

Reece
-
Posts
6 -
Joined
-
Last visited
-
 aaronc reacted to a post in a topic:
Lowell Grand Banks Dory by Reece - FINISHED - Model Shipways - 1:24
aaronc reacted to a post in a topic:
Lowell Grand Banks Dory by Reece - FINISHED - Model Shipways - 1:24
-
MajorChaos reacted to a post in a topic:
Lowell Grand Banks Dory by Reece - FINISHED - Model Shipways - 1:24
-
davec reacted to a post in a topic:
Lowell Grand Banks Dory by Reece - FINISHED - Model Shipways - 1:24
-
East Ender reacted to a post in a topic:
Lowell Grand Banks Dory by Reece - FINISHED - Model Shipways - 1:24
-
SaltyNinja reacted to a post in a topic:
Norwegian Sailing Pram by Reece - Model Shipways - 1:12
-
SaltyNinja reacted to a post in a topic:
Norwegian Sailing Pram by Reece - Model Shipways - 1:12
-
Reece reacted to a post in a topic:
Norwegian Sailing Pram by Reece - Model Shipways - 1:12
-
druxey reacted to a post in a topic:
Norwegian Sailing Pram by Reece - Model Shipways - 1:12
-
ccoyle reacted to a post in a topic:
Norwegian Sailing Pram by Reece - Model Shipways - 1:12
-
Ryland Craze reacted to a post in a topic:
Norwegian Sailing Pram by Reece - Model Shipways - 1:12
-
DanB reacted to a post in a topic:
Norwegian Sailing Pram by Reece - Model Shipways - 1:12
-
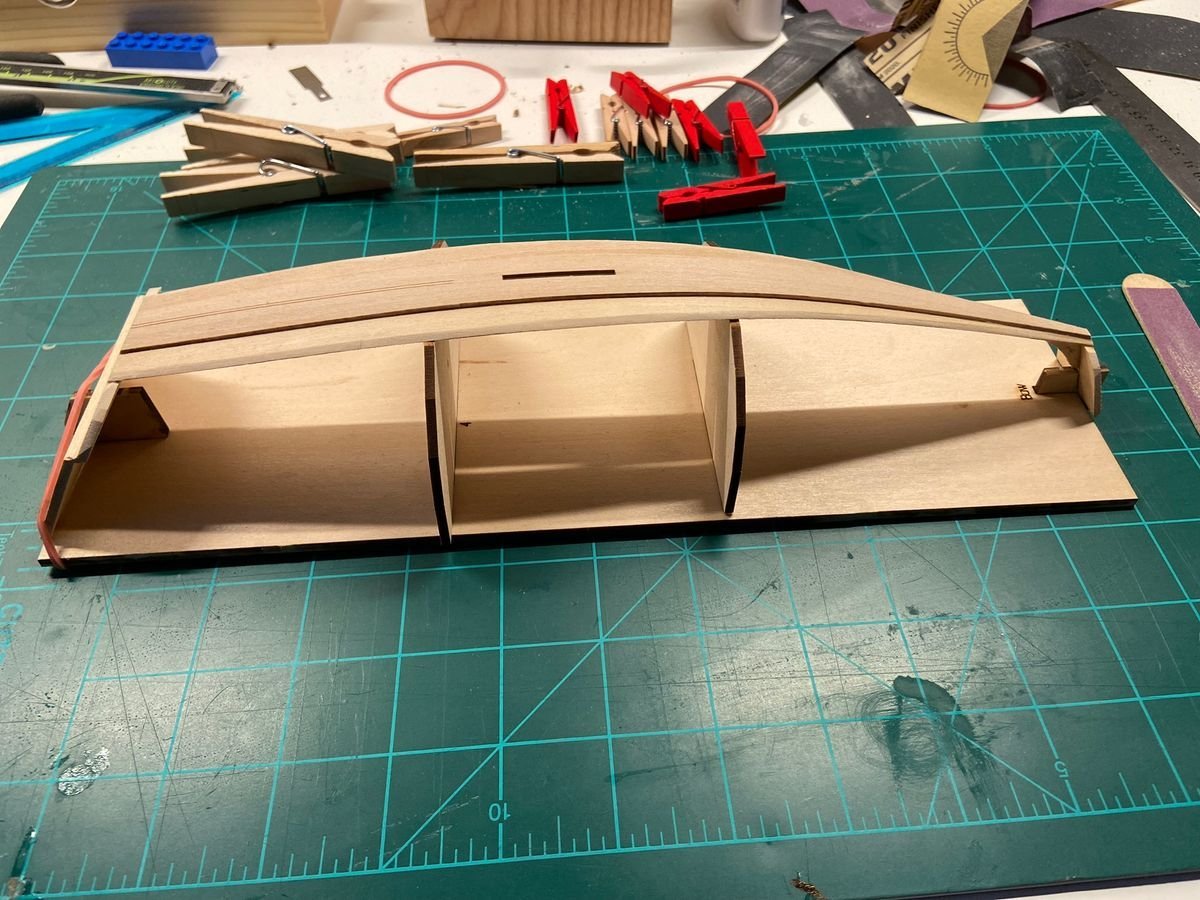
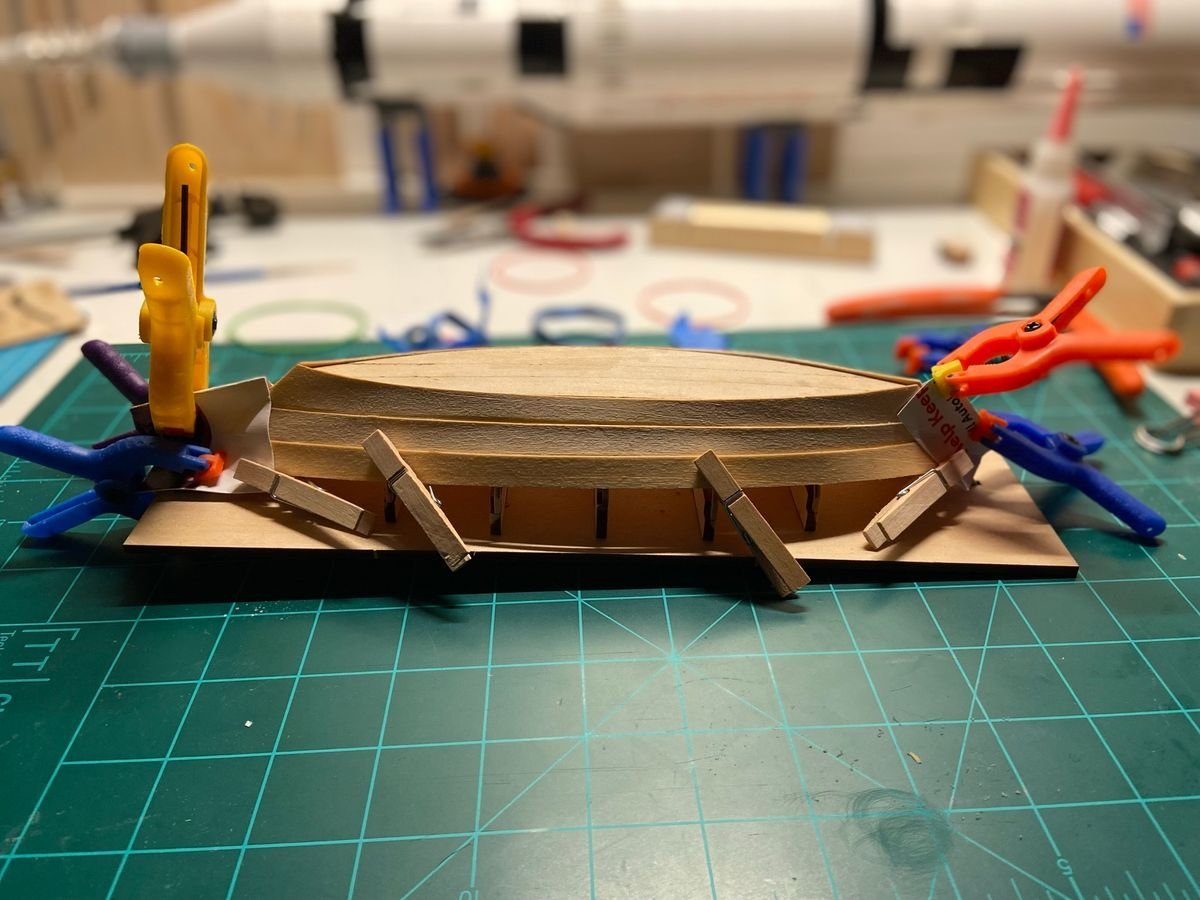
 Made some progress on the hull this week. Was able to get everything up through the sheer planks attached to the transoms. Just need to get the skeg and the bilge keels attached and I should be done with the bottom of the boat.
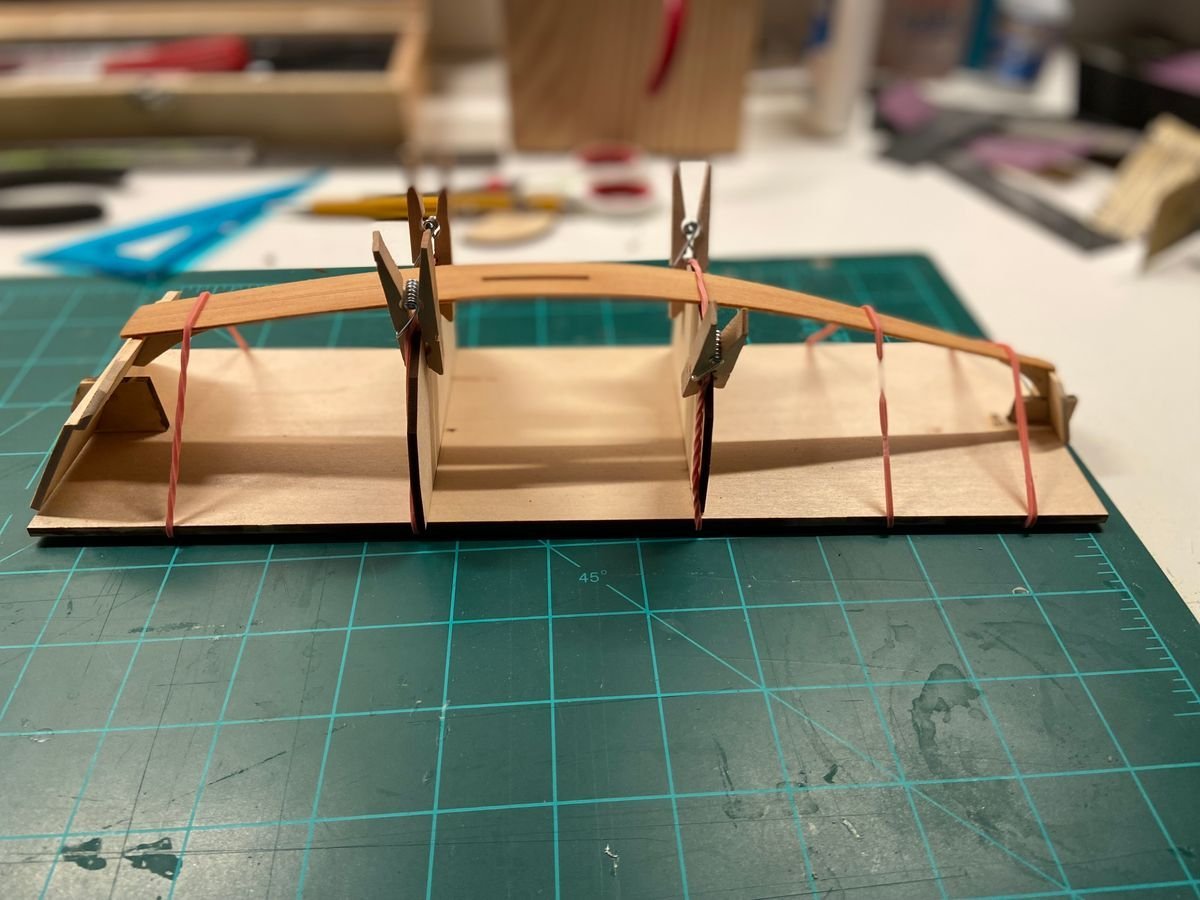

-
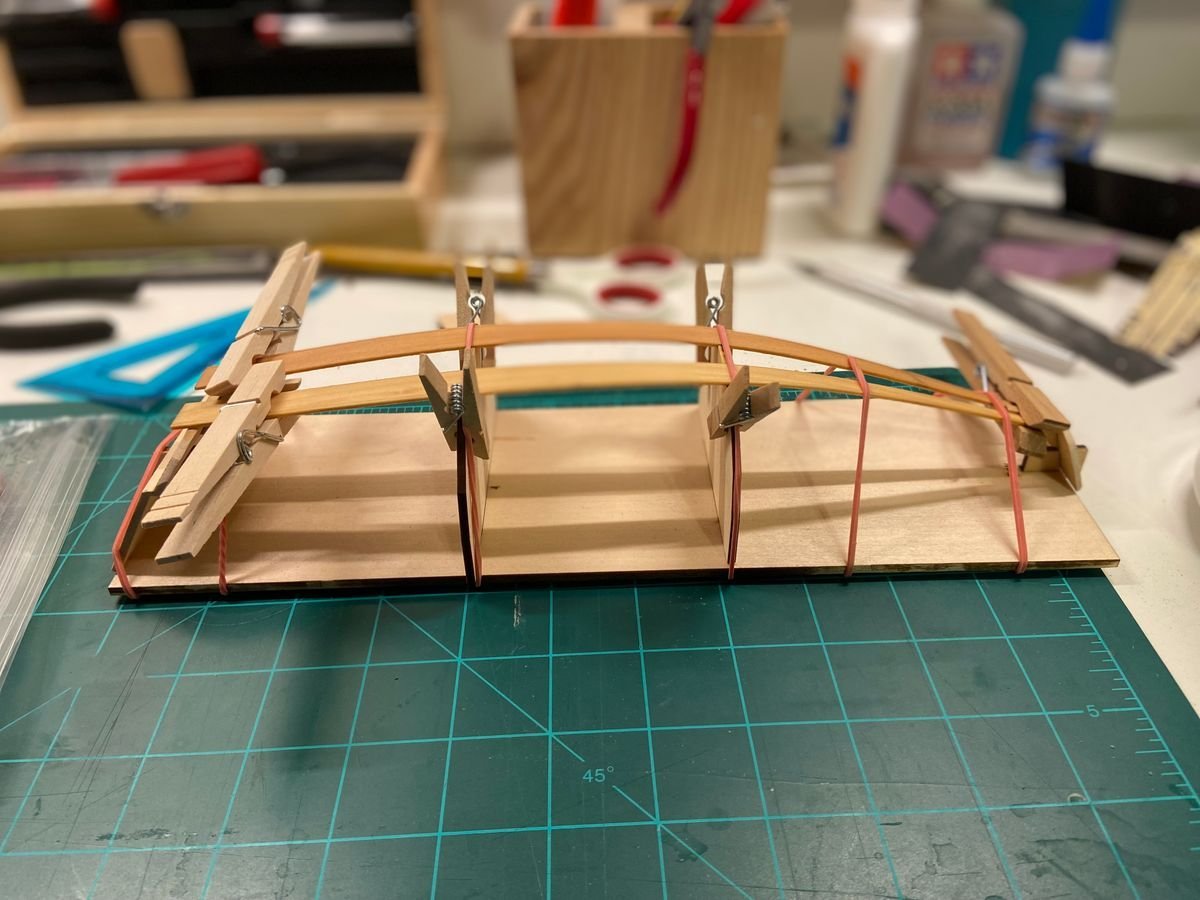
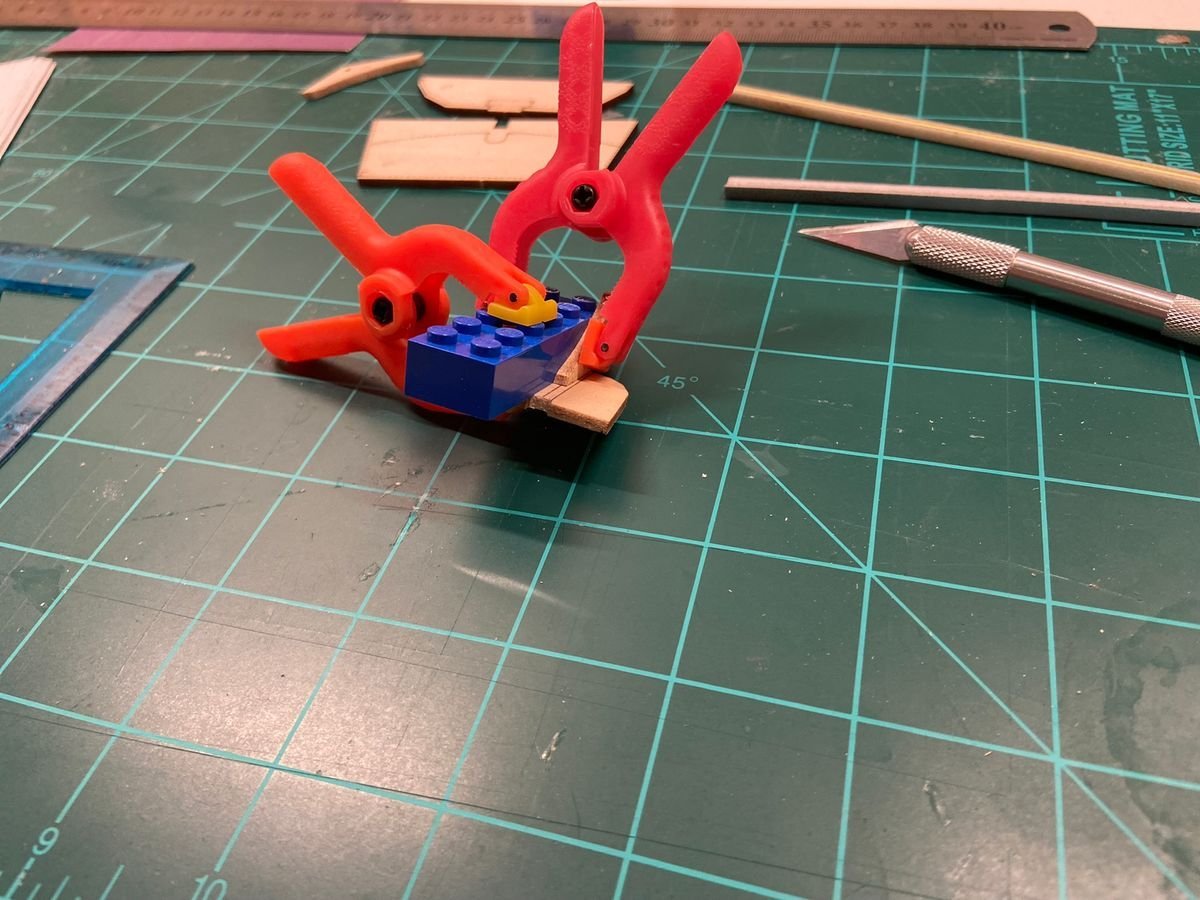
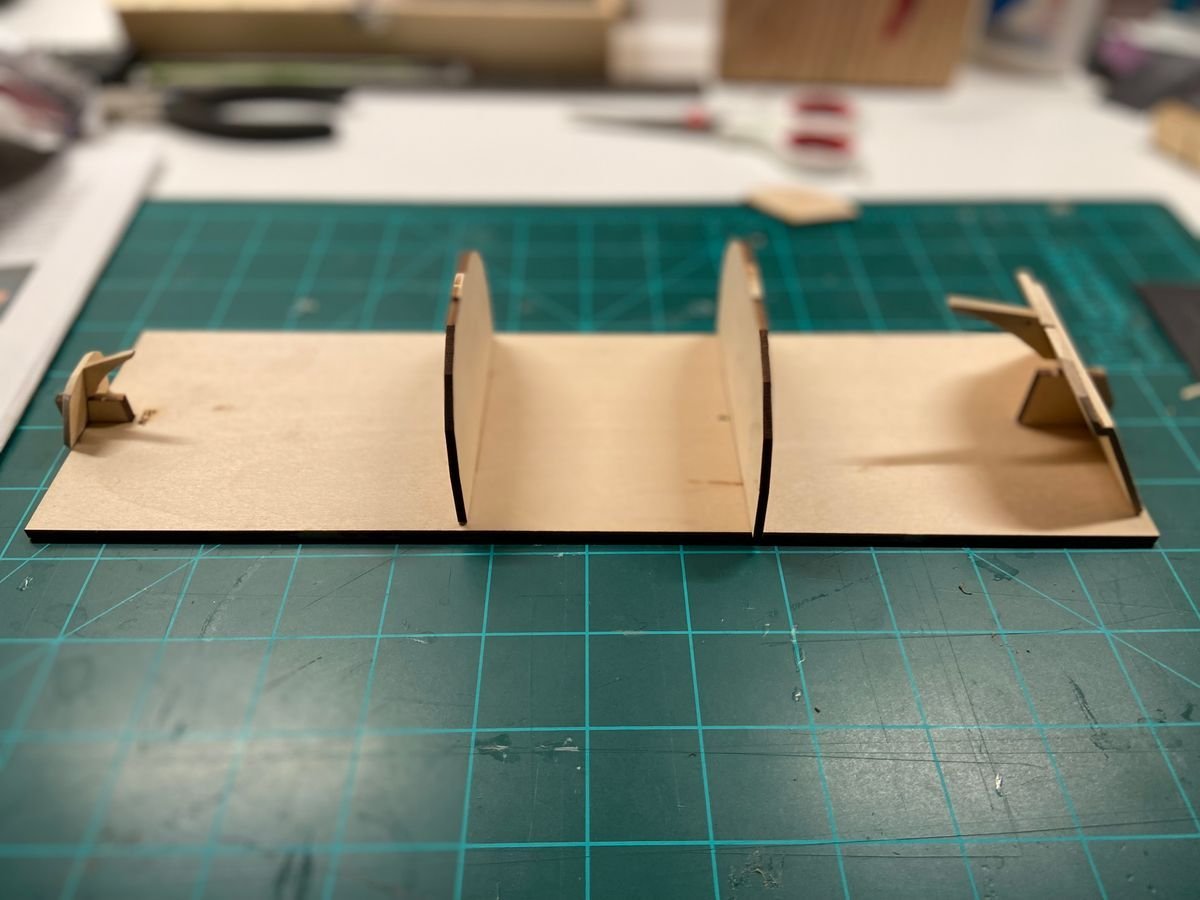
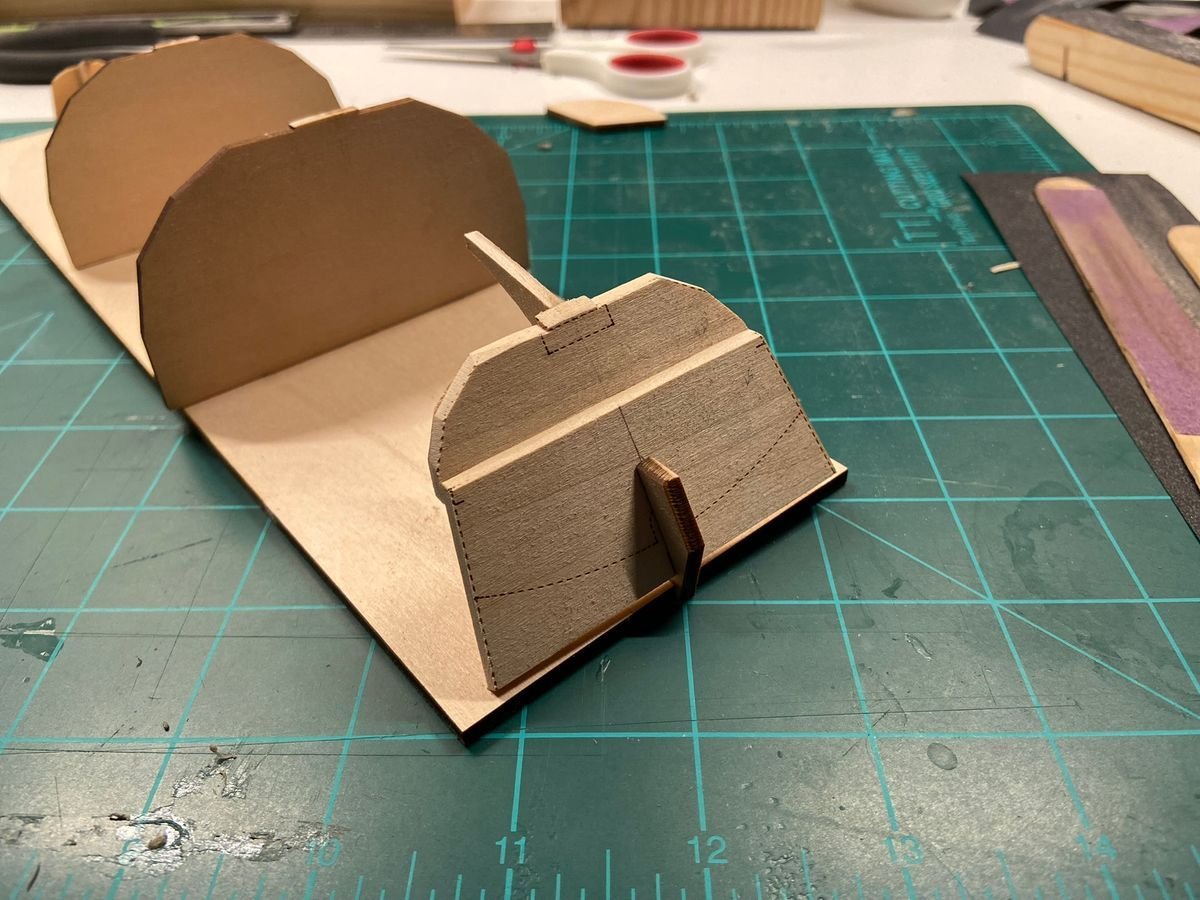
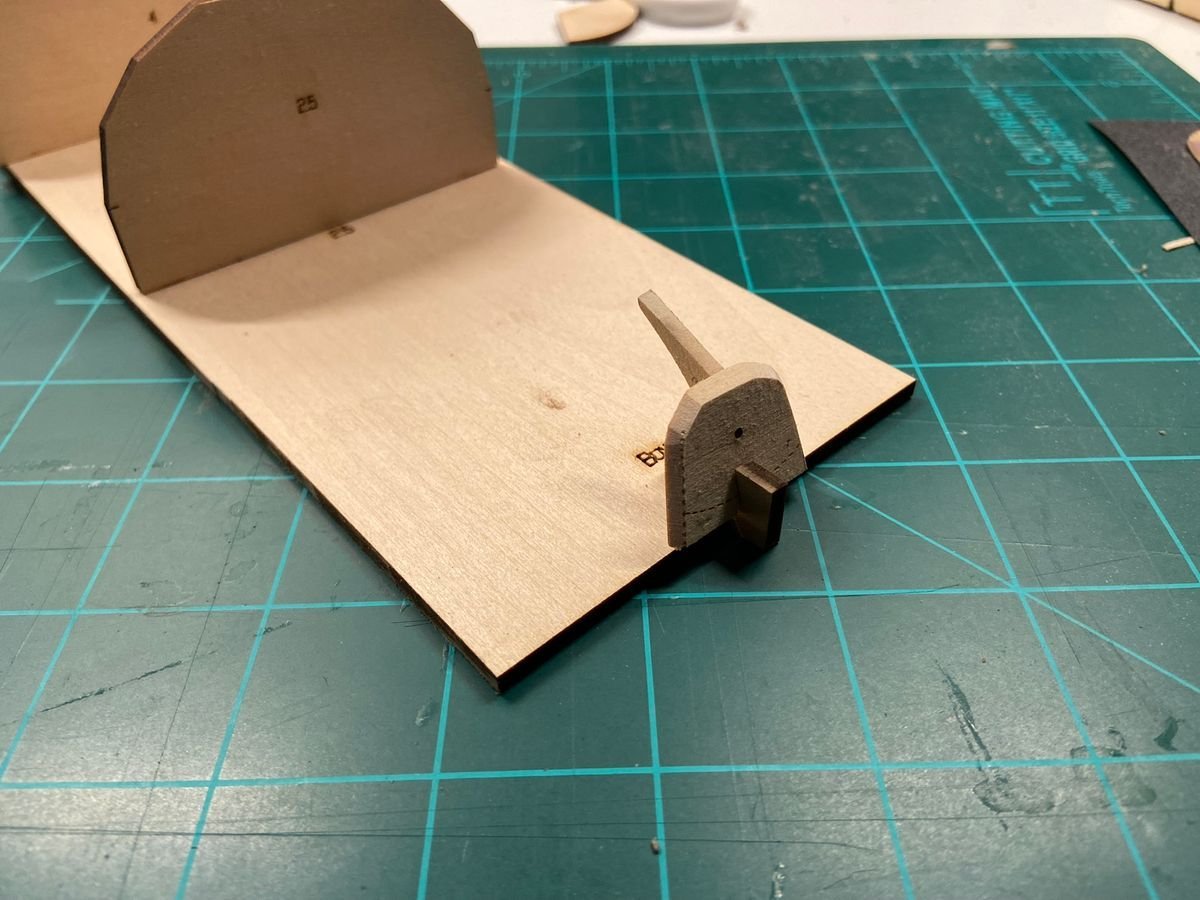
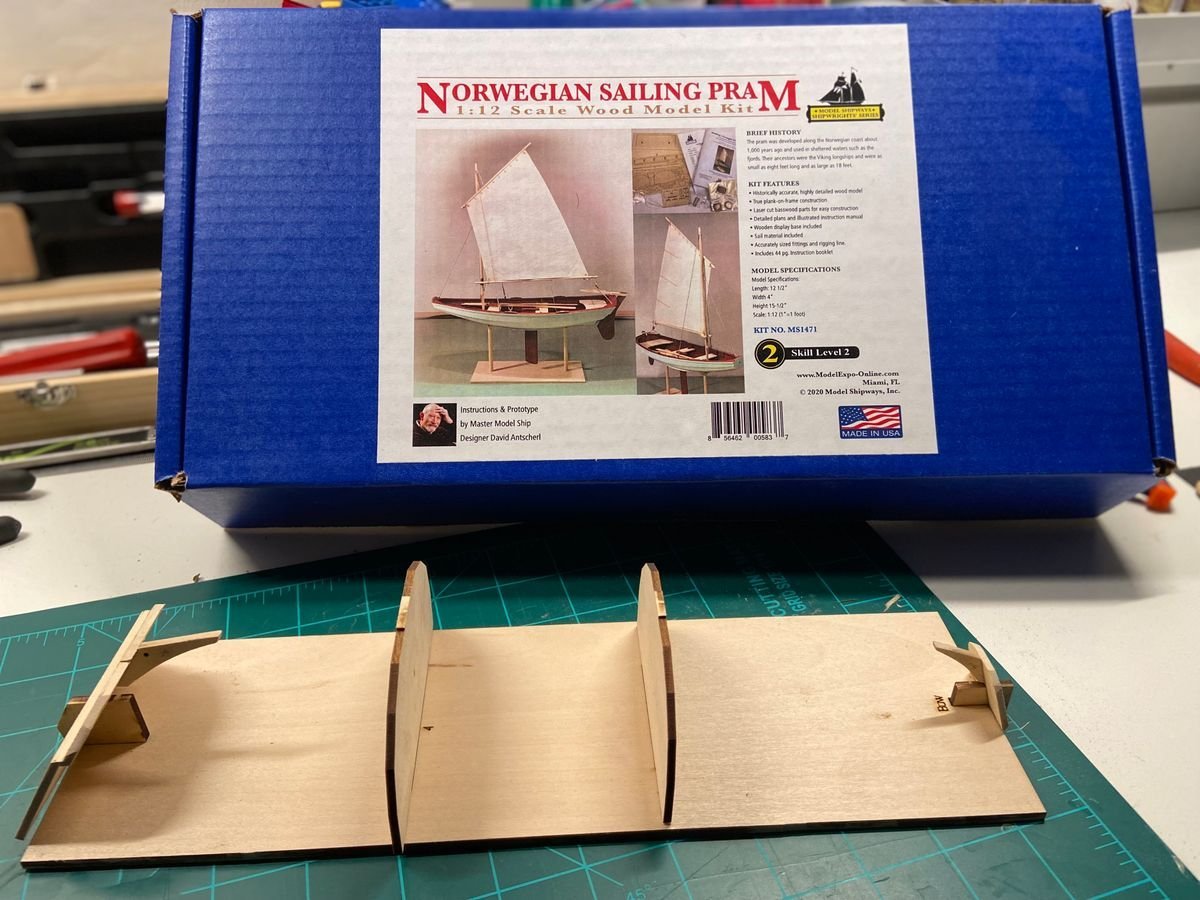
Hello everyone, I'm back with my second build - the Model Shipways Norwegian Sailing Pram. This is the second model in the Model Shipways Shipwright series designed by David Antscherl. I have to say I've been looking forward to this build after completing the Dory as it gives me the opportunity to work with some metal parts, a mast, rigging, and a sail. There are quite a few build logs on here for this model so I'll just get right to it. I've made a decent start so far and have made it through step 5 where the transoms are mated with the building board. Using a Lego block to align the bow transom knee. The bow transom seated in the bow transom holder. The stern transom seated in the transom holder. Its slightly wonky but instructions say only to glue in the bow transom holder. I imagine this is to make it easier to remove later on. I'll have to pay extra attention here we the planking starts going on to make sure everything is aligned. The current state of the build with the two transoms seated in the building board with forward and midship molds. Anyway, that's all I've done so far. Its been pretty easy and I've enjoyed it.
-
Reece reacted to a post in a topic:
Hello from the Desert Southwest
-
Reece reacted to a post in a topic:
Hello from the Desert Southwest
-
Reece reacted to a post in a topic:
Hello from the Desert Southwest
-
 Reece reacted to a post in a topic:
Lowell Grand Banks Dory by Reece - FINISHED - Model Shipways - 1:24
Reece reacted to a post in a topic:
Lowell Grand Banks Dory by Reece - FINISHED - Model Shipways - 1:24
-
Reece reacted to a post in a topic:
Hello from the Desert Southwest
-
Reece reacted to a post in a topic:
Hello from the Desert Southwest
-
Reece reacted to a post in a topic:
Hello from the Desert Southwest
-
Reece changed their profile photo
-
Reece reacted to a post in a topic:
Hello from the Desert Southwest
-
@allanyed - Thank you for the tip. I'm definitely going to try that on the next kit in the series - the Norwegian Sailing Pram. I'll be sure to post how that goes. @dcicero - Two models for the price of one!
- 9 replies
-
- 1
-
-
- Model Shipways
- Lowell Grand Banks Dory
- (and 2 more)
-
Reece reacted to a post in a topic:
Lowell Grand Banks Dory by Reece - FINISHED - Model Shipways - 1:24
-
Dan, congrats on finishing your build - looks great! Thanks for this build log as well as I'm just about to start this kit and it looks like there are some real gems of information in here. Great notes on what to watch out for and the areas you had issues.
- 51 replies
-
- 1
-
-
- Model Shipways
- norwegian sailing pram
- (and 1 more)
-
Hi everyone, I'm Reece. I joined back in September but have finally gotten around to posting a build log and adding some meat to this introduction. I completed my first build - the Lowell Grand Banks Dory by Model Shipways in 1/24. I had a lot of fun building it and cant wait to move on to the next in Model Shipways' Model Shipwright series. Here's the build log. I'm a software developer by trade and some of my other hobbies include backpacking, woodworking, and other scale models (1/12 motorcycles, a few planes). I try to get out from behind the screen as much as possible. A lot of the work I've seen on this site is really great and I can't wait to learn from you all. Best Regards, Reece
-
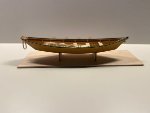
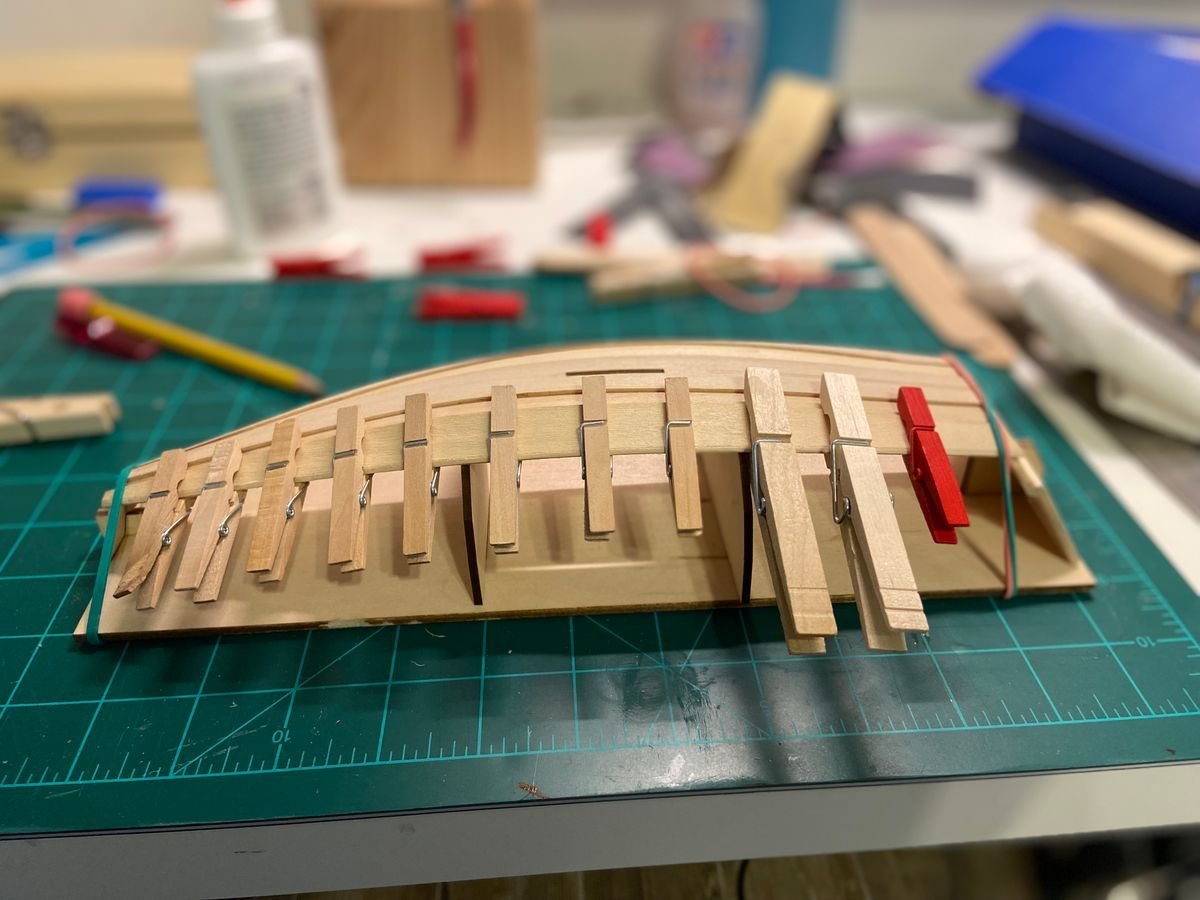
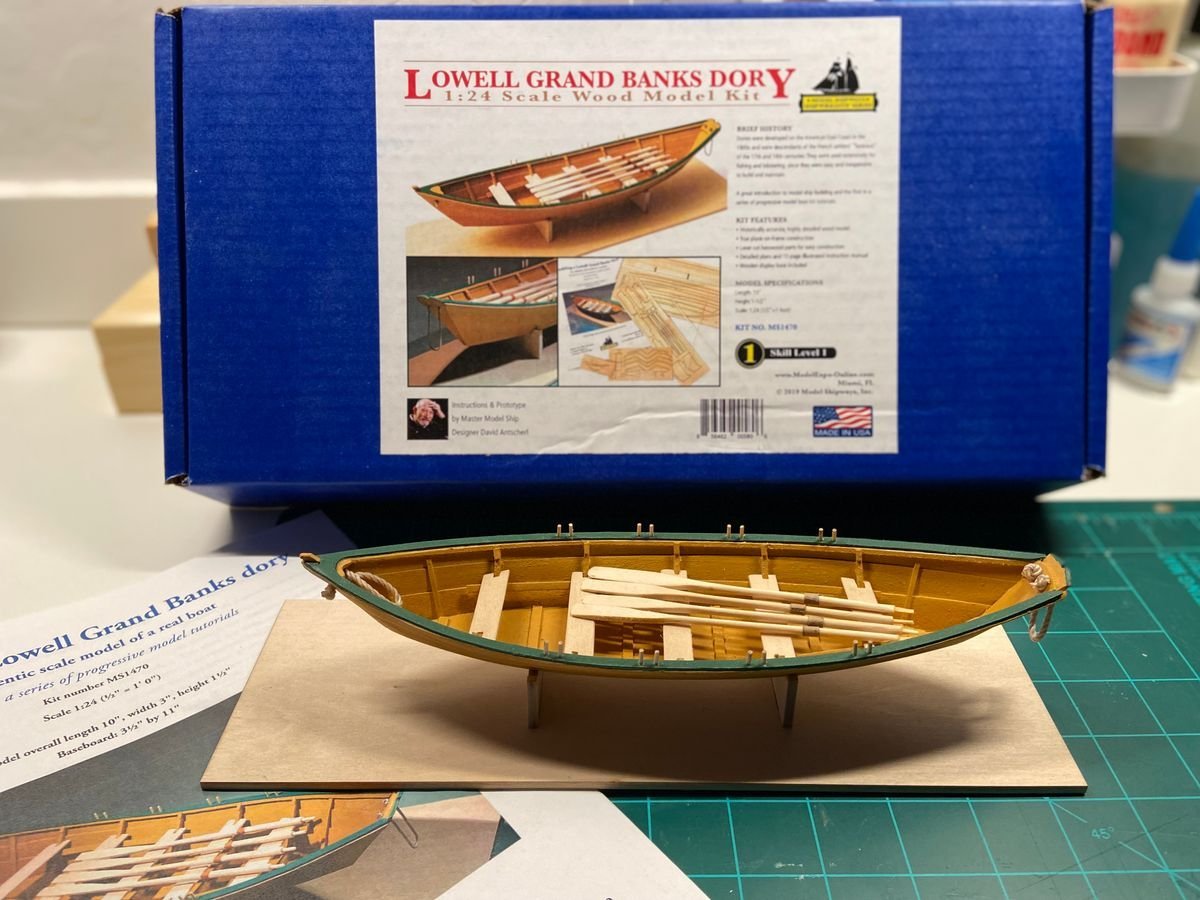
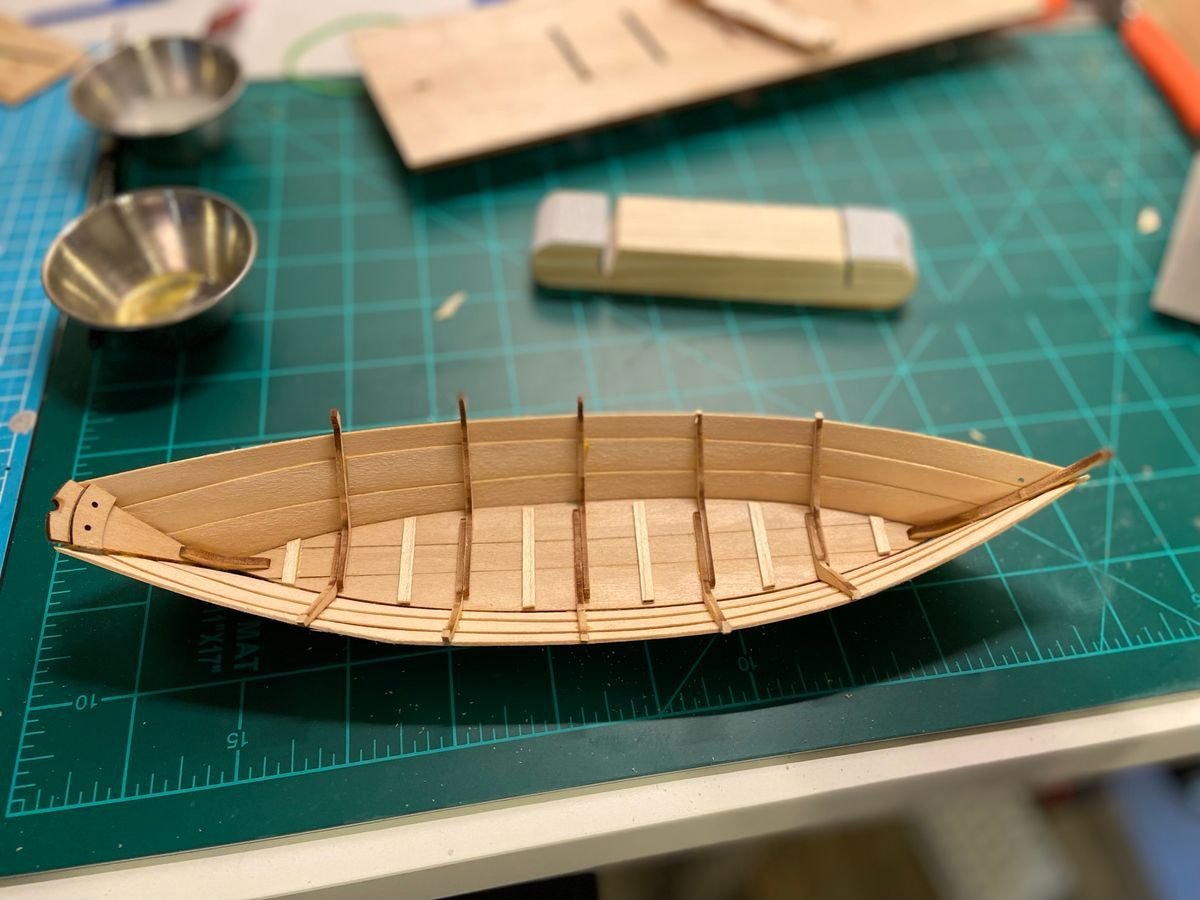
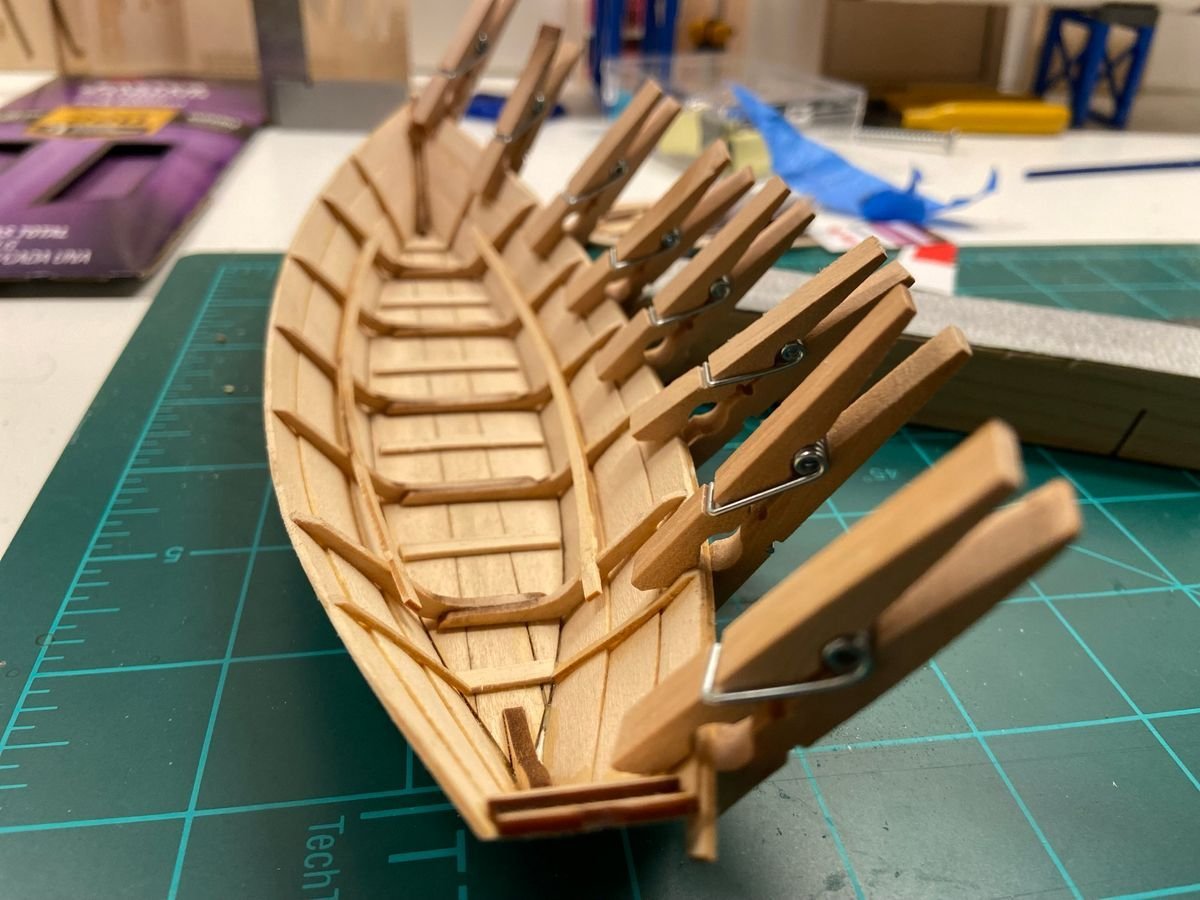
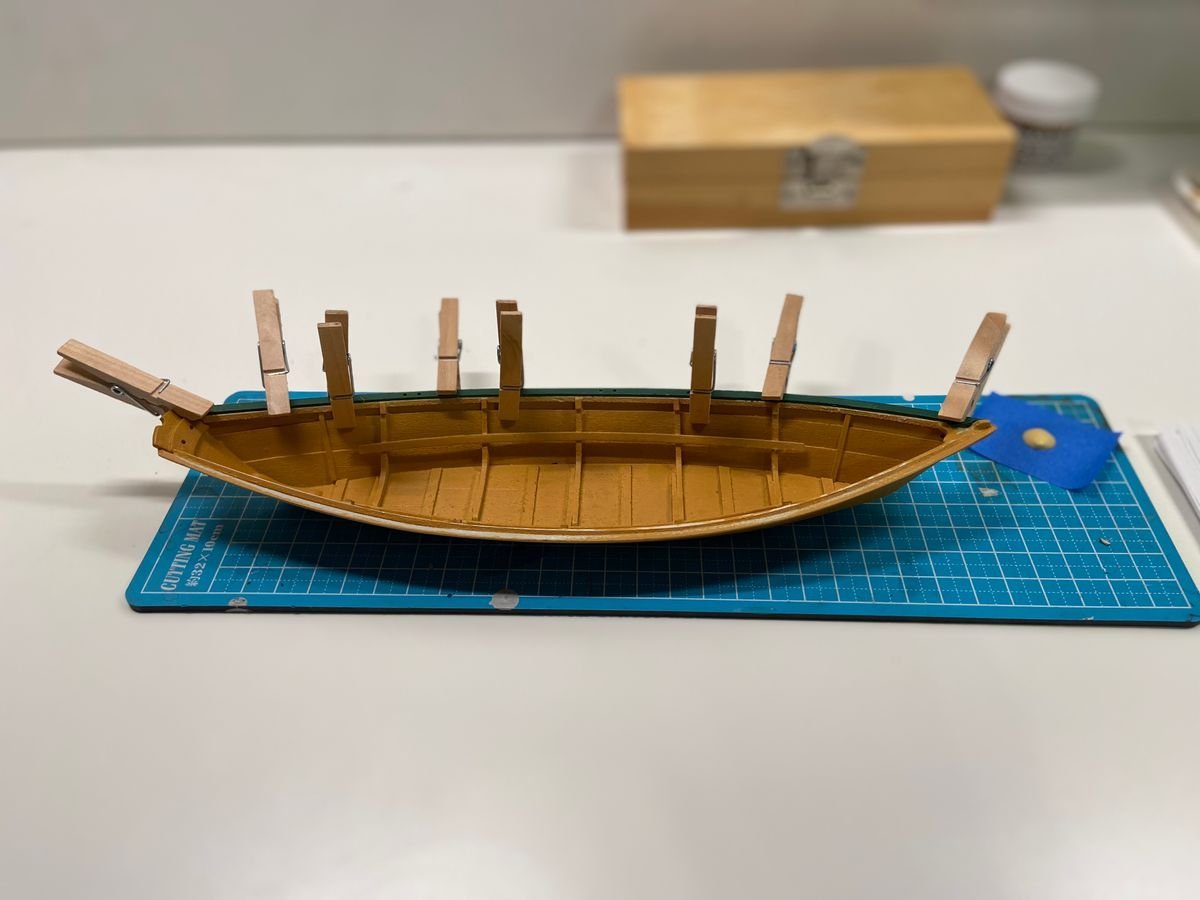
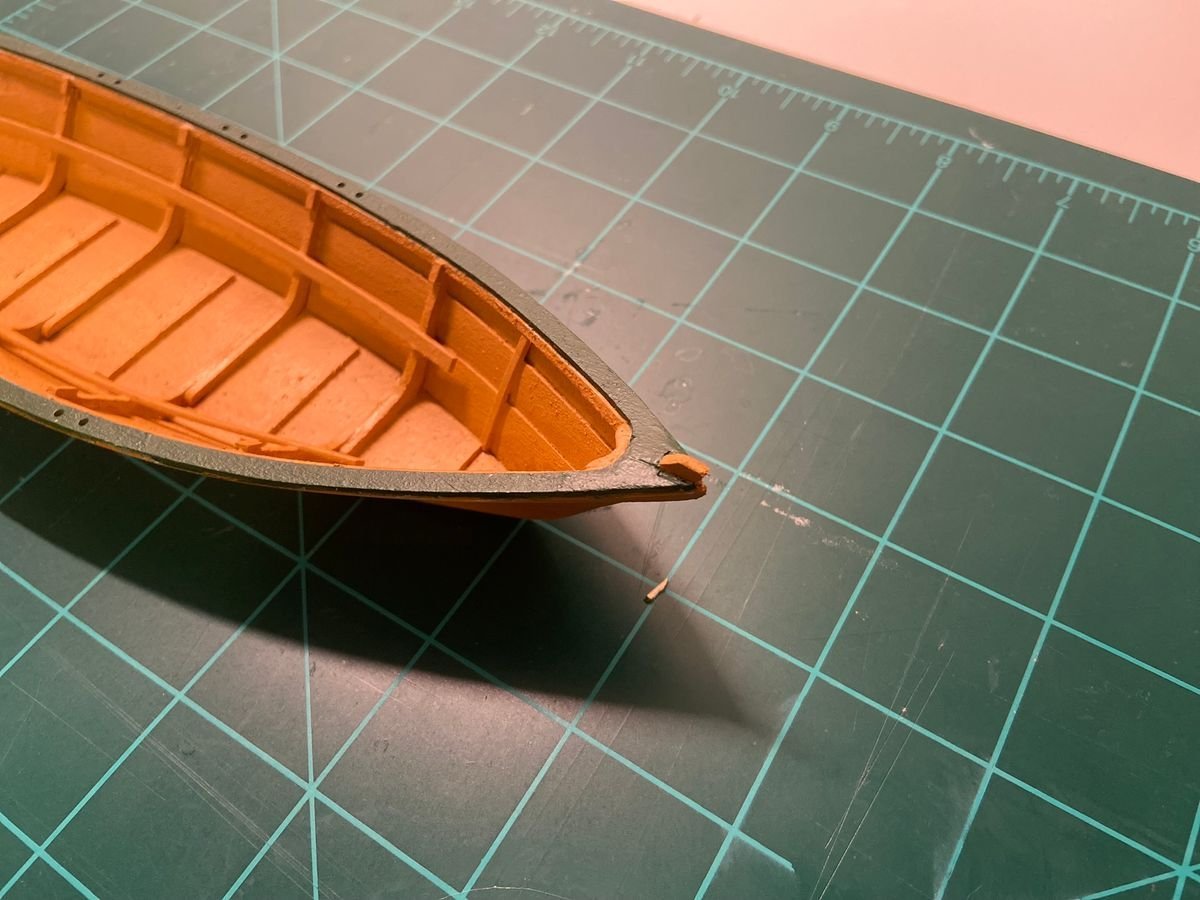
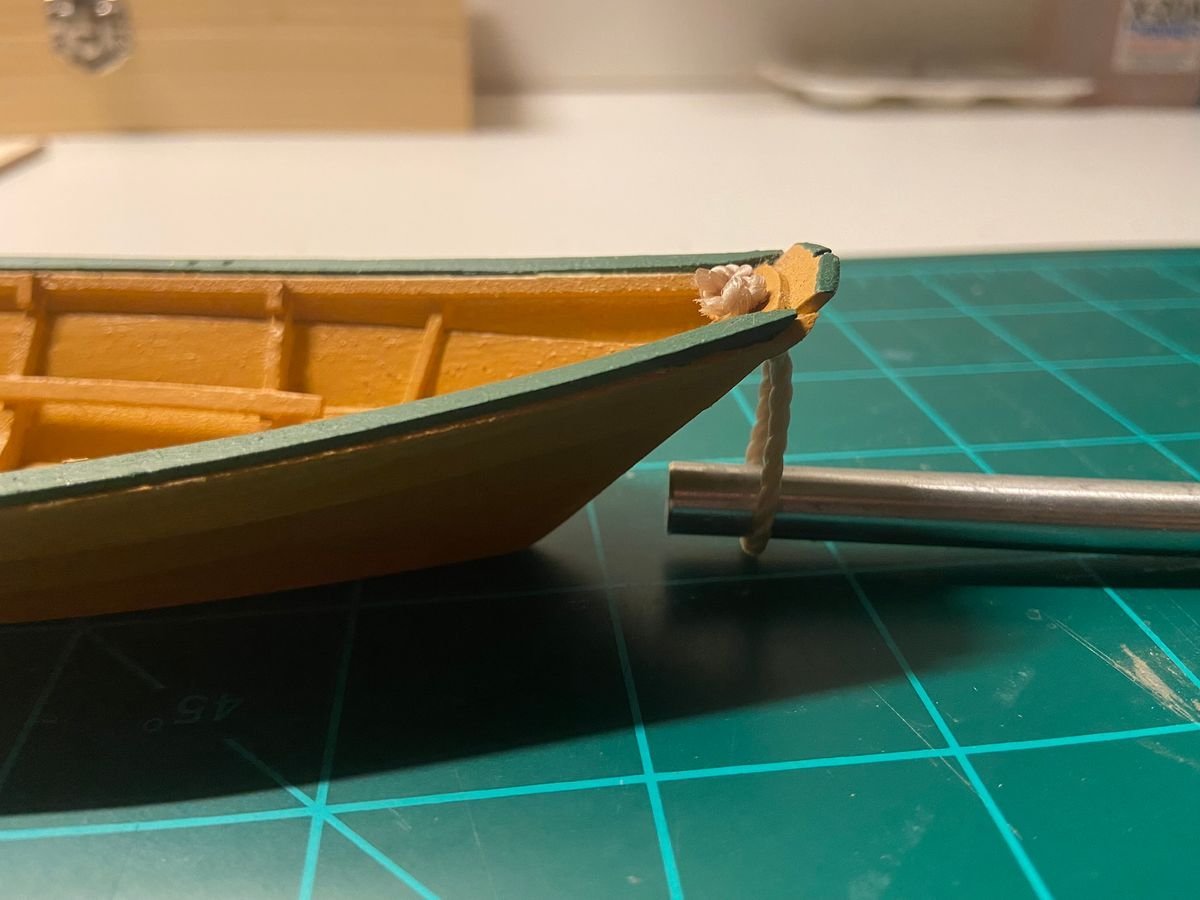
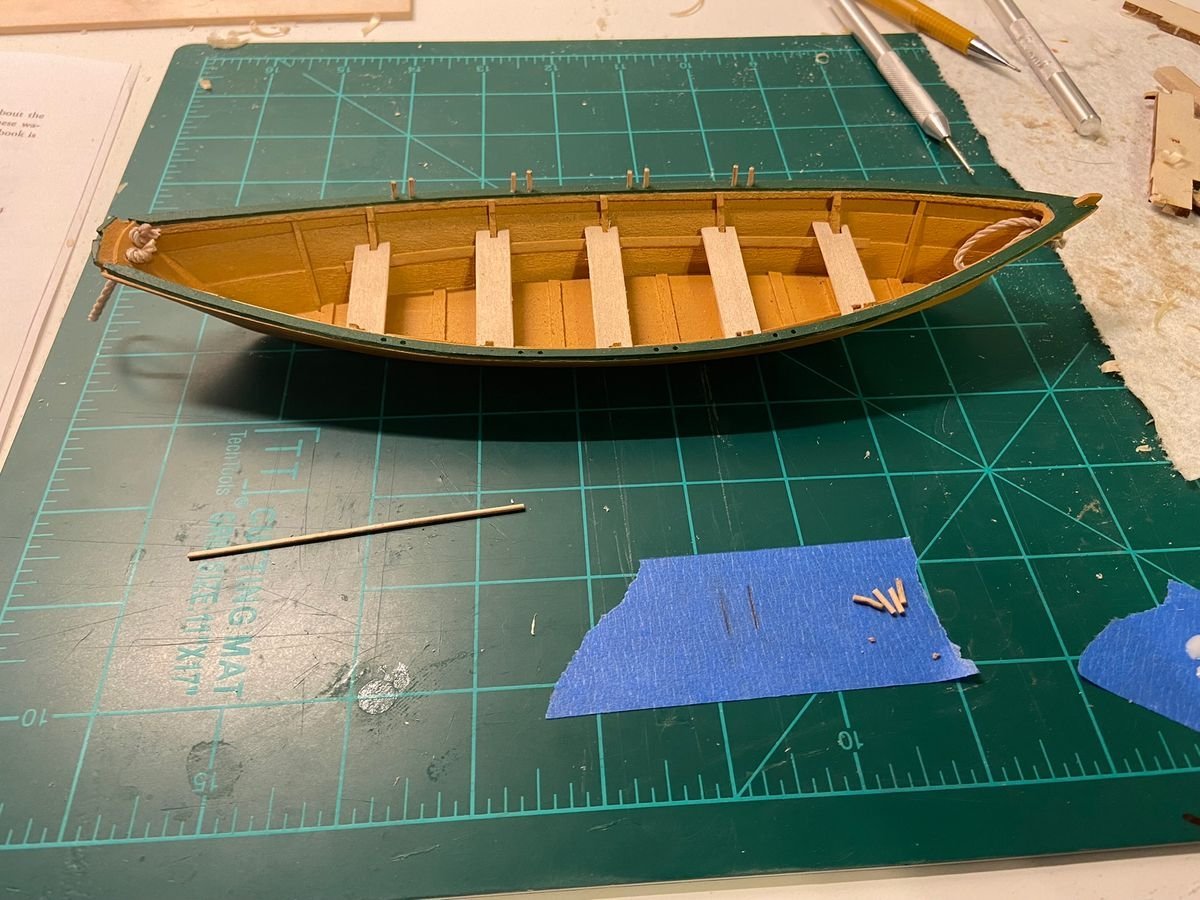
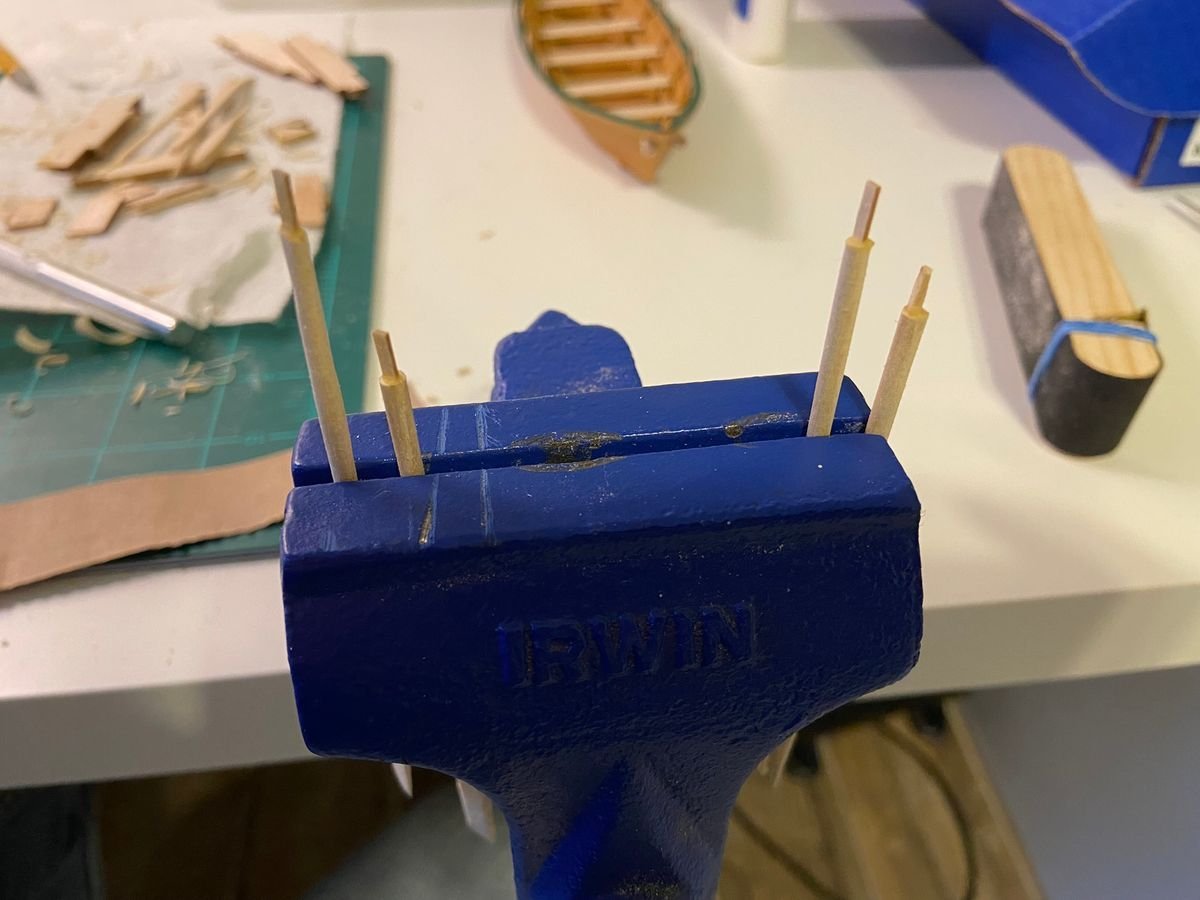
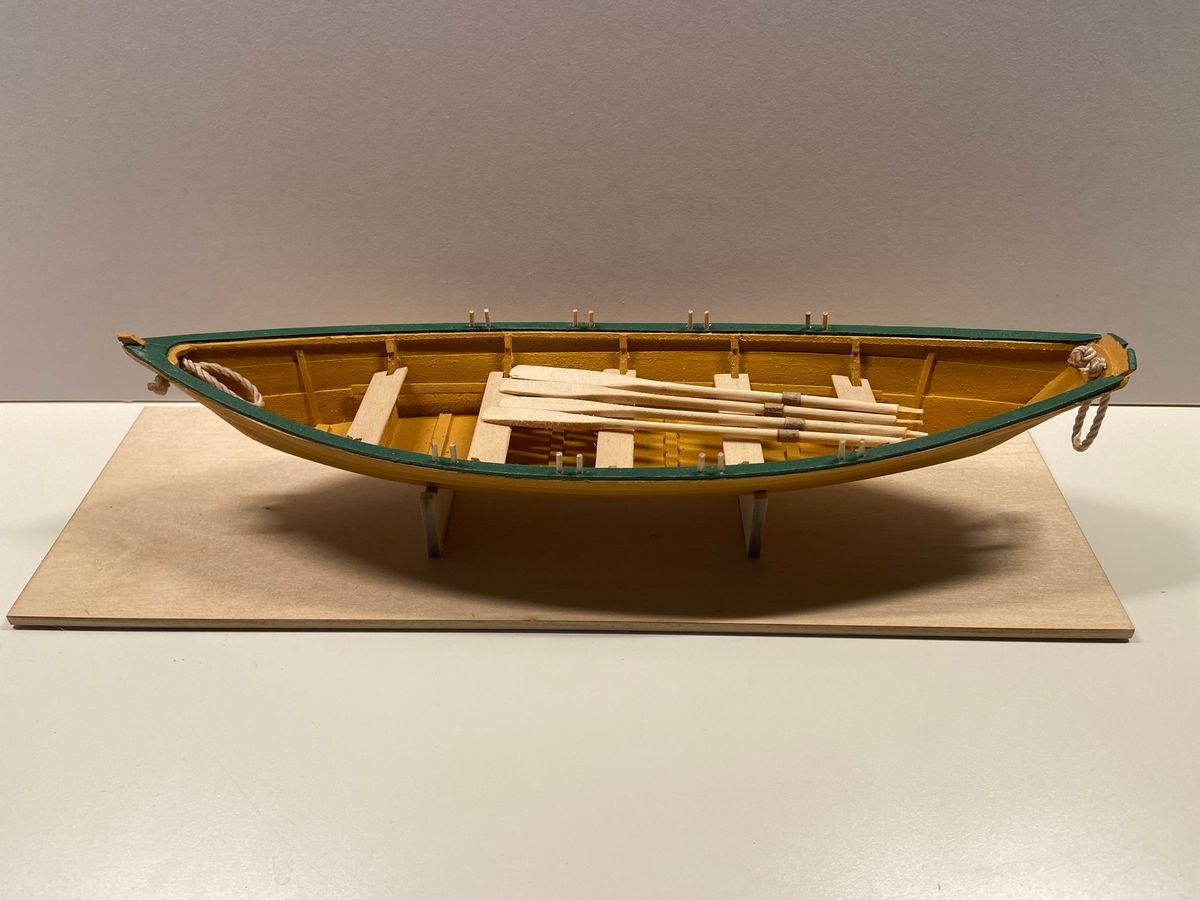
Hello Model Ship World members. I’m Reece and I'm a new boat modeler. I decided to start my start my journey with the Model Shipways Shipwright Series. The first build is the Lowell Grand Banks Dory. I don’t have all the pictures from this build but I have a fair amount and wanted to post this for those that may be looking for references in the future. I thought this was a great introduction to ship modelling and thoroughly enjoyed my time spent on the project. I definitely learned a thing or two and look forward to applying those to my next build in the series. Here are some of the steps I struggled with on this build and how I corrected them: I had trouble aligning the bottom/stem/transom assembly with the frames and building board. This is something I should have spent much more time on because it ultimately affected the outcome of the planking. I should have spent some more time getting the stem and transom holders securely placed. Some slop here caused the transom to not be exactly perpendicular to base of the building board and resulted in the planks being slight asymmetric when viewed from the bow. I ended up just sanding this as best I could and the planks are slightly uneven. Lesson learned for next time for sure. My seat risers were slightly off and had to be removed and reattached as it made the thwarts out of level. I tried to thread the beckets without applying CA to the tips first. This caused me to waste an entire section as it unraveled before my eyes. I was able to salvage this step with the remaining pieces by dividing the remaining rope in half and giving myself extra material to work with beyond the recommended 4" section. I think in the end the pieces ended being about 5 1/2" each. I had just enough and was able to trim the excess to match the pictures in the instructions. The oars. I was too heavy handed when sanding the oars and completely lost one when it snapped in my hands. Yikes. Luckily the kit includes an extra laser cut piece probably for this very reason. I ended up snapping the hand holds on several of the oars as well and had to glue some little pieces of balsa I had left over to make them look somewhat like the pictures. Not my finest moment but I’ve definitely learned a lesson here that I can use on future models. I’m not totally satisfied with the shape and look of the oars. I might try to revisit in the future if I’m looking for something to do. Other Notes: I found the section on the thole pins was slightly different. In the instructions it mentions using a 3/64" dowel and cutting the pins to length. I spent some time looking for this until I realized that a dowel was actually not provided but was replaced in the kit by a strip of 3/64" balsa. I ended up cutting this in half and shaping it on a drill press. I inserted the balsa half way into the chuck, set the speed on the lowest I had available (approx. 500 rpm), and then proceeded to very lightly apply sandpaper to the strip as it spun. I flipped the balsa piece in the chuck and repeated. It made short work of creating the dowel. Overall I had a great time with this kit and would definitely recommend anyone who’s curious about building it to give it a go. Its a great model to learn some basic ship modelling skills on. The completed Lowell Grand Banks Dory. Attaching the sheer plank. The Dory right side up and about to clean the frame tops. Gluing on the starboard gunwale. Attaching the cap rail after painting the model using the recommend Hull Yellow Occre and Bulwarks Dark Green. Close up of the bow after rebuilding the stem top so that it was aligned better with the cap rails. This was a result of poor original alignment of the bottom/stem/and building board before planking. Using the handle of a model knife to force the becket into place after applying the watered down PVA glue. Cutting and installing the thole pins. Attempting to fix the oar handles. Another shot of the completed Lowell Grand Banks Dory.
- 9 replies
-
- 12
-
-
- Model Shipways
- Lowell Grand Banks Dory
- (and 2 more)