DONATION DRIVE - SUPPORT MSW - DO YOUR PART TO KEEP THIS GREAT FORUM GOING! (91 donations so far out of 49,000 members - C'mon guys!)
×


SteveA
-
Posts
50 -
Joined
-
Last visited
Content Type
Profiles
Forums
Gallery
Events
Everything posted by SteveA
-
 Thanks! Yes, the wishbone was a fun little build. I just started outfitting the main mast.
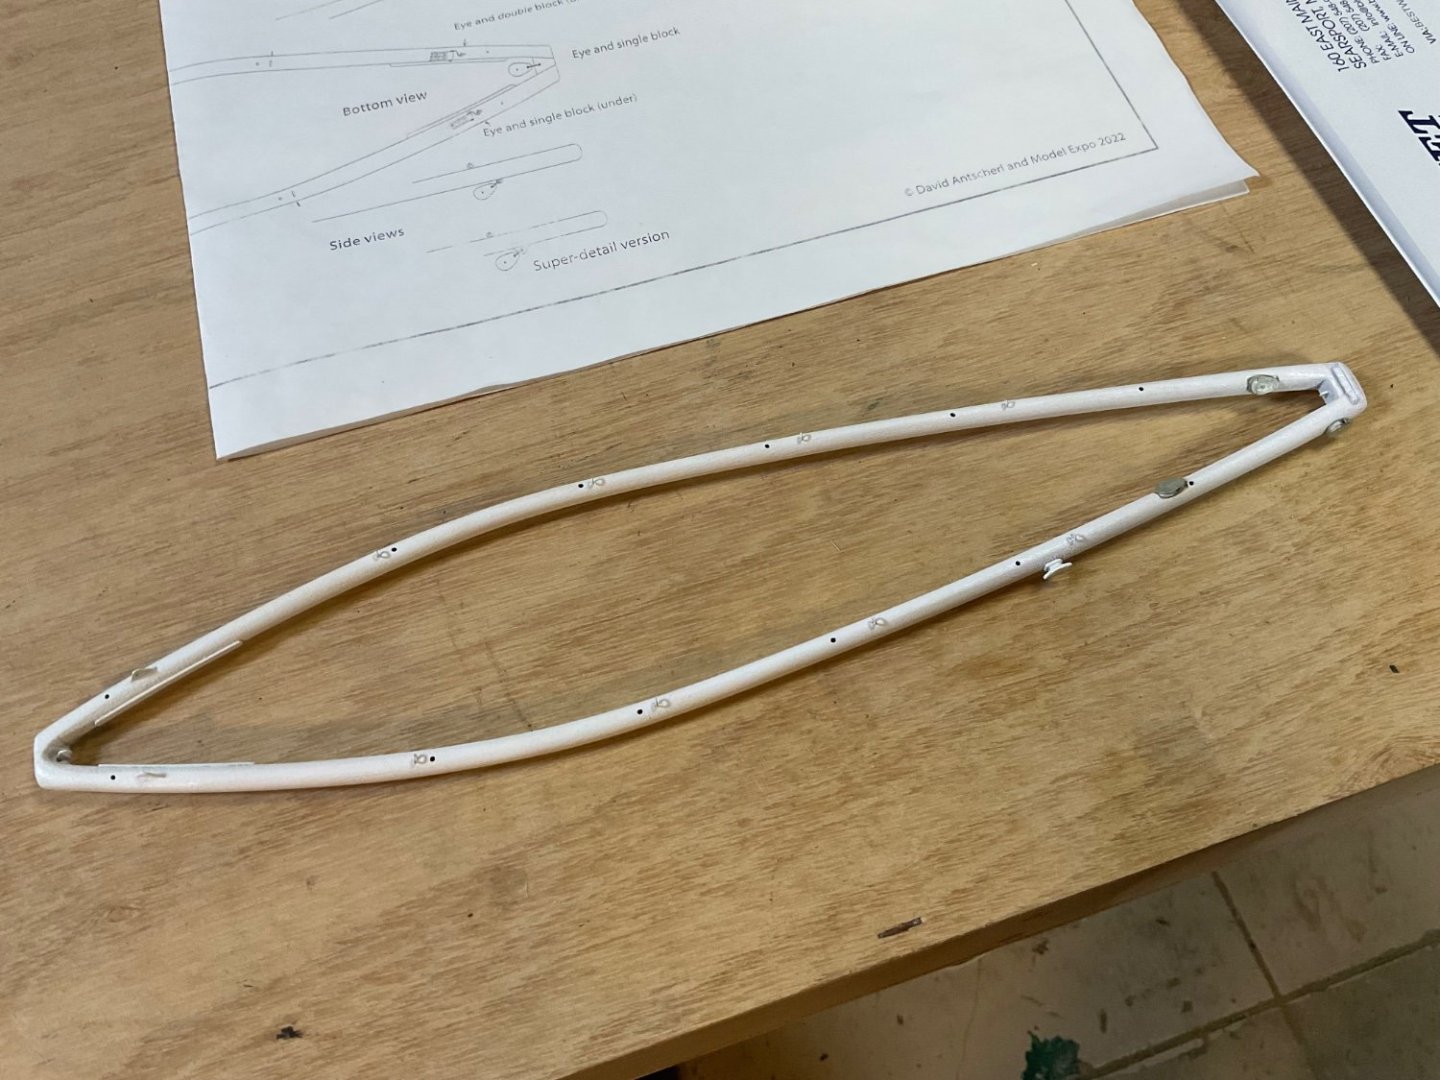
- 27 replies
-
- 3
-

-
- Nonsuch
- Model Shipways
- (and 1 more)
-
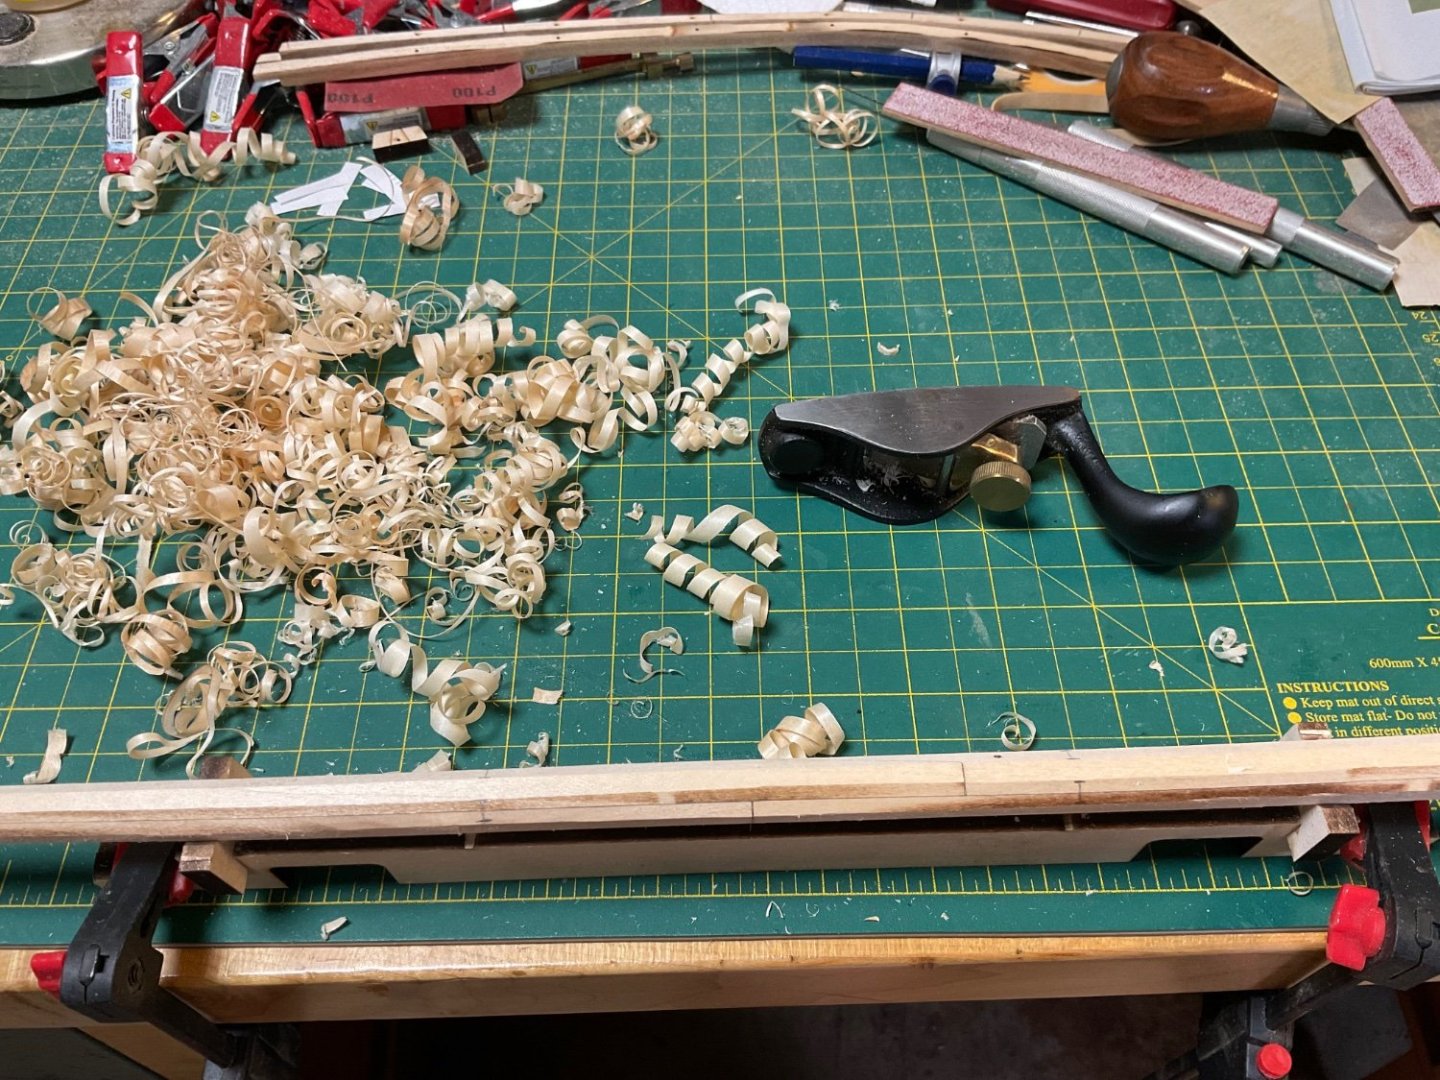
I finally have a paint scheme for this model with some input from family members. It looks interesting at least: Working on main mast now. The kit provides a nice jig to get to “eight-square”. I used a no. 100 plane which makes some nice shavings!

- 27 replies
-
- 5
-
-
- Nonsuch
- Model Shipways
- (and 1 more)
-
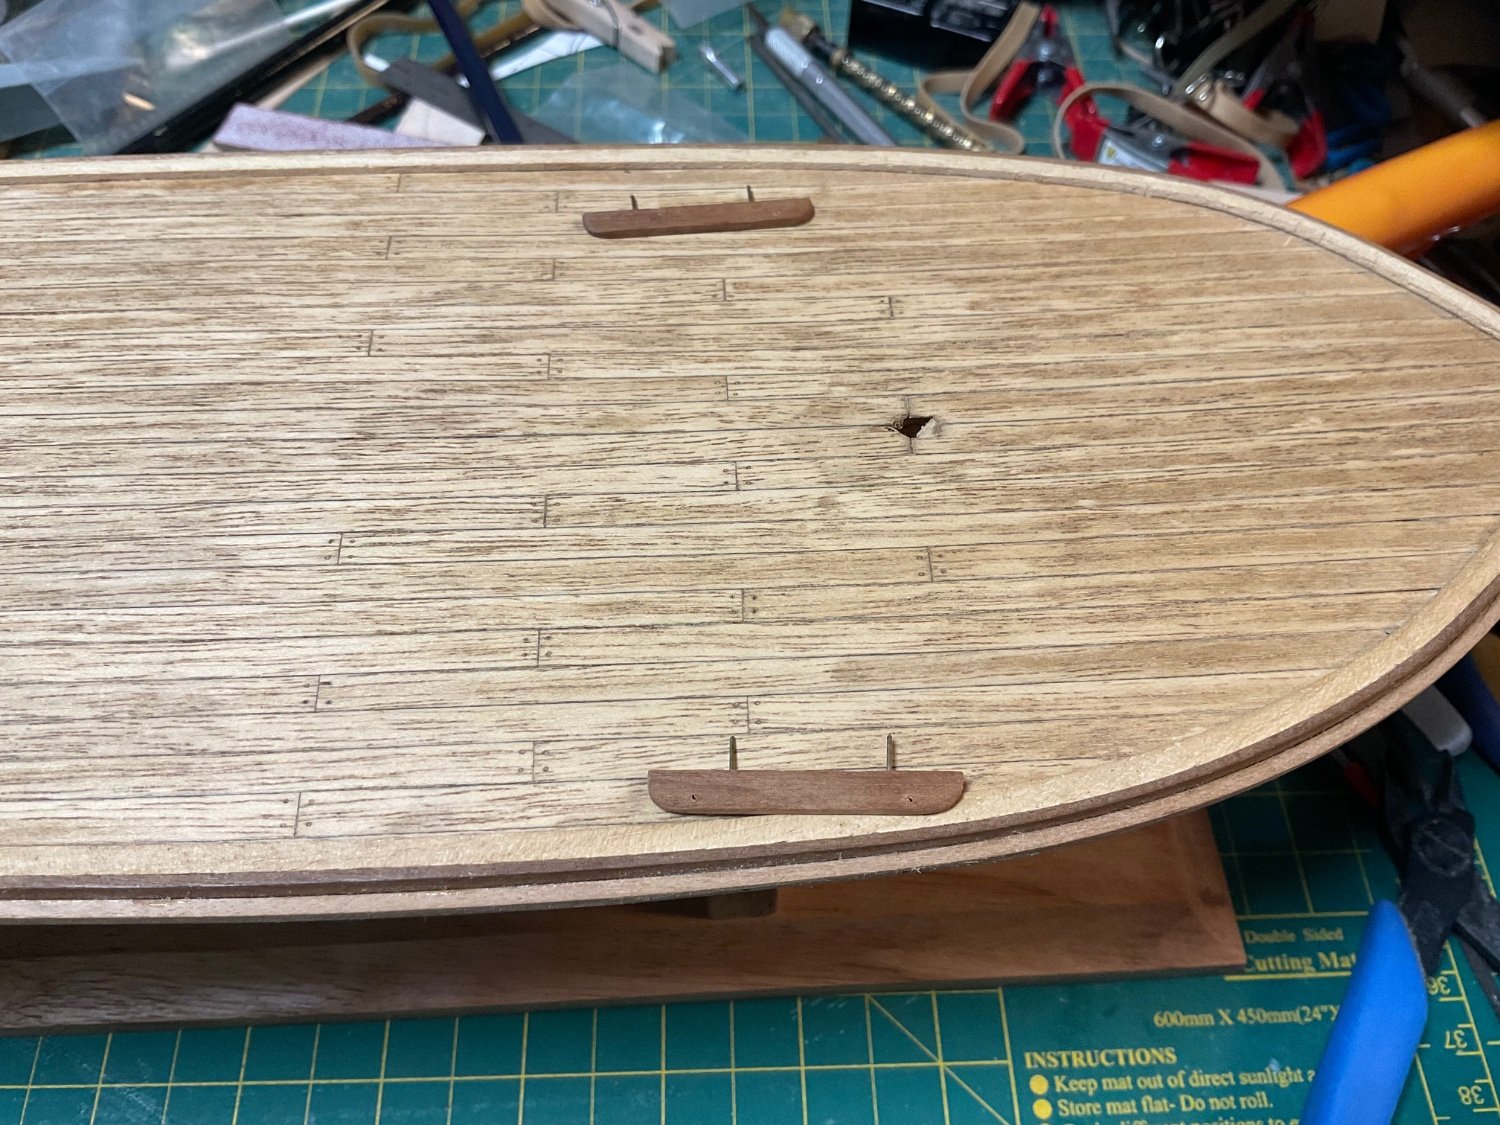
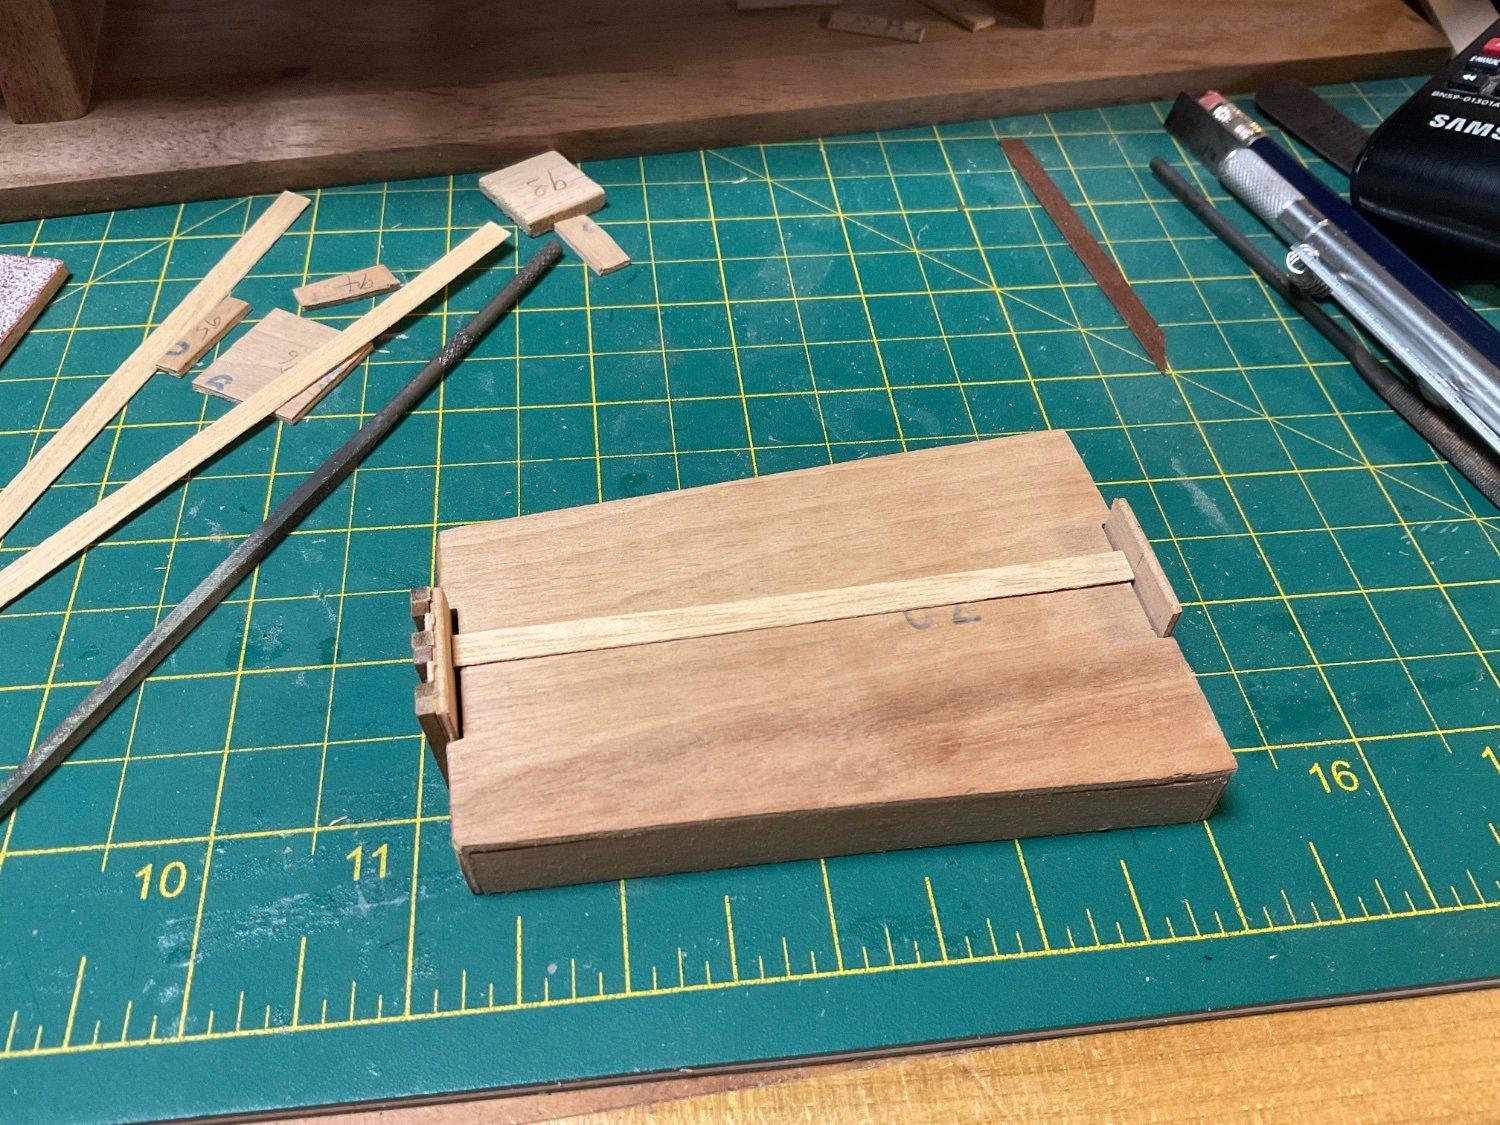
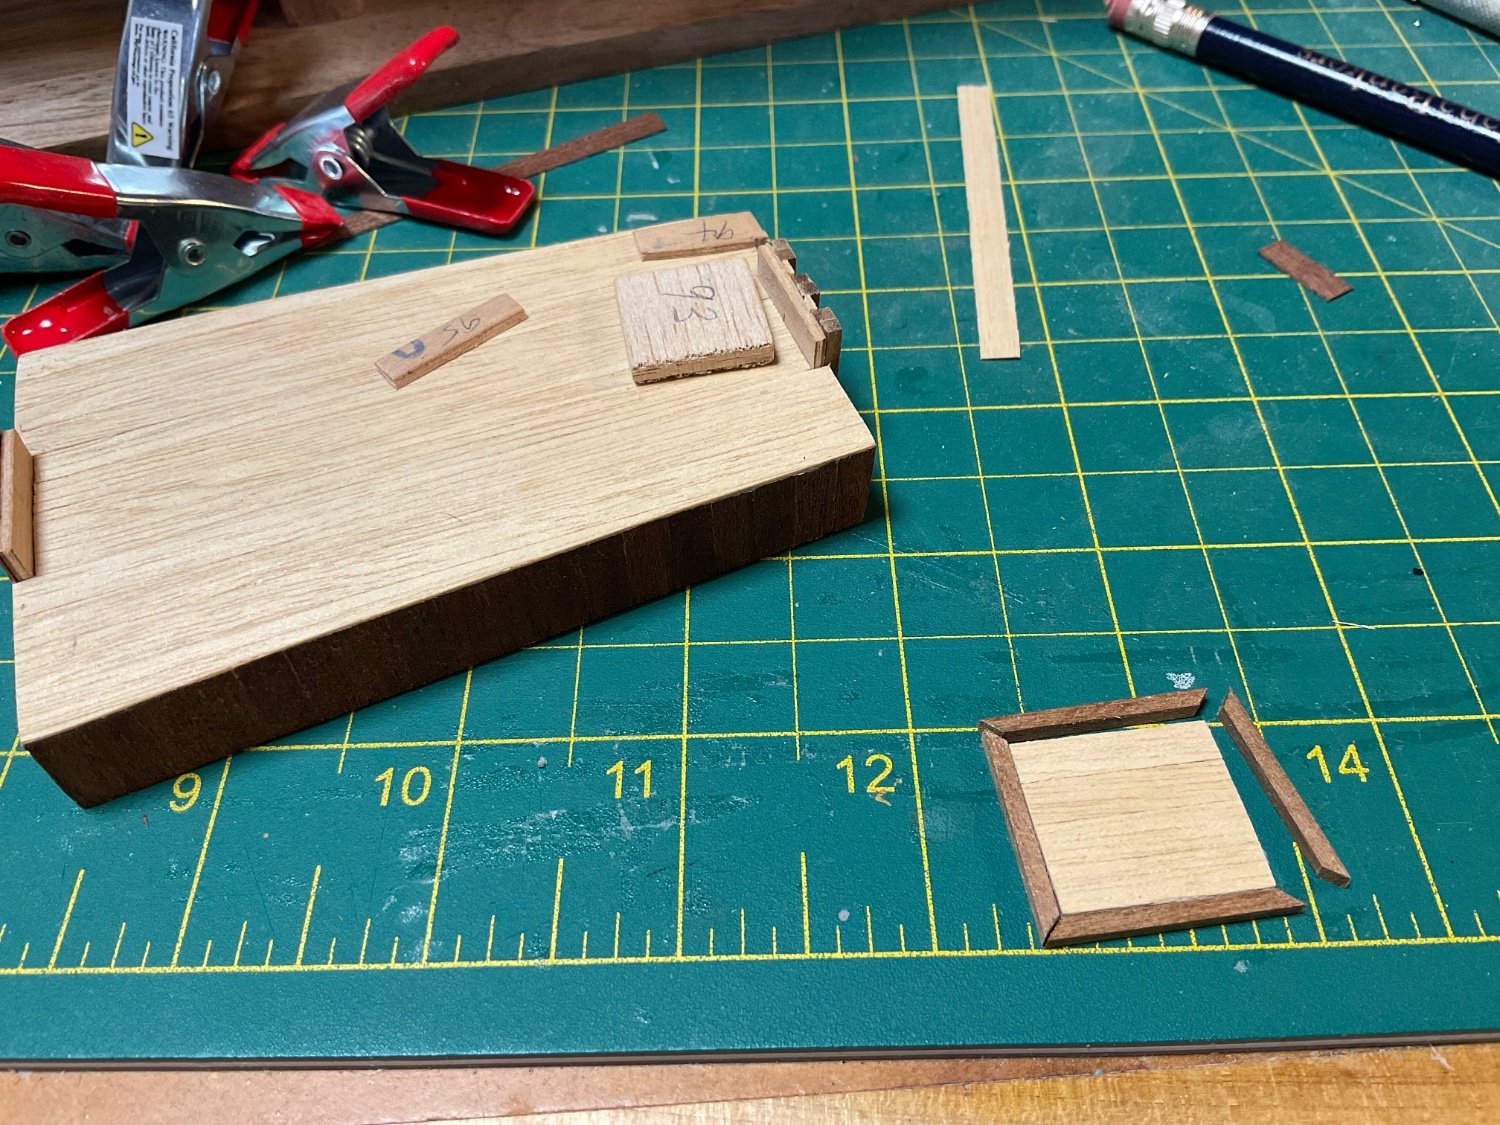
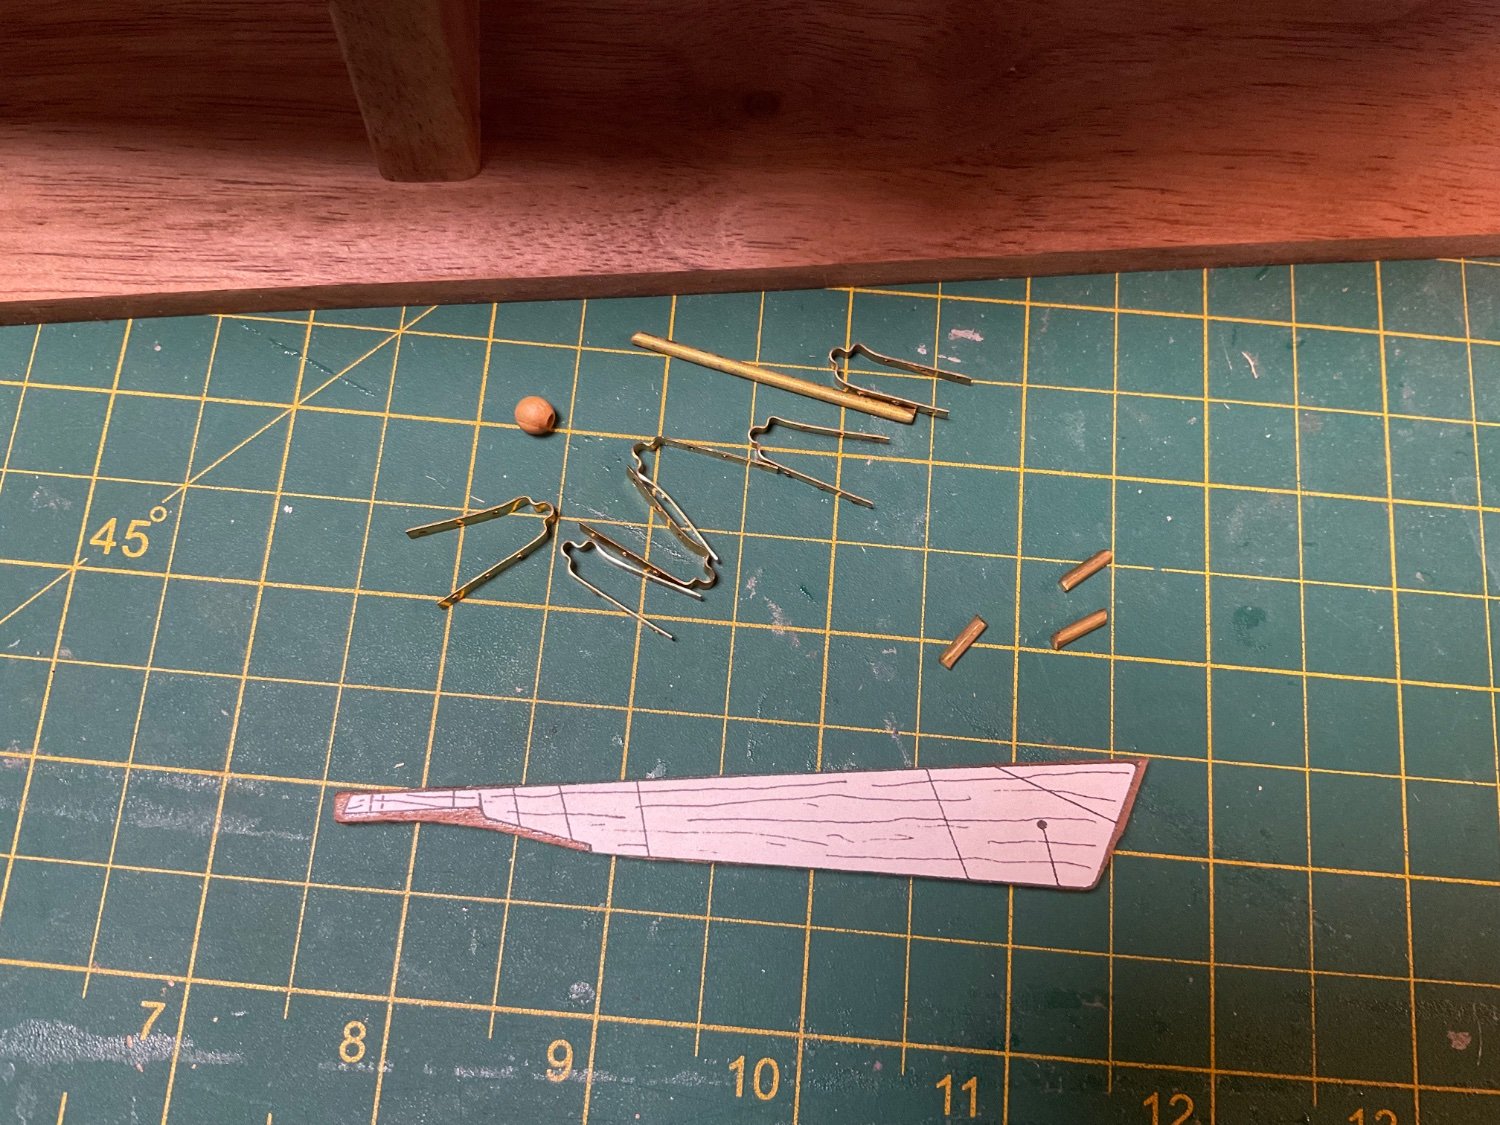
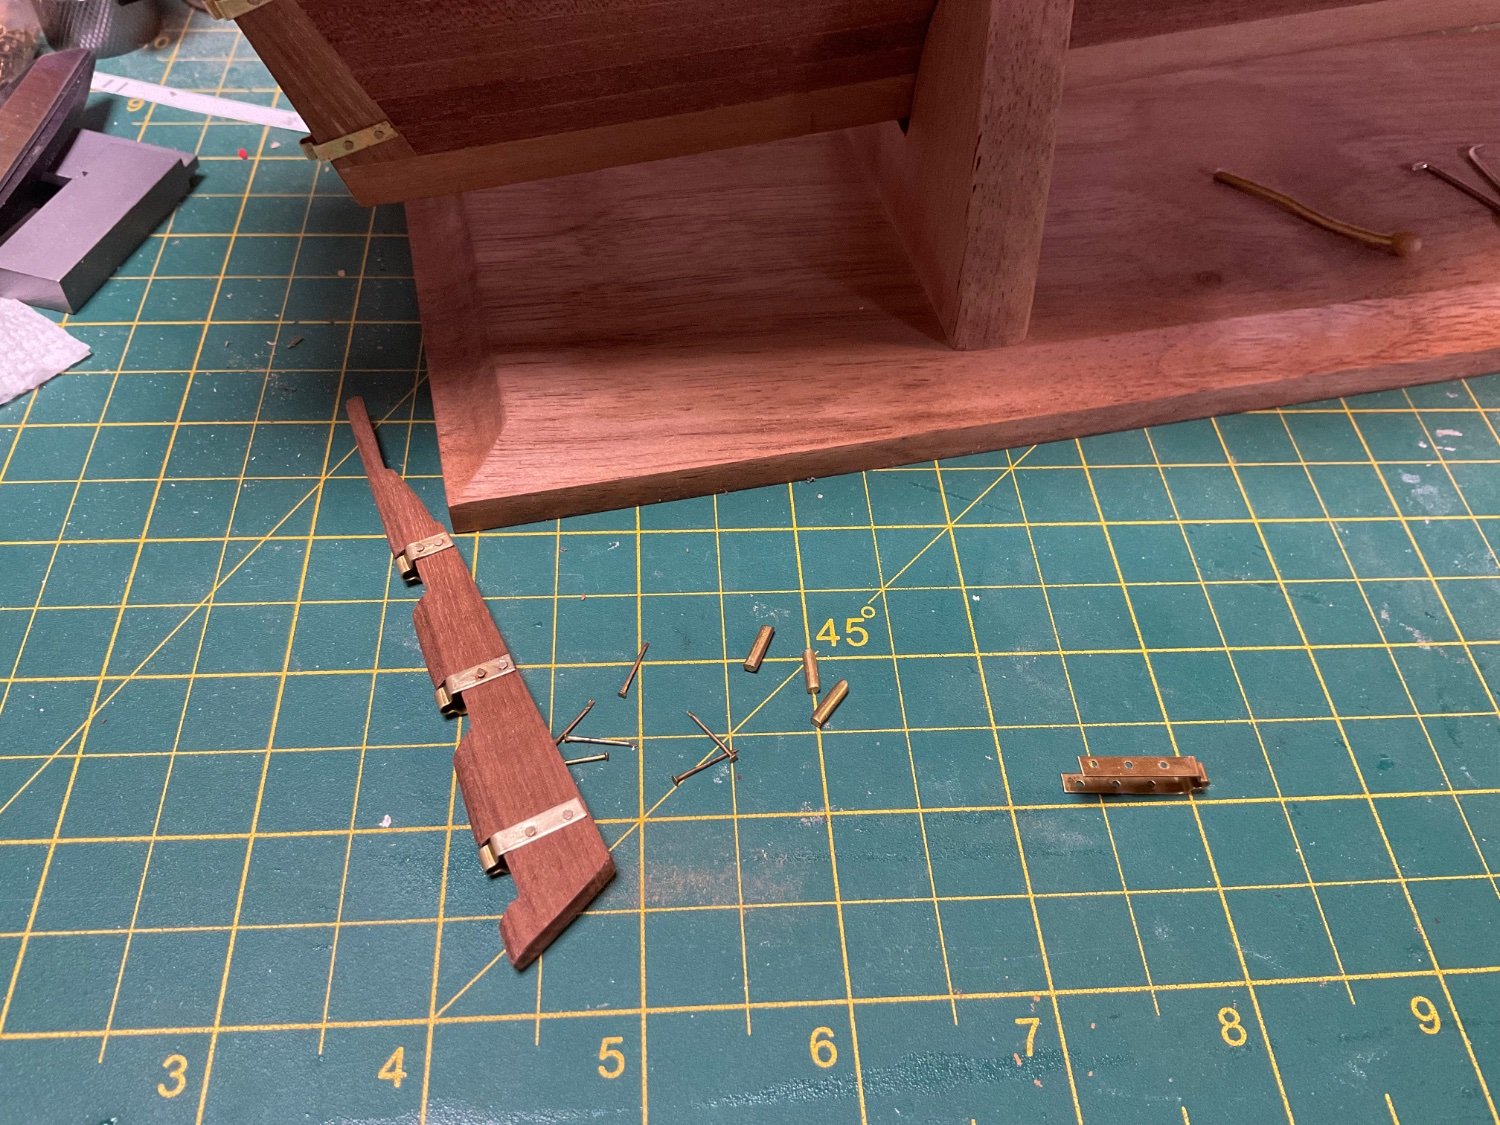
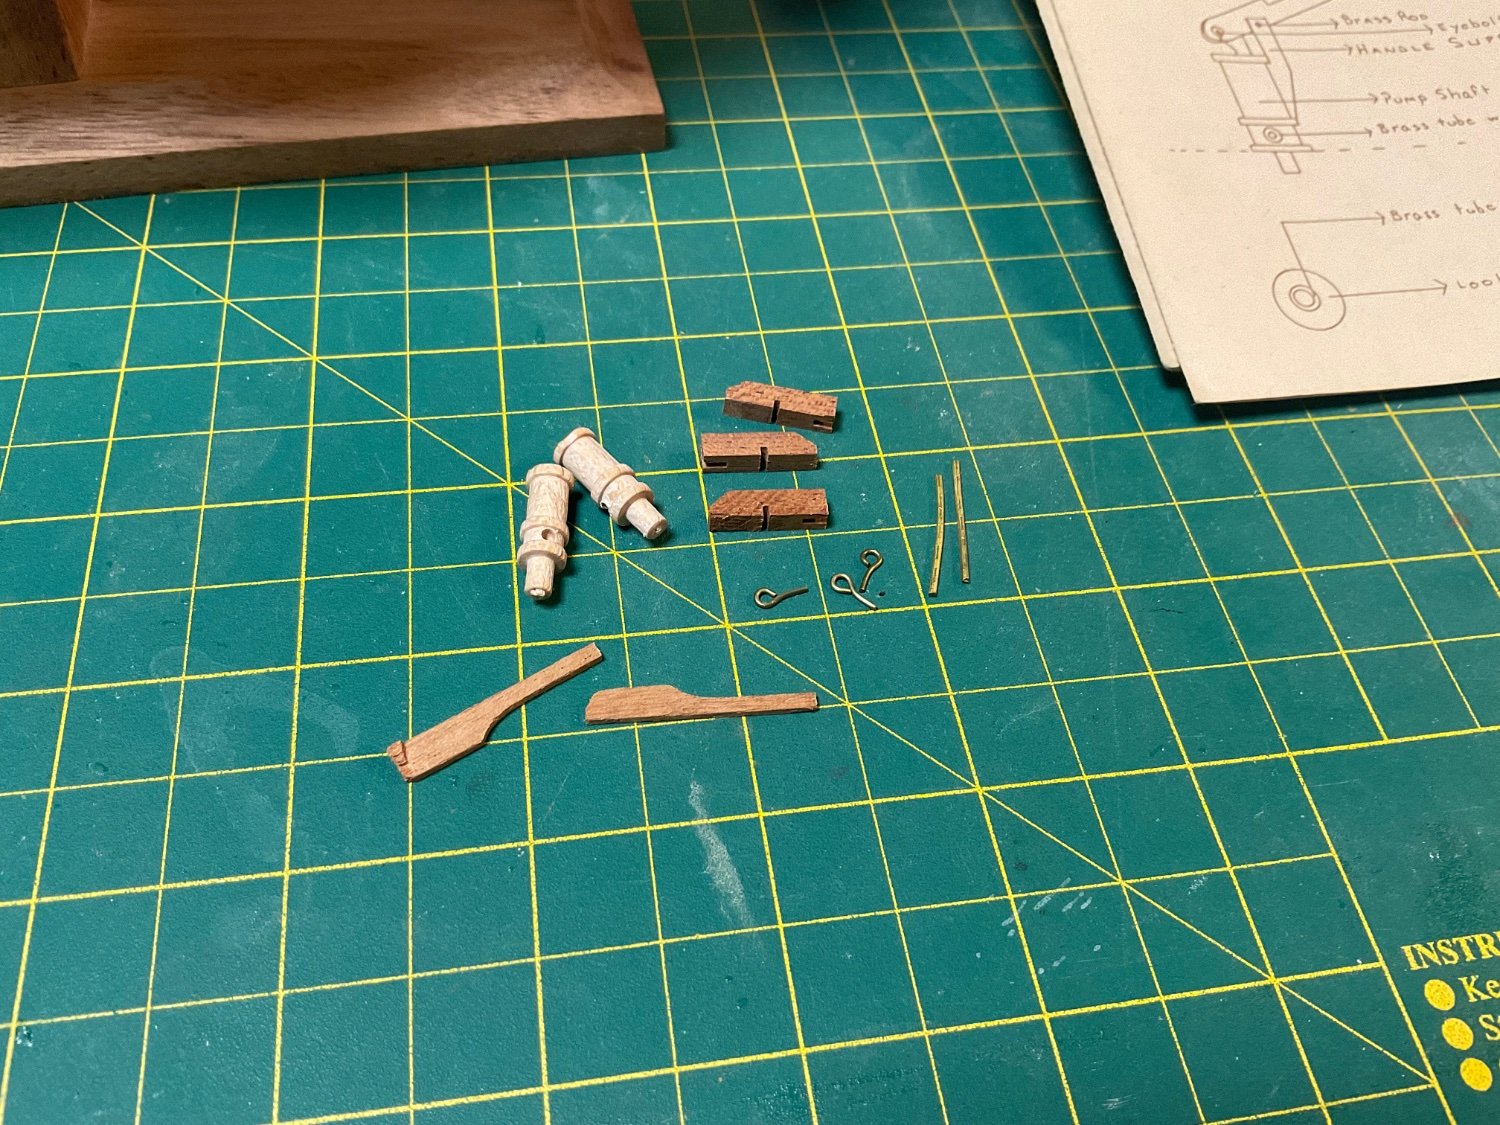
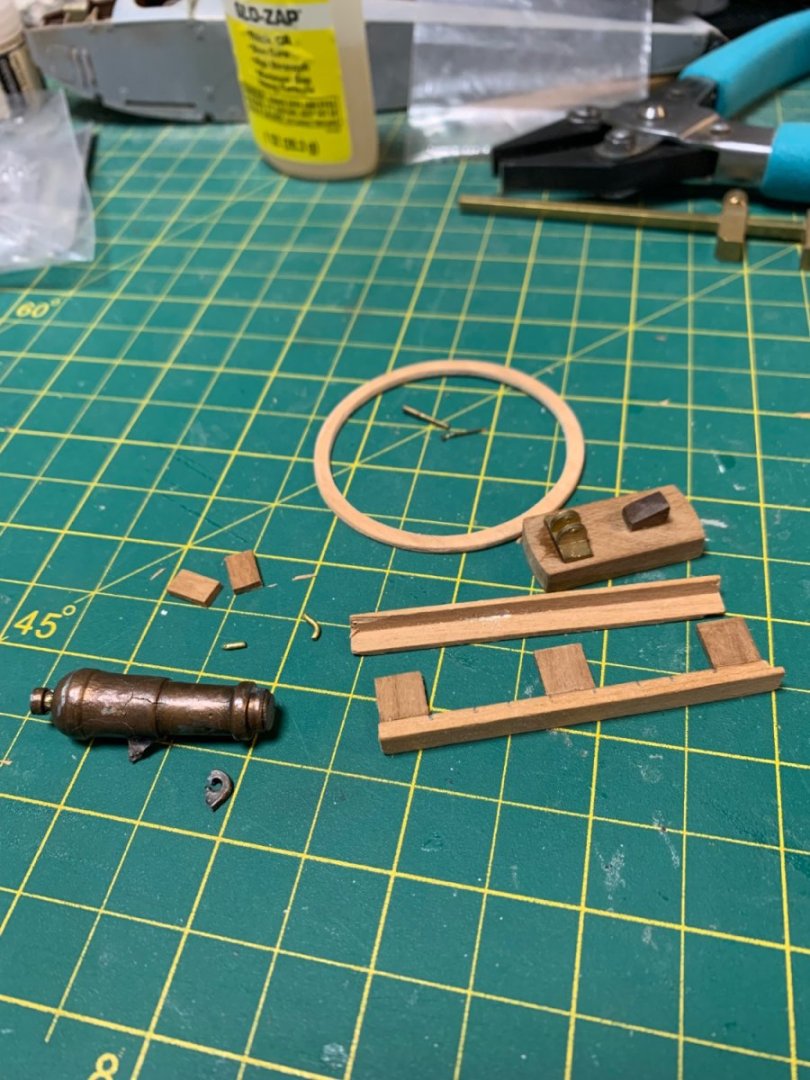
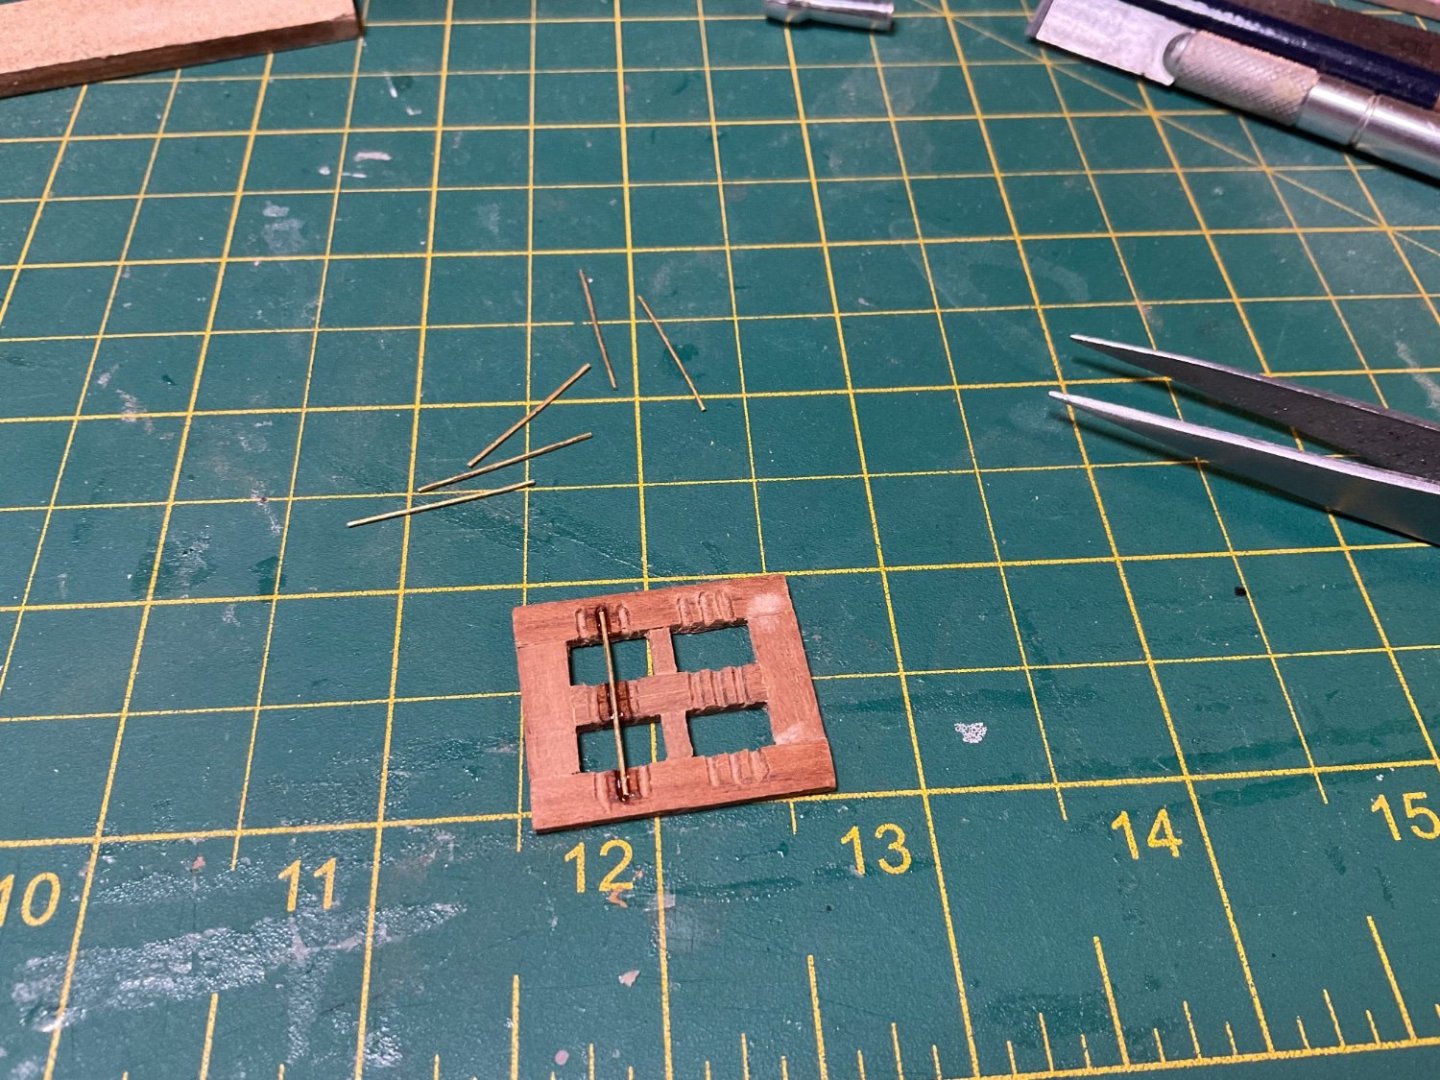
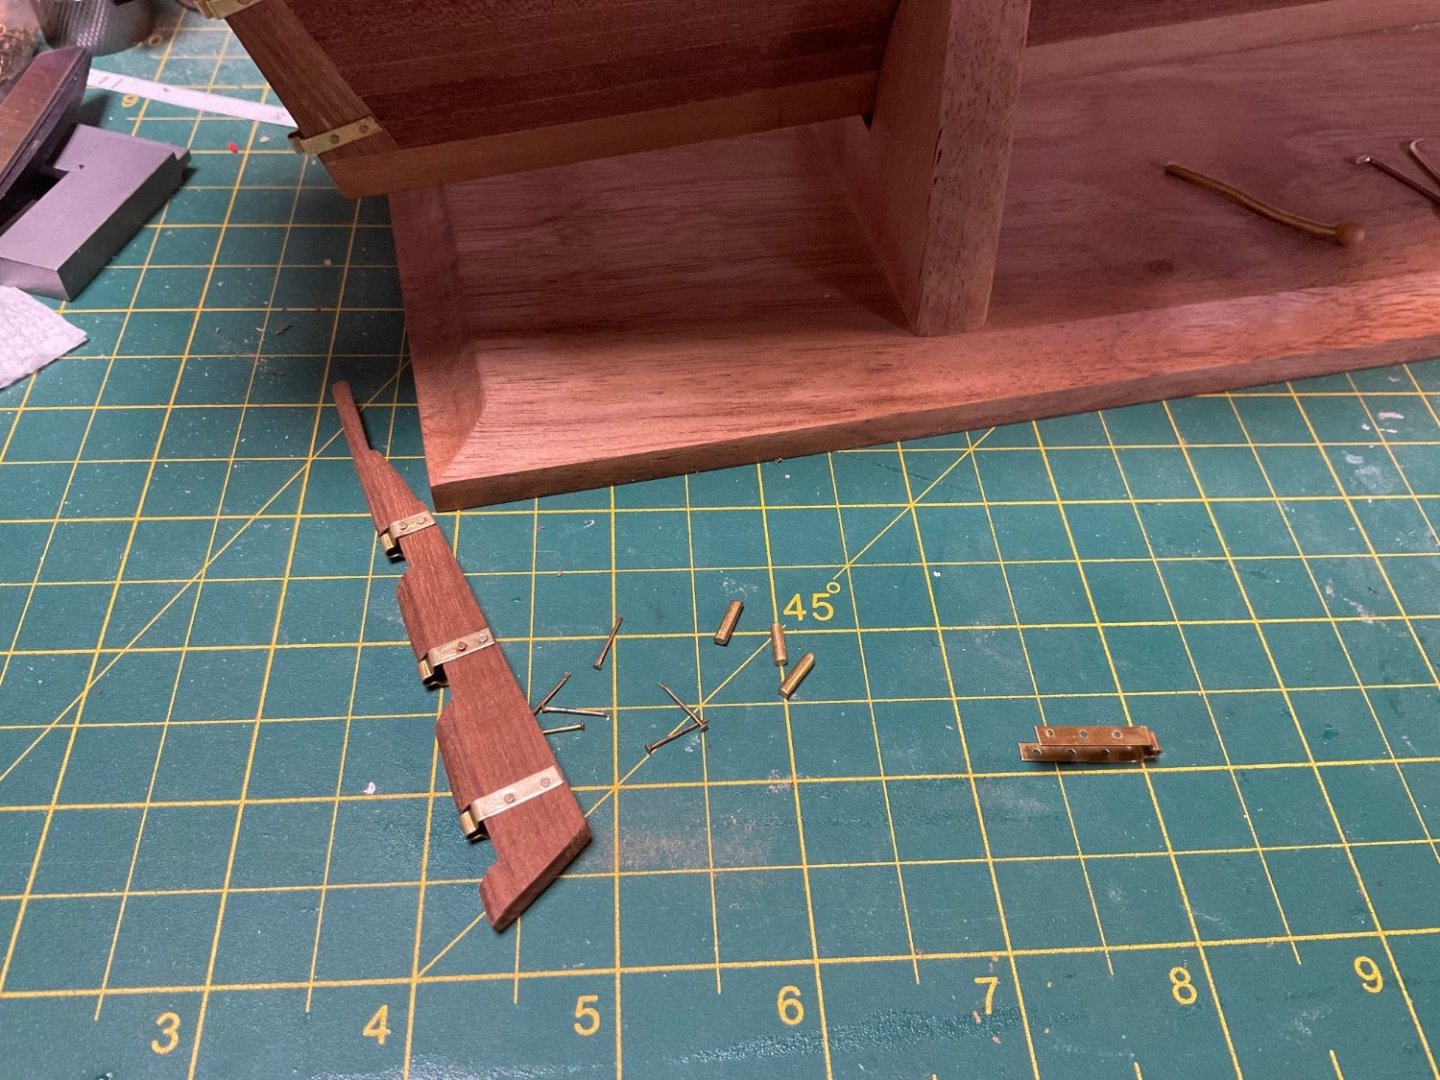
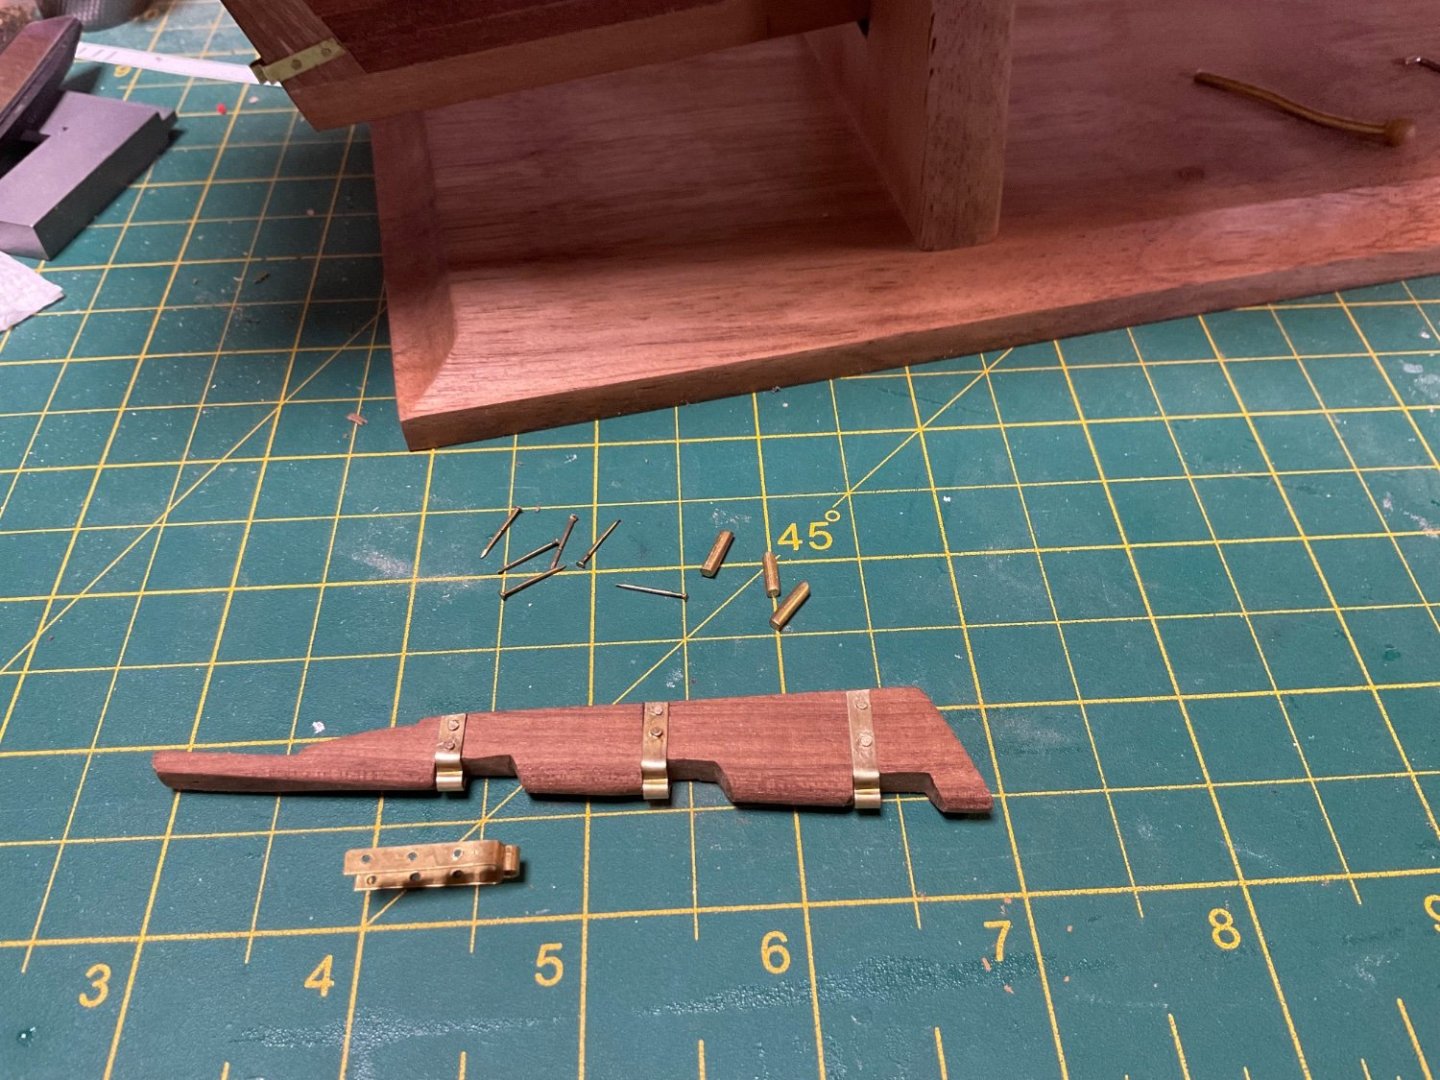
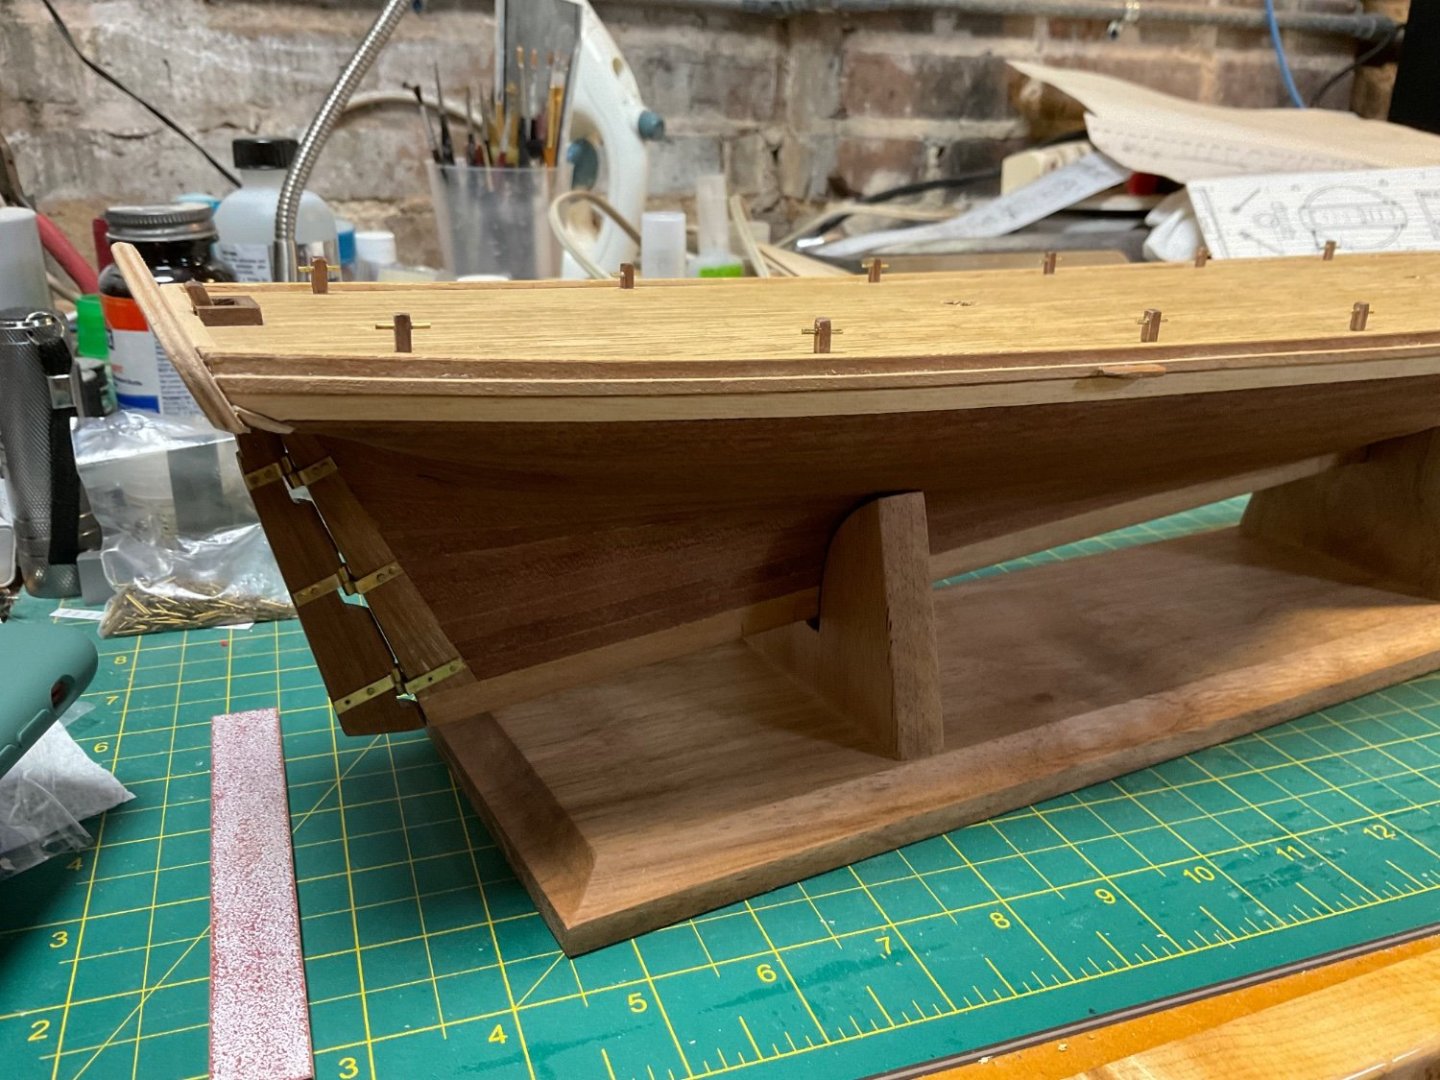
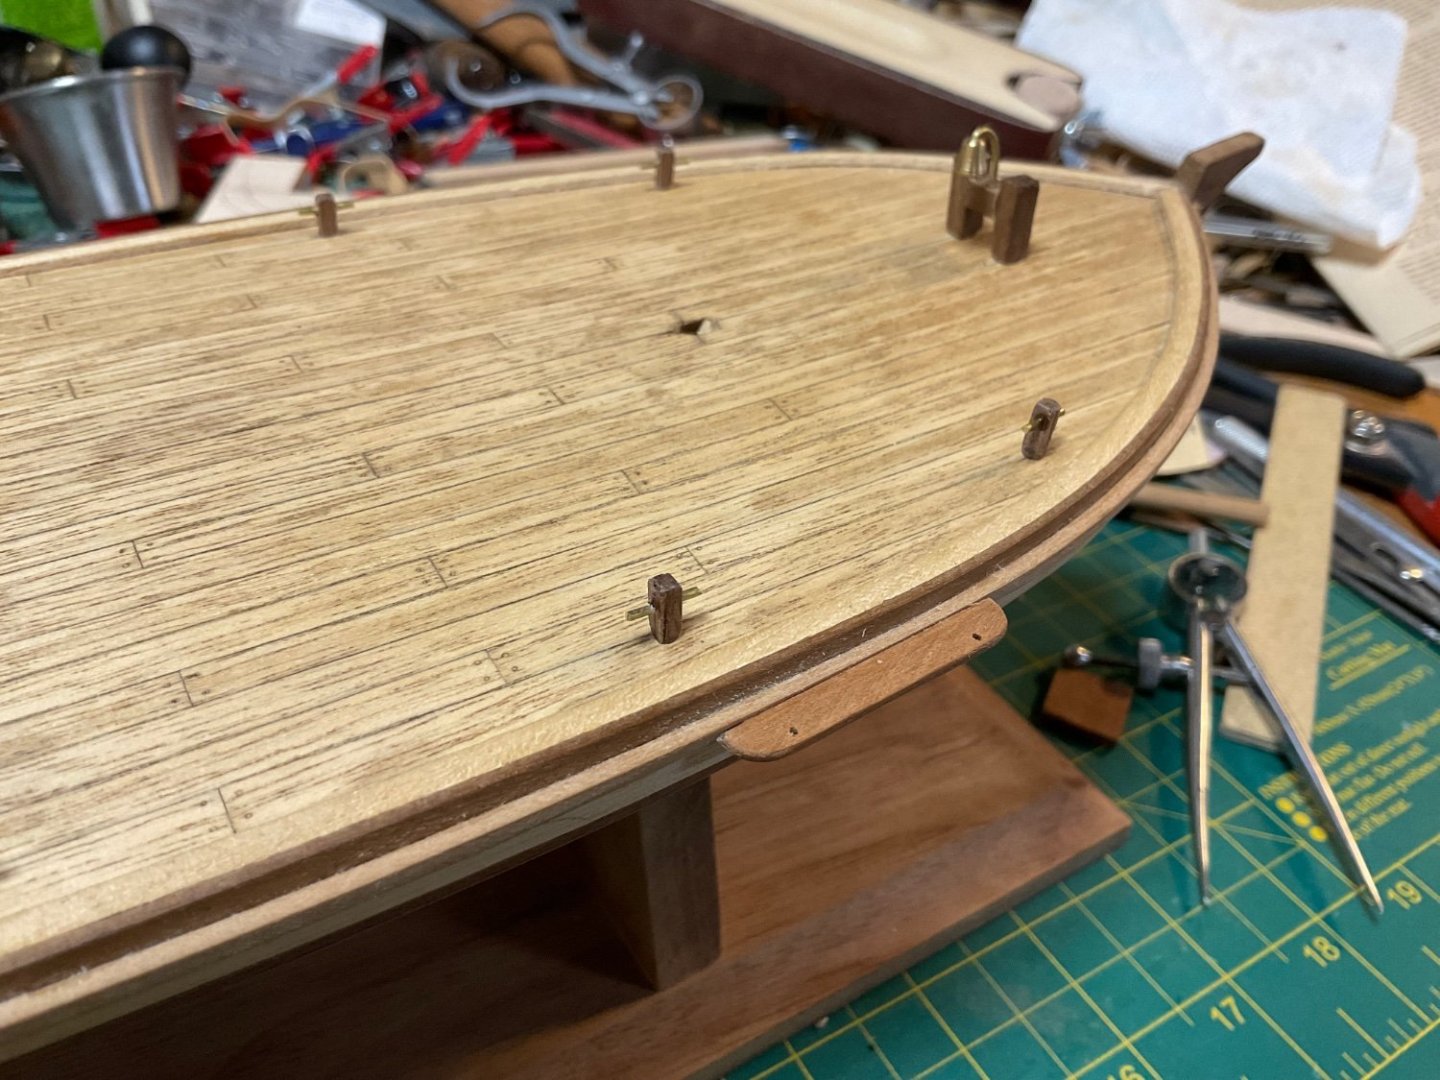
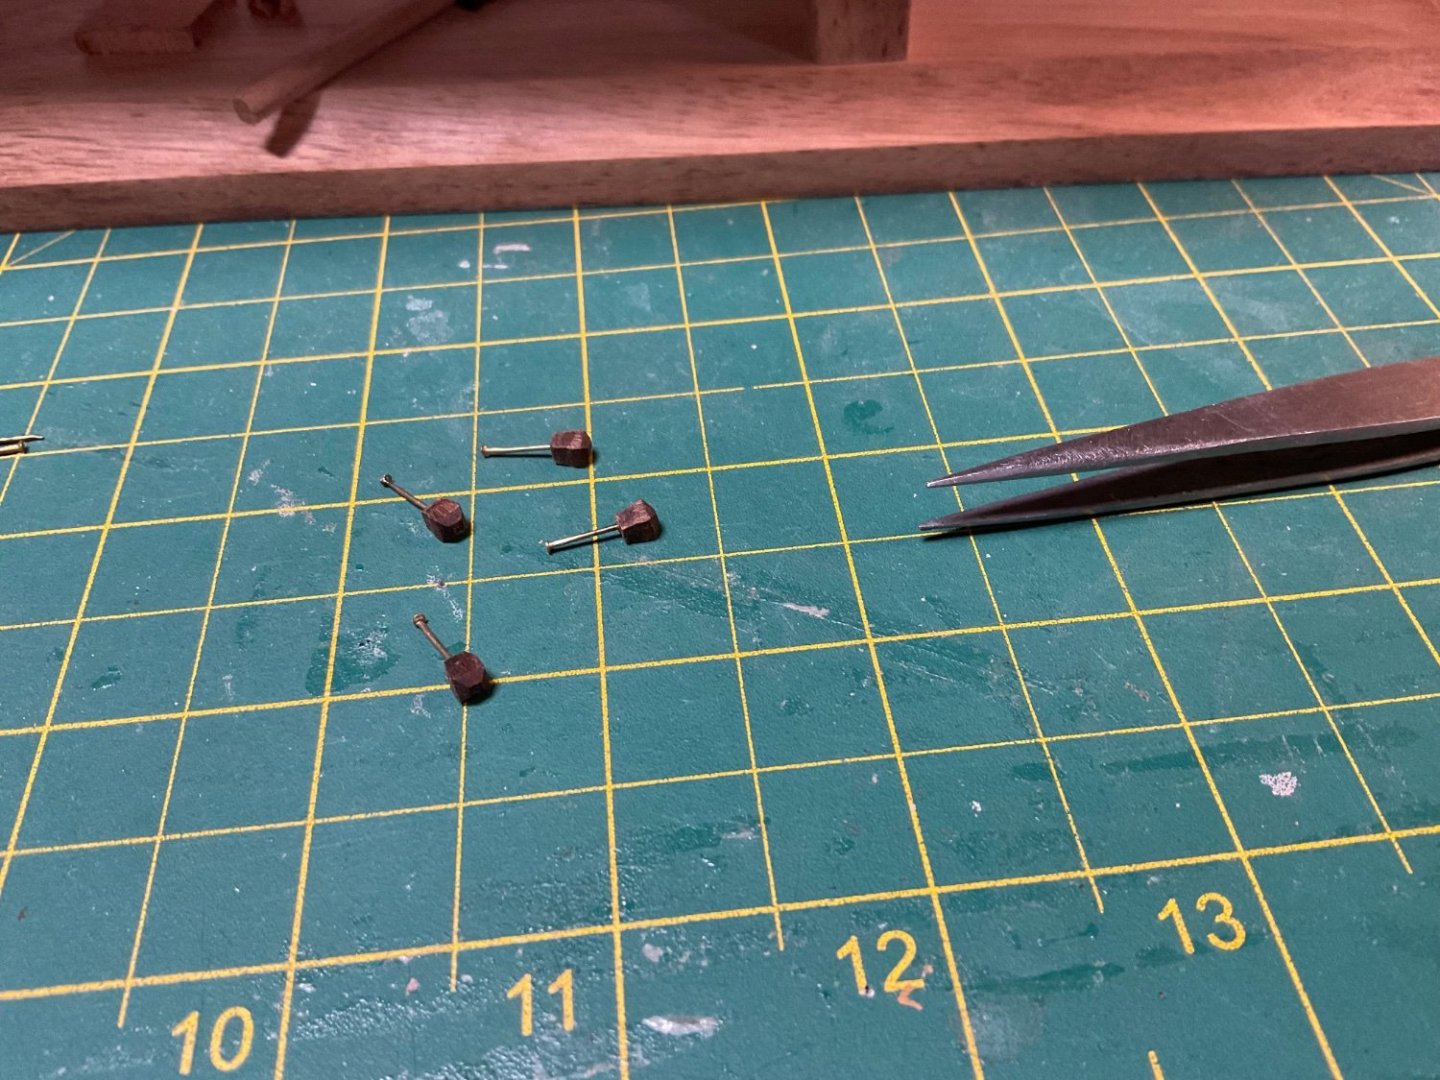
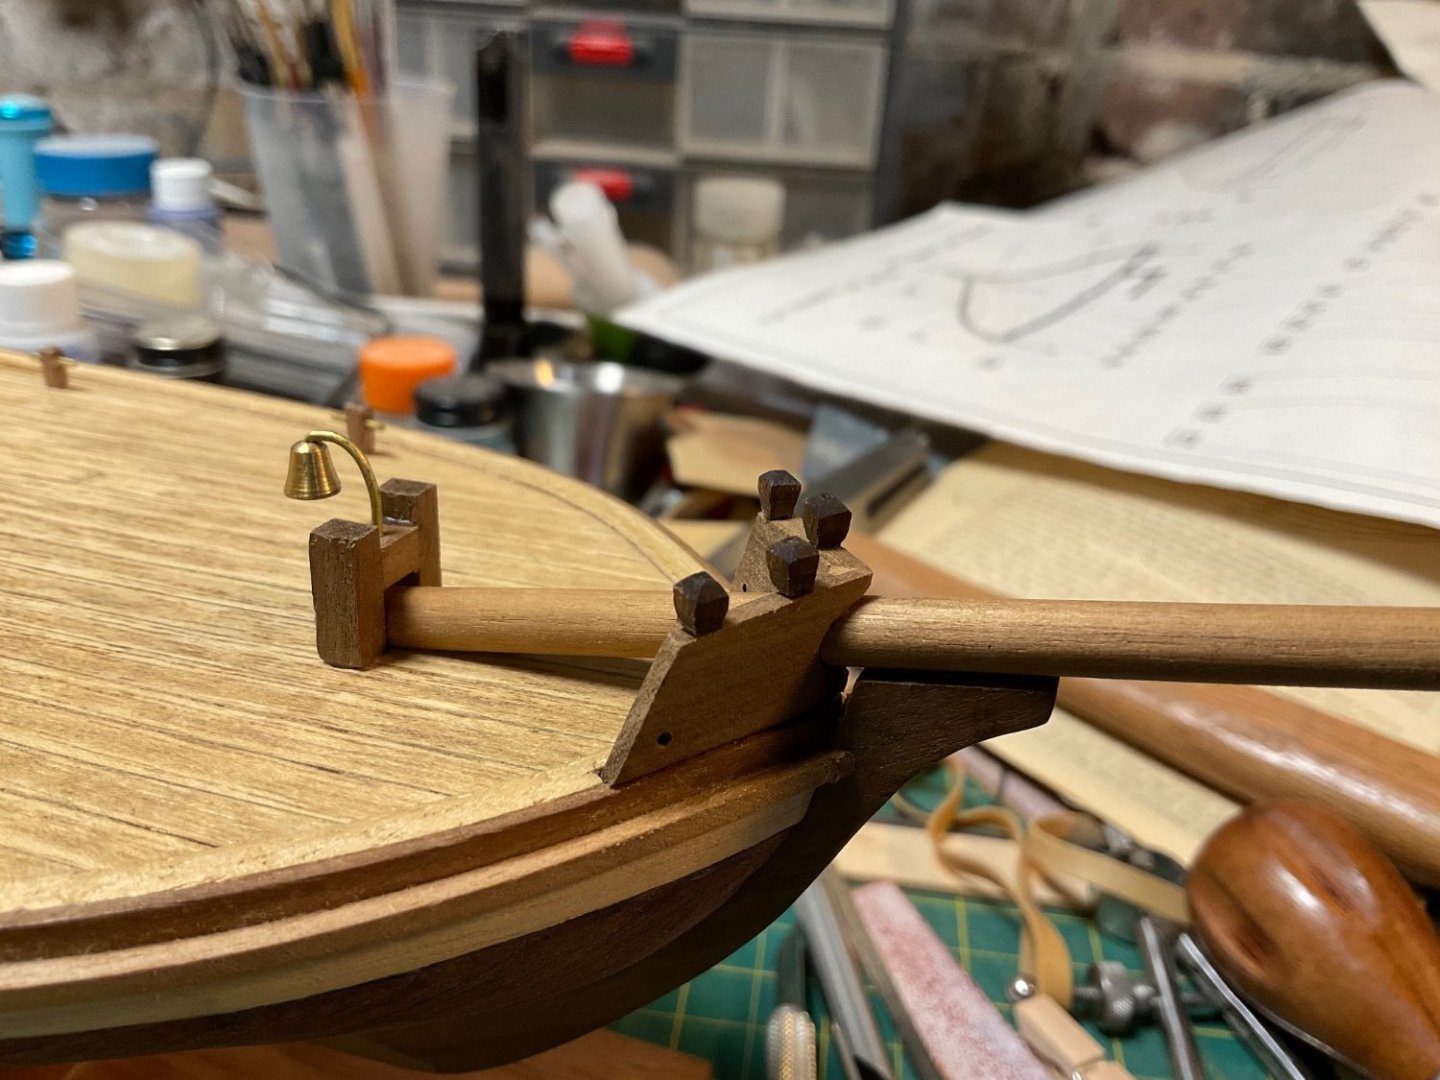
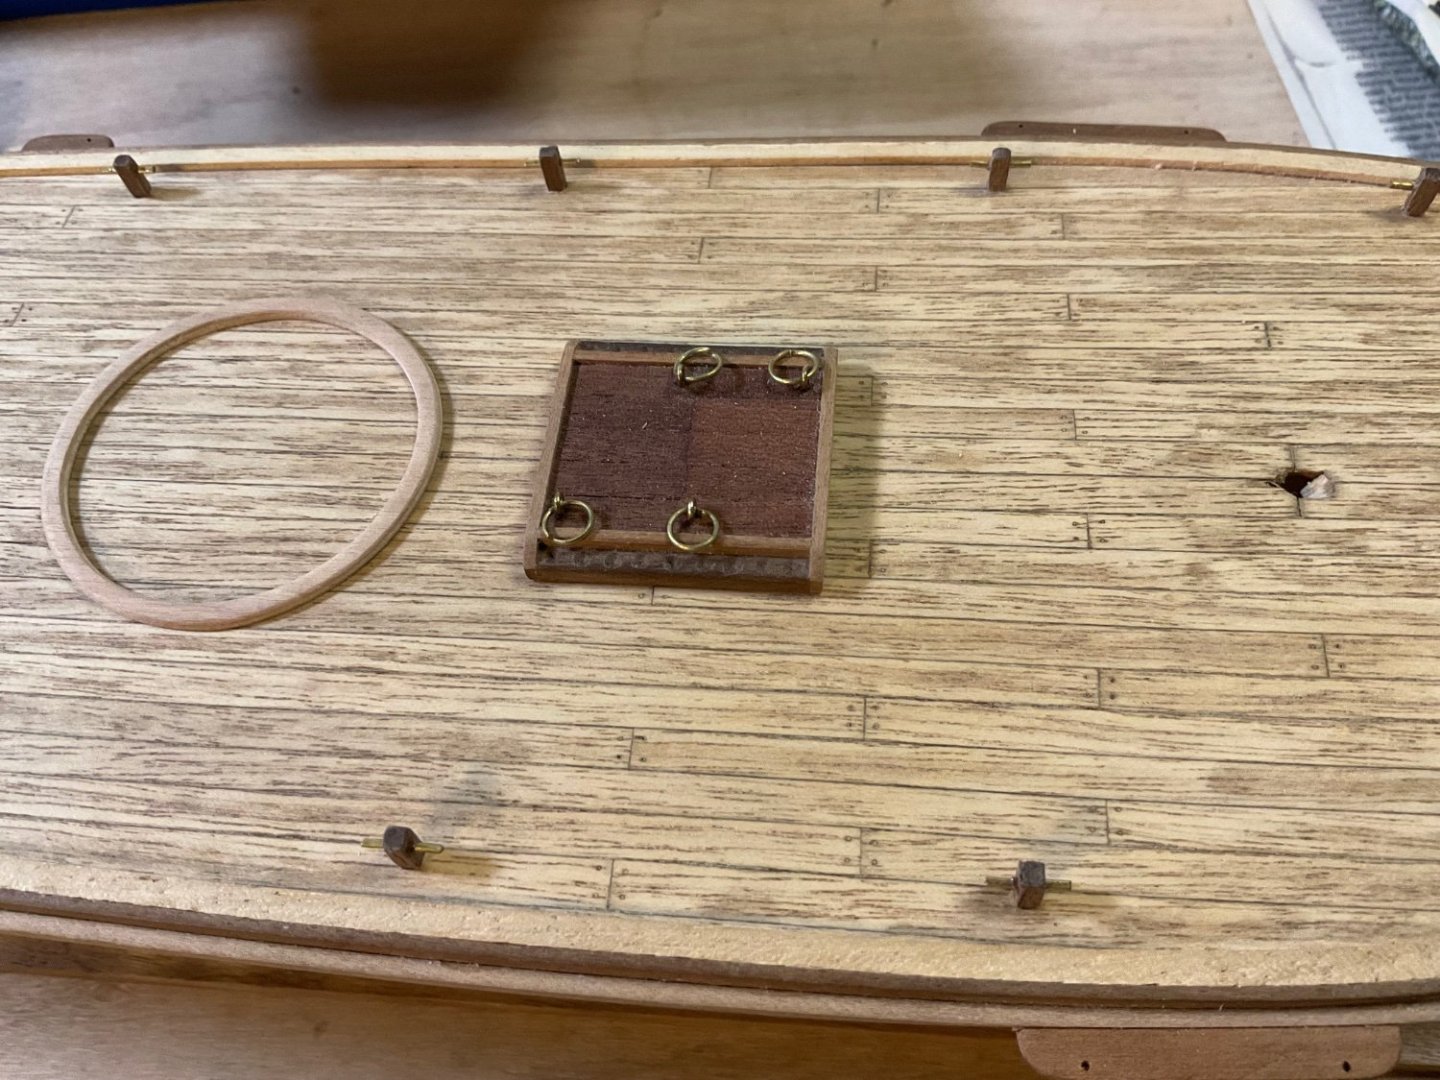
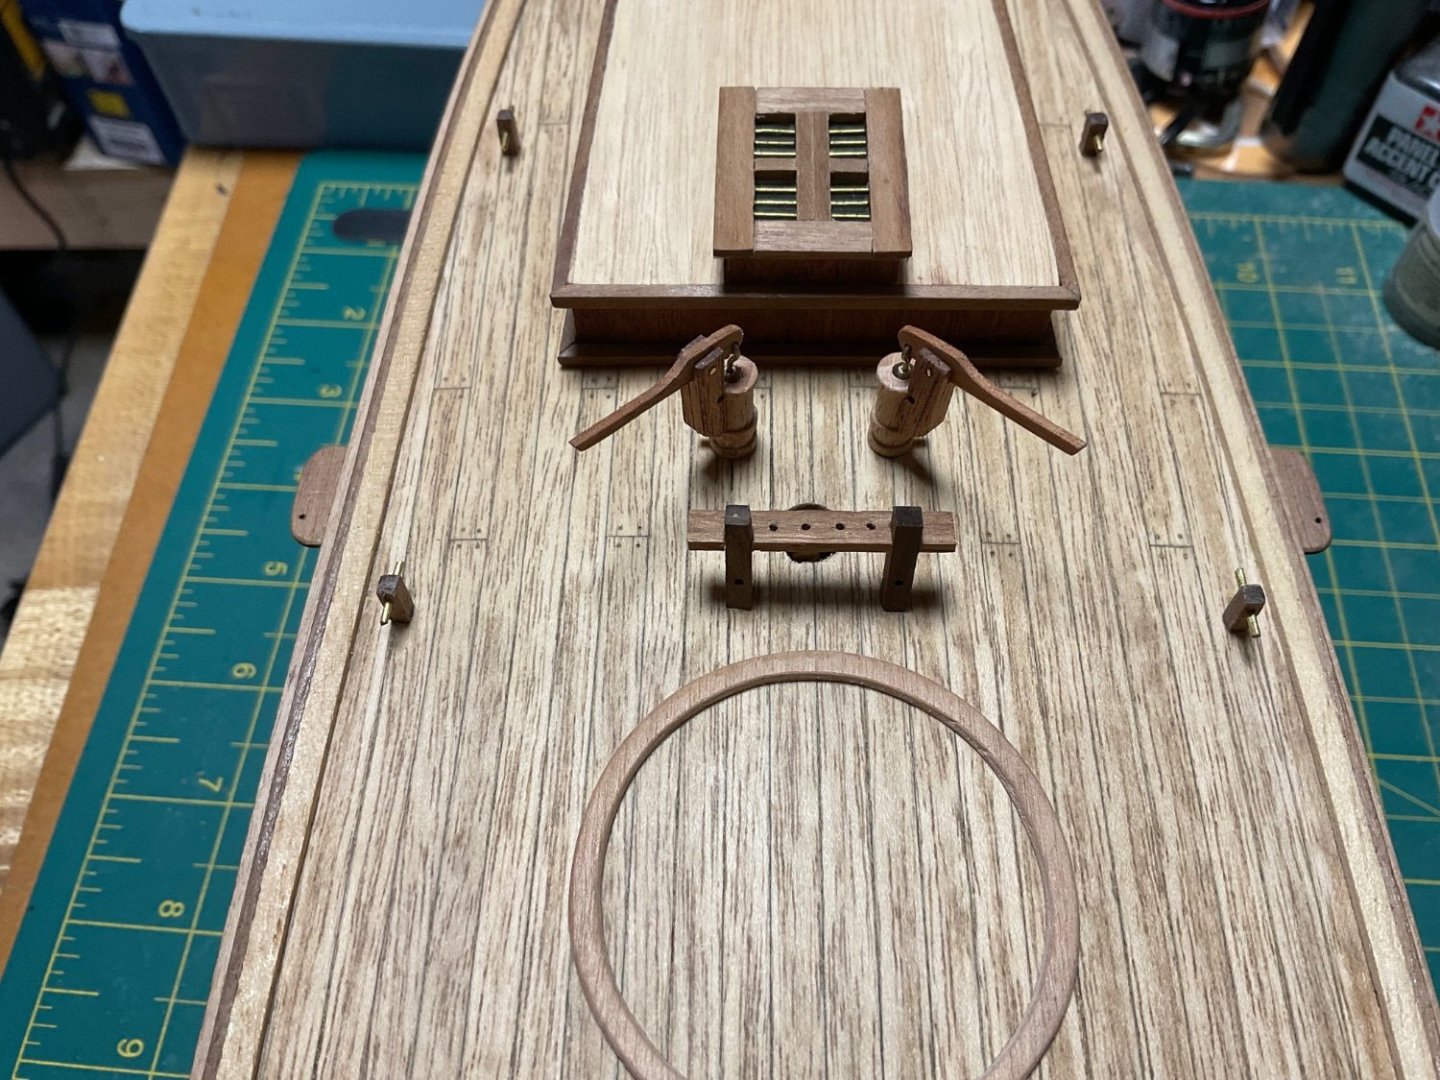
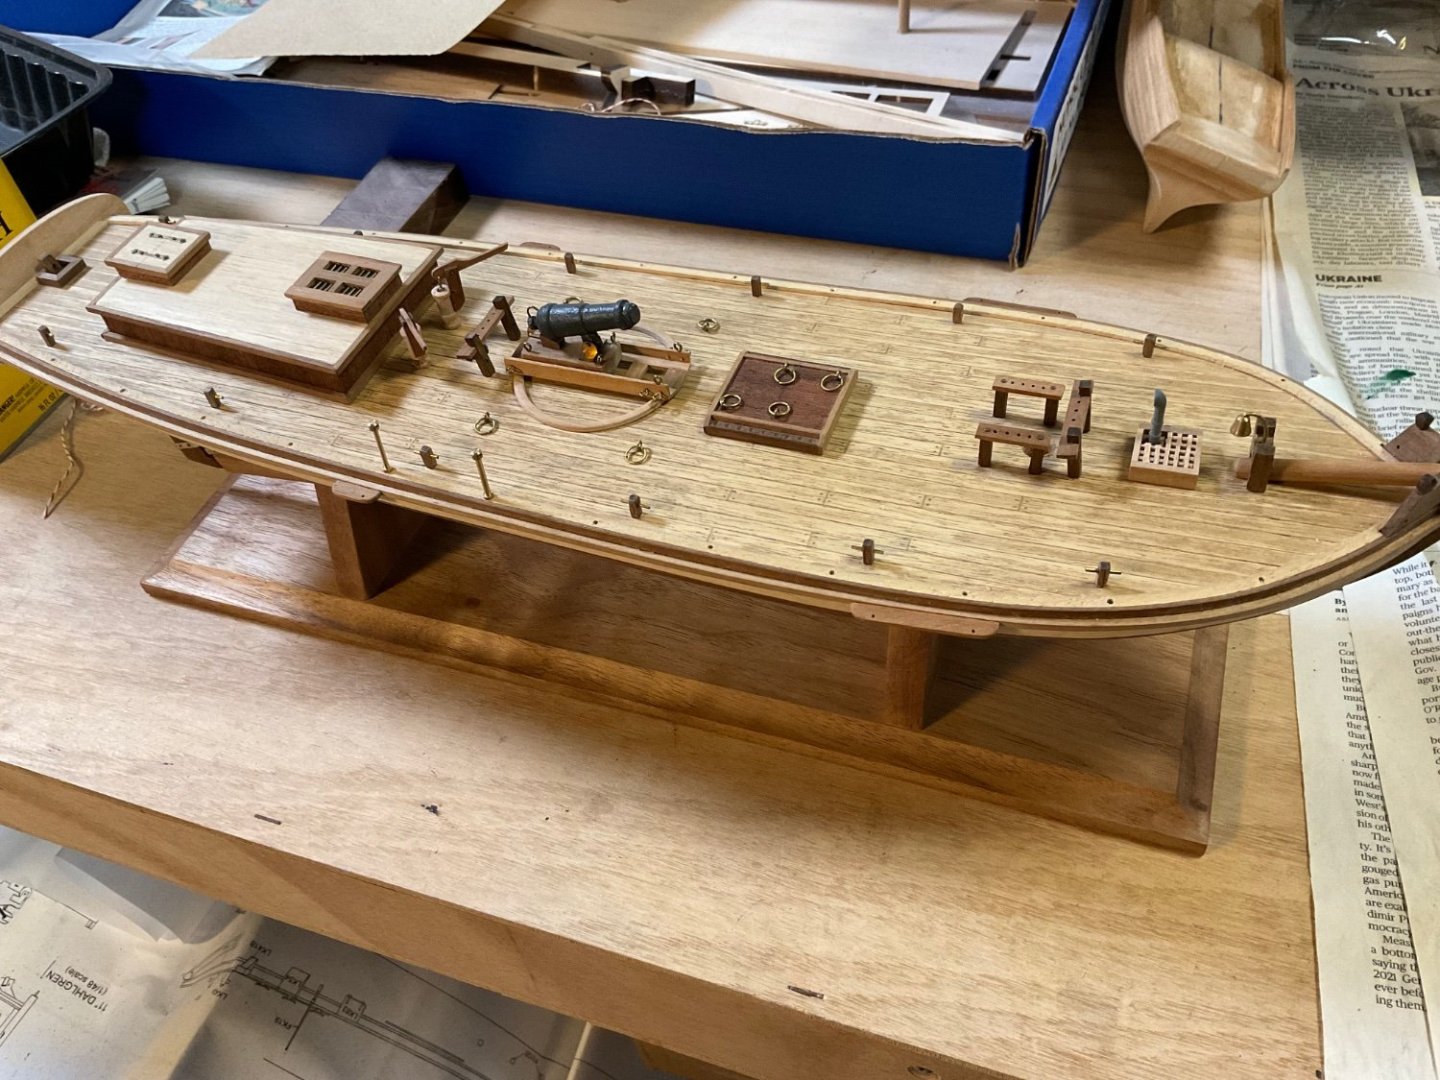
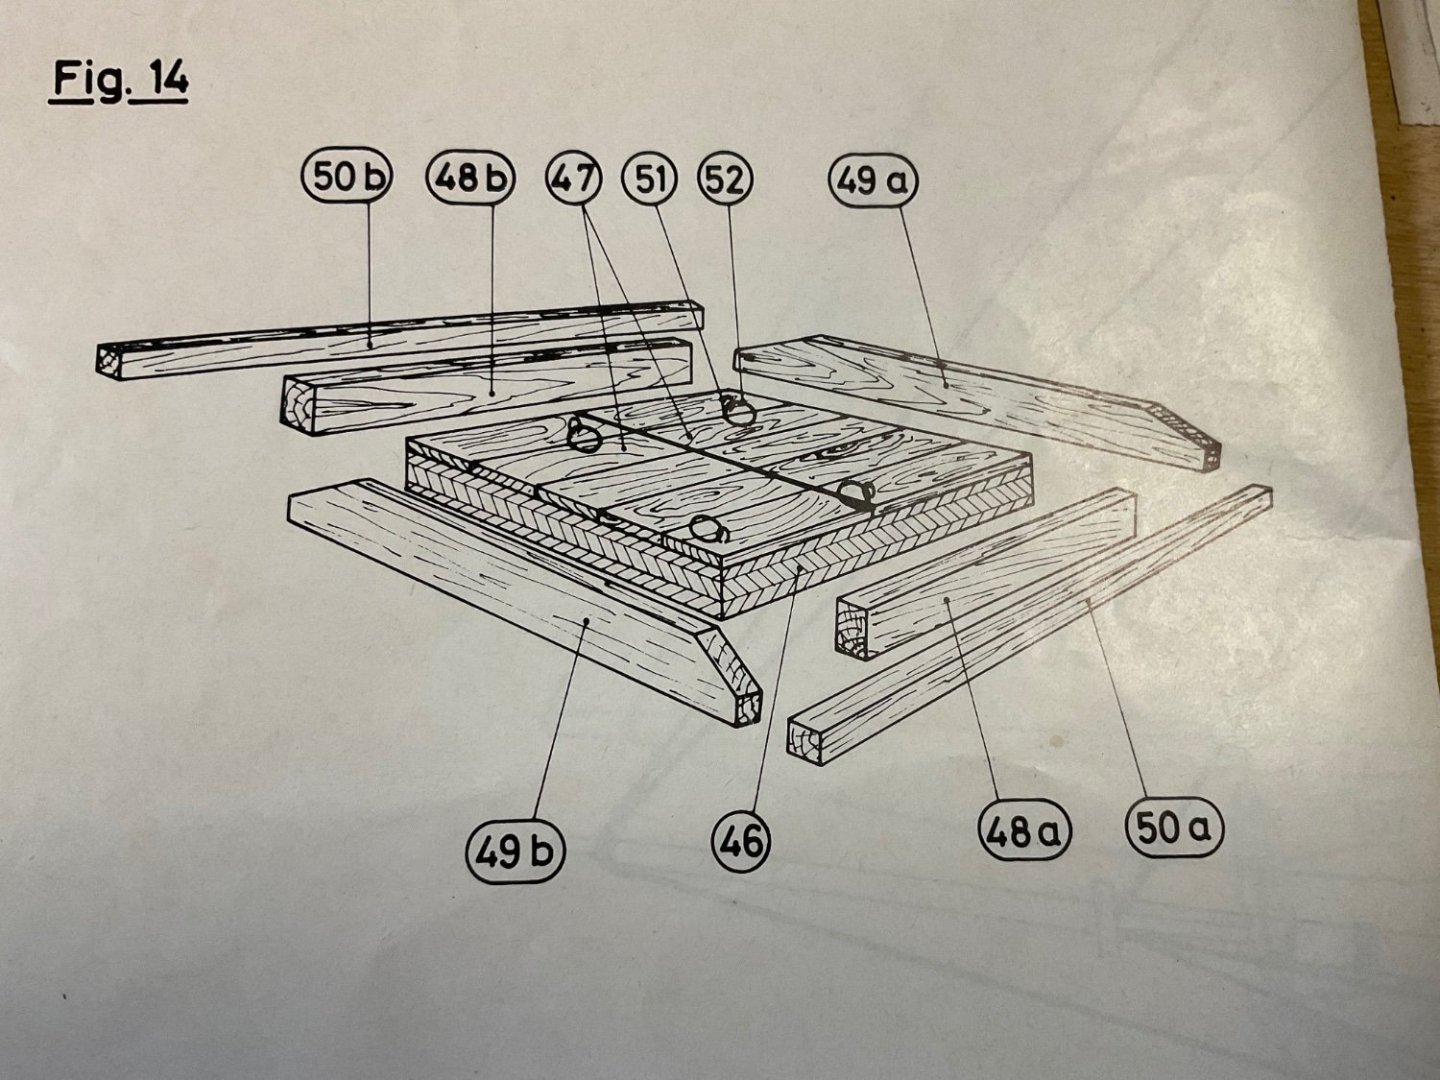
Thanks Phil, based on your info, I drilled out shallow pockets for the cannon balls. This will give them more glue surface than what the drawing showed. Some progress has been made on the deck furnishings and sub-assemblies. I put pins in the channels for added strength, otherwise, I’m sure the rigging would have pulled the channel from the hull. Here is the channel attached to the hull. Here are the parts provided for the rudder assembly: All of the straps provided were pre-drilled for bolts and were too long. I trimmed them to fit and drilled additional holes where needed. Pins were clipped shorter to simulate the bolts on the straps. I think the final rudder assembly looks decent, but very challenging to construct using the provided materials. Here are the parts provided for the vent: Vent assembled: Locker assembly: Final locker assembly on deck: Cabin assembled: Final cabin assembly: I put pins in the knighthead bits for strength, there is no way these would stay in place with glue alone: Knighthead bits attached to splash boards: Here are the parts provided for the pumps: Final pump assemblies on deck: I drilled out holes in the deck for the masts using a drill press, the plans show an 11 degree rake for the masts, this was easy to reproduce on the drill press: The cannon assembly was somewhat disastrous. The cannon barrel was in rough shape as it came, the metal was cracked and the finish had flaked off in some areas. Also, the barrel was a little bent. It also didn’t help that I dropped it a couple of times and broke pieces off. I used a file and tried to smooth it out as much as possible and used putty to fill the cracks in the barrel, then painted it cannon black. And this is where progress currently stands: Next is the rigging for the cannon. The instructions are unclear as to the proper way to rig the cannon so it should be an interesting exercise.


-
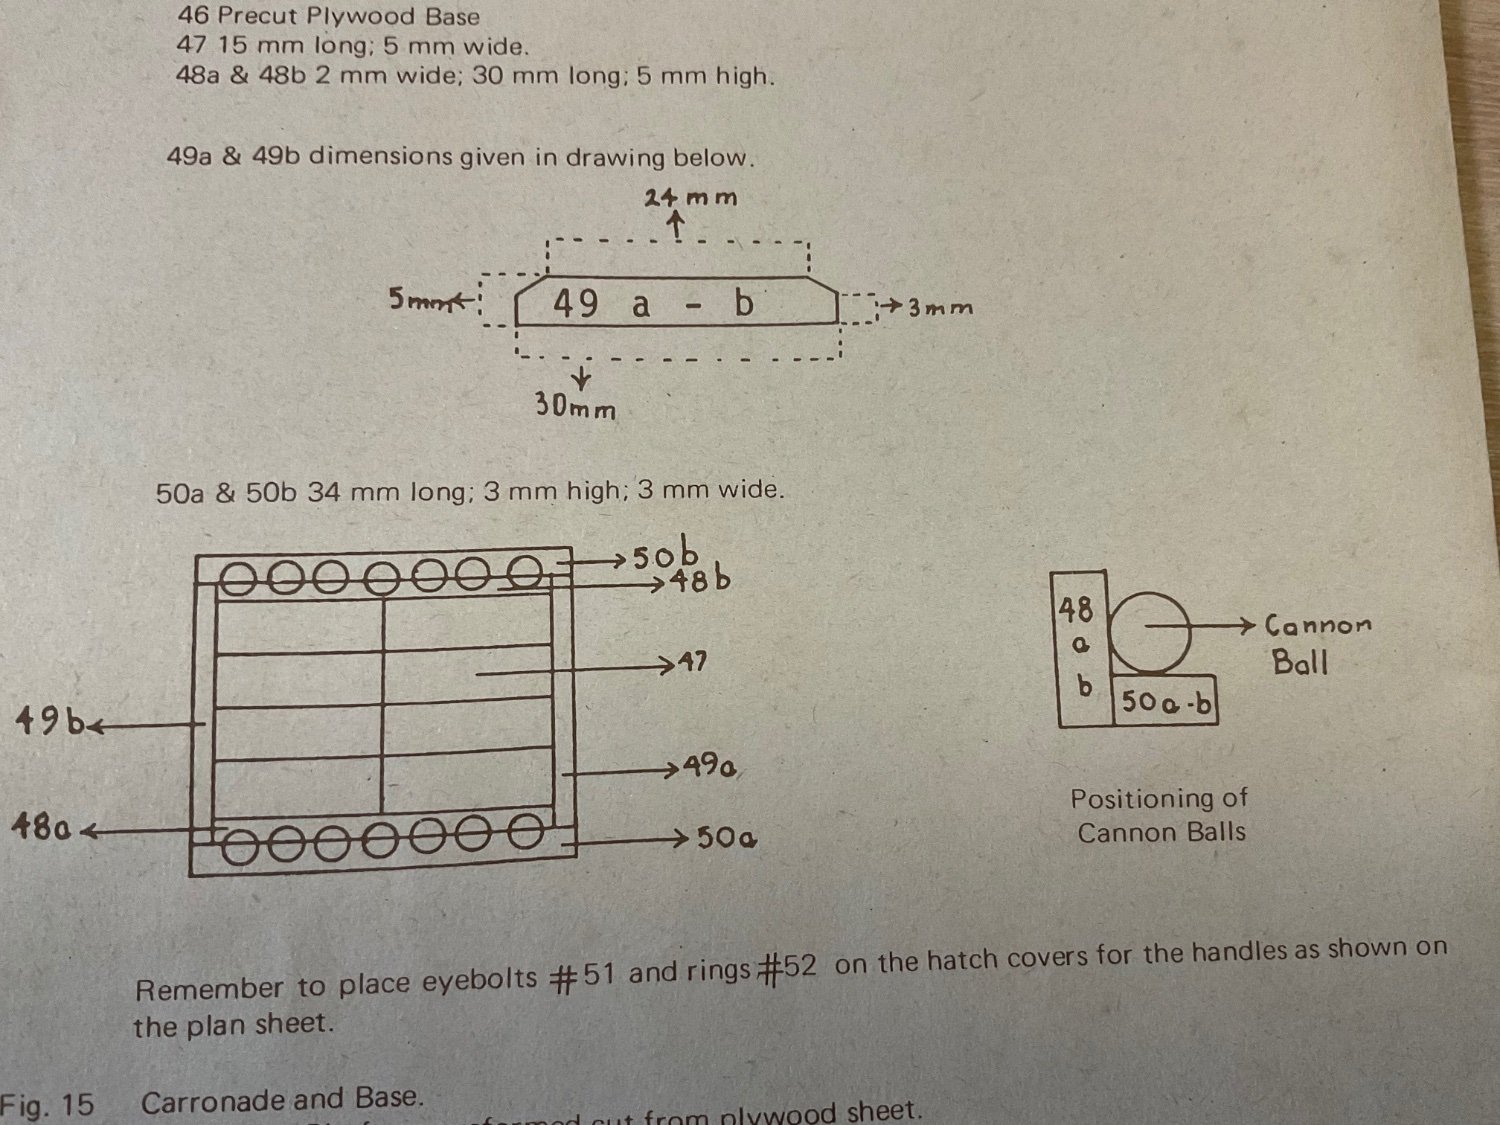
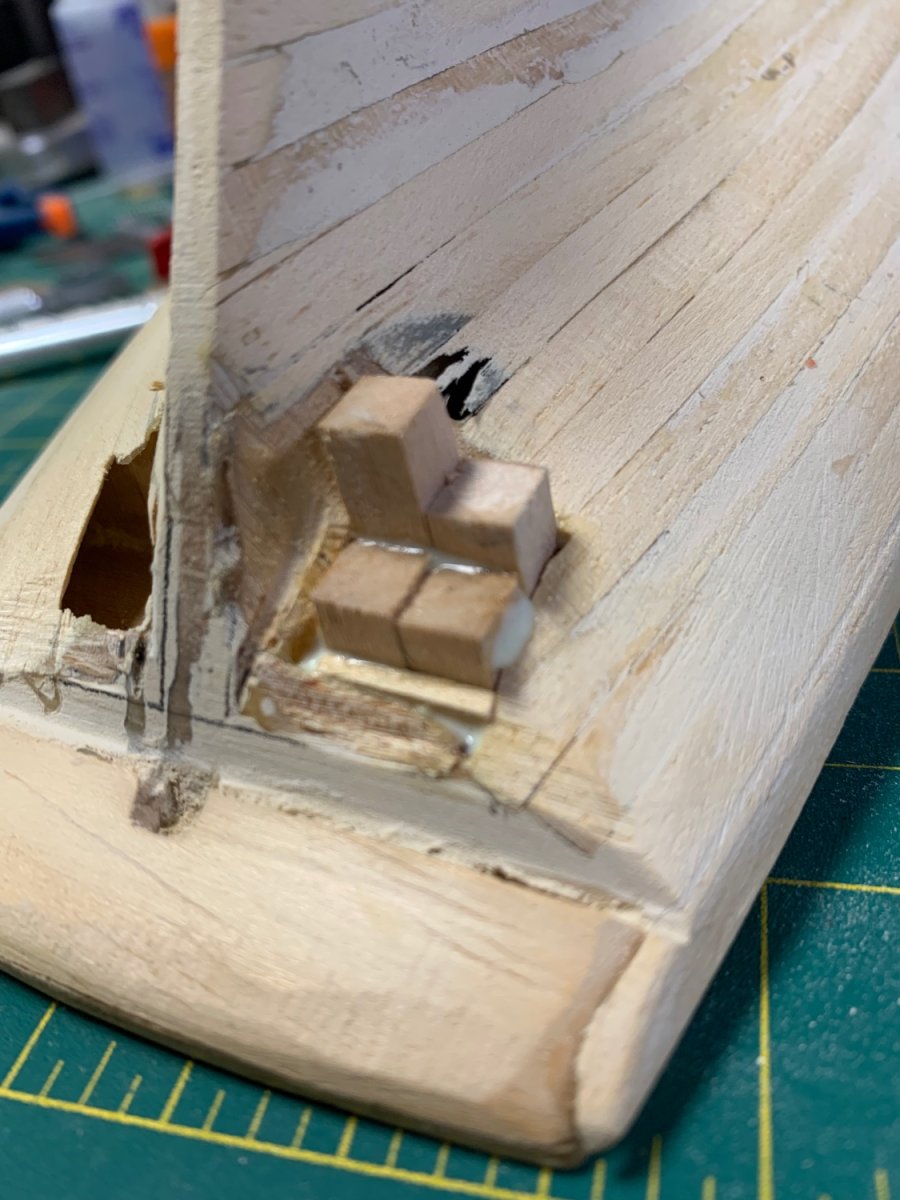
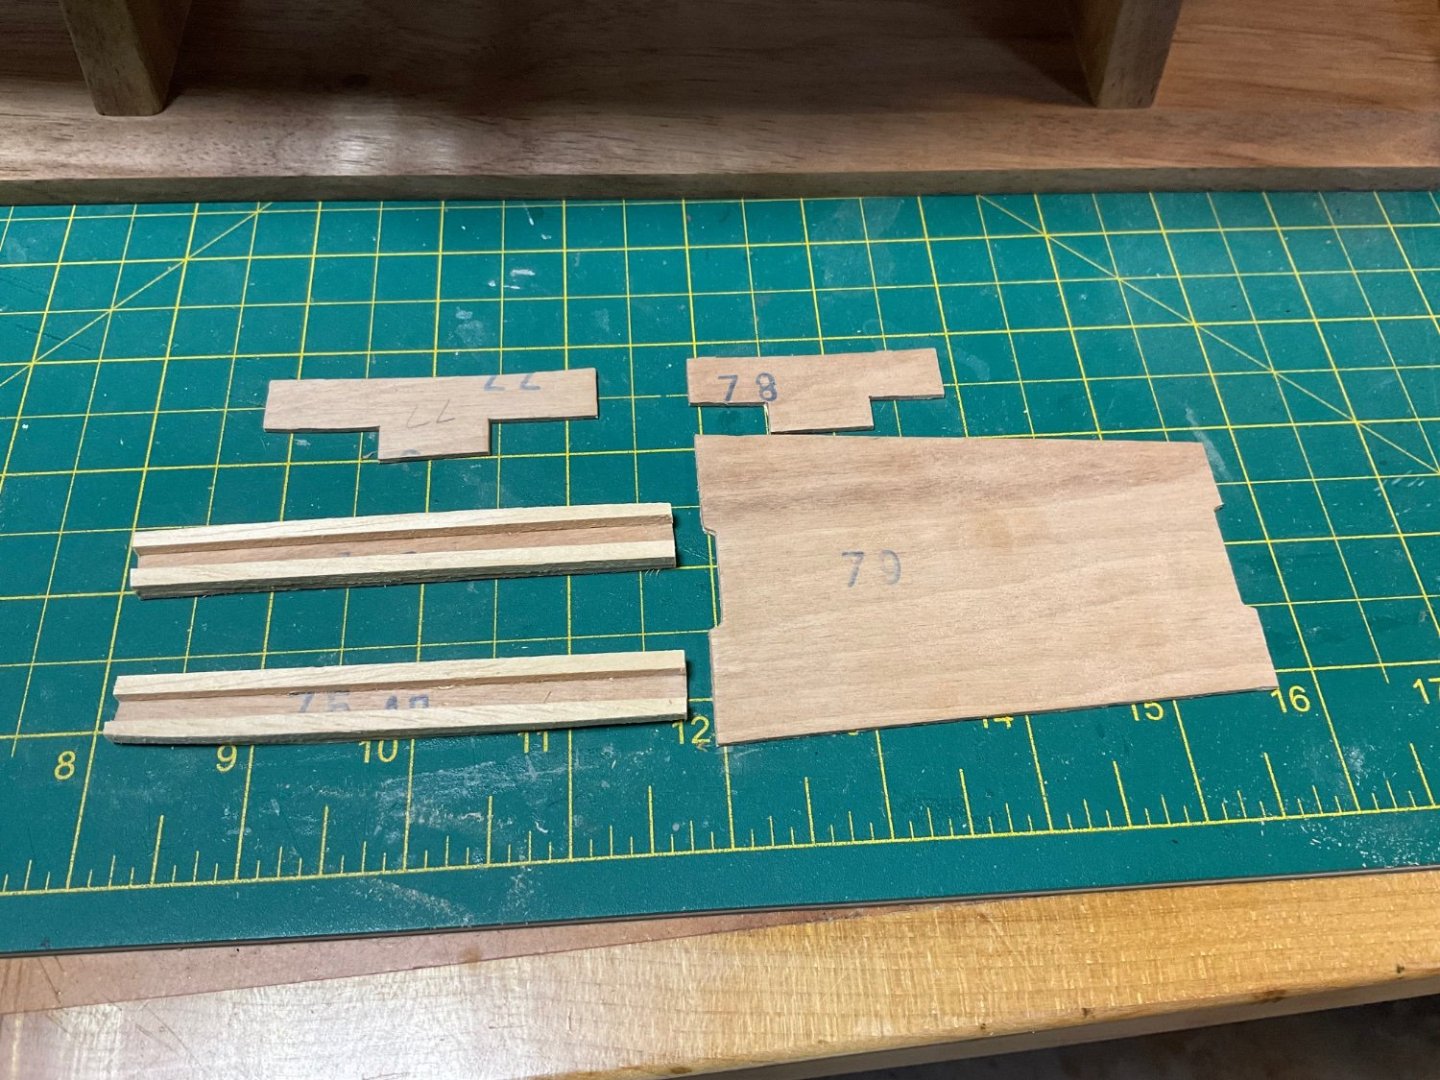
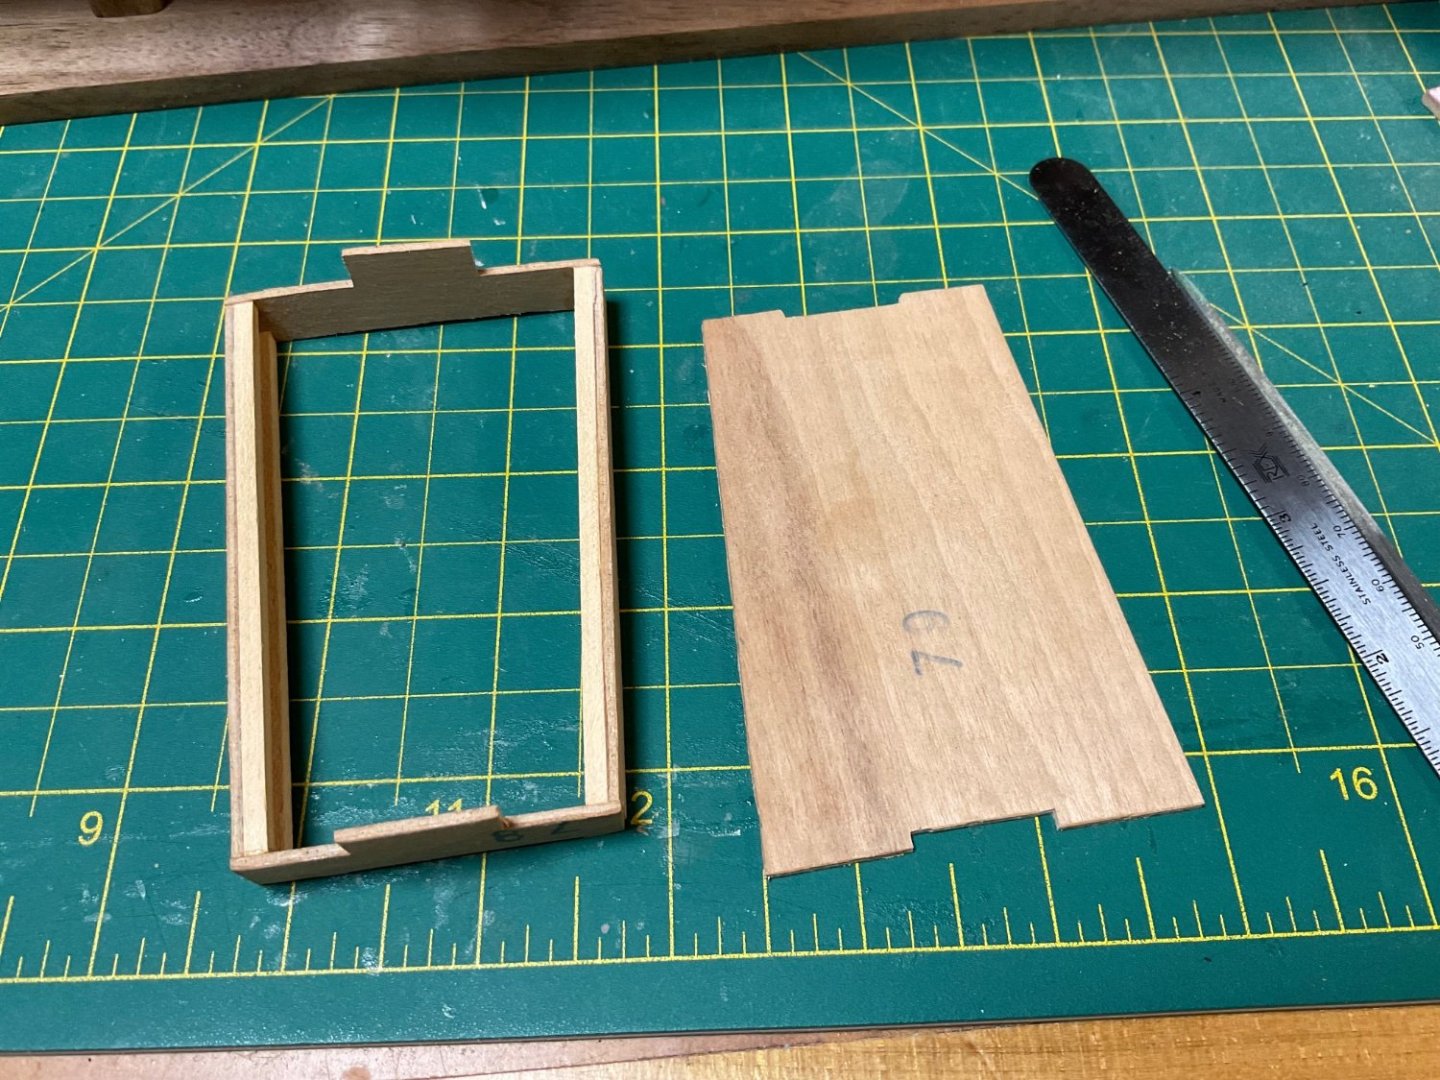
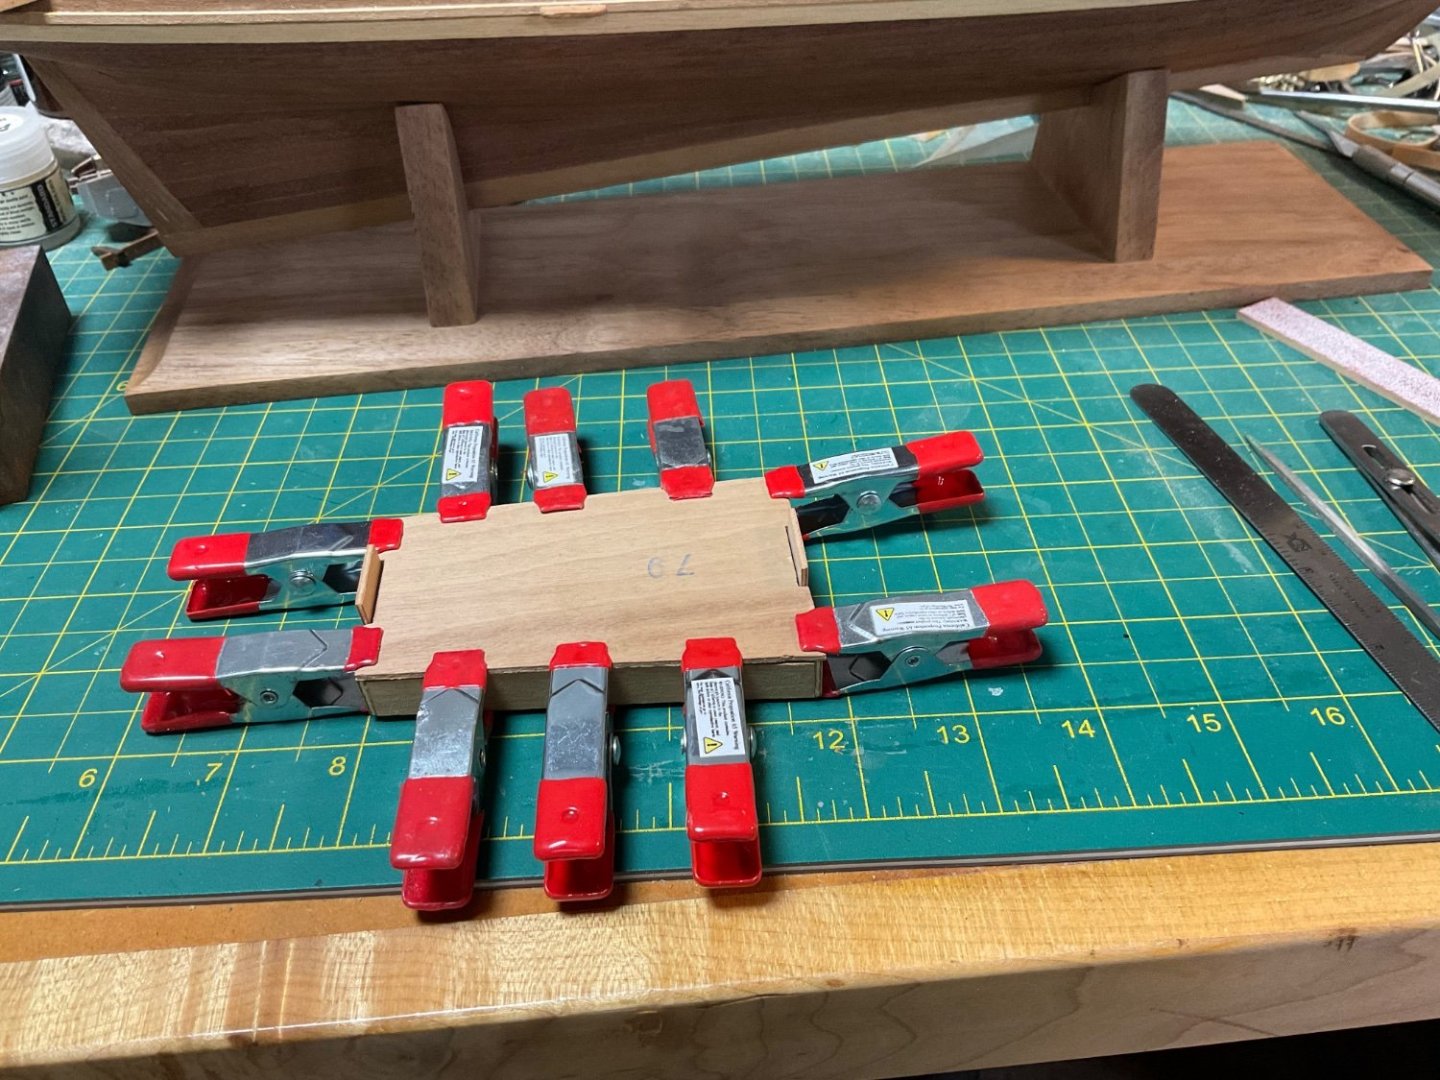
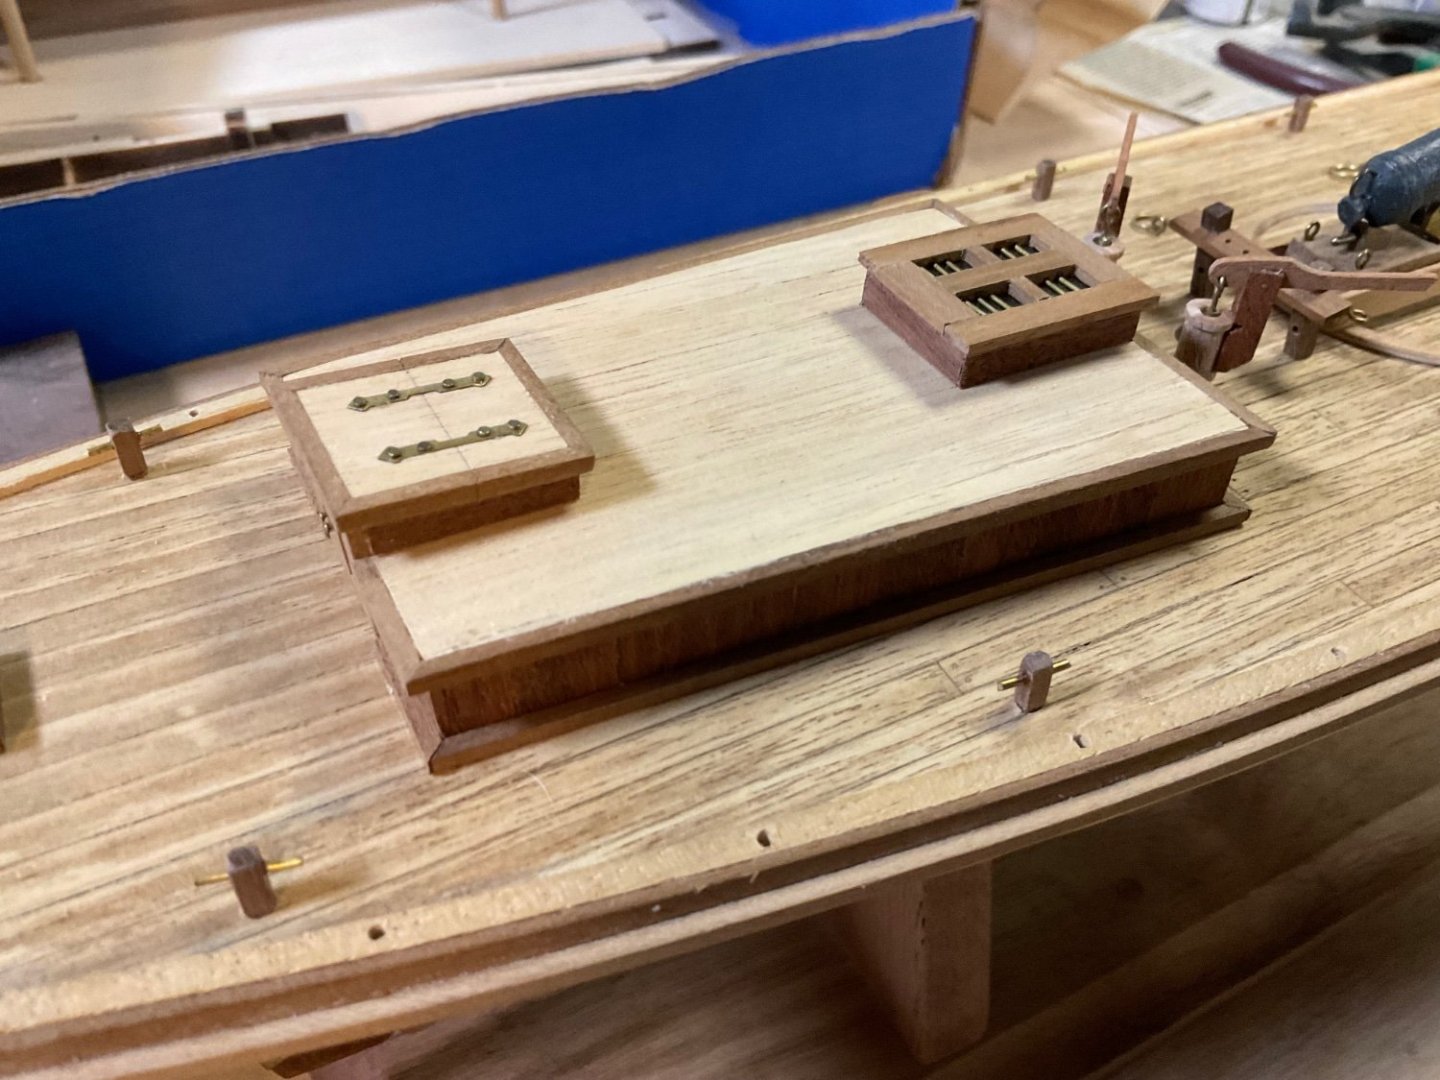
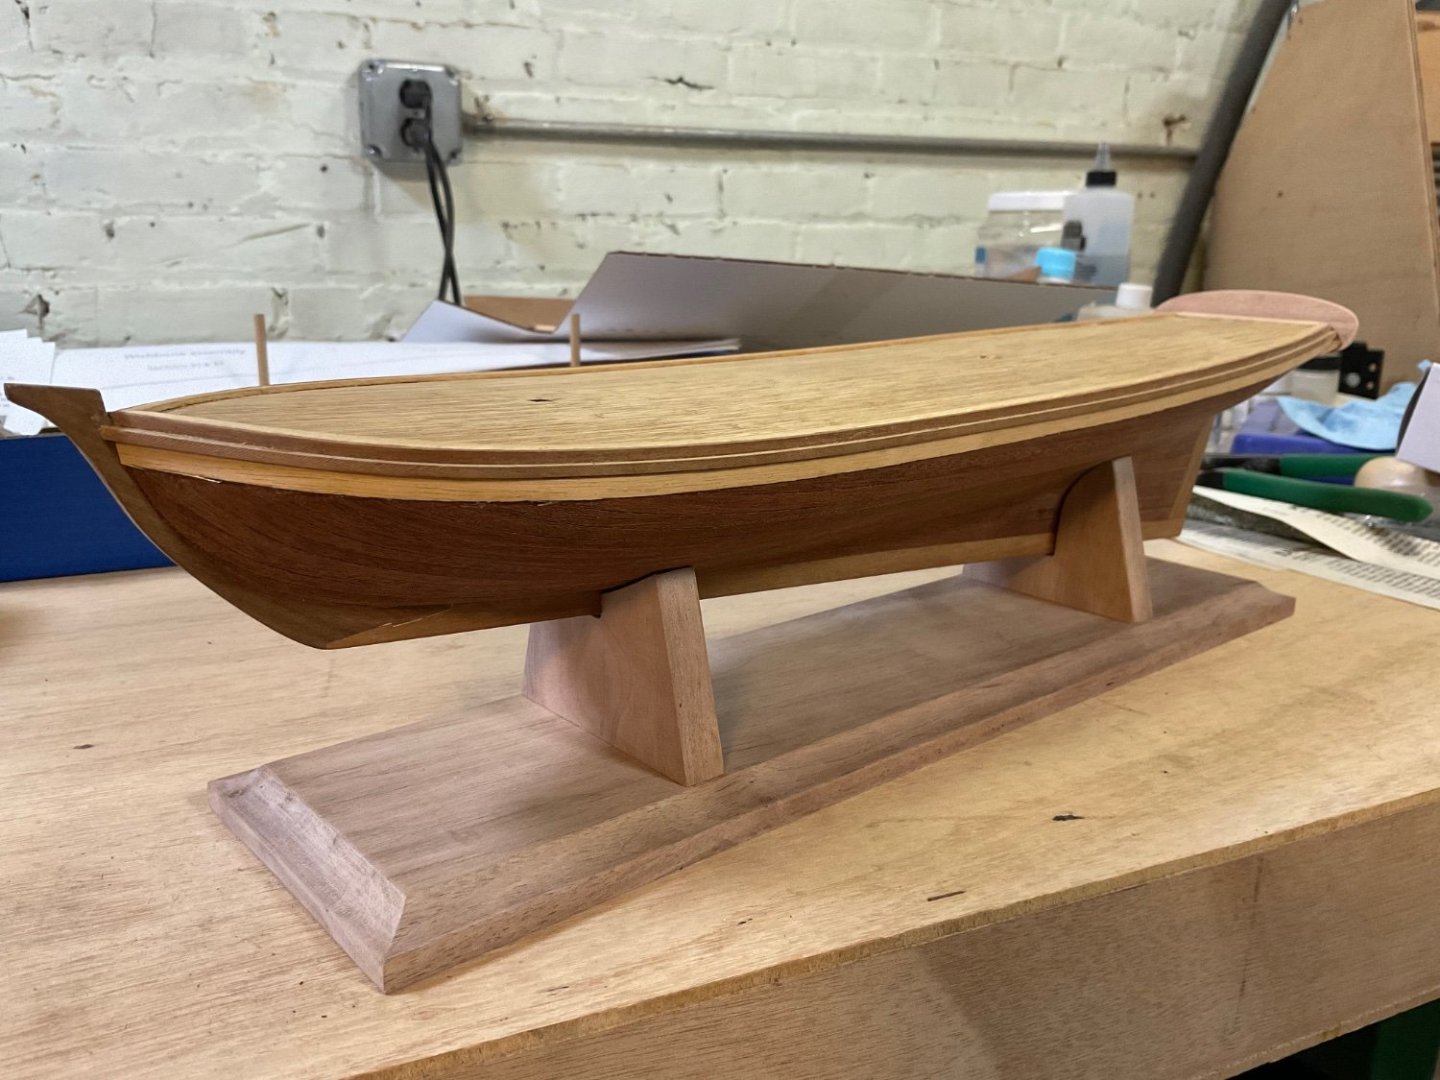
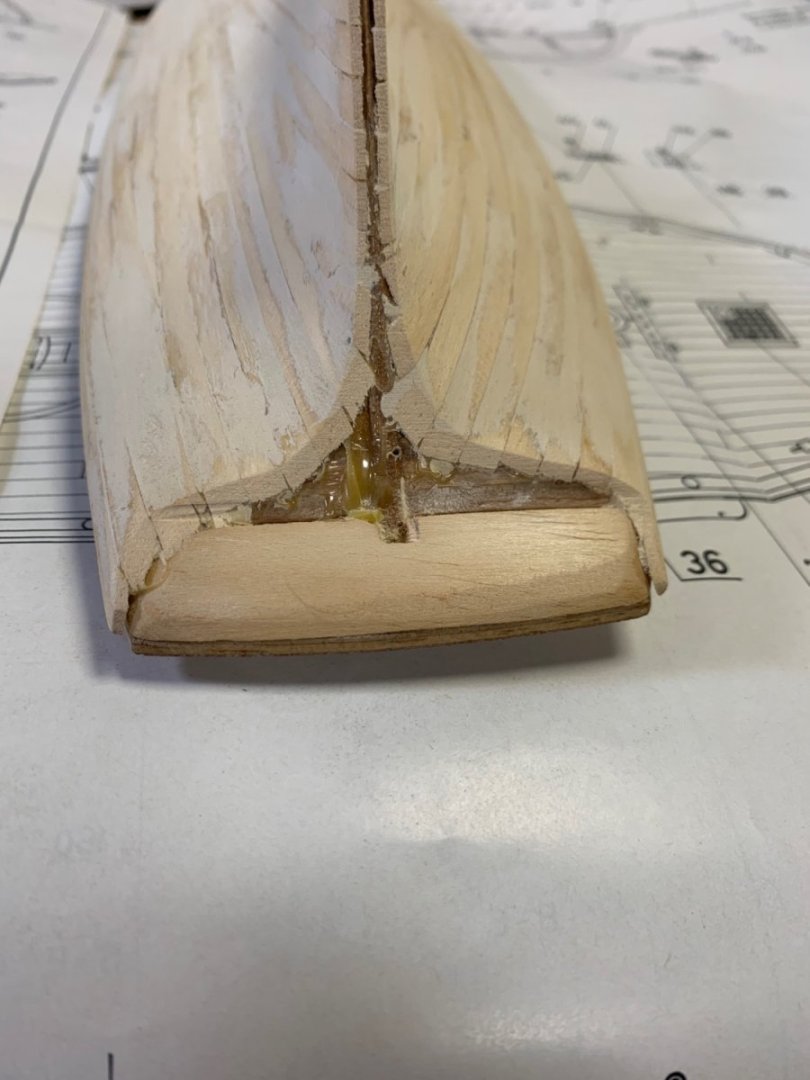
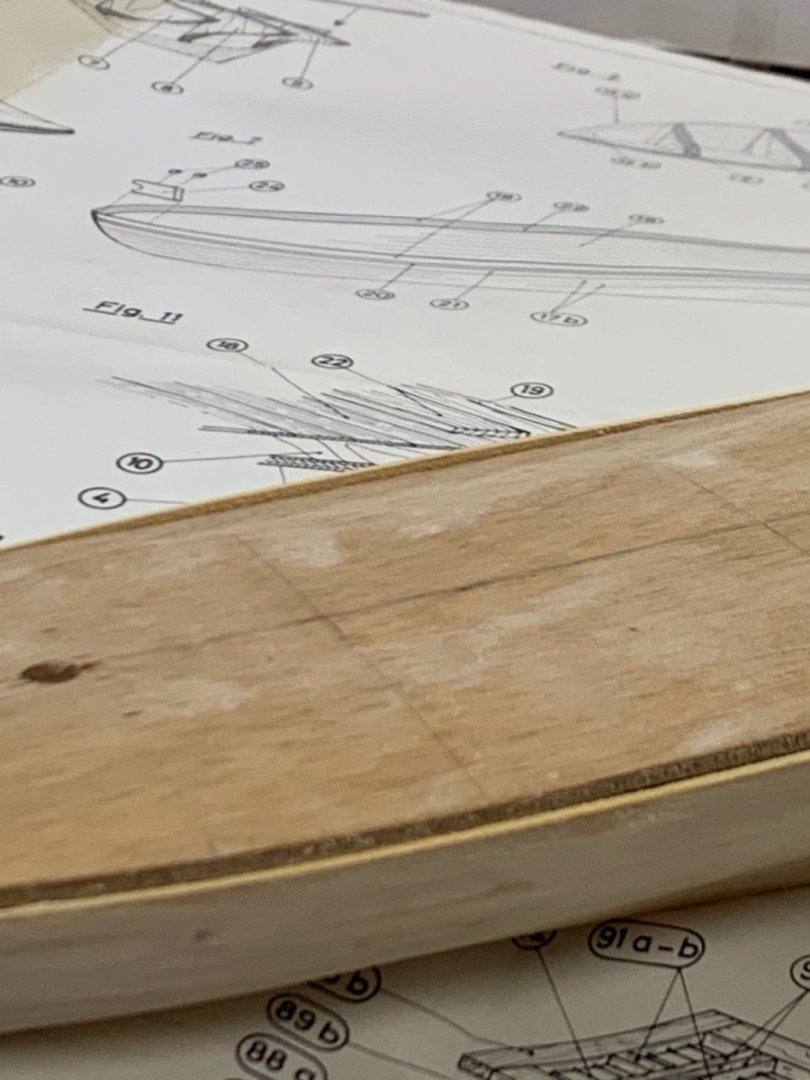
It’s been a while, but I wanted to give an update on the revenue cutter progress. This one has been on the back burner but some progress has been made. The hull veneer was applied as well as the waterway. I also built a cradle from black walnut. I started putting together some of the deck furniture but am a little confused on the construction of the hatch with cannonball storage racks. A detail in the instructions shows the cannonballs sitting on parts 50 a-b. It seems strange to me that there is nothing to secure the cannonballs to the rack. I could put a retainer board next to part 50 but this is not shown in the design or picture. What is the method for securing cannonballs in practice?
-
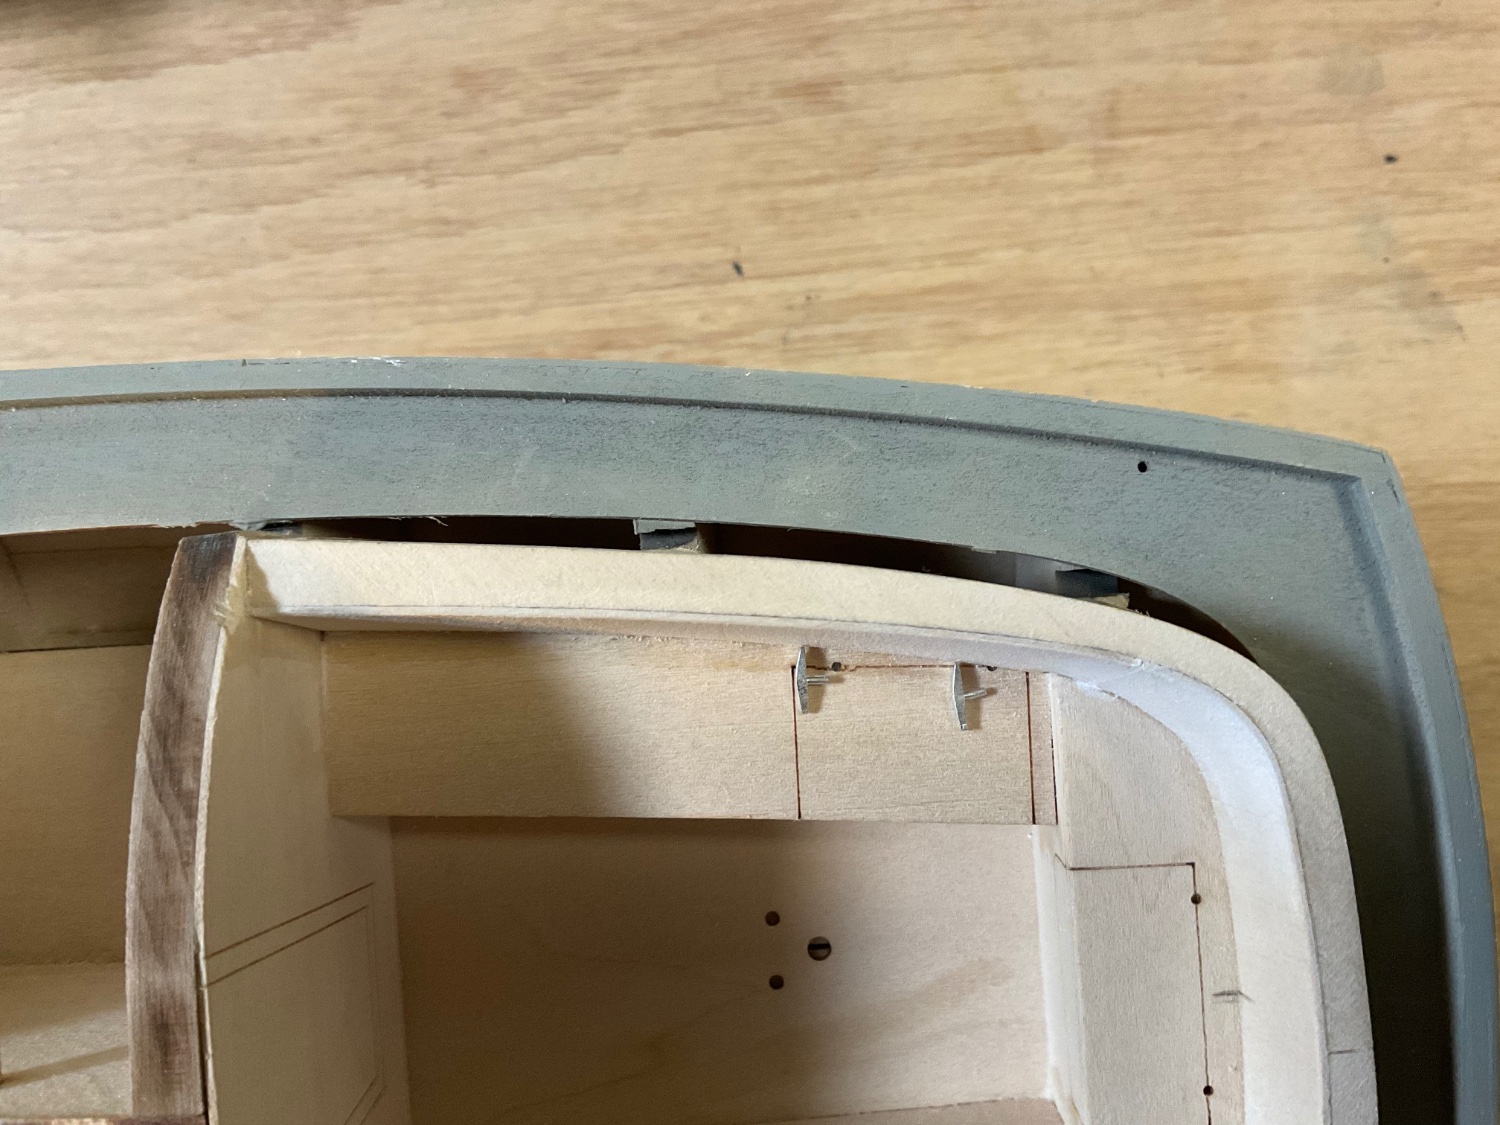
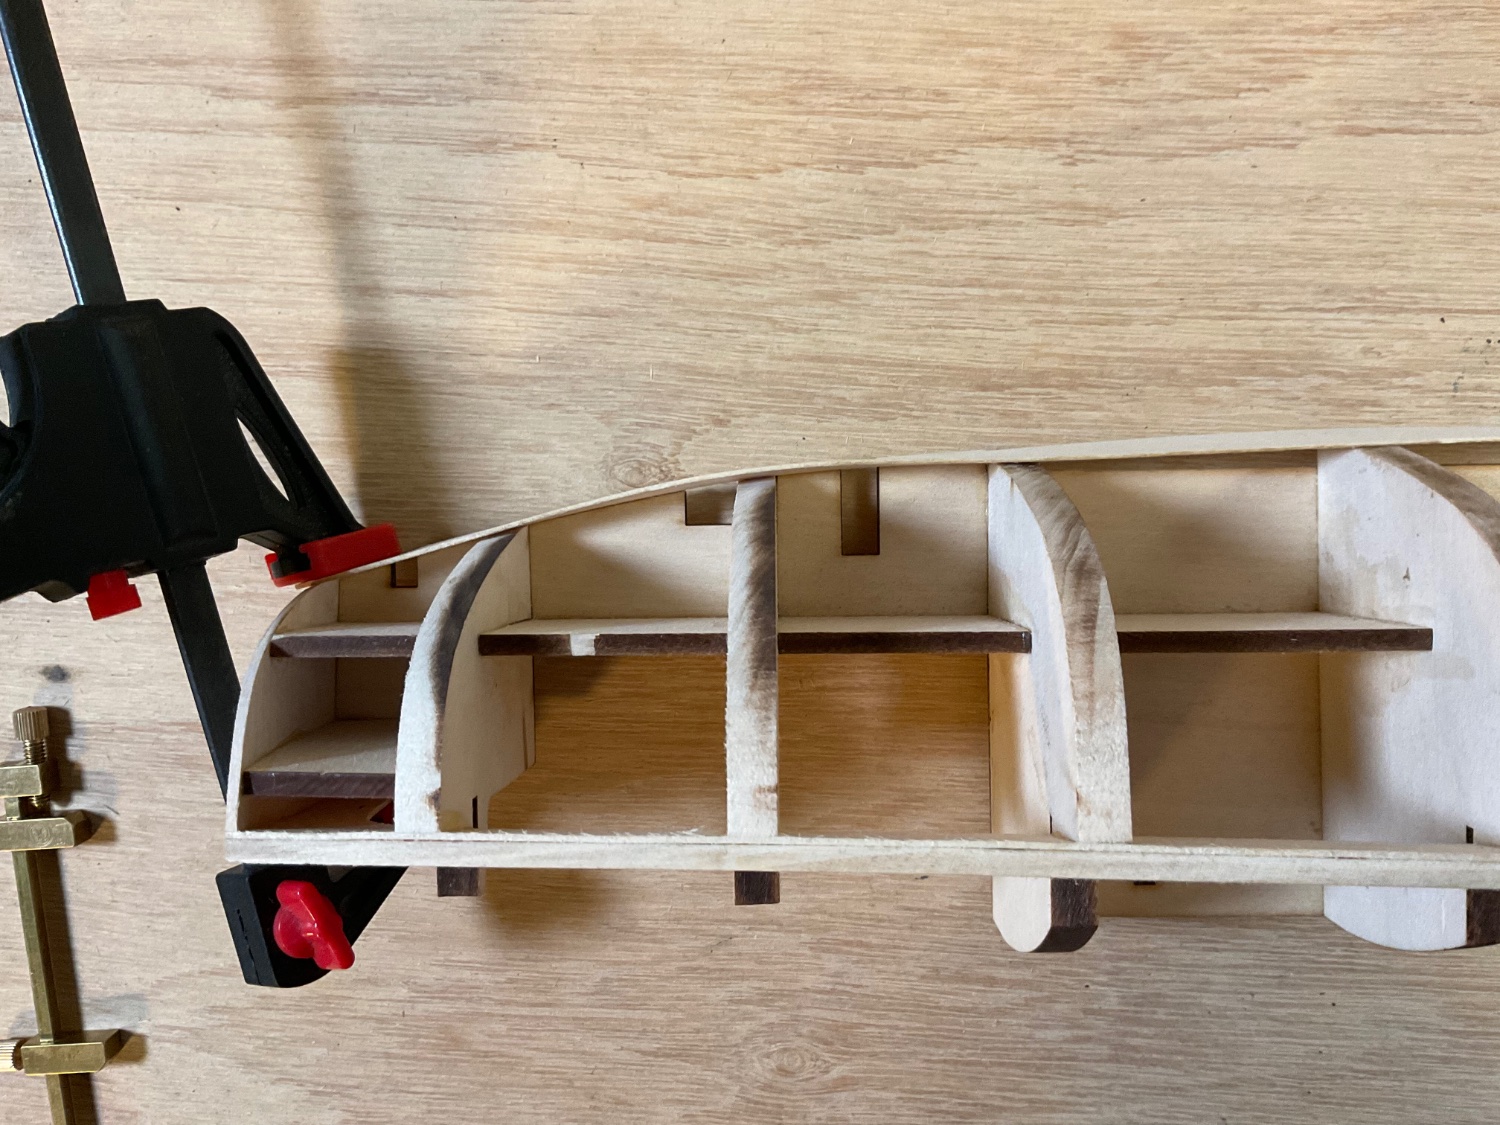
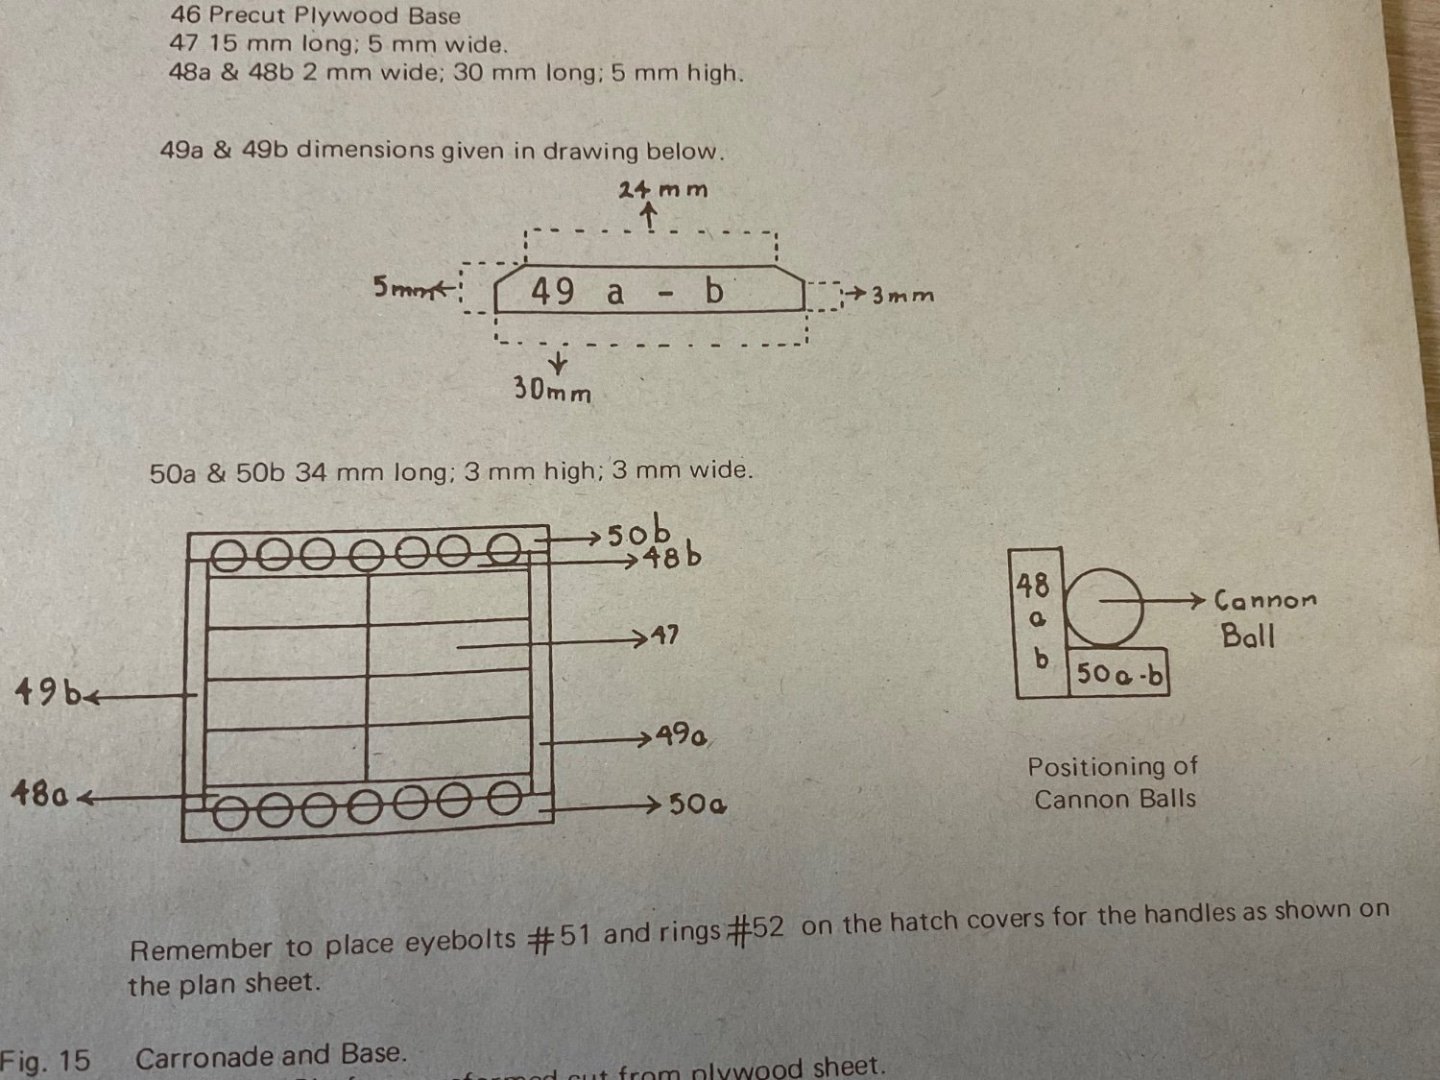
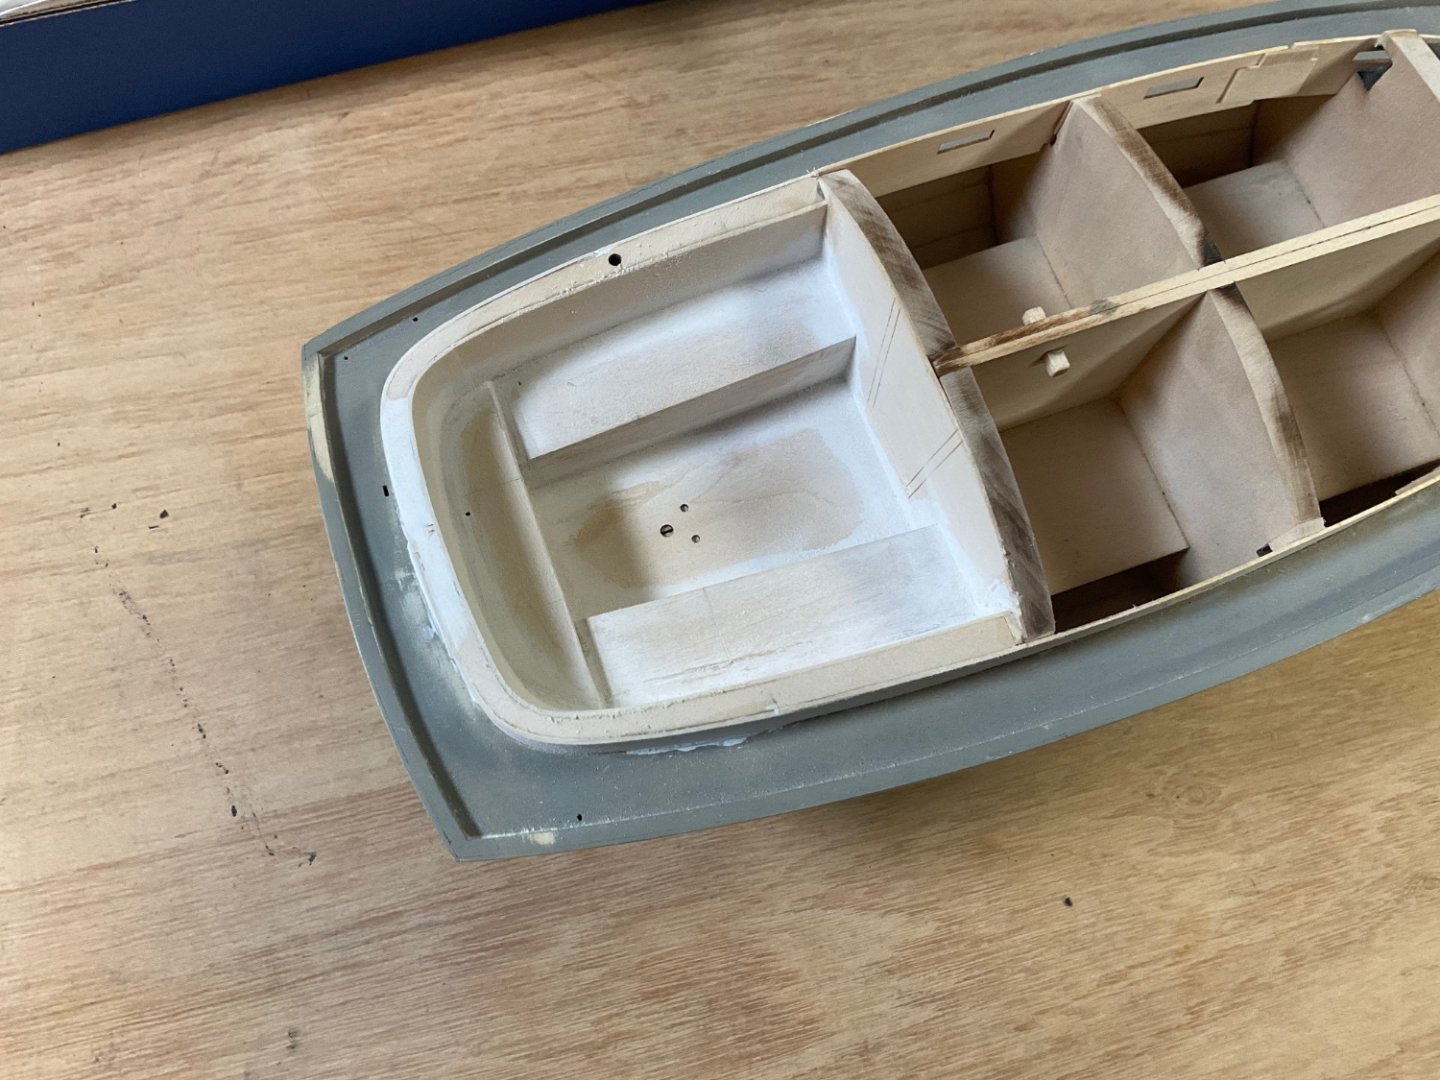
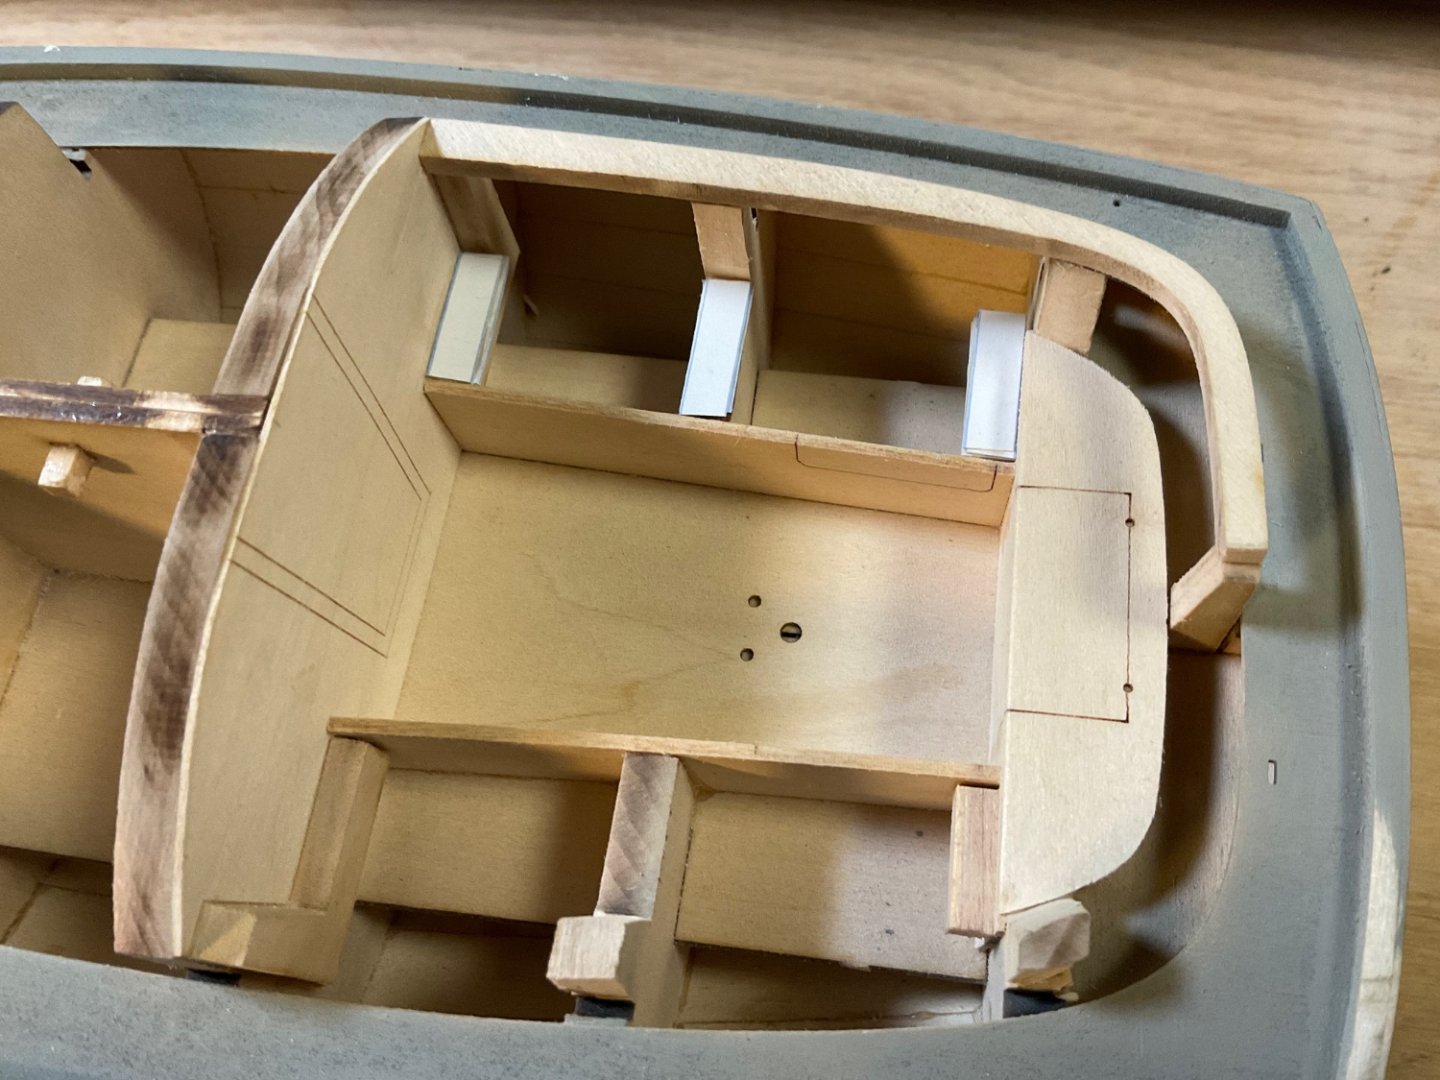
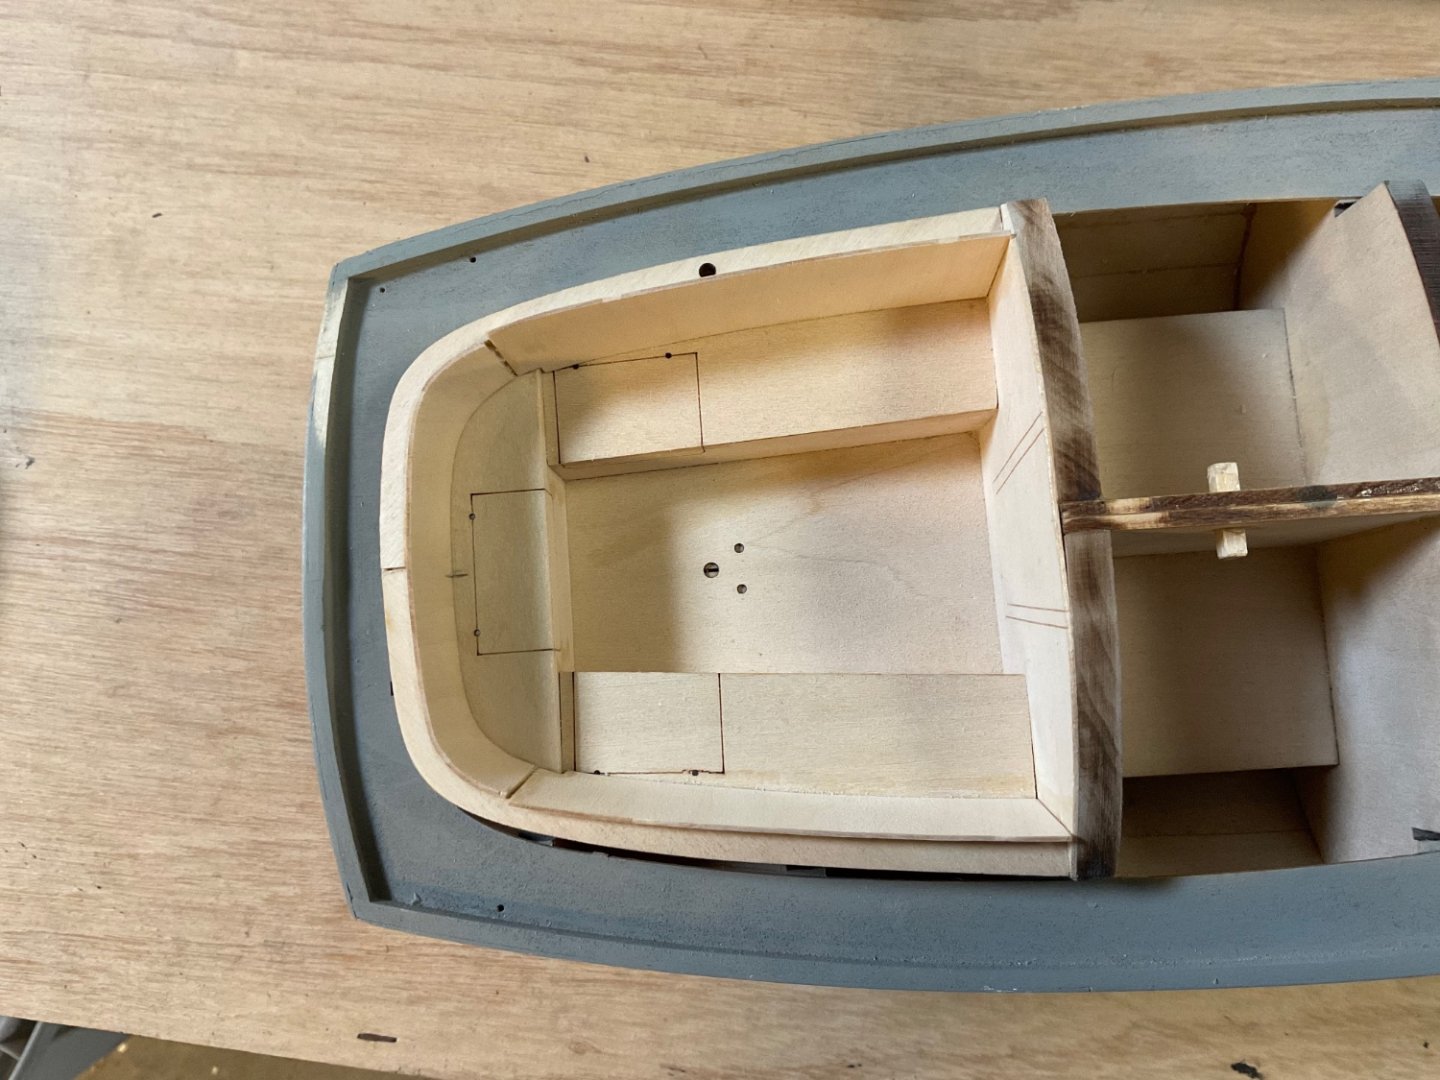
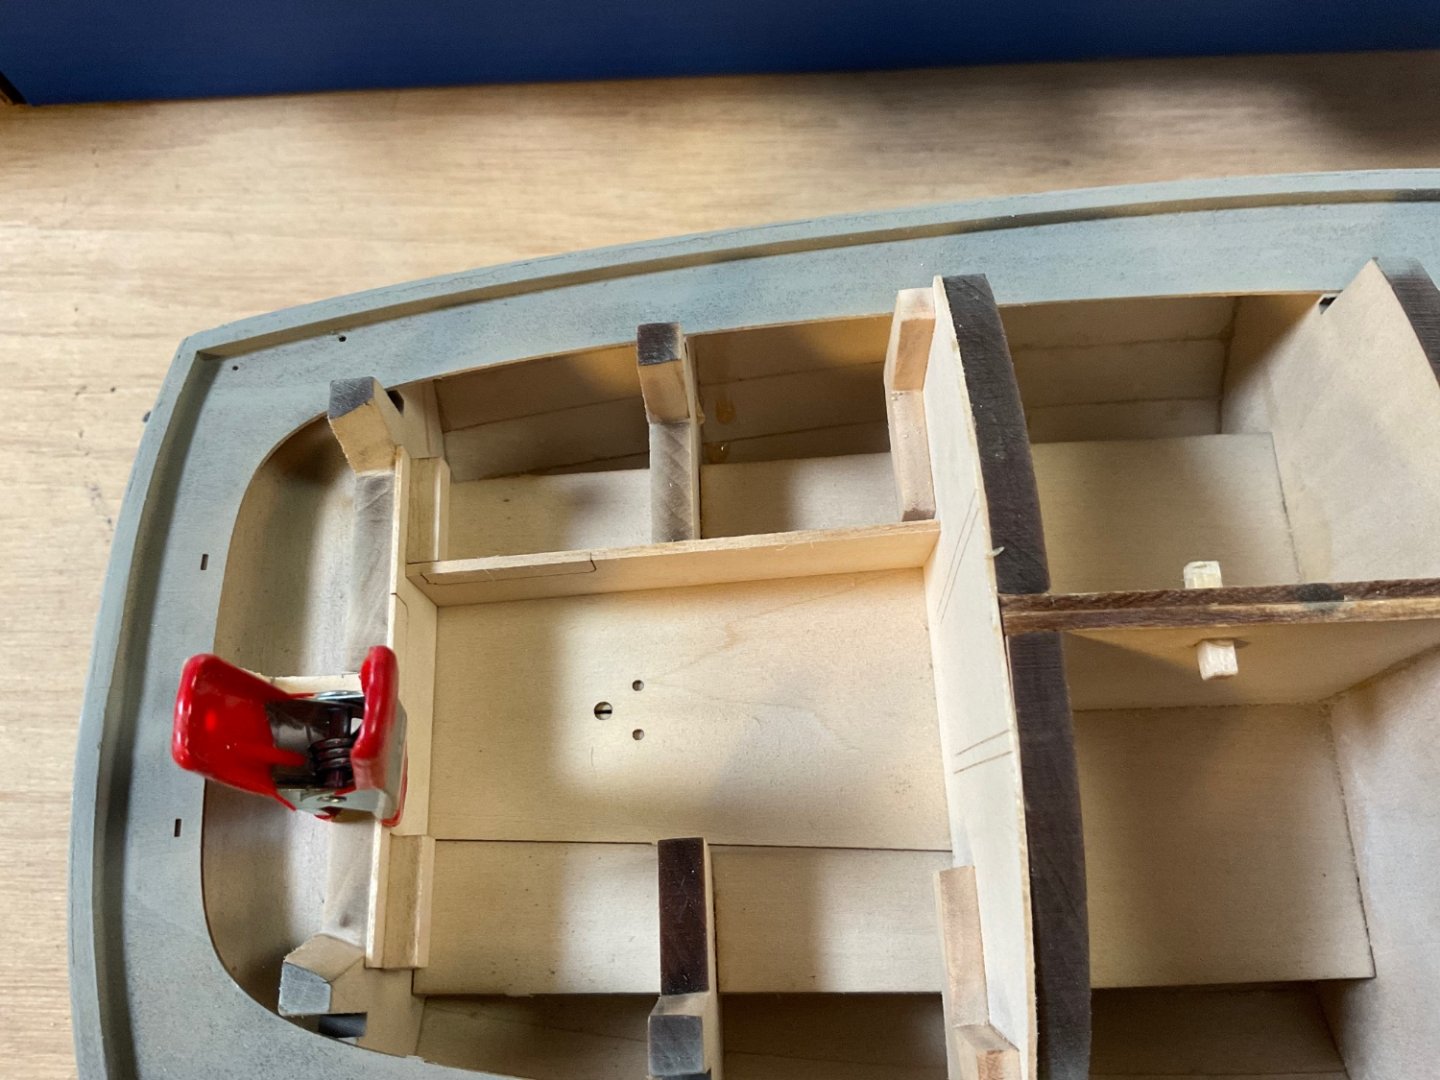
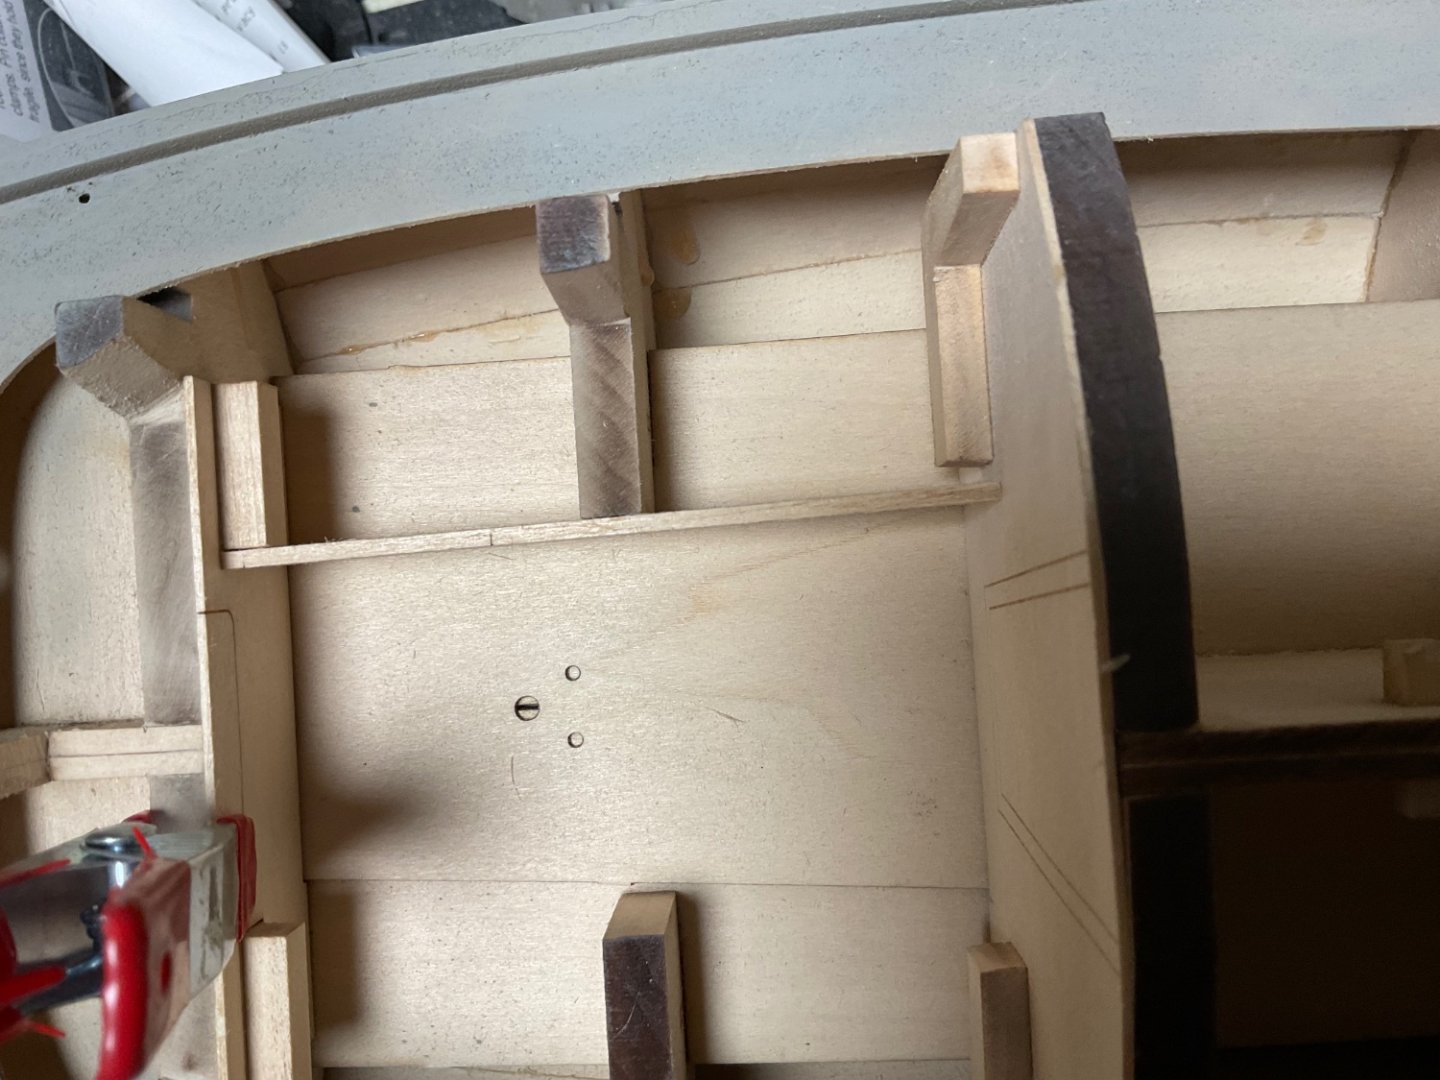
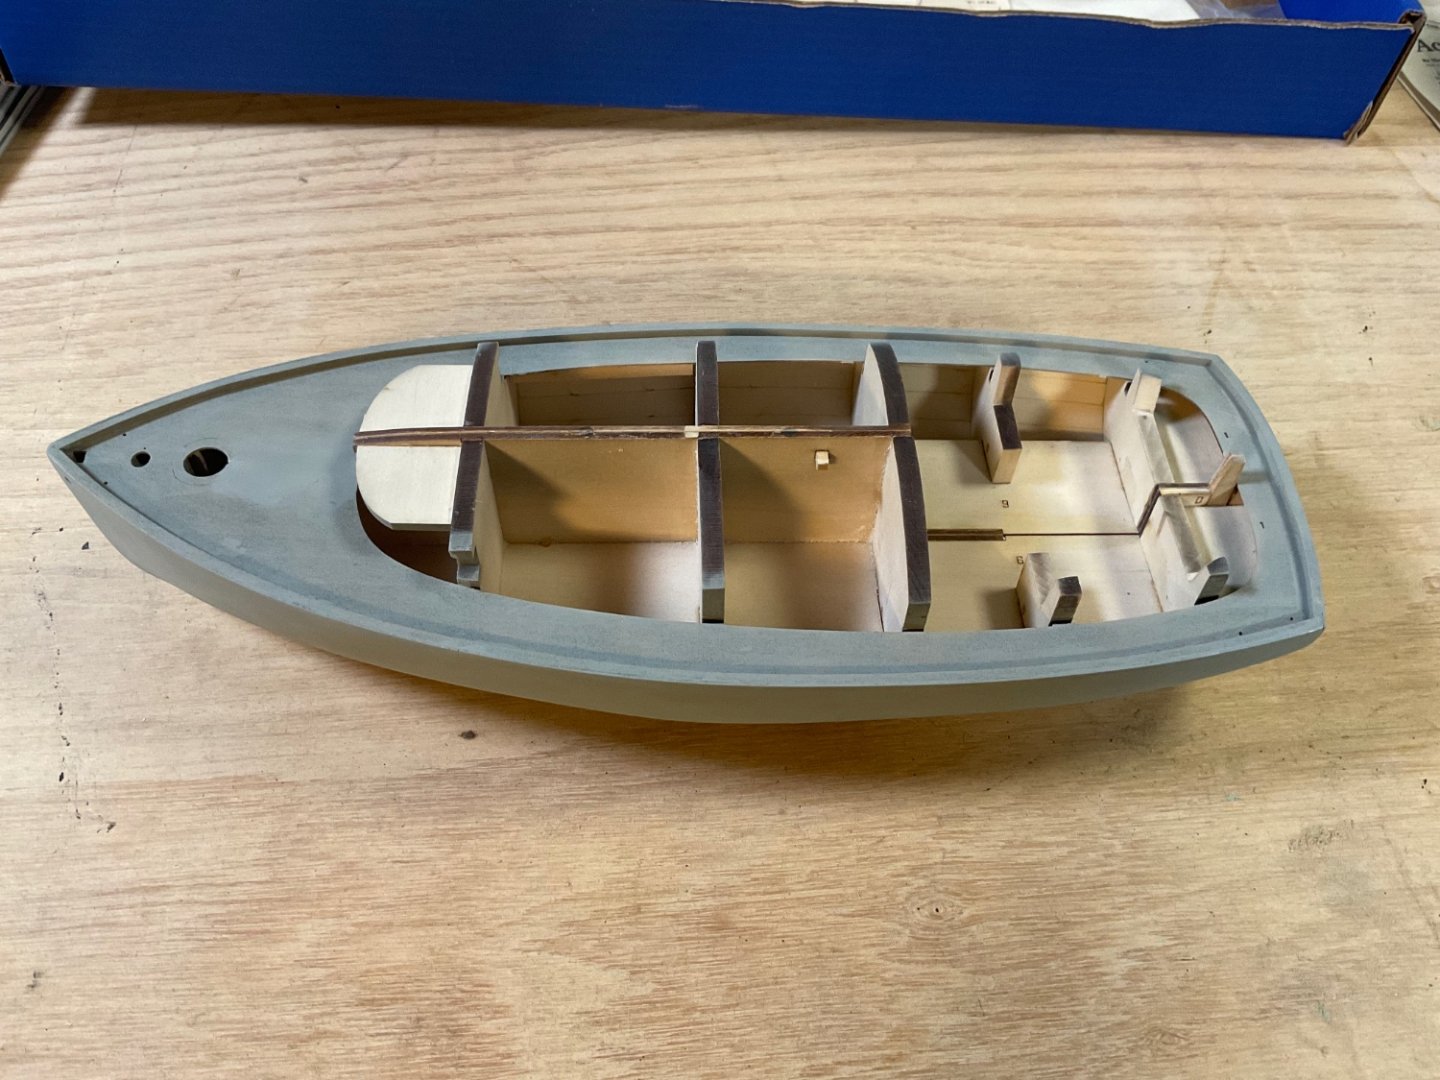
Yes, both cockpit sidewalls had to be adjusted to accommodate the hinges. The cockpit was reworked by bringing the walls out, this took a bit of trial and error of fitting pieces, adding shims where needed, and re-creating a few pieces from scrap. The cockpit and cabin sidewalls are in place now. Placement of the front cabin walls was particularly challenging as the wall pieces have to be bent around the front curve. This would have been much easier if the front wall parts were run against the grain instead of with the grain. After struggling with one side, I cut out the other side from scrap with vertical grain and had a much easier time. This could have easily been done by the manufacturer by swapping the front cabin wall pieces with the cockpit seat backs on the cut out sheet. I’m wondering if this was originally intended and just didn’t make it to the final layout. For me, there was a lot fiddling with the placement of the cabin walls until I got something that I thought looked right with the windows lined up in a row. Placement of the ceiling was rather straightforward which is composed of three pieces. I had placed the rudder earlier as instructed but it got knocked loose while installing the cockpit and cabin. My advice would be to leave installation of the rudder until after hull is glued to the base, otherwise there is a good chance it will get knocked or broken off during the construction of the cabin and cockpit. Fortunately, mine was only knocked loose and can be glued back in place.


- 27 replies
-
- 8
-
-
- Nonsuch
- Model Shipways
- (and 1 more)
-
Welcome William, that kit was my first build as well and is a great way to get your feet wet in model shipbuilding.
-
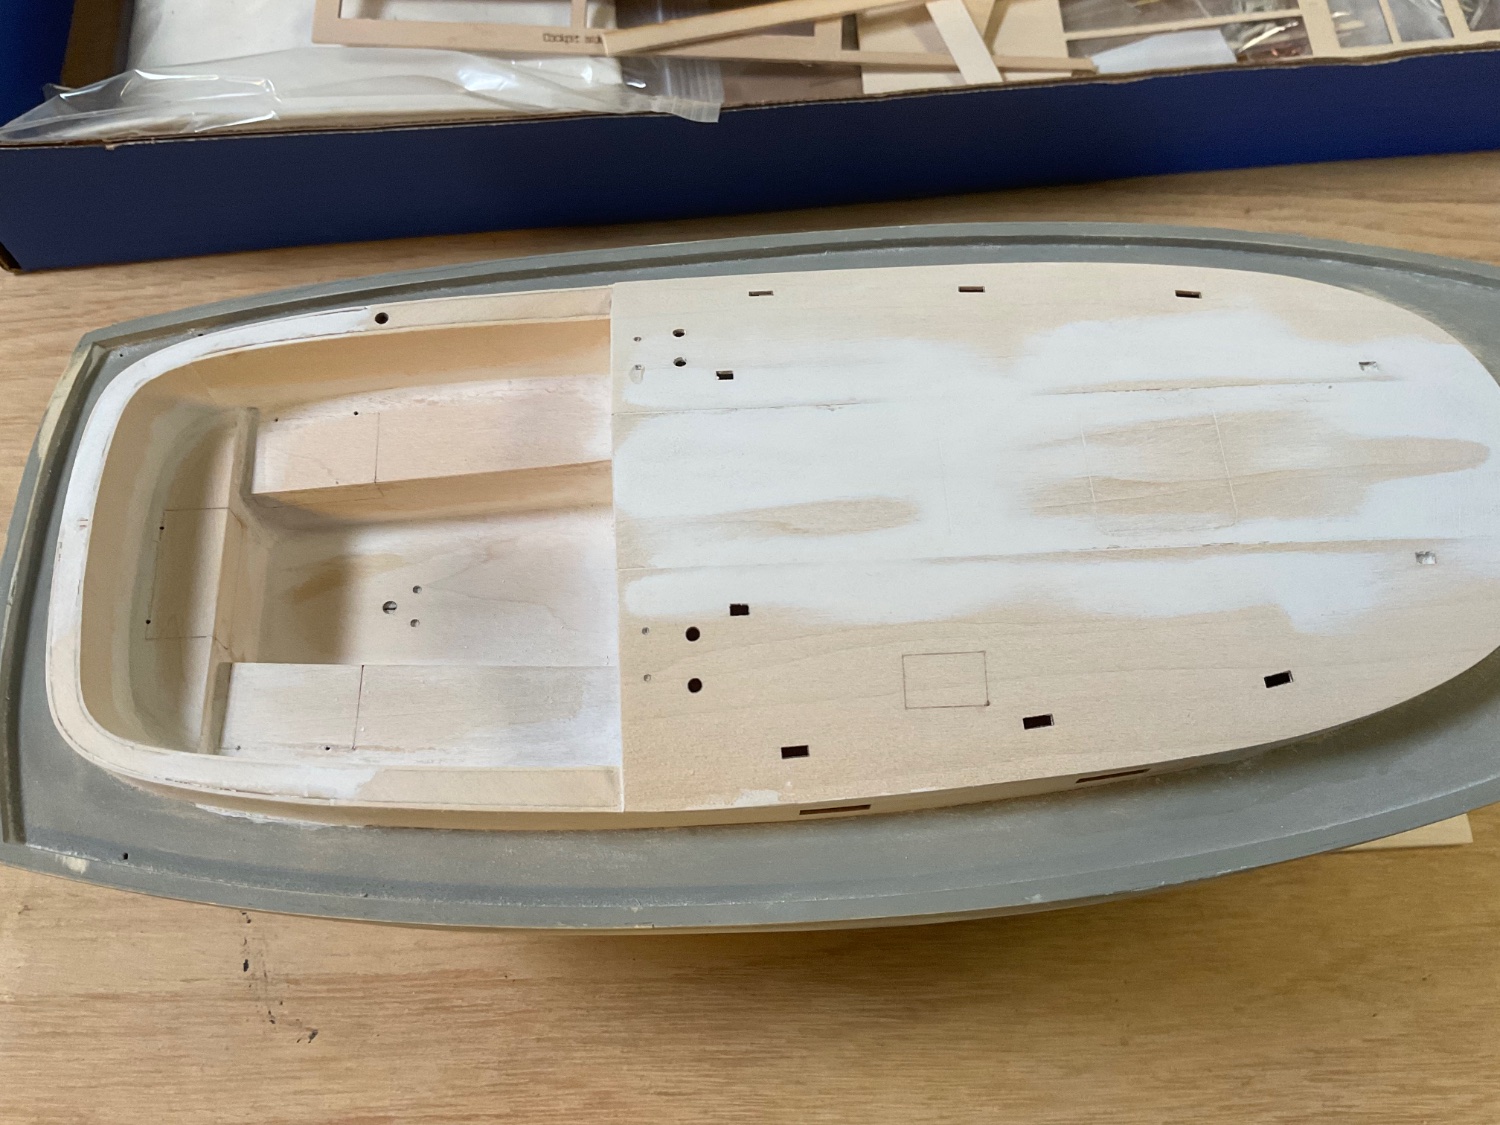
Thanks druxey! I added index card shims to the seat supports to bring them up to the level of the seat fronts. They were of varying heights but all were lower than the seat fronts so the thin index cards worked nicely as I was able to use a different number of shims on each support as needed. The seats were placed along with the seat backs and seat rails. There are a few issues with the position of the seat backs and rail that I will have to address, The holes for the hinges are too far back on the side seats as can be seen in the picture below. I also don’t like the large gap between the edge of the deck and the seat rail. This will make placement of the outside wall very awkward. I figured a new approach was needed to tackle the cabin and cockpit walls so I removed the seat rails and seat backs and will try again, probably by moving the rail out to accommodate the hinges on the lockers and better support the outer wall. I’ll try to detail this in the next post…

- 27 replies
-
- 3
-
-
- Nonsuch
- Model Shipways
- (and 1 more)
-
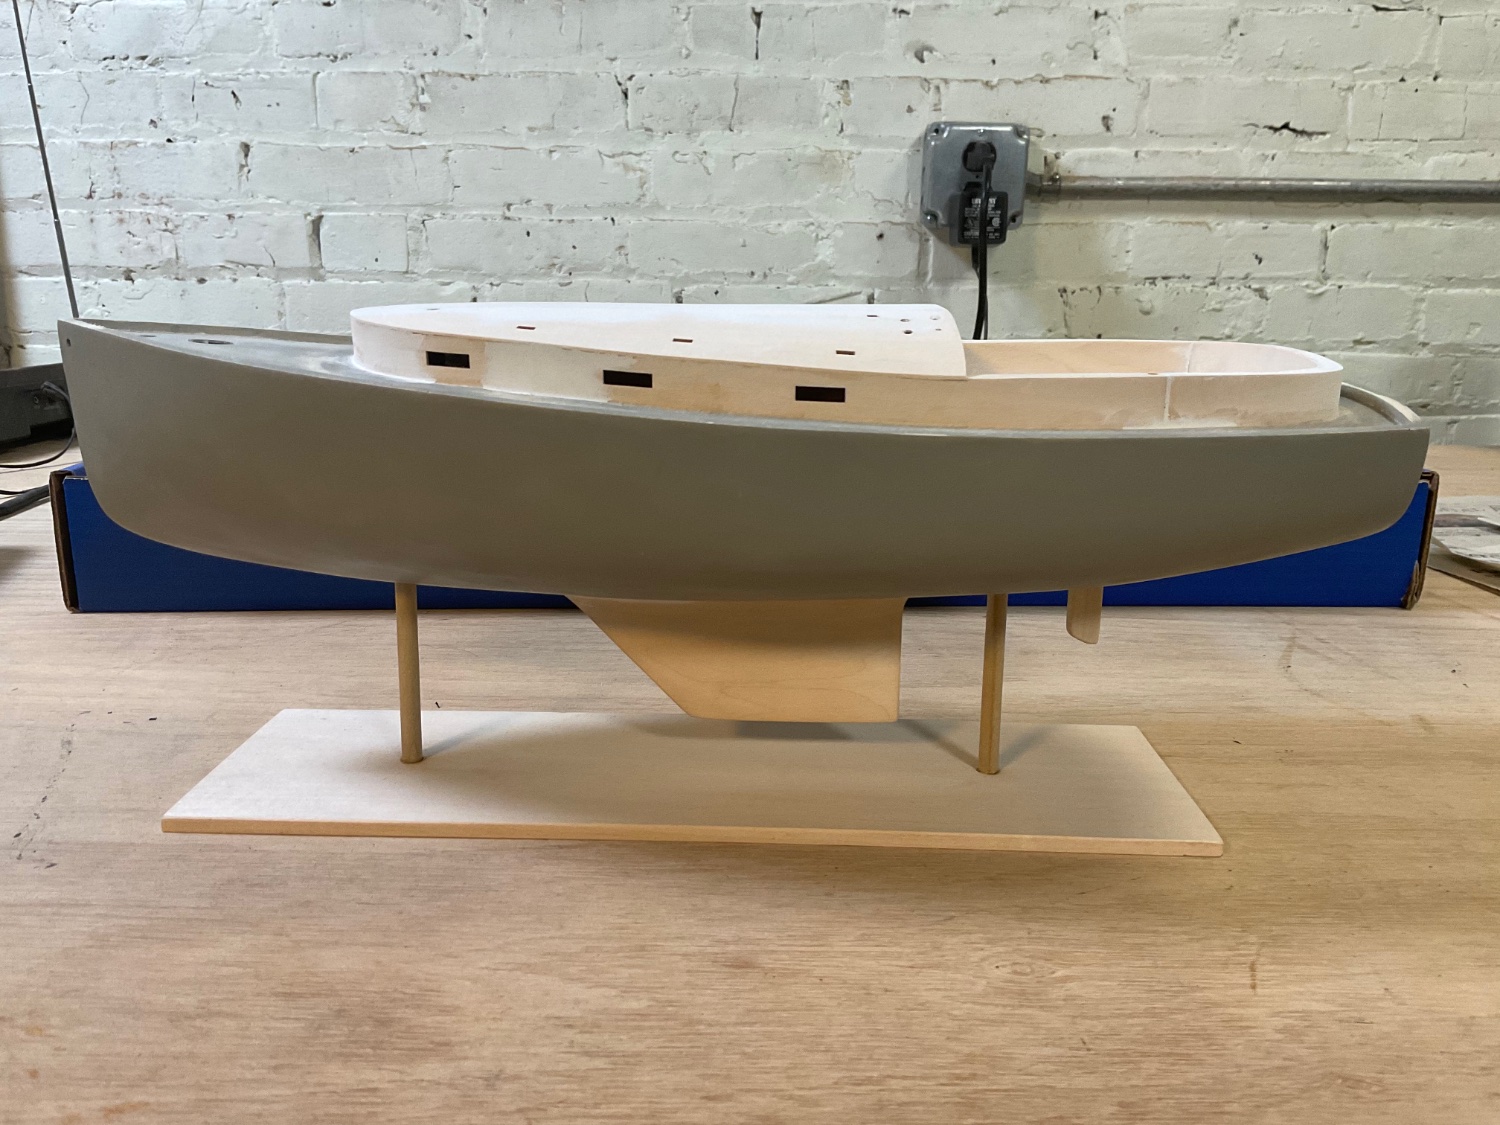
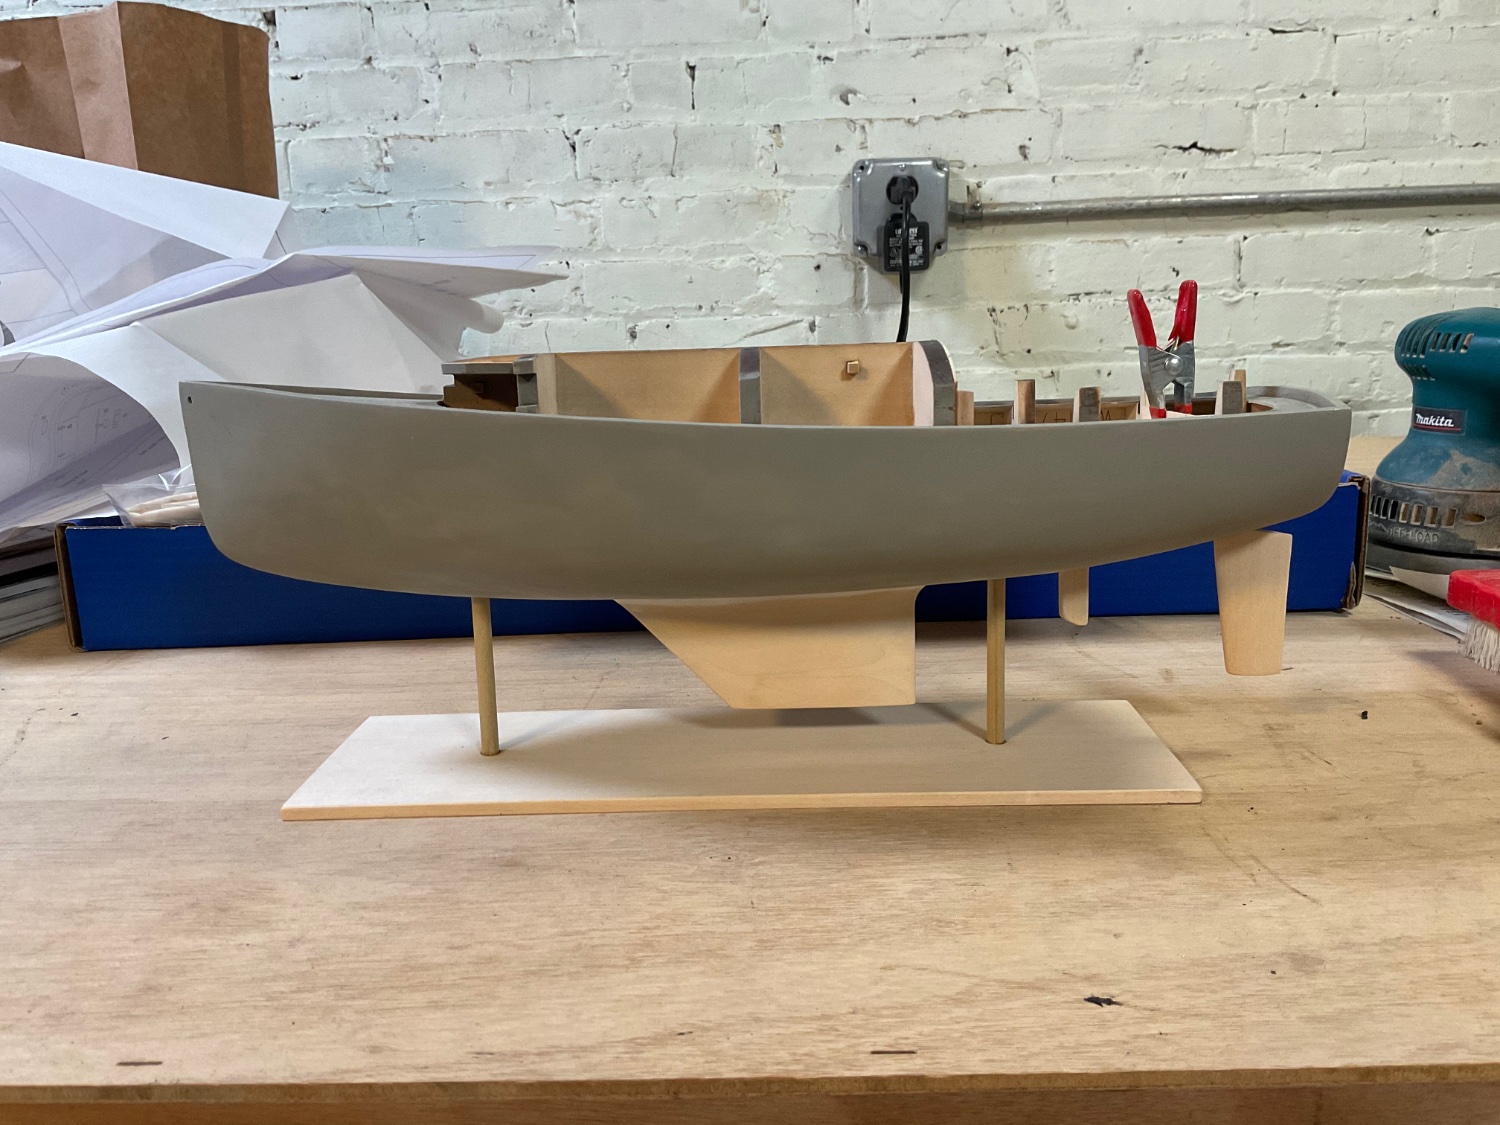
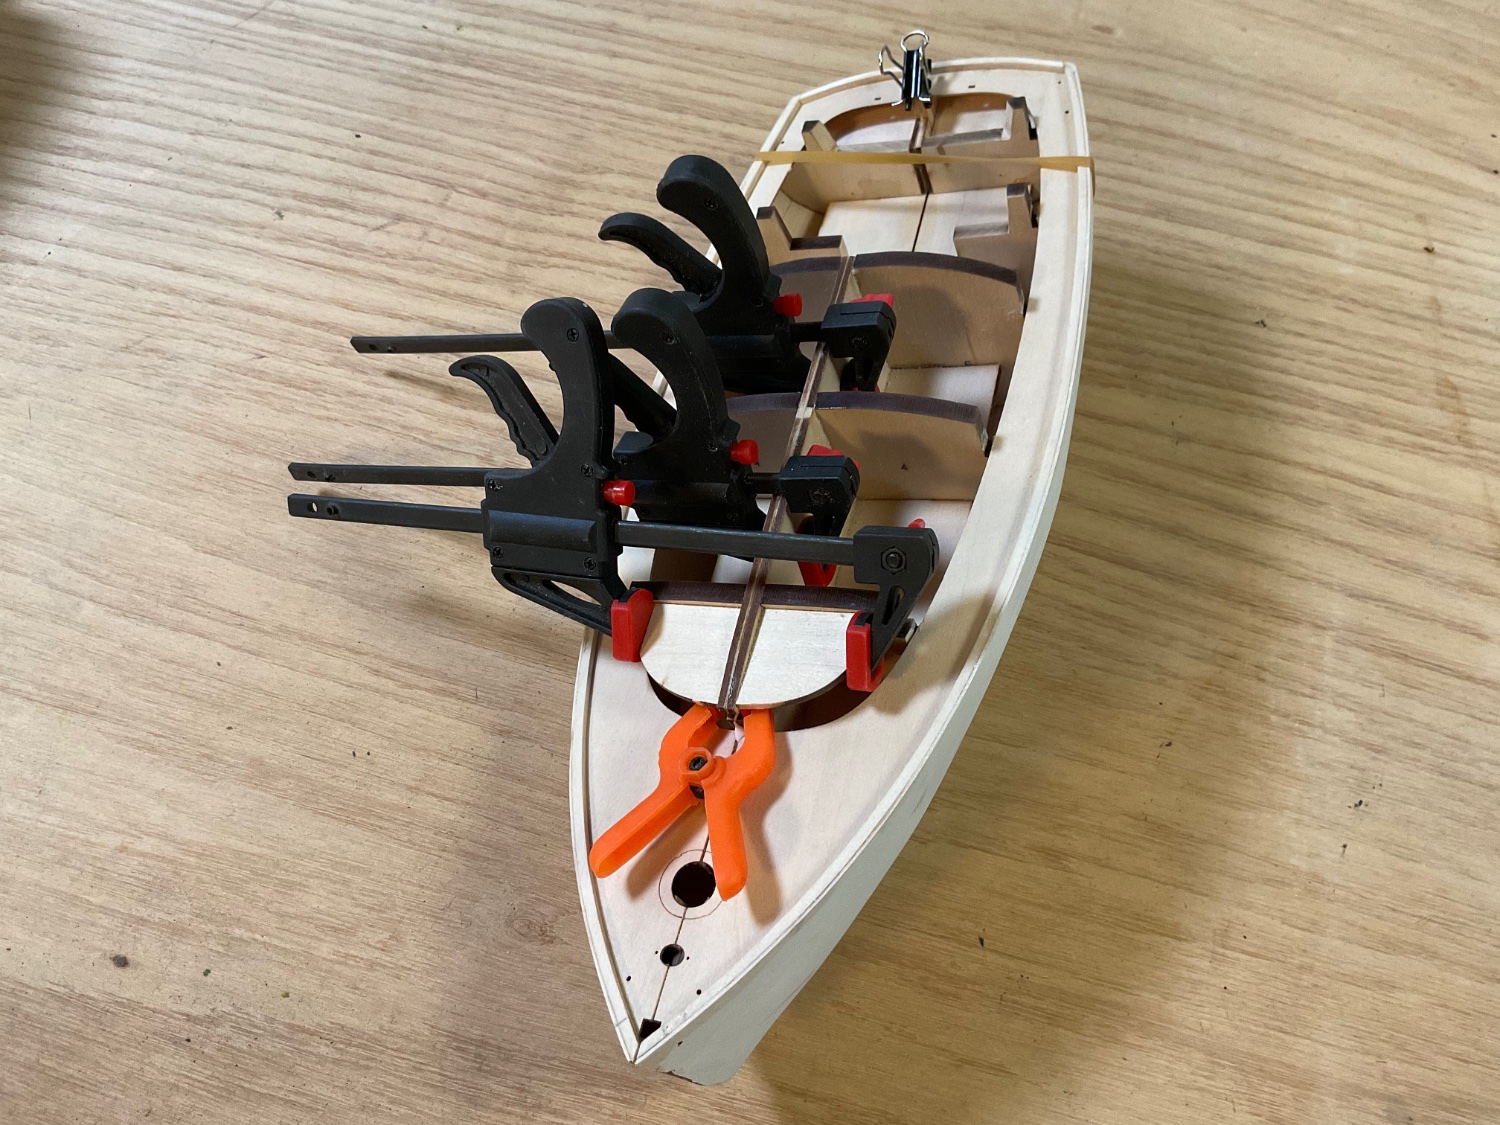
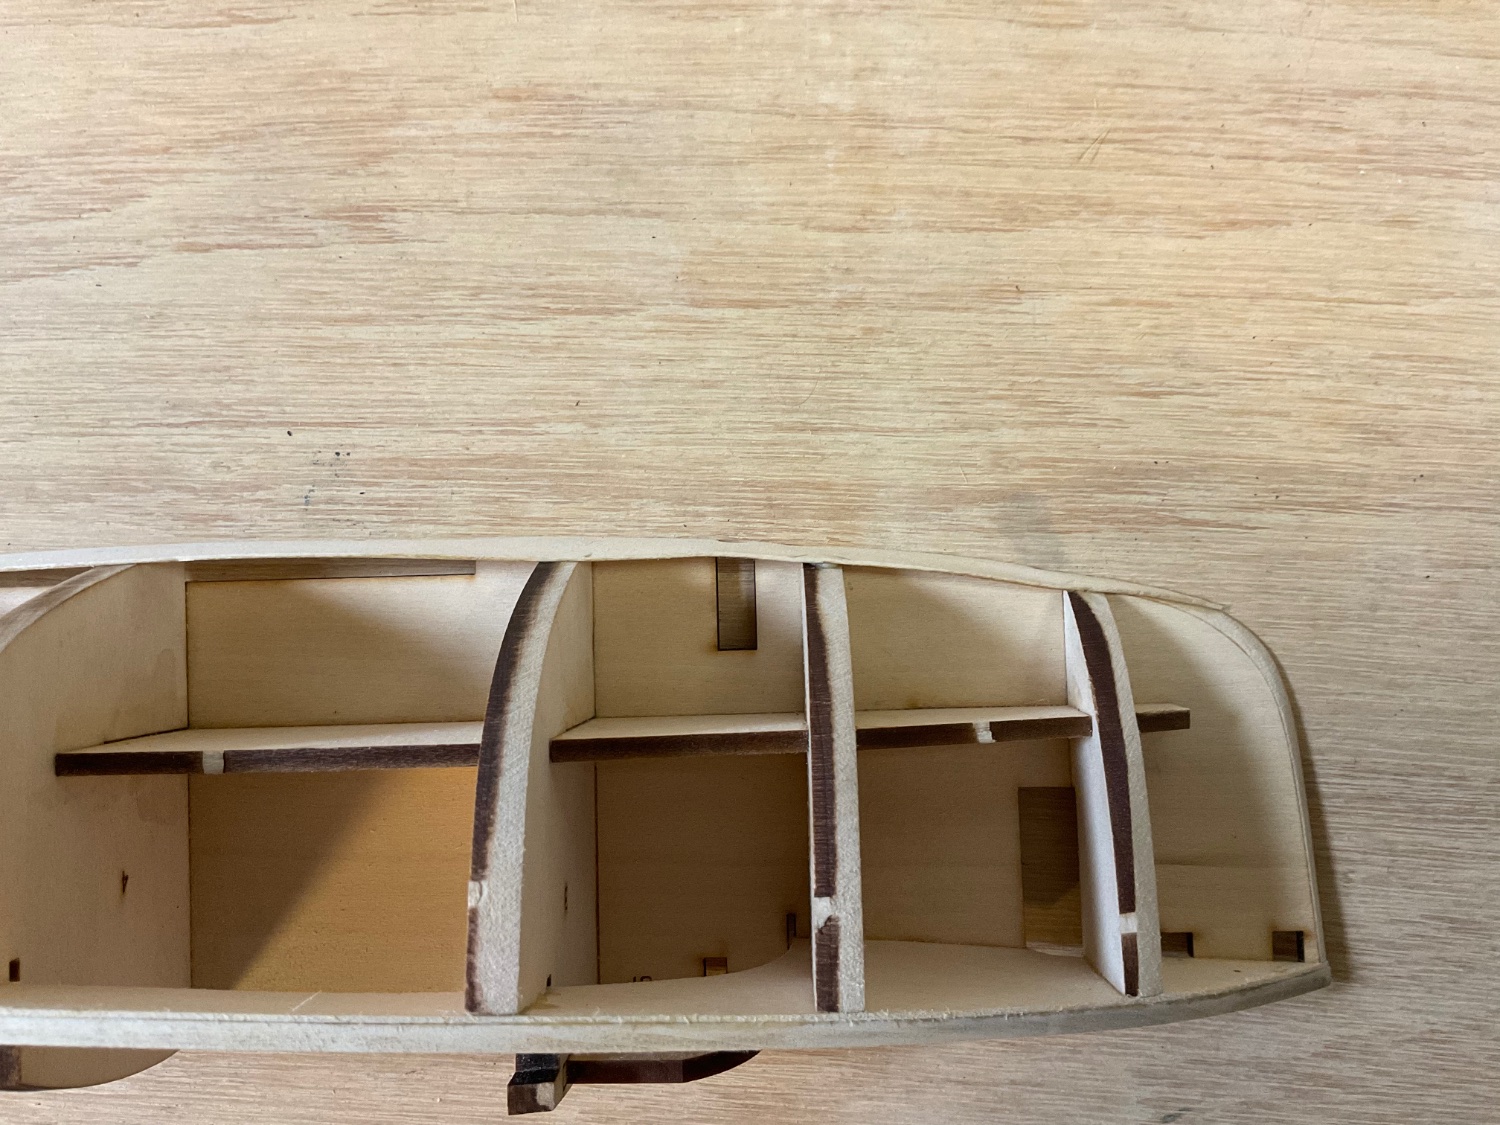
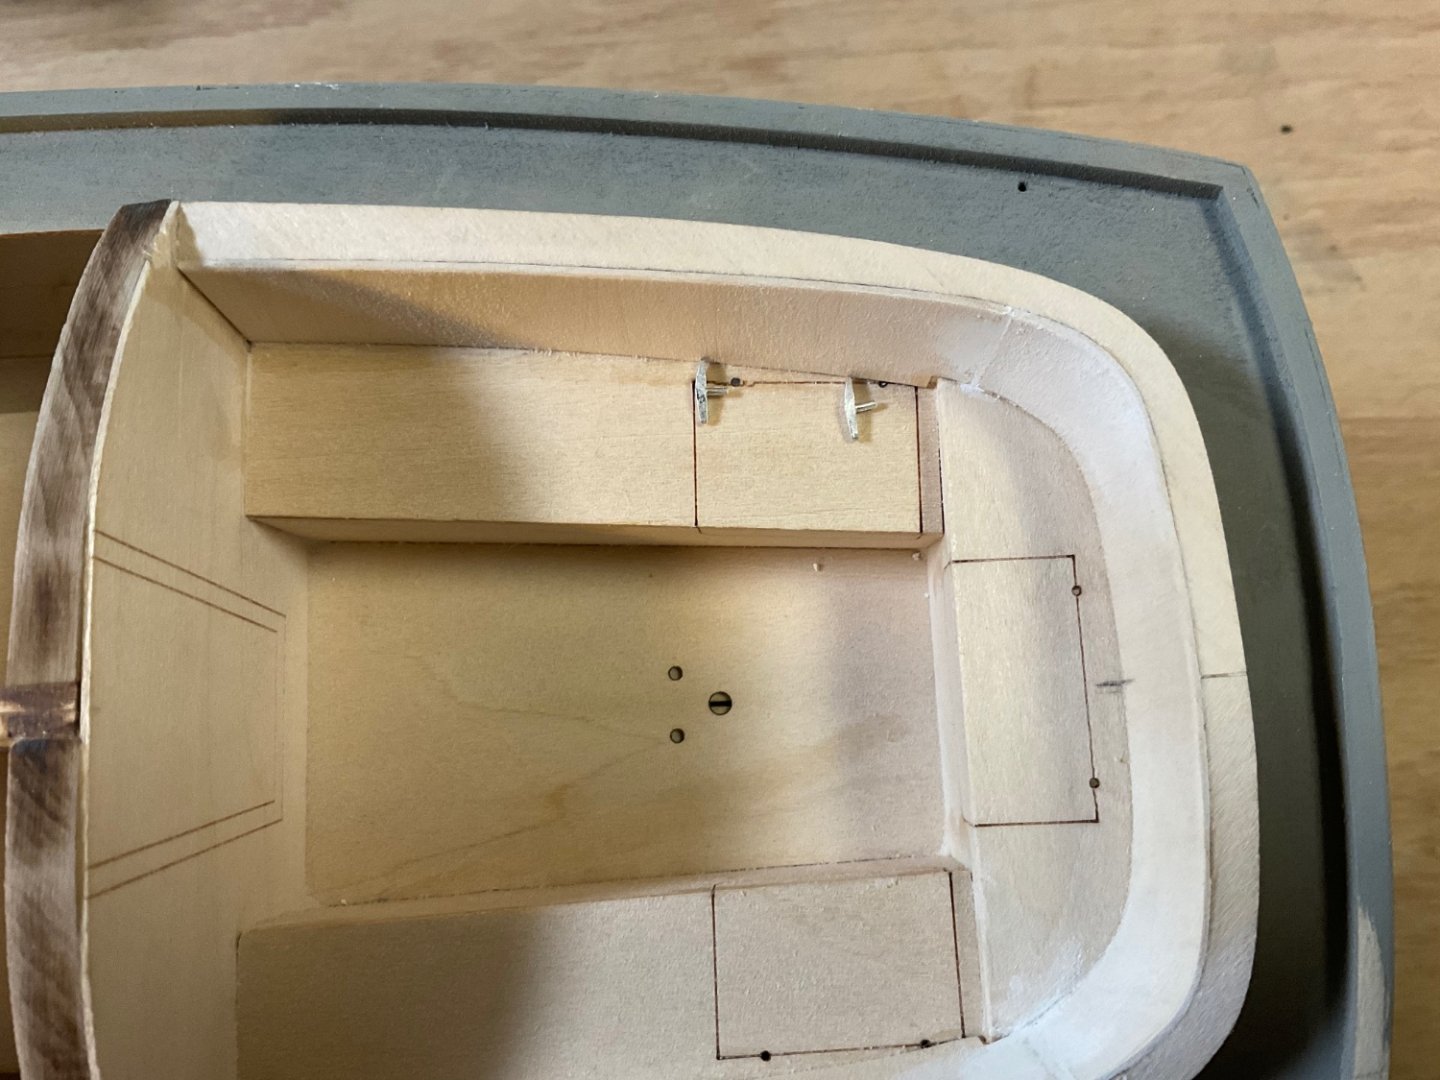
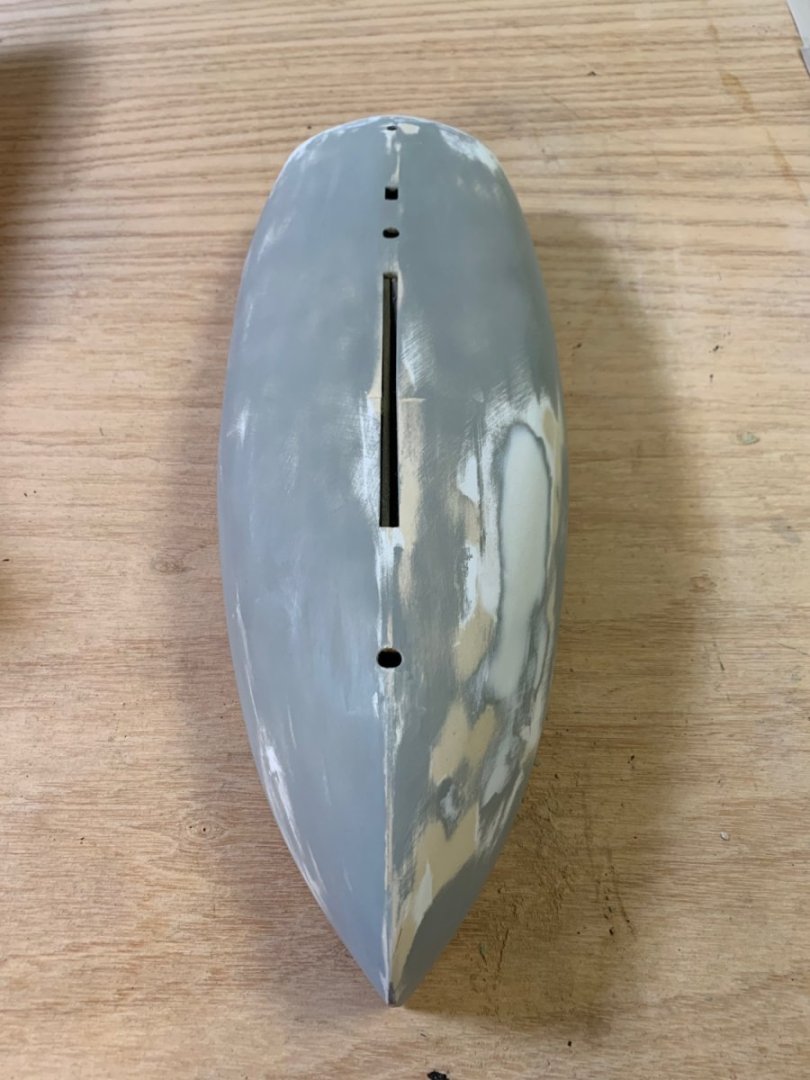
The fin, propeller post, and rudder are shaped and installed using epoxy for extra strength. The seam around the fin was filled with scrap wood and wood filler and then sanded smooth. I built the base to temporarily hold the model with the fin and rudder installed. I had to use epoxy to hold the posts in the base, wood glue was not strong enough to hold the weight of the model. I started construction of the cockpit, it looks like there will be a good bit of shaping and fitting the various pieces to get a smooth looking cockpit. For example, a shim will be needed behind the seat walls for proper support: I’ll post another update once the cockpit is completed.

- 27 replies
-
- 4
-
-
- Nonsuch
- Model Shipways
- (and 1 more)
-
Congrats on a fantastic build! Your skills and results have given me inspiration for my Nonsuch build.
- 111 replies
-
- 1
-
-
- Nonsuch 30
- Model Shipways
- (and 1 more)
-
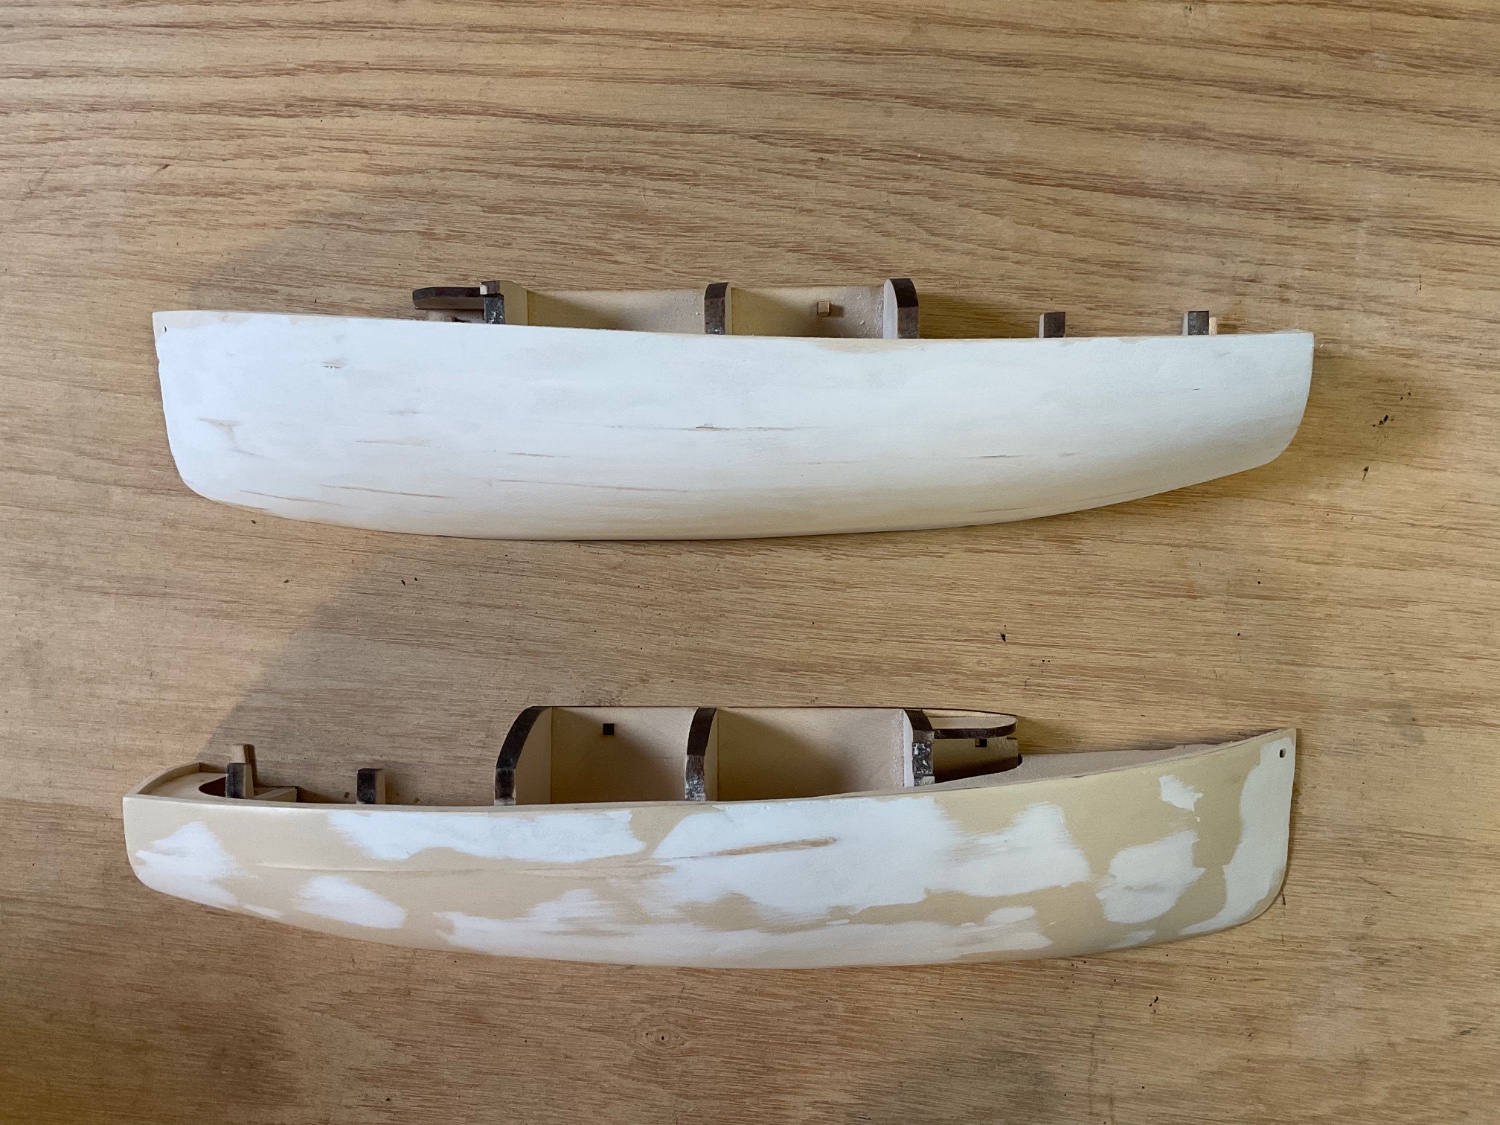
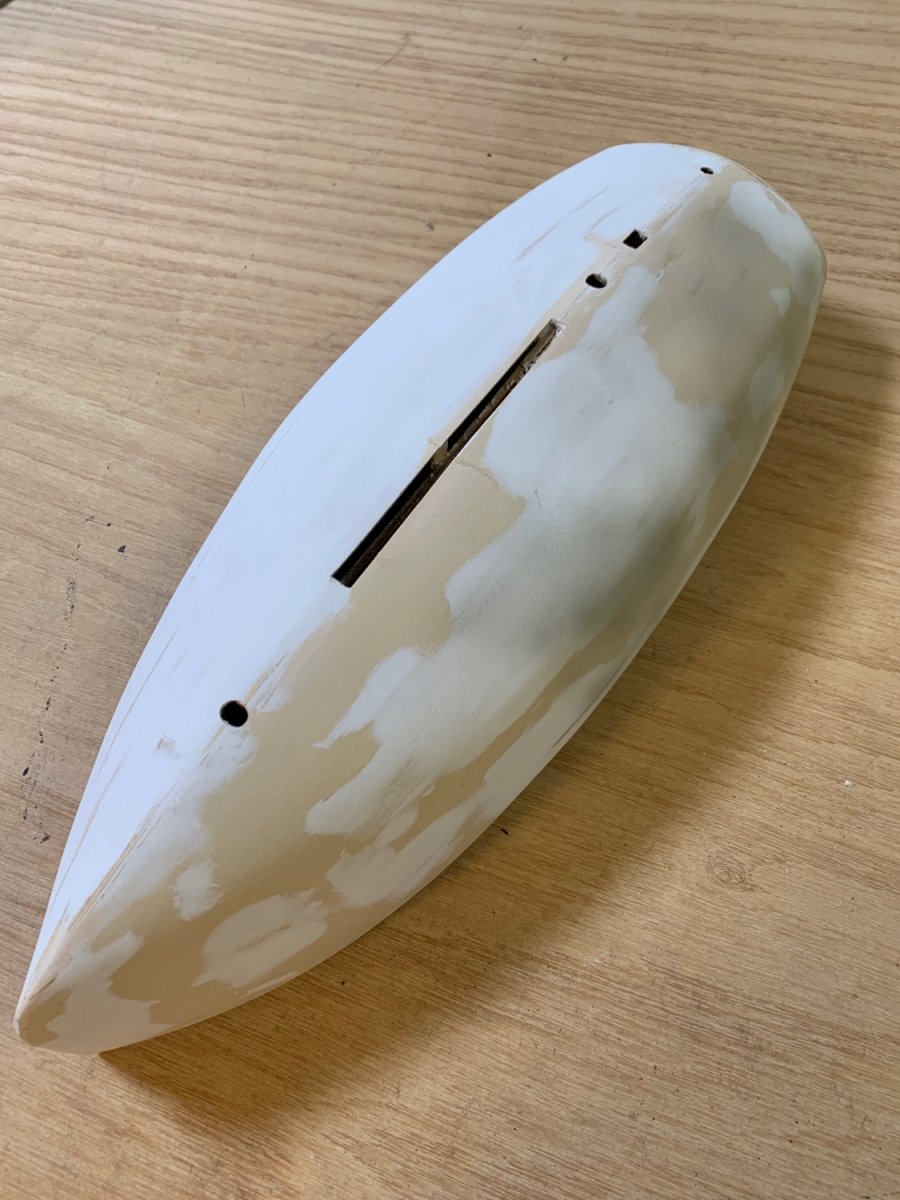
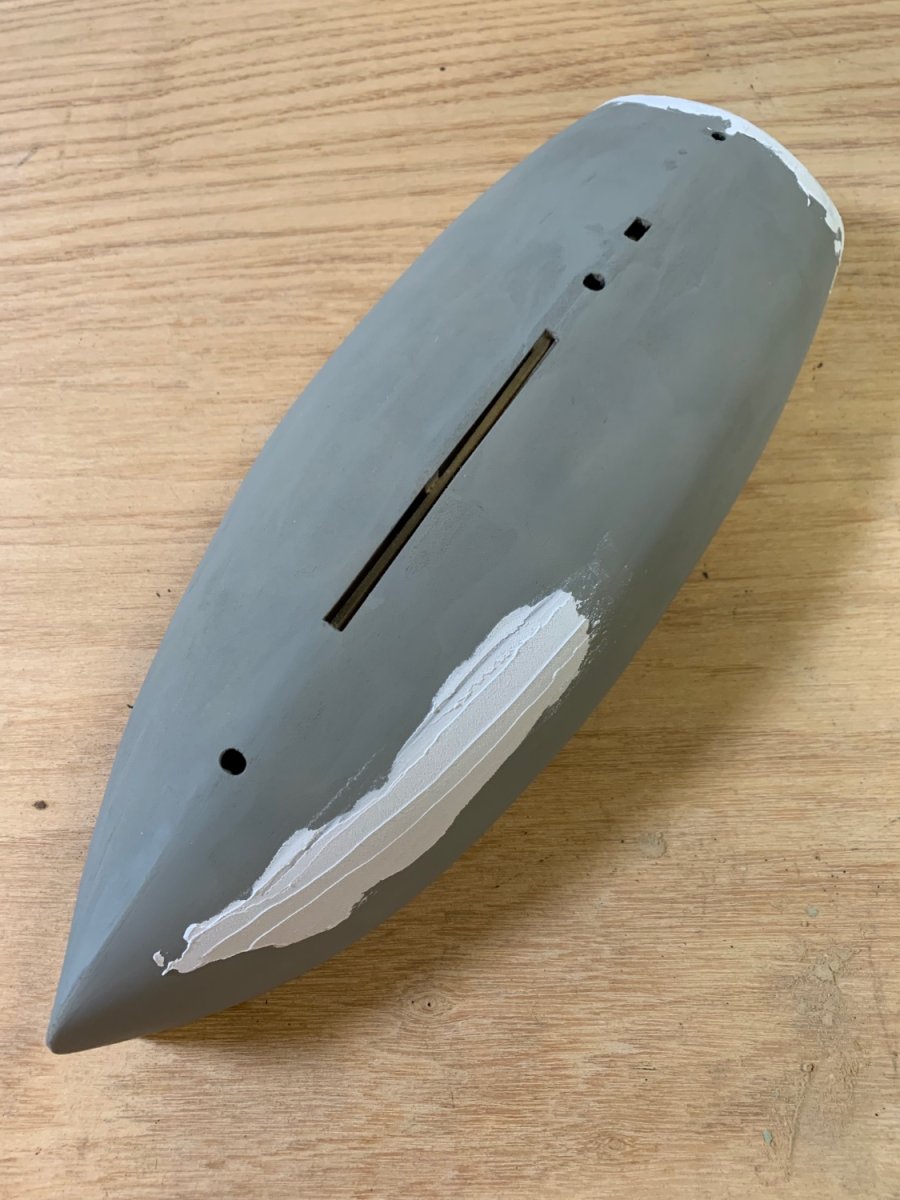
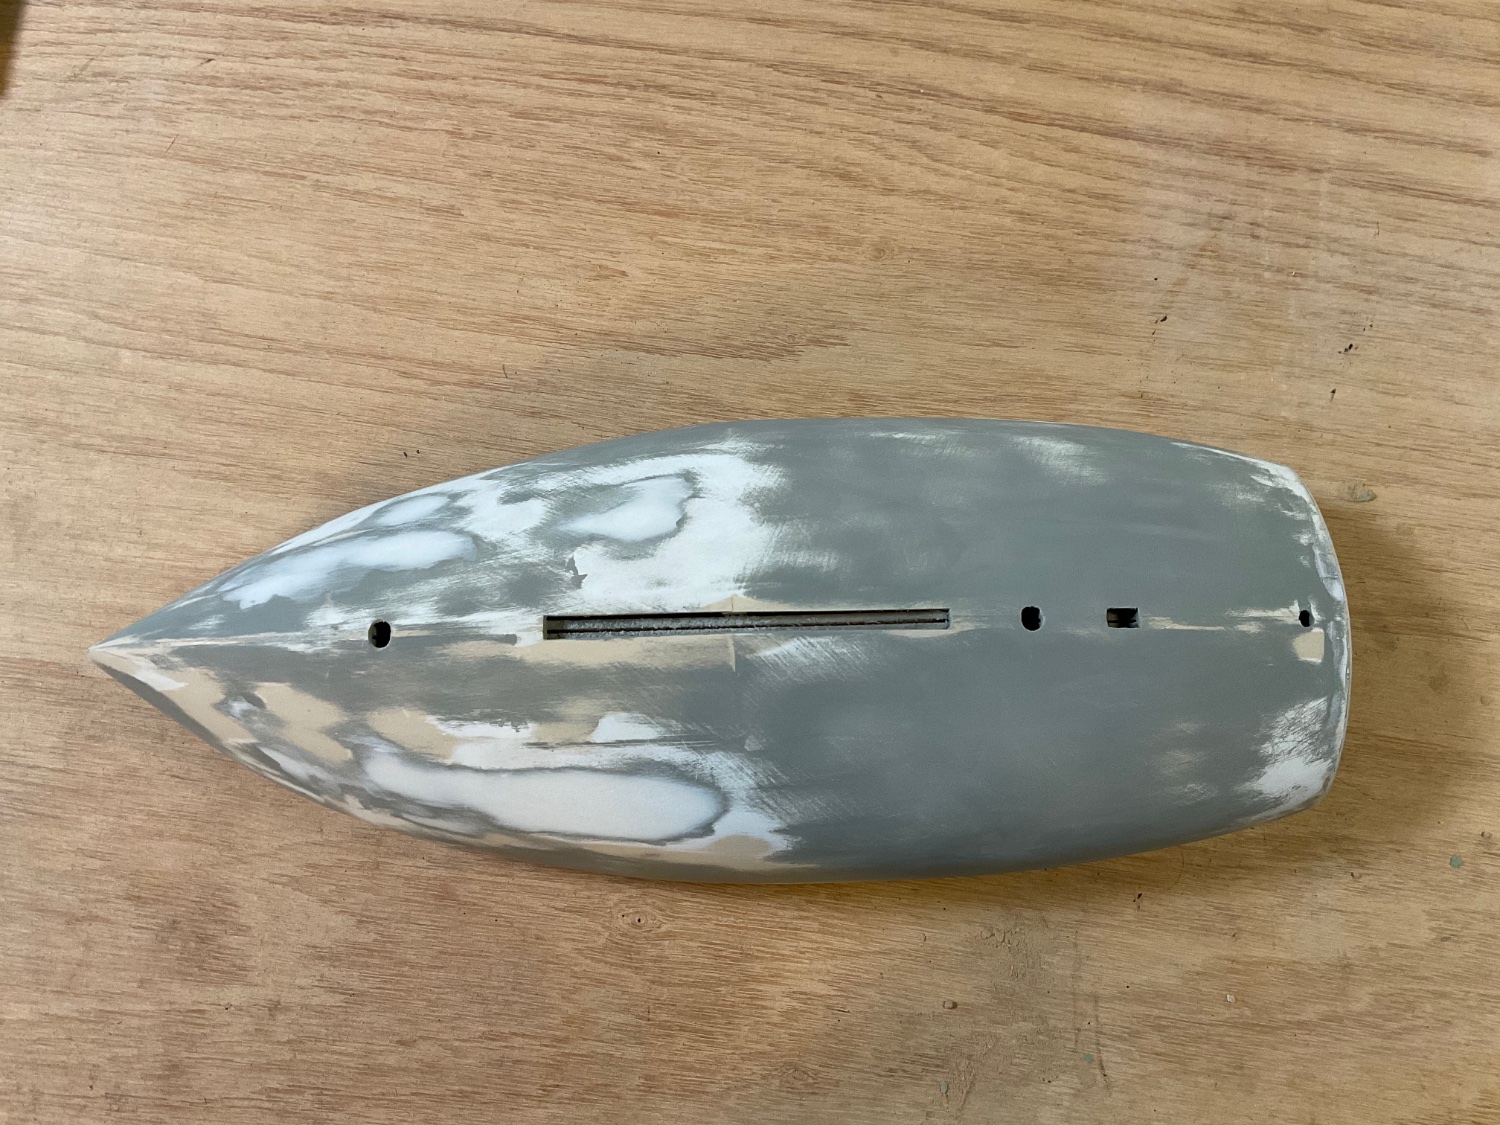
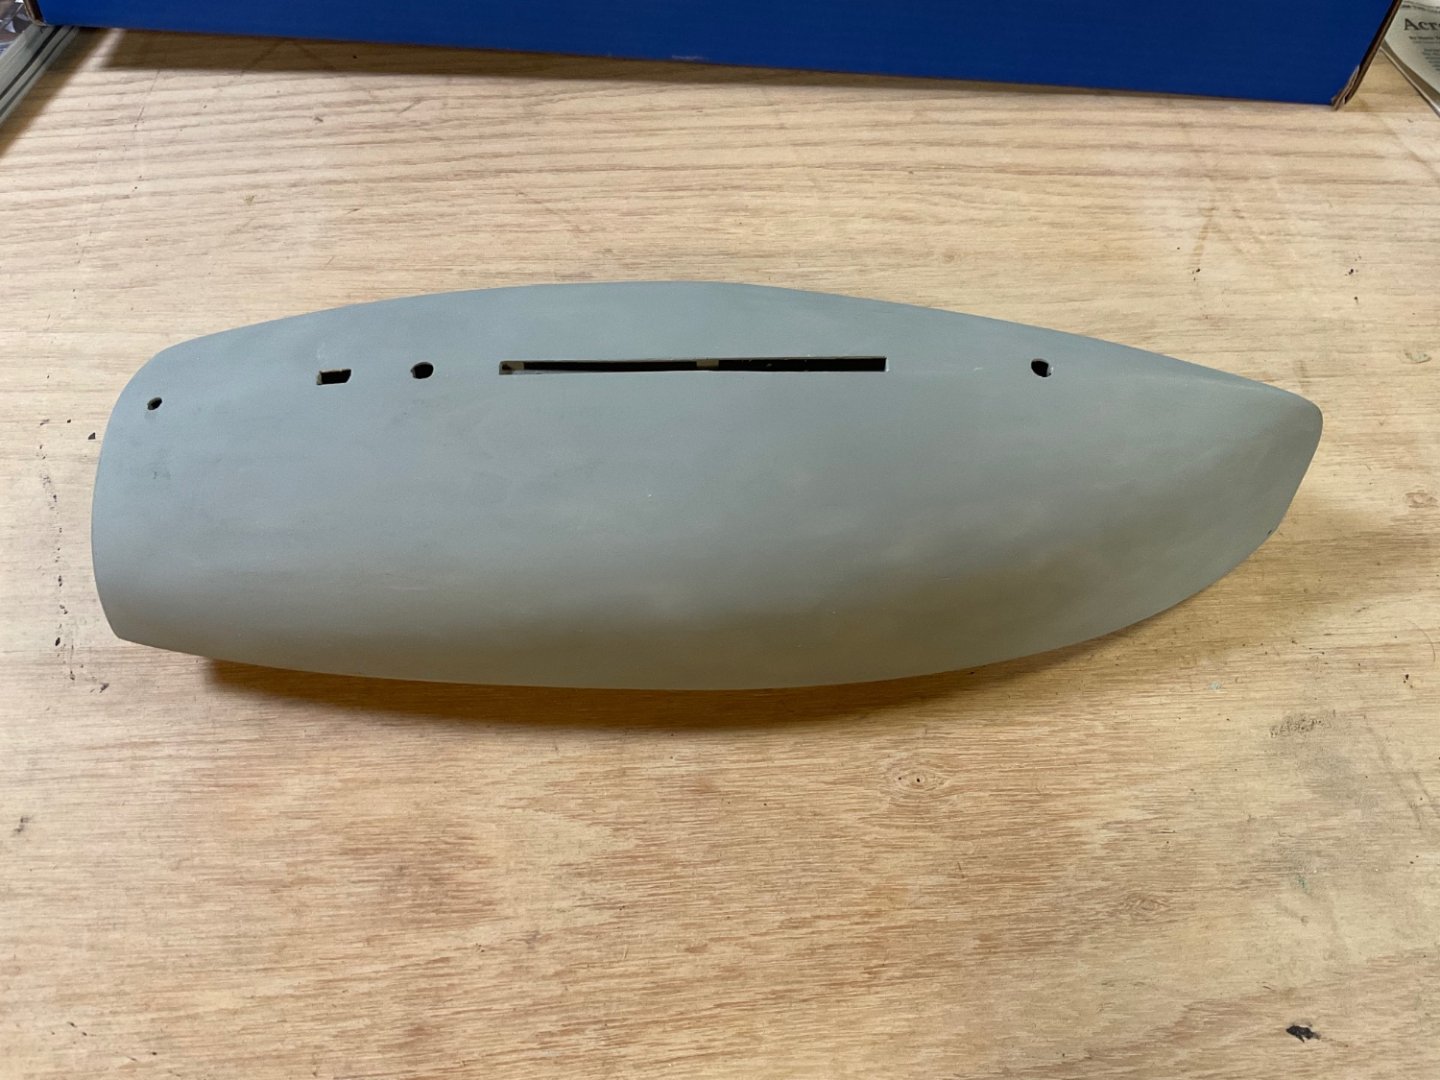
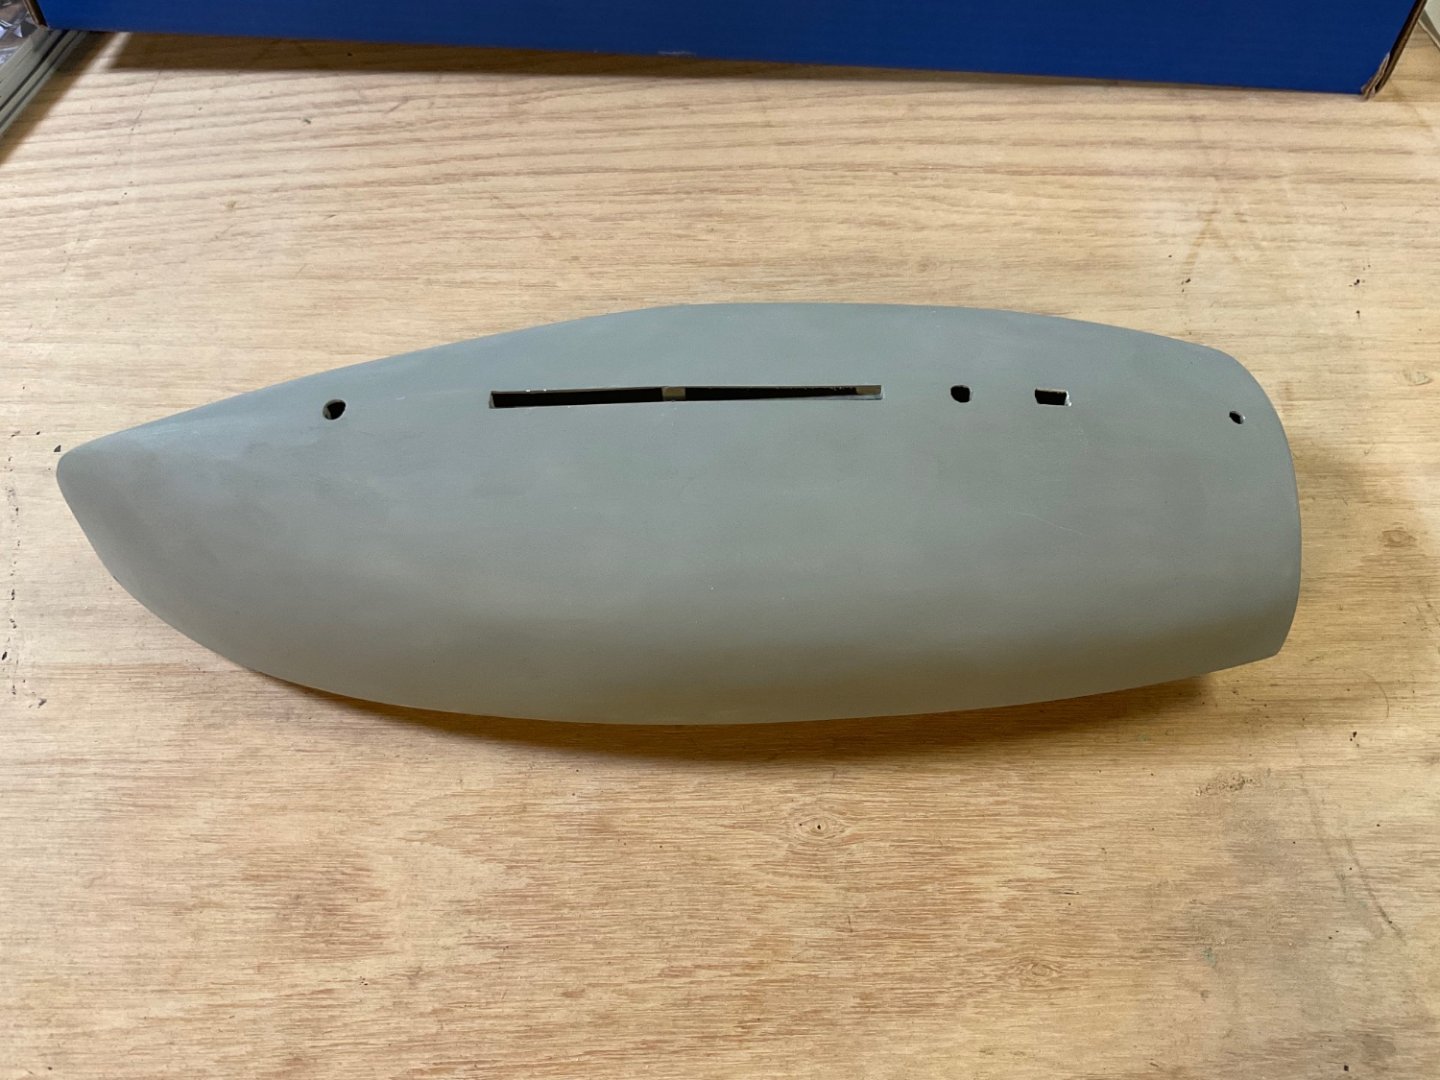
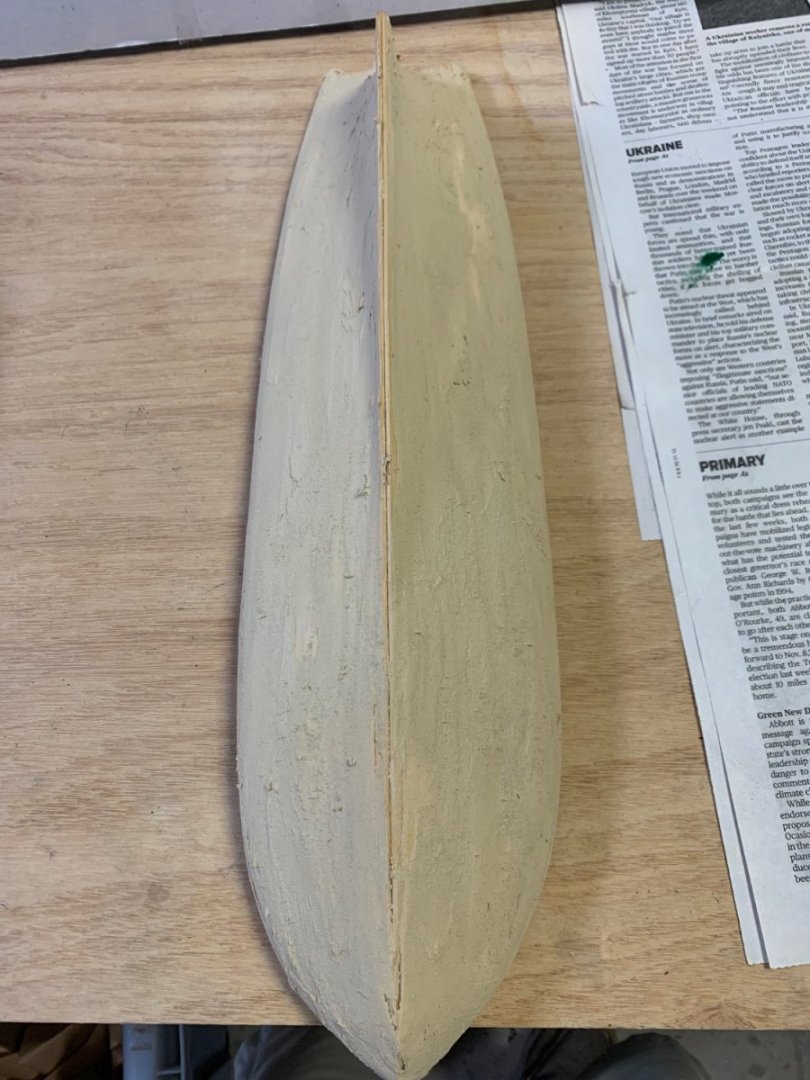
Hull halves prior to joining, I switched to white wood filler after using up the natural color, hence the color differences between the halves. I used Dap plastic wood and had good experiences with it. Joining the hull halves: Further smoothing of the complete hull, there was a small gap that I filled with scrap wood at the seam along the bottom of the hull: Several rounds of filling, sanding and priming: Finished hull ready for painting:


- 27 replies
-
- 4
-
-
- Nonsuch
- Model Shipways
- (and 1 more)
-
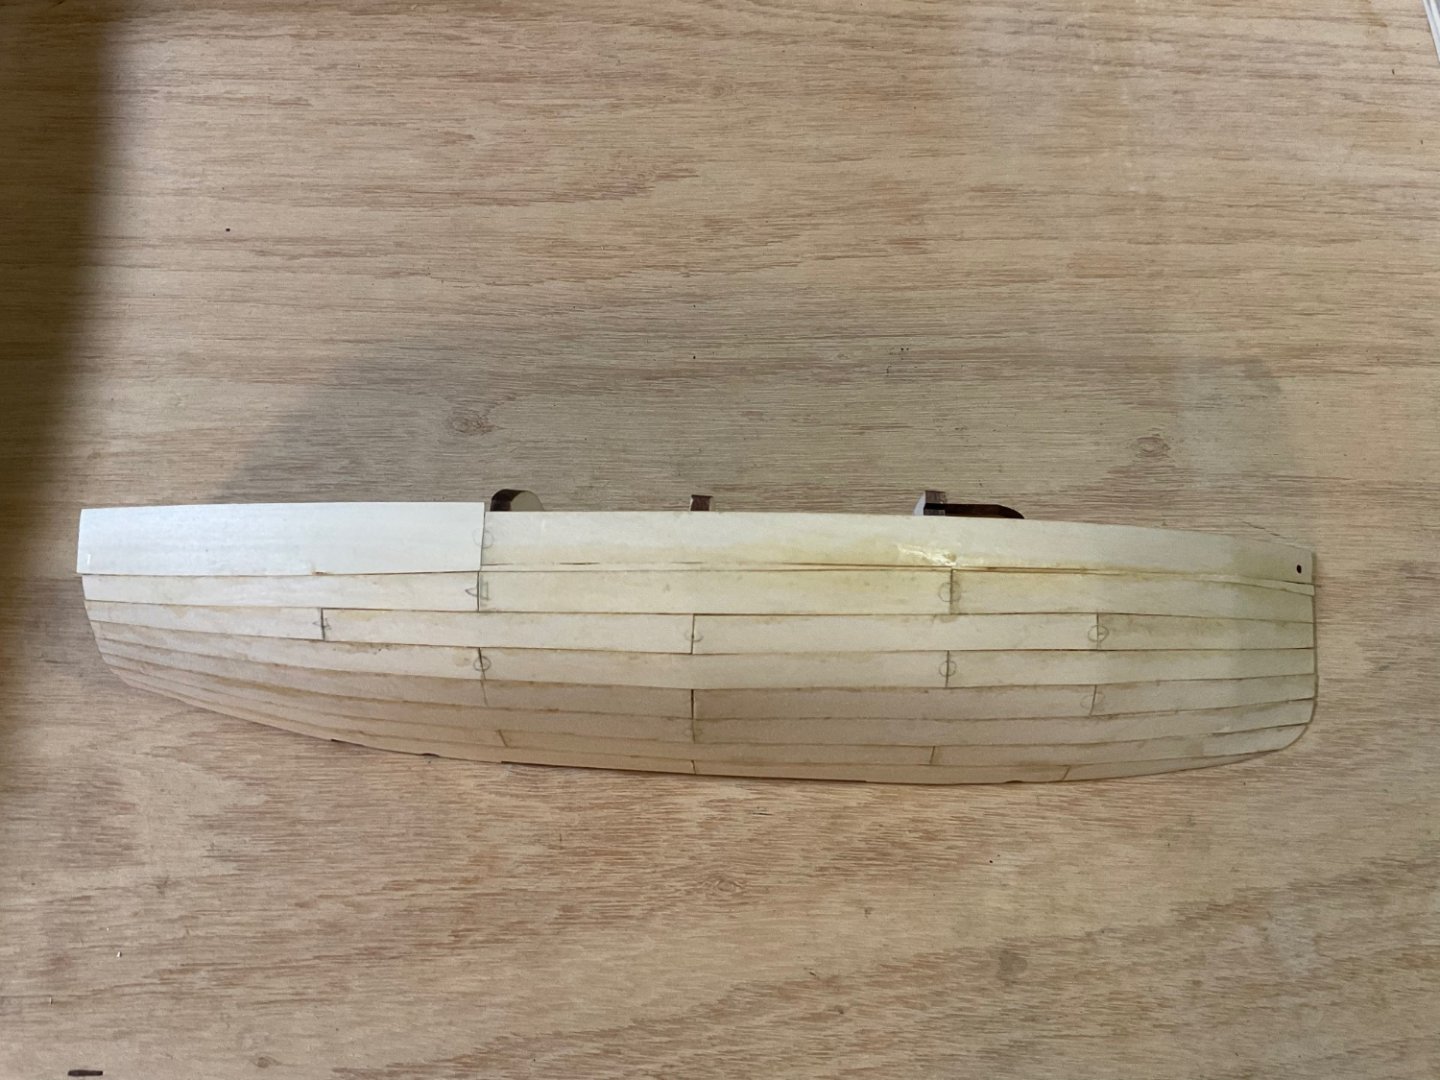
After several rounds of filling, sanding, and spraying with acrylic paint, the hull is more or less completed. I had a few issues laying down the laser cut planks and had to add scrap wood to get complete coverage of the hull. Also, the top plank was not long enough so I used some scrap wood to get complete coverage. Here are the two hull halves with complete planking.

- 27 replies
-
- 1
-
-
- Nonsuch
- Model Shipways
- (and 1 more)
-
I understand what you are seeing, but I think it is more an issue of the way the plank was cut and laid on the bulkhead and the camera angle. The plank did not lay across the bulkhead in an arc as a continuous plank would. I was not too worried about how the planks looked as they would be covered with wood filler and smoothed out to simulate a fiberglass hull.
-
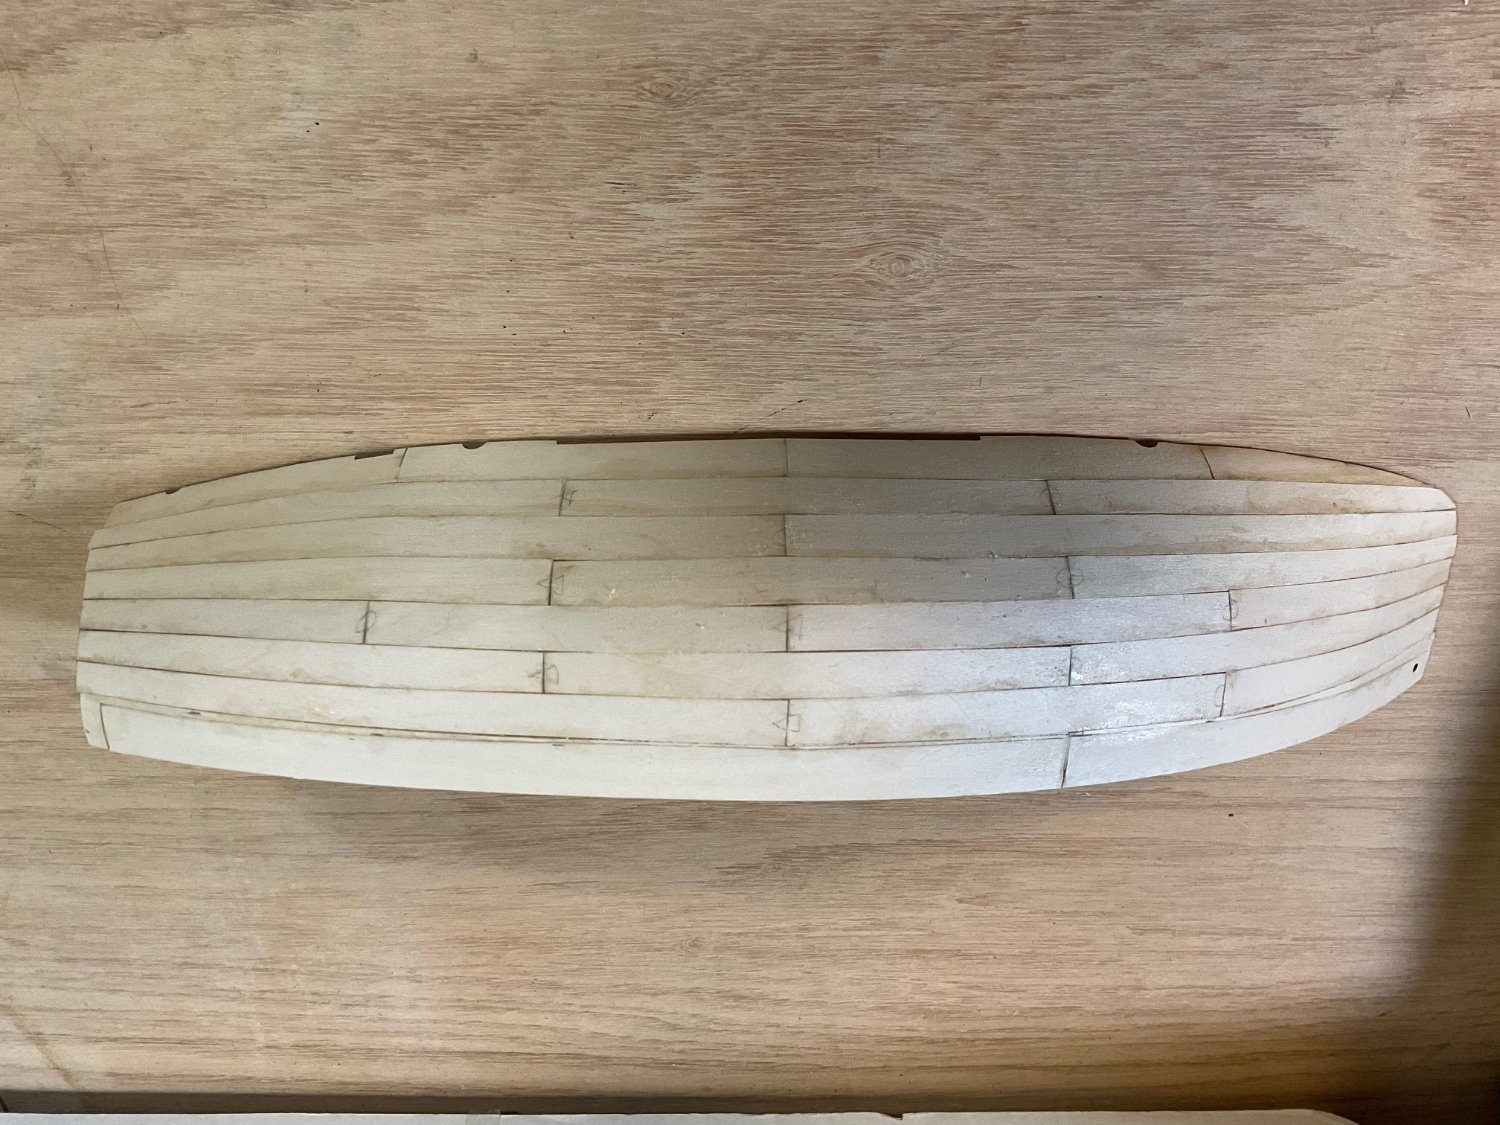
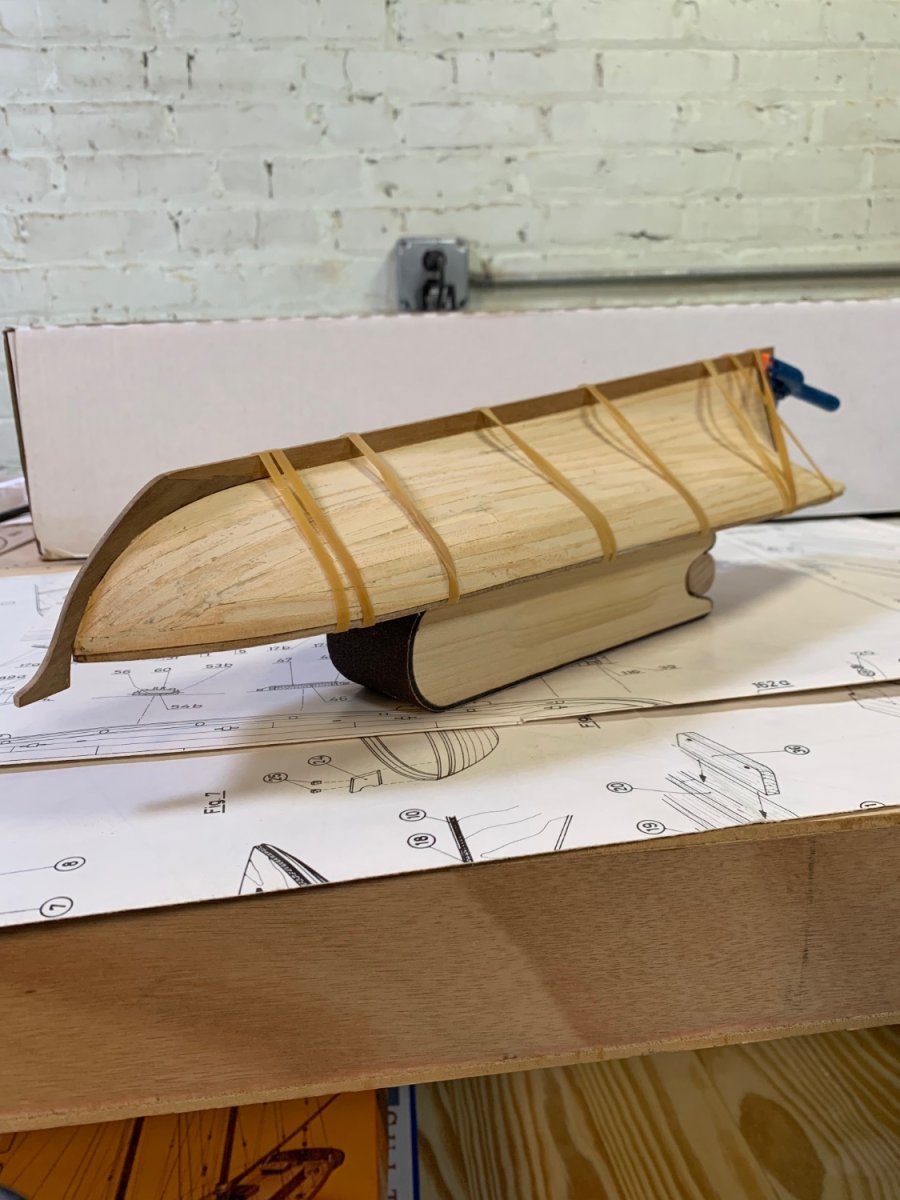
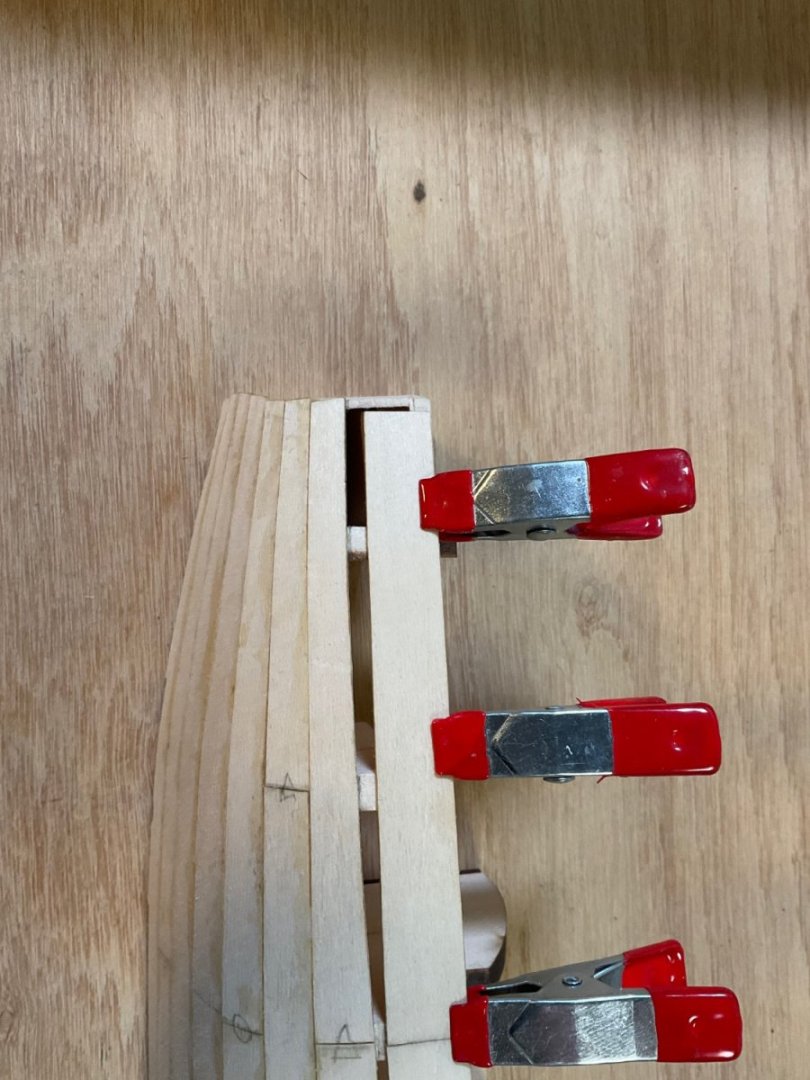
Having built the Model Shipways shipwright beginner kits by David Antscherl, I thought I’d try out the latest kit by Antscherl being offered by Model shipways, the Nonsuch 30 catboat in 1:24. I just started the hull planking, up to this point the build process has been rather straightforward for a plank on bulkhead kit. However, the start of the planking process has not gone smoothly. The Garboard plank is the first one to be placed on the bulkheads. I could not get the plank to lay smoothly on the bulkheads and keep the precut holes lined up with holes in the spine. The next two pictures show how warped the plank turned out. I will have to remove this plank and reapply it. My solution was to cut the plank into 4 pieces and lay them individually. I just had to sand the edges of the pieces a little to get a good fit. The bulkheads are rather thick, so this worked out ok. We’ll see how the following planks lay down.


- 27 replies
-
- 2
-
-
- Nonsuch
- Model Shipways
- (and 1 more)
-
I would like to build a paddle wheel at some point, so I thought about the Harriet Lane, but now I’m leaning to scratch building the confederate blockade runner Hope using the Seawatch book. BTW your build is looking great, I just started my build of Nonsuch…
- 111 replies
-
- 1
-
-
- Nonsuch 30
- Model Shipways
- (and 1 more)
-
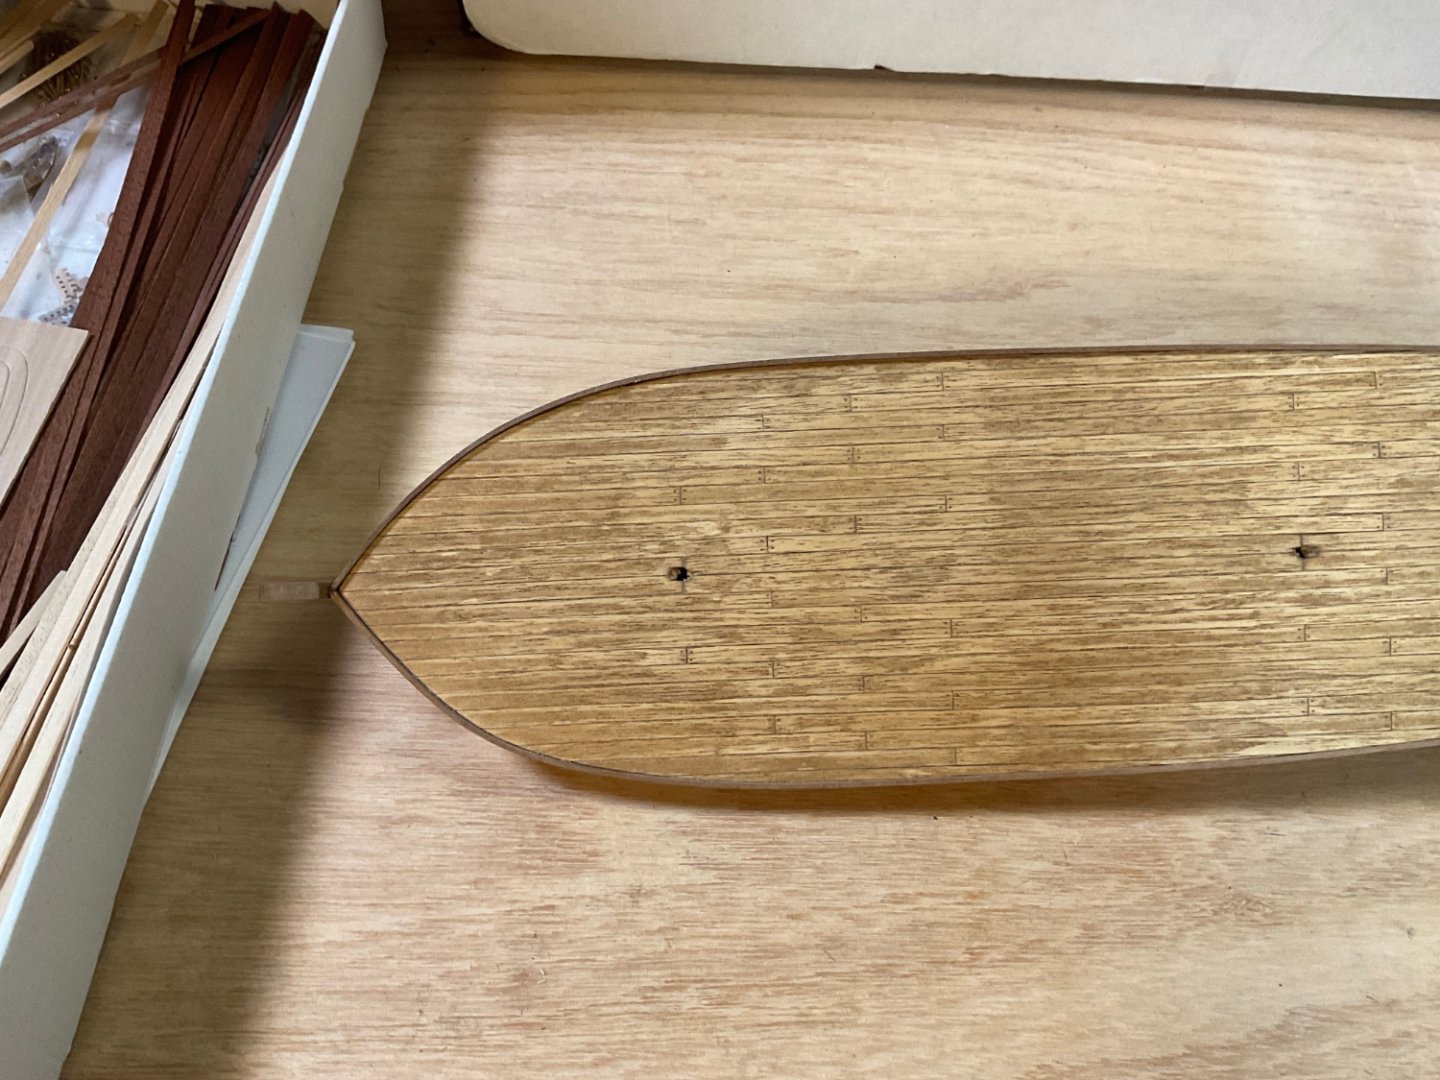
I went ahead and added nail holes to the end of the deck planks. I stained the deck with some golden oak, which helped highlight the nail holes and wood grain, but maybe too much grain? It came out a bit splotchy but looks kind of like a weathered deck I think. Not sure how I feel about the results but I’ll live with it. I probably did not sand it evenly before putting the stain on, oh well, lesson learned. I also added the bulwarks and counter piece. A little more prep work on the hull and then it will be ready for the top hull planks.
-
I just ordered this kit from model shipways yesterday during a sale. I built the 3 model shipwright kits by David Antsherl as my first builds and enjoyed the experience. I love the looks of this boat and think it will make a great display or gift. I’ll be following you in the build process so hopefully I can pick up some good tips along the way.
- 111 replies
-
- 2
-
-
- Nonsuch 30
- Model Shipways
- (and 1 more)
-
Thanks Cathead, I glued down the deck planks using a thin layer of titebond that I rubbed on with my finger and they quickly adhered to the plywood. The deck planks are the same dimension as the hull top planks so the thin layer of wood glue should work out. Progress update, the keel has been attached and decking layed down. I may still add some nail holes to the deck for visual interest.

-
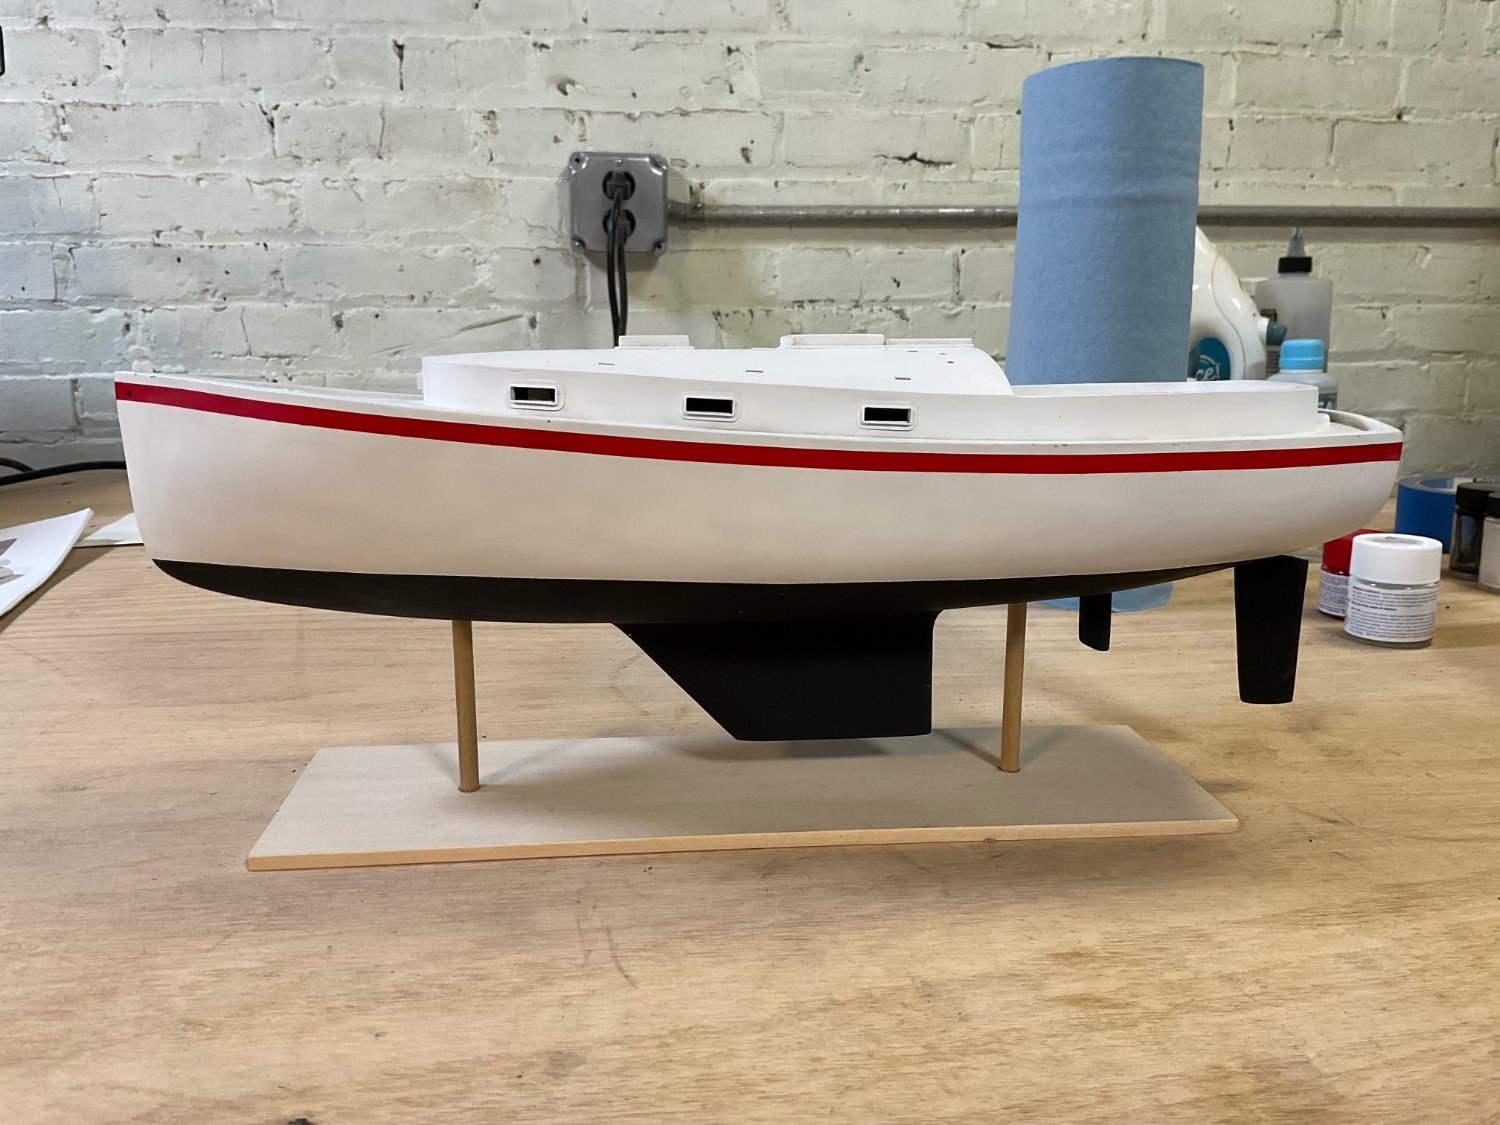
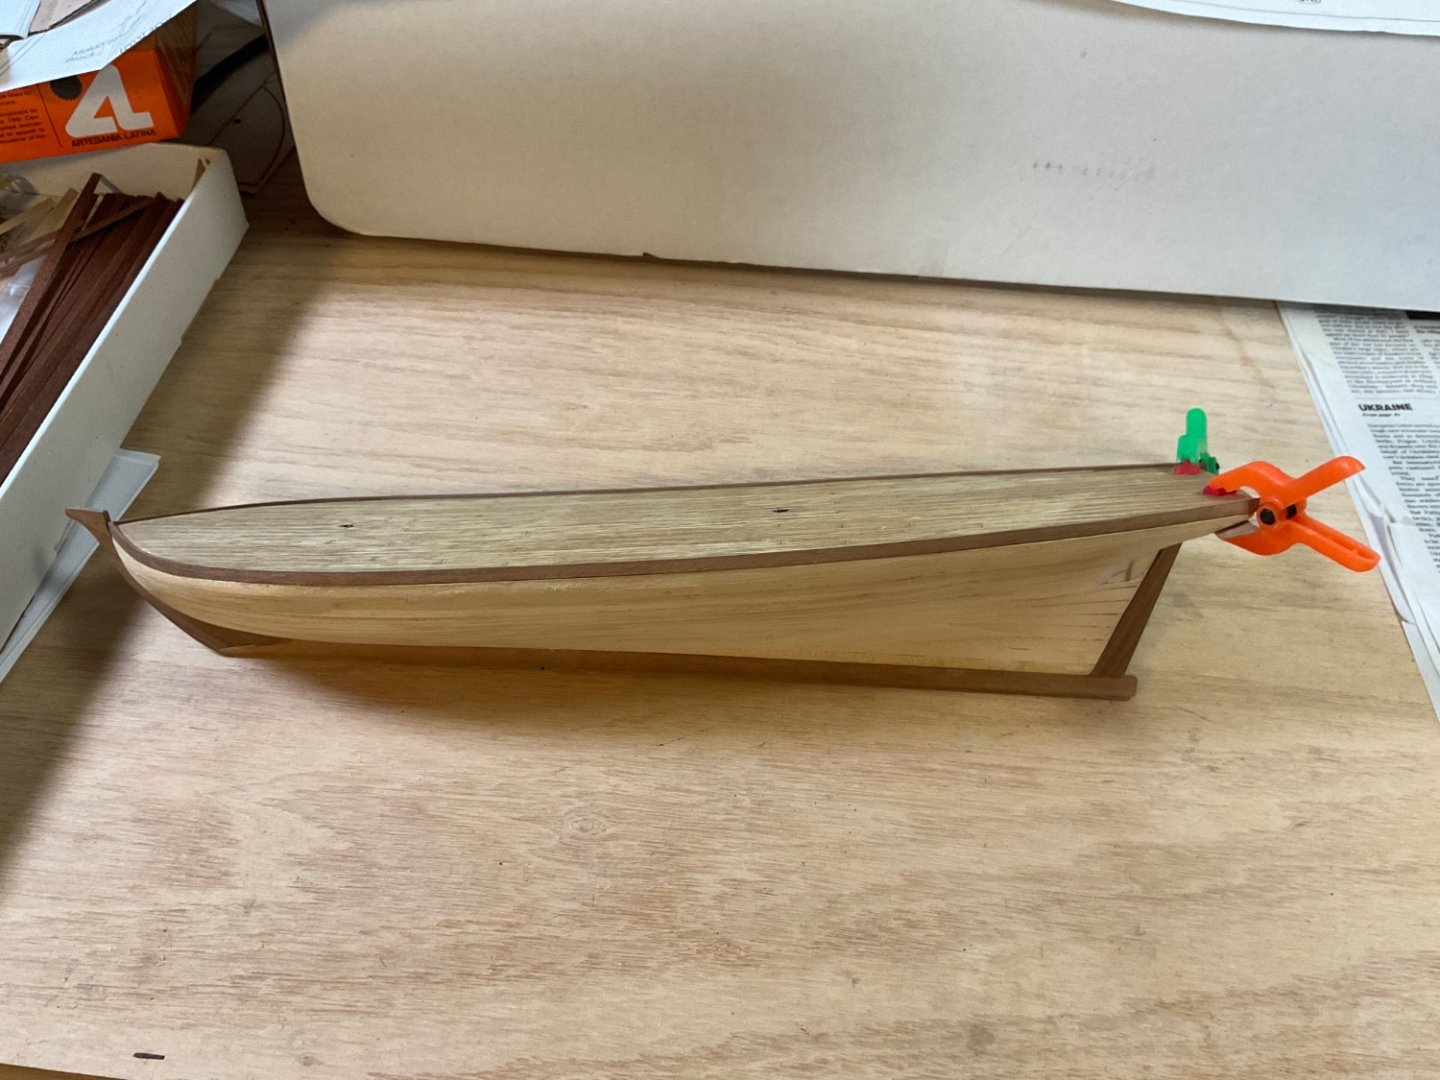
Well its not pretty but I think the stern has been re-shaped to match the plan drawing. I had to remove a good bit of material but was able to fill the holes and reshape the area with a Dremel and sanding.


-
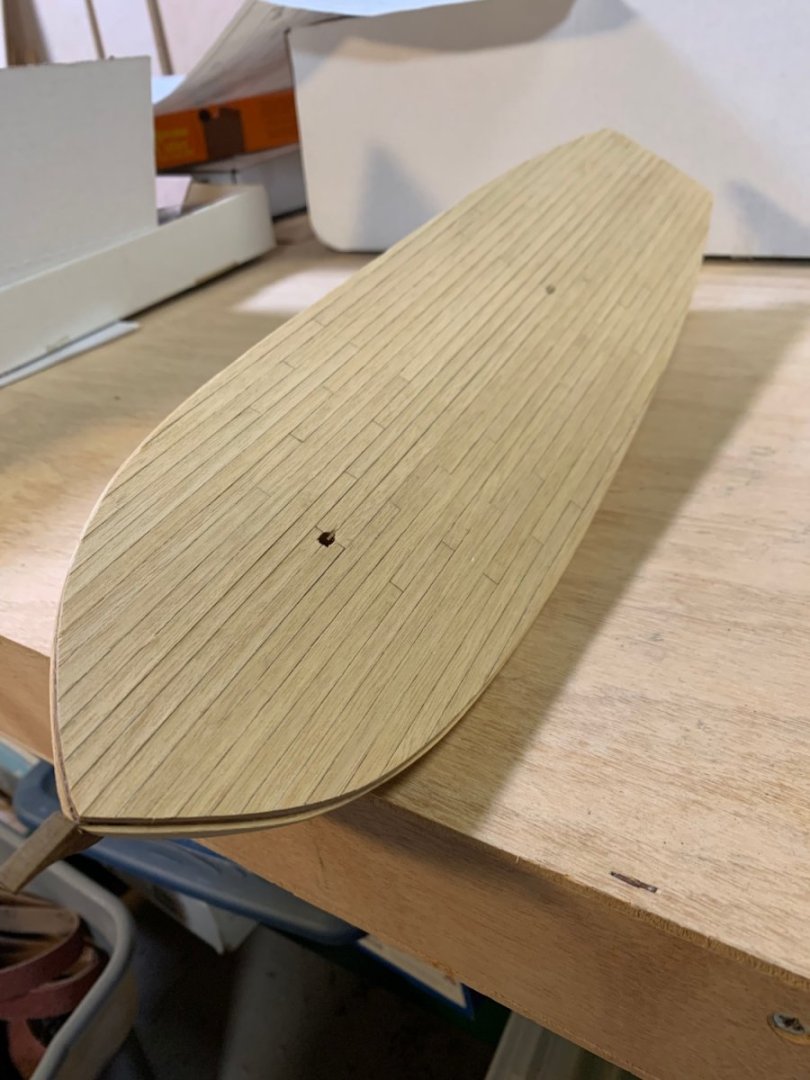
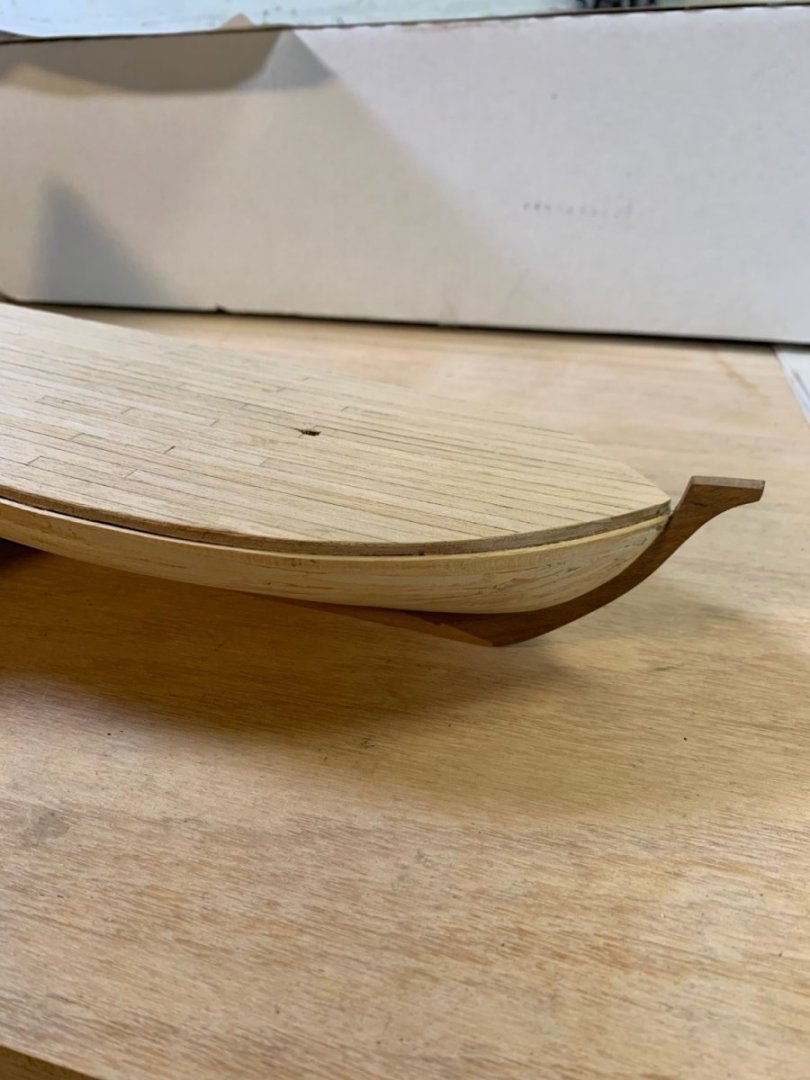
The kit provides 0.5 mm thick walnut strips for the veneer planking. There is no recommendation for the type of glue to use for this veneer top layer in the Dallas instructions. I have an Occre kit in my stash that recommends using contact cement for this top layer. I was wondering if the general consensus is to use contact cement for the veneer or is another type of glue recommended. What are some preferred brands for contact cement in this application?
-
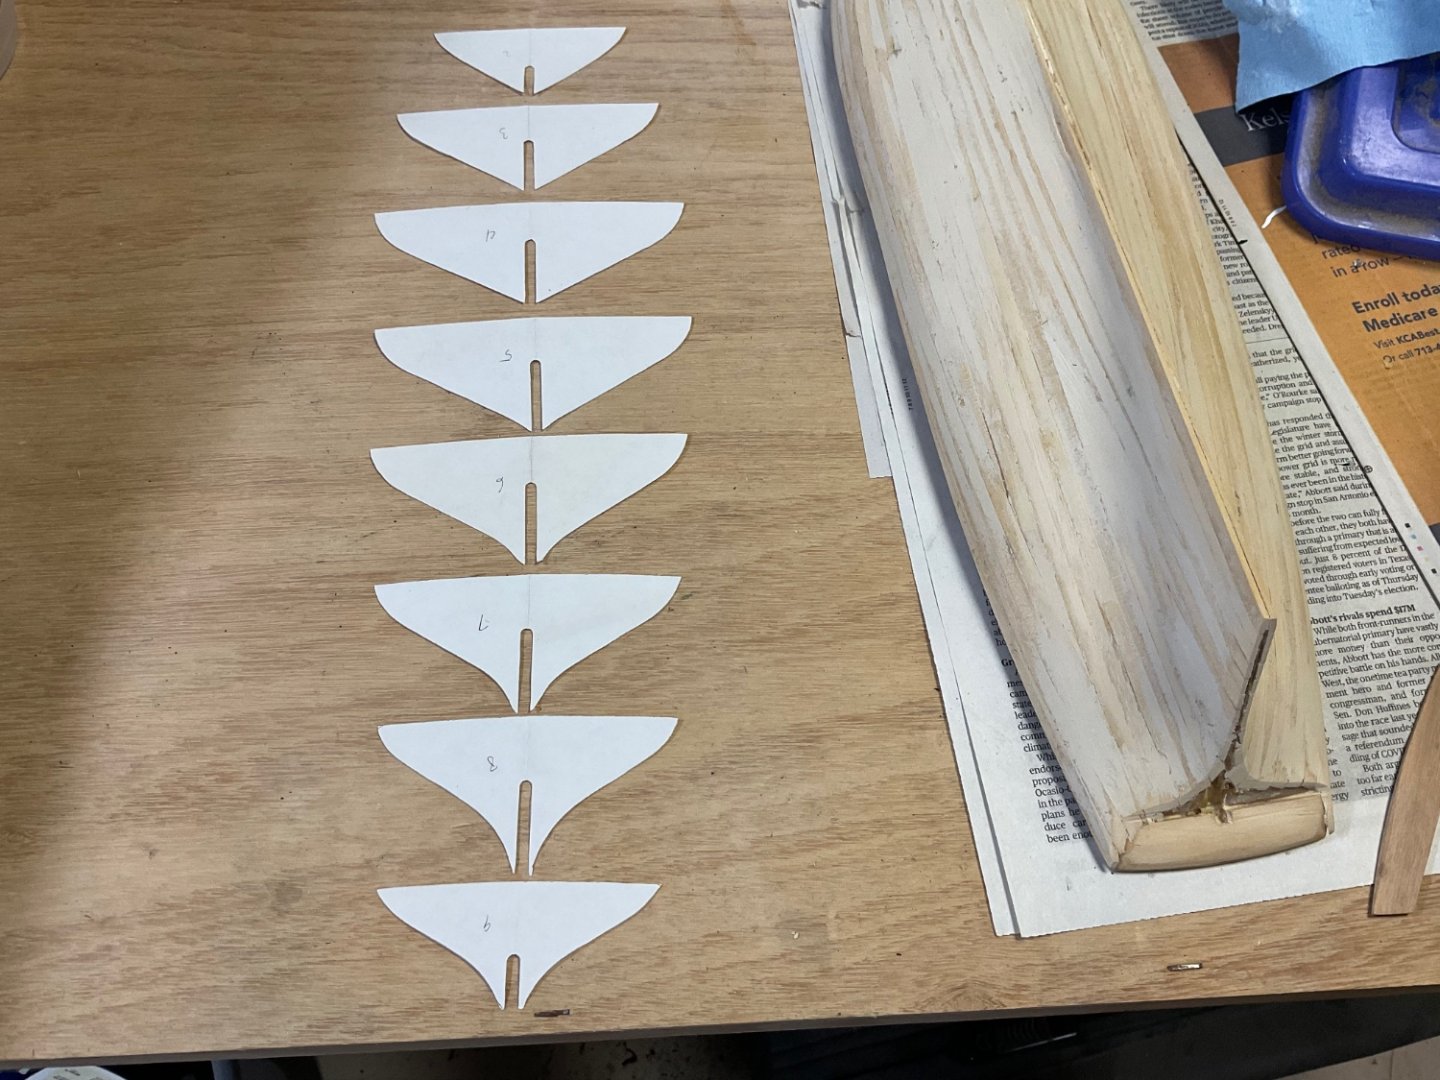
For some reason I made paper tracings of the bulkheads many years ago and kept them in the box. You are welcome to those if you still need them. I have bulkheads 2-9.
-
I am trying to shape the stern now. It will be a challenge to get from where it is to match the plans, but I’ll give it a shot. I have lots of wood filler and scrap wood.😁
-
For some reason the top plank rode up above the deck during the assembly process but I was able to correct the issue by shaving the plank down to the correct alignment.
-
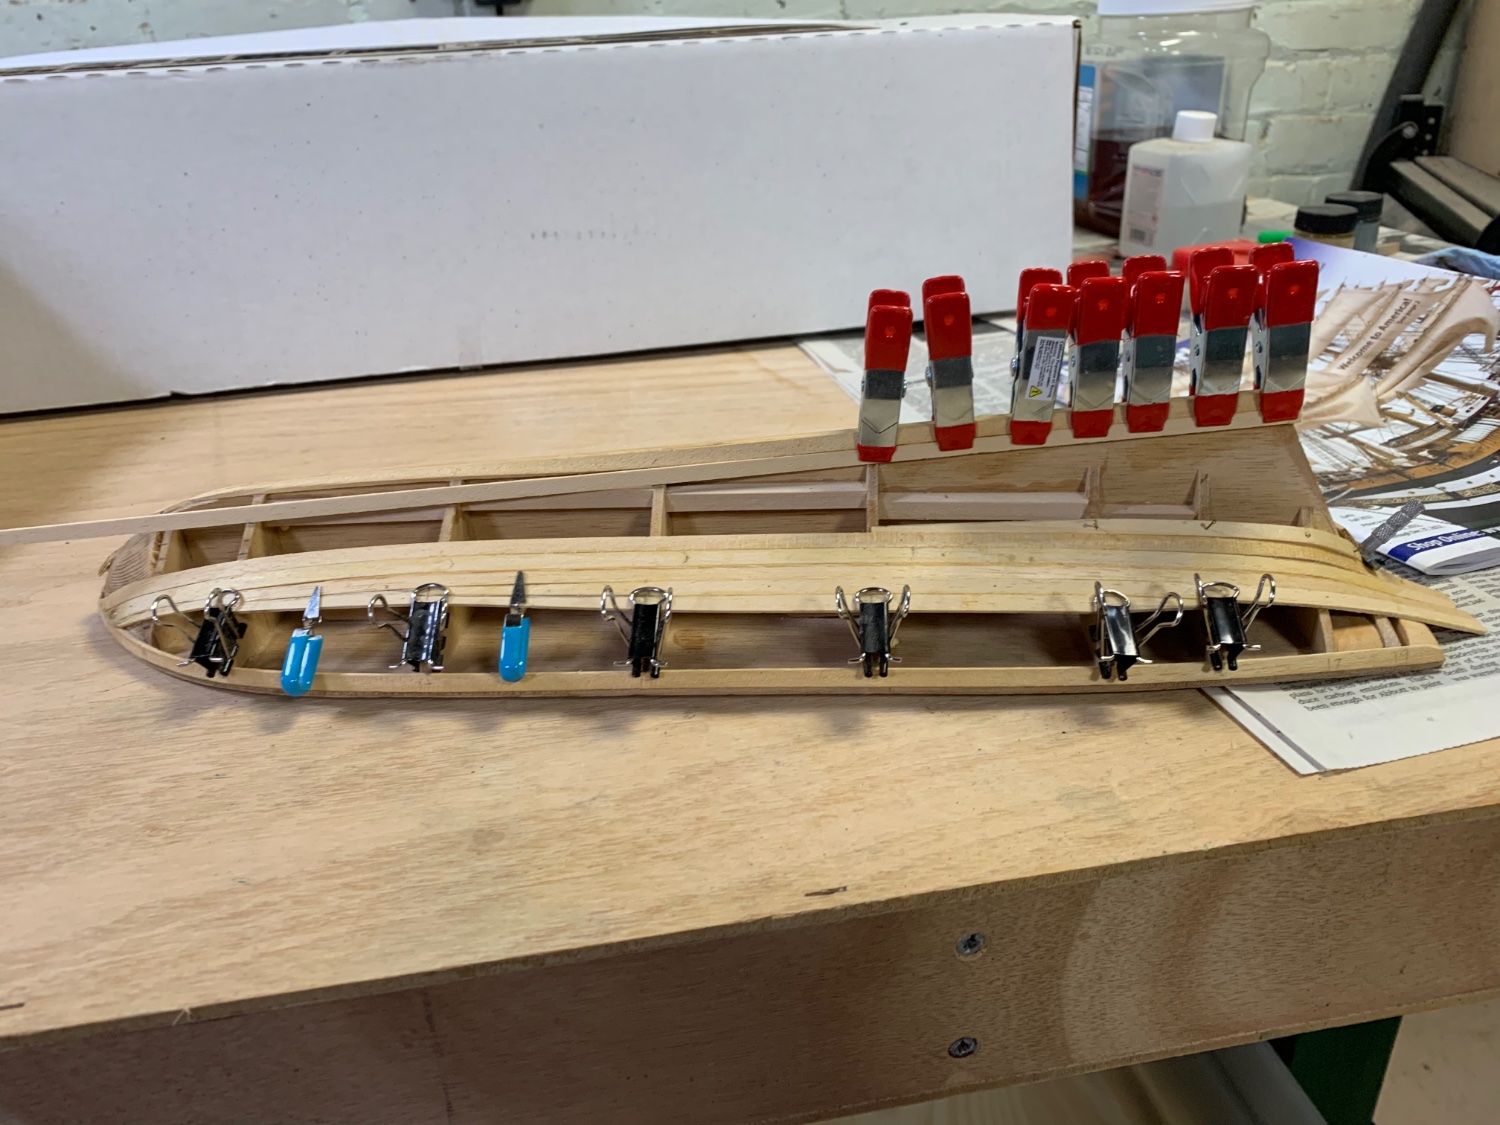
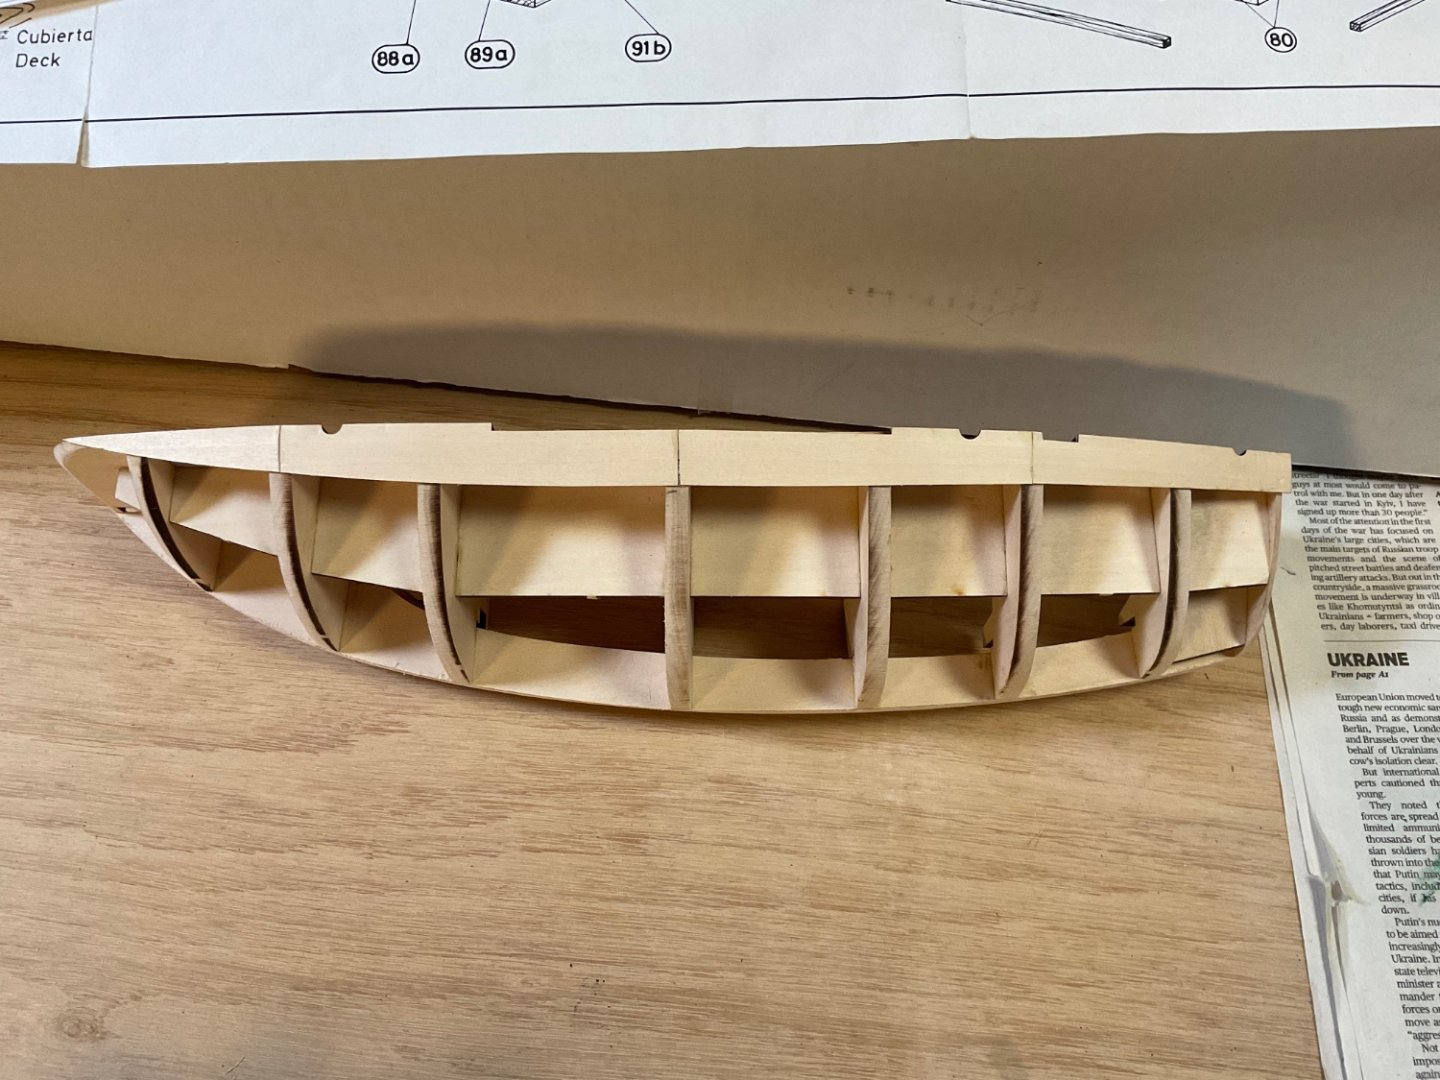
Apologies for the long break on this build. I seem to have a short attention span and too many projects at once. Anyway, I’ve made some progress with the base layer of planking. Here are a few pics showing progression and progress to date.


-
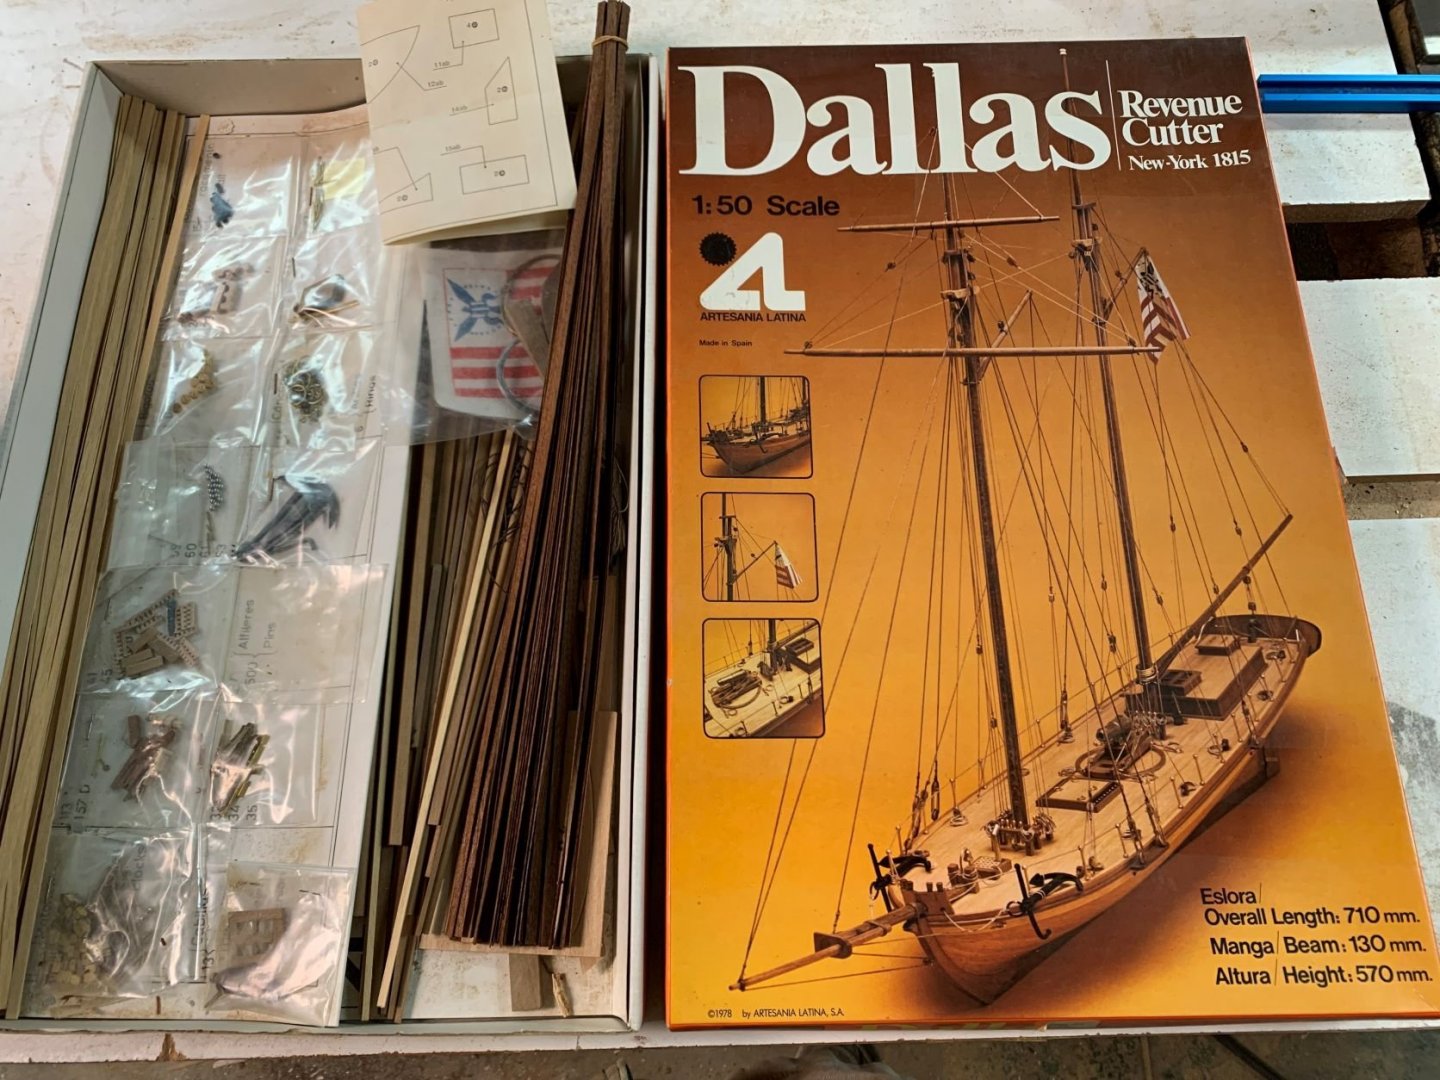
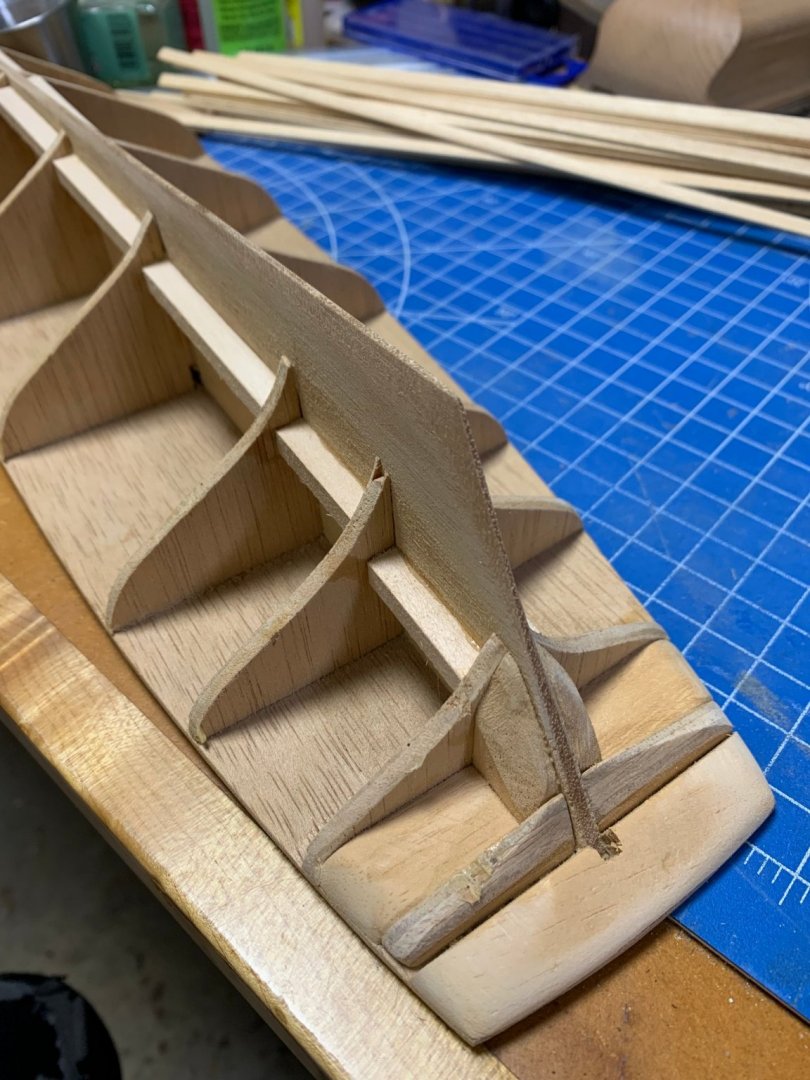
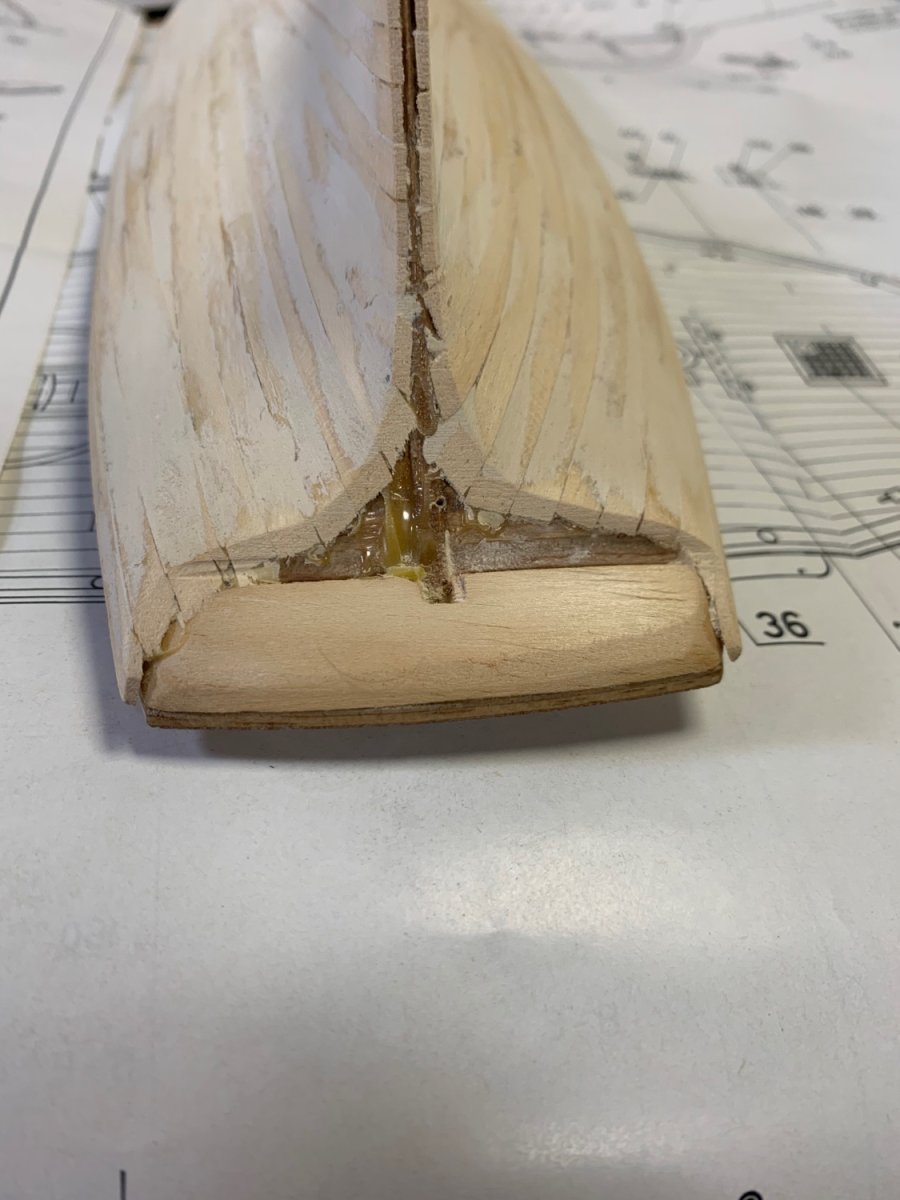
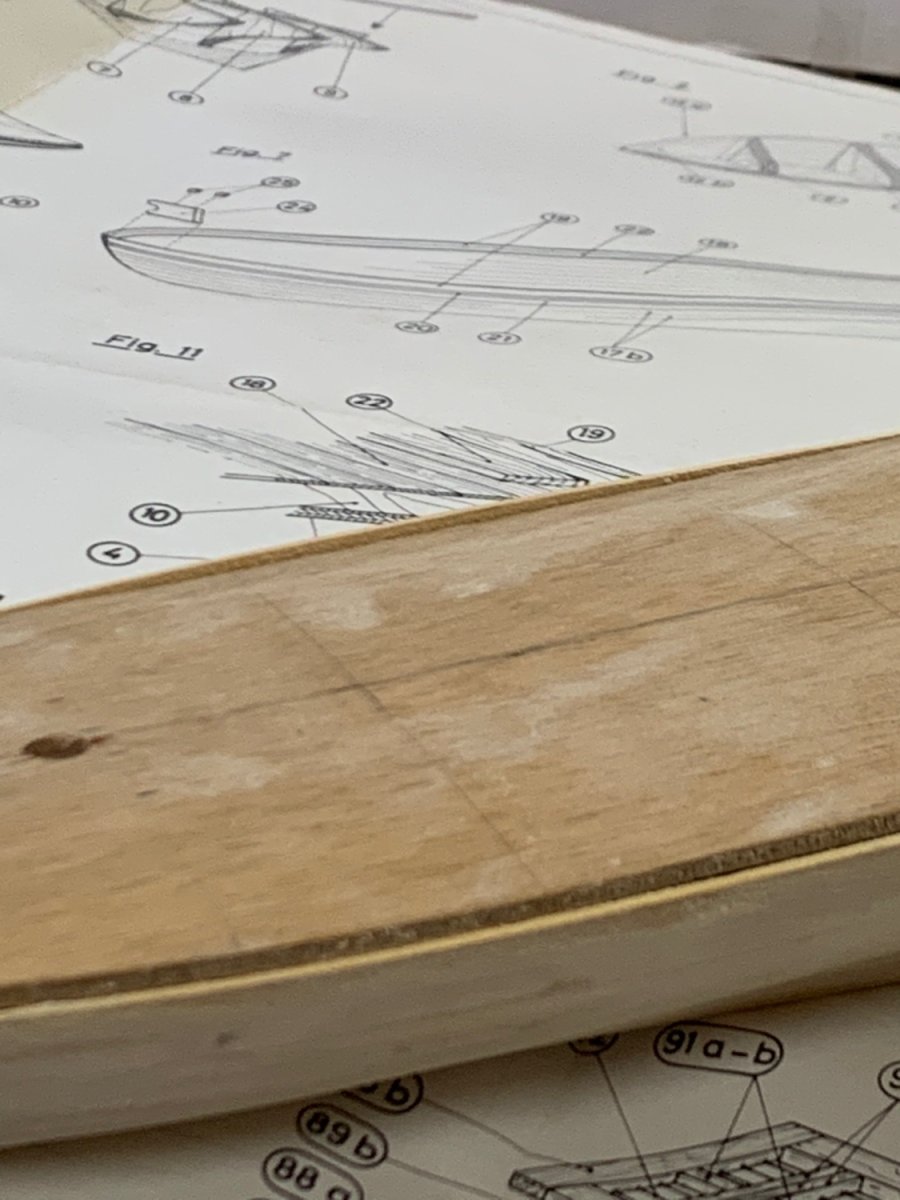
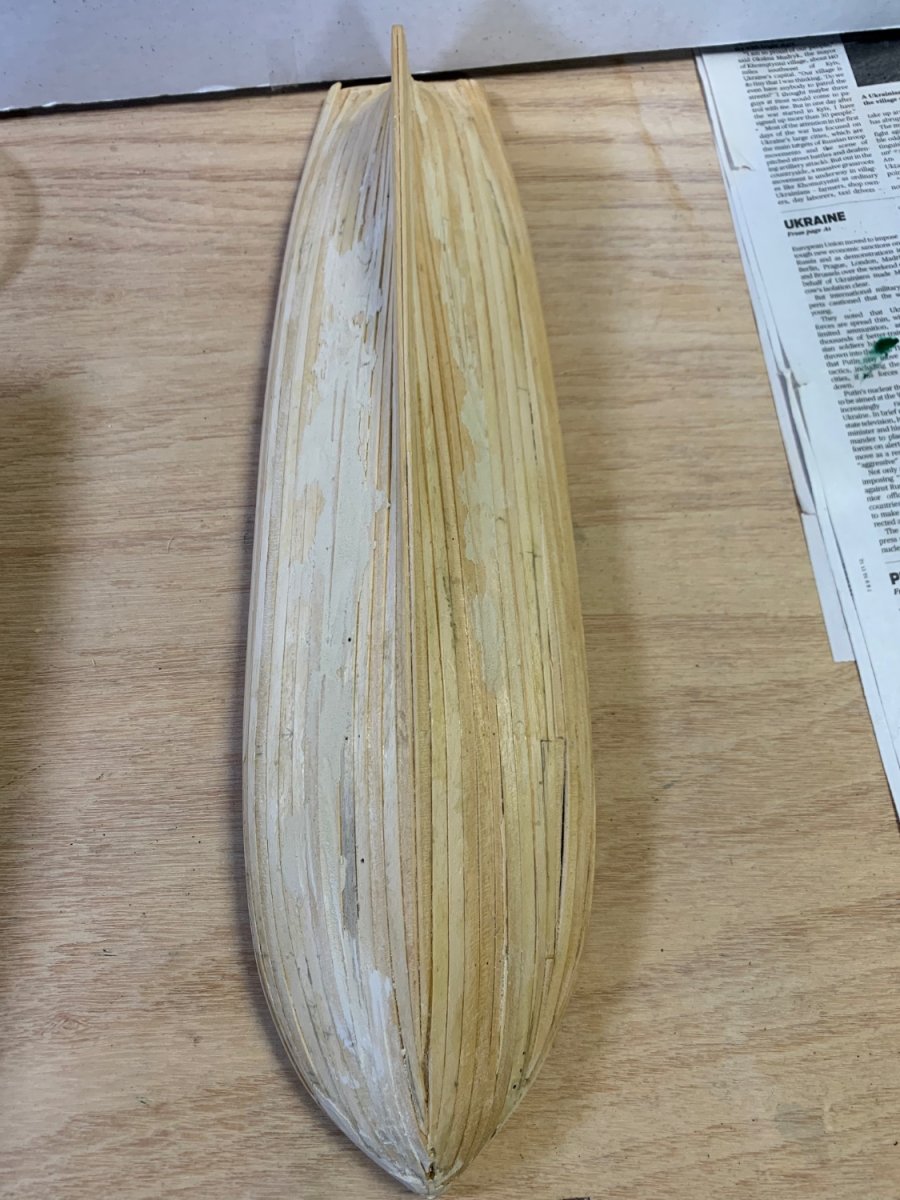
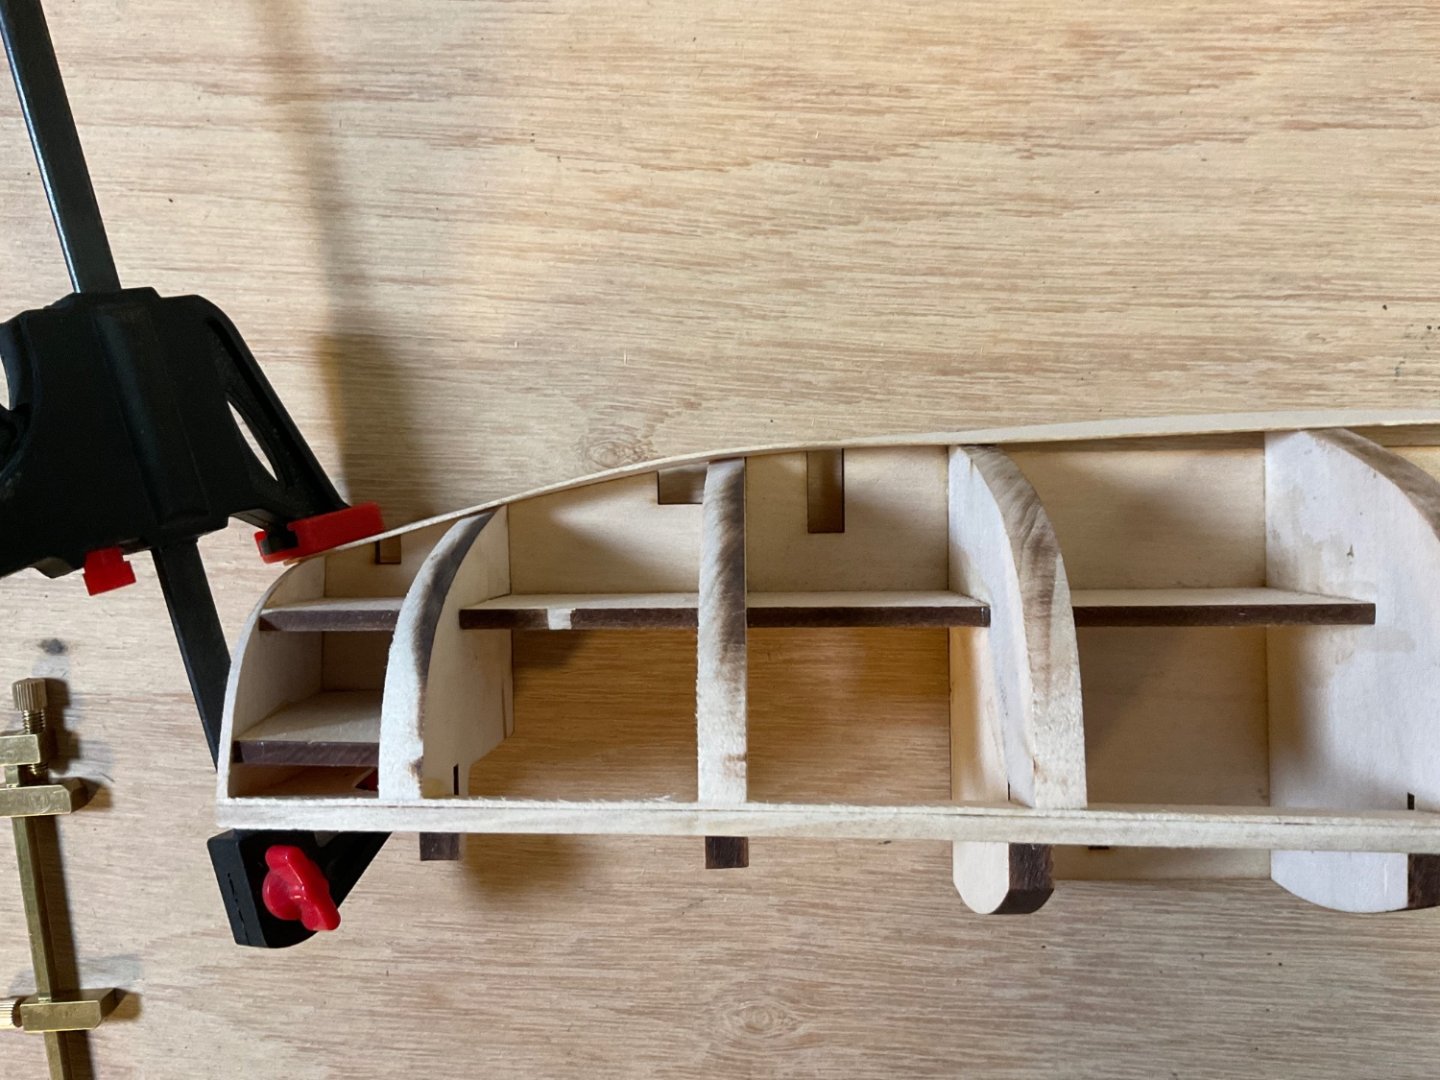
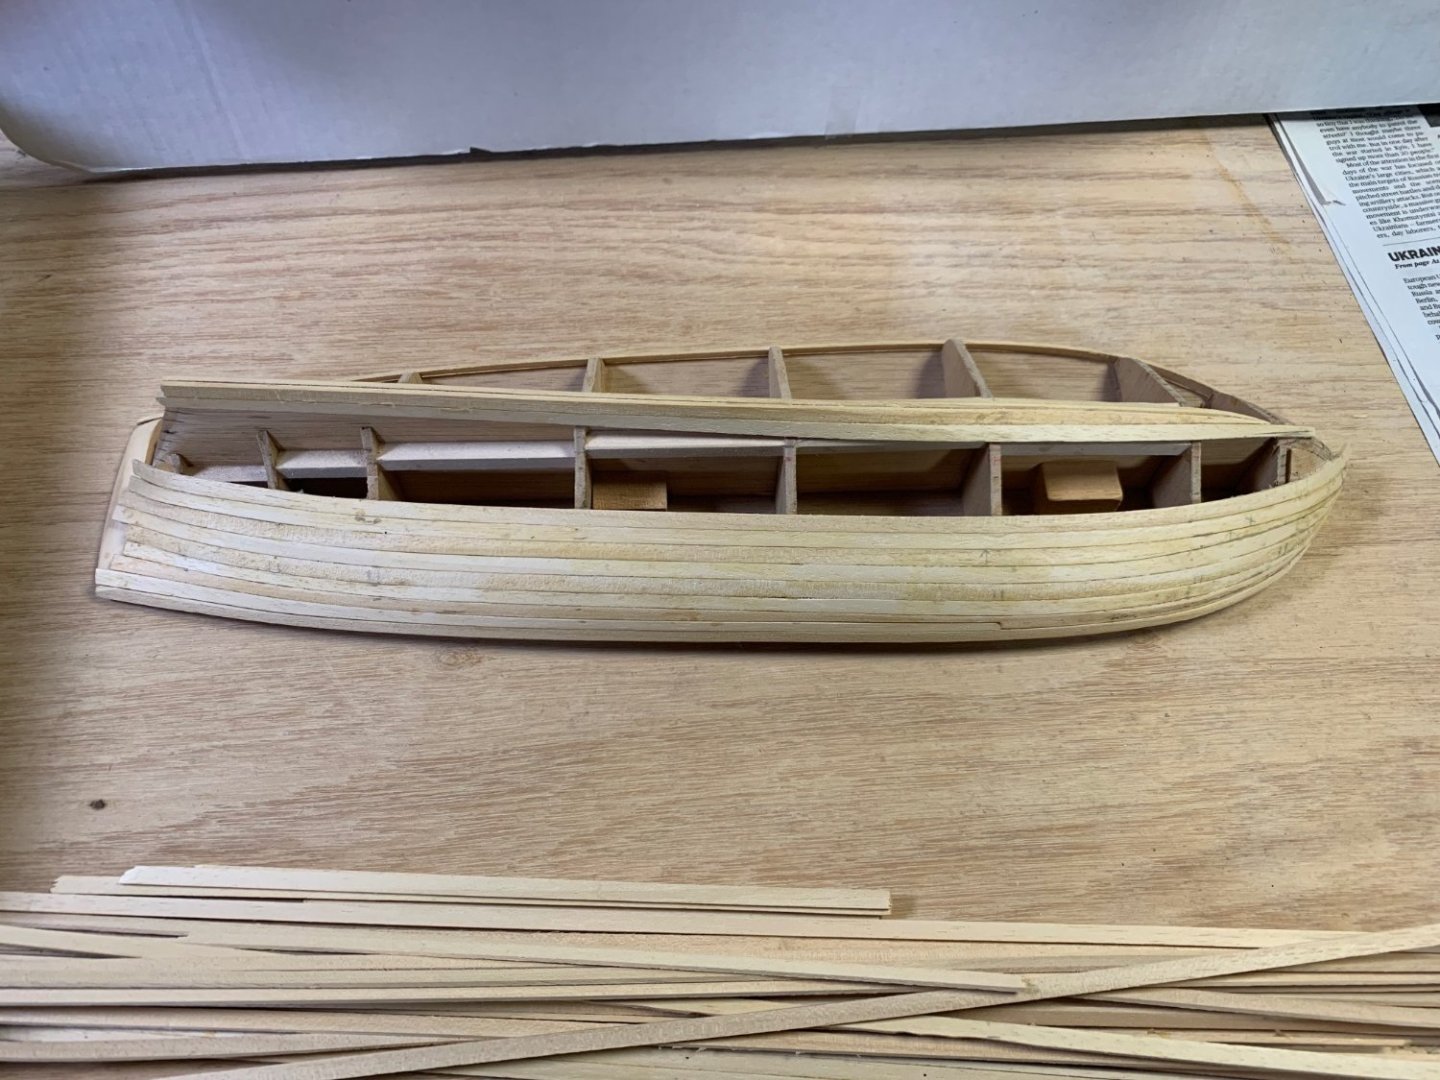
I've had this old AL kit in storage for a long time and thought it would be a good subject to improve my planking skillset. The box has a copyright date of 1978. I probably acquired it in the '80s. I got as far as putting the false deck on the bulkheads but that seems to be as far as I got prior to giving up in frustration many years ago. I am now working on tapering the keelson and frames to apply the bottom layer of planks. The drawings show a sharp taper is needed at the bottom before application of the bottom planks. This method is new to me as previously I have used the rabbet method on other builds.