Peter6172
-
Posts
182 -
Joined
-
Last visited
Content Type
Profiles
Forums
Gallery
Events
Everything posted by Peter6172
-

EURYALUS 1803 by Peter6172 - 1:48
Peter6172 replied to Peter6172's topic in - Build logs for subjects built 1801 - 1850
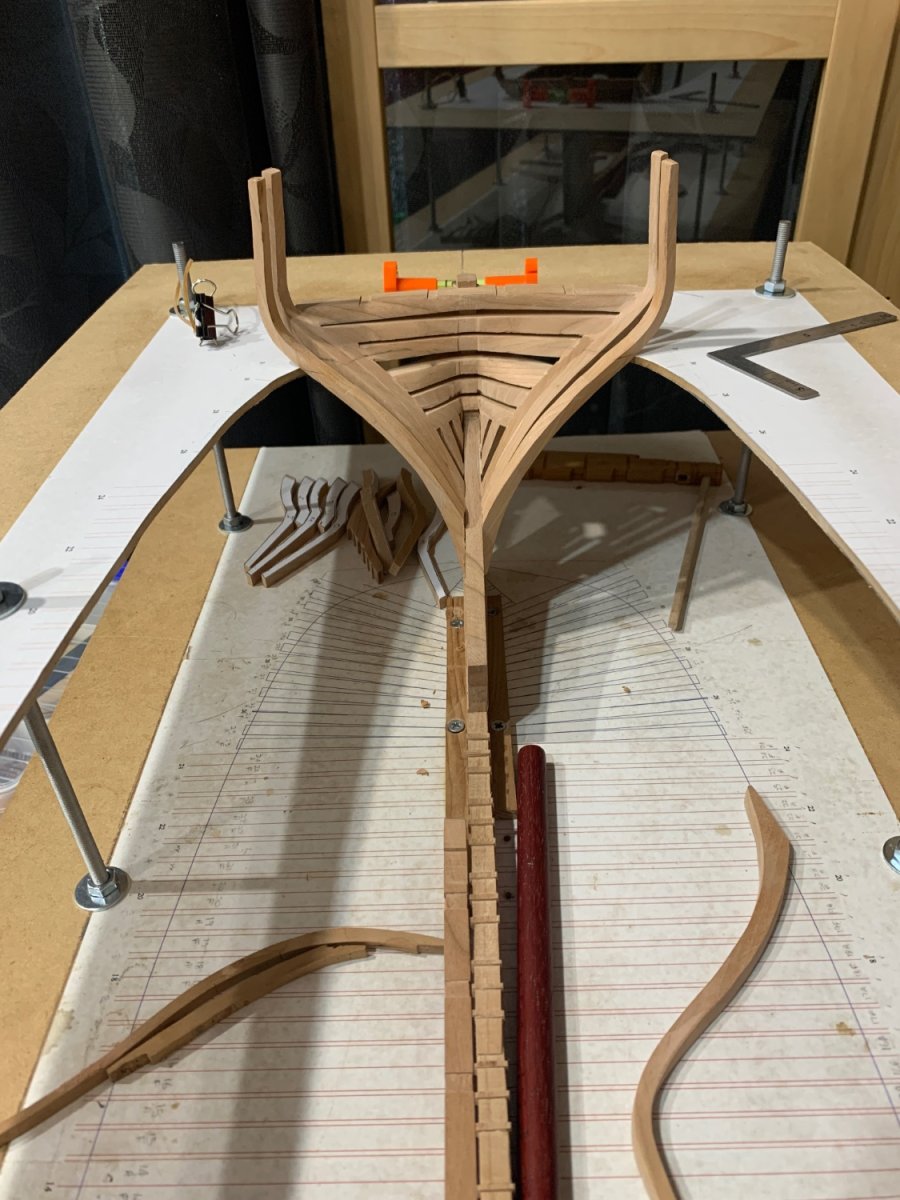
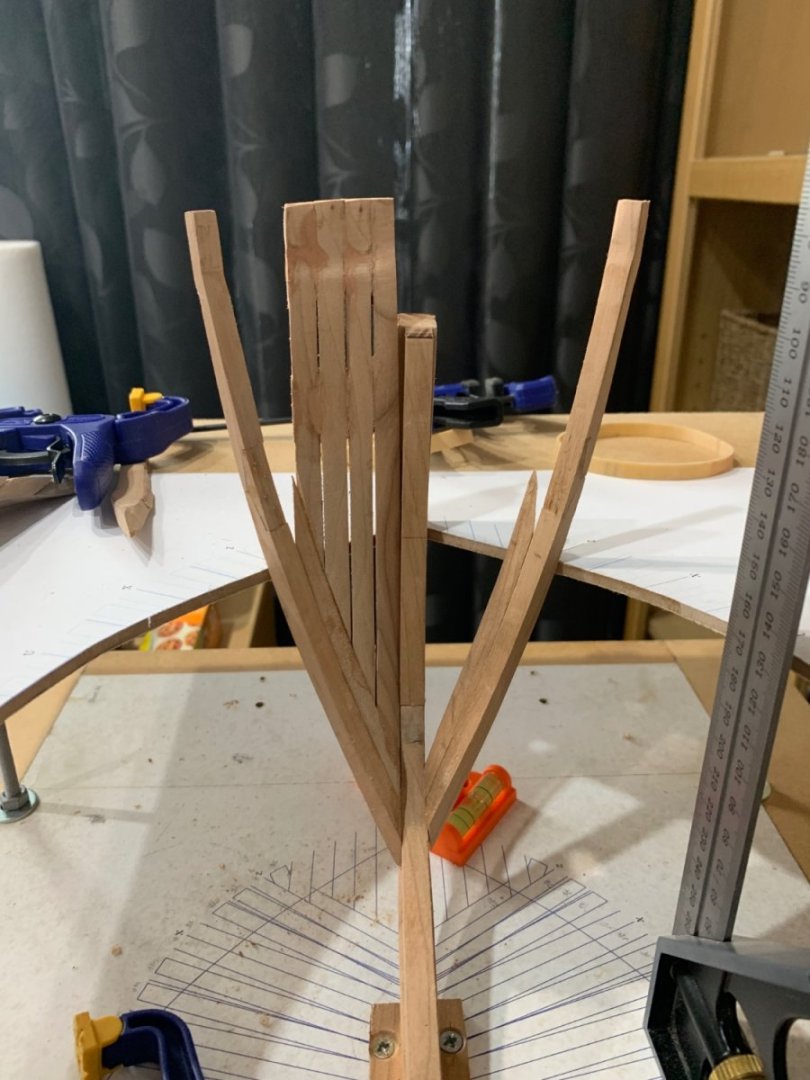
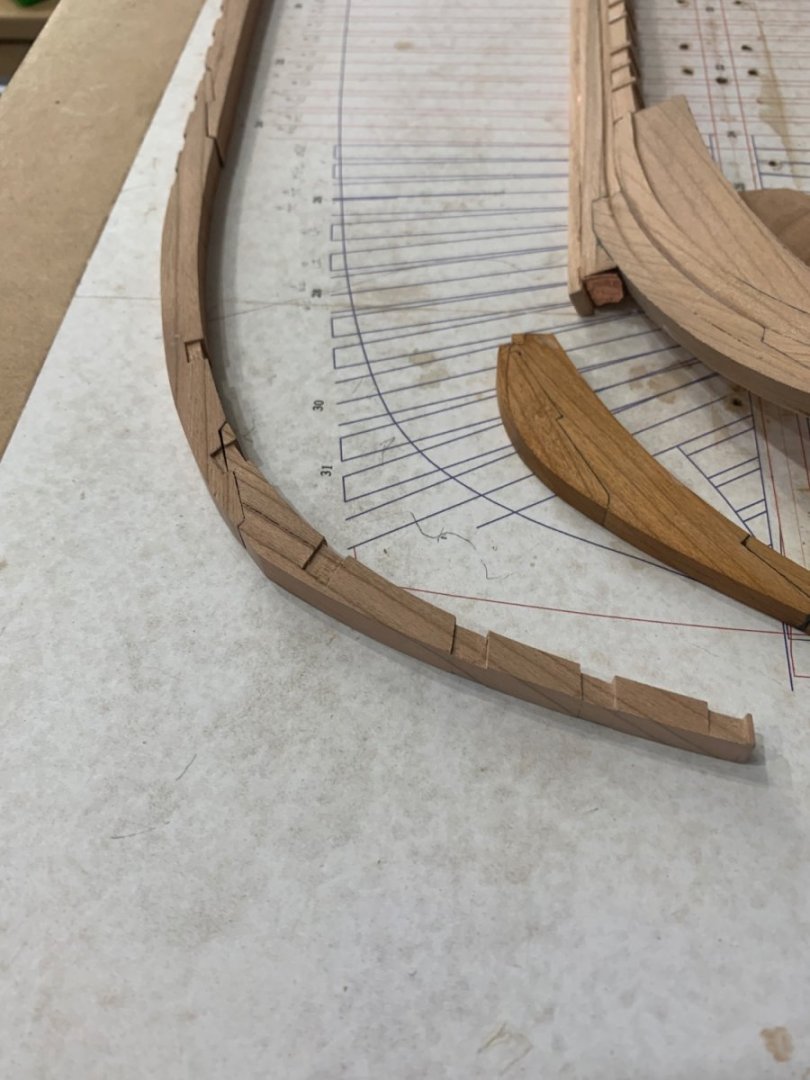
Have made some progress with the reorganisation/refitting/remaking of Bollard and Hawse pieces and forward cant frames. Have made and fitted port cant frames Zf, Za, Yf, Ya, Xf, Xa with Wf ready to fit. Starboard side has only Za fitted. Need to remake Hawse piece #4 port and starboard and Zf for the starboard side. These splintered during disassembly.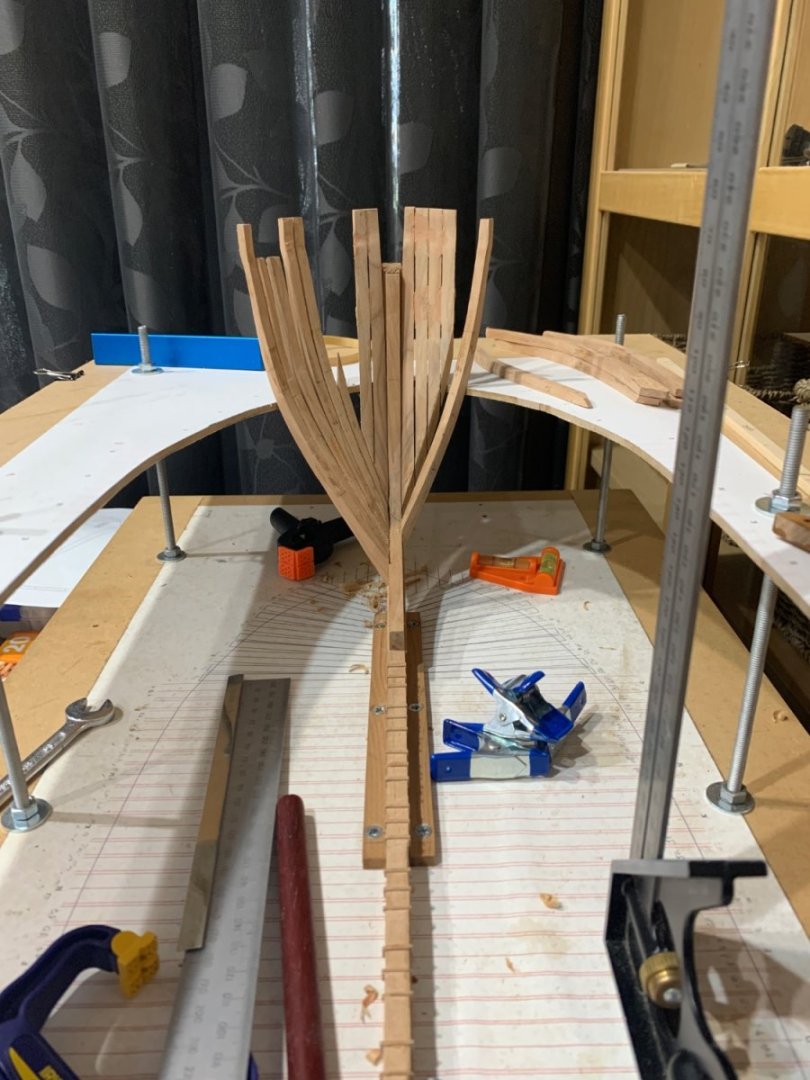
-
EURYALUS 1803 by Peter6172 - 1:48
Peter6172 replied to Peter6172's topic in - Build logs for subjects built 1801 - 1850
Well after hours of procrastination, I finally decided I was not happy with how the bollard/Hawse pieces were fitted to the stem so they were all removed. I had considered just sanding them back to get a neat fit but then decided that if I chose not to plank then I really did need them to fit properly relative to the already cut rabbet. I need to examine how the Bollard piece fits the stem and will need to mark the pieces with the Reference Line mark so that I can fit them up knowing where they should fit in relation to the stem and the rest of the frames. I will refit frames Zf and Za before I embark on the Bollard/Hawse pieces but this time make sure that the frames are perpendicular and not slanted aft (caused by the previous poor fit of the pieces). -
EURYALUS 1803 by Peter6172 - 1:48
Peter6172 replied to Peter6172's topic in - Build logs for subjects built 1801 - 1850
Getting on with fitting the Bollard/HawsePieces as well as Frames Zf and Za. Had all sorts of difficulties envisioning the way the Bollard/Hawse timbers fitted the stem and Frame Zf so I decided to make and fit Frames Zf and Za first so I could see the gap in which the Bollard/Hawse timber pieces went. This was simplified further by assembling Bollard and Hawse timbers 1, 2 and 3 leaving Hawse Piece 4 to fit later with the filling piece. While things were drying, I got on with finishing the assembly of Frames 23a, 23f, 22a and 22f and started assembly of Frames 21a and 21f. I also need to finish scrolling out Frames 0 thru 10, the start cutting templates for the front end of the ship. I also finished the preliminary fairing internally and externally off the aft end of the ship. I employed Dremel's 60grit 30mm diameter sanding disk for this mounted in my Ryobi R18RT rotary tool. It has more power and lasts longer than my Dremel 8220 and a slightly smaller handpiece.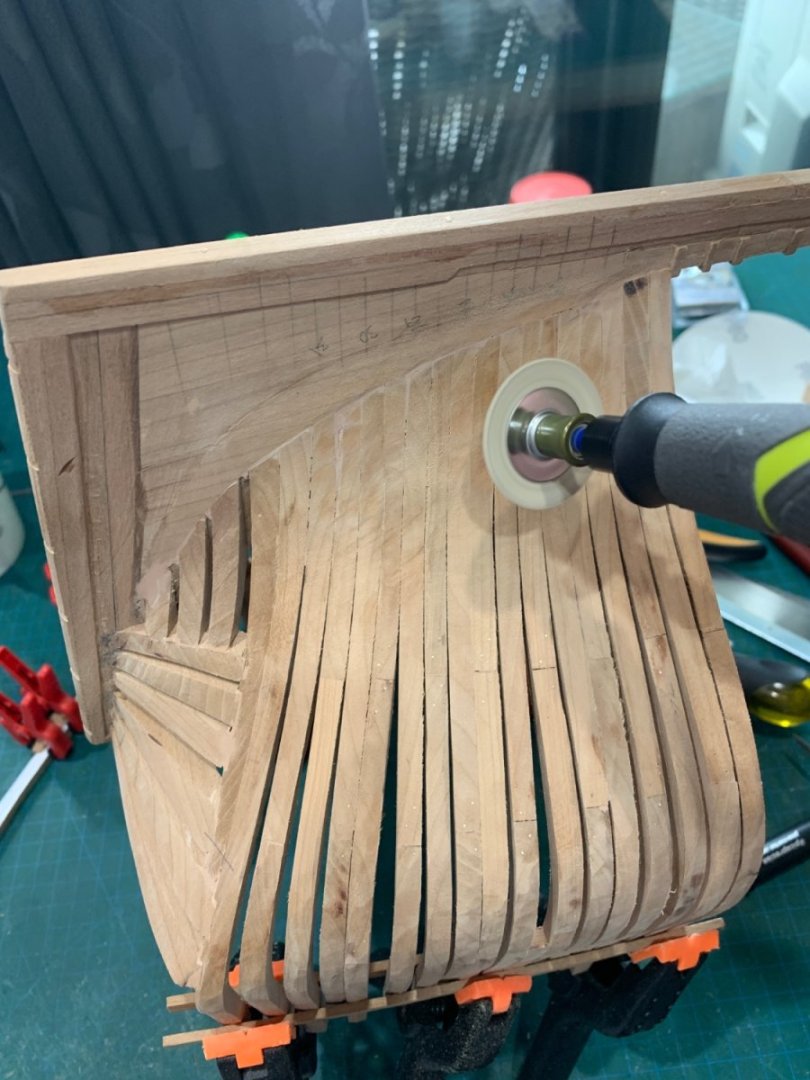

-
EURYALUS 1803 by Peter6172 - 1:48
Peter6172 replied to Peter6172's topic in - Build logs for subjects built 1801 - 1850
I made up a wood base to secure the pieces to using washer head screws. I then slid the base piece under the mill by hand (just like a router really) to mill out the slots. Obviously I had to leave some on the toe so that there was a flat surface to do the other side on Hawse 1, 2 and 3. I then simply shaved these raised ends with a chisel. The real test for me is glueing the pieces together as there was no real way to clamp it up. -
EURYALUS 1803 by Peter6172 - 1:48
Peter6172 replied to Peter6172's topic in - Build logs for subjects built 1801 - 1850
Mark. It's come to my attention from other modellers here that perhaps you have relocated me to the wrong sub heading. Perhaps my build log should be in the scracthbuilds of 1801 - 1850 section? -
EURYALUS 1803 by Peter6172 - 1:48
Peter6172 replied to Peter6172's topic in - Build logs for subjects built 1801 - 1850
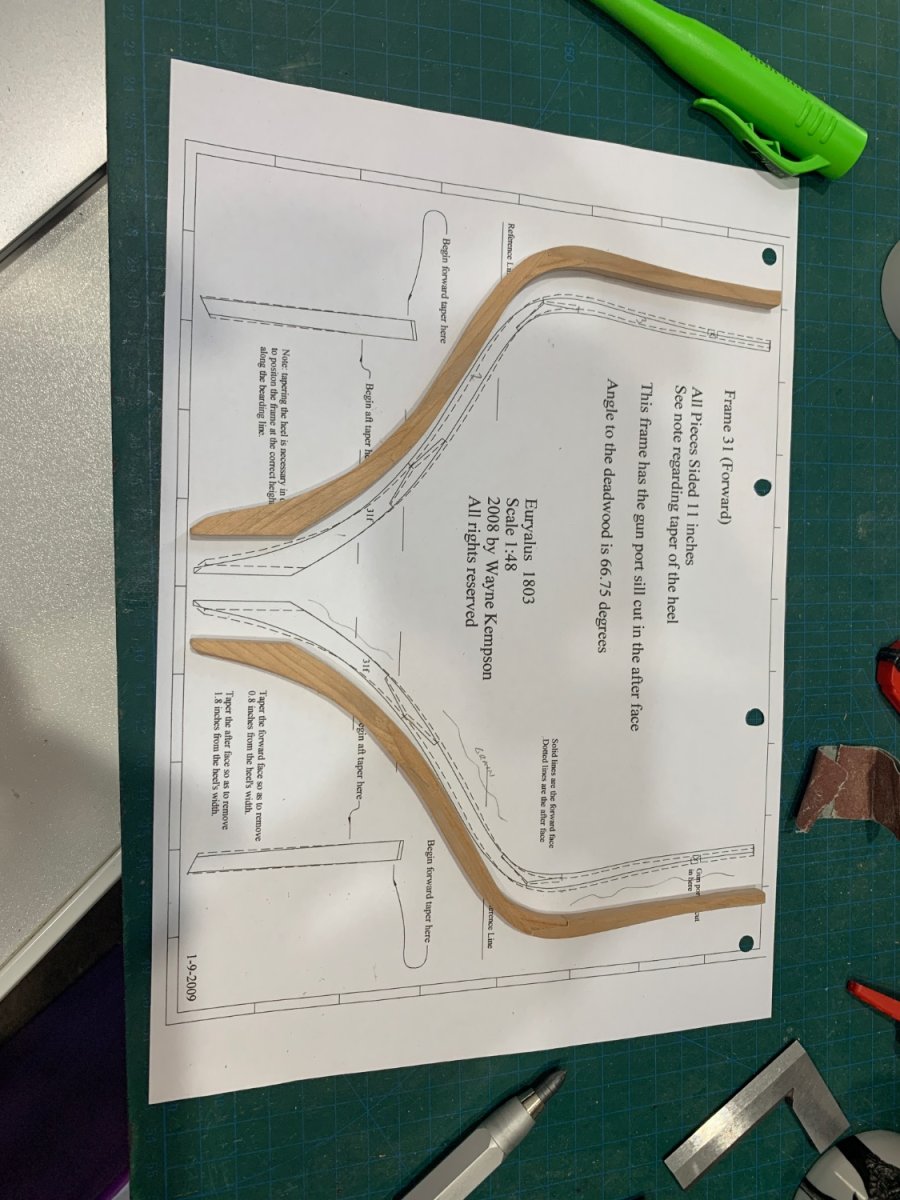
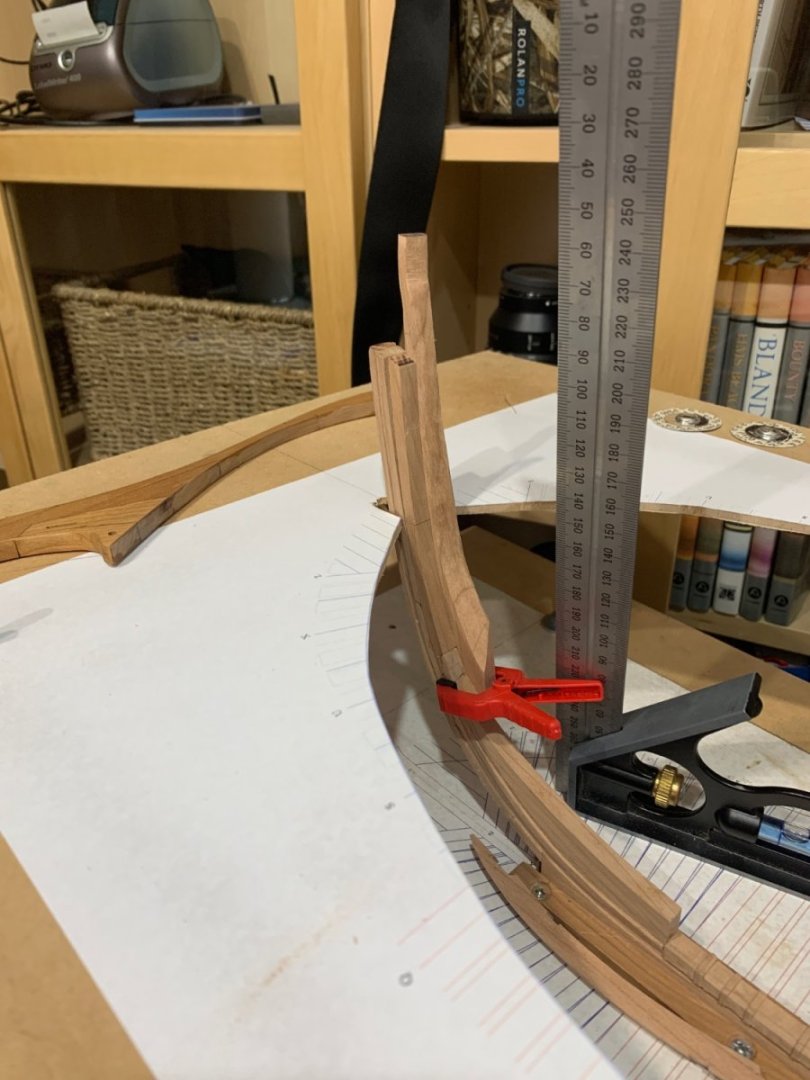
Issues with my Bollard and Hawse pieces resolved. I misinterpreted the plans by making assumptions about how they were shaped based on how the frames were made: i.e. fwd/aft faces flat, athwartship faces tapered. The Bollard/Hawse pieces are fwd/aft tapered with athwartship flat. STBD side done and ready for milling out the air slots and drilling hawse holes. Frame Zf sits next to it waiting final fitting once the Bollard/Hawse pieces are assembled.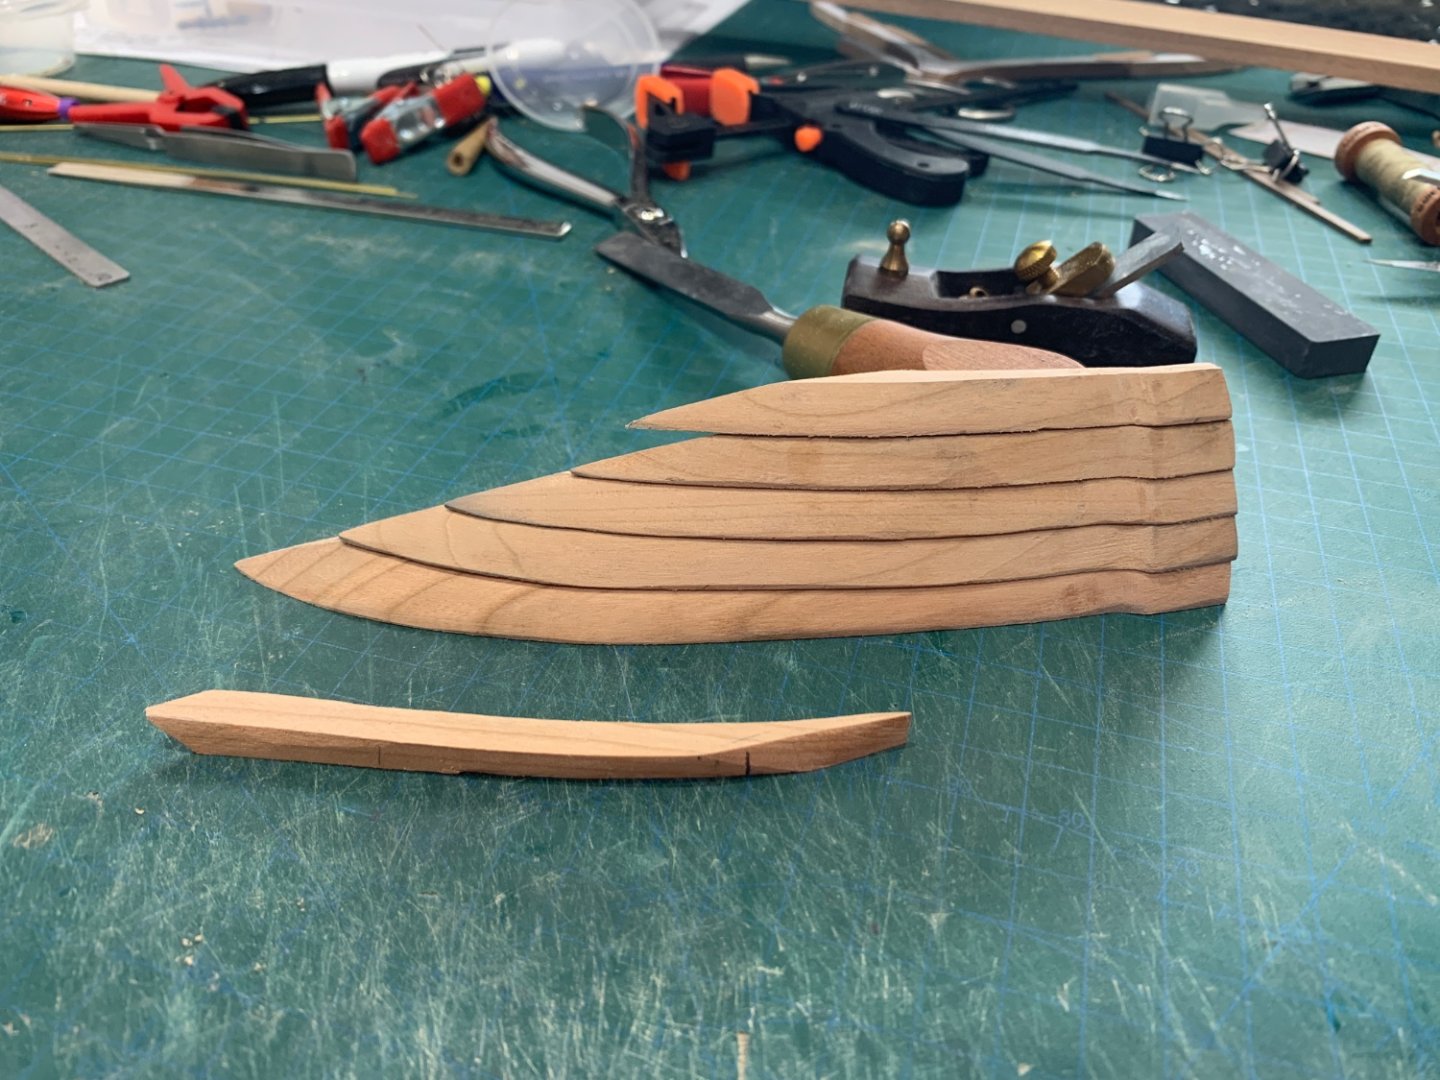
-
EURYALUS 1803 by Peter6172 - 1:48
Peter6172 replied to Peter6172's topic in - Build logs for subjects built 1801 - 1850
Having some difficulties with the Bollard and Hawse pieces. I templated and cut them out but after shaping one side, I think I have misinterpreted the drawings as they don't go together correctly. I think I know where I went wrong but have sort guidance from Allan and Wayne to set me right.


-
EURYALUS 1803 by Peter6172 - 1:48
Peter6172 replied to Peter6172's topic in - Build logs for subjects built 1801 - 1850
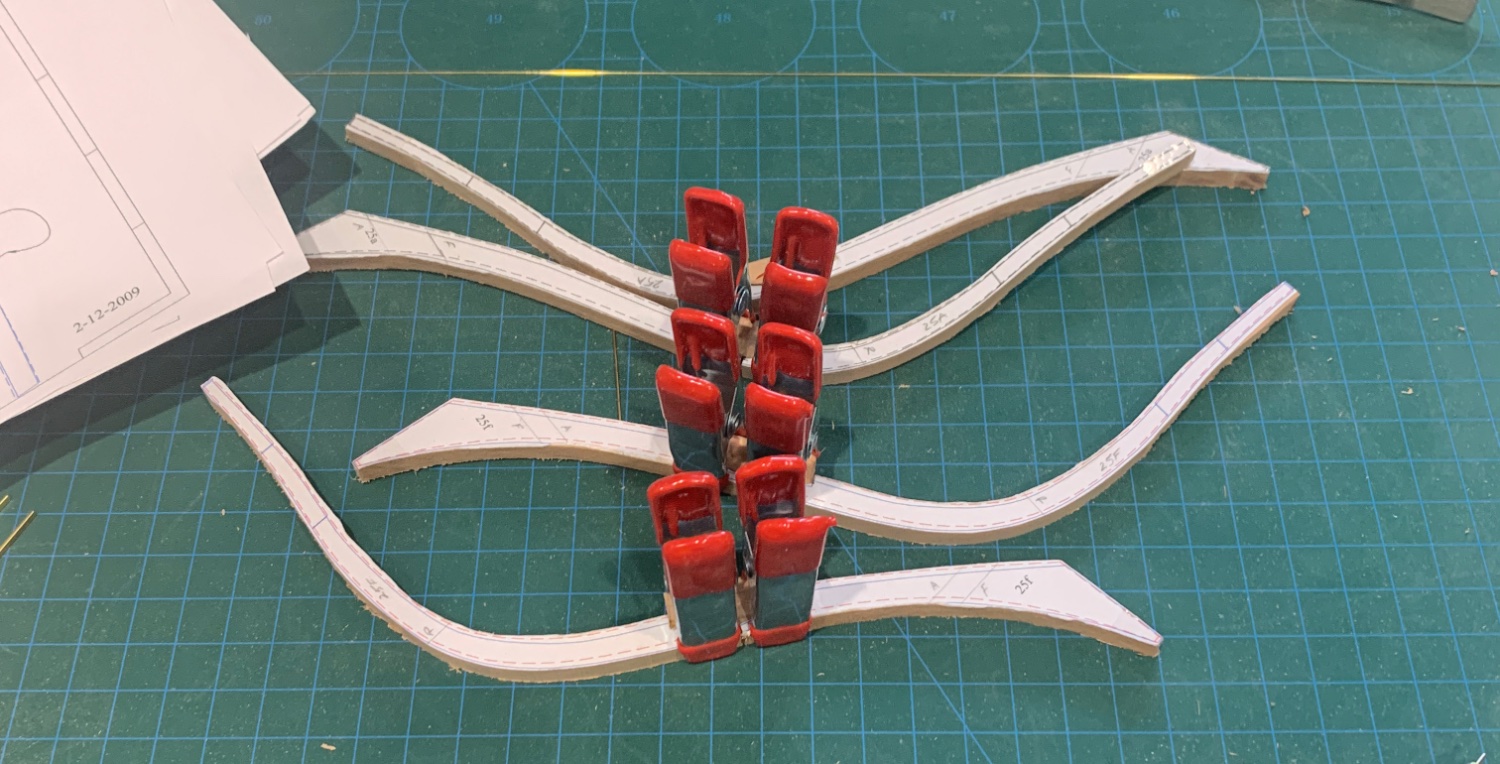
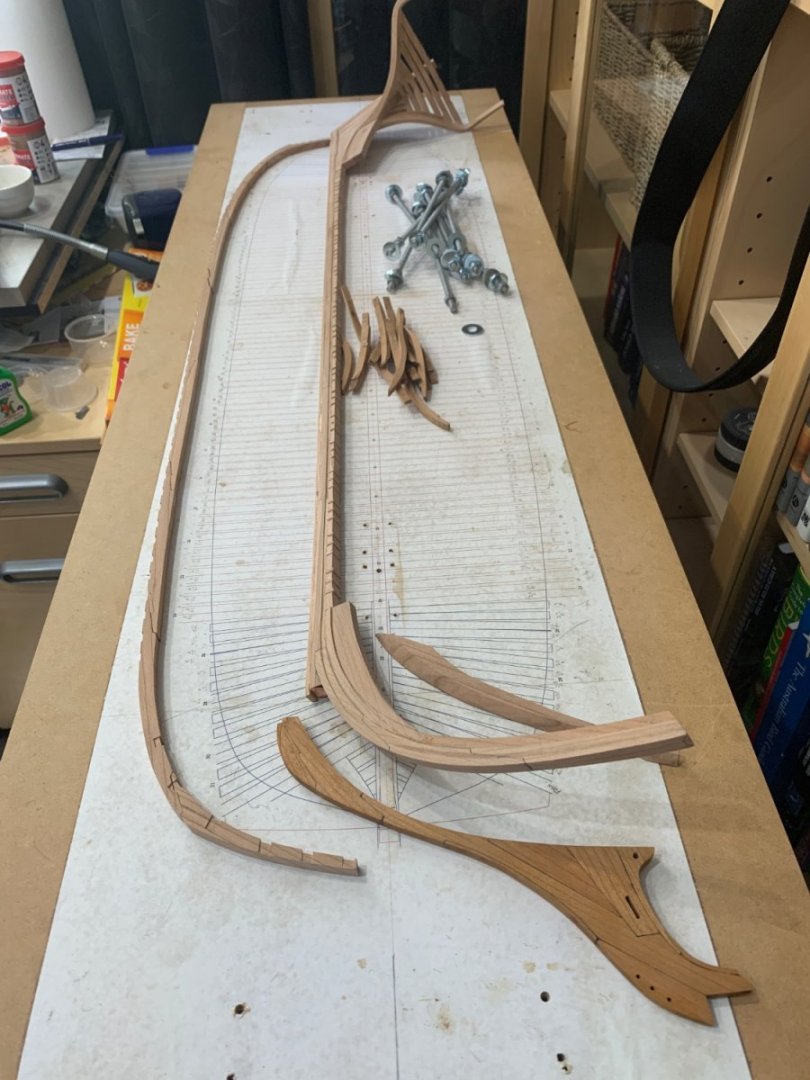
So all the aft cant frames are in as well as the first full frames 24a and 24f. I have also dry fitted 23a as well as Keelson 6 and the sternum knee to see how things are progressing. Some minor fitting to be done between 23a, 24f and the keelson to neatly fit the taper. I have also done a preliminary fairing of the frames from transom to 24f and all looks well so far. I am now turning my attention to the bow with the bollard and hawse pieces to be scrolled out today as well as frames Va and Vf.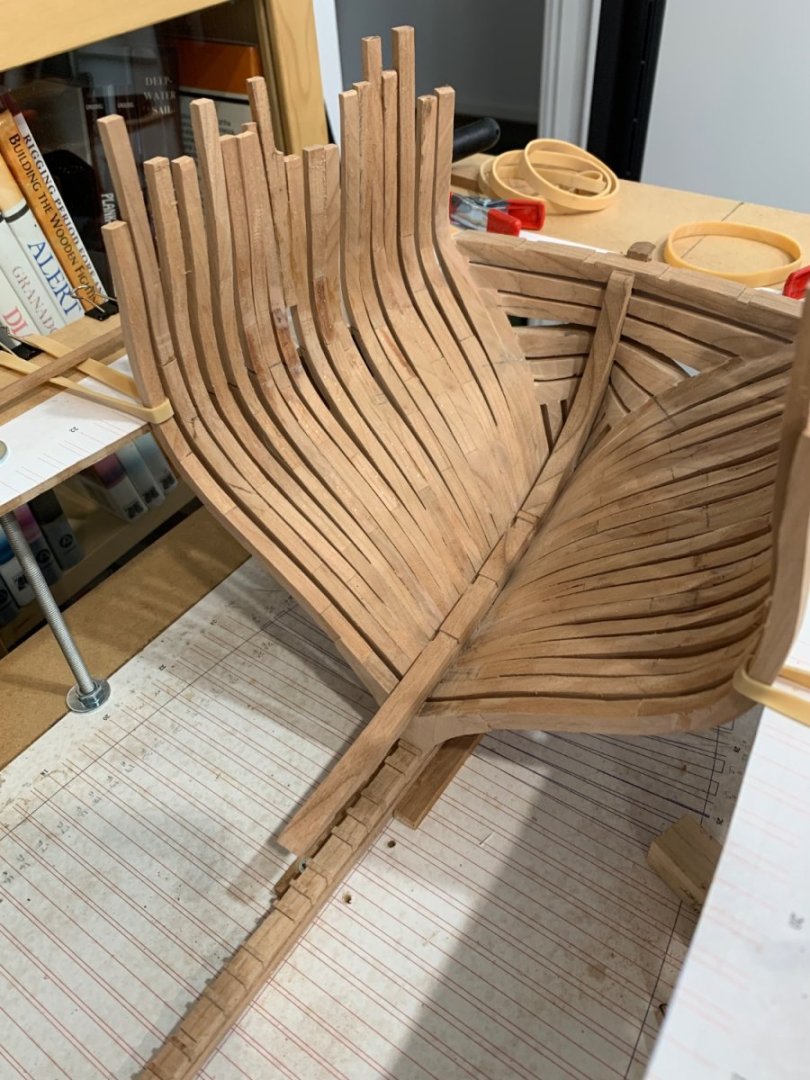
-
EURYALUS 1803 by Peter6172 - 1:48
Peter6172 replied to Peter6172's topic in - Build logs for subjects built 1801 - 1850
Ahhhh. Next disaster. In a rush to install cant frames 27A/F and 26A/F the clamp holding the heels to the deadwood was applied too harshly and the frames slid up the deadwood overnight. Things looked a little off this morning when I checked the reference marks and the tops of the frames relative to their Port counterparts. 2mm appeared at the beading line so off came the frames. thee were damaged in removal so three new frames have to be made. Lesson: Take your time and make sure the timbers you clamp are clamped in a way that they cannot move out of alignment as glue can be a good lubricant at the timber/timber interface. -
OK team, I have put this build on hold as I have taken possession of the EURYALUS from a modeller who has now passed away. THUNDERER will be the next cab off the rank.
-
Work has finally recommenced on BOUNTY with the arrival of more pear timber. I purchased 2mm sheets of pear so I could properly spile the bow planks rather than steam bend and force edge set the planks. I have managed 7 planks below the whales fitted in the bent and edge set manner so 8 and below will be undertaken with proper spiling.
-
EURYALUS 1803 by Peter6172 - 1:48
Peter6172 replied to Peter6172's topic in - Build logs for subjects built 1801 - 1850
Have completed installing Port side aft cant frames. Just need to install the starboard 27A & F, 26A & F and 25 today then 24A & F full frames (shown dry fitted) and I will stop to do some internal and external fairing to make sure I am still on the right path. The first of the Bollard Pieces and been made and dry fitted to the stem.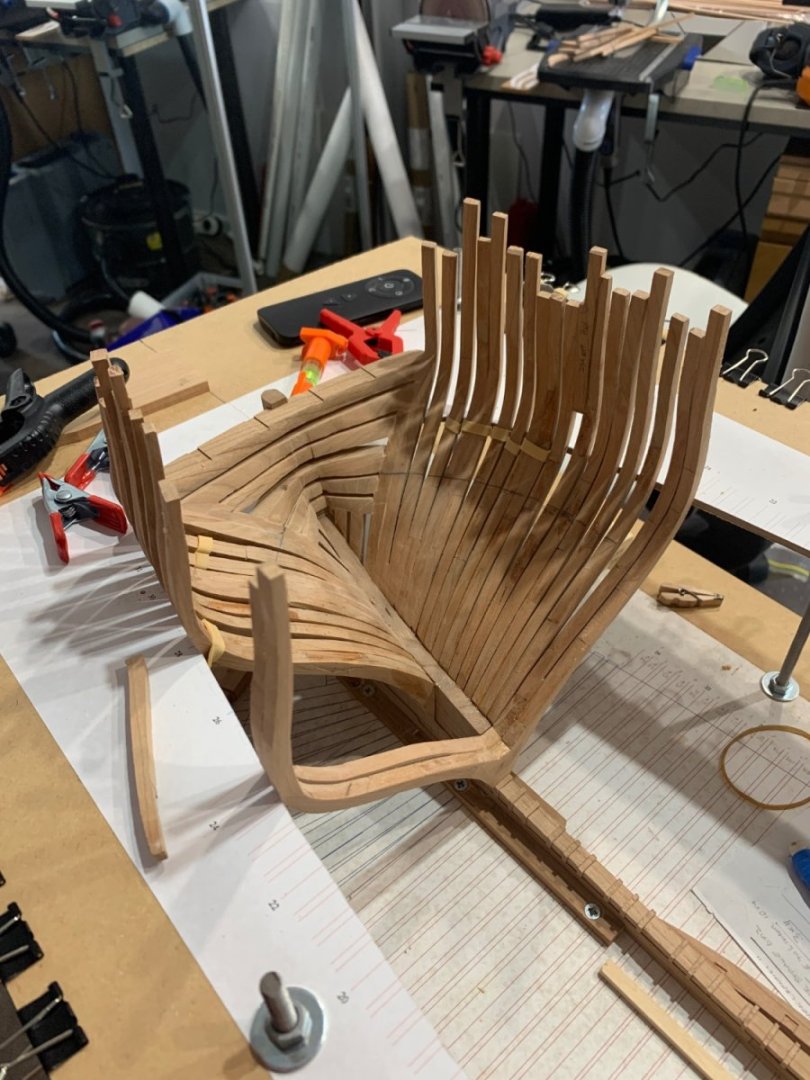
-
EURYALUS 1803 by Peter6172 - 1:48
Peter6172 replied to Peter6172's topic in - Build logs for subjects built 1801 - 1850
Still have bunch of cant frames to install (now they are all made) but I wanted to test fit my first full frames (24A and 24F) to see their fit on the rising wood. Nicely surprised to see them slot in with a little push. They are all clamped in against the deadwood to make sure that their alignment is true at the keel and reference board.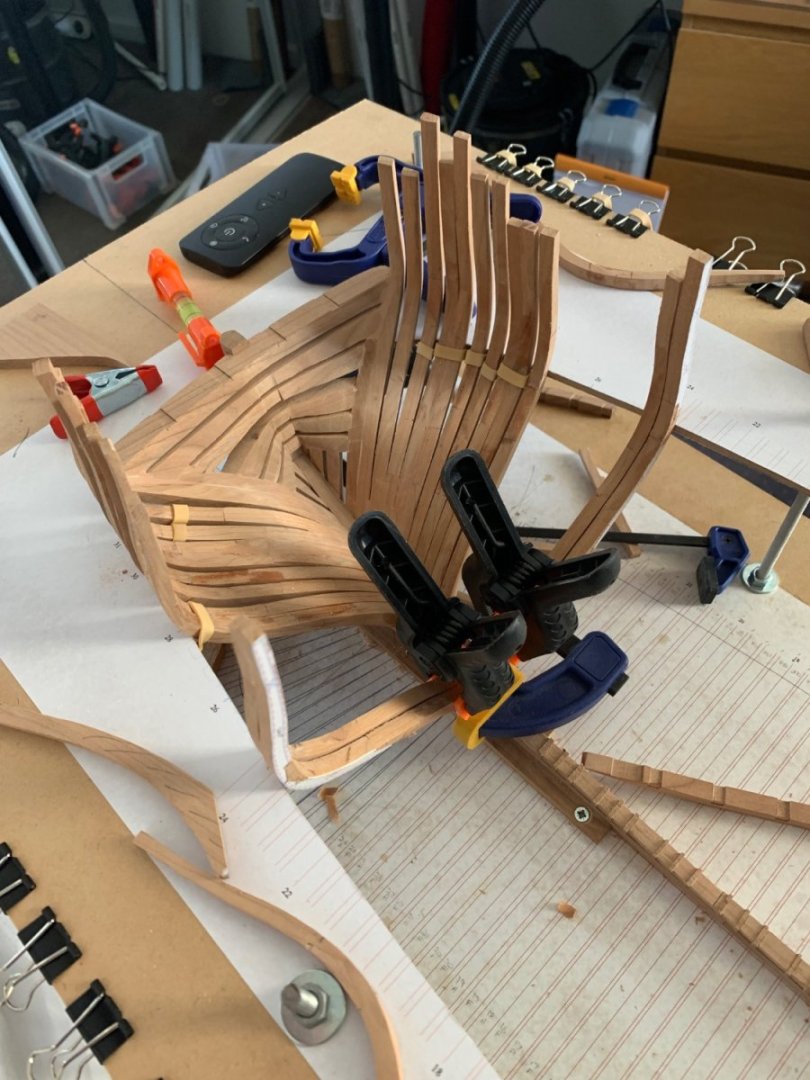
-
EURYALUS 1803 by Peter6172 - 1:48
Peter6172 replied to Peter6172's topic in - Build logs for subjects built 1801 - 1850
So, all the aft cant frames are fabricated; some still need pre-fairing and tree-nailing. 29F is being glued in so I should get to the straight frames by the weekend (touch wood)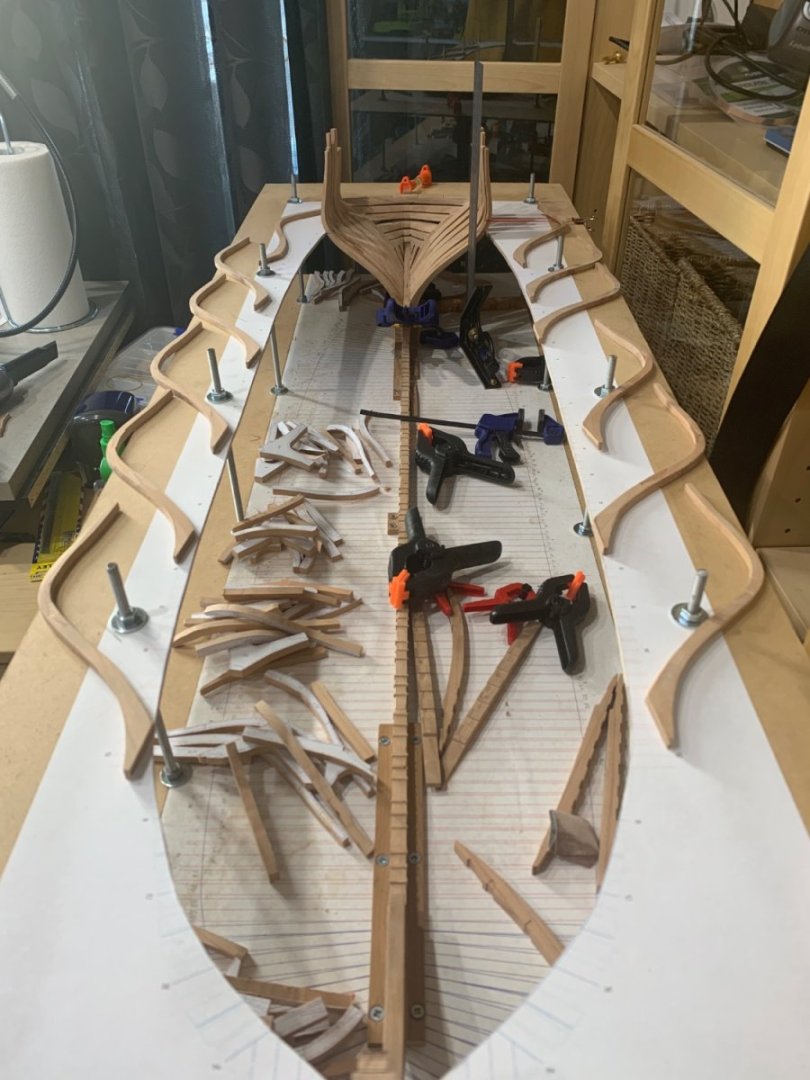

-
EURYALUS 1803 by Peter6172 - 1:48
Peter6172 replied to Peter6172's topic in - Build logs for subjects built 1801 - 1850
Well I am back to where I left off before discovering the issue with the starboard can't frames. I have done some further fairing by hand held sandpaper to see that the alignment is true on the inside. If it's right on the inside, the small extra on the outside should fair in nicely. I picked up the issue when I noticed that Frames 30A and 30F albeit correctly aligned on the reference board, were not vertical as they rose above the reference board. The way I have the building board position, I get a perfect view of the port frames but only a side on view of the starboard frames so I will need to move the trolley out into more open space when fitting the frames to get a better view from all angles.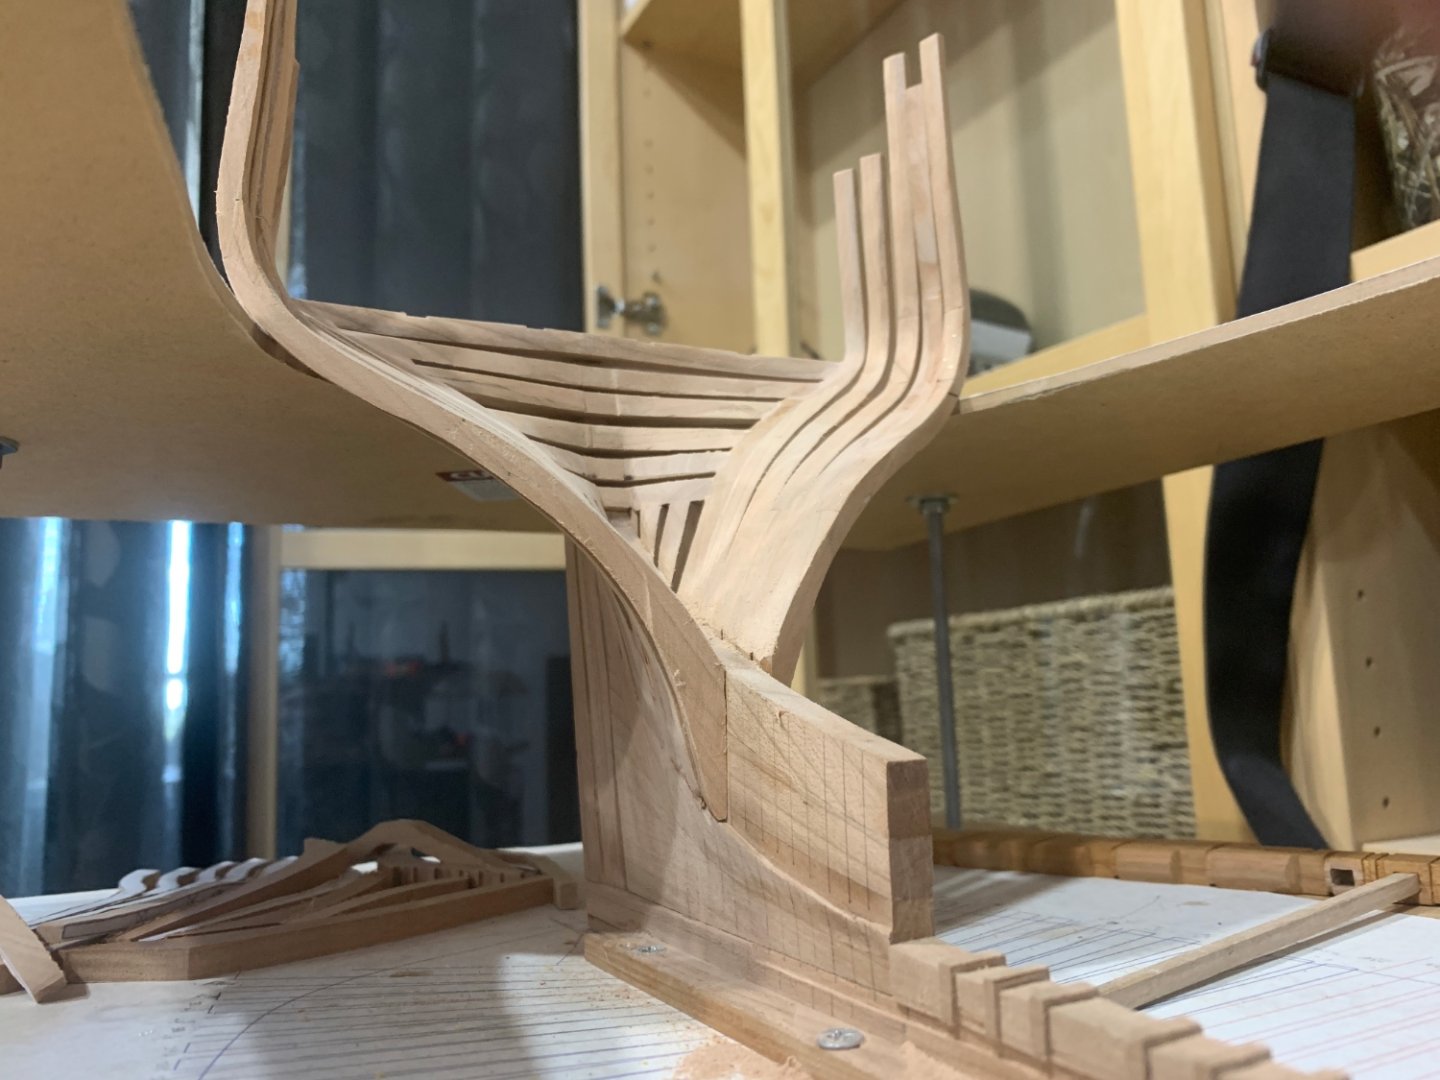
-
EURYALUS 1803 by Peter6172 - 1:48
Peter6172 replied to Peter6172's topic in - Build logs for subjects built 1801 - 1850
Ah, Disaster. Realised I was aligning the foot of the frames at the deadwood to the wrong frame line (1/2 frame out). It appears I failed to taper both sides the foot of frames at Station 31A&F and 30A&F on the starboard side. I managed to remove 30A and 30F with little damage the foot of the frames or the deadwood thanks to a very sharp thin blade and the fact the glue had not full cured. I am in the process of cleaning up the feet to the right taper on both sides and then check the alignment at the deadwood as well as the reference line. Lesson: Need to work out a sequence to make sure all the parts are cut, assembled with chocks, tree nailed, pre-faired then tapered before removing the template and cleaning up the frame for installation. I recall that Talley Ho had one of those check off boards on the wall of the workshop to make sure all the frames went through all the stages of preparation prior to installation. -
EURYALUS 1803 by Peter6172 - 1:48
Peter6172 replied to Peter6172's topic in - Build logs for subjects built 1801 - 1850
Thanks to Allan's suggestion, frame construction has speeded up to three frames per day. I had a 3/4" chisel in the locker in the apartment garage. I brought it up and sharpened it and it works ok. I need to work on the blade though as its not a clean edge (from past misuse?). I have finished installing Fashion Piece, 31A, 31F, 30A, and 30F with frames 29A, 29F and 28A assembled and waiting for treenails then installation. Frames 28F, 27A and 27F are cut out and waiting for chocks and glue-up. I also have frame components for frame stations 26, 25, 24, 23, 22, 21 and 20 cut and ready to go. Had one disaster with 29F port side. The 3rd futtock foot snapped when I was preparing it for the chock. This was the second frame where I was to use an original component from Russel's build but alas I realised it was just too close to the line for me to use and have some wiggle room for fairing. If I had to make one replacement component on that frame, I might as well make both futtocks. Oh yes, the bow piece has been tapered and given a coat of shellack (foreground). The rude too has been completed (timber wise anyway) and give a coat of shellack and a Tasmanian Oak tiller shaped and dry fitted (background).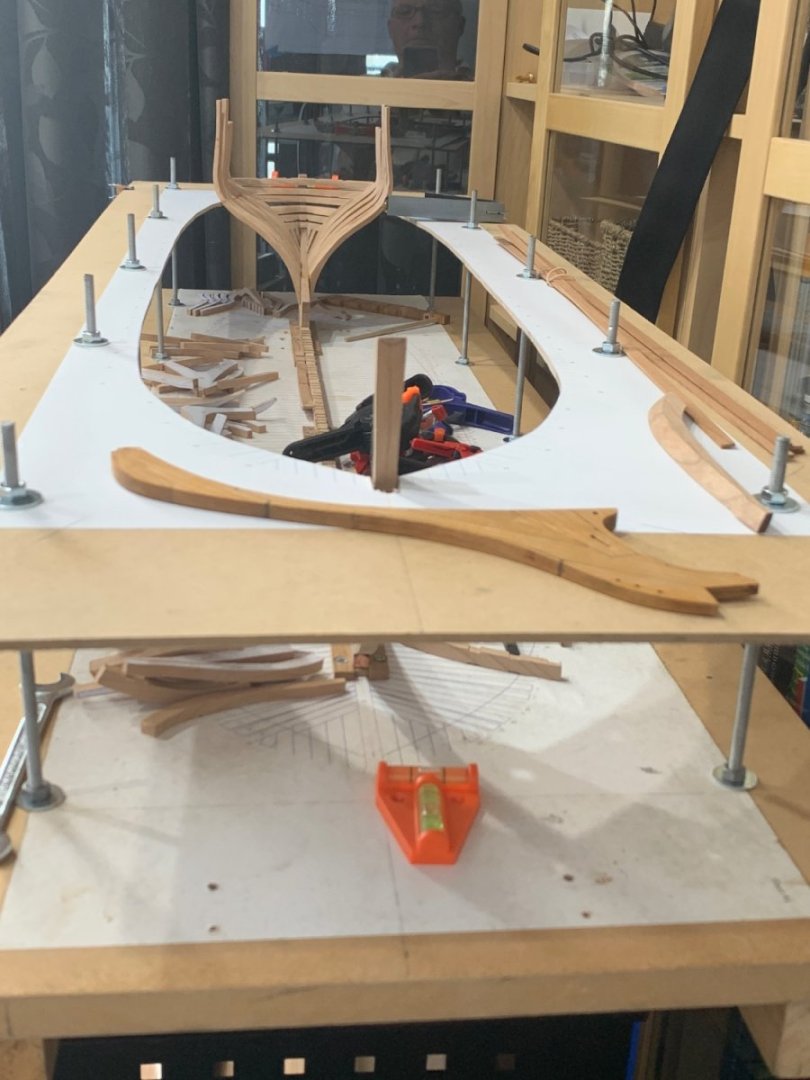
-
EURYALUS 1803 by Peter6172 - 1:48
Peter6172 replied to Peter6172's topic in - Build logs for subjects built 1801 - 1850
Allan, I have been making do with a 4mm chisel but I think I might have to invest in a 1/4" to make sure the chisel cuts are flat across the face of these bevels. That's why I'm using the 8mm diamond tapered flat file. I have David A's books so I will have to tae a break and read them.... -
EURYALUS 1803 by Peter6172 - 1:48
Peter6172 replied to Peter6172's topic in - Build logs for subjects built 1801 - 1850
Ok so framing is moving along at about 1 frame station a day. I think this will pick up as I'm working on the aft can't frames at present with F31A glued in a F31F ready to bevel the deadwood join. The chocks are a little more complicated then I originally thought as the bevel on the forward face differs to that on the aft face so a lot of careful fitting up with files is need to get the right fit.

-
EURYALUS 1803 by Peter6172 - 1:48
Peter6172 replied to Peter6172's topic in - Build logs for subjects built 1801 - 1850
I finally managed to get all the templates for the aft section of EURALUS peeled and stuck to the appropriate thickness cherry planks. I have also managed to get the reference board cut, drilled and mounted to the building board. Some weeks to do at each end is all that remains but I can get onto frame assembly and dry fitting to the keel now.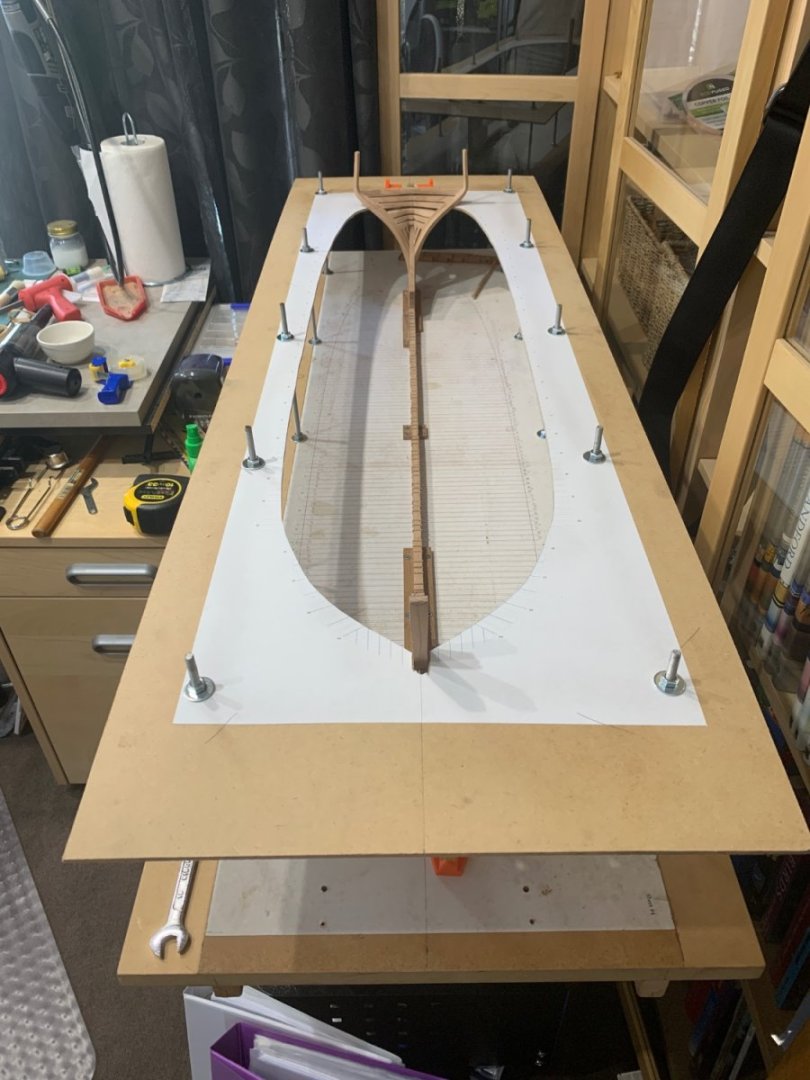
-
EURYALUS 1803 by Peter6172 - 1:48
Peter6172 replied to Peter6172's topic in - Build logs for subjects built 1801 - 1850
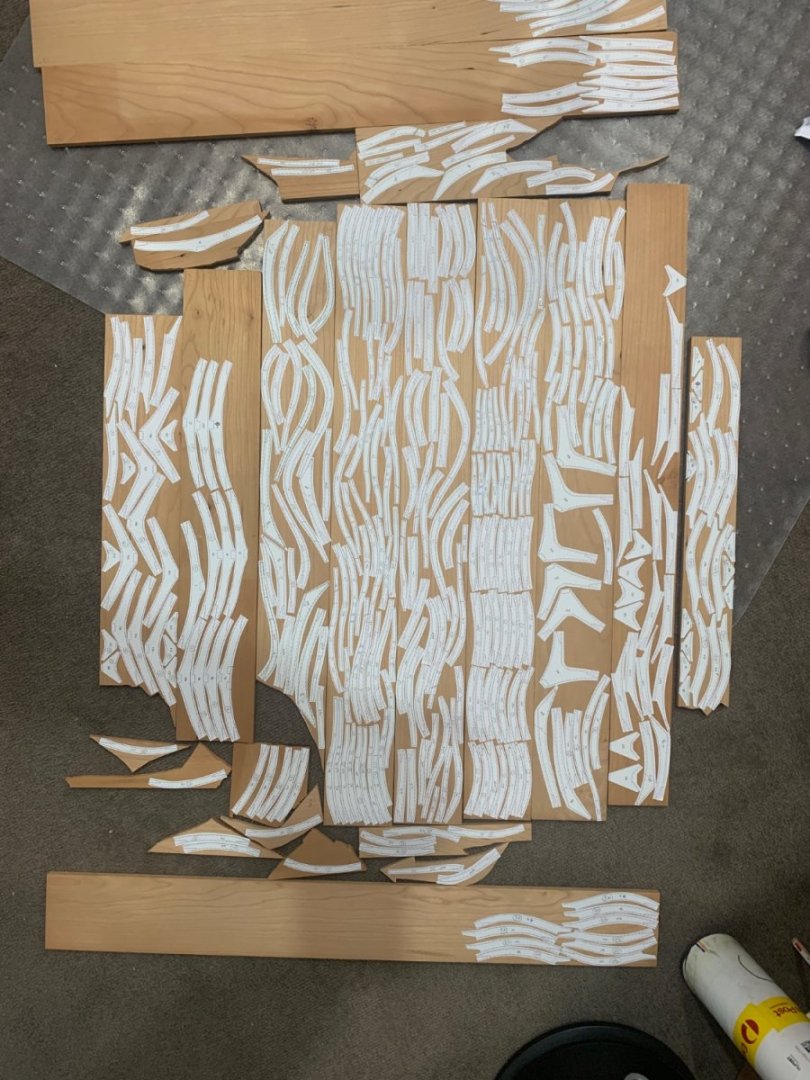
Wow, 2 days and I managed to print and cut out all the aft frame templates and get about 1/5 onto timber ready to saw. I guess this is the tedious part of fully framed model ships... that and trying to peal off the backing on the self adhesive label material..... Next job is to sort the templates into the appropriate material thickness piles before working out the best way to fit on the Cherry material.
-
Sorry about the lack of movement here team. I have been trying to source pear since cutting down the kits planks I am short about 50% of planking. Pear isn't available in Australia and I have tried a couple of European sources but have had some web issues so I finally had to go to the US (not that there's anything wrong with the US but postage is awful). Well Modellers Sawmill is going to fix me up with some pear that I can mill down to the sizes I need but I have to wait my turn in the production line. Could be a month or so before I get the timber and can finally finish BOUNTY's hull.
-
EURYALUS 1803 by Peter6172 - 1:48
Peter6172 replied to Peter6172's topic in - Build logs for subjects built 1801 - 1850
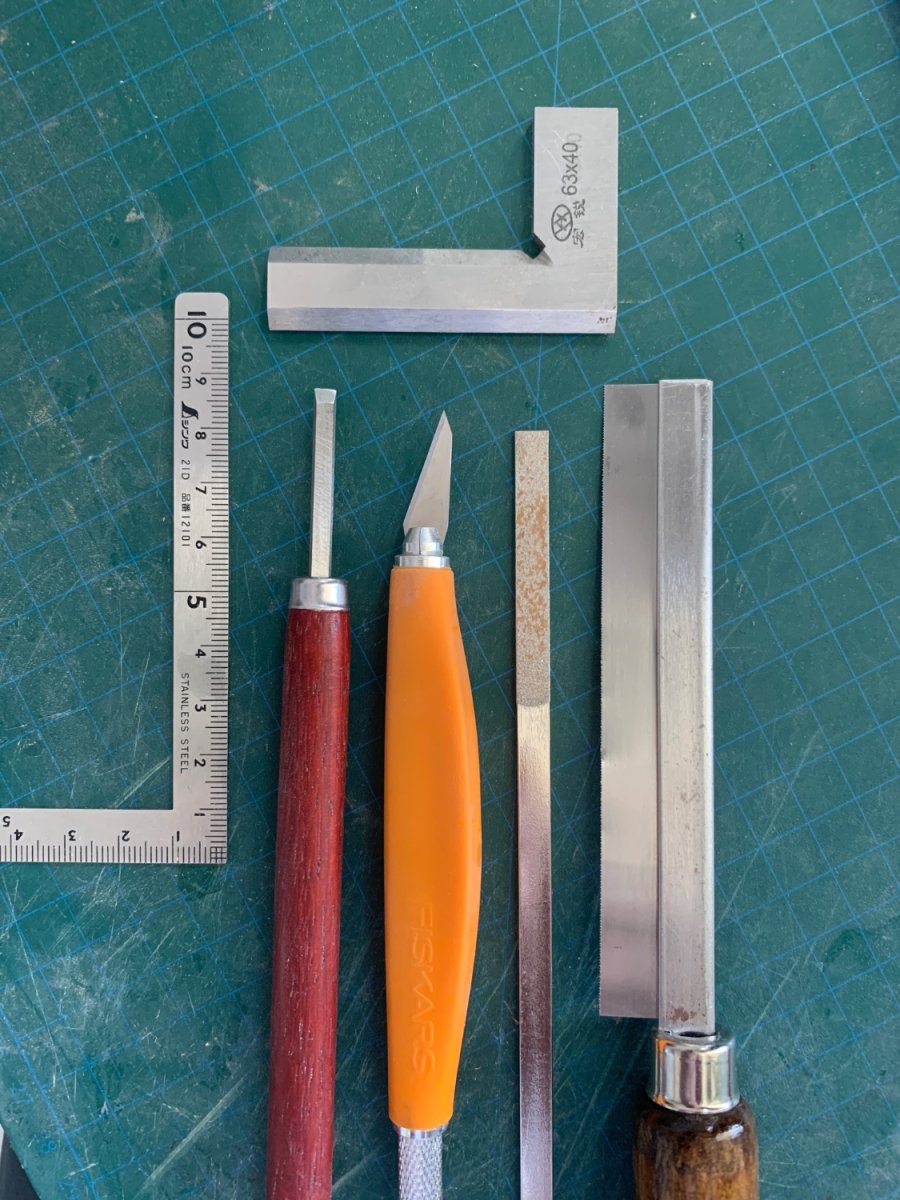
What a bummer. Glued the plans to the reference board and got ready to cut out the profile when I found out I no longer owned a jigsaw. I must have donated it before my move east from Western Australia to Canberra...... I have a small B&D jigsaw on the way so the Reference board will have to wait a little longer Well in the meantime I finished the Keelsons and fitted them up with the Stemson and Sternsom knee so all is ready to fit after framing is done. For those wondering (if any) what hand tools I have been using for the Rising Woods and Keelsons, refer attached photo. I score the lines of the template with a scalpel, including the cross timber lines before using the ultra fine razor saw to cut the depth. I then chisel the notches with a 4mm chisel (sharpened to 35º) and finish up with a diamond file. I use the chunkier square (which has a beveled "sharp" blade to check the notches are cut perpendicular to the sides of the embers using the "light behind the straightedge" technique.
-
EURYALUS 1803 by Peter6172 - 1:48
Peter6172 replied to Peter6172's topic in - Build logs for subjects built 1801 - 1850
I like the Dremel because of its small size. I am not sure however if it will last the project but blades are still readily available. At 75db its not too noisey (though it is the noisiest kit I have in the "workshop"). I get through about 30-40 cut pieces before the blades part. I think that's more to do with heat and fatigue as the blade dulls in the Cherry. I have 15 spares at present so that should keep me going for a while. -
EURYALUS 1803 by Peter6172 - 1:48
Peter6172 replied to Peter6172's topic in - Build logs for subjects built 1801 - 1850
Yes, I I still have 120 more frames to print templates and then cut and stick to timber then cut out the 600ish parts......... These ships are long term projects. The books you see are only one shelf. I have found that UNderhills, Pettersons and Lees books are a must. Although Underhills seem dated, they are as valid to todays modeller as they were when he wrote them.