Peter6172
-
Posts
182 -
Joined
-
Last visited
Content Type
Profiles
Forums
Gallery
Events
Everything posted by Peter6172
-
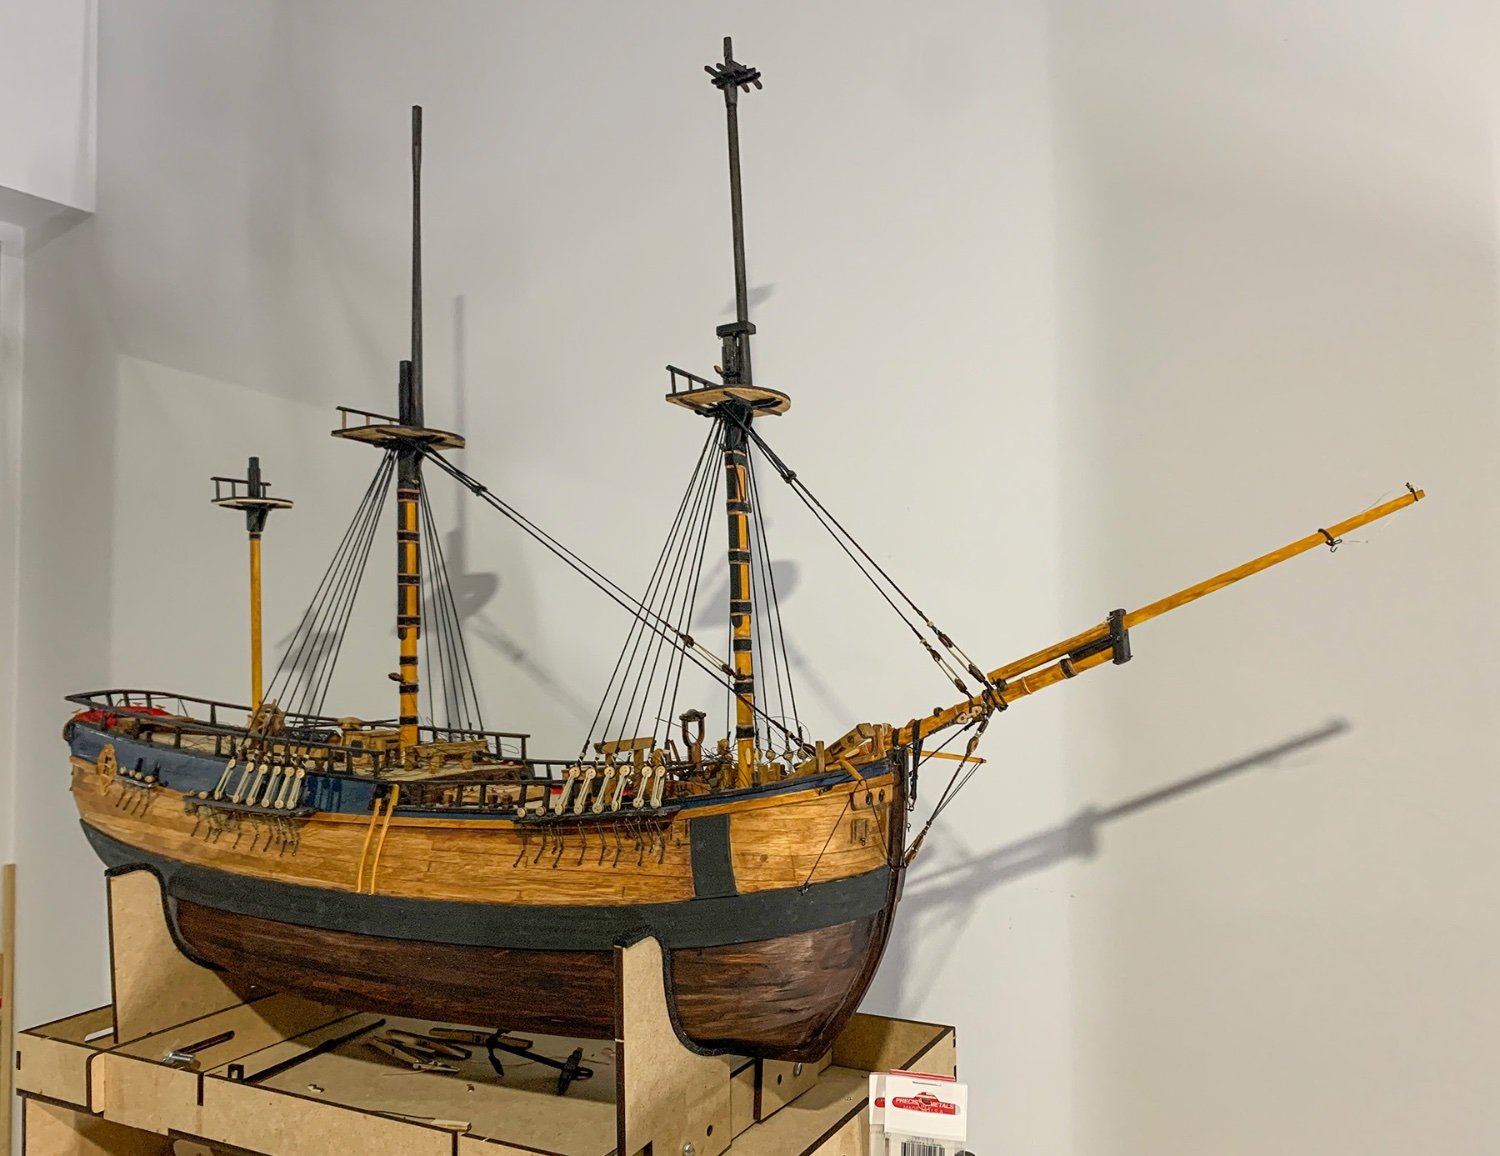
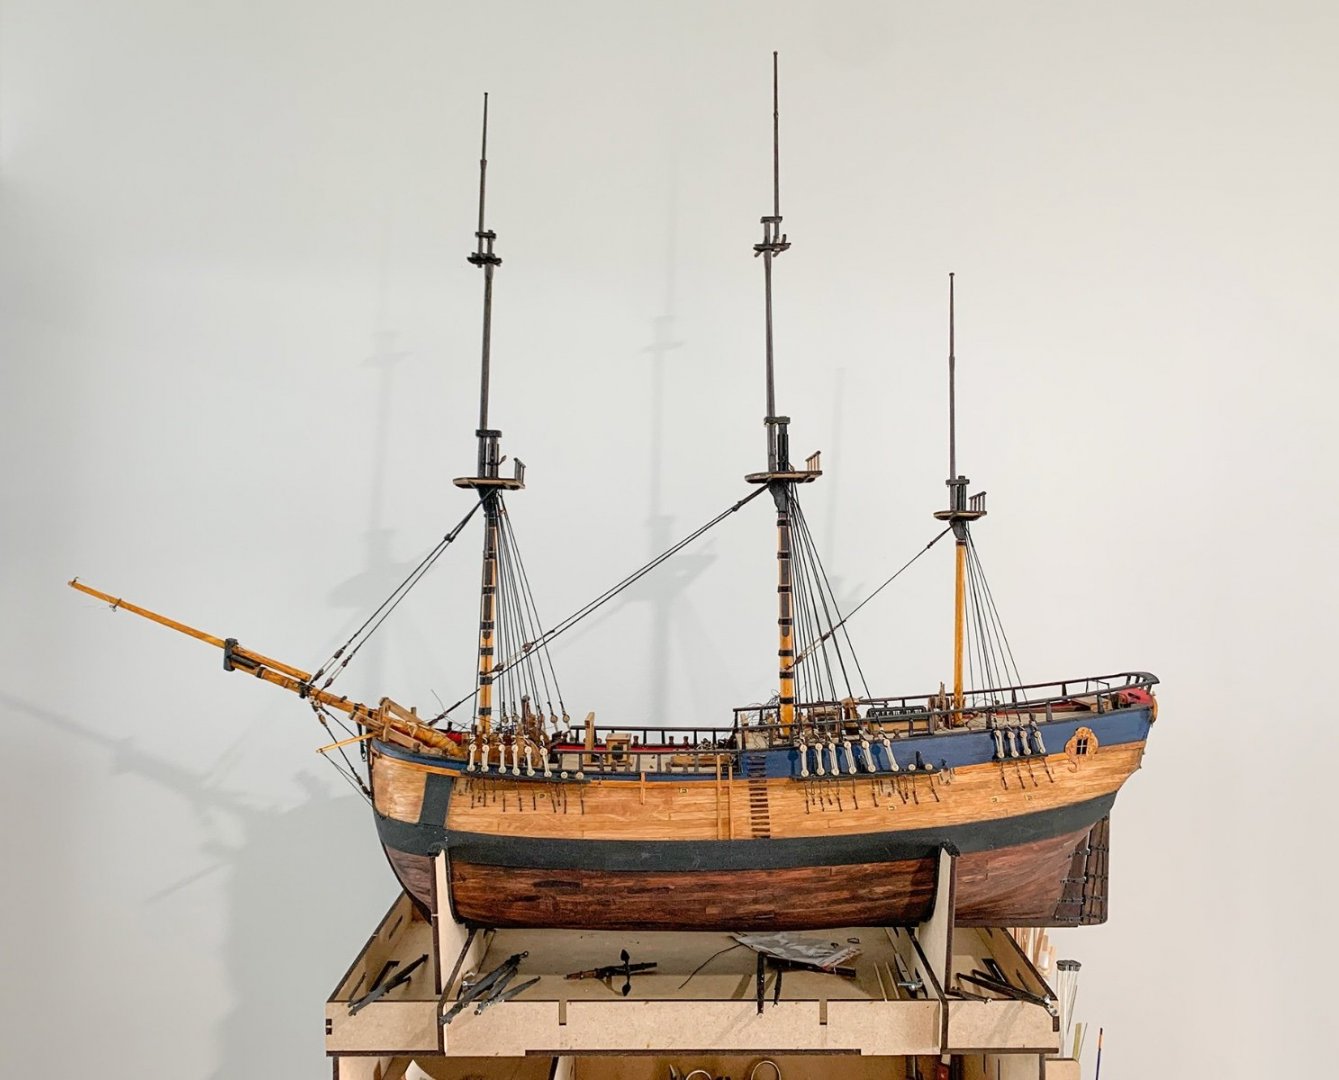
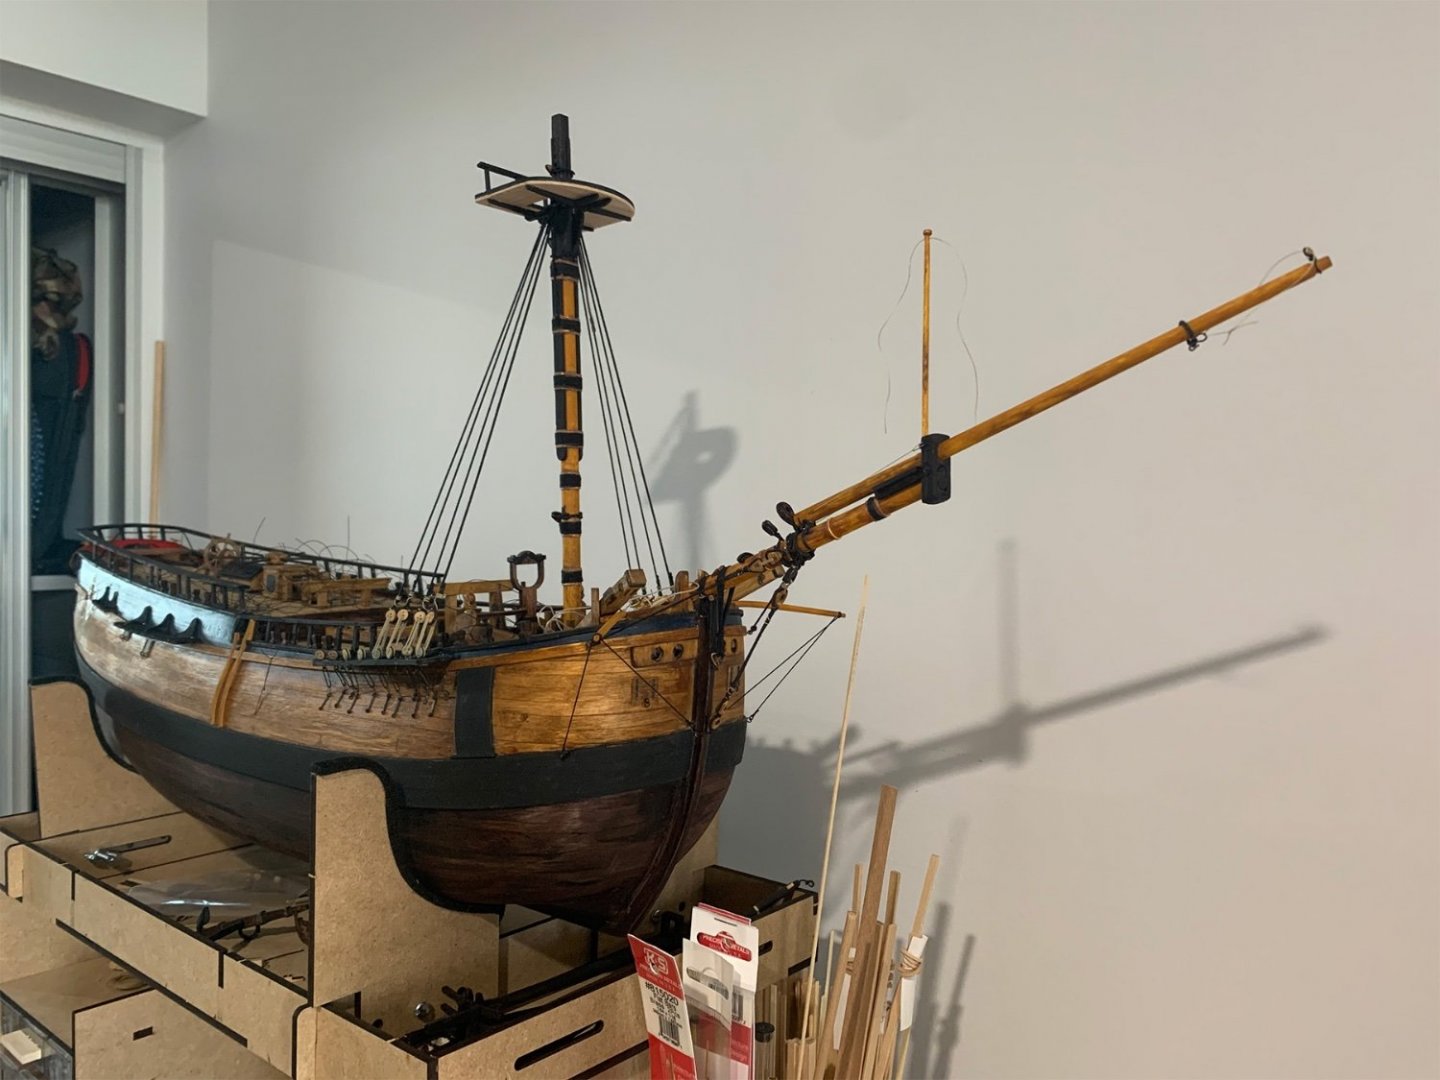
 Rigging has slowly progressed. Still waiting for my next order of Ropes for Scale as I am short some standing rigging. I'm close to completing the fore course yard and will soon progress to the Topsail mast and yard. The Stays on the topsail mast are only temporarily in place (held down by a bulldog clip on the stem post) as I wait for standing rigging to make up the pendants and shrouds. I still have to make up a truss for the fore course yard but have yet to identify where it ties off too as its not represented in the kit, Marquardt's drawings or the replica ENDEAVOUR. According to Petersson's book on rigging it would venture to the base of the fore mast via a table hooked to a ring in the deck and tie off on the bitts aft of the mast. but there aren't enough belaying ins for this purpose.
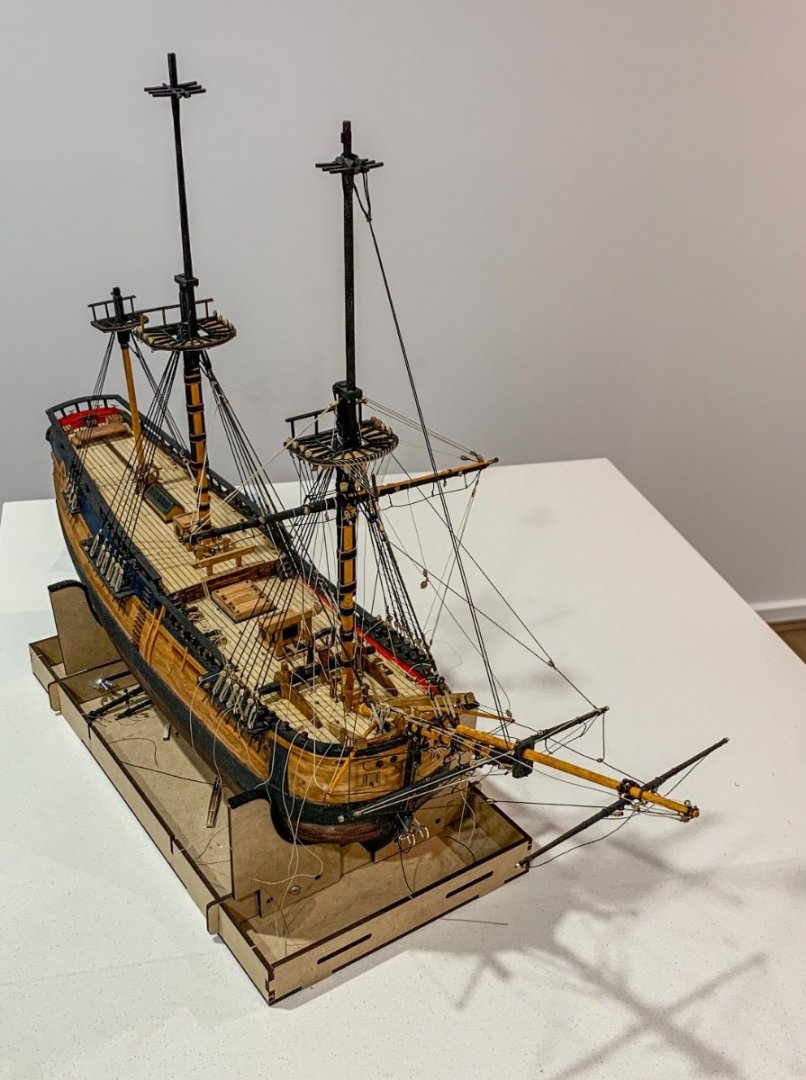
- 79 replies
-
- 6
-

-
- Endeavour
- Artesania Latina
- (and 1 more)
-
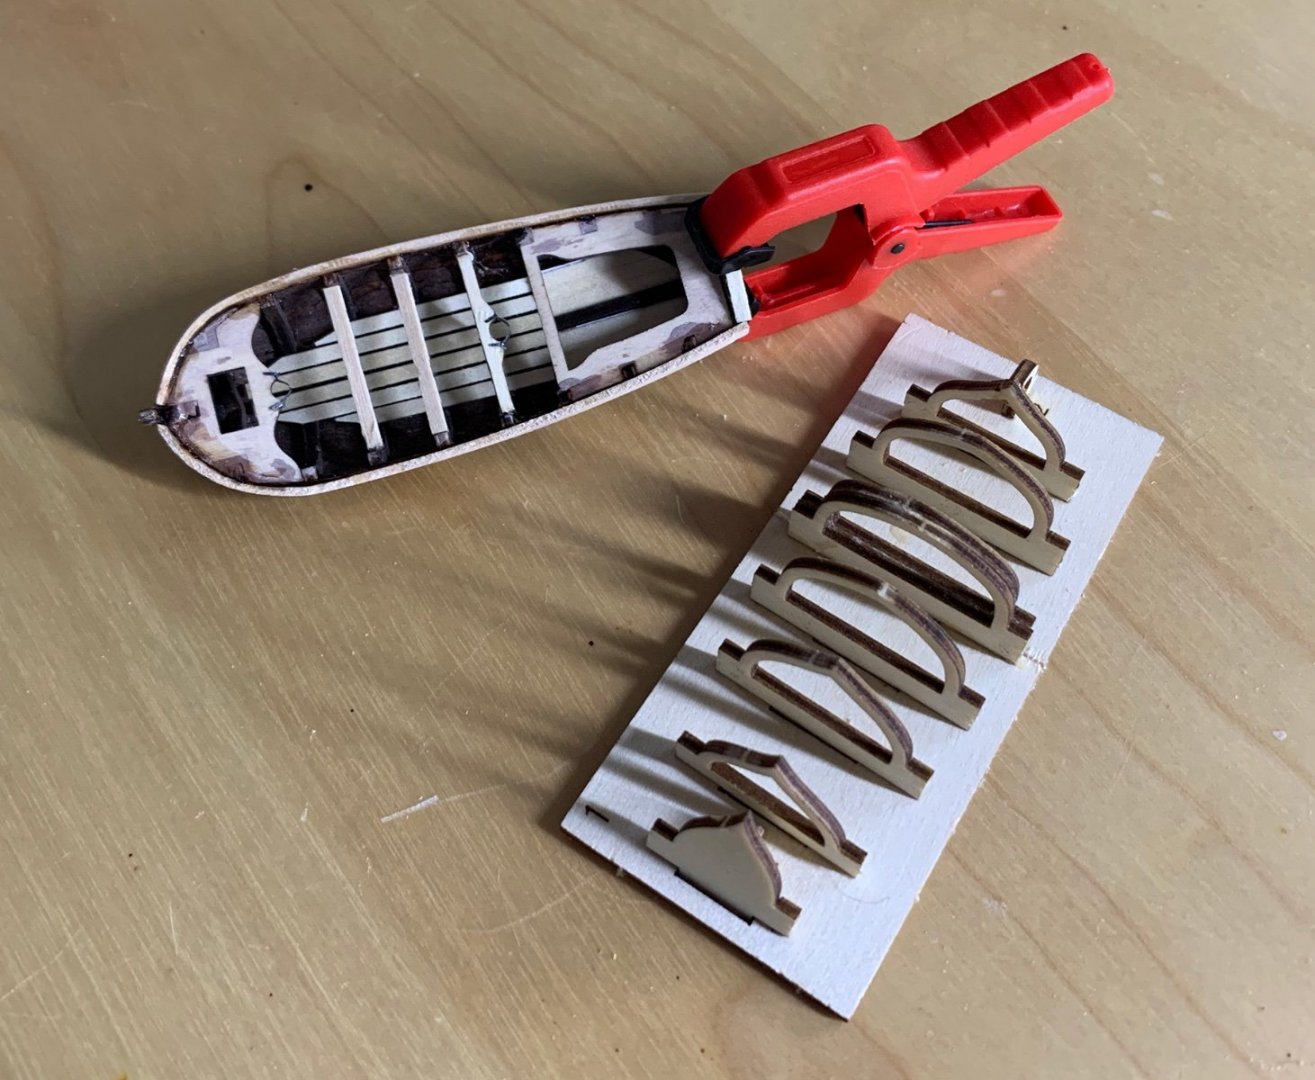
The longboat is 110mm and the Pinnace 100mm long in the kit. Marquardt's drawings show 85mm for the longboat and pinnace. The kit does not provide for a Yawl but Marquardt's drawings indicate 48mm. As I only have scanned copy of Marquardt's drawings I cannot be too accurate with the dimensions. Parkins book refers to the Longboat as 18'1", The pinnace as 18' and the Yawl as 10' so this gels well with my Marquardt estimates as ENDEAVOUR is 1/64 scale. The kits boats fittings are not very accurate either especially under foot and in the bow of each boat.
-
Continued working on ENDEAVOURs boats today. Checking the kits boats vs Marquardt's drawings I found them way too long so I cut our the centre of the semi finished Longboat and removed Frame 6 from the Pinnace formwork. Joining the two halves of the longboat was not as difficult as I thought and I have started the finishing touches. Still some more cleaning up to do then painting the hull tot he waterline white. Marquardt's drawing shows a windlass in the longboats midships between the aft mast seat and the next seat forward.
- 79 replies
-
- 2
-
-
- Endeavour
- Artesania Latina
- (and 1 more)
-
Interesting subject on ENDEAVOUR's boats when Cook landed at Botany Bay. Most of the contemporary paintings depicting the landing show the pinnacle and launch with plain varnished wood finish and not the white, blue and gold renditions of the Artesania kit. The only image that depicts a white hull on the pinnacle but varnished wood on the launch is the Phillips Fox painting which was painted in 1902 so not particularly contemporary. So to paint or to varnish the boats?
-
Well I'll be buggered. Obviously didn't look very closely at the time. They are all good ropes. I don't have to glue anything down; just a cleat hitch then loop the excess and hand on the cleat or belaying pin.
- 79 replies
-
- 1
-
-
- Endeavour
- Artesania Latina
- (and 1 more)
-
Its all your rope....thought I had only ordered poly from you?
- 79 replies
-
- 1
-
-
- Endeavour
- Artesania Latina
- (and 1 more)
-
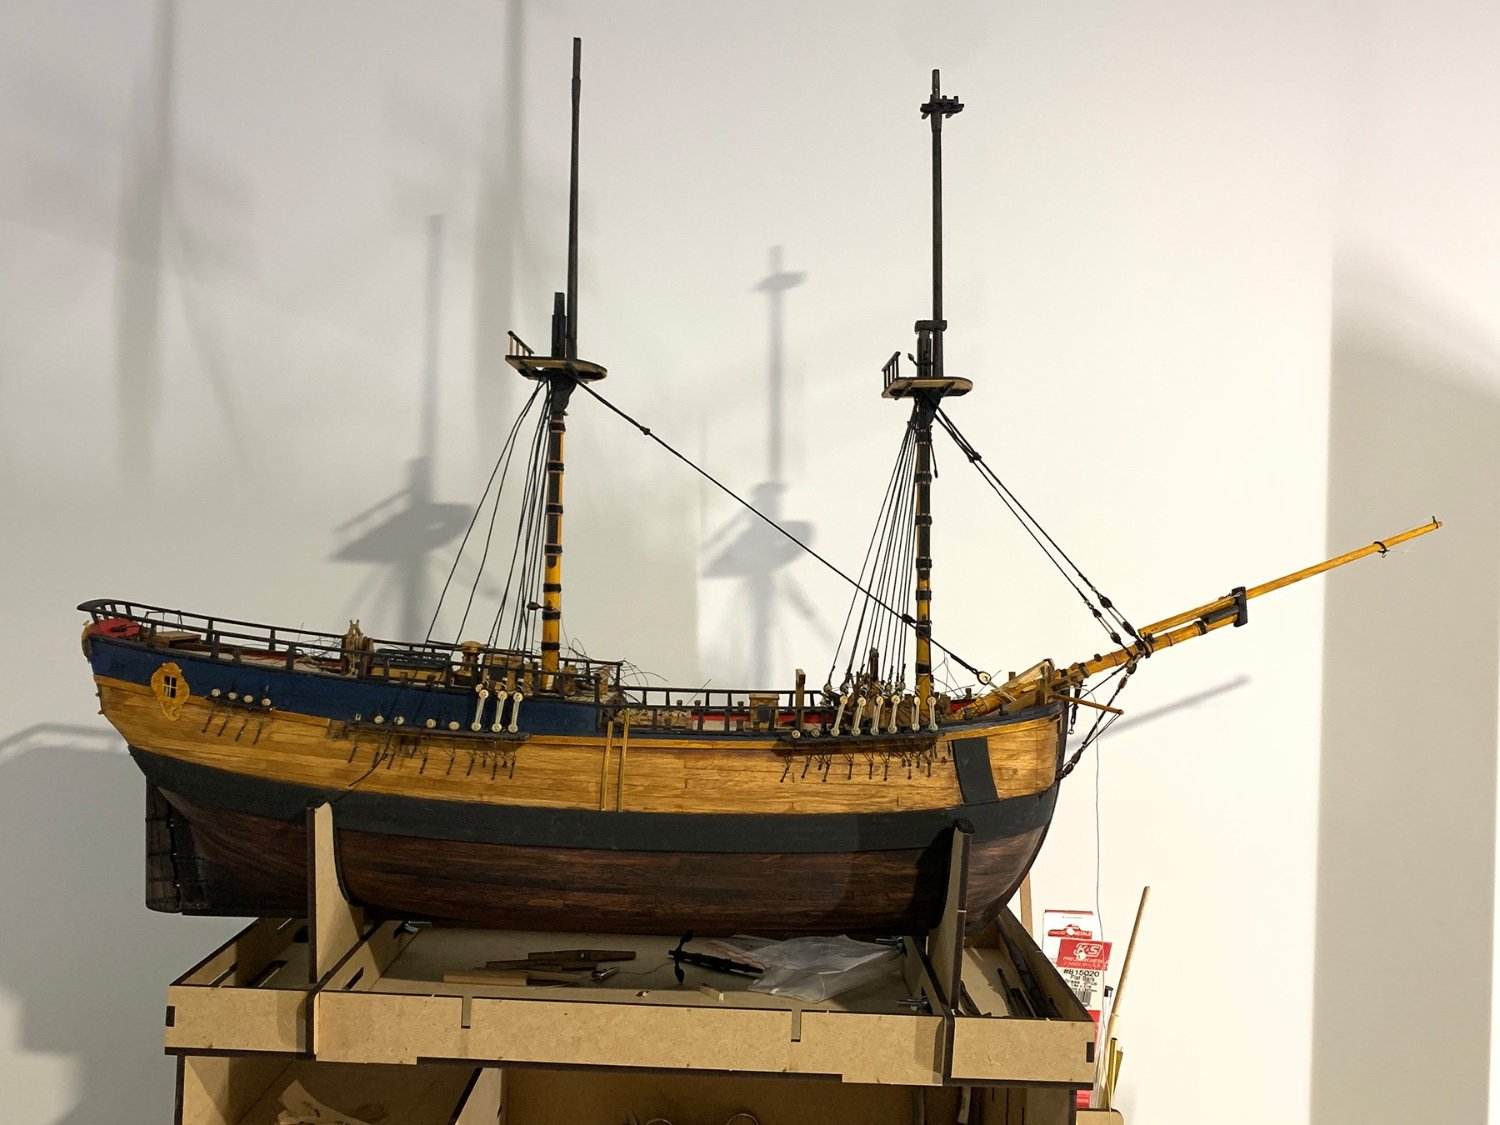
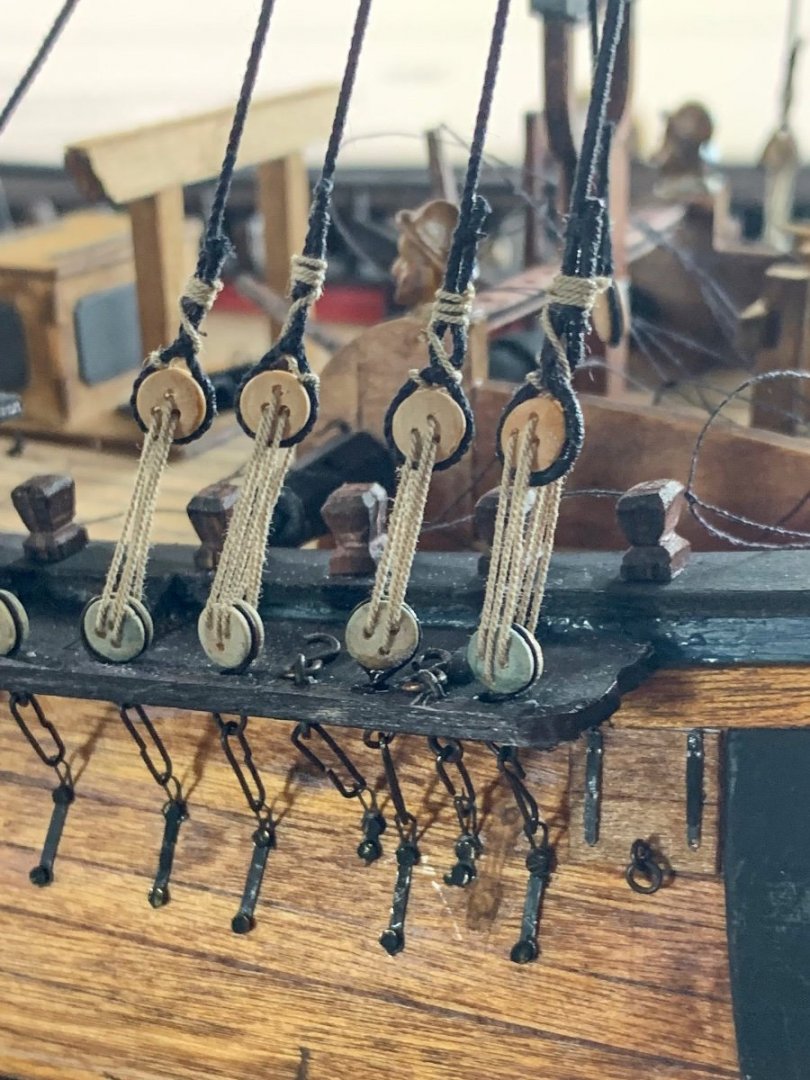
Some limited rigging progress while I await the arrival of my next small batch of rigging from Ropes of Scale. Fore course yard lifted on Jeers with the spritsail and spritsail topsail yard are rigged. I did the Fore course crowsfeet (took a lot more than the 120mm they suggested in the instructions) and the rigging so far is being finished with a 'cleat' hitch to secure before looping, tying and hanging the leftover without glue.

- 79 replies
-
- 5
-
-
- Endeavour
- Artesania Latina
- (and 1 more)
-
Interesting question: The Marquardt drawing of the main and fore course yards show parrel beads in use, however, noting the lower mast arrangements this would very unlikely be the case. I also note the replica Endeavour also does not appear to employ parrel beads on the fore and main course yards. Is Marquardt drawing correct or is my assumption and the arrangement on the Endeavour replica correct?
- 79 replies
-
- 1
-
-
- Endeavour
- Artesania Latina
- (and 1 more)
-
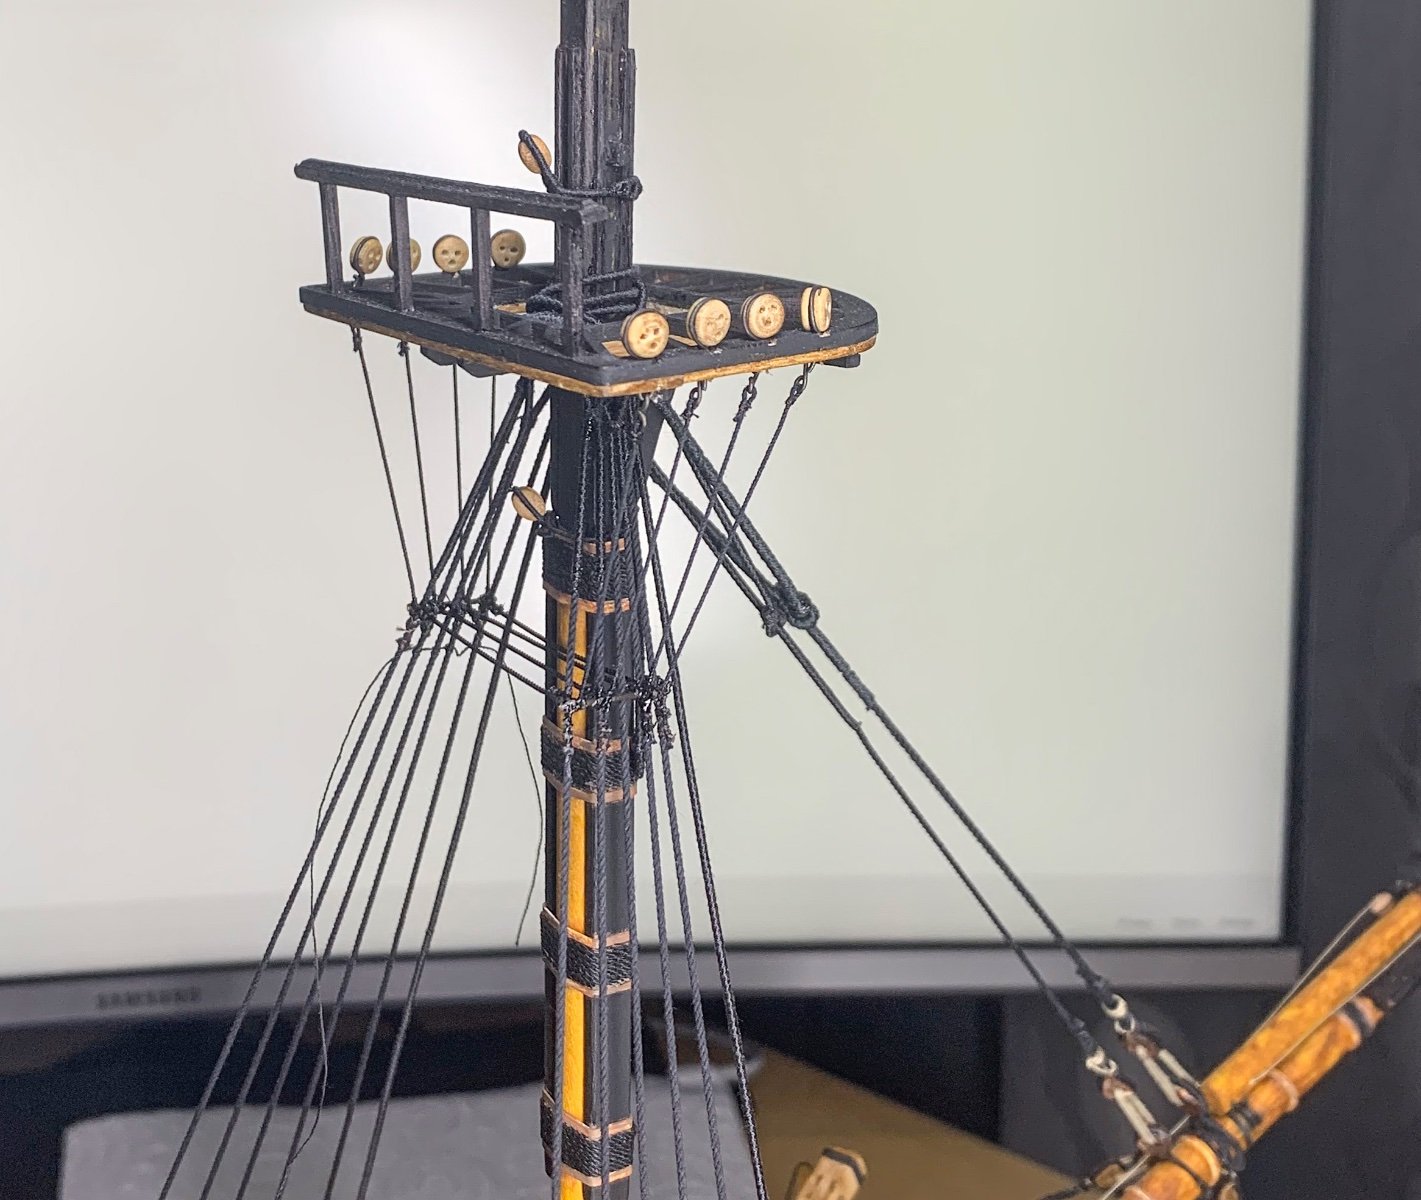
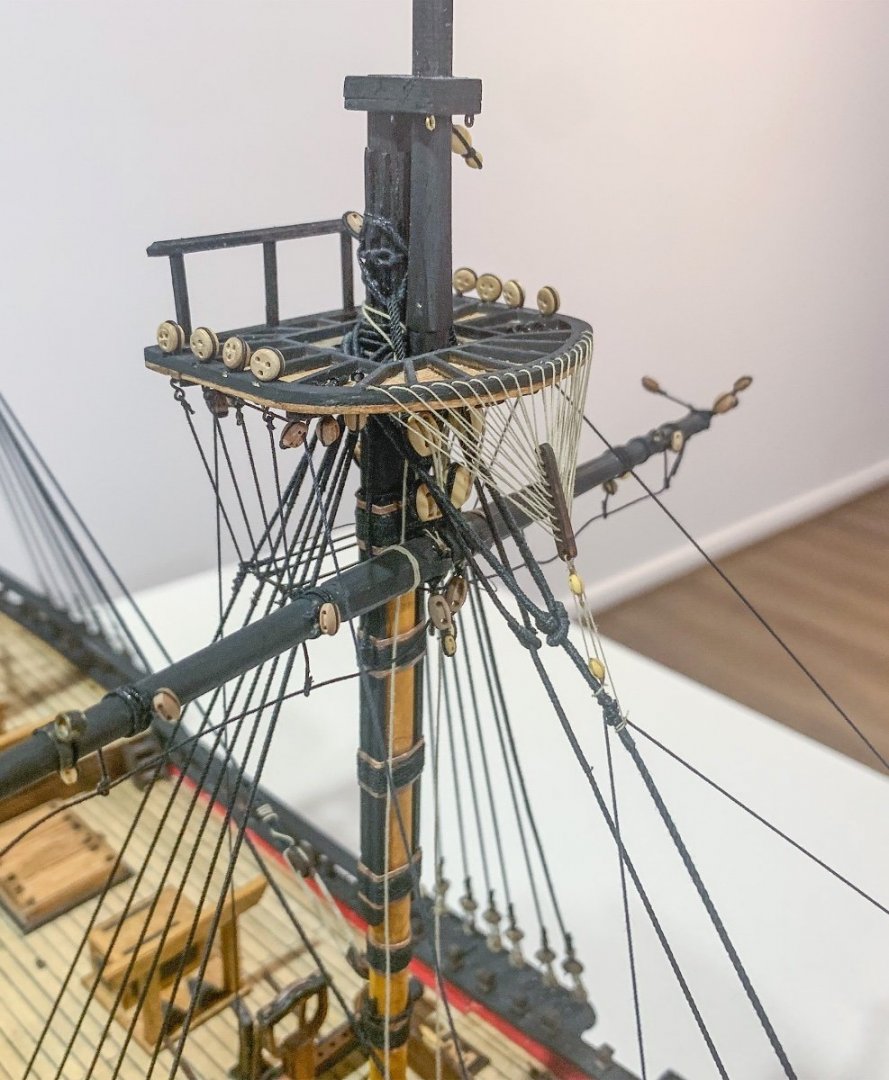
Well that was a busy long weekend. I managed to fit the Futtock Stave, Futtock Shrouds and the Catharpins on the Foremast. Thought the lacing of the Carthapins would send me batty but I managed in the end. I've tried to keep everything as close to scale using Ropes of Scale rope and 0.08mm Aurifil 1130 thread. The Ratlines will be 0.12mm Guttermann CA02776 thread eyed and lashed at each end with clove hitched in between.

- 79 replies
-
- 6
-
-
- Endeavour
- Artesania Latina
- (and 1 more)
-
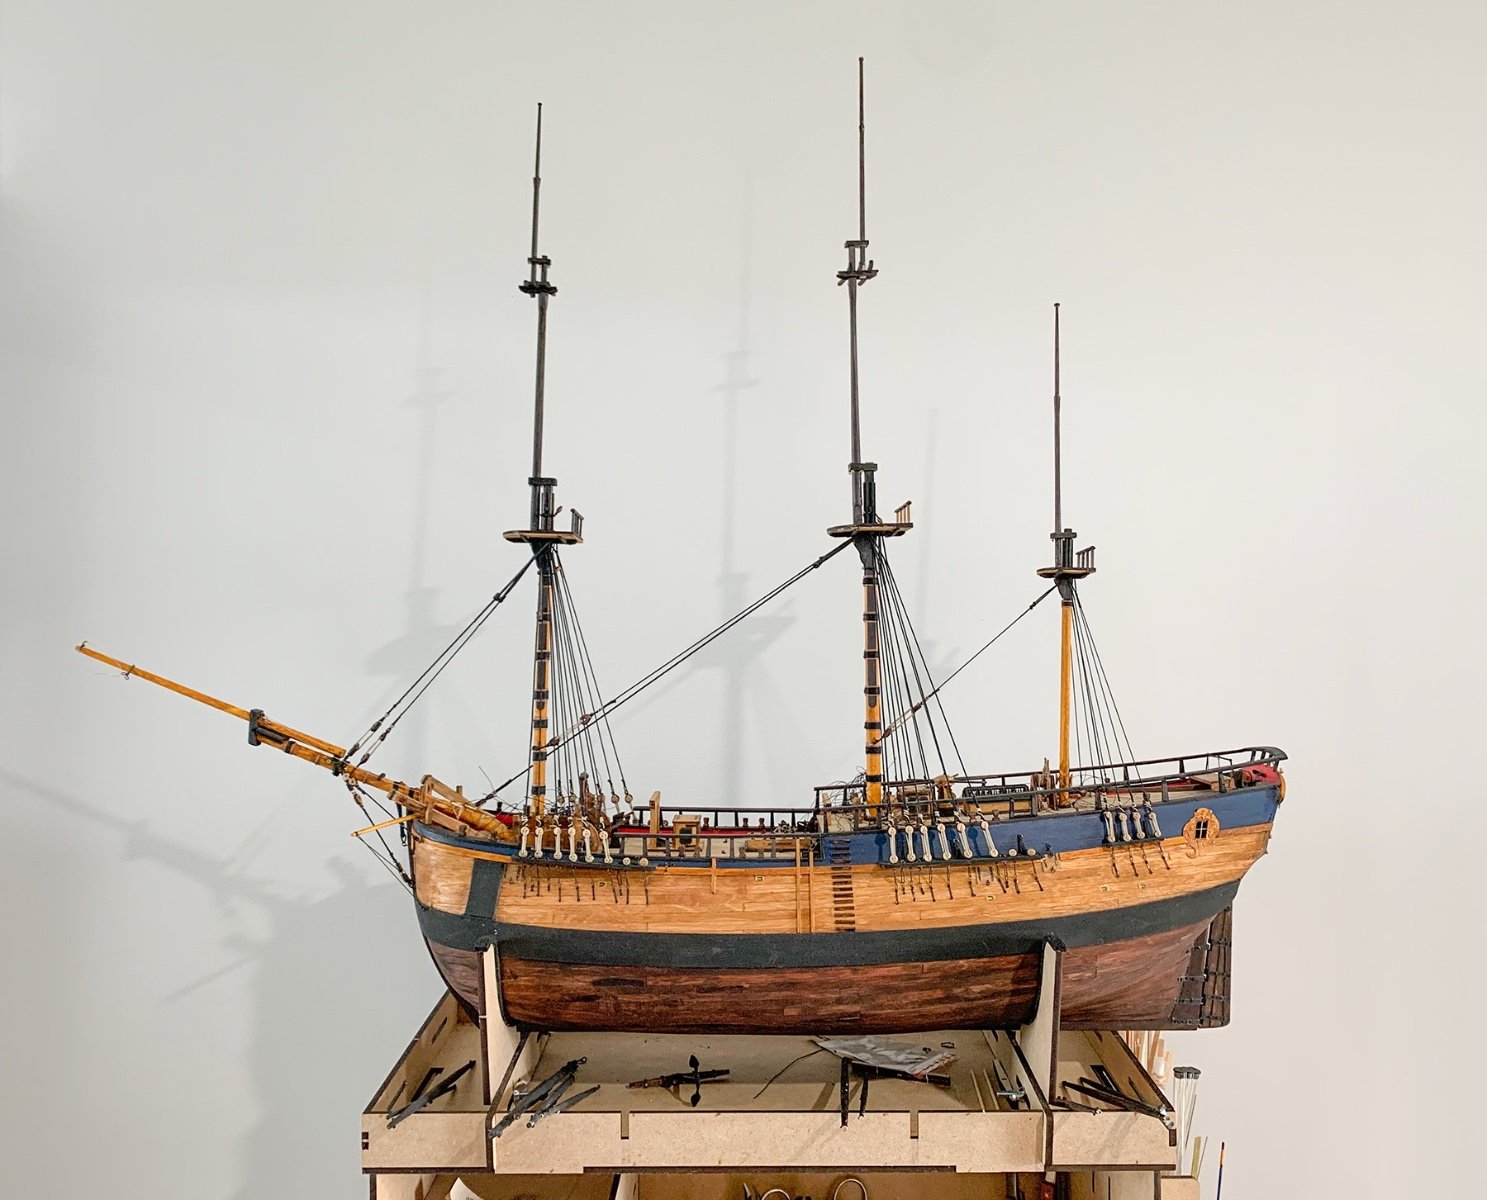
Not sure if this has been provided before, however I found it tedious converting the actual rigging size from admiralty tables (inches circumference) to scale diameters in mm so I could order and fit the correct size rope. The table below is in various 'common' scales and the scale size is rounded to the nearest scale size. I hope this is helpful for other modellers

-
- 10
-
-

-
Foremast Lower yard rigged. Took a good 9 hours for the 20 blocks plus serving of stirrups and pendants.I haven't rigged the clew-garnet and yard block yet. Disregard the red coloured coding. It was my original estimate of block size in mm: most of the 3mm blocks were upsized to 4mm.
- 79 replies
-
- 8
-
-
- Endeavour
- Artesania Latina
- (and 1 more)
-
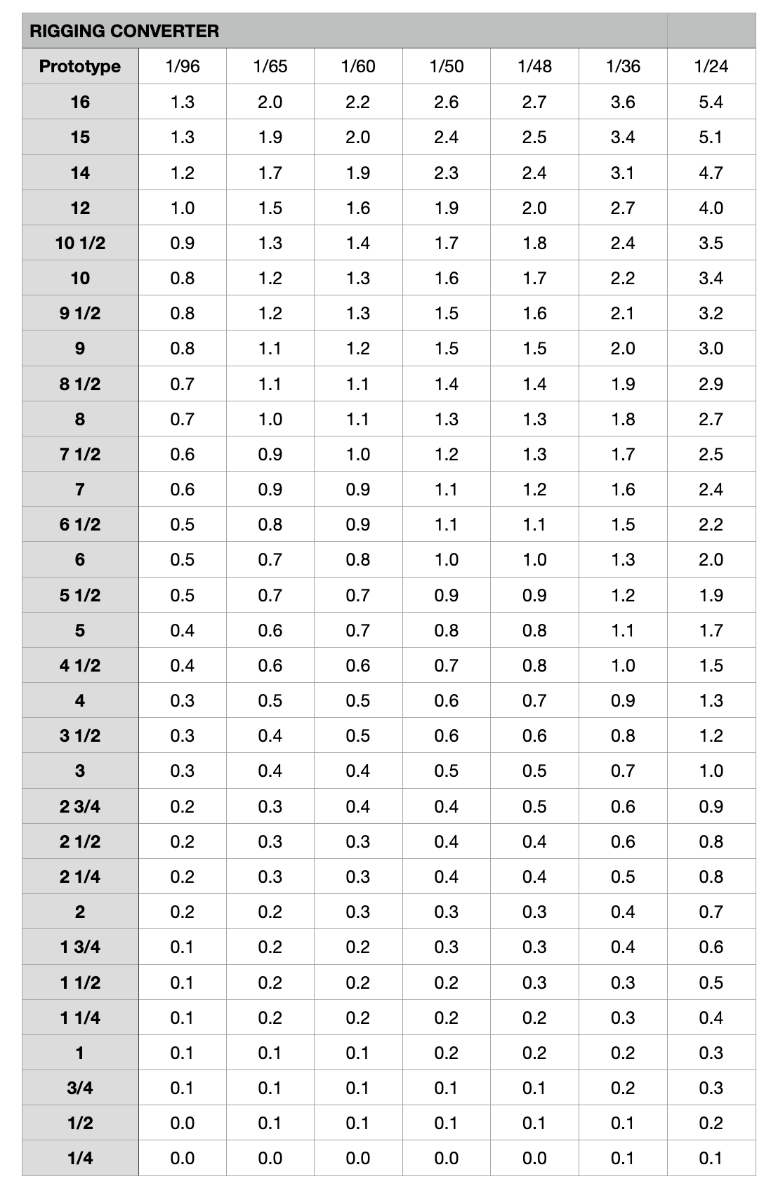
All the main timber work is now made; a couple of studdingsail booms and spare spars/yards to go on the rack still to be made. Now time to start pre-rigging the yards with the various blocks, fitting the rest of the standing rigging and getting the yards slung before moving onto the running rigging.
- 79 replies
-
- 5
-
-
- Endeavour
- Artesania Latina
- (and 1 more)
-
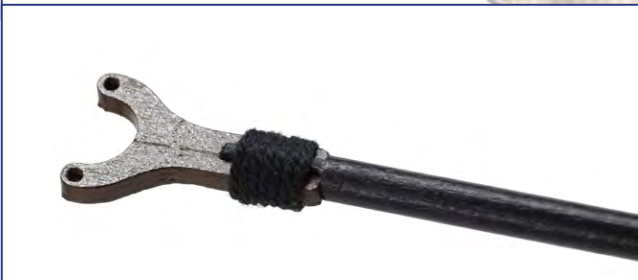
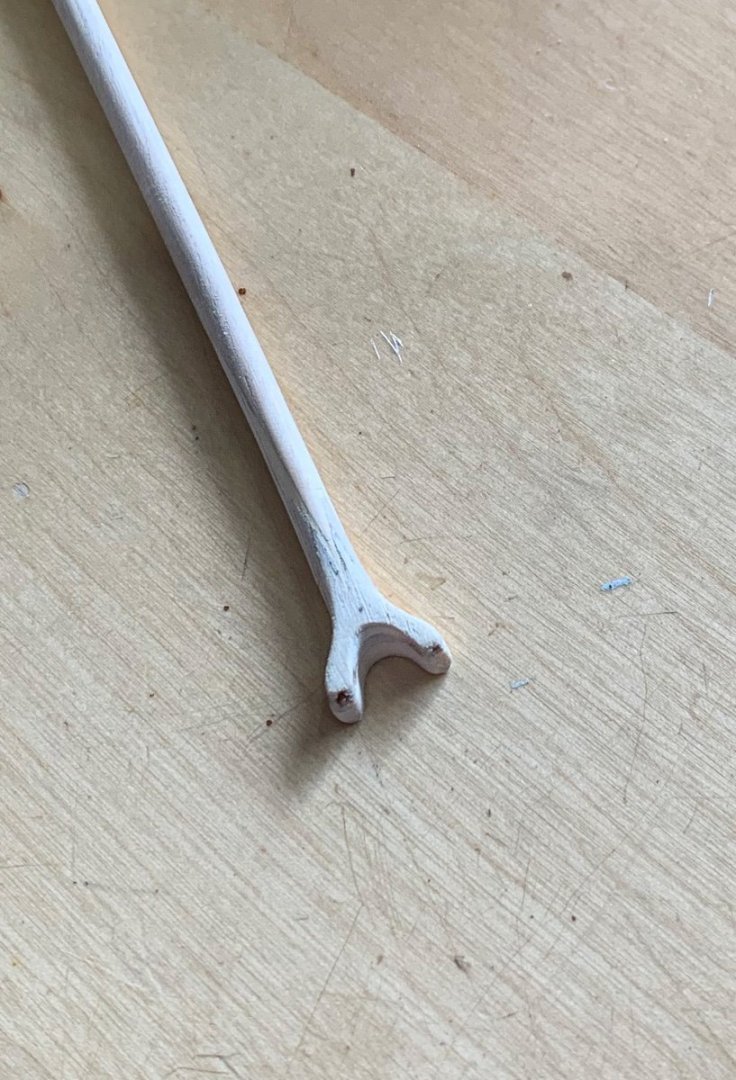
Another kit compromise overcome with some scratch building. The yoke on the gaff was a 2mm laser cut piece with barrel rope holes in the wrong plane. It also didn't account for the angle of the gaff nor its correct thickness so using the laser cut piece as a pattern I made up 7mm of kit ply then sanded back to shape before sanding in the angle. I also cut a V and sanded the gaff to a point for the joint. Still some fine sanding to go and some rings to fit but I'm happy with the handiwork
- 79 replies
-
- 3
-
-
- Endeavour
- Artesania Latina
- (and 1 more)
-
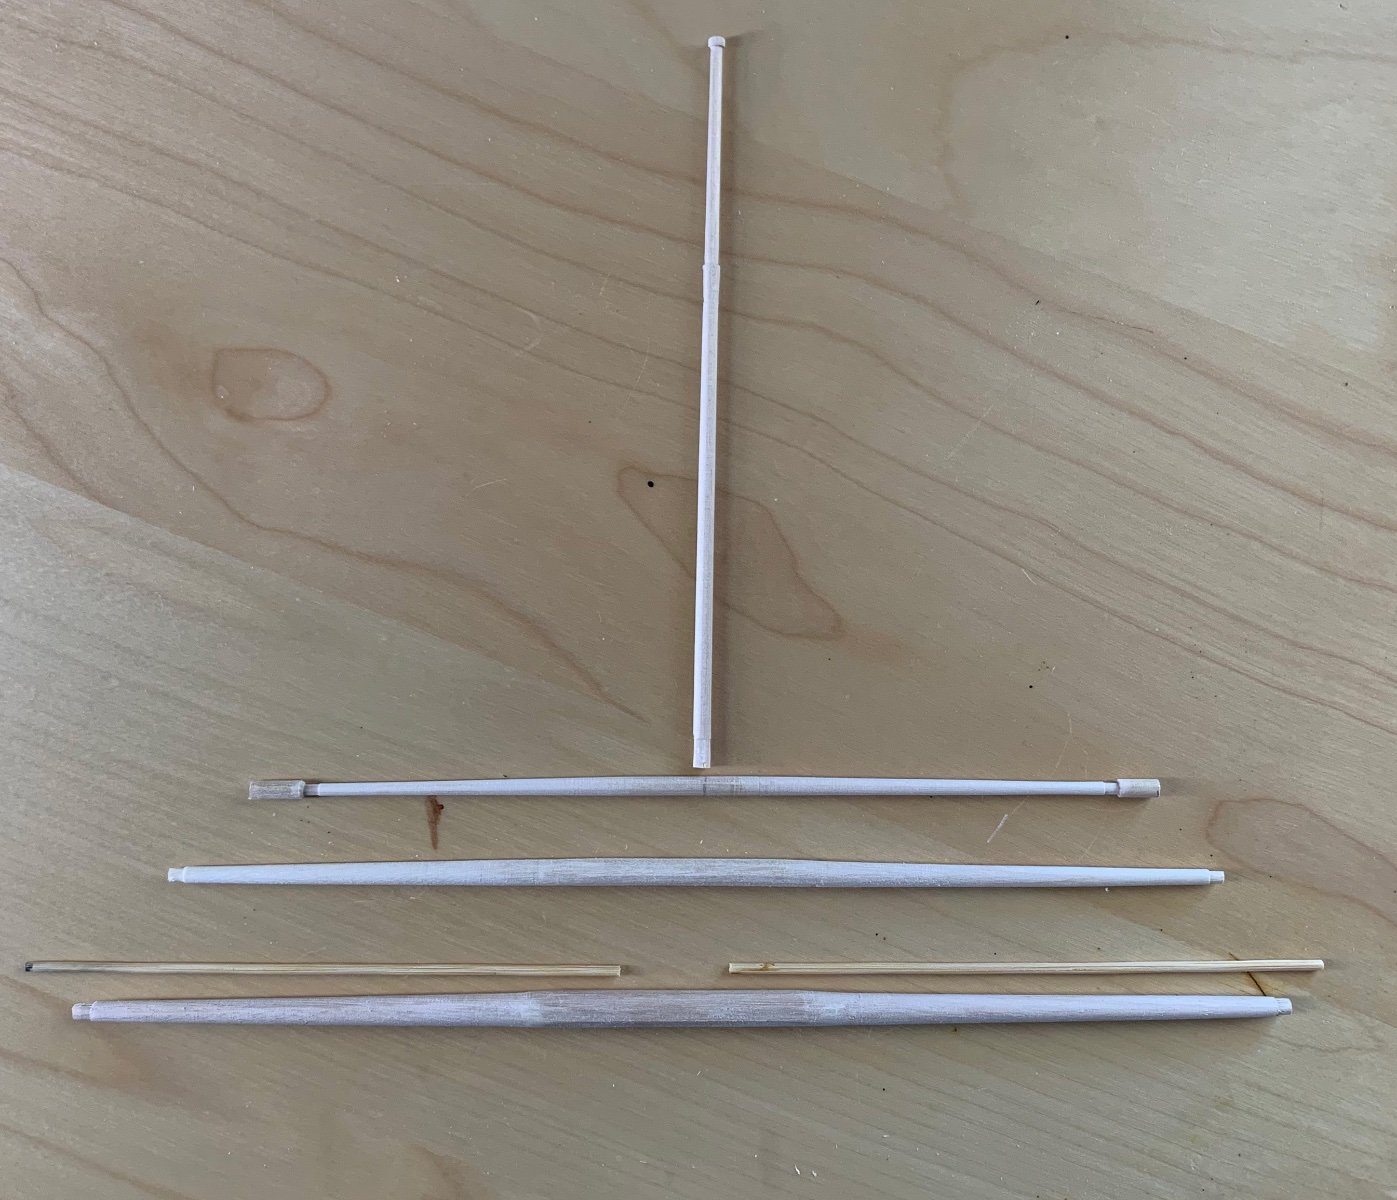
Just finished turning u the yards and the topgallant mast for the main. The main yard for the foremast was made following the Artesania instructions (two piece: turned section and the hexagonal centre slid on). This time I went u a size of dowel, made the hexagonal section then turned down the rest in the mini lathe. I did the same for the topgallant mast filing the square base and hexagonal section before turning down. There is still some cleaning up to do and I need to turn the studdingsail booms to shape as well. All that left is the Mizzen topmast, gaff and the other various studdingsail booms and then I can put the lathe away till the next ship project.

- 79 replies
-
- 2
-
-
- Endeavour
- Artesania Latina
- (and 1 more)
-
Fore and Main Masts 'fitted' with shrouds and forestays. Mizzen in place but I am waiting for my Ropes of Scale 0.6/0.7/0.8mm order to get the mizzen shrouds and stays done. Meanwhile I am continuing progress on the cannons and the yards. Spritsail yards are complete awaiting painting as are the Foremast yards.

- 79 replies
-
- 5
-
-
- Endeavour
- Artesania Latina
- (and 1 more)
-
I have worked out how to stop the twist when fitting the lanyards to the shrouds. Fit the lanyard through the top deadeye, then throughs the corresponding hole in the channel deadeye, then pull tight. This will draw the twist out of the shroud. Hold the shroud in this position and put the lanyard back trhought the top hole in the shroud deadeye. While the deadeye may rotate back when pressure is released, the deadeye is in the correct position once tension is reapplied.
- 79 replies
-
- 1
-
-
- Endeavour
- Artesania Latina
- (and 1 more)
-
Having completed the shrouds and forward stays on the Fore mast, I have moved onto the main mast. It was a little loose in its hole so I have had to wedge it before starting the shrouds. Even dredging it, I had to temporarily fit the Main stay to stop the mast from being dragged too far aft when tensioning the third and forth shroud pairs. I have also fitted the topmasts as the shrouds position around the mast top can affect fit (again only temporary at present).

- 79 replies
-
- 6
-
-
- Endeavour
- Artesania Latina
- (and 1 more)
-
Have made further progress this weekend. The Foremast Main and Preventer stays are installed after completing the 5th and 6th pair of shrouds. I also installed the final 10 deck fittings in the foredeck for running rigging. I think tomorrow will see the main mast channel deadeyes installed but noting its Mothers Day in Australia, I may have other duties to perform....
- 79 replies
-
- 3
-
-
- Endeavour
- Artesania Latina
- (and 1 more)
-
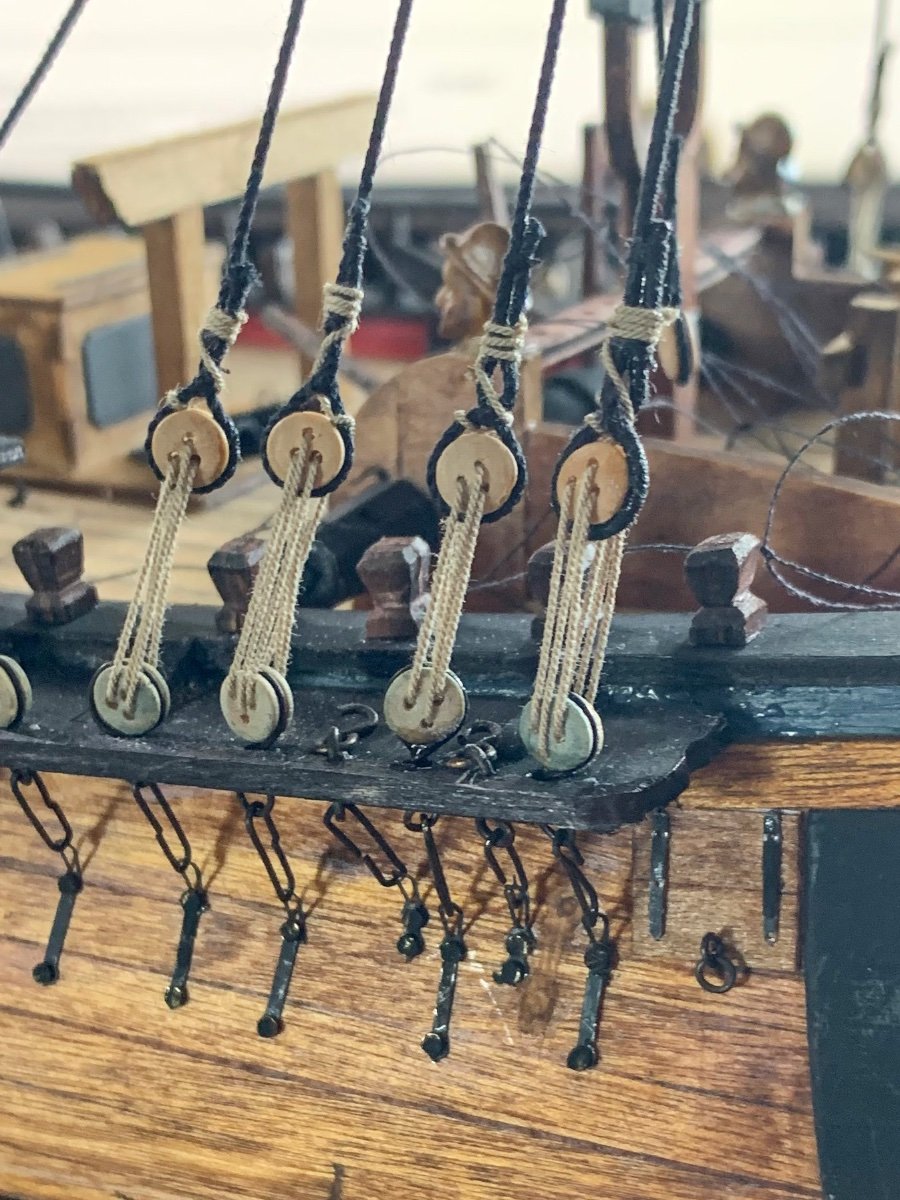
Pat, I have set all the lower deadeyes in the channels and chained then down to the hull. The shroud deadeyes are then caught in the shroud, the first lashing across the looped shroud, then two lashings up the shroud. The holes in the deadeyes are lined up and then CA to fix the deadeyes in the right orientation. I then lash the deadeyes together. The twist I refer too is represented in the second shroud of the 1st pair where there is rotation toward the bow. Please note that the odd colouring of the lower deadeyes is a result of dipping the deadeye and chains in brass black solution. I plan going over the deadeyes and lashings with a black wash anyway....
- 79 replies
-
- 4
-
-
- Endeavour
- Artesania Latina
- (and 1 more)
-
Getting into the Shrouds on the Foremast. I'm not glueing the mast in place so its position and straightness will be down to the rigging. One thing I have noted using ropes of scale is that when I tension the shrouds, they twist. I am putting about 5mm of tension into the Shrouds. I will have to go through glueing the deadeyes straight in the channels to remedy. The first four pairs are in with after installing a pair of Burton Pennants; one more pair each side before heading to the Fore and Aft Stays. I have also temporarily fitted the Jackstaff and the Jib Boom Traveller.
- 79 replies
-
- 4
-
-
- Endeavour
- Artesania Latina
- (and 1 more)
-
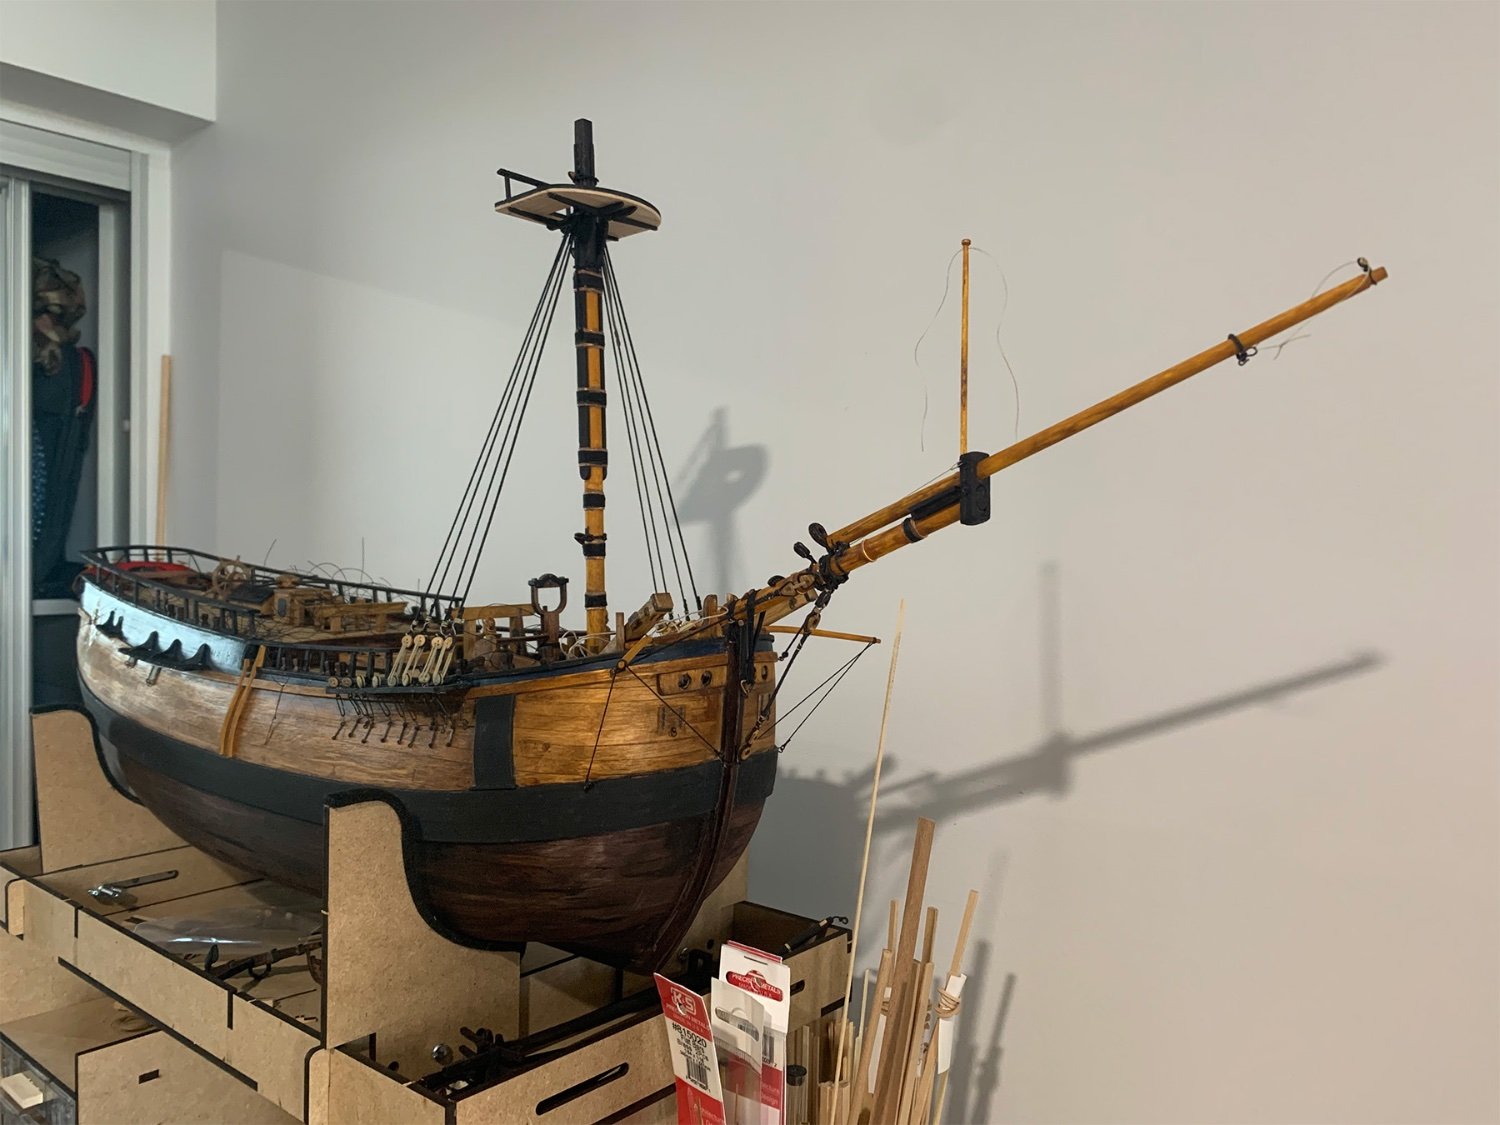
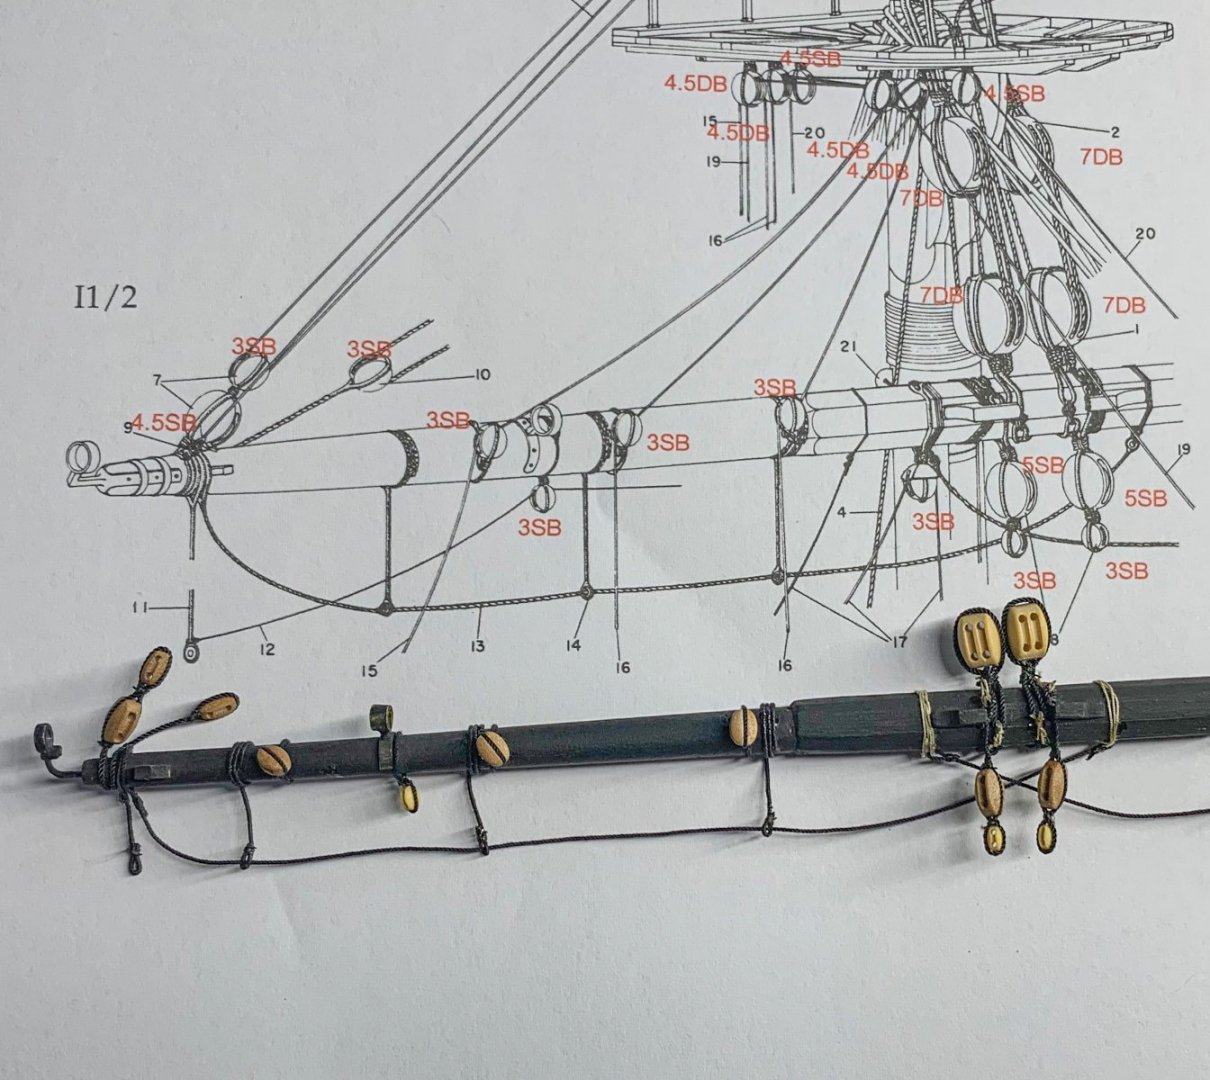
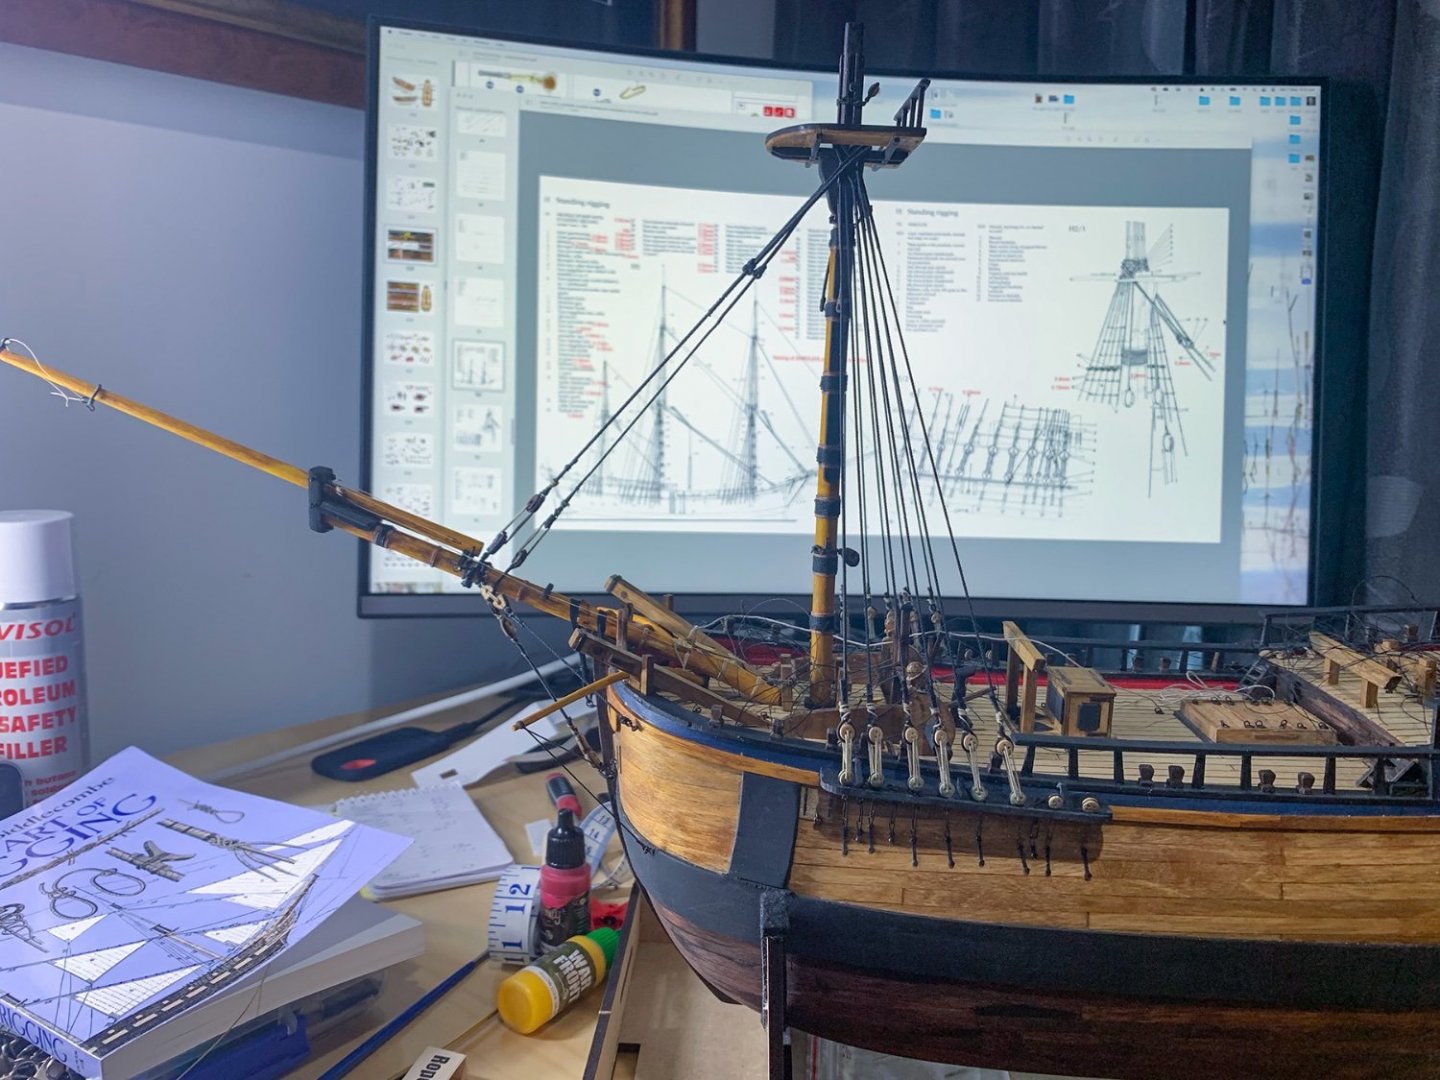
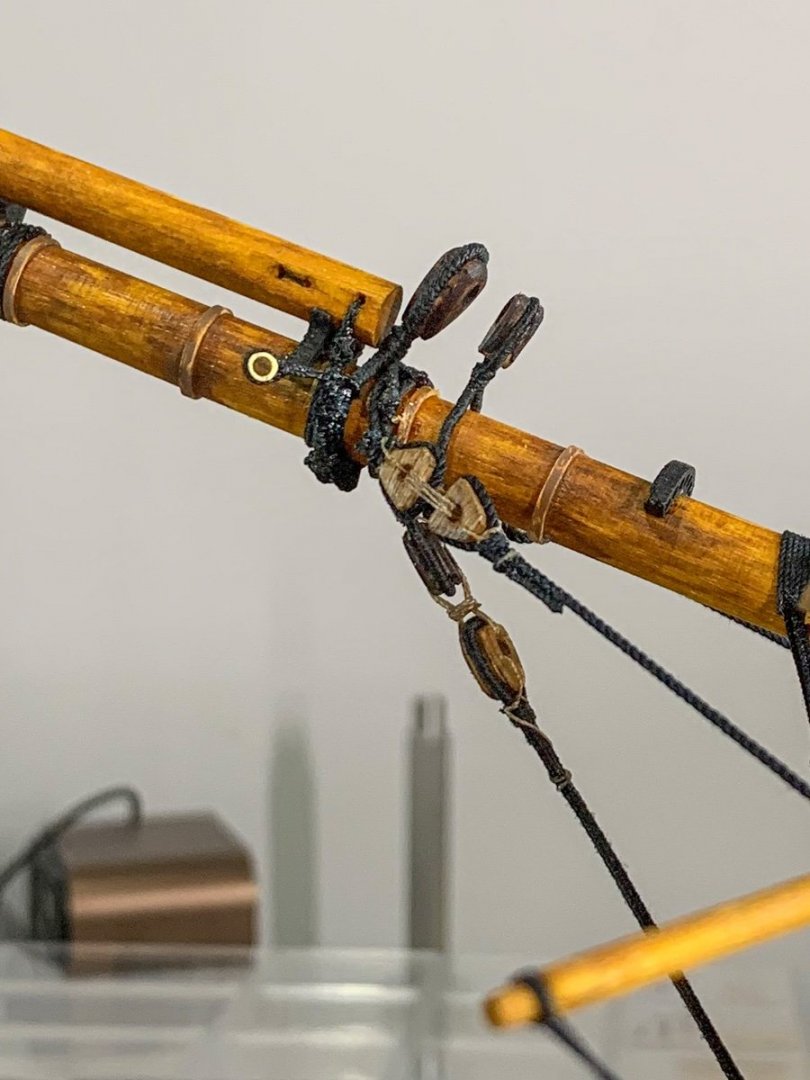
Well its time for rigging the ship so first things first, the bowsprit. I am following the rigging sequence per Biddlecombe's "the art of rigging". The inner and outer gammoning, Bobstay collar, both Bowsprit shroud collars and both Fore stay collars have been installed as have the bobstay, and shrouds. I have also fitted the Bumpkin stays and my first thimble (for the Fore topgallant stay) I will need to redo the outer gammoning as I only have 6 turns instead of the correct 8 (miscounted during install), and I have a further lashing to do on the bowsprit should deadeye. QUESTION: Where thimbles brass or iron?
- 79 replies
-
- 7
-
-
- Endeavour
- Artesania Latina
- (and 1 more)
-
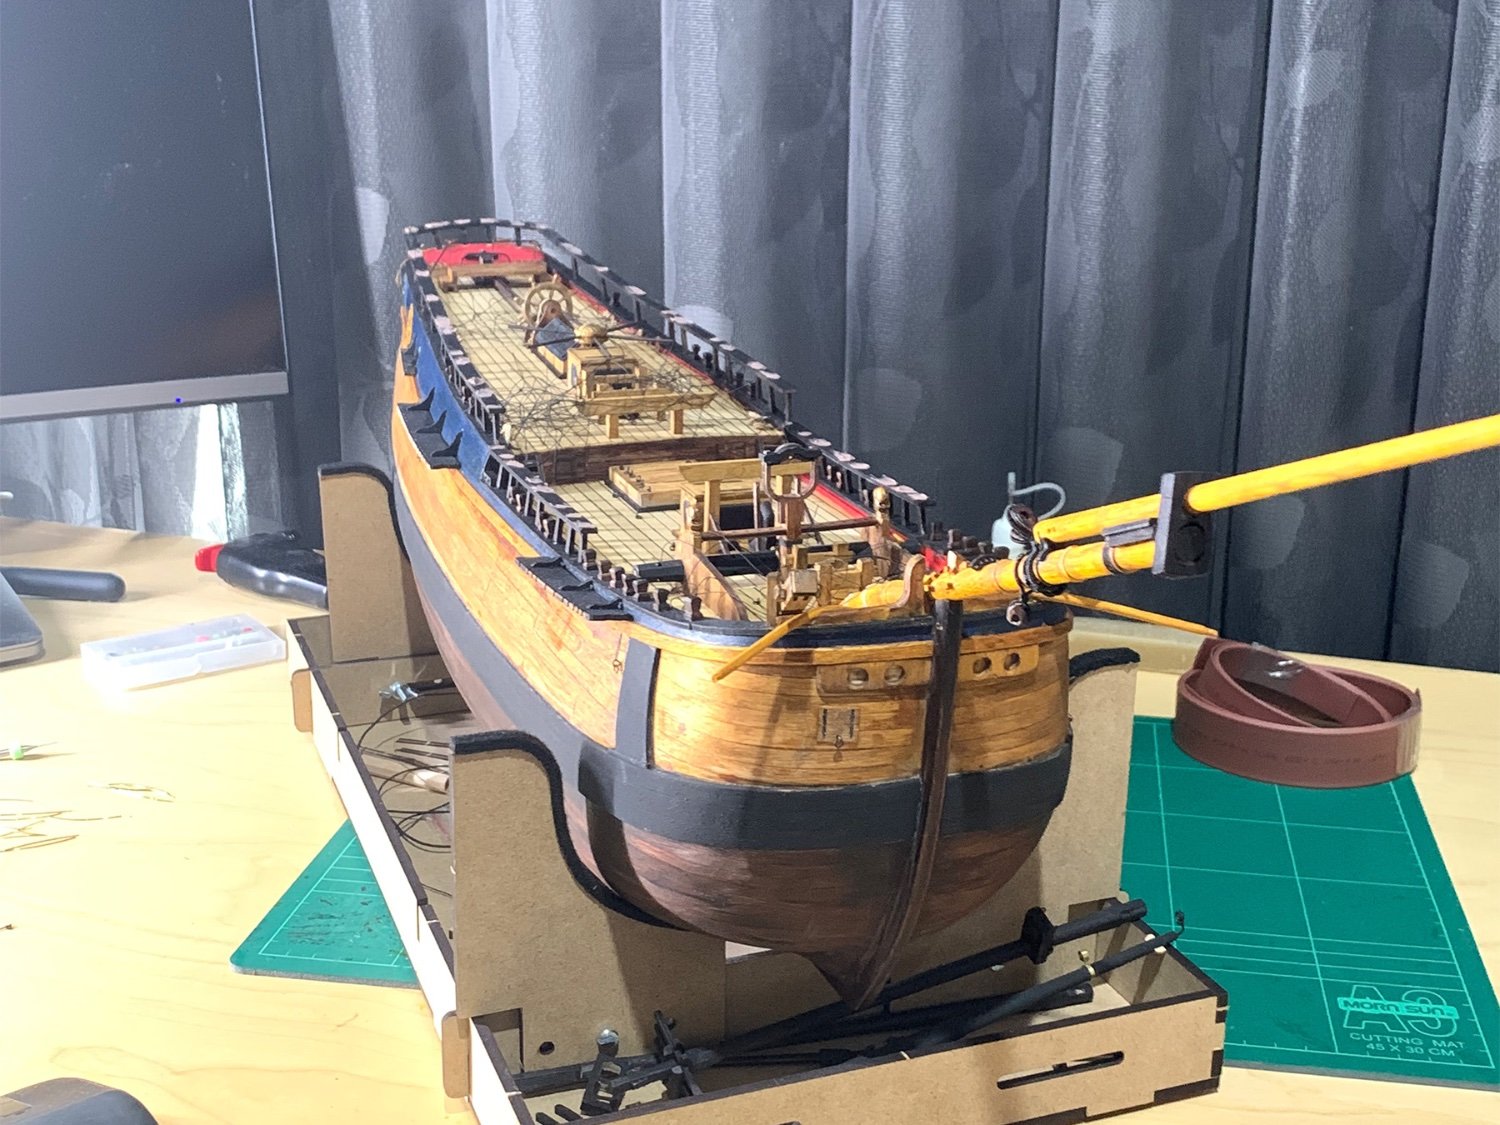
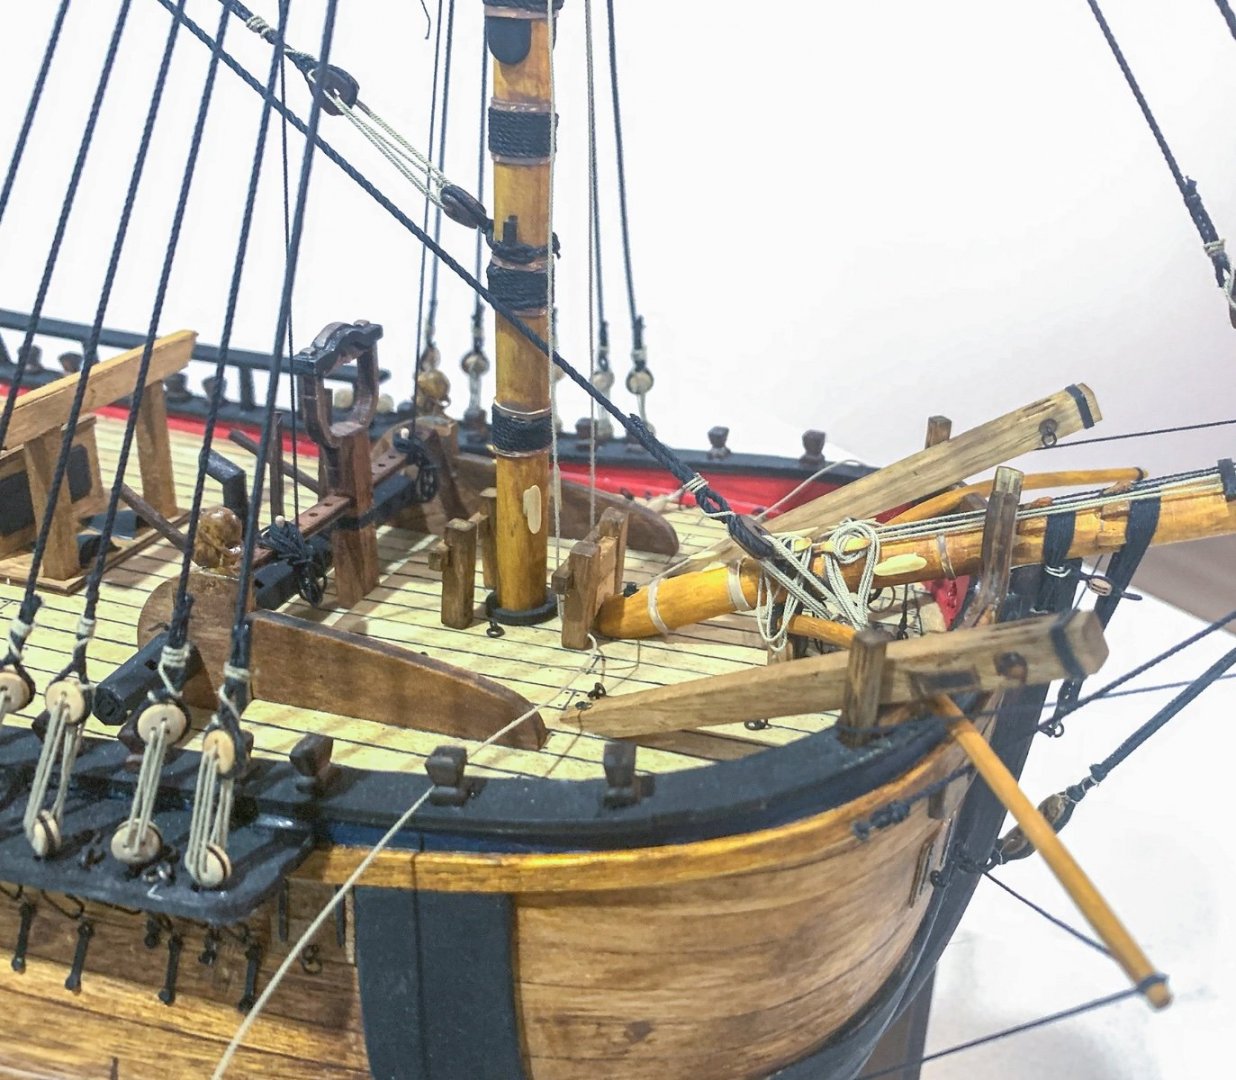
Handrails on and holes filled ready for sanding. Have made some preliminary progress with the transom; some cleaning up to do. I have also mounted the channels and started on making up the deadeyes; 24 down, 22 more to 'wire up' before assembling and fitting to the channels. The boom has been fitted and 'bolted" in place under the foremost bitts. The catheads have also been installed as have the bumpkins. You may note that the ships bell has not yet been fitted but as its a swinging bell I did not want to to go astray. Some hatch covers have been installed on the STBD side too.


- 79 replies
-
- 5
-
-

-
- Endeavour
- Artesania Latina
- (and 1 more)
-
Well, after an Easter long weekend with a cold (negative RAT results) I have managed to get from stern to midships with the deck blocks and rings. I have attached thread to all rings and blocks as well as sheaves in the bitt pins to make it easier to run rigging through them when the time comes. Still have to attach cleats to transom, bulwark etc before I start mounting the bumpkins, catheads and bowsprit.

- 79 replies
-
- 5
-
-
-
- Endeavour
- Artesania Latina
- (and 1 more)
-
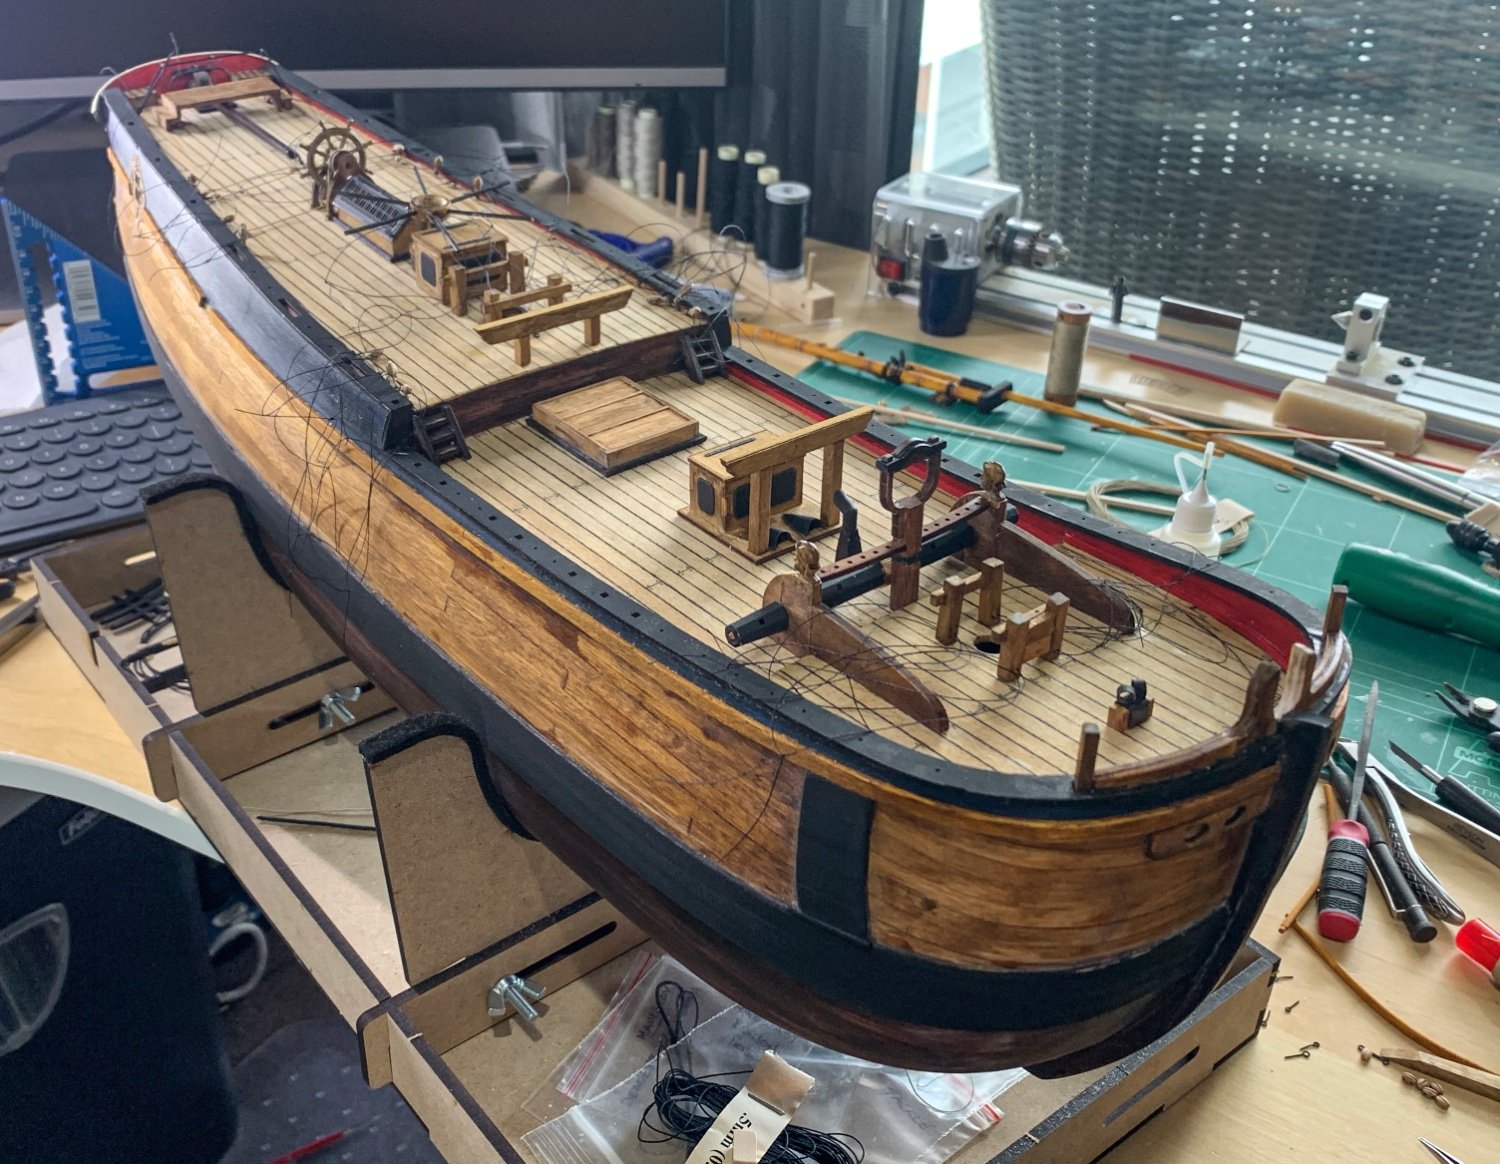
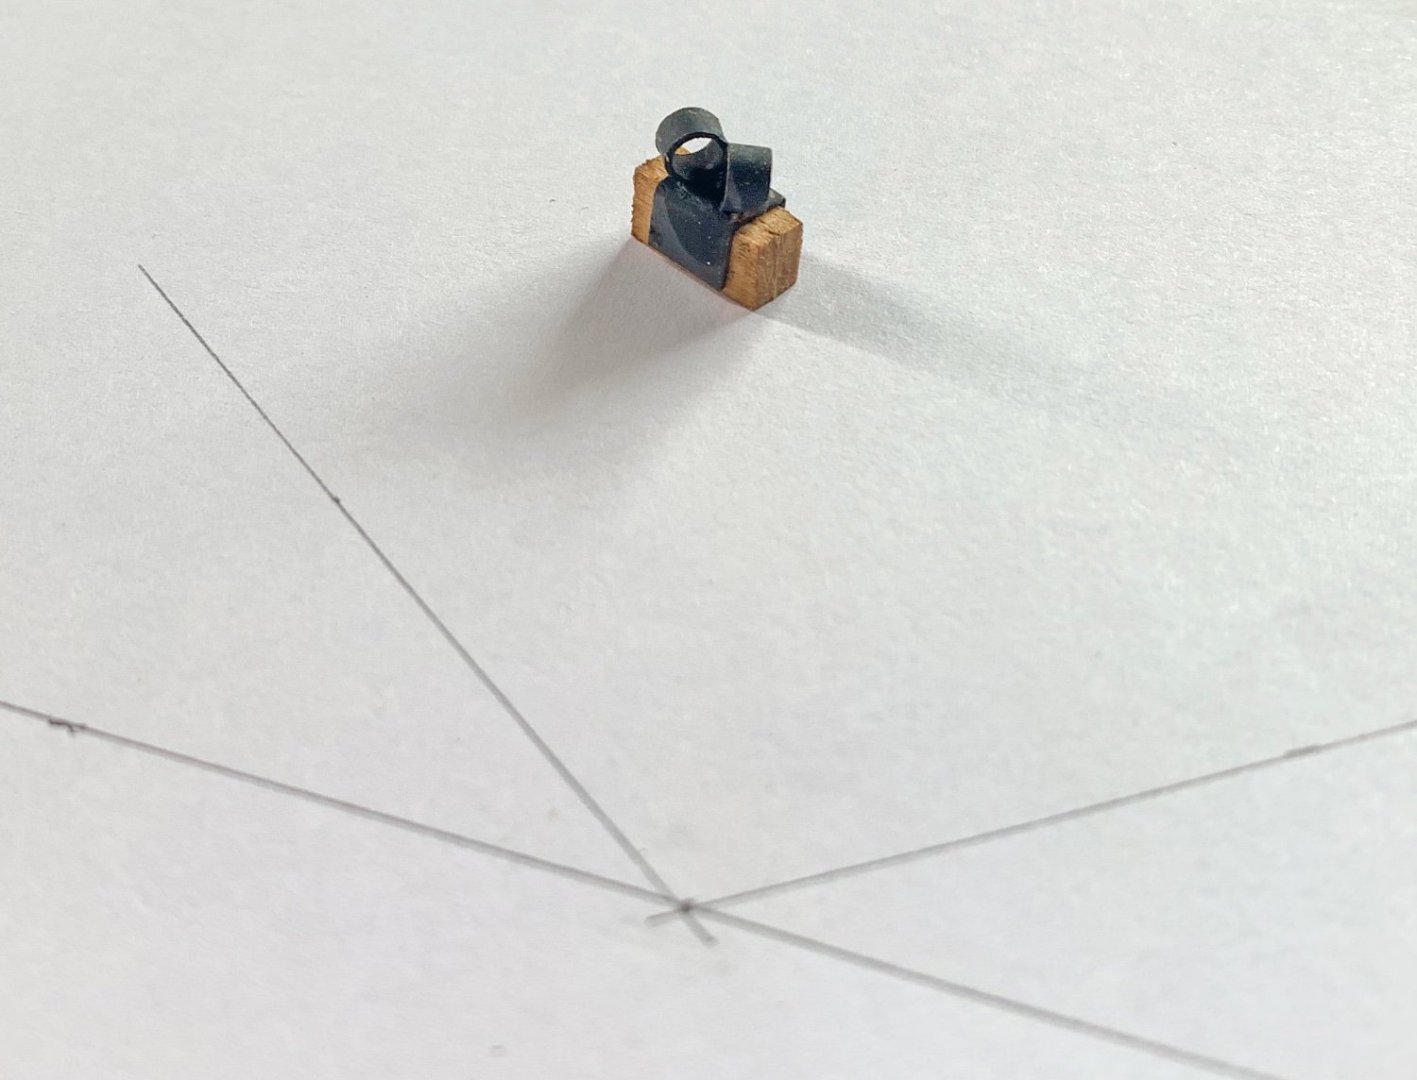
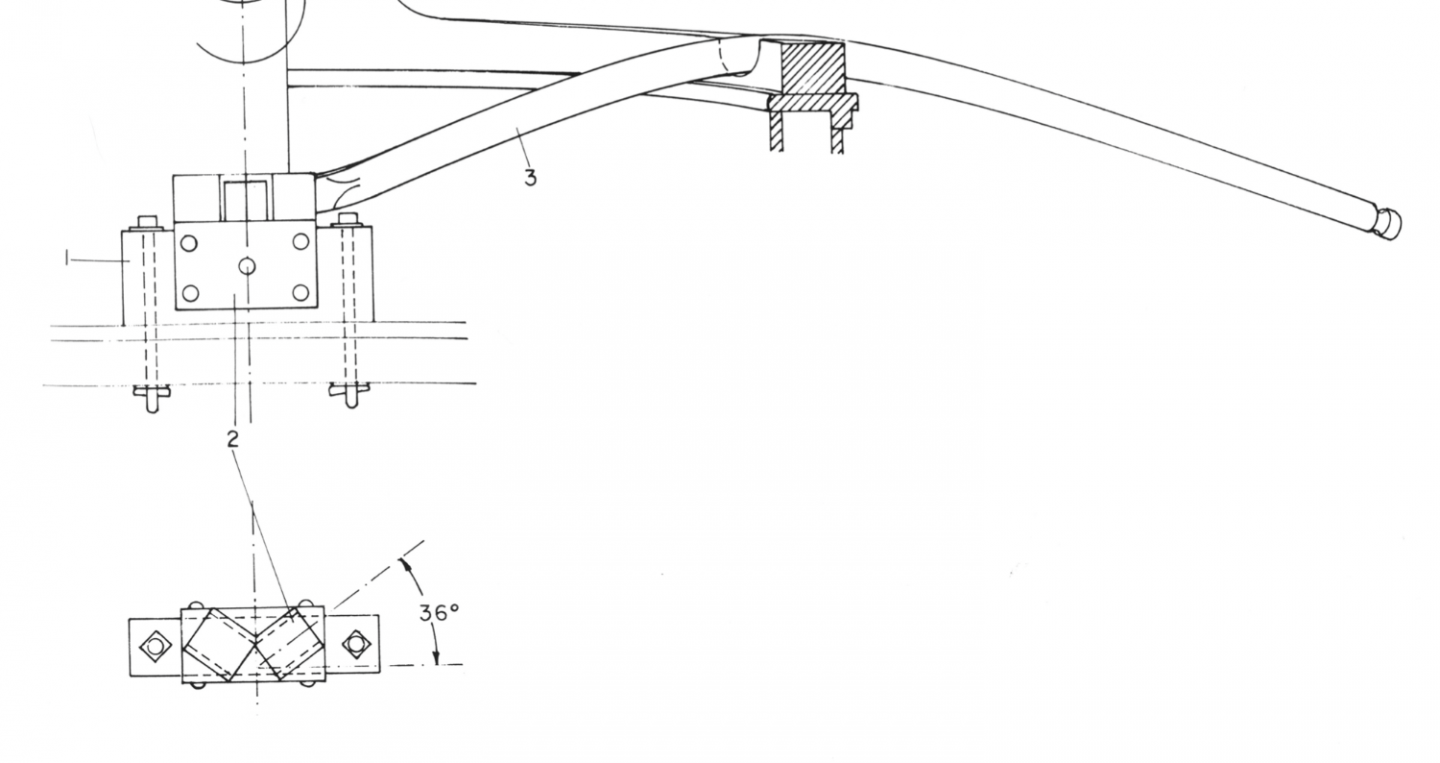
One of the items missing in the Artesania kit are the Bumpkins. I soaked and bent some 3mm dowel (after tapering and turning stepped end). It was difficult as the dowel kept snapping even after prolonged soaking in boiling hot water, however persistence paid off. The stand into which the Bumpkins mount on the centreline was made from 3mm brass tube and flat brass bent and mounted onto a 5mm x 4mm base. I have 5 holes to drill in the face of the brass to fit brass rod which secure the "iron" to the "wood" then make up two more pins to hold the base to the deck.
- 79 replies
-
- 2
-
-
- Endeavour
- Artesania Latina
- (and 1 more)
-
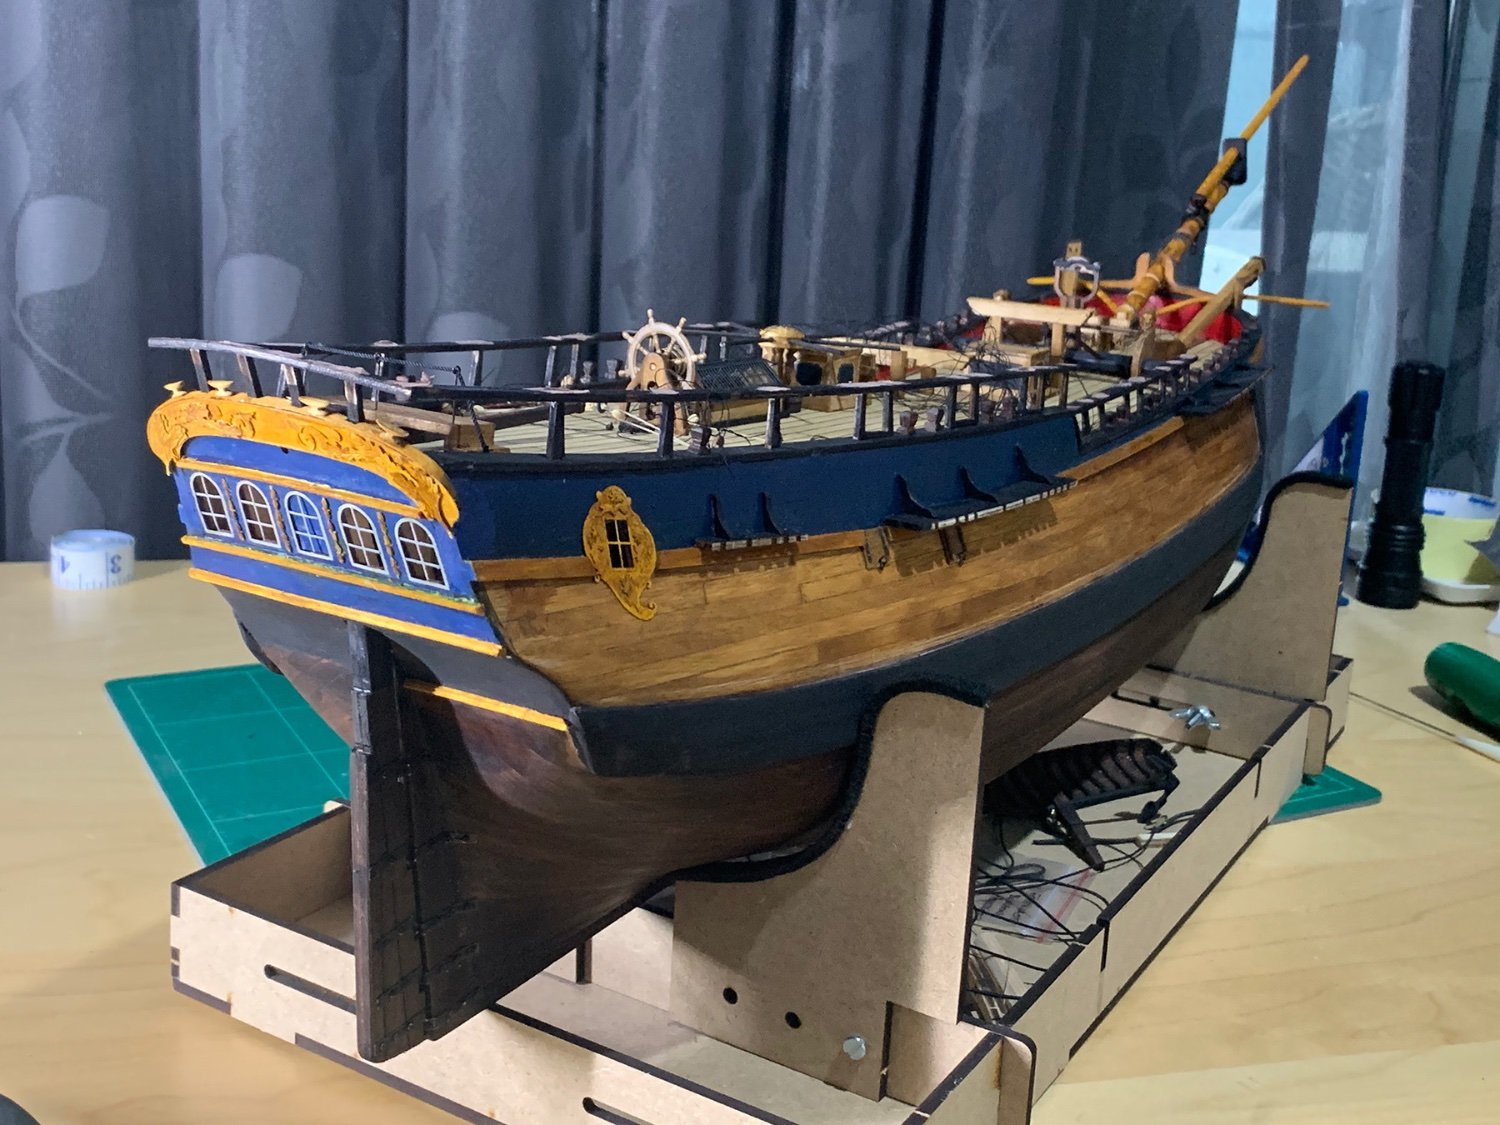
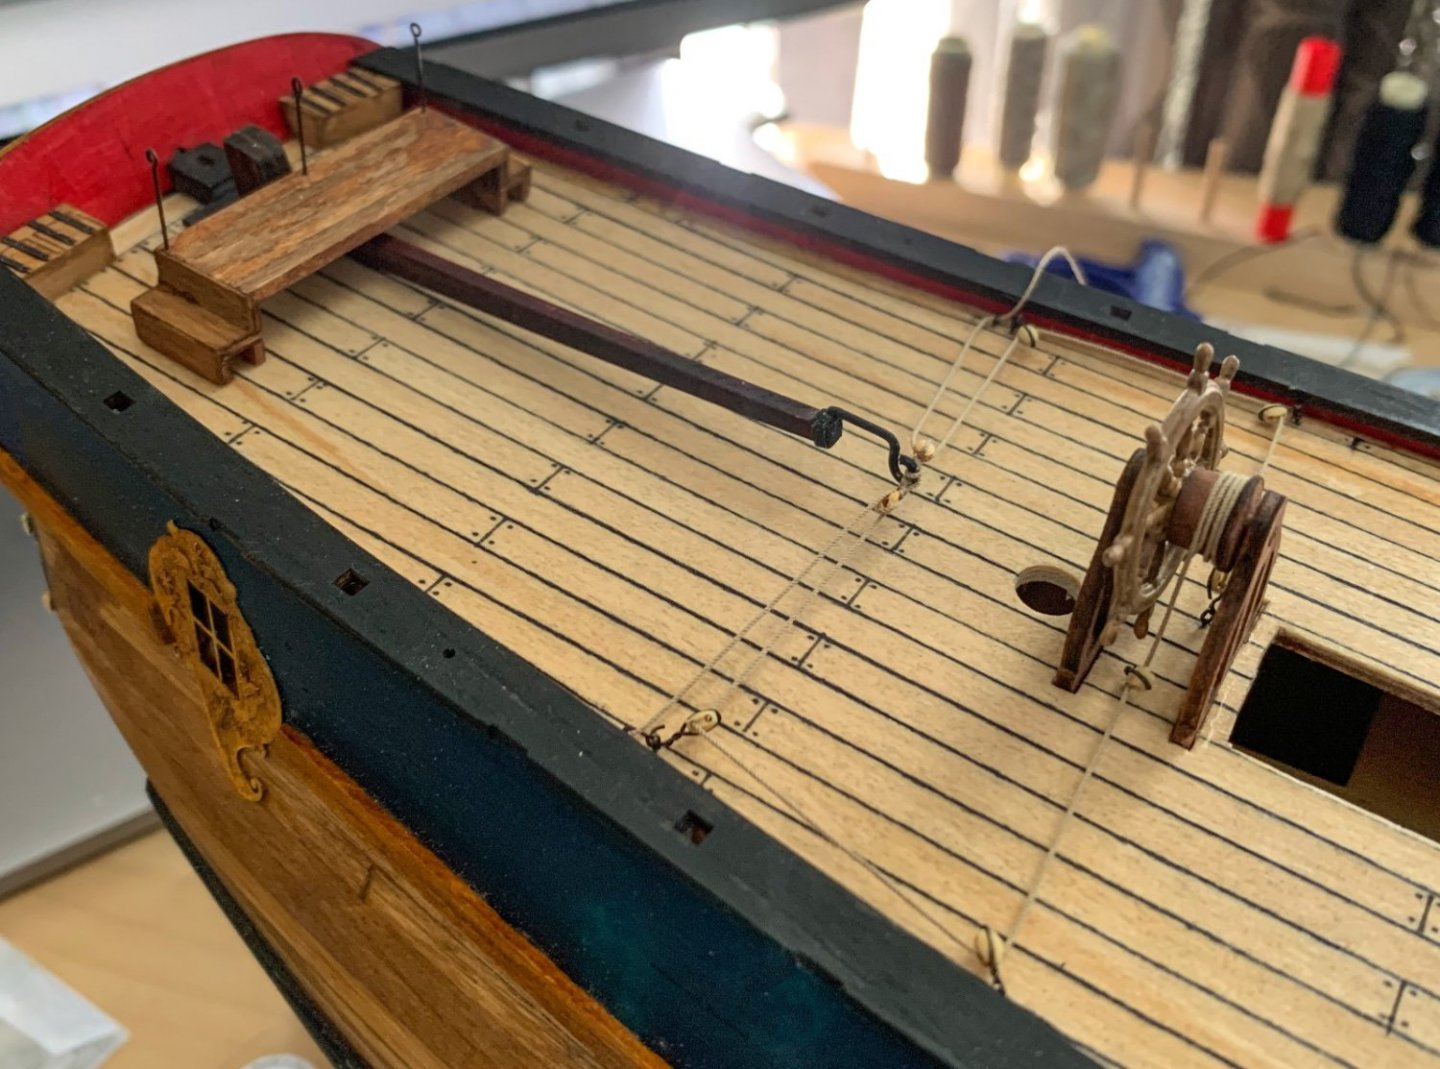
Finally started some rigging.... well the steering anyway now that the rudder is in using 3mm SB, 3mm wire for deck rings and iron hooks and 0.5mm Ropes of Scale. Still have to secure each end to the iron rings. I did modify the ships wheel structure to more closely represent the original. I also fitted the iron end of the tiller with an iron clamp on the end of the tiller rather than rope lashing per the instructions. The rear platform has been fitted, stained and then rubbed back to look like its worn from use. Still have the iron rings and rope railing to fit.
- 79 replies
-
- 6
-
-
- Endeavour
- Artesania Latina
- (and 1 more)