Peter6172
-
Posts
182 -
Joined
-
Last visited
Content Type
Profiles
Forums
Gallery
Events
Everything posted by Peter6172
-

EURYALUS 1803 by Peter6172 - 1:48
Peter6172 replied to Peter6172's topic in - Build logs for subjects built 1801 - 1850
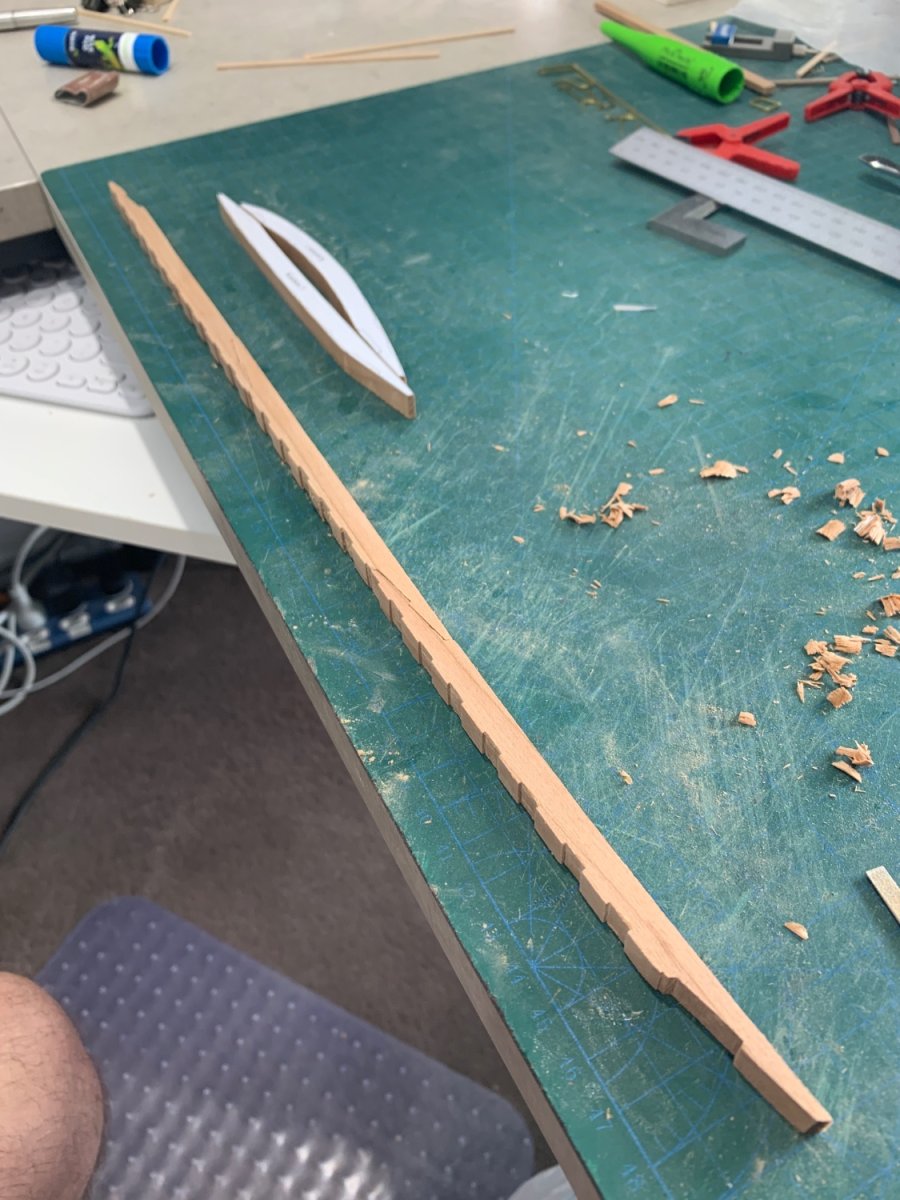
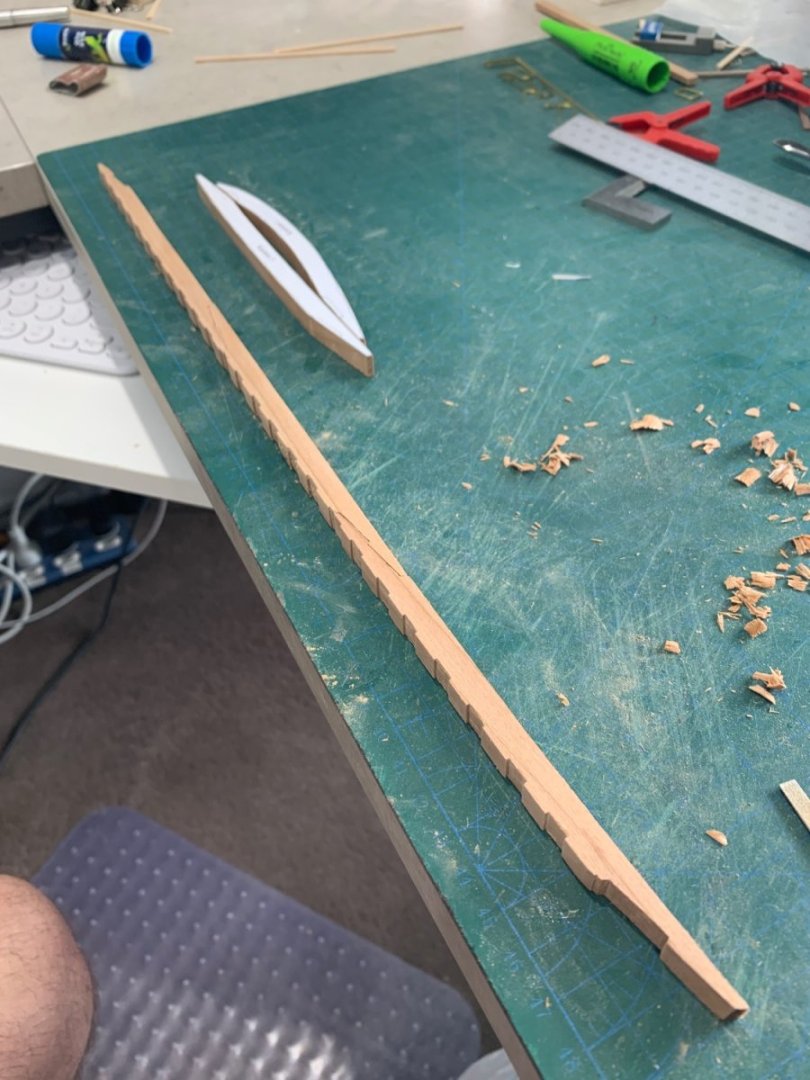
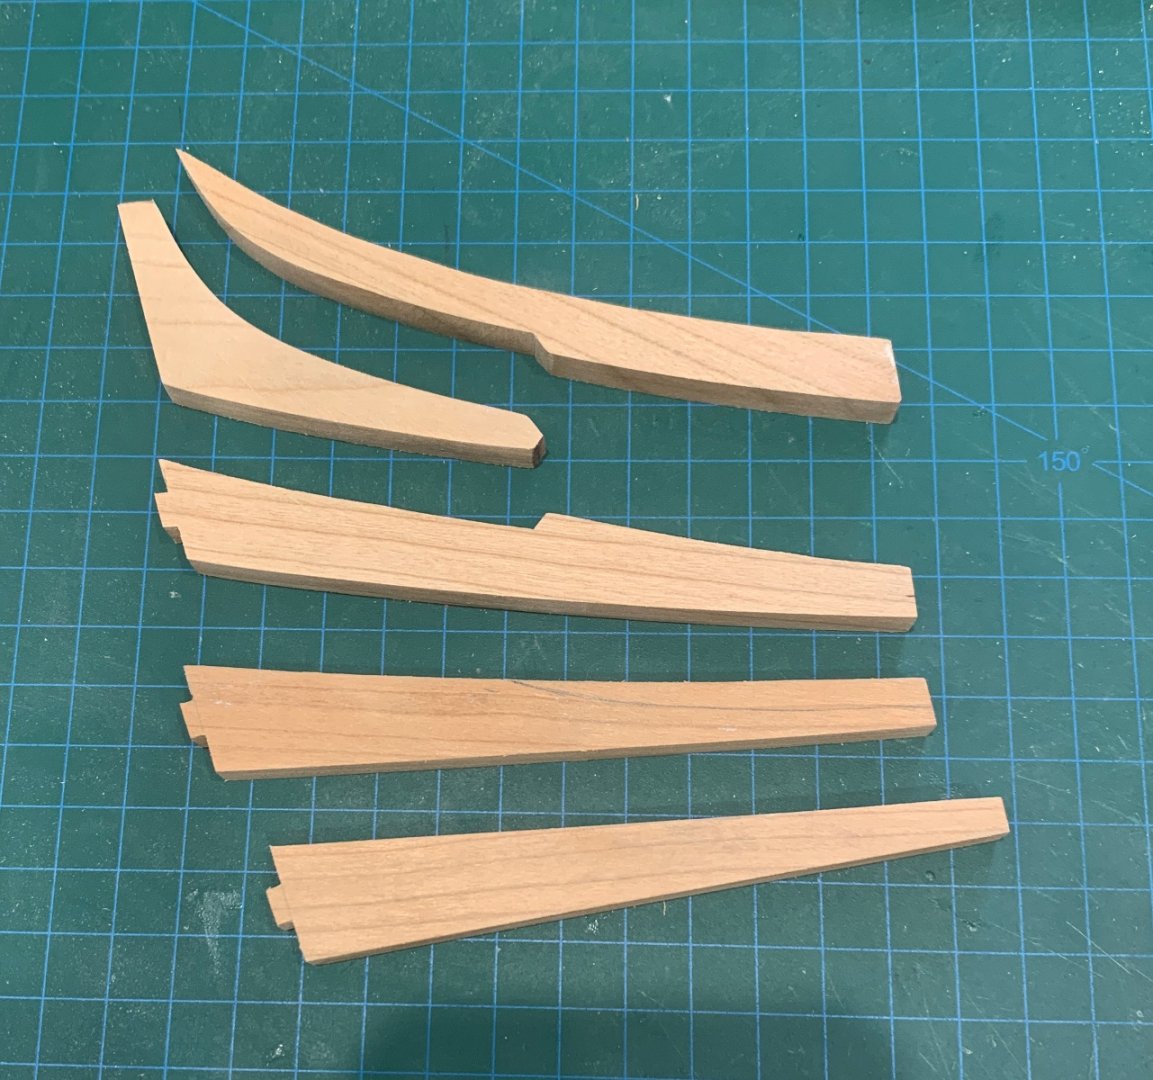
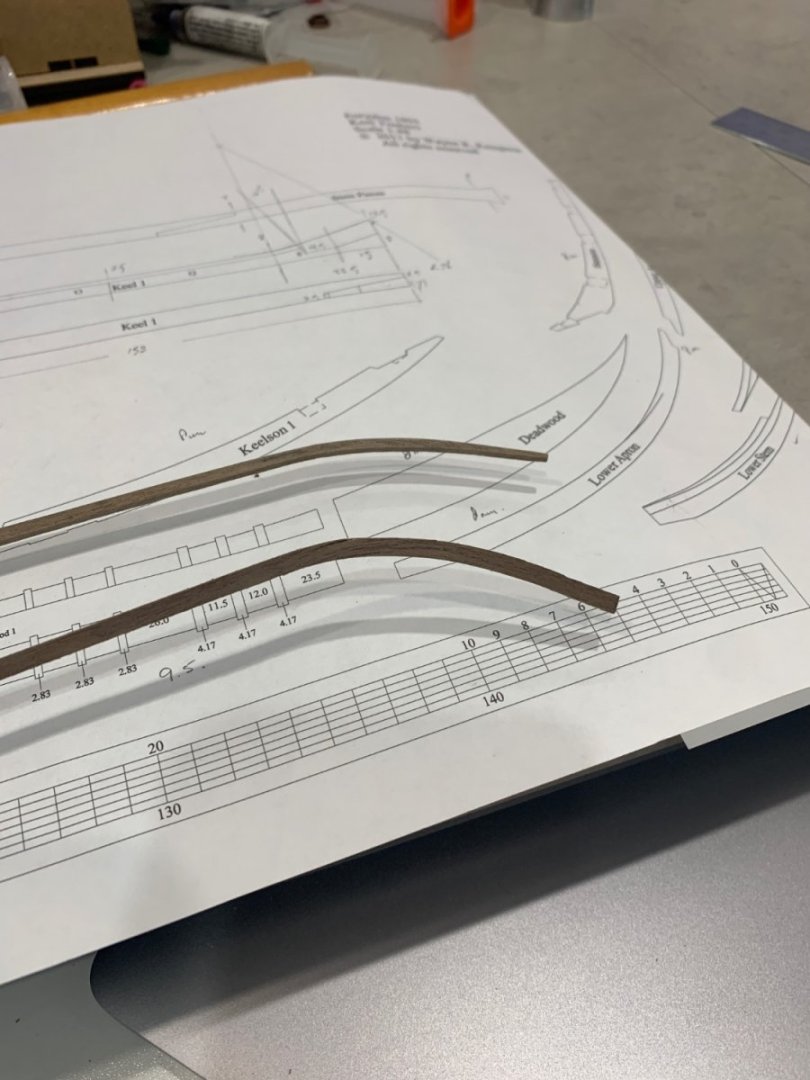
Inclement weather today made making up the reference board impossible (not something I can do inside the apartment). So I cut out all of yesterdays frames, sanded them up and them started on the Keelson components. Keelsons sections #2, 3, 4 and 6 are all but finished and #6 fitted up to the aft deadwoods and Steronsom Knee (only dry fitted until all the frames are made and installed). Keelson sections #1 and 5 are templated, just need scoring and fitting up to the other sections.
-
EURYALUS 1803 by Peter6172 - 1:48
Peter6172 replied to Peter6172's topic in - Build logs for subjects built 1801 - 1850
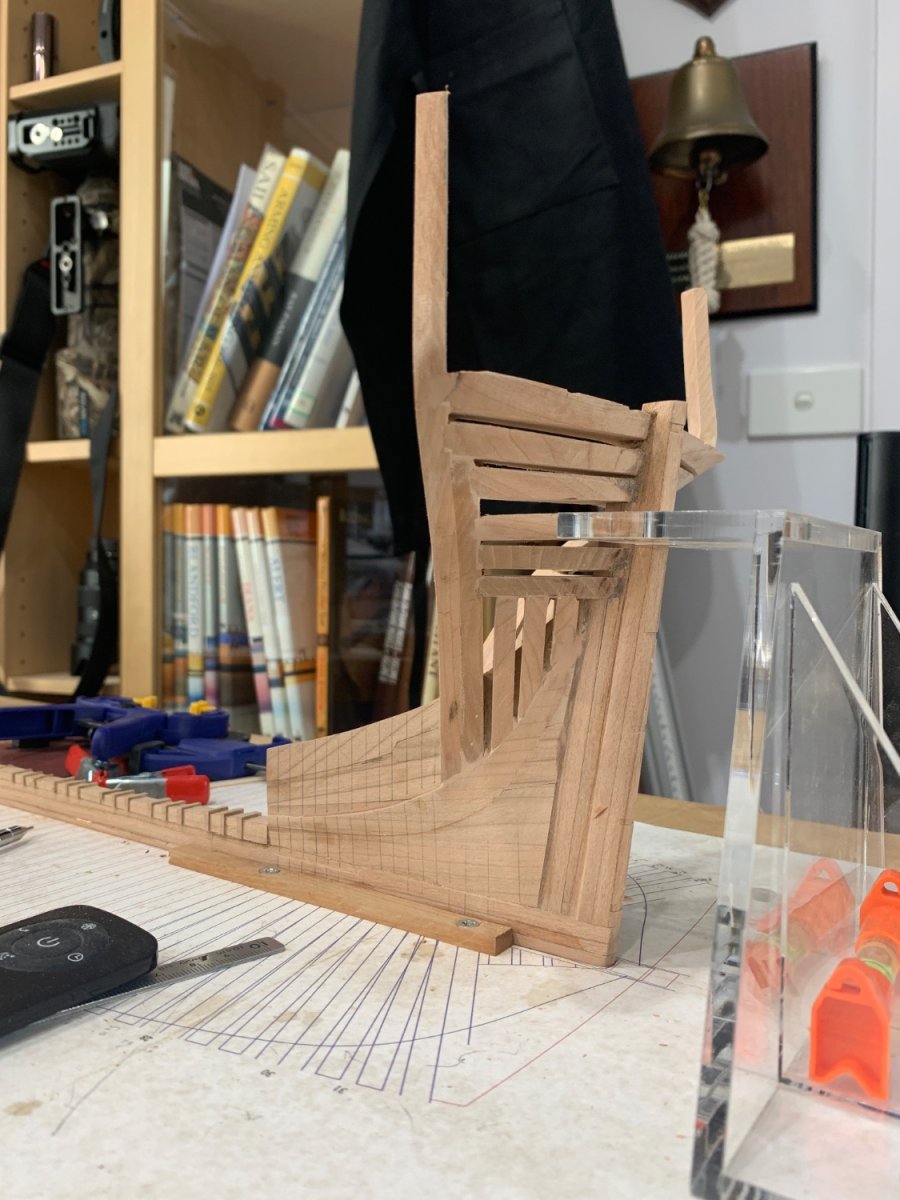
A day spent template ing and cutting framing pieces..... I have made up half of F30A when I realised that F31A was the aft can't frame.... I am leaving the frames a little oversized (not cut nor faired to the line) so I have wiggle room for fairing. I have ordered up timber and threaded rods to make up the reference line board to support the frames as I proceed forward. Should pick up the bits tomorrow and spend the day cutting out the support board, lining it up on the building board then drill the support holes. Getting the plan on the reference board aligned with the building board will be undertaken before drilling the supports. More on that tomorrow.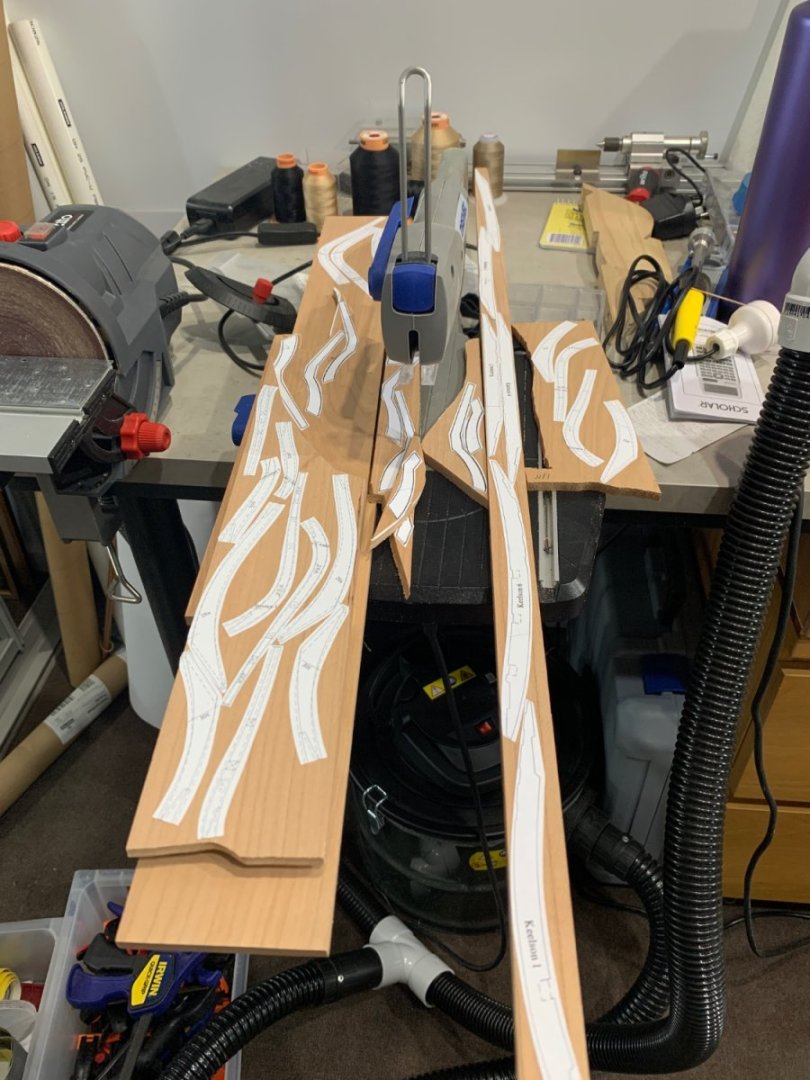
-
EURYALUS 1803 by Peter6172 - 1:48
Peter6172 replied to Peter6172's topic in - Build logs for subjects built 1801 - 1850
Work on the rudder has stalled. I did not have enough Brass strip nor the right size of rod and tube for the gudgeon pins and pintals. Fashion pieces installed and the whole stern section given its preliminary fairing inside and out. Fashion pieces are still a little oversize so they can be "blended" into the rest of the frames as the go in. I have also used a little filler to help fair the joints (where tenons/mortices did not match tightly) or the beading line joint did not match. Have learned that I need to cut the fill frames closer to their faired shape before glueing in so I can fully see the joins. I have started on the other can't frames. F31A sections is being glued up with their joining chocks as we speak. Frames 31F, 30A/F and 29A/F are templated and ready to scroll saw out. The position of the can't frames on the deadwood have also been marked out in pencil.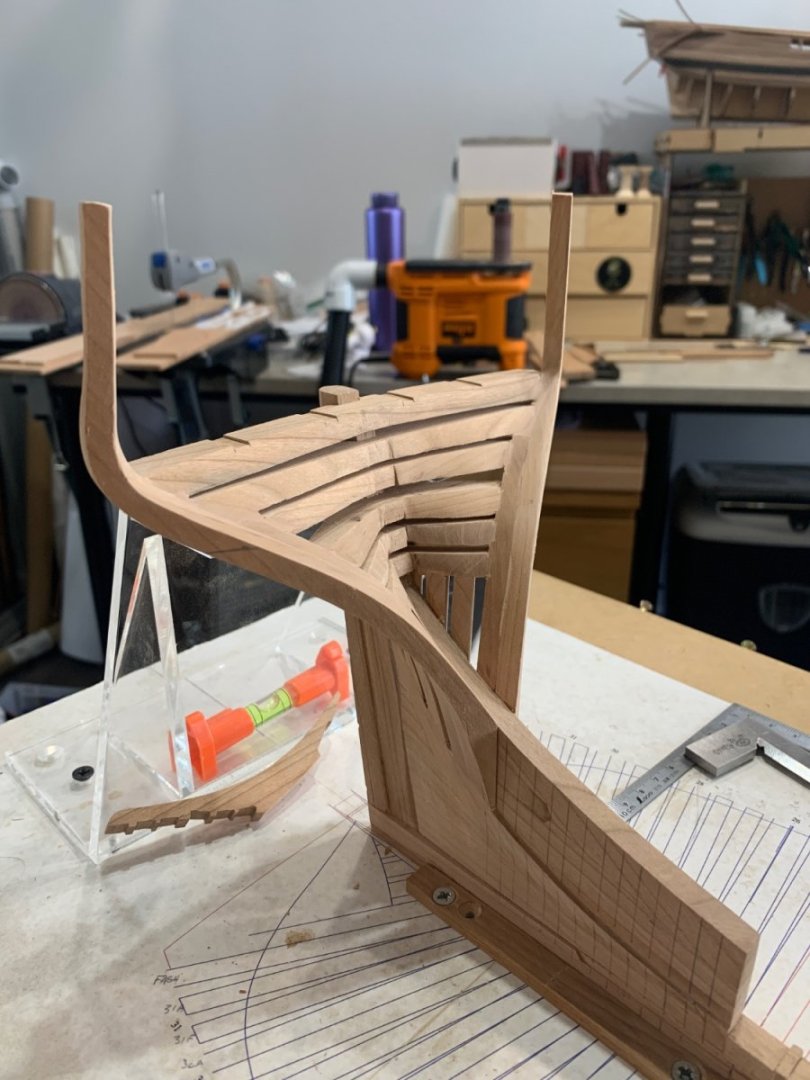

-
EURYALUS 1803 by Peter6172 - 1:48
Peter6172 replied to Peter6172's topic in - Build logs for subjects built 1801 - 1850
Mark. It's a handrolic Zona razor saw. Goes as fast as my hands can push it. -
EURYALUS 1803 by Peter6172 - 1:48
Peter6172 replied to Peter6172's topic in - Build logs for subjects built 1801 - 1850
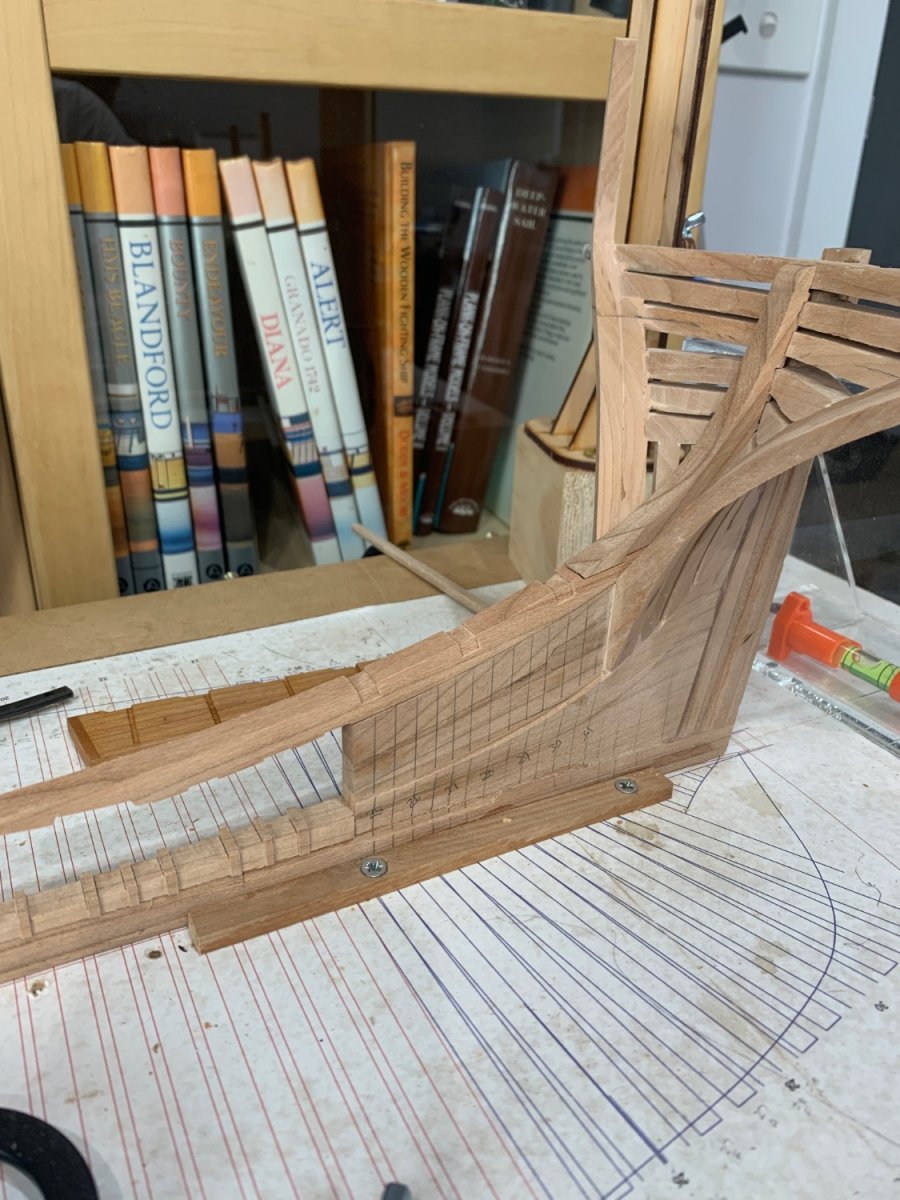
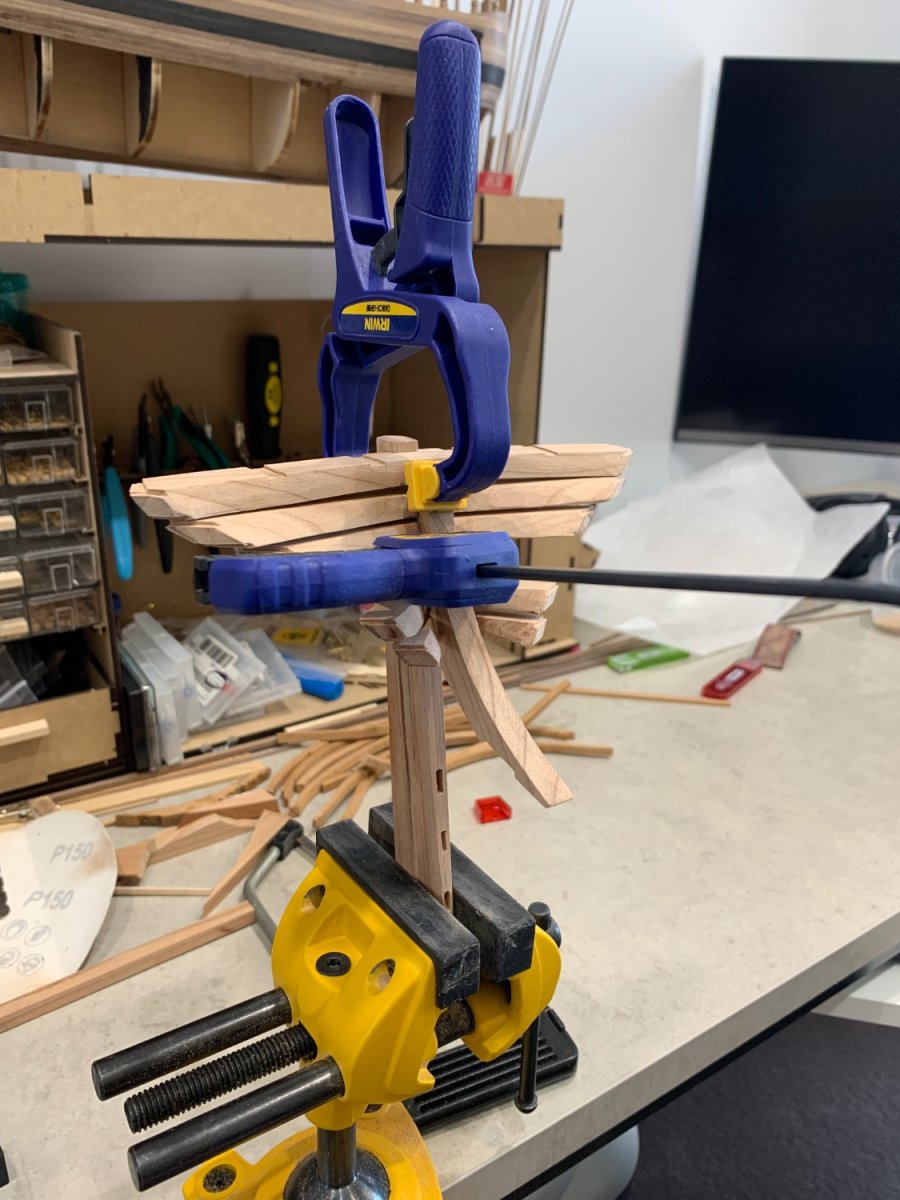
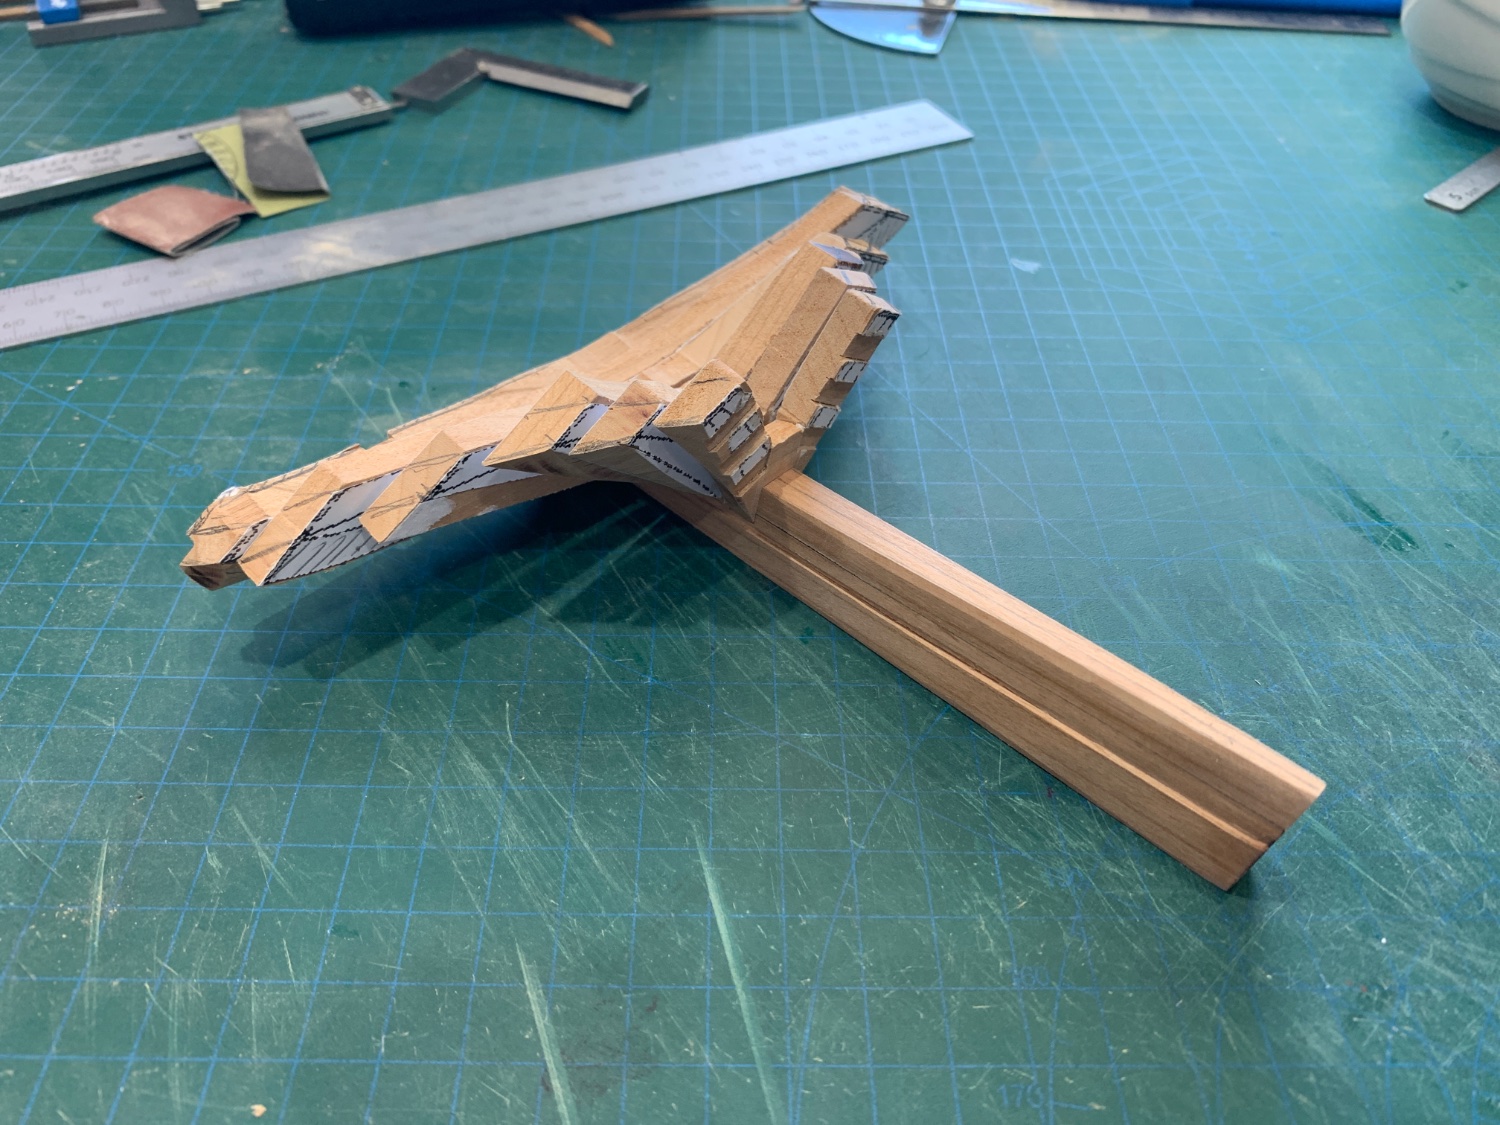
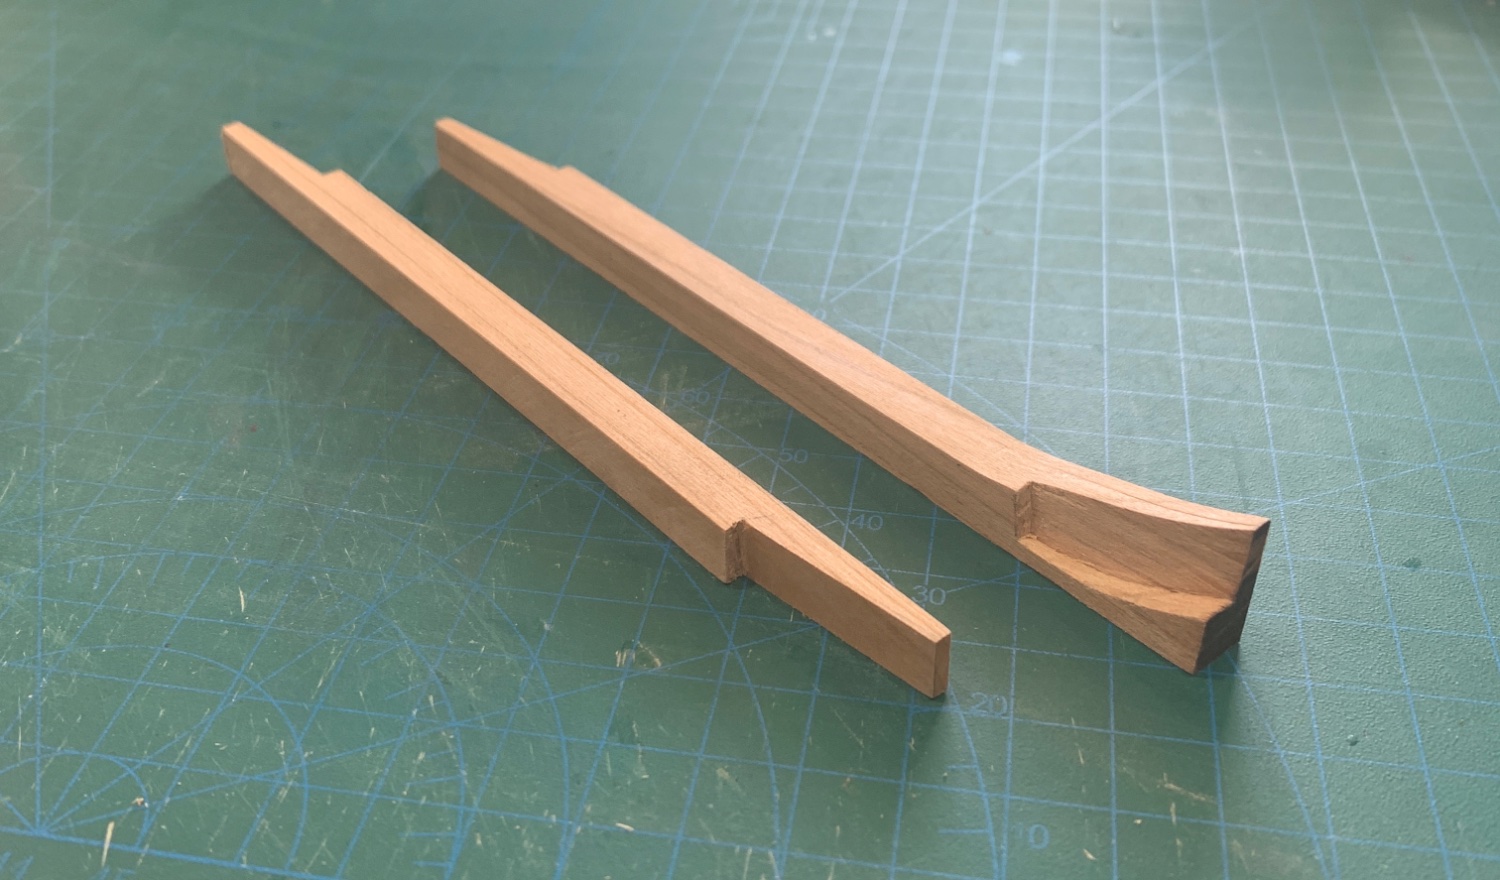
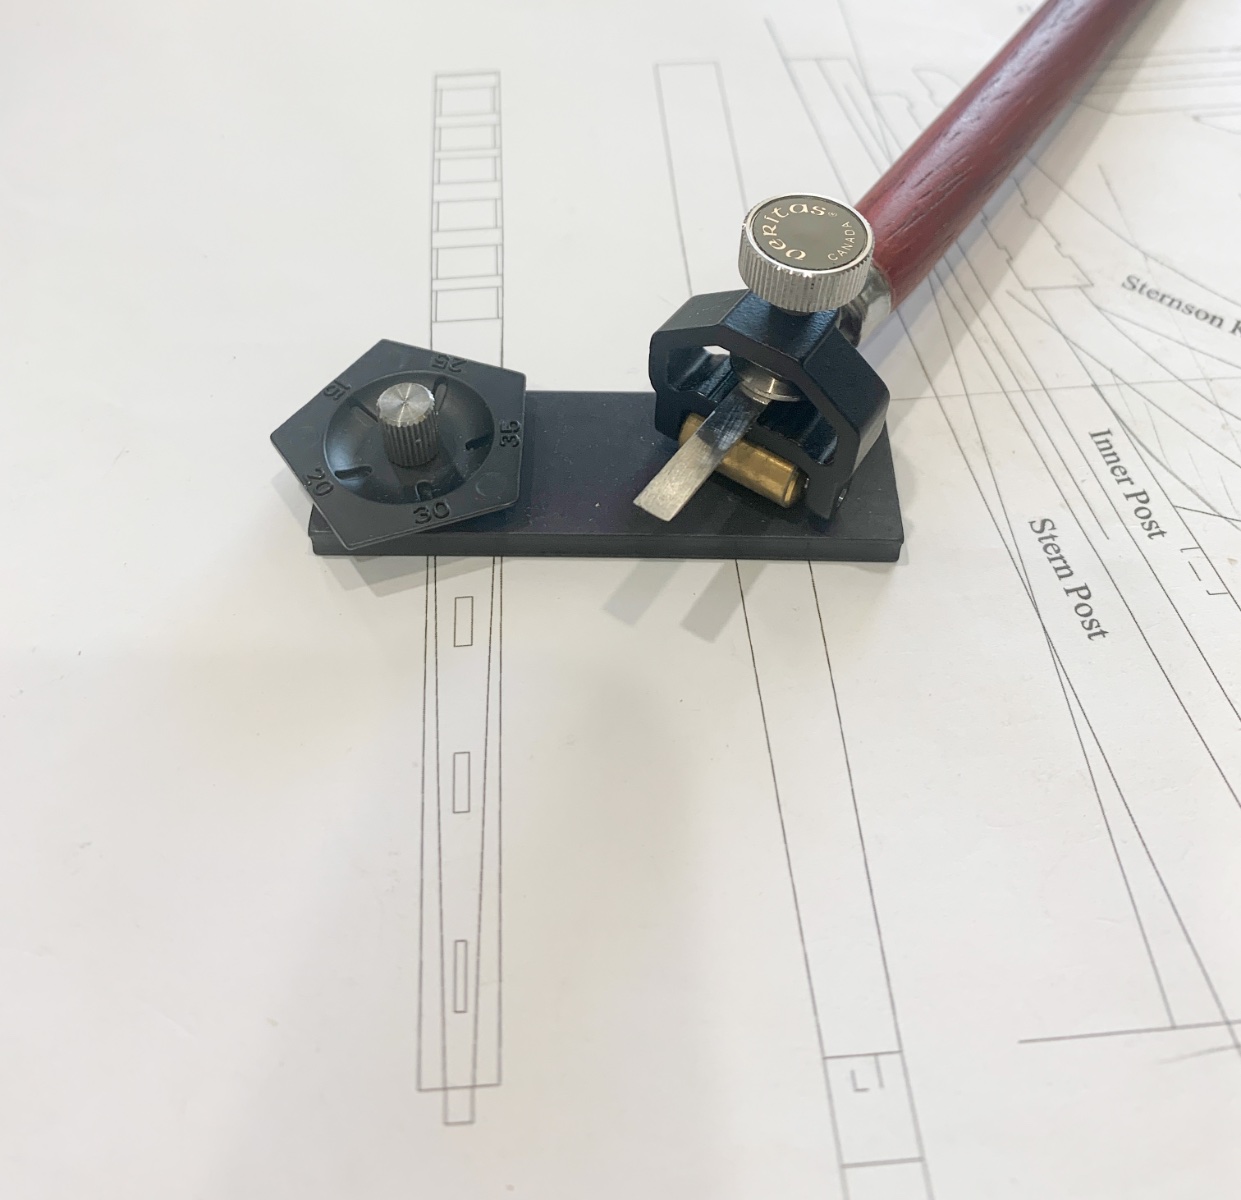
A little more headway on EURYALUS this weekend. While waiting for the rising wood assembly to glue to the keel, I decided to go off course a little and steered toward making the rudder. Nothing unusually difficult in this and a nice mixed wood/brass component. Tapering the rudder stock was done with a nice wooden 1/2" finger plane. I also chose to bevel 60º rather than round the edge adjoining the stern post. I have the brass straps all made and dry fitted; just need to silver solder in the pintels, then drill for nails, clean and blacken the brainwork before final assembly. I still have the four head straps to make up
-
EURYALUS 1803 by Peter6172 - 1:48
Peter6172 replied to Peter6172's topic in - Build logs for subjects built 1801 - 1850
I have to admit that the rising woods are not easy to keep neat and tidy. It may be the cut of wood I am using but I seem to loose some corners on the webs. Perhaps the Cherry is a little dry and brittle? or I am just being a little clumsy....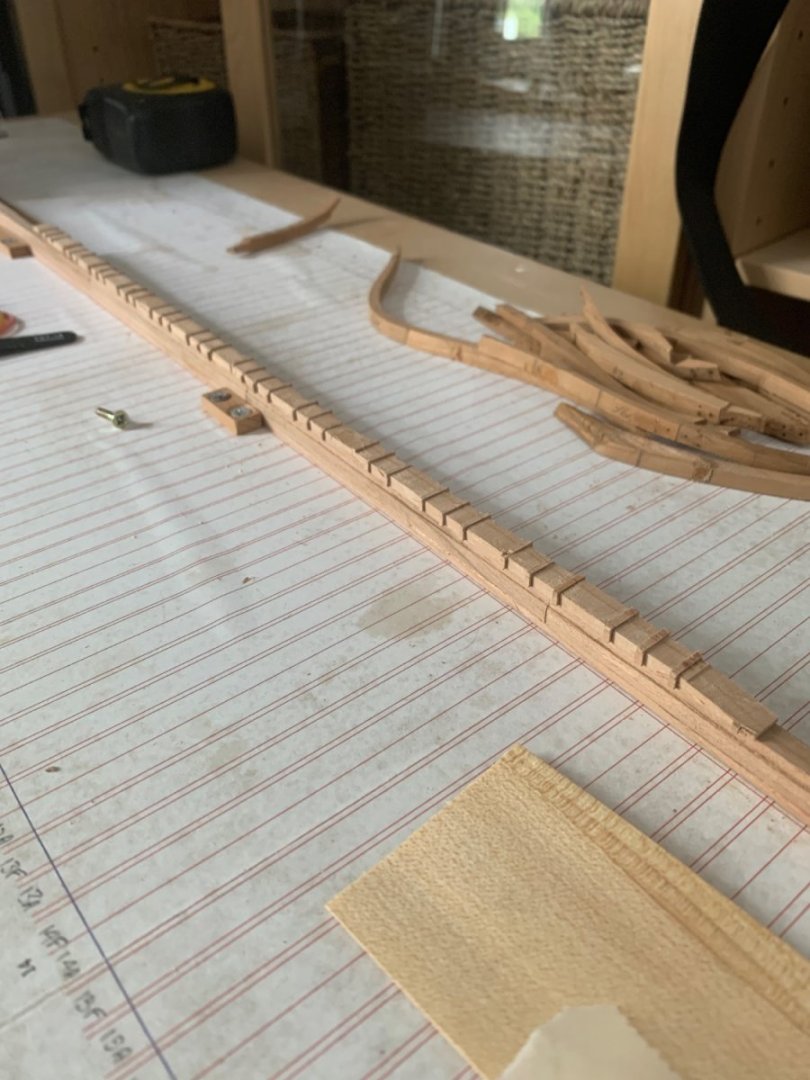
-
EURYALUS 1803 by Peter6172 - 1:48
Peter6172 replied to Peter6172's topic in - Build logs for subjects built 1801 - 1850
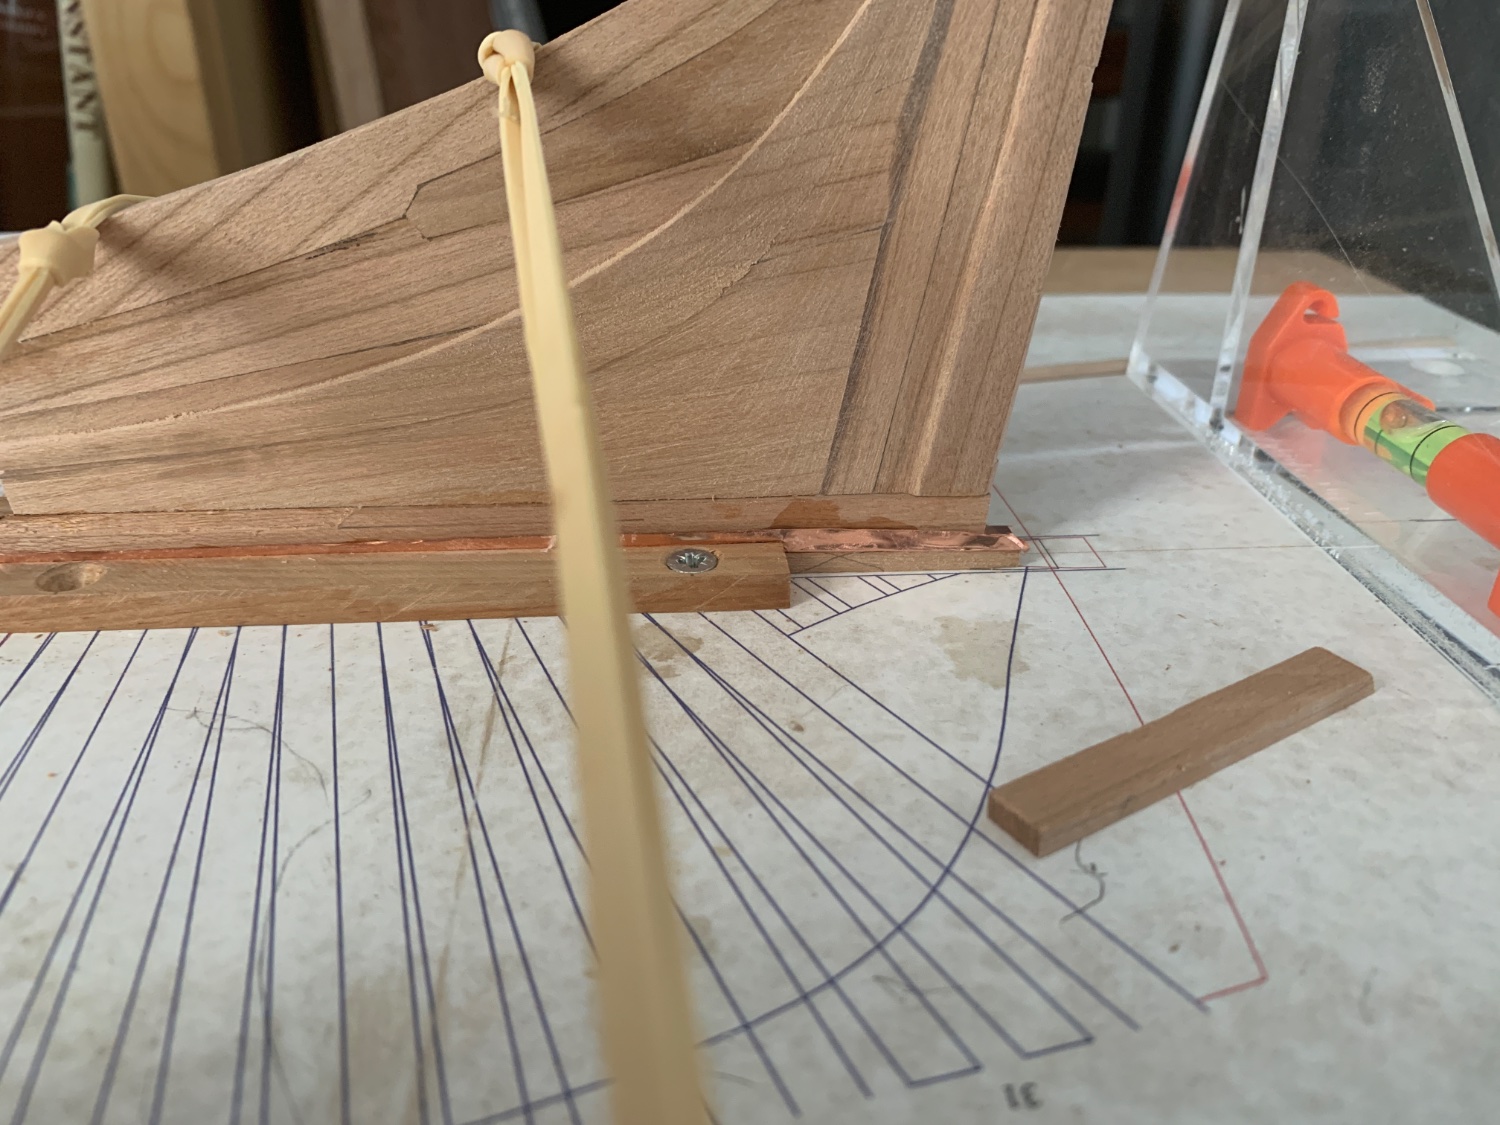
Glue up of keel and stern assembly. 12mm coper foil added between the keel and false keel using self adhesive one side and super glue the other. I will carefully lift the assembly once the wood glue has dried and drill and pin using bamboo dowel between the false keel and the keel then drill and pin (copper wire pins) the keel scarfs and the stem pieces.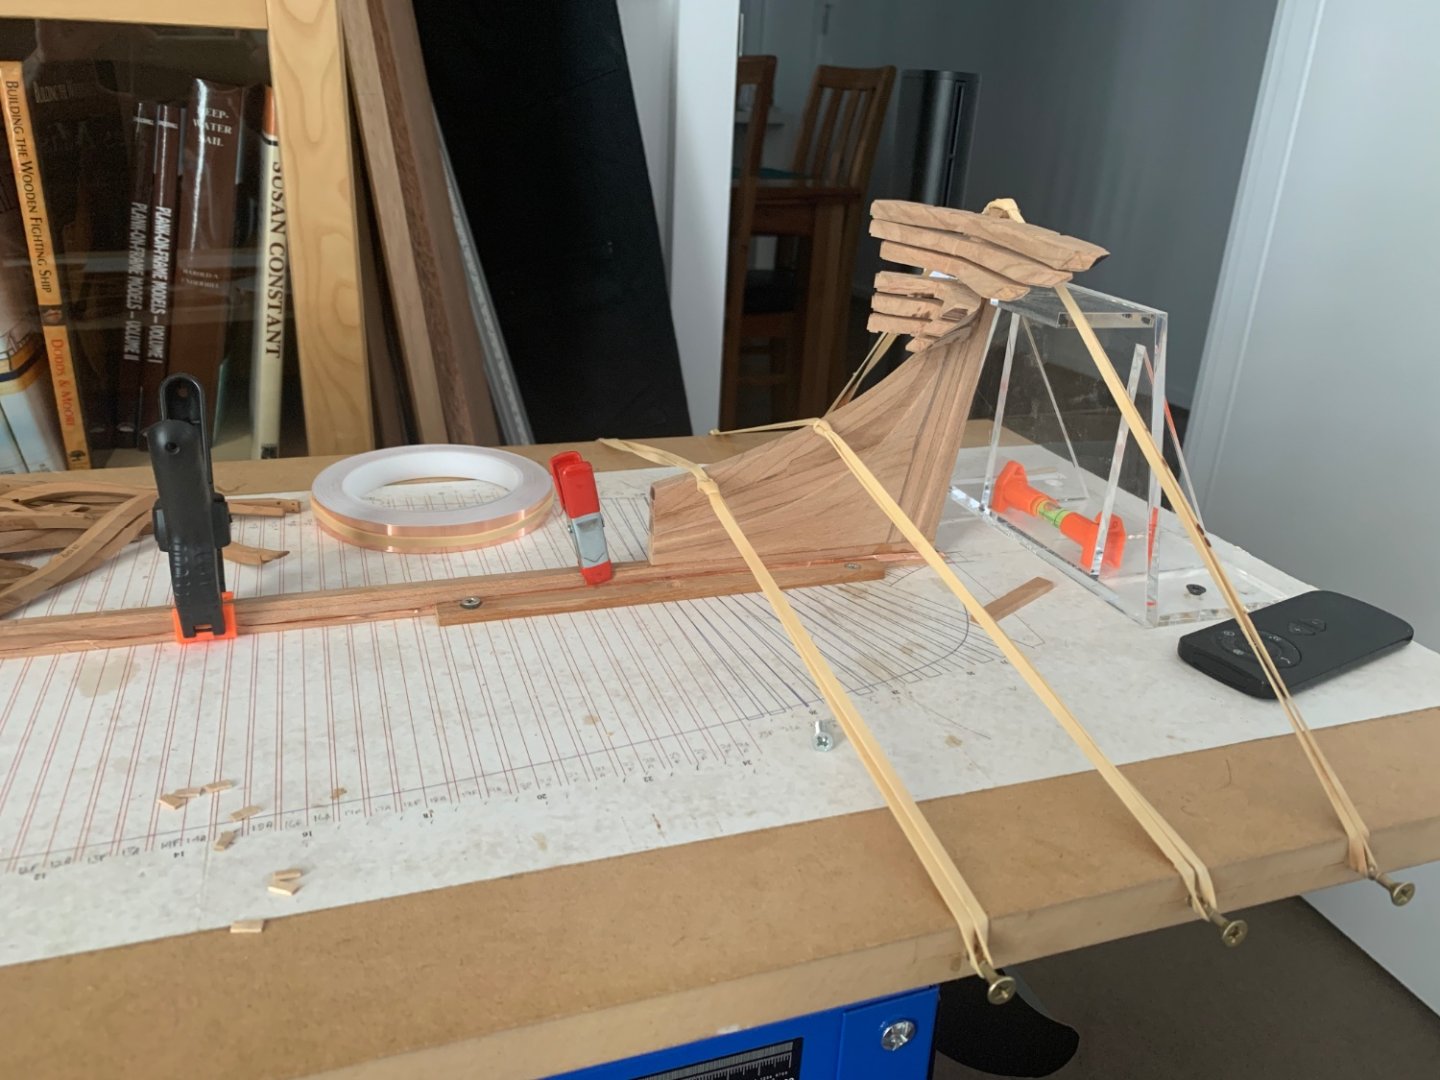

-
EURYALUS 1803 by Peter6172 - 1:48
Peter6172 replied to Peter6172's topic in - Build logs for subjects built 1801 - 1850
Almost ready to lay the keel and install stern post and stem. False keel has been cut, scarfed, glue and placed. Just waiting on some copper foil to lay between the false keel and keel. Seen post/transoms.deadwood all glued up and dry fitted to keel. The first recycled part from Russells build is dry fitted too: port aft fashion piece. I had to cut the mortices as Russel only but fitted these joints. The fit was pretty good so everything is going by the drawings. I chose what I thought was the simpler option of sanding the aft deadwoods and forward aprons and fitting a 3" thick (scale) piece to set up the beading line. IN hind sight this was far more difficult as establishing the right thickness for the joints was something I should have done after glue up so some cherry sawdust filler was needed to level out the joints. This is a good reminder to make sure I do not cut the frame pieces to the line. Get it all glued up the do some pre-fairing and leave the main fairing until all the frames are securely in place.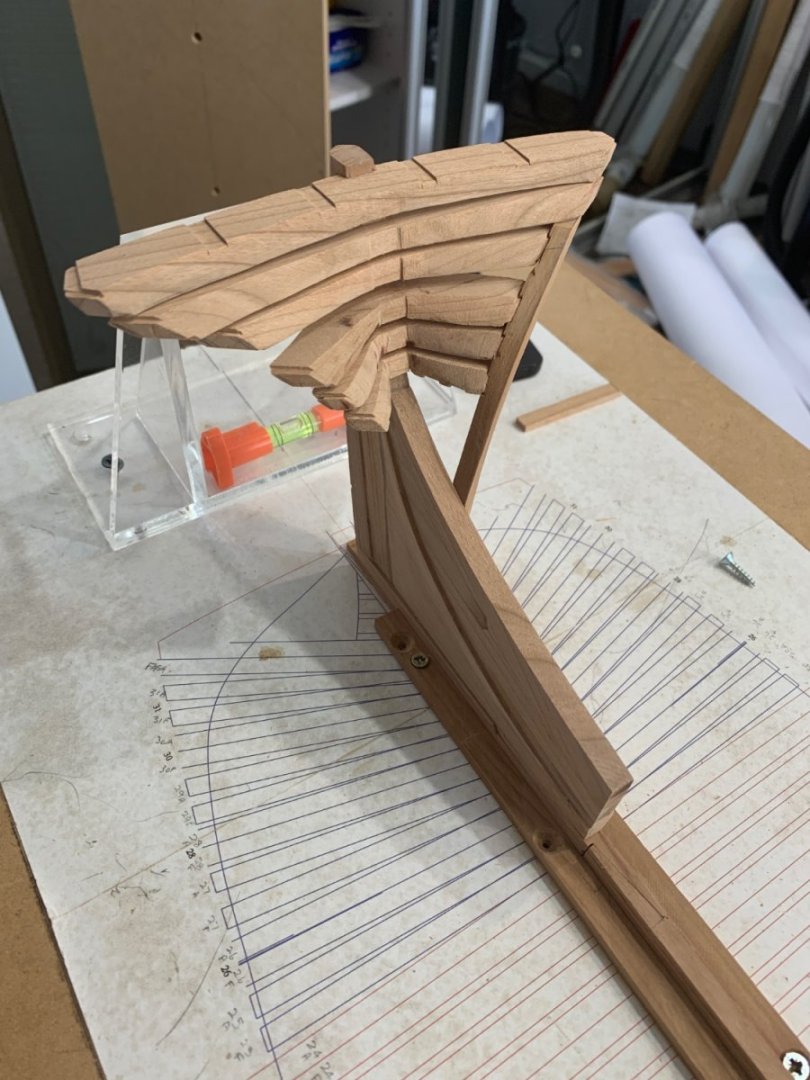
-
EURYALUS 1803 by Peter6172 - 1:48
Peter6172 replied to Peter6172's topic in - Build logs for subjects built 1801 - 1850
OK so its glue up day. Have started assembling the deadwood components and the transoms to the stern post (the sternsom knee is simply dry fitted under the clamps and ensuring the complete alignment of the transoms so there will be no nasty surprises later). I have also notched out the mortices for the deadwood tenon joints. This is where 1 and 2mm wide chisels really come to the fore. Finally got around to getting the replacement 1200 x 600mm replacement plans and elevation drawings to the printers so I can get on with fixing everything down on the building board. in the meantime I have been using photoshop to create font and back templates for the ribs on label paper.
-
EURYALUS 1803 by Peter6172 - 1:48
Peter6172 replied to Peter6172's topic in - Build logs for subjects built 1801 - 1850
New acquisition arrived today. This will helpmeet with shaping frames.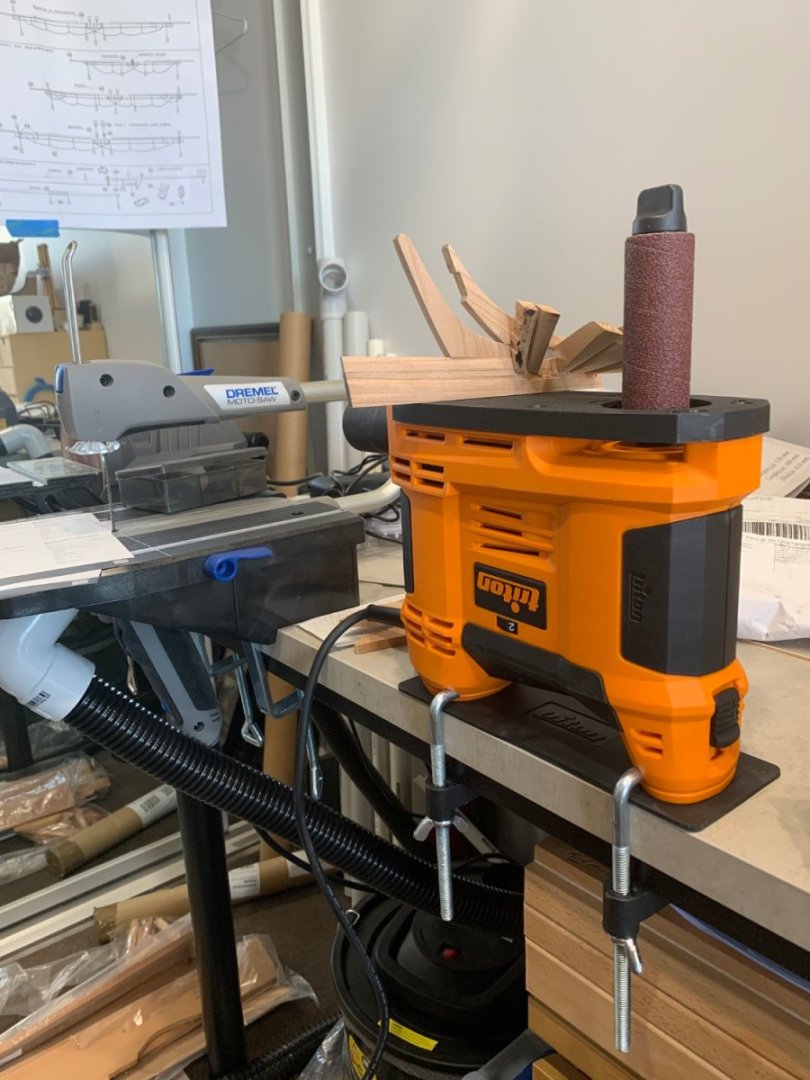
-
EURYALUS 1803 by Peter6172 - 1:48
Peter6172 replied to Peter6172's topic in - Build logs for subjects built 1801 - 1850
Ah..... well that makes everything simpler then -
EURYALUS 1803 by Peter6172 - 1:48
Peter6172 replied to Peter6172's topic in - Build logs for subjects built 1801 - 1850
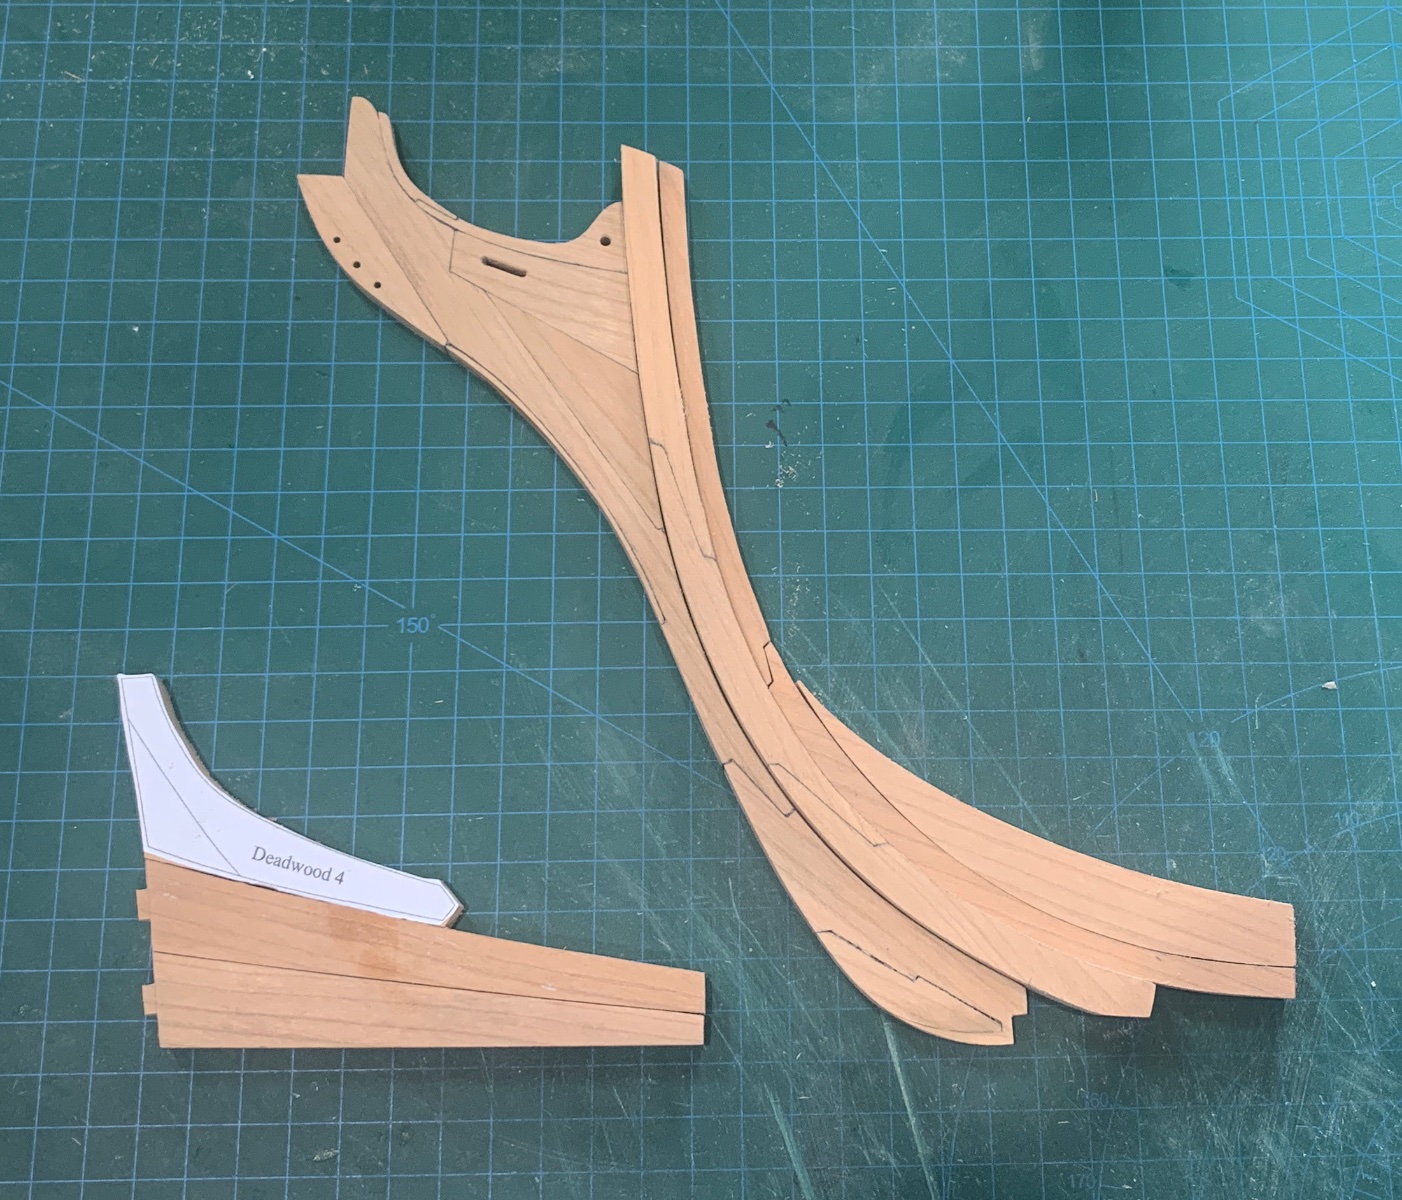
Couldn't wait. Had to do a preliminary fitting tonight otherwise I wouldn't sleep. First dry fit. Someminor shaping to do to fit the knee then test deadwood 4 and 5 elements to make sure everything will go together before I start gluing up. Waiting for some info back from Allan Y regarding the extent of copper between the false keel and the keel. Does it extend forward and under the gripe?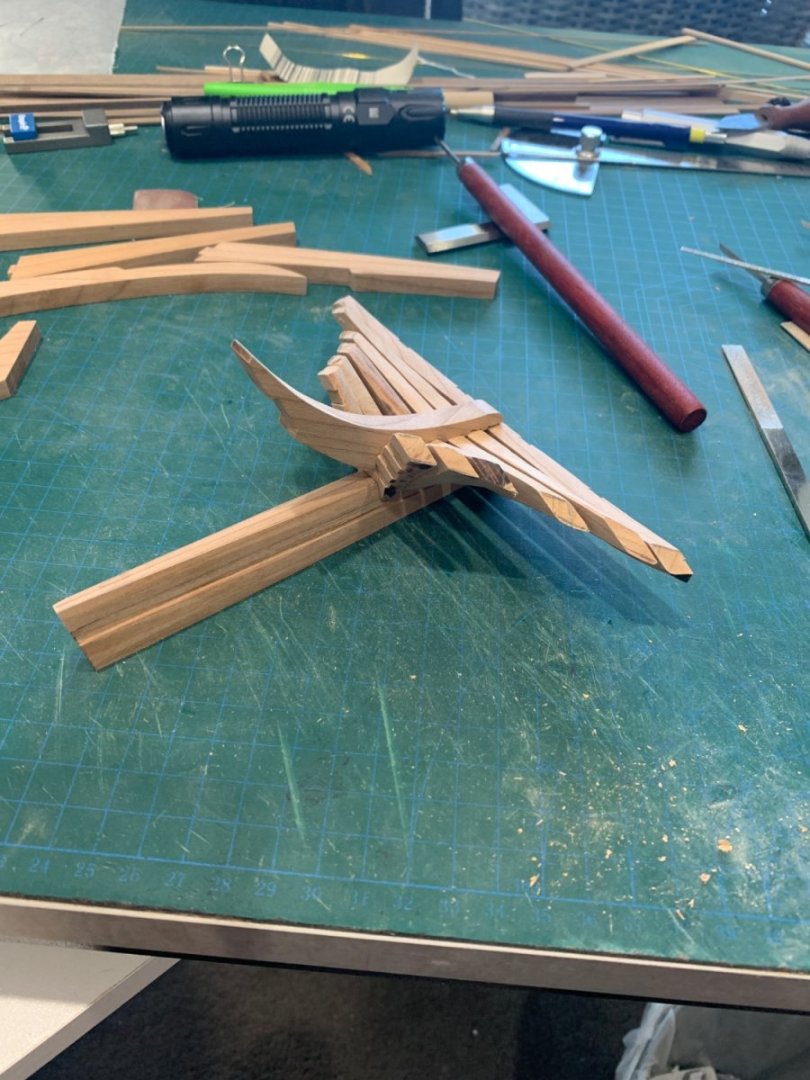
-
EURYALUS 1803 by Peter6172 - 1:48
Peter6172 replied to Peter6172's topic in - Build logs for subjects built 1801 - 1850
Alan, Missed tyour post before getting this far. The extent of shaping is just on the extreme edge so I will be able to assure the flat remains for the most part. I have now marked the margin in on all the transom pievces Stern post shaped and fitted with partially shaped transom pieces. For the underside templates, I made a copy of the transoms diagram on pg. 45 of Vol 1 of Allans book and then blew it up 195% on the copier; just remember which lines your supposed to be following.... Sternsom knee also cut and shaped. Final fitting to be undertaken once the transom have been internally shaped. All the keels have been made. Time to turn to the false keel components

-
EURYALUS 1803 by Peter6172 - 1:48
Peter6172 replied to Peter6172's topic in - Build logs for subjects built 1801 - 1850
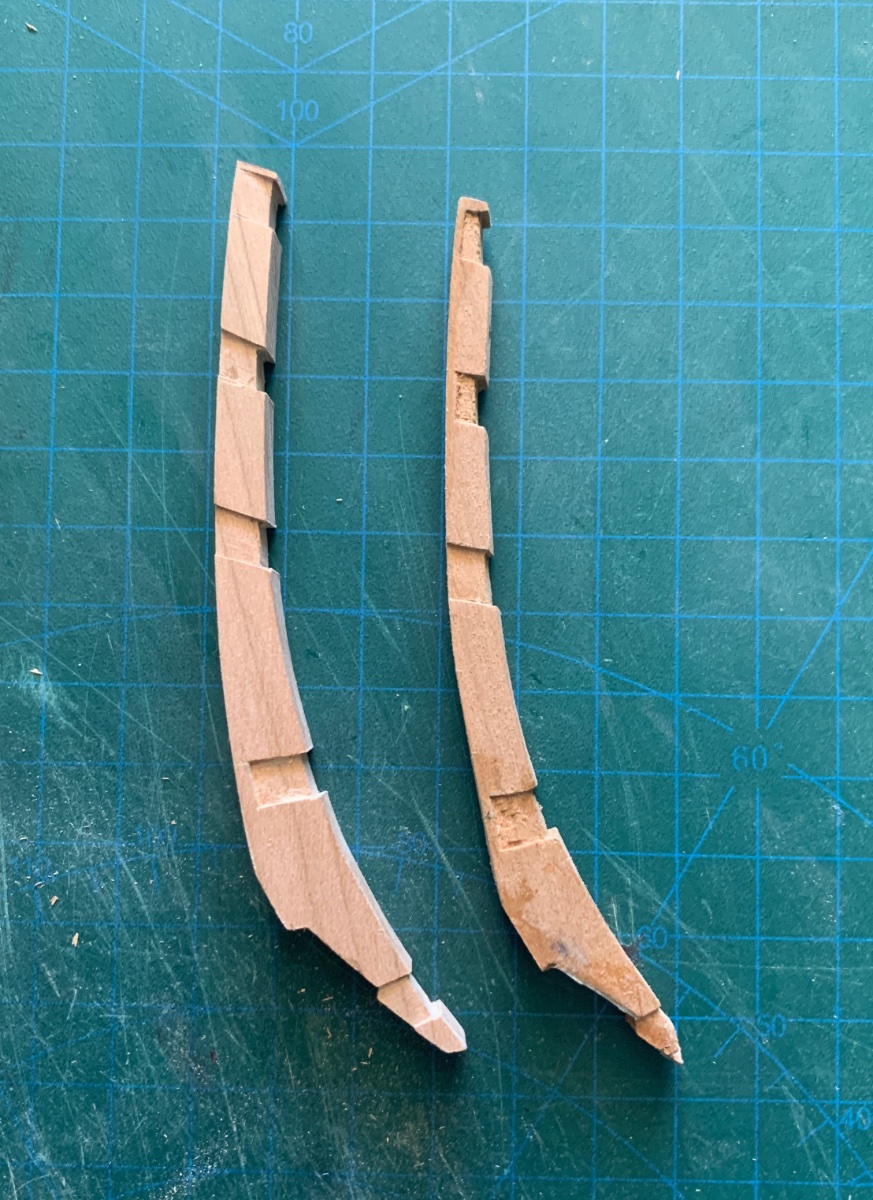
Forgot that I hadn't finished the Stemson so I did that this morning. As can be seen from the comparison, I suspect the original was made from a photocopy template that was not a full size copy (at least not in both x and y directions. The top transom has been fitted to the stern/inner post. I still have to shape the forward face, shape the camber athwartship then finally start the bevel on both forward and aft faces. I won't shape the sternpost till after all the transoms have been made and dry fitted it.
-
EURYALUS 1803 by Peter6172 - 1:48
Peter6172 replied to Peter6172's topic in - Build logs for subjects built 1801 - 1850
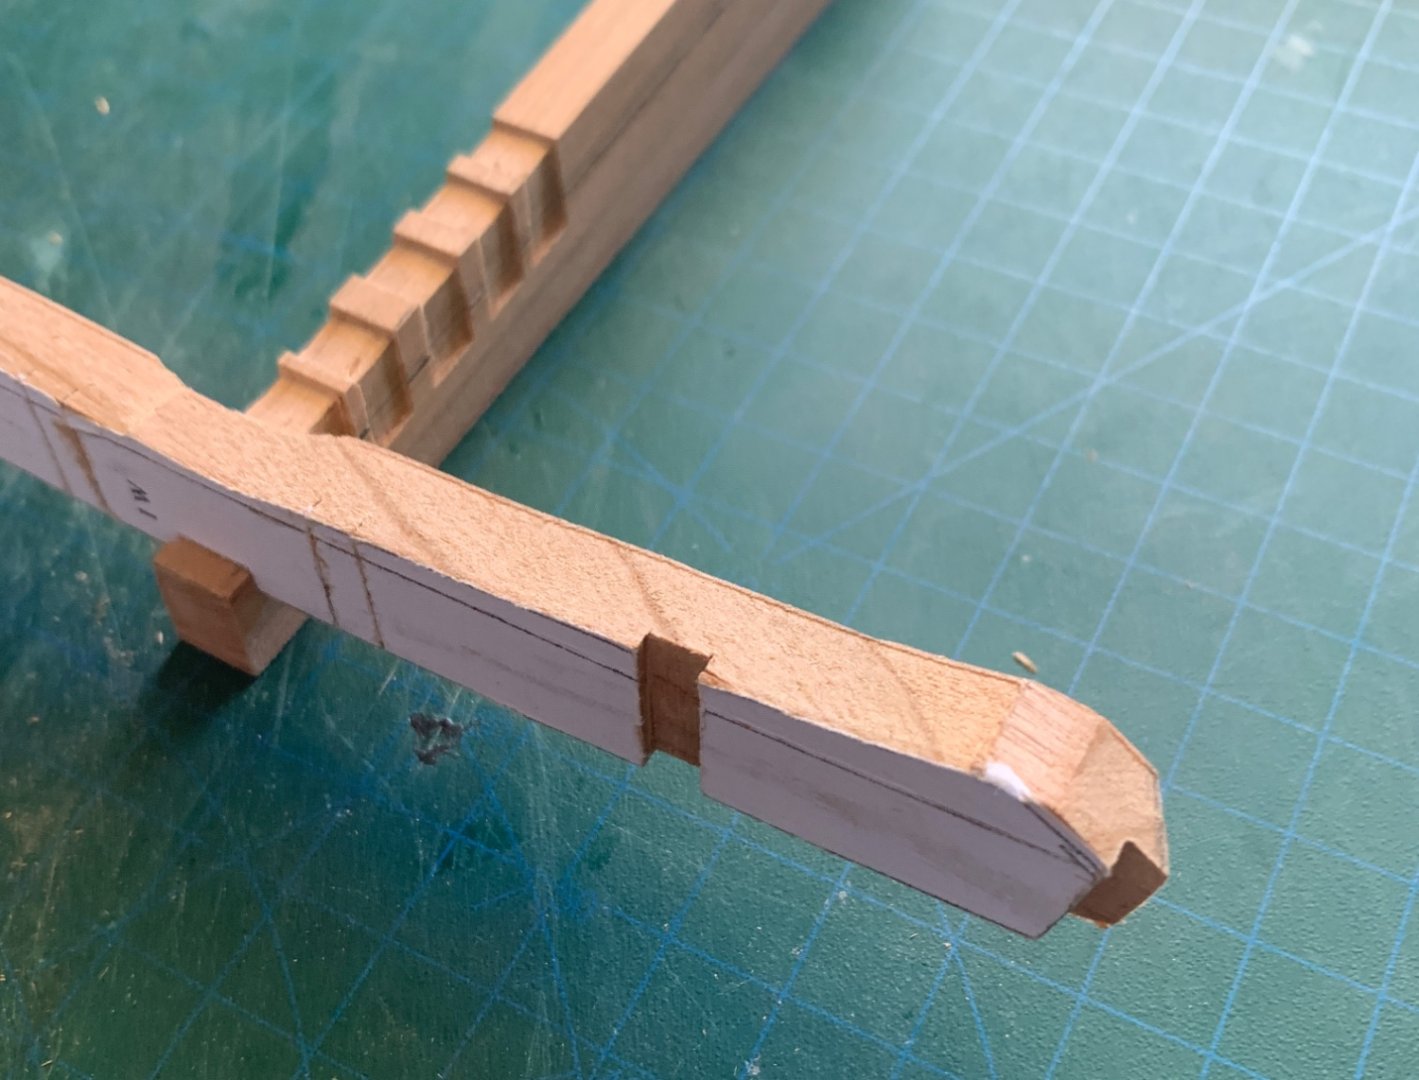
Some more progress on EURYALUS. Stern deadwoods cut and shaped. They still need shaping to keel and bearding line to rabbet. I have also made a start of the stern post/inner post and cut a bollard piece and the top transom to test my bevelling skills. I also dismantled and then reassembled the building board to set the two support ends perpendicular and on the centreline of the plan. I am almost ready to start placing components not he building board.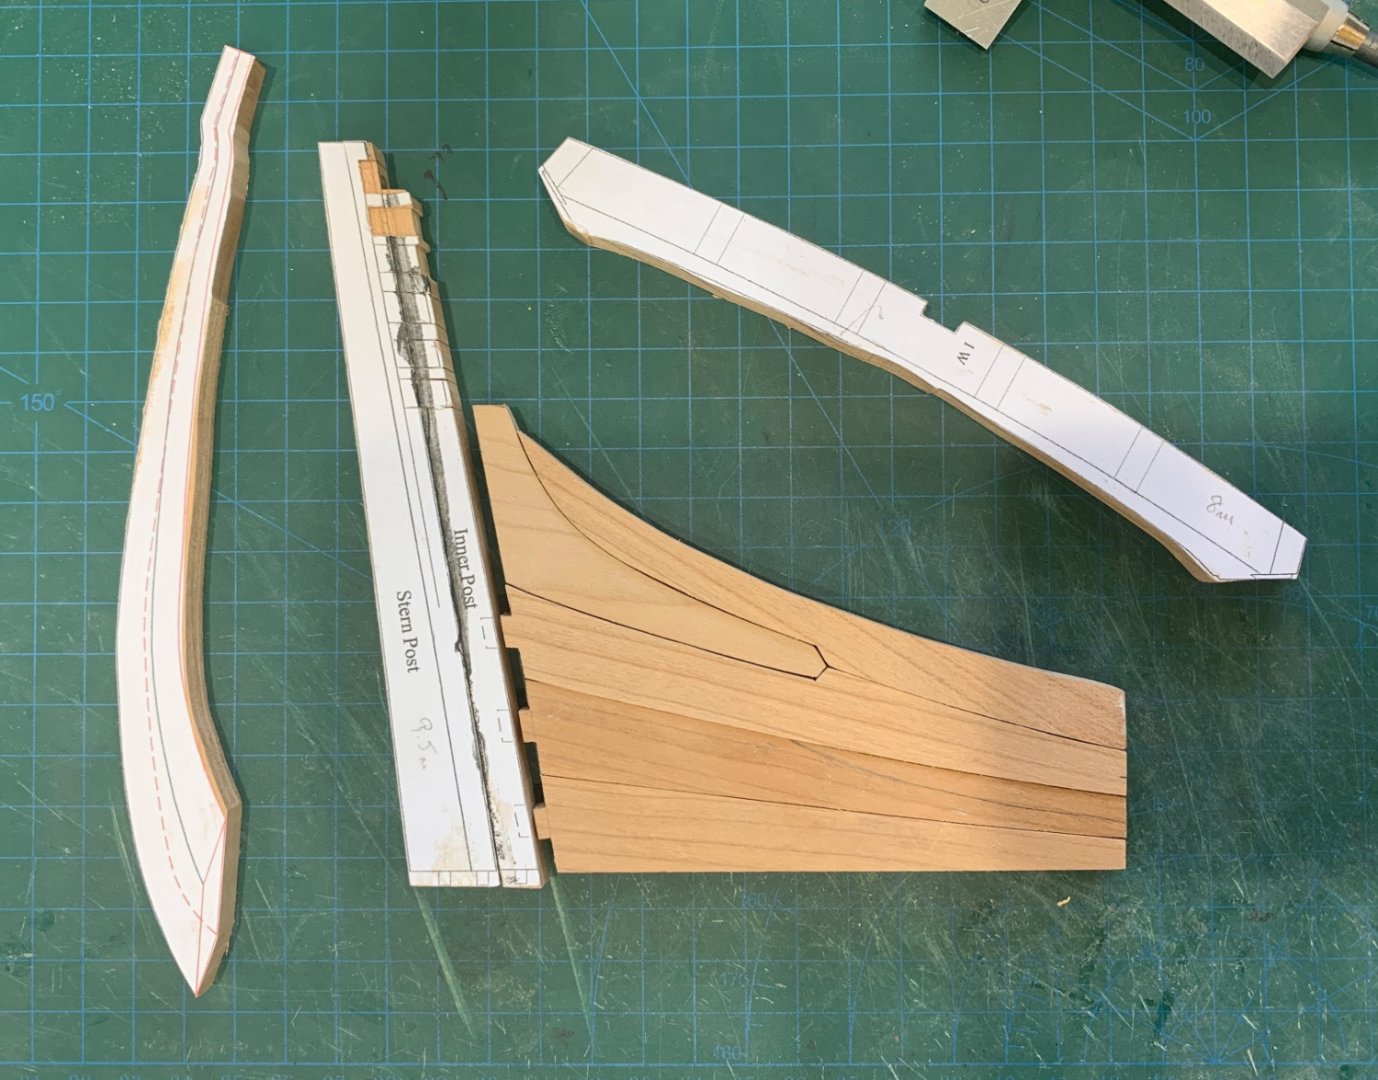
-
EURYALUS 1803 by Peter6172 - 1:48
Peter6172 replied to Peter6172's topic in - Build logs for subjects built 1801 - 1850
Managed to re-saw one of the Cherry planks that GDALE graciously milled up for me so I could get going on the new keel. Keel 1 and Keel 2 ready to go; 4 more sections to go. I just love working with wood. I am using a junior hacksaw, a 4mm chisel, a 10in flat file and a piece of 19 x 65mm radiate pine with some 120grit glued to one face. I'm using Veritas mini set to see these mini chisels sharp.

-
Tobias, That would be great. I am visiting a local who has a piece of cherry from furniture that might get me going on replacing the keel but not sure its anywhere near enough for the main framing requirement.
Regards
Peter
PS. You say "we ship". who is we?
-
EURYALUS 1803 by Peter6172 - 1:48
Peter6172 replied to Peter6172's topic in - Build logs for subjects built 1801 - 1850
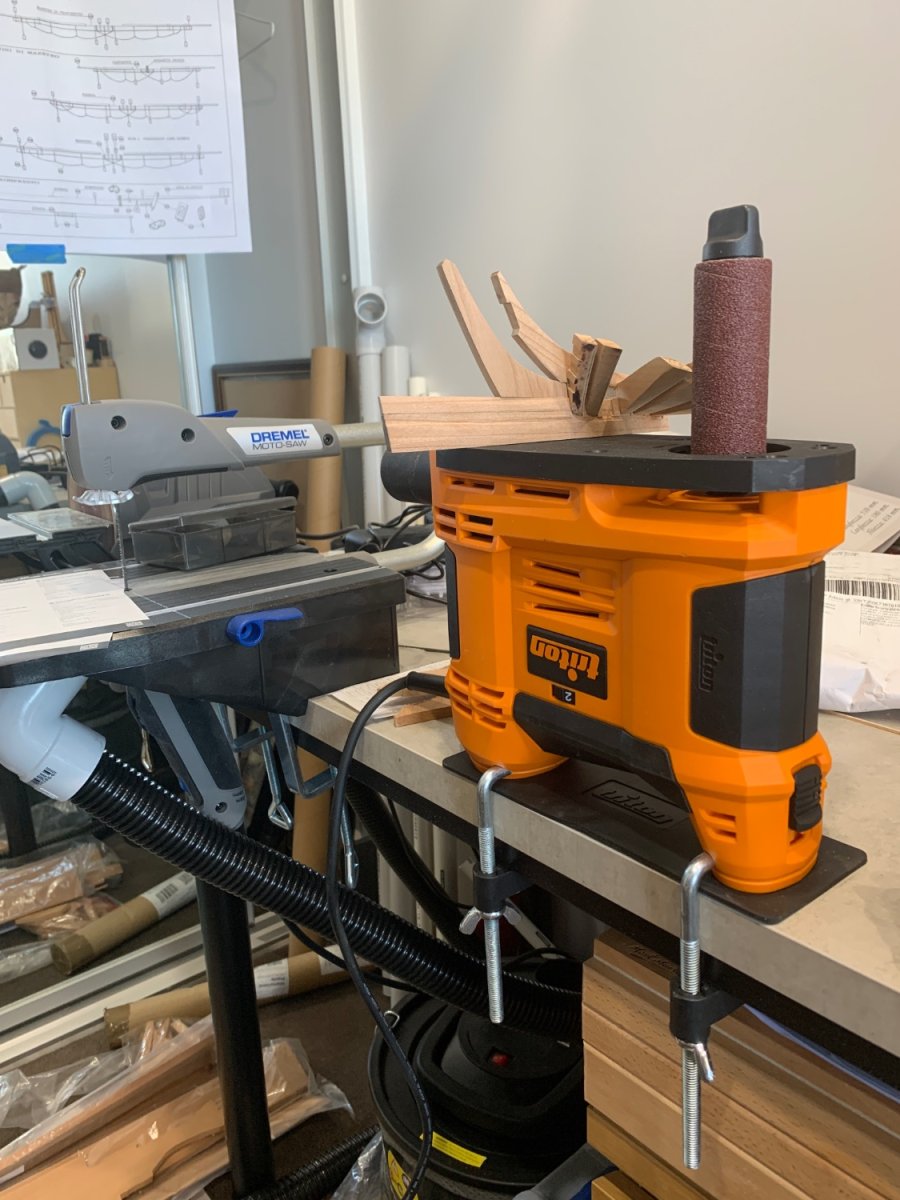
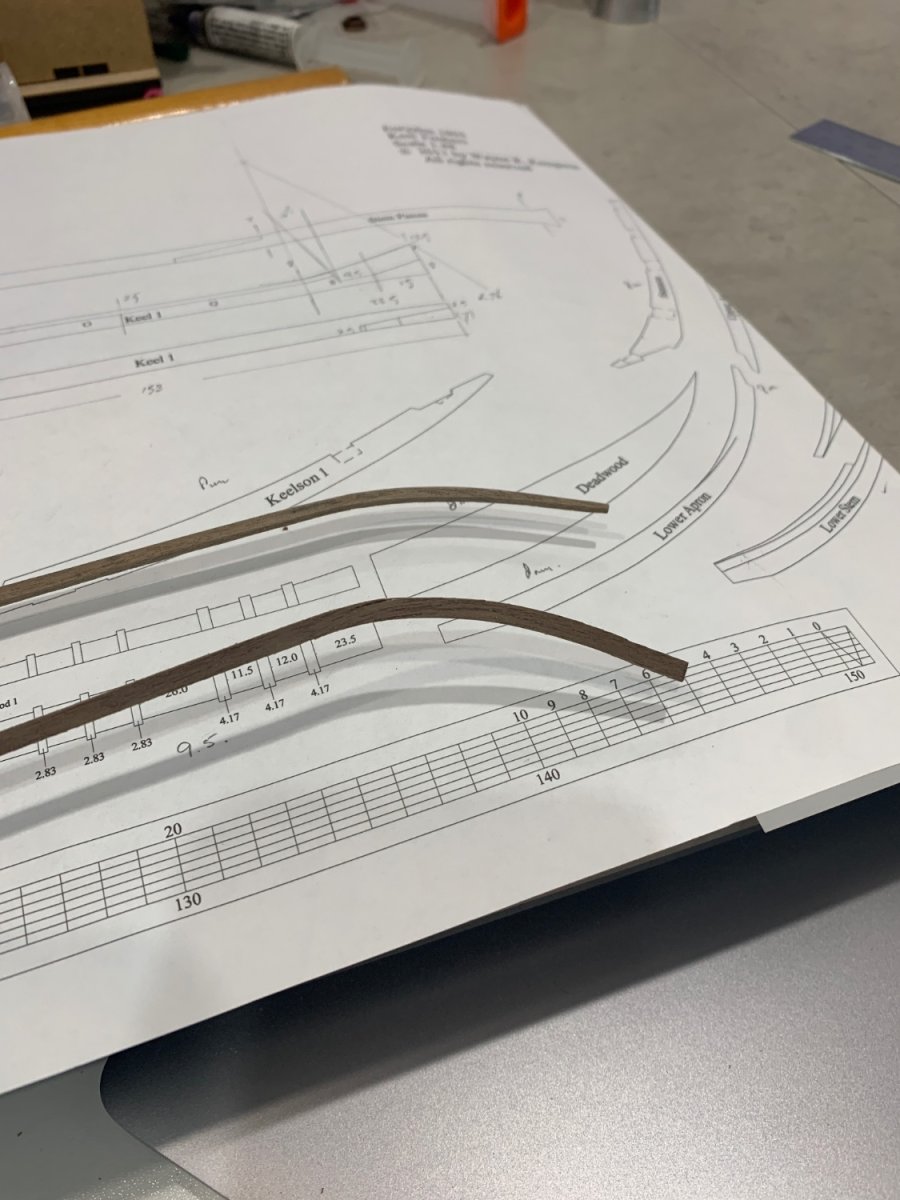
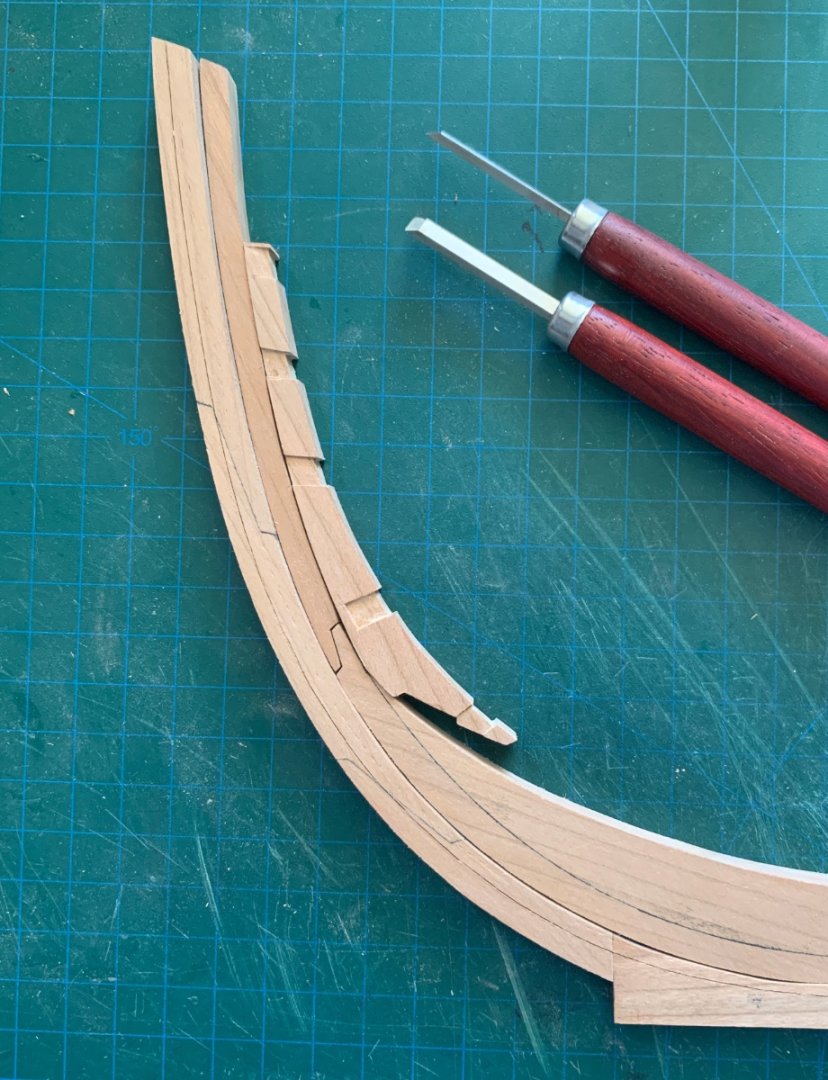
Well EURYALUS is mostly dismantled. Unfortunately There are only a few frame sections that can be reused as the majority of floors and futtocks were not constructed per the drawings. The Stem too was undersize and I suspect that copies of drawings made as templates may have not been full sized. Oh well. I have made a start on the new stem and stern deadwoods. I realise now that my Dremel attachments are not up to the task for such which stock so I have purchased a portable oscillating spindle sander to assist in the shaping of internal curves. Happy with what I managed to achieve today. Once the parts are glued up the apron halves with the deadwood I can then finish the tapering/shaping of the stem pieces and cut in the rabbet. I still have to taper the bow pieces and fit the apron laminations for the bearding line.
-
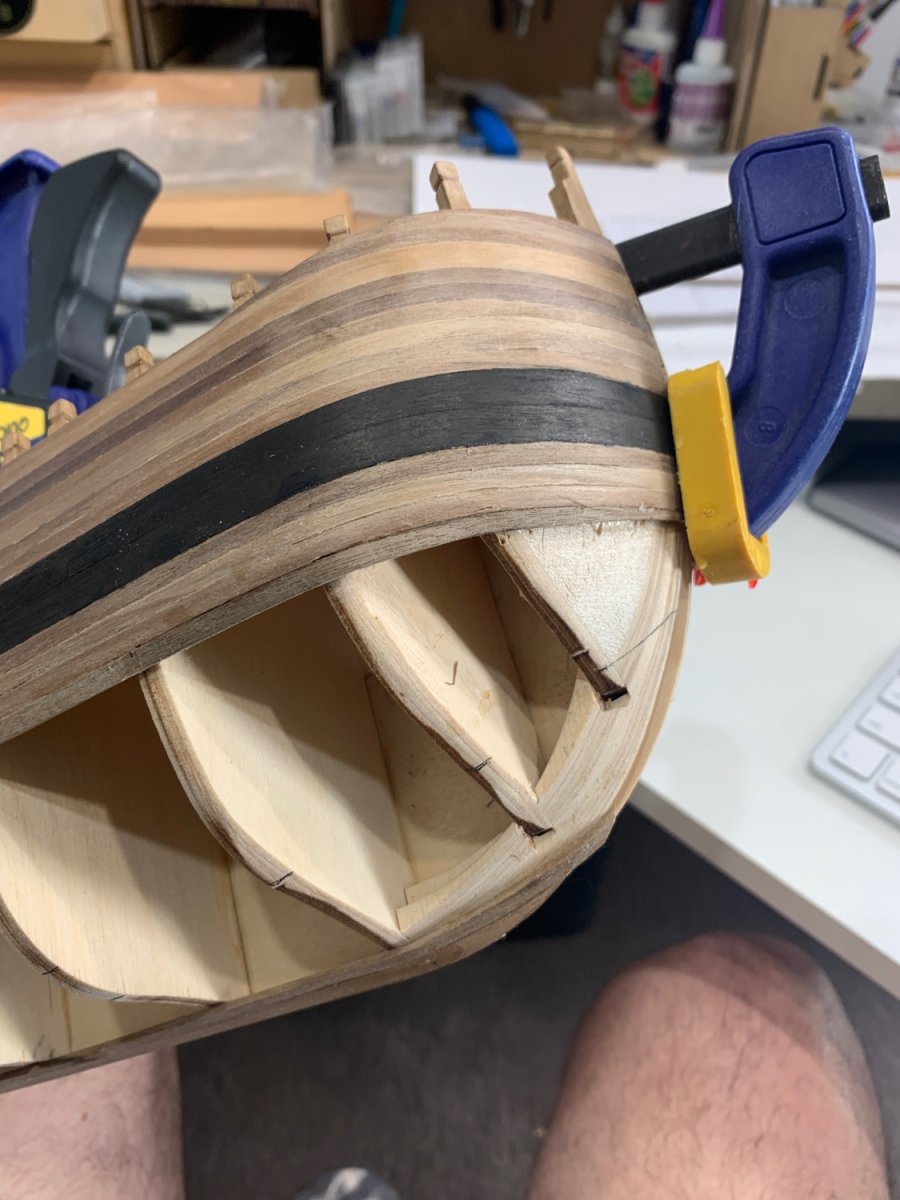
Have started tapering the planks now. Four rows below the whale on port and starboard and the garboard and next on the starboard side. I need to smile the planks now but in the basic of a nice piece of pear from which to cut the spine, I am trying out steam bending in both planes, effectively edge setting to fit the bow profile. Instead of seeming the planks flat around the form, I am bending them width wise to, then tapering to form the spiled shape, and finally wetting them and using a soldering iron to form the bend around the bow.

-
So I gather the answer to my question would be no. Mark, I have created shortcuts on my home page that go to my build logs since logging directly into the home page requires a bit of searching to find your own build log, especially if one has been busy on other pages of the forum and your own build log notifications falls off the bottom of the notification list (if anyone was in fact following your build log.) If we had a static header then going from build log to home page and being able to see notifications would make navigation a little simpler. Dare I say it; but that "other" forum has a fixed header.
-
Team, Is there a way to fix the MSW header so I don't have to keep scrolling to the top of my build log pages to see if there has been any messages or notifications?
-
EURYALUS 1803 by Peter6172 - 1:48
Peter6172 replied to Peter6172's topic in - Build logs for subjects built 1801 - 1850
Yes Tobias, a nice selection but they too do not post to Australia. -
EURYALUS 1803 by Peter6172 - 1:48
Peter6172 replied to Peter6172's topic in - Build logs for subjects built 1801 - 1850
Team, It is with regret that I inform you all of the passing of Russell Hopkinson - original builder of this EURYALUS model. Russell passed away peacefully in hospital on the 21 December after being admitted following a major stroke. Russell was suffering from Pancreatic cancer which had metastasised to both his lungs and liver. Russell was forum member and contributor. He first started EURYALUS in 2013 with the purchase of the books and then the frame package from HobbyMill. It's a shame that due to his illness the model sat for such a long period in his shed in the hot dry summers and cold wet winters of Canberra Australia. This has taken its toll on the cherry timber of the framework. I plan to carefully and completely dismantle EURYALUS to determine how much movement/damage exists, keeping as much of Russells work as possible, then give her a rebirth inside my "climate controlled" apartment. I fear however that when it comes time to masting her, I may have to move or find another location for her else she will never leave the apartment short of being craned off the balcony. (make me think that THUNDERER too could be problematic when I get around to her). I will not share any pictures or notes of the disassembly. I am using Isopropyl Alcohol to dissolve the PVA and then letting the timbers dry thoroughly before cleaning them up and comparing them to the drawings. I already know a number of frames are going to have to be remade due to breakage or the fact that they have been sanded too thin to be reused. Also all the knees and keelsons will be remade as Russell had glued and pined them down. I hope to get to the rebuild in about a weeks time. PS: I have found that Russell used about 50% of the framing package. I have approached HobbyMill EU to replenish the used stock but they do not have any Cherry stock. Can anyone point me to a good supplier please. -
EURYALUS 1803 by Peter6172 - 1:48
Peter6172 replied to Peter6172's topic in - Build logs for subjects built 1801 - 1850
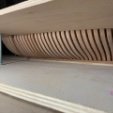
OK, further update. Examining the rear end of EURYALUS with transom removed gave me a good perspective of the potential issues I might have completing this model. It is apparent that there has been a good amount of timber movement since the original owner ceased working on the model. It is clear that not only are the frames not now vertical in elevation around the bow and stern of the vessel, the frames are no longer symmetrical around the longitudinal axis. So, the Plan (pending Russells approval). I will dismantle the complete model frame by frame using Isopropyl Alcohol then clean up all the parts and check them off against the drawings. Those that are correct size and shape (or oversize) will be re-used. Those not the right shape or undersized will be replaced. Now some might say why not just start over. Well this model was gifted to me by the Russell on the basis that I would complete his model. So I plan to use as many of his parts as possible. This will be like a "Tally Ho" rebuild. To date I have removed the SternPost, Transoms, Sternsom Knee, Keelson 6, Port Fashion pieces F and A, Port Frame 31A and Port Frame 31F. I don't wish to dismantle further till Russell gives me the thumbs up. Will keep you all posted. In the meantime I continue with BOUNTY, GREYHOUND and NORFOLK. -
EURYALUS 1803 by Peter6172 - 1:48
Peter6172 replied to Peter6172's topic in - Build logs for subjects built 1801 - 1850
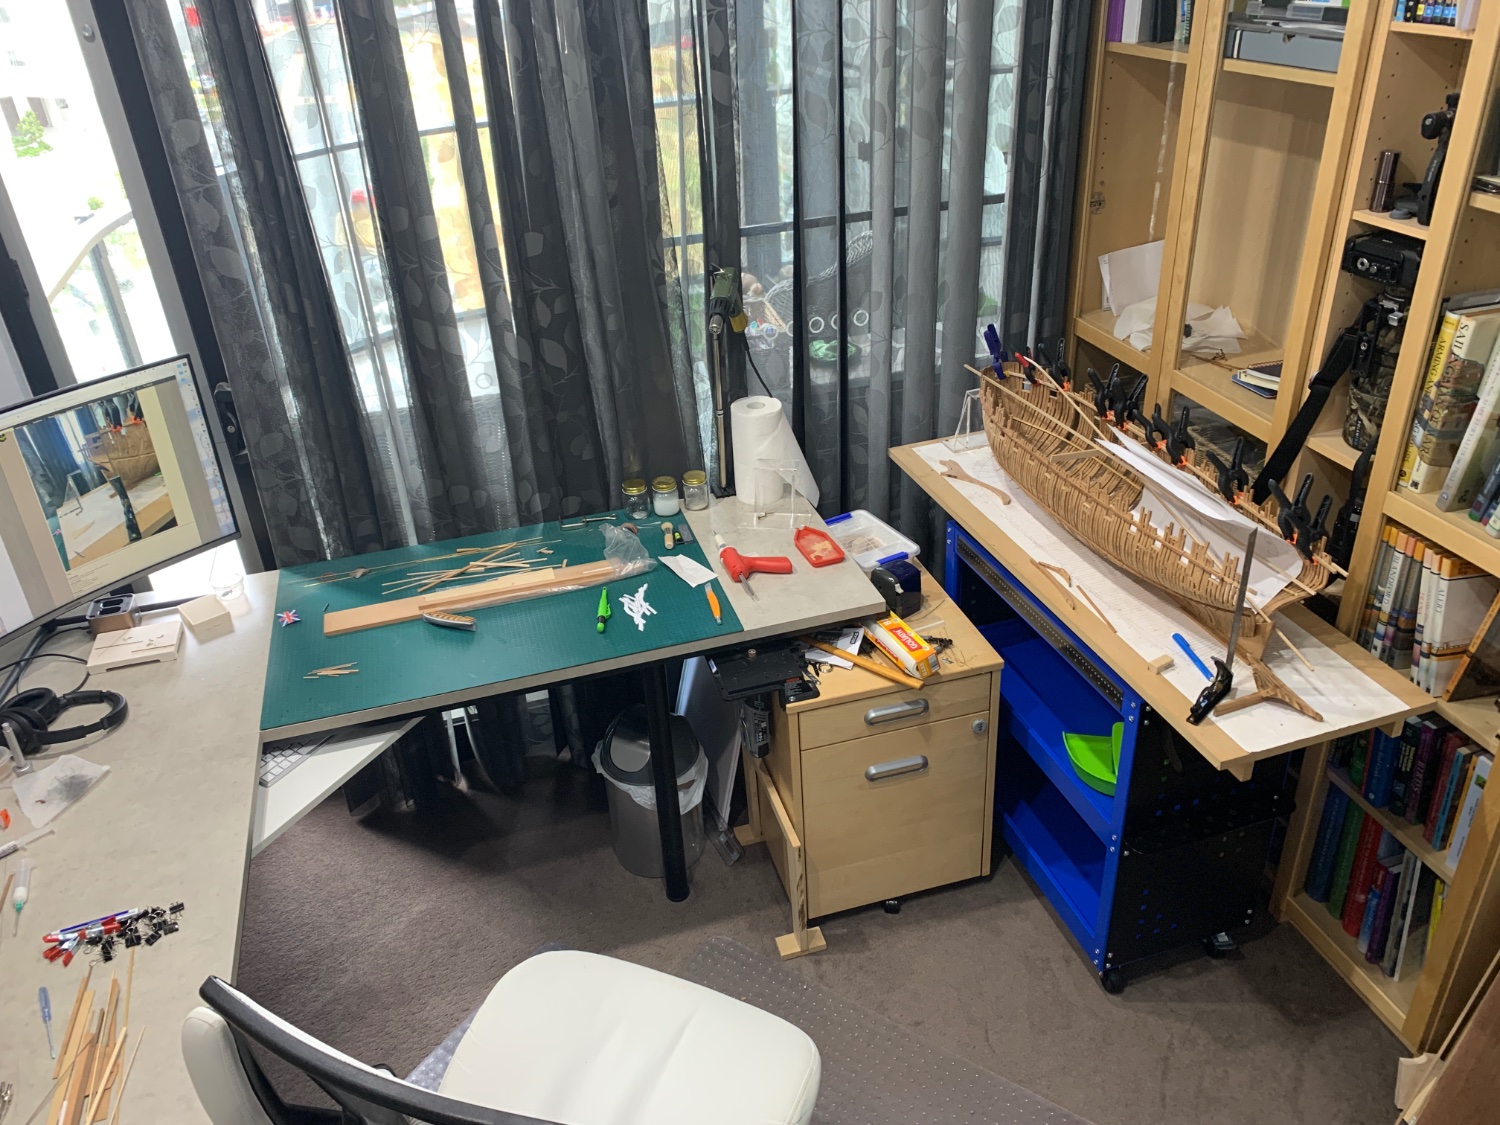
finally have a mobile bench to keep EURYALUS on the move and out of the way when I need more workspace.