Peter6172
-
Posts
182 -
Joined
-
Last visited
Content Type
Profiles
Forums
Gallery
Events
Everything posted by Peter6172
-
 That's some inspiring plank work Glenn. Shall follow and try to emulate (as nears as I can) your quality builds. By the way. I note red pen marks at frames on your planks. Is this to just mark where the frames are or where you will later show plank joints? Regards Peter
- 840 replies
-
- 2
-

-
- winchelsea
- Syren Ship Model Company
- (and 1 more)
-
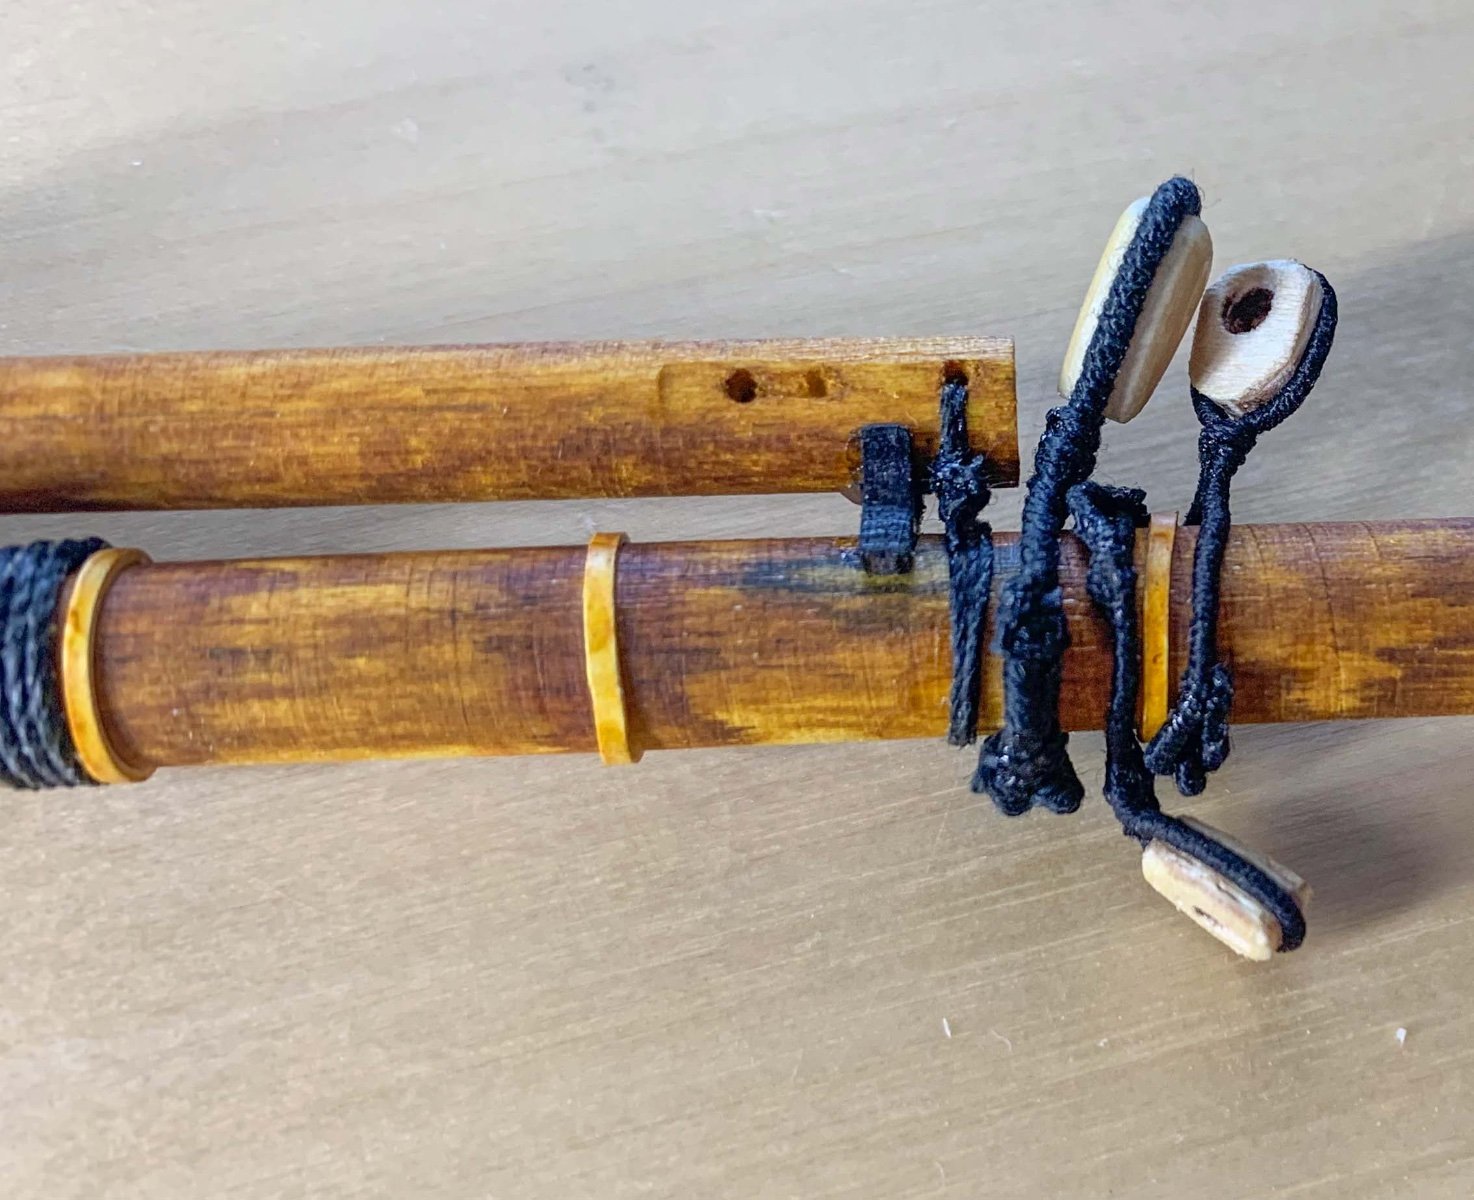
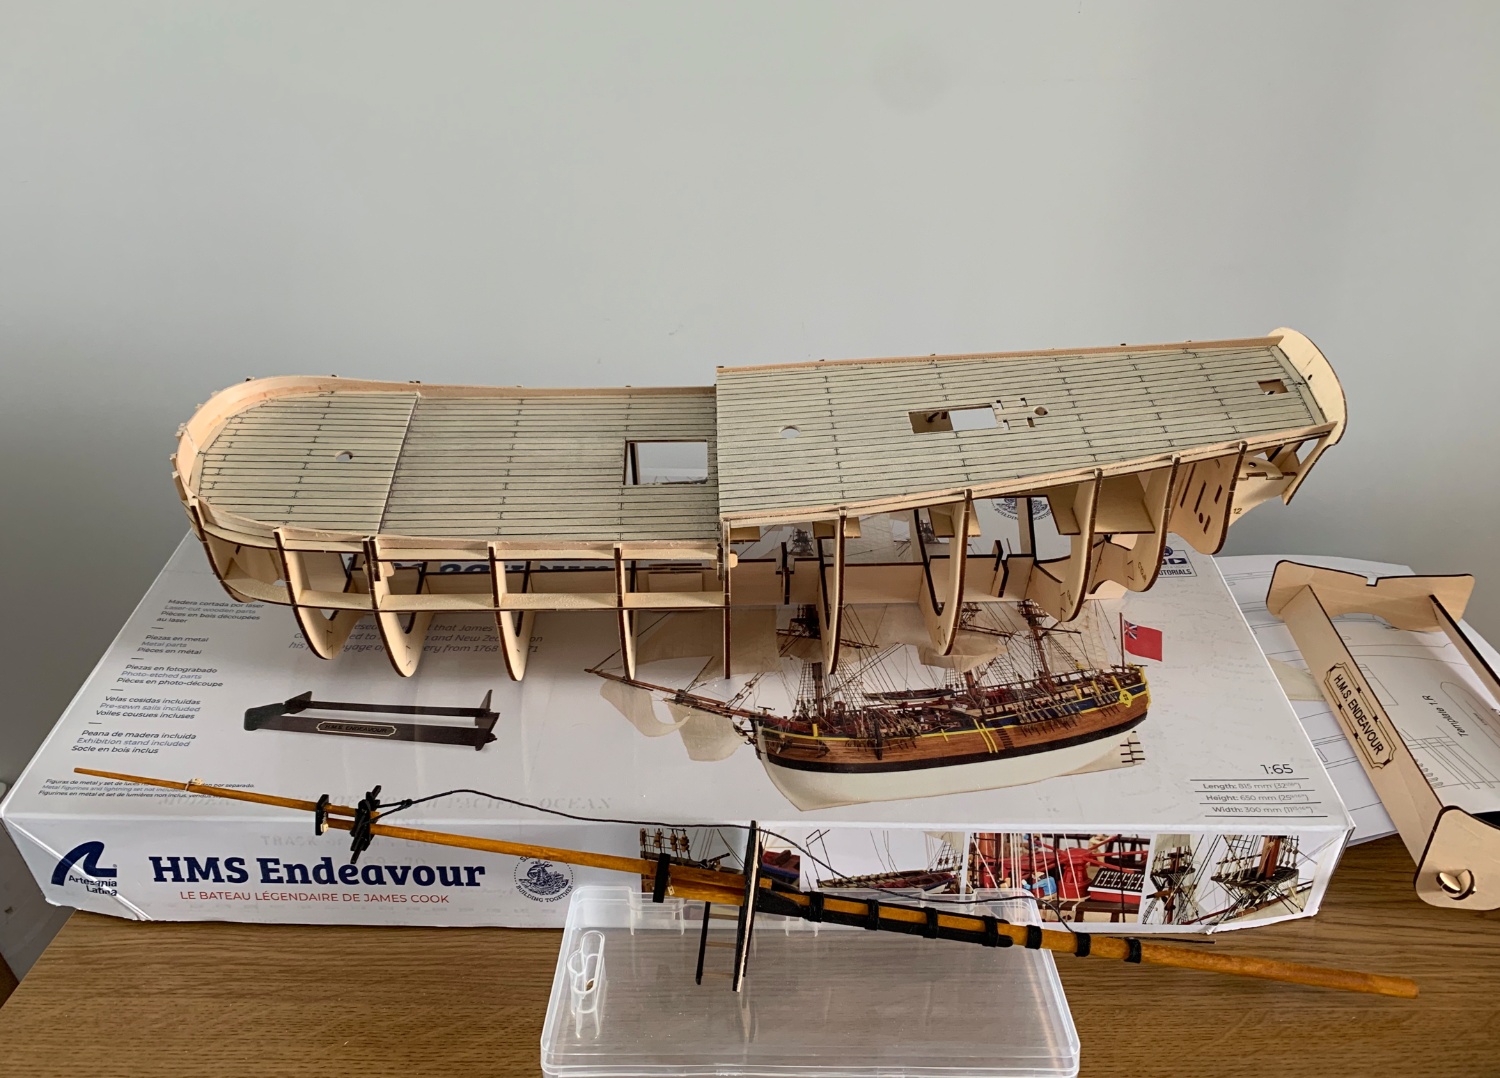
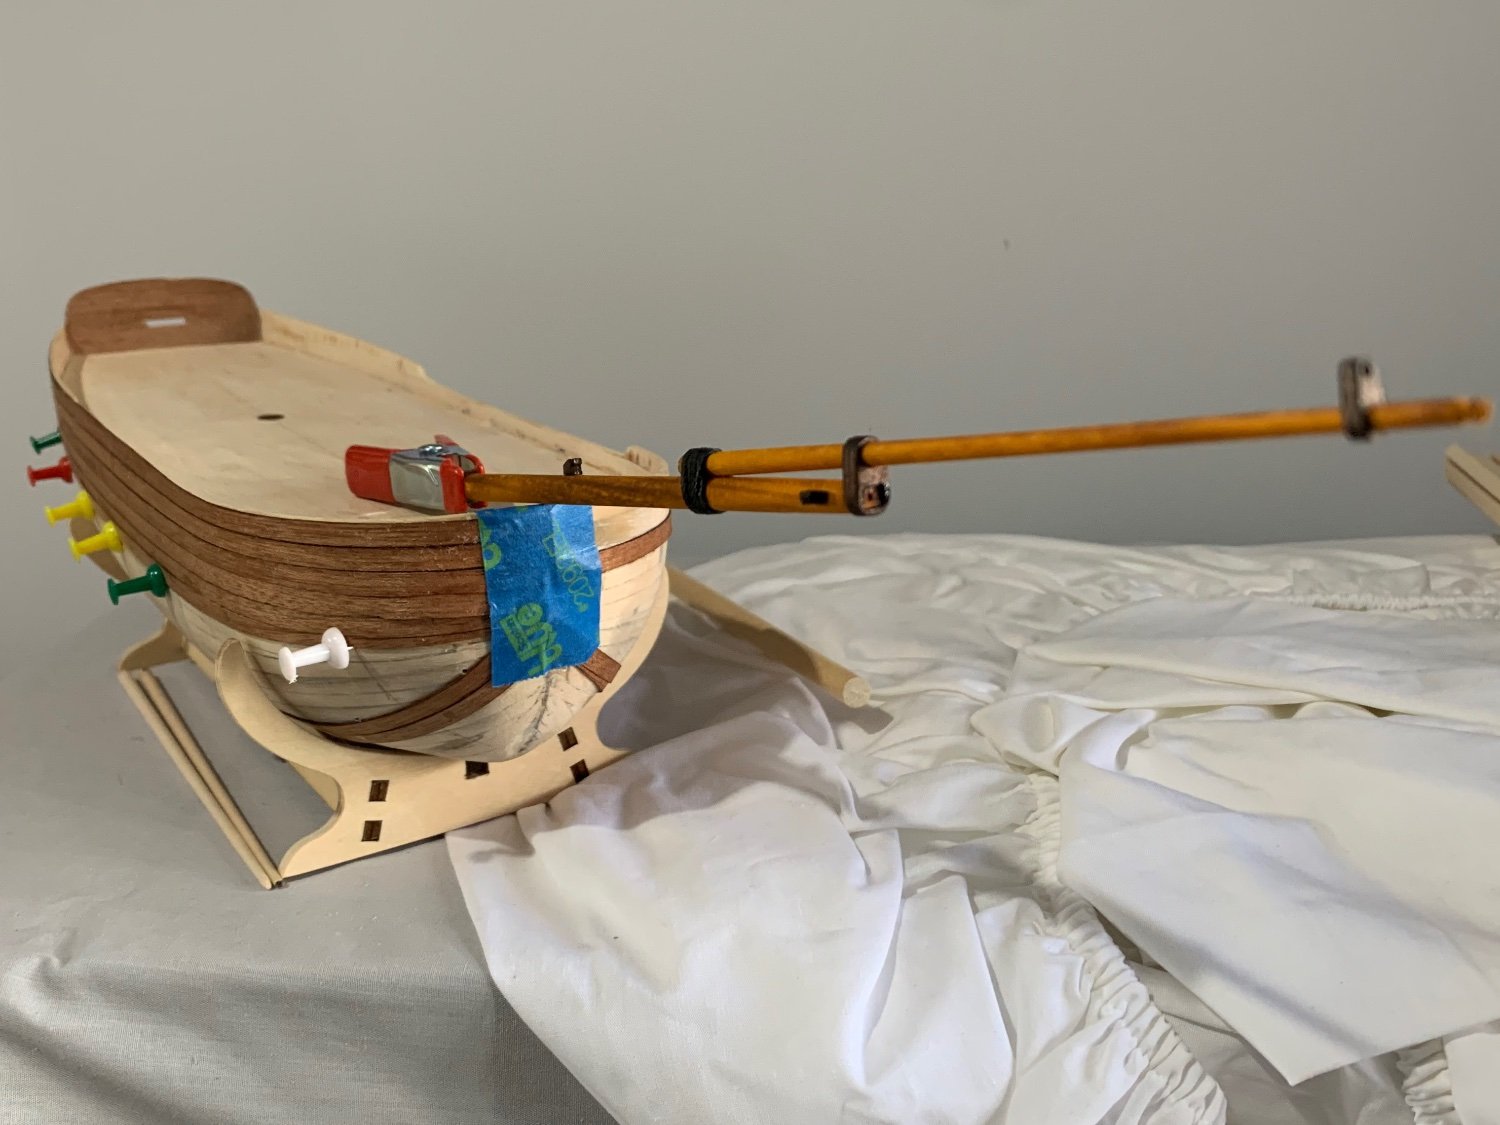
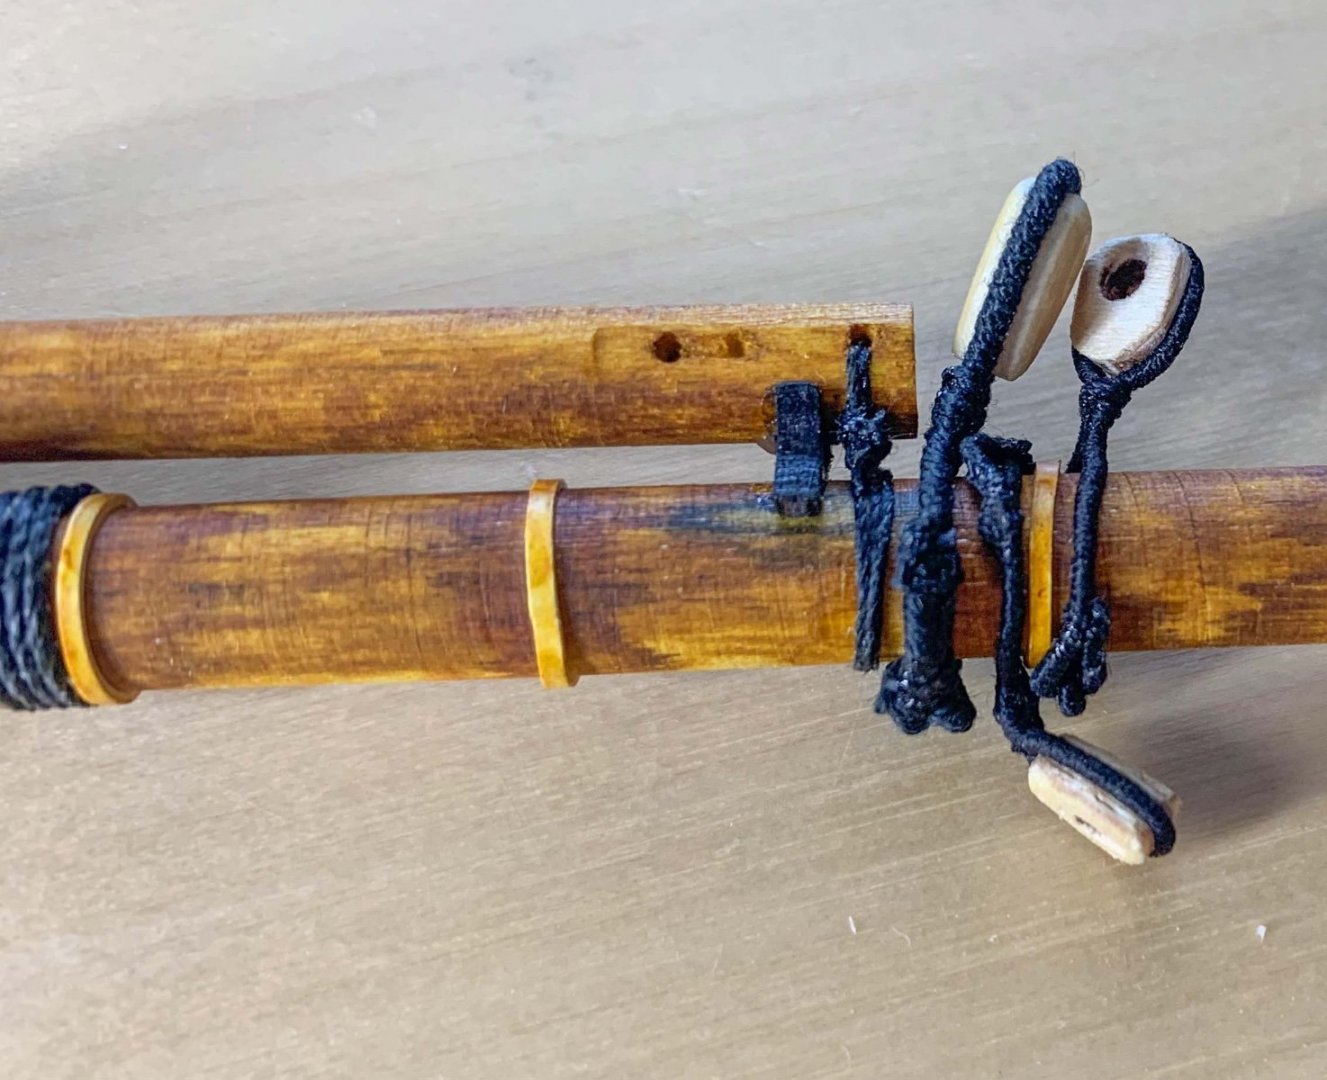
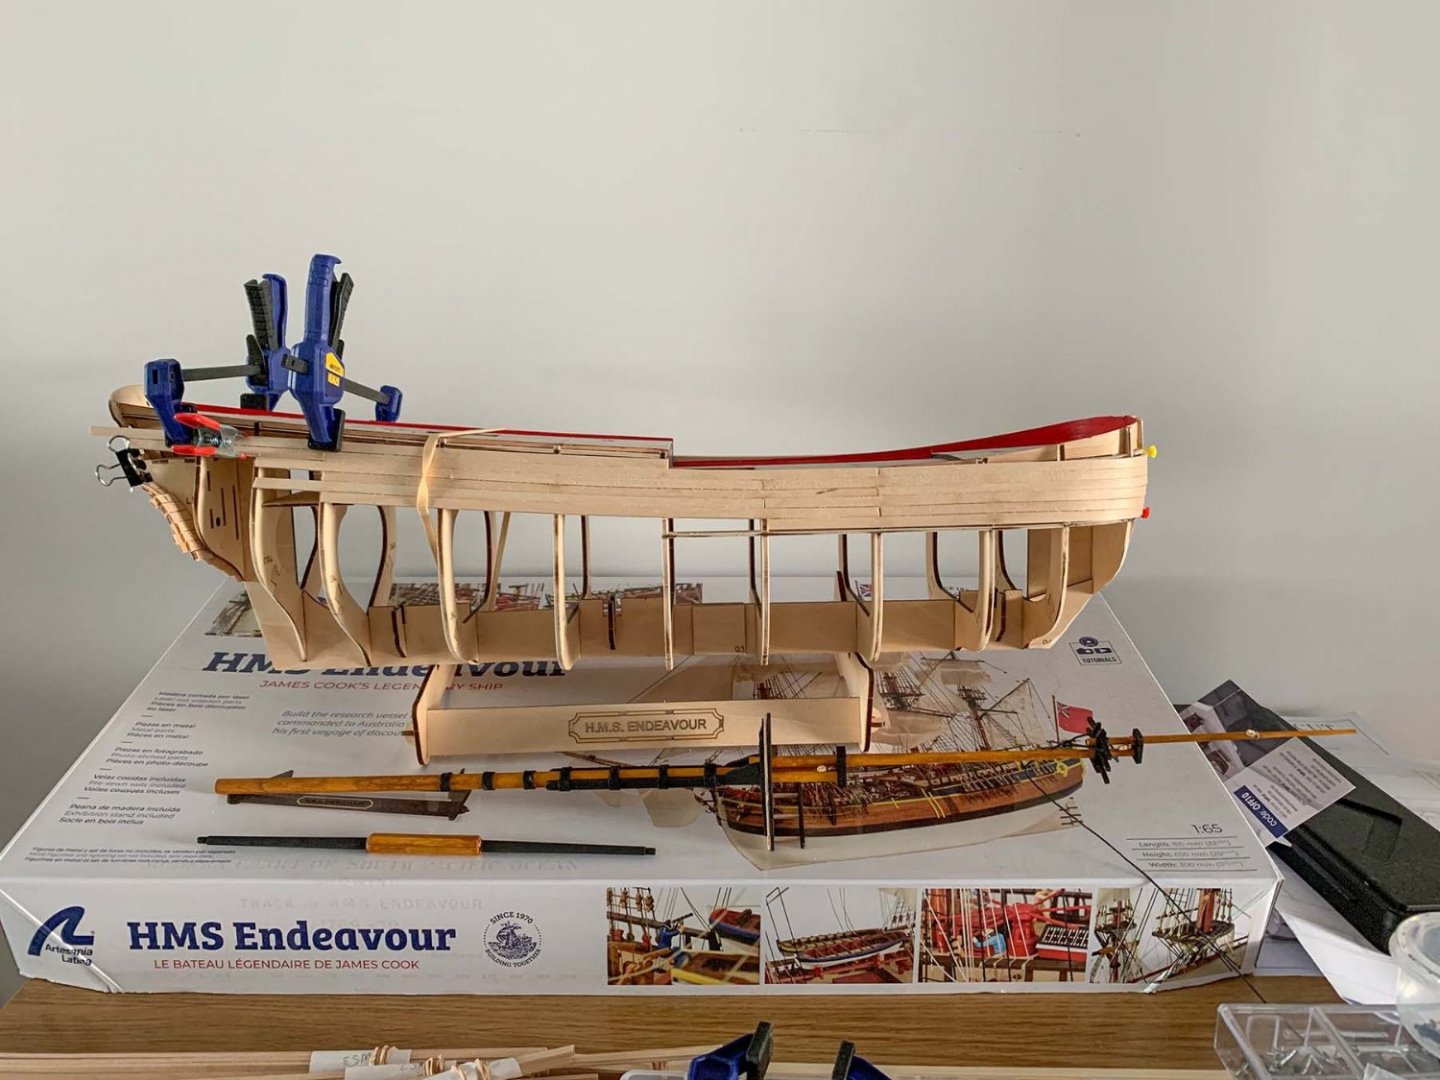
Bay...bathwater... sound familiar? I received my "serving machine" in the post and have redone my serving - so much better than my manual efforts so the previously made served rigging has been dumped. I have fitted out the bowsprit with Fore and preventer stay deadeyes and the Bobstay deadeye as well as lashing the jib boom to the bowsprit. I have also bee busy with the deck fitting, features, structures but they remain unfinished as I am loathe to paint everything red per the instructions. I will have to do more reading before committing to painting everything. I have also temporarily fitted wooden hoops to the foremast and bowsprit using white heat shrink. Only coloured with a caramel marker to see what they look like (waiting for some paint). Planking continues. I have got to the point where straight planks are no longer working to I will need to start tapering at bow and stern.

- 79 replies
-
- 3
-
-
- Endeavour
- Artesania Latina
- (and 1 more)
-
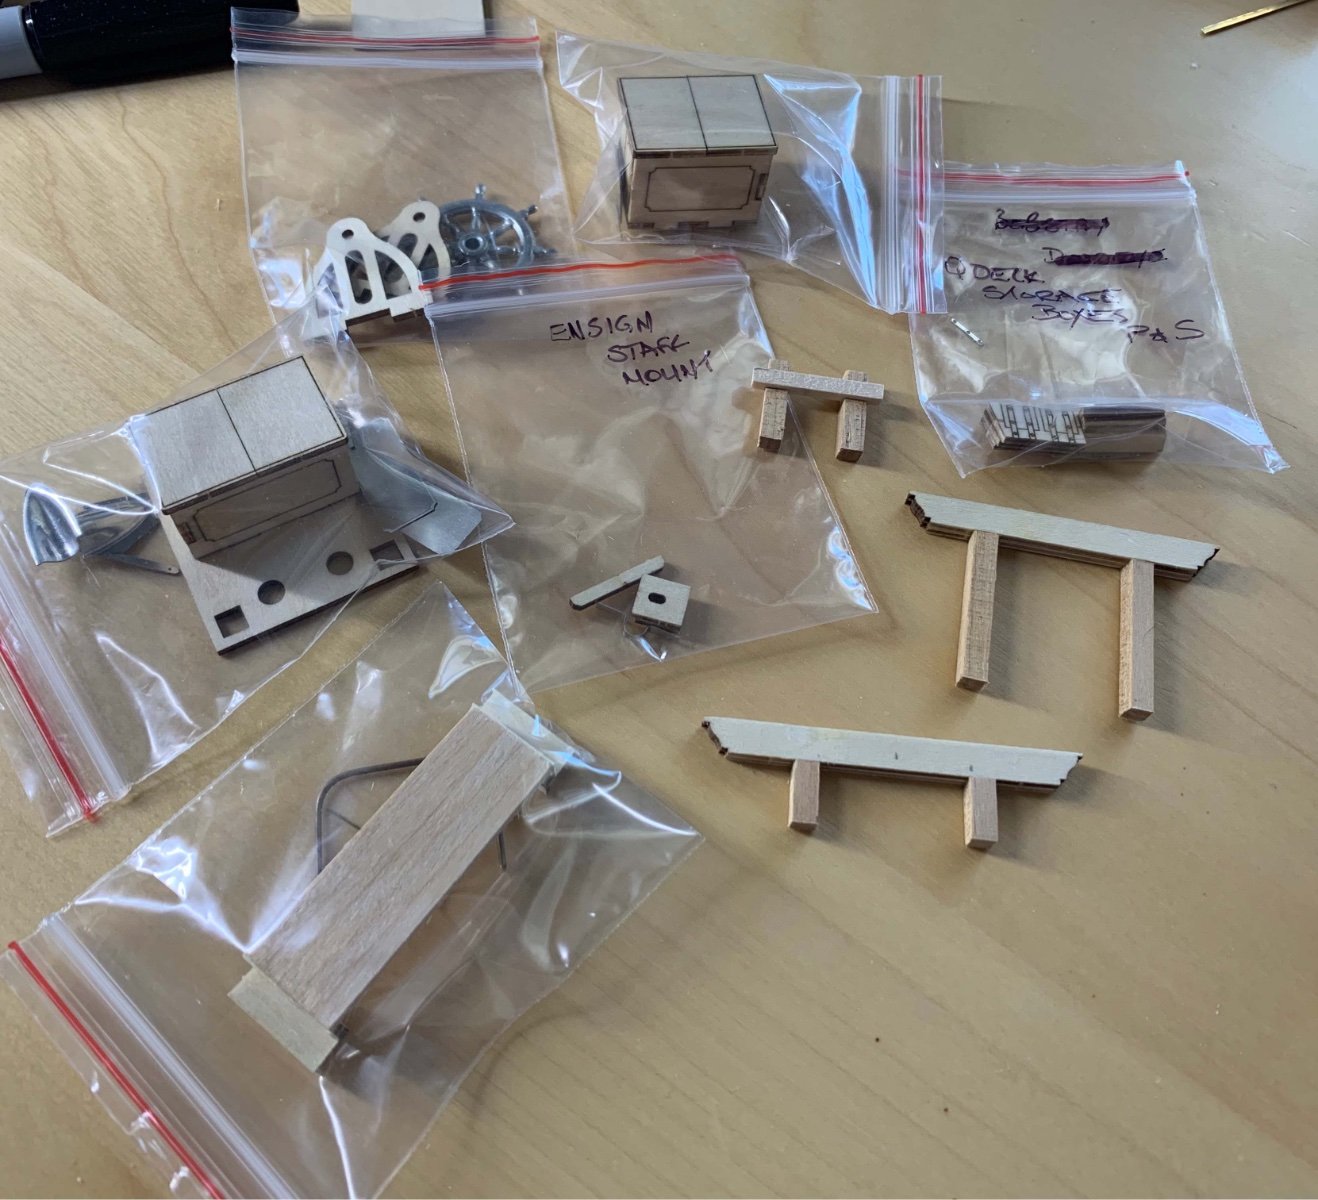
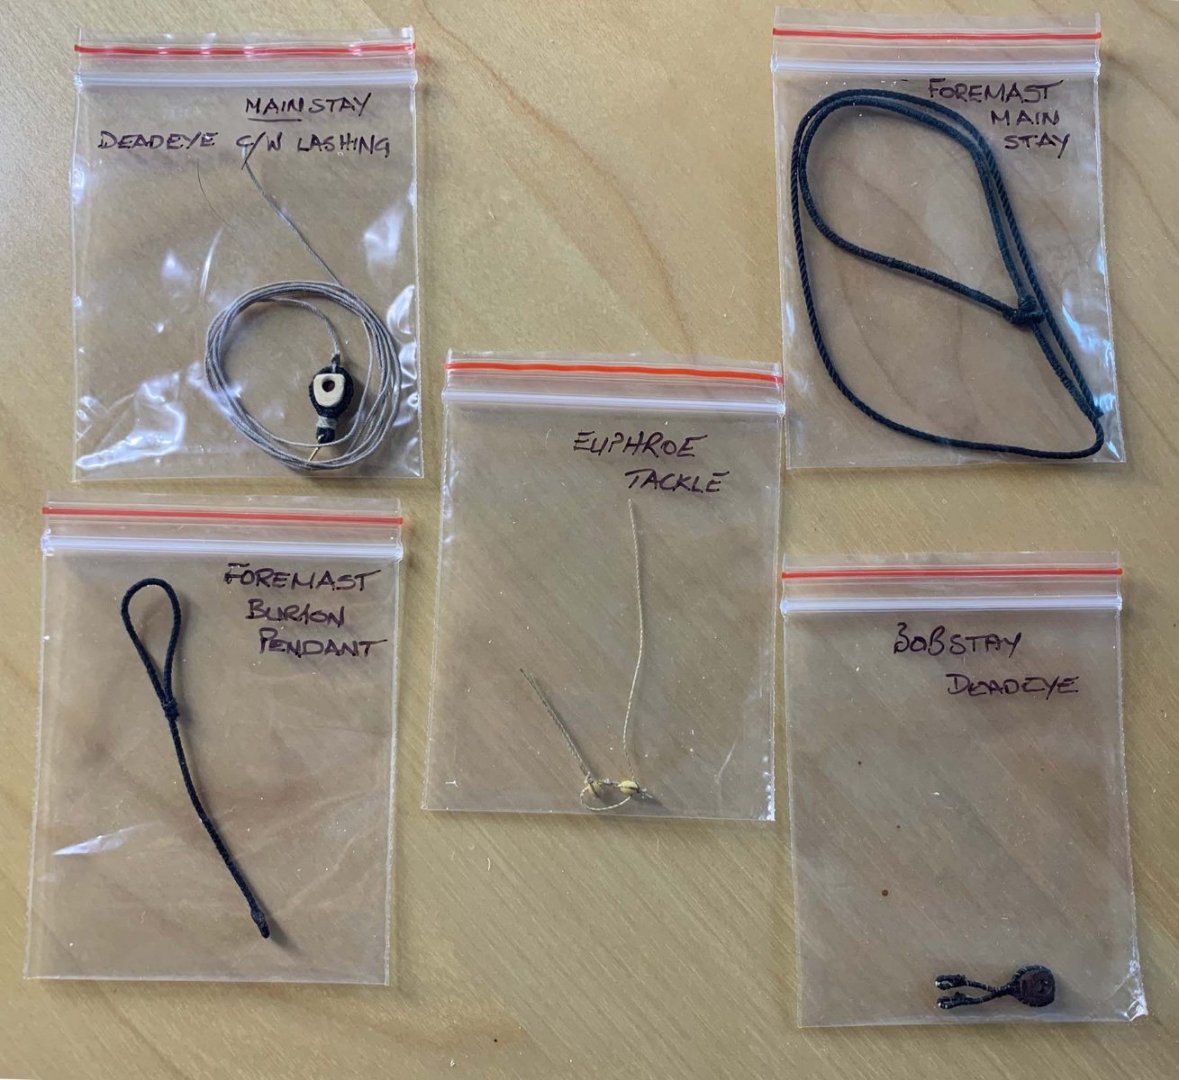
Some progress since receiving my blocks and scale rope. I am making up and bagging discrete rigging elements that can be fitted when time comes.
- 79 replies
-
- 3
-
-
- Endeavour
- Artesania Latina
- (and 1 more)
-
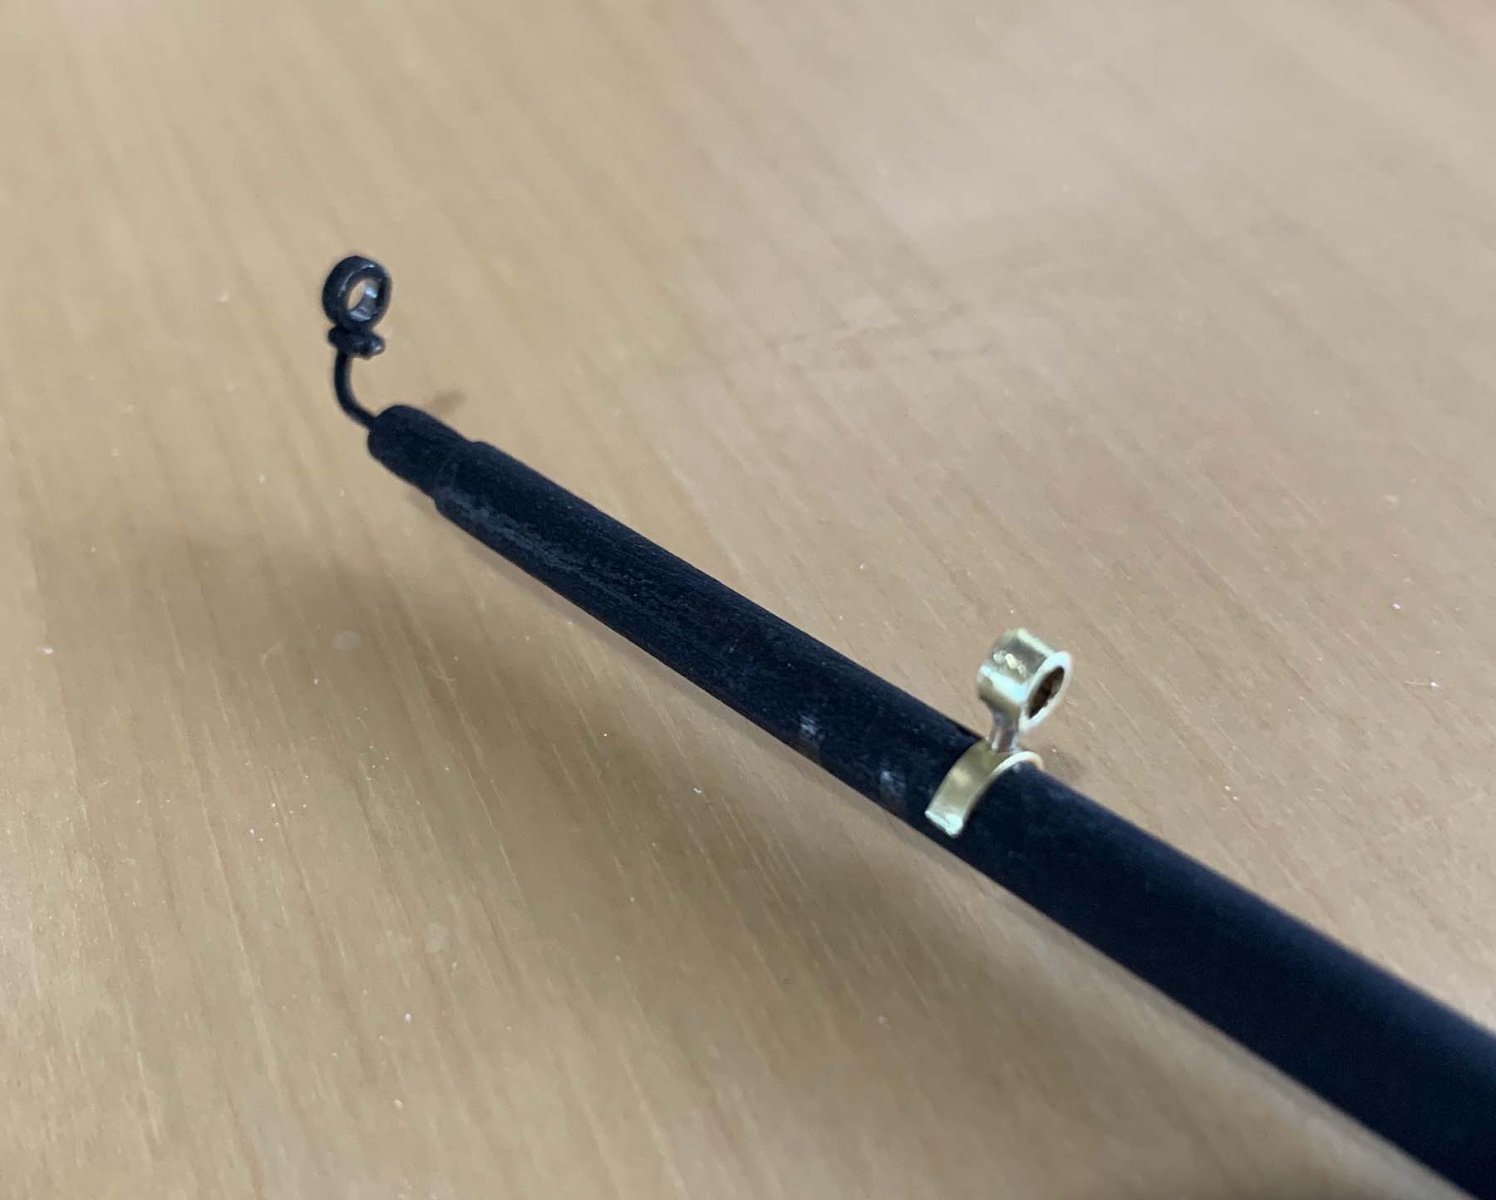
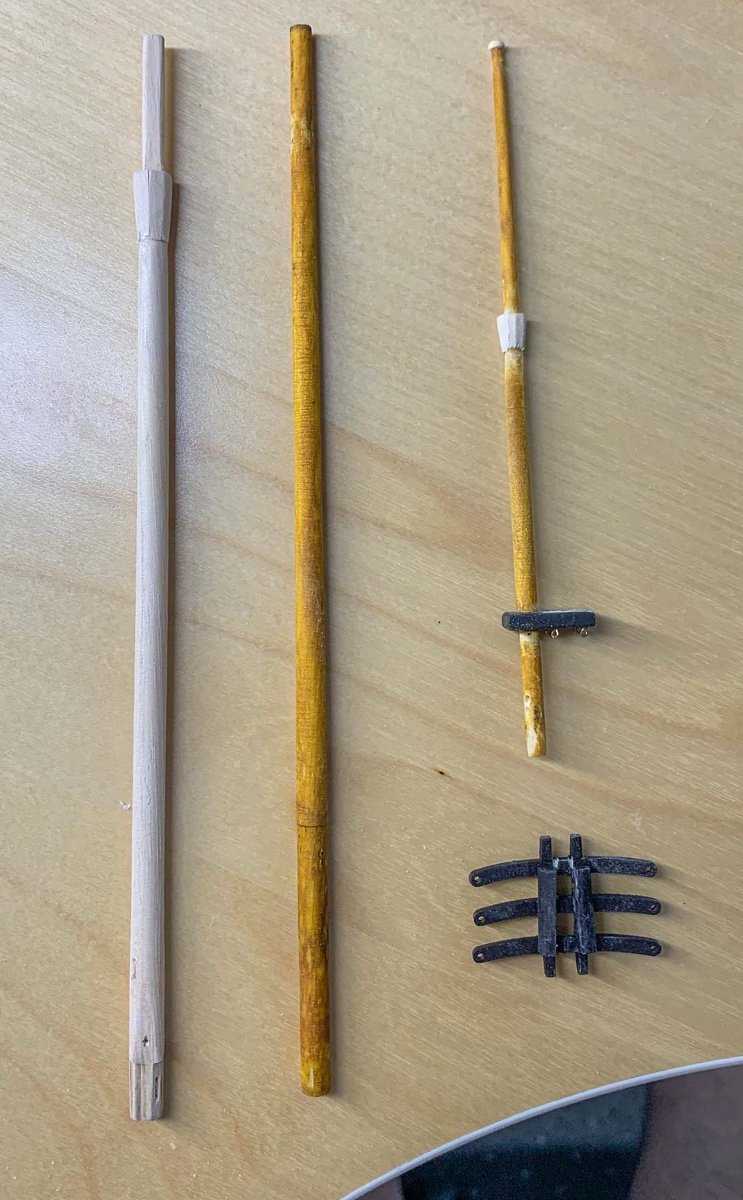
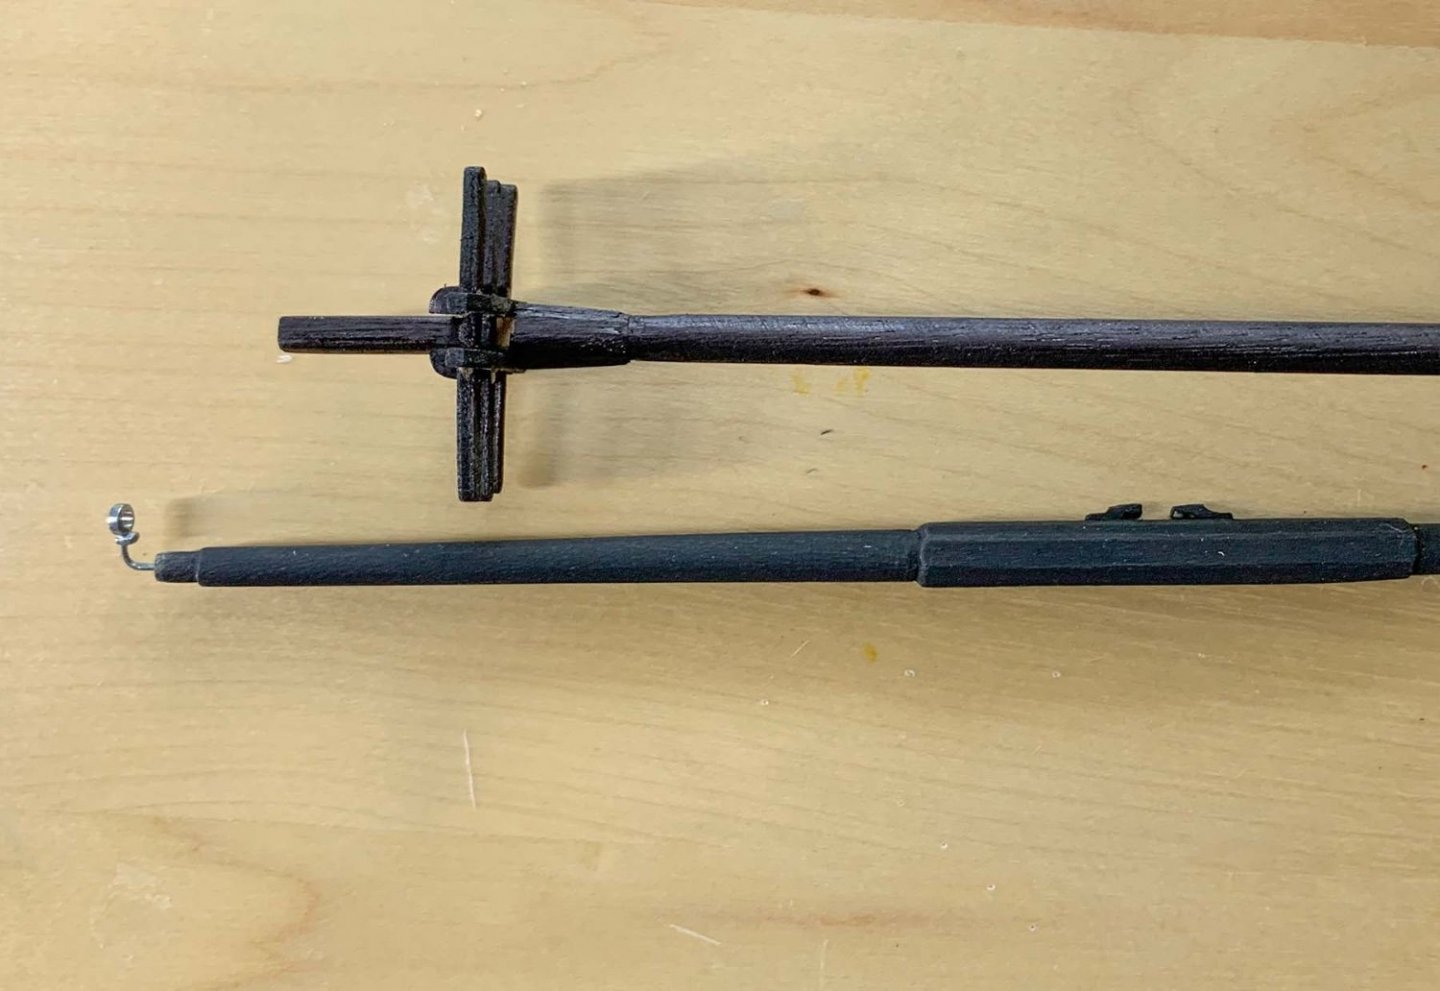
Another day and some more challenges to tackle. Today I set about replacing the oversized d spritsail support with a correct sized (and correct mounting) support for the Foremast lower yard. I used 3/16" bendable tube, 1mm rod and 1/16x1/32 flat bar brass for the components. A 1mm hole was drilled into the tube and bar which were then cut to length and filed (the bar was bent around a former slightly smaller than the final resting point on the yard before being cut to length). I then soldered the rod into the tube, cleaned up the joint and then mounted on the yard by drilling a 1mm hole into the yard so the final assembly was fixed in the right position when the tube/rod was pushed through the bar into the yard. Photo attached. Final fixing was with CA. I also used the 1/16x1/32 bar for the brass collars on the first anchor formed with needle nose pliers and the join soldered, before cleaning and chemically blackening.


- 79 replies
-
- 4
-
-
- Endeavour
- Artesania Latina
- (and 1 more)
-
MAKING EYE'S AND HOOKS
Peter6172 replied to Peter6172's topic in Modeling tools and Workshop Equipment
Keith, I bought a very cheap pair from the local Bunnings (hardware) store. While there may have been some surface hardening, They were fairly easy to file down. I used needle files to turn one cylinder end into a cone with nearly a point on it and a large (near new) flat file to file flats so that there was a parallel flat face on each side to hold the wire (albeit about 0.2mm wide at the tip. The tip is certainly robust enough to hold and bend hard brass wire. The key is the height to diameter ratio of the cone. Keep it to no more than 2; anything more and you might well fine that the tip starts to bend. -
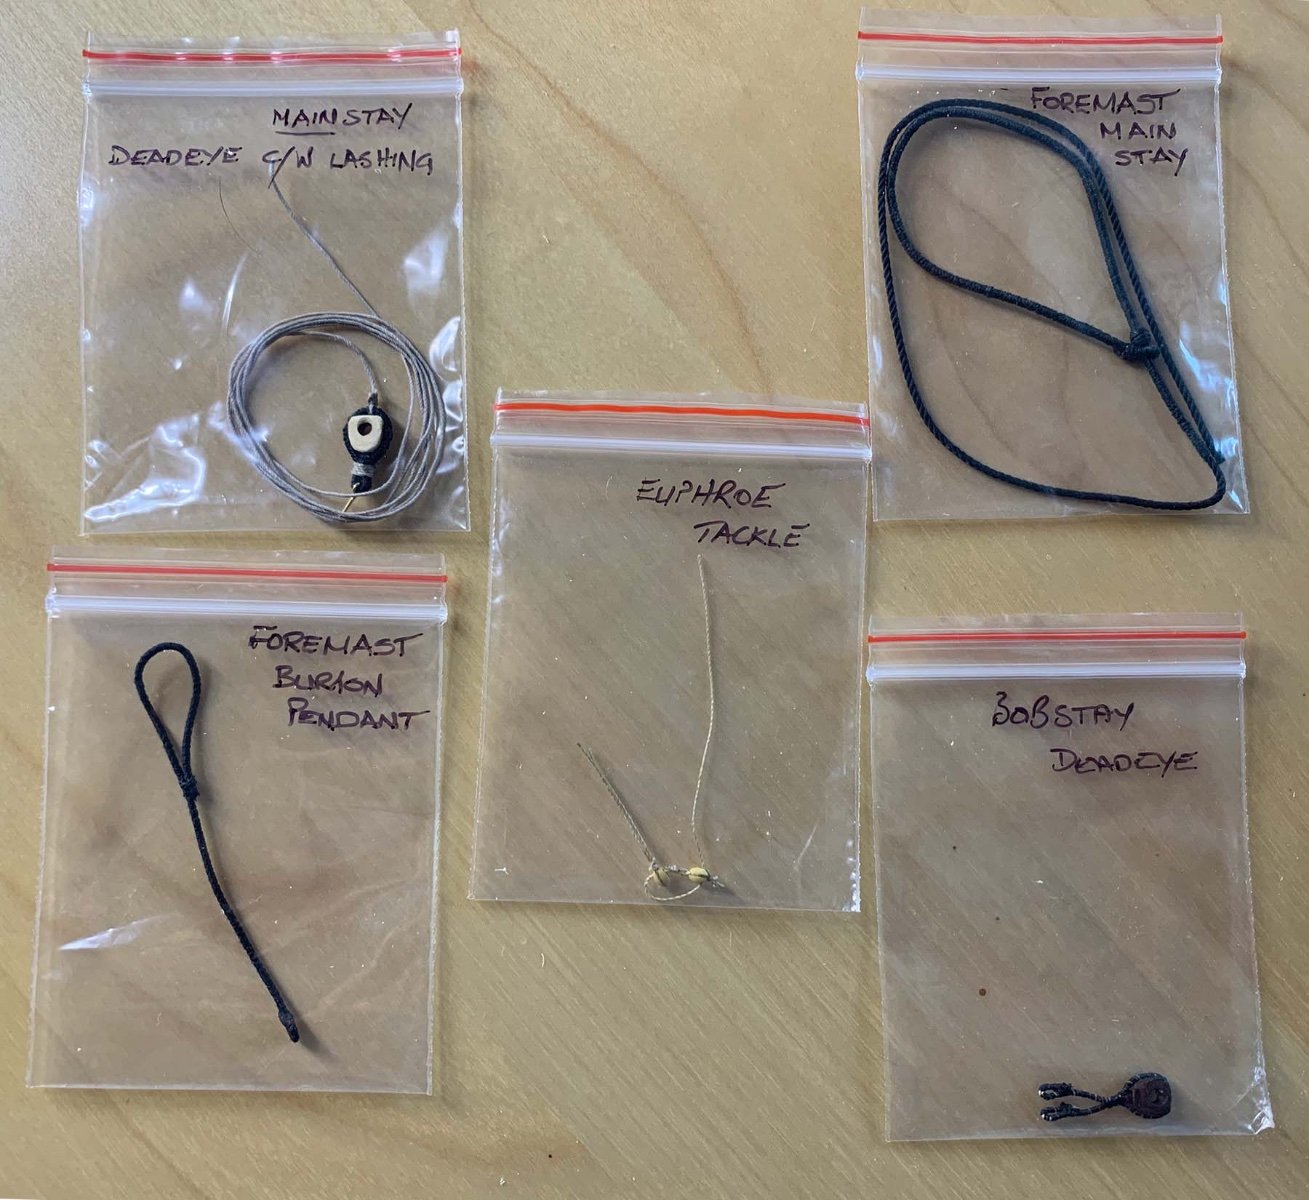
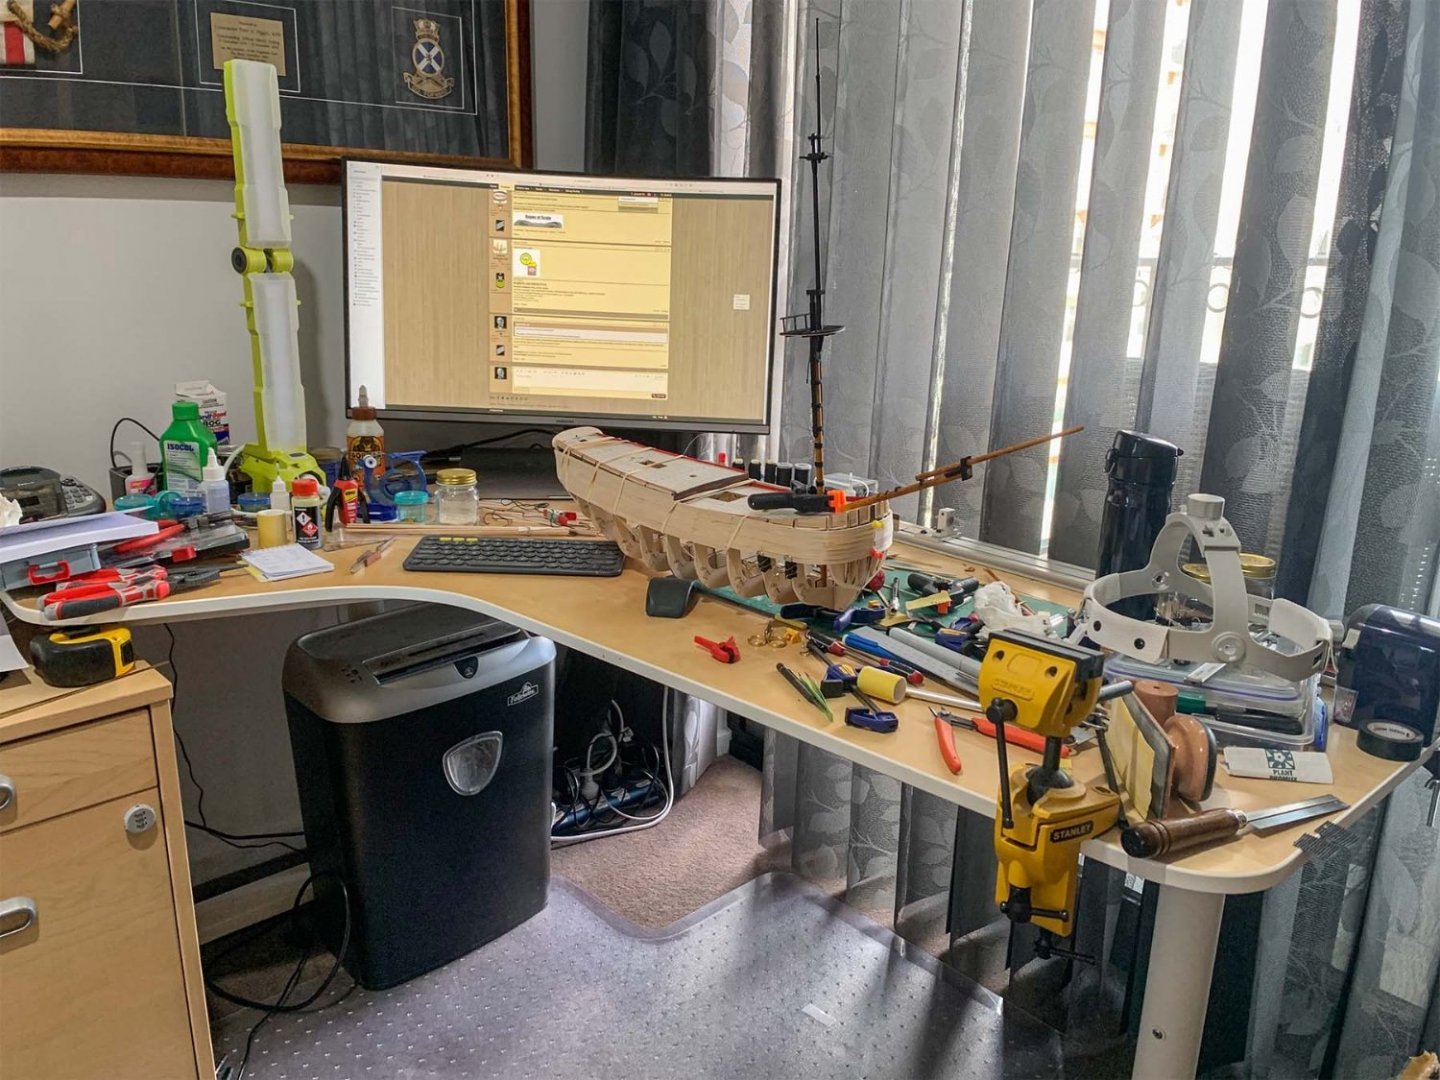
Finally received replacement blocks and cleats and scale rope so I can do some actual pre rigging work rather than practice for ENDEAVOUR. I received some excellent material on masts and yards from ANMM so changes have been made to Artenasia's instructions and used the tables in The Art of Rigging to align block size and rope size for each of the rigging components (based on 300t ship). I have made up one of the Burton Pendants with Thimble (per table) rather than SB (per Marquardt) on 0.9mm rope served laboriously by hand with Gutermann thread. I have also progressed first planking to about 25% and made up the basic bones of the Bow sprit. I can see that this ship will be a challenge base don the limited working space that I have. At least I have a 27in screen to read the 516 pages of pdf instructions that Artesania provides.
- 79 replies
-
- 2
-
-
- Endeavour
- Artesania Latina
- (and 1 more)
-
Need help making eyes, loops, etc.
Peter6172 replied to Michael Scarborough's topic in Masting, rigging and sails
Michael there is a section in the forum on tools: If you need more information don't hesitate to contact me. -
Welcome. There seems to be a link between Model Railway and Model ships. Not sure what it is but there's a few of us here in the forum....
-
Red Ochre Paint
Peter6172 replied to starlight's topic in Painting, finishing and weathering products and techniques
Yes, there are a few paint colours that definitely require a colour primer. any Red or Yellow requires a tinted primer. There are some model paint manufacturers who do provide these for the modeller. If painting wood, you must use a primer anyway else your paint be absorbed into the timber (regardless of the number of coats you might put on. -
Making a Ropewalk Article by Phil Krol
Peter6172 replied to Chuck's topic in Rope Making/Ropewalks's Ropewalk Plans/Downloads
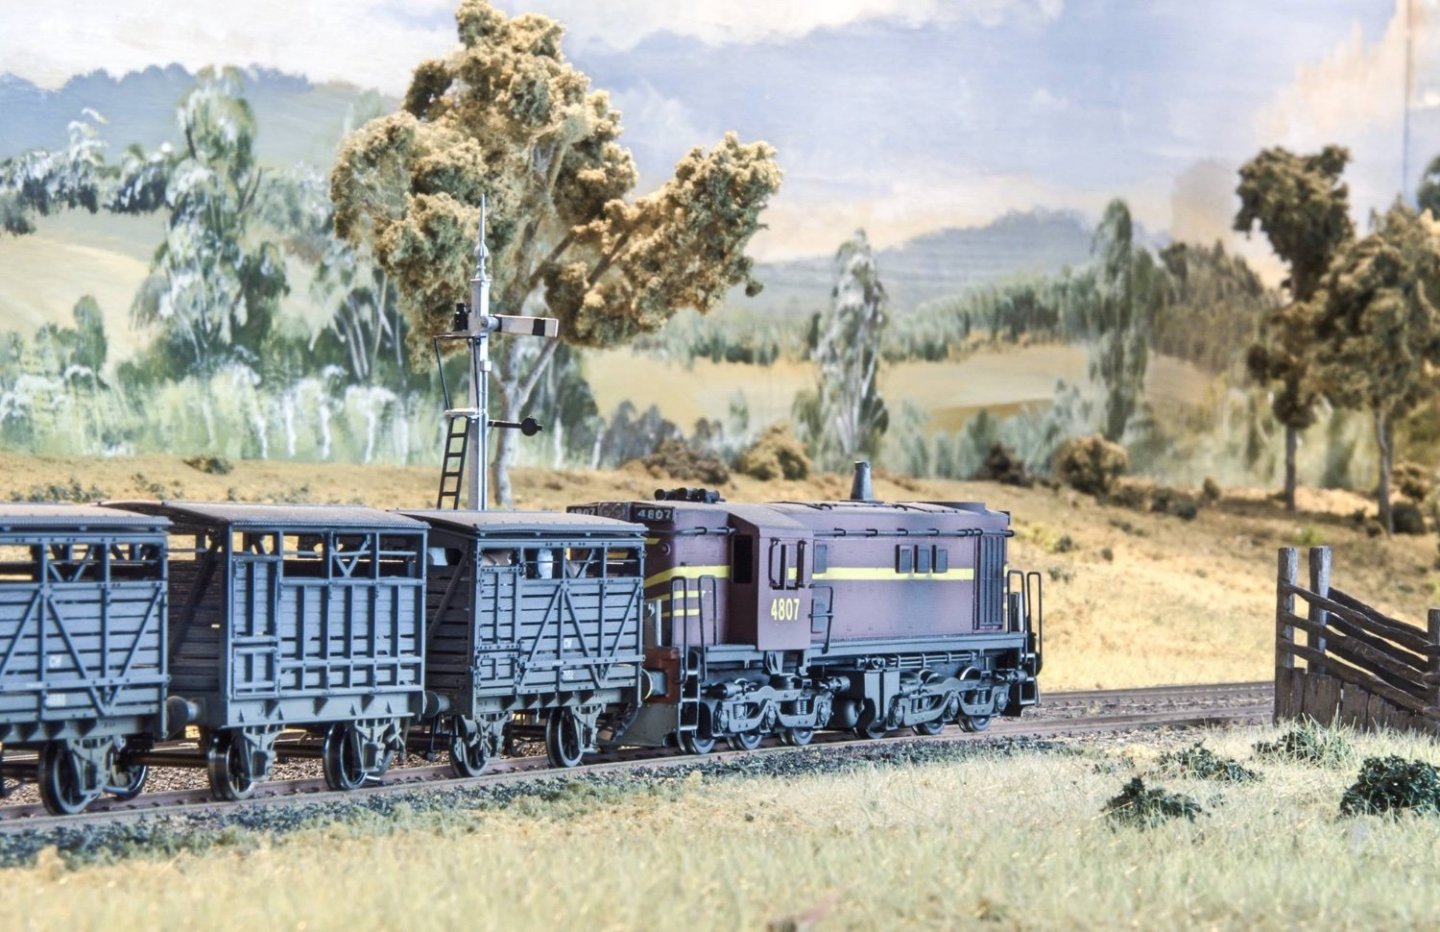
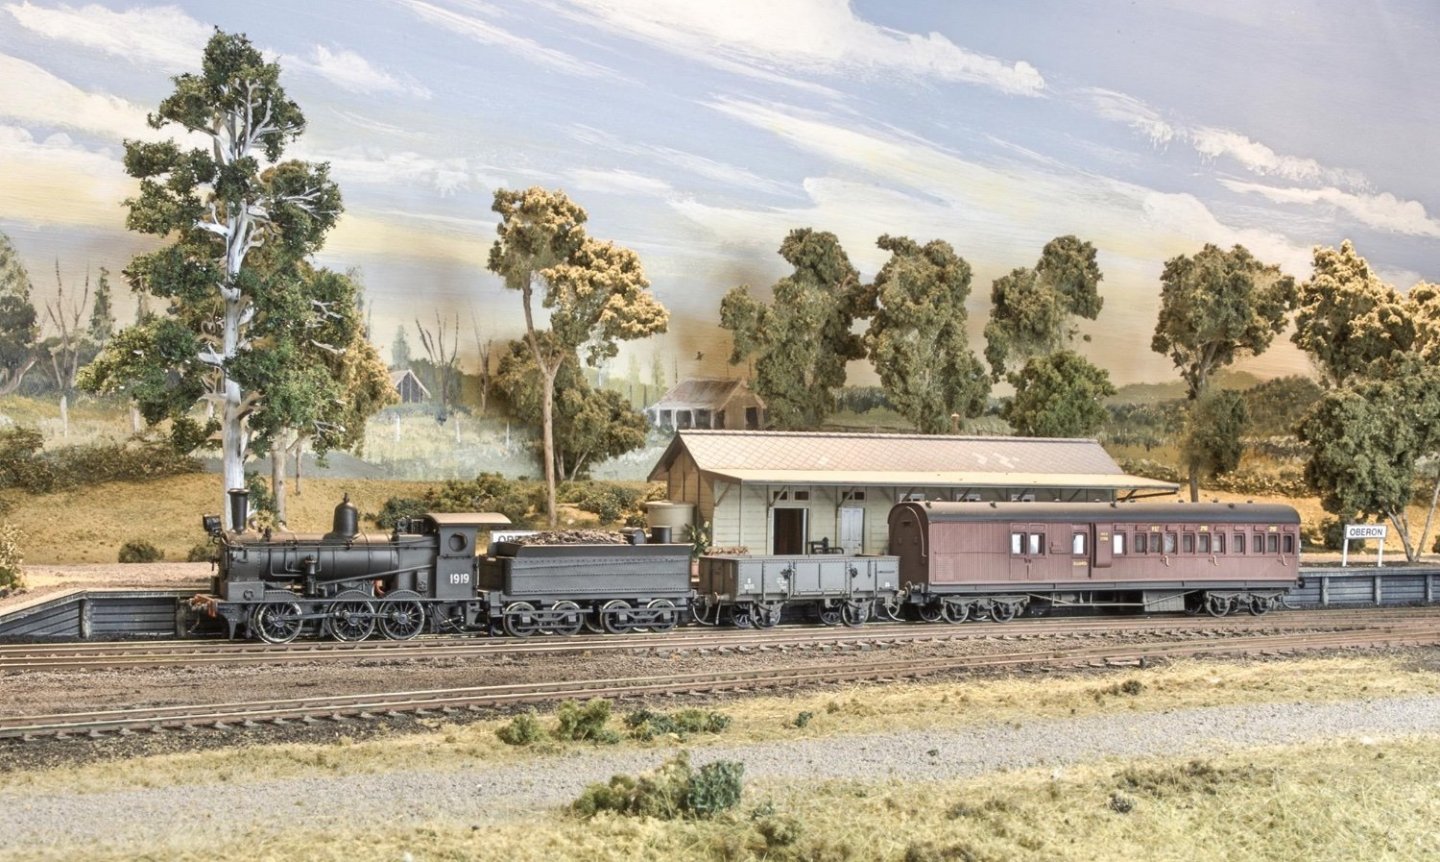
Love the use of the 3 rail track work and bogies.... Were these a repurpose from an old model railway set? -
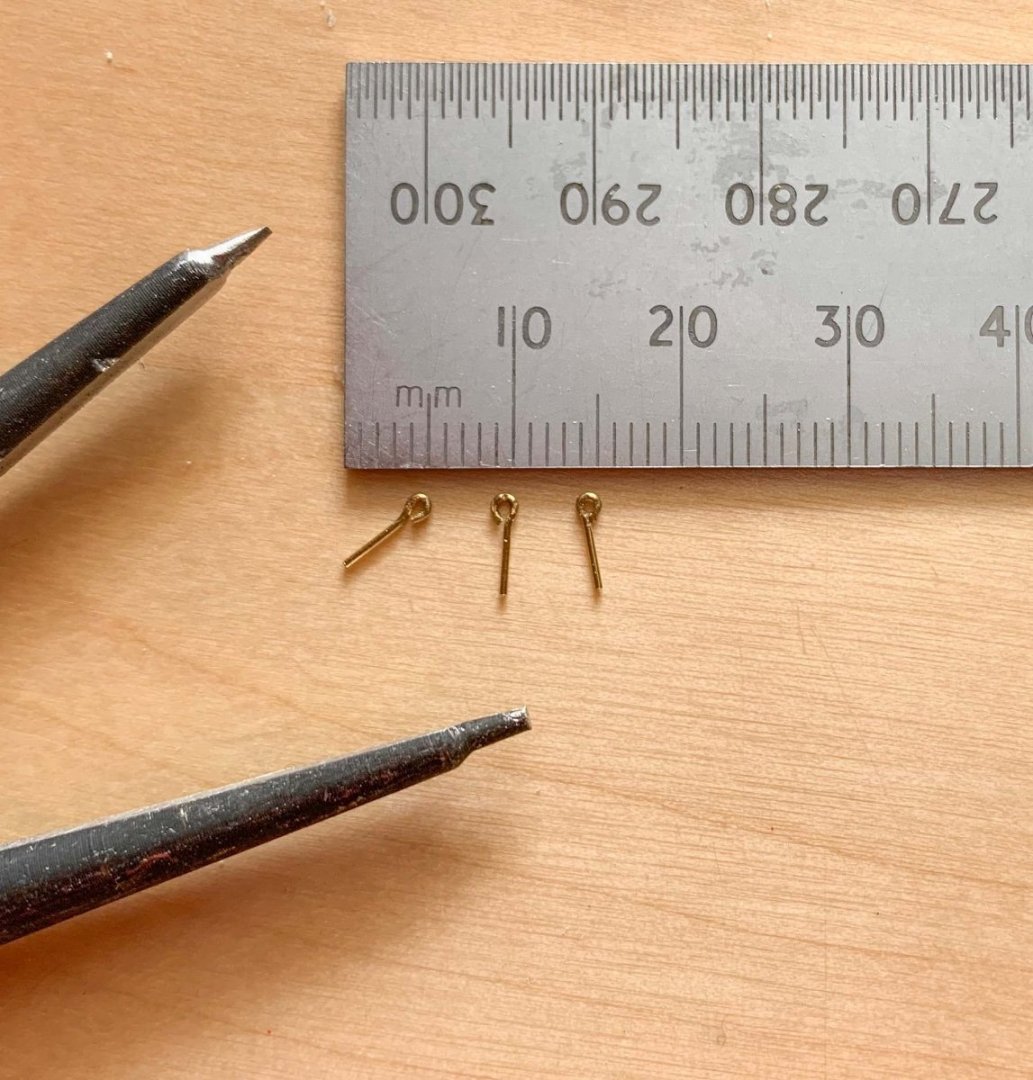
I have found that making my own eyes and hooks means getting them the size and shape I need and using brass means I can easily solder when making up more complex assemblies with them. This comes from my background in brass locomotive construction where handrail stanchions were required in relatively large quantities. I use a standard pair of cheep Circles pliers (the type that operate like normal pliers not reverse pliers). I file down one of the circular tips to a fine cone with needles files then use a flat file to make sure that there is an even, parallel flat between the two jaws of the pliers. I can then make quite small eyes/hooks clamping the brass wire between the flats at the point along the cone where I want the desired diameter. In the attached image I have made 1.0mm eyes with 0.5mm hard brass wire (unsoftened wire could also be employed but I like the hardened wire). I could go smaller using finer wire as I have done in N scale locomotive constructions.... These 1mm eyes represent 50mm (2in) at 1/50 or 65mm (2 1/2in) in 1/65 for my ENDEAVOUR. A little more realistic than the 3mm (195mm or 7 3/4in) versions provided in the kit (but as a newbie I could be wrong.....)
-
Team, I have found that using both Feast Watson and Comic Markers provide good coverage of bare wood. In fact I have found that the use of both the Comic Special Black (100) and Dark Bark (E49) provide a lovely satin (near matt) finish that can be varnished over. The stains do run slightly but into the grain so I find it great for edges of planking but not smooch for the ends. The Topic markers come in a huge range of colours and have are double ended - board chisel and fine point. The yard is painted in matt black acrylic while the Topsail Mast is marked with Comic marker (still some touchups and varnishing to do). The key differentiator for me is that the acrylic can scratch off while the marker does not. The Feast Watson stains are nice and come in the usual wood colour varieties, They even come in 50ml bottles which is perfect for modellers.
-
- 3
-
-
Well I made some changes on the Foremast I had already made to Artesania's instructions. The Fore Topmast (before per Artesania instructions and after) and the modified Fore Topgallant Mast are shown. The new Topmast is made from Tasmanian Oak and to the design of Marquardt. I have also been making some adjustments to the Lower Mast section but having already assembled with Cheeks, Cross tree Platform etc I was loathe to throw 'baby out with the bathwater'. The variations were minor in nature.

- 79 replies
-
- 6
-
-
- Endeavour
- Artesania Latina
- (and 1 more)
-
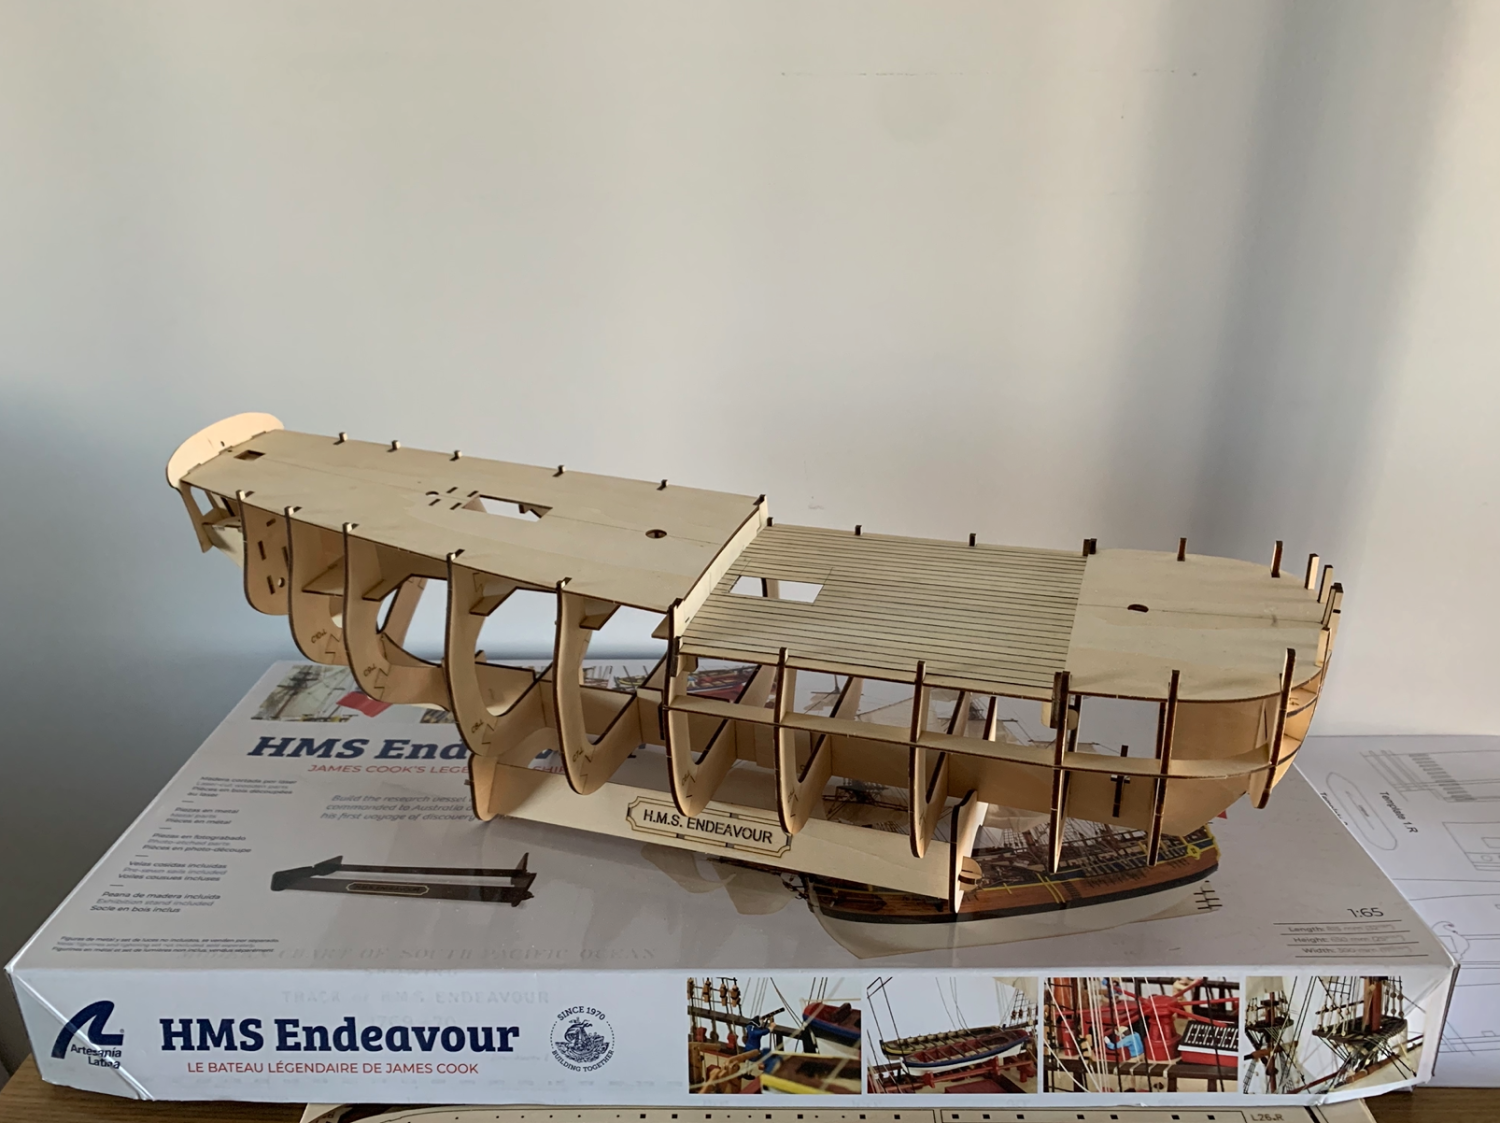
I have moved along a little with ENDEAVOUR having started on the planking. PORT JACKSON was done by wetting timber and bending over a soldering iron. After finding that putting the timber strip in very hot water for a short while, I could achieve a nice even bend without the need to use a soldering iron which unfortunately can burn the inside of the curve. This ship is also much bigger and requires three planks per row rather than a single plank. So far I am following the Artensania instructions but I'm not sure I am going to stick to that as all the joins are close together which I am sure would not have been prototypical.I also did my first yard and although it meets the Artesania design, I feel is is in no way prototypical.
- 79 replies
-
- 6
-
-
- Endeavour
- Artesania Latina
- (and 1 more)
-
Ok onto my second build and I expect this one will be a little more of a challenge than PORT JACKSON. The framework was a little loose so I had to be rather careful in assembly to ensure the frames not only lay flat but also symmetrical about the centreline and had the right space at the deck level for the beams to be fitted later. Laying the deck was a relatively simple process having previously marked the centrelines on the false deck I laid full lengths of the 0.5mm strip material after rubbing the edges with a permanent black marker. I chose to insert perimeter planks (not sure what these are actually called) so that the deck planks did not end in sharp points at the bulwark. The plank joints and nails were marked by a 0.1mm permanent ink marker. As can be seem in the picture, I had lots of time to spare while glue dried so I started work on the Foremast. The mast pieces were turned in a mini lathe tapered by holding sandpaper on each side to support the material under pressure and runs the sandpaper up and down the tapered length until the diameters were met. The squaring was achieved by marking a square on the end of the material and then running lines down the length and then sand to the lines. It was at this point that I noted that some of the work done by ENDEAVOUR builders in the past reveal some potential errors in the Artesania kit so I bout the Parkin book but alas it does not provide sufficient detail on masts and yards. It does however reveal some missing features in the deck which I will have to mark and amend.


- 79 replies
-
- 4
-
-
- Endeavour
- Artesania Latina
- (and 1 more)
-
Hi team, I'm new and although I have searched the forum I haven't found anything specifically on the timber sheathing and iron nail filling of RN ship hulls prior to the introduction of copper sheathing. I am building the new 1/65 Artesania HMB ENDEAVOUR and research indicates that the hull was timber sheather and iron nail filled with the idea that the nail heads would rust forming a rust coating over the whole hull. This being the case, how would one model such a finish. A rust comes in a multitude of shades I would guess stippling the hull with various rust colours combined with a little medium would create the 'authentic' used feel. But how would one represent and brand new finish?
-
Suggested sites for purchasing wood model ship kits
Peter6172 replied to Capella's topic in Wood ship model kits
Yes they provide some good kits particularly in the Colonial range. I have just finished PORT JACKSON but have now been banned from purchasing from them as I sent them suggested amendments to their instructions. They wanted to pursue me for copyright infringement and went I told them to fill there boots (as I hadn't breached any copyright) I was banned from shopping and banned from the Modellers Central FB group. I have since found that they also challenged the accuracy/integrity of the instructions and they too have suffered a similar fate. I simply get someone else to order from them on my behalf now, though I have found some great suppliers of products in Canada (ROPES OF SCALE) whose products are far superior to anything Modellers Central can provide.
-
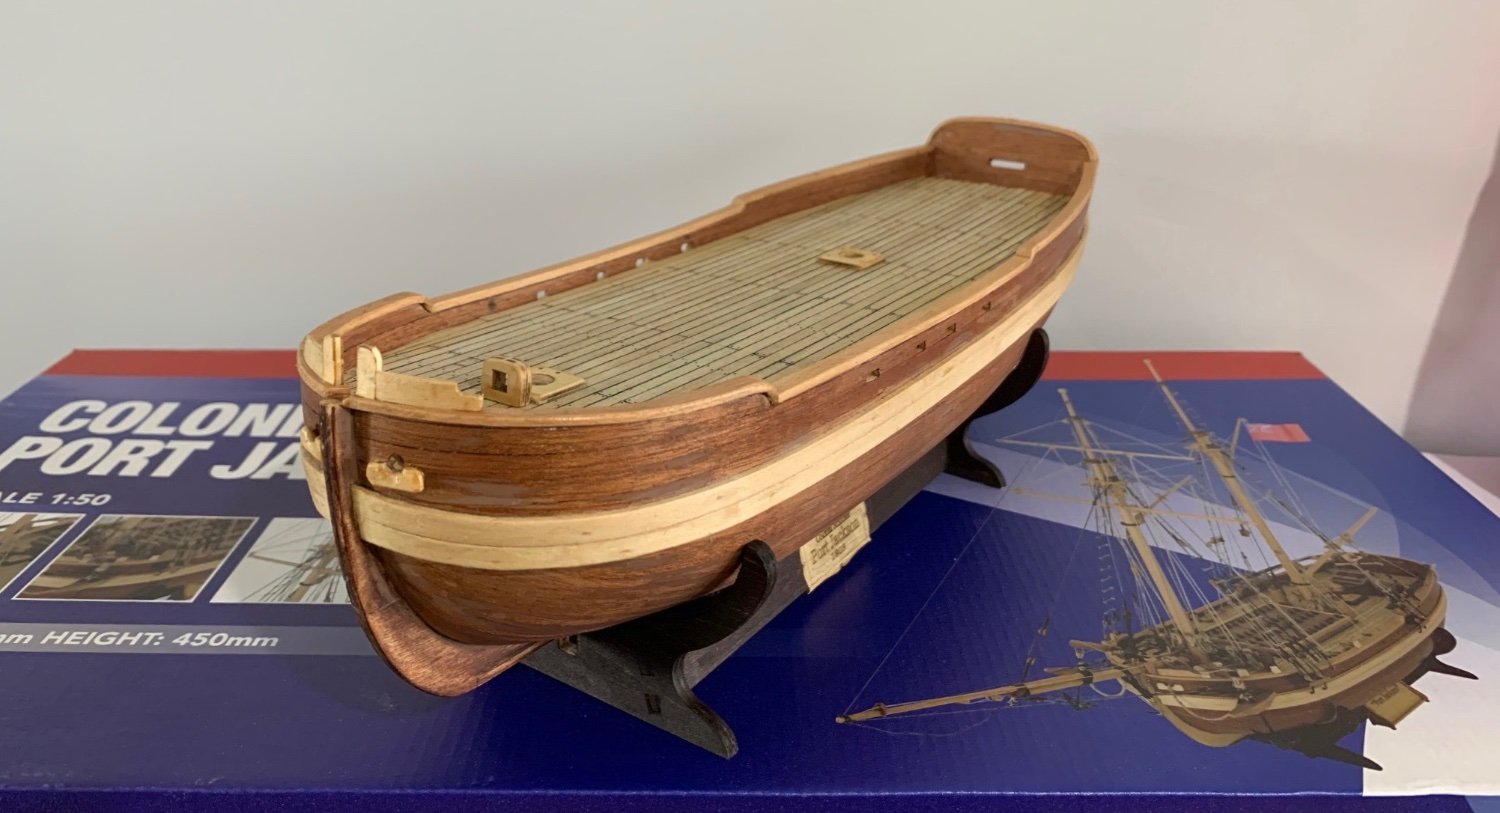
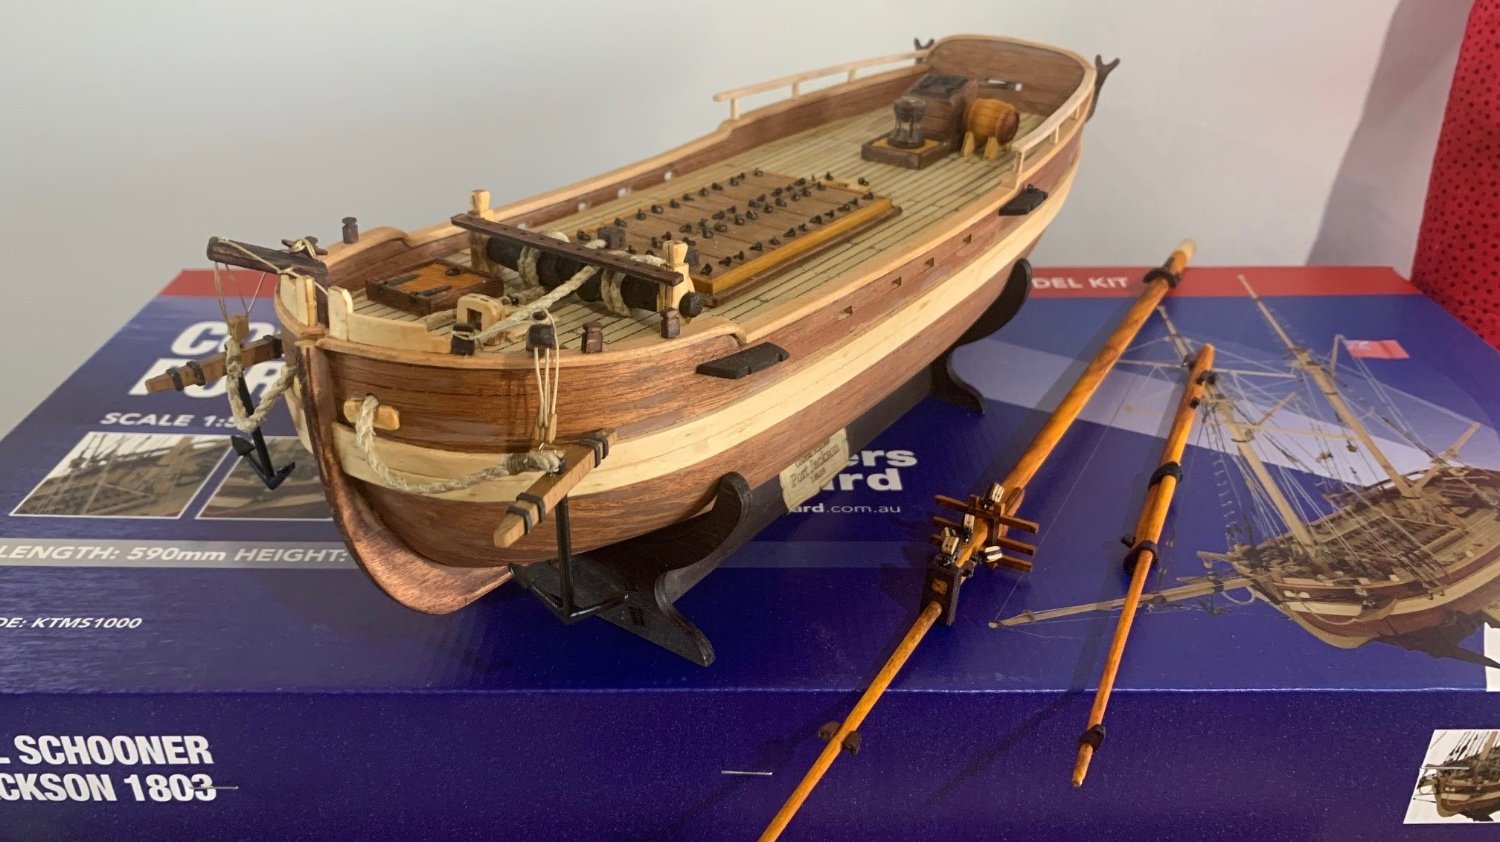
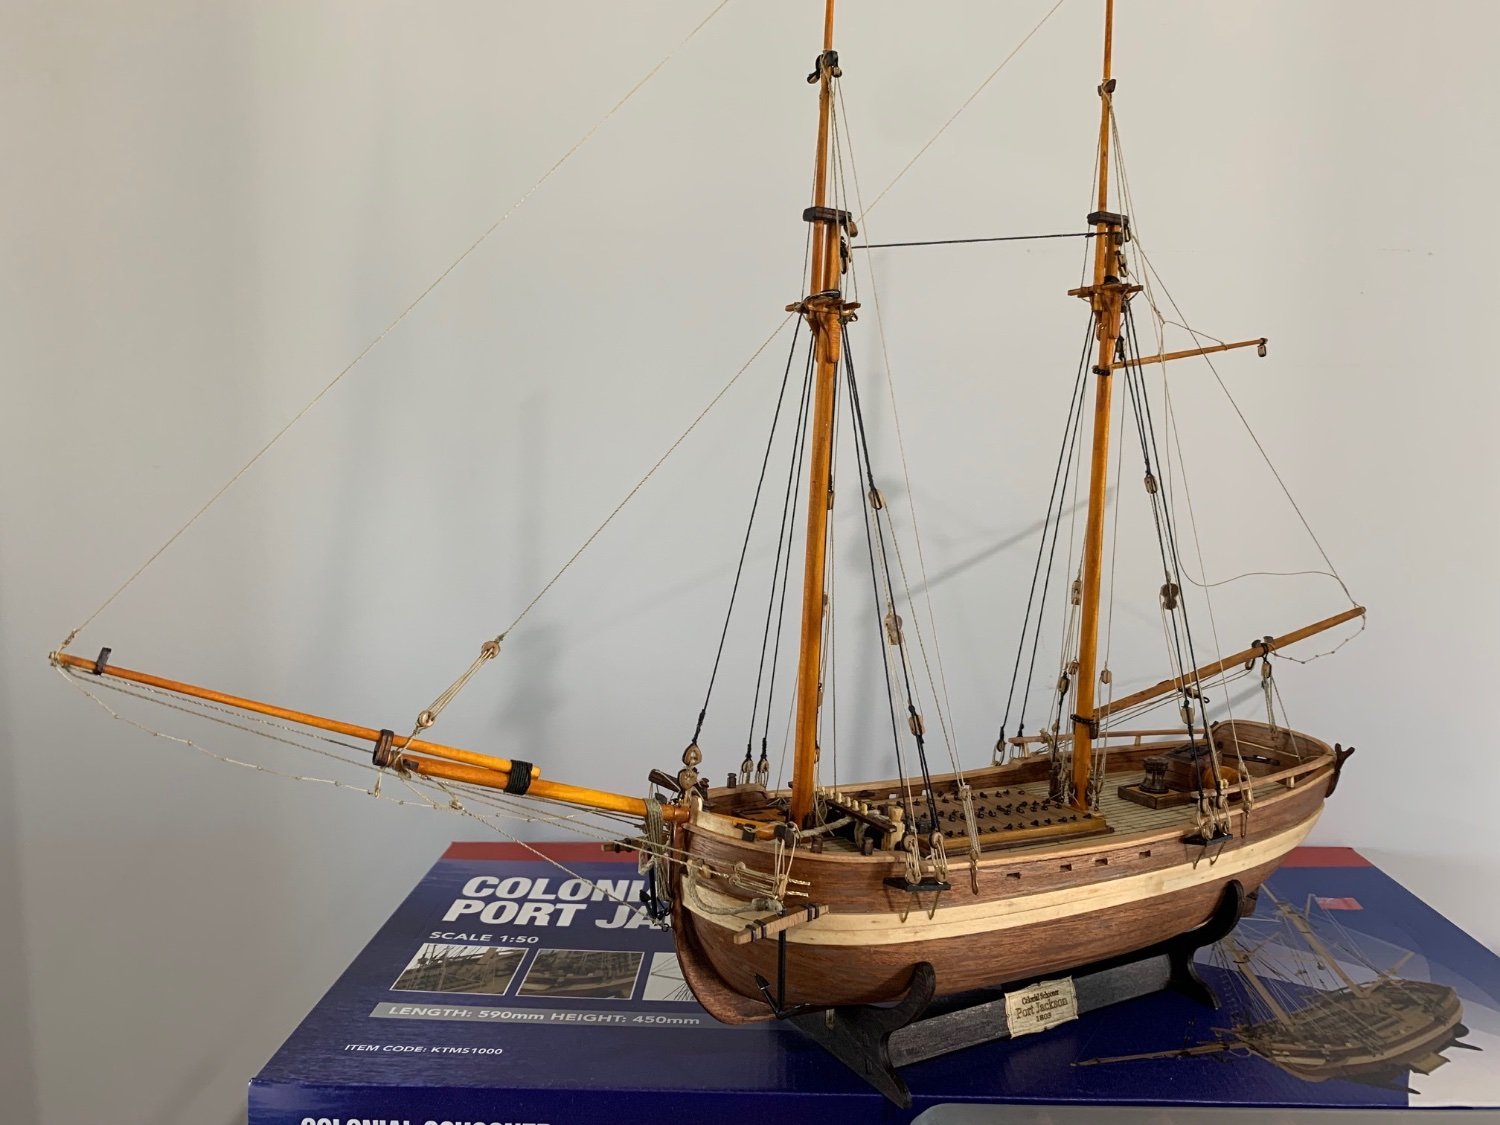
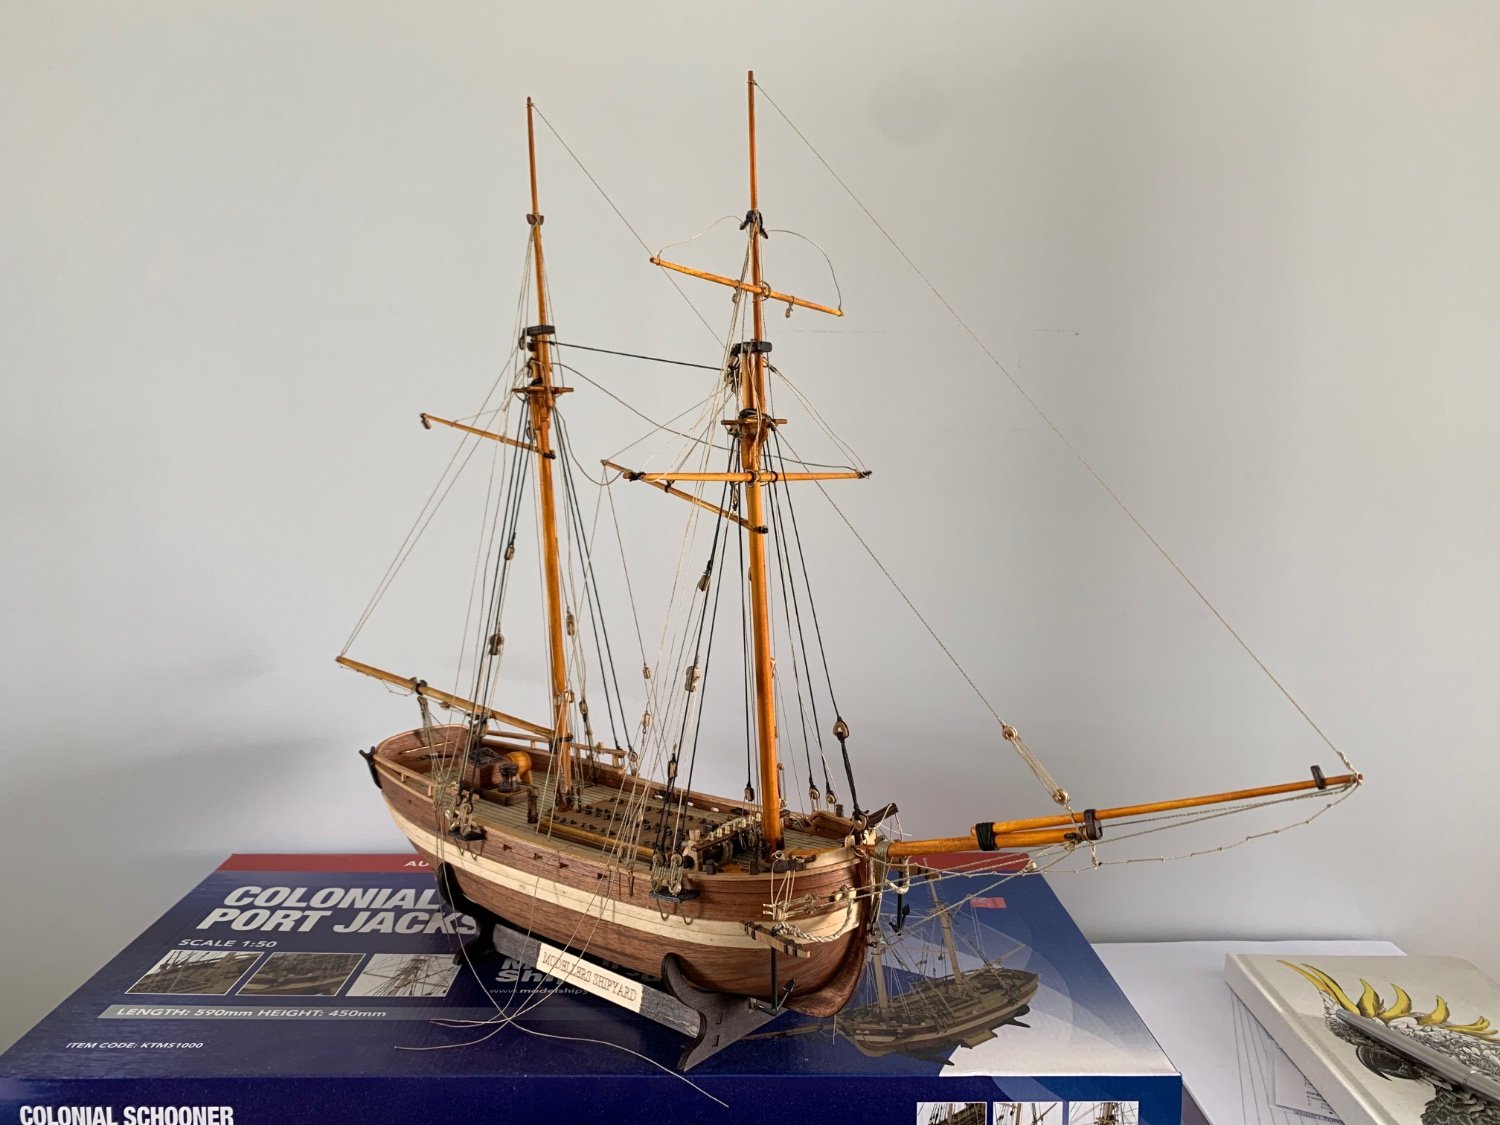
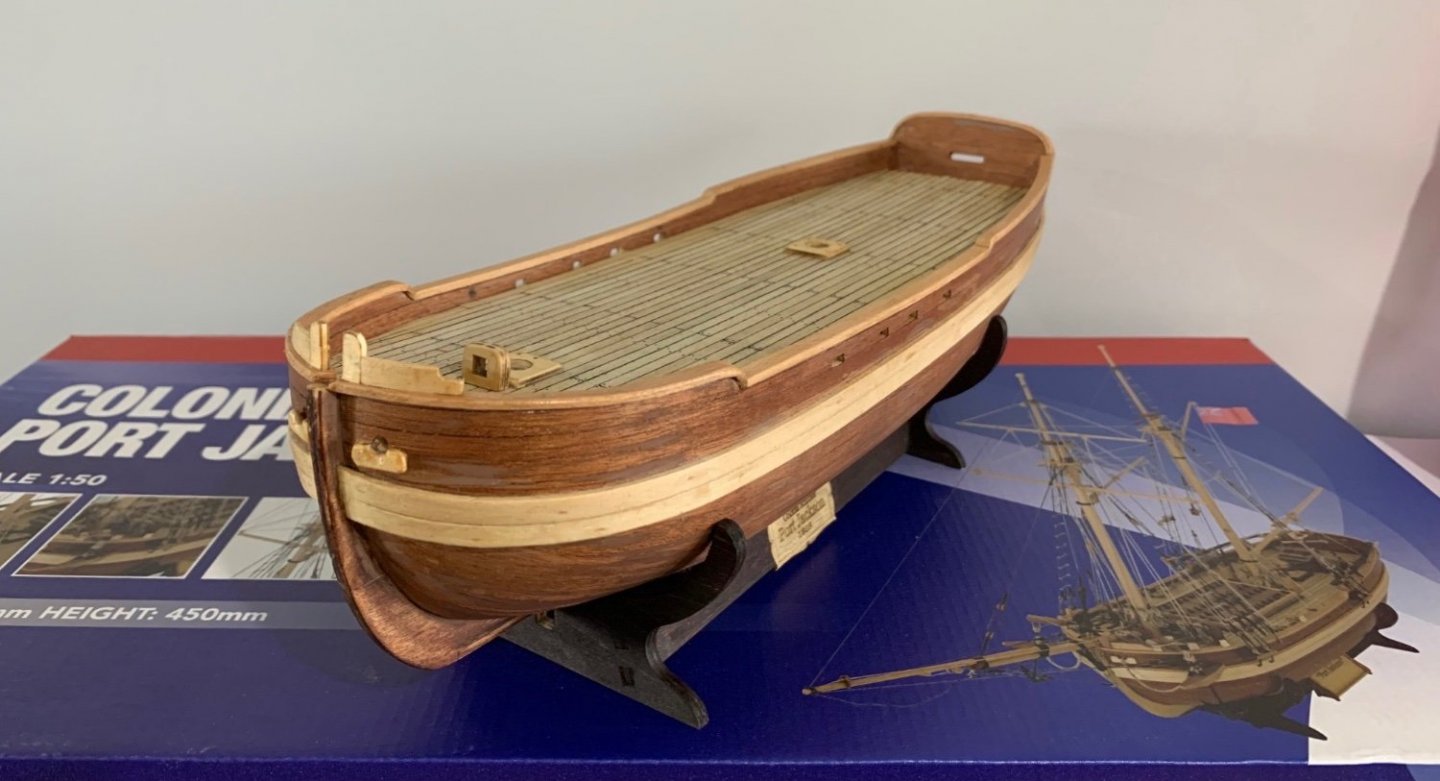
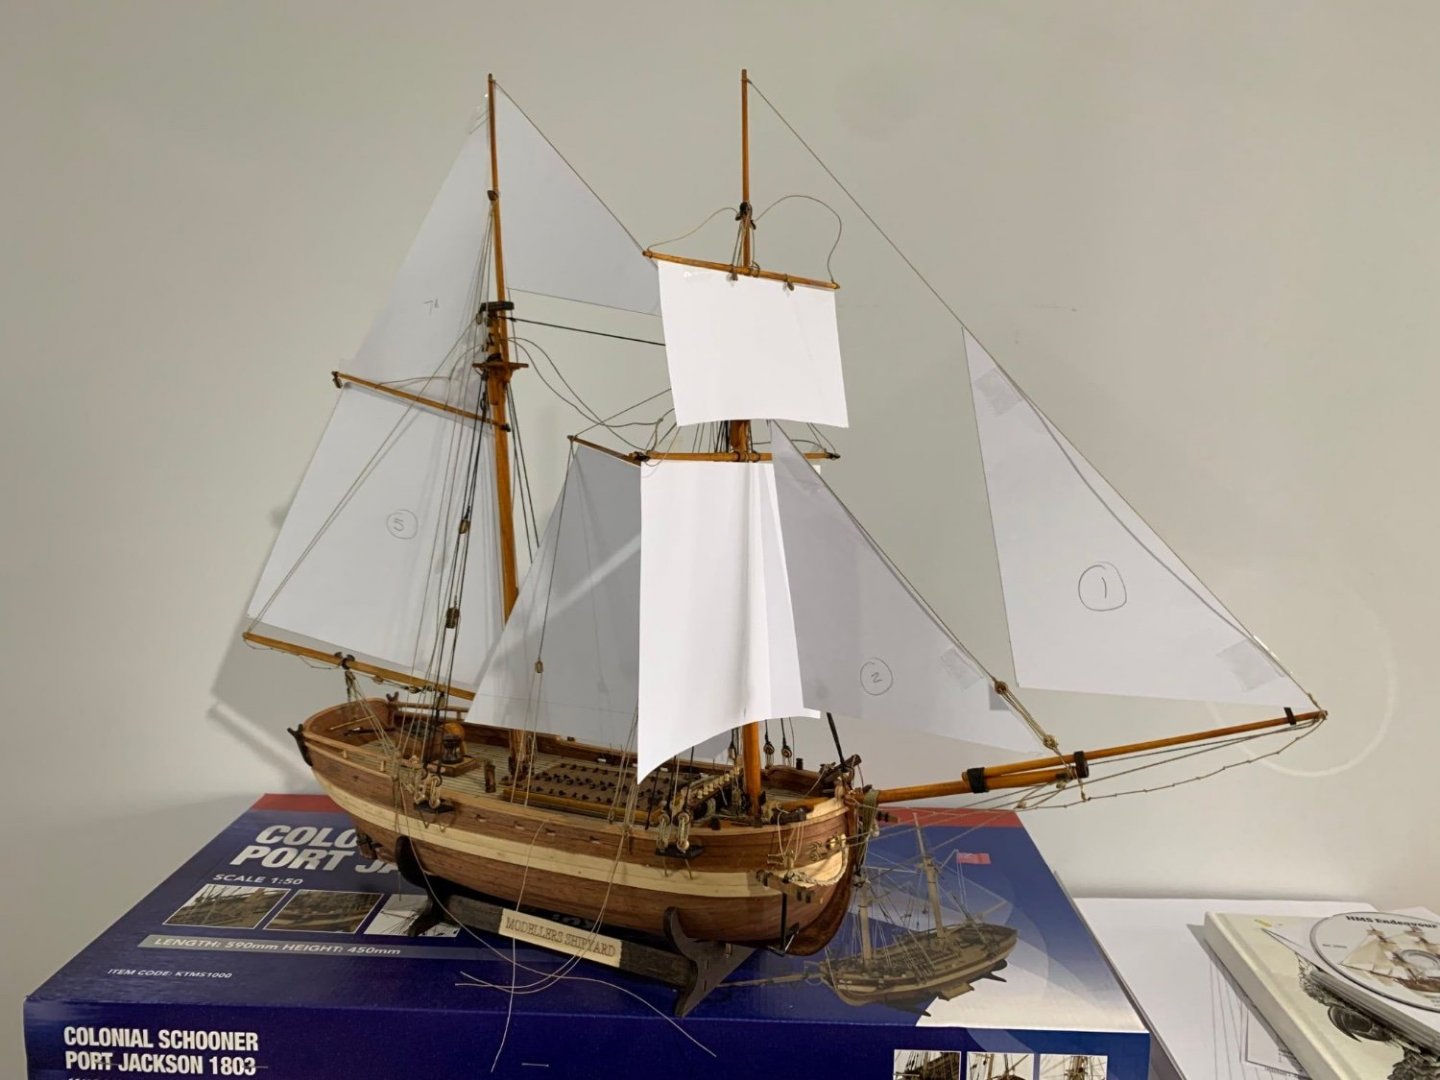
Hi team, Great to be able to join such an illustrious group of modellers. I am new to Model Ship building having only ever built one 1/350 scale plastic model FFG (HMAS ADELAIDE) and a submarine (HMAS RANKIN) for my daughter who served in both. My background is Model Railway predominantly HO but I did dabble in other scales over the years. I have built over 200 locomotives for clients around the world but very few for myself. I have finished building PORT JACKSON (Modellers Shipyard) in 1/50 scale as my first and pushed myself by scratch building the sails and associated rigging not included in the kit. I hope to learn a lot about wooden sailing ships and with a special focus on the rigging and getting it as historically correct as I can. IN this pursuit I expect to learn a great deal from the significantly more expert modellers in this forum.
- 10 replies
-
- 10
-
-
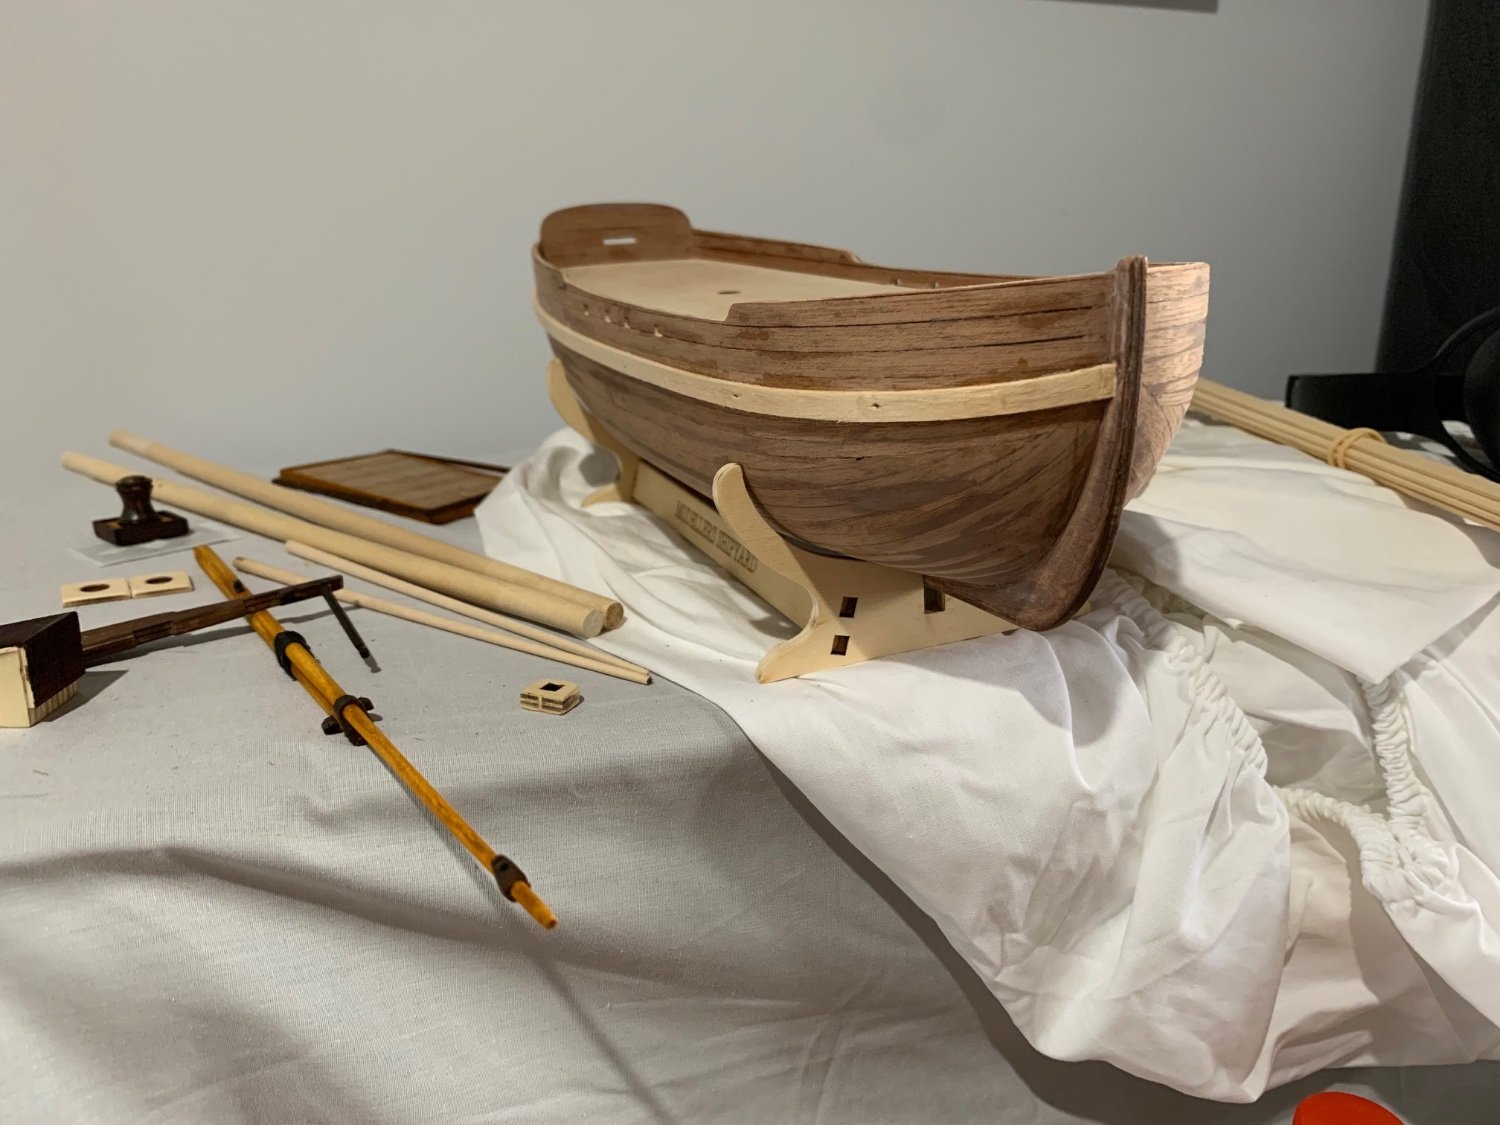
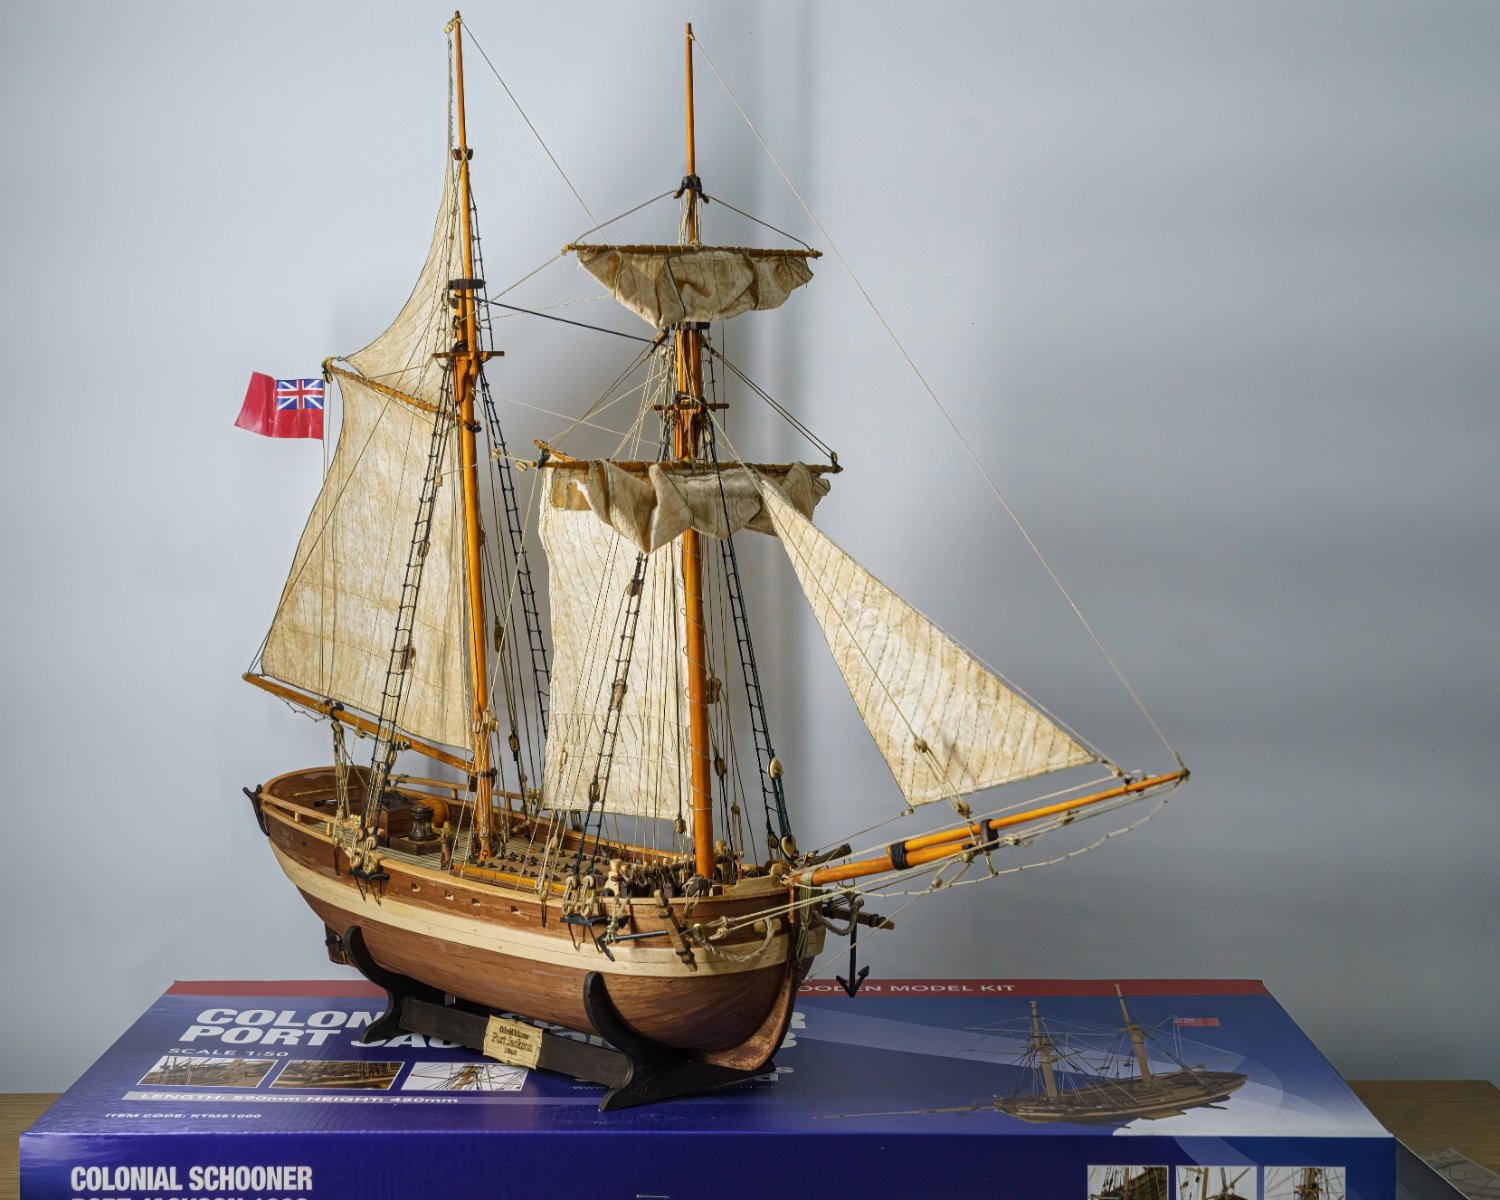
Regret that my build log was lost when I started my 2nd ship, HMB ENDEAVOUR: accidentally overwrote the file... I still have some of the images to I will load them in chronological order. The PORT JACKSON was my first ship ever so I was pleased with the result including the inclusion of sails and associated rigging that was not part of the kit nor were there any instructions for them. I hope to learn from the very skilled modellers her in this forum and share any learnings that I might find.


- 4 replies
-
- 7
-
-
- Modellers Shipyard
- Finished
- (and 2 more)
-
I successfully completed the Port Jackson with scratch built sails and associated rigging. It was my first build and I was pleased with the kit albeit some instruction errors still exist even in 2021.