Peter6172
-
Posts
182 -
Joined
-
Last visited
Content Type
Profiles
Forums
Gallery
Events
Everything posted by Peter6172
-
 Thanks Pat. I used walnut filler sanded back then walnut stain. I'm not particularly happy with my cast heads colouring so I too may end up painting them. The issue is what colour: red?
 -
After drying out the varnish in the sun, I found a couple of gaps open up in the planking of the lower hull. The material used in the kit must really soak up moisture. I have had to putty, sand and revarnish the lower hull and now its time to put varnish on it again so its likely to set me back a few more days. In the meantime, I have cut the heads off the windless support castings and manufactured my own windlass supports from wood gluing on the heads when completed. Getting the metal to look like wood is a little beyond my skills at the moment.
- 79 replies
-
- 2
-

-
- Endeavour
- Artesania Latina
- (and 1 more)
-
kit review 1:65 HMS Endeavour - Artesania Latina
Peter6172 replied to James H's topic in REVIEWS: Model kits
Covered in my build log Allan. -
kit review 1:65 HMS Endeavour - Artesania Latina
Peter6172 replied to James H's topic in REVIEWS: Model kits
Its a great kit but like all kits there have been quite a few compromises. The instructions are the first real concern. 500+ pdf pages is difficult to manage even on a current i7 computer with 32Gb of RAM. The kit is based on the Replica of the Endeavour so there are marked differences between the replica and the drawings by Marquardt and Parkin which are based on the admiralty drawings and image/sketches of the time. The stern profile and planking are incorrect, however the material provided for the planking is very forgiving and while id di not smile, I was able to bend and twist planking to follow the lines of Marquardt's drawings rather than the basic bluff bow planking in the instructions. The etch appears to be stainless steel which is a shame as it is very difficult to work with compared to brass. While the etches do provide some 3D in the stern/window embellishments, 3D printed resin would prove a far superior (and likely cheaper) option. There is a good deal of clean up needed on the cast metal parts also with obvious parting lines. Again, these could have been supplied as 3D resin prints instead which would make them easier to work with. Four identical anchors are supplied; unfortunately ENDEAVOUR had two different types/size of anchors. Not sure the colour scheme is authentic for the period model either; again base don the colours used by the replica. Endeavour certainly did not have a white hull and I am not sure that yellow paint would have been used on ships as it would have quickly bleached to white. The yellow may have been used as a representation of varnished teak embellishments? There are a few shortcuts in the standing/running rigging and fittings on masts, yards and gaffs but then its a level 3 so not sure if the square and hexagonal details of the topmasts in particular are relevant. If you want to replicate the authentic masts then you need to procure dowel 2mm in diameter larger than shown: a 6mm square section requires an 8mm dowel and does not seamlessly transition to 6mm diameter as indicated in the instructions. Artesania is not the only manufacturer who seems to have flawed mast/ yard/ gaff geometrics in their instructions. I have also chosen to discard all the Artesania thread and blocks as they are poor representation of the real thing. I feel that Artesania should supply kits without thread and blocks making them an optional extra should someone wish to use their products. Agree that this version of ENDEAVOUR is a great improvement on Artesania's previous offering but there are many improvements that could still be made. -
kit review 1:65 HMS Endeavour - Artesania Latina
Peter6172 replied to James H's topic in REVIEWS: Model kits
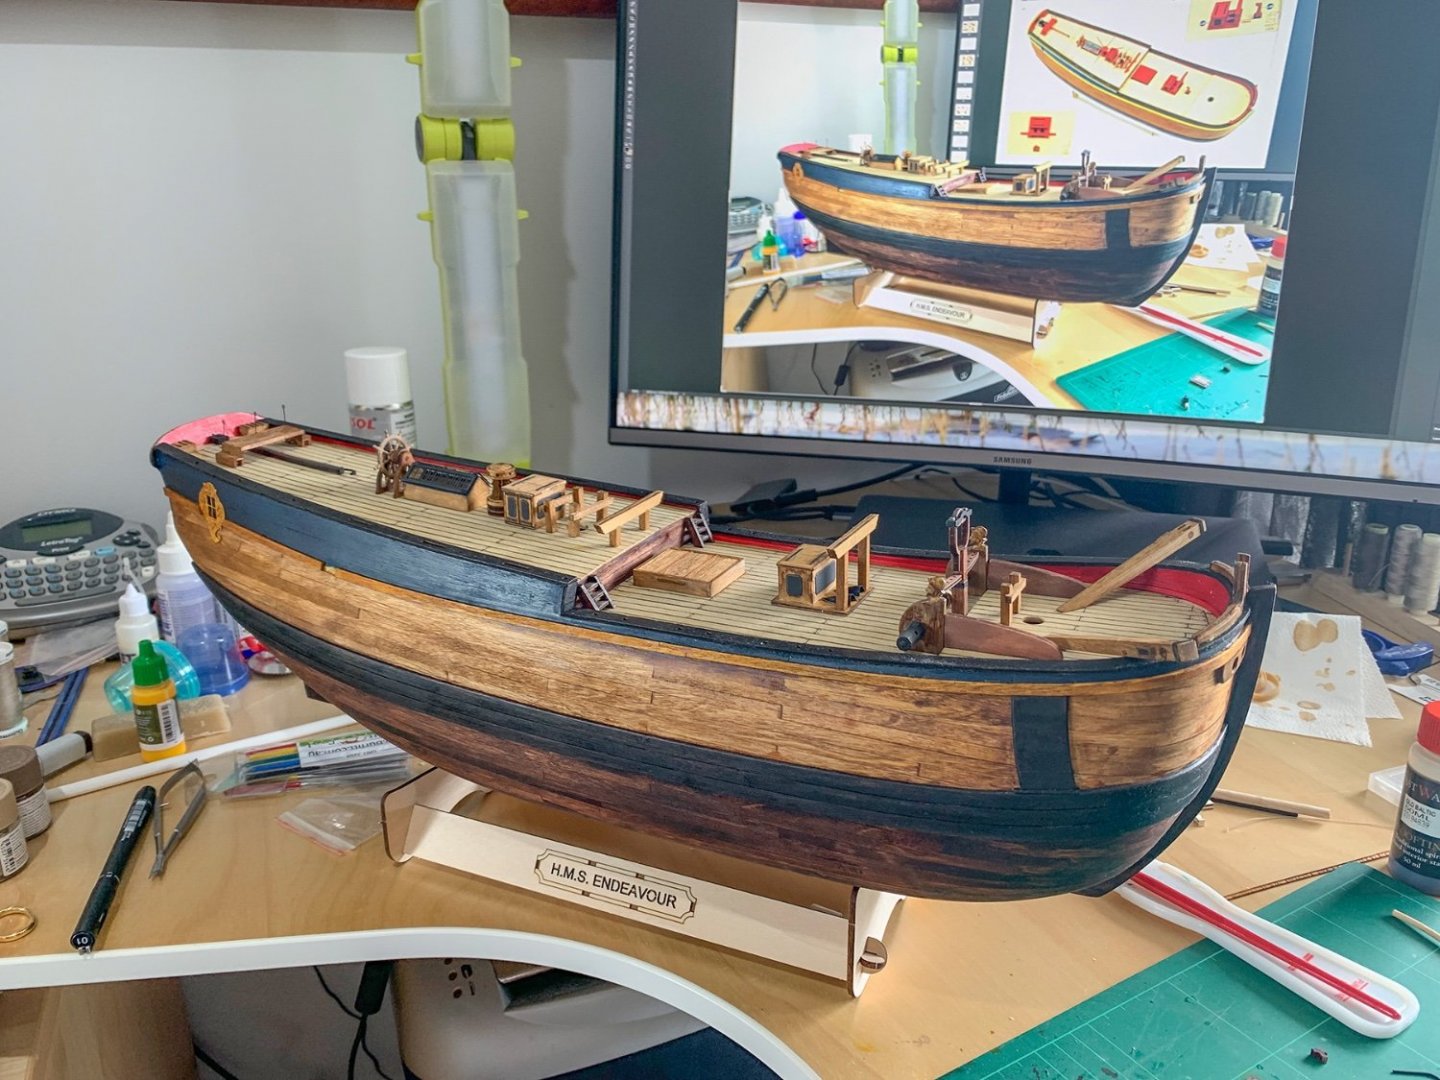
I've been building this model since Feb 2022. The Build Log is on this forum (not sure how to create a link to it though). I have almost completed the hull work, some detail and transom work to complete. I have fabricated much of the deck structures/fitting and just placed them to see where everything goes while waiting for the varnish to dry.
-
Made some more progress however the weather has been appalling here in Eastern Australia with high humidity low temperatures and non stop rain. My first coat of varnish has been on for 4 days and its still tacky but it is slowly drying. Have test fitted the deck fitting to see where things go before I mark up the deck and bulwark for holes for ring bolts and securing cleats plus holes for the bitt posts. I also need to remove the square ends on the bitt posts to make them upright on the sloped quarterdeck. Some imperfections under the blue paint need to be dealt with too.
- 79 replies
-
- 3
-
-
- Endeavour
- Artesania Latina
- (and 1 more)
-
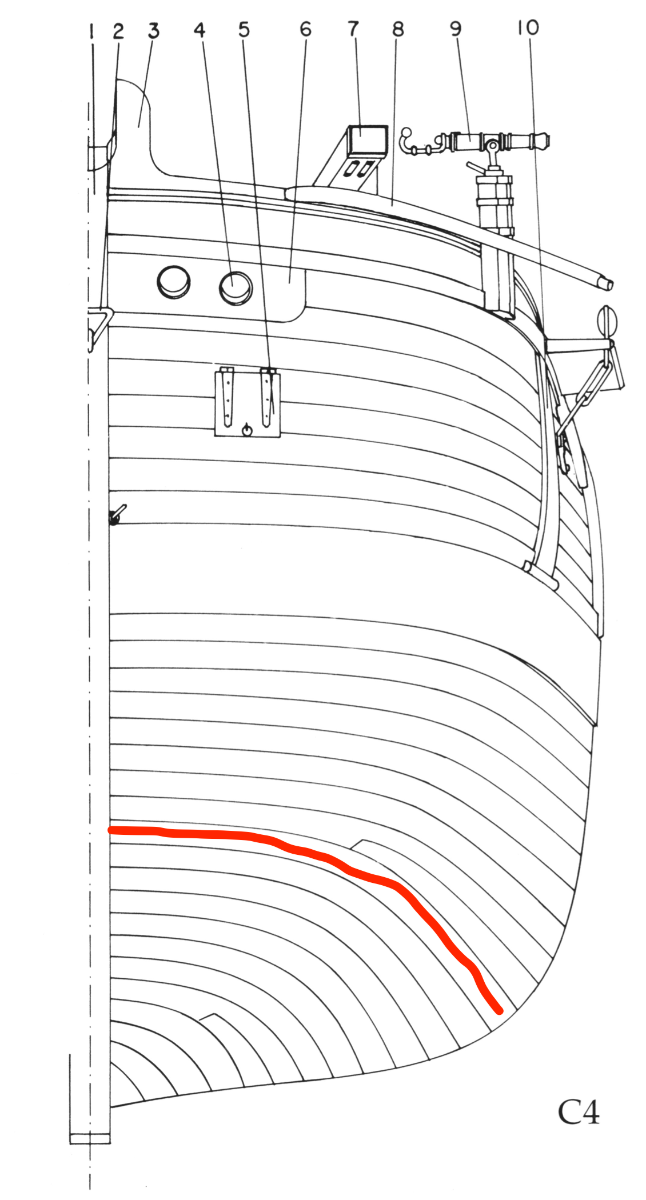
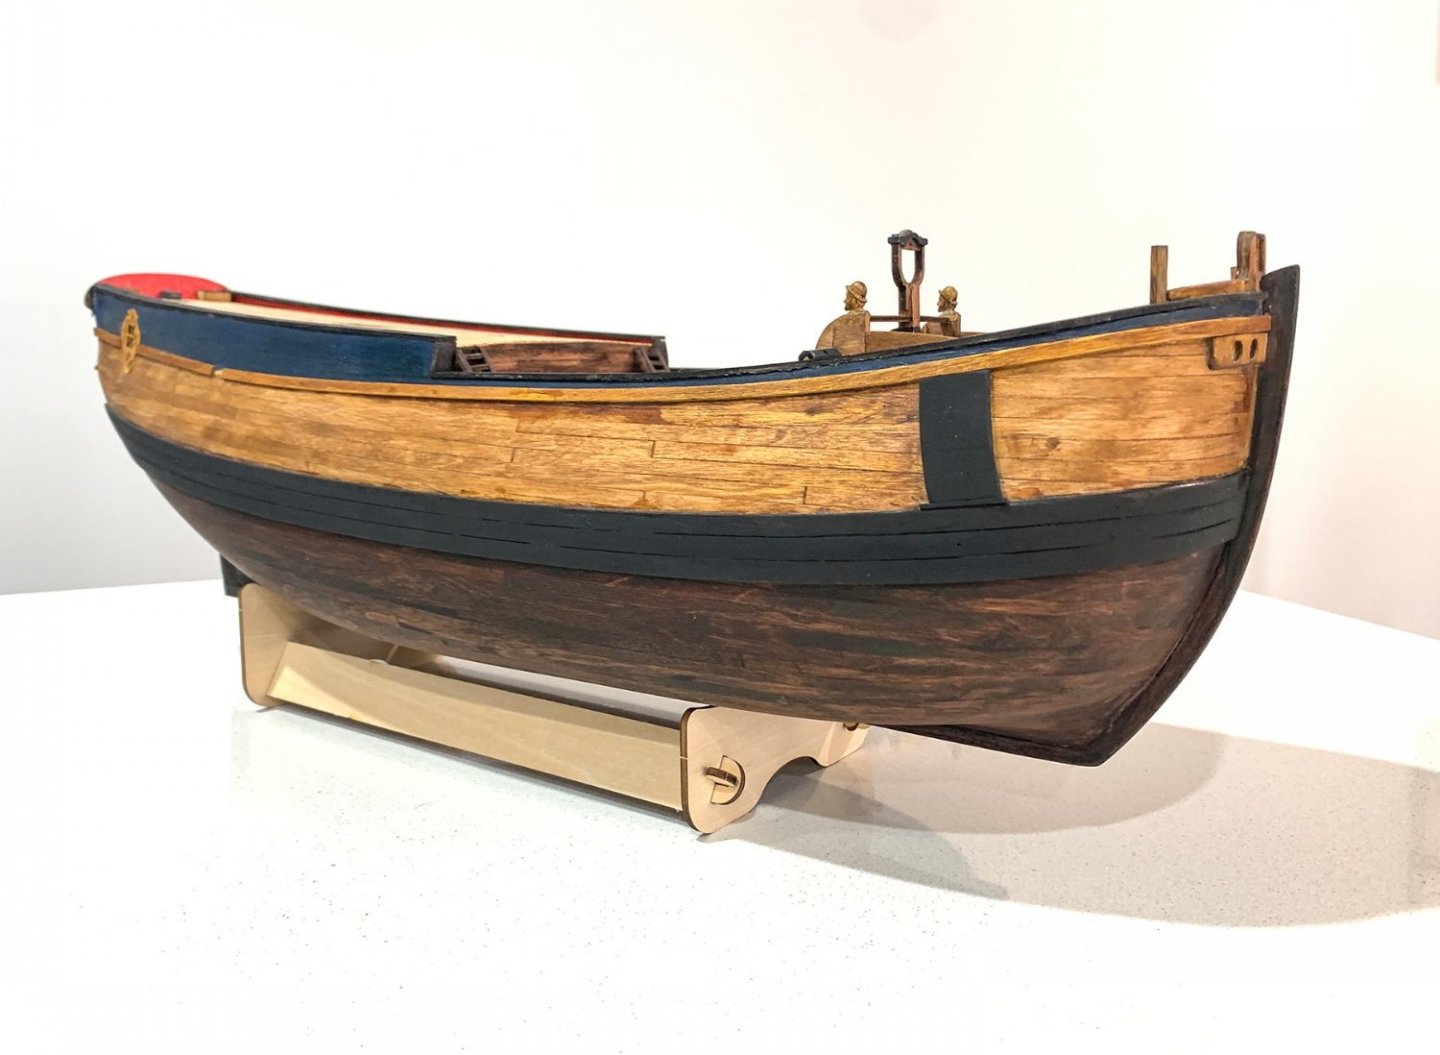
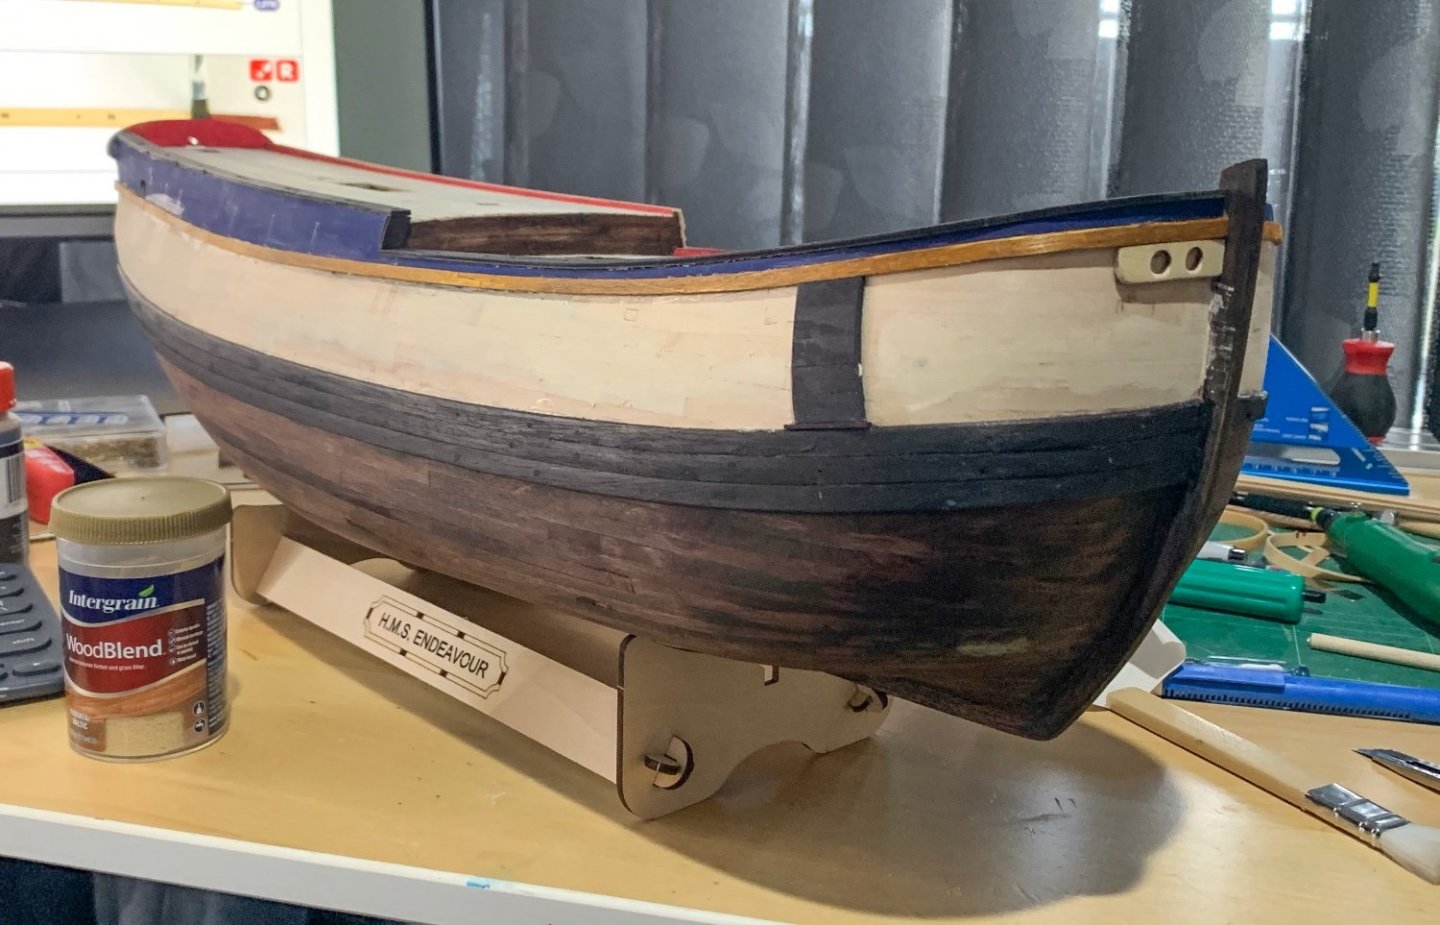
Progress has moved on a little since completing first plank. I have sanded and faired the hull and added whales (pre-stained black) as well as the bulwark/deck line trim. I have added some fine baltic pine woodlblend filler on the unstained area of the hull and put a fist coat of royal blue on the bulwarks. The lower hull has been stained walnut to represent the muddy dark shade that the hull was described as on the Australian voyage. Some minor areas filled to be sanded and the bow. The anchor rubbing timbers are installed per the Marquardt drawings. Not sure how large the bolster was but I made a guess and installed. I will spend the next week sanding and finishing the hull and progress to the stern decorations and rudder installation.
- 79 replies
-
- 4
-
-
- Endeavour
- Artesania Latina
- (and 1 more)
-
that makes sense though pulling the rope tight would mean pulling back over the top of the bitt to secure on the timberhead. Not a great purchase though. On the four posted bitts I would consider a better purchase by securing on the opposite timbered to the sheave through which it ran but then in a four post/four sheave bitt you would have ropes crossing....!
-
My understanding is that there are different spellings based upon which continent one resides?
-
OK must be a dumb question but I have not found it asked anywhere yet. In L. Petersson's book on Rigging Period Ships I have yet to ID where running rigging which passes through the various bitts post sheaves are secured. e.g. the various sheets shown on pages 48 and 49 of the book. The belaying plans show the rigging running into the sheaves in the bitts posts but not to any securing point.
-
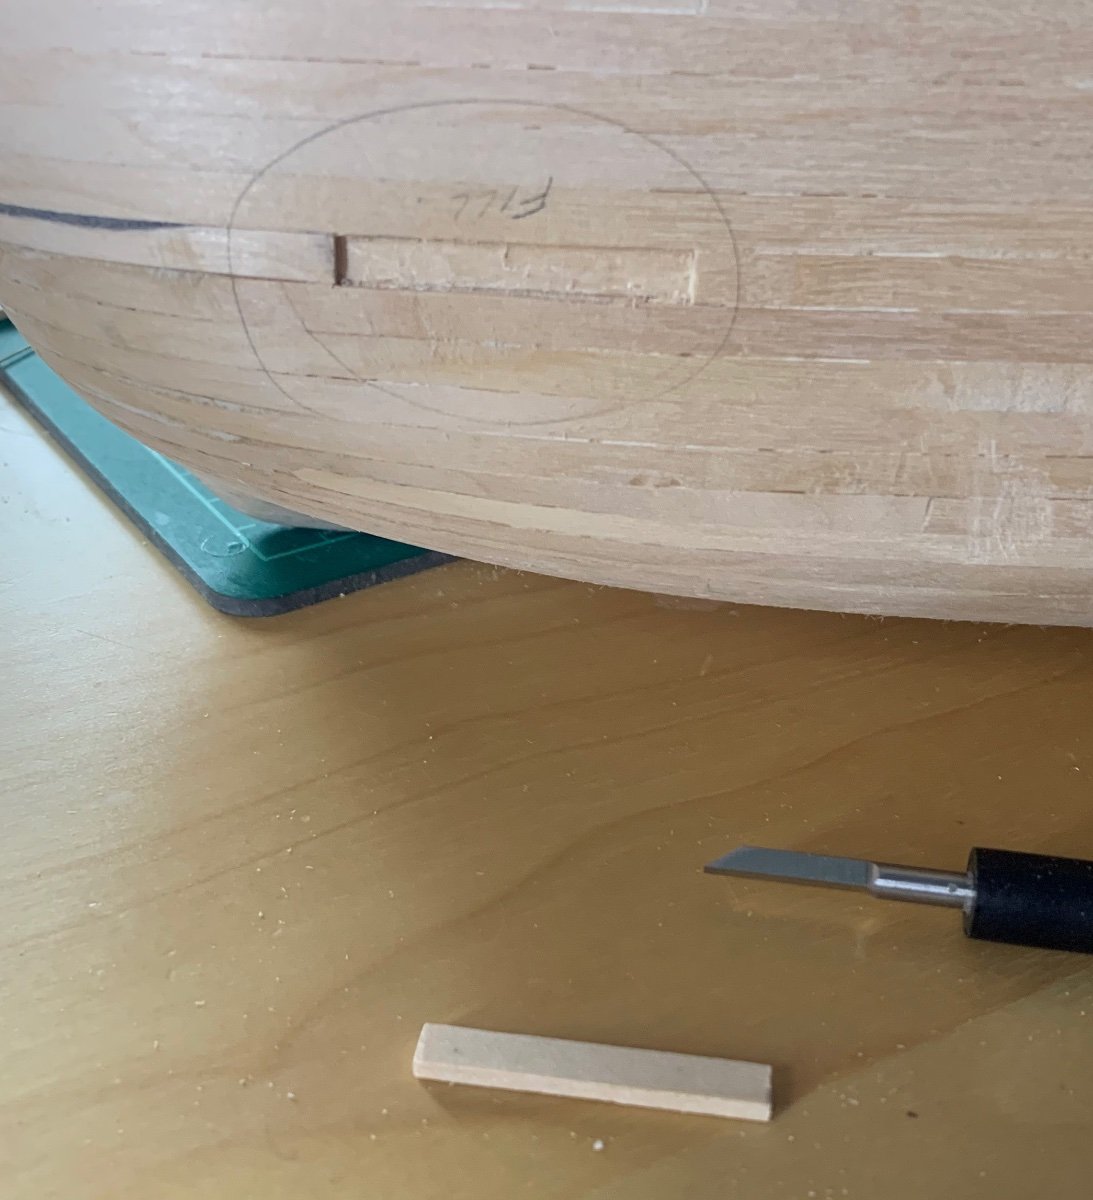
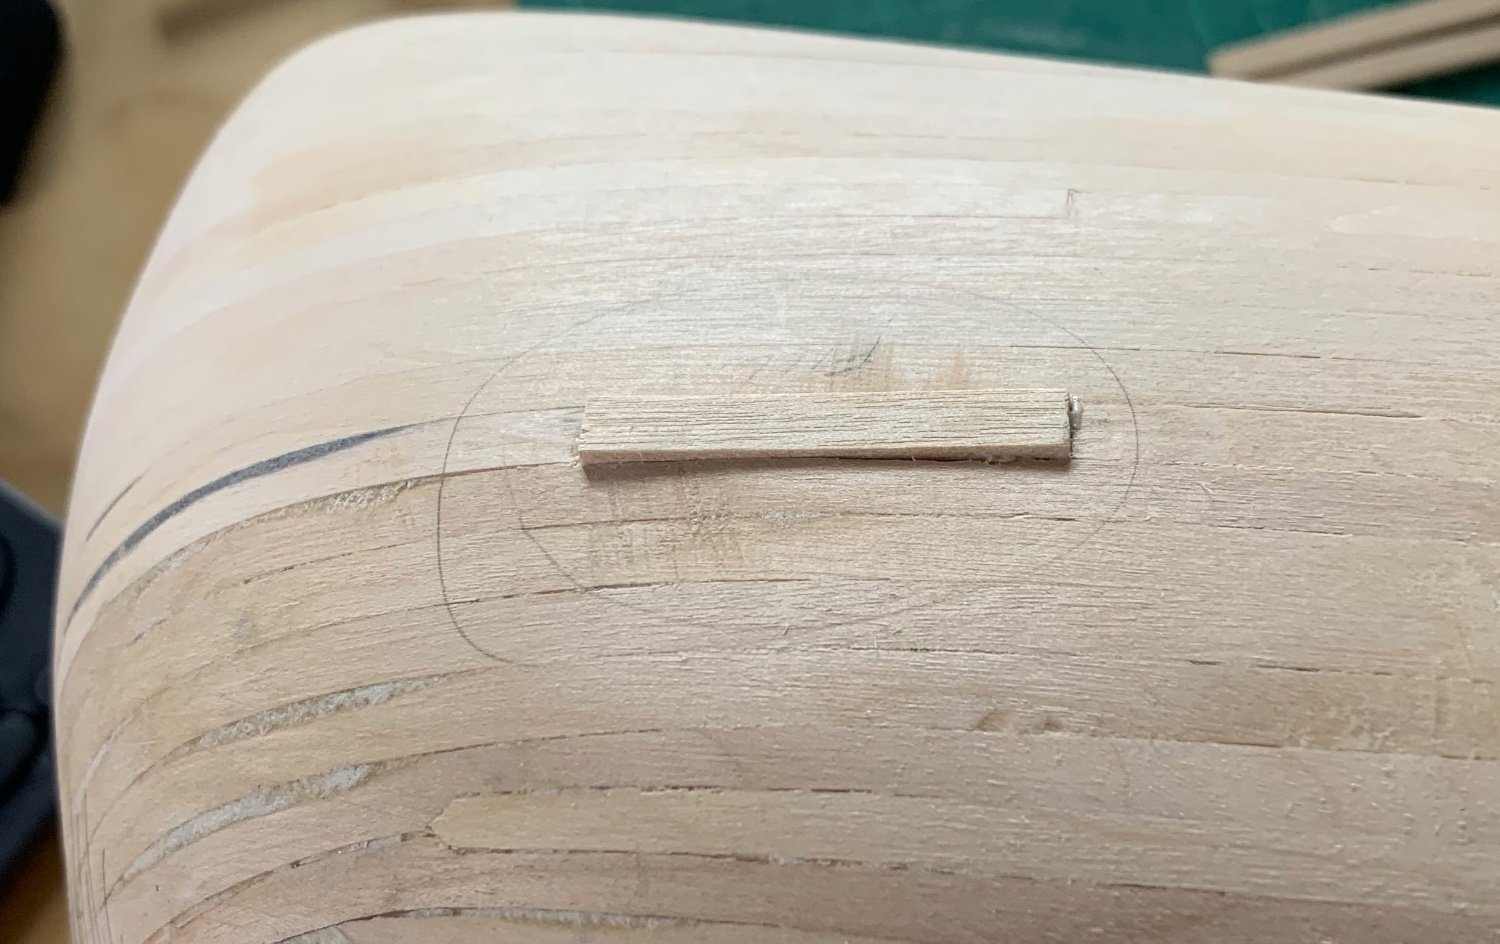
Rather than remove the entire plank I have chosen to remove the offending section using a small chisel and replace with a short piece of plank material. I did not remove the entire depth of plank so the new piece will be planed then sanded down. If this transition works well I will consider the small section right on the bow along the same plank.


- 79 replies
-
- 4
-
-
- Endeavour
- Artesania Latina
- (and 1 more)
-
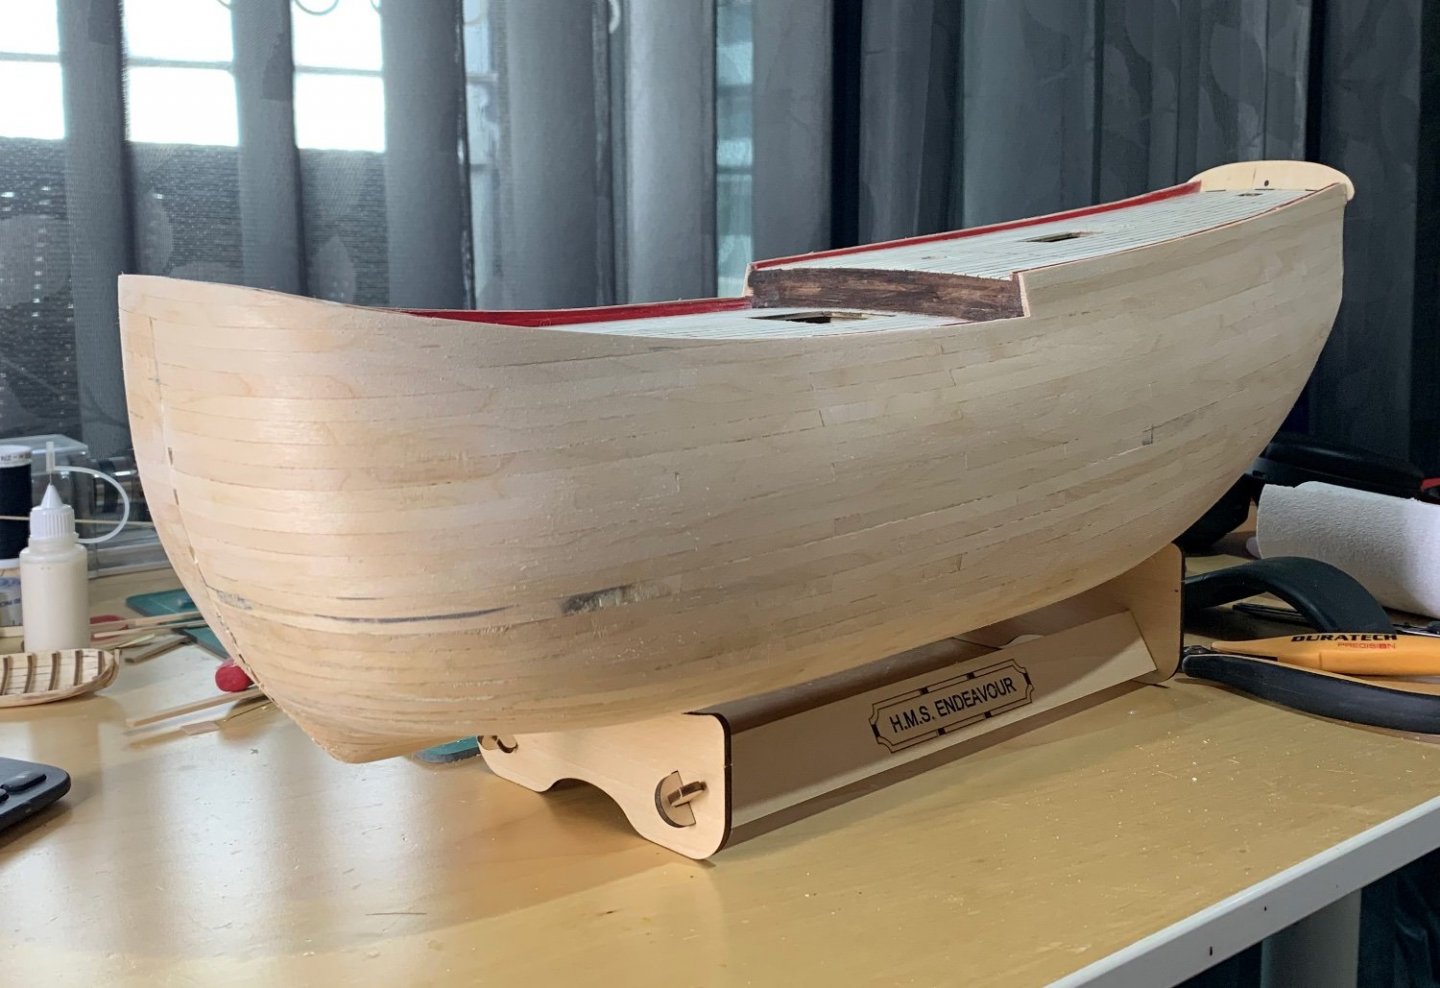
Well I have finally finished the first plank and preliminary sanding. There's a couple of small gaps to be be filled that revealed themselves when the planks were sanded back (bevelling not done as accurately as I should have). I am using finely sanded plank material mixed with PVA, water and detergent to fill the gaps between planks. The dark areas on the planks were a result of a previous fill with the PVA mix eating with a steel applicator. I have to do a little more shaping sanding around the deadwood area before getting onto the cherry whales I plan to use. I am happy how the planking went keeping as close to the original line of planking as I could.
- 79 replies
-
- 7
-
-
- Endeavour
- Artesania Latina
- (and 1 more)
-
Size of Rope and Serving for Stropping blocks
Peter6172 replied to Peter6172's topic in Masting, rigging and sails
Might have gone a little overboard with this now. Received some 0.2mm NS wire today so I tried new hooks. The first two were with my modified circle pliers. The third was after I modified those circles pliers a little more. I'm not going to bother putting the digital verniers on them..... I'm not even sure I have thread that would pass through the small one...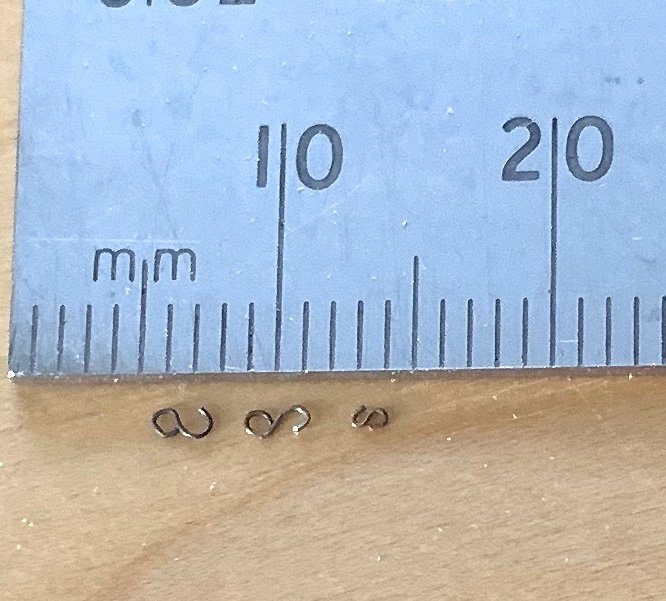
-
Size of Rope and Serving for Stropping blocks
Peter6172 replied to Peter6172's topic in Masting, rigging and sails
Still experimenting, I have served Ropes of Scale 0.25mm with Aurifil 80wt Sandstone 2 ply cotton. This is the DB on its own in the image. Not sure if this might be just about right and if I go for 0.3mm wire and 2mm blocks I might be scale sized for 1/64....?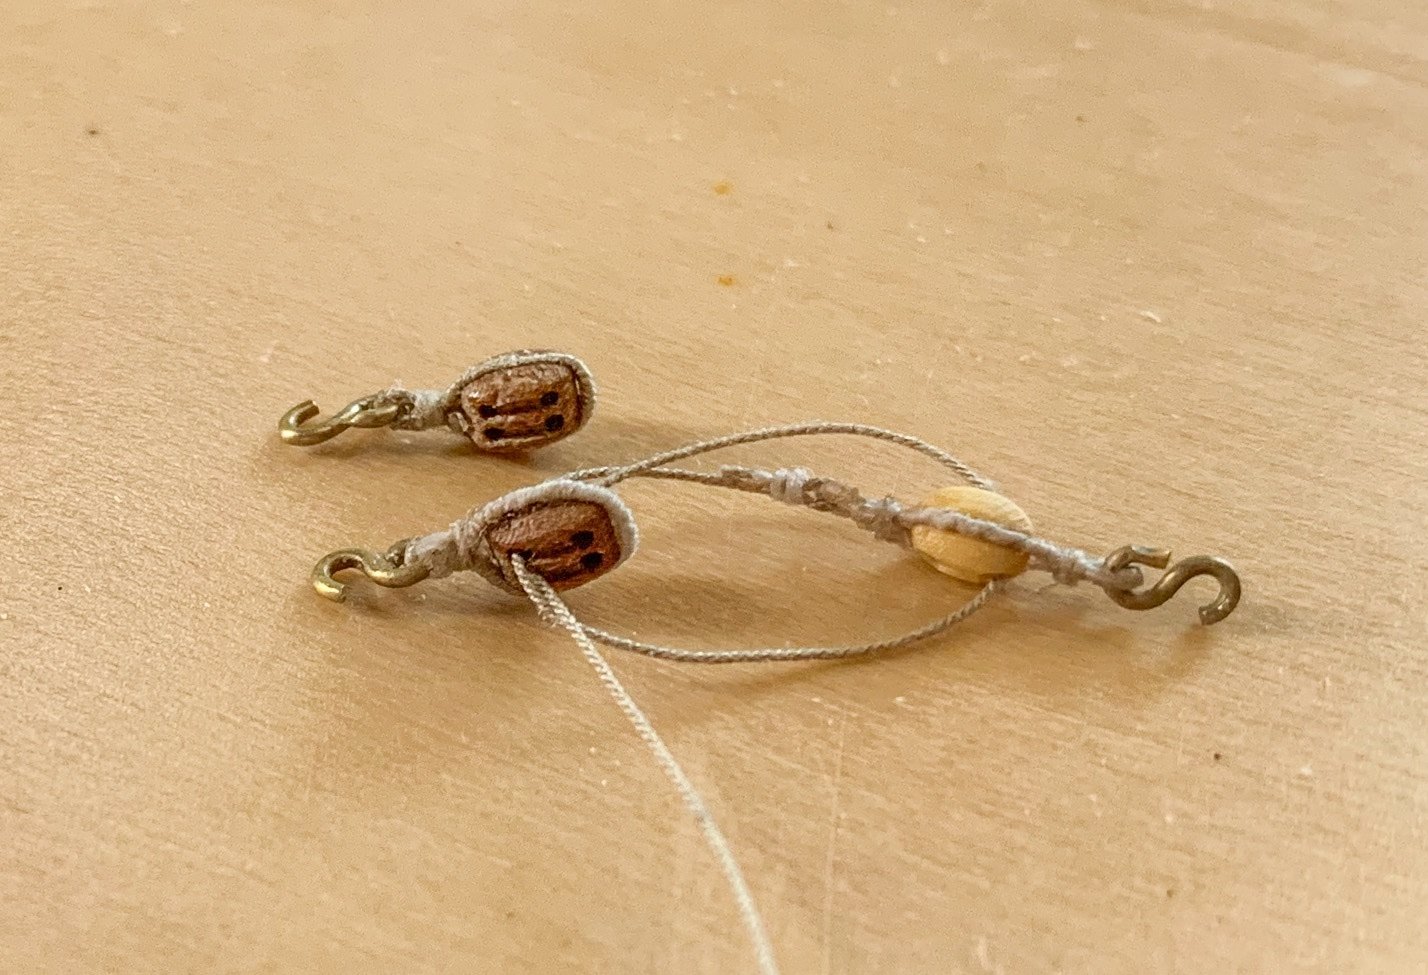
-
Size of Rope and Serving for Stropping blocks
Peter6172 replied to Peter6172's topic in Masting, rigging and sails
thanks Allan. I am going by the Marquardt drawings which show single/double combination used on the ENDEAVOUR. Two single blocks makes sense as there are less forces involved. -
Size of Rope and Serving for Stropping blocks
Peter6172 replied to Peter6172's topic in Masting, rigging and sails
According to Parkin ENDEAVOUR had 6 x 4 pounders making the breeching line around 1" diameter (scale 1/64 = 0.44mm). So my use of 0.6mm thread might be slightly large. Have continued working in my served ropes stropped blocks for the cannon getting them close to scale. I have secured the tackle between 0.7mm nails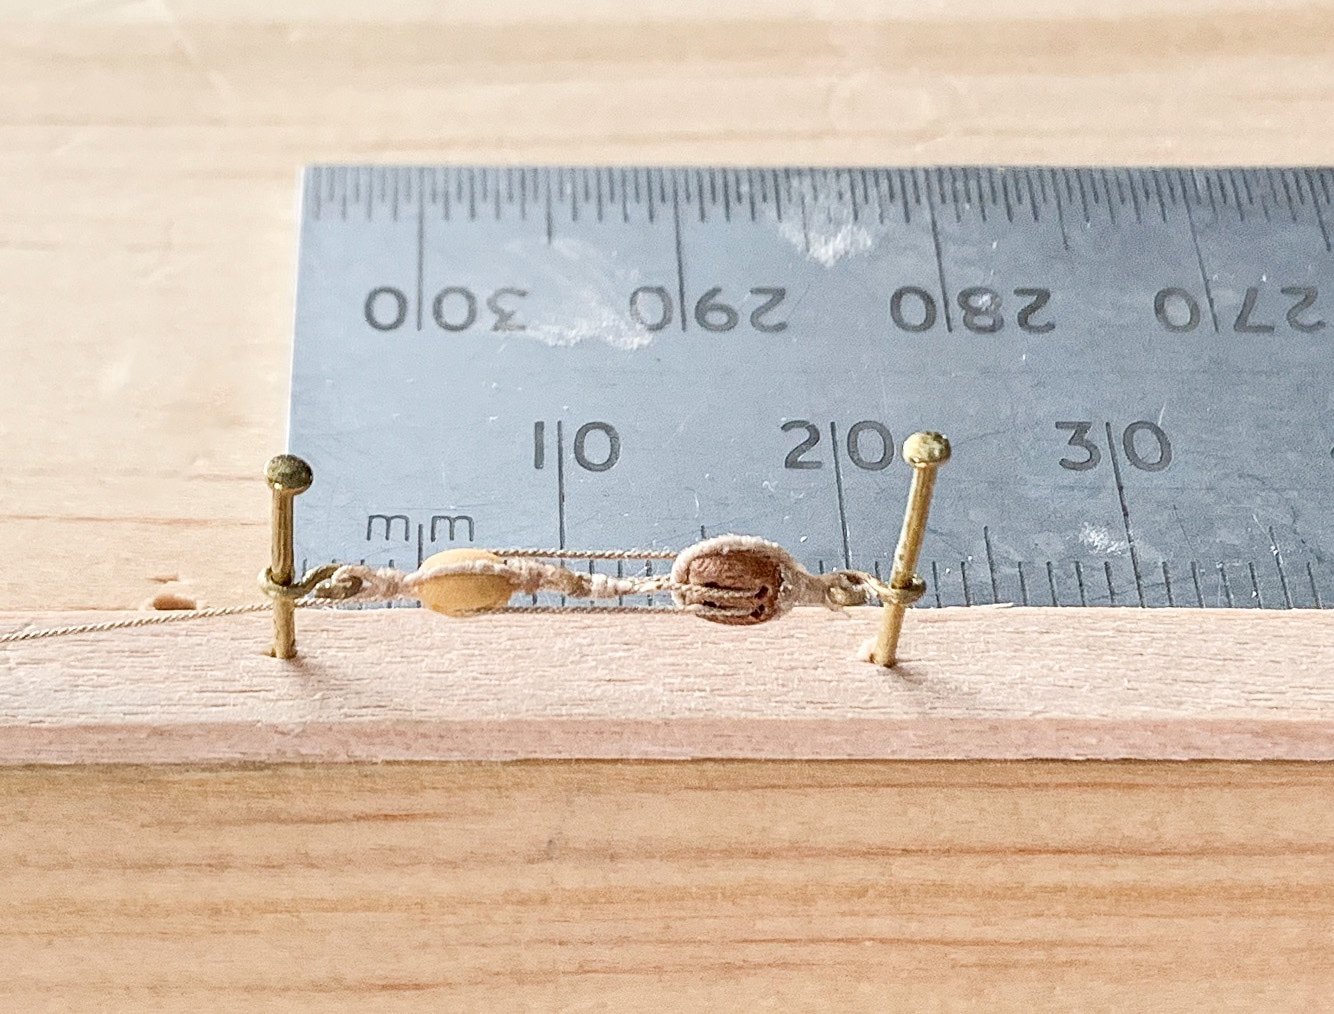
-
Size of Rope and Serving for Stropping blocks
Peter6172 posted a topic in Masting, rigging and sails
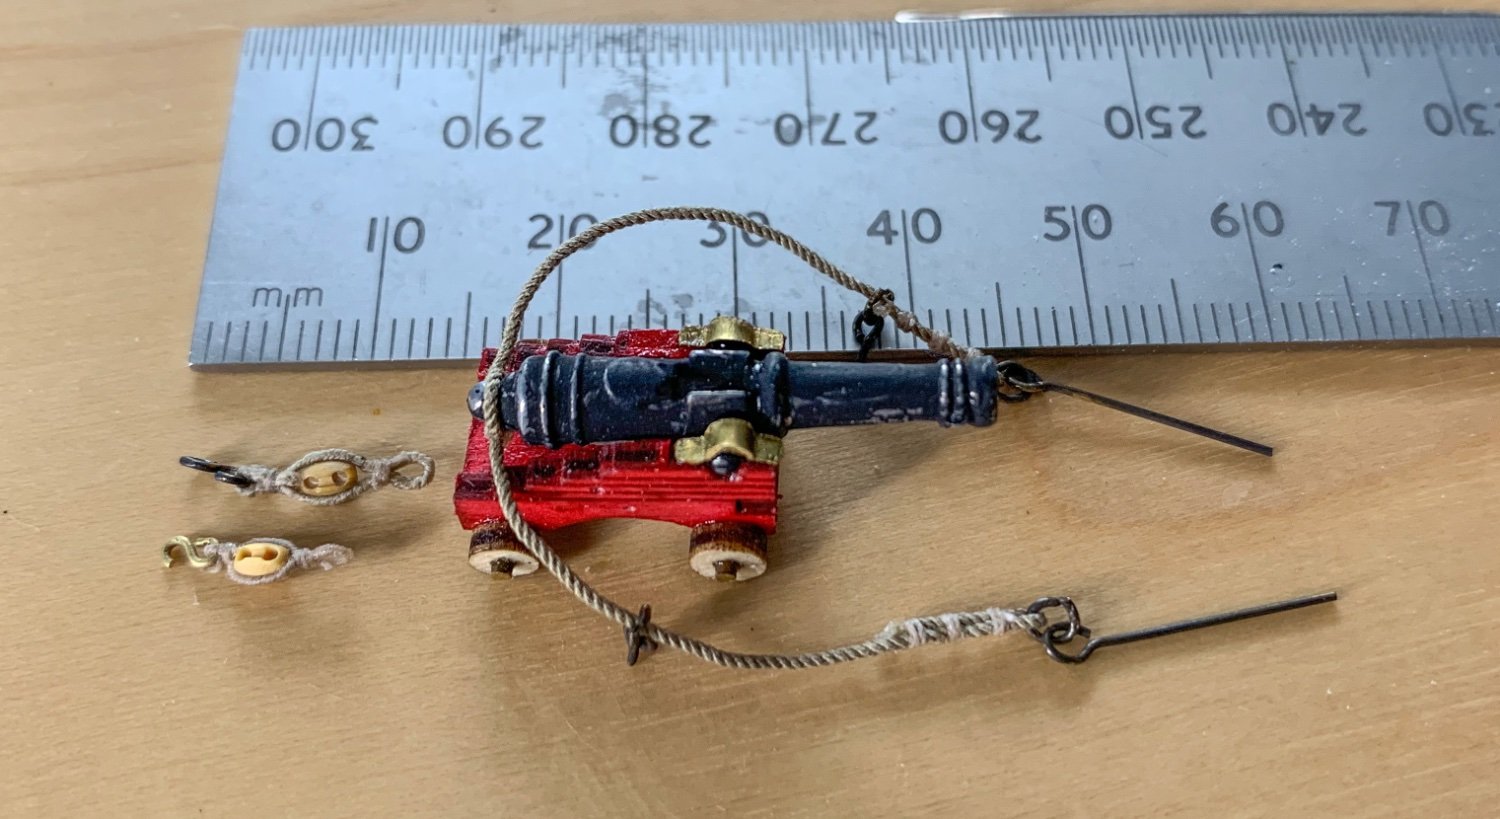
Team, I am a beginner and I have searched this forum but cannot see any topic/advice on how to size the rope and serving for stropped blocks where the strops are served; in my case working on cannon second reinforcement tackle. I am working in 1/65 scale on the new Artenasia ENDEAVOUR using 3mm (7.5in Full scale equivalent) blocks. I am experimenting with various products and sizes of rope and serving to see if I can get something that approaches scale. Theoretically the blocks should probably be 2mm (5in full scale) but that's seems just a little too small by my eye. My latest attempt is using Guttermann 2776 thread for the rope and the serving (smaller stropped single block in the attached image). The hook is 0.5mm wire but I think its too big (as are the rings and the ringbolts) so I'm waiting for some 0.3mm wire. I'm not particularly happy with the Guttermann thread and was wondering what other more advanced/skilled modeller use to for rope and serving on 3mm blocks. The cannon is not finished and will be shipped and stained rather than painted. The primary reinforcement is Ropes of Scale o.6mm rope with 0.15mm Amarti thread for seizing.
-
Building seems to have slowed but I have only 10 rows of planks to go. I have been dabbling with a Cannon and ist associated rigging but I am struggling with identifying the right combination of thread and serving to strop the blocks with. I tried 0.5mm first before quickly dropping to 0.15mm. The image below shows a 3mm SB stropped with 0.15mm Amarti thread served with Guttermann 2776 thread while the smaller combination is a 3mm block with Guttermann 2776 Thread served with the same thread. Both have 0.5mm wire hooks as are the hooks, rings and ring bolts. I think I will try using 0.3mm wire instead. Finding that my serving is not tight enough as the completed served rope need to be pushing to the start to make the serve more right-angled but this also has a tendency of loosening the serve. More serving practice is required..... I have used 0.6mm Ropes of Scale for the primary retarder rope seized with 0.15mm Amarti thread.

- 79 replies
-
- 4
-
-
- Endeavour
- Artesania Latina
- (and 1 more)
-
sed my hand drilling was not as accurate as needed when creating the pulleys in the ends of the catheads. I had some odds and ends hanging around so I put a small pillar drill together. The old 1560 aluminium extrusion base from the mini lathe, a linear bearing, 775 12/24vdc motor and mini chuck all connected to a square shelf. Just need some wire, a switch and a DC plug. The rubber band works a treat in lieu of a spring.

- 79 replies
-
- 5
-
-
- Endeavour
- Artesania Latina
- (and 1 more)
-
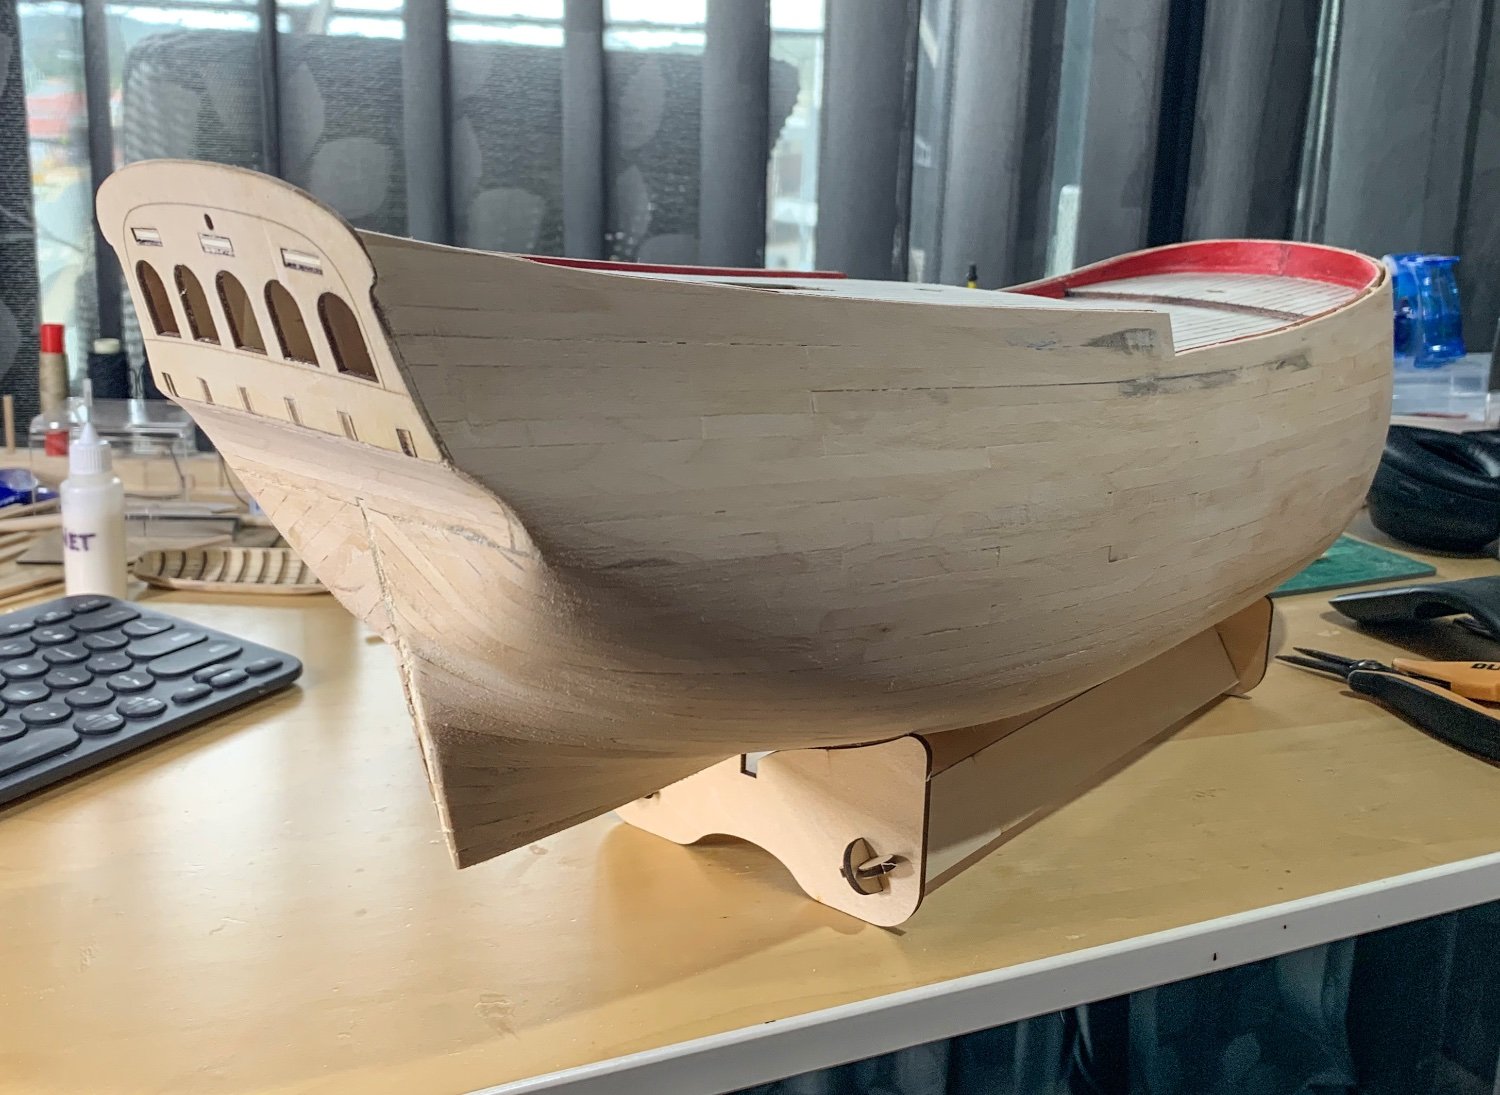
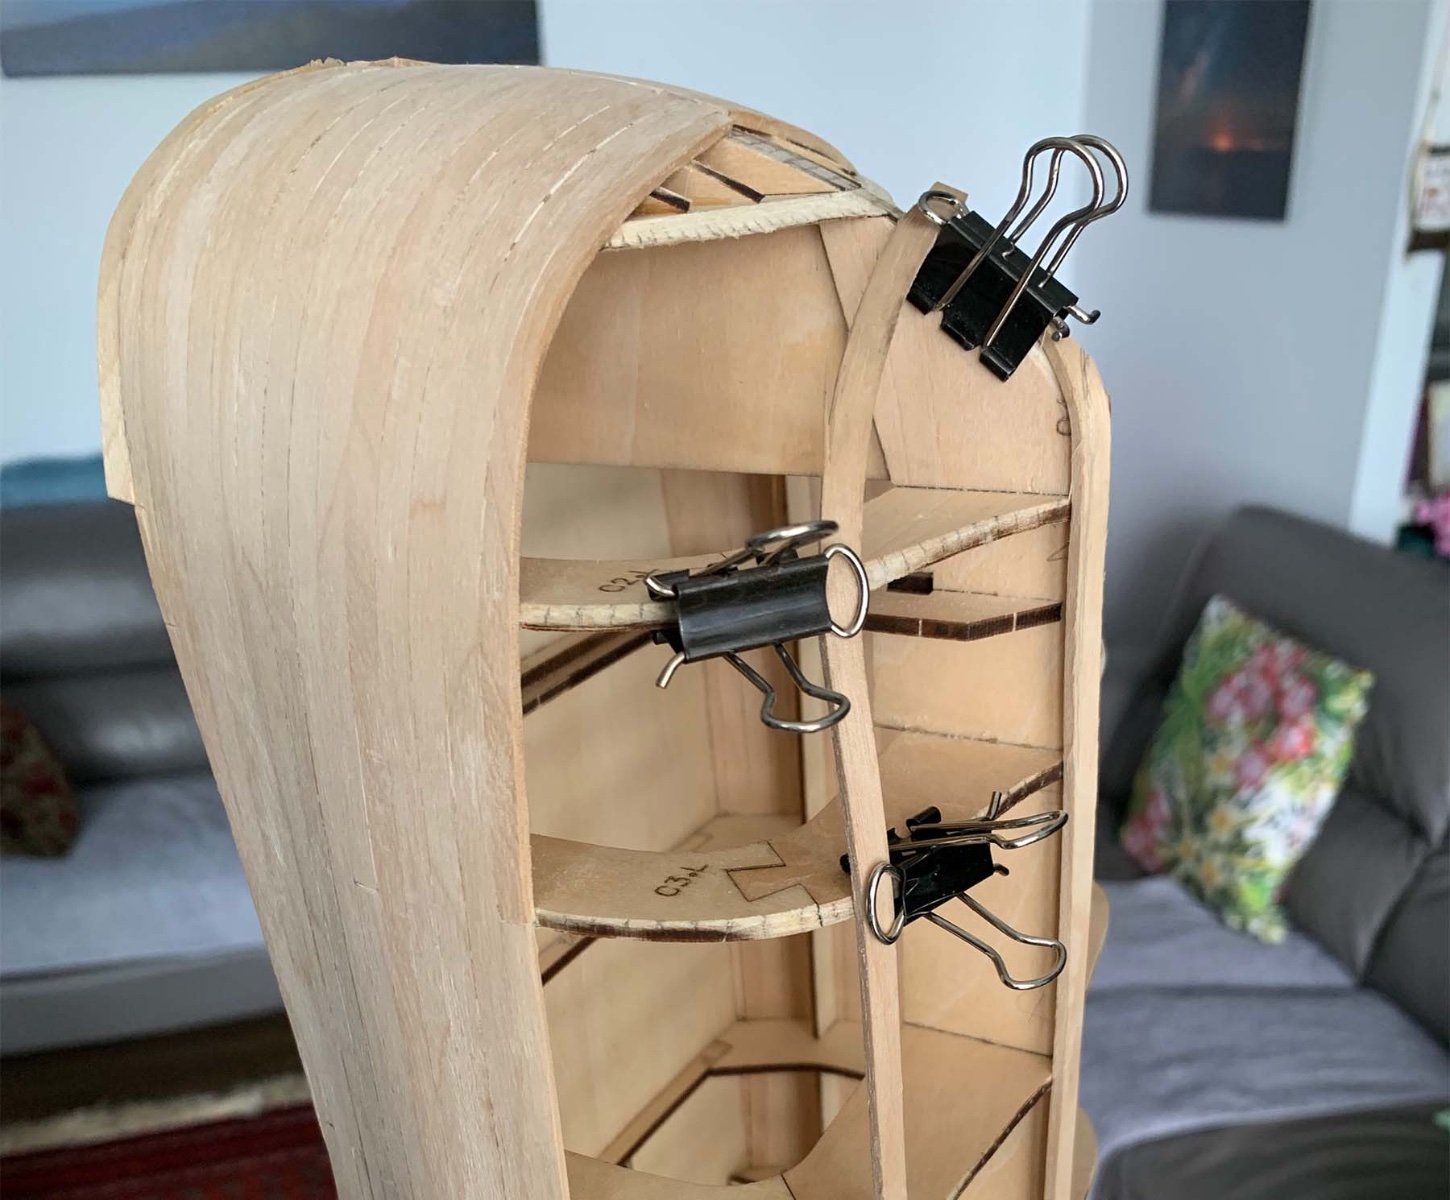
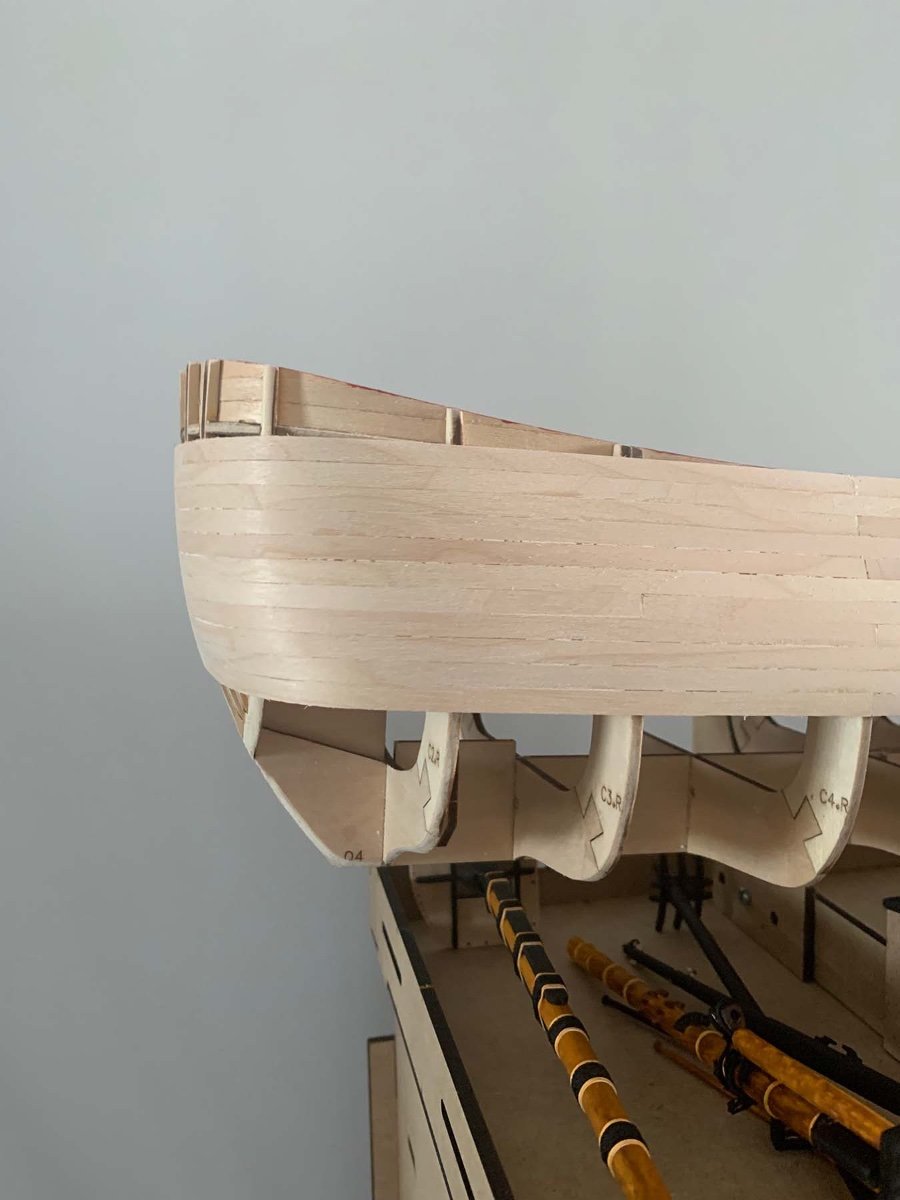
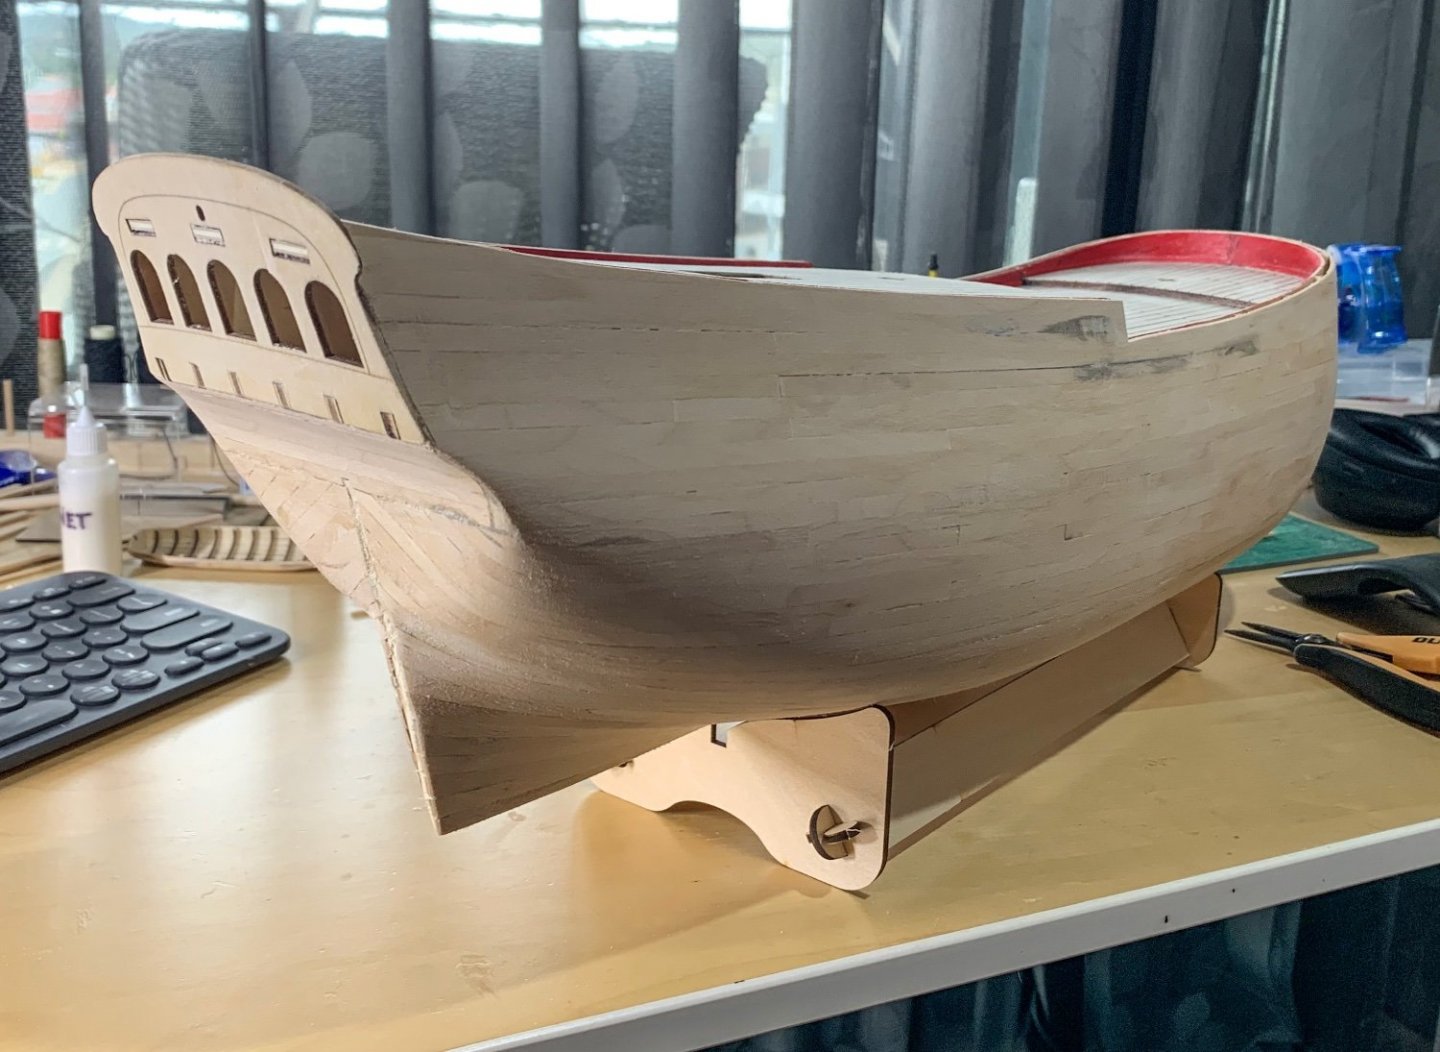
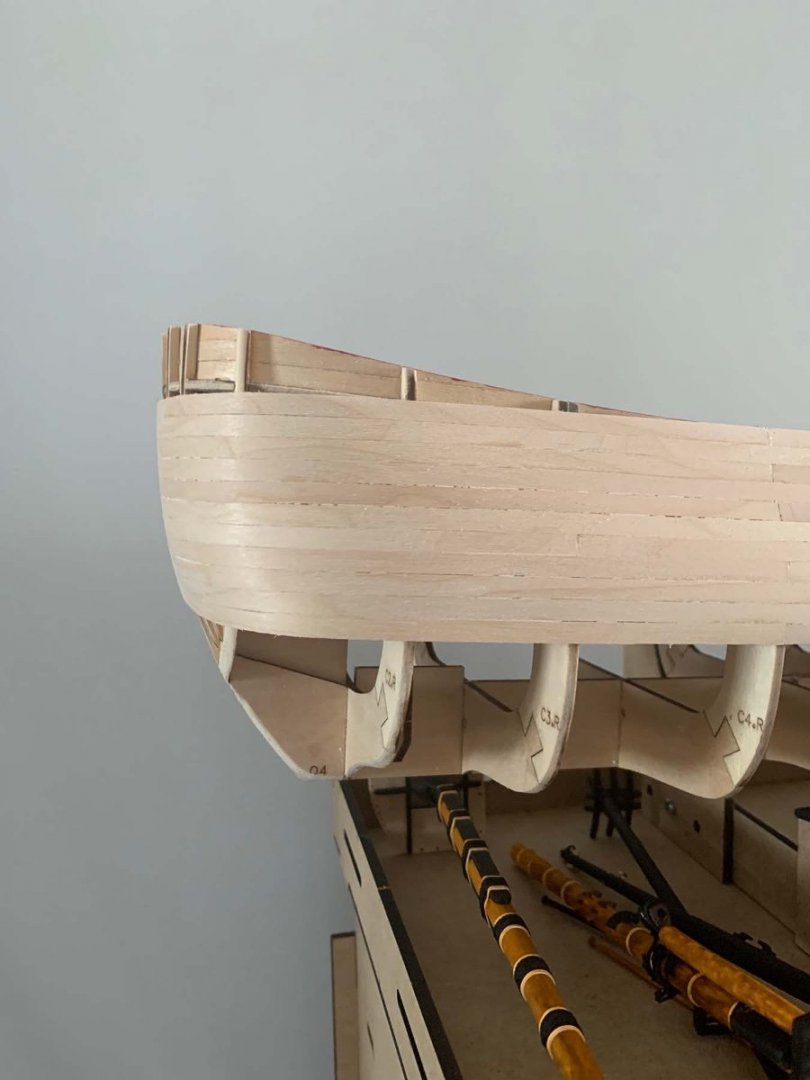
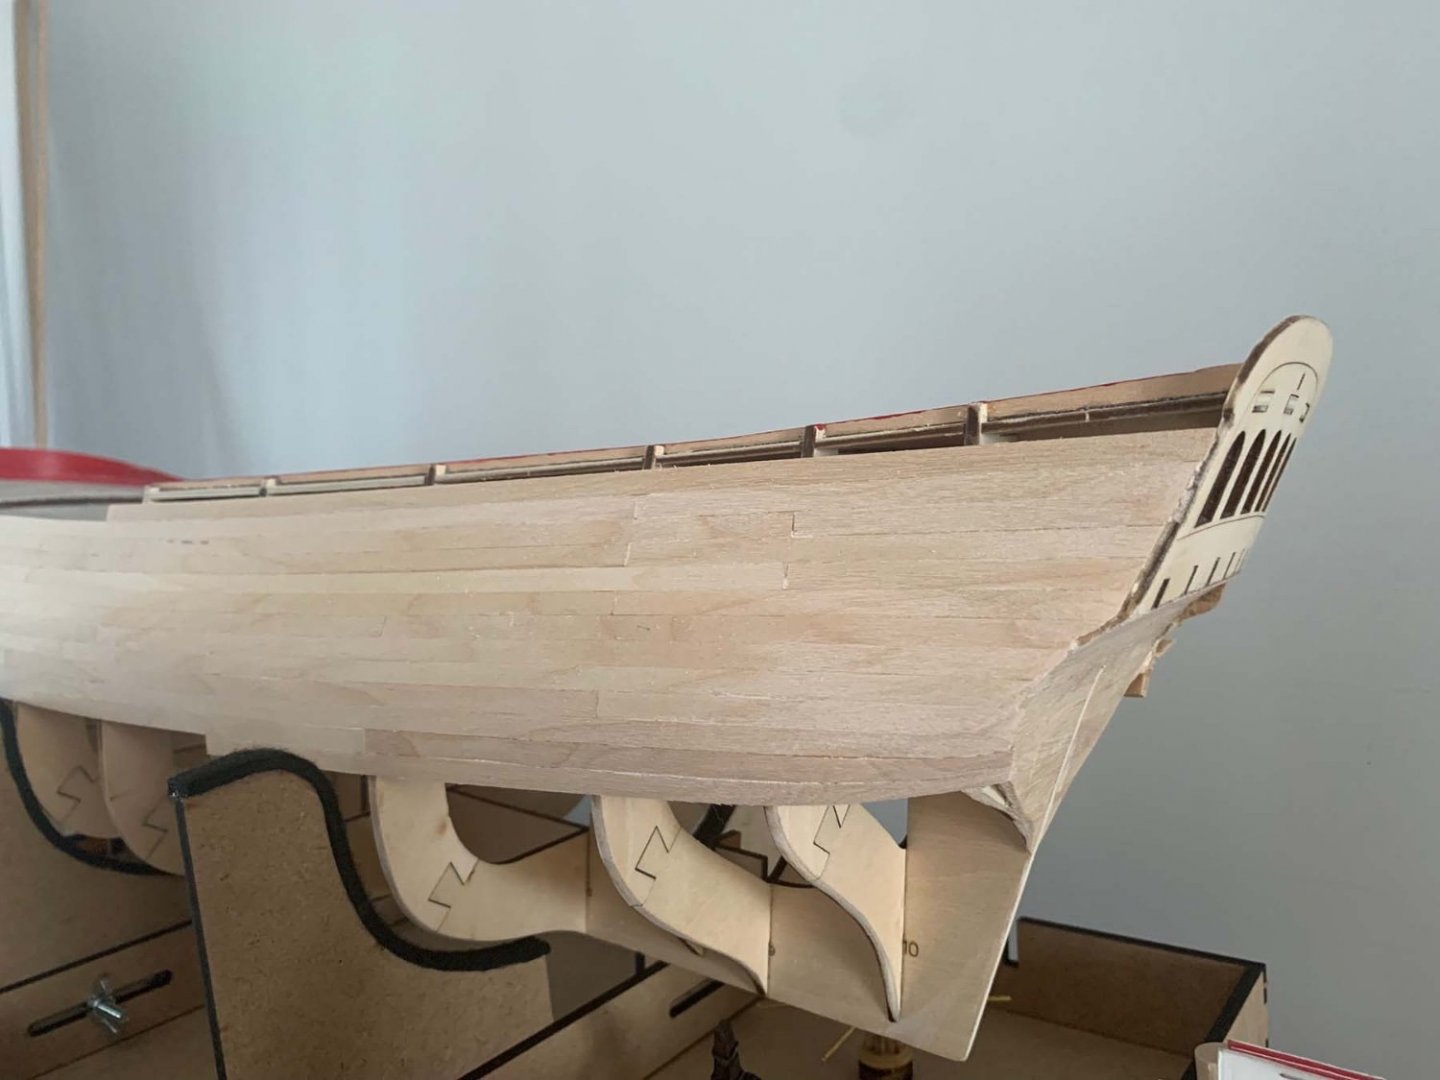
Regrettably I have had to walk back in time and remove three rows o planks at the stern of ENDEAVOUR so that I could examine the framing structure to determine how much modification is required to plank the stern to match the original ENDEAVOUR. It would appear that the replica did not follow the planking arrangement of the original which is understanding considering the financial pressures the replica project was under at the time. Thankfully, the planks were persuaded to let go with the use of a very sharp thin blade. I have fitted my first test plank at the stern and await the outcome. Again the planks were very forgiving. I also did a test bend at the keel line and again the planks will form the compound curvature needed to meet the originals planking profile.
-
Ahhhh. Another finding today. I looked more closely at the Artesania kits planking instructions of the transom and stern and then compared it to the Marquardt and Parkin drawings to realise that there is a vast difference. It will mean I have 3 rows of planks to remove at the stern and removal of half the material on the transom below the windows before I can recommence planking at the stern.

-
After some discussion on and off line about tapering I felt I needed to do some testing of plank bending to see if I should follow tutorial instructions, Artesenia's instructions or Marquardt's drawings. I 'steamed' a plank in boiled water in a thermos for and hour then put it to the framing and started the compound bend required to meet Marquardts drawings. I was pleasantly surprised to see just how forgiving the plank material is. There are a couple of flats that have occurred due to clamping but the plank was pretty well unsupported as I bent it on the frames away from any other planks but following the planking lines I drew on the frames. Still its pretty well followed the contours without objection so I will continue to follow the Marquardt drawings for the planking of ENDEAVOUR. NOTE: The loose piece on the outside of the bend is not a split. Its a loose piece on the outside corner I caught when I thought about tapering but decided not too bother in case the bend failed.


- 79 replies
-
- 2
-
-
- Endeavour
- Artesania Latina
- (and 1 more)
-
Yes Dave, I have marked our all the planks now I'm at the taper stage (not shown in the image). I remeasured after Allans comments made me a little apprehensive and have I confirmed 2.9mm Bow, 5mm Midships and 4mm Stern. I am also bevelling all the planks top edges. The visible seem gaps I have were a result of me not waiting till my planks were completely dry before glueing in place. I have slowed to one plank layer a day now to make sure the planks are thoroughly dry before glueing in place.
- 79 replies
-
- 3
-
-
- Endeavour
- Artesania Latina
- (and 1 more)
-
Allan, Yes I have. ENDEAVOUR has a particularly bluff bow. I have just go to the point where I need to start the taper: 10 Planks from main deck complete; 22 more 5mm planks tapering from 5mm midships to 3mm at bow and 2.3mm at stern.
- 79 replies
-
- 3
-
-
- Endeavour
- Artesania Latina
- (and 1 more)
-
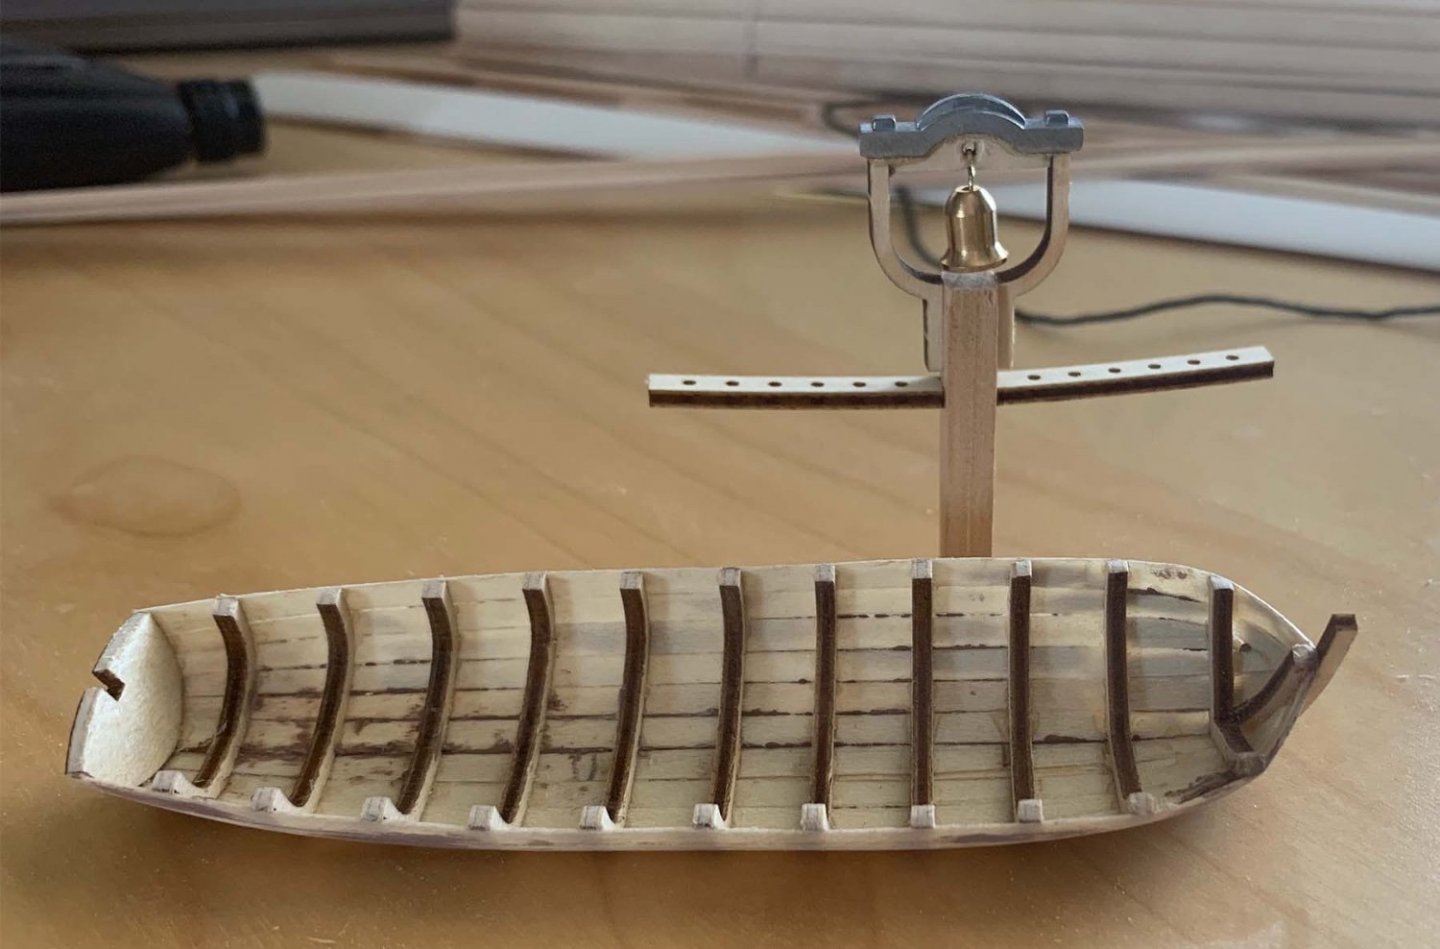
Did a light sand on the port side of ENDEAVOURs hull to see how I was going. Looks like only slight seems to fill so far so I'm happy with the way the first planking is going. Might consider no doing second planking and simply stain hull I have also completed the Ships Bell stand and finished planking the longboat.
- 79 replies
-
- 2
-
-
- Endeavour
- Artesania Latina
- (and 1 more)