Peter6172
-
Posts
182 -
Joined
-
Last visited
Content Type
Profiles
Forums
Gallery
Events
Everything posted by Peter6172
-
 Work in progress by my 3D designer. He has already achieved a great result. He wants to do some more detailing in the bird.
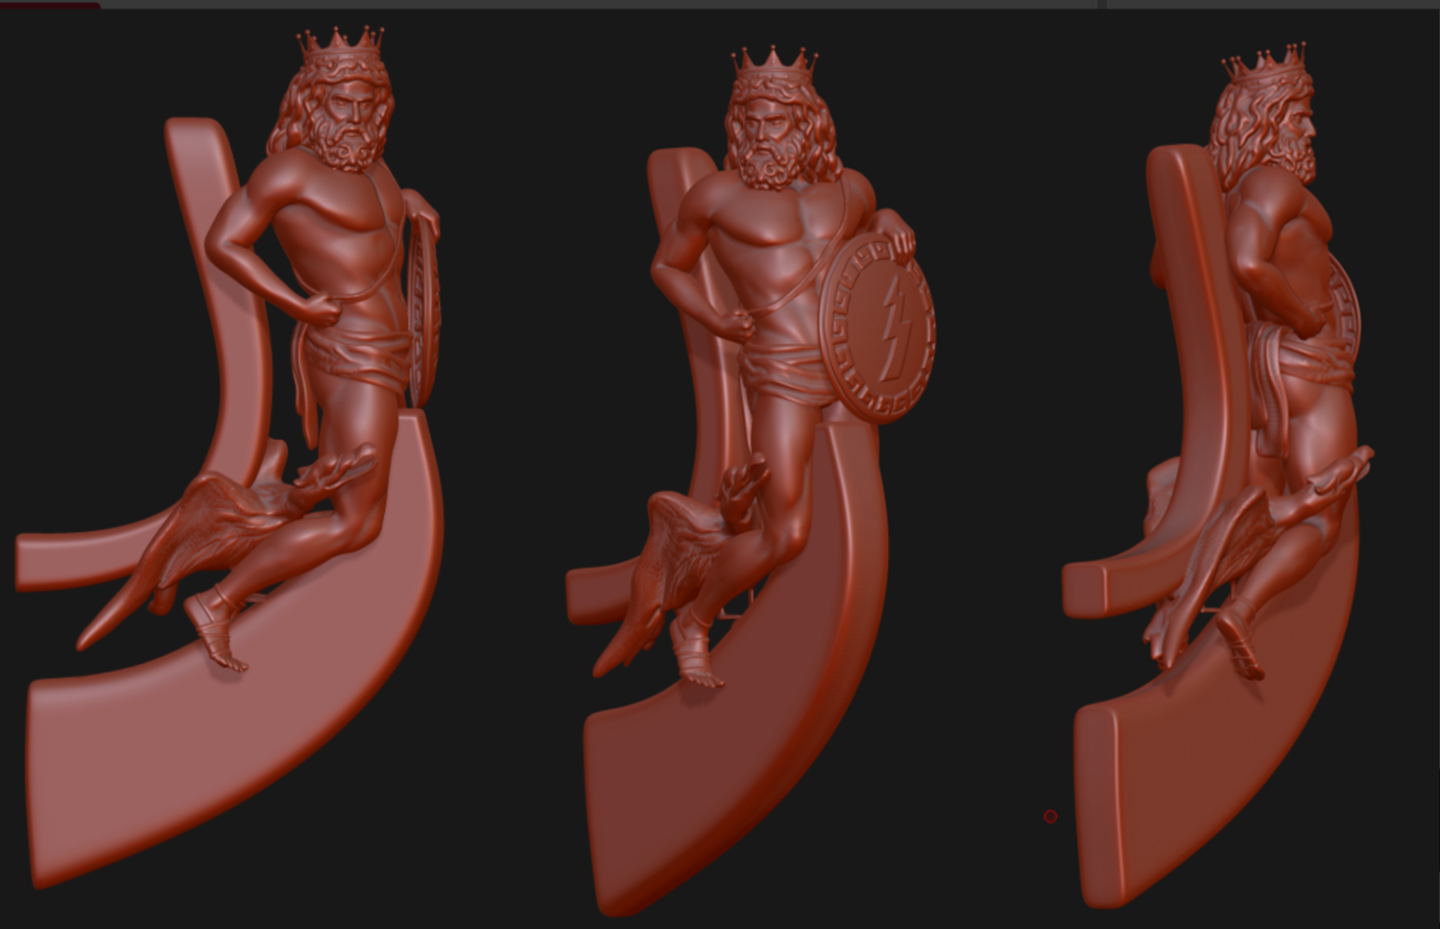
- 18 replies
-
- 12
-

-

-
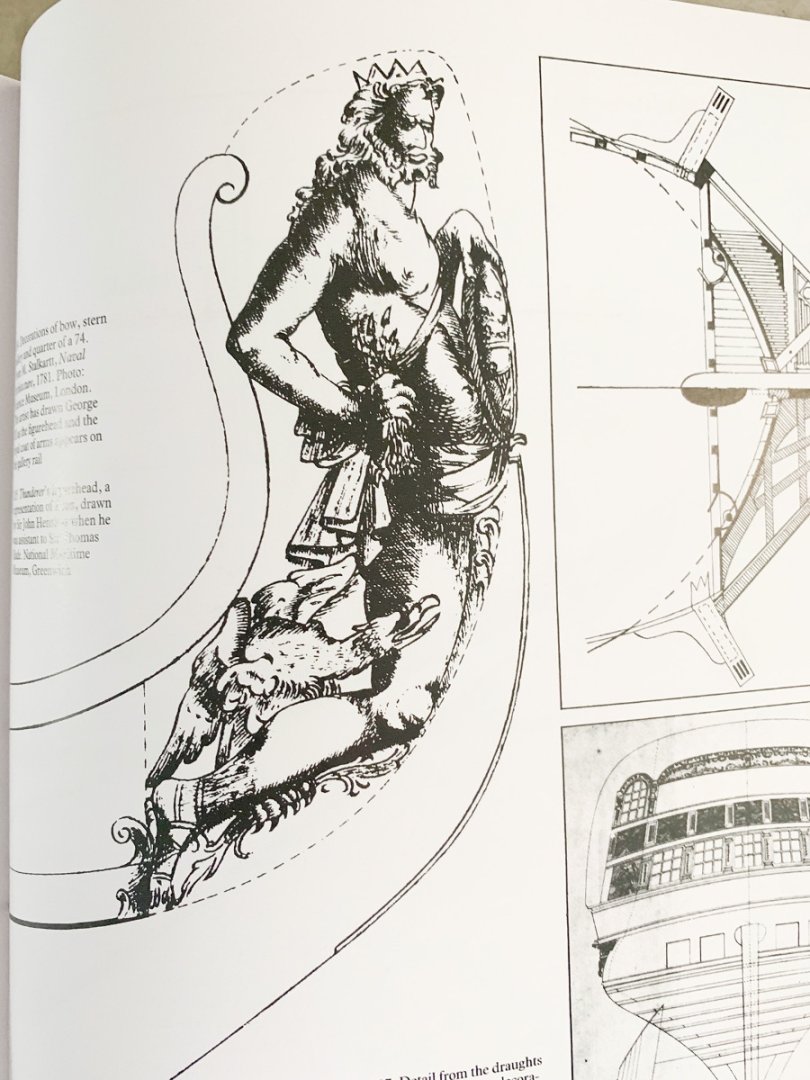
IN THE BEGINNING: OK team, I am starting this thread now as I have some work going on behind the scenes before I open my Christmas 22 present. I have purchased Session 1 of the CAF Bellona kit; a Third Rate 74 gun ship of the line in 1:48 scale. This is going to be a large ship at 1090mm main gun deck length. Not too sure on overall length with bowsprit and Jib Boom but it will stand nearly 1000mm tall once the masts are in place. Why such a large ship? I don't really know. I sercved on an overseas exchange posting with the Royal Navy teaching post graduate engineering at the Royal Navy Engineering College at Manado, Plymouth. The establishment on which the college was based was HMS THUNDERER. Unfortunately the establishment no longer exists as the college was moved to Collingwood in the late 90's and the base is now a housing estate. I have initiated the build hiring a 3D designer to produce the figurehead for the model of HMS THUNDERER as I cannot have the kit until Christmas . There are a few ZEUS resin sculptures out there but only one really comes close to the Figurehead. I am using that designer to modify and create a 3D print file for me to use in creating THUNDERERs Zeus figurehead. I have also gone over the AOS- BELLONA and the Dodds and Moore book "Building a Wooden Fighting Ship" to tease out the details I need for Session 1 which is the keel and Frames of the ship. I may then proceed to scratch build the rest of the hull using the books mentioned as I feel I have developed sufficient skill to do so. I suspect this will be a long duration build (unlike my current 3 - 6month builds), I suspect this one will be in the order of years. The only issue is its sheer size and where to put it when not working on it......
- 18 replies
-
- 15
-
-
Mmm, having some difficulties trying to fit stanchions etc. The Amati kit says 1/60 but comparing it to the AOS- BOUNTY, its actually on 1/60 in beam. Length and height are 1/52 while the transom etched decorations scale around 1:45 which is probably why the finished models I have seen have such a 'fat ****" appearance. I may have to completely scratch build the transom to get the proportions correct. A little disappointing that such details are so far out of scale as the book has been found for some time (or have the AOS authors got it wrong?)
-
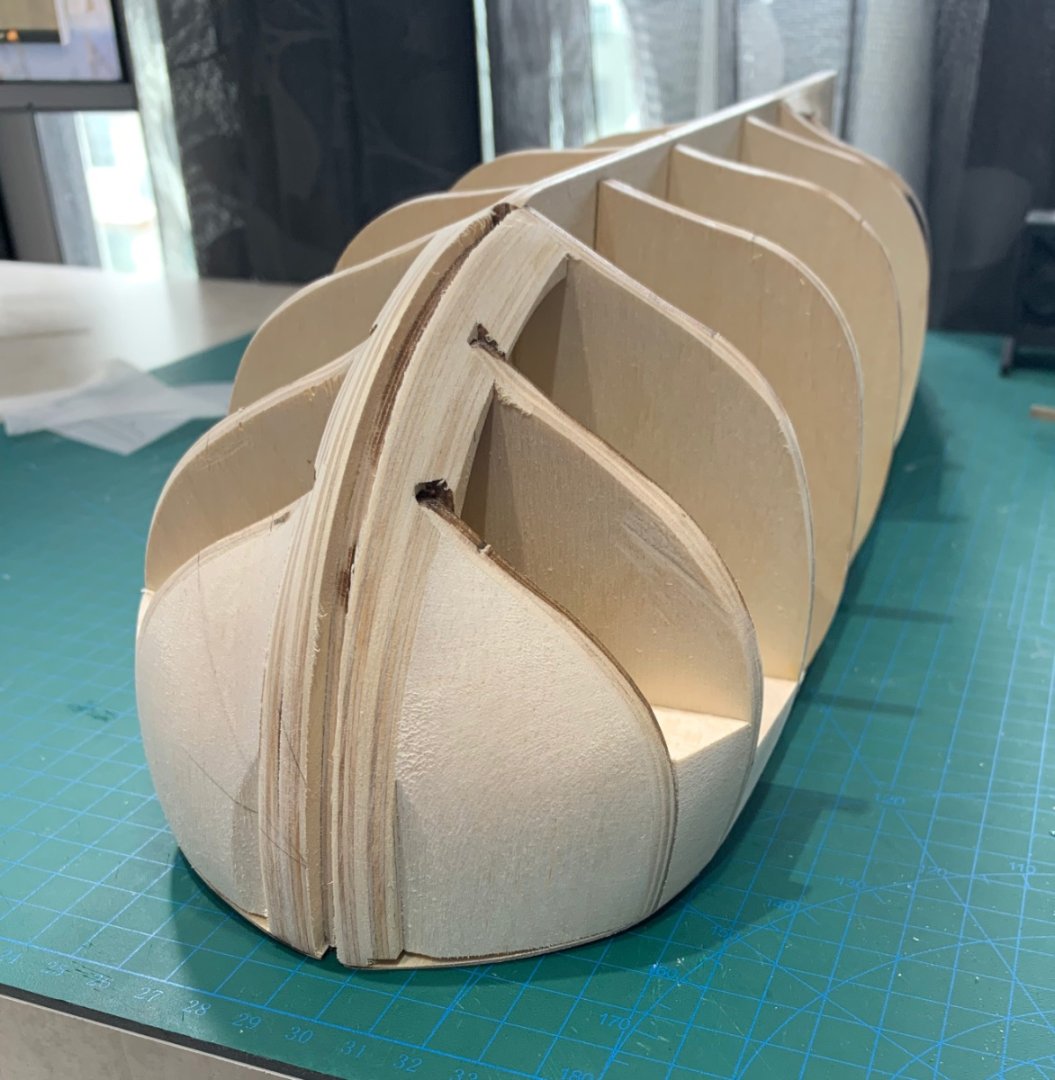
Perhaps, but then there's all the carving out to make the lower decks which would be visible through the deck gratings. Its also simpler to fit balsa and follow the lines of the bulkheads.
-
Finally got back to BOUNTY after spending some time on a 1/64 scratch build of NORFOLK (the colonial sloop that Bass and Flinders explored/mapped the SE coast of Australia and circumnavigated Tasmania on). I wanted to test the fitting of Bulwark stanchions then planking instead of using thin ply and second planking per the Amati kit. This also permitted me to utilise the off cuts from cutting down the 6mm to 3.5mm planks to plank NORFOLK

-
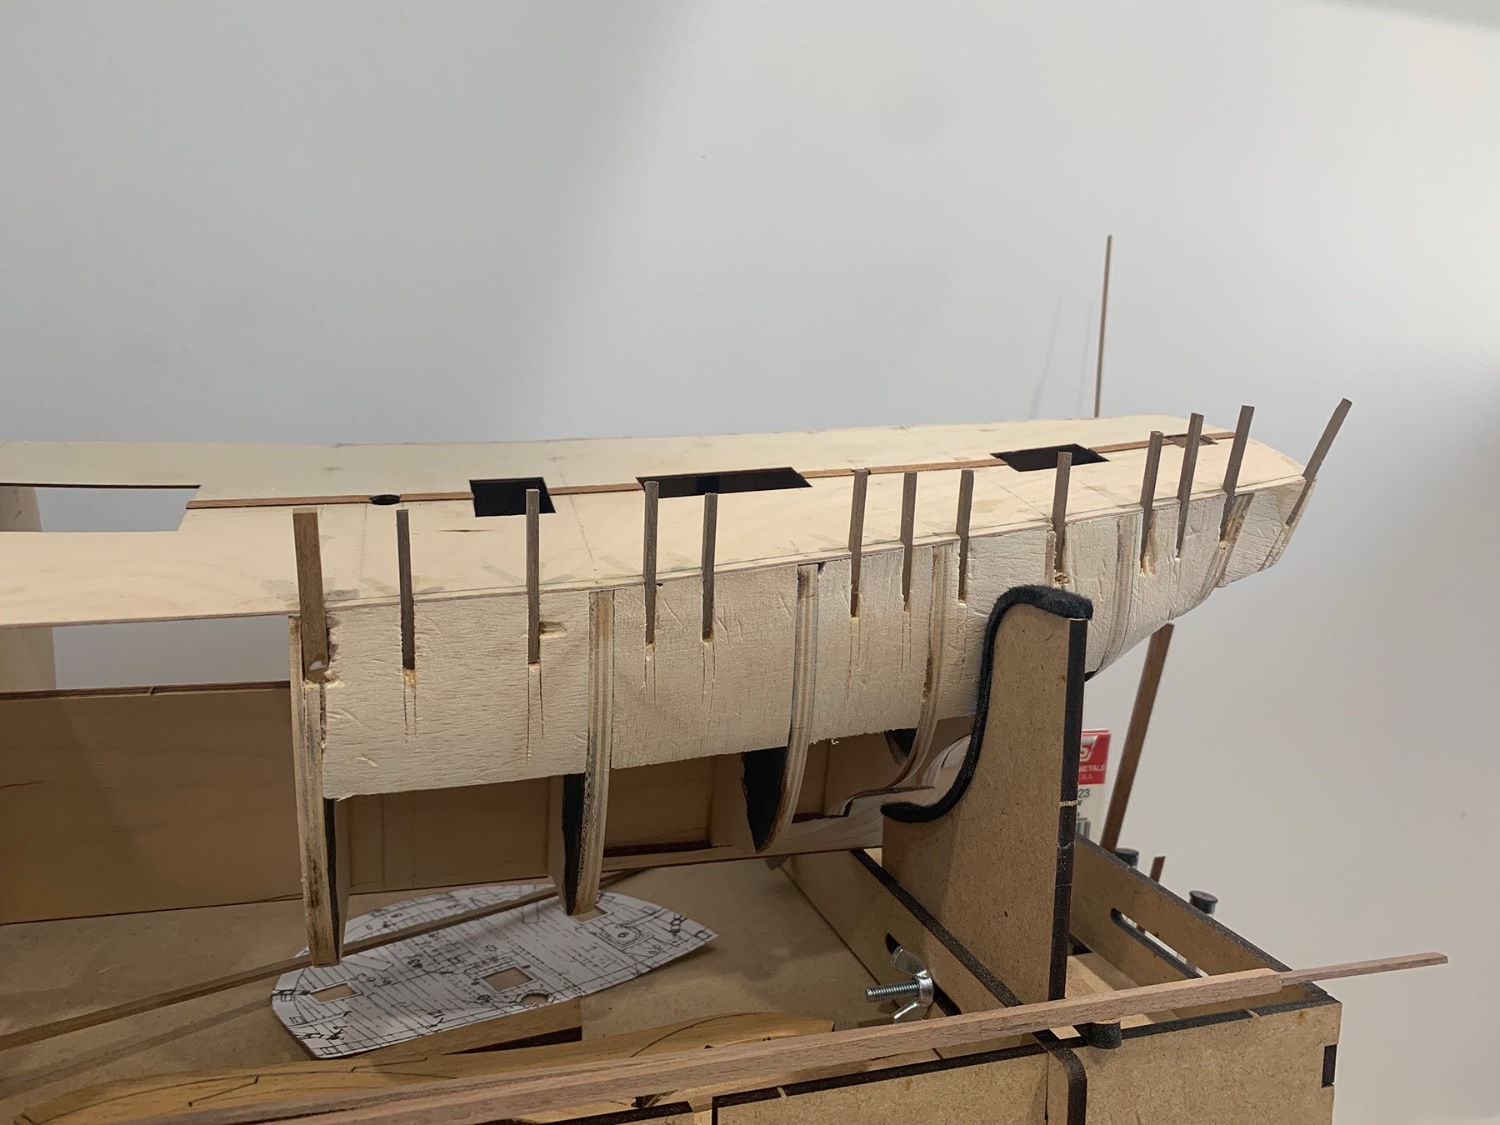
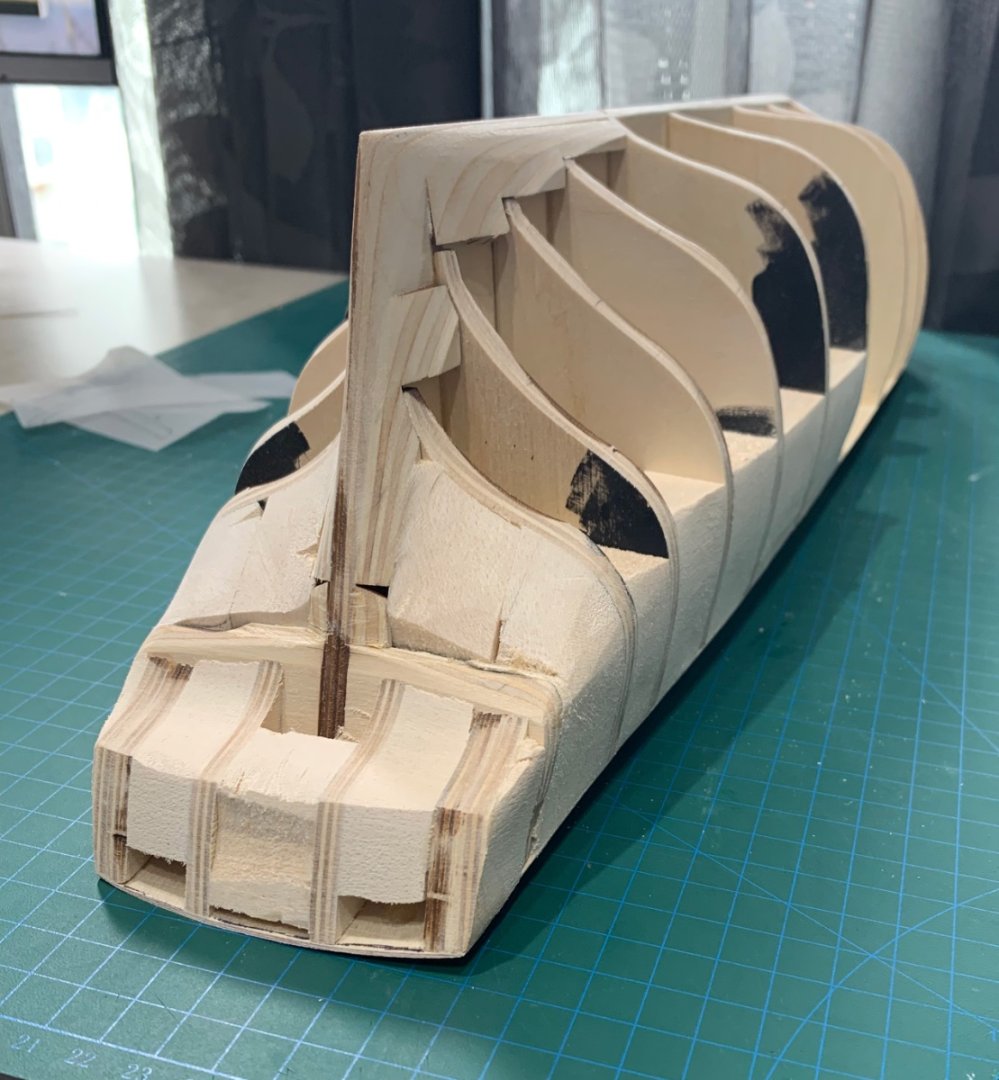
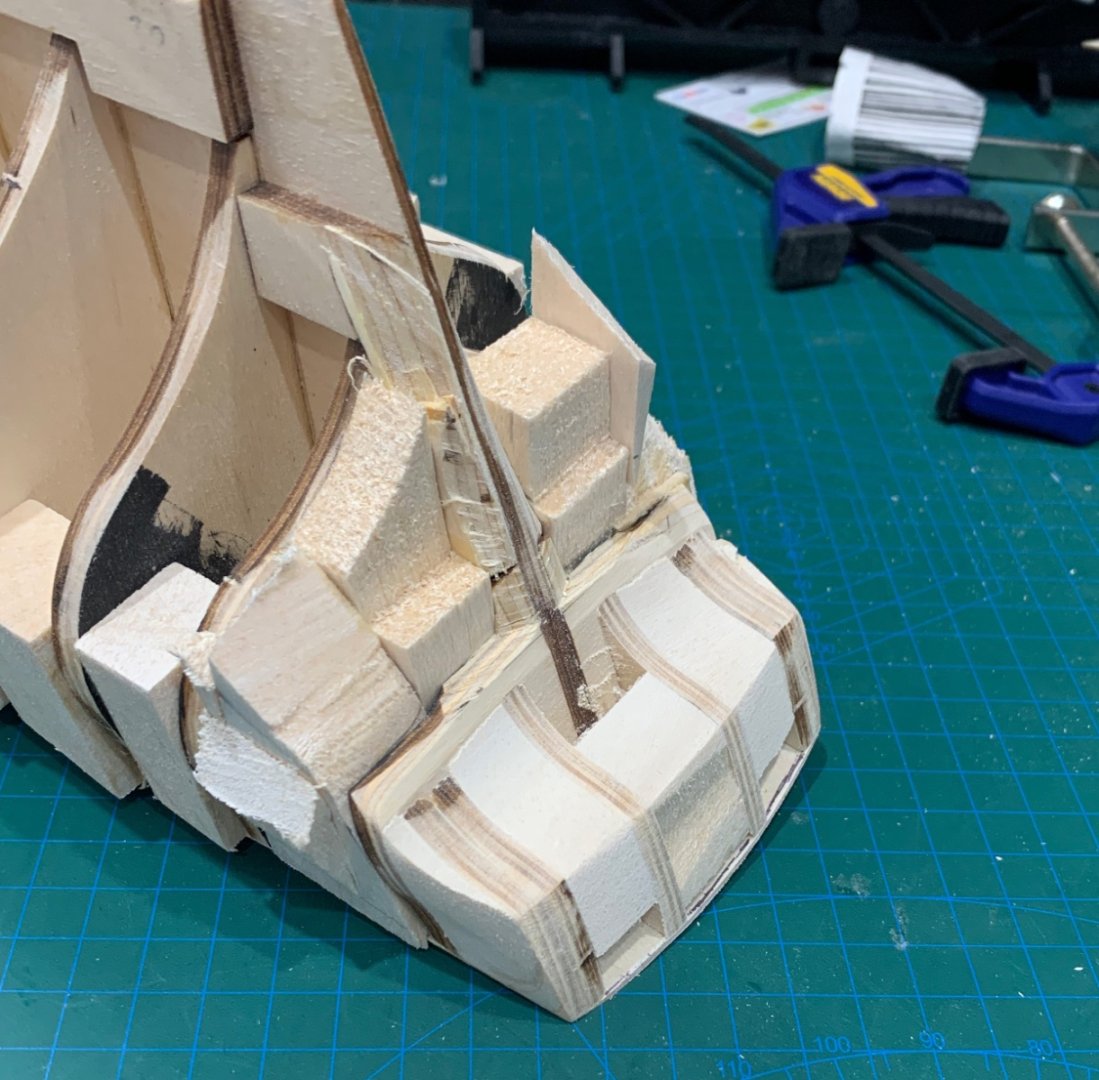
nitial fairing of the fill has been done but I am still not sure I am happy with the shape of the stern. I think I will have to fit some cutwater planks to see how the hull planks flow from the deadwood to the cutwater. I have to say that those Dremel sanding disk wheels certainly cut down the work on shaping/fairing. I used them on my Ryobi R18RT; just forgot to wear a face mask..... I won't be fitting any bulwark stanchions until I get the stern shape right...
-
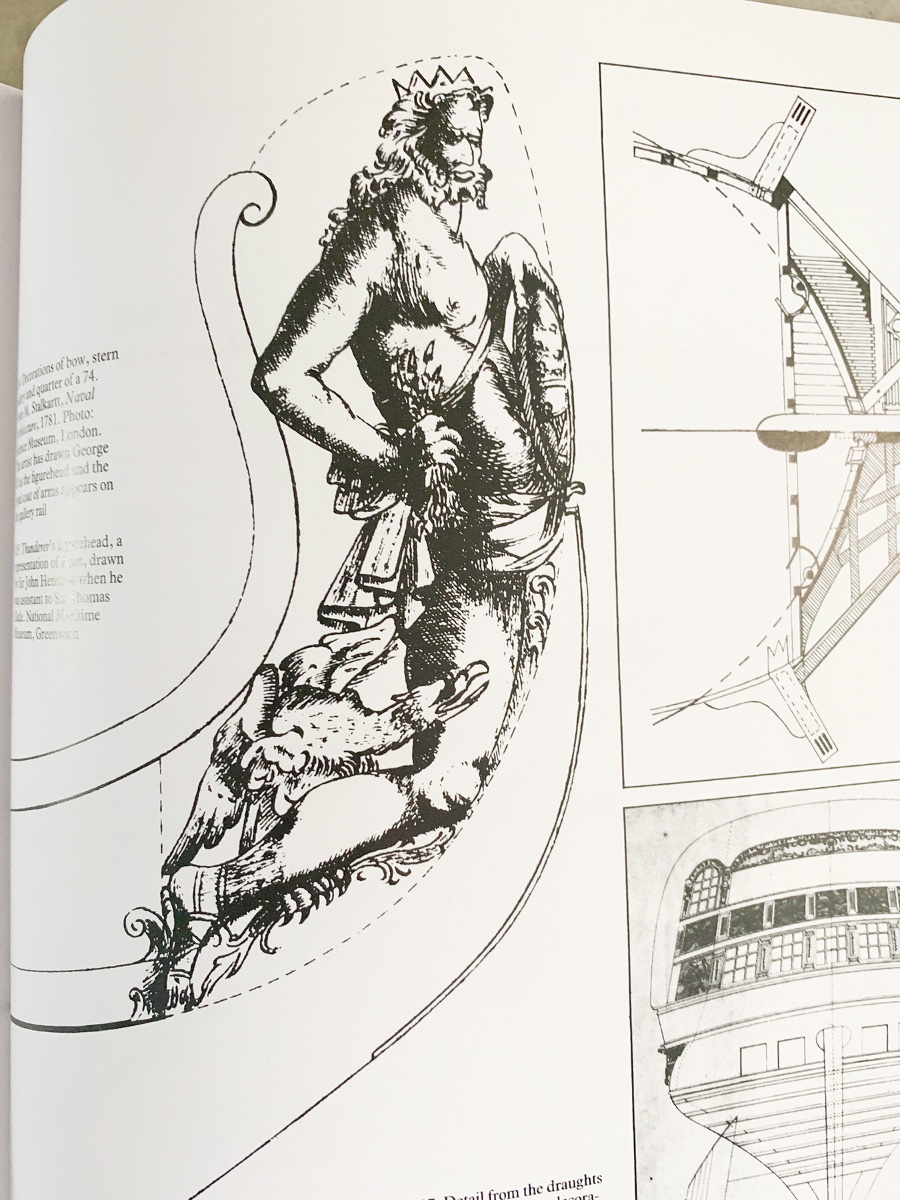
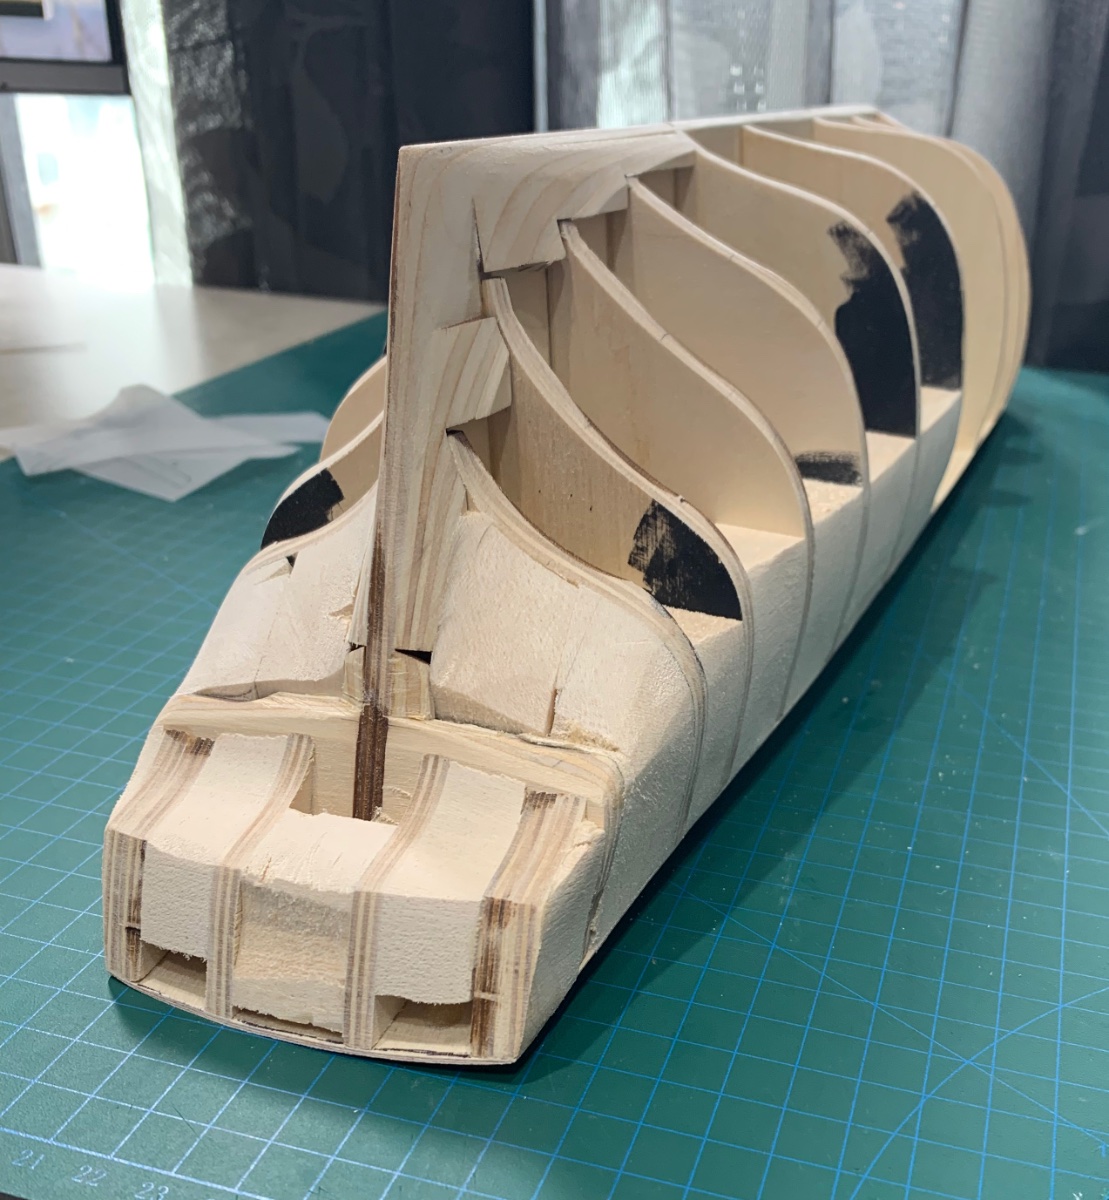
Finished blocking in the stern and changing the shape of frame 16 (would have been easier before installation but one doesn't always pick up these issues early). I have also blocked in where the bulwark stanchions are going to be installed

-
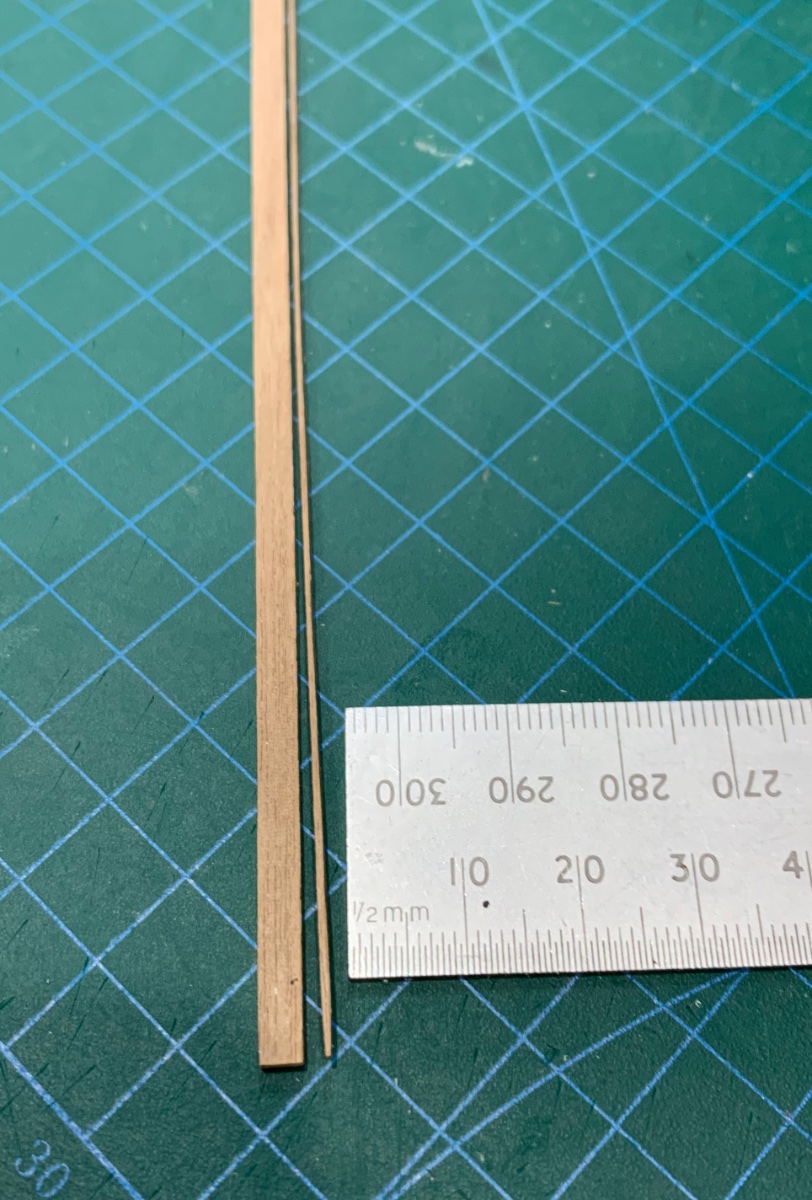
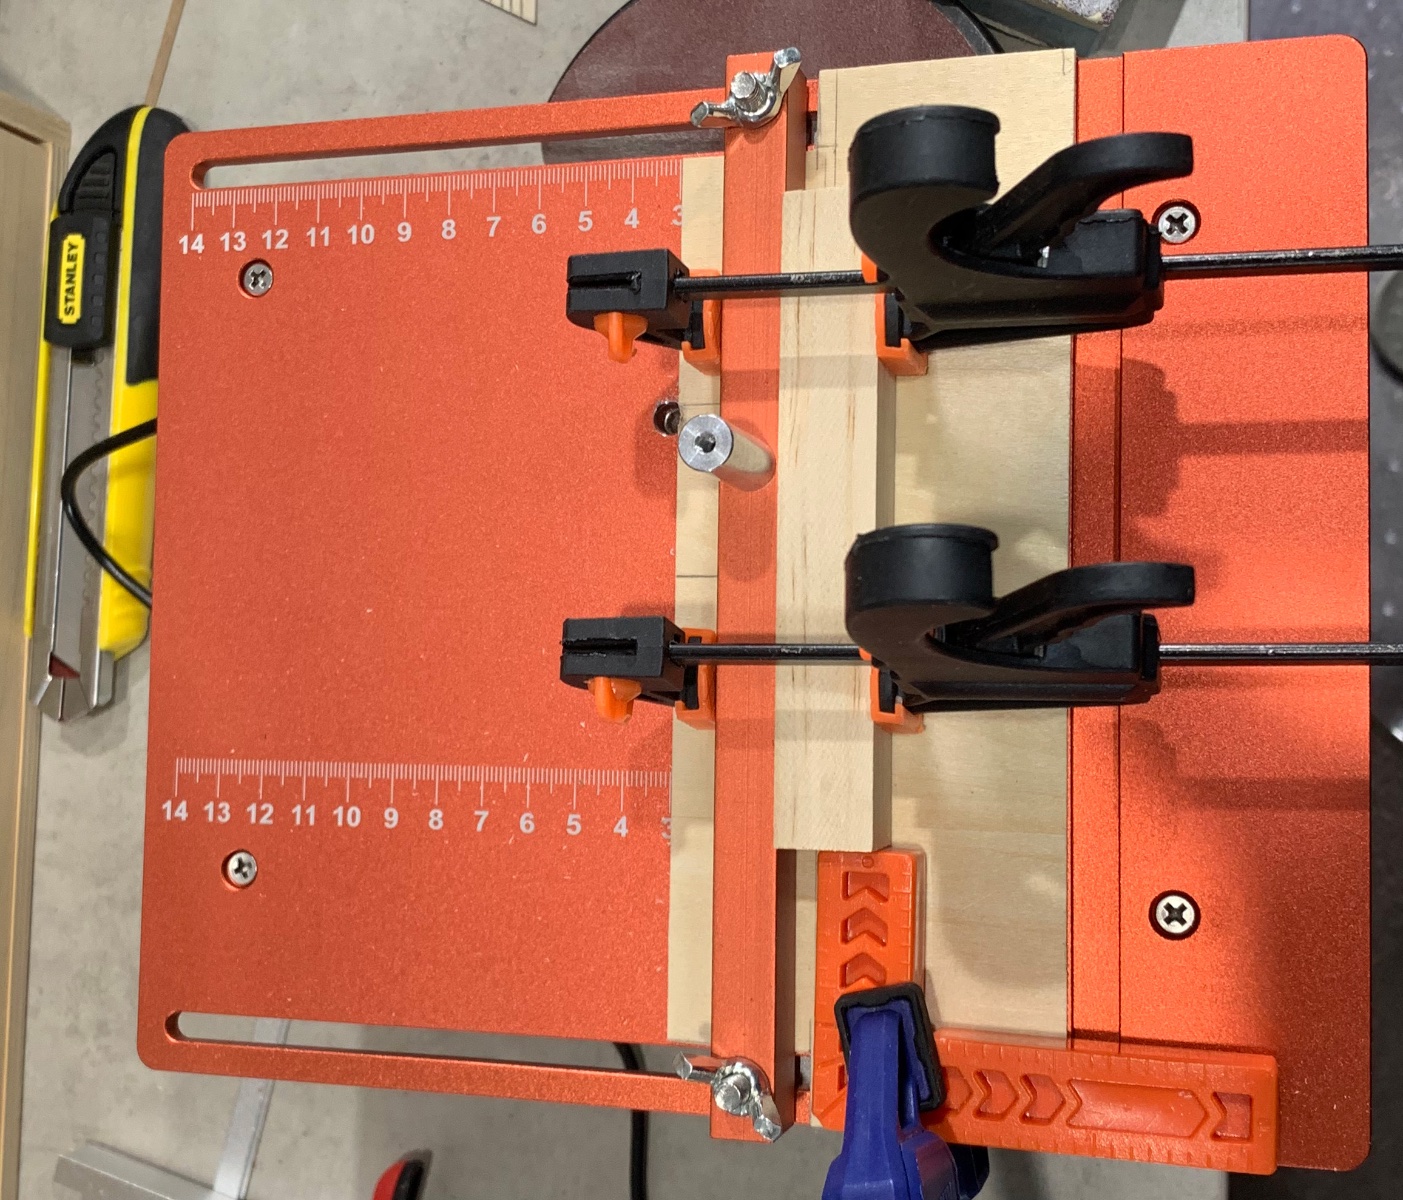
Well I had to burn two planks but get the rig right to cut a 3.5mm plank with the 0.6mm offset on my cheap Chinese mini table saw. (only because I thought Byrnes Model Machines didn't want to talk to me. Now I know it's an email issue, I'll be shopping a BMM when this one breaks). These 3.5mm planks bend far better than the original 6mm planks and of corse are more prototypical as BOUNTY had 3 x 6in planks, 5.5 x 12in Wales, and a single 4.5 x 24in strake immediately above the wales.


-
Thanks Grant. Donna has now responded, They are continuing to have email issues..... US$25 for the draw plate and US$44.50 for postage but I still purchased it as its difficult getting a quality draw plate for under AUD$150.
-
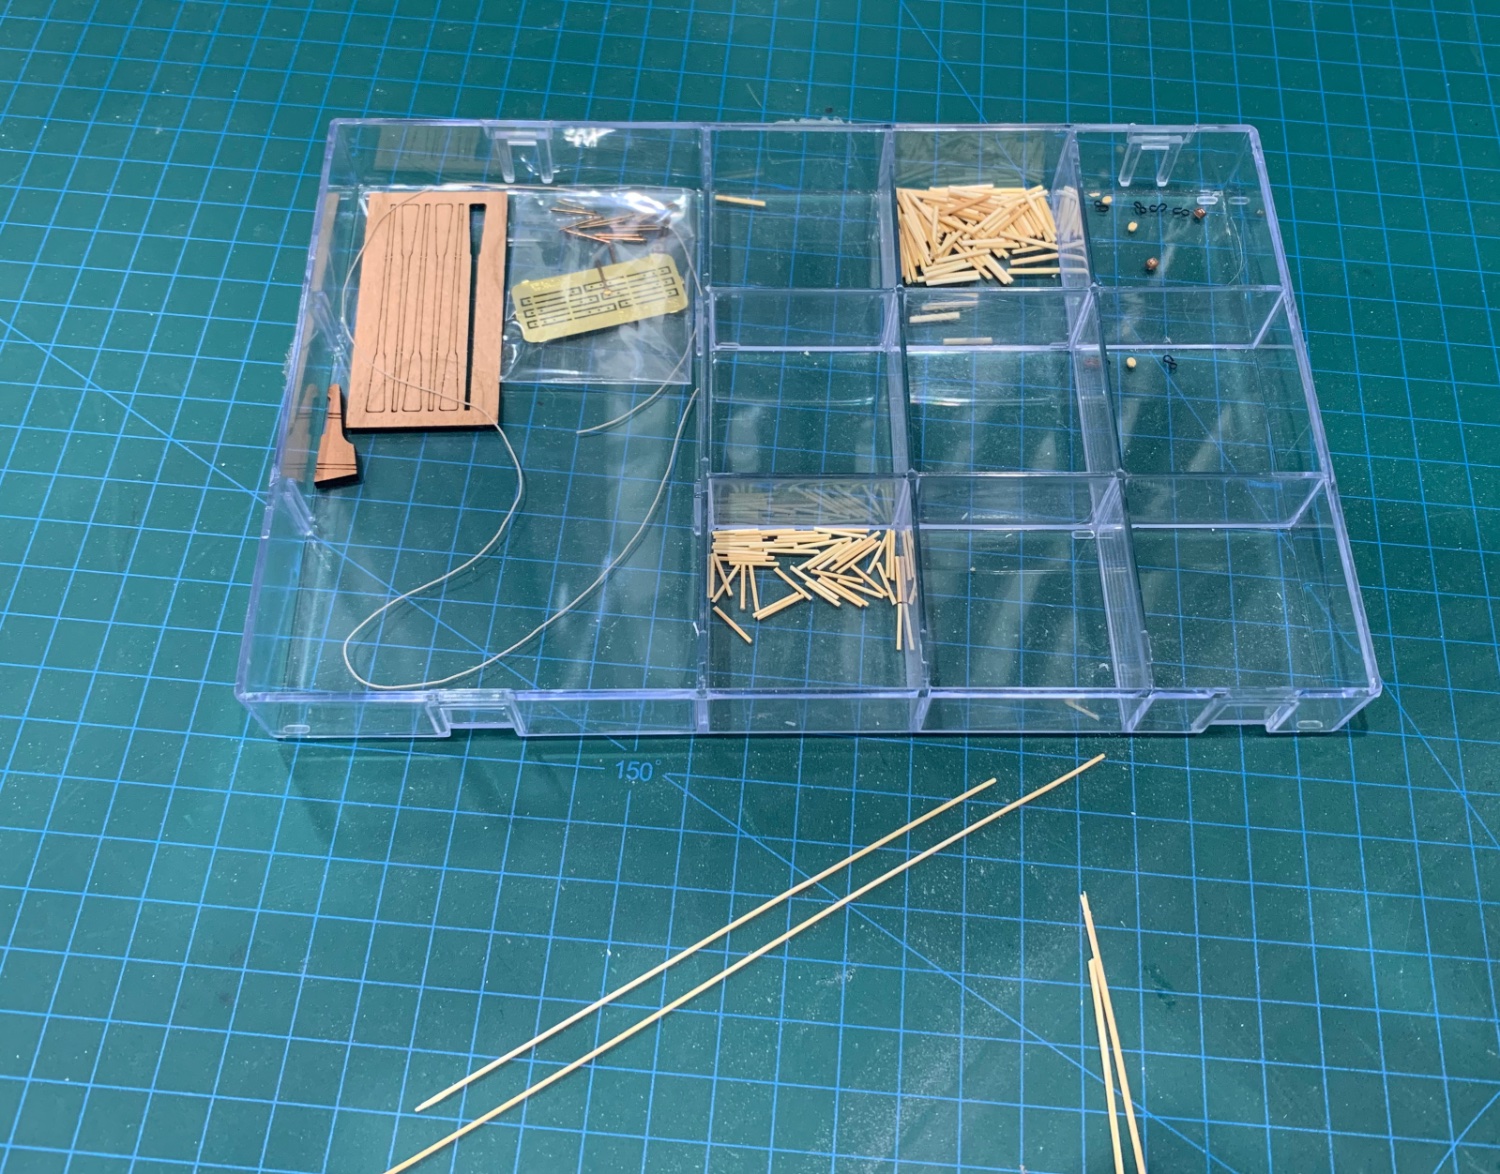
Have spent the day making up 0.7mm and 1.0mm trenails. I would like to make smaller trenails but I have been unable to get Jim and Byrnes Model Machines to respond to my order or emails. I do hope he is alright...

-
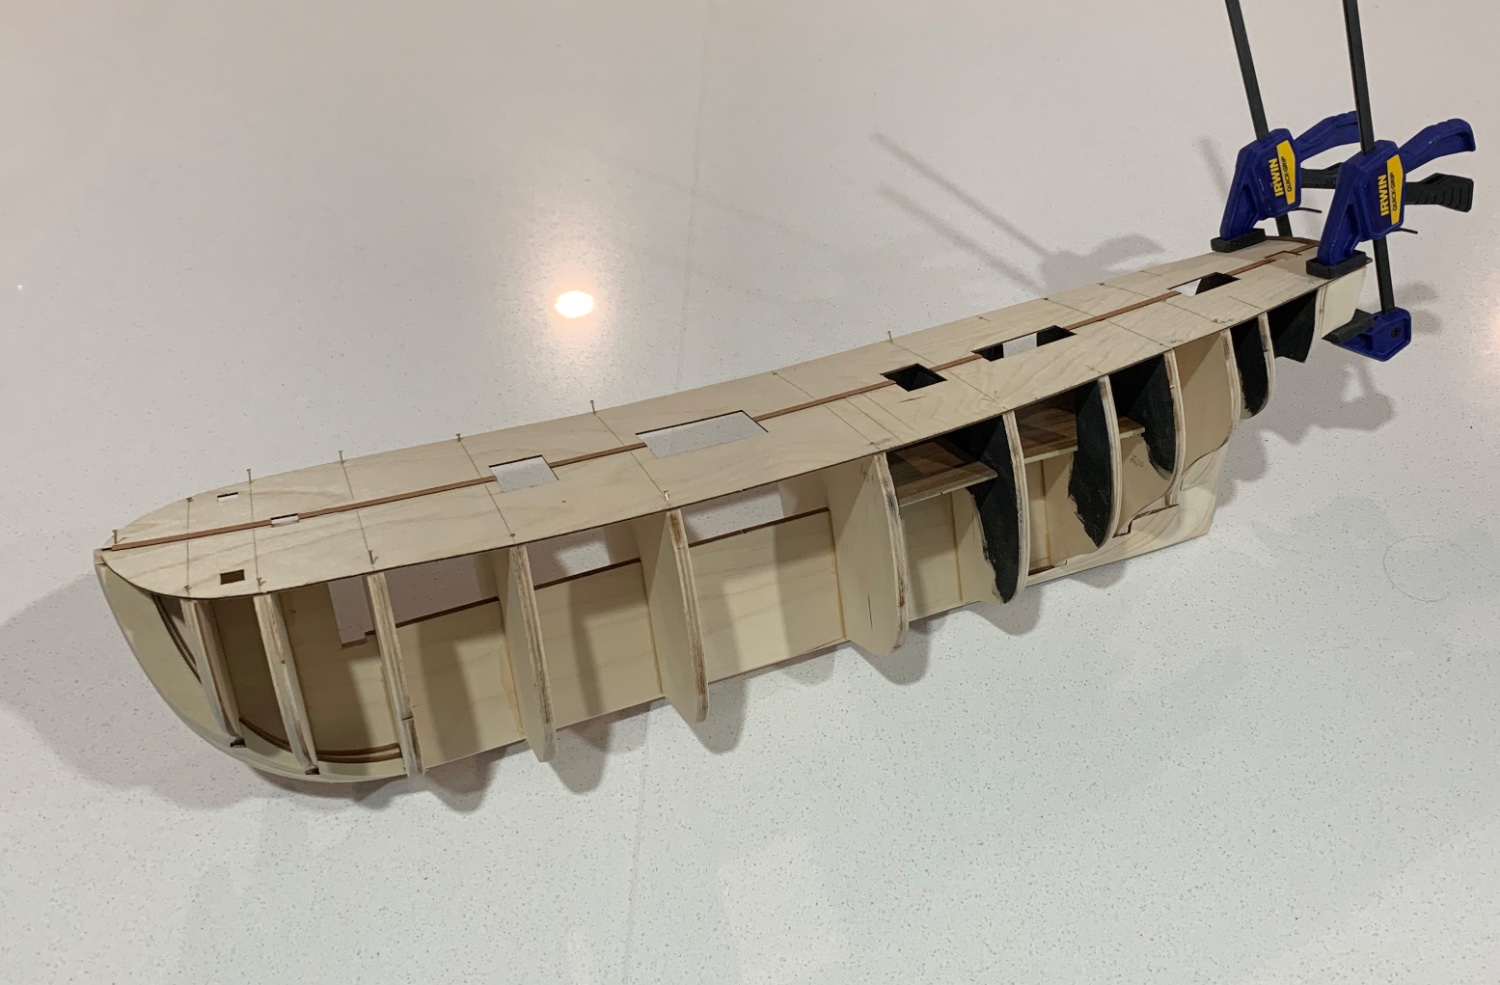
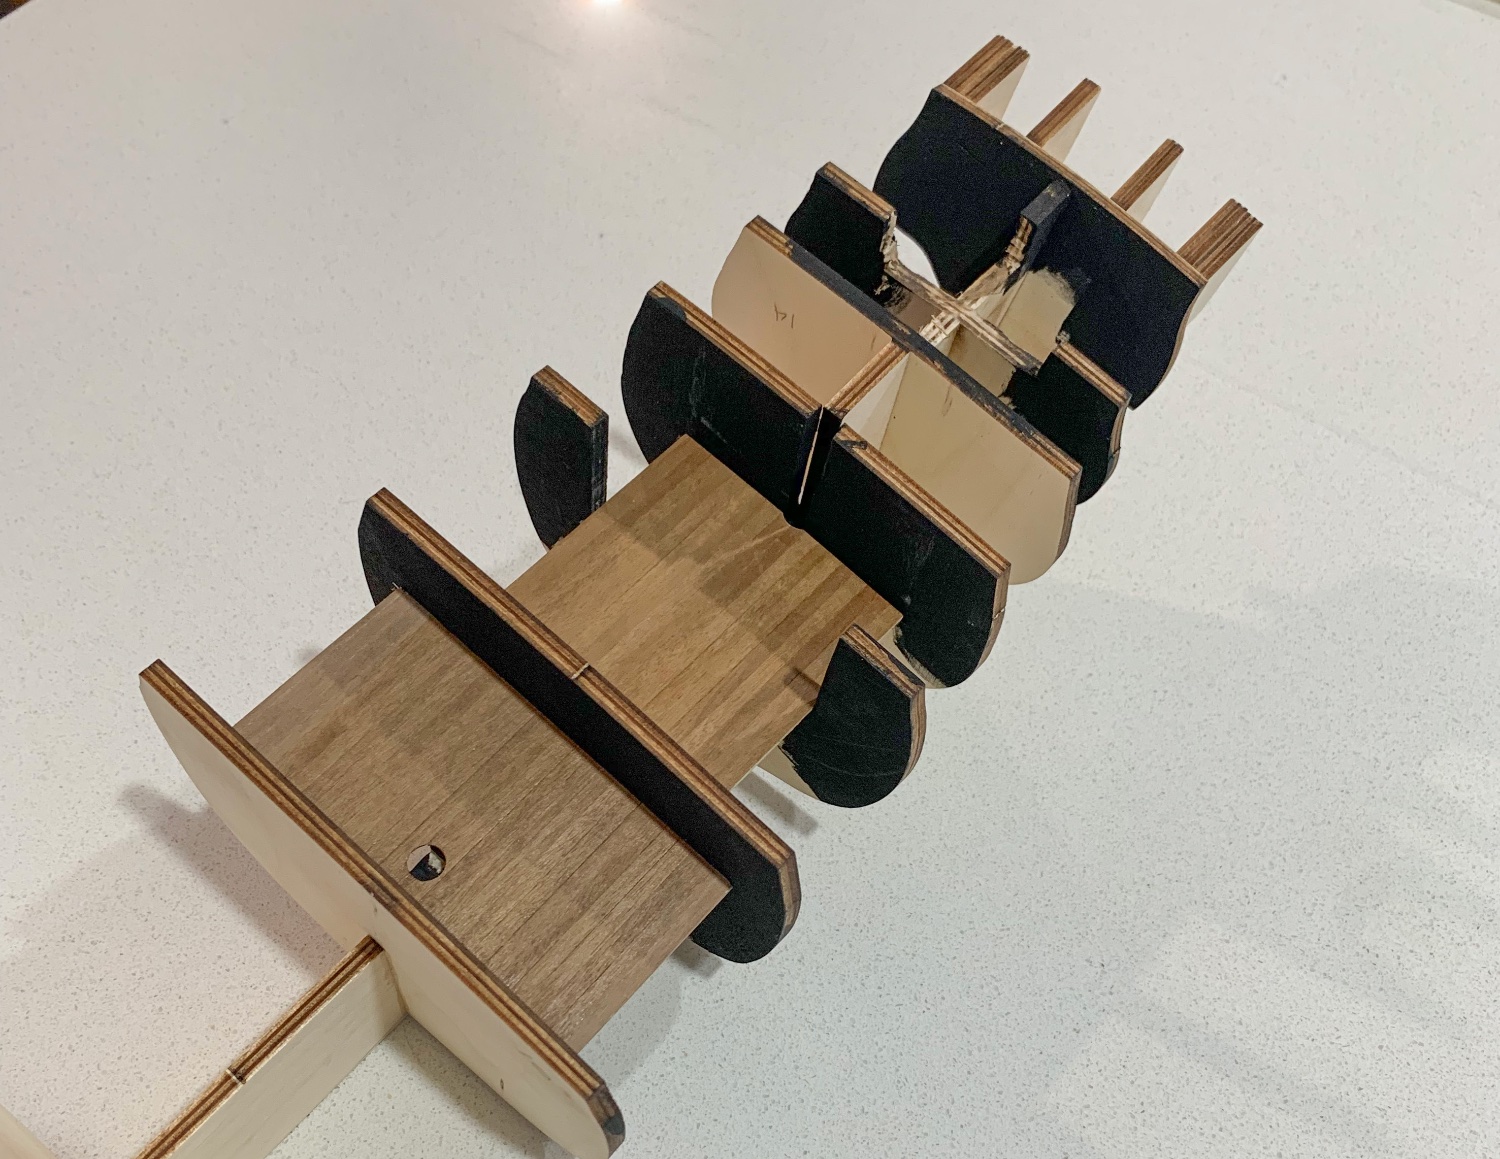
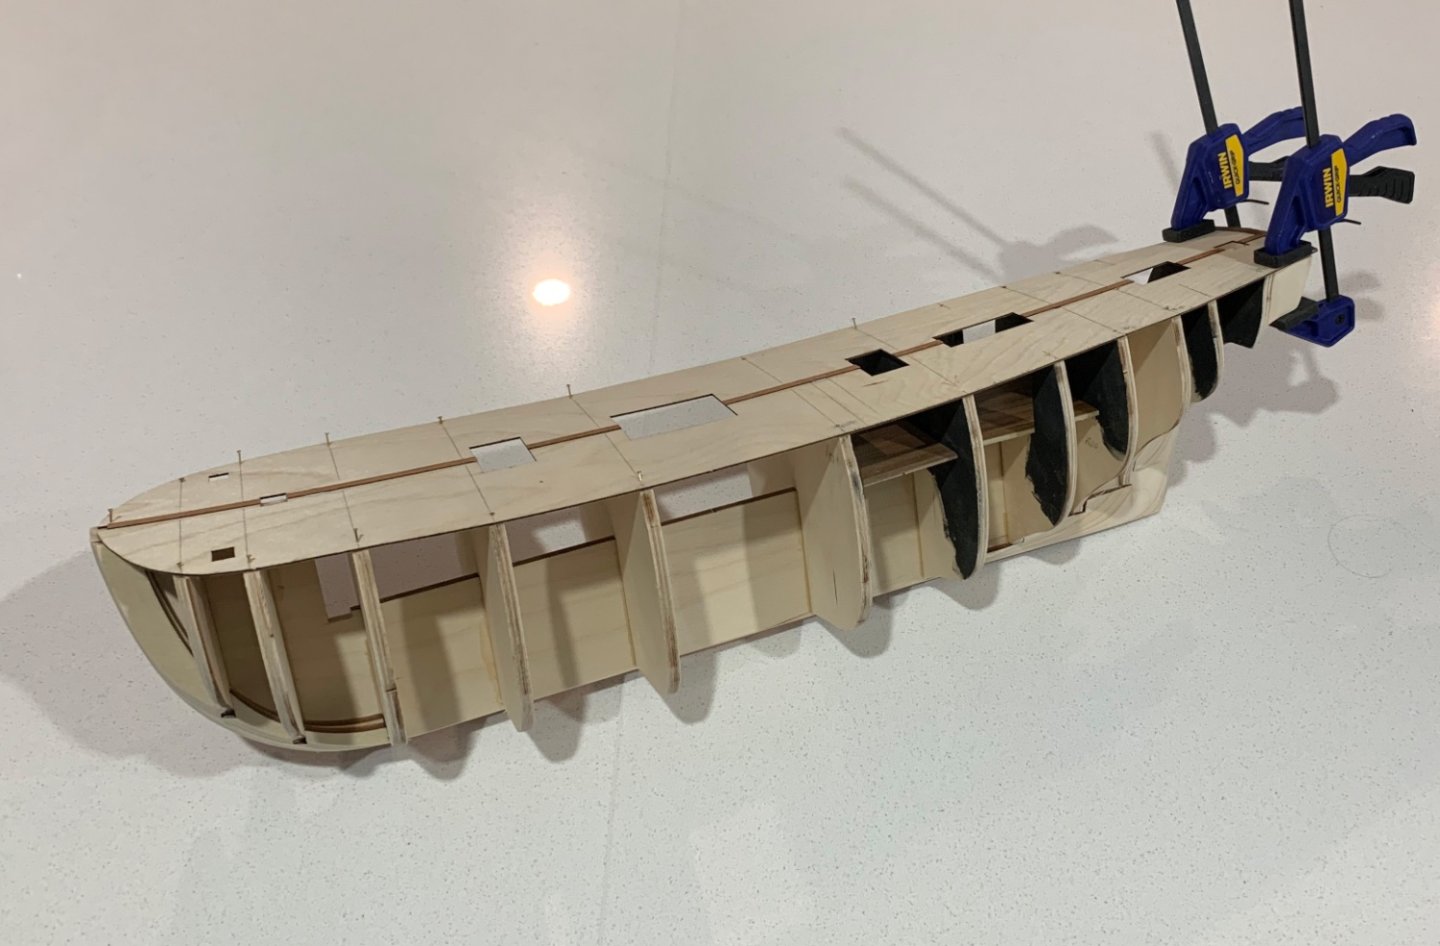
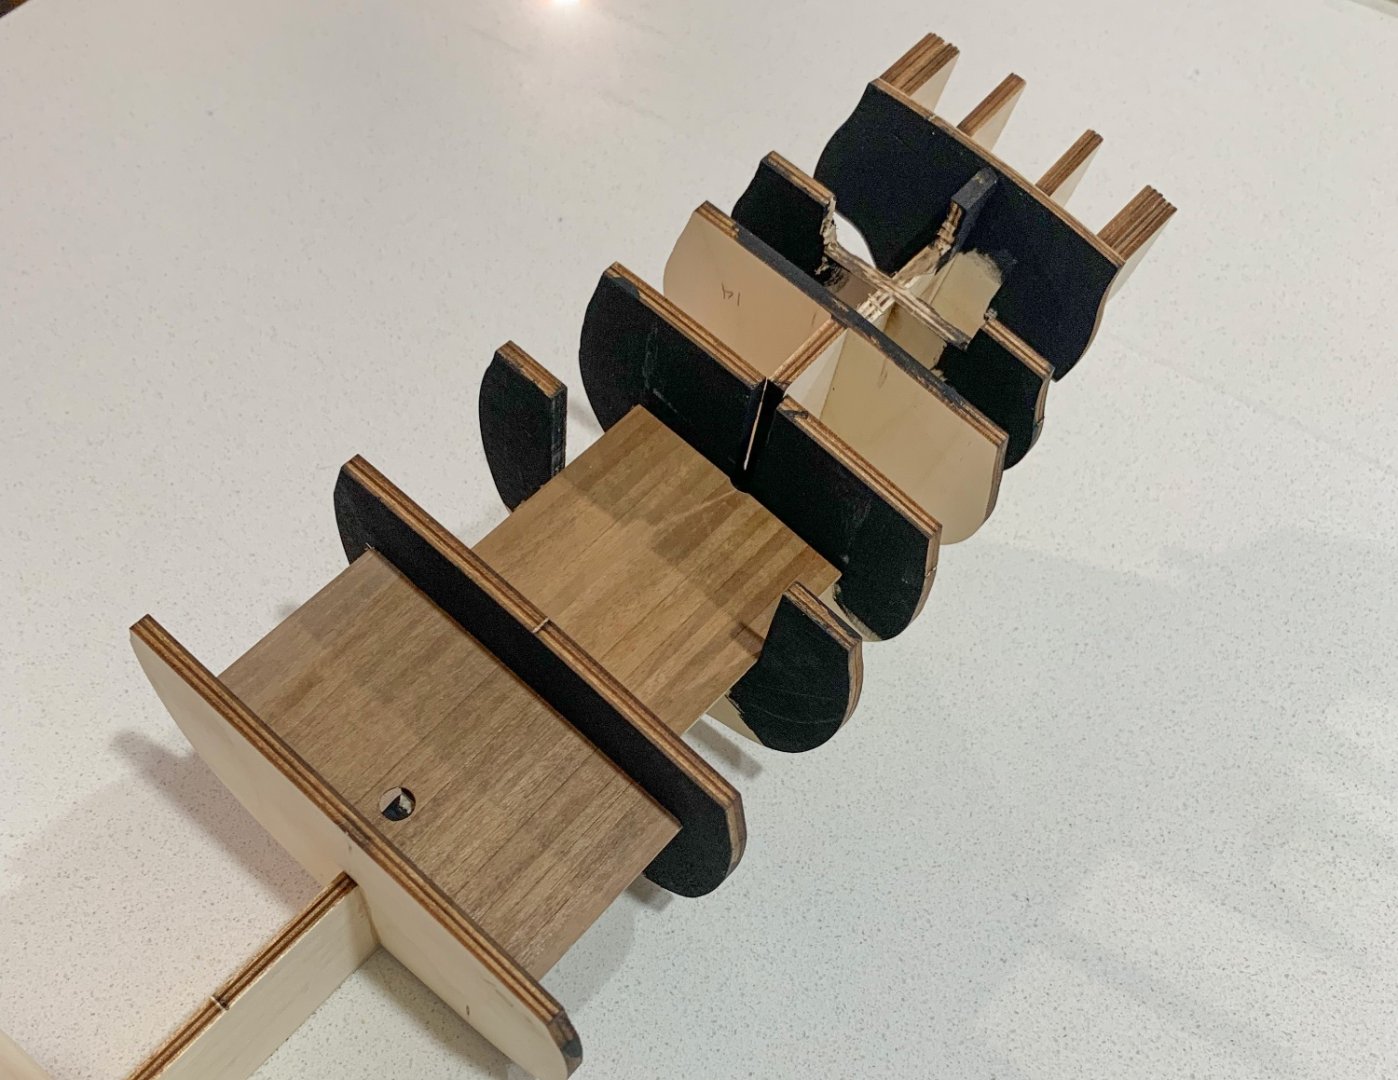
Team, Today was a continuation of the initial framing. The lower deck between frames 14-16 had to be lowered as it was too shallow to be realistic so I did that with a 5mm chisel and followed up with a 25mm sanding disk before fitting the lower deck. Before fitting the main deck, its necessary to fair the top of the frames. There is a little bit of work forward but a lot of sanding between frames 12 and 16 due to the slope of the aft deck and Frame 16 and the square cut nature of the frames themselves. I did the initial work with a mini wood plane before getting to fairing by hand with a sanding block. Now its time to fit the main deck. Relatively simple task of applying glue to all top surfaces, aligning the deck then drilling and nailing. I would be using trenails but my 0.7mm drill broken the materials too hard for the bamboo in a 0.6mm hole. I have ordered replacement 0.7mm bits so will remove nailsandreplace with trenails when the glues has dried. Also visible is the preliminary hull fairing and the king plank (wanted to make sure I didn't forget it this time).
-
Well its time for a new build now that ENDEAVOUR is ostensibly complete. My next choice of kit still had to have an Australian flavour so I chose the BOUNTY. Choosing which BOUNTY to buld came down to what I could afford and what was available. I considered the Artesania version but was not keen paying for a single sided planking and open side with interior. I also stumbled upon a sale for Amarti BOUNTY's through Premier Models in the UK so I ordered one and it arrived safe and sound. I was surprised on opening the box at the difference in quality between the Artesania and Amarti kits. The Amarti materials appear and feel much better quality and the use of timber rather than ply for the keel, stem and stern posts, channels etc means one don't have t find a way to mask exposed ply ends. The ply stock itself also appears better quality with far les tear-our/delamination that the artesania material did. I also like the Amarti rigging (blocks, deadheyes, hearts, and parrels parts as these too are timber and not laser cut ply. I also like the Amarti threads even though I would prefer scale rope but it appears that this build may be a commission and will be an out of the box build. So lets get to work: FRAMING: Thank heavens for DAVOSHIPMODELLER on YouTube. He has a playlist for the construction of the Amarti BOUNTY and the identification of kit issues starts at the pre-framing stage. The first big is the location of the Mizzen and the implication that notching the false keel has with the location of Frame 13. The most effective solution is to notch out Fame 13 and then adjust the length of the Mizzen mast down the track. The other main issue is the shape of the false keel stem support and the reinforcing parts on either side. They do not match the plan nor the shape of the laser cut timber stem. Best to fix now before any assembly take place. Other changes made also follow the DAVOSHIPMODLLER experience including cutting out sections in the frames between Frame 11 and 13 and also Frame 14 and 16 to permit planked decks to be installed should one wish to have open hatched on the main deck.
-
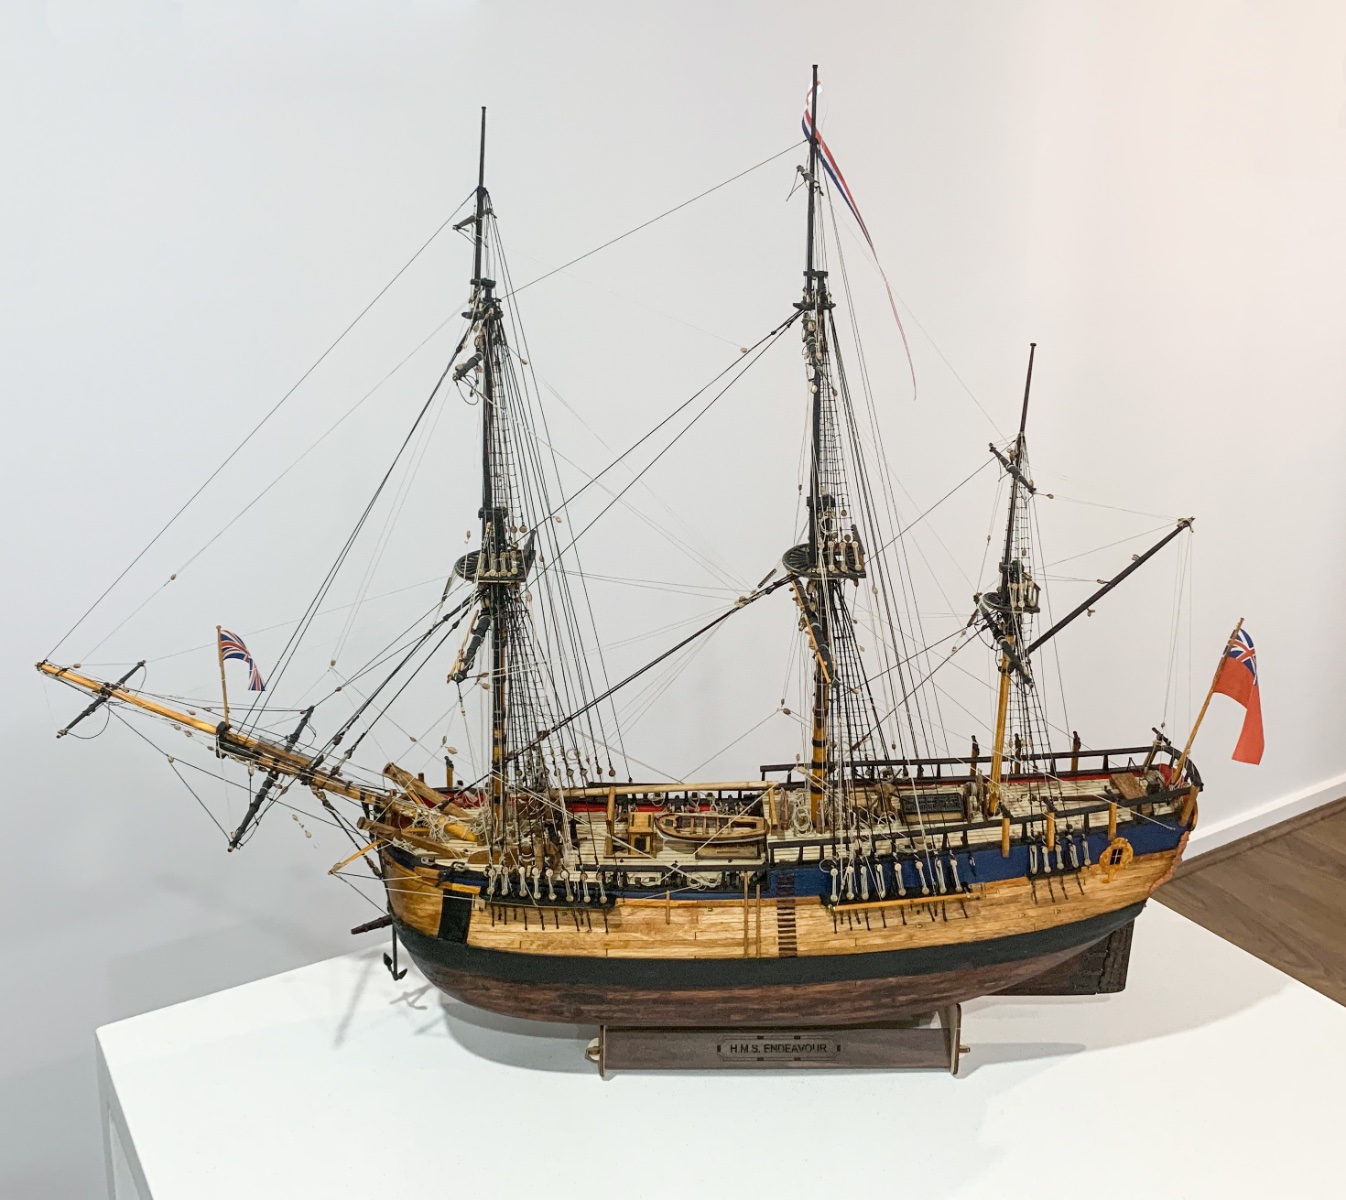
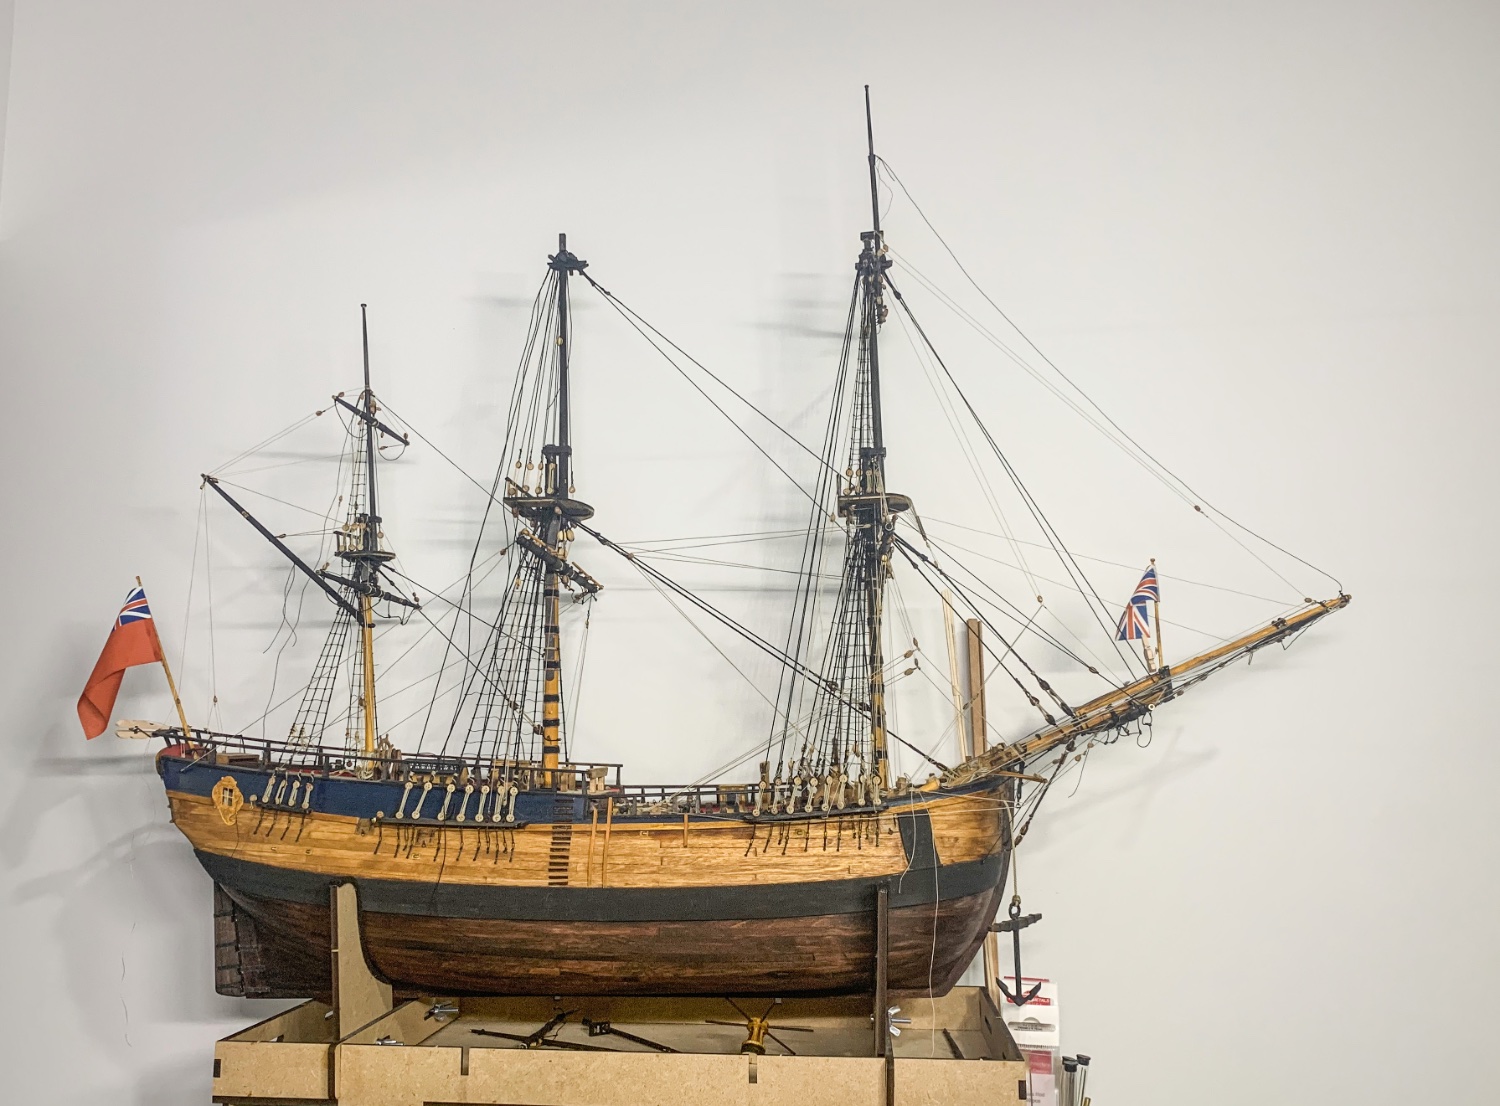
Well she's all but complete. Still have the two smaller anchors and the stern lantern to mount and two boats to finish planking. I have made up one spare spar with another in the lathe ready for tapering. While I have rigged a Main Masthead tricolour pennant I am having issues trying to identify where this would have been tied off. No mention in Parkins or Marquardt's books nor can I find any information online. There are a number of lines (Clew, Bunt, Bow and Brail lines I have not rigged. According to the Marquardt book, theses lines were pretty much rigged directly on the sails themselves. This seems to include the downhauls and associated blocks for all the staysails too; Hence I have omitted these.

- 79 replies
-
- 5
-
-
-
- Endeavour
- Artesania Latina
- (and 1 more)
-
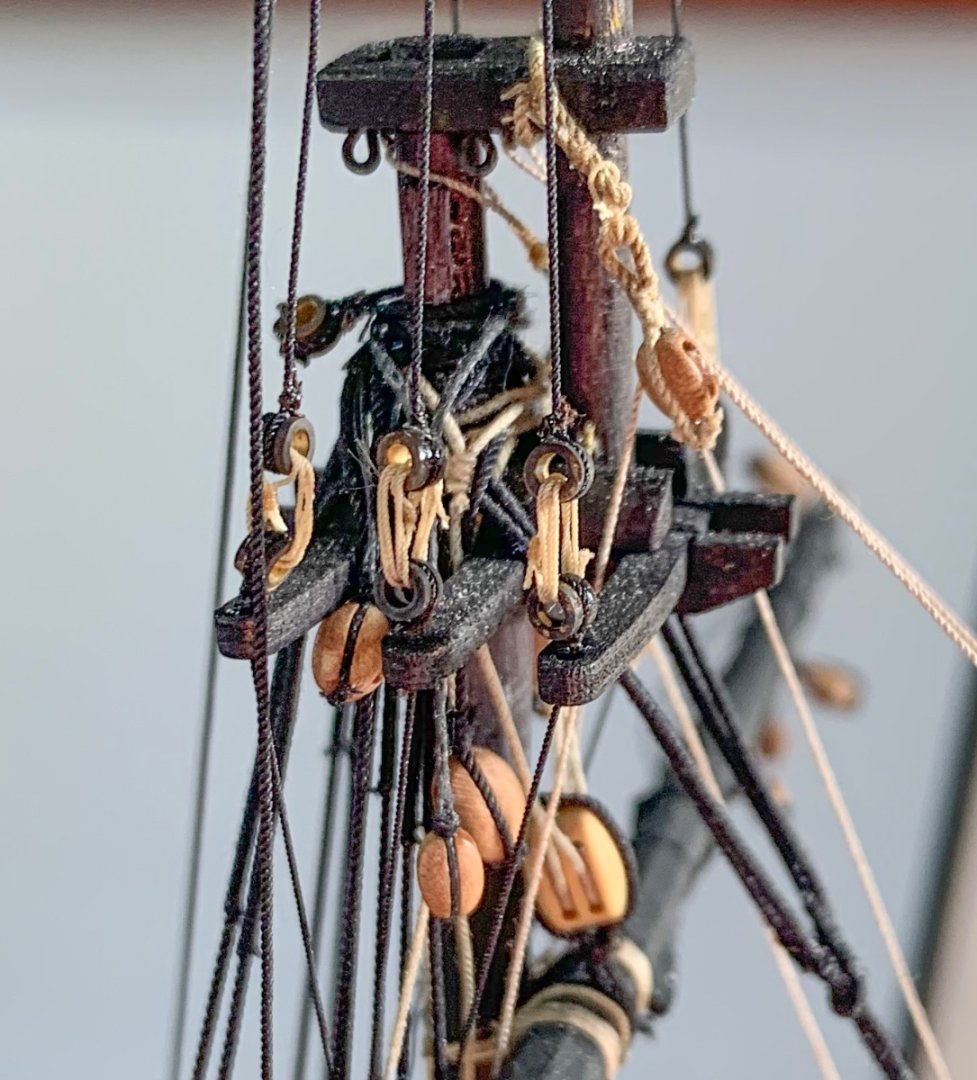
I purchased thimbles from Caldercraft in the UK for the Topgalleant shrouds as well as the topgallant backstays. I realised that making the 32 thimbles was going to take me a lot of time. One is turned in to show the thimbles depth. These closeups really show the dust that gathers on a model too...😂
- 79 replies
-
- 3
-
-
-
- Endeavour
- Artesania Latina
- (and 1 more)
-
Ropes arrived and its back to rigging. Some progress has been made in the past 24 hours. Standing rigging is now at 75% while running rigging is at just over 50%. Who thought there were so many ropes and blocks in a three masted ship I should be able to make the 16 Sep deadline for the Canberra Model Shipwrights EXPO 2022.

- 79 replies
-
- 4
-
-
- Endeavour
- Artesania Latina
- (and 1 more)
-
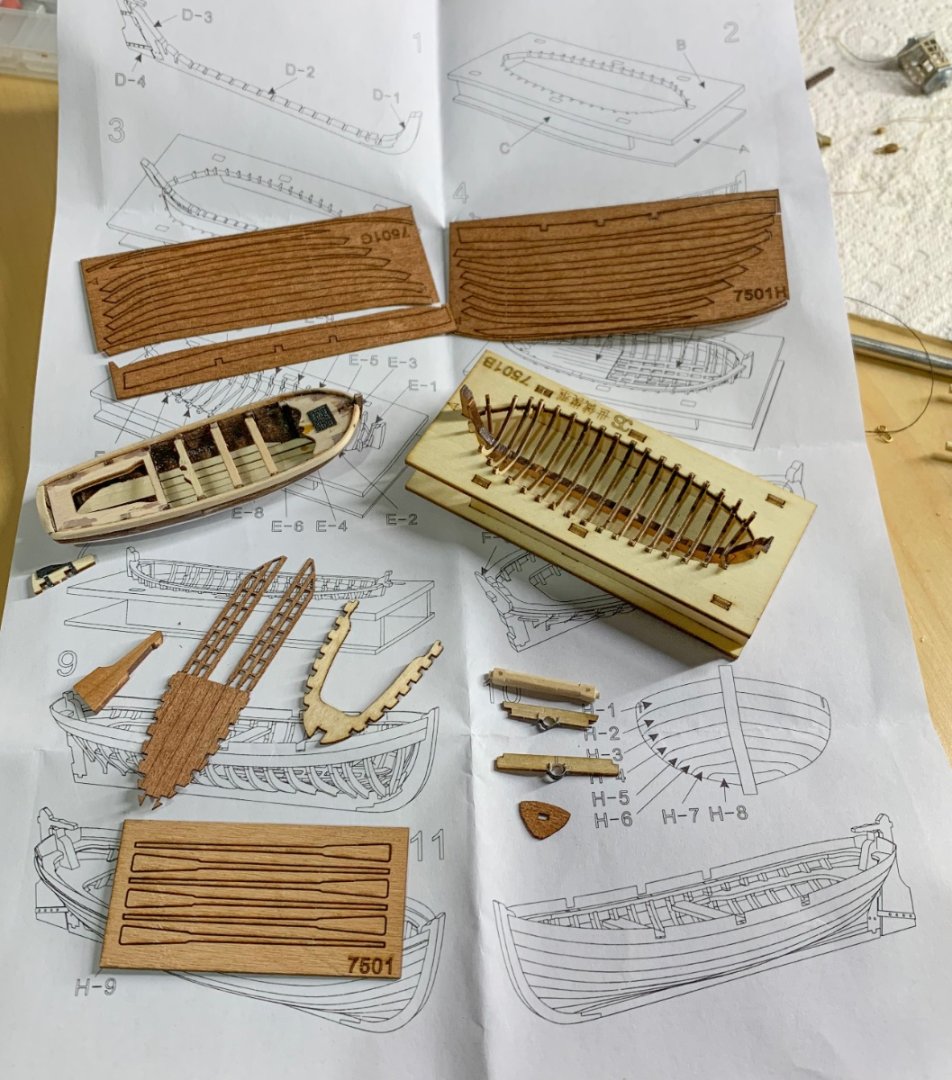
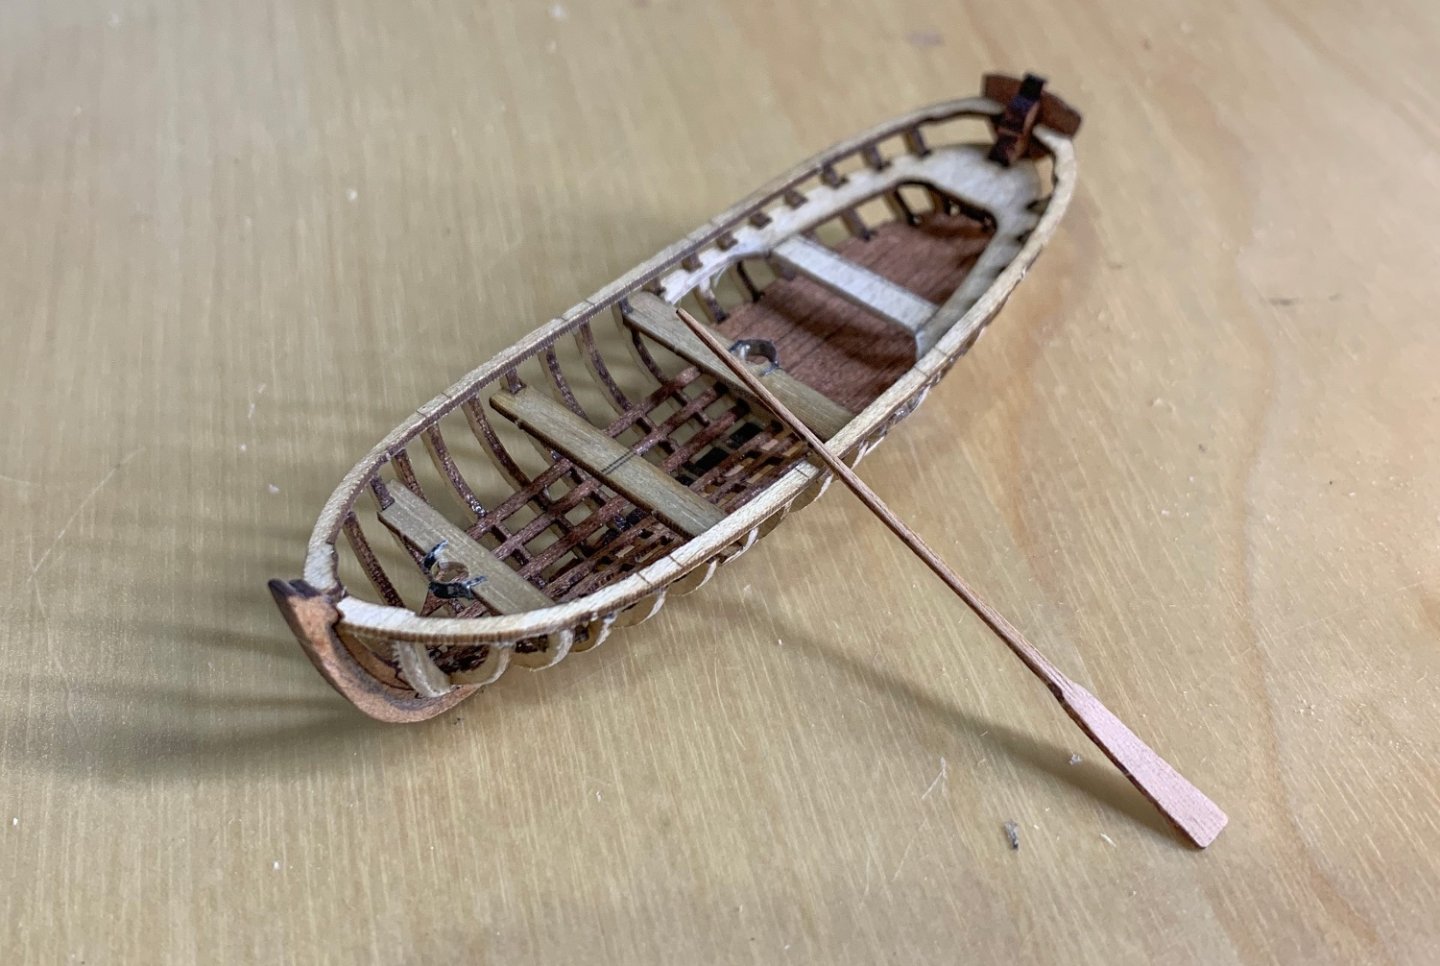
Well the Jolly Boat kit is assembled and the frames faired ready for planking. I even managed to shape one of the oars. Its a delicate model to assemble but once assembled its quite robust The first image shows the near completed (but cut down) kit model vs the full frame version sitting in its 'mould'.
- 79 replies
-
- 1
-
-
- Endeavour
- Artesania Latina
- (and 1 more)
-
OK, Now that I am well into running rigging, I gather that Bowlines, Leechlines and Buntlines are not rigged when sails are not fitted.
-
Ben, I should have known you had this type of information. Very much appreciated. At 0.7mm I can get on with them now.
- 79 replies
-
- 1
-
-
- Endeavour
- Artesania Latina
- (and 1 more)
-
I understand that most model ship plans miss breast stays but as I am modelling them I need information about them but cannot find them in The Art of Rigging or rigging tabes I have access to. Can anyone tell me the size of a breast stay vs the associated backstay (e.g. equal size, 75% or 50%) so that I can model them in the correct scale rope. Marquardt's drawings of ENDEAVOUR show them quite clearly so rigging them is not the problem but that doesn't help with sizing the rope.
-
Ok. so most model ship plans miss breast stays but as I am modelling them I cannot find them in The Art of Rigging so can anyone tell me the size of a breast stay vs the associated backstay (e.g. equal size, 75% or 50%) so that I can model them in the correct scale rope. Marquardt's drawings of ENDEAVOUR show them quite clearly so rigging them is not the problem but that doesn't help with sizing the rope.
-
Do you have an image to share? I don't varnish or glue as I want to be able to uncoil and adjust rigging should th need arise; e.g. should I decide later to add sails.
-
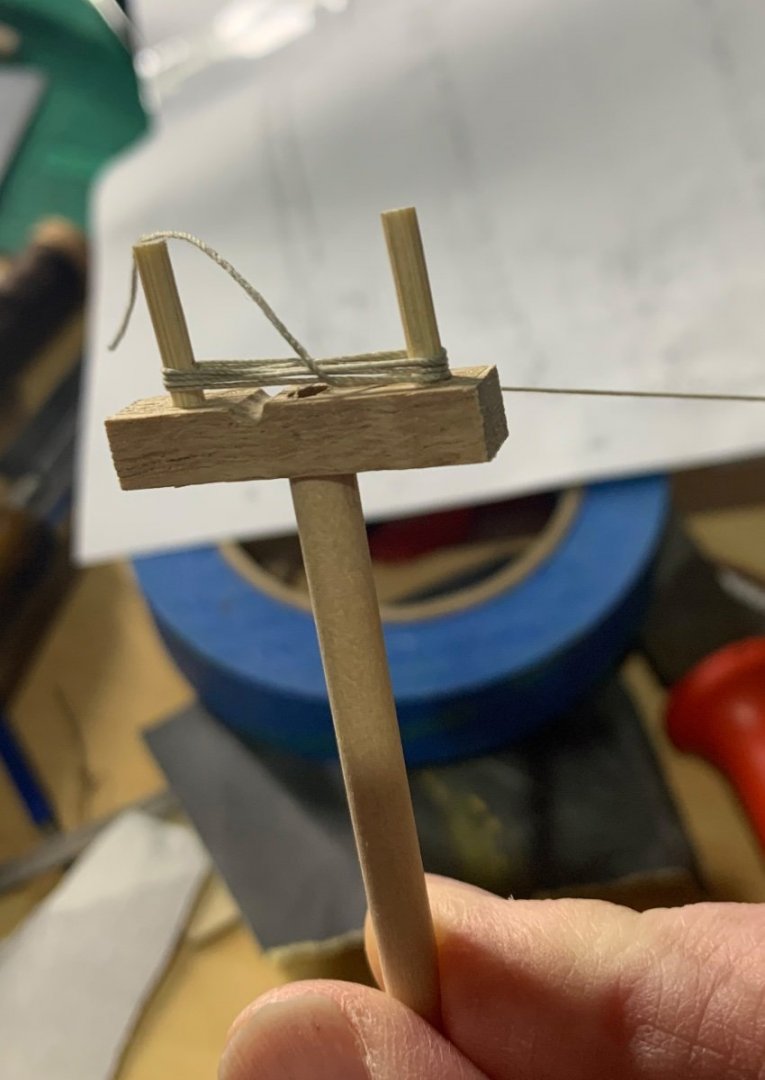
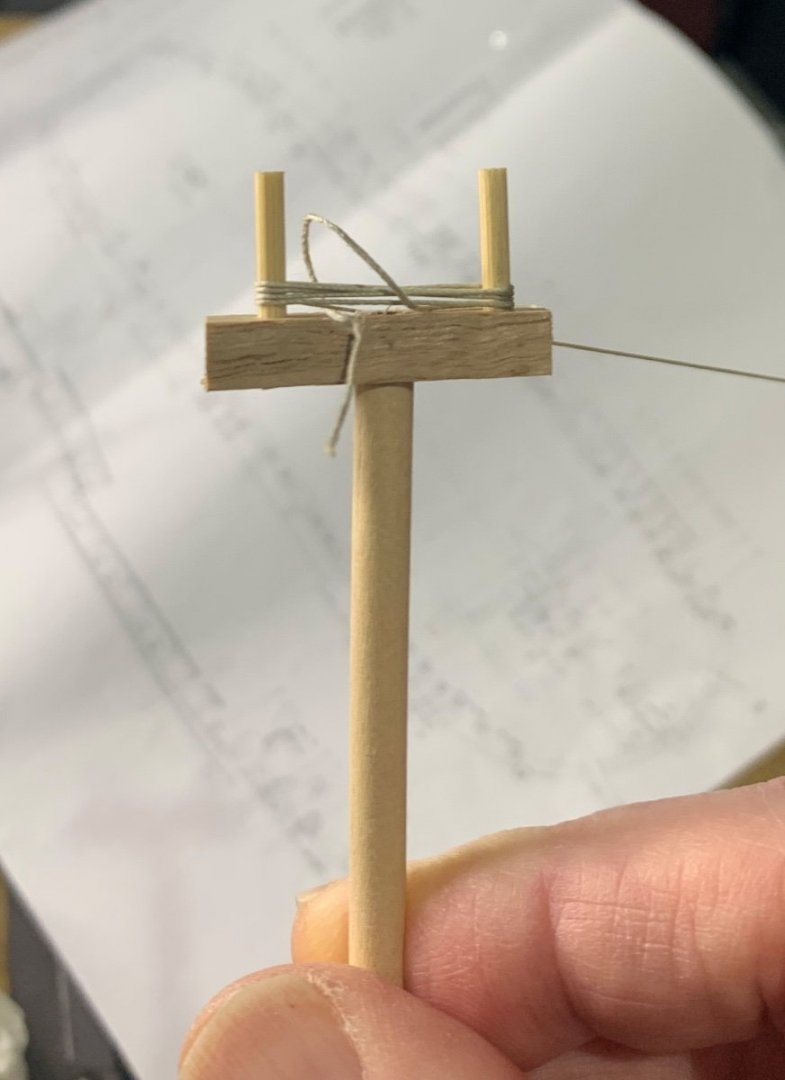
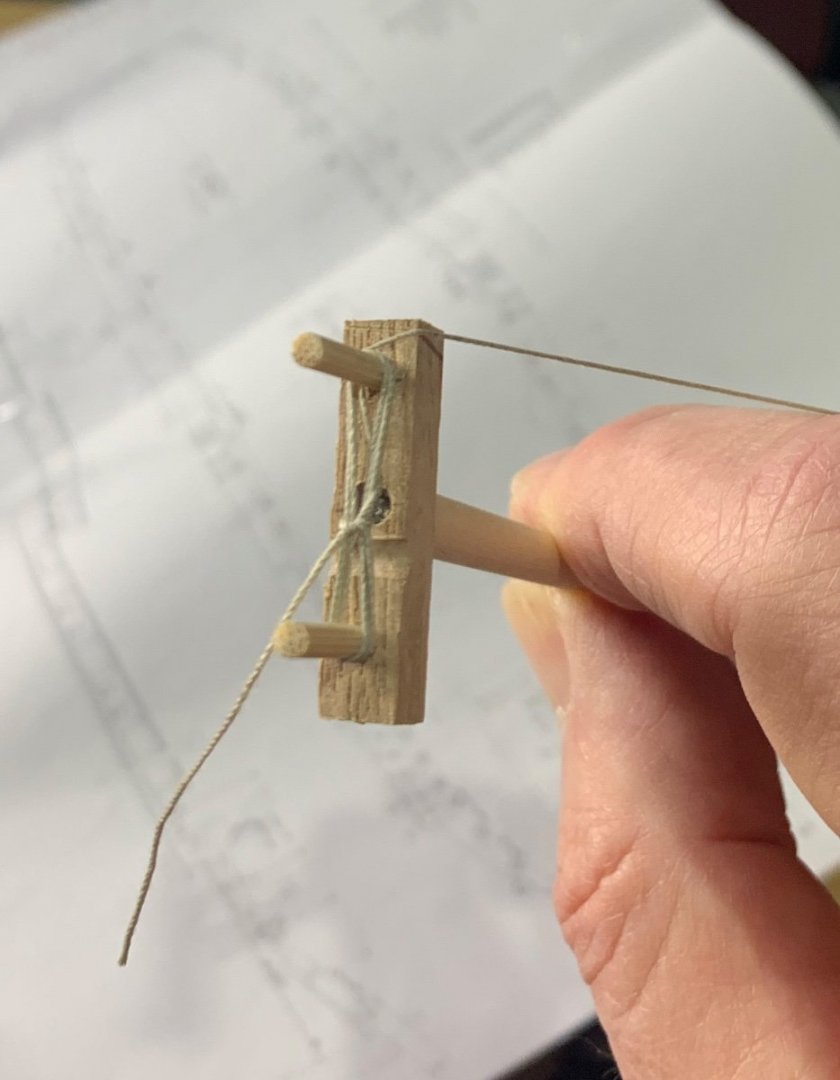
agree. One fixed pin and the other on a slide controlled by a thread to move closer or further from the fixed pin would work nicely. Probably needs to be made of metal (aluminium) though due to the small size.
-
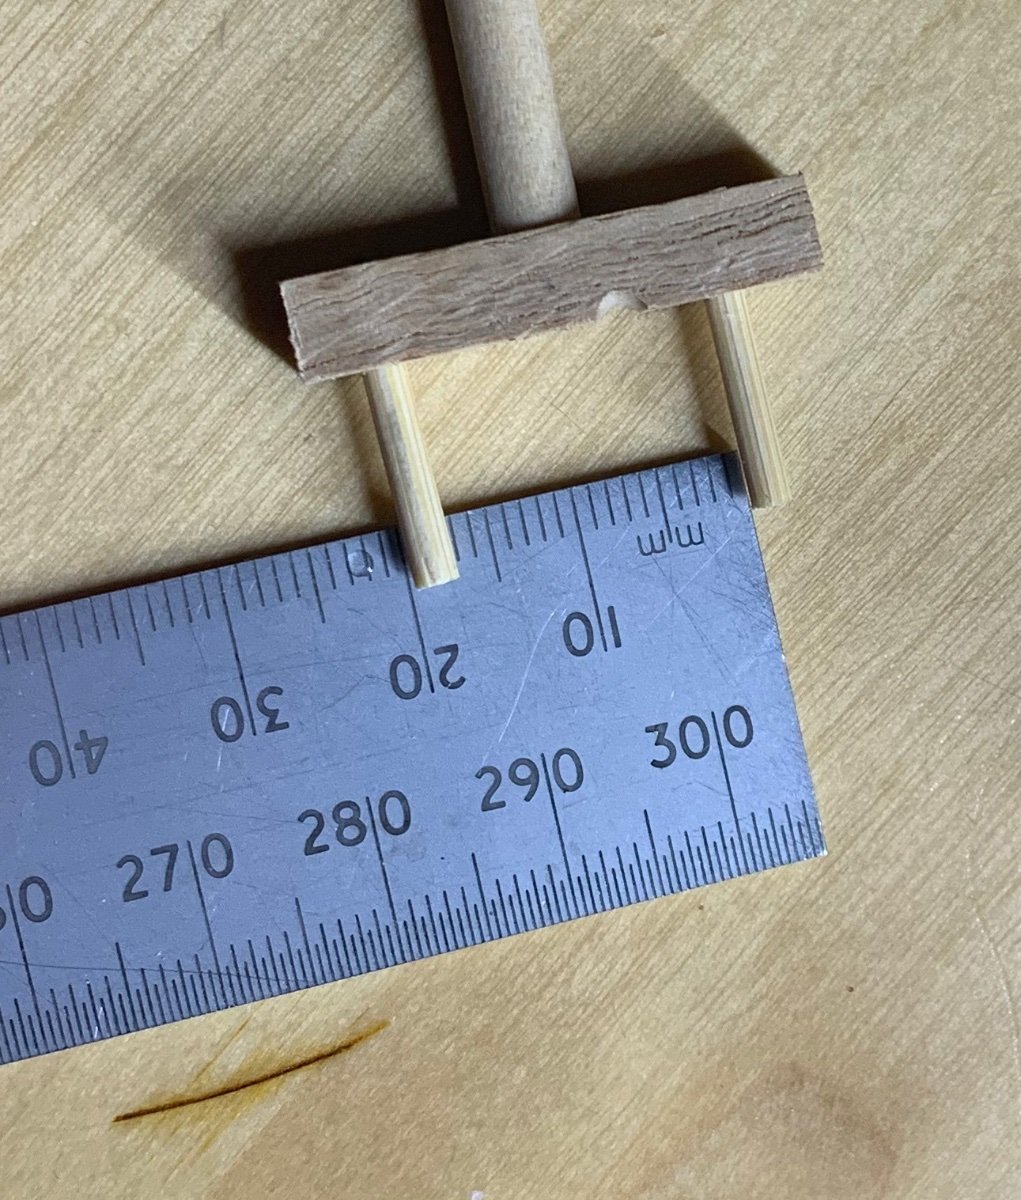
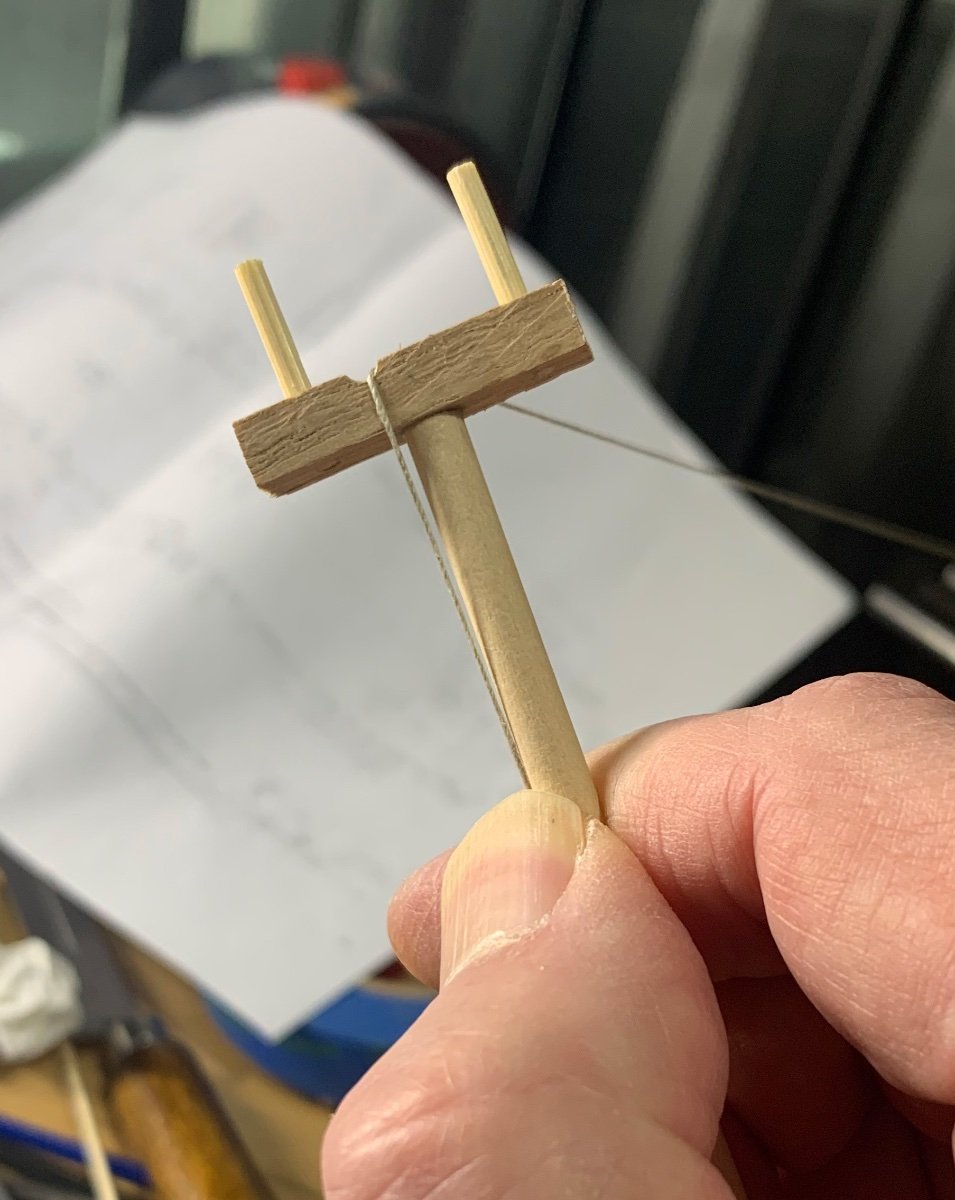
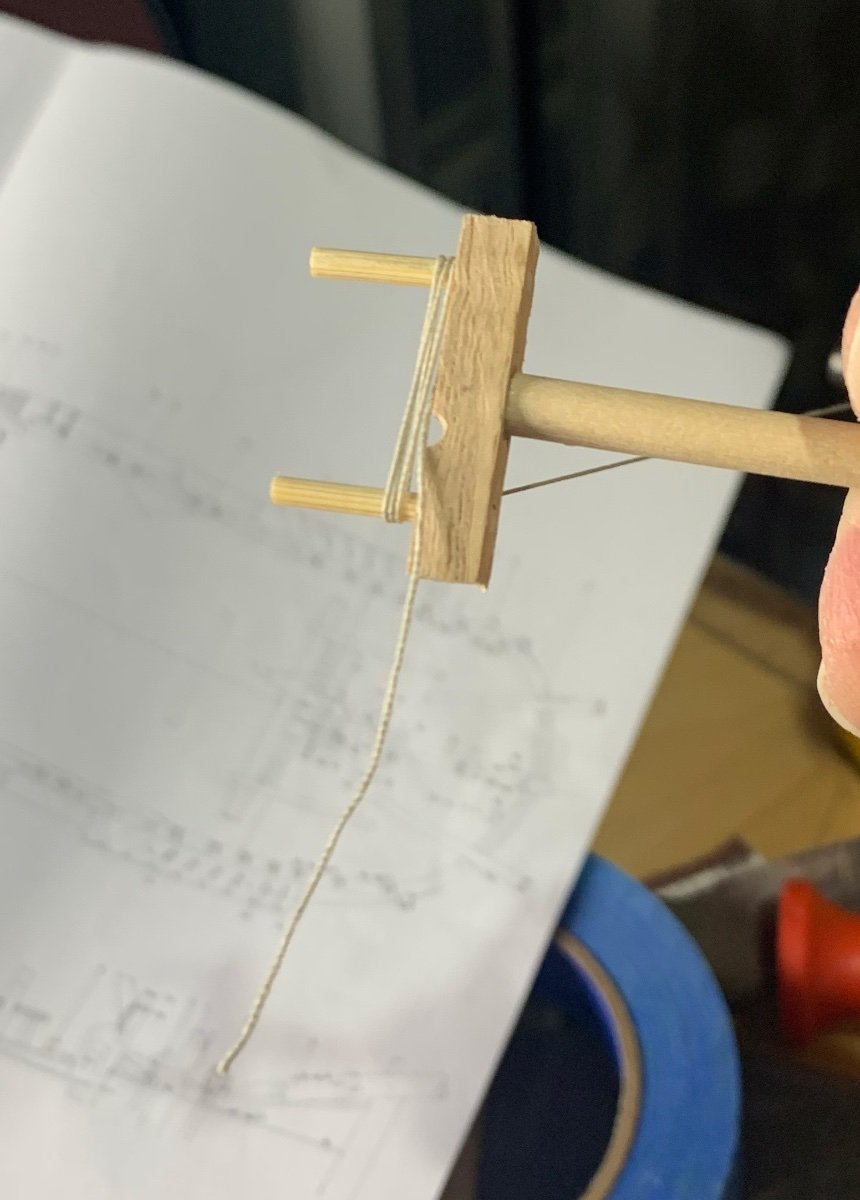
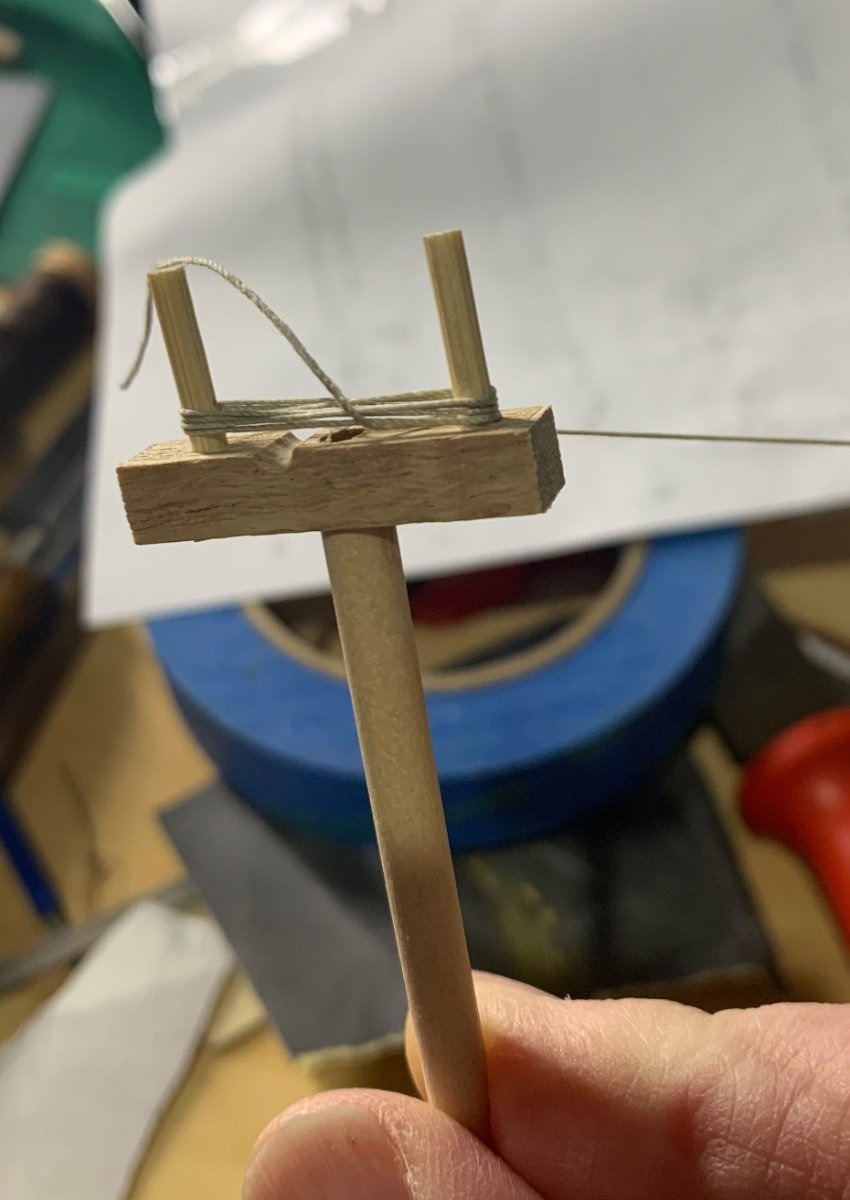
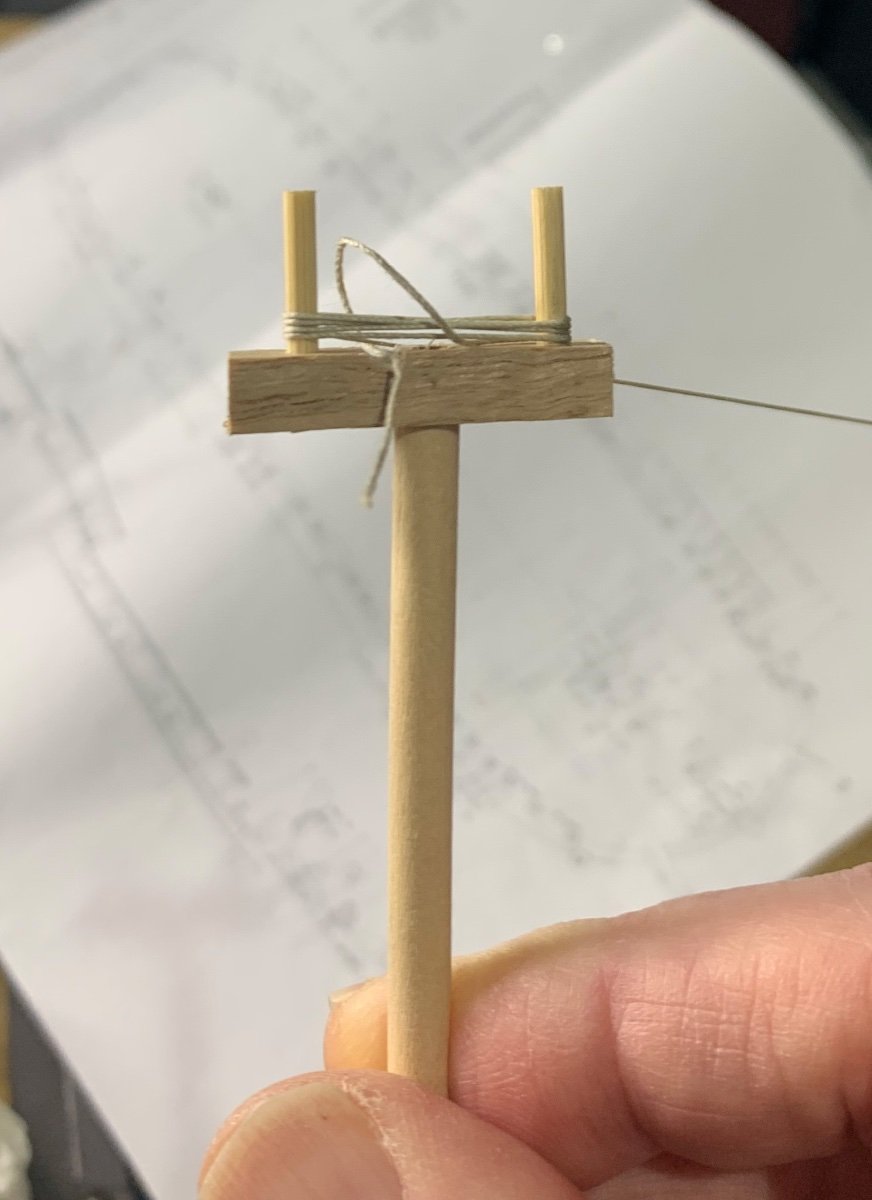
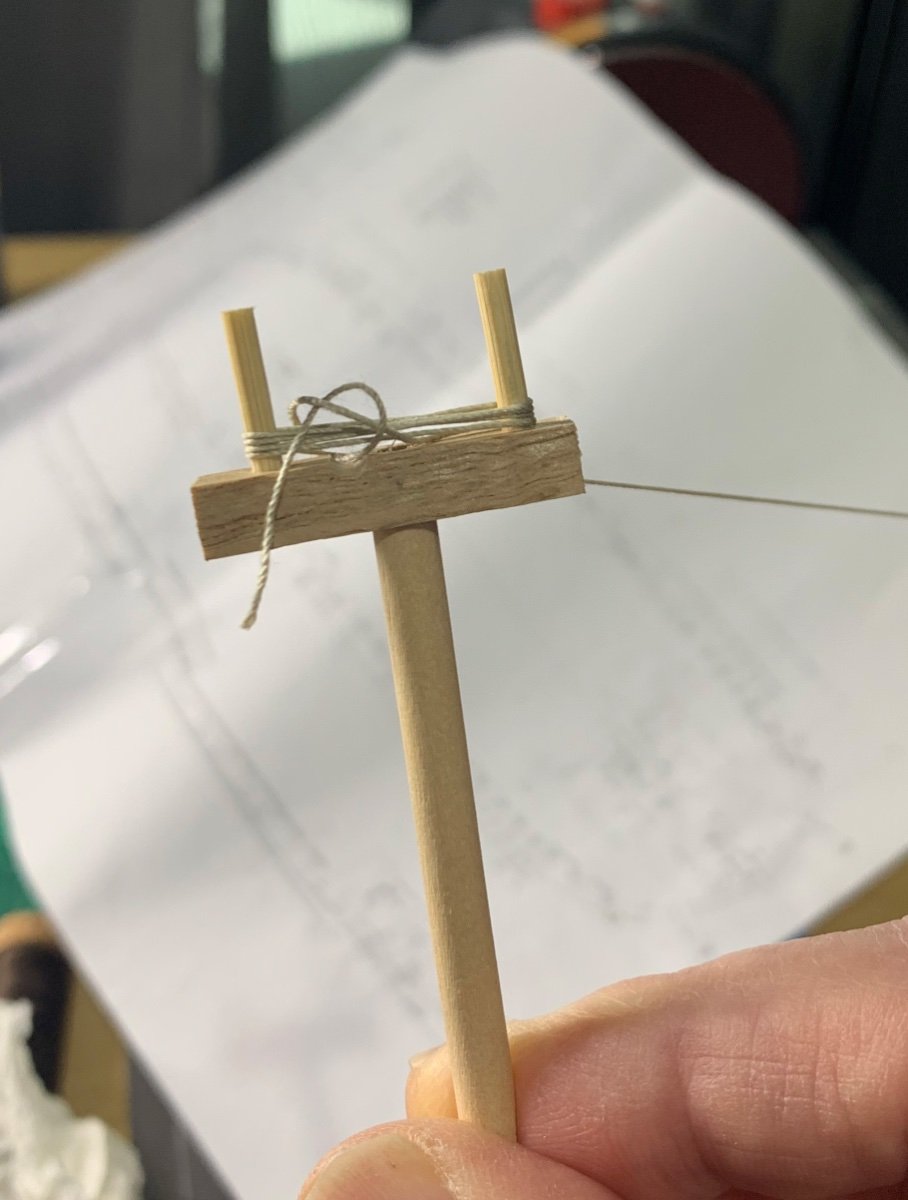
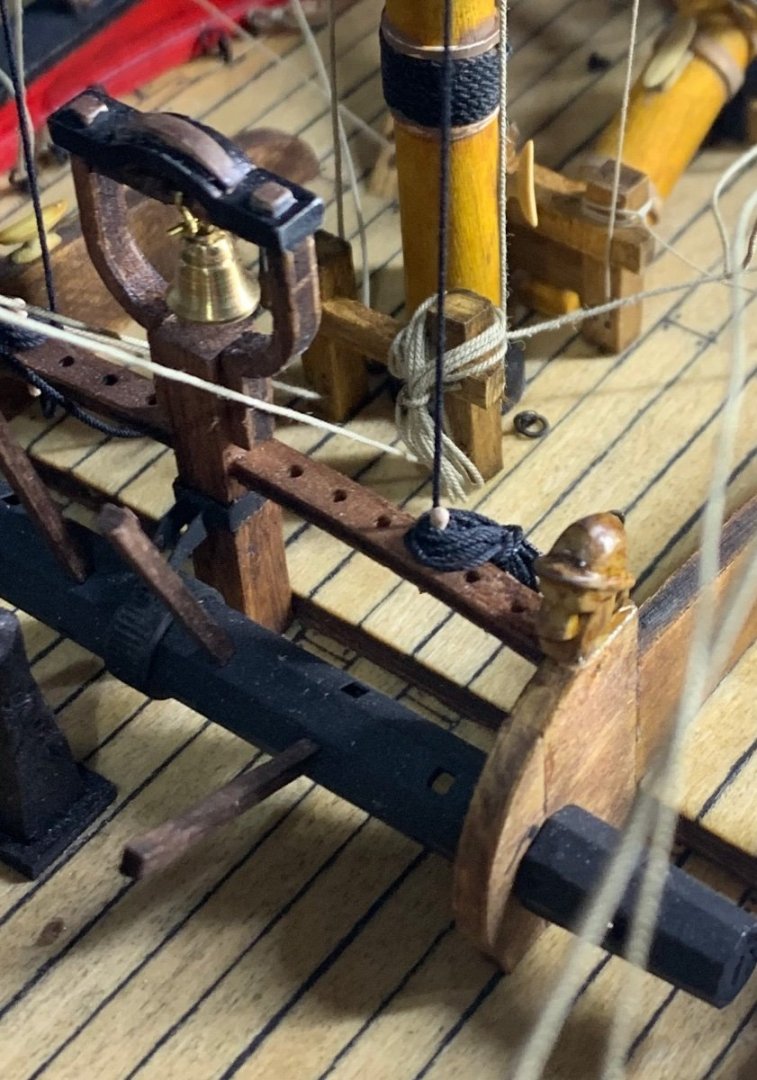
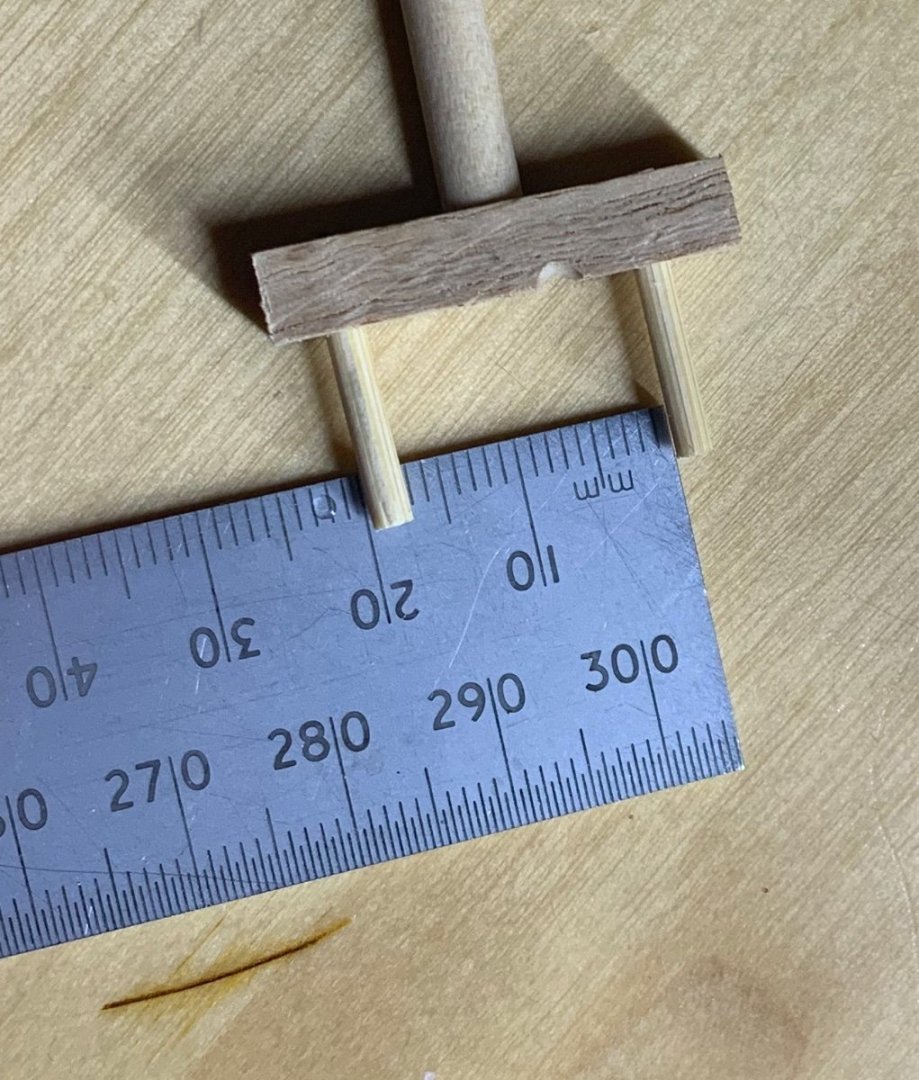
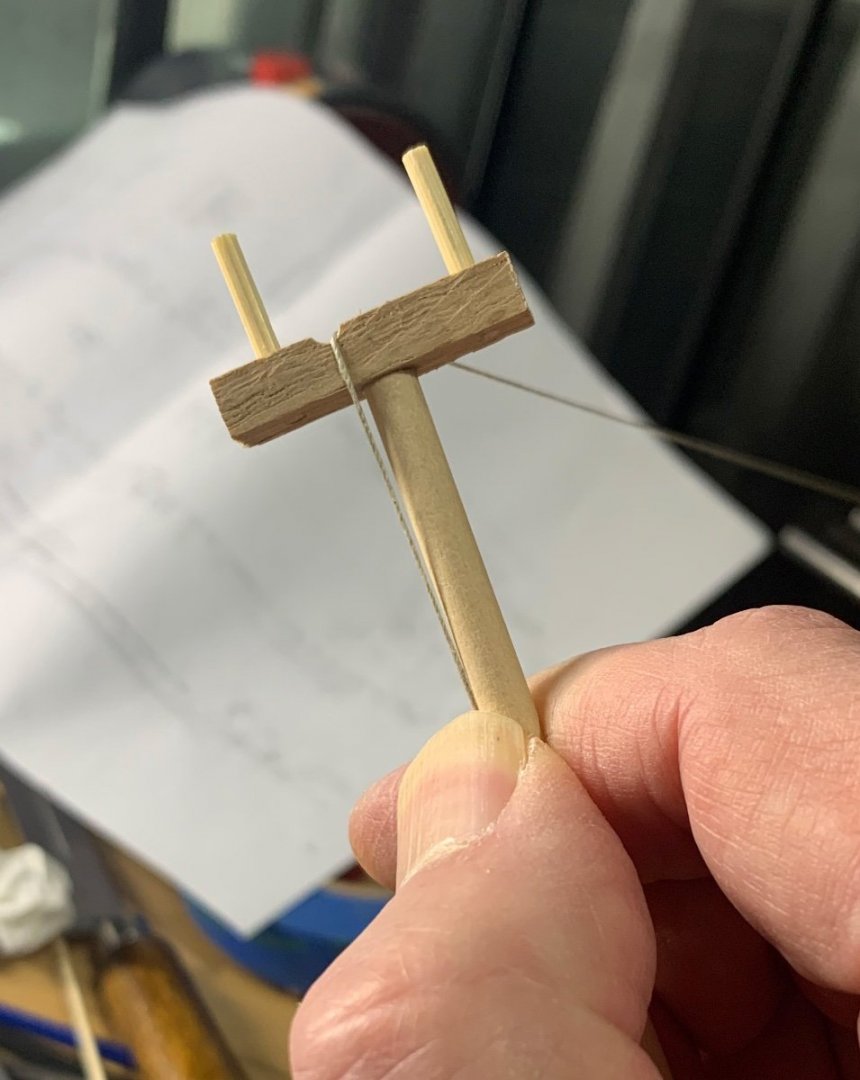
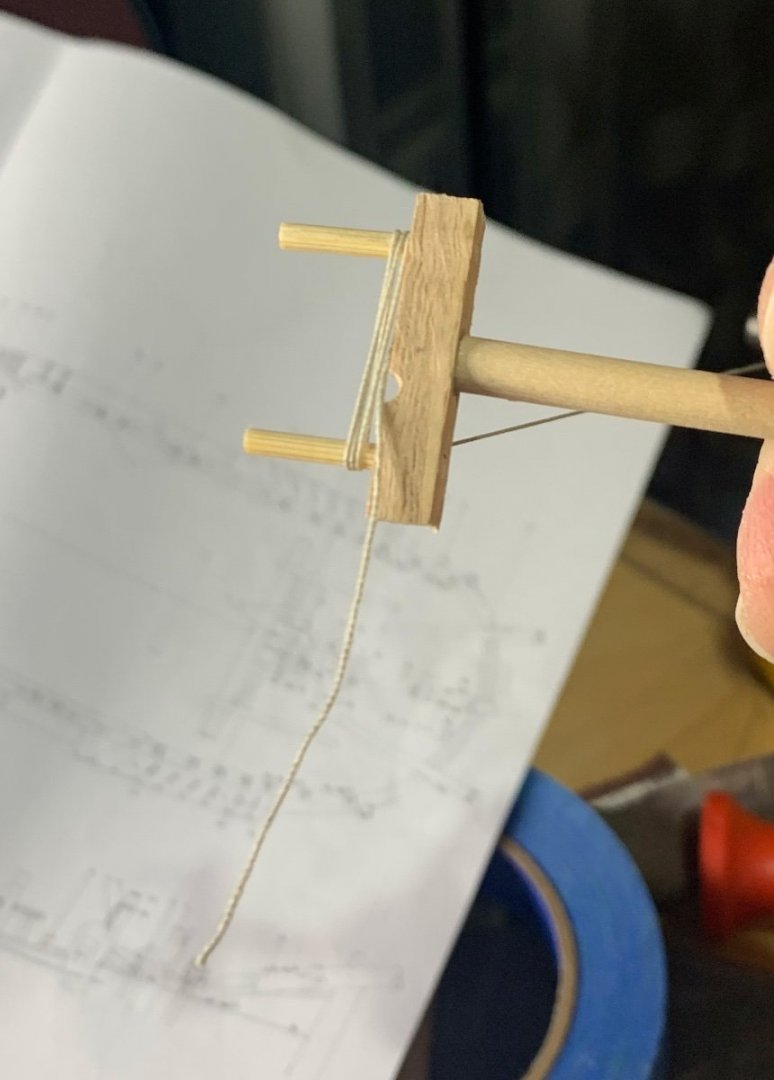
So I have to admit that I have been having real issues trying to tie off the rope ends when finishing lines on the bitts near the masts. As I aim to keep the rope ready to unrig should I choose to do so. There is just not enough room for my fingers. Well I thought about it an came up with a type of fork (refer diagrams). Taking the end of the rope between thumb and spindle, I rotate the device wrapping the rope around the two dowels until I get to the bitts. I then put the device down and then using long tweezers wrap the end around the rope loop and finish off. I then slip the loop off the device and then hung the rope over the bitts. Worked great first attempt (after doing some off model trials). You may not like how I finished the rope but that's up to your own preference as its independent of the device. The images show the first finished rope on the foremast bitts followed by the device and then the sequence I follow to create the rope loop.


- 14 replies
-
- 17
-
-

-
As this is also how Petersson's book shows them so I will follow suit. Many thanks for the images.
-
Allan, There are good diagrams in both Parkins and Marquardt's books. Not sure if I will get to scratch building them or keep to the shortened versions I have made from the kits boats. I will have to scratch build a Yawl and Bank's Skiff if I want a complete set fr the Australia journey.
- 79 replies
-
- 1
-
-
- Endeavour
- Artesania Latina
- (and 1 more)