HOLIDAY DONATION DRIVE - SUPPORT MSW - DO YOUR PART TO KEEP THIS GREAT FORUM GOING! (Only 75 donations so far out of 49,000 members - C'mon guys!)
×

Twokidsnosleep
-
Posts
231 -
Joined
-
Last visited
Content Type
Profiles
Forums
Gallery
Events
Everything posted by Twokidsnosleep
-
What a most thorough and excellent answer SHJ This is why I joined here, just great advice on this site so far I am a woodworker so clearly understand your lesson. I was worried I was missing that this wrapping tied into the rigging somehow, but could not see that on any of the research pics so far. So your answers absolutely makes sense and I thank you a ton 👍🏻😎
-
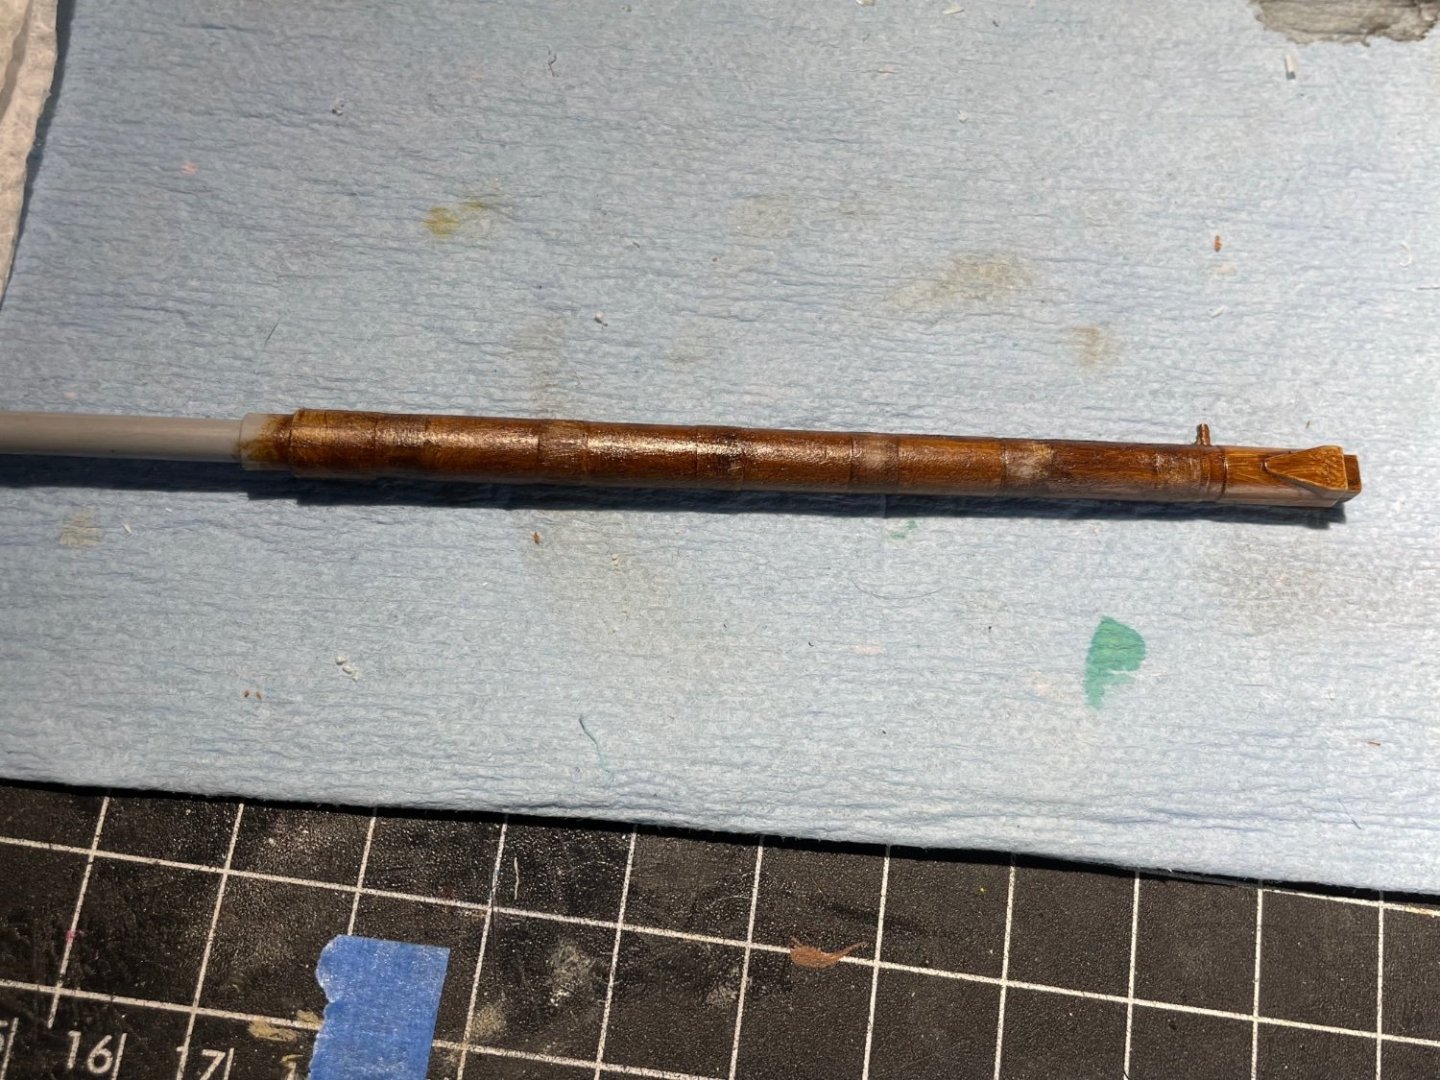
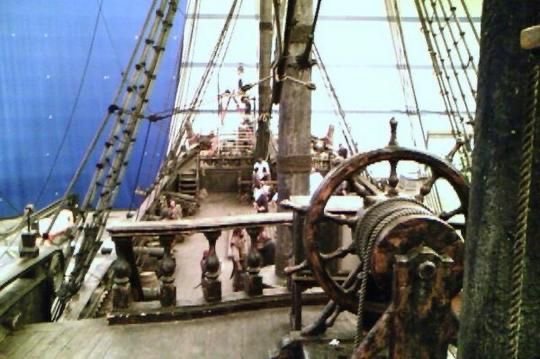
I have another pic of taking them off the foretopmast as well..will post it later after work. What purpose did those rope windings have on the masts??? I have not been able to find an answer so far in my research
-
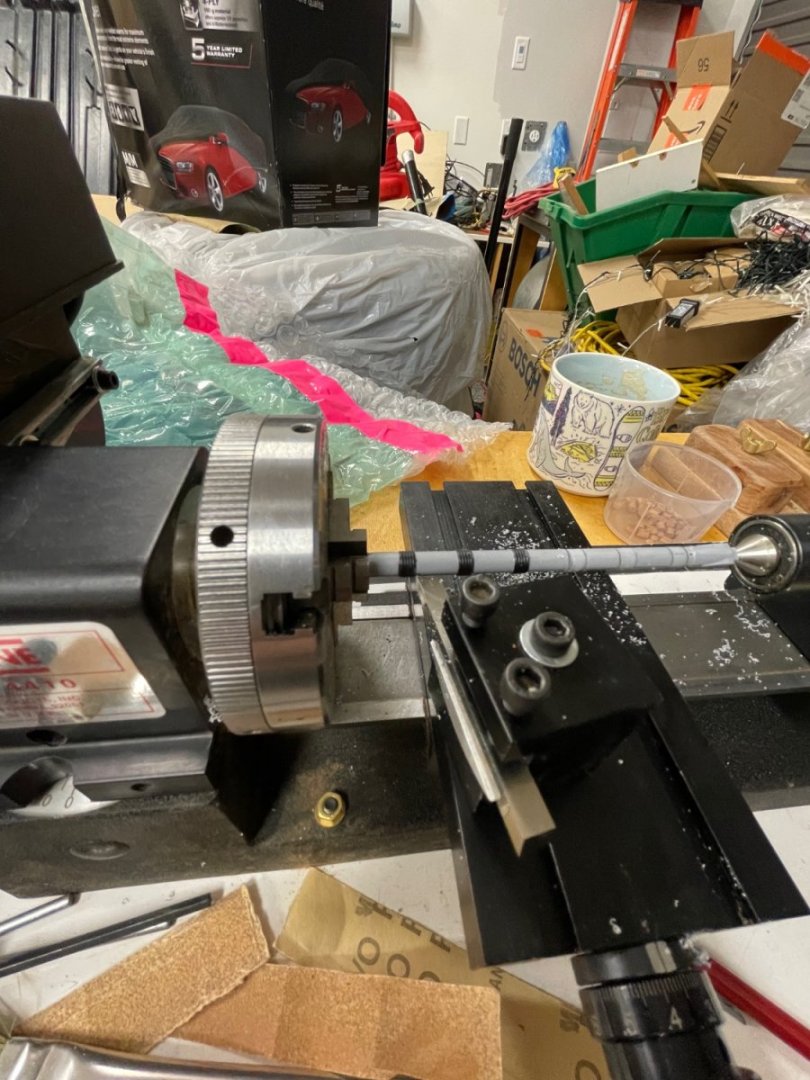
Quick video of it running on the lathe https://youtu.be/Ung4RtH8c_c
-
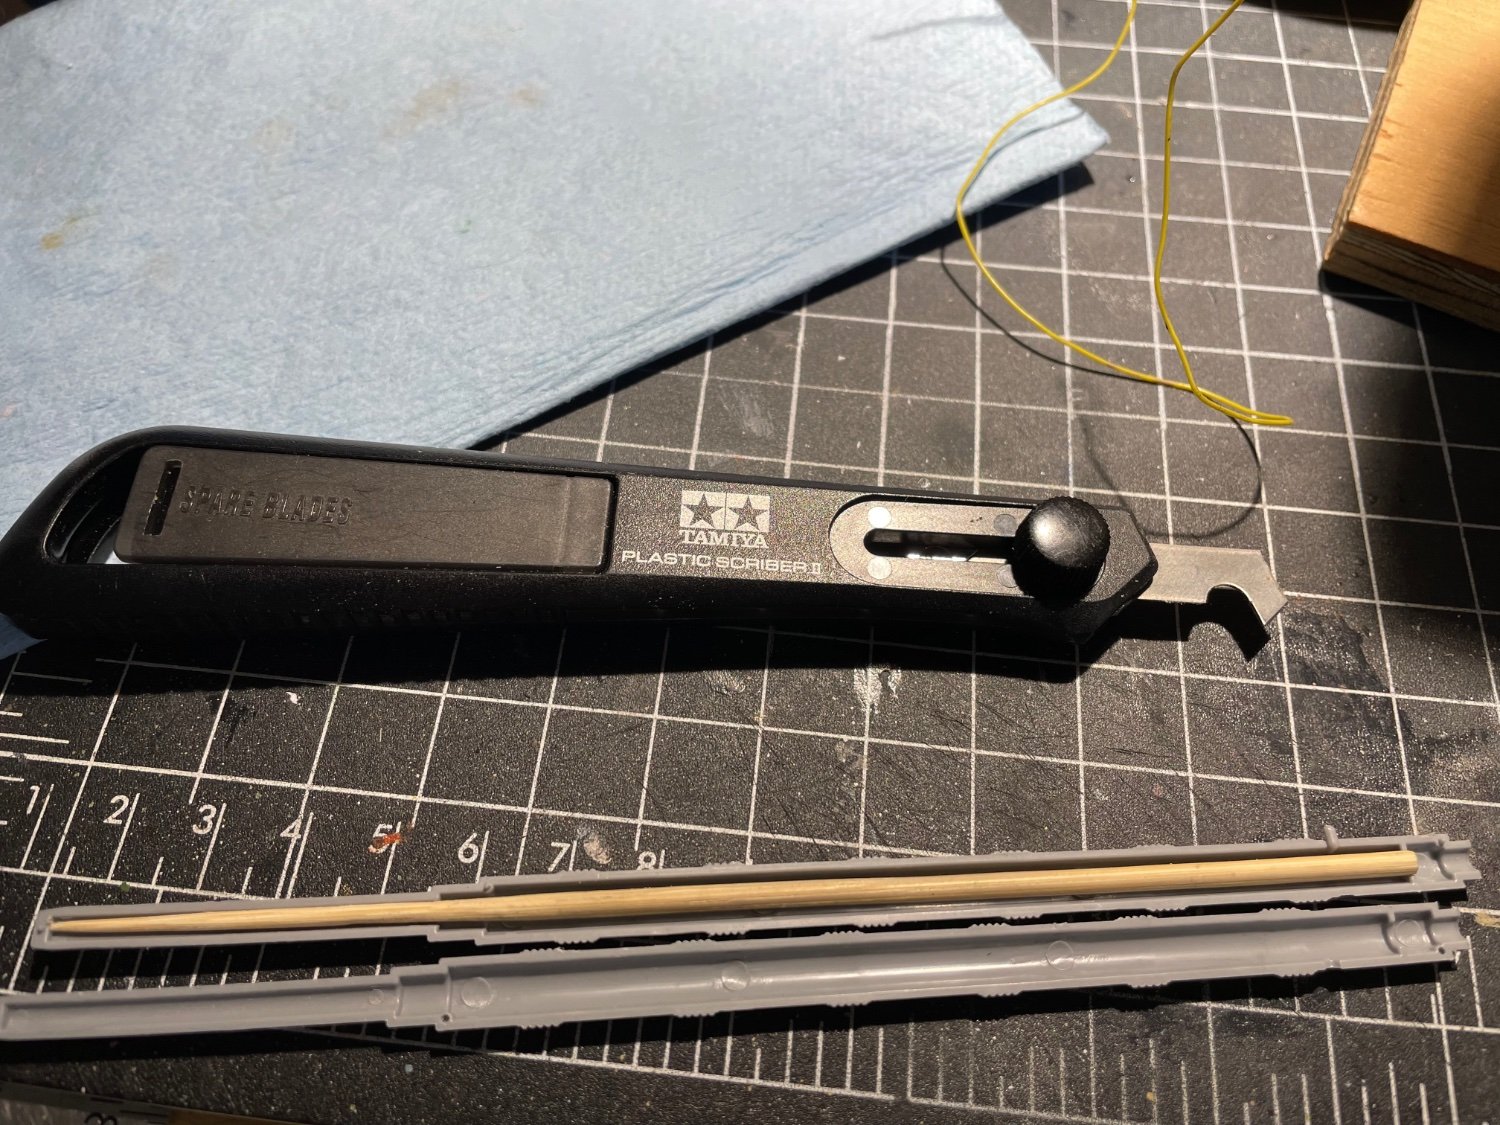
Working on the foremast I believe this is called I re-inforced the mast with a wooden dowel ála Mr OC And then took it to the lathe to remove the six moulded rope windings so I can add the Ropes of Scale rope I was fully prepared to make a wooden mast if this broke or I FUBAR’’d it Was careful and it came out ok, but the styrene is very flexi on the lathe and so hard to turn concentric Now in primer to get the oil paints today Edit: added the oil painting pics


-
I LOVE the rope I know good stuff when I see and feel it, been blabbing about your ropes all over the internet Great stuff man, just great👍🏻😎
-
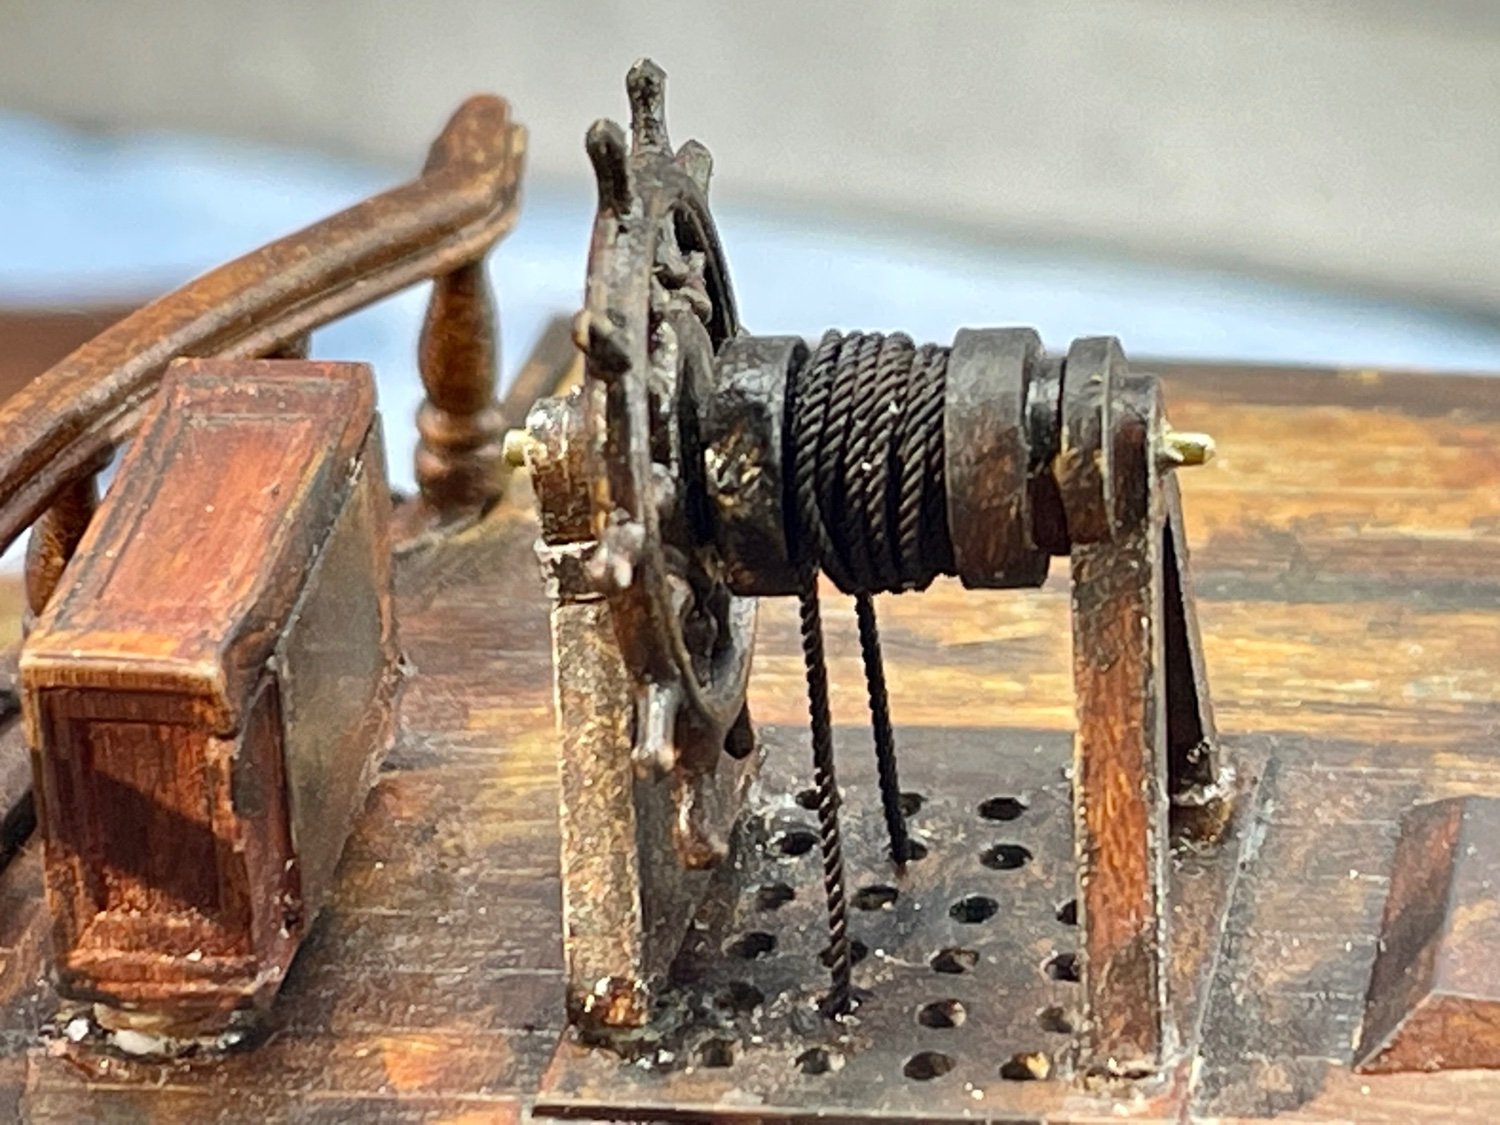
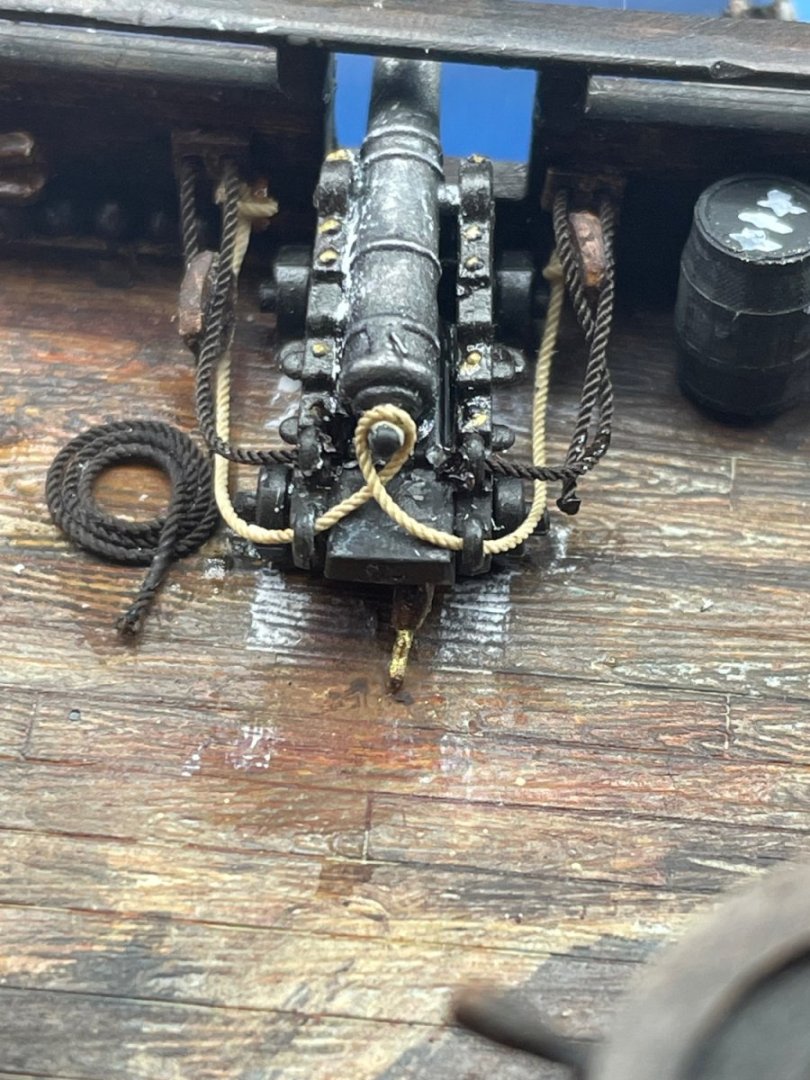
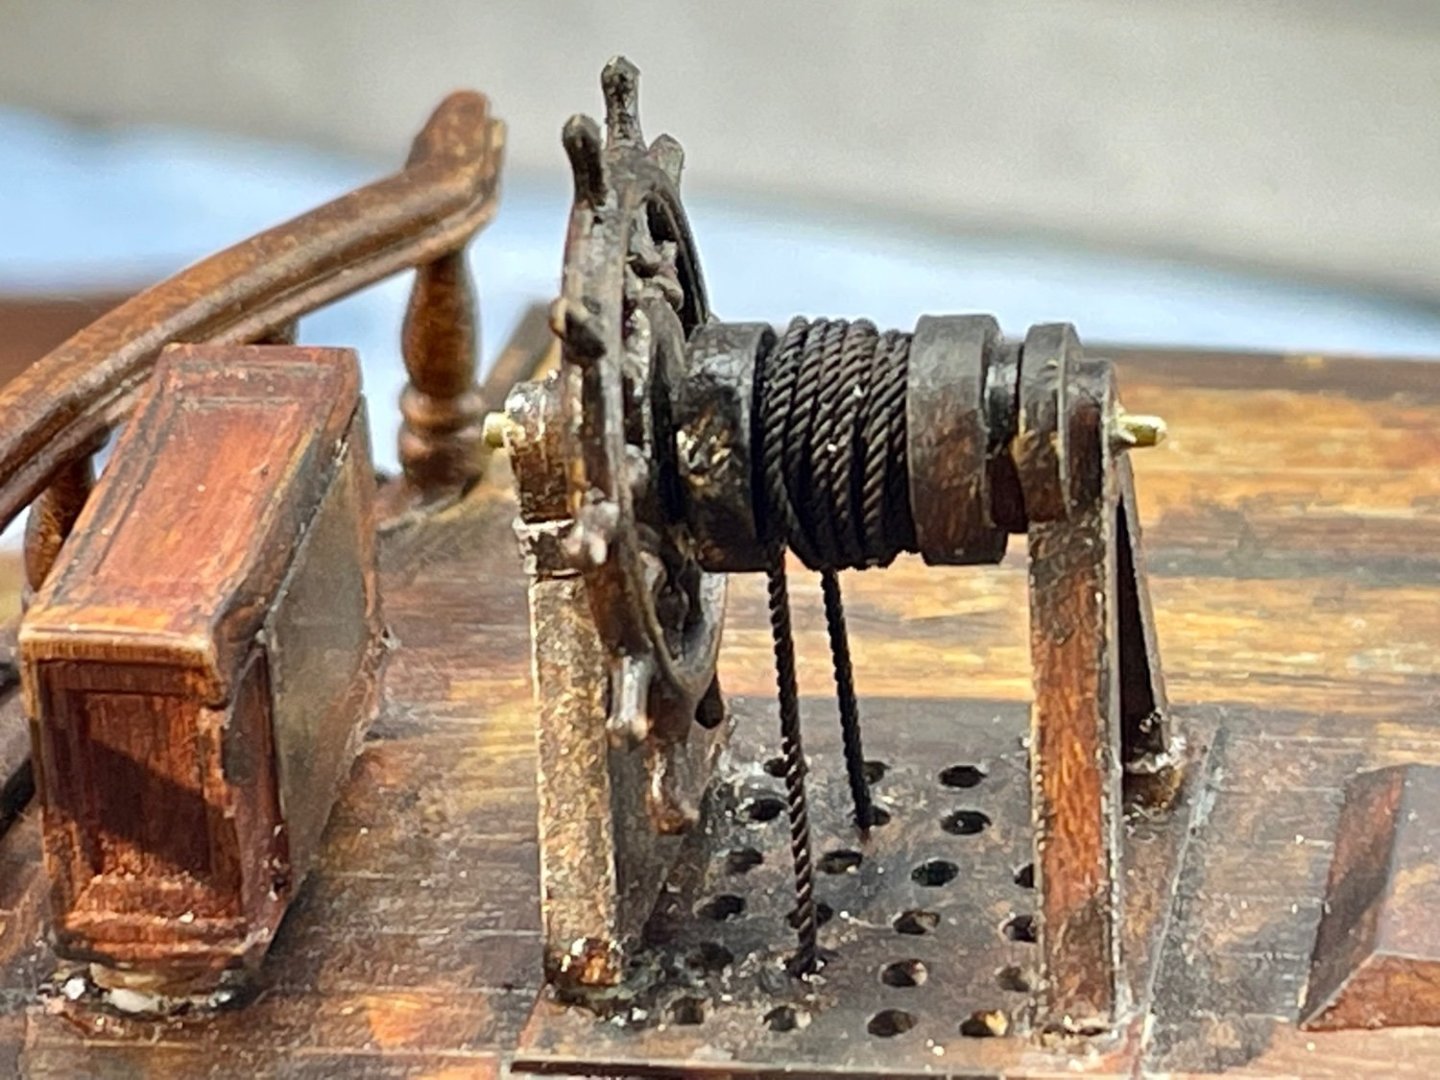
New ropes on the ship’s wheel. These are fantastic to work with. I added a little CA glue to hold reference pic of The Pearl
-
Just got my order and am super happy with the quality of these ropes..soon to the riggin !


-
Thanks OC Your build is the inspiration for mine and I refer to what you did with your Pearl frequently I really appreciate your commenting and support, mate👍🏻😎
-
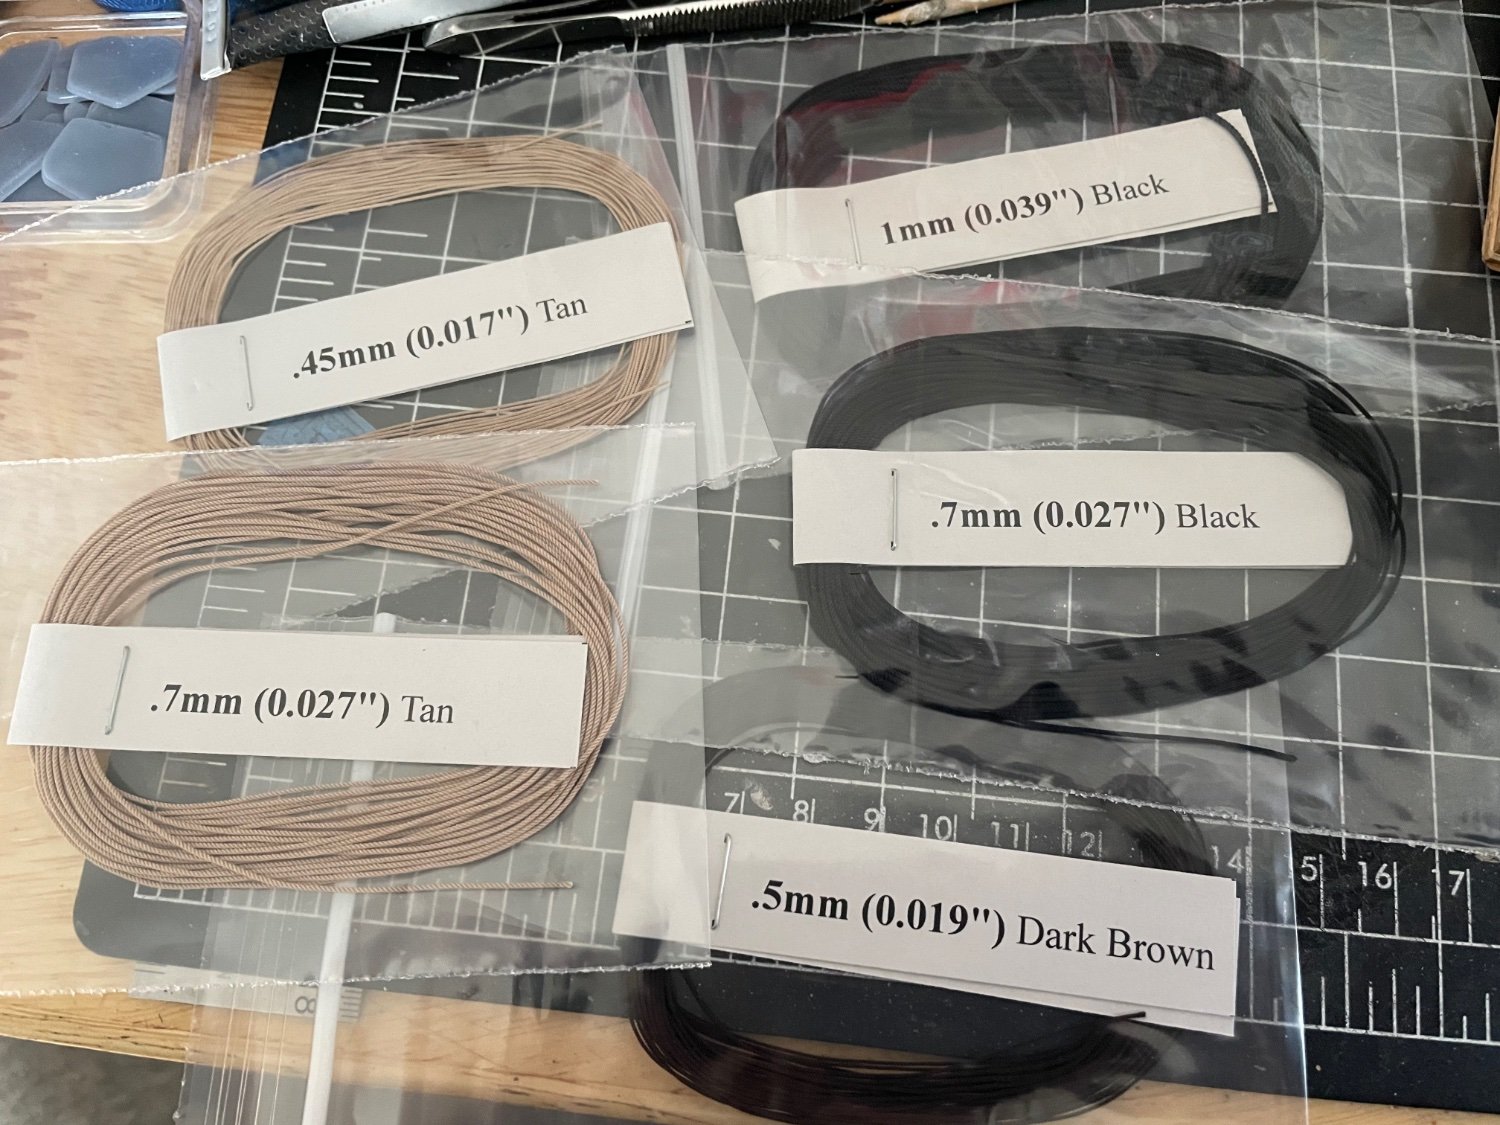
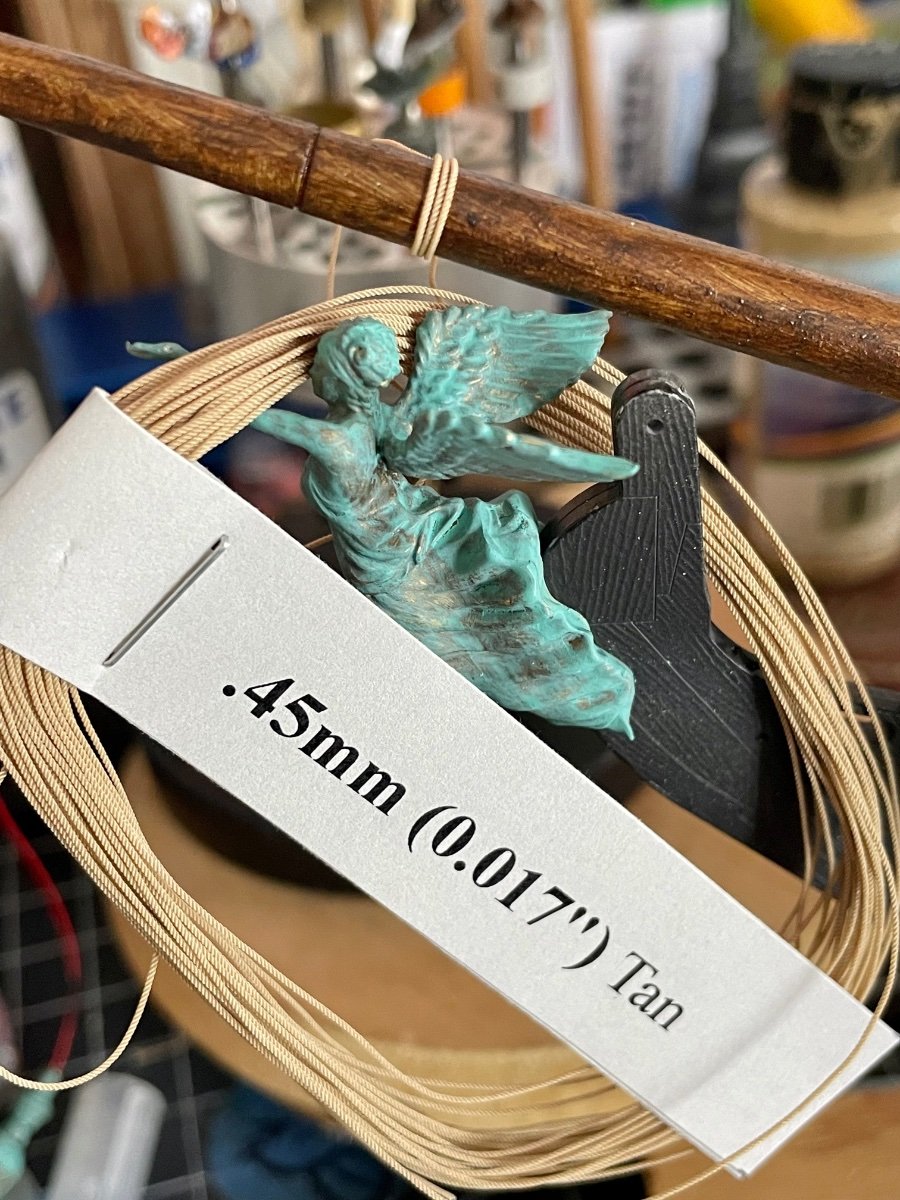
Got my Ropes Of Scale order in the mail today These look absolutely phenomenal and will add hugely to this build. Such an awesome find as a resource👍🏻


-
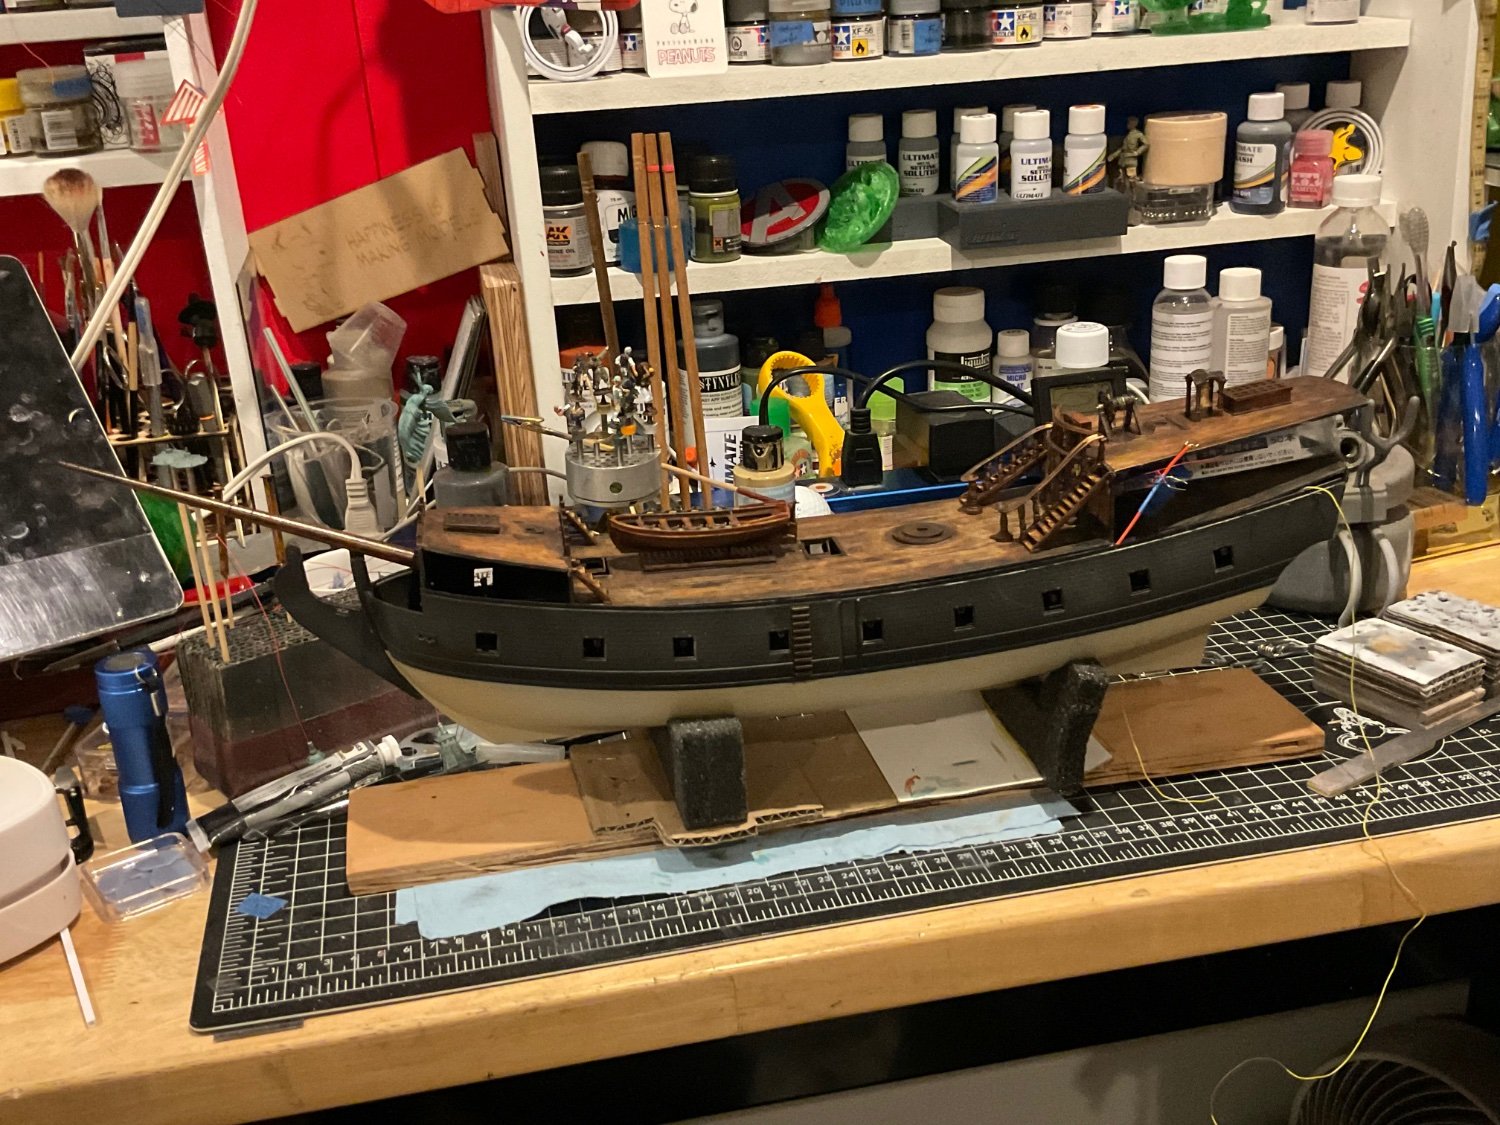
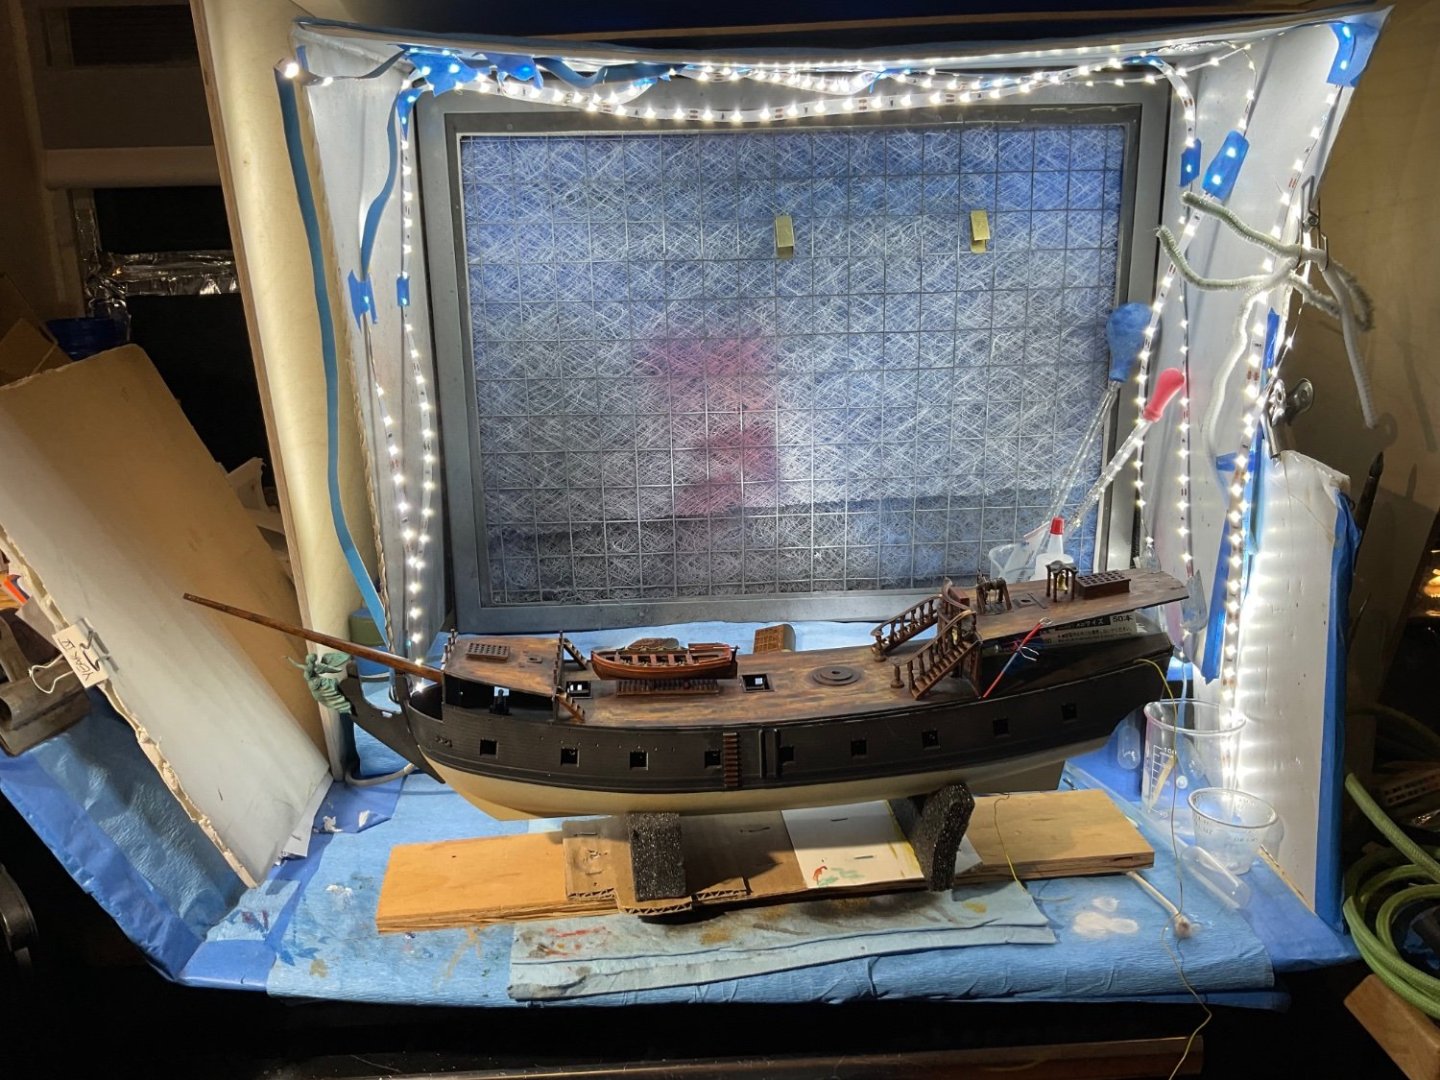
Working on the bowsprit mast. I did as OC suggested and put a tapered dowel inside A ship starts getting pretty big once you put some masts on…my entire desk pad and my entire spray booth


-
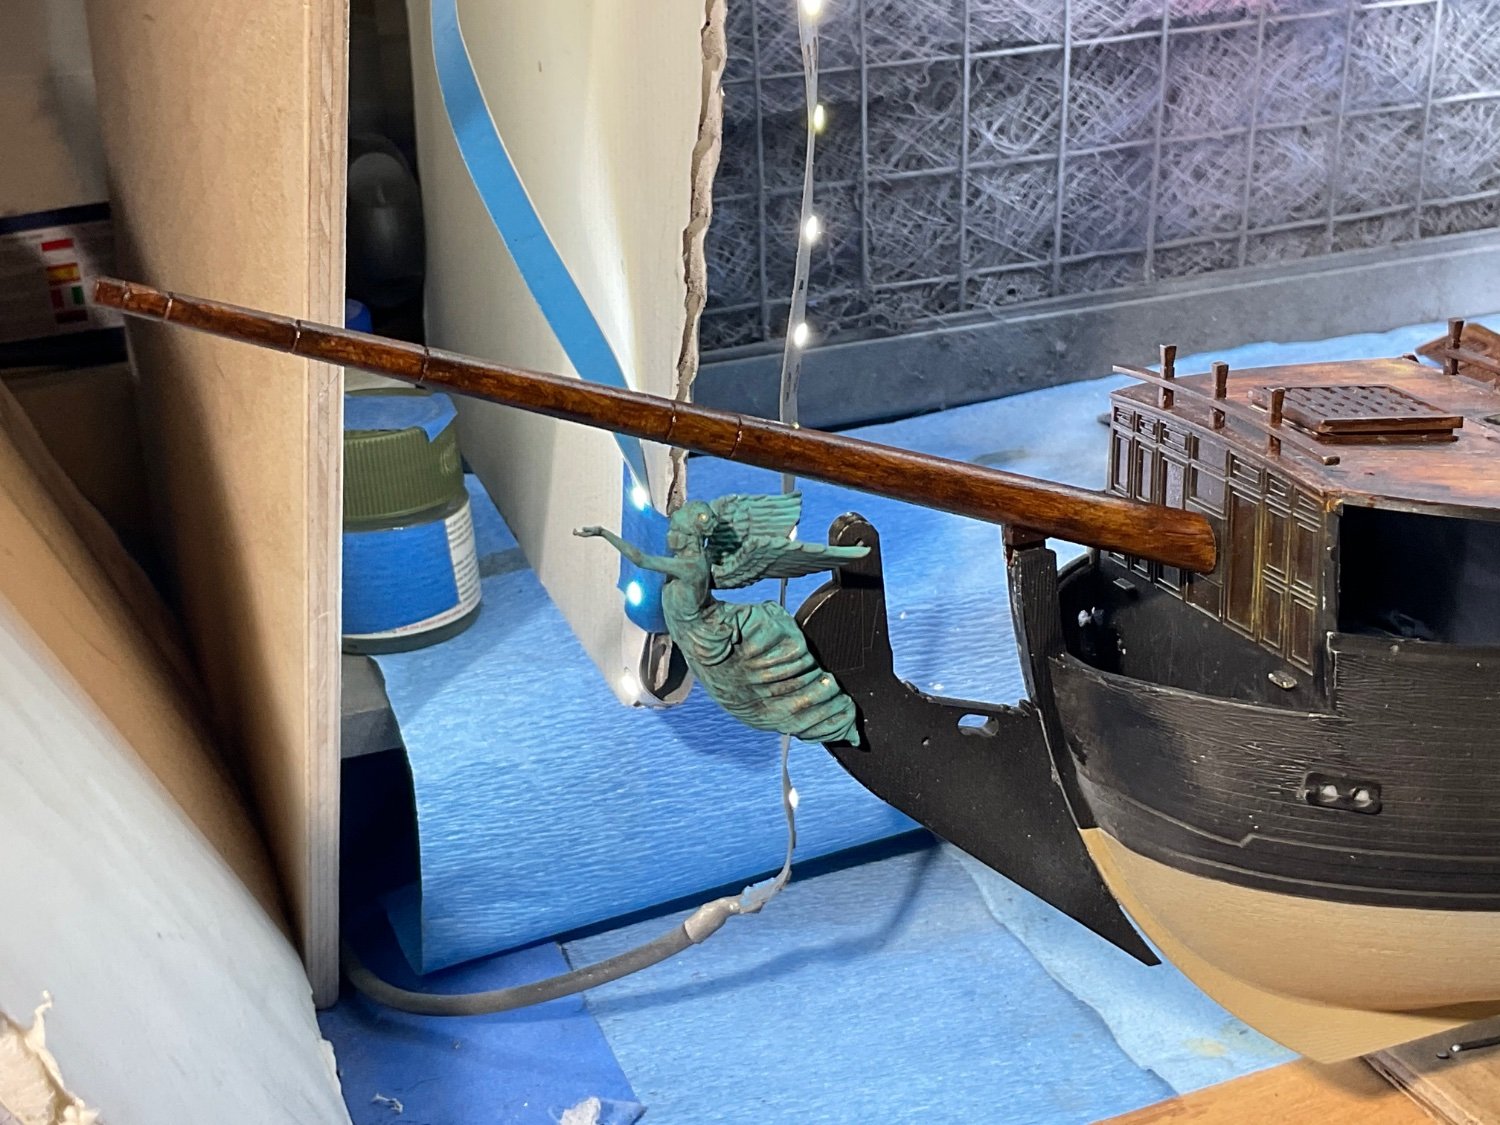
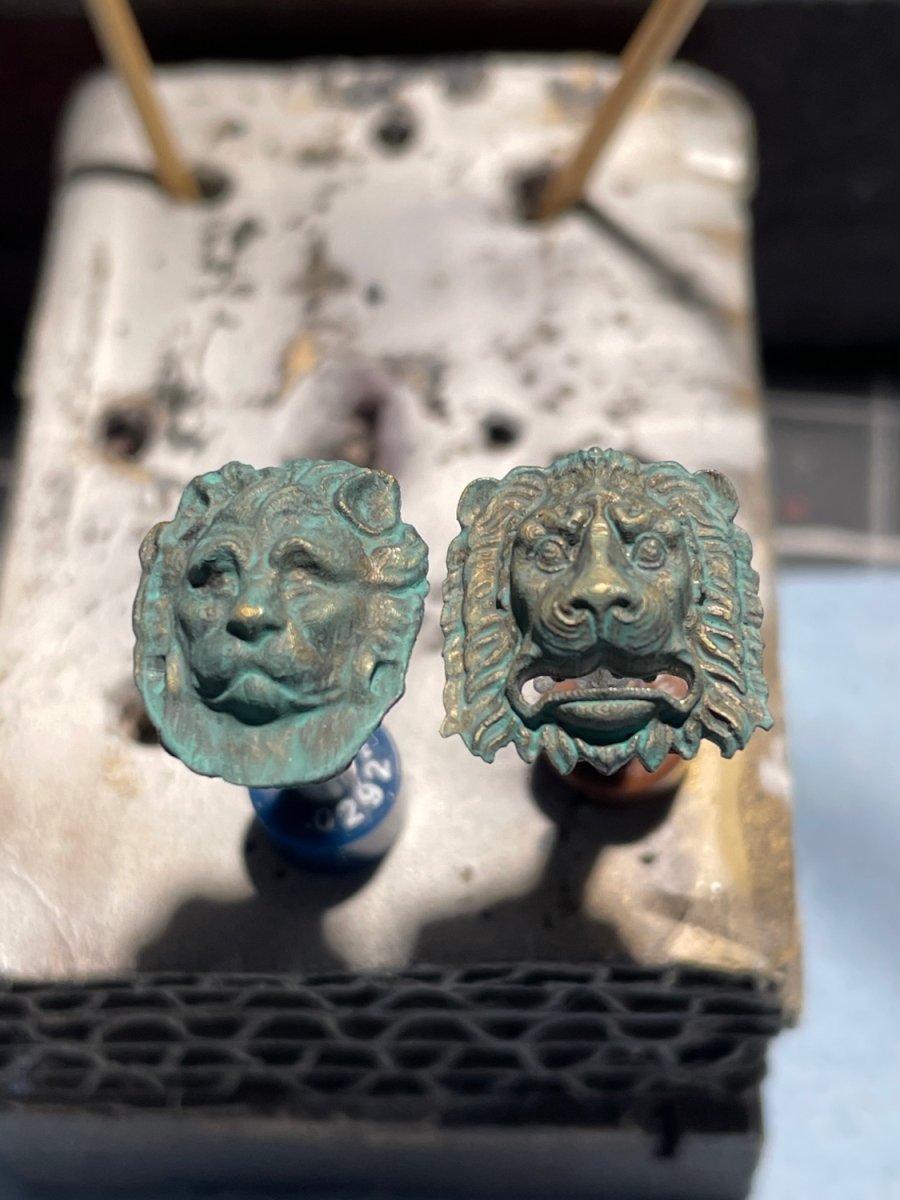
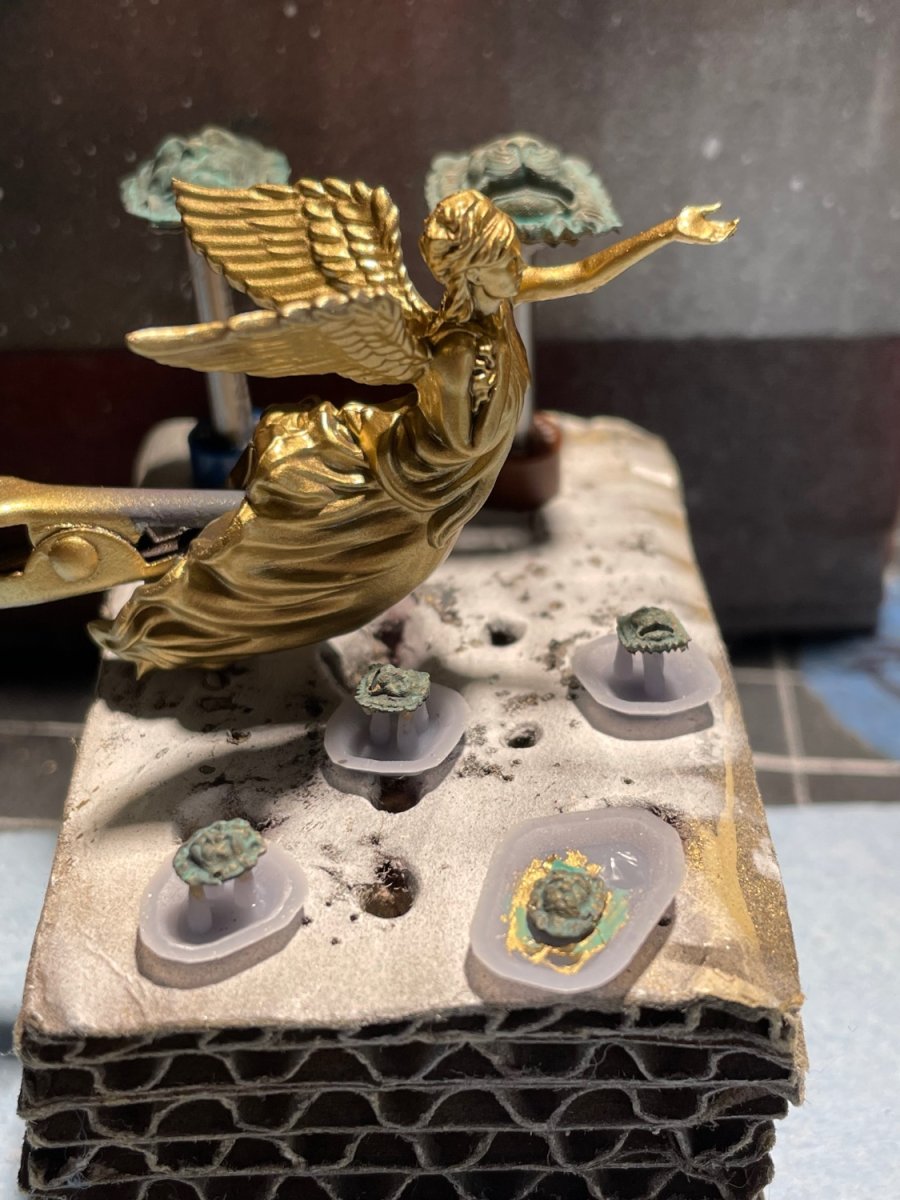
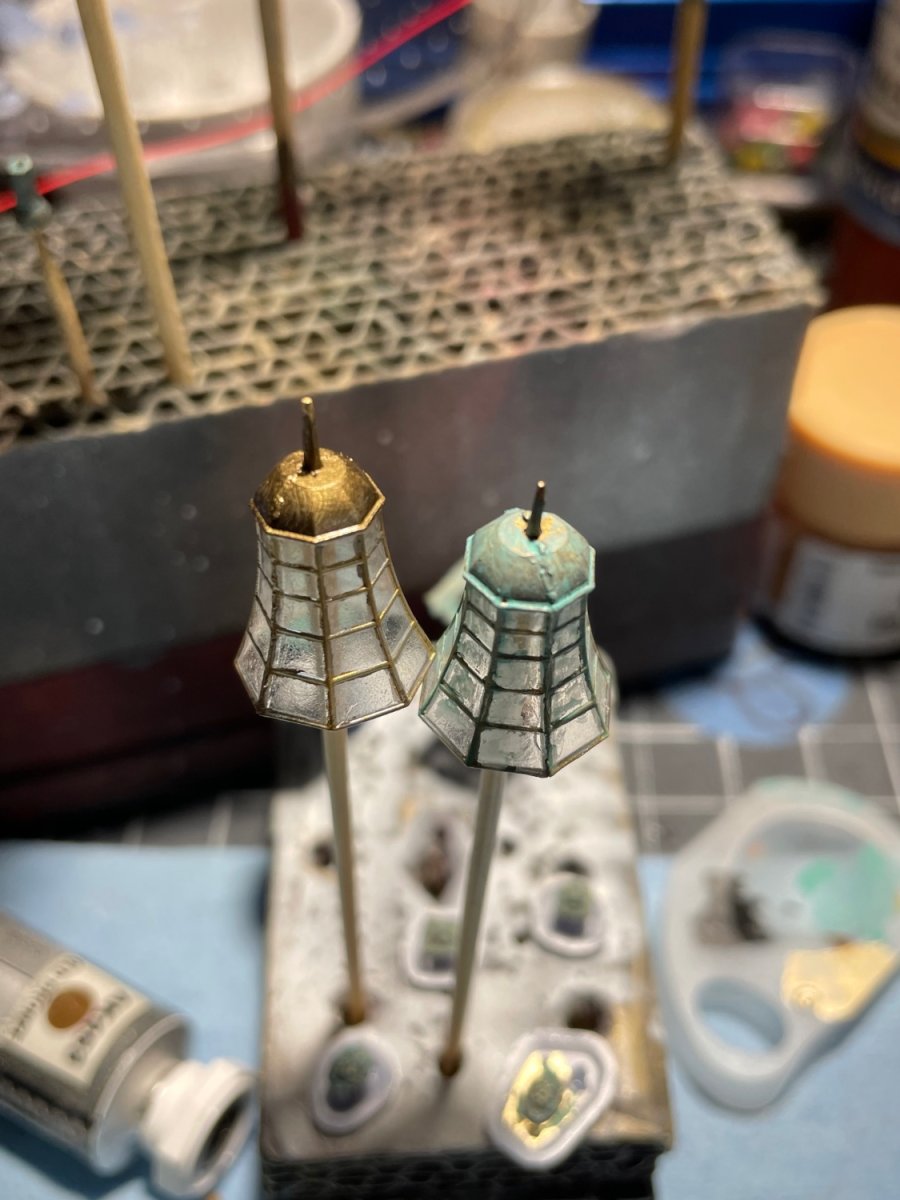
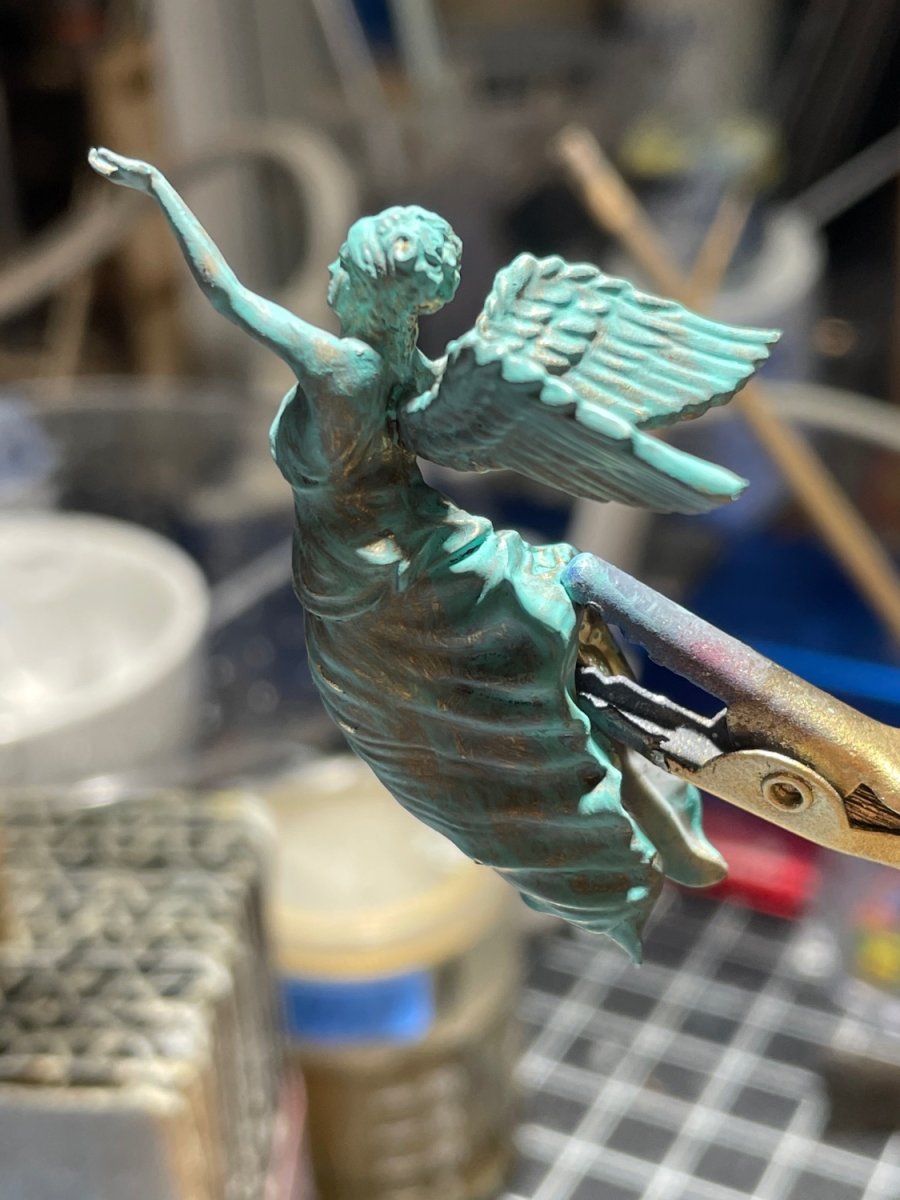
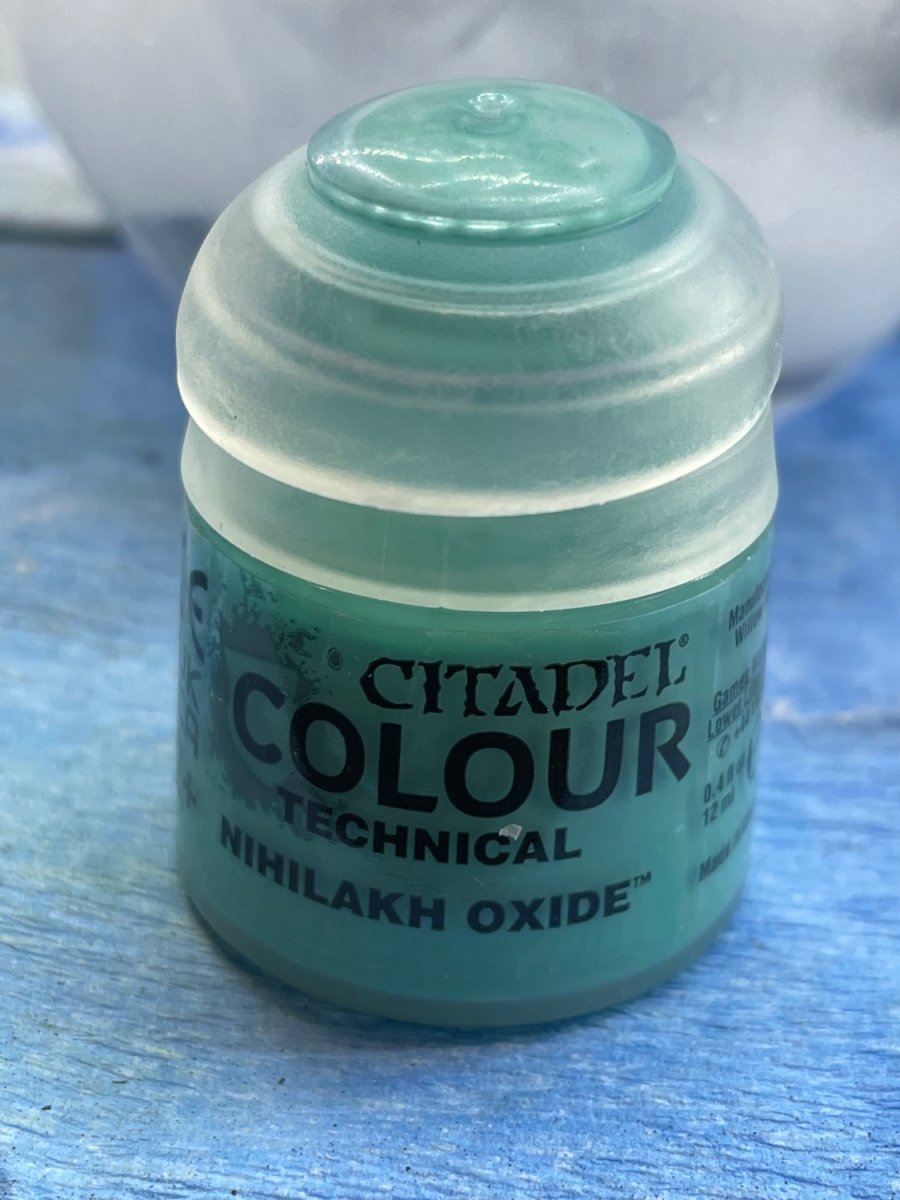
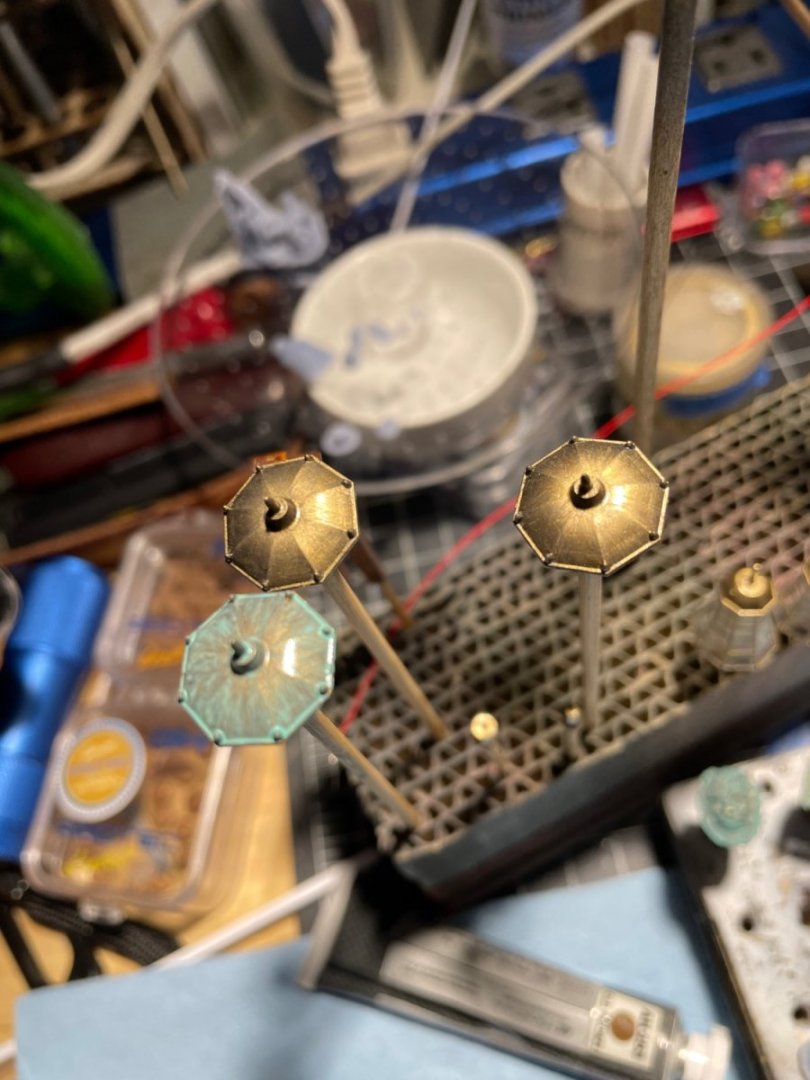
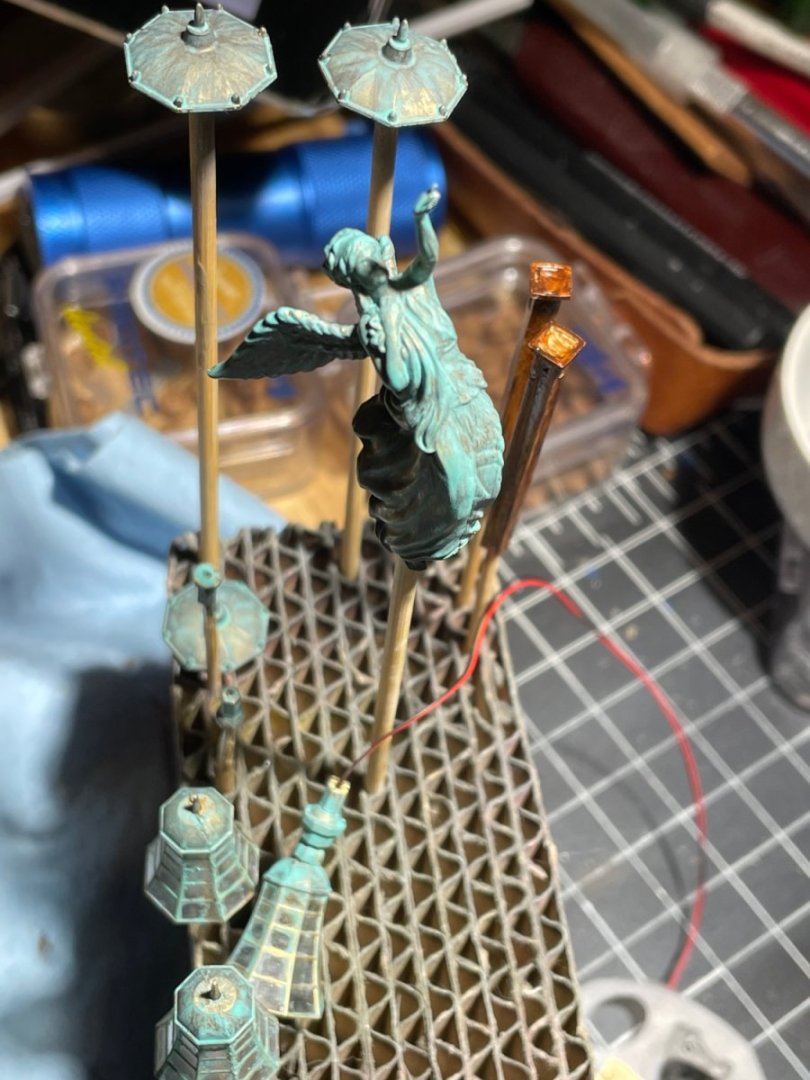
Verdigris painting time. Using the Citadel oxide overtop a gold My test cat heads The gorgeous moulded figurehead sprayed Tamiya gold Lamps too She is beautiful


-
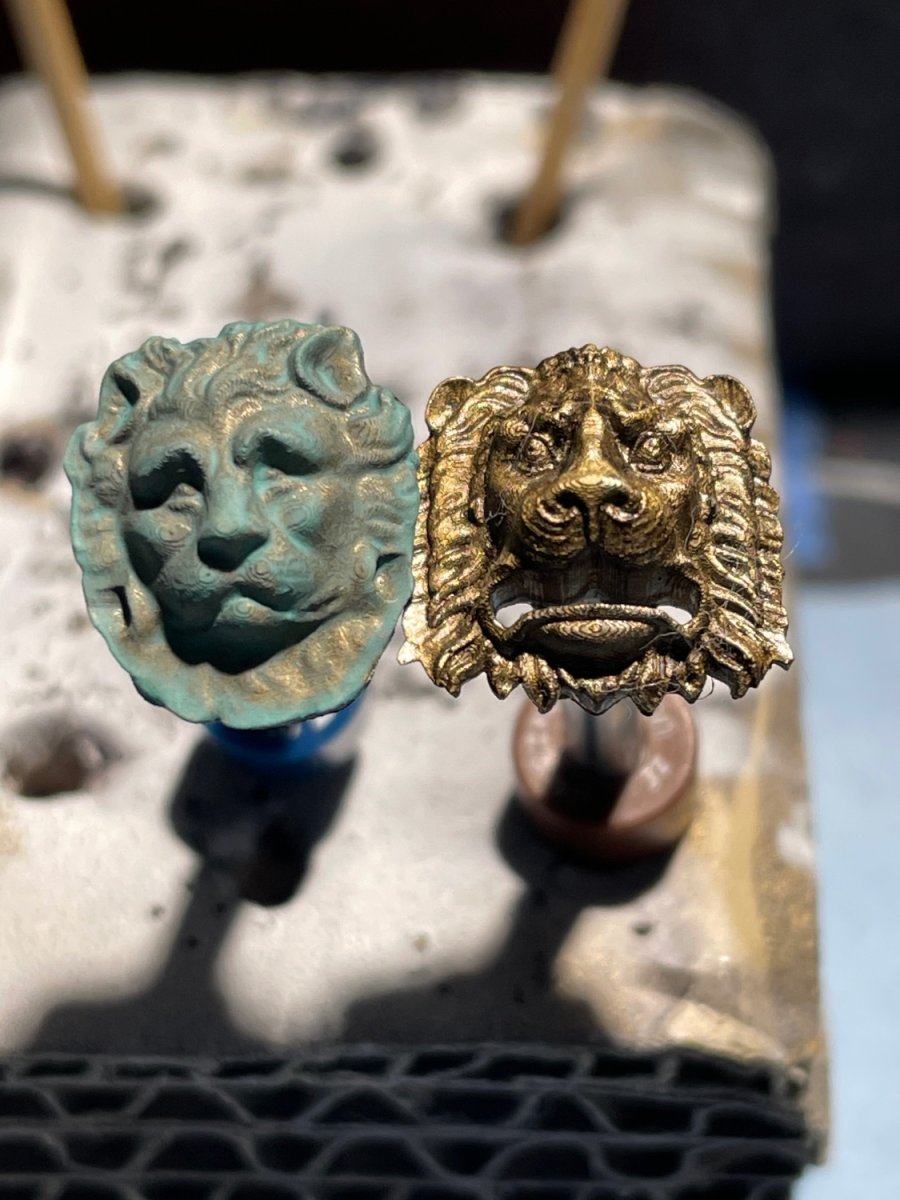
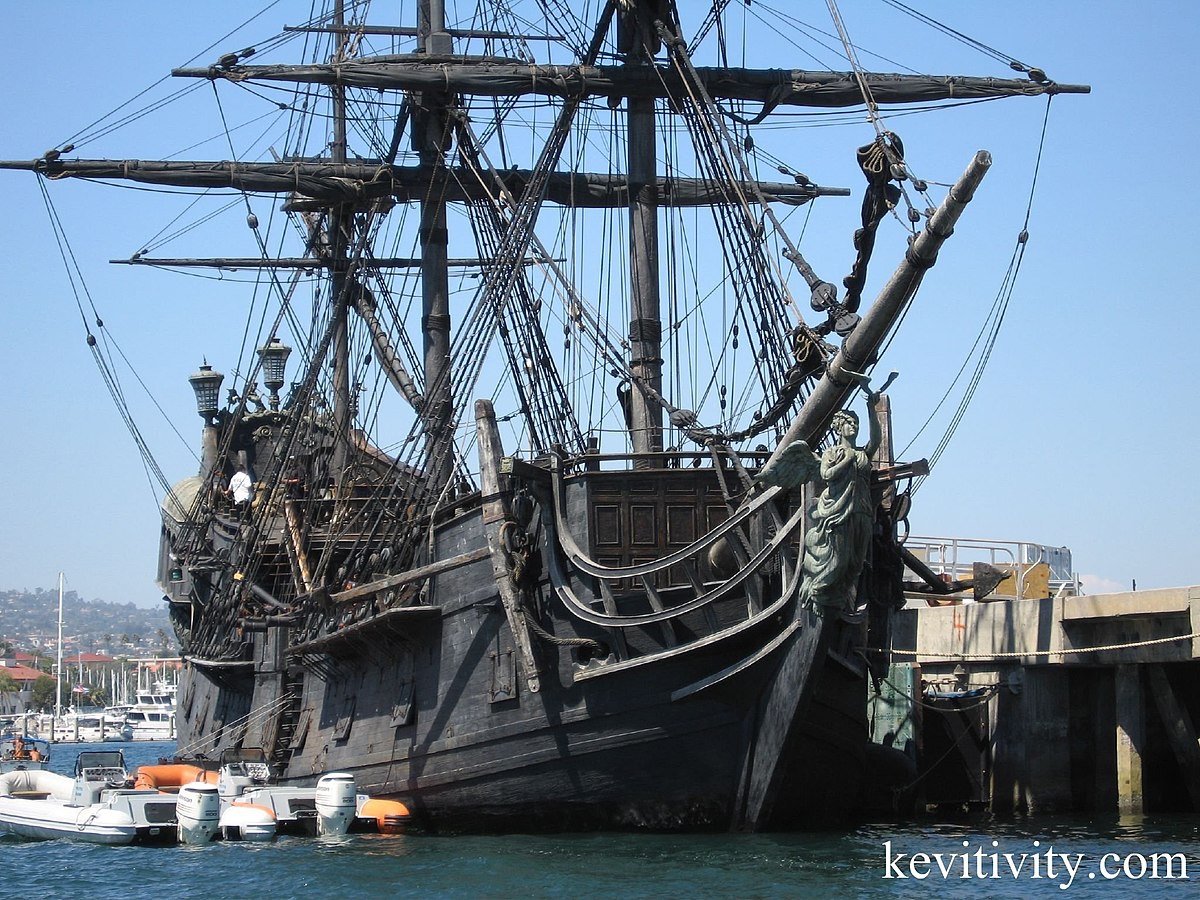
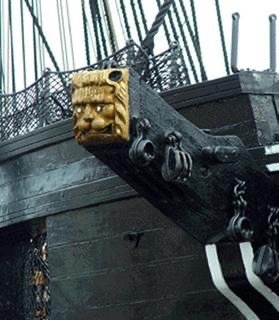
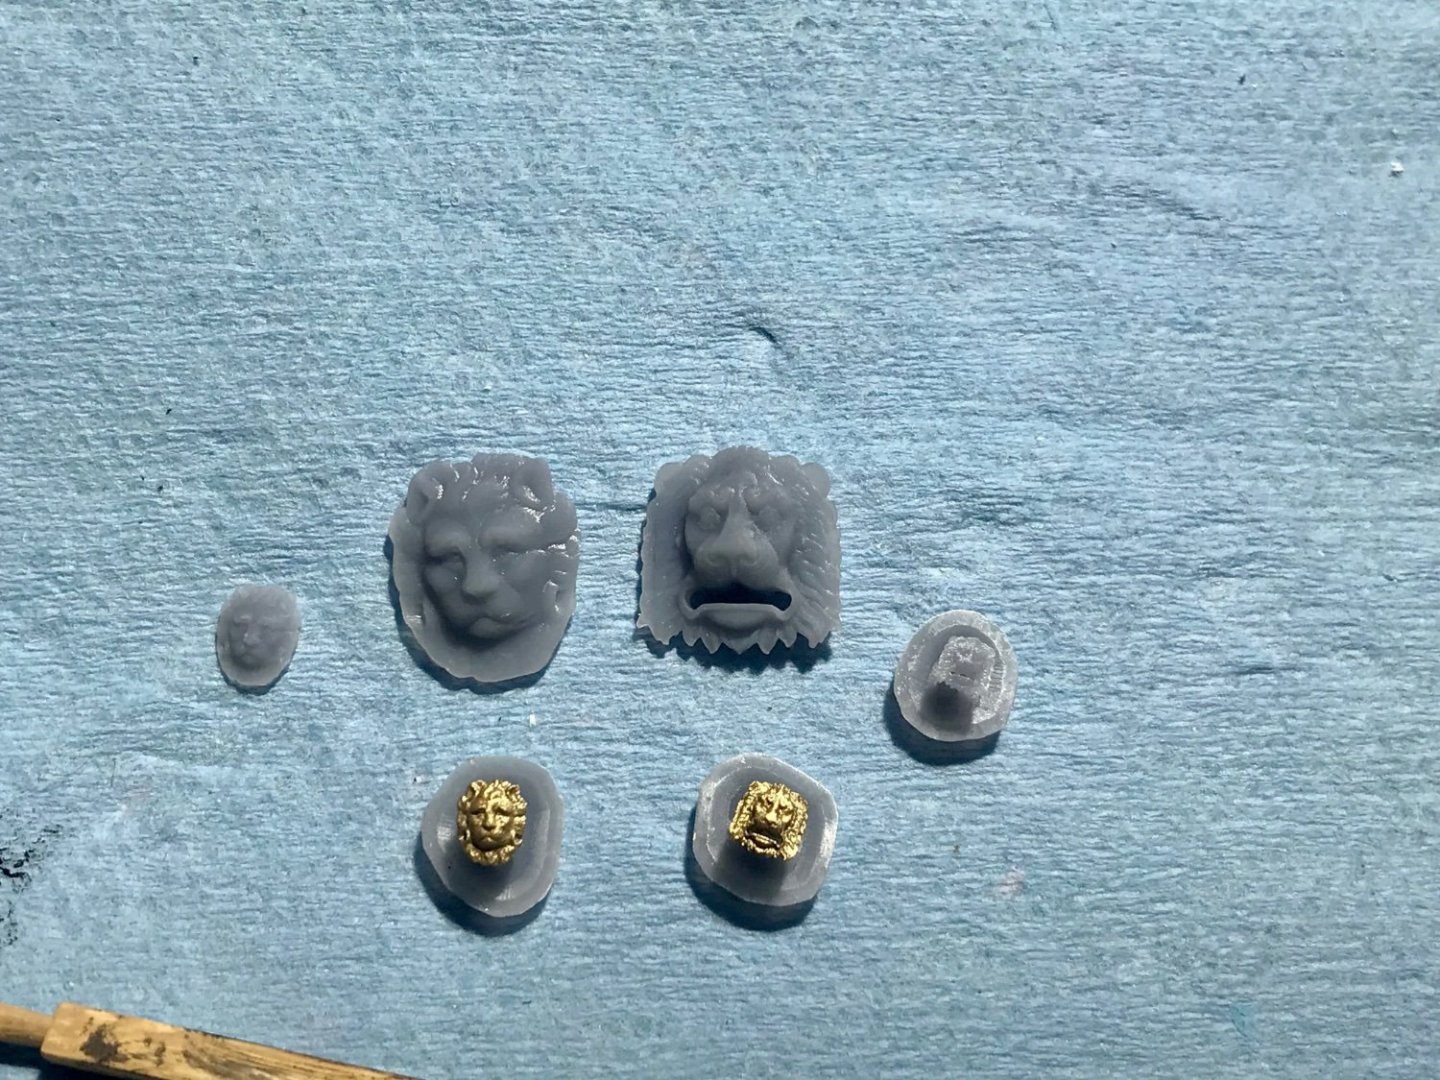
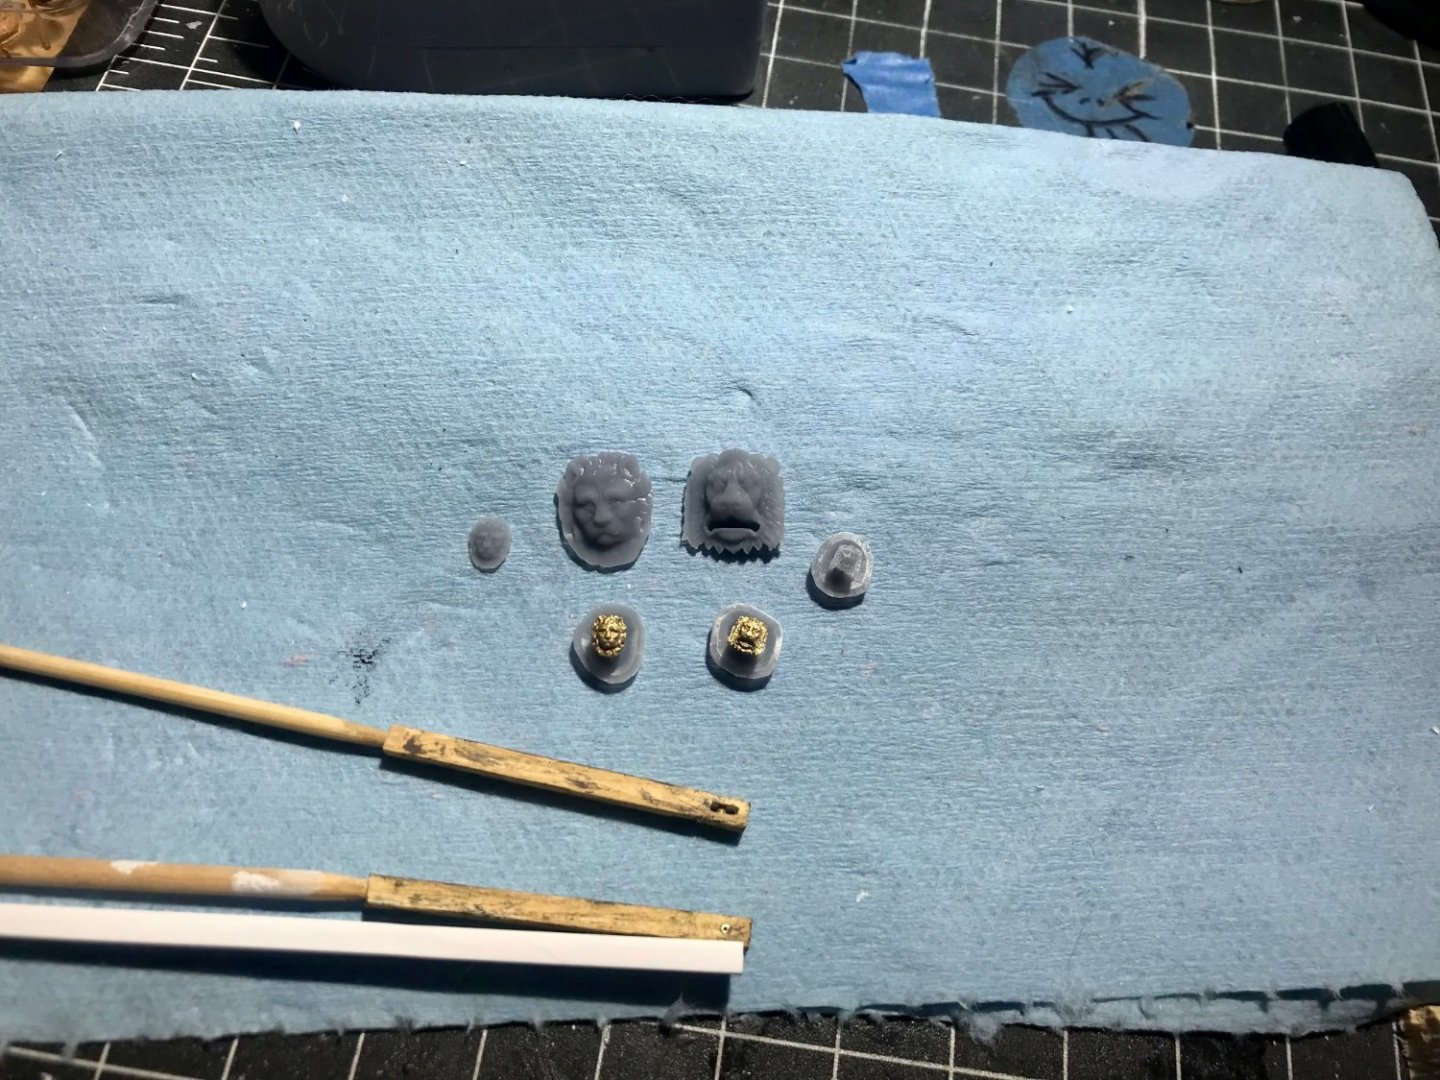
Thanking OC for another modification…the catheads to support the anchors 3D printed out a couple of lion heads in various sizes to make the carved face at the end of the beam The Pearl has the carvings, though hard to see some research pics, this isn’t the Pearl My 3D prints and the styrene beams I have a couple back ups and larger versions to test out my patina paint efforts for weathering You can dial down the sizes on the print program so these are 10% , 2.5% and 2% of the full figure size. It also correlates the sizes in mm’s
-
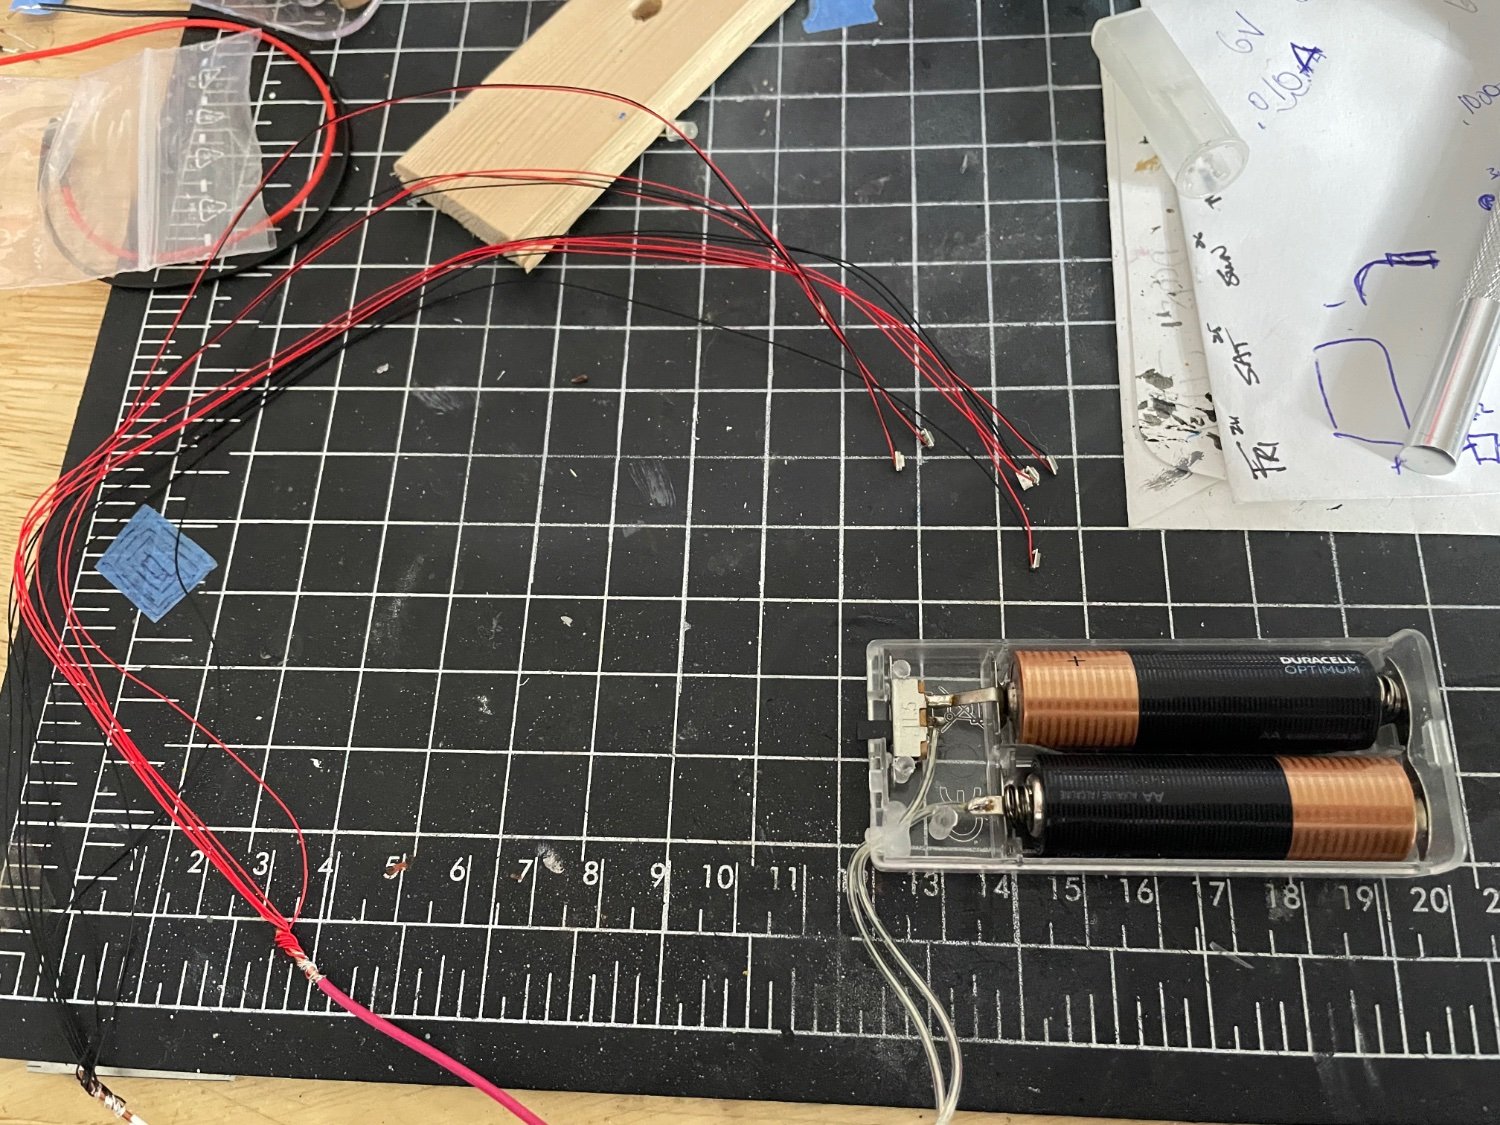
Good thought I don’t usually leave batteries stored in the builds I do just for such reason…household stuff too
-
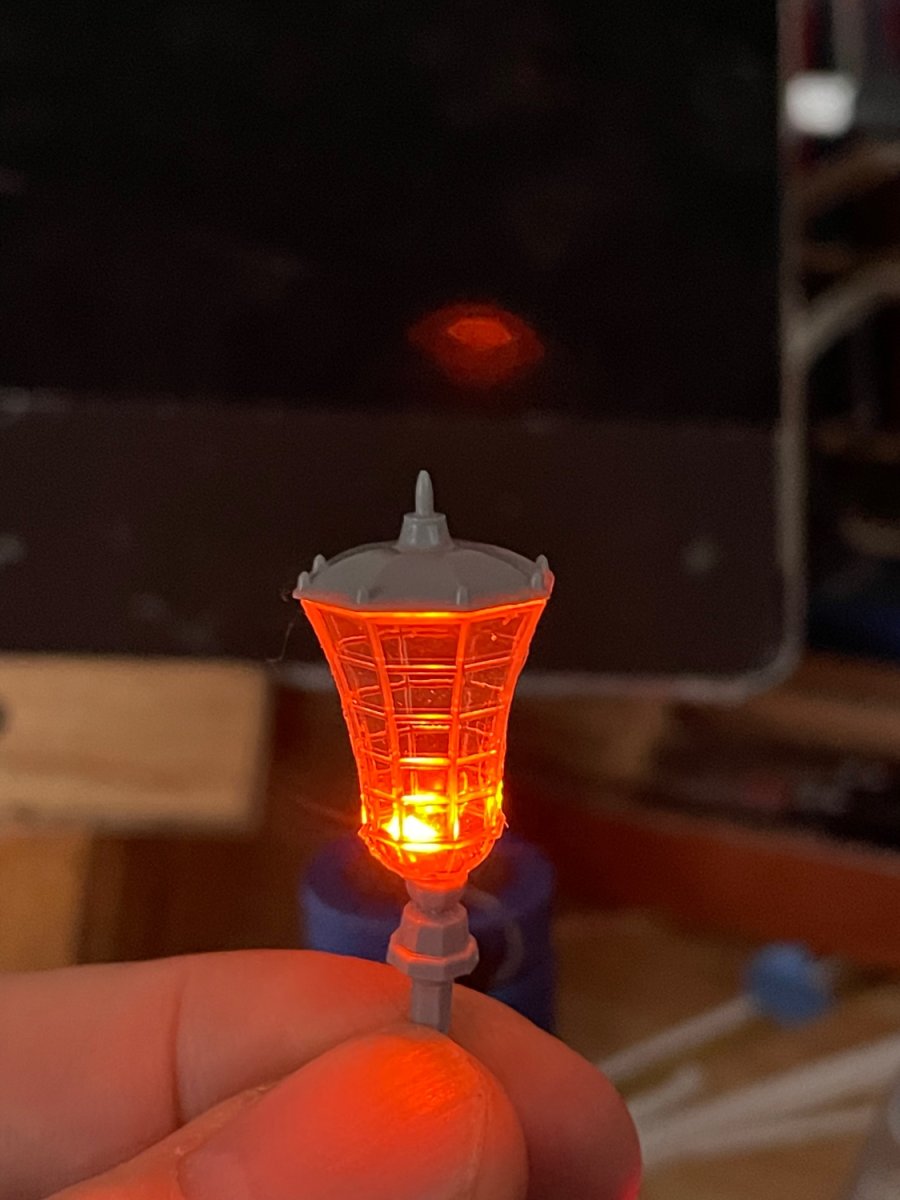
I gotta get my wiring into the hull now so I can move on and keep the build going forward. Managed to fry a couple orange LED’s in my test circuit wiring for the lighting🙄 The calculations said I was ok with the 3 volts and specifications of the bulbs but clearly not. I had to put a 100 ohm resistor on the positive line and then it was all ok and no smoking E8B45A5D-0BB2-4886-B844-9173451F118E.MOV

-
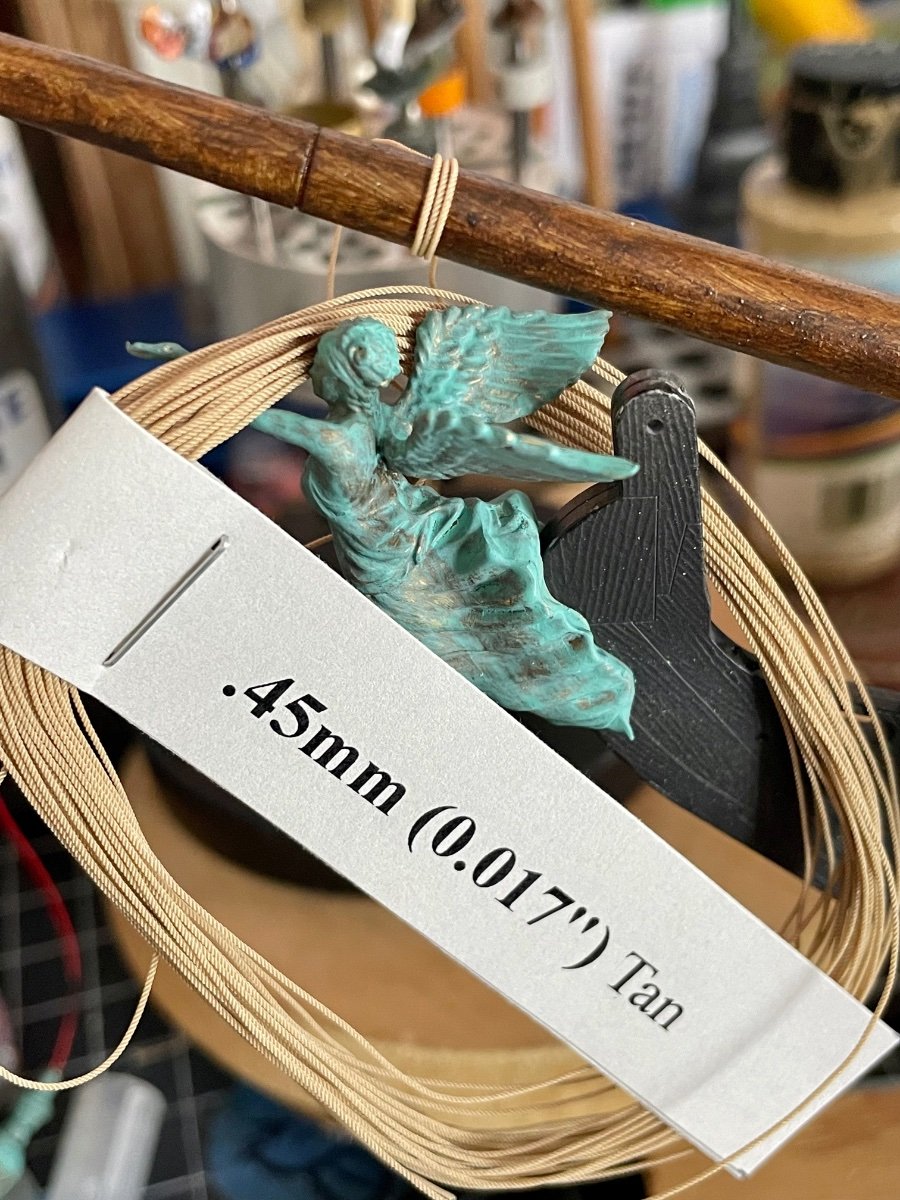
I measured the plastic dead eye lines, the moulded shroud and rat lines from the kit last night and did an order for some polyester ropes from Ropes of Scale. Super happy to see they are in Canada and am watching lots of videos of tying the clove hitch rat lines and rigging the deadeyes.
-
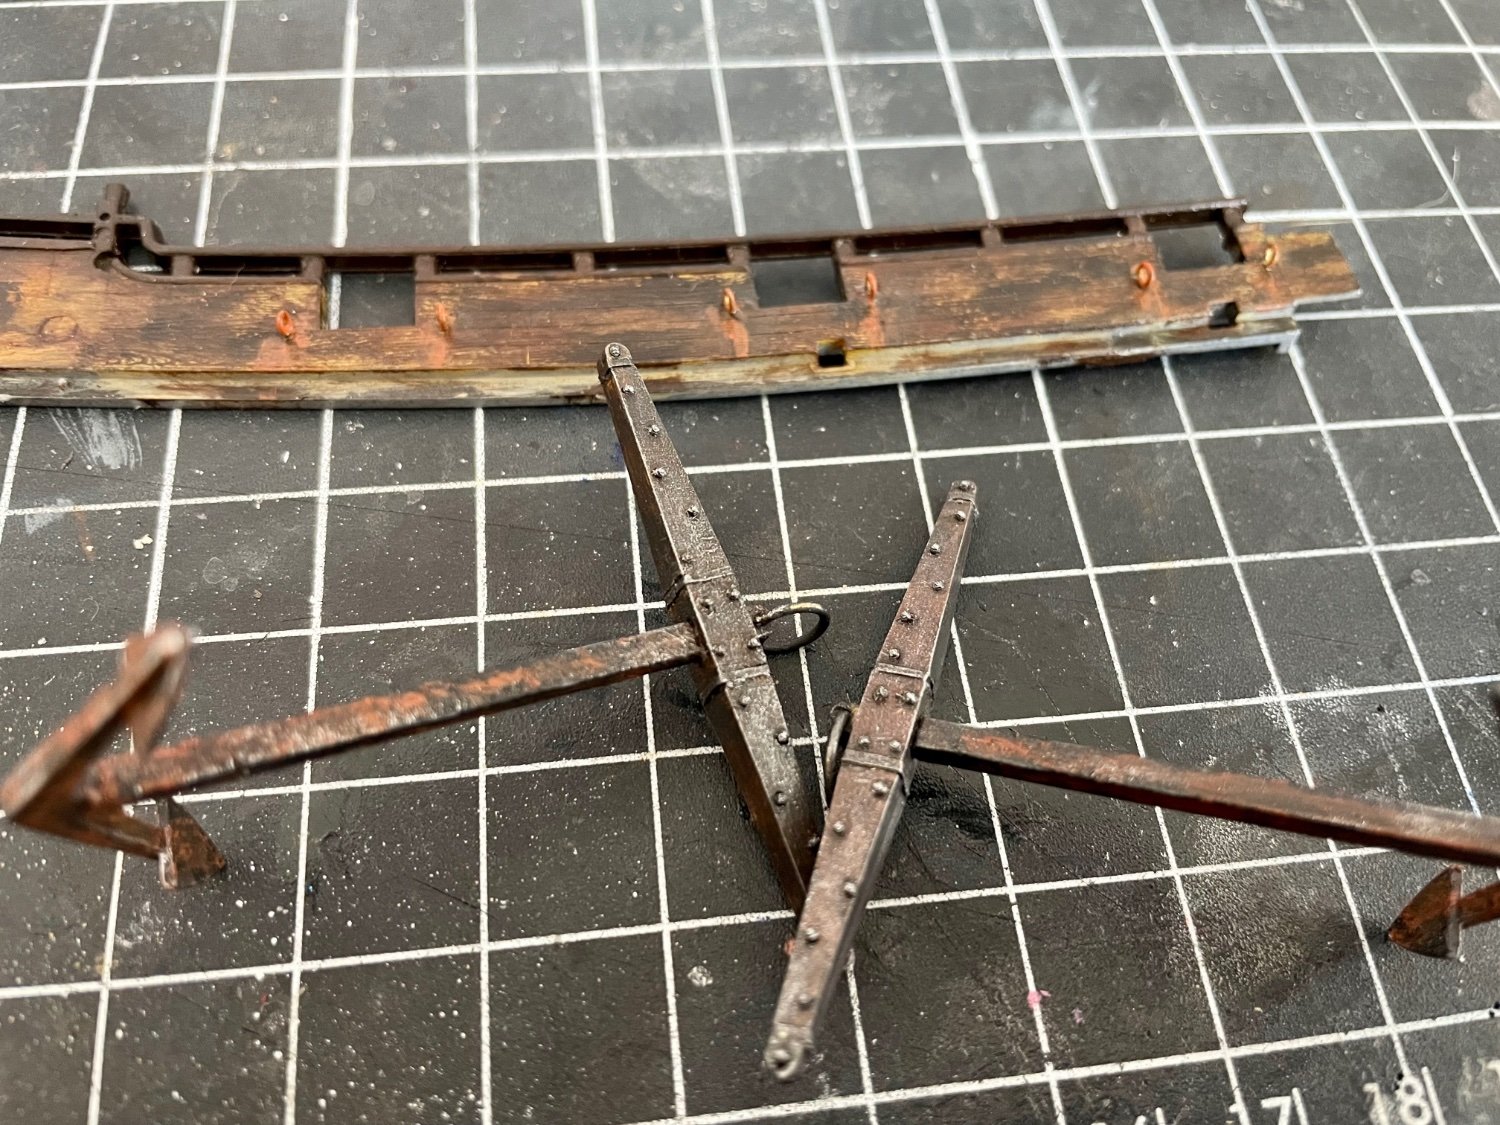
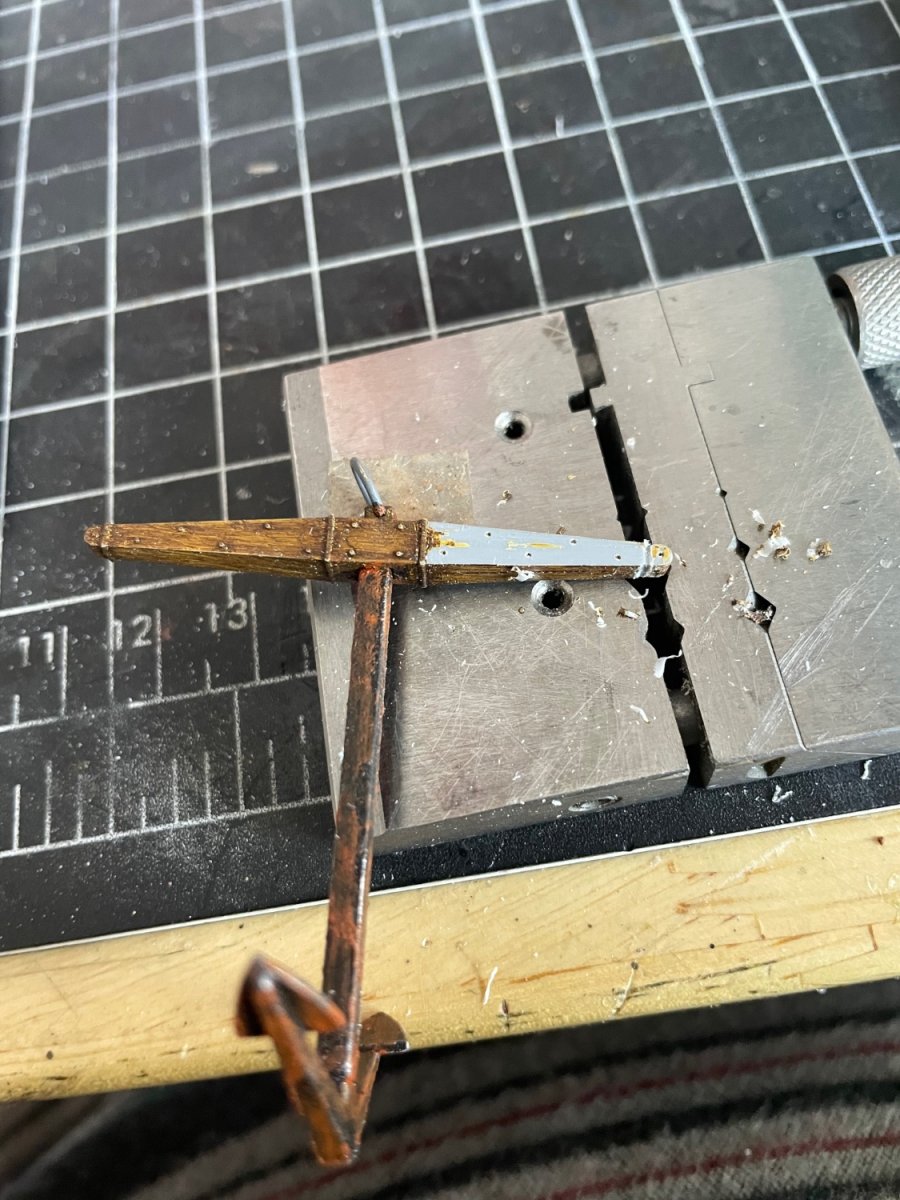
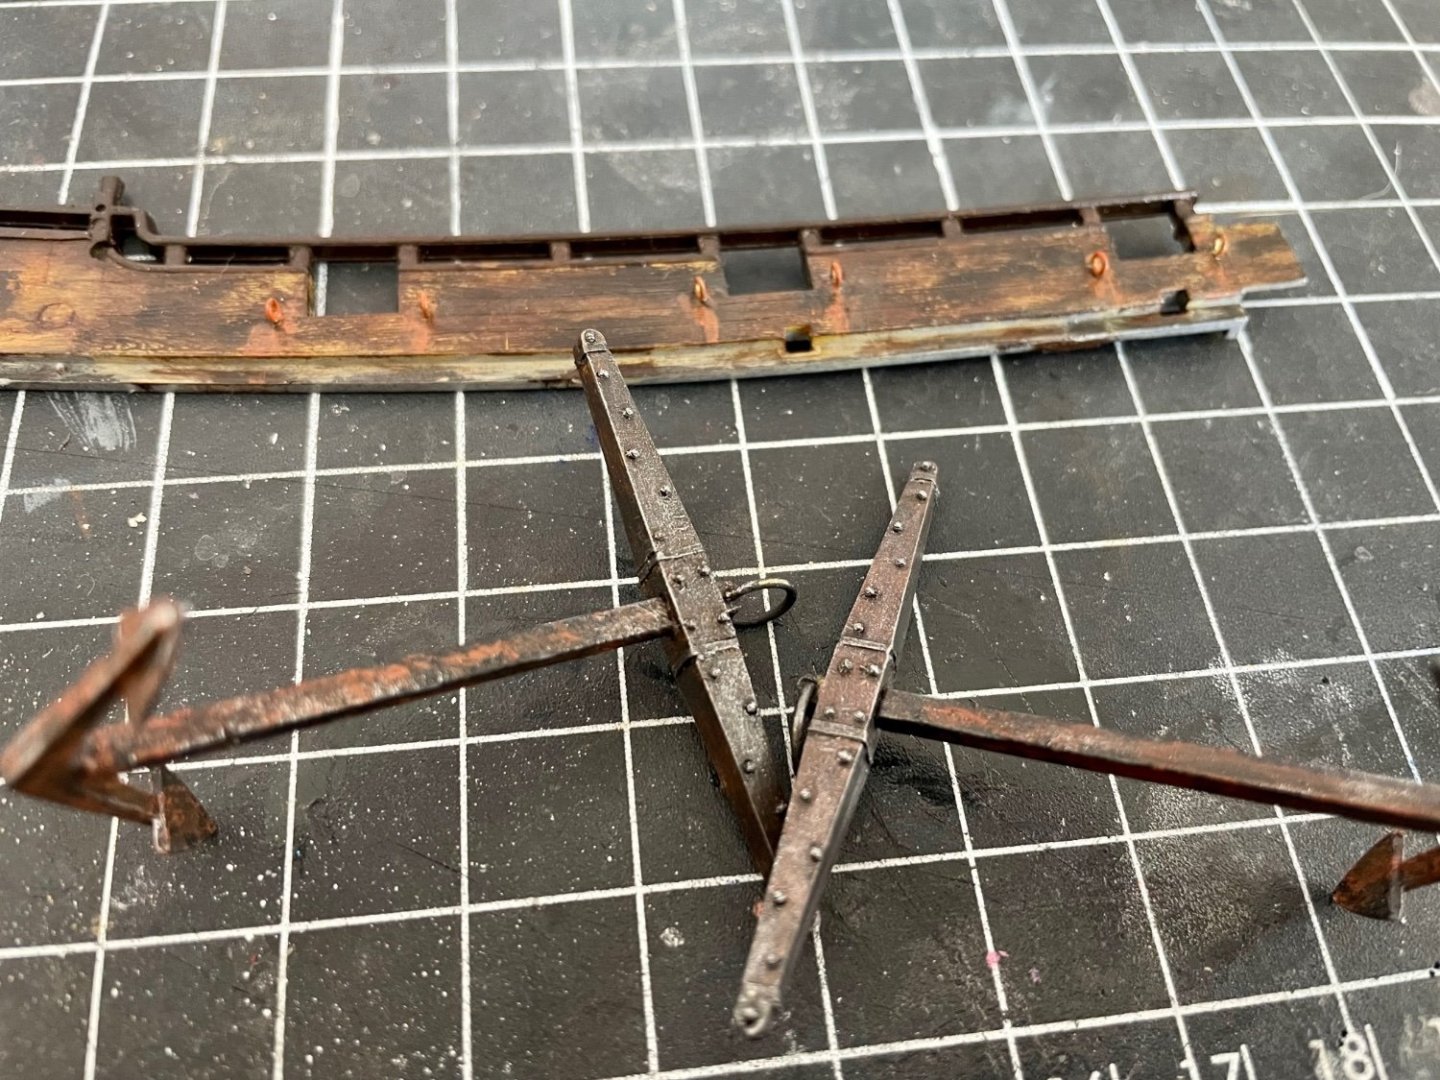
Made some changes to the anchors. A metal ring was added up top, then decided to do metal strapping and individual rivets And then finished off. May add some rust on the straps🤔


-
Thanks OC Yes, not very crisp moulding detail, hard to cut or sand and don’t take paint all that great I am hoping to get some of my 3D printed ones dialed in for the general crew
-
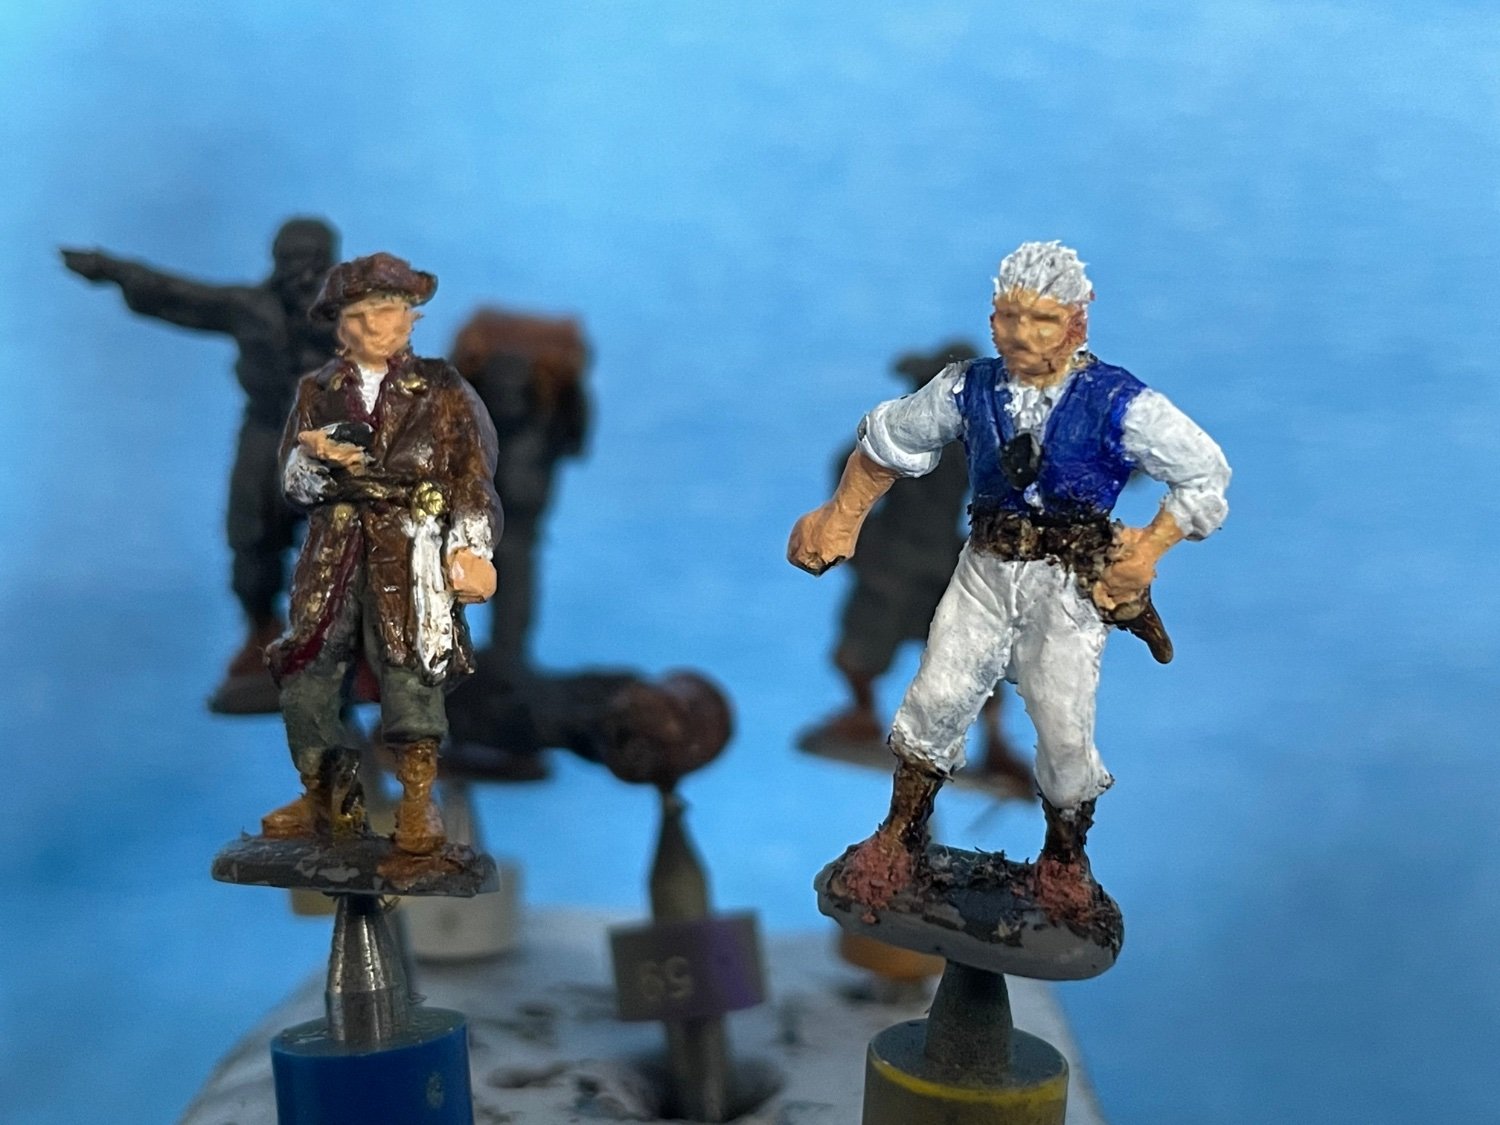
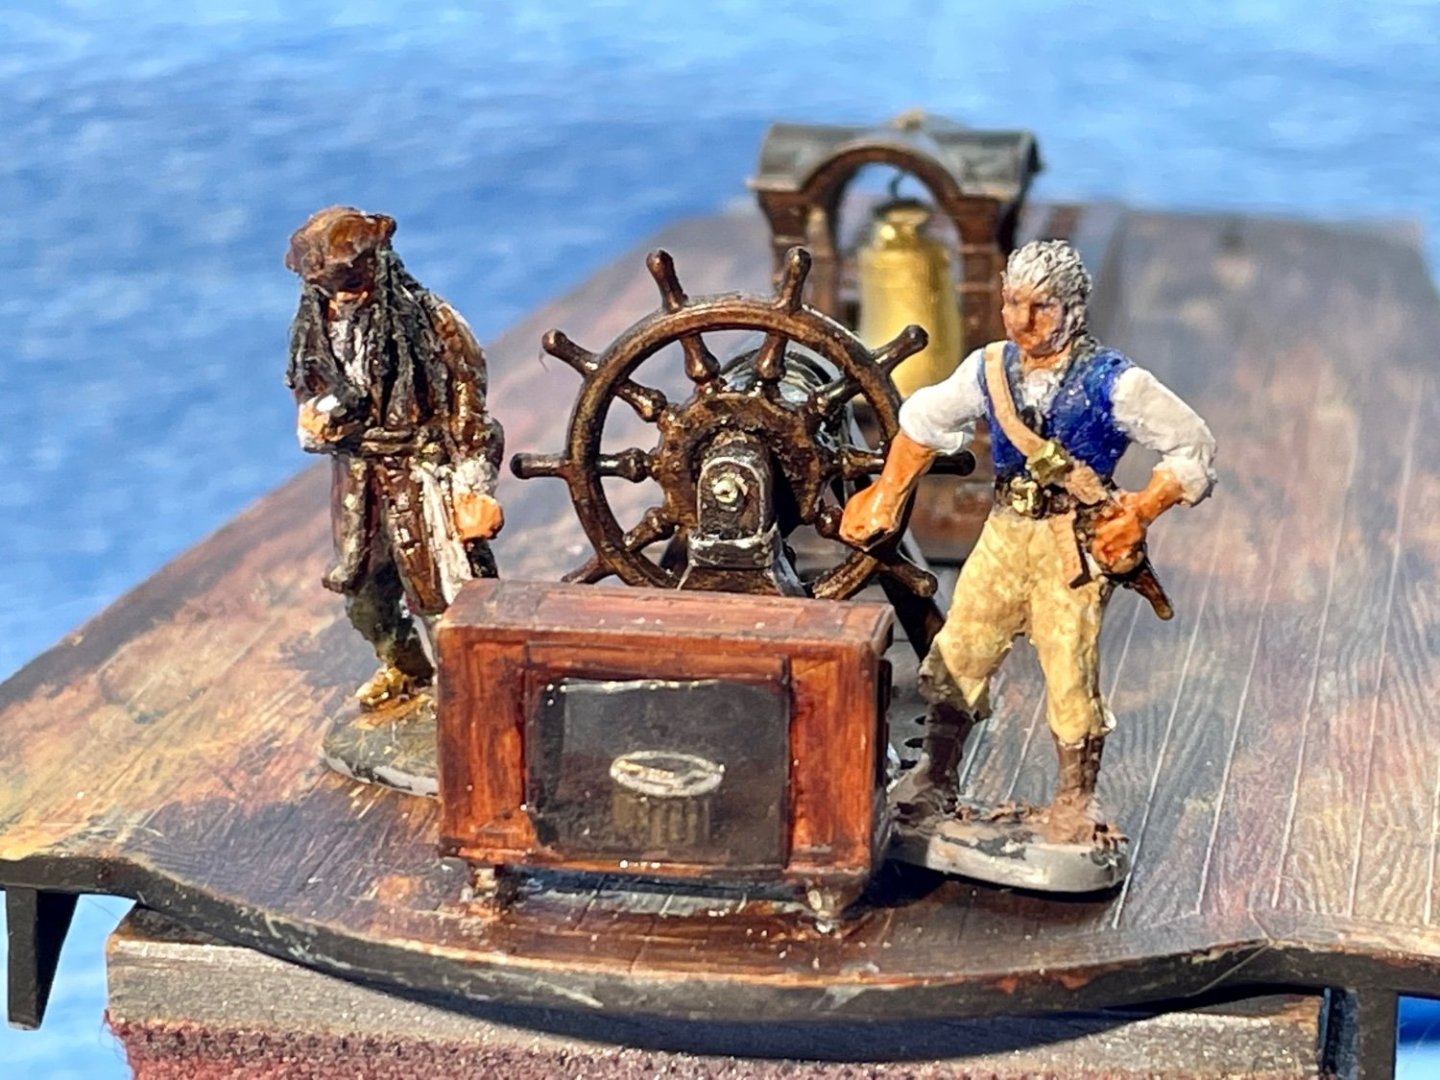
Thanks Jeff , I am glad you like them….still think I can do better and get cleaner/sharper details at 1/72 but it is hard Priming: I do a flat black…stylenrez or Ultimate model products Weathering wash: I made a “magic wash” one flat and one clear. It is just clear acrylic+india ink. At 1/72 scale I think it gives too muddy a look. Jack sparrow got the wash and Gibbs didn’t and I think Gibbs looks better. The larger scale Jack sparrow definitely got acrylic magic washes. Before leather I prime a loose layer (ie not super dense, thinned slightly) of a tan primer again stylenrez, then oil burnt umber on top and you can wipe some off before it fully dries to show wear. Other brown oils can be used for lighter leather For faces: Flesh is Tamiya flat flesh..but I think vajello or citadel might brush paint easier Trick layer is a coat of a rusty red stylenrz, very thin like a glaze. It gives a reddish alive with blood look to the face this is a good video summary of faces and pretty much what was done
-
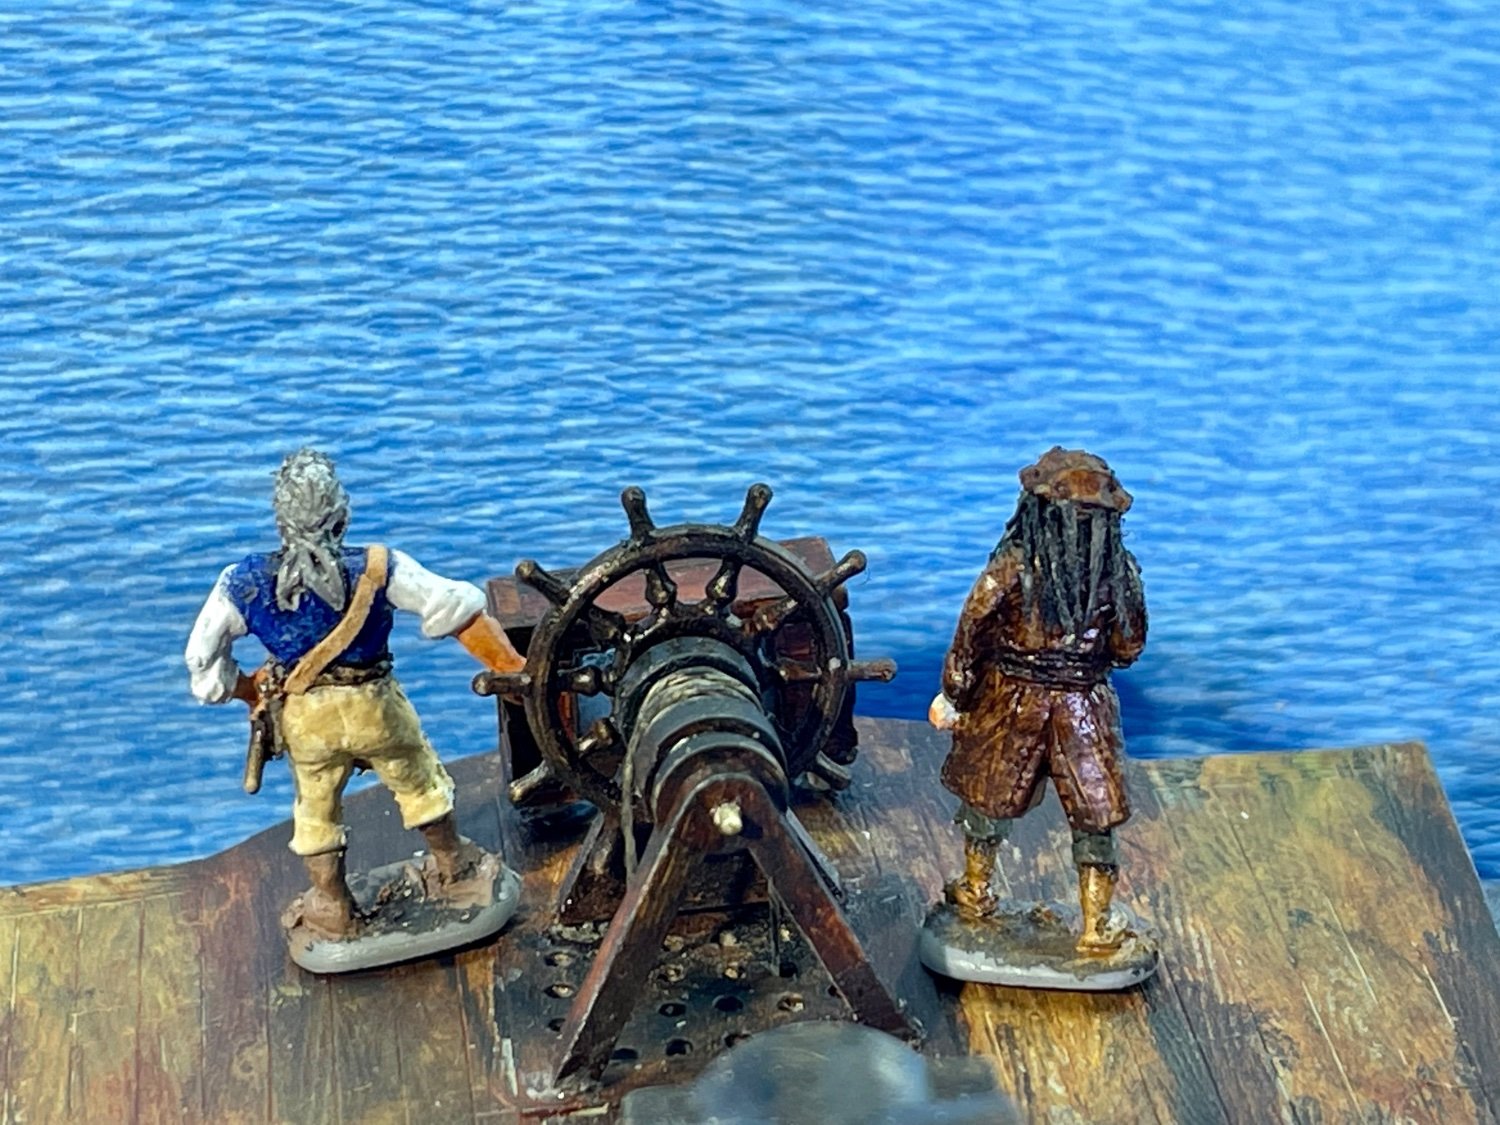
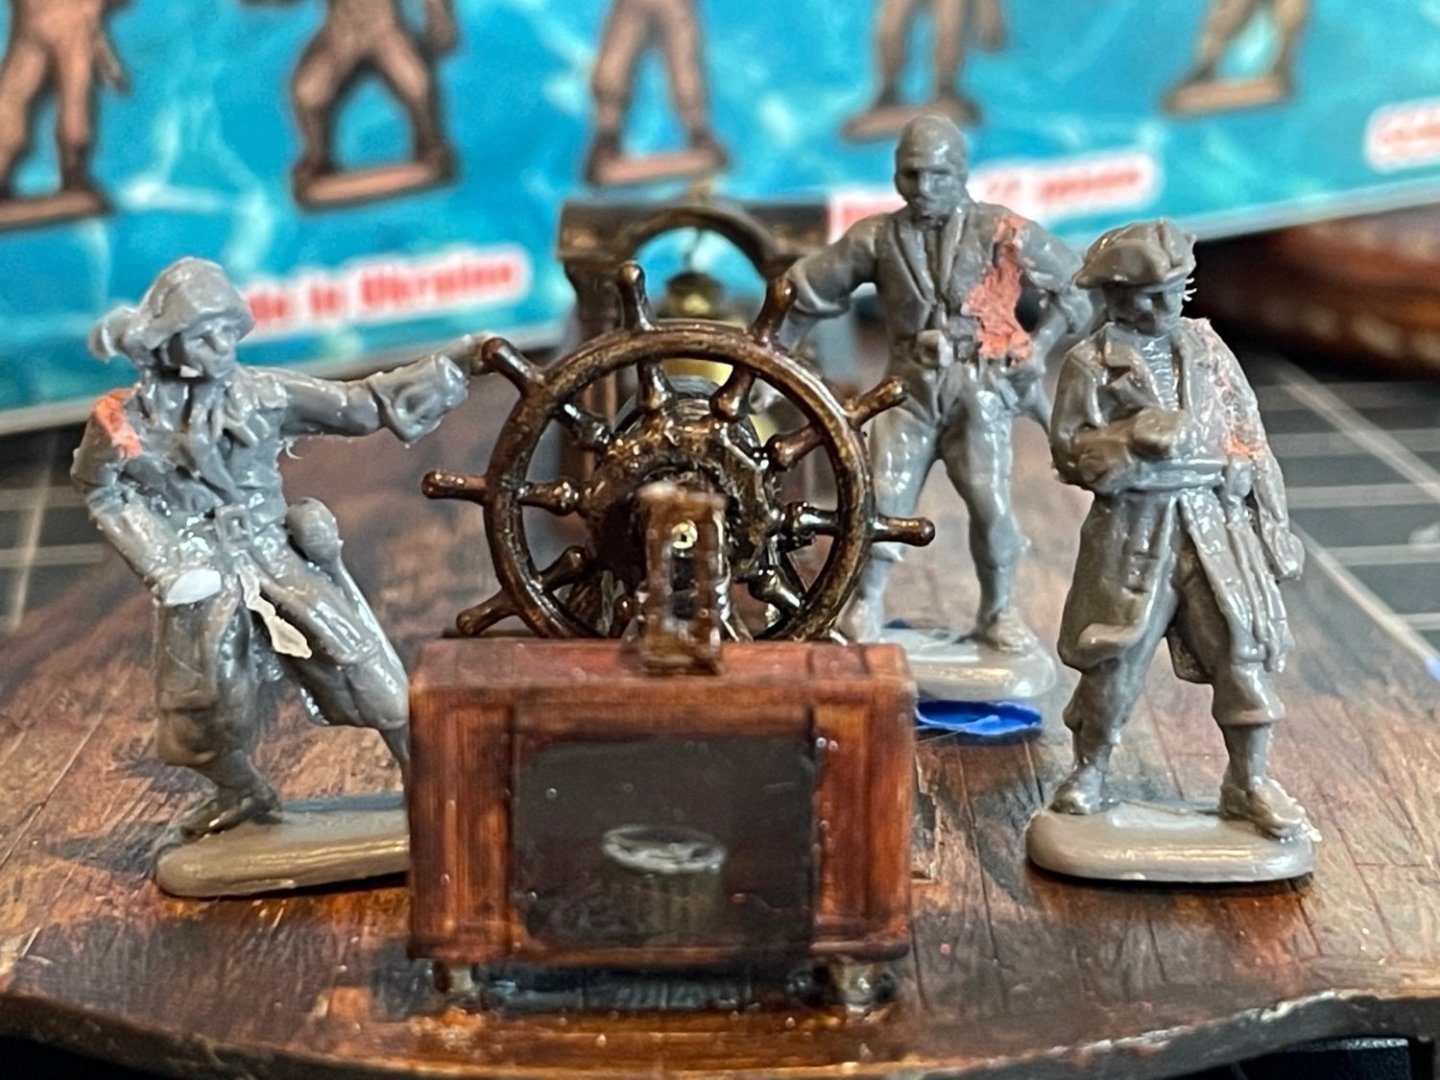
Made some more of the deadeyes today. I have about 25 more to go to get the 130 or so I will make Switched gears and worked on some figures to bring the ship to life Modify the same set of figures OC used. Made two main characters of POTC, Capt Jack Sparrow and Mr Gibbs I like this one. They stand at the wheel watching the sea, missing most of their boat, but that is beside the point


-
I posted this elsewhere on here, but here is my wooden deadeye manufacturing video
-
Brilliant Jeff A light lesson given perfectly and understood 👍🏻
-
Is there a trick to making deadeyes?
Twokidsnosleep replied to Schooners's topic in Masting, rigging and sails
This is another old thread I am going to pull up and add my two cents ( no sense) to I again thank each end ever one of you who commented, provided photos or referenced material to help a newbie figure out how to make these. I did a little video to show what I came up with to make my dead eyes. Maybe not perfect, but absolutely workable for my 1/72 Black Pearl kit modifications. -
Ok cool. I was concerned it might be too orange blazing fire and not yellow candle light enough 🤔