Brad NSW
-
Posts
20 -
Joined
-
Last visited
-
 Saburo reacted to a post in a topic:
HMS Serapis by Brad NSW - from Greenwich plans
Saburo reacted to a post in a topic:
HMS Serapis by Brad NSW - from Greenwich plans
-
Saburo reacted to a post in a topic:
HMS Serapis by Brad NSW - from Greenwich plans
-
tlevine reacted to a post in a topic:
HMS Serapis by Brad NSW - from Greenwich plans
-
Snug Harbor Johnny reacted to a post in a topic:
HMS Serapis by Brad NSW - from Greenwich plans
-
Ryland Craze reacted to a post in a topic:
HMS Serapis by Brad NSW - from Greenwich plans
-
Ryland Craze reacted to a post in a topic:
HMS Serapis by Brad NSW - from Greenwich plans
-
Ryland Craze reacted to a post in a topic:
HMS Serapis by Brad NSW - from Greenwich plans
-
ccoyle reacted to a post in a topic:
HMS Serapis by Brad NSW - from Greenwich plans
-
ccoyle reacted to a post in a topic:
HMS Serapis by Brad NSW - from Greenwich plans
-
mtaylor reacted to a post in a topic:
Cathead Lifeboat by Brad NSW - FINISHED
-
Brad NSW reacted to a post in a topic:
HMS Serapis by Brad NSW - from Greenwich plans
-
Brad NSW reacted to a post in a topic:
HMS Serapis by Brad NSW - from Greenwich plans
-
Completed and hung on the stern, replacing the cracked and rotted metal boat that came with the Artensia Latina Kit. Did no research, so it's probably a bit out of scale, as well as not an accurate depiction of the type of boat during the 1770-90s. It was fun and the back of the ship needed something and 99% of the folks who look at it will not notice anything. I will probably load it up with pennies for a week or two, to try and get the lines to "look" like they are supporting a heavy boat. Bottom line: 1) Kit was under $20!! 2) It would have been hard to do using the soft basswood supplied in the kit. 3) Photo's on the instruction are terrible and show no details that the instructions were discussing. I had to go online to find others who had built this to see pictures with any useful details. 4. Frame #1 (closest to the bow) IMO was way too wide to even attempt to fair in. I moved it halfway between the precut Frame #1 slot and the Frame #2 slot. I.E. to the intermediate slot they instruct you to cut for the four additional frames. This worked for me and gave an acceptable bow profile. 5. Fun kit but not recommended for beginners, as the result won't be pretty. BUT, with decent hardwood, one can substitute for all teh cheap basswood. AND, i believe some more advanced tools (I.E. thickness sander, micro table saw, jewelers files, clamps, etc) are needed to make this come out well.

-
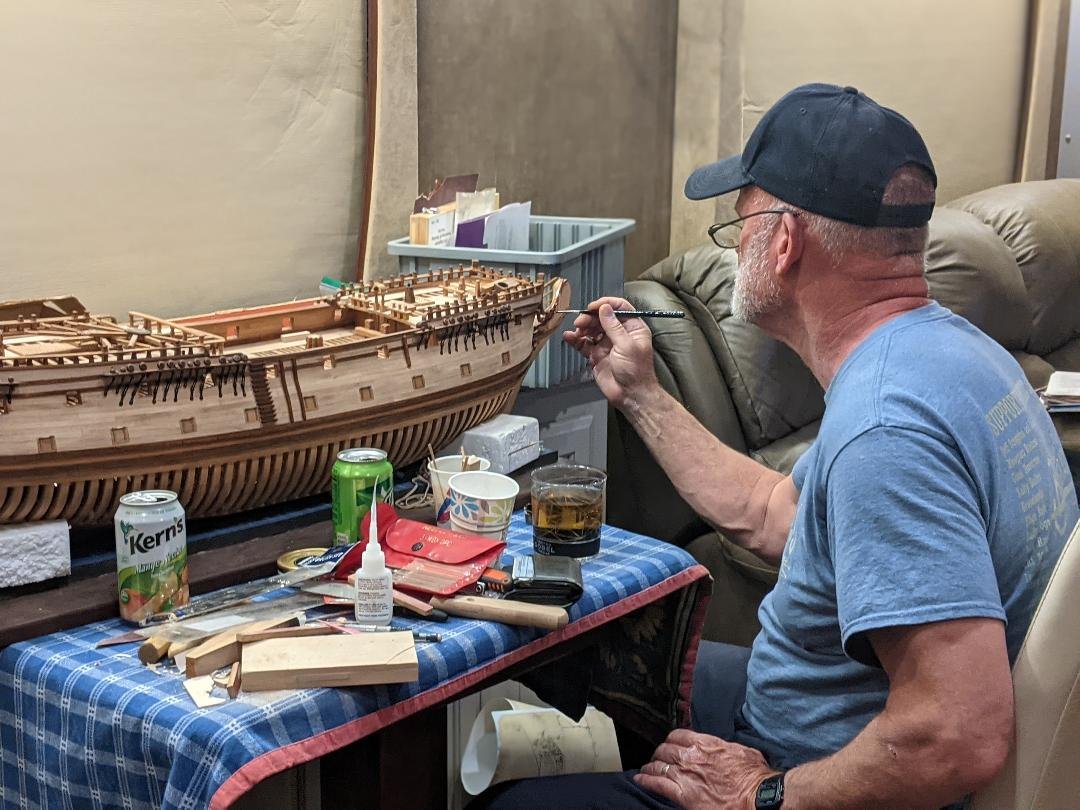
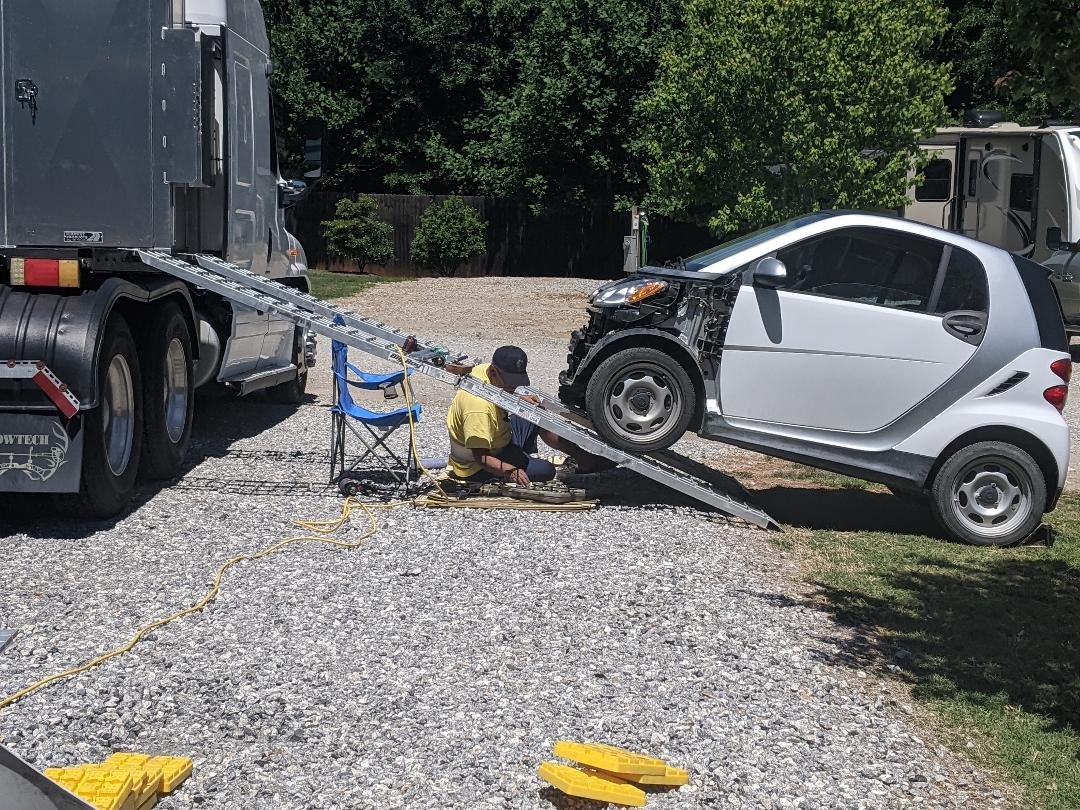
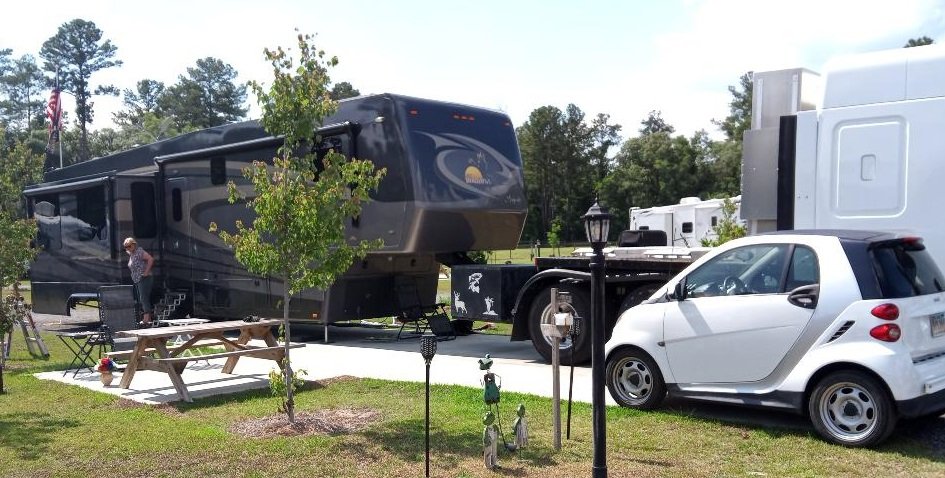
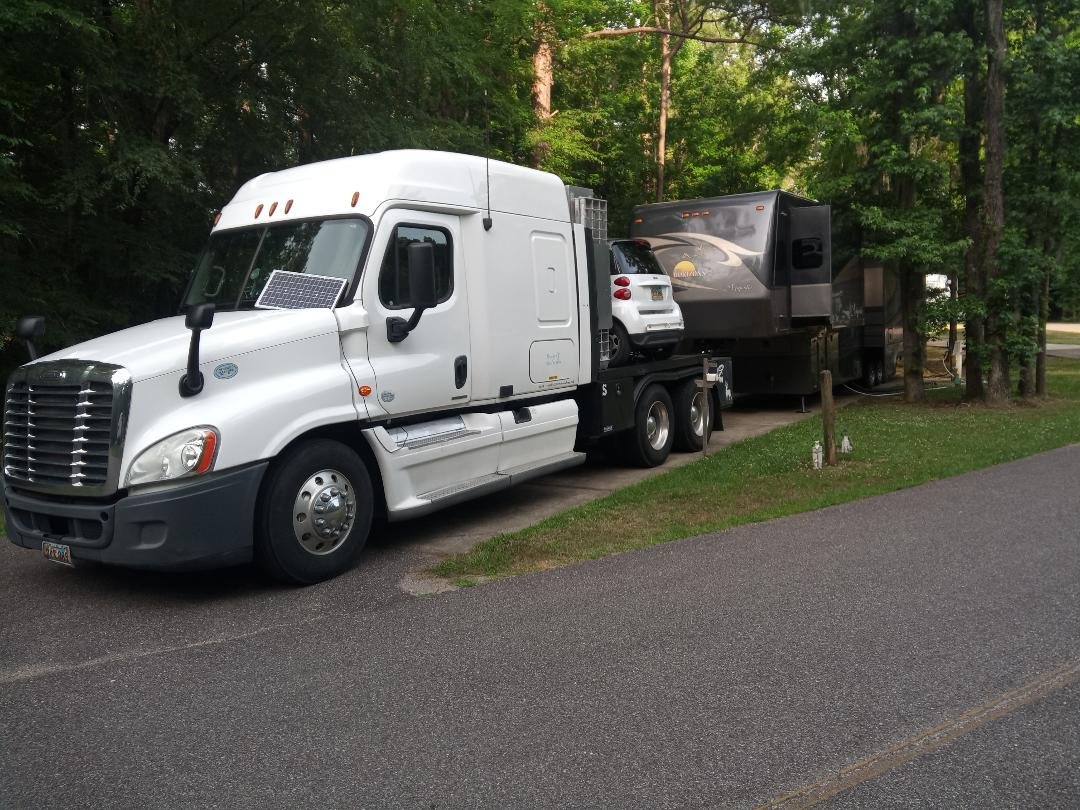
Here I am working at 20 below during the winter in Colorado (we ski too)! Wife isn't too happy about the dining room table always cluttered. We eat in the recliners. The model is transported between campgrounds, on the bed, on the existing cradle, with pillows bracing it from any movement. Below the table, a thickness sander, mini-lathe, and micro table saw. Bigger power tools are in the drom box on the back of the semi. (photo two). Oh yeah, we have a smart car to get around.
-
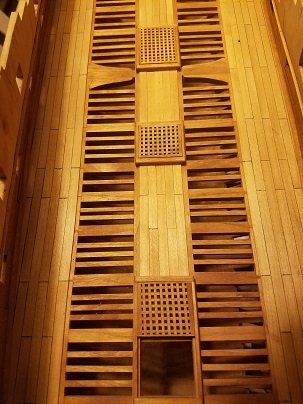
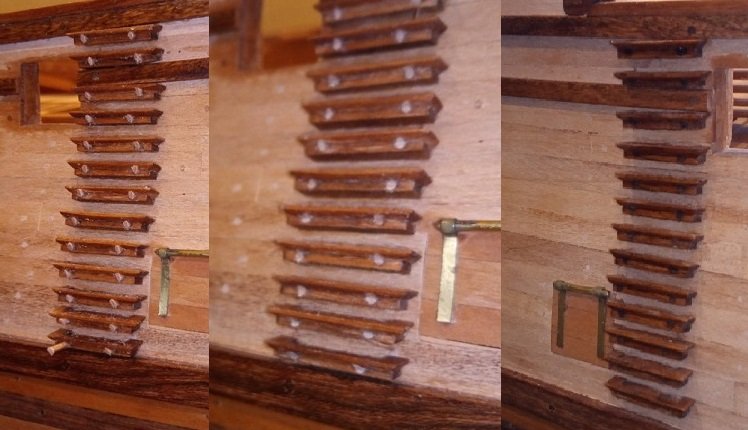
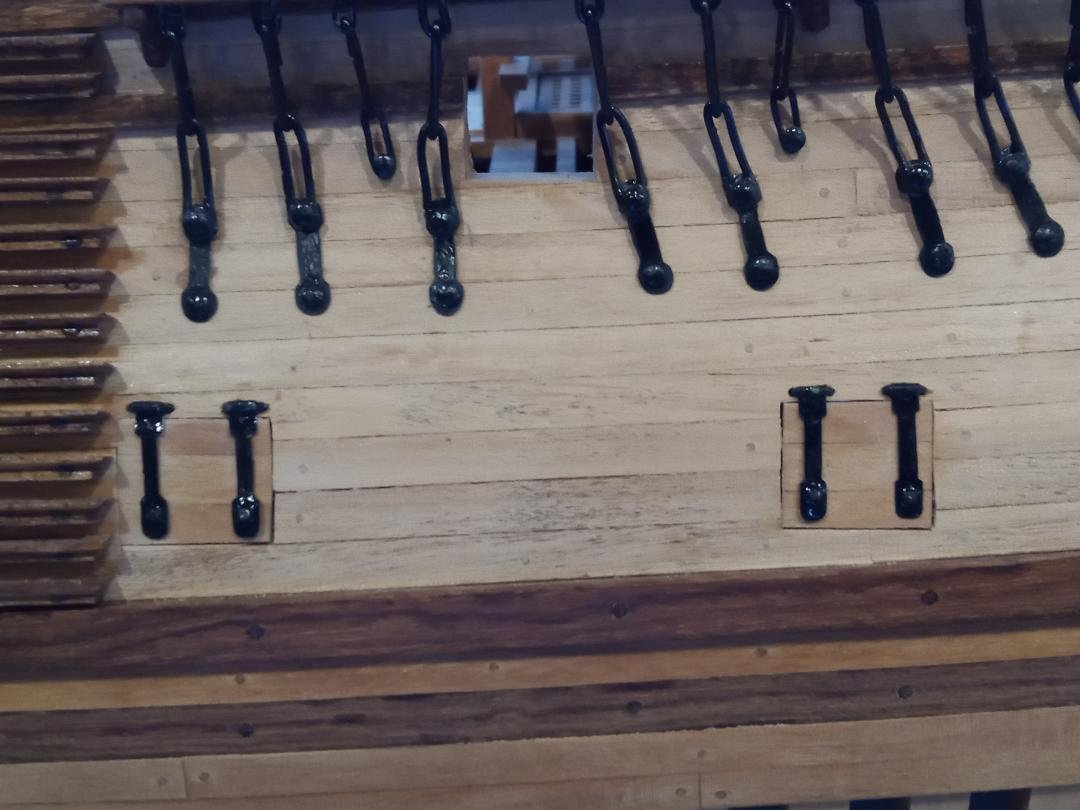
Here are some from earlier on. I didn't start photographing it until I pulled her out of mothballs 3 years ago, so the frames were done, as well as the lower deck, shown in the first picure. Here is the accommodation or quarterdeck ladder, as progress was made. I changed out the cannon port hinges, which I felt weren't detailed or accurate enough. Rudder assembly photos.

-
Some of you may have noticed the outdoor shots. Here is a picture of my workshop. We've been traveling in this set up for over two years. My Serapis project began in the late 1980's, then took a 25 year haiatus, as our two girls grew up. I've accomplished the last 60% in two years and the 1st 40% in 25 years!!
-
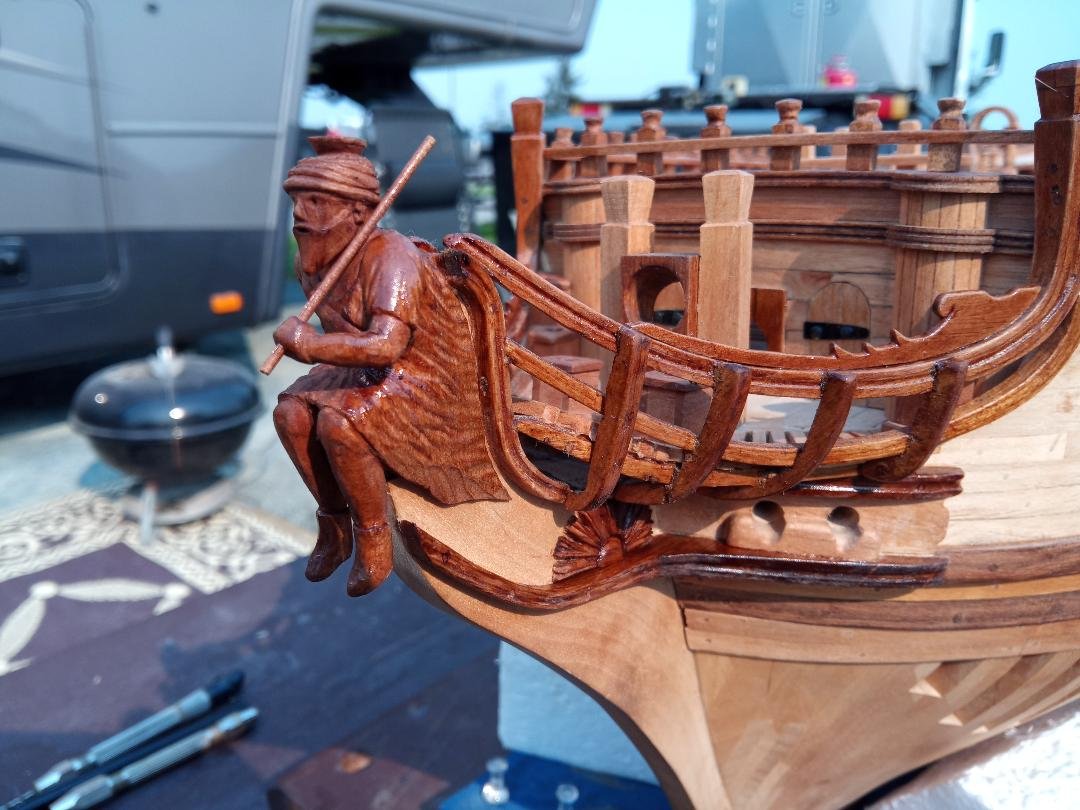
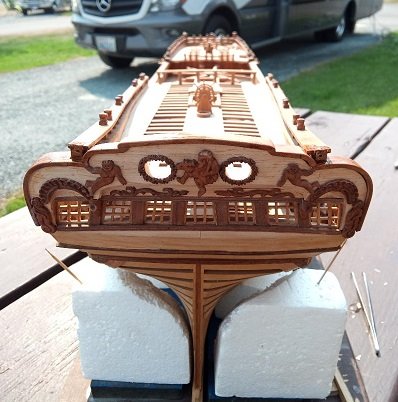
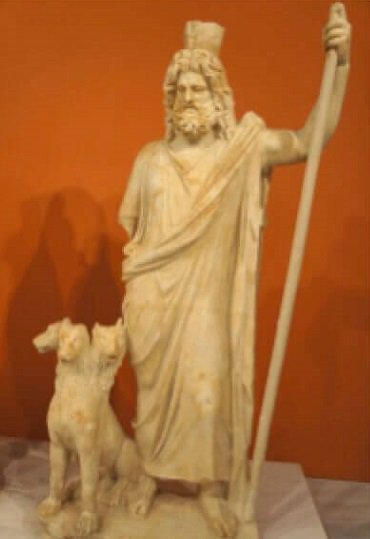
Final pictures are the figurehead mounted on the bow. Below, you can see Cerebrus mounted below the right hand of Serapis. Here is the stern, where you can see Serapis again depicted between the two stern cannon ports.

-
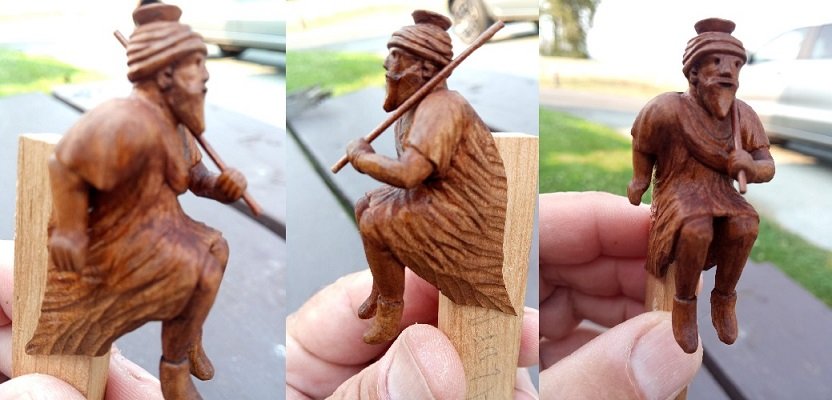
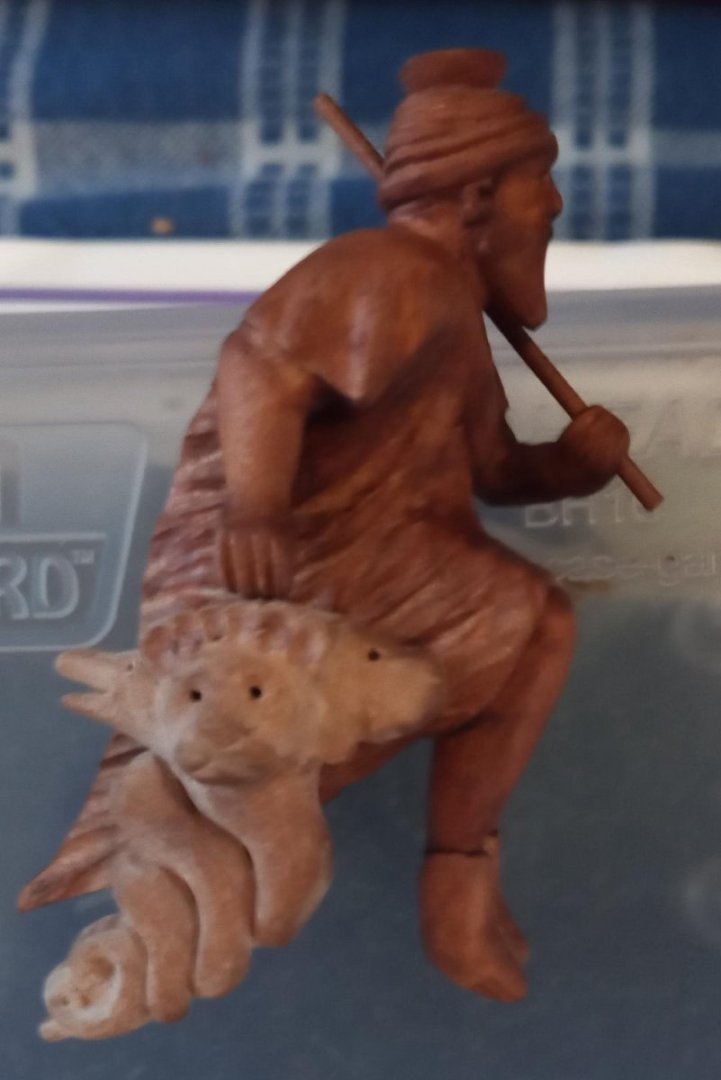
Here is a montage (shown over plans, with a penny for scale) and also mounted. This is about 3 weeks of part time work. After another week or two of chiseling and careful file work, I called him complete. Here are several different angles. You can also see the "false bow" I used to hold, while carving and filing. Below, note the three headed dog Cerebrus, who guarded the gates of hell. Some depict him with three of the same dogs. I opted to use three different dogs, mostly because I couldn't do three of the same. What eventually came out was a greyhound or wolf (left), a lion (middle) and Basset Hound (right). OR AT LEAST That's what I see!!

-
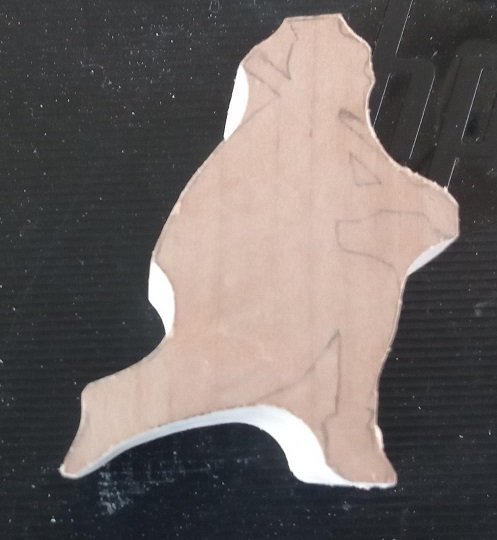
Just discovered this site, so I thought I'd share construction of her figurehead. Serapis is an Egyptian Bey (or diety) . who had a 3-headed dog, which guarded the gates to Hades/Hell. He is usually depicted with a plain staff, beard, as well as an Egyptian headdress that looks like a big bowl. The Figurehead incorporates all this. I started out cutting a cardstock silhouette from I traced from the plans. This was then traced on a laminated block of pear wood. After a few weeks of careful chiseling and filing (I did 80% of the forming with a set of 12 different profiles of micro Jewlers files).

-
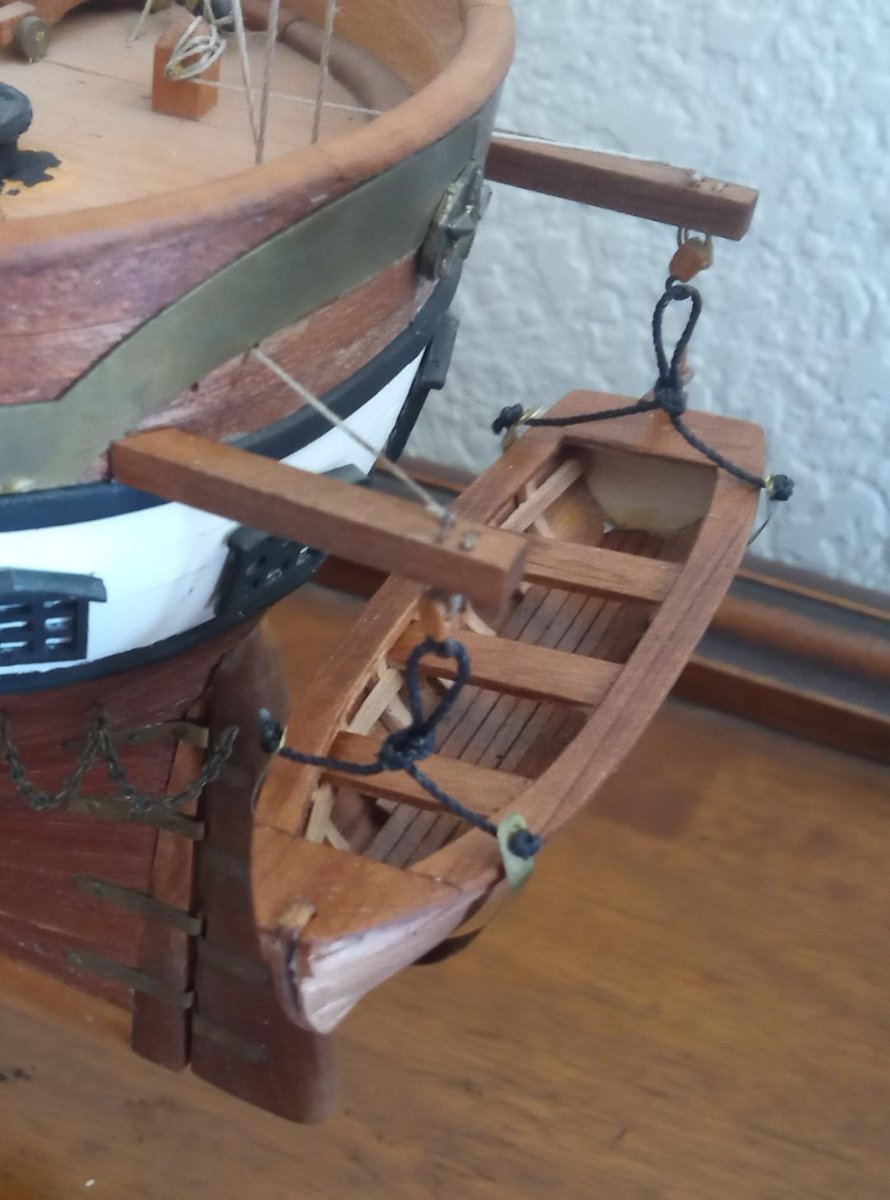
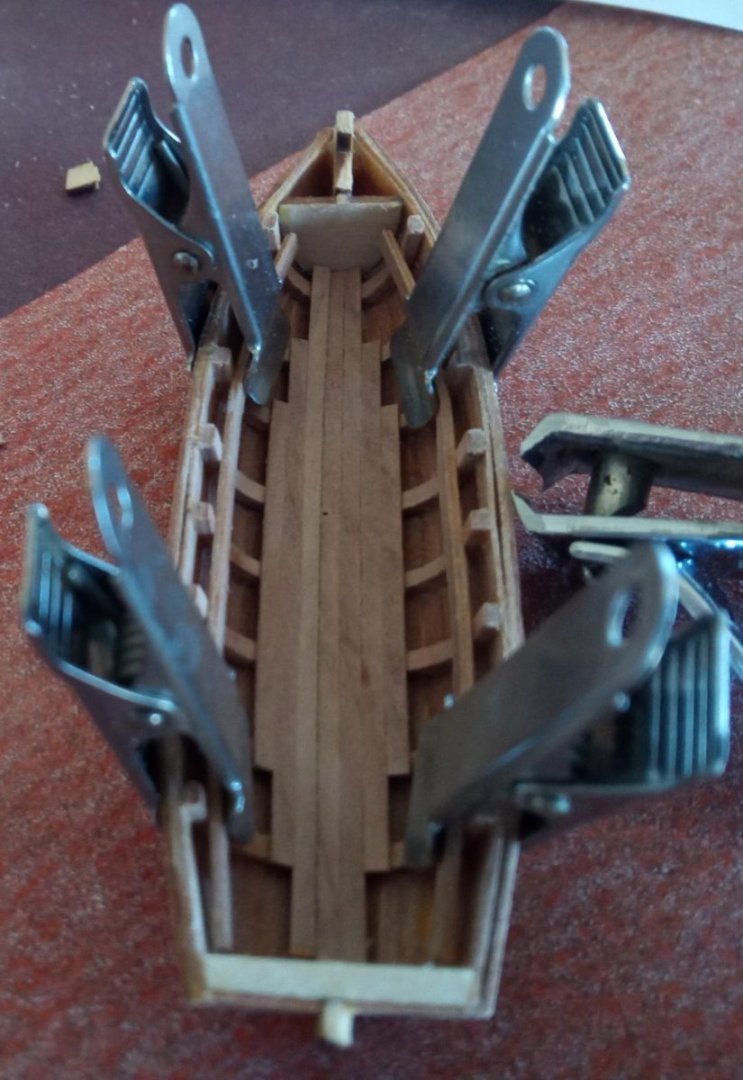
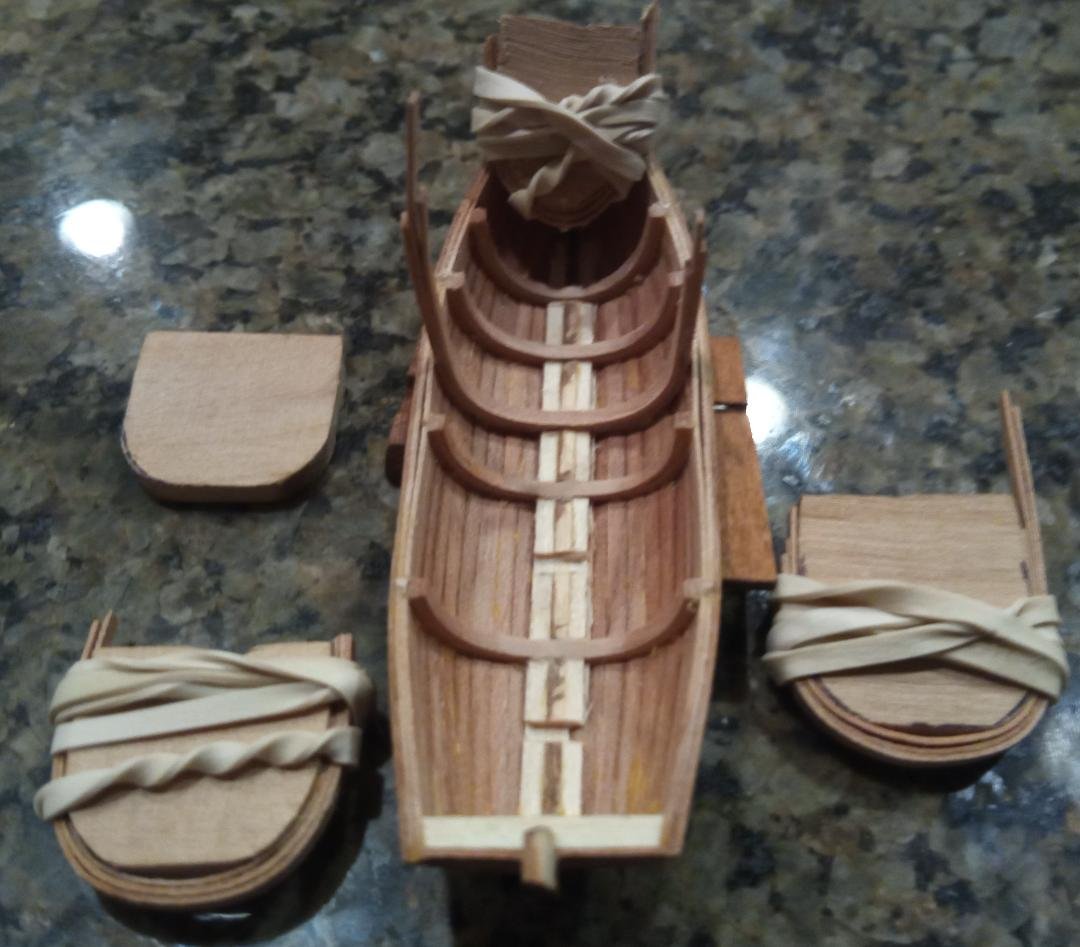
I cut some leftover brass into strips, which I molded around the hull to simulate a carrying cradle. Below those are the blocks I'll use and finally below the blocks are the new catheads that will hold the lifeboat out behind the stern. On the right is one of the old catheads and on the left are two new, beefier ones I'm fashioning out of pear wood.

-
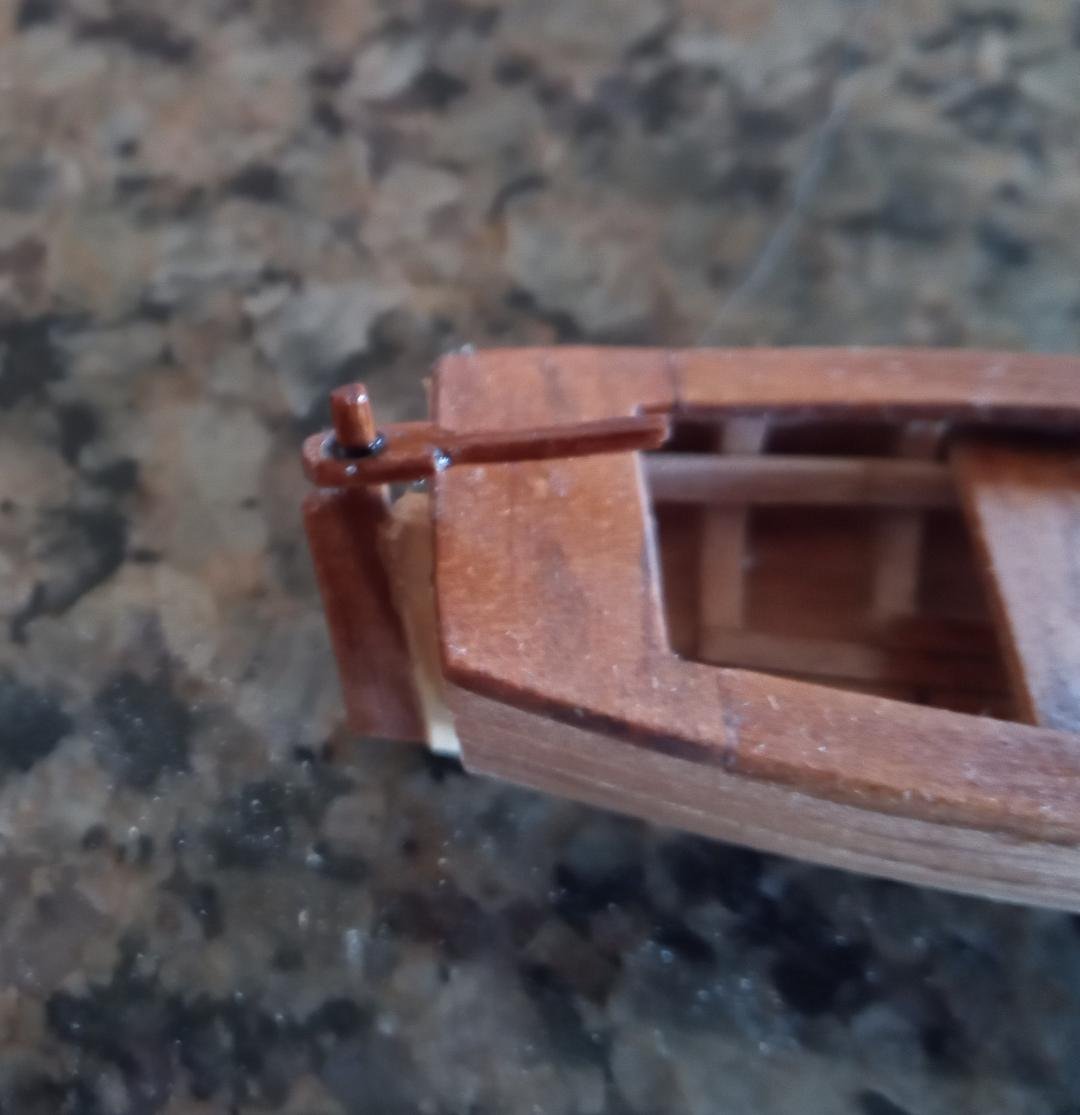
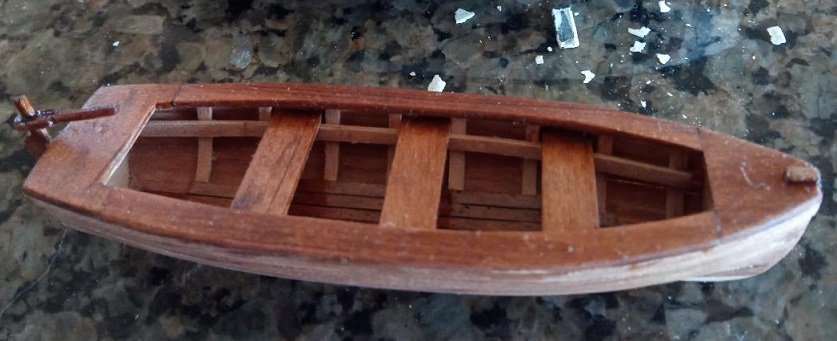
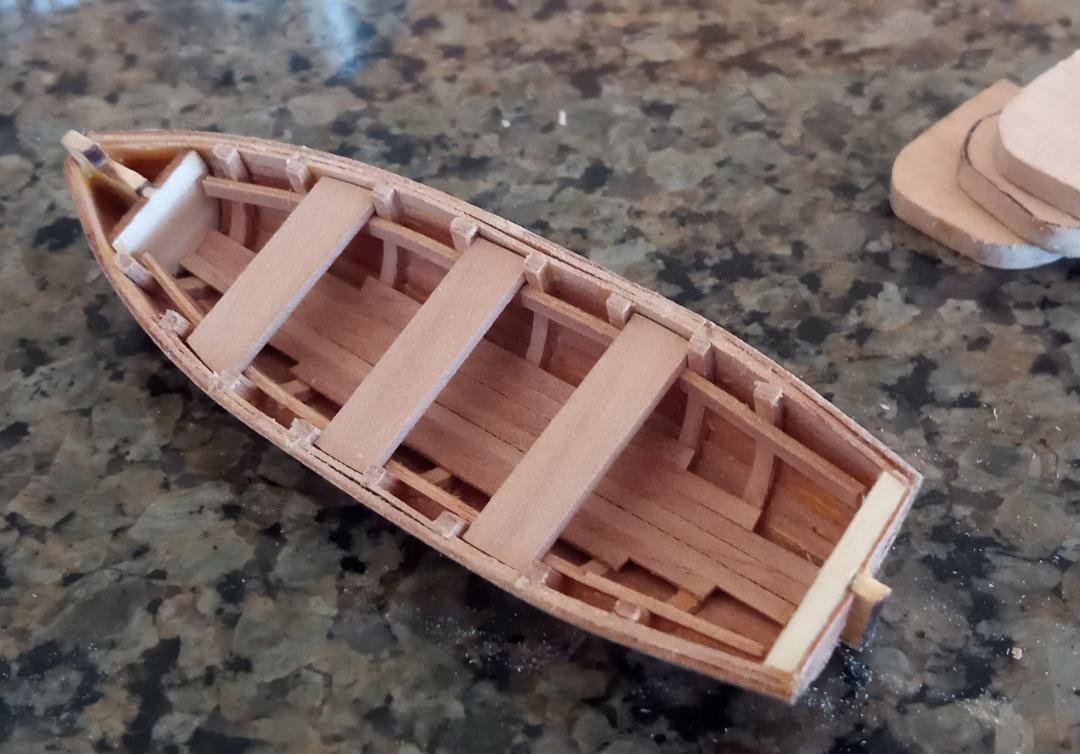
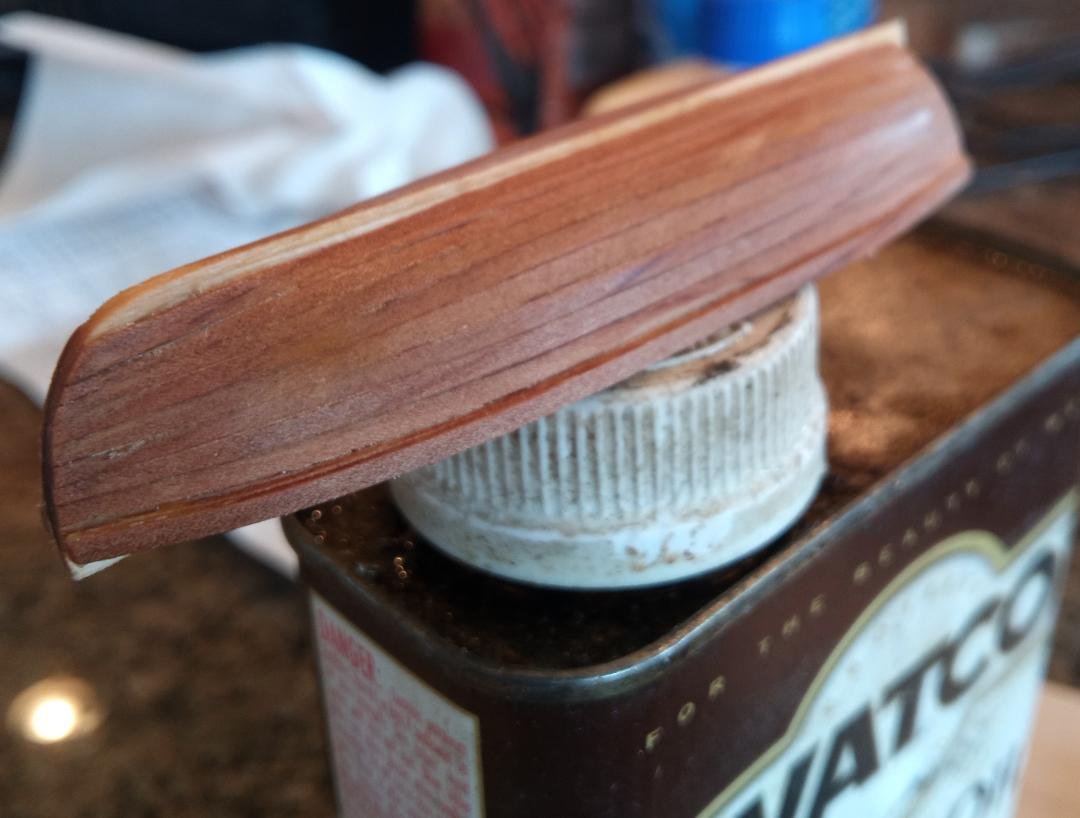
Gunwales are in place and stained with WATCO Dark Walnut. This oil was also applied to the seats, the floor rails and rudder assembly. Close up of the rudder.

-
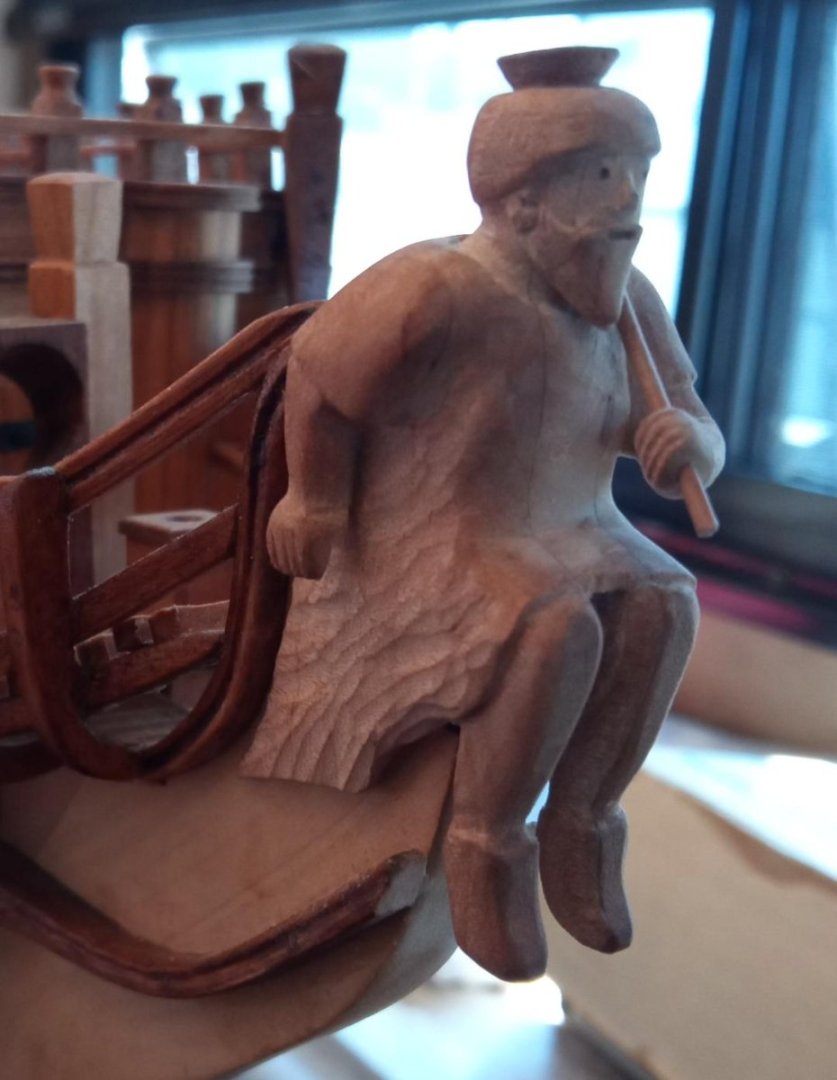
Here the gunwales are being formed, sanded and test fit. Same with the bow compartment cover and helmsman seat. Tomorrow, I'll place them, stain the model and work on a custom rudder assembly, as the one in the kit is cheap basswood that will take little or no detailed forming.
-
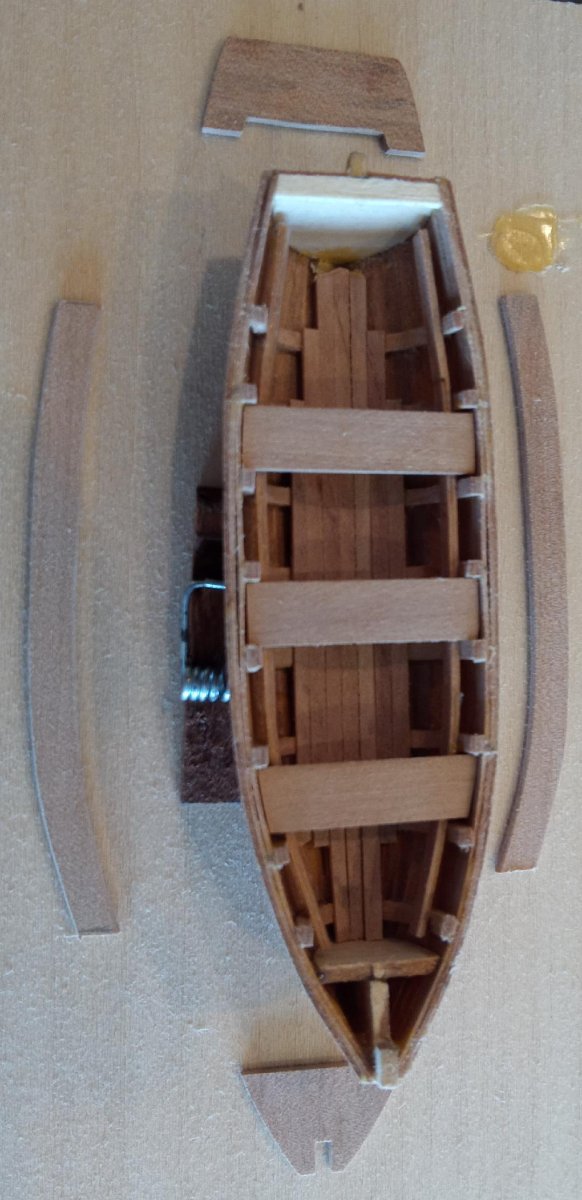
I added the seats, resting on the "seat rail". At this point, the only original kit parts are the keel/frame spacer, the bow bulkhead and stern bulkhead.
-
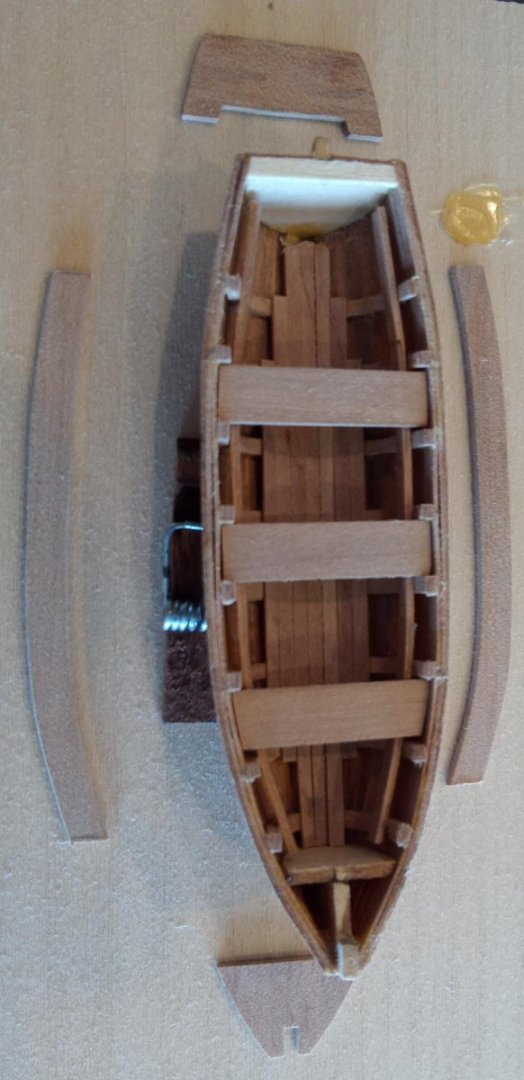
Additional frames went in with no problems. It did take some sanding to get them even with the four original frames. I added some floorboards (not in the plans but shown in the photo below), as I believe the flatter portion of the bottom would have had some sort of flooring. Either grating or planks like I added. You can also see the seat rail clamped in place.
-
Next step is to add four additional frames into the already formed hull. Seems odd/harder to do now, than if they had the forms and you put them in before planking. Guess that's what one gets for following directions. We'll see how this works out. I laminated three of the thin pear strips, over the same jigs I made for the middle three frames. I narrowed the bow jig considerably and we'll see how that fits tomorrow, after the laminated strips dry on the jig. In the below picture, you can see: 1) a frame taken off the jig and added to the interior of the planked hull. 2) The three additional frames drying on their respective jigs. I can already tell from the first one I glued in, that they will all need to be sanded to get a similar thickness as the ones that were faired before planking.
-
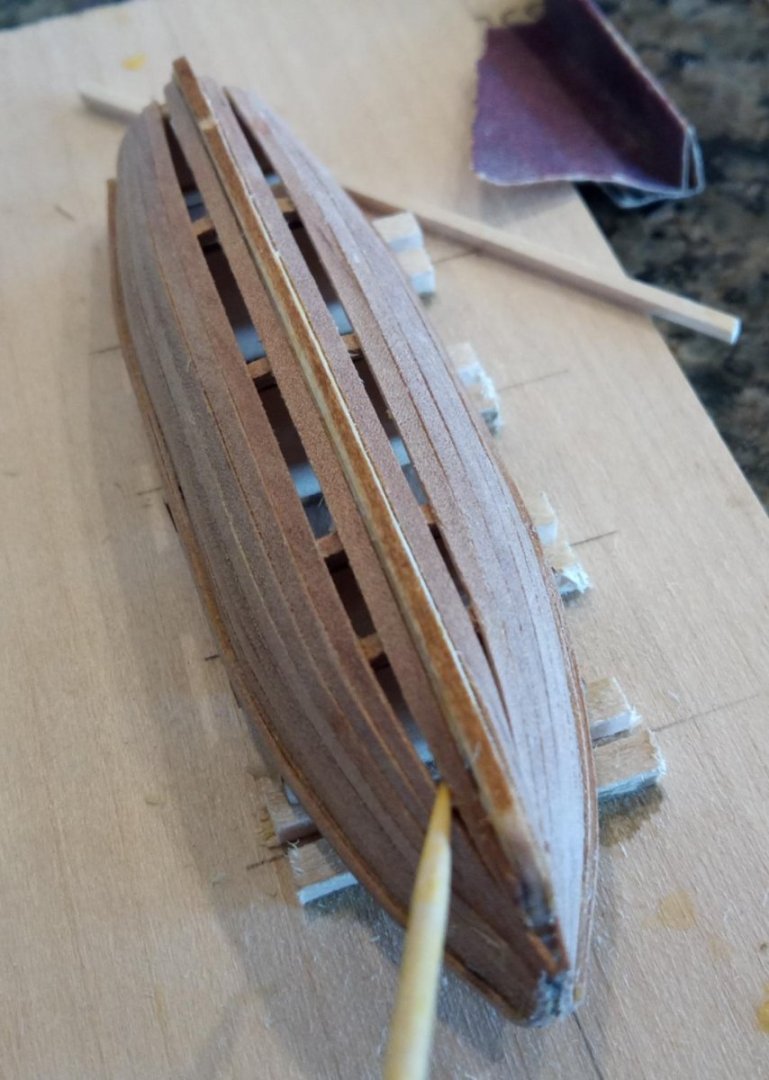
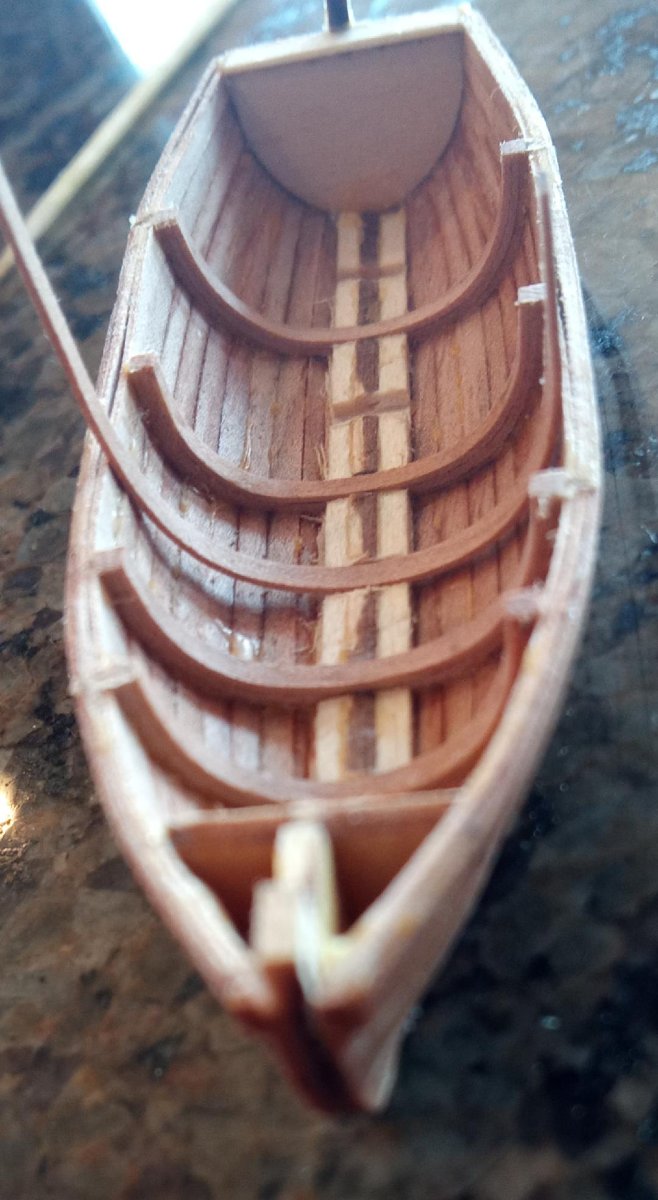
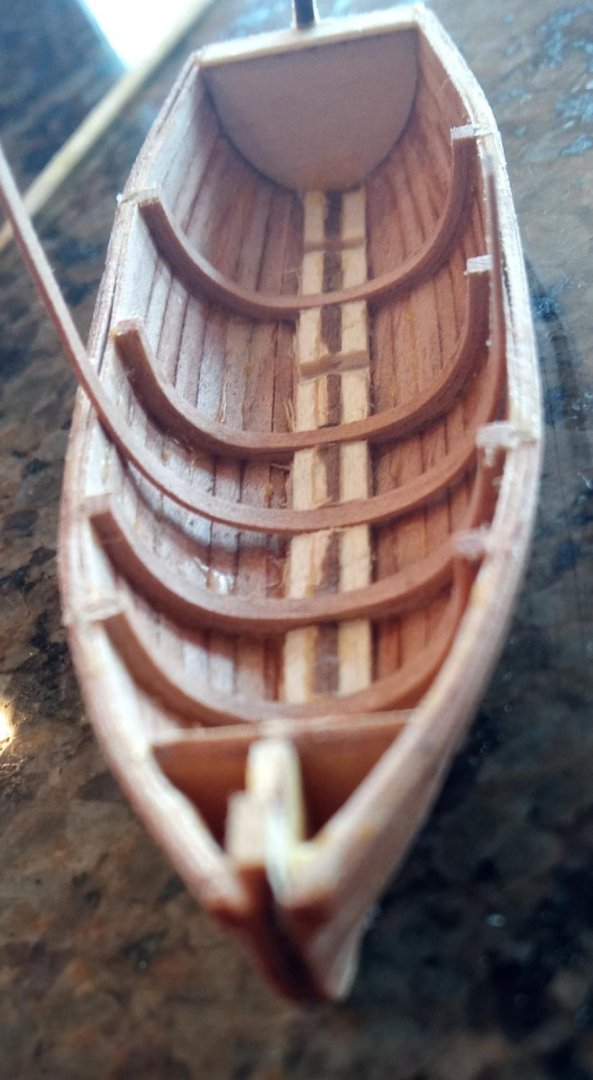
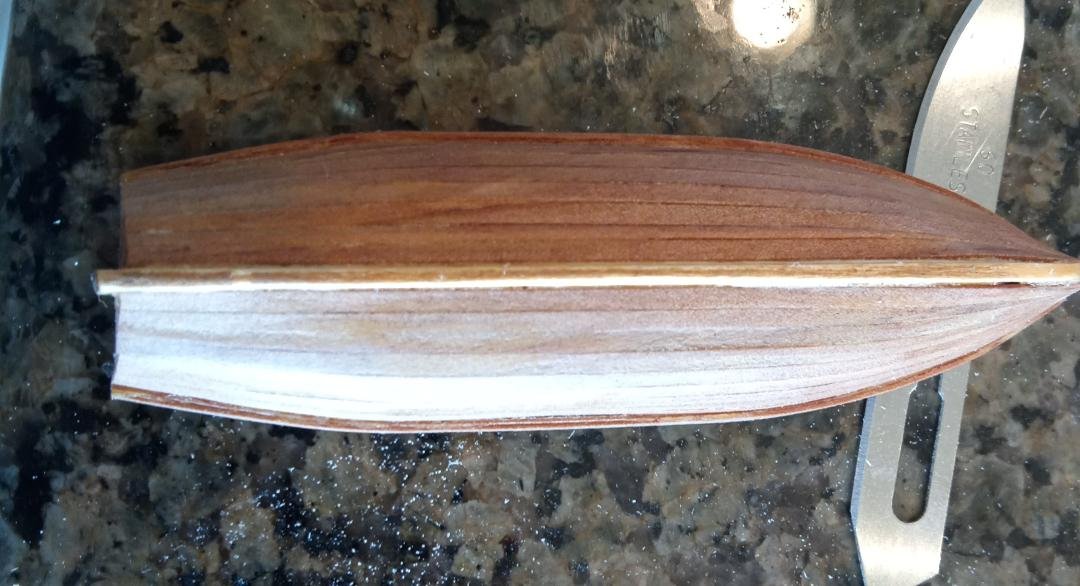
Planking complete. I gave it a light sanding and then oiled with WATCO Natural wood oil to make the grain of the pear wood pop a bit.
-
One more plank to go