Rking
-
Posts
17 -
Joined
-
Last visited
Recent Profile Visitors


-
 clearway reacted to a post in a topic:
HMS Terror by Rking - OcCre - 1:75
clearway reacted to a post in a topic:
HMS Terror by Rking - OcCre - 1:75
-
ccoyle reacted to a post in a topic:
HMS Terror by Rking - OcCre - 1:75
-
HMS Terror by Rking - OcCre - 1:75
Rking replied to Rking's topic in - Kit build logs for subjects built from 1801 - 1850
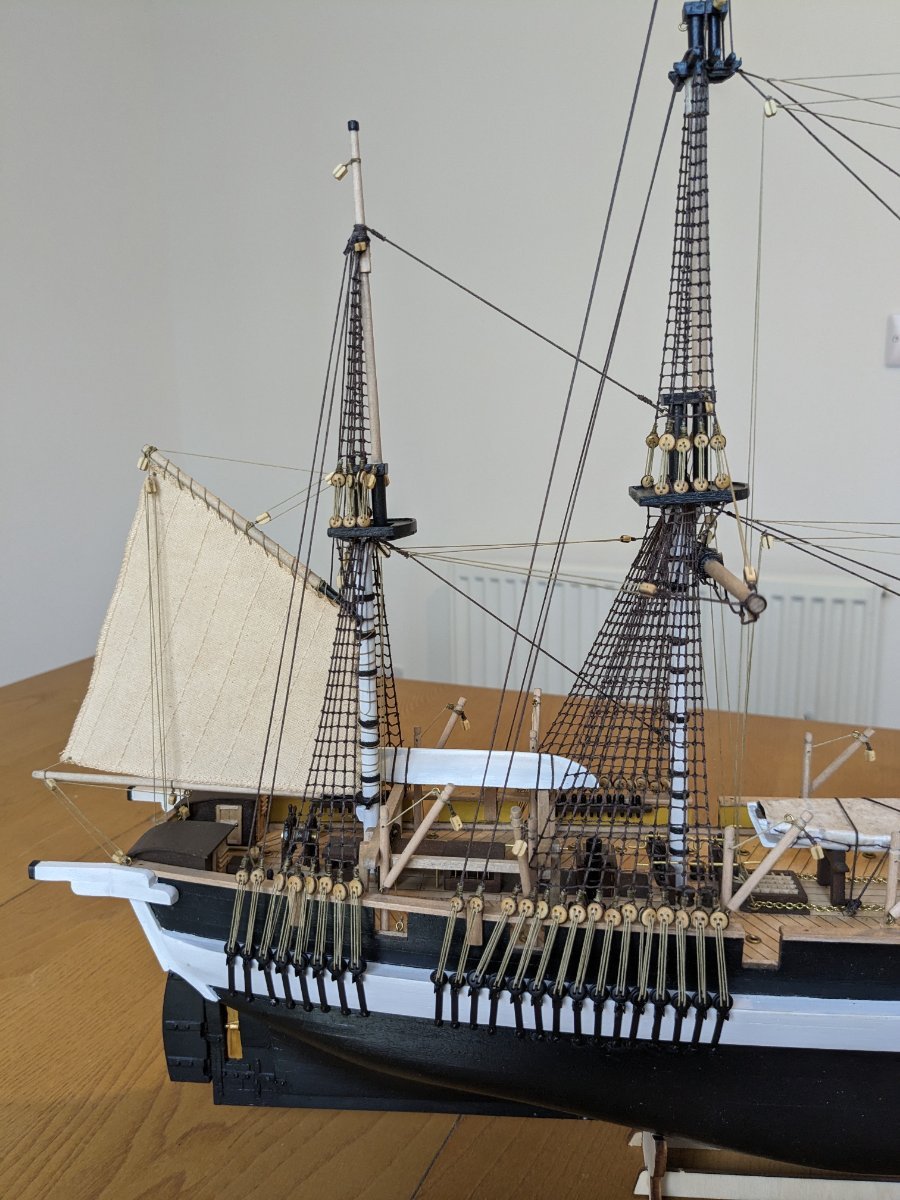
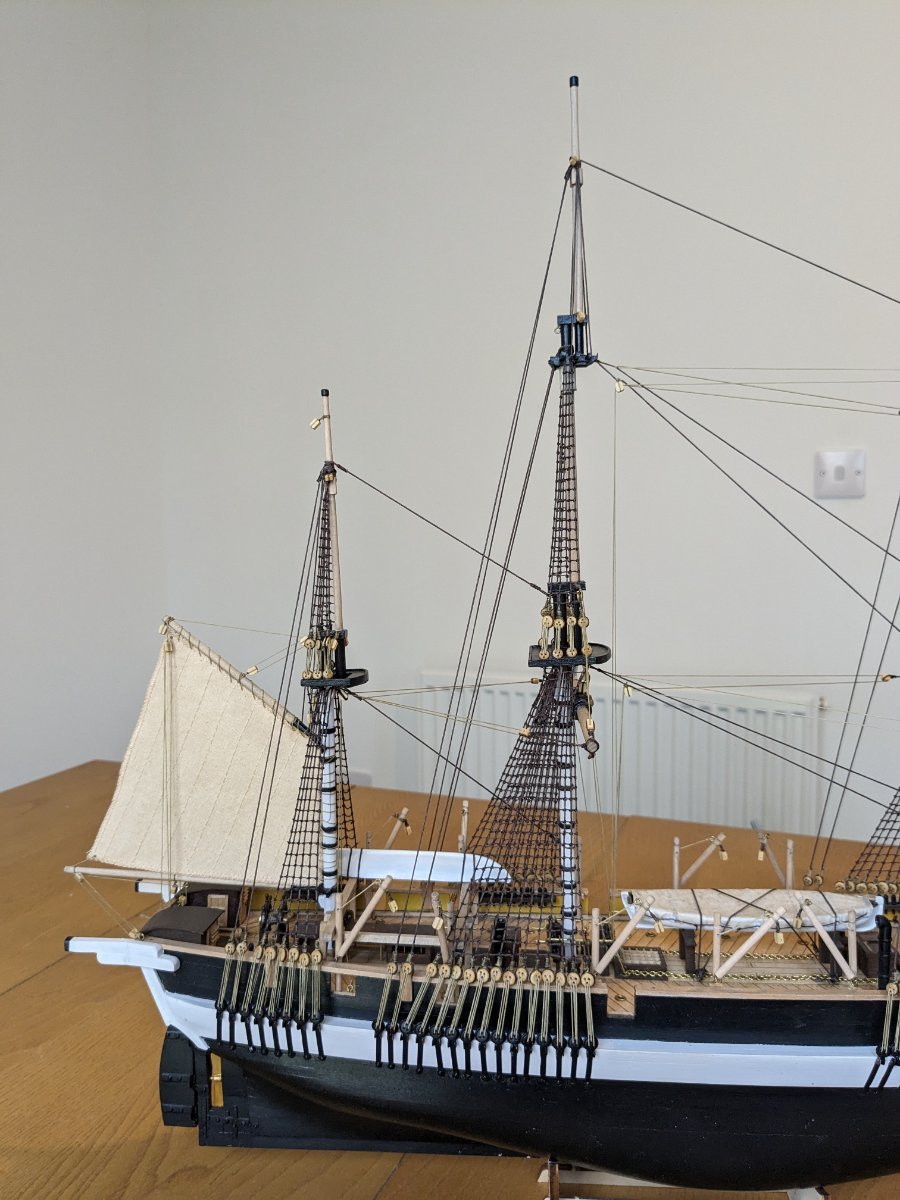
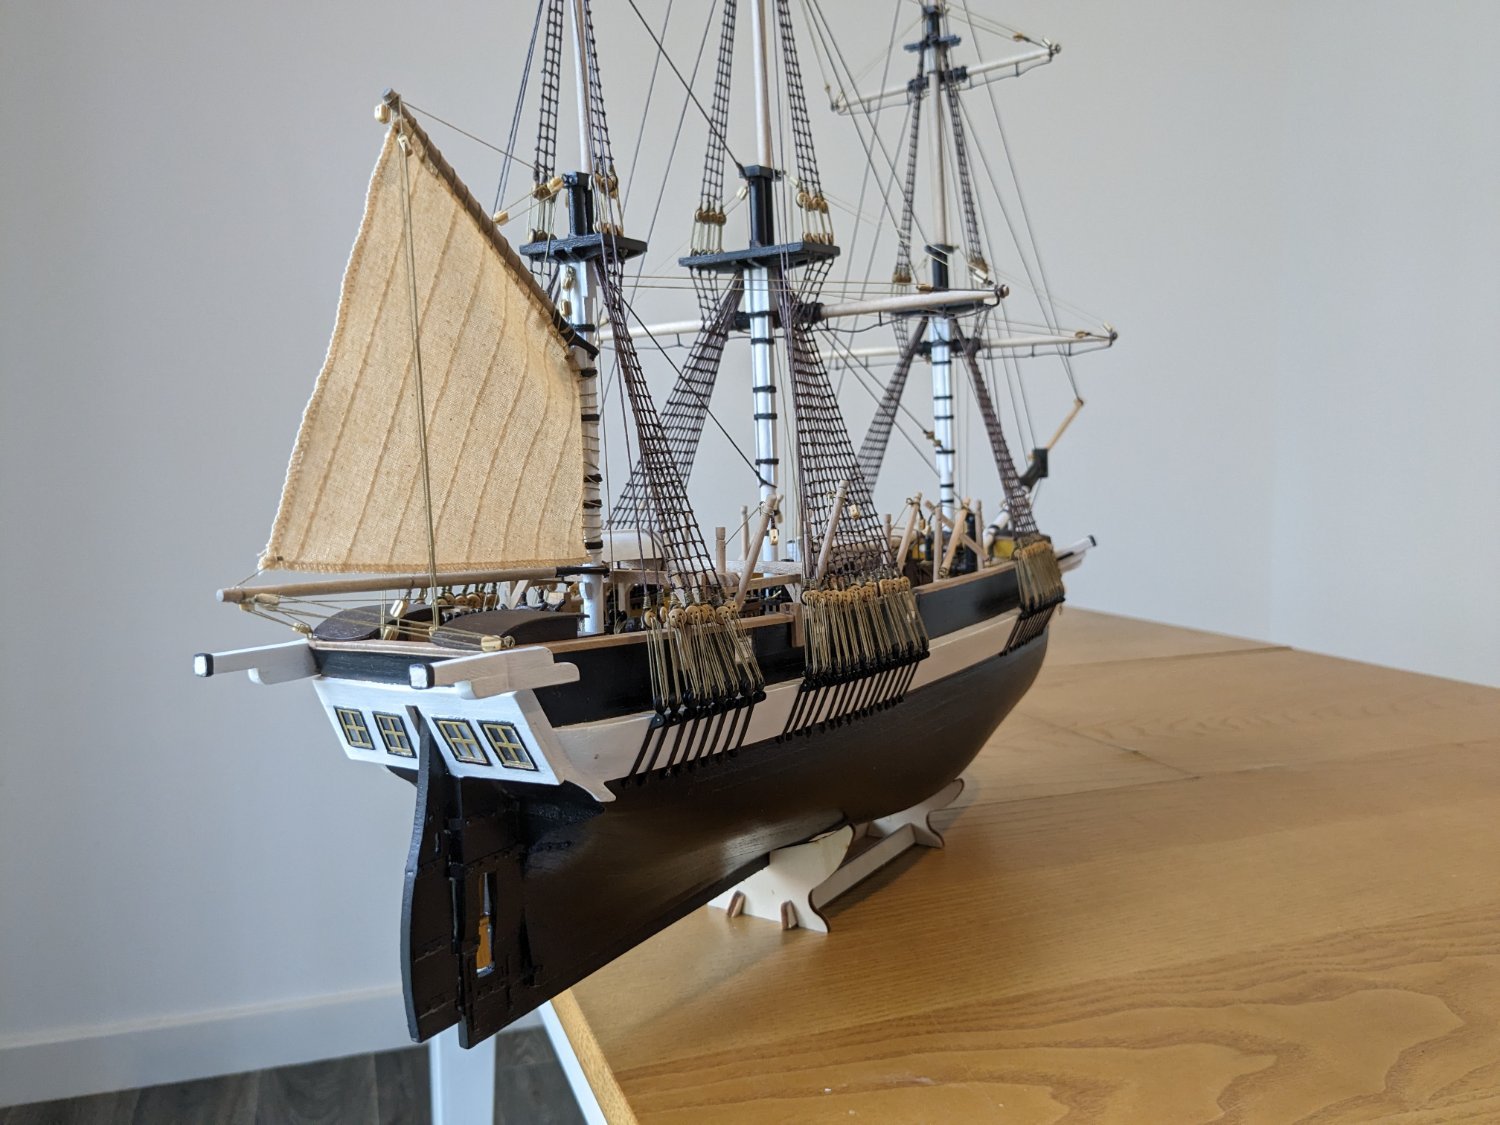
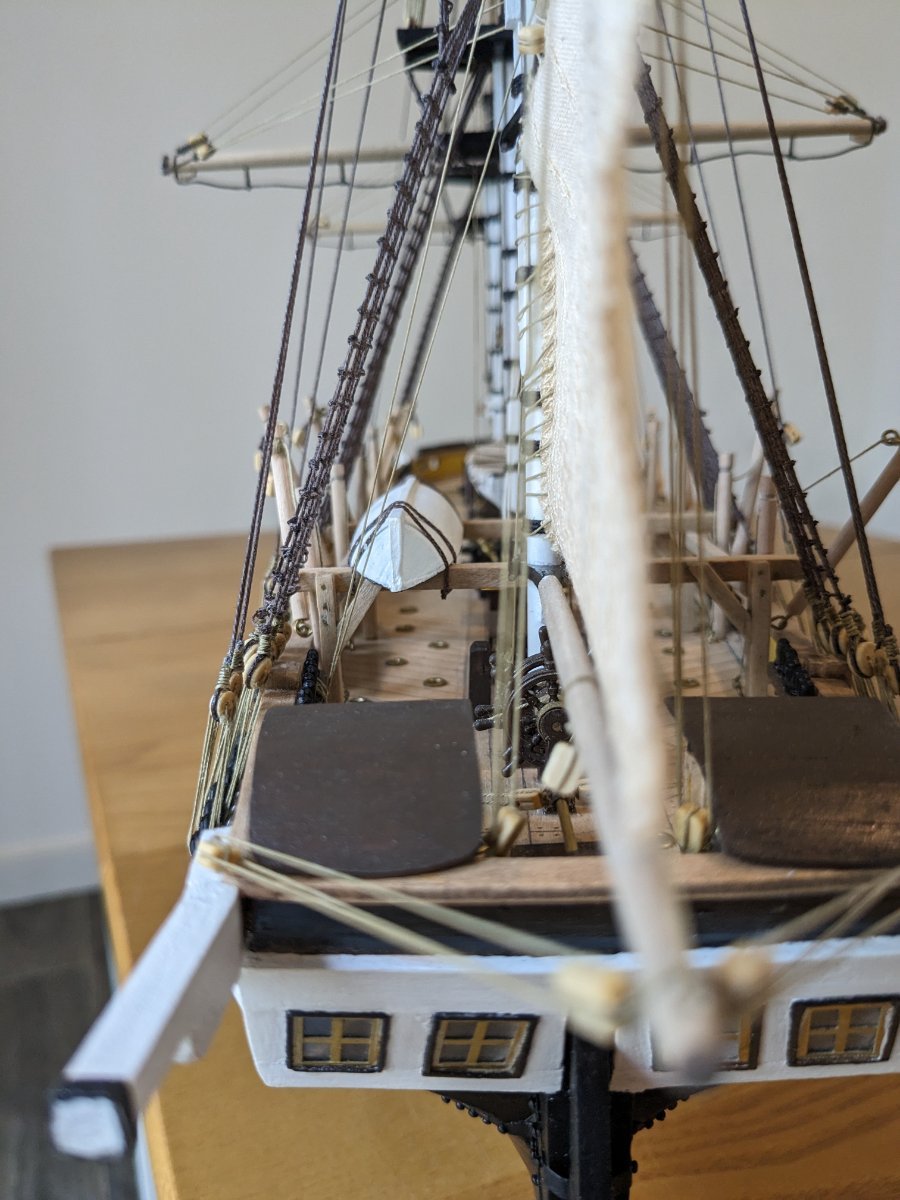
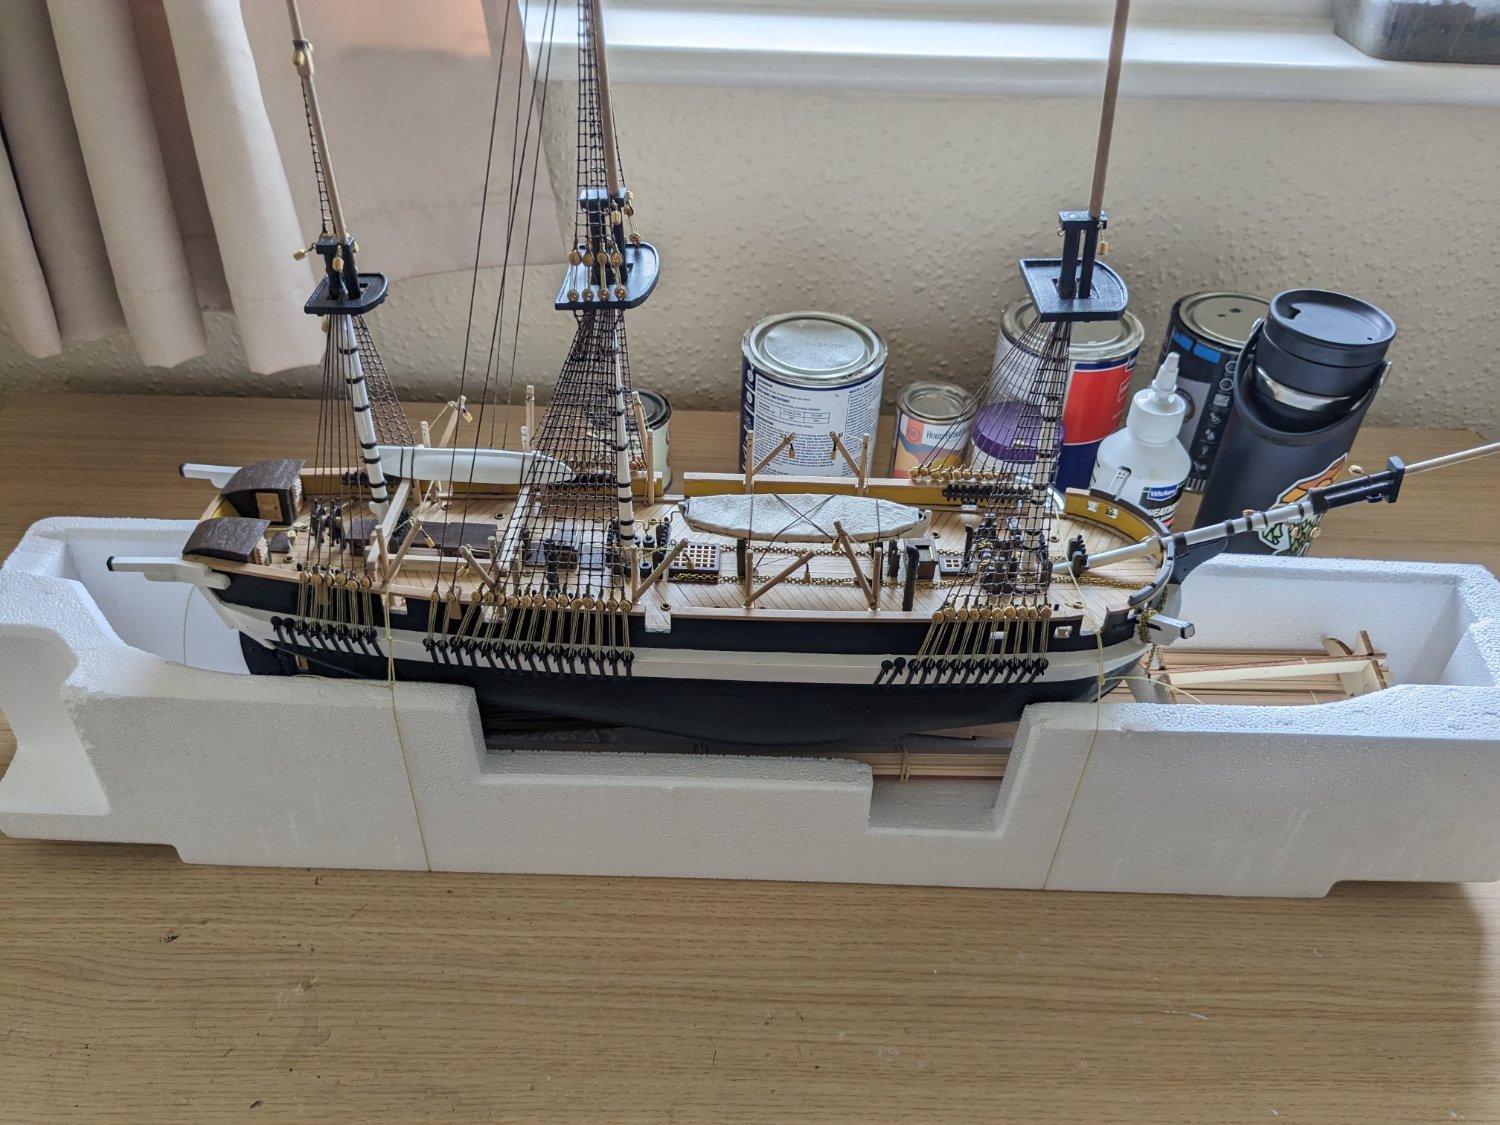
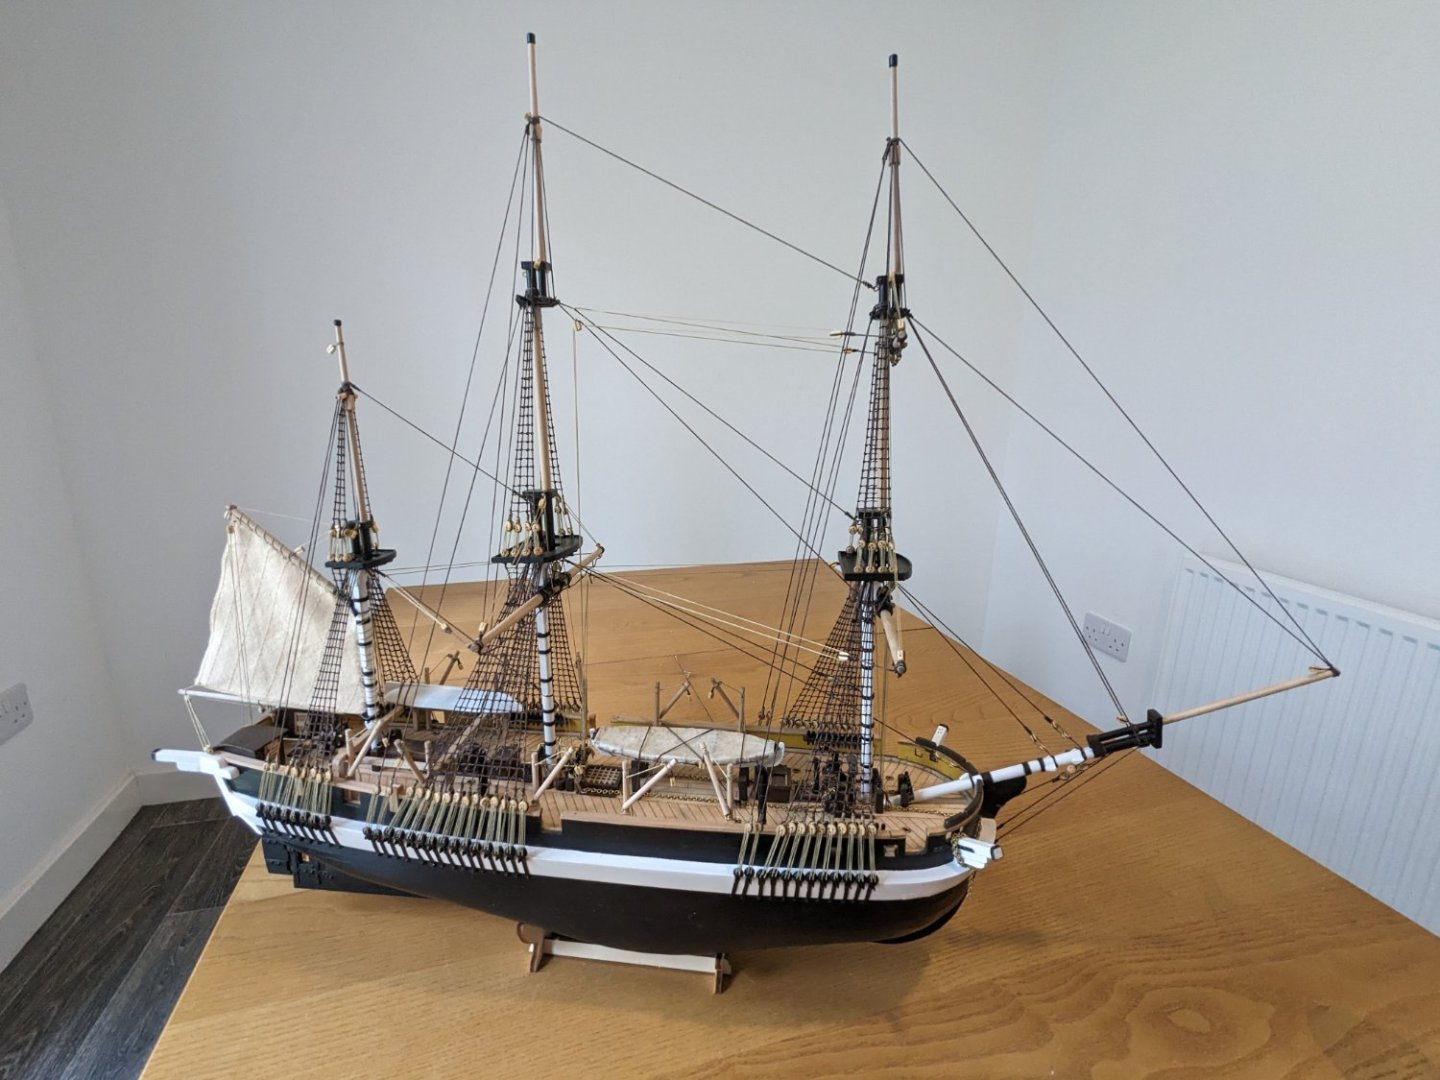
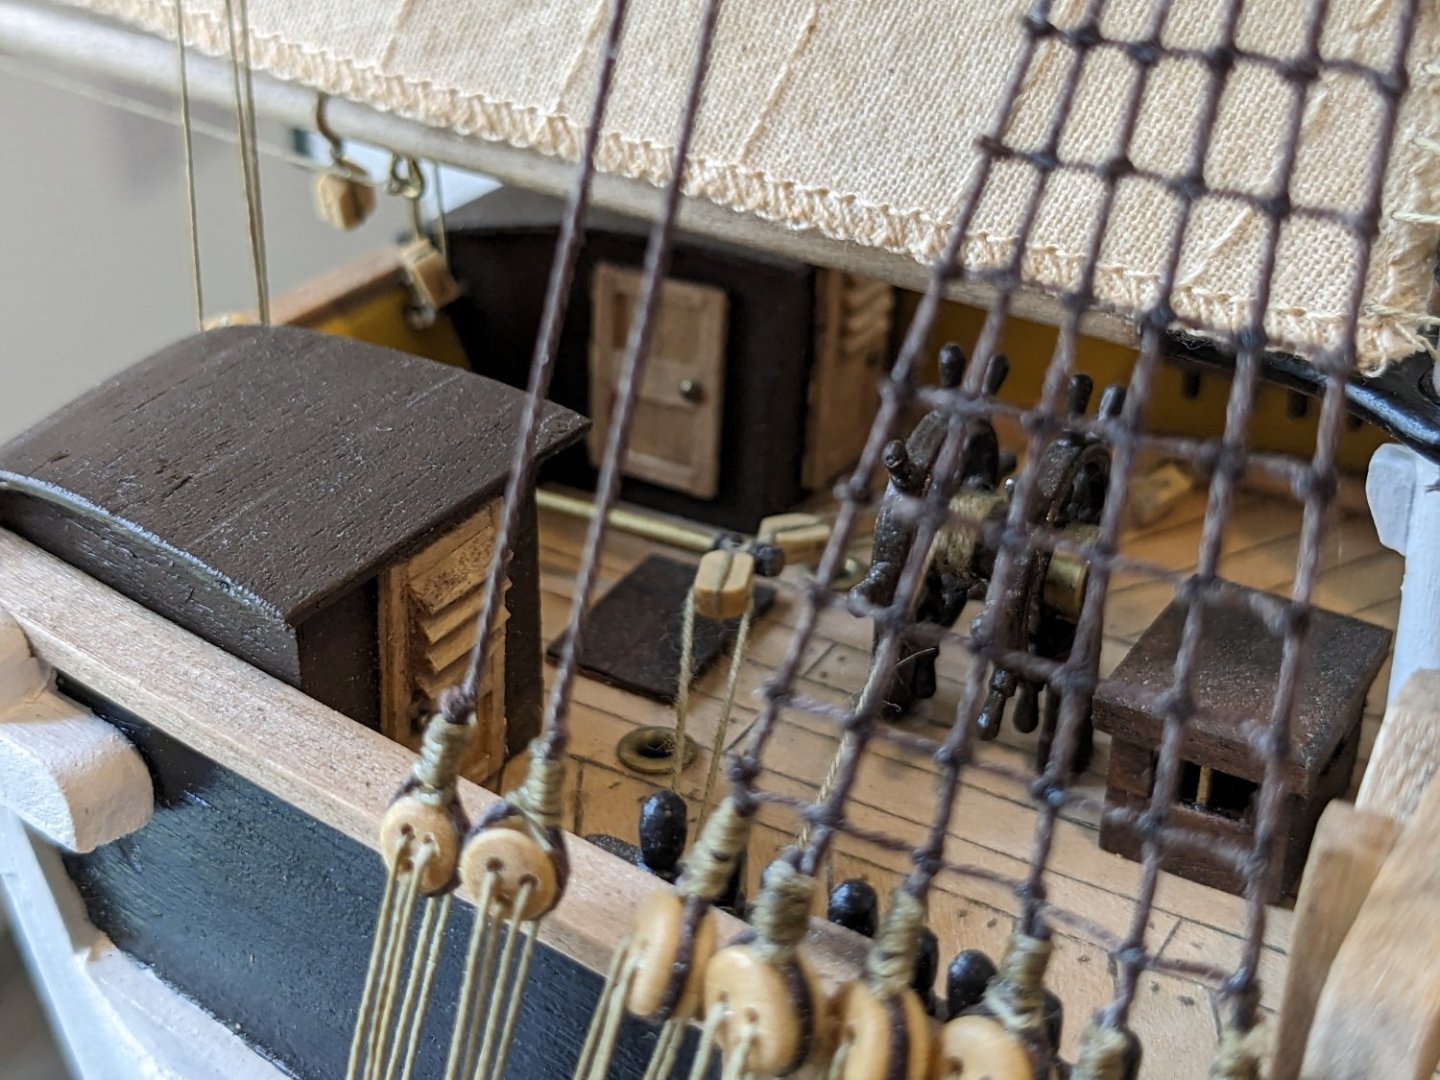
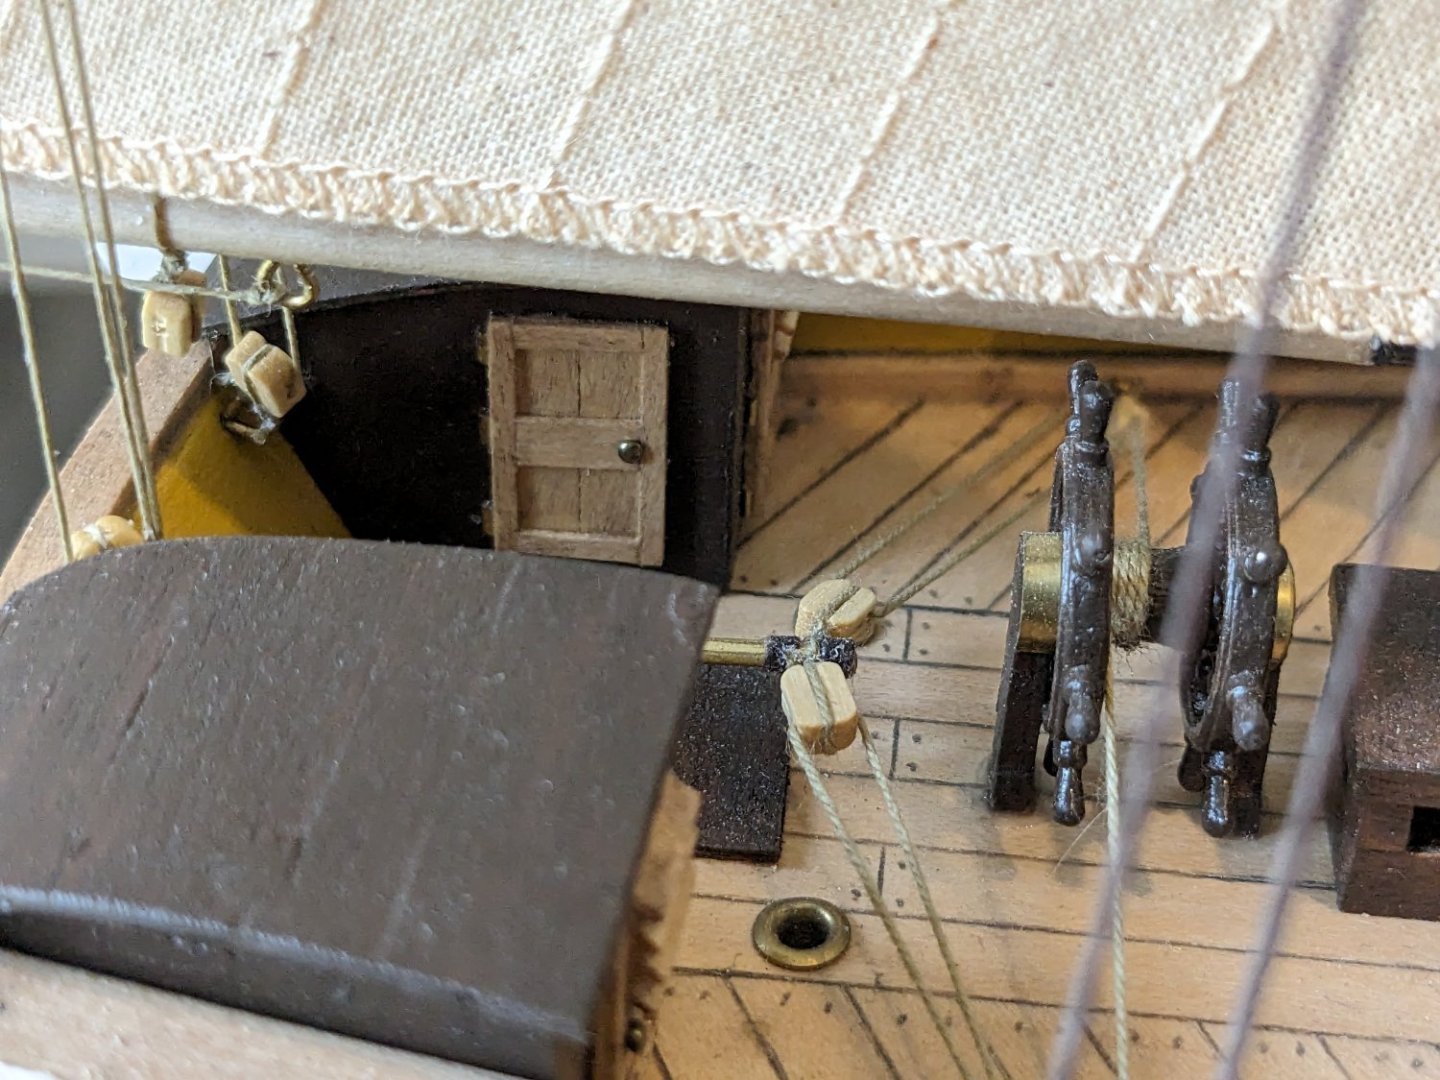
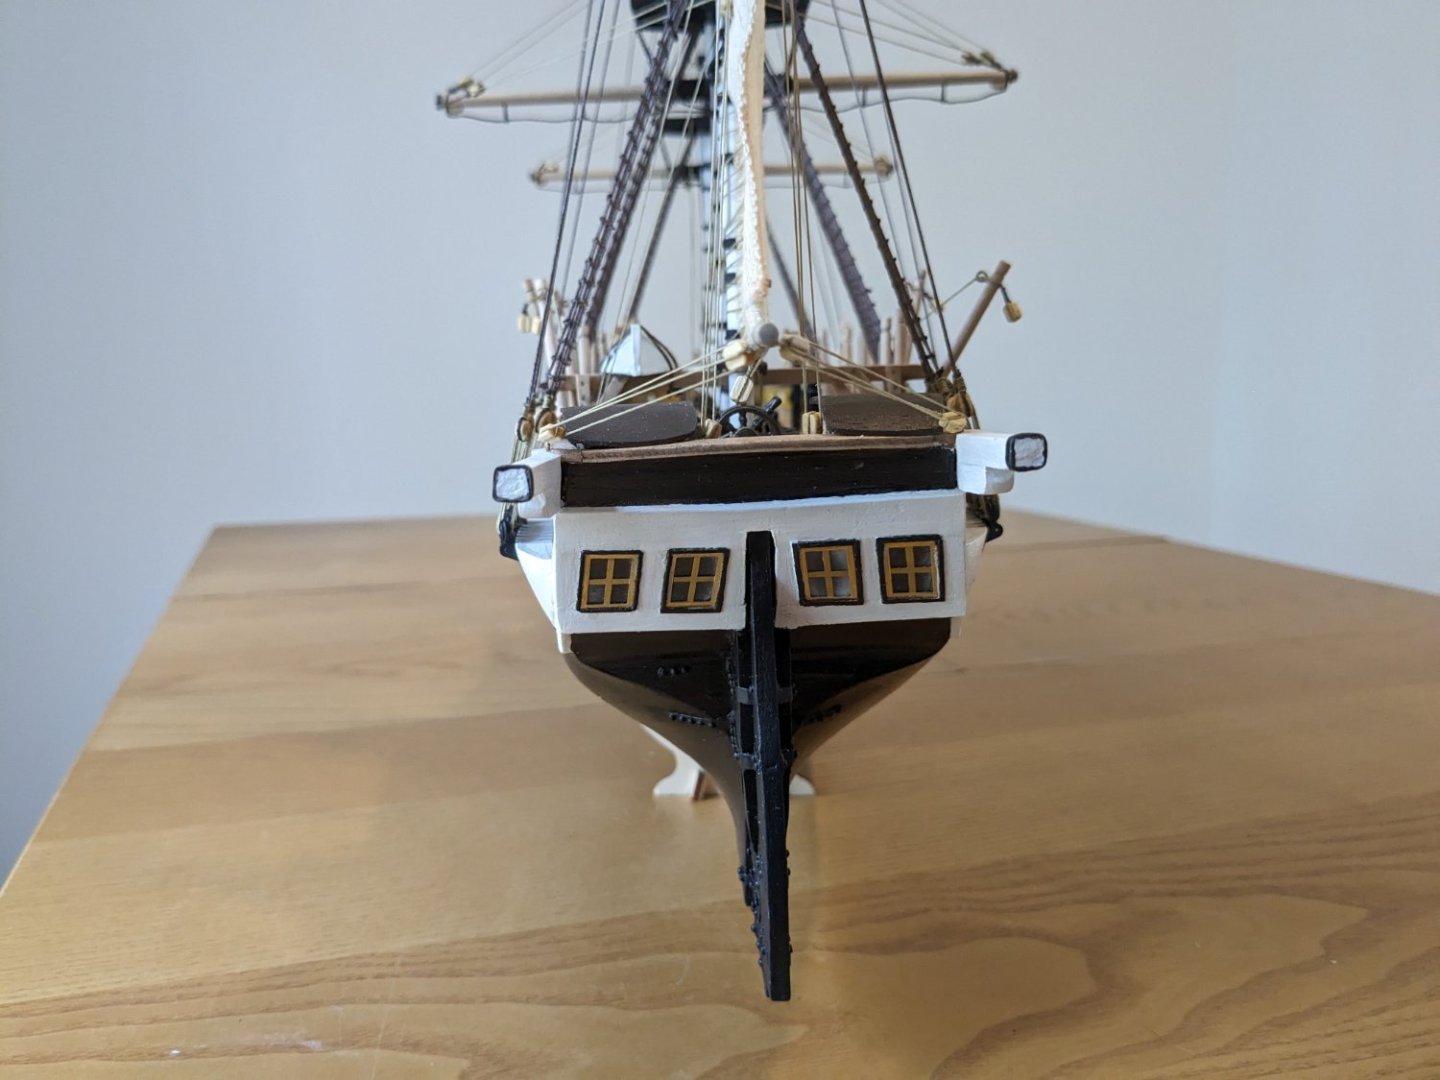
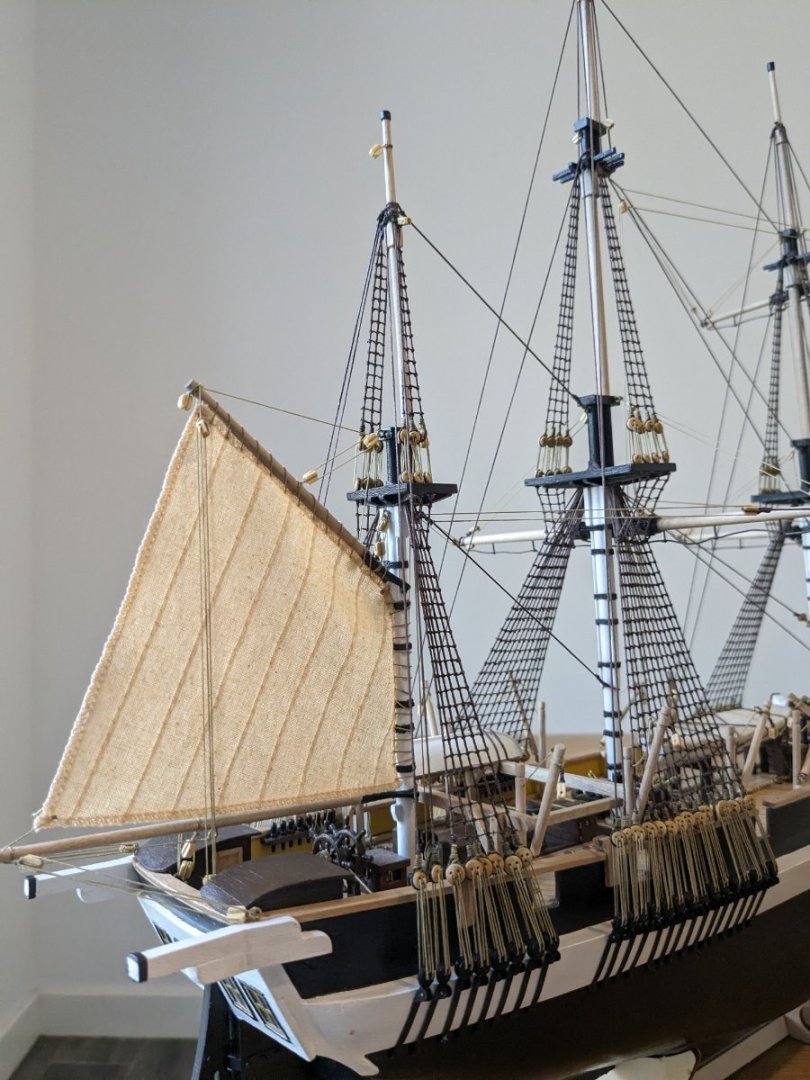
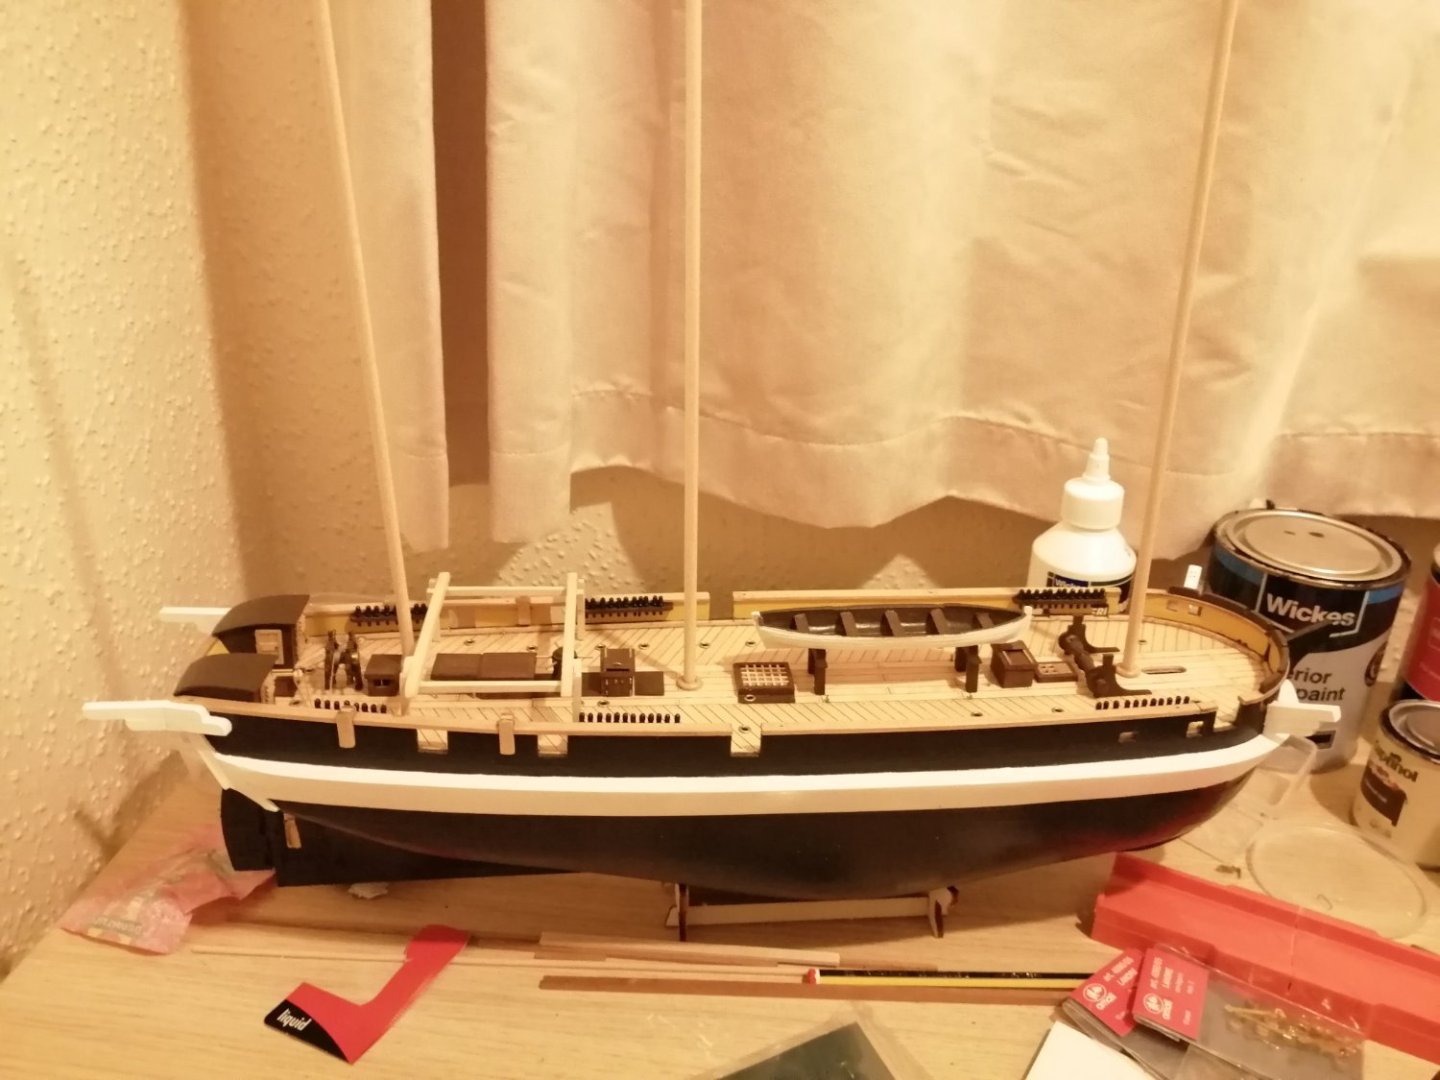
And here she is as she currently stands!


-
HMS Terror by Rking - OcCre - 1:75
Rking replied to Rking's topic in - Kit build logs for subjects built from 1801 - 1850
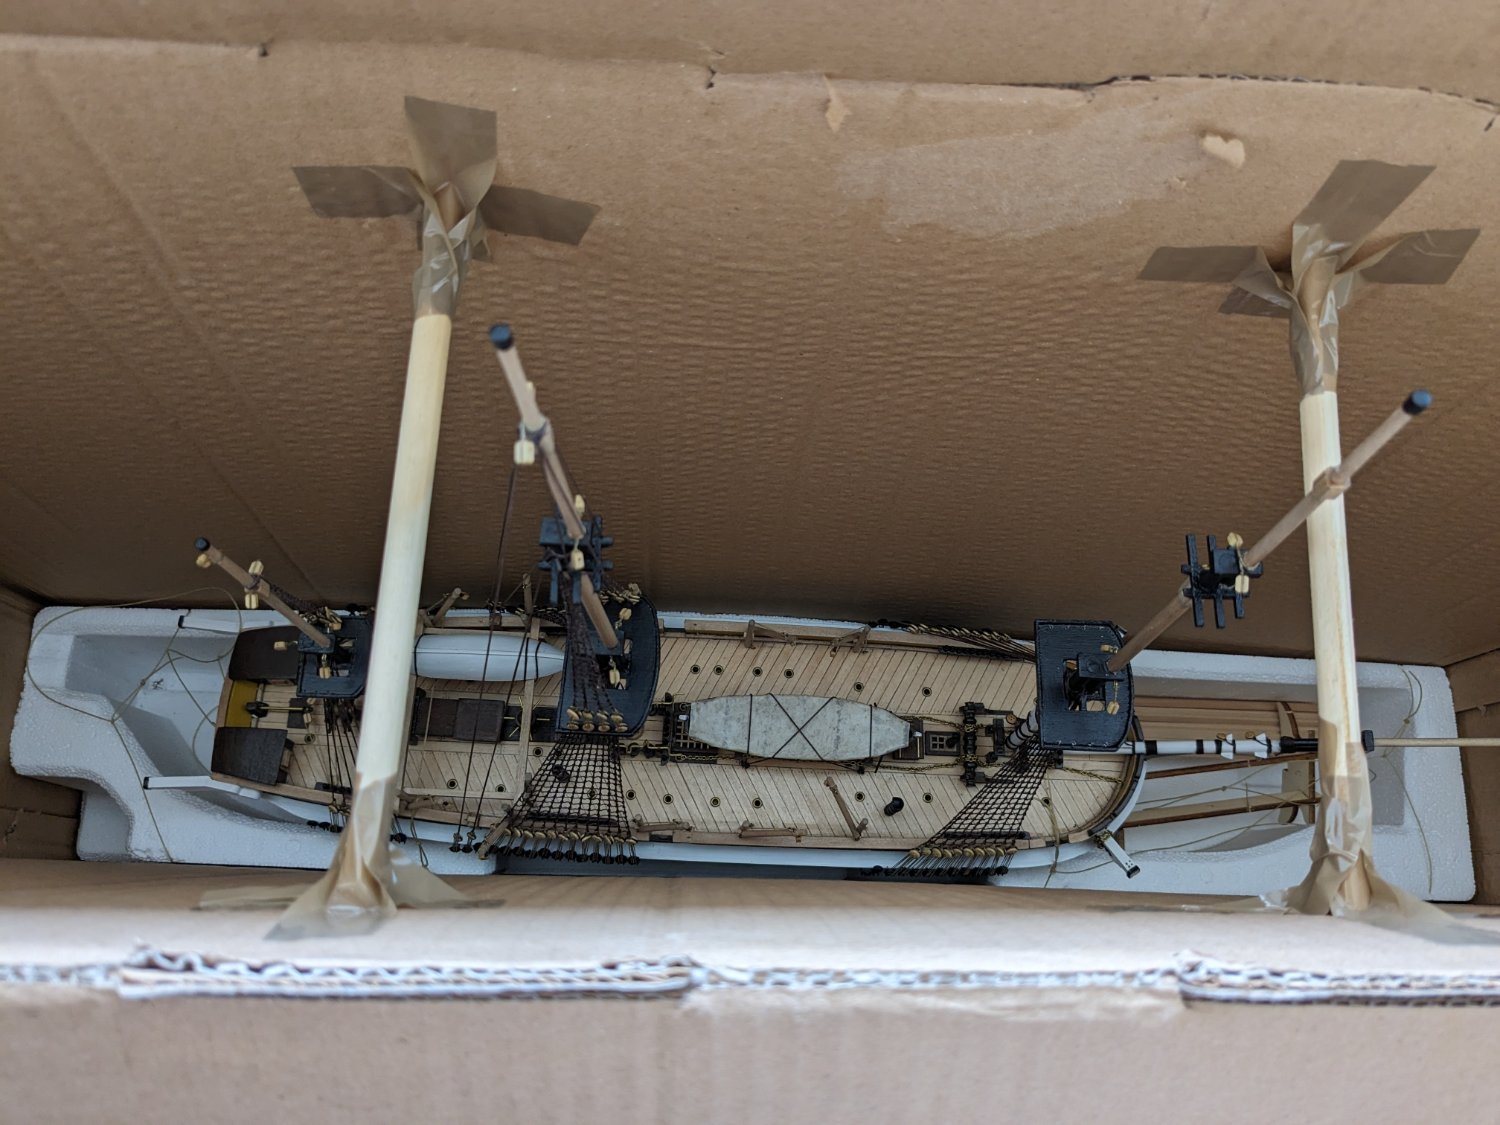
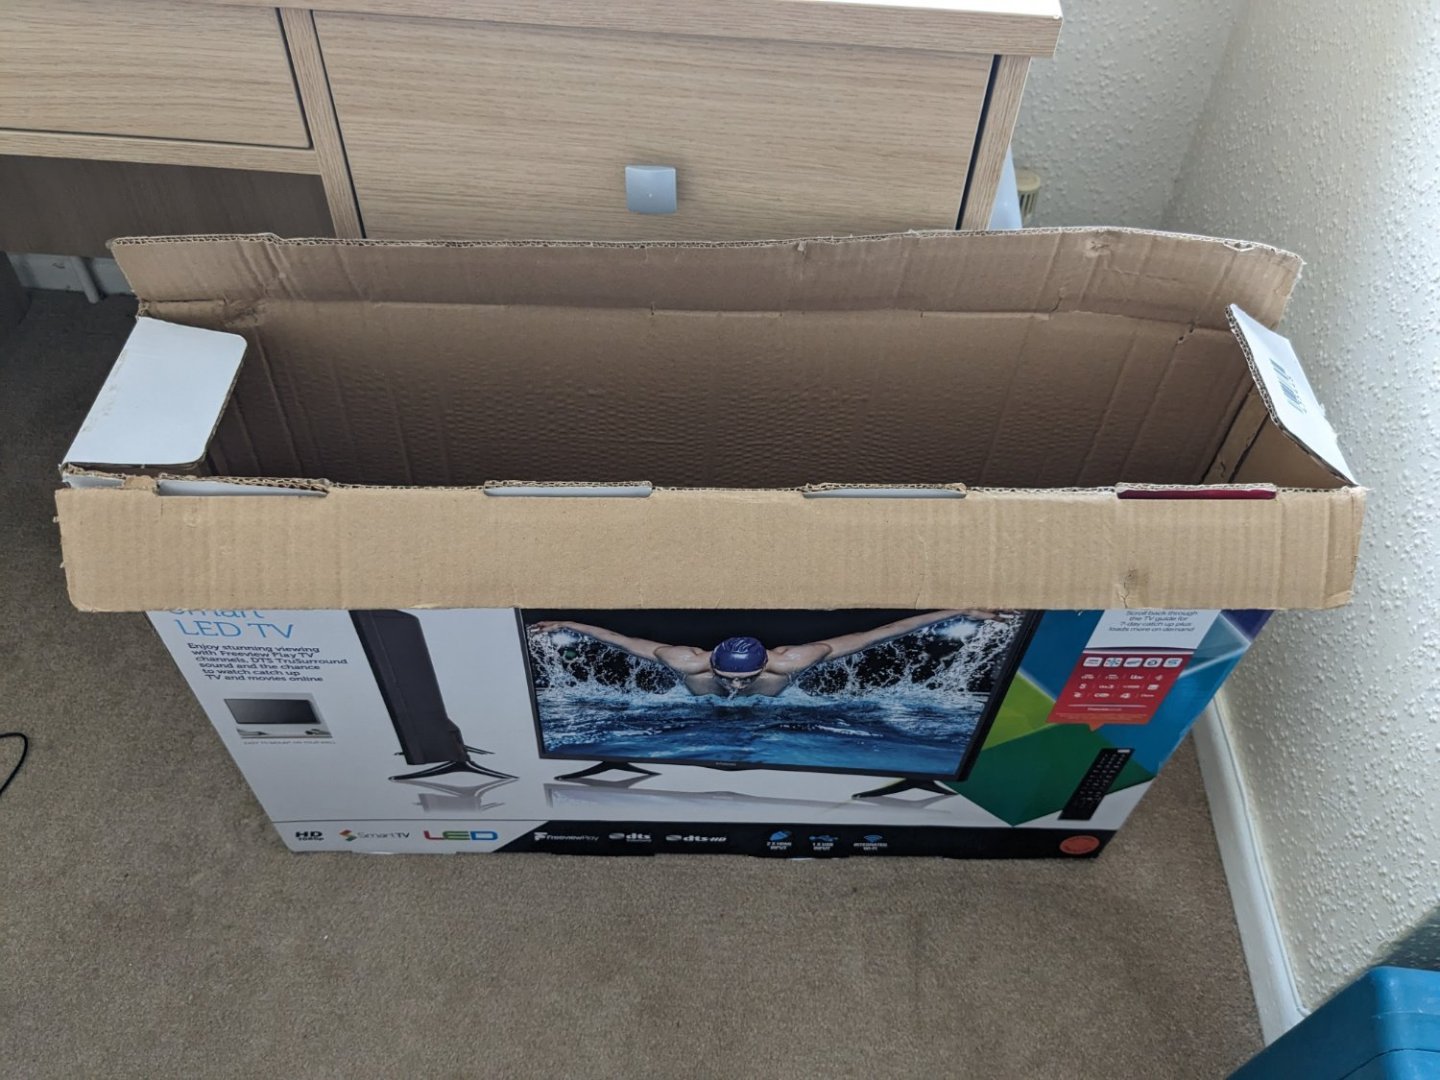
About a month ago we had to make a move from the south coast to the southern highlands of Scotland. I was scratching my head for a while debating how I was going to get her up there in one piece, until my fabulous long haired admiral came up with this plan of using an old TV box! worked like a dream! luckily I hadn't fitted any of the spars yet!


-
HMS Terror by Rking - OcCre - 1:75
Rking replied to Rking's topic in - Kit build logs for subjects built from 1801 - 1850
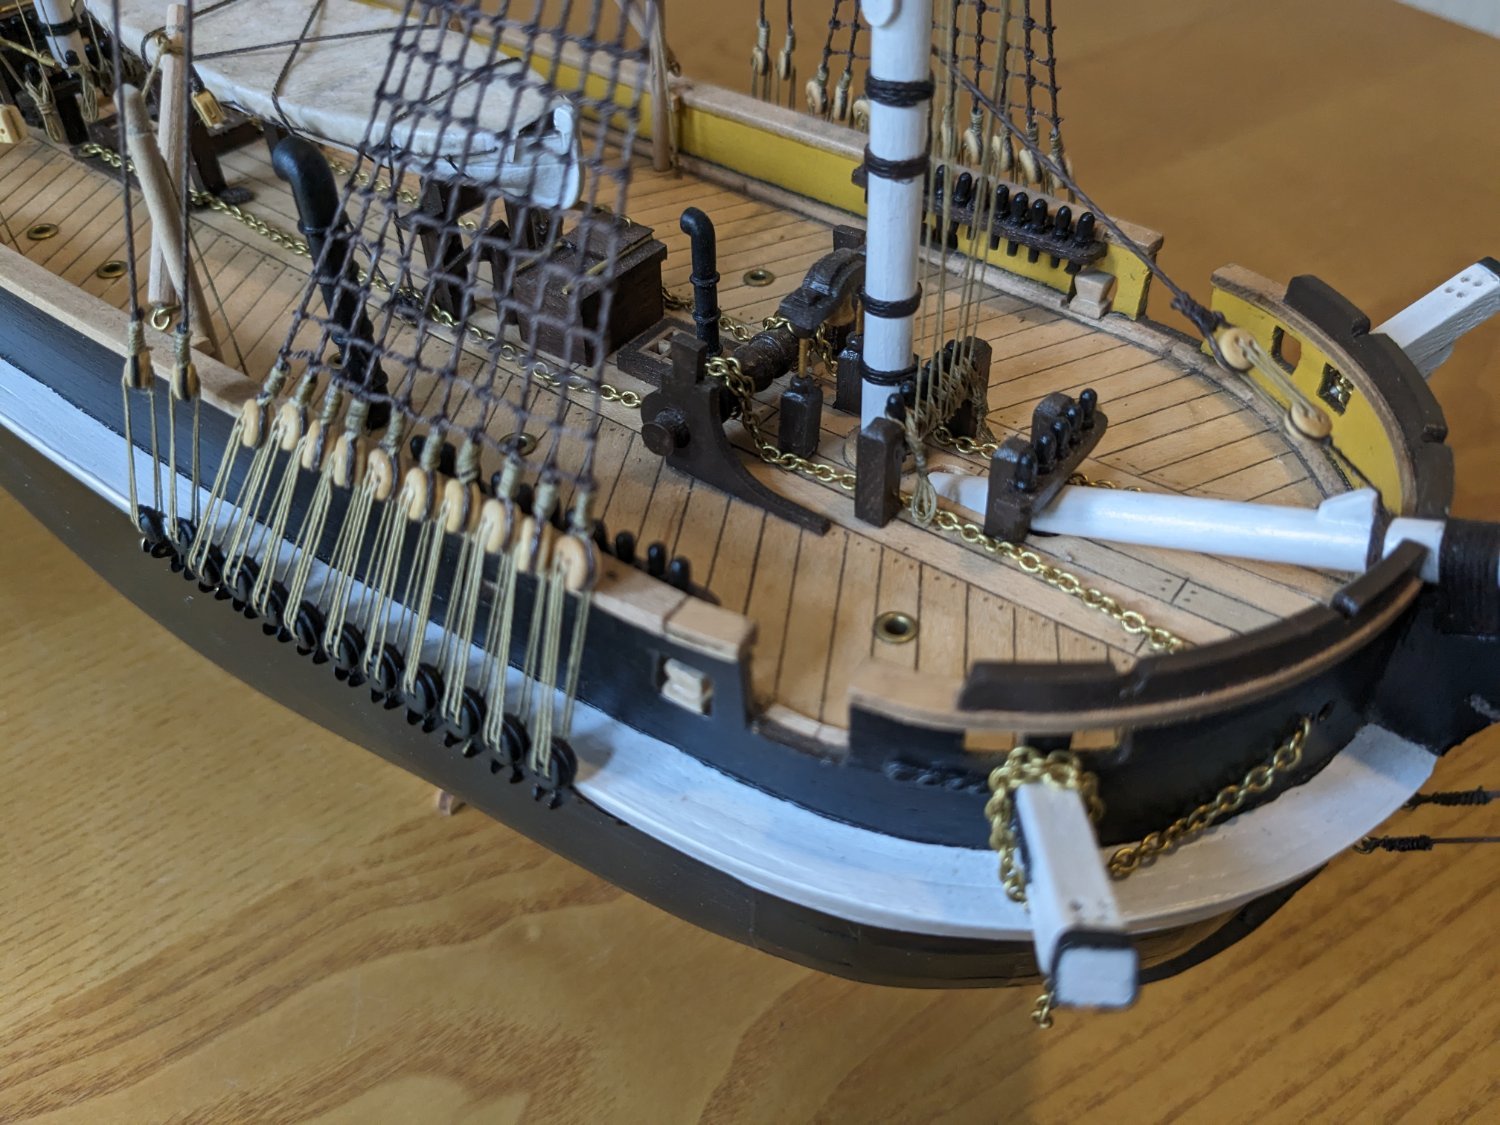
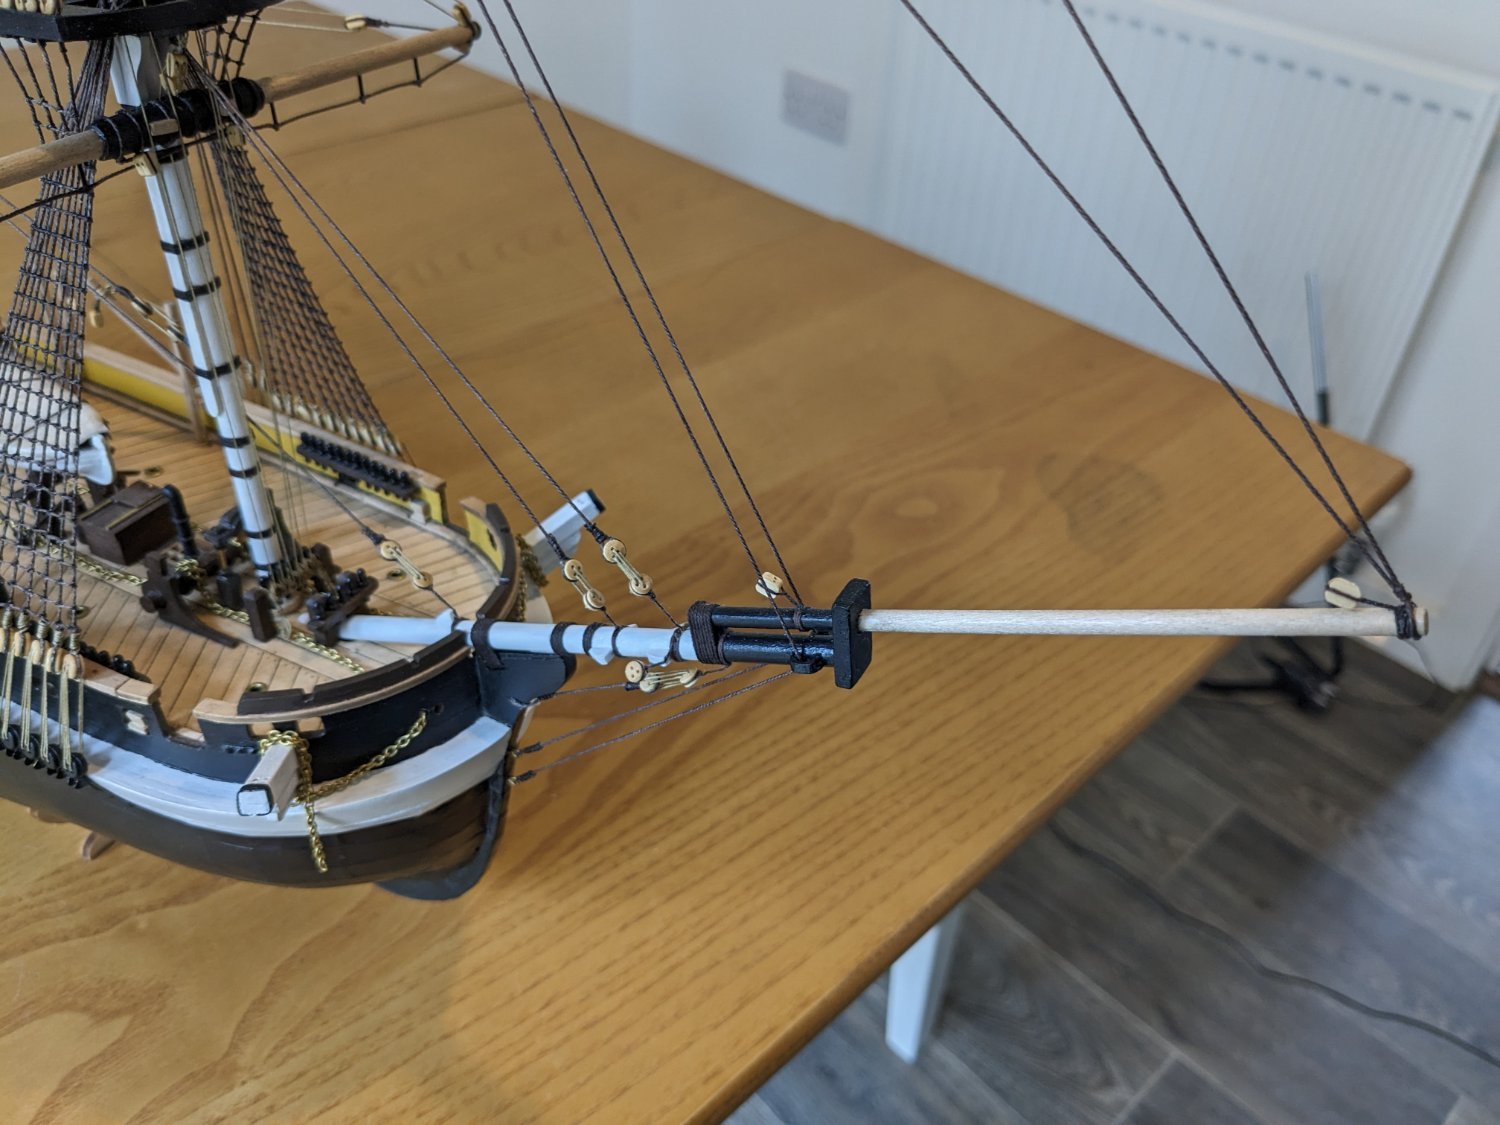
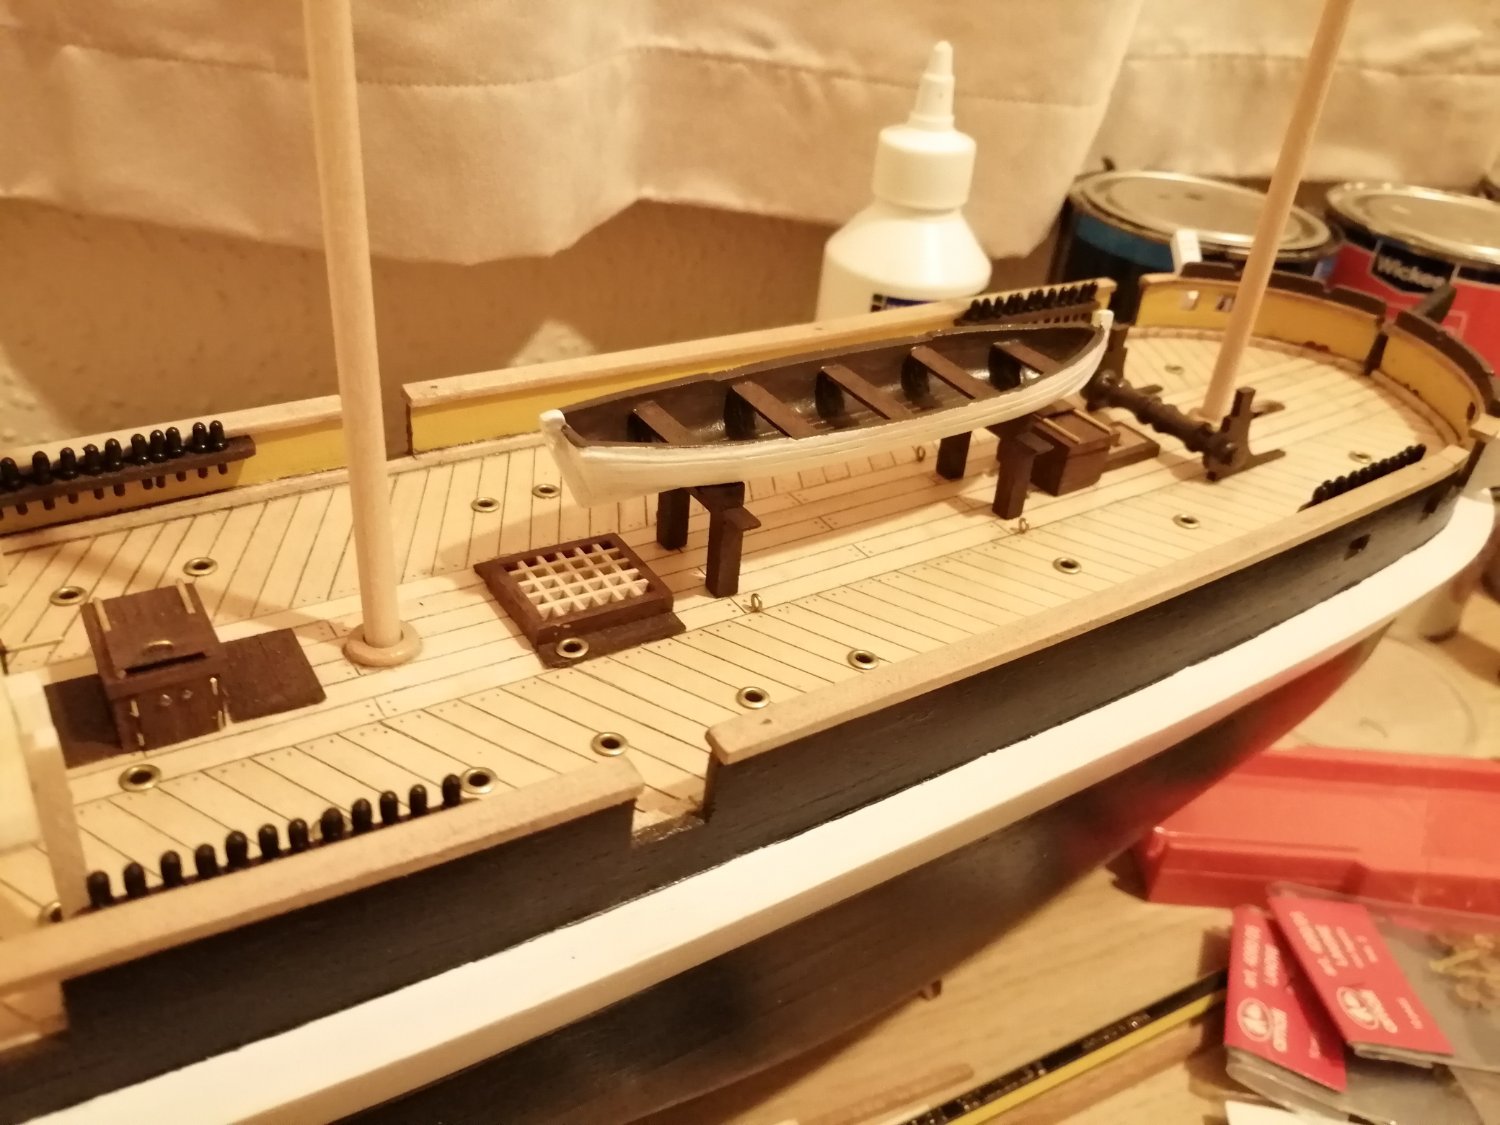
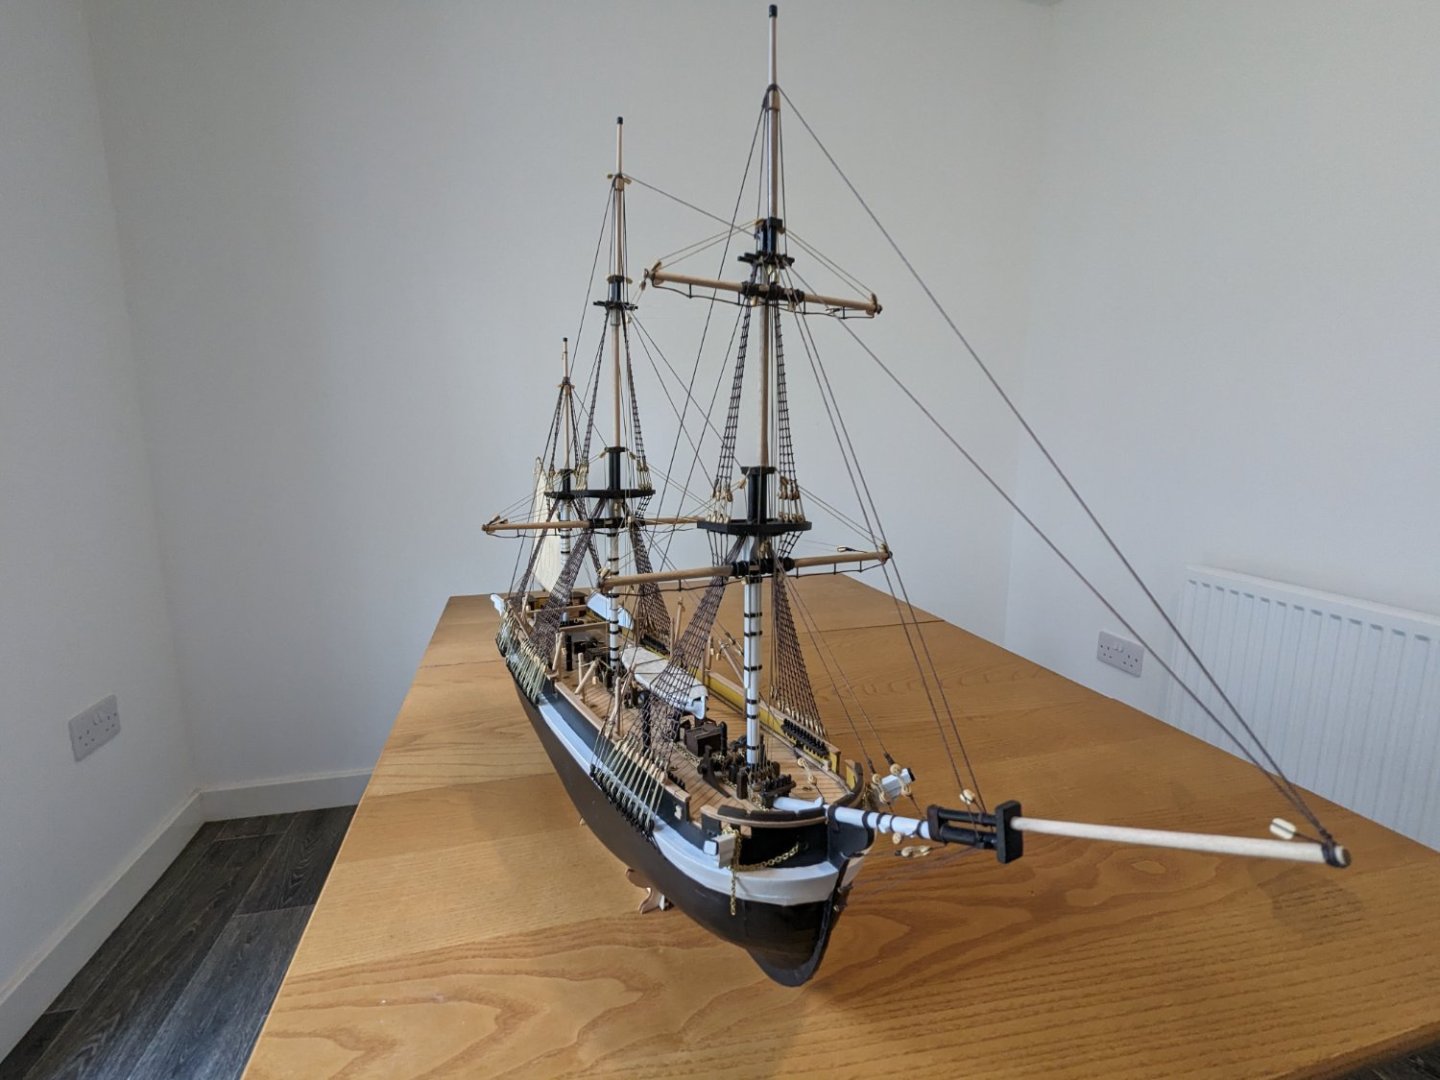
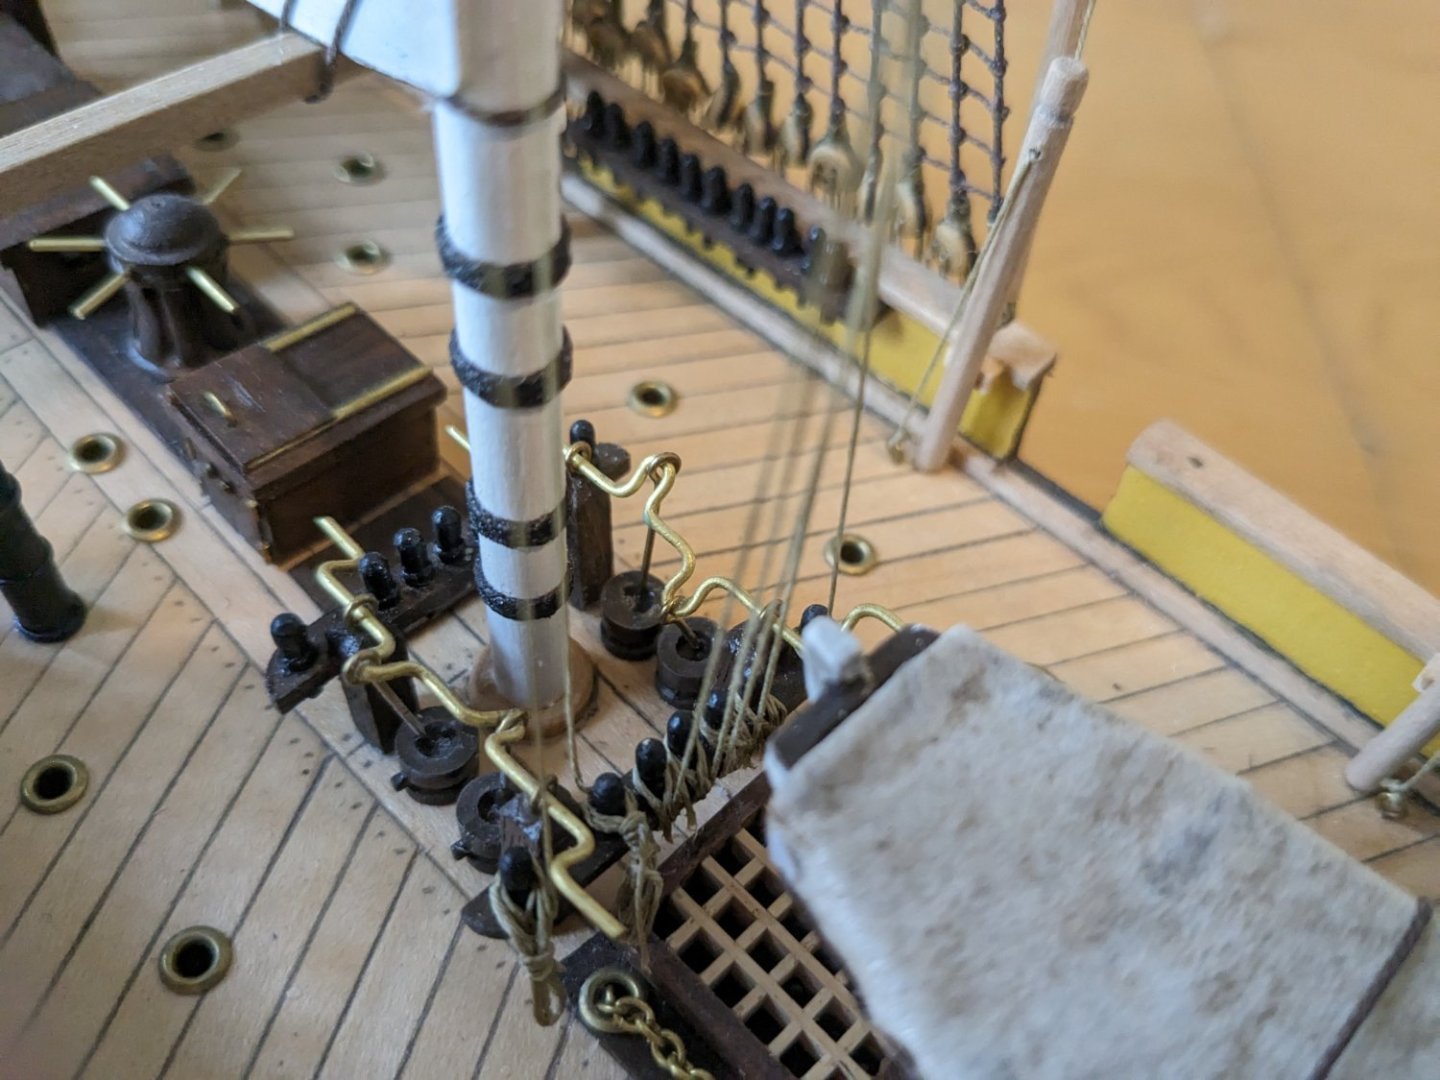
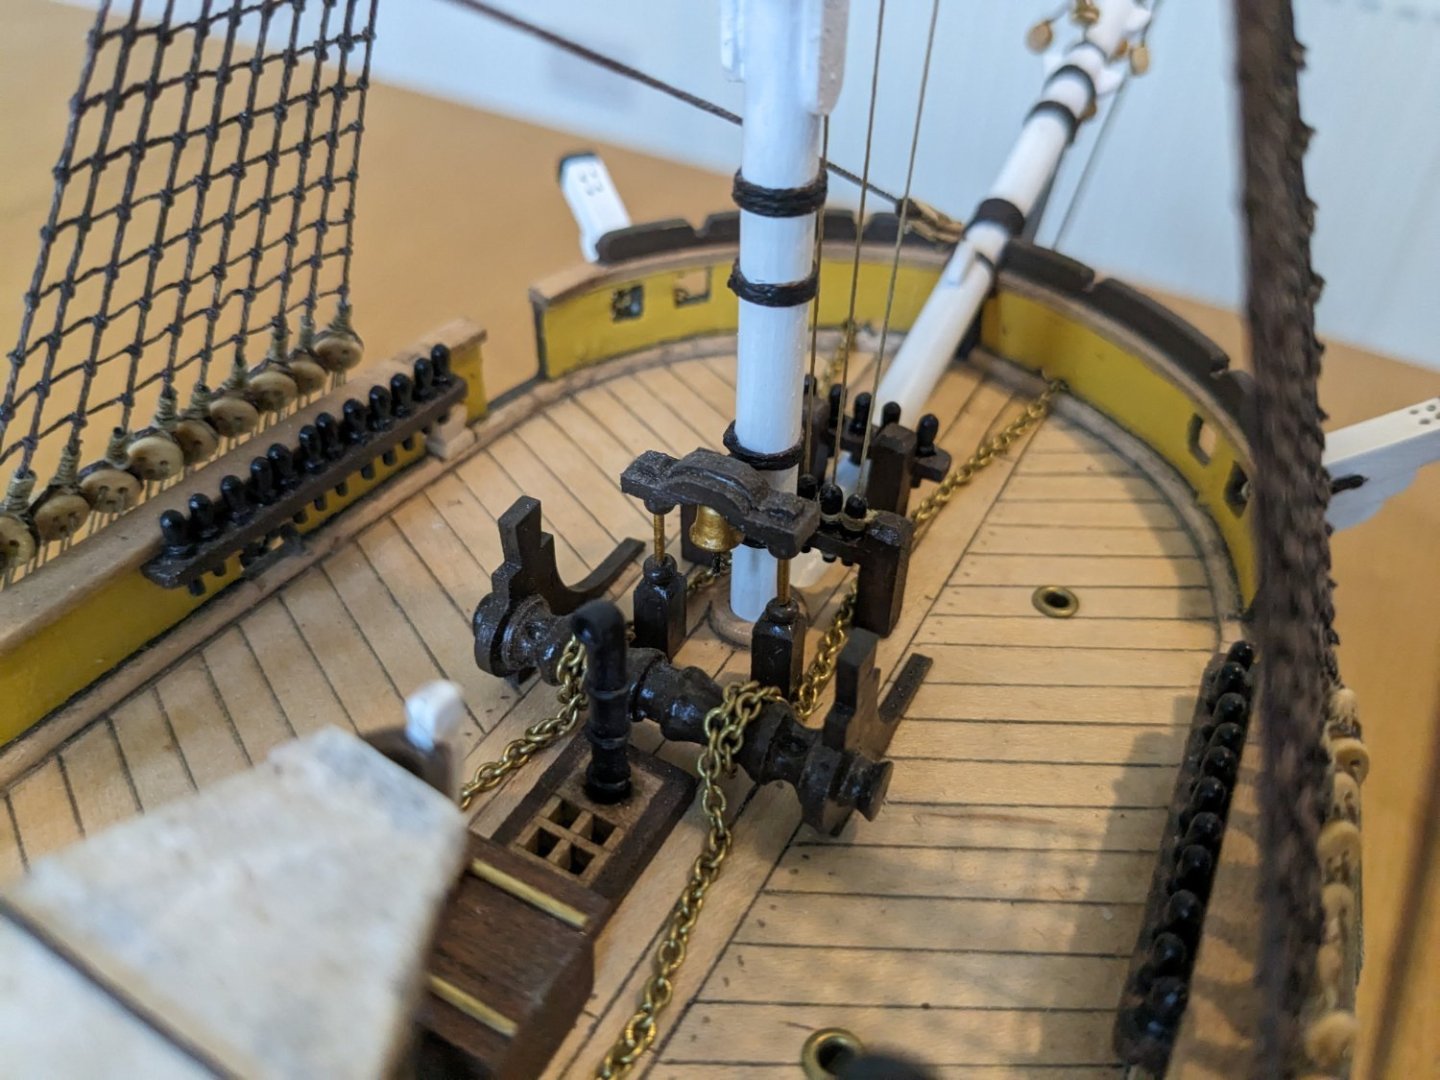
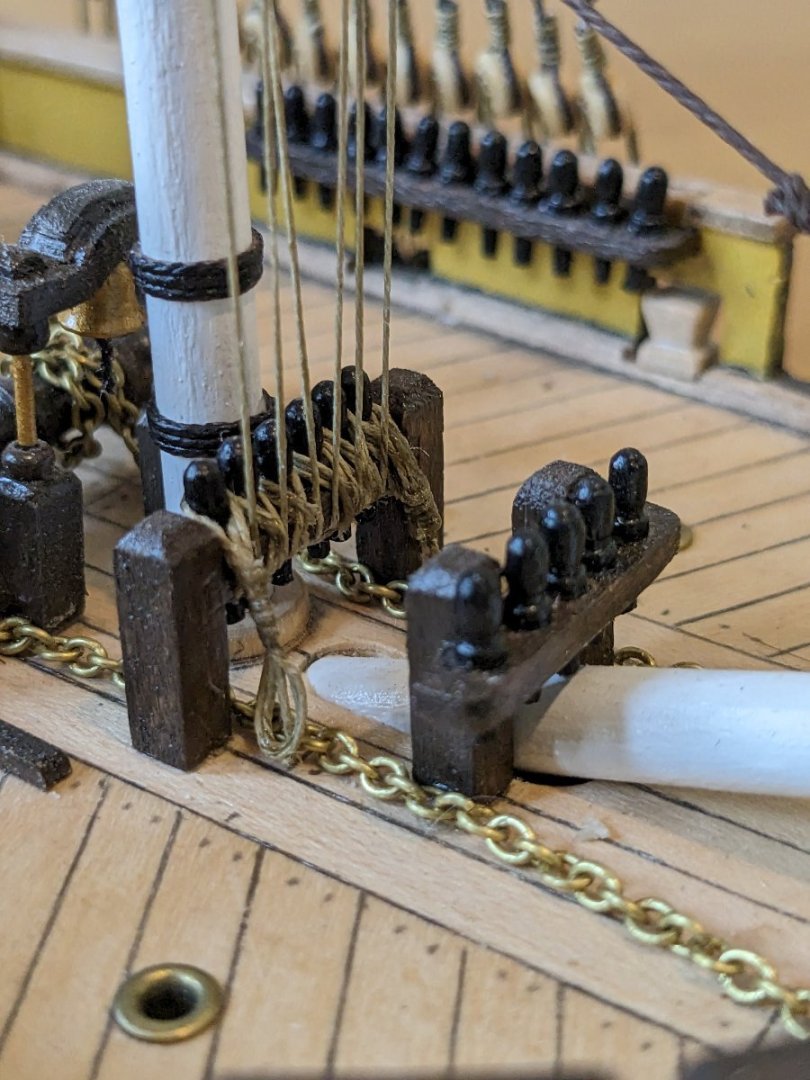
Test fitting the masts, and some progress with the deck fittings

-
HMS Terror by Rking - OcCre - 1:75
Rking replied to Rking's topic in - Kit build logs for subjects built from 1801 - 1850
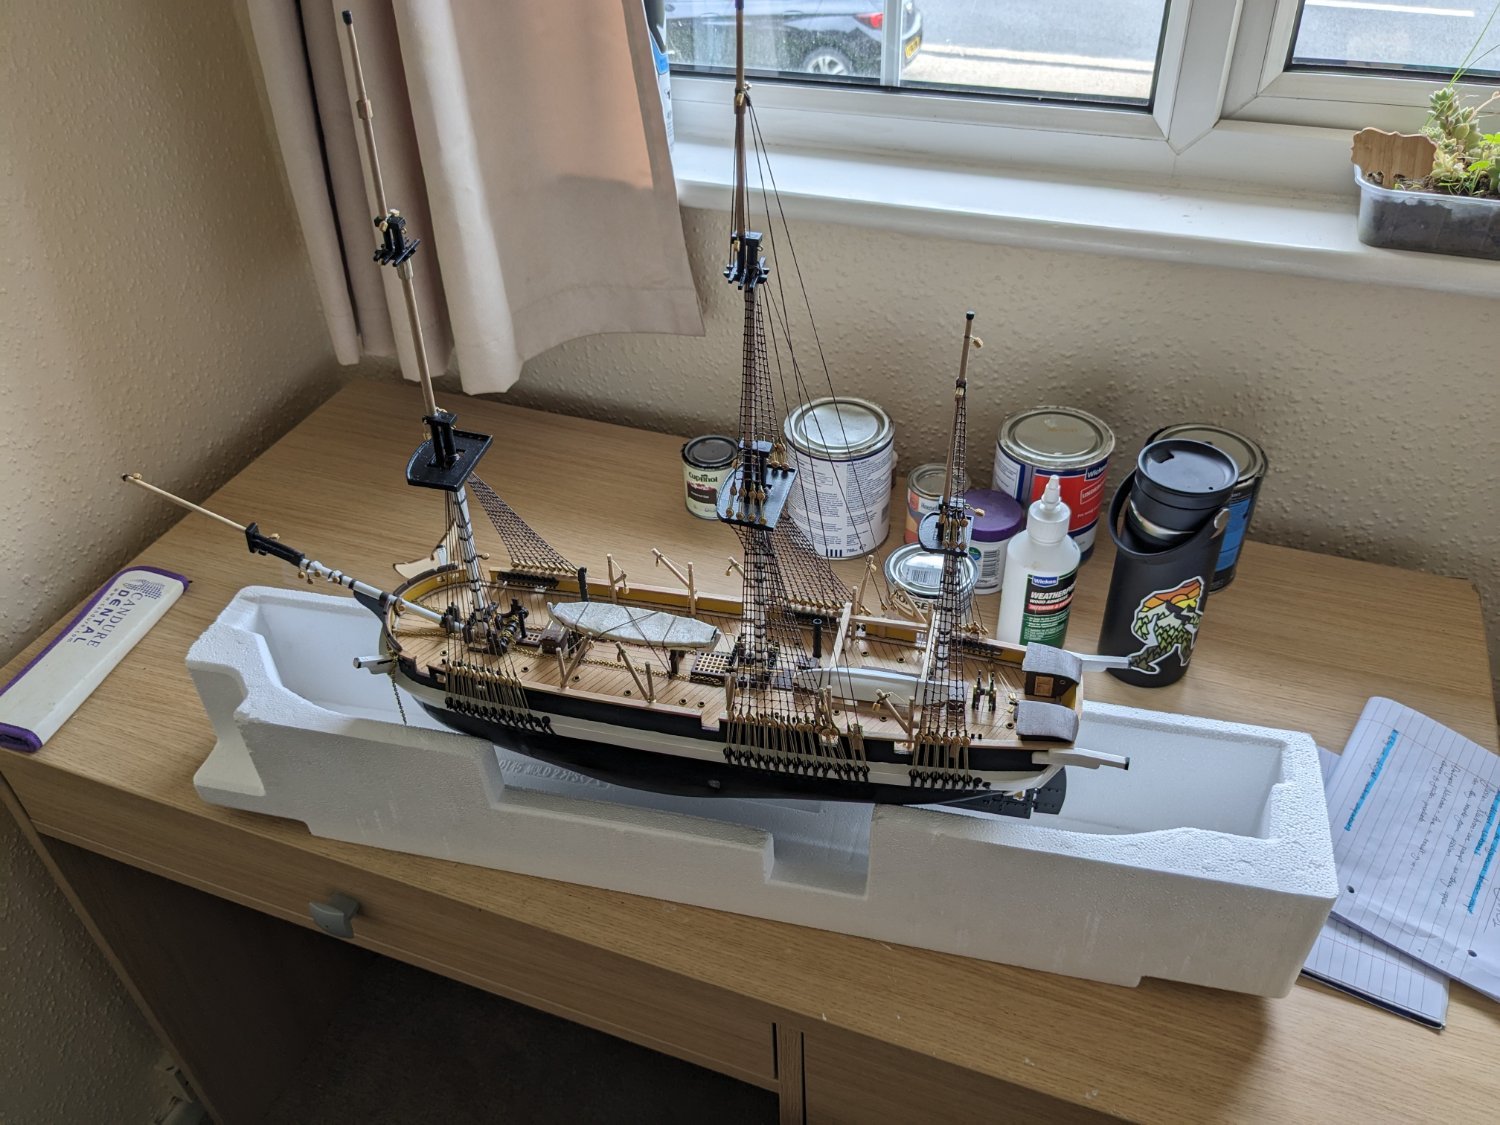
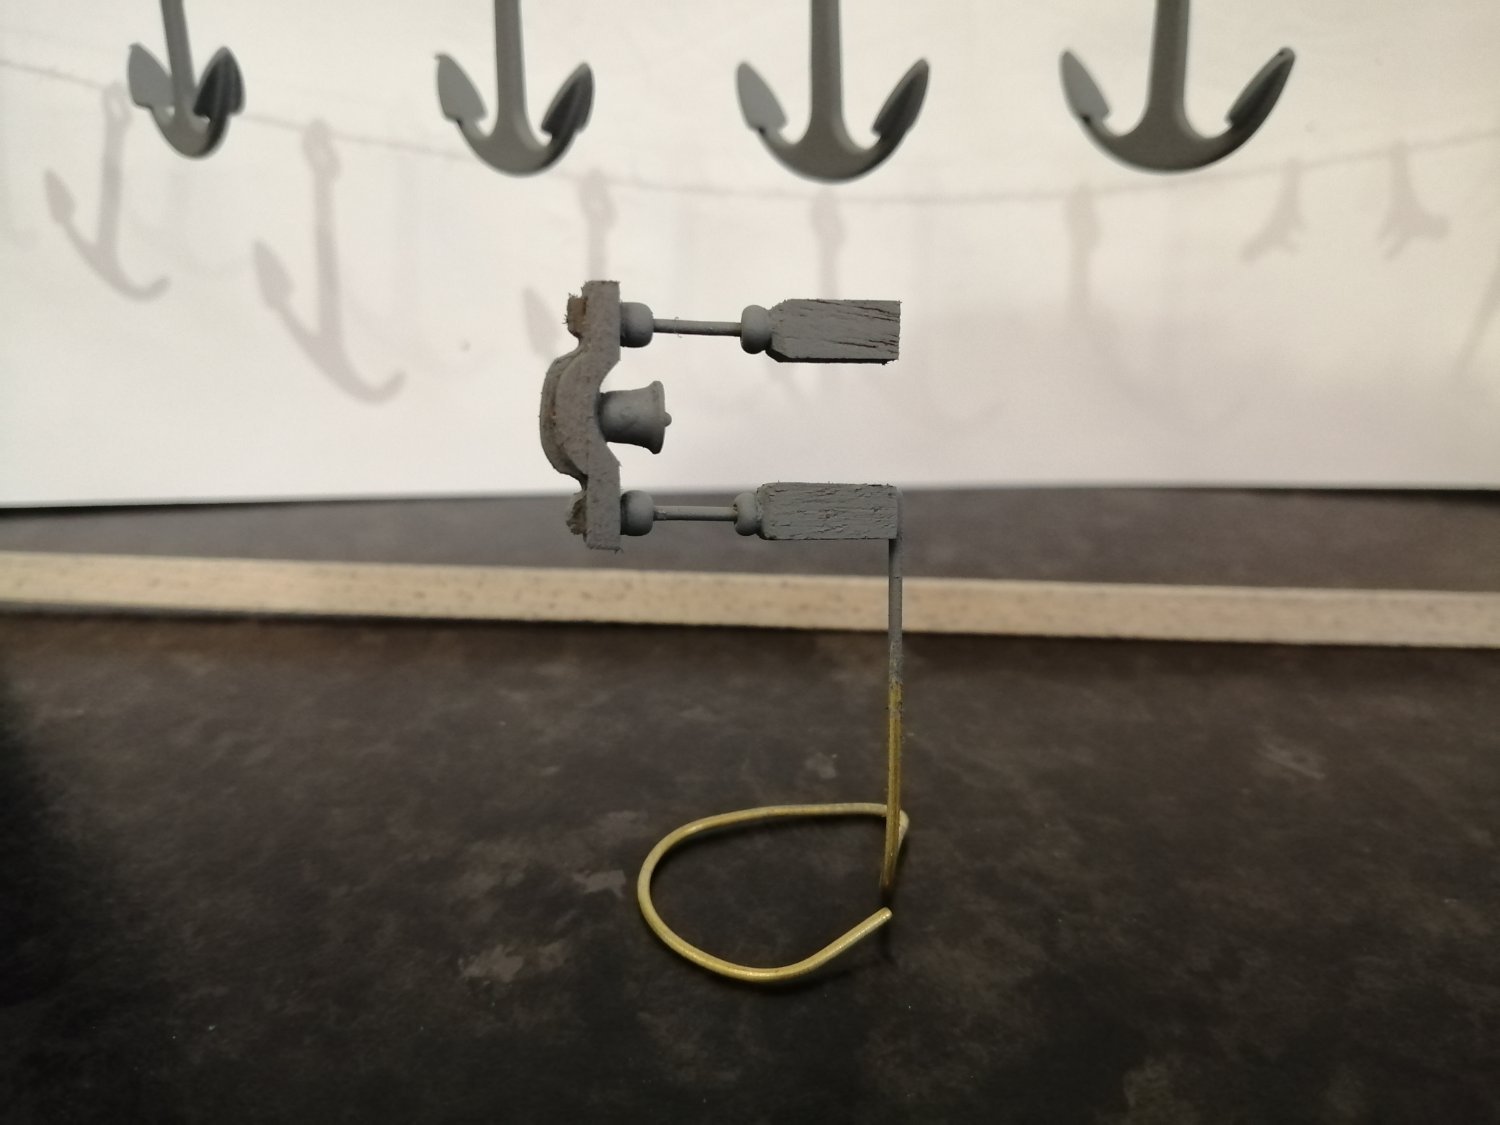
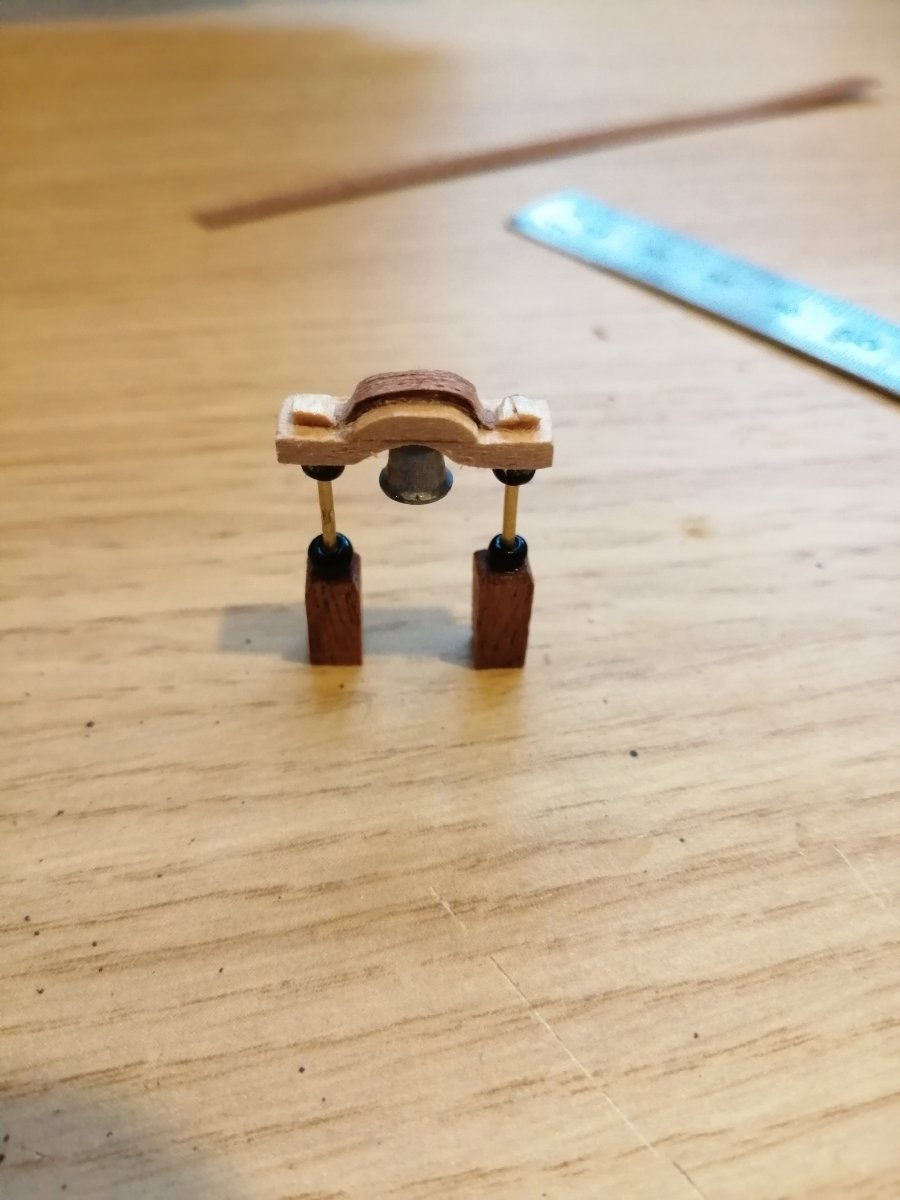
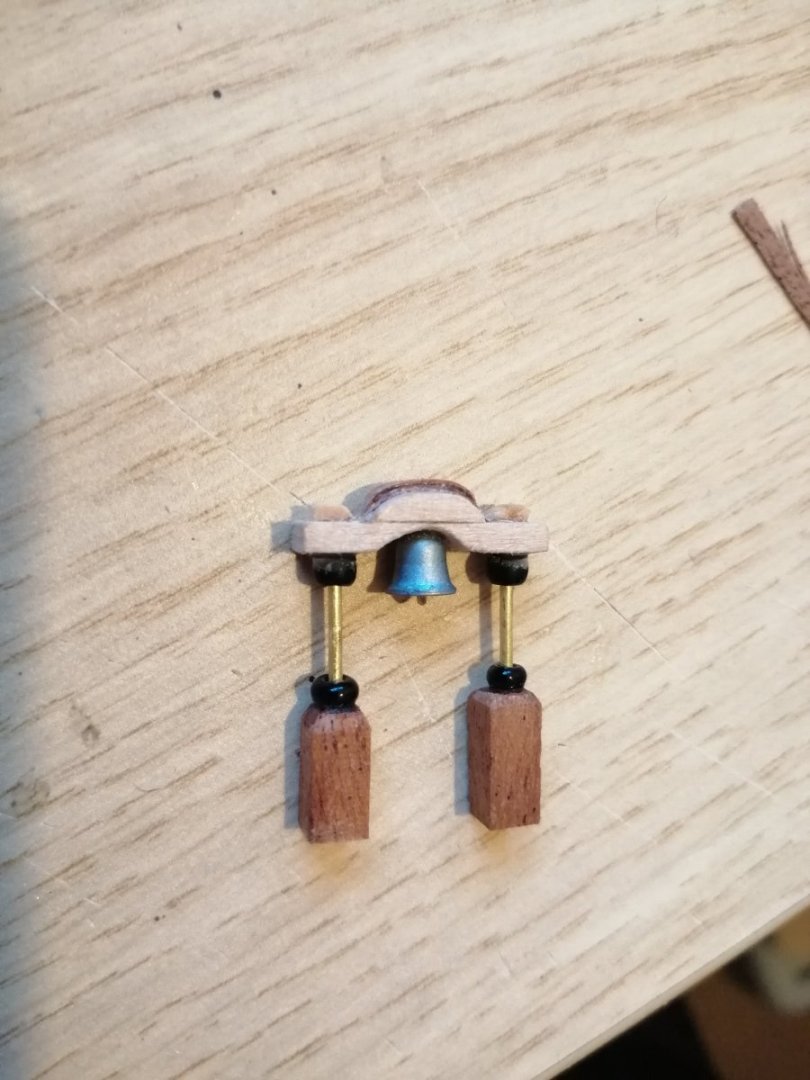
Hello all, Apologies that its been a while since I've uploaded anything on here, but work/life commitments have been pretty hectic this year! that's not to say that the boat yard has been quiet however, some decent progress has been made on Terror. I'll do my best to upload them in chronological order haha I've found the whole process more addictive as time has gone on, what was originally a project to get me through a quiet winter has rapidly turned into something I'm getting hooked on.........all credit to my incredibly patient and cooperative missus at this point! I've found that almost as soon as every part is completed I wish id done it a different/better/more efficient way, especially when it comes to the rigging (there's something about the neatness of some peoples projects on here that I find mind blowing and really inspiring) but hey, its all part of the learning process I guess! As you can see from the final images there's still a lot of work to do to get her finished, but hopefully wont be long now! But please enjoy having a look at my efforts, and as always any tips/advice on where/how to improve things are greatly appreciated! cheers! (I decided to rebuild the ships bell in wood as I had nothing that could drill into the cast metal component that came in the kit)


-
clearway reacted to a post in a topic:
HMS Terror by Rking - OcCre - 1:75
-
HMS Terror by Rking - OcCre - 1:75
Rking replied to Rking's topic in - Kit build logs for subjects built from 1801 - 1850
Yeah that was my thinking, trying to put myself in the position of those sailors I reckon there'd only be so much bailing you'd be willing to do before you'd bodge some sort of cover together for them haha -
Belco reacted to a post in a topic:
HMS Terror by Rking - OcCre - 1:75
-
clearway reacted to a post in a topic:
HMS Terror by Rking - OcCre - 1:75
-
clearway reacted to a post in a topic:
HMS Terror by Rking - OcCre - 1:75
-
clearway reacted to a post in a topic:
HMS Terror by Rking - OcCre - 1:75
-
richardhd reacted to a post in a topic:
HMS Terror by Rking - OcCre - 1:75
-
HMS Terror by Rking - OcCre - 1:75
Rking replied to Rking's topic in - Kit build logs for subjects built from 1801 - 1850
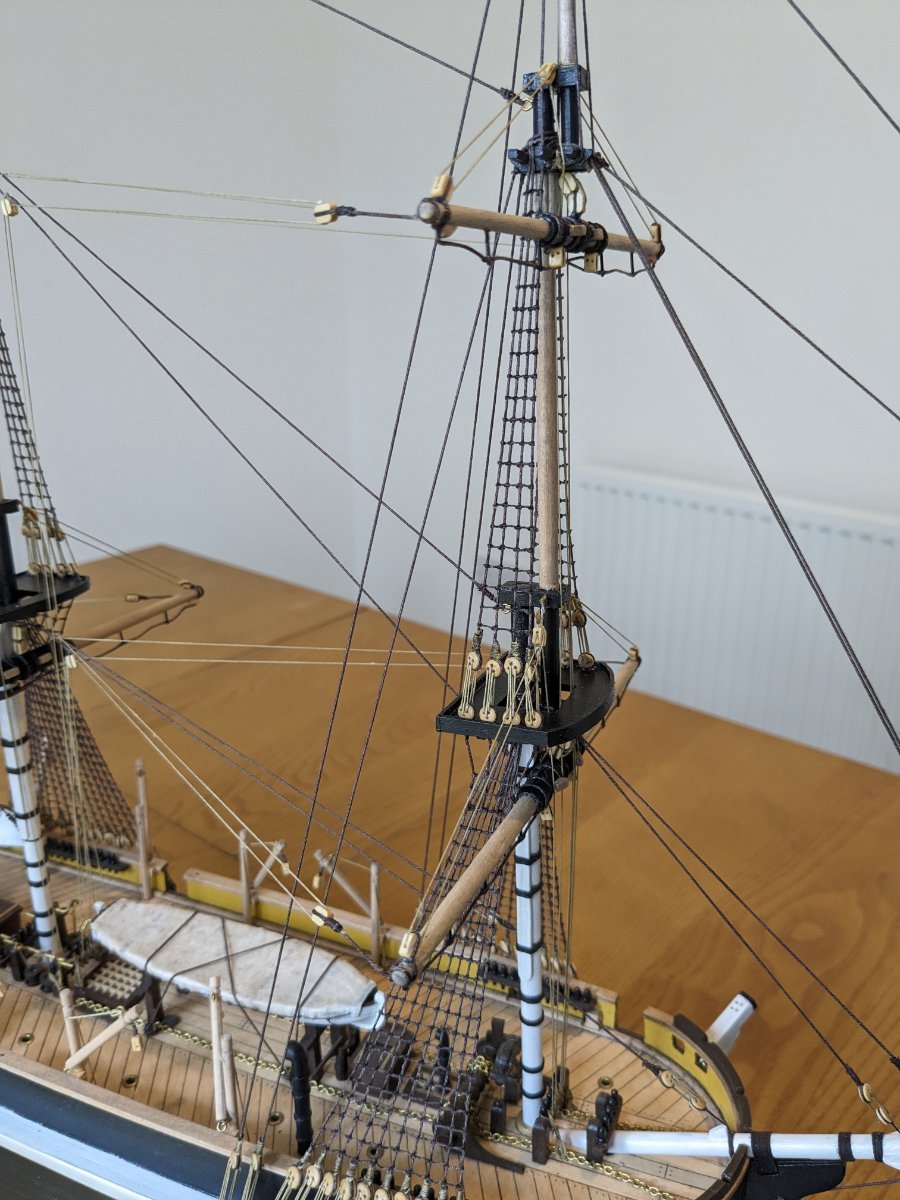
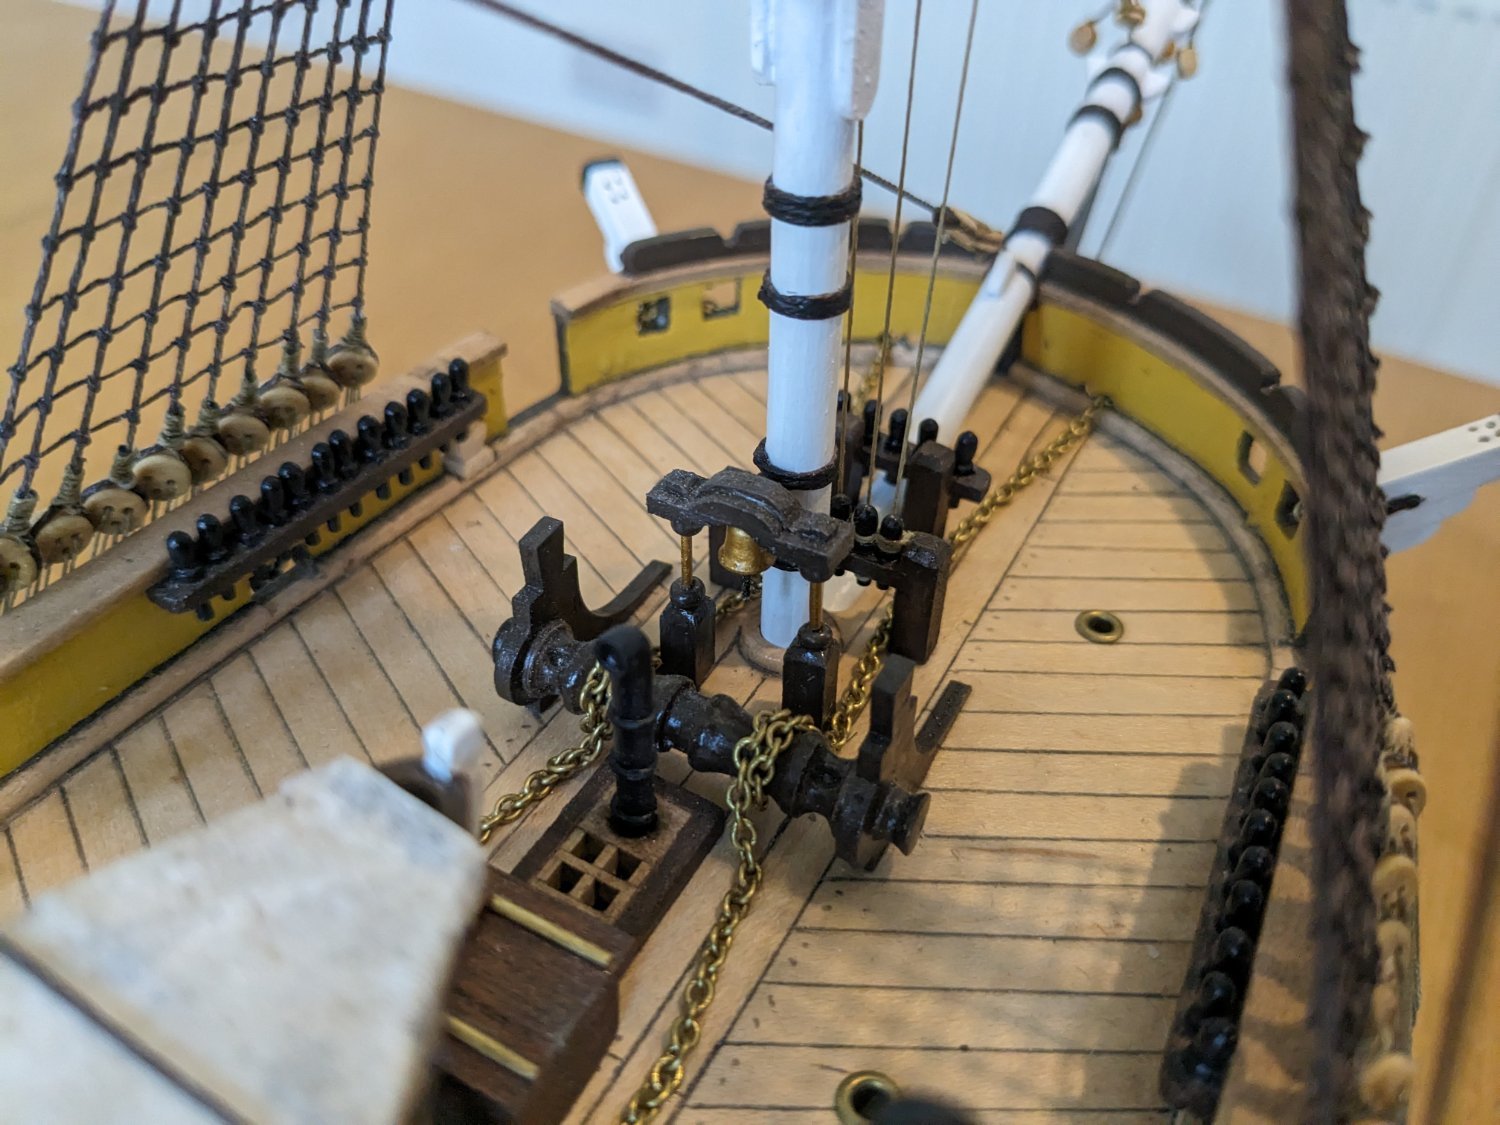
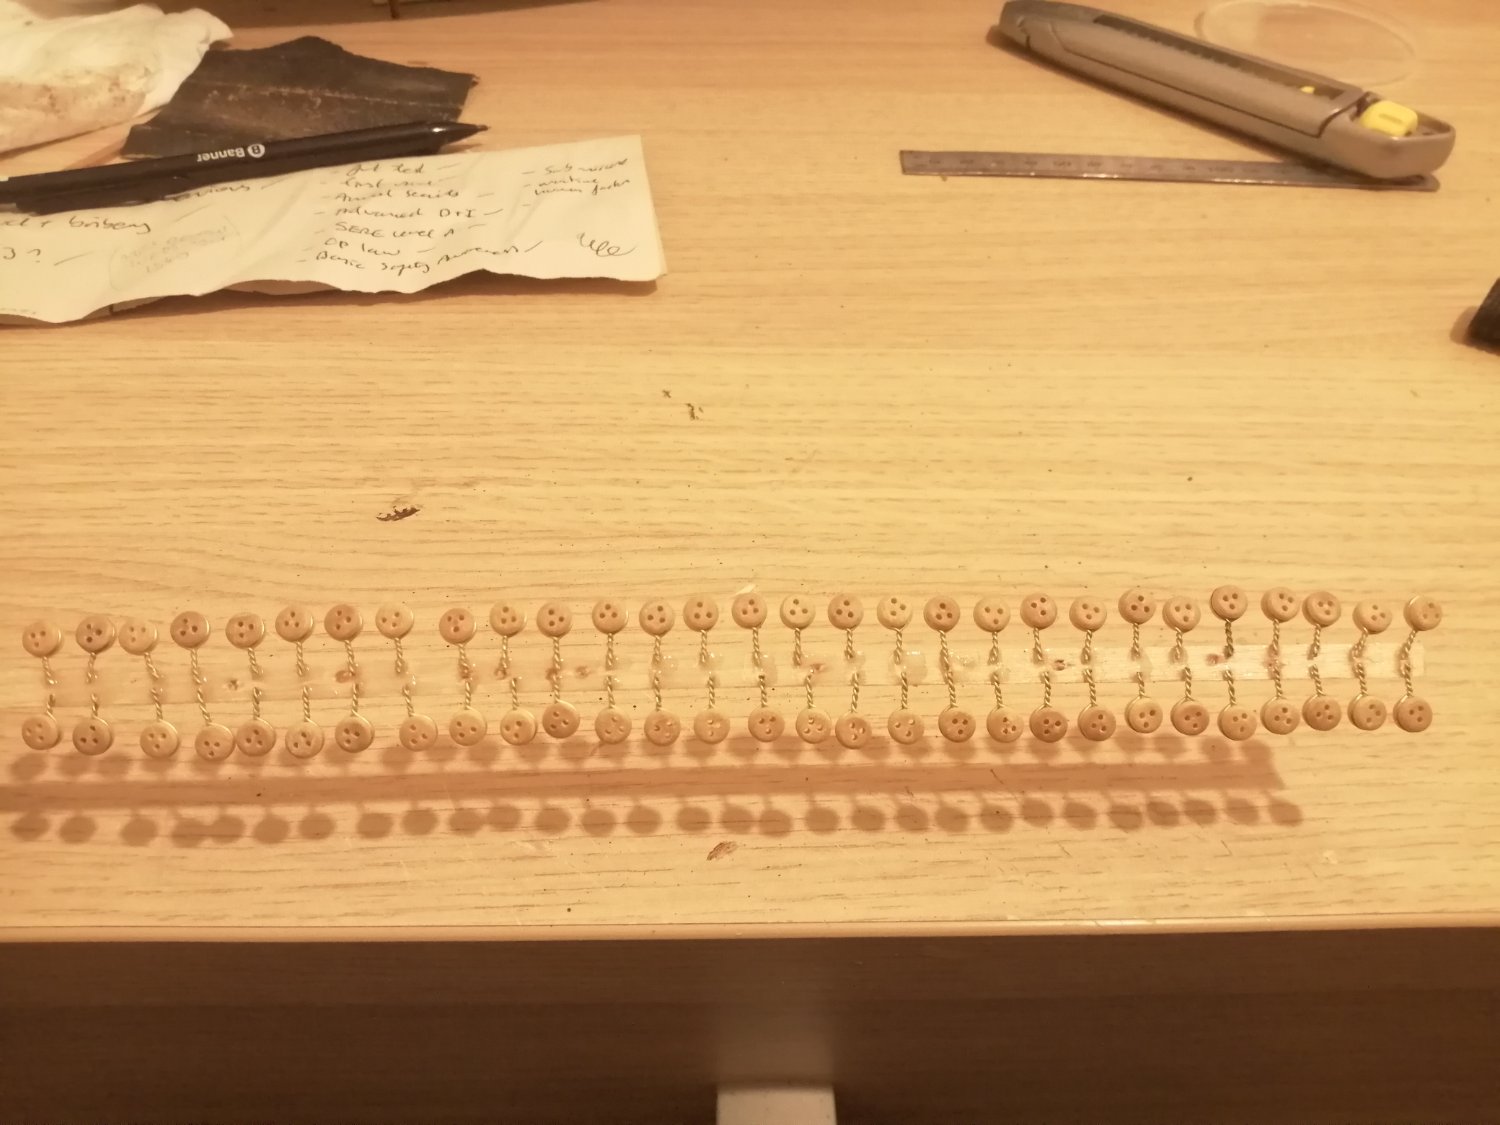
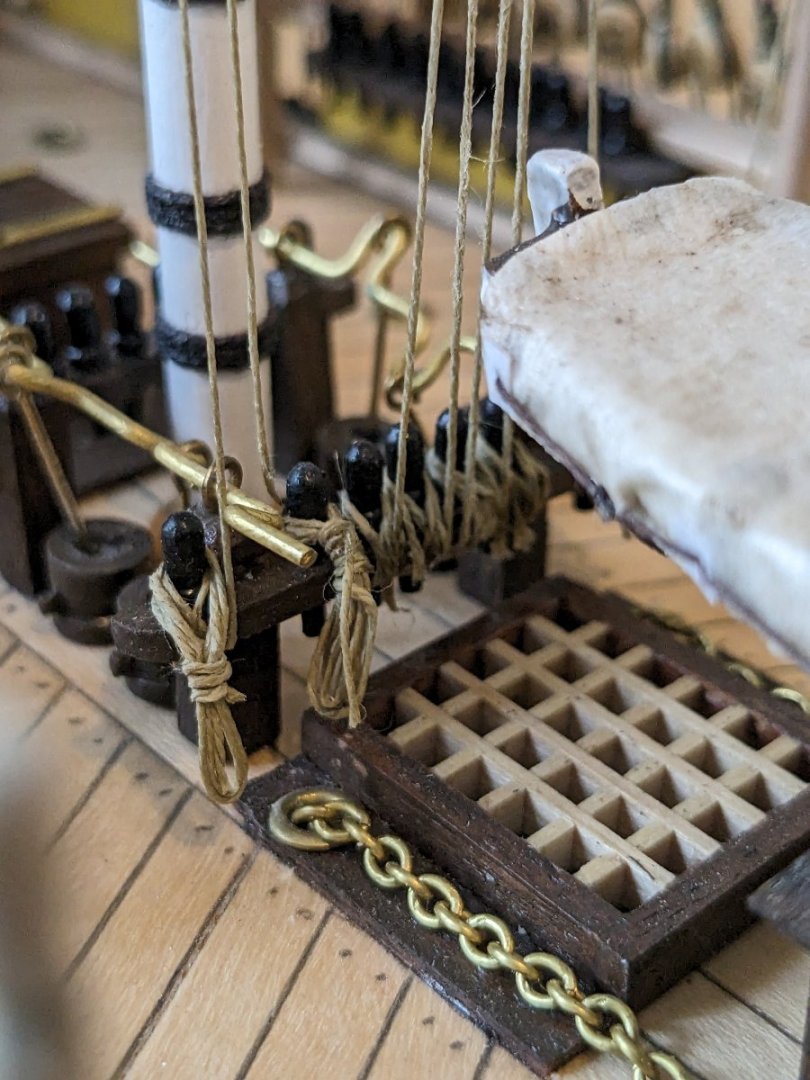
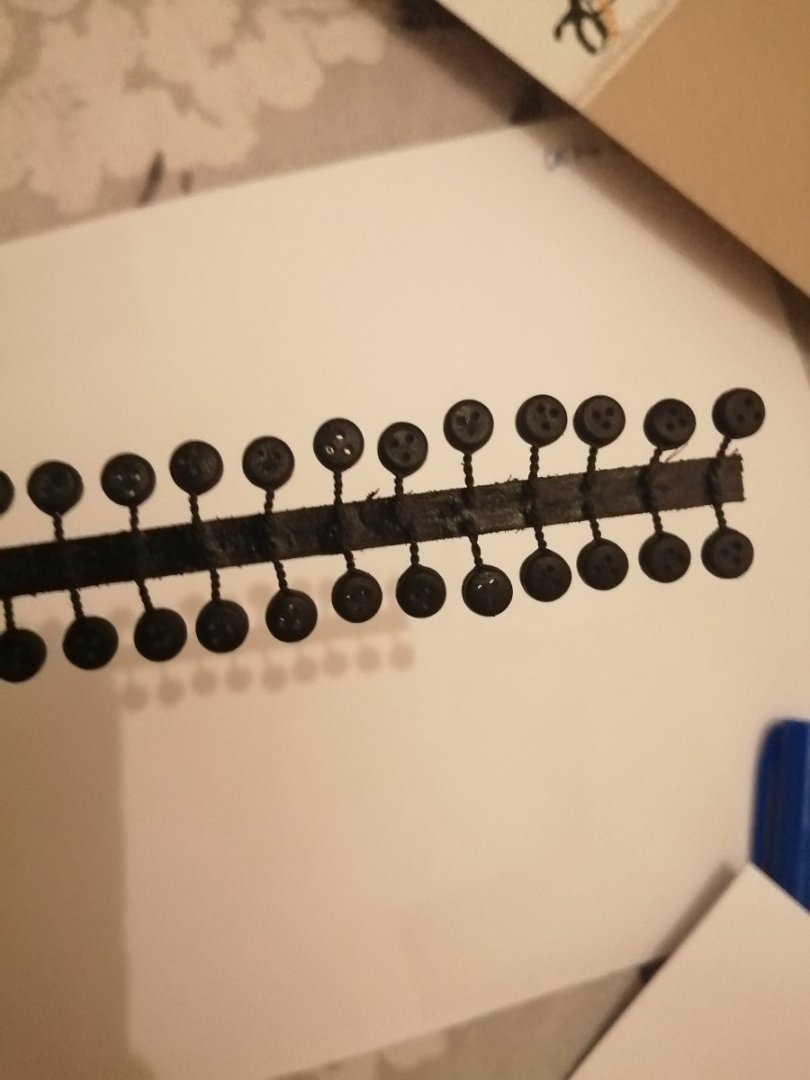
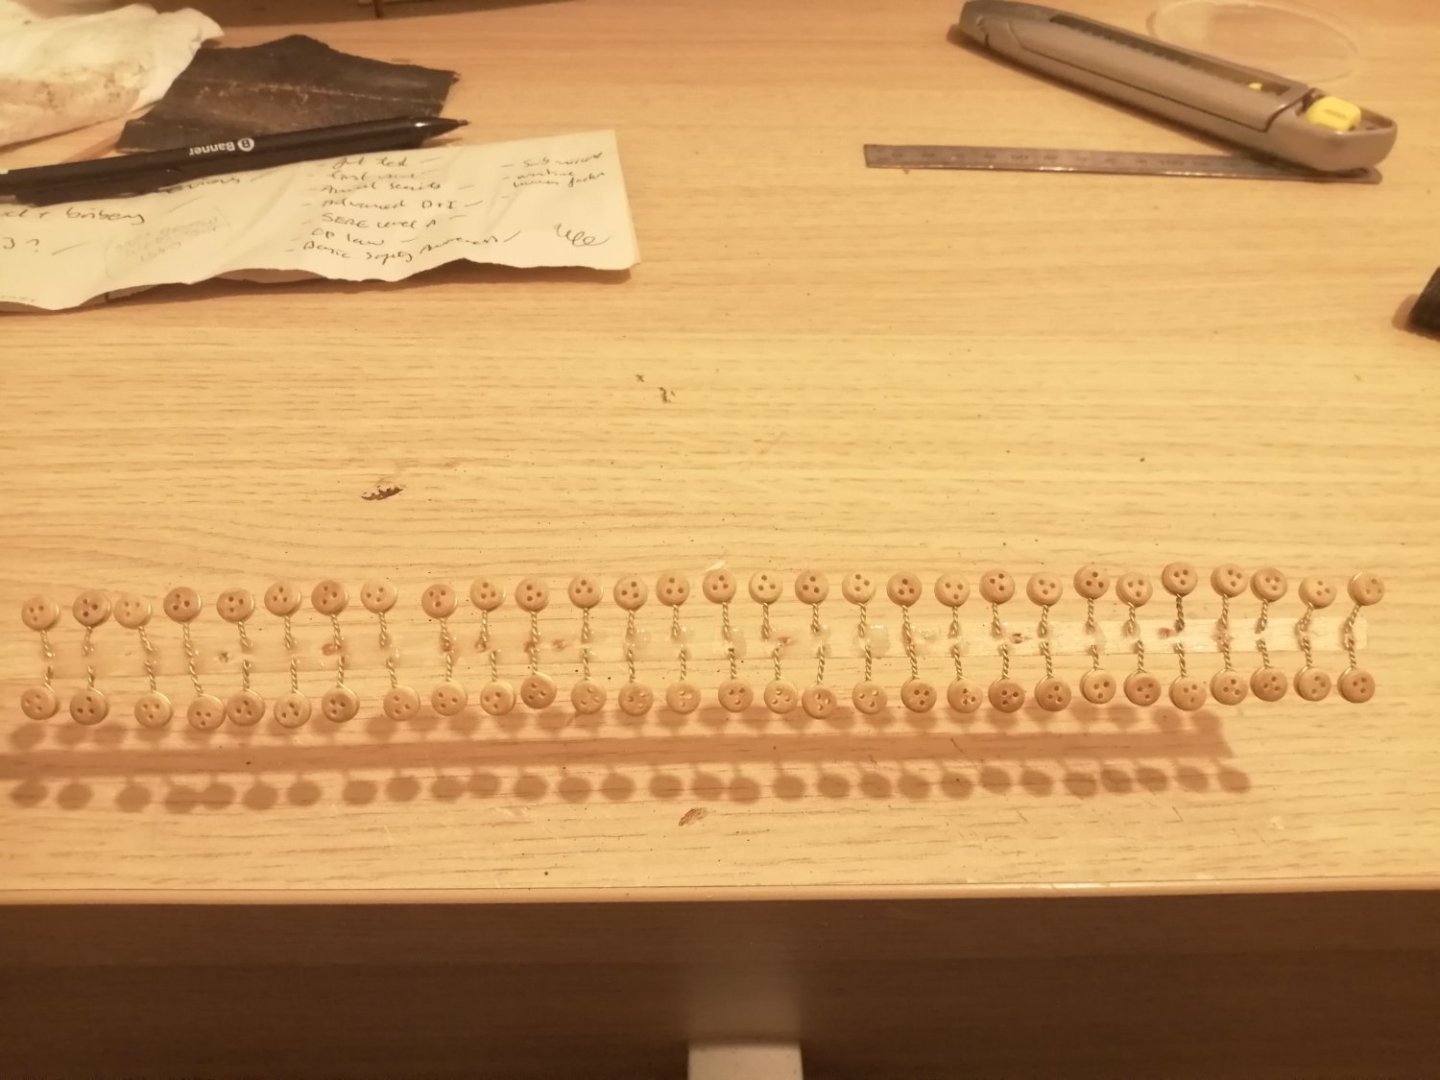
Also made a start painting up the dead eyes, fiddly little buggers but hugely satisfying spraying them up in batches like this!
-
HMS Terror by Rking - OcCre - 1:75
Rking replied to Rking's topic in - Kit build logs for subjects built from 1801 - 1850
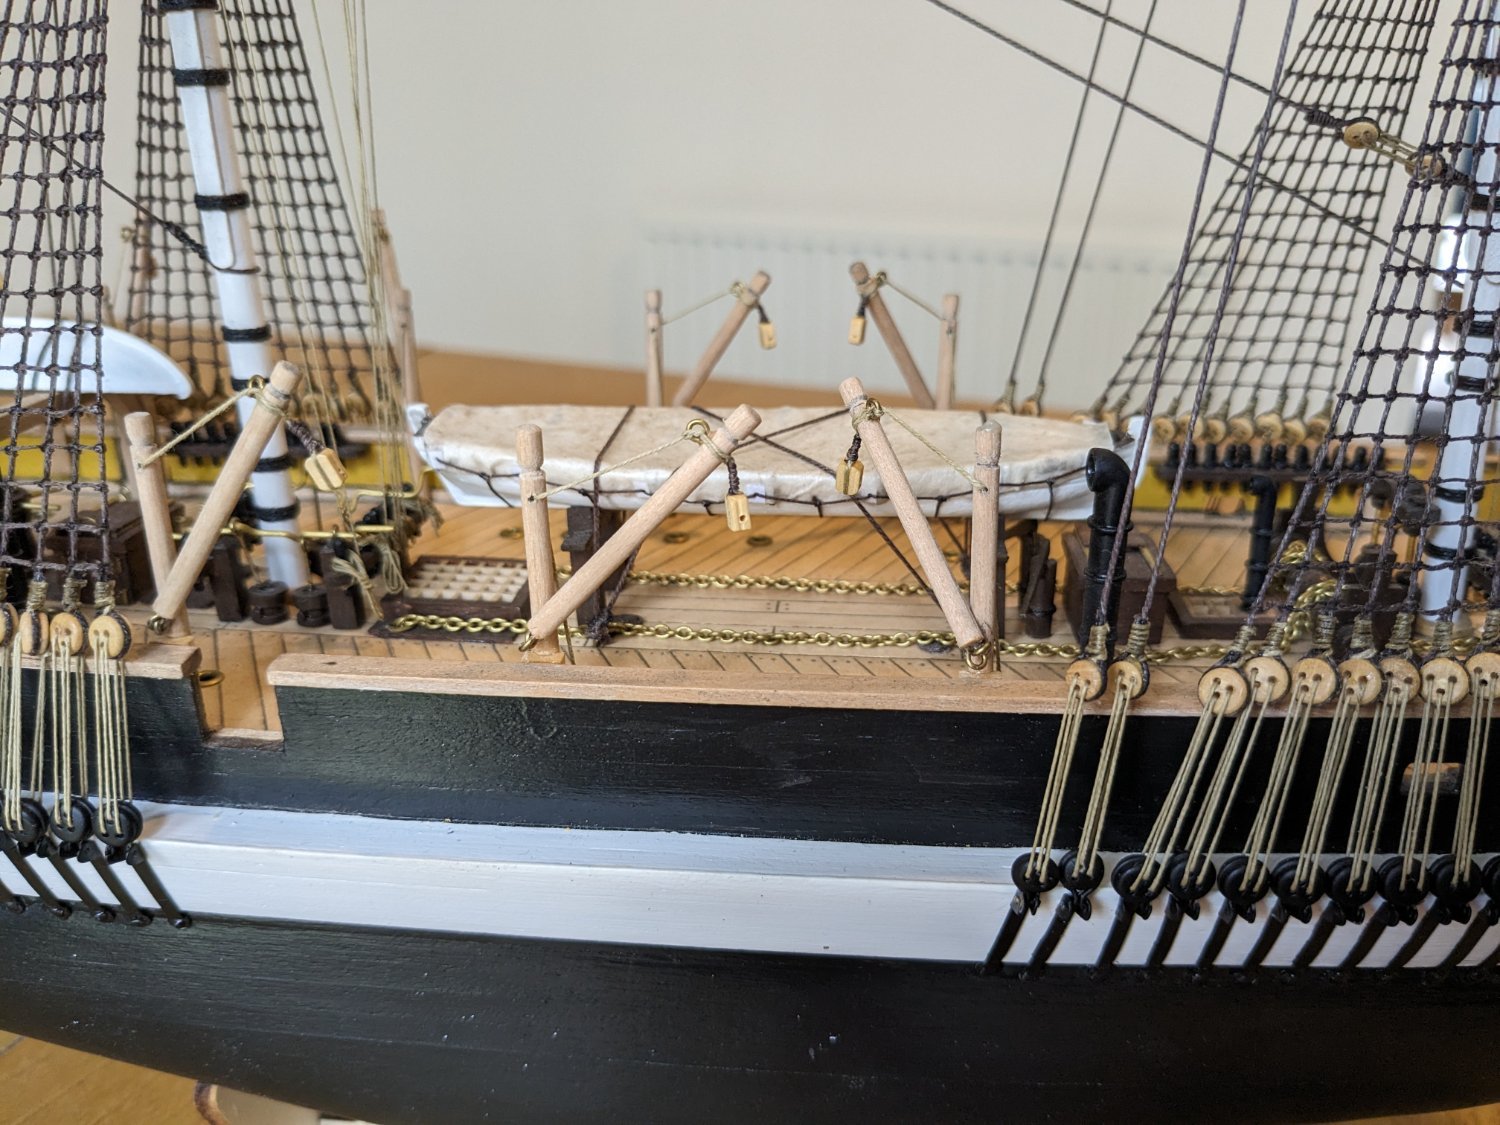
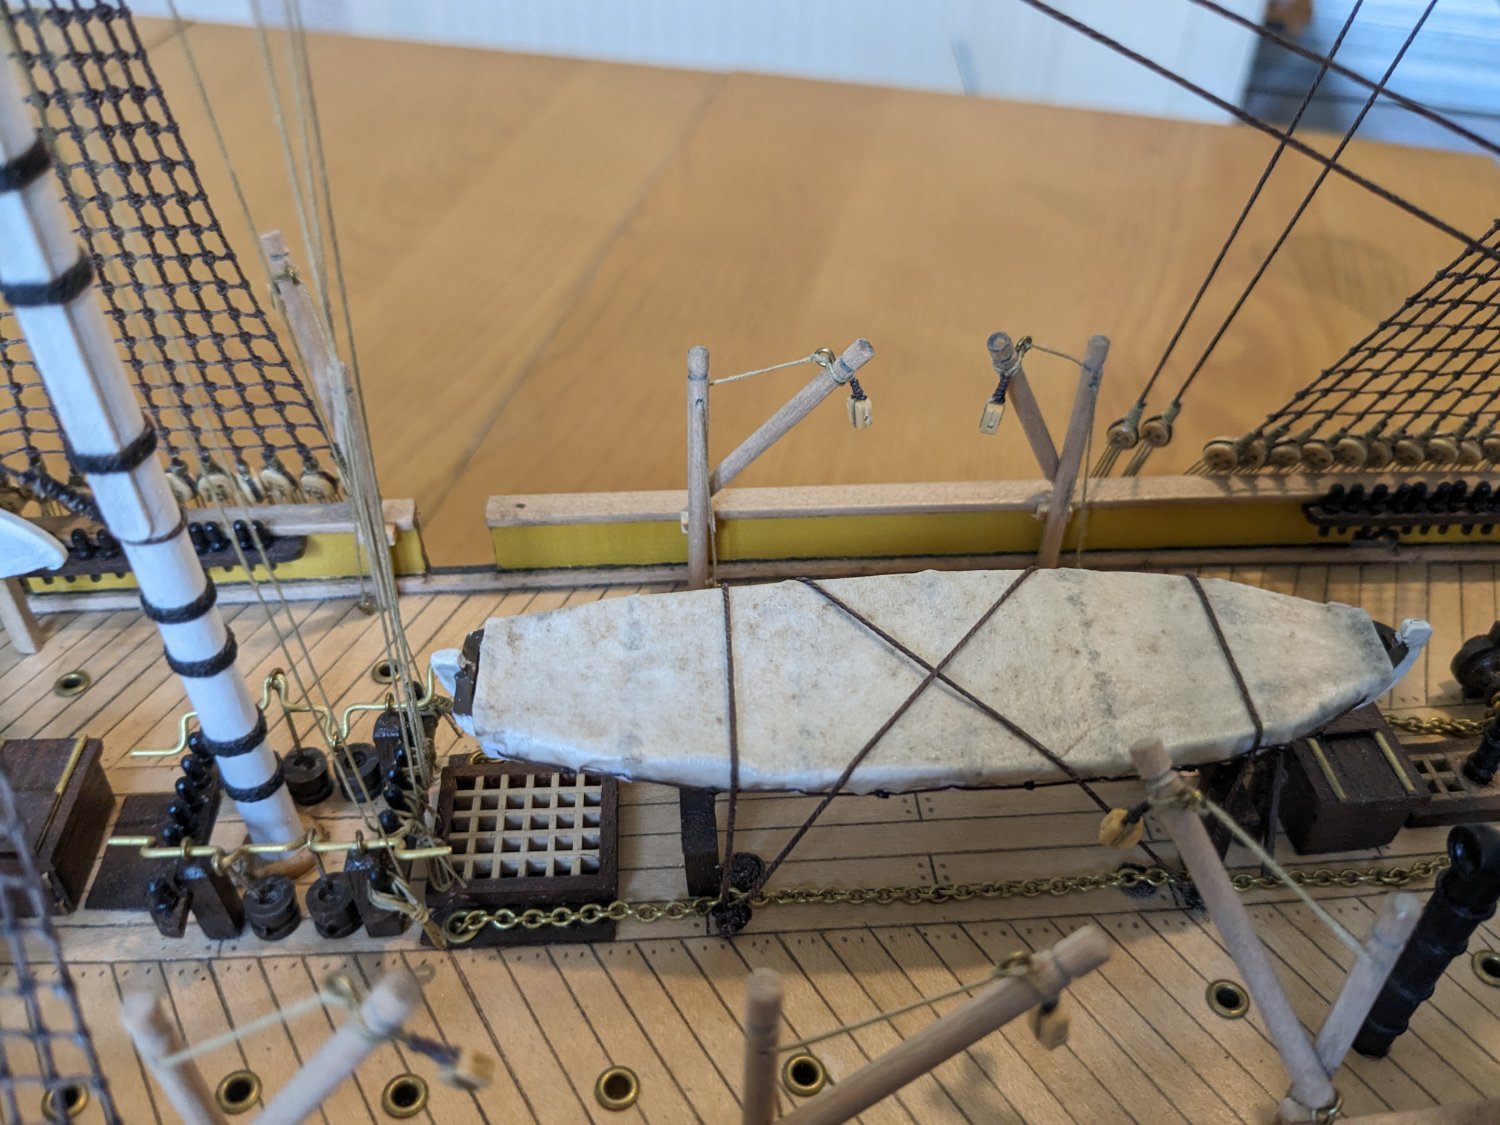
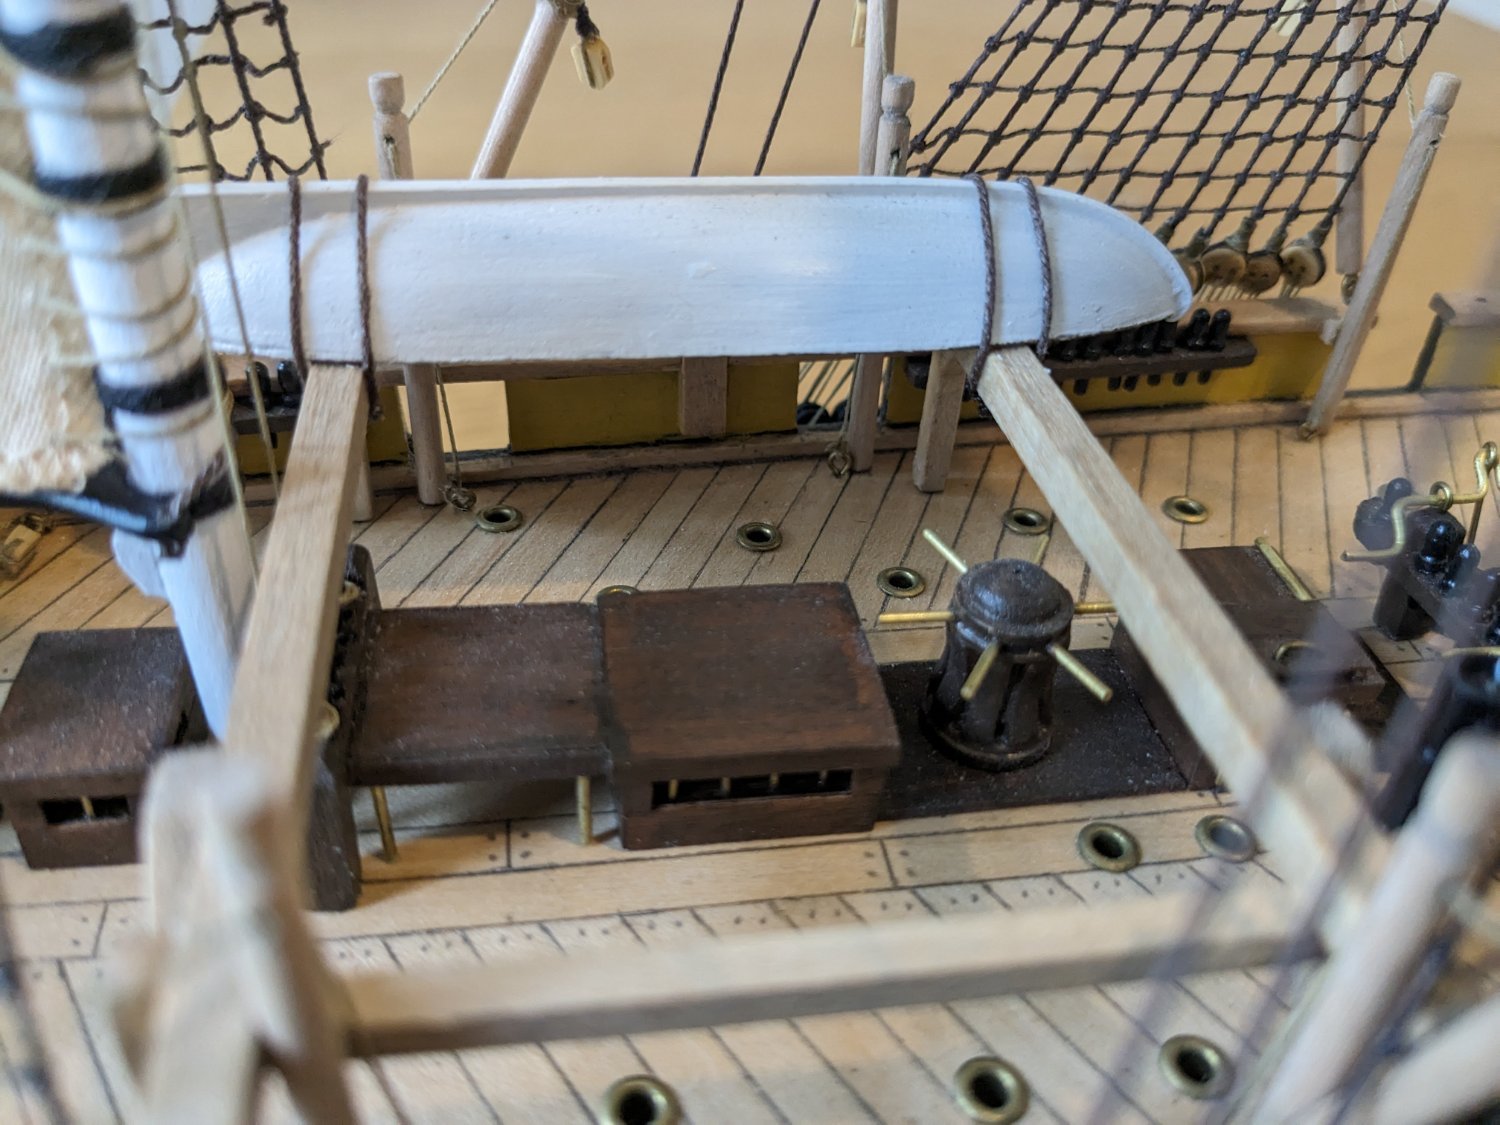
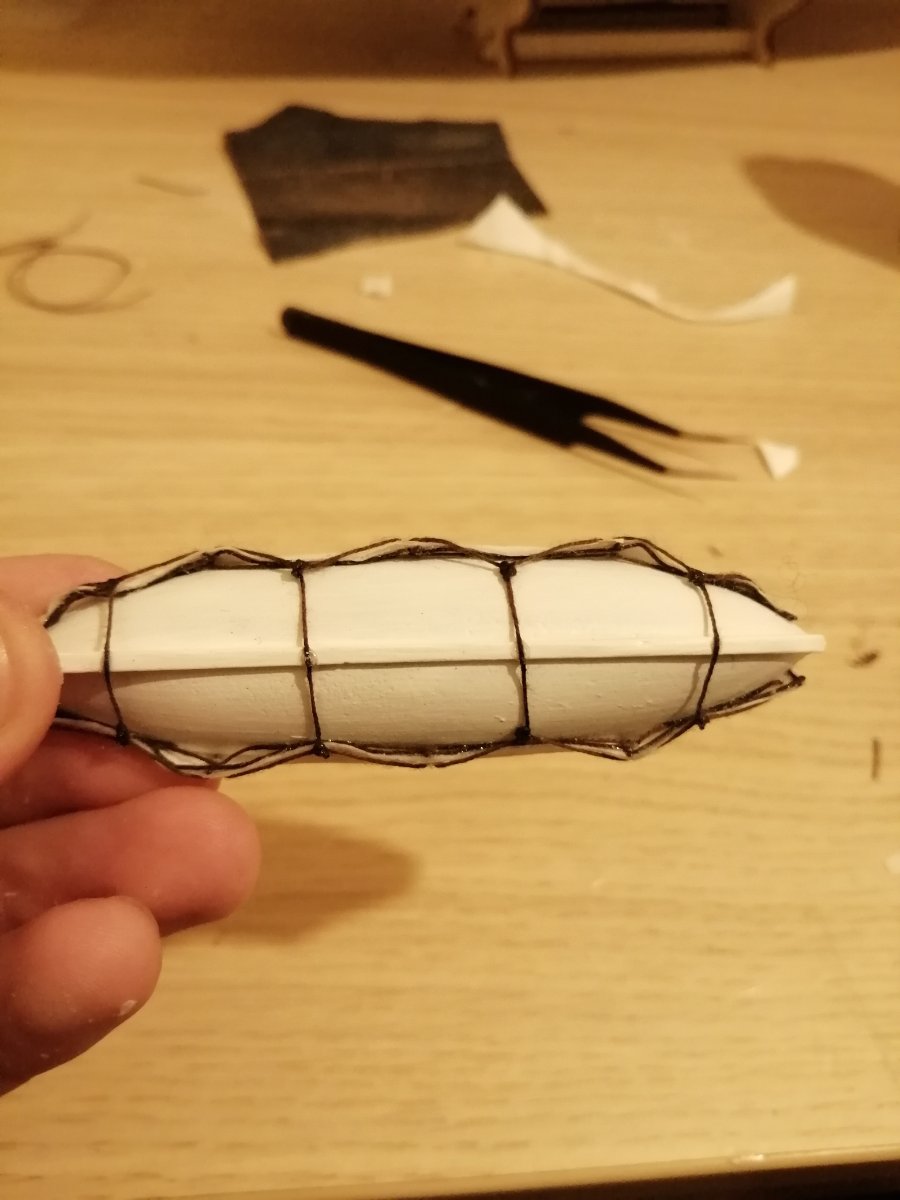
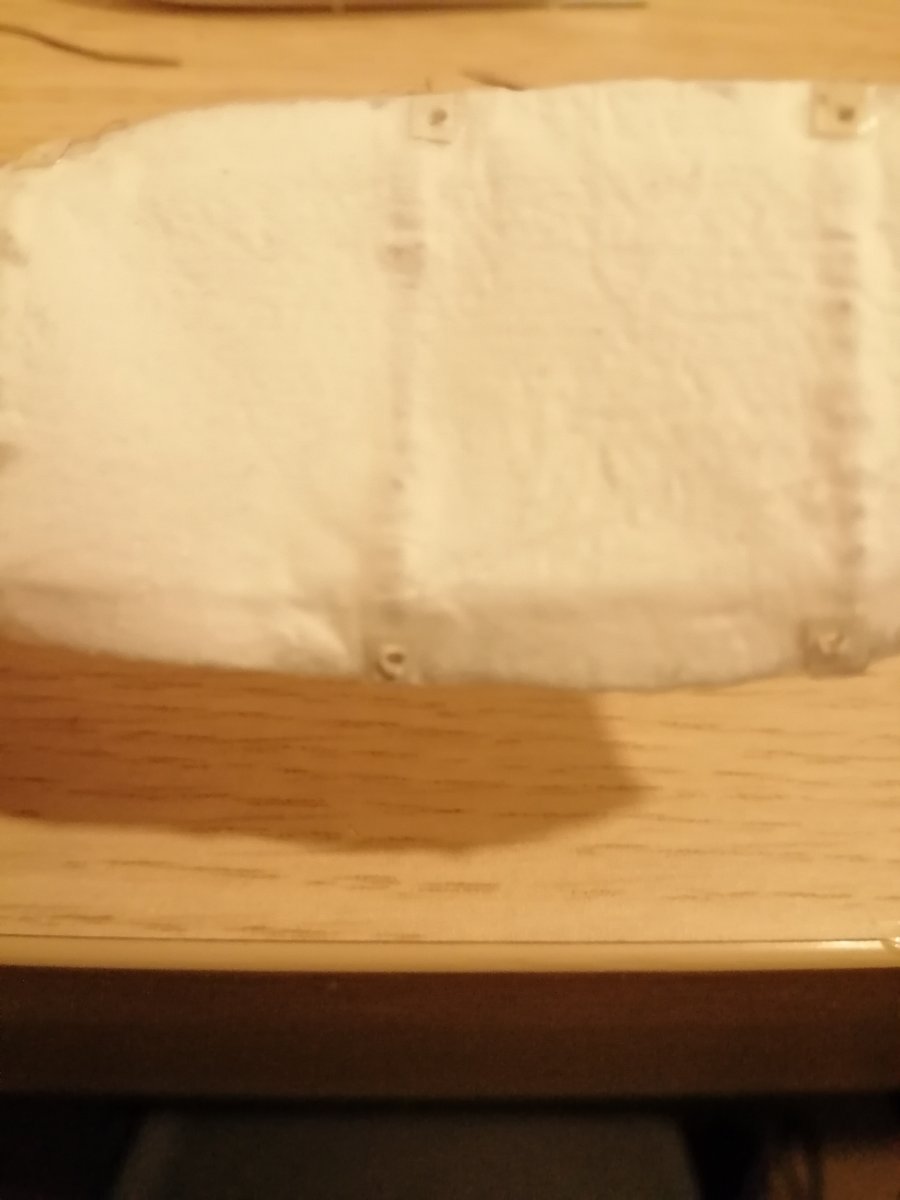
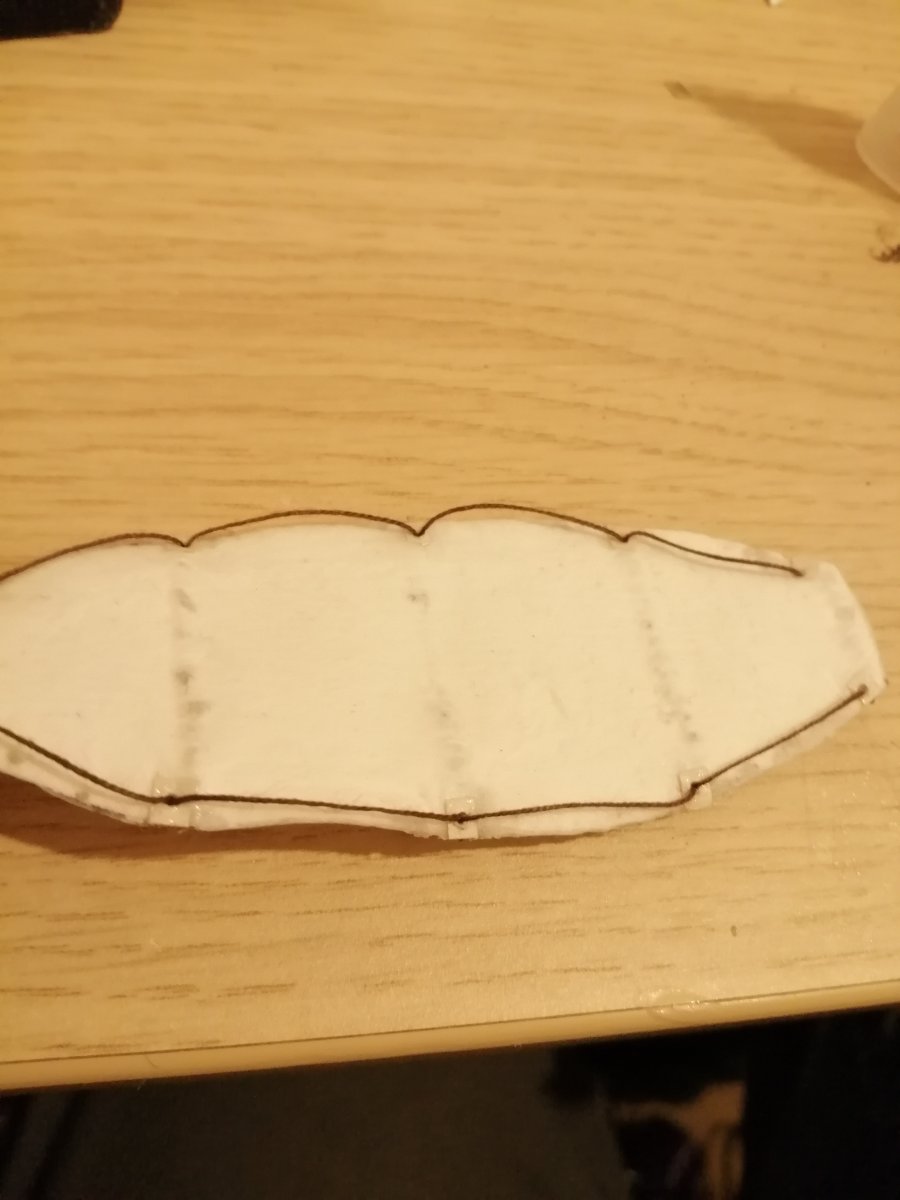
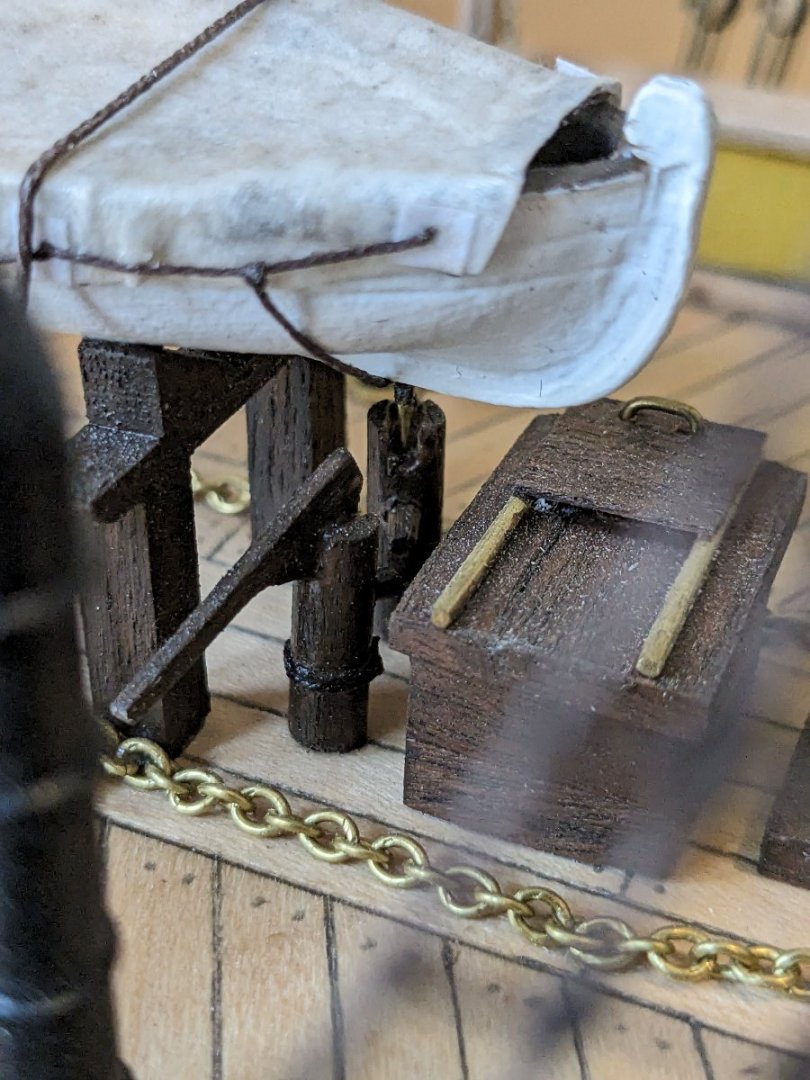
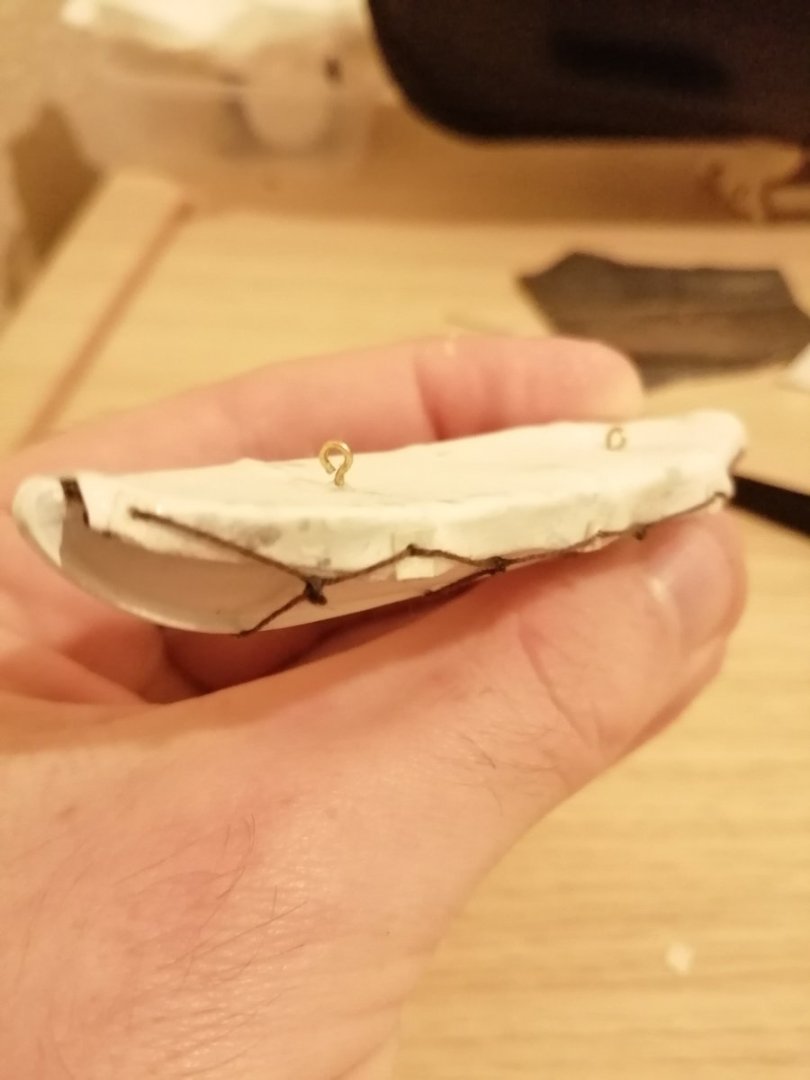
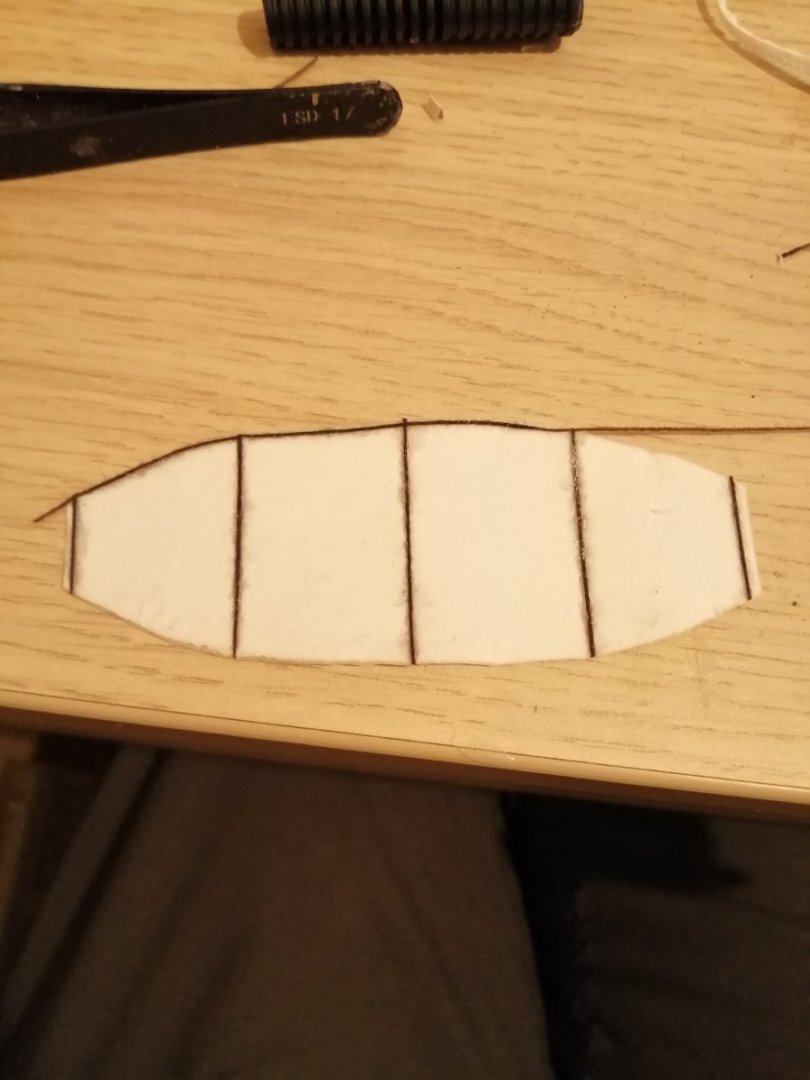
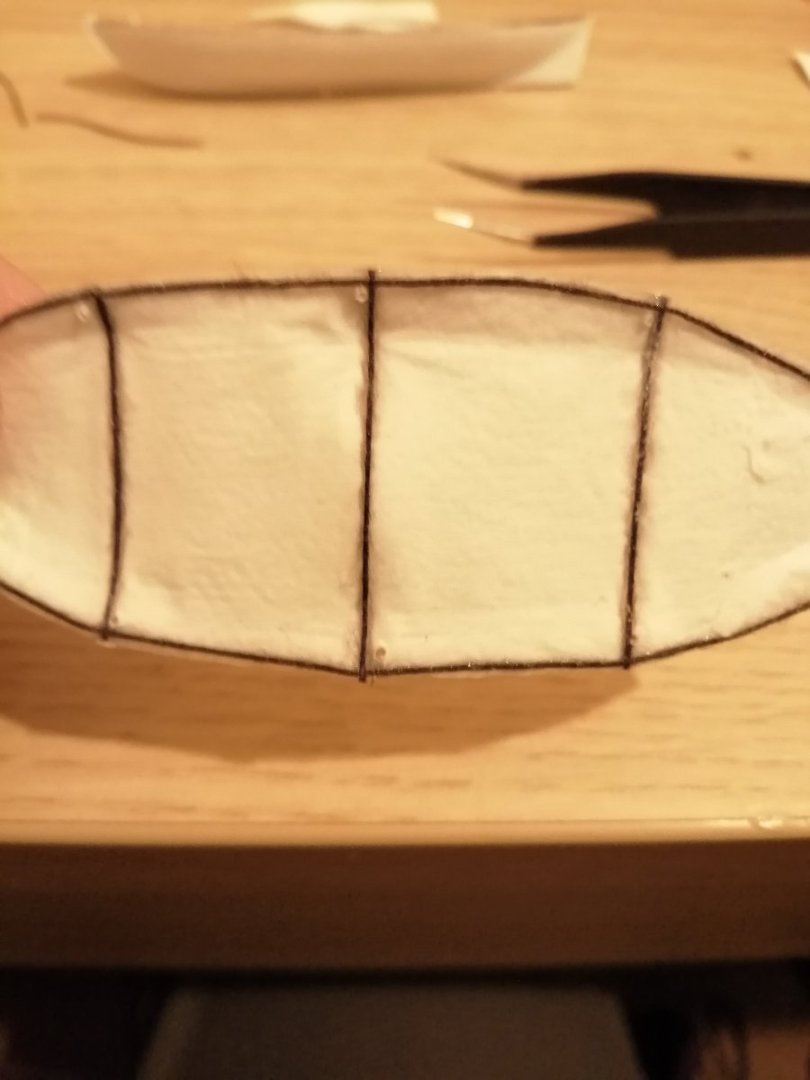
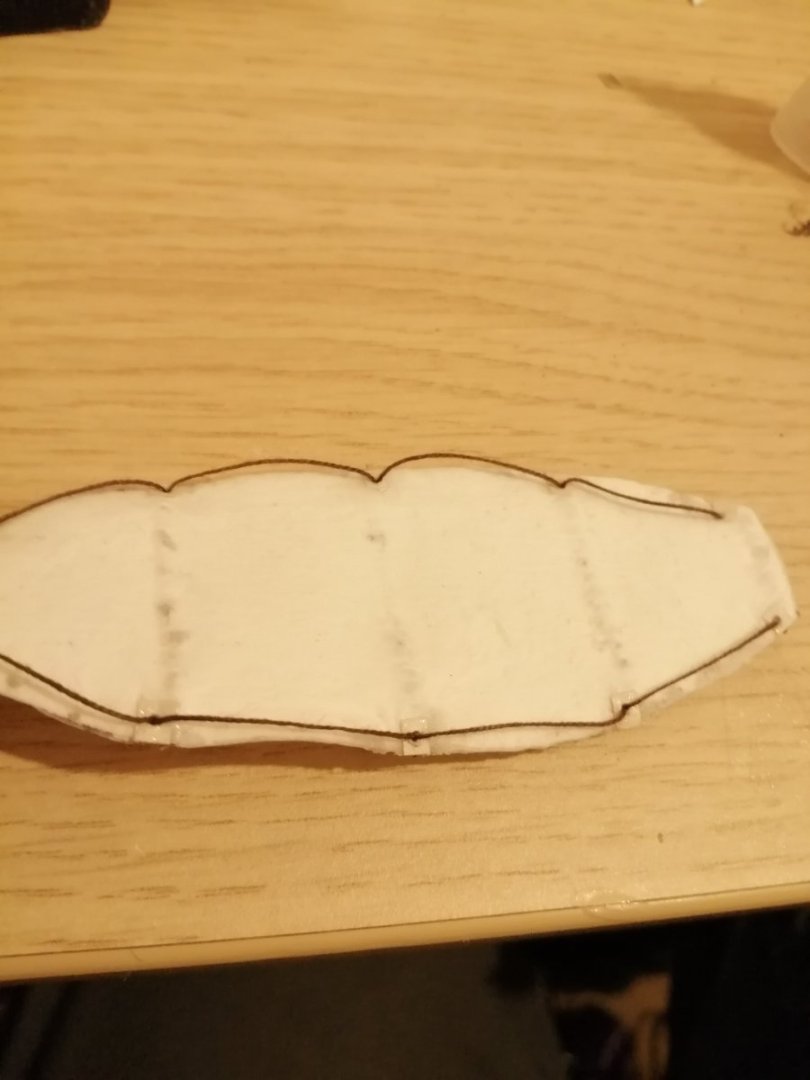
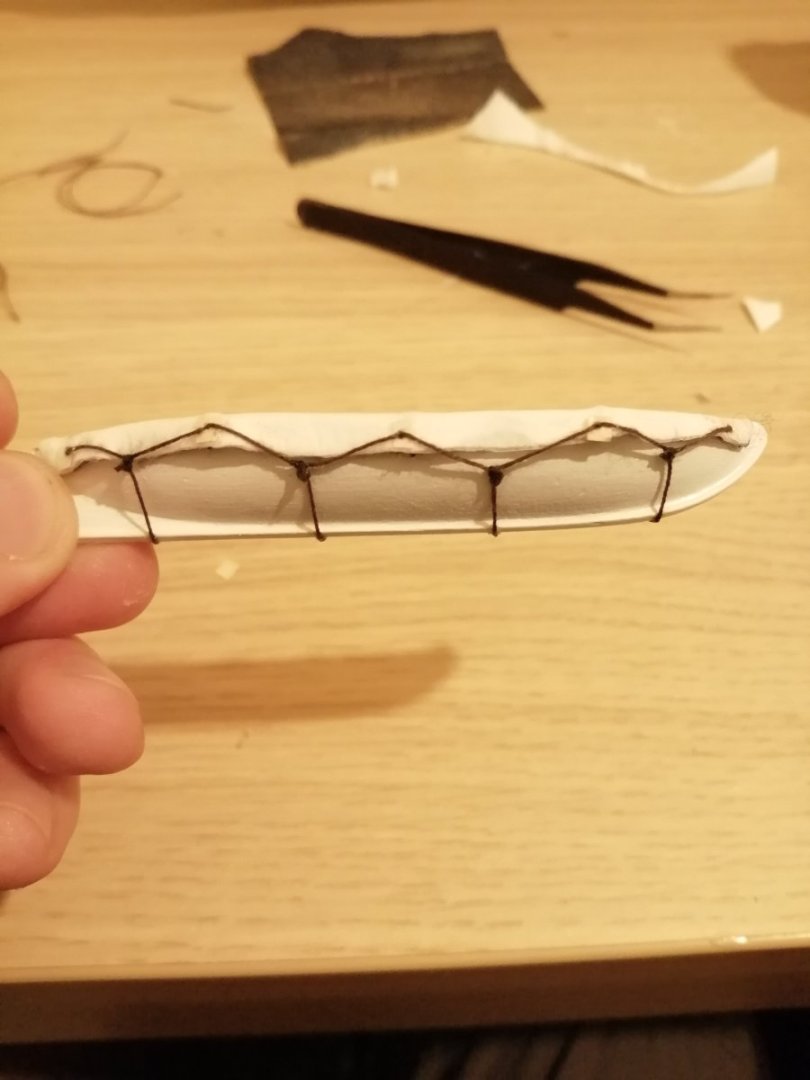
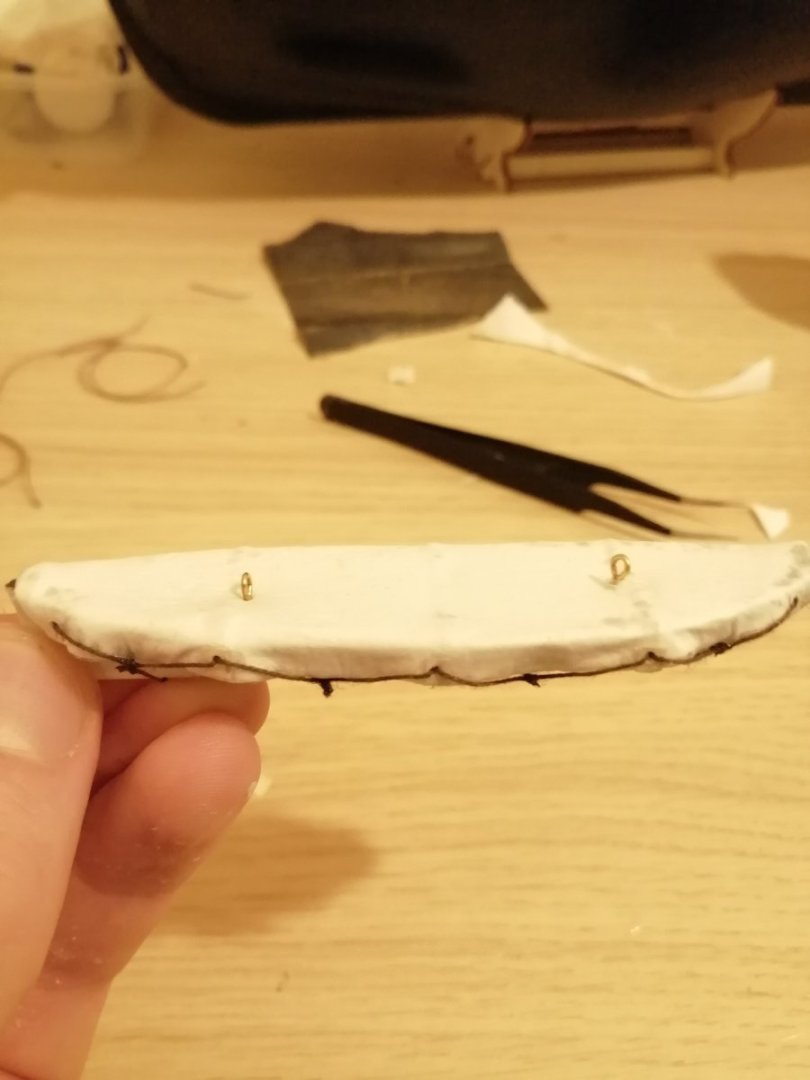
I've got no idea how accurate a design this is for a boat cover, I struggled to find any good reference shots online, however I think it's a plausible attempt. Manufactured by soaking 3 layers of folded toilet paper in PVA glue and water, thread super glued to the underside for re-enforcement and structure, and gromets made from small paper squares. Just needs painting now. Does anyone know how these boats were stored when at sea? I can imagine them having some sort of cover for bad weather as they must have been pretty heavy hanging off those davits if they became full of water in heavy rain. 🤔


-
HMS Terror by Rking - OcCre - 1:75
Rking replied to Rking's topic in - Kit build logs for subjects built from 1801 - 1850
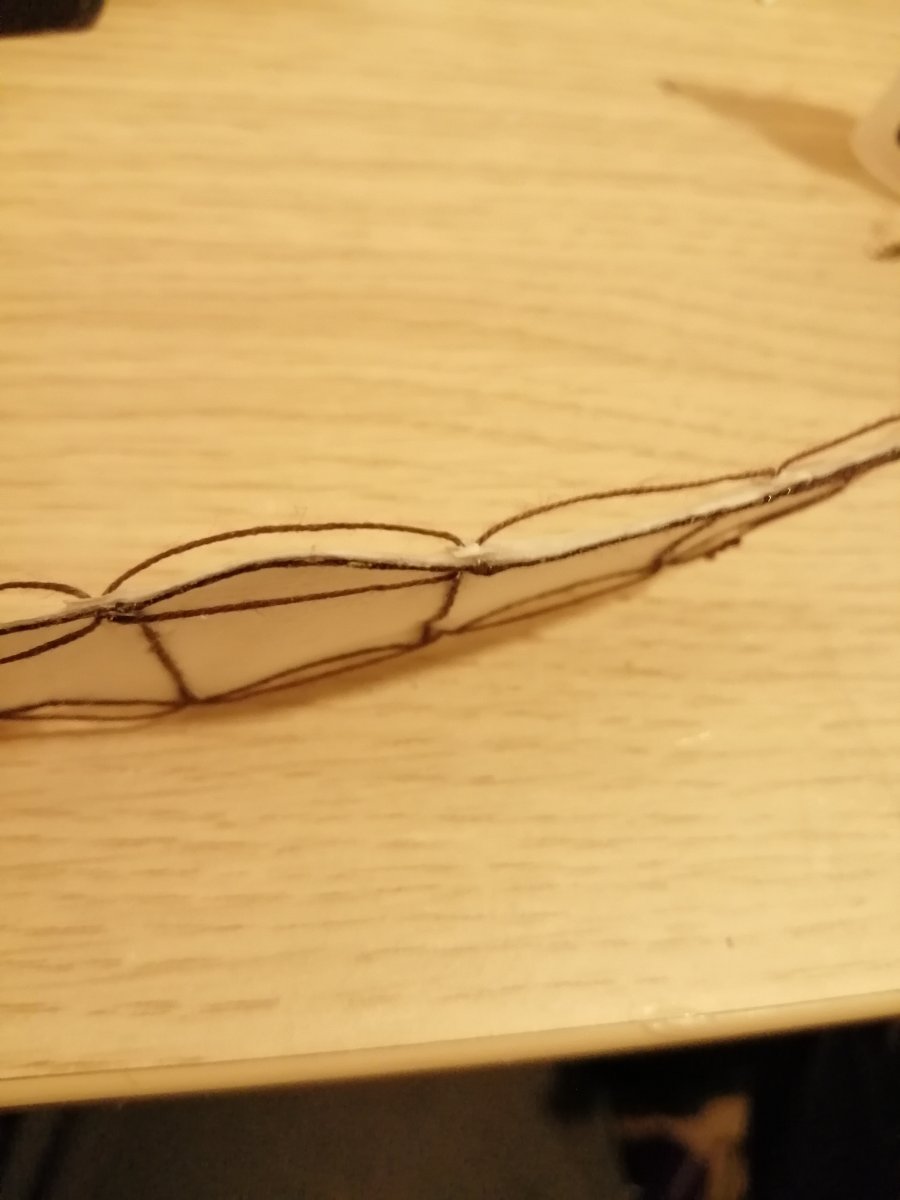
haha frustrating memories? I'm definatly going to try pre-drilling the holes next time, trying to press them in without pre-drilling was causing the hull to bend in places which was a little disconcerting! As far as the boats go i decided to make some canvas covers for them as I really wasn't happy with the way they looked inside. -
HMS Terror by Rking - OcCre - 1:75
Rking replied to Rking's topic in - Kit build logs for subjects built from 1801 - 1850
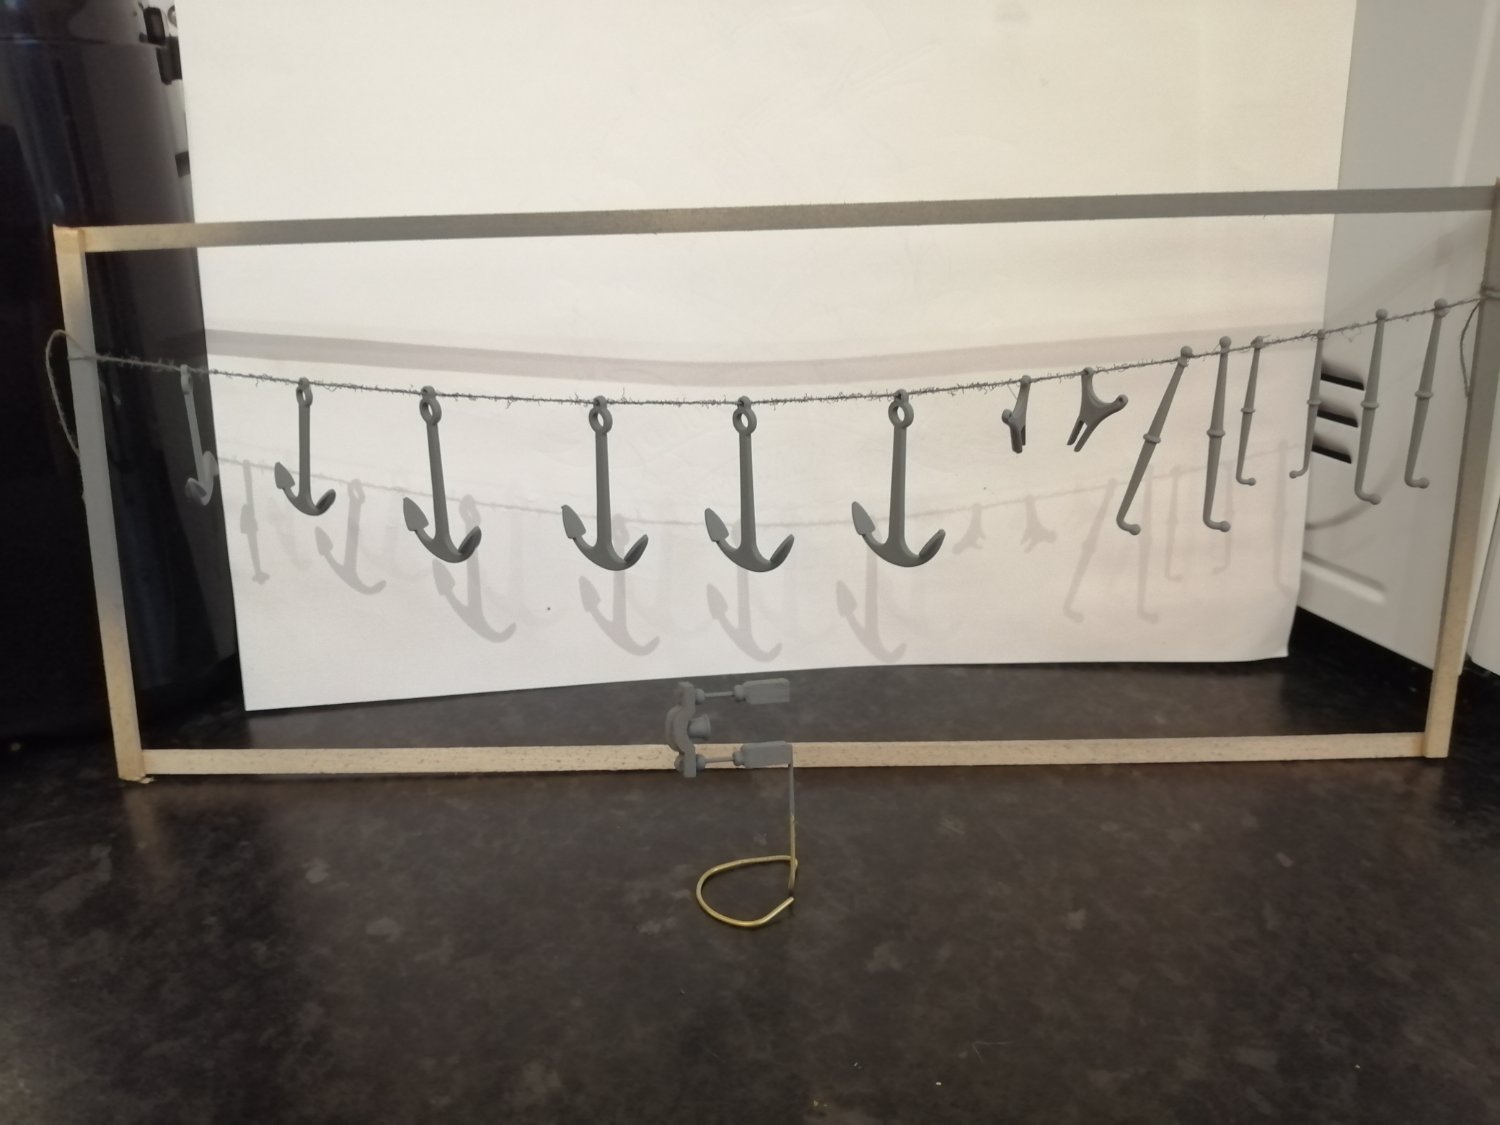
Also, the ships boats which come with this kit almost don't seem to be of the same scale? I get that they are two different sizes of boats, however the spacing between the seats in the larger one seems totally off when compared to the smaller two? as the missus quite rightly pointed out, there's no way the same size people that would fit in the bigger boat would be able to sit in the smaller one! haha. Have I missed something? I placed planks/seats across every point where there seemed to be a support for them moulded into the metal component, but should i have? Any insight on this would be great cheers! if it wasn't for the sake of trying to save a bob or two at the minute, I would have defiantly invested in a different specific kit for these boats as I've seen others doing.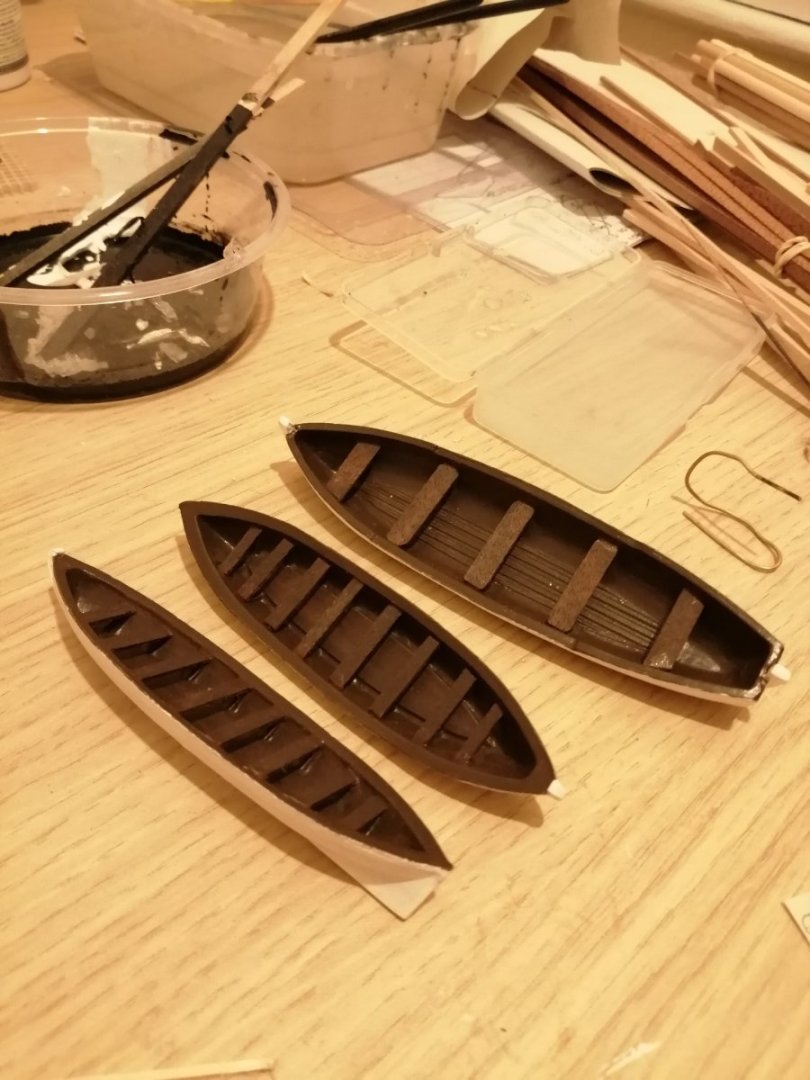
-
clearway reacted to a post in a topic:
HMS Terror by Rking - OcCre - 1:75
-
HMS Terror by Rking - OcCre - 1:75
Rking replied to Rking's topic in - Kit build logs for subjects built from 1801 - 1850
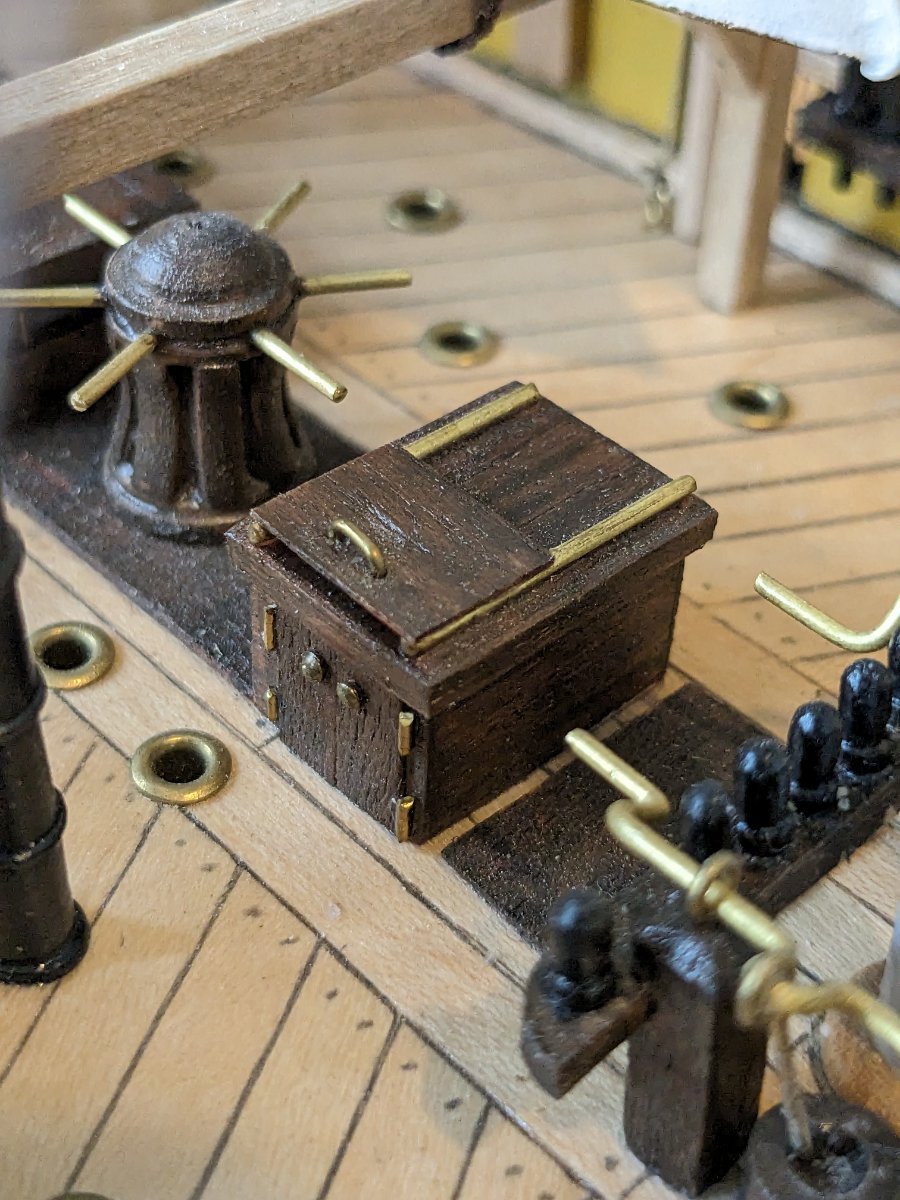
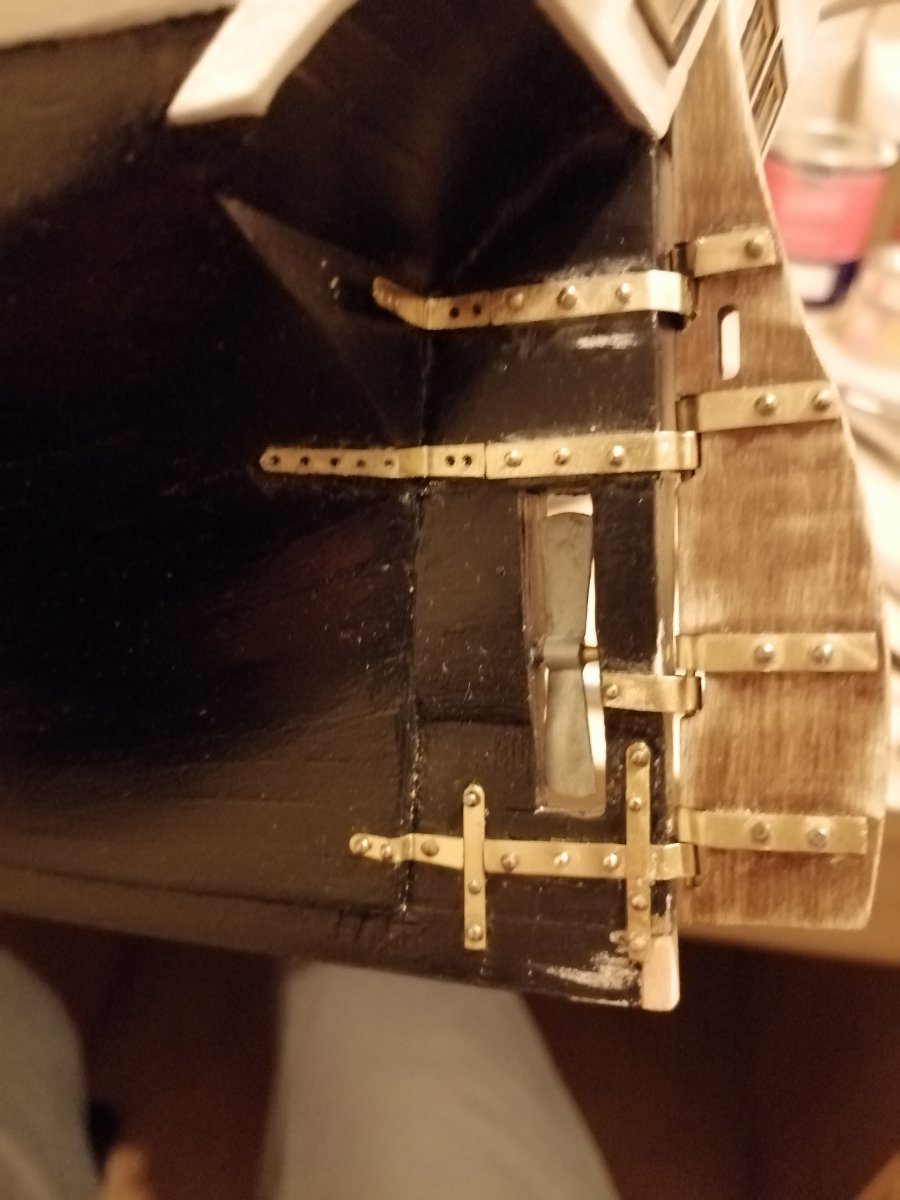
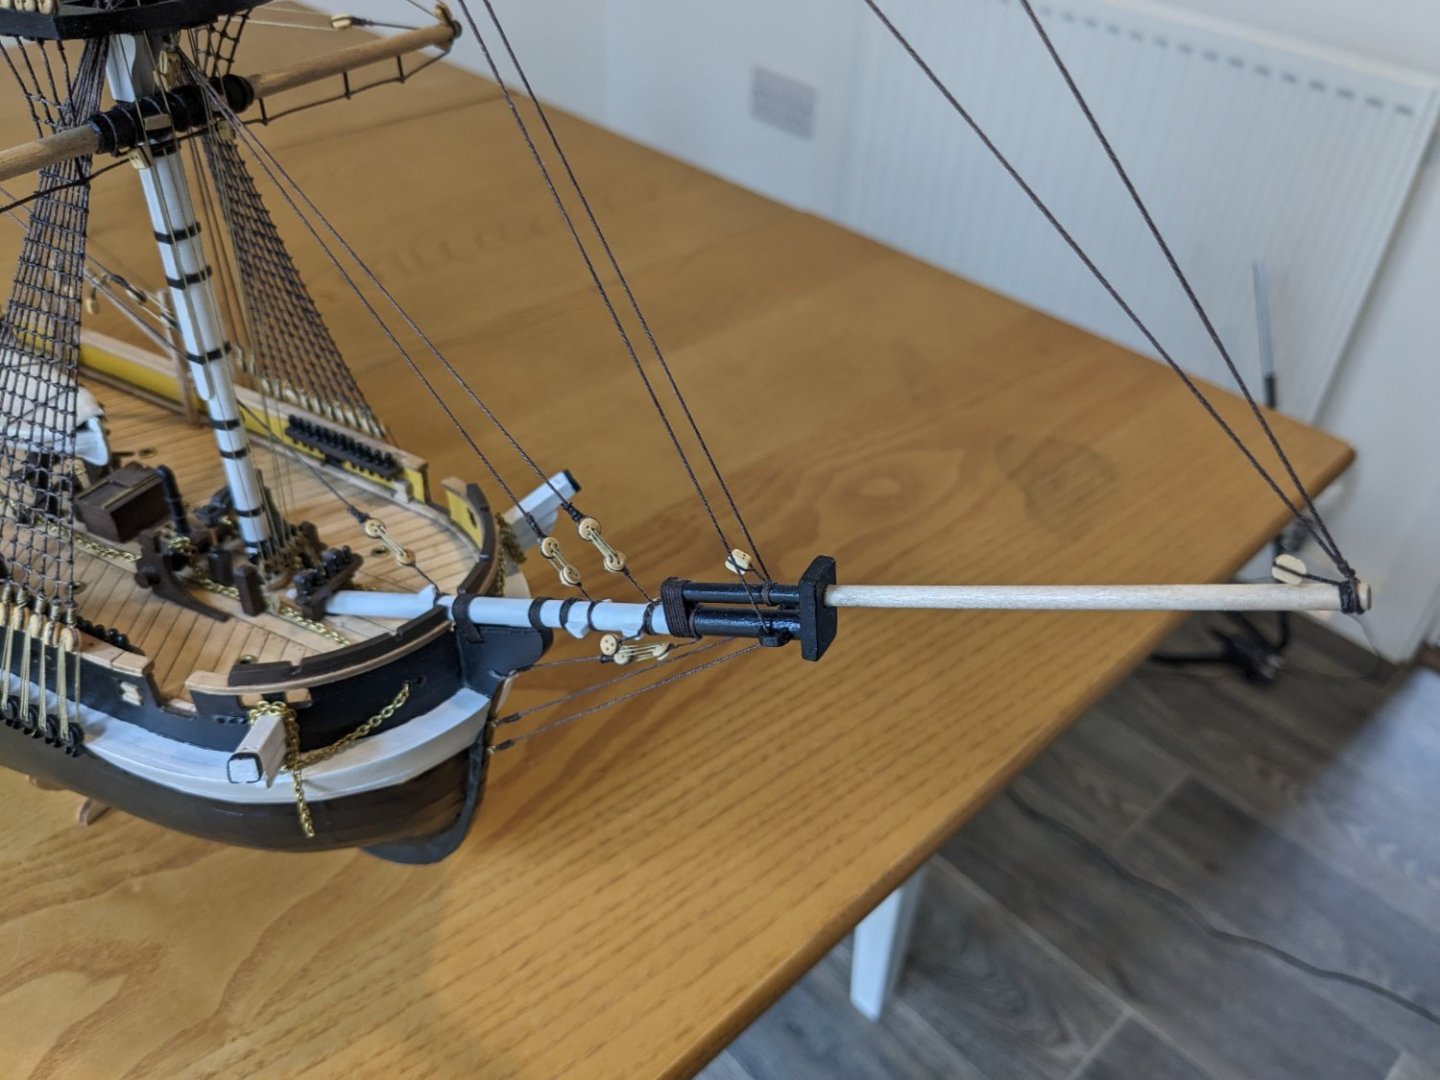
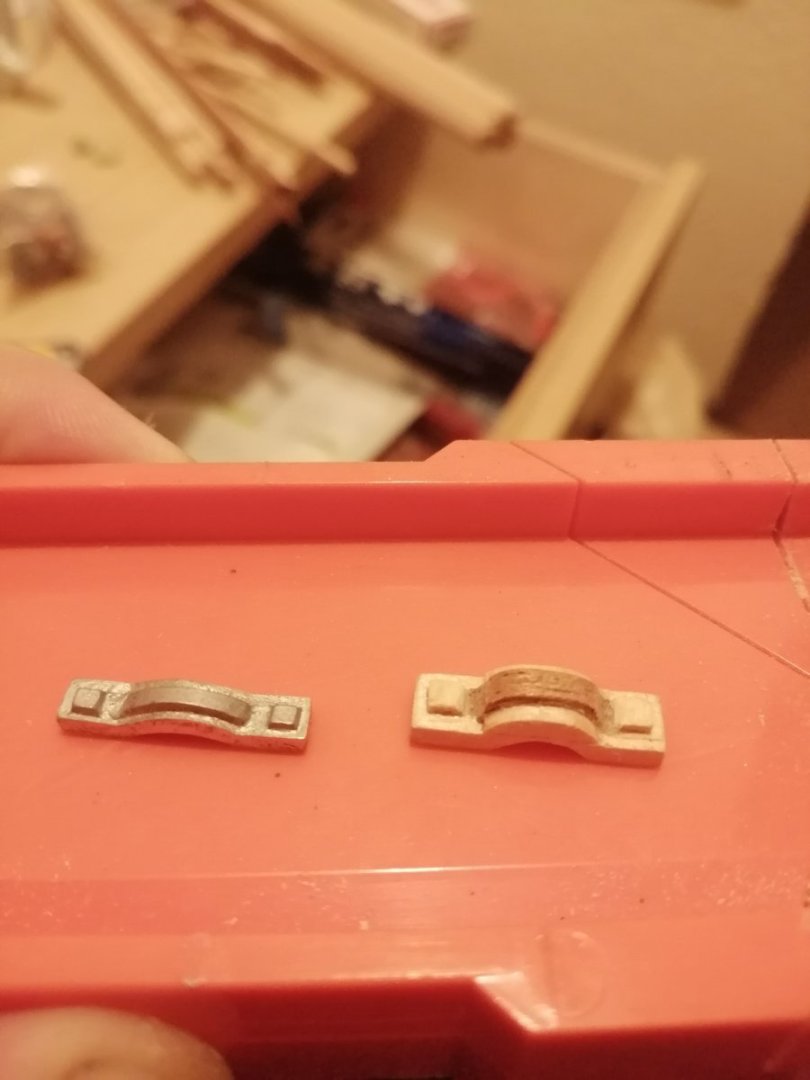
This evenings efforts have concentrated on the reinforcement straps on the rudder section. This job has been quite fiddly and frustrating, I initially didn't want to use any glue in the process, as I knew the inevitable overspill would result in having to sand back and re-paint the area to get a good finish again, (not a major dilemma as ill obviously be painting the brass parts anyway.....but still) however in the end I gave up the fight and resorted to supergluing them in place and adding the pins/rivets afterwards. I'm just curious as to whether anyone else has a neater/easier approach to this process? Cheers!
-
clearway reacted to a post in a topic:
HMS Terror by Rking - OcCre - 1:75
-
HMS Terror by Rking - OcCre - 1:75
Rking replied to Rking's topic in - Kit build logs for subjects built from 1801 - 1850
Yeah I think I'll stick with it this time, like you say it might be a bit painful removing them now, but I'll take it forward to Terror Mk2 😅 and good pickup on the rudder hole haha will get that chopped out 👍 -
HMS Terror by Rking - OcCre - 1:75
Rking replied to Rking's topic in - Kit build logs for subjects built from 1801 - 1850
Brilliant info thanks! 👍 -
Rking reacted to a post in a topic:
HMS Terror by Rking - OcCre - 1:75
-
Rking reacted to a post in a topic:
HMS Terror by Rking - OcCre - 1:75
-
HMS Terror by Rking - OcCre - 1:75
Rking replied to Rking's topic in - Kit build logs for subjects built from 1801 - 1850
Thanks very much! Had a quick look through your build log, that's something to aspire to 👌 I think I'm going to have to start Terror Mk2 straight afterwards to incorporate all these new ideas haha -
HMS Terror by richardhd - OcCre
Rking replied to richardhd's topic in - Kit build logs for subjects built from 1801 - 1850
That's a great effect you've managed to achieve with the plating 👍 wish I'd taken a bit more time over mine now, but you're right it was certainly the most tedious aspect of the build so far! -
Rking reacted to a post in a topic:
HMS Terror by richardhd - OcCre
-
HMS Terror by Rking - OcCre - 1:75
Rking replied to Rking's topic in - Kit build logs for subjects built from 1801 - 1850
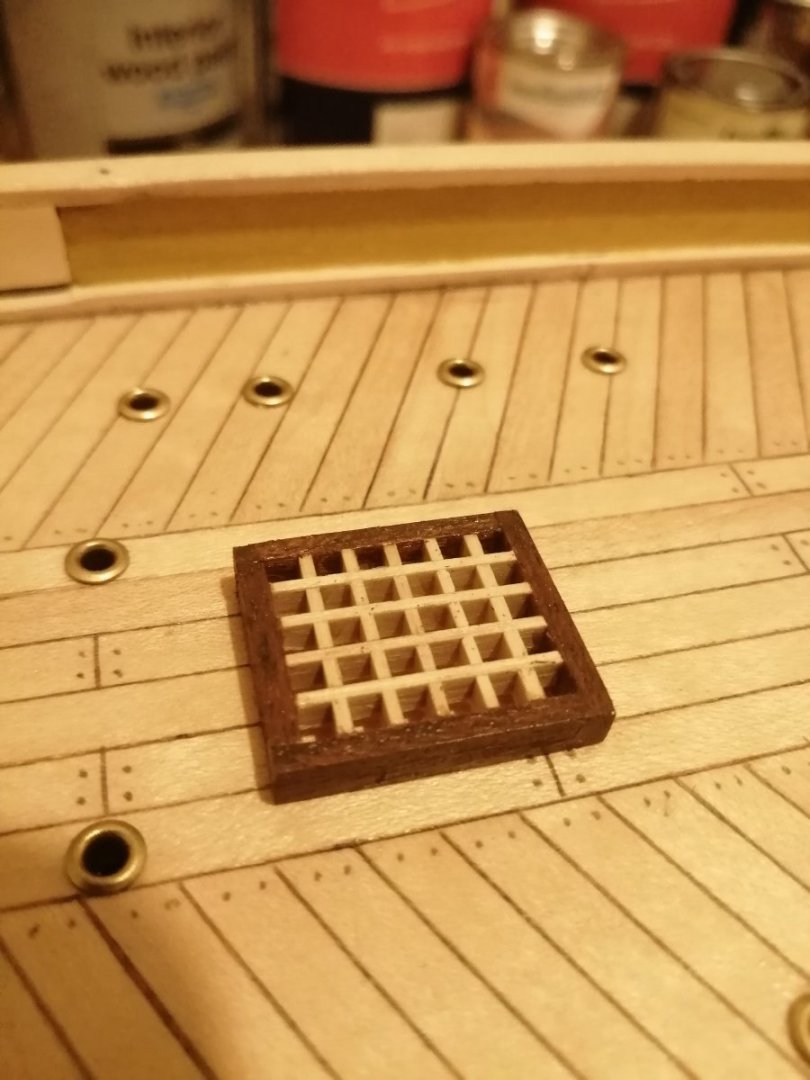
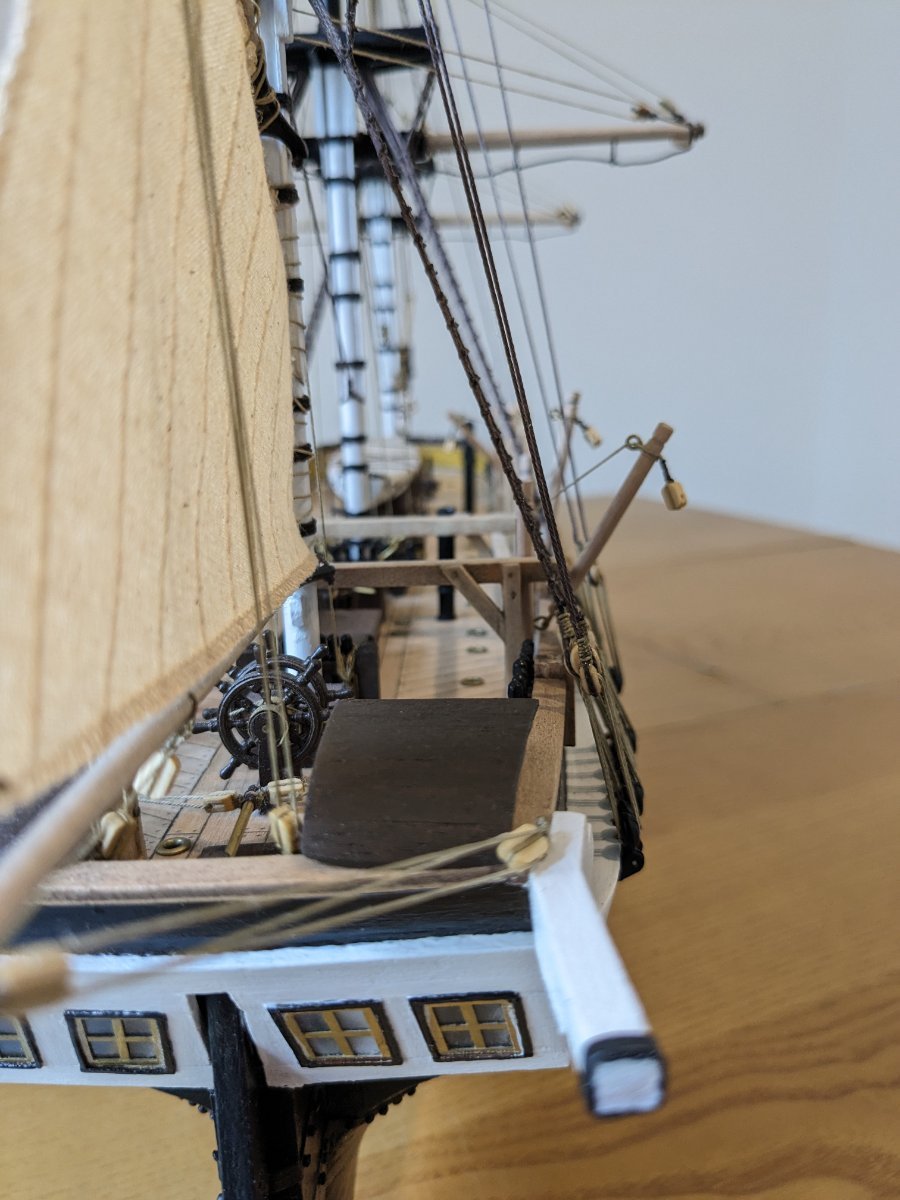
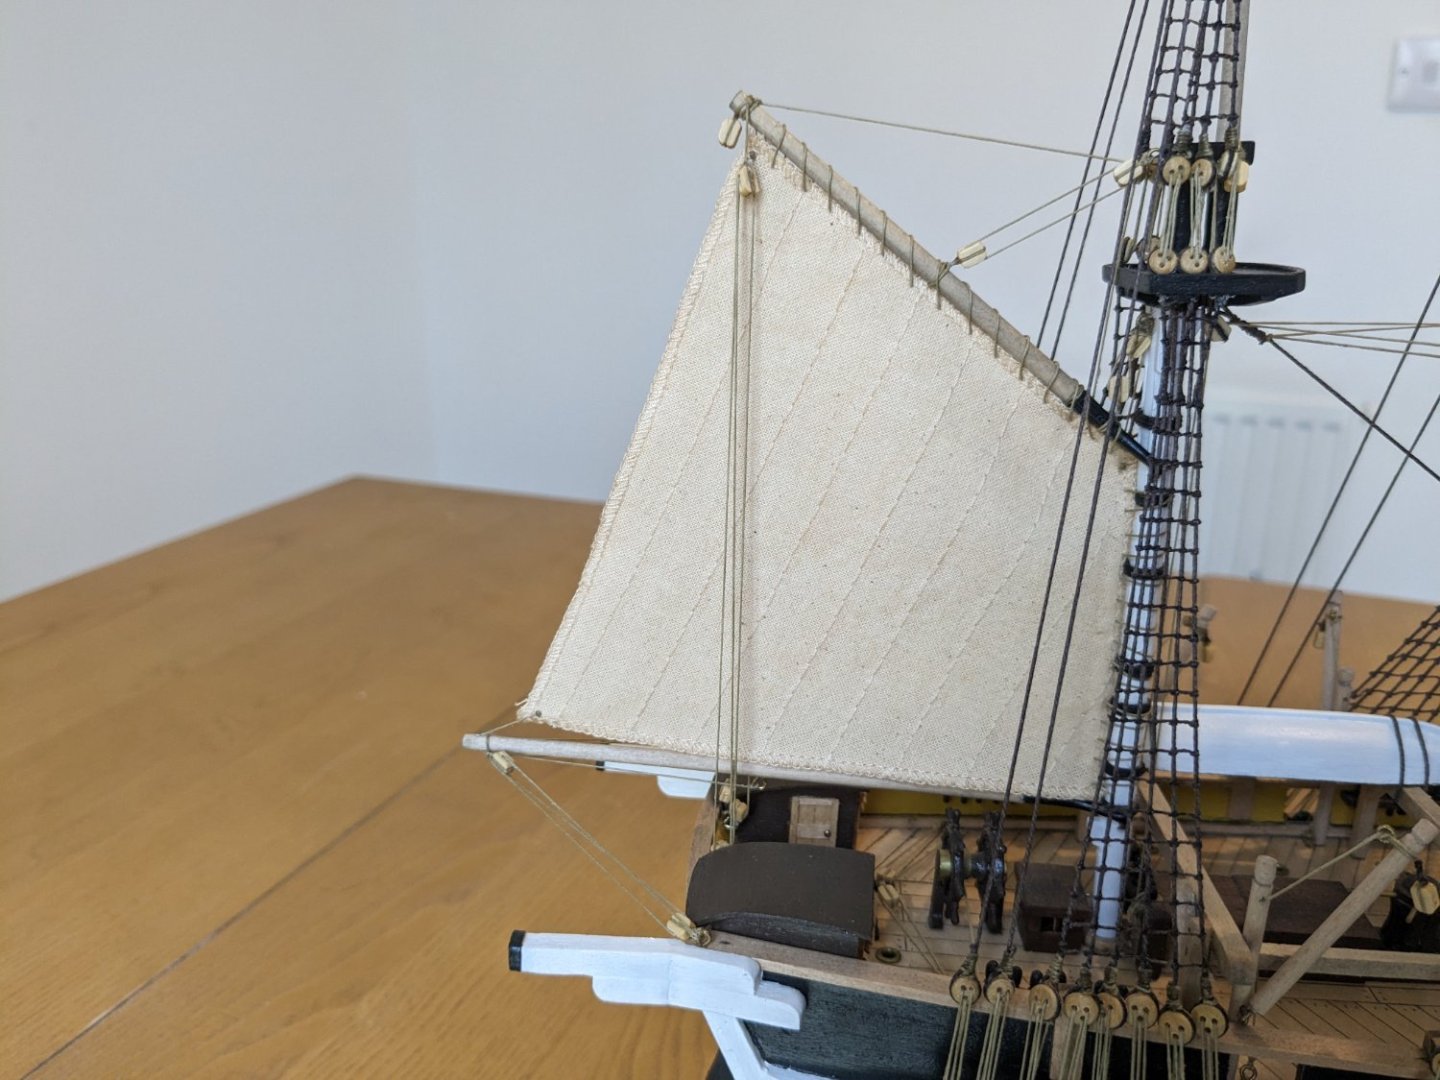
And one last question for now, are these deck gratings meant to have a slightly curved/rounded profile to the tops or just left square? quite tricky to see from the instructions 🤔 cheers!