NRG Photographic Model Ship Competition - All eligible to enter - Reduced memberhsip fee - JULY 31 ENTRY DEADLINE
×
New Banner Ad Sponsor - Epic Engravers - Great plank bending machine (also bends thin metal sheets) and unique engraved coins to label your model displays!
×


WizardOfOs
-
Posts
73 -
Joined
-
Last visited
Content Type
Profiles
Forums
Gallery
Events
Everything posted by WizardOfOs
-
I can't say I'm any kind of expert with regard to norms on painting, but that's exactly what I did with my Pram. I painted the seats/mast with the same off-white colour I chose for the exterior of the hull and think it looks "right." If nothing else it can serve as an example of what it may look similar to for you to judge if you like the look. Your model helped considerably in the early stages of mine and I'm very glad to see the excellent progress.
-
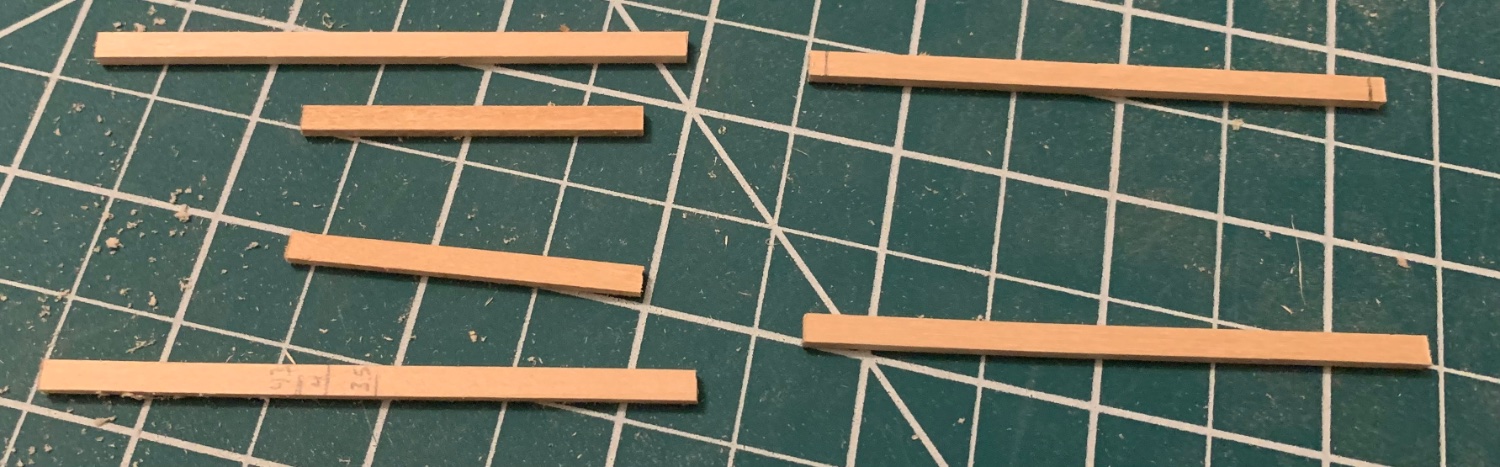
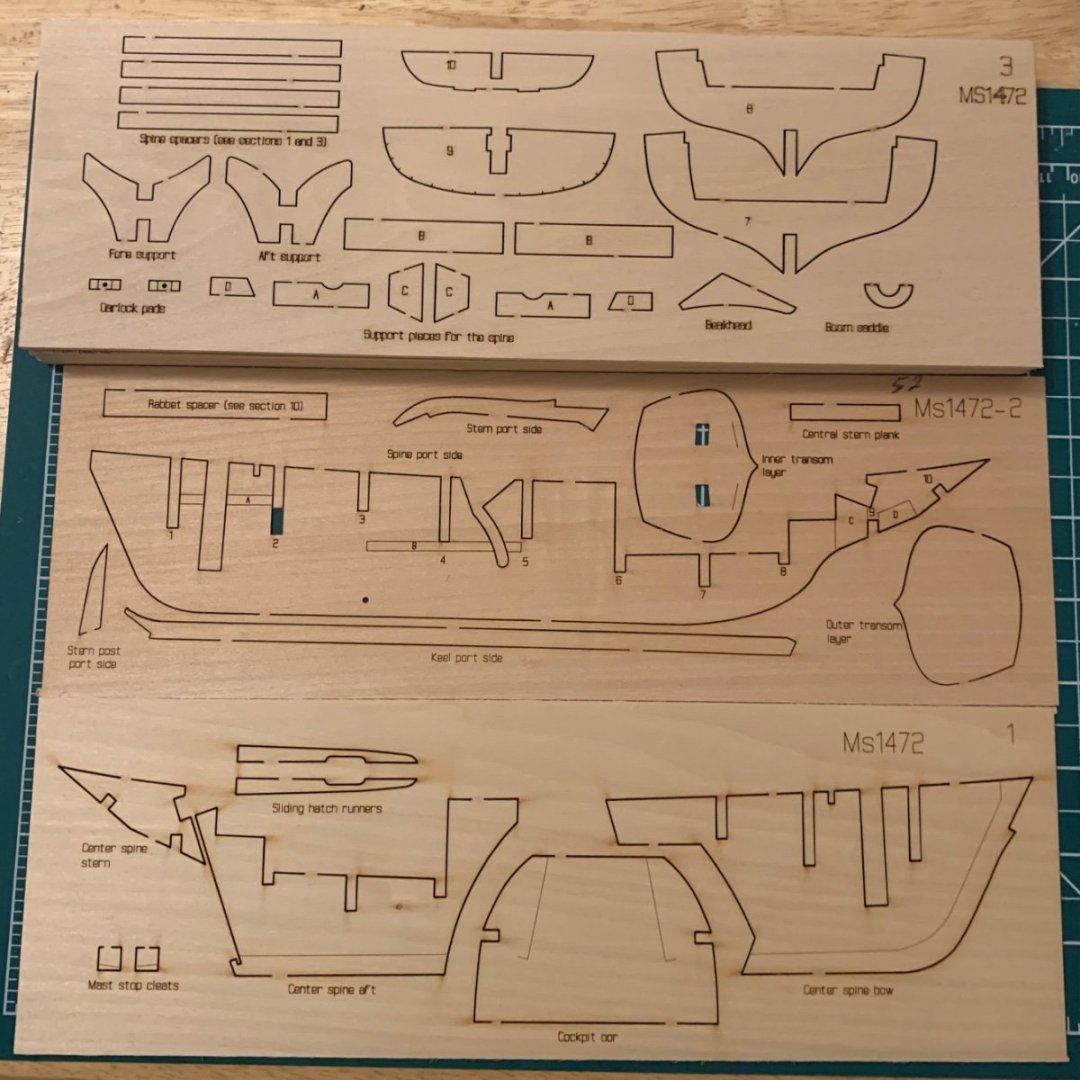
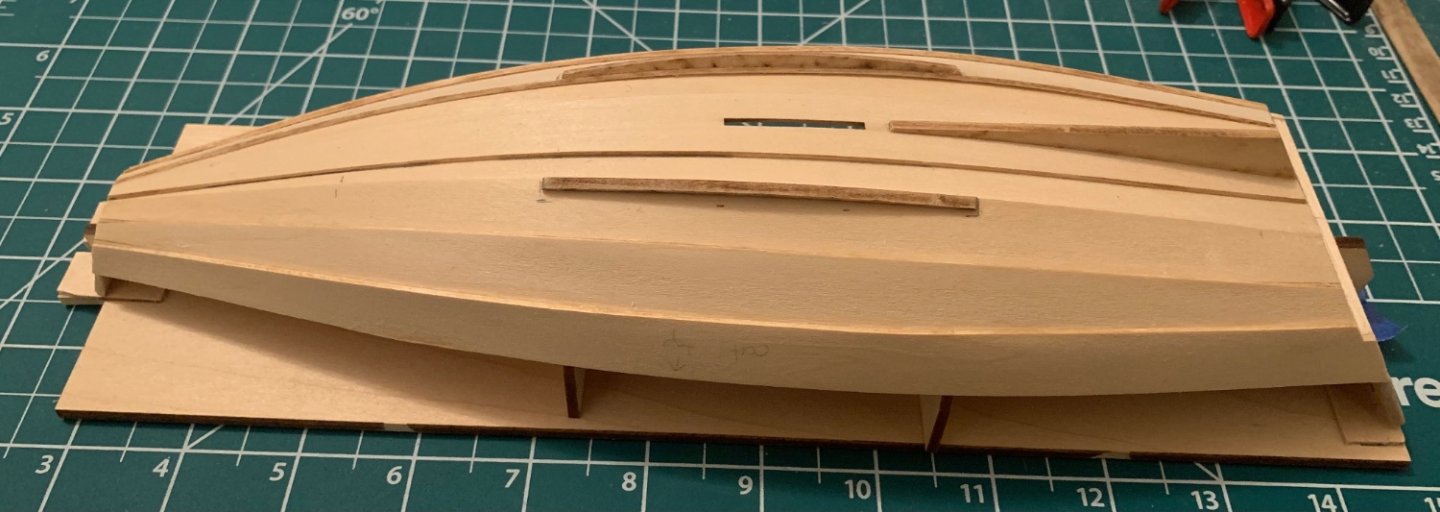
Hello again, I’m back with the beginning of the third and final model in the Shipwright Series kit by Model Shipways: the Muscongus Bay Lobster Smack. It would appear that I’ve fallen slightly behind my cohort here as I’ve been away on vacation for a short time. I’m catching back up on everything Happening in the other build logs and have some really good work to live up to. So far all I have done is take a quick inventory to make sure everything is included and accounted for. I’m eager to get started. Most importantly, though, is that I’m going to take some time to read through the instruction booklet and familiarize myself with the first few steps before getting started. It’s a practice that served me well in the first two models and I see no reason to rush in on the third (even though I desperately want to get straight to the cutting, sanding, and gluing). I suspect this build will be at a bit of a slower pace than the Pram was because I’m transitioning between a very hands-on phase at work where I could have my evenings to myself and into a more creative phase where my evenings are going to become busier with recording or expanding ideas.

- 38 replies
-
- 5
-

-
- Model Shipways
- Shipwright Series
- (and 2 more)
-
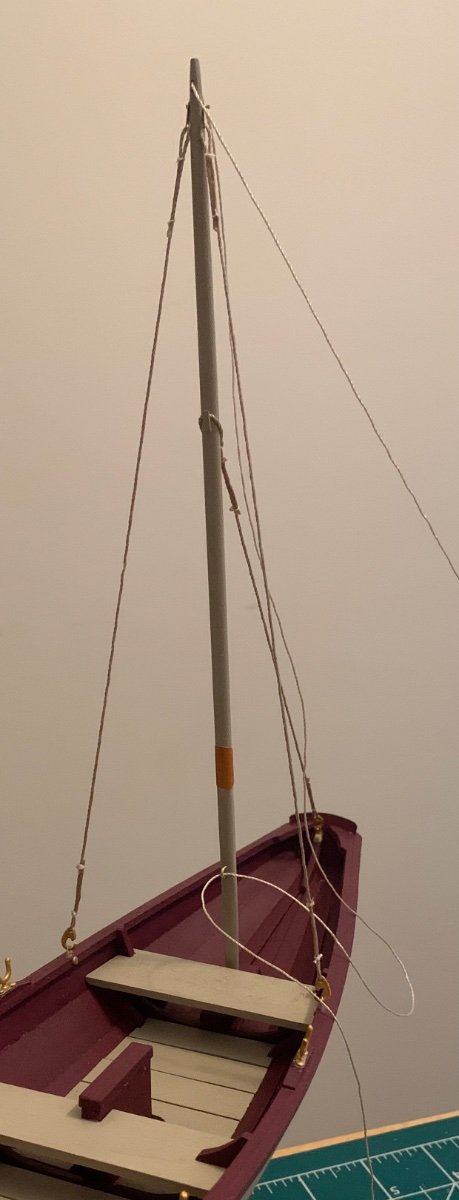
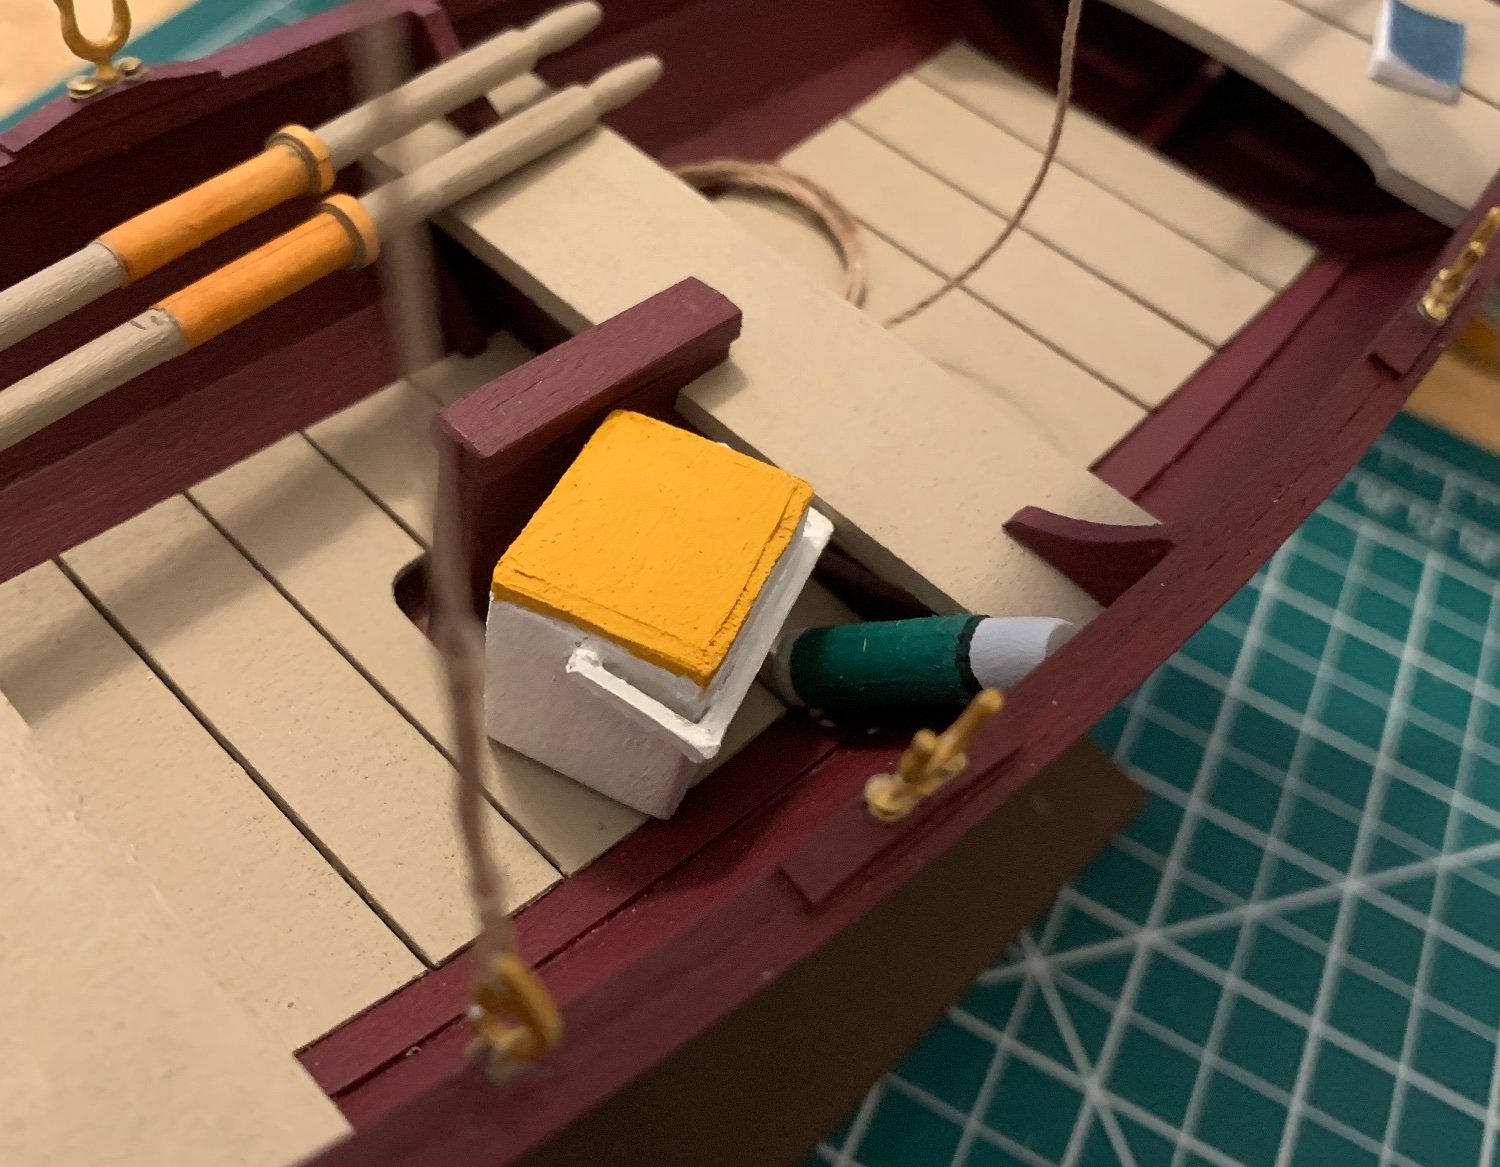
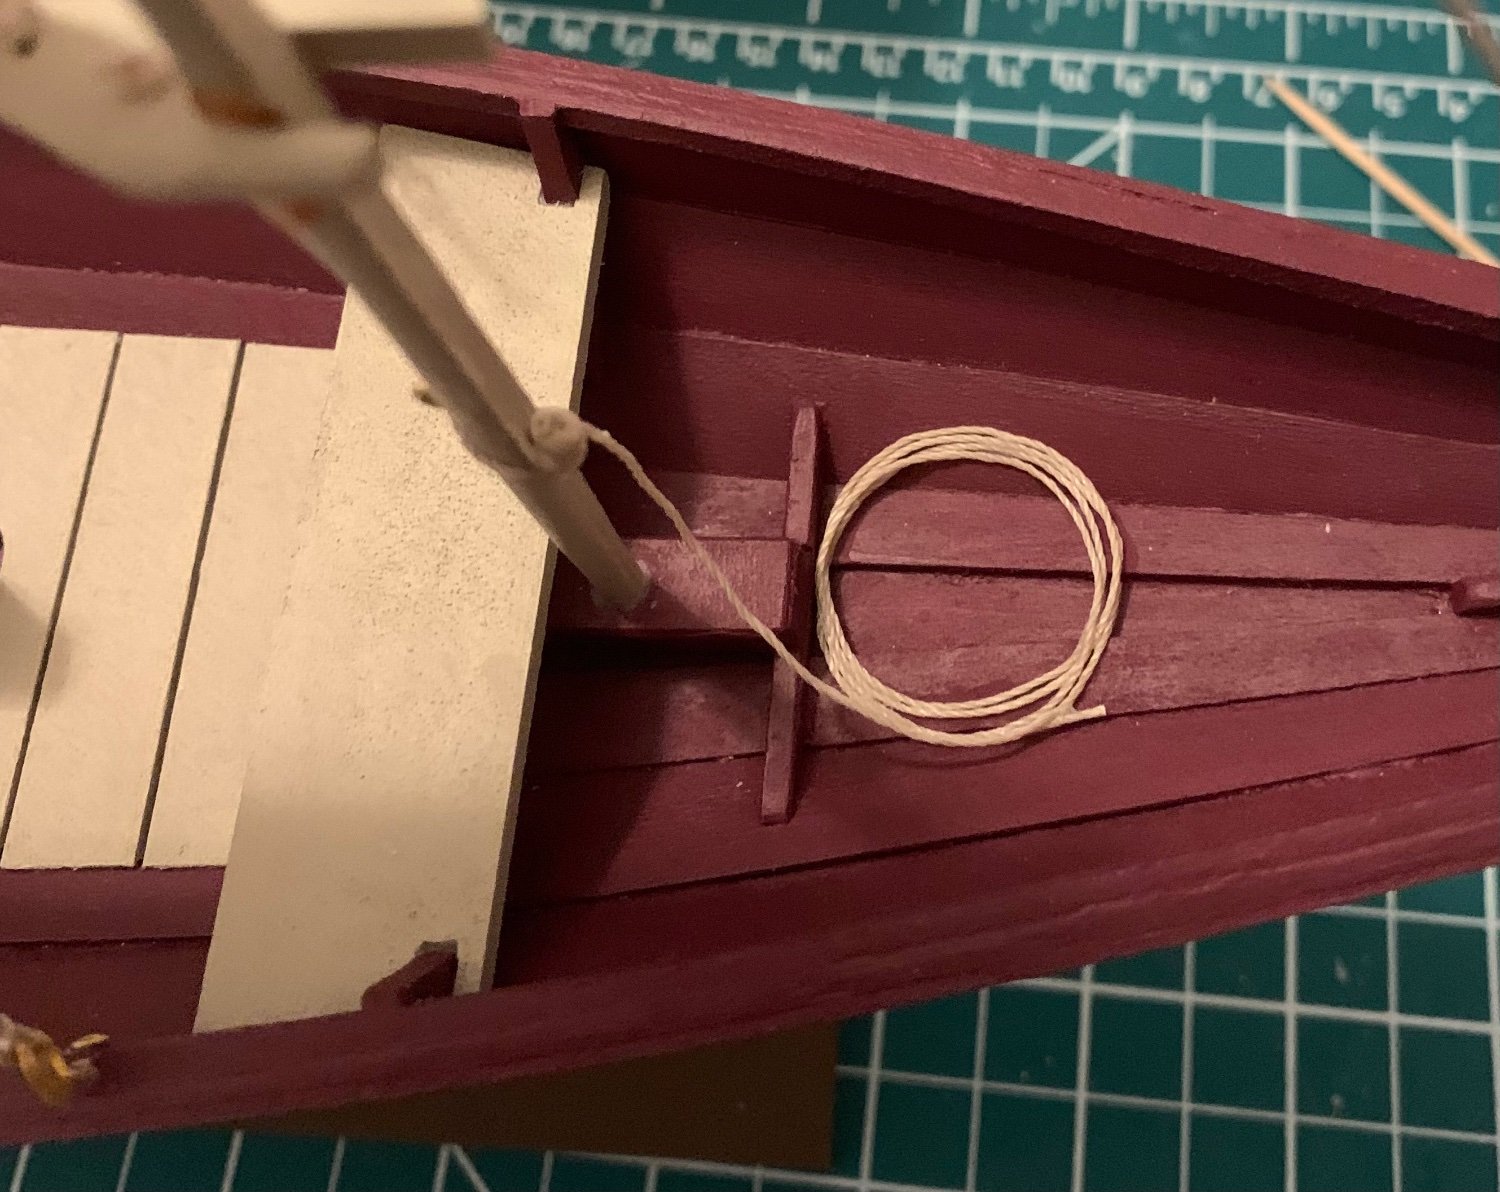
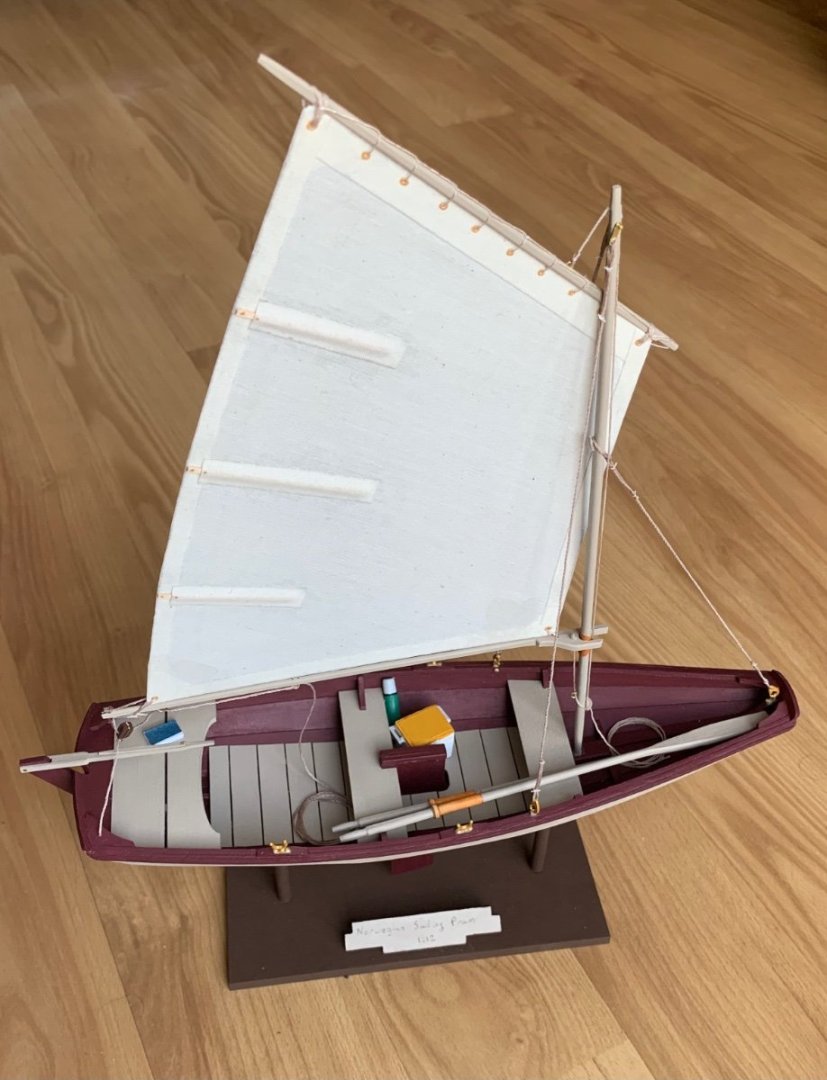
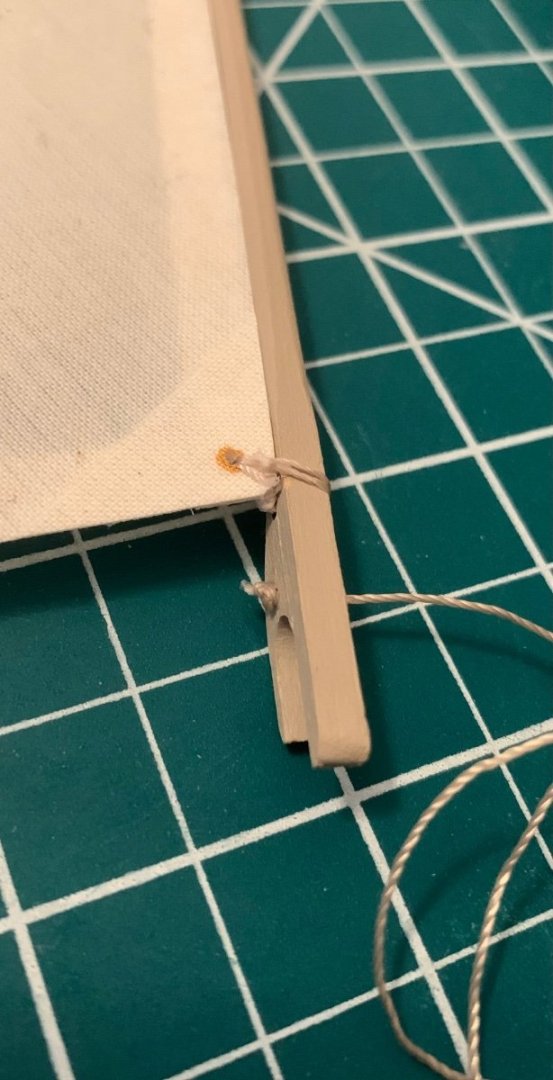
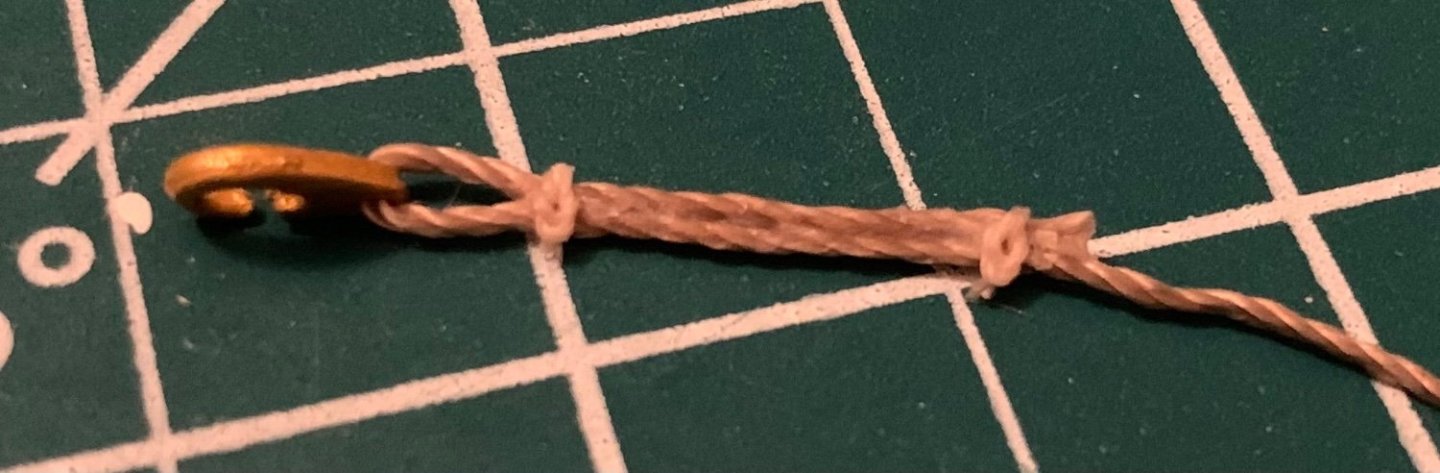
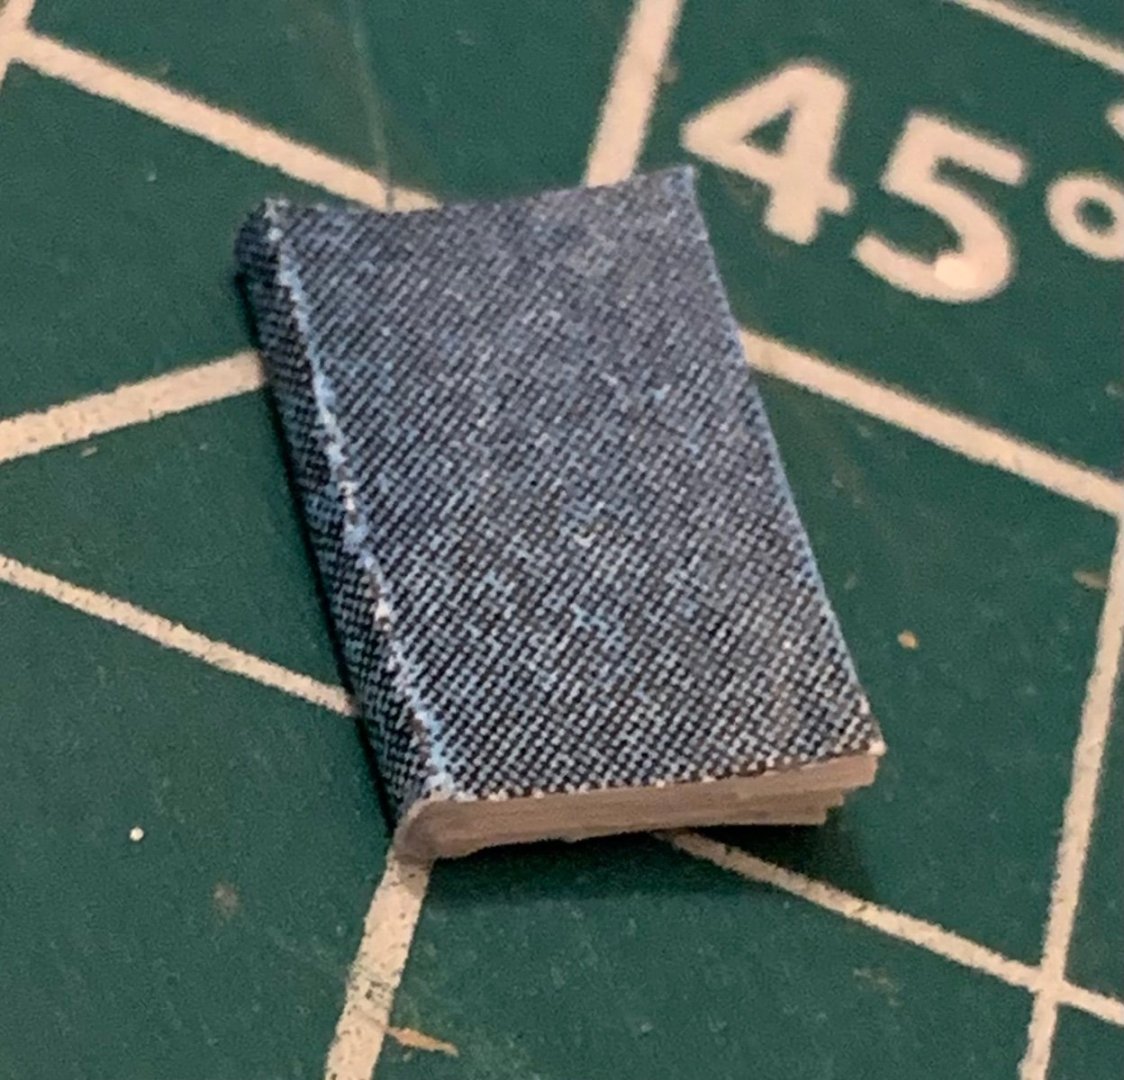
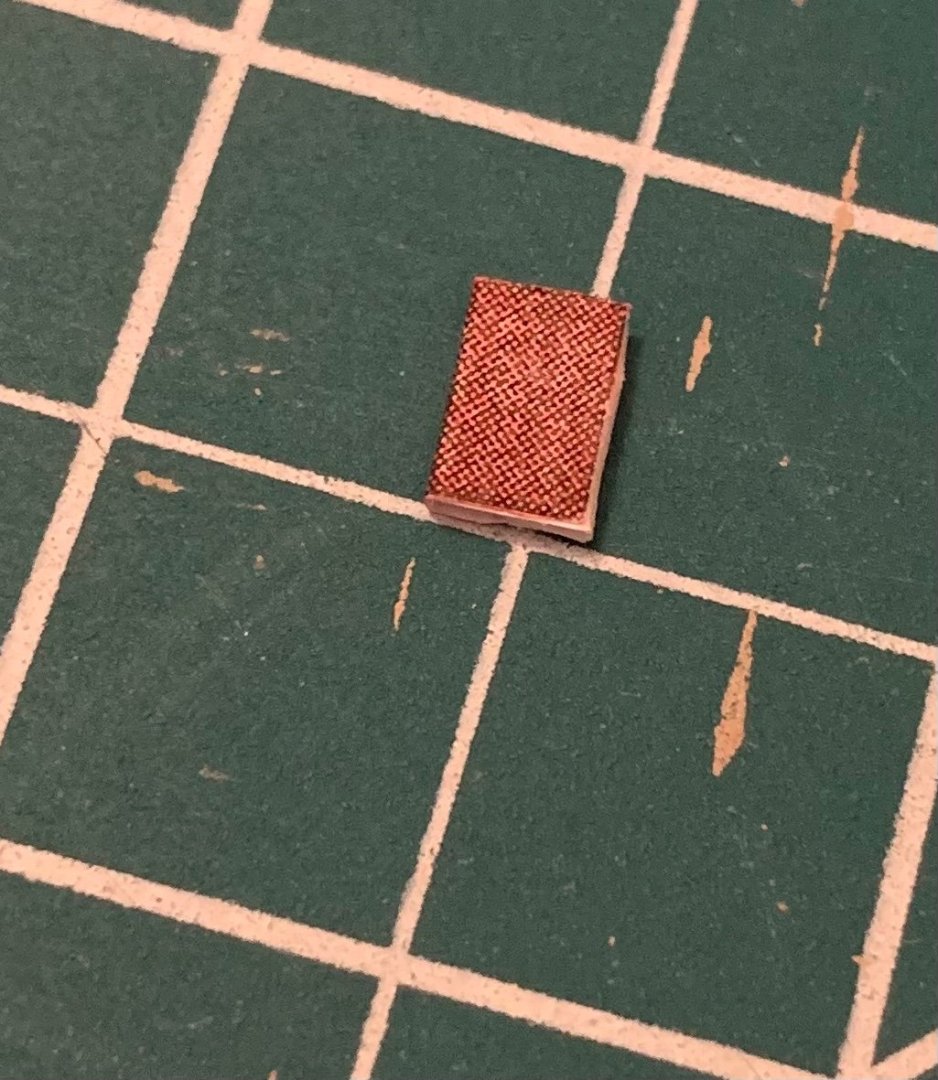
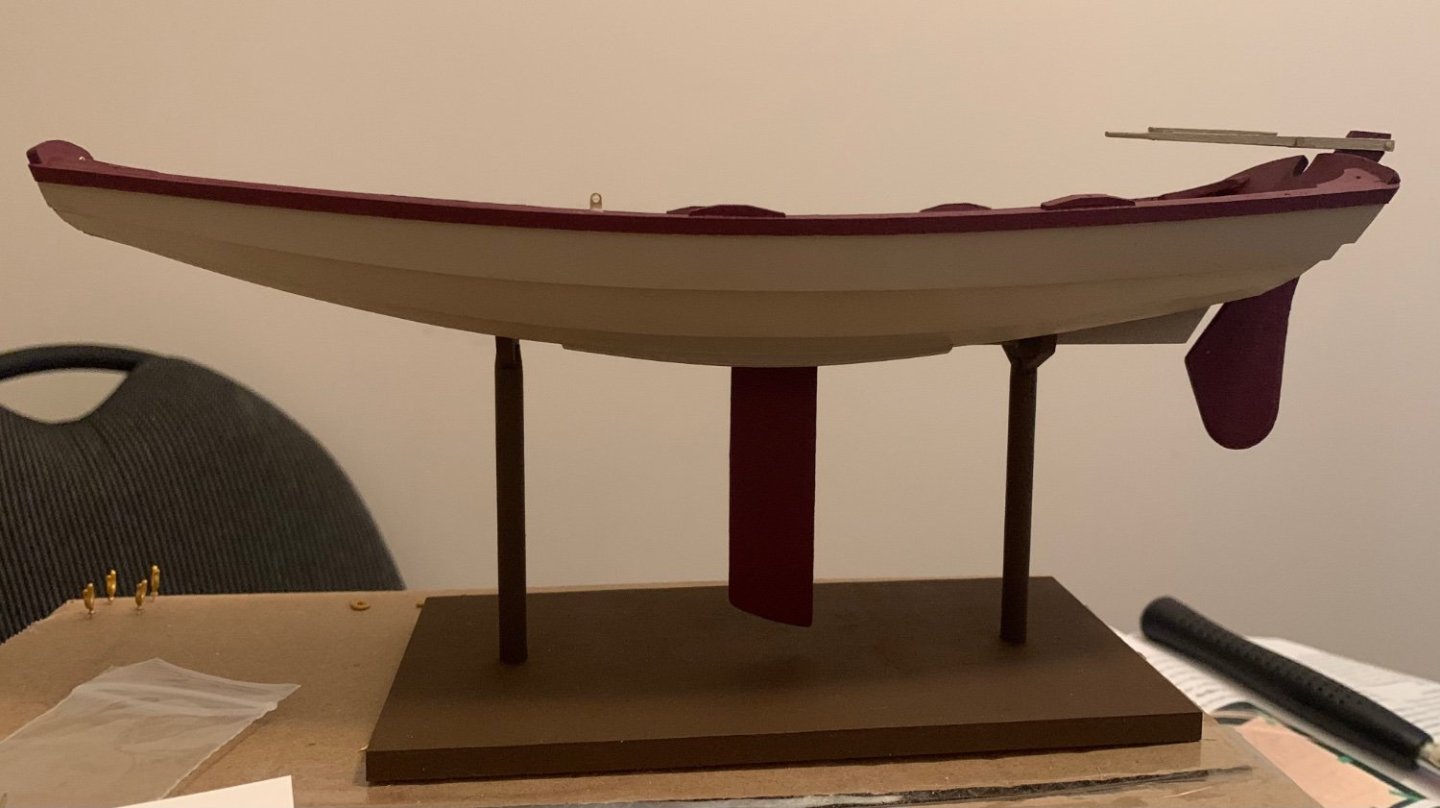
Finishing touches have taken a little time to get to. I find I’m usually that way, slowing down a bit right at the end of a project. The new chaffing pad was added to the mast. I know it would have bothered me to leave it the way it was and can now be proud of the repair. If I didn’t tell you it had been fixed I don’t believe anyone would know. Then came the dressings. First a couple of rope coils. I can not begin to express how frustrating those were to create. I really like how they turned out but I’m going to need to find a better method for the future. All told, I enjoyed doing the (admittedly simple) rigging quite a lot. The coils were the only part to frustrate me. The entire experience with the sail has me excited to do the next one. As with the dory, I added a small name plate. Nothing fancy, and of course my chicken-scratch passing for lettering, but it’s important to label things. There is a much more comprehensive name/date/model name/manufacturer on the bottom of the base but I’ll refrain from showing that. For oars I decided to only include two of the four. Enough to get back to shore in an emergency but not so many as to clutter the boat. Of course there is a novel, sitting nearby and waiting to be read. And finally, a lunch packed away for later. My goal, both here and in the dory, is to try to tell a bit of a story along with the actual modeling of the boat. I’d like to keep that up throughout all my models moving forward. So that’s it. The Pram is finished and I’ll go edit the title of the thread as such. I plan to go find my camera in the next day or two and take a few higher quality pictures to make a gallery. I’ll come back here and add a link when that’s been done. I also sincerely want to thank all of you for following along and offering encouragement. I appreciate all the supporting posts and “likes.” My next project will be the Muscongus Bay Lobster Smack, which is absolutely going to get a build log of its own. That will be forthcoming in a few weeks.


- 38 replies
-
- 10
-
-
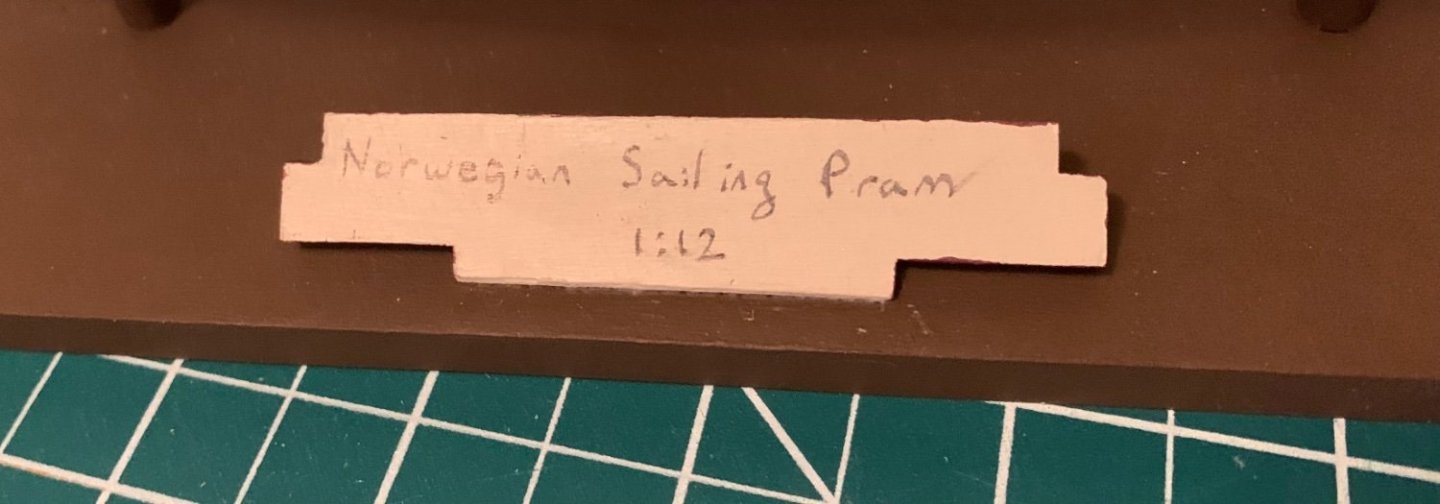
- Norwegian Sailing Pram
- Model Shipways
- (and 2 more)
-
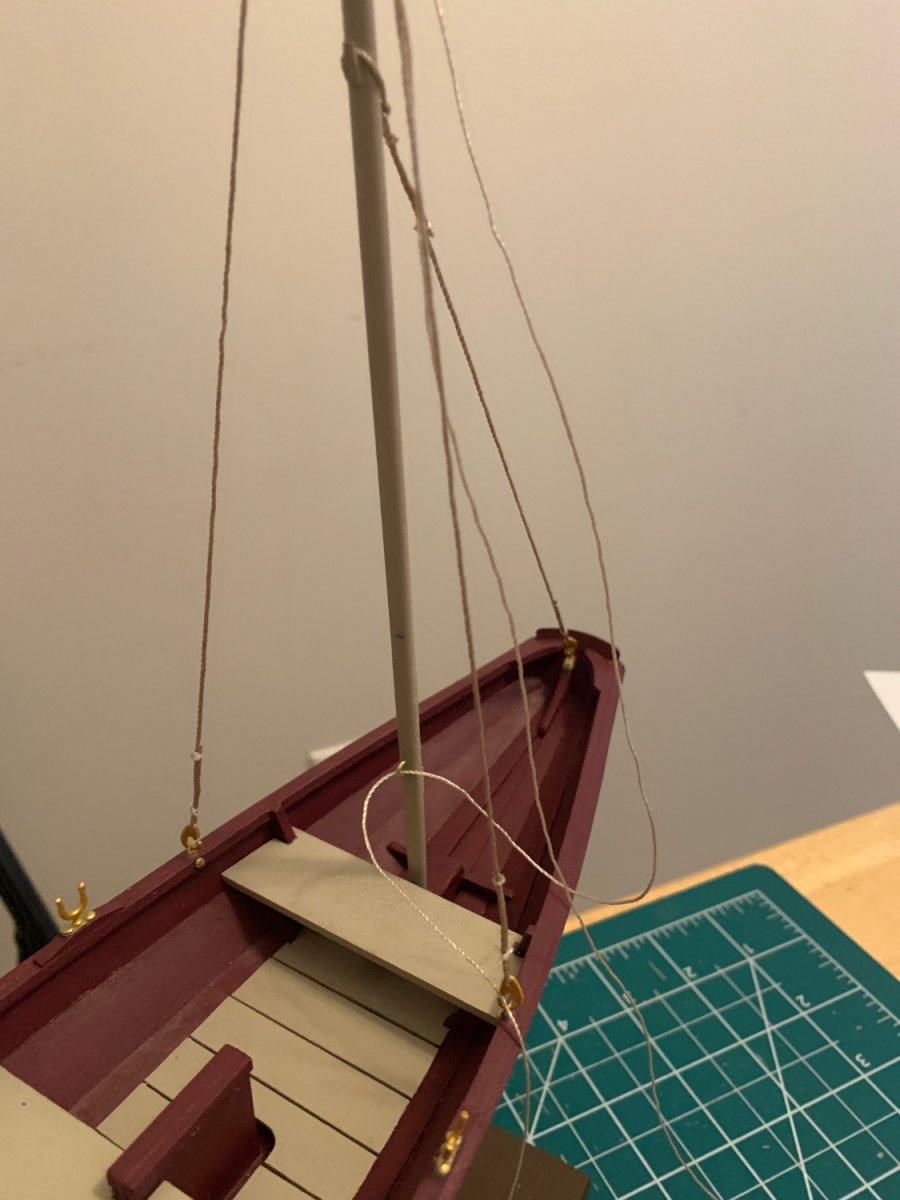
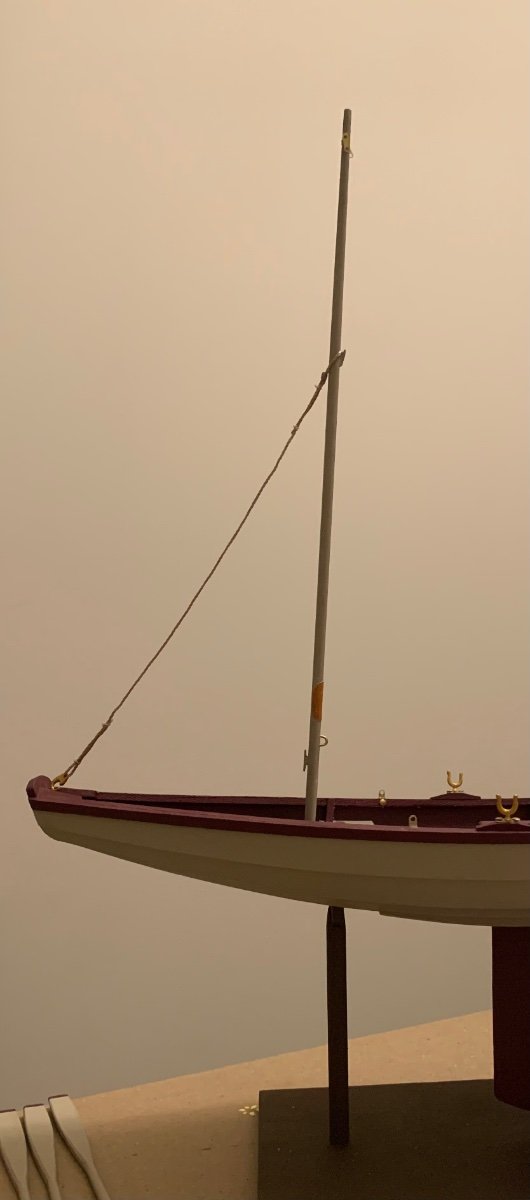
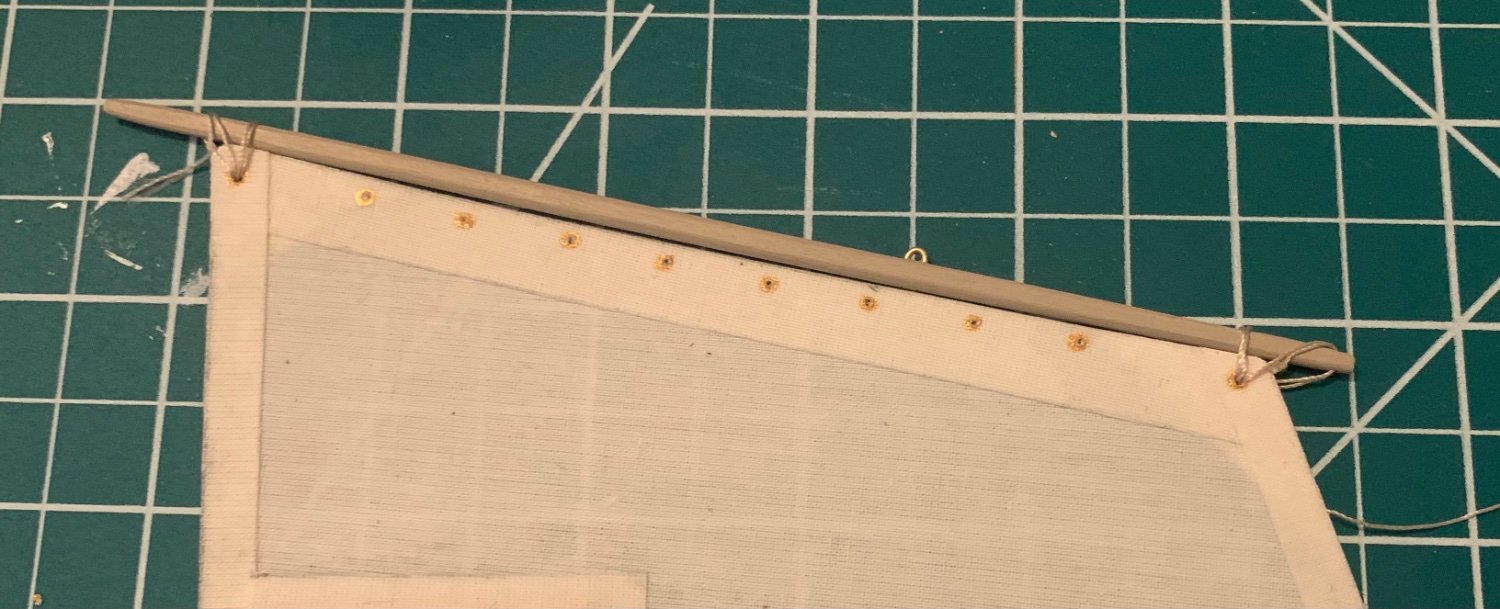
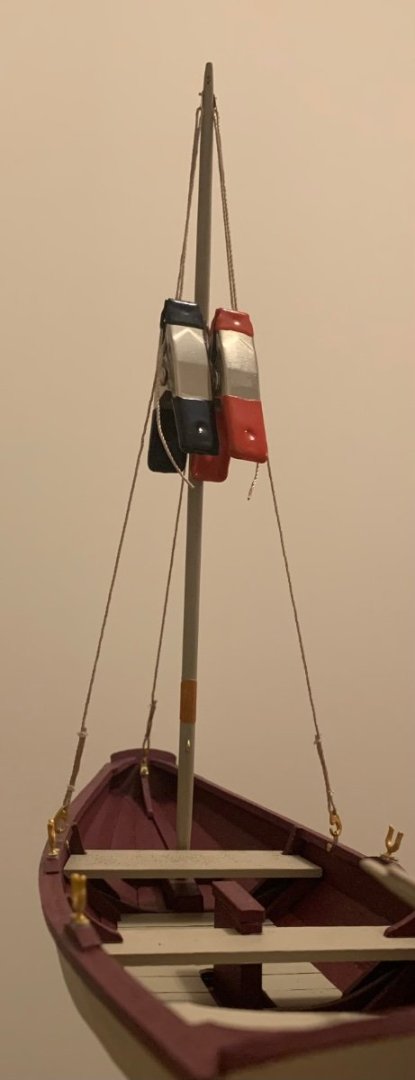
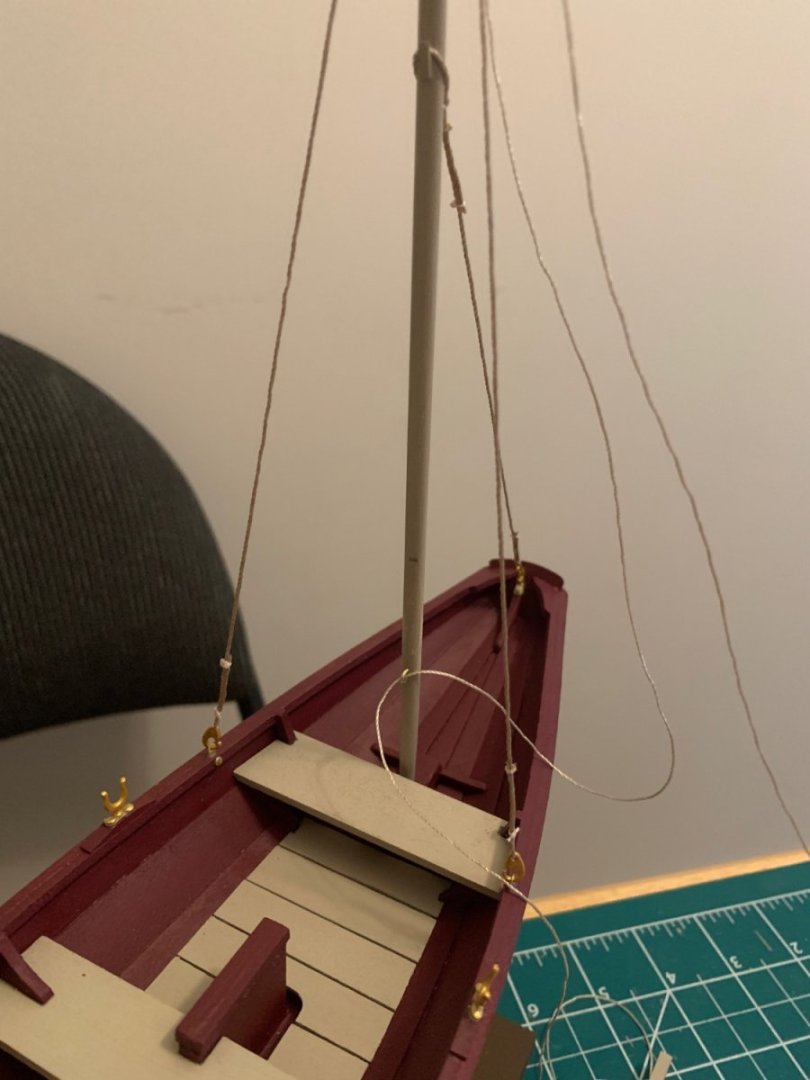
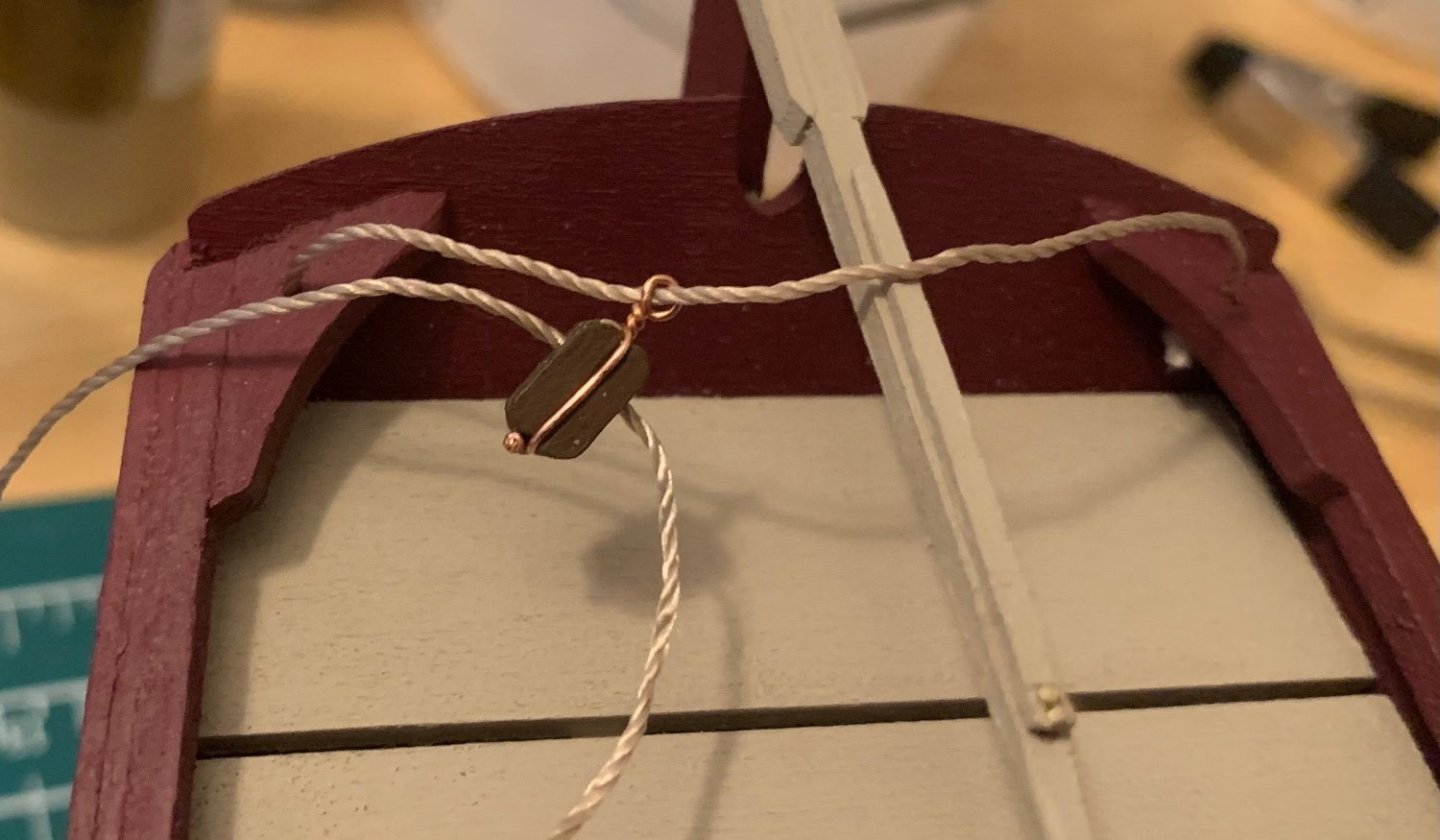
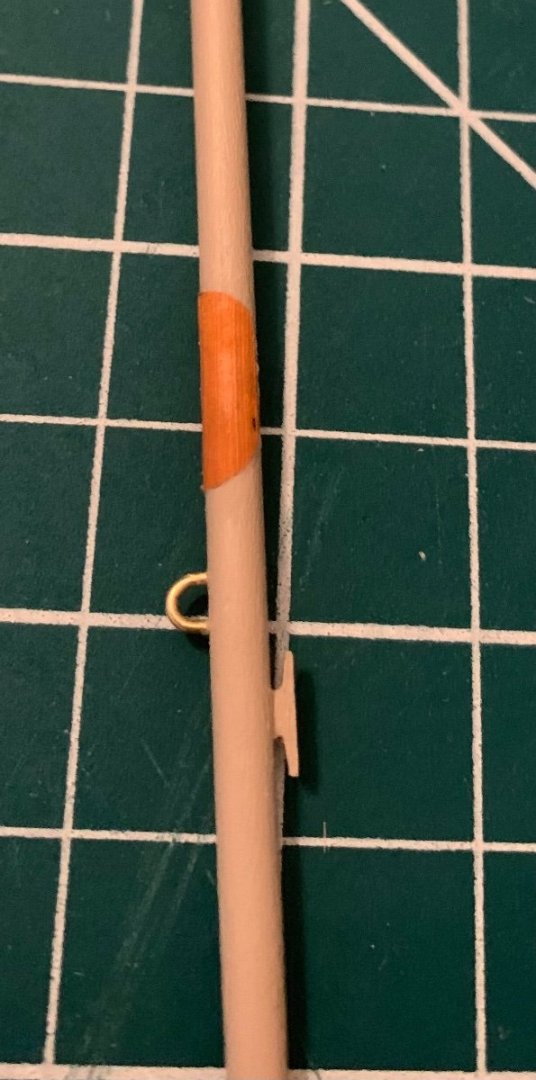
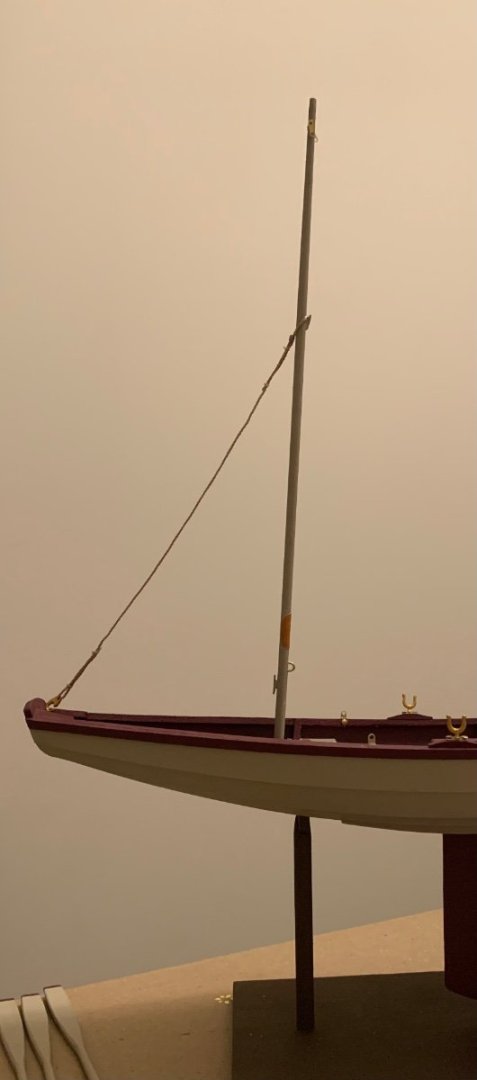
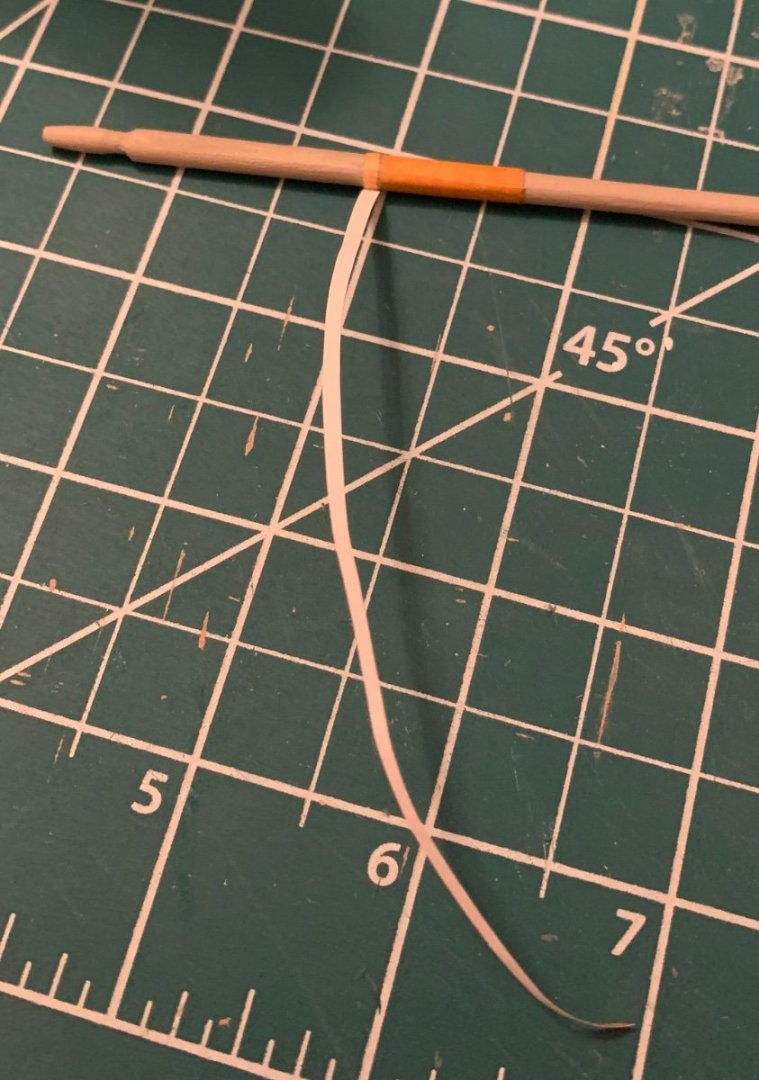
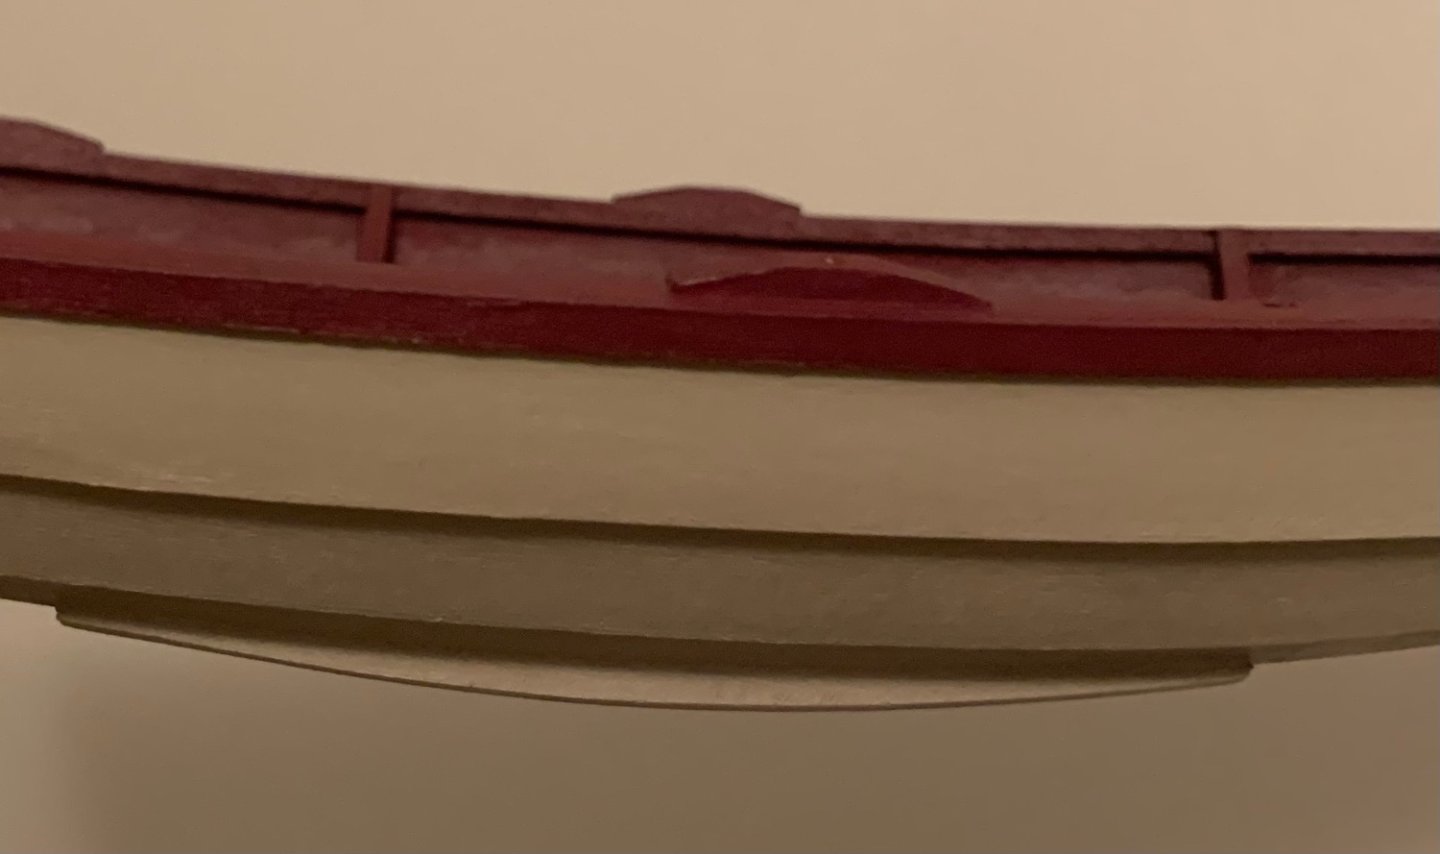
I had thought it was time for final fitting, but then something happened. First up went the back stays. These went exactly according to plan. I also finished fastening the remaining lines were needed. The traveler, with the block attached. The halyard The downhaul And the main sheet So far, so good. then I had the hood sense to test fit the sail to the mast. Oops. Everything fit right and sat well adjusted except for one part, as you can see here. The Chaffing pad is too low. A little acetone helped remove the bulk of it. Then some sanding to get rid of most of what was left. Followed by another coat of paint. You can see my pencil mark indicating where the new pad needs to go. So now I’m just waiting for the paint to dry and will pick back up with installation of the new pad. A little setback, but it will make a big difference to me.


- 38 replies
-
- 6
-
-
- Norwegian Sailing Pram
- Model Shipways
- (and 2 more)
-
Hi Claire, looking good and welcome to the Pram. As for #55 drill bit, it's referring to wire gauge sizes. A #55 wire gauge drill bit is approximately equal to a 1.3 mm bit so your estimation of 1.4 mm was a good one.
-
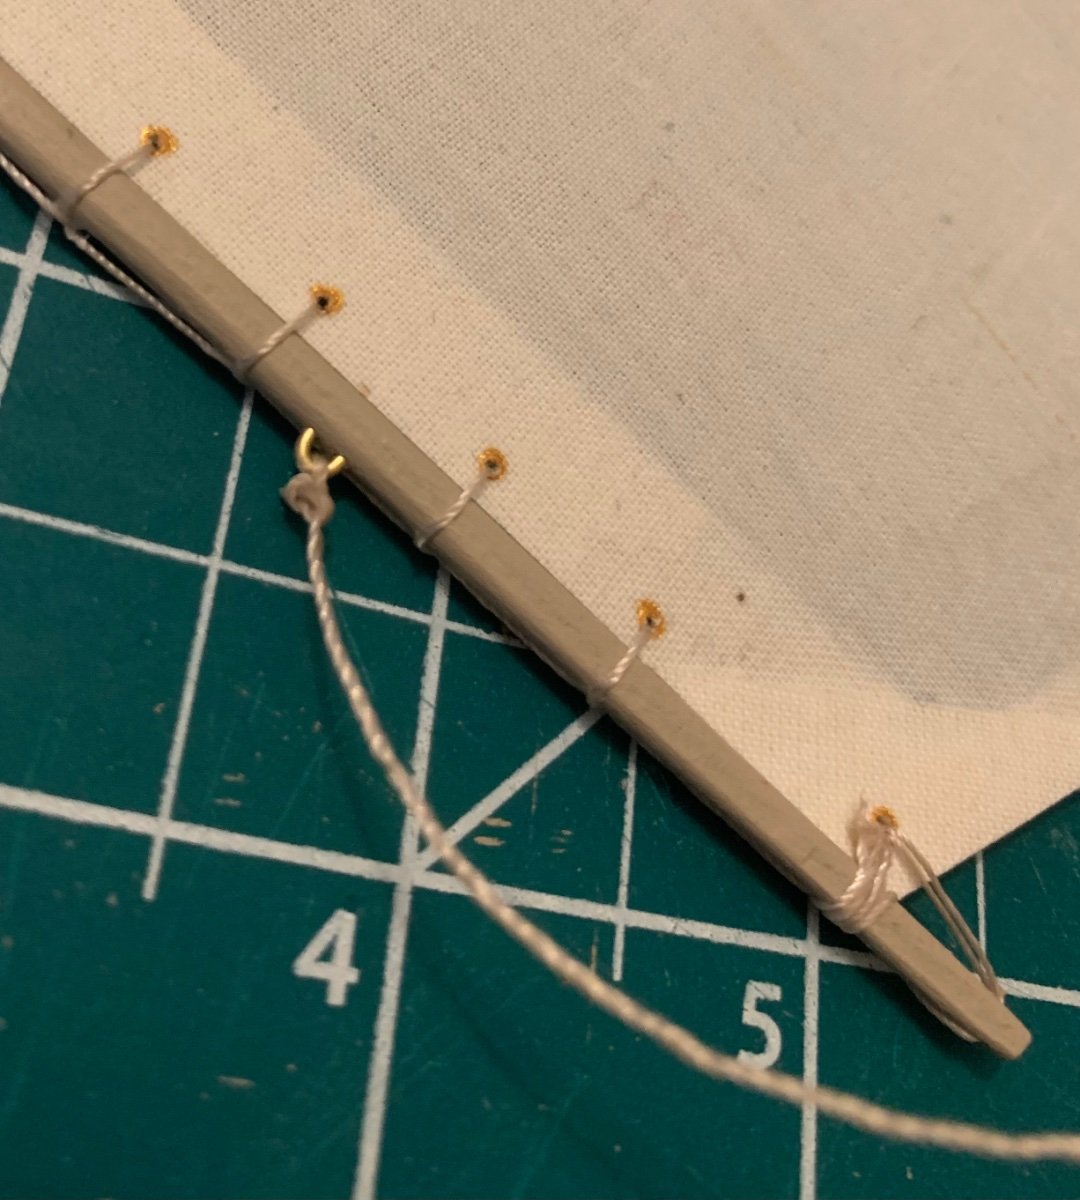
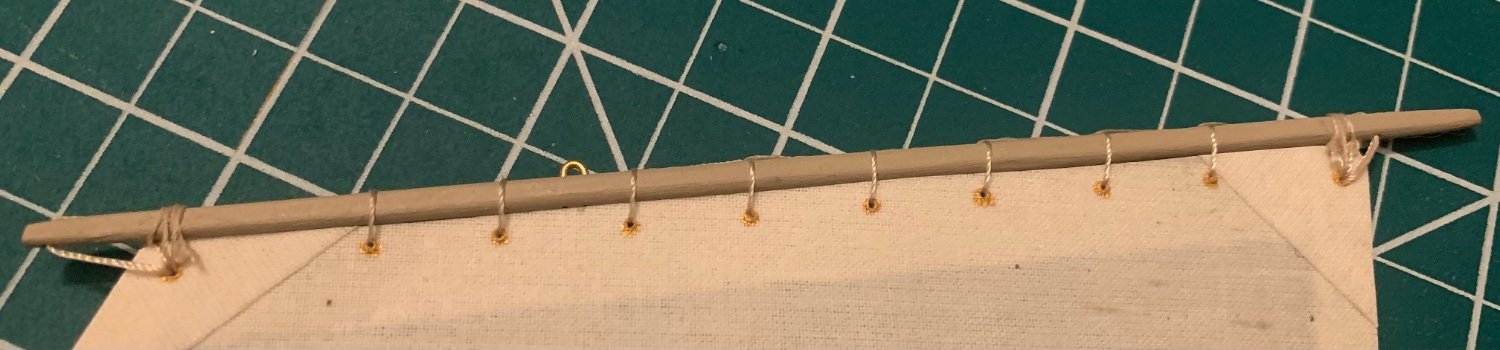
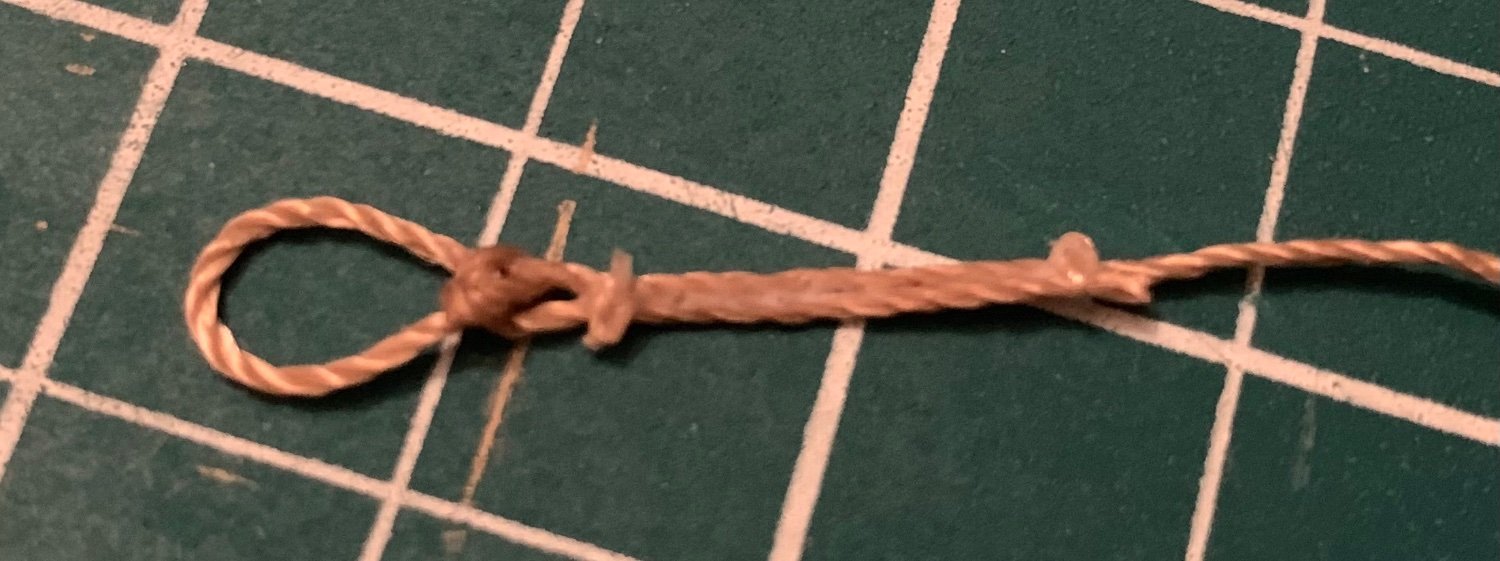
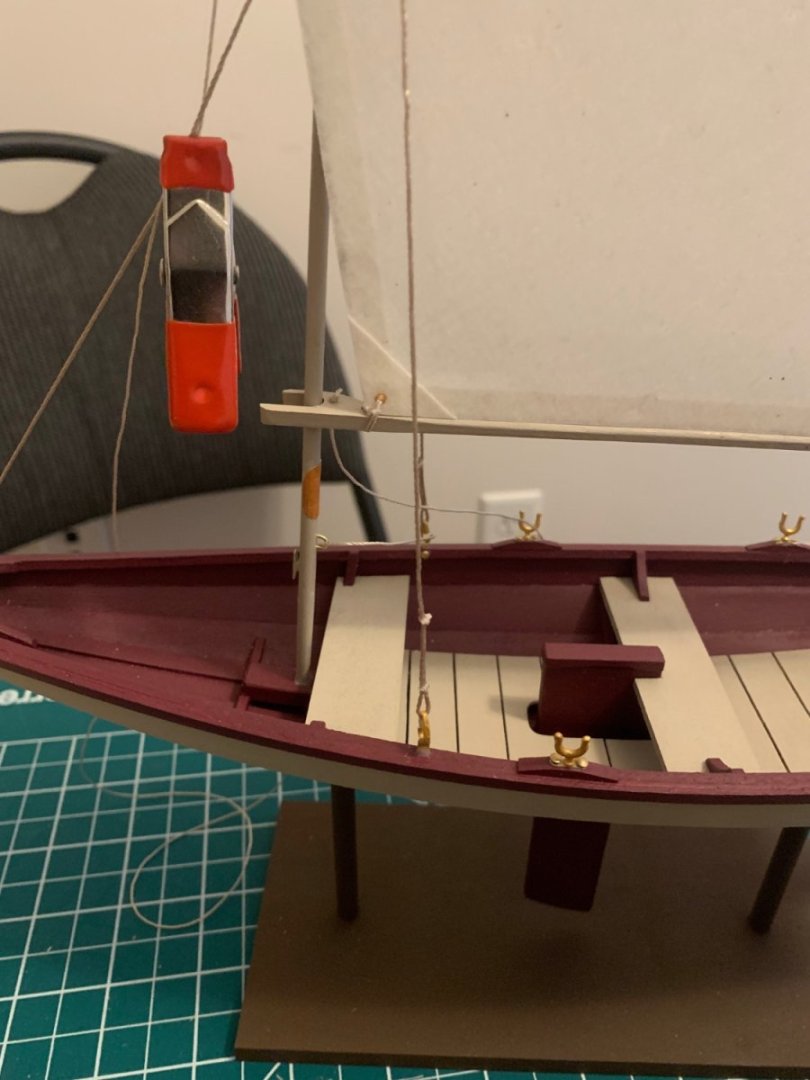
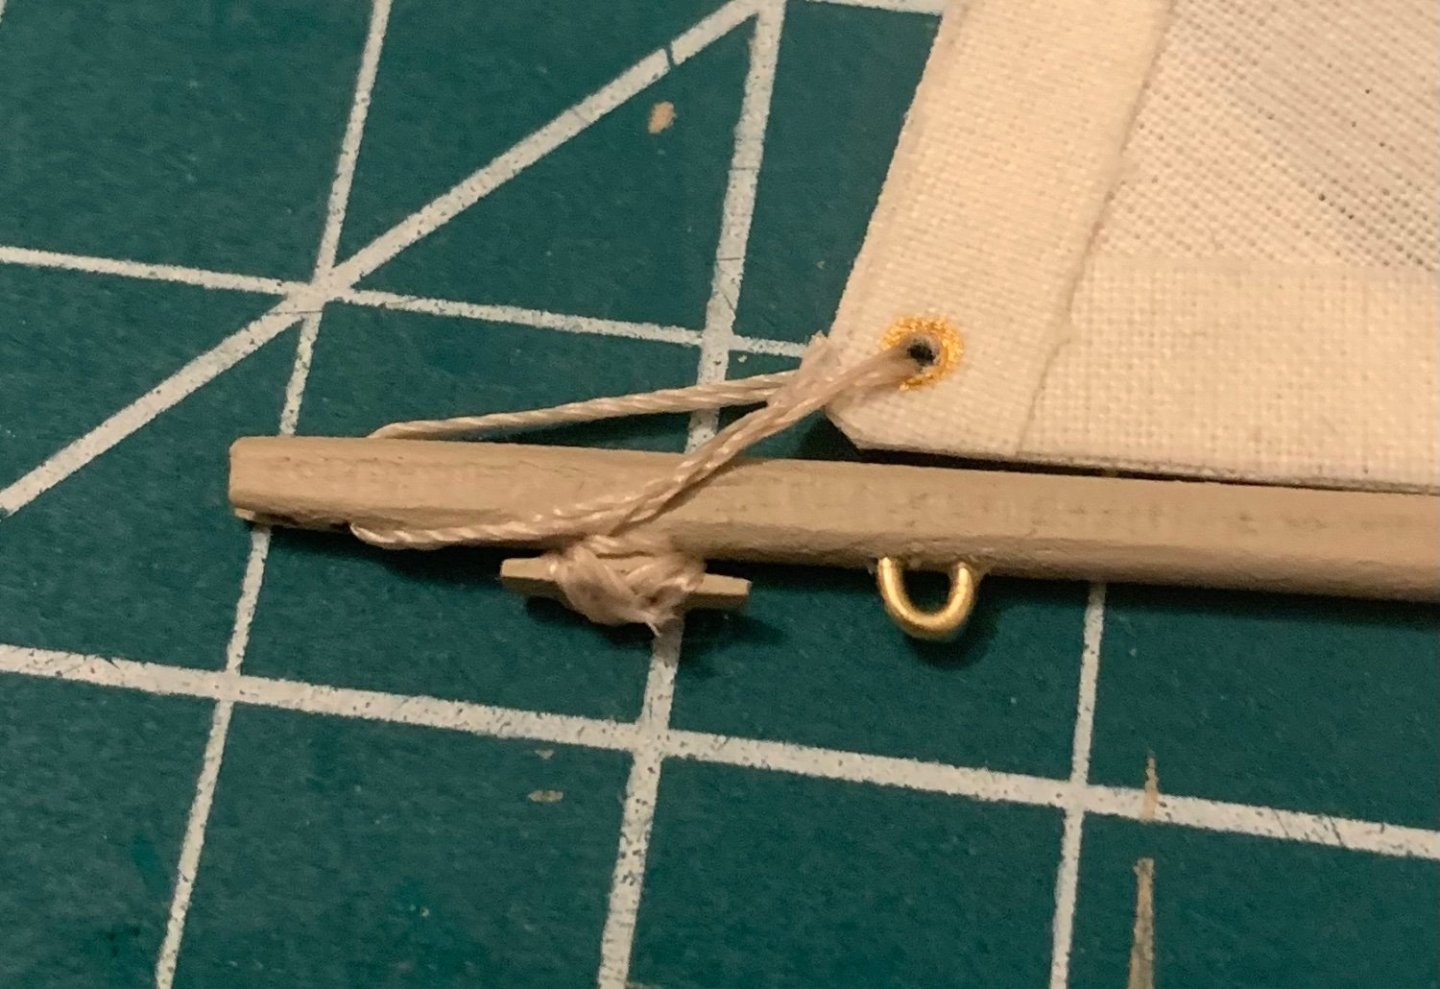
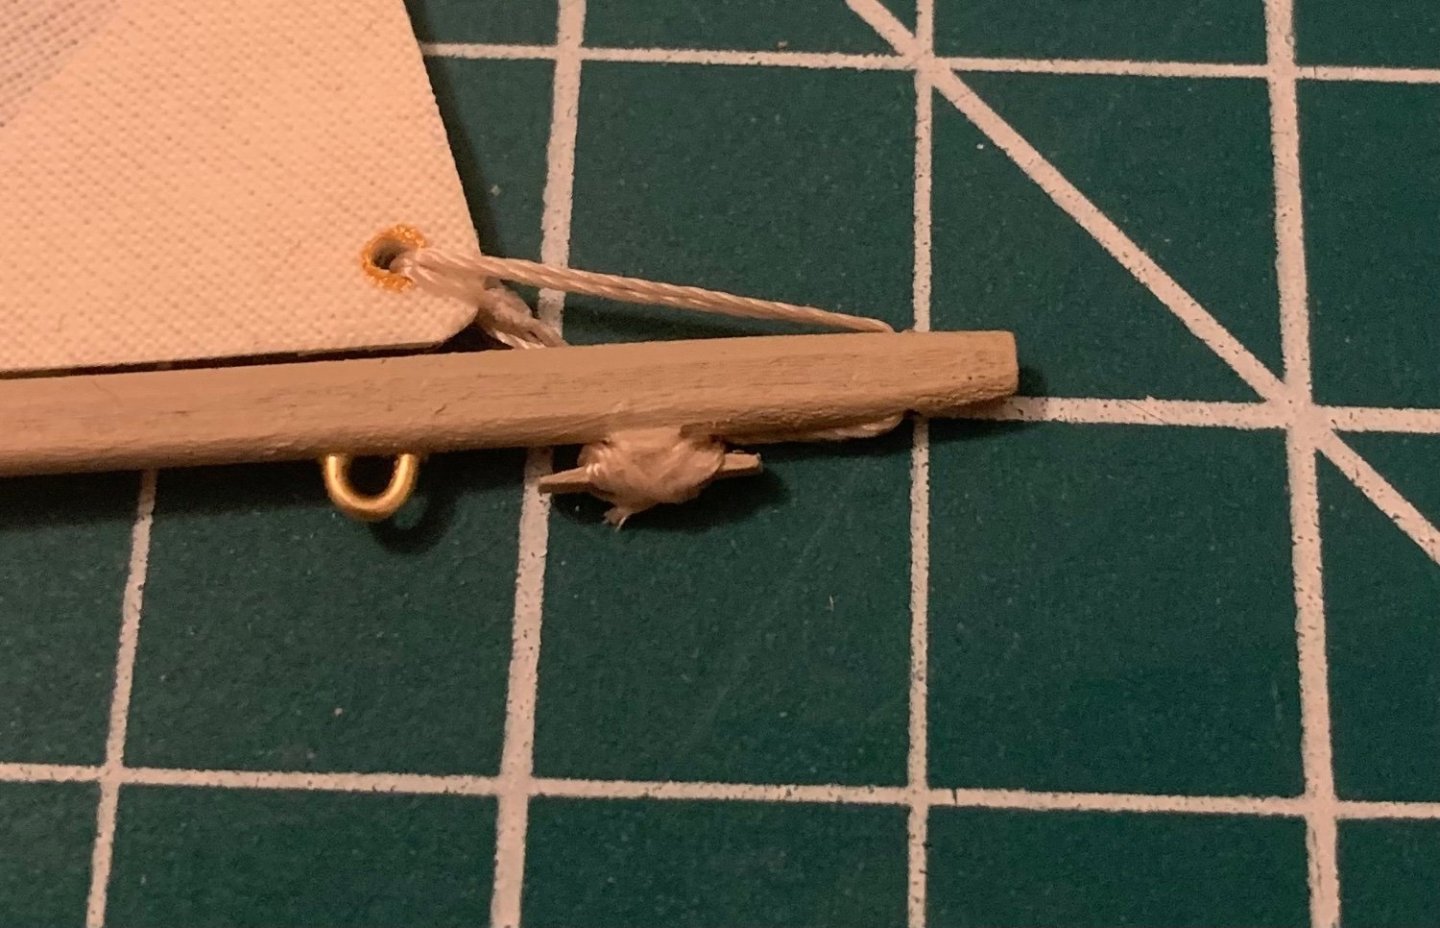
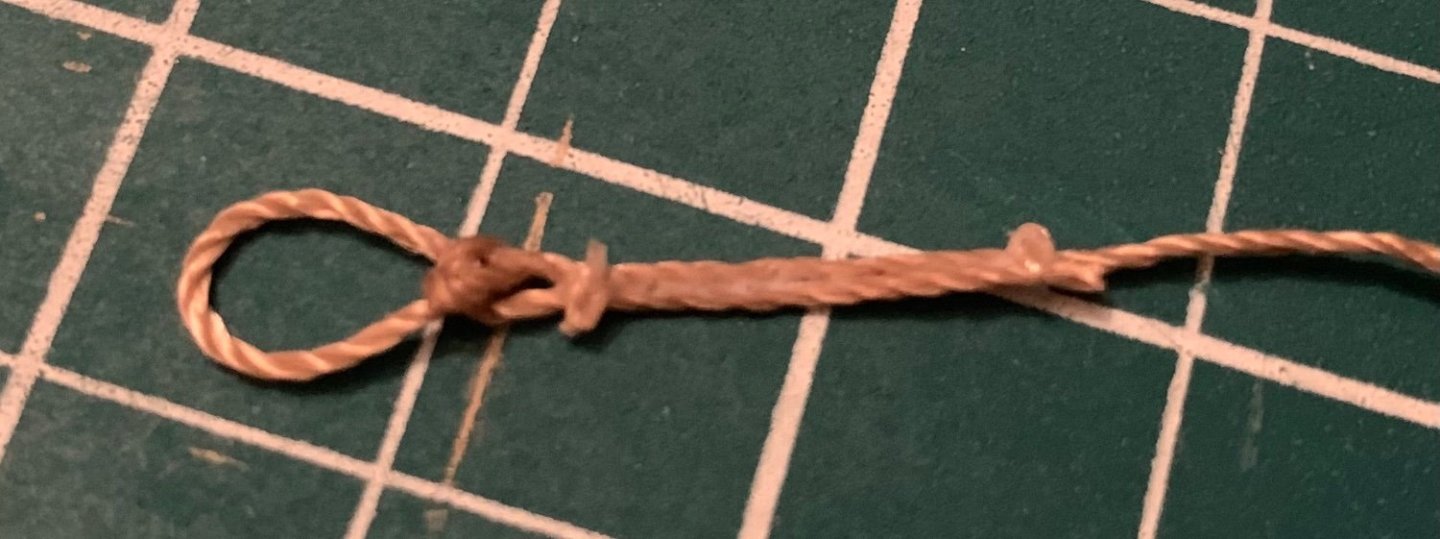
I’ve been tying a whole lot of small knots. There’s not very much to say, it’s all gone smoothly and makes sense. First was lacing the gaff. Then came lashing to the boom. At the other end of the boom I think I made a slight error but it’s going to be very difficult to fix for limited benefit. I’ll consider it a lesson and move forward. The line should not have passed through the hole. Next I glued on the chaffing pad to the mast. I also tied up the fore stay. Which brings me to where things currently sit. Mast is raised and in approximately the final position, but not yet secured by the back stays. There is somewhat more of a backward sweep than I intended but the only way to fix that would be to entirely remake the fire stay line. Hopefully it’s not too comically exaggerated.


- 38 replies
-
- 7
-
-
- Norwegian Sailing Pram
- Model Shipways
- (and 2 more)
-
I’m eyeing this kit as a potential future project and excited to see some live progress on it. The first layer of planking looks good from the images here!
-
Hi MajorChaos, Looking great so far. For the mast, you’ll find instructions on adding it on page 36, step 54. I’ve been jumping all over the book, doing whichever step takes my fancy so havn’t actually added it yet. I’m eager to see how you tackle that part.
- 72 replies
-
- 2
-
-
- Norwegian Sailing Pram
- Model Shipways
- (and 1 more)
-
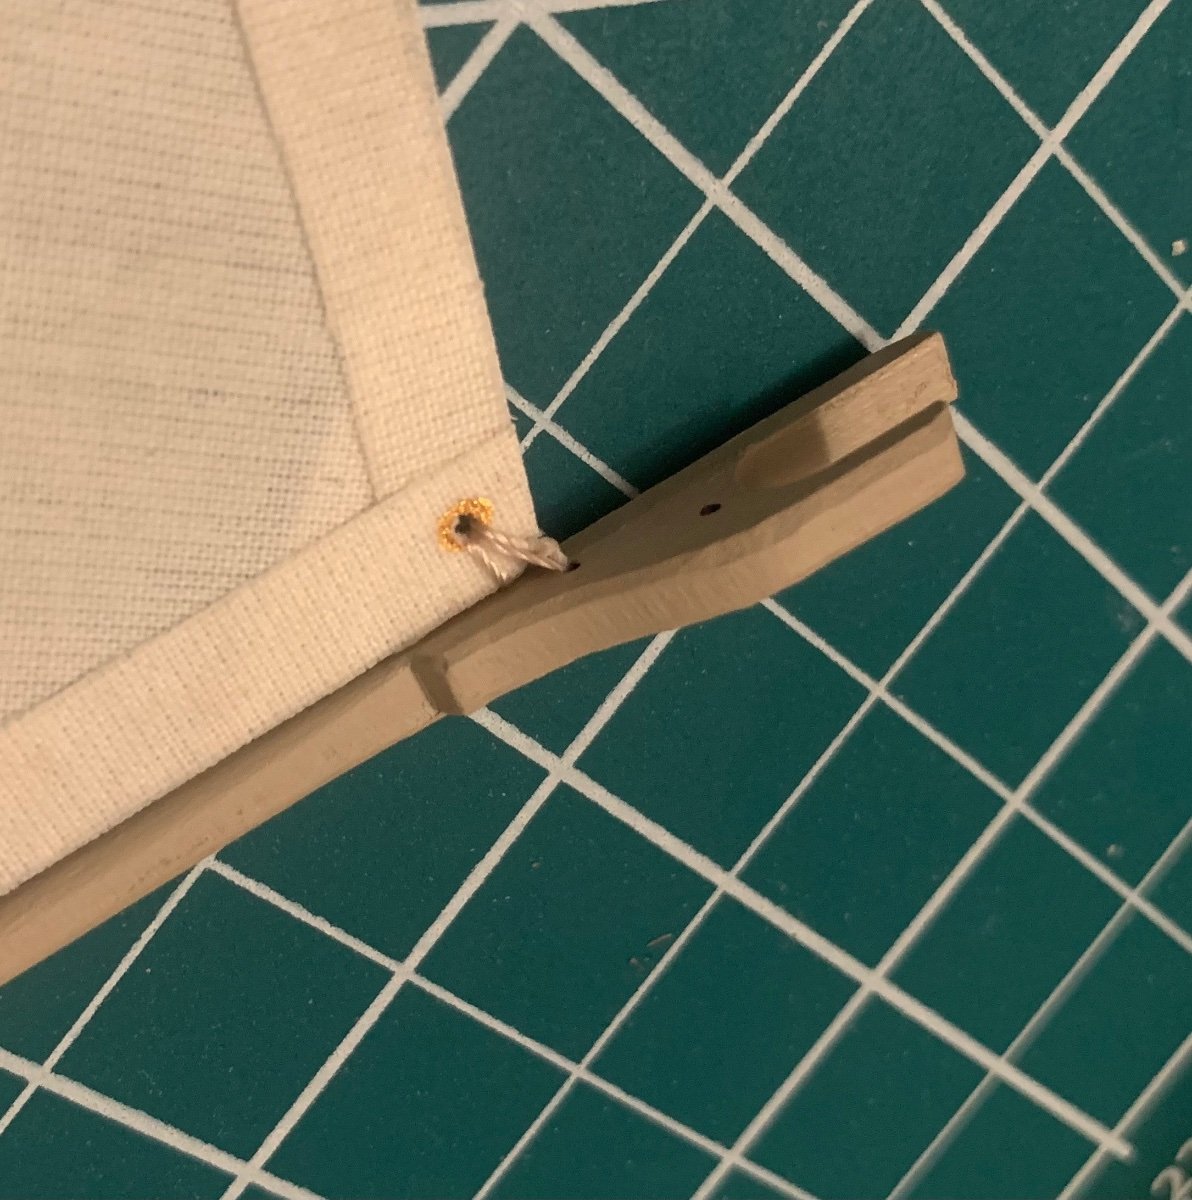
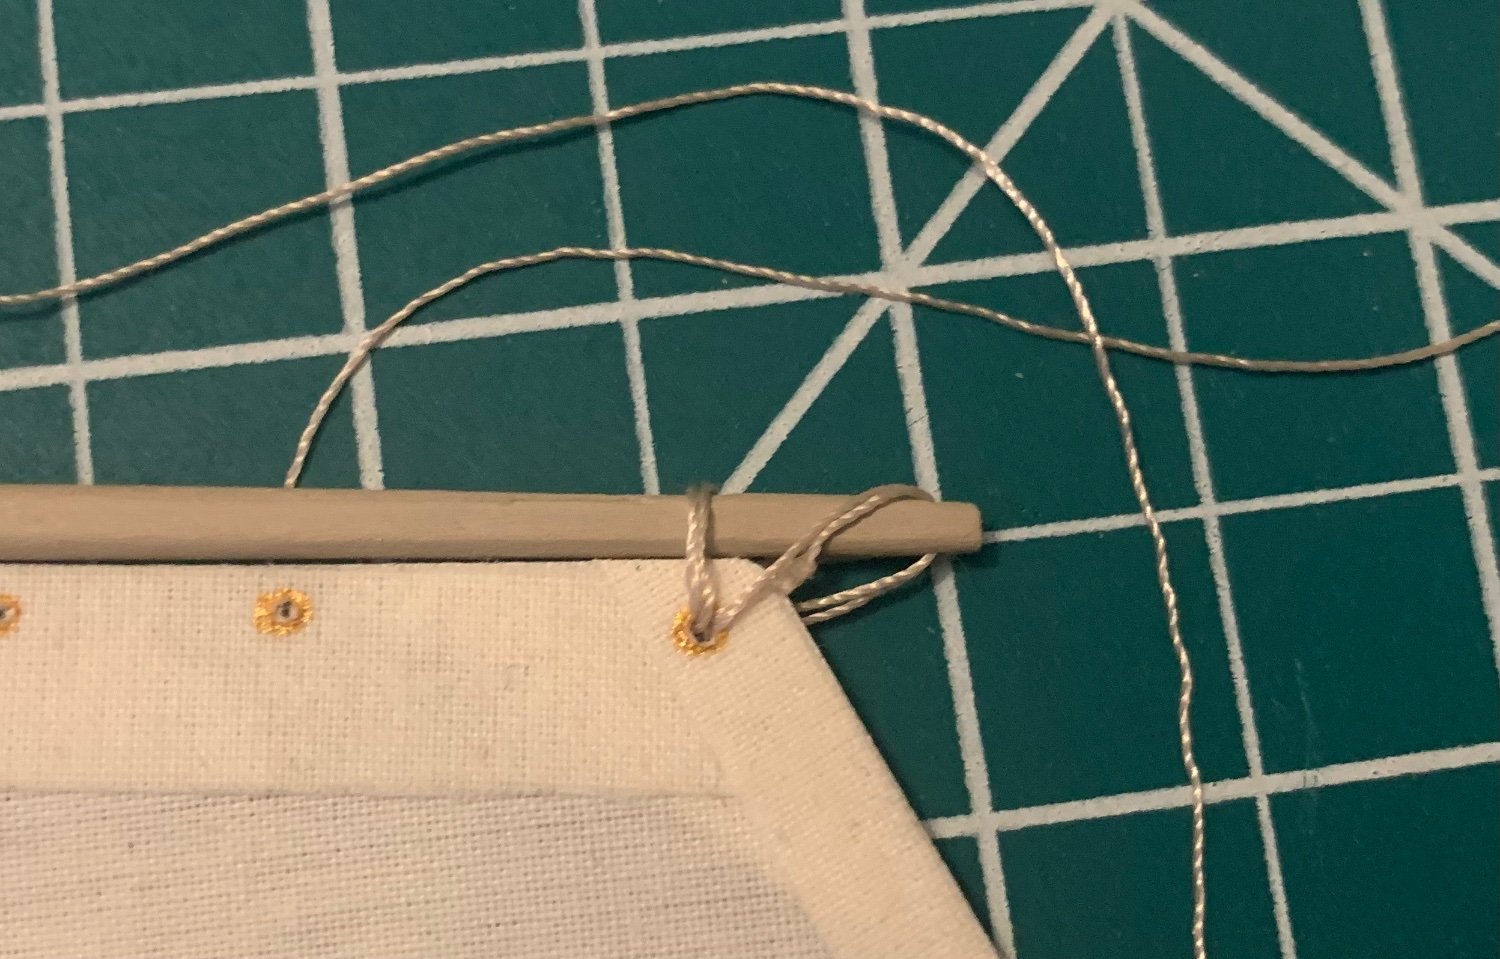
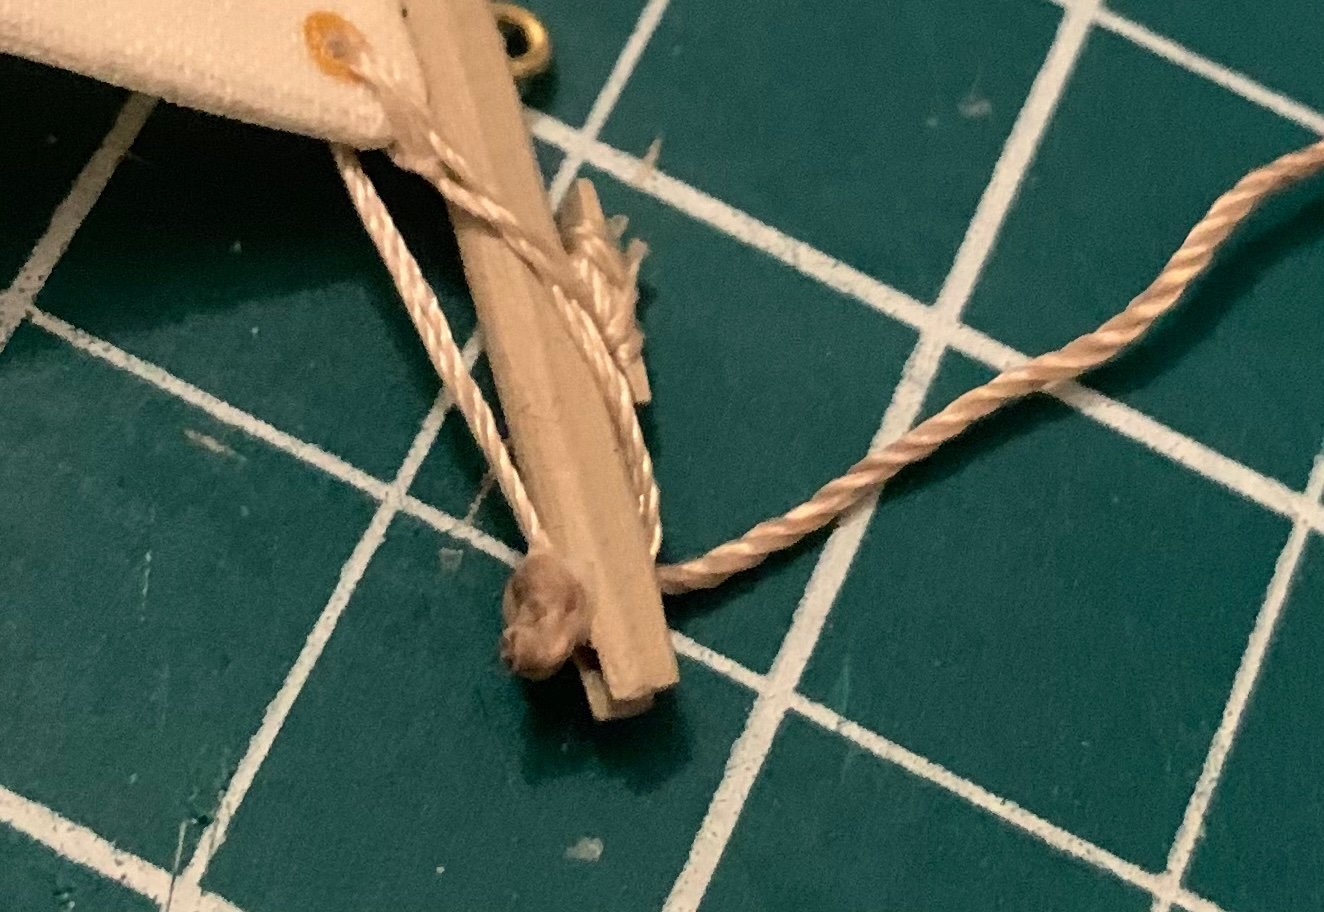
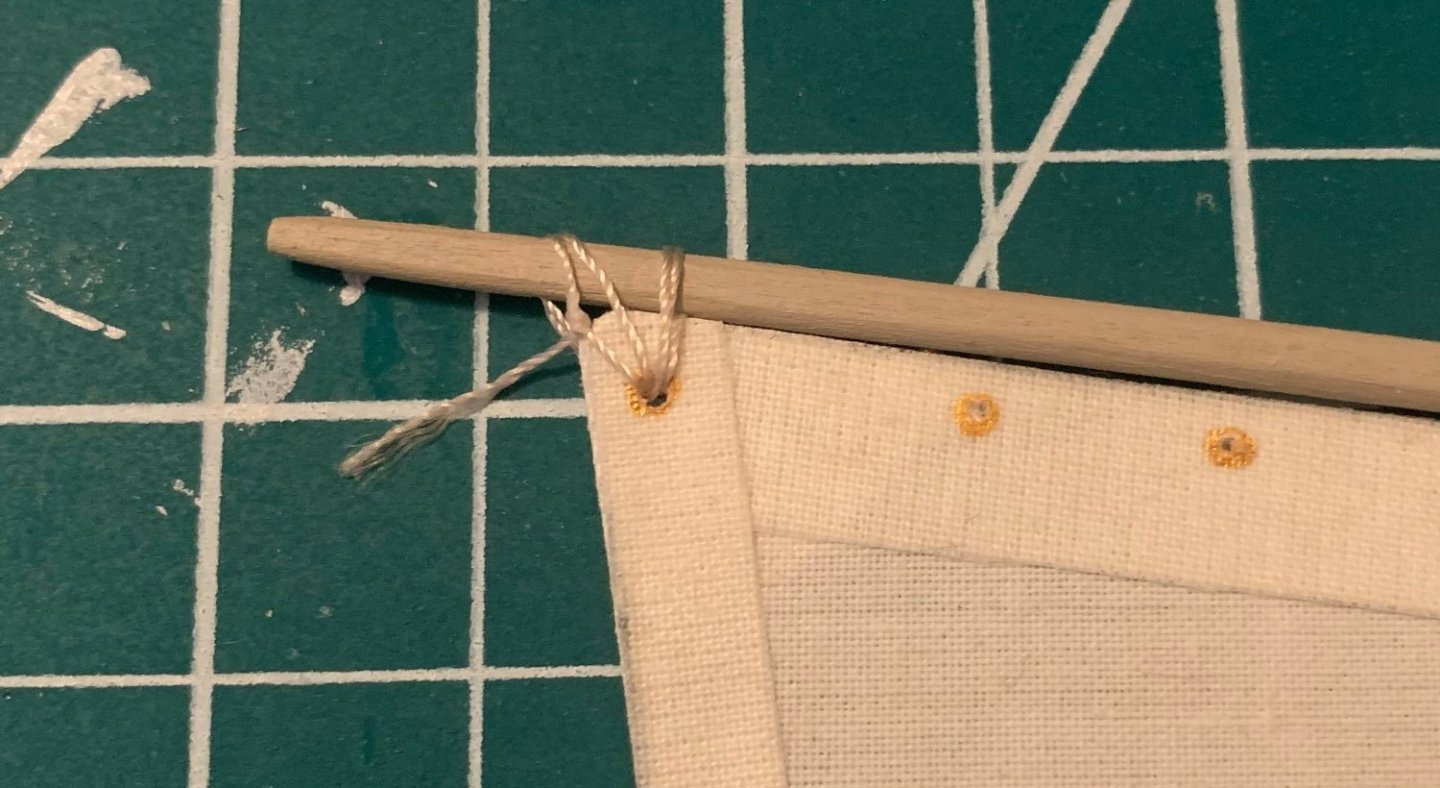
I think I figured it out. Amazing what sleeping on a problem and then thinking about it while doing some repetitive work tasks on a Sunday can achieve. And some close ups of the two ends. In my diagram from the previous post, there is no step 5. Instead of looping back overtop the gaff at step 4, simply tie two half-hitches to create another anchor loop attaching the line to the sail. If it’s not perfect, it at least looks as exactly like the photograph in the manual as I am capable of.


- 38 replies
-
- 4
-
-
- Norwegian Sailing Pram
- Model Shipways
- (and 2 more)
-
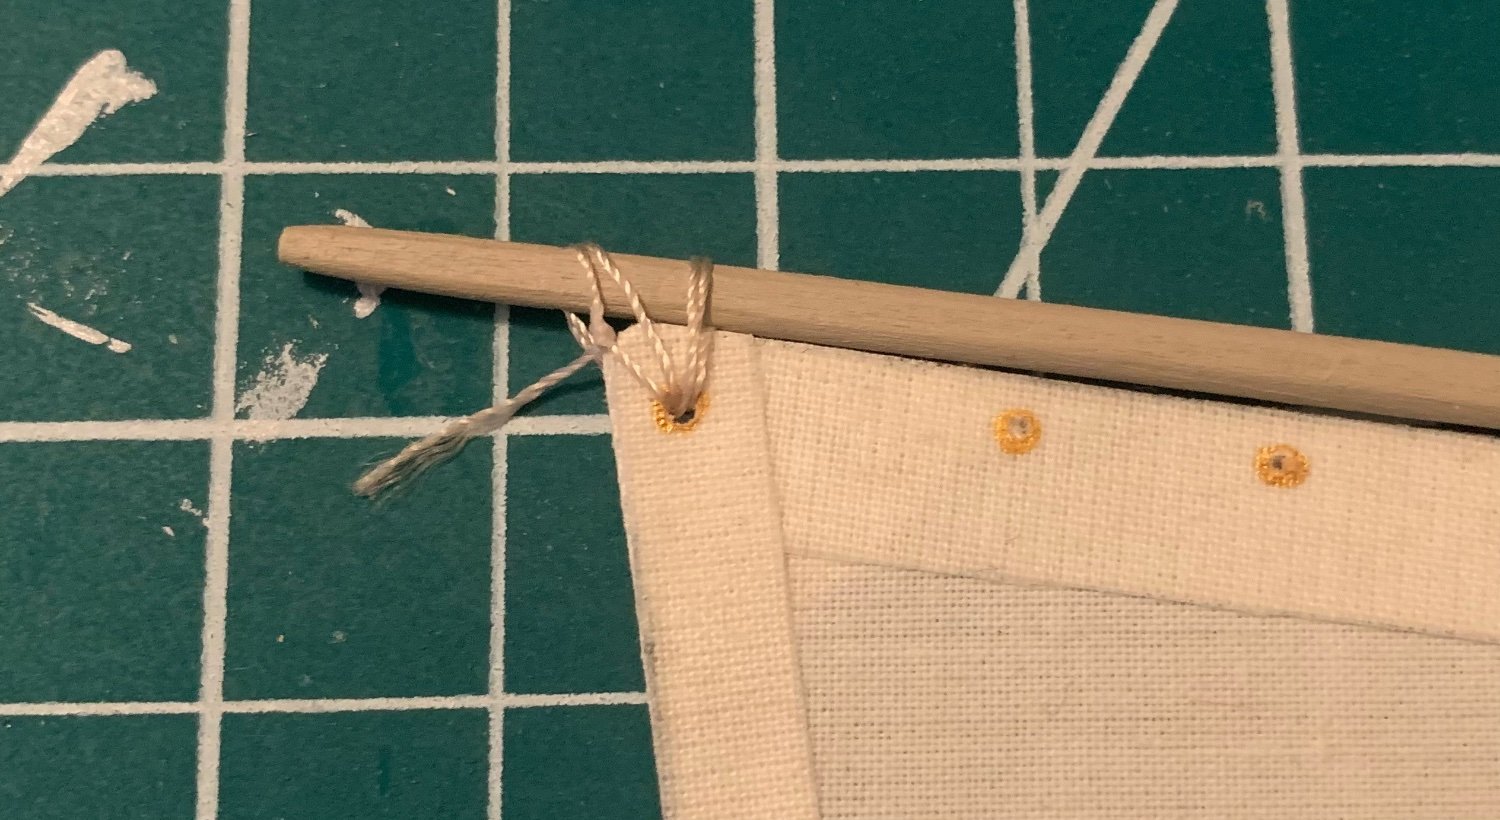
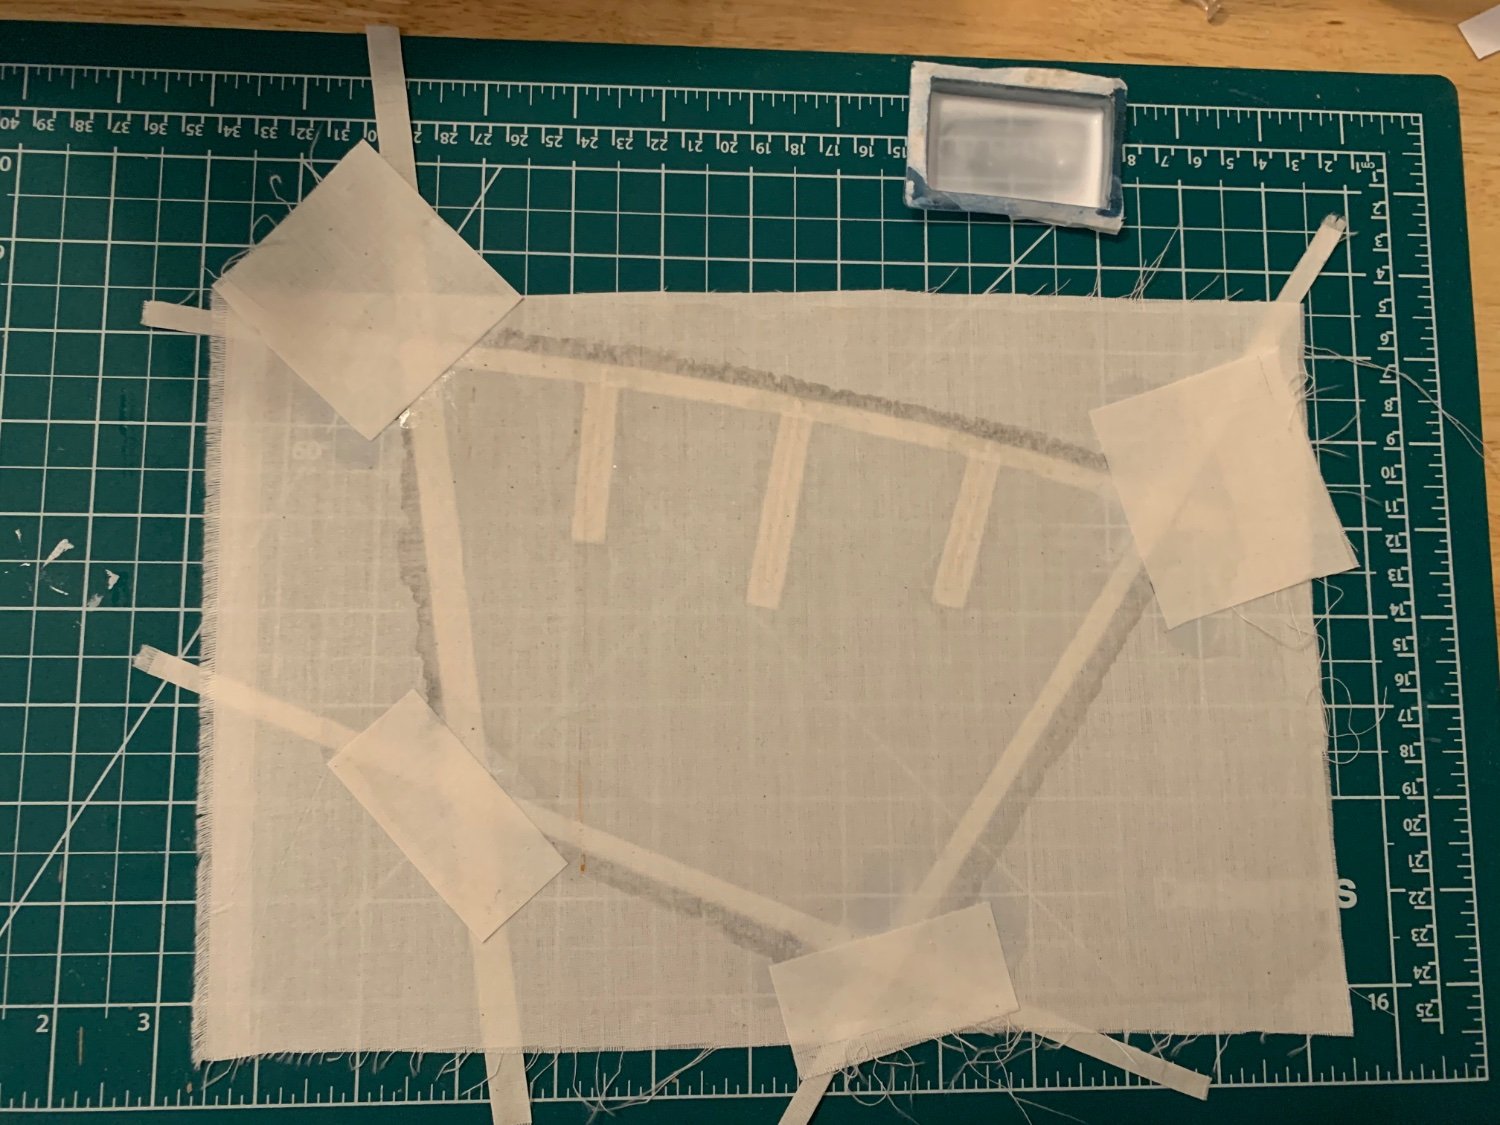
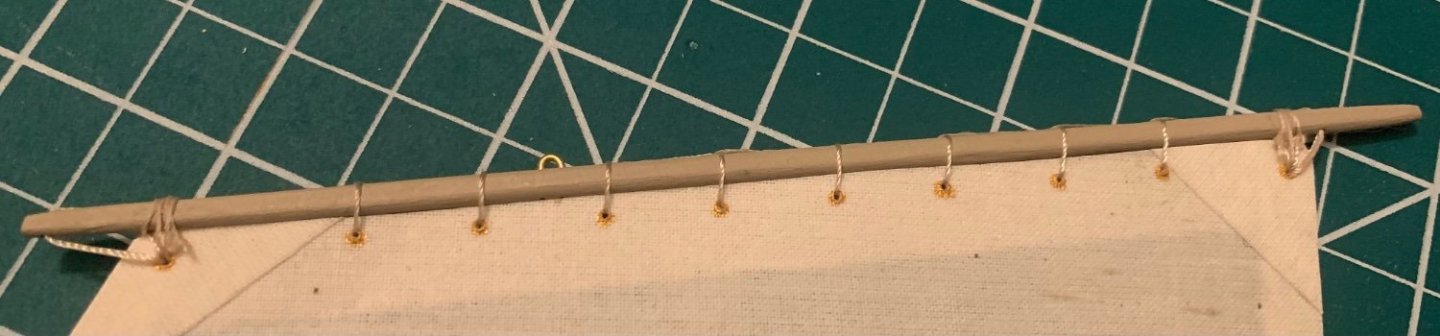
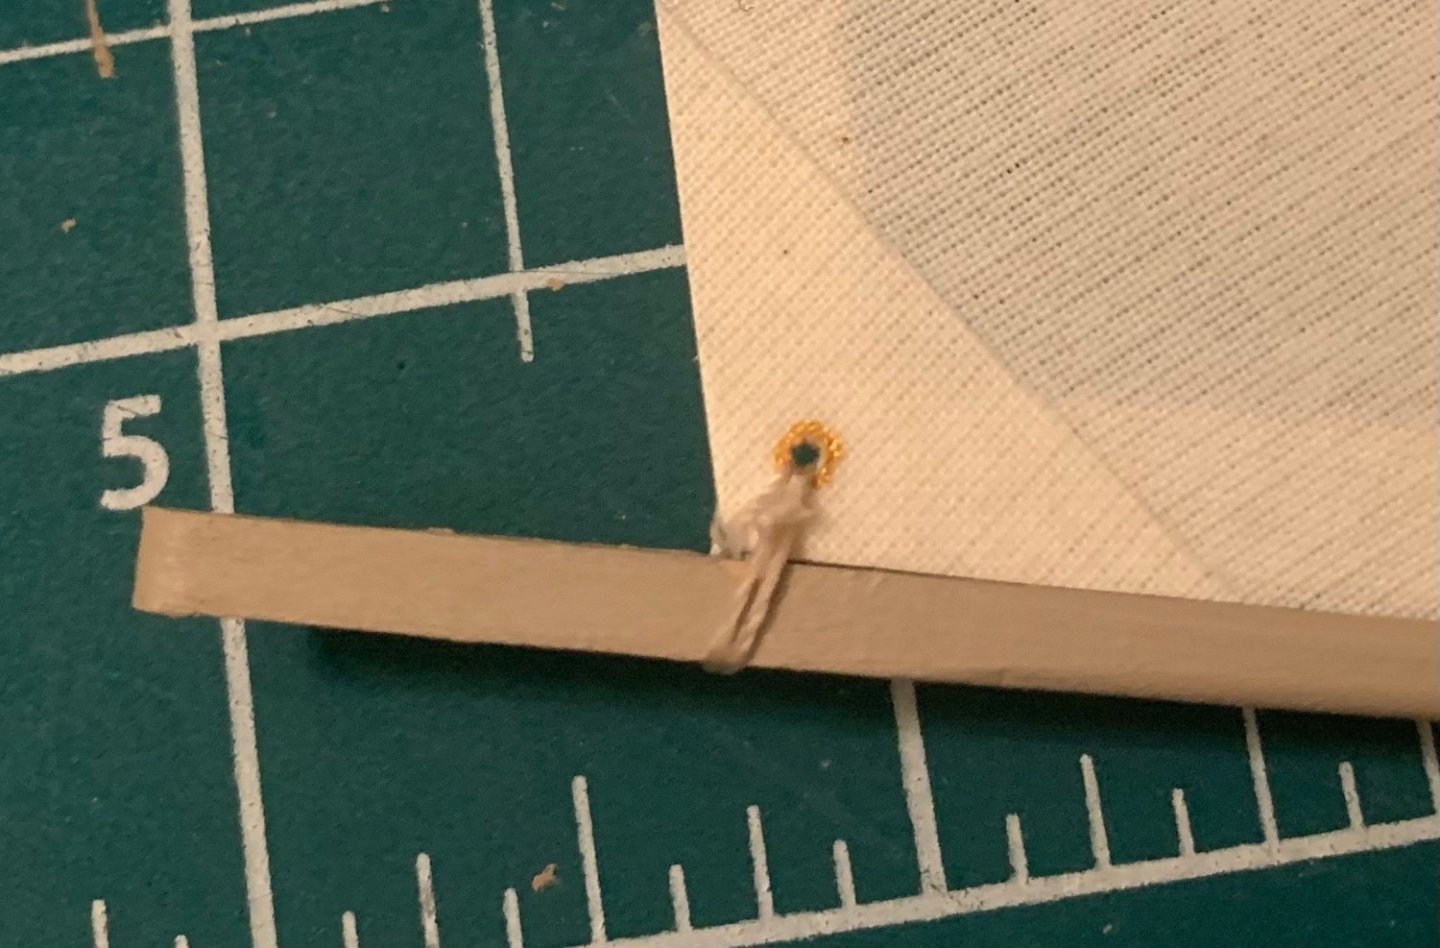
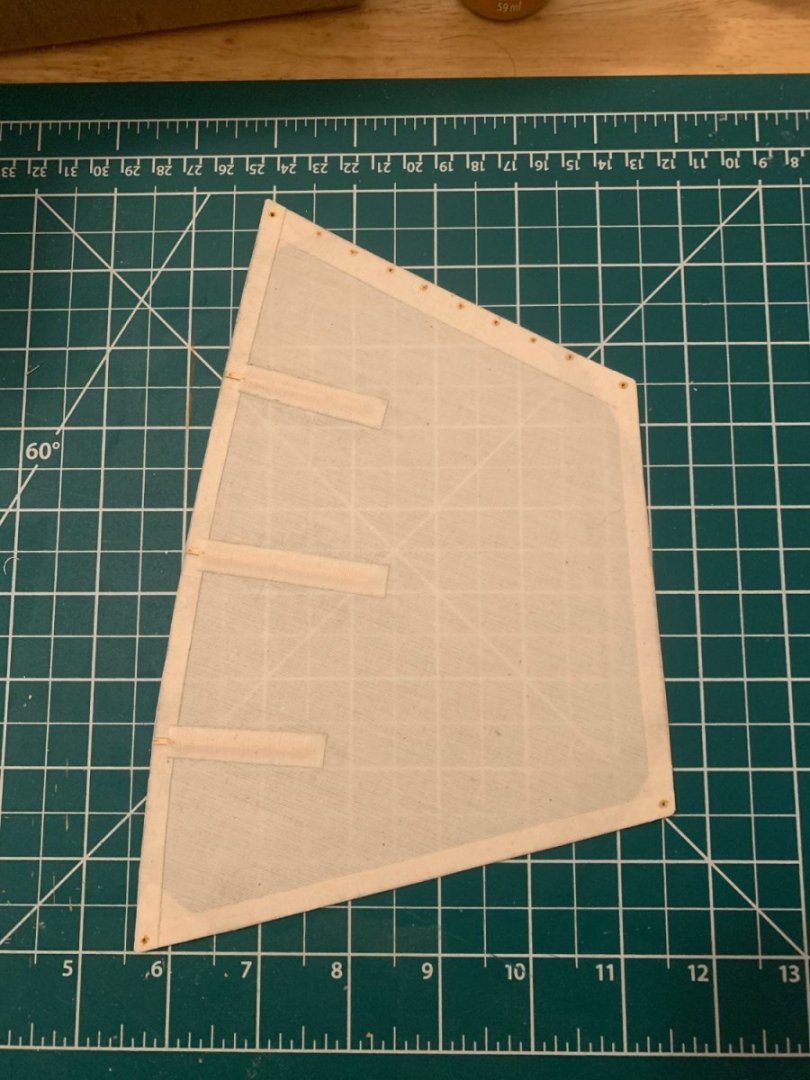
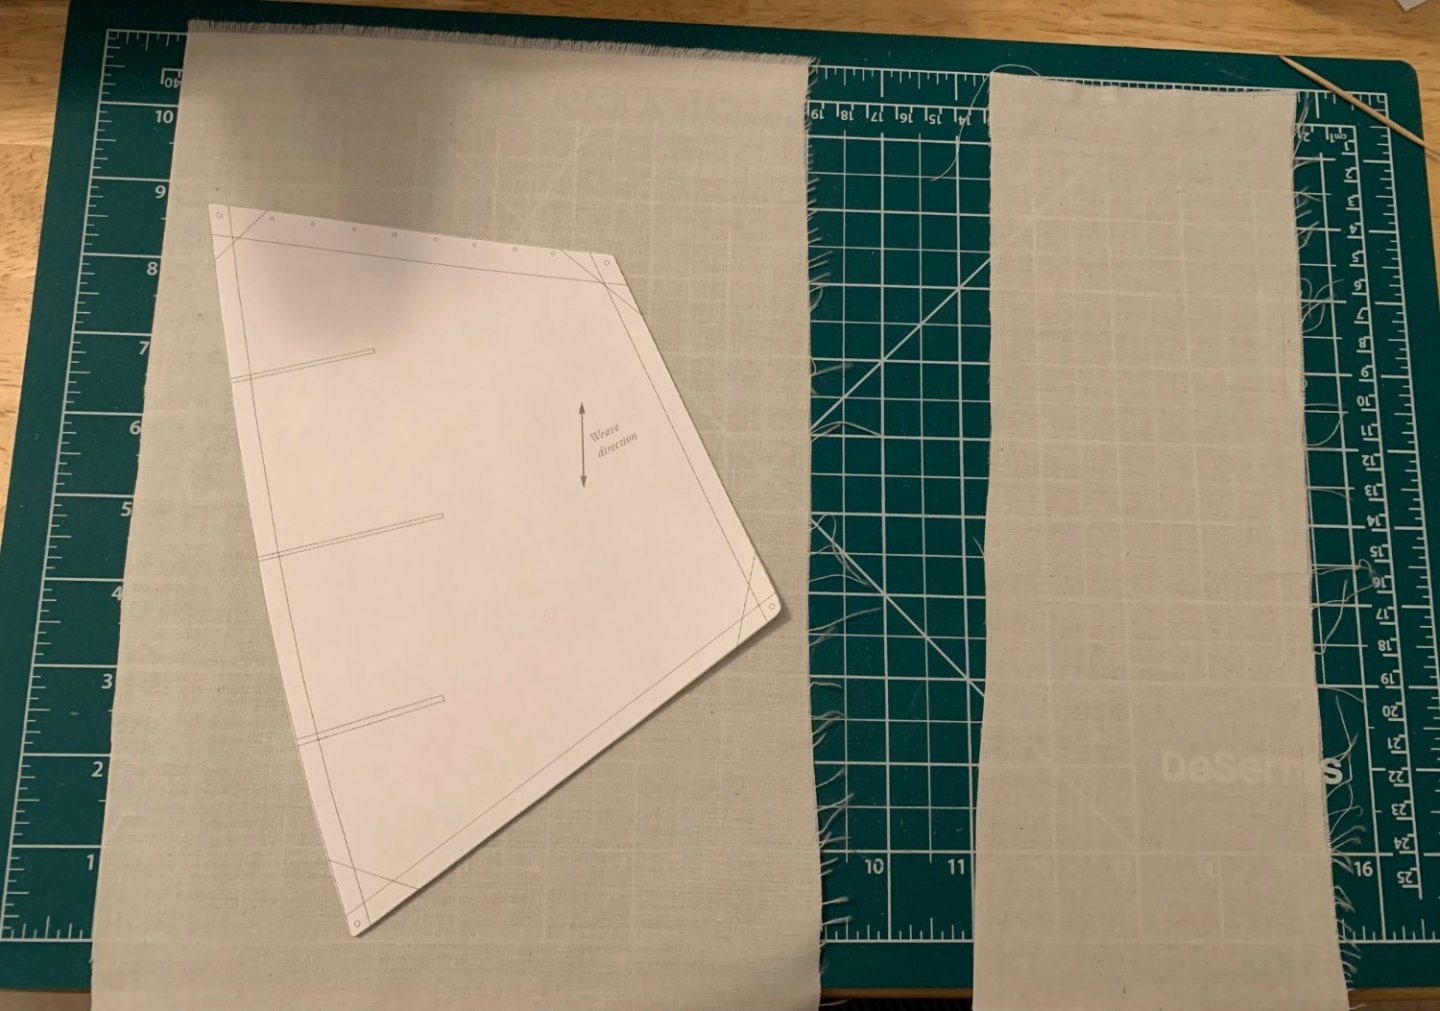
I’m working on sails and confusing myself with knots. Progress first, then a question as to knot tying technique. I cut and glued the strips of cloth along the edges of the sail outline following instructions. Everything went smoothly and gave me a good result. I also added the wooden battens and the previously mentioned batten pockets as inspired by DanB’s log. They were easy enough to make. For anyone interested they consist of the trimmings of the 3/8” strip. I put a bit of dilute glue on the sail, stuck the wooden batten to that, added a bit more dilute glue on top of the wood, stuck the “pocket” on top, and then thoroughly soaked the pocket with dilute glue until it smoothly formed around the batten. Next I flipped the sail over and added some off cuts to create the reinforcements in each of the four corners. The biggest lesson learned here is that it’s important to “repaint” the entire sail with dilute glue or else there will be some slight discoloration between the centre of the sail and edges. It’s barely noticeable, but I’ll know for next time. Then I cut the sail out with scissors and overlayed the schematic over it. That let me use a thumb tack to poke holes where they needed to be, which was a convenient way to register where to paint and drill. I opted to use gold paint to simulate brass grommets. So that’s where I am and now I need to tie knots. This is another area where I find myself out of my comfort area. I’m a bit confused as to how to lash the sail to the gaff at the two corners. I’ve drawn a diagram to try to help myself. In my diagram I have 5 steps (well, two versions of step 2 but I’ll get to that) which I think I need to follow. Could someone confirm if I’m on the right track or correct if needed? I appreciate it. 1) pass one end through the sail and tie a knot from two half-hitches then pass the other end through the gaff from top to bottom 2) continue the free end down from the gaff, back through the sail, back up through the top of the gaff. a) the line will pass on the “front” of the gaff both times, or b) the line will pass on the front of the gaff the first time and the back of the gaff the second. I think “a” is correct. 3-4) we’re done with the hole in the gaff now. Loop back down through the sail and over the gaff twice. 5) tie a knot (two half-hitches?) securing the free end to the gaff and cut the excess. Then mirror this process at the other corner. I guess more properly would be wait to tie this final knot on both ends at the same time so the sail can be made level to the gaff. Past that, I think I understand the lacing, haulyard, downhaul, tack, and clew as these seem straightforward. I’m sure it’s just a perspective problem I’m having with the gaff.


- 38 replies
-
- 3
-
-
- Norwegian Sailing Pram
- Model Shipways
- (and 2 more)
-
I think the ability to overcome the slight differences from one build to the next necessitate the instructions being a bit vague in places because too much detail may lead to off proportions. The one line I really took to heart was "if it looks right then it is right." That's been my biggest lesson with the kit. Fantastic looking build and I'm eagerly following you post new updates.
- 72 replies
-
- 2
-
-
- Norwegian Sailing Pram
- Model Shipways
- (and 1 more)
-
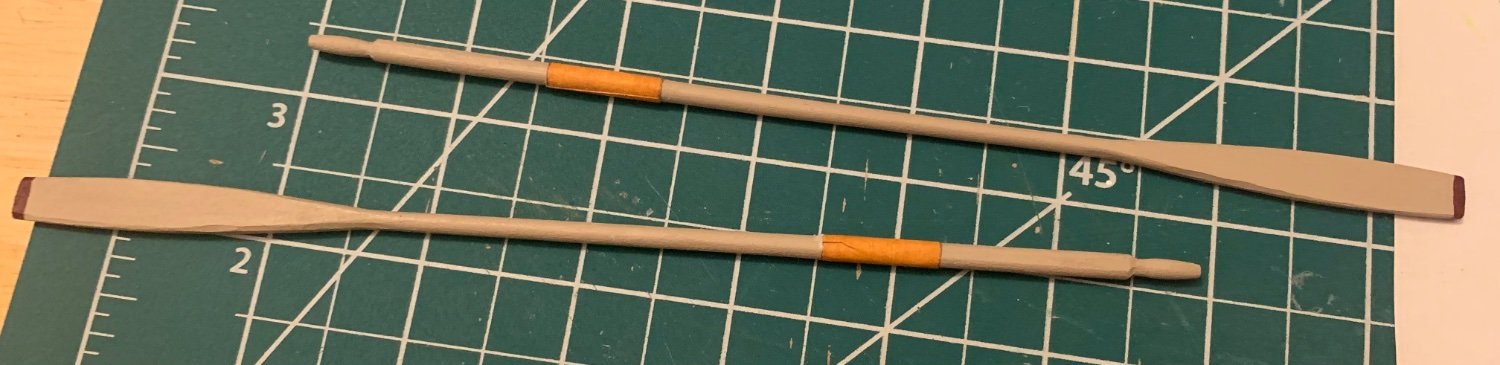
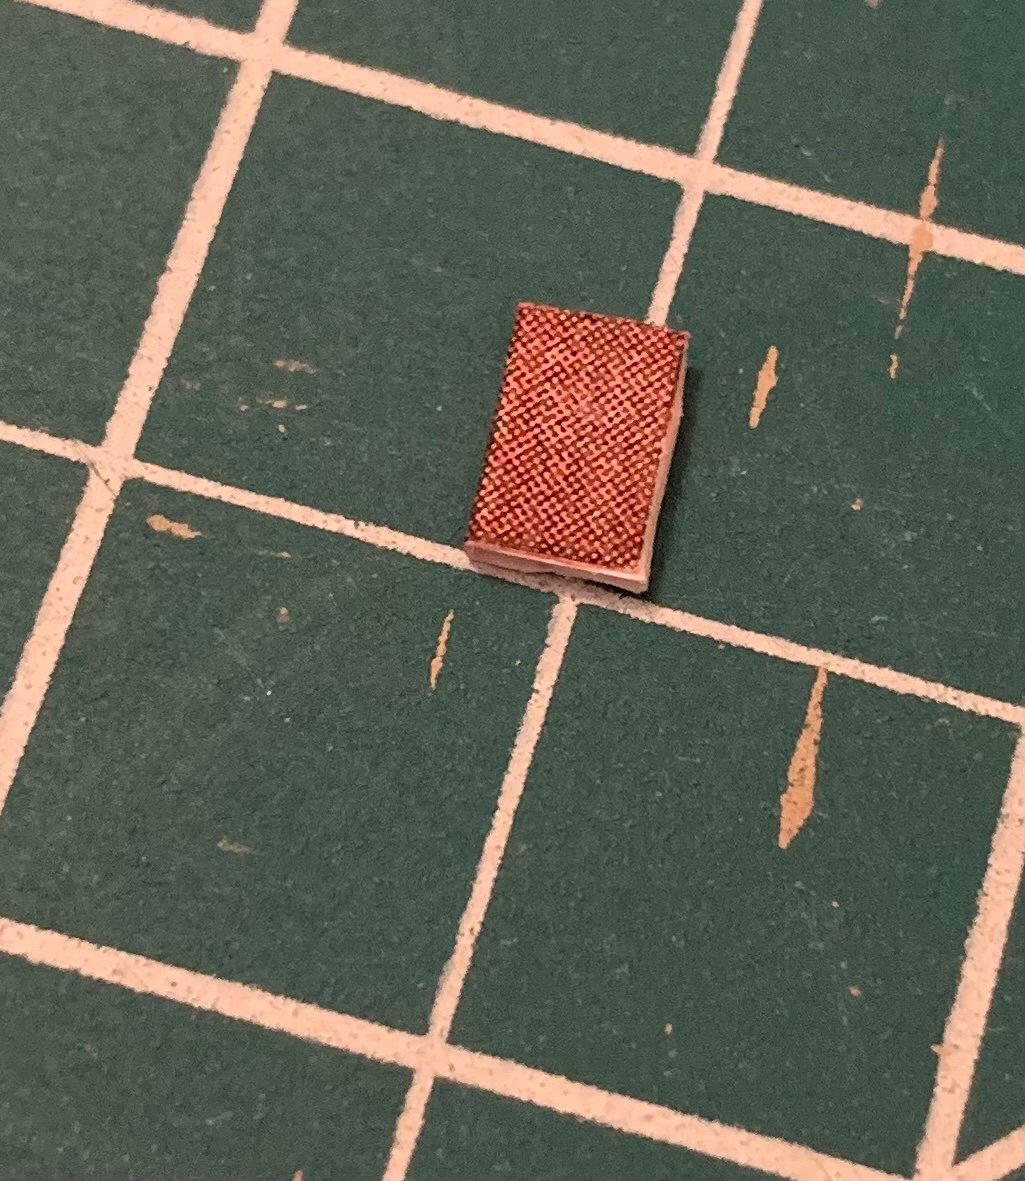
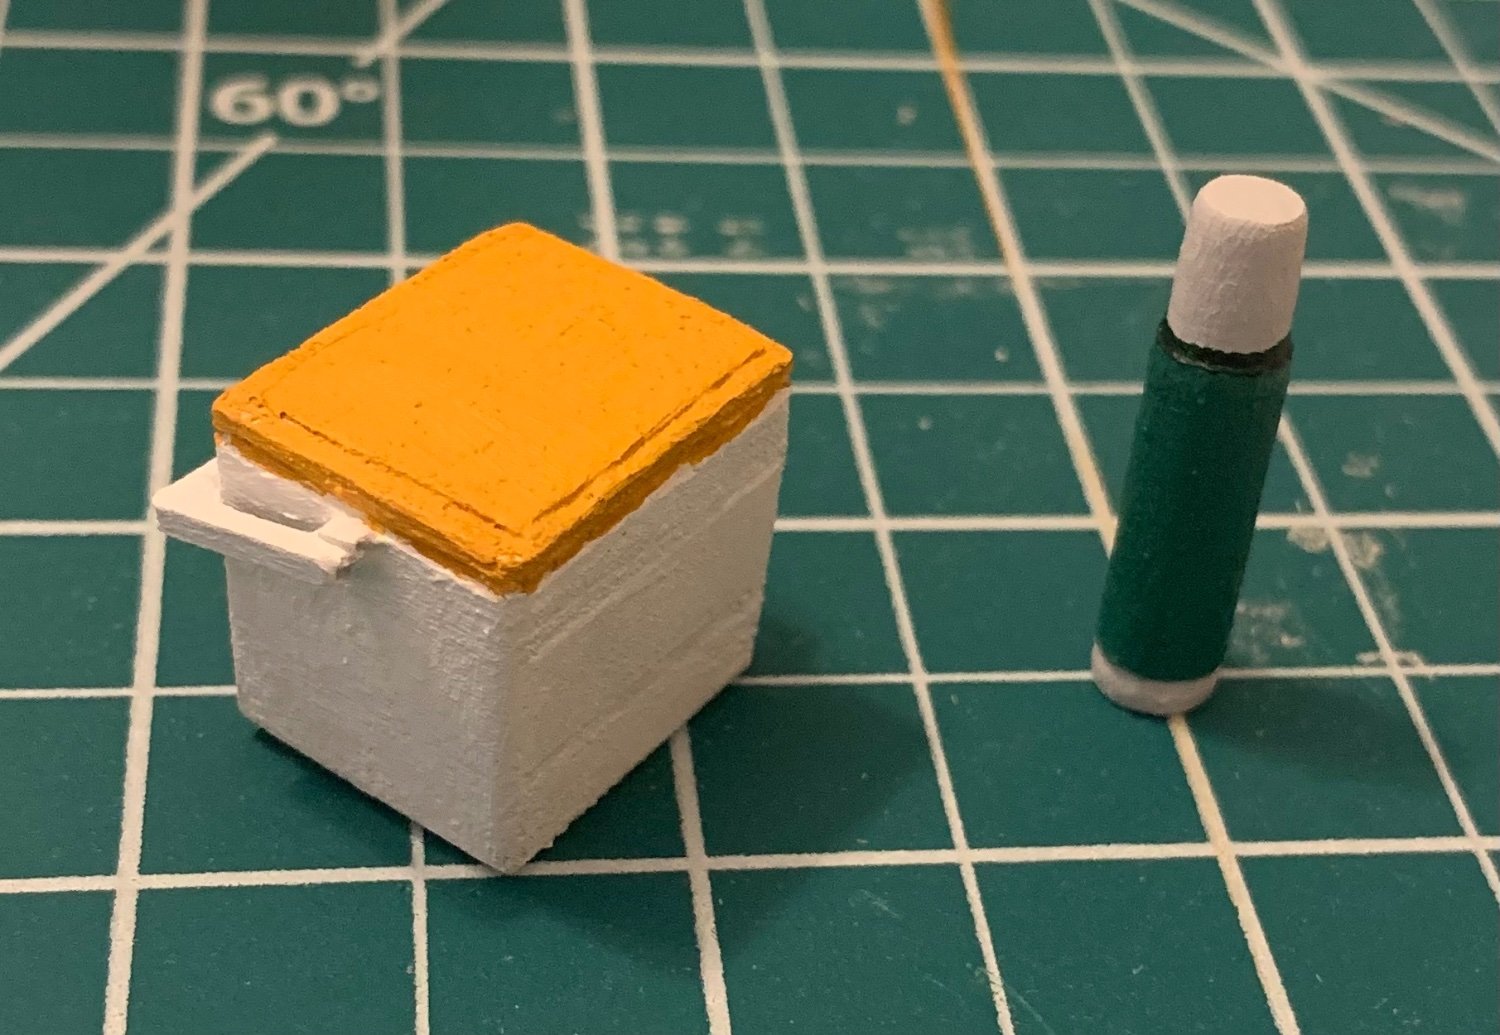
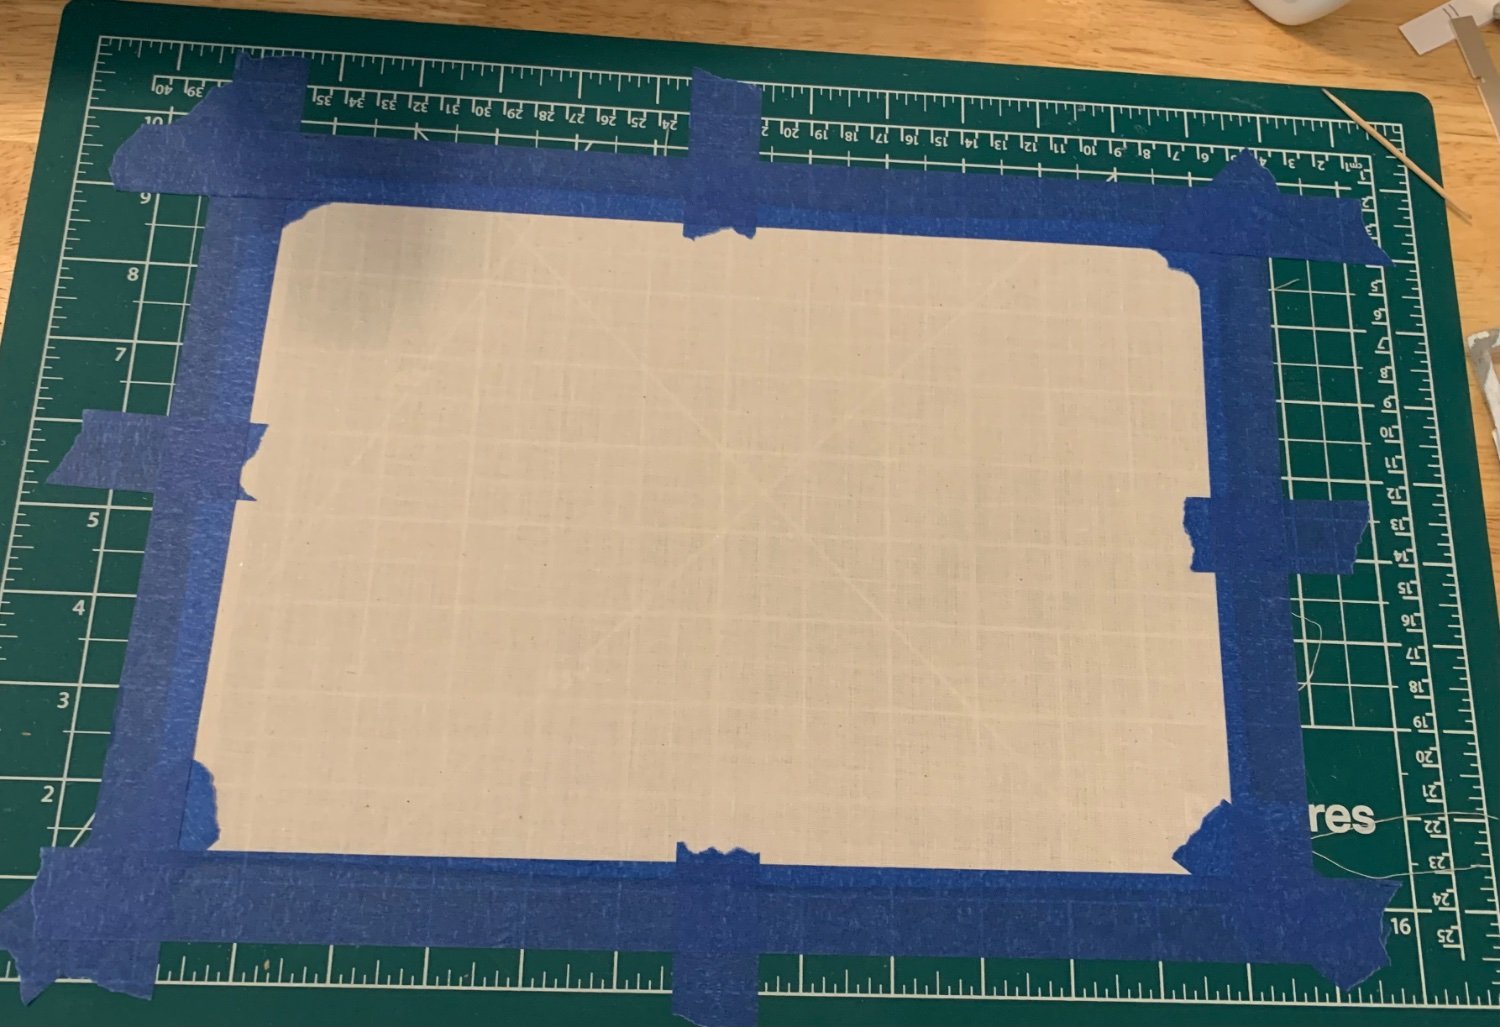
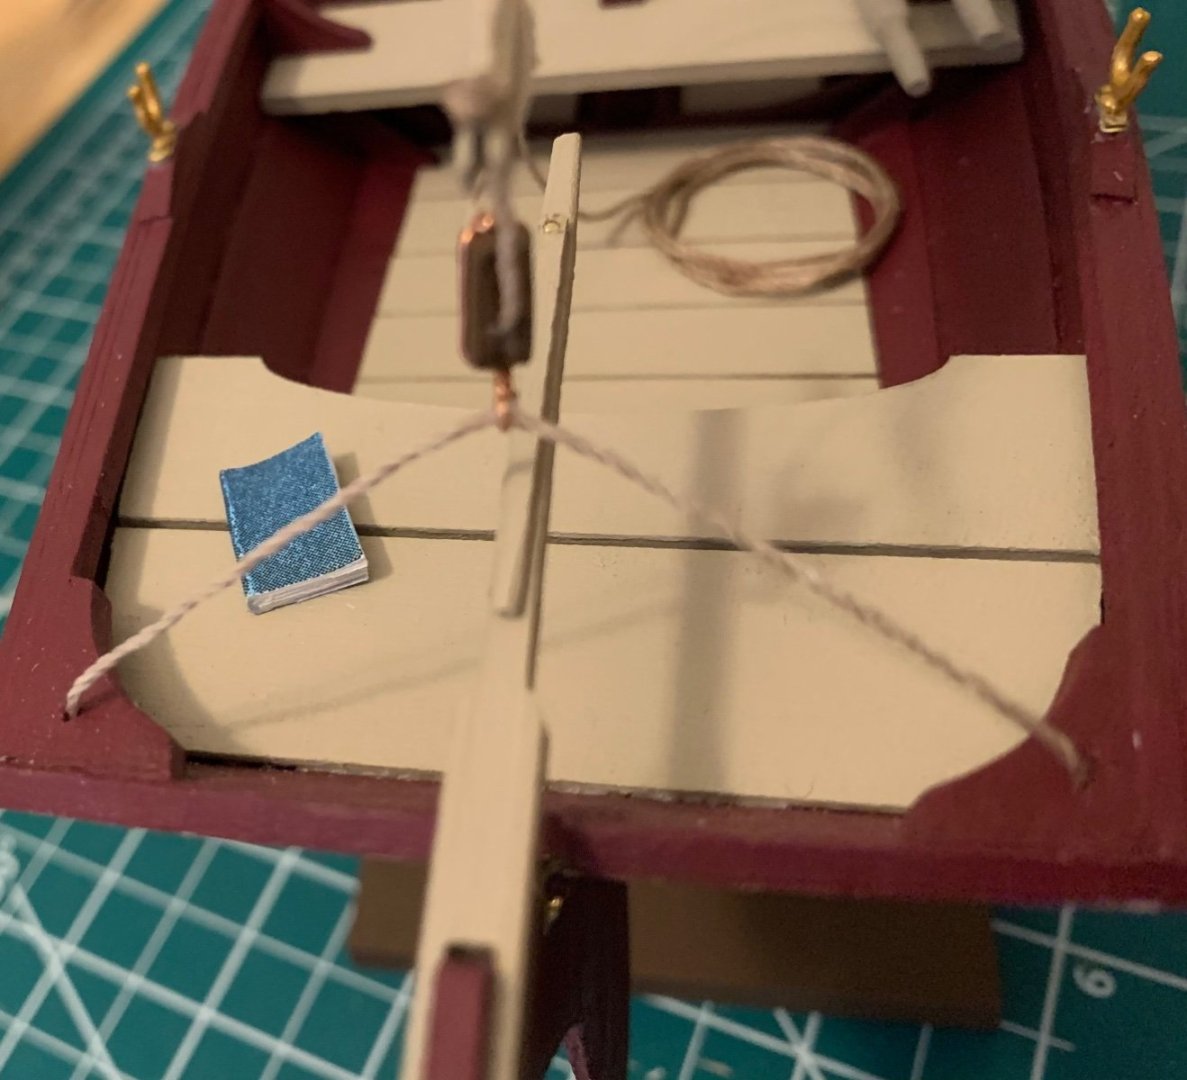
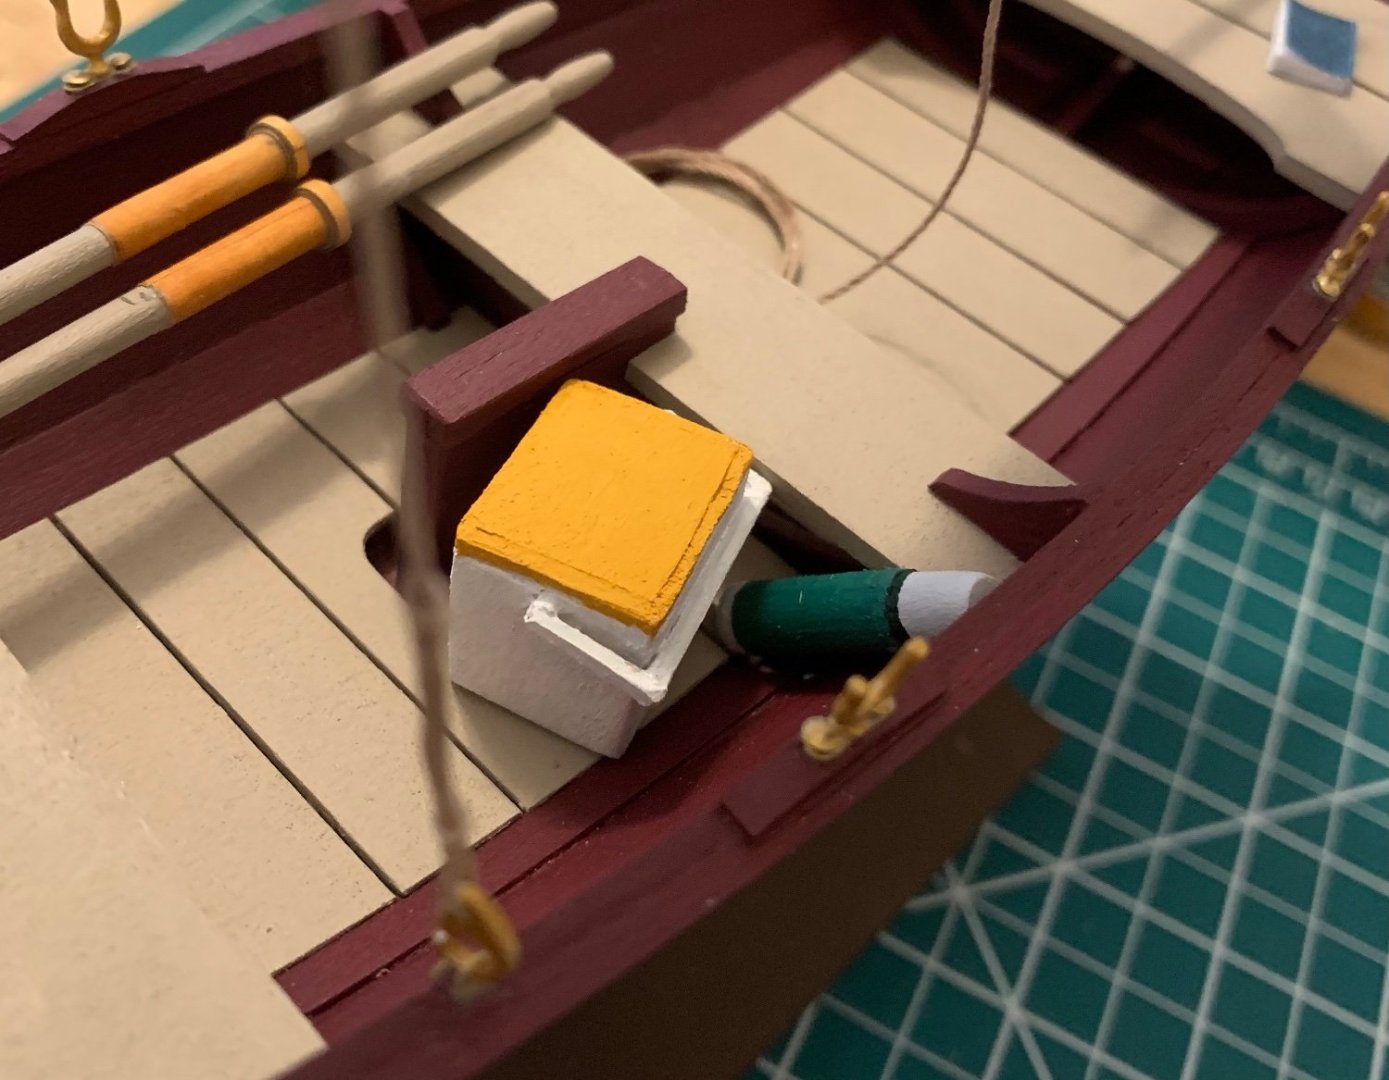
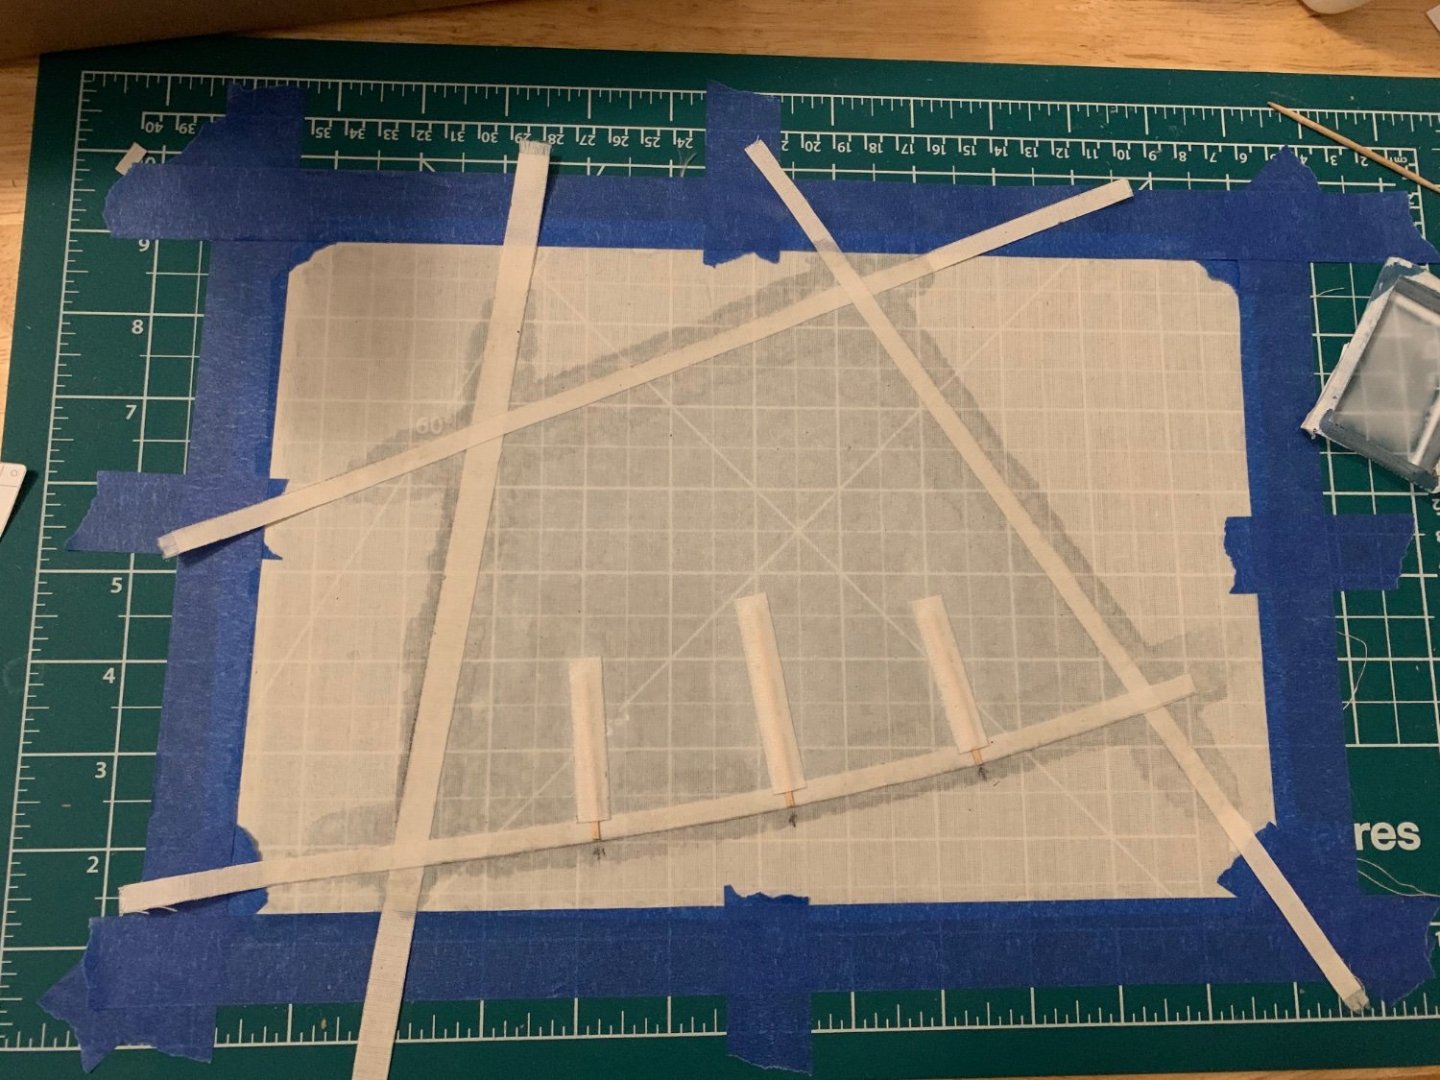
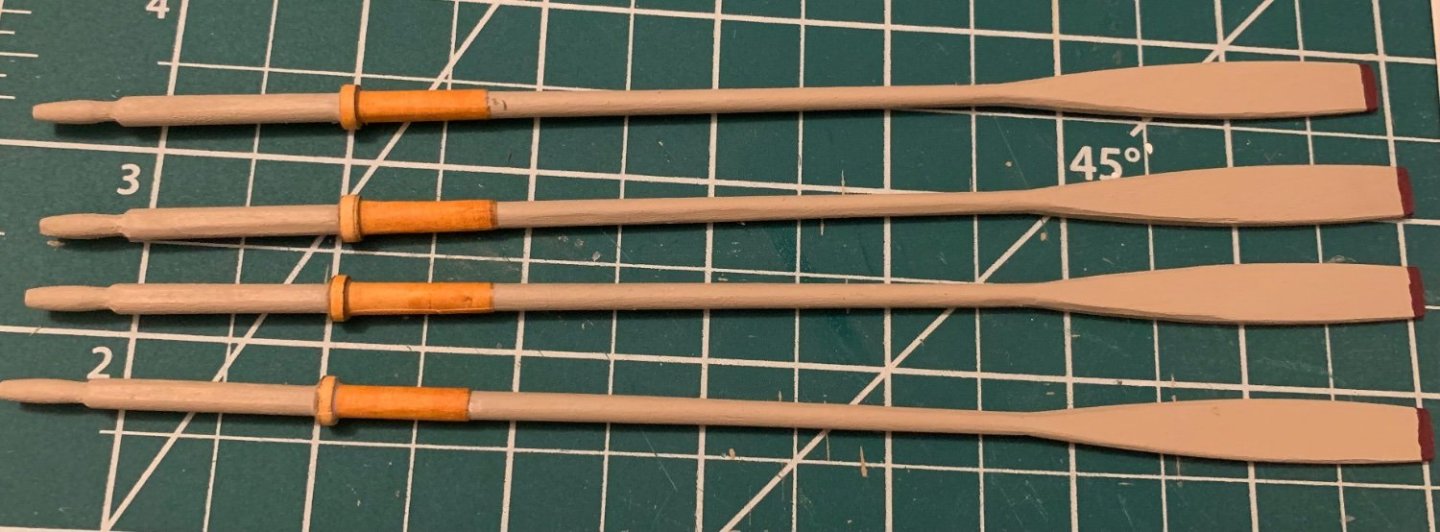
Where did I leave off? Doodads and Whatsits! I think the paint job brought them to life and now I’ll have a cold lunch and a hot drink on the boat. Along with lunch, what’s better than reading for a bit in the sun and the wind? My first try was far too small. It only measures 7mm, 8.4cm at full scale. That’s more of a pocket book than a novel. So I tried again. At 14mm it’s much better, though not as cleanly built. Next up came the oars. A quick painting using my same colour scheme. Followed by wrapping in “leather” made from painted printer paper. Accessories made, I’ve next turned attention to sails. These were first ironed flat and cut to size. And I’ve just taped the larger piece down and painted it with dilute glue as instructed. Now I just need to wait for that to dry so I can trace out the pattern and start gluing on the reenforcing strips.


- 38 replies
-
- 7
-
-
- Norwegian Sailing Pram
- Model Shipways
- (and 2 more)
-
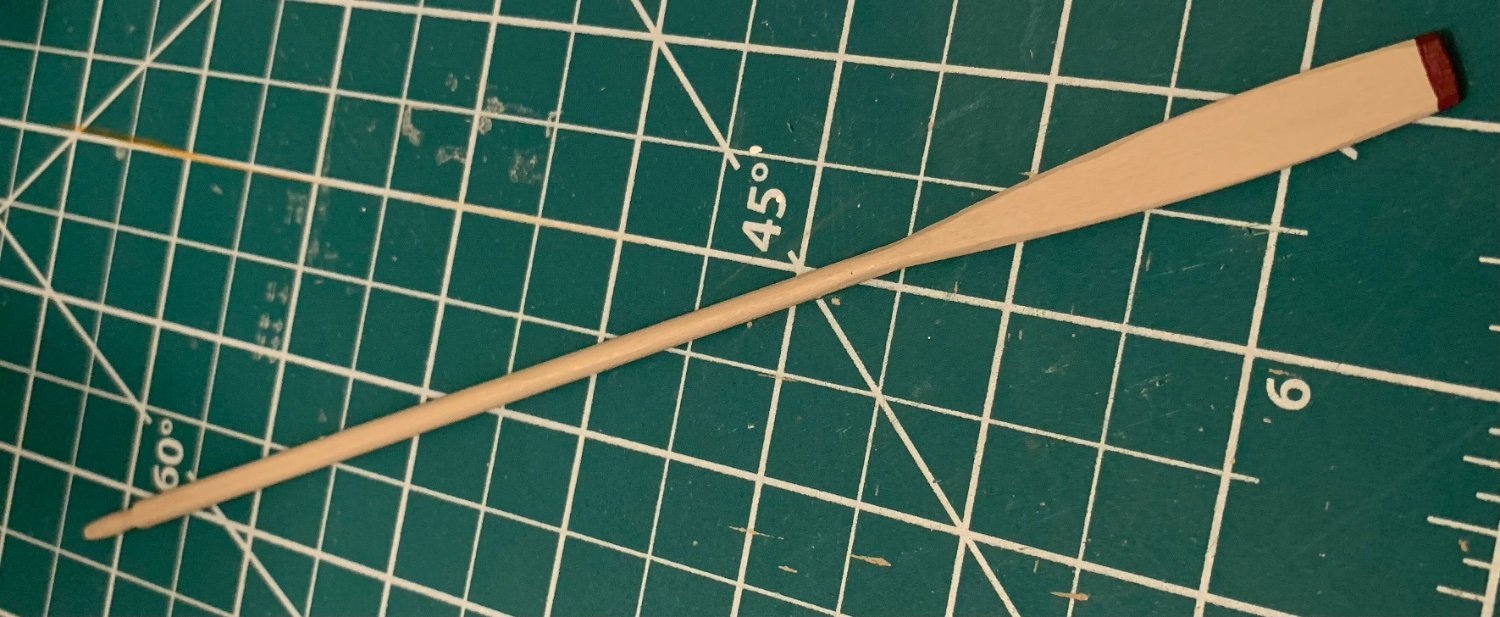
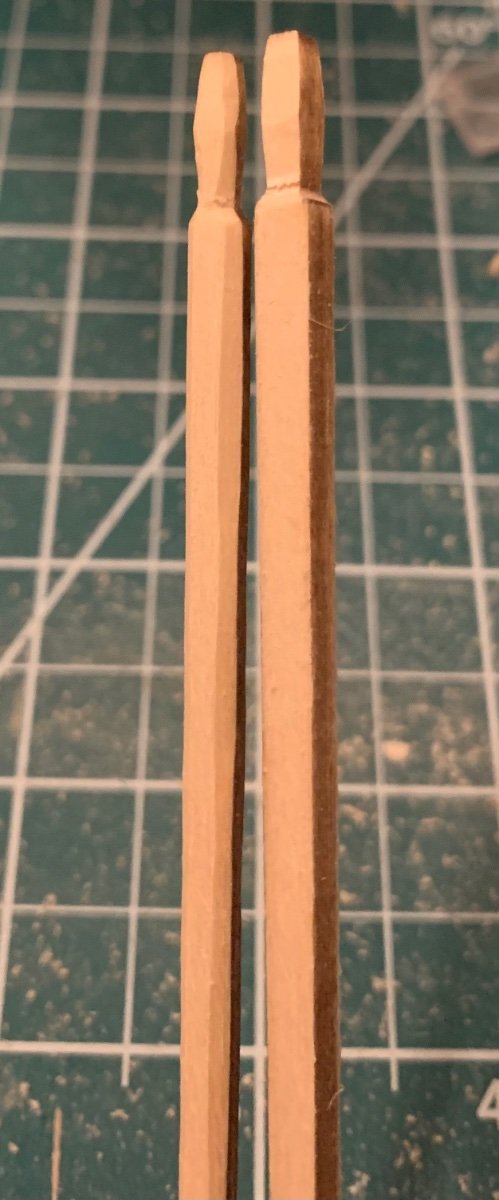
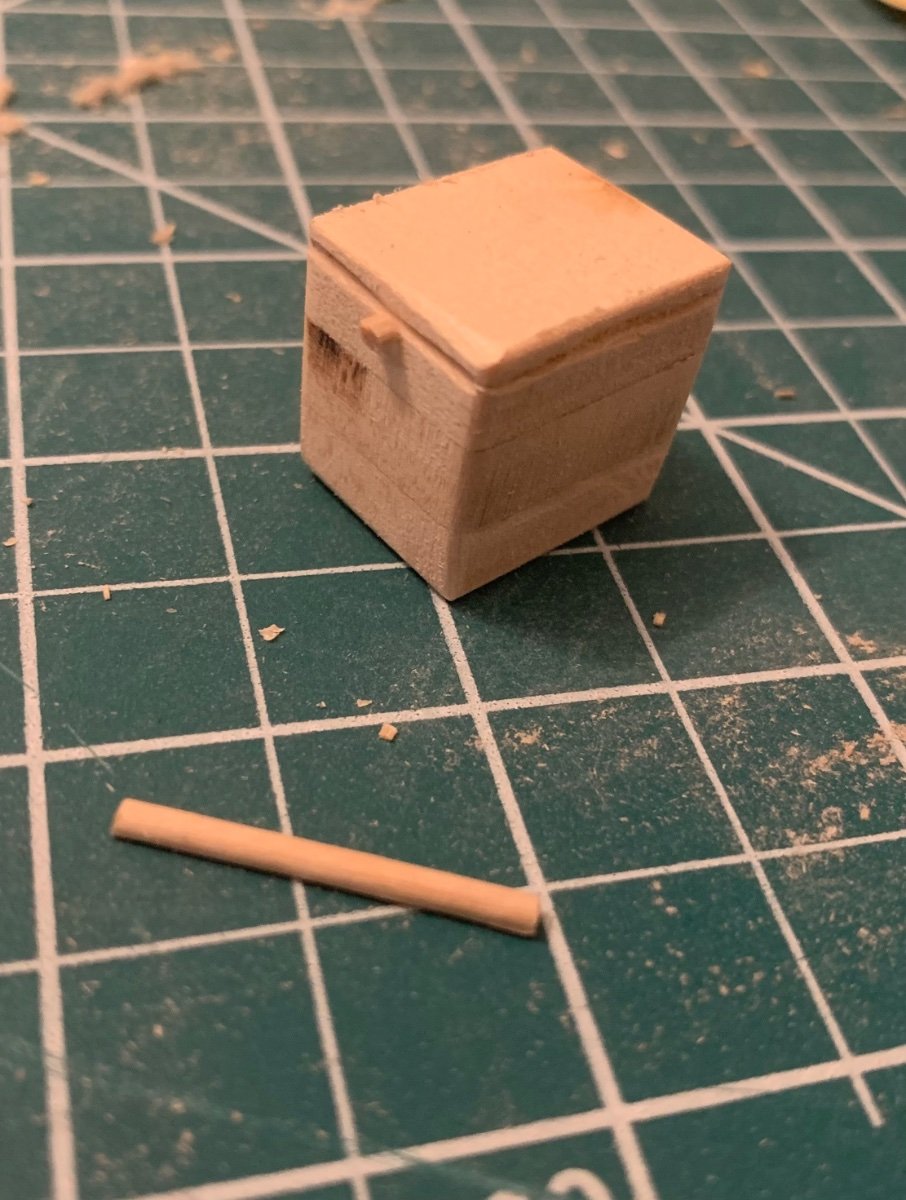
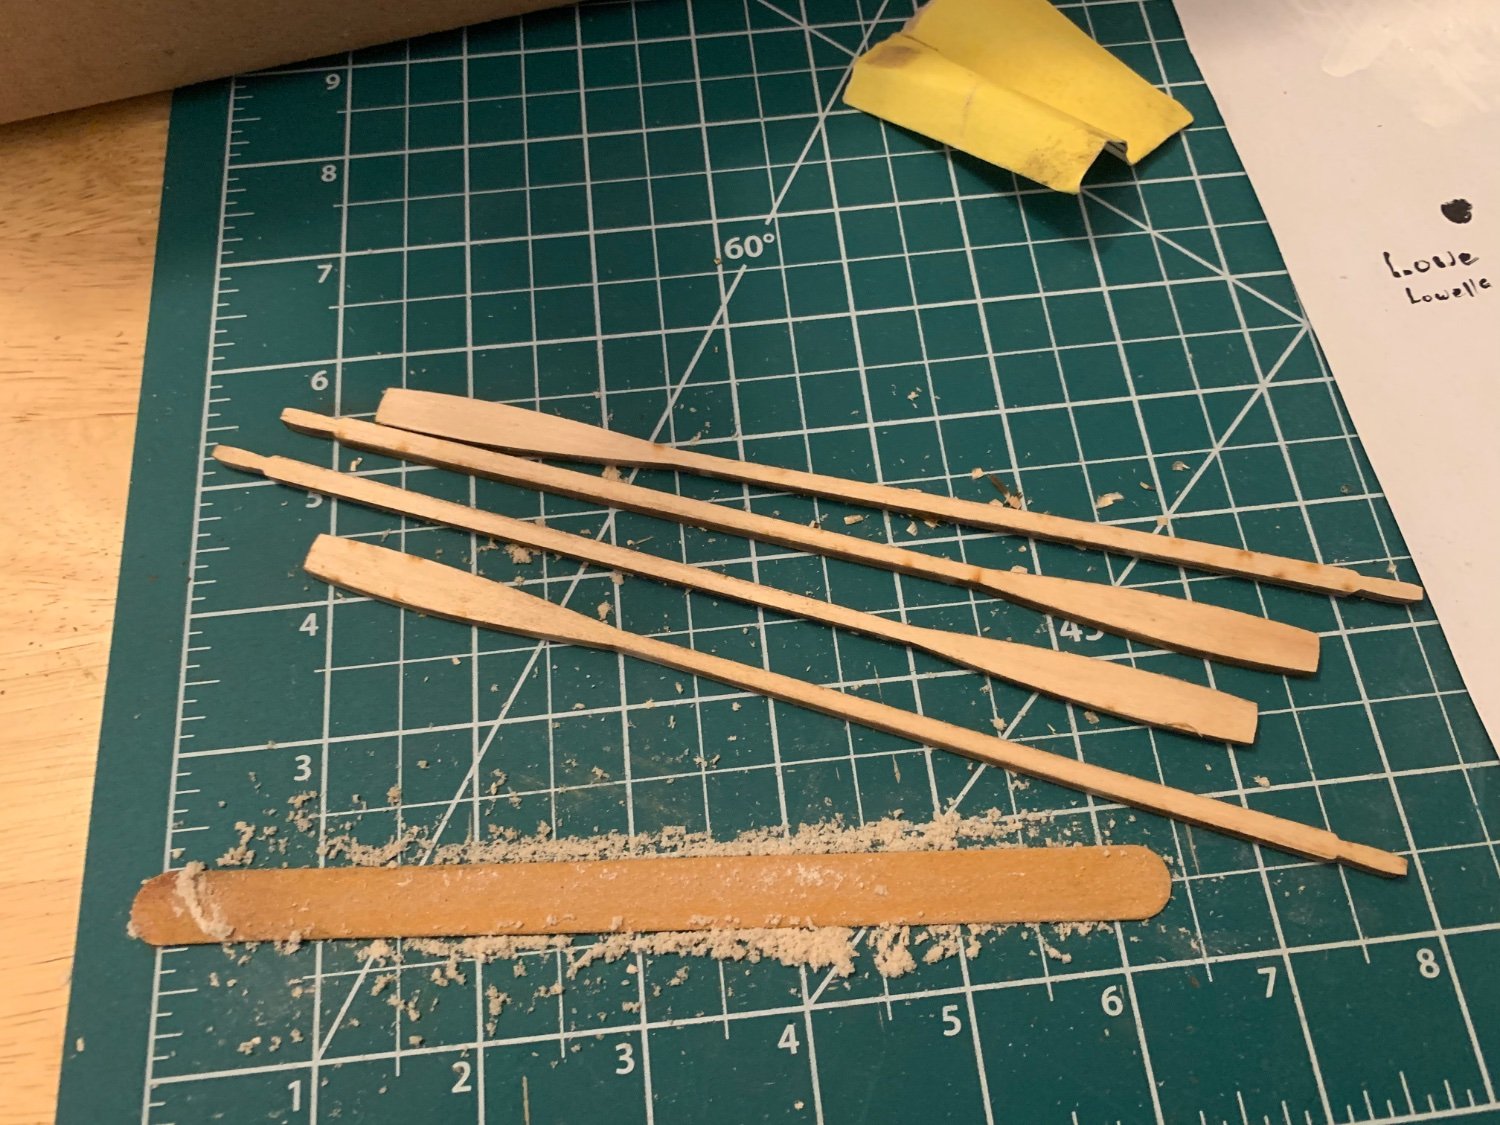
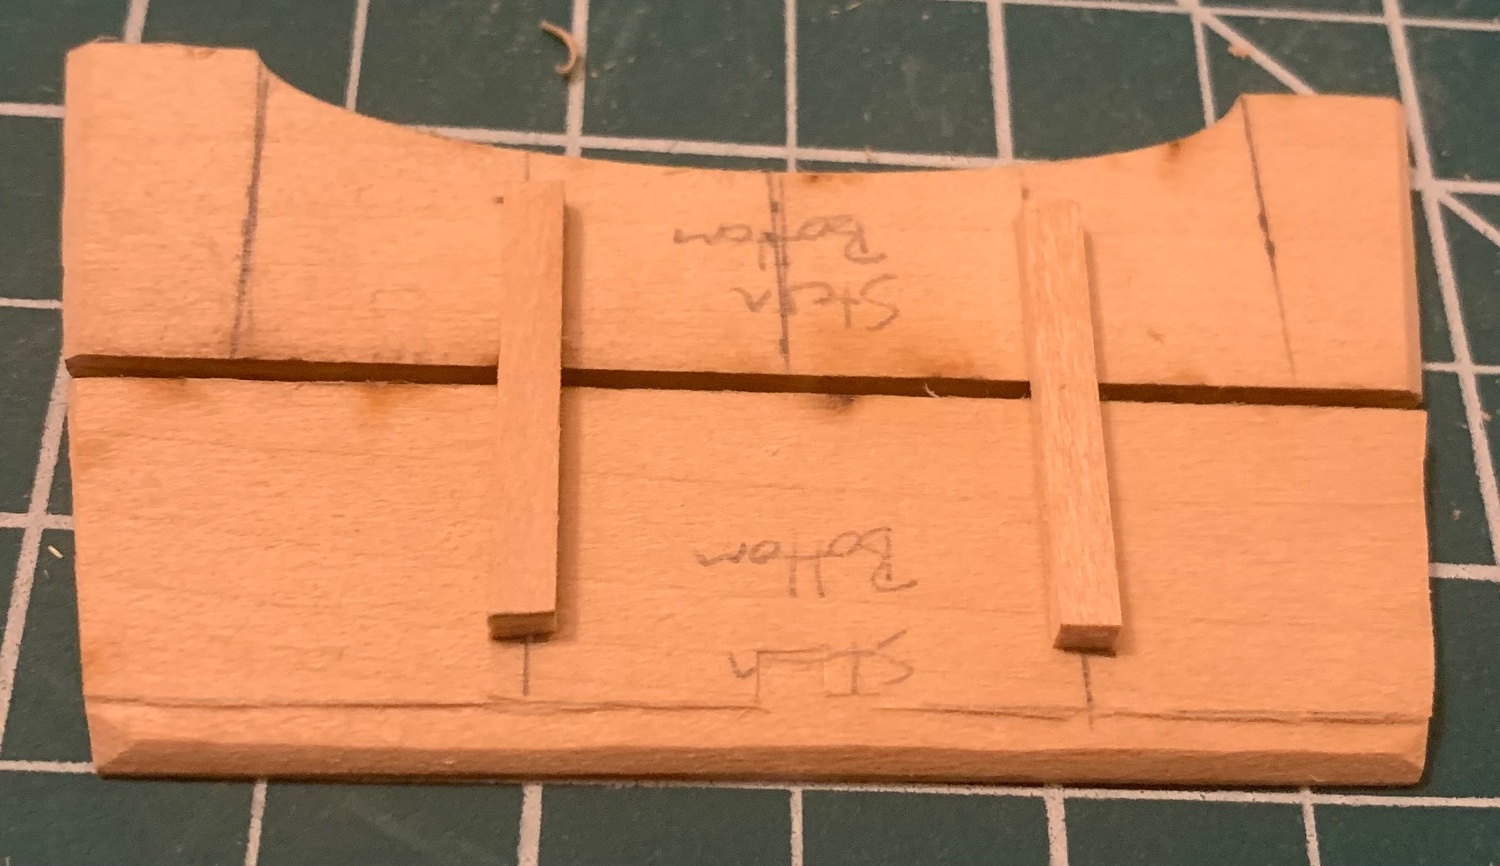
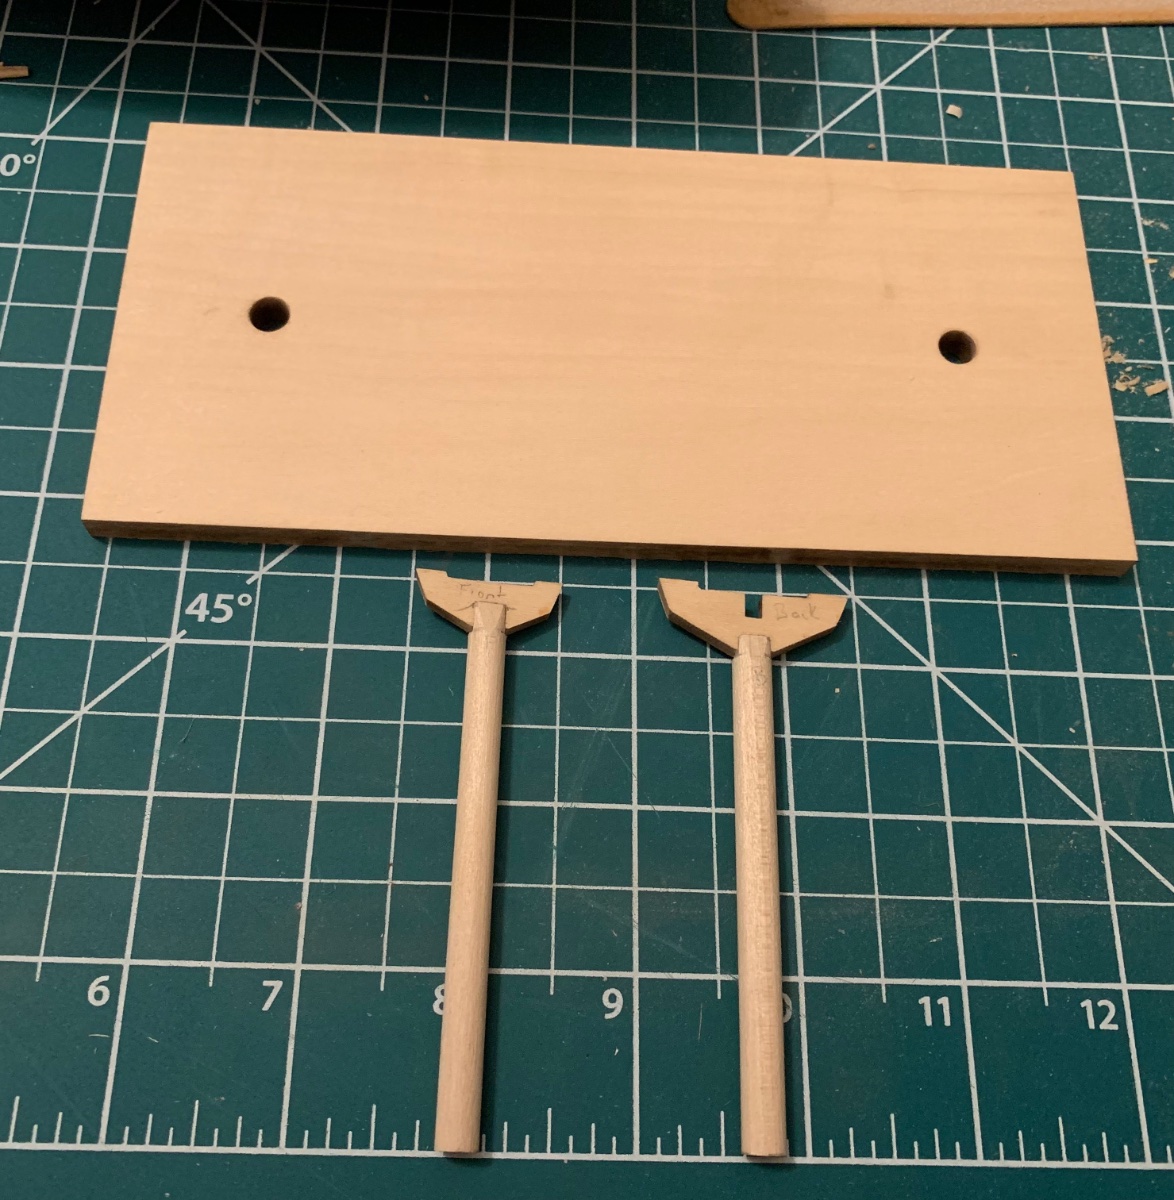
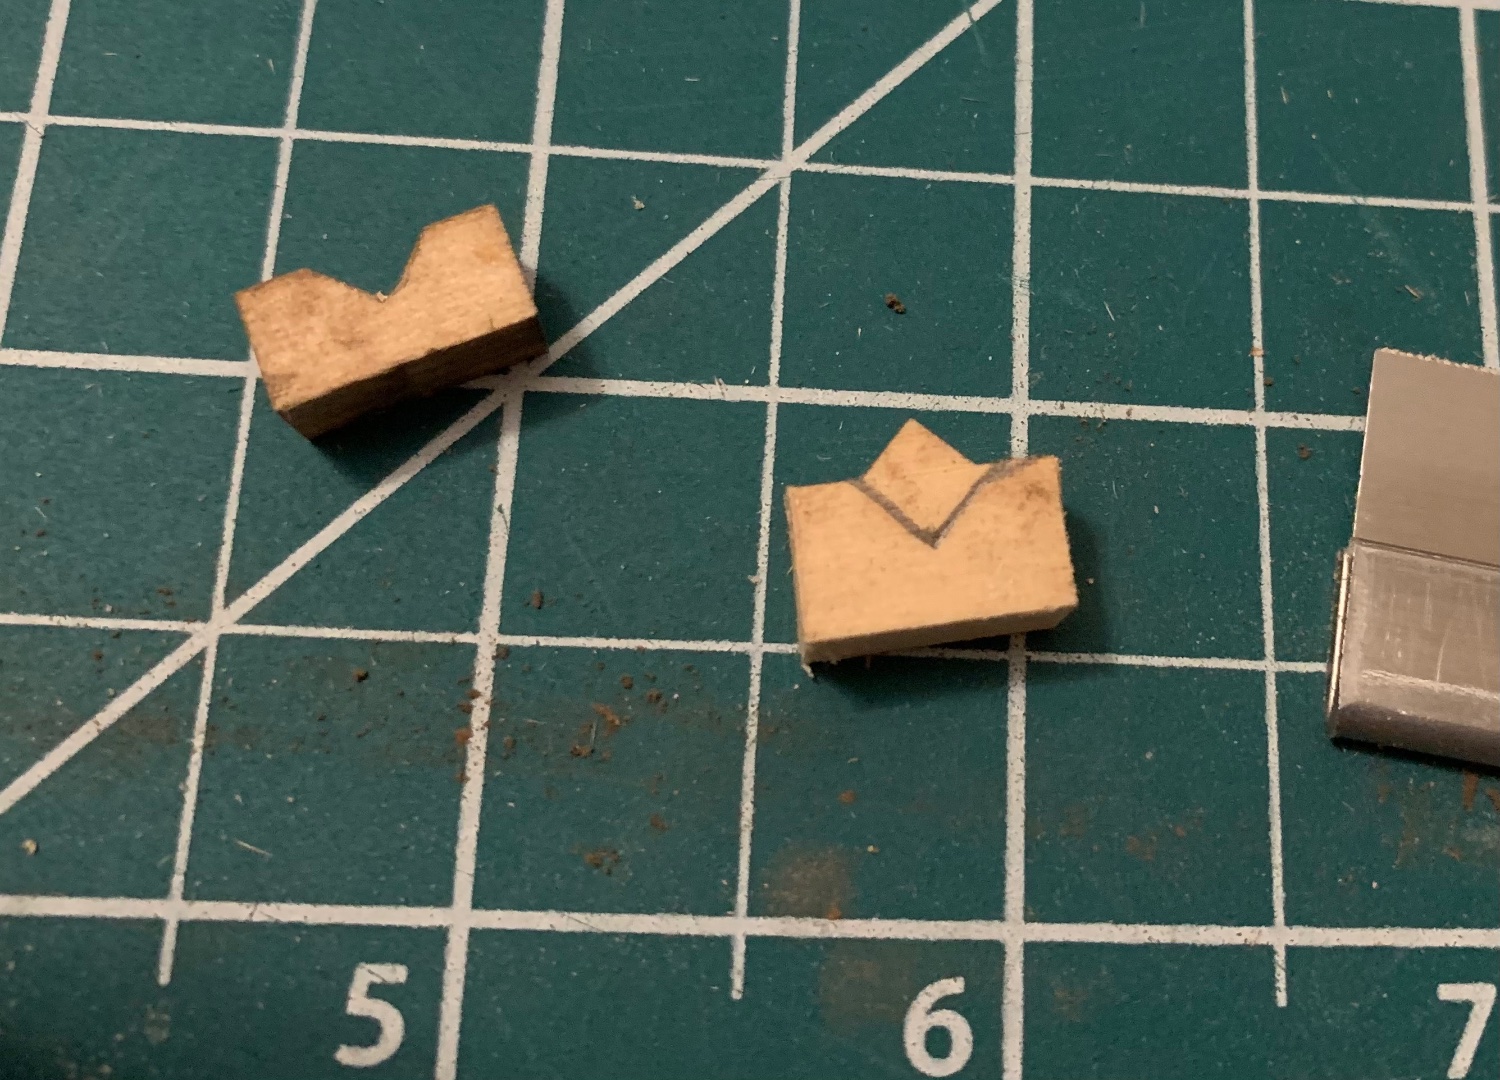
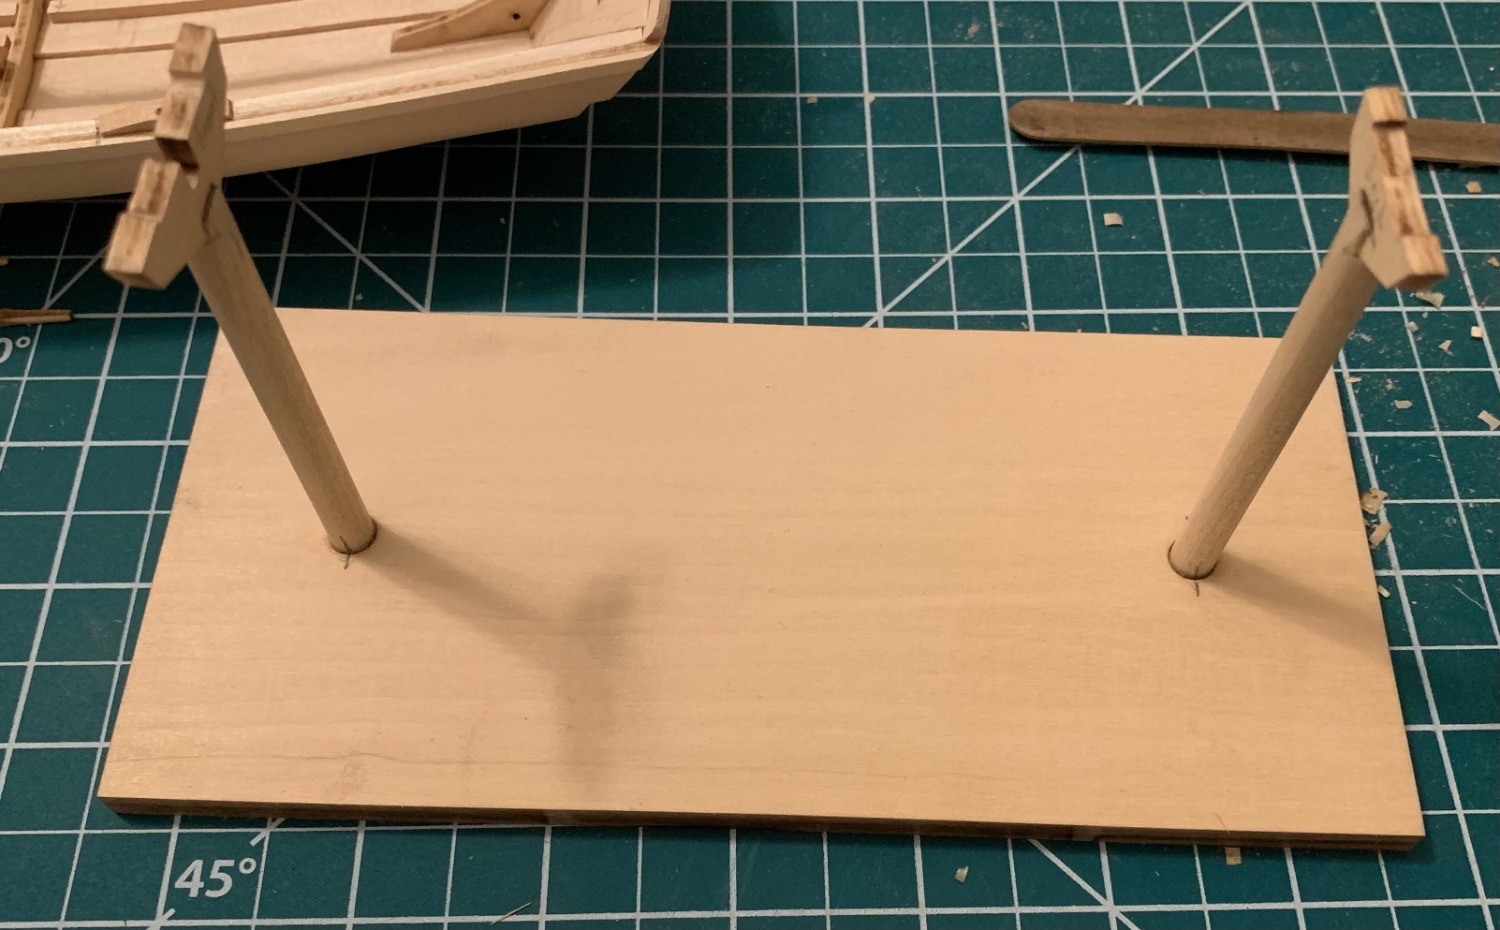
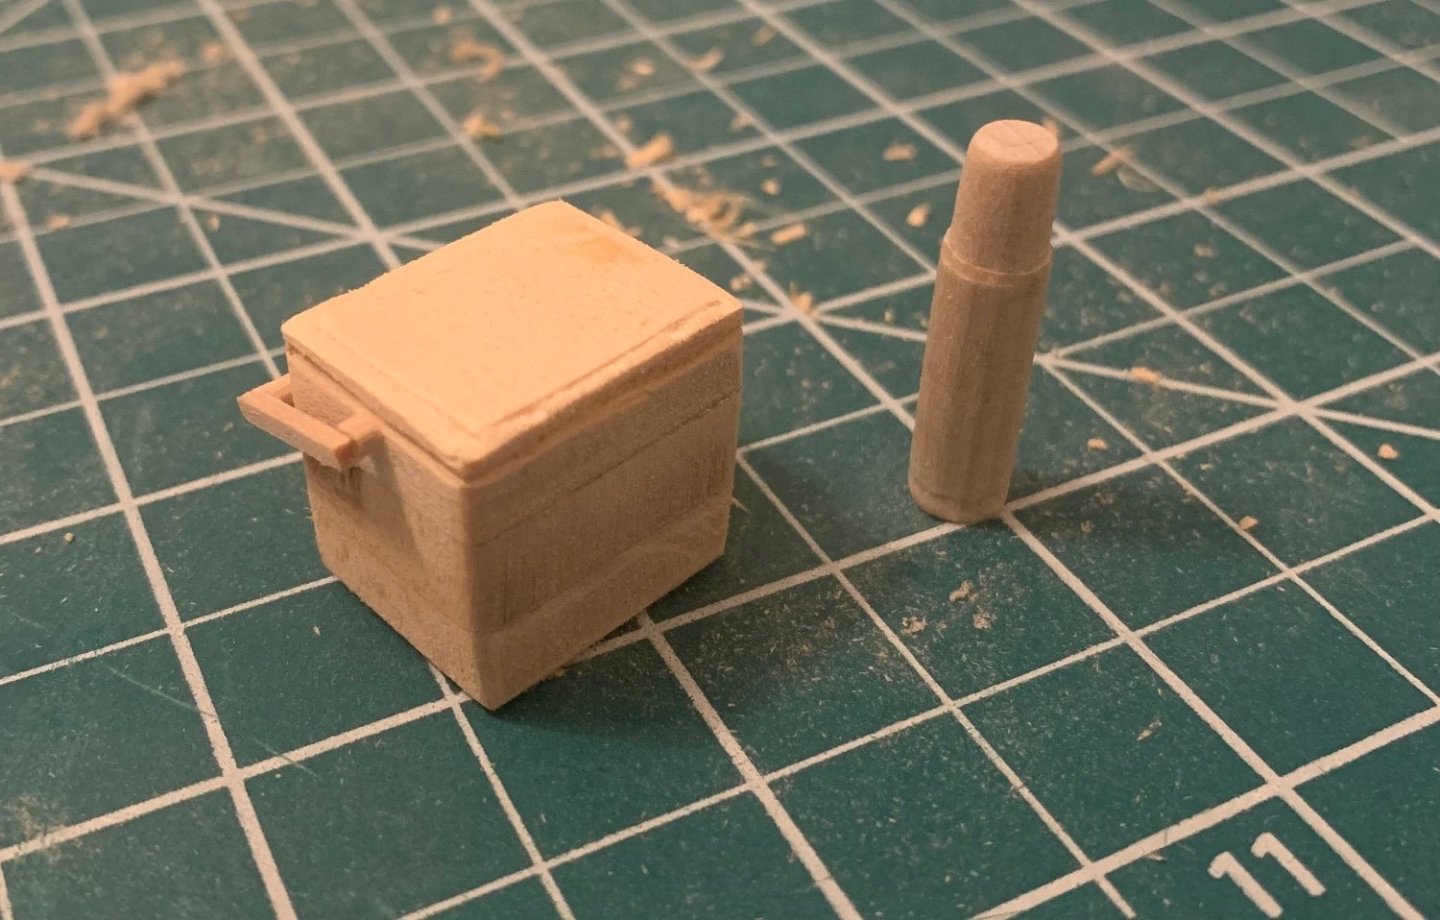
Still shaping parts but I’m eager to share a little bit of creativity. I’ve been trying to figure out what I would take with me, were I to go on a day sail. Oars first. They thinned down nicely and the dory proved excellent practice there. Shaping came from my experience with the mast and spars The main benefit was having the jig to help take down the corners. A little rolled up sandpaper and they rounded nicely. What’s that above the oars? Well, an item I’d want to have for a day on the water. Shaped from some leftover dowel after making the stand. Here’s the matching piece, this time made from the excess sheet containing the base of the stand and a couple lengths of toothpick. If I have to tell what they are then I didn’t do a good enough job making them.


- 38 replies
-
- 8
-
-

-
- Norwegian Sailing Pram
- Model Shipways
- (and 2 more)
-
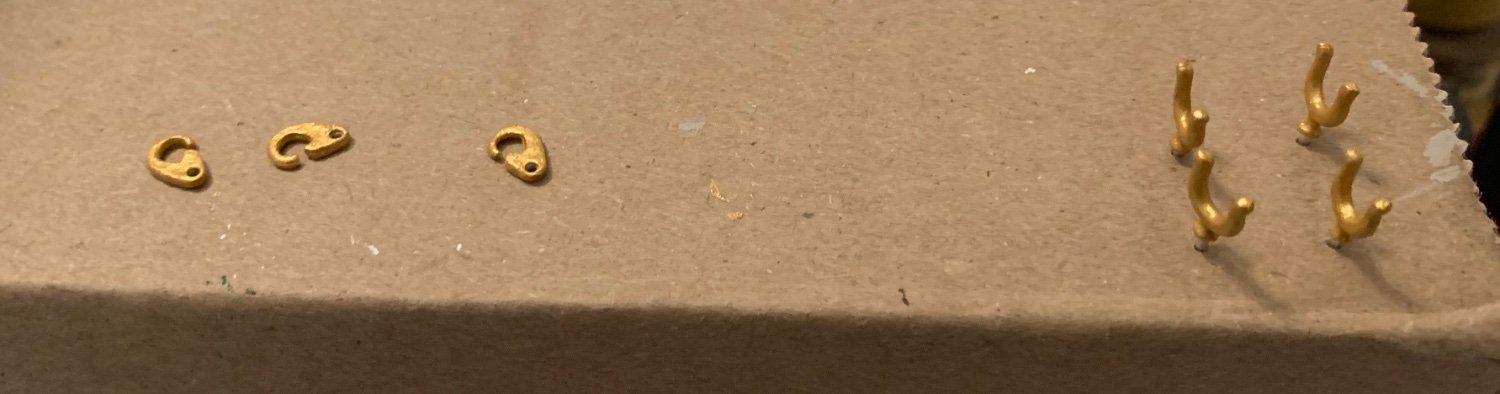
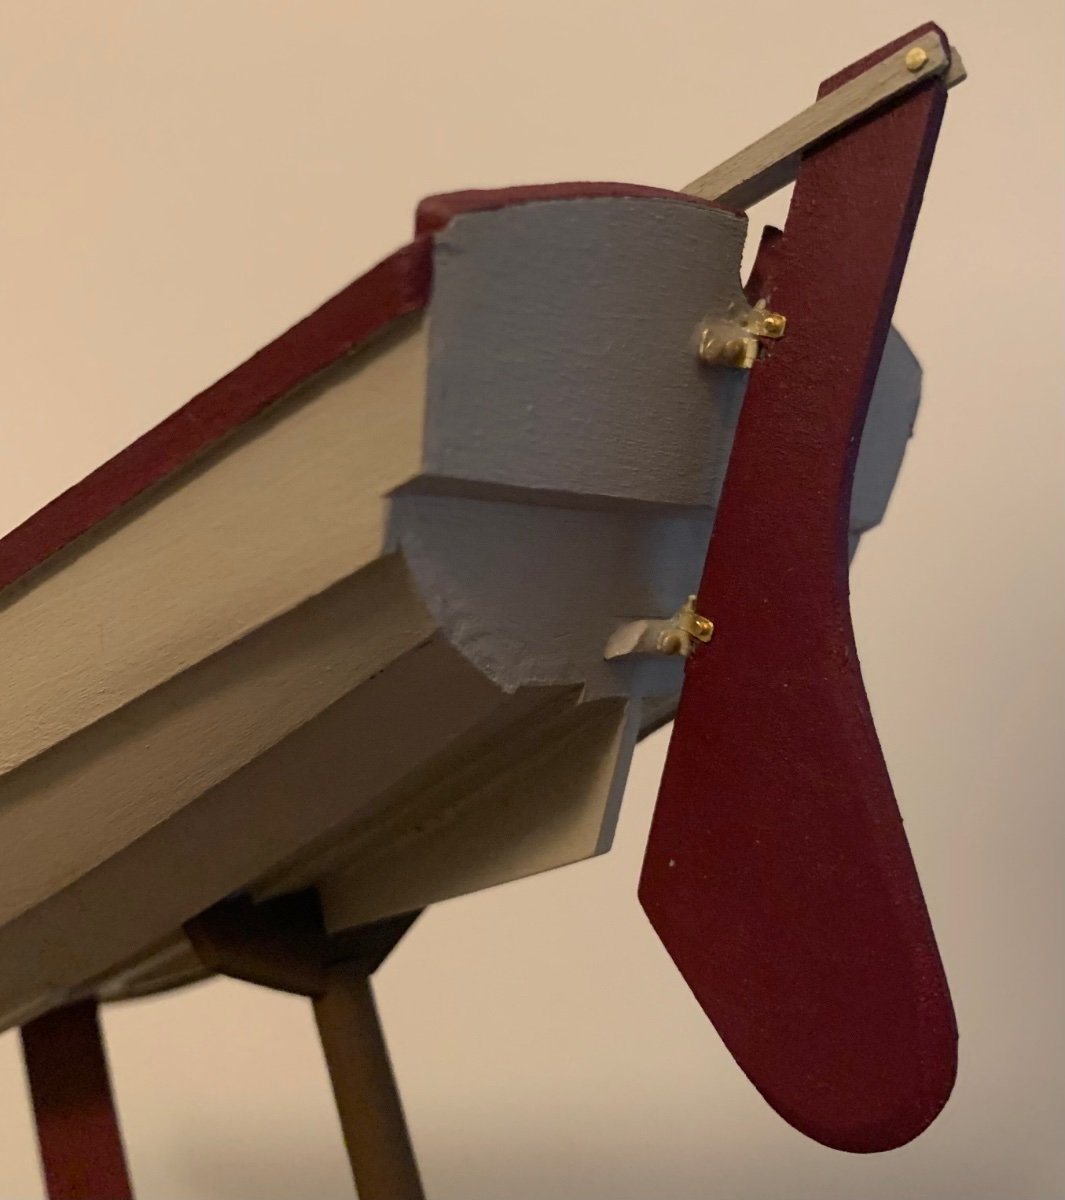
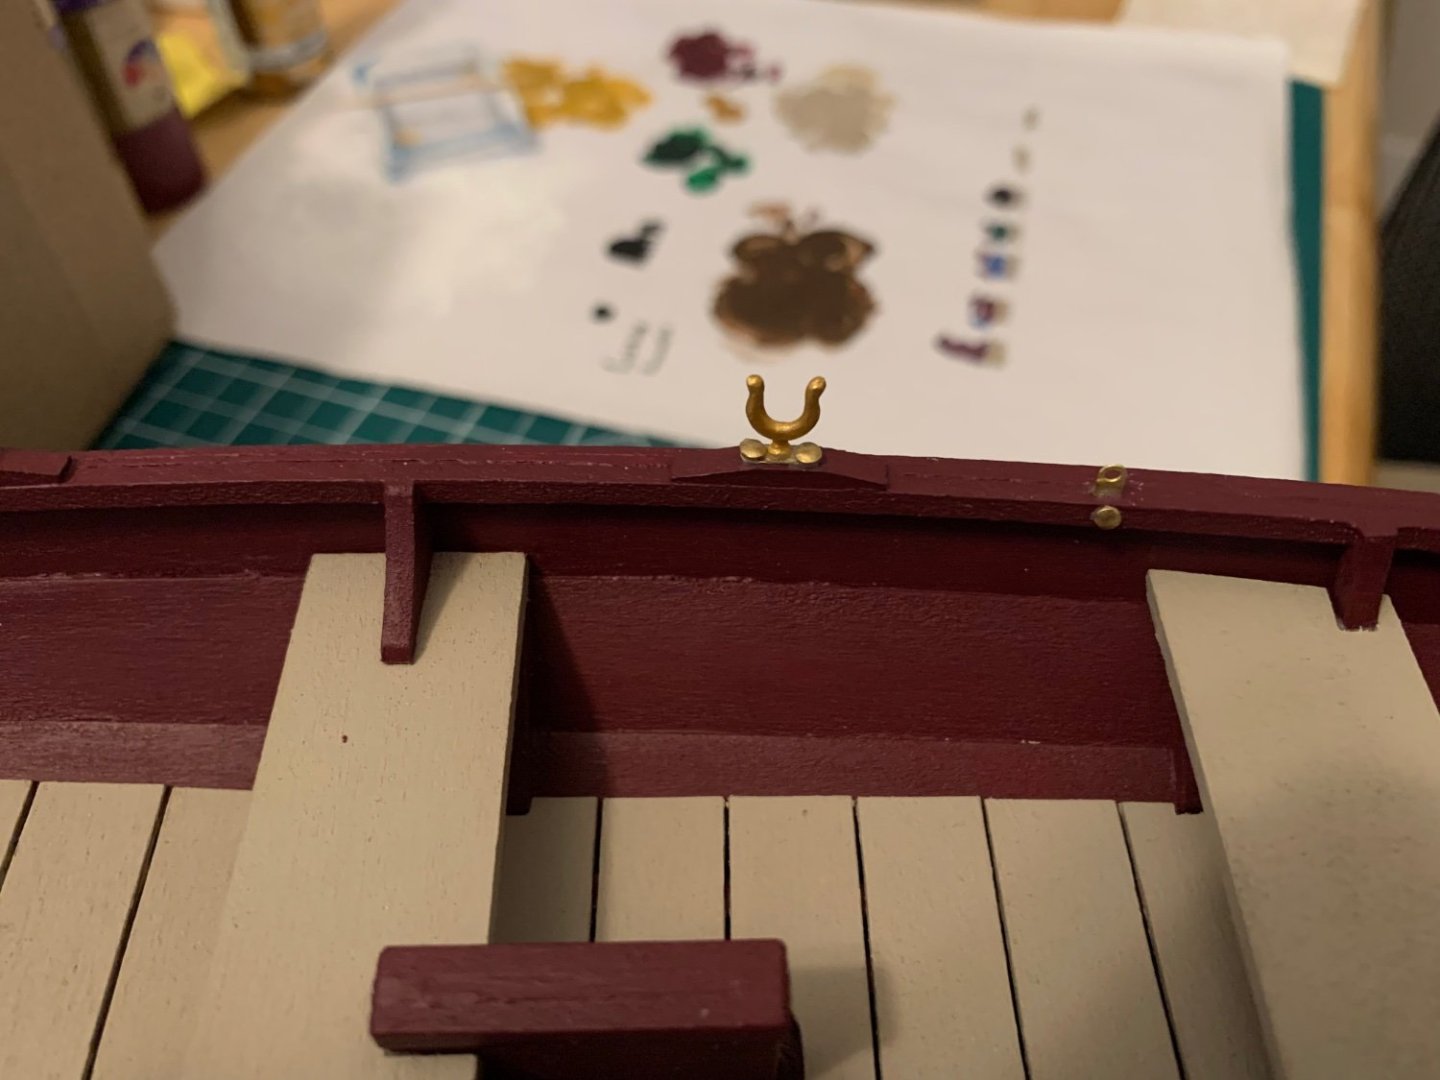
Fighting with brass has been an experience. Small pieces that go flying across the room led to a lot of searching for lost parts. As alluded to, I added the other gudgeon and hung the rudder. I’m still not happy with this and it’s the only real disappointment I have in the model. Entirely because of poor skill on my part and the choice of the wrong materials. I can absolutely understand why CA would have been better, but this was done before the conversation with Bob. Thank you, and I’ve learned for next time. While I was at it I glued the model to its stand and put the dagger board in place. It cuts a nice outline. On the left hand side of the box you can see the cast white metal parts. Here’s a close up: I gave then a couple of coats of gold paint to help them match the brass parts. It’s not a perfect colour match but is close enough to make them look finished in a similar way. Next was on to the oarlock pads. As with all the photo etched parts the holes for the pins were too small. Here’s a snapshot of the process I used to widen them: On a scrap piece of wood I drove one of the nails through each hole, then hammered the pad flat again to eliminate the introduced bend. The nailhead was then cut off short to fit the needs of the model. After drilling holes for the nail heads into the pads things went together smoothly. I’m very happy with how those turned out. As an aside, I was playing with ideas for how best to display the oars. My intention is to do something like I did with the dory, making more of an “in use” scene rather than a static model. I want the sail up and in position so I ultimately decided not to place the oars in the oarlocks, which I why I have them positioned the way I do in the above photo. Im open to any ideas or suggestions for extras to build to make it look more like a boat that someone has just rowed out of Harbour, shipped oars and put up the sail. I’m thinking I’ll build/paint all four oars and then bind them together with some leftover rope and place then toward the bow. Which brings me to the next project, sanding down the oars to shape. Once that’s done I’ll paint them and get started on sailmaking. I plan to incorporate the pockets for the sail battens as described on DanB’s log (suggested there by Veszett Roka). I think they’re an important detail which will add a lot.


- 38 replies
-
- 7
-
-
- Norwegian Sailing Pram
- Model Shipways
- (and 2 more)
-
In the light of a new day that post feels like I was fishing for compliments. That was not my intention but I appreciate them none the less. The support from everyone here has been a huge help. Bryan, I'm glad there is something useful in here for others as well. I'm following your progress and always excited by a new update on your log. Dan, your build log is one that I have kept permanently open in a tab to refer to throughout this build. I appreciate the details and advice contained therein. Bob, I hadn't previously found your log but I've now added another such tab to the collection. Regarding the CA/epoxy, is the grief you're referring to encountered while building or is there an issue with longevity as well? It seemed to work well for attaching the rudder to the boat (photo coming in the next update) and all I really have left are the oarlock pads and the mast plates.
- 38 replies
-
- 2
-
-
- Norwegian Sailing Pram
- Model Shipways
- (and 2 more)
-
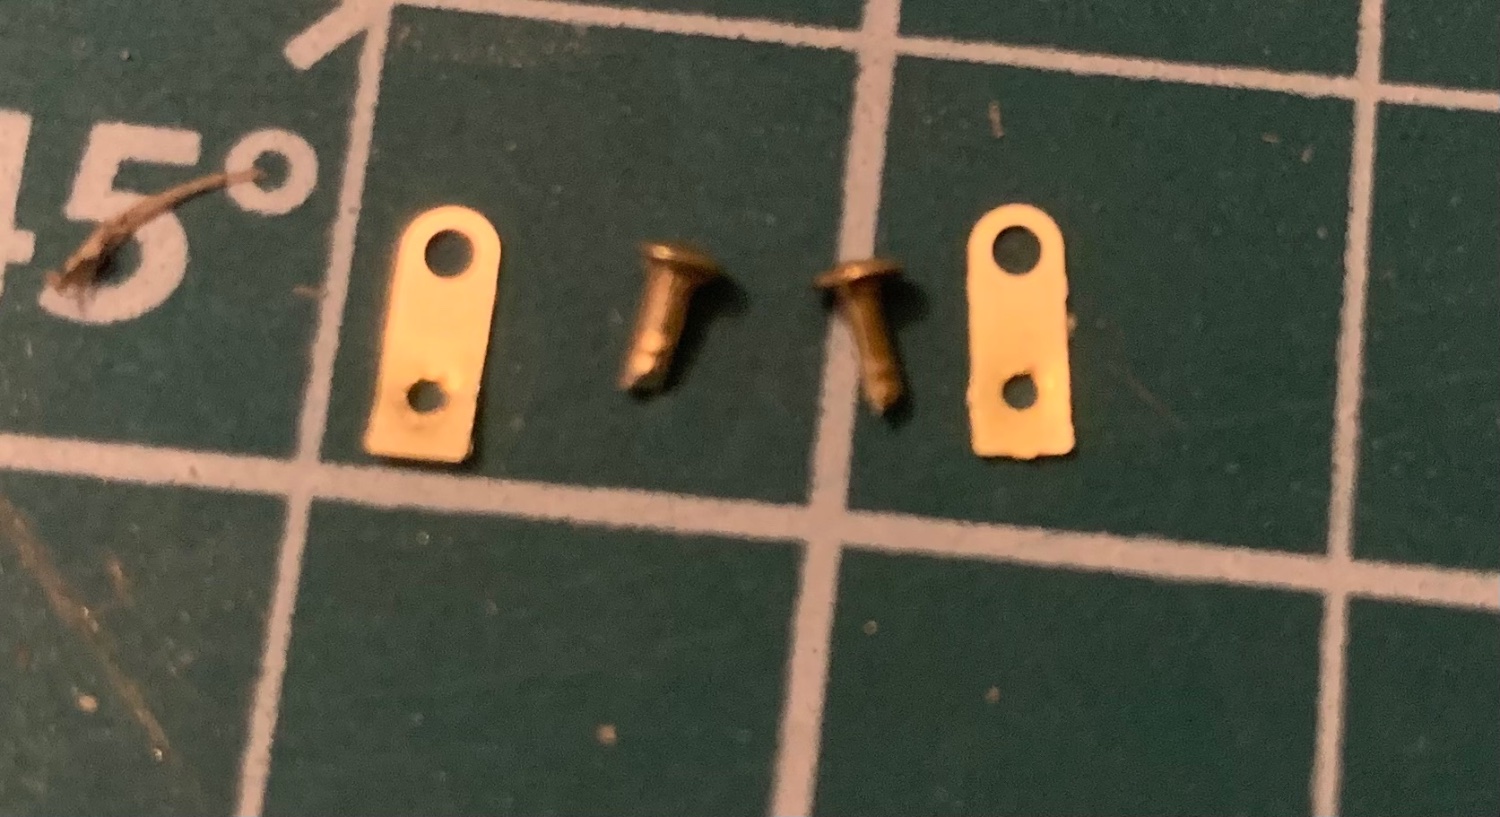
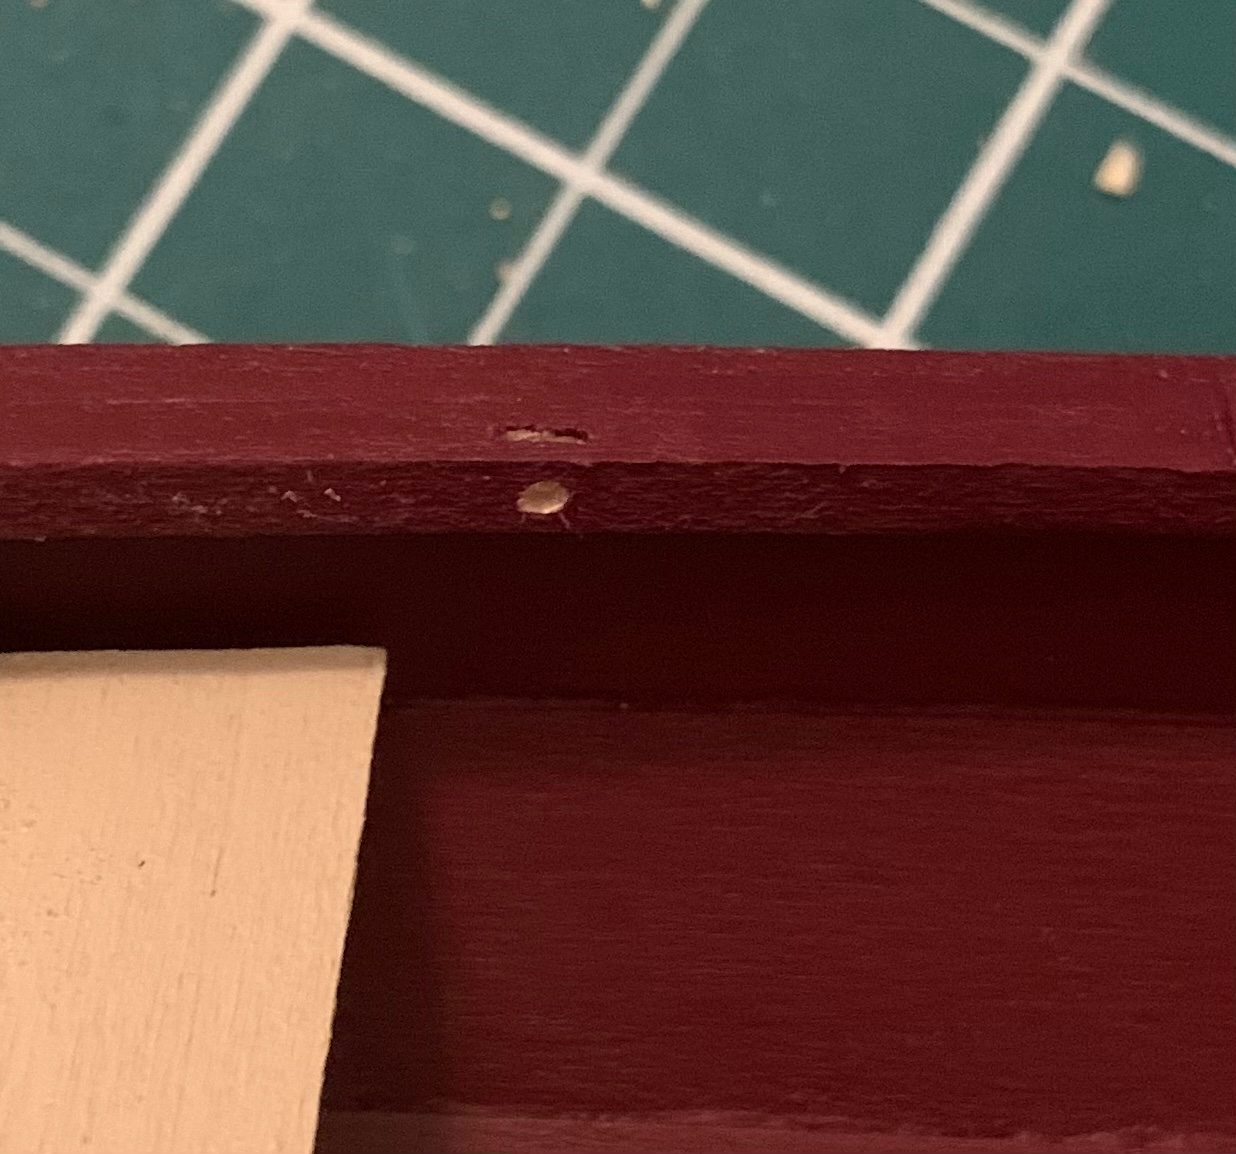
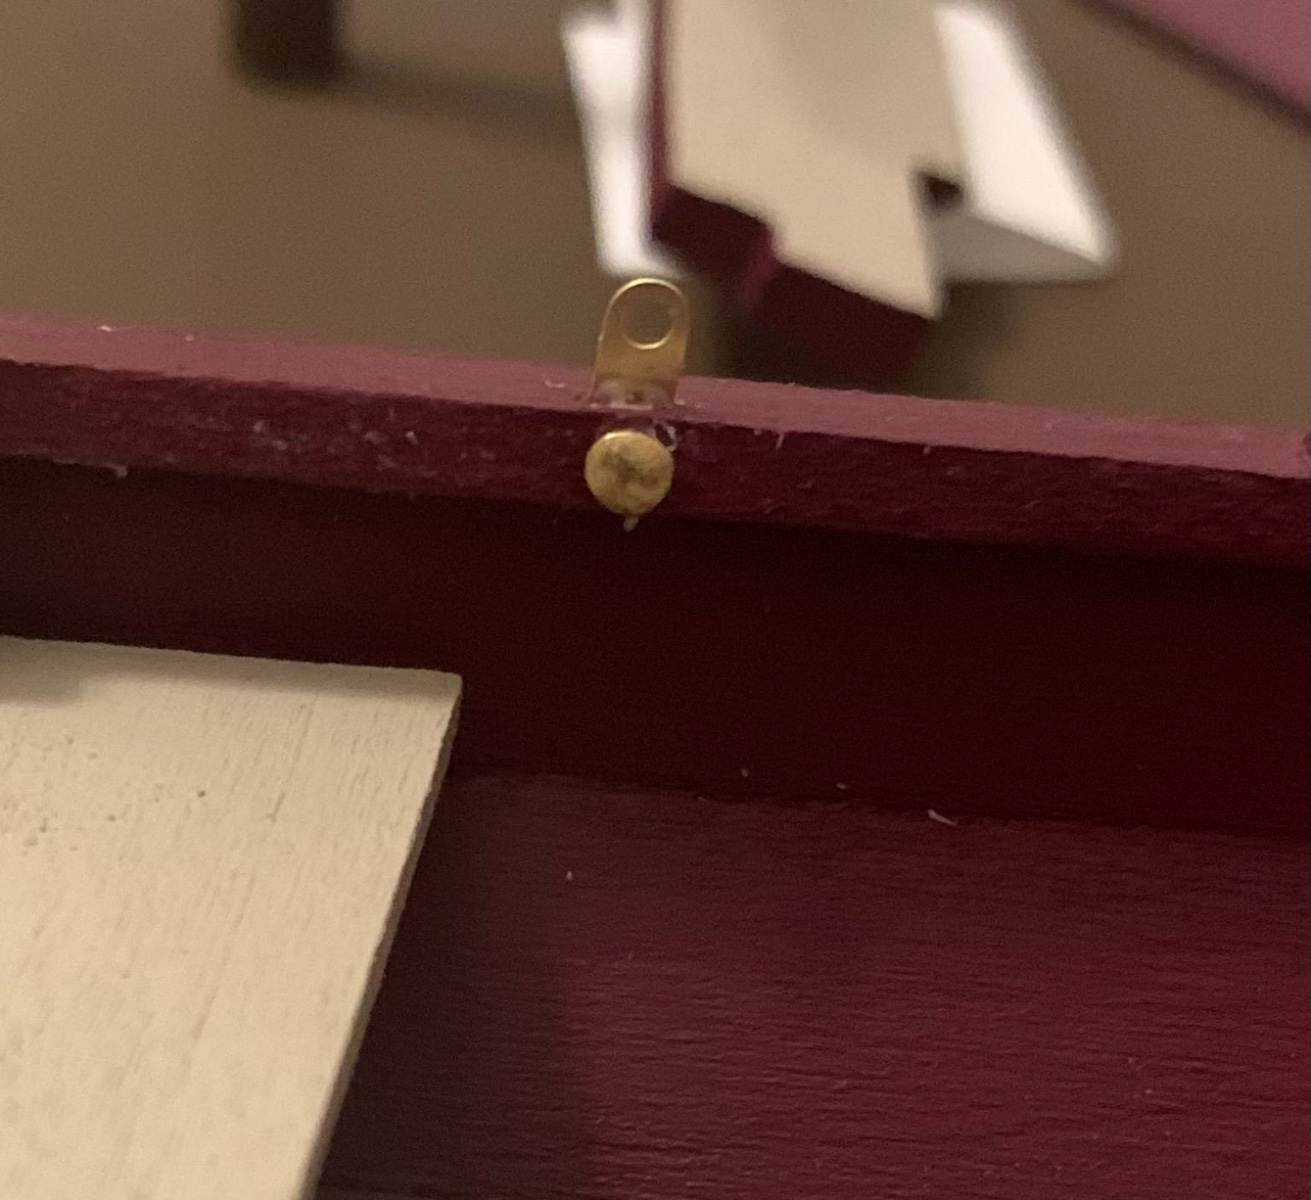
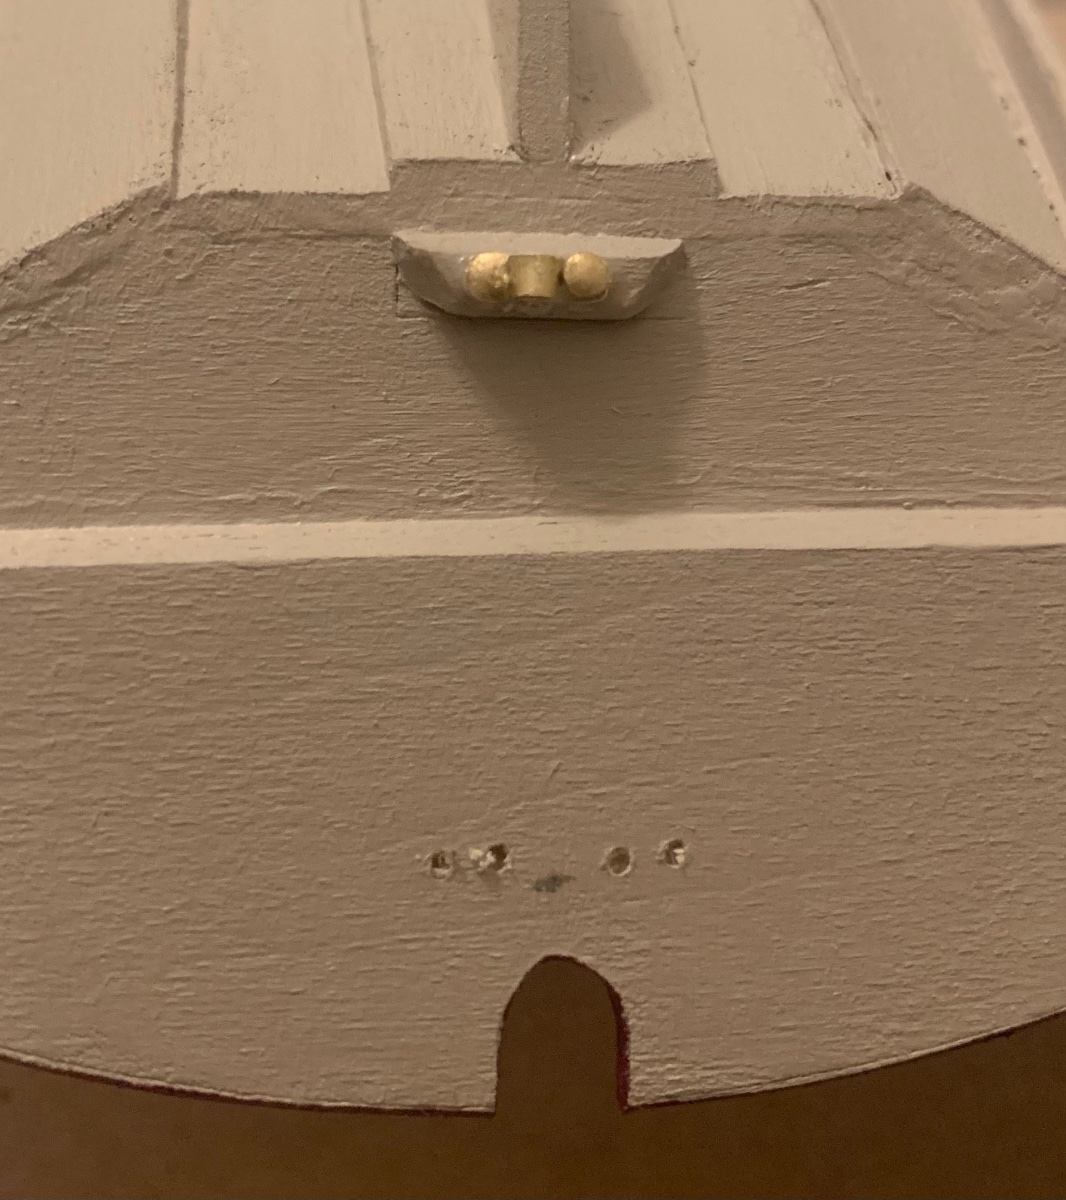
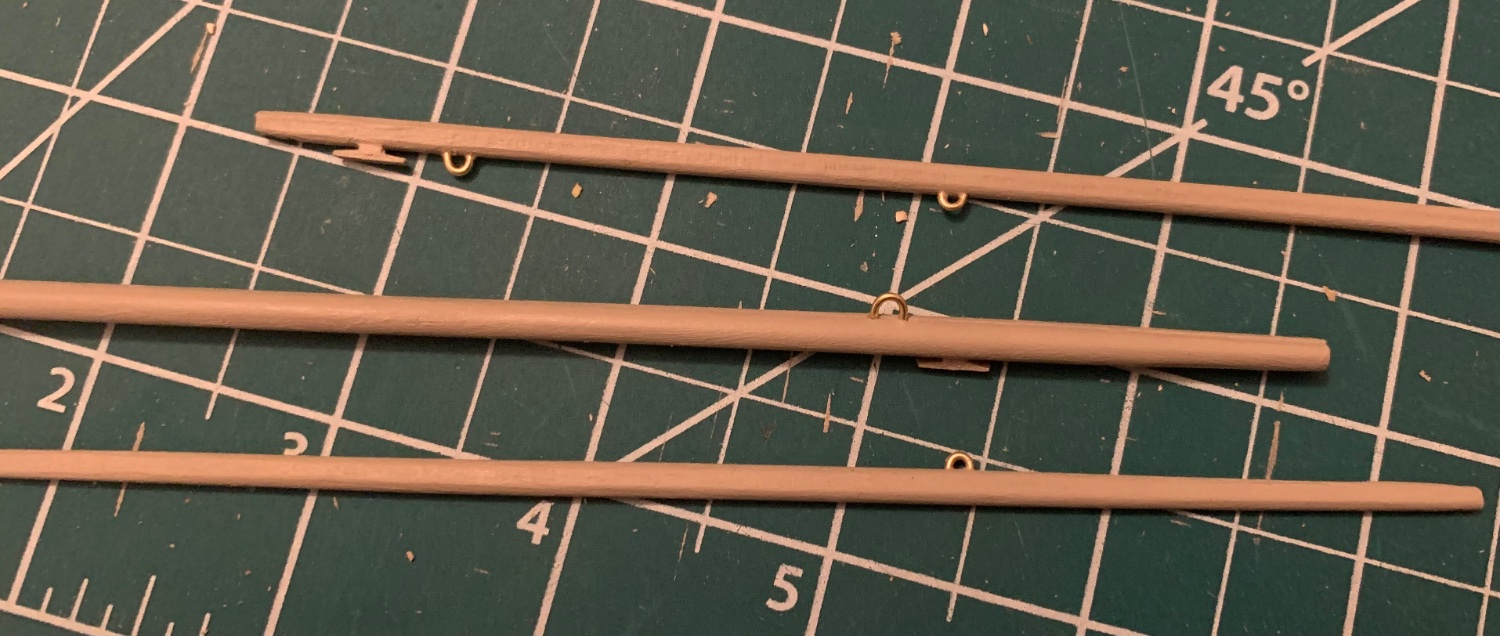
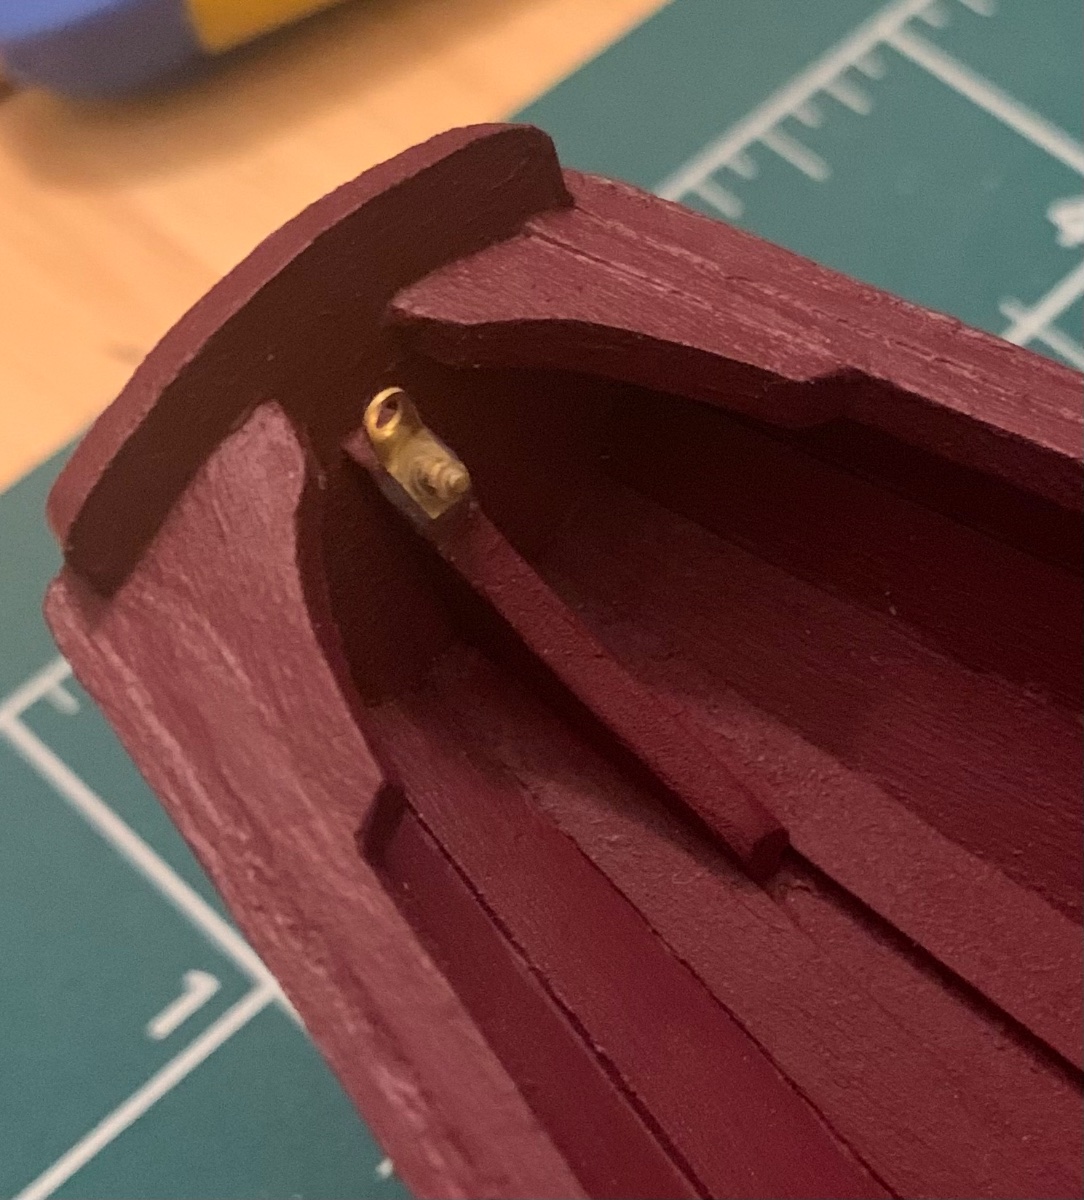
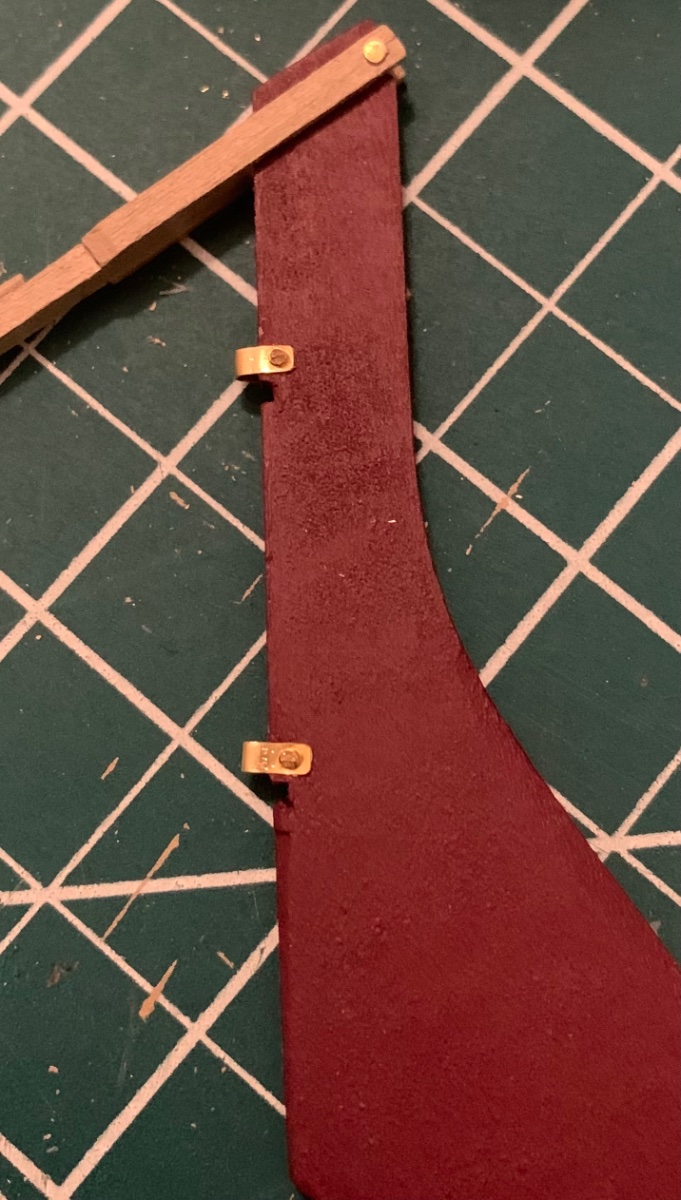
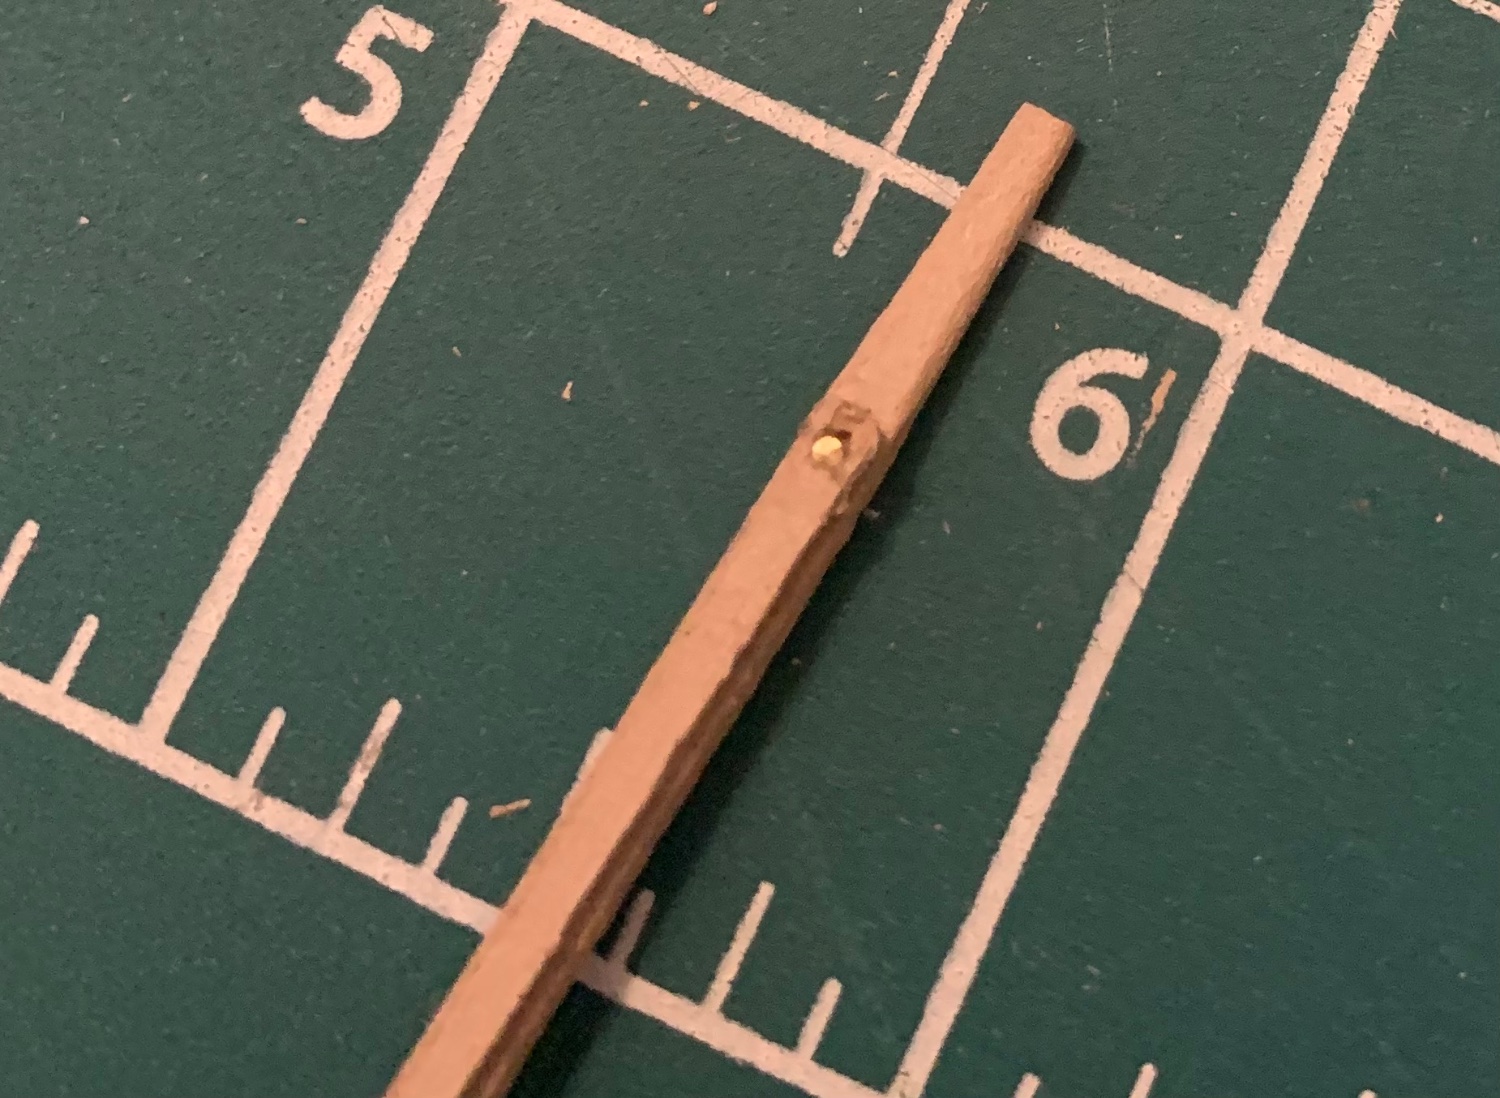
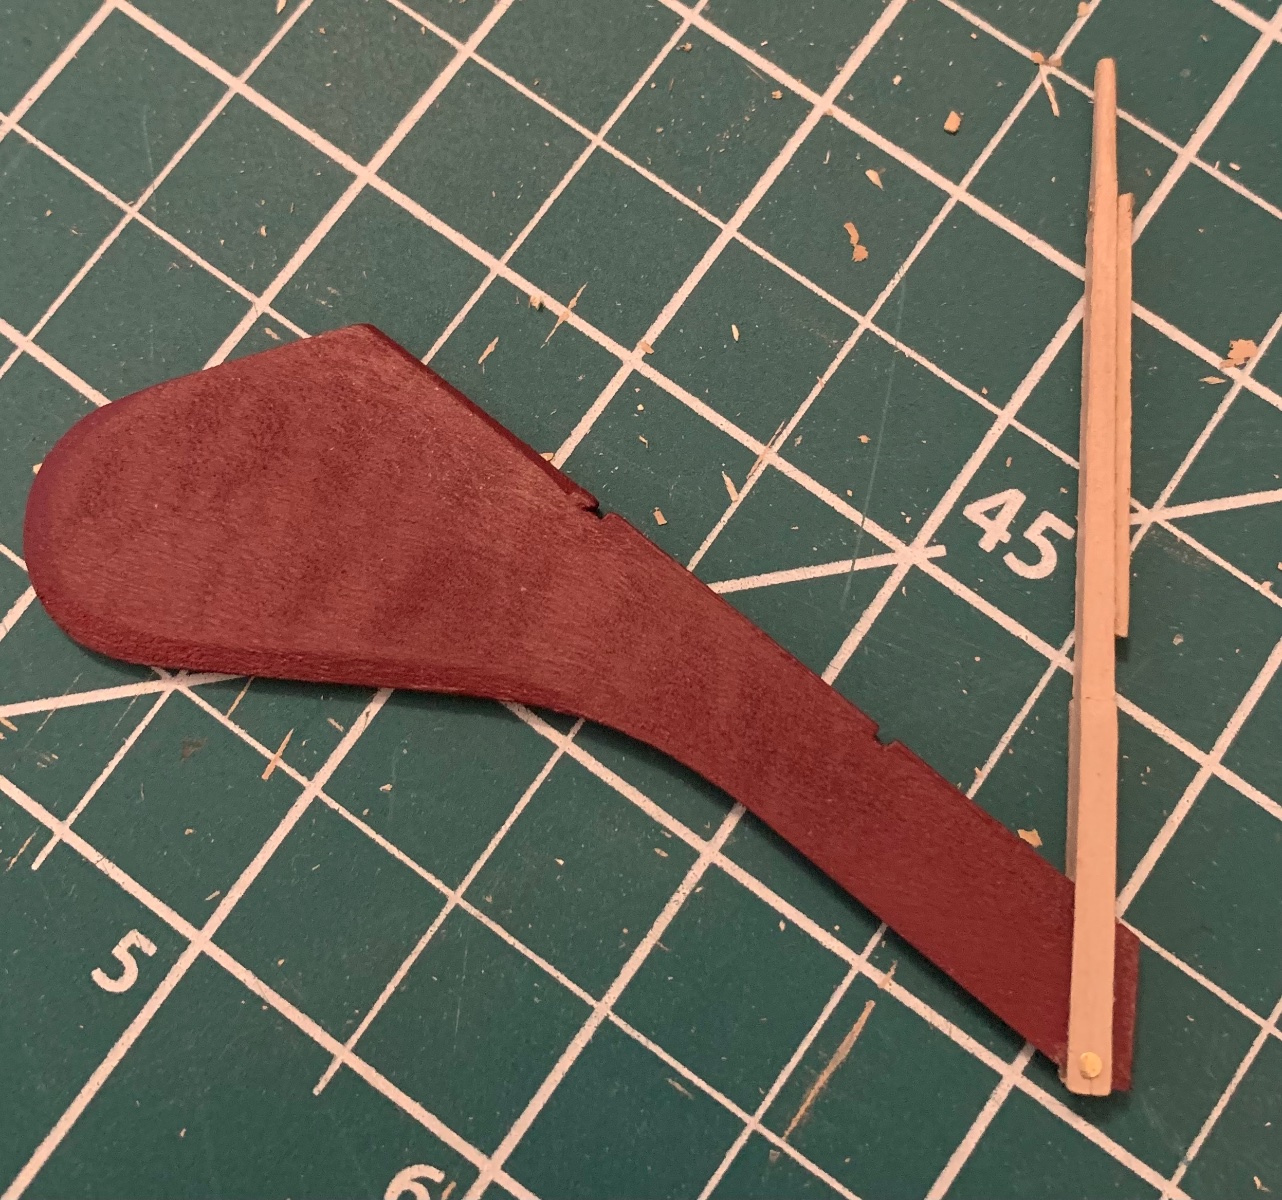
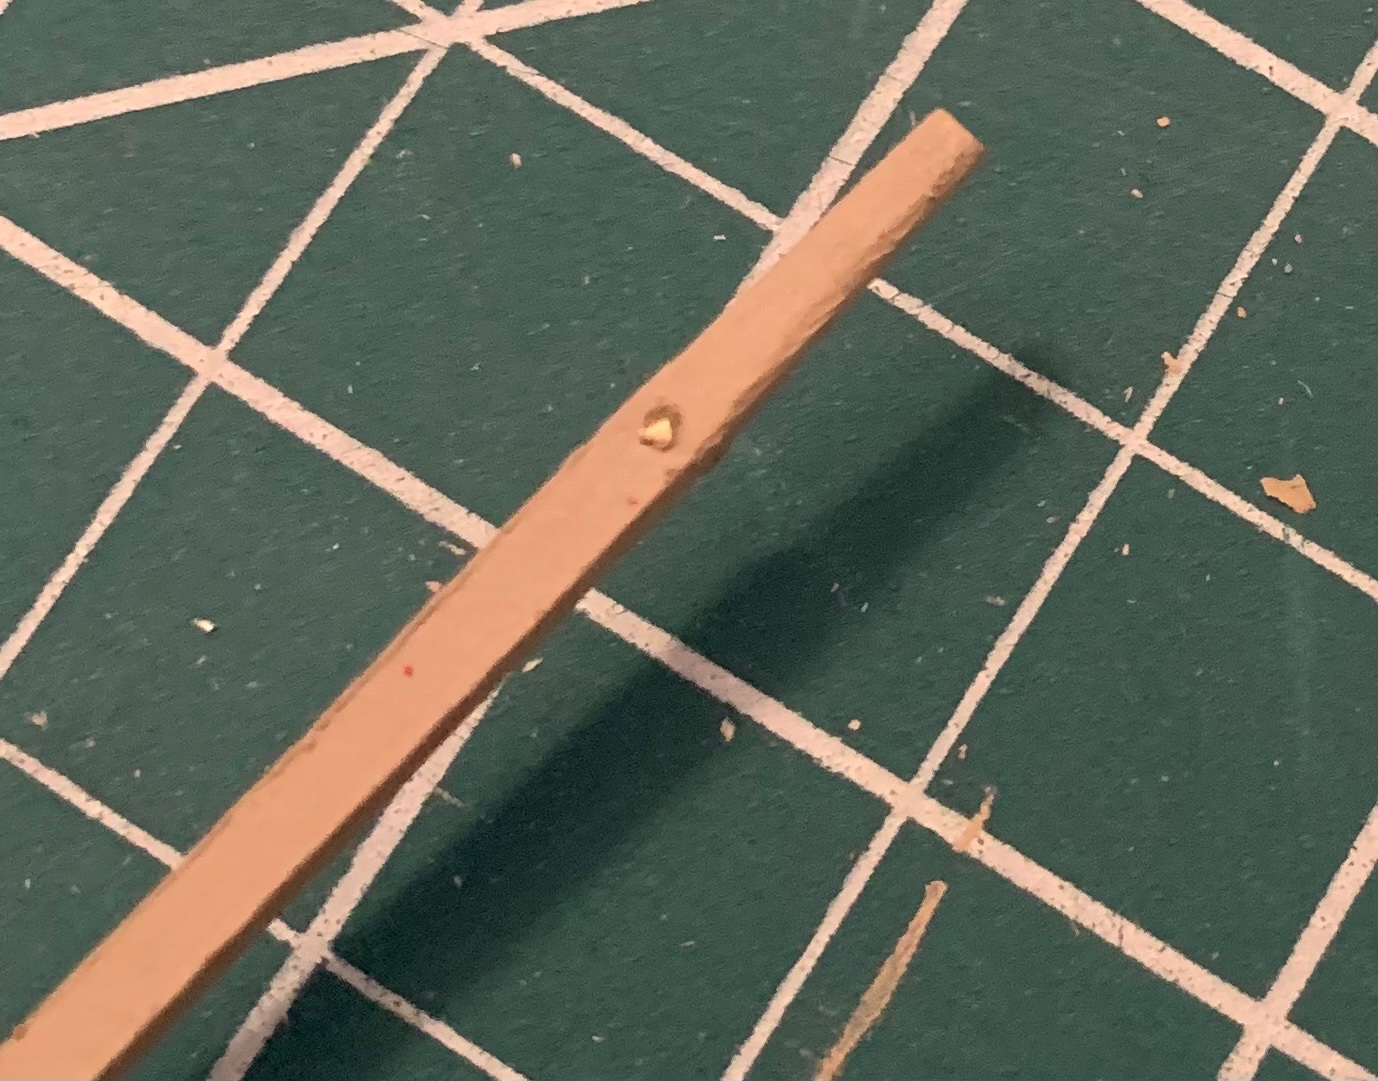
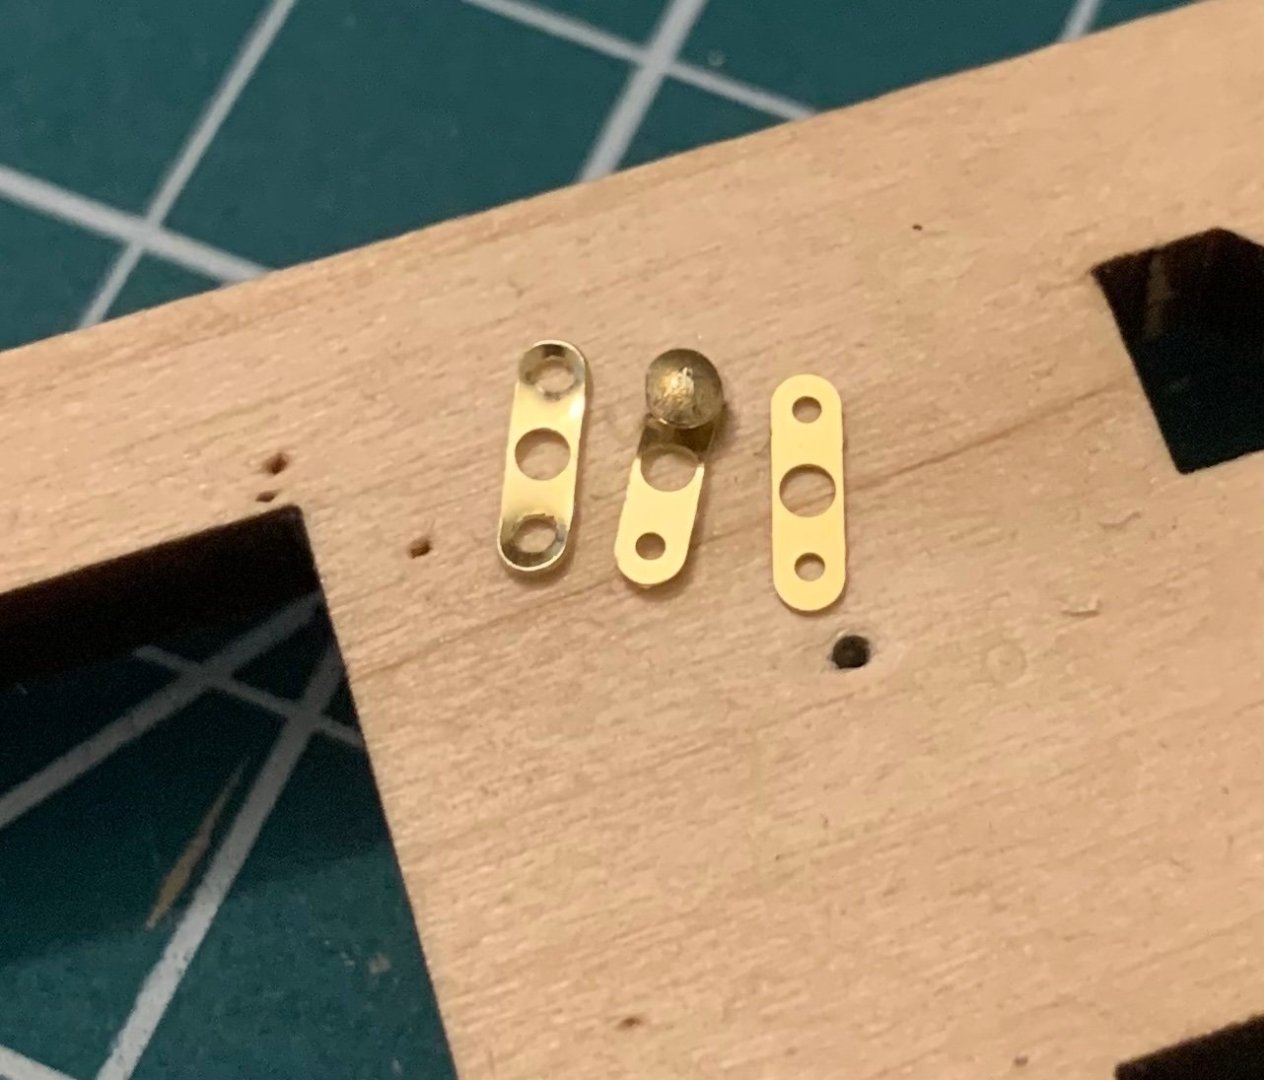
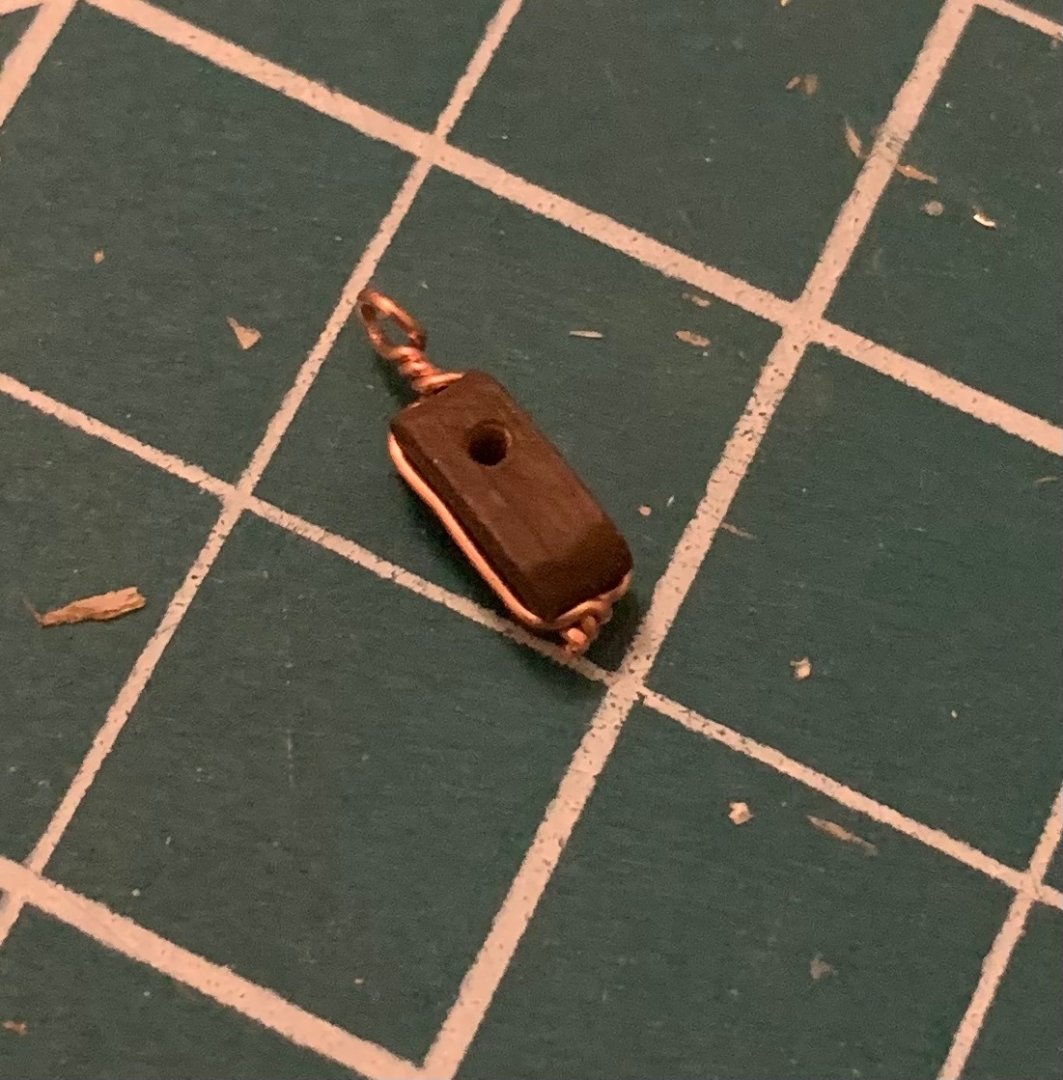
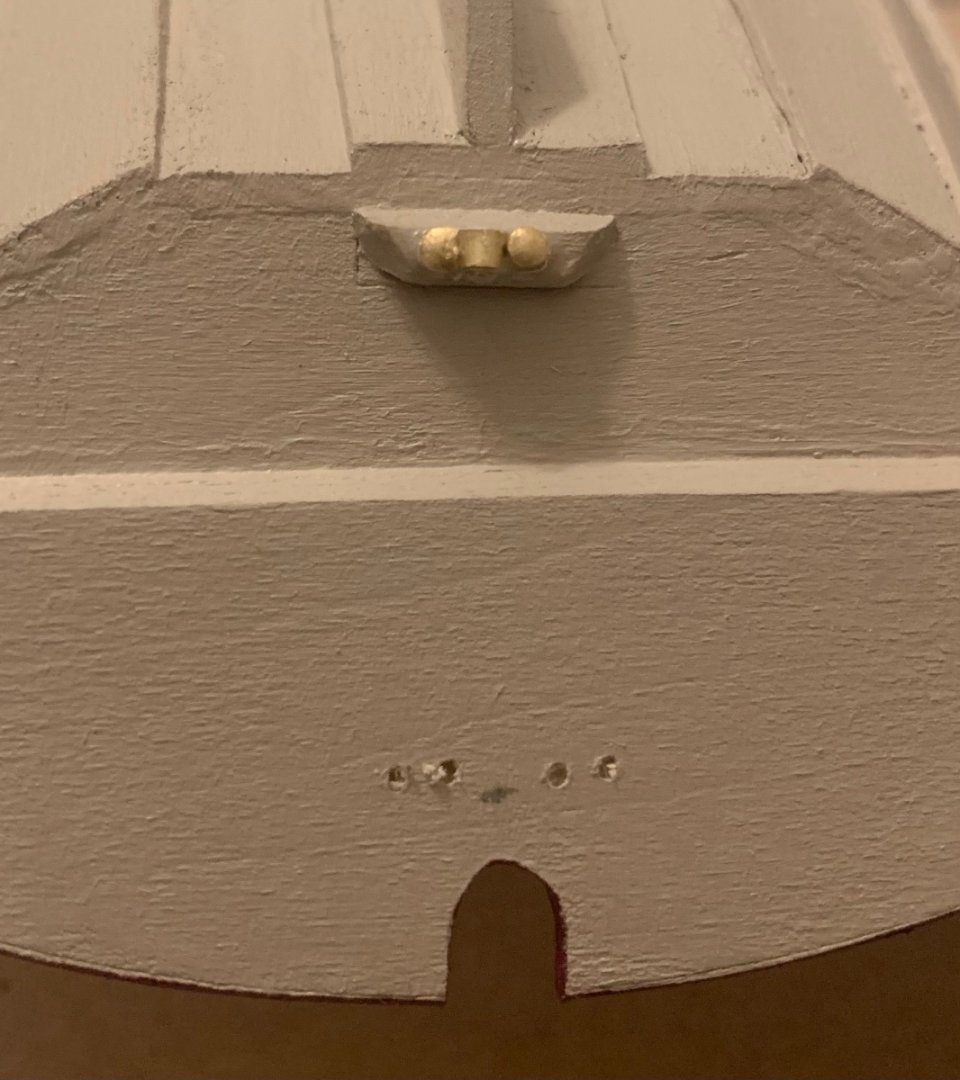
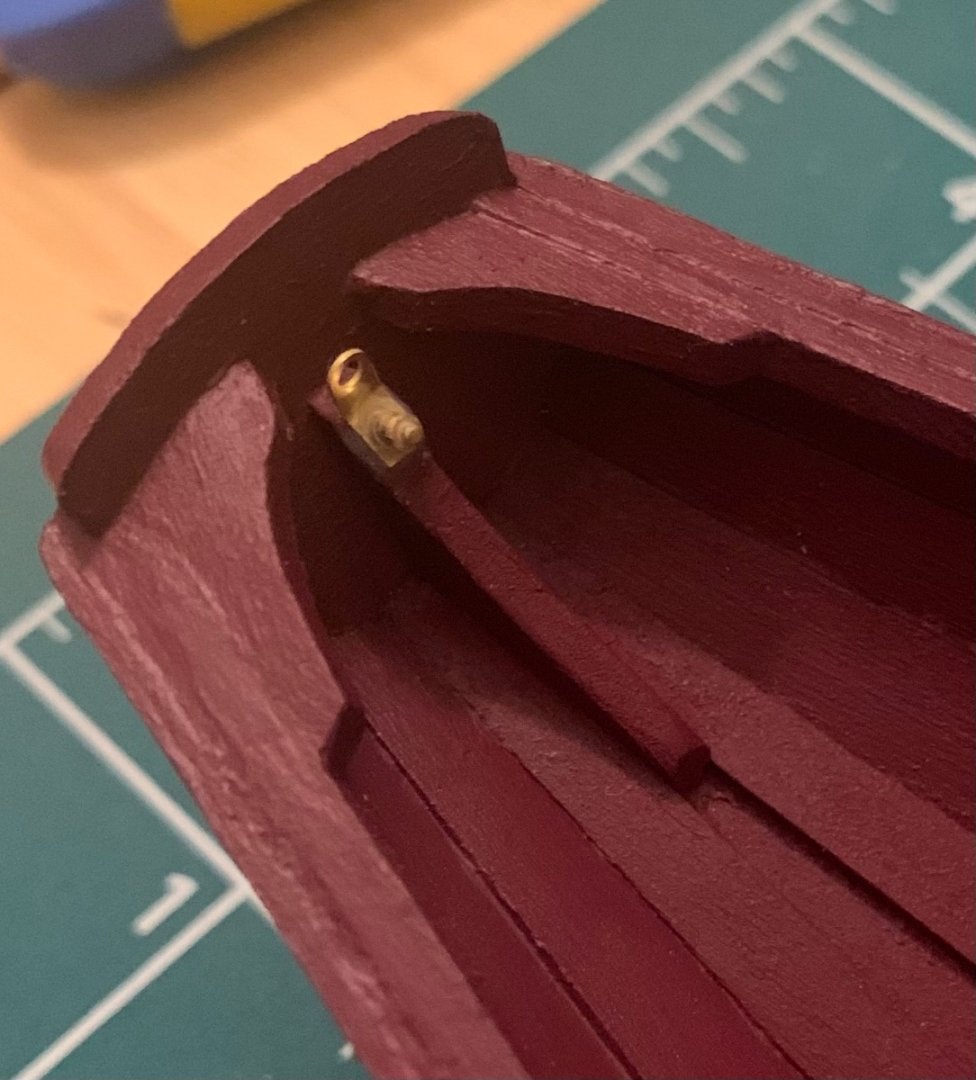
I’ve had a couple of frustrating days at work which have led to staying up too late at night working on the Pram as a way to try to relax. As a result I’ve put out some sloppy work which I don’t feel very proud of. I need to learn to slow down. With my new found brass skill I cut down a couple of nails and cleaned up the anchor plates. I held the plates against the inner side of the inwale at approximate my desired position and used a thumb tack to mark the centre of the smaller hole in the wood. Then I put the plates on a bit of scrap wood and drove a nail through the smaller hole to widen it. Using the tack hole as a guide I drilled out holes approximately the diameter of the nails. Then smeared some PVA glue into the two openings, slid the plate into its hole and drove the shortened nail home to secure it. The whole assembly then got a little more PVA to hold it. Once everything was good and dry I bent the plates in situ to the appropriate angle. Next was the eye on the bow and associated plate. I pre-bent that as seen in my previous post and carefully assembled it one part at a time. Some PVA along the shaft of the eye bolt then inserted through the bow transom, some more glue on the back of the plate and slid down the length of the bolt, and a little more before sliding on the tube. Once it was dried I used the file on a Swiss Army knife to clean it up a bit and secured everything with a little more glue. While I was waiting for the glue to dry I wrapped the copper wire around the block. I feel so much more comfortable with copper wire, a little past experience with a material makes one feel so much more confident. The eye at the top isn’t as tight as I’d like but twisting it any further would probably cause it to break off. I also added all the brass loops to the spars. I’m reasonably happy with those. Here’s the part I’m disappointed in. The lower gudgeon seemed simple in concept but didn’t come out as clean as I’d have liked. The nail heads look too big and it’s a bit off centre. There’s also a lot of excess glue I wasn’t able to clean up. On the rudder side things are also a bit tenuous. The pinlet straps were too small to accommodate the sections of tube I had cut so I just shaped them and added them without the tube. My plan is to cut the pinlets next and simply glue them directly to the straps. Once the straps were bent to shape I again marked the holes with a thumb tack, removed the straps, and drilled to accommodate the nails. Straps went back in place and I drove the now headless nails (remnants from those I’d used to secure the gudgeon) all the way through the rudder and through both strap holes. I shortened the nails by clipping both ends with side cutters and plan to peen them into rivets at some point in the future when I won’t wake anyone up with my hammering. What isn’t visible is on the upper pinlet is the repair I had to made after splitting the wood when drilling. I glued it all back together and it’s hidden underneath the strap but I’m afraid on a real boat I would no longer trust the structural integrity of that part. Omitting the tubing under the pinlet straps isn’t going to make much visual difference to the final product but it still bothers me that I didn’t follow the directions explicitly and will probably result in my needing to glue the entire rudder assembly in place such that it will become immobile.


- 38 replies
-
- 5
-
-
- Norwegian Sailing Pram
- Model Shipways
- (and 2 more)
-
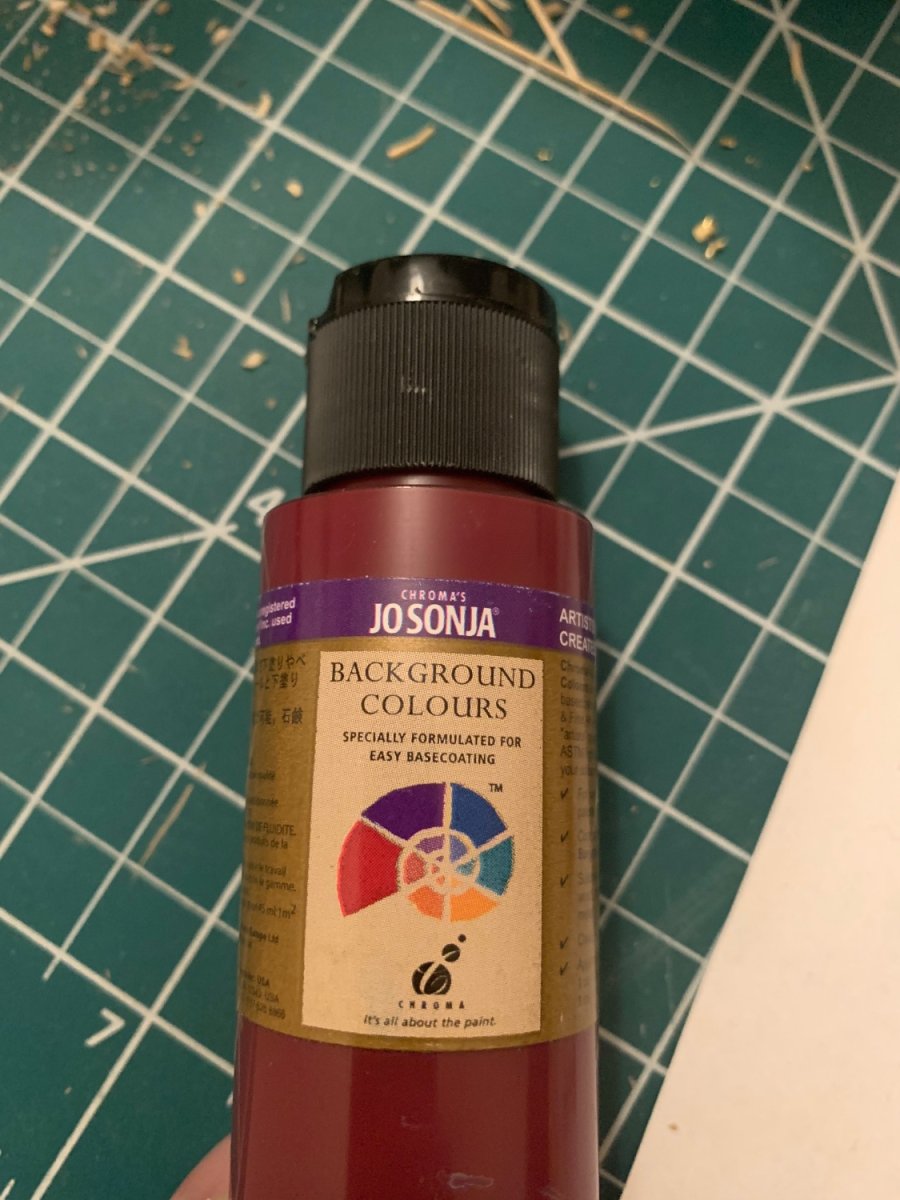
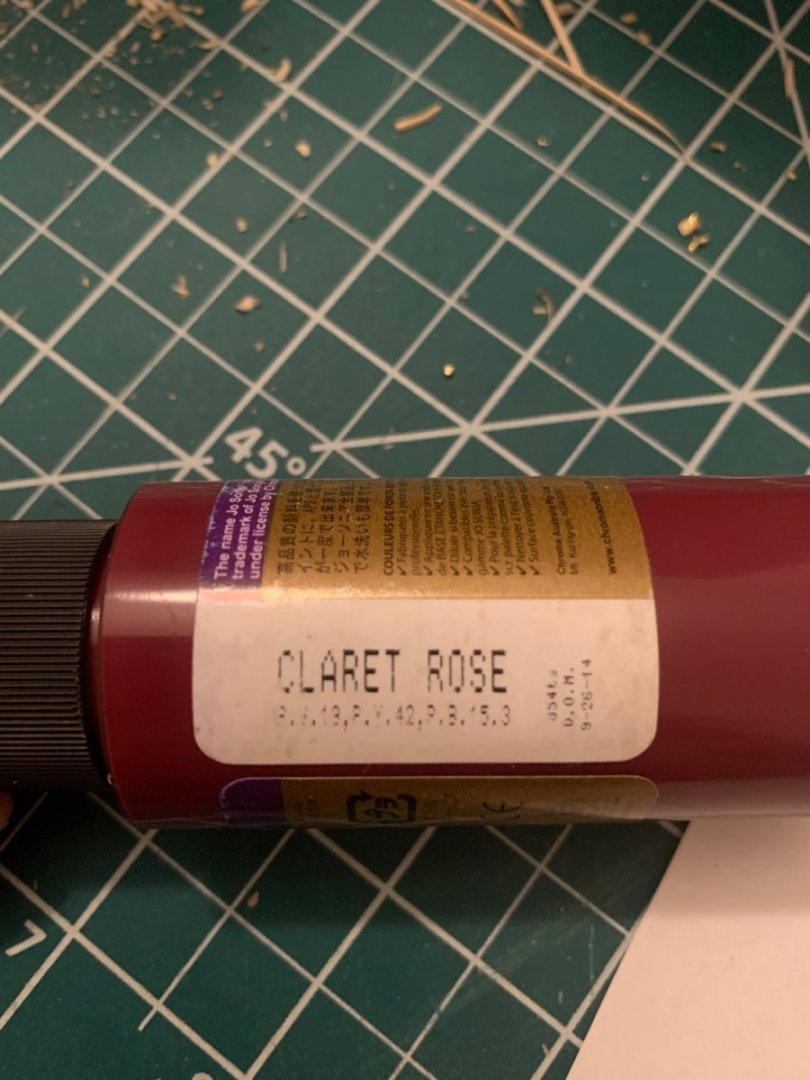
Bryan and Paul, excellent advice about sliding the smaller 1/32 rod into the 1/16 tube and rolling it under a box cutter. I tried it without annealing the brass and it worked perfectly. This exactly solved my issue and isn’t something I would have considered on my own. Paul, the red is a “claret rose” from Jo Sonja that I borrowed from a special someone’s paint supplies. She’s been very supportive even if she doesn’t quite understand why I’m constantly producing so much sawdust. I havn’t the slightest idea where she found it, other than it’s been in our closet for years. Druxey, as always I appreciate the insight. I’ll be looking for just such a torch to make the cutting more efficient and help with bending other parts. I’ll also keep in mind that a lighter touch with the hammer could make the difference. Thanks again to the three of you.

- 38 replies
-
- 5
-
-
- Norwegian Sailing Pram
- Model Shipways
- (and 2 more)
-
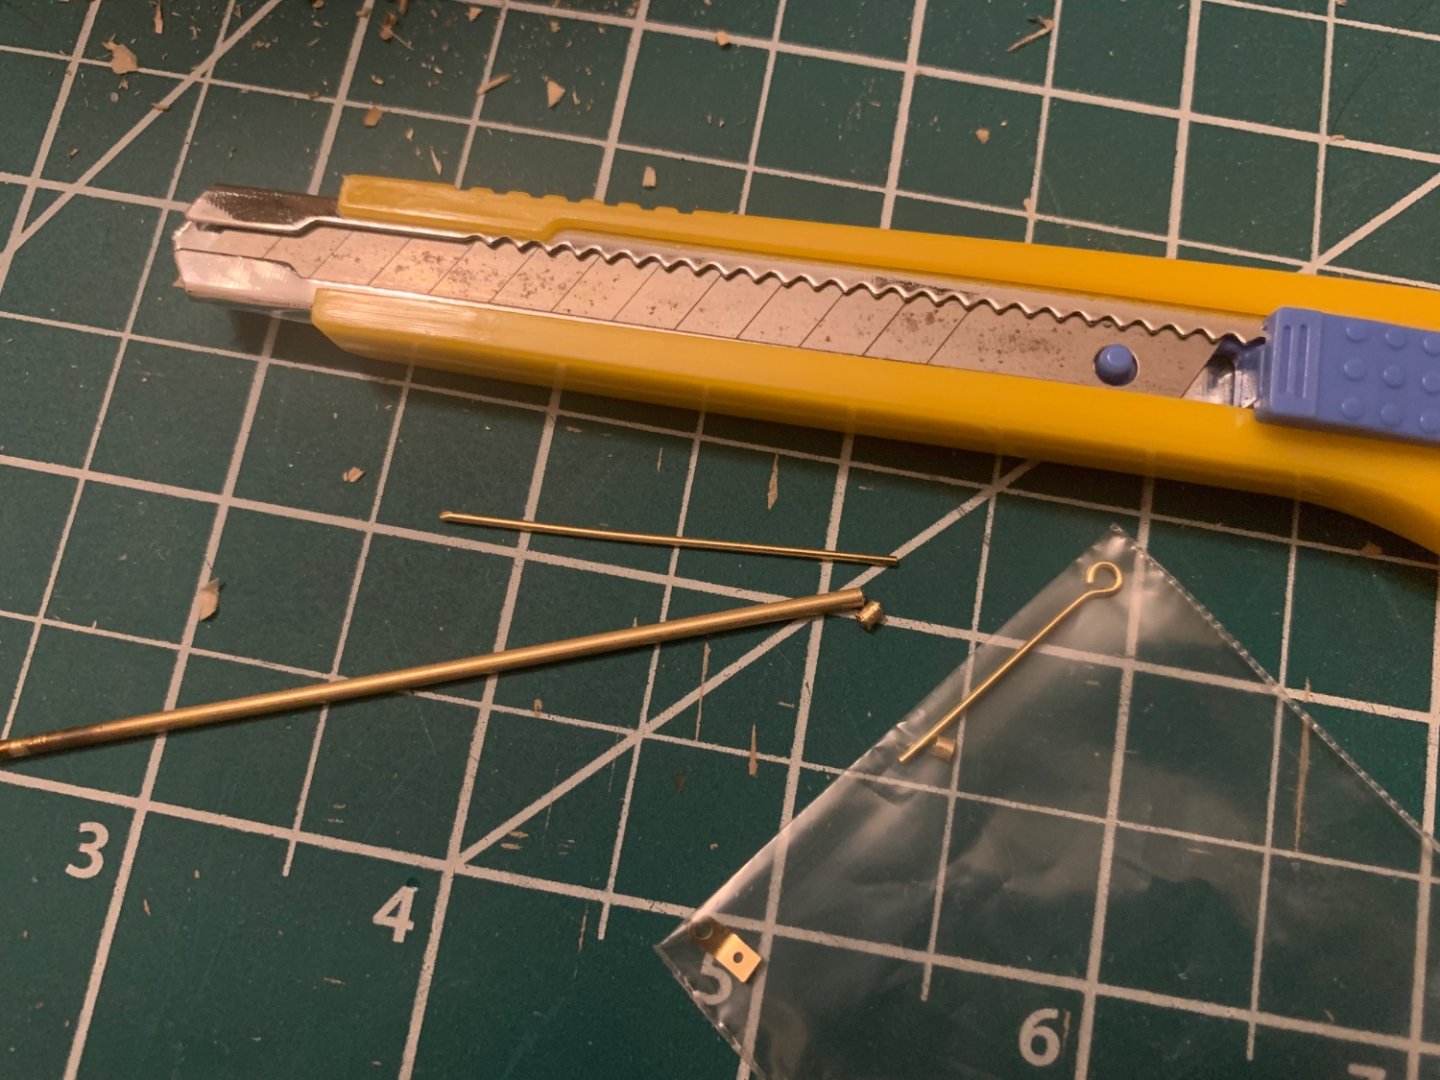
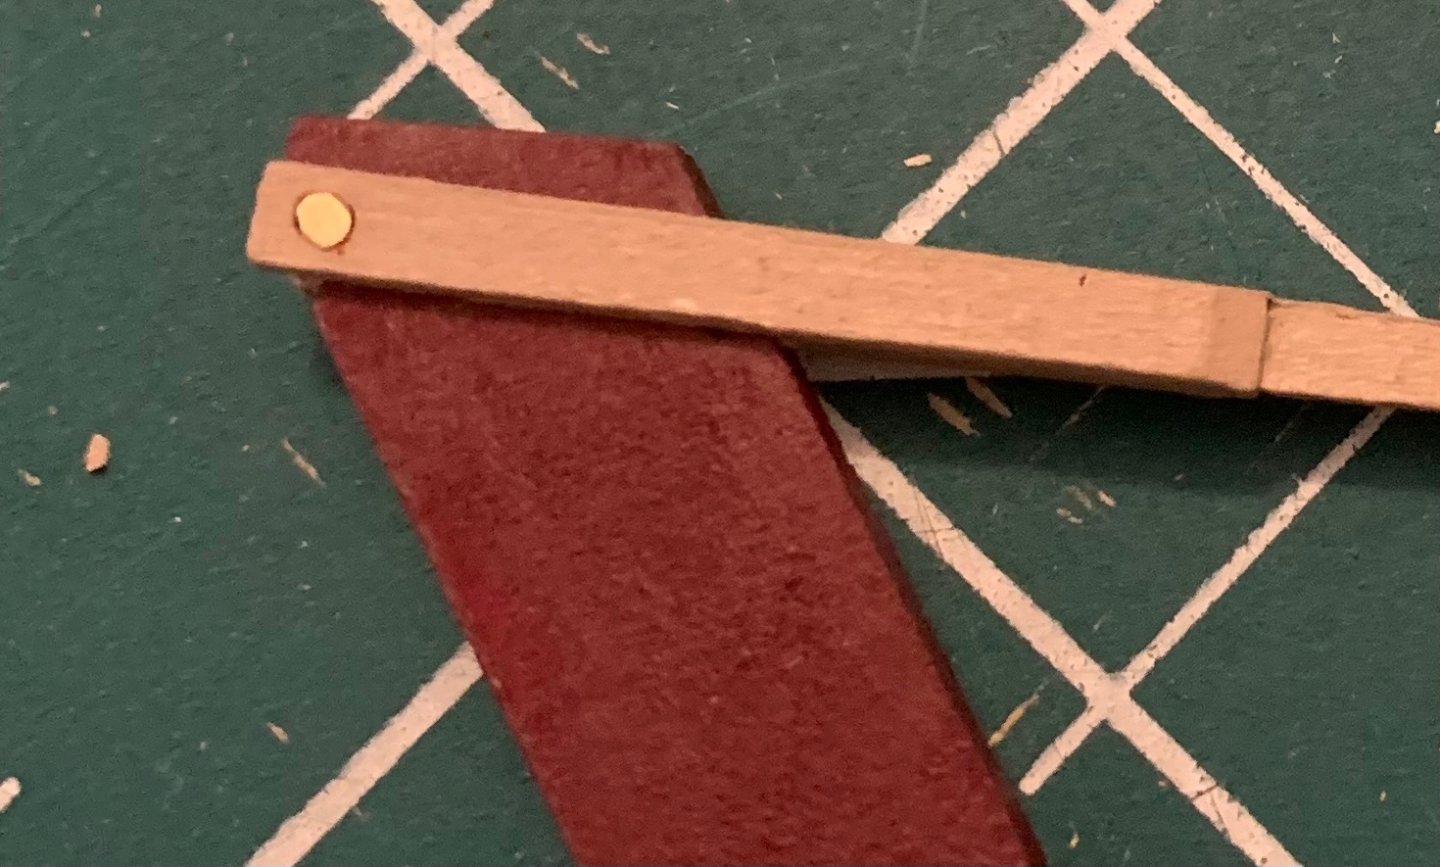
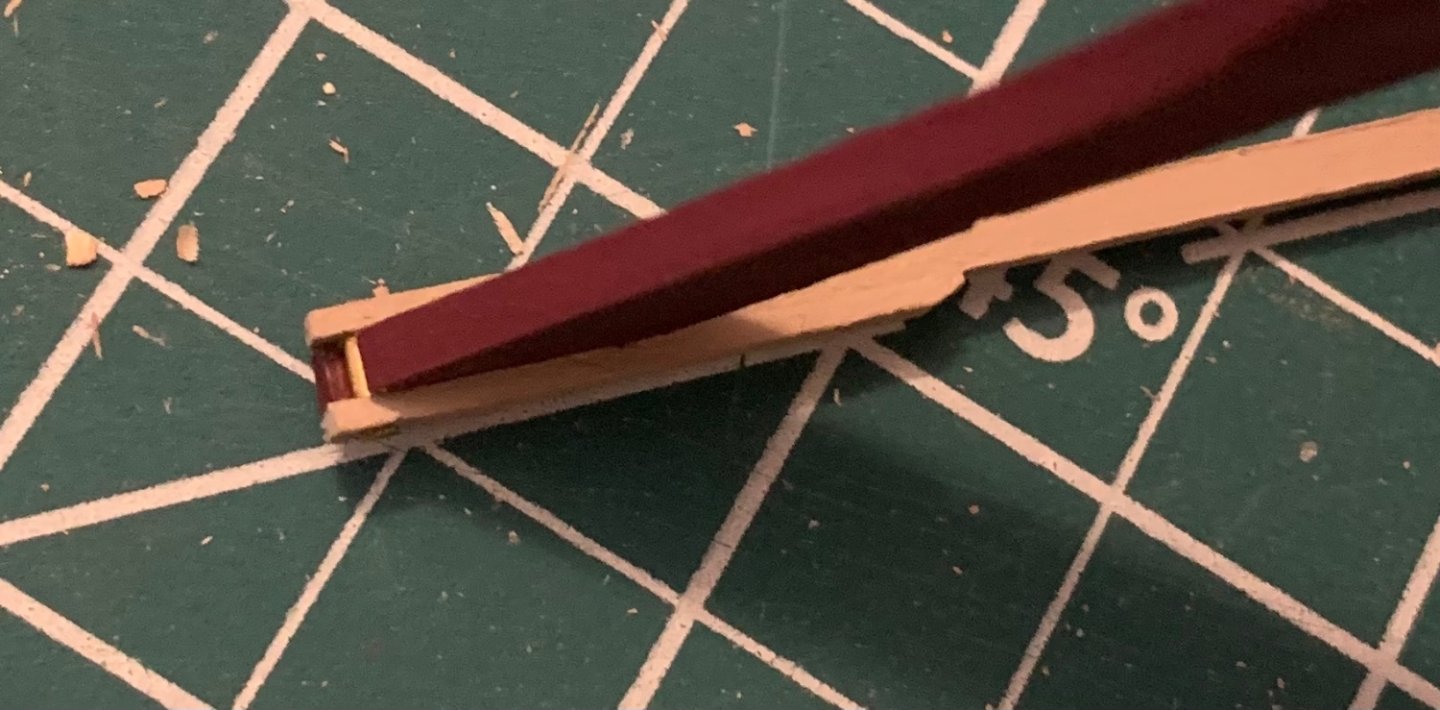
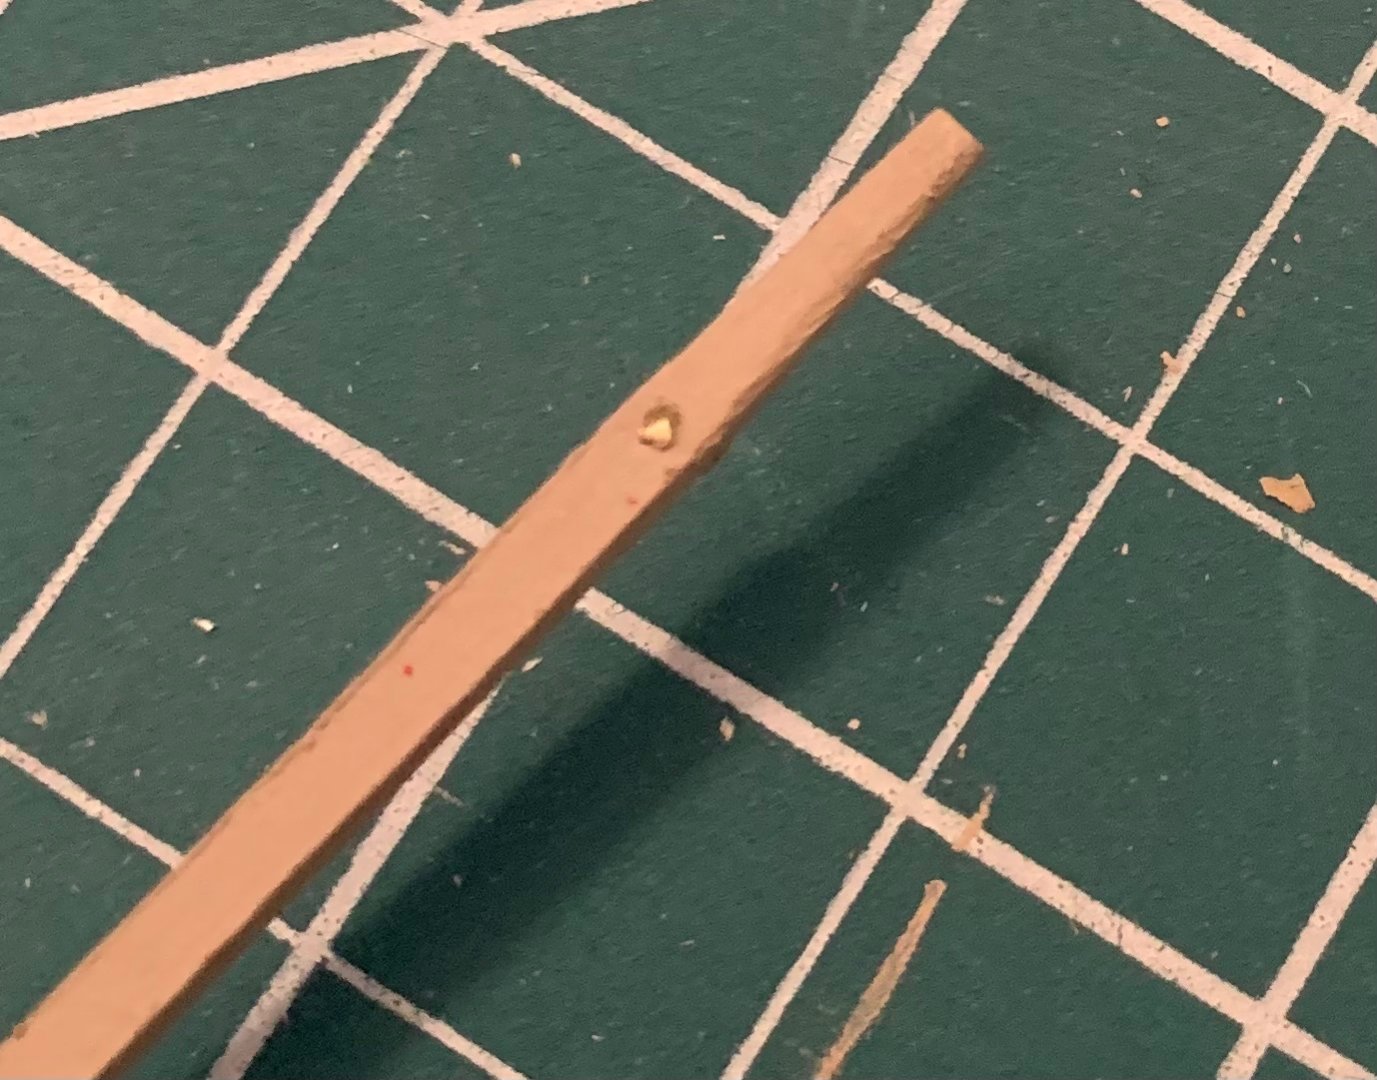
I’ve hit the point where I need to ask for help. First I’ll cover what I’ve done, where I’m struggling, and what advice I need. Successfully complete is the addition of the floor and seats. These I’m very pleased with. I’m also okay with how the pin at the end of the tiller turned out. To make it I used a pair of side cutters (ones I had for general electrical work) to snip the 1/16 brass rod to length, then used a small 8oz hammer to peen the ends to make rivets as instructed. It worked well and looks nice except that the hole on one side of the tiller split so I had to glue the wood back together. What didn’t work well at all was the pin for the tiller extension. I used the 1/32 brass rod as that seemed appropriate for the hole pre-cut into the extension and then matching hole I drilled in the tiller. Maybe my mistake was using too small a piece of wire but widening the hole in the extension would be tricky too. My problem was that when I tried to peen the ends of the pin the wire would begin to bend at a 90 degree angle between the tiller and extension. Eventually I got a product that looks alright, but the joint was so tight that the extension could not swivel. An aspect of that is that the rod is almost certainly bent inside the joint between the pieces. In frustration I glued the assembly together for strength. The final product looks nice but is no longer dynamic. I’m okay with that, if a little disappointed in my failure. Is there anything I could have done differently here? Okay, where do I need help? Cutting the brass tube. Pinching a piece off using the wire cutters won’t work, and the small 6”hacksaw I have has fine teeth but I feel like they’re still very coarse for a 1/16 brass tube. Should a small hacksaw be able to do this, or will I need to look for some other type of saw? I’m not very keen on trying my razor saw on brass because I want to keep it sharp for cutting wood. The instructions recommend a butane torch to anneal the brass, which I’ll have to go look for. Would one of the cigarette lighter style torches suffice? Aside from that, any general brass advice that I may not even know to ask for? Thank you all in advance.


- 38 replies
-
- 4
-
-
- Norwegian Sailing Pram
- Model Shipways
- (and 2 more)
-
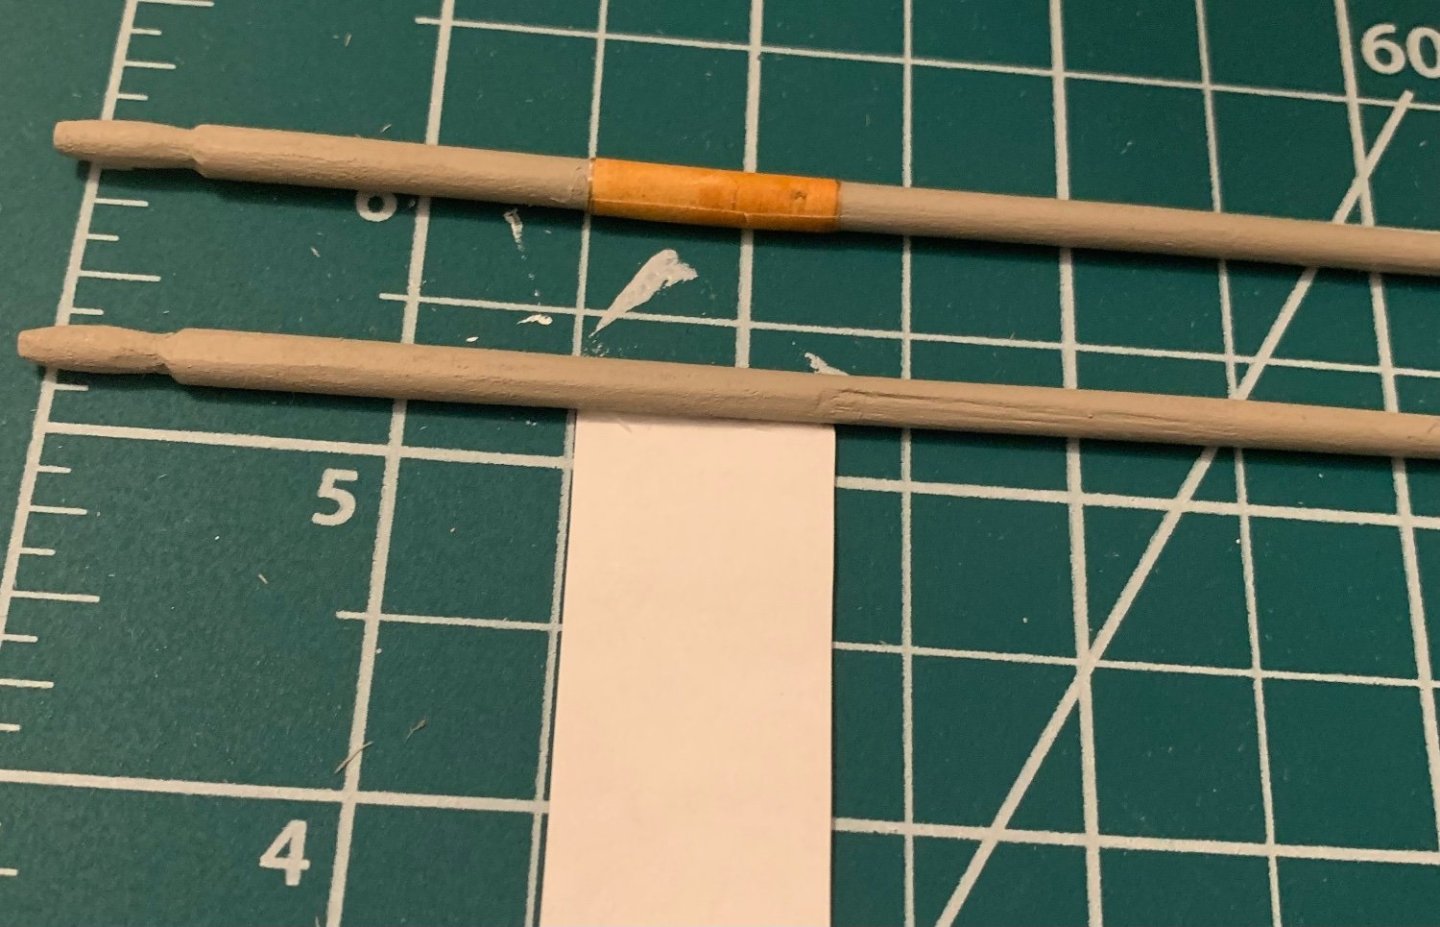
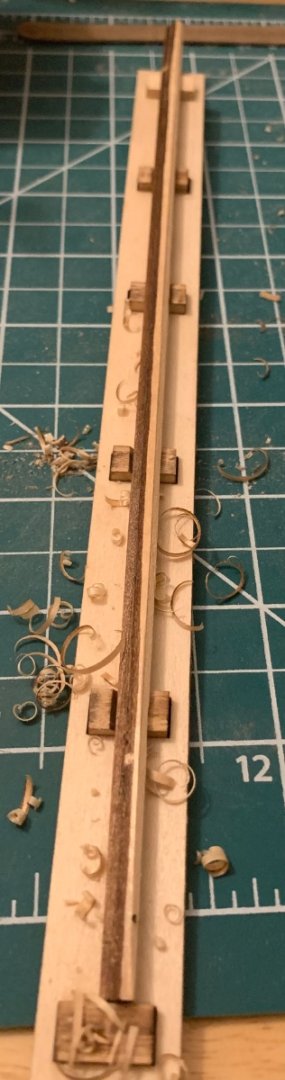
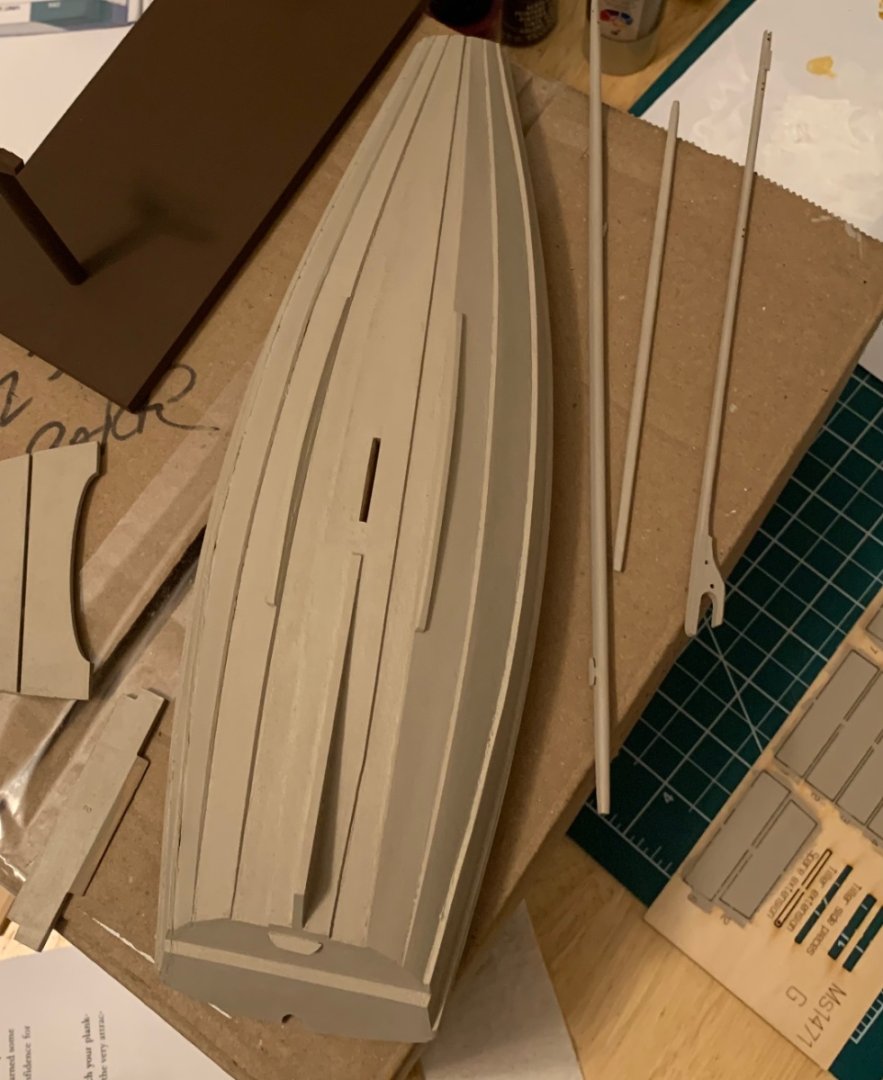
Painting is always a slow process. Combined with some things at work getting in the way I’ve stepped back from the Pram for a while. Here’s what I’ve managed. Shaping the mast was an interesting experience. I really like the idea of creating a square block and rounding it as opposed to tapering down the included dowel. It is, however, the greatest weakness I’ve encountered in the kit so far. The two mast pieces glued together produced a rectangle which lends to producing an oblong mast when rounded. It’s not too extreme and I’m happy with the result, but the scale feels off. Beyond that, I assembled and shaped the boom and gaff. The idea of adding the cleats to the spars was intimidating at first but it practice went very smoothly and presented no trouble at all. Now I’ve got a couple of coats of paint on everything. I did decide to paint the mast/seats/floor boards because I liked the look of it. This aspect may not be entirely authentic, but artistic license took over for a bit there. Final assembly of the wooden parts is up next, followed by a venture into brass.
- 38 replies
-
- 8
-
-
- Norwegian Sailing Pram
- Model Shipways
- (and 2 more)
-
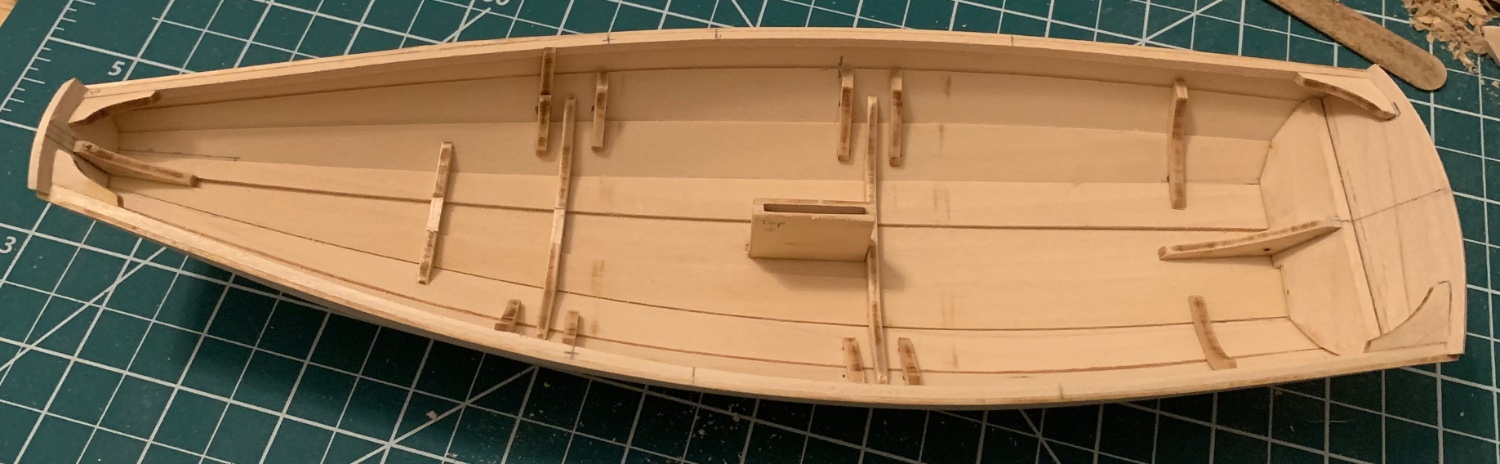
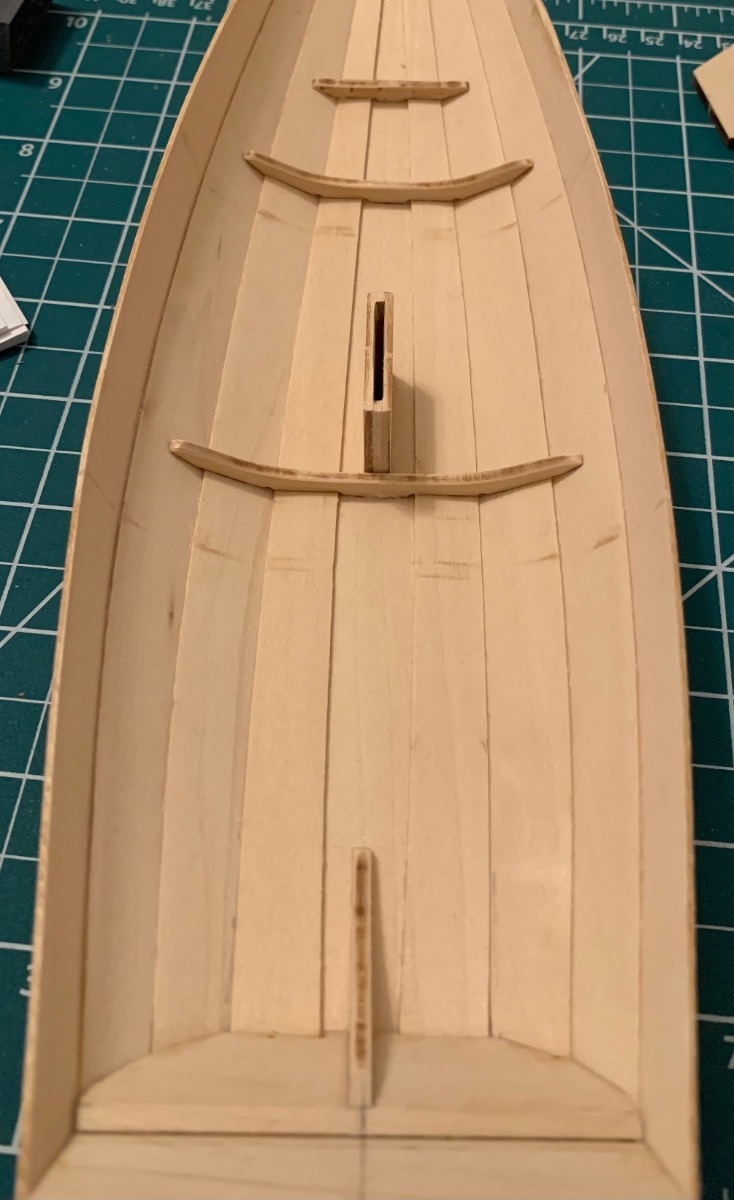
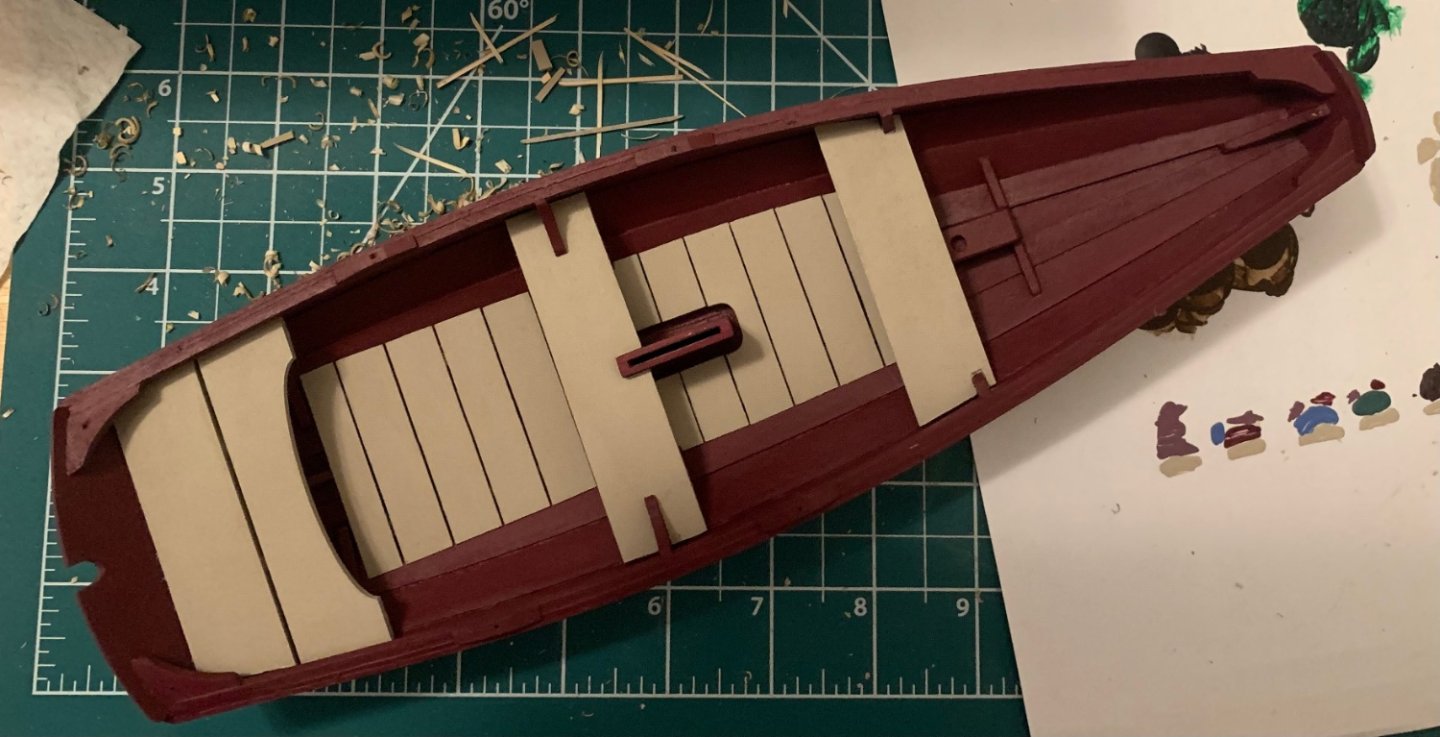
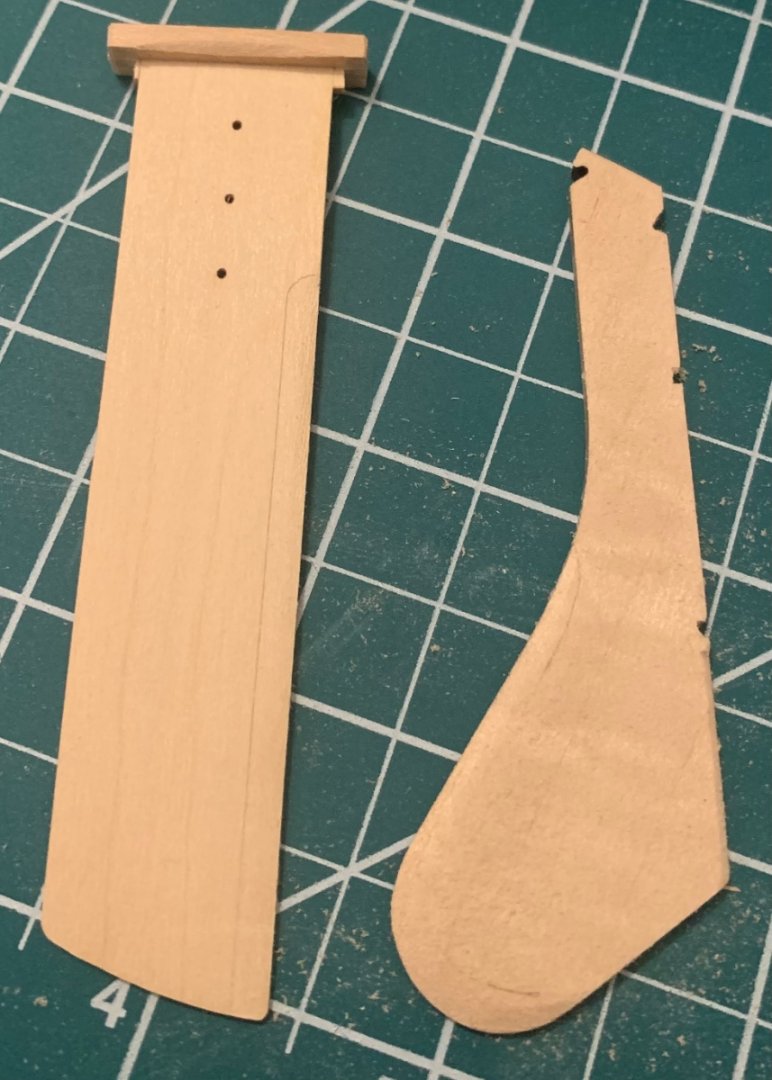
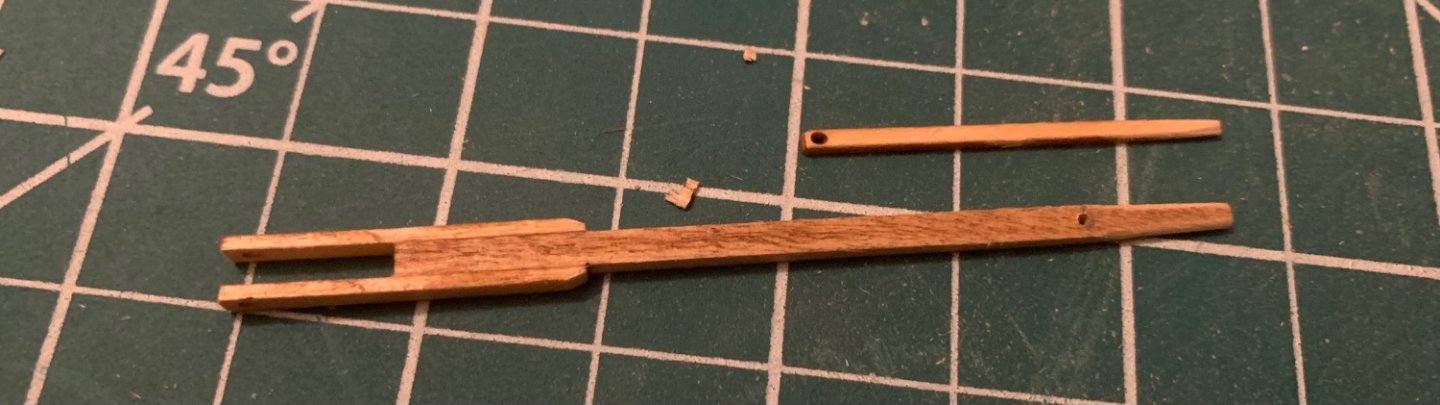
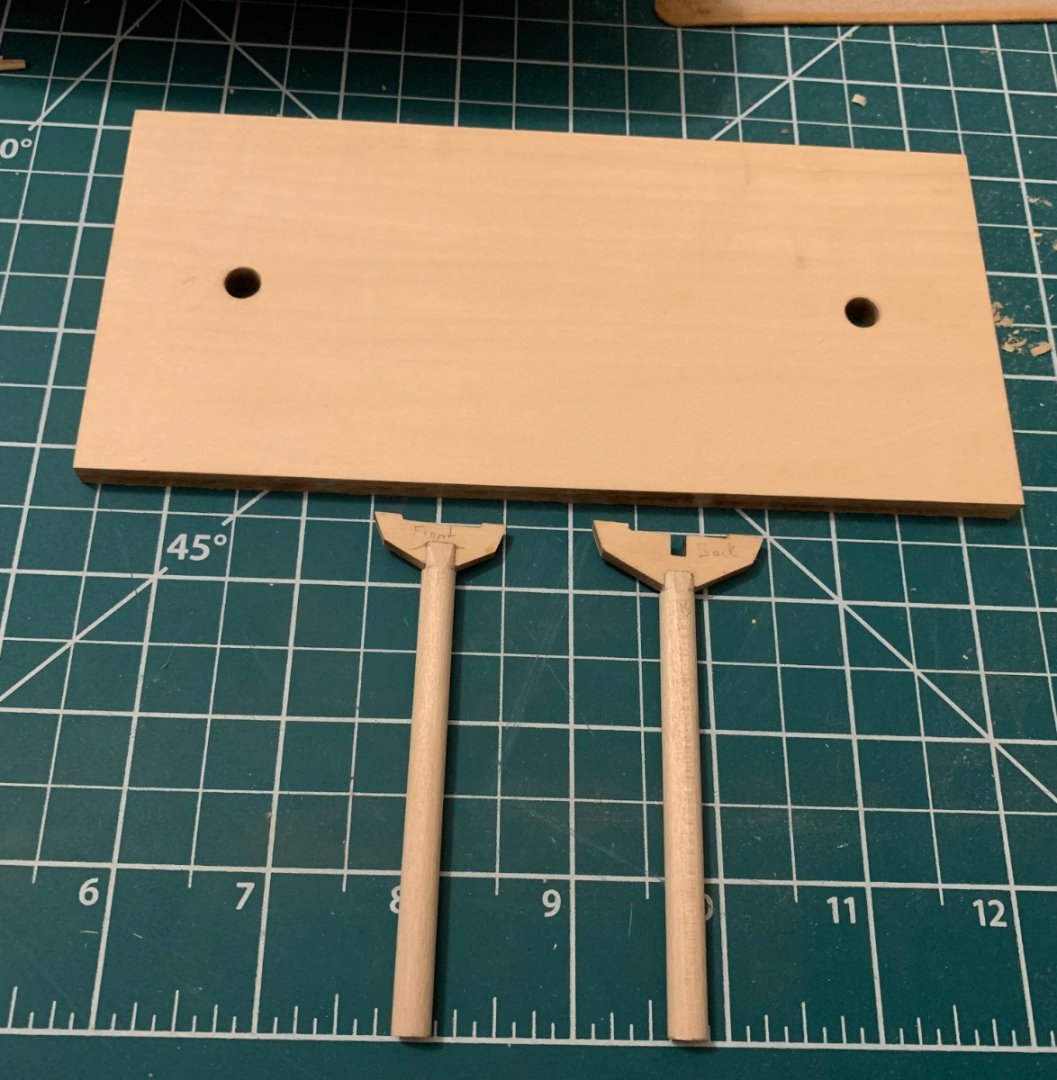
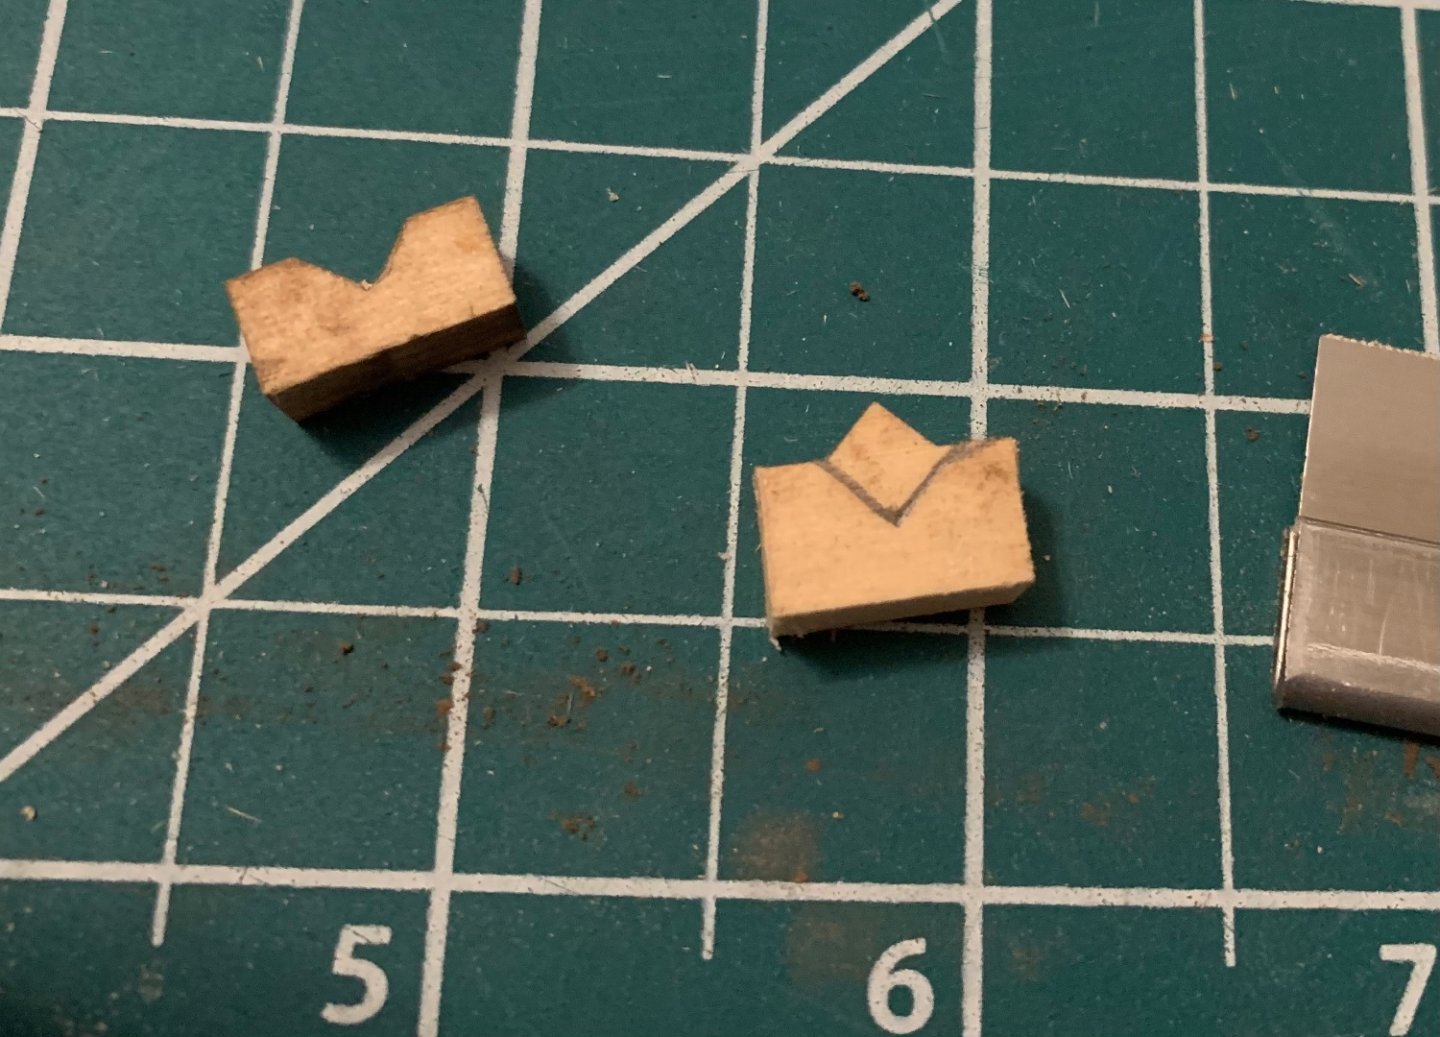
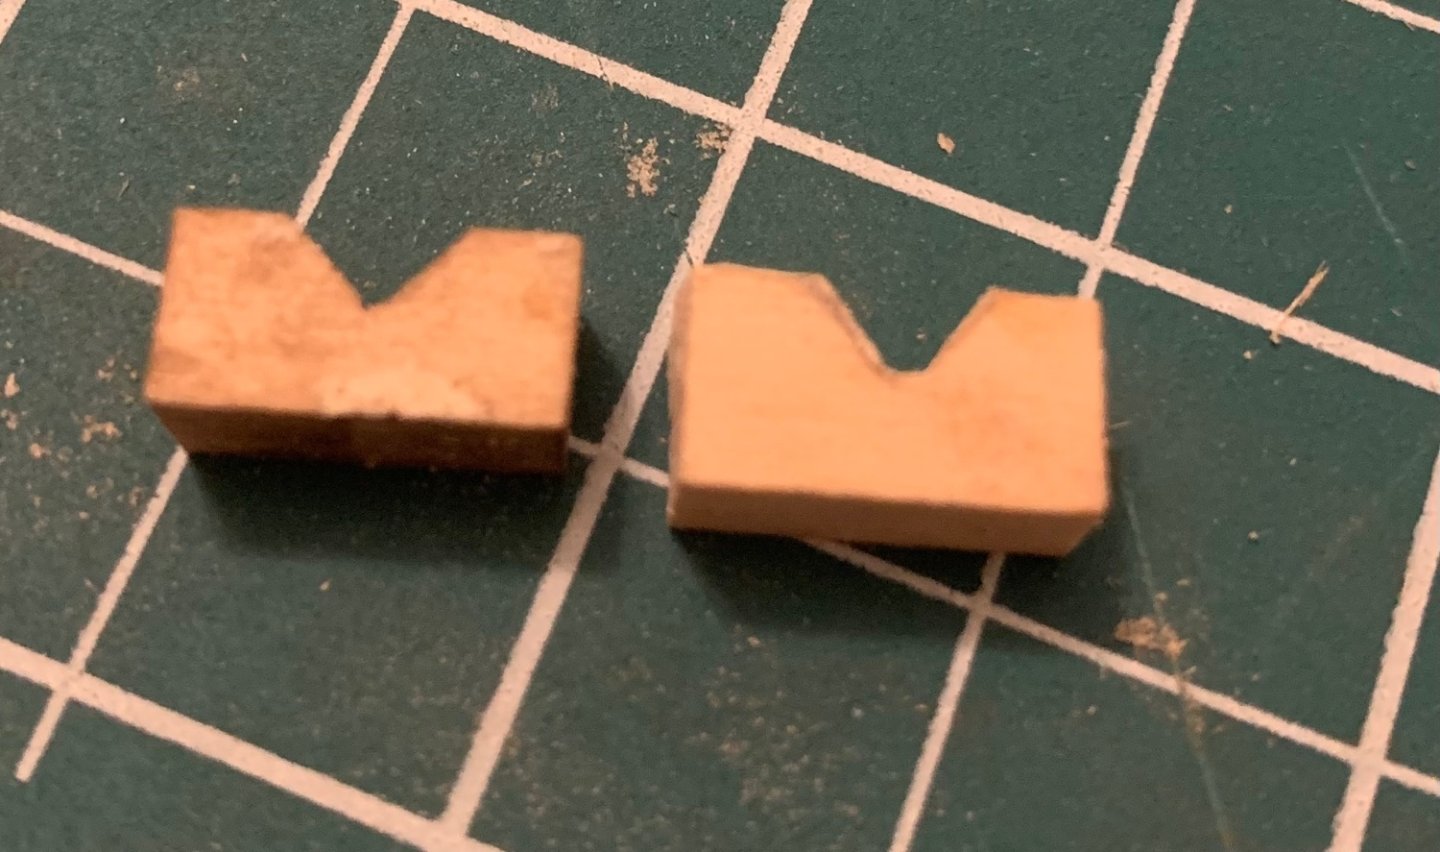
Details are hard. One tool I have found absolutely vital is the pin vise, it’s a pleasure to use and does exactly what it needs to. I have no idea how I would accomplish any of the small holes needed without one. It came in handy for drilling the hole in the rowlock pads as well as the chain plate slots. Specific to the chain plate slots, I just drilled two holes and used a knife blade to carve the space out between them. Up next we’re the dagger board and rudder. There was a whole lot of sanding and shaping (which I’m not quite happy with yet, it’s an ongoing process). Mostly I’m proud of how the stop at the top of the dagger board came together. I used 3/32x1/8 strip because I ran out of 3/32 square, and I think it looks good and proportional. I also added a couple of little tabs to keep it centered. Thwarts and stern sheets were next. I hadn’t noticed anyone mention the cleats under the stern sheets so I figured I should snap a quick picture of those. Otherwise, these needed a little bit of narrowing and shaping but fit pretty close without much work on my part. Also visible in the above are the fitted midship toward knees. Those provided the first definitive proof that my boat isn’t perfectly symmetrical. The top of one knee was flush with the inwale while the other side needed sanding down by 2 mm or so. That fact that I couldn’t tell until I got to this point suggests no one will ever notice and I’ll likely forget which side it was. I didn’t feel like painting yet so I moved forward to a few more wooden parts. The tiller assembly is shaping up nicely. I have absolutely no clue how I’m supposed to drill a hole through the extension horizontally to add the pin in the end. My current plan is to just skip that step. Skipping significantly forward, past all those intimidating metal parts (which I’d have to get to paining before I could tackle anyway) I came to the display stand. Nothing too remarkable there. It came together easily. The only added detail was that I beveled the tops of each dowel to make it a little more streamlined. Lastly, I began working on the spar shaping jig. As others have noted, there were only four notched blocks for the jig included in the kit. I fixed that by just shaping my own out of some scrap wood. It’s been a busy old time but I’m quickly running out of things to do before I need to venture into the brand new skill of metal working. At least painting will be familiar territory.


- 38 replies
-
- 4
-
-
- Norwegian Sailing Pram
- Model Shipways
- (and 2 more)
-
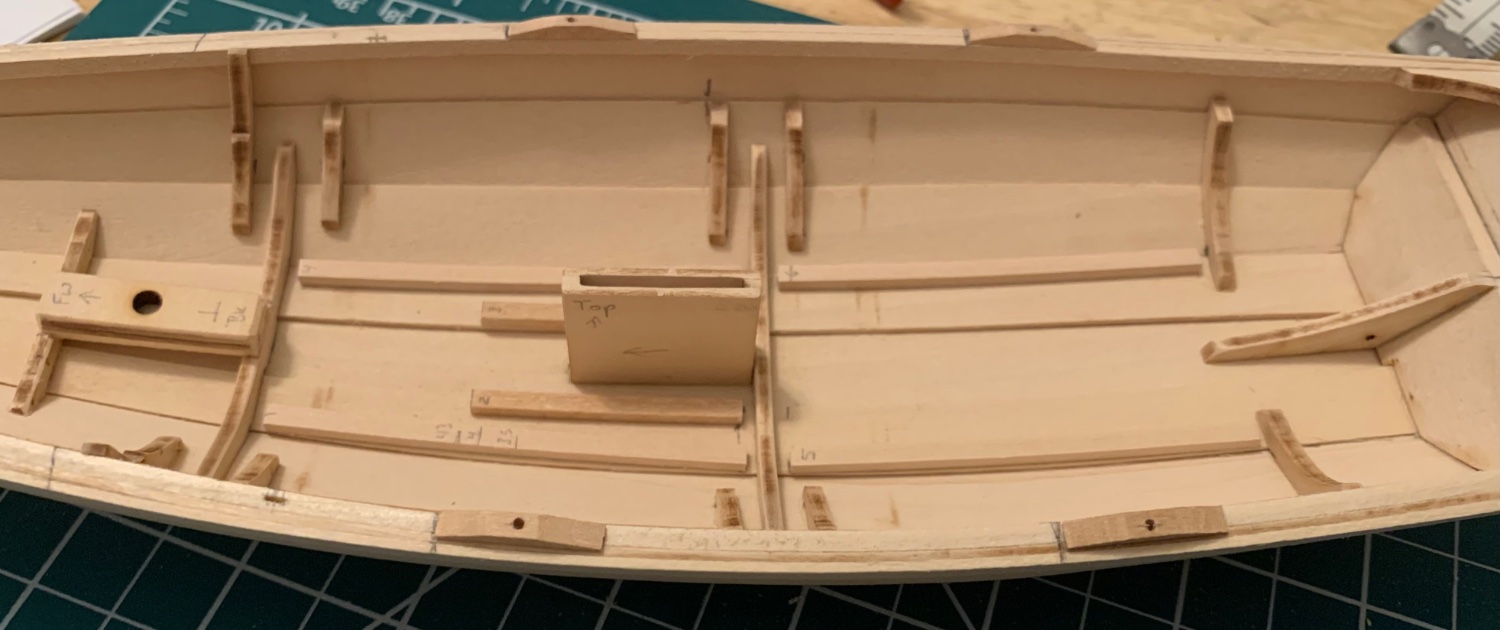
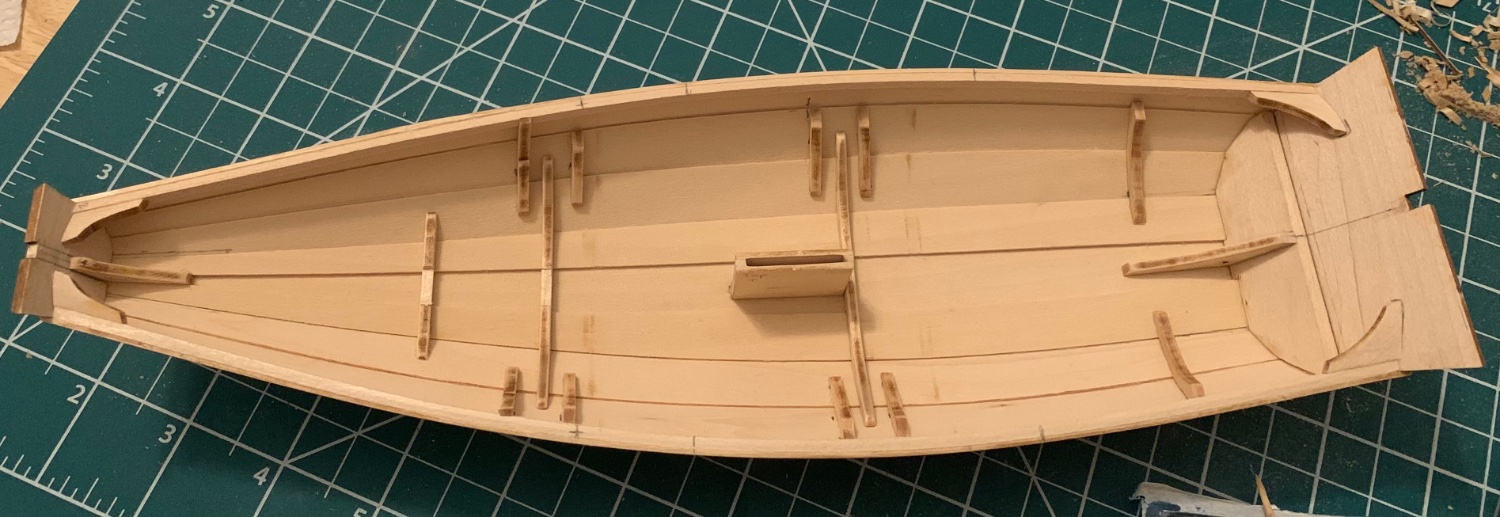
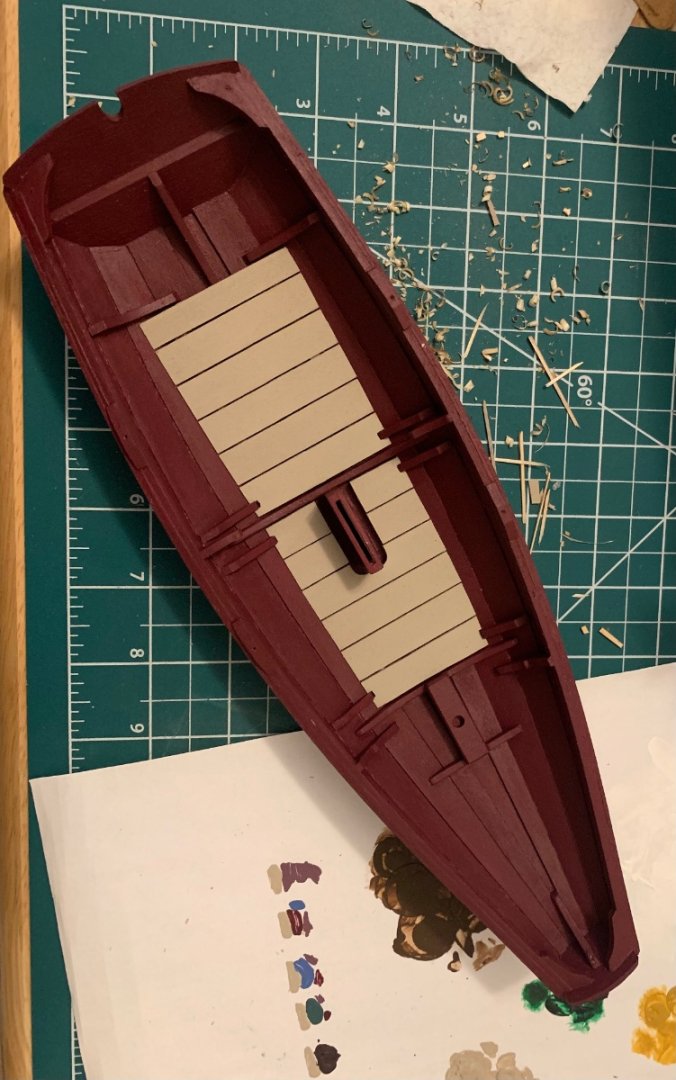
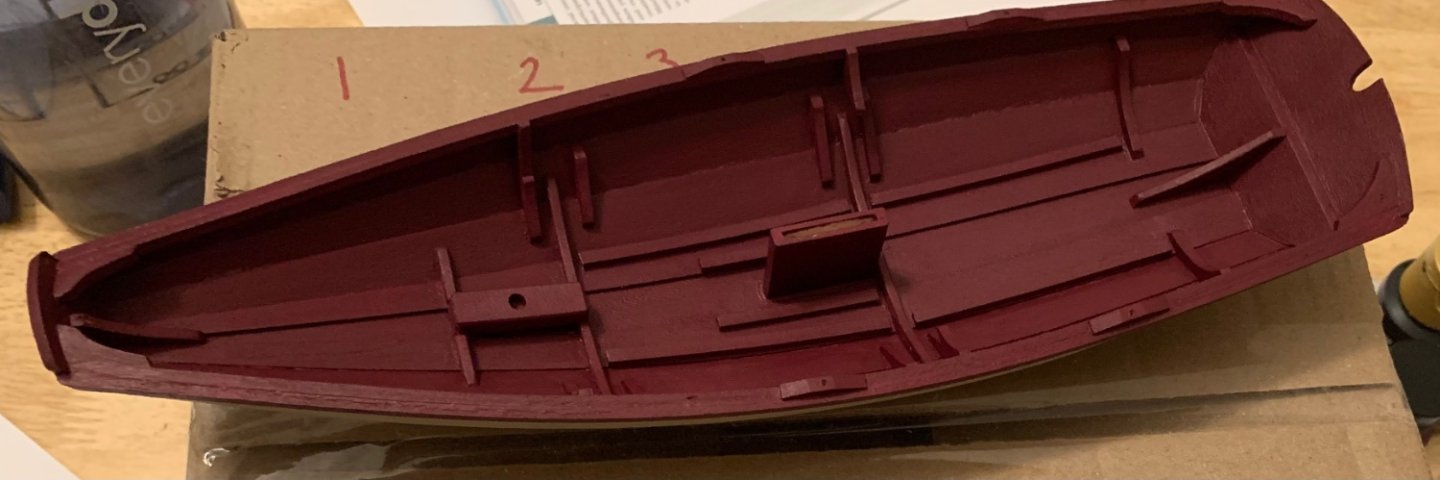
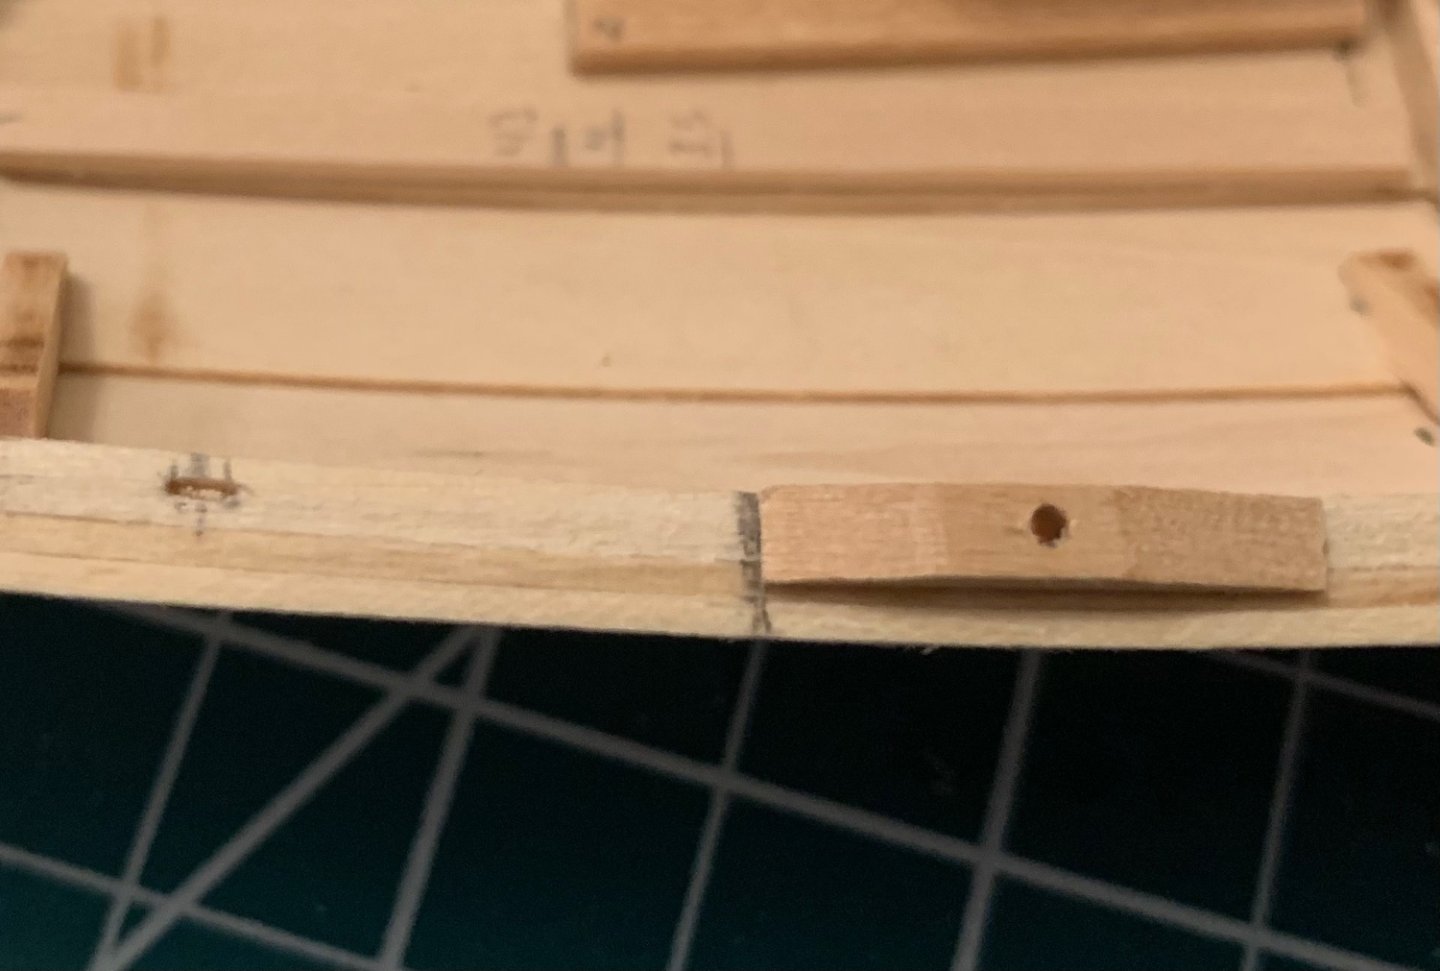
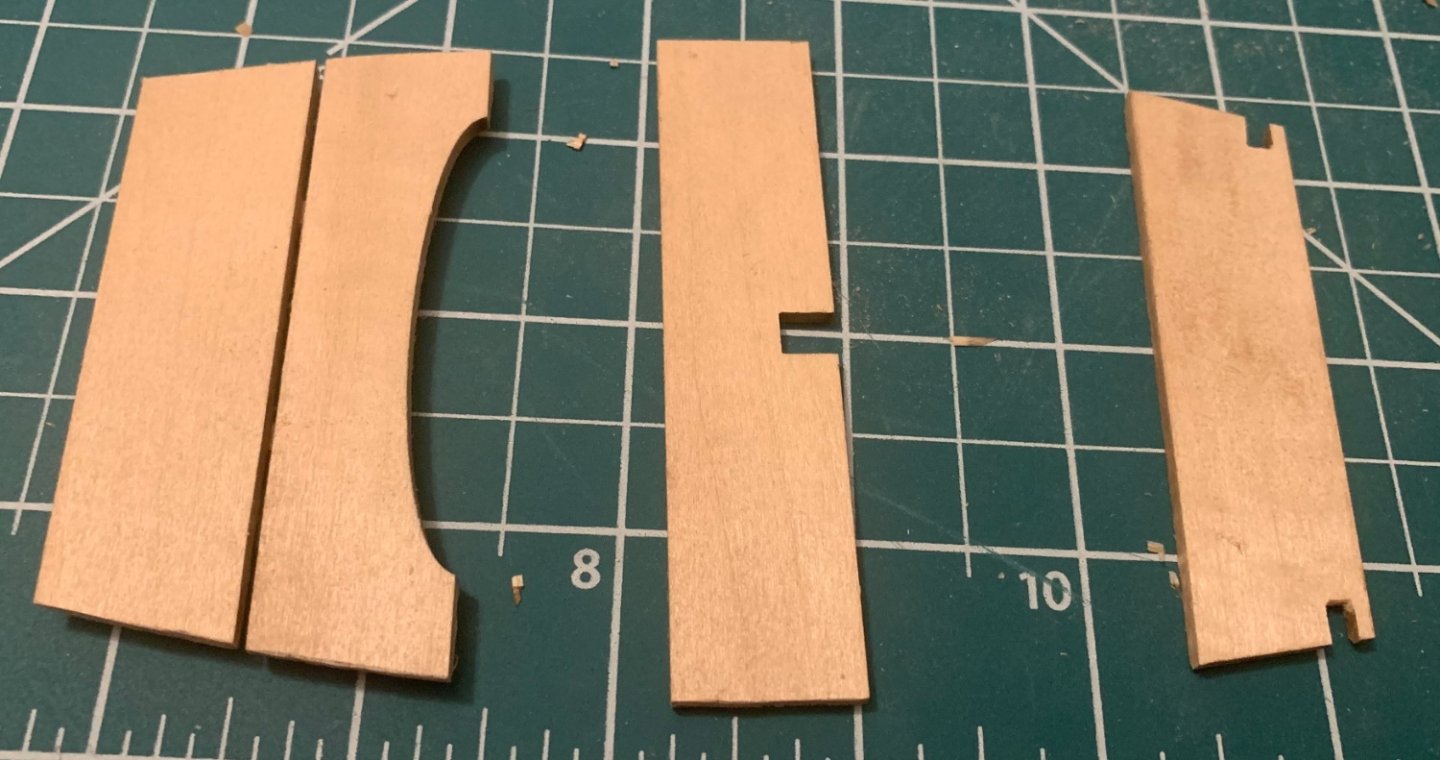
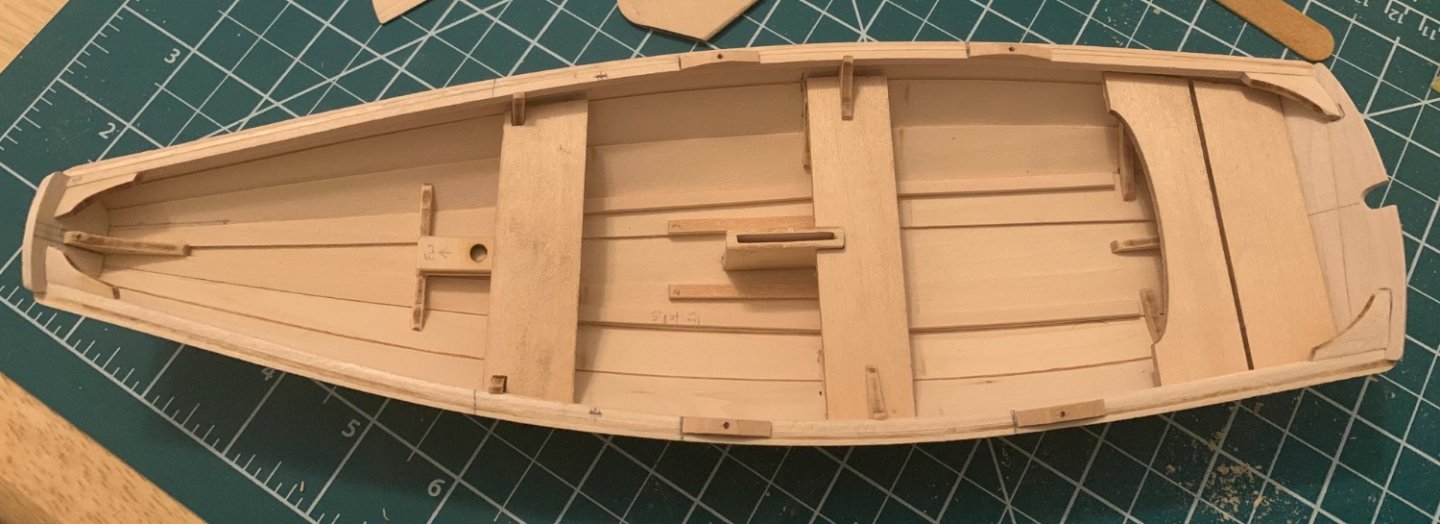
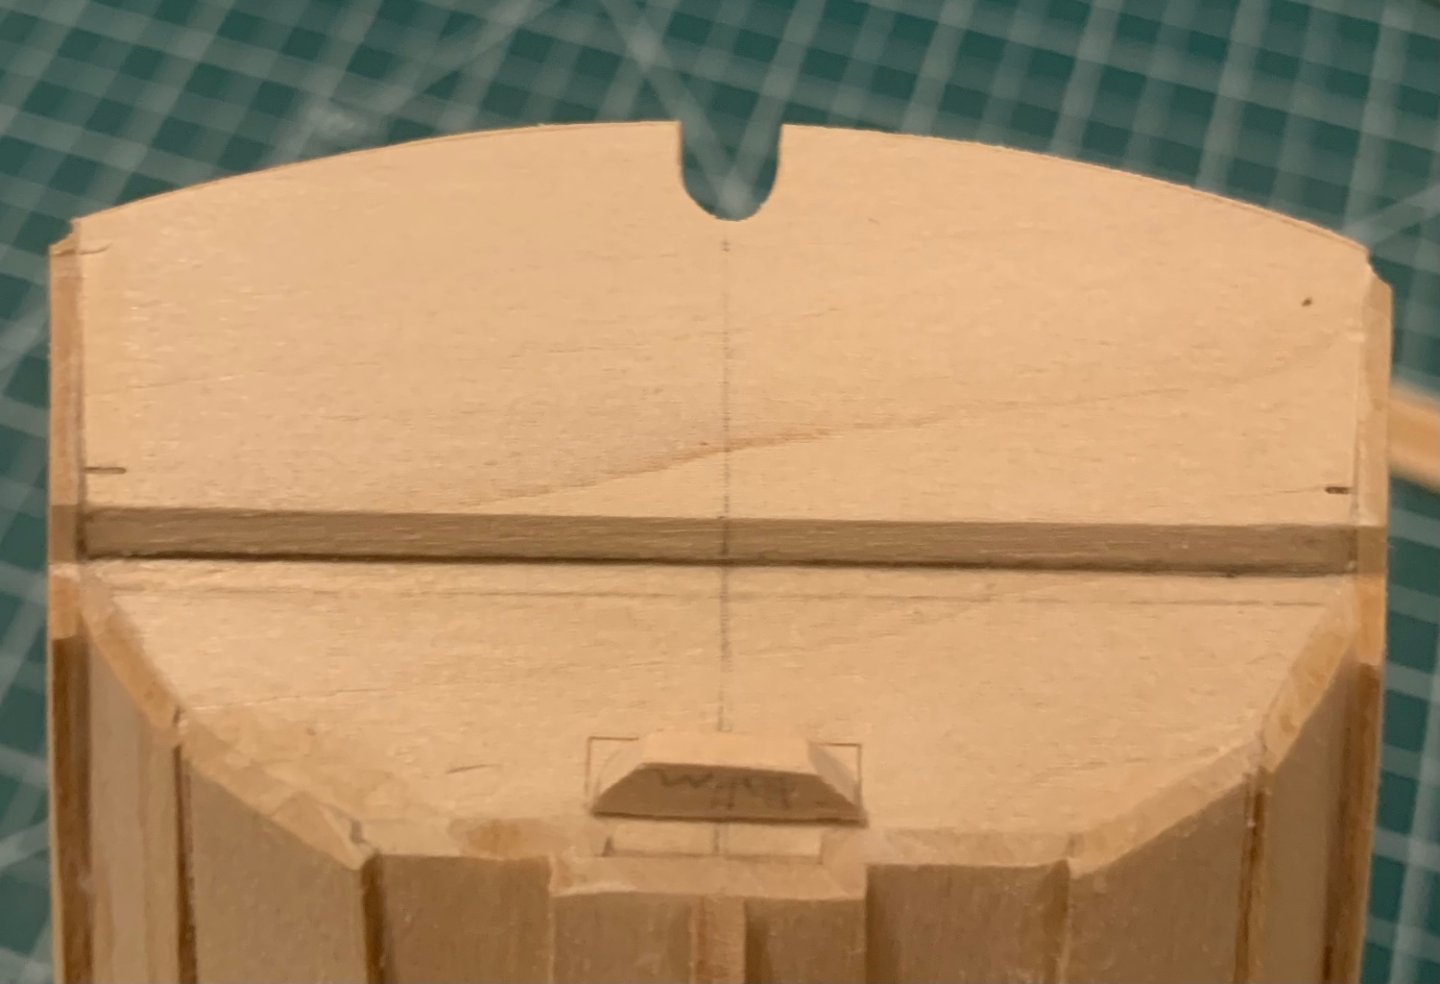
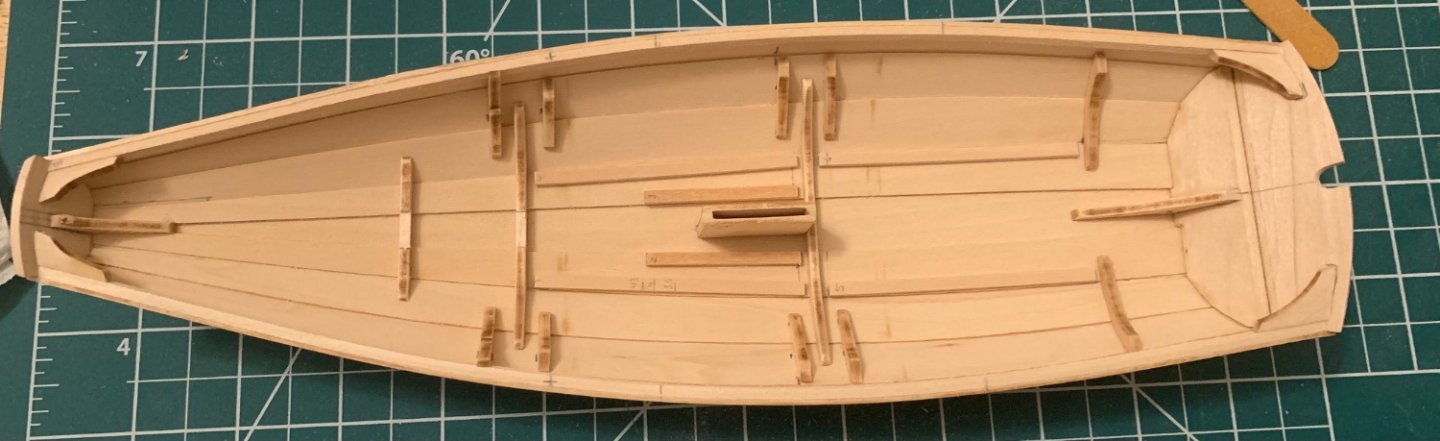
This will be a bit of a quick update. Lots of small parts were added slowly, namely the ten seat and thwart frames. I also added and shaped the bow quarter knees. I’m not as happy with the bow knees as I was the stern. They’re not as perfectly even as I had hoped they would be. They’re close and from any kind of distance at all it’s difficult to tell. you can also see a slight modification I made to the first and second bottom frames. As other logs had mentioned that the two included mast step pieces both have holes in them and that a common solution was to cut some scrap wood to provide a solid bottom, I plan to do just that. I carved an inset into those two frames to receive that third layer. Next came the step I was most nervous of in the early part of this build, sanding and shaping the two transoms. They turned out pretty handsome if I do say so myself. Cutting the notch in the stern was going to have to wait until I could buy a file (more on that in a moment) so I moved forward a few steps and added the rudder gudgeon pad because it seemed easy to do. The next day, impatient of waiting for an opportunity to buy a file, I improvised. I took some coarse sandpaper and tightly wrapped it around the shaft of a screwdriver. Who says you need the proper tools for these things? Well, to be fair I think it would have been best to use the correct tool and I’m adding a file set to the list of things I still need to get. Something I have not noticed in other logs is the inclusion of the floor board cleats. There are six of them but it took me a bit to realize the two smaller, inner ones existed. I made a few assumptions with these which in retrospect I ought to have thought longer about. I assumed they would sit with the 1/8 dimension flat and the 3/32 dimension making the height. I’m not convinced that was correct due to the second assumption. I assumed the curve that the instructions describe referred to the curve on the bottom and didn’t account for any curve along the sides. Again, it’s difficult to see and I have no intention of changing things but the floor board cleats don’t match the angle of the bottom planks lengthwise. Only in the sense that they’re curved to the bottom of the boat. In the grand scheme these minor quibbles (bow quarter knees and floor board cleats) are not going to have a meaningful impact on the state of the finished model. Just something I’ve learned to pay more attention to and a way to include more fine detail.


- 38 replies
-
- 5
-
-
- Norwegian Sailing Pram
- Model Shipways
- (and 2 more)
-
Thanks Druxey, it’s reassuring to hear this is something that can happen rather than something I inadvertently caused. I’m also encouraged to see you and the others following along. These are wonderfully designed little kits and I feel like I am learning lots every time I sit down to work on it.
- 38 replies
-
- 2
-
-
- Norwegian Sailing Pram
- Model Shipways
- (and 2 more)
-
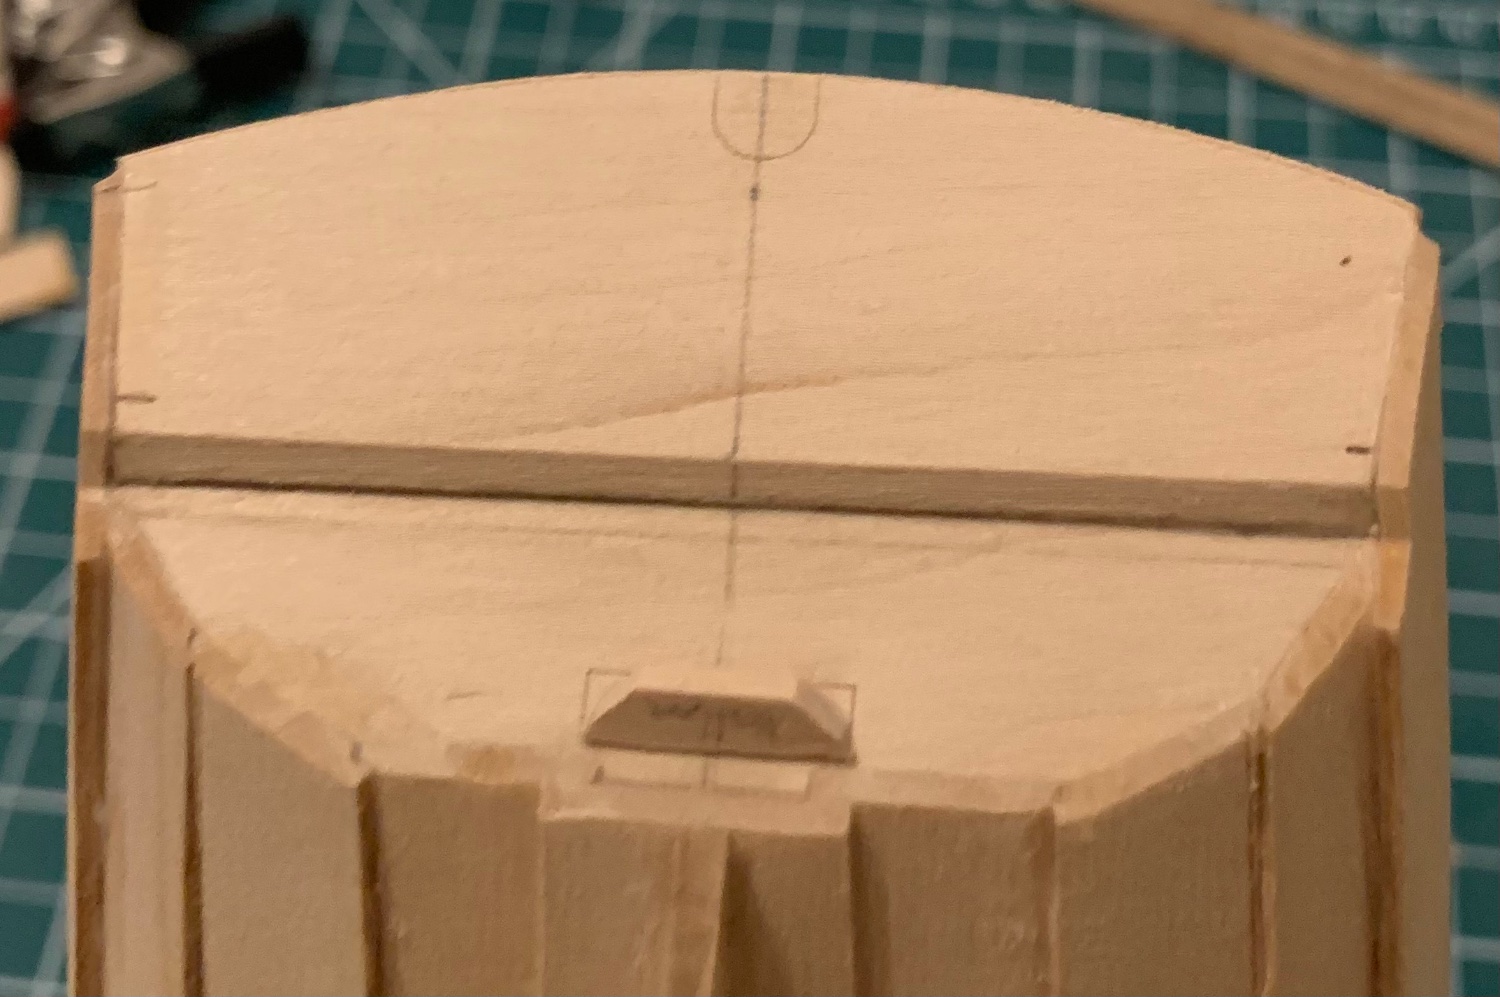
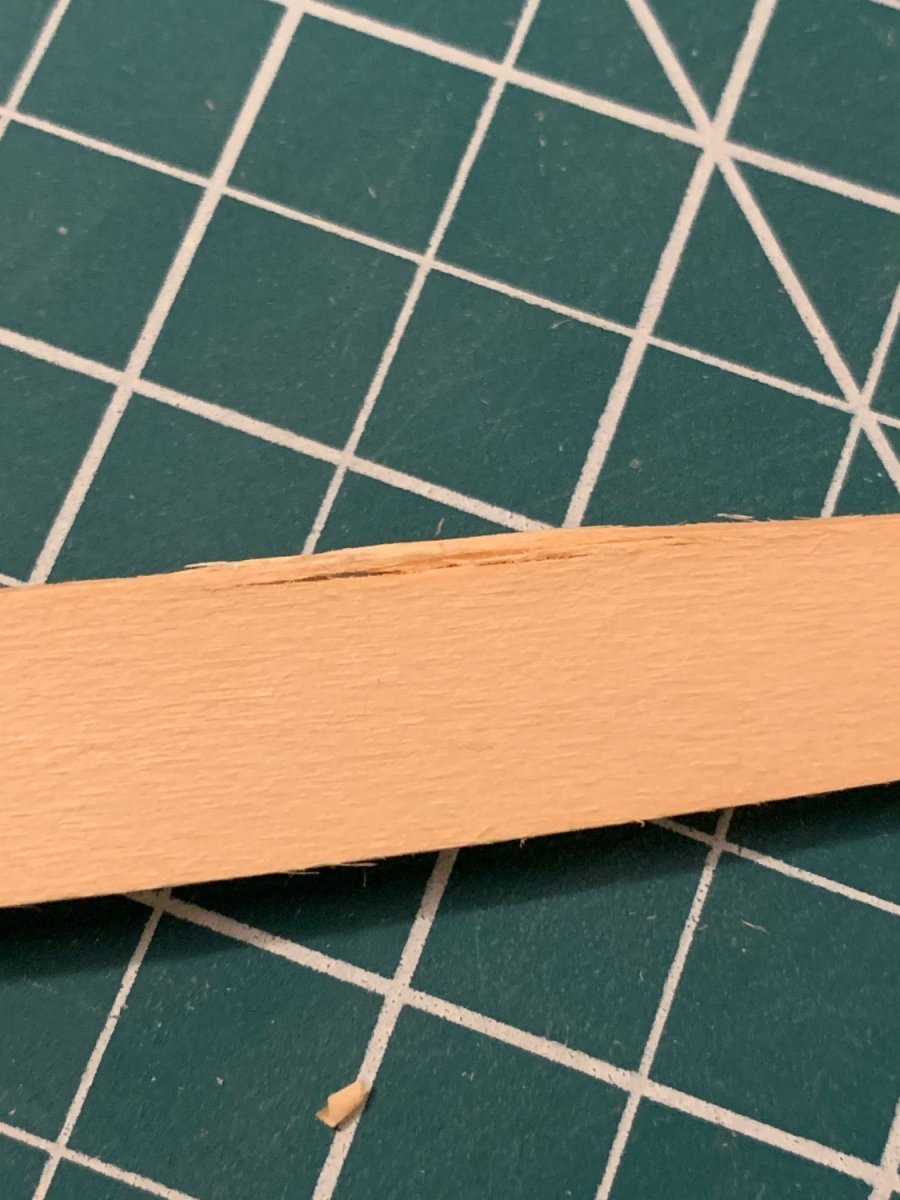
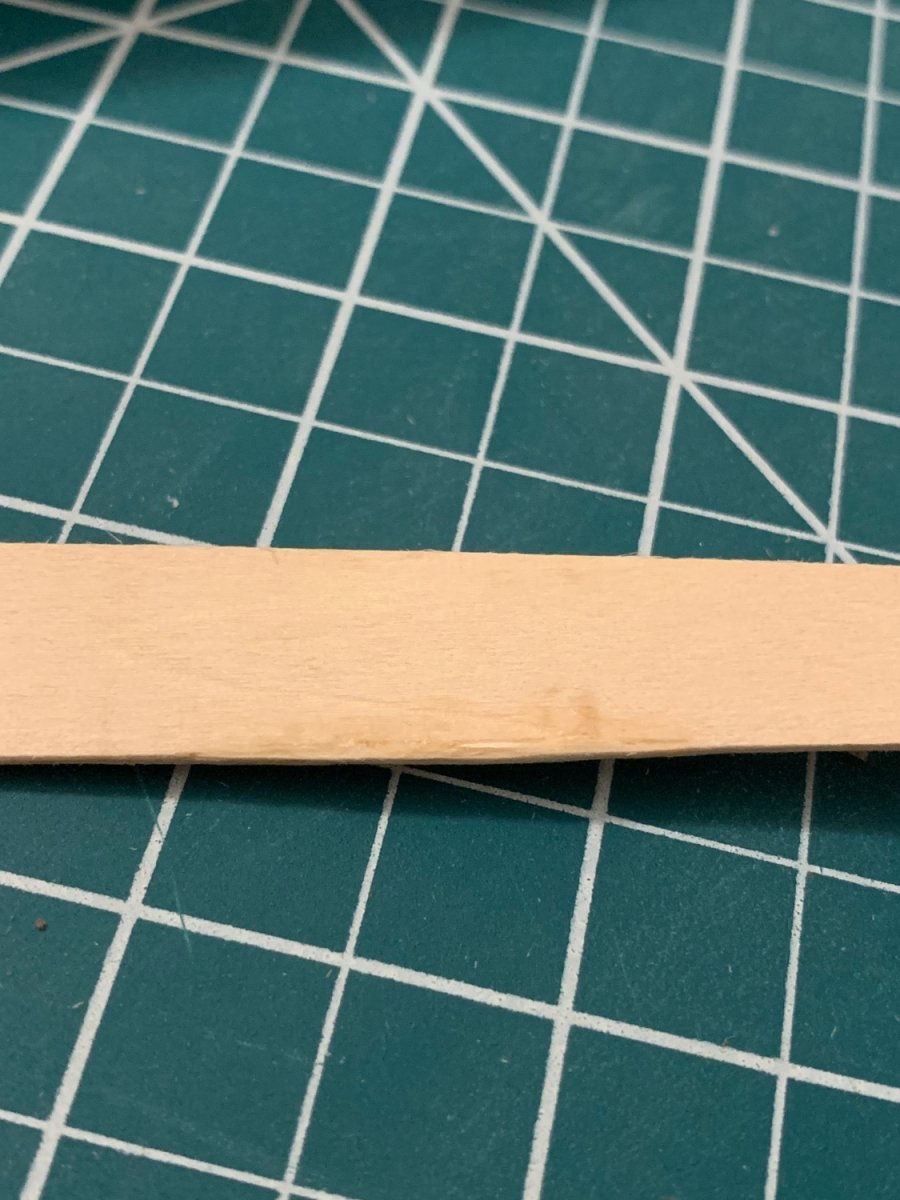
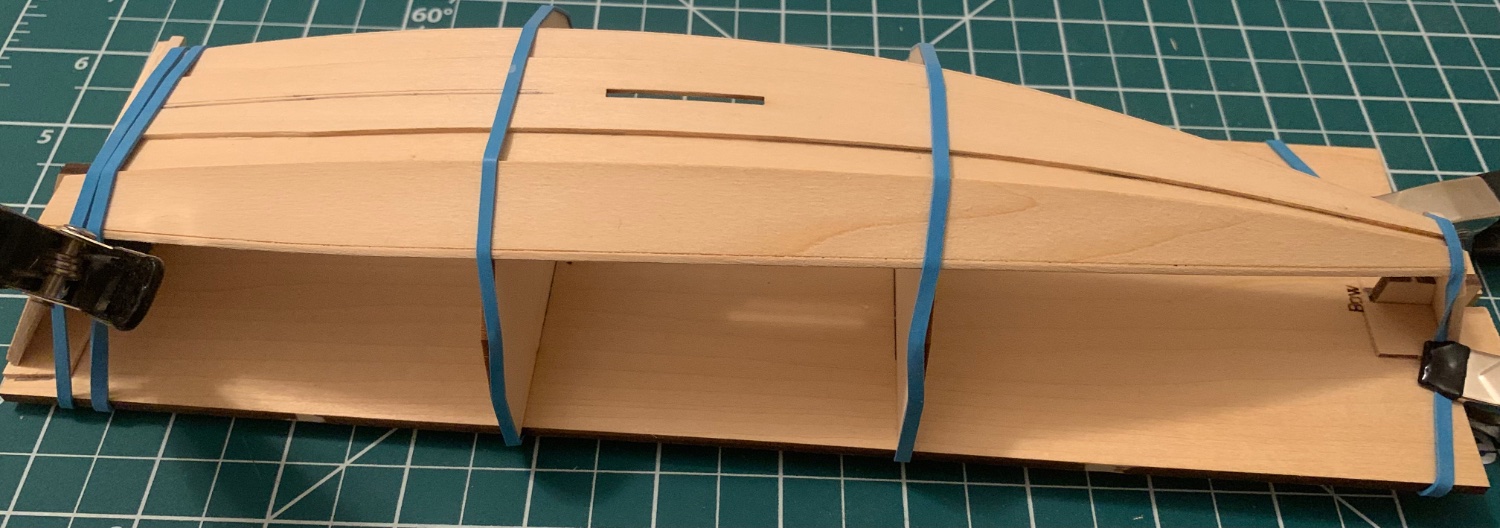
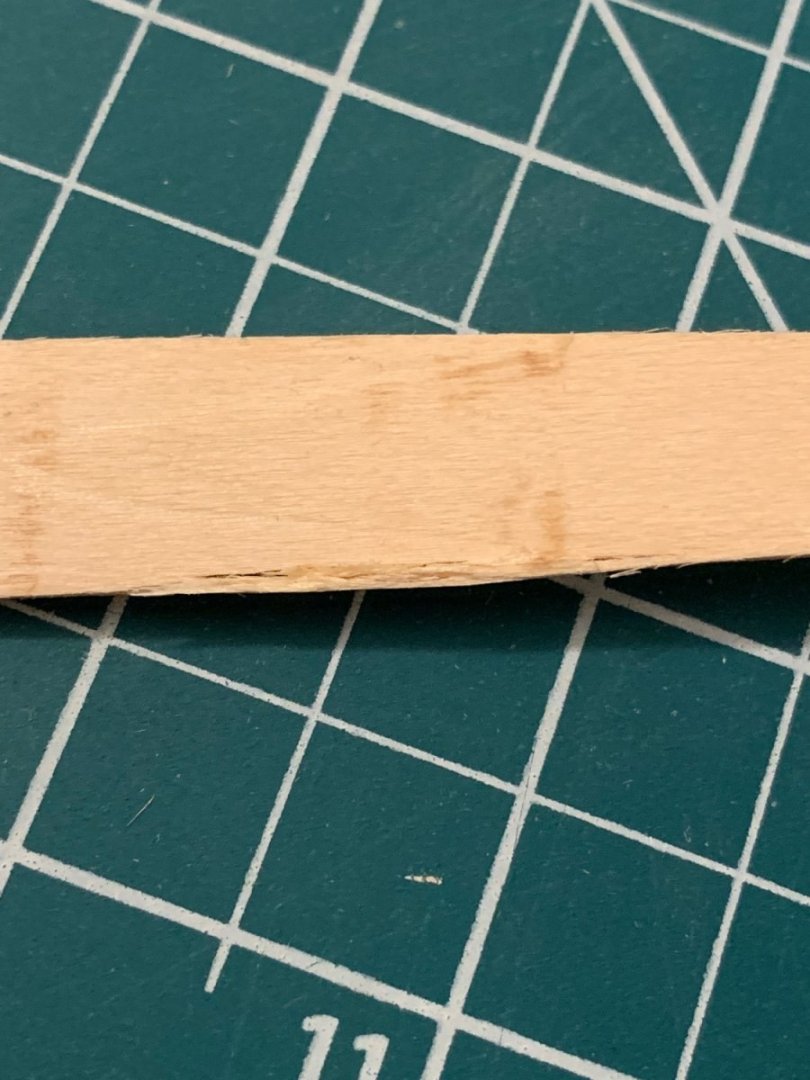
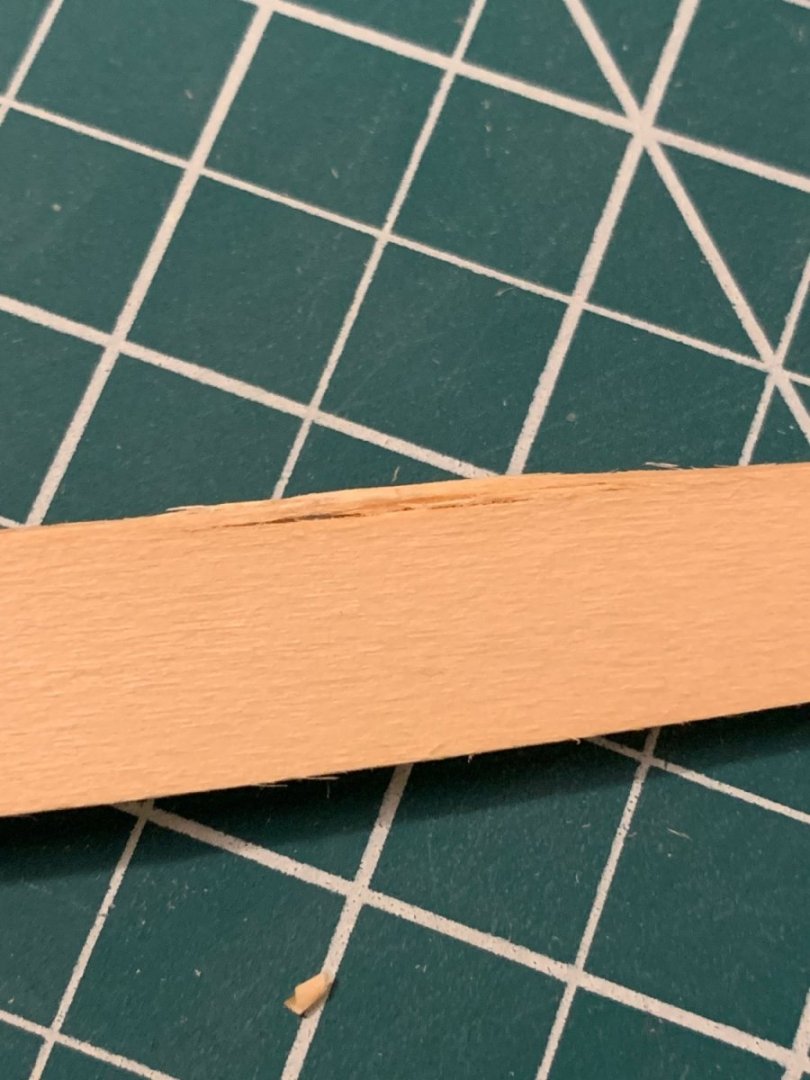
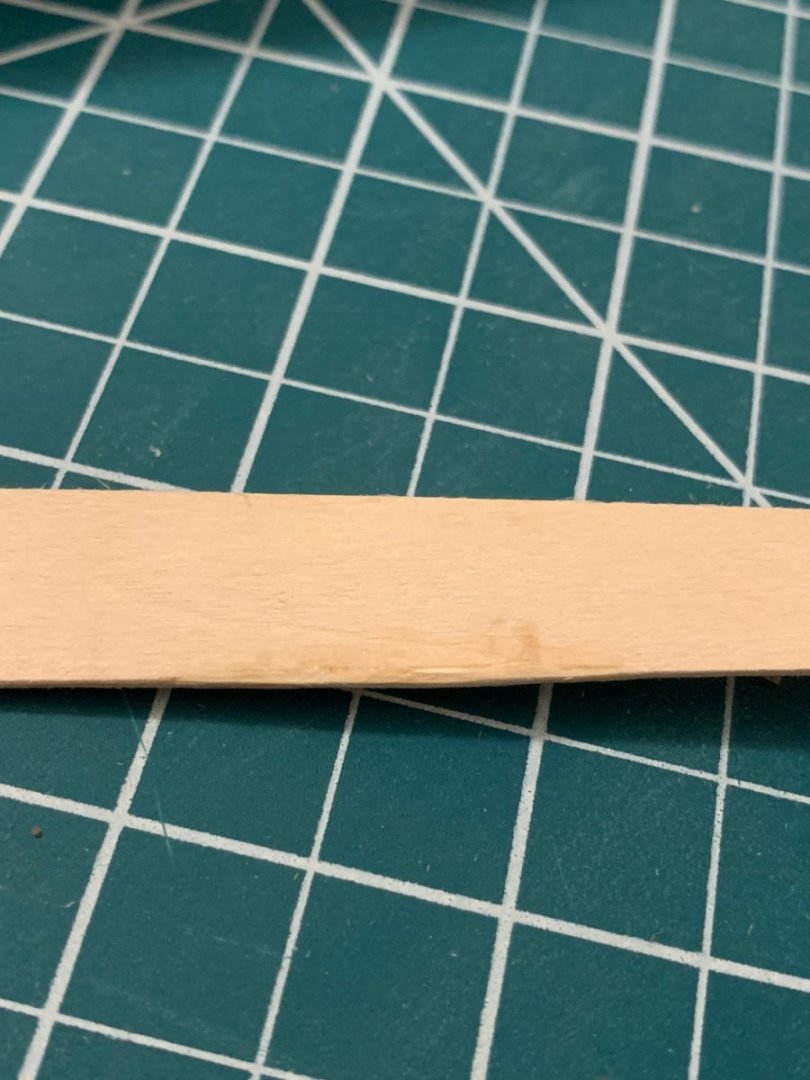
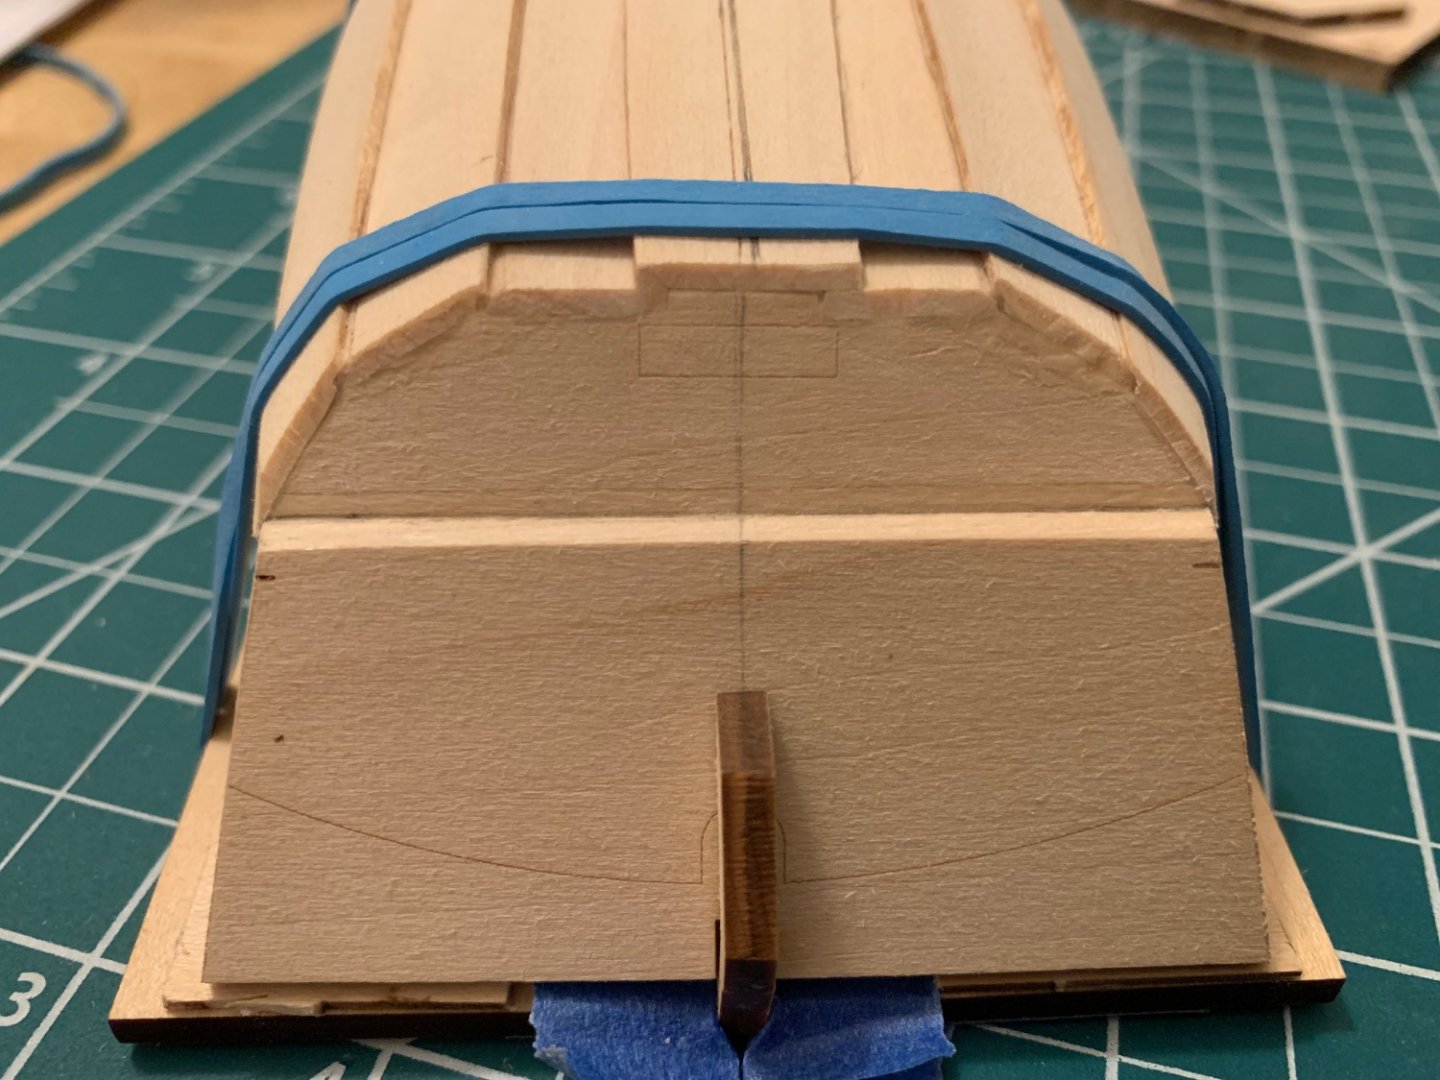
A little progress is still progress, even if it’s been a busy week. I began by bending the sheer planks in the same manner I’d bent every previous one: soaking in hot water for about five minutes and then attaching to the building frames via elastic band. This is where I encountered a strange new issue for the first time. While I was soaking one of the planks it began to “dissolve” in the water and splinter as I bent it around the frame. Here are a couple of shots of either side of the plank in the damaged area. To fix it I added white glue into the crack and held it with my fingers until it began to harden. From there I sanded them smooth again. This is the resulting repair. Certainly not perfect, but structurally much more solid. I wonder if there is any better method to fixing this/preventing it from happening in future? From there I got the sheer planks glued in place and added the skeg and bilge keels. Then I turned my attention to the dagger board box. As many others have reported, the slot in the keel plank was too long, but rather than making the box to spec and filling the remaining gap I attached the two end boards “too wide” such that the filled the hole and then trimmed the sides to made a square box. I also slid an emery board into the slot and sanded the inside so that the dagger board could slide freely inside. Lastly, I added the bottom frames, inwales and got the stern quarter knees placed. Looking back on what I’ve just written makes it seem like a lot more building than I felt it was at the time. It’s coming together and looking more and more like a boat!
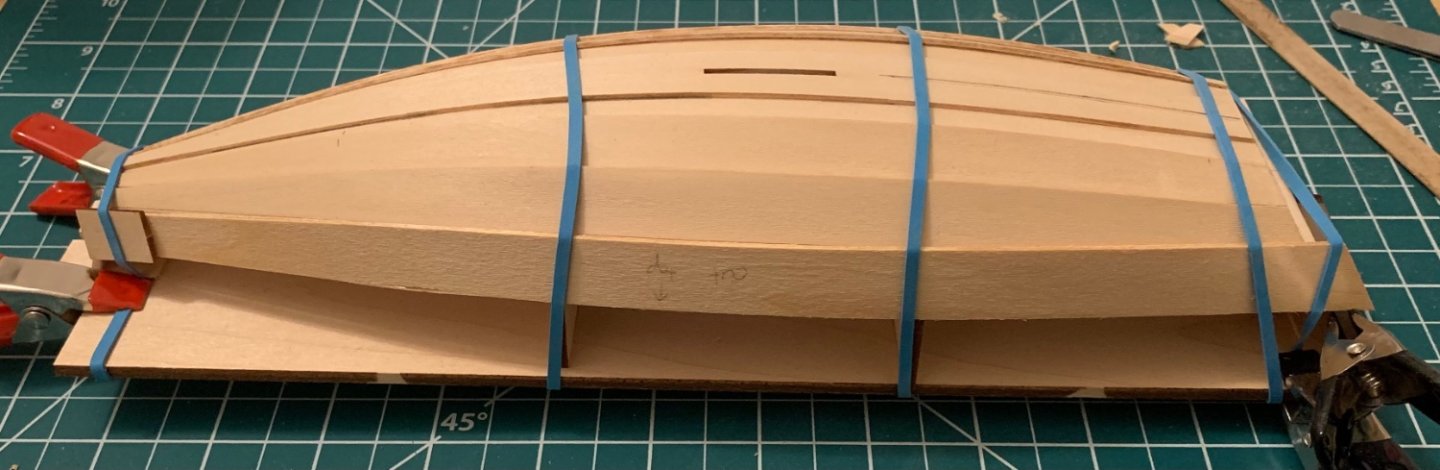


- 38 replies
-
- 6
-
-
- Norwegian Sailing Pram
- Model Shipways
- (and 2 more)
-
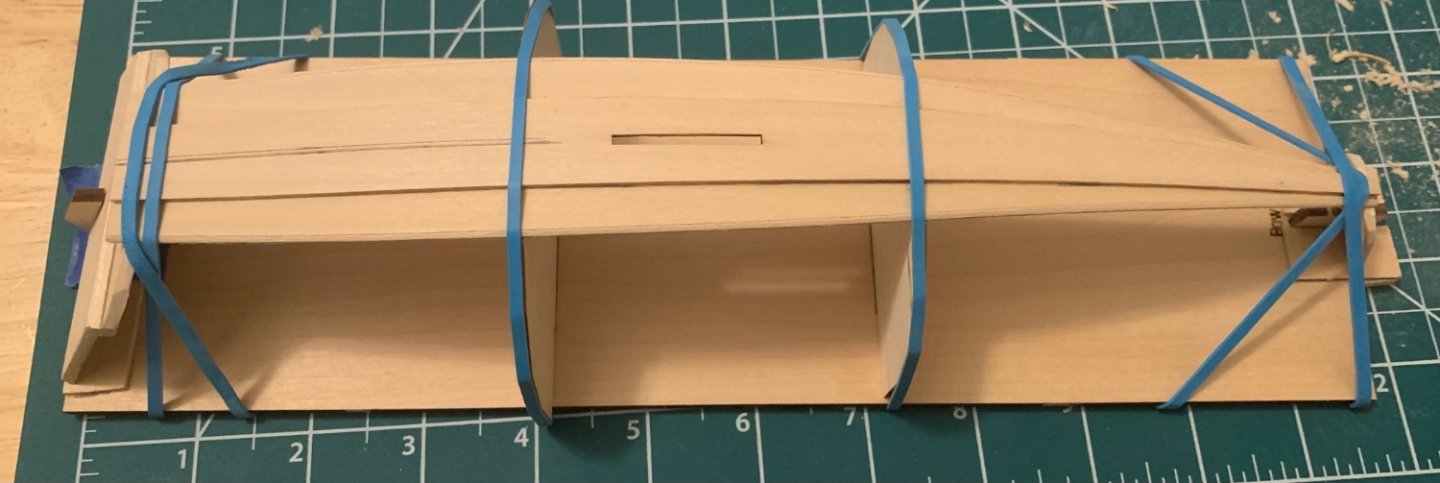
The weekend gave me a chance to steadily plank away. Here are a few shots of sequential progress: This gave me the chance to practice carving rabbets, which I feel much more comfortable with and think I’m improving on. I decided to stick with the 1 mm width which worked very well for overlapping. I was happy with it right up until I uncovered a possible mistake. My second strake planks fell awkwardly on the connection between my upper and lower stern transom. There wasn’t enough material over hanging to justify carving a step, but there was too much overhand to let the final Sheer plank meet the stern transom without a gap. My solution was to just sand down the second strake plank and simply not carve a rabbet into the sheer plank. I think it’s going to work out okay. We’ll see when I bend the sheer planks in the next day or two.


- 38 replies
-
- 7
-
-
- Norwegian Sailing Pram
- Model Shipways
- (and 2 more)
-
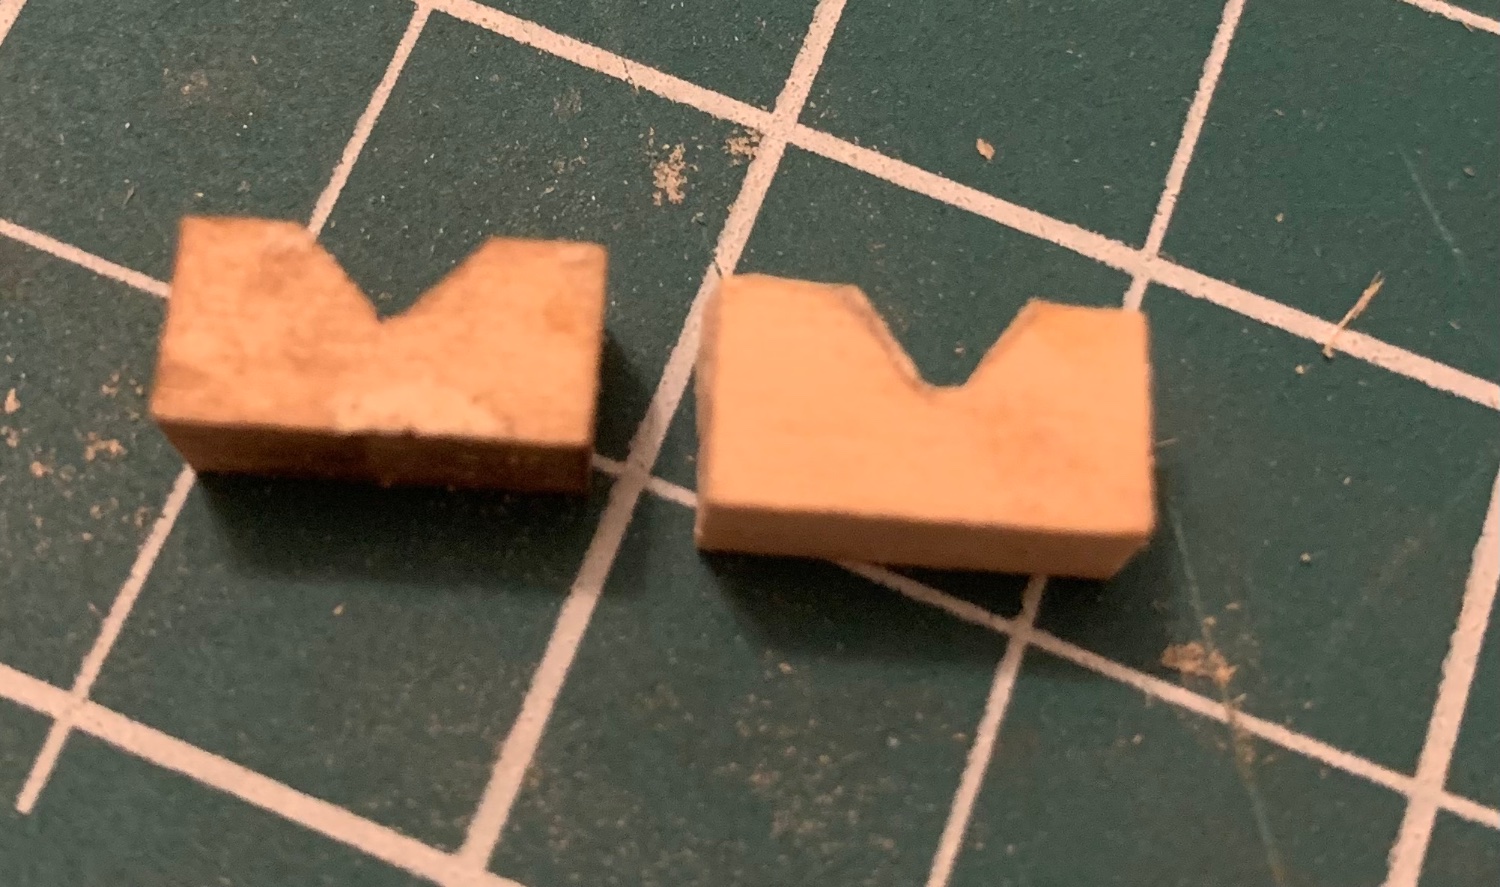
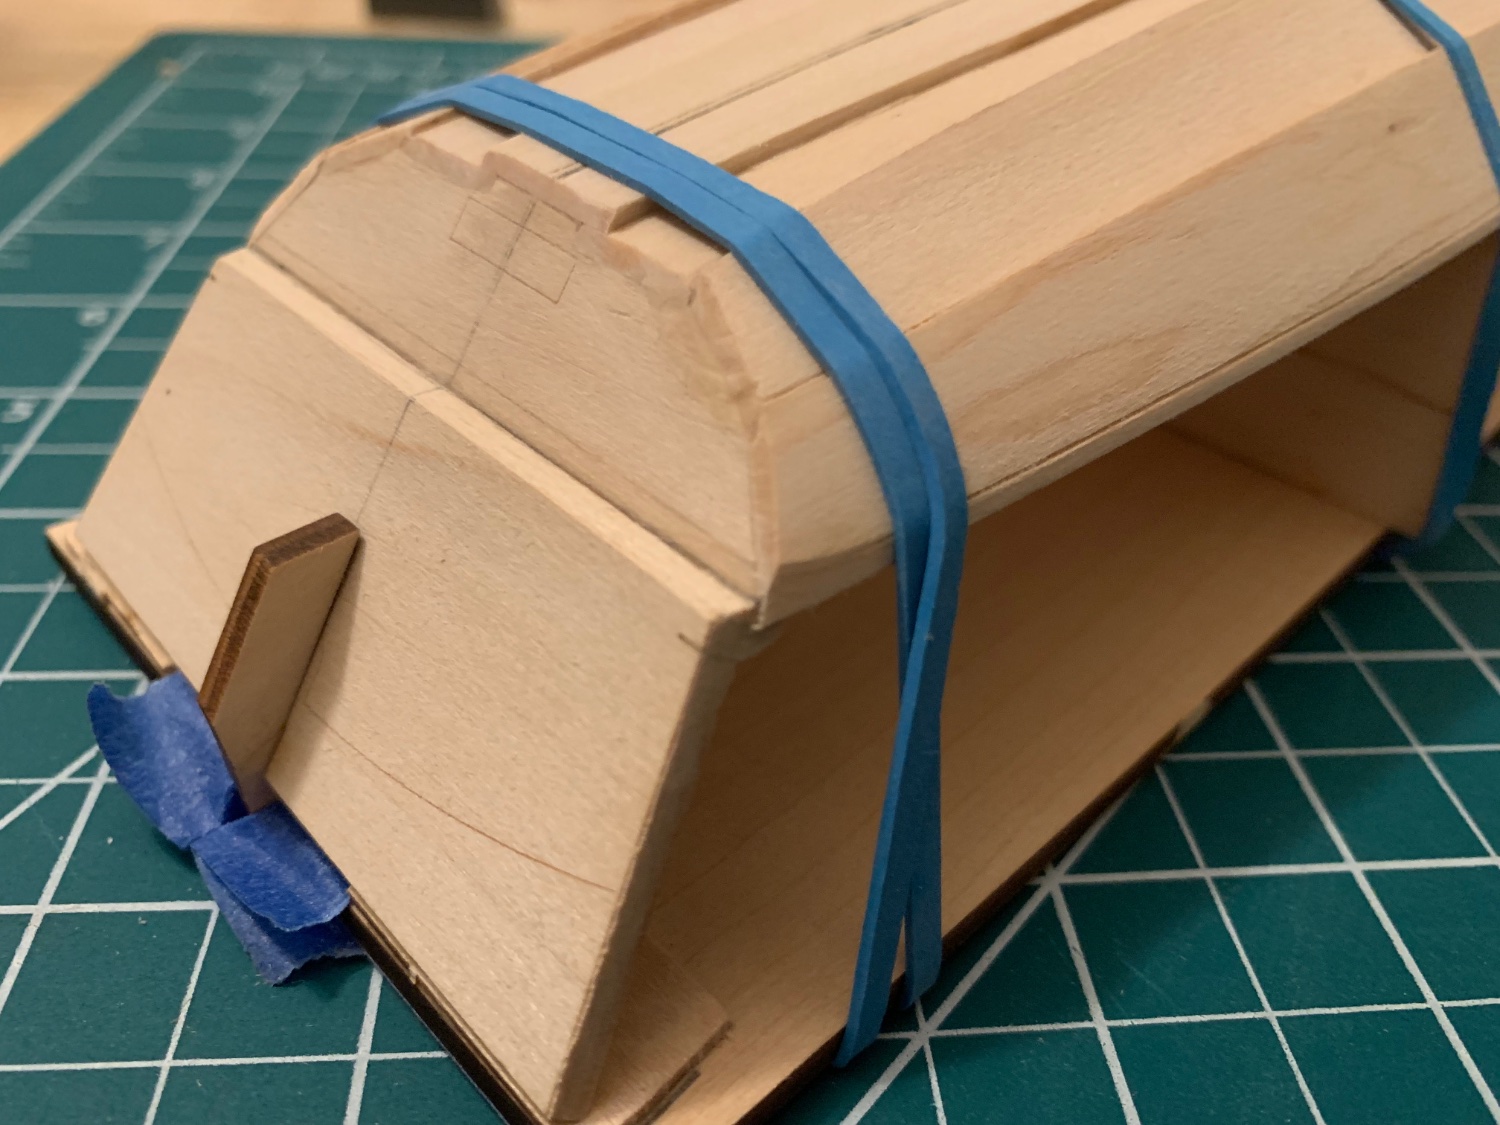
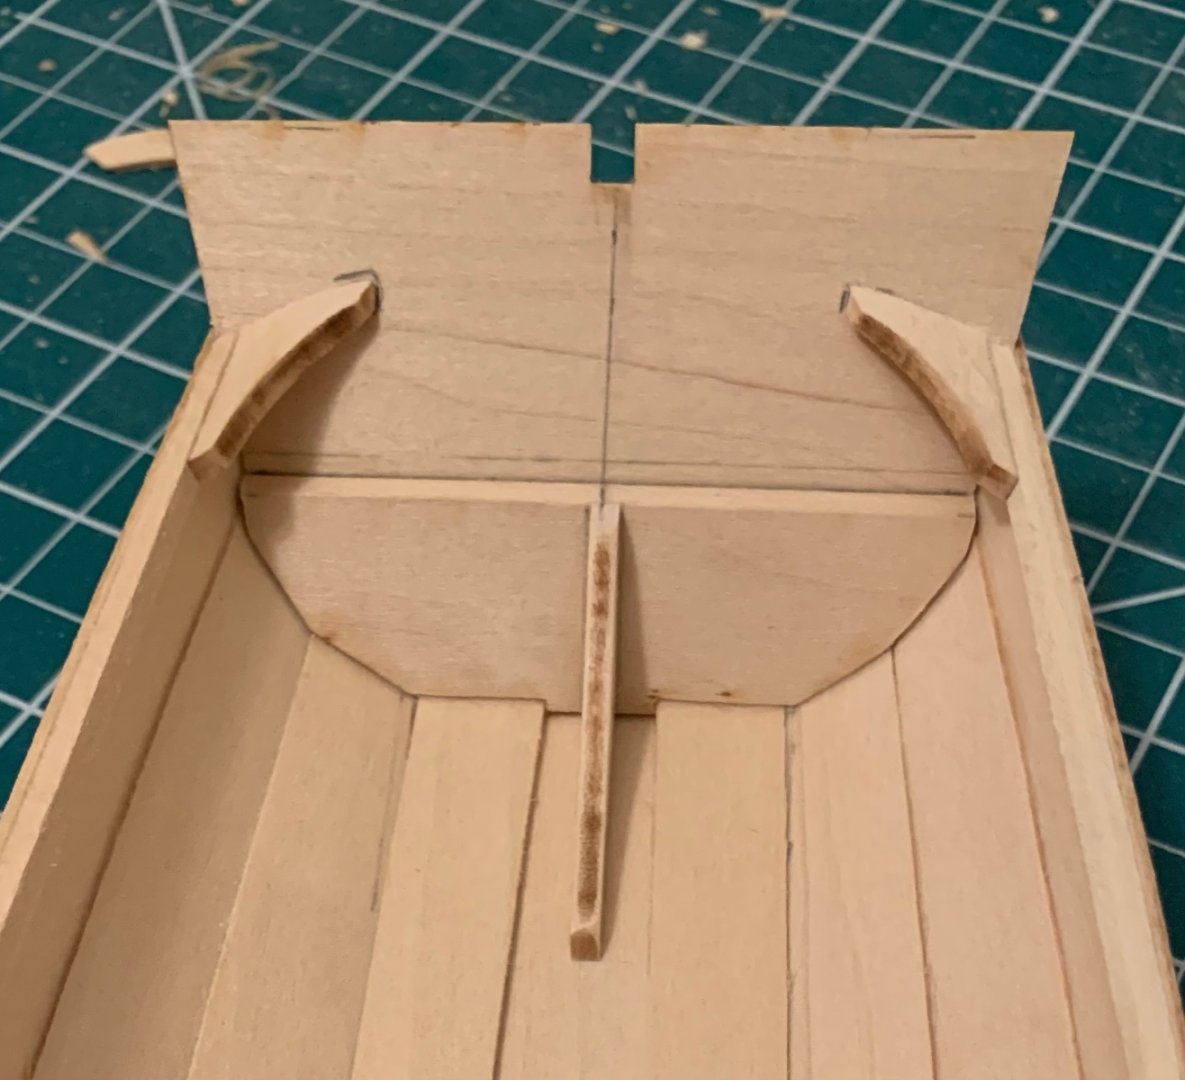
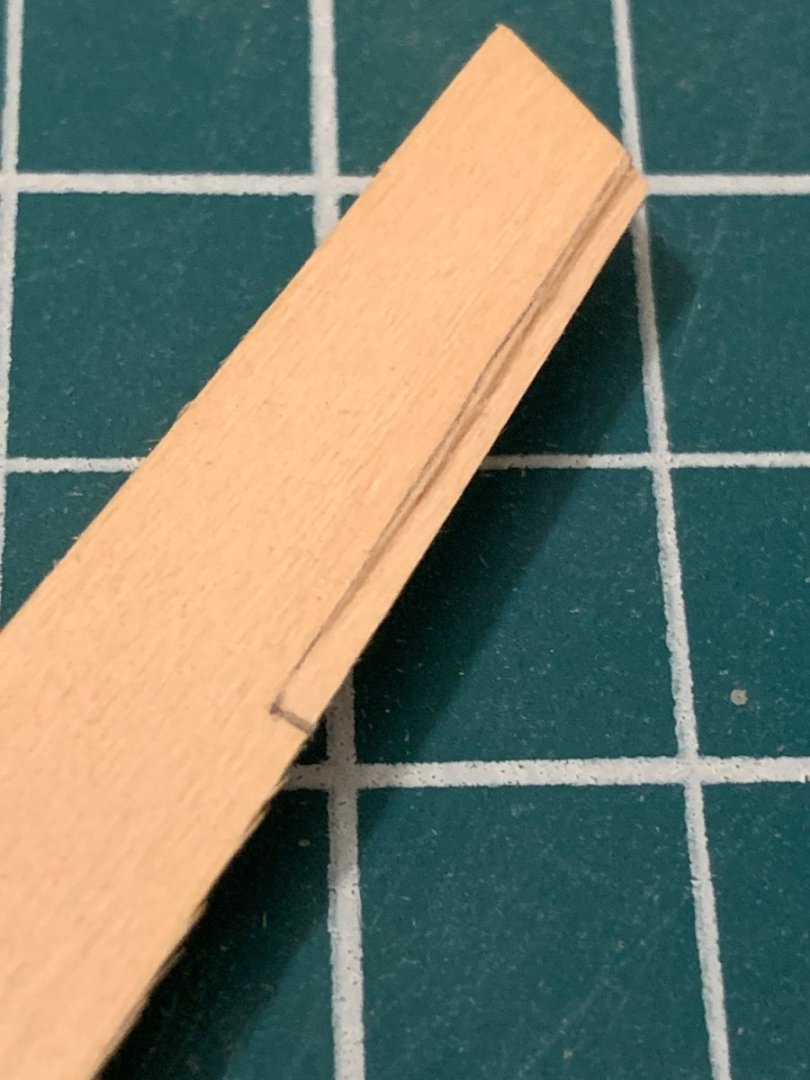
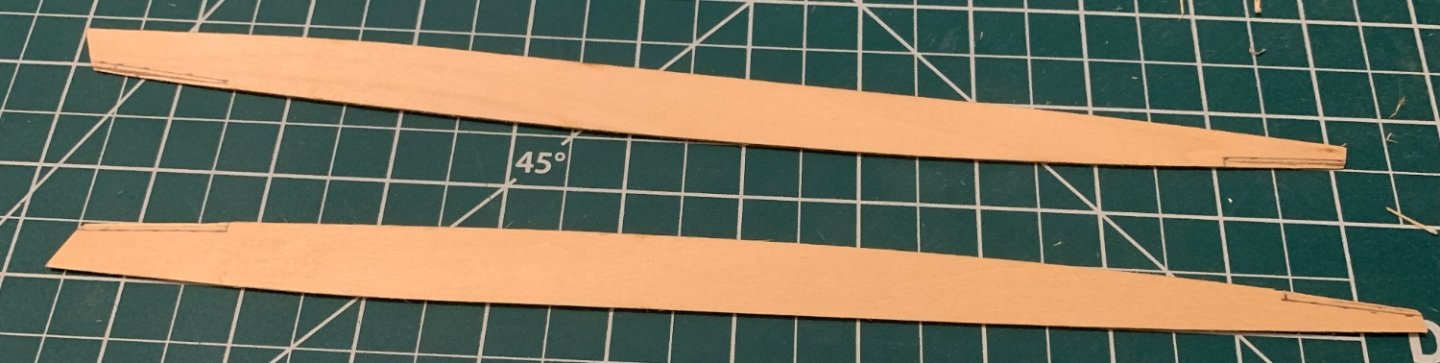
Finding time through the work week is always a challenge. As such, I’ve only managed to get a few things done. I started by getting the bow nice and square and gluing that down. The technique I found worked best for me was to glue the very tips of the two bottom boards together first, then glue the combined piece to the bow transom and let that set. Doing it this way meant I didn’t have to worry about them splaying unevenly as I fiddled with gluing them down. This left me free to square up the two bottom boards against the appropriate stops on the molds and then glue them (one at a time) to the stern transom. The stern doesn’t look square in the above because it is not, that got fixed when I glued as described. Next came bending and then gluing the keel board. The process was exactly the same as what I had done for the dory so it was a comfortable process. The only helpful thing I added was tracing along its edges with a pencil when I dry fit it to make sure it was as exactly centered as possible. Finally, I sanded the bevels into the garboard planks and tried my hand at cutting the rabbets. The instructions say to cut the rabbet a scale foot long and a scale inch wide. At 1:12 a scale inch is ~2mm so that’s the pencil line you see drawn. I went back and forth with myself, wondering it that was too wide and would impact the final height of the sides of the boat because of too much overlap. Ultimately I ended up only cutting them ~1mm wide but may come back and widen them before I soak/bend them after a chance to dry fit in the daylight.

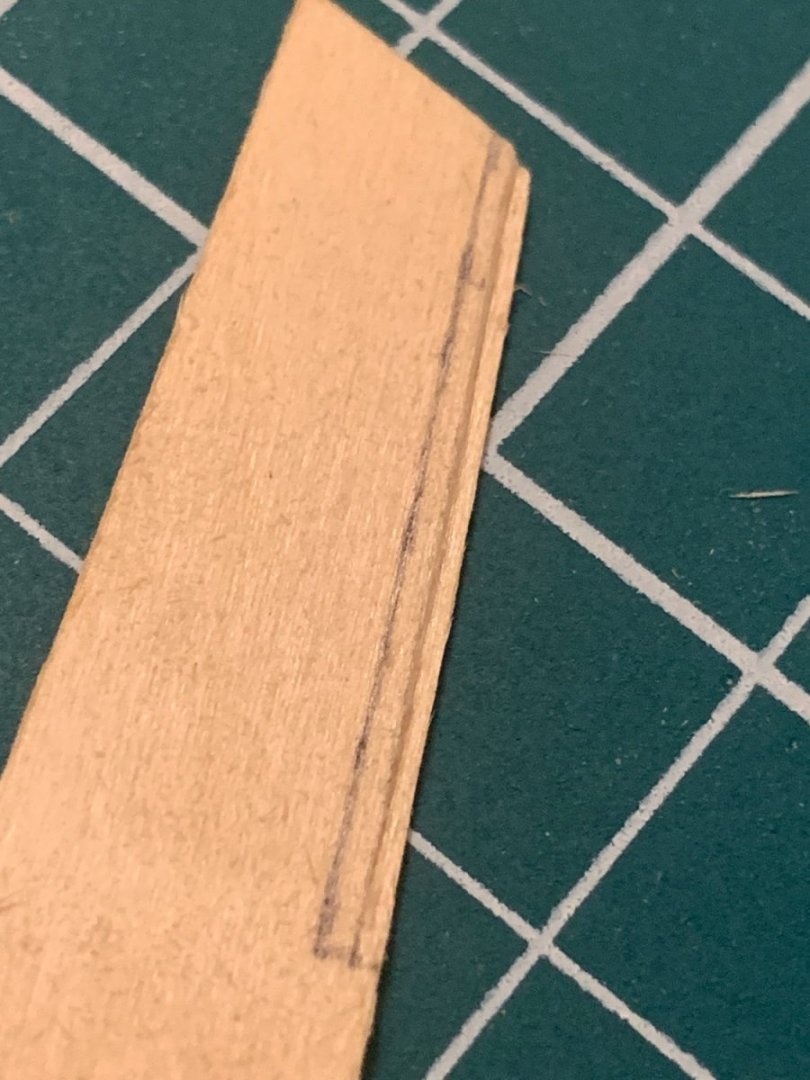
- 38 replies
-
- 4
-
-
- Norwegian Sailing Pram
- Model Shipways
- (and 2 more)