Patrick B
-
Posts
74 -
Joined
-
Last visited
Content Type
Profiles
Forums
Gallery
Events
Everything posted by Patrick B
-
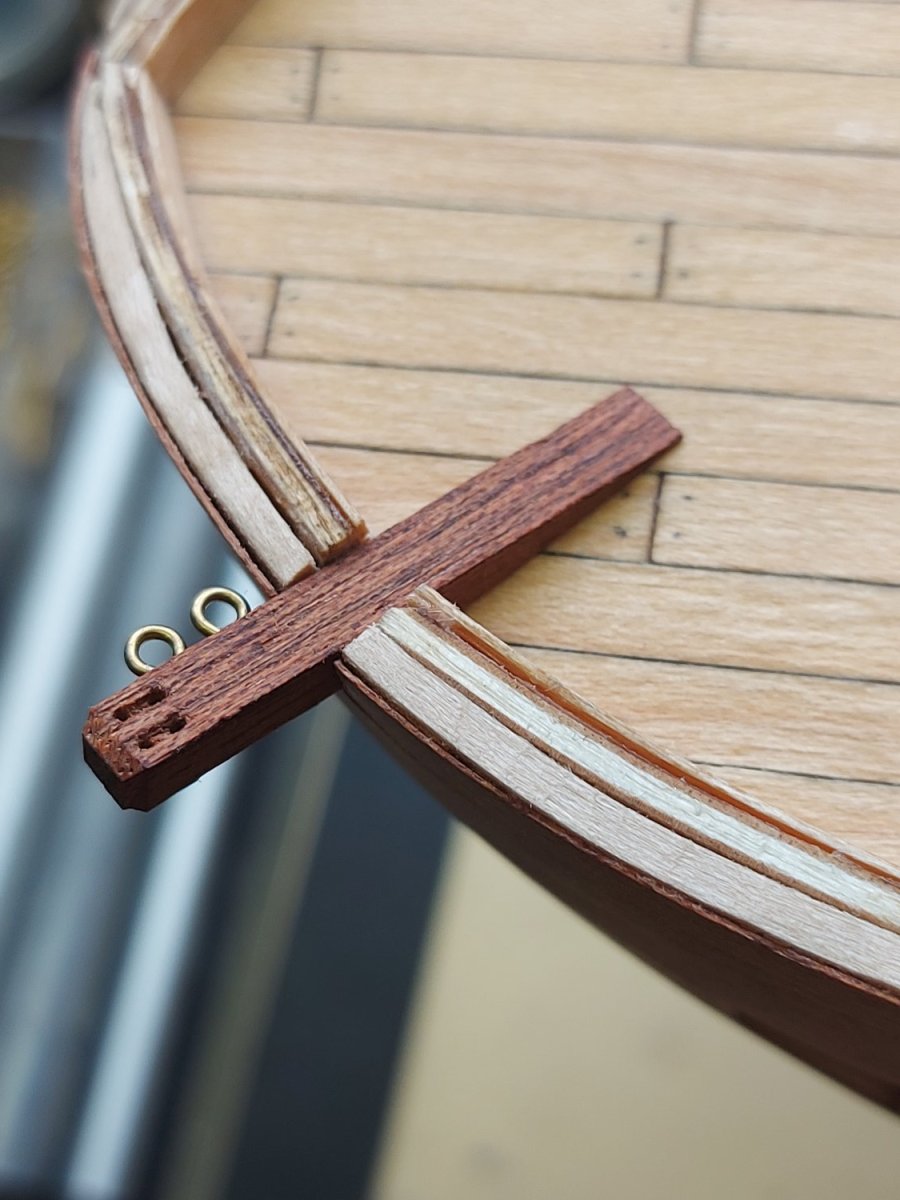
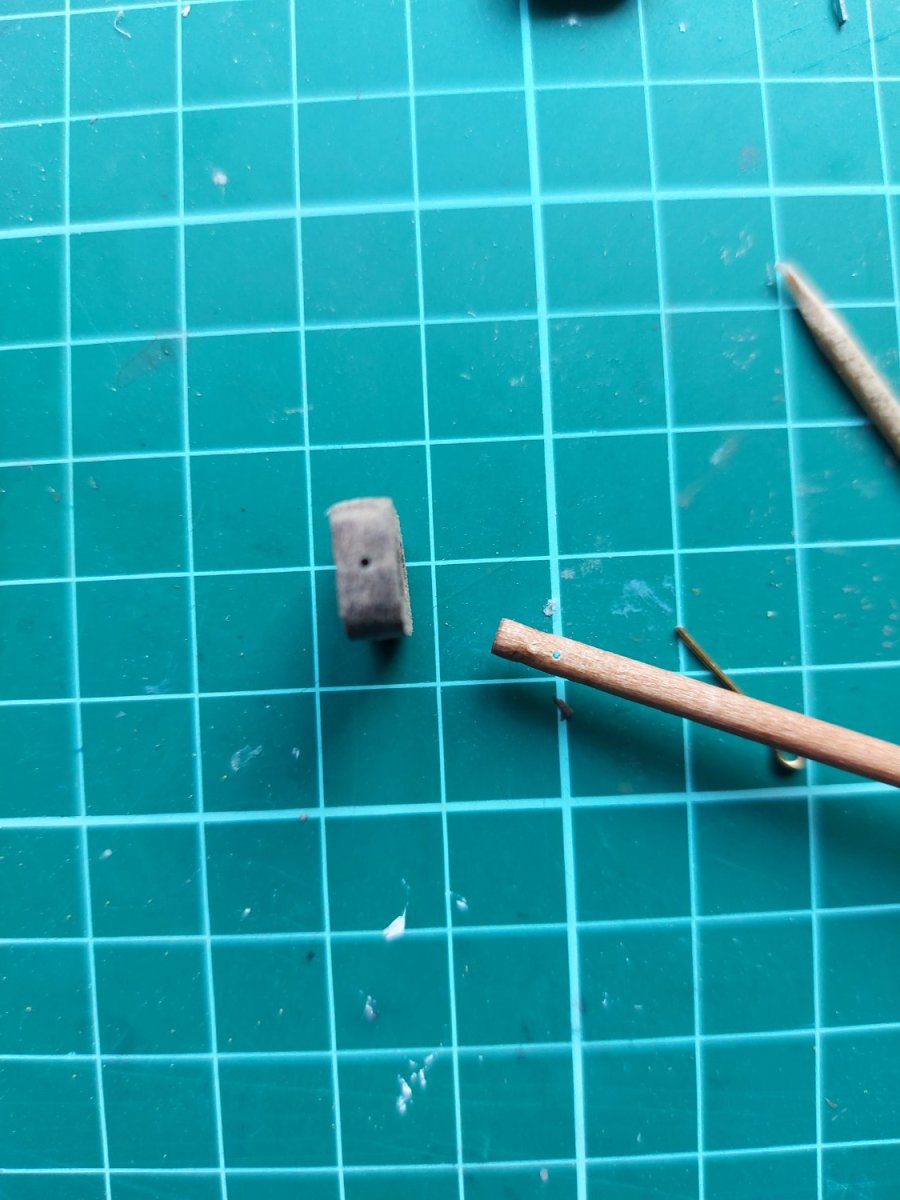
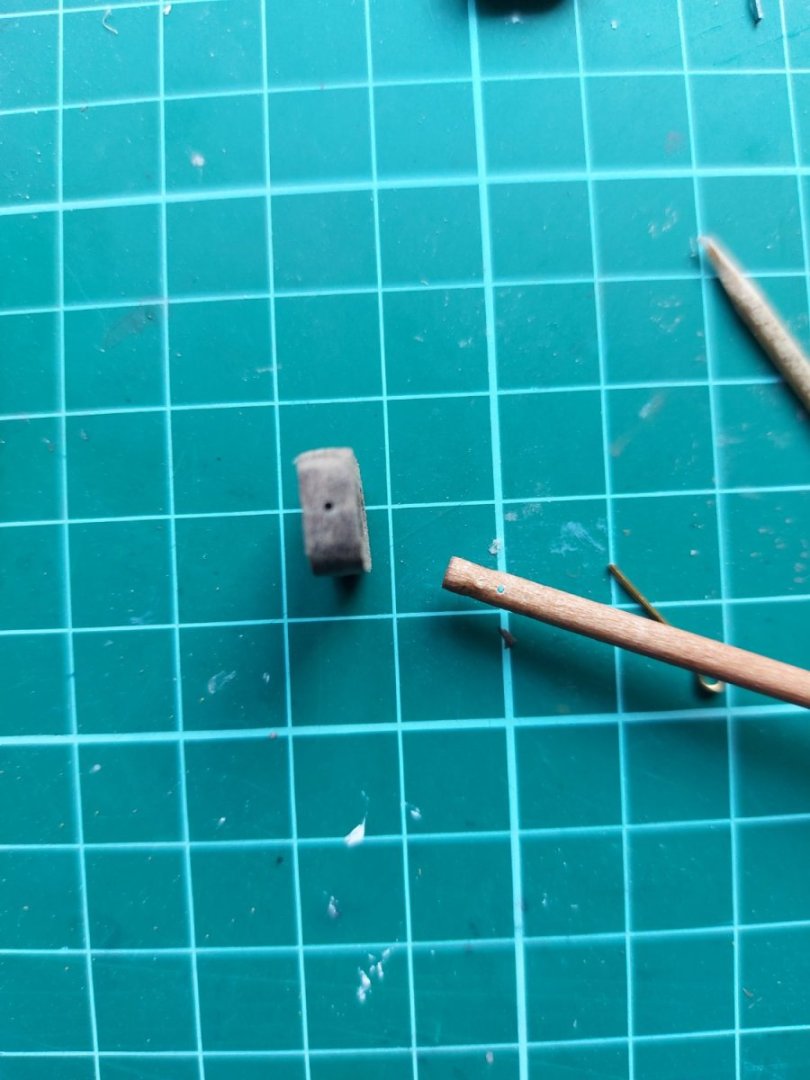
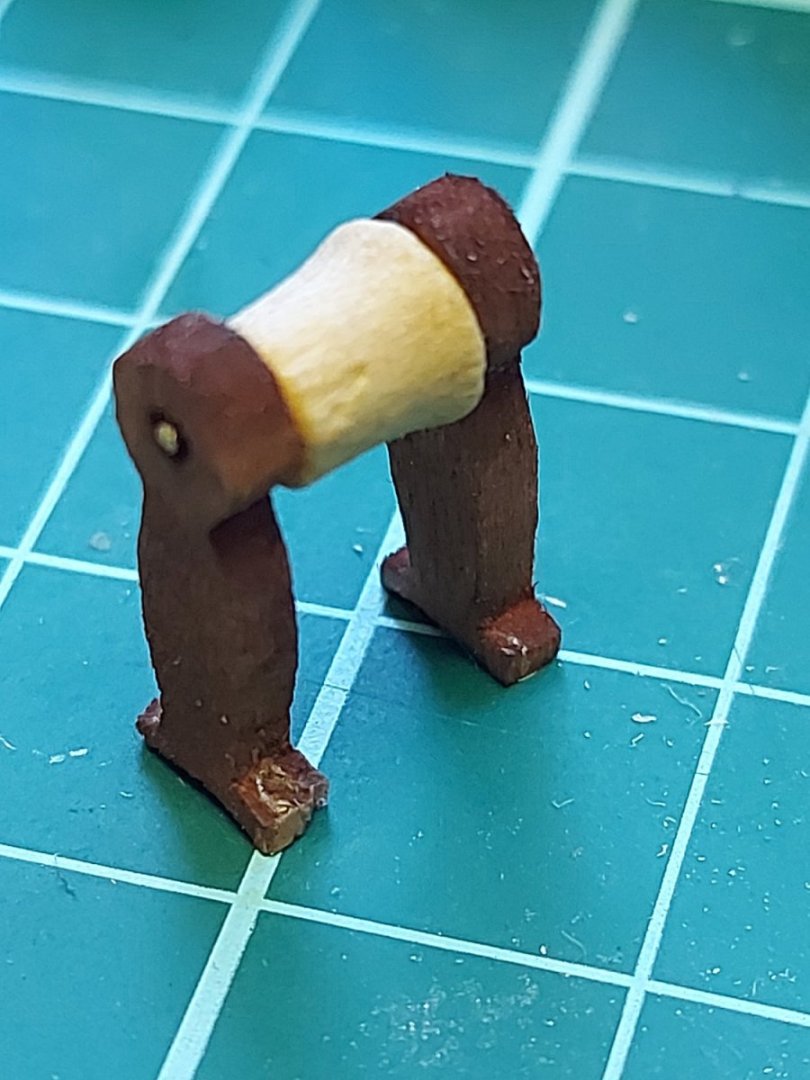
Anyways, here is the first side of the model planked, using CA glue. The other side is to come. The little thing to hold the anchor has been made, although I can't find in the instructions how the rigging will pass through it. Even on the final picture these 4 holes seem unused.

-
I haven't cleaned it with acetone. After sanding the little that leaked through, I can't see anything. Now its fingers crossed. Regarding the manual, here is what's written. Using contact (or cobbler's) adhesive, glue the lining into place. The lining being the second planking of sapelli.
-
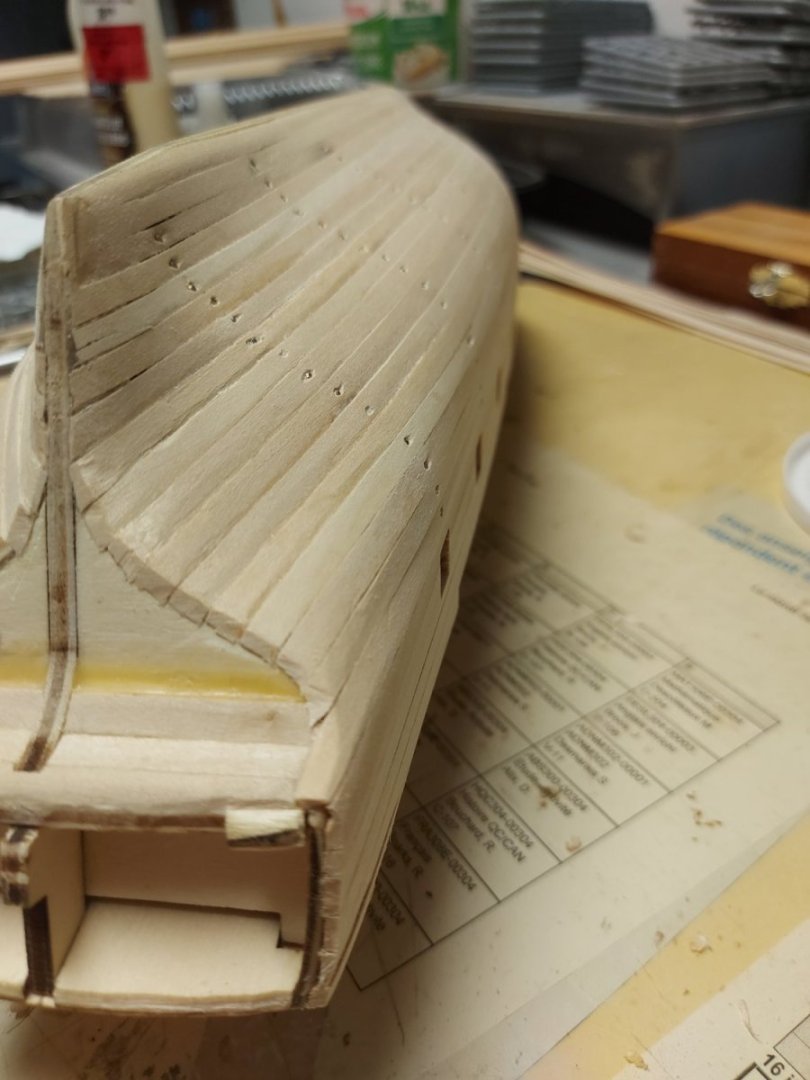
Thanks for the info allanyed, good think I stuck ( without making a bad word play ), with CA glue. My only concern is that I have sometimes a little bit of glue that comes out on the sides of a plank. I try to sand it until it disapeares, but I hope it won't show when I will apply the Tung oil. Anyway, here is the progress of the hull. Please inform me if you see any CA leakage.


-
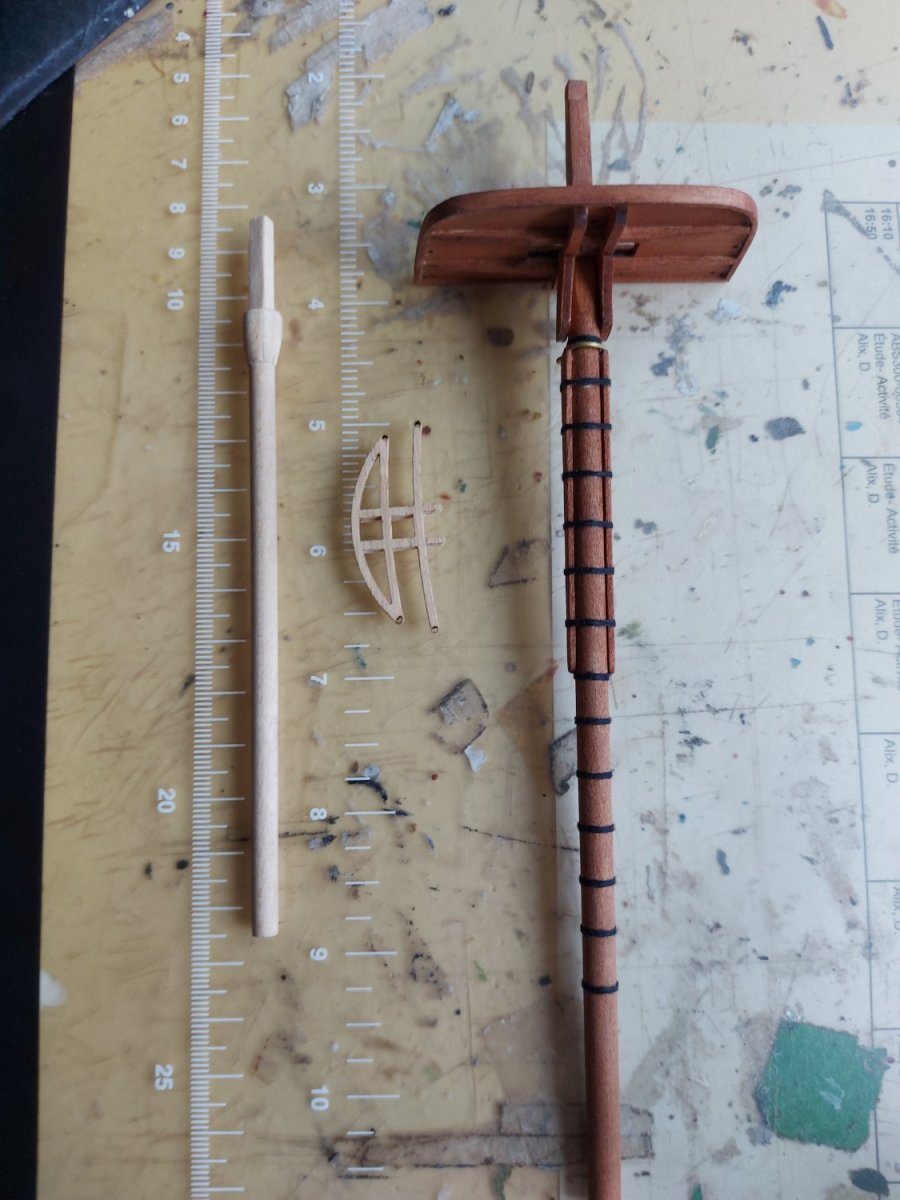
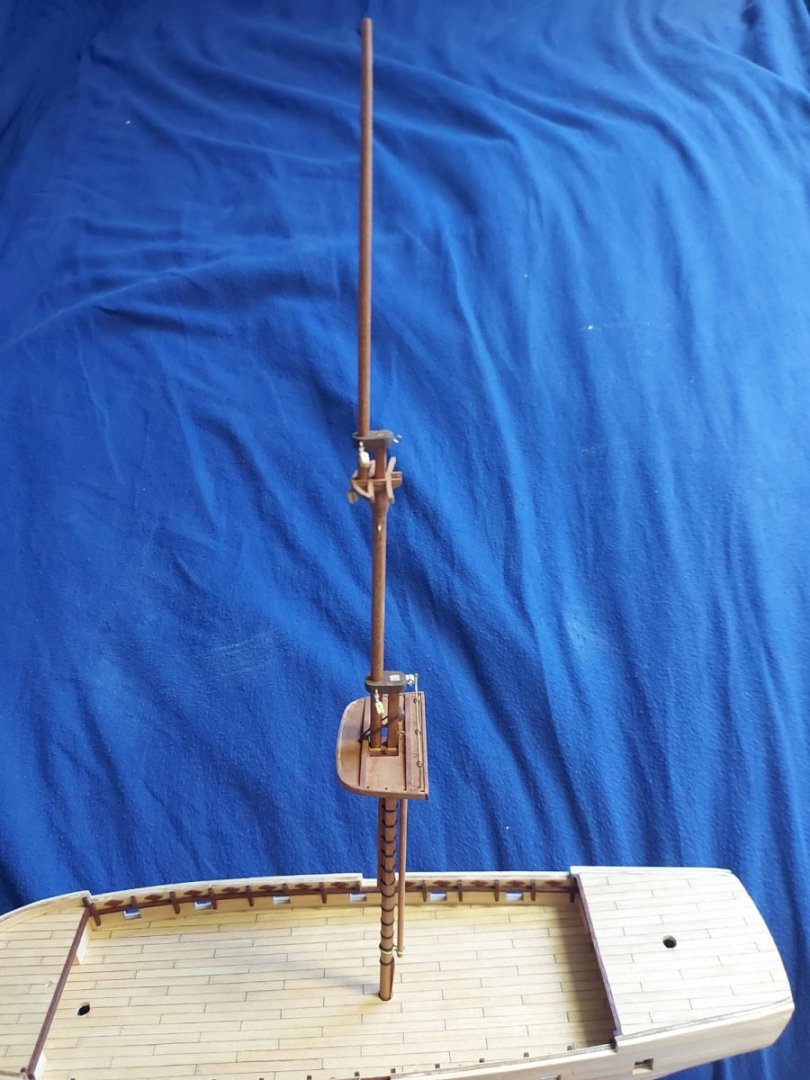
One side of the model has now 10 strips of double planking. The keel fits seamlessly into it to my great hapiness. The main mast, lets call it step 1 of it, has been finished. The mast is temporarly secured with a smal wedge.

-
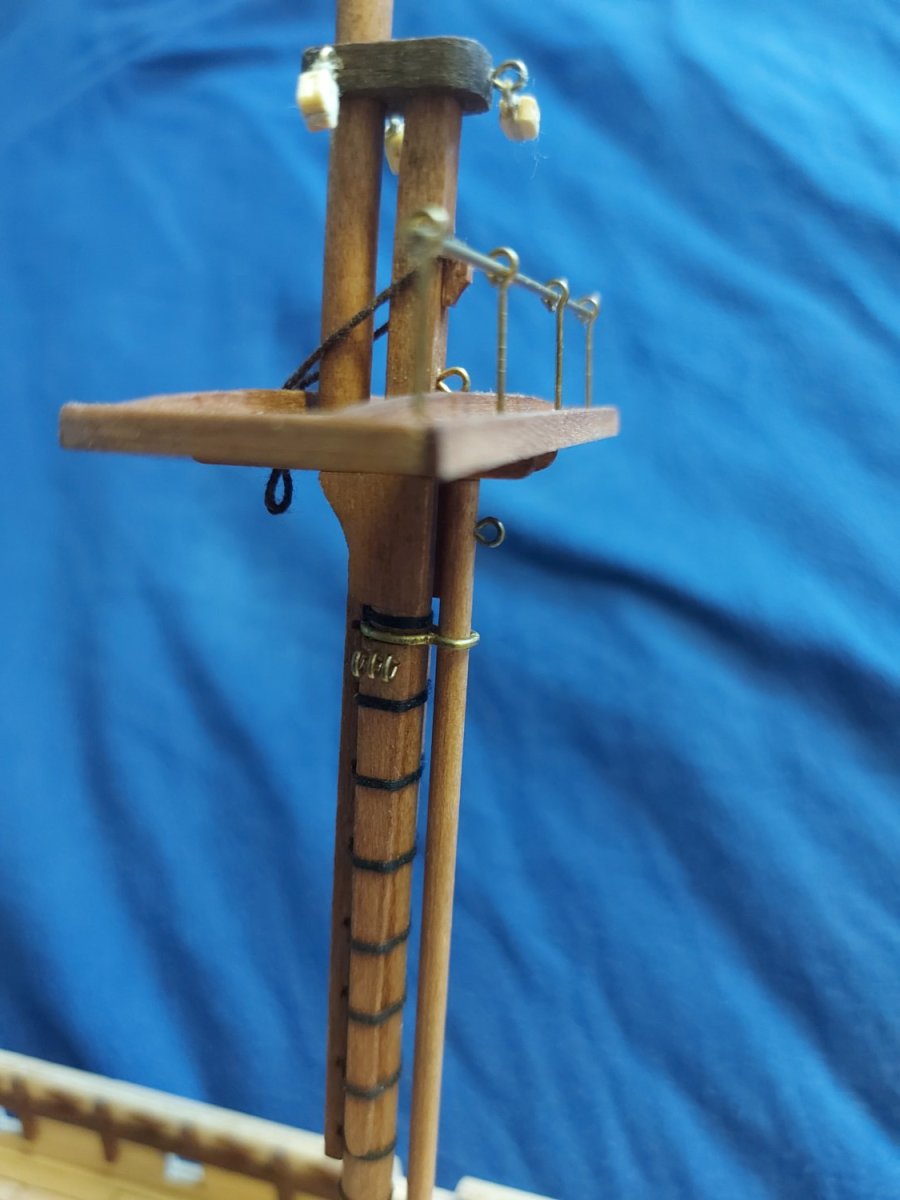
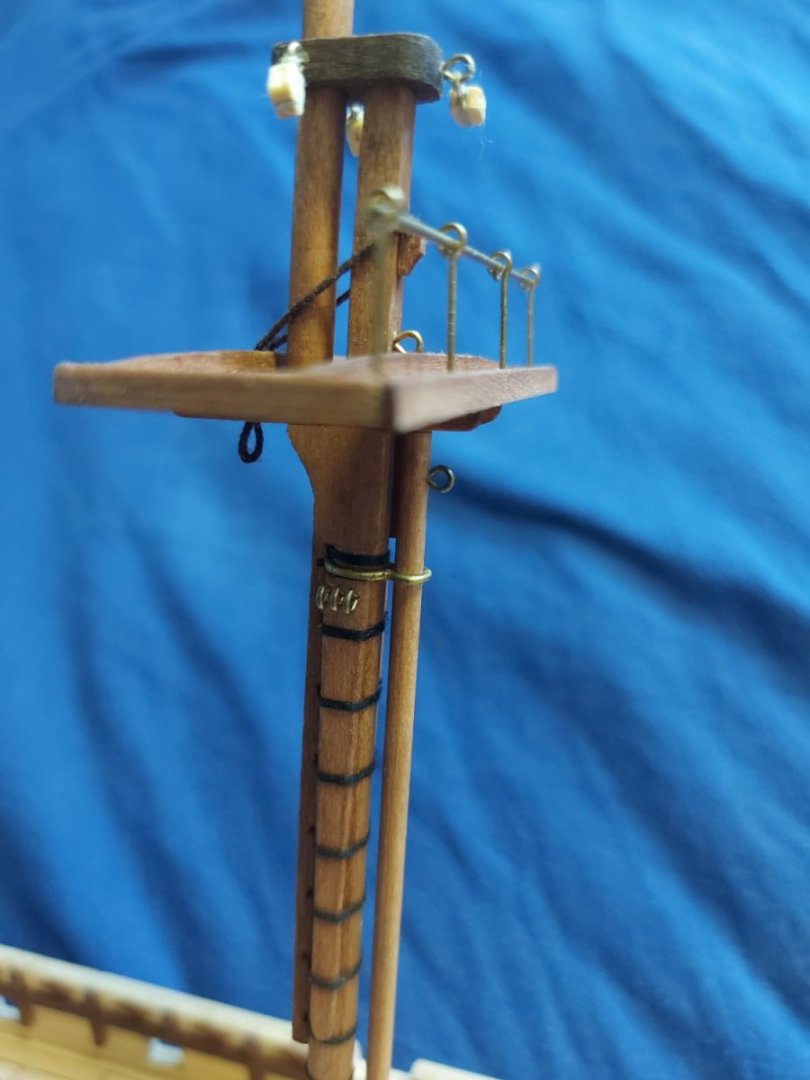
Hi, I know the last update was a while ago, but life got in the way a bit. Anyway, I bought a small drill kit, and I have been playing with it a bit. I got bored of planking so I decided to take a break. I instead worked on the main mast. Here are some of the small holes I was able to acheive.


-
The decorations are finished. They where one of the reasons why I chose this particular ship. I have never seen any other with this kind of decorations. If you know one, please let me know. It could be my next build for the future. Here are the results :

-
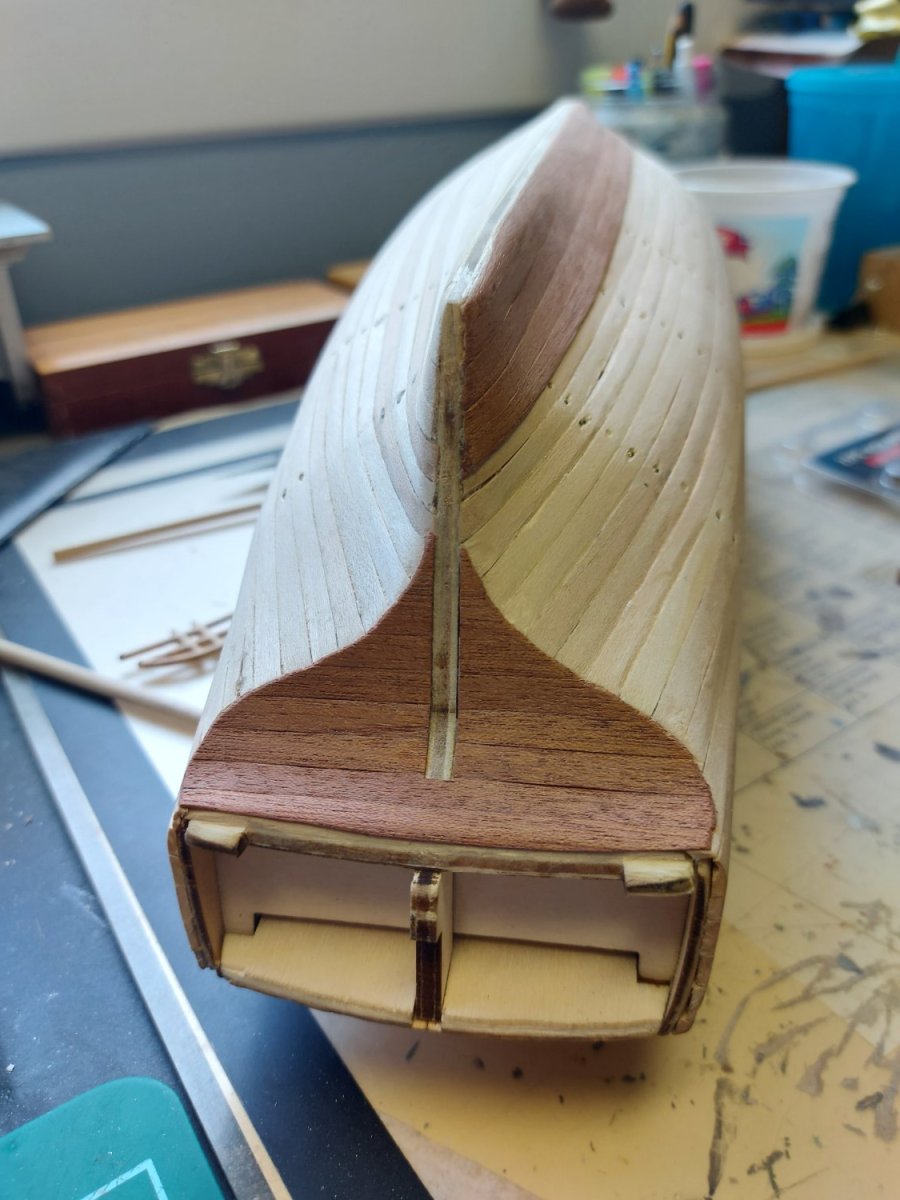
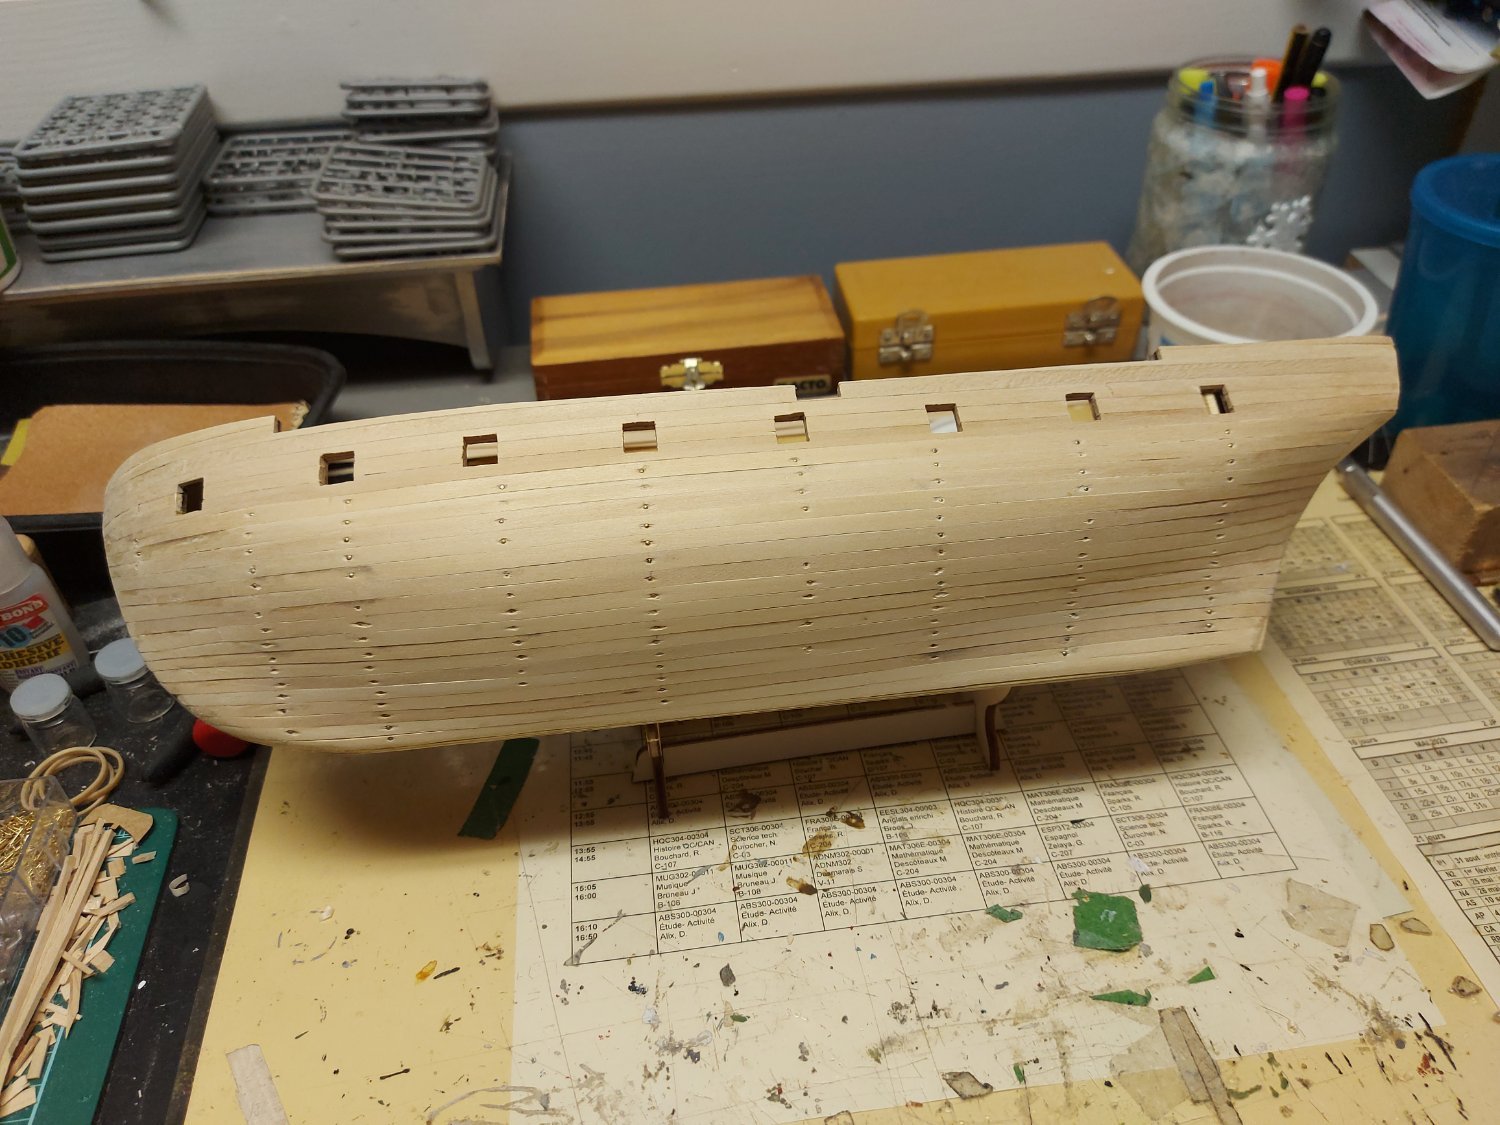
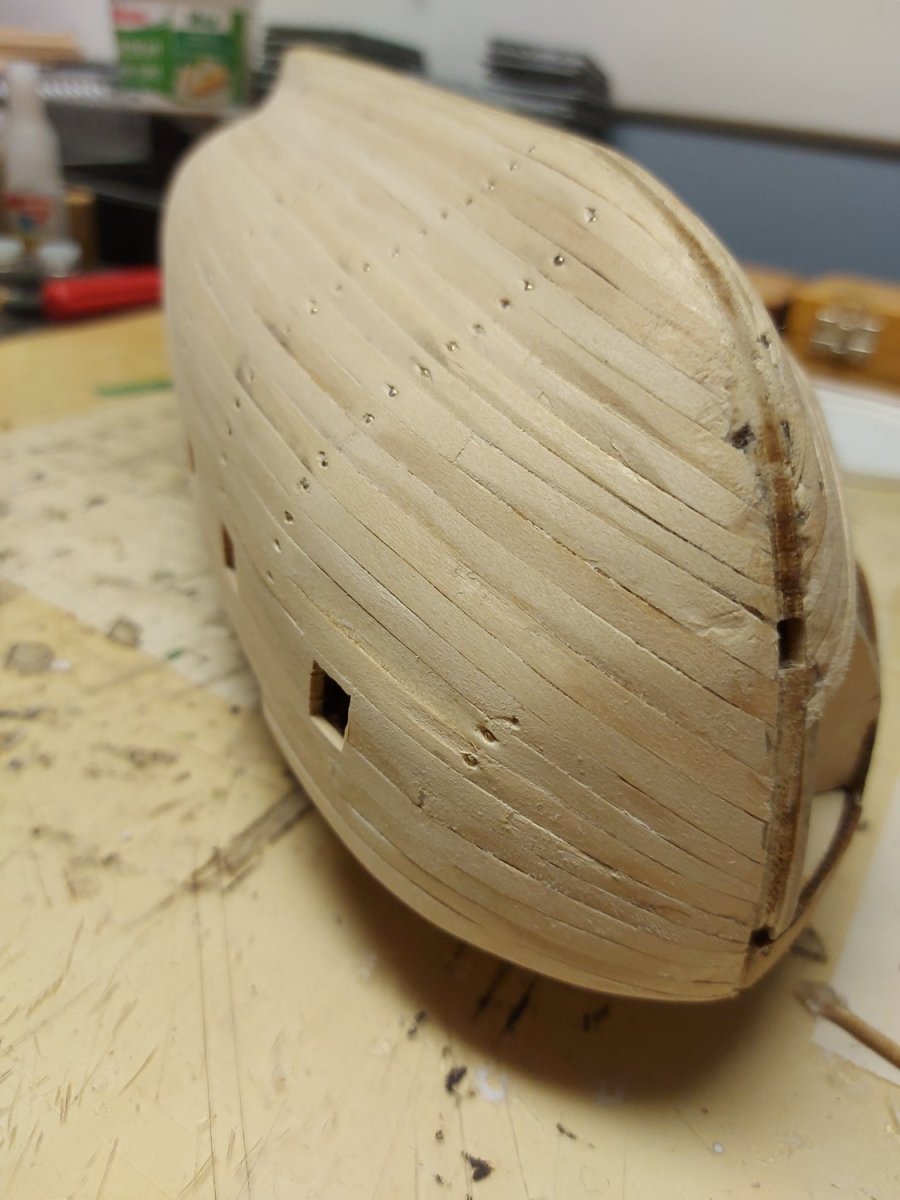
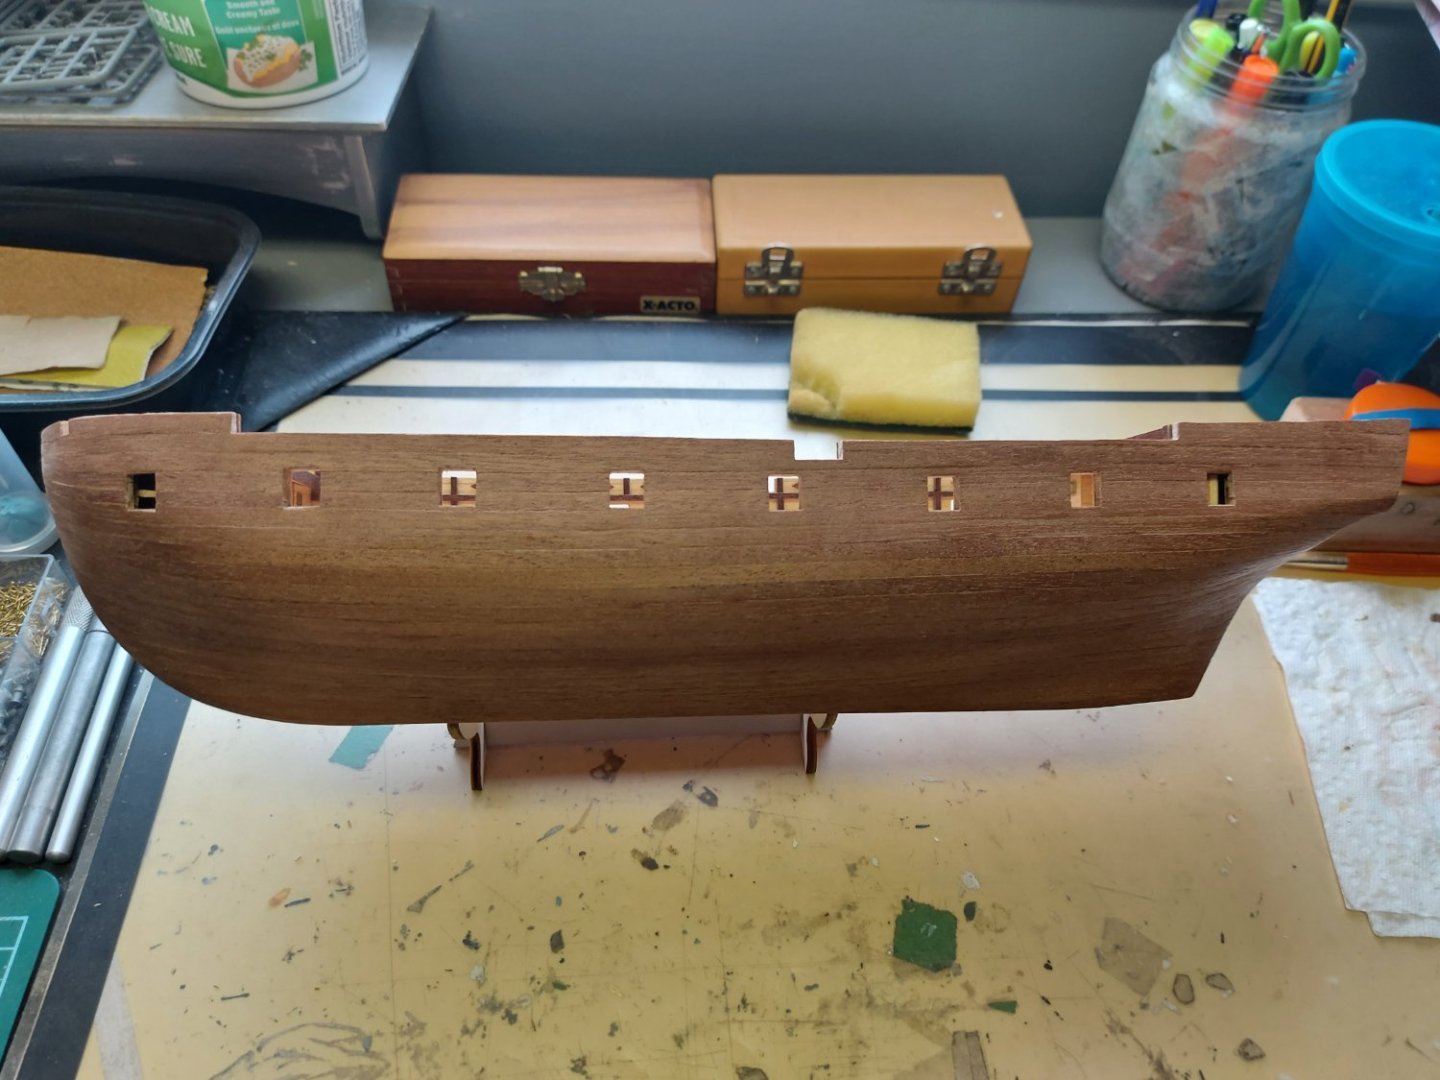
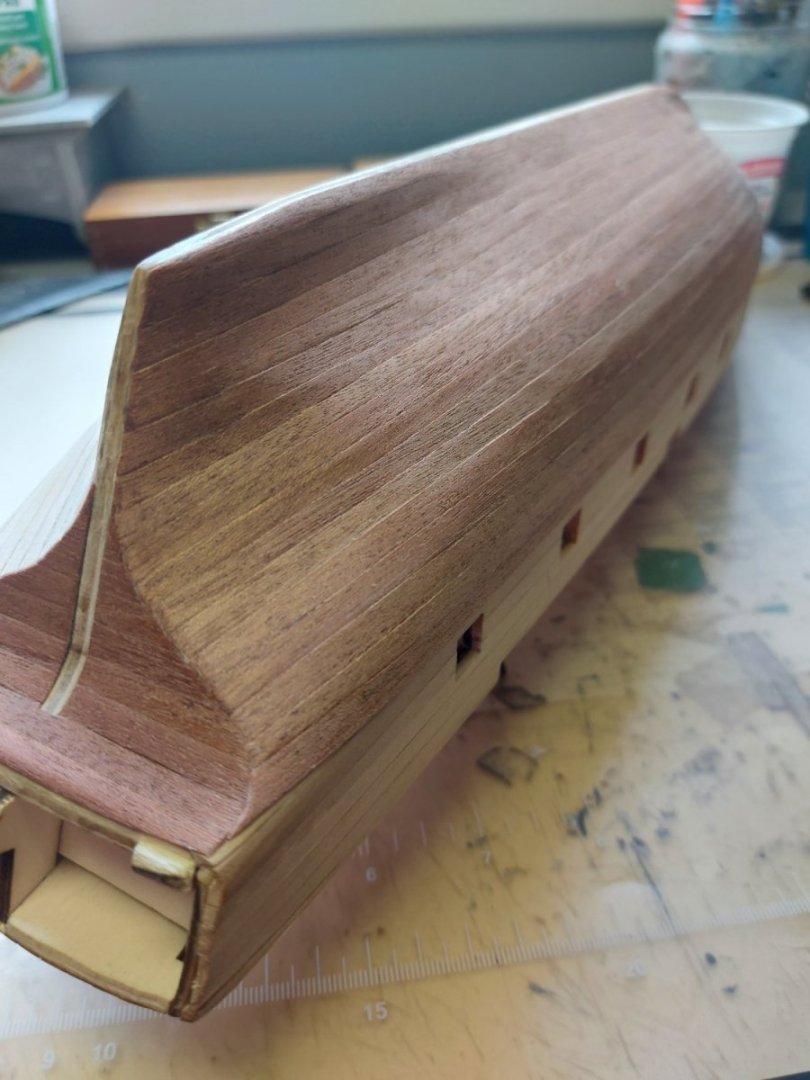
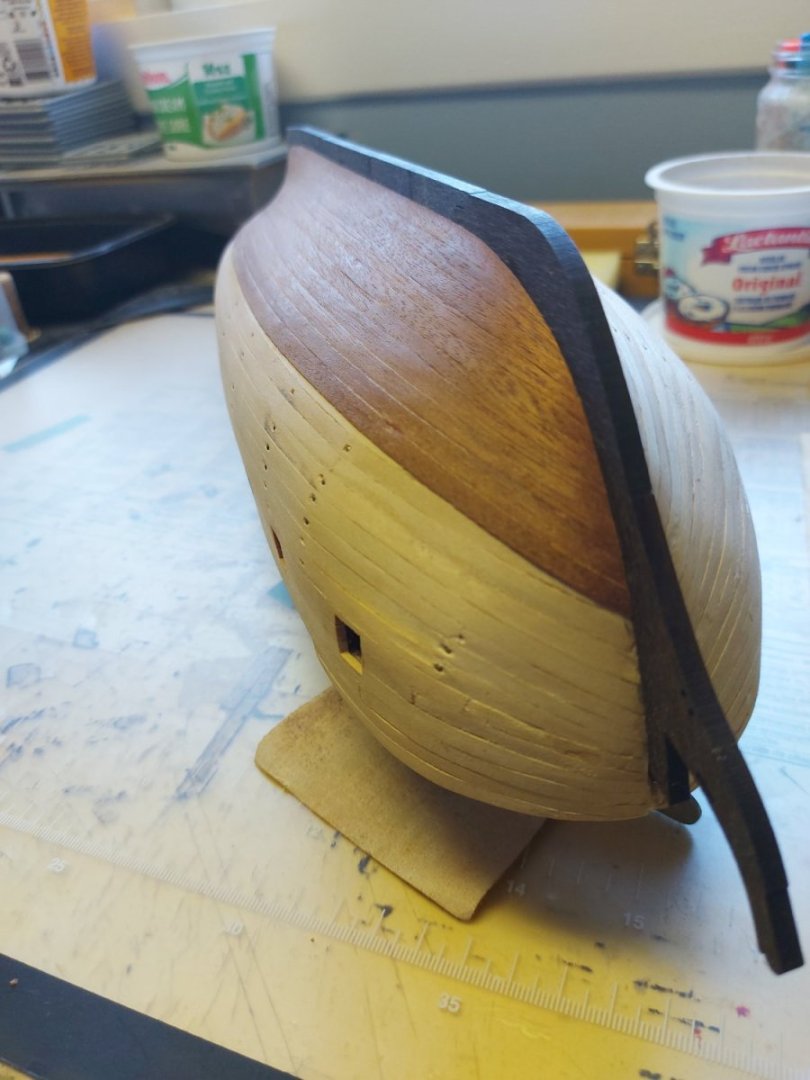
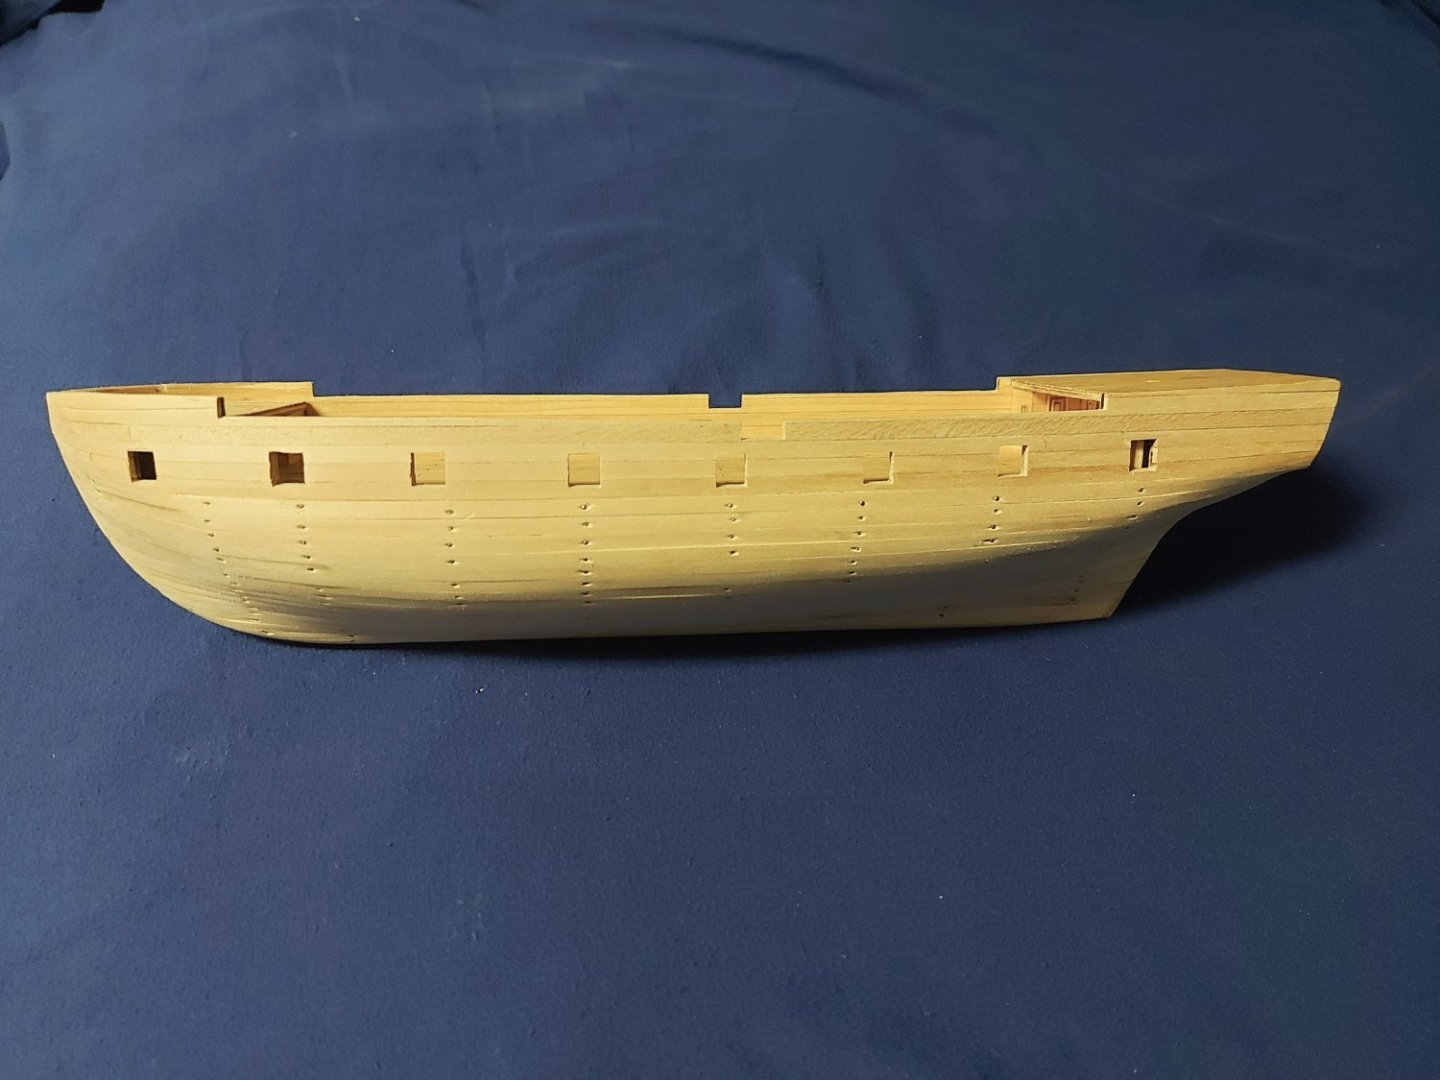
The first layer of the hull is officially finished and trimmed. Here is the result :
-
Which version do you prefer? My carved version, without the visible char : The kits plywood part with visible char :

-
Hi RossR, could you show a picture of the cement glue you are using. Thanks, Patrick B
-
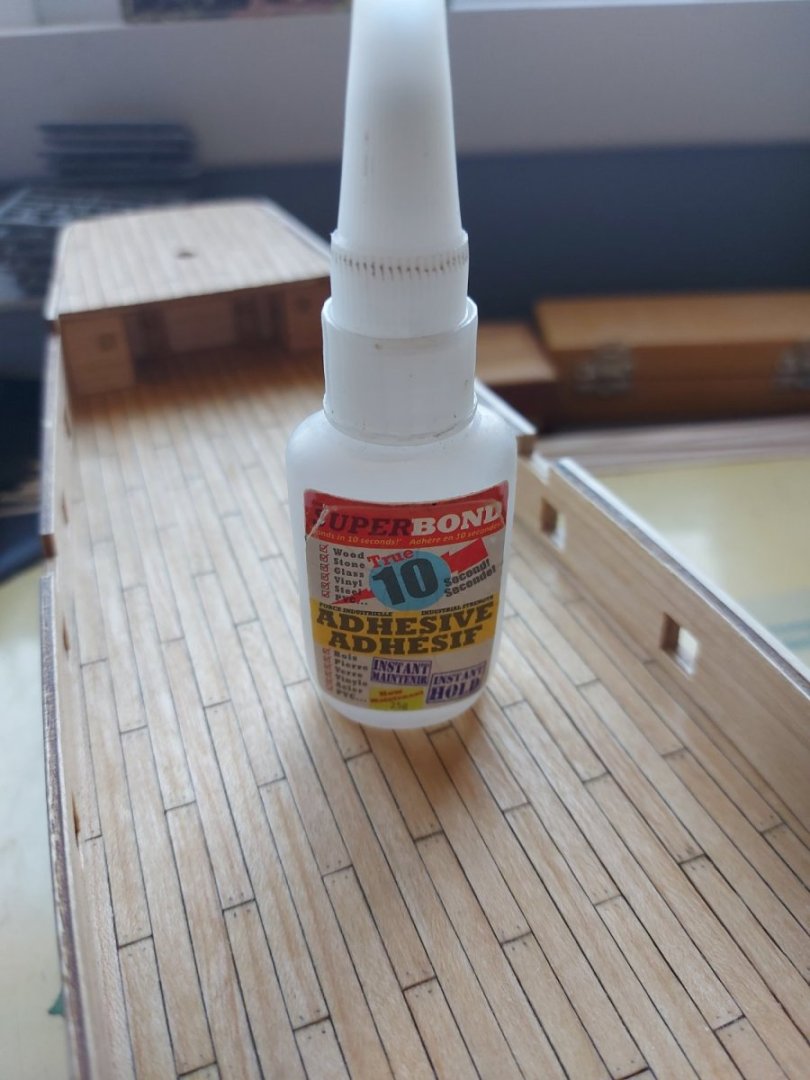
Hi RossR : Cyanocrylate, the same stuff I used to glue the ends of the first planking layer's planks. It glues in ten seconds and its not fraudulous markething. Plus, when its glued, its very tought.
-
Planking update : The first side is finished planking. I am very happy with the result, as no wood filler was needed whatsoever, and little to no sanding was done too. Due to the carefull attention in the planking process, no "steps" where created. I leaved the nails in, contrarly to the popular behavior, as this didn't affect the sanding process at all. This choice was made because of the fact that I posses a nail pusher. Without it, I would have certainly took the nails off. I leaved the nails in, contrarly to the popular behavior, as this didn't affect the sanding process at all. This choice was made because of the fact that I posses a nail pusher. Without it, I would have certainly took the nails off.


-
Update on planking : I have placed 10 planks on one side, 7 on the other. My predictions came true, I needed a drop plank on one side. Meaby not on the other because the elevation for the same number of plank isn't as pronouced.
-
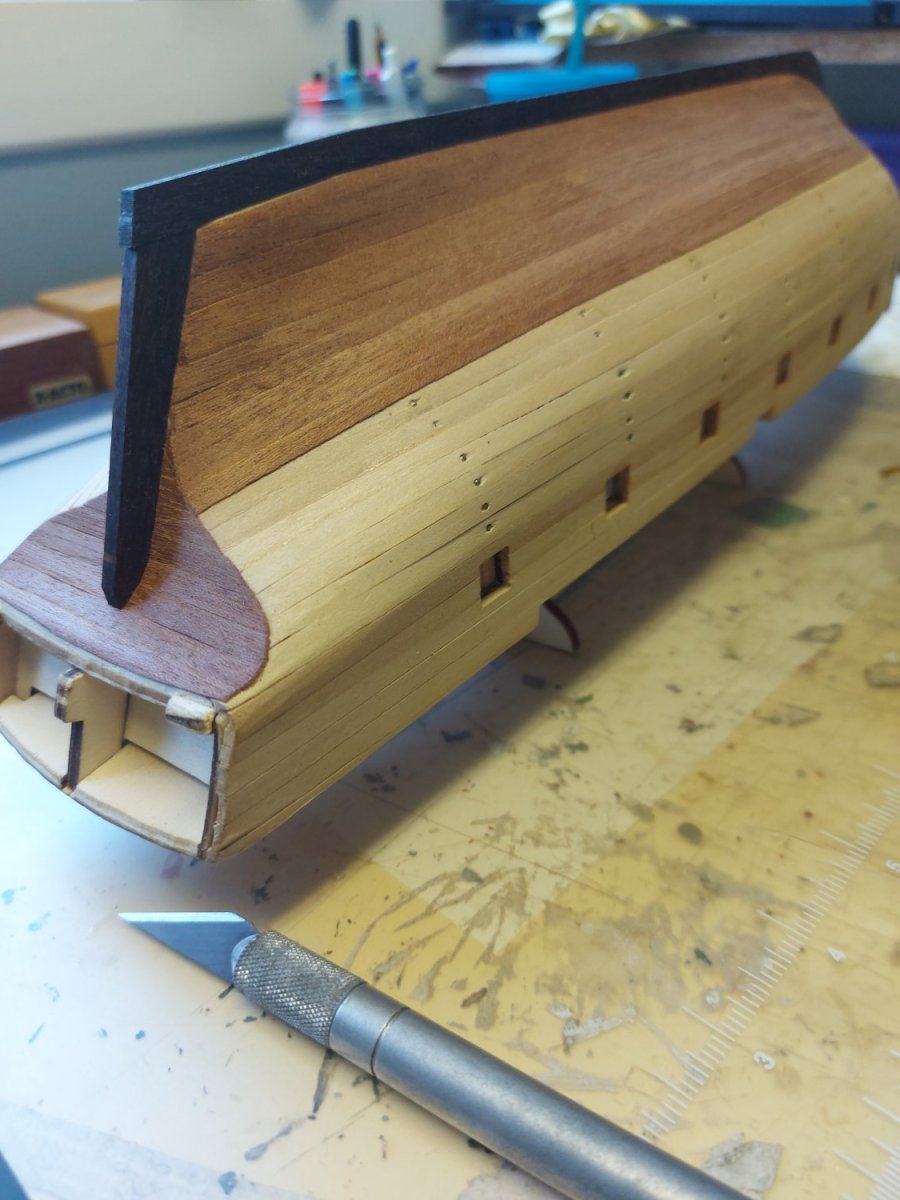
I added a couple of strips to the hull. The other side gunport holes is finished too, glued on, covered in lime strips. Then cut out and oiled.

-
The ship returned from her Journey back to the shipyard. When she will do it's next travel, she will be finished.
-
Thanks for the attention allanyed, but I guess for this one, the rowers will need to bring their legs back, or stand. Haha
-
You are right. But I still like the appearance of the 1-3-1 thwart pattern. This being my first ship, I incourage you to inform me about these interesting tricks the old sailors know. Keep in mind that I might change some other things afterwards if not too much added work is needed. I am very interested in those small tweaks that coulds make it more realistic.
-
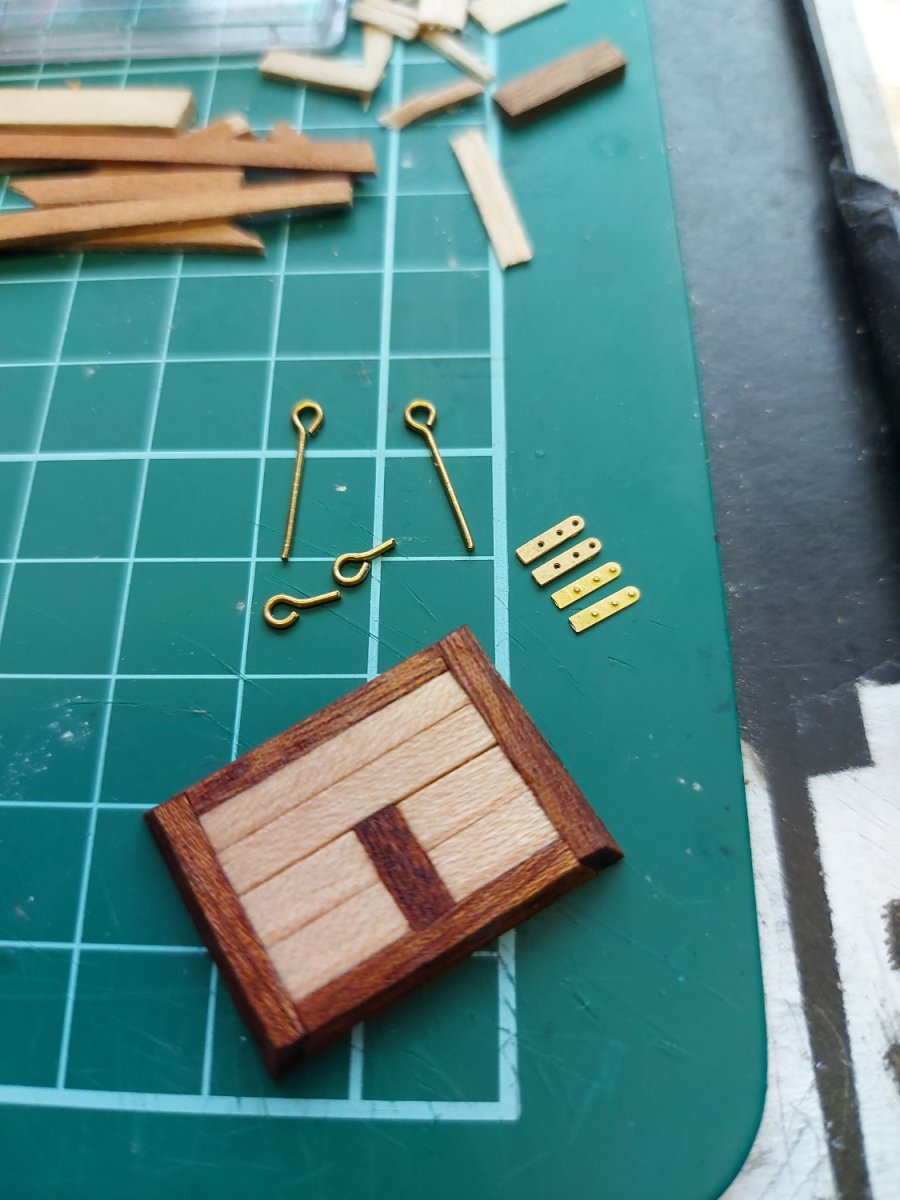
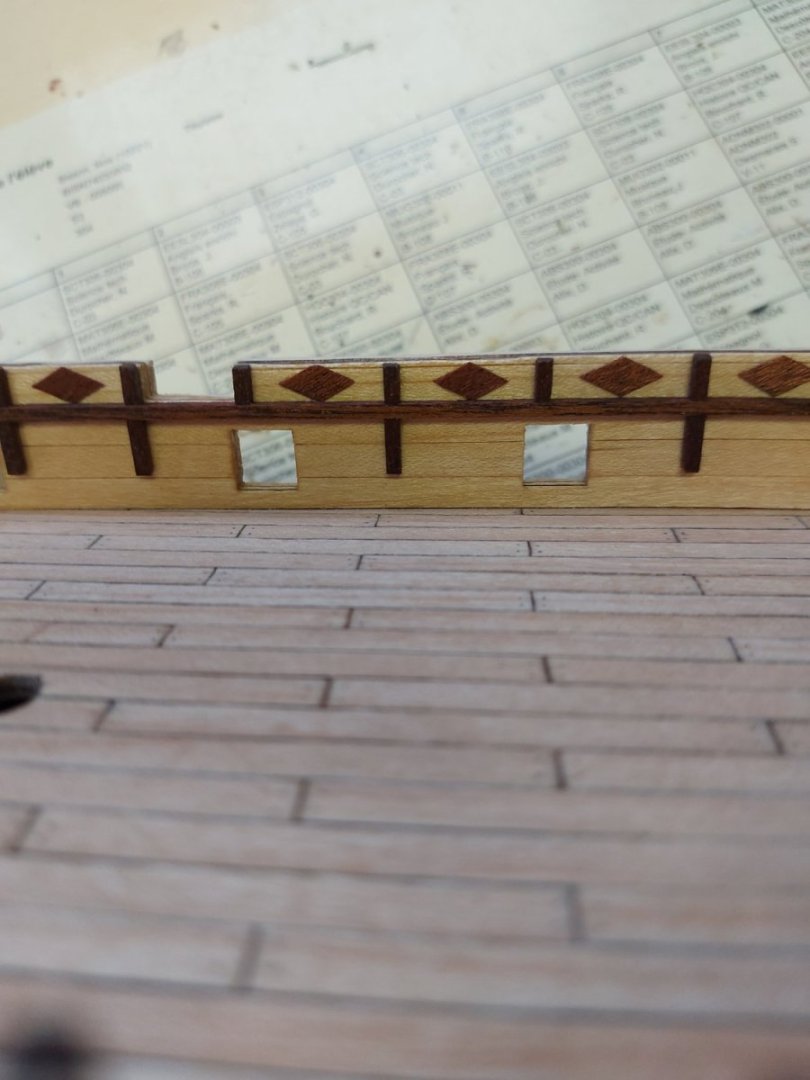
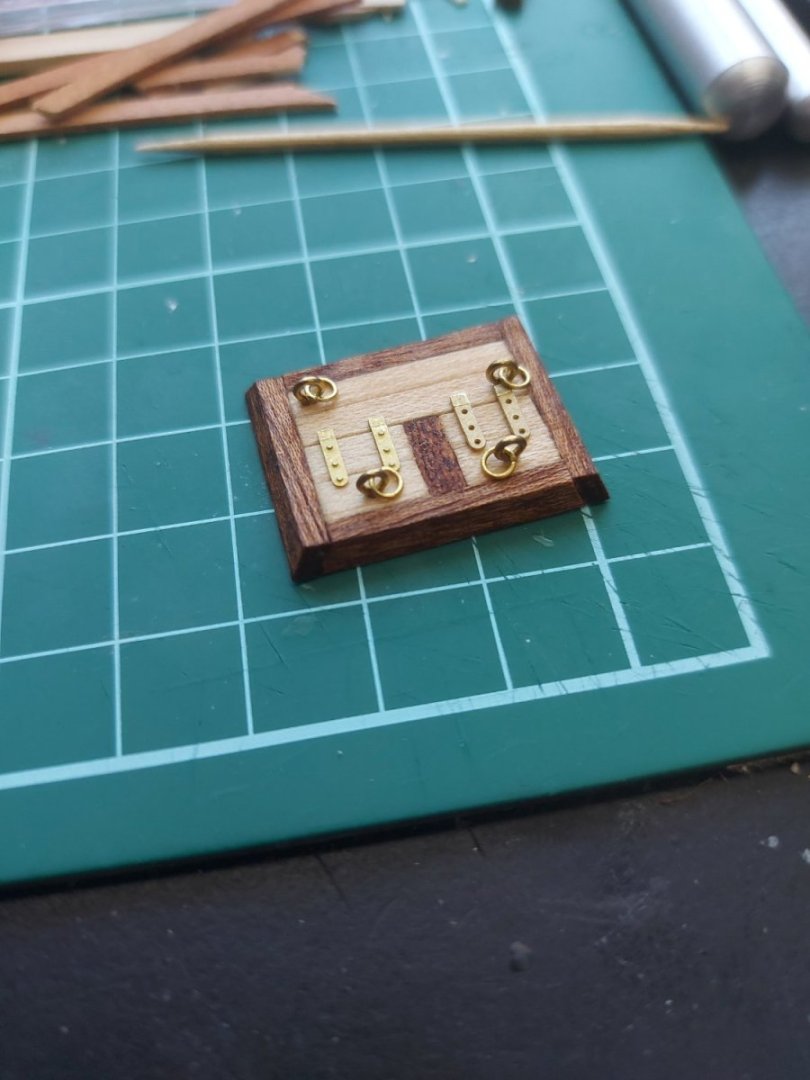
Yes, the thickness is different. The one with holes is a bit thicker than the other pair. It's color is different too, being a bit darker. They are the only use of the J7 parts. The other hinges have different sizes and names. I decided to put one pair for each hatches. Otherwise looked odd.
-
Hi, in the construction of one of the deck fittings, I noticed something. One pair of the hinges has holes in it rather than "nails". Both are named J7. Anyone has an idea on how I should display them? One pair per door or alternate them?

-
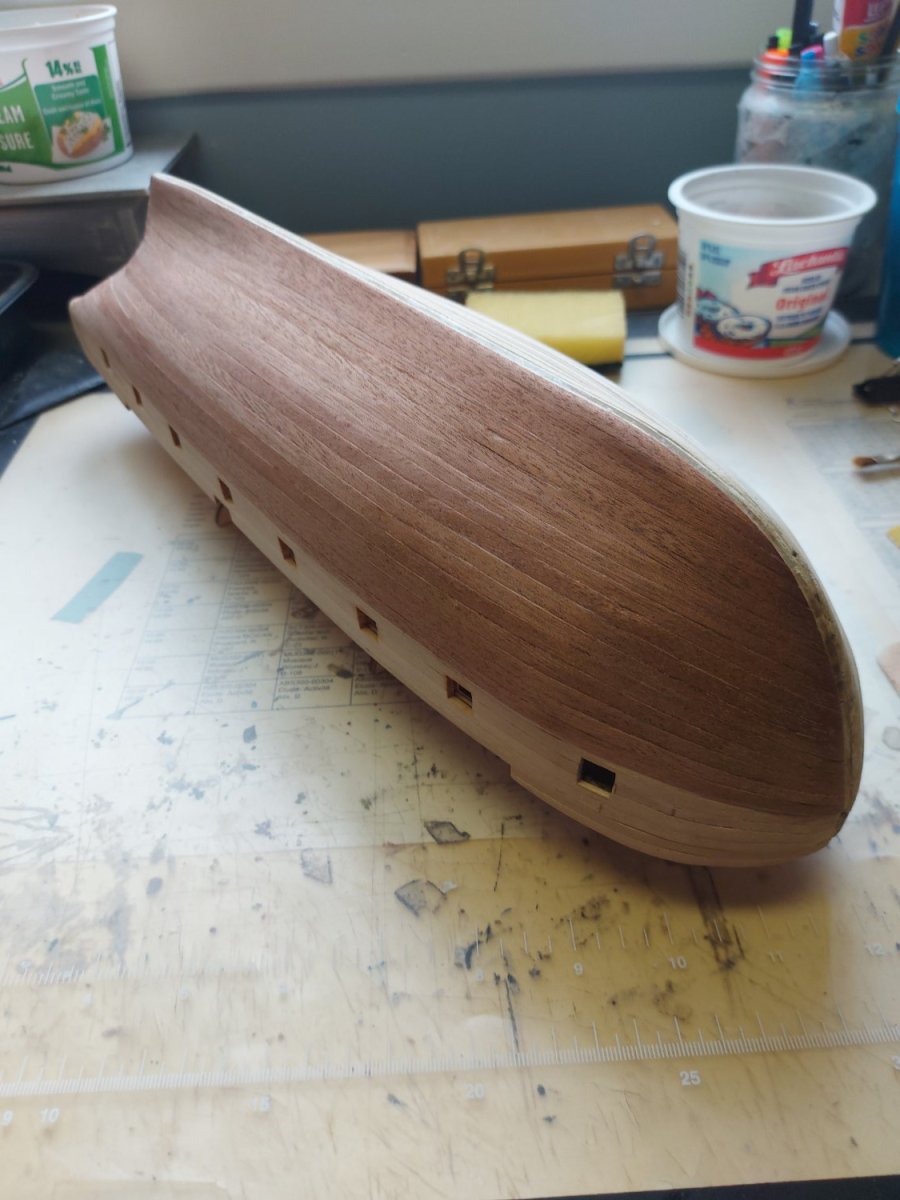
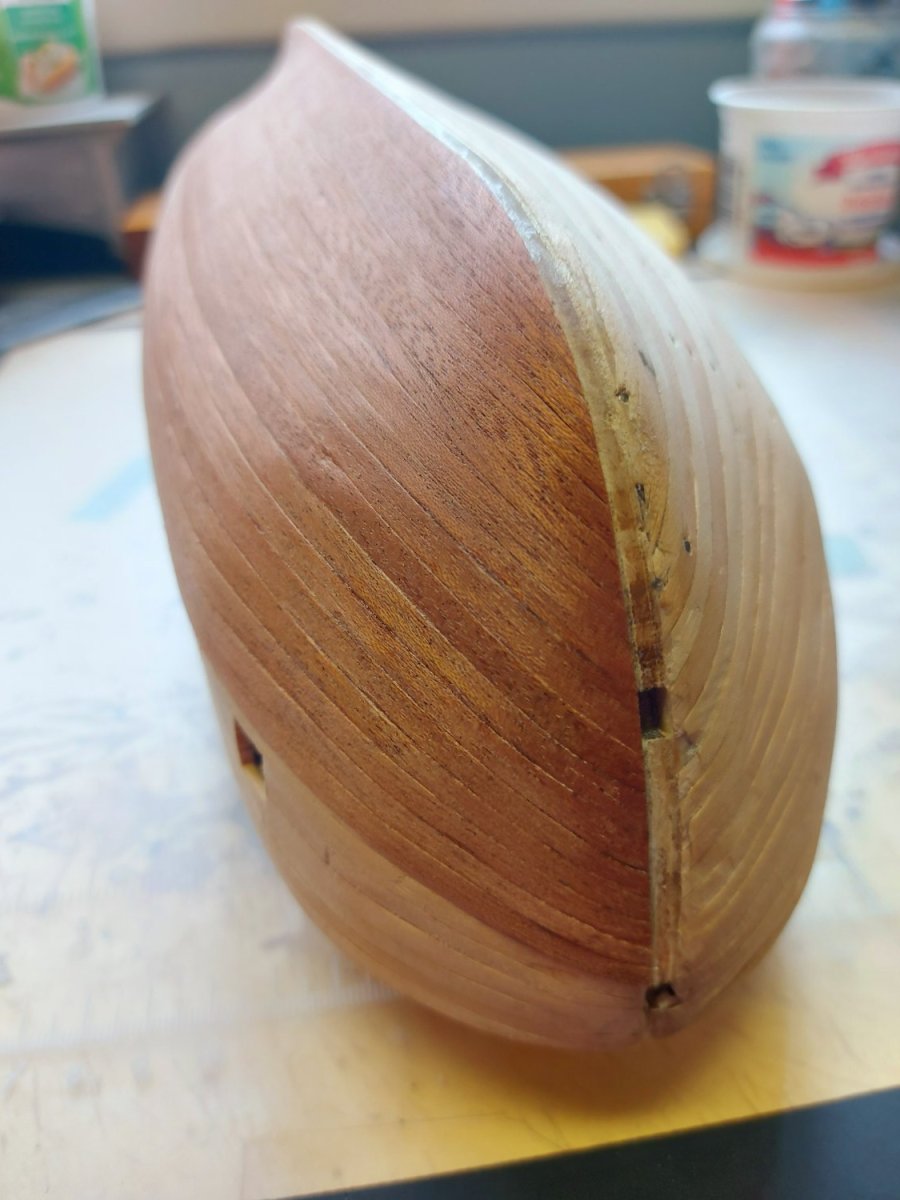
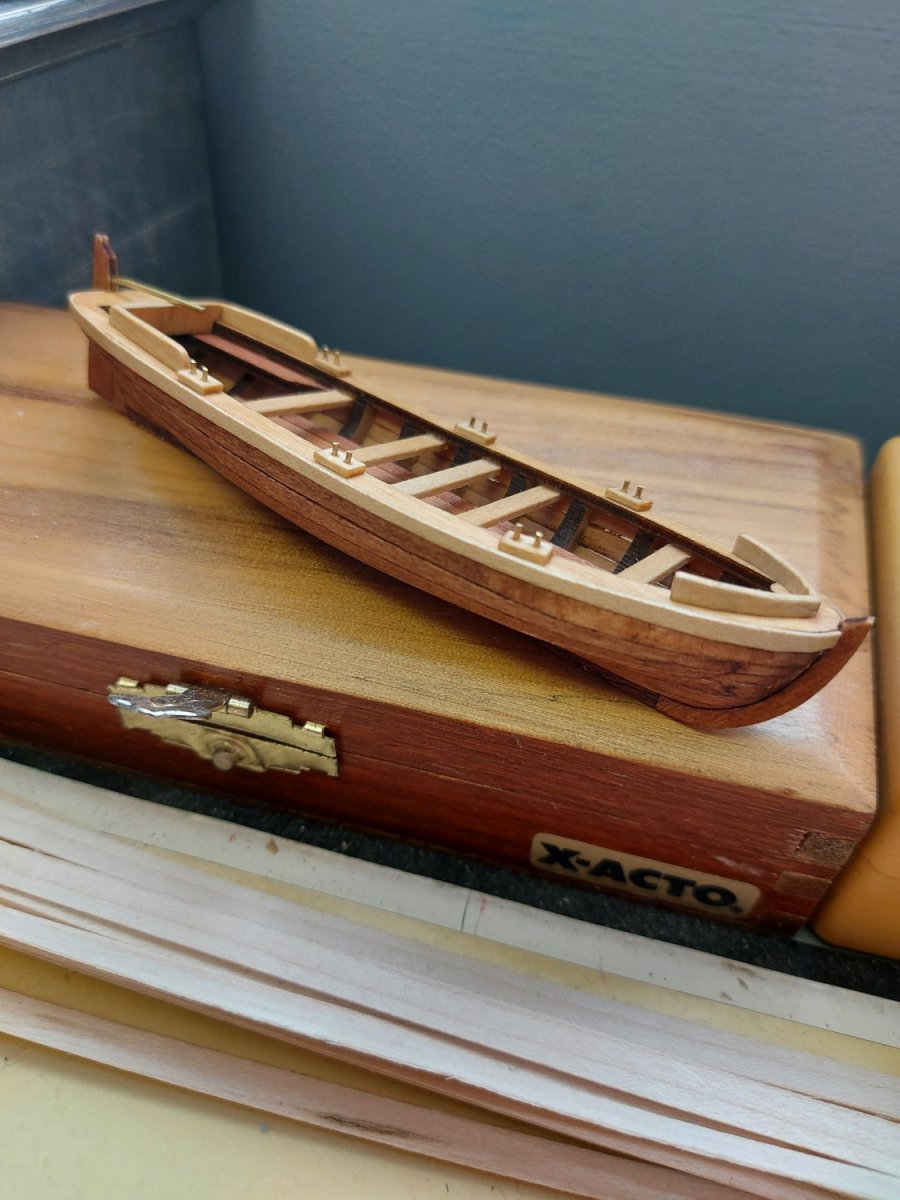
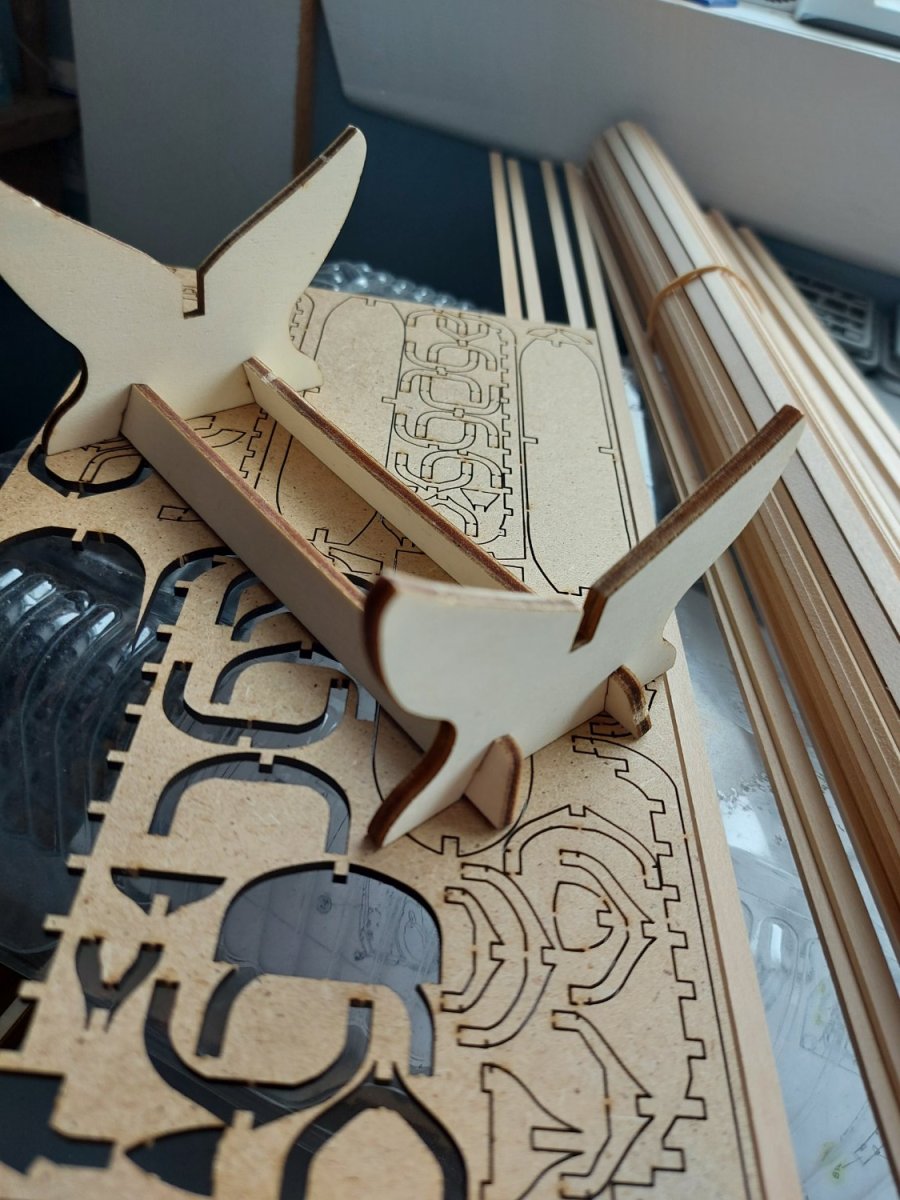
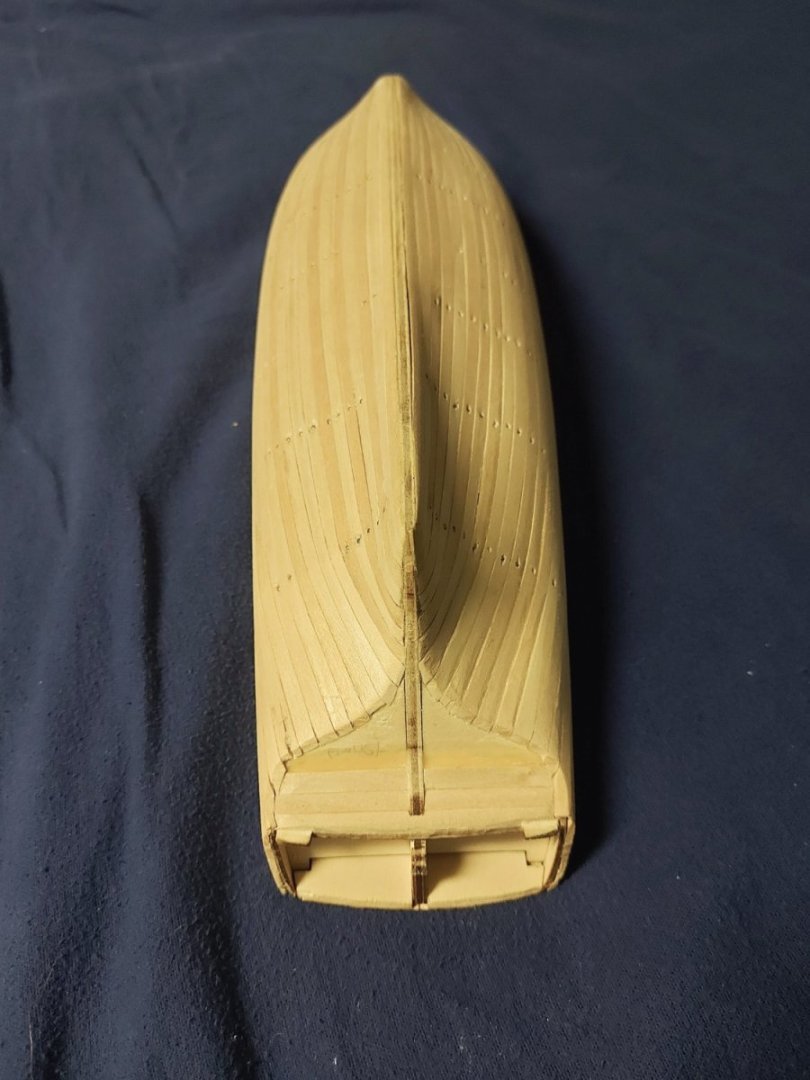
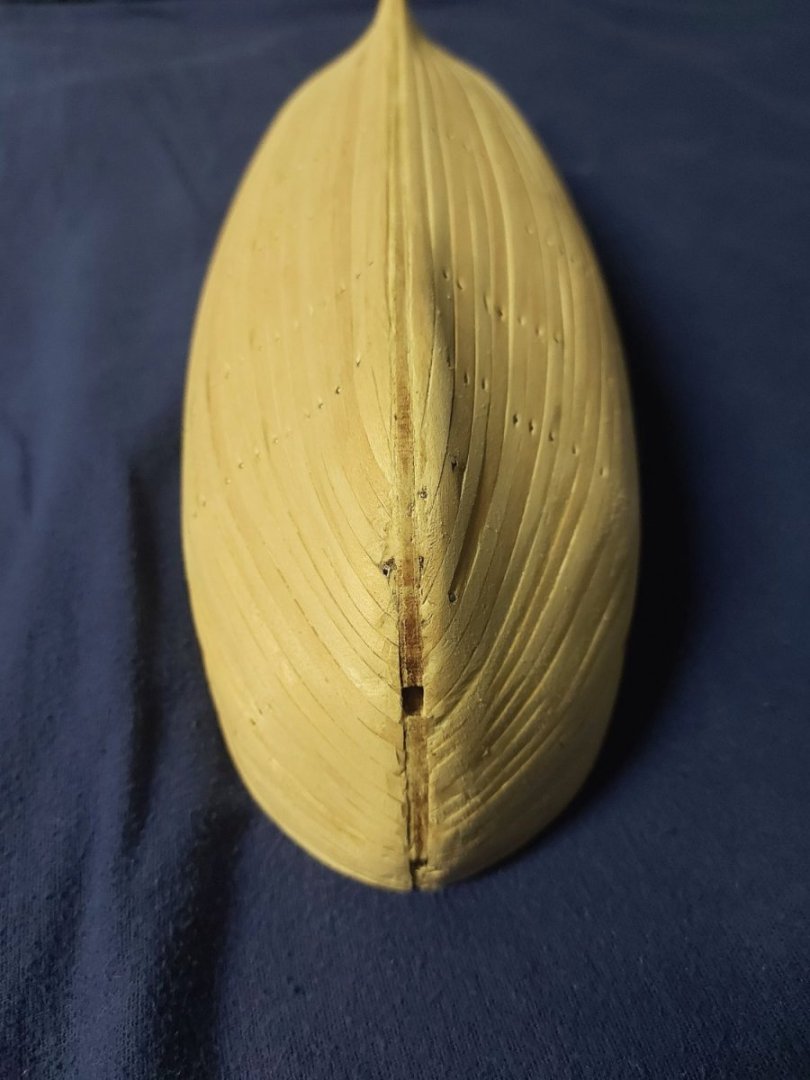
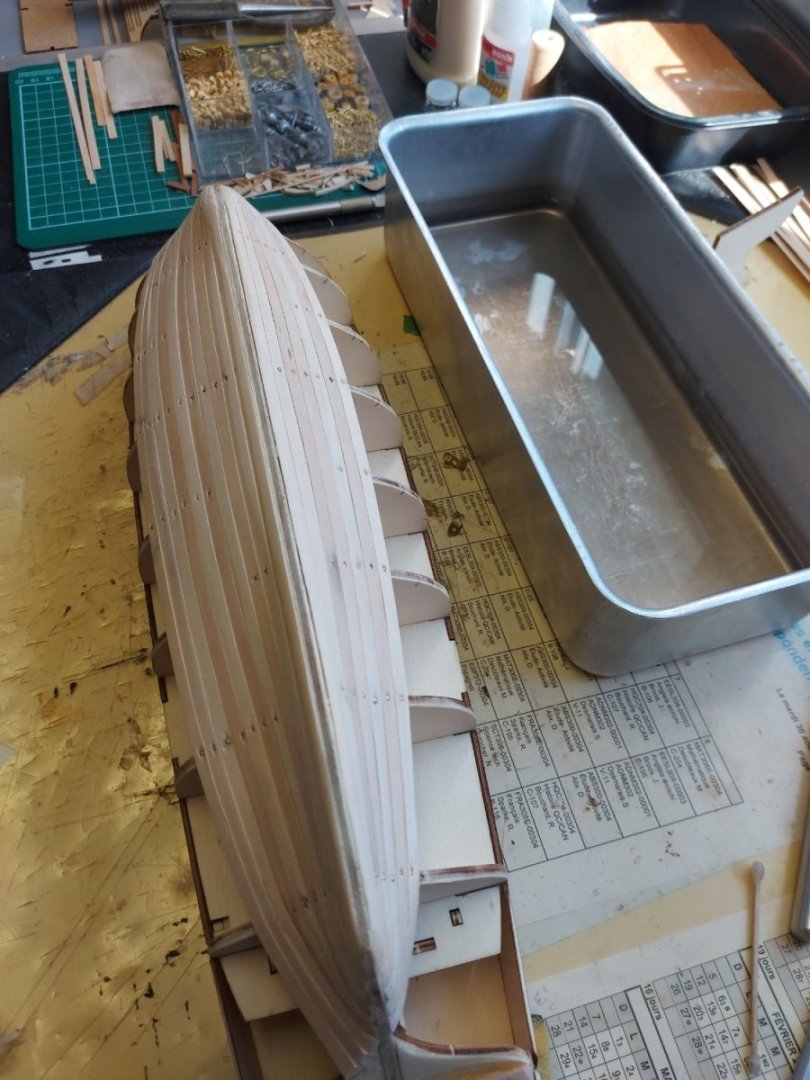
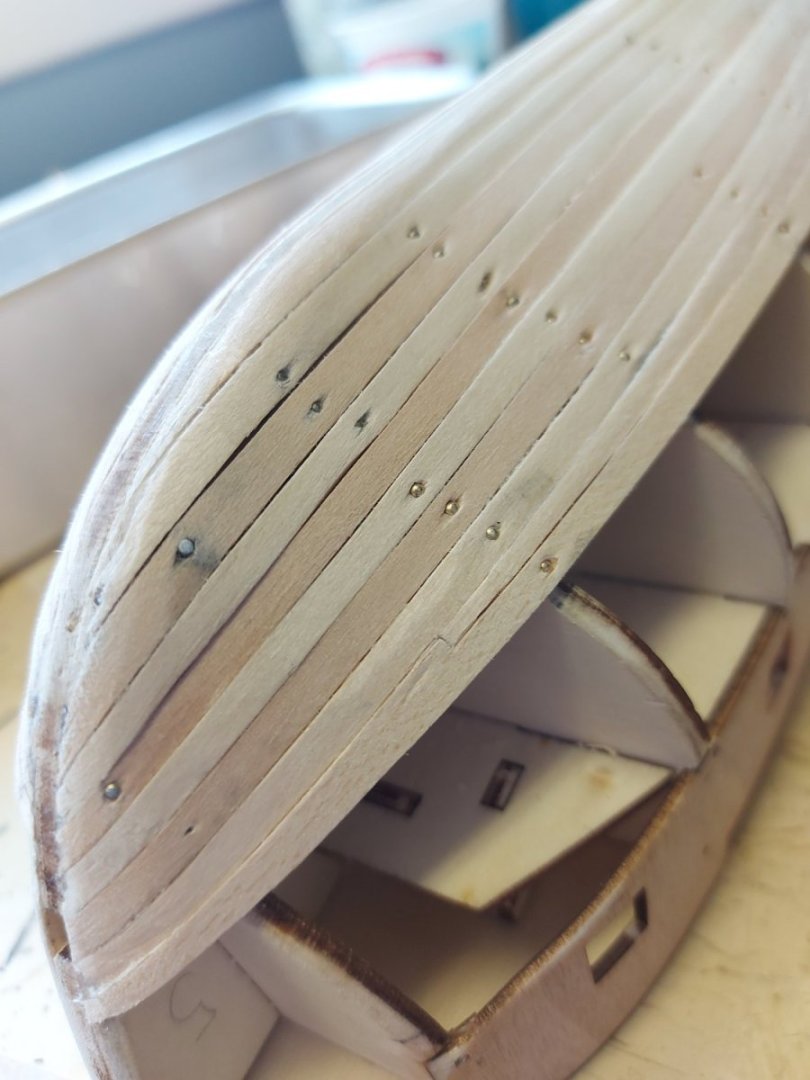
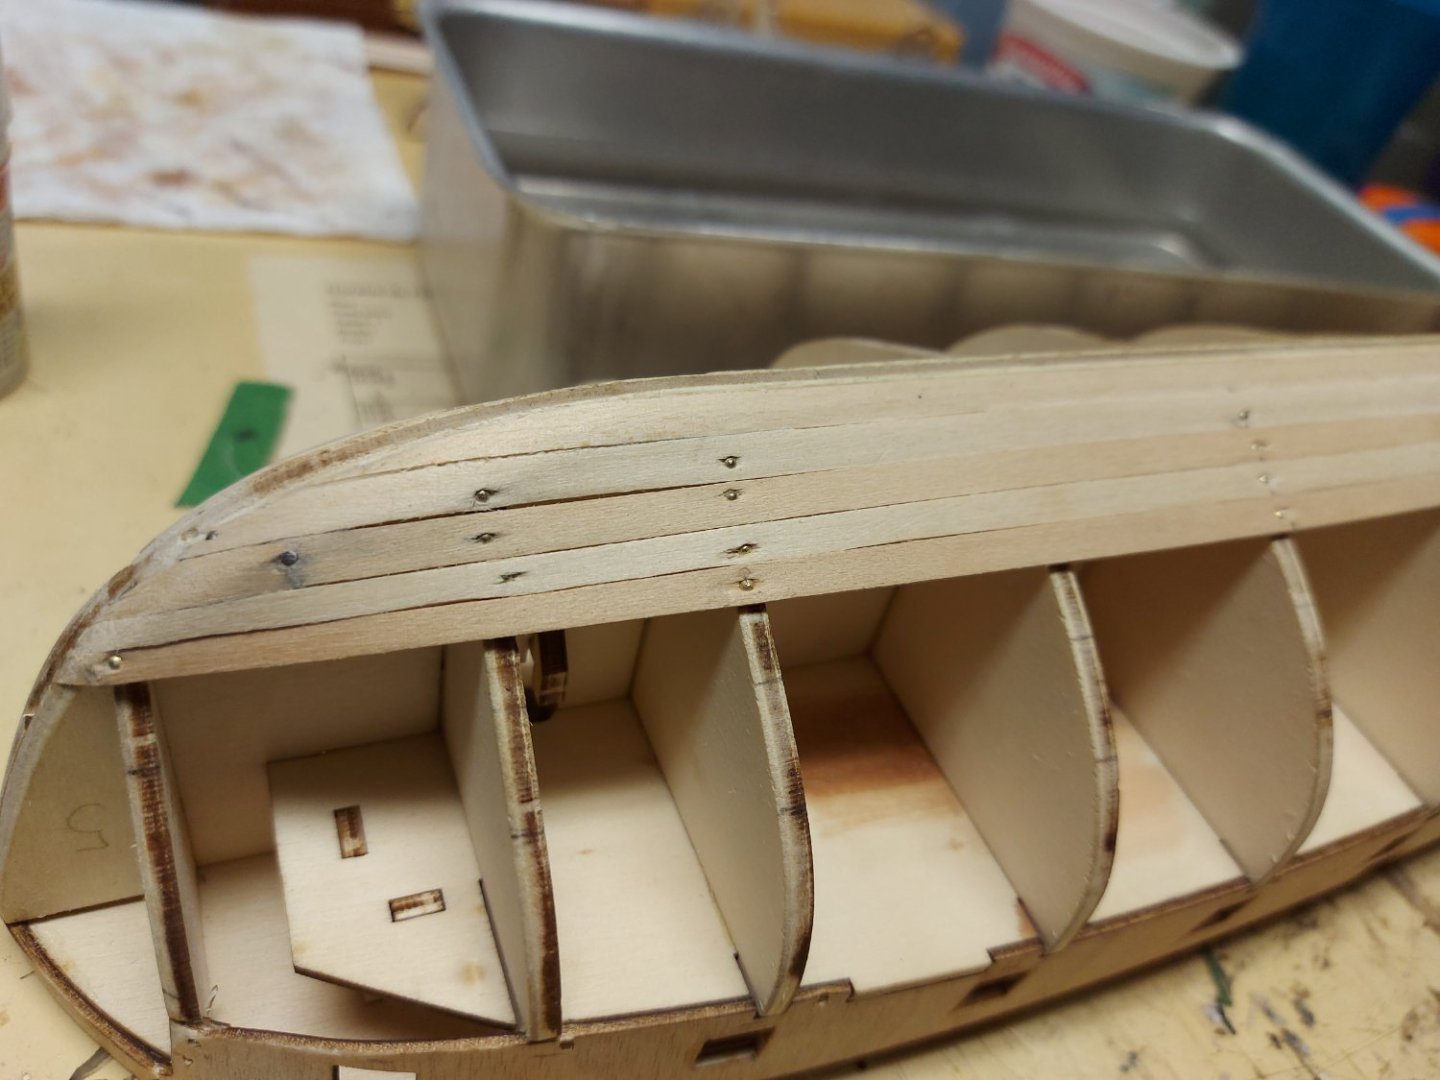
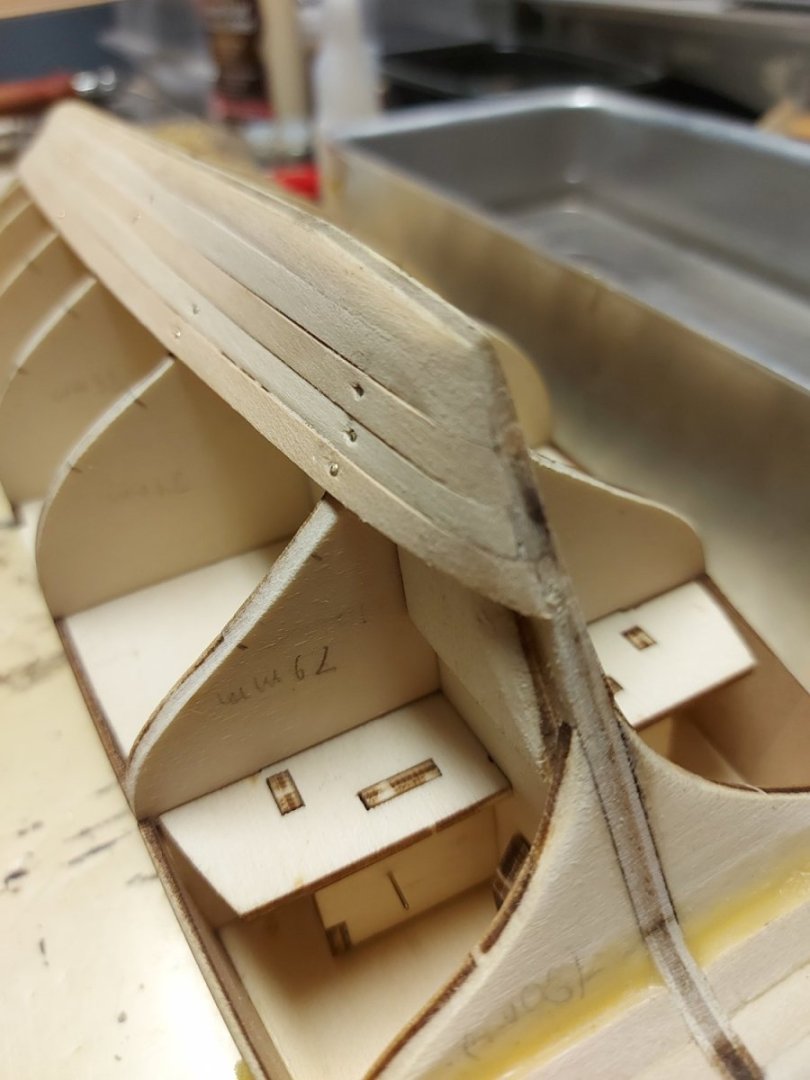
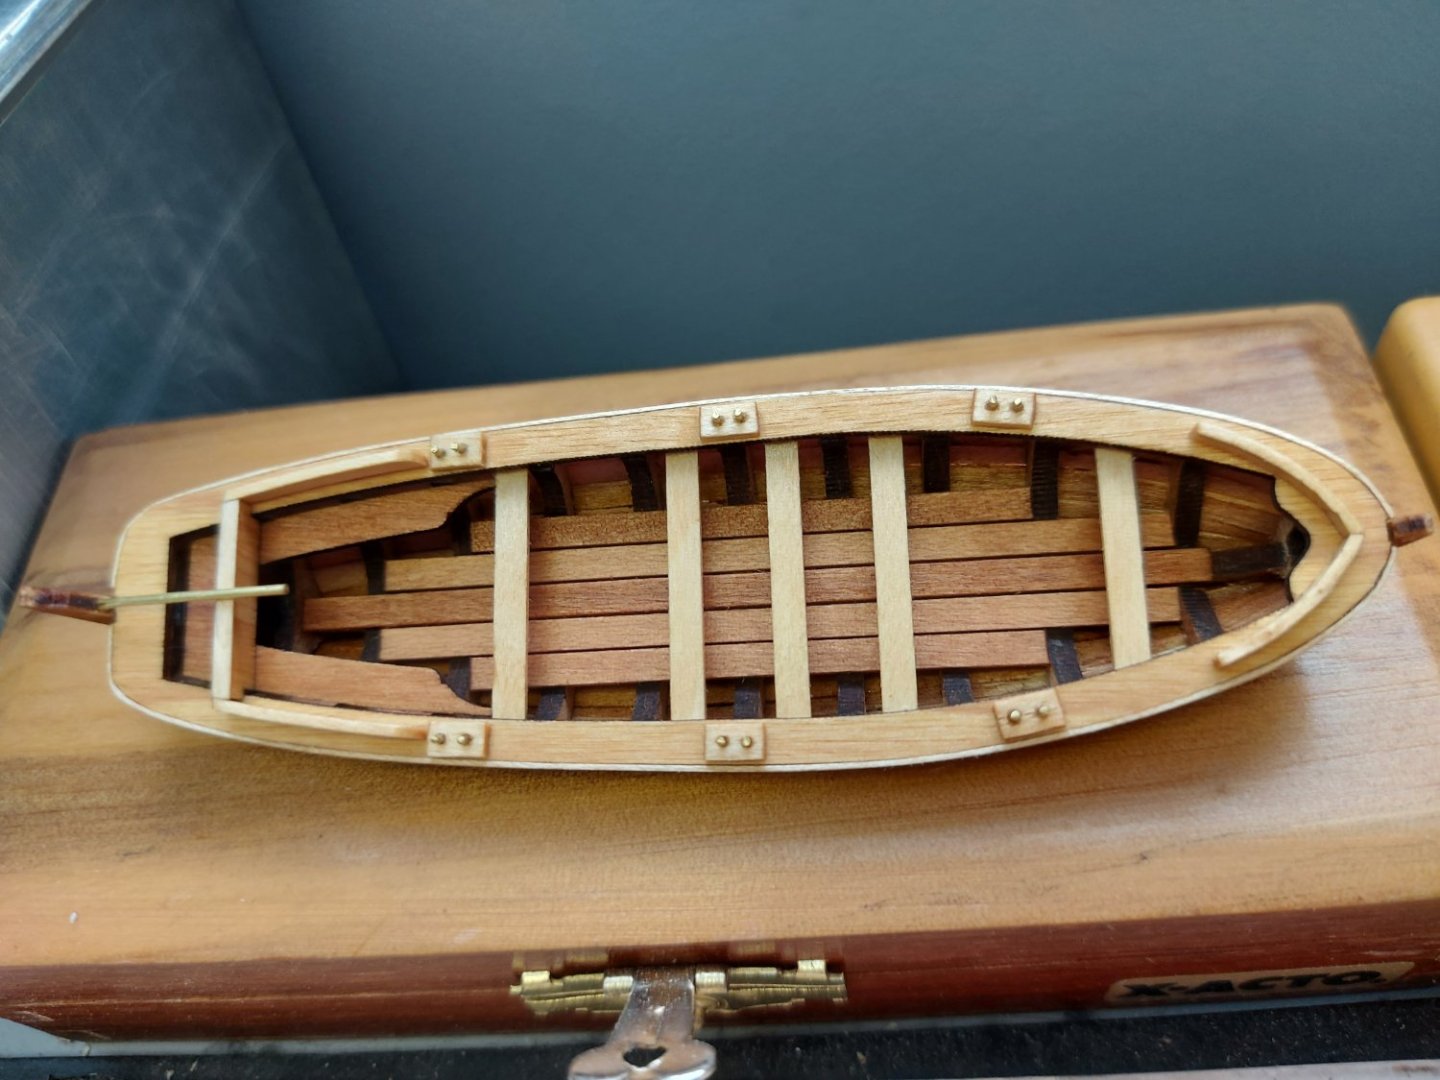
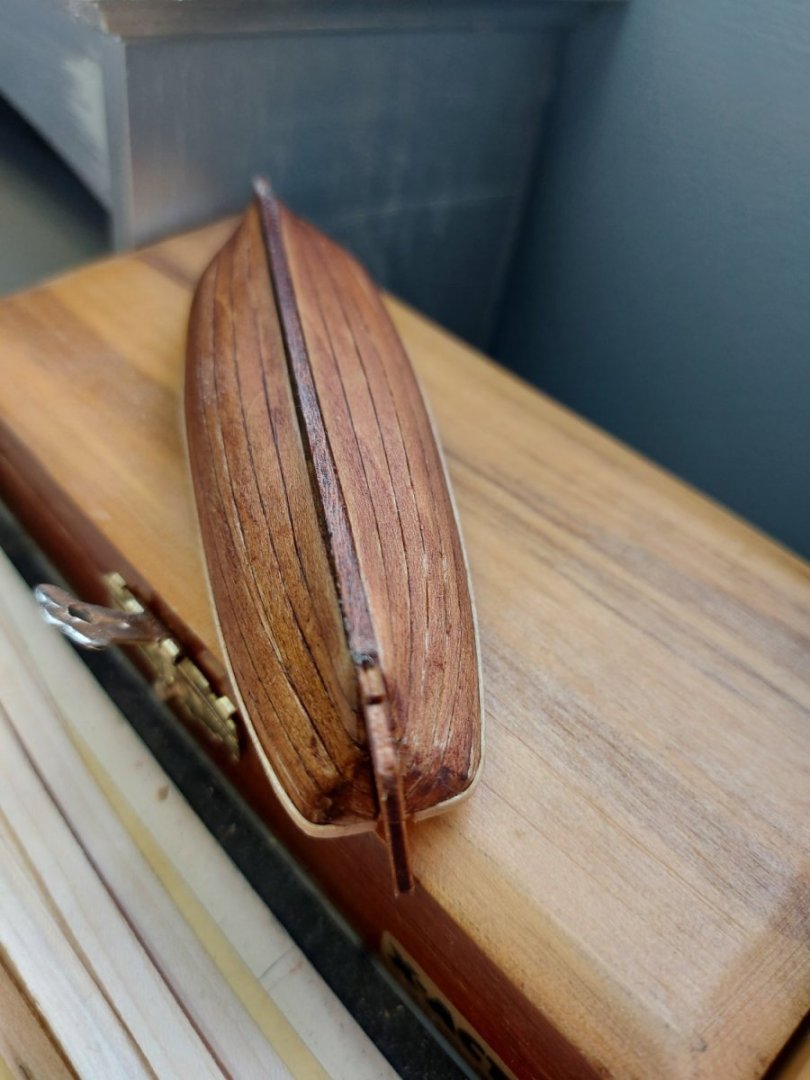
Hi everybody, this morning, I finished the first Beagle launch. Some parts were plywood and I didn't like the look of it, so I added a thin strip of sycamore to cover them. See the photos: After that, I added the usual coat of tung oil and it really sealed up the finished product to me.

-
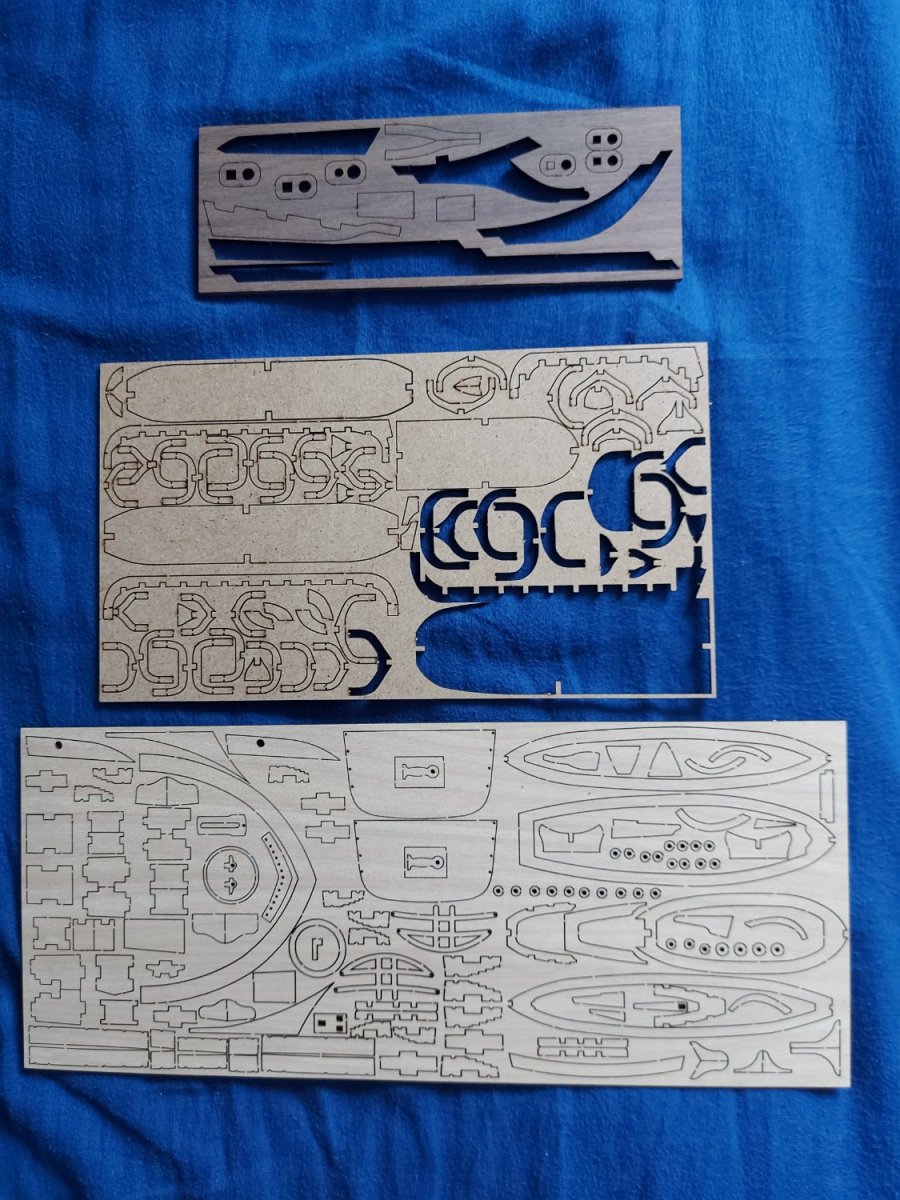
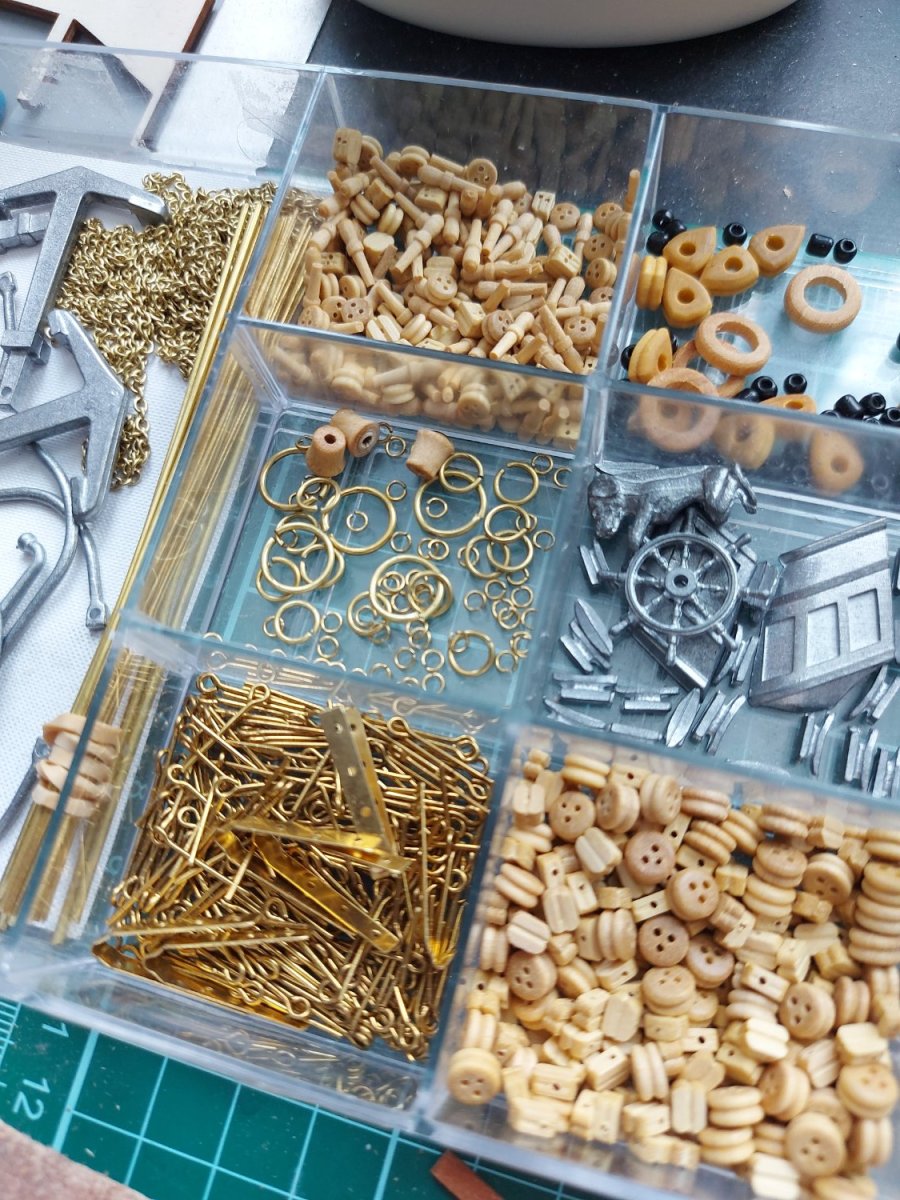
I have bought the Beagle in the last 3 month, and a couple of things have changed. -The stained plywood was changed to solid africain walnut -The other mixed sheet was changed to solid wood (unknown) -The launche's sheet was changed to mdf -The blocks have changed again to (box?) wood -The little cylinders made from brass where changed to (box?) wood also. -The stained plywood stand was changed to unstained plywood. See photos


-
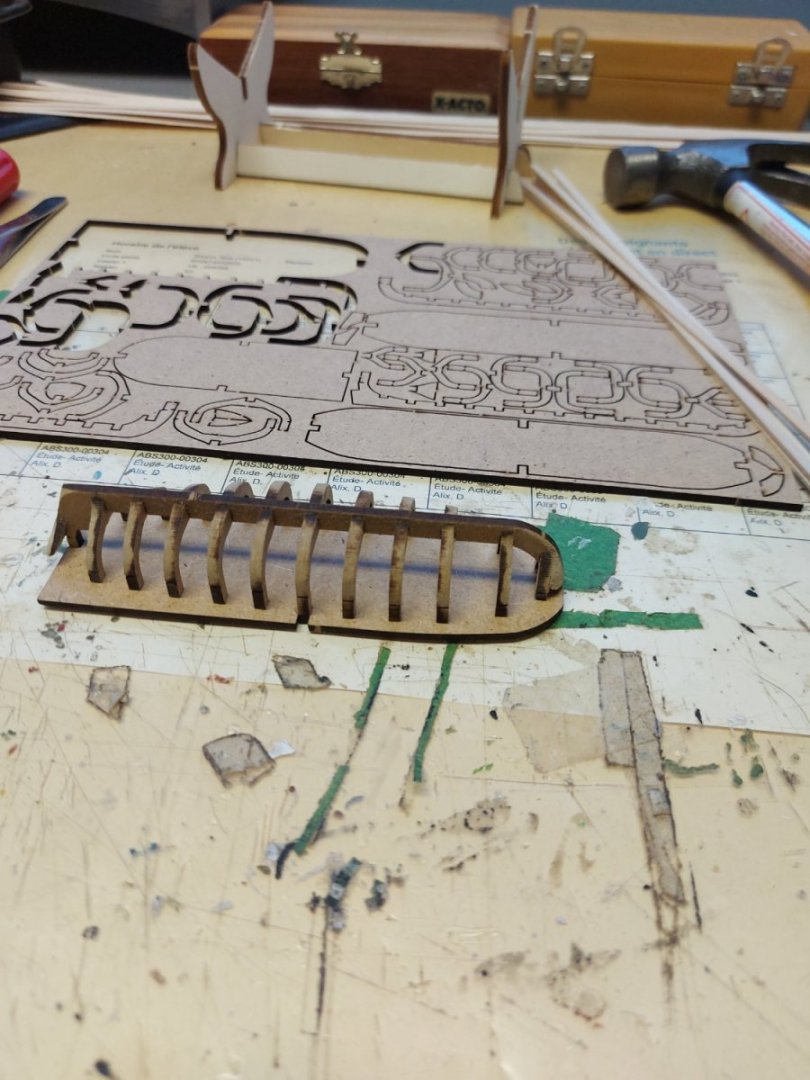
All right, I made a mistake. Not a modelling mistake tought. I went to one of my relatives, and brought the hull to show them the processus of ship building and how far I was. The thing is, I forgot it there. The good news is, I will go to this person's house again in about 2-3 weeks and I will be able to bring it back to the shipyard. In the meantime, I will be doing the several launches. Here is where I'm at for the (23 foot?) one. I don't think I will be painting it white if I do a good enought job on the hull.
-
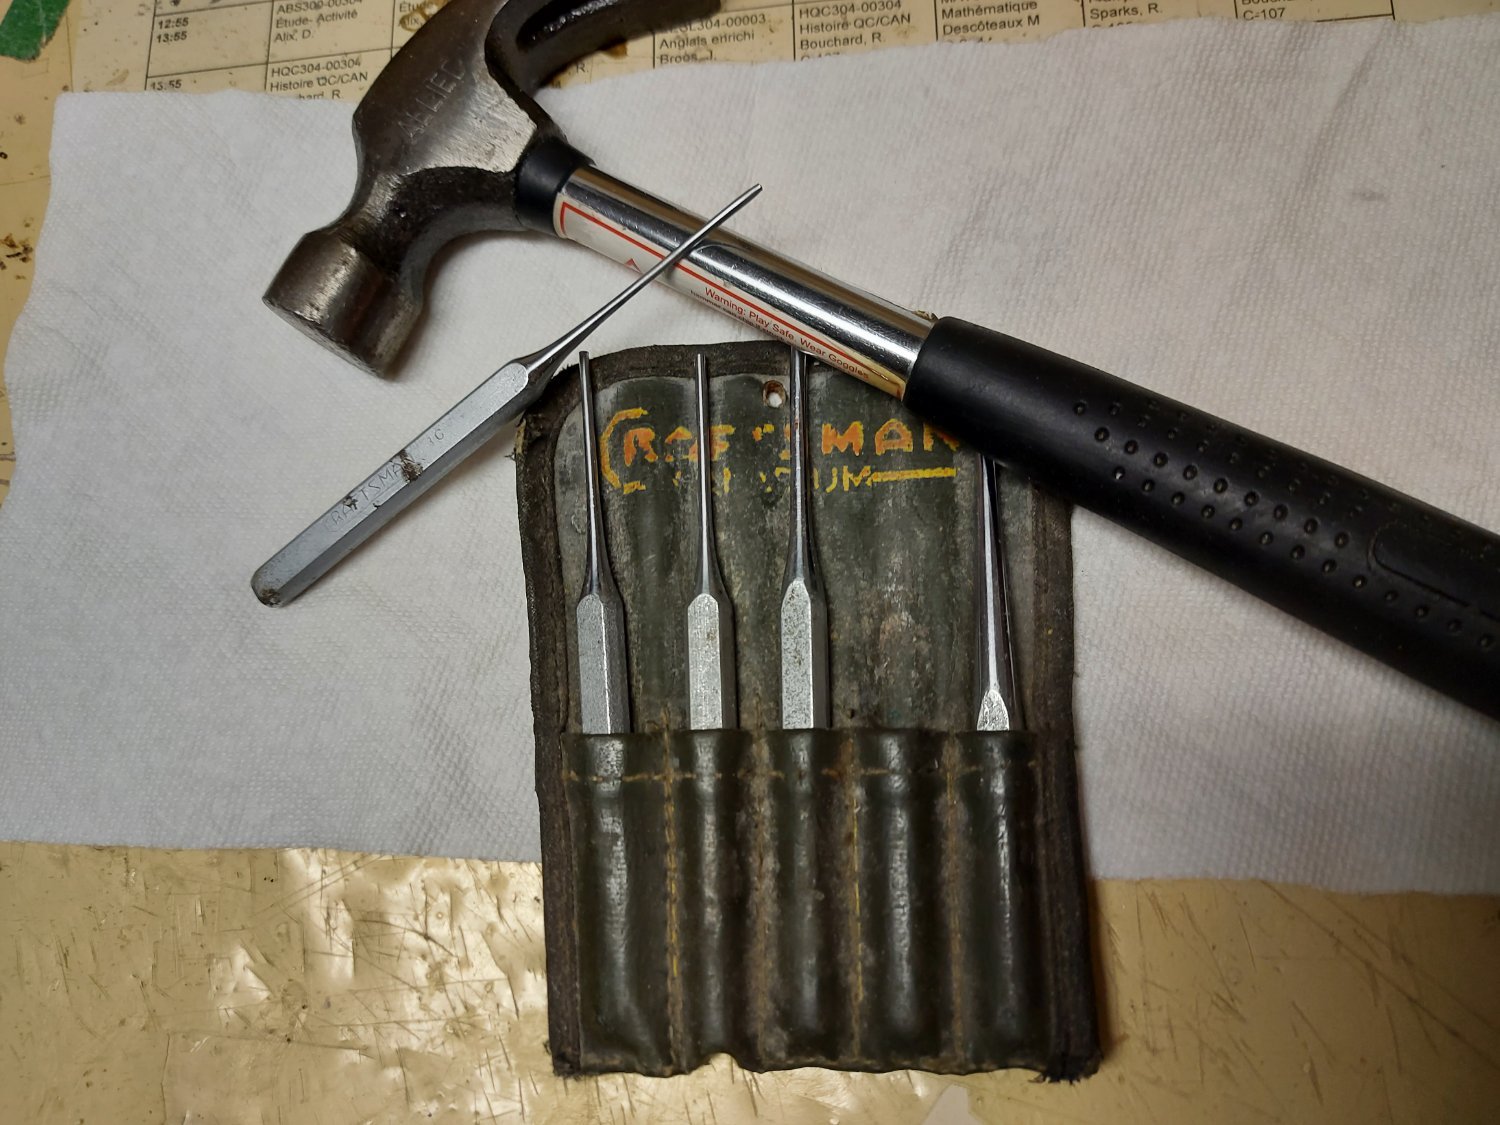
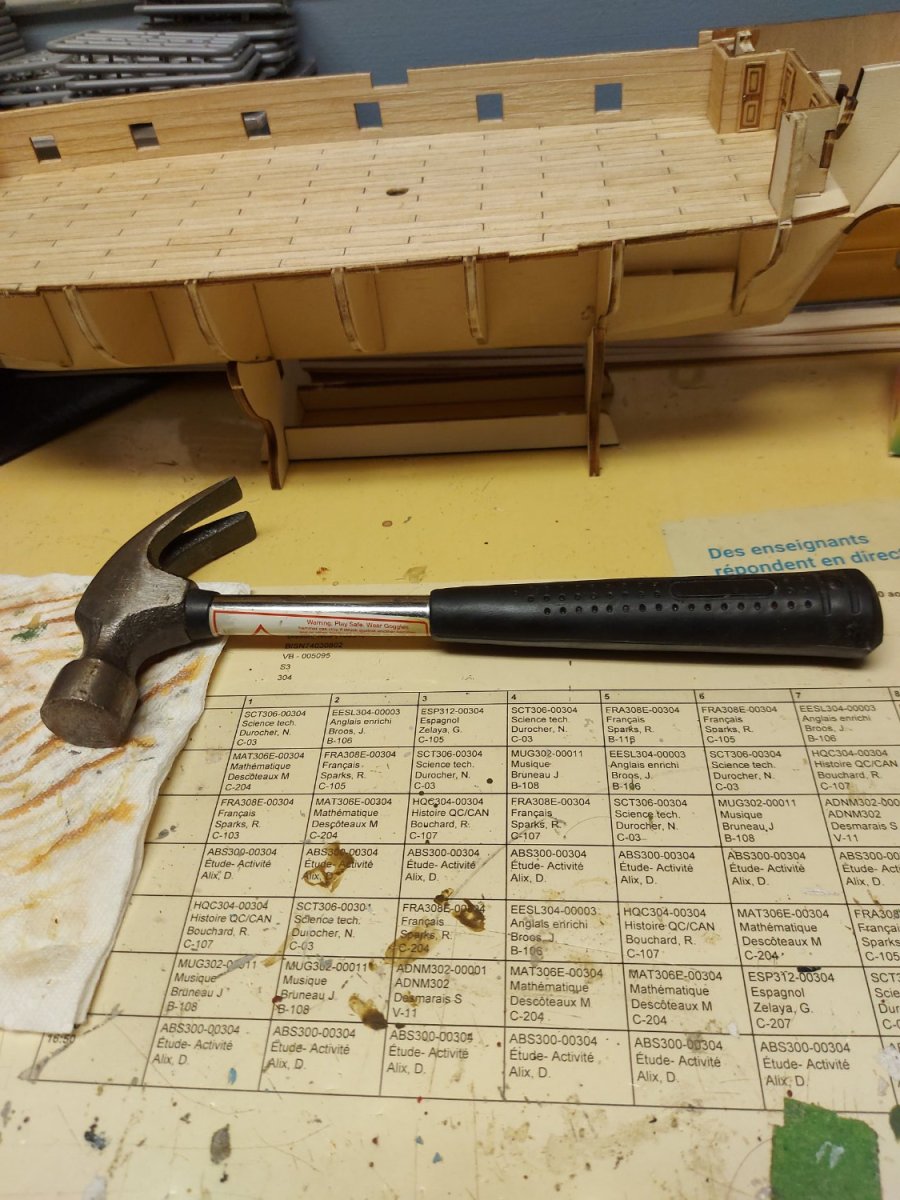
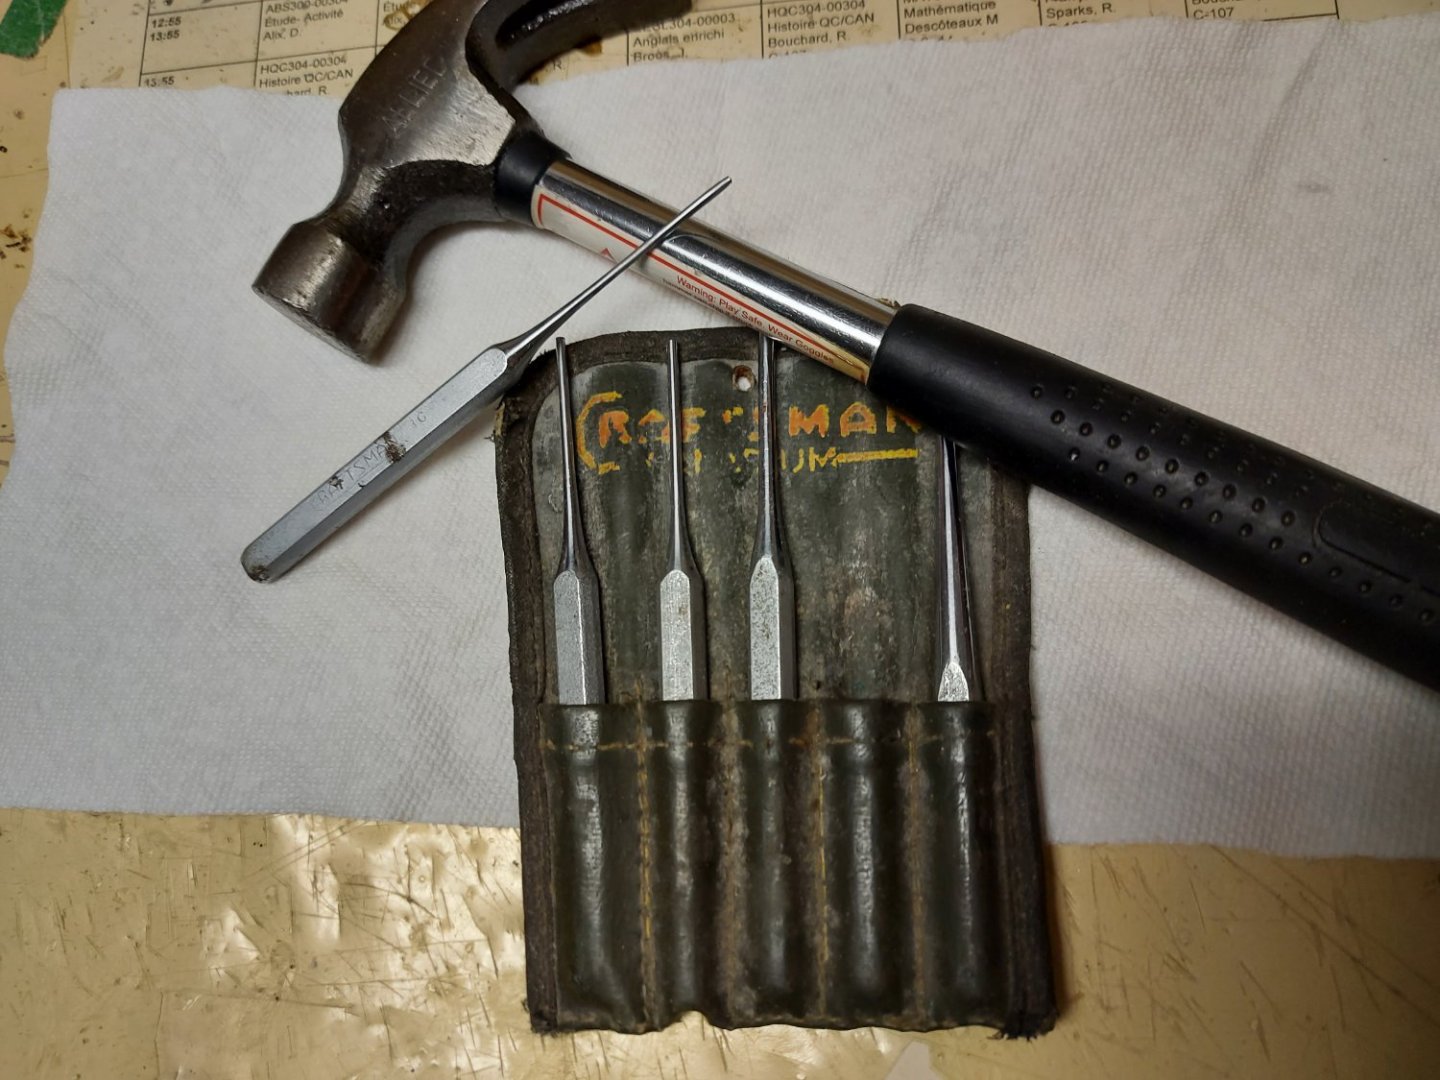
A small hammer?

-
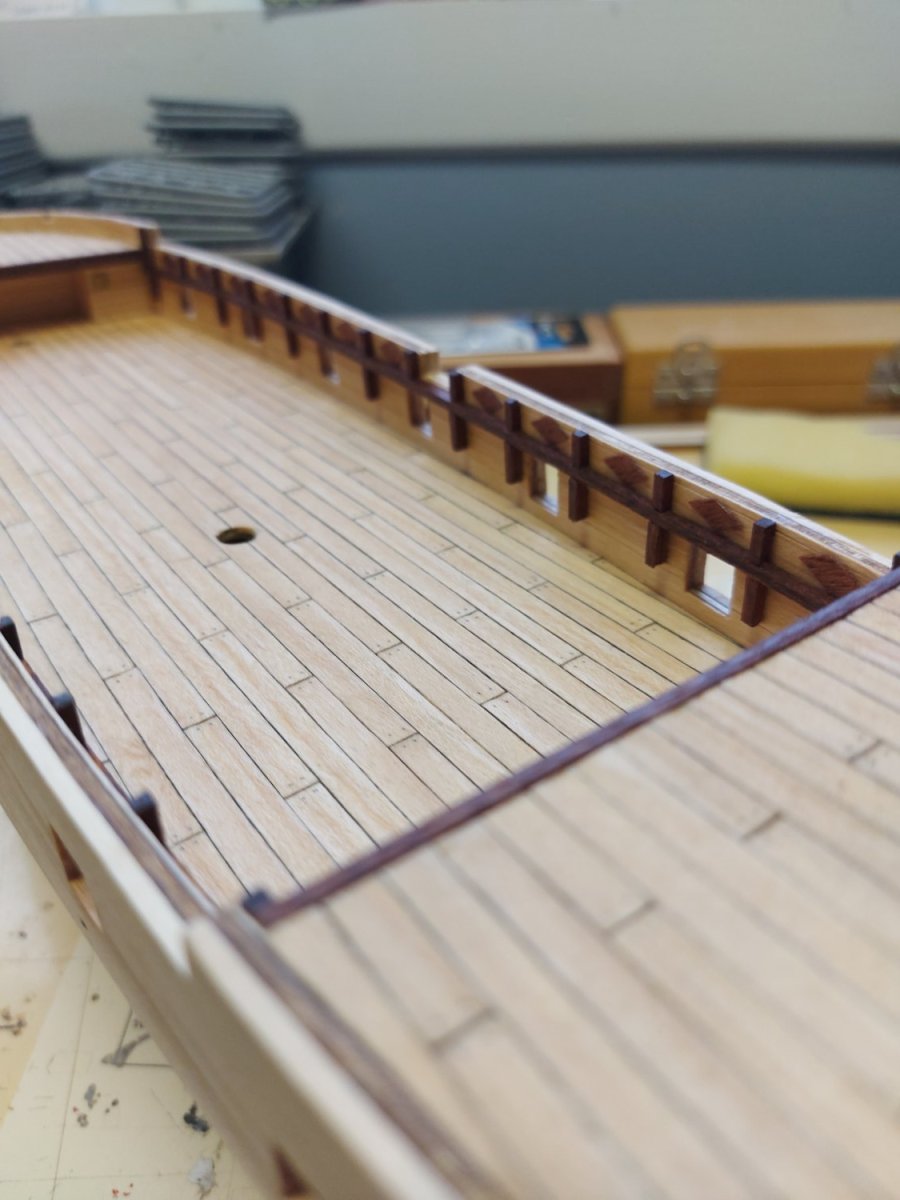
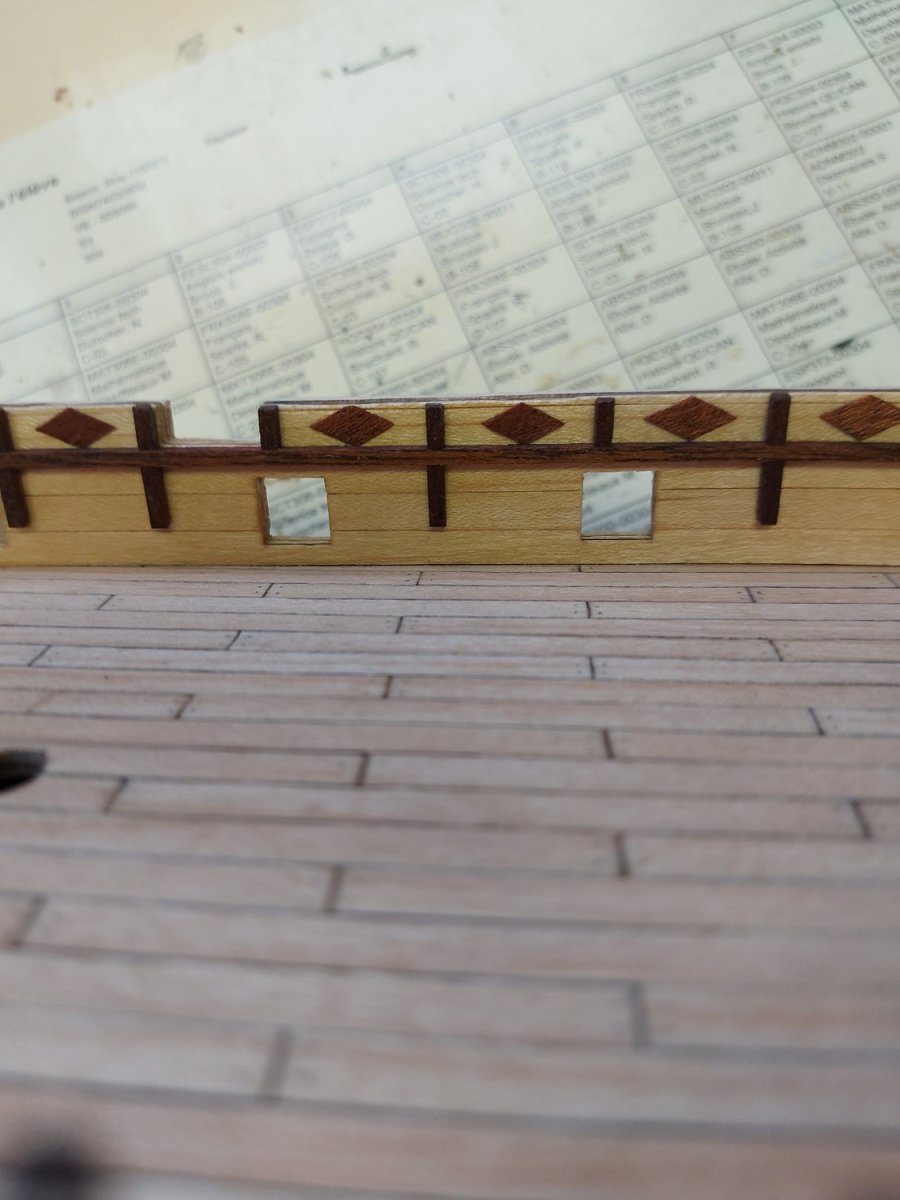
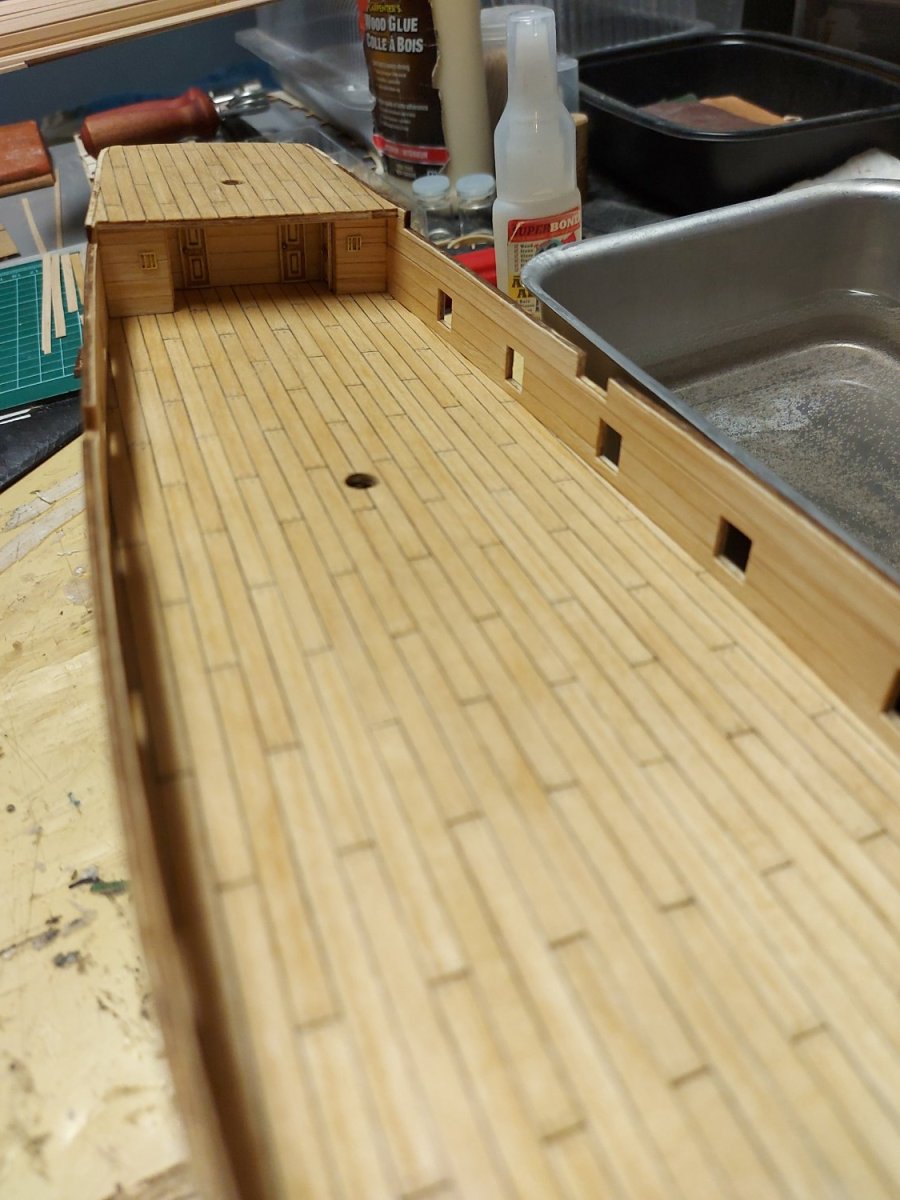
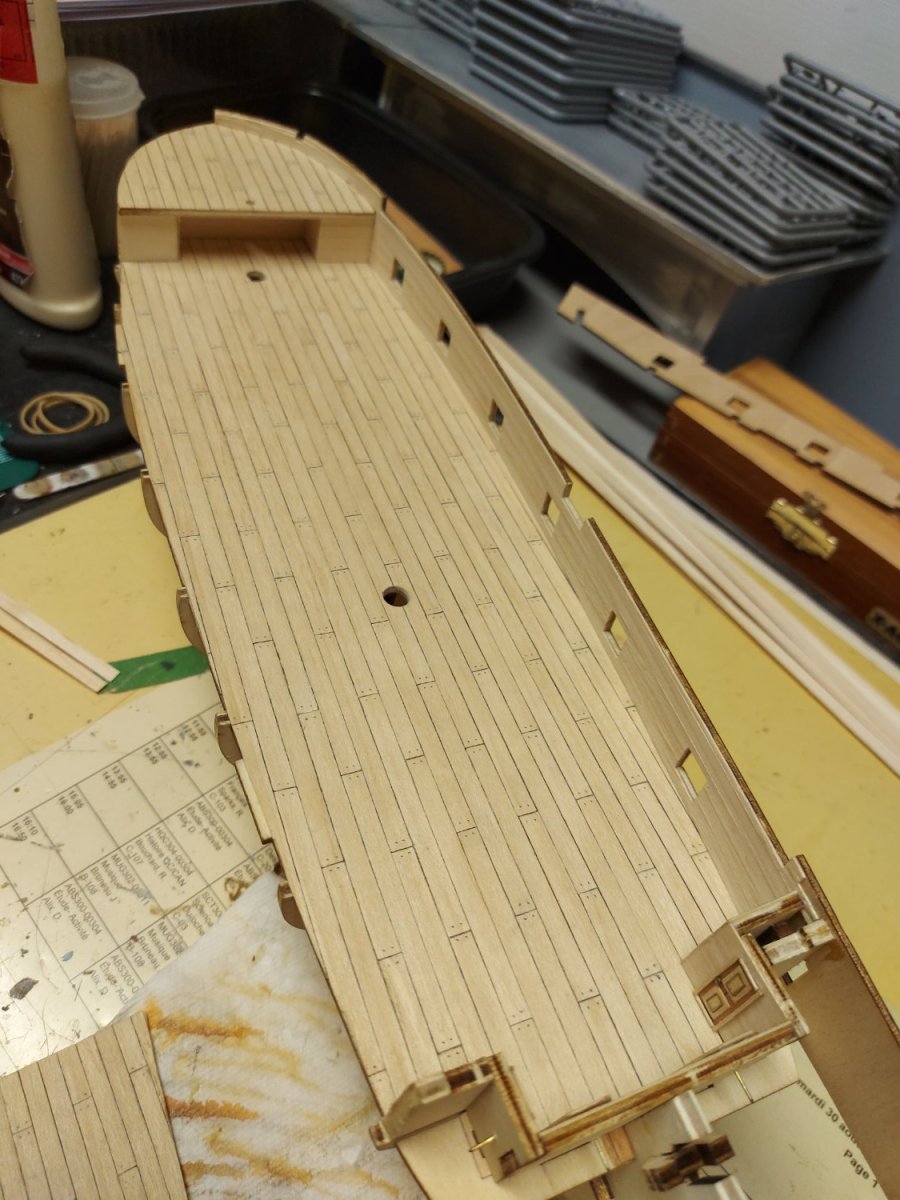
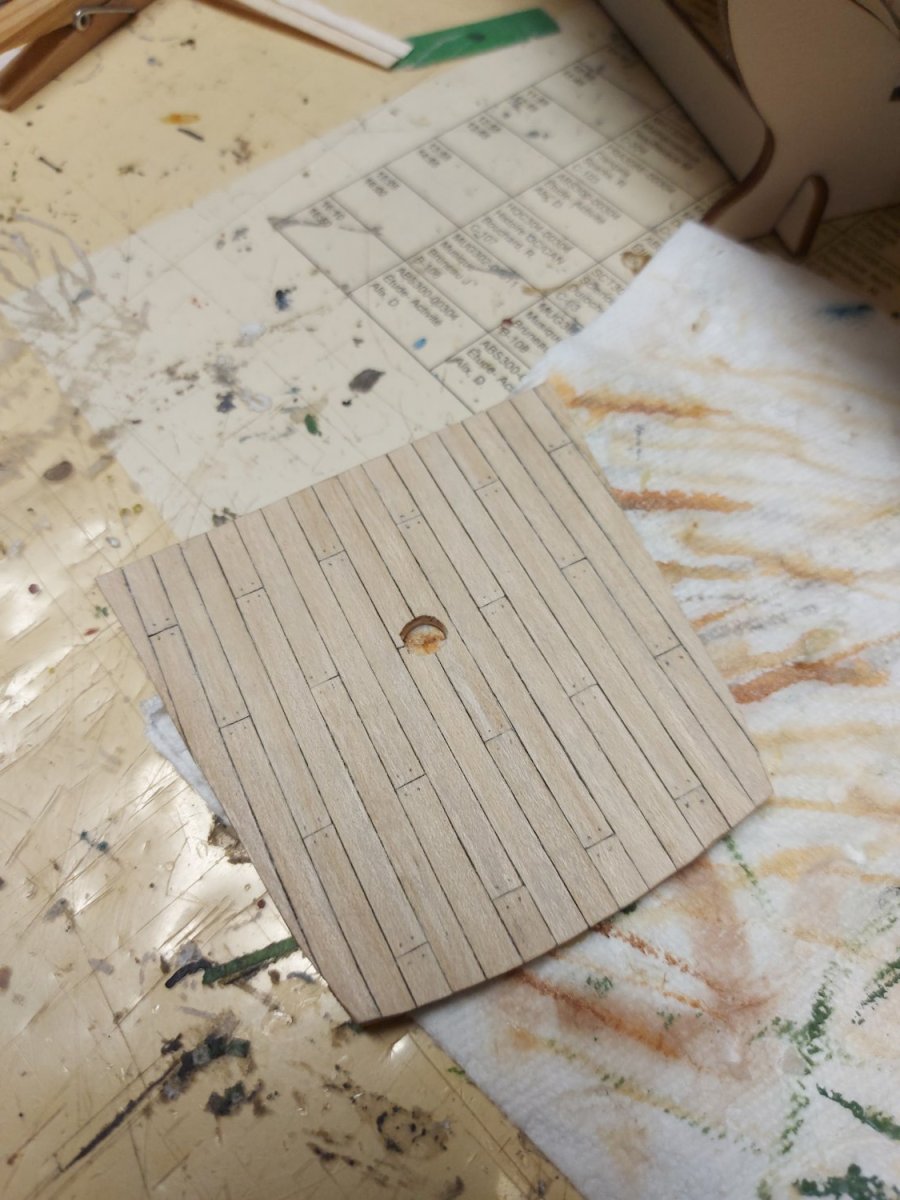
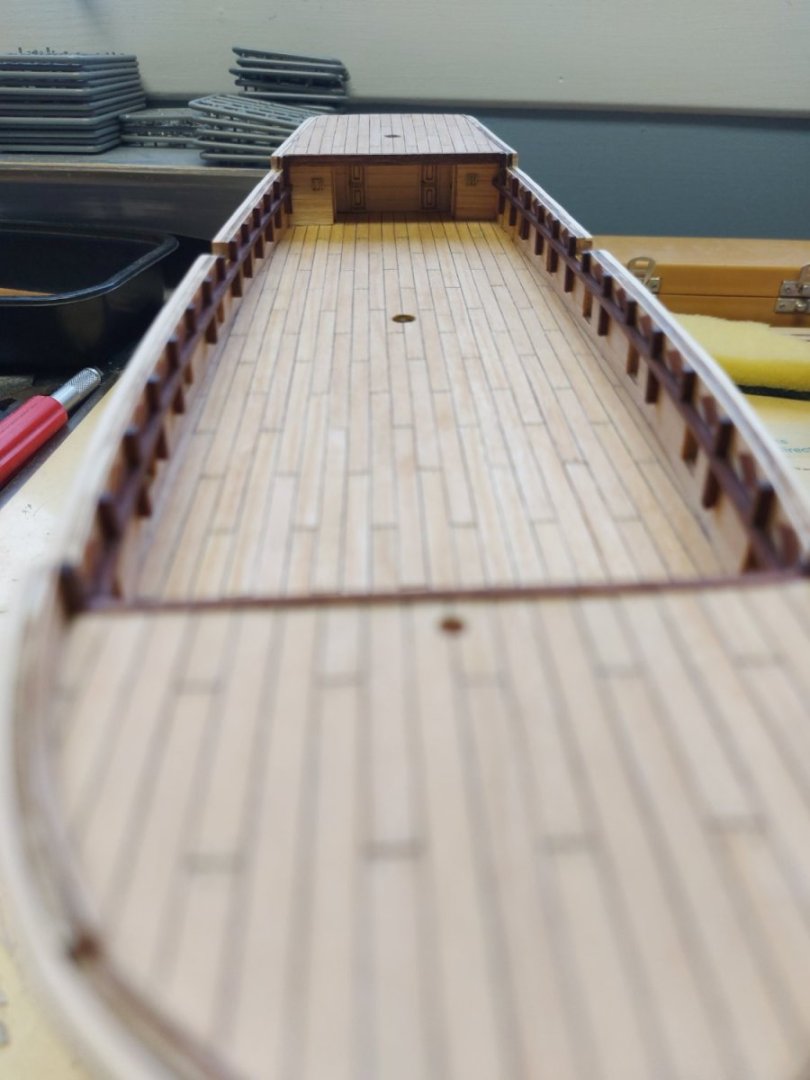
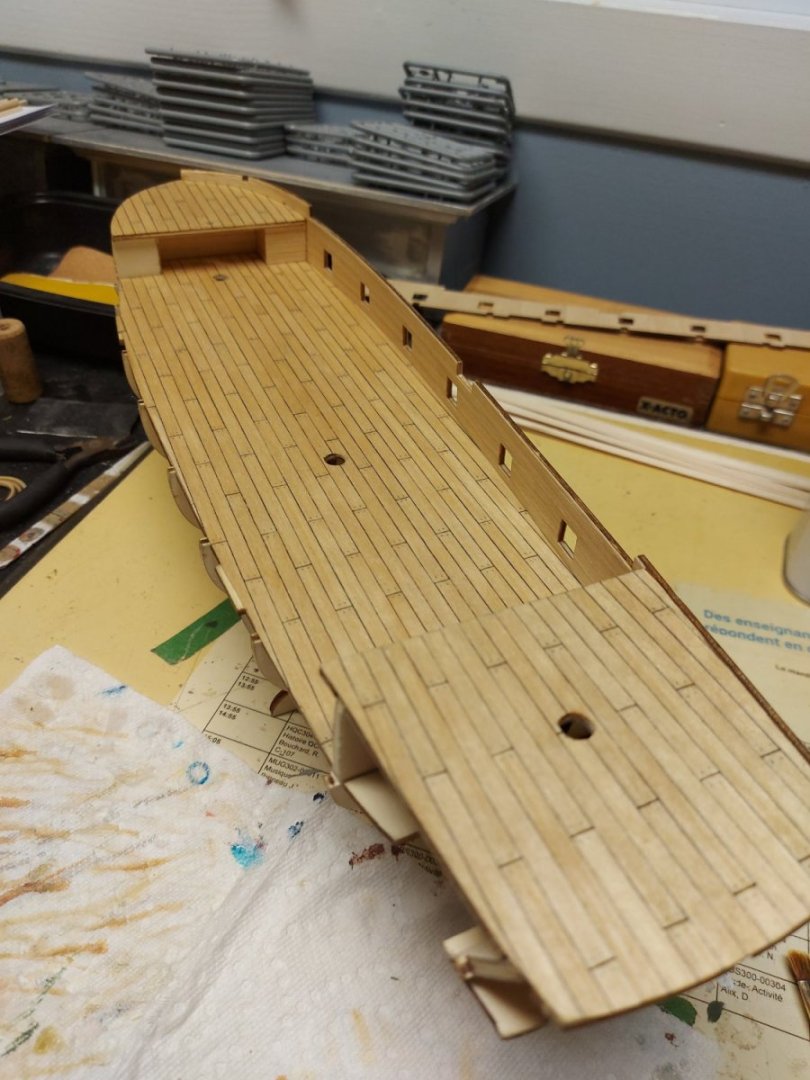
I just oiled up this beauty of a deck. Before and after picks:


-
Haha, you just felt like it was the way to go and you where right.
-
A drop plank or a stealer is a way to condense or enlarge either the bow or the stern. I think a picture will explain it better than me. Just write drop plank on google and try a look at Chuck's hull. It looks like a hook.