PlasticShipwright21
-
Posts
16 -
Joined
-
Last visited
-
 Obormotov reacted to a post in a topic:
Posting Images of Instructions for Out of Production Kits?
Obormotov reacted to a post in a topic:
Posting Images of Instructions for Out of Production Kits?
-
Canute reacted to a post in a topic:
Can she be saved?
-
bruce d reacted to a post in a topic:
Can she be saved?
-
PlasticShipwright21 reacted to a post in a topic:
Can she be saved?
-
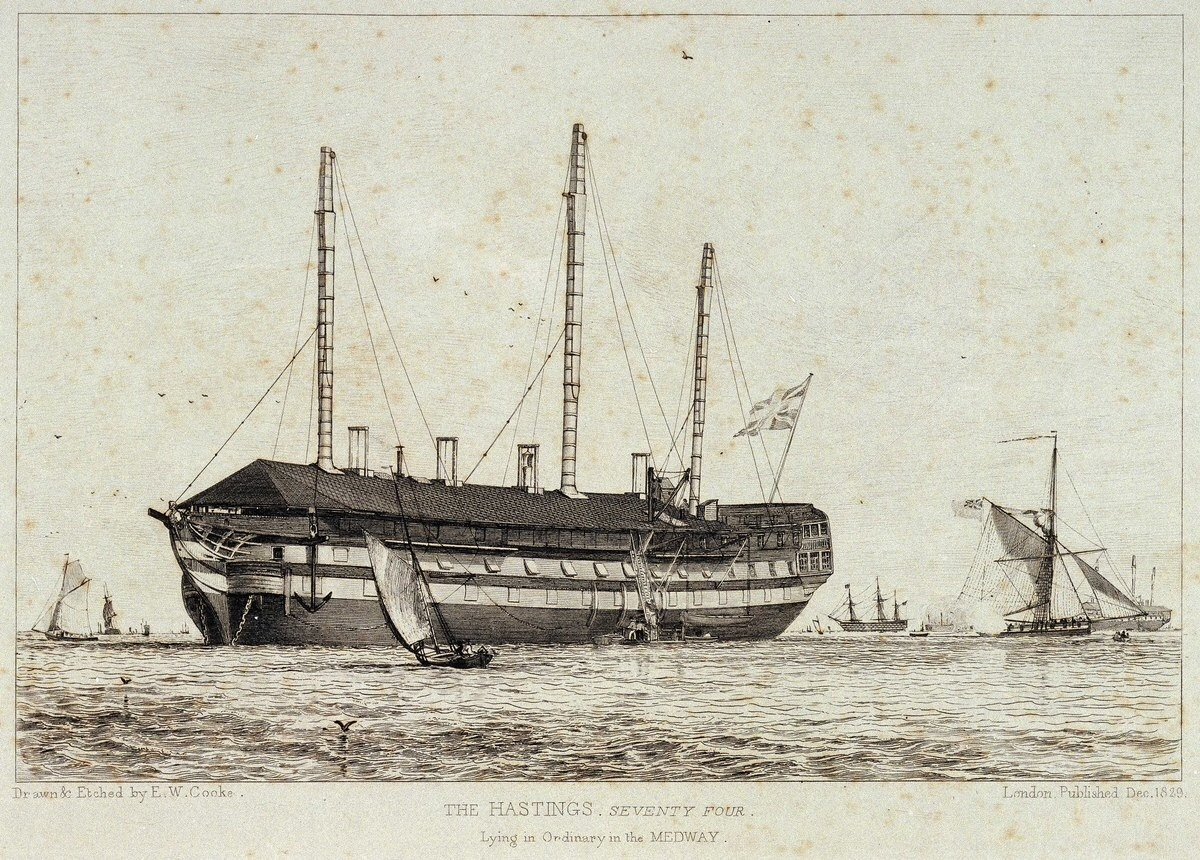
I’m new to ship modeling, but I do like collecting and restoring “basket case” stuff. I guess that’s why I’m a preservationist as a day job... in any case I’d try and cut the rigging free and see what repair the masts might need, and what shape the hull is in (looks ok but maybe in need of a repaint. Then the next step is up to you, I suppose, depending on what kind of model you want in the end. It might be interesting to try and model her as a ship in ordinary: you could have fairly bare masts and build a superstructure over the deck. The faded paint might even be appropriate if she’s a captured French ship that’s been sitting around in some English port for a while. And it’d be a unique subject!
-
PlasticShipwright21 reacted to a post in a topic:
Can she be saved?
-
PlasticShipwright21 reacted to a post in a topic:
Can she be saved?
-
ccoyle reacted to a post in a topic:
Gertrude L Thebaud by PlasticShipwright21 - Pyro\Lifelike - 1/96 - PLASTIC - Grand Banks Schooner
-
Prowler901 reacted to a post in a topic:
Gertrude L Thebaud by PlasticShipwright21 - Pyro\Lifelike - 1/96 - PLASTIC - Grand Banks Schooner
-
thibaultron reacted to a post in a topic:
Gertrude L Thebaud by PlasticShipwright21 - Pyro\Lifelike - 1/96 - PLASTIC - Grand Banks Schooner
-
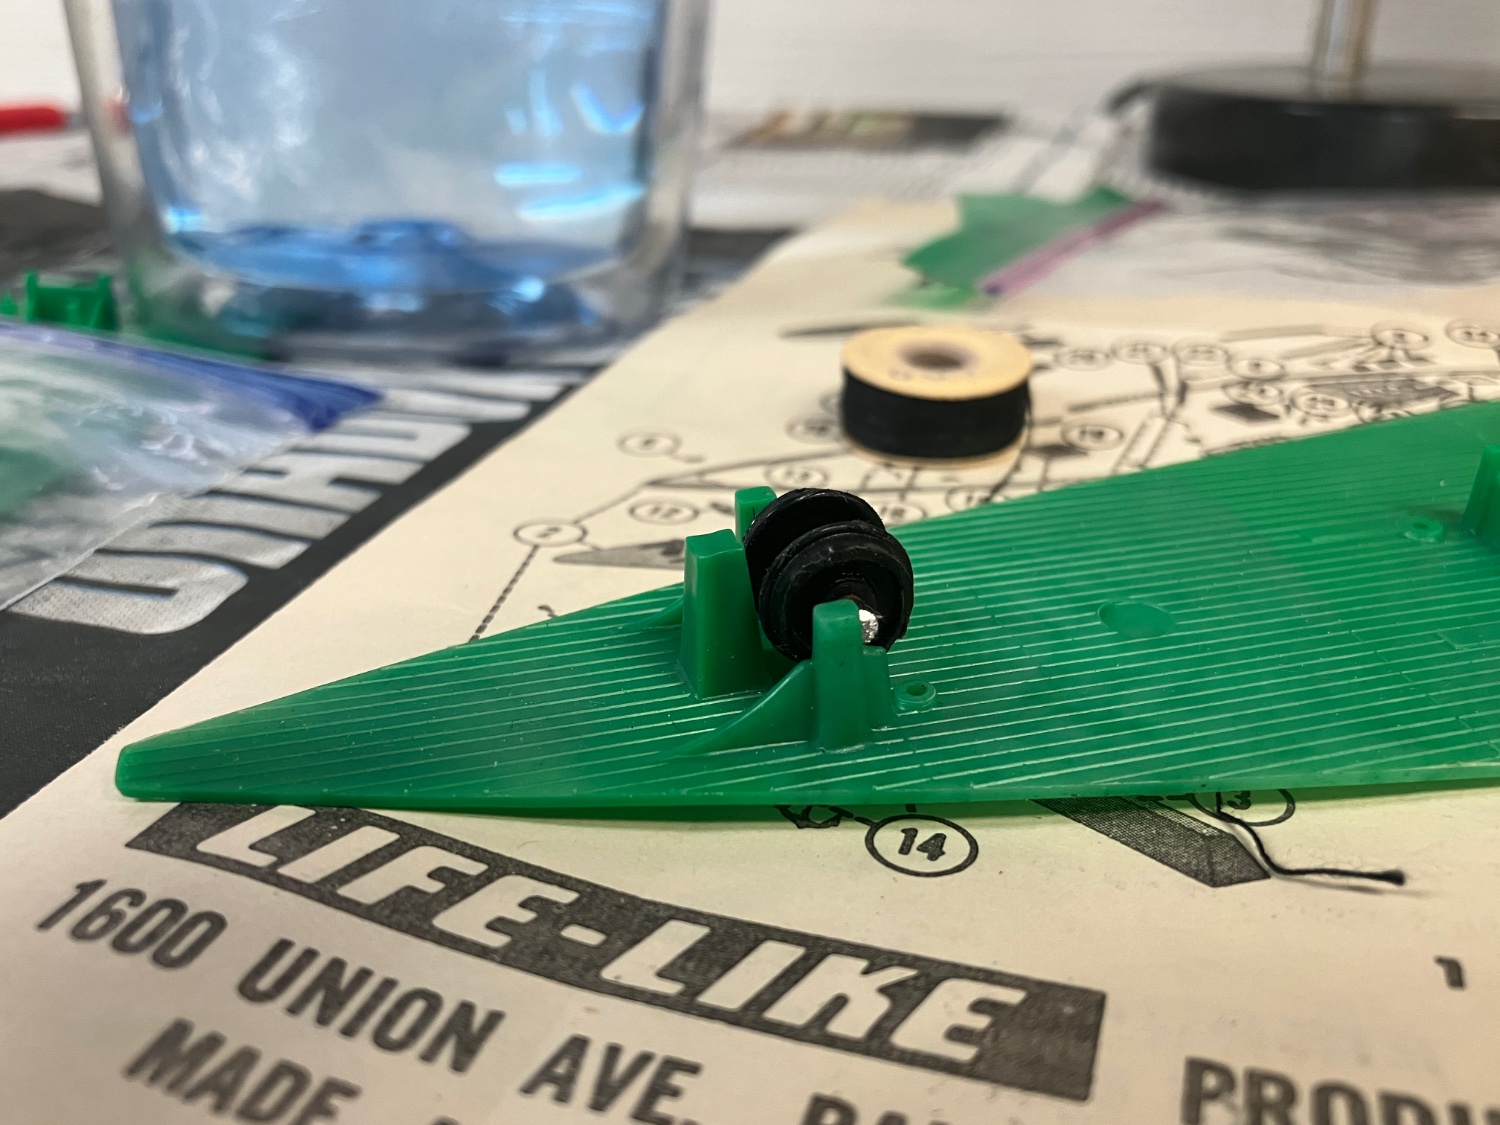
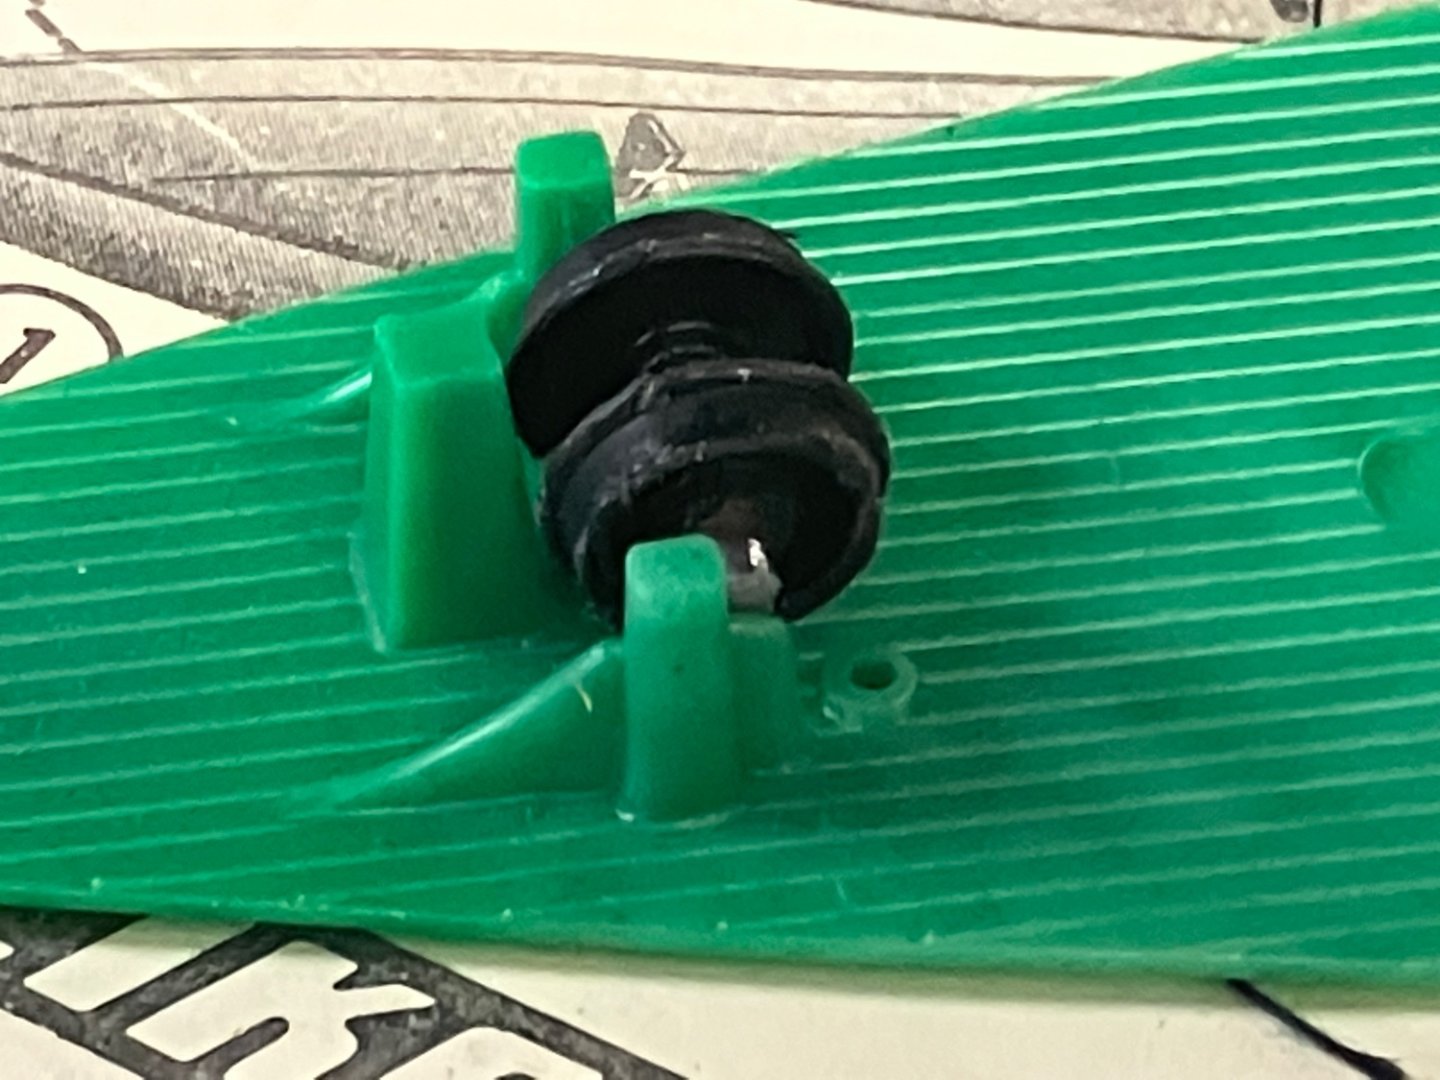
Well, I decided not to do that thing involving thread spools because I had a better idea. After doing unspeakable things to a set of old plastic HO wheels in my spares box, I now have a new windlass. It’s not the same type as the original kit part, but I think it’s passible. I model in O, and these were from a pair of cheap trucks from stuff my uncle had back in the 1970s that parted ways with the car they were under years ago so I don’t feel too bad for repurposing them. They’re a bit rough but I think they will do.

- 15 replies
-
- 3
-
-
- Gertrude L Thebaud
- Pyro
- (and 3 more)
-
Prowler901 reacted to a post in a topic:
Gertrude L Thebaud by PlasticShipwright21 - Pyro\Lifelike - 1/96 - PLASTIC - Grand Banks Schooner
-
thibaultron reacted to a post in a topic:
Gertrude L Thebaud by PlasticShipwright21 - Pyro\Lifelike - 1/96 - PLASTIC - Grand Banks Schooner
-
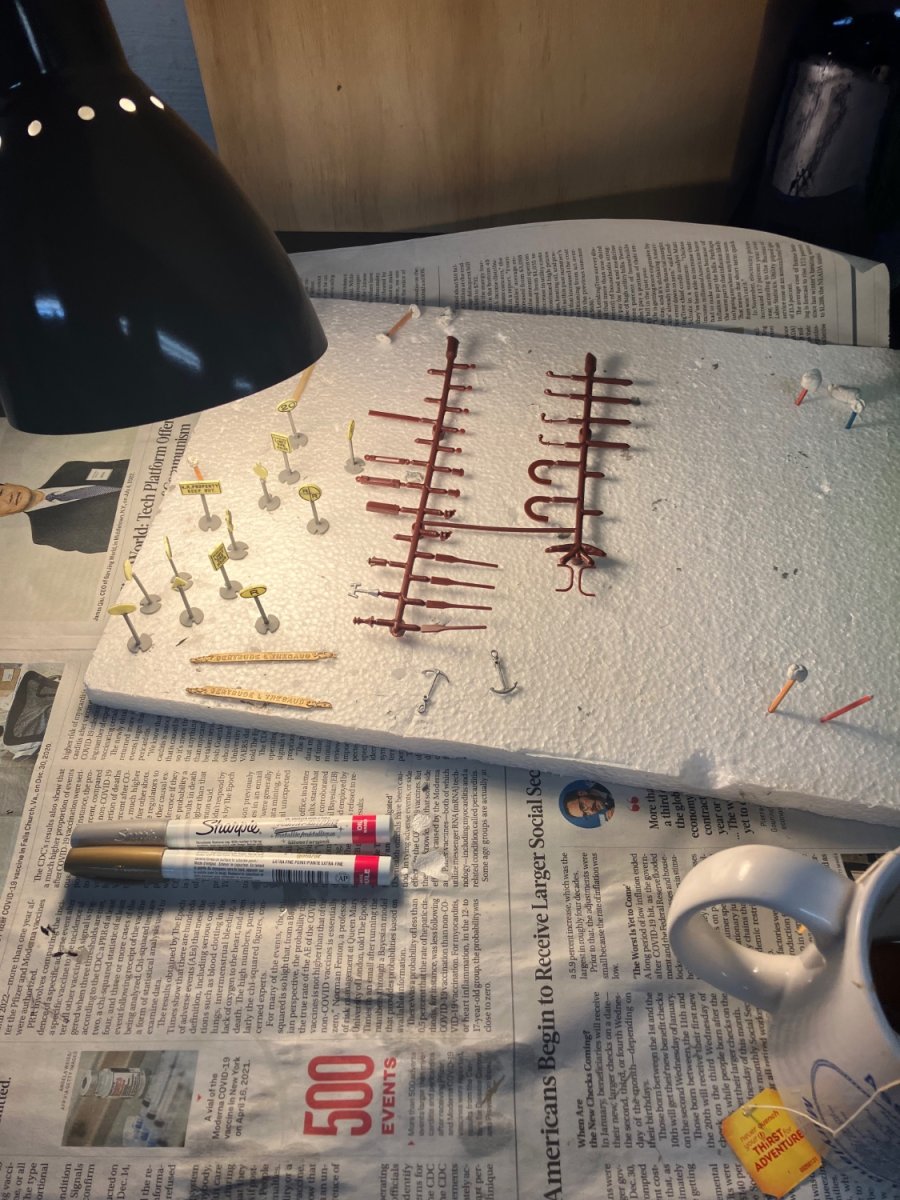
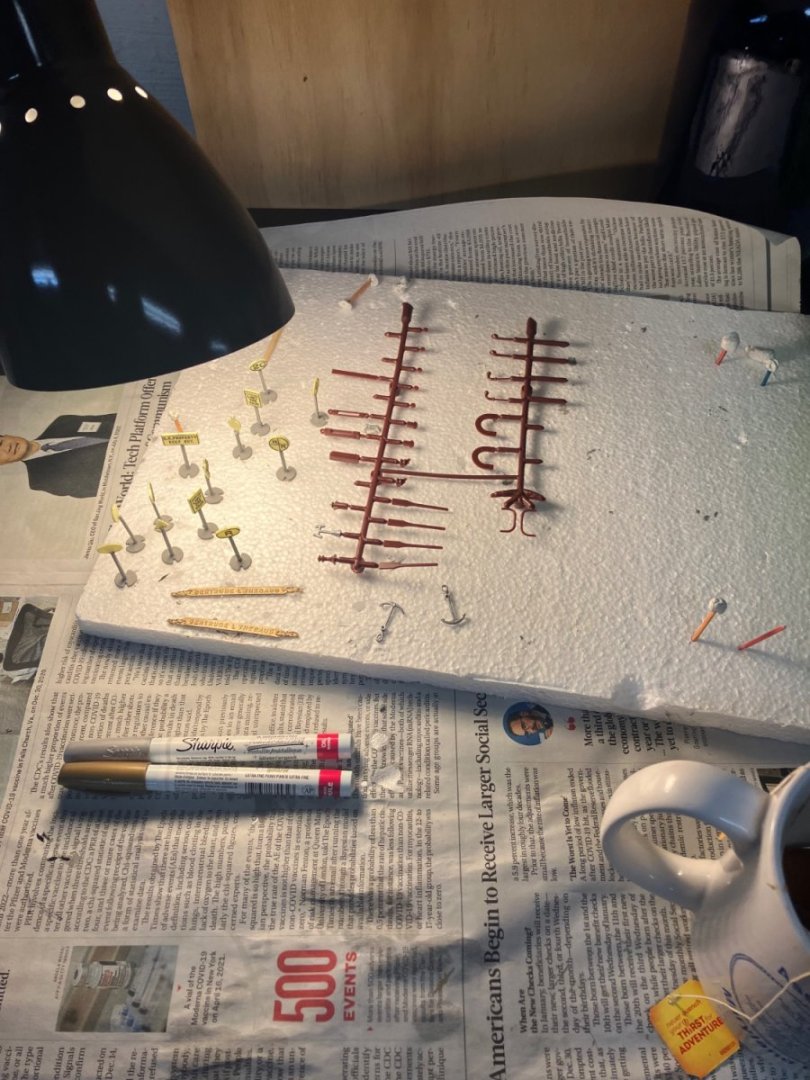
Painted the galley stack, and binnacle today, as well as the anchors. The anchors and stack will, eventually, get some black acrylic wash to add some dirt and grime to them while hopefully keeping the metallic look. I’ll paint the binnacle body either paint the same color as the rest of the wood on the boat, or white, eventually and maybe even add a dot of red & green, which I’ll need for the nav lights anyways. An attempt to add some black paint to the name boards nearly ended in disaster! Fortunately the black was acrylic so I was able to wash it off then add more gilt paint to cover any stains. Probably I’ll do another gilt coat to try and even things out a bit.
- 15 replies
-
- 2
-
-
- Gertrude L Thebaud
- Pyro
- (and 3 more)
-
Prowler901 reacted to a post in a topic:
Gertrude L Thebaud by PlasticShipwright21 - Pyro\Lifelike - 1/96 - PLASTIC - Grand Banks Schooner
-
thibaultron reacted to a post in a topic:
Gertrude L Thebaud by PlasticShipwright21 - Pyro\Lifelike - 1/96 - PLASTIC - Grand Banks Schooner
-
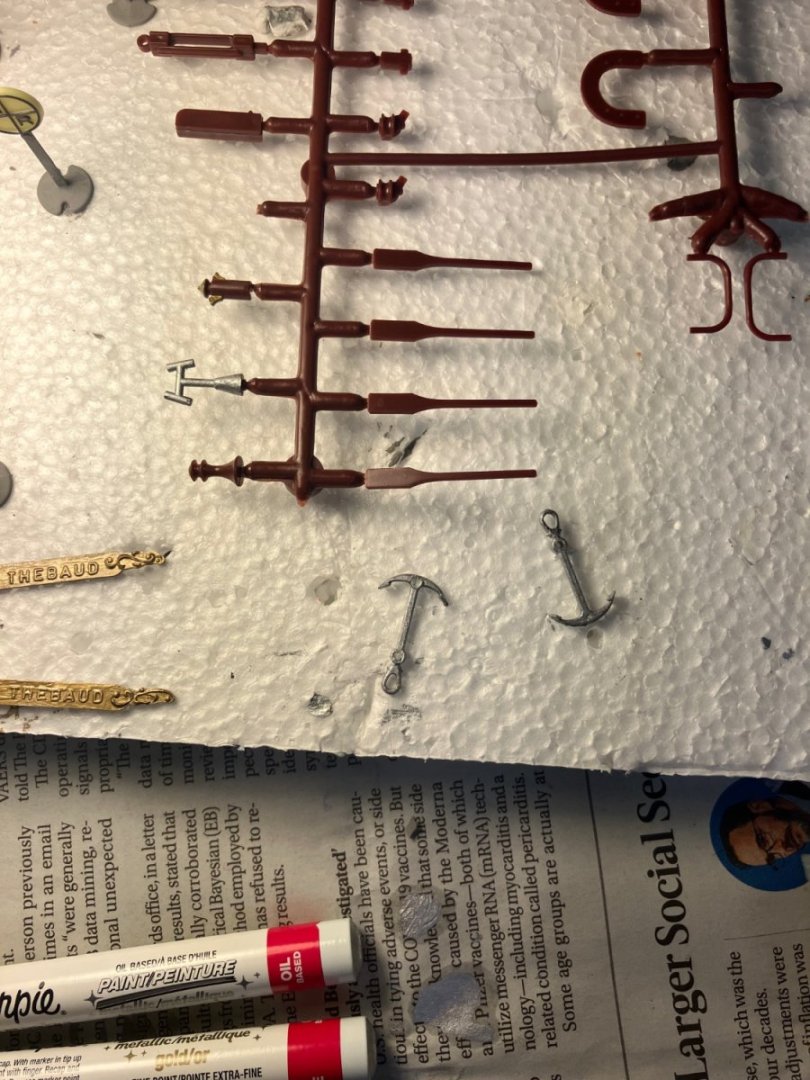
Closer inspection reveals that I do in fact seem to be missing the barrel of the winch. I do think I may have a solution to that, though. One of my far too many hobbies is sewing, and I believe that I have a empty wood thread spool that will with some modifications be able to fit in between the uprights that are molded on to the deck. I might be able to hunt down a random useless gear from somewhere, which might be glued to it too. That ought to produce a reasonable facsimile of the original part. I happen to have a book on ship modeling about as old as this model, which has some great reference photos. The hatch may actually be harder to deal with as I haven’t any styrene lying about at the moment, and I’ll not sure how I’d replicate some of the original geometry of the part if I did. I’m hoping to do more painting on the parts tree tomorrow! I’m still a bit hesitant on paint choices simply because of having limited photo references and the kits instructions having... interesting... color choices. Why they felt, for example, that the galley stack ought to be painted gold is beyond my ken. I’m debating whether to go for metallic or flat gray for parts like that, and the anchors? These may also have black washes applied to them for weathering. I have decided they ought not be black so that the detail isn’t lost on the background of the black hull.
- 15 replies
-
- 3
-
-
- Gertrude L Thebaud
- Pyro
- (and 3 more)
-
PlasticShipwright21 reacted to a post in a topic:
Gertrude L Thebaud by PlasticShipwright21 - Pyro\Lifelike - 1/96 - PLASTIC - Grand Banks Schooner
-
I might wind up just buying another 1/96th scale winch, if I can’t find the parts hidden somewhere among the sprue forest. I want to say someone else did something similar in another build. I’m not sure if I’m up to scratch building a hatch yet with my skills yet. But since it’s a minor detail I suppose it can wait…
- 15 replies
-
- 2
-
-
- Gertrude L Thebaud
- Pyro
- (and 3 more)
-
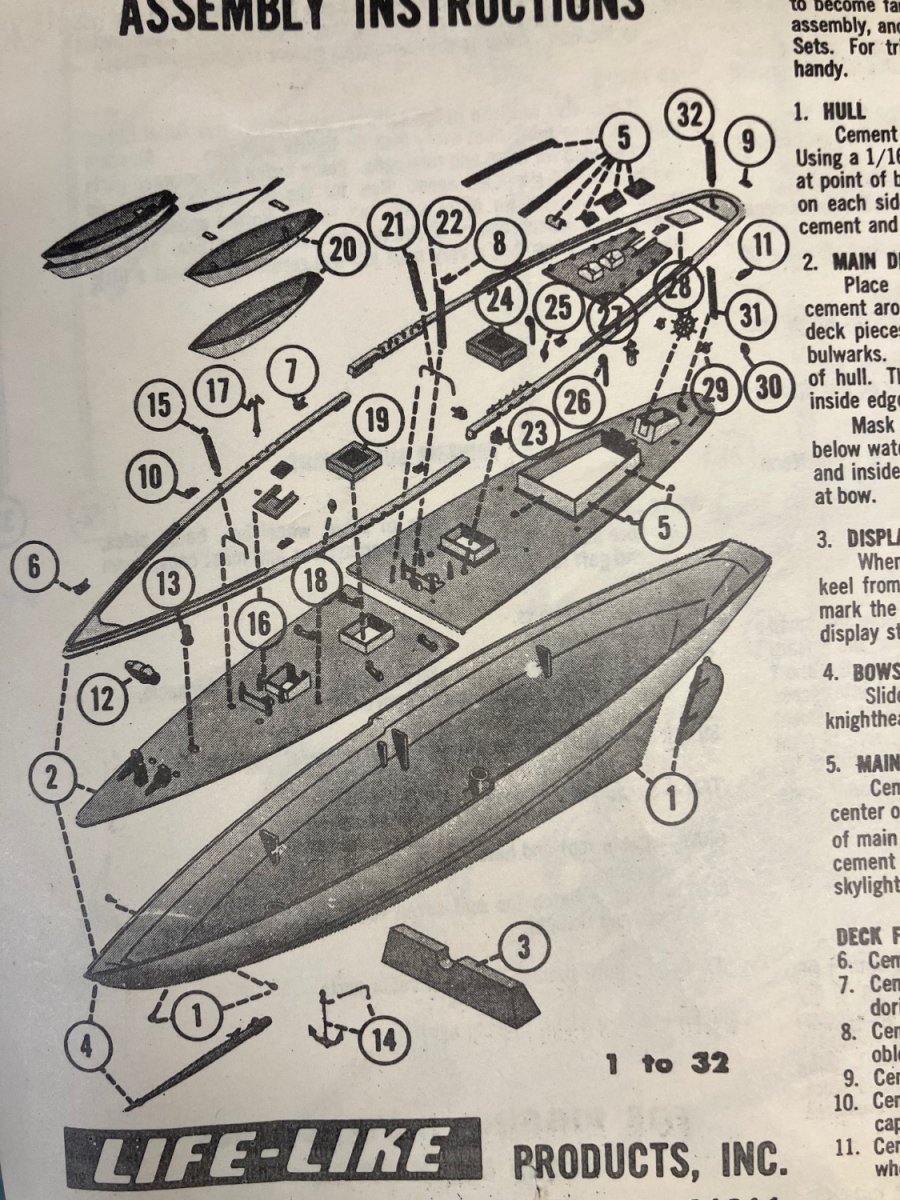
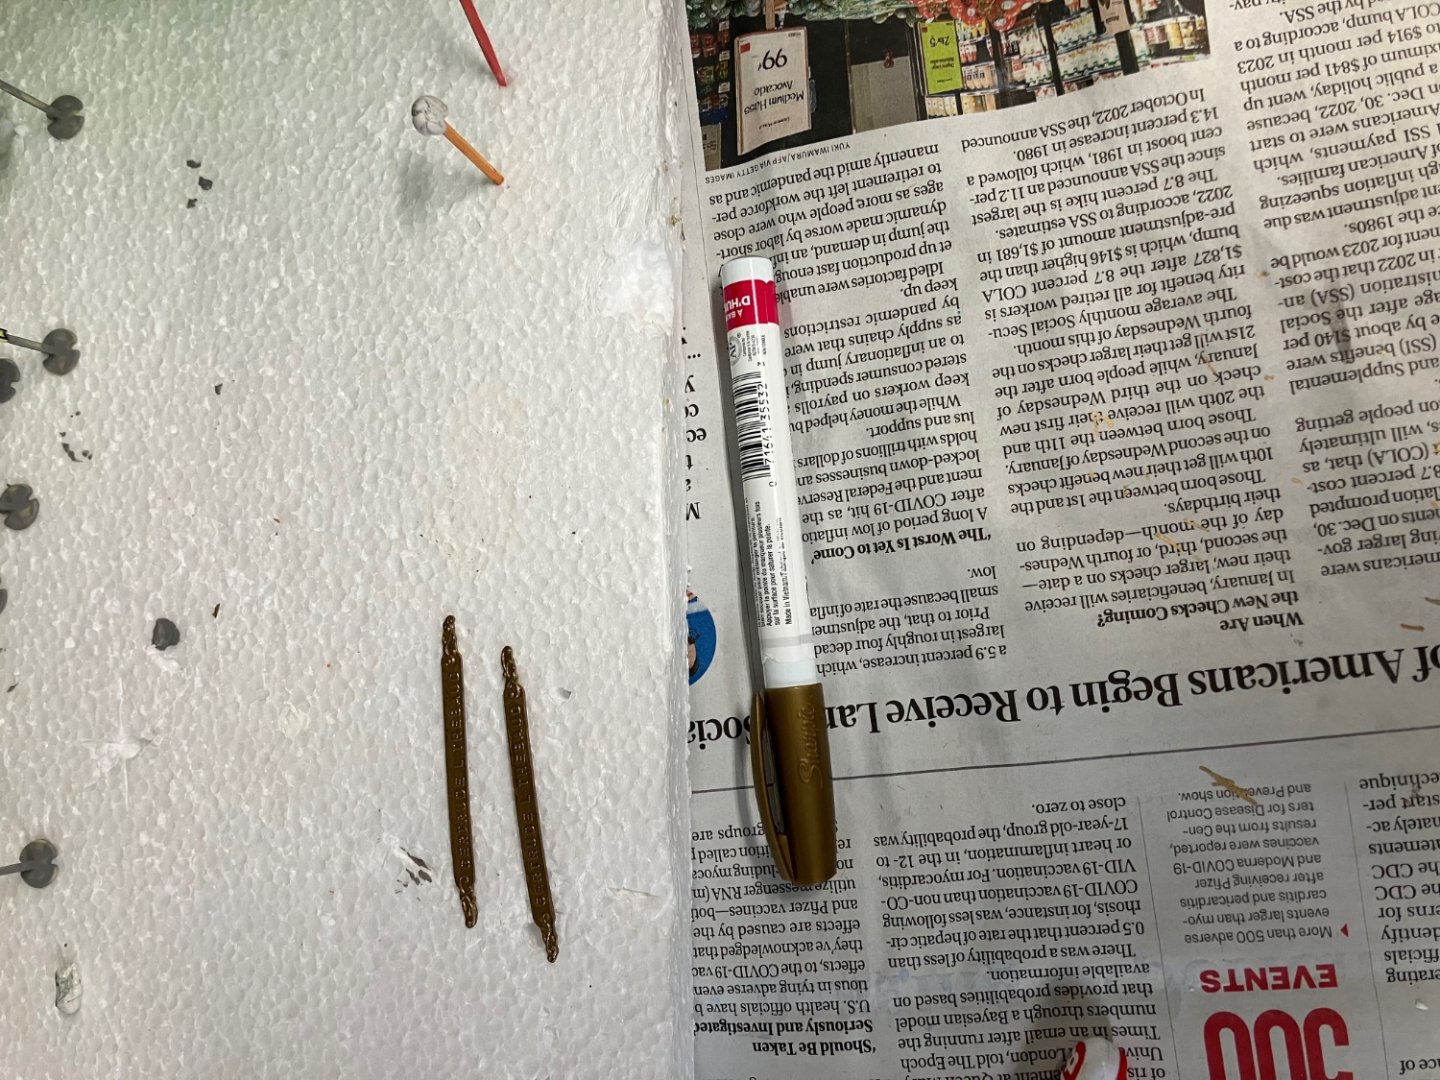
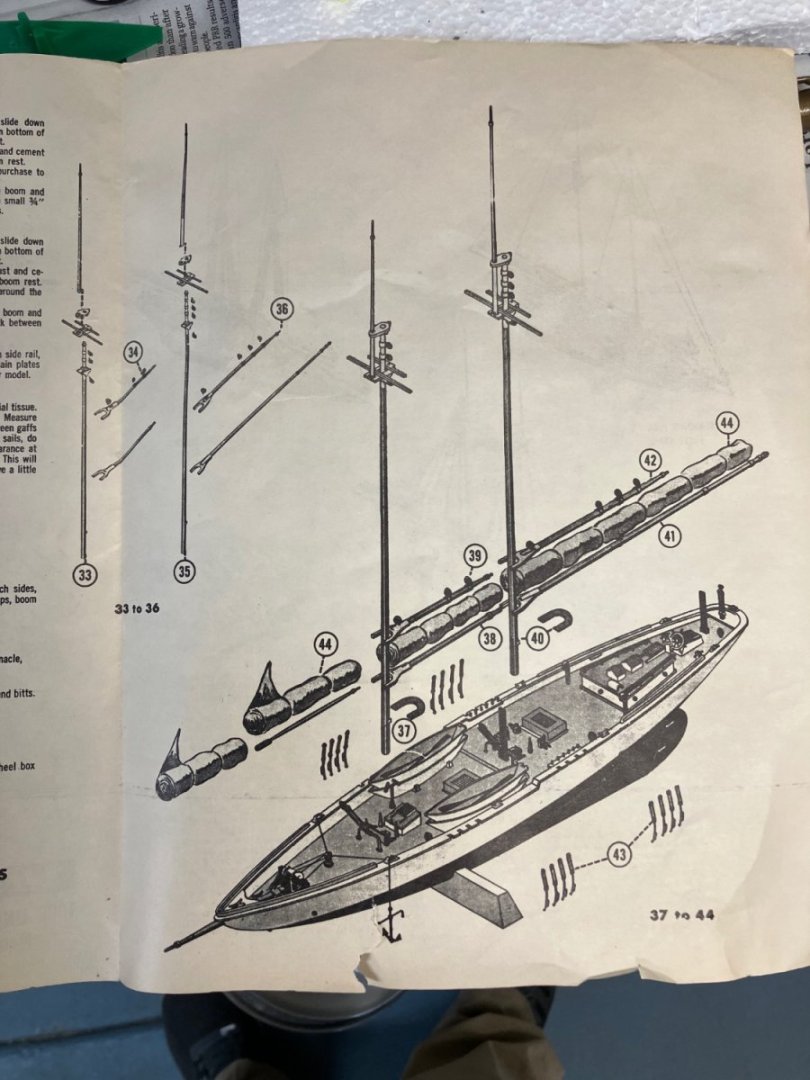
One step forward and one setback… I used a gold paint marker, shown earlier, to paint the name boards of the Thebaud. They look pretty slick now, though I think the prototype may have just had the letter’s & scroll work in gold? I need to look at my prototype pictures again and decide whether to keep the whole board guided or just some of the spots. In any case I am reasonably happy with the results. The real issue, at the moment, is that I’ve noticed a piece missing! It’s the part that goes over the forward hatch, that forms the rails on which a separate flat hatch cover rides, in the exploded diagram part of step/assembly 16? It can also be seen in place on the diagram where everything is in place before rigging. I’m also a bit worried that winch might be missing too, as I have not run across any likely looking bits in the sprues (but they might just be hiding). So… that’s an issue. Does anyone have a decent picture of all the sprues that the ship came with, laid out individually? Or some of these parts deep down in their spares box? Another looming issue: There’s also a bit of a hole opening up along the stern of the hull, you can just about see in the earlier pictures. I need to get some Milliput or something to patch it.

- 15 replies
-
- 5
-
-
- Gertrude L Thebaud
- Pyro
- (and 3 more)
-
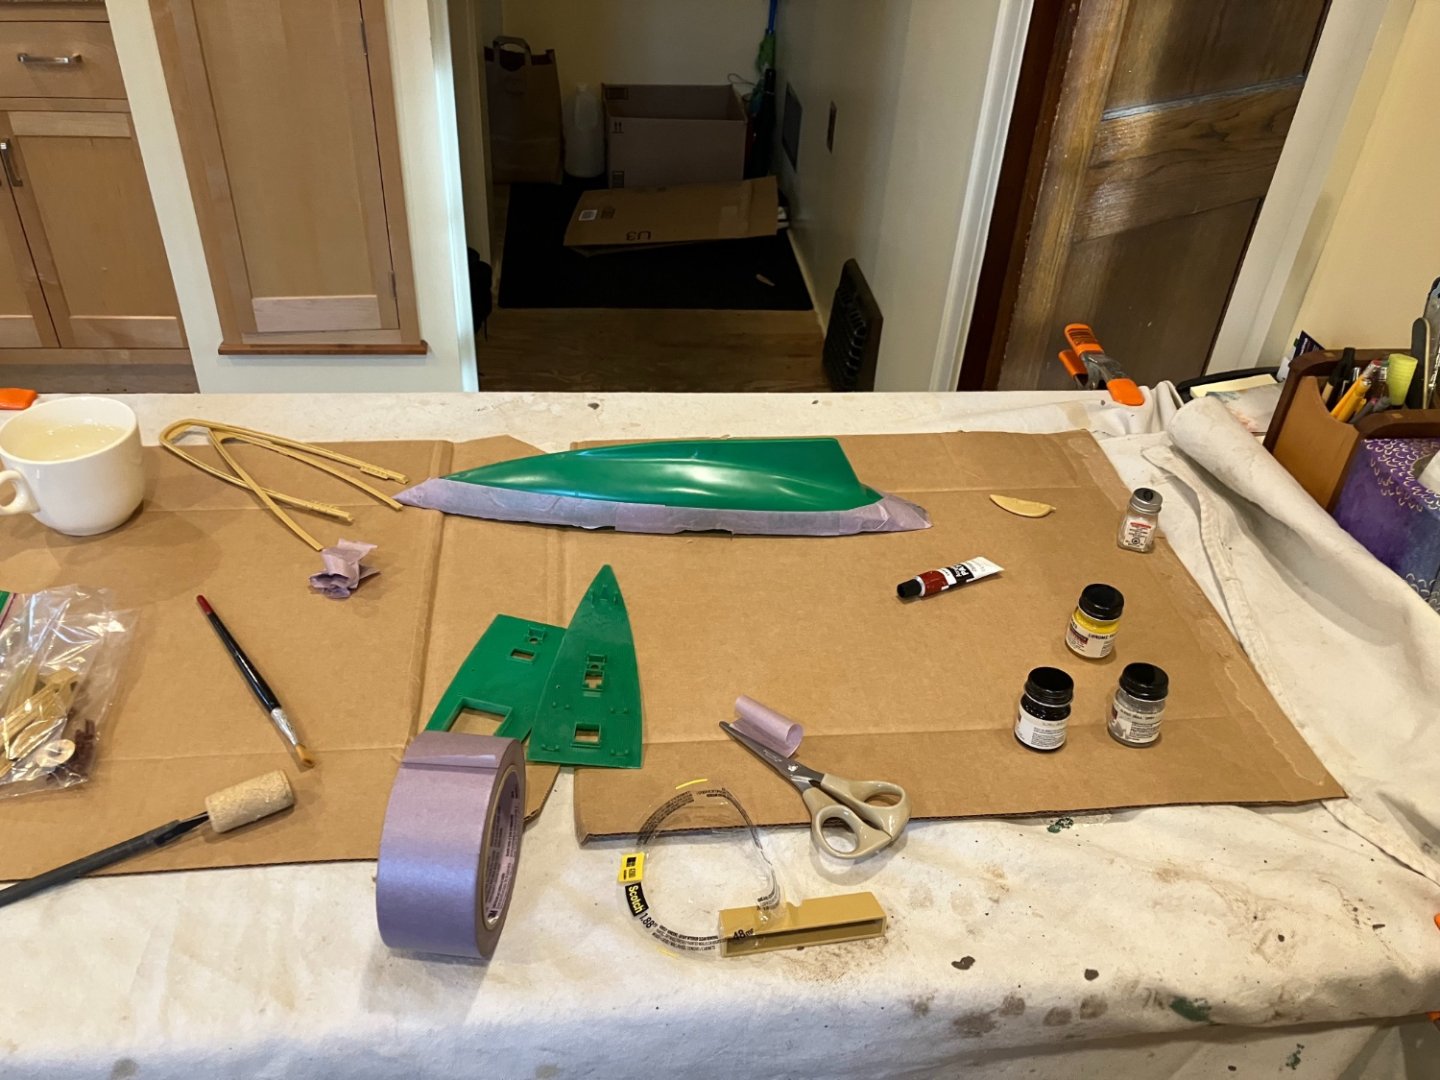
I also discovered this hack on YouTube, and working on making use of it. I swore I had another pallet somewhere, but it must have bit the dust, so when I was out buying paint I picked up one. But that's, I guess, a dry pallet. I definitely want to try out wet pallets, both to save on paint and to get better blending in colors. This is, I think, a good way to try one out without breaking the bank.
- 15 replies
-
- 3
-

-
-
- Gertrude L Thebaud
- Pyro
- (and 3 more)
-
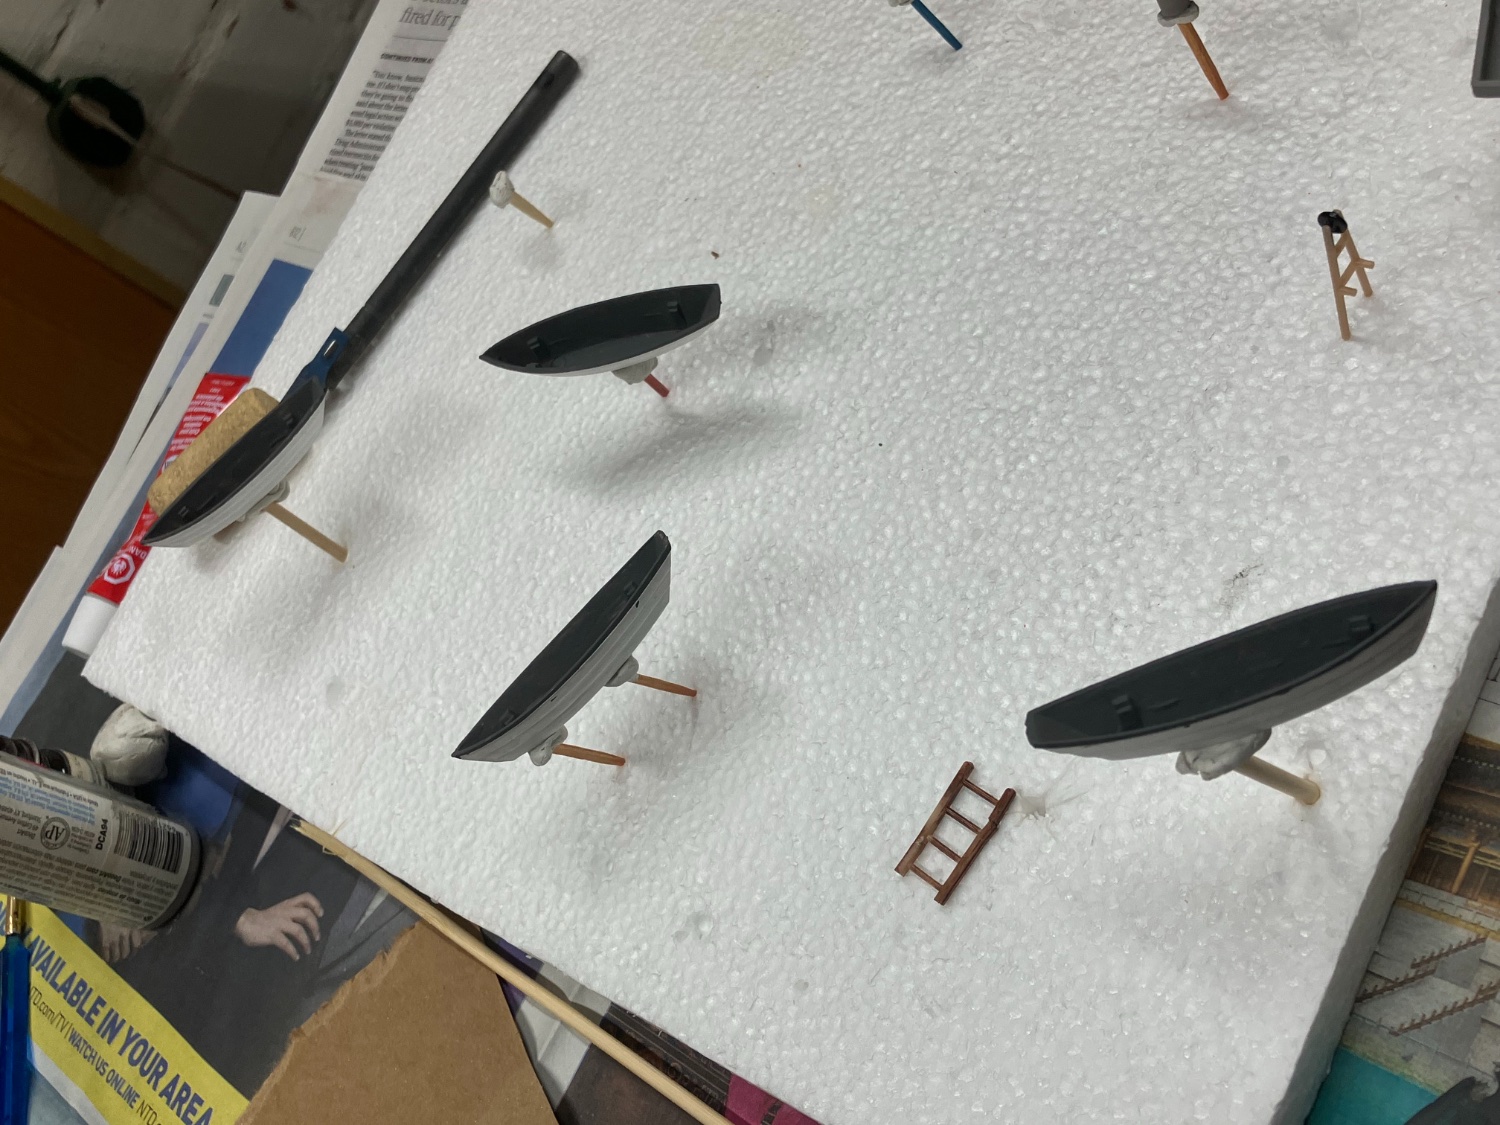
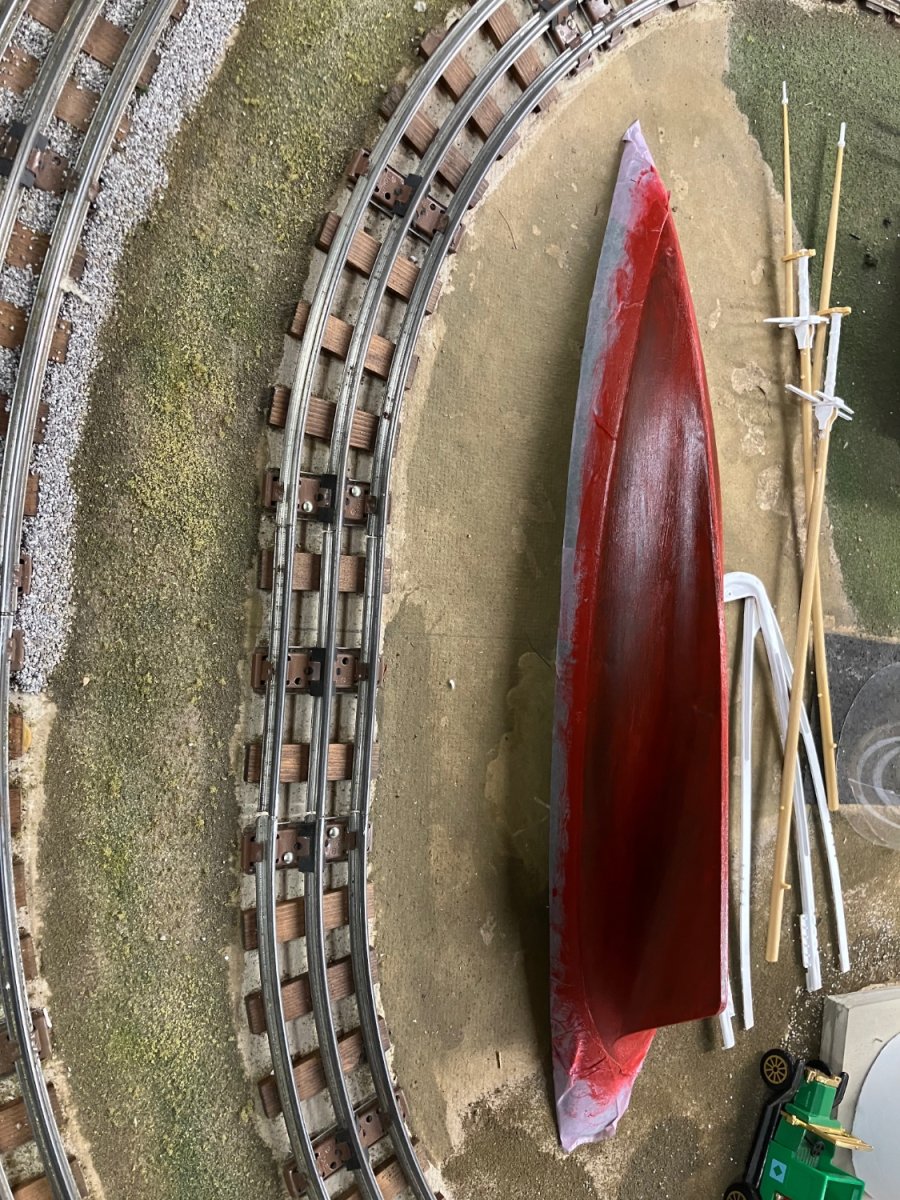
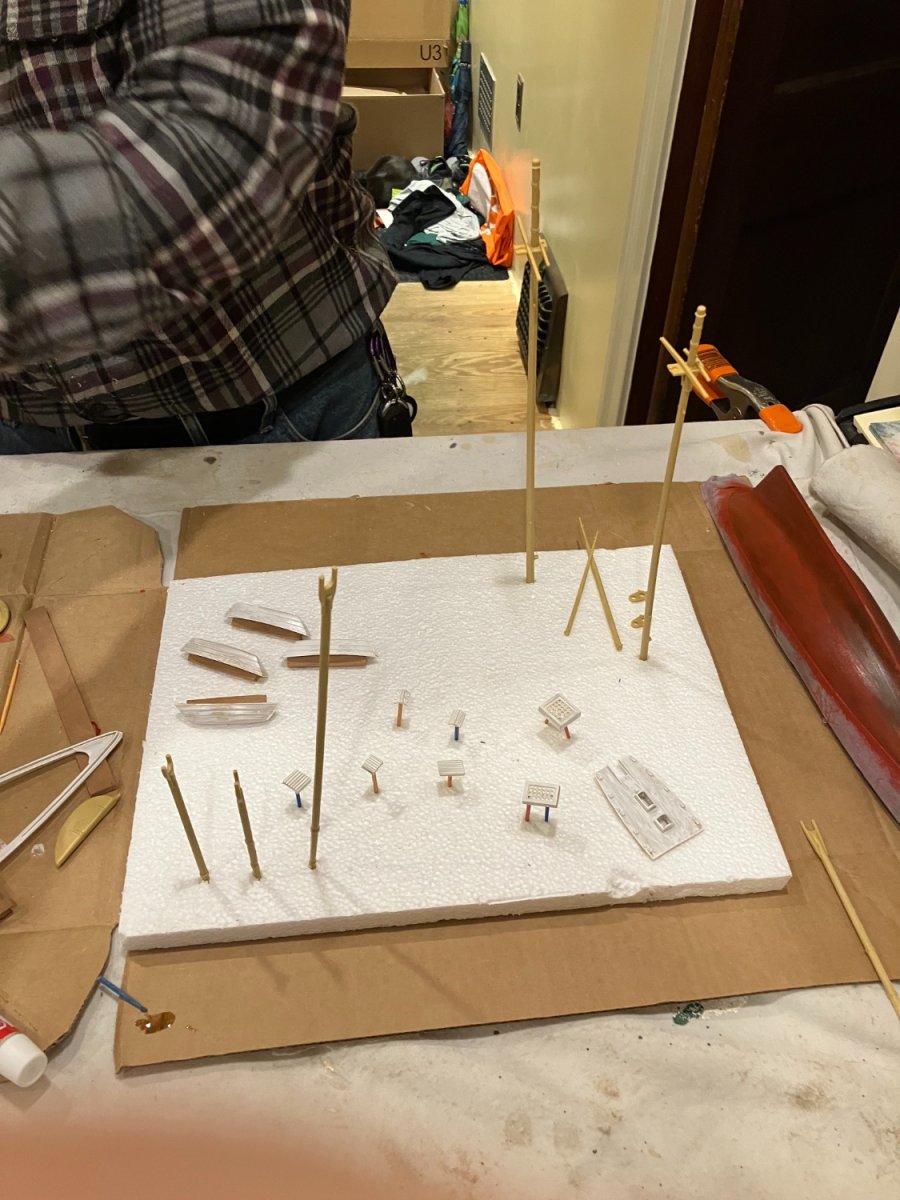
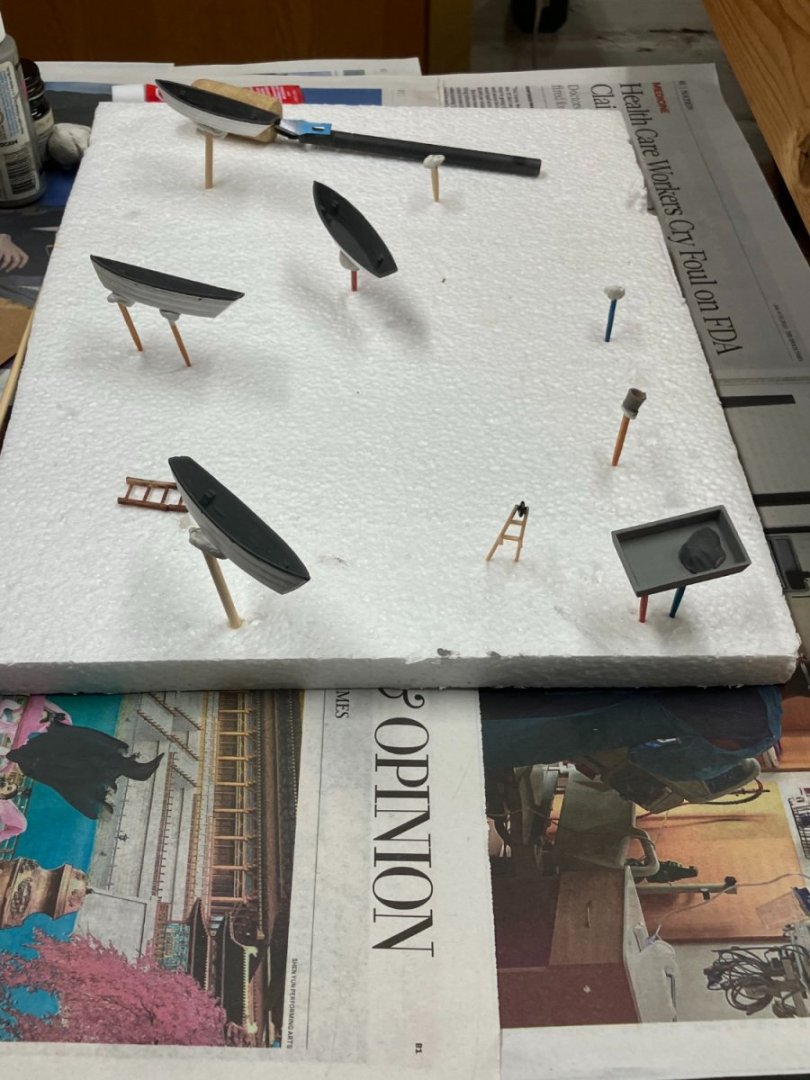
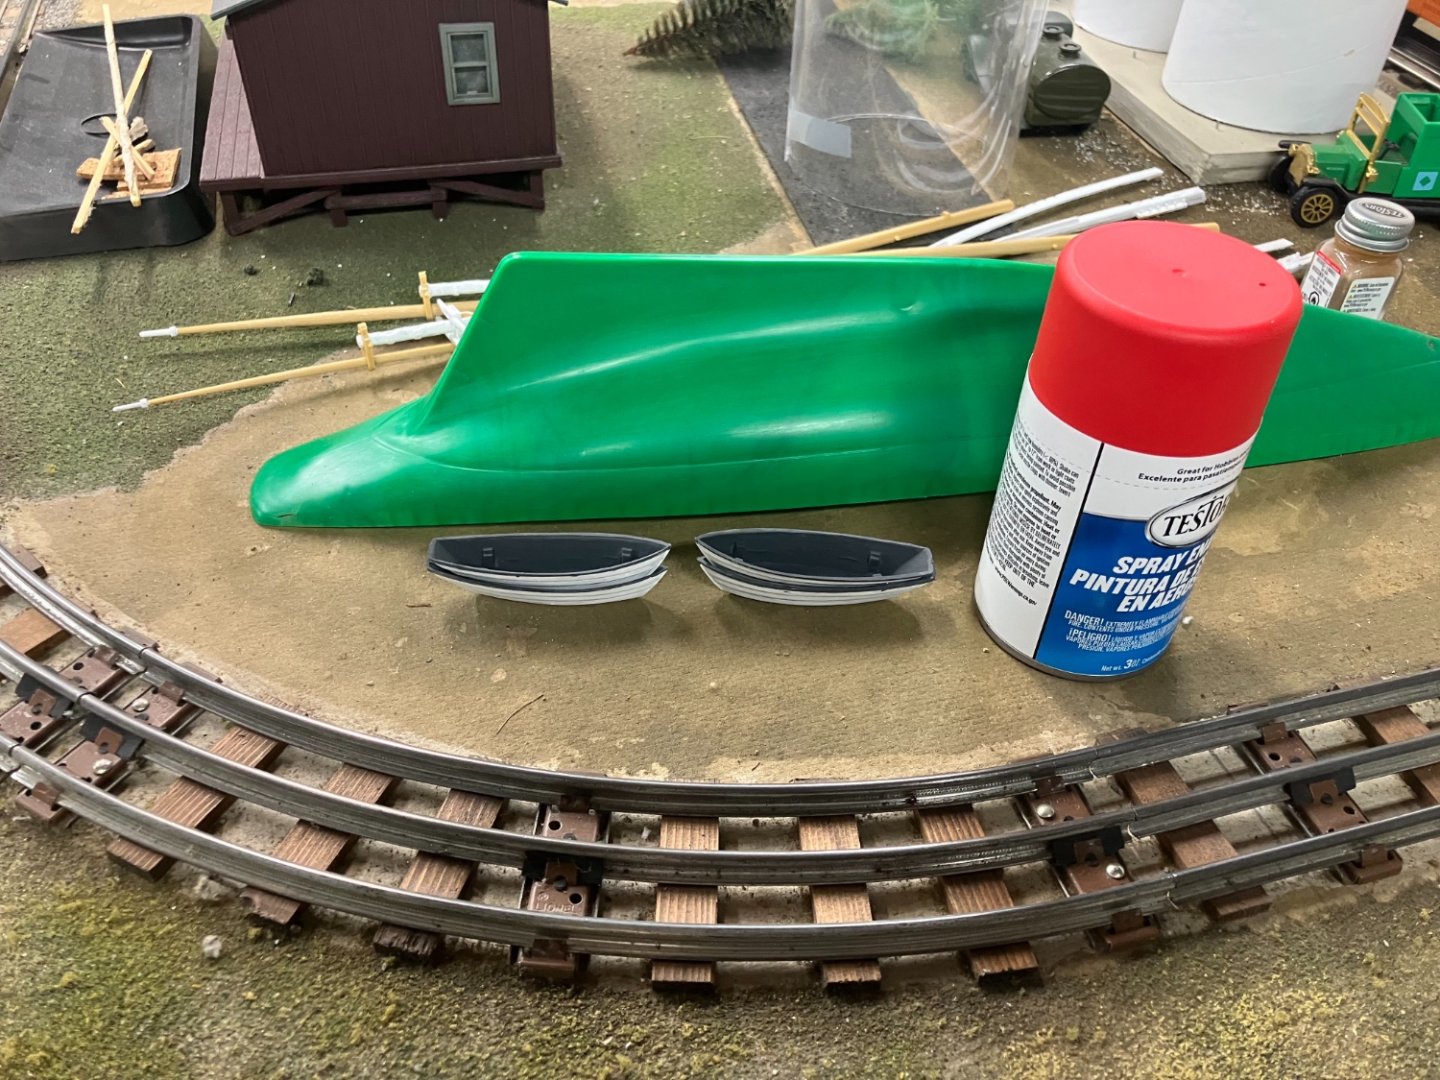
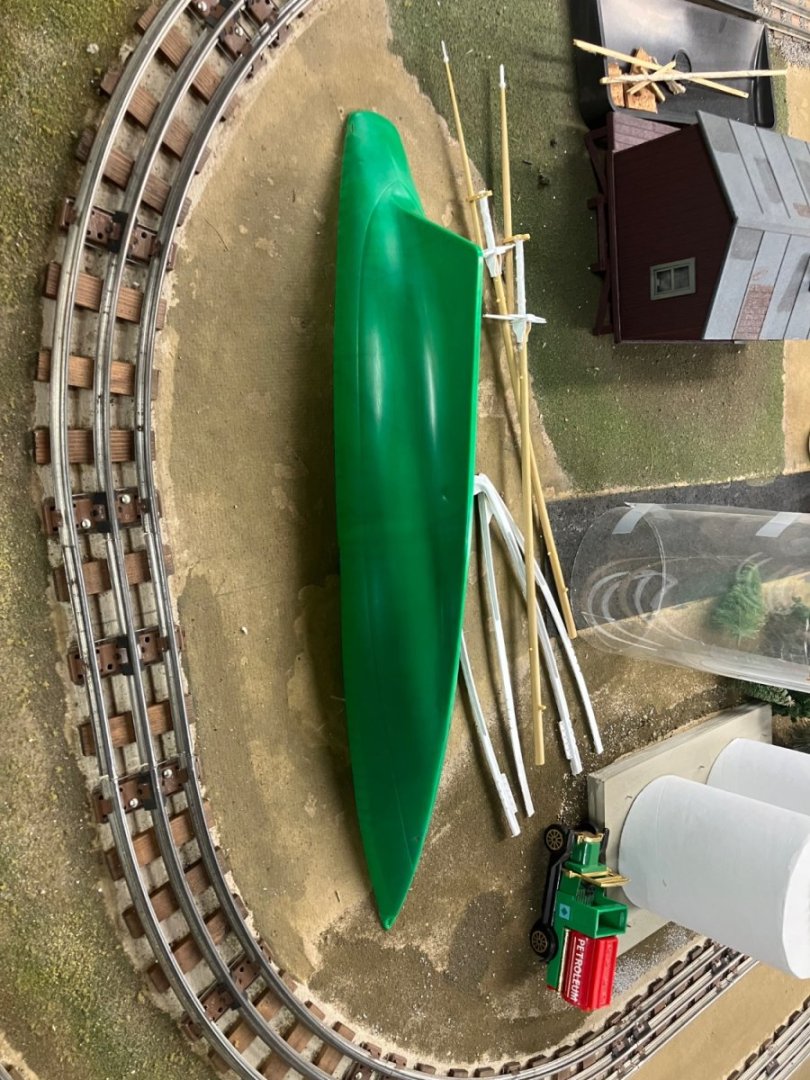
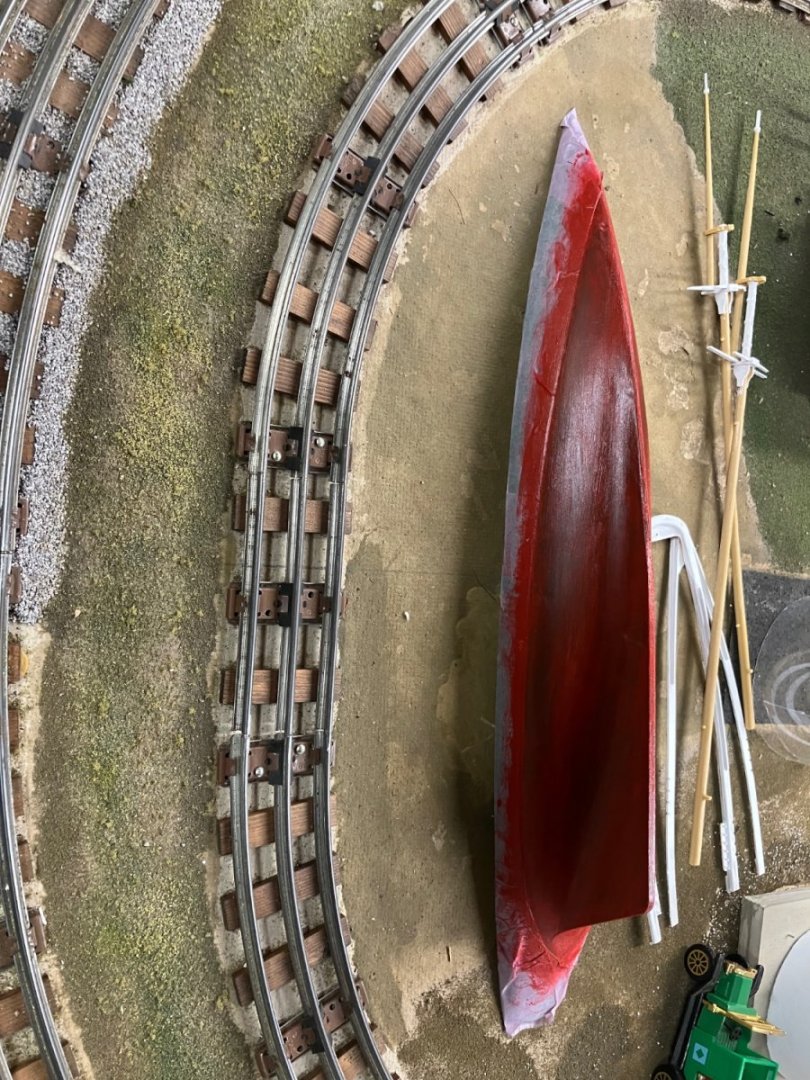
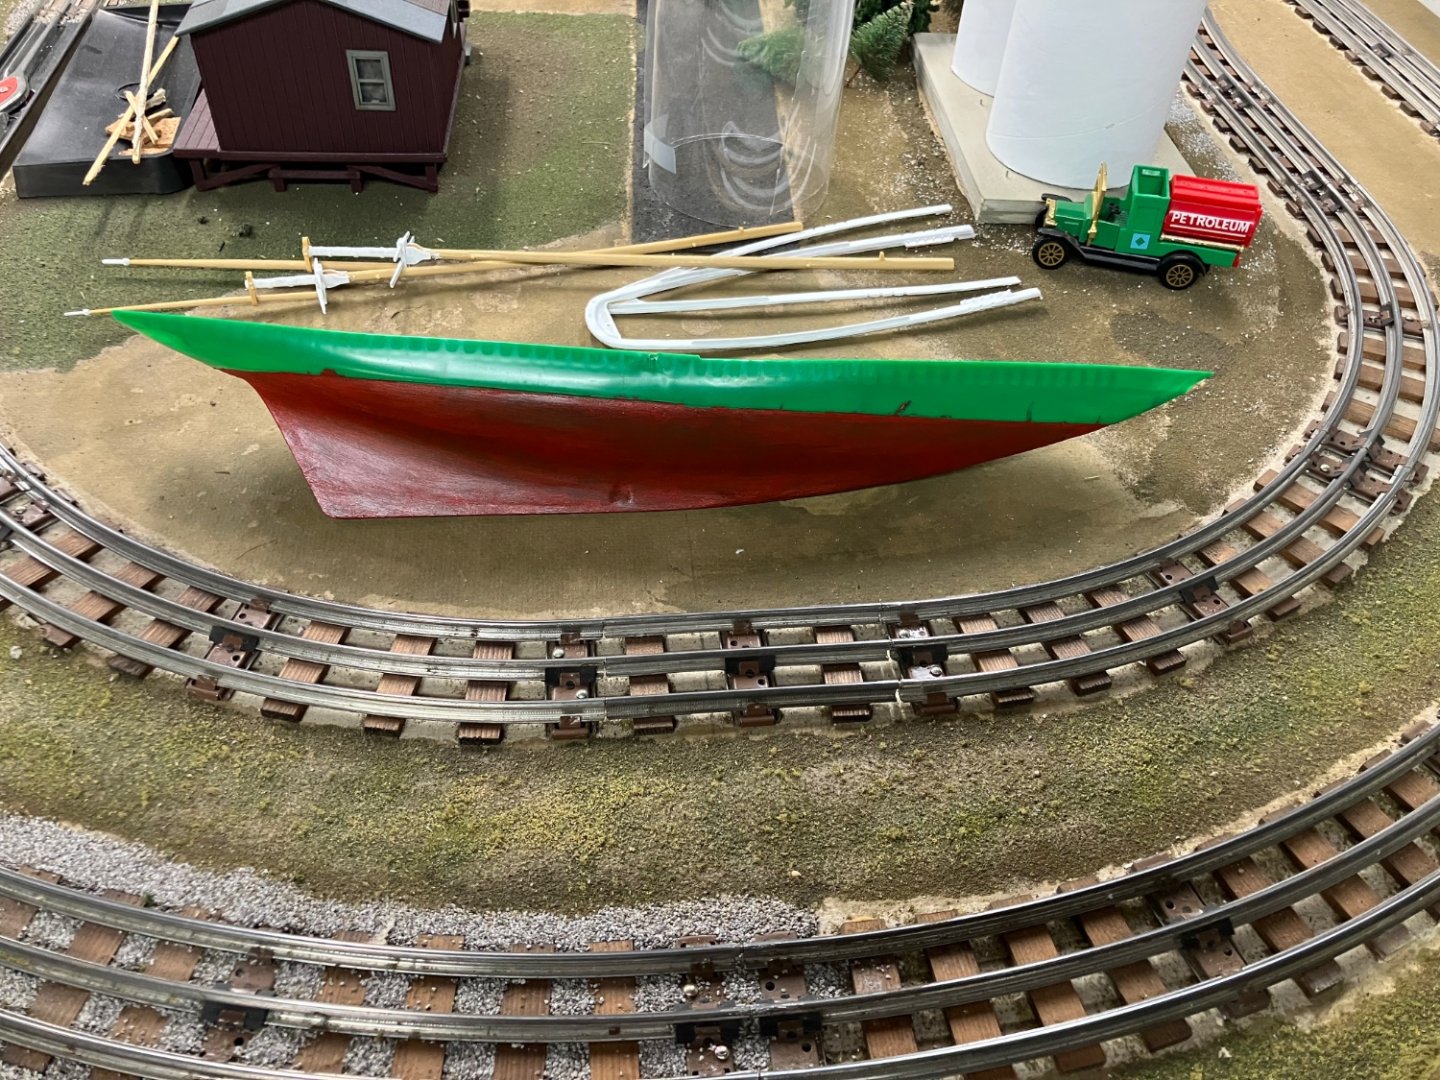
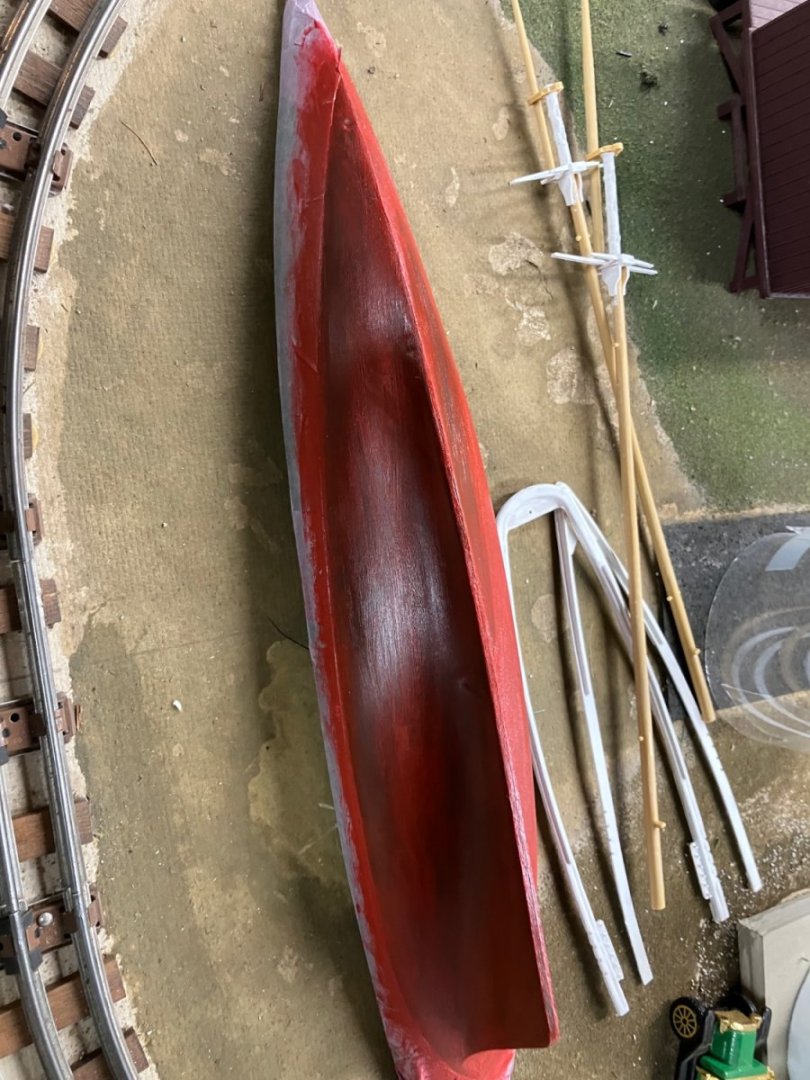
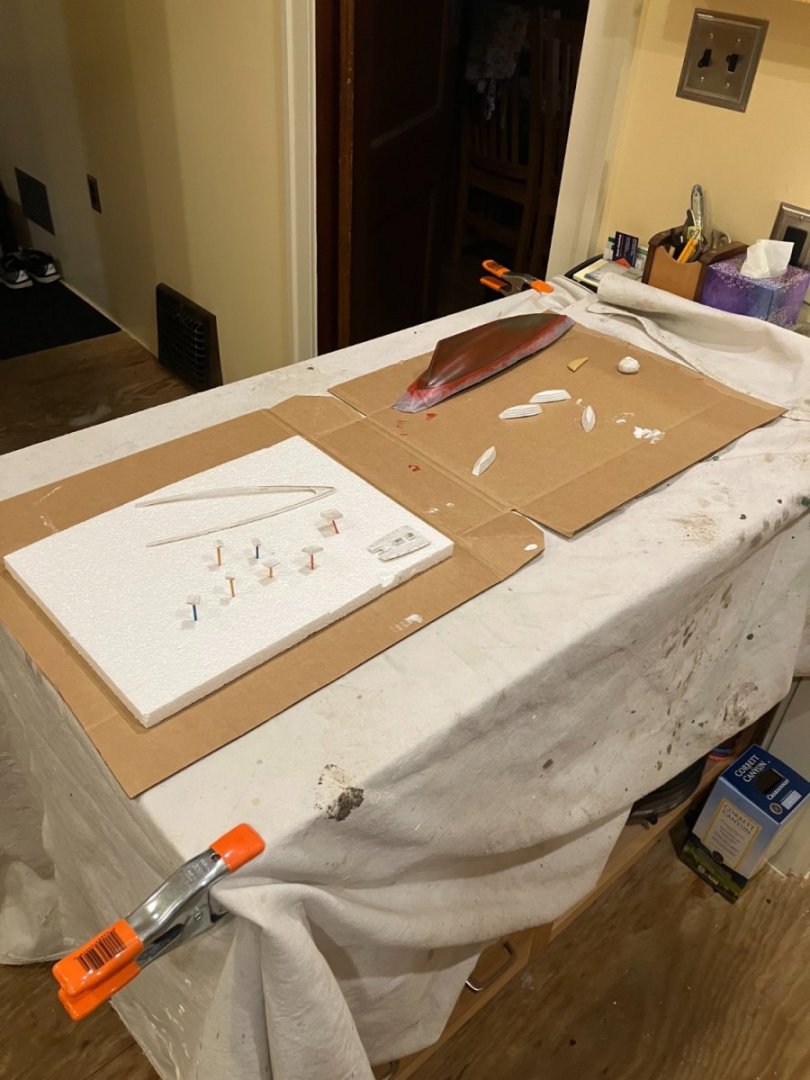
The arrival of an obnoxious political rag was the spur for my latest efforts; it was just the thing needed to use as a backing for my painting. I cracked open the good acrylics this time around, the ones I've used in the past for modeling. Really appreciated the difference in quality, as these actually worked. I painted the inside of the dorys a nice dark naval gray, something a shade or two darker than gull (it was gull & black mixed together). It looks really good, if I do say so myself. I painted a tiny line along the gunnels to good effect, I think it was just about the same width as the uppermost strake. I bought more paints after combing local stores. I miss the days of local hobby shops, made this so much easier. Thankfully, I've got so many various crafty hobbies that I have a good idea where you can still find some of what you need. Although local stuff is so heavily focused on modeling cars, it's a little hard to find suitable paints. Which is nuts, because I assure you the same old USS Arizona & PT-109 kits that have sold since time immemorial are still stocked by every place with a plastic kit aisle on the planet. Why is must it be so hard to find red paint for a hull bottom? Anyways, I settled on Rattle can red for that bottom hull, which I'll mask but think I'll leave the painting of until later, when I can do some spraying in an place with better ventilation. I also found a nice tan\light brown colored enamel. That'll probably go on the masts and decking. I might play around with some of the acrylics for various other details... I have so many small parts to paint on the tree of parts. Frustratingly, I think they are all different colors, too. I also took the liberty of painting some parts for the Model RR. You may recognize some: they are the concrete mixing tray, bucket, and wheelbarrow frame from an incomplete vintage Plasticville "House Under Construction" kit I picked up from the self-same Savers as the Thebaud, about a week later.

- 15 replies
-
- 4
-
-
- Gertrude L Thebaud
- Pyro
- (and 3 more)
-
Cleaned up the hull today. Fortunately I did not need to get too aggressive with the cleaning, some warm water and a mild abrasive worked just fine. Now, to get hold of some decent paints, hopefully without bankrupting myself. In the immortal words of Monty Python: “Next time, definitely!”
- 15 replies
-
- 5
-
-
- Gertrude L Thebaud
- Pyro
- (and 3 more)
-
I removed the masking today… got a pretty clean line at least so I know that works. Tell me what you think about the texture I got with the brush? The paint is far too thin in places and weirdly thick in others so I think maybe another try is in order…
- 15 replies
-
- 3
-
-
- Gertrude L Thebaud
- Pyro
- (and 3 more)
-
Thank you for the advice! I think you’ve explained why I had such different results with acrylics before vs trying to paint the Thebauds hull. I did wash the pieces I was painting before hand, but as you say with a lack of primer and paint with a thicker grain vs proper model acrylics, the results were subpar. I feel daft for forgetting the importance of gloves: as someone who works in the museum field for a day job I’m all too aware of the nastiness of skin oils! D’oh! So, I guess the next post will be me undoing bottom paint attempt no 1 and getting different paints before I move on.
- 15 replies
-
- 2
-
-
- Gertrude L Thebaud
- Pyro
- (and 3 more)
-
I have a question: is posting kit instructions for out of production kits allowable? I'm working on a build log of the old Pyro\Lifelike Gertrude L Thebaud, which to the best of my knowledge hasn't been reproduced since the 1980s. I assume that one cannot post the instructions to kits currently in production as this would violate copyright, but what about kits that are out of production? I'd like to be able to post some images of the instructions for other members to see, both for historical\future reference and to get their opinion on them (in case they know of better techniques than the instructions recommend for building the ship). I'm not sure who even owns the copyrights to things produced by Lifelike, I know some Pyro kits have been reproduced but these do not seem to include the higher detail ones like the Thebaud suggesting those molds and related copyrights are in limbo?
-
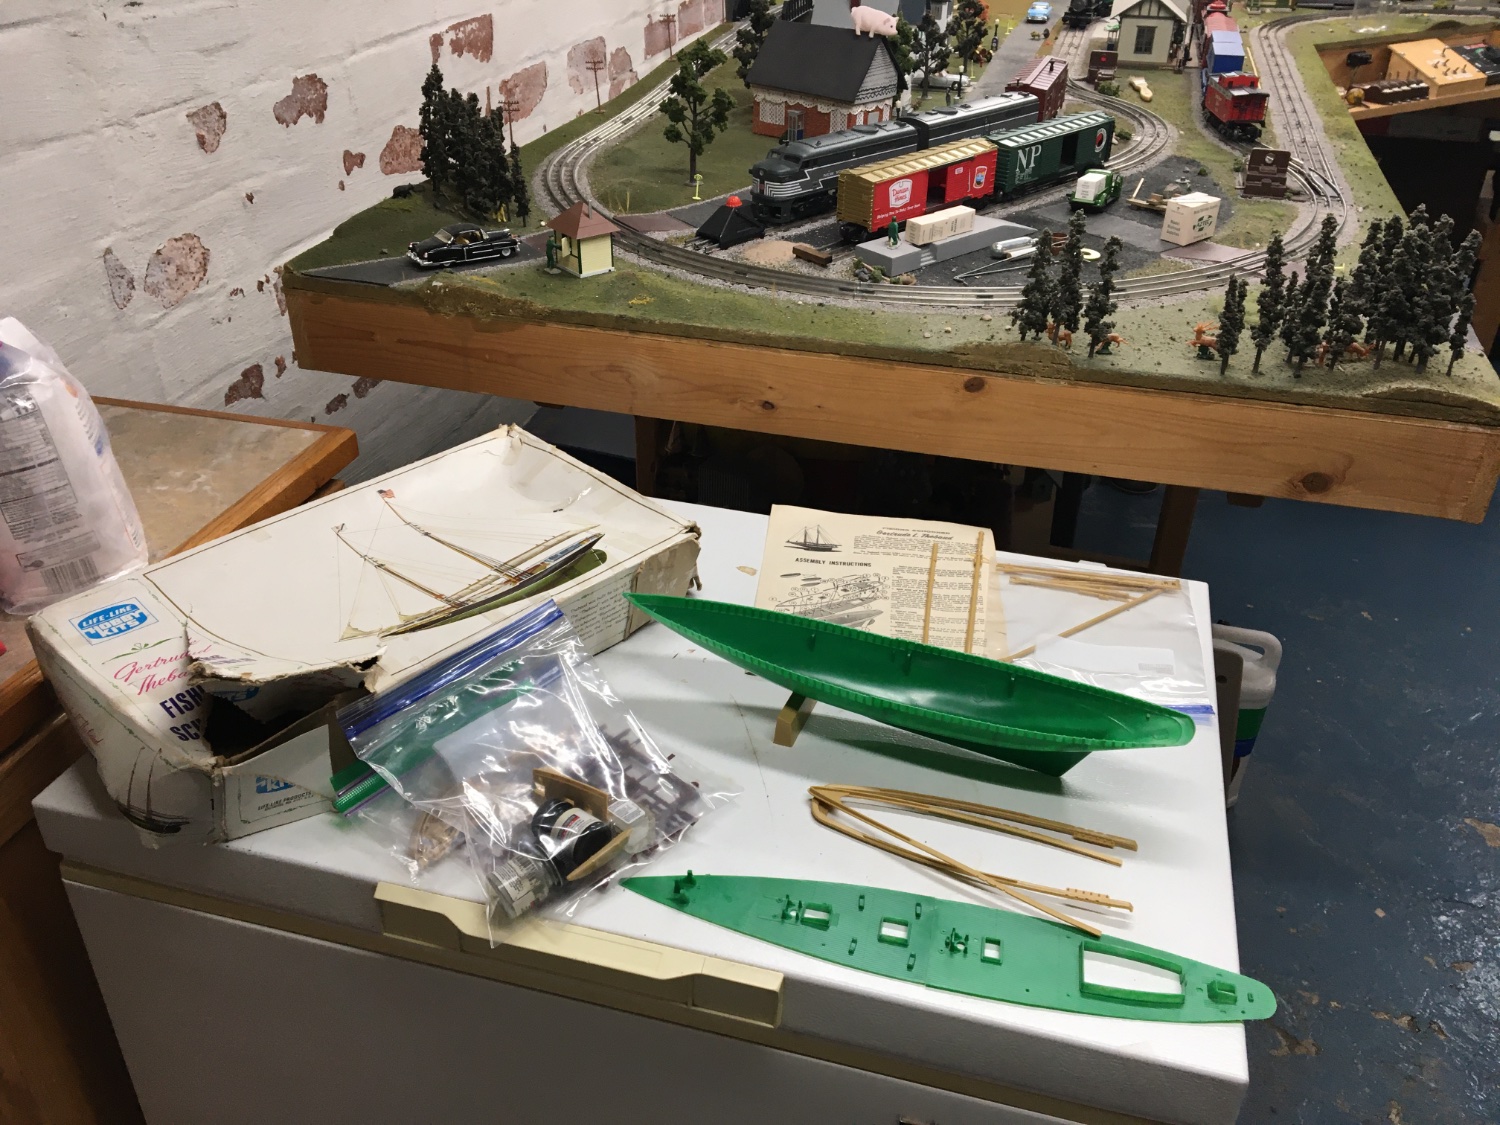
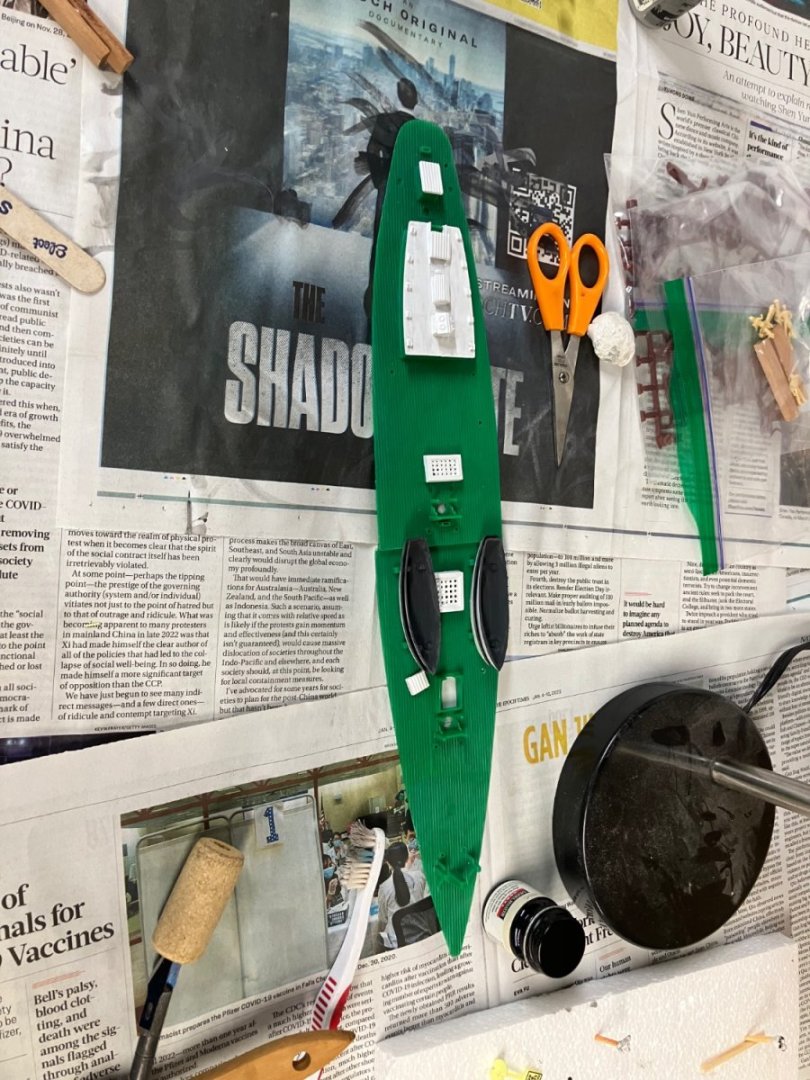
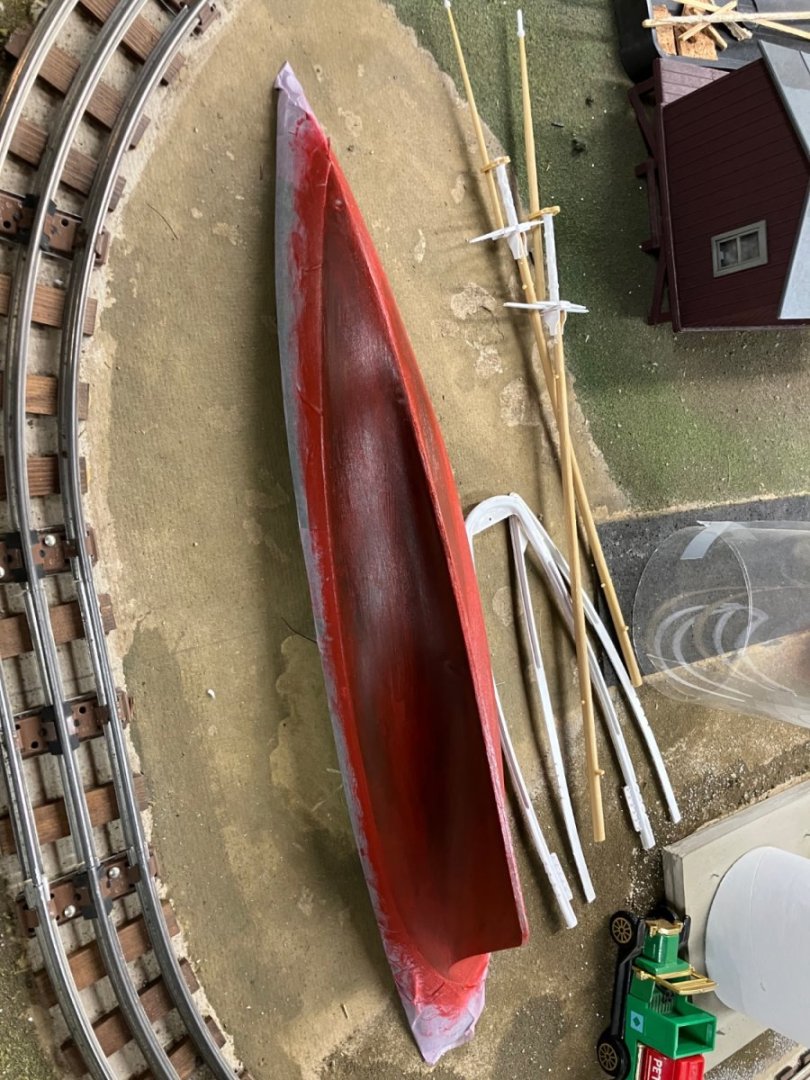
Hello everyone! I'm a first time ship modeler, long time model railroader, and I've just started a build of the old Pyro\Lifelike Gertrude L Thebuad, a Grand Banks Schooner. This is the kit in the state I found it, at my local Savers for a very low price! I've always liked tall ships, so I thought it would be a fun project to work on. I was mostly surprised that all the pieces were intact: I usually avoid second hand kits on the assumption that they are likely incomplete\semi-assembled\broken, hence why they are for sale at places like Savers. In this case, however, although the box appears to have been through an Atlantic storm, the model was completely intact and unassembled. After some assessment of what supplies I had on hand, and reading the instructions, I decided to go shopping for some new paints, as the kit recommends pre-painting everything before gluing it all together. Also, I needed new model glue: the last time I bought a tube was probably more than a decade ago! And the tube was completely squeezed out. I also spent some time putting a little wood grain into the masts, using the old hobby saw trick, as this was something I did just last year with my telegraph poles on my layout (you can just about see them in the background). The paints from good ole' Testors I'd been using previously for various detail painting around the layout were acrylics, so I opted to buy more of those. That... was probably a mistake, if I'm honest. I wound up getting acrylics that weren't from Testors, and I am thus far not please with their proformance. More on that later, though. Here I was getting things laid out for the first round of painting. I masked the hull, knowing that I wanted to paint it red to match the real Thebaud's antifouling paint. You can see the four pots of Testors paints I had from previous projects, the Black, Grey, and Yellow are Acrylic and the White is an Enamel. The new tube of red-brown Acrylic is also visible. I'm actually really happy with how well I managed to get the hull masked for painting, I used some very nice Washi based masking tape I borrowed from my dad, and managed to figure out how to do the mask with the minimum of wastage, too. What I did was mask the one side of the ship with tape that was about twice as wide as it needed to be, then used the scissors in the foreground to cut the tape in half, along the gunwales. Then I used that other half of the tape, with the non-cut side facing towards the keel, along the molded in waterline. That wound up working really well! This was the end result of the first session I spent working on the Thebaud. The hull... did not really turn out that well. I sort of like the grained finish you get by brushing on the paint, somehow it seems more real, and wooden than just a smooth gloss. But the color, thickness, and smoothness of the paint... really leaves something to be desired. I'm still debating, at the moment, whether for the hull I will start over again, and used a different painting technique (spray can?) or just press on. The second session, with the Acrylics not really working out, I decided to concentrate on painting everything that needs to be white (my only enamel), white. So the Thebaud's Dorys, Cabins, Hatch Combings, and &c got another coat of paint, and I also decided to glue together the Fore & Mainmast. I did eventually manage to paint some the white sections on those masts, too, after the glue dried. Didn't get a picture of it, though. Whoops! I'm very interested in what advice more experienced modelers here might have, having built this ancient kit before? Especially when it comes to painting...


- 15 replies
-
- 6
-
-
- Gertrude L Thebaud
- Pyro
- (and 3 more)
-
Hello all! I'm a historian by trade, with a recently acquired masters degree in public history. I'm currently working on a certificate in historical preservation, which mainly entails working to help preserve old buildings. I have entirely too many hobbies, including but not limited to writing, playing the violin, and being a Civil War reenactor. I also quite enjoy Japanese arts and culture. I've been a model railroader for many years, so I have a little background with plastic kit building though not much. Many moons ago I did build a model of the NCC-1701 Enterprise from Polar Lights. My late Grandfather & Great Uncle were both Navy destroyer men, and I live in the Great Lakes region so ships have been a long term interest for me. I've read a few threads on here before, especially research threads on early American frigates and other sailing warships, which have been fascinating and useful. A recent trip to the local Savers yielded a Life Like schooner model, at a low price, so I decided I'd give it a shot. I'll try to post a build log of it as I get underway and I welcome any more experienced modelers tricks and advice.