


Lin Feng
-
Posts
62 -
Joined
-
Last visited
Reputation Activity
-

 Lin Feng reacted to wernerkalk in Vasa by Karleop - FINISHED – Billing Boats – reviving a poorly built model
Dear friends and Wasa builders
I have followed nearly all Wasa buildes on Model Ship World mostly yours and I'm very impressed.
After I did start with my Wasa in January I found out that the manual from Billing Boat was very uncomplete and it was nearly impossible to work after that, even when I have some experiences by Building "Santa Maria", "Danmark" and "Jylland".
Thanks your very extremely good explanations and fotographs my ship becomes more and more nice.
Gegards
Werner Kalk
-
Lin Feng reacted to mar3kl in Vasa by mar3kl - Billing Boats - scale 1:75
The three towers in place, together with their finials. The hapless lower rear tower needed its finial truncated in order to fit underneath the upper gallery. The gaps in the shingling panels occur because the curved tower profile is not quite regular, but the gaps will be covered by sculptures, so it won't matter.
The very front of the upper gallery is a little tricky. The kit provides balsa as it does for the front of the gallery bottom, but it doesn't match well with the clinker planking. I ended up creating three shingled panels to go over the balsa, and they looked pretty good.
A view from the stern. Bad lighting, but you can see the sides of the tower bases are fairly vertical, which was surprisingly hard to get right. There are lots of angles conspiring against you here.
The towers all primed and ready to paint. What you don't see is that the sides facing the hull also need shingling, and you can't really do that until the towers are in place, making the job quite fiddly.
Beginning to paint the towers. The horizontal plank is a test fit. Note the window below it - there will be a corresponding square cut into the gallery planking.
-
Lin Feng reacted to NAZGÛL in Wasan 1628 by Nazgul - FINISHED - Billing Boats Vasa 1:75
Hey all! Here are some pictures of the shrouds:
Quite enjoyable stage of the build, and changes the look of the model alot, at least in my eyes.
The ratlines will be testing my nerves though Im sure...
/Matti
-
Lin Feng reacted to fmodajr in Wasa by fmodajr - FINISHED - Corel - 1:75
Using dark brown rigging line, I wrapped the 2 large eyes for the anchors
Painted the anchors and assembled the stocks
Rigged the large anchor line and attached to the large eyes.
Took the blocks and added the hooks and wrapped with darkened thin metal straps
Added wrapped line to only one of the anchors. This is for the starboard side anchor, which I will show being hoisted up with davit. (I will have the port anchor shown in a stored position)
Rigged a double block to the starboard davit
I will mount the anchors soon and try to have an update early next week
Thanks,
Frank
-
Lin Feng reacted to mar3kl in Vasa by mar3kl - Billing Boats - scale 1:75
My next problem was figuring out how to put overlapping shingles on the towers like on the real ship. The kit makes no provision for this - all they expect you do to is scribe some lines on the towers. I thought shingles would look better.
The kit-supplied towers are continuously curved, but the real ship's towers are more complex. As far as I can tell they are octagonal, with eight panels, each curved to form a dome together. The kit's contour for the dome was basically correct, so I started by marking the points of an octagon at the base, and then making lines from each point to the top of the tower.
The next problem was attaching the shingles. I didn't want to mess with the towers too much (the rear lower ones were a notable exception) since the curve profile looked pretty good out of the box. So I ended up flattening the cylindrical lower part of each tower only. Then I constructed a set of triangular pieces similar to the photo below, composed of shingles laid over one another:
Eight triangular pieces comprised the shingling for a single tower. The shingles were thin veneer, so it was pretty easy to bend them to follow the curve of the dome. Getting the edges to meet up was tricky, and there were a few gaps, but they will be covered with sculptures, so no problem there.
Here's a photo of one of the towers once it was shingled. I then needed to drill a small hole in the top for the finial, which is a turned piece of brass. The real ship had different shaped finials for each tower, since as far as I can tell they had an unlimited supply of labor to do that sort of thing. The kit's finials are all the same, so I'll differentiate them with paint.
And here is a tower dry-fitted in place. The shingles extended the size of the tower slightly, so I needed to cut away the clinker planking on the hull where it met the tower. I think the result turned out pretty well - the bottom part is nicely octagonal, and the top part curves nicely.
Repeat five more times for the remaining towers...
-
Lin Feng reacted to md1400cs in Wasa by md1400cs - FINISHED - Corel - 1:75
Mark,
Thanks for the info. That, it seems to me, will make it even harder for the smaller rear towers to rise up enough to overlap the lower parts of the upper galleries as we have been discussing. It will be interesting to see how you figure that one out, allowing enough room for the standing stern guards.
PS: Fred has also just sent me a post indicating that the quarterdeck pinrails should not be there. “The museum got it wrong”, he said. You can check that out at the Vasa specific site, at my build postings. So, I just removed mine, and it left scars grrrrrrrrrr. He also discusses what should be there instead.
PS: No I am not rebuilding my towers.
This will be an ongoing problem with this ship as new data are turned up and subsequent changes to our builds are needed.
Enough already (:-) I'm just going to move forward from now on. My log is already SO filled with "going backwards” tearing out and making fixes. I'm now done with that. And as you said maybe six members here out of the more than ten thousand would even know the differences, and errors........
As Fred had mentioned last year there is some interest for a new kit that may be in its development stages. One that is 100% based on Vasa’s 1/1 current info inclusive of 3D/cad computer renderings. I say current info because the way this ship is "changing" I can just imagine after this kit "is released???" the museum will find more areas where they got it wrong.
Just going to have fun moving forward, not sideways, and definitely not backwards anymore. Pulling out those two pinrails that left scars is the last change for me.
I will however absolutely highly regard member’s suggestions for how to get this right in regard to nautical accuracy. Nigel, B.E, Ferit as well as some kind other members have been so gracious in offering their guidance as I move along.
Big thanks to the nice people, who click, or post comments. I need this project to be fun, not an exercise in frustration J
Sorry for the long post, but I needed to vent as well
PS: I do very much believe, however, that seeking the most accurate build possible is a wonderful goal that I wholeheartedly support. I'm only writing for myself here, certainly out of frustration. And Corel's is the furthest from what should be Oh well..
Regards,
Michael
-
Lin Feng reacted to mar3kl in Vasa by mar3kl - Billing Boats - scale 1:75
The quarter galleries were the most challenging part of the build at that point. Lots of curves meeting each other, requiring earlier framing to be aligned very carefully. If the early parts are off, I suspect it would be almost impossible to make the galleries look right. I started by planking the curved parts of the stern out to where they meet the lower parts of each quarter gallery. In order to get the edges mitred properly I needed to make balsa support blocks at each corner and very carefully shape them to the desired curved corner profile. Then I used 3mm veneer as the planking, starting at the base and working upward. The topmost piece of each level is curved to match the lip of the gallery.
I then painted the planked areas - you can see the result in the following two pictures. It turned out reasonably well -- once all the sculptures are mounted there, you won't see much of the base. Again the color for some reason looks pinkish. The actual color is a dull red.
Once the stern planking was finished, I needed to plank the lower half of each quarter gallery and get it to meet at the back with nice mitered curve. The balsa support block really helped here; the only other tricky part was that the gallery curves slightly, so various planks needed a little edge bending to line up properly. I figured this would happen so I started at the top where the joints are visible, and worked my way down. By the time I got to the bottom I needed an oddly shaped plank but it's basically hidden at the very bottom of the gallery.
Finally I needed to make the front nose of the quarter gallery bottoms. The kit supplied balsa, and I couldn't think of a better solution so I used it. I glued a block into place and then shaped it in situ until it looked reasonable. The texture's different from the strip wood but it's not that noticeable. The joint will be covered with a sculpture
And with that I moved to the turrets, something I was not looking forward to, but which turned out quite well in the end.
-
Lin Feng reacted to Karleop in Vasa by Karleop - FINISHED – Billing Boats – reviving a poorly built model
Hola:
Before going into the sailing process I decided to finish the anchor fittings. Here some pictures:
For the first step it was necessary to do the blocks due that the ones included in the kit seems not the appropriate. To accomplish this I used a little piece of redwood, brass wire obscured with Black Patina (the one used to the lead in staining glass) and the metal strap for the pulley was made with a paper strip painted black.
The second step was to fix the anchor ropes. Here you can see the little pieces of wire in the opposite side of the anchor that were used to fix them inside the anchor ports
And finally, installing the anchors in its place. This was done according to the BB instruction manual, except I added little wood caps in the extremes of the anchor davits. I made this because the ropes tended to slip off the pulleys due to the low weight of the kit anchors (in the original this did not happen due the great weight of the anchors)
Thanks for your comments and likes.
Saludos, Karl
-
Lin Feng reacted to md1400cs in Wasa by md1400cs - FINISHED - Corel - 1:75
Hi Mates,
Continuing with the bow anchor cathead details, now turning to their needed kevels.
It turns out that I had built and installed a second pair that was at one time attached to the quarter-deck, turns out that this was incorrect (see first two pics).
An early Vasa museum plans set (1980) showed two sets per side at that location, as did Landsröm. A second plan set dated 1981 had one set removed. I communicated with Fred Hocker, who indicated that the ’81 set had been corrected.
So the two kevels were just lying around, how convenient; shortened them for use at the bow railing, and just added a framing bit for attaching.
After gluing, then drilled small holes and inserted black fishing filament to simulate the needed nails.
The brilliant fishing line idea is not mine but belongs to one of our MSW members; apologetically I don’t remember whom (I did post a notation on his build log at the time of seeing his very clever idea)
Inserted the lines from the rear and left the front ends just a tad proud to simulate nail heads-sort of J
G-S cement is perfect for this task. If there were a bit of glue that travelled through the hole to the front end, after a few moments it can be removed with your thumb nail or tweezers, pulls completely off as would rubber cement. LOVE this glue! It has proved to be so versatile. Ferit thank you Again!! You found this.
Hint: I attempted to just “hack of" the front tips of the black filament to adjust them, but the blade snagged them and some resulted in angled cuts. Solution was to actually use the razor blade as a slicer moving the blade as I cut. Worked very nicely allowing for a nice clean flat cut. PS: Exacto type blade not up to the task.
--------------------
Thanks for your “likes”, dropping in for a look, as well as the very welcome supportive suggestions and comments J
Regards, as always
Michael
-
Lin Feng reacted to mar3kl in Vasa by mar3kl - Billing Boats - scale 1:75
Thanks Karl - I like how it came out. Here are some pictures of the clinker-style planking above the main deck line. Fairly easy to do once you have the top wale in place. The wale was easy to install because my scratched bulwarks followed the deck line, so the hull planking did as well, and to install the wale I just followed the hull planking. Everything following everything else :-). I did have to replace the wale because I made it too wide and the spacing for the wales below it wasn't quite right.
The only real issue was being very careful about opening the round gun ports because the veneer had a bad tendency to split.
I added scratched pieces of very narrow (1mm) veneer painted white at the top. Note the rearmost gun port - it is a half-port and I think I'm going to mess with it some and make it fully round, but lower. The kit supplies an odd looking carriage for that gun - looks like an artillery carriage. Since I want to replace it with something correct, I can make sure at the same time that the gun is in line with the port at its new location.
-
Lin Feng reacted to md1400cs in Wasa by md1400cs - FINISHED - Corel - 1:75
Nigel and Ferit,
Thanks so very much for your advice. I have made the subtle, but very noticeable change to the knots by counter-sinking the holes. I have also changed how the blocks were laced.
Lastly I added the small details of the metal bracings at the sides of the cathead pulley rods.
Cheers guys and (:-) for you
Michael
-
Lin Feng reacted to mar3kl in Vasa by mar3kl - Billing Boats - scale 1:75
With the quarter gallery supports in, it was time to go back to the hull and sand and fill it. This was a tedious, long process of using gradually finer grades of sandpaper until everything was flush and smooth. It generated epic amounts of wood dust, and since my "workshop" is the guest bedroom, I needed to vacuum a lot so that the guests in question could sleep without coughing all night. I tried to be careful during planking not to have any depressions - gaps are easy to fill with small amounts of color-coordinated filler, but depressions need more filler and are more visible. Luckily I didn't need much filler at all, except with the spiled planks at the front. Those were all hand curved and didn't match each other perfectly.
Here you can see the area where the spiled planks begin.
Here you can see filler that's been applied but not yet sanded down. It's a nice water-based filler whose color matched the wood fairly closely.
Next up was staining the hull and scribing plank butts...
-
Lin Feng reacted to Karleop in Vasa by Karleop - FINISHED – Billing Boats – reviving a poorly built model
Hey friends:
I had several days without showing progress in my Vasa, which does not mean I was not very busy working on the rigging.
So, at last I finished the more than 1,000 knots that were needed to fixed the ratlines to the shrouds !!
Probably this ratlines could be a little thinner and darker but I used the material that came with the kit.
Now I will begin with another challenge: doing and sewing the sails in order to fix them to the corresponding yards.
Saludos, Karl
-
Lin Feng reacted to Ferit in Wasa by md1400cs - FINISHED - Corel - 1:75
Looks great Michael,
This is a Scratch Build Log...
Sorry but I think that the situation should be like the second instead of the first as you had done.
-
Lin Feng reacted to md1400cs in Wasa by md1400cs - FINISHED - Corel - 1:75
Hi Mates,
Thanks for the comments and the likes very kind of you.
Started working on the ropes for the anchor catheads. I wasn’t sure about how to detail the blocks. On the 1/10th the blocks were capsuled with metal bracings, not rope. This created a bit of a scratch of the head.
So I chose this solution;
1) re-drilled the block holes increasing their size.
2) drilled two more holes in each block, one for the hook and the other two for the pulley rods.
Looking through my boxes of “stuff” I found a copper tape strip that had adhesive backing. Hmmmm, that might work?
Cut the tape into a narrow strip and wrapped it around the block.
Glued the hook with CA, and pulled a drill bit through making sure that the hook was not blocking a rope hole.
Cut some flat head nails and glued them to the sides of the block.
Painted the added bits with flat black paint.
Lastly added the ropes attaching the blocks. Next up will be the single side anchor cathead and its block.
In the last two pics; I removed the knightheads that had been built such a long time ago, as well as removing the railing leading out of the upper gun deck, both of which are incorrect for Vasa. I will rebuild the knightheads to correctly reflect the Vasa’s. Tossed the railing (it was so nice (L)
-
Lin Feng reacted to mar3kl in Vasa by mar3kl - Billing Boats - scale 1:75
With the hull finally planked, I wanted to do something different, so I started the quarter gallery supports. They were fairly straightforward except for the double curves at the rear. To get those to look right I needed to break the pieces and reassemble them with the right curve, cleaning up the joints with filler.
Each gallery has an upper and a lower part, separated by a spacer. Eventually the gap gets filled with small balusters - the kit provides 2x2mm wood for them, but I think I'm going to do something slightly more ornate.
And finally the view from the stern, showing the reverse curves.
-
Lin Feng reacted to marktiedens in Wasa by marktiedens - FINISHED - Corel - scale 1:75 (Vasa)
I have decided to continue on with the Corel version of the Vasa which I started about a year and a half ago.I got as far as the first planking done & set it aside while I continued working on the Sergal kit. I have fixed a couple of things so far. I re-sized the upper row of gunports as I cut them too big to start with . Also I the slant to the companionway roofs - the kit had them flat. I also re-did the lower stern to be more square.One more thing I noticed after glueing on the false deck was there were no openings for the knighthead behind the main mast or the ladder behind the fore mast so I had to make them.
/Mark
-
Lin Feng reacted to mar3kl in Vasa by mar3kl - Billing Boats - scale 1:75
Here's a photo of a finished gun port, lined with thin veneer. Fred Hocker kindly gave me average dimensions for the upper and lower ports so I was able to get them more or less the correct size.
The gun port lids will be an interesting exercise too. The kit provides plastic lids. Each lid has a raised square center section with its lion head in the center. The lion head detail looks pretty good, and because the whole center section is painted, you won't know it's plastic. You get the benefits of nice detail and workability without it looking ugly. The outer edges are supposed to be wood though, and it's hard to paint plastic to look like wood.
I think I will cut the edges off the lids, leaving only the raised square center section. Then I can grind down the back until it's fairly thin, and simply mount each section on a wooden lid. Seems like it'll work, but I'm going to do the lids very near the end of the project since they will be fragile.
Once I had decided to fix the kit's gun port design, I needed a solution for mounting the cannon. I decided to make a set of false gun carriages, very low on detail since only the front will be seen. Those would then be mounted on strips of false decking attached at the ends to the bulkheads. Here are pictures of the pieces of false decking and the assembly of the false carriages:
And the carriages mounted to the decking...
And the decking mounted at the ends to the bulkheads.
And finally a couple of pictures test-fitting cannon on the carriages. The cannon supplied with the kit are not very detailed and seem out of scale to me, so I bought some Amati cannon that I thought looked better. I'll paint them black and then add bronze highlights.
-
Lin Feng reacted to NAZGÛL in Wasan 1628 by Nazgul - FINISHED - Billing Boats Vasa 1:75
Update time finally. Here are the finished chainplates and channels for the main mast:
It's some work to make them, especially reshaping the deadeyes and scratching the metalparts. It feels good to do some other work now before starting with the next mast.
/Matti
-
Lin Feng reacted to fmodajr in Wasa by fmodajr - FINISHED - Corel - 1:75
Started working on the false cannon.
Painted them with a diluted black to match the deck cannon.
Then I sprayed on a coat of "Dull Cote" for handling.
Now installing the false cannon on the starboard side.
Previously, early in the build I milled a slot in the cannon housing and installed the false carriages.
Now, I just add some glue, slide in the cannon and lower onto the carriages.
Here are some pictures of the first side.
Now onto the port side.
Next up, I will start working on the anchor installation.
Thanks,
Frank
-
Lin Feng reacted to fmodajr in Wasa by fmodajr - FINISHED - Corel - 1:75
Hi,
I continued by working on the figurines on both side of the ship.
I had to thin down the figurines, especially the large figures near the bow, in order to get them to fit above the gun ports. Then, as usual, I gold leafed them before mounting.
Large figurines (tight fit) on starboard and port sides.
I had to grind off some of the nails that were in the way for the smaller figurines.
Also, I inserted some wood shims to help support them.
I left some space below the top shim so that rigging line can pass thru this space later on.
Test fit of rigging line to make sure there were no obstructions
Installed figurines on port and starboard side
Added the chains to the rudder at this time. I blackened them before installation
Frank
-
Lin Feng reacted to mar3kl in Vasa by mar3kl - Billing Boats - scale 1:75
And now the hull planking began in earnest. The kit is designed for a single planking layer. If there were lots of frames along the length of the hull this would be fine - lots of attachment points, and nice gradual curving. Unfortunately there are only a few (relatively speaking) bulkheads, so not a lot of places to attach your planks and you need to be very careful about fairing the bulkheads to avoid any unsightly bends in the planks. In a double-layer design like my first ship model, anything unsightly gets sanded or filled to produce a smooth surface for the final planking; no such luck here. There's a second-order problem with the single-layer design, which is if you want to use individual scale-sized planks rather than long strips, you have the problem that the planks butt against one another in places where there is no underlying support. Add to that problem that the planks in question are usually curved, and getting it to look nice is difficult. Finally, even if you use long strips, getting them to sit flush against one another without underlying support is tricky. All in all a challenging task.
I tried one strip of planking as individual planks with small pieces of wood behind the joints, but it was tedious work, and the result didn't look all that great. I decided instead to use long strips and scribe the butts afterward. I realize that the real ship didn't have a pattern for shifting the butts (insert juvenile humor here as needed), but I liked the look so I used a pattern. Also, the real ship used scarf joints, which I didn't want to deal with in large quantity, so I decided to scribe scarf joints for the wales only.
The hull is fairly bluff-bowed, and the compound curving of the hull didn't start until quite far forward. In practical terms that meant I could use strip wood for almost the entire hull, with only a small amount of tapering required. Near the front I needed to spile planks from wide planking stock. Unfortunately for me the wide stock and the strip stock, though both mahogany, didn't match perfectly, requiring a darker stain on top to blend together.
The rear of the hull is another slightly tricky area. There is a pronounced sweep upward toward the rear, requiring some edge-bending of the planking. Now that I think of it, maybe that was why the bottom of the pre-built bulwarks didn't follow the curve of the top - by keeping the line below fairly straight, no bending is required. The narrower strip stock I used was fine with the edge-bending required, so luckily no problems there.
The second design issue I had to deal with was gun ports. The kit provides brown plastic frames and you are supposed to paint black squares on the hull and then glue a frame over them. I found this a dubious idea at best and decided to make real gun ports. More on this later, but in the following photos you can see them take shape. Locating them on the hull was difficult since they are not evenly spaced and the placement on the kit plans is wrong. I ended up looking at the real ship and the 1:10 model and eyeballing the placement as best I could. I was pretty happy with the result. Scratching my own bulwarks and having them follow the curve of the decks was a big win here because the gun ports follow the same curve. All I needed to do was make vertical cuts.
Luckily for me, the first band of planks requires no tapering and no spiling, so I could practice getting a nice result. I steamed the planks for a bit, then nailed them to the bulkheads, all with no drama. I did need to use clamps to keep the rows sitting flush with one another, and I needed some temporary bracing at the bottom of the current row to make the planks sit tightly against one another.
-
Lin Feng reacted to mar3kl in Vasa by mar3kl - Billing Boats - scale 1:75
Here are some photos of the diagonal transom planking. The 5mm width wood feels more in scale to me. More by luck than anything else I managed to match the number of planks with the real ship.
Note the colored molding at the base of the buttresses. Because I had the buttresses curve, the molding curves as well. The actual ship and the 1:10 model don't show such a pronounced curve, so I ended up redoing that area. Not sure it made much difference in the end.
The kit plans don't call for open rear gunports. I think you're supposed to paint a black square and put a plastic frame around it. I made "real" gunports, although they are very shallow because of the bulkhead behind them. Rather than opening up that bulkhead and having to deal with false decking and false carriages for the guns, I decided to leave the depth shallow and use false cannon that screw into the bulkhead.
The only parts of the transom still to do are the curved areas that meet the quarter galleries. I wanted to wait on them until I did the quarter galleries, since the area where the transom meets the quarter galleries is a bunch of complex compound curves and needed a lot of care all at the same time.
-
Lin Feng reacted to JanV in Wasa 1628 by JanV - Corel - scale 1:75 - Vasa
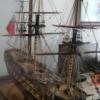
a dry-fit for the masts.
I will fix these the next step.
-
Lin Feng reacted to md1400cs in Wasa by md1400cs - FINISHED - Corel - 1:75
Hi Mates,
Installed carriages now just need to clean up the ropes. I will leave that for now and move to an other area TBD. Thanks for looking in (:-)
PS: first pic, is self explanatory, but found it easy to position carriage then drill a small hole in deck for installation.
MIchael