HOLIDAY DONATION DRIVE - SUPPORT MSW - DO YOUR PART TO KEEP THIS GREAT FORUM GOING! (Only 36 donations so far out of 49,000 members - C'mon guys!)
×

MajorChaos
-
Posts
301 -
Joined
-
Last visited
Content Type
Profiles
Forums
Gallery
Events
Everything posted by MajorChaos
-
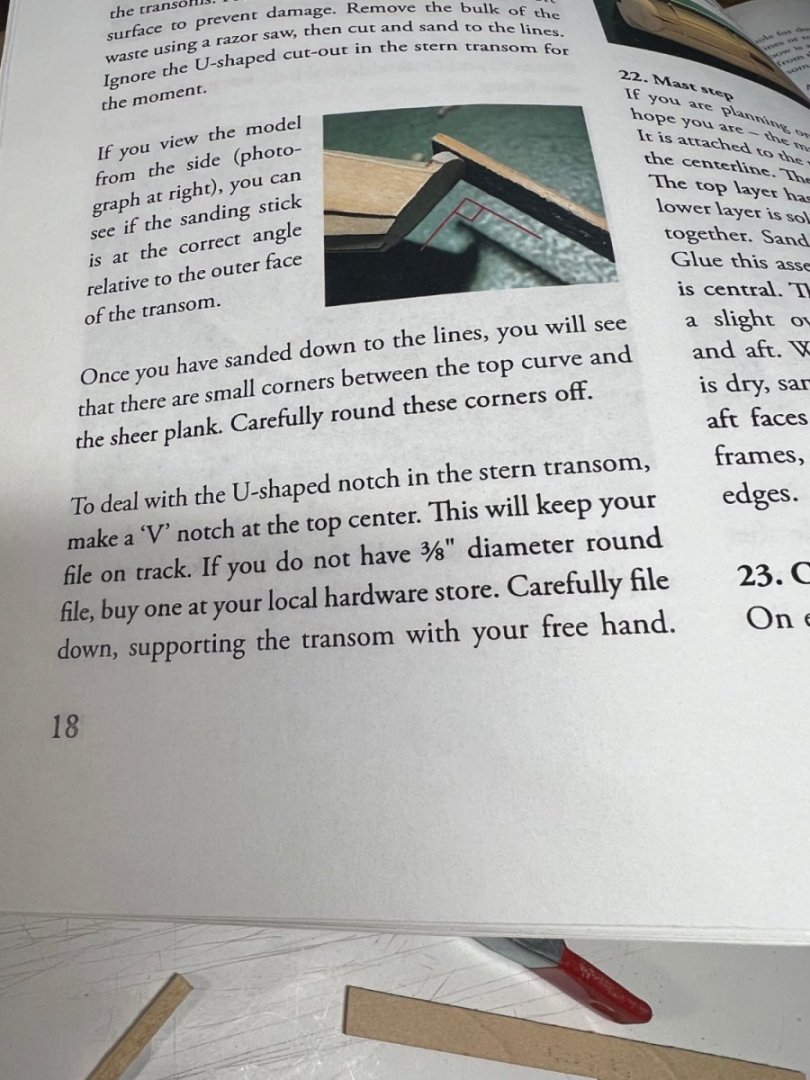
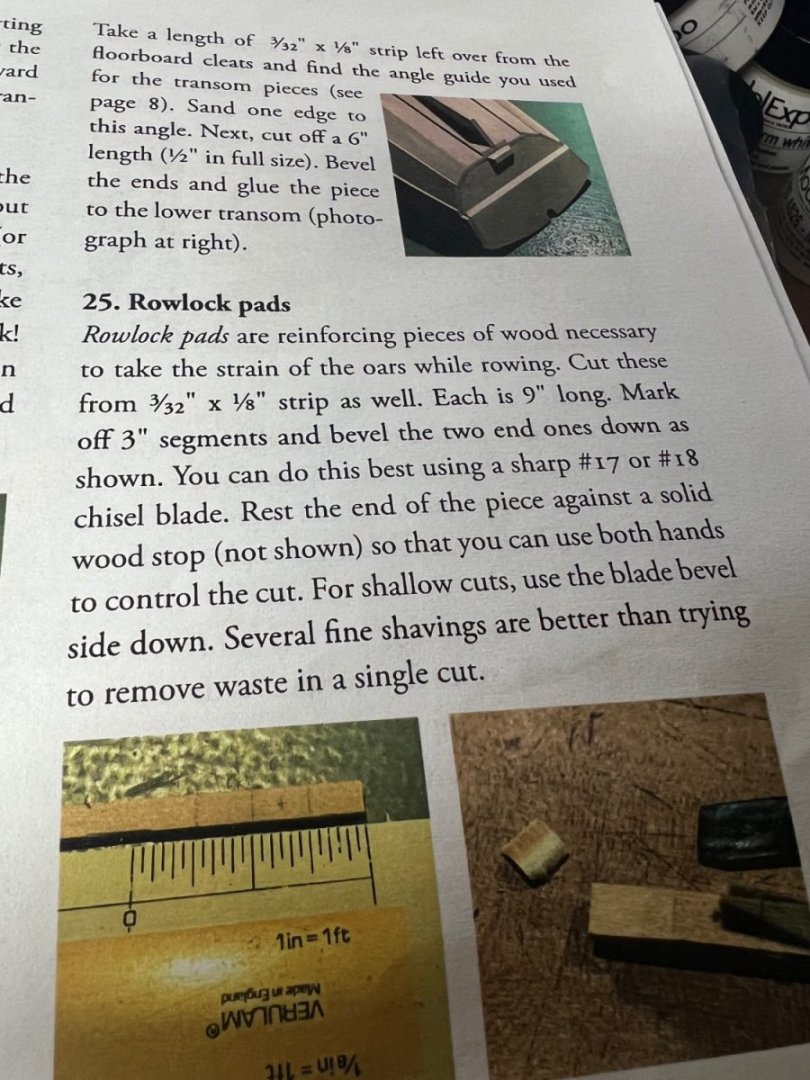
I now consider the instructions a suggestion of what to do. For a beginners model series this is almost a joke. The steps 19-26 were clearly written after completion. They had a full set of real plans they referred to during building of this model. Rowlock pads, 9” long with 3” segments. Wait what? I know what they mean, but still. The stern transom notch is 5/16 and NOT 3/8, if you use a 3/8 file it will be way to big. Unless they meant the tapered end of a 3/8 file and that won’t make a nice notch. My dagger board sample makes a nice handle lol. I will finish this model because I should, I’m so ready to start the next one. The Muscongus Bay lobster smack. I really like that construction type, and I’m super excited to start it because most of its other ships I have waiting are that type of hull. I might throw the Pram out of the pram. Lol

- 72 replies
-
- 3
-

-
- Norwegian Sailing Pram
- Model Shipways
- (and 1 more)
-
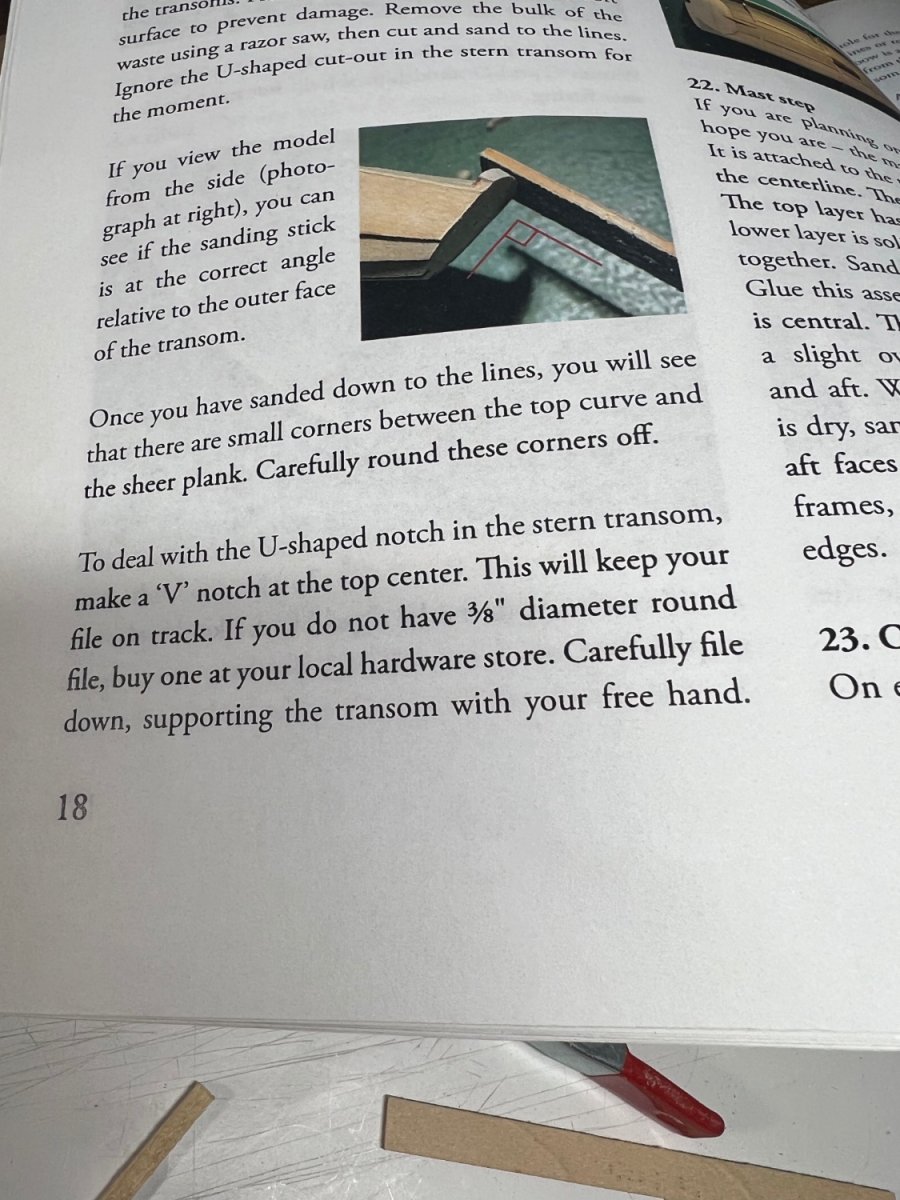
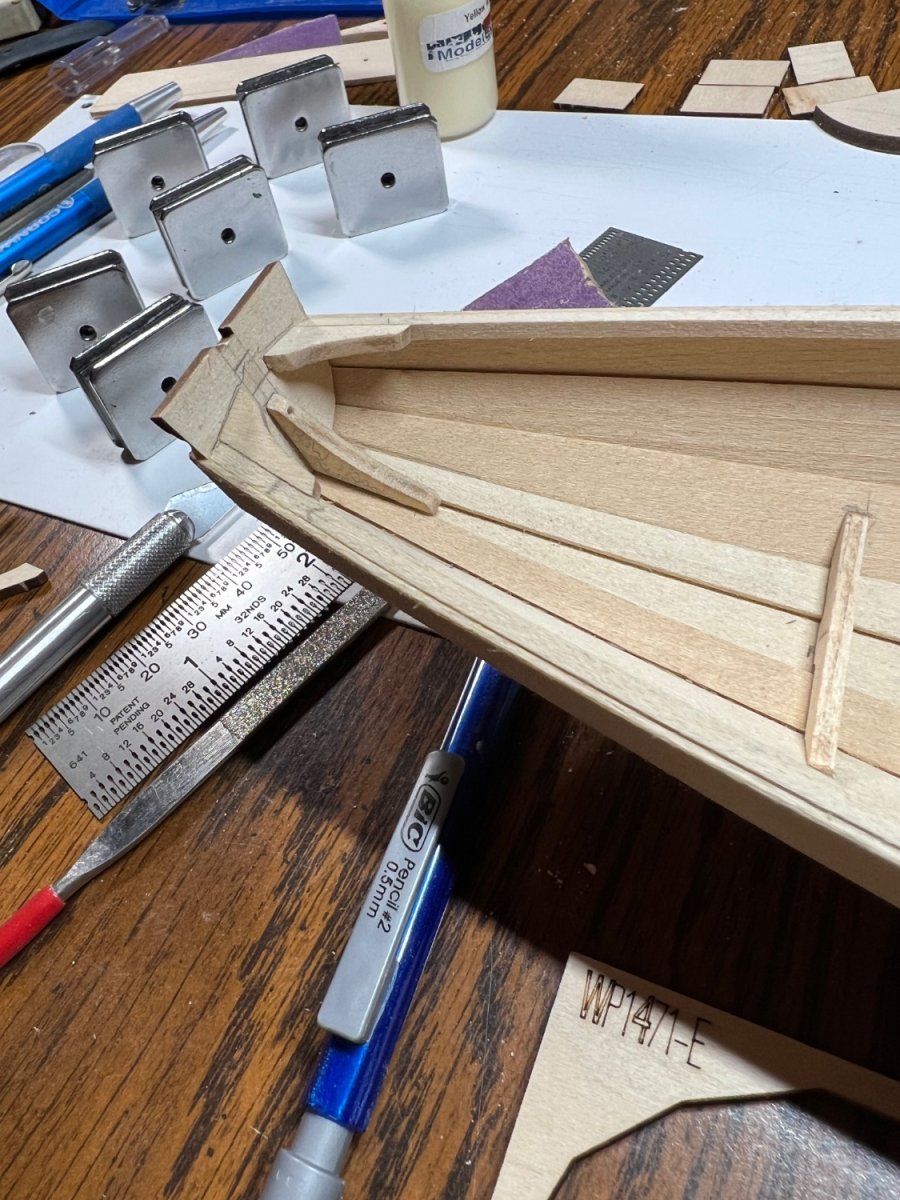
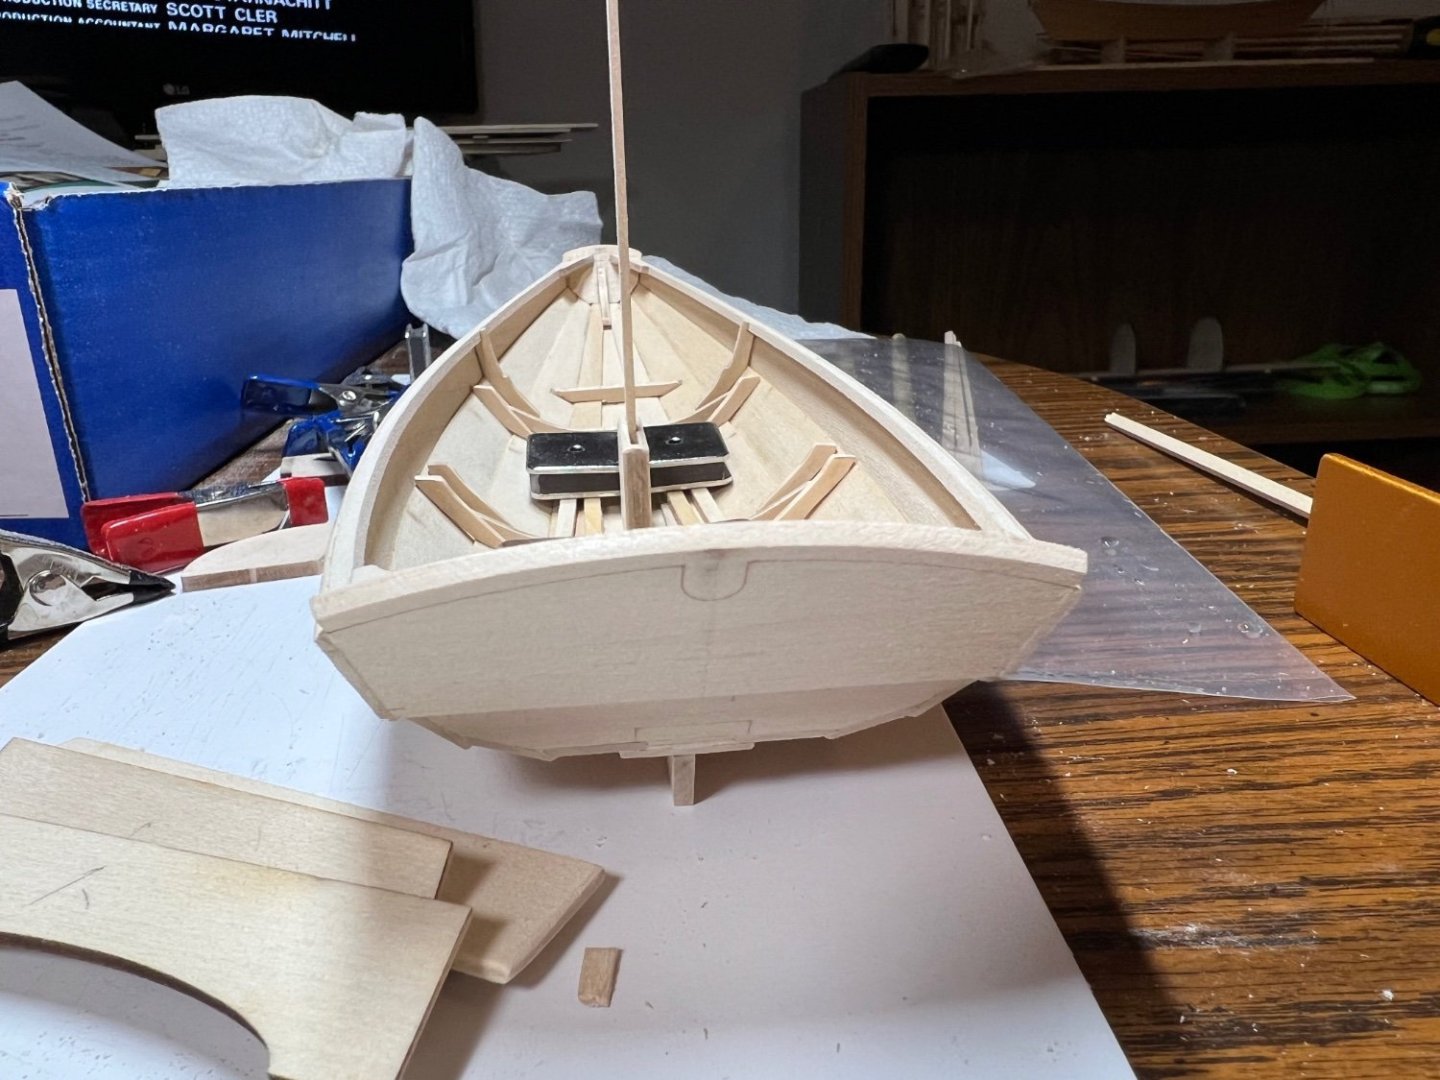
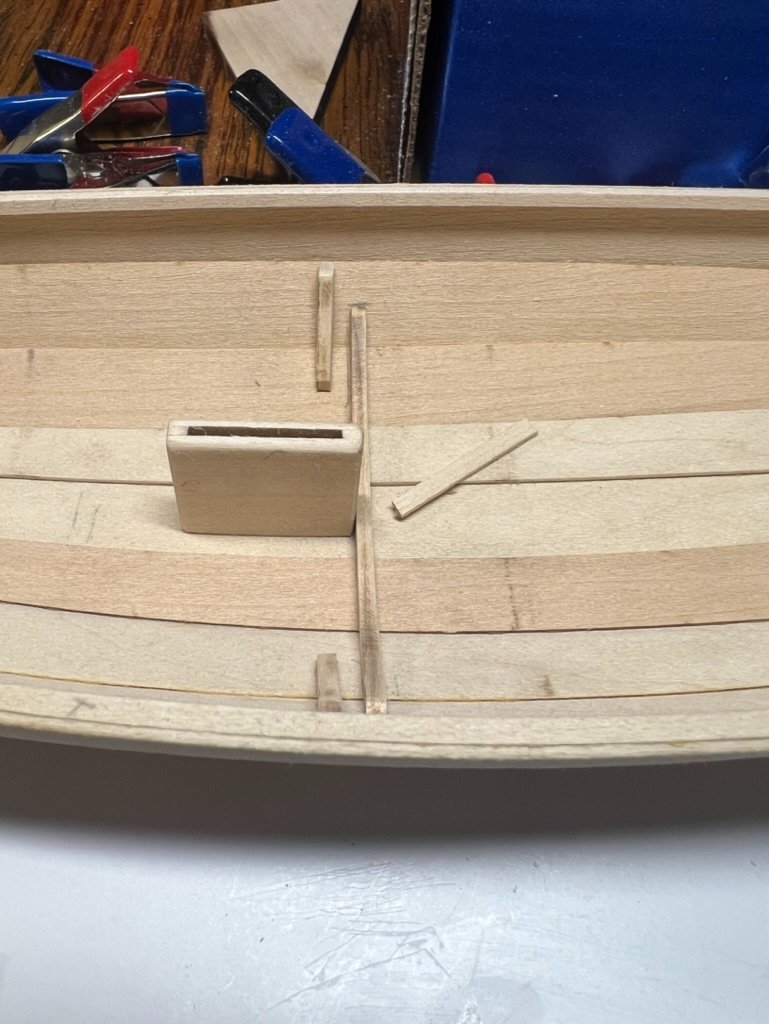
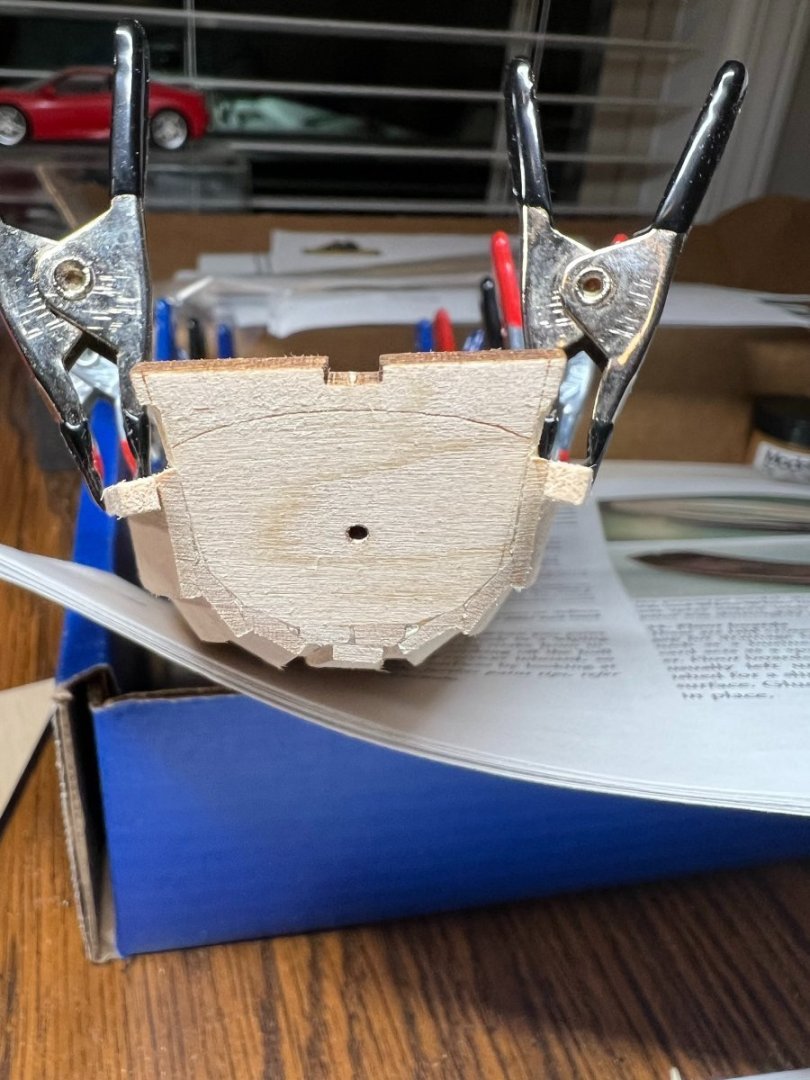
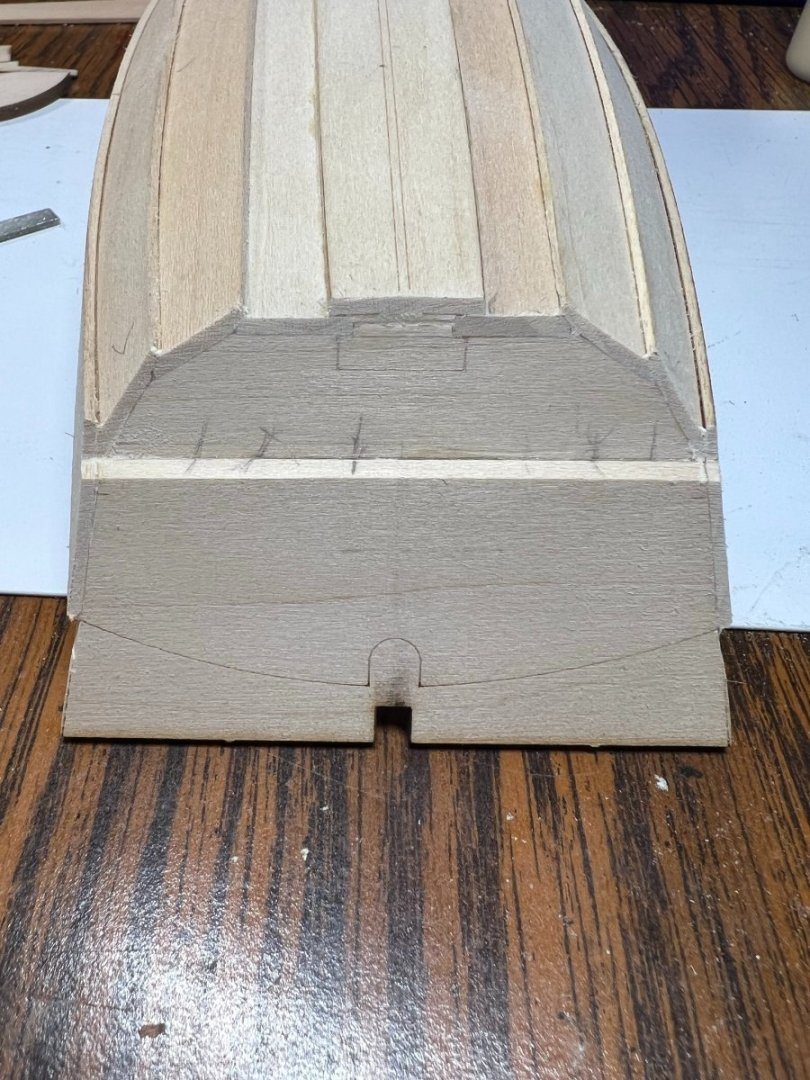
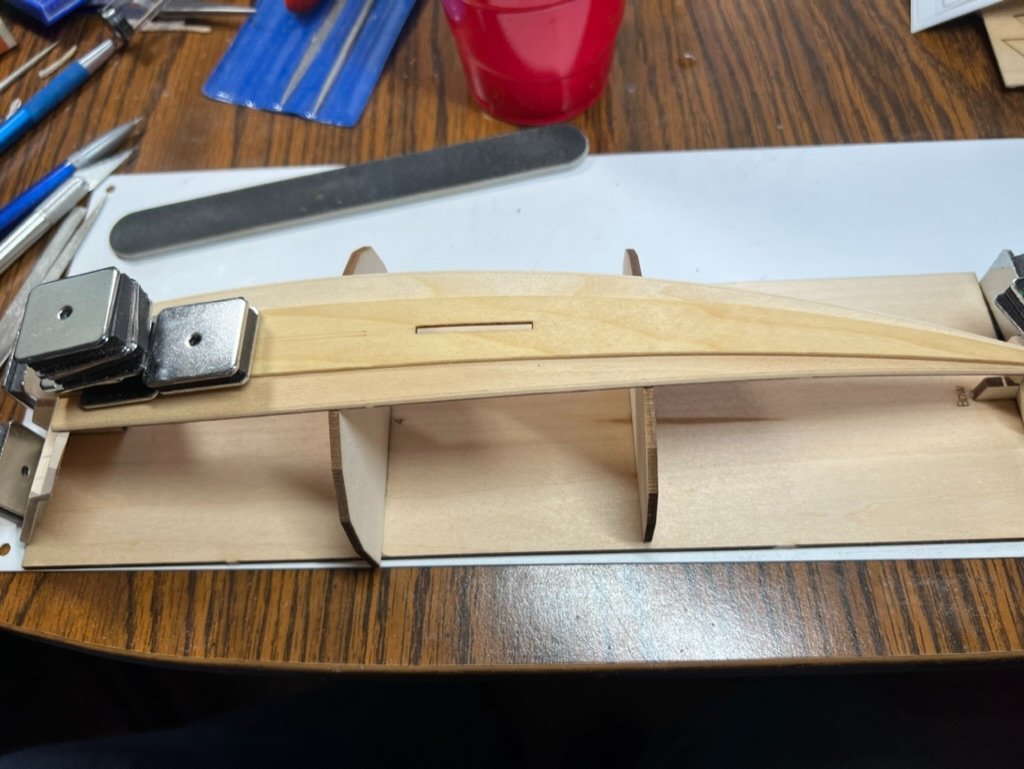
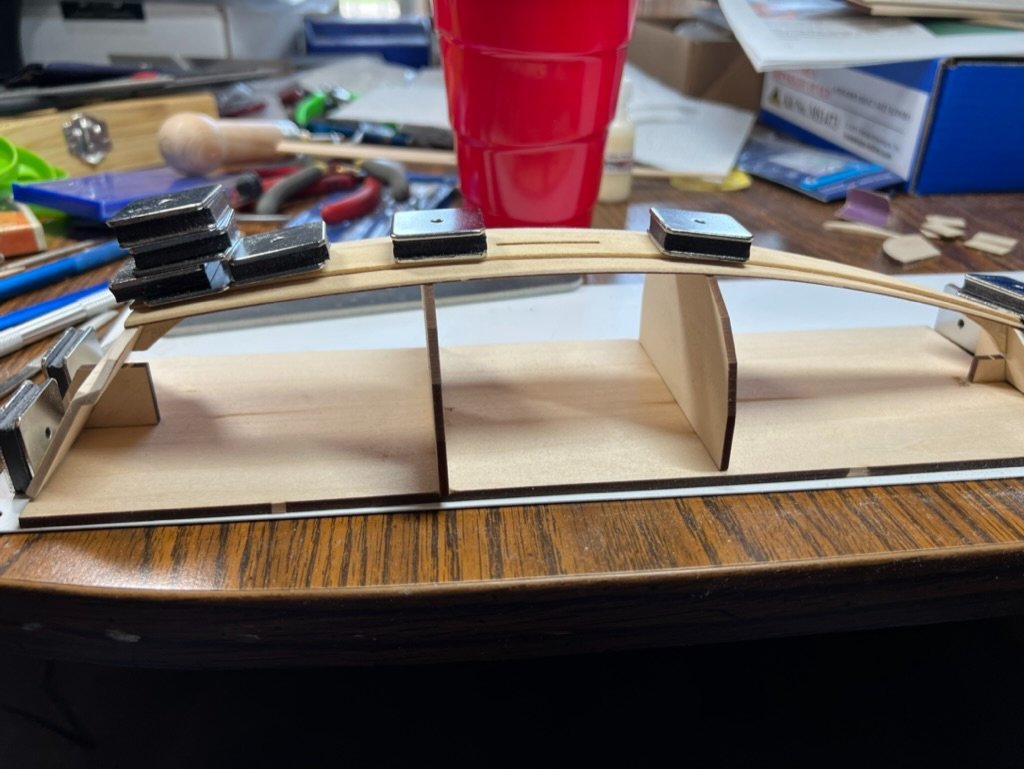
No clue how tall to make the transom. I’ll make the front and rear match. The line by the instructions should be 1/8 in higher. But the notch in the transom matches the pictures. For many of these and following steps, they seem out of order, without proper detail. I’m around step 20, I’ve read ahead. Step 26, no pictures. Should be done before around 22-23, at least before the top has stuff added to it. The floor cleats are drying and I’m trying to hold the hull shape. Look like the forum is flipping my picture upside down. It’s still a better shot of this step than the given instructions. Lol.

- 72 replies
-
- 4
-
-
- Norwegian Sailing Pram
- Model Shipways
- (and 1 more)
-
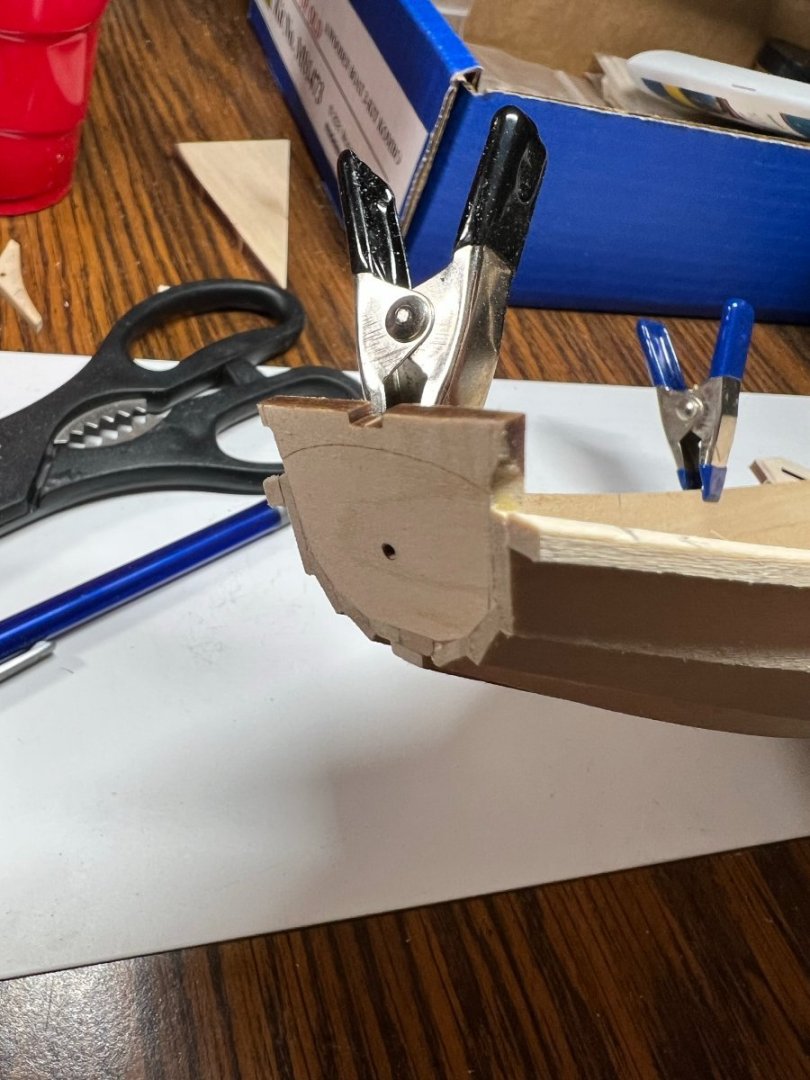
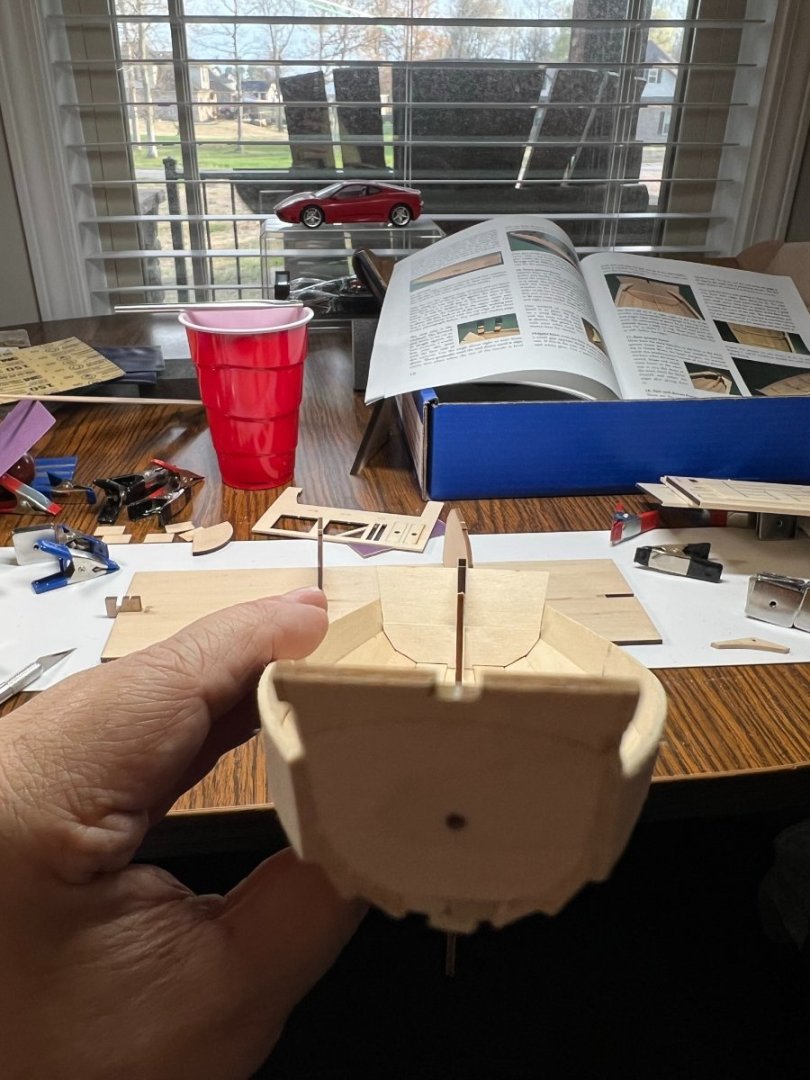
I trimmed the bow transom some. Looking at some real Pram pictures the bow transom can be narrowed some. E parts have a groove at the bottom plank boards. It was decided to place the groove at the gap and trim the top seat as needed. After careful and repeated fitting and planning they are rotated out of square fore and aft.


- 72 replies
-
- 6
-
-
- Norwegian Sailing Pram
- Model Shipways
- (and 1 more)
-
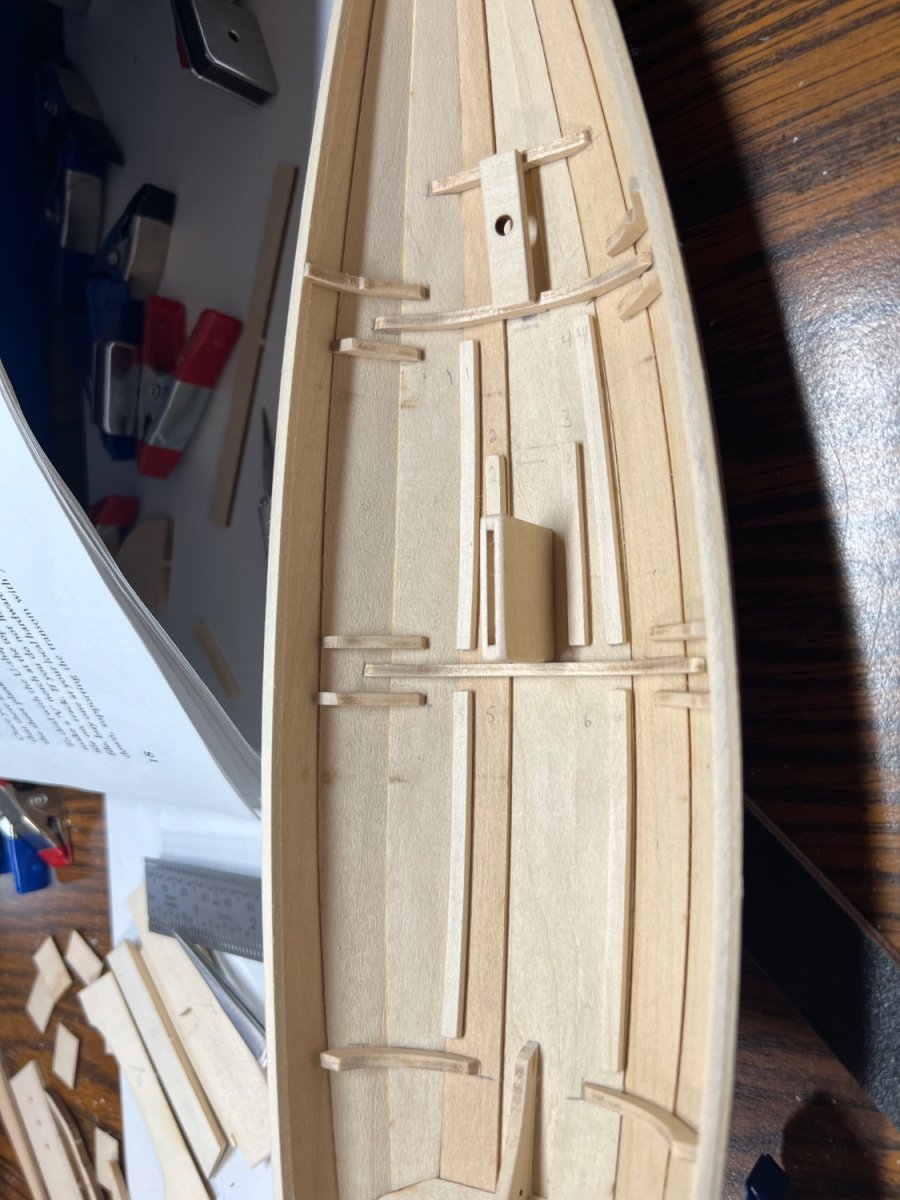
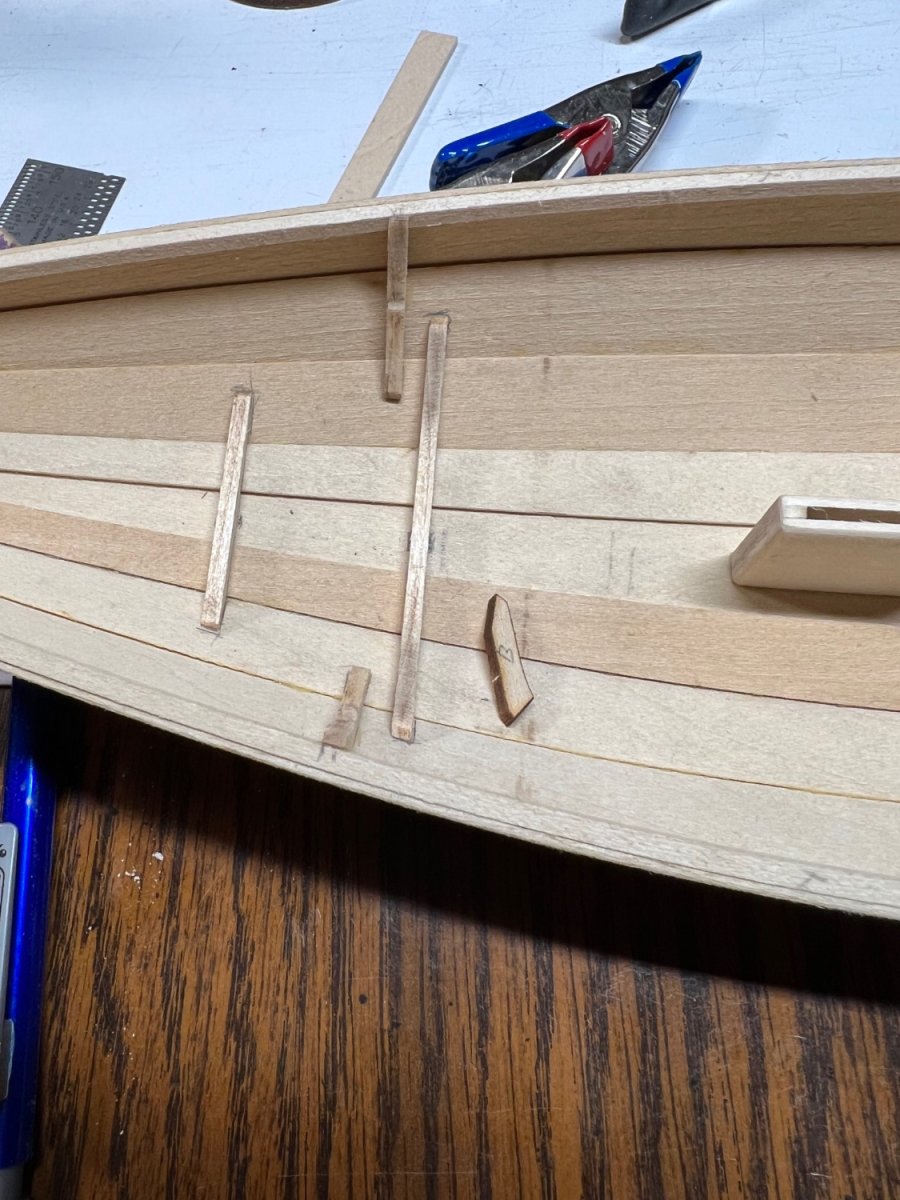
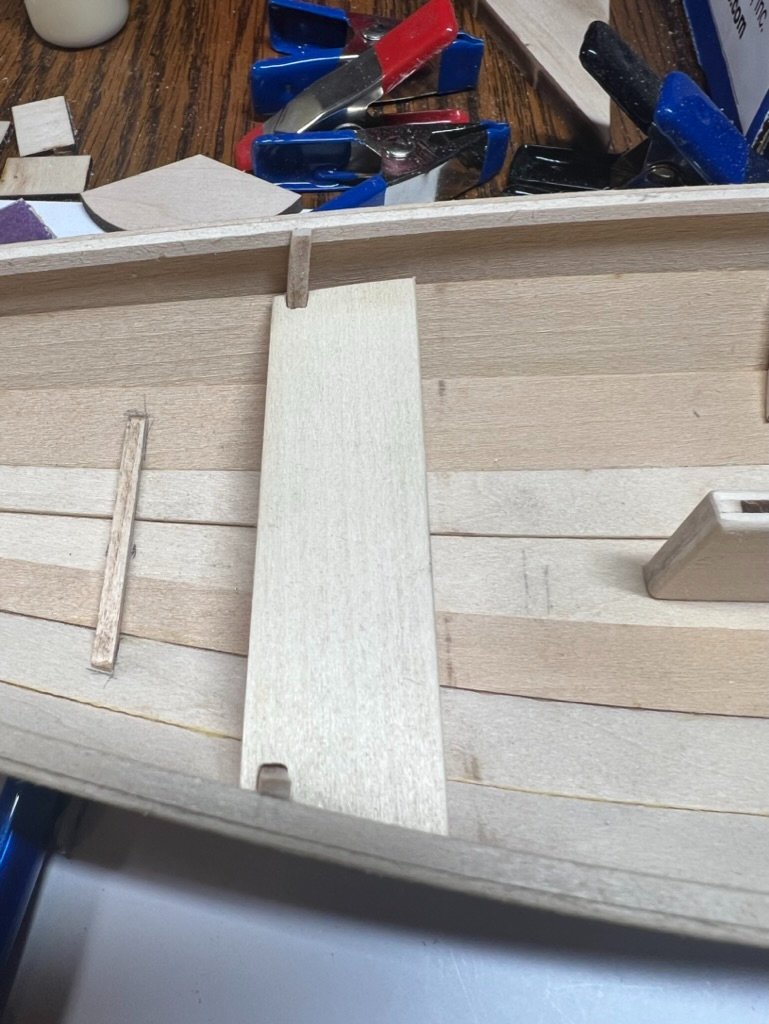
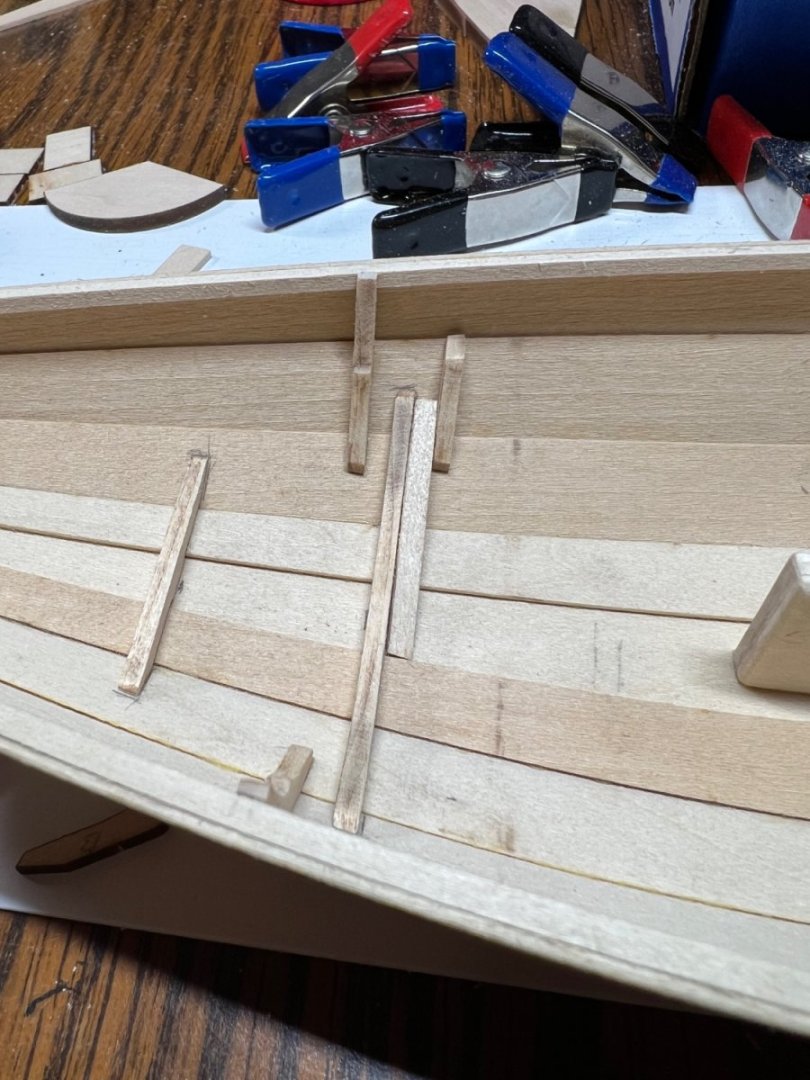
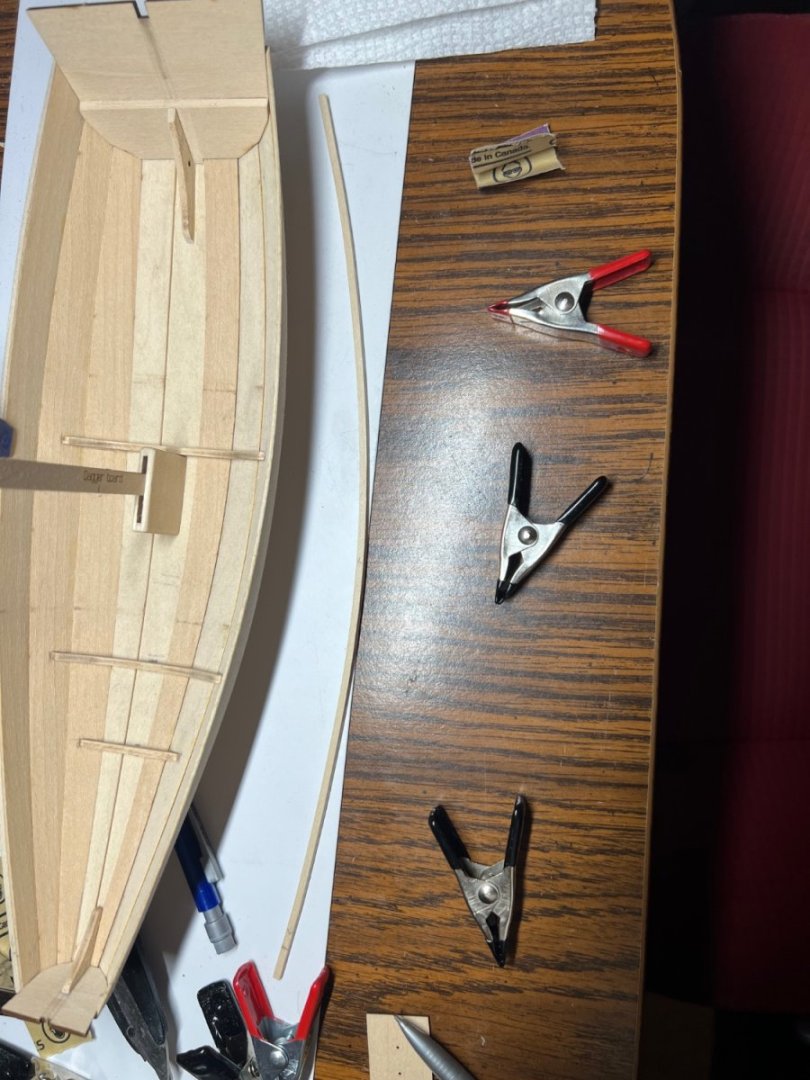
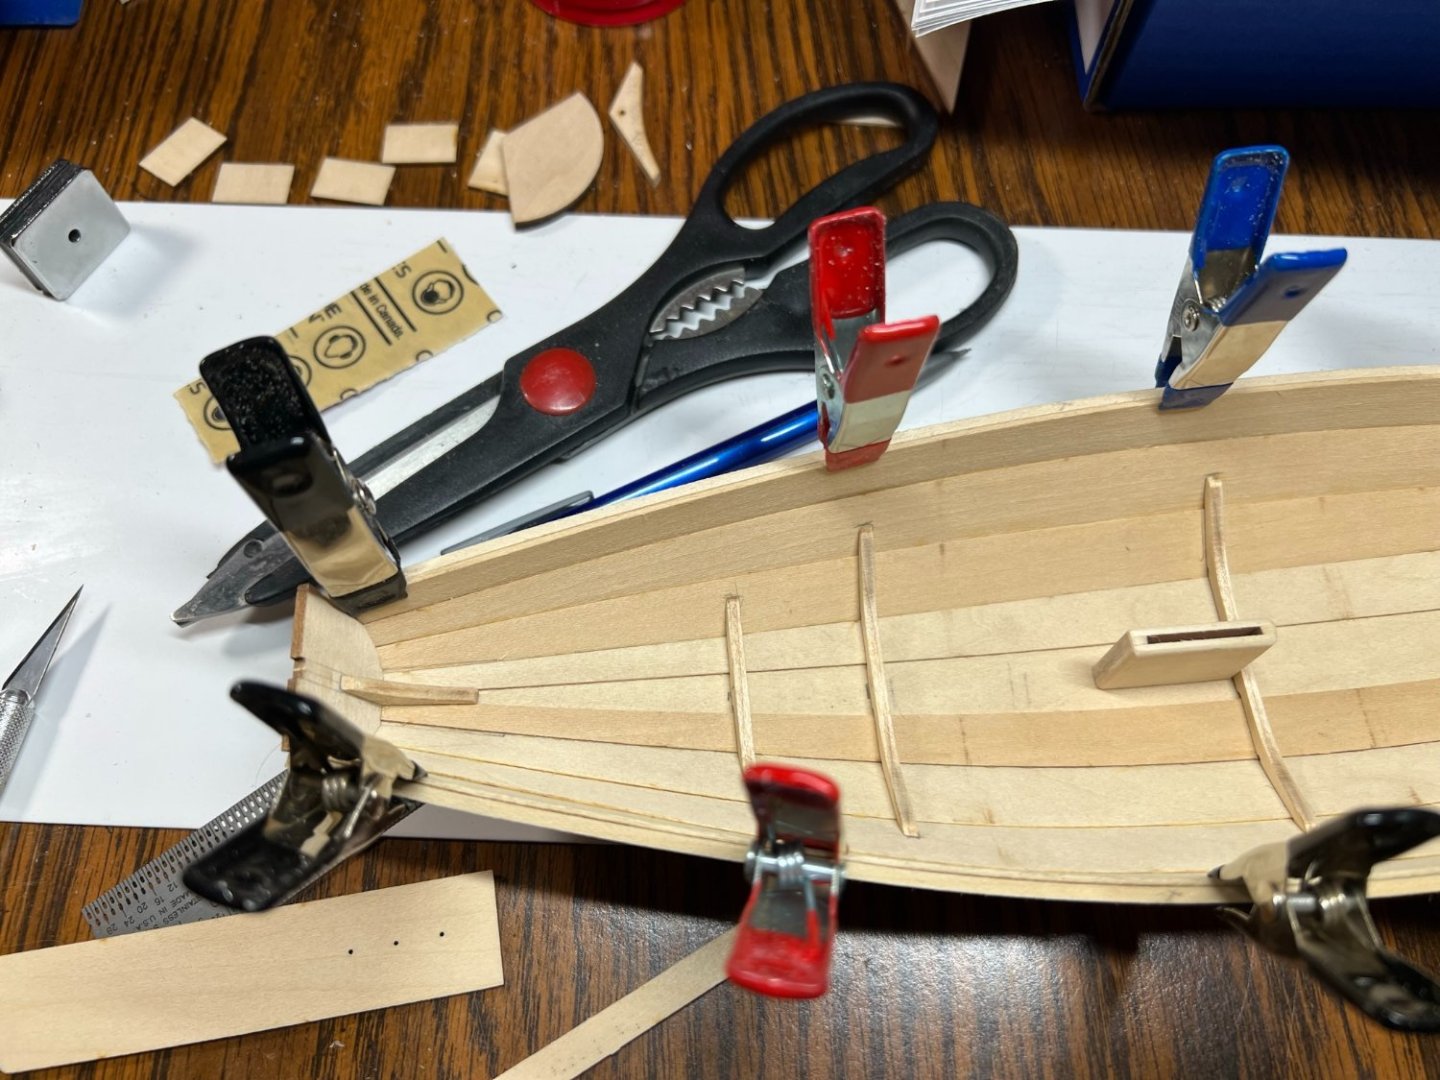
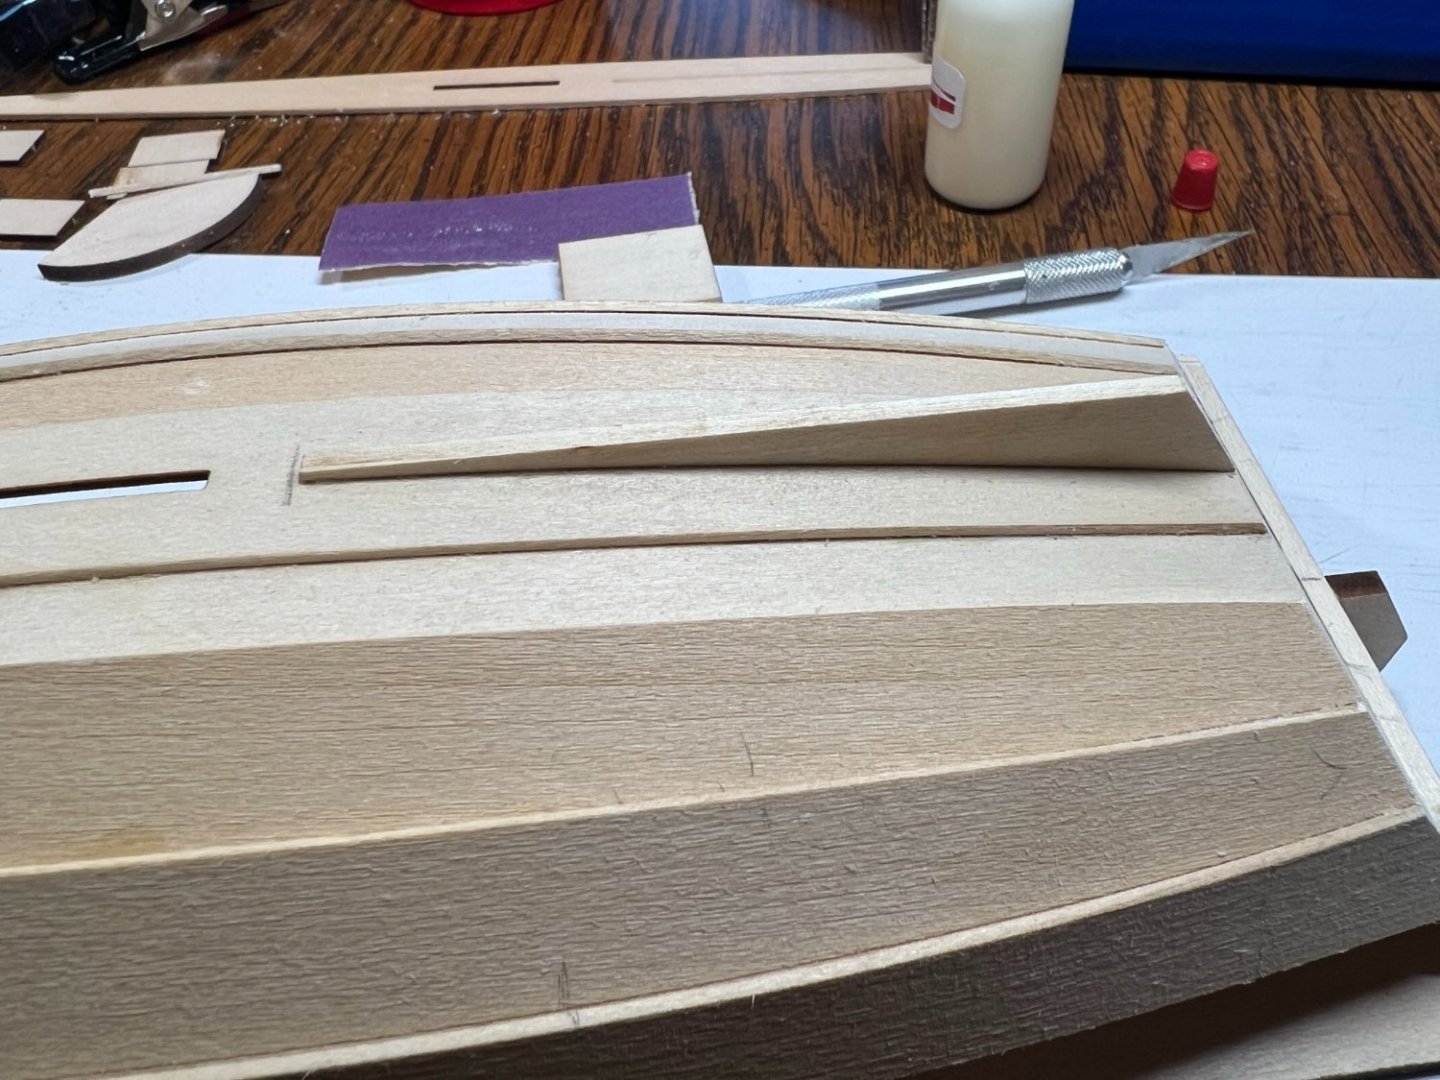
The 1/8 stock you see floating around in the picture was used for the spacing for the thwart mounts. Thats closer then the tick strips but close enough to work out. Reading your tape idea, if you could get something flexible held in place to make the height hold and clamp it in place, that might work as long as you could work under it. The thwart seats follow the flow of the top of the boat, I made mine 'level' in a way. I can still sand them down and make them angle. I had a bendy drafting aide tool that was 3/8 square that would work, not that I could find it after 3 moves. https://www.amazon.com/Westcott-24-Inch-Flexible-Curve-TC-382/dp/B001E209MM Something like this. Once you get started mounting A and B then C and D, you'll see more. Its deceptively simple and must be located in all 3 axis with no help to locate them. If the bottom supports are not mounted correctly they can't be used as a guide to help. A, B, C, D all build on errors already made. I'm trying to get E located well enough.
- 72 replies
-
- 3
-
-
- Norwegian Sailing Pram
- Model Shipways
- (and 1 more)
-
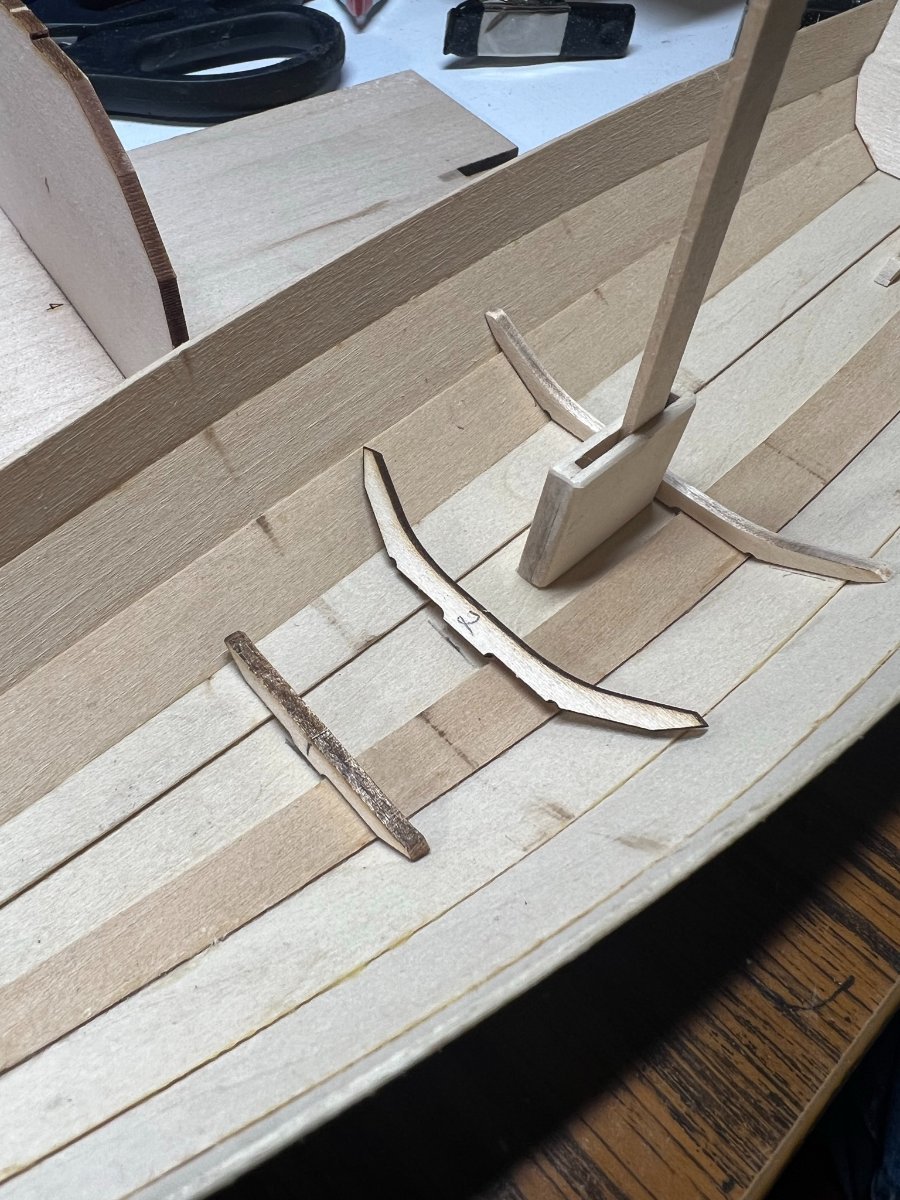
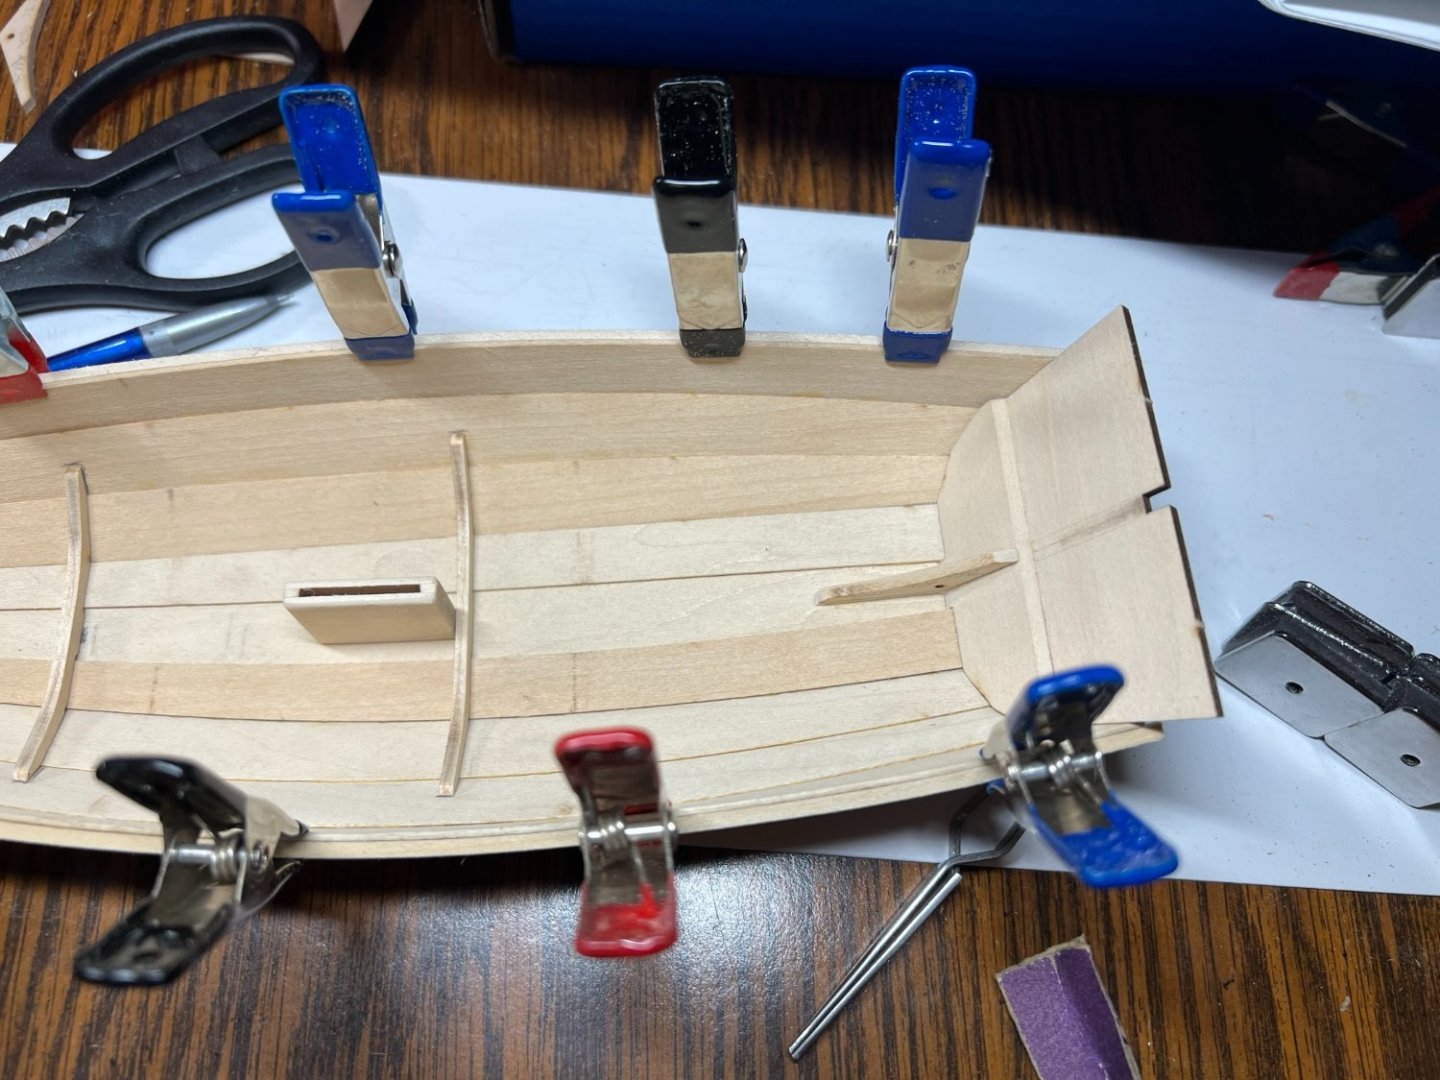
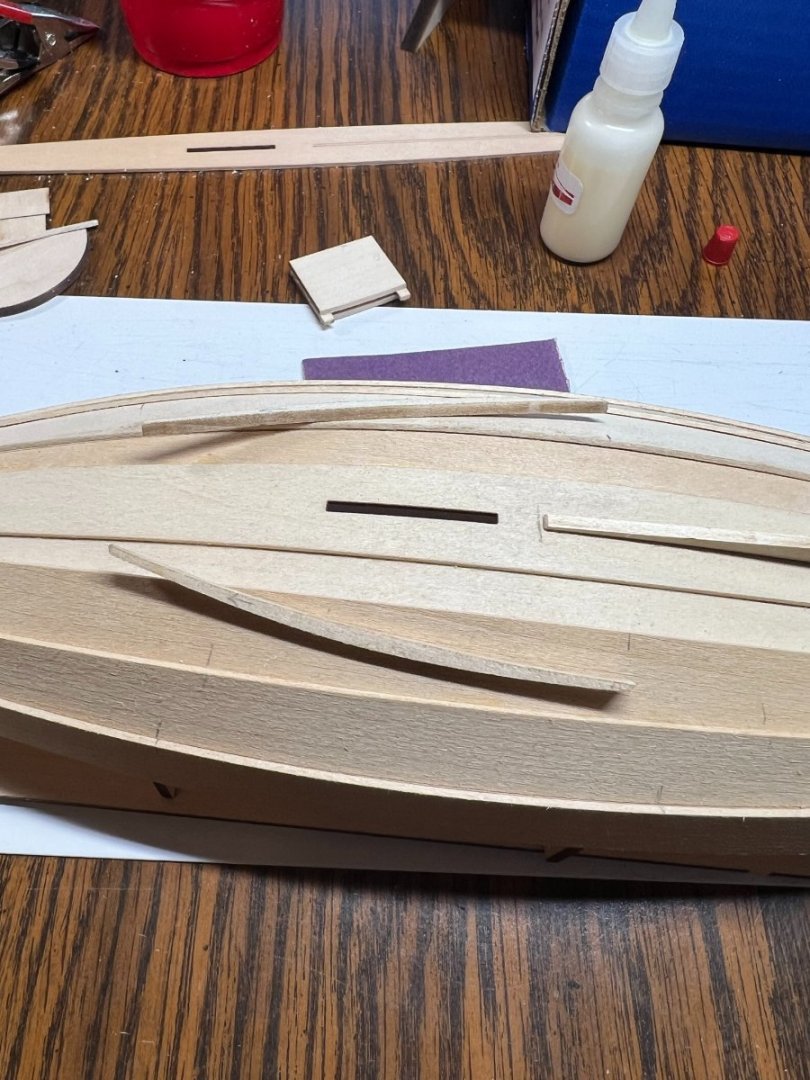
The instructions in this area of the build feel like they were written well after the model completed and they forgot to take some good pictures. I'm clearly not ready for a scratch build. Alignment of all the boat bottom parts is a challenge for sure. Not knowing exactly where they are supposed to be left and right. The curve of the boat creates a challenge to get the straight up and down. I prepped the thwarts and seats to make some kind of guide to show how high and what angle to trim the thwart mounts. There are no instructions or good pictures to show how this is done. I did finally realize the first few pages had a blurry side view. I wish a larger 3 view came with the kit. Below are the pictures of progress. So many parts rely on other parts placement. I tried to think it thru to get everything close. It should look ok when finished. The thwart angles are off, they don't have as much tilt as the side drawing, I may still be able to trim to mounts to make it finish better. The stern seat is next. Well not next, but its mounts are next and the ONLY way to know exactly where to place them is to make the stern seat. Now to figure out what a 'cleat' is for the bottom of the seat, the instructions don't say what size how long where to place. The side drawing has the front to rear length, I think I can wing it from there. The flat 1/8 stock should work or similar.


- 72 replies
-
- 5
-
-
- Norwegian Sailing Pram
- Model Shipways
- (and 1 more)
-
In order to convey this section of the build, just like the instructions, I’m not going to provide good pictures or descriptions lol. Nah just kidding, I have some good ones to post in the morning.
- 72 replies
-
- 1
-

-
- Norwegian Sailing Pram
- Model Shipways
- (and 1 more)
-
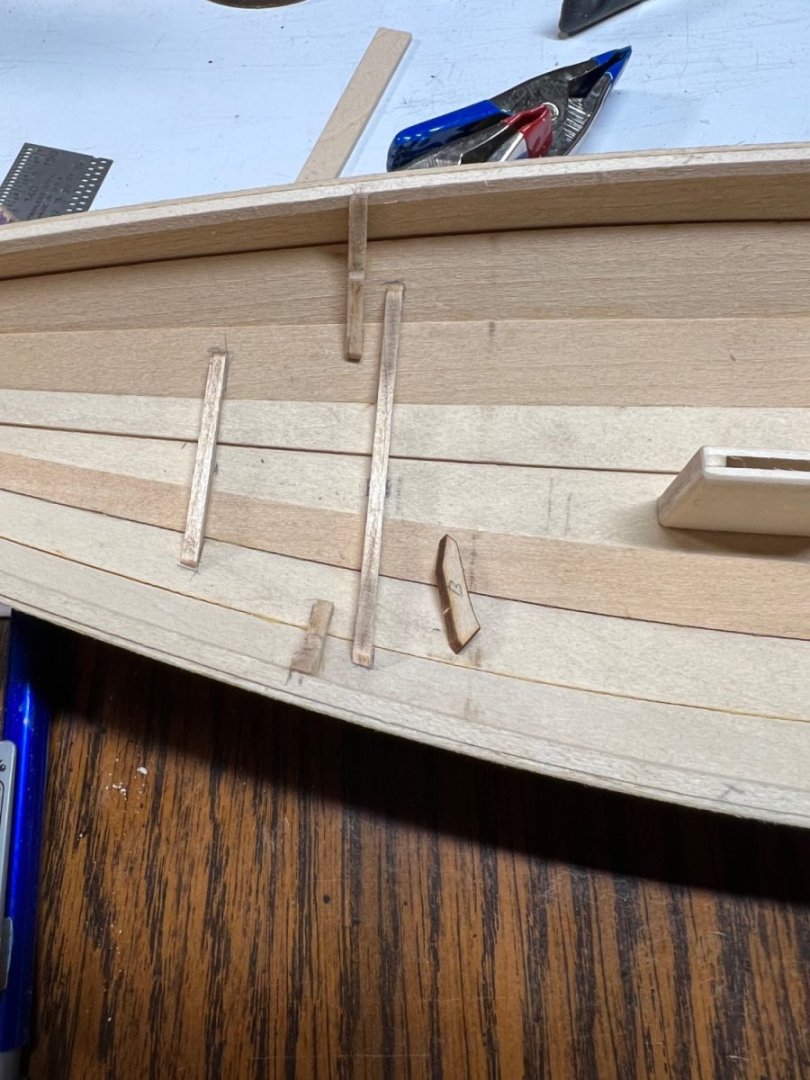
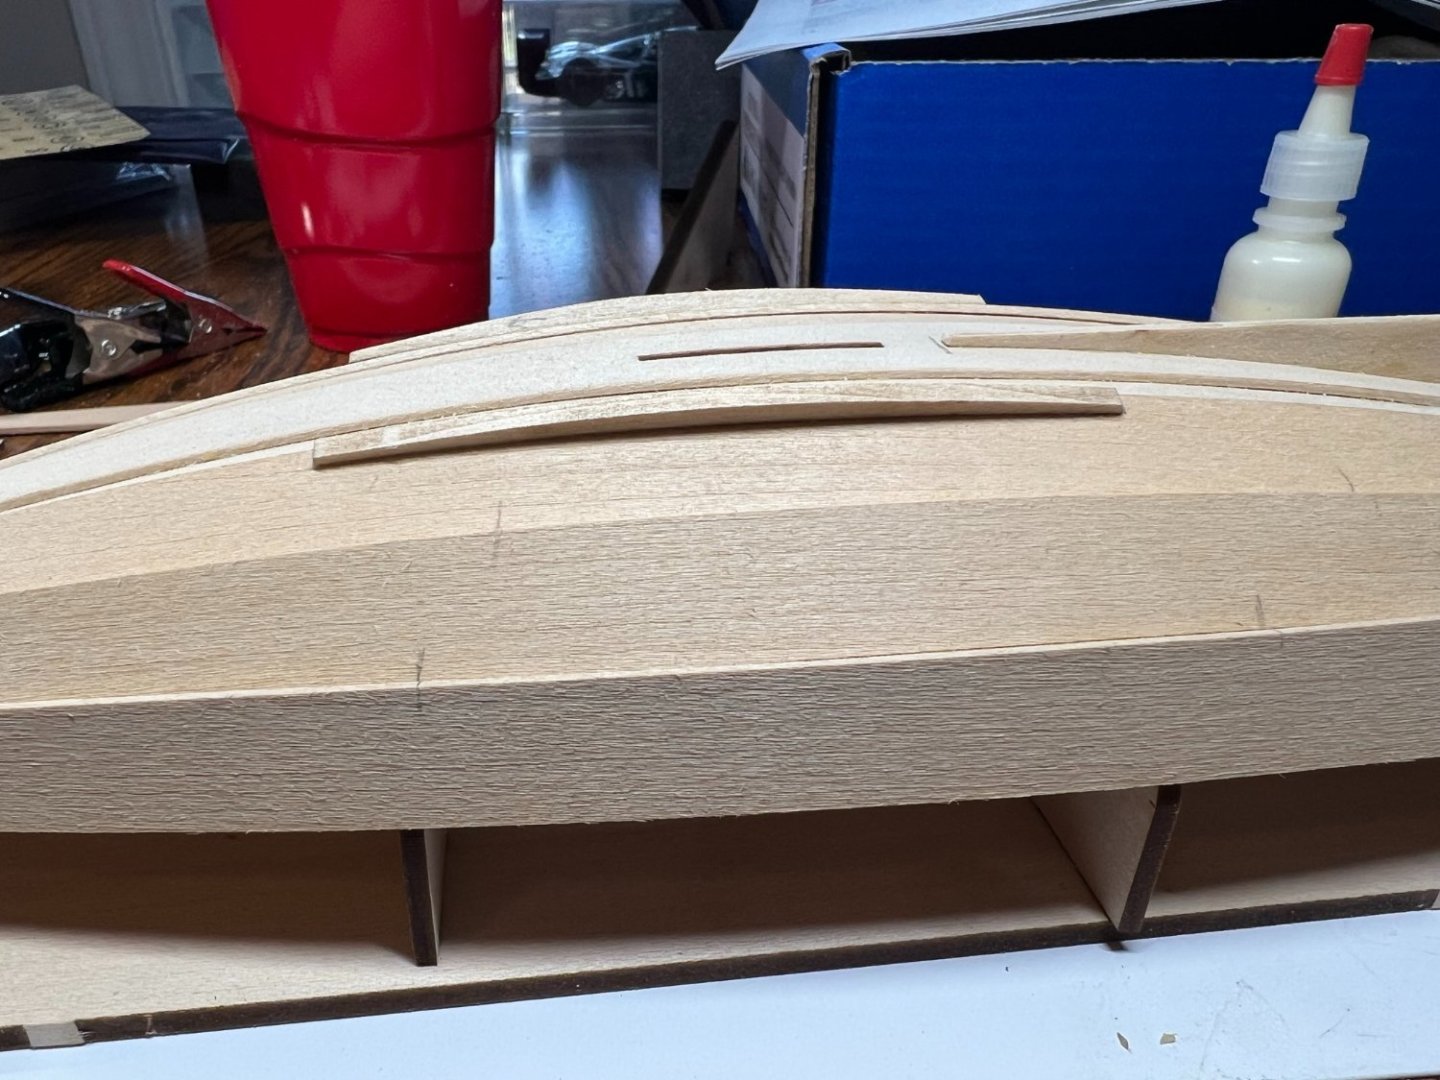
It’s moving along but I’m starting to struggle on some of this. I made a mess of some of it. Stern and bow quarter knees are close I guess. I’ve tried to carefully place items. Not much help in the instructions on alignment for some of it. “At this point, your model should look like the photograph above.” I prepped the seats to help figure it out. I’m trying to get the seat and thwart frames straight and level.

- 72 replies
-
- 4
-
-
- Norwegian Sailing Pram
- Model Shipways
- (and 1 more)
-
Working on a model project dog tired from work is not a good idea. The inwales are attached. The bending method also shows a sand/file to match surface, when placed on the inside it fit perfect. Then match the stern and trim to length with the same match, it fit great without much futzing around.
- 72 replies
-
- 7
-
-
- Norwegian Sailing Pram
- Model Shipways
- (and 1 more)
-
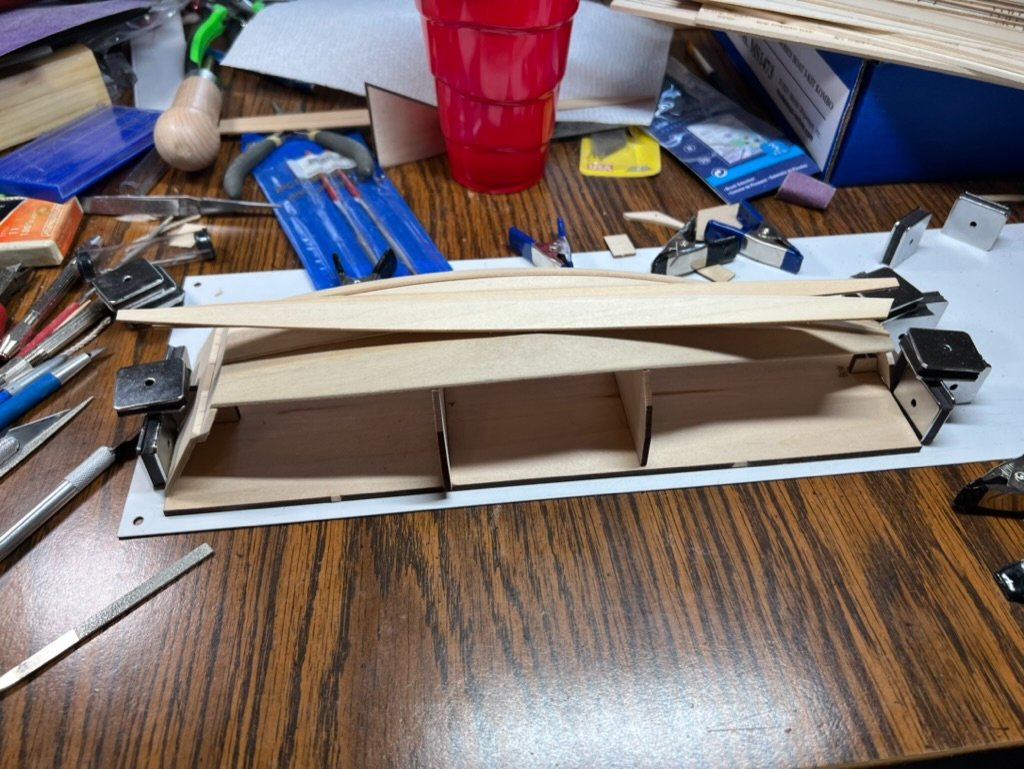
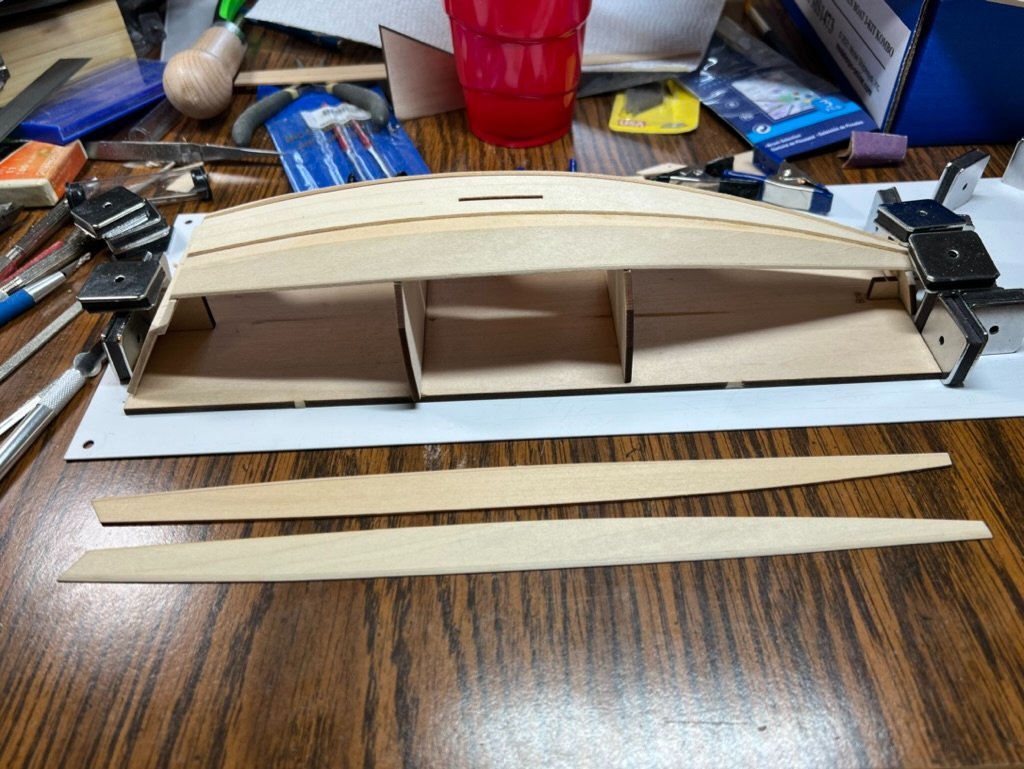
The wood is being trained so it behaves it self. This will make trimming the ends and gluing super easy. I left it to dry overnight, shrink to normal after being wet and bent. The outside is the inside shape. It’s not glued. It should make an almost perfect inwale. I won’t have to fight it when I glue it on the inside.
- 72 replies
-
- 6
-
-
- Norwegian Sailing Pram
- Model Shipways
- (and 1 more)
-
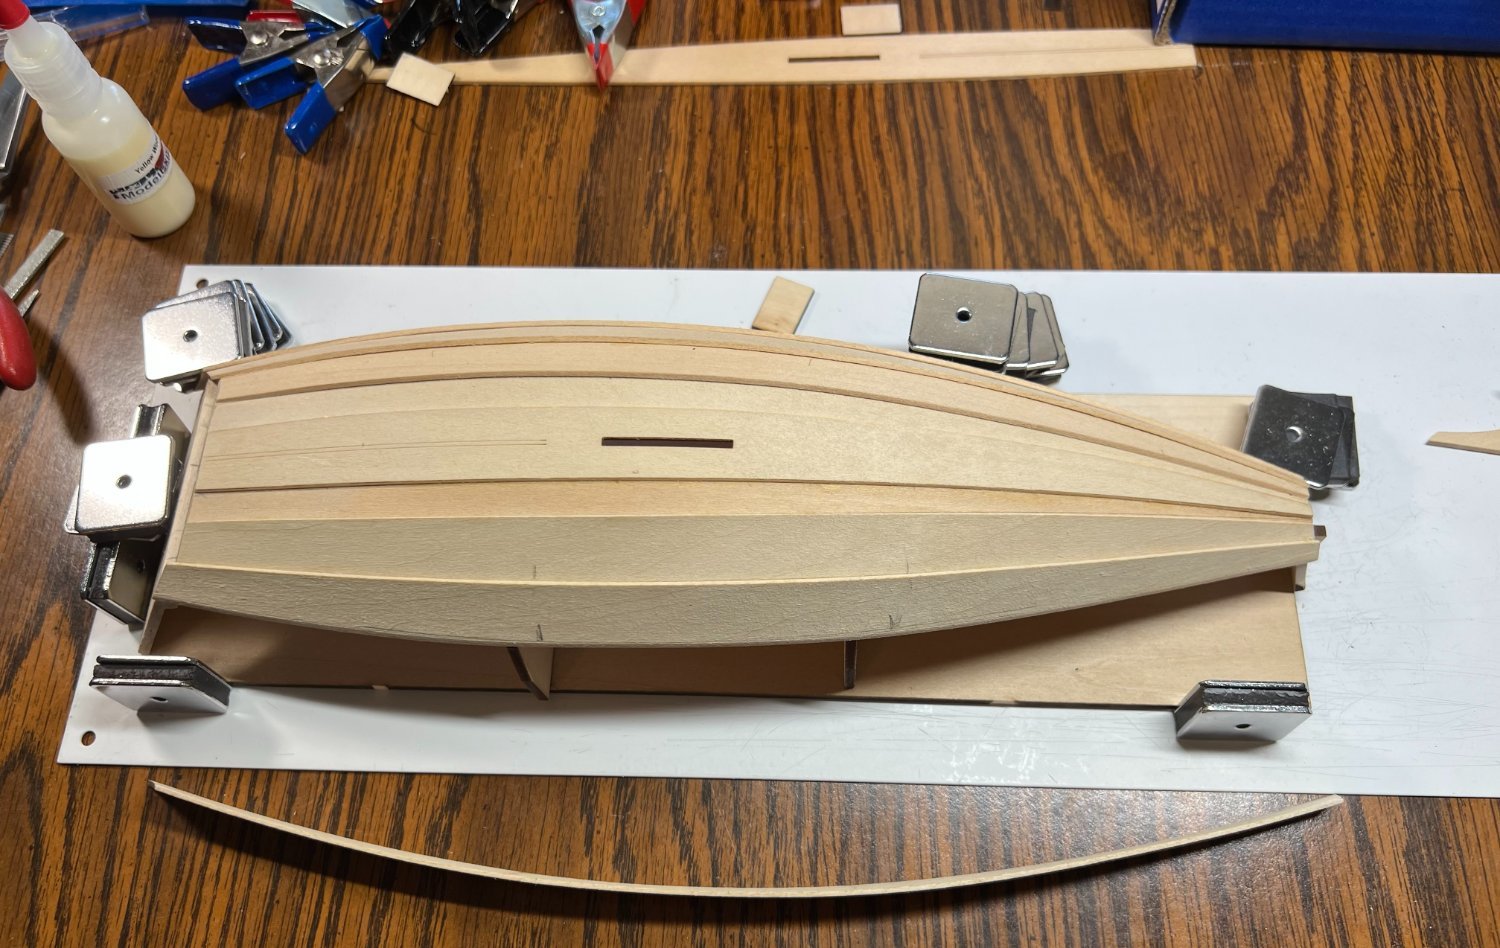
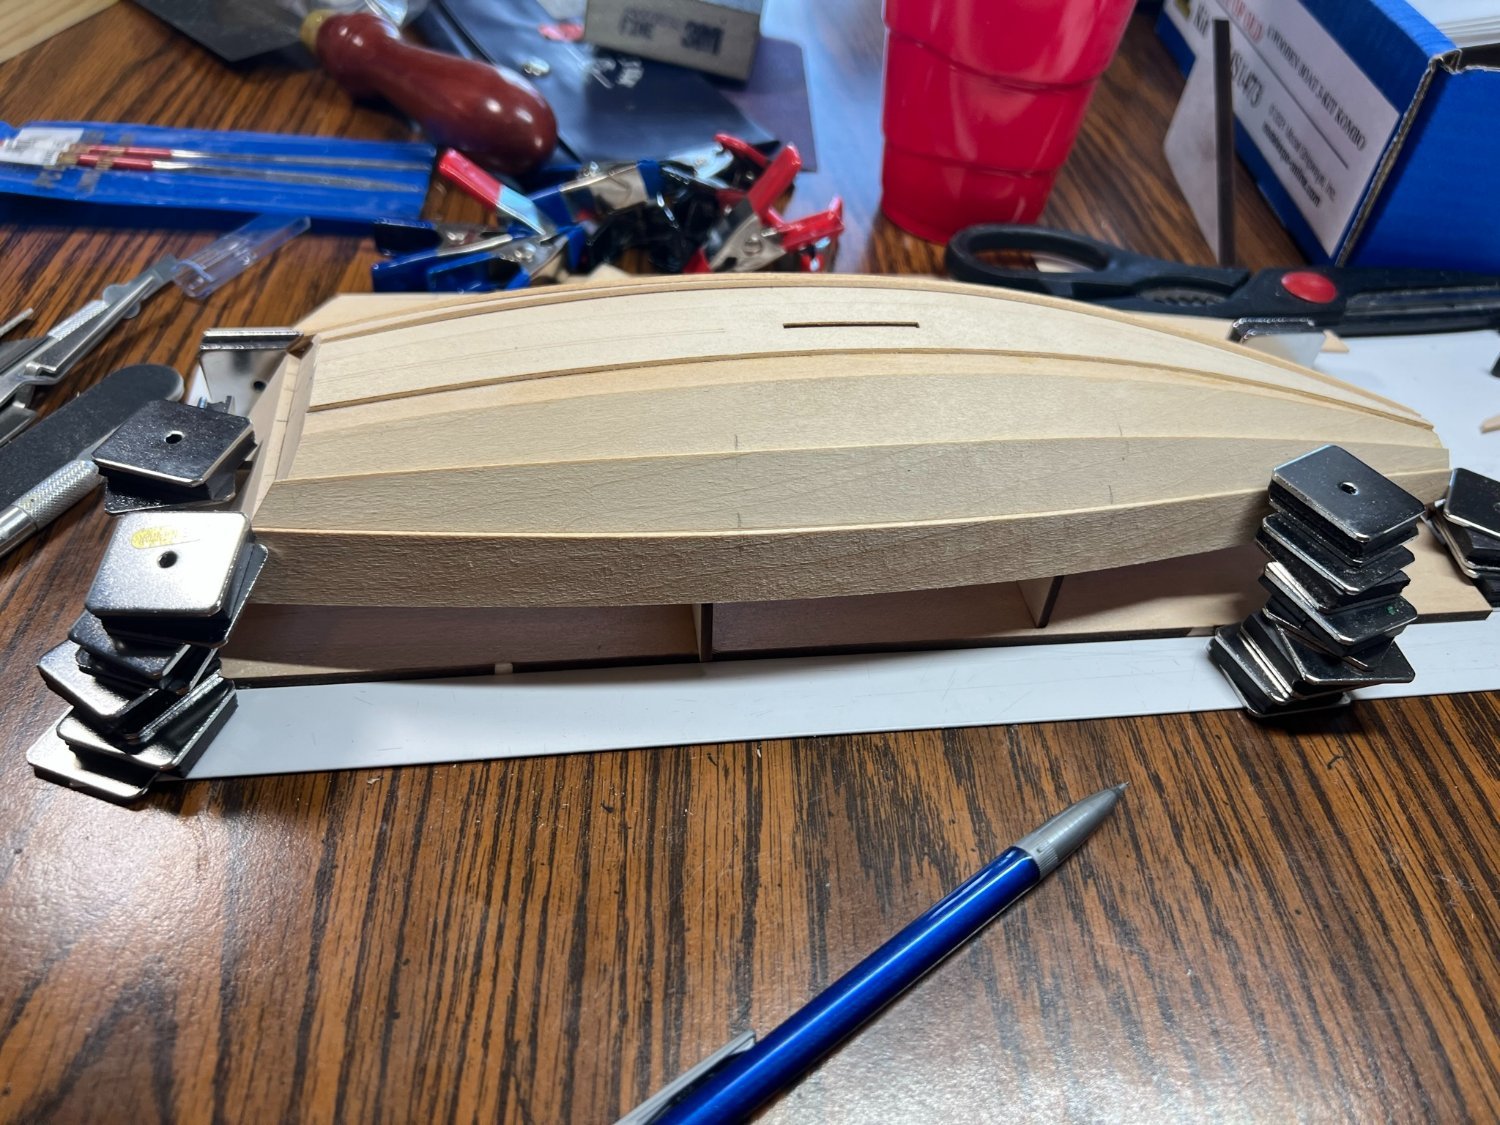
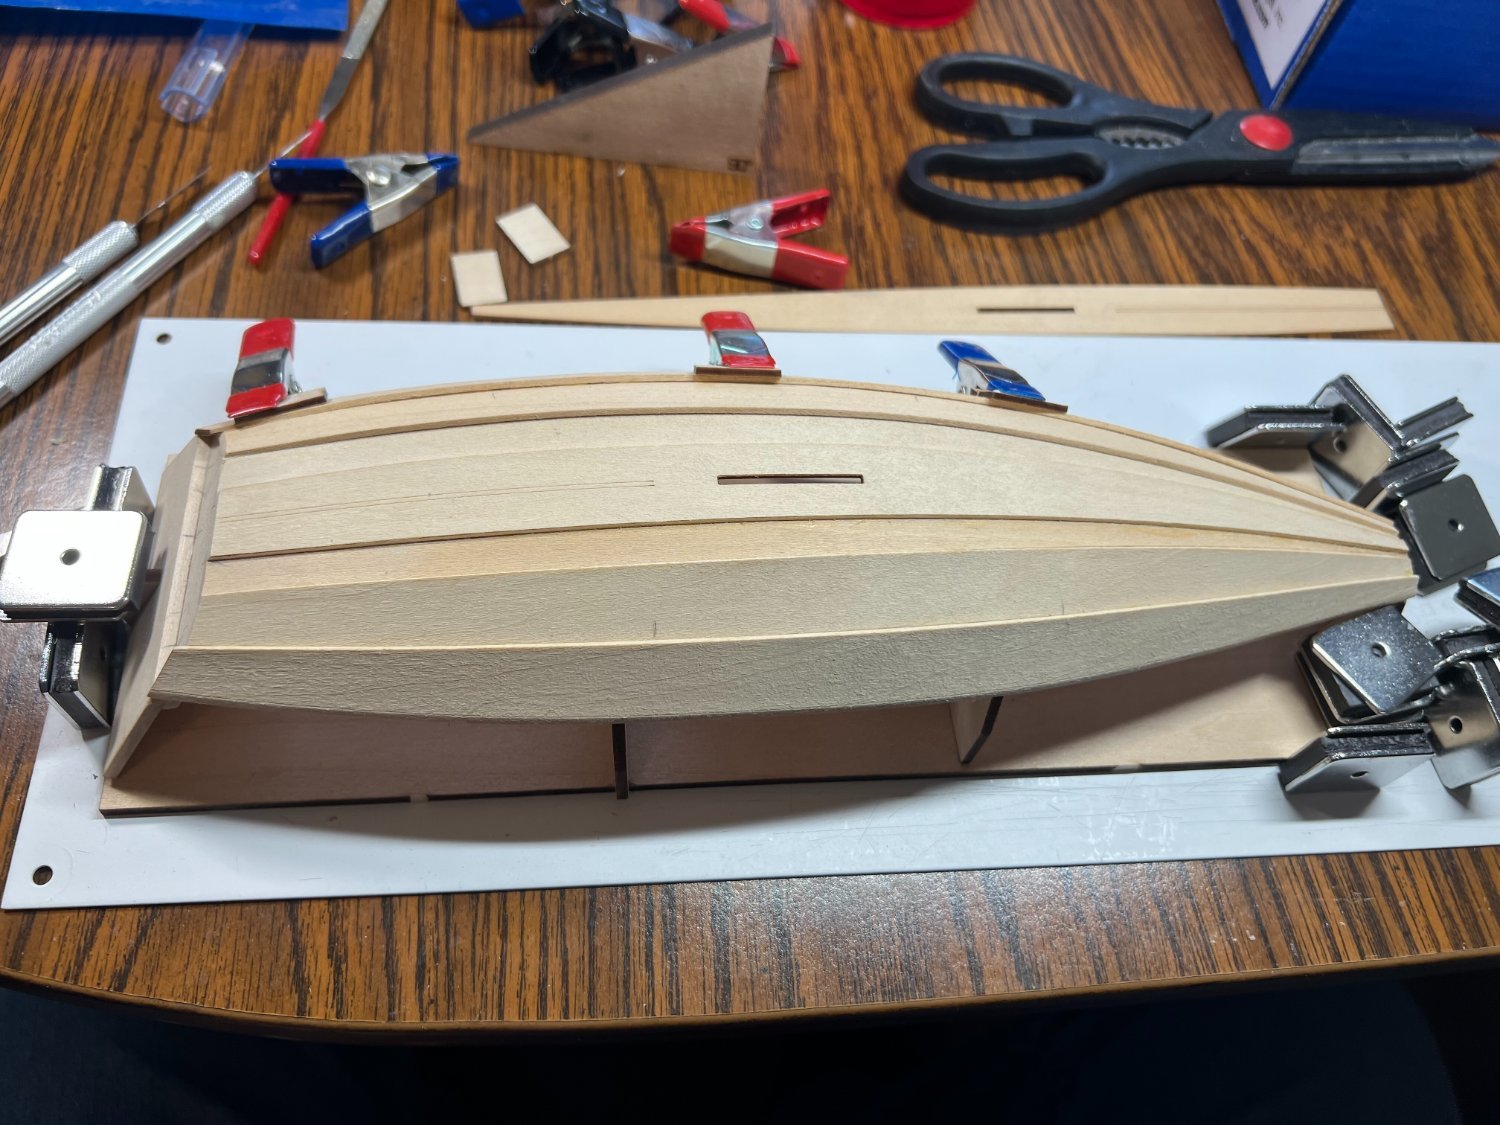
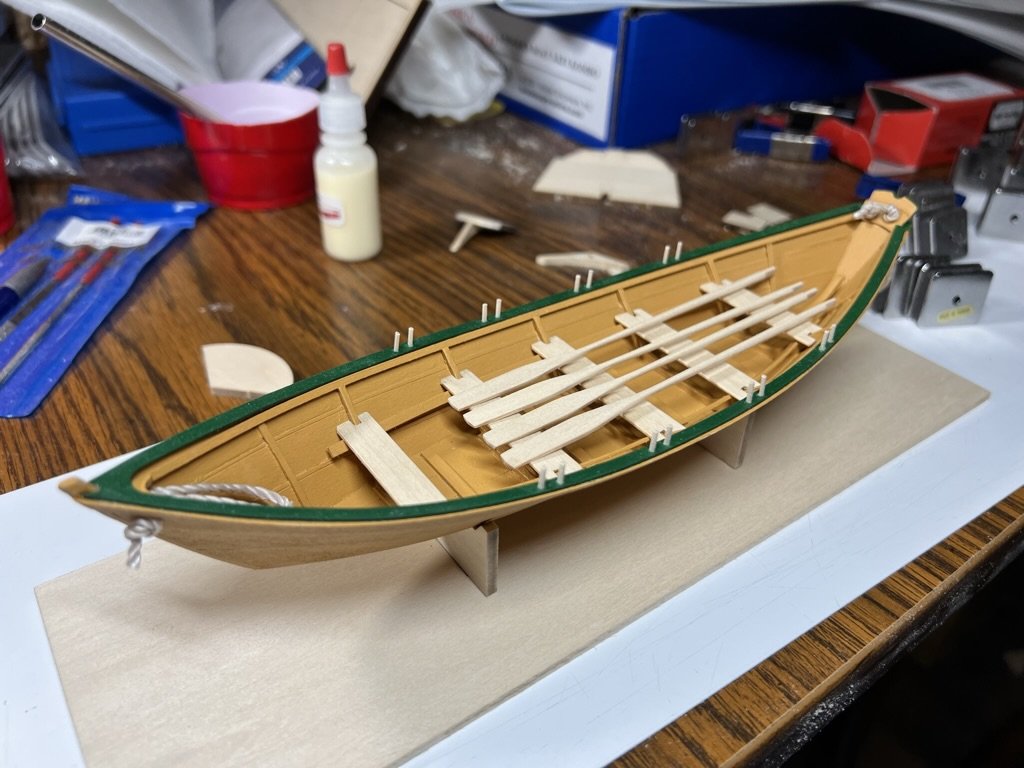
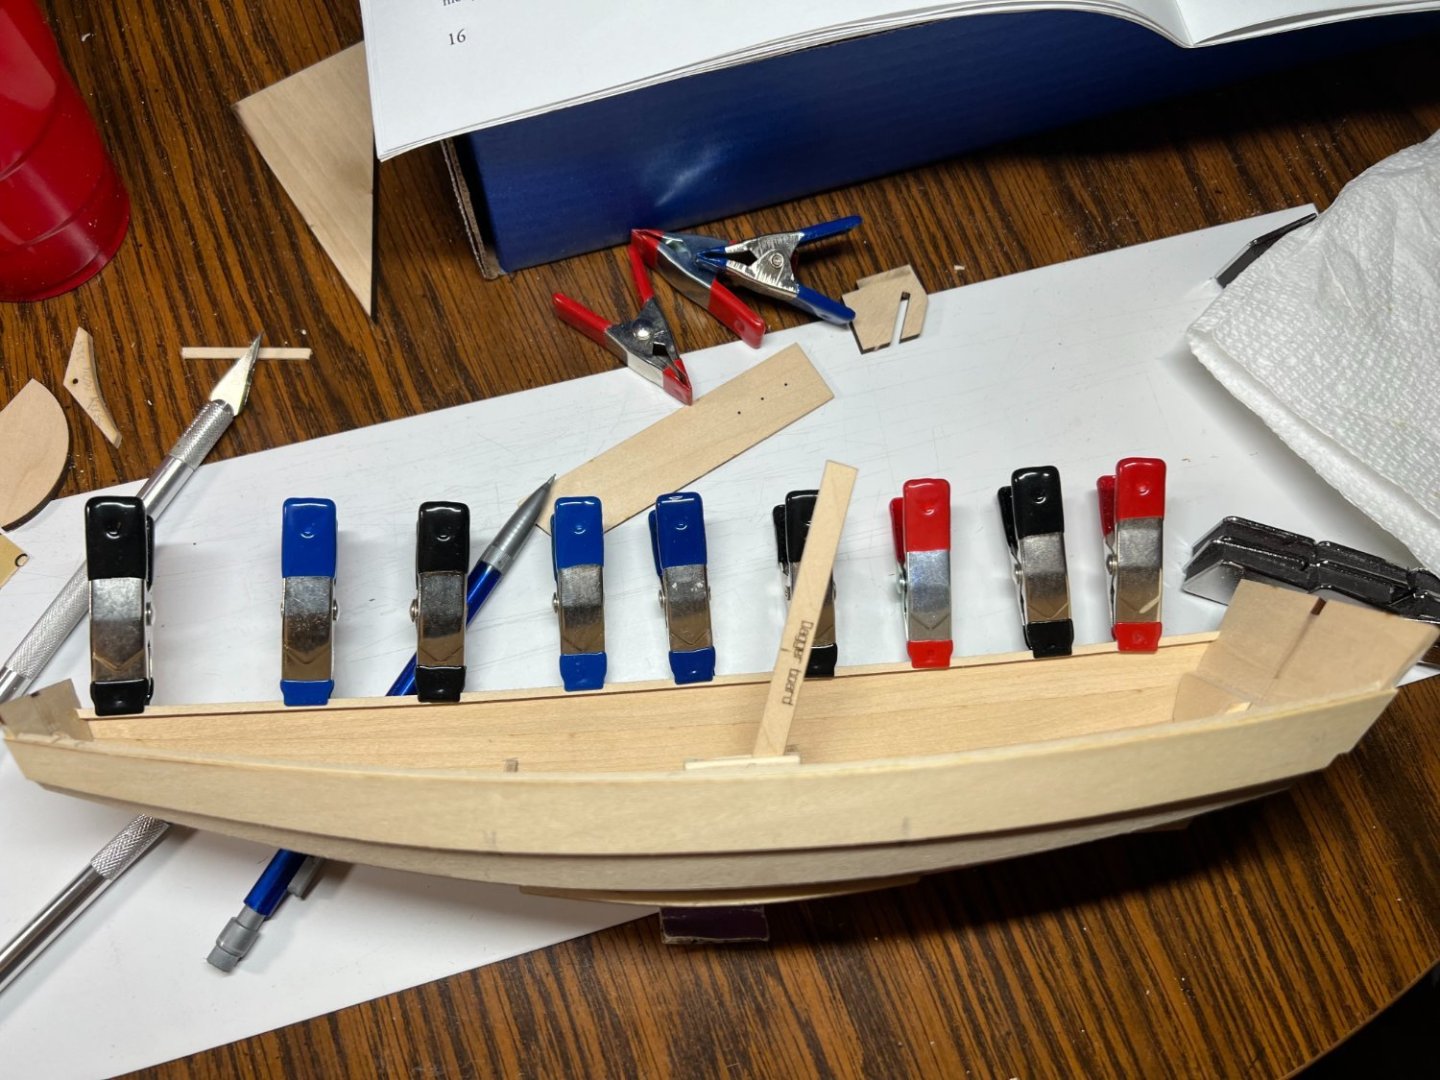
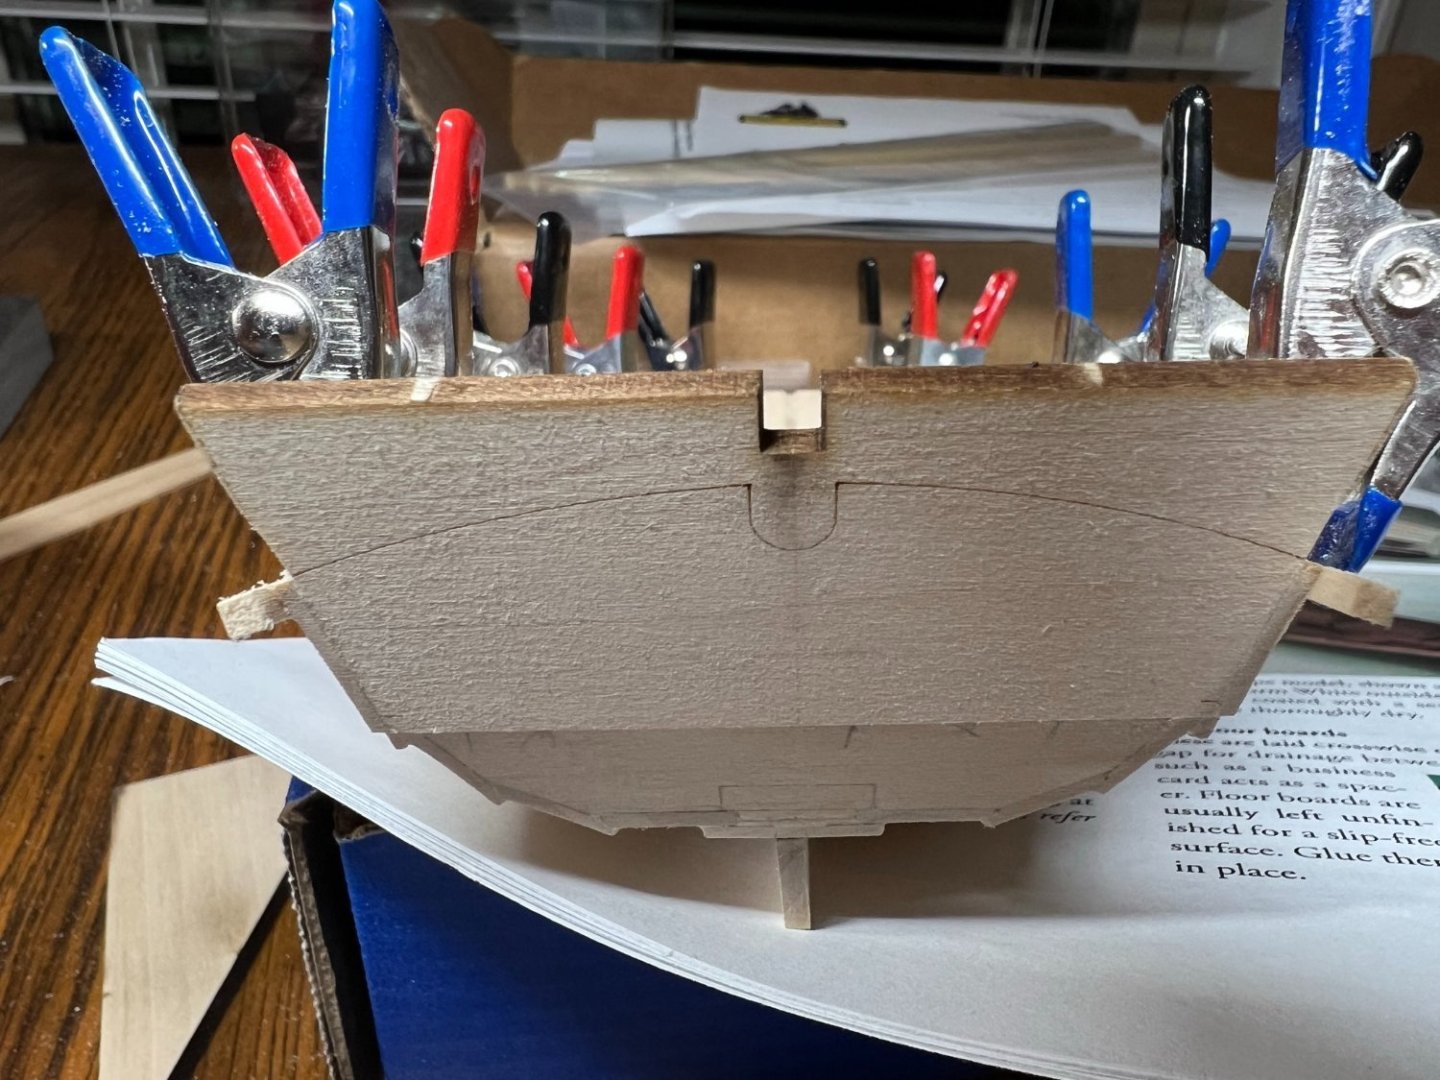
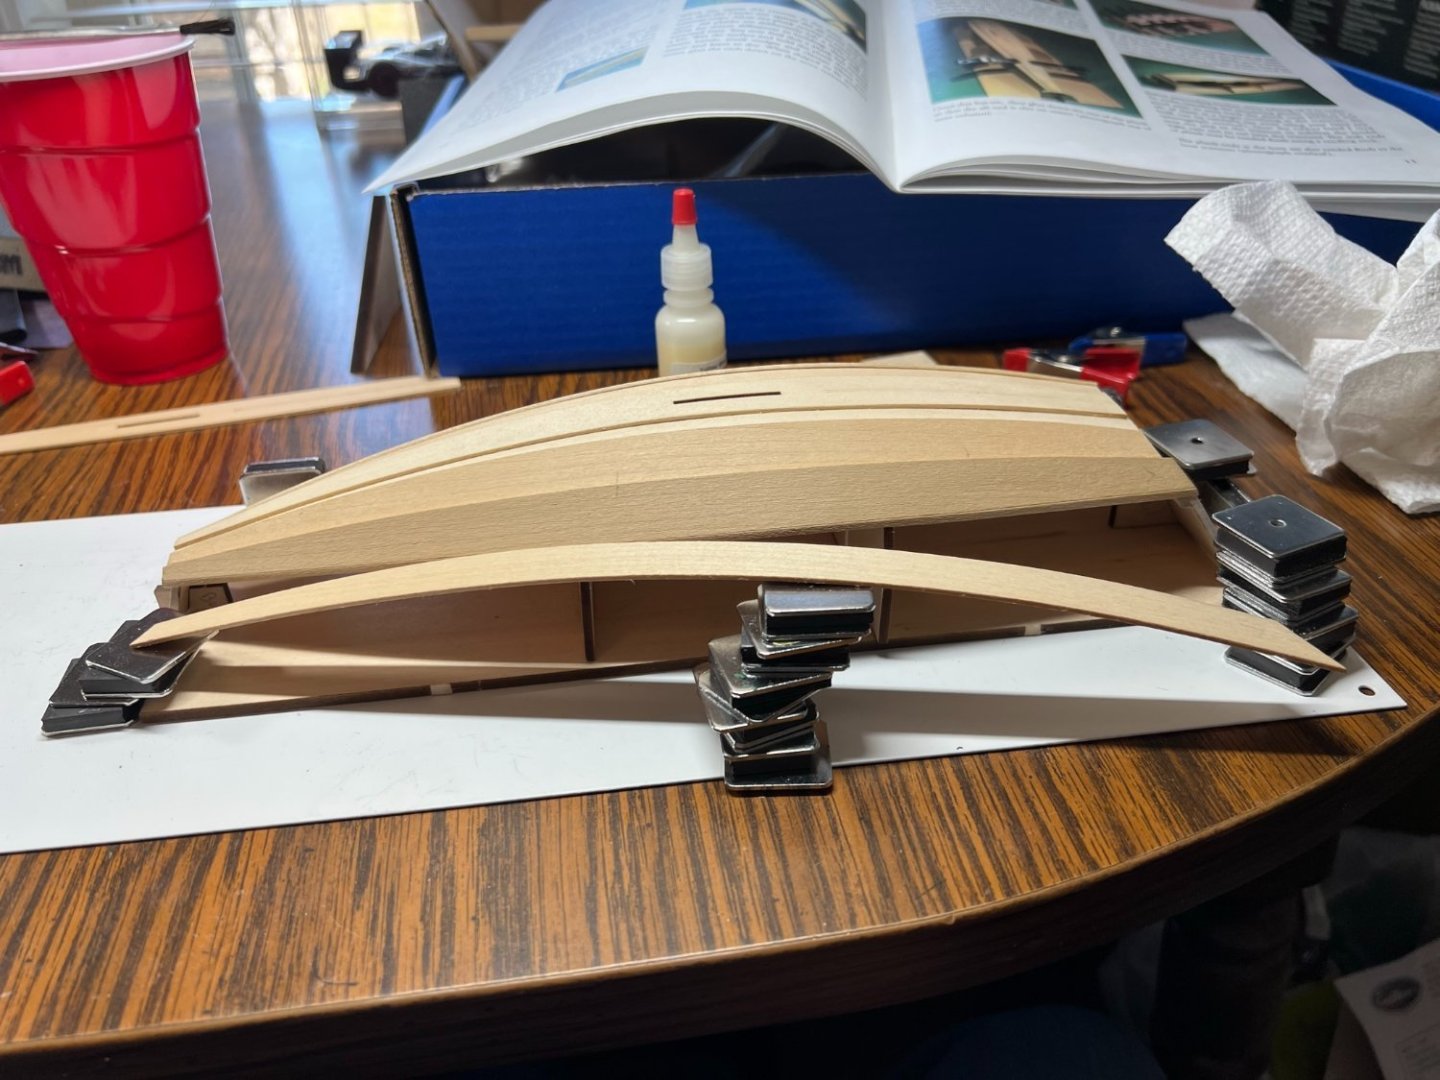
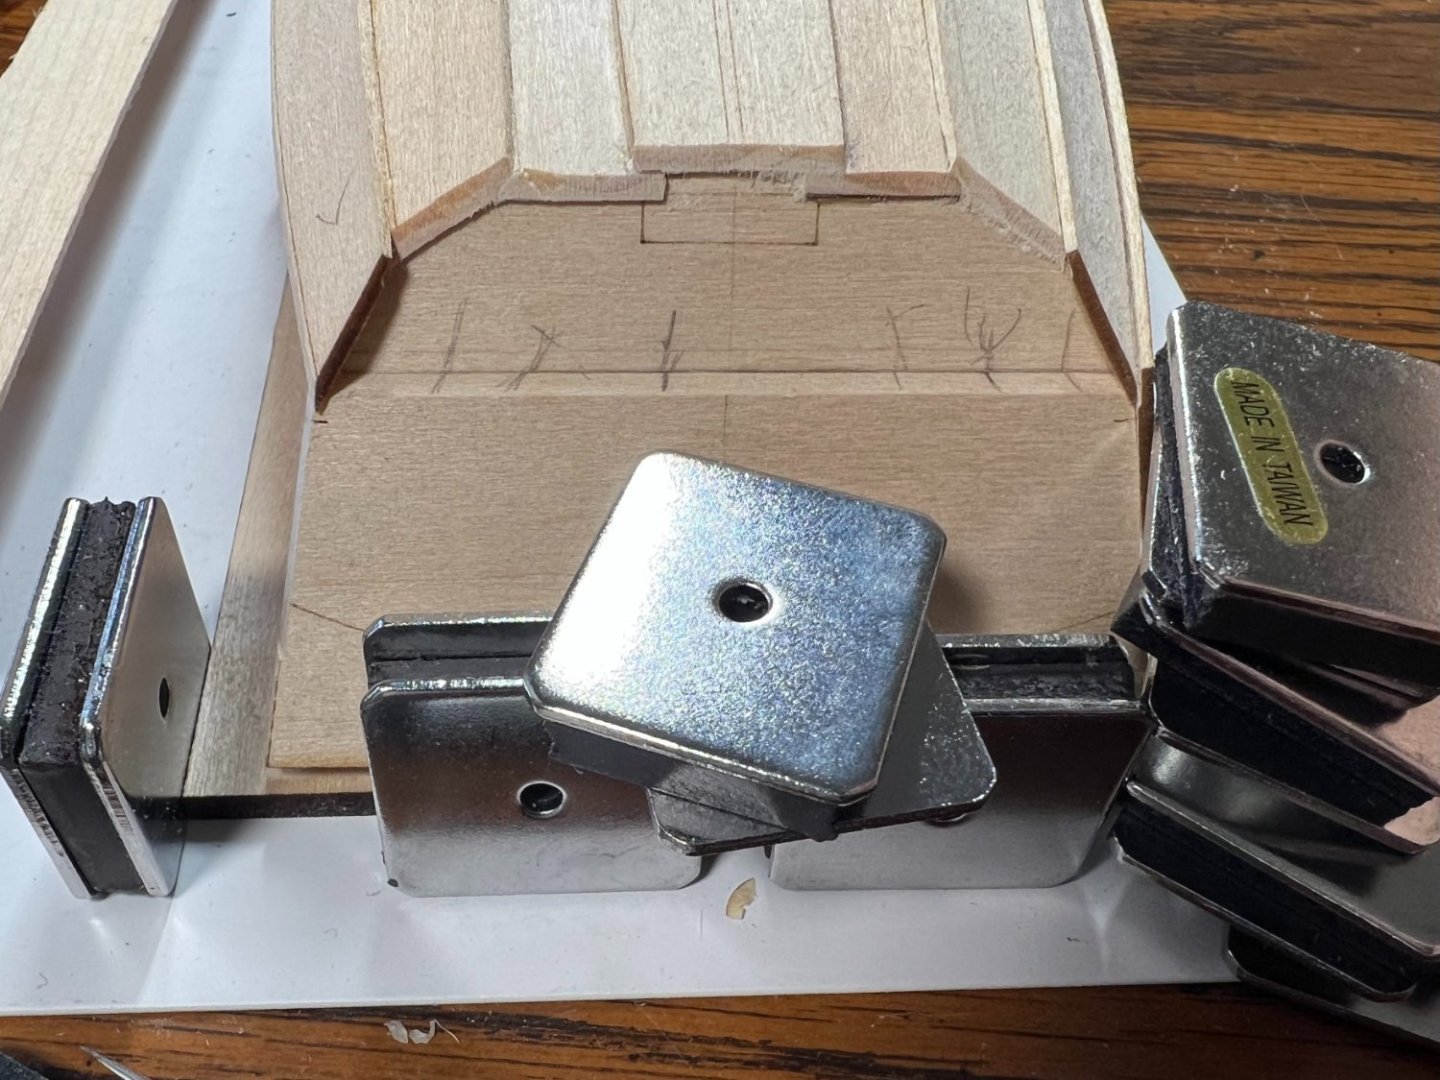
The sheer plank and inwales look like they are almost perfect. Not sure what will go off the rails later. Page 15 says check now, widest point should be 3 3/4 wide. Mine is 3 5/8. I think he's saying it should not be wider than 3 3/4. 3 5/8 is the widest build mold, not sure how you could get 3 3/4 out if it anyways. The thwarts should fit at 3 5/8 with some trimming. Its all to late now. Not sure what could be adjusted at this point anyways. Now I'm stopped for the night.
- 72 replies
-
- 5
-
-
- Norwegian Sailing Pram
- Model Shipways
- (and 1 more)
-
The bottom frame instructions and tick strips are horrendous. The top long tick strip, with bow and arrow starts at the forward part of the dagger case. The shape of the bottom frames makes it clear they are to far forward or to far aft when placed wrong. This took a bit of marking and testing to see where they went. Looking ahead at some pictures helped show when I had it completely wrong. A tad more detail or tying together some notes would certainly help someone new, or someone experienced. I looked at the inwales for many minutes. I knew of the issue I had with the Dory with getting them placed, shaped, and cut to size. I didn't see this trick possible with the Dory at the time. Now they can be shaped, dry and be ready to cut and trim into place without changing size! Wood expands when wet, shrinks when drying. When I cut to fit a part on the Dory when it was wet, when I went to glue it in it was 1/16 to short. I don't want that to happen again. That was a good place to stop for the night.
- 72 replies
-
- 4
-
-
- Norwegian Sailing Pram
- Model Shipways
- (and 1 more)
-
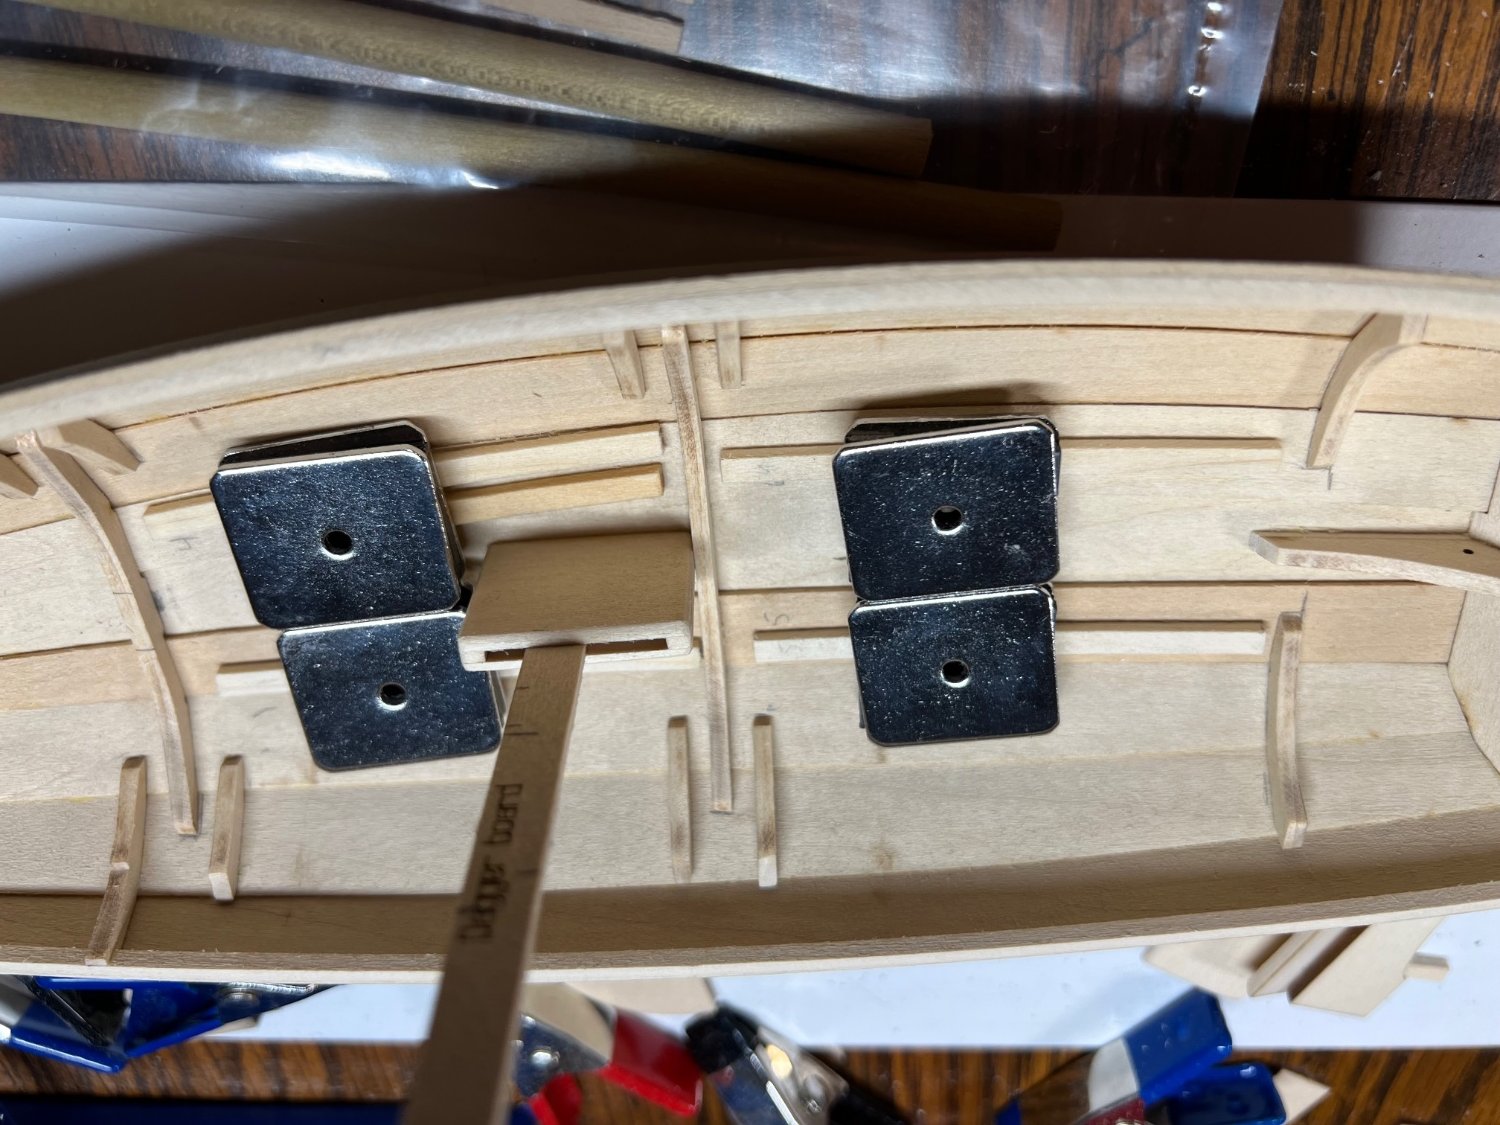
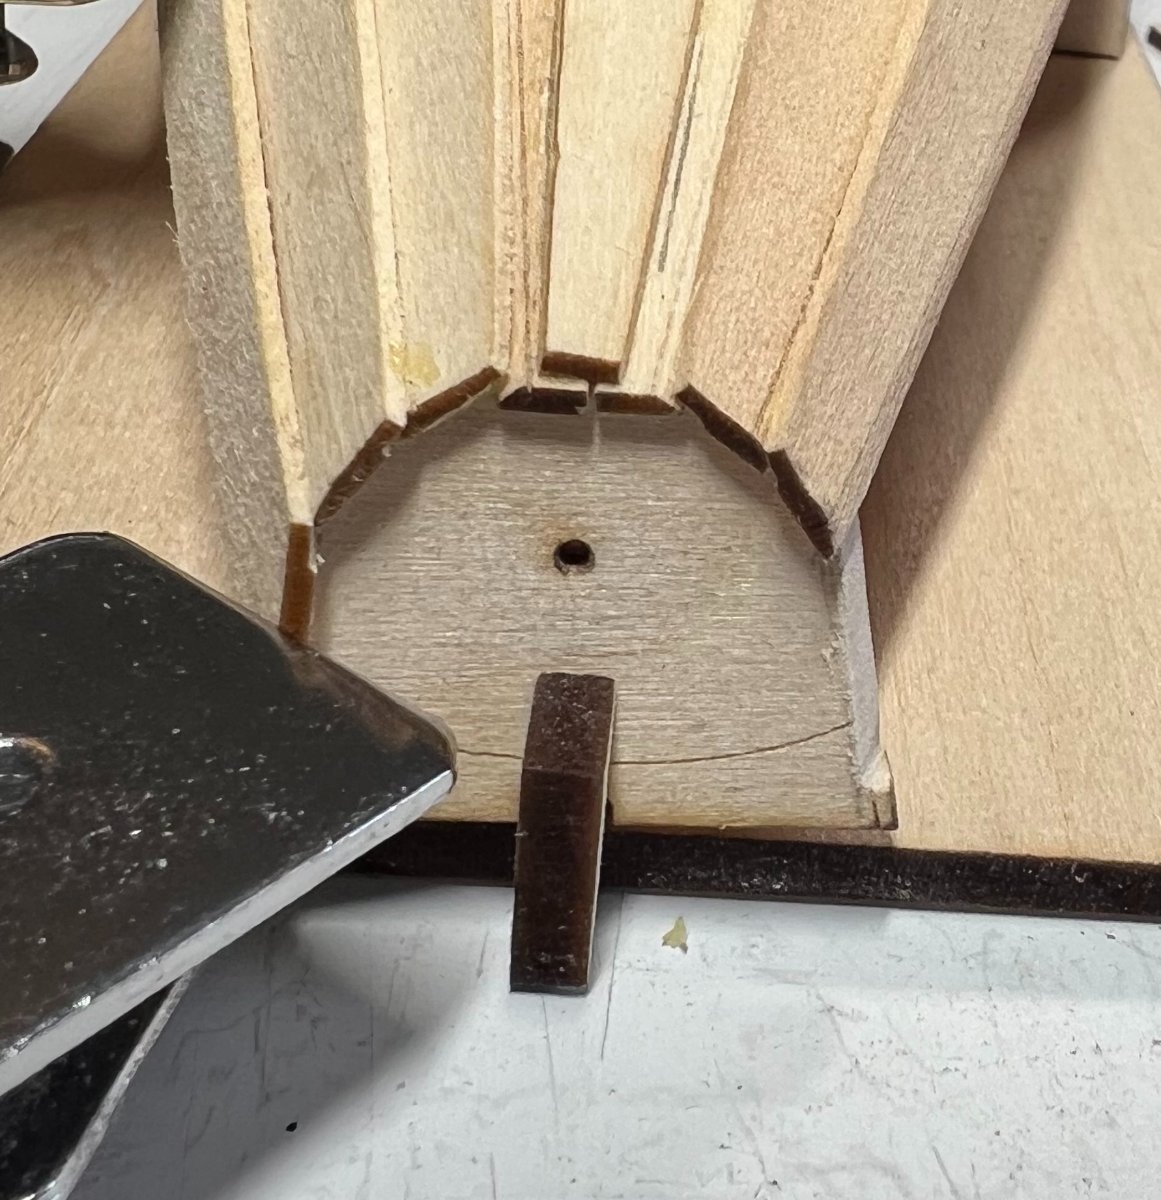
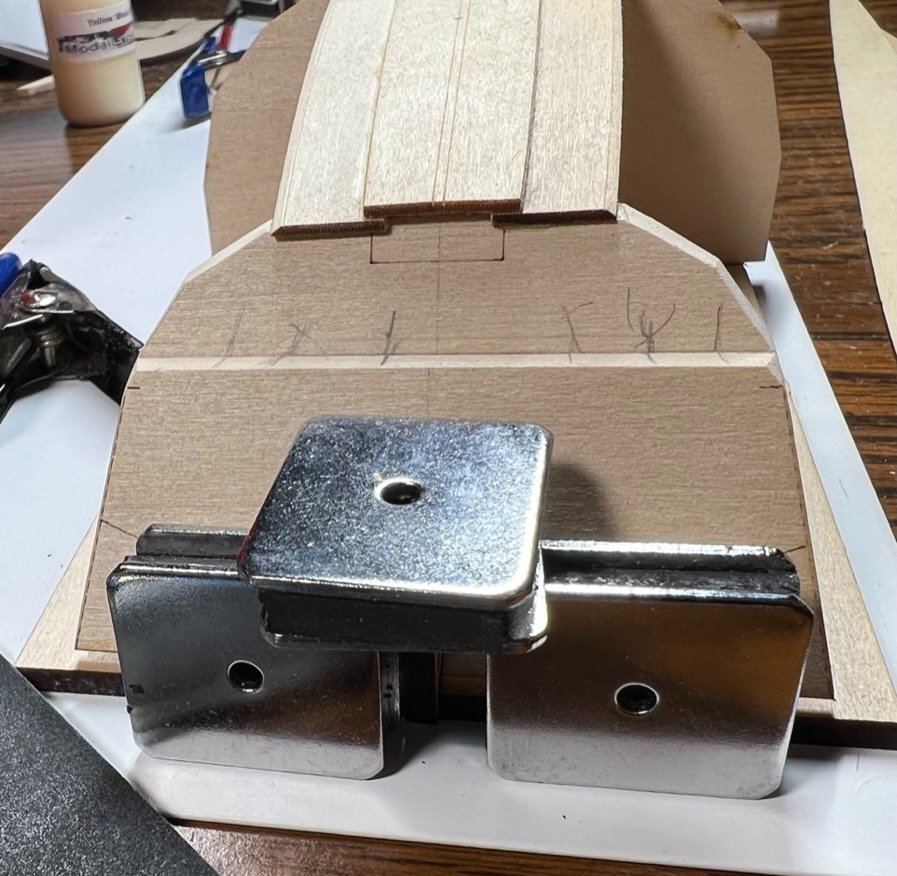
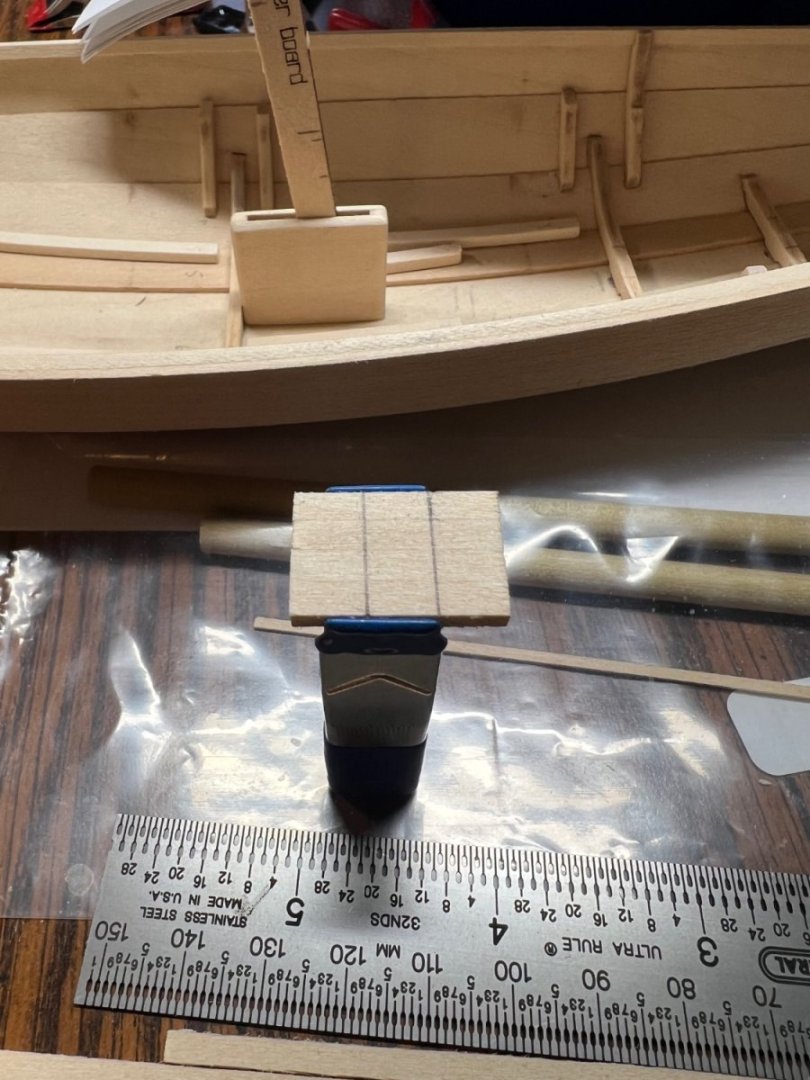
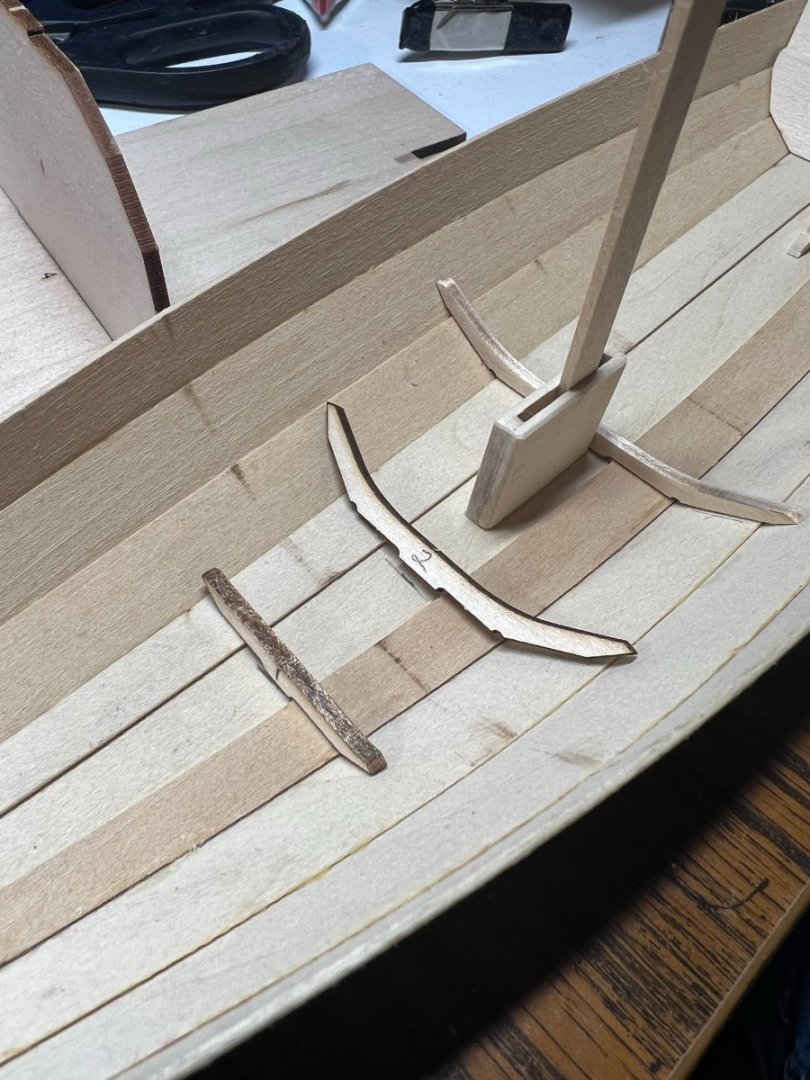
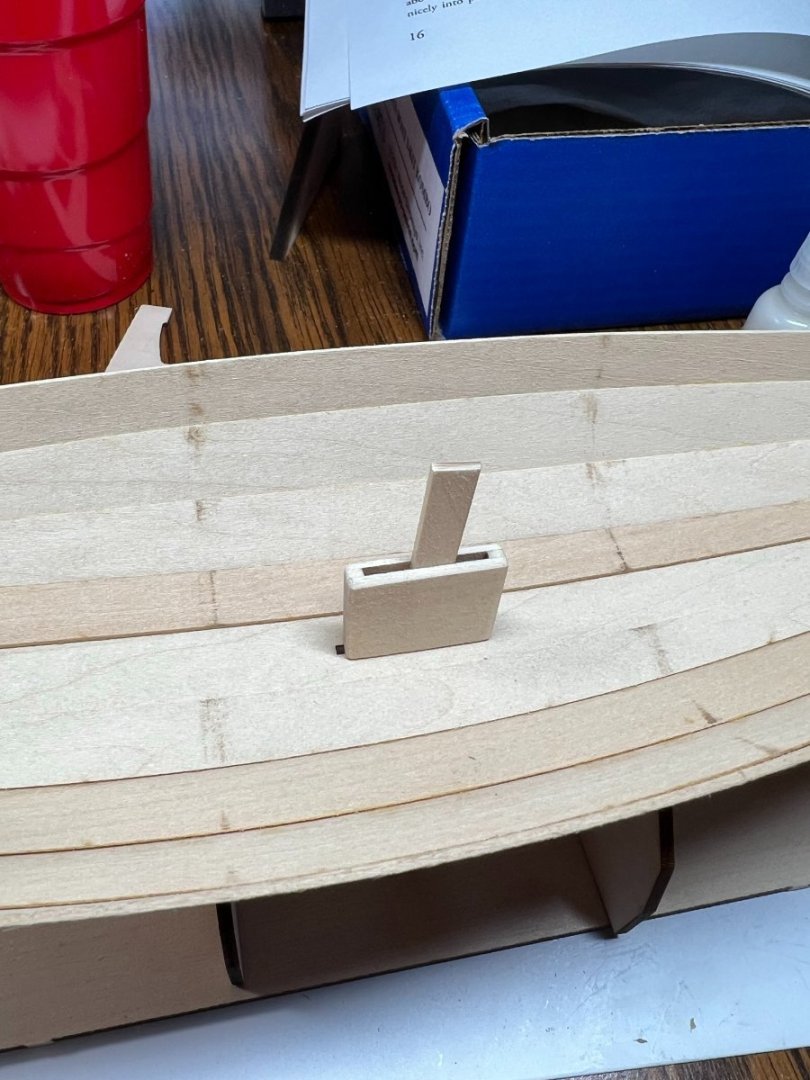
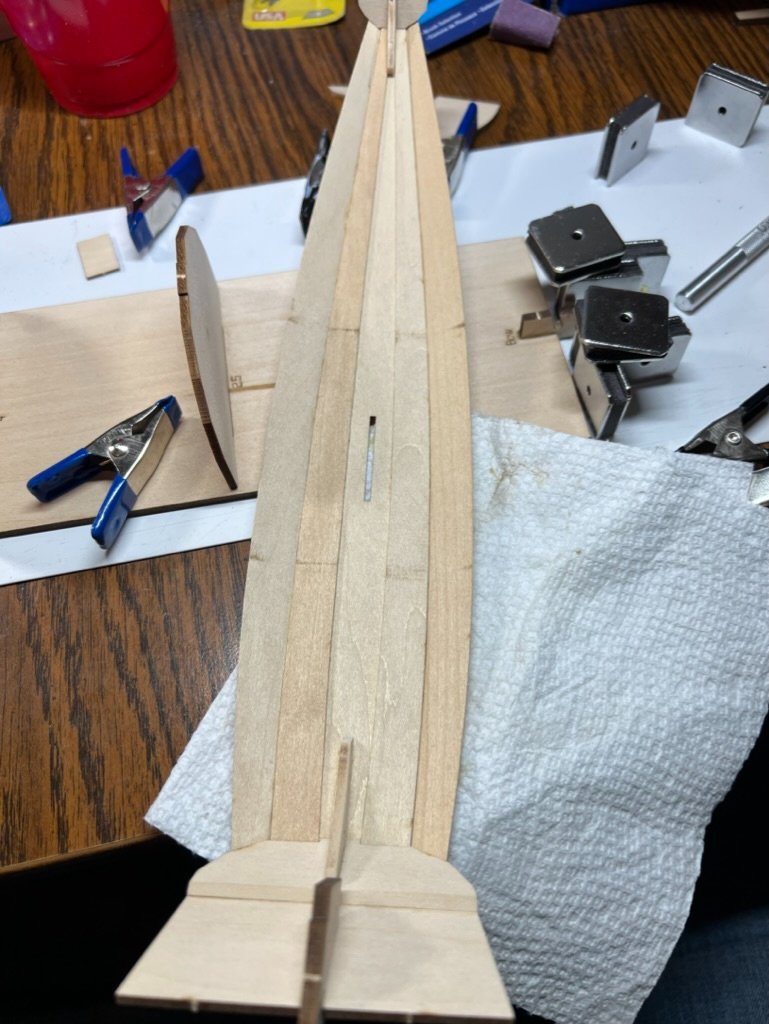
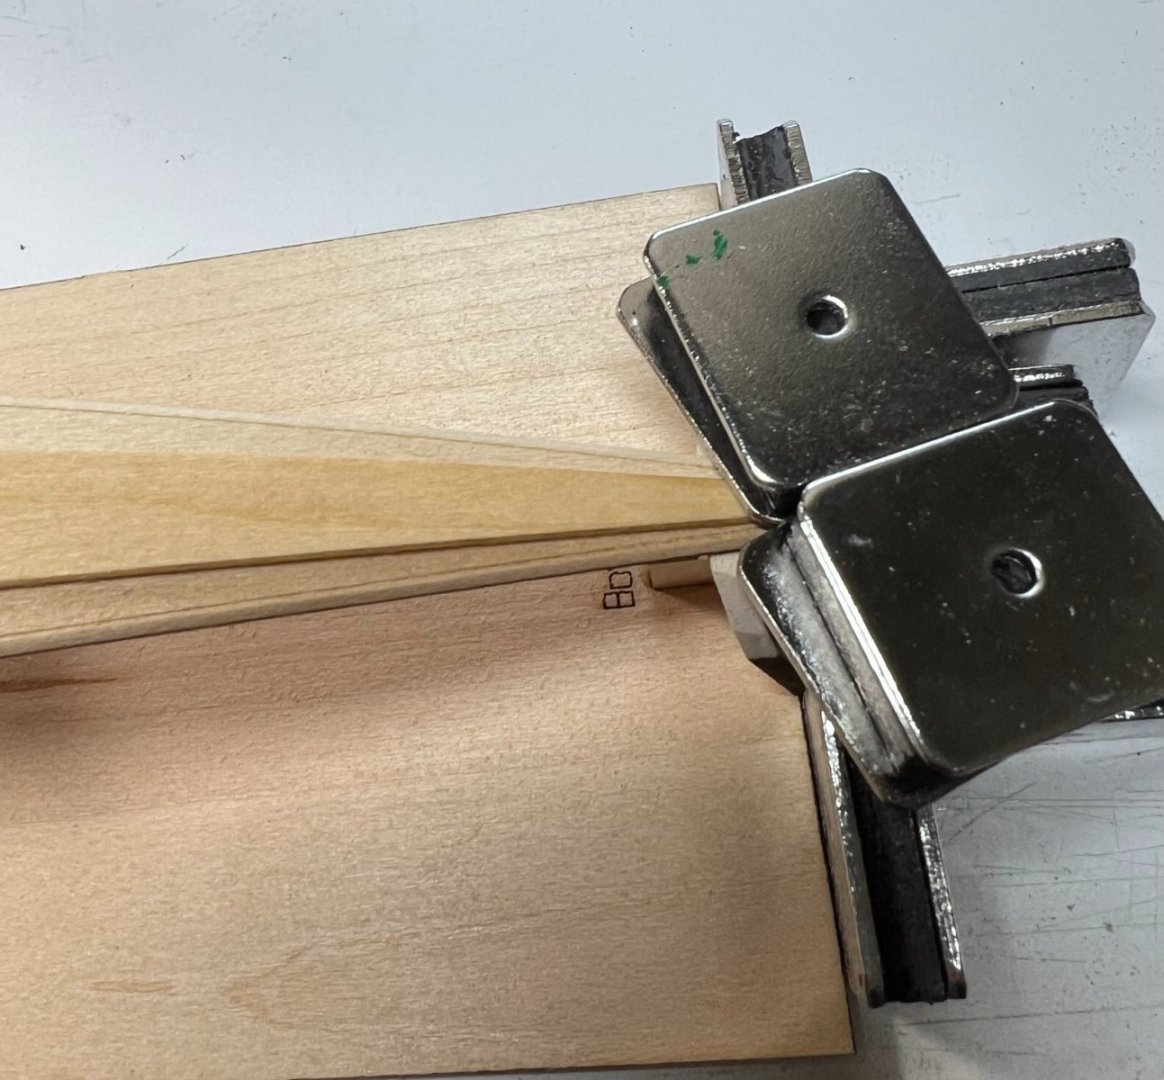
Mount the dagger board vertical. Ok. Lets see if we can extend that vertical so we can see it. I'd say, thats close enough. The marks in the hull are from the framing tool. I wet them with a dab from the tip of my finger the popped right back out to level. Cleaned up the char transfer at some point later one.
- 72 replies
-
- 6
-
-
- Norwegian Sailing Pram
- Model Shipways
- (and 1 more)
-
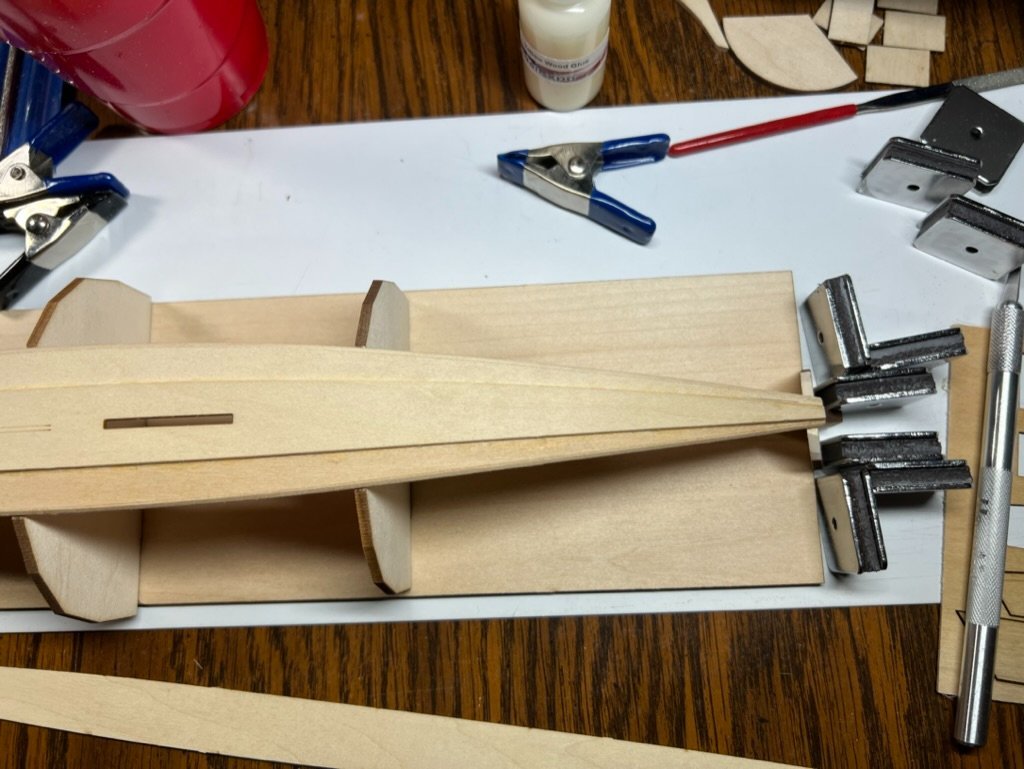
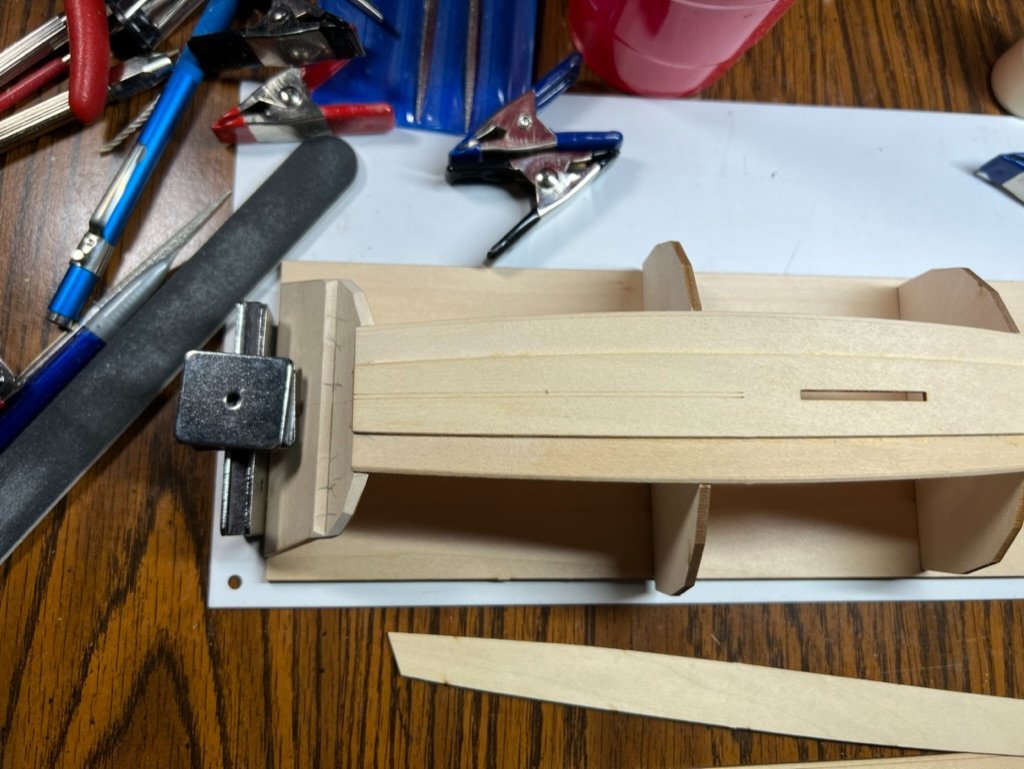
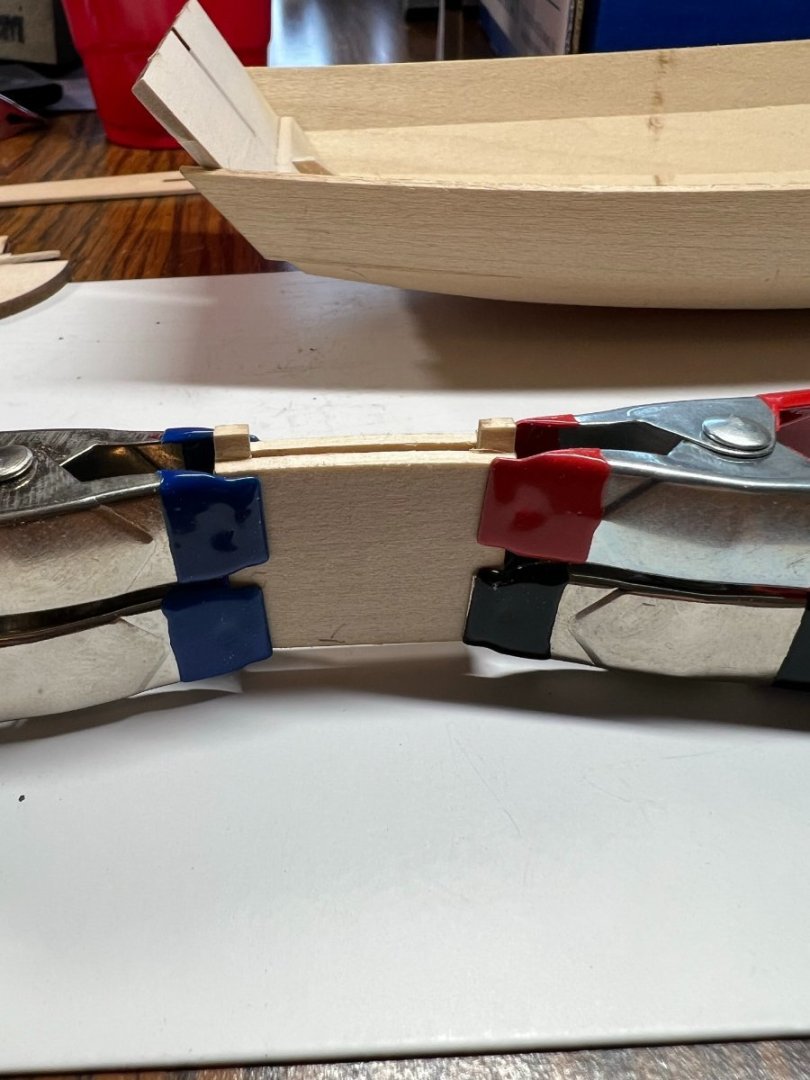
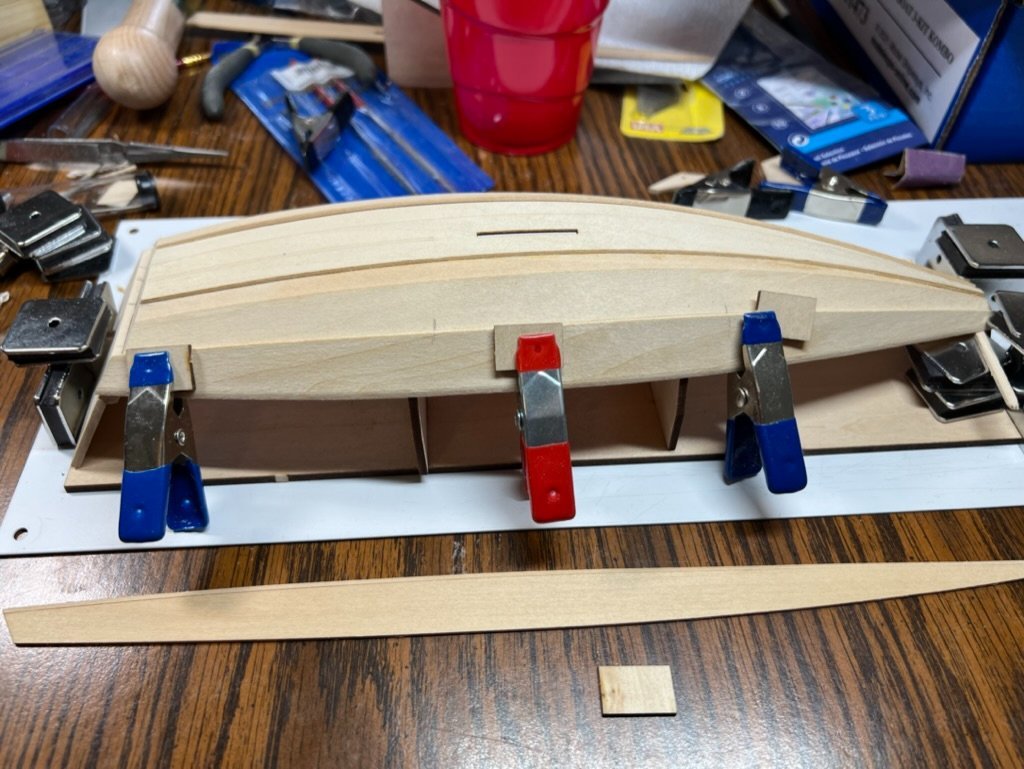
The skeg and bilge keels are easy enough. I used a piece of 220 pictured, to shape the skeg. The bilge keels only needed cleaning up and they looked good. I marked both sides about where they should go, not much for exactly where they should go that I could find in the instructions. I used tweezers for the first time to hold them and place them with a bead of glue. The bead of glue is spread and shaped with a #11 blade knife. I can place a good bead right in the center and clear up edges before its even placed. Then can get the squished out glue cleared up quick wit the back end of a #11 blade. The glue balls up and peals off. Hard to to explained there is a magic point its like rubber, not liquid, not cured.
- 72 replies
-
- 4
-
-
- Norwegian Sailing Pram
- Model Shipways
- (and 1 more)
-
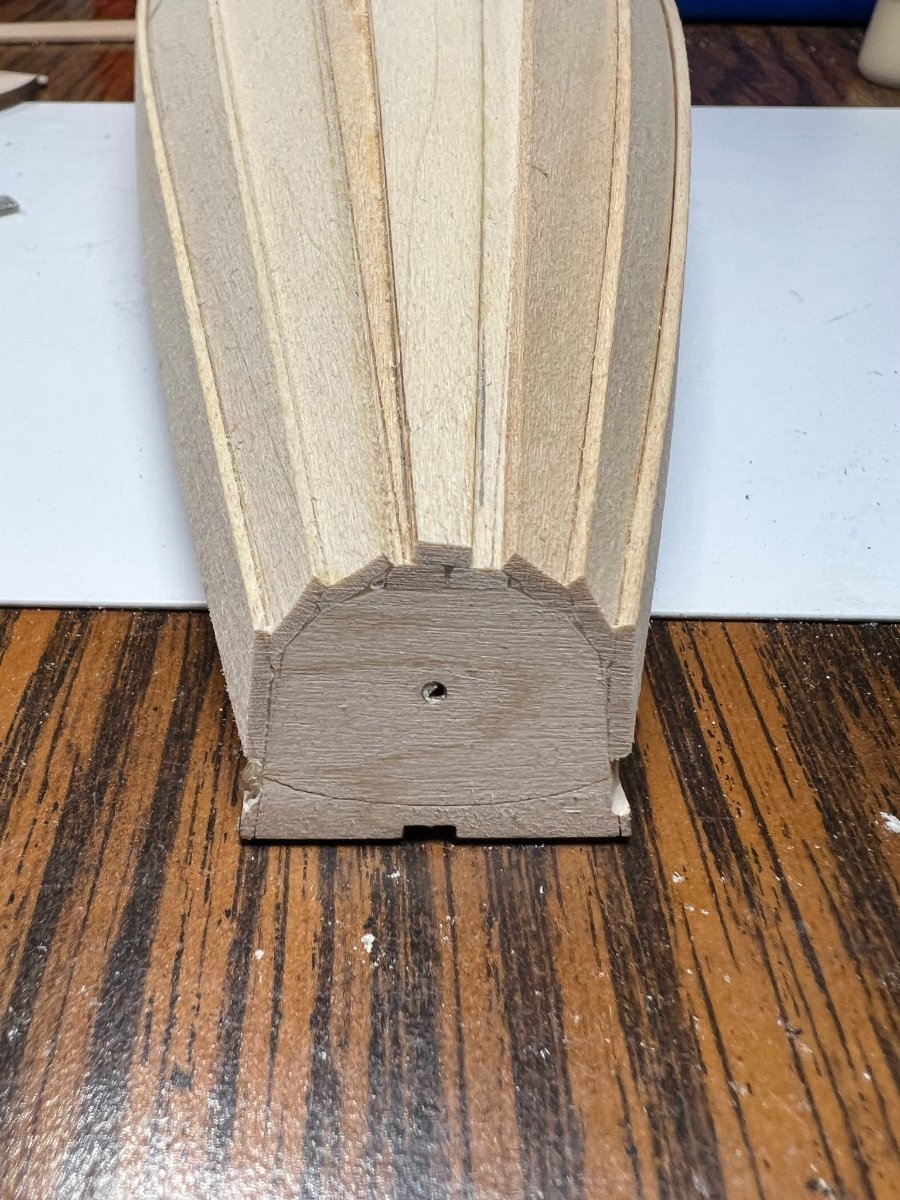
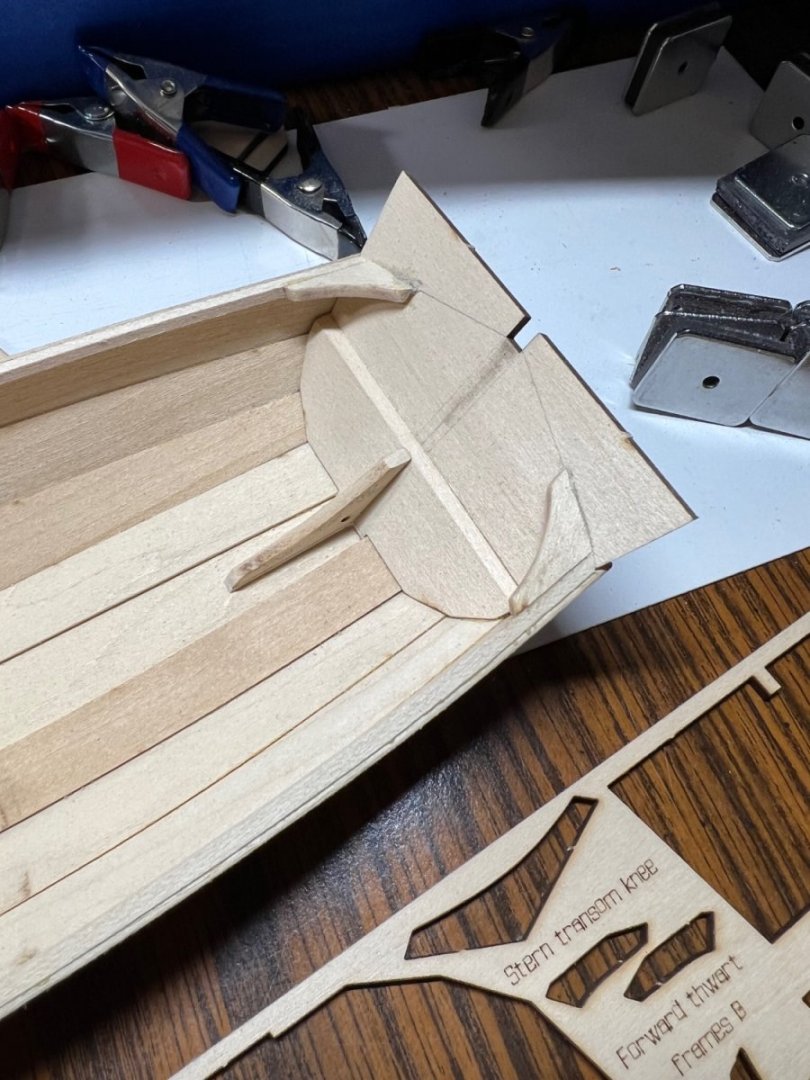
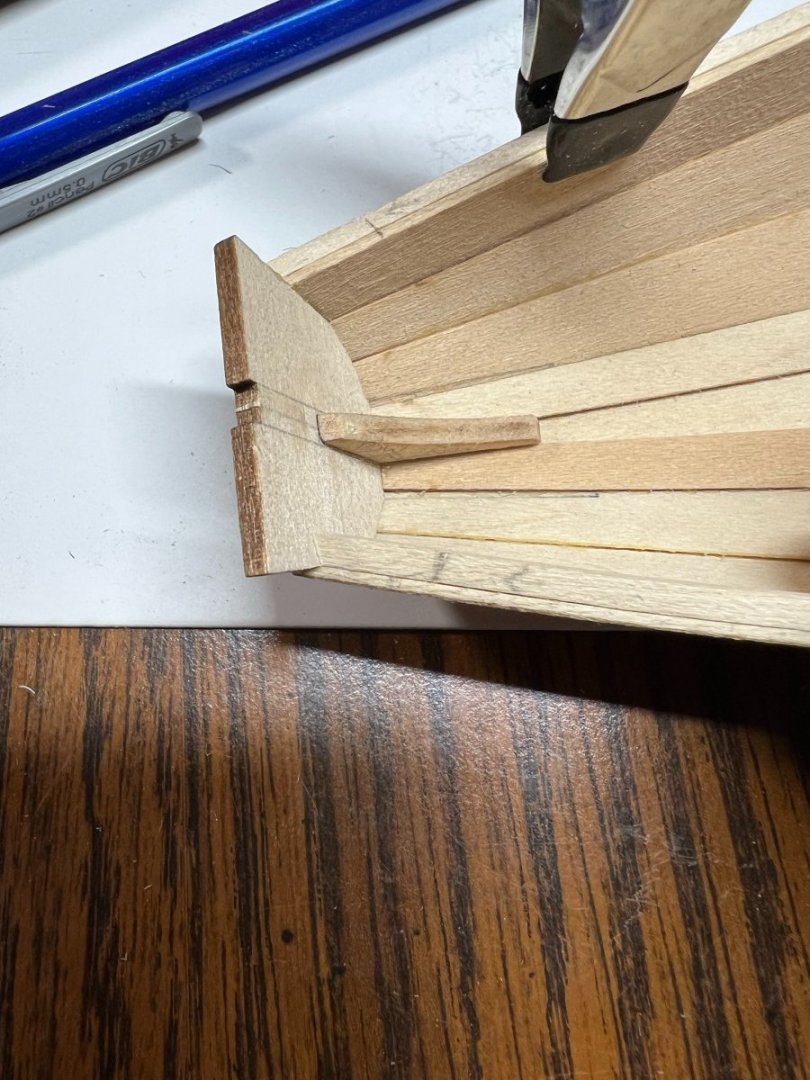
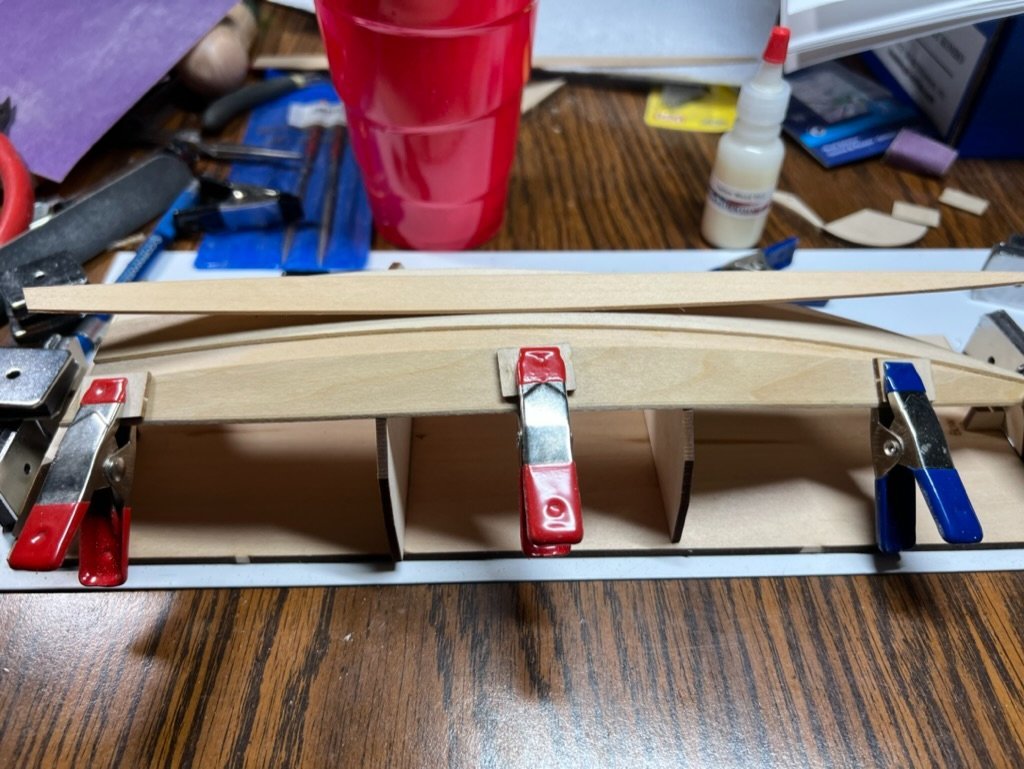
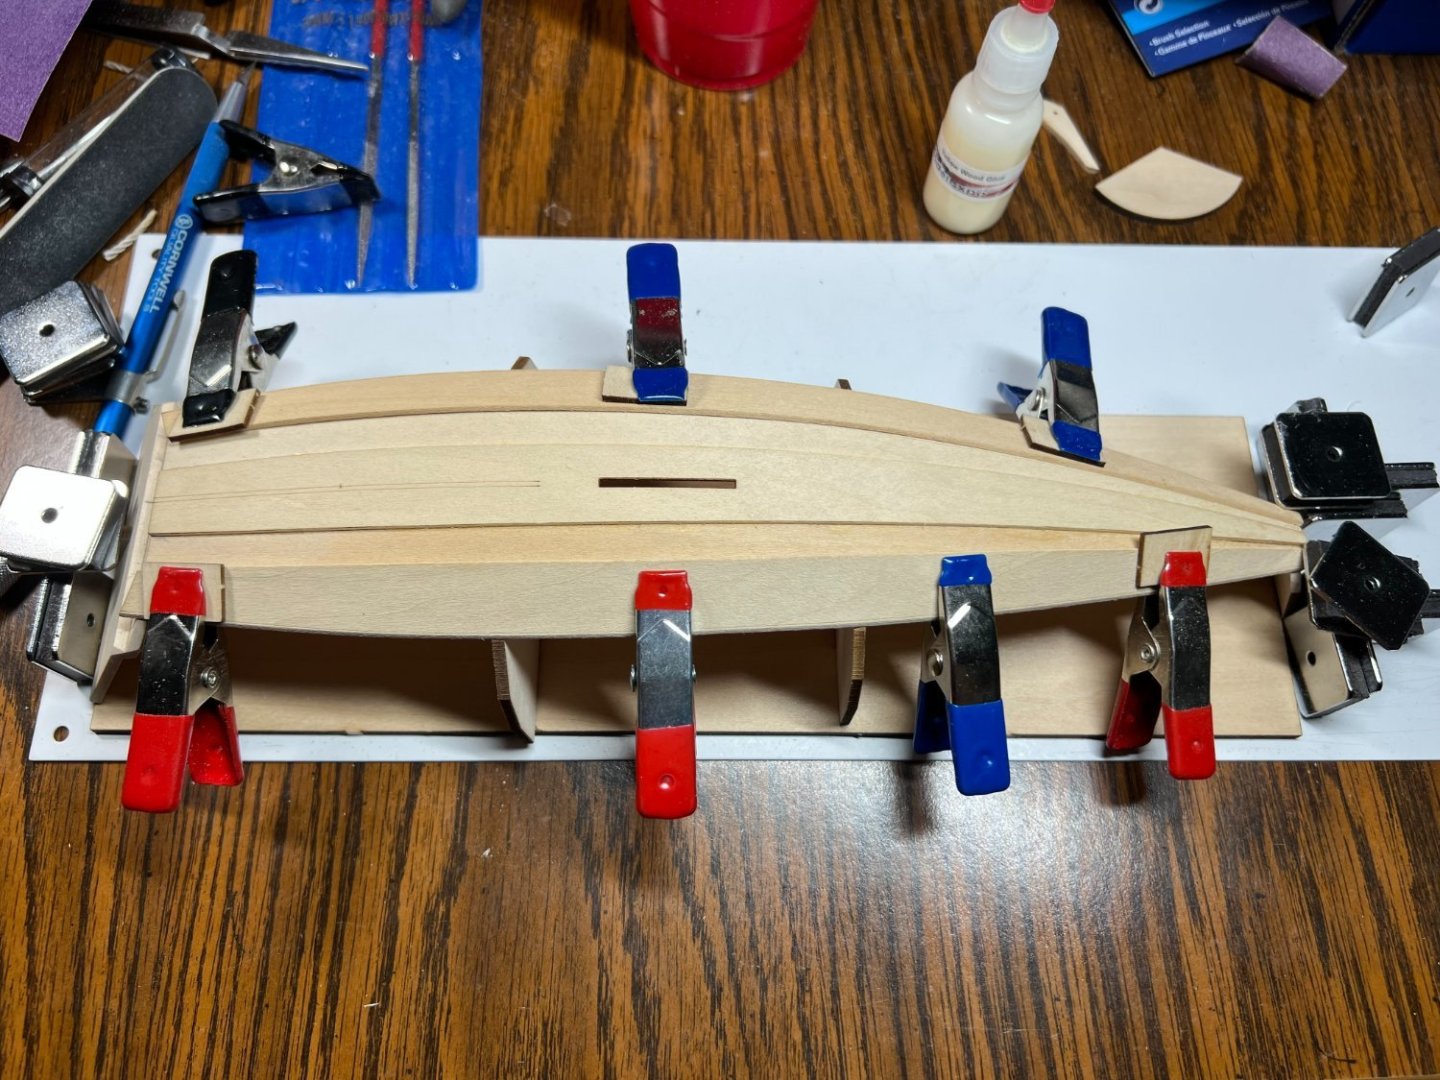
The bow and stern transoms turned out nice. A bit of fill on the stern were I added the spacer on the stern transom knee. The sheer planks ended up what looks like exactly where they should be. Pure dumb luck. Even more amazing they are the same. I never even looked at the spacing or how it grew. The planks have some gaps and spaces viewed from the bottom. The bevel edge looks great on the inside. Skills learned during the Dory construction.

- 72 replies
-
- 5
-
-
- Norwegian Sailing Pram
- Model Shipways
- (and 1 more)
-
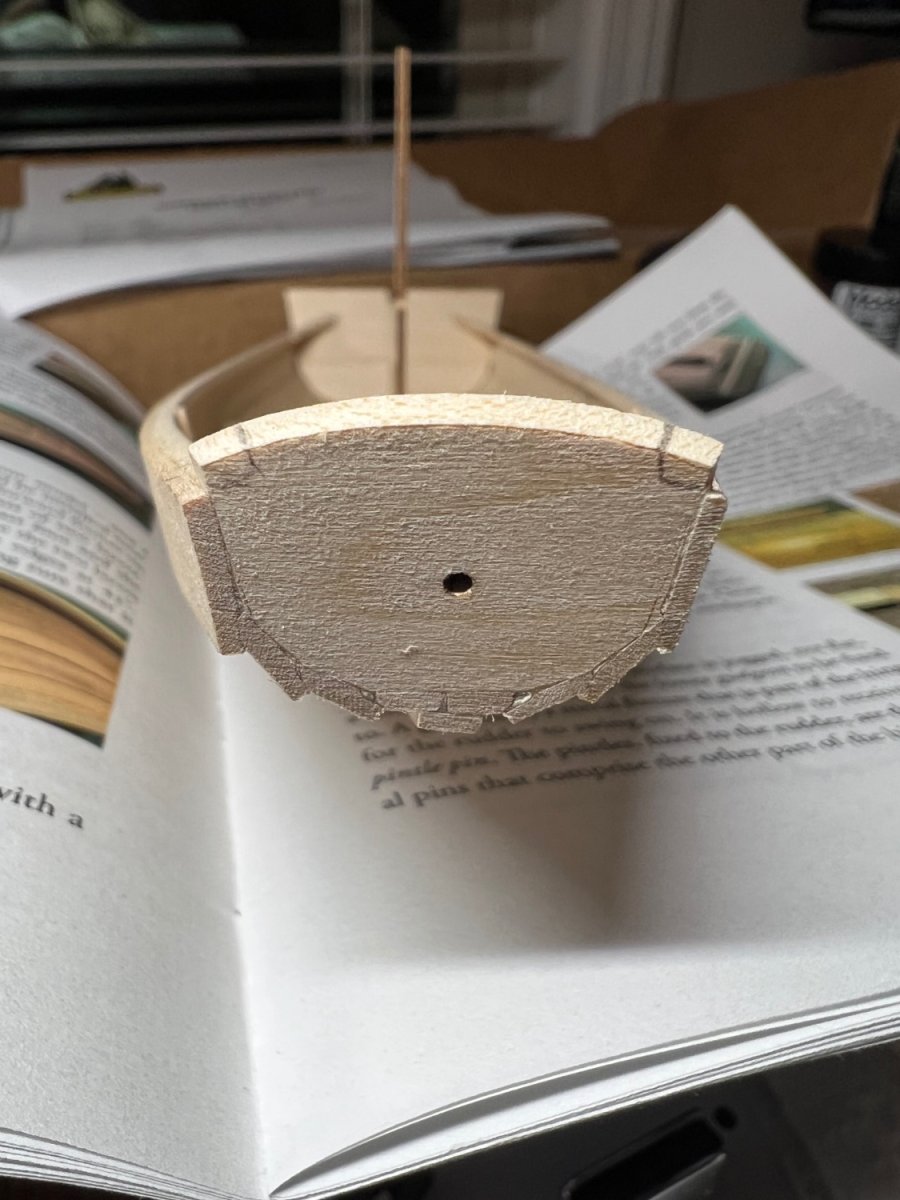
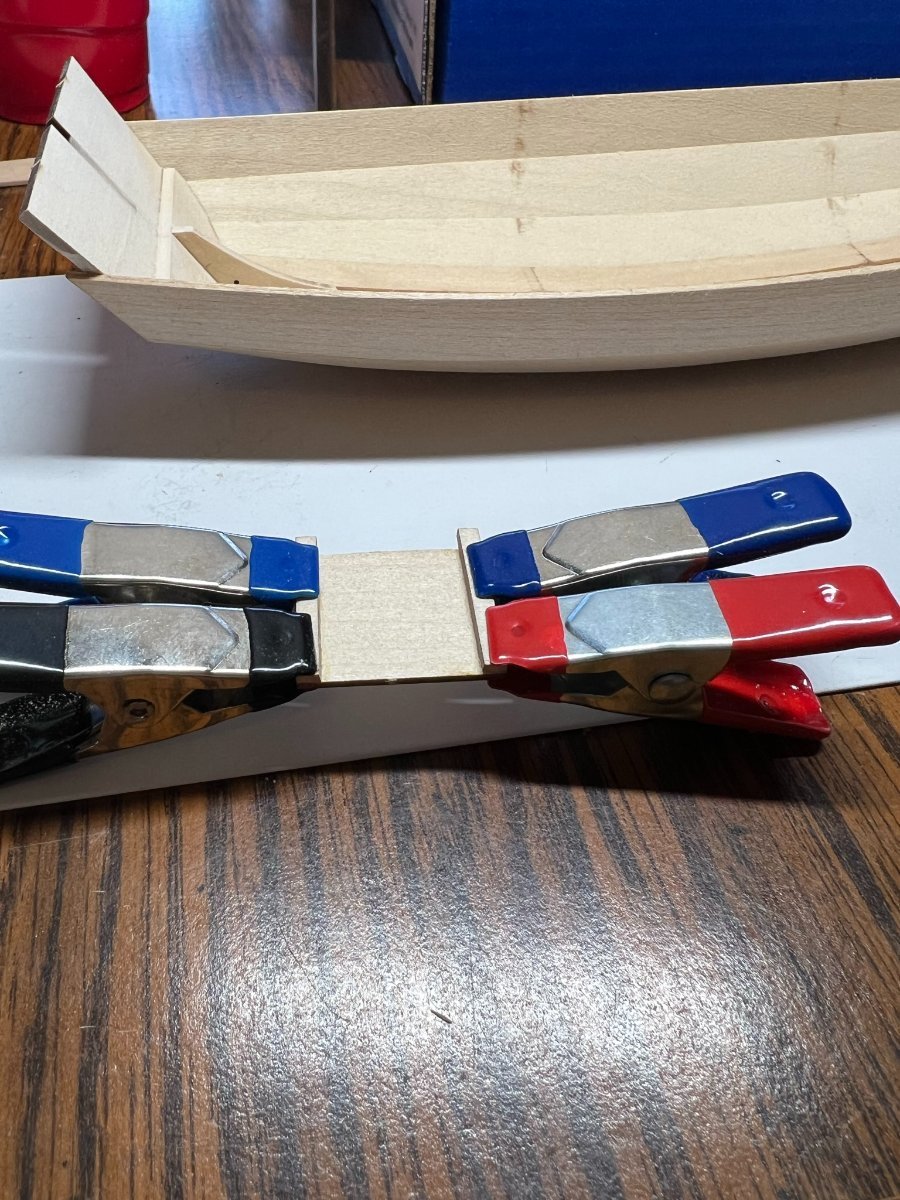
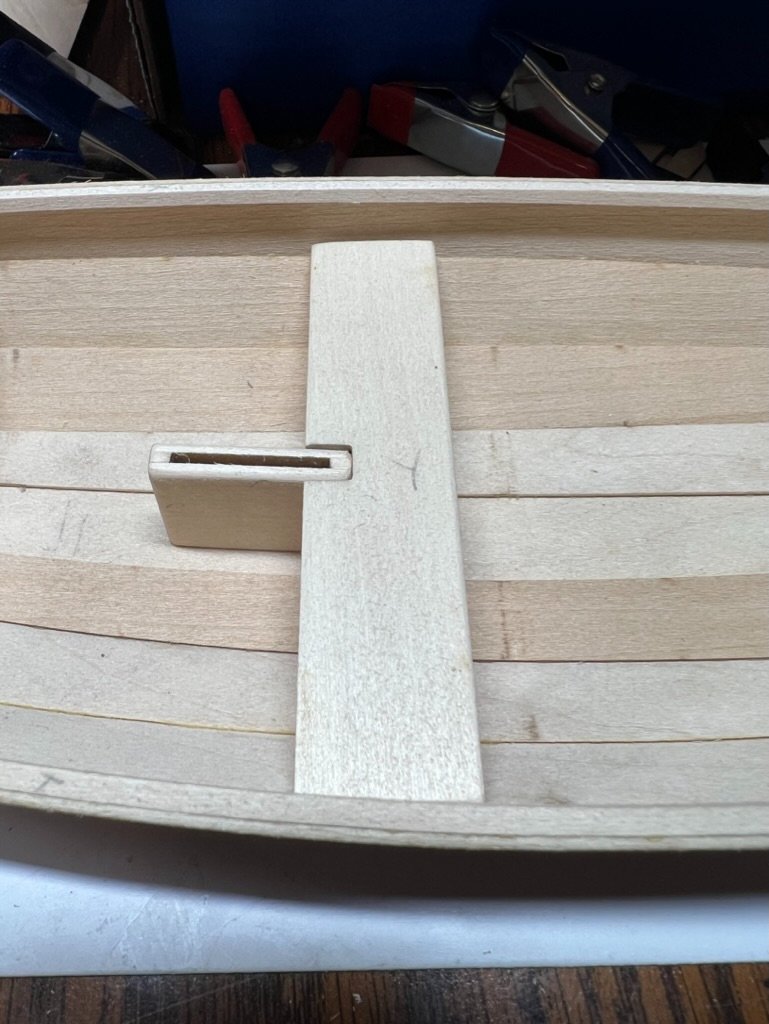
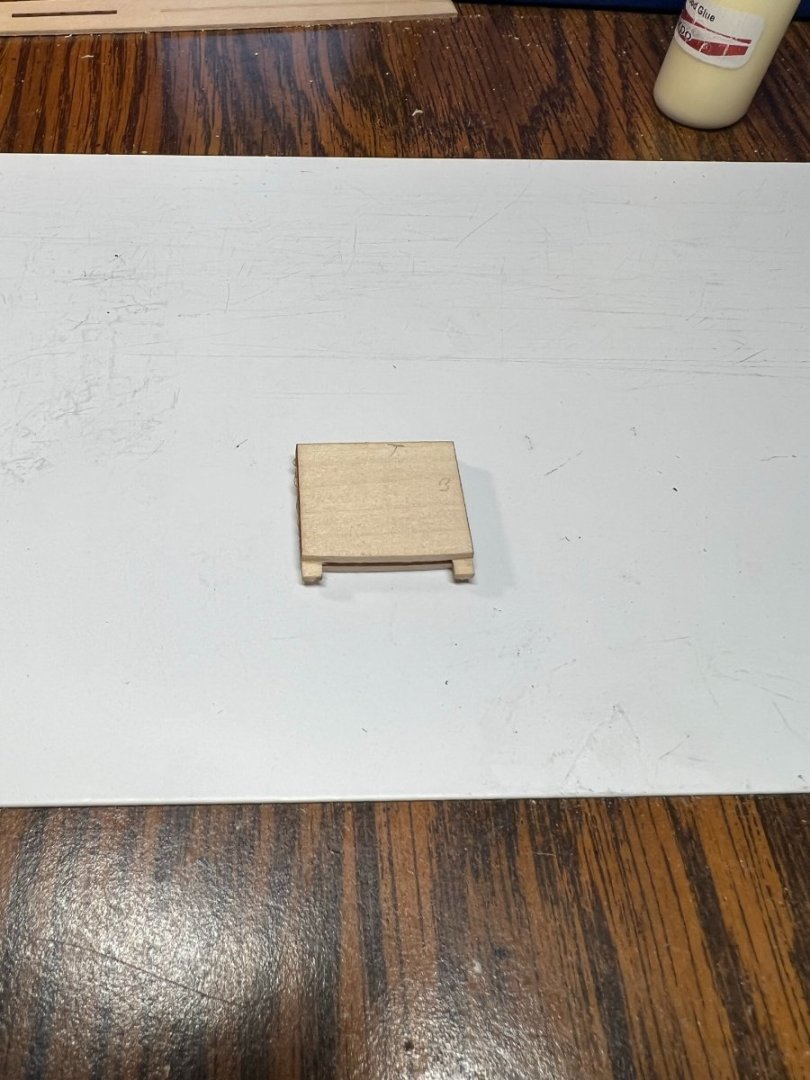
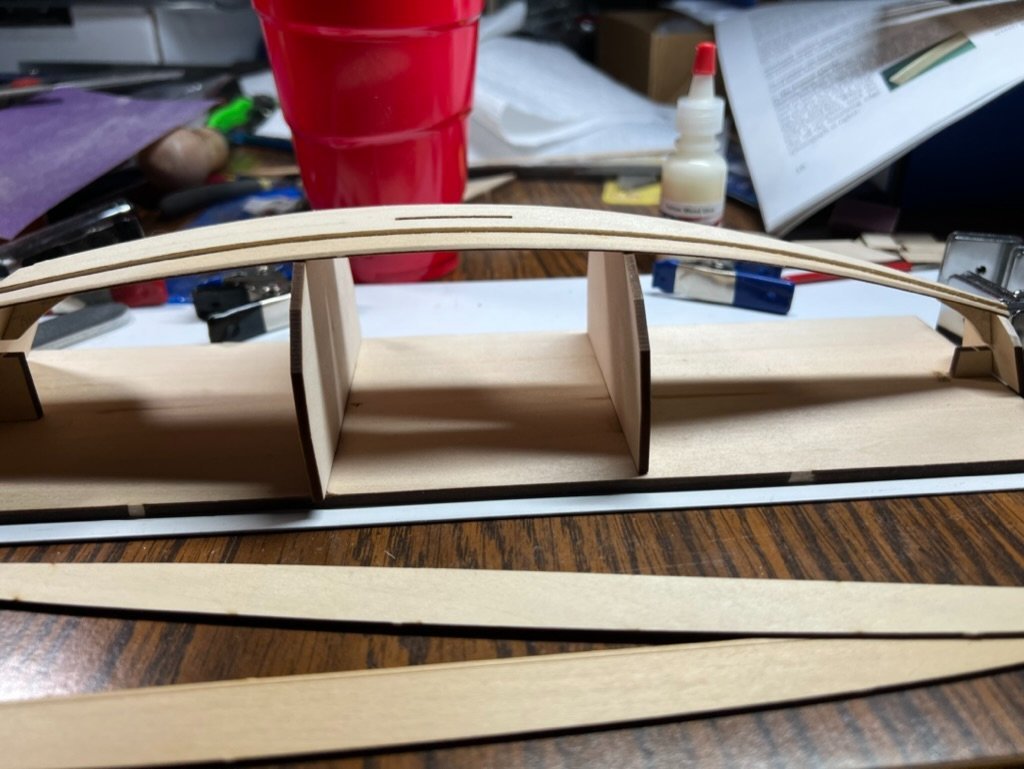
Whiles stuff dried I started the dagger board case. I had to wait to glue it until I could shape the bottom on the center plank shape. Wasn't much of a times savings getting it ready. But it made me stop touching the drying wood for a few minutes.

- 72 replies
-
- 3
-
-
- Norwegian Sailing Pram
- Model Shipways
- (and 1 more)
-
The wood is so well behaved. It just sits here in perfect shape ready to get glued in place. A small bead of glue from one end to the other. By the time I got to the last 2 planks I had this down to a science. This being meant for training, worked very well to train me on the wetting and shaping of wood.

- 72 replies
-
- 2
-
-
- Norwegian Sailing Pram
- Model Shipways
- (and 1 more)
-
No rubber bands yet. The wood just sits here and drys, it shrinks a little over time so it needs a nudge back in place. The stern and bow are looking good. Small error at the bow, the glue set and it wasn't worth the effort to get it centered. I even missed my line.


- 72 replies
-
- 2
-
-
- Norwegian Sailing Pram
- Model Shipways
- (and 1 more)
-
One more round without rubber bands. The wood wetting method I'm using is making easy work of the planks. They stay at the shape of the bend and almost put themselves in place.


- 72 replies
-
- 2
-
-
- Norwegian Sailing Pram
- Model Shipways
- (and 1 more)
-
Training wood with water. Getting ready to dunk the next two pieces. The rabbit cuts are easy with a needle file. The diamond coated needle files work very well.

- 72 replies
-
- 6
-
-
- Norwegian Sailing Pram
- Model Shipways
- (and 1 more)
-
A brave look at how its going on the under side.
- 72 replies
-
- 5
-
-
- Norwegian Sailing Pram
- Model Shipways
- (and 1 more)
-
Thanks! I’ve got some good rubber bands on standby.
-
Moving on to the garboard planks. After wetting the planks they dry at least 2-3 hours so they stop changing size. If glued when wet I imagine they would pull the shape all over the place. The first rabbit cuts for the planks occurs on the garboard plank. My plank holding method is quickly running out of options. The garboards will be ok to hold this way, the second strake plank and the sheer plank need a different holding method. Maybe.
- 72 replies
-
- 4
-
-
- Norwegian Sailing Pram
- Model Shipways
- (and 1 more)
-
Waiting for the planks to dry. Some areas are 'meh, close enough'.
- 72 replies
-
- 4
-
-
- Norwegian Sailing Pram
- Model Shipways
- (and 1 more)