HOLIDAY DONATION DRIVE - SUPPORT MSW - DO YOUR PART TO KEEP THIS GREAT FORUM GOING! (Only 36 donations so far out of 49,000 members - C'mon guys!)
×

MajorChaos
-
Posts
301 -
Joined
-
Last visited
Content Type
Profiles
Forums
Gallery
Events
Everything posted by MajorChaos
-
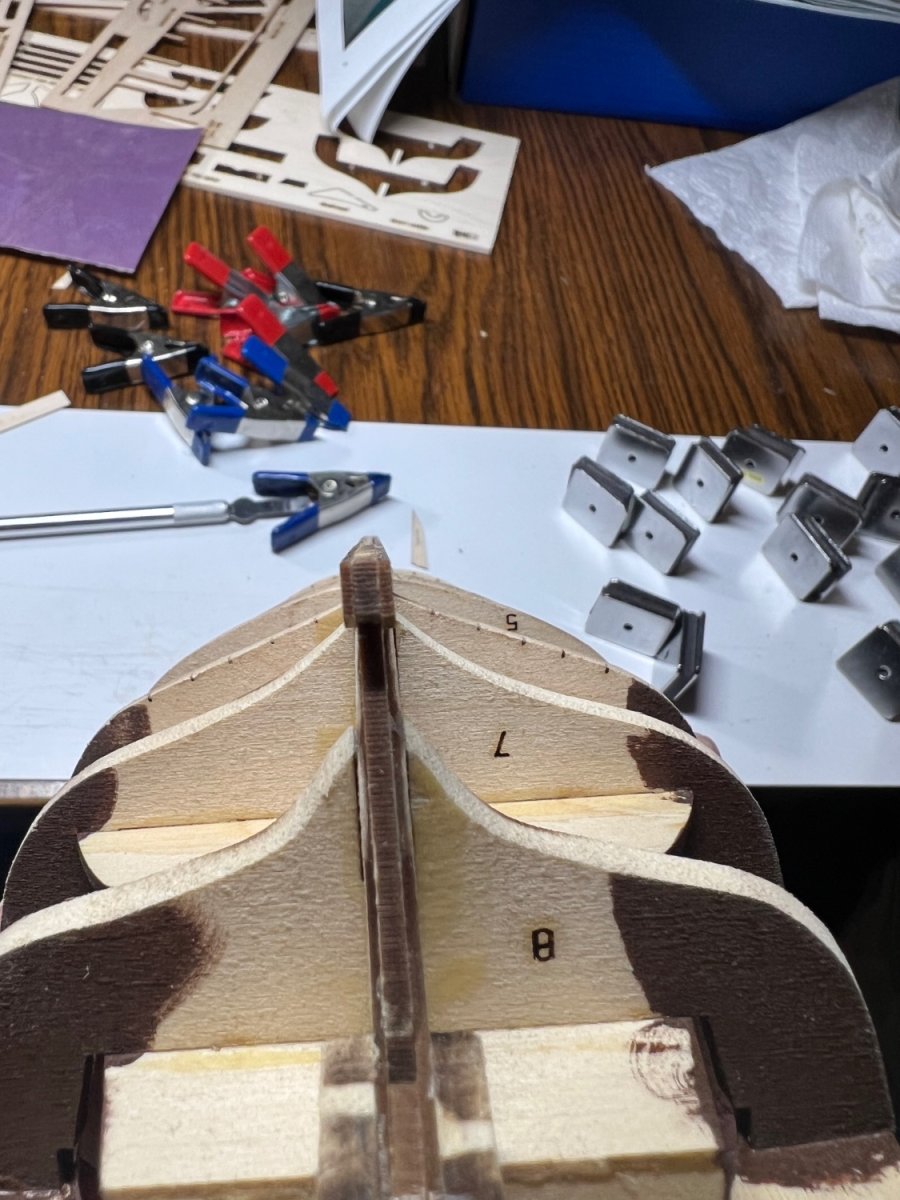
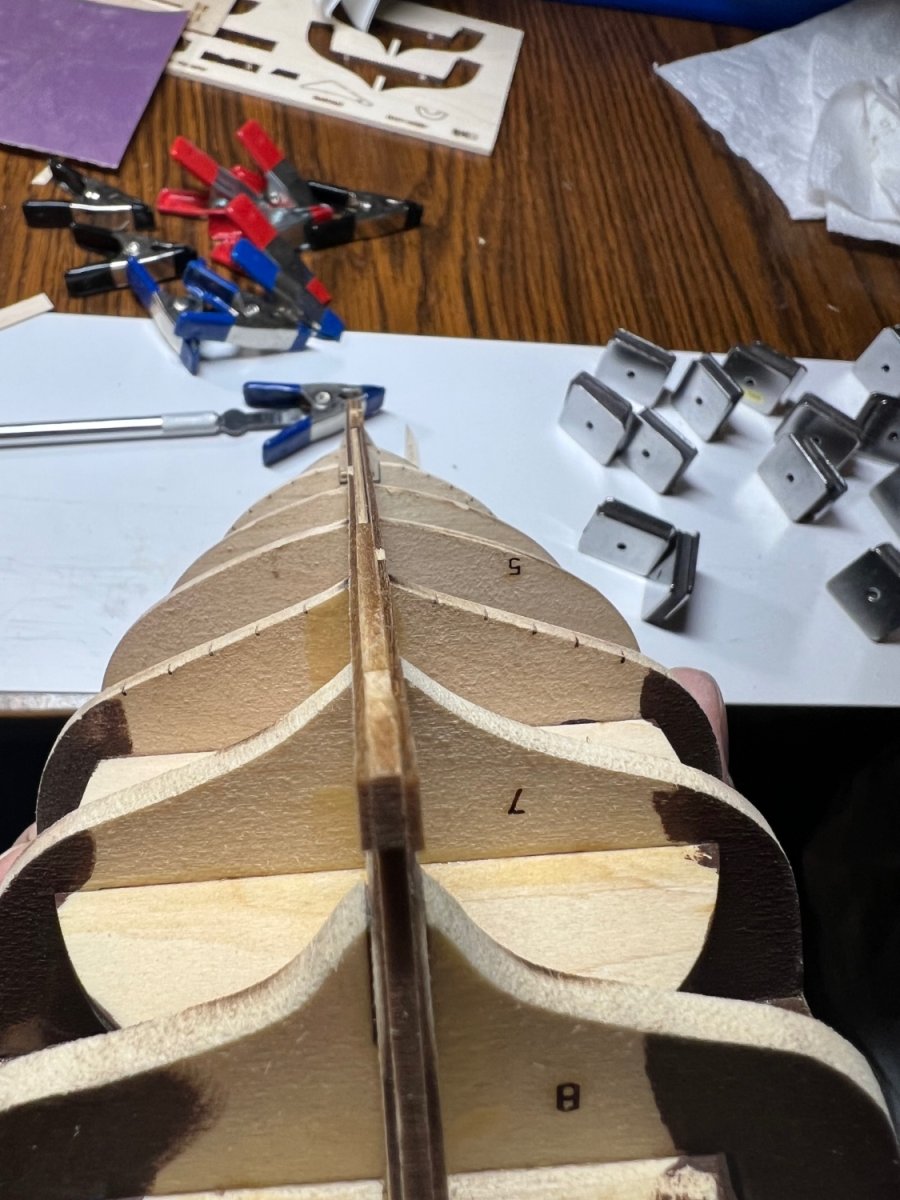
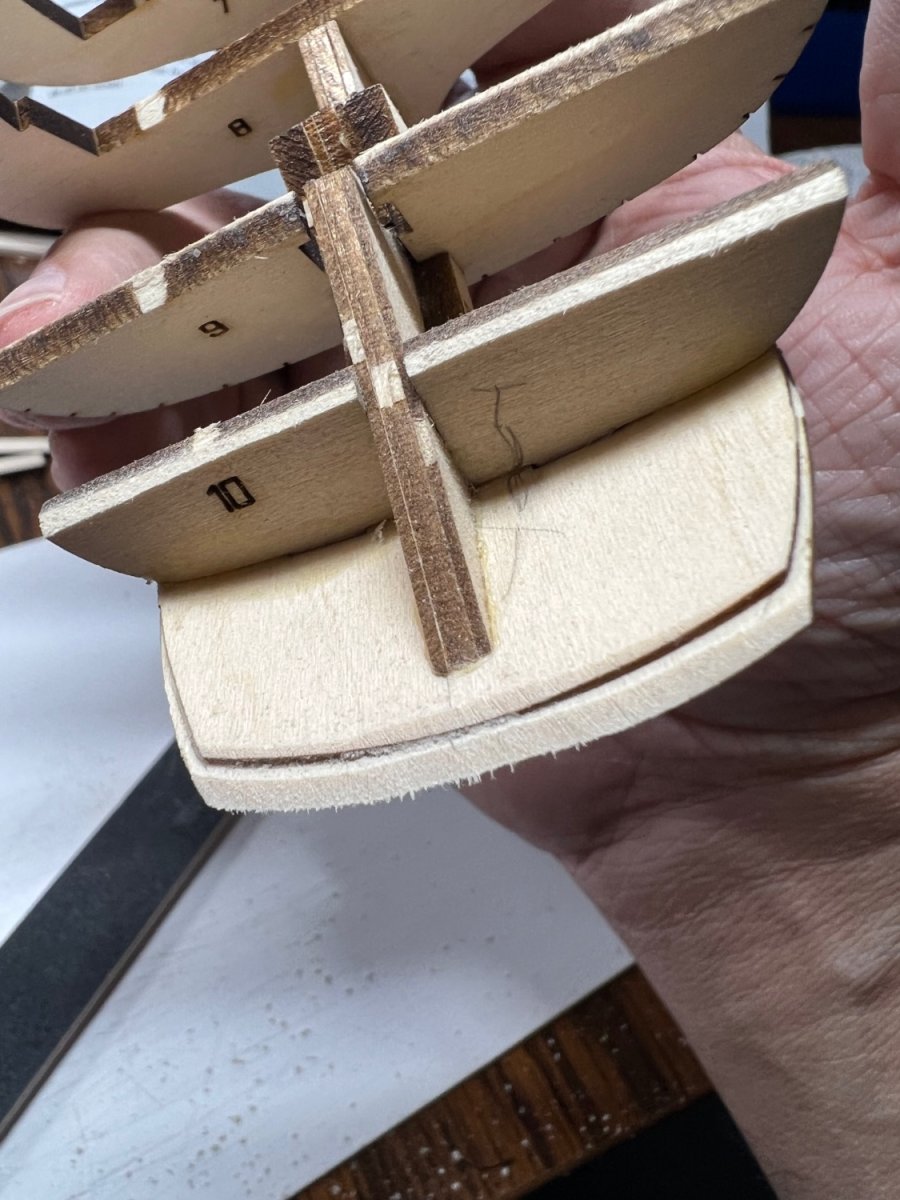
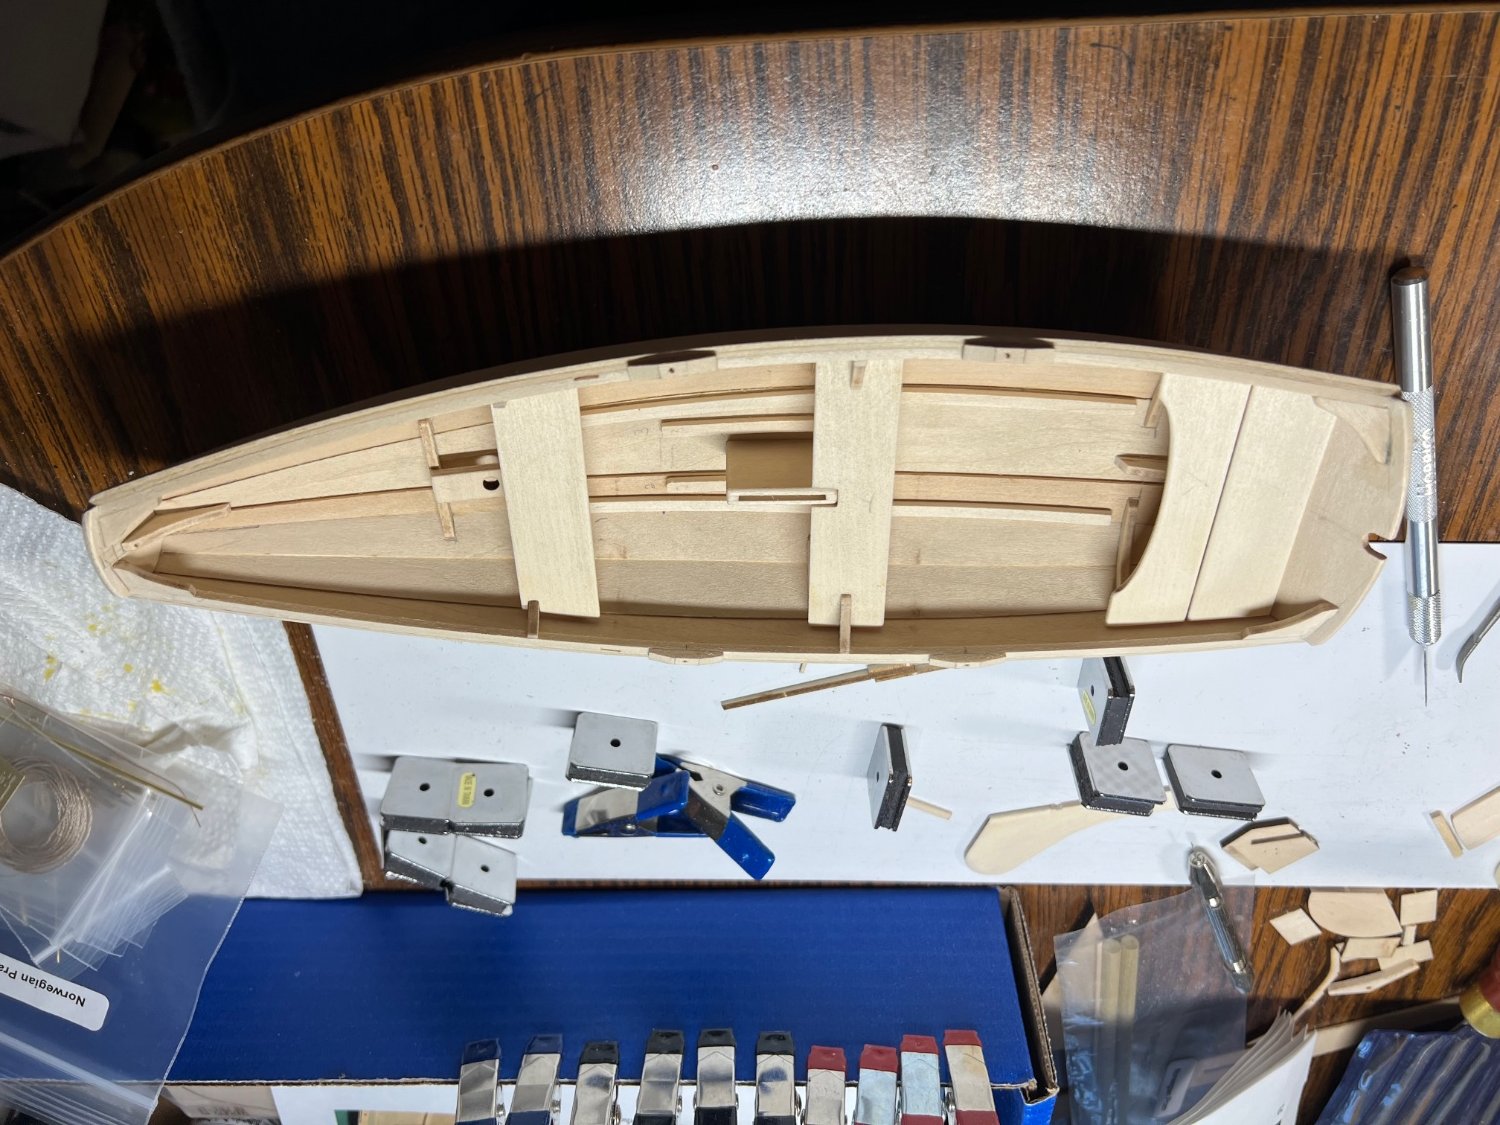
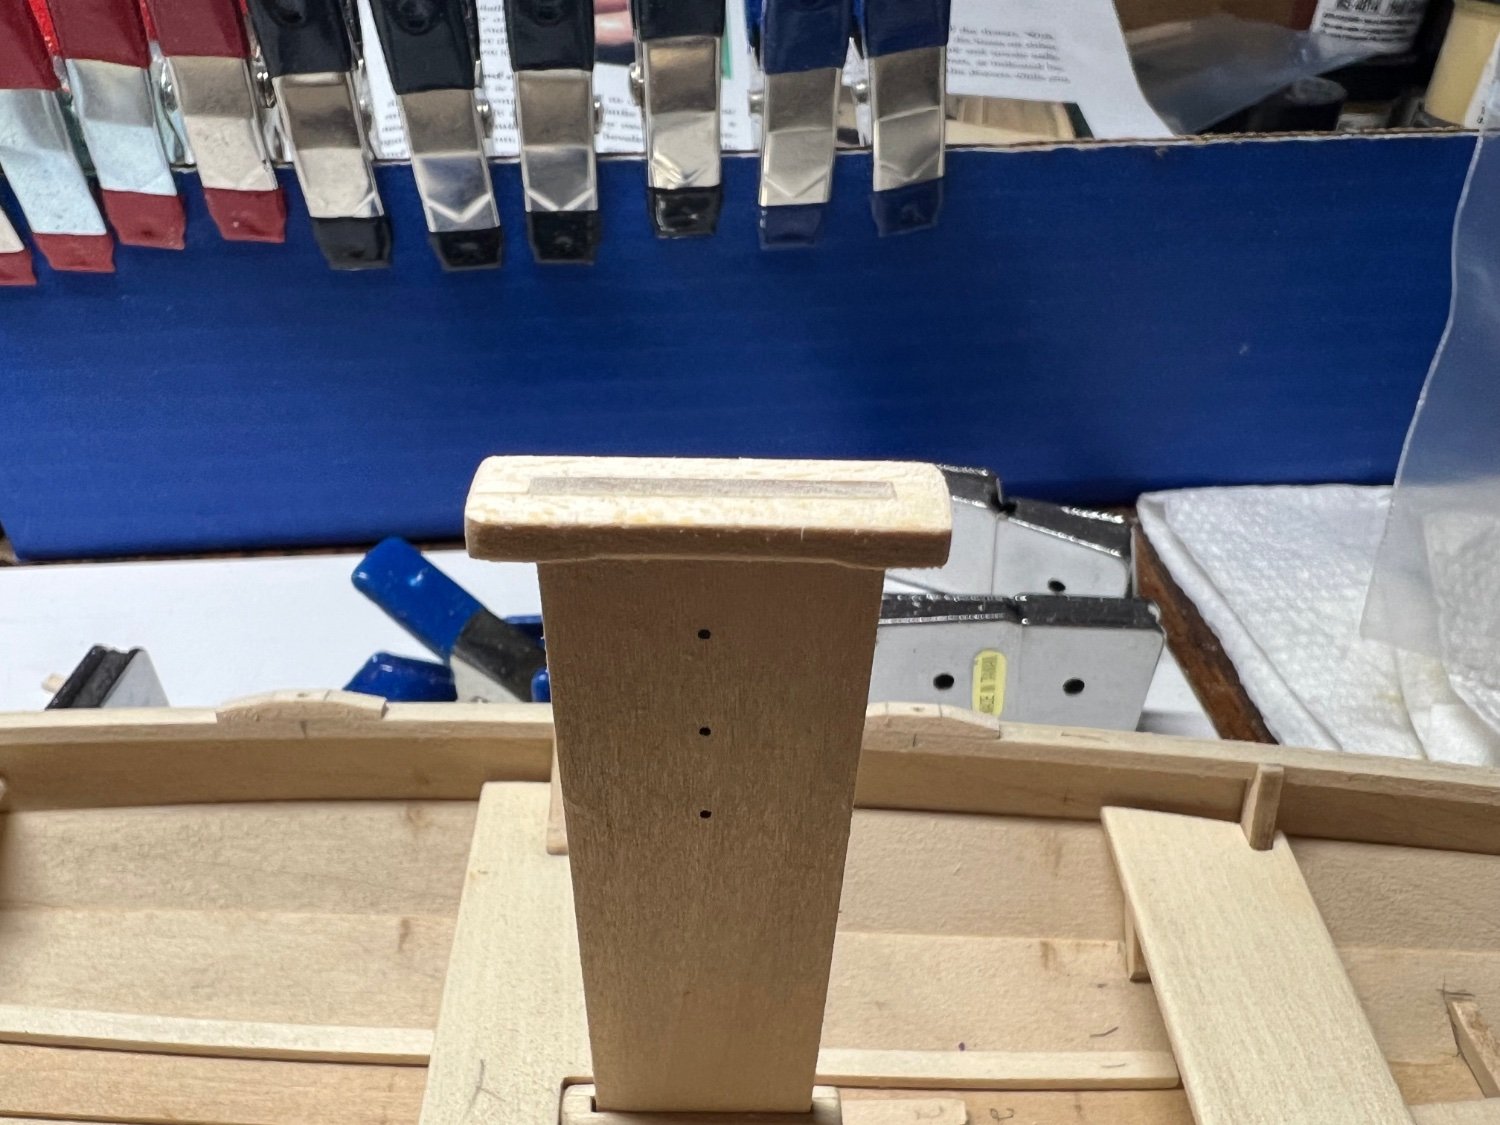
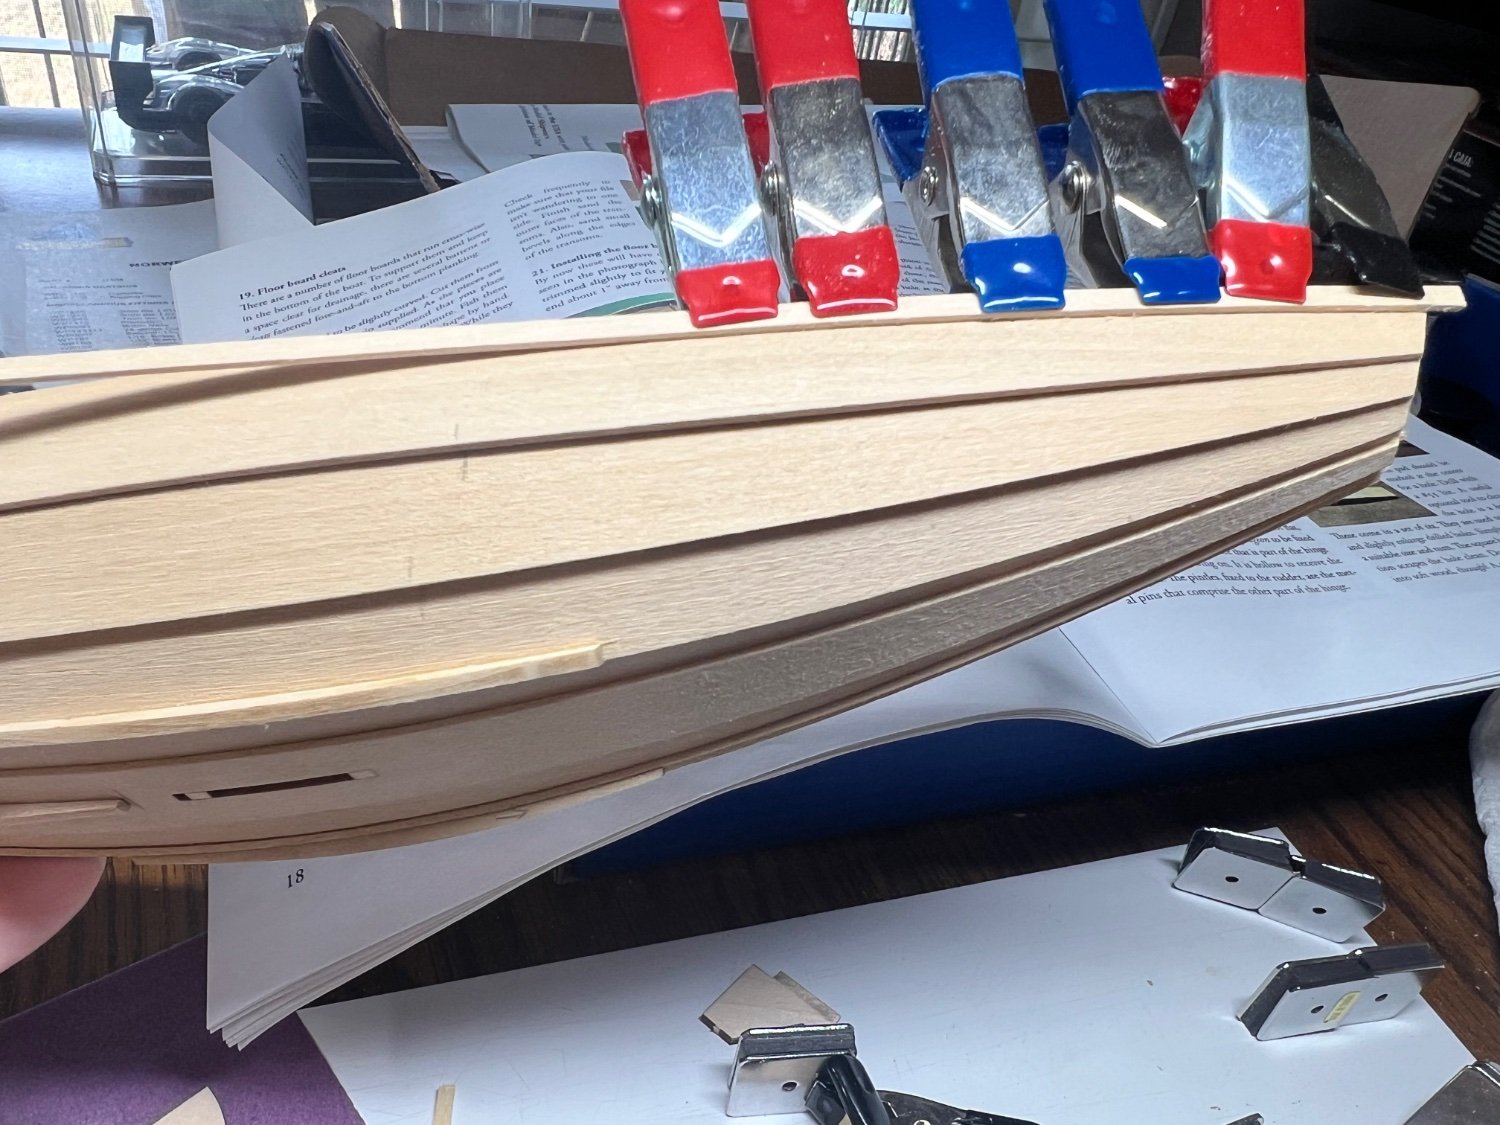
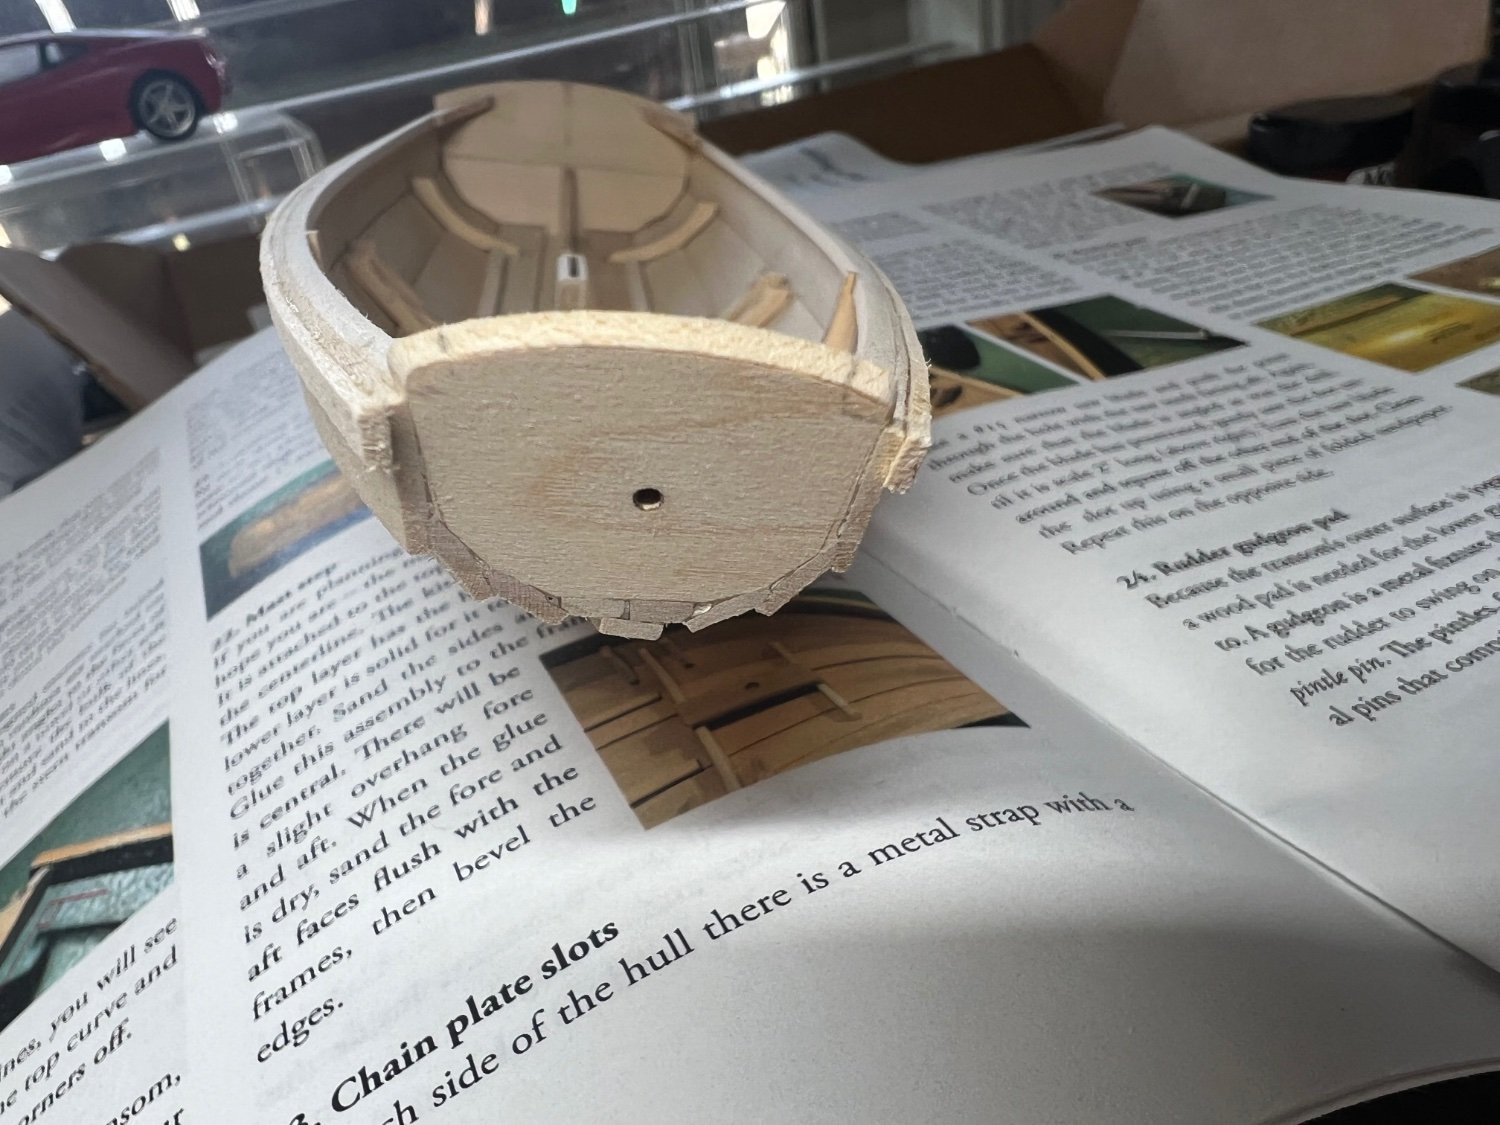
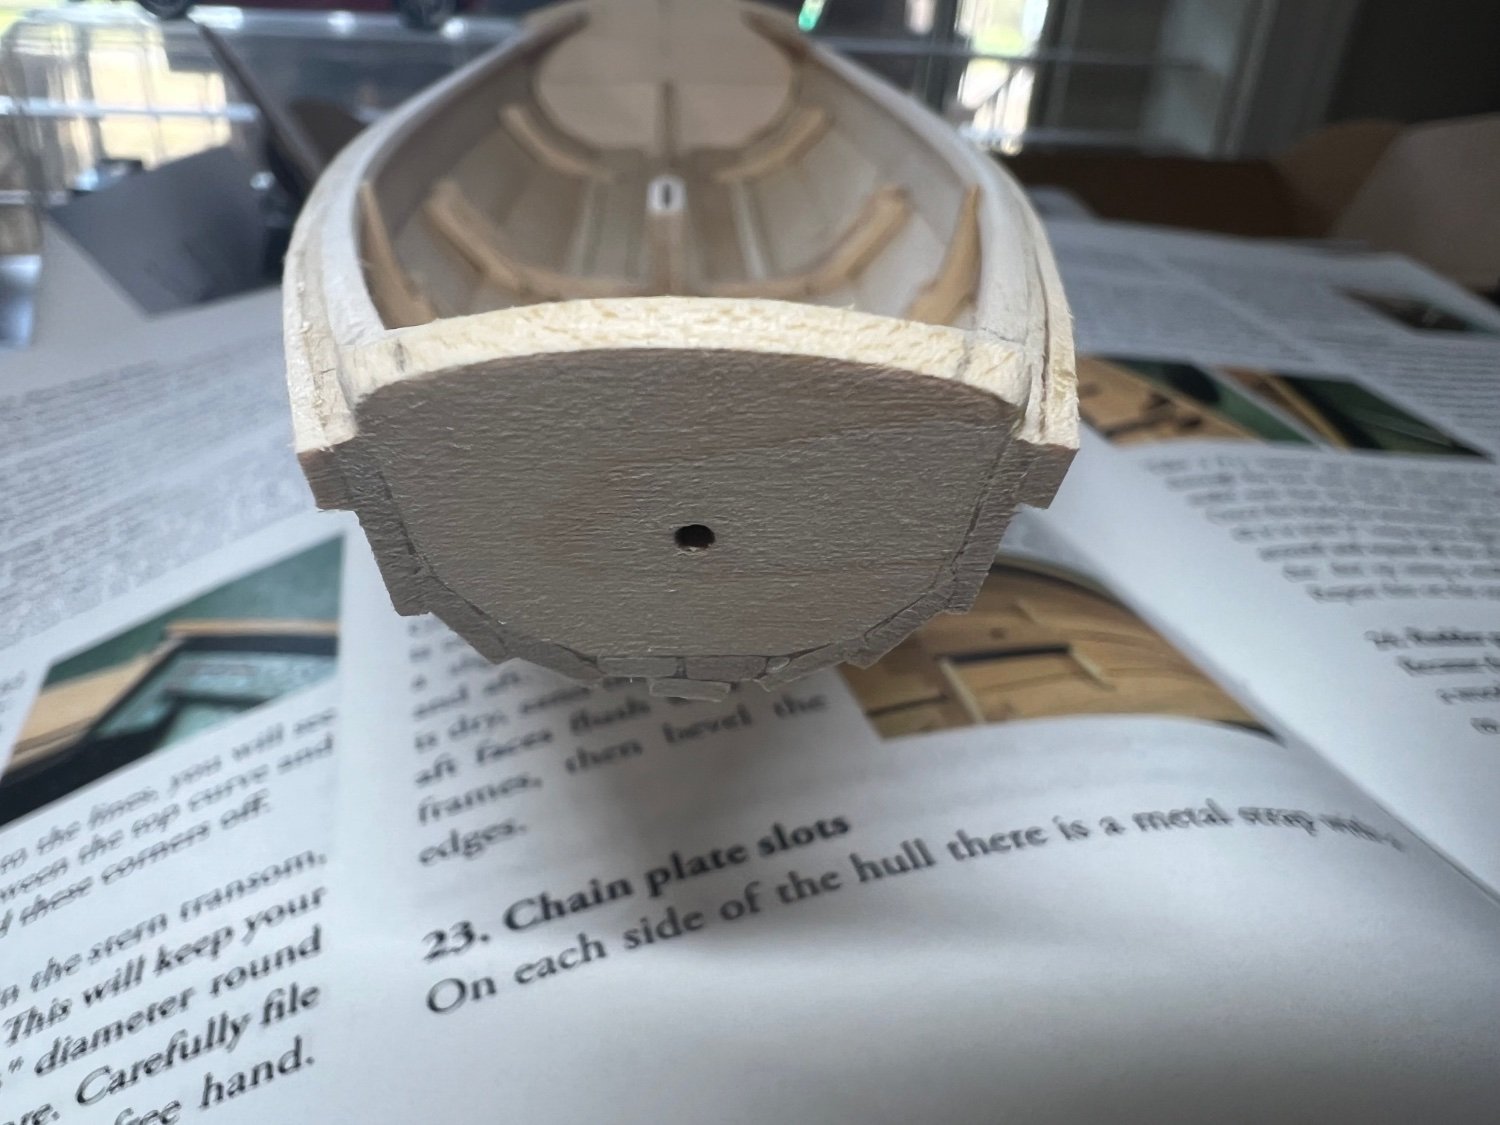
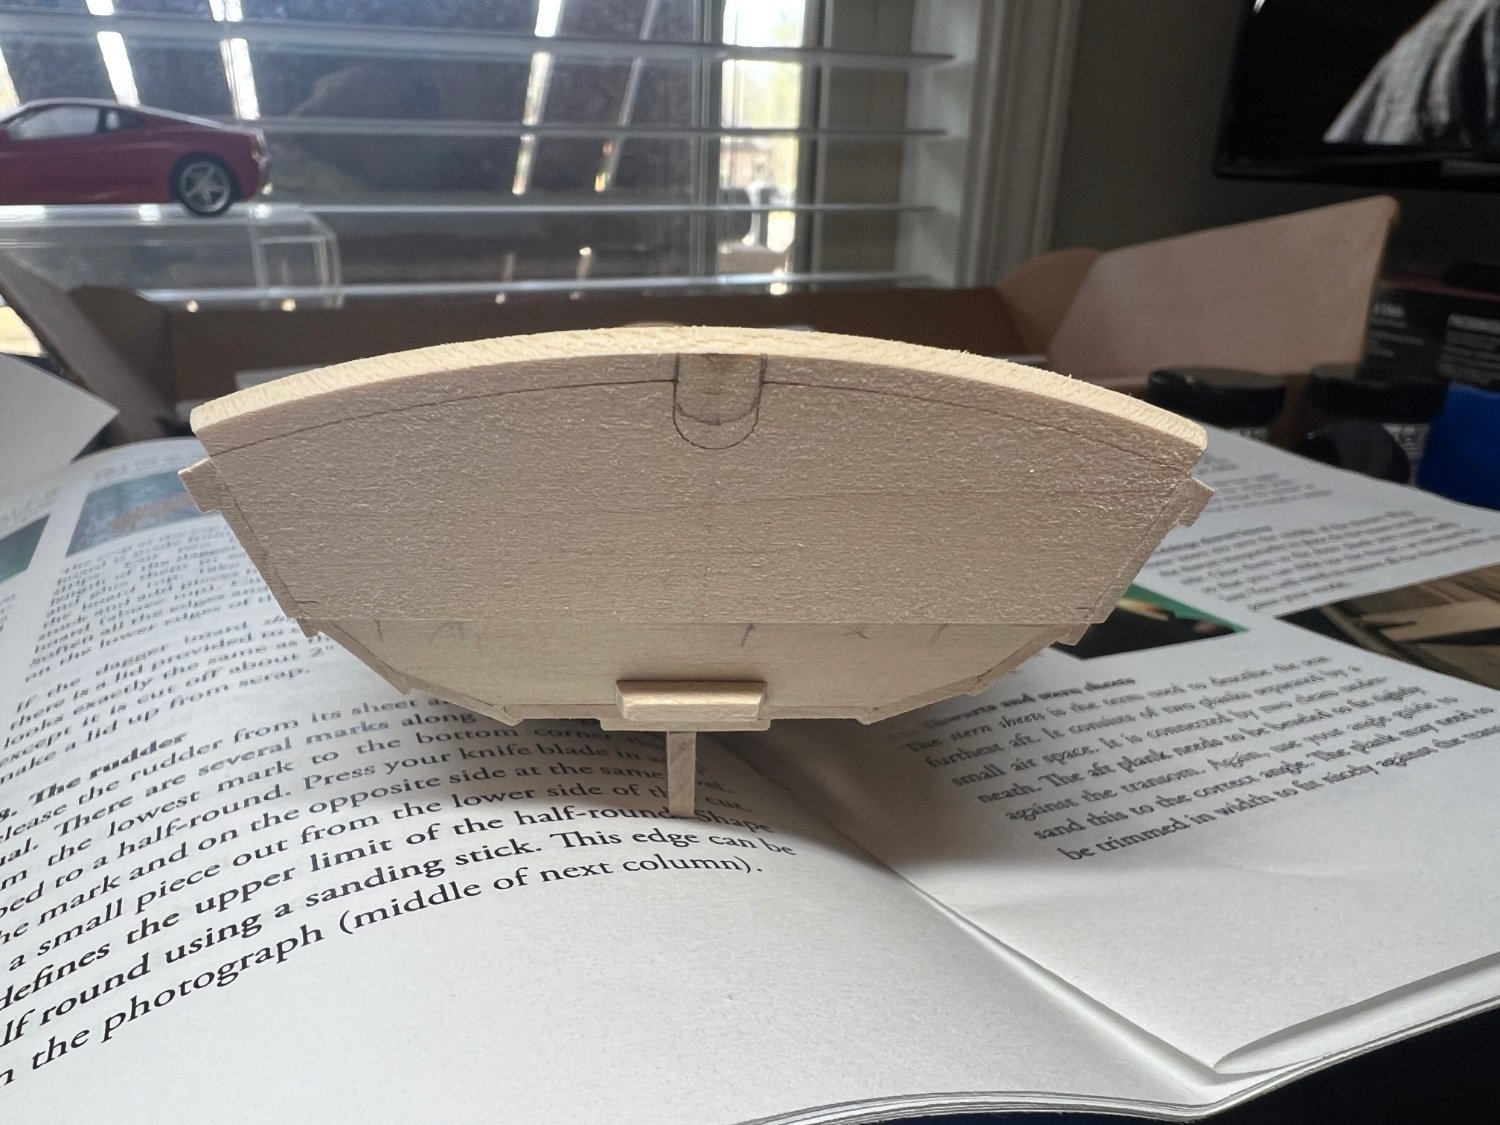
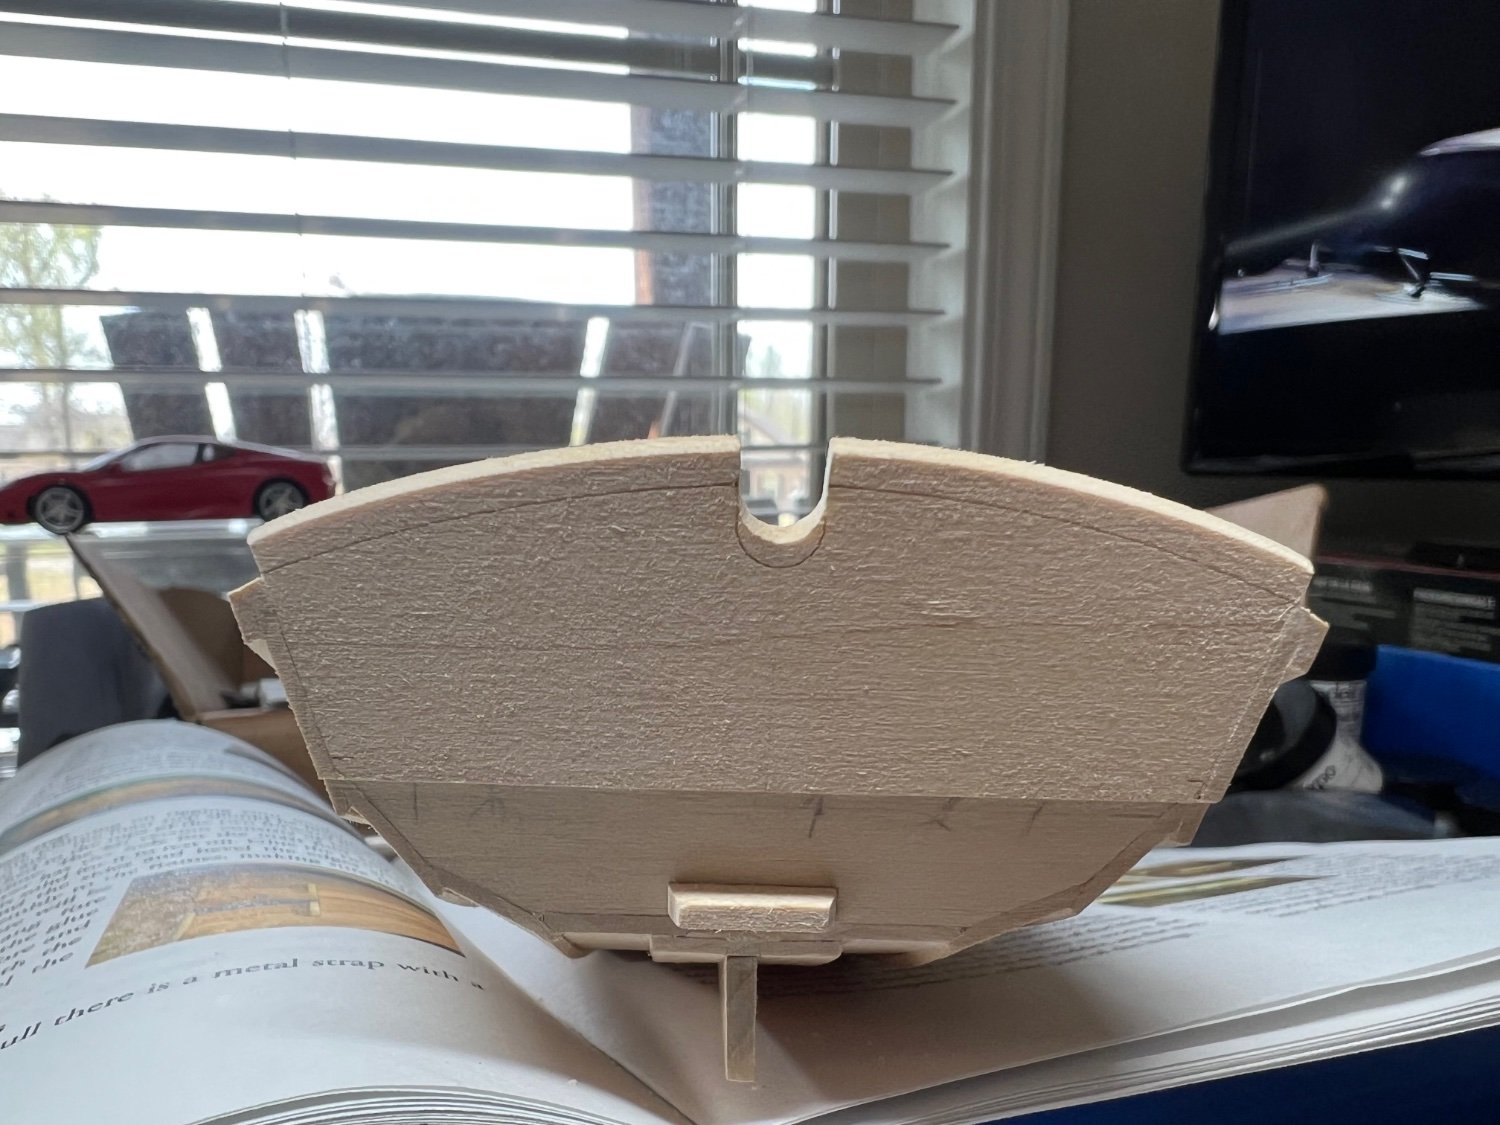
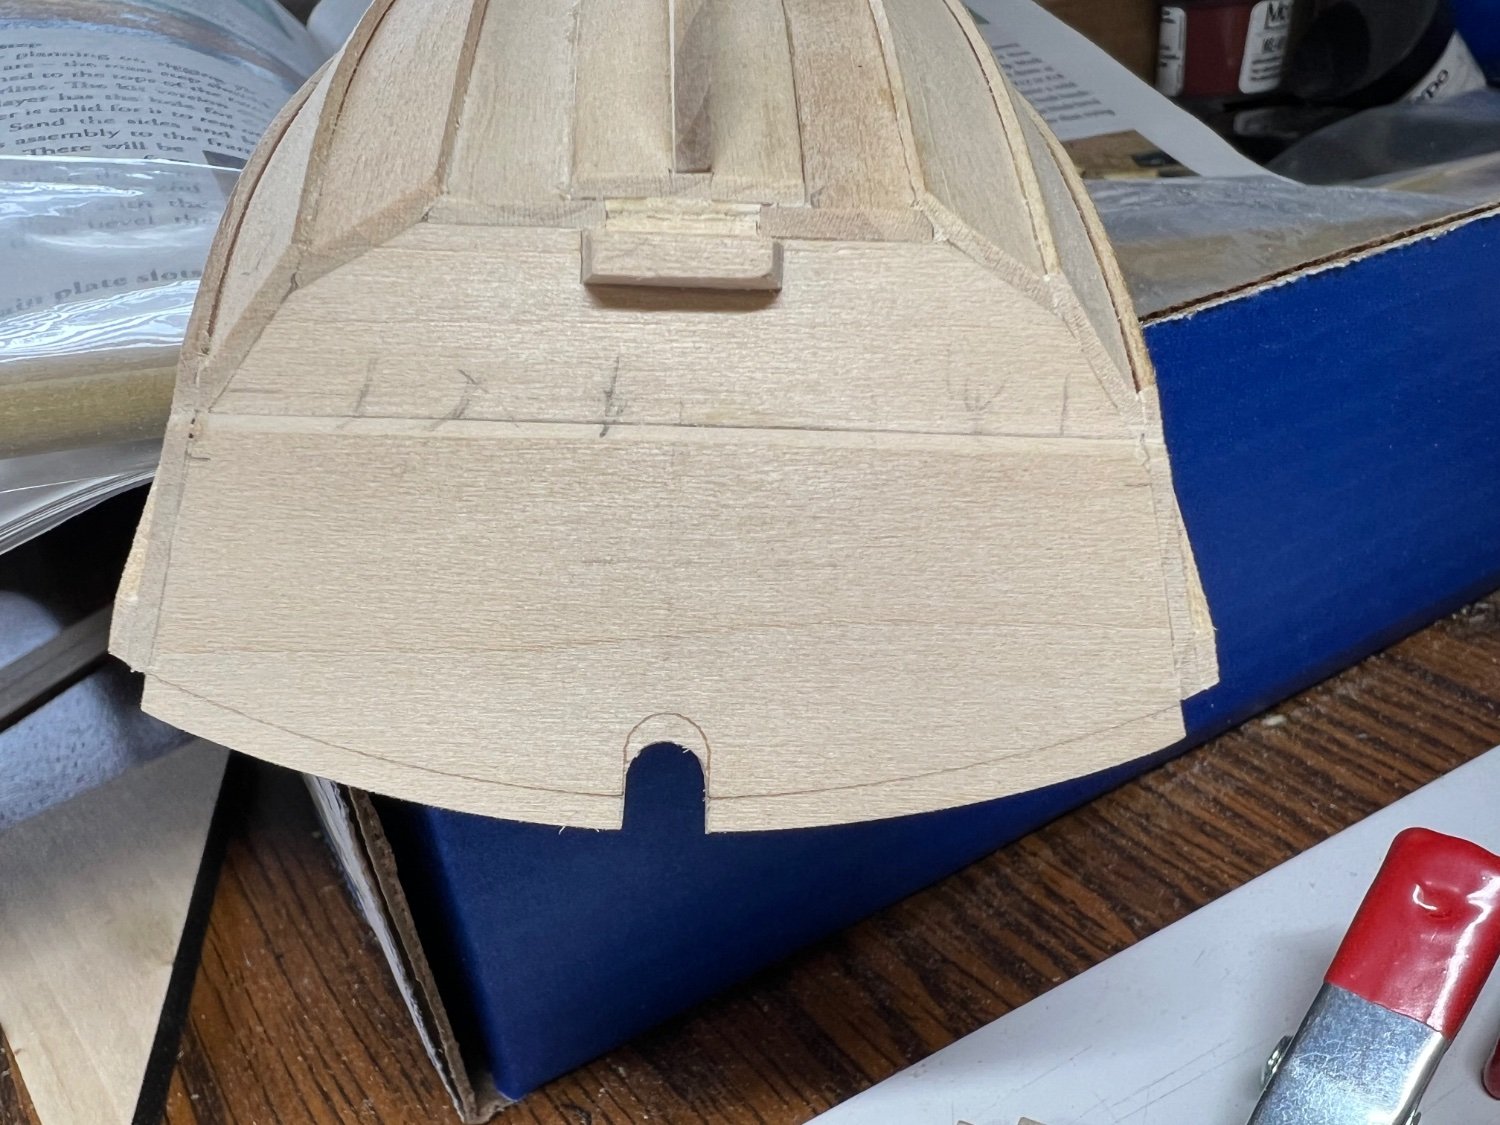
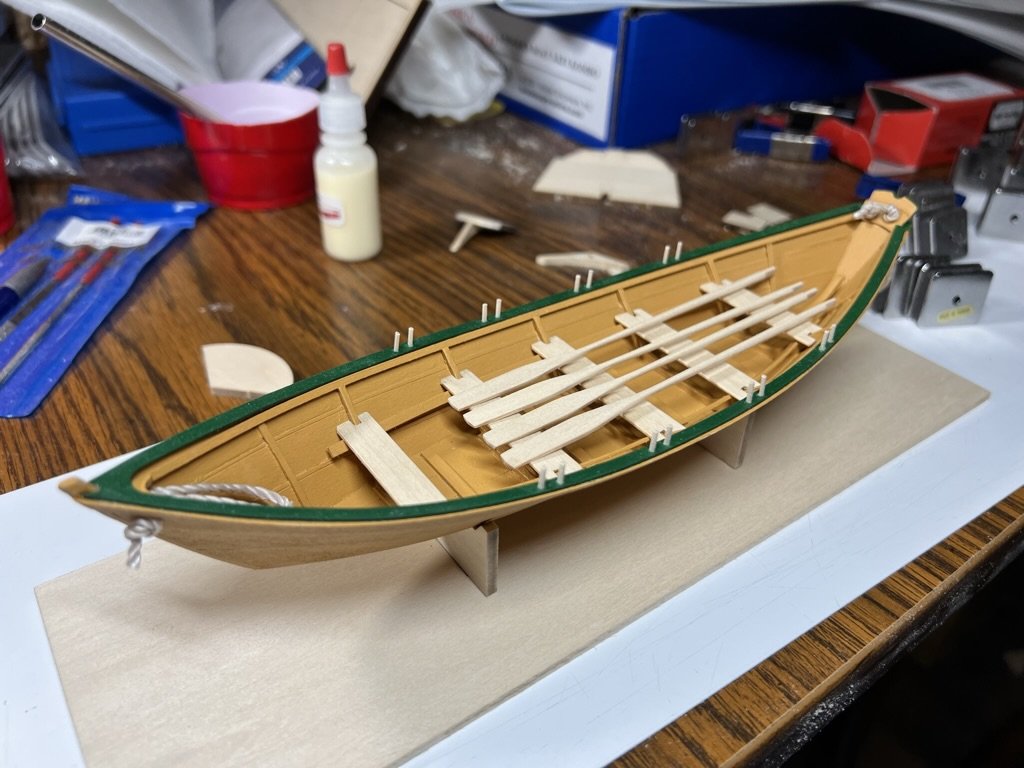
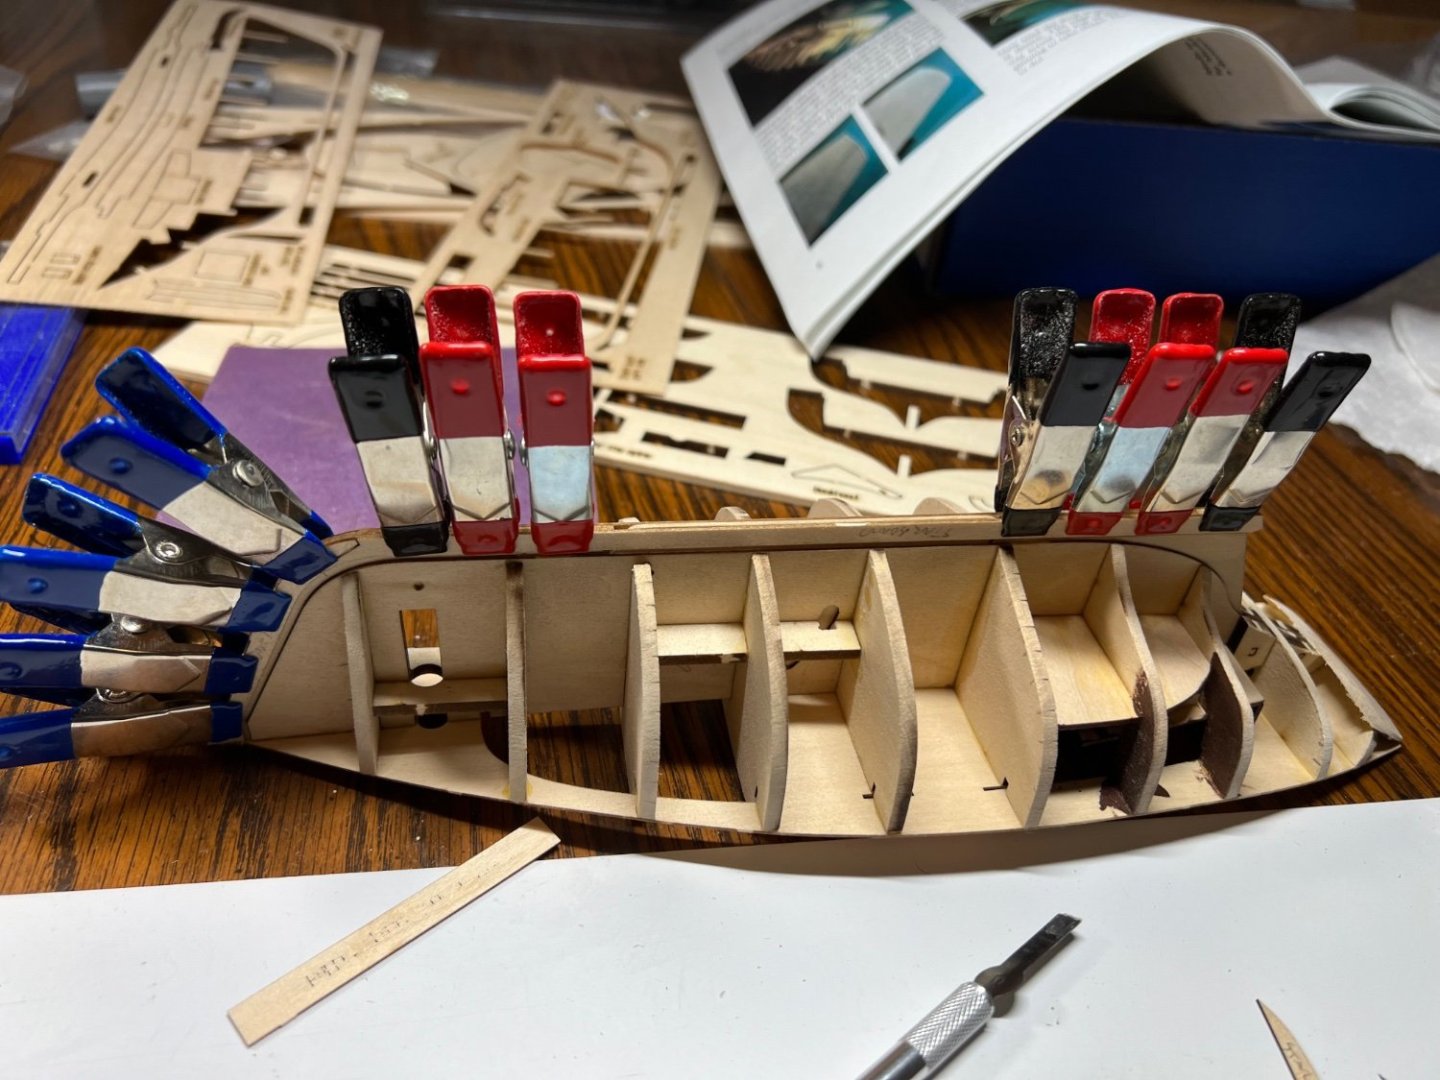
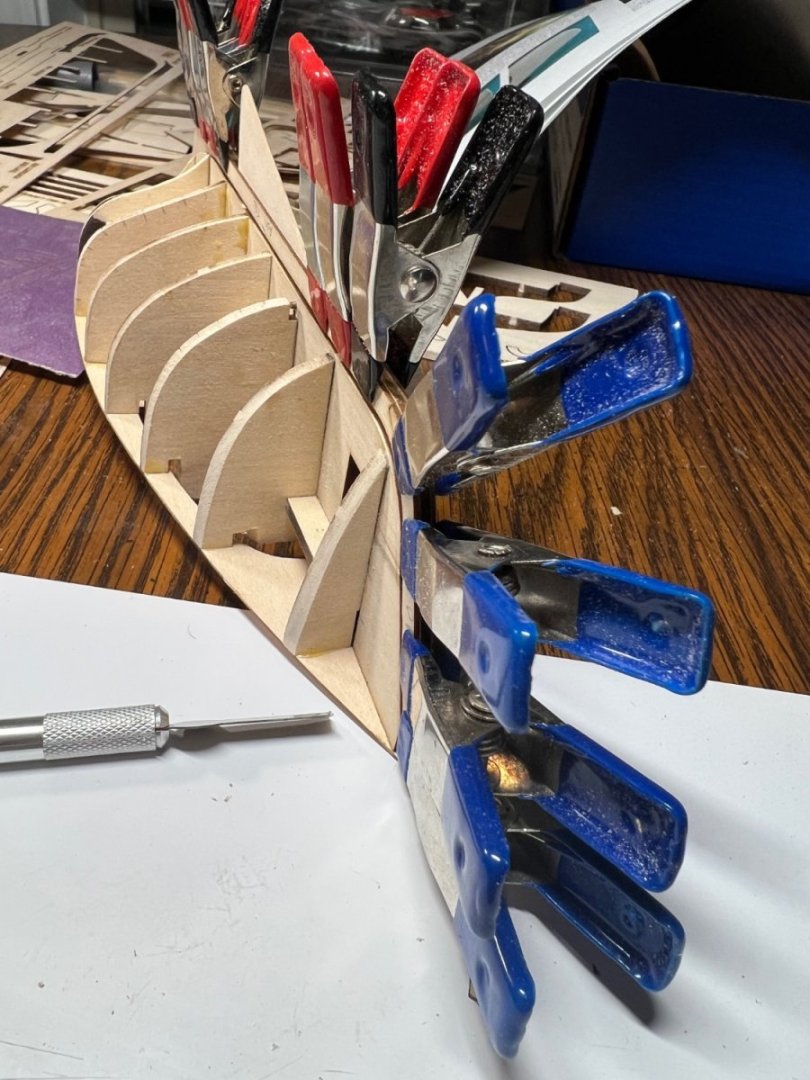
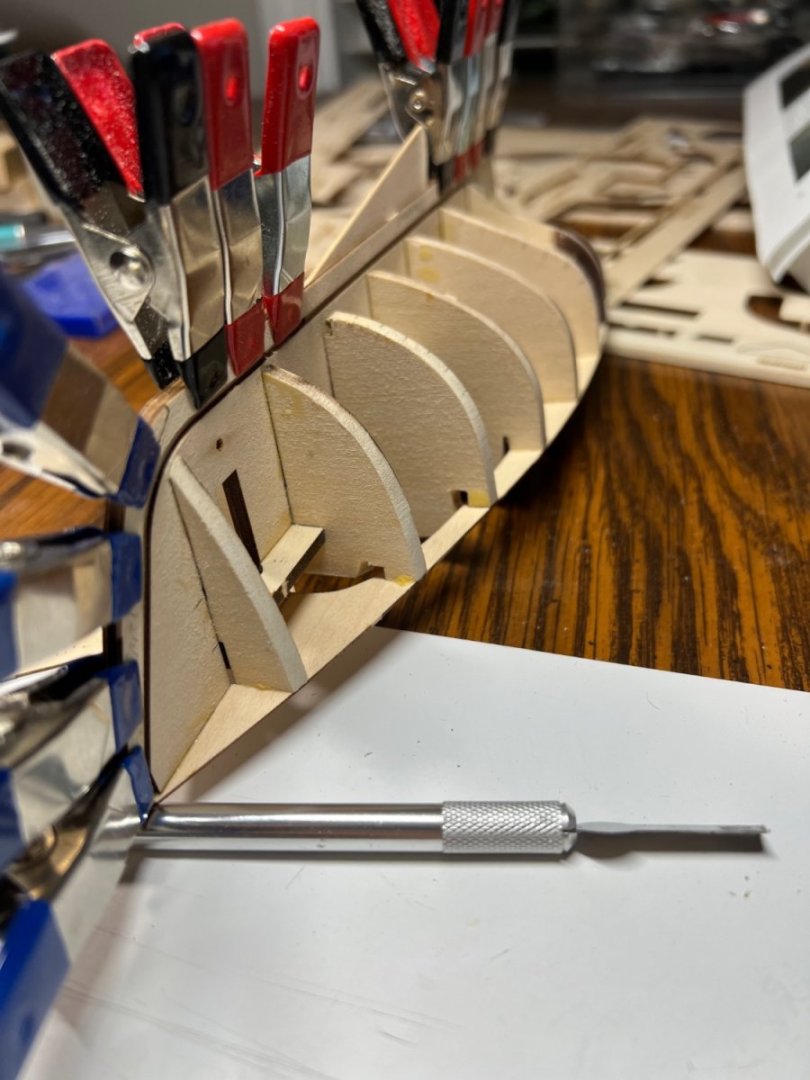
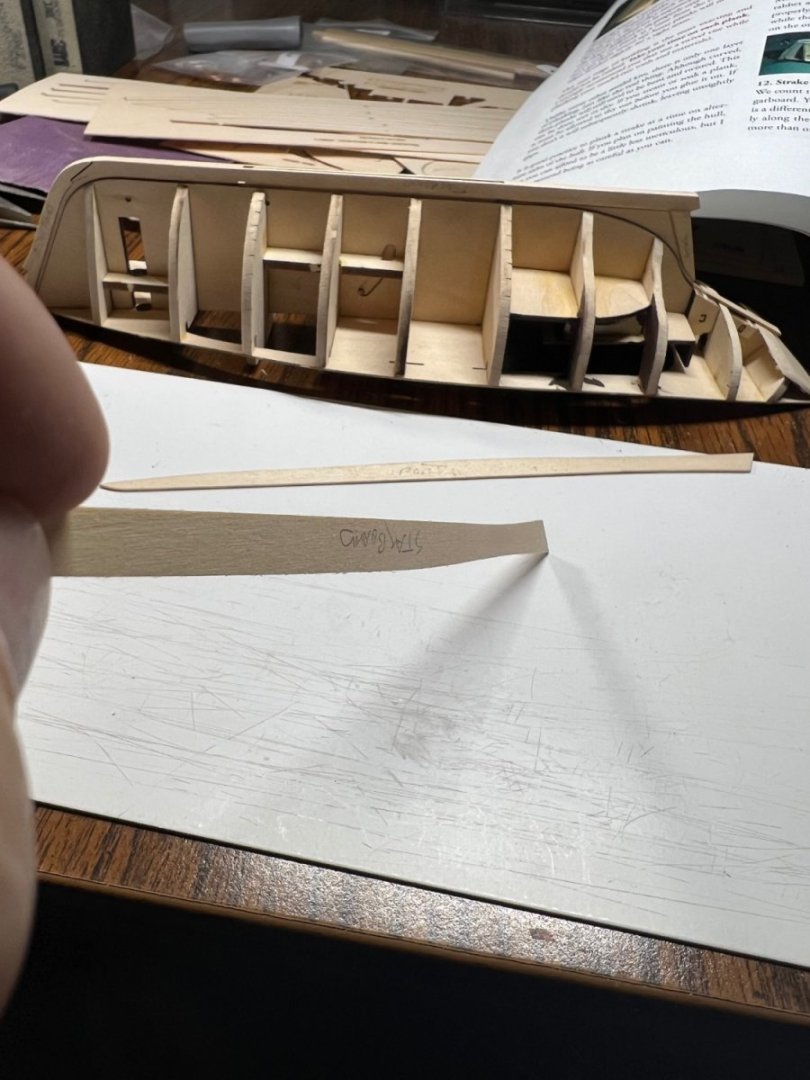
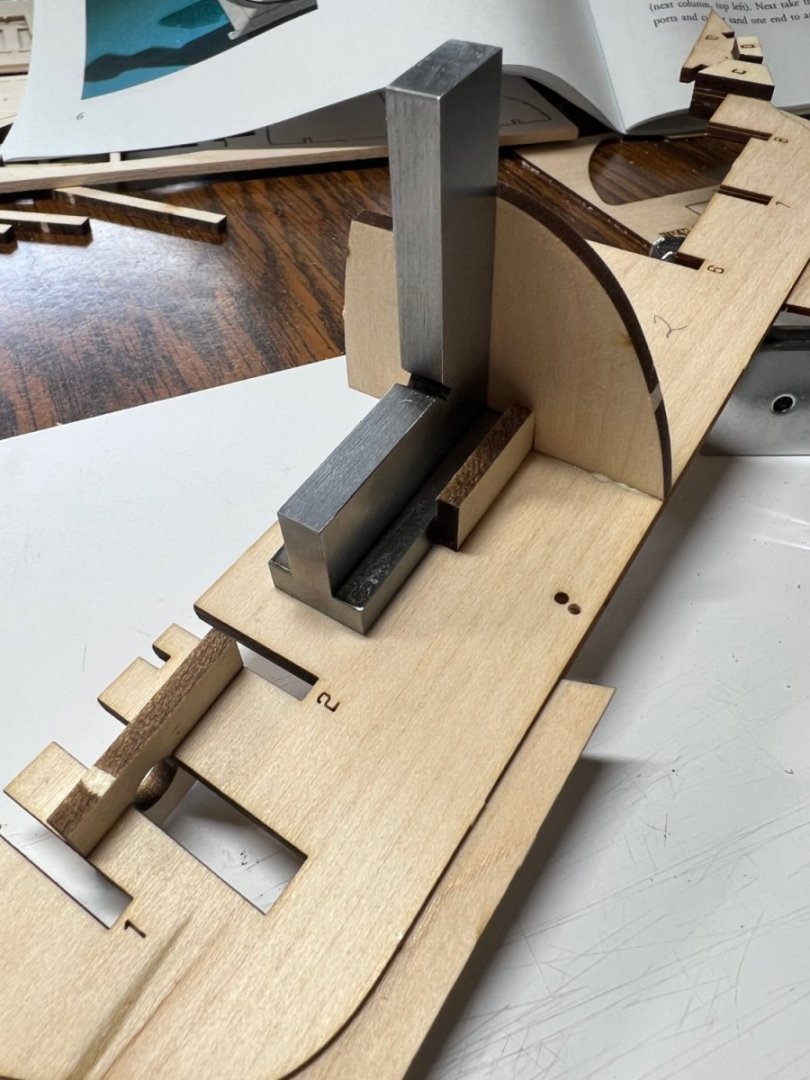
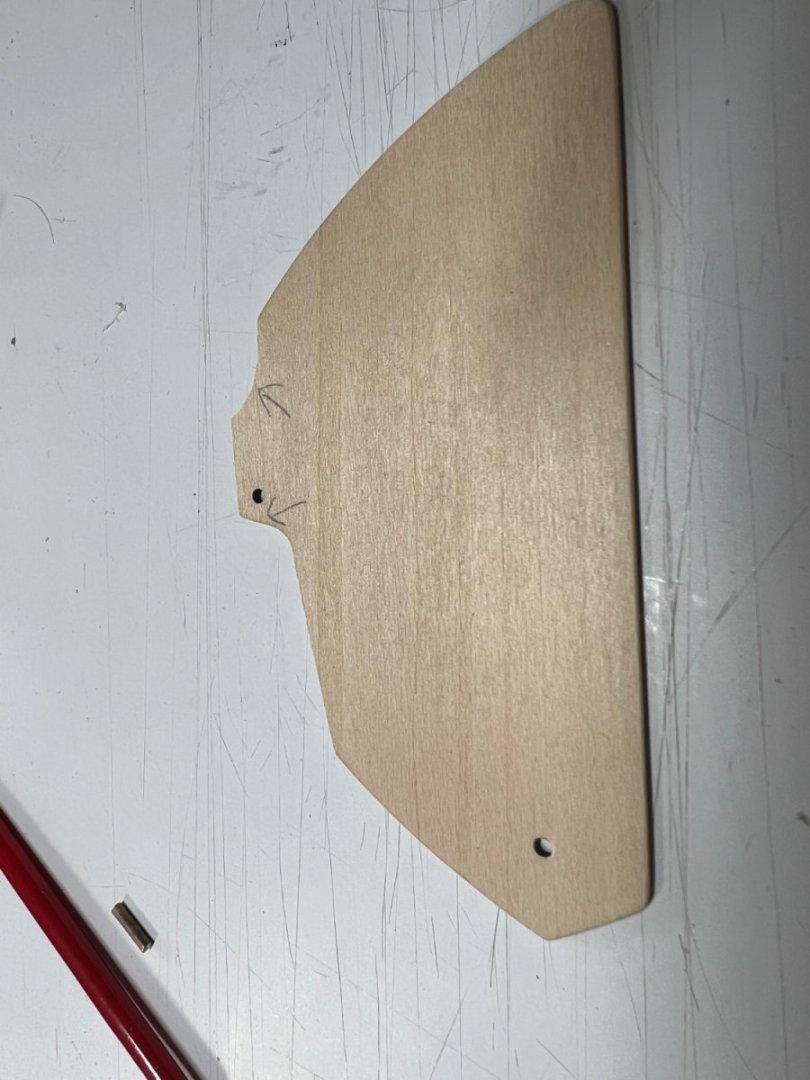
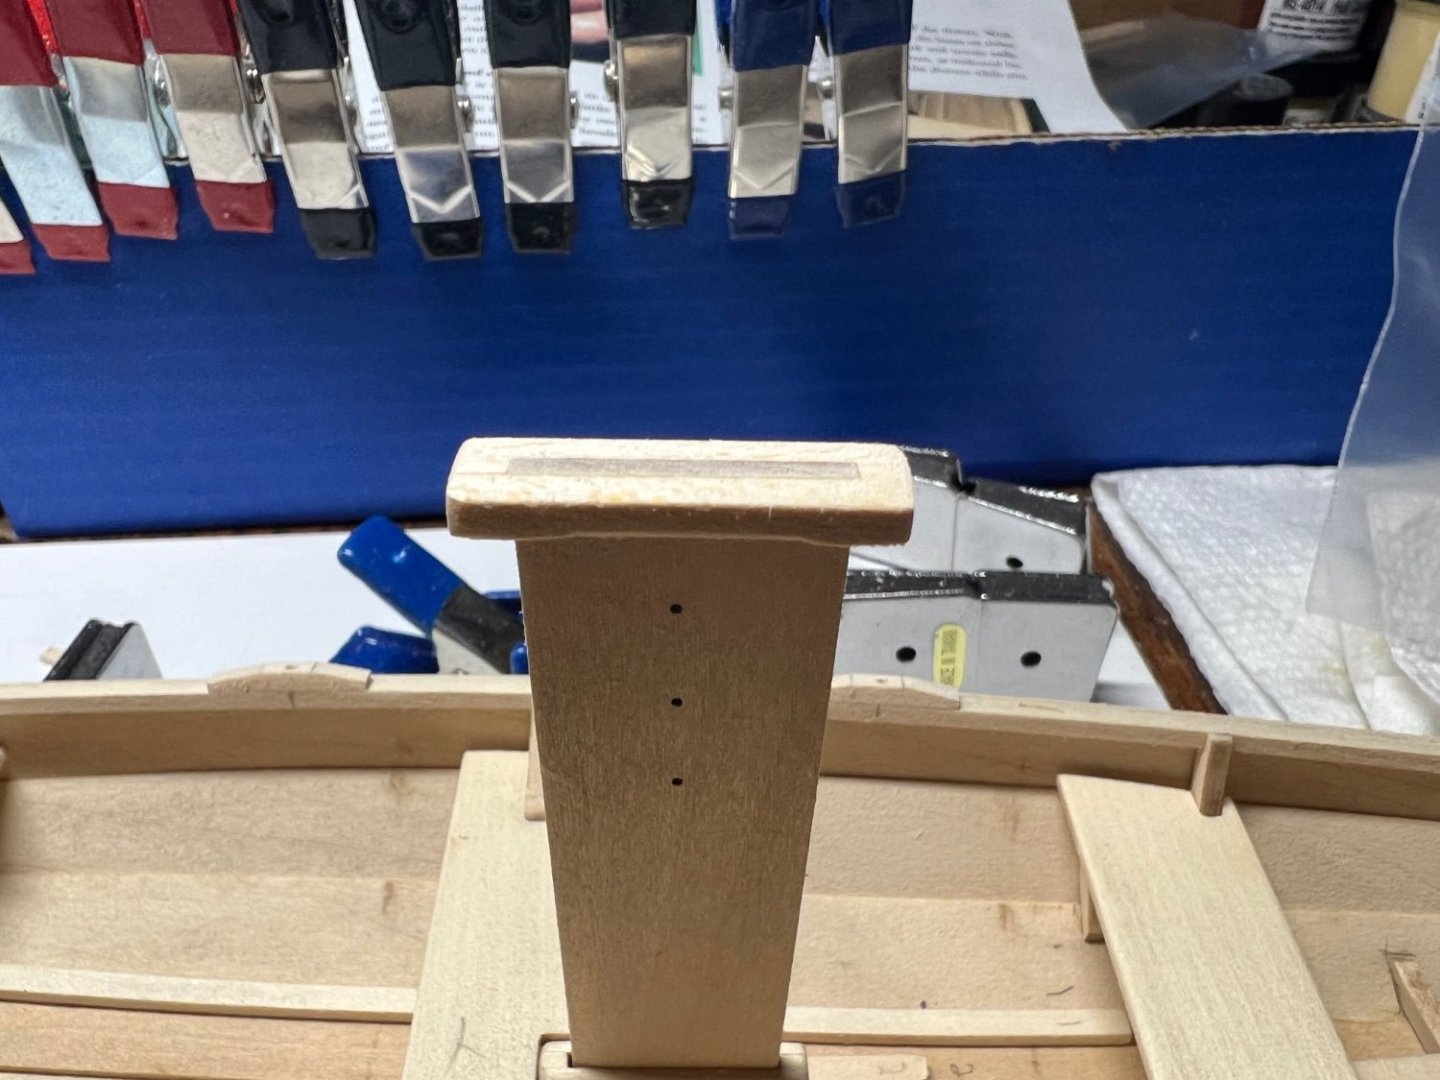
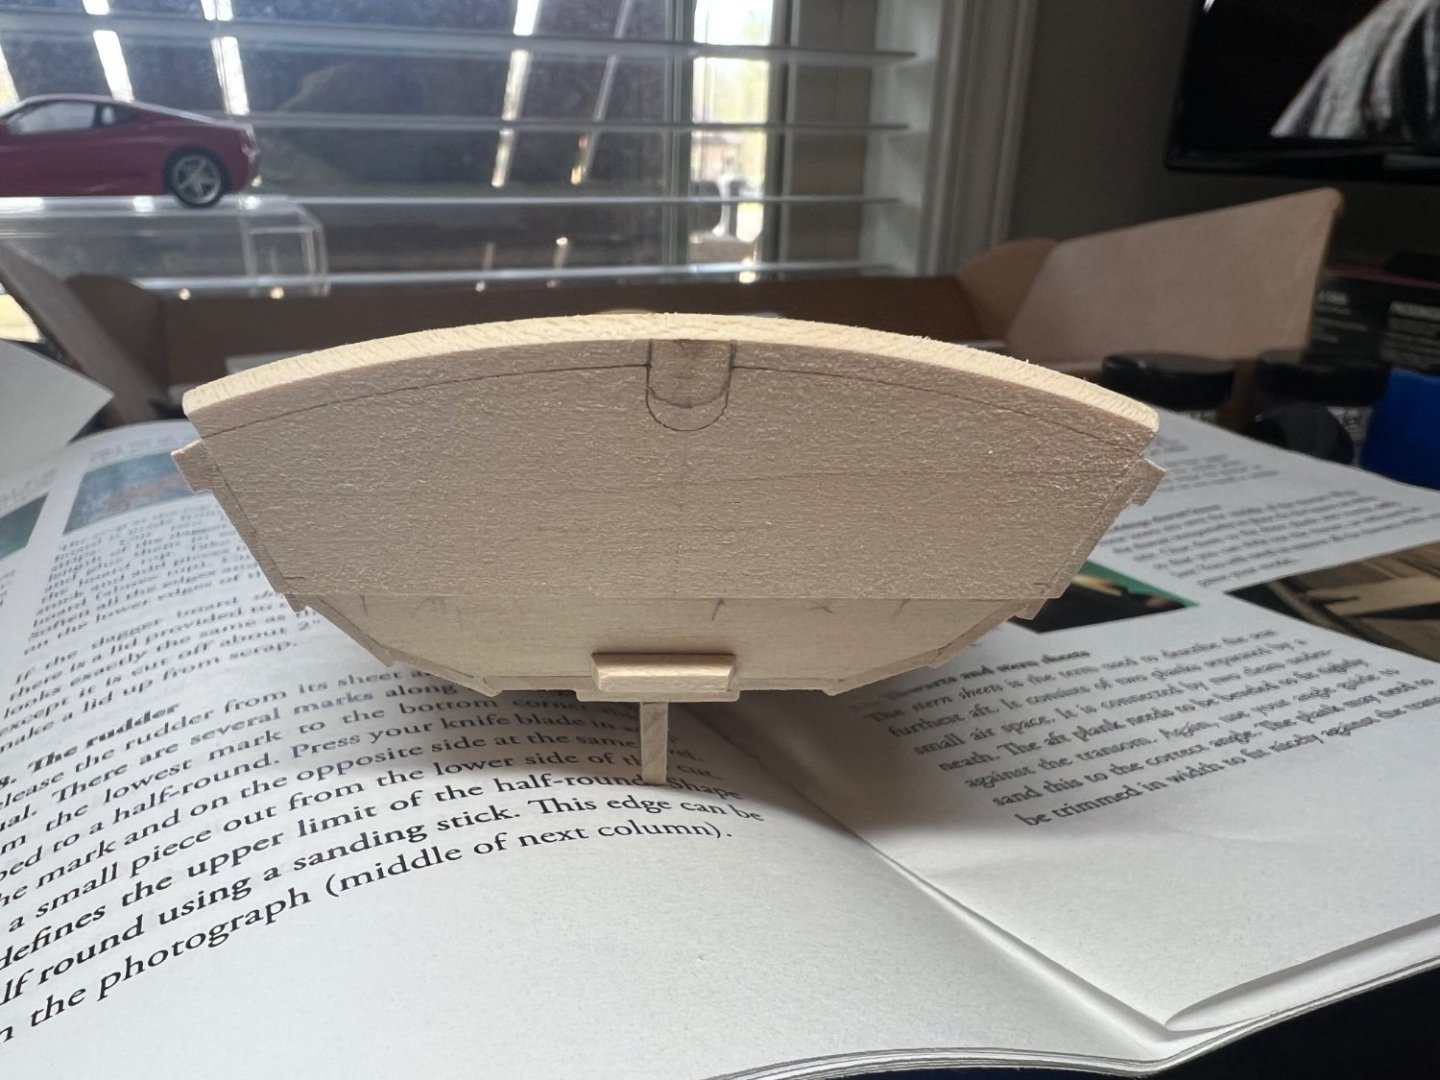
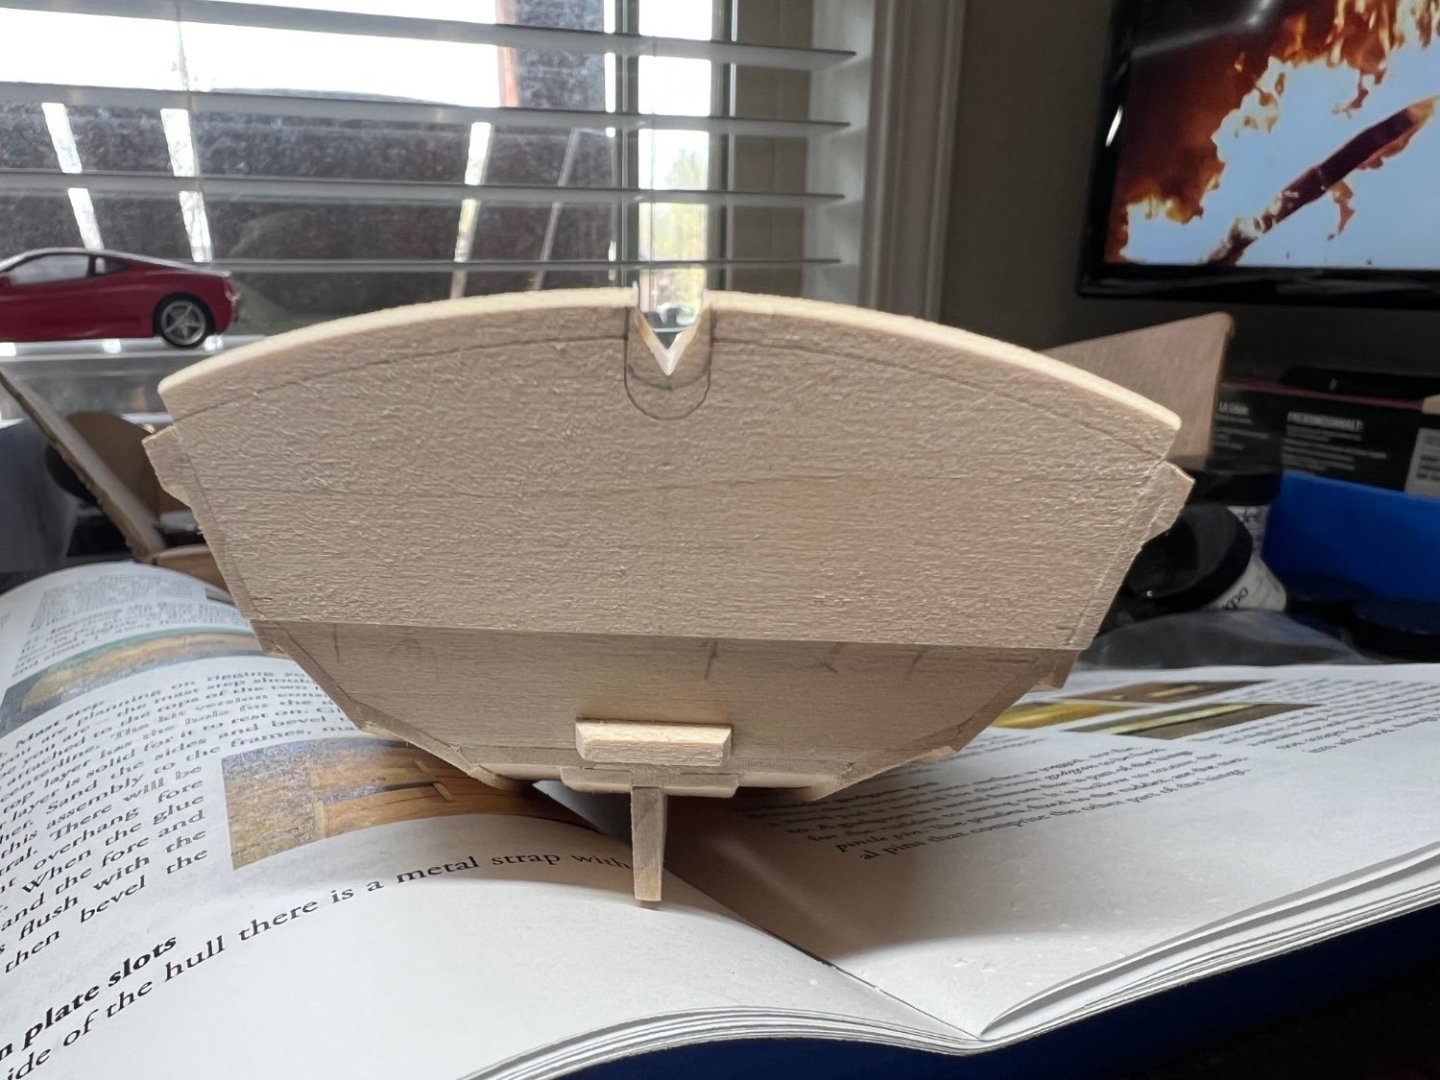
Step 9, Fairing the hull. Sanding until it all flows, it needs a bit more in areas. It says to use a sanding dowel, I don’t see it, in the hollow areas. Not sure what hollow areas are talked about. Step 10, Stem, keel and sternpost. I almost got this right, I ending up with one side offset a bit, nobody will know lol. The garboard and planking is next. I’m fascinated with how the parts were designed. How the curves were discovered. The lengths and the angles. It’s a complex 3D surface, the planks will likely fall into place with a little bit of work. The lower portion of the garboard settles into a perfect straight slot, but it has a curve to the edge that must lay flat when placed in its proper location. The last picture shows the curve. A good place to stop for the day. 2 movies work time lol


- 40 replies
-
- 5
-

-
- Model Shipways
- Muscongus Bay Lobster Smack
- (and 1 more)
-
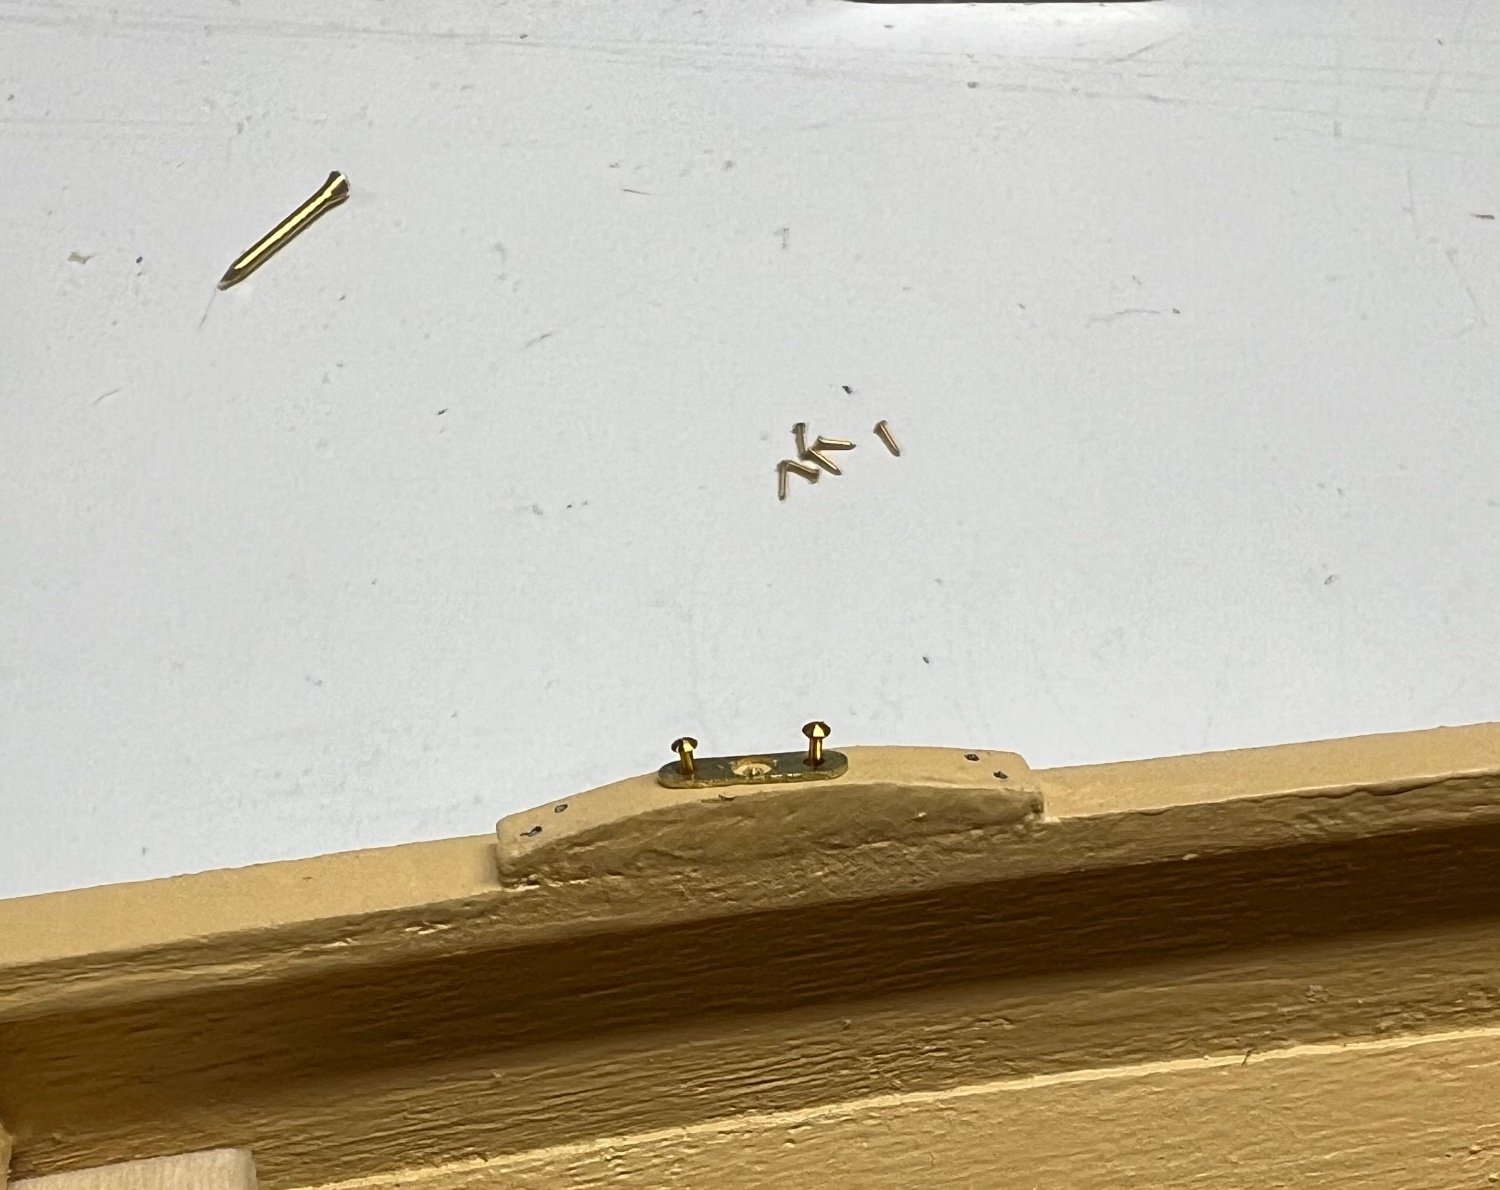
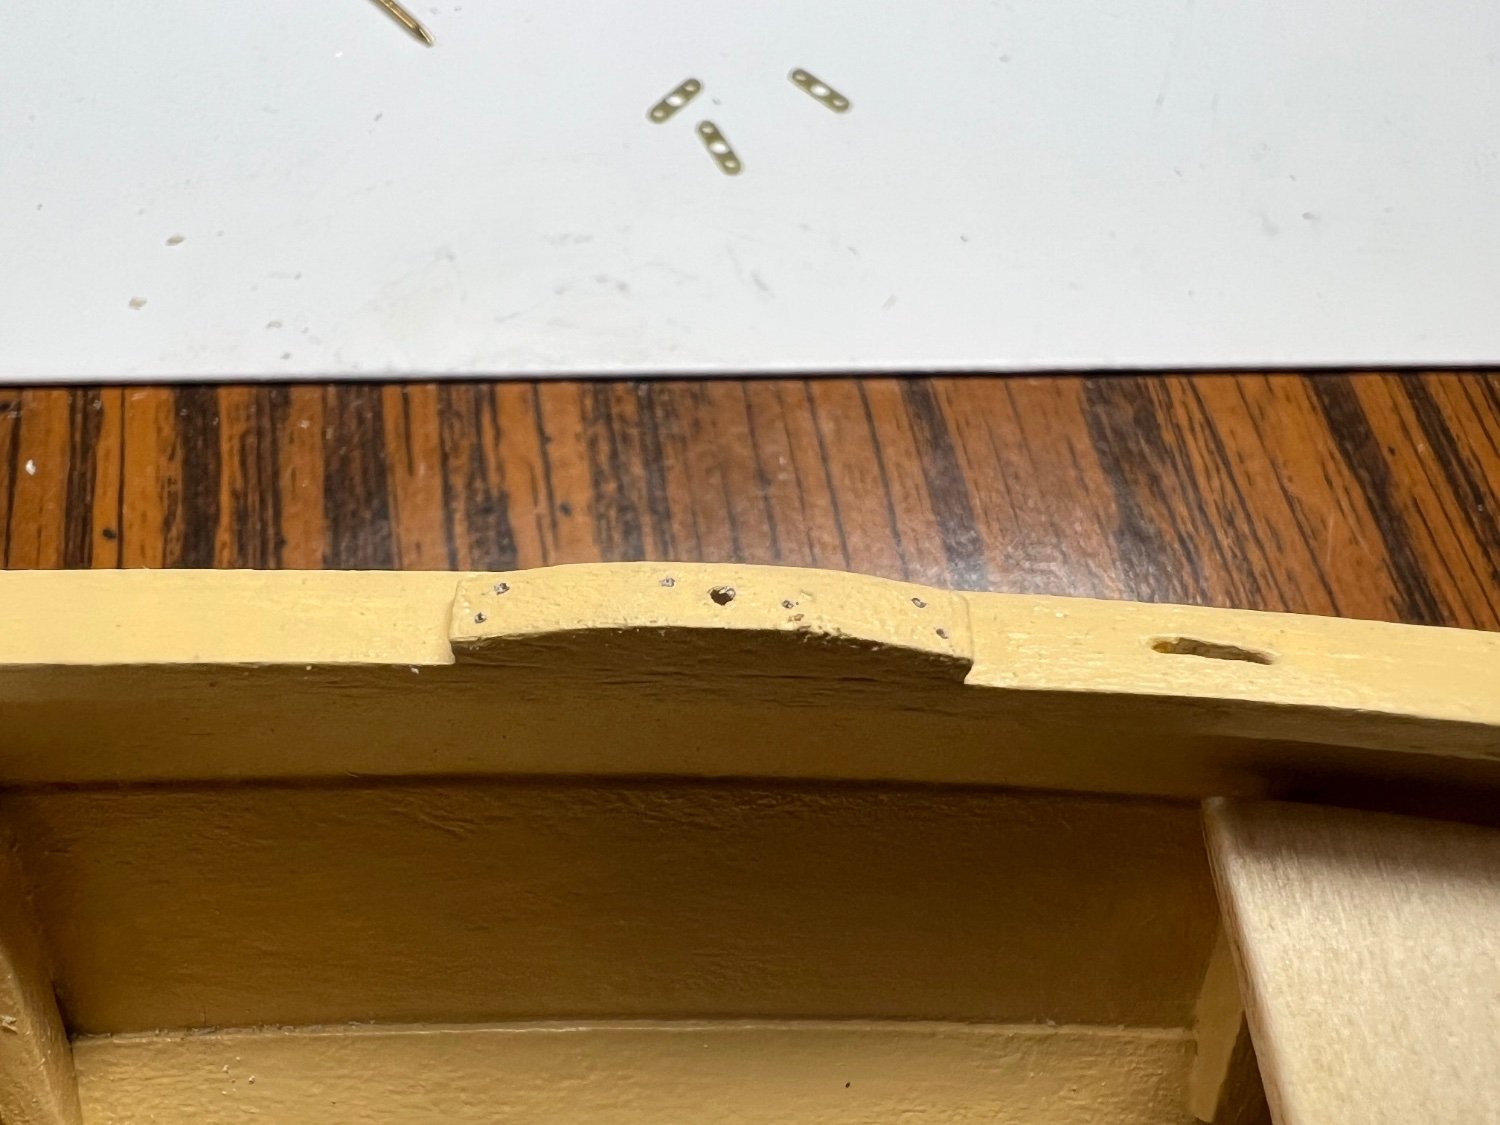
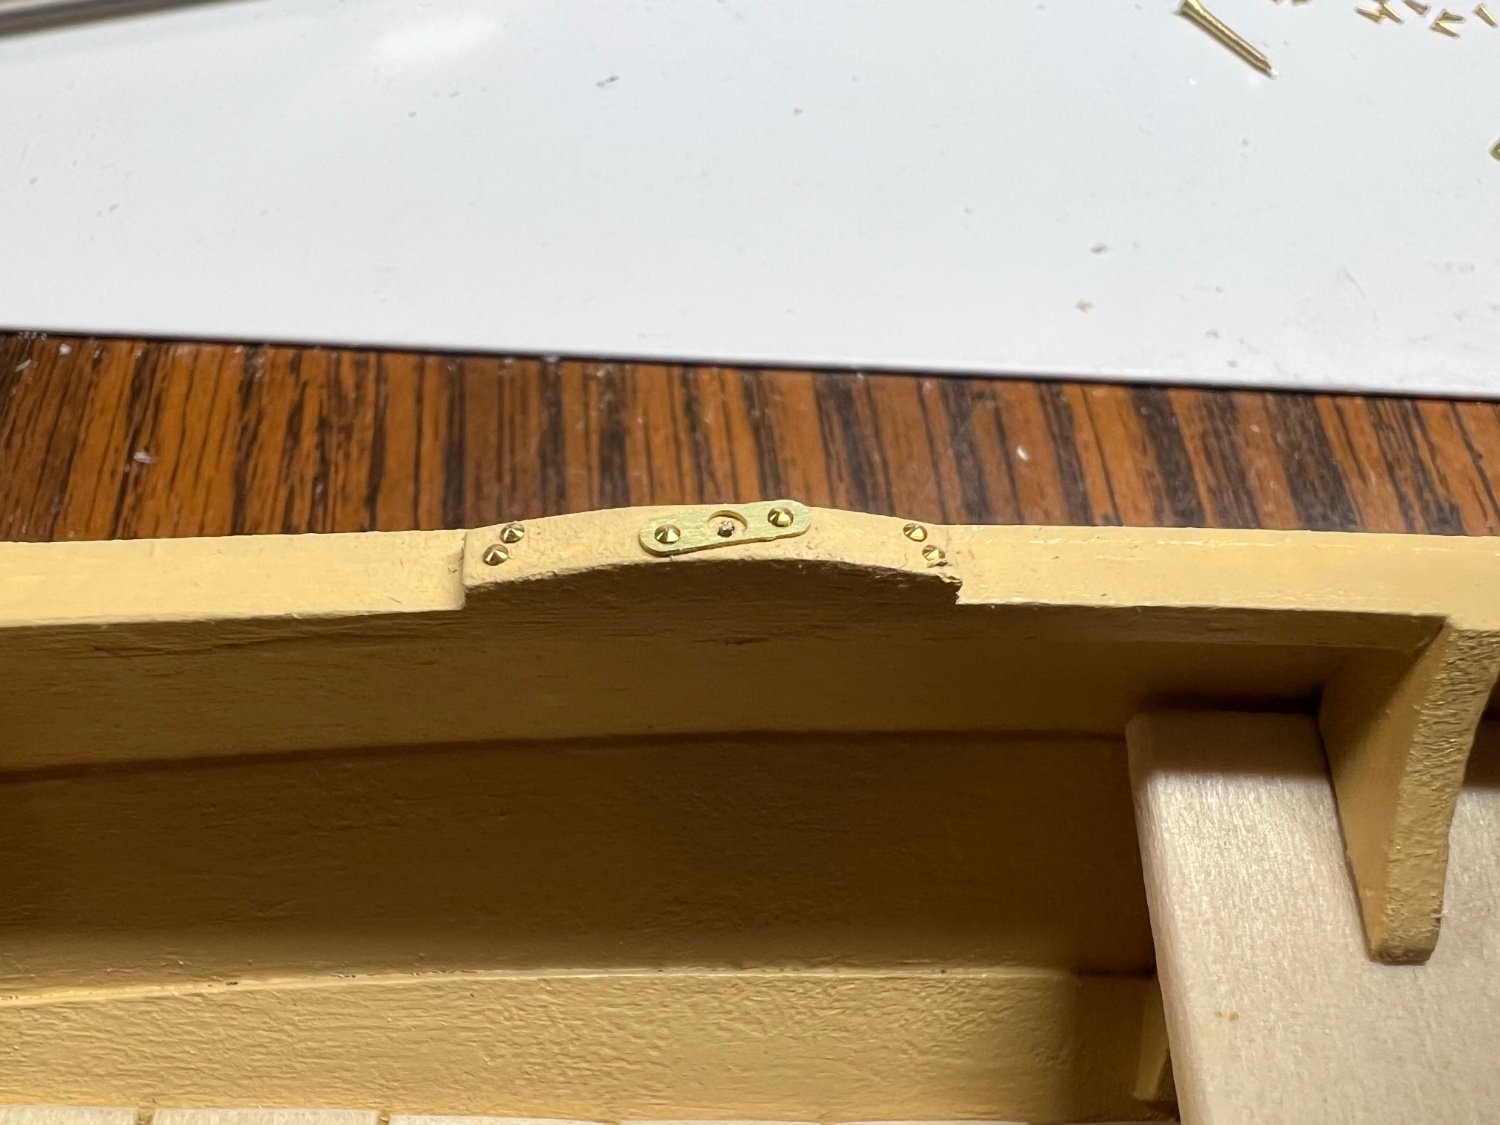
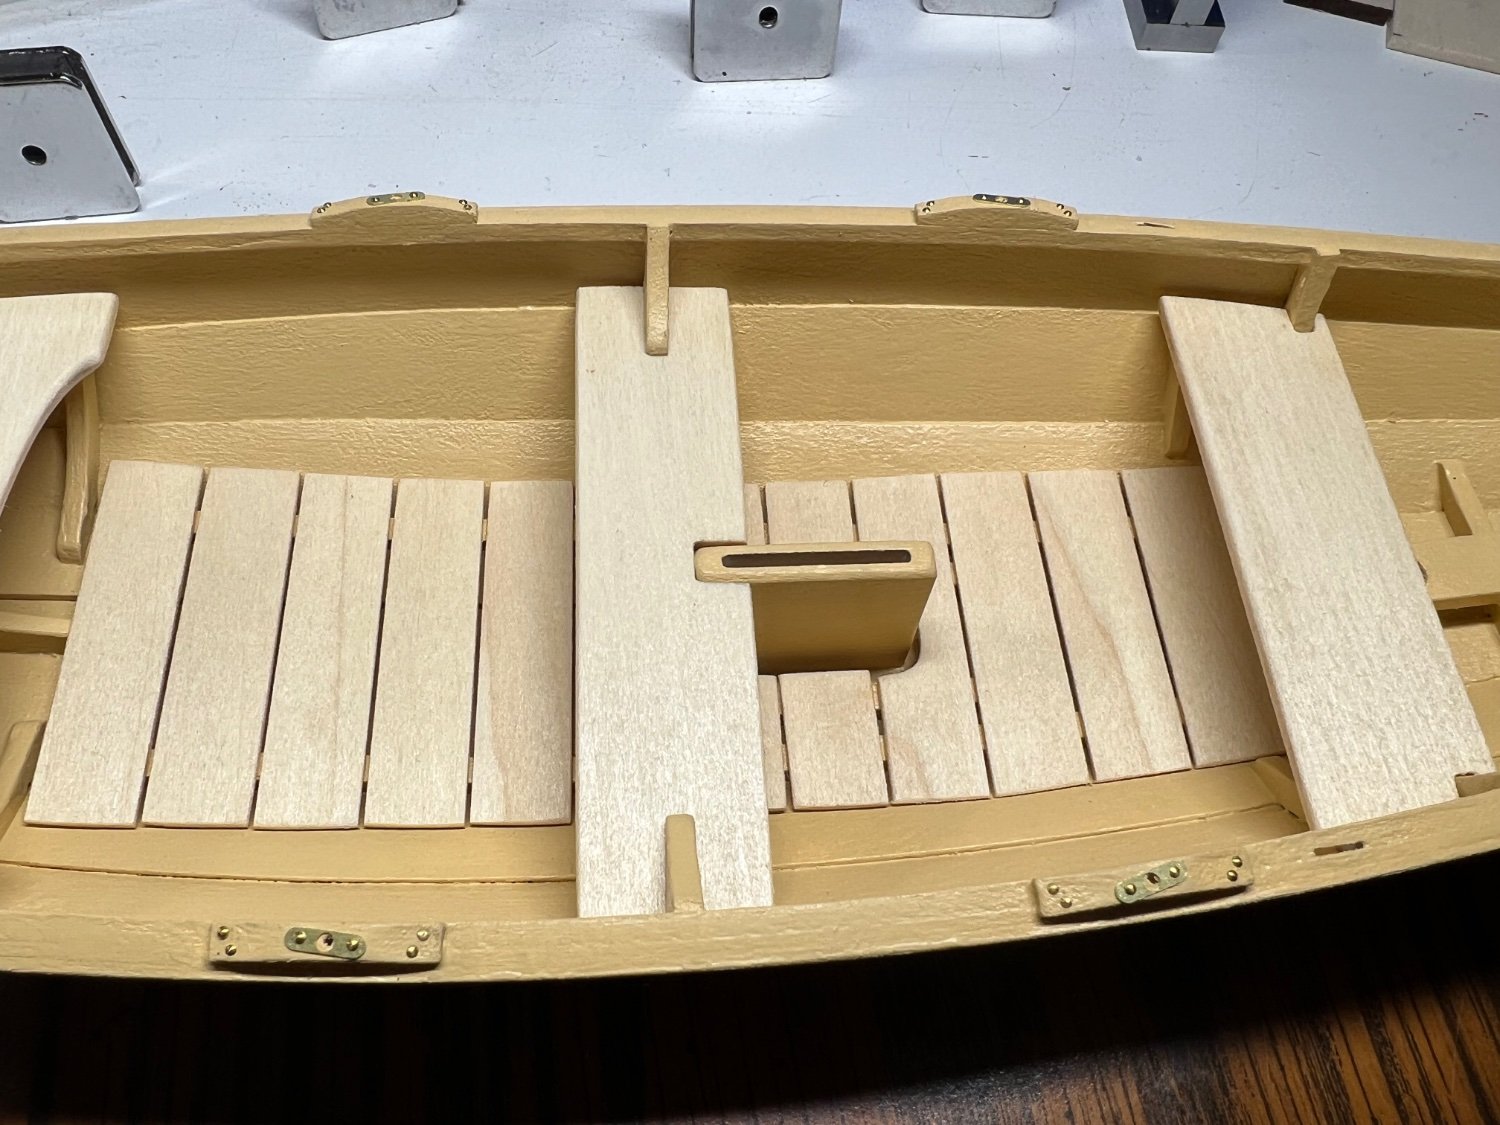
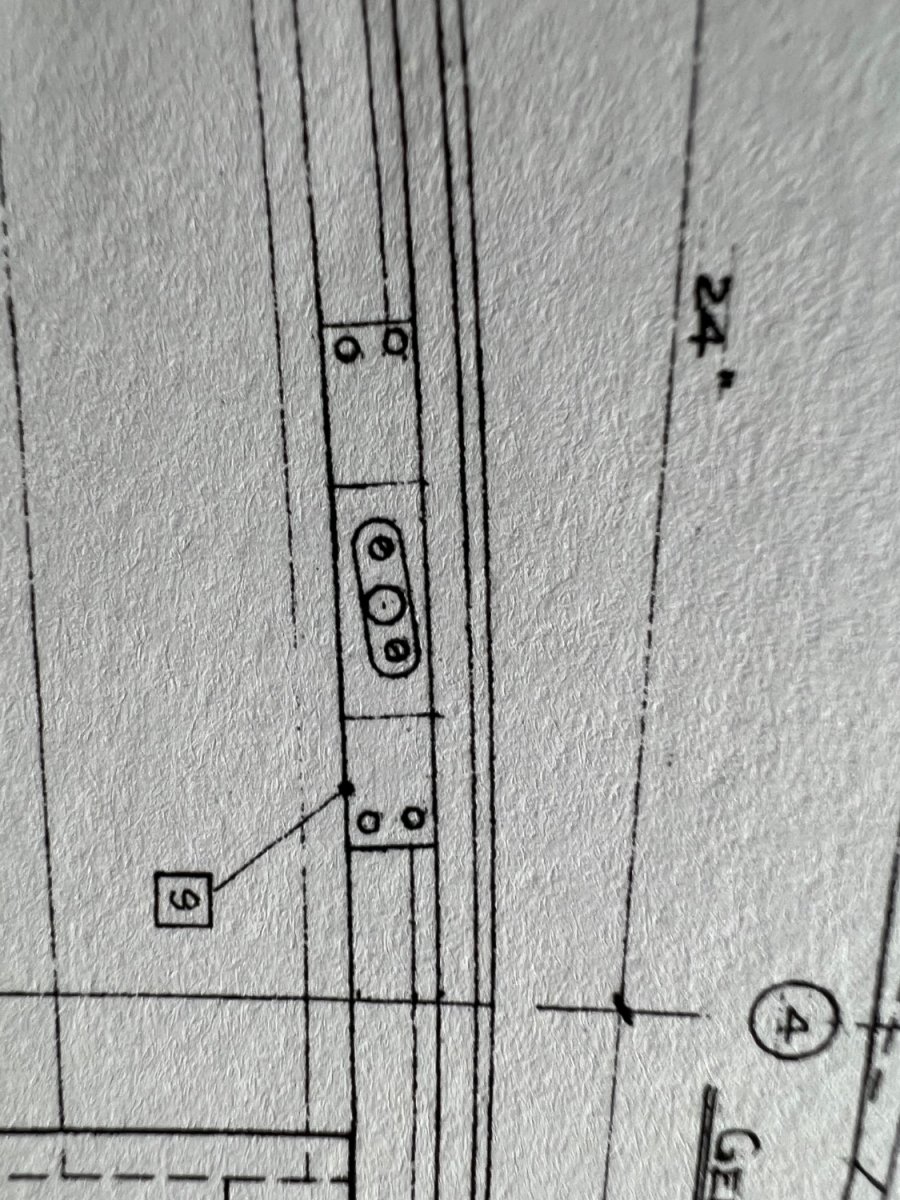
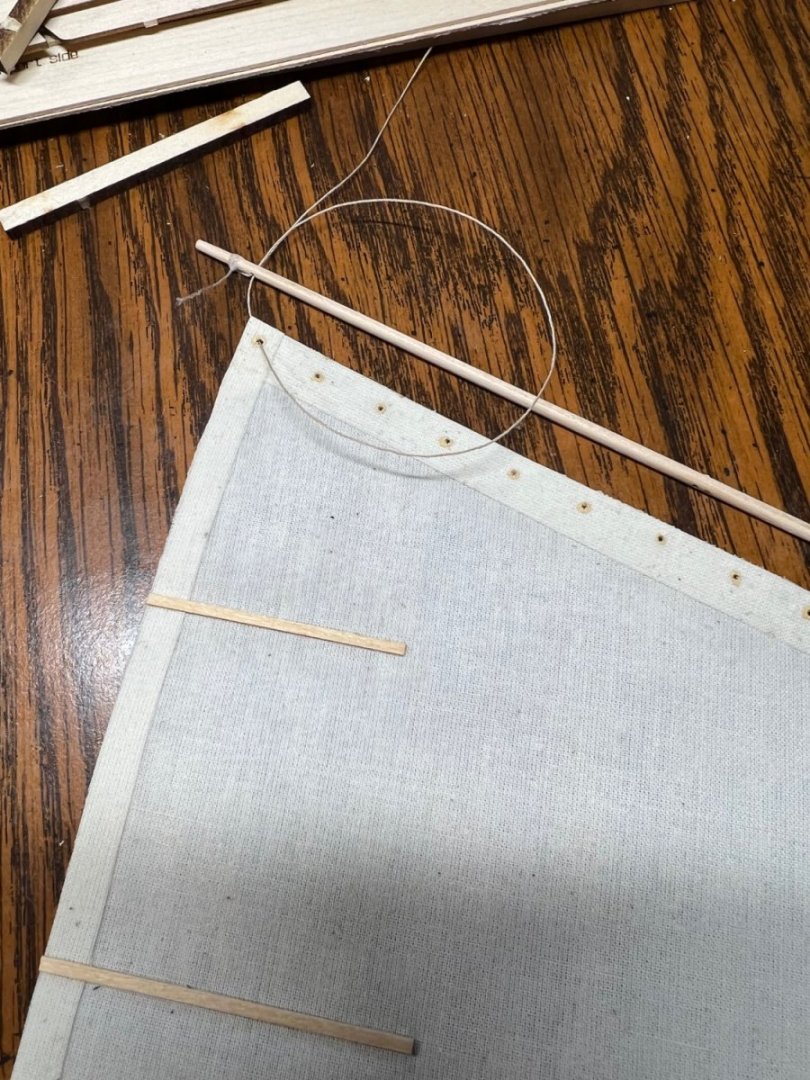
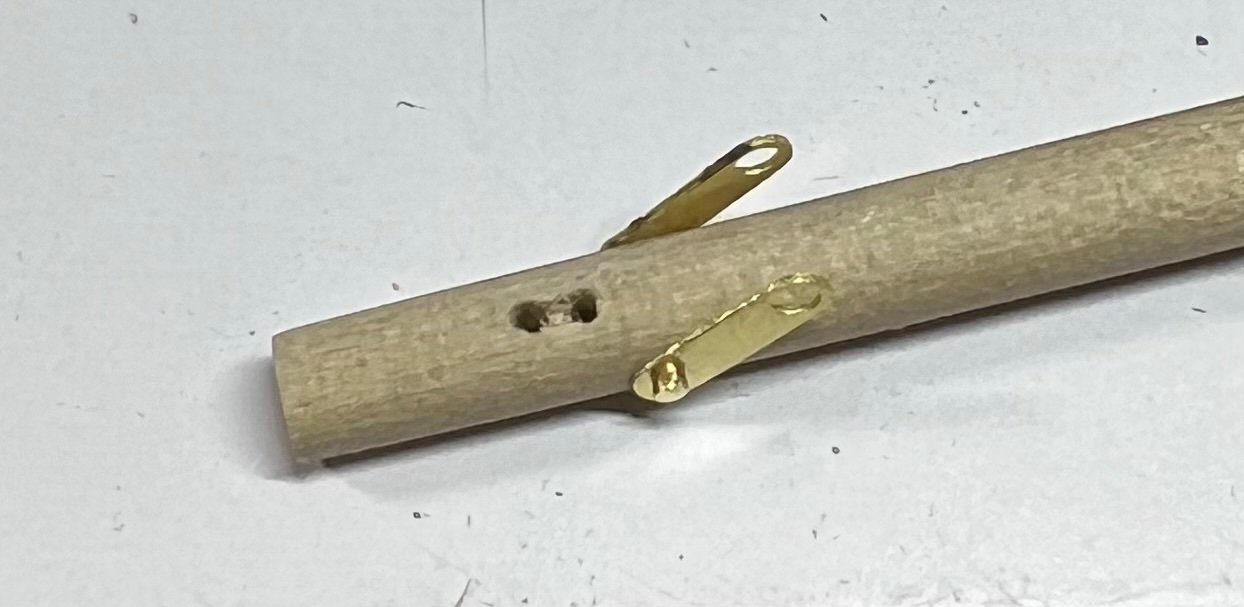
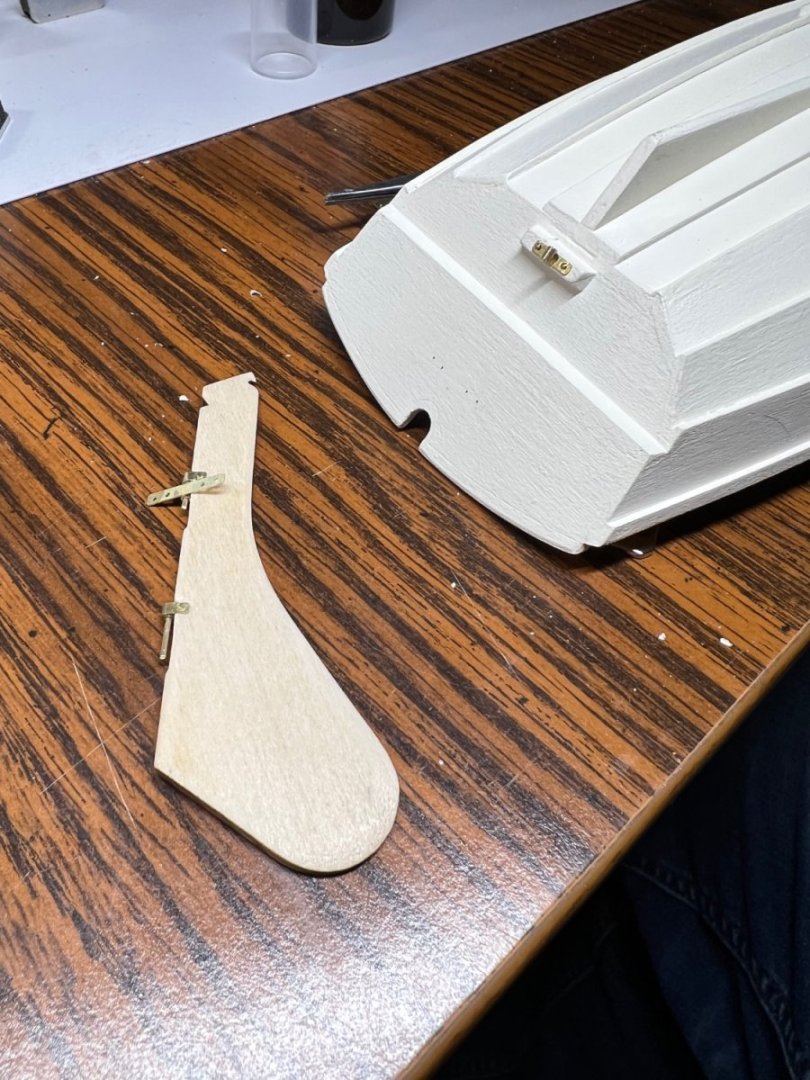
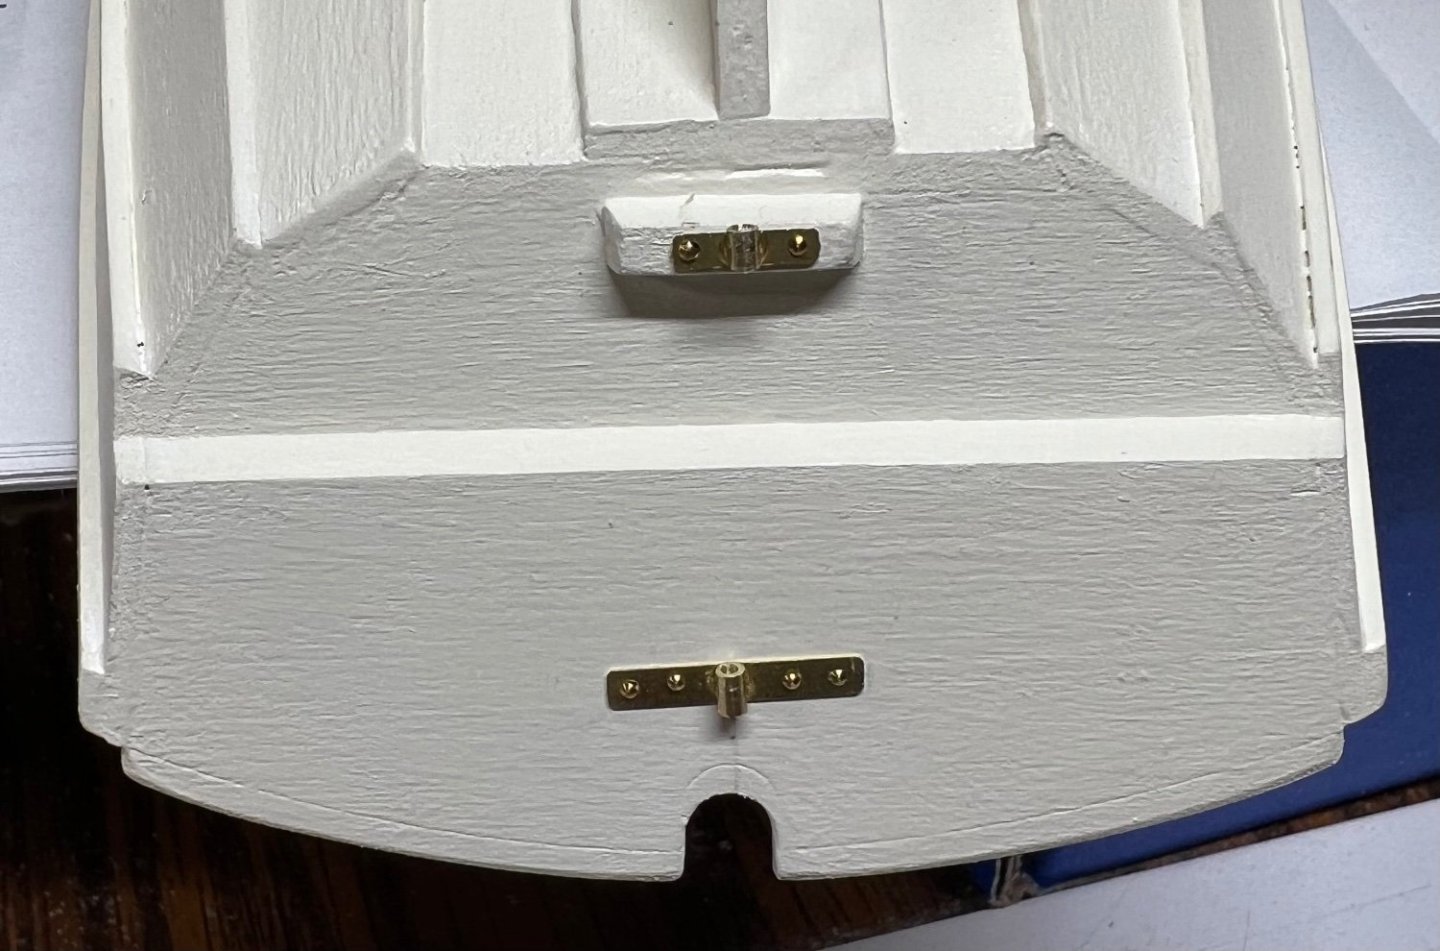
@Lieutenant Dan thank you for joining and making your first post on my build thread. I’m honored. I forgot to mention in my build notes, the small brass rod was a perfect nail for the side line attach points, I made the slot to big, but the small brass was a perfect fit in the lower hole. I think this is what you said you did also. The tiller holes were made with a pin vise drill. I have every bit from 40-80 now. It’s so very close to being many pieces. I’m shocked it didn’t break. My rivet curved when I tried to mushroom it. I bought a torch later to make the brass soft for the next build. The tiller is a hot mess but you can’t see it lol. I added the nails to make rivets like the real plans, I thought I would break it doing it. It fit on the rudder top with no extra work, dumb luck. I was harsh about the instructions. They assume one knows how to do things, which they don’t. But I stuck with it and learned how to do them. One thing for sure, no two models will be exactly the same. Everyone will make their own version. @Lieutenant Dan make a build post and have fun with it. I’m working my way to a Bluenose, I started one in the mid 2000s and never got close to finishing it. It was way to much for a first boat.
- 72 replies
-
- 3
-
-
- Norwegian Sailing Pram
- Model Shipways
- (and 1 more)
-
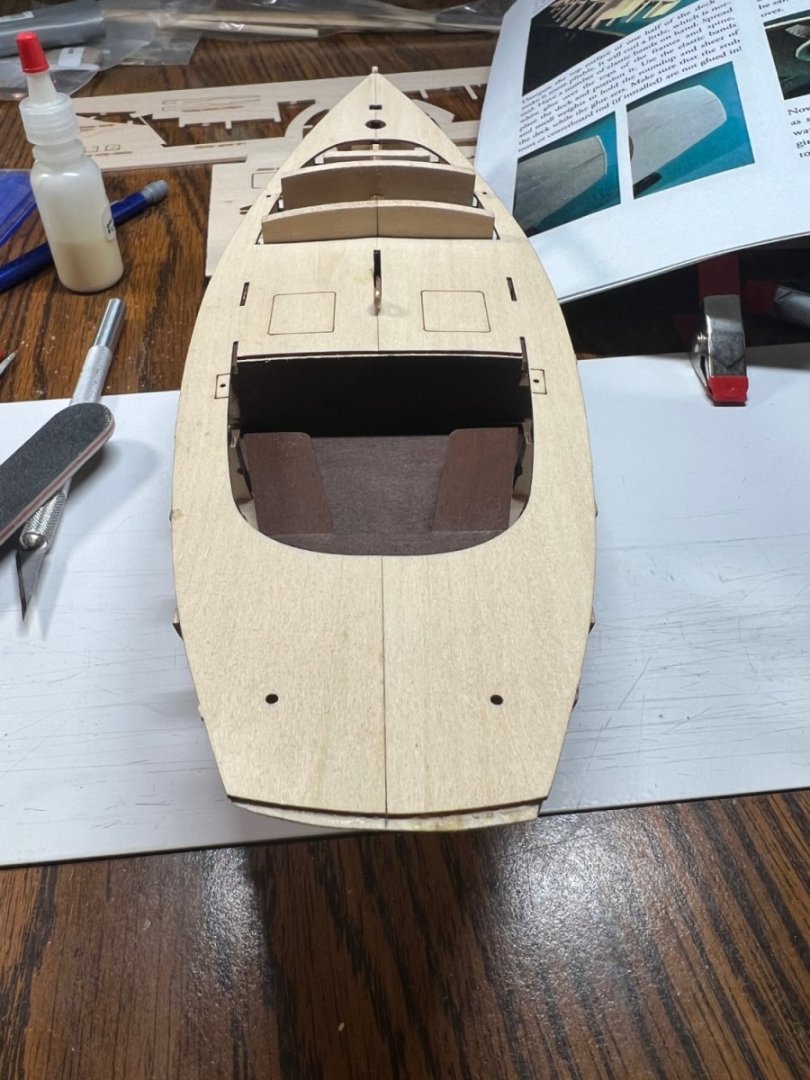
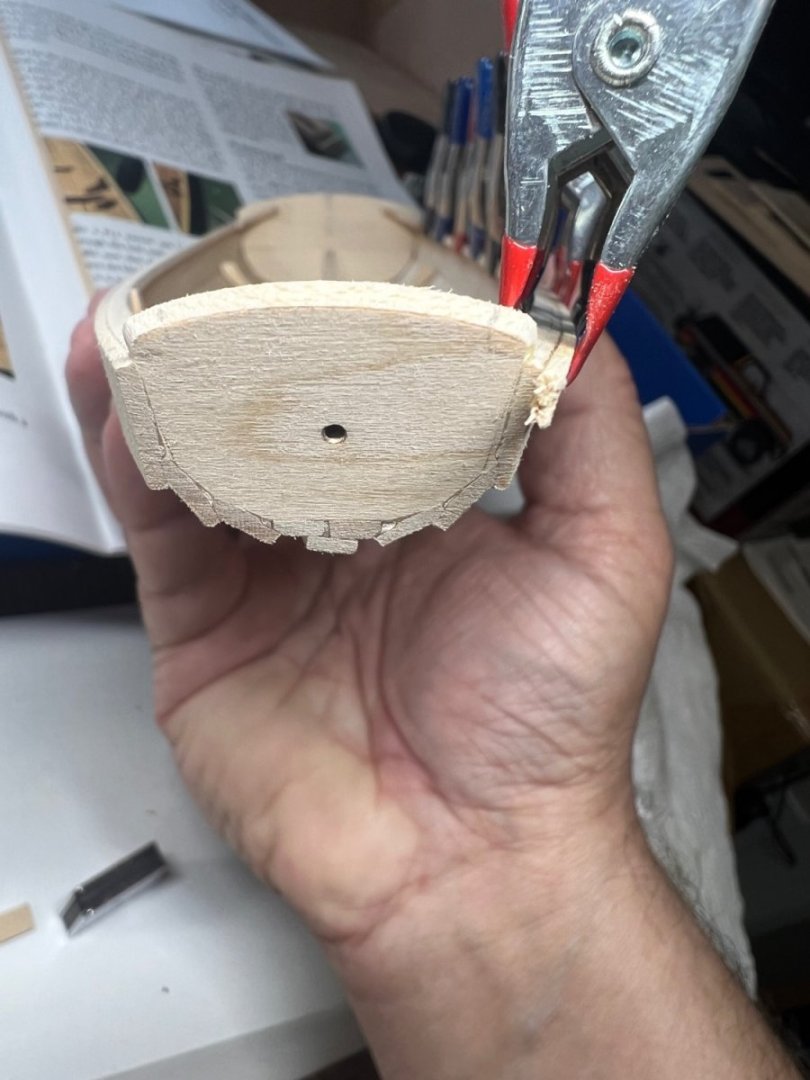
I trimmed the deck former, it left the center higher. I saw this after I had one side done. It had a wave in the deck. I sawed off one saw blade of the former and made the deck flow smoothly. I hope this works out. Lol. It was notched there so, it looks like it flows well. I think the notches are the deck formers are just for this ready to not have a tight corner to fight with. The deck went on very easy compared to what I thought it would go like.

- 40 replies
-
- 3
-
-
- Model Shipways
- Muscongus Bay Lobster Smack
- (and 1 more)
-
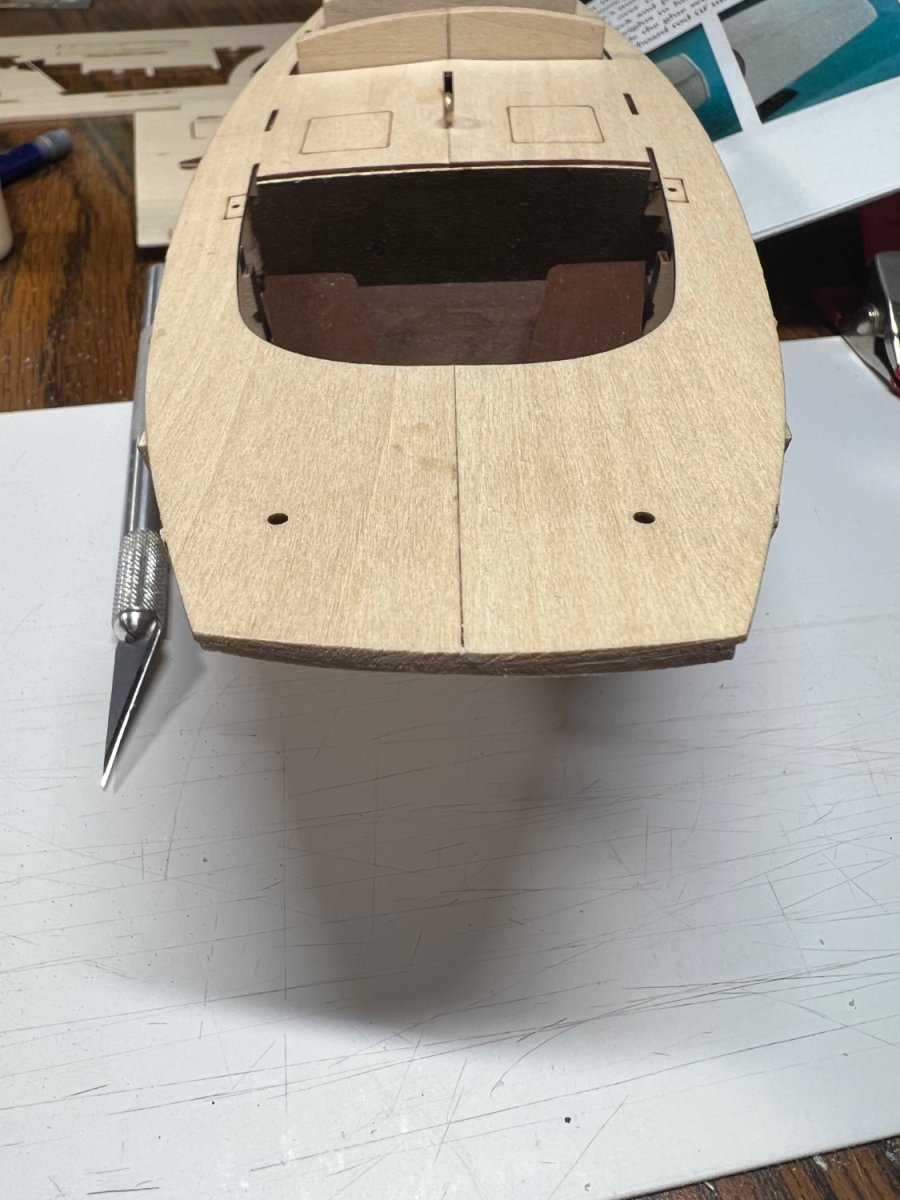
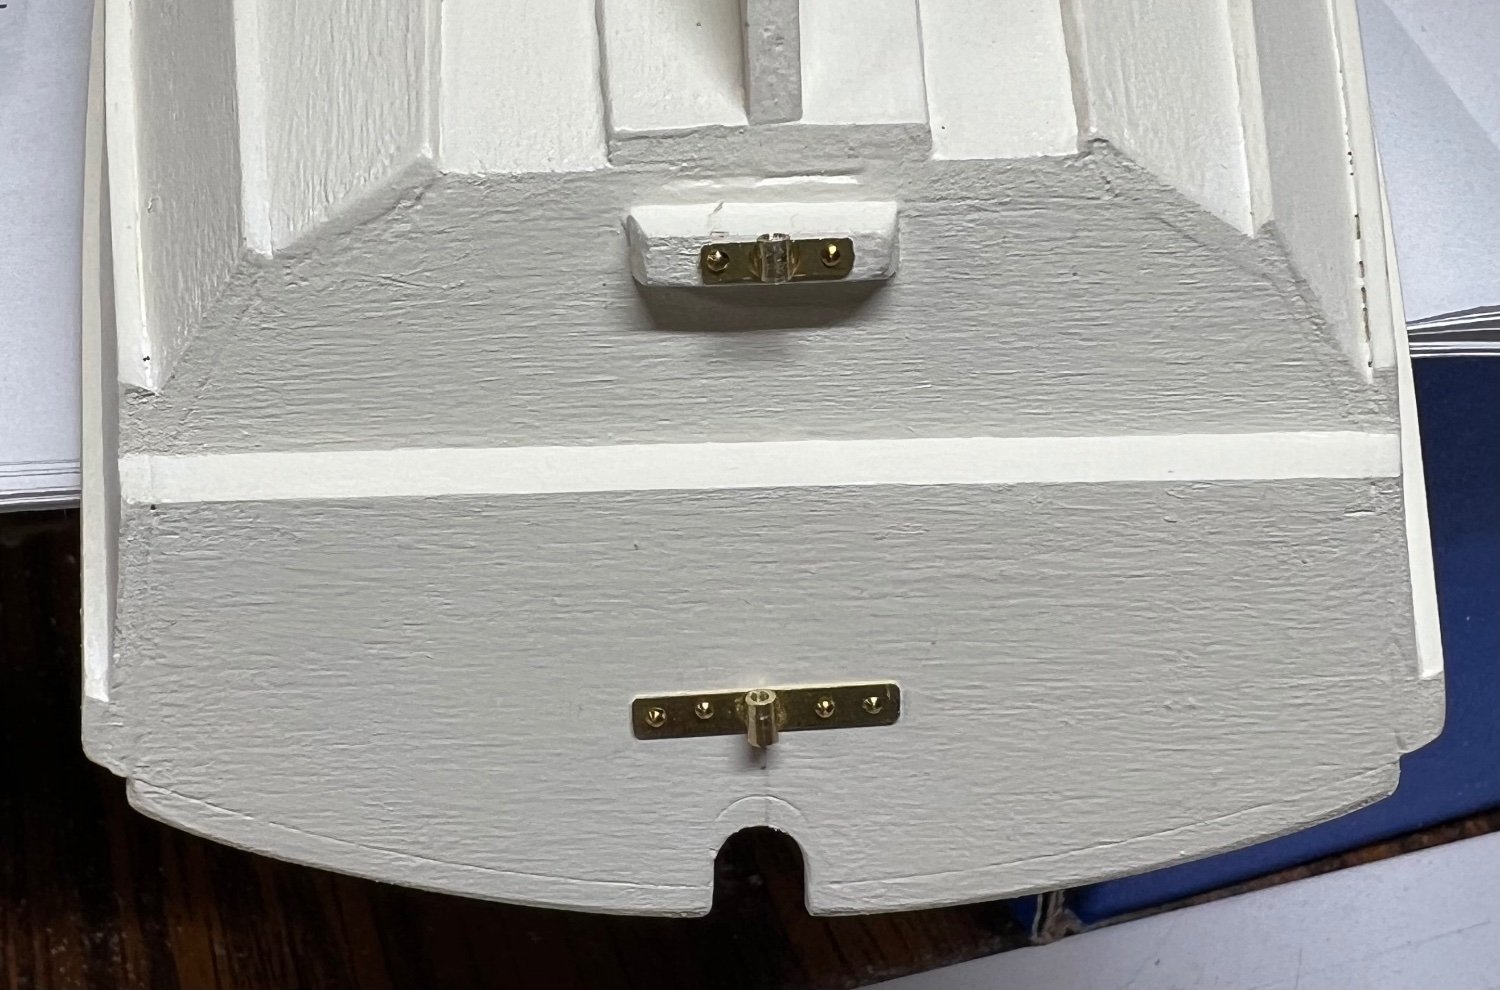
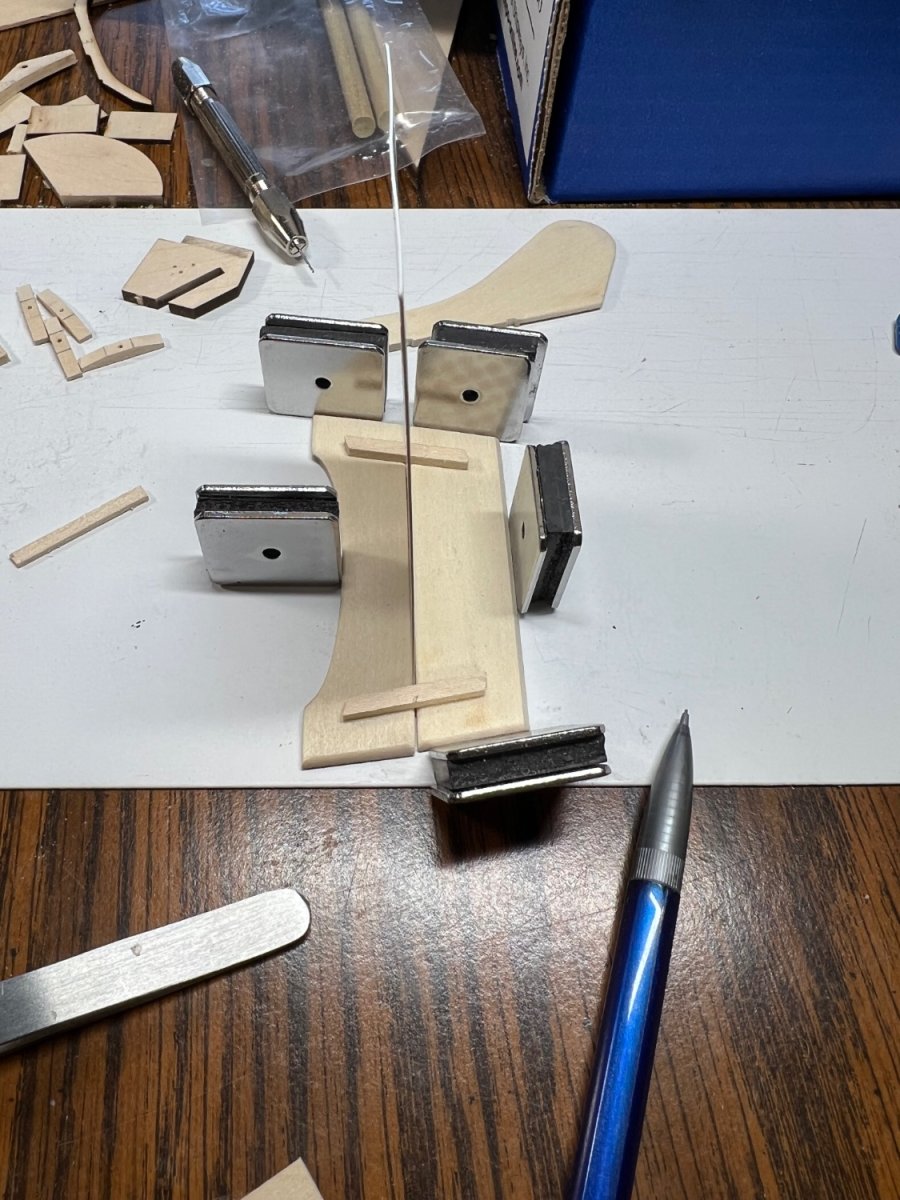
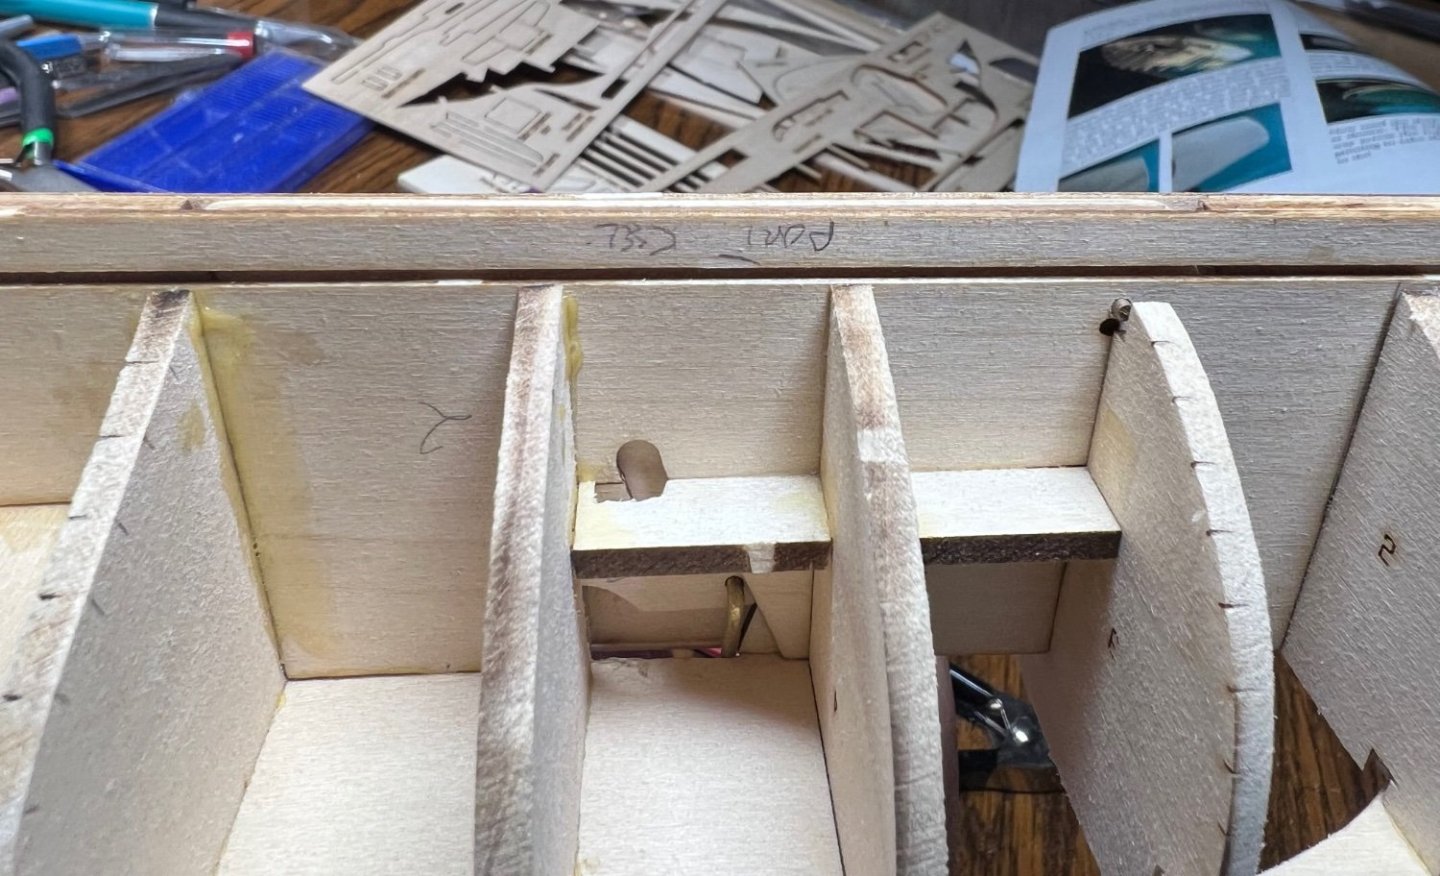
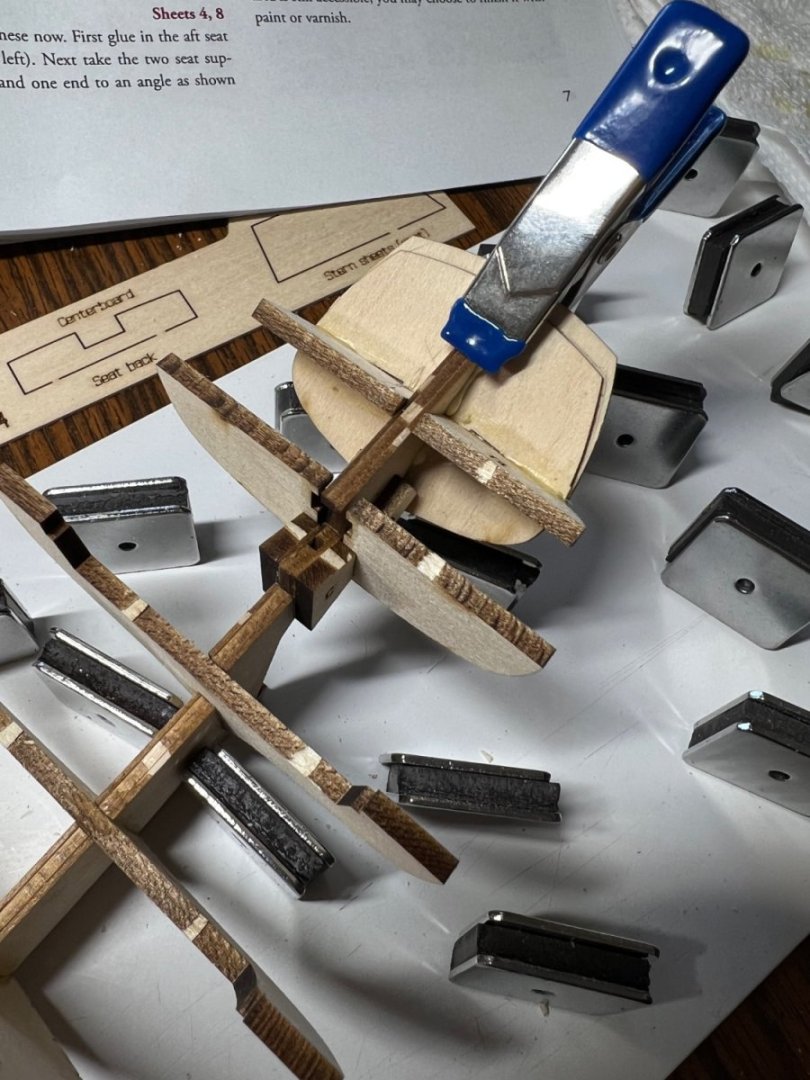
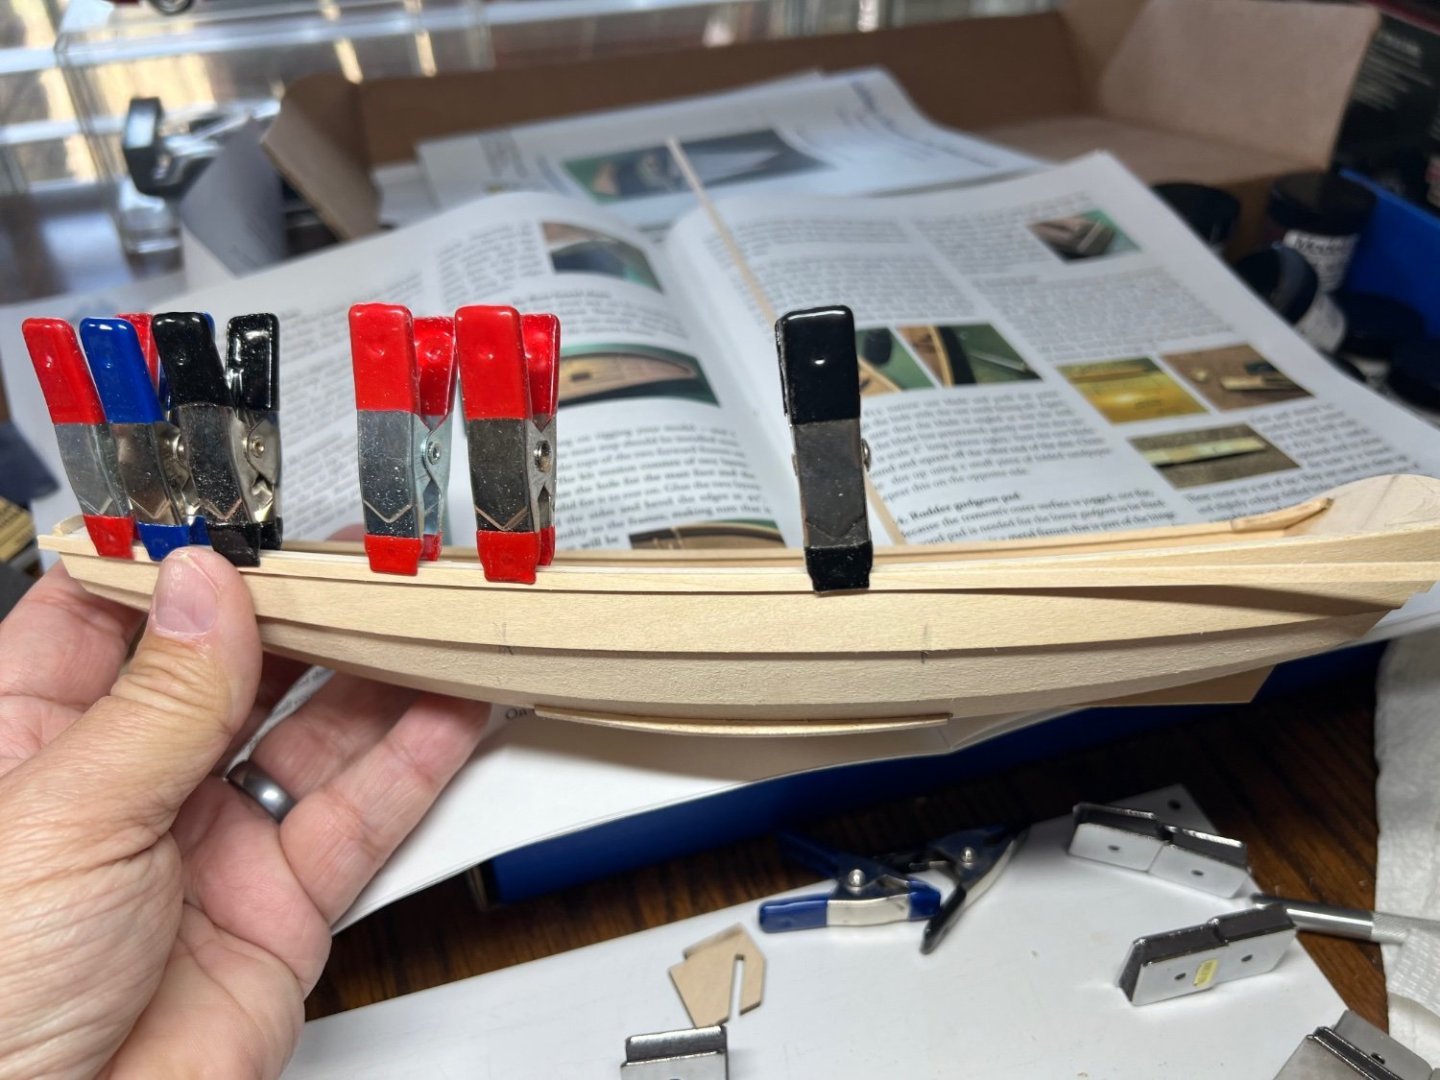
Anyone build this will go thru all these same steps. This is yet another lesson to think ahead of the steps. A moveable centerboard requires more work than is described. It requires trimming a clearance work that is not spelled out. For them first time in this build series I like that fact. It requires one to work harder than the given instructions. To succeed getting a functioning smooth movement centerboard requires a good effort. I stained the seat area, cherry stain. It looks a whole lot like walnut. 🤷🏻♂️It had no reds in it, maybe it need stirred up, but it all looks brown in the bottle. This completes up to step 8, the deck is complete.


- 40 replies
-
- 5
-
-
- Model Shipways
- Muscongus Bay Lobster Smack
- (and 1 more)
-
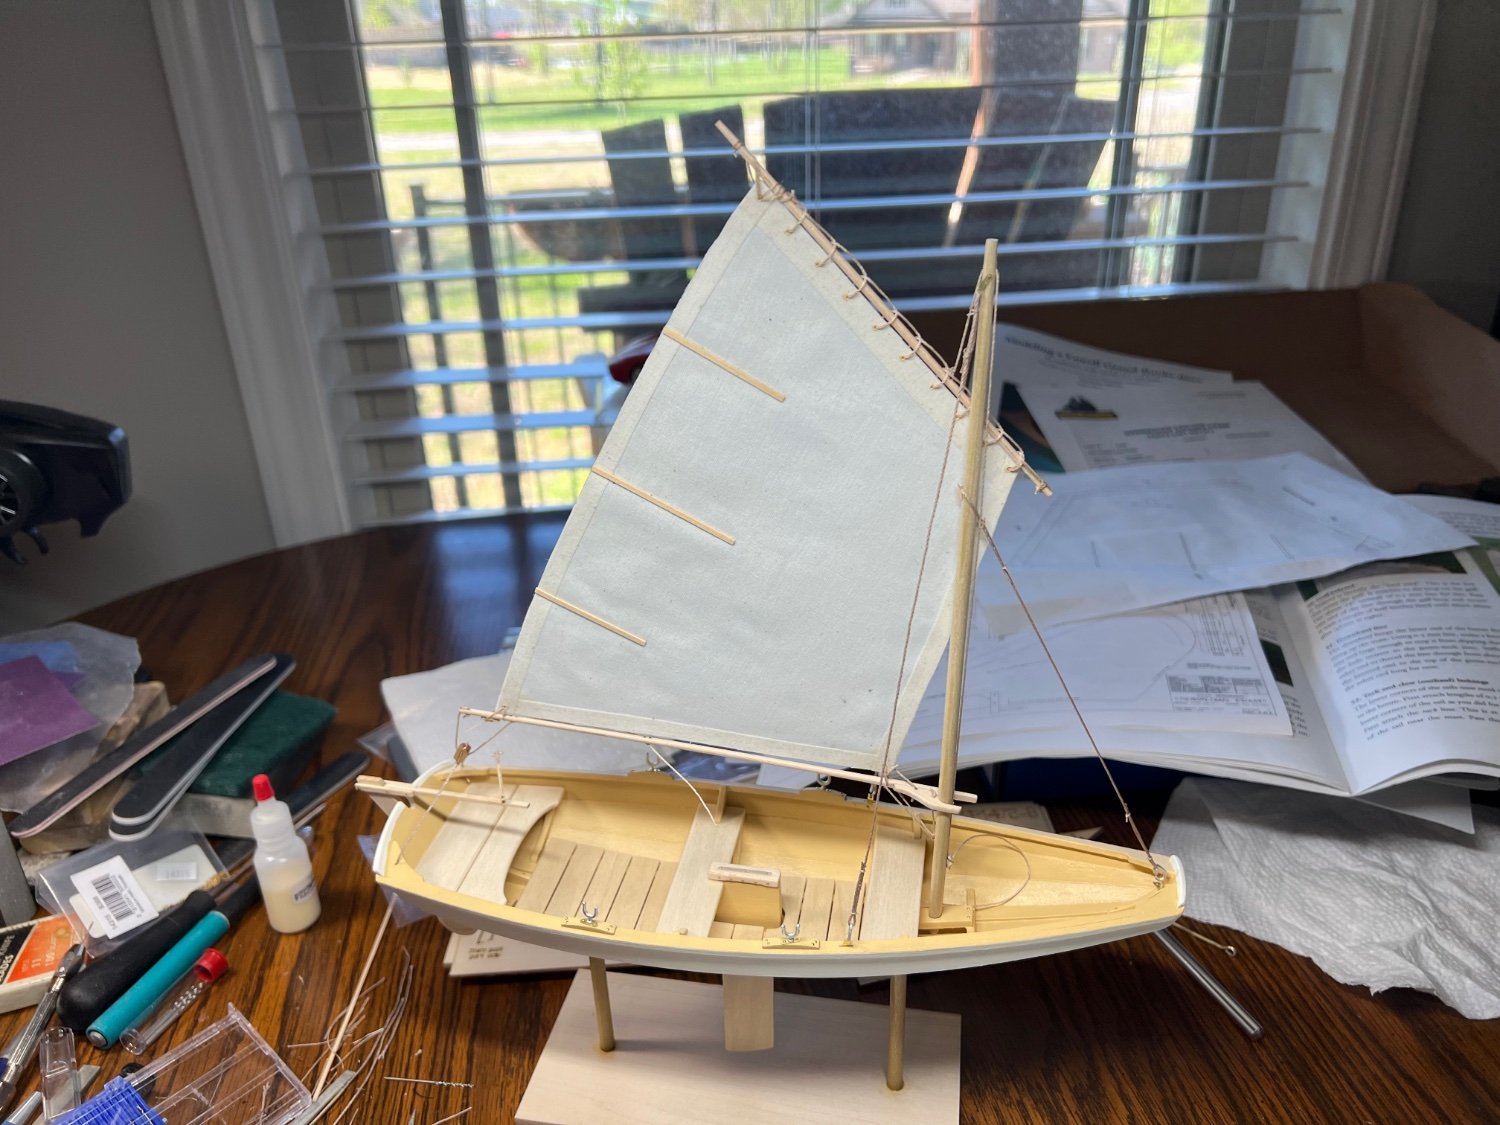
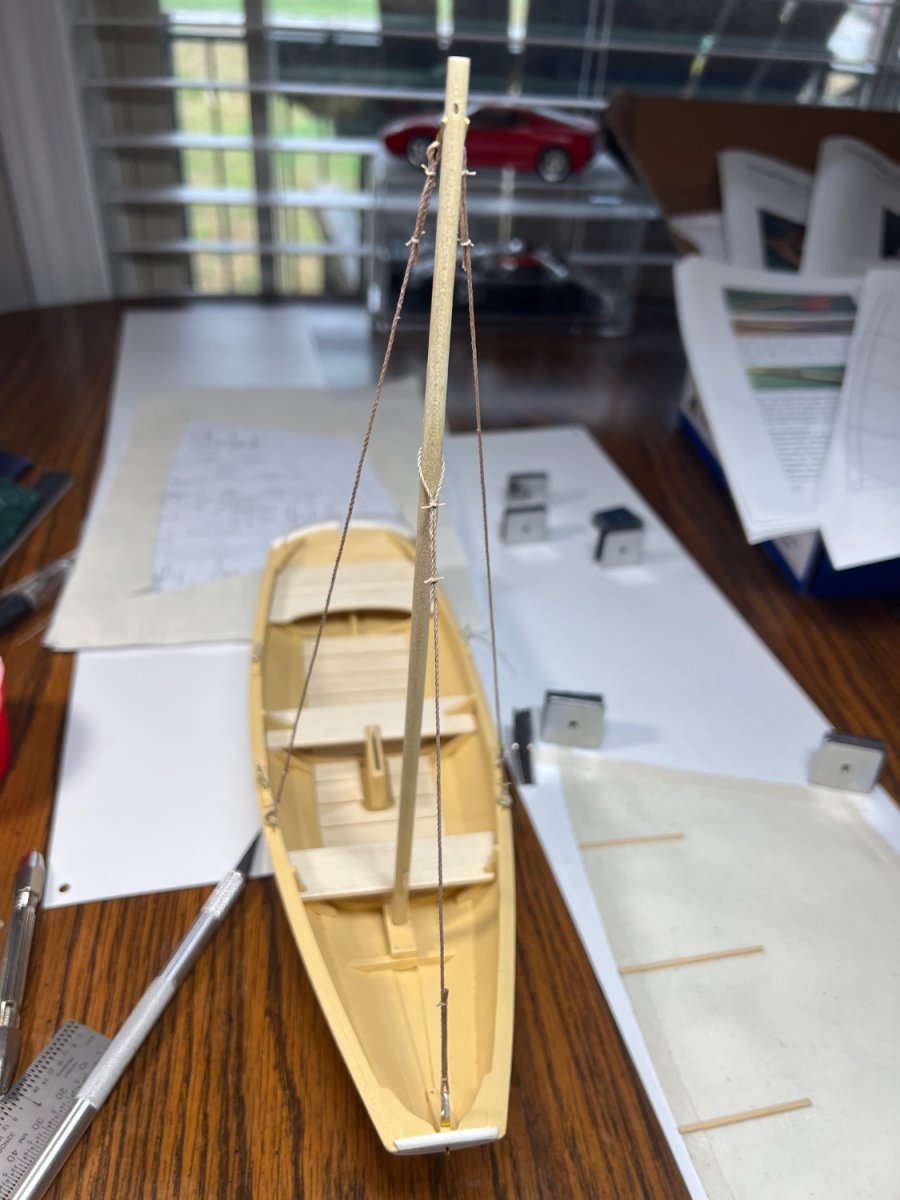
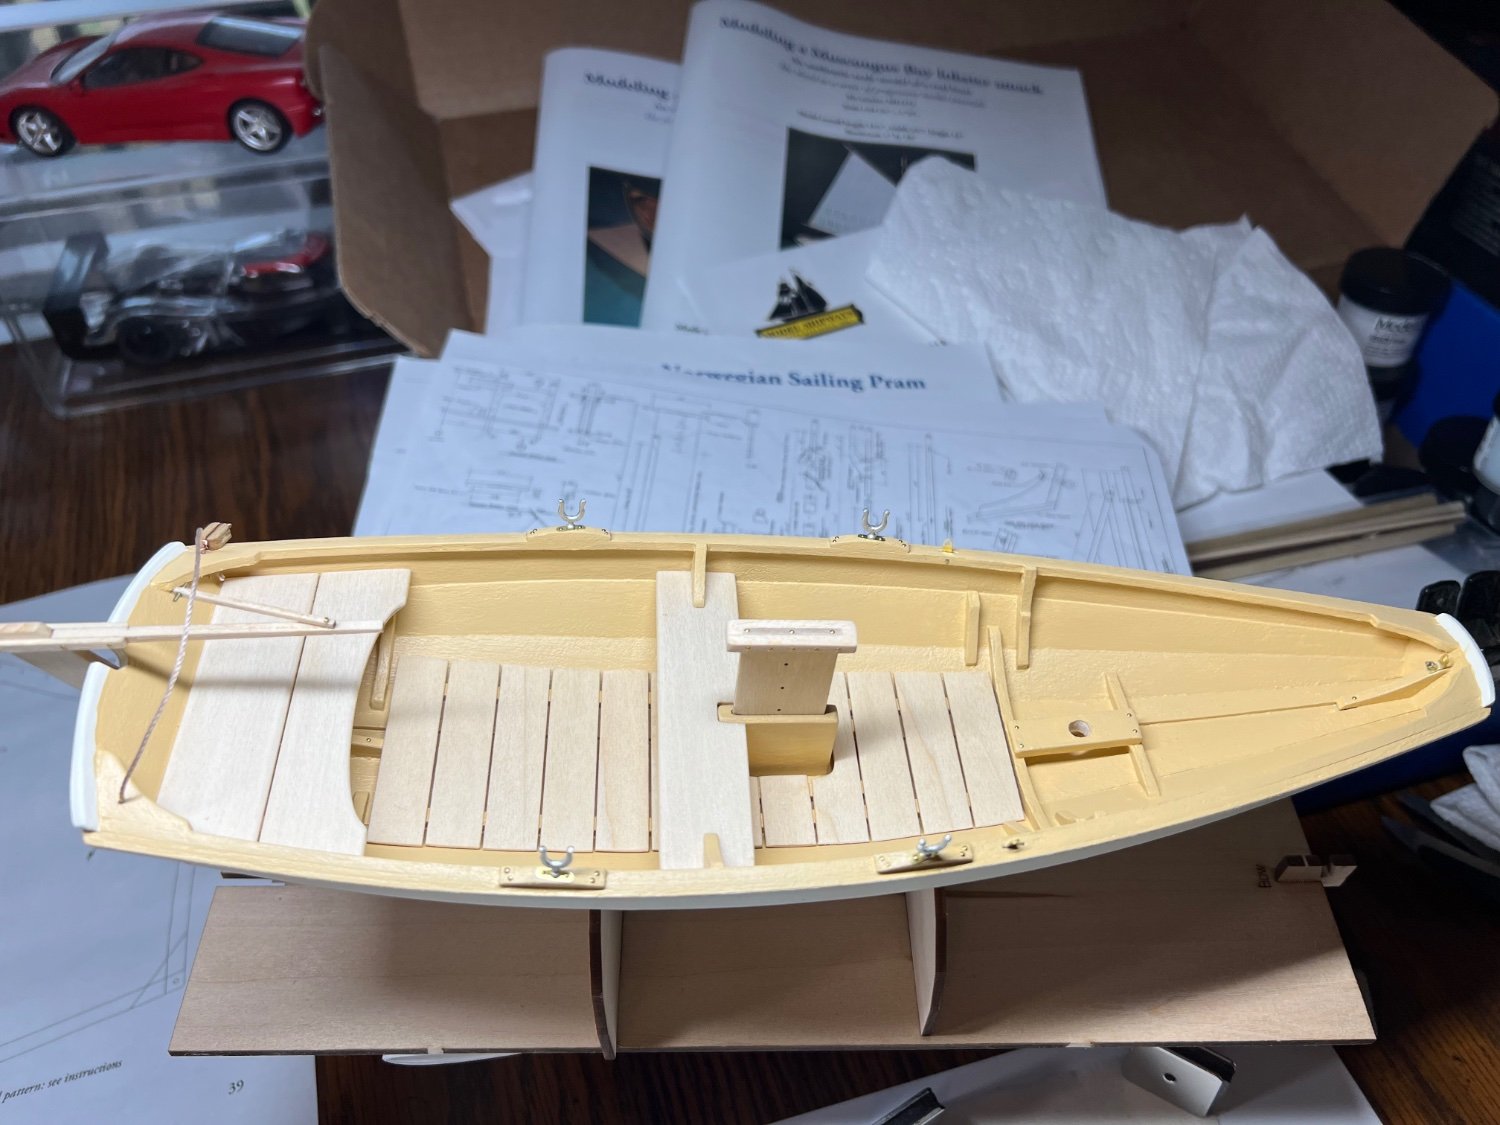
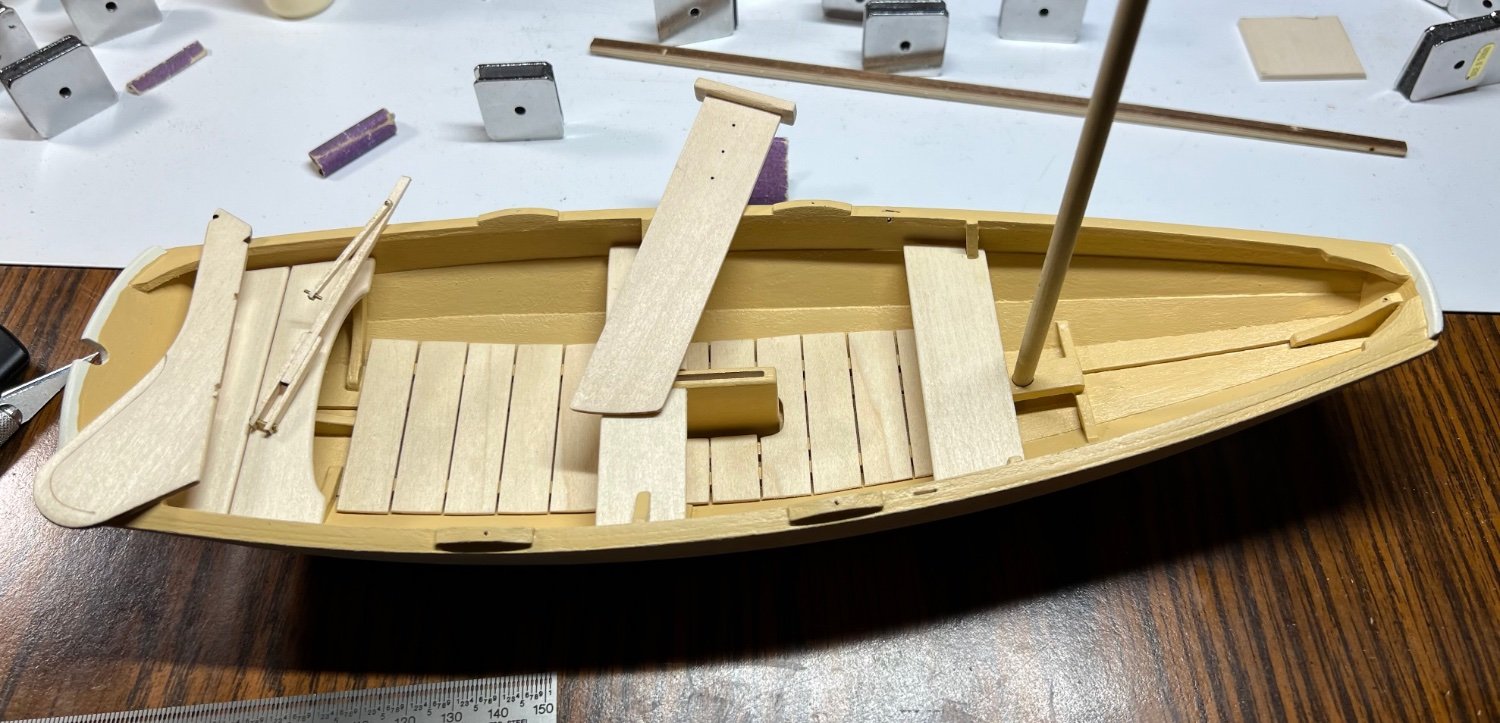
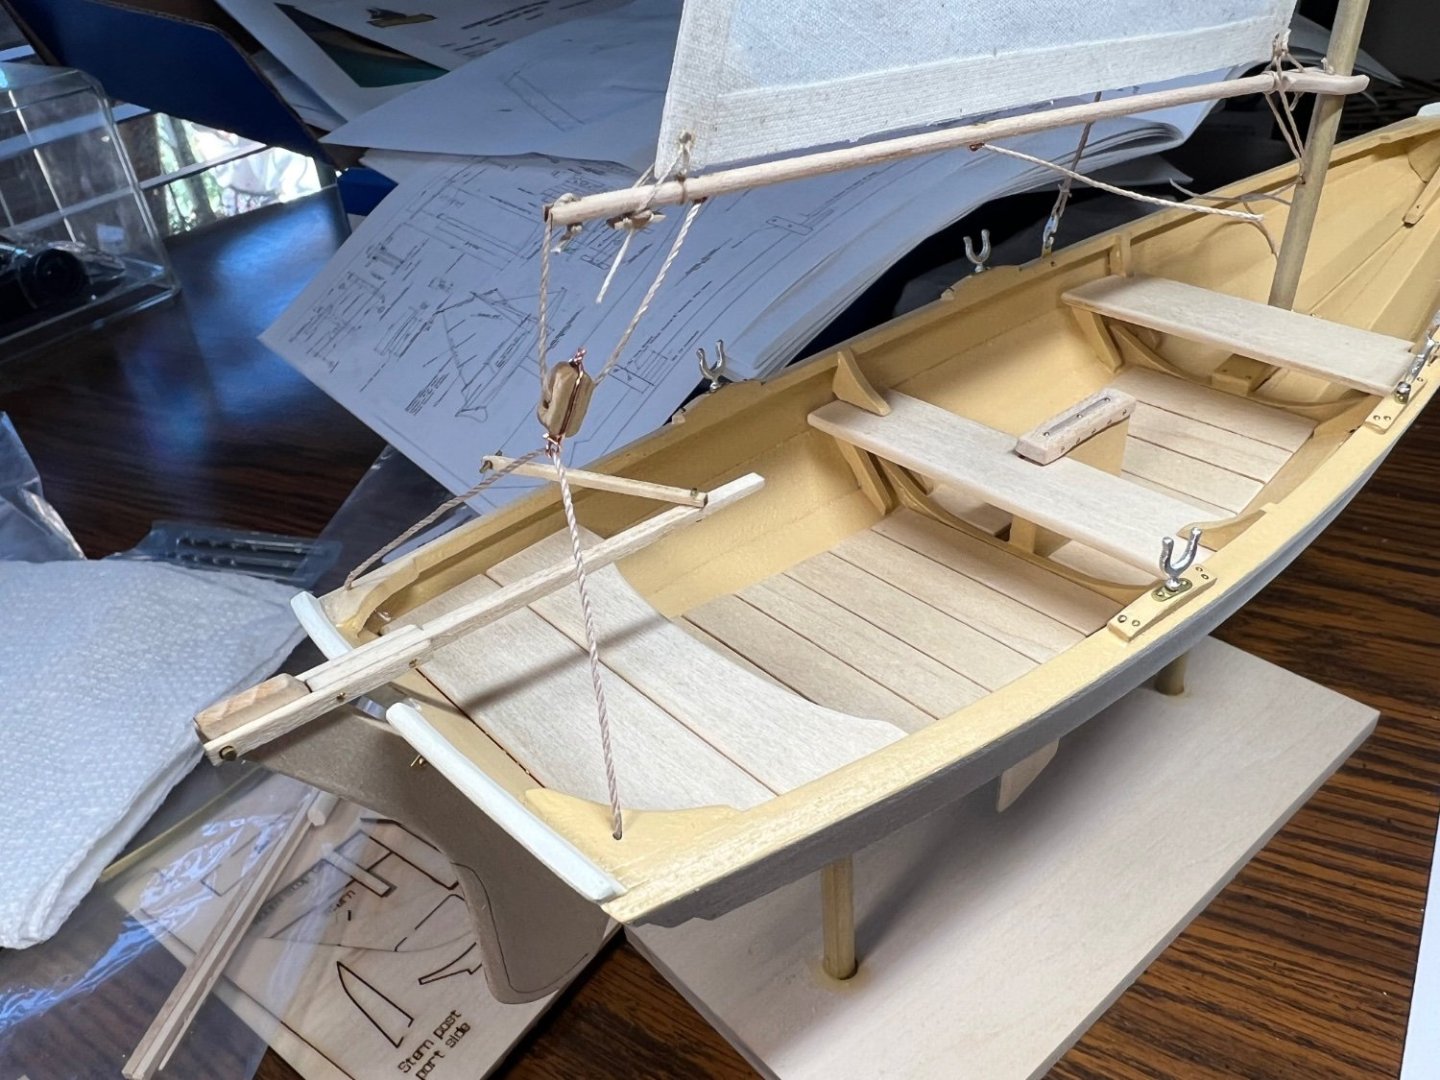
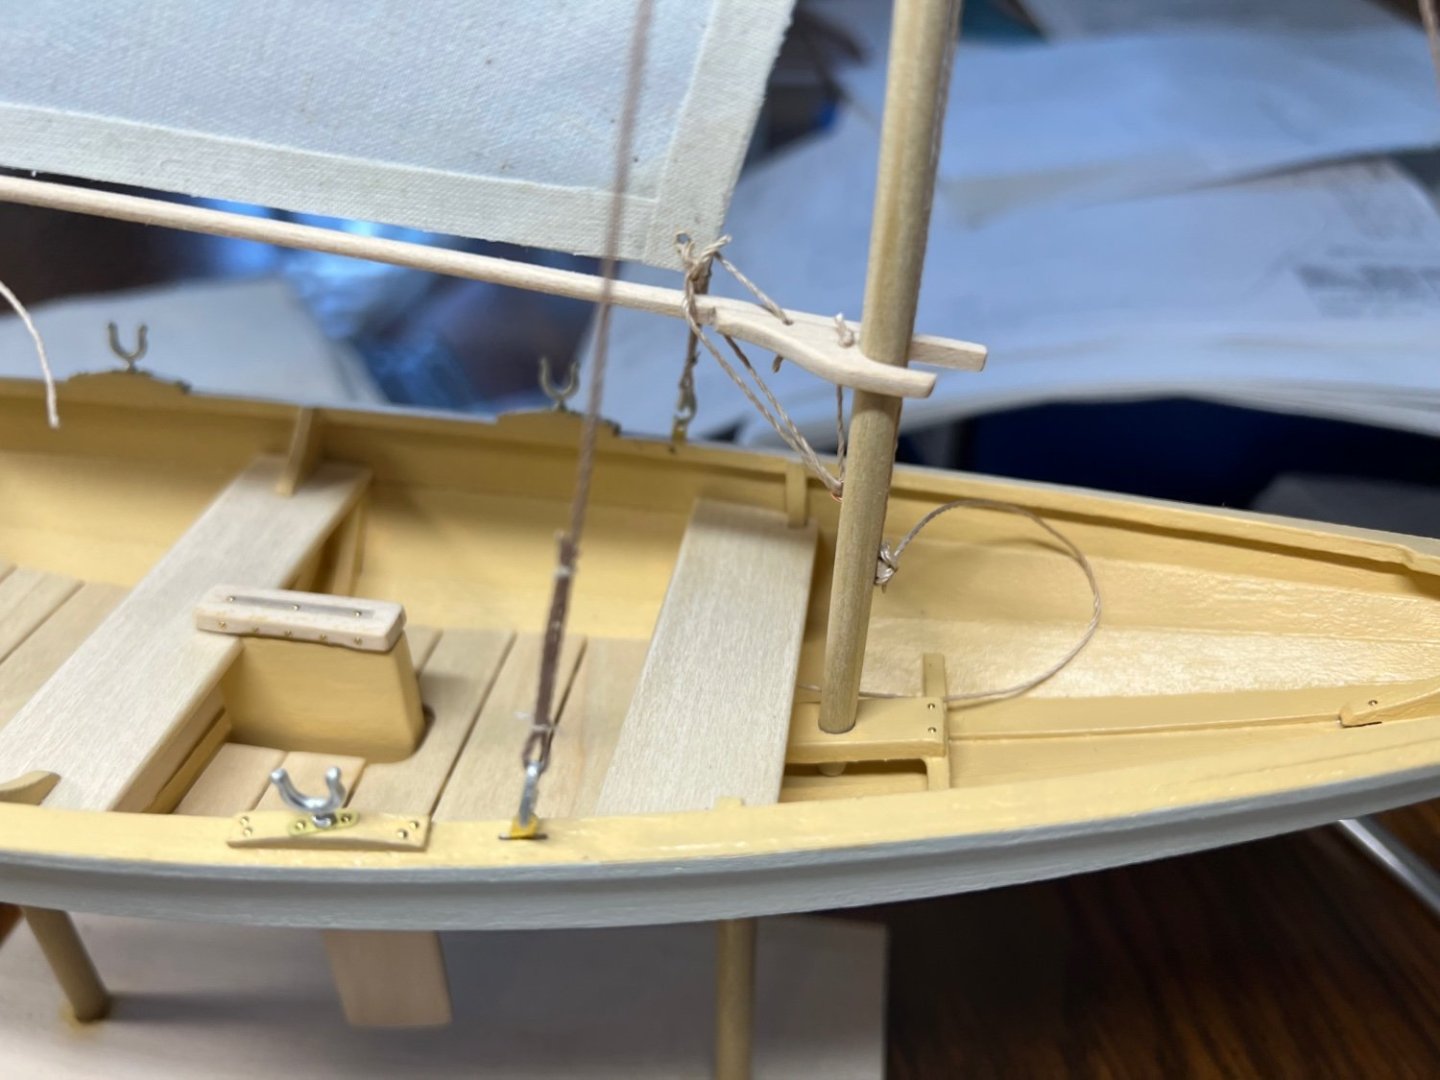
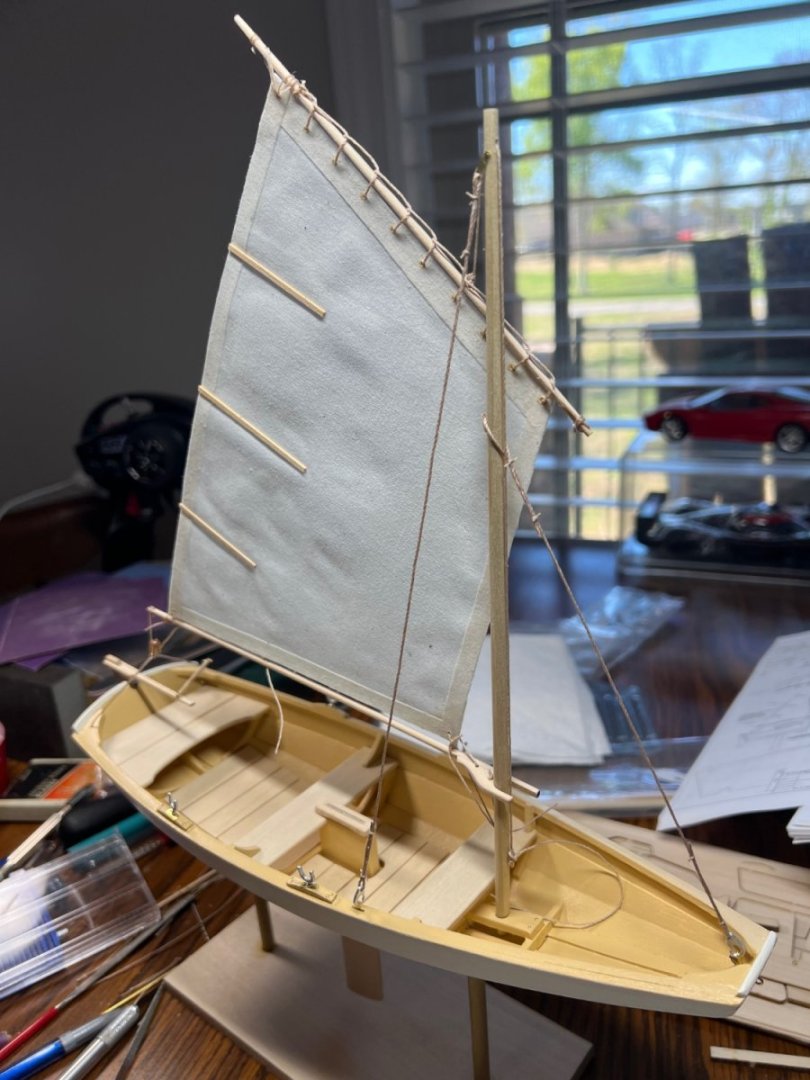
Finished April 9th 2023. The rigging is an art I need to learn. I tried to proper knots. I ran short of .3mm line, I used .5mm in places that needed .3mm. The rear looks like it could tack. I left it loose to swing the sail. The bottom of the gaff pulls down the halyard line the more vertical the better. I’m not doing oars, it’s a sail configuration lol. It’s done and that’s what matters.


- 72 replies
-
- 12
-

-
-
- Norwegian Sailing Pram
- Model Shipways
- (and 1 more)
-
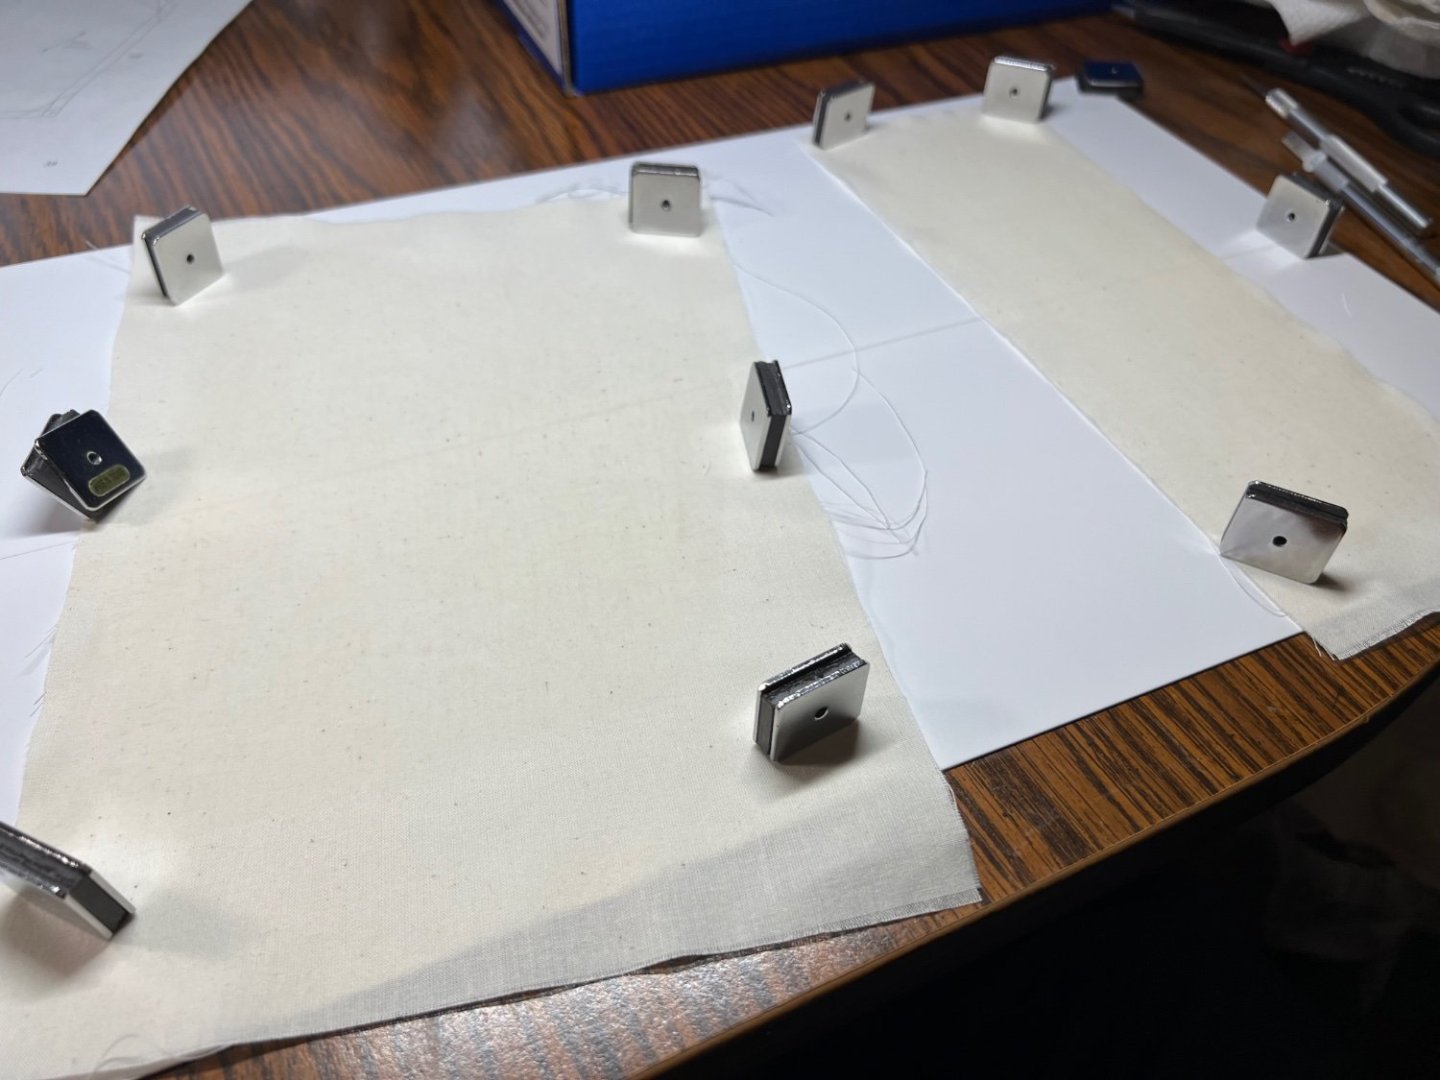
The sail dried nicely overnight. A few holes and some paint and it was ready. I’ve done a bunch while I waited so now to the rigging.
- 72 replies
-
- 5
-
-
- Norwegian Sailing Pram
- Model Shipways
- (and 1 more)
-
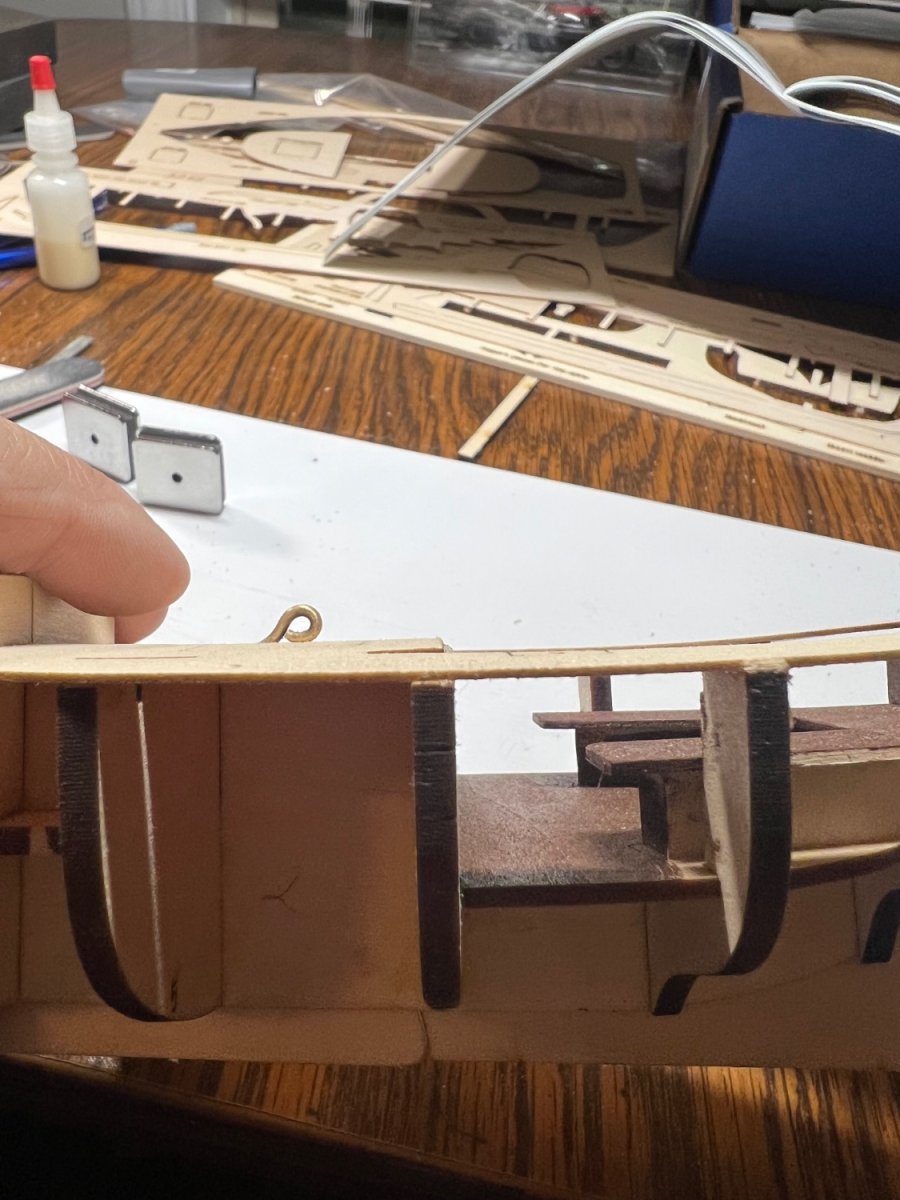
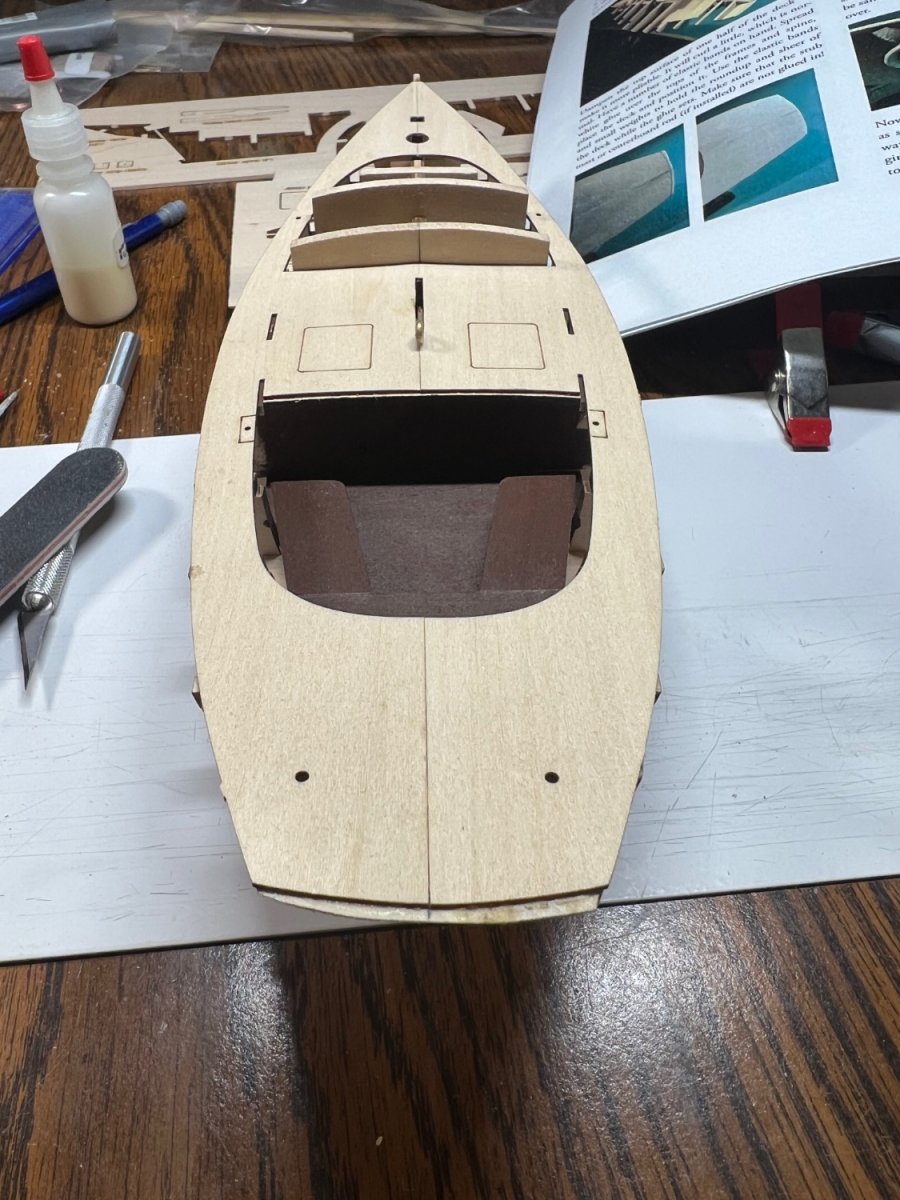
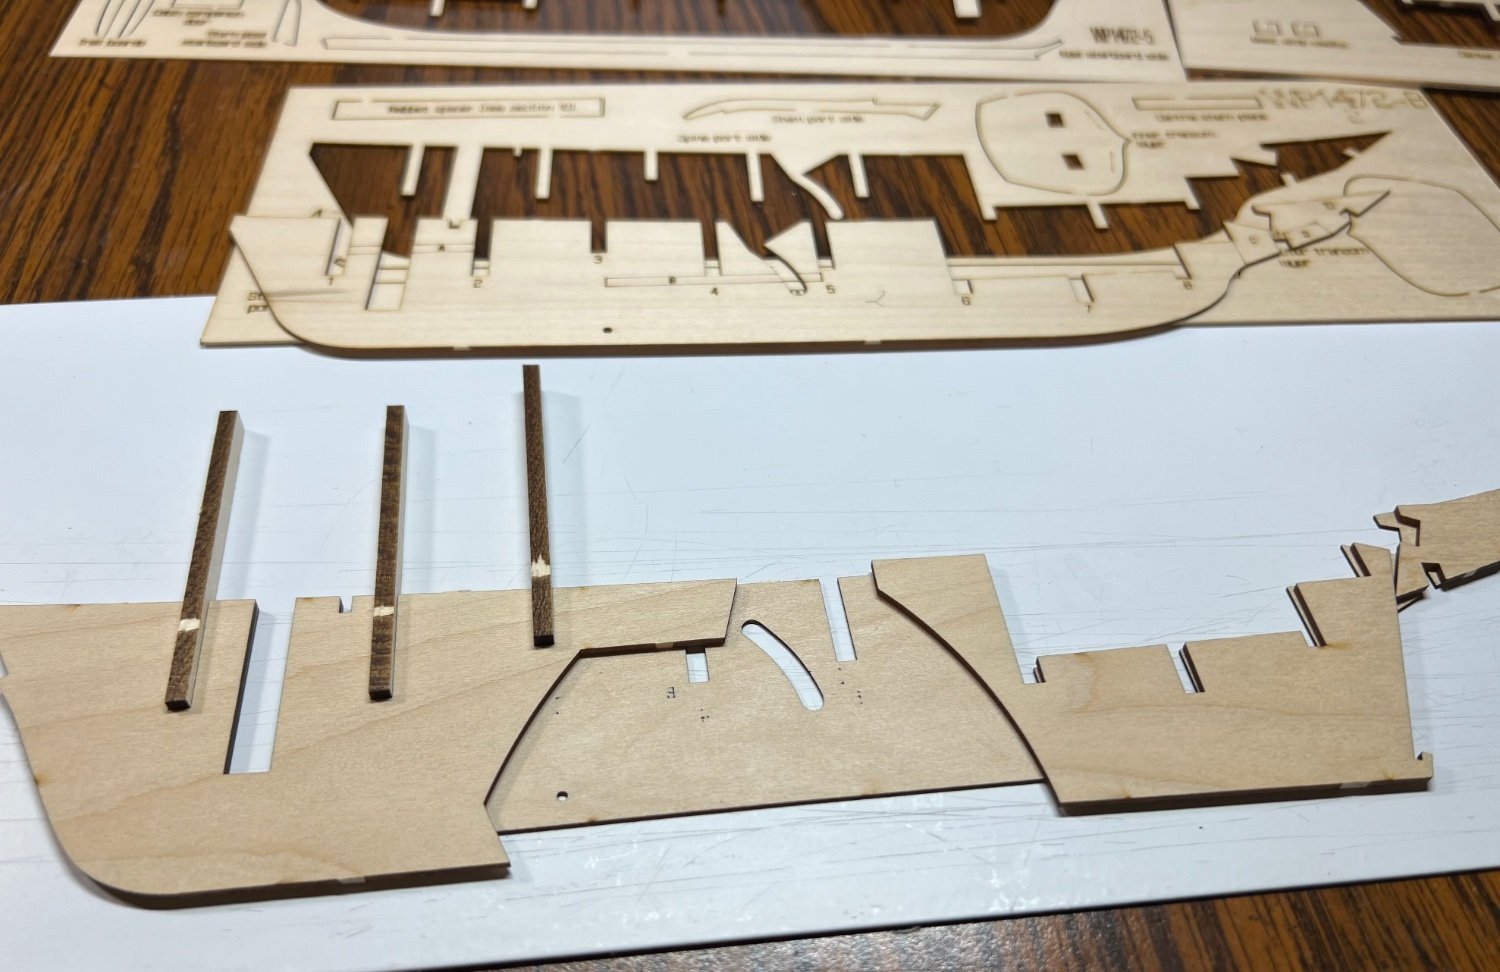
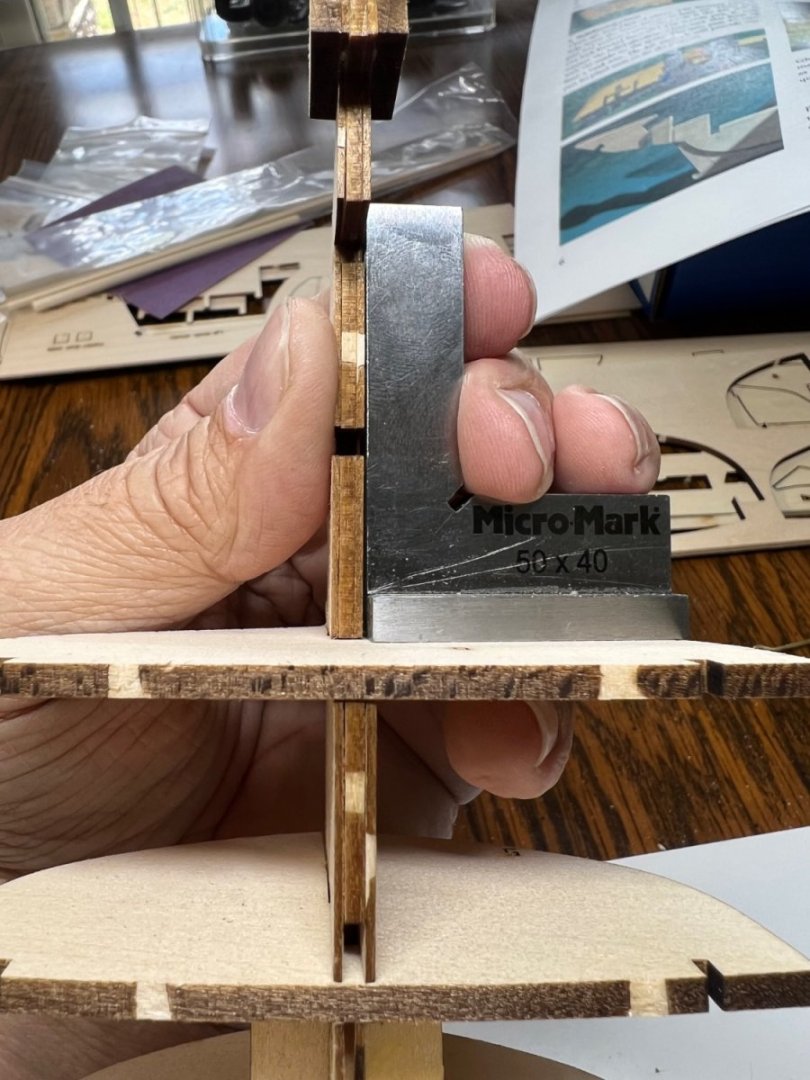
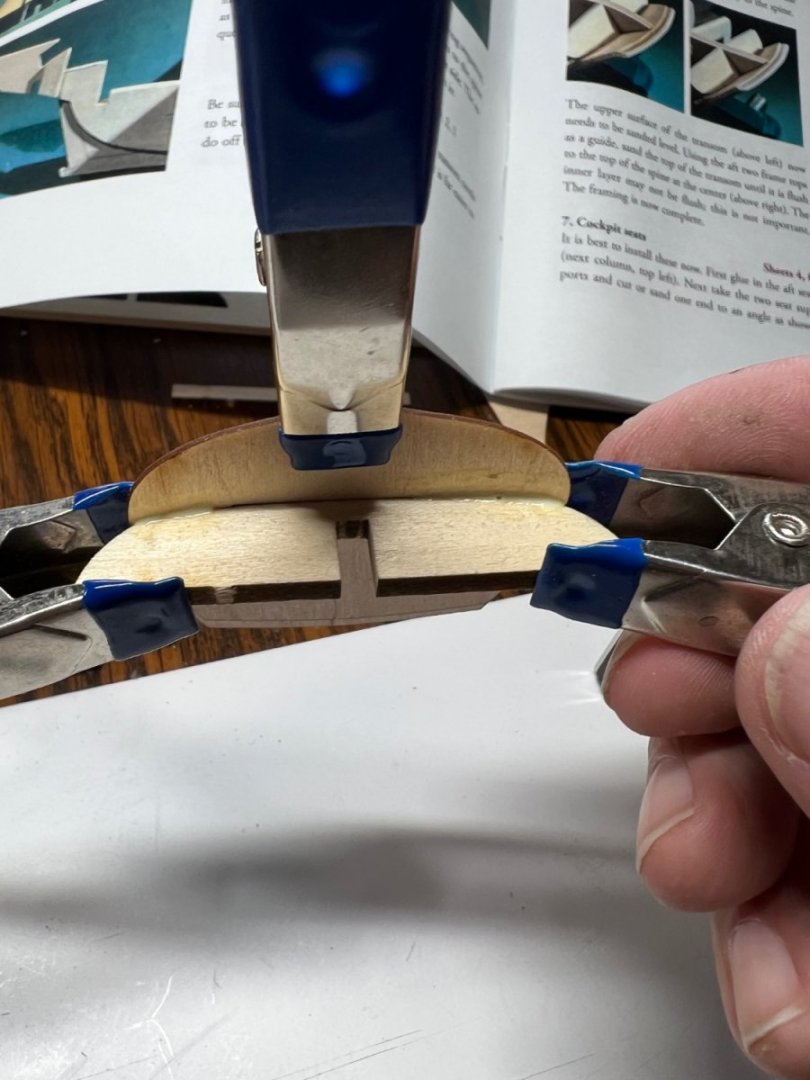
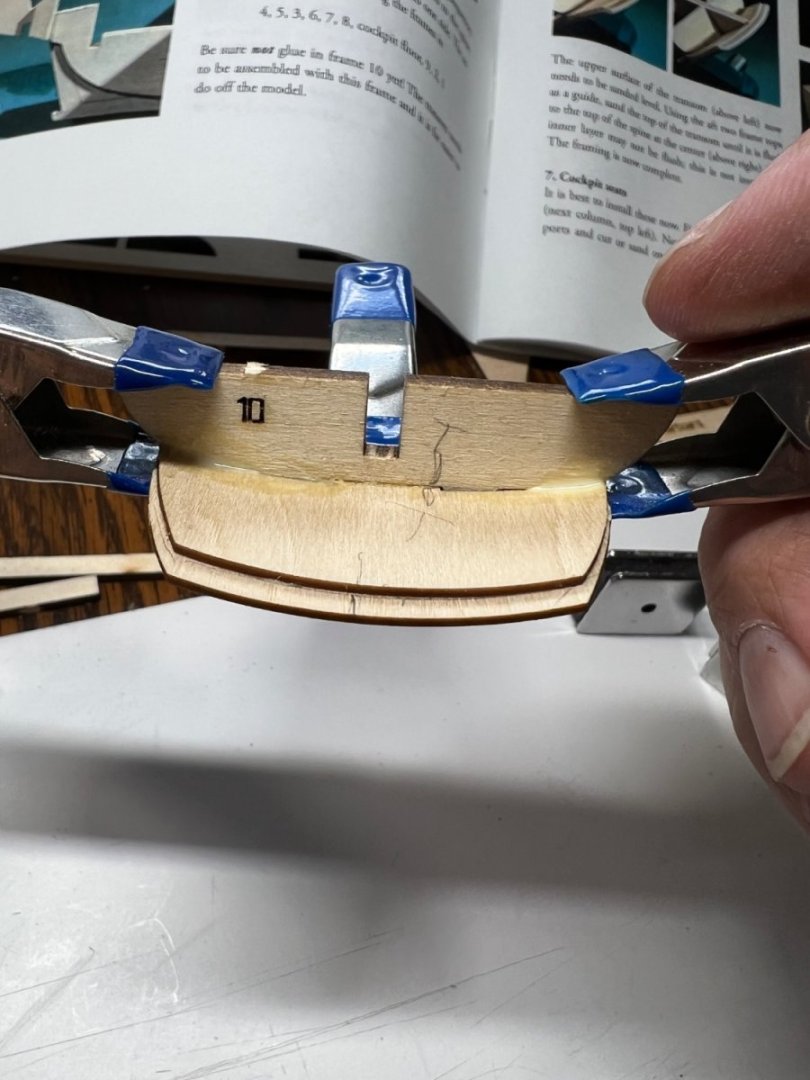
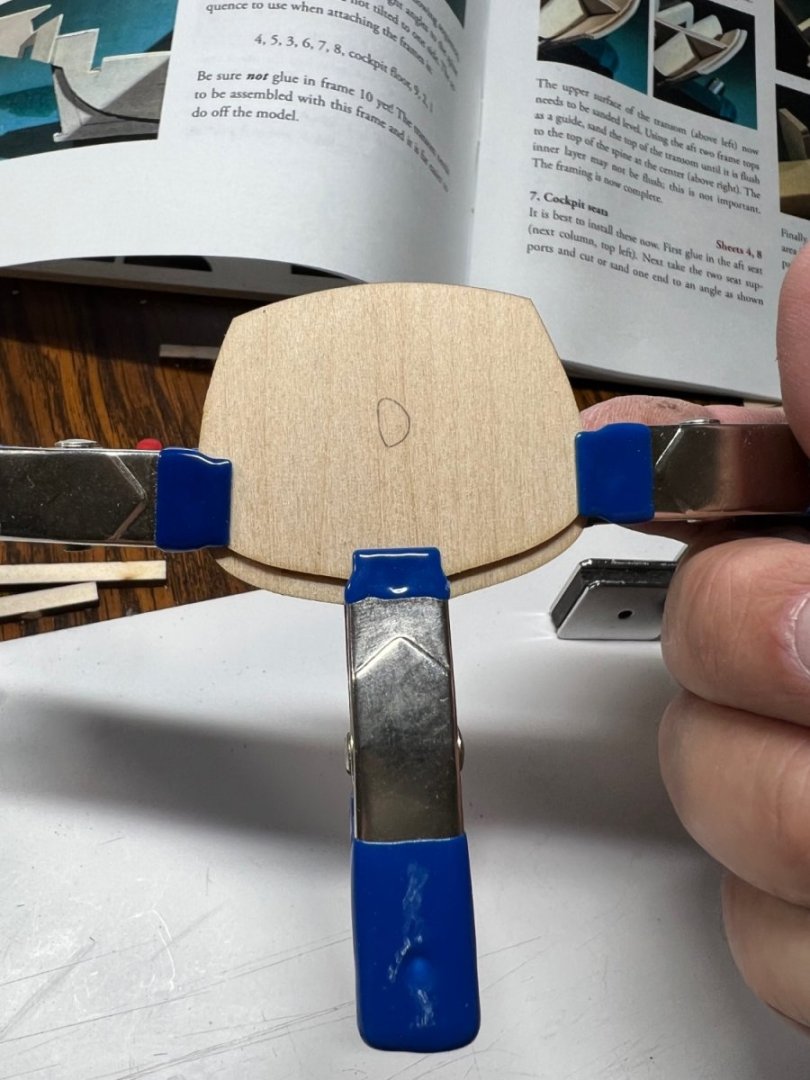
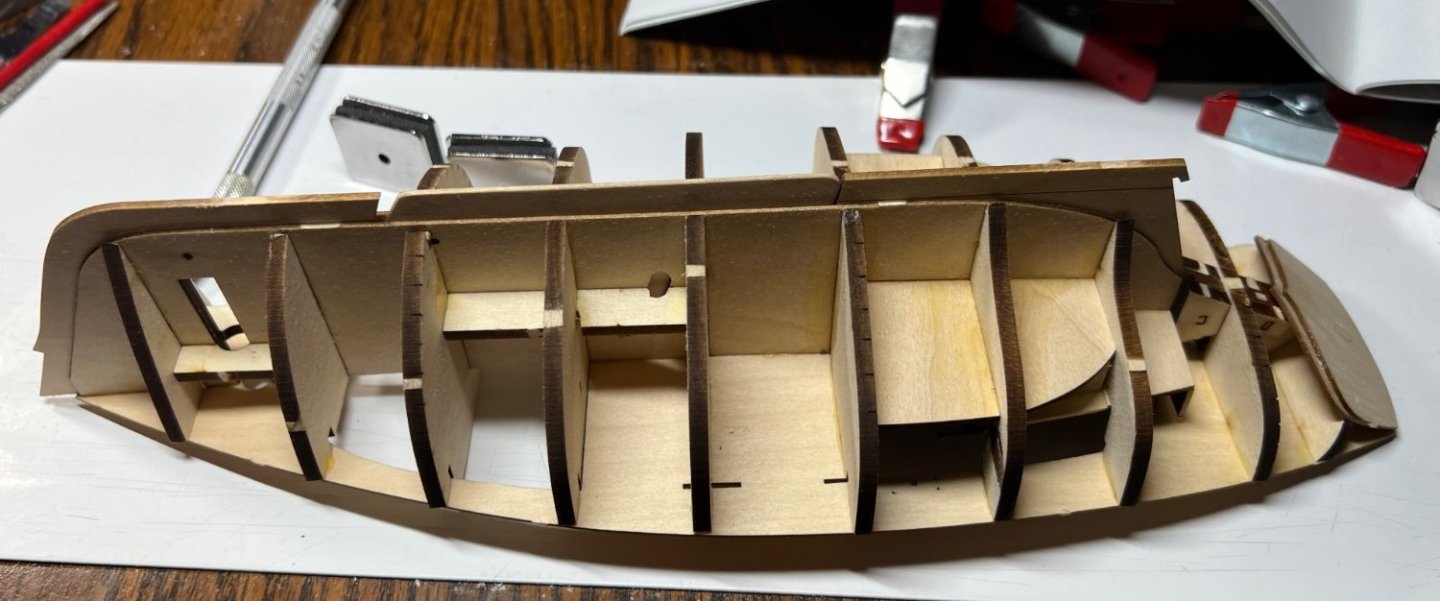
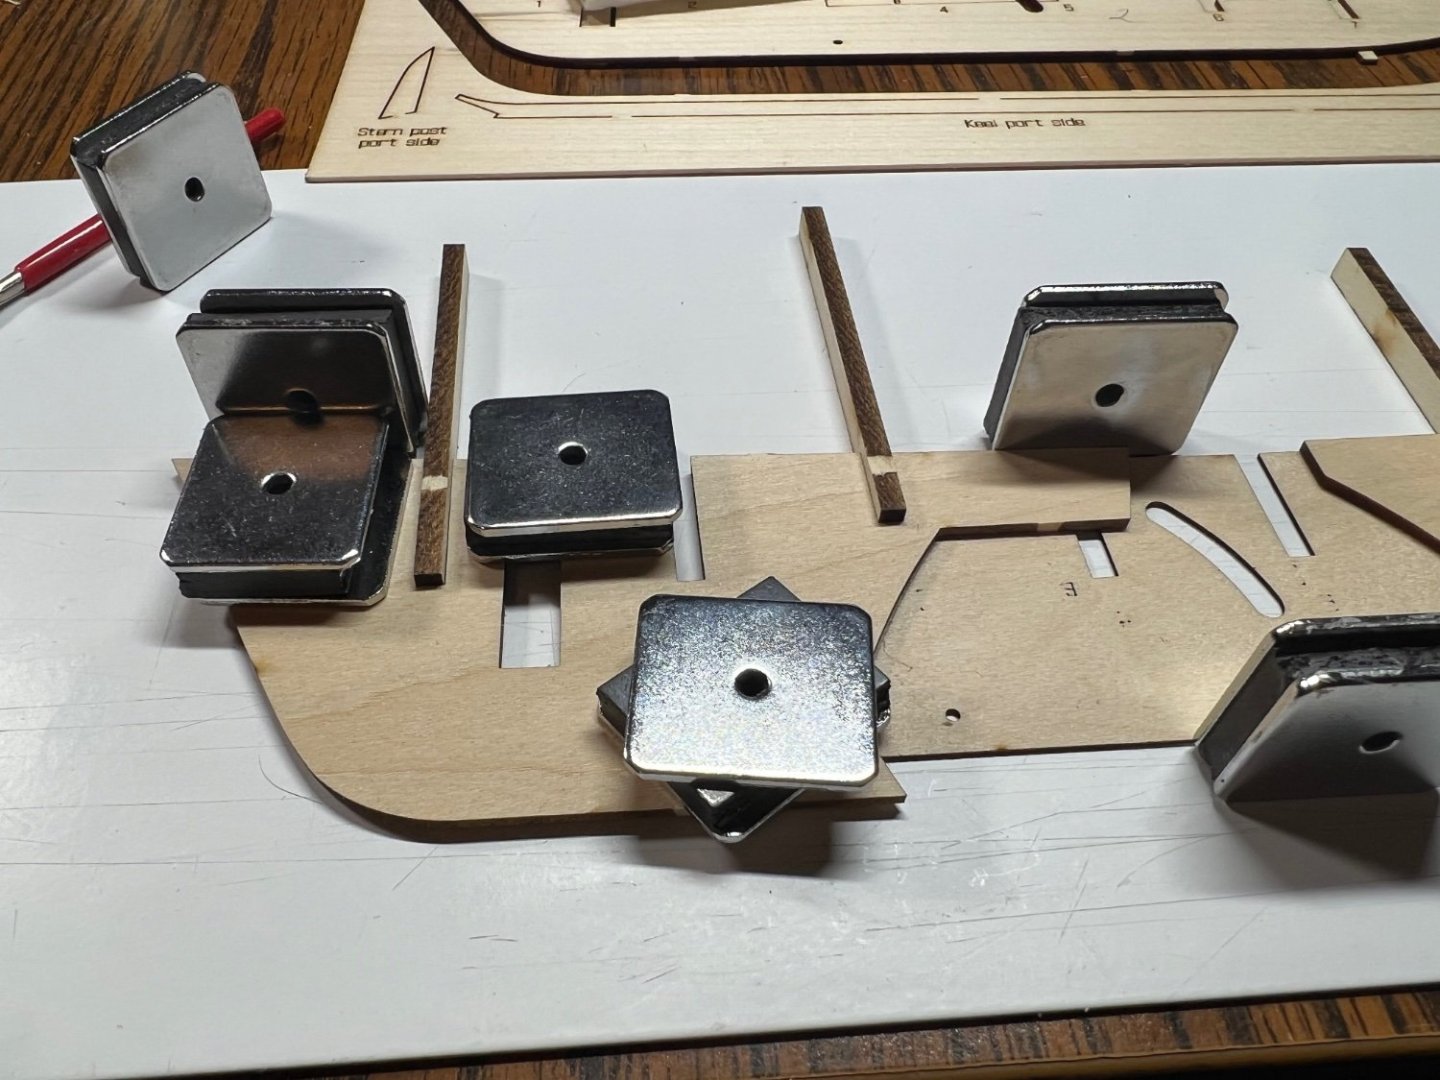
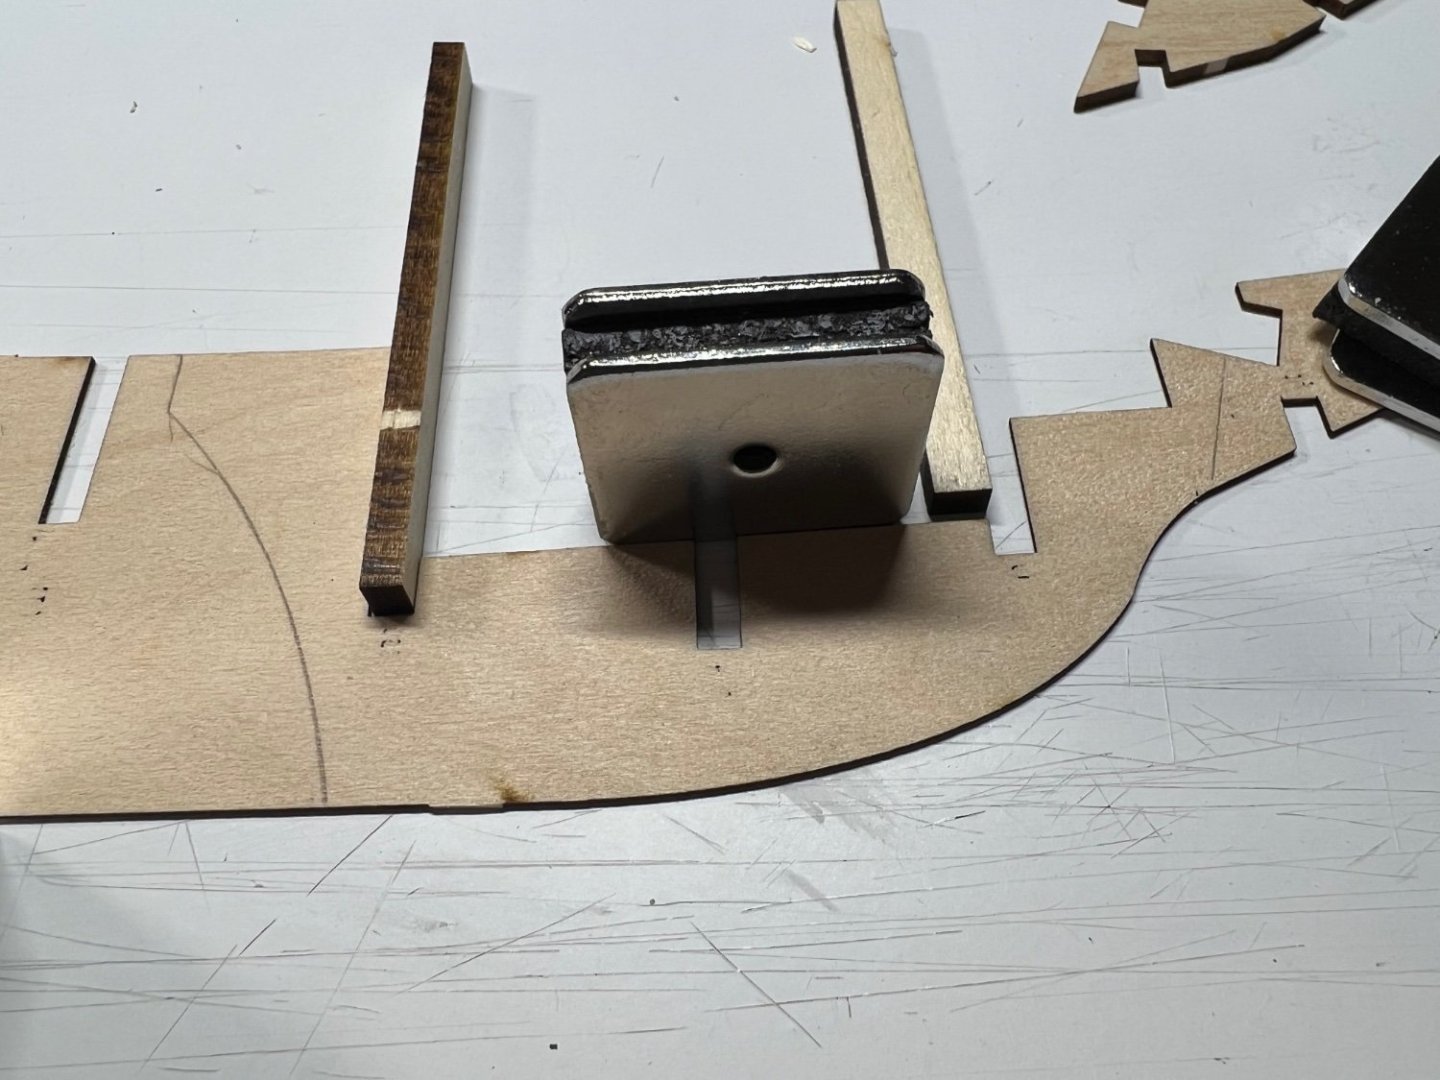
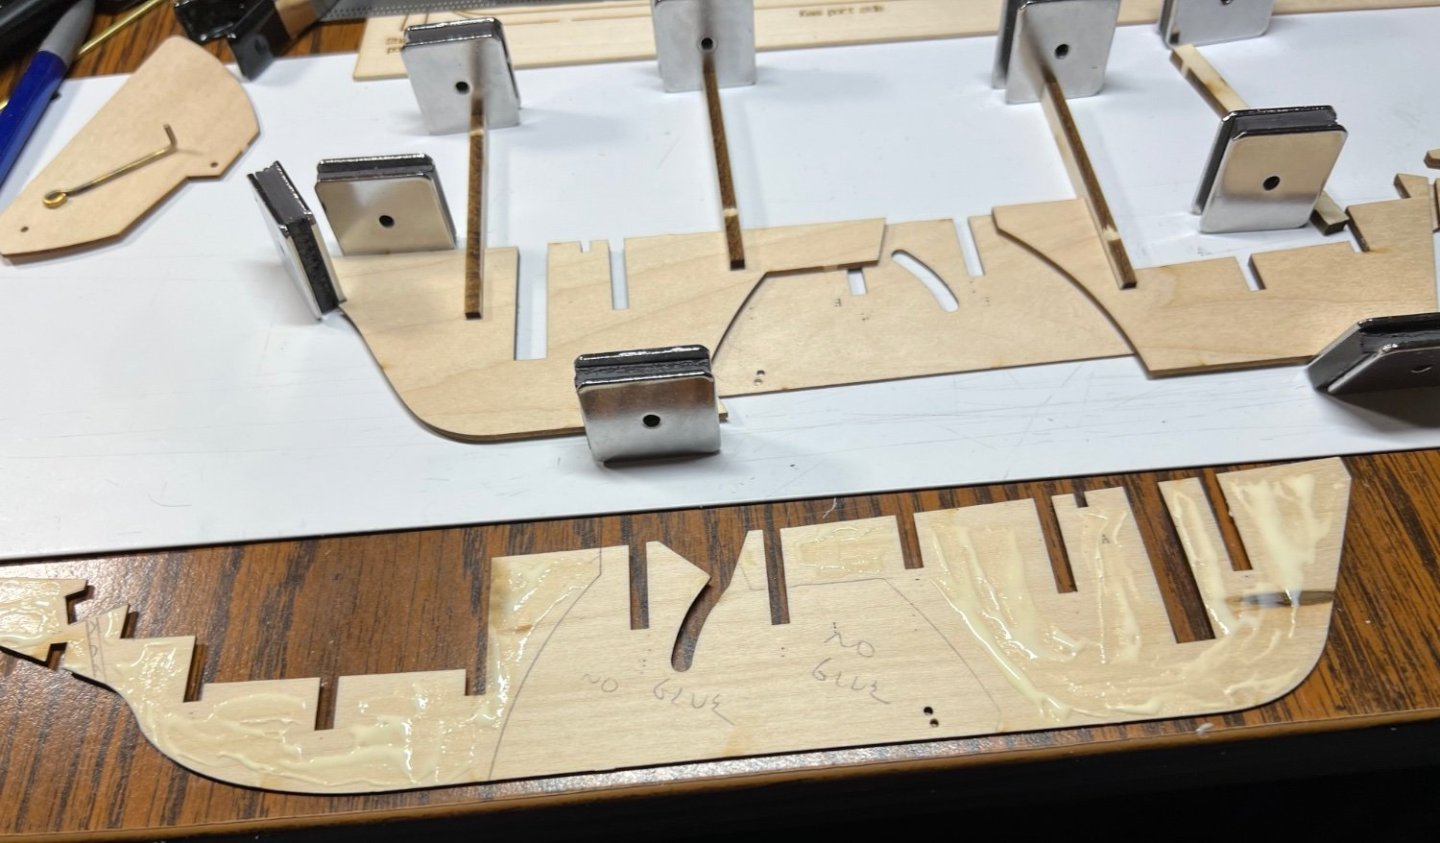
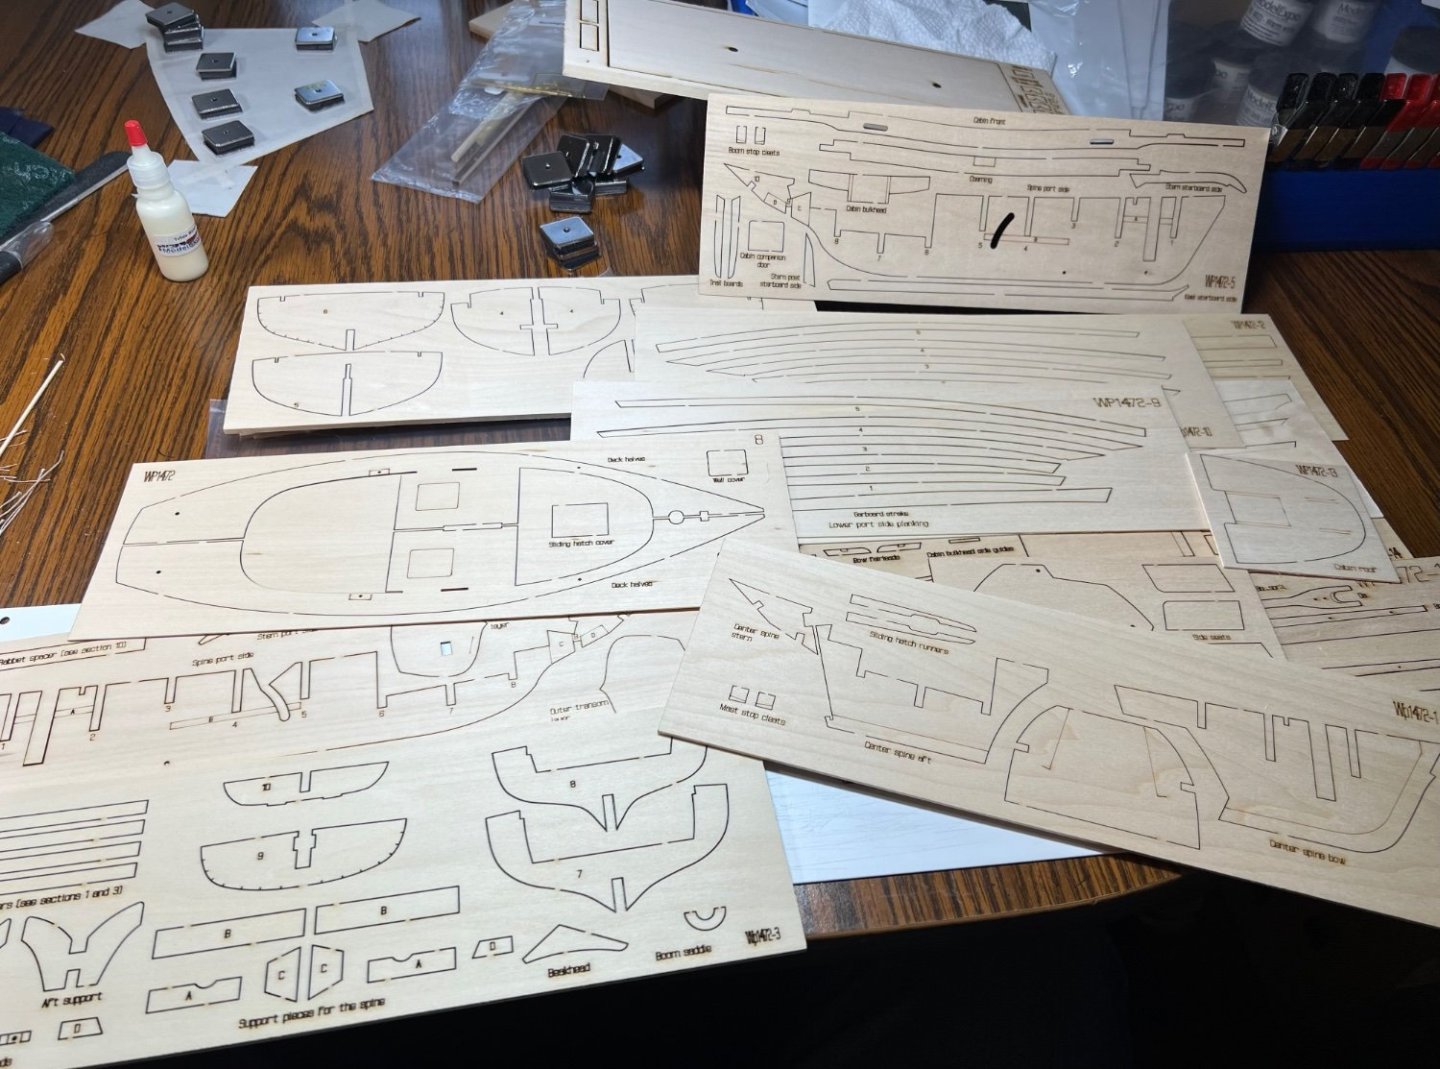
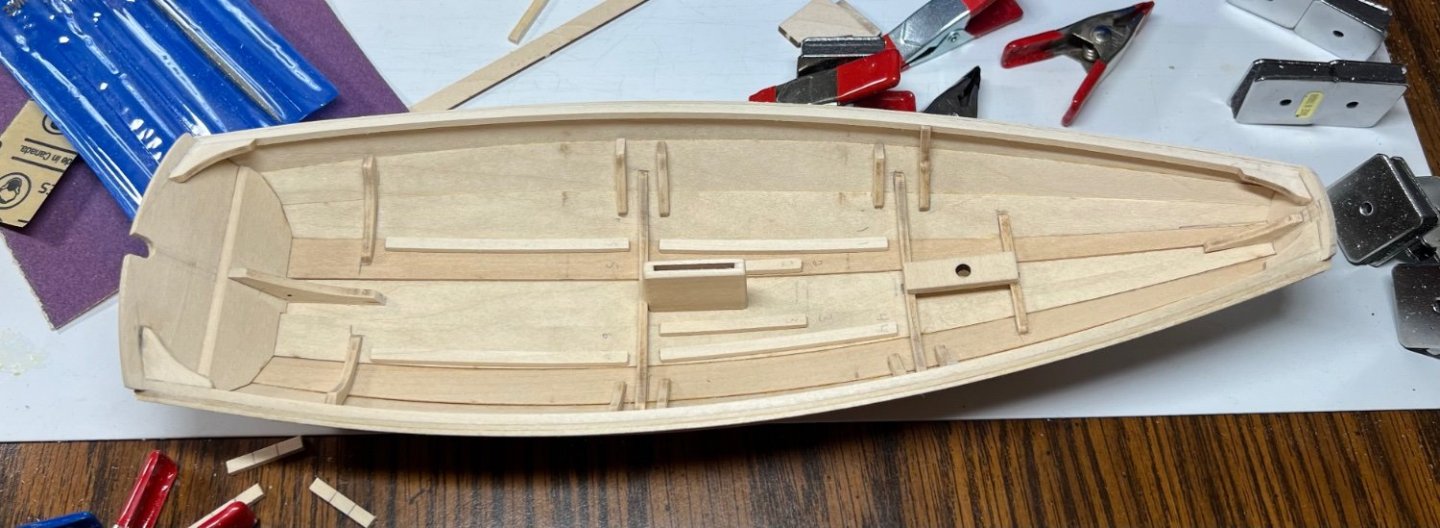
Works done on the first 3 steps, needed a part from sheet 5. Port side from sheet 2 goes on top of the first picture. I made a new hole for the centerboard. The pull rod fits the slot this way. It will work out or it won’t. it said careful not to glue the top piece in the wrong place, I marked out where not to put glue on both starboard and port spine sides. I just noticed they both say Spine Port Side, obviously one is port lol. On sheet 5 is Starboard port side. 🤷🏻♂️ Back to the Pram in the morning to finish up a few more things.

- 40 replies
-
- 4
-
-
- Model Shipways
- Muscongus Bay Lobster Smack
- (and 1 more)
-
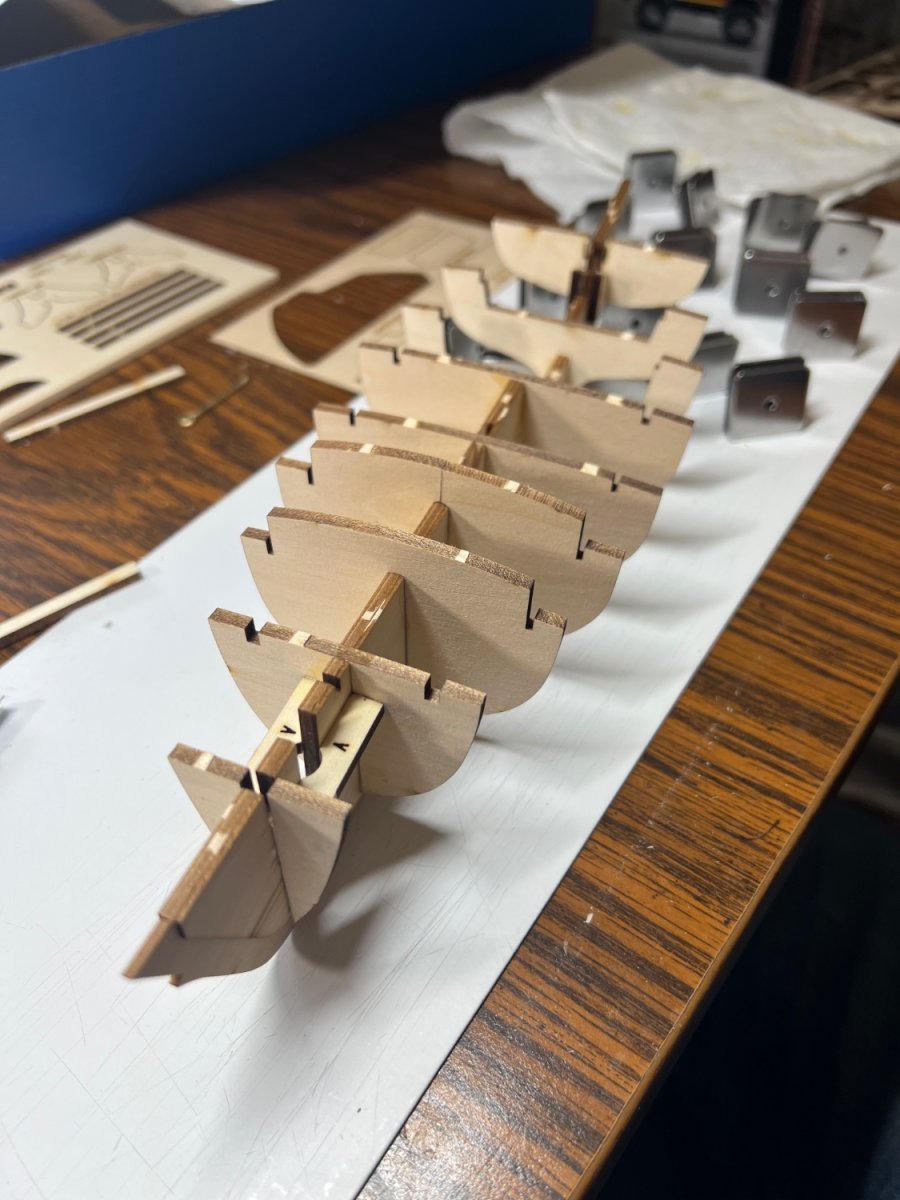
Muscongus Bay Lobster Smack by MajorChaos - Model Shipways - 1:24 Third in a series of progressive model tutorials. The Dory is complete, model 1. The Pram, model 2, is almost done as of this writing. The Dory build Finished The Pram build Finished The Dory and the Pram have their short nick names we all seem to use, not sure what to short name this one yet. Started April 8th 2023.
- 40 replies
-
- 4
-
-
- Model Shipways
- Muscongus Bay Lobster Smack
- (and 1 more)
-
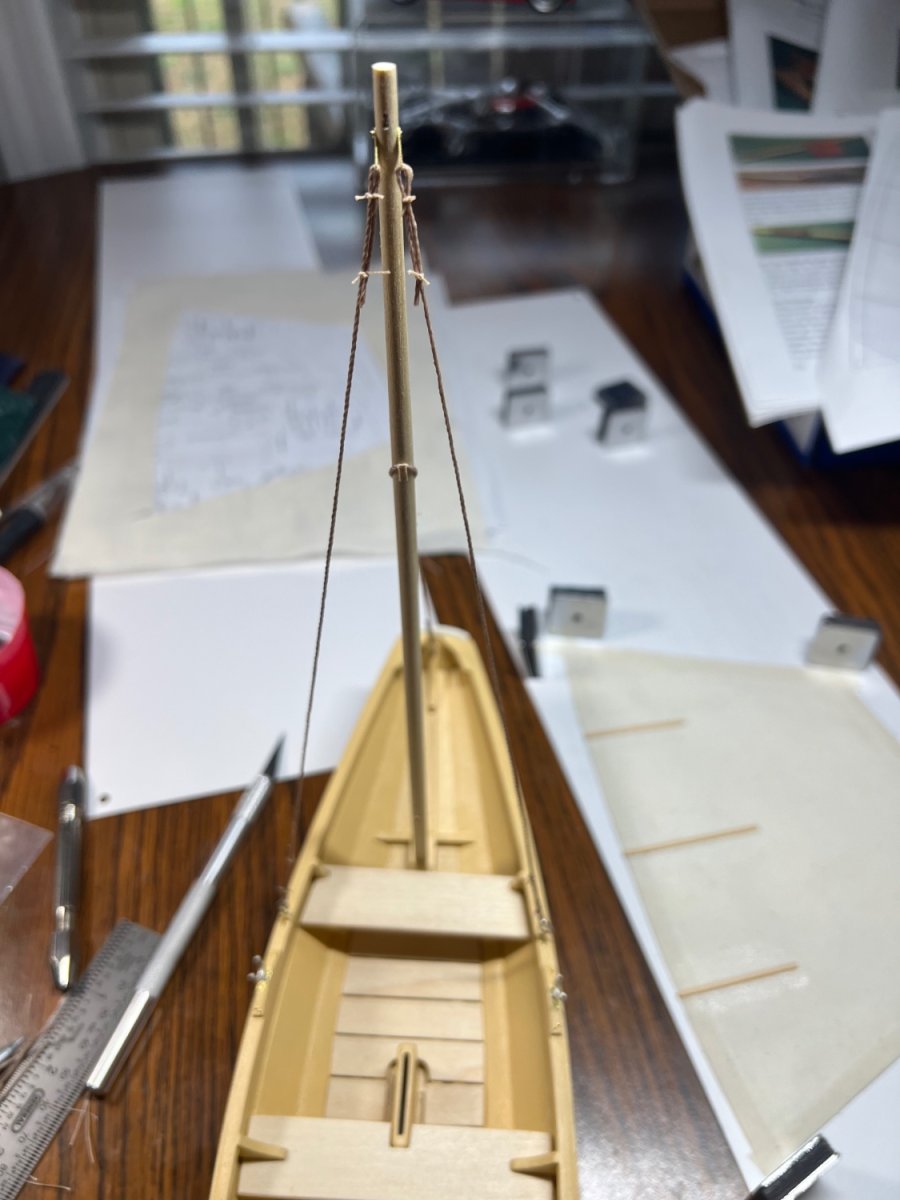
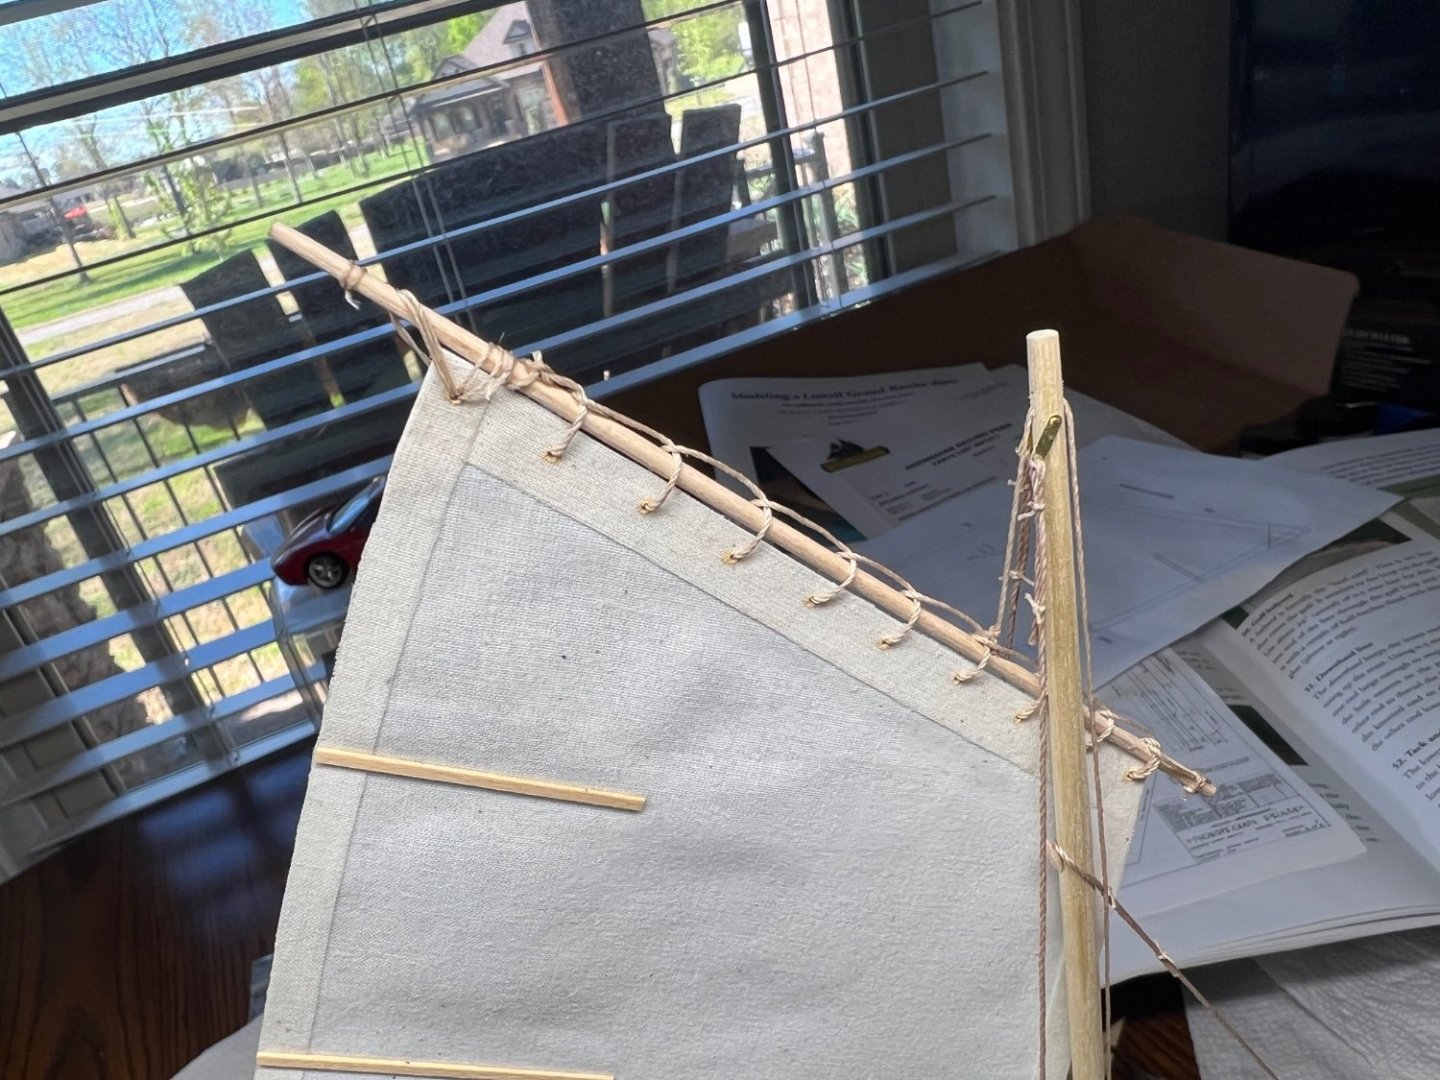
Step 48 making the sail. I should not have cut it out yet, to late. A very sharp blade is needed. The blade was to dull by the last cut, crazy. Step 54 the fore stay. Step 55 the back stays. These turned out way better than I imagined! Tying small knots it harder than it looks. Using the line already with glue on it made it seam easy. Getting closer to being done.


- 72 replies
-
- 7
-
-
- Norwegian Sailing Pram
- Model Shipways
- (and 1 more)
-
I had many extra super tiny nails, so using the real plans I put some details in. Some of the places nails/rivets could go, can’t be reached now. I left the floor, seats, rudder, and dagger board natural wood, with a satin coat. I like a real wood look. I like to see the grain in great pieces. I lost track but I think this has taken 14-16 movies so far lol. Waiting for the sails to dry so I can continue.

- 72 replies
-
- 6
-
-
- Norwegian Sailing Pram
- Model Shipways
- (and 1 more)
-
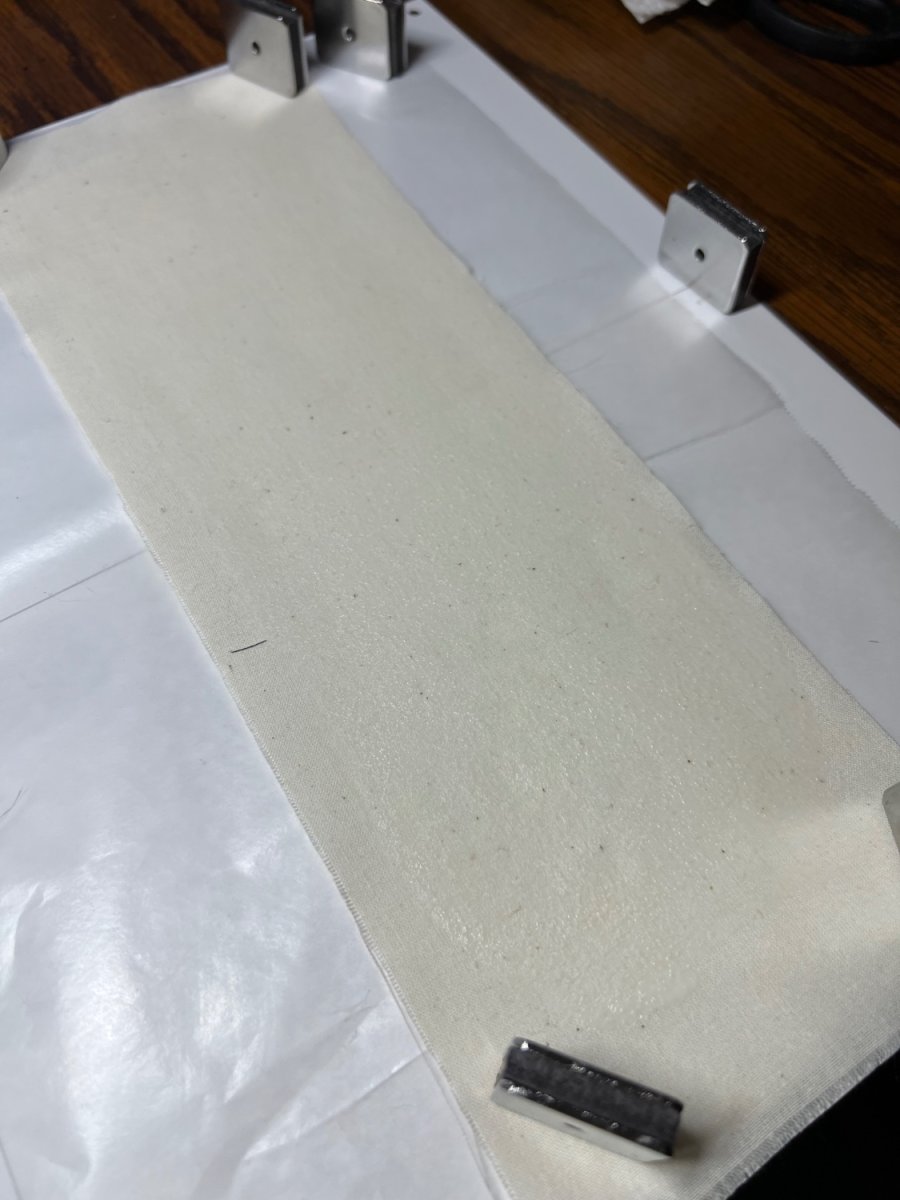
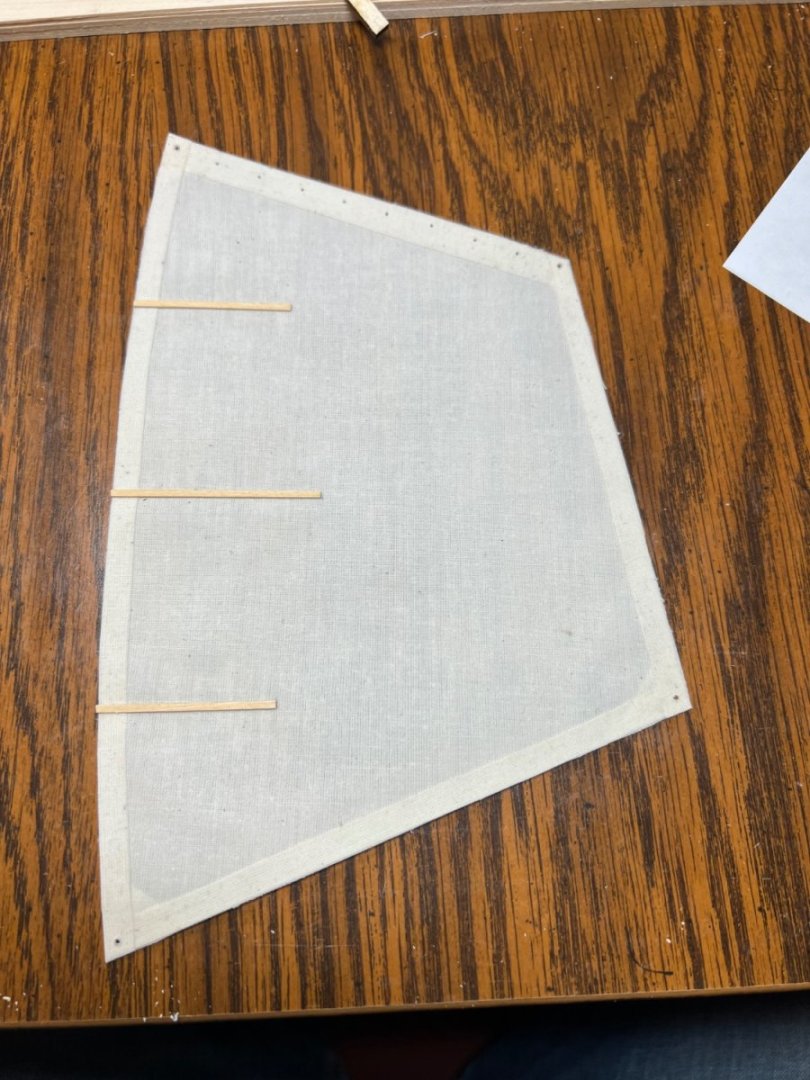
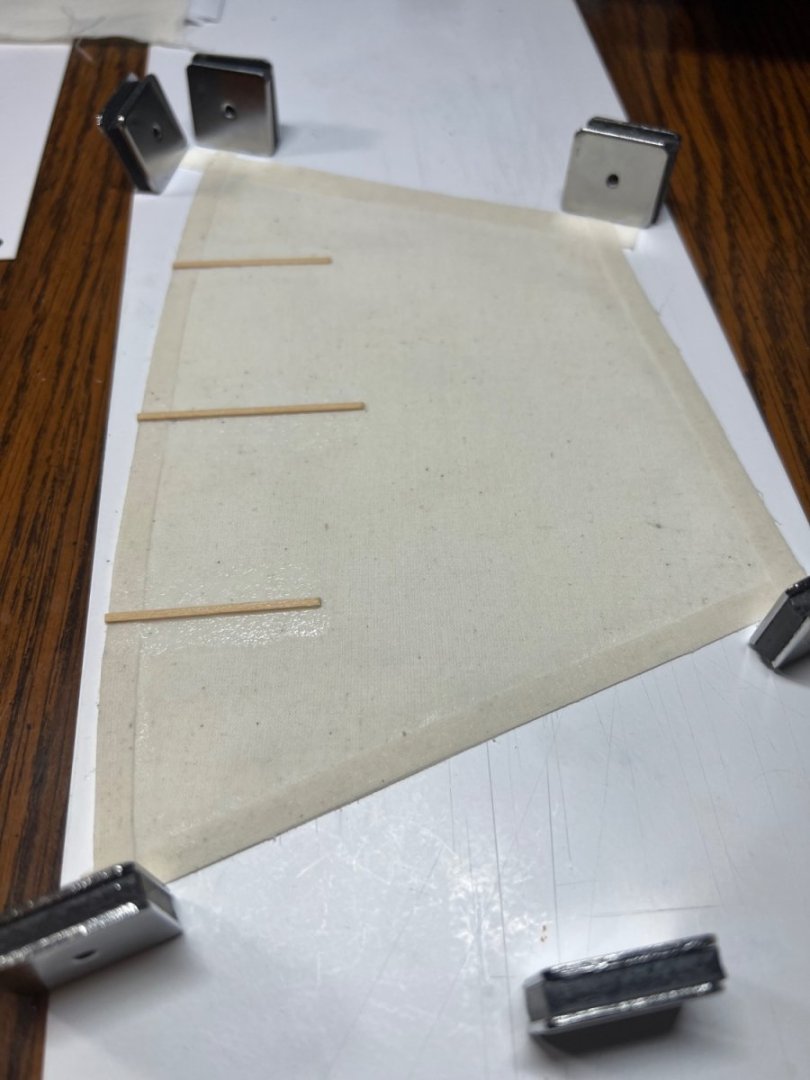
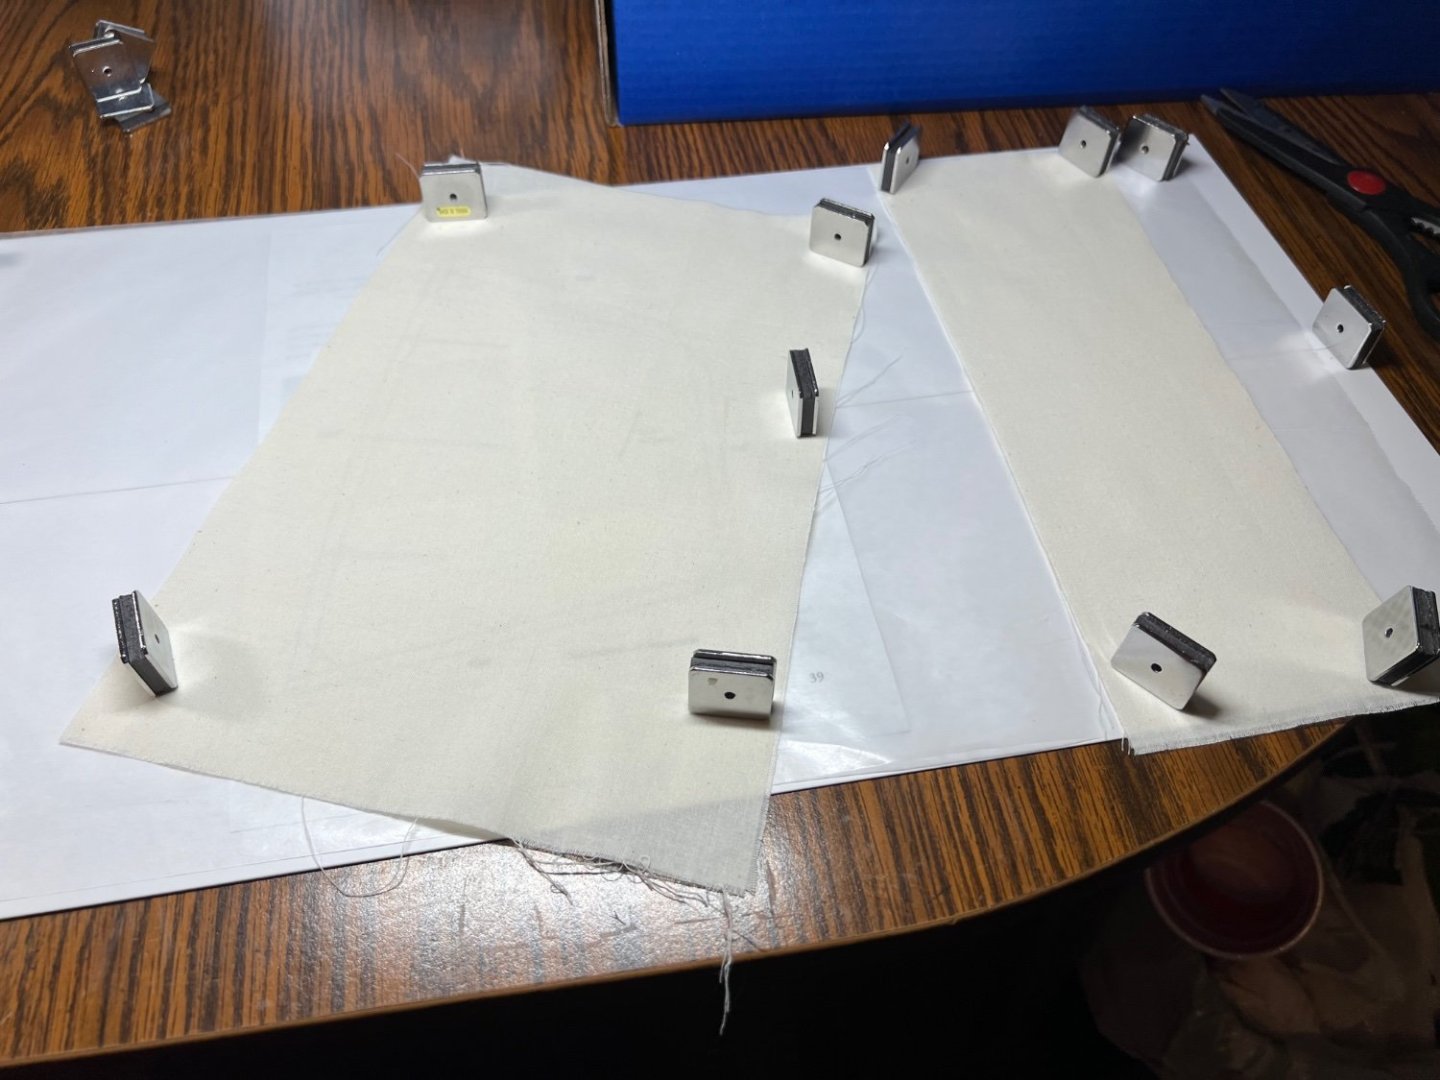
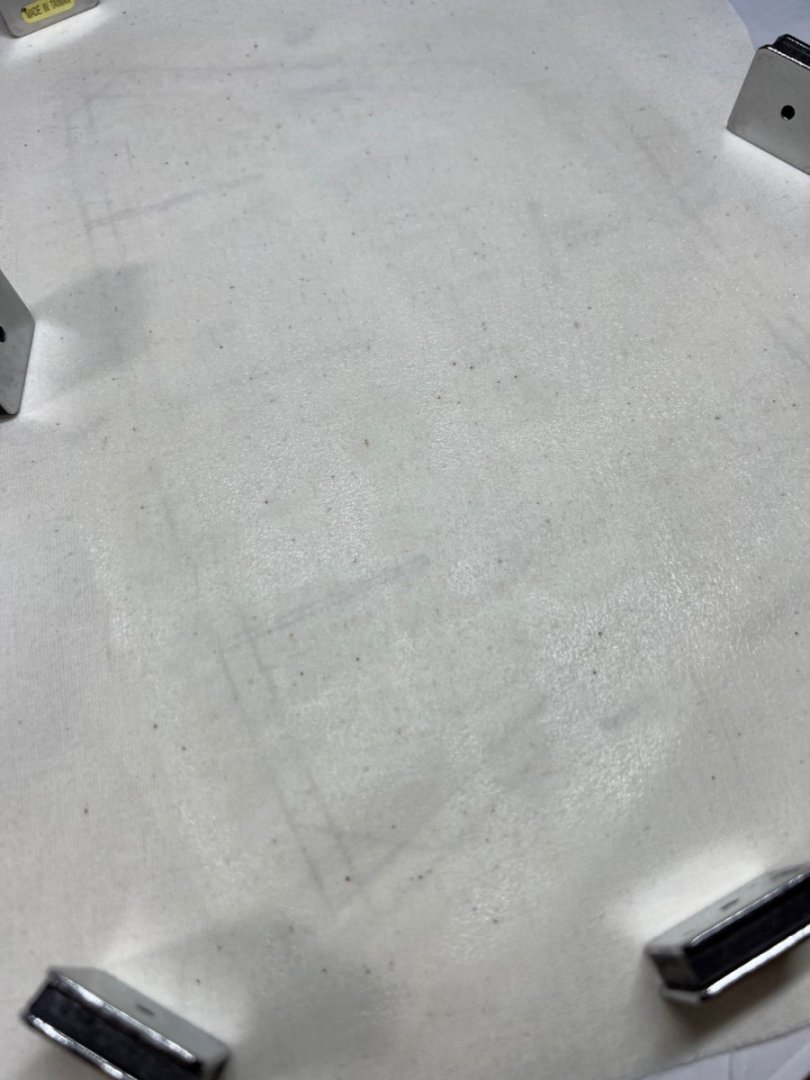
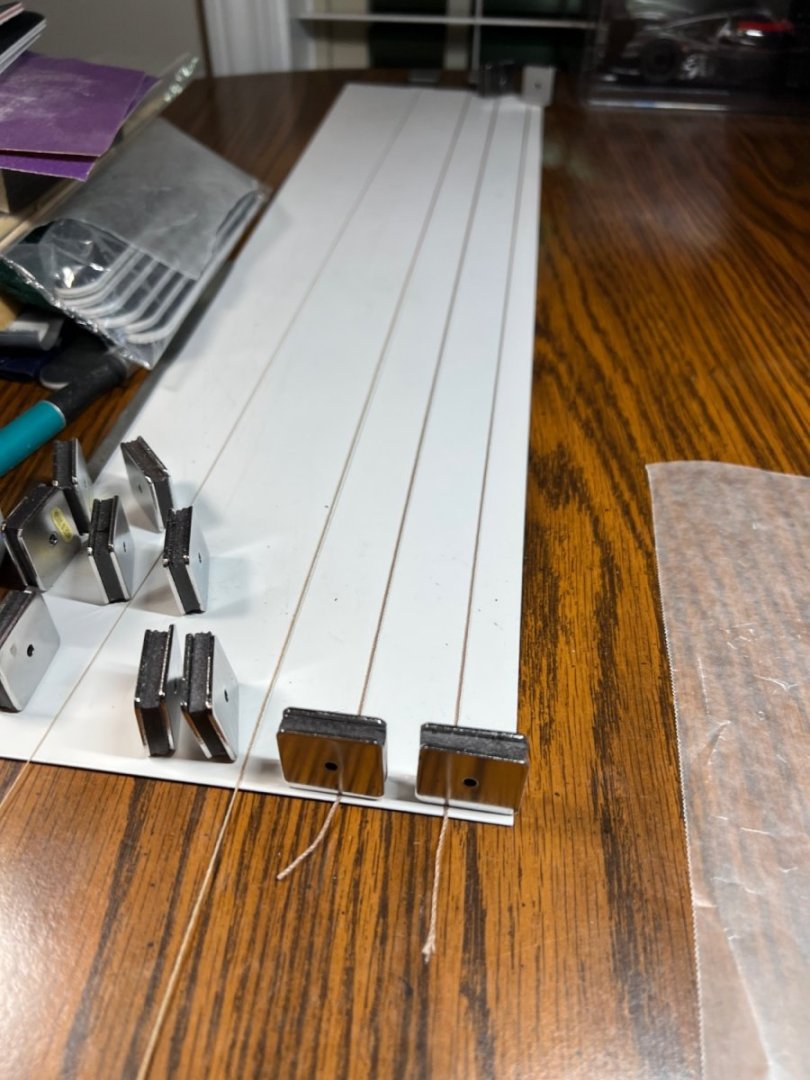
Wax paper for the sails and glue was a bad idea. I don’t have a cutting mat. It sounded like a good idea but the wax paper winkles badly when the glue gets it wet. It was dry enough to put on the metal build plates. This is my first time making a sail. And rigging. The glue stiffened lines are working good so far.


- 72 replies
-
- 4
-
-
- Norwegian Sailing Pram
- Model Shipways
- (and 1 more)
-
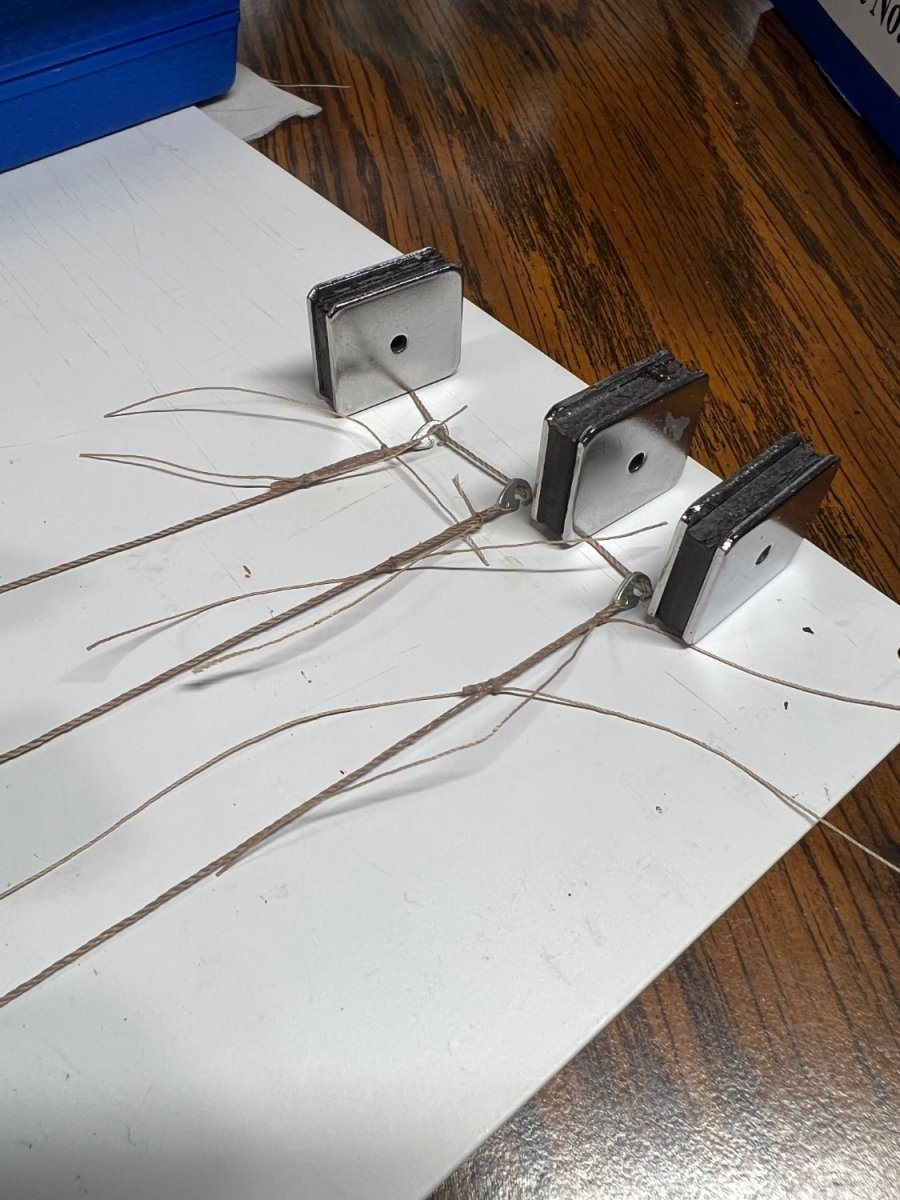
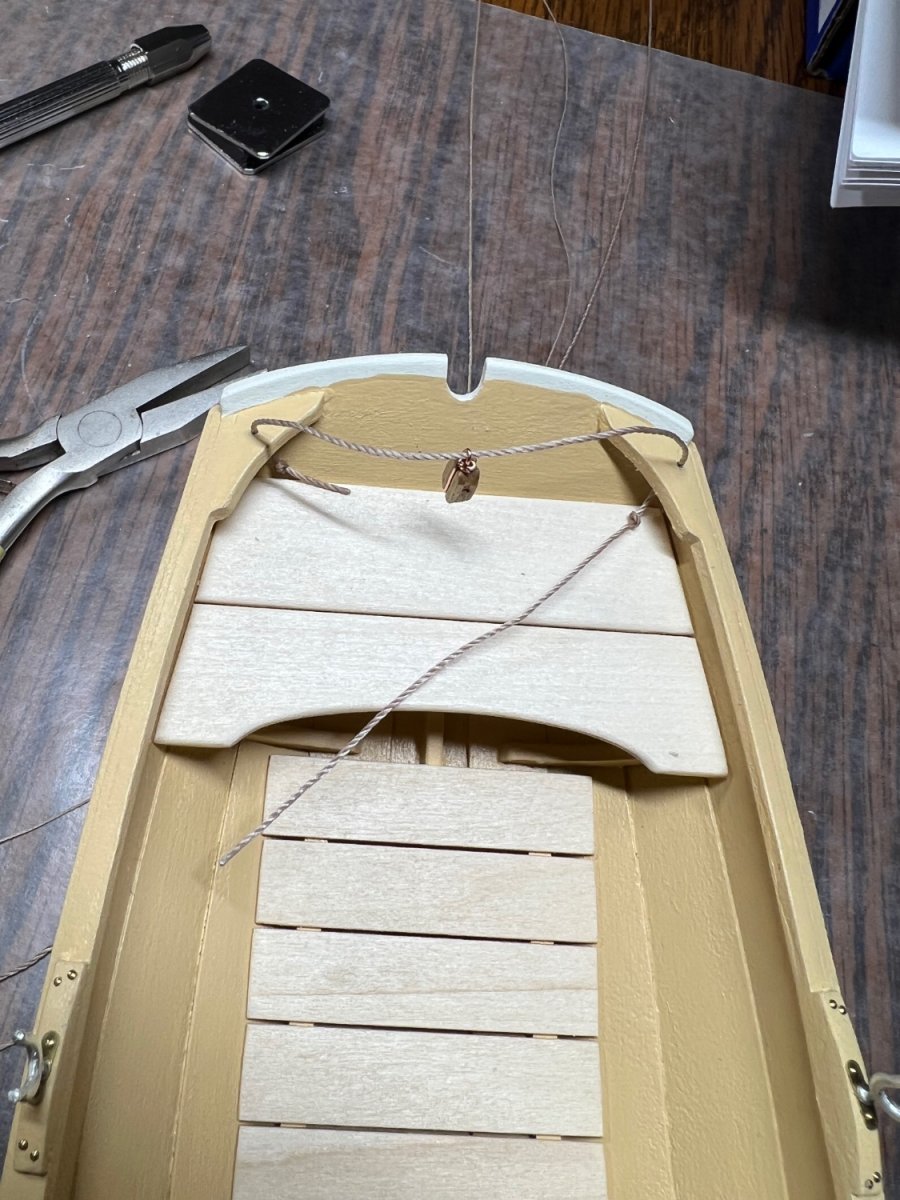
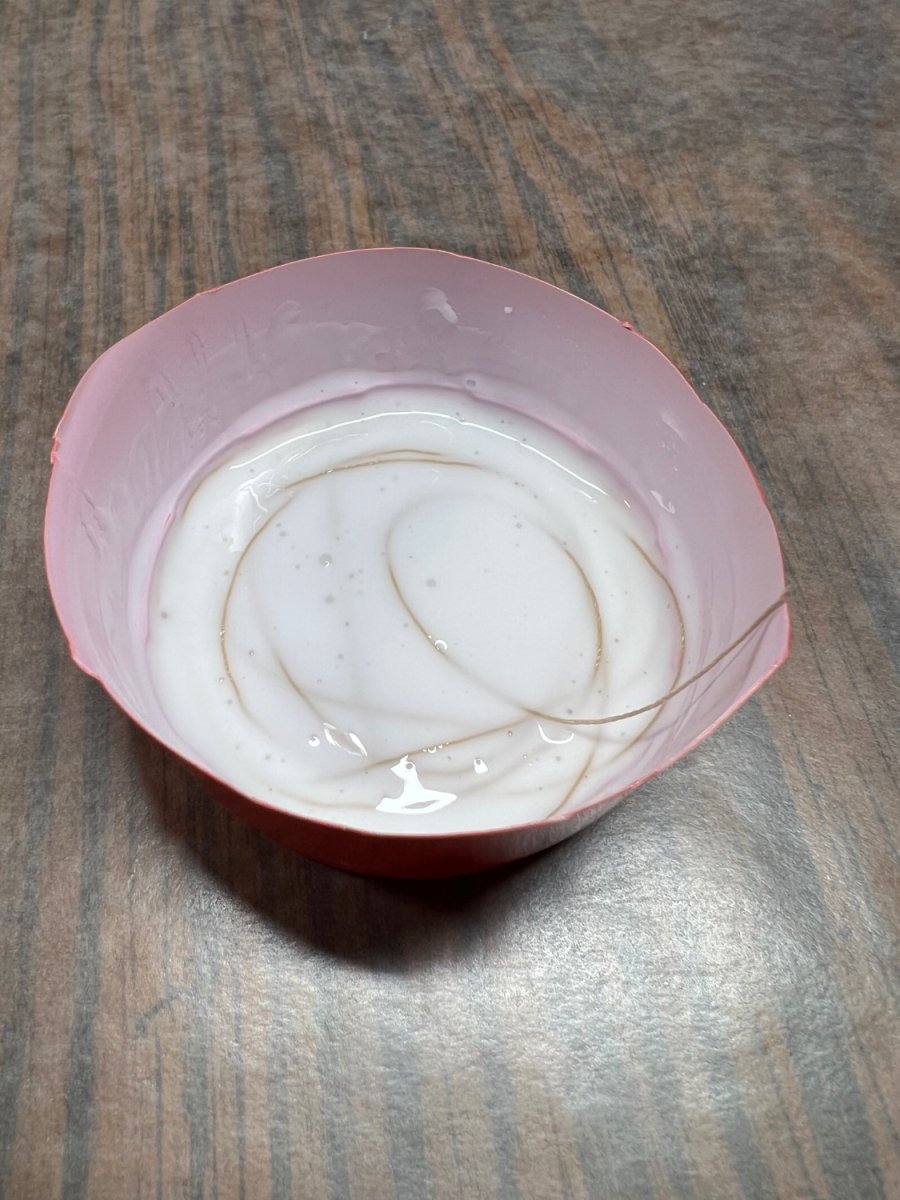
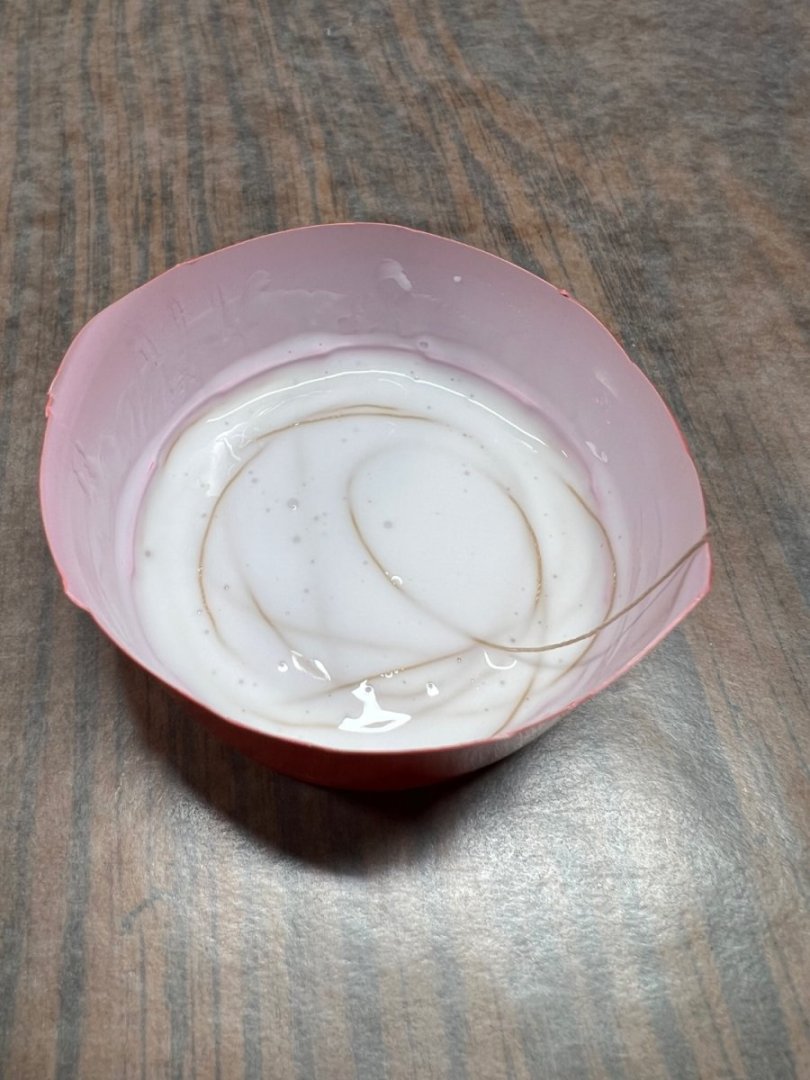
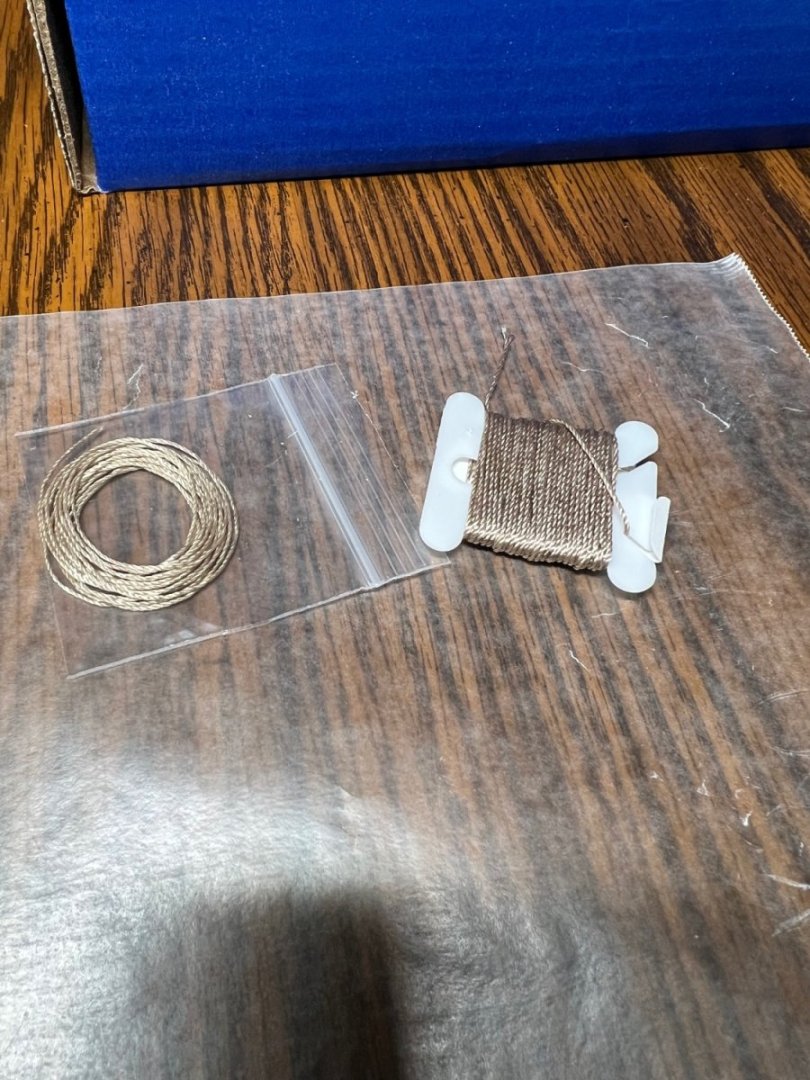
Thank you! I saw a bunch of un raveled ends on someone’s build, I was wondering if I could prevent that. Your Pram is looking great! They look like you could blow on them and they unravel. So I came up with this idea. A glue bath. Then stretched them out to dry. The Dory build gave me the idea, but my Dory knots are a hot mess.
- 72 replies
-
- 3
-
-
- Norwegian Sailing Pram
- Model Shipways
- (and 1 more)
-
I used thick CA, I thought it would give me working time. The epoxy is a great idea, I didn’t even think of it. I should have soldered them, I don’t have a solder station at the house.
- 72 replies
-
- 2
-
-
- Norwegian Sailing Pram
- Model Shipways
- (and 1 more)
-
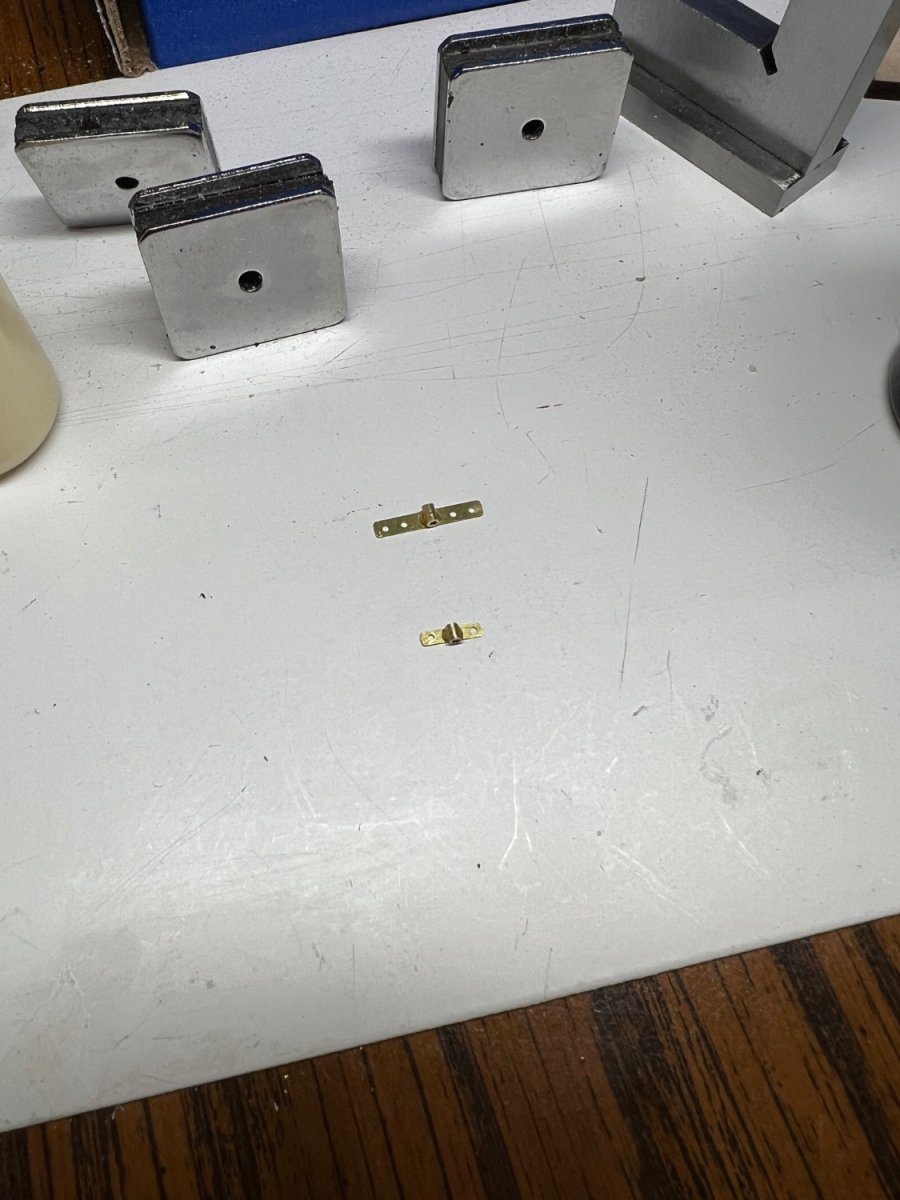
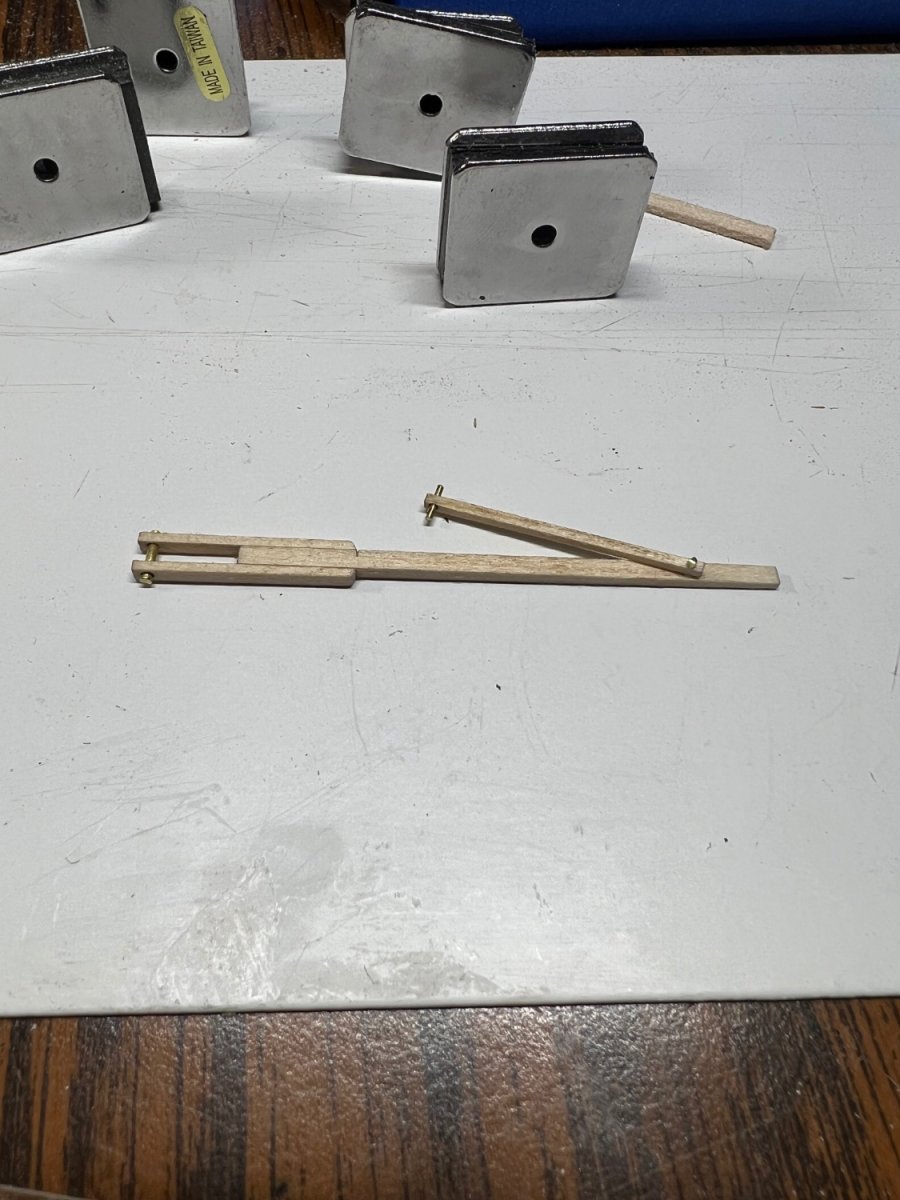
Step 43 the mast fittings are completed. The real plans and the given instructions I think it’s close to what was intended. I want to find some copper sheet for the chafing pad. Step 38 and 39 the rudder gudgeons and pintles are done. I annealed the brass with a small torch. It almost gets to soft, that’s neat to see. From snap hard to pliable. The little nails from Micro Mark work perfect to attach the gudgeons. A small starter hole and it fits very snug. It’s a challenge with super glue to get the parts straight. They have NO working time. Stick, stuck, not moving for placement if I missed. I got used to the wood glue with 5-15 seconds of working time. Oars, I don’t like making oars. They are next.


- 72 replies
-
- 5
-
-
- Norwegian Sailing Pram
- Model Shipways
- (and 1 more)
-
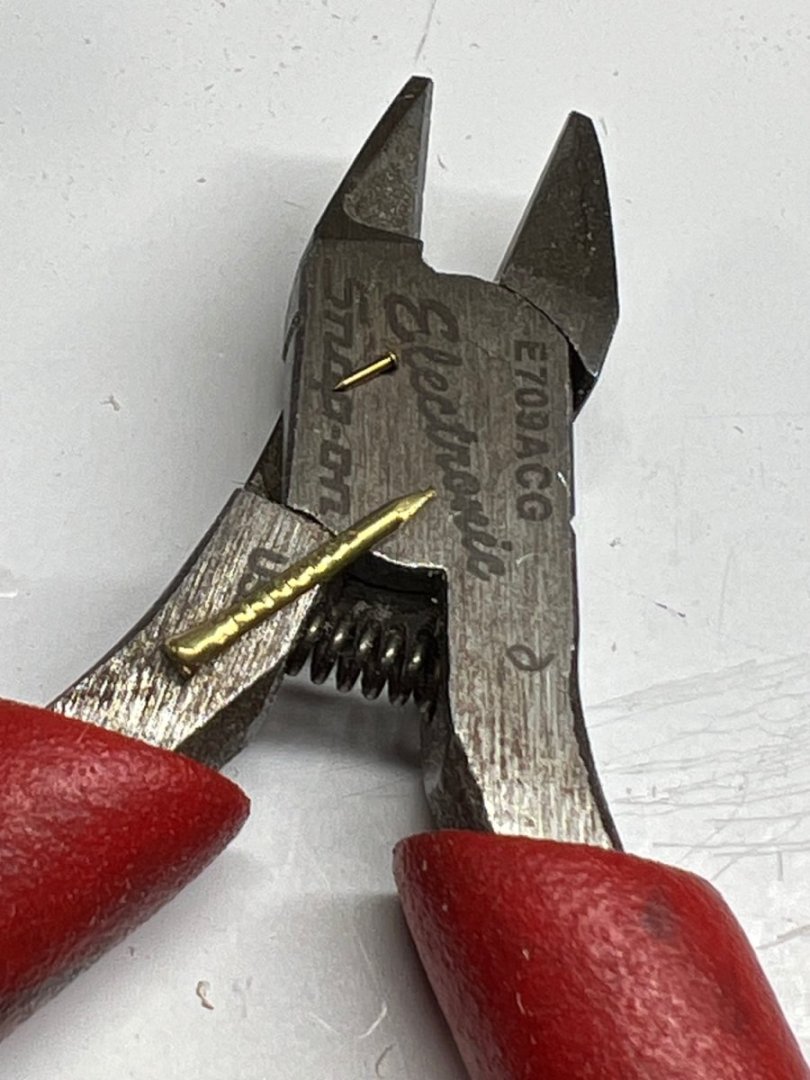
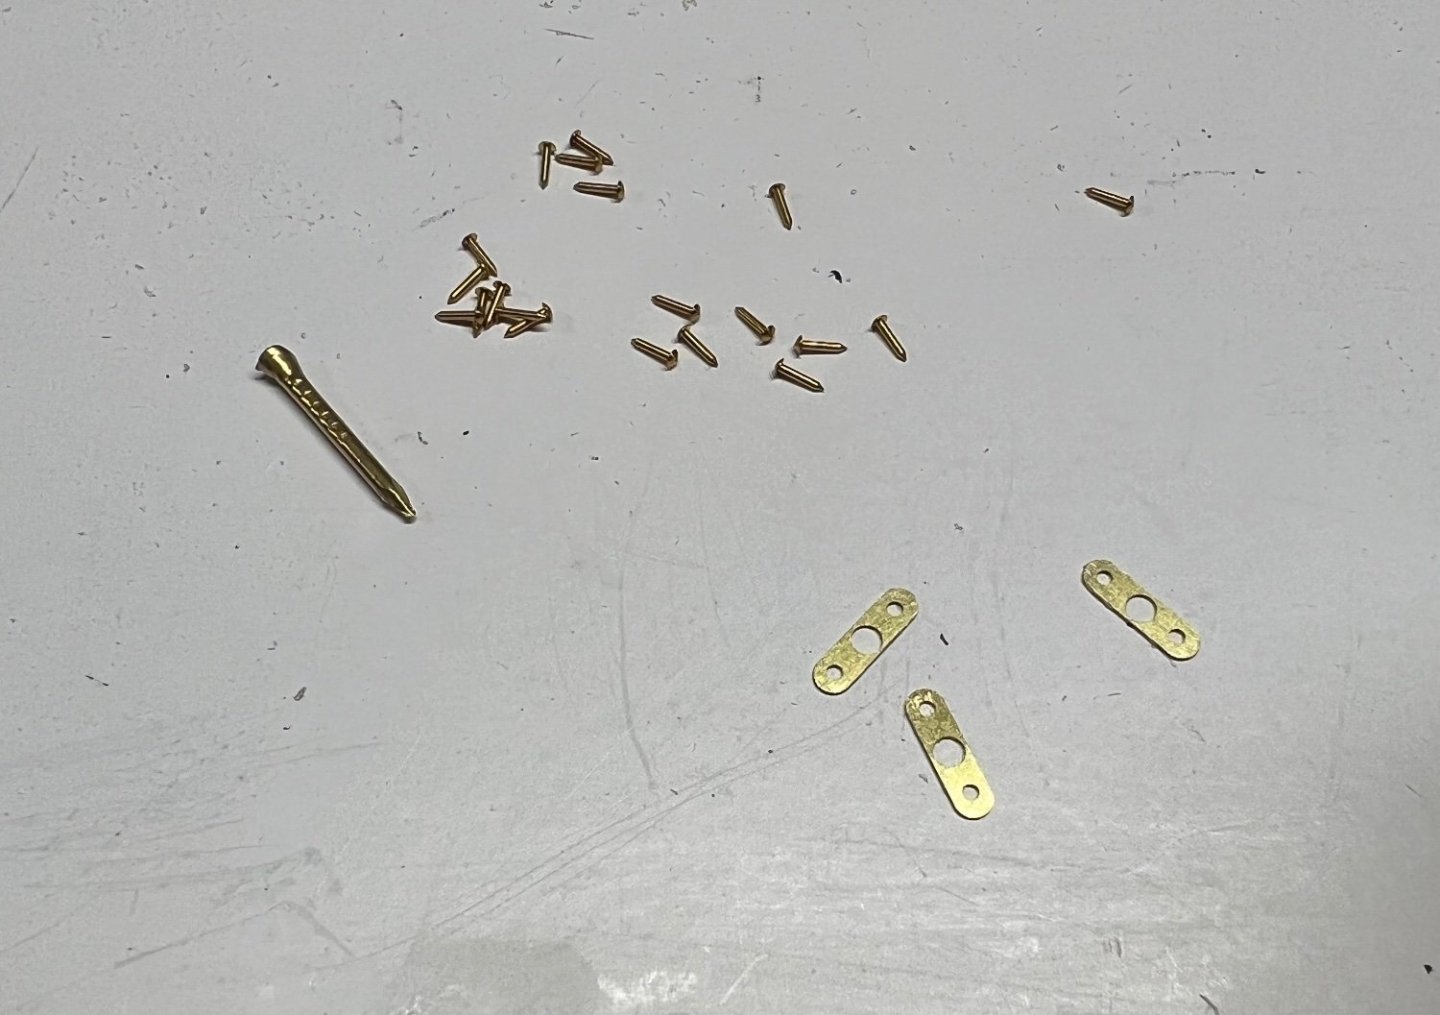
I may have over compensated with the nail size. It went to far the smaller direction. BUT. They work perfect for some details. I will have may small brass nail sizes shortly, I’m sure they will be used other places. 😀 The slots are 3” scale, not the intended 2” scale, oops. The down haul will just have to wiggle some. Shhh no one will know…. Can make a small hole bigger but can’t make a big hole smaller. I bought the full Pram drawings and instructions to build the real boat for $30. It was well worth it to see how to do a few things better. I’ll make an edit to my first post about this. I can complete the mast, gaff, and boom correctly now. The provided instructions give no way to do so with any accuracy. Looking at the completed Pram list, only one of the started kits is finished, I think that’s telling. The Dory has a high complete % as does the Muscongus Bay lobster smack.


- 72 replies
-
- 5
-
-
- Norwegian Sailing Pram
- Model Shipways
- (and 1 more)
-
Metal work, sails and lines are left to do.

- 72 replies
-
- 7
-
-
- Norwegian Sailing Pram
- Model Shipways
- (and 1 more)
-
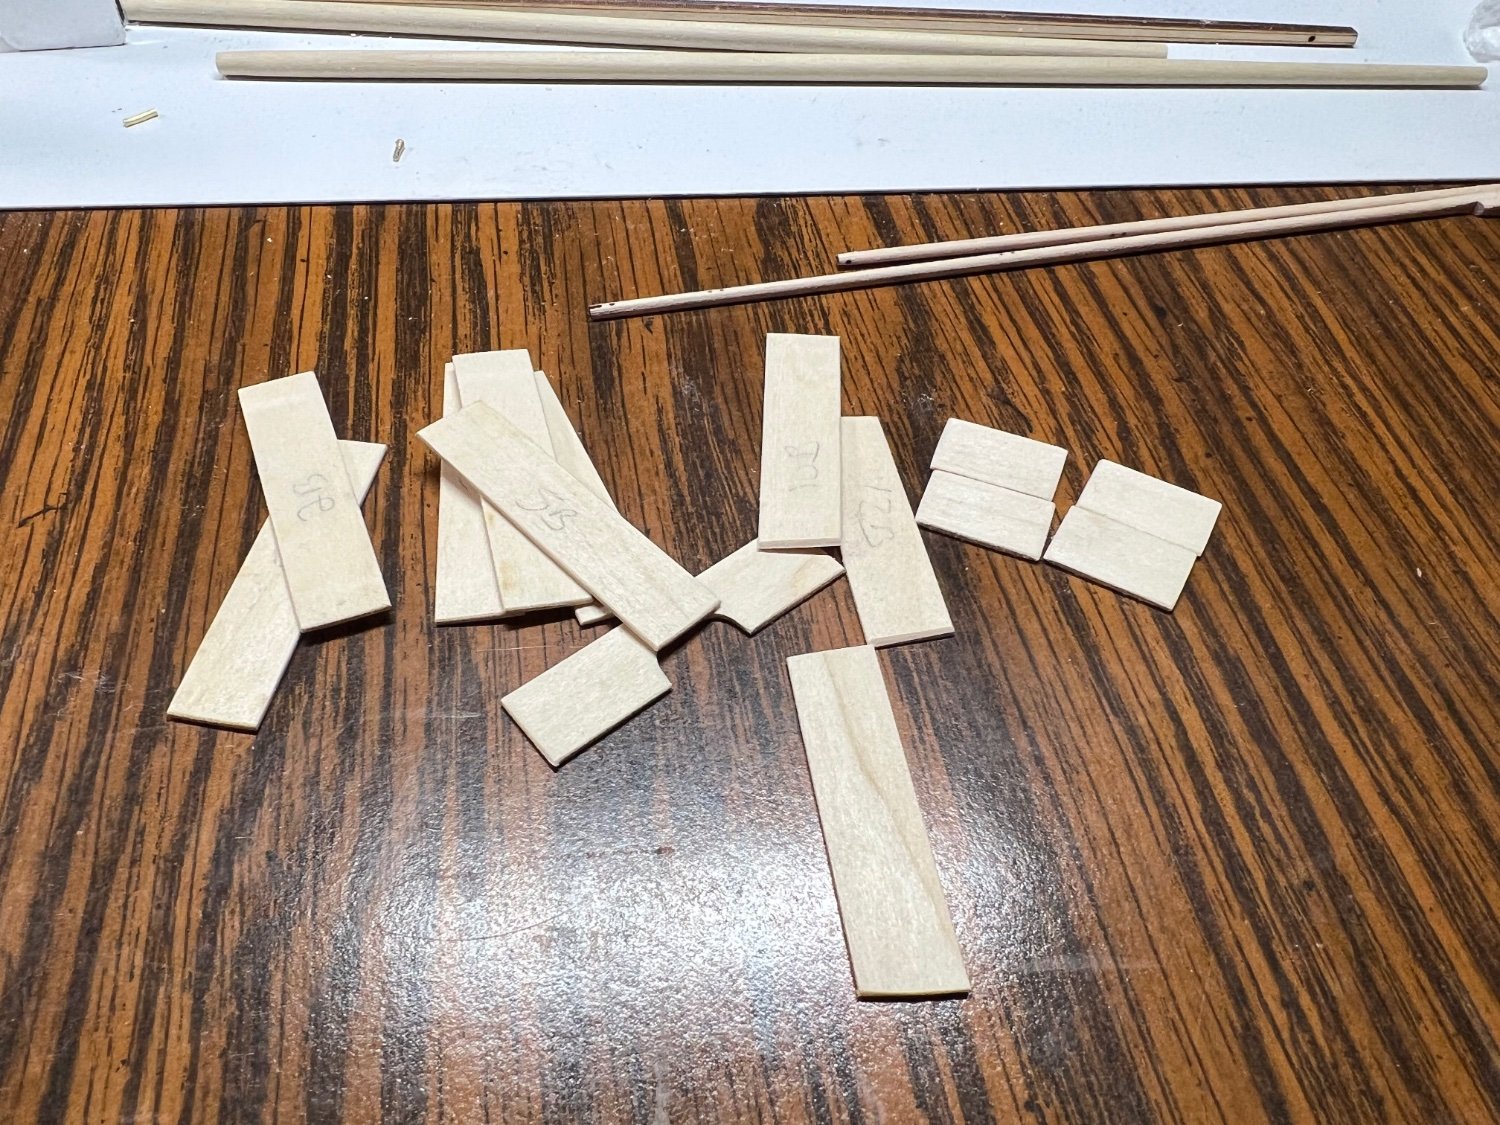
Second inside coat of paint and it’s dry. Trial fitting the thwarts and stern sheets. Painted with MS 4972 Clear Satin. Gaff and boom sanding to shape. Learned to sand the oars this way by drawing them on a piece of 150 and 220. Easy to keep control, make them round. Then finished off with a curved small piece of 220 to take off the edges. They look pretty good. Not very strong but look like they should I think. The brass nails in the kit are the size of pencils I ordered some smaller nails to make that part easier. Micro Mark has tiny brass nails and way to much other stuff. Nails cost me almost $200. My wife can’t see this thread, I hope lol.

- 72 replies
-
- 7
-
-
- Norwegian Sailing Pram
- Model Shipways
- (and 1 more)
-
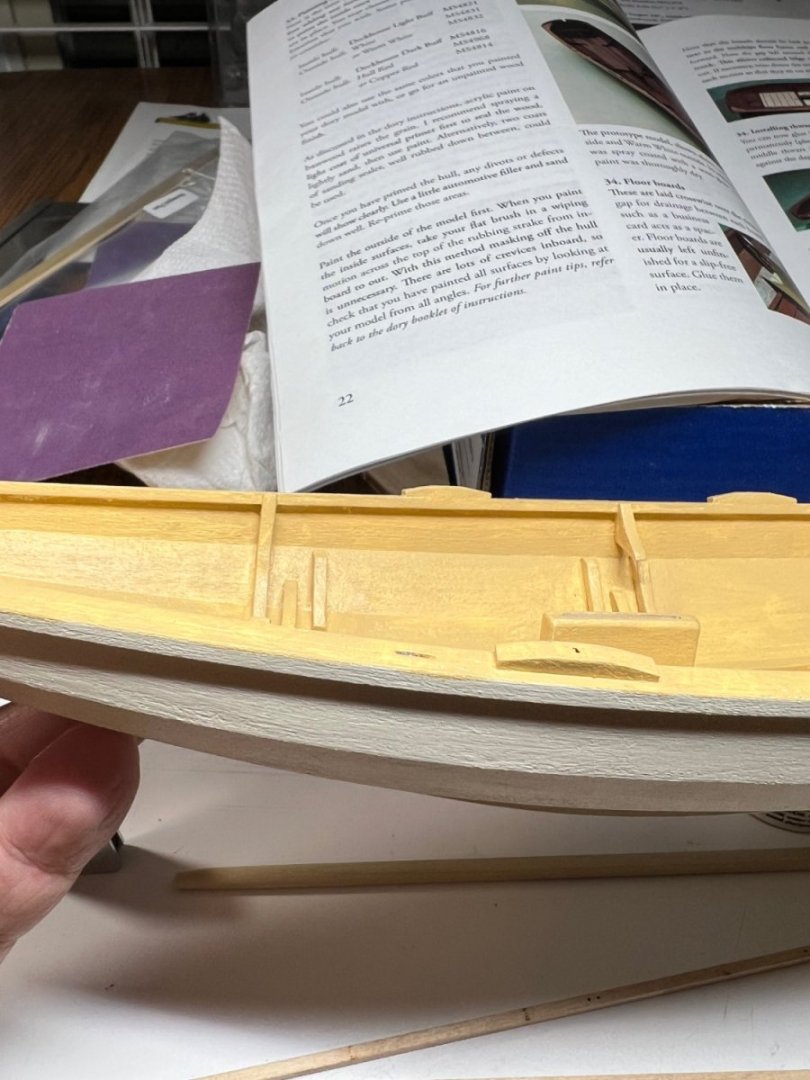
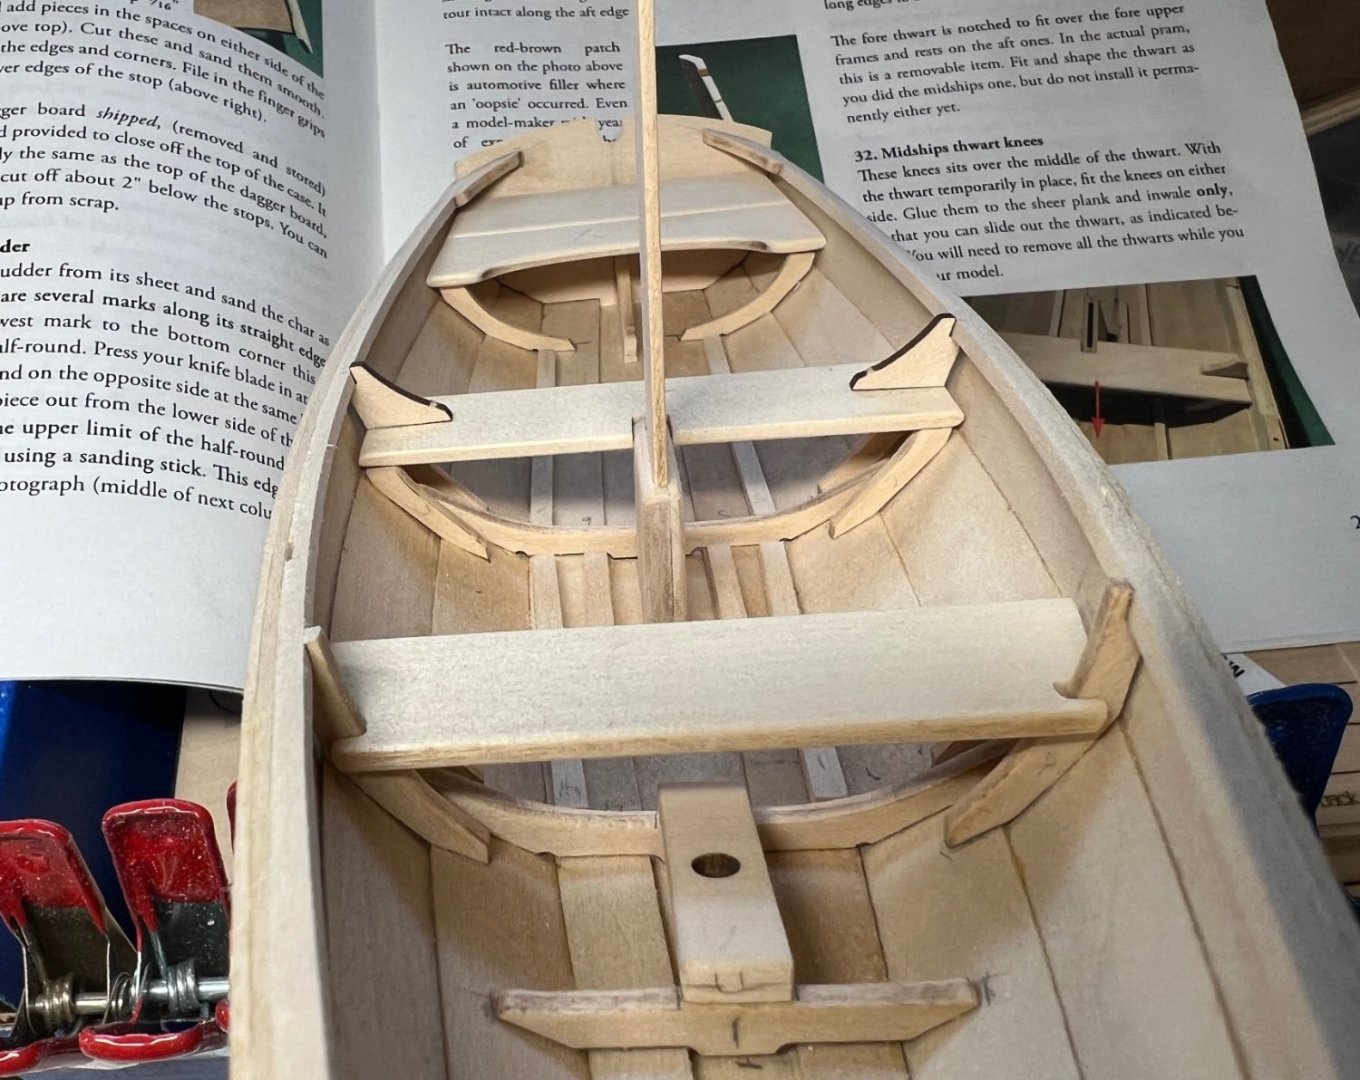
@WizardOfOs Thank you. I’m jumping around too while I paint step 33. I’m working on step 34 Floor Boards still, sanding and such. I completed step 34 Installing Thwarts and strern sheets not a typo lol. Thanks for step 54. I read most of it trying to find it. I fitted it already so I don’t damage my painting.
- 72 replies
-
- 2
-
-
- Norwegian Sailing Pram
- Model Shipways
- (and 1 more)
-
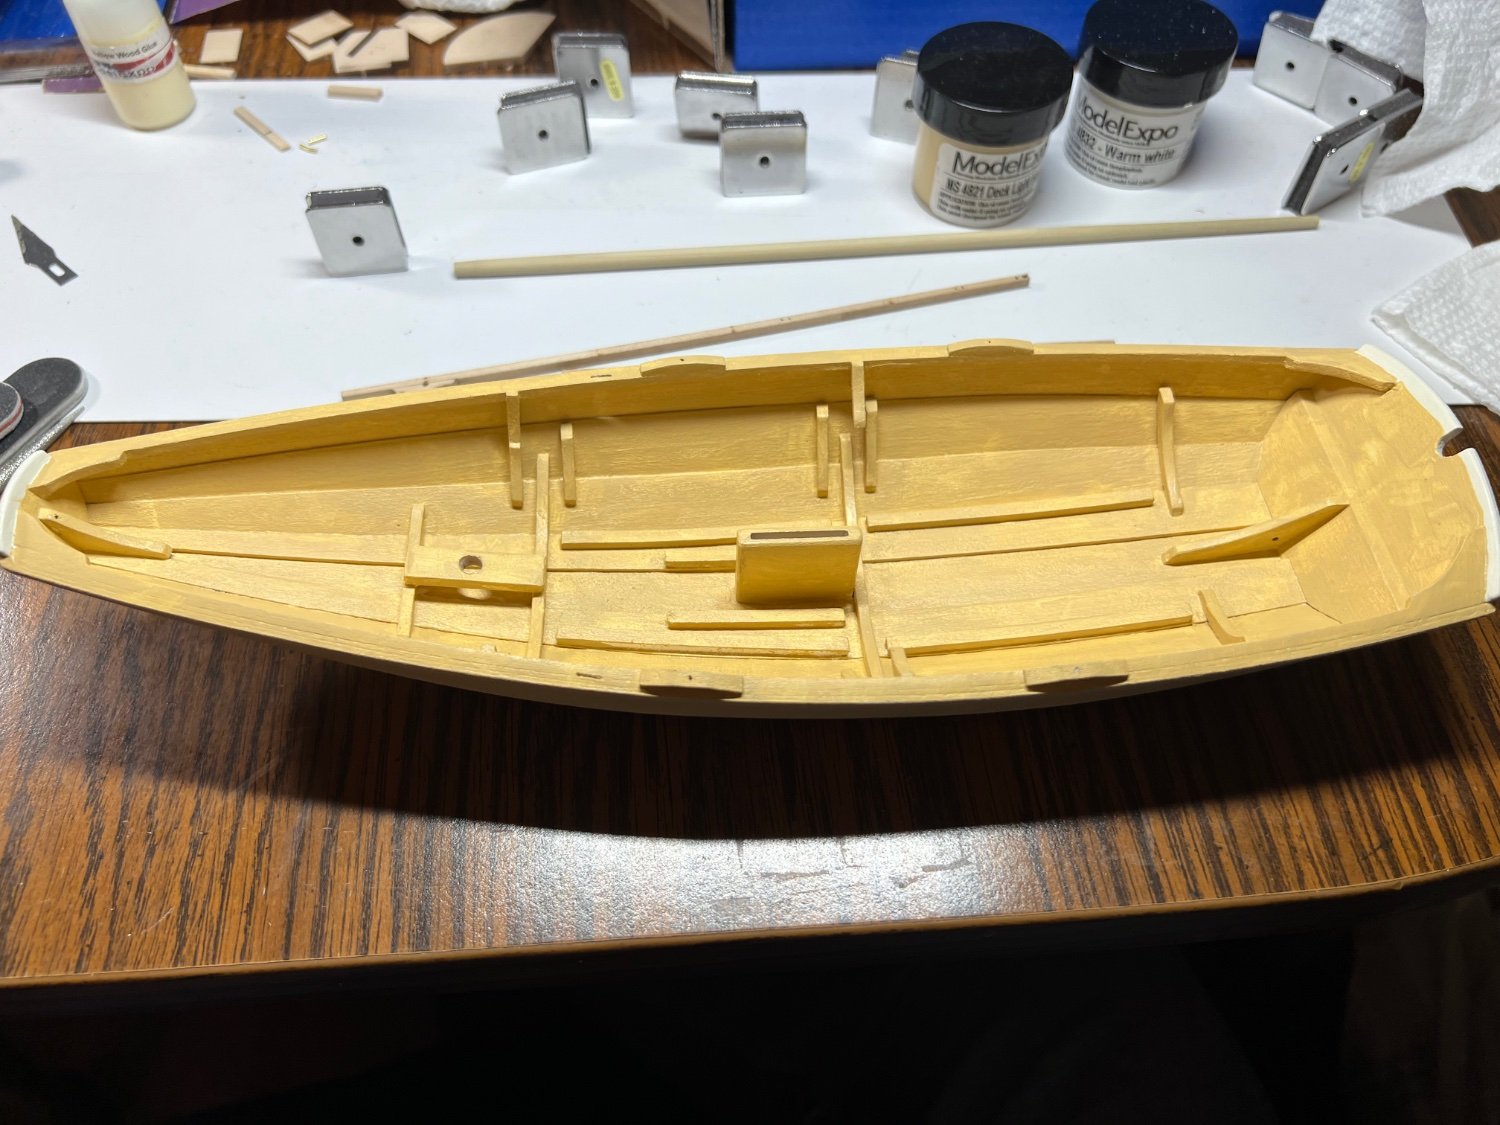
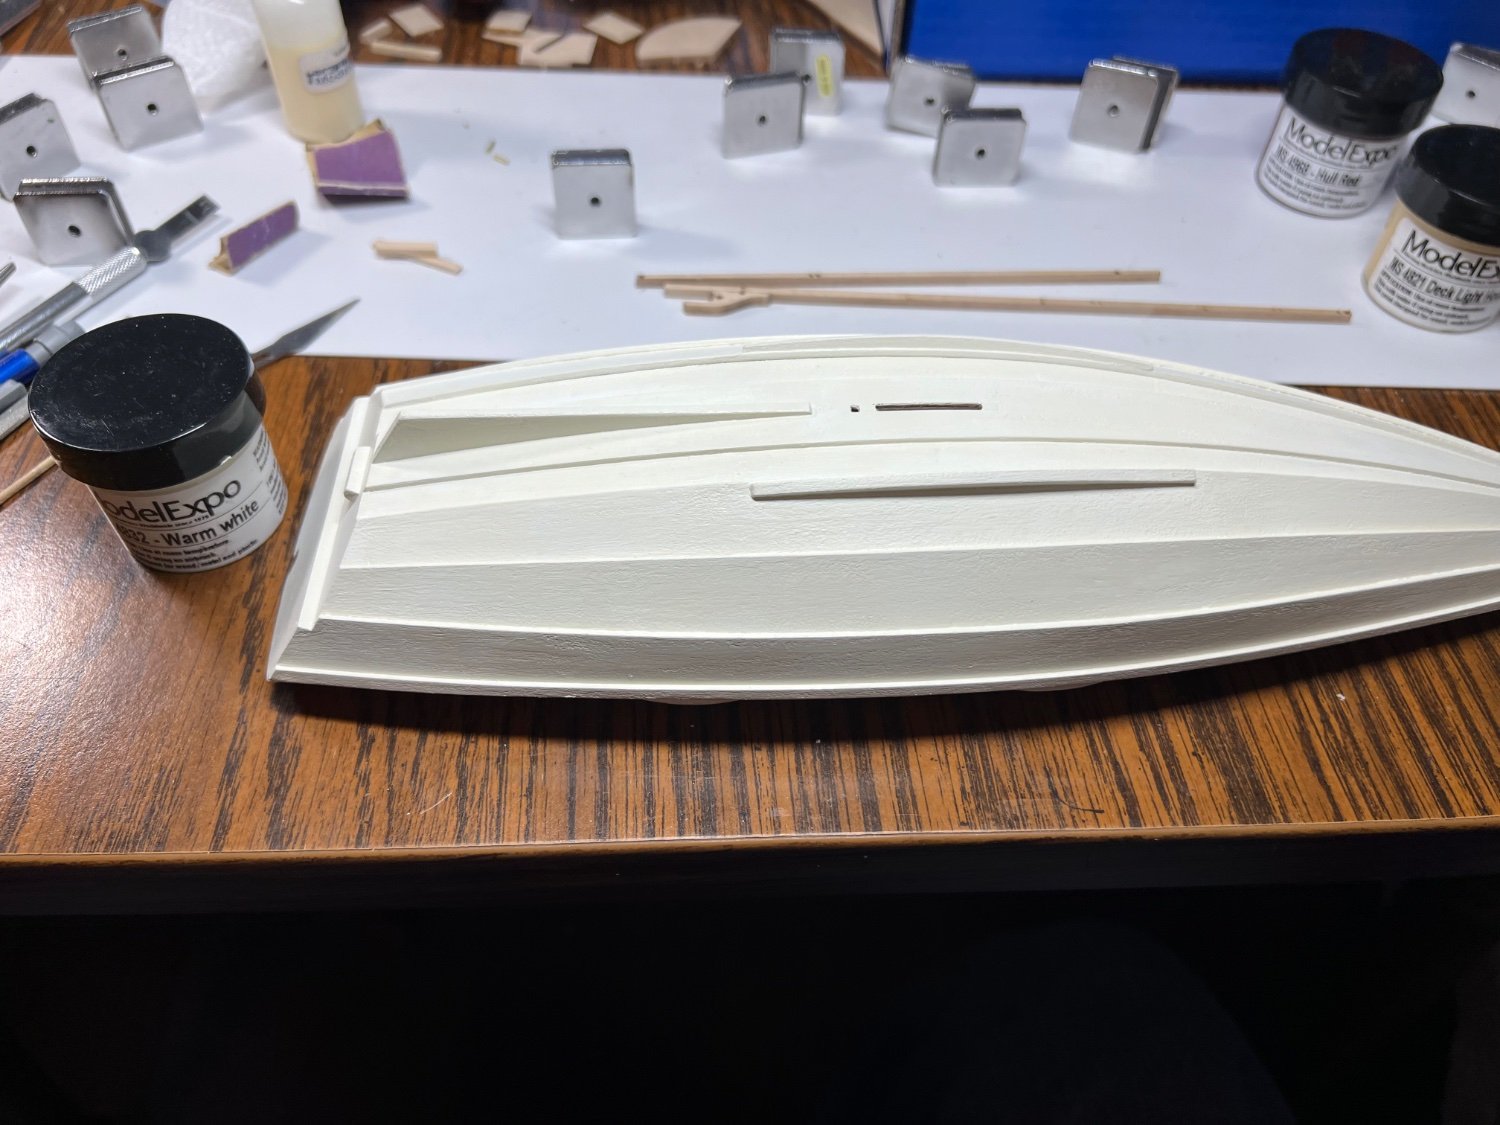
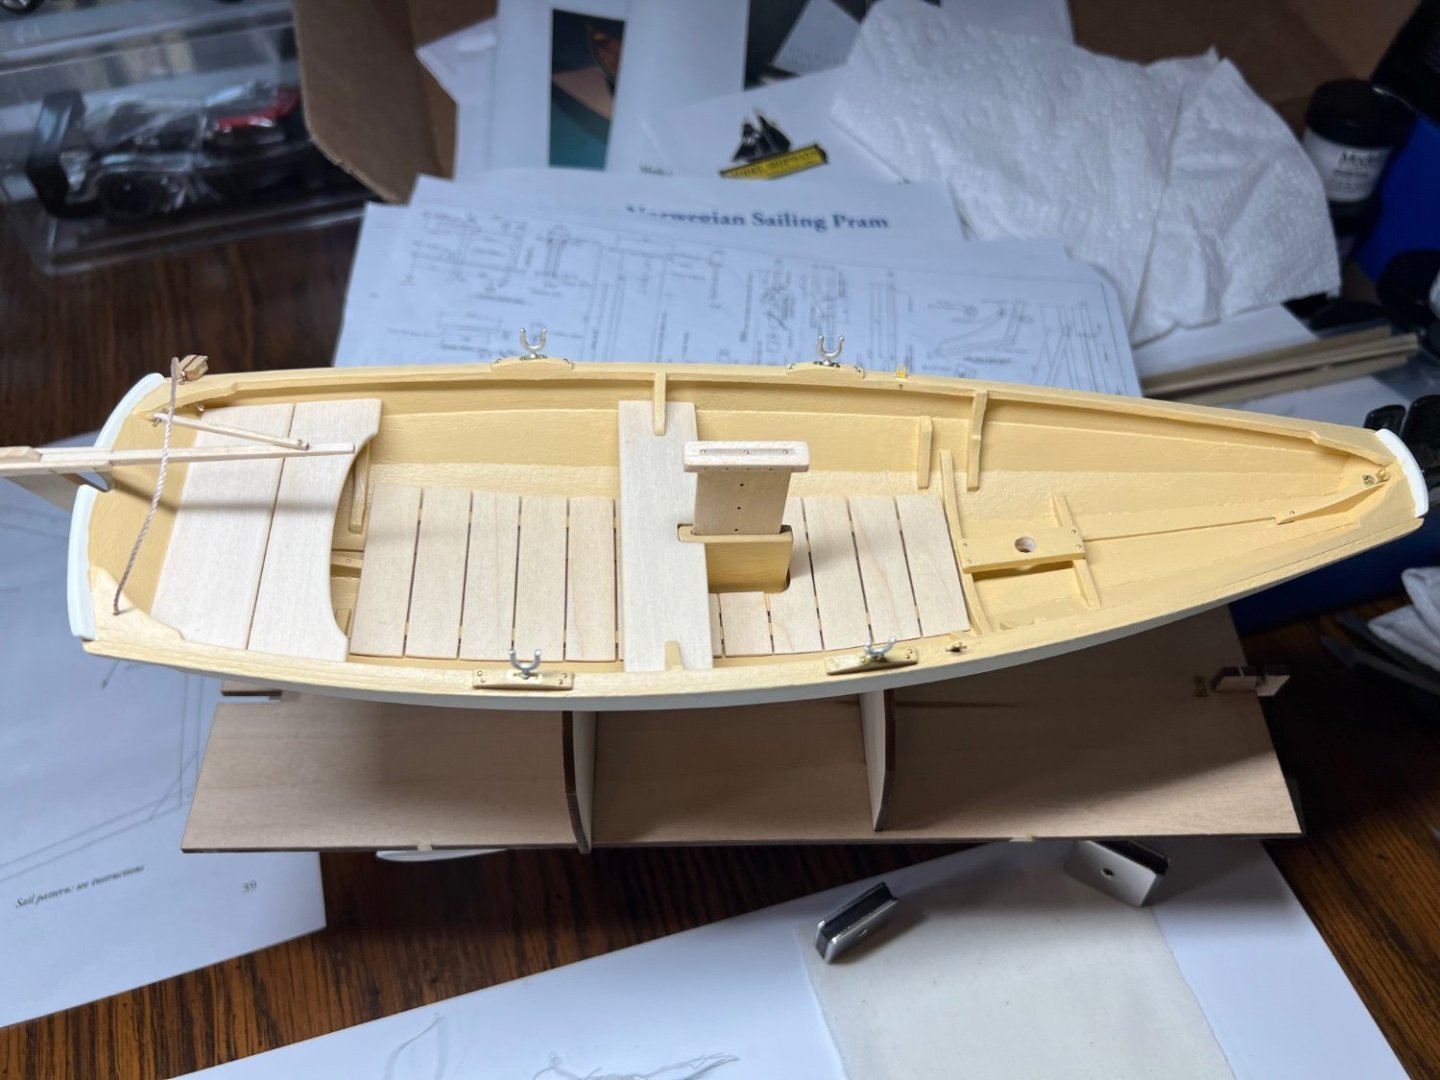
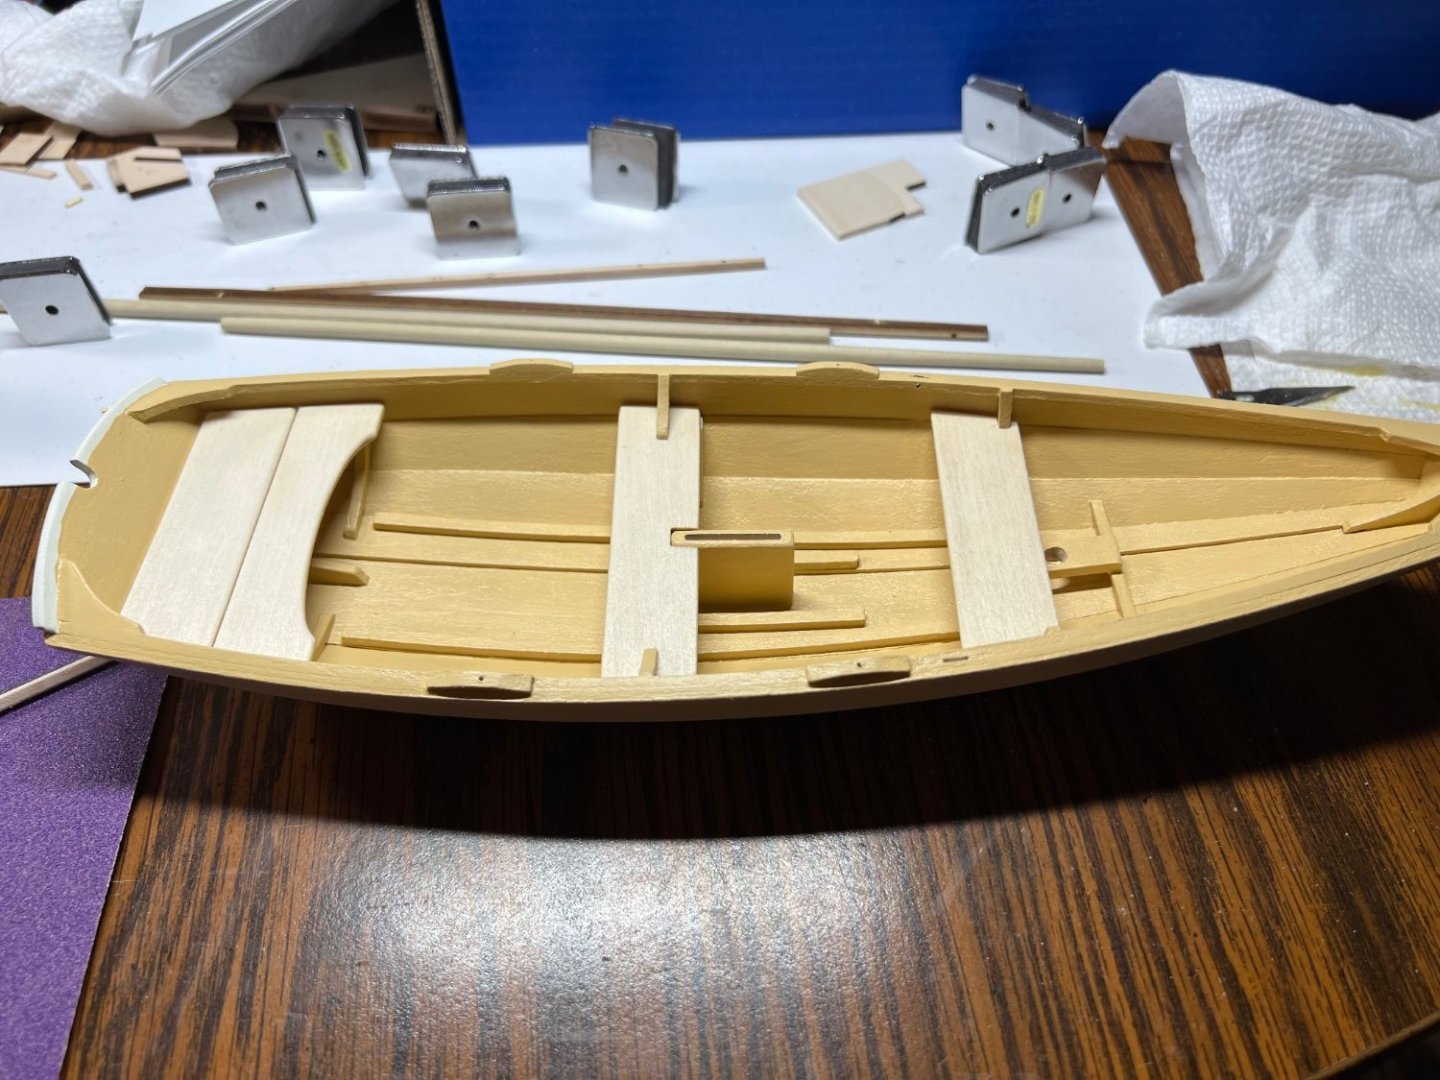
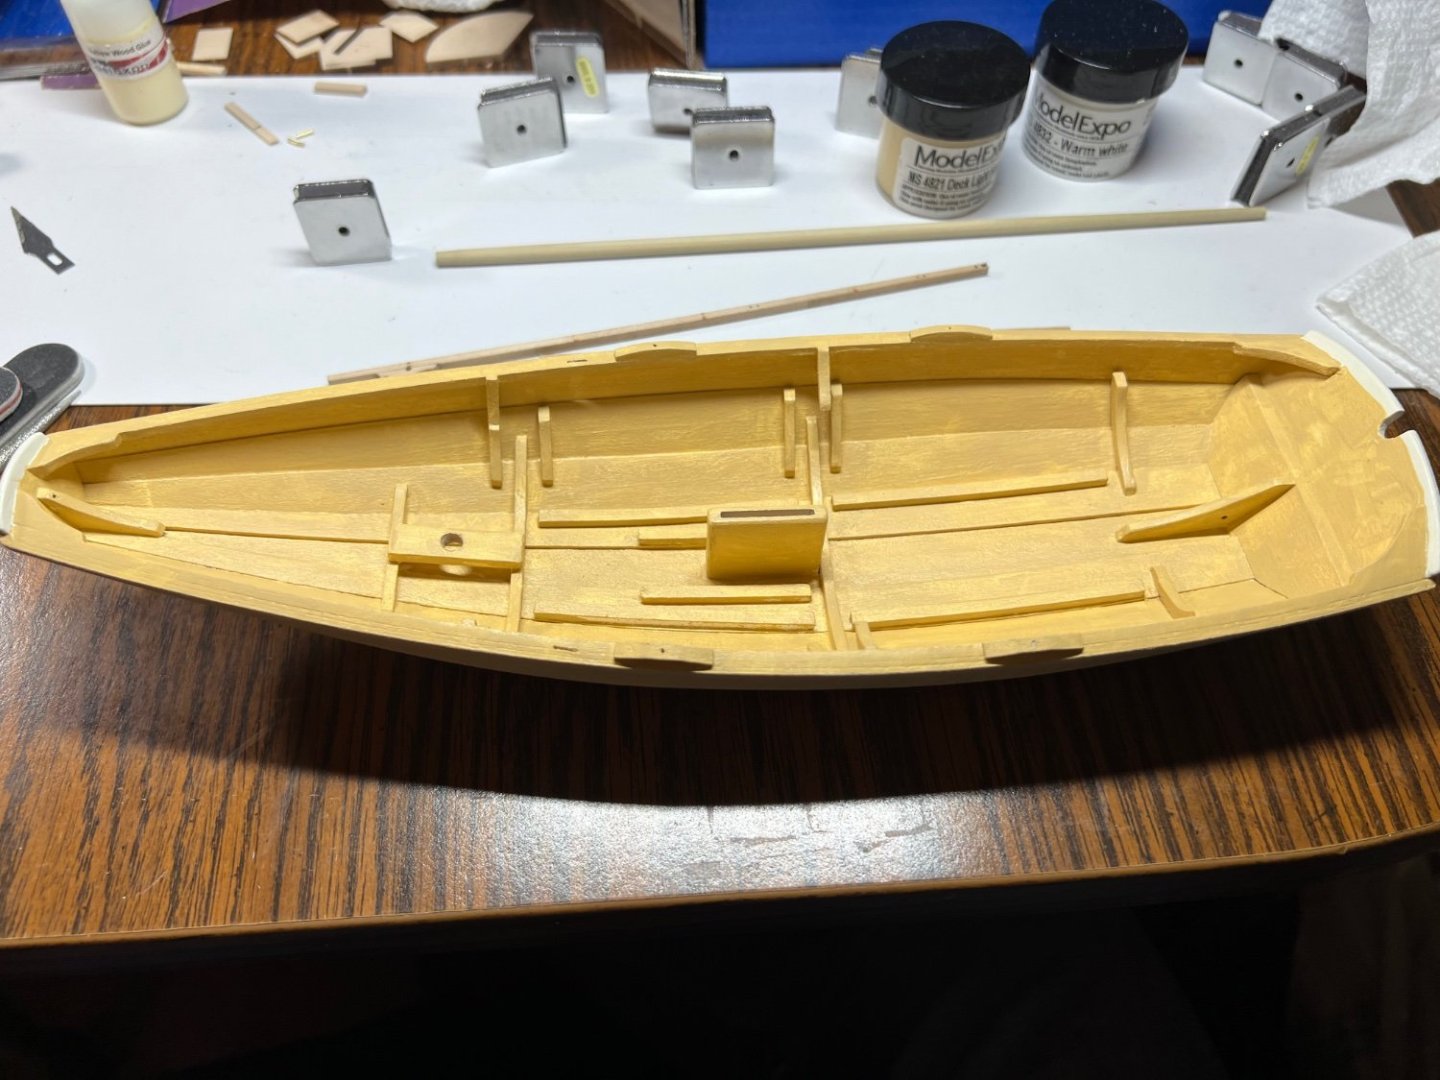
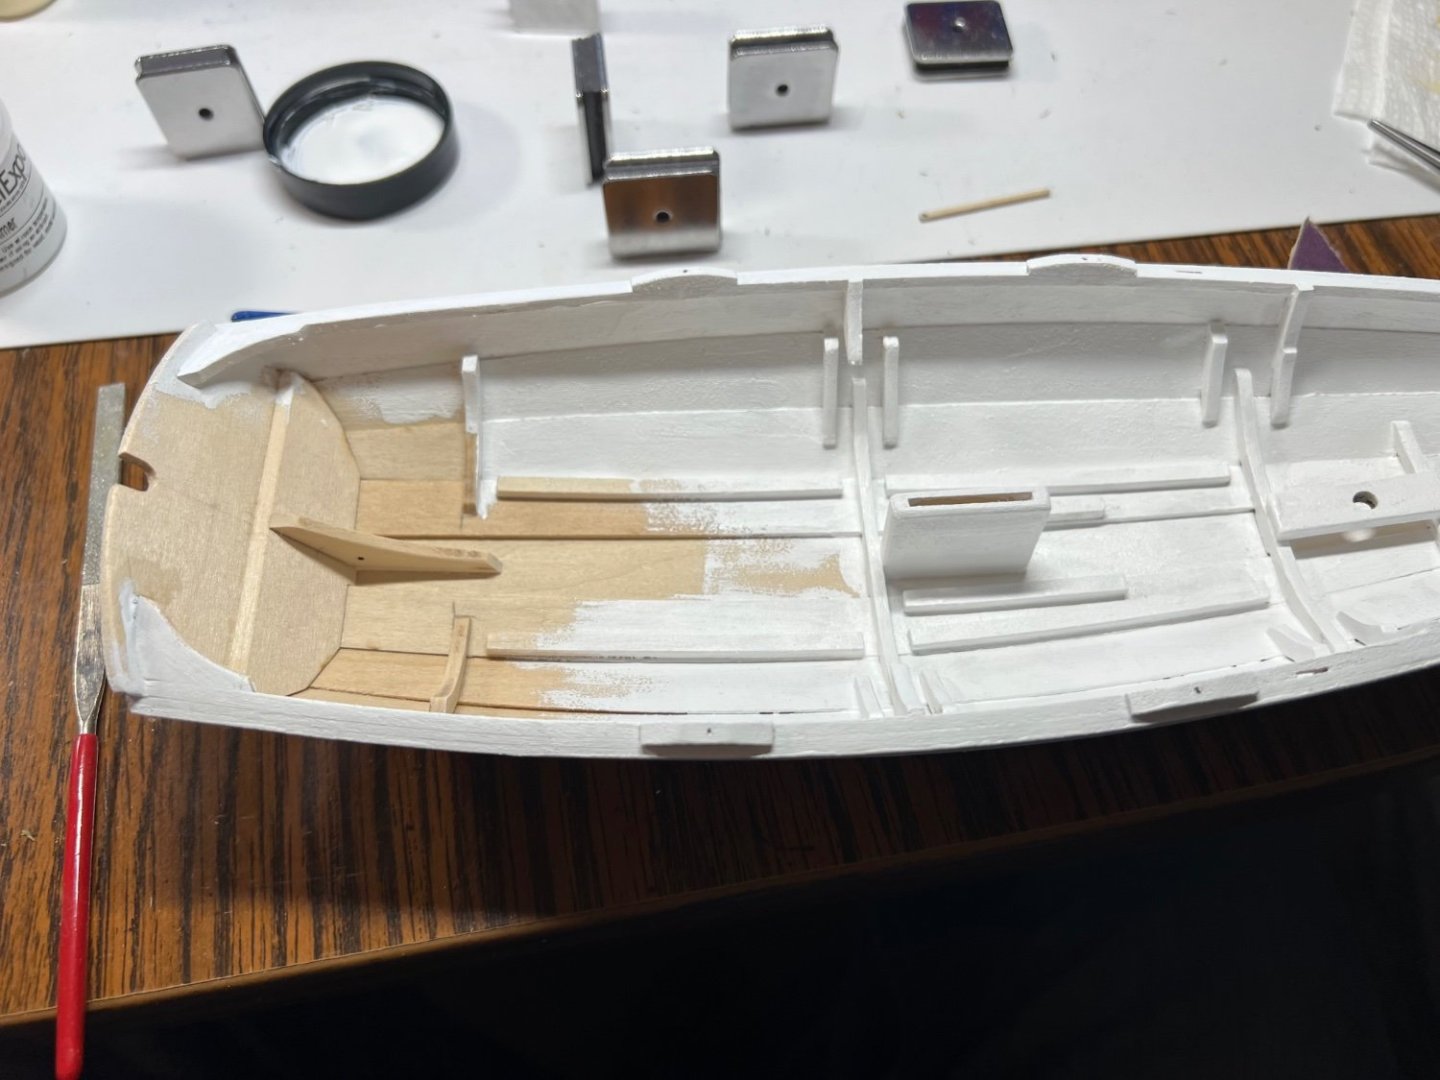
Inside I’ve decided MS 4821 Deck Light House Buff. I looked at other colors, this looks good. It looks yellow in the picture but it’s not yellow. The first coat in the primer doesn’t look to good. The first coat of warm white didn’t the second looks great. The best thing I’ve learned from this build is painting inside to outside on rubbing strake. I’m not a great painter, with learning tricks like that I might get better.
- 72 replies
-
- 9
-
-
- Norwegian Sailing Pram
- Model Shipways
- (and 1 more)
-
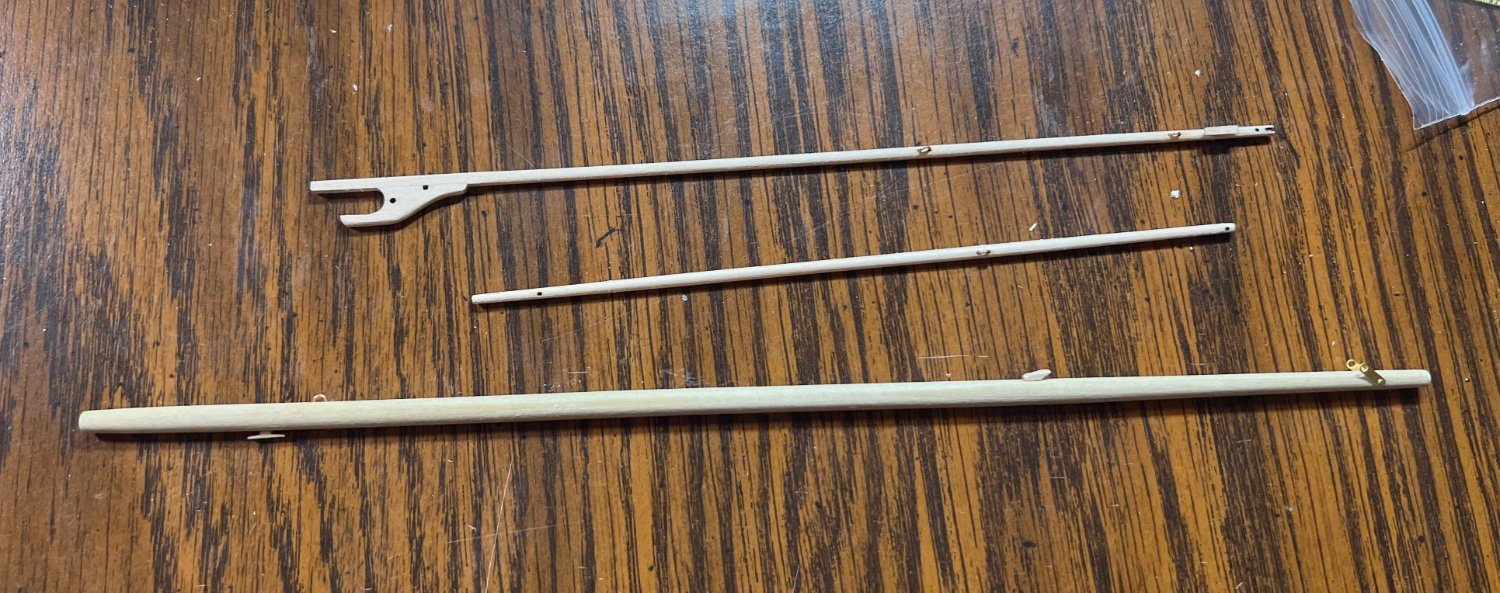
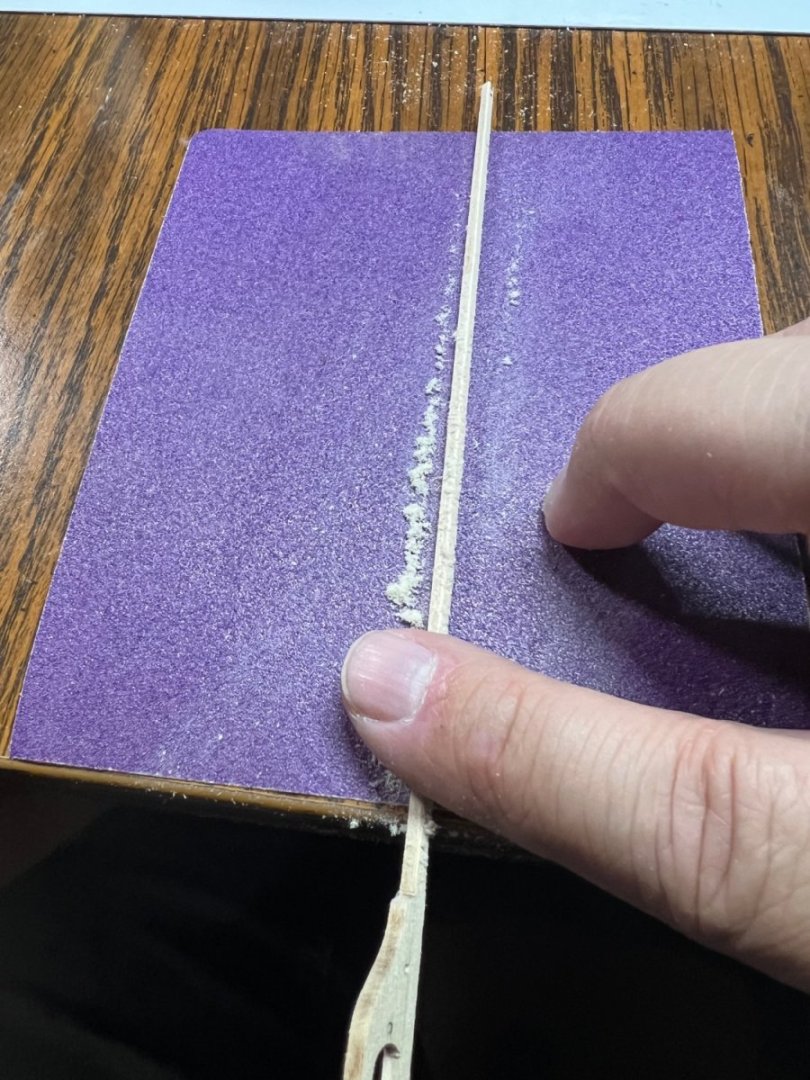
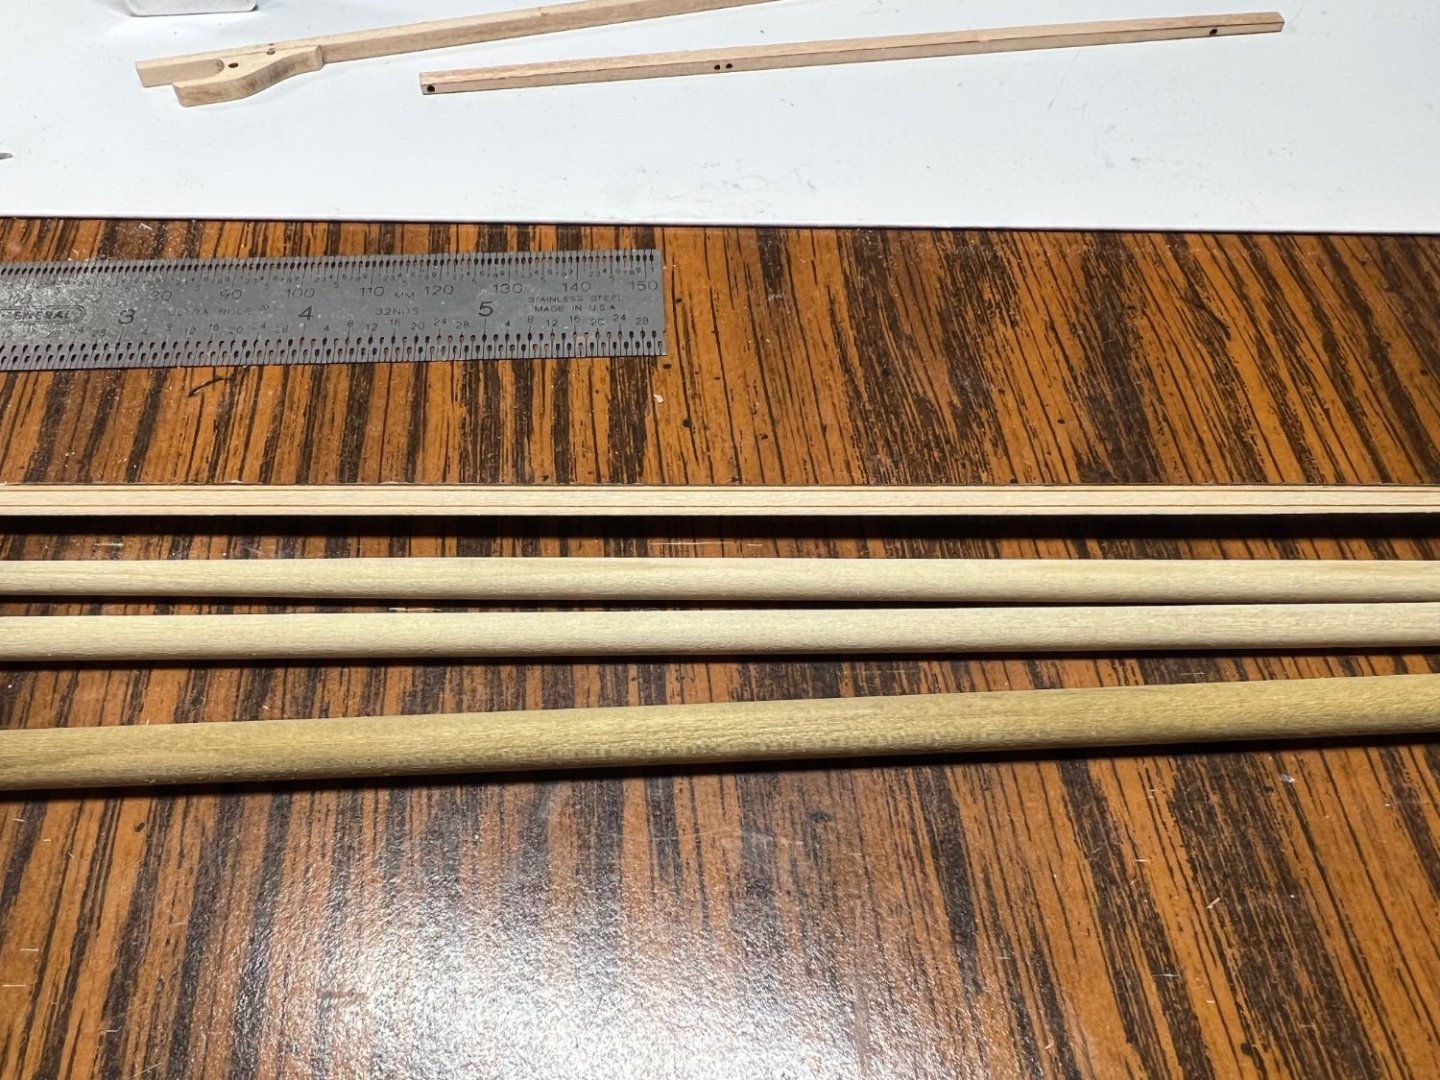
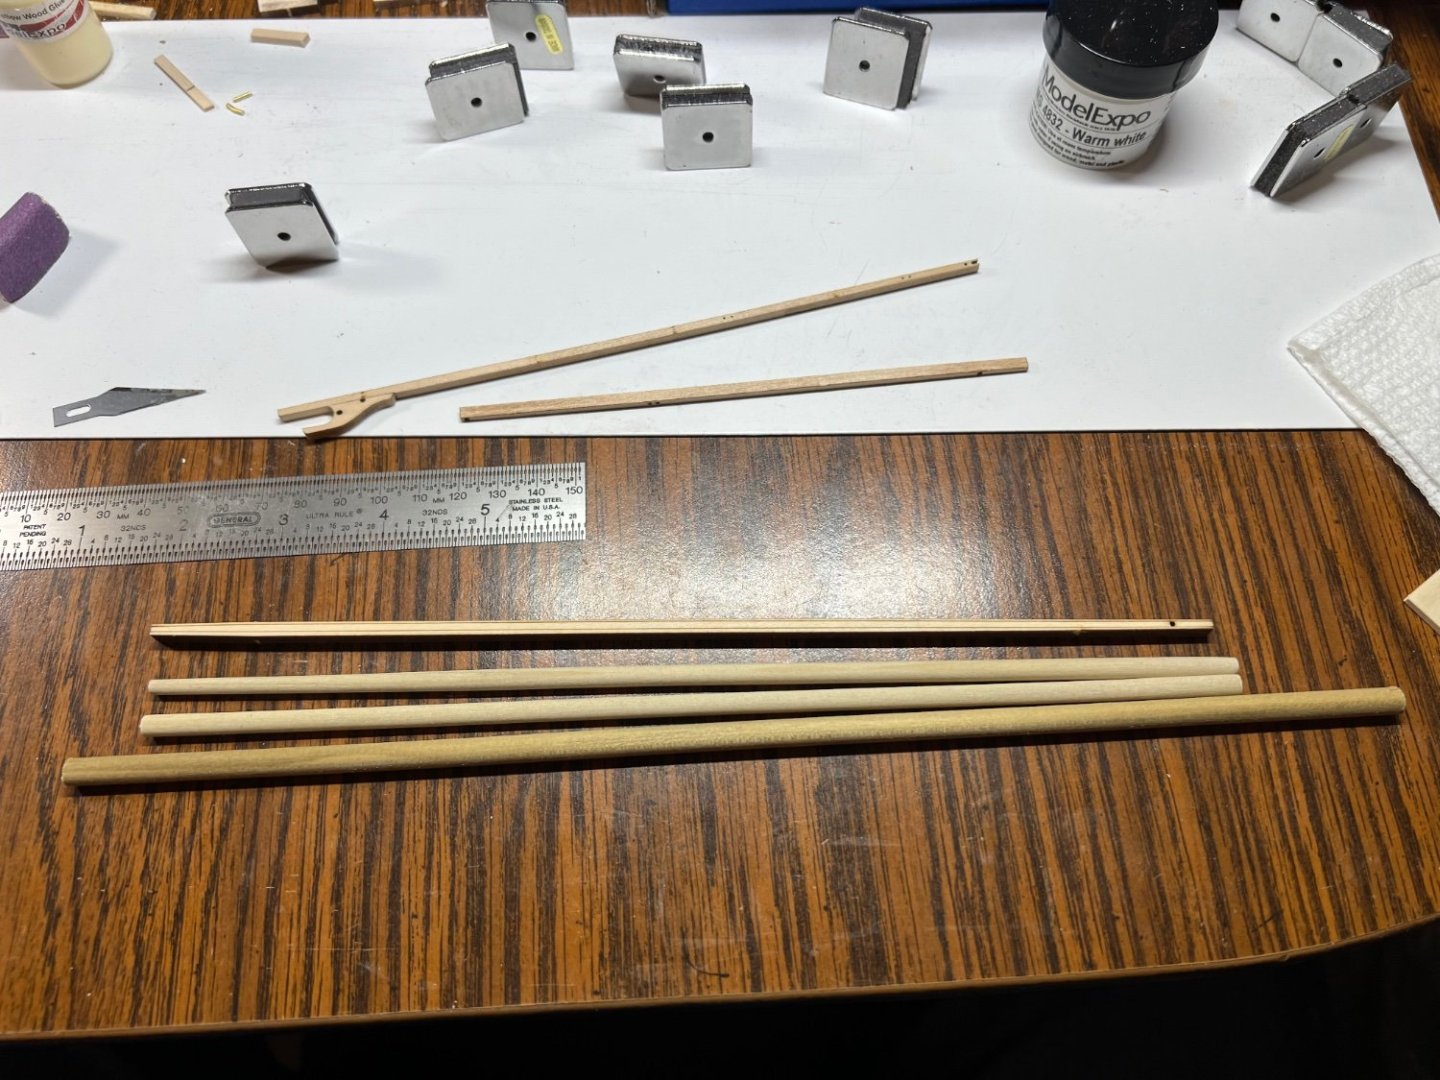
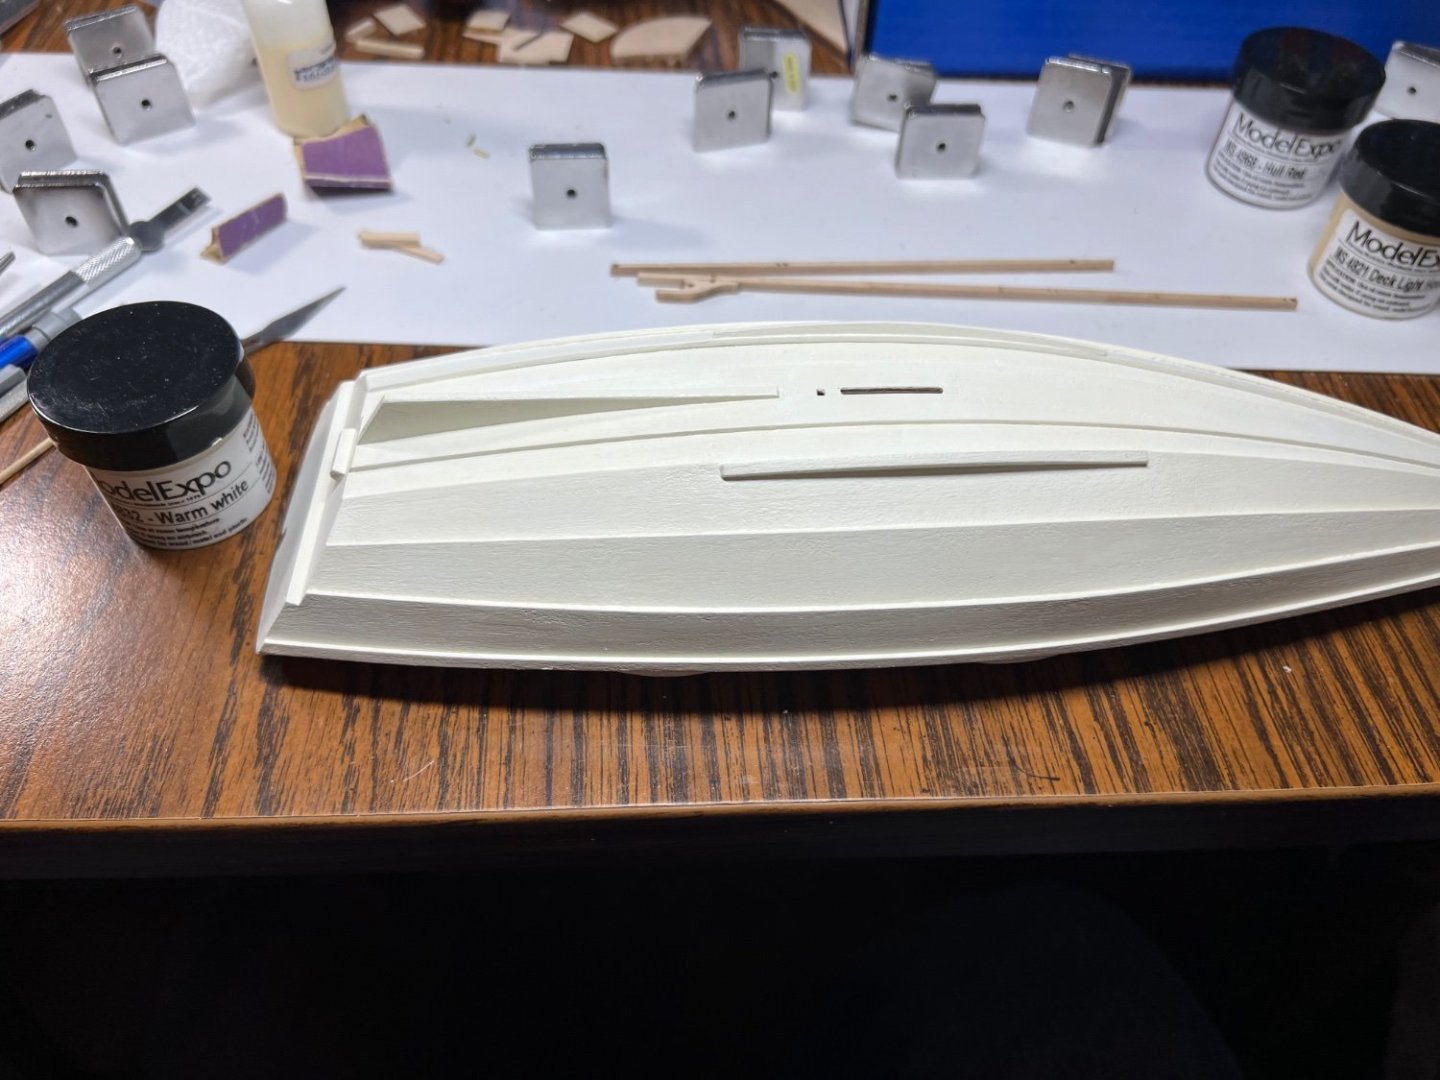
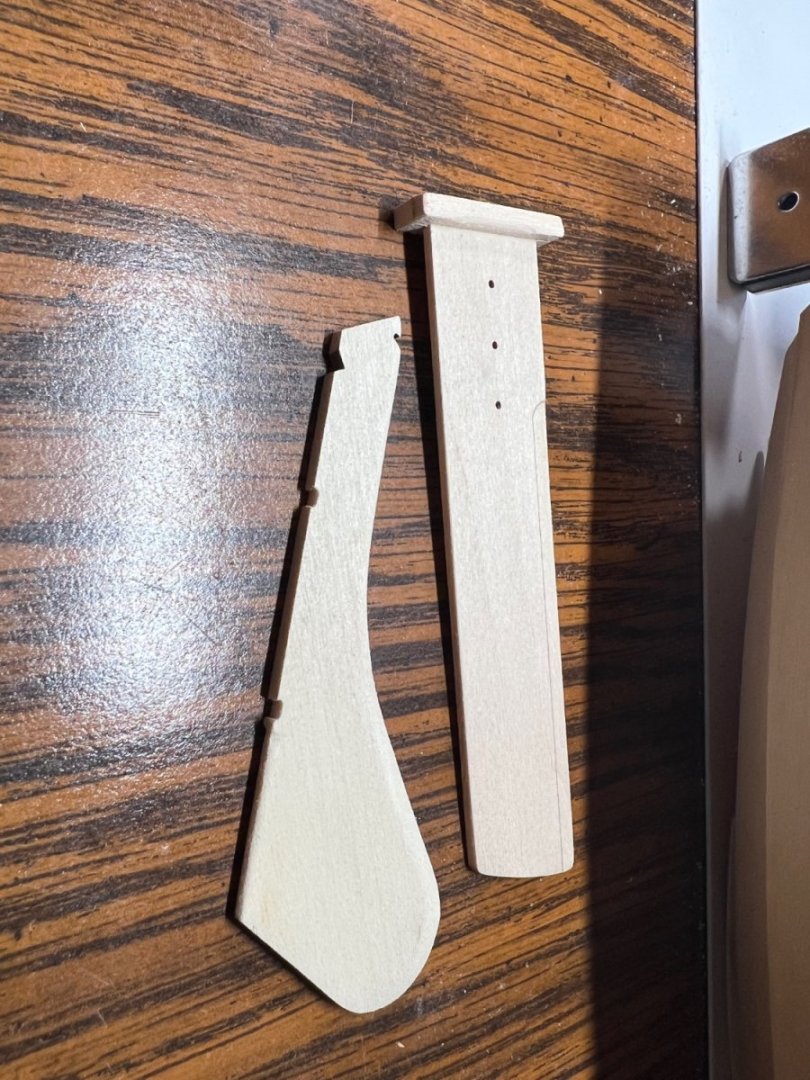
The included 1/4 dowel is way to big. The fabricated mast parts are to small one direction and will not make a 3/16 diameter mast. A Sunday trip to the hardware store for a 3/16 dowel. It’s not the best piece of wood, but it will do. I cannot find where it says to mount the mast. It has a short taper end and a long taper end. I know it goes short end taper into the boat, but I have yet to find the instruction to actually mount the mast. Page number ot step number of someone that’s is building this Pram or has built this Pram. A second coat of warm white for the bottom. It’s looking good on the outside.
- 72 replies
-
- 5
-
-
- Norwegian Sailing Pram
- Model Shipways
- (and 1 more)
-
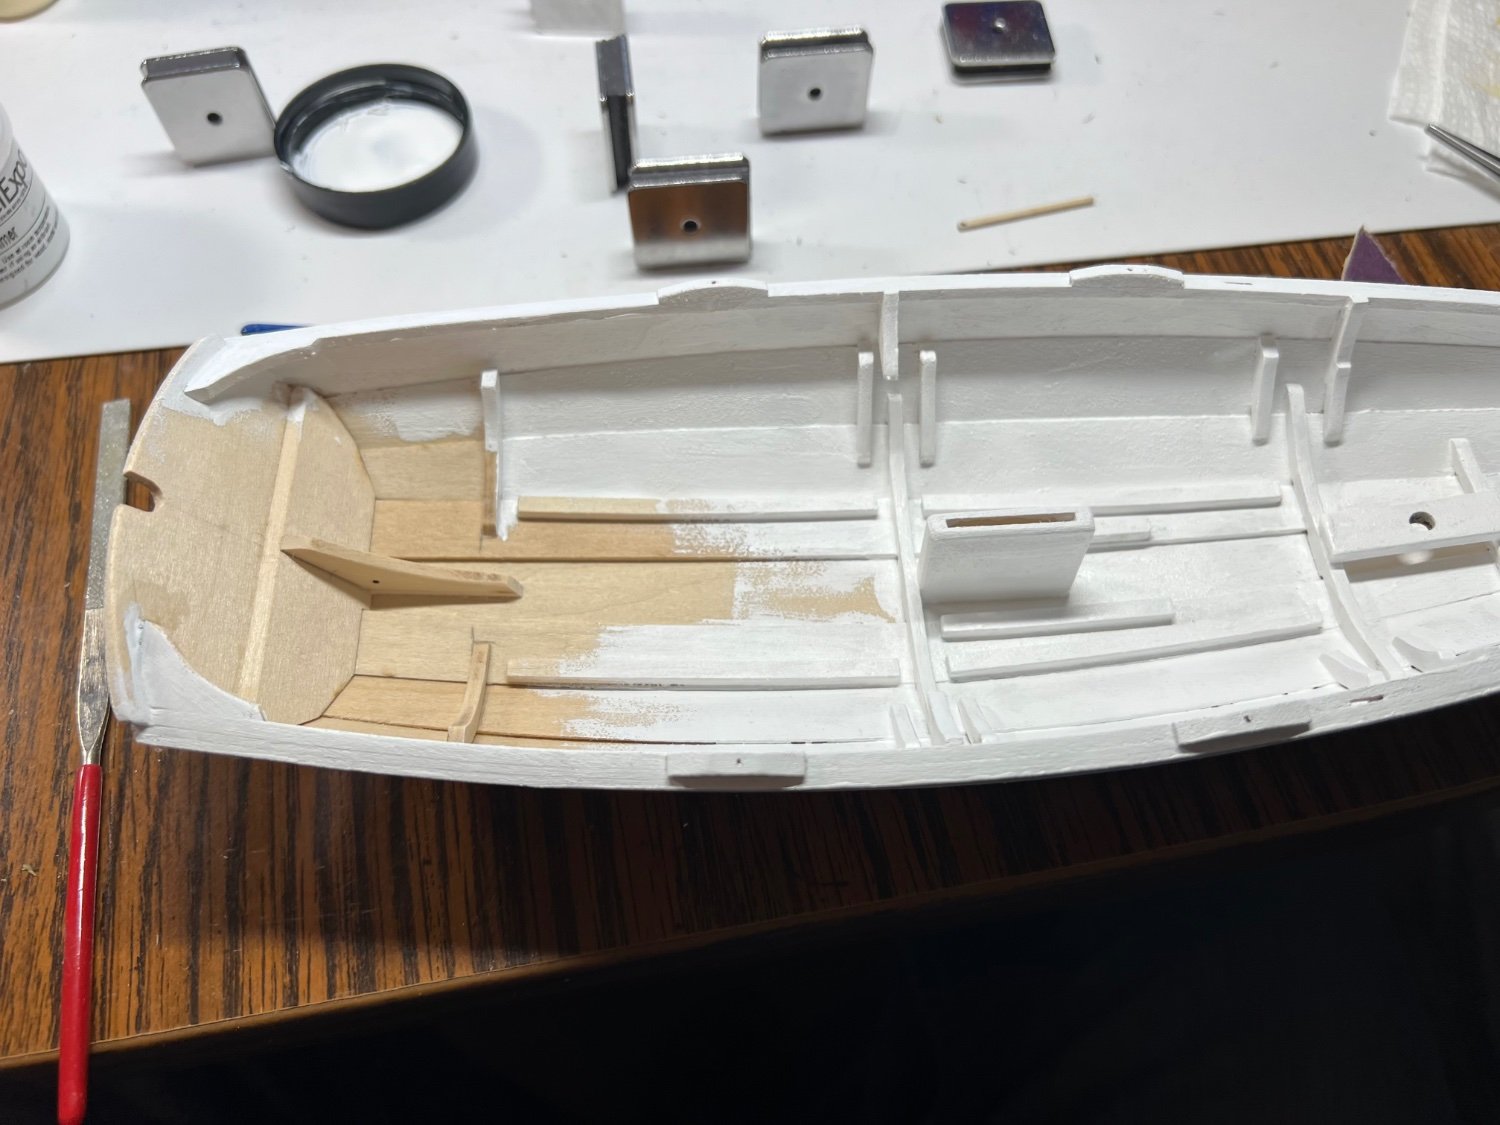
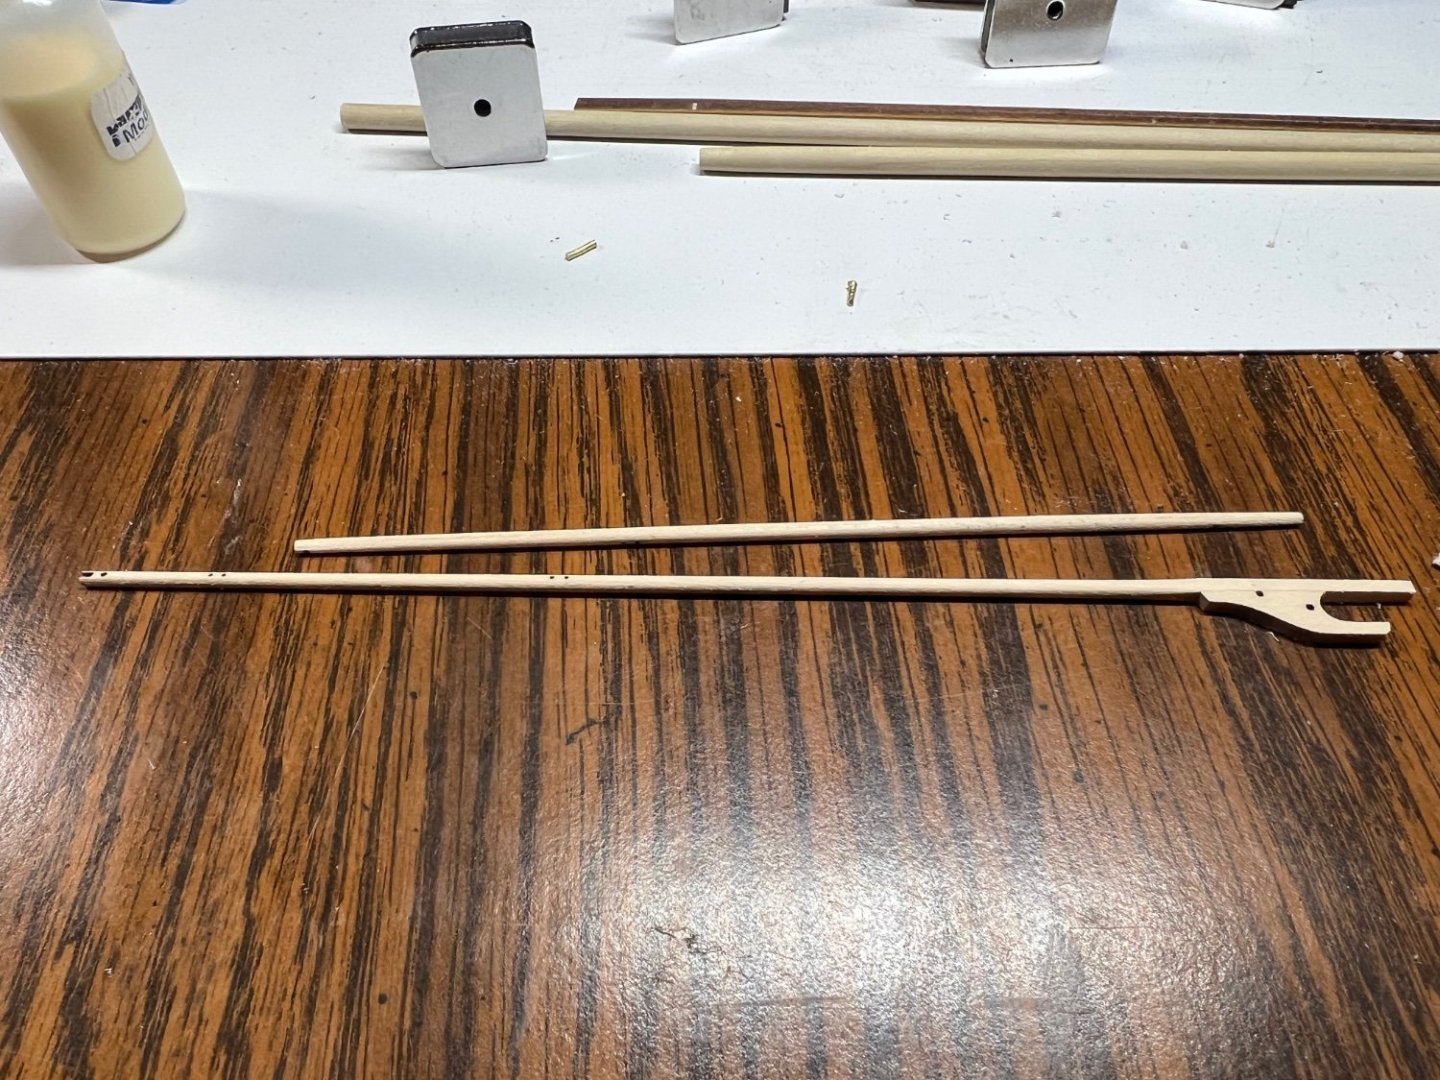
Step 33, paint. Primer coat. Sanded, another primer coat. The a coat of Warm White MS4832 for the outside. I made the tiller while I was waiting for coats to dry. I used MS 4972 Clear Satin on the thwarts and sheets. I’ll circle back to the 12 + floor board prep. I’m studying the mast fabrication. The dowel is way to big and the glued together parts are way to small.

- 72 replies
-
- 7
-
-
- Norwegian Sailing Pram
- Model Shipways
- (and 1 more)
-
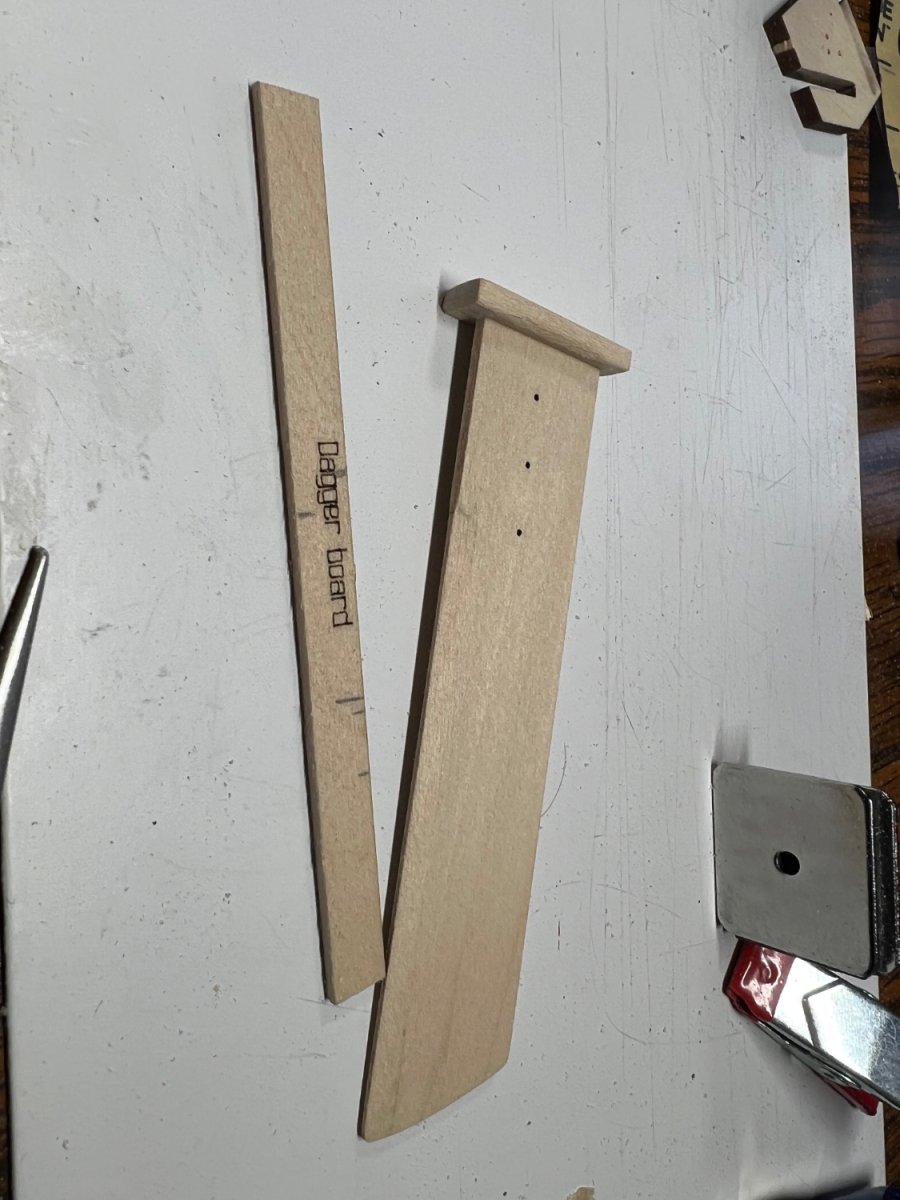
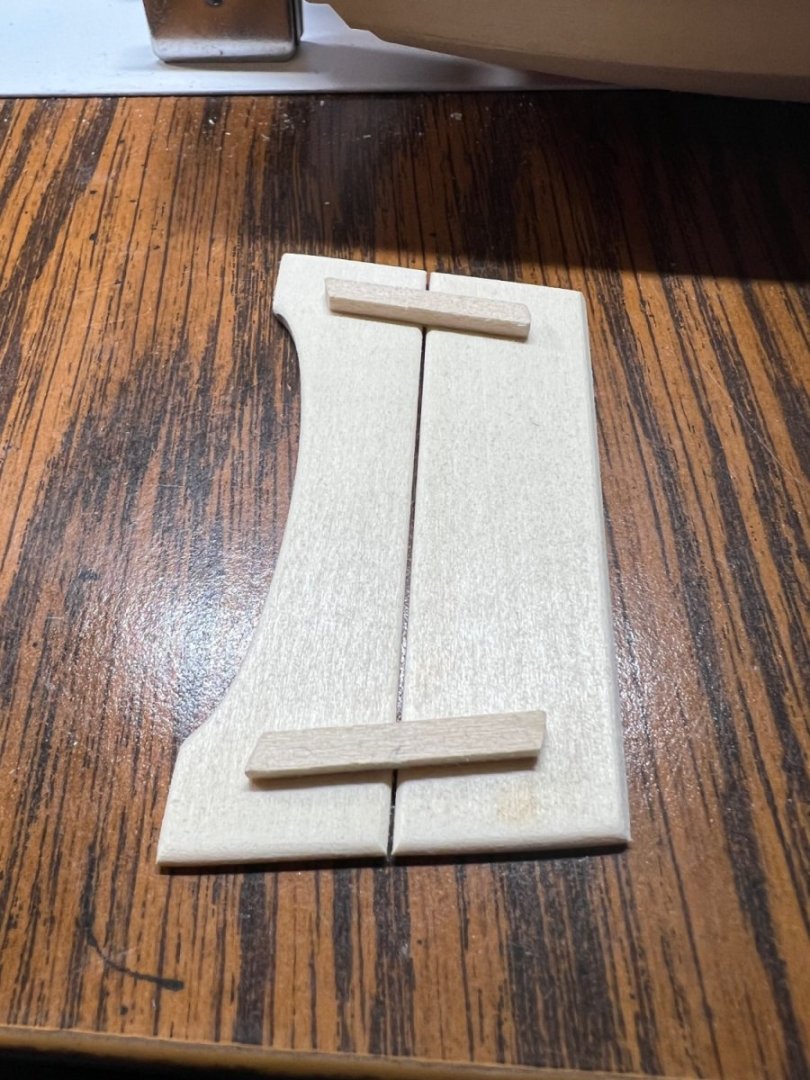
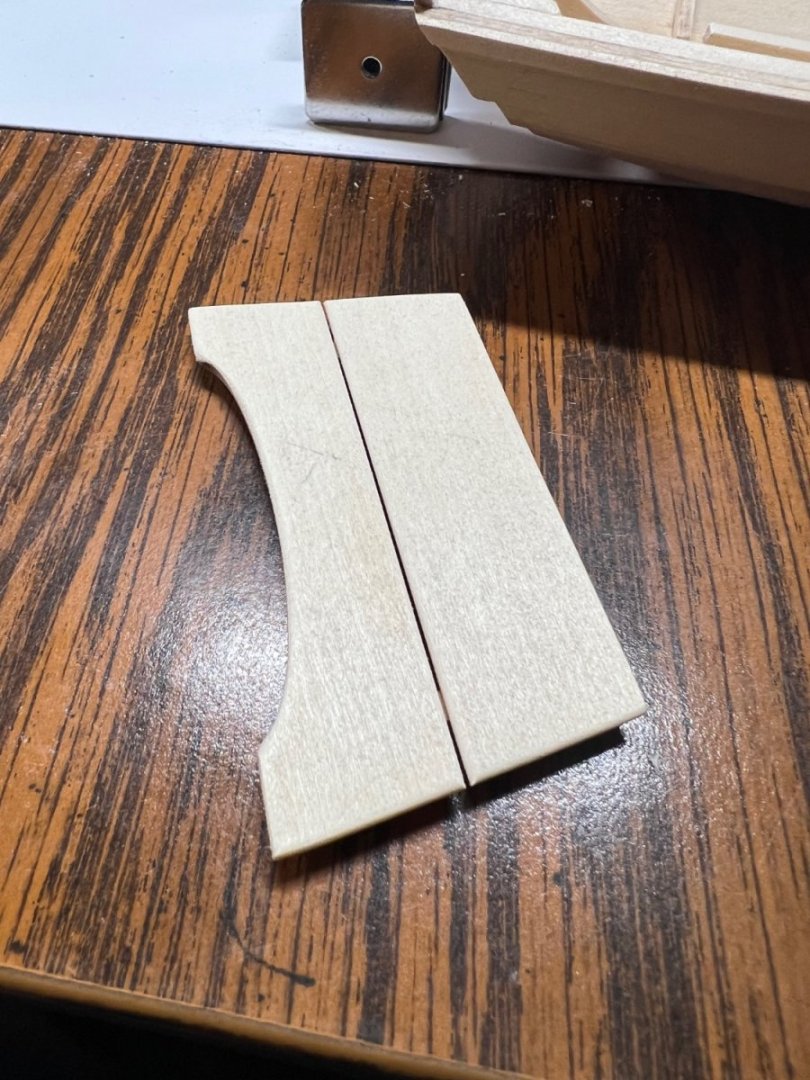
Step 25 rowlock pads. Easy to make. Step 23 chain plate slots. I used a #12 blade, 2 drilled holes and the recommended folded sand paper worded great. Mounting the rowlock pads was easy. 1.5 inches aft of each forward thwart frame. It was squared up enough they are almost exactly where intended. The dagger board was prepped. The rudder was prepped. Stern sheets with two cleats. This was my take on the cleats. They fit. They could be closer to center to hold load better on a real seat. I used a business card to make the gap. The midship thwart knees fit just a bit snug without trimming, the careful planning for height of the thwart worked out. I am 4 movies farther along. I think this is 10 movies of work, I didn’t keep track of the hours, it’s for fun and I’m not trying to set a record, I just want to finish it. I have a problem finishing projects lol. Completed to step 32. Trying to decide what color. I’m not a fan of the dark inside as shown. Current selection on the chopping block. MS 4821 Deck Light for the inside MS 4832 Warm white for the outside.


- 72 replies
-
- 5
-
-
- Norwegian Sailing Pram
- Model Shipways
- (and 1 more)
-
This is the end of step 22. With 26 completed, rub rails installed. I may be the only one to see my errors, but they are there. Thwarts and stern sheets were worked some to get the frames set as best as I could.

- 72 replies
-
- 3
-
-
- Norwegian Sailing Pram
- Model Shipways
- (and 1 more)
-
Very cool. So far my frustrations have not reached a question or a road block to pass. I did step 26 in front of 25, so I could clean up the top before adding the rowlock pads. The rub walls and inwales clean up nice when they can be sanded without interference. The rear transom trim mark is in the wrong place on my model. See picture. But the inwale plank placement seems correct. Both sides fit almost perfect to the line. Detail of the transom tops is missing. I think what I’ve done is the intention. A bit more sanding and rounding and both transoms will look good. I’m happy with what it looks like so far. I have many things out of alignment for thwart supports, obviously knowing what I know now I could have done better. It’s part of the learning for sure.


- 72 replies
-
- 3
-
-
- Norwegian Sailing Pram
- Model Shipways
- (and 1 more)