HOLIDAY DONATION DRIVE - SUPPORT MSW - DO YOUR PART TO KEEP THIS GREAT FORUM GOING! (Only 36 donations so far out of 49,000 members - C'mon guys!)
×

MajorChaos
-
Posts
301 -
Joined
-
Last visited
Content Type
Profiles
Forums
Gallery
Events
Everything posted by MajorChaos
-
I’ll get back to this one some day. I’m having a great time with the Bluenose and need to finish up the Flying Dutchman.
-
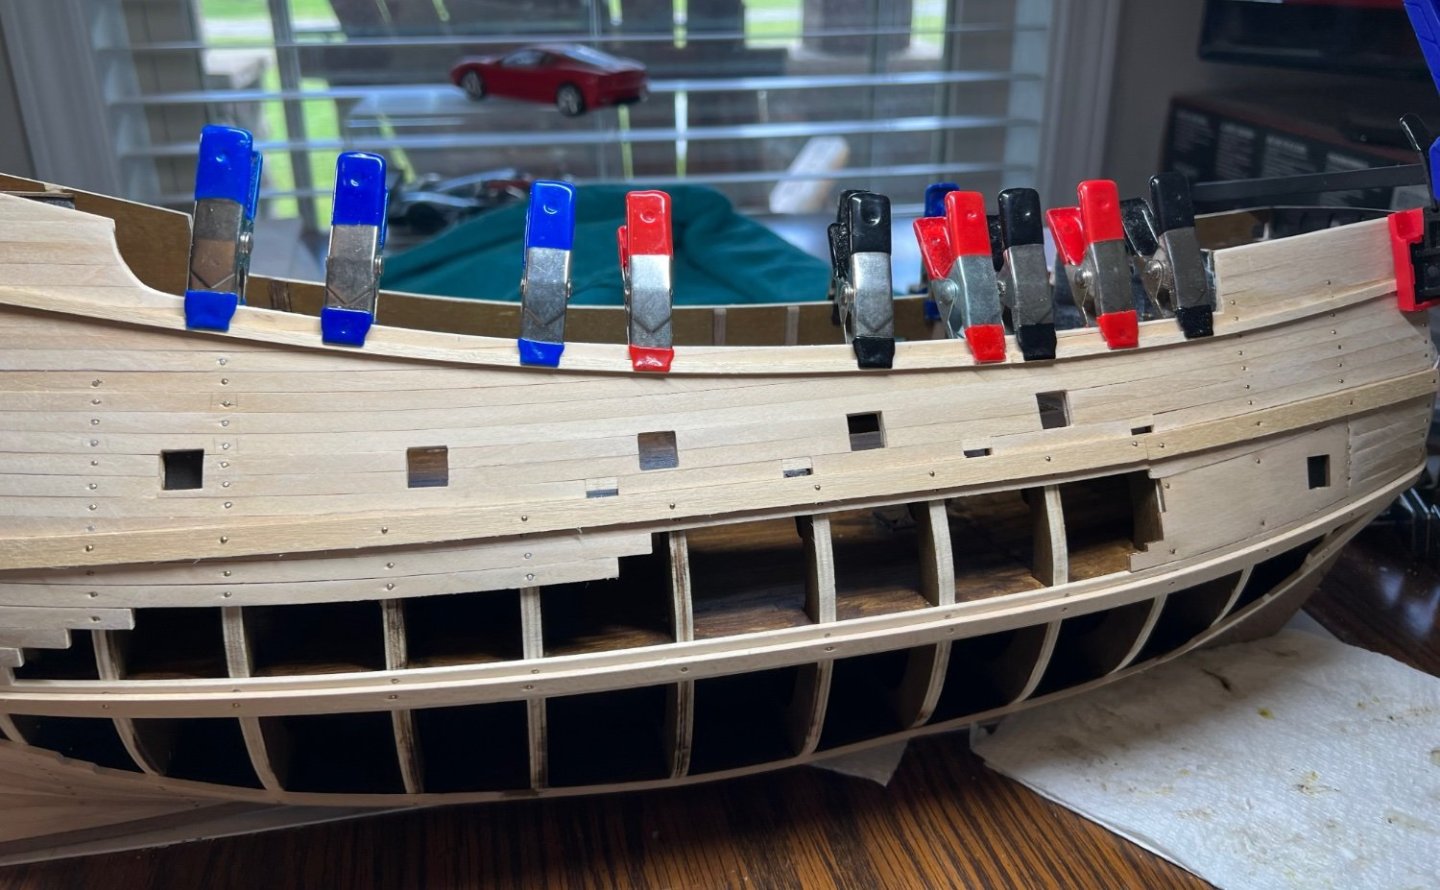
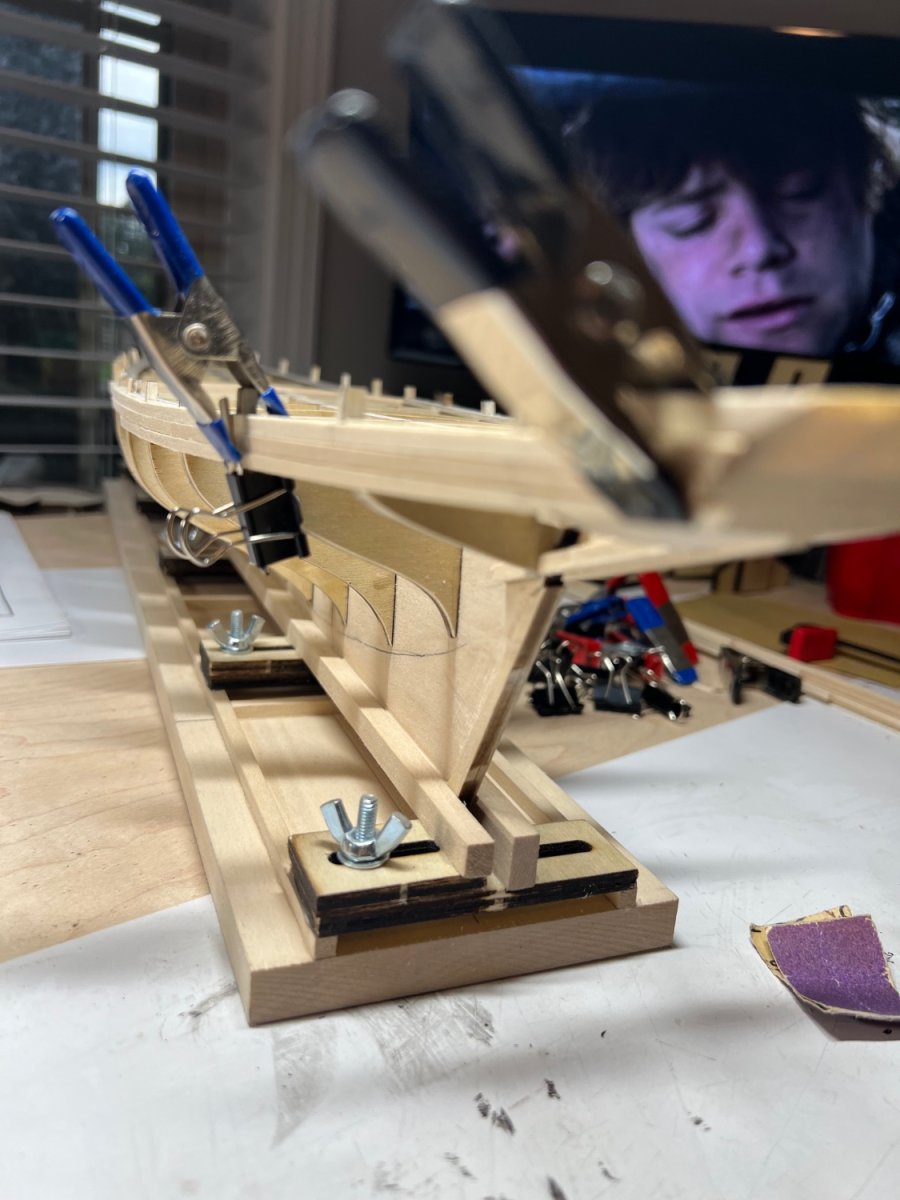
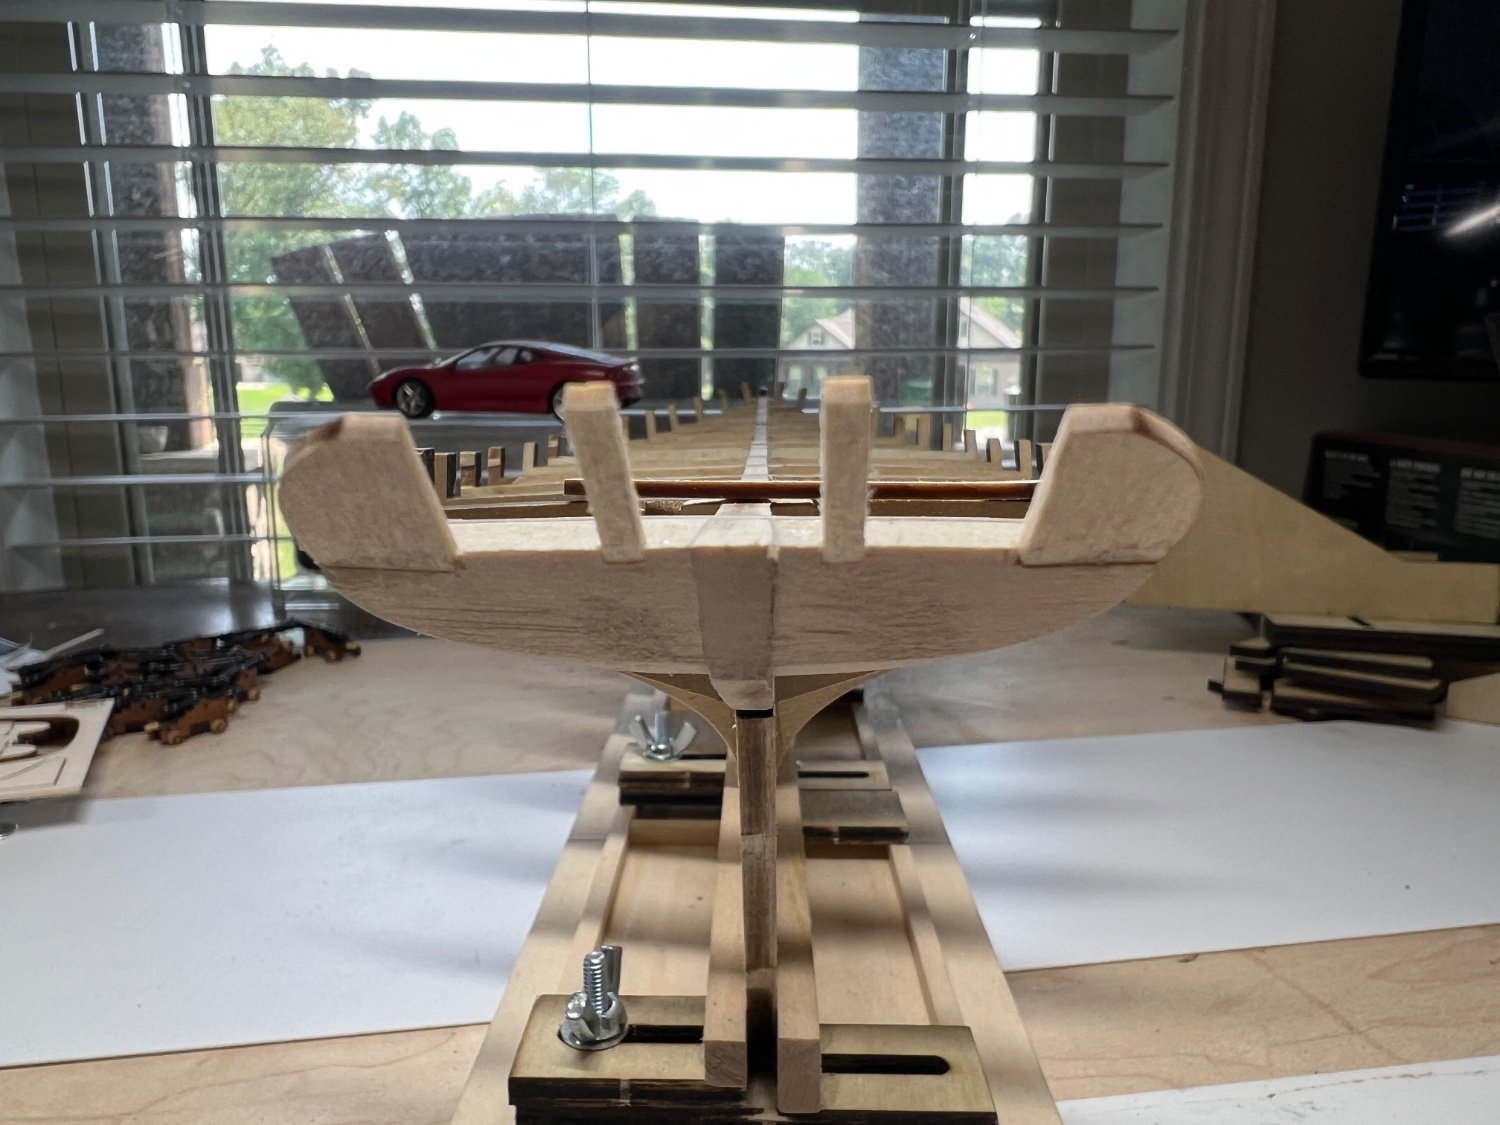
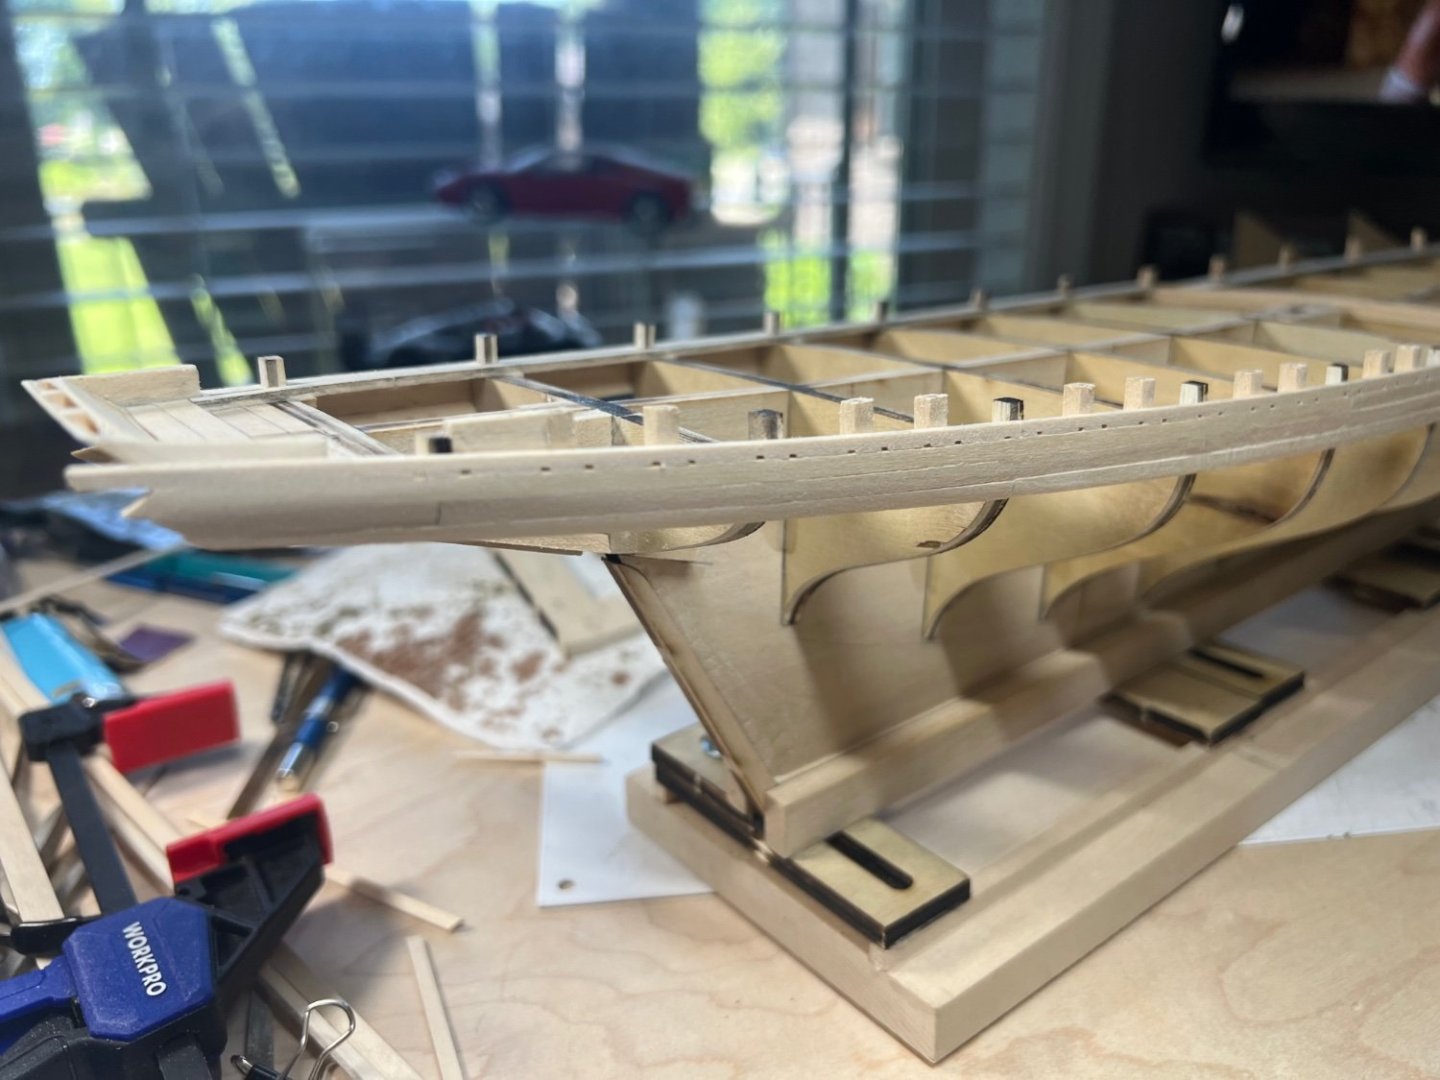
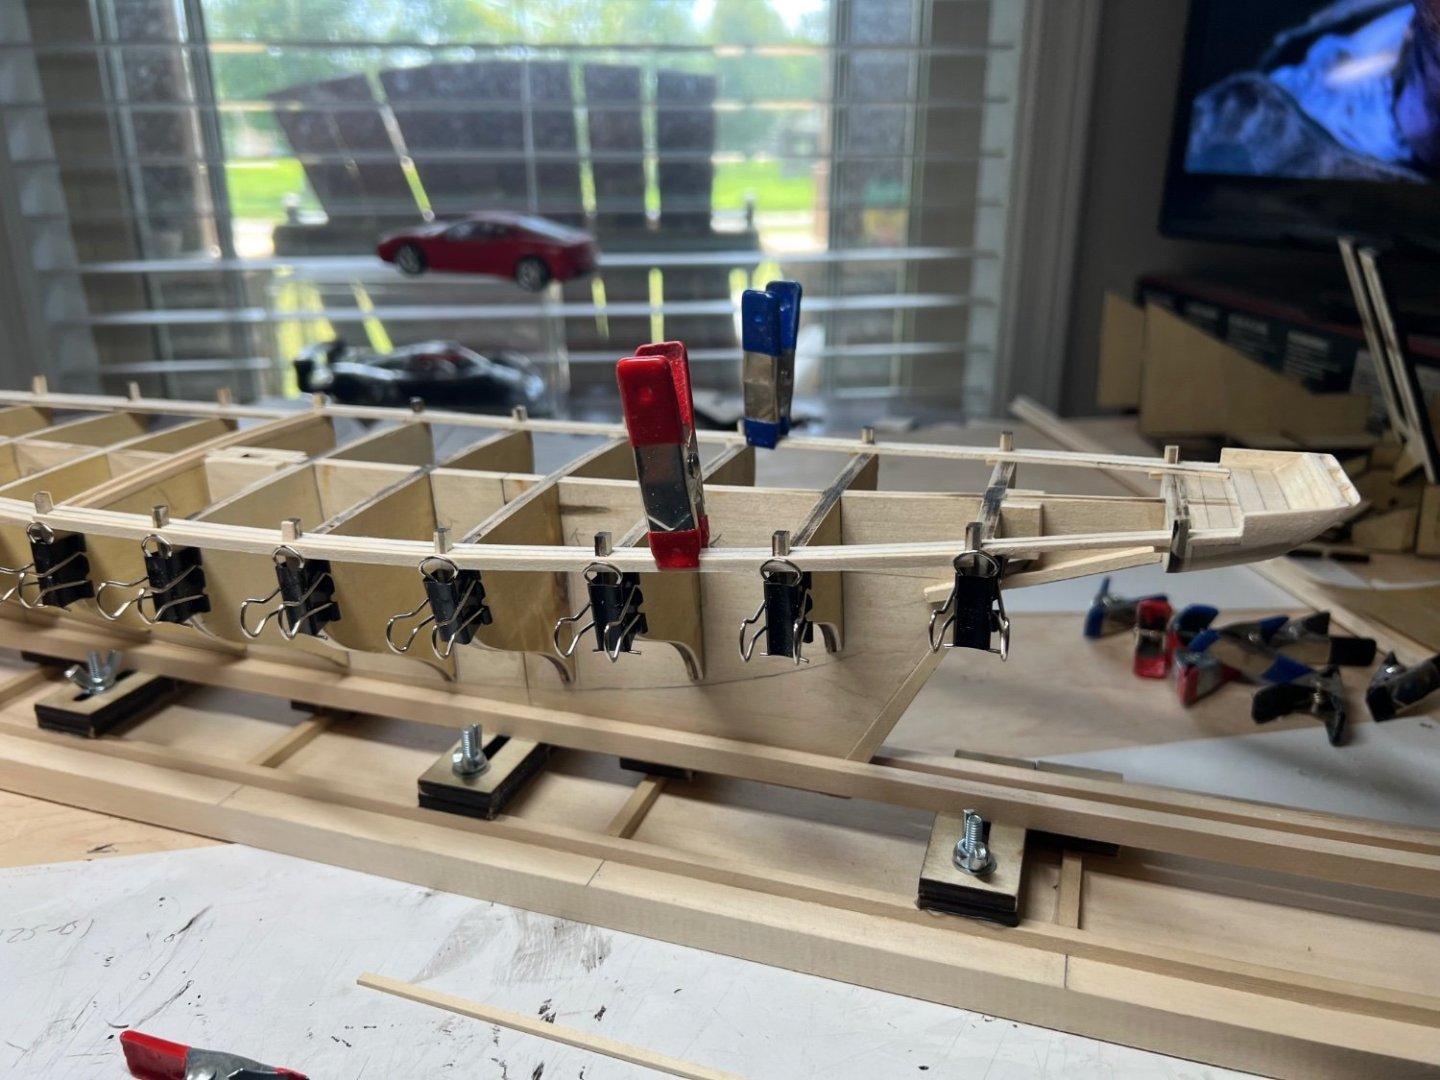
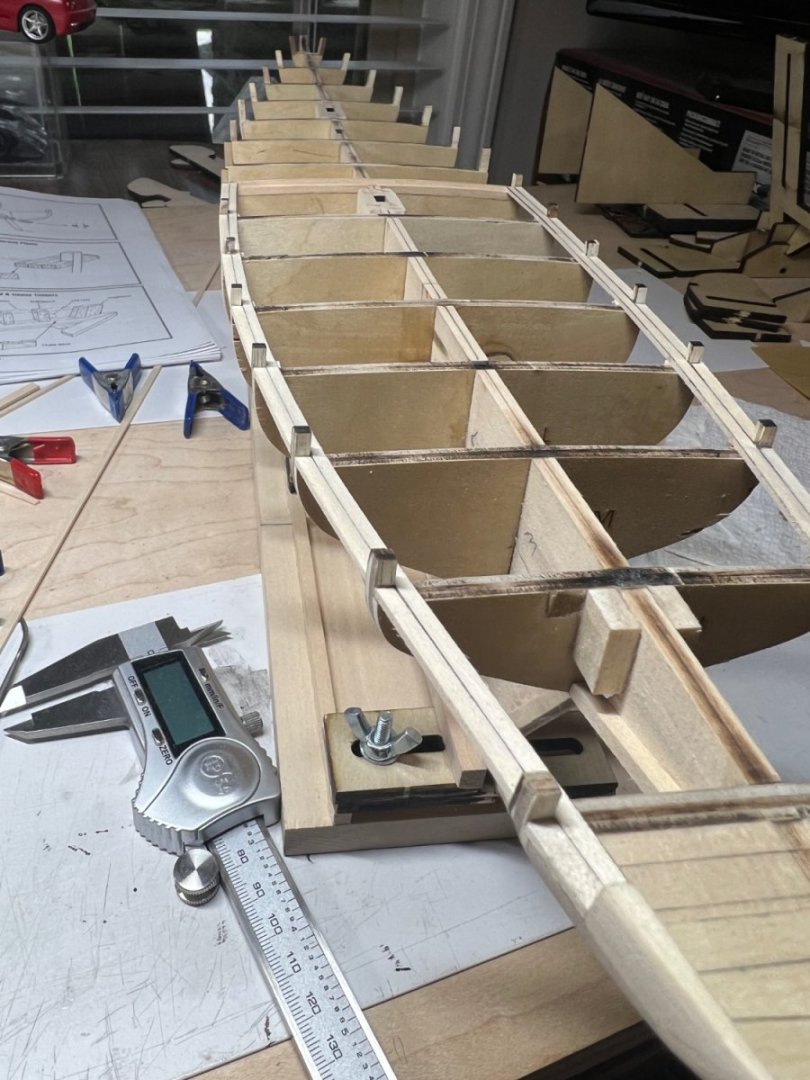
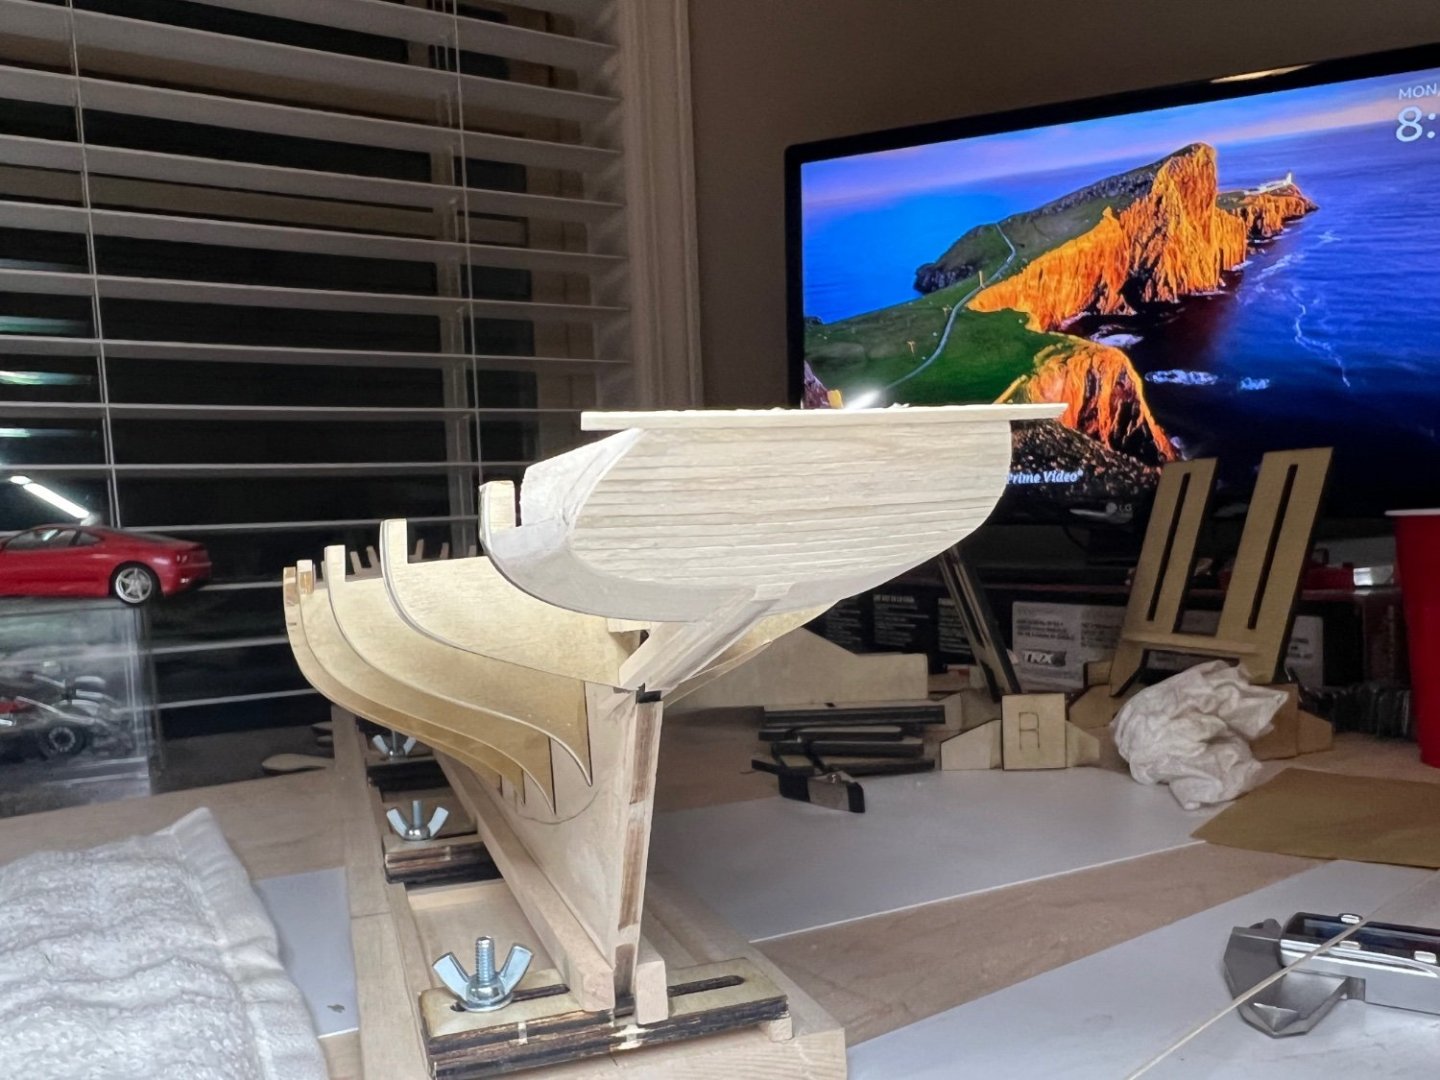
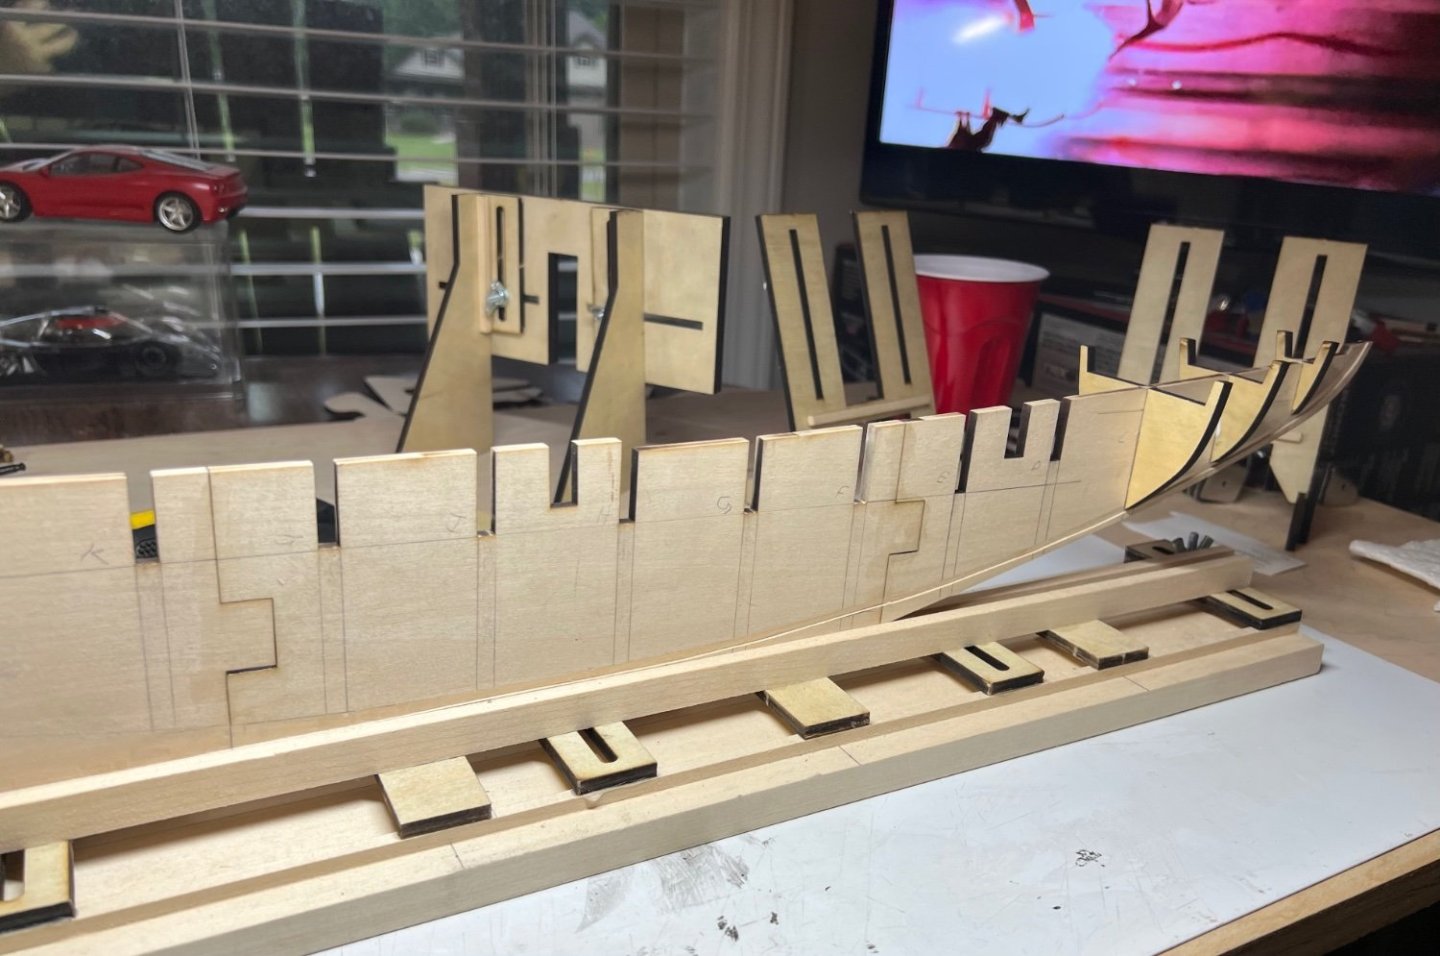
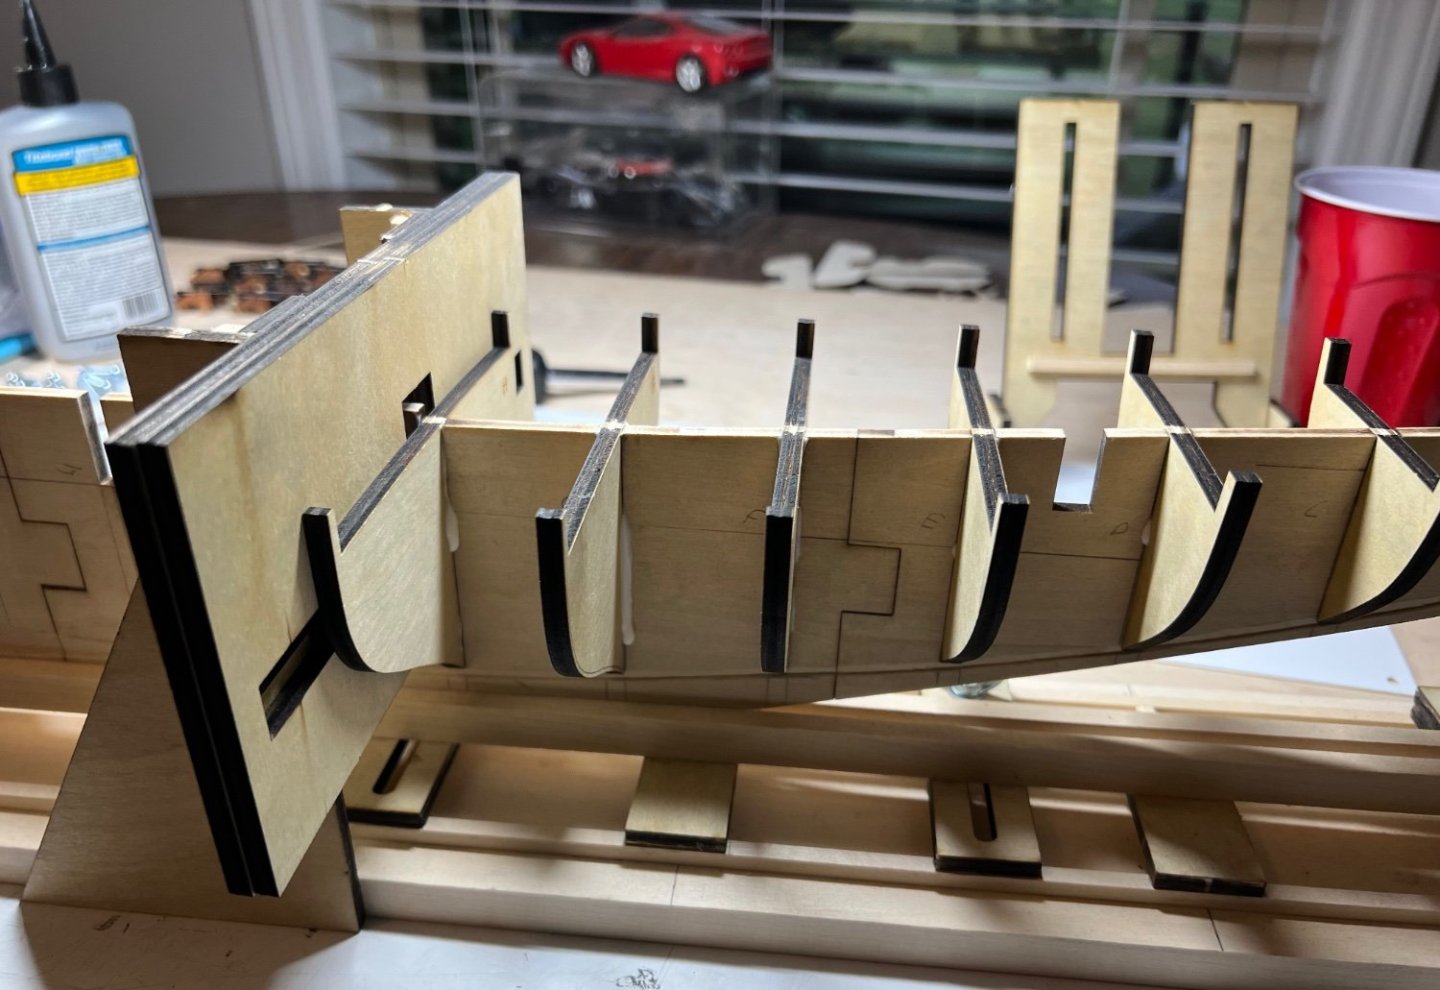
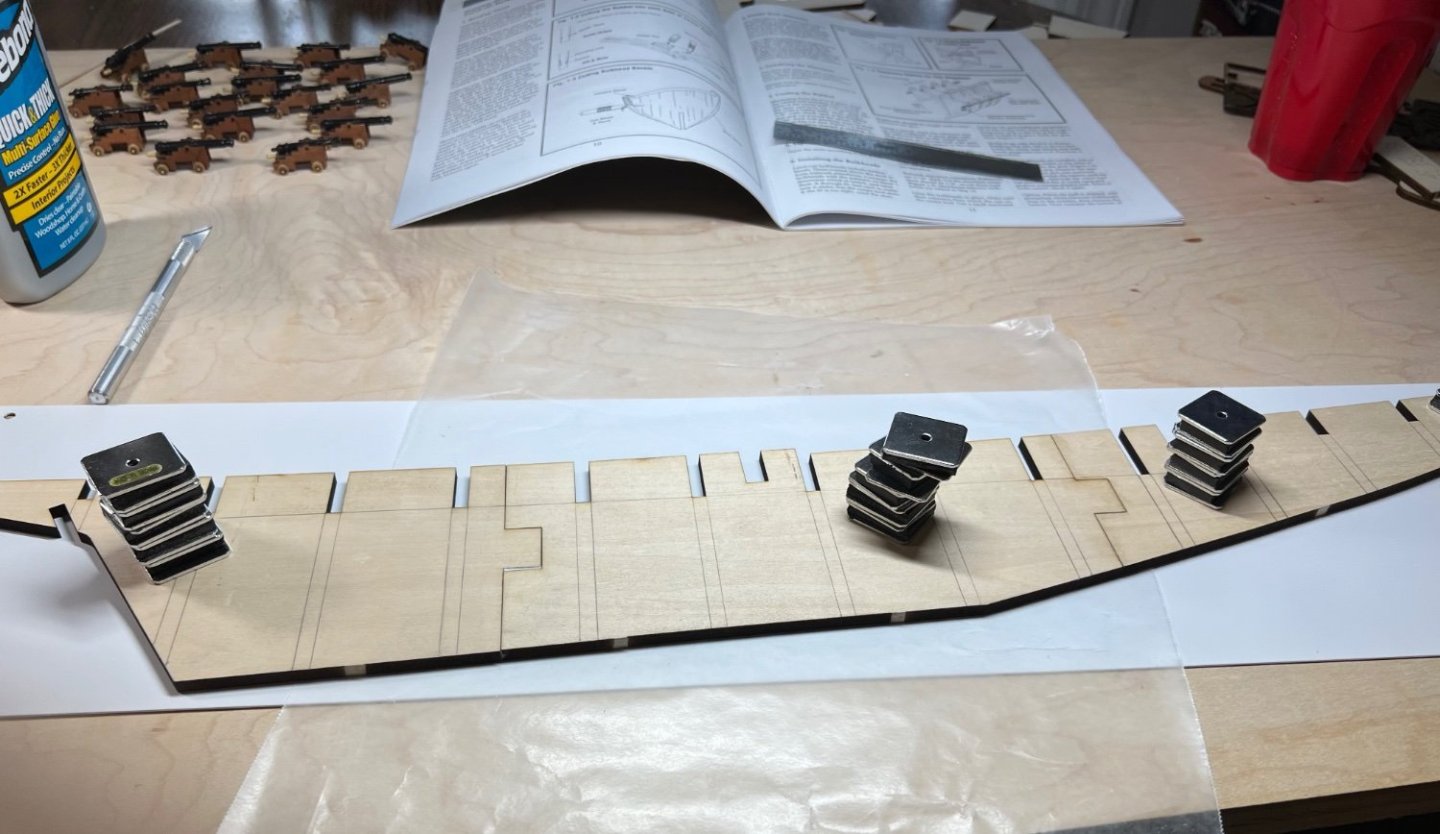
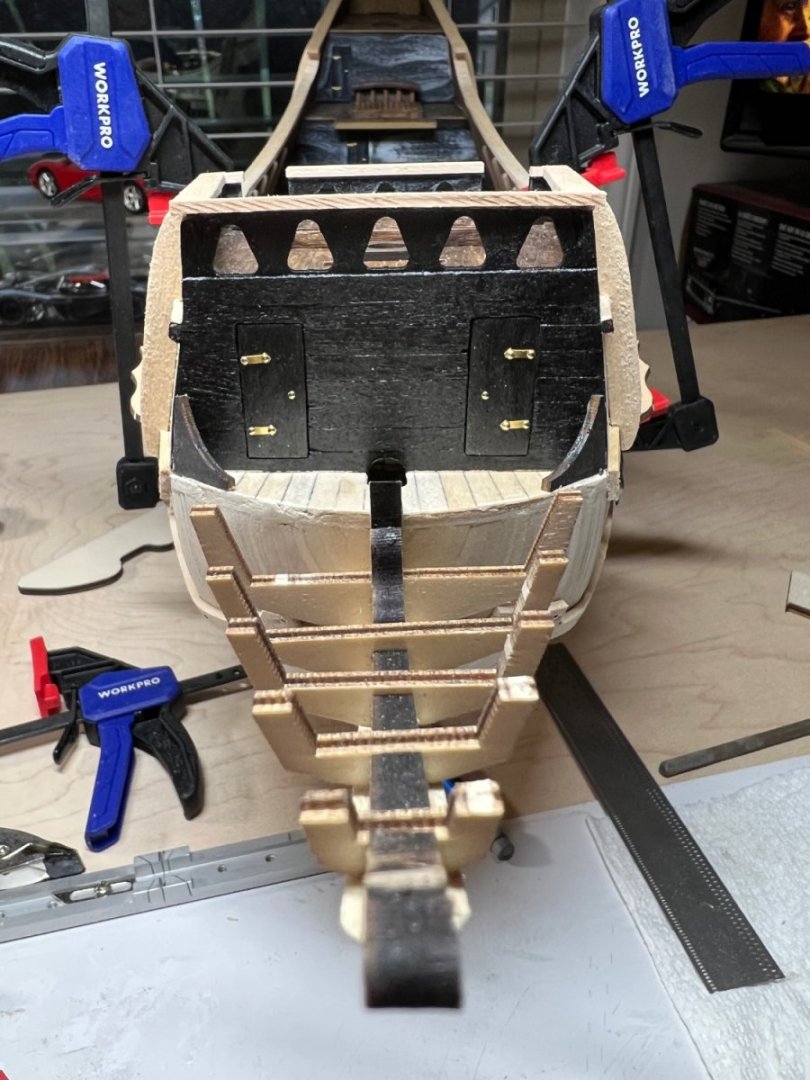
Moving along. It’s turned out as good or better then I hoped so far. The waist looks good with some trial fits. I wanted to build up to a flat surface to make the main rail. Thank you for the encouragement. The transoms has worked out so far, the tale will be the main rail fit. 🤞🏻@DBorgens @GGibson

-
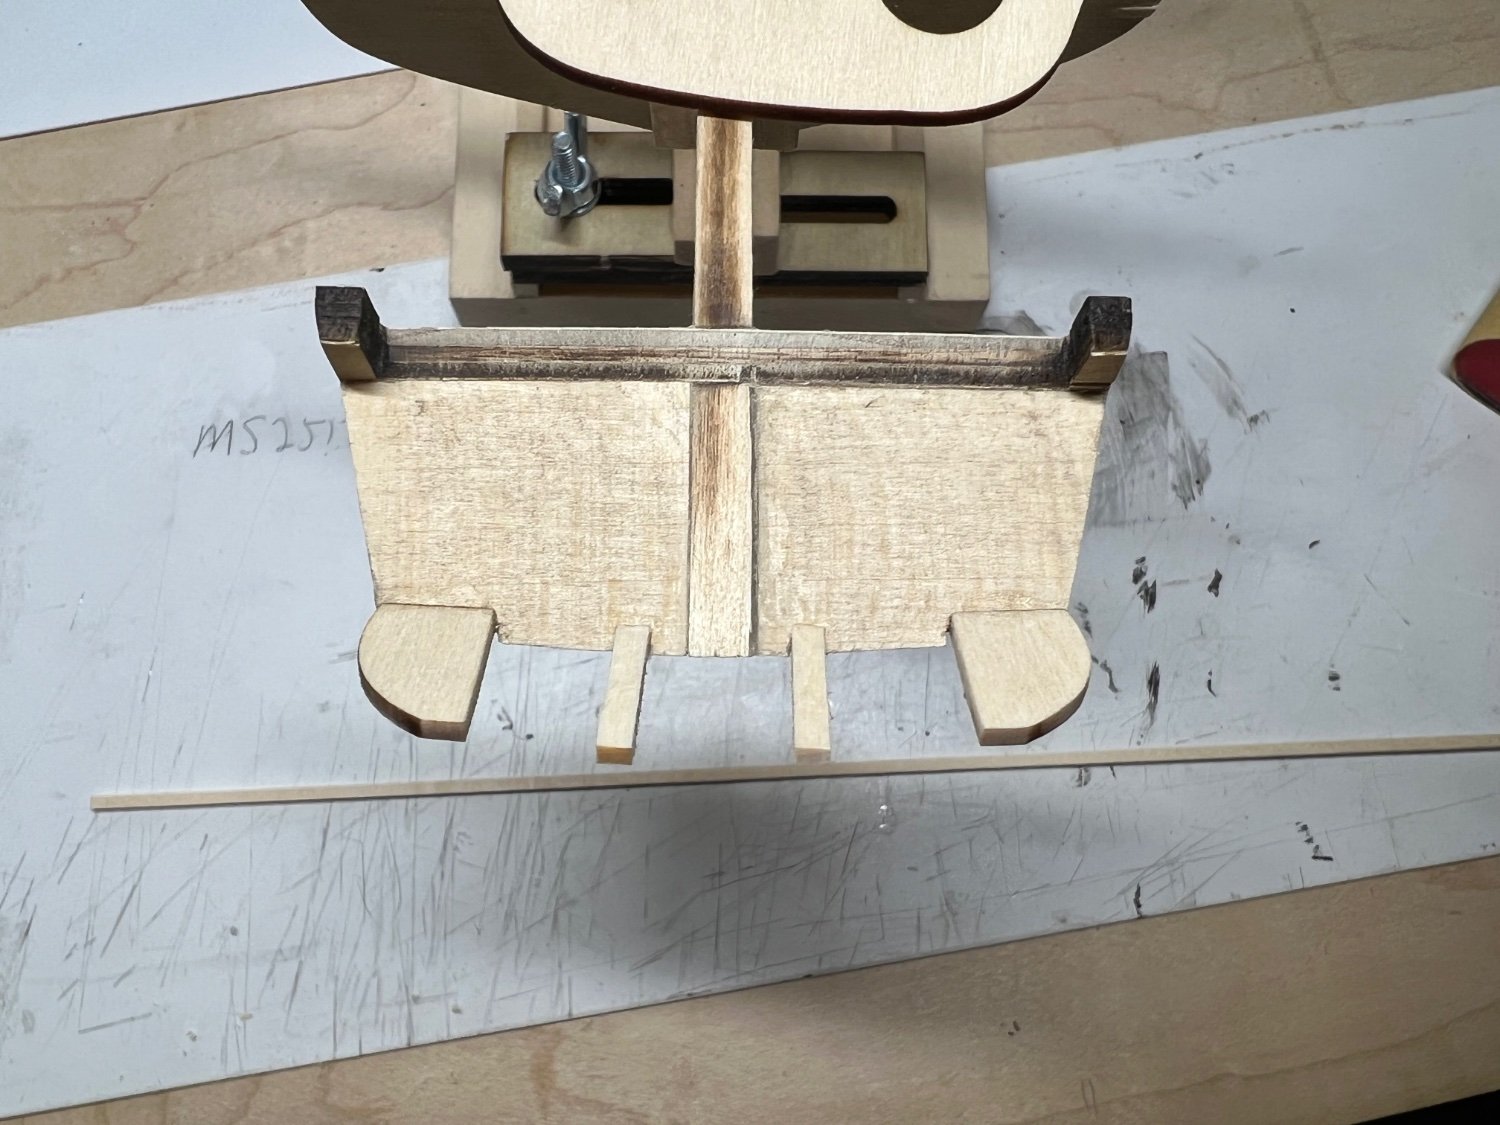
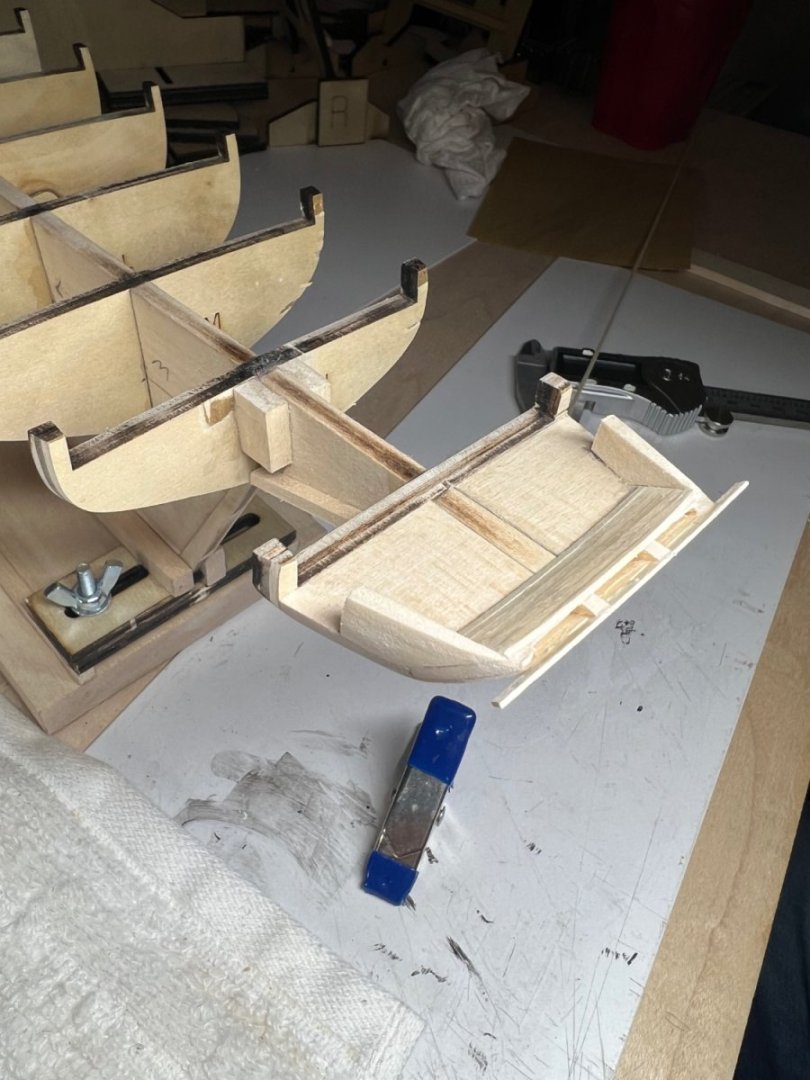
To late now. It was supposed to have 3 fake stanchions between, I only installed 2. Darn it. Lol. Oops. It looks nice….
-
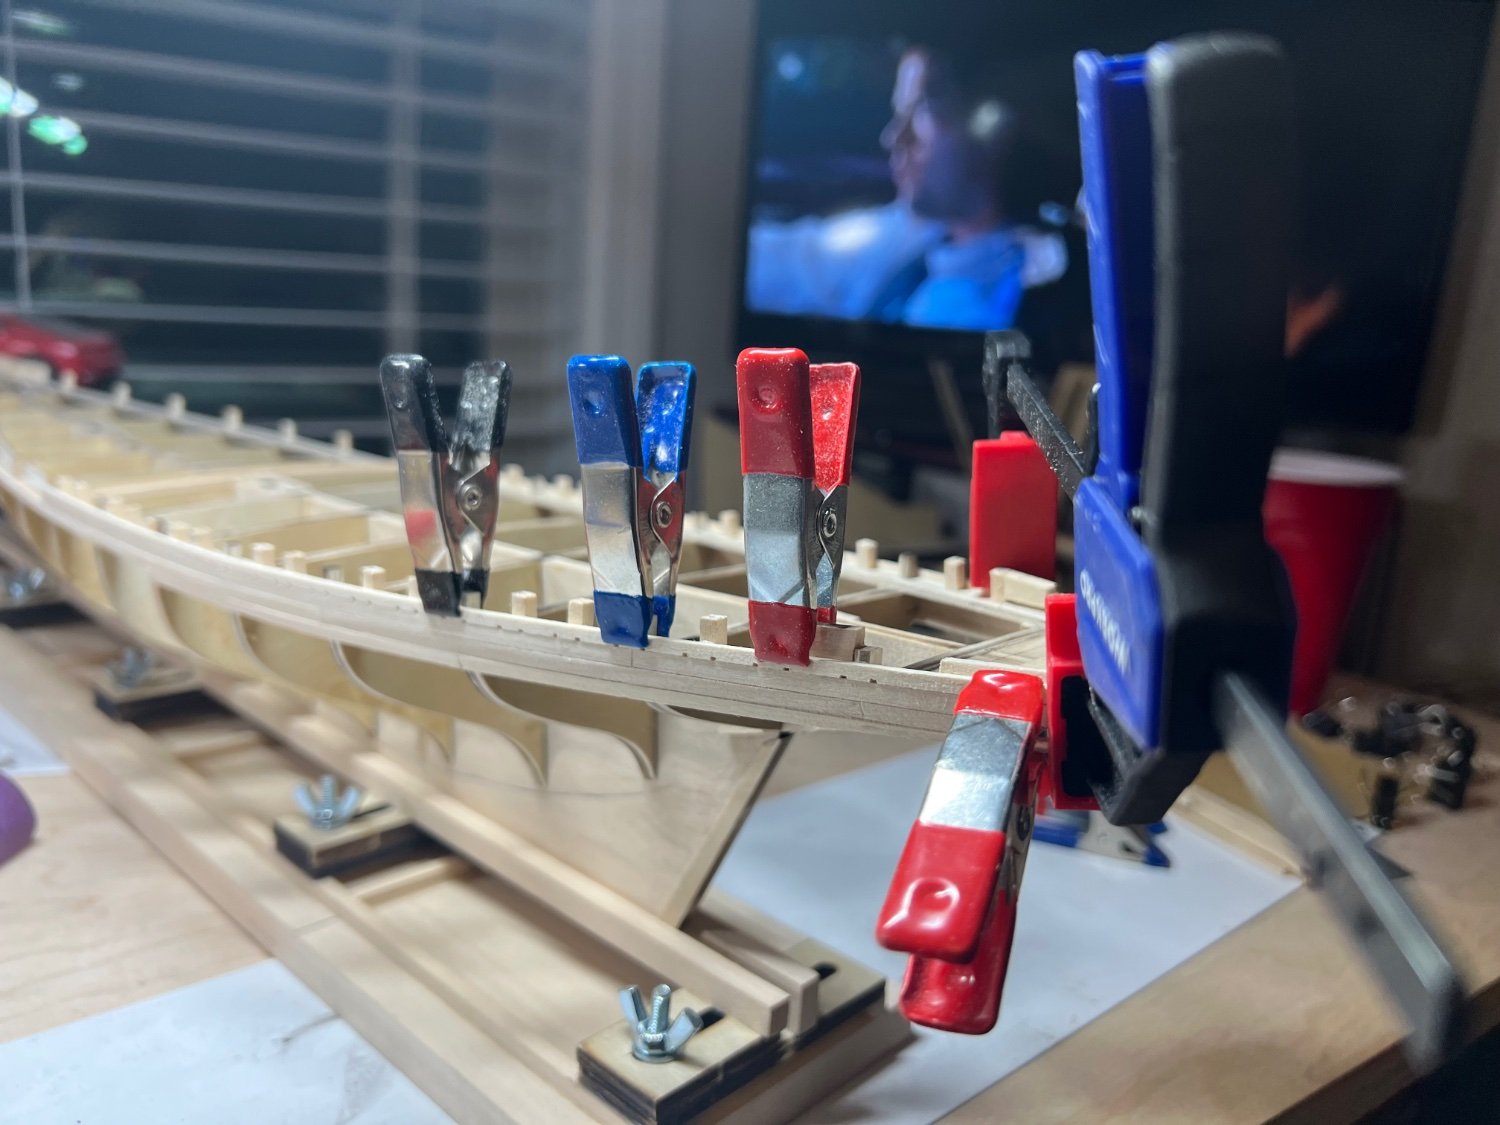
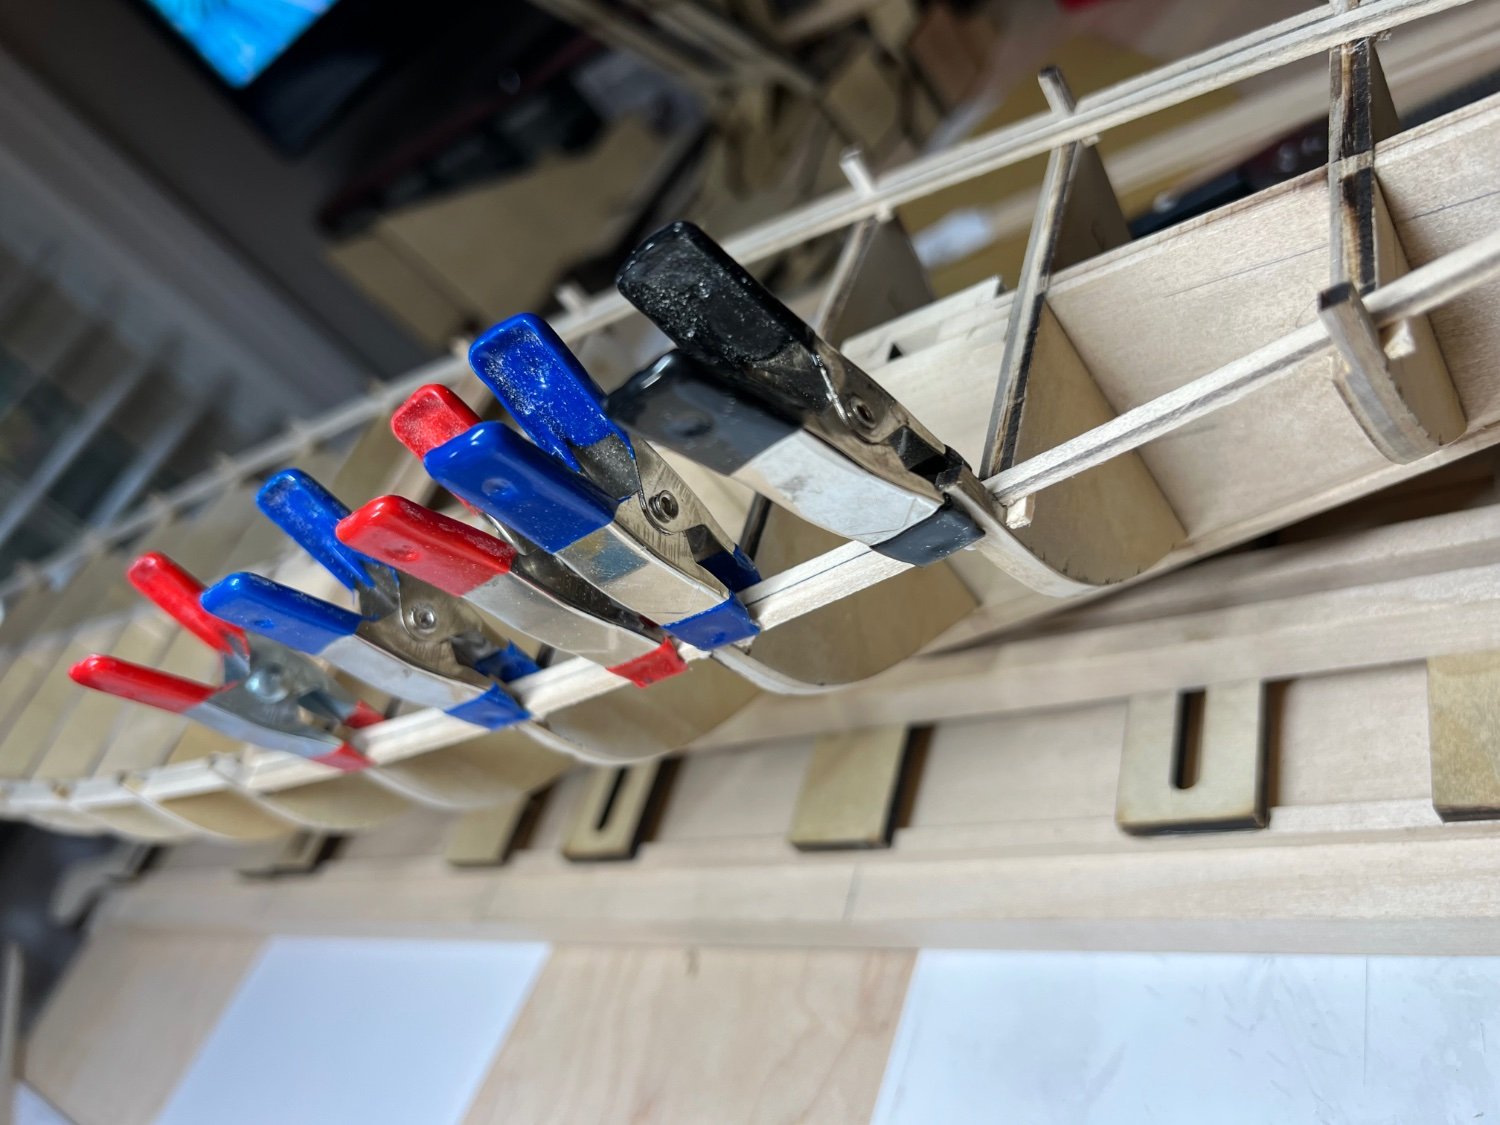
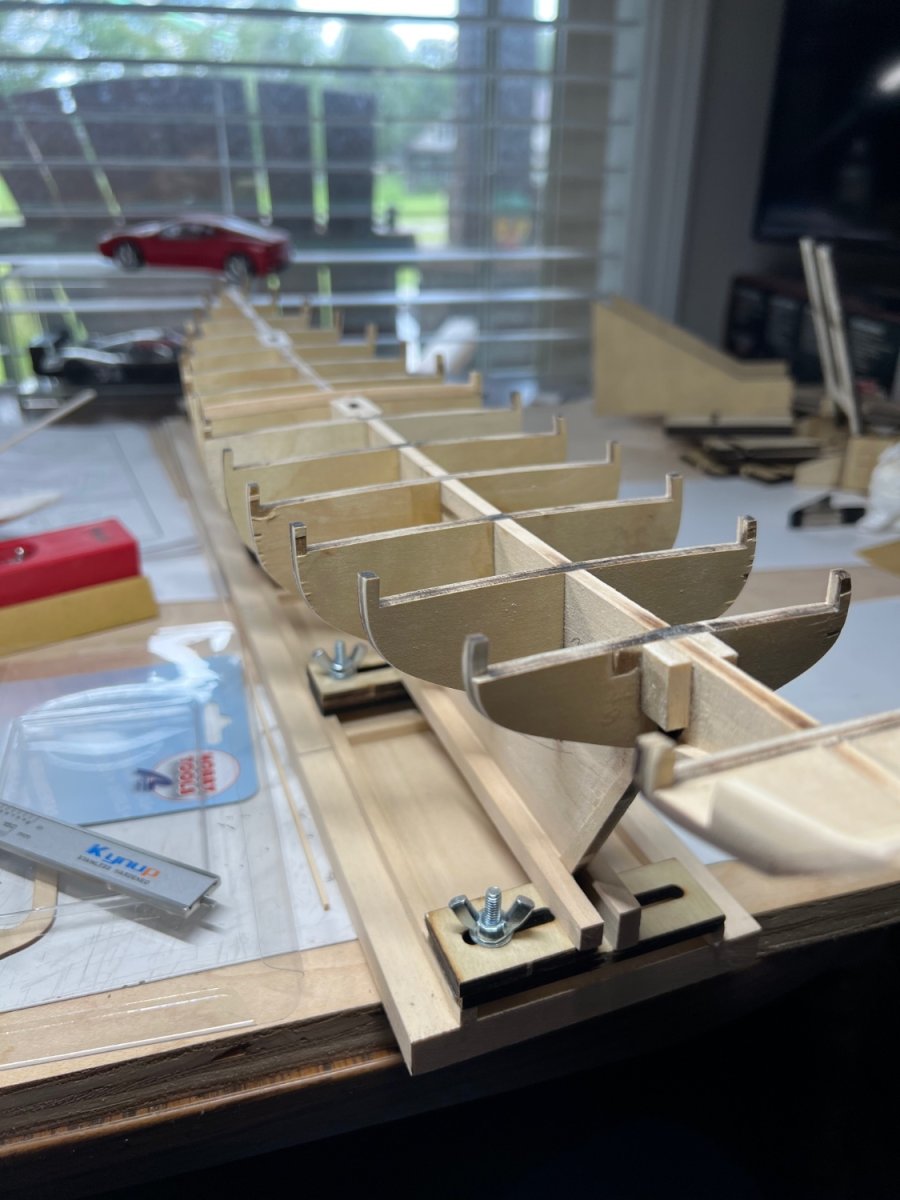
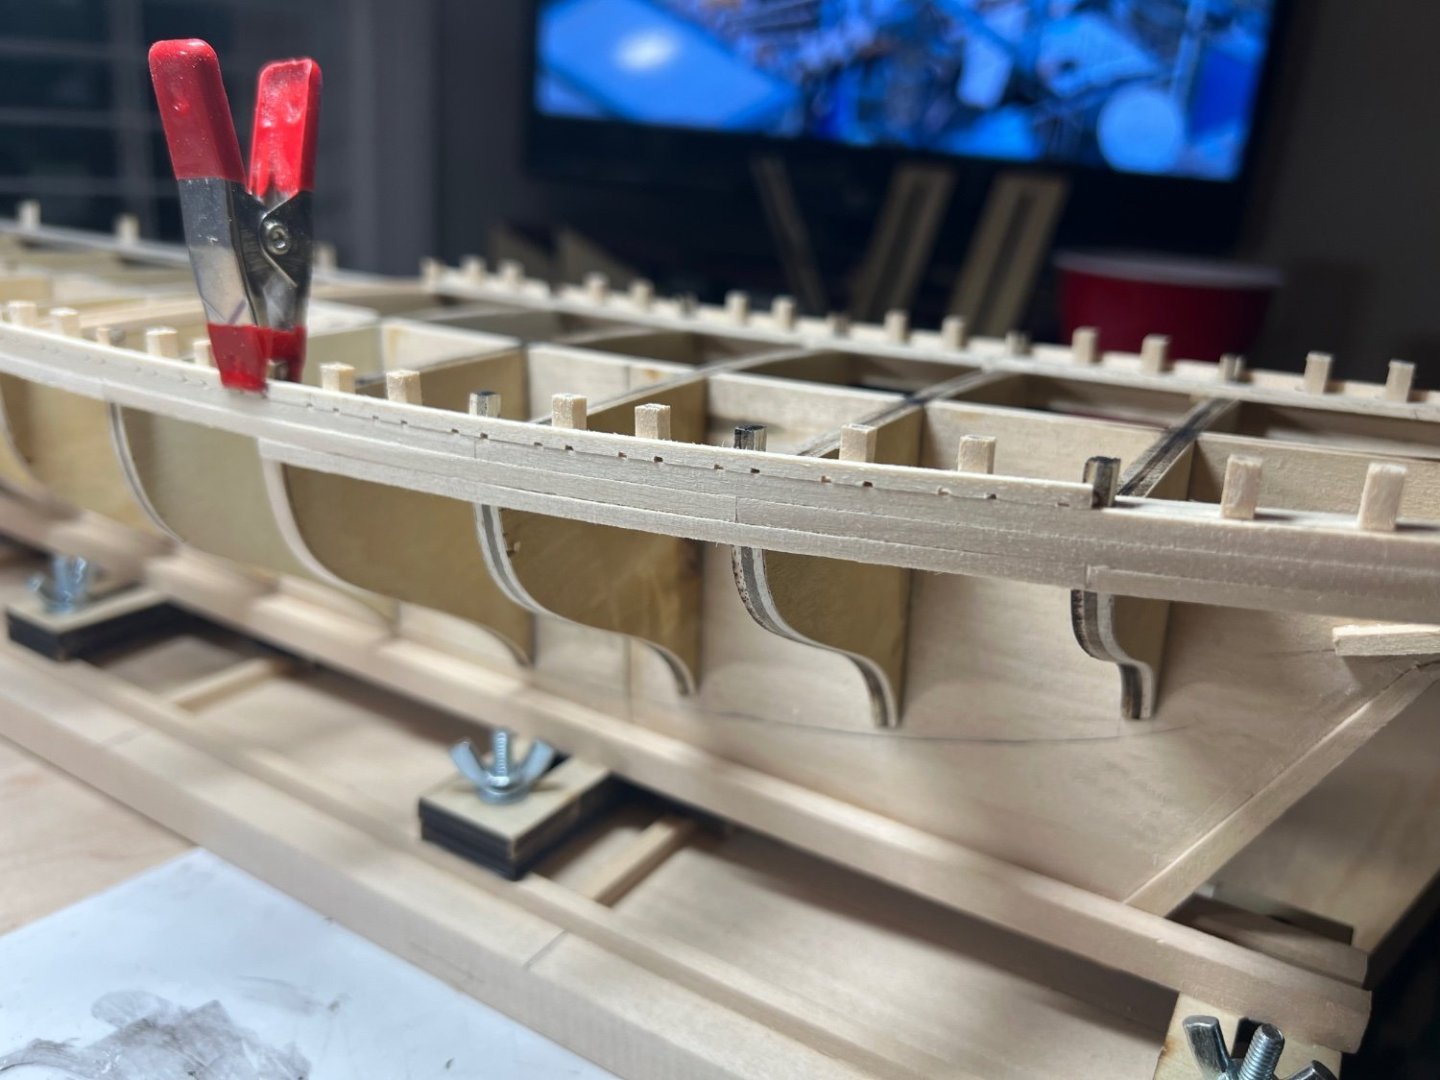
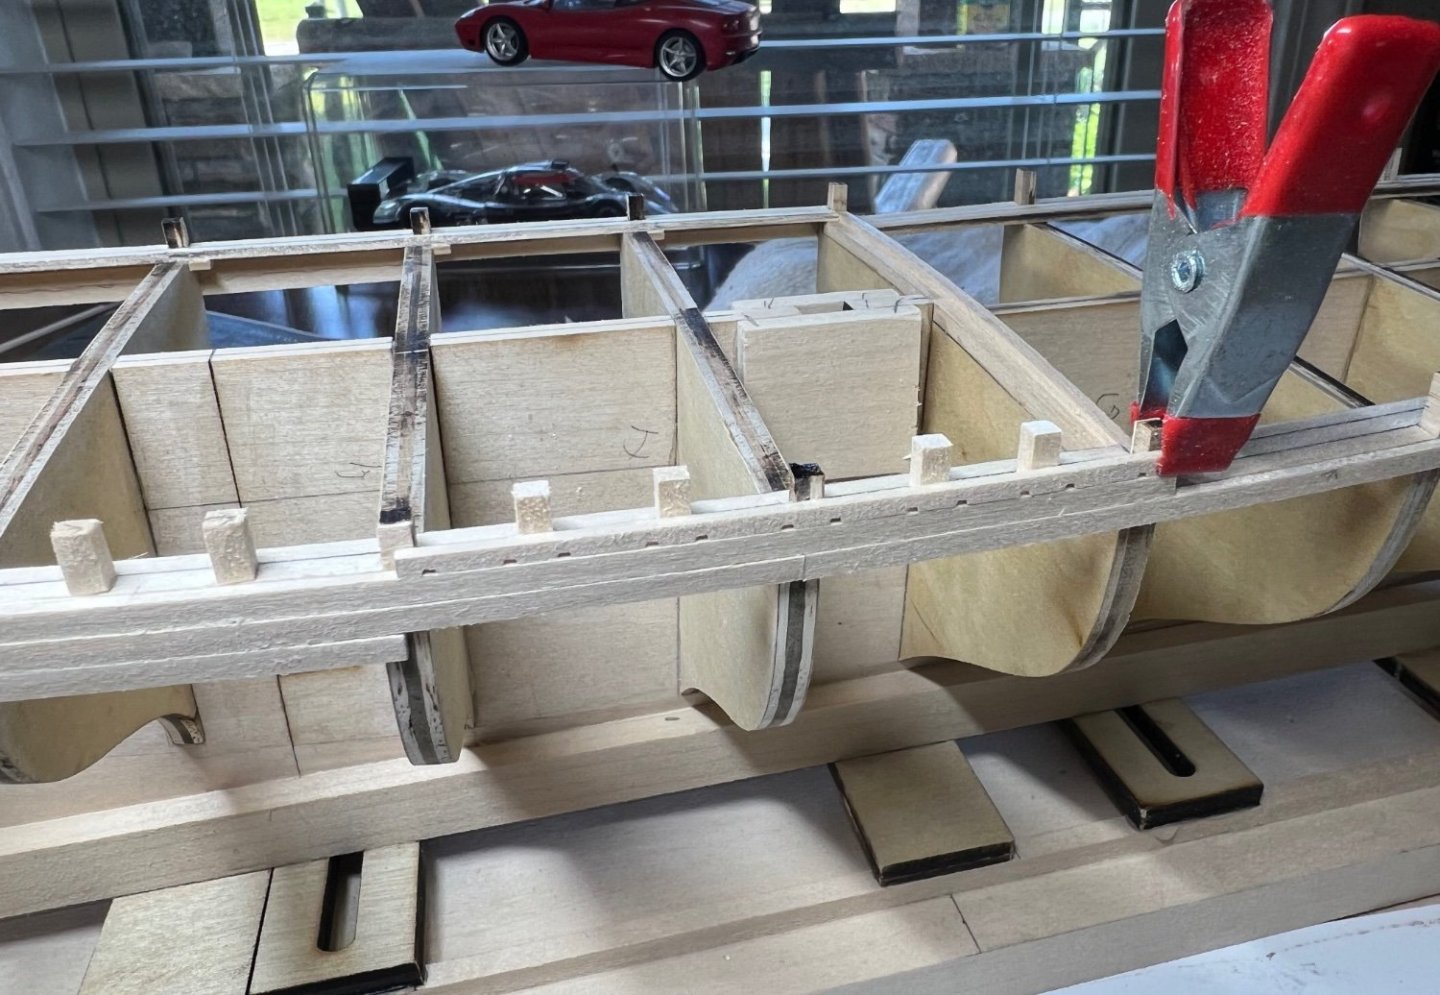
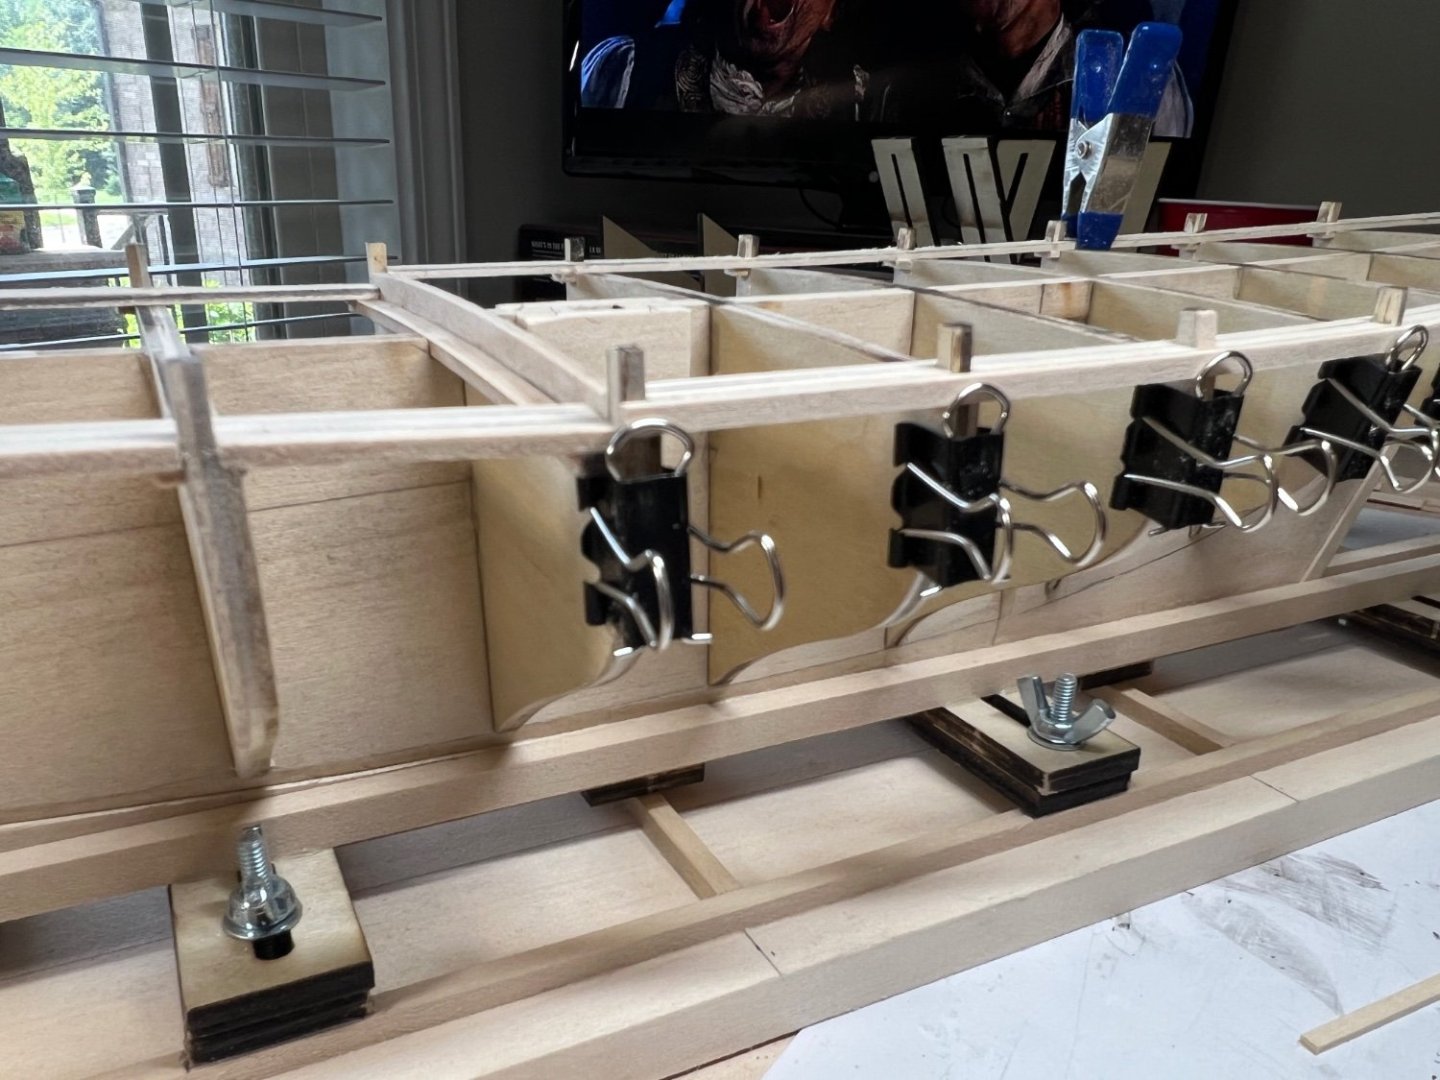
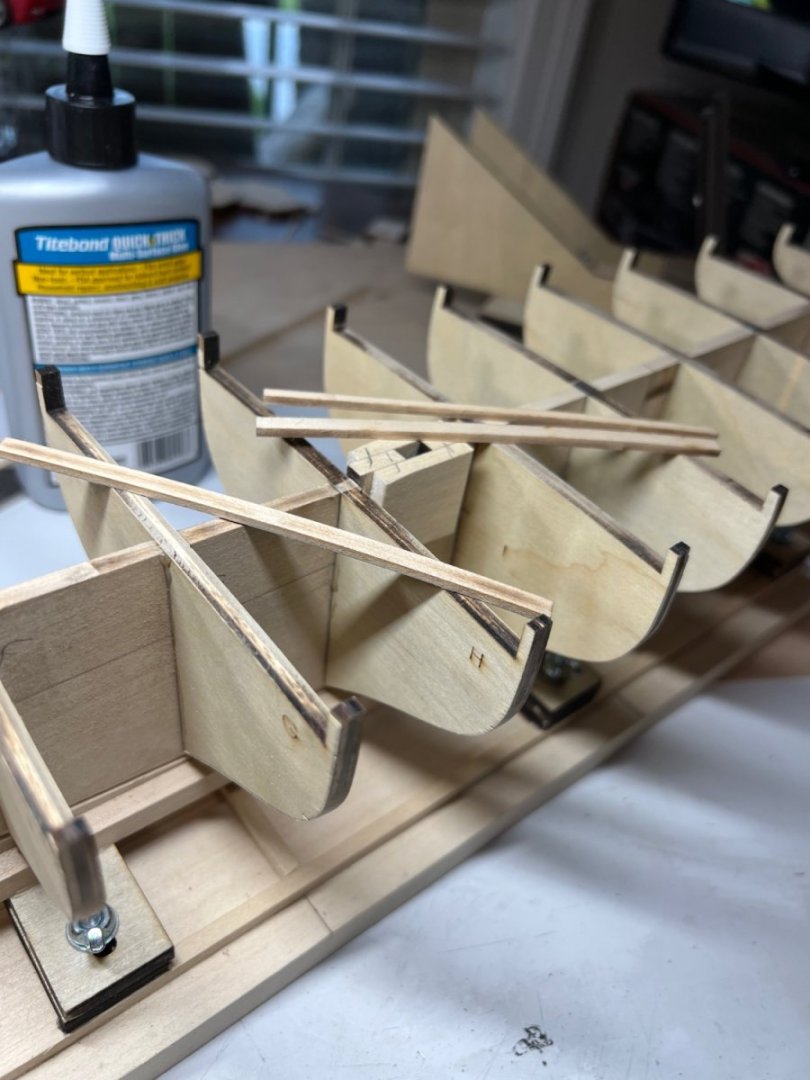
Stanchions are getting installed slowly. I have to remind myself it’s not a race. Slowly making one piece at a time a victory.

-
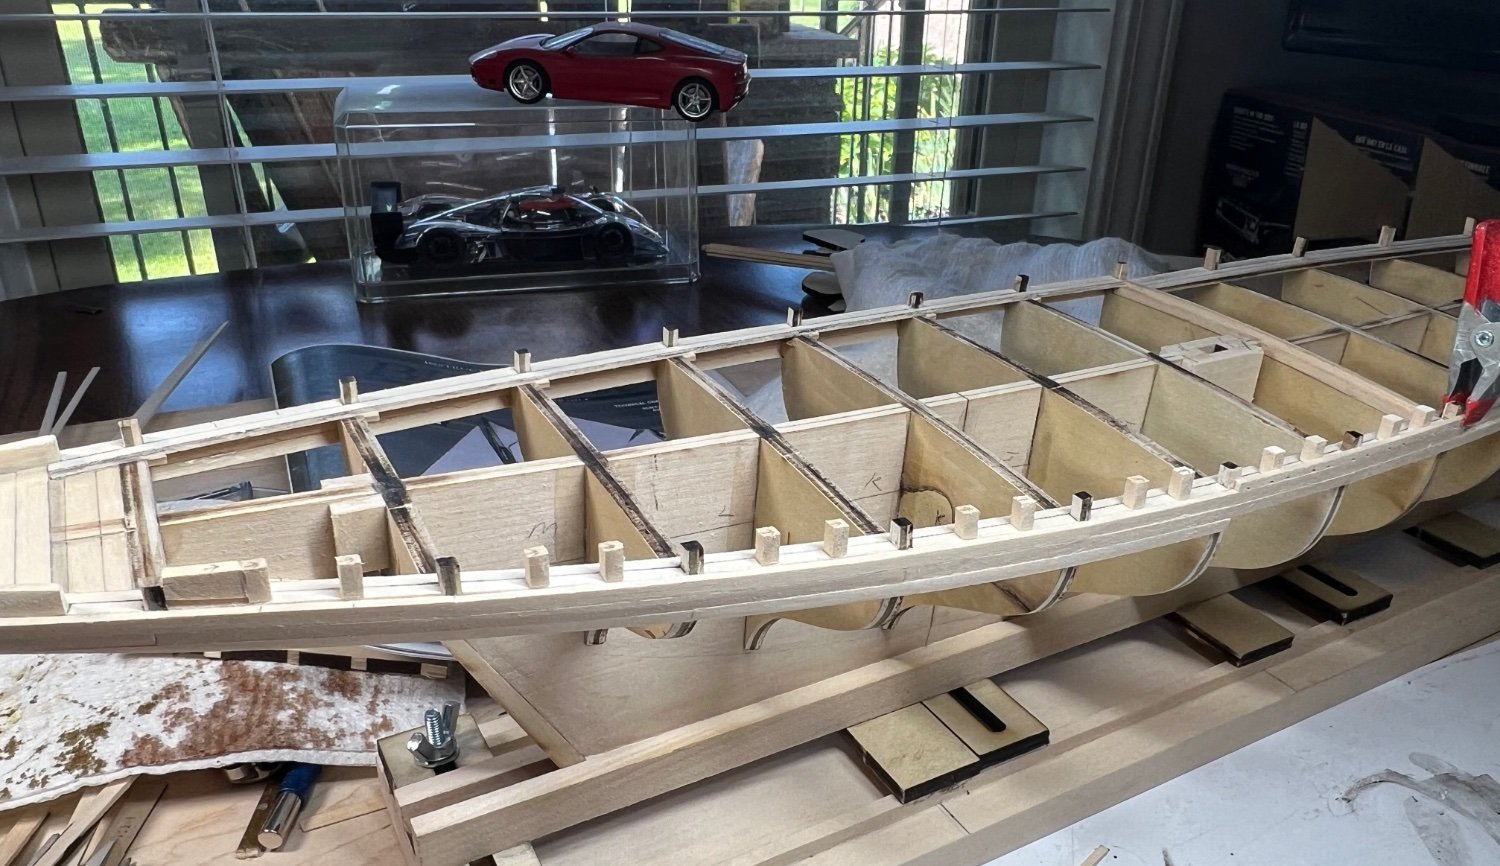
The current goal was/is to plank the sides enough to get the waist installed, to get all the stanchions installed and the main rail on top of that. As many of the instructions and guides state, I’m trying to make each plank a victory in itself. Hundreds more to follow. 😳 The Modena just won’t fall off…..

-
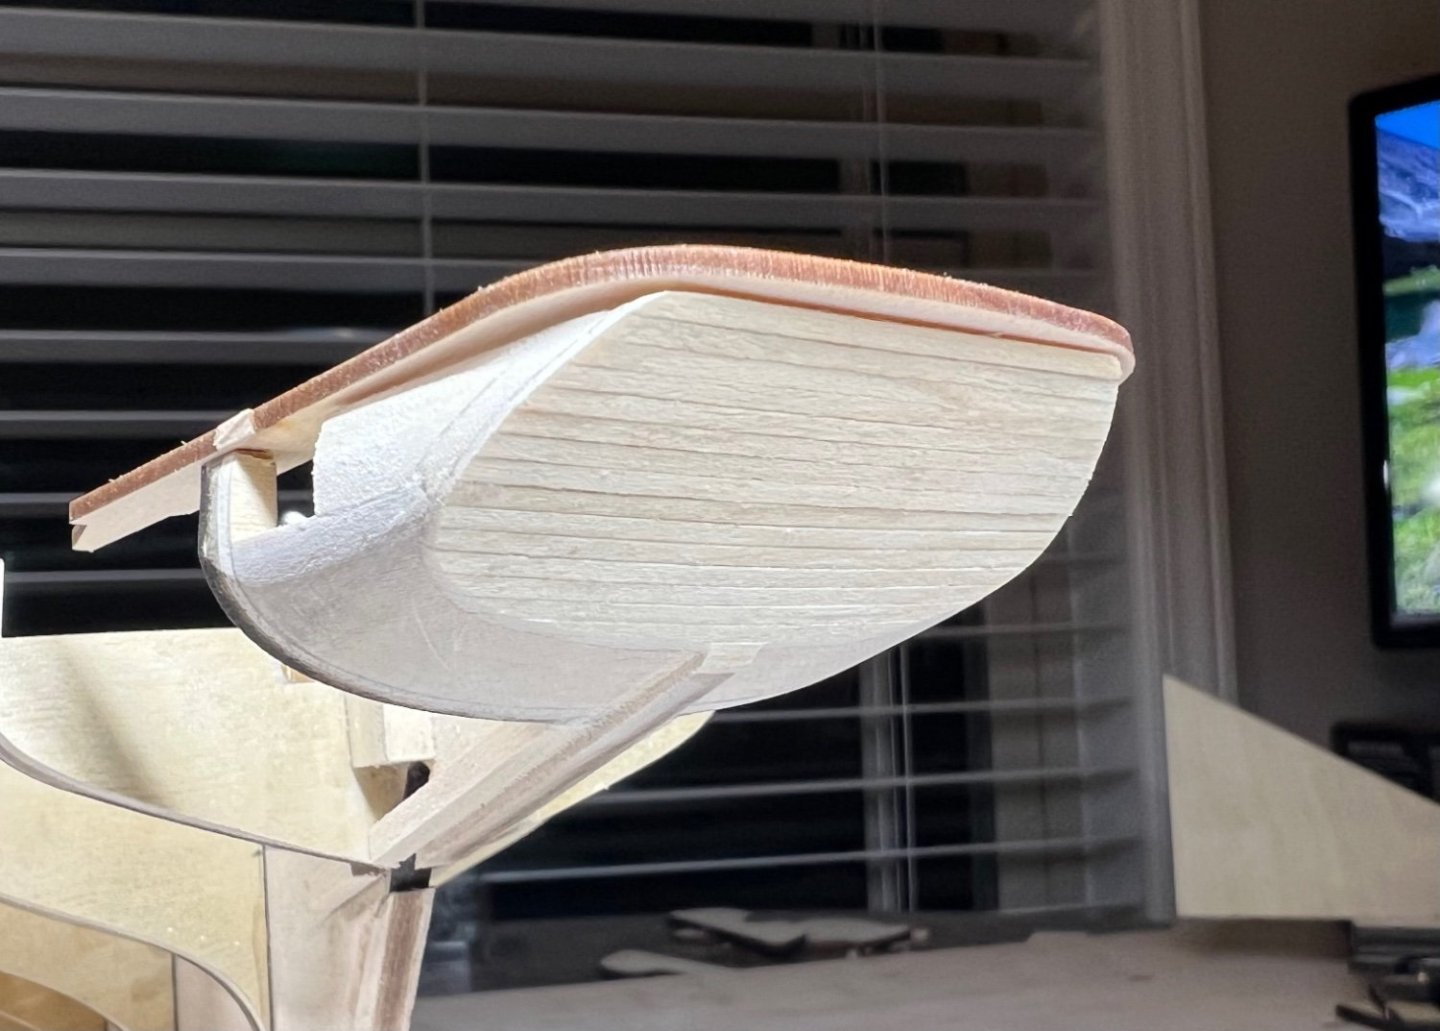
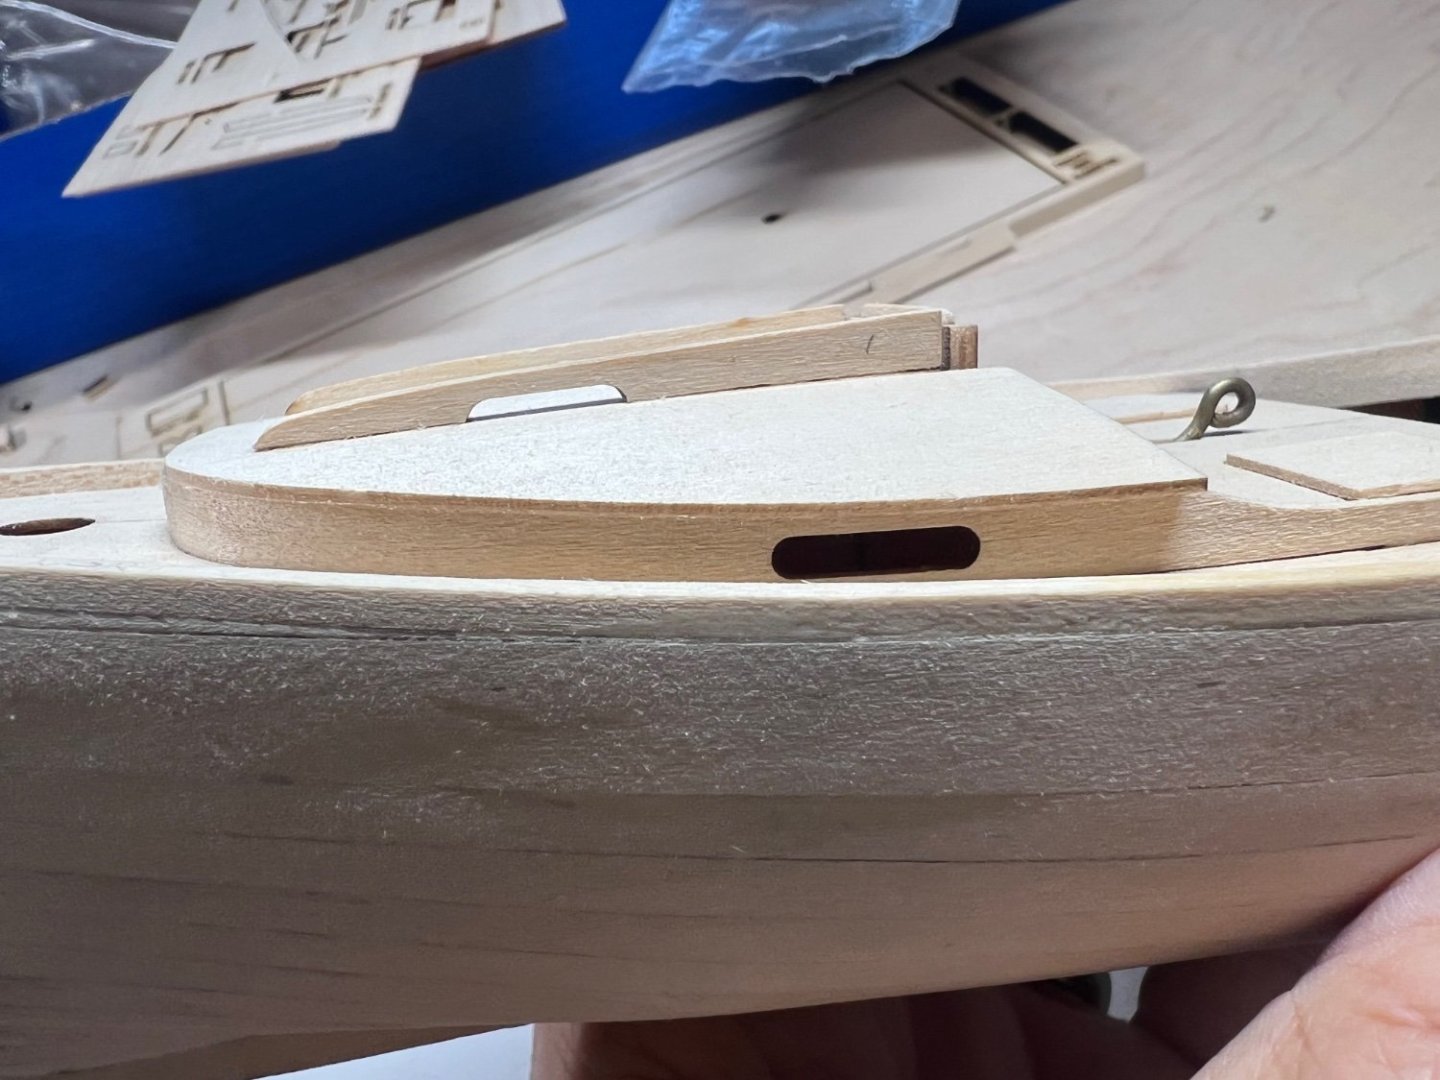
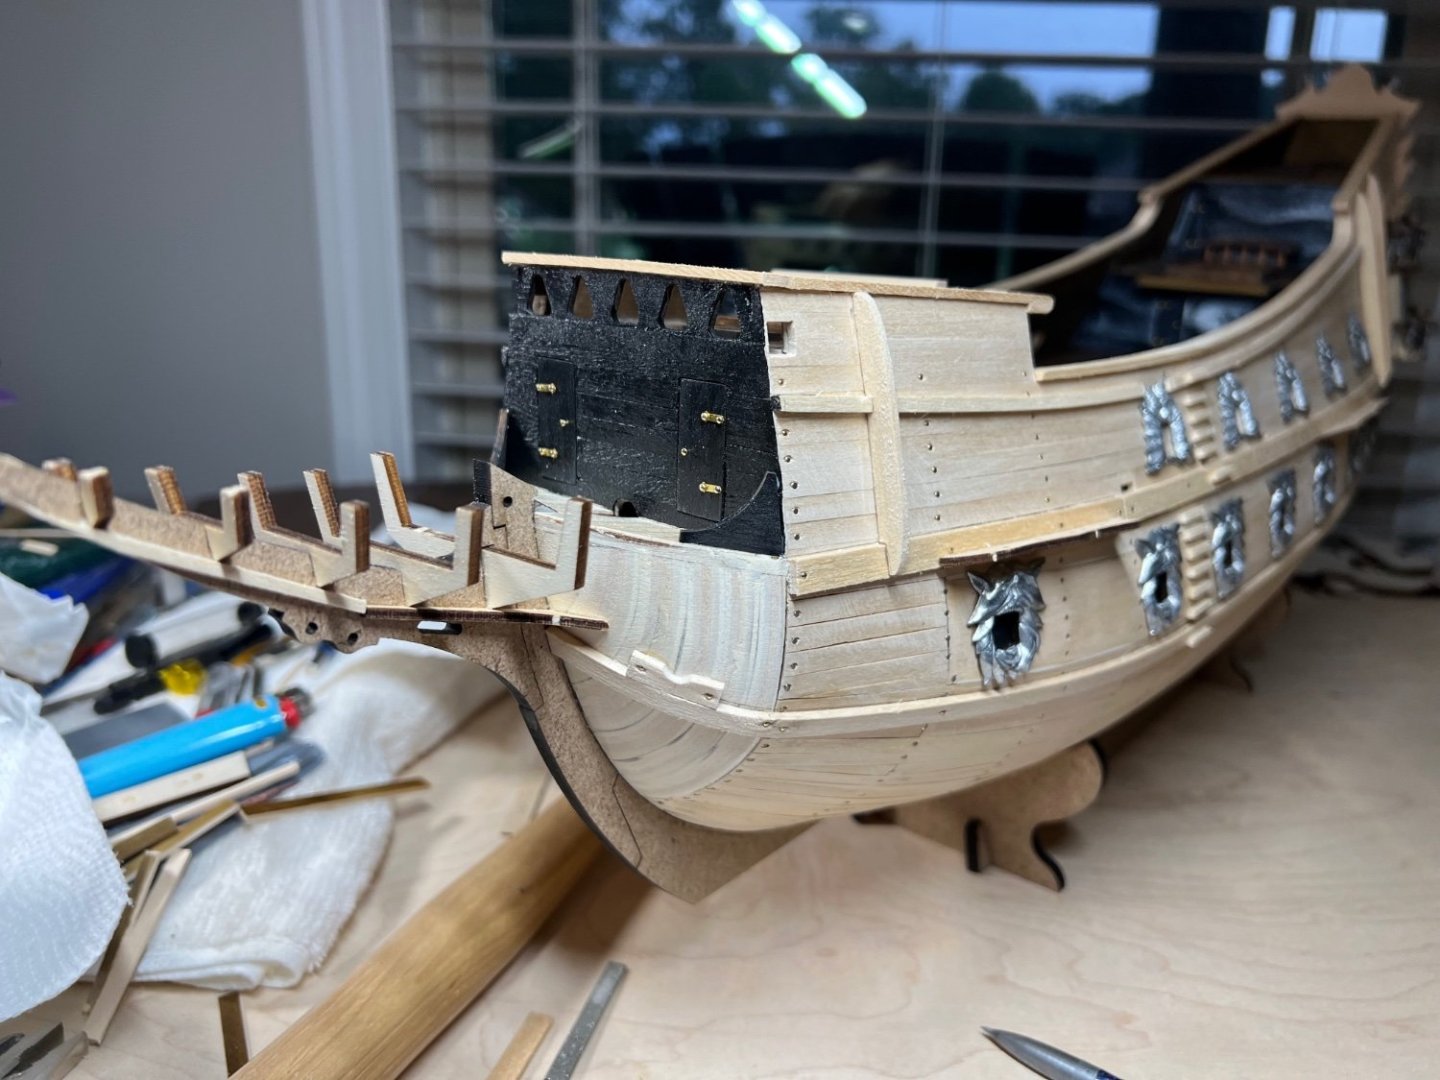
By the time I figured out I used the wrong size waterways on the foredeck it was to late. They were well placed, nicely fitted and won’t be noticeable unless looked at by a boat expert. This project is about where I was almost 20 years ago. I think the main rail is what I got stuck on.

-
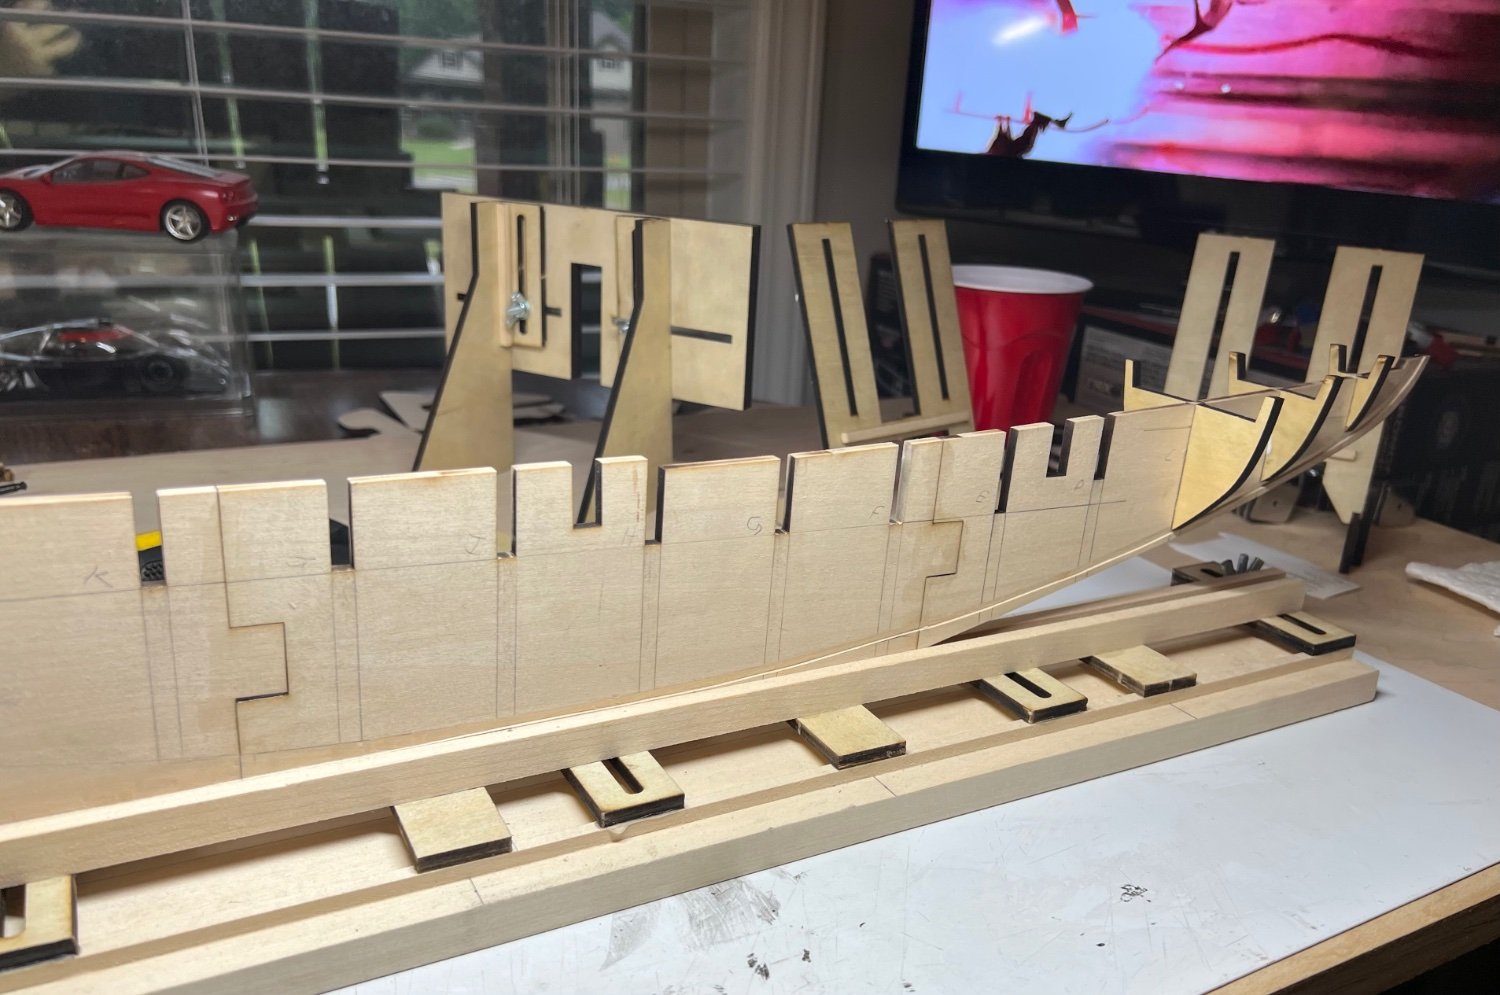
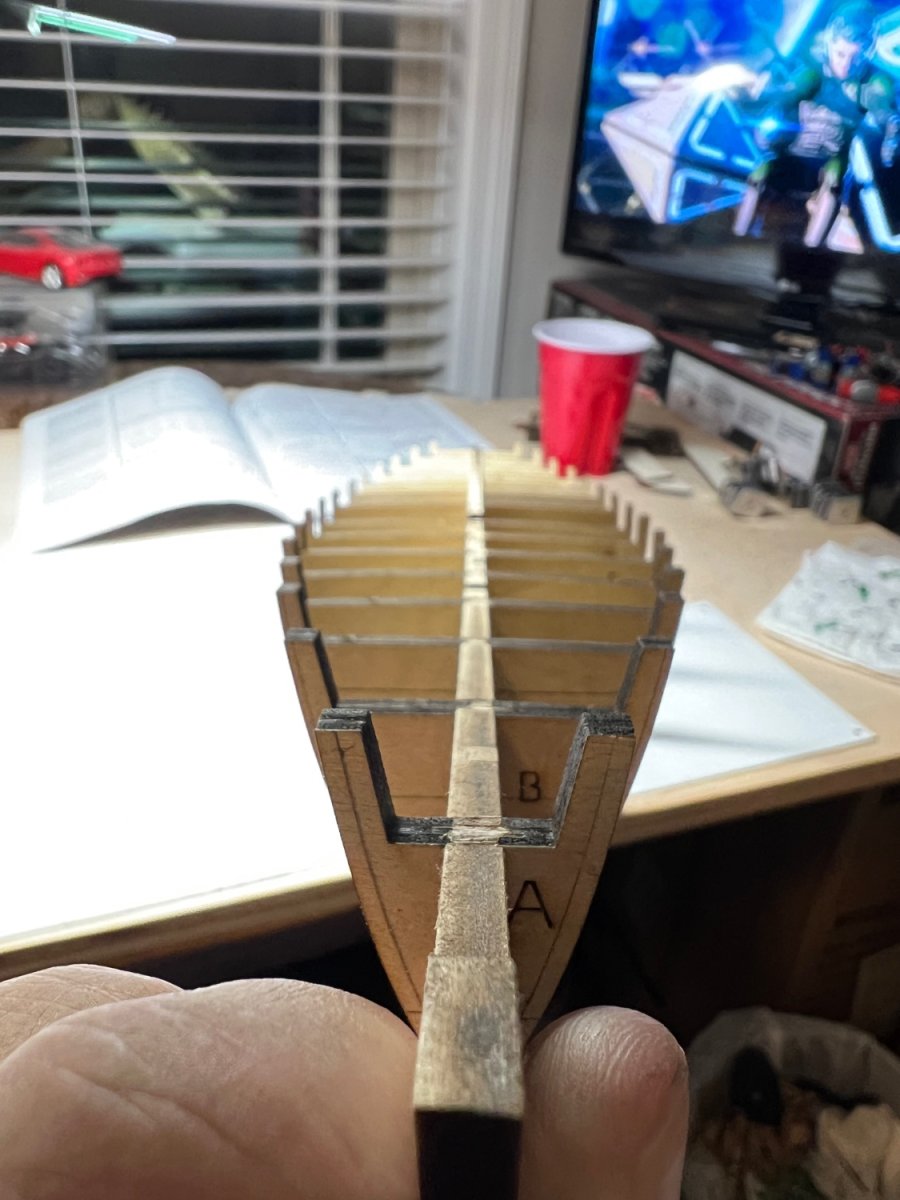
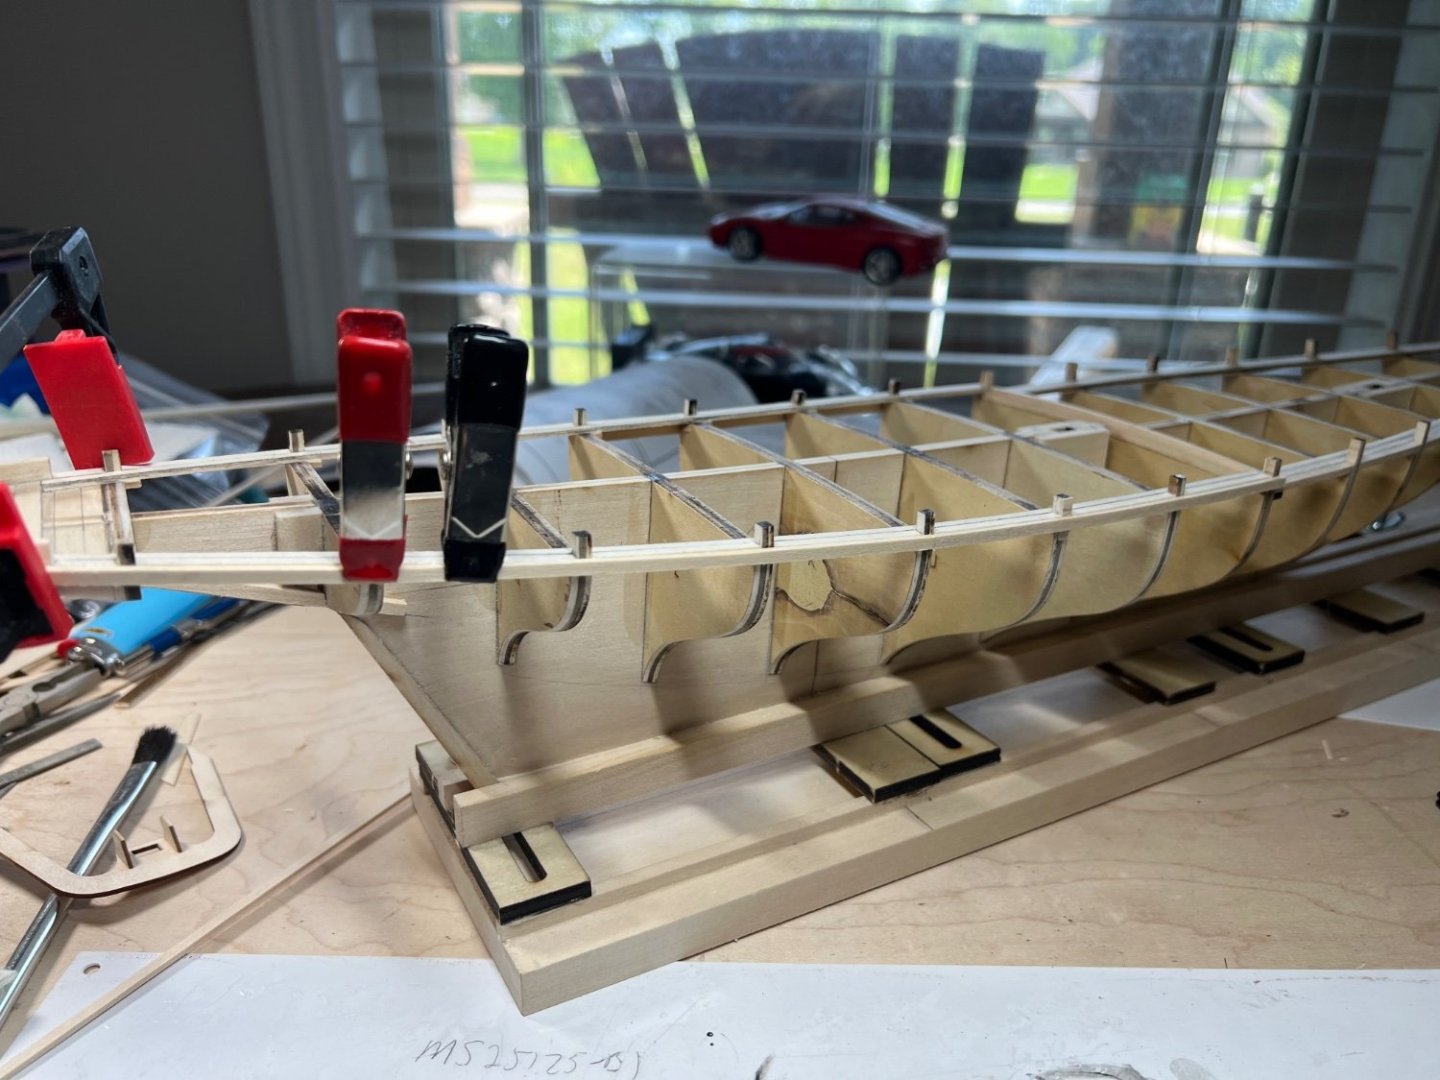
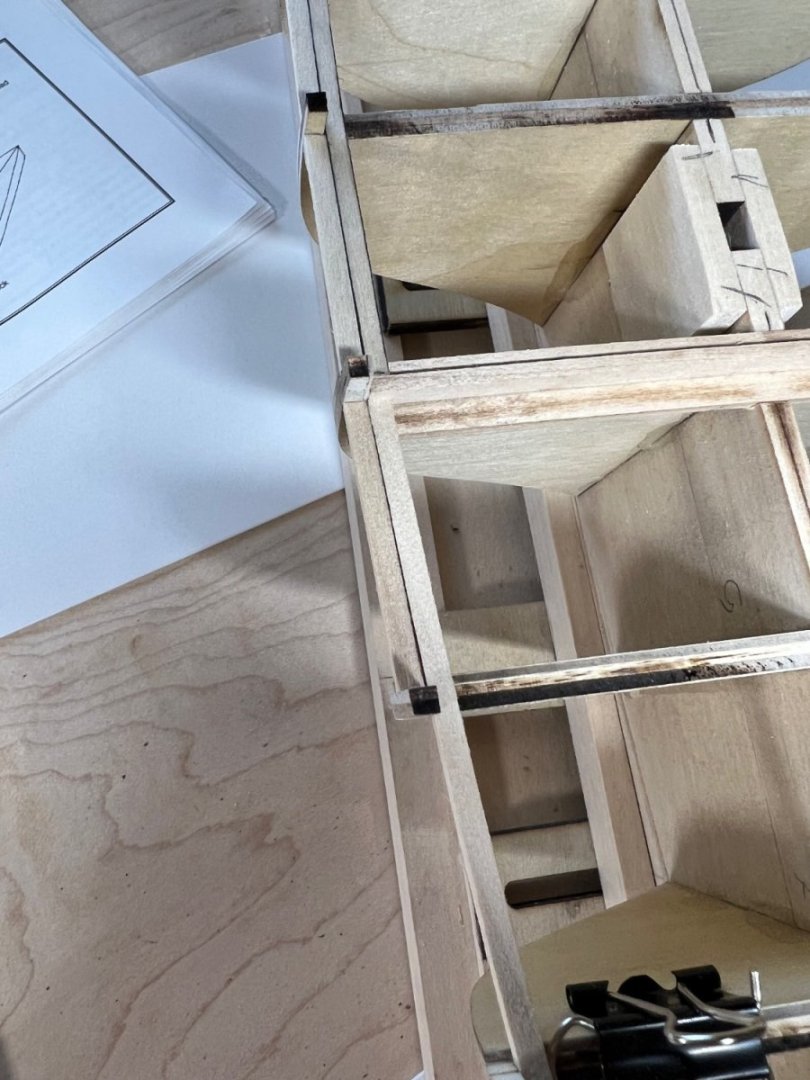
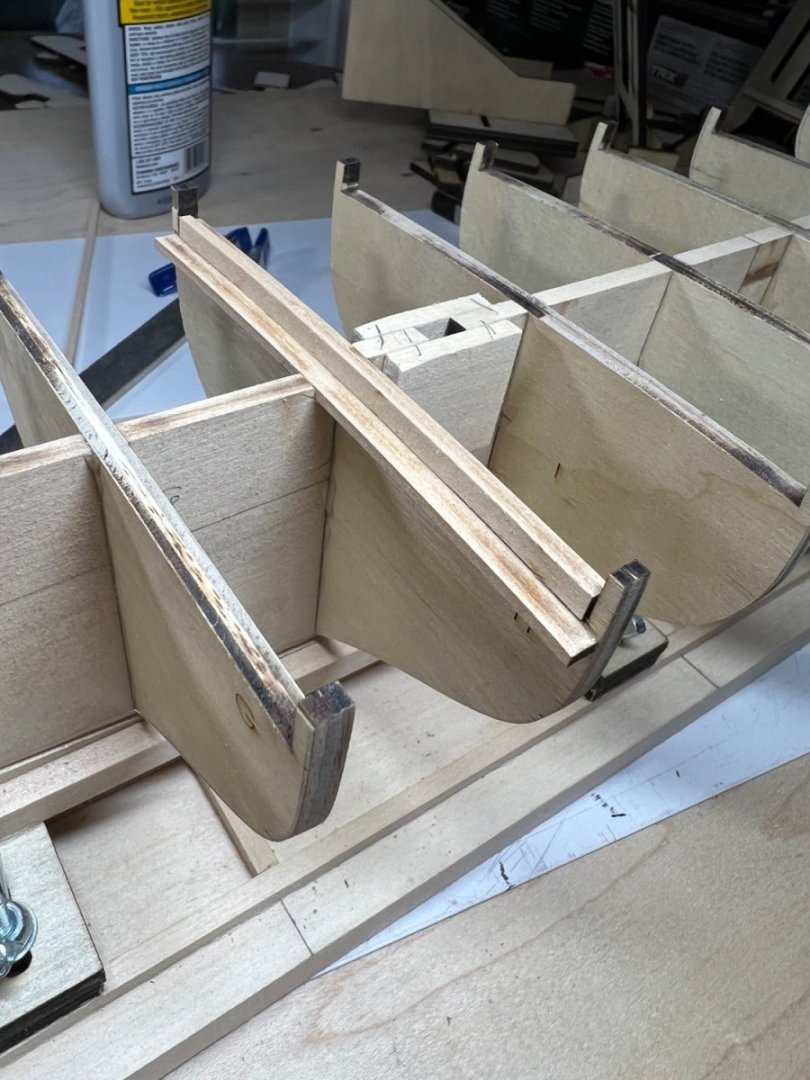
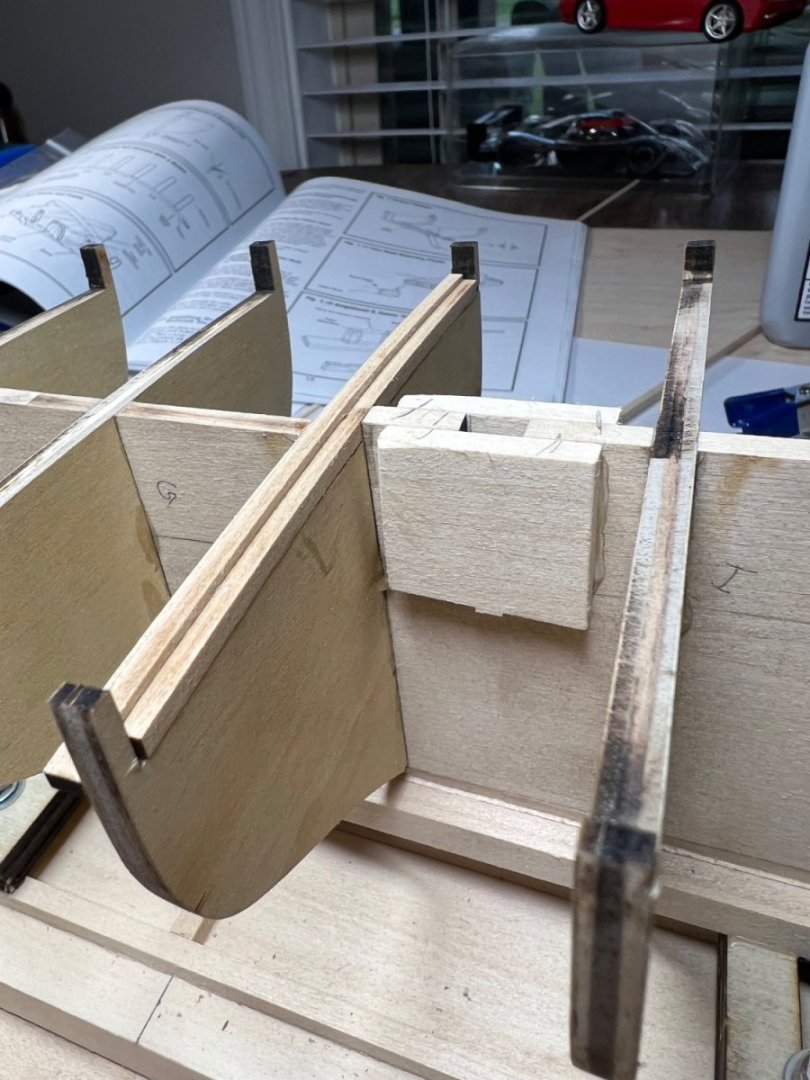
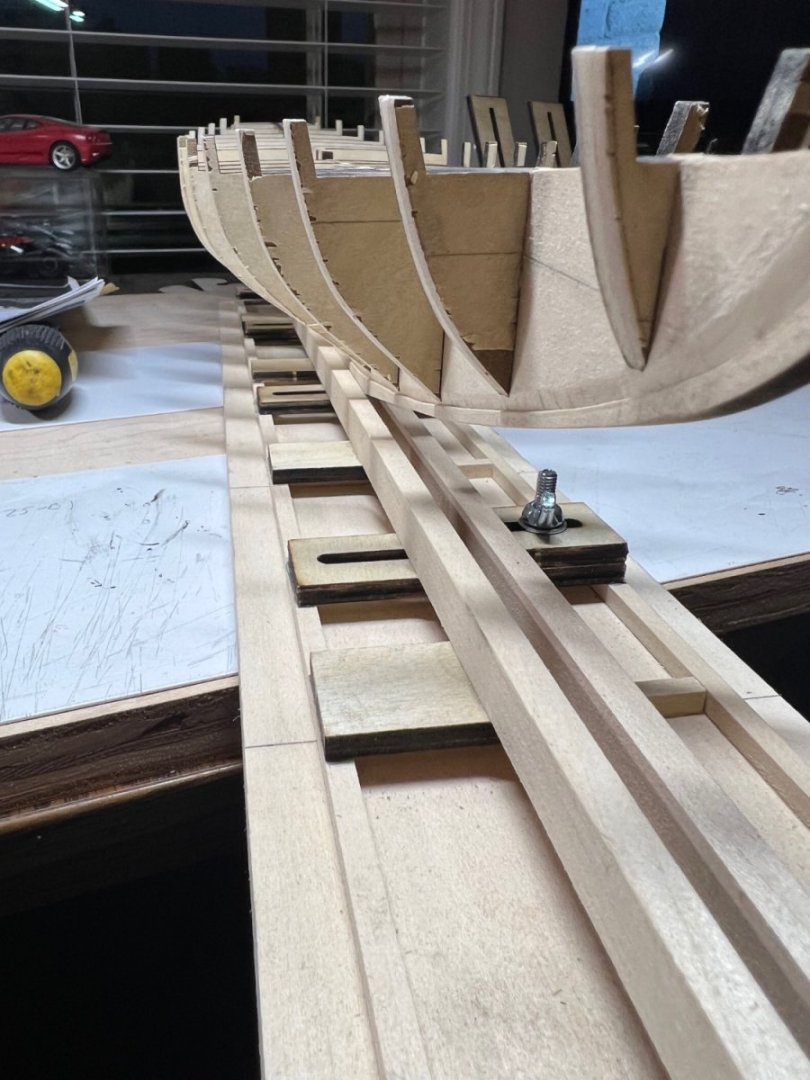
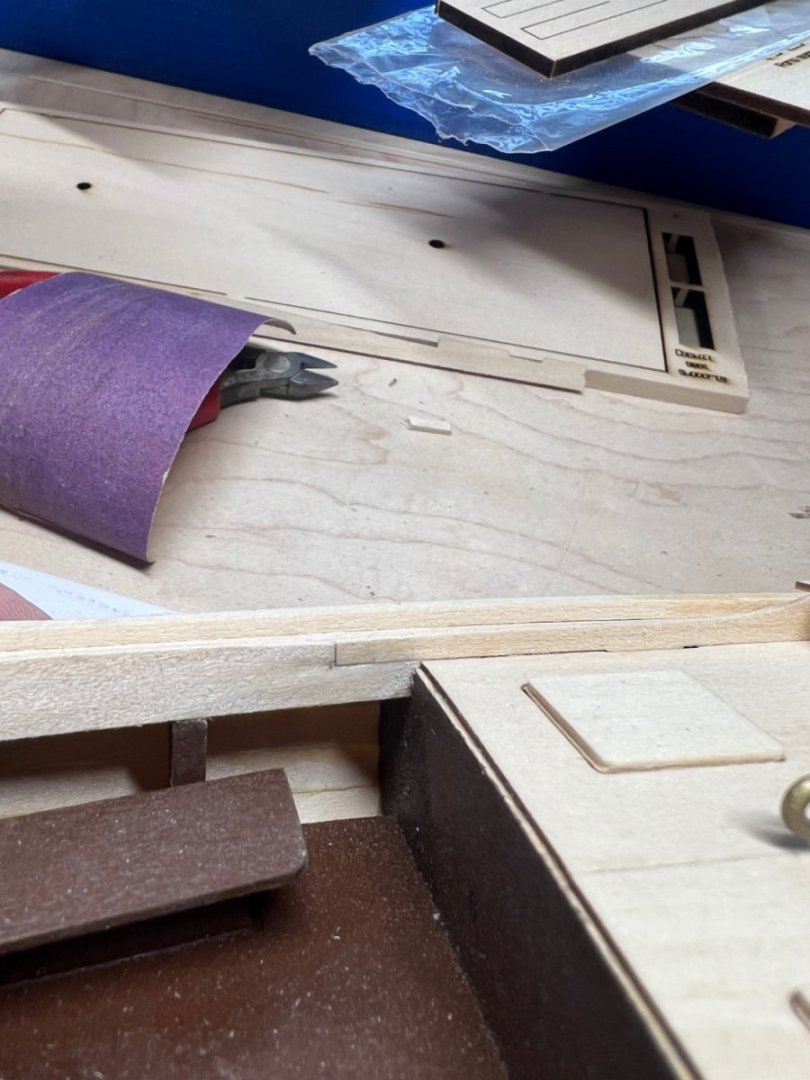
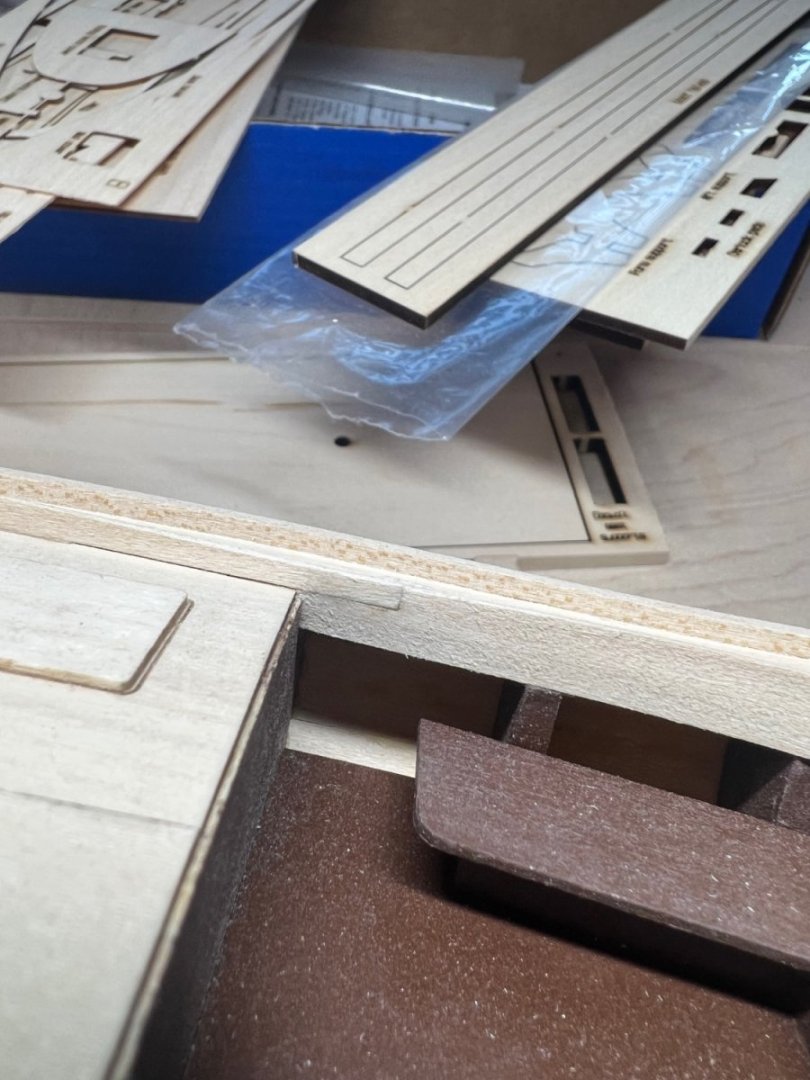
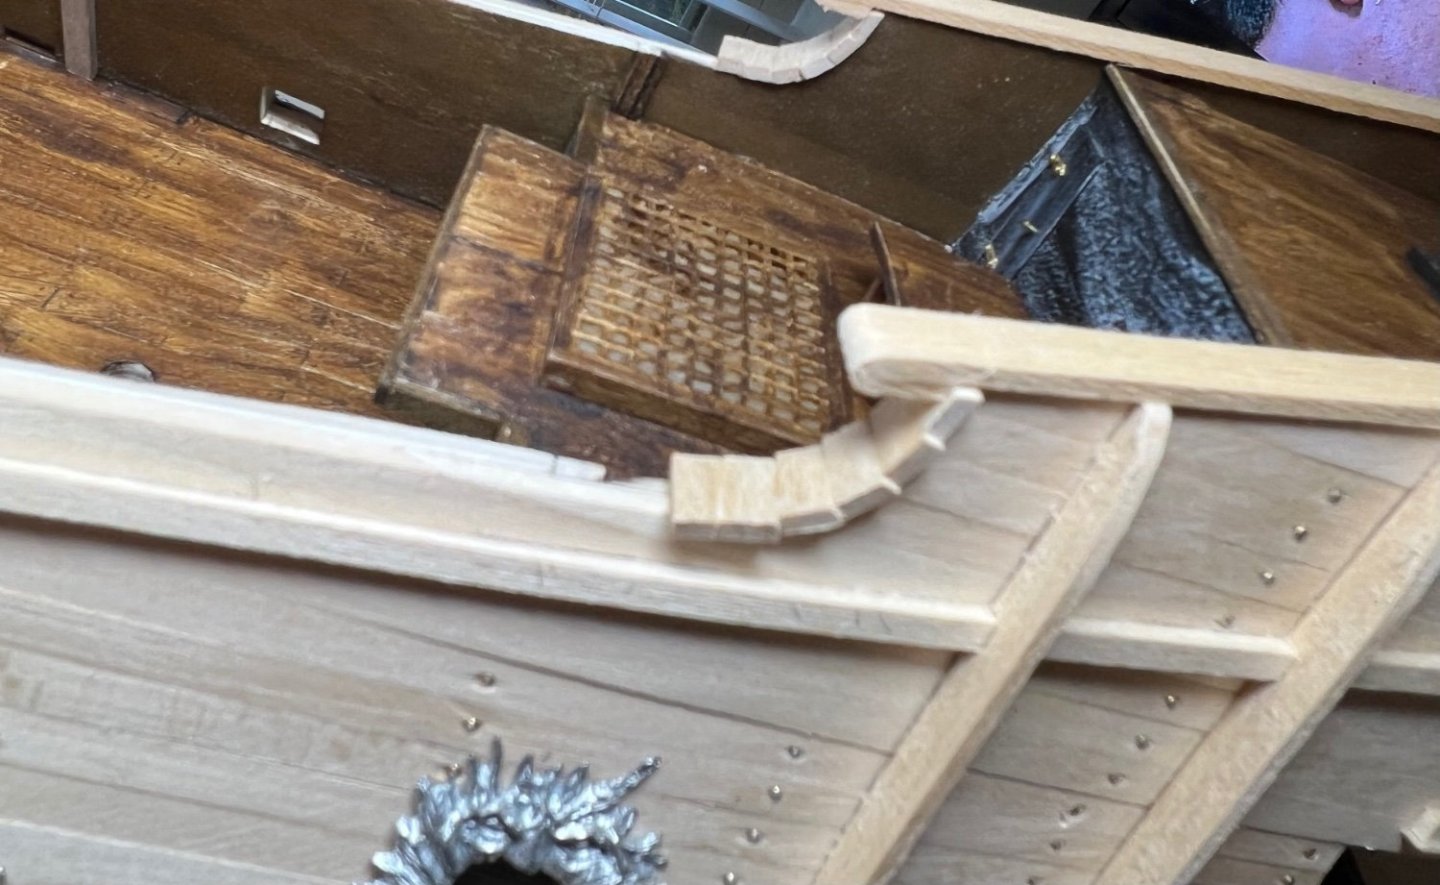
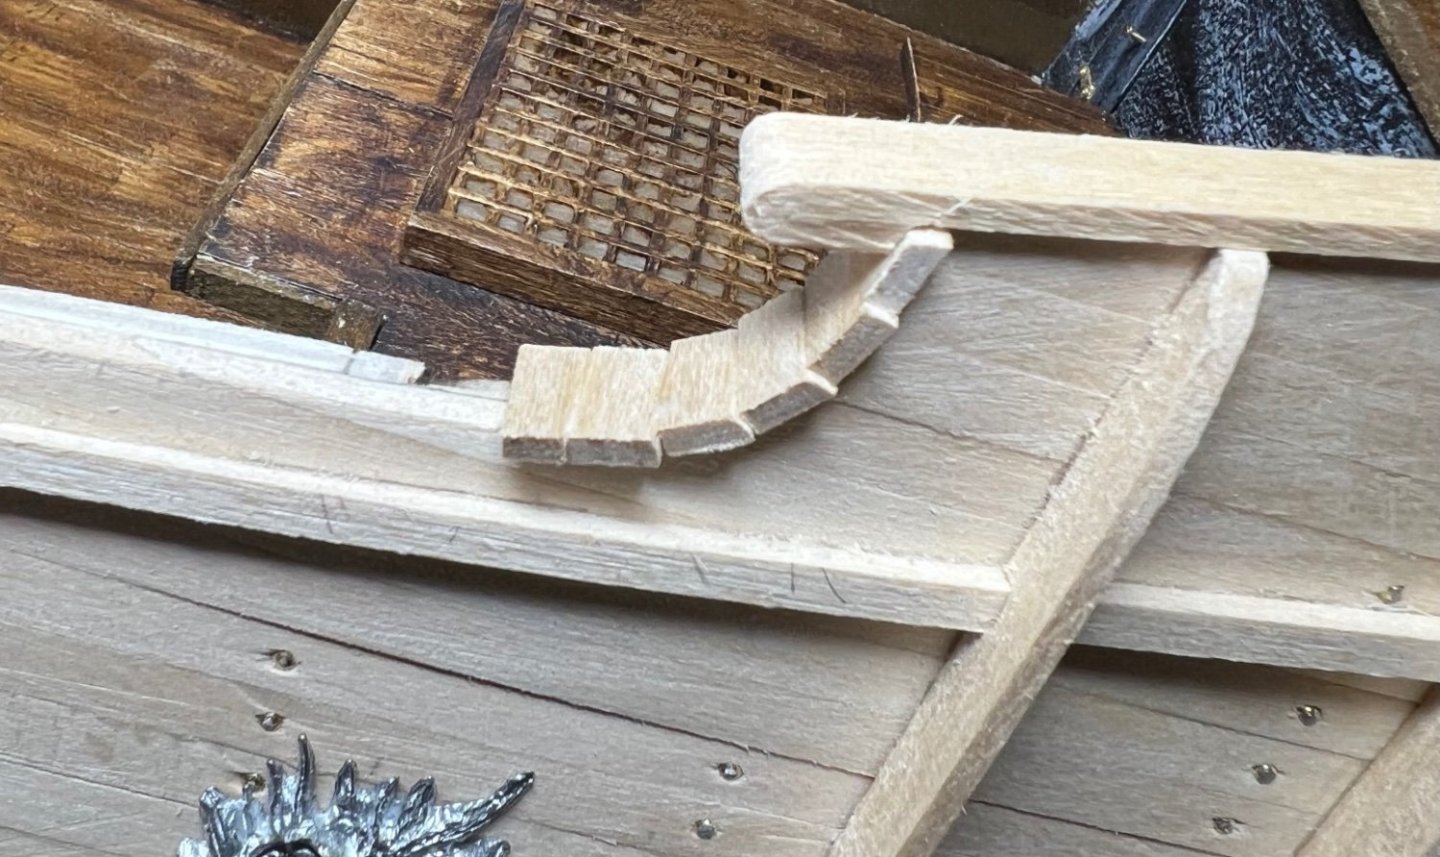
There are certain things to be done in a different order. The great beam it shows last for stage 1. I don’t think that would work out. The water ways rest on the great beam. The main rail on the aft section needs an aft boom sheet buffer fitted before installing. Or at least it looks a lot simpler to do it now. I’ve cleaned up and fitted bulkhead stanchions until it looks like they fit and flow well. I have convinced myself nothing will fit going up to the top rails, we shall see. I have no idea which wood to use for the main rail. There is some 1/16 inch thick 1/2 wide, looks like these would fit the curves every 6 inches. I think I will start a few top side planks before the top rail, so the waist can be fitted nicely before gluing the top rail in place. This should allow fitting of fake stanchions also. Model Expo still hasn’t shipped a small order made last Sunday for some 3/32 x 1/8 sticks and other stuff for the fore waterway. I bought what was missing so I didn’t have to wait until they got around to it.

-
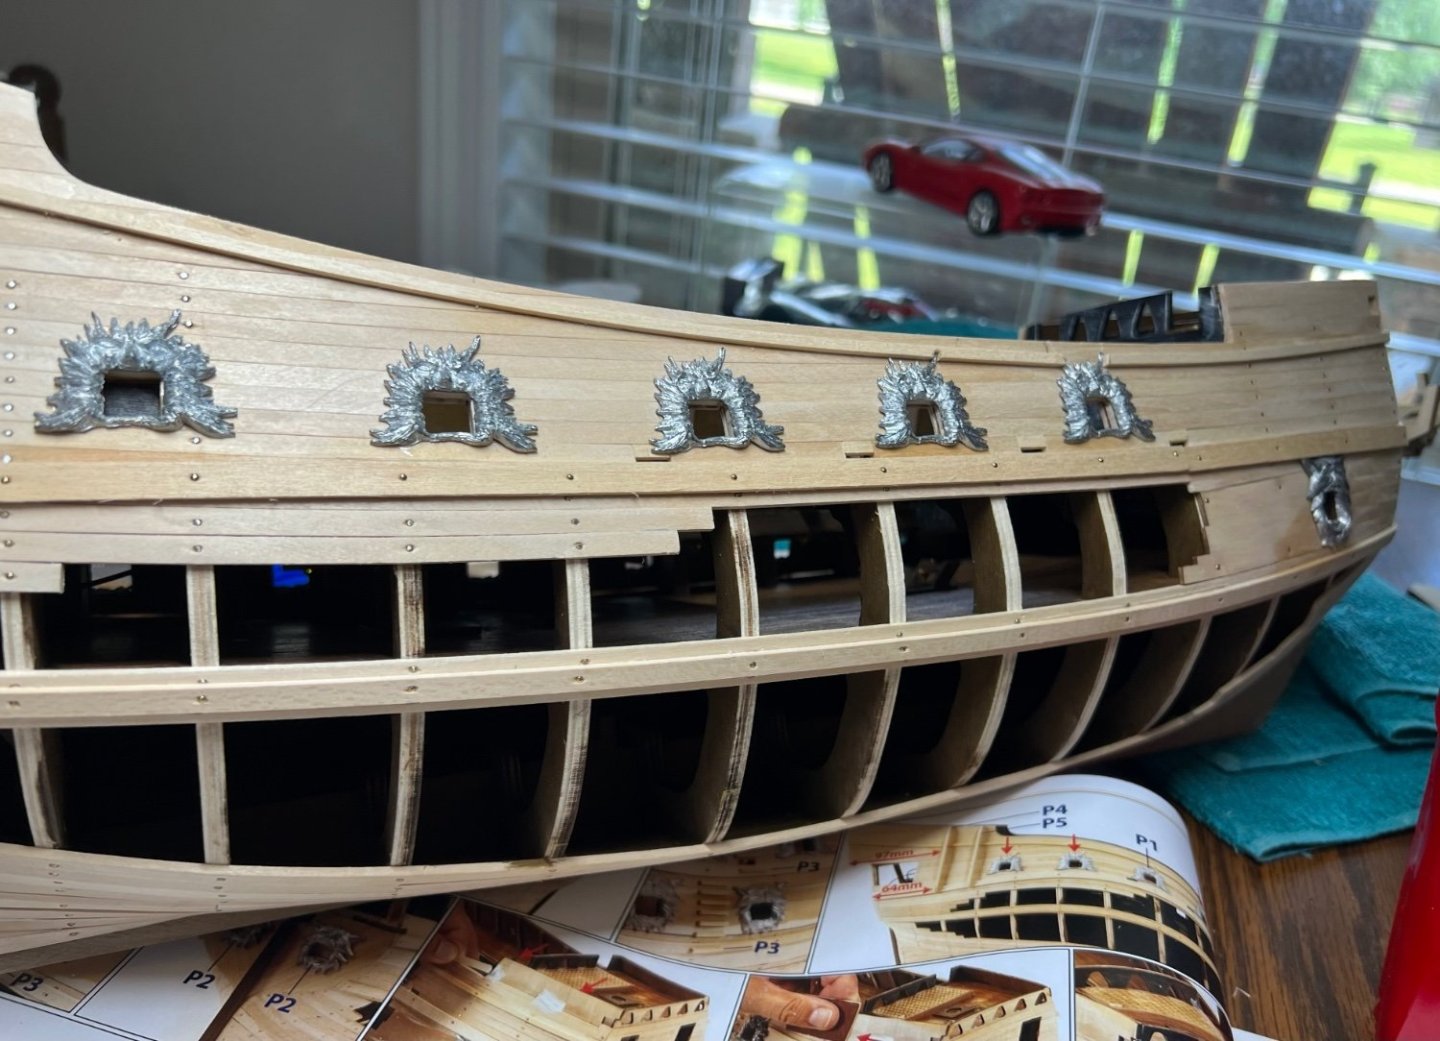
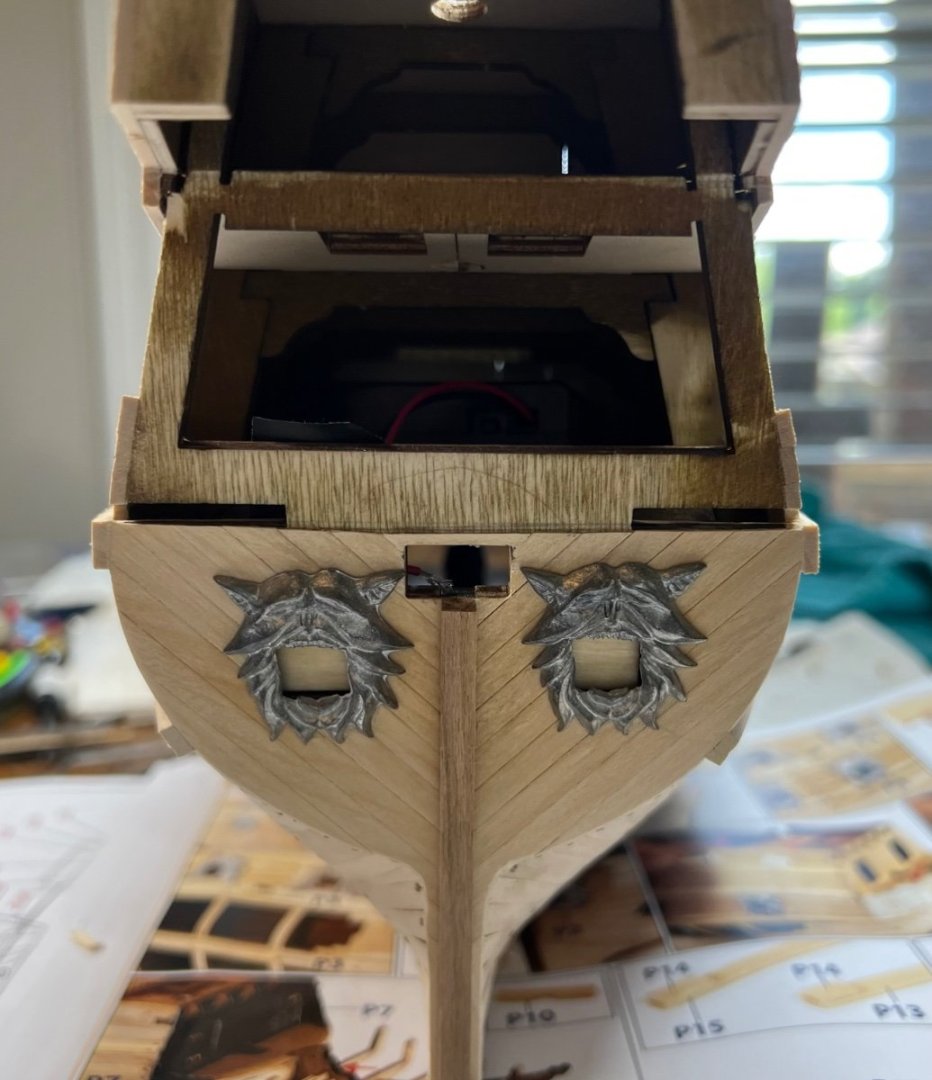
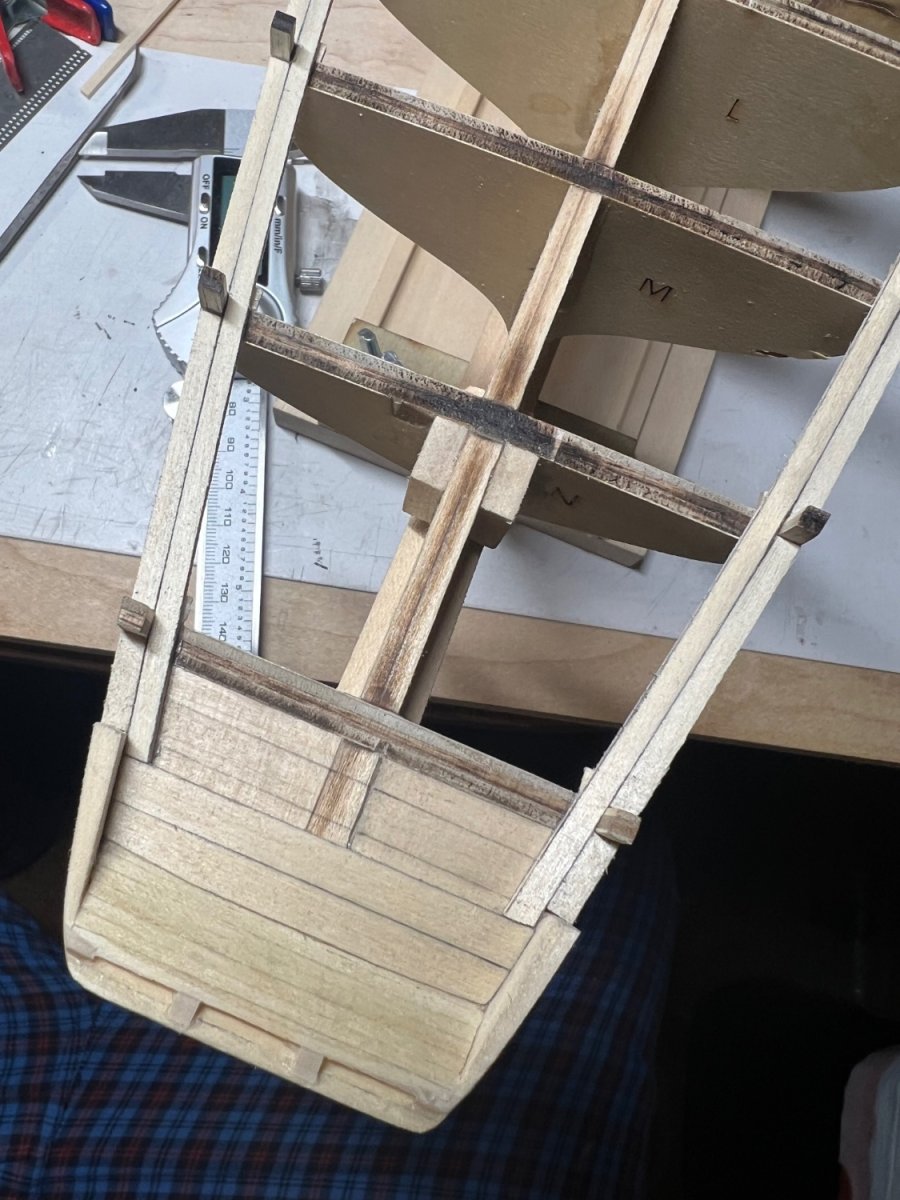
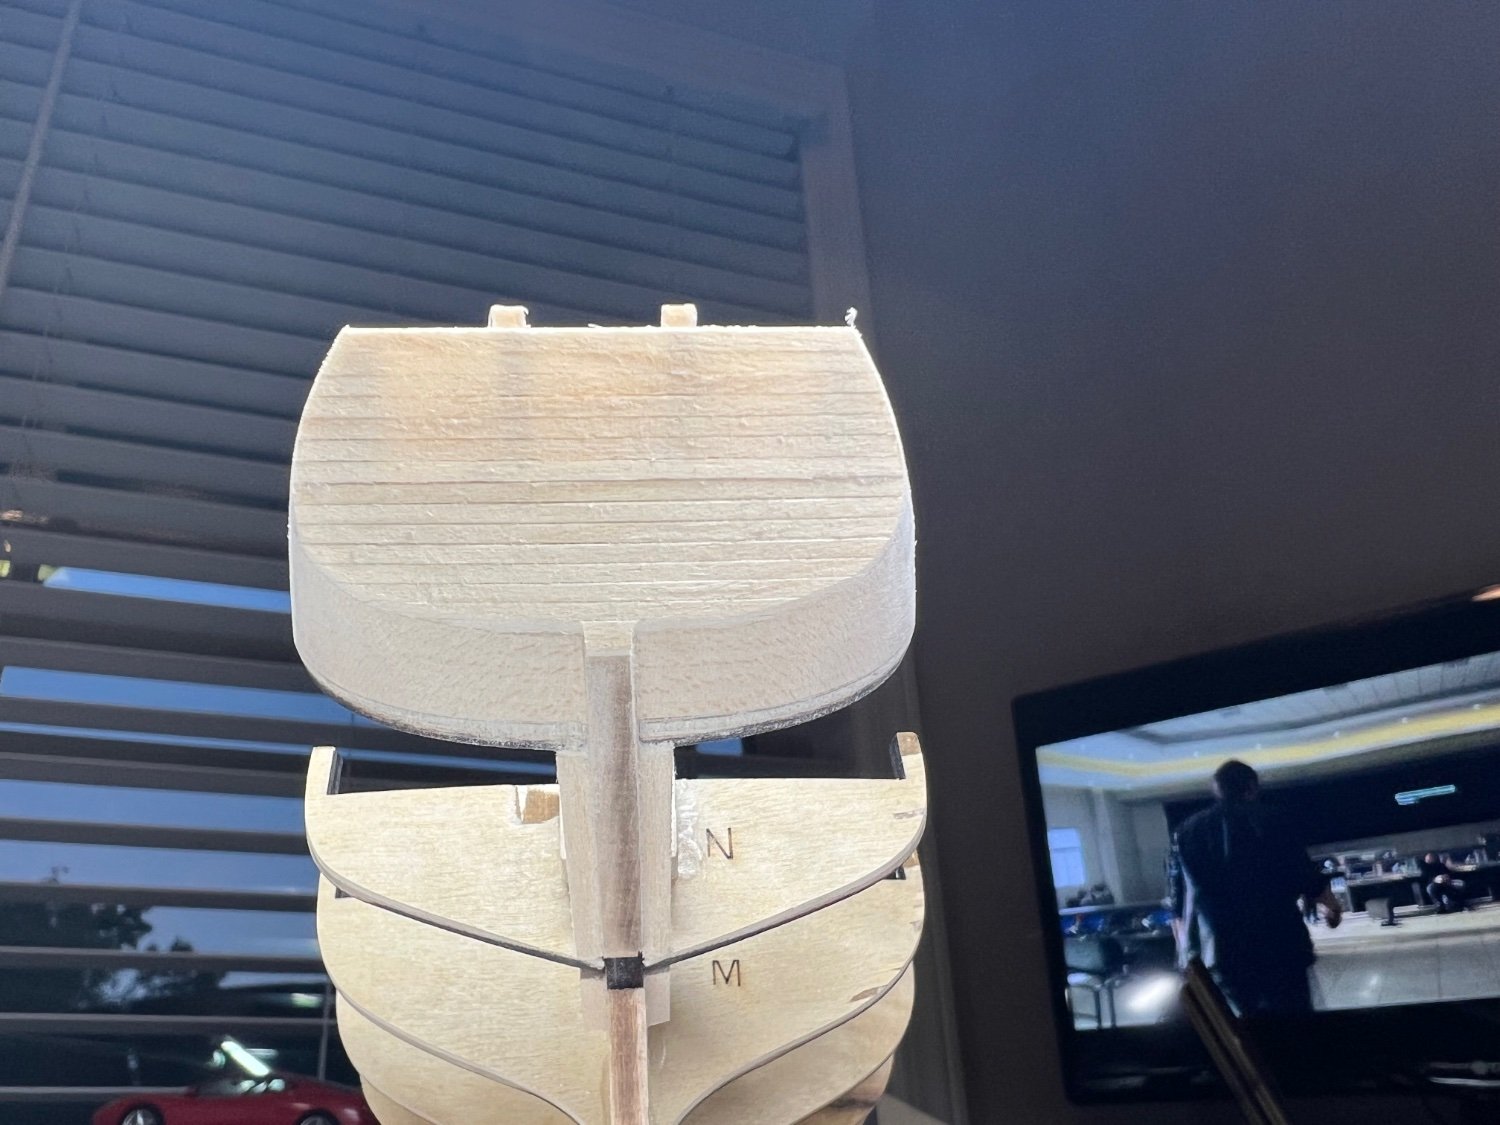
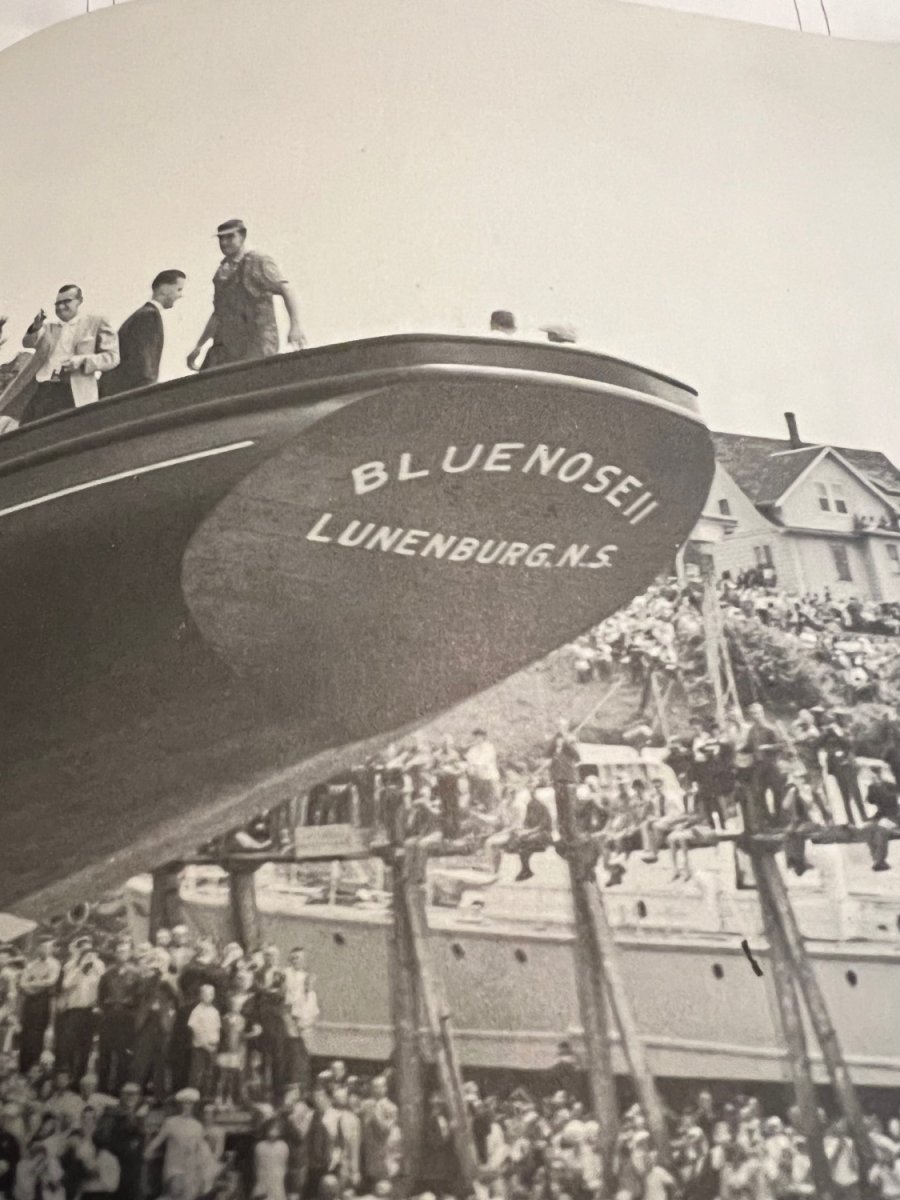
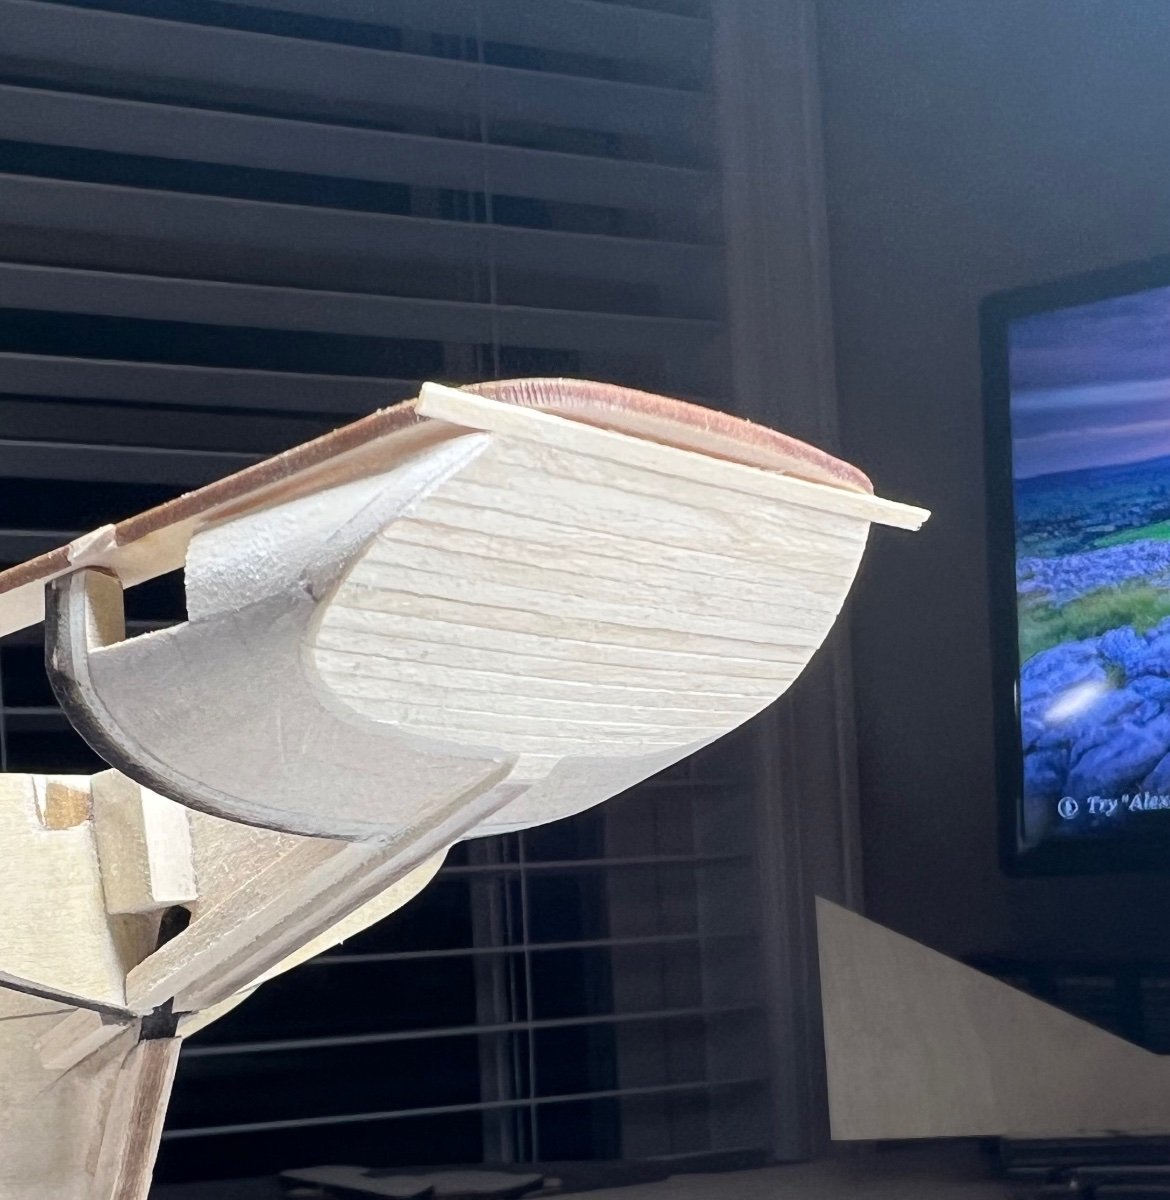
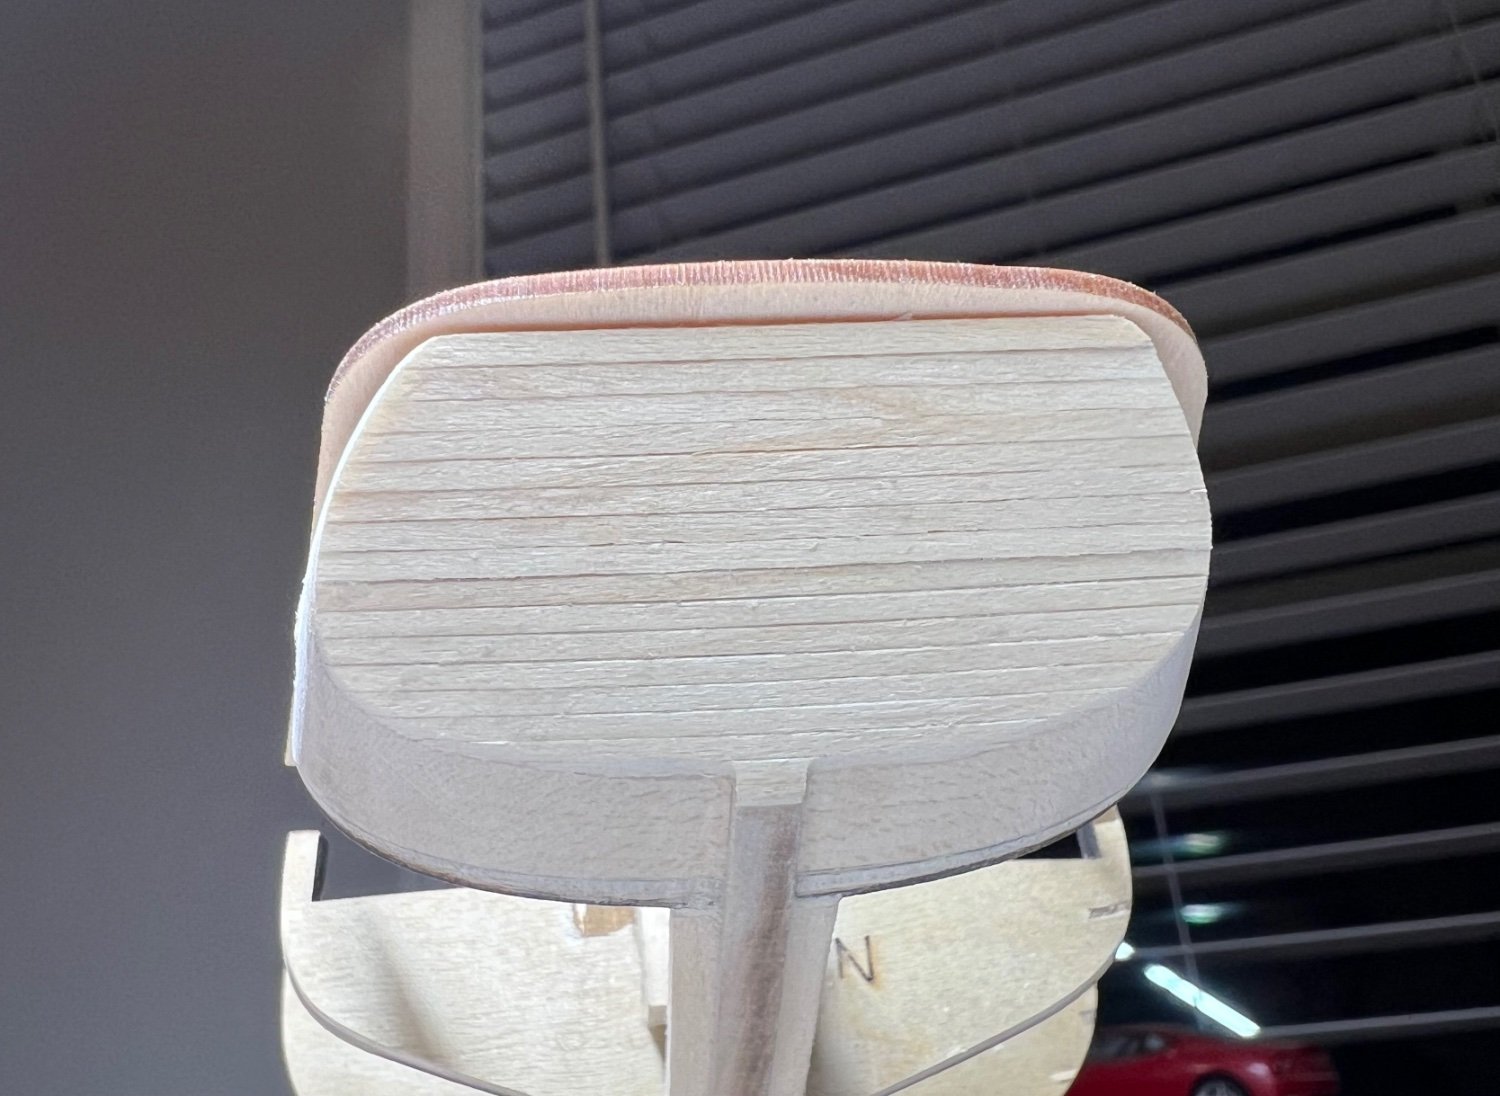
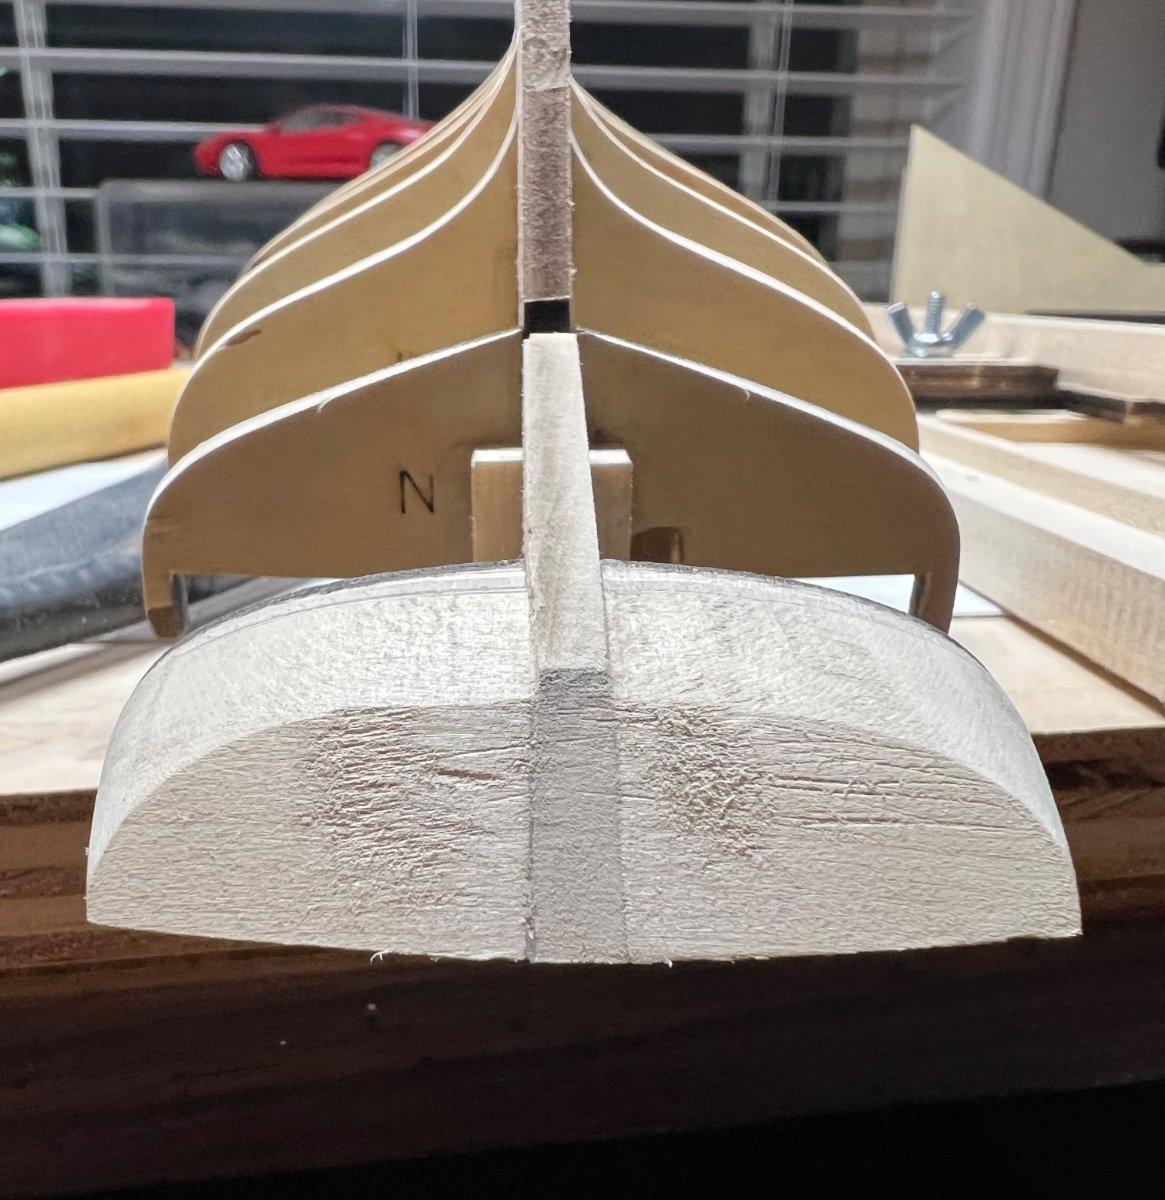
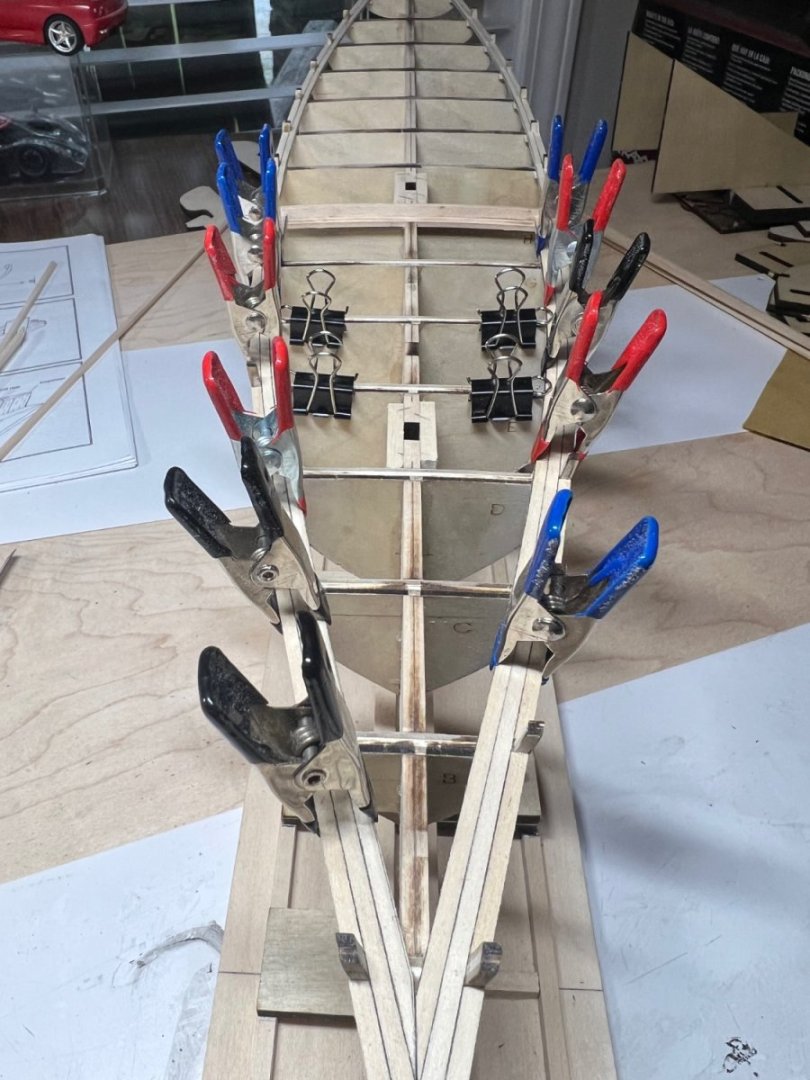
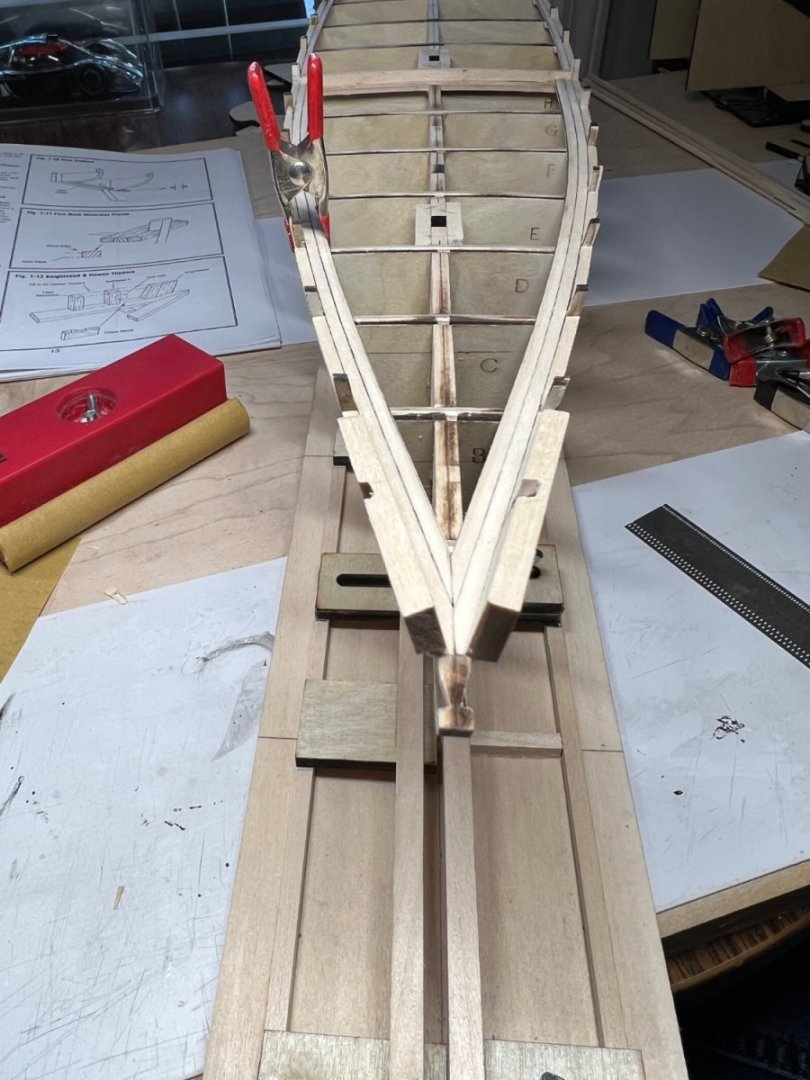
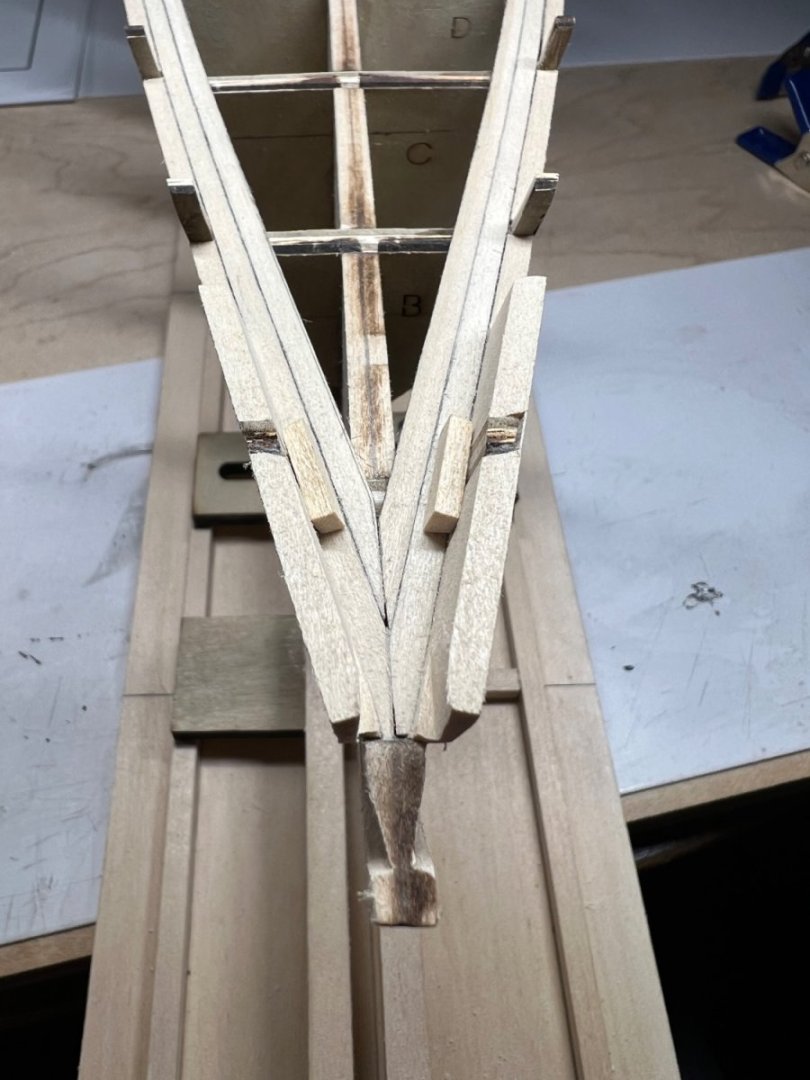
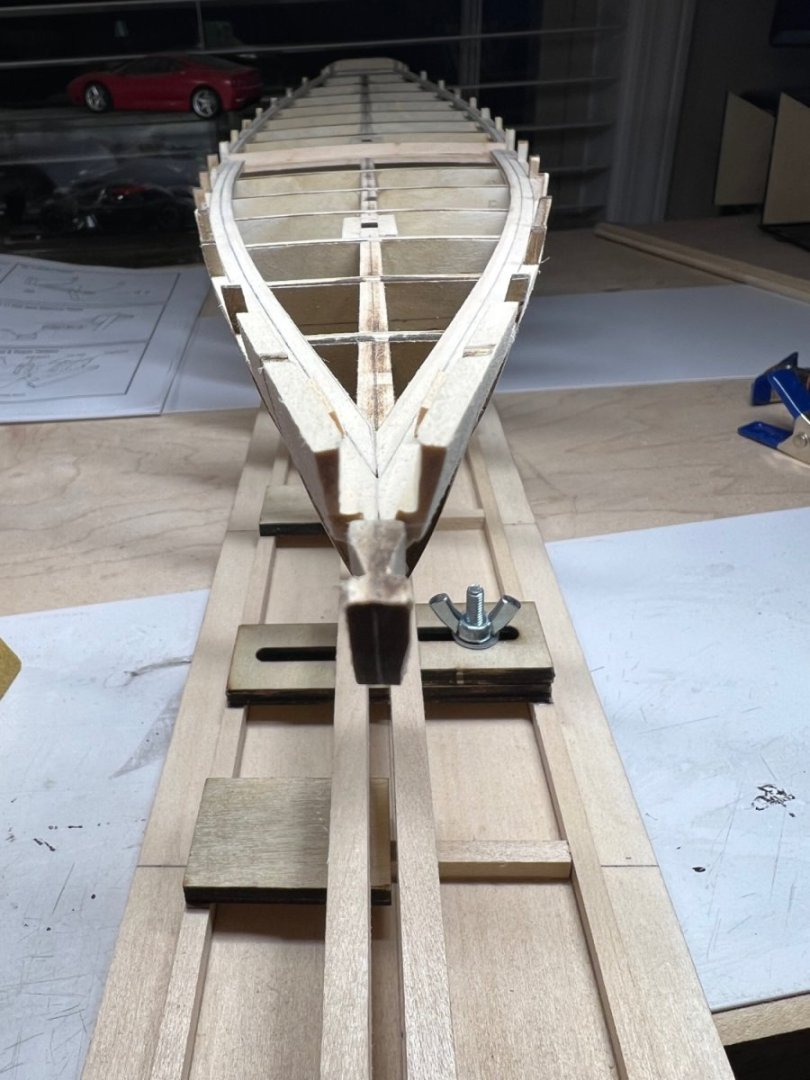
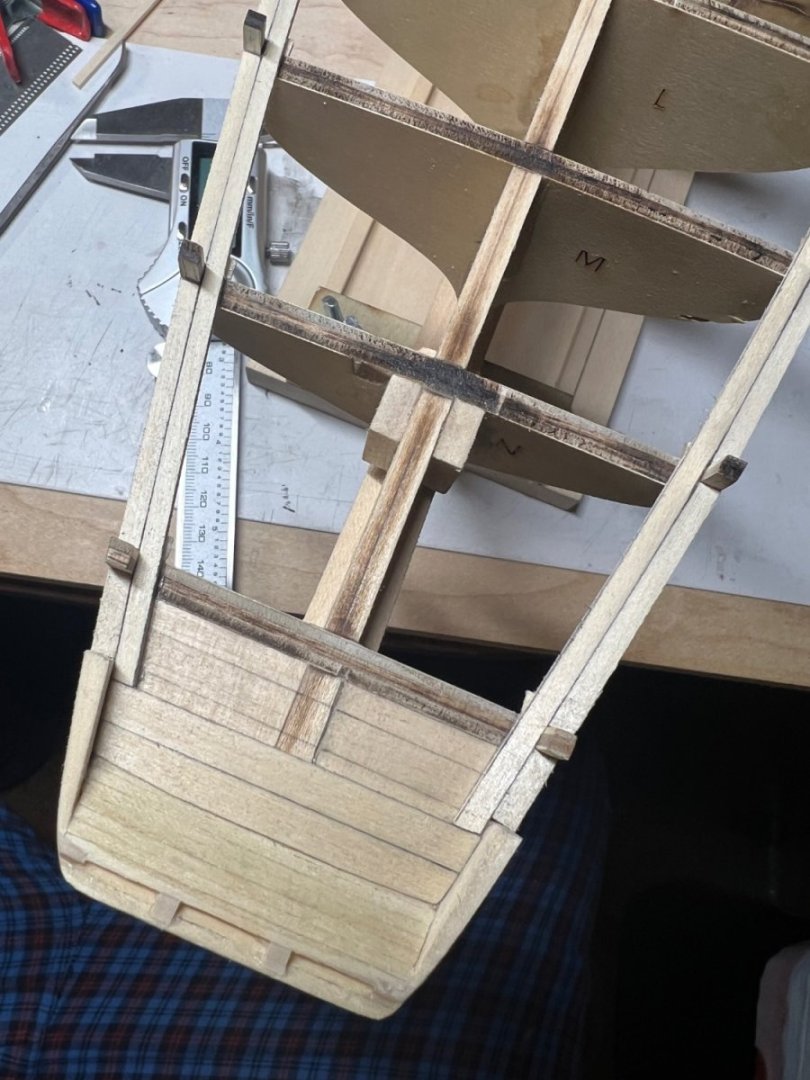
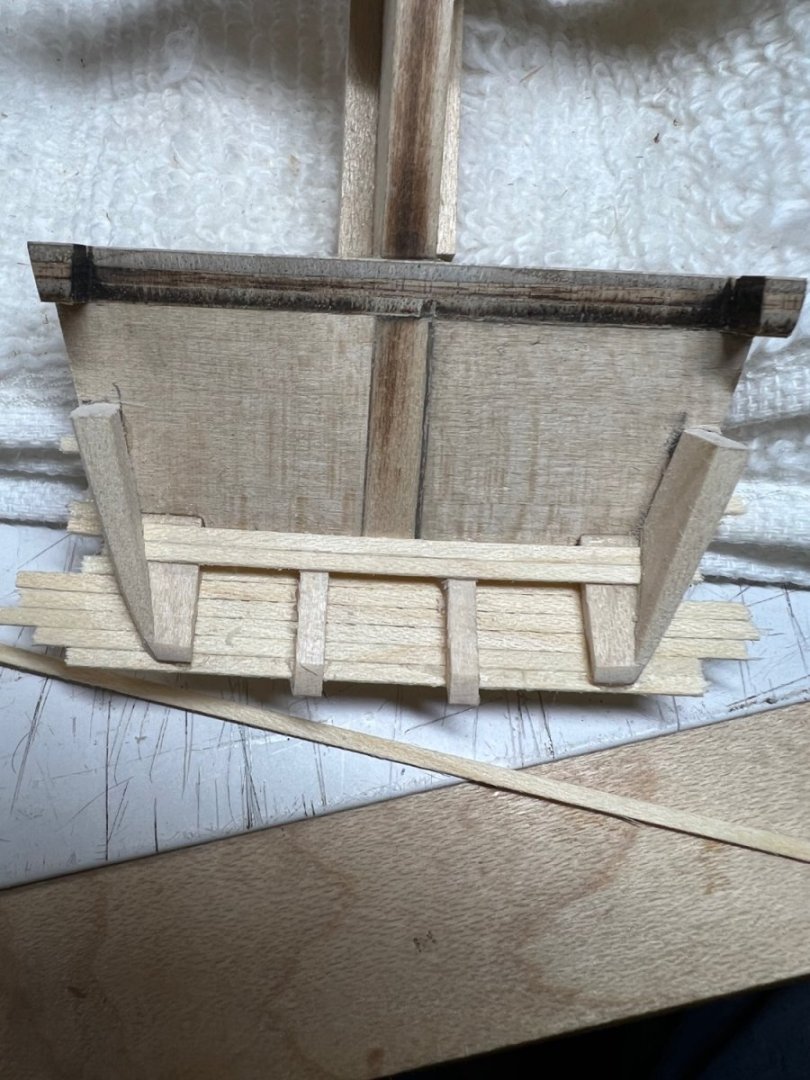
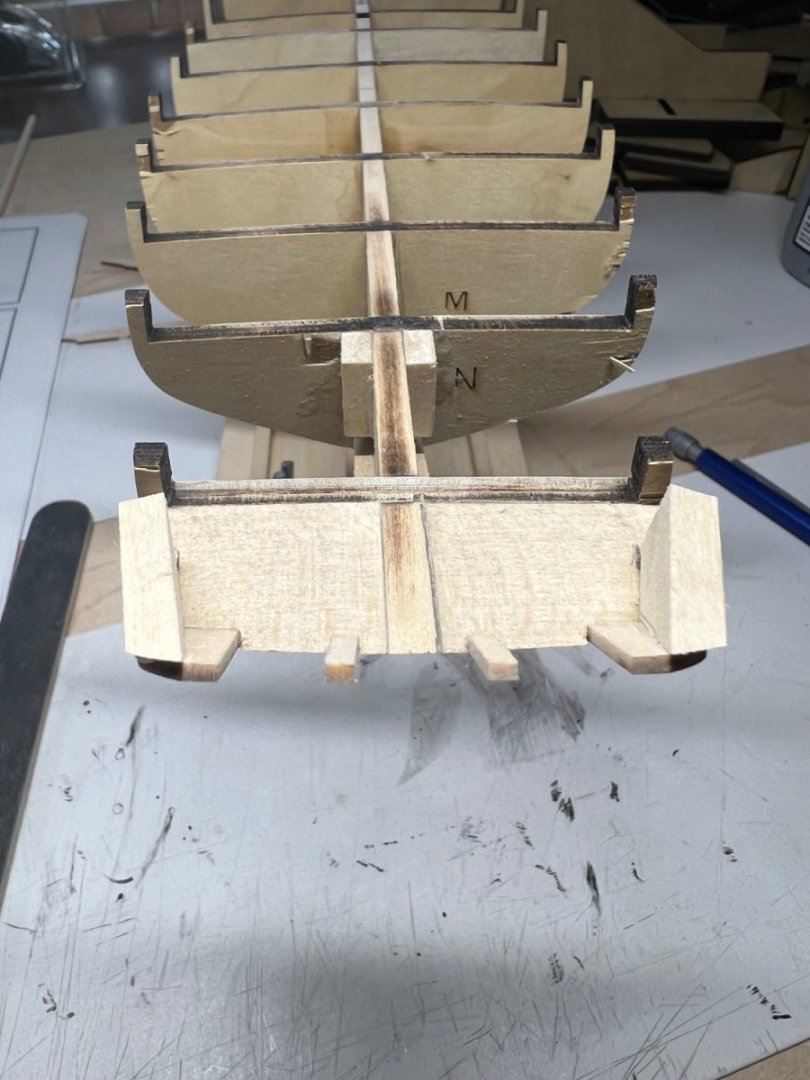
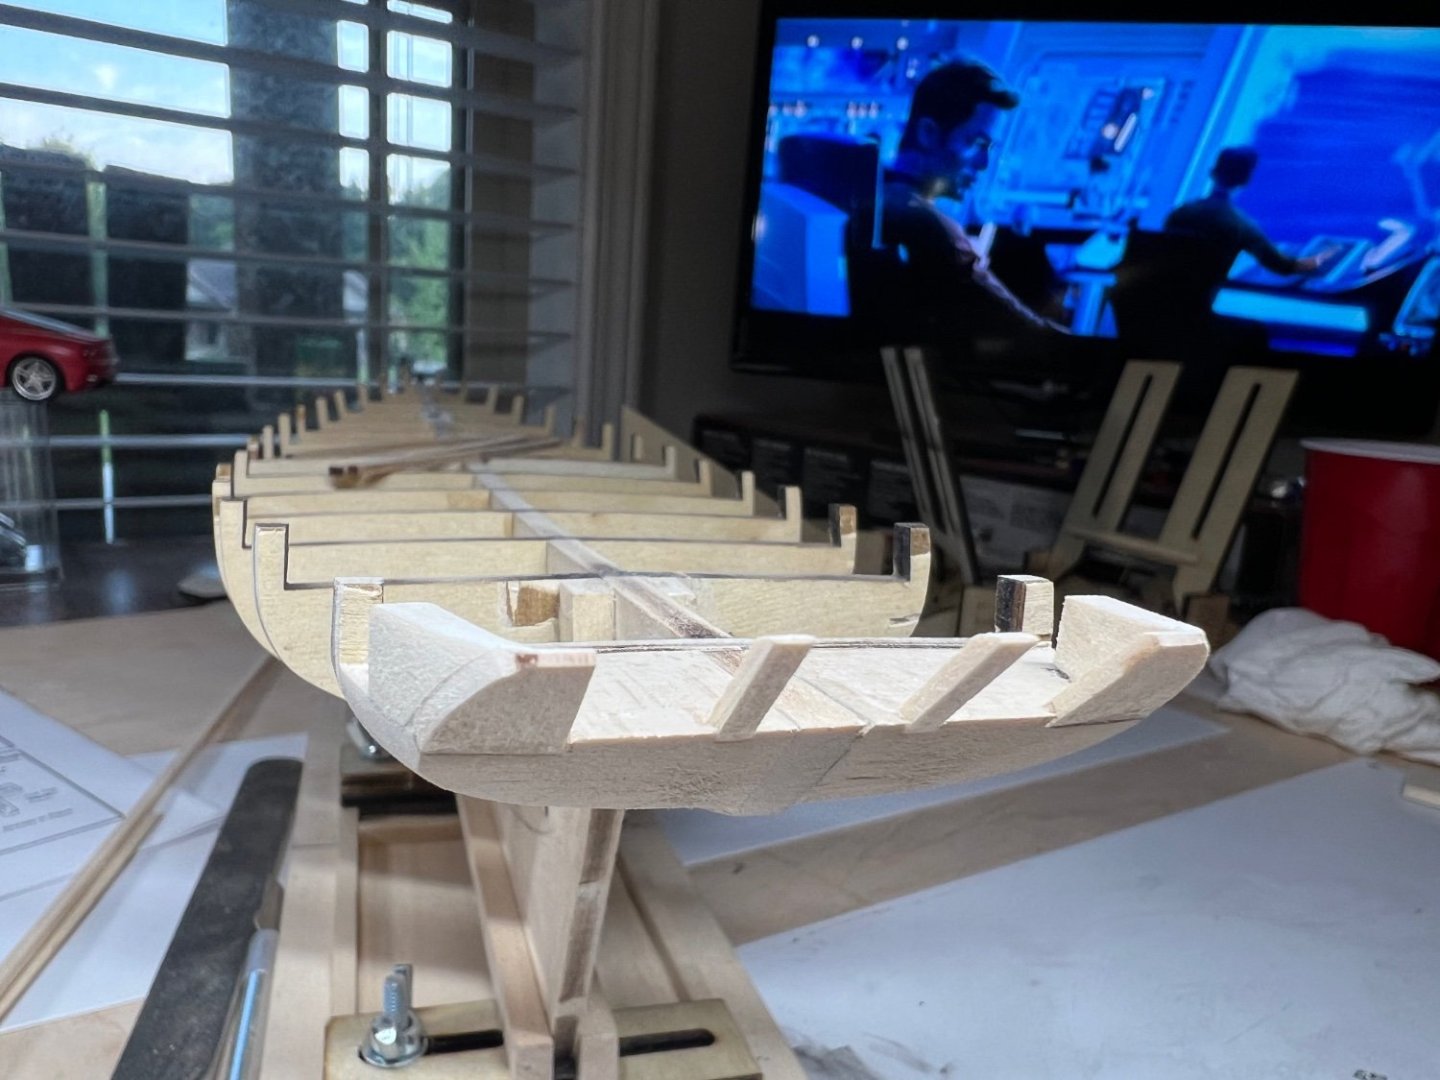
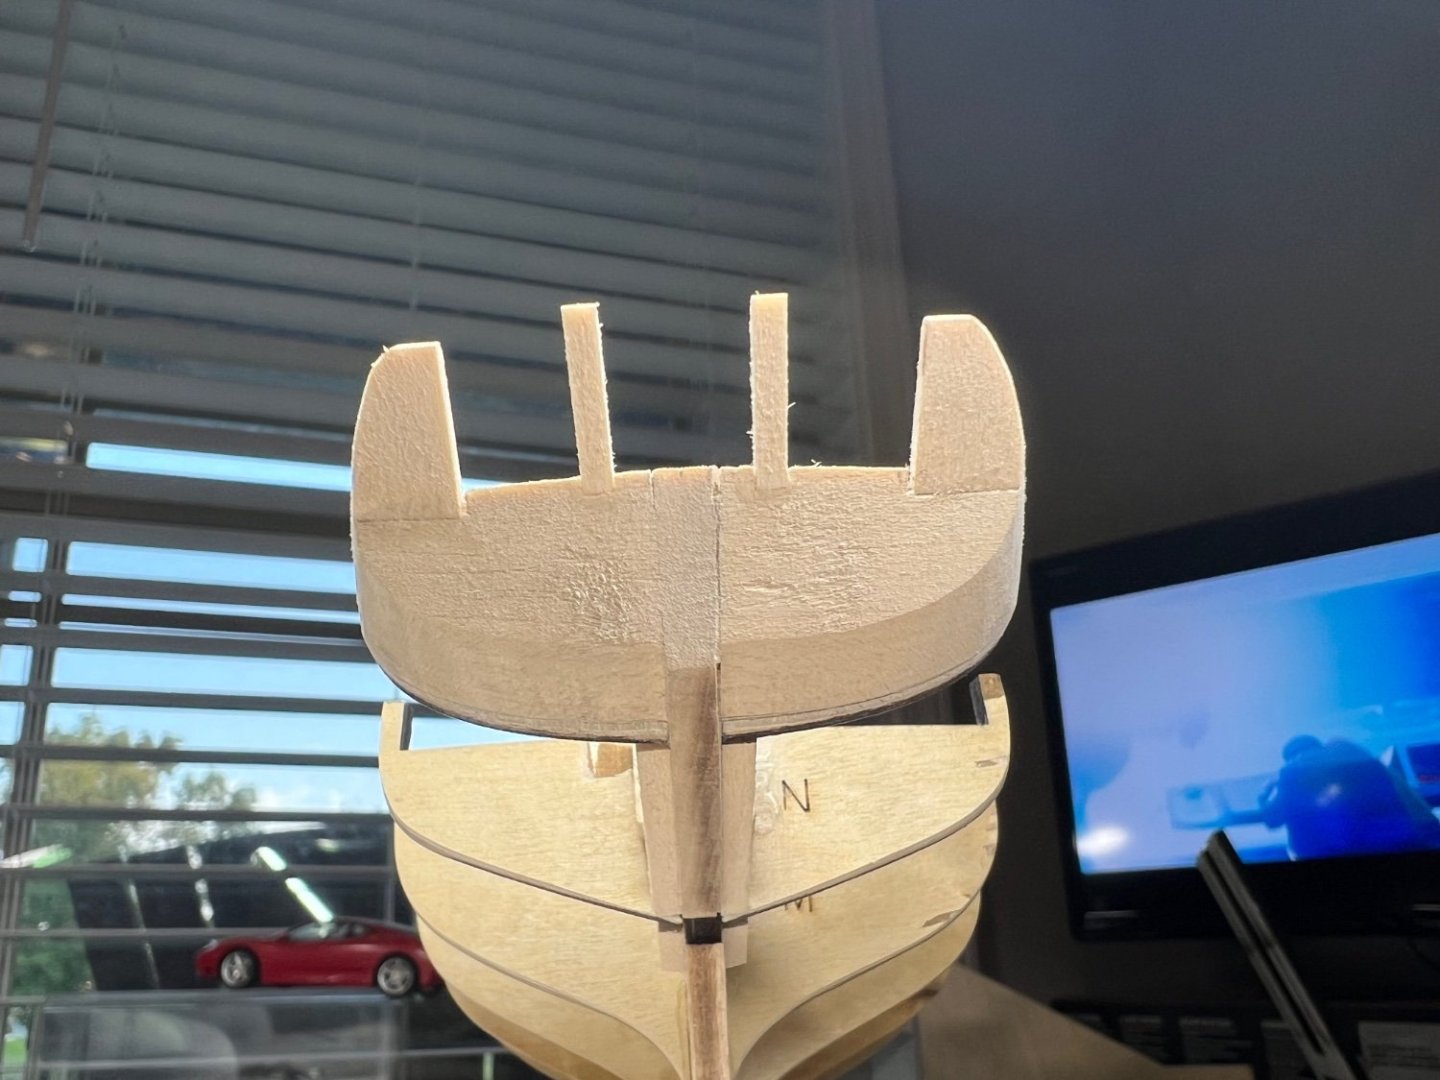
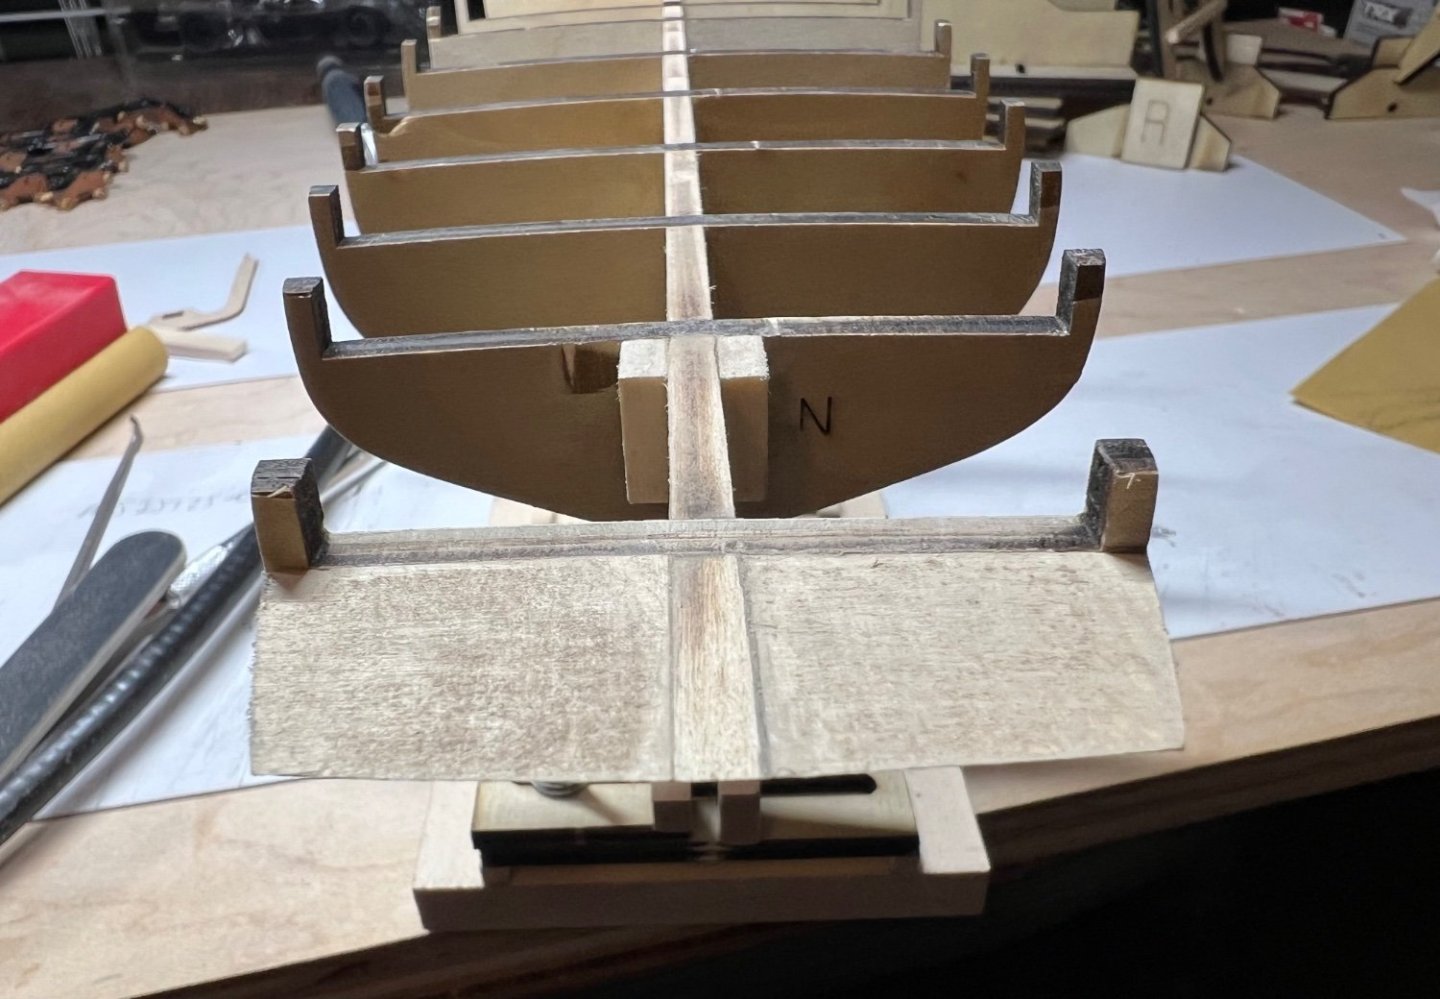
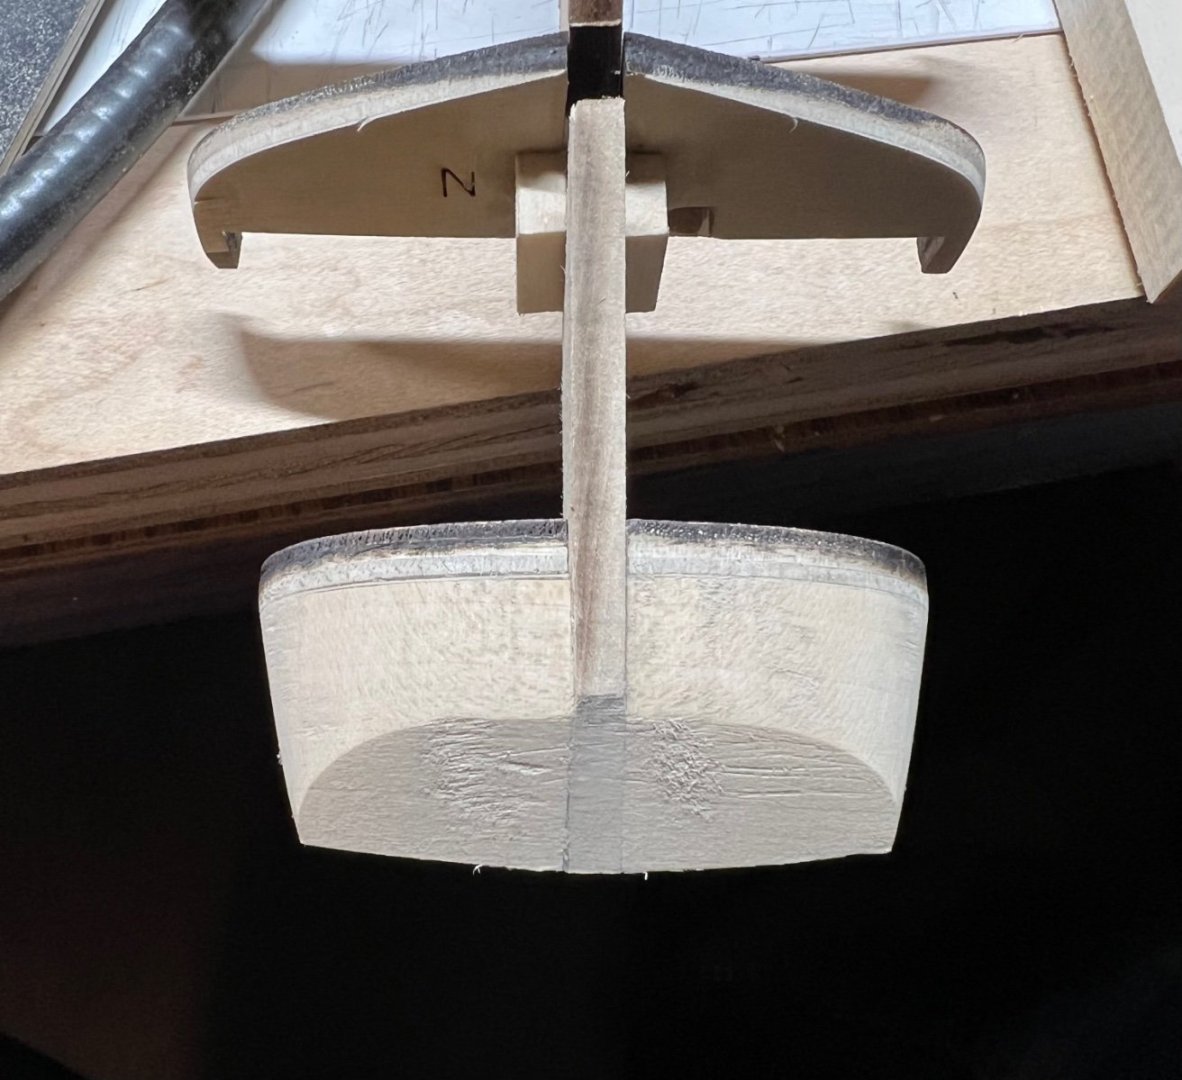
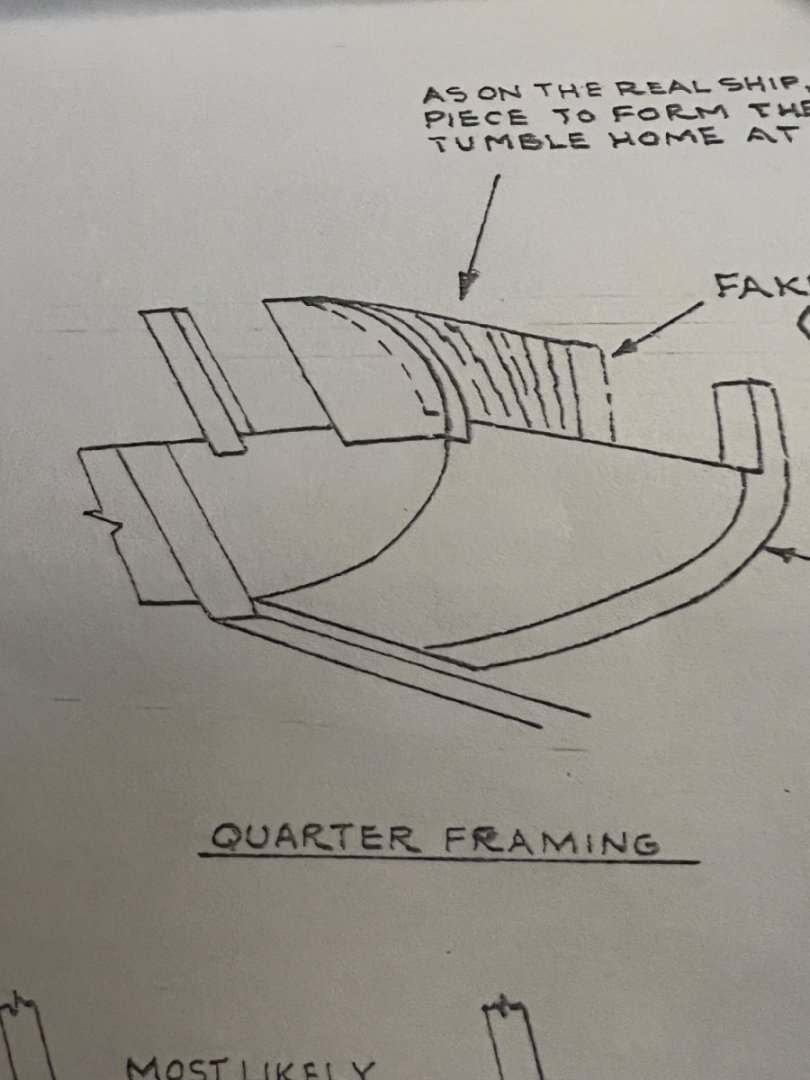
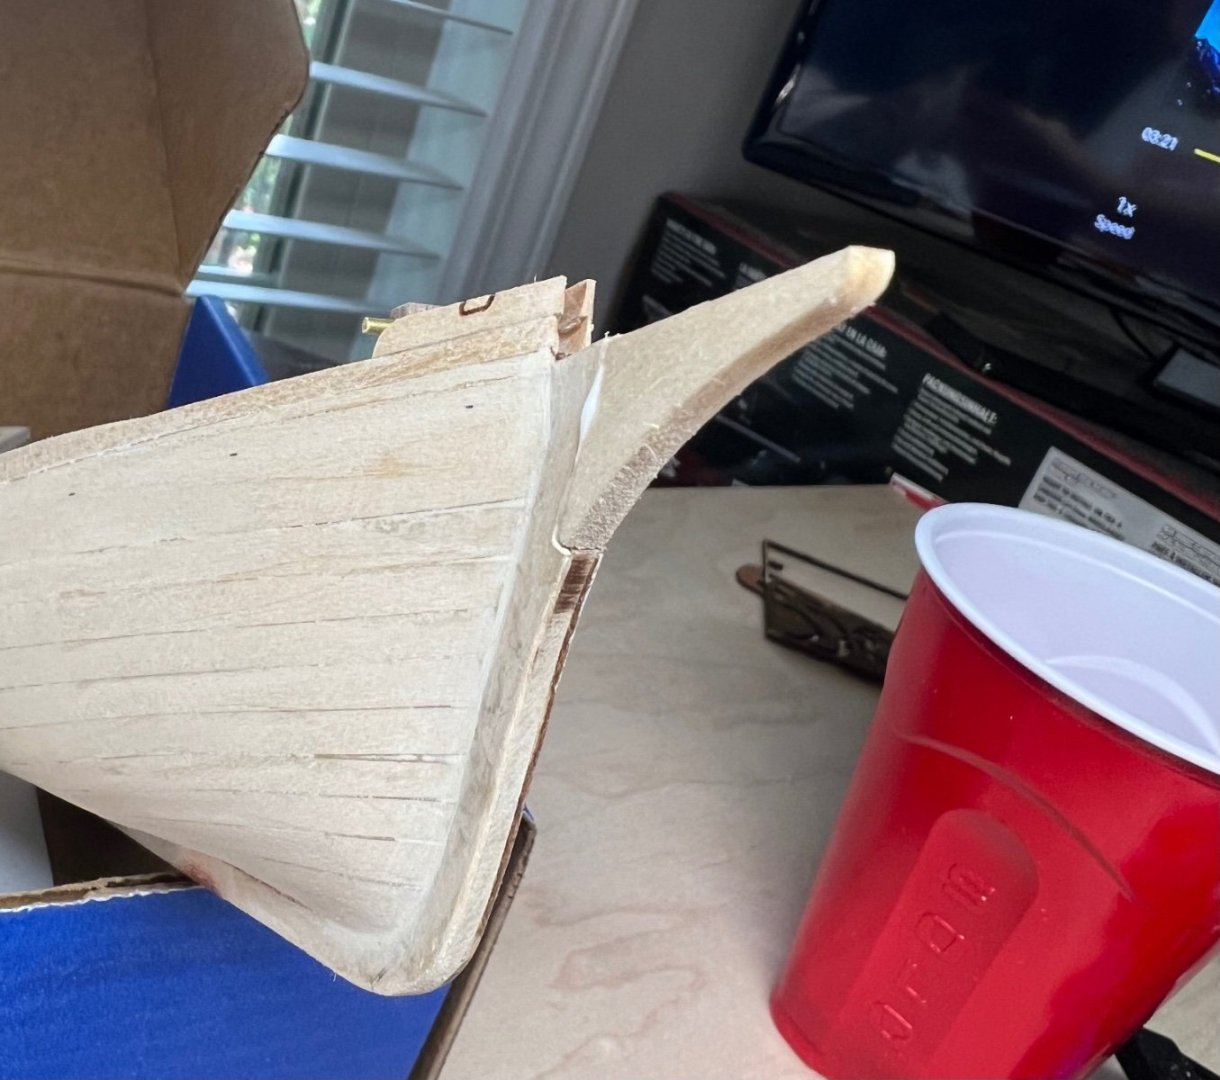
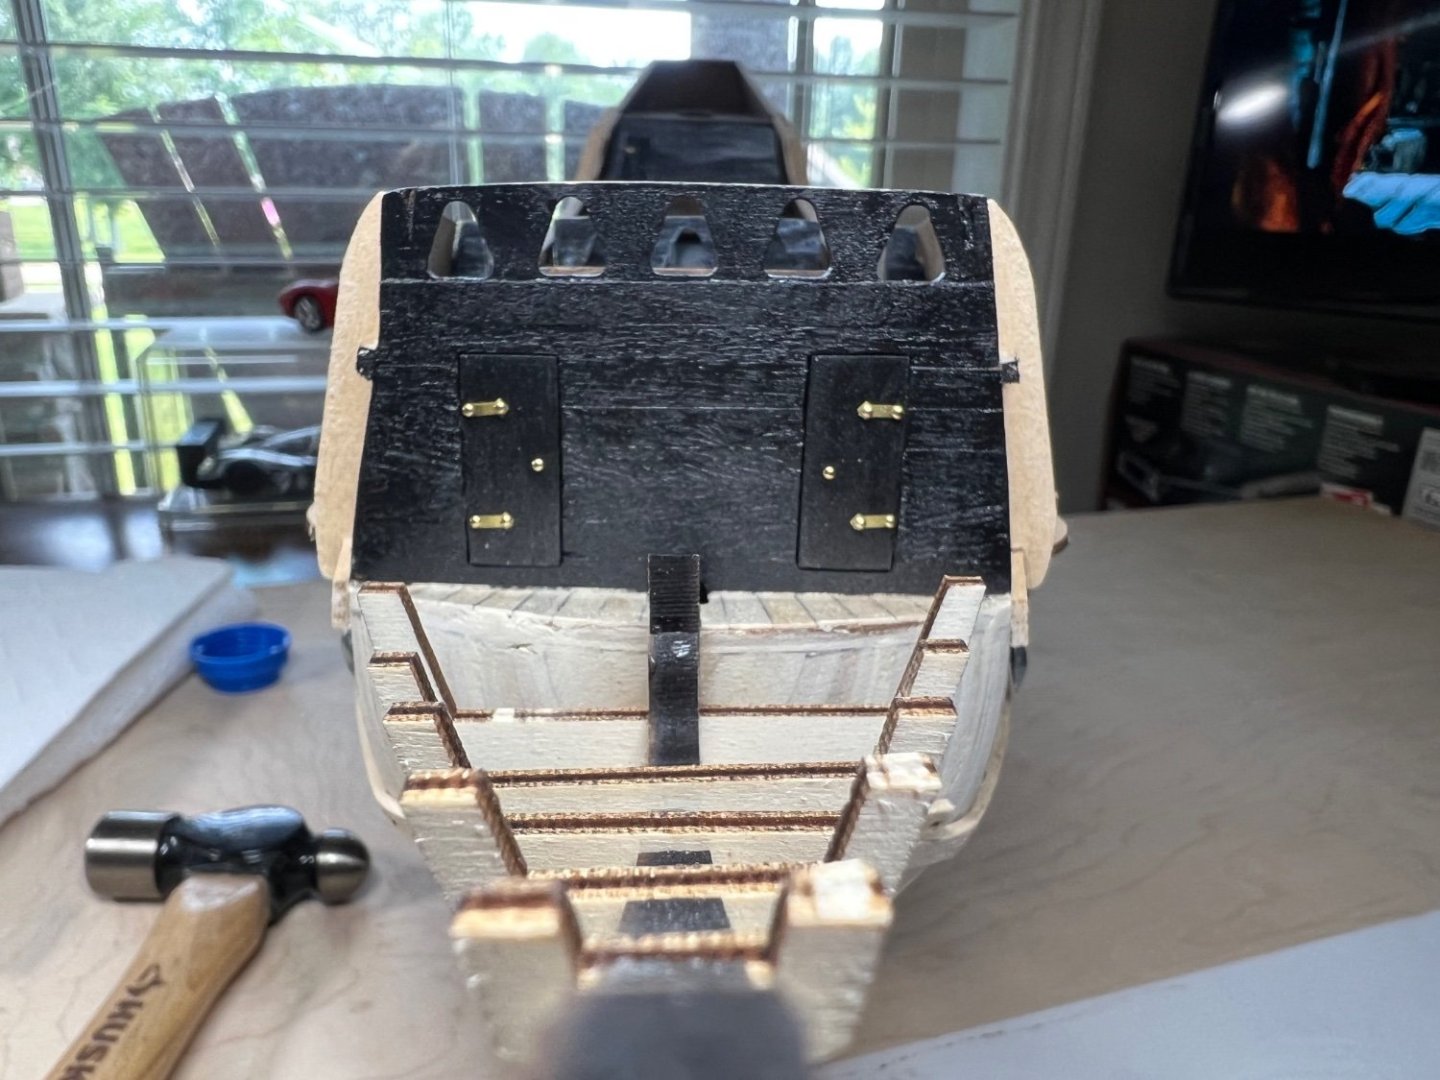
The transom is very close to the picture of the Bluenose II. I’m thrill I got it to look like this. I’ve stopped and studied the plans the instructions, pictures everything I could find. I think I even understand where the fashion piece fits in. Soon to learn how to cove. Then figure out the scuppers, and fake stanchions. Soon I’ll be past the point I got stuck years ago.


-
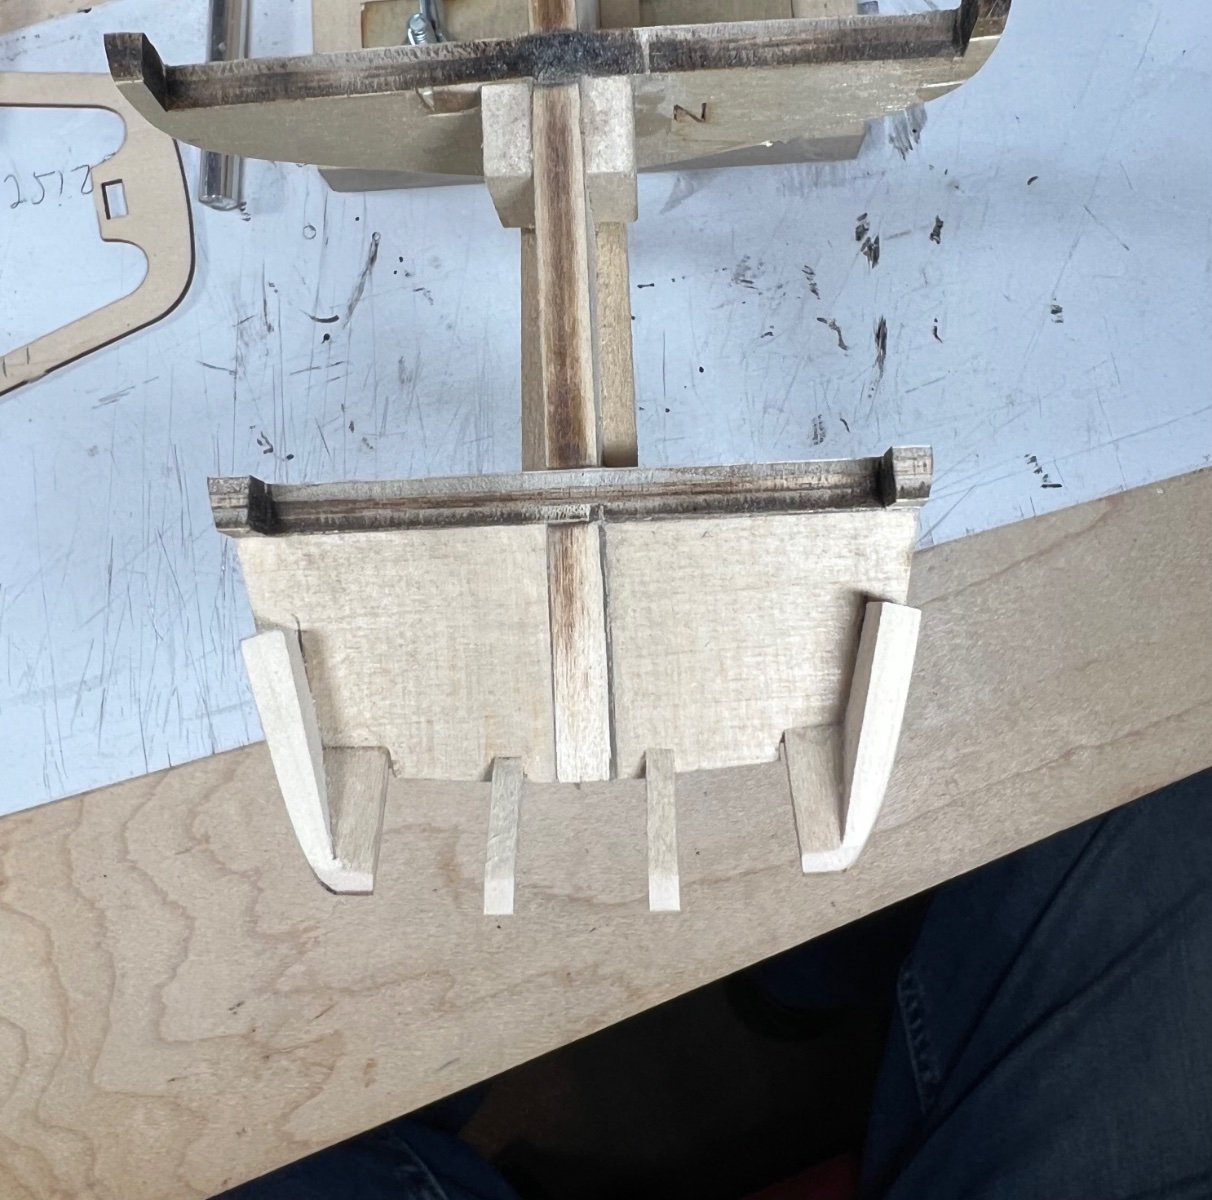
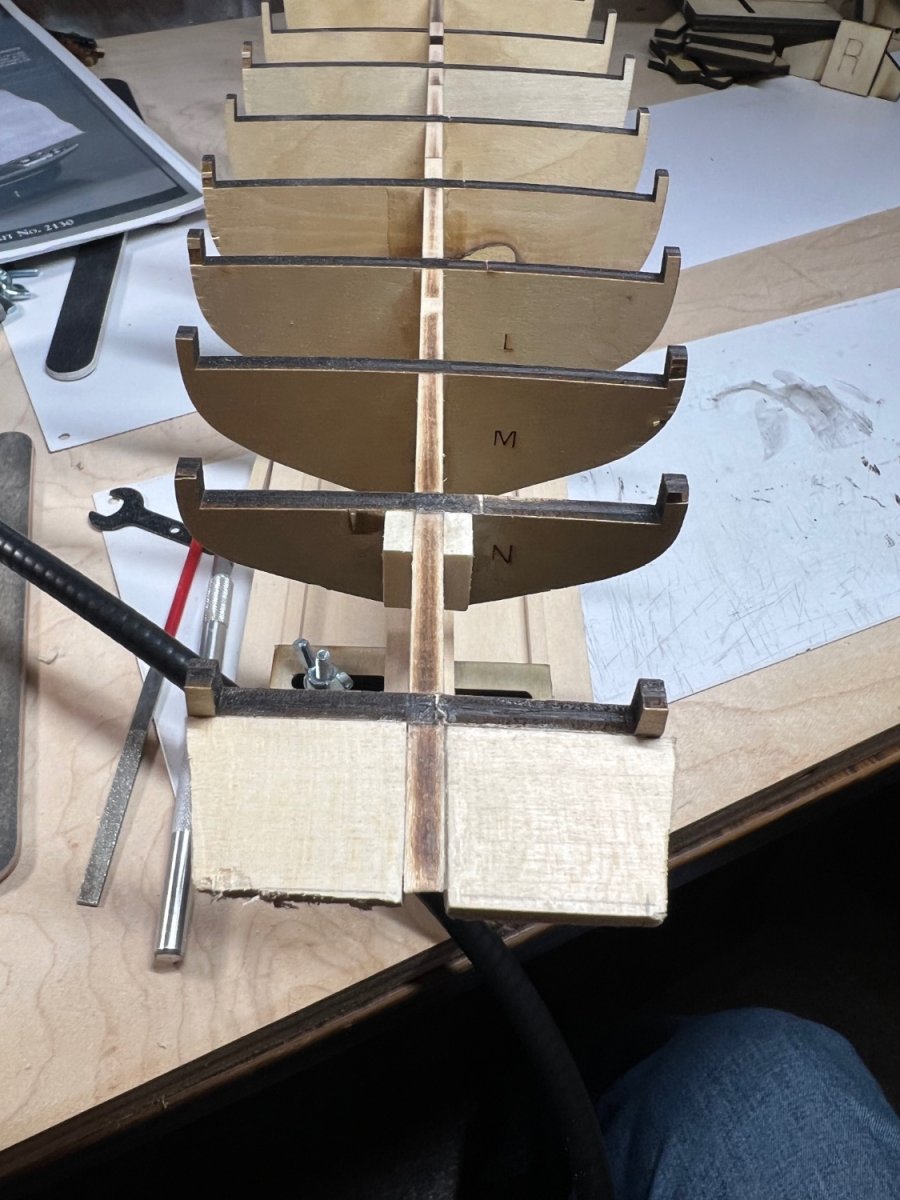
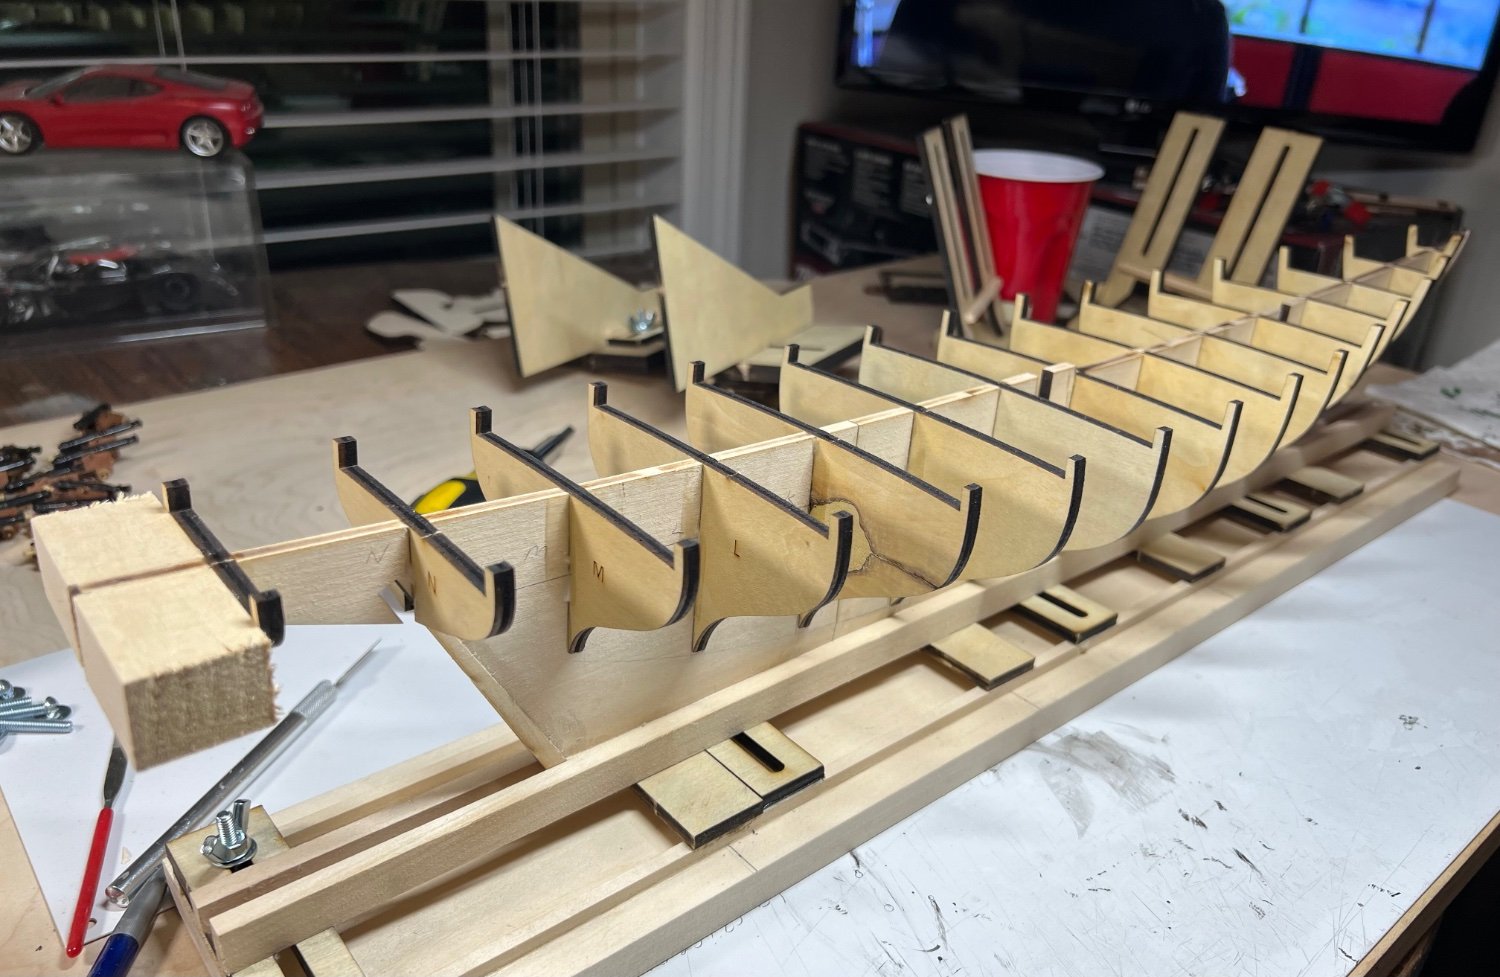
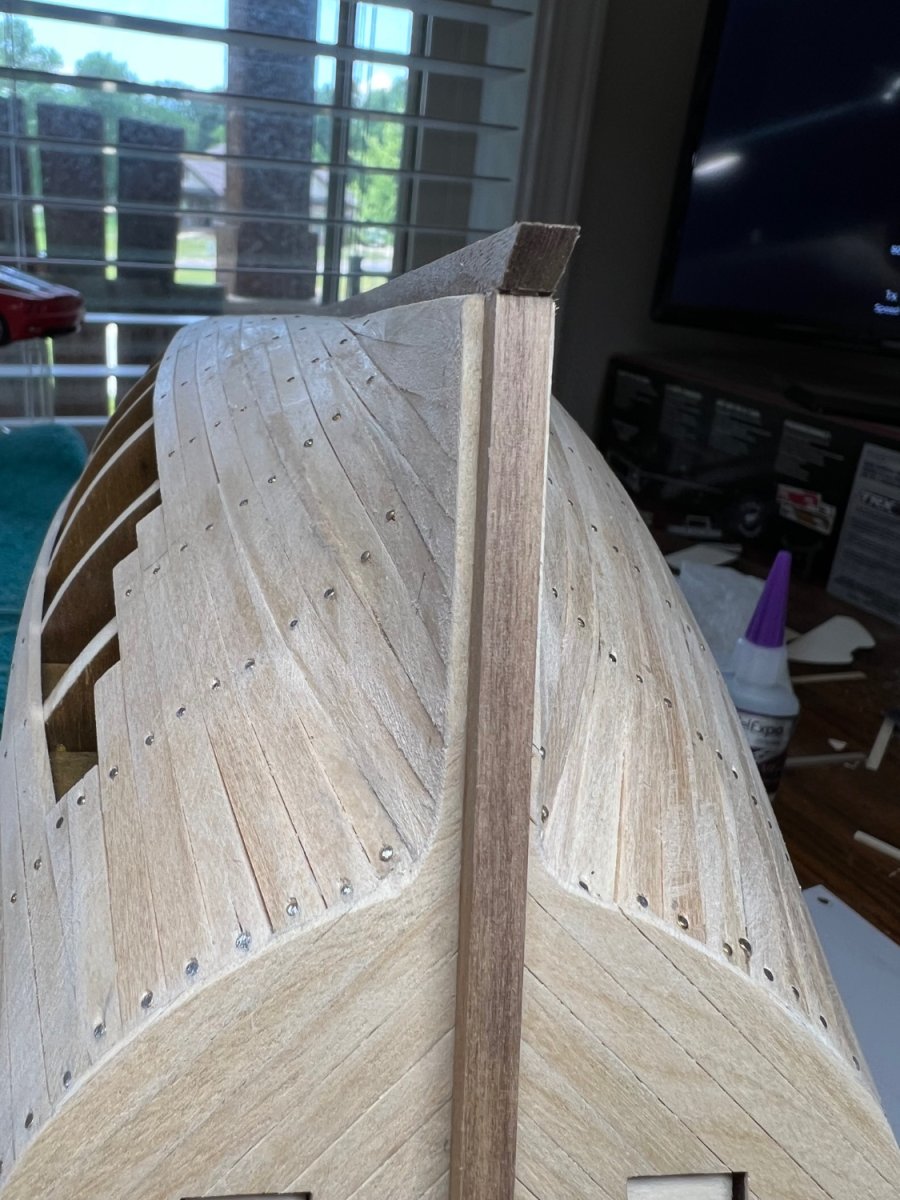
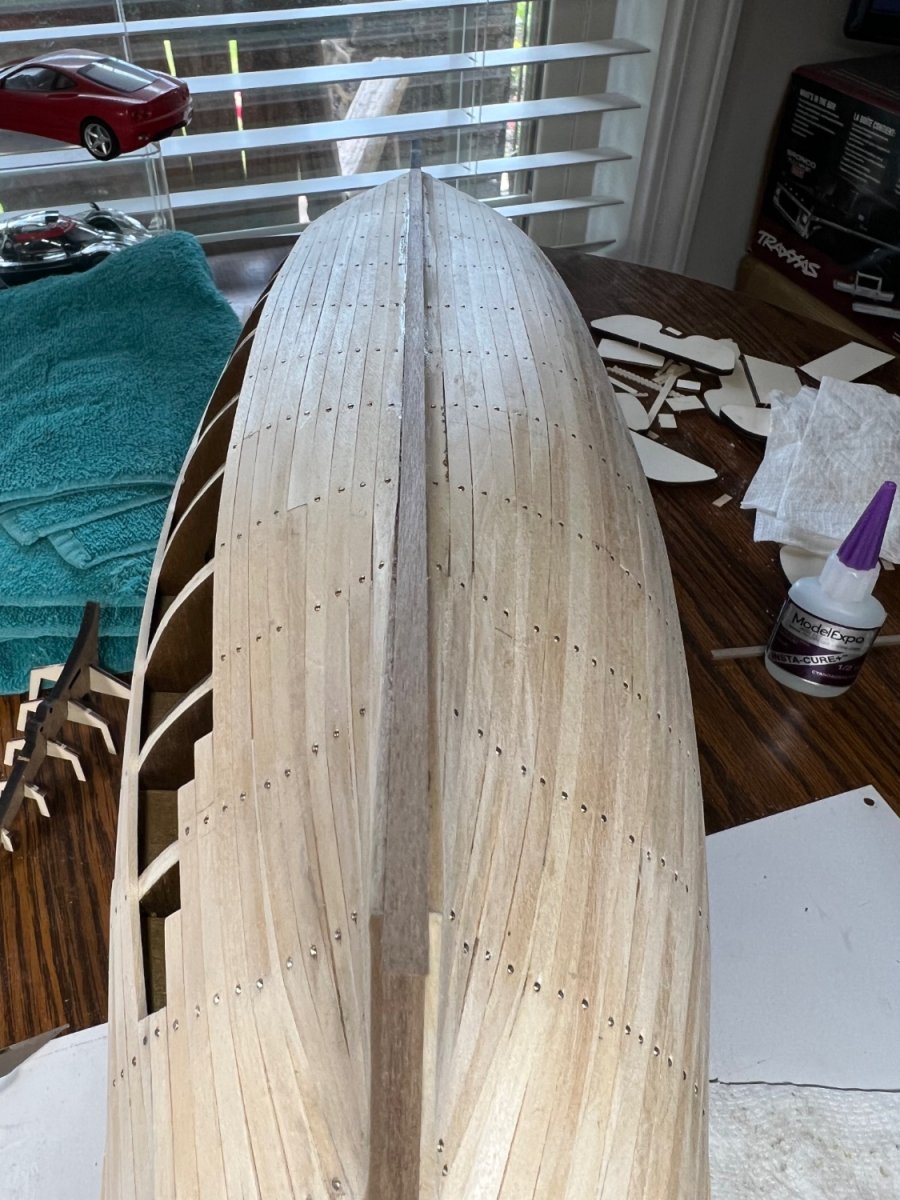
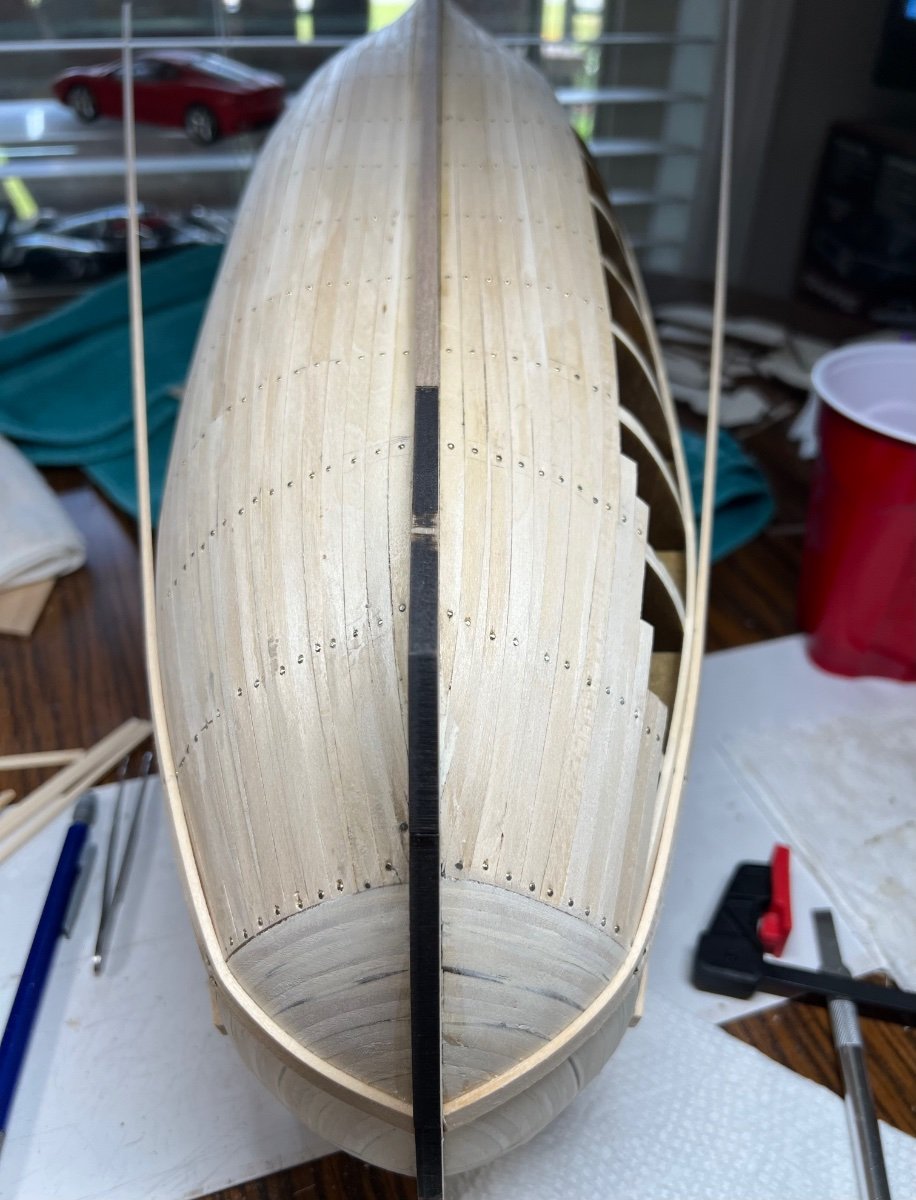
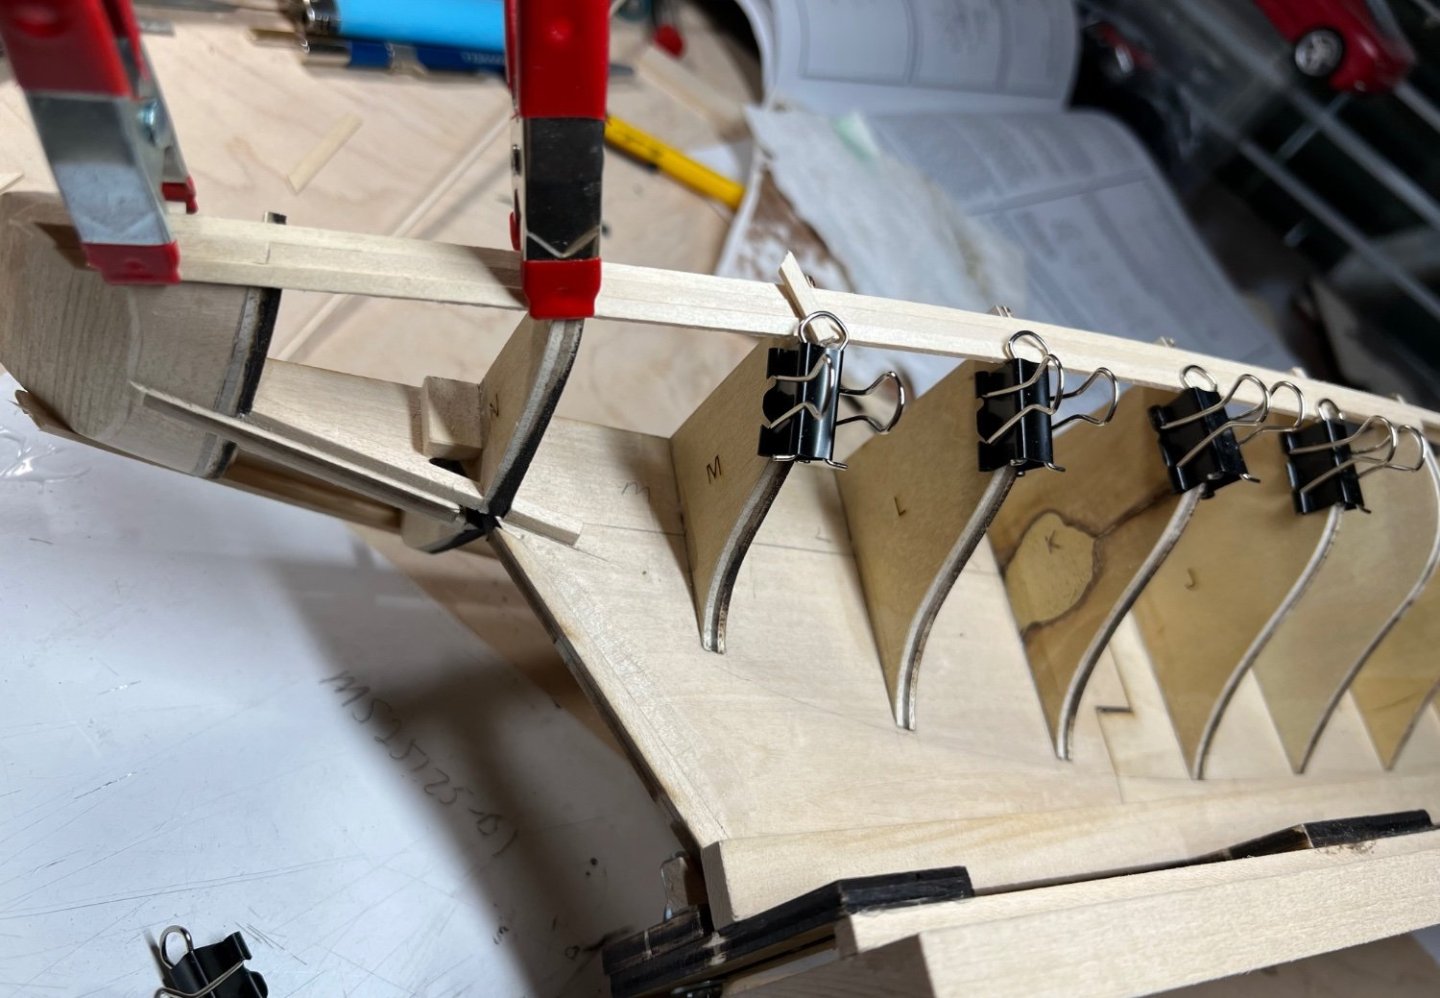
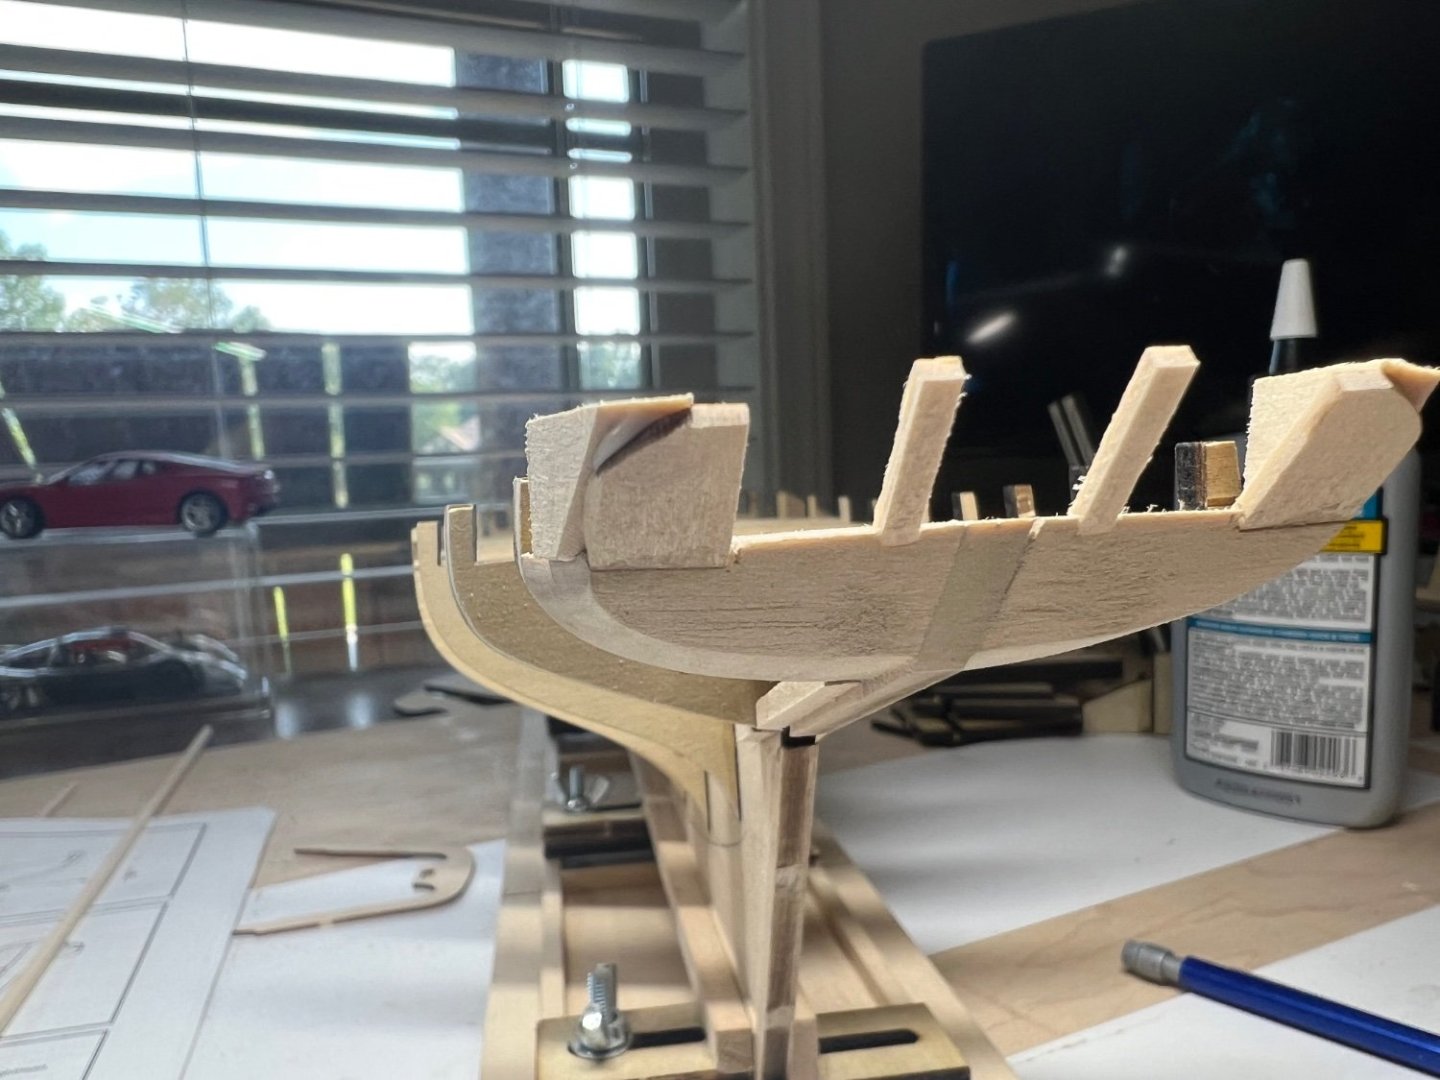
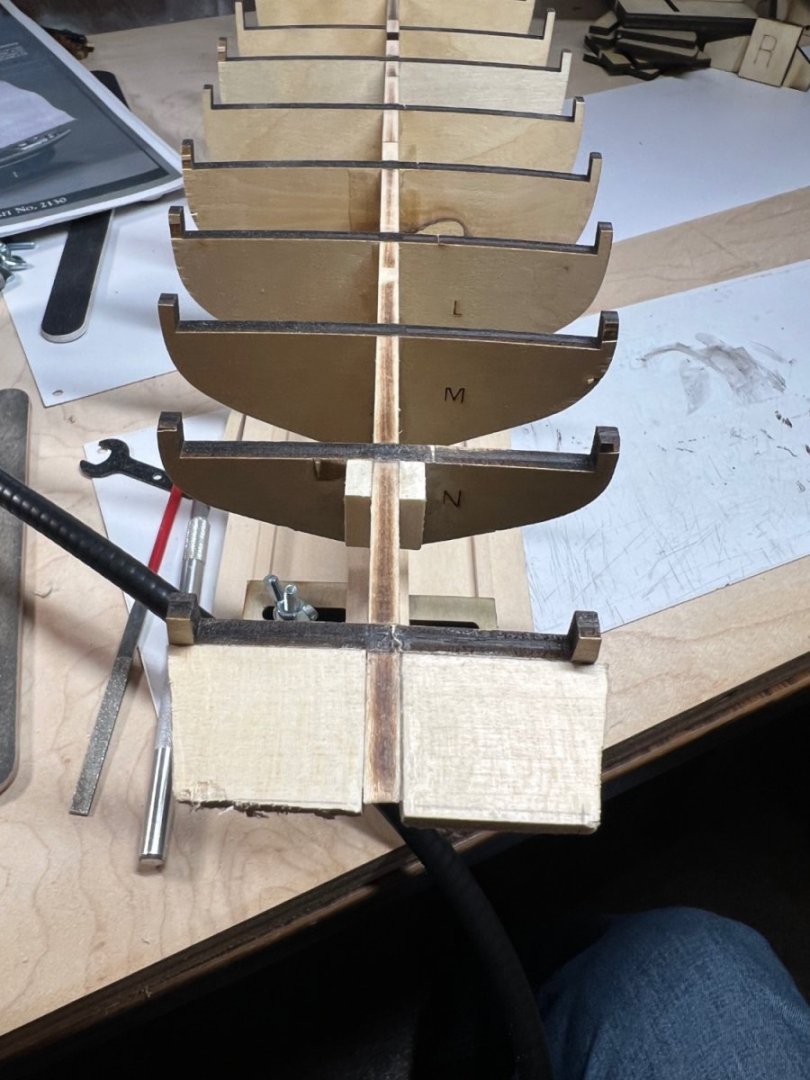
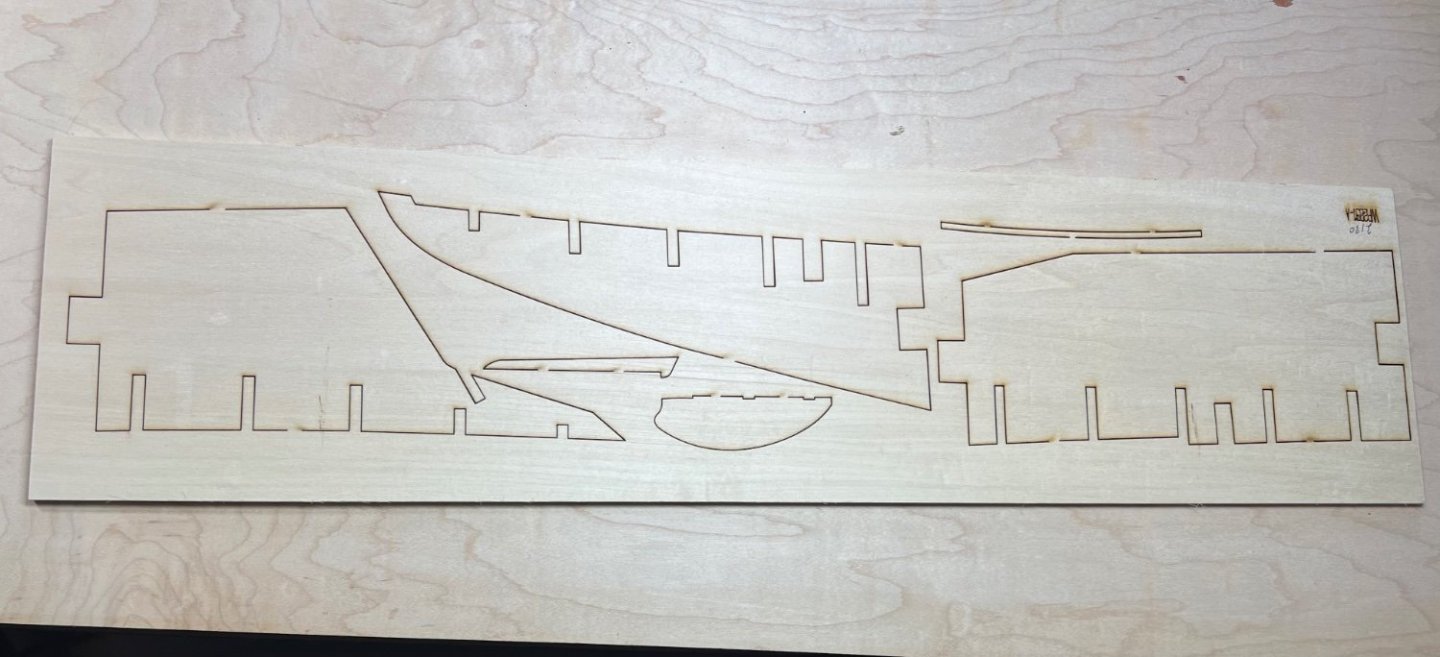
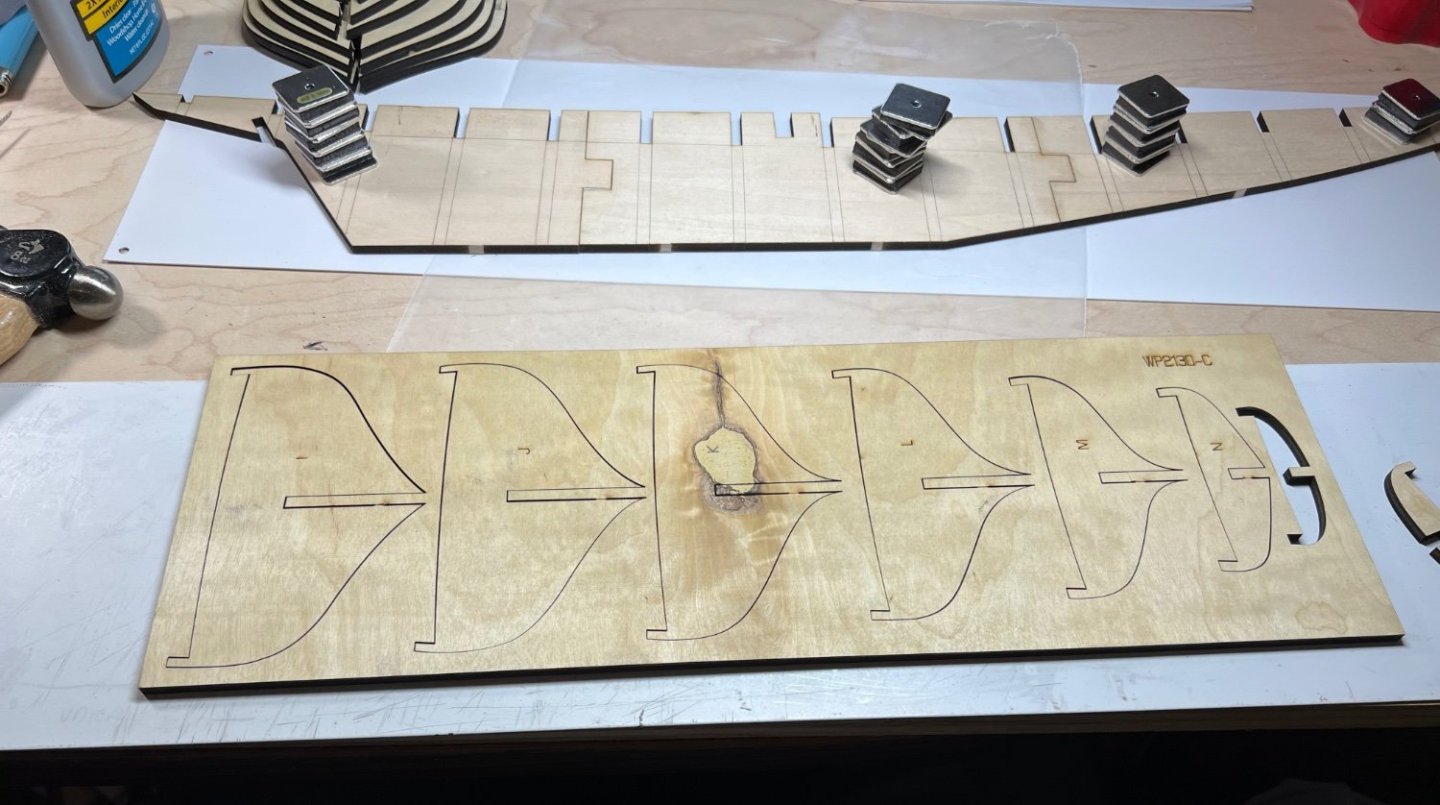
The Bluenose transom is crazy hard for me to figure out. I think I’ve got it 95-97% what it should be. It flows nice. It seems to fit the next piece to go on top. It not clear what to plank it with. The notes seem to not say both parts of the stick size. It does not say to cut a slot for part of the great beam in front of H. But it clearly has it be notched out. It might be on a note on the plans I have not found yet. My kit is missing 3/32 x 1/8 sticks. I have 20 different sticks, the list is 21 items long. What a bit of fun to figure out what size everything is without dial calipers, ordered those and on the way. I’ve faired it well. I see more stuff to sand as I study it. It should plank well.


-
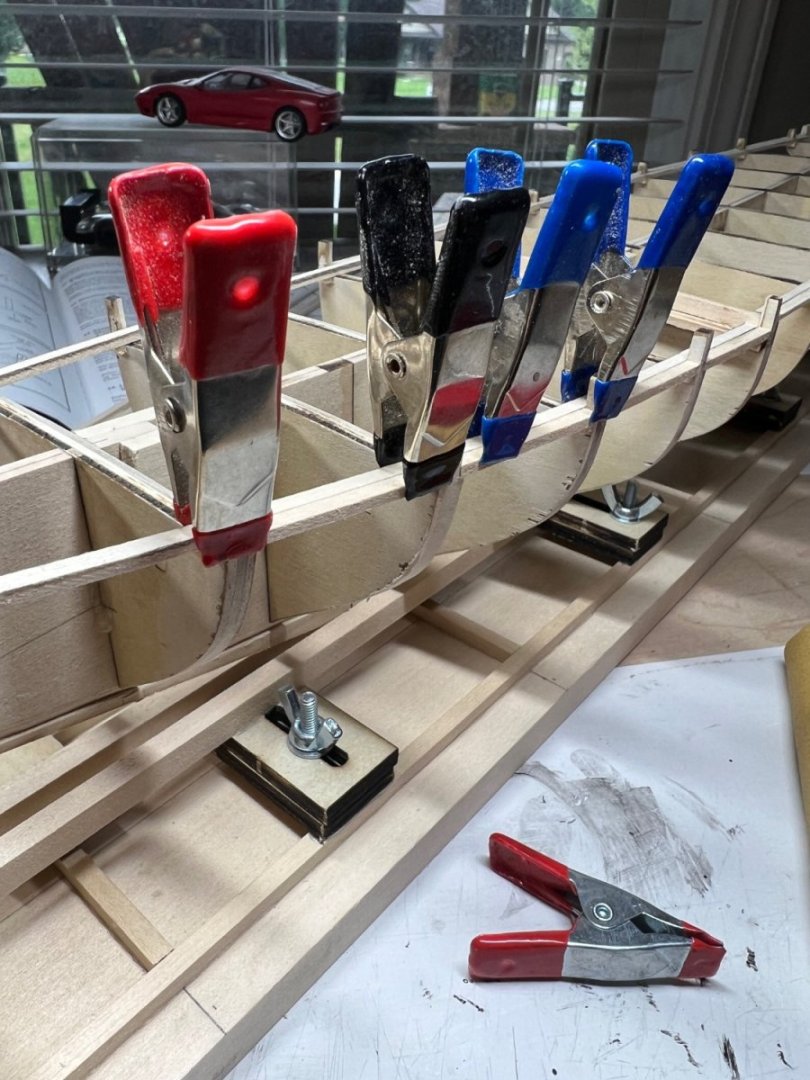
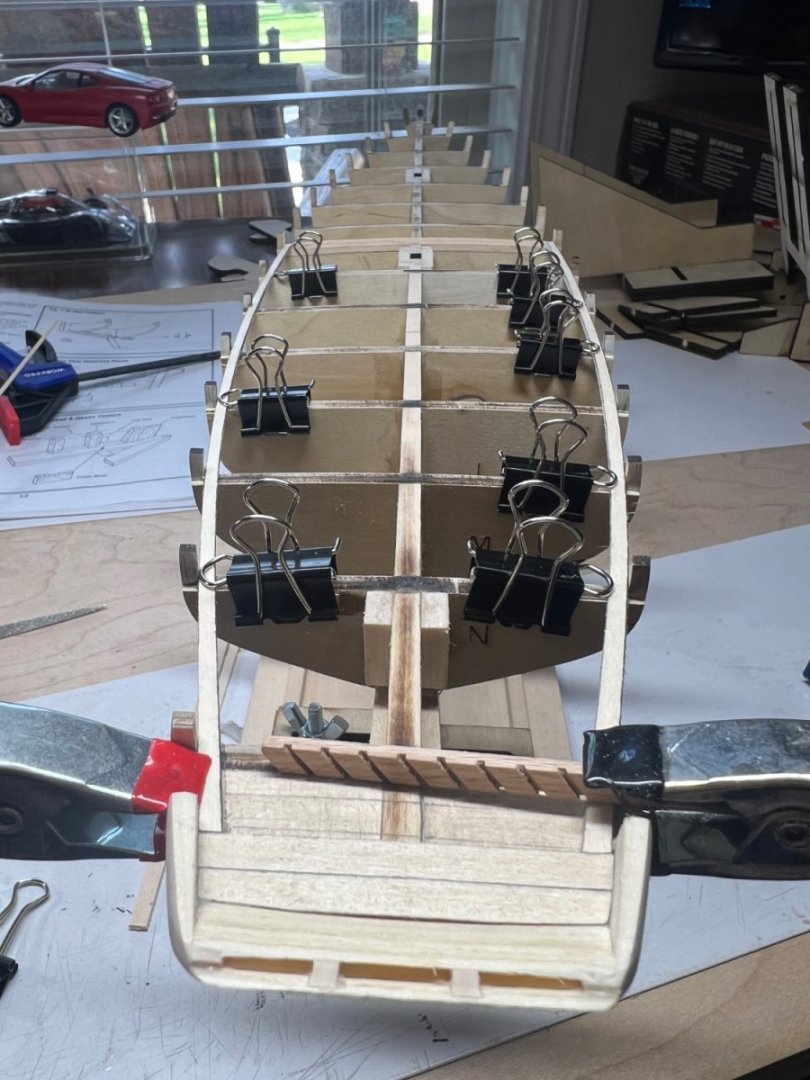
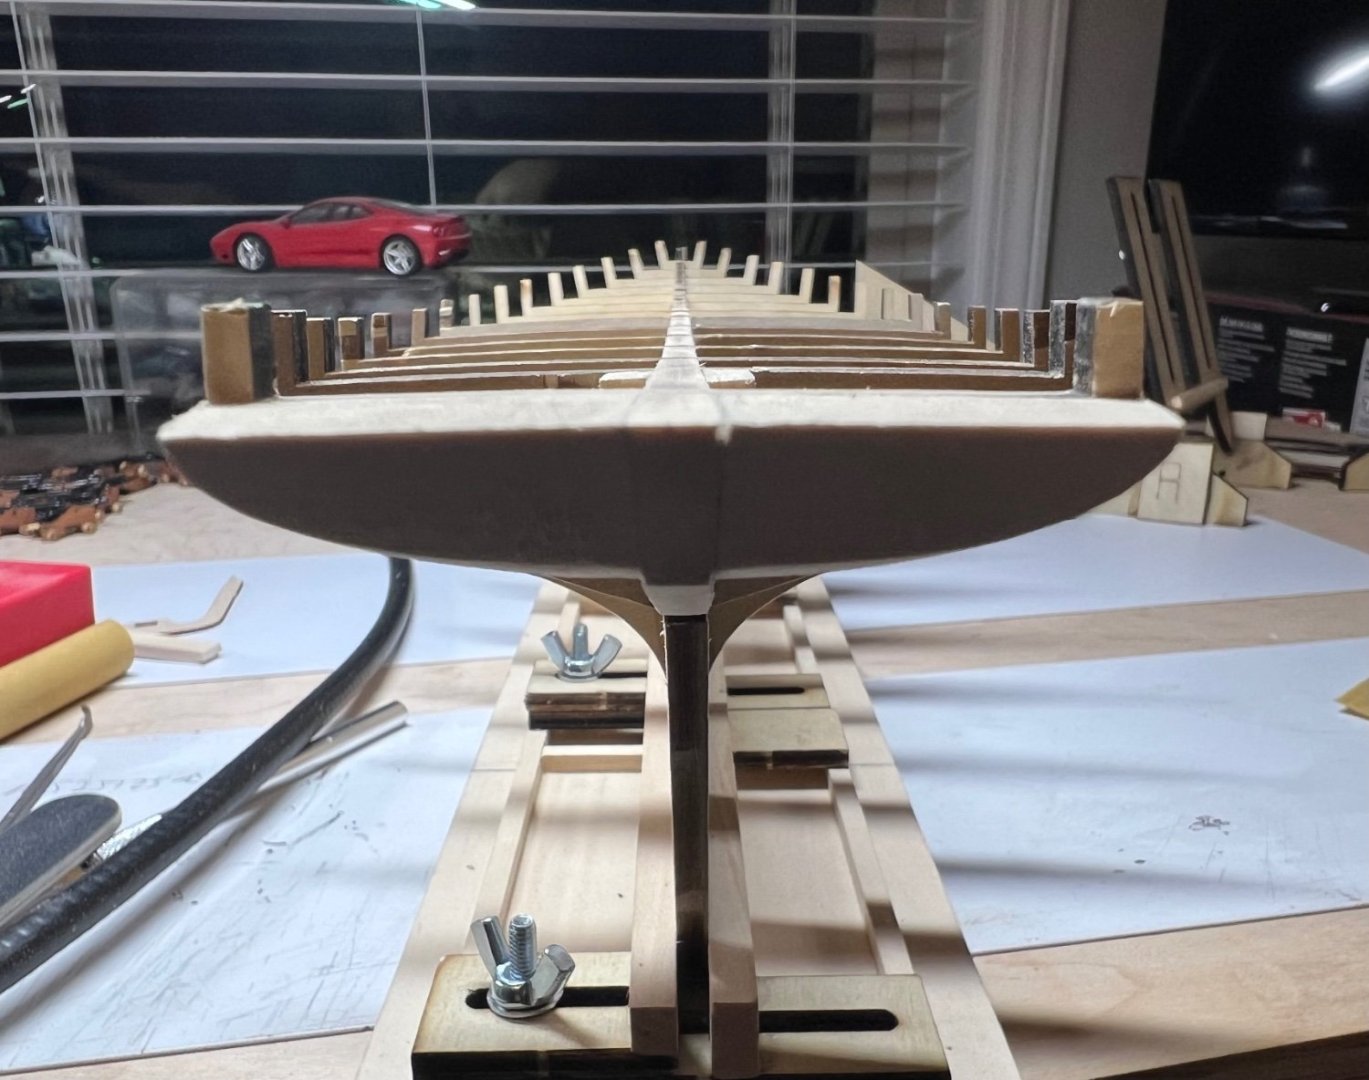
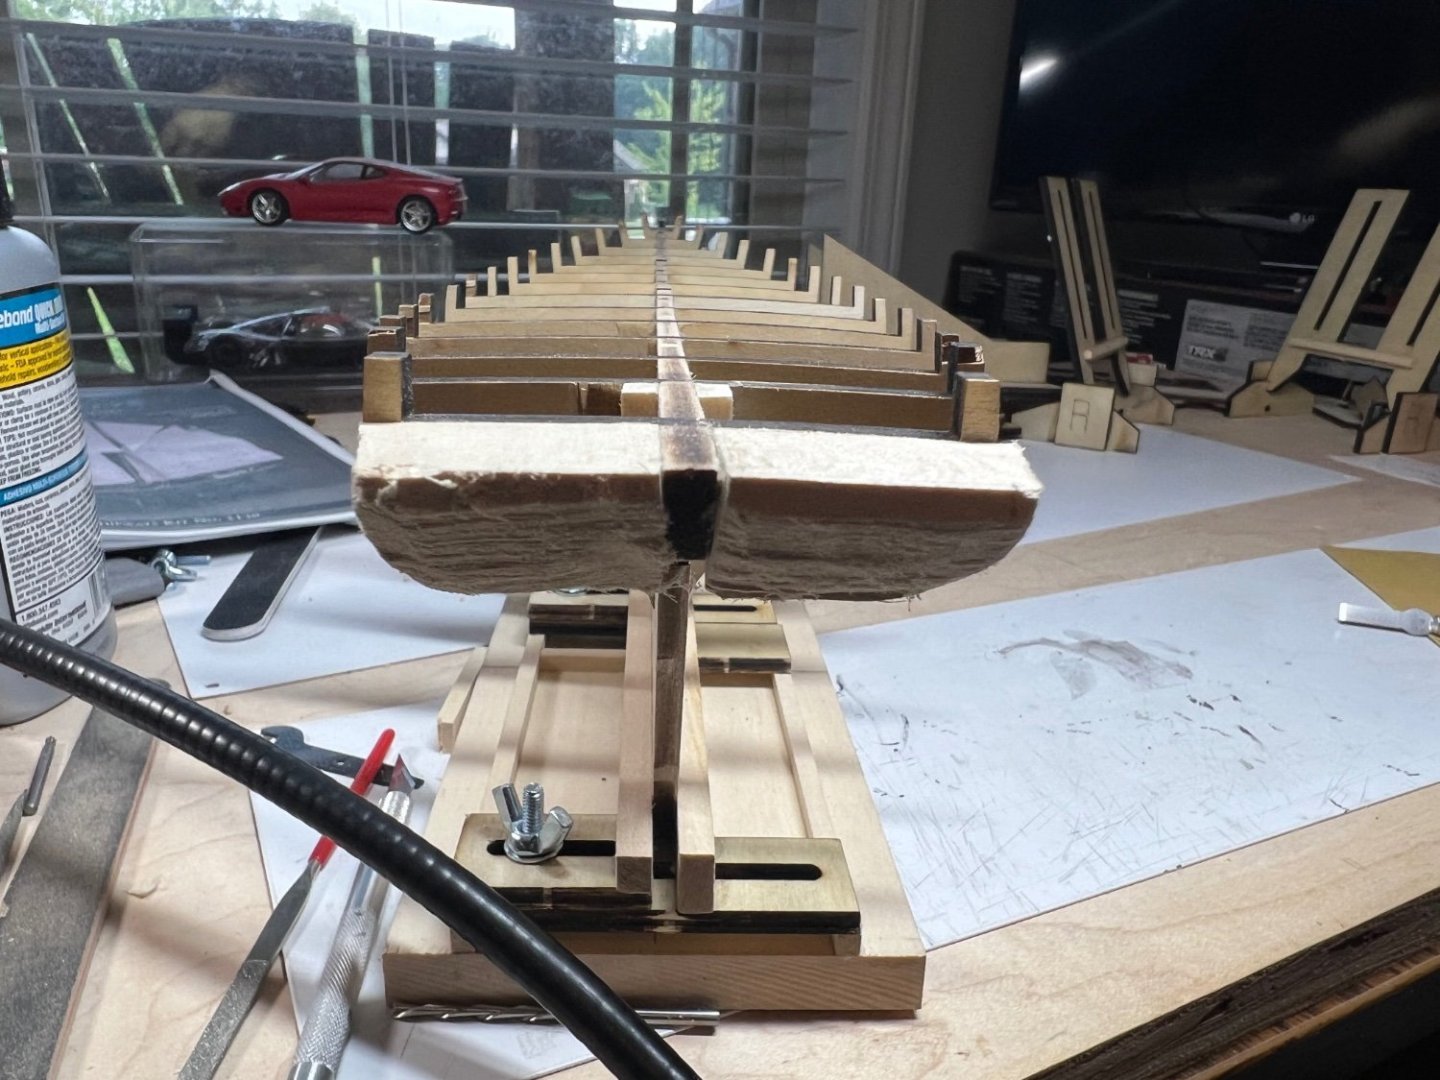
A few dollars in Dremel tools bits and sanders and the transom looks good! Much of the fairing of the hull is done. Taking my time. I’m in no rush.

-
This transom wood is hard for soft wood. I’ve broken the bonds in the N and O formers. I completely broke off the rear keel at the weakest point. I’ve spent some good money on Dremel toys. I remember this being a bugger the first time. I’m trying to not make a mess of this transom.
-
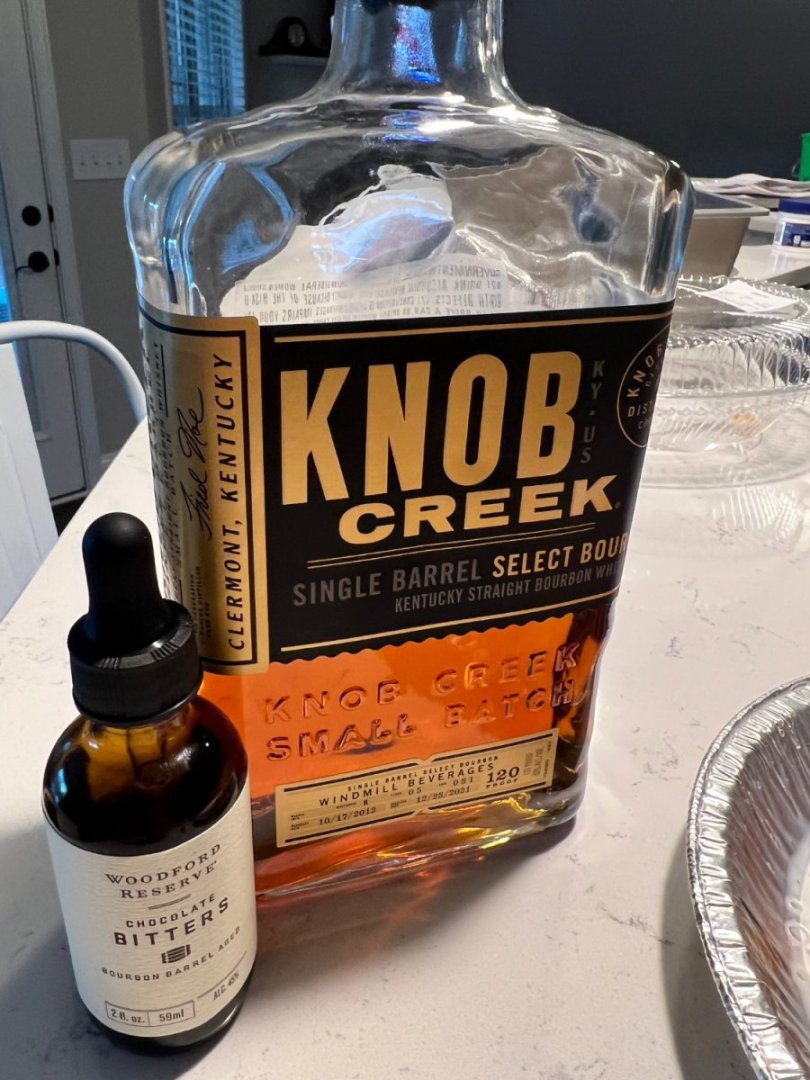
Bluenose fairing brought to you by Knob Creek. I can’t be the only one.
-
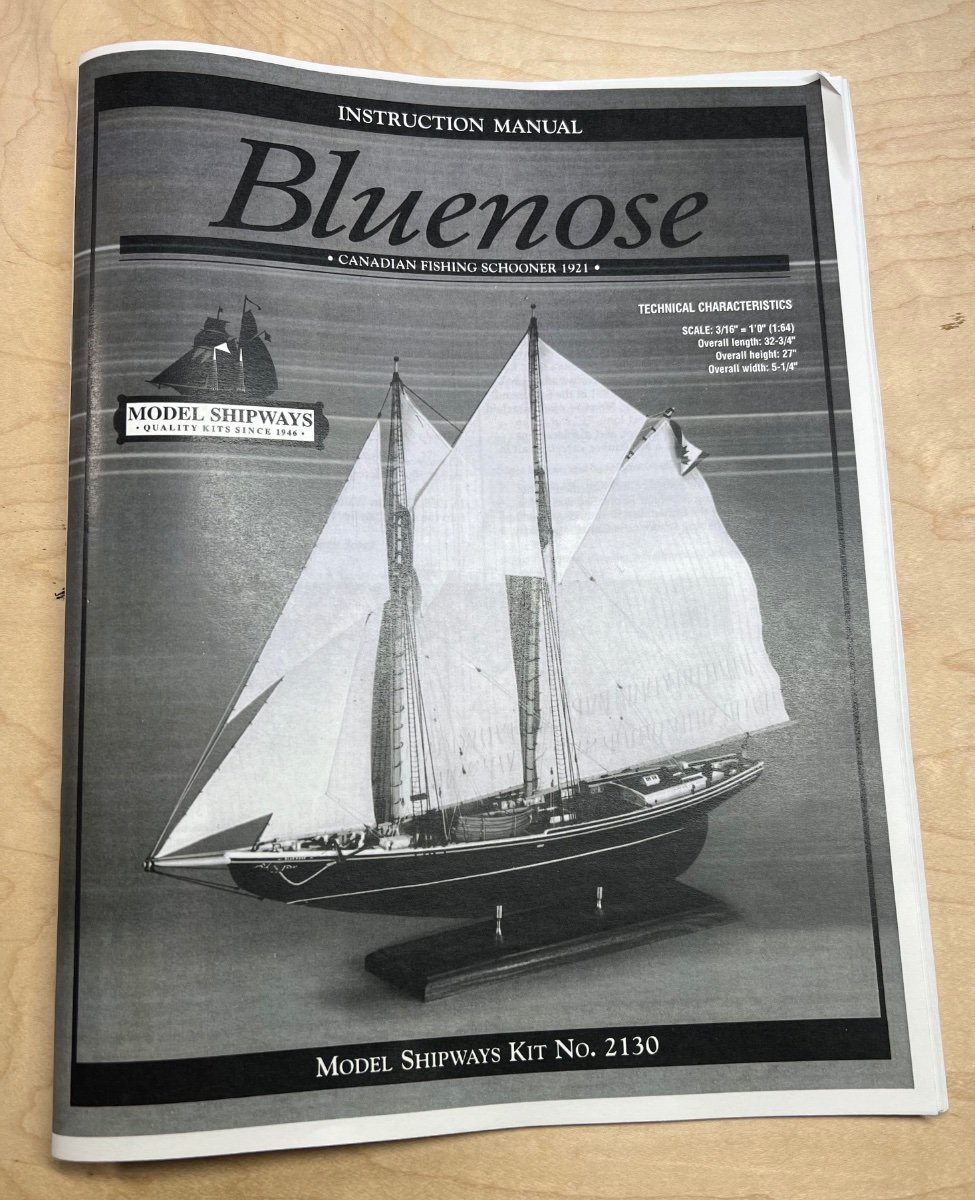
The book is on order. Thank you. I found it in hardcover.
-
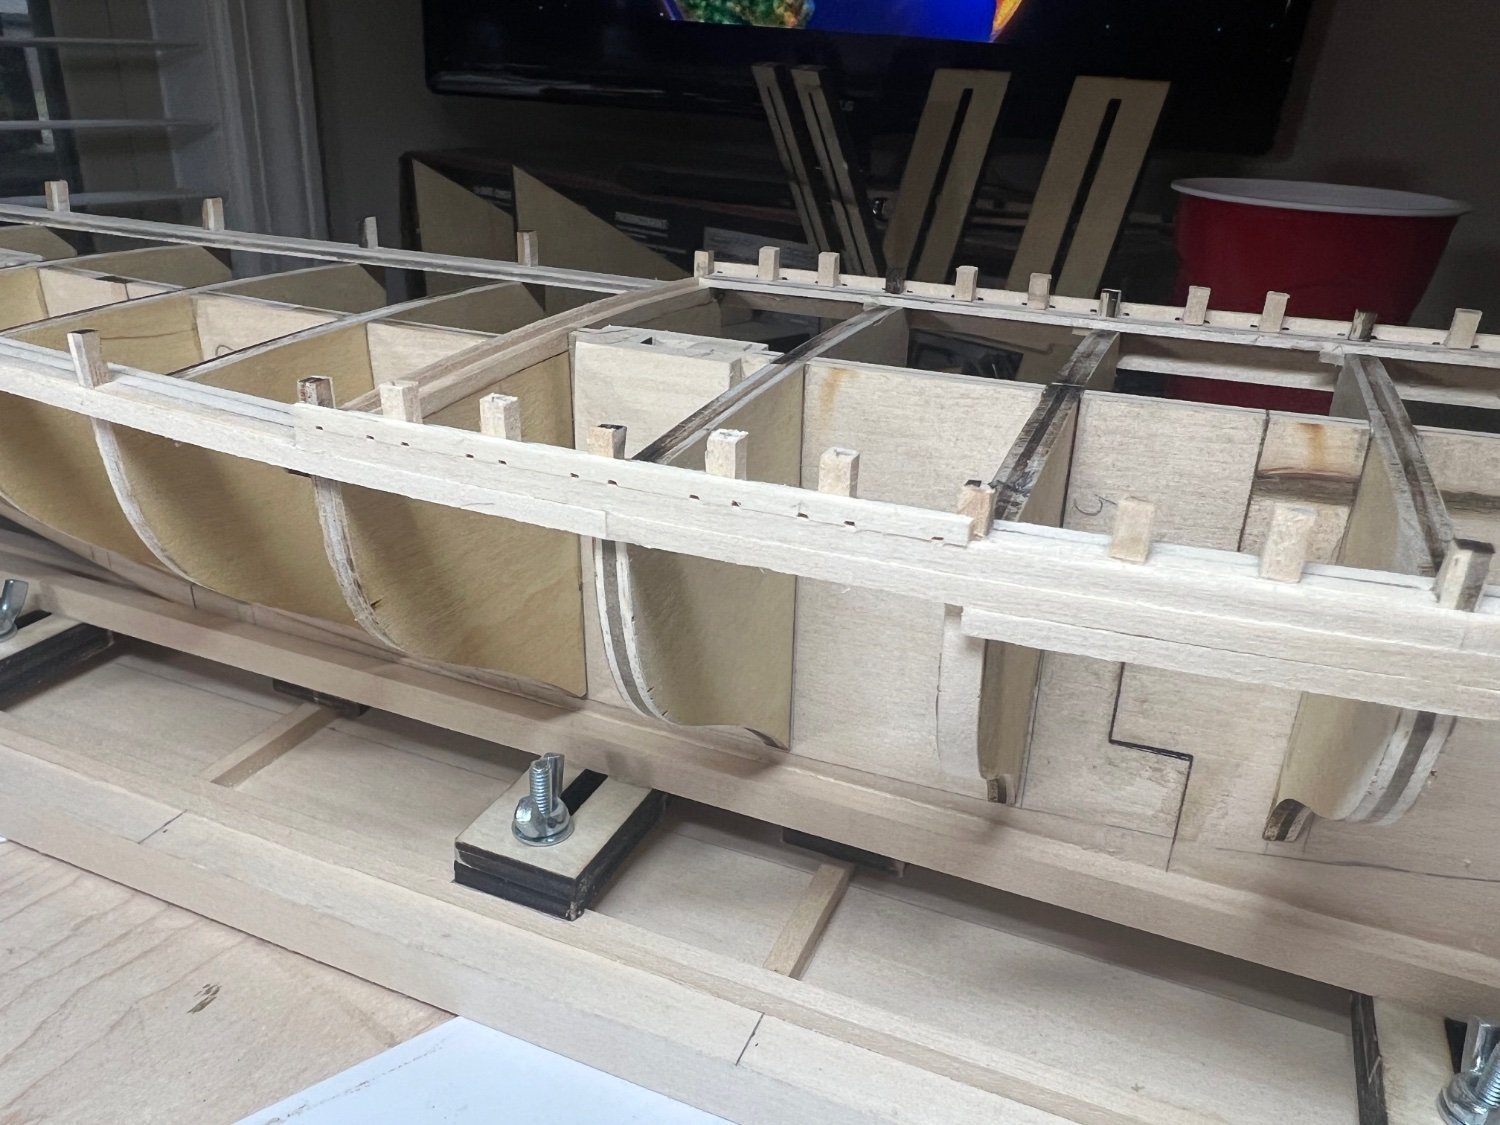
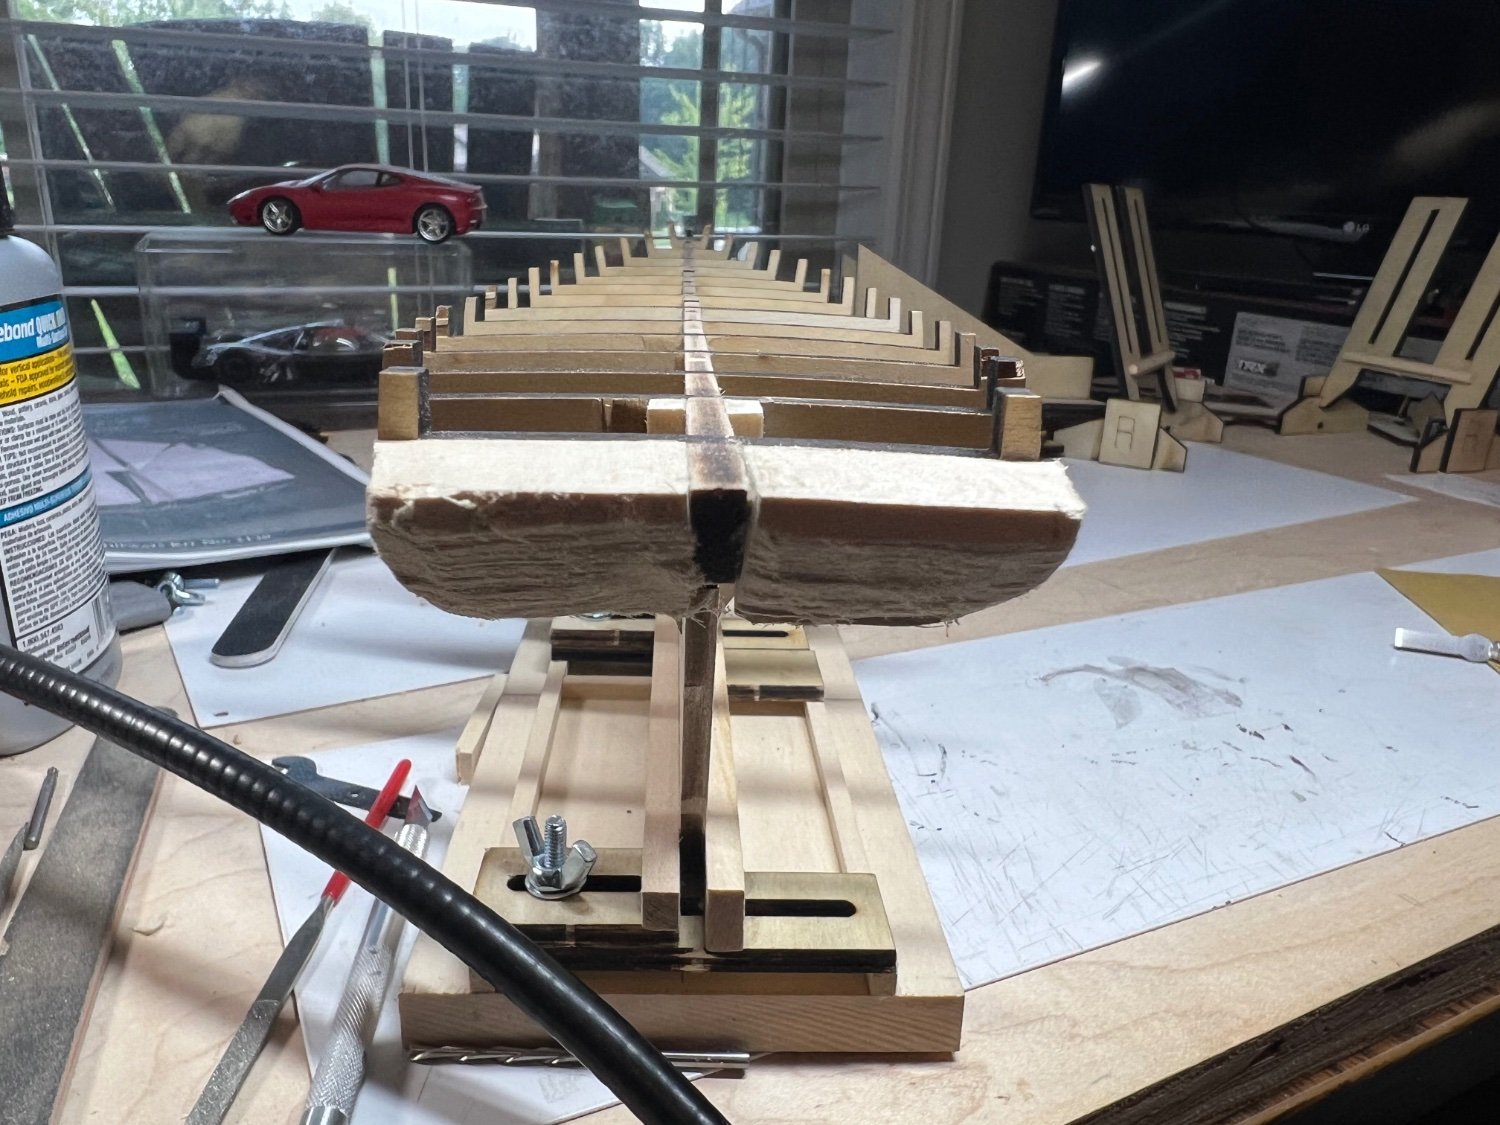
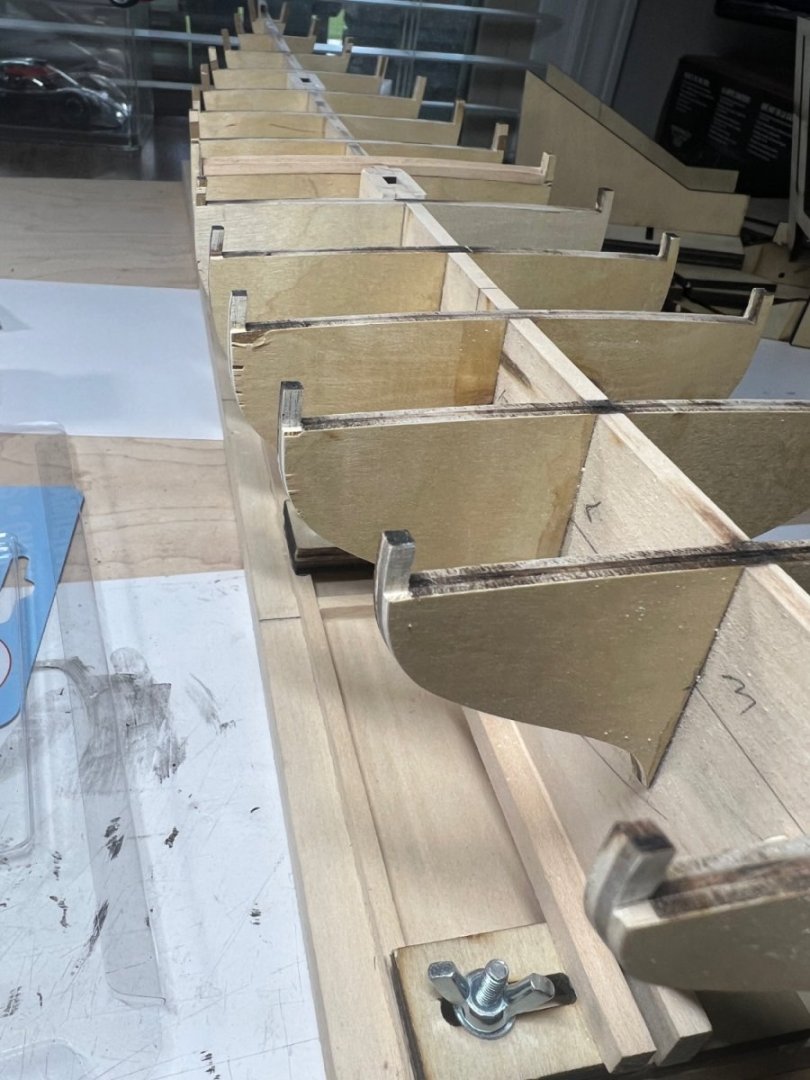
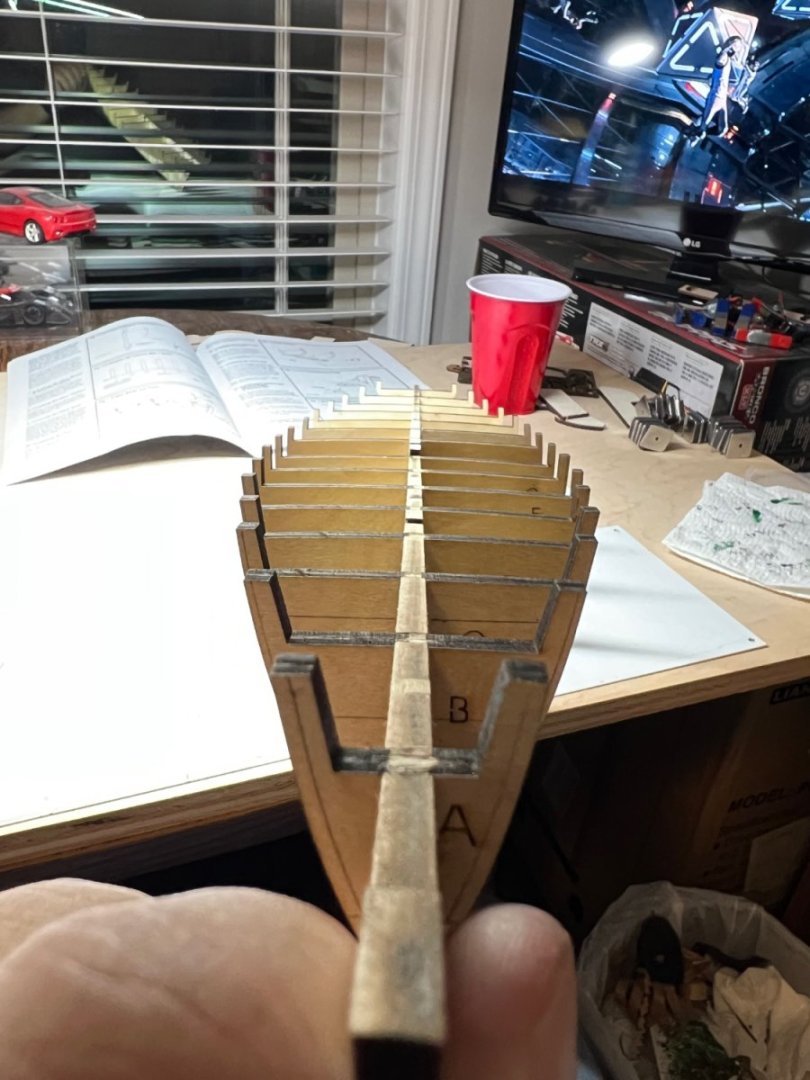
I remember this taking much longer the first time. It’s been so long I’m not really sure where I got to. Now that I have a better understanding of fairing the hull this part may go better. Fair a frame MS105 was good enough to square up the bulkheads. I built it to hold the hull. I got it a try for it’s intended purpose. Not my favorite tool, but it did the job.

-
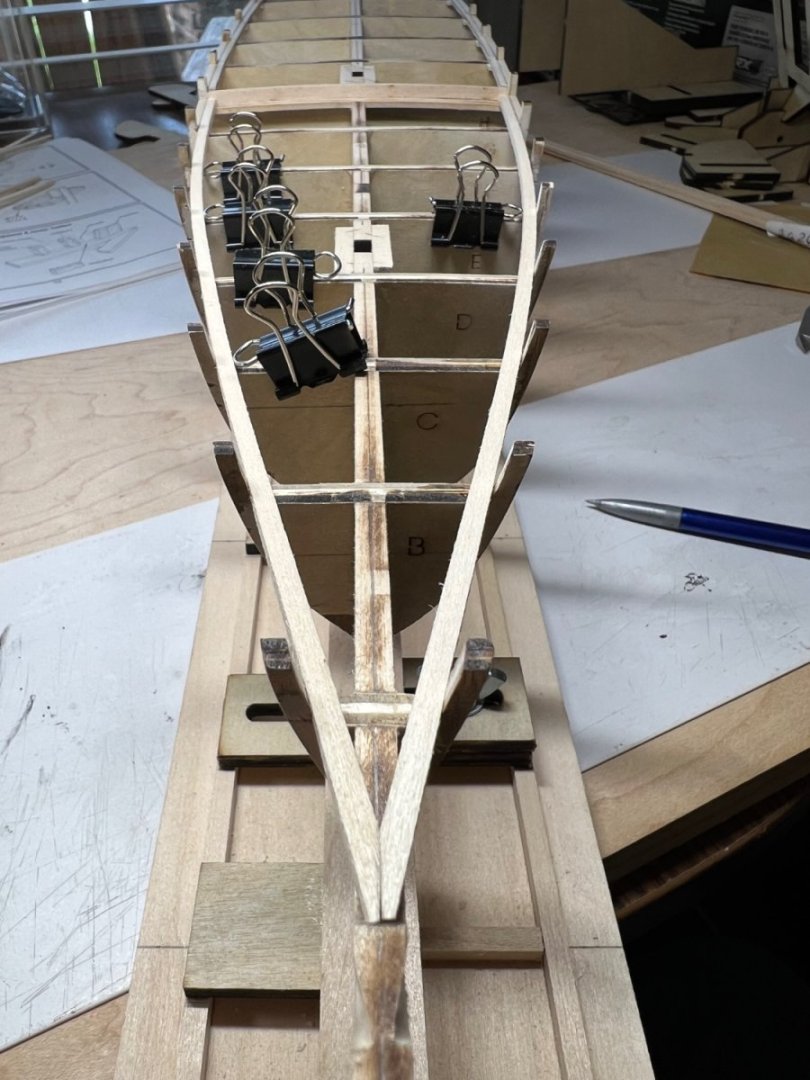
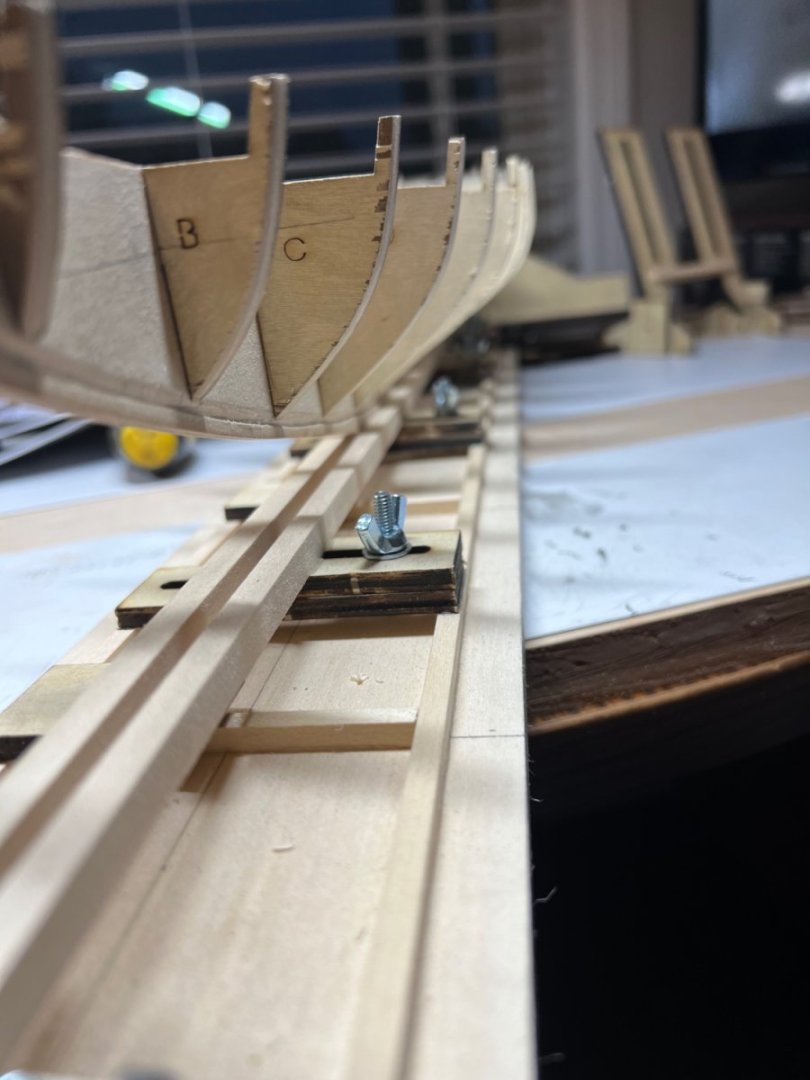
I started a Bluenose in the mid 2000s and was way over my head. Attempt number two began today. Bulkhead K will have some internal character.


-
My attempt at paint. Step 36. The goal is to finish. Not to be perfect. Tamiya masking tape works good.


- 40 replies
-
- 7
-

-
- Model Shipways
- Muscongus Bay Lobster Smack
- (and 1 more)
-
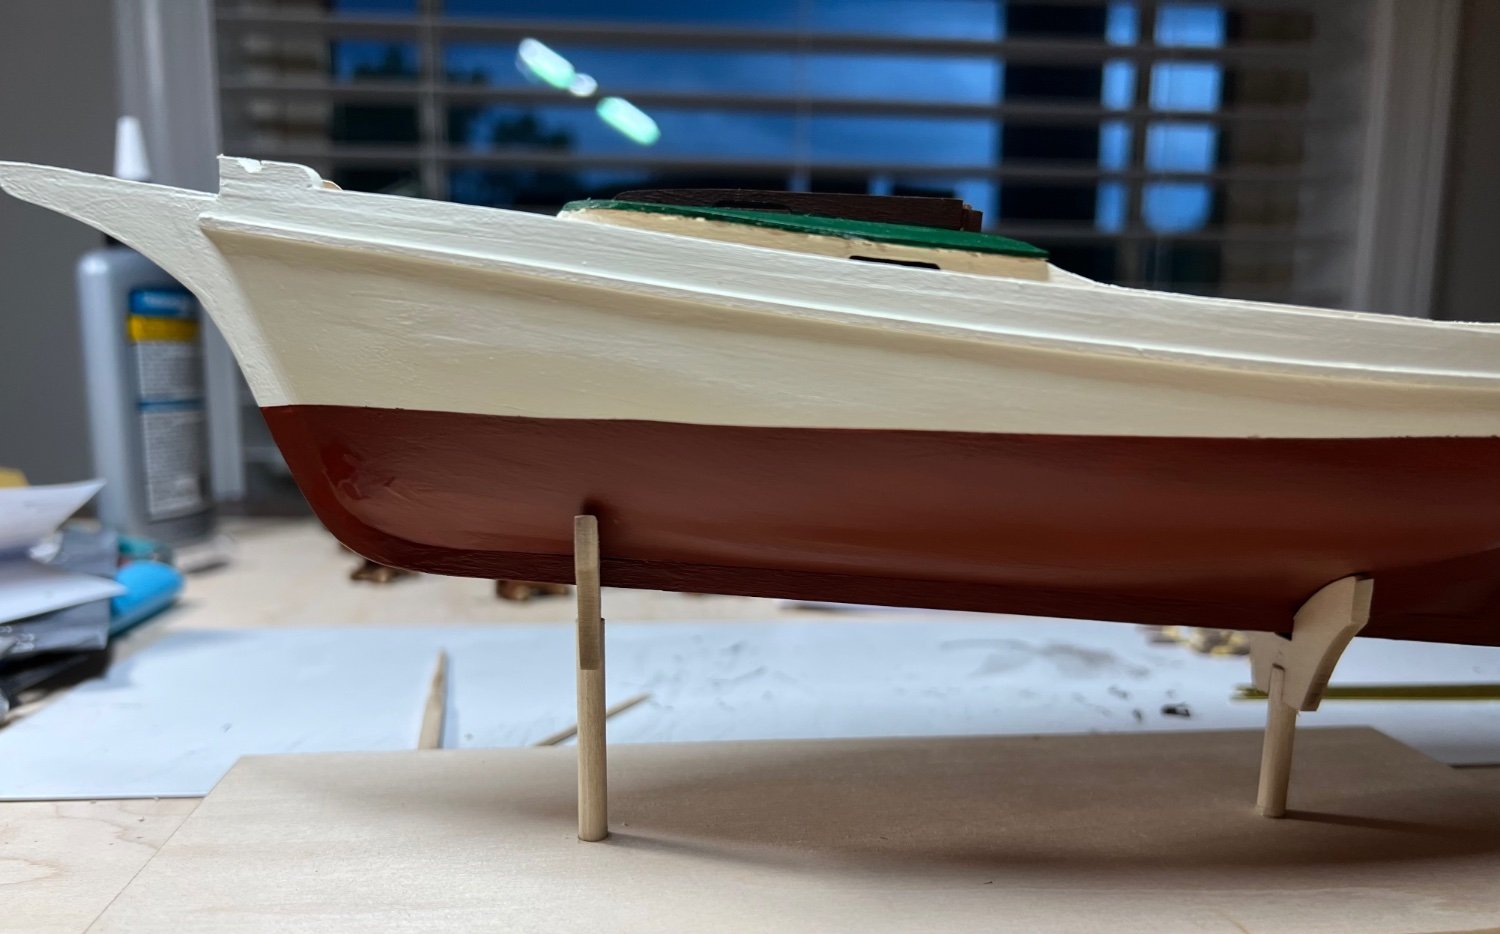
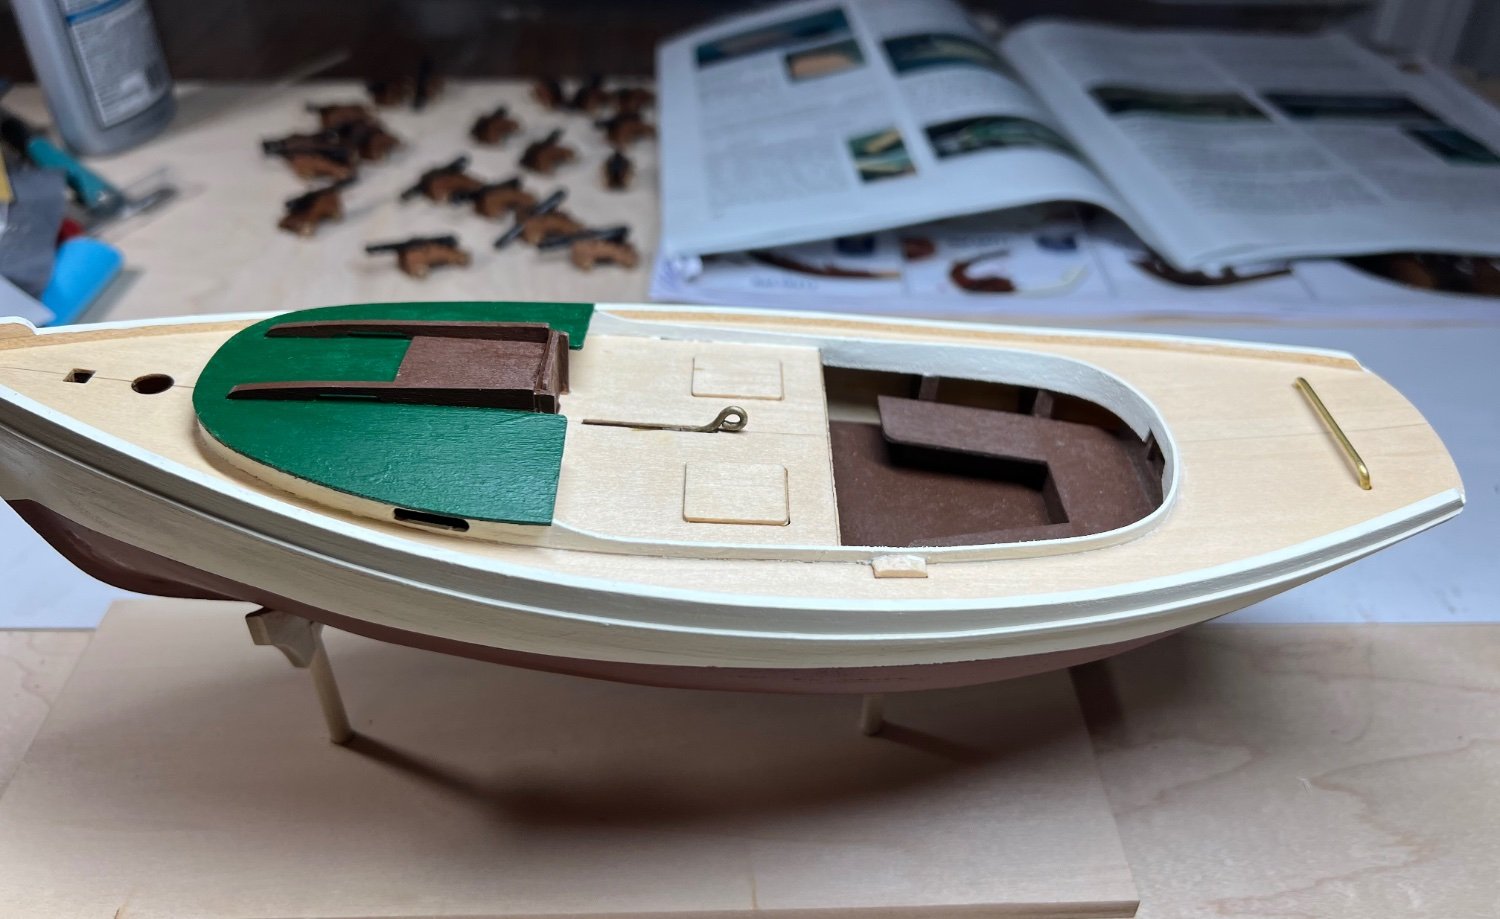
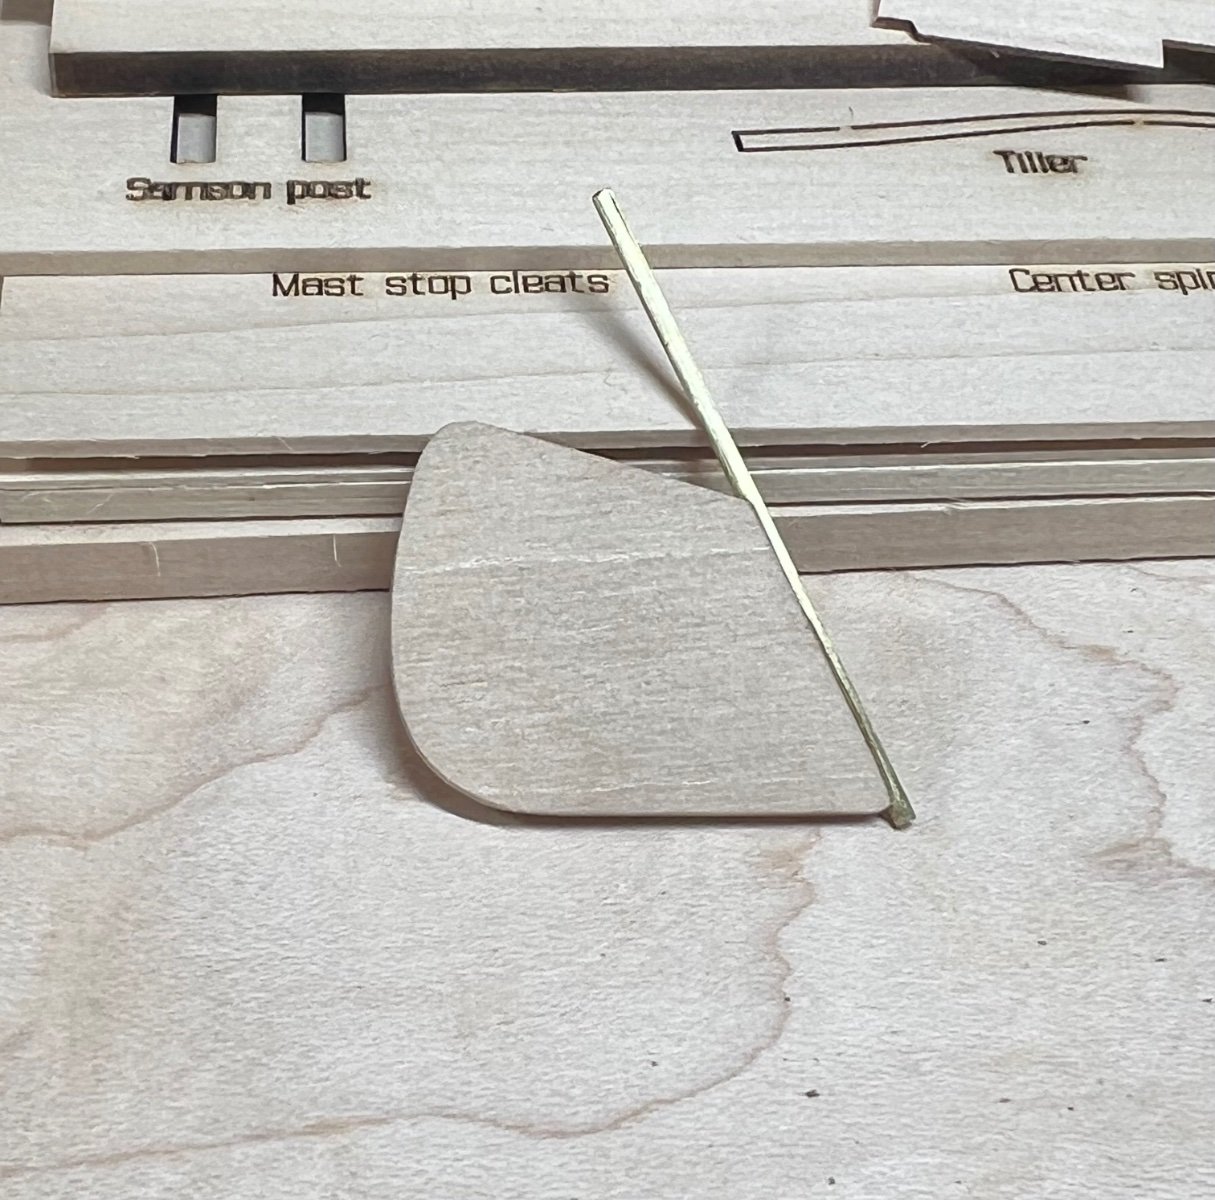
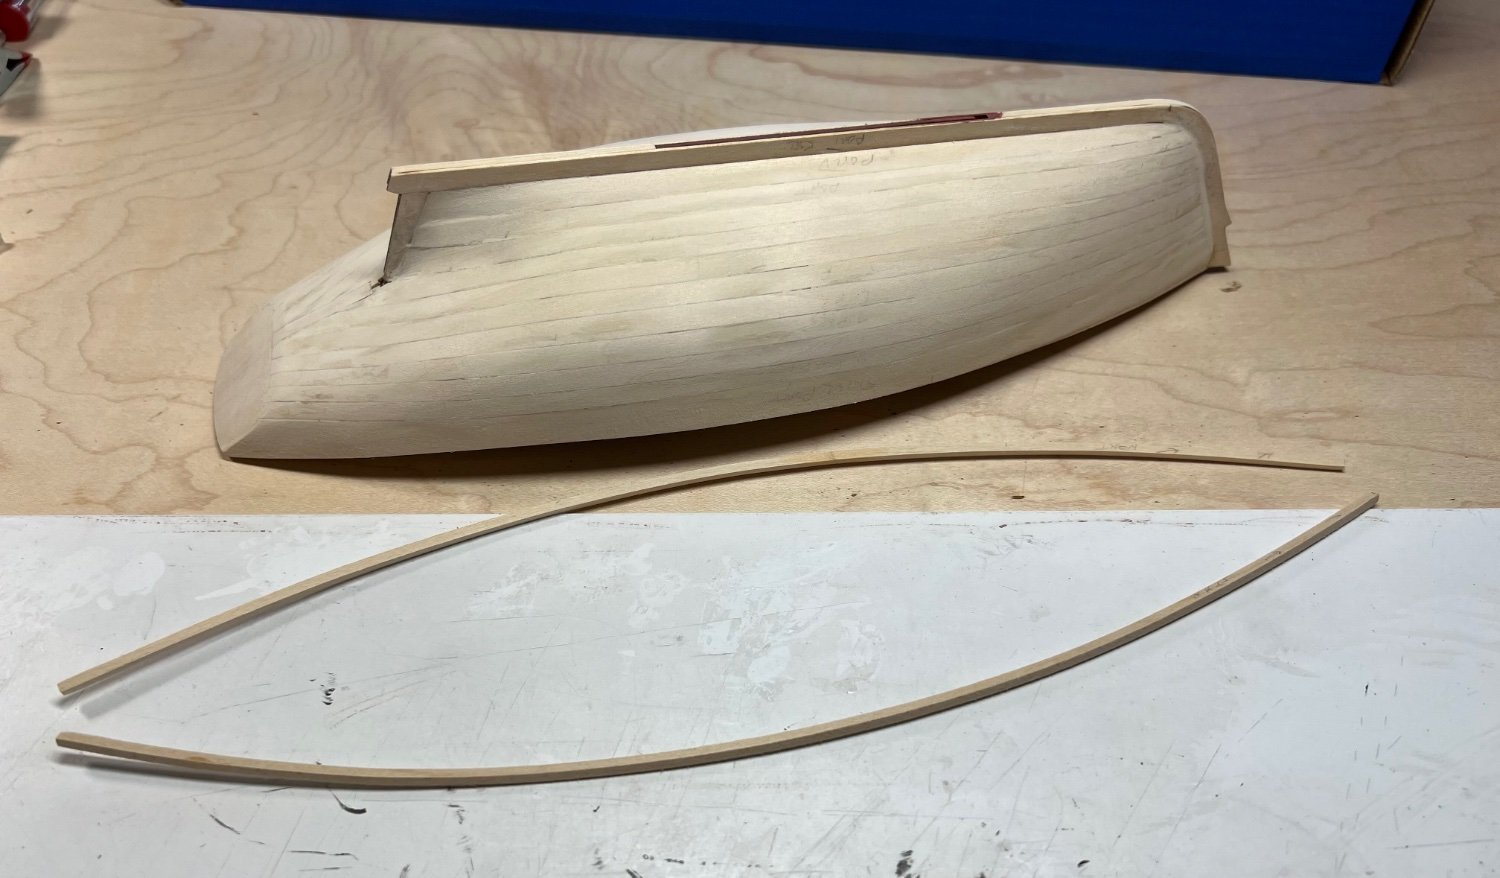
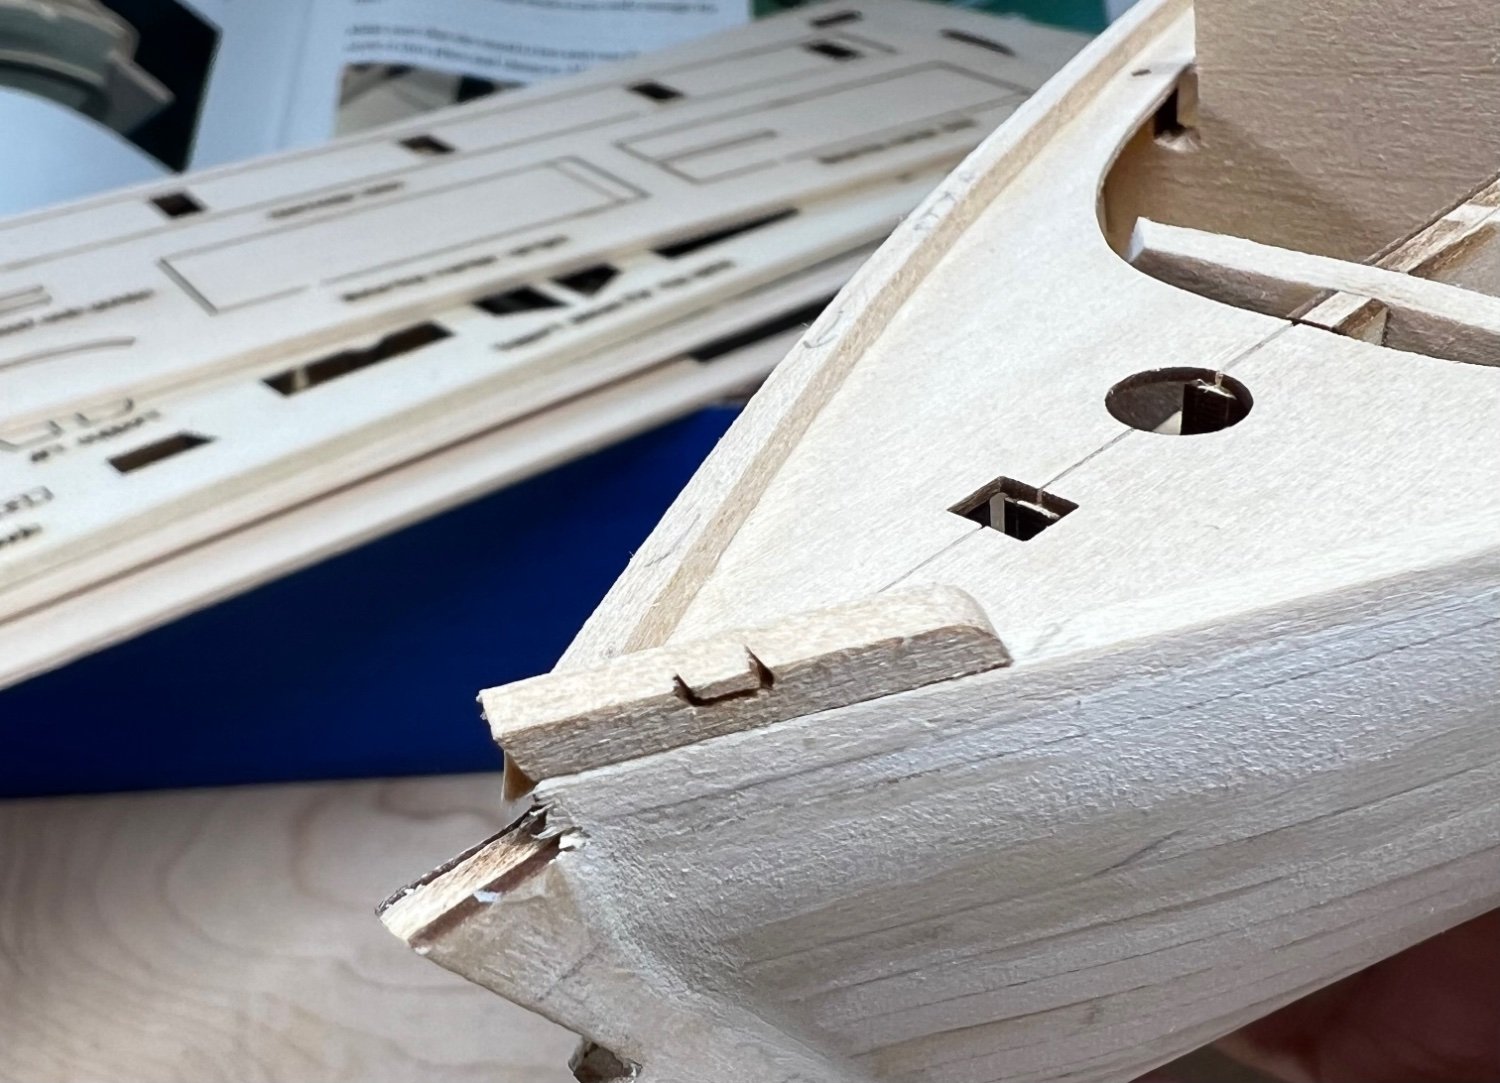
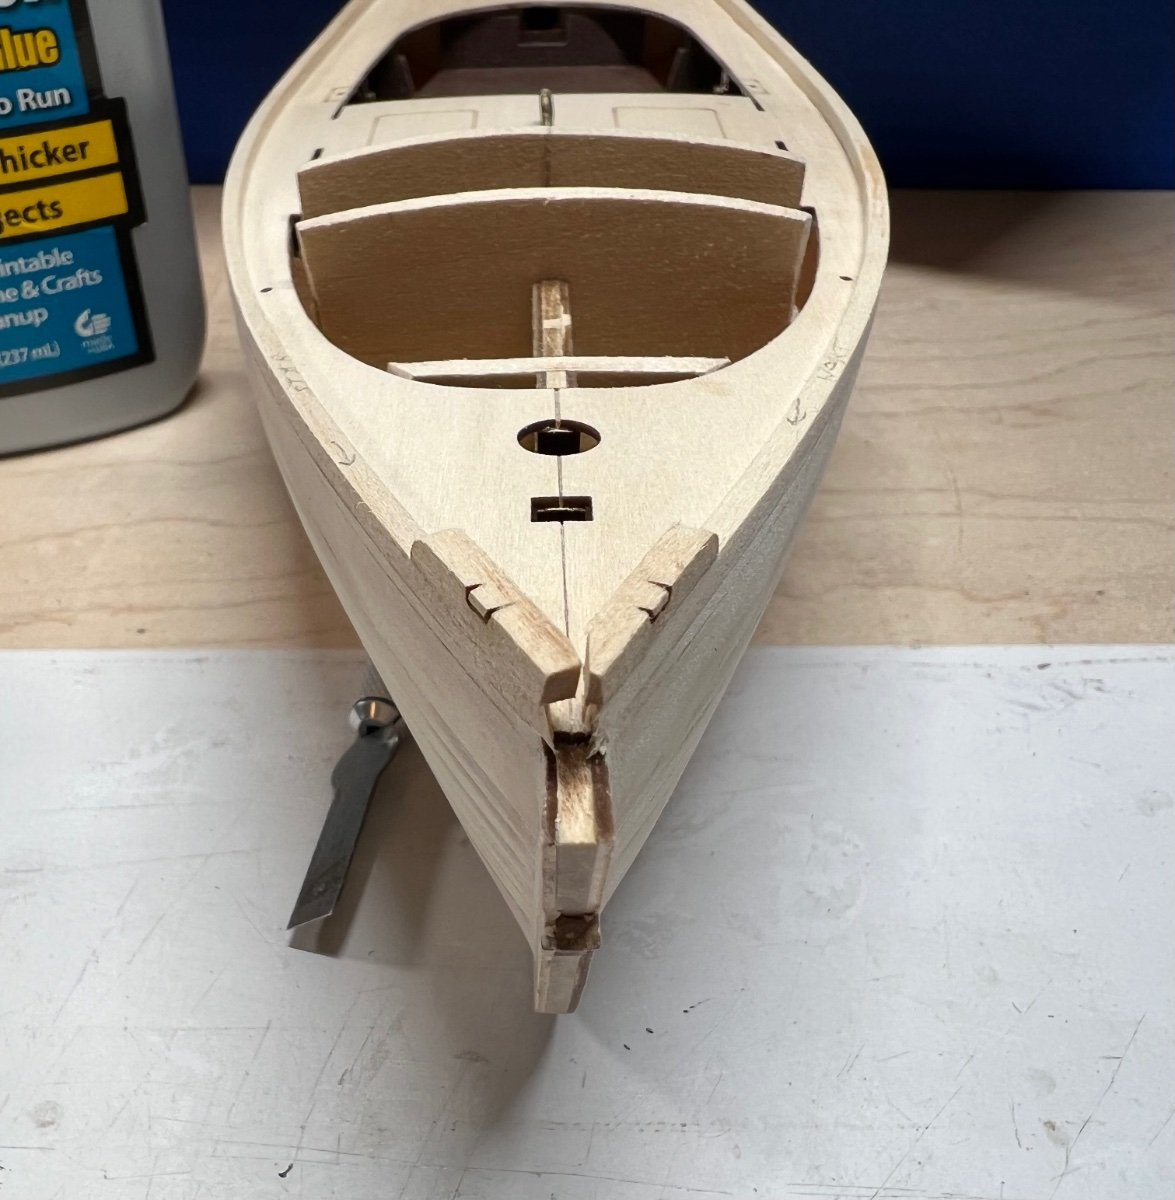
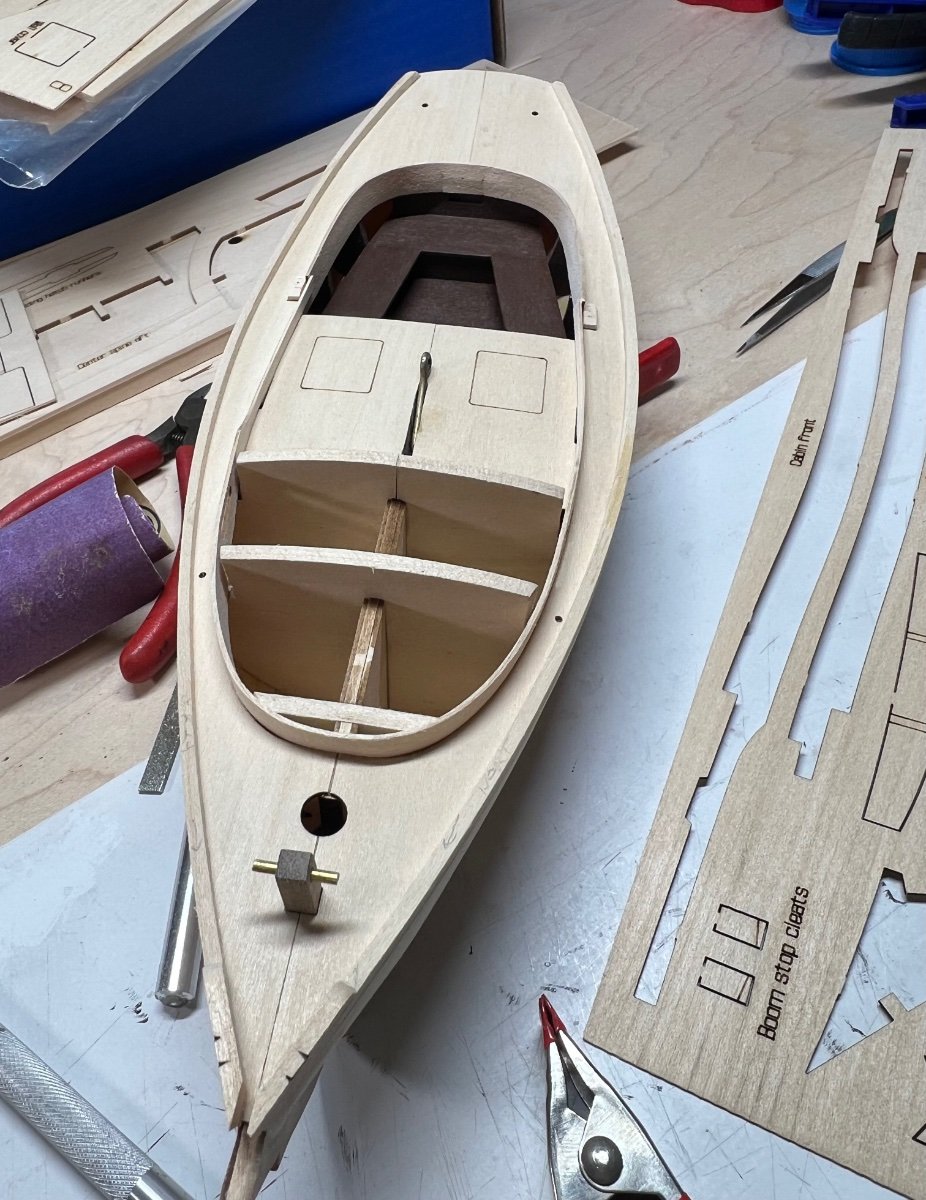
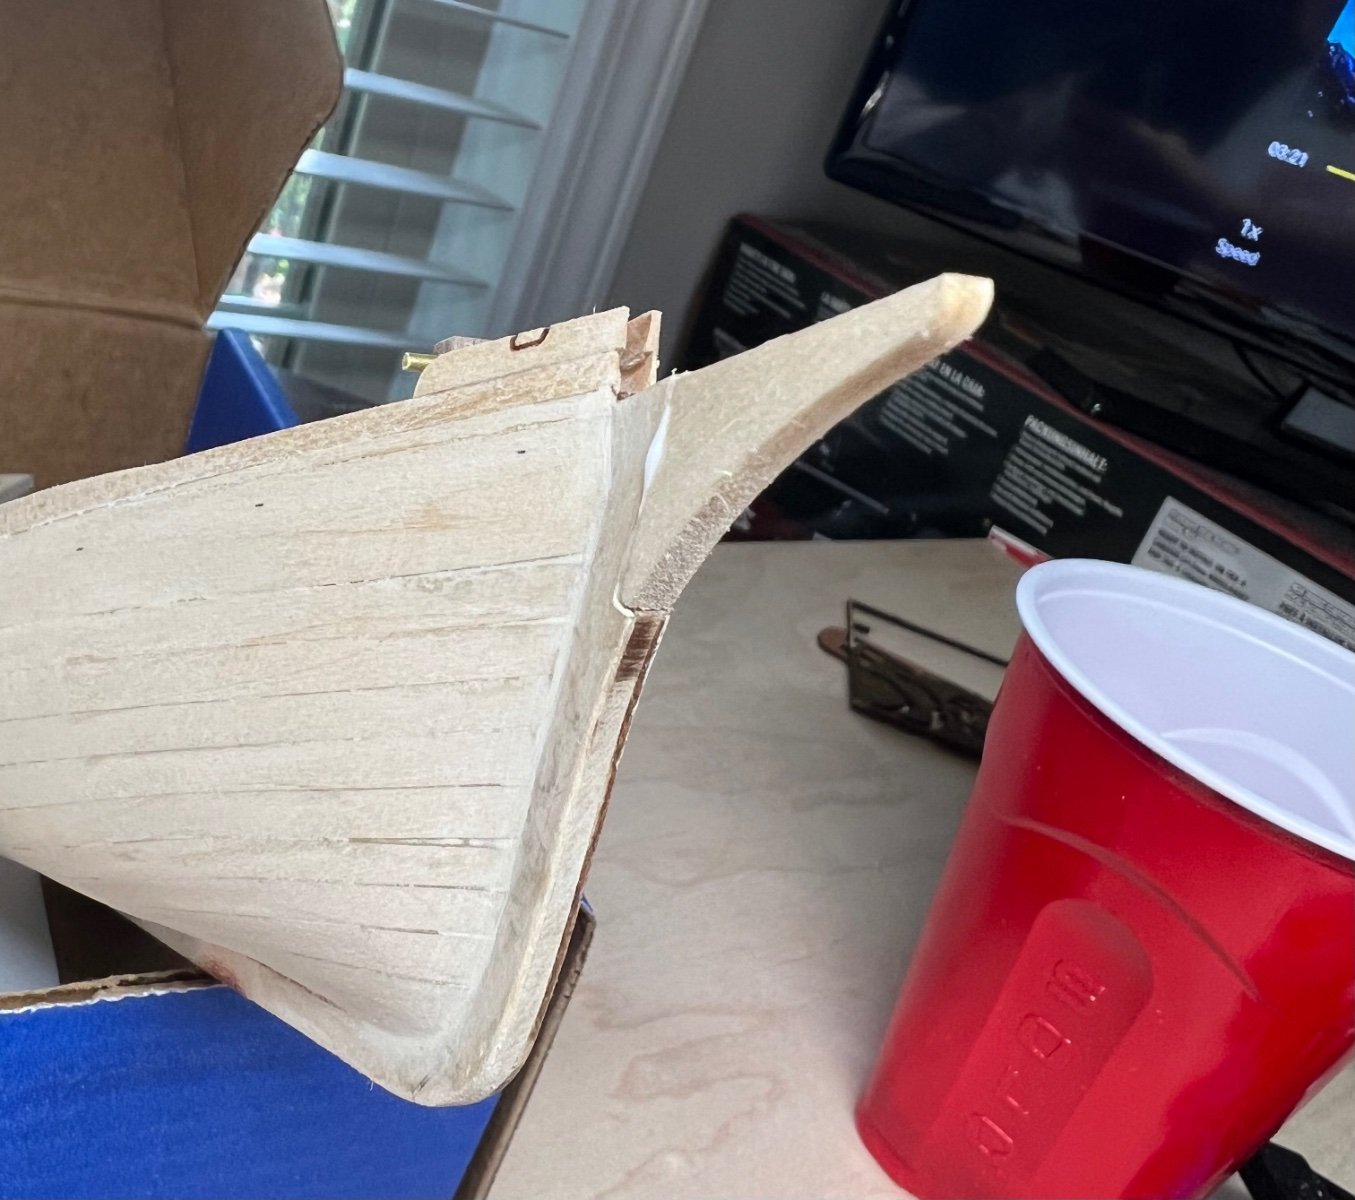
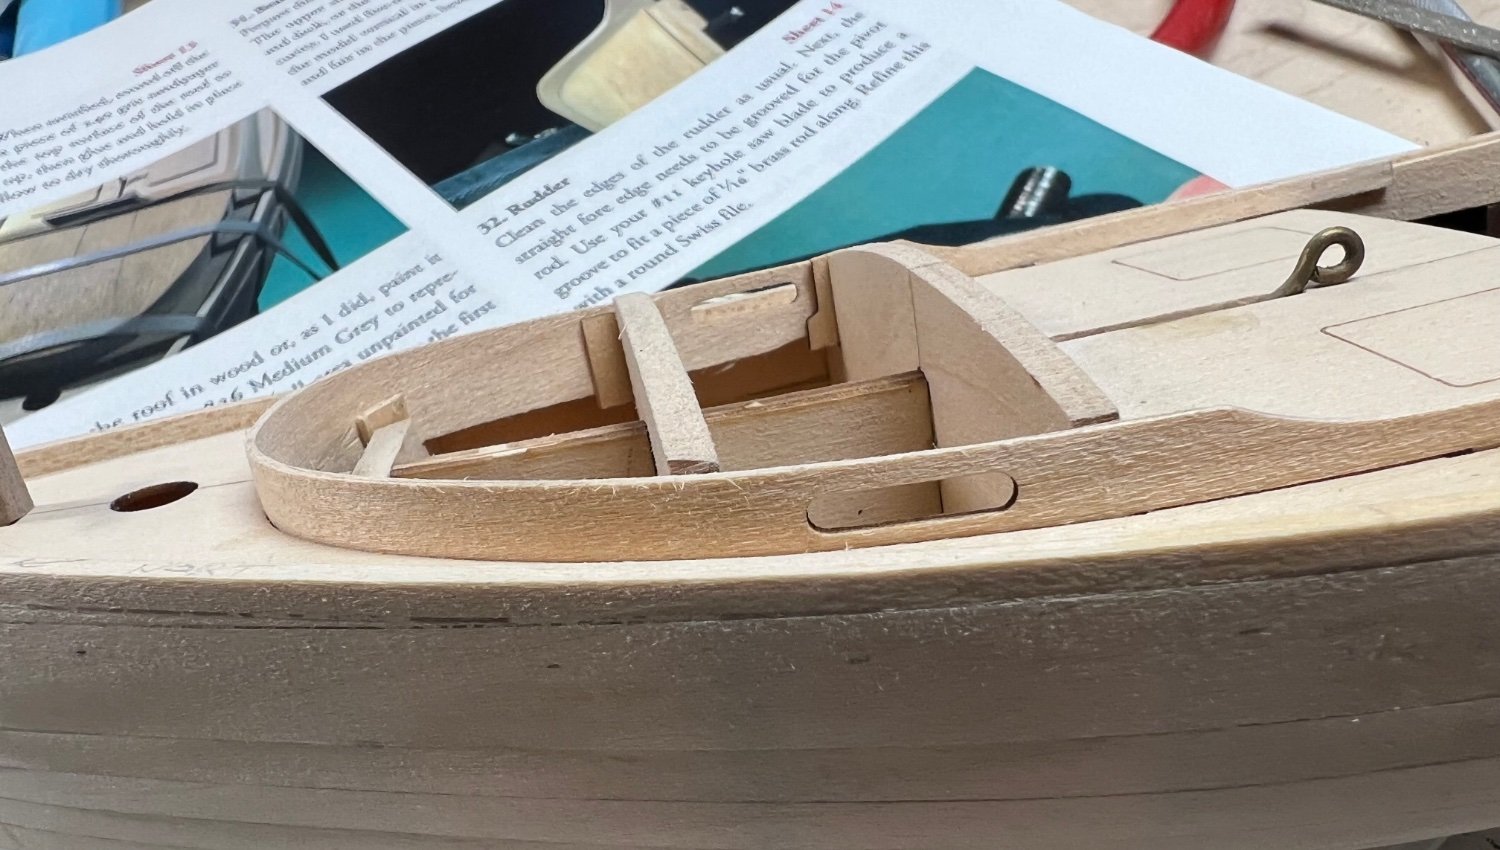
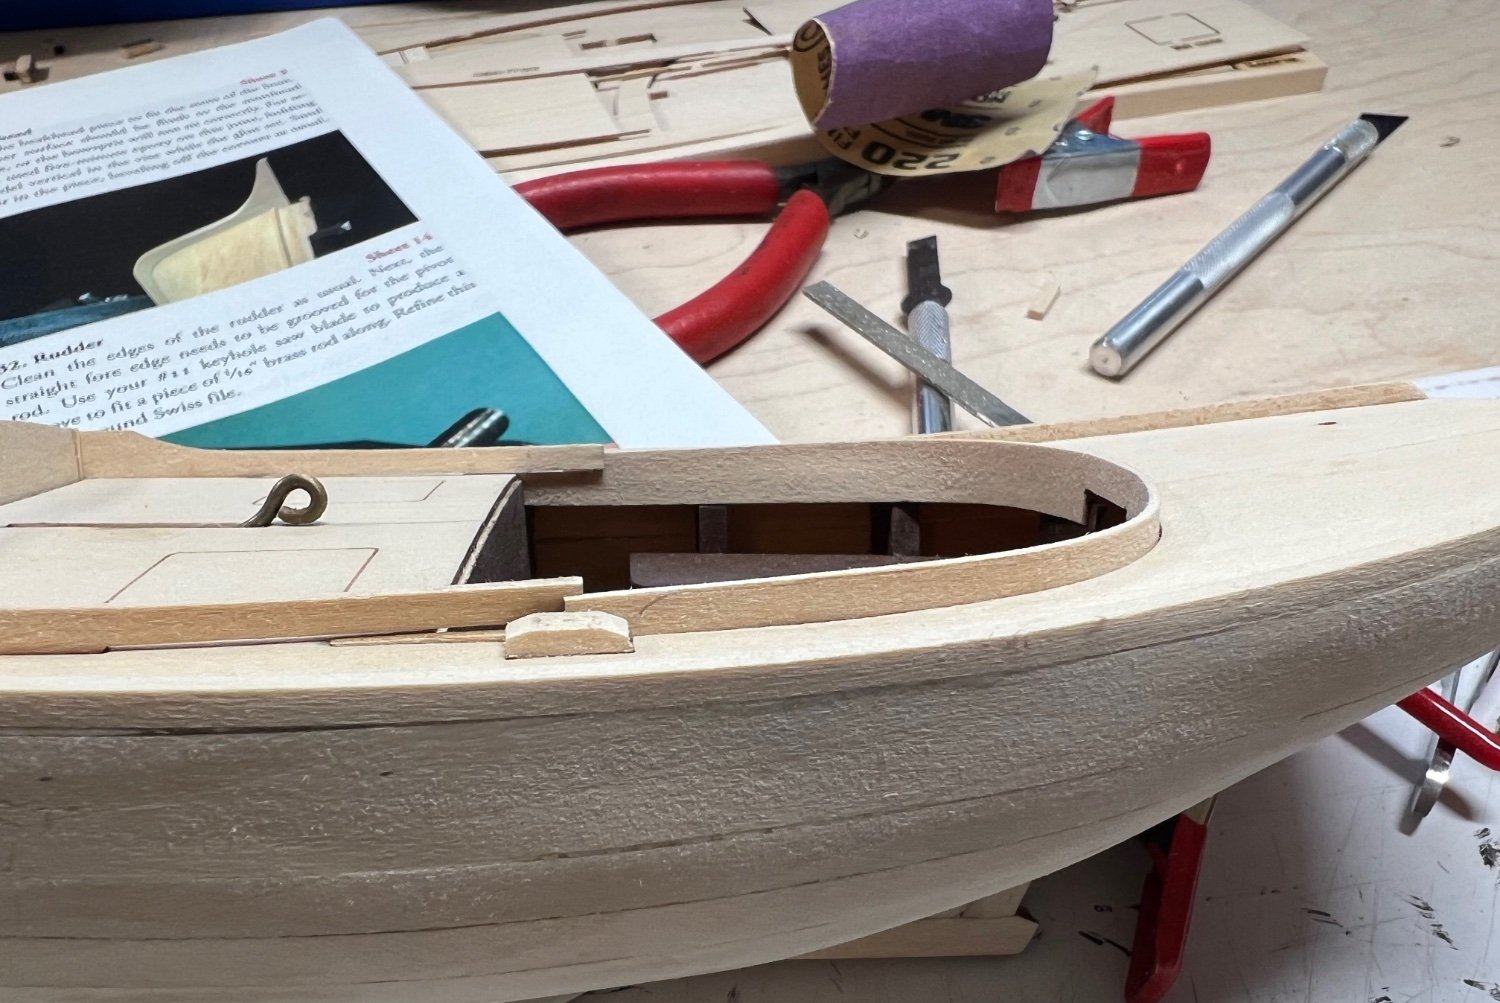
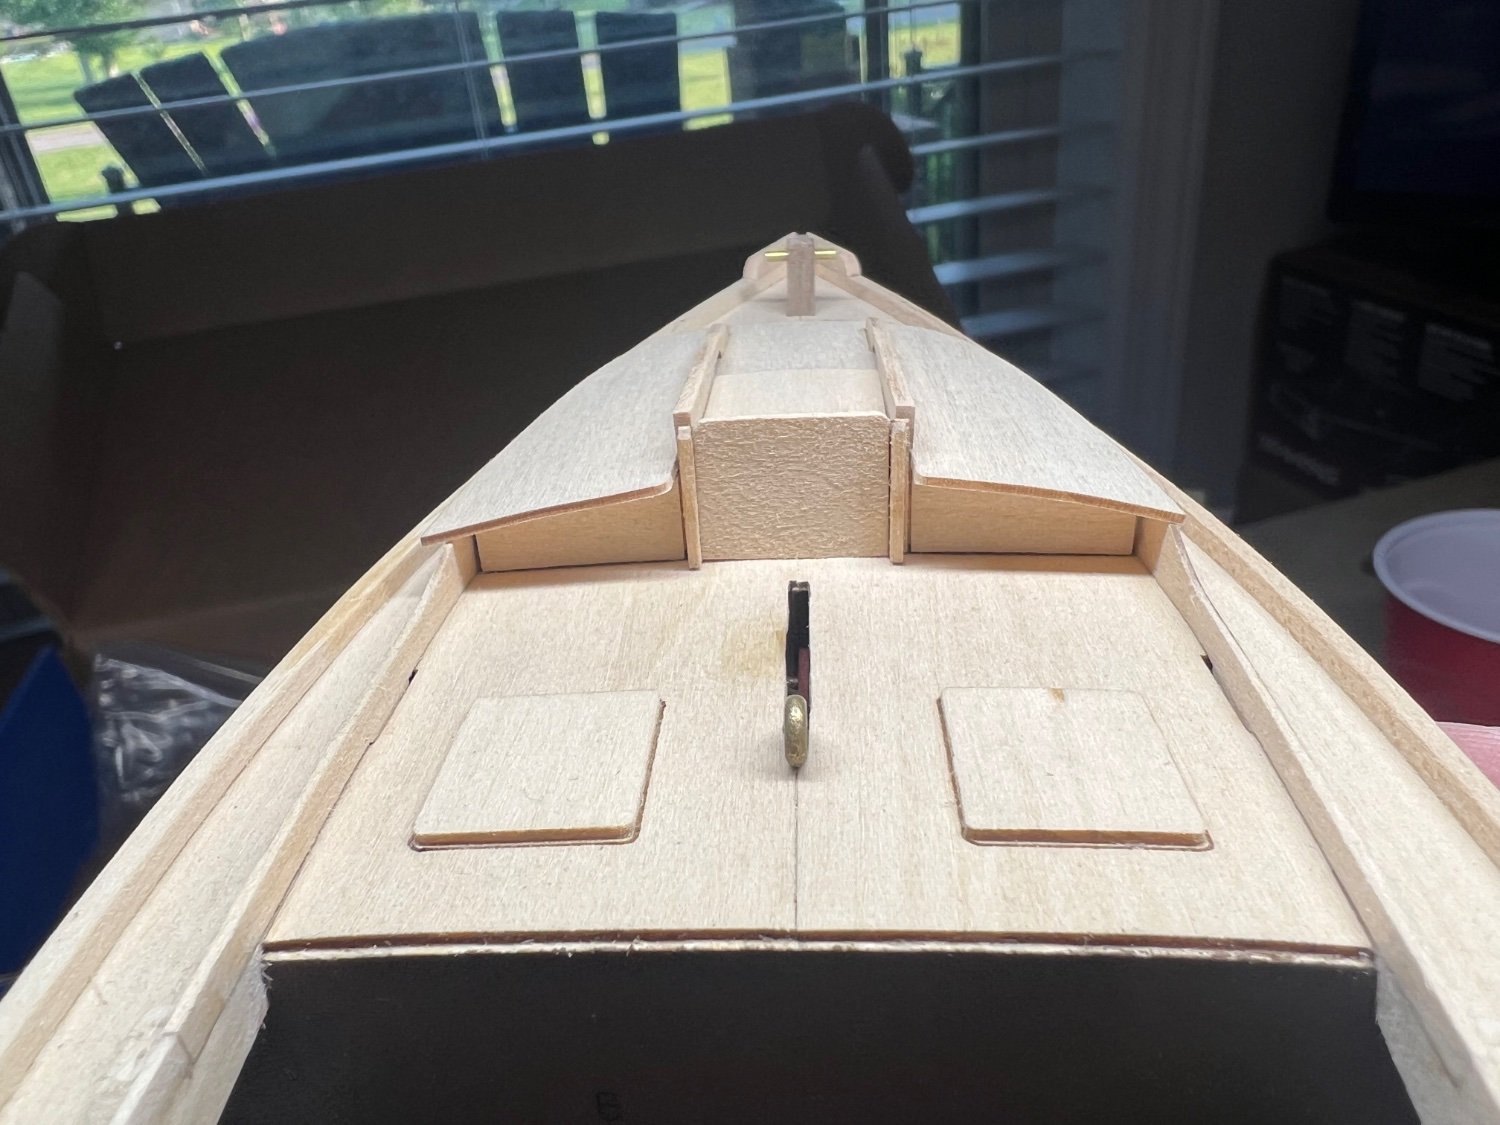
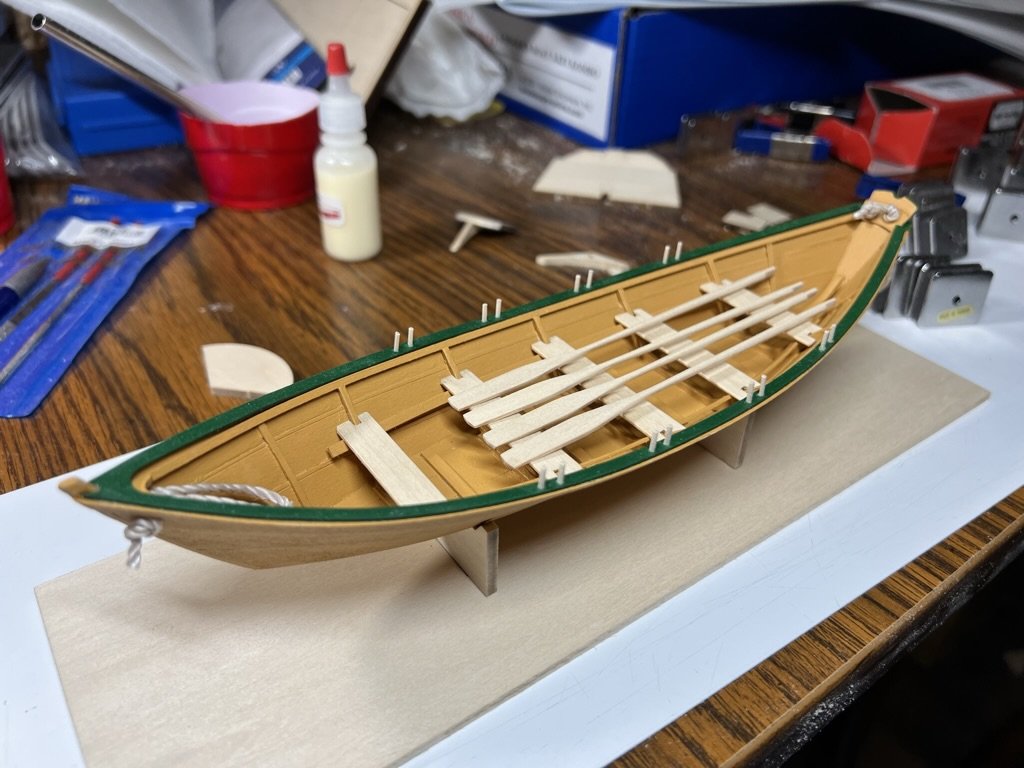
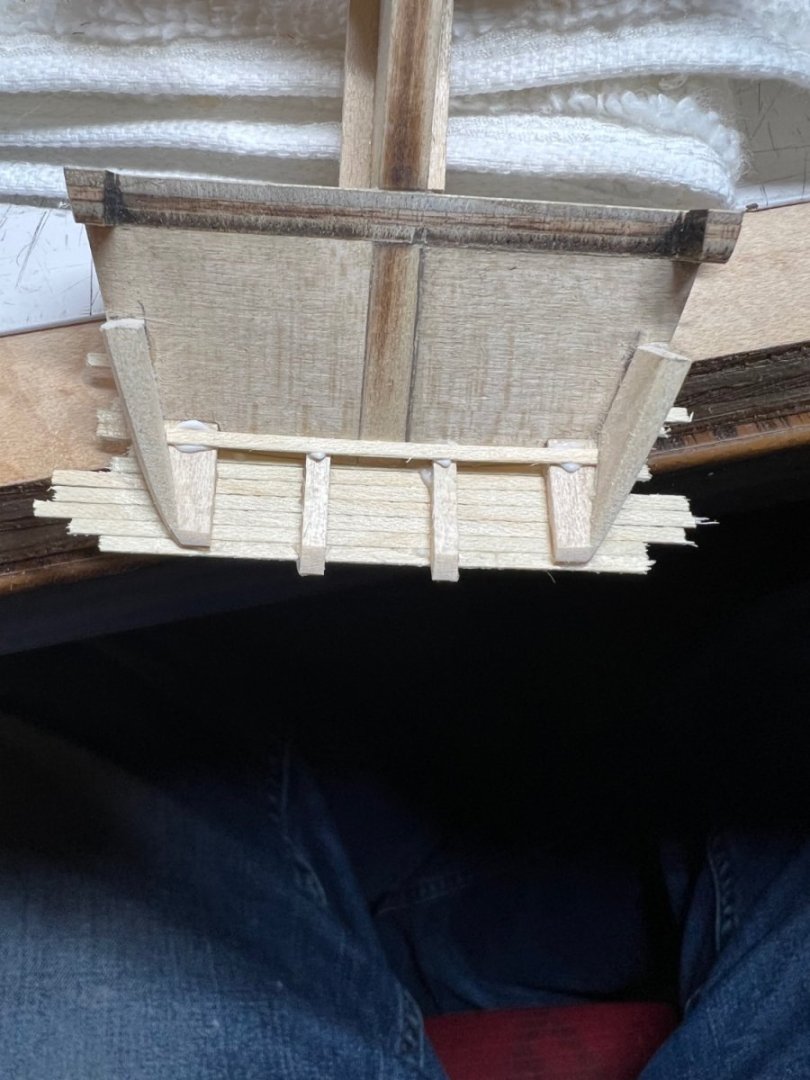
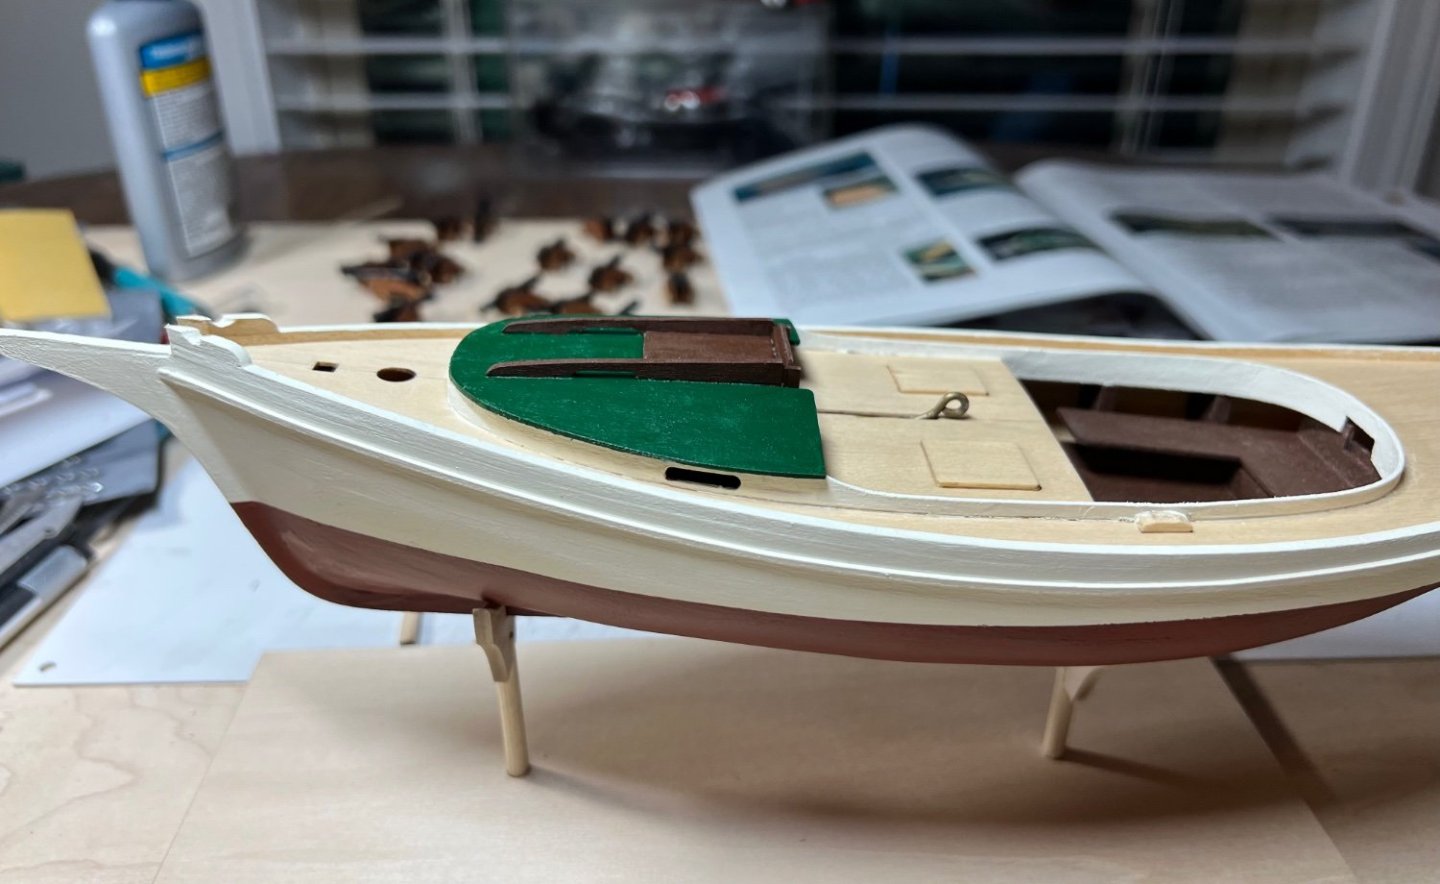
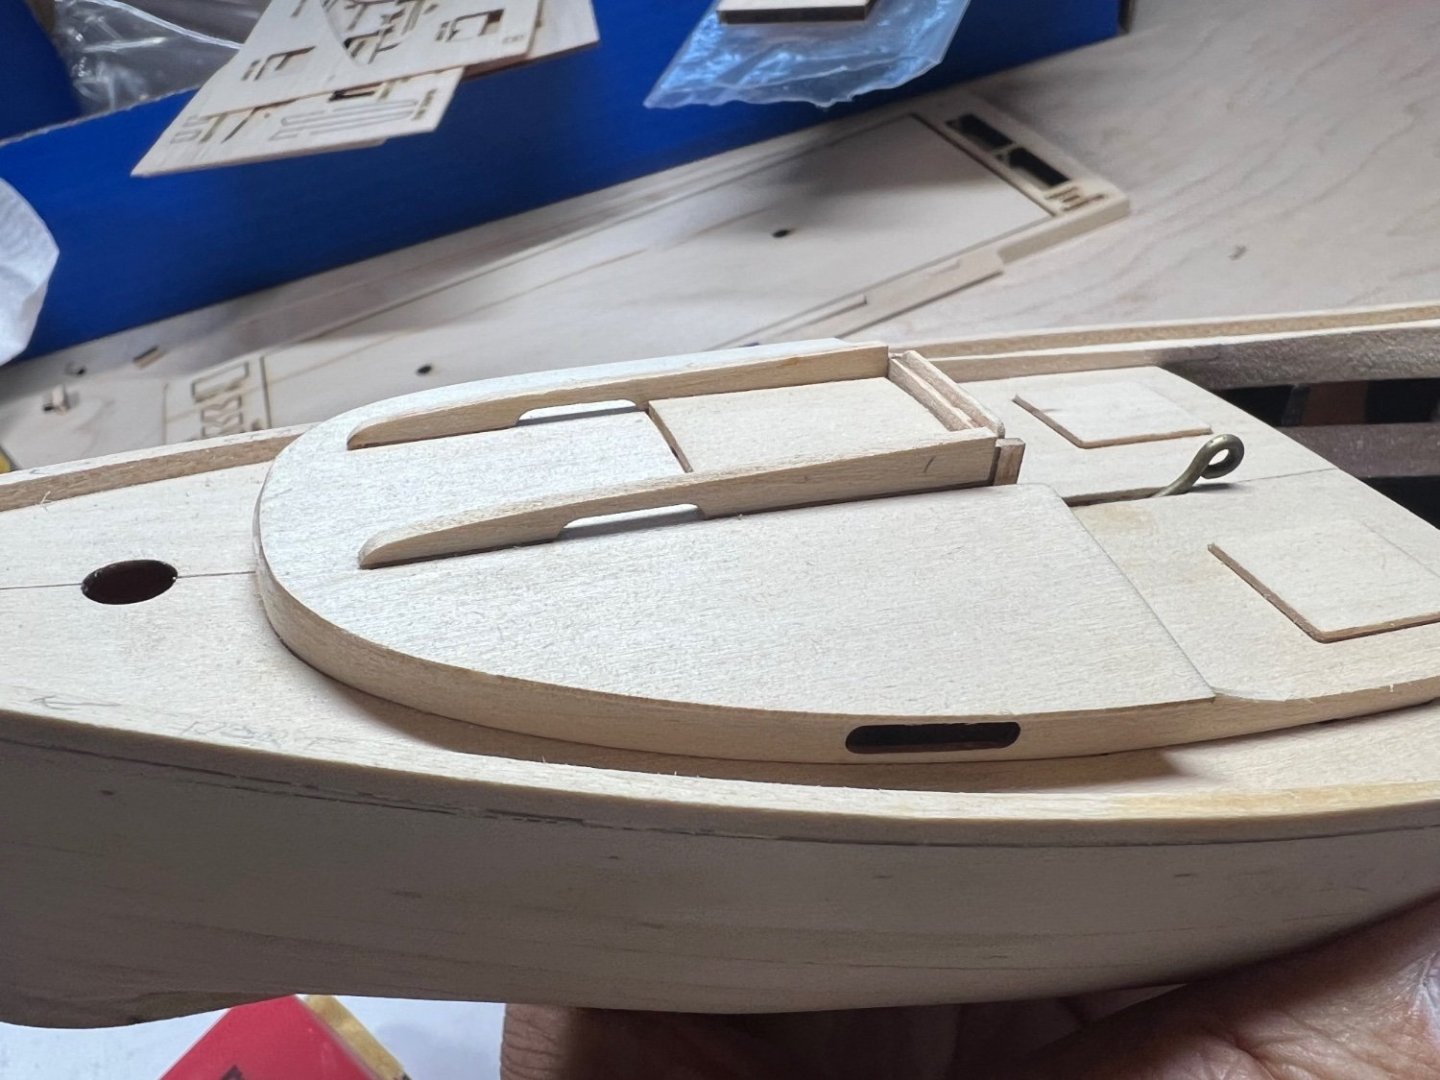
Completed thru Step 32 Rudder I’ve taken pictures of strategic spots from 19 thur 31. No picture of the rudder was taken with this batch. The oarlock pads from the punch out didn’t seem right. The instructions show oarlock pads like made with the Dory. They should be 1/8 in tall, mine are to short, I’ll leave them like I have them, I want to finish, not achieve perfection. I’m sure I’ll regret not painting something at this time, but I’ll deal with that later. I had to add material to the beakhead, not sure why it was angled down and was not tall enough. Working on 3 kits at the same time I’ve got all kinds of scrap around me now haha.


- 40 replies
-
- 5
-
-
- Model Shipways
- Muscongus Bay Lobster Smack
- (and 1 more)
-
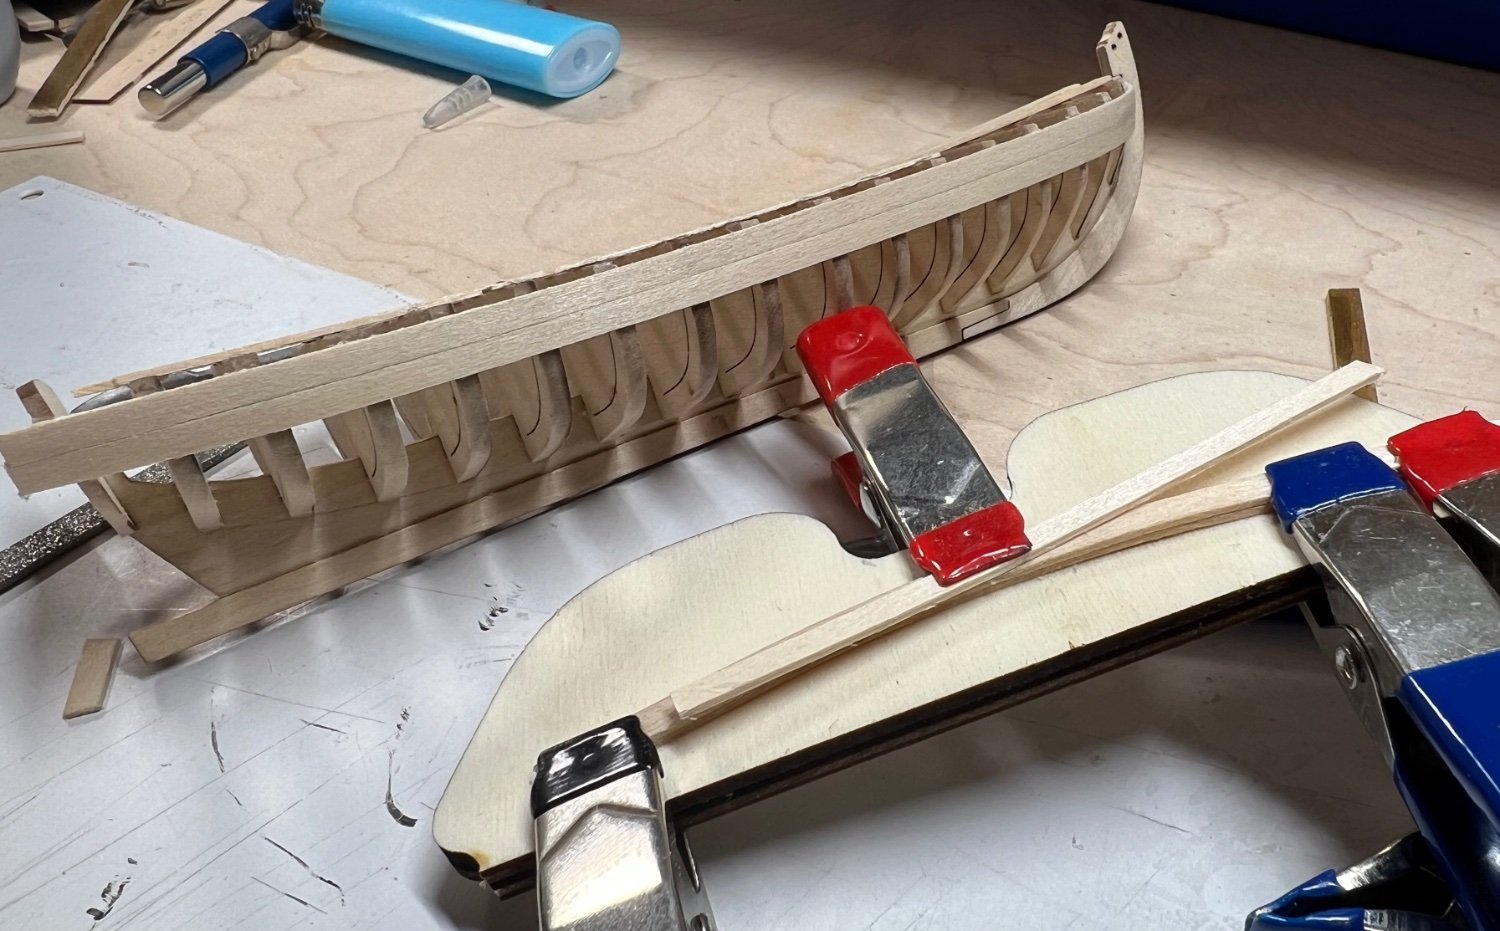
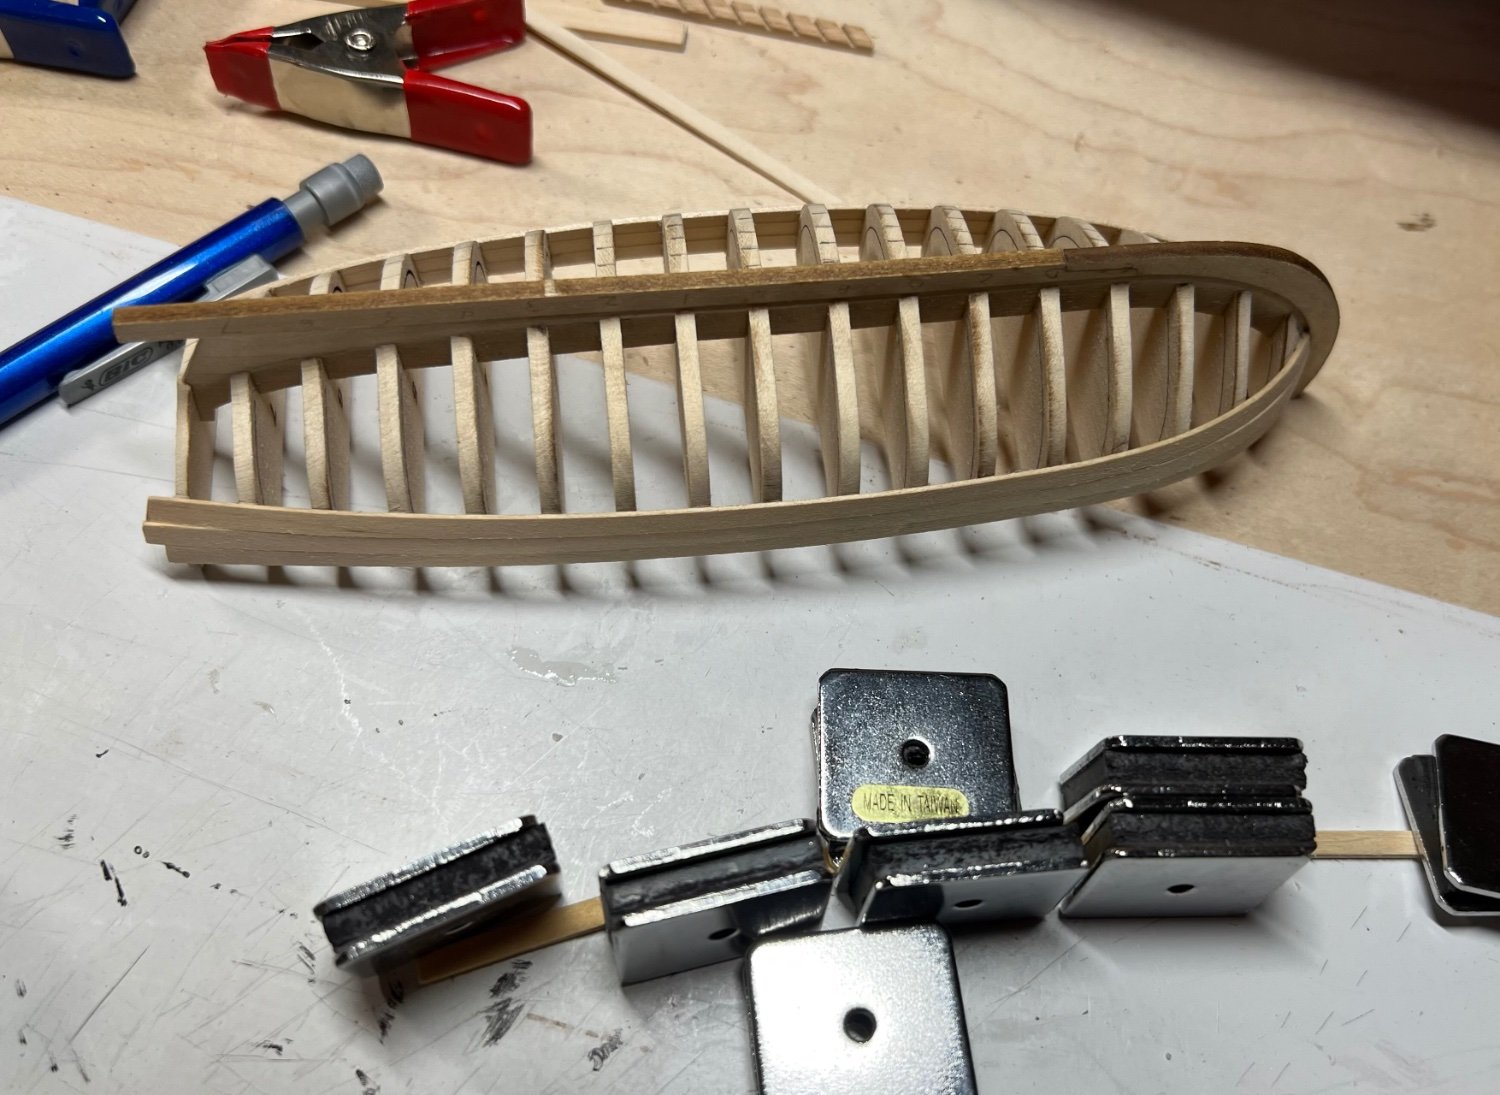
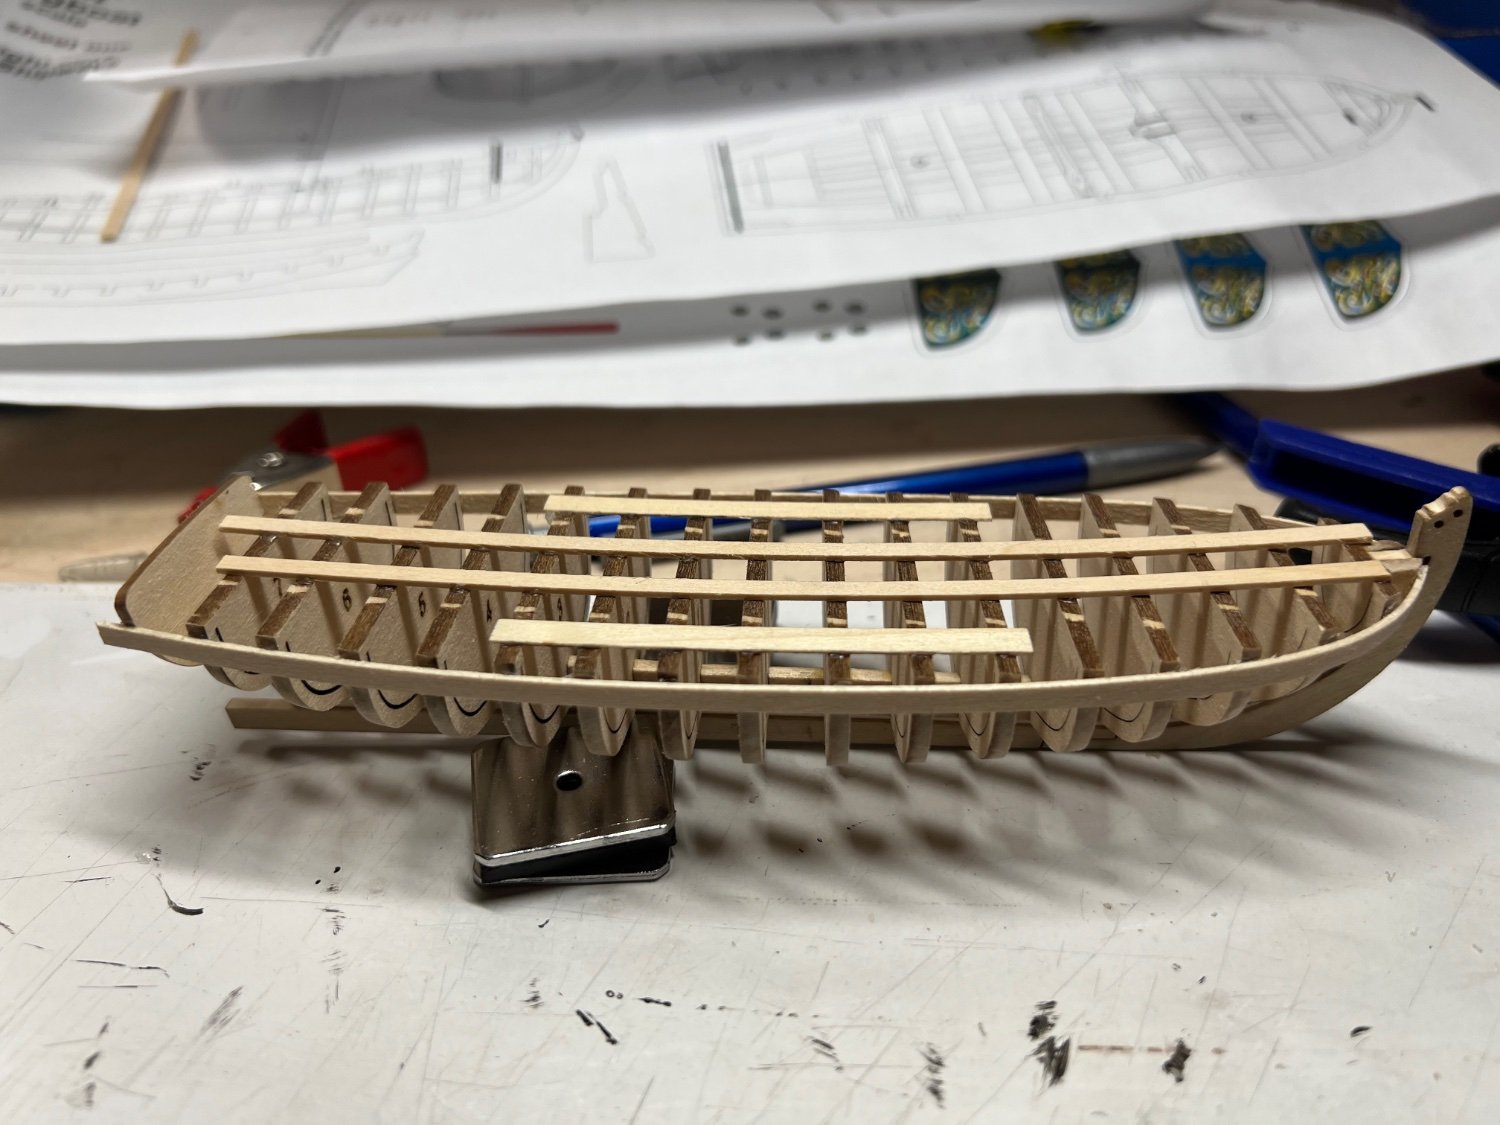
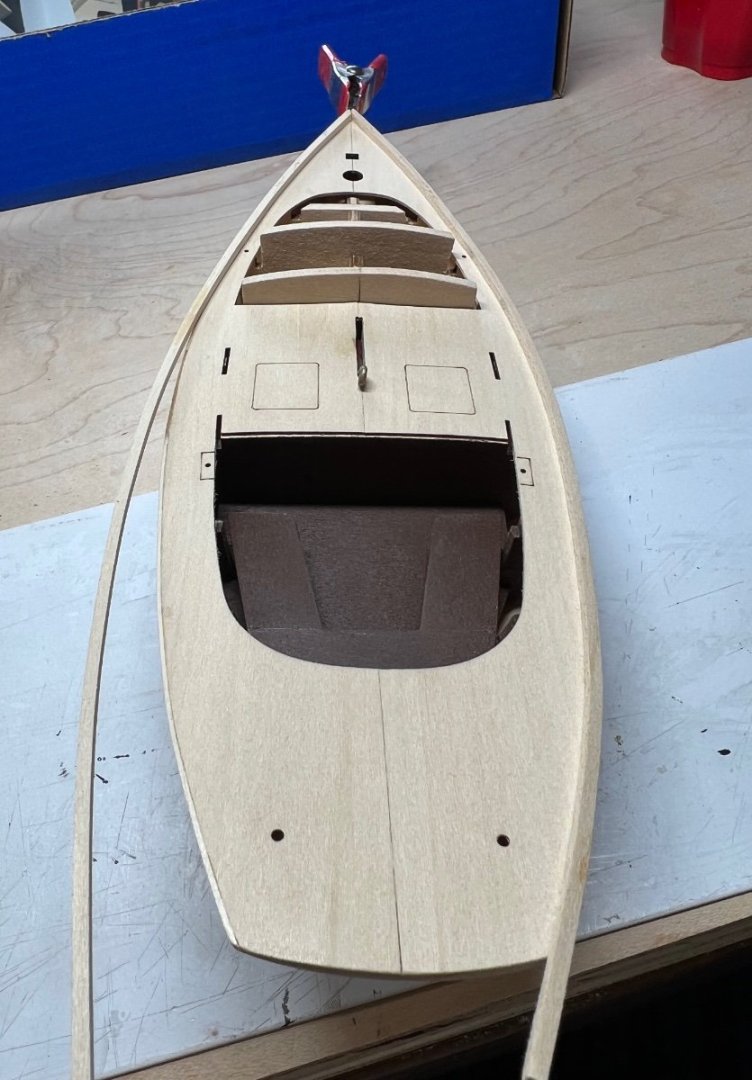
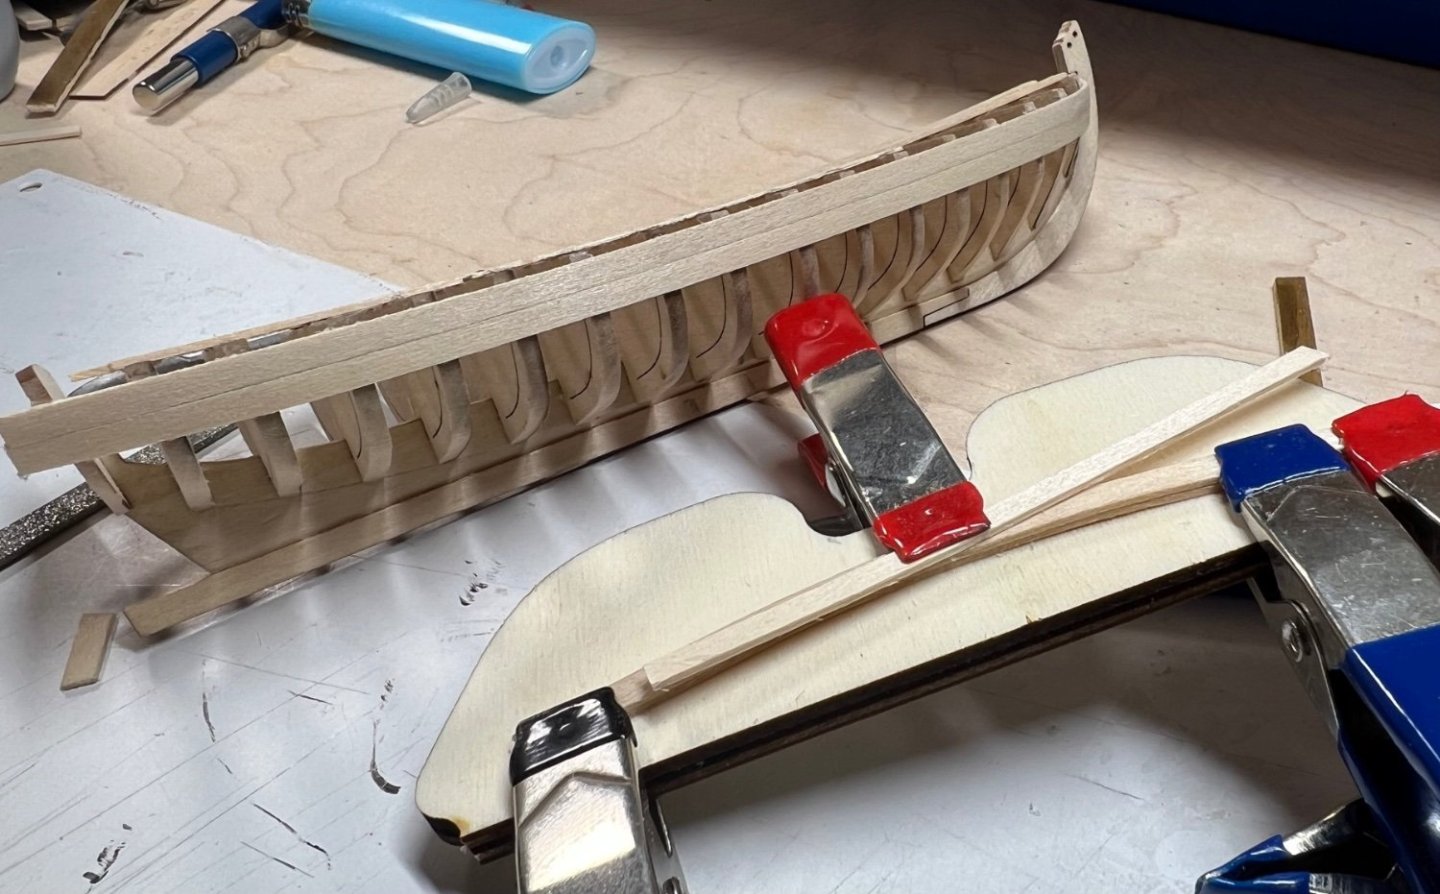
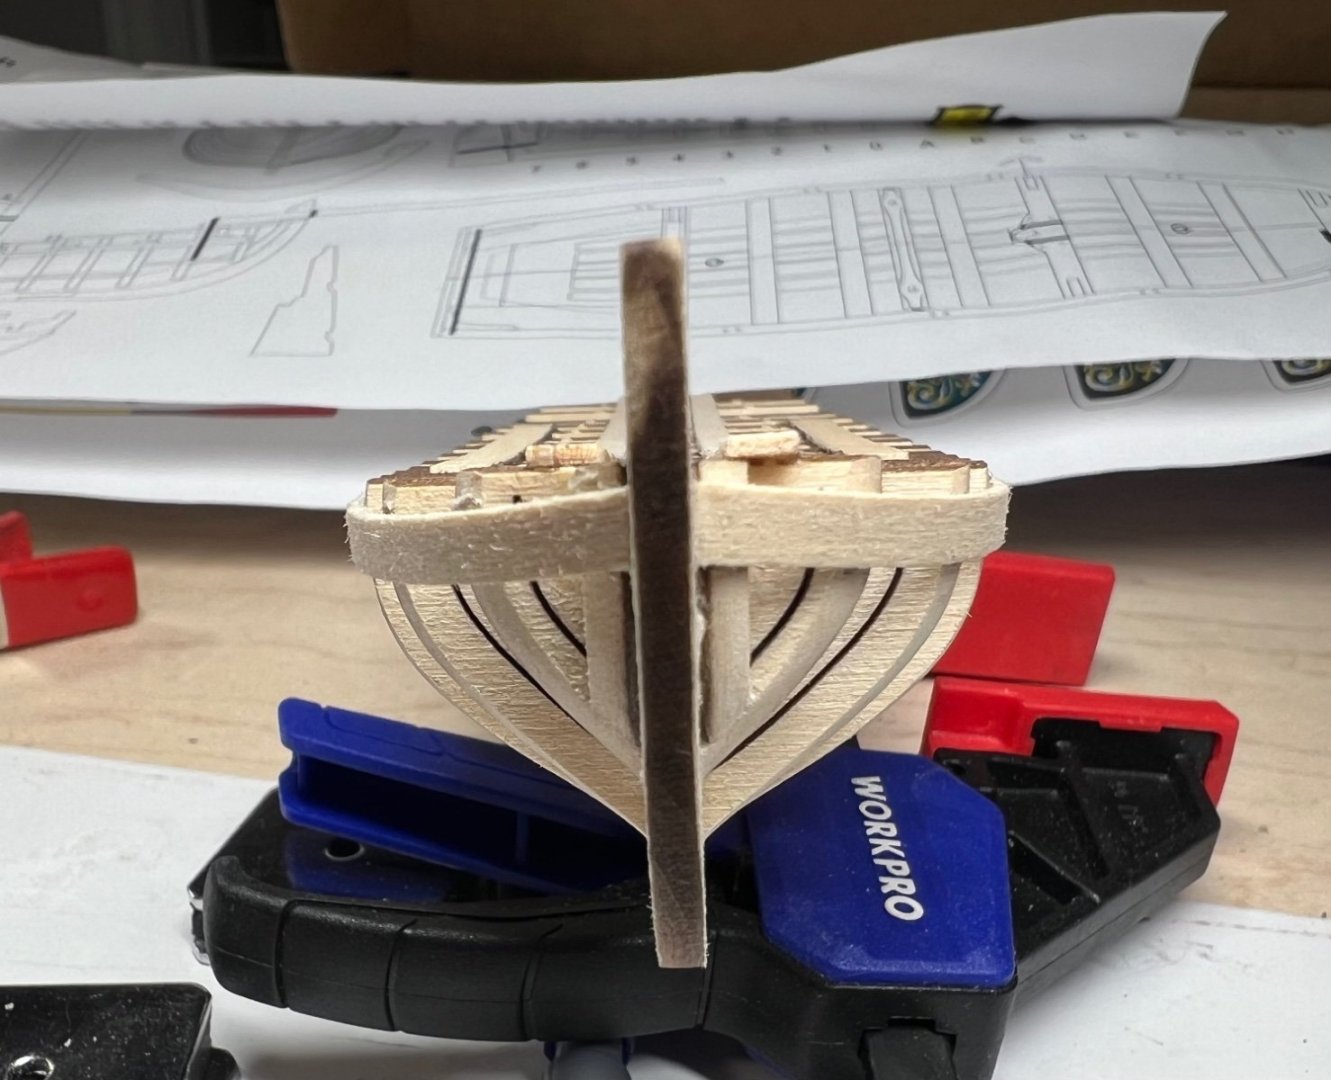
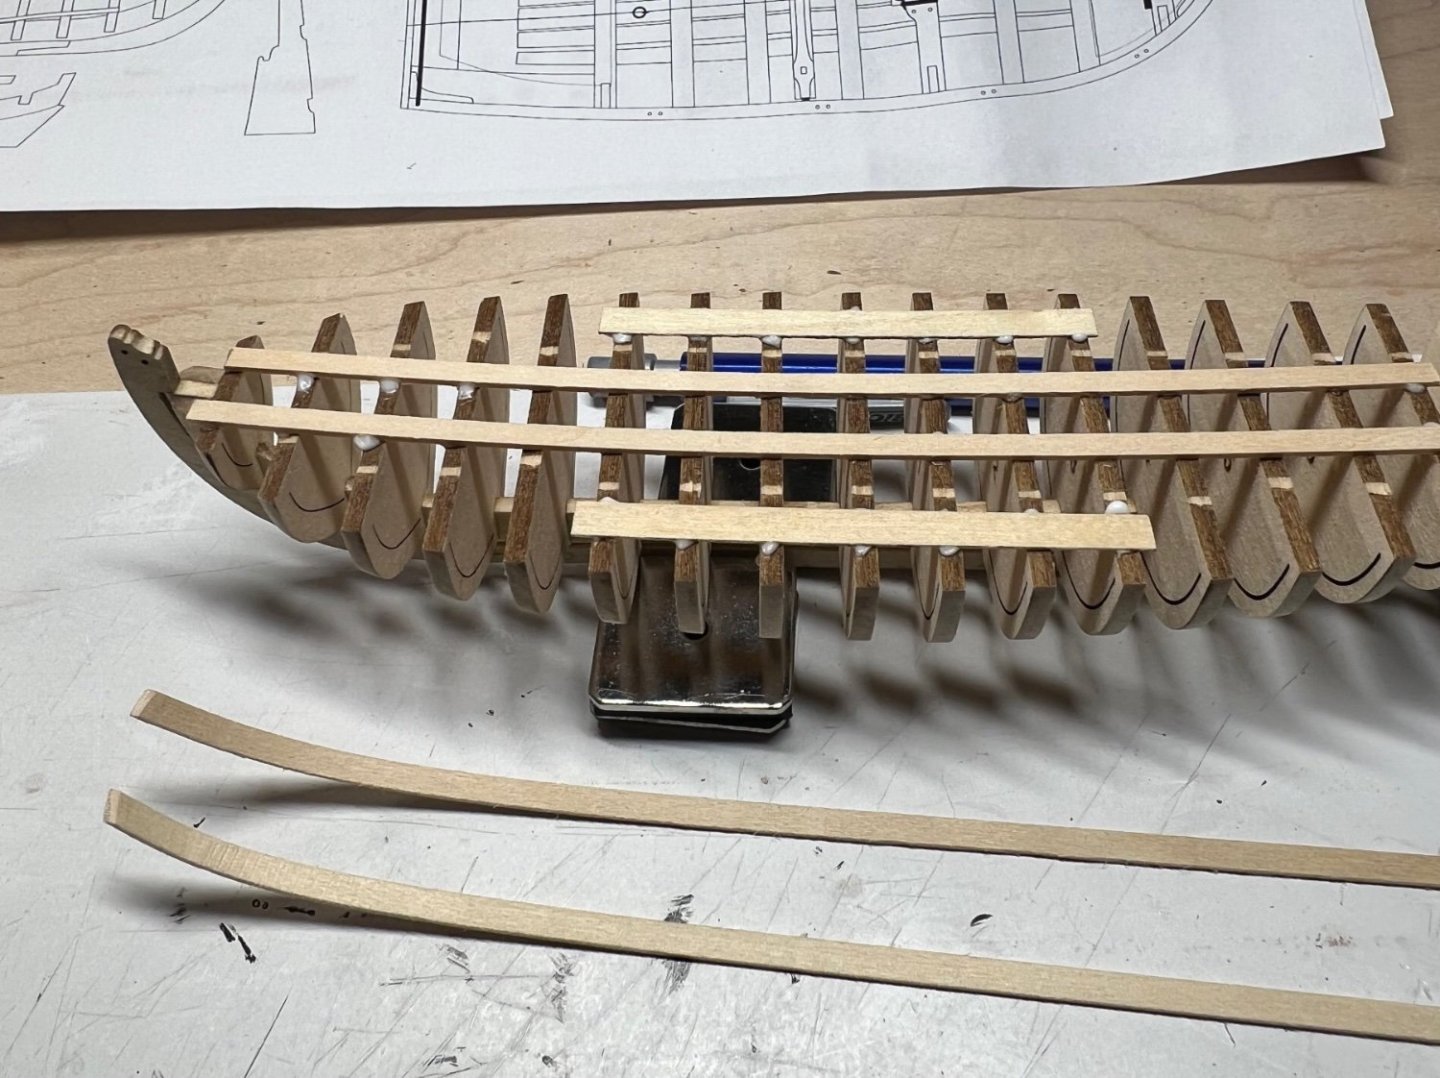
Planking one slowly at a time. Bending edgewise is a cool trick. I learn something new with each step. I'm envious of those who have great talent doing these crafts.

-
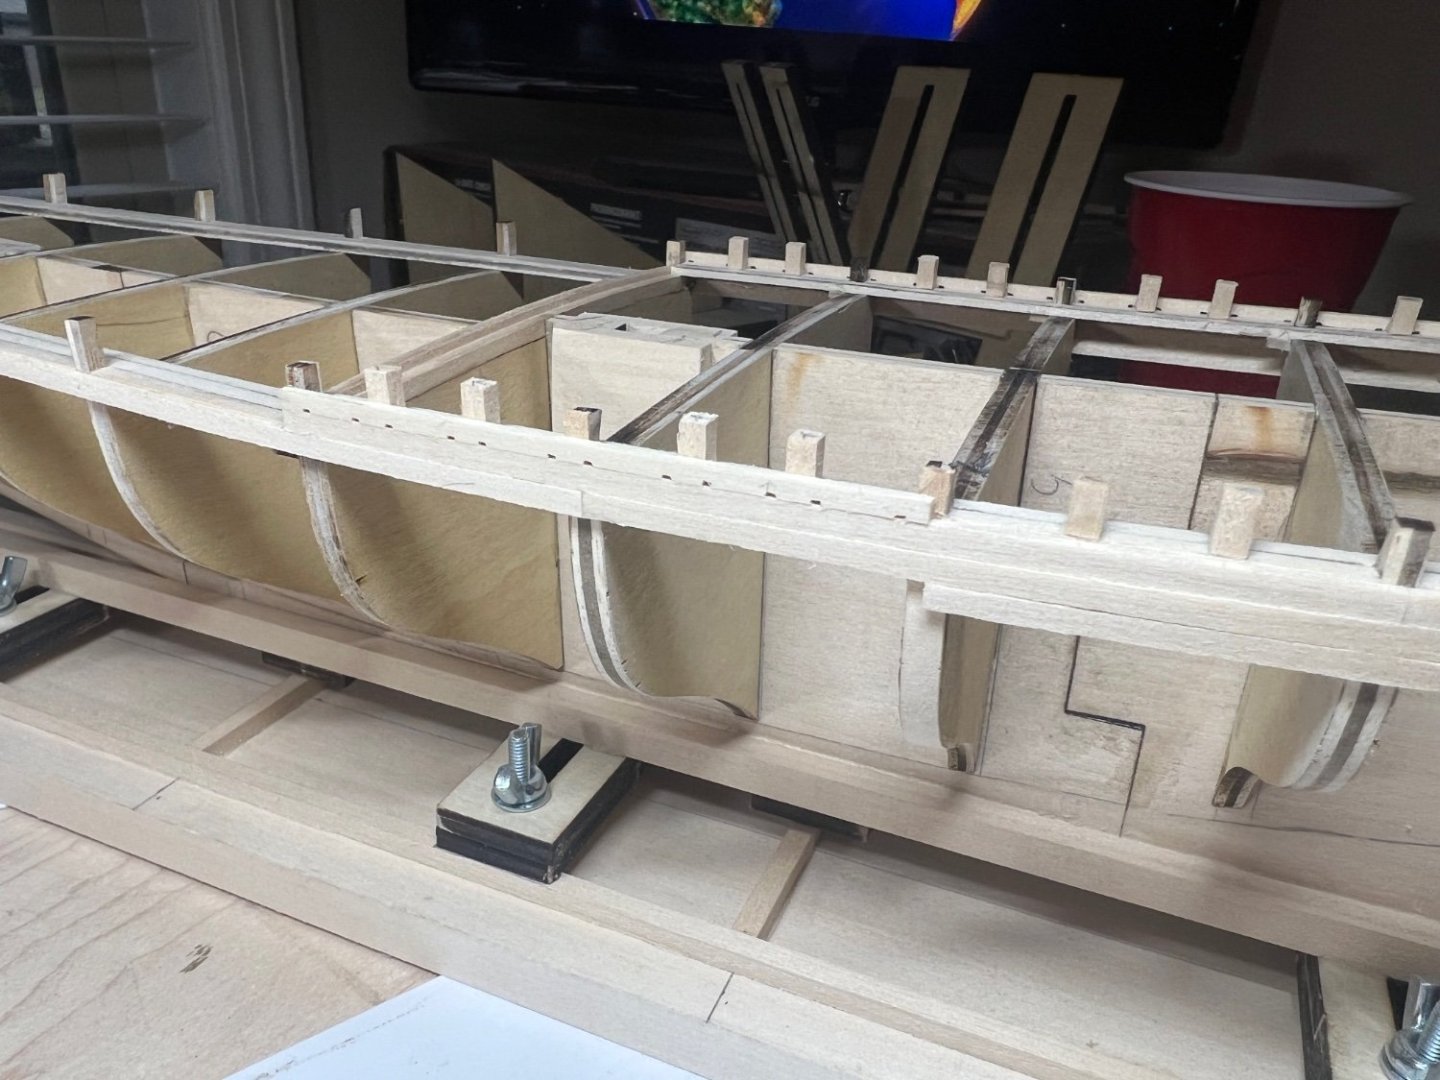
I looked at this project a few times over the last few weeks. I could not figure out how to stabilize the hull so I could plank it. I found another build log to see what others have done. Someone mentioned straps across the top. It worked great. Bending the planks around a cap worked great too. Top planks in place. It’s so small, it’s easier and harder to work with being so small.

-
This could take a while to get it all black, lots of surface area. I found out I'm short a few more parts. Intermission while I wait for parts to continue.
-
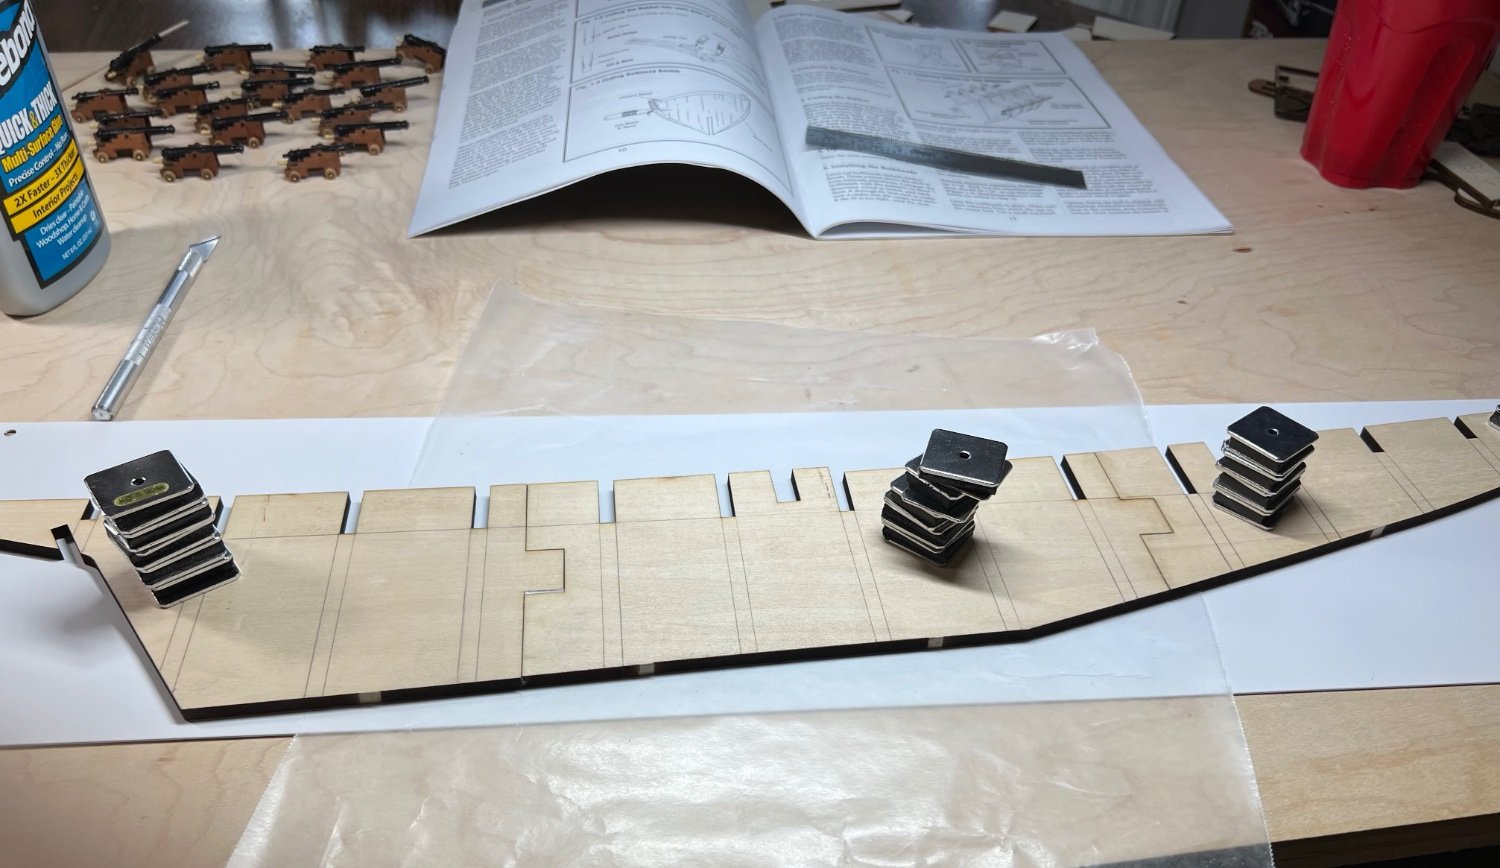
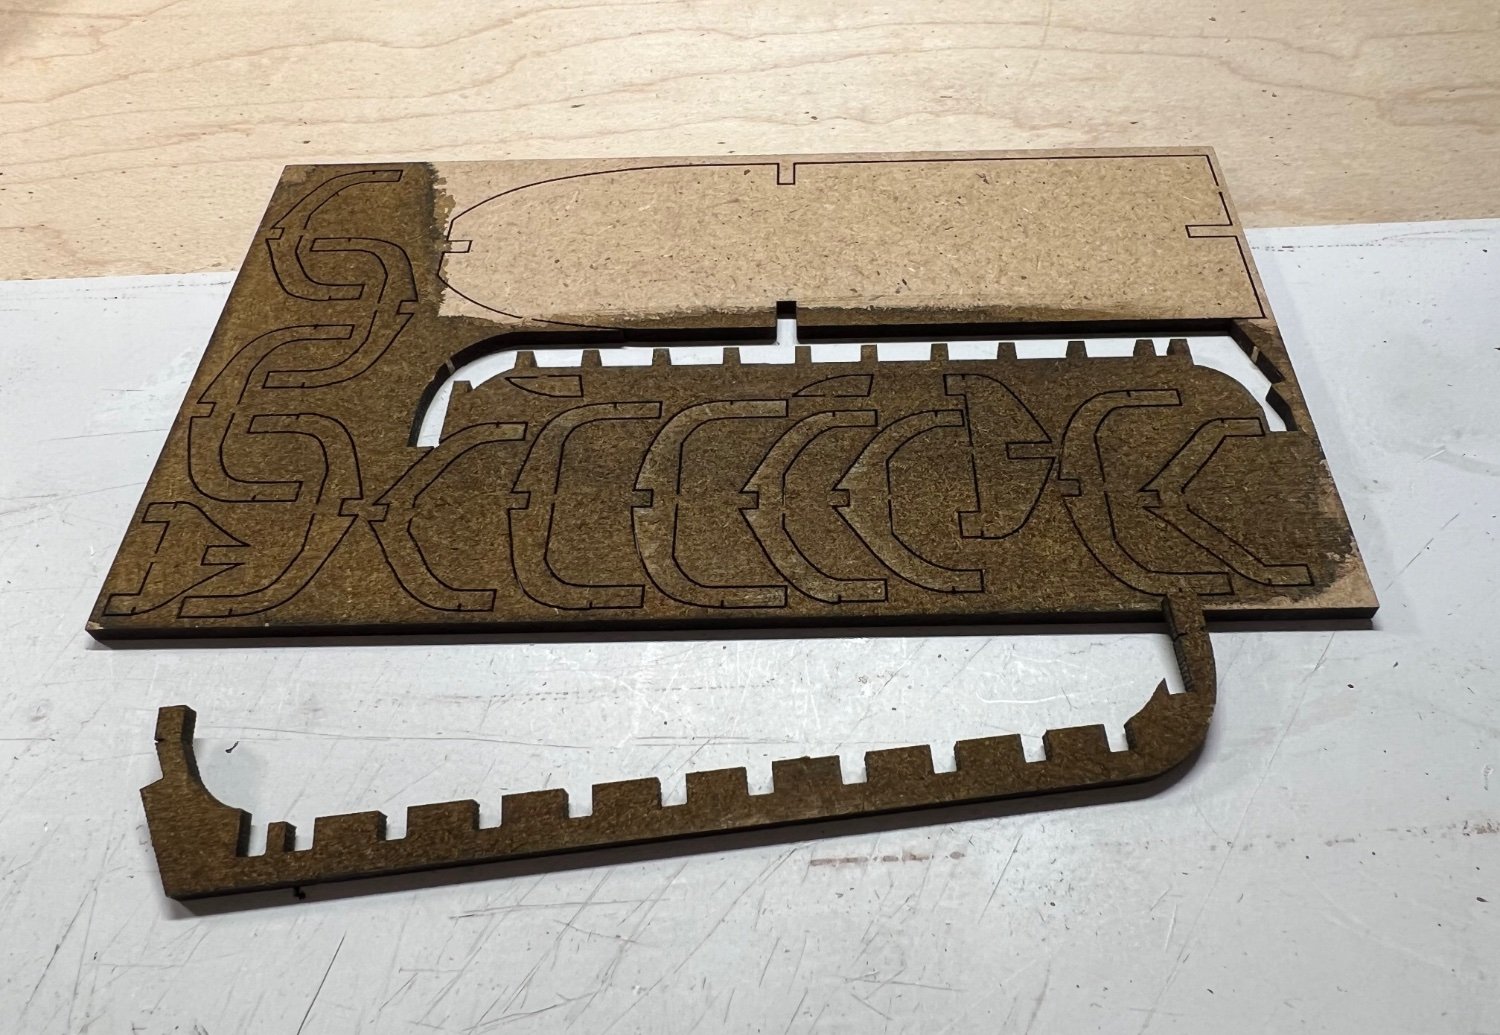
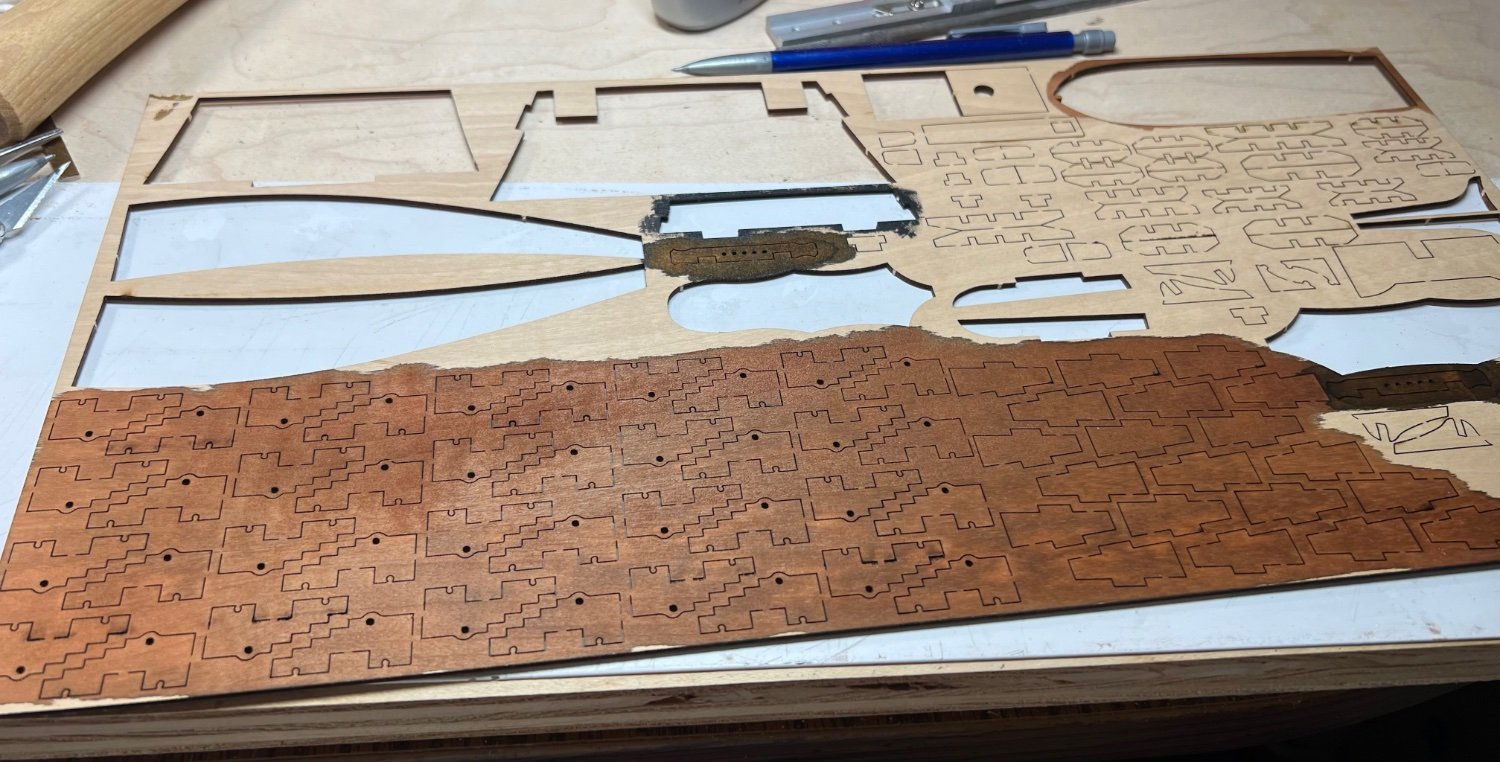
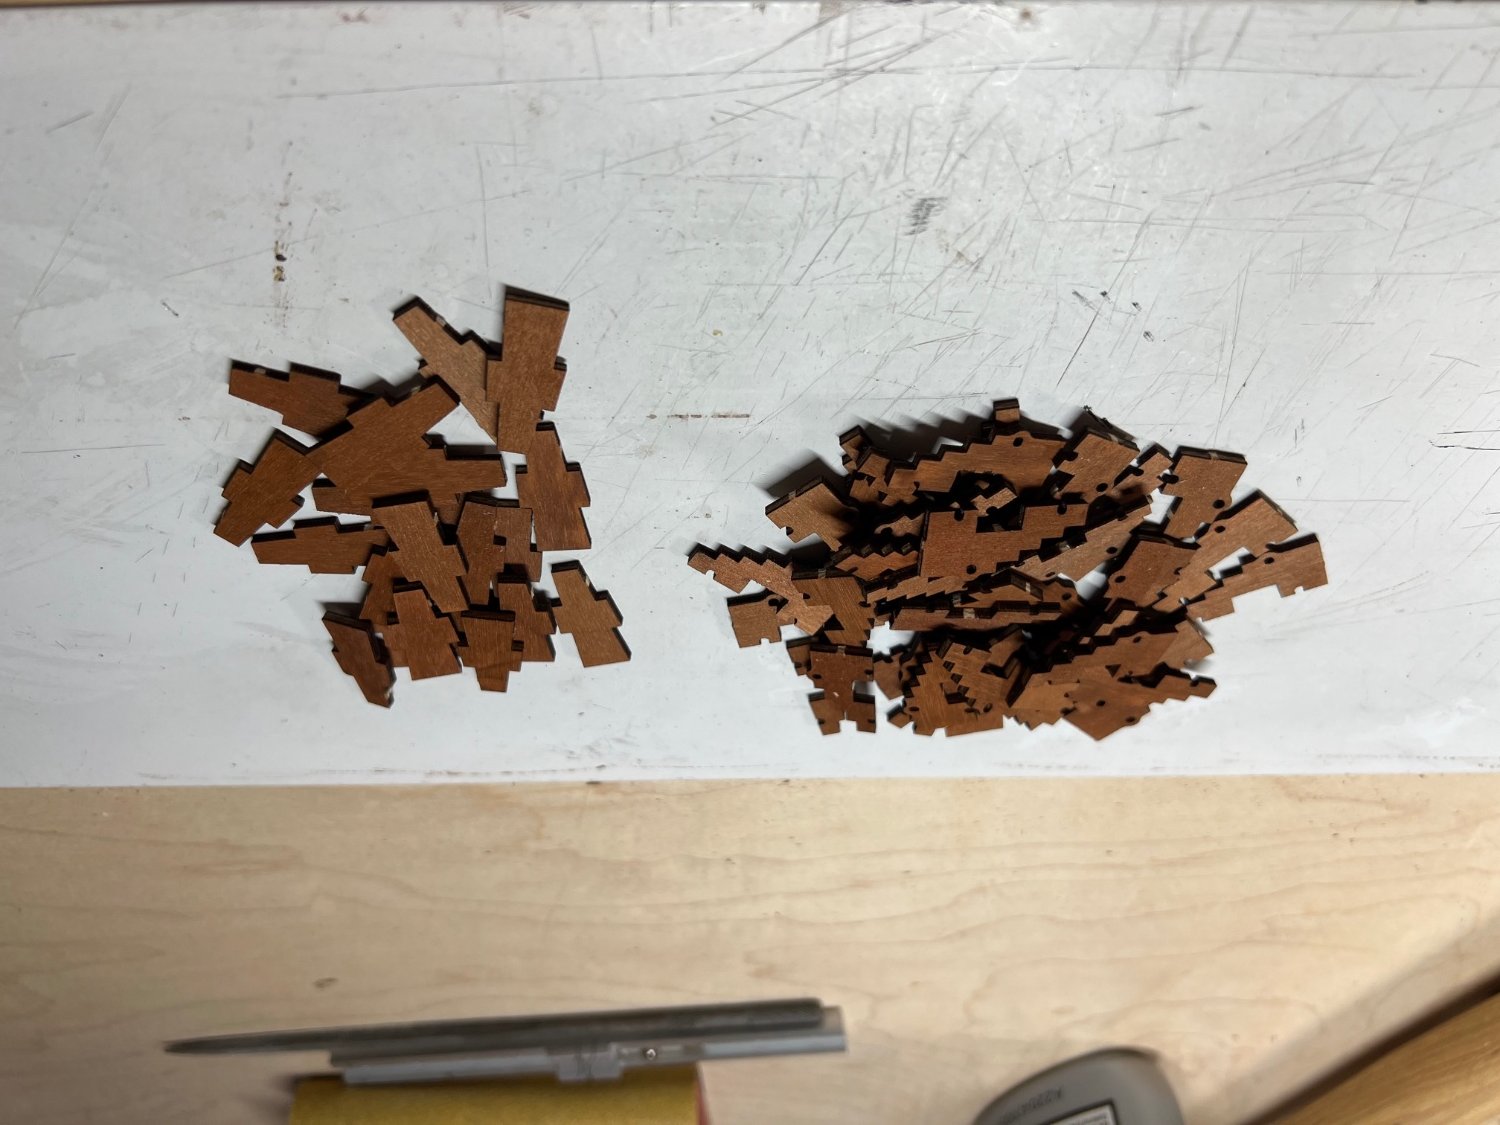
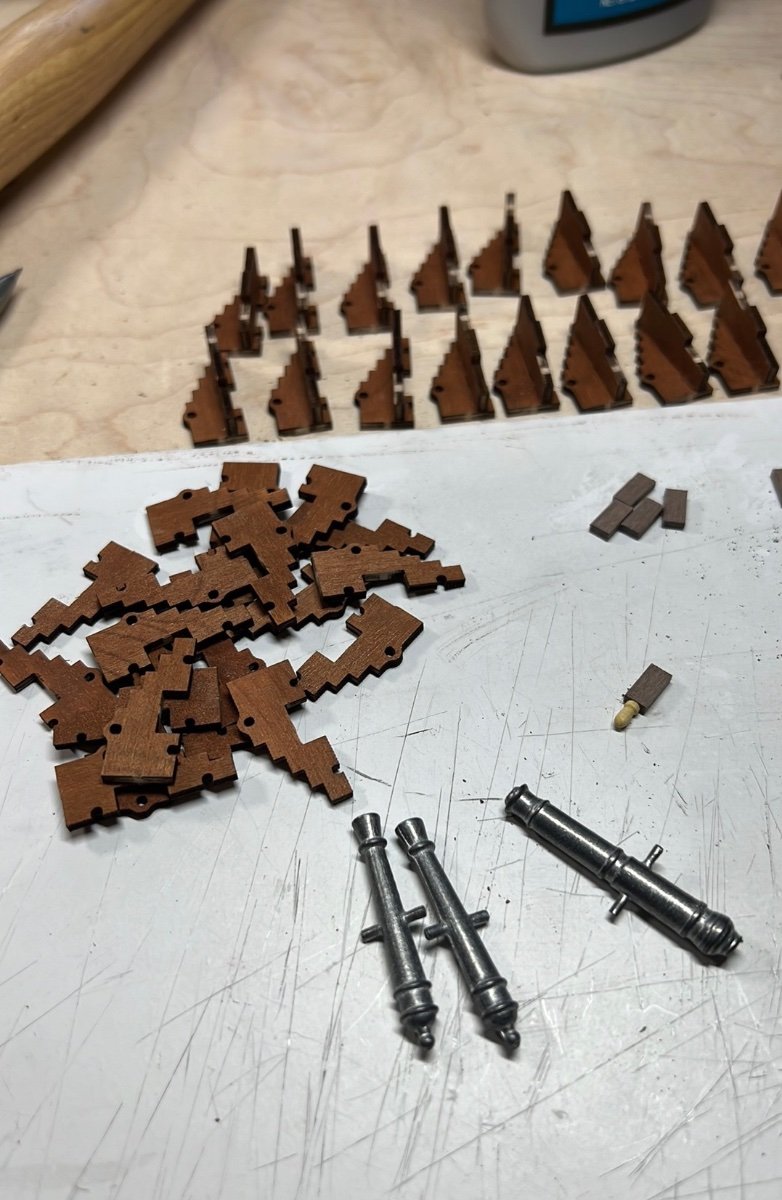
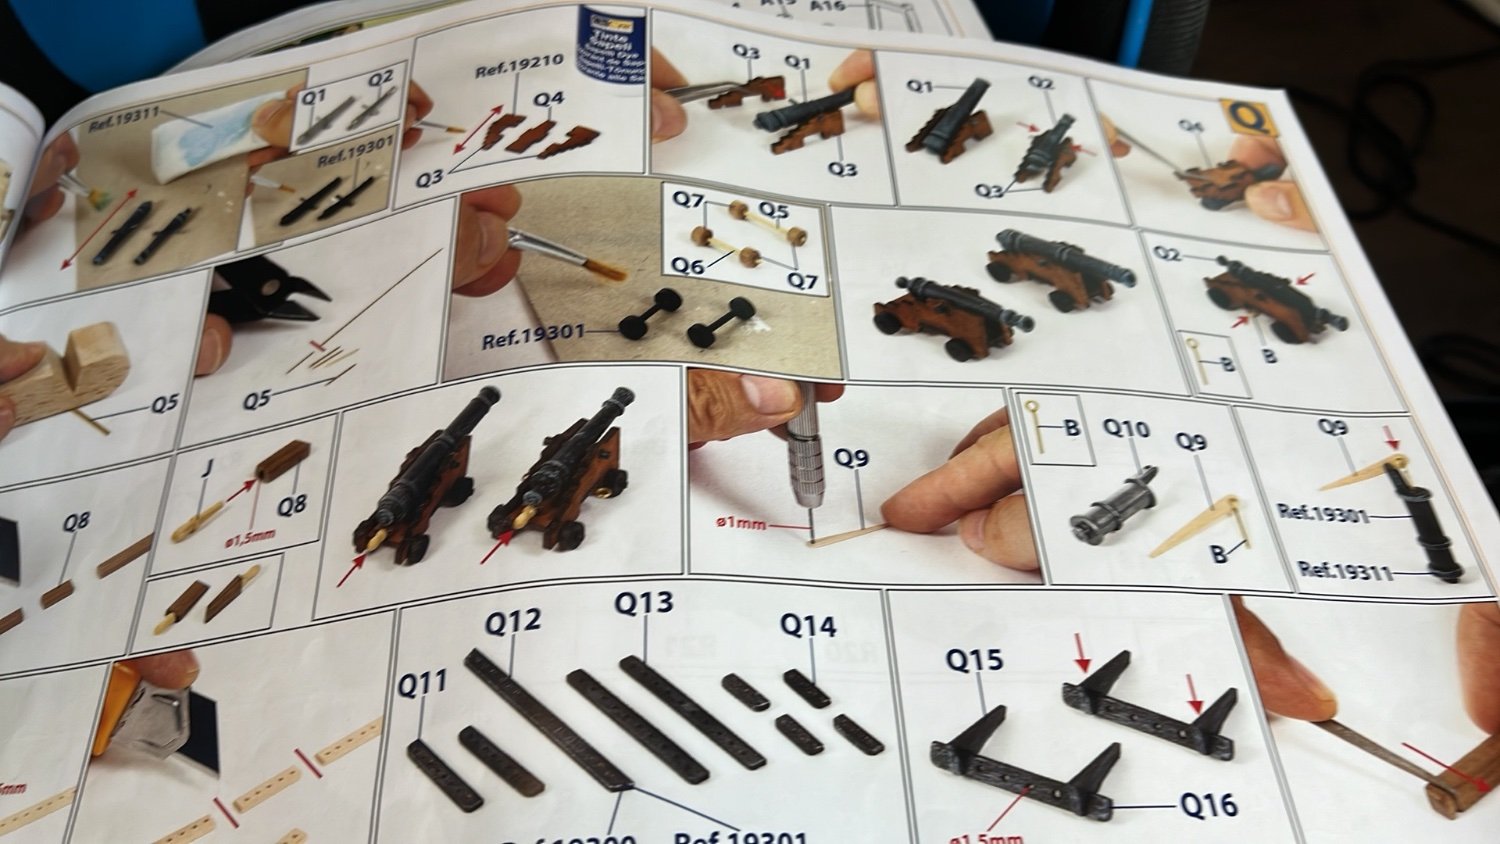
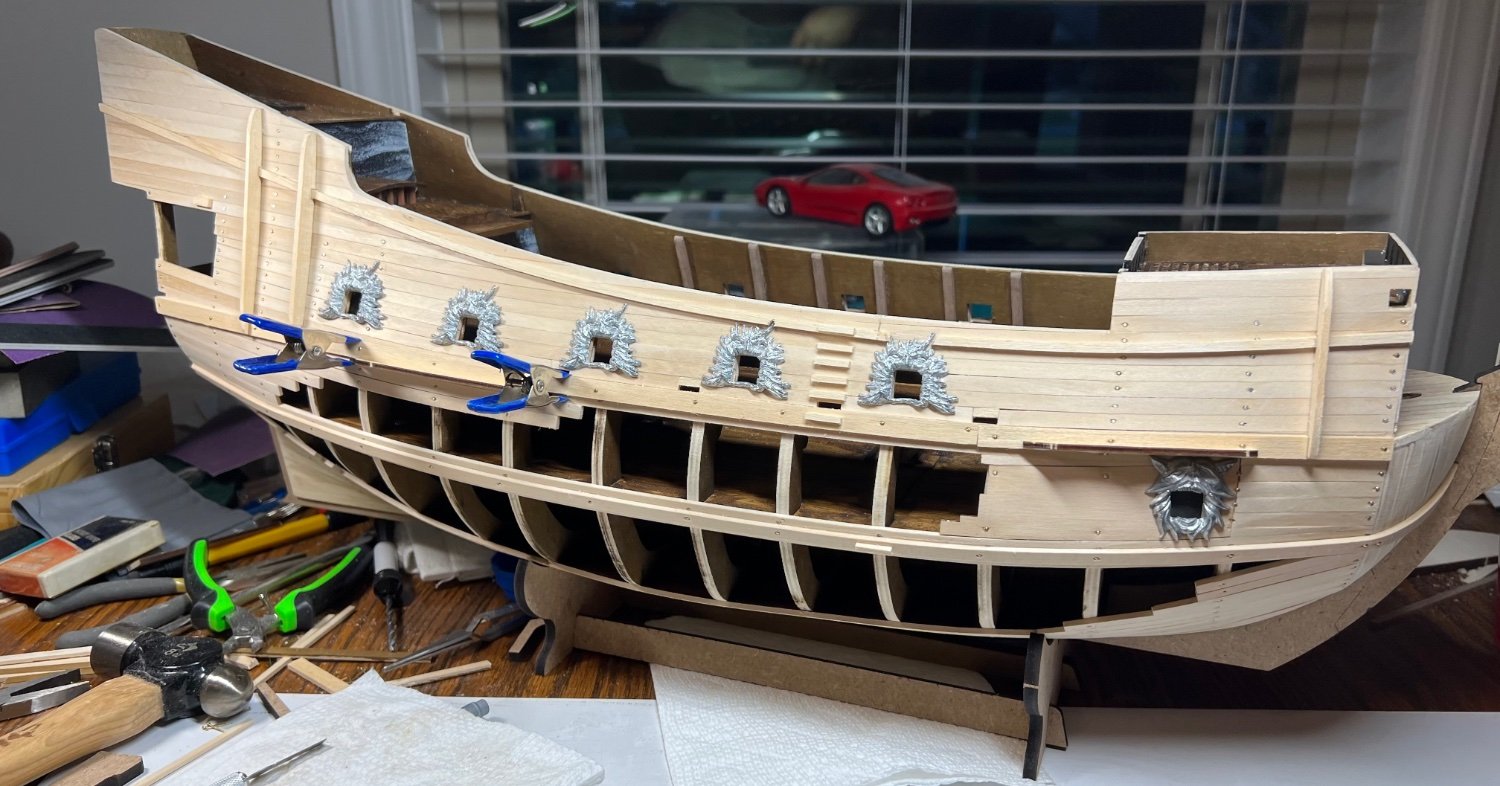
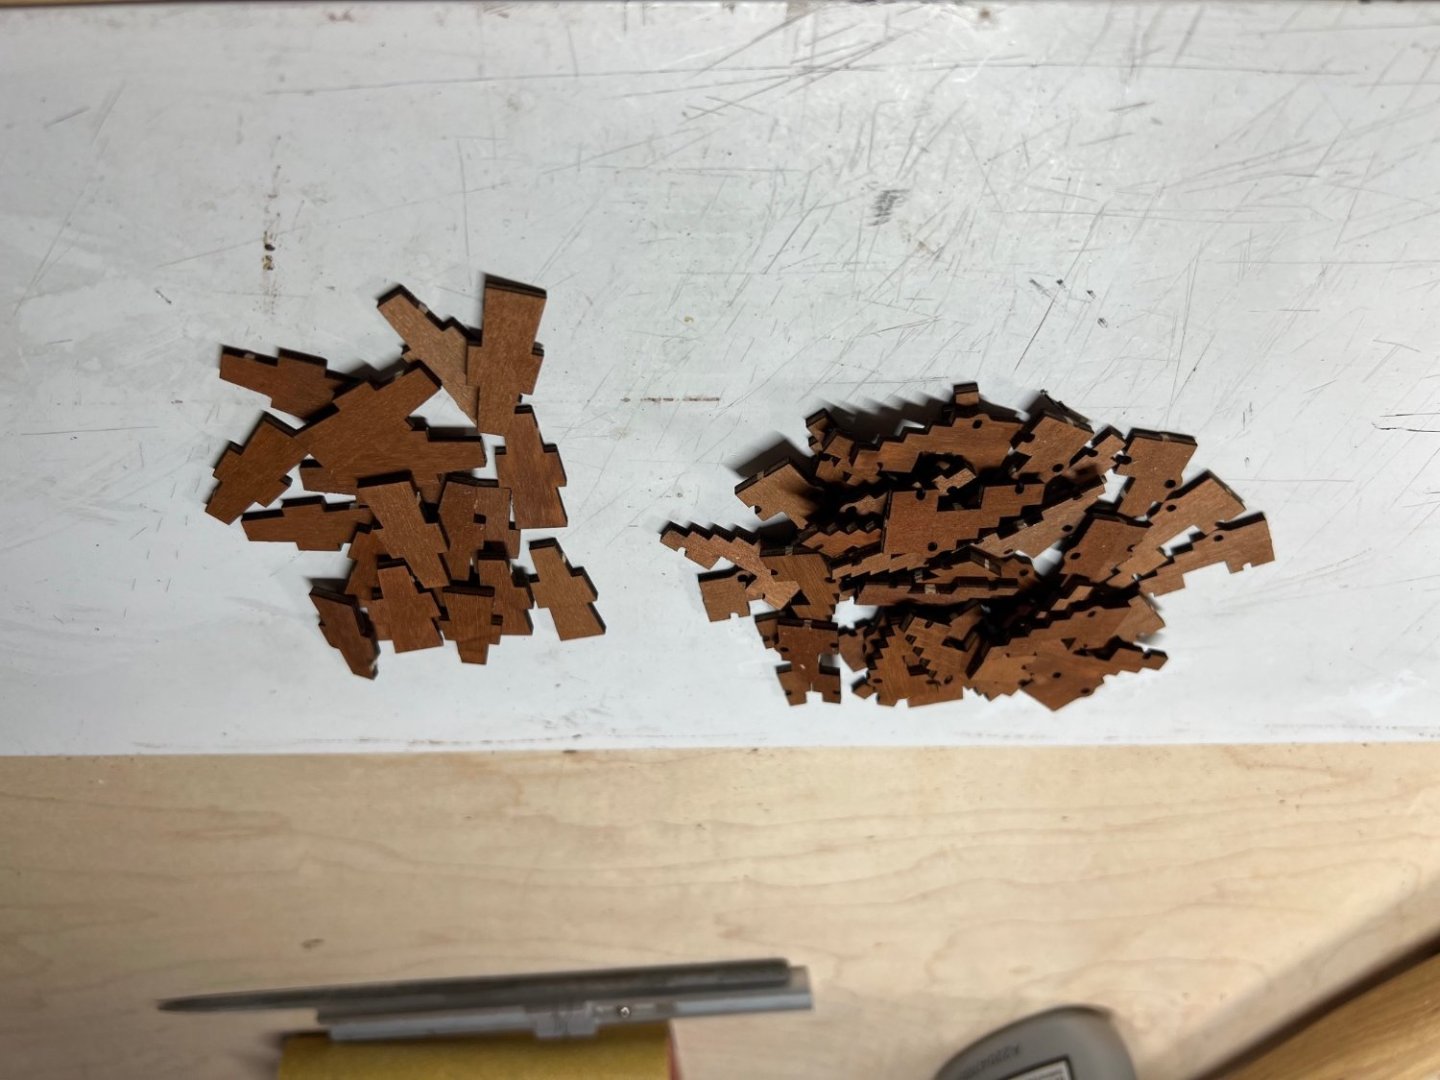
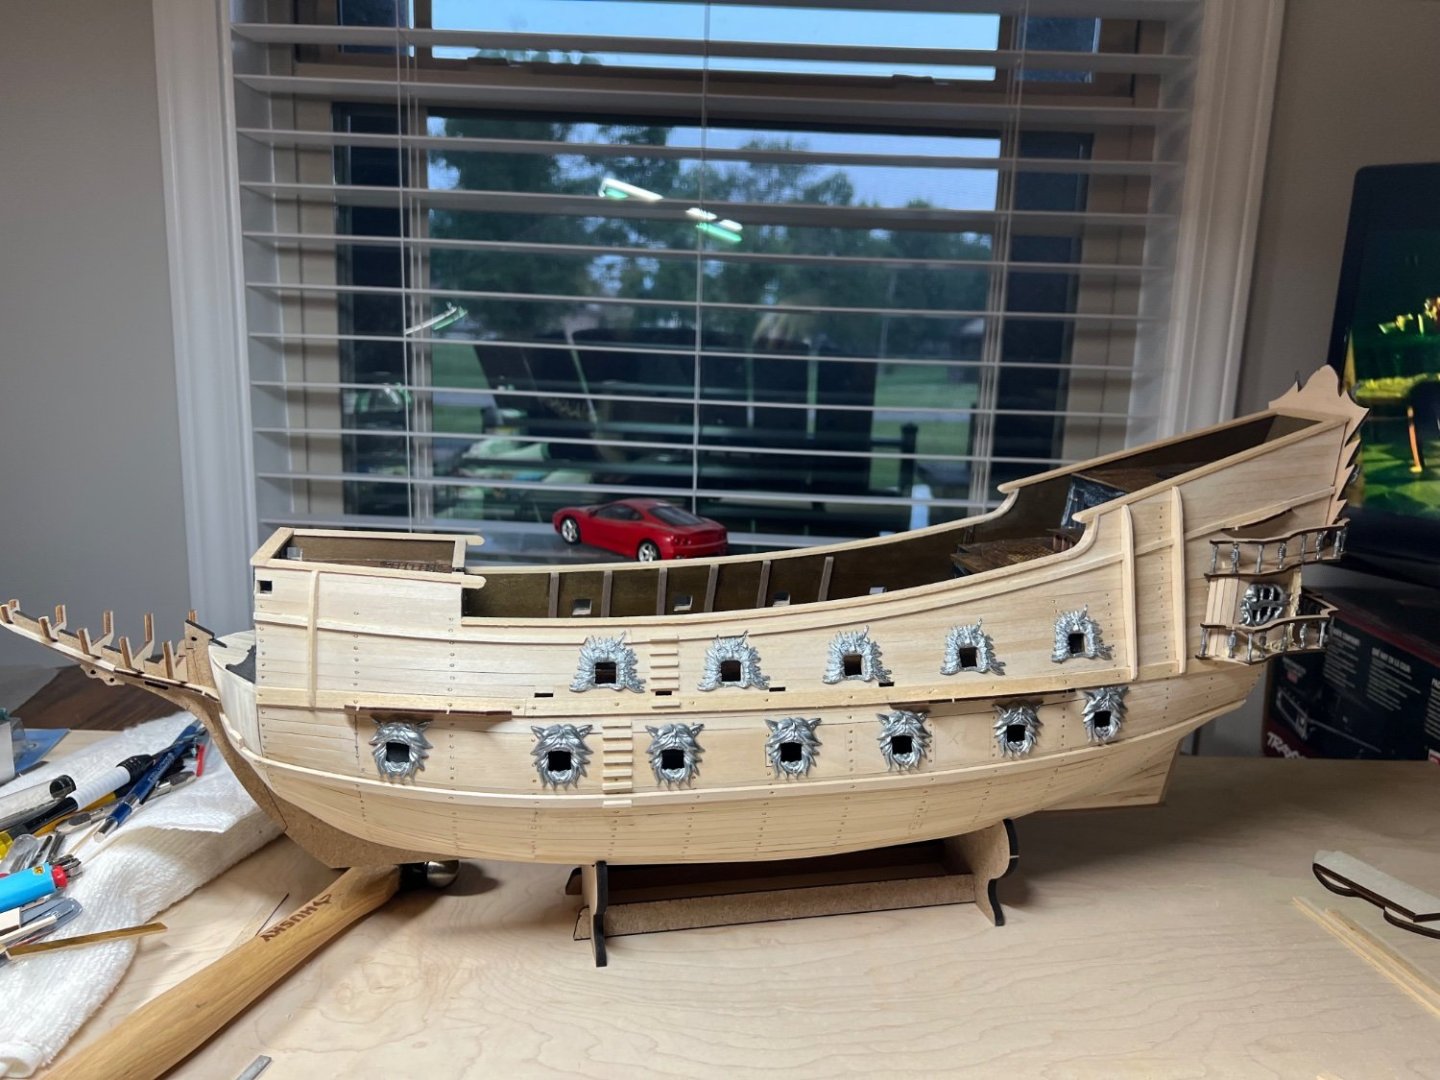
I started this ship because I wanted to build a bigger project. Today I learn big ships can have little boat projects inside them. Ugh. 20 cannons. I’m avoiding hull painting to make cannons, I might go paint lol. This kit has a lot of little parts remaining.


-
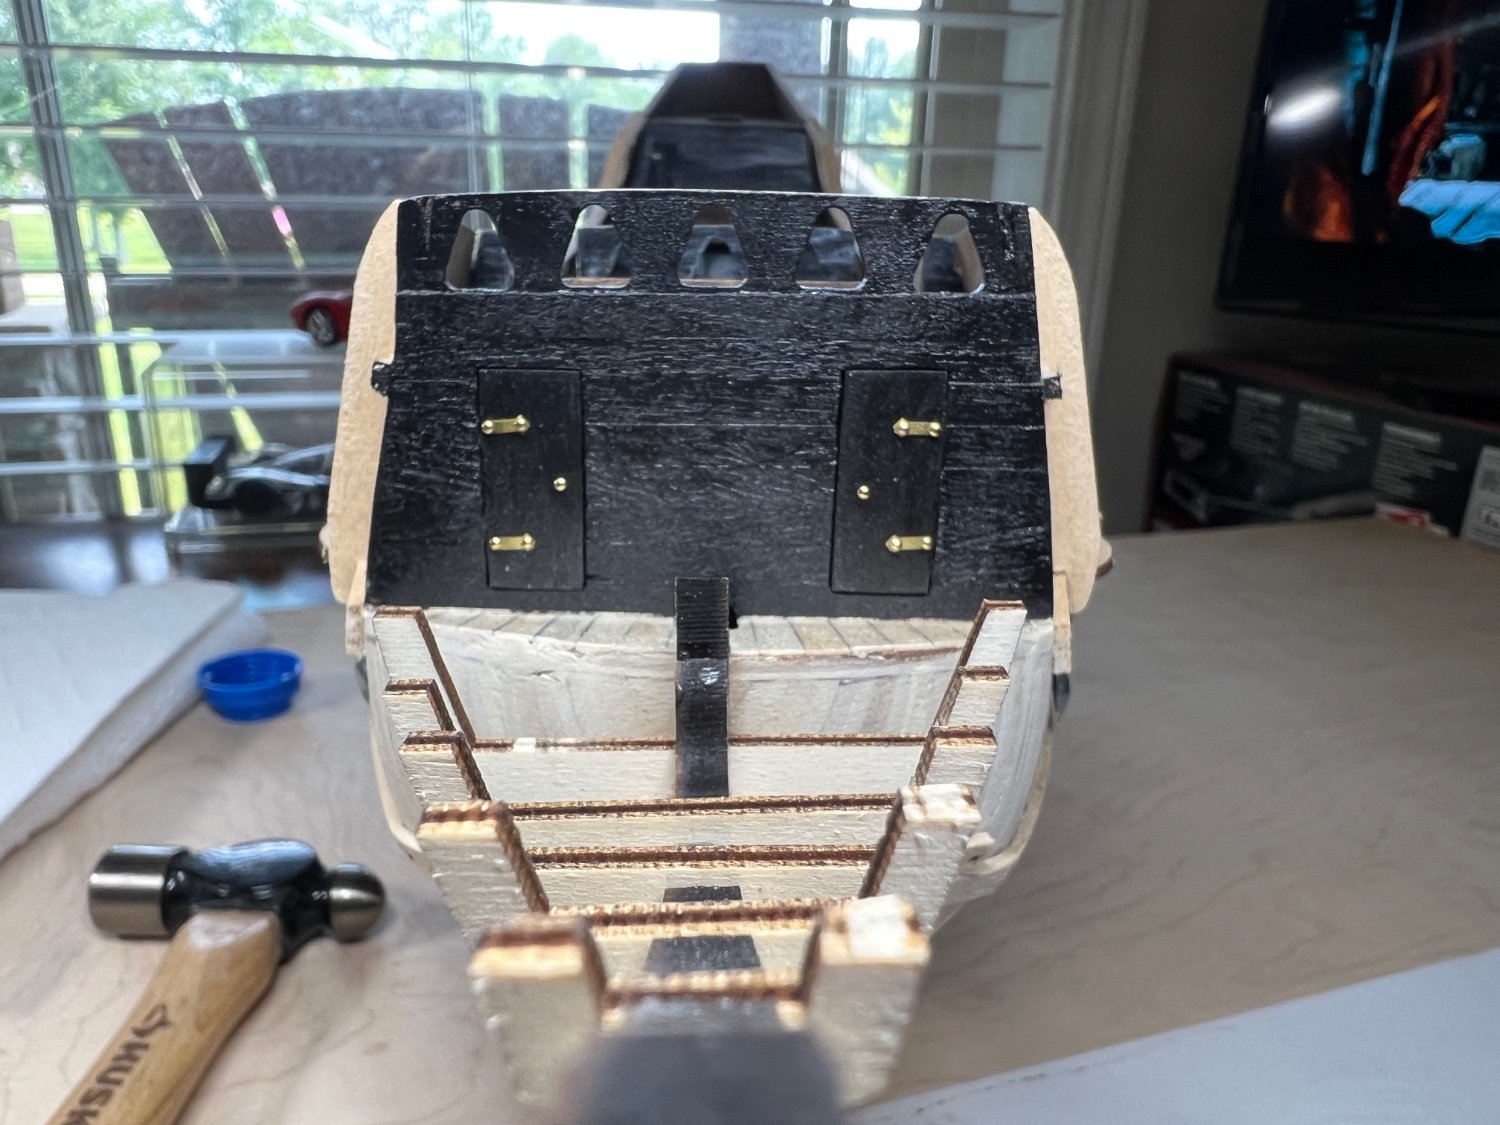
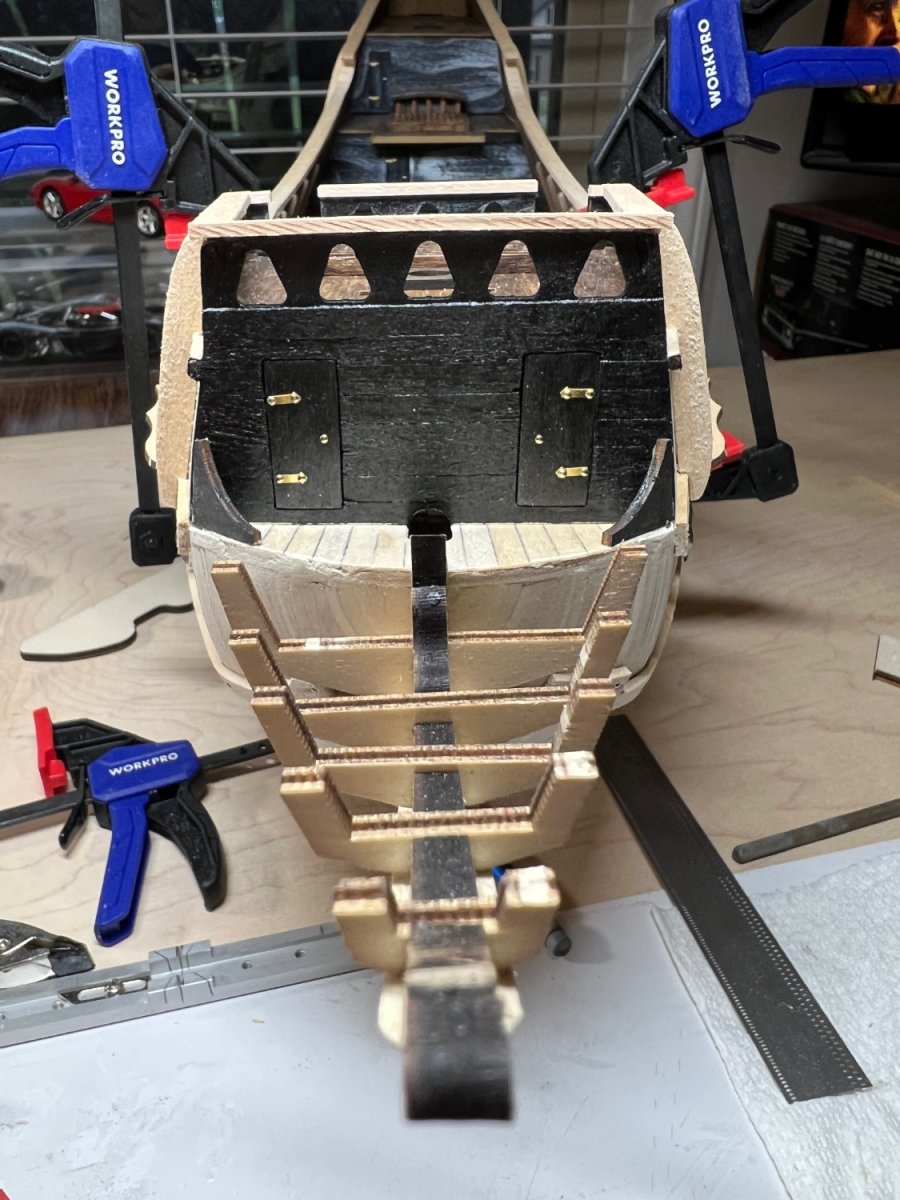
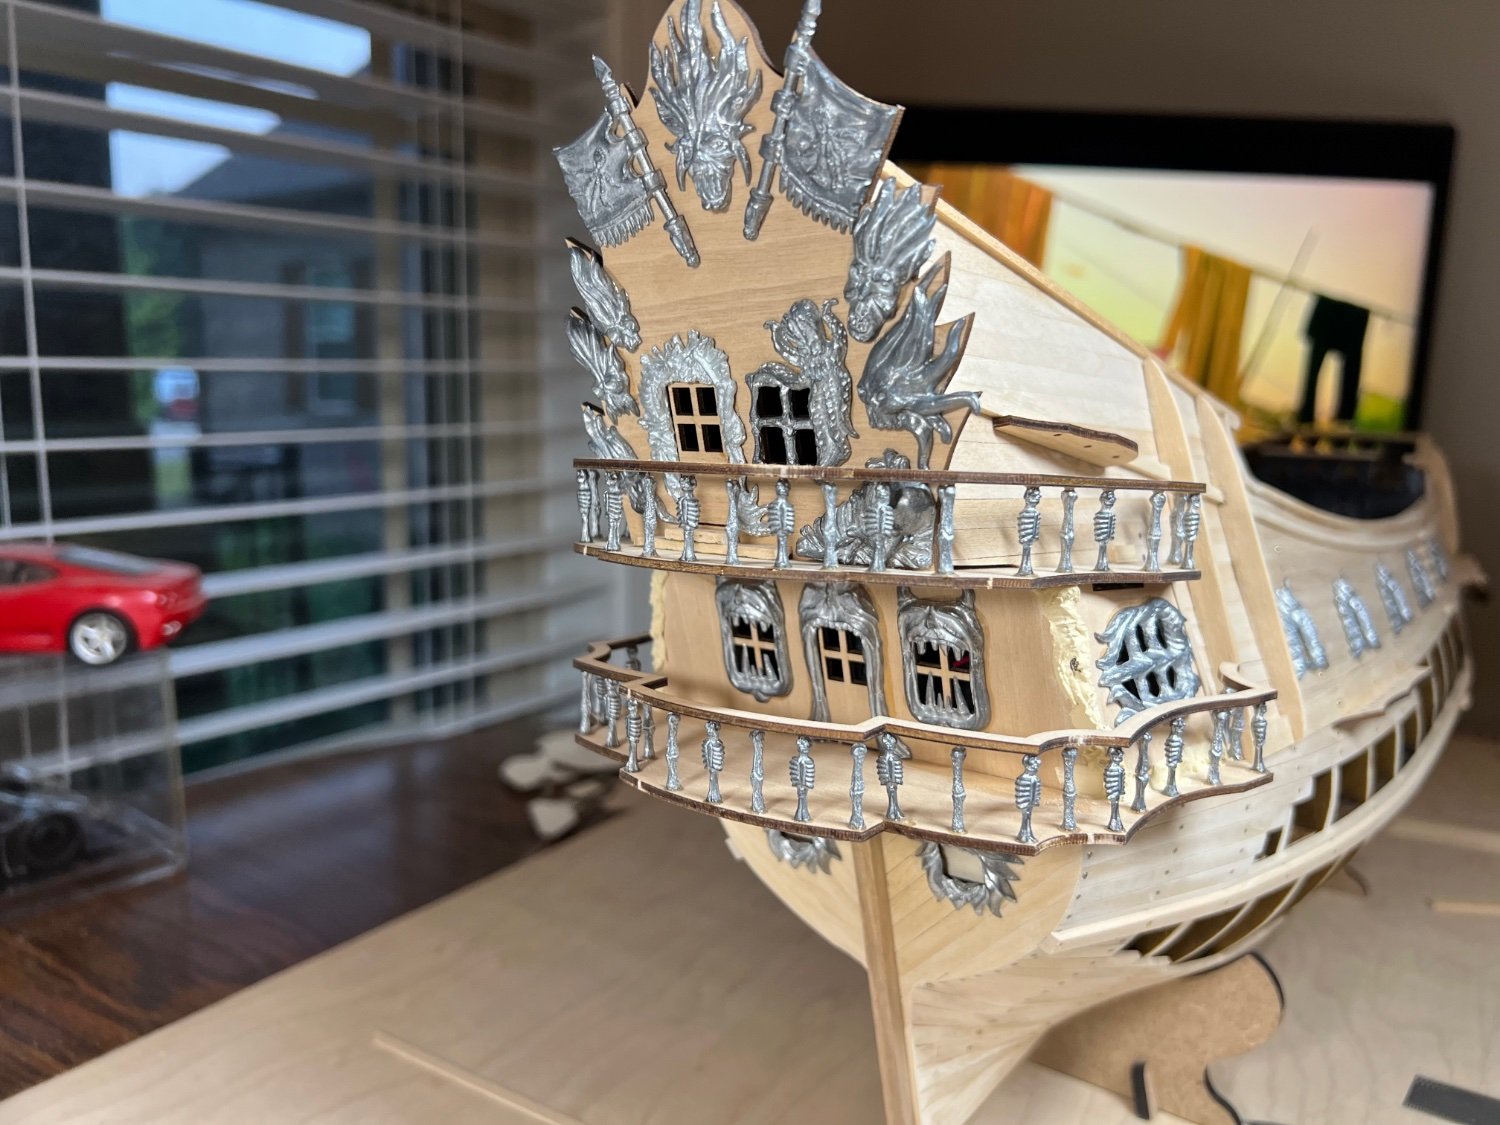
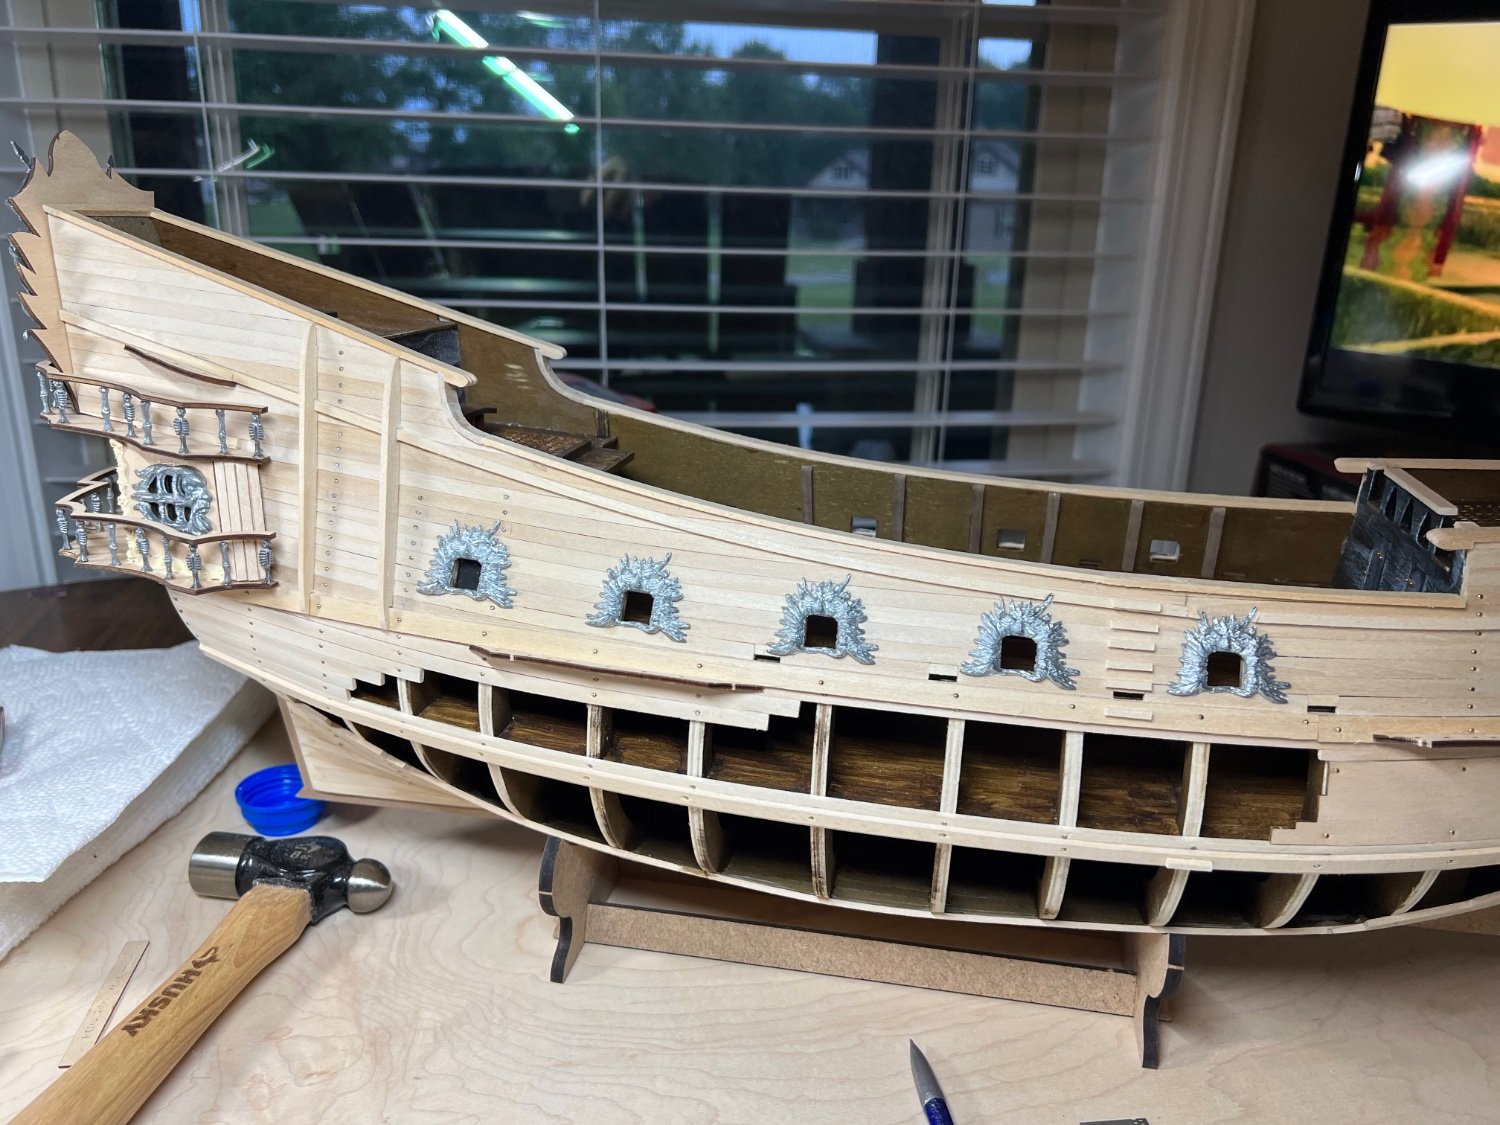
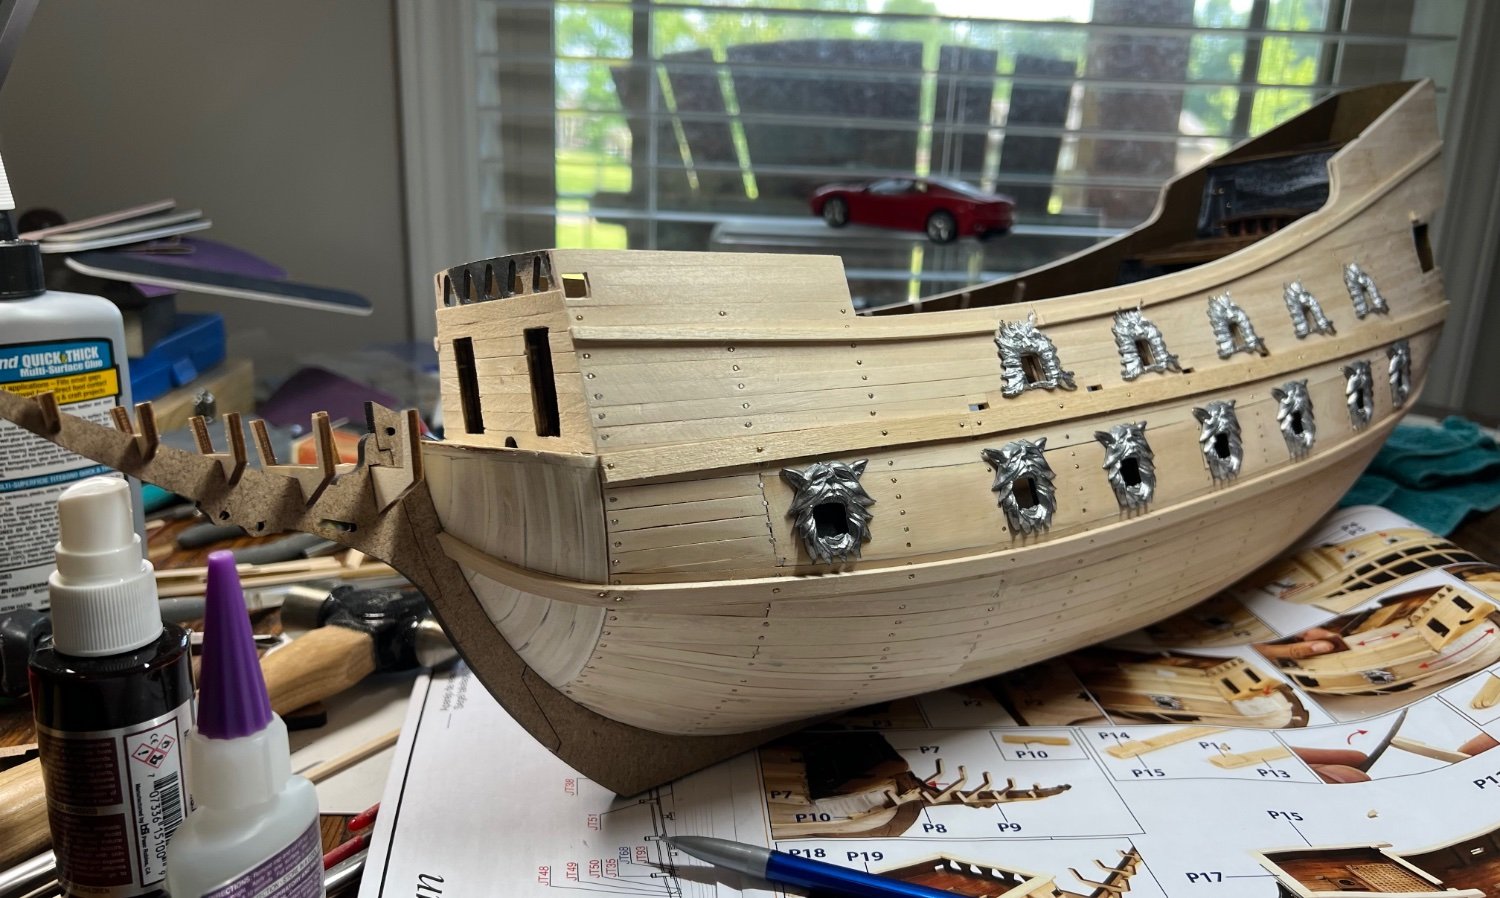
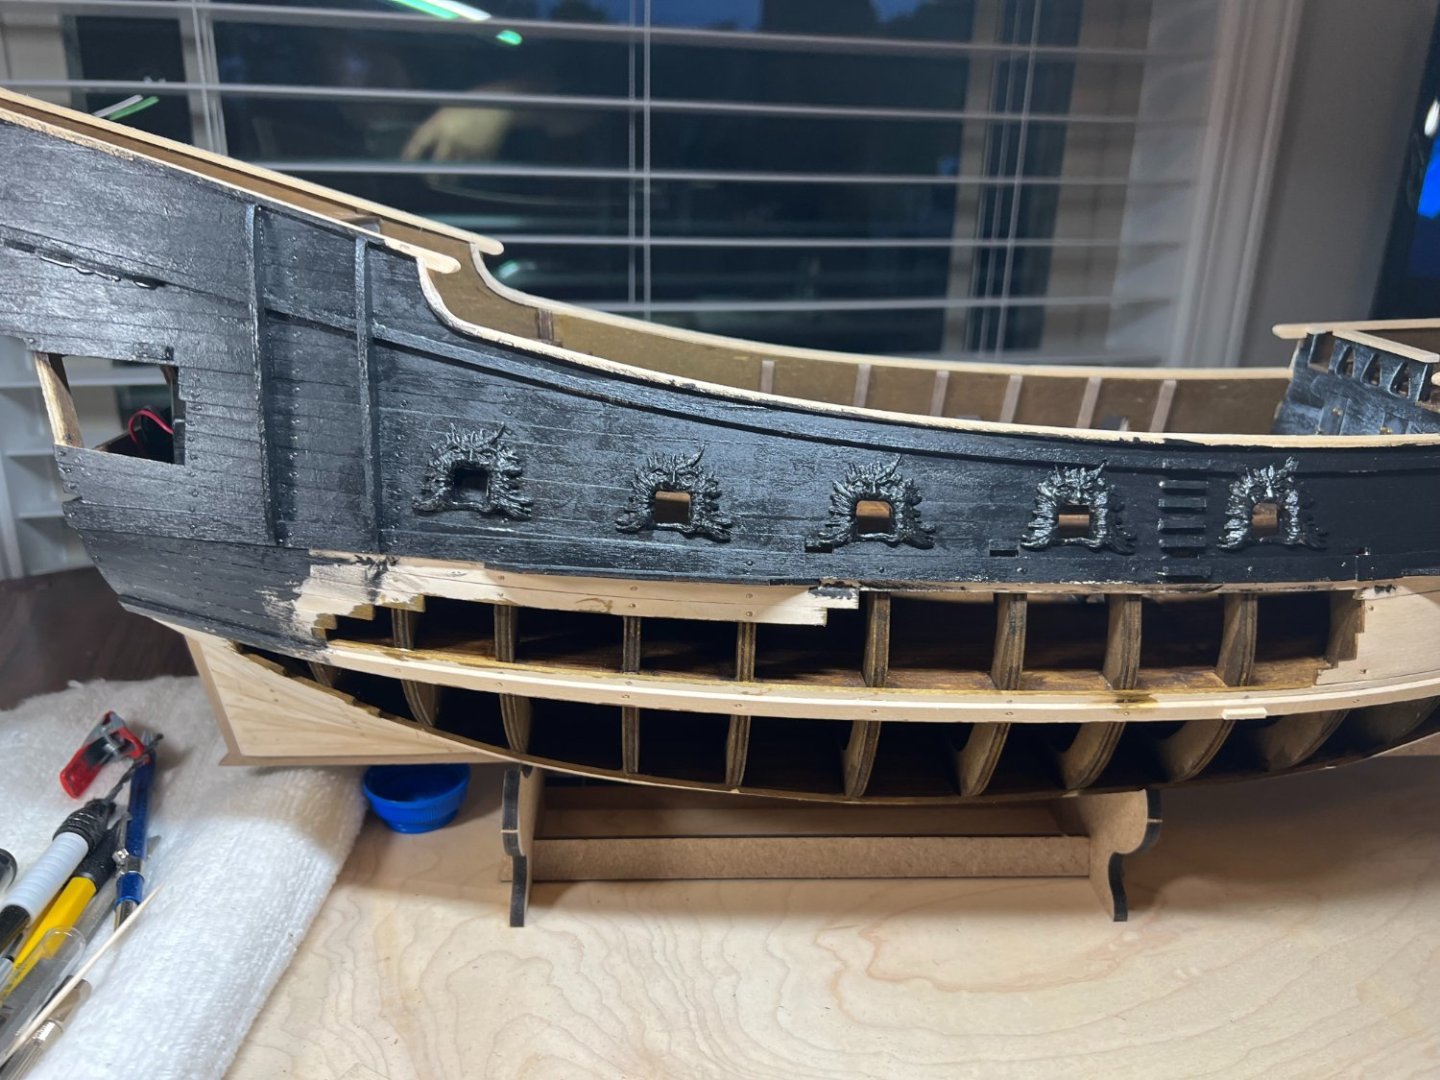
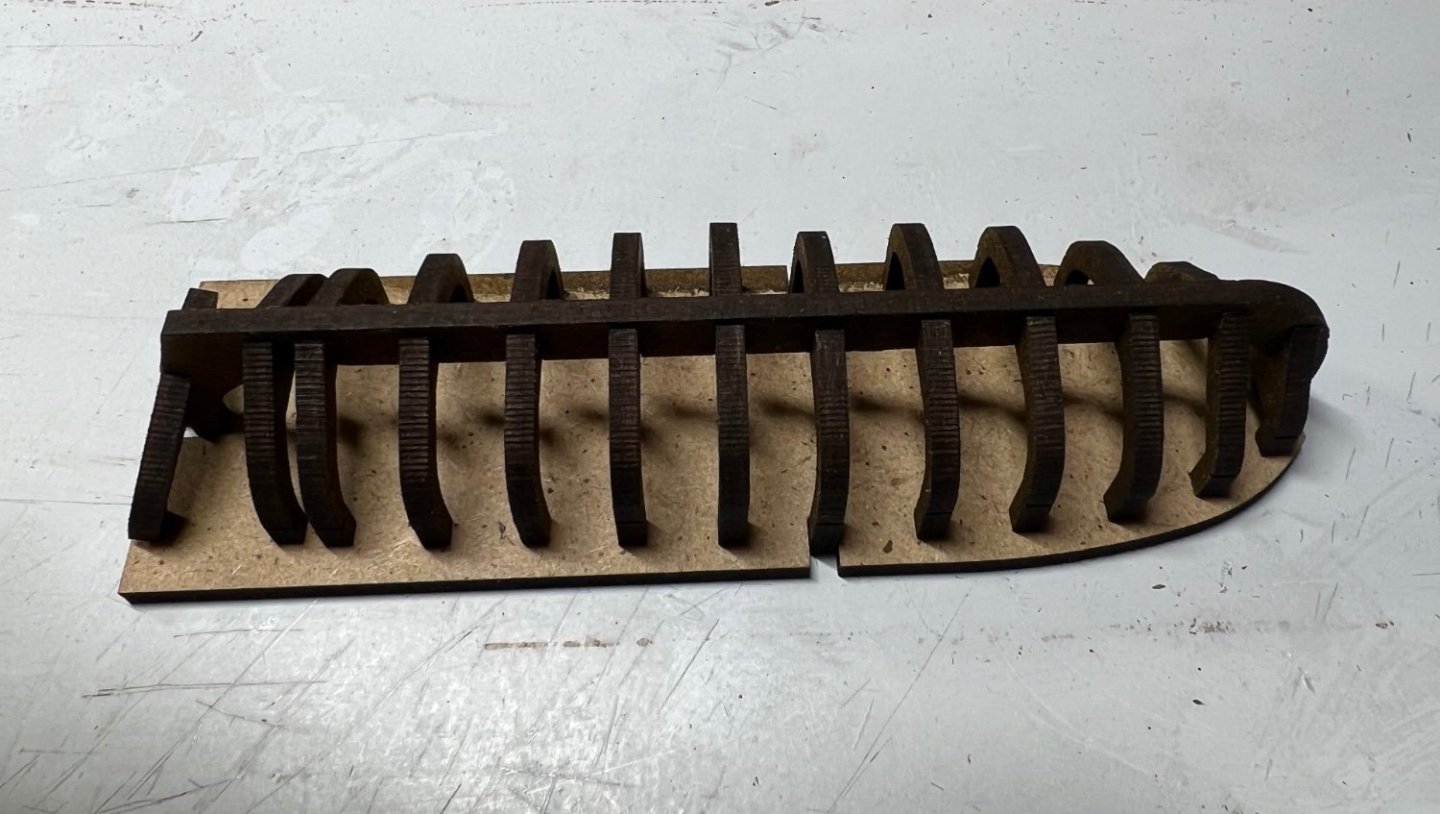
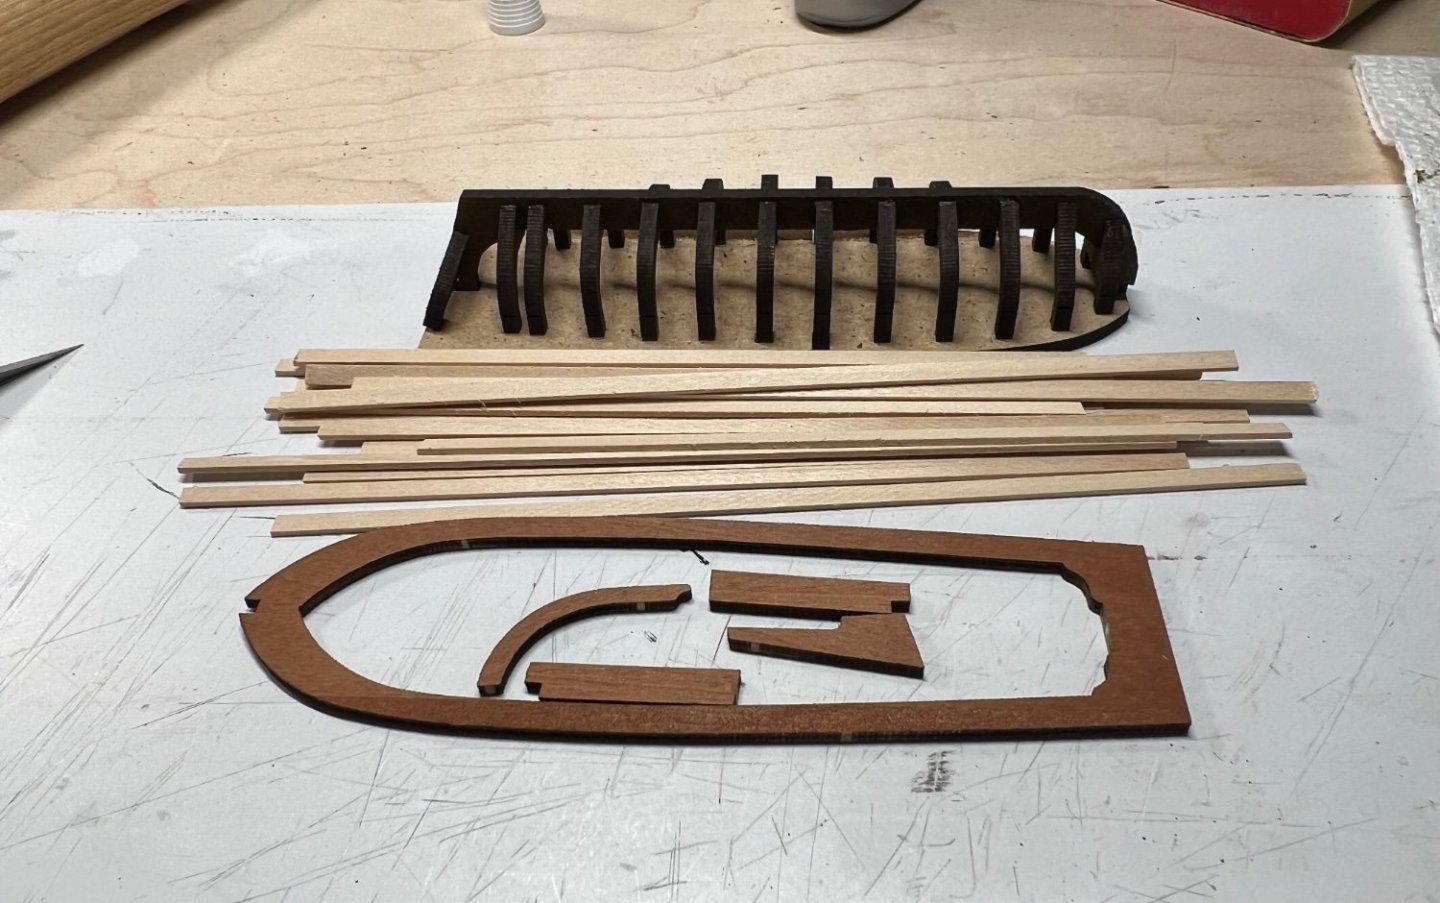
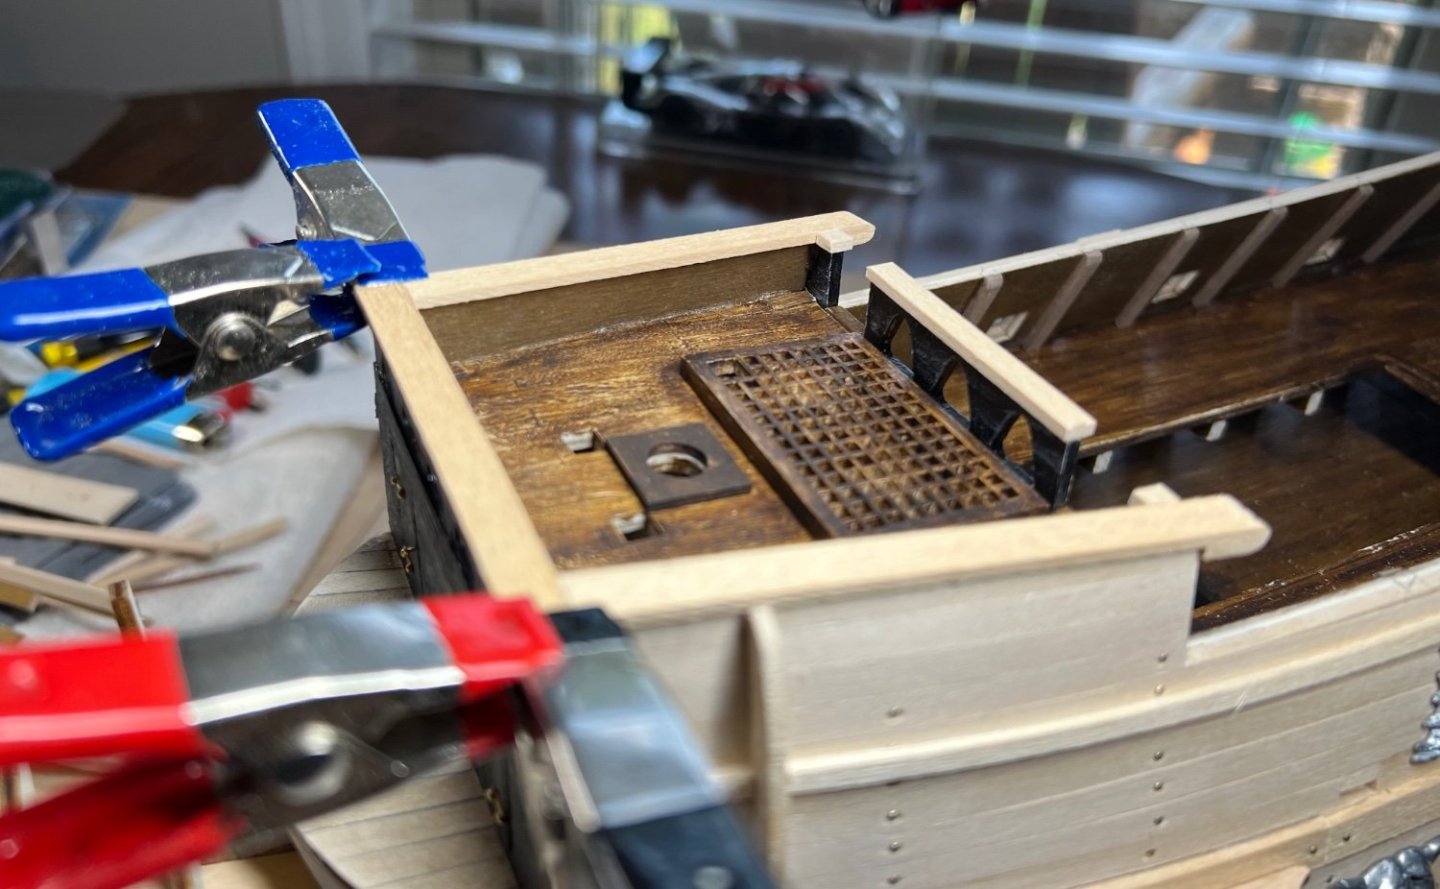
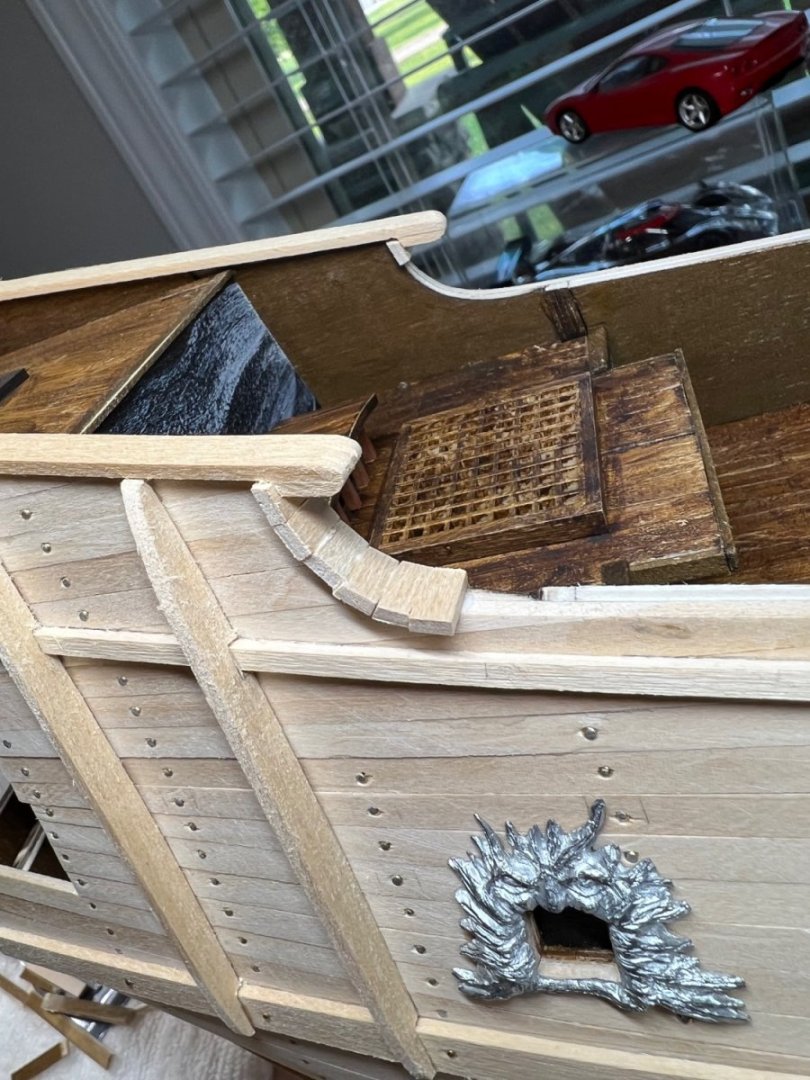
The aft balcony needs its clear windows installed. All hull parts are installed, complete thru stage P. it’s easier and harder than it looks. It’s far from perfect but it’s a run out ghost ship, so I’m not looking for being perfect. The next step for the hull is full black paint. One tiny container of black paint and one big boat. I bought extra of the full paint set, just in case. I'm following the instructions and the videos closely. No two builds will be the same that’s for sure.


-
Most of everything thru video 15 completed.