HOLIDAY DONATION DRIVE - SUPPORT MSW - DO YOUR PART TO KEEP THIS GREAT FORUM GOING! (Only 36 donations so far out of 49,000 members - C'mon guys!)
×

MajorChaos
-
Posts
301 -
Joined
-
Last visited
Content Type
Profiles
Forums
Gallery
Events
Everything posted by MajorChaos
-
Mr Robot thru season 4 final show complete. It helps to look very closely as the pictures for the decks. Some notches don’t get carved out. I made a recovery, looks good enough. Oops. I didn’t get 19141 paint with the kit. I’m working on getting some so I can continue building upward.

-
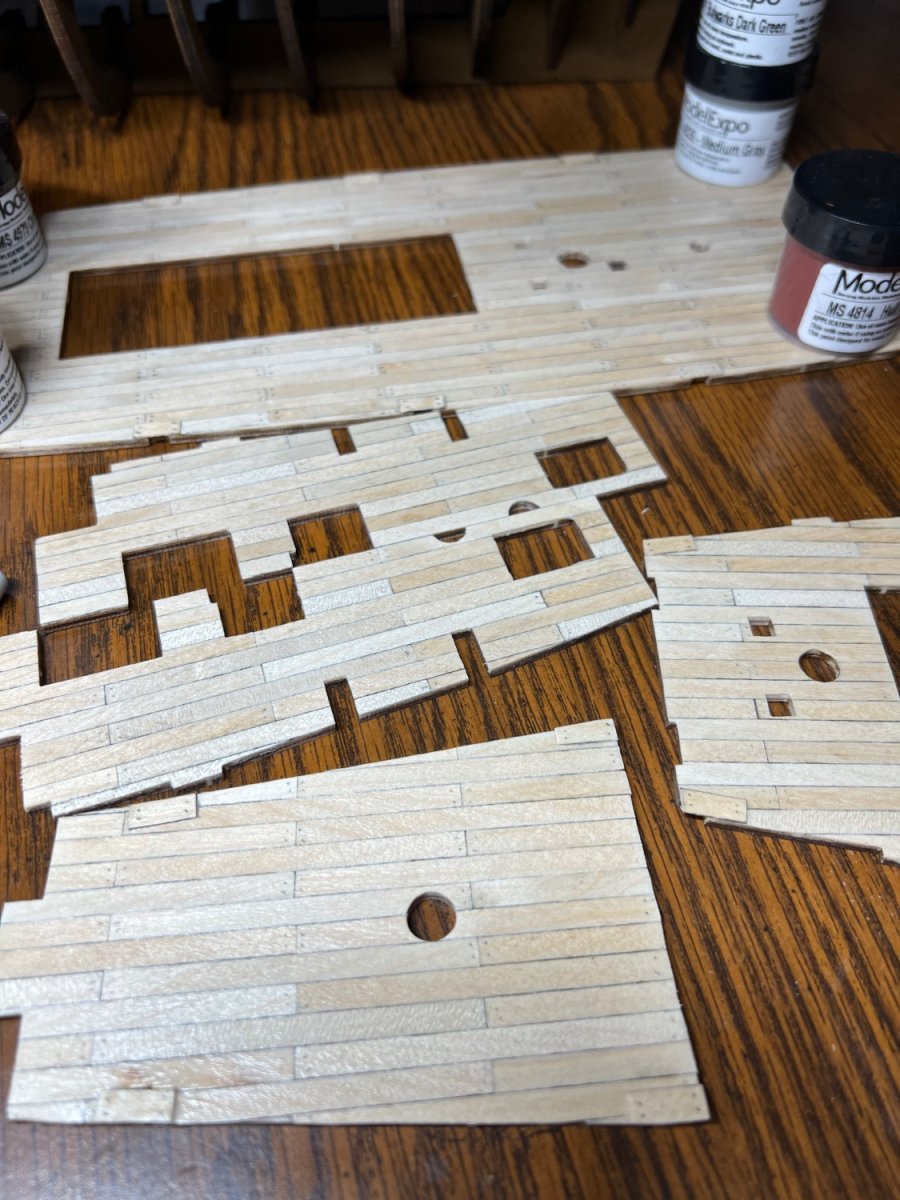
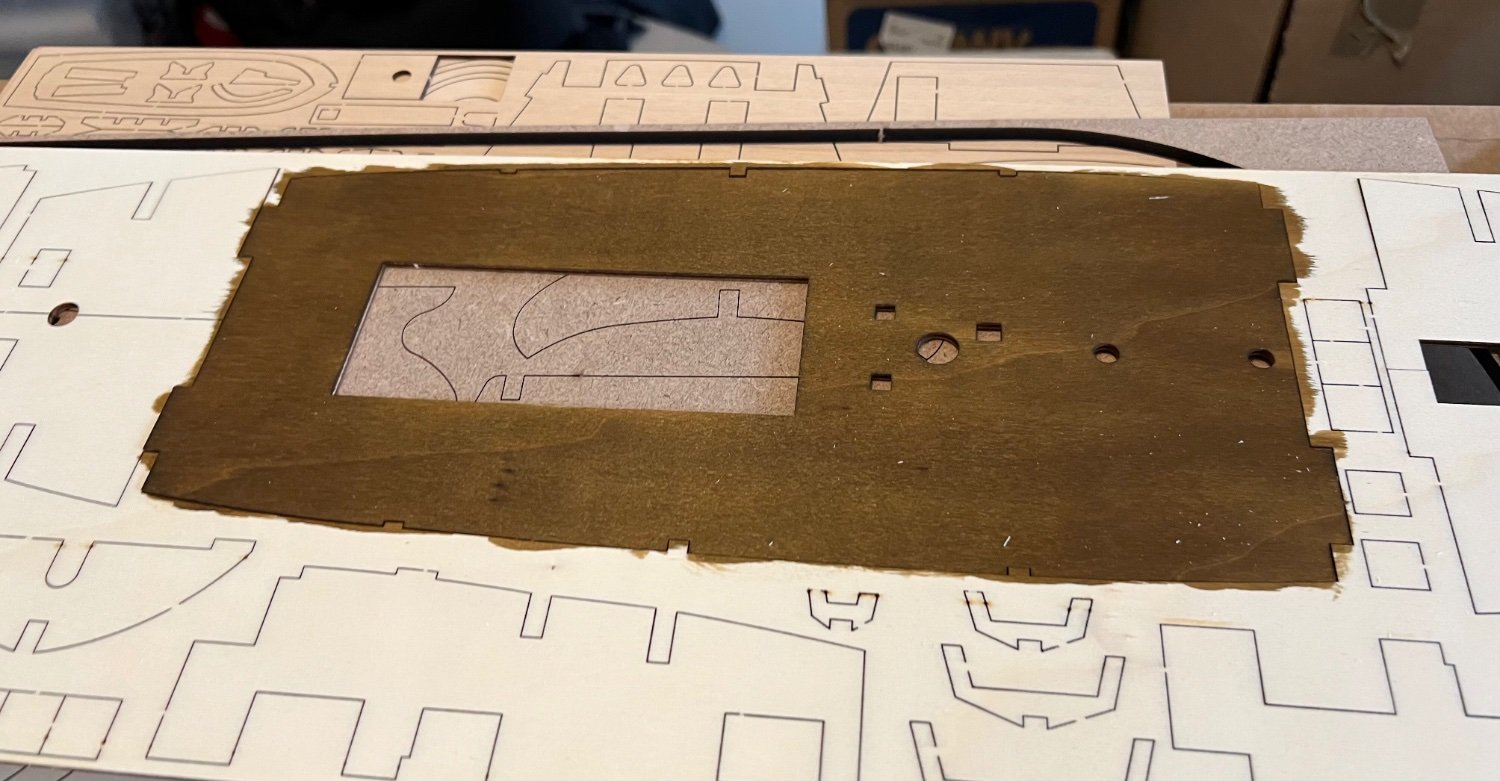
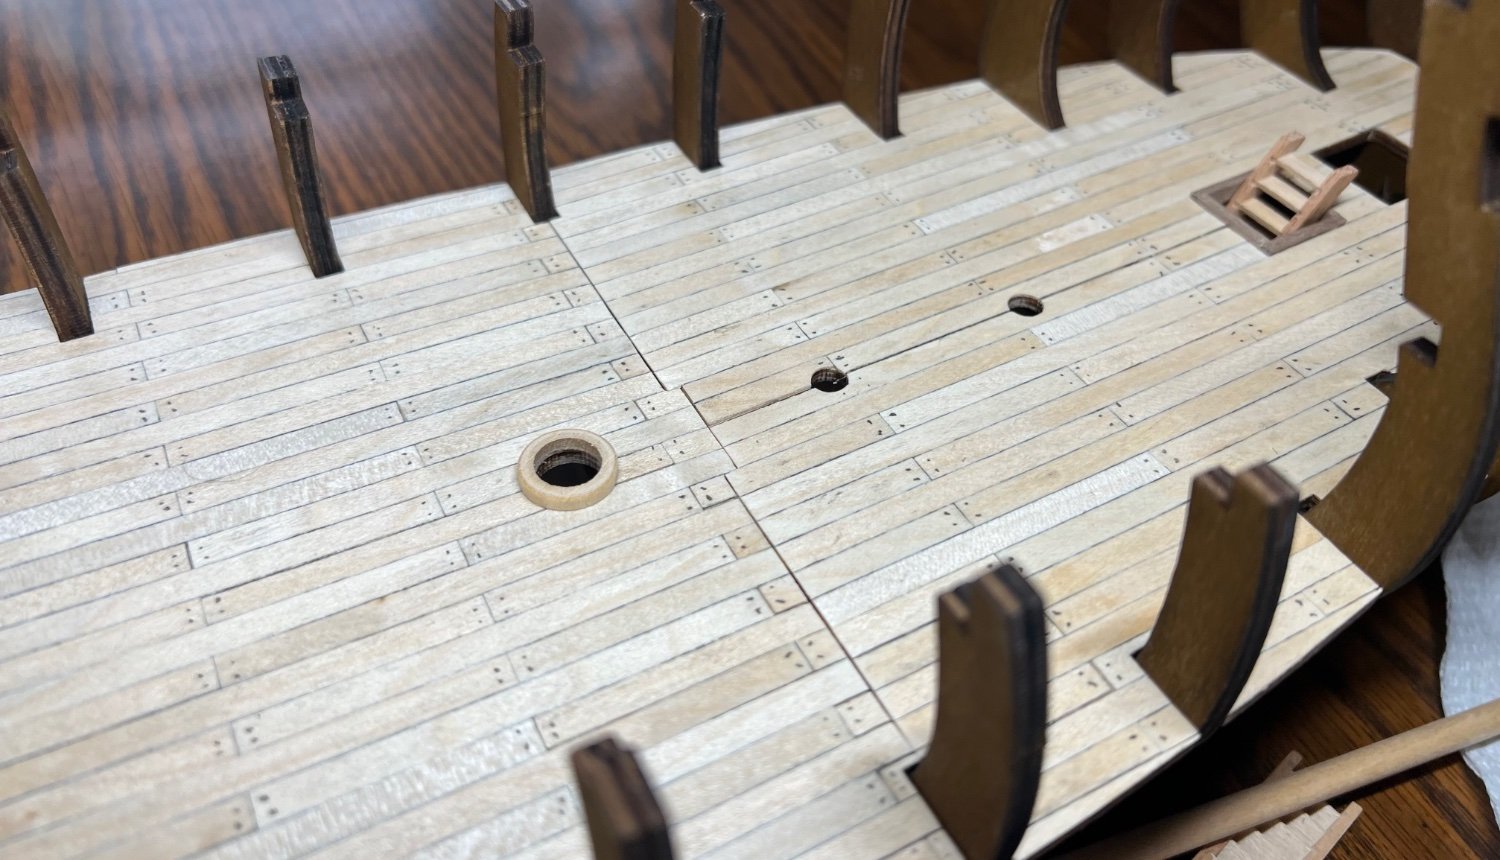
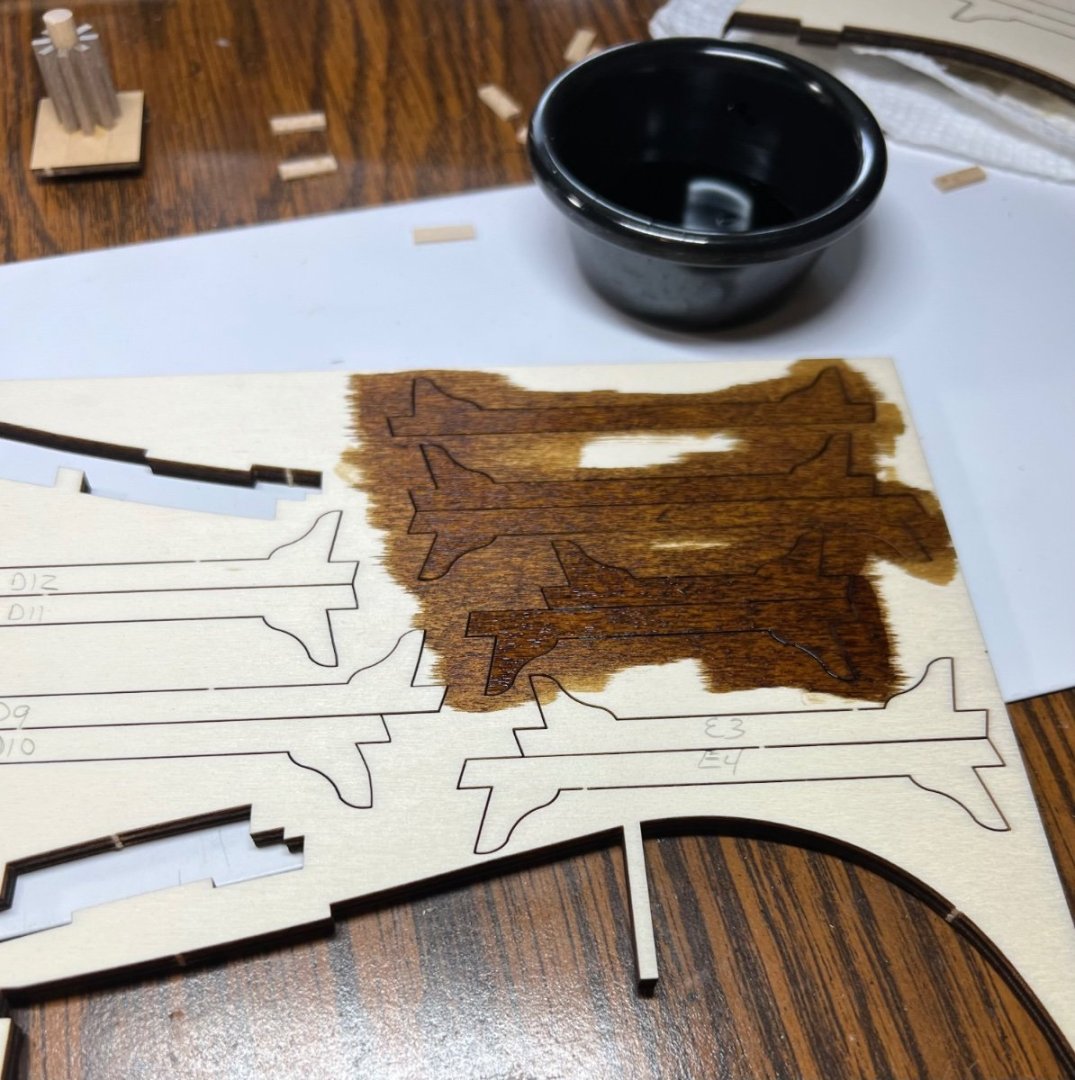
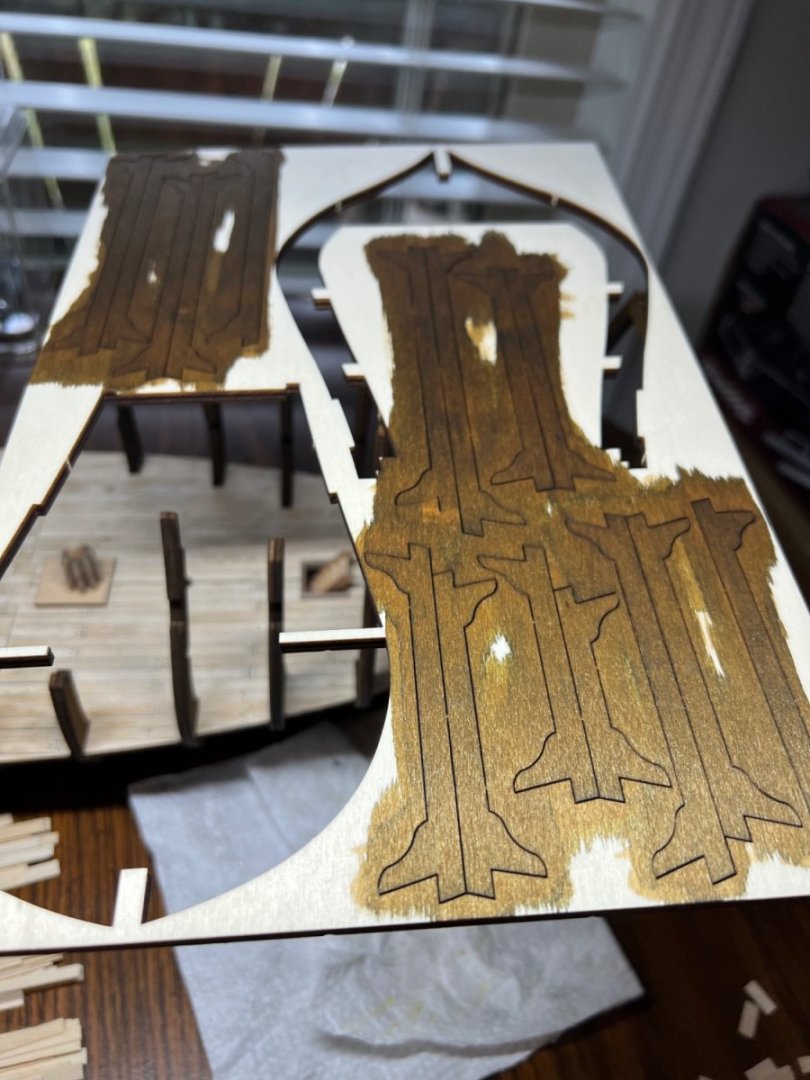
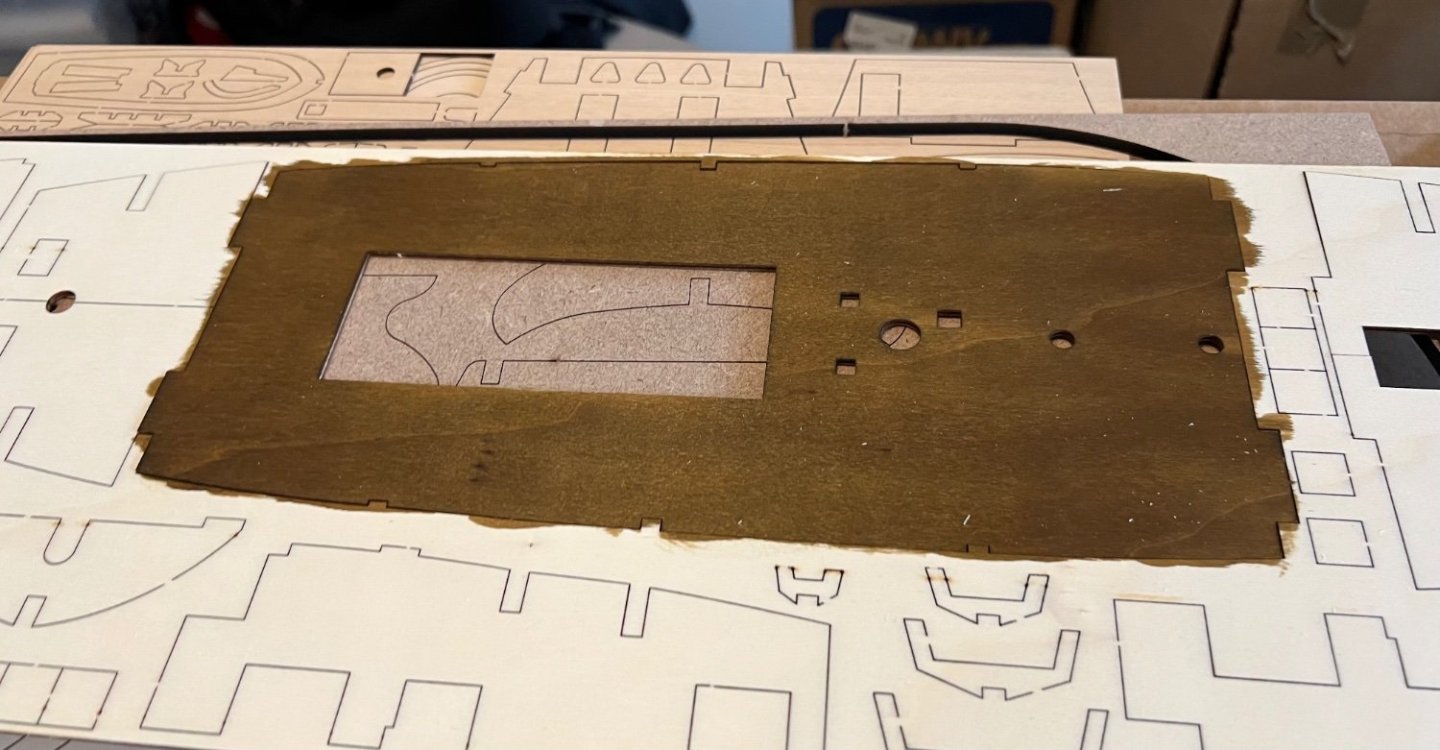
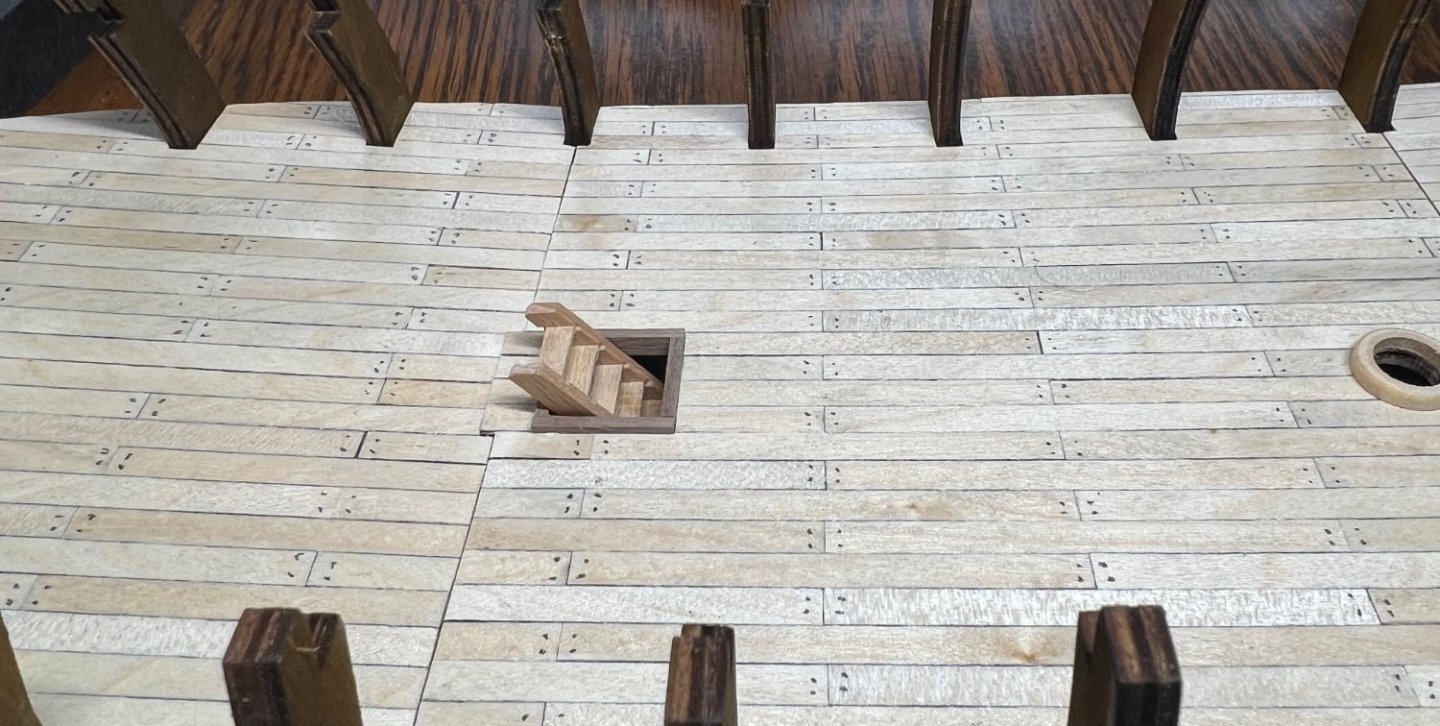
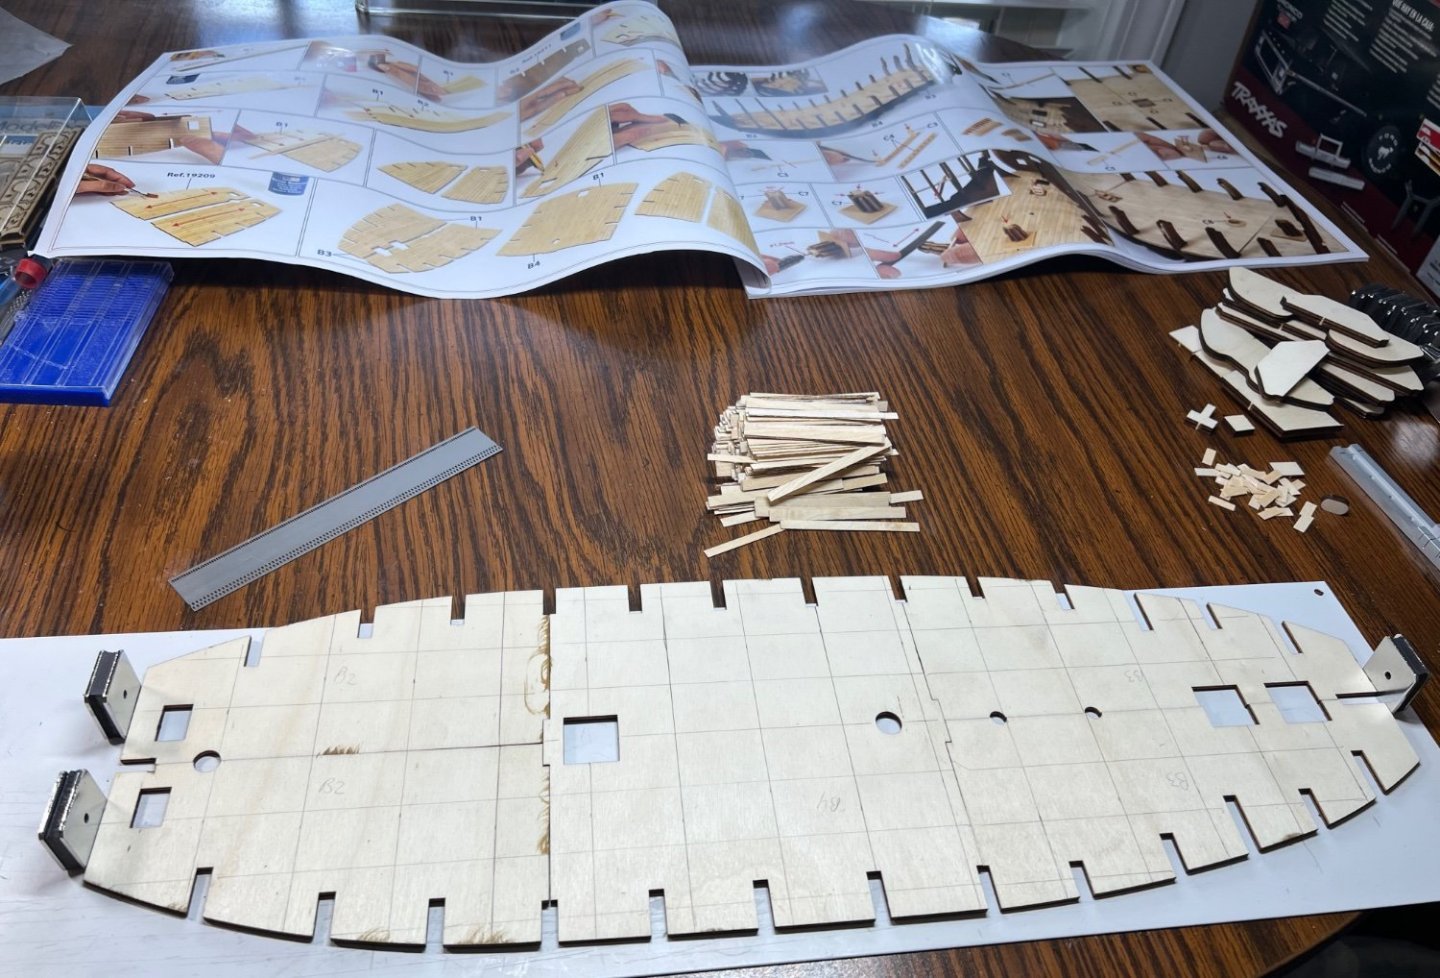
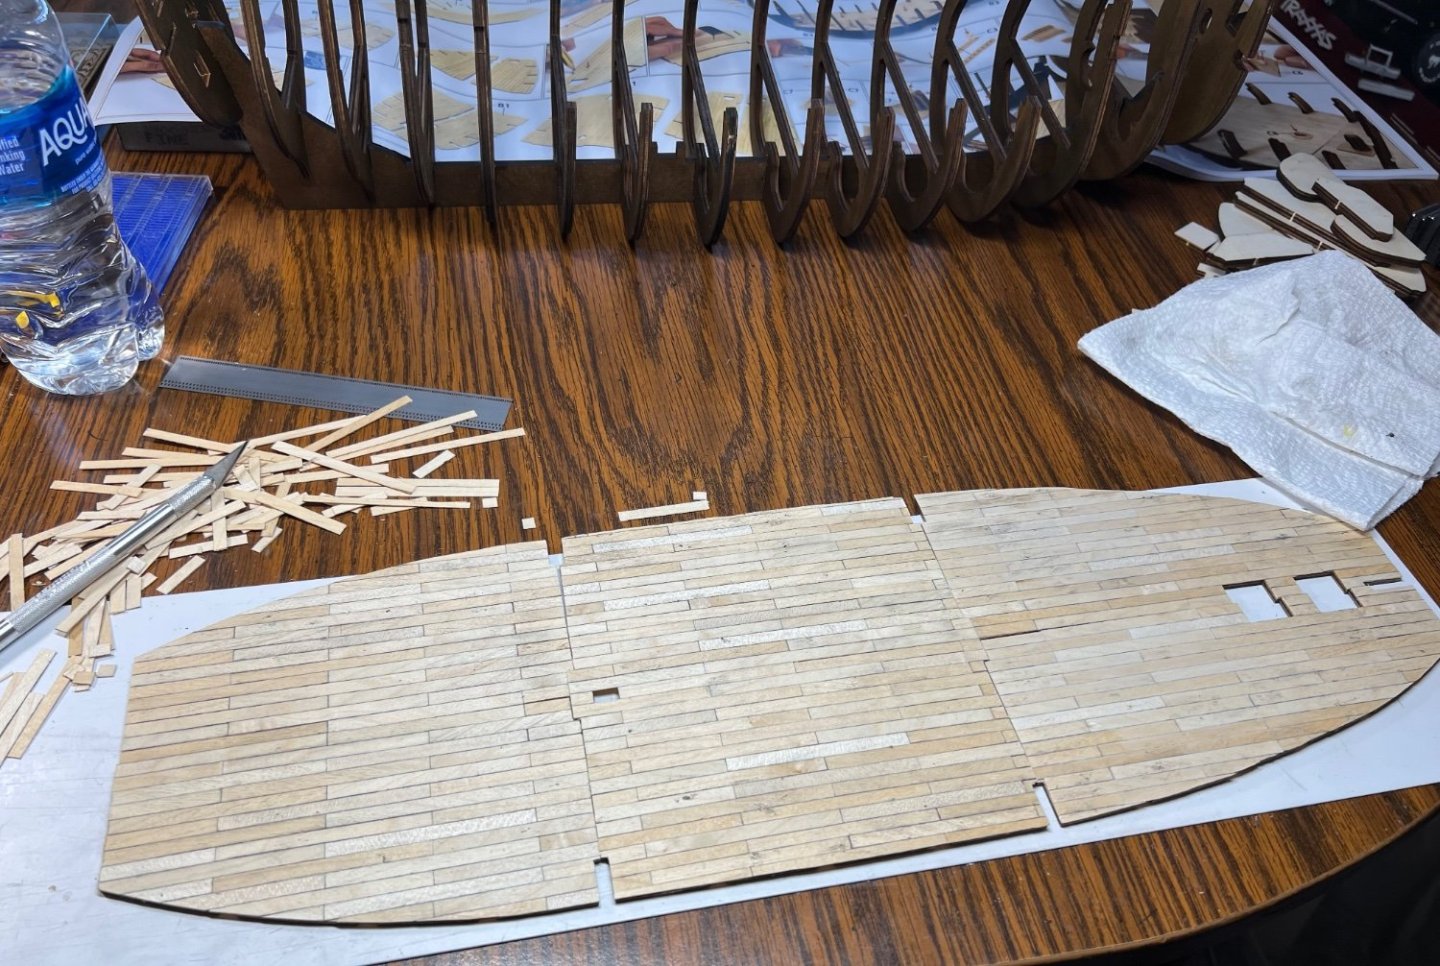
The last time I used the stain I got it all over my fingers and the table. I marked the pieces and as soon as they were stained the marking disappeared. As I thought about it I could have left the parts in the wood, as the edges are not dressed much. That’s what I did for the D and E series cross members. With them still in the sheets it’s easy to find them and not get them mixed up. The last piece of section C is completed. Fun note, making the next deck with planking isn’t mentioned. It shows a planked planned and infers to plank it. I wonder how many steps are like that… oh my. I could see this one clearly needs to be done. We shall see.


-
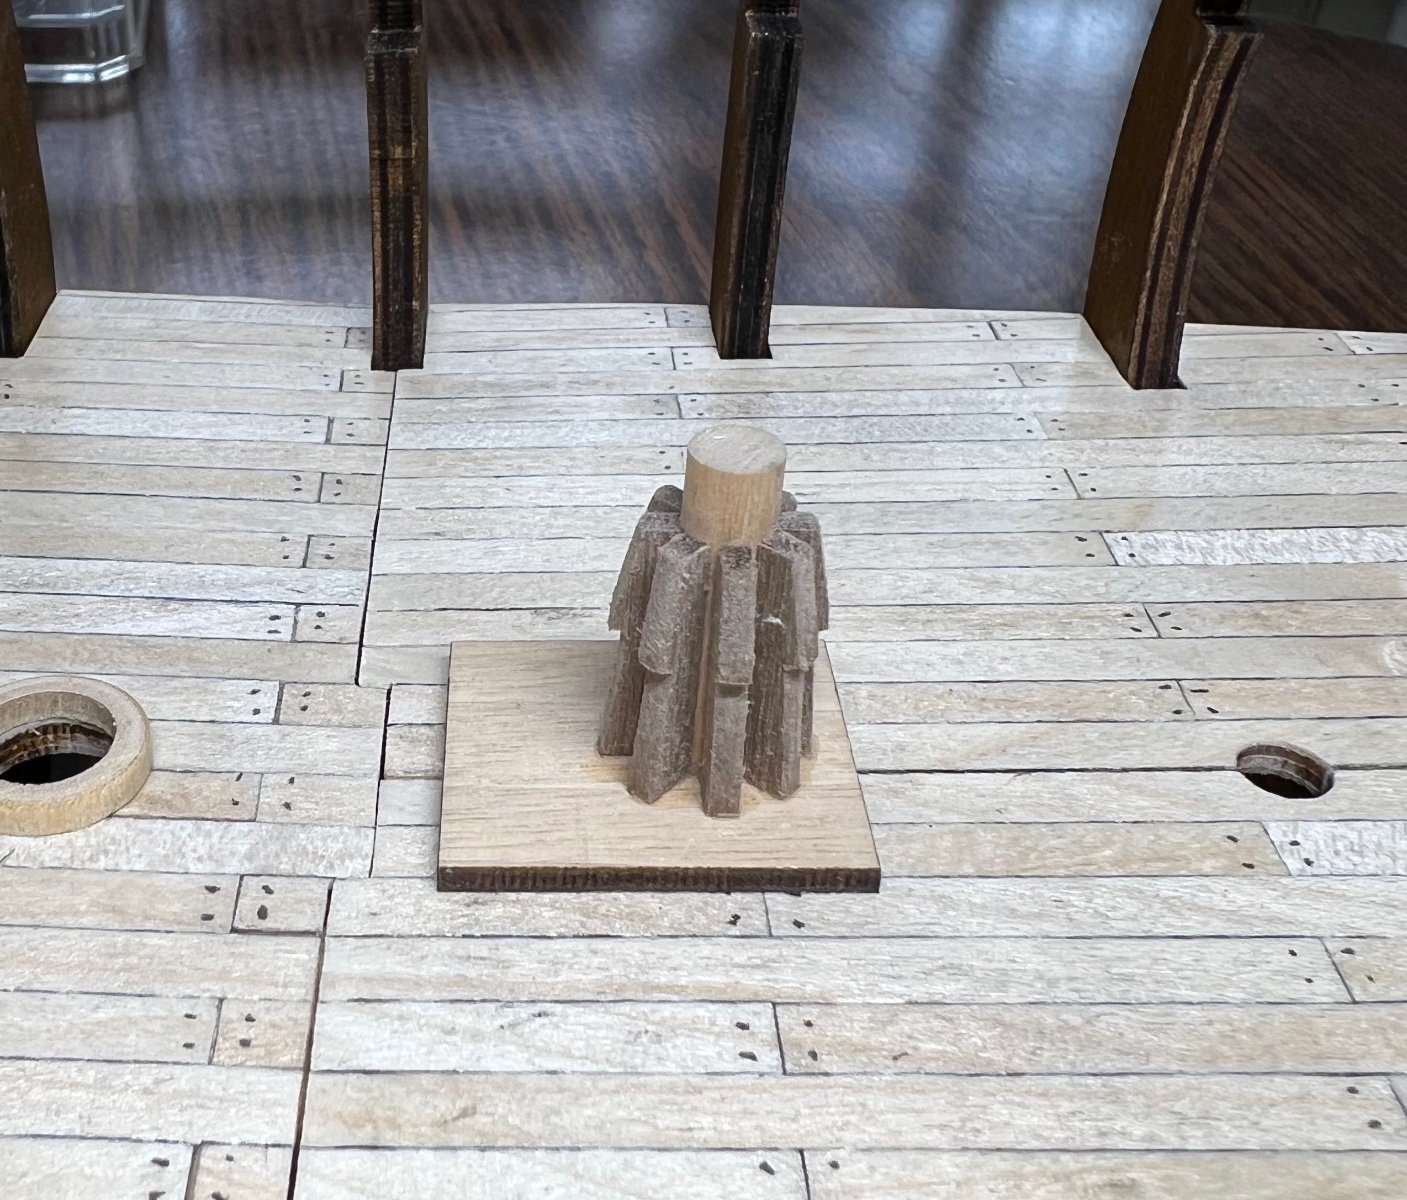
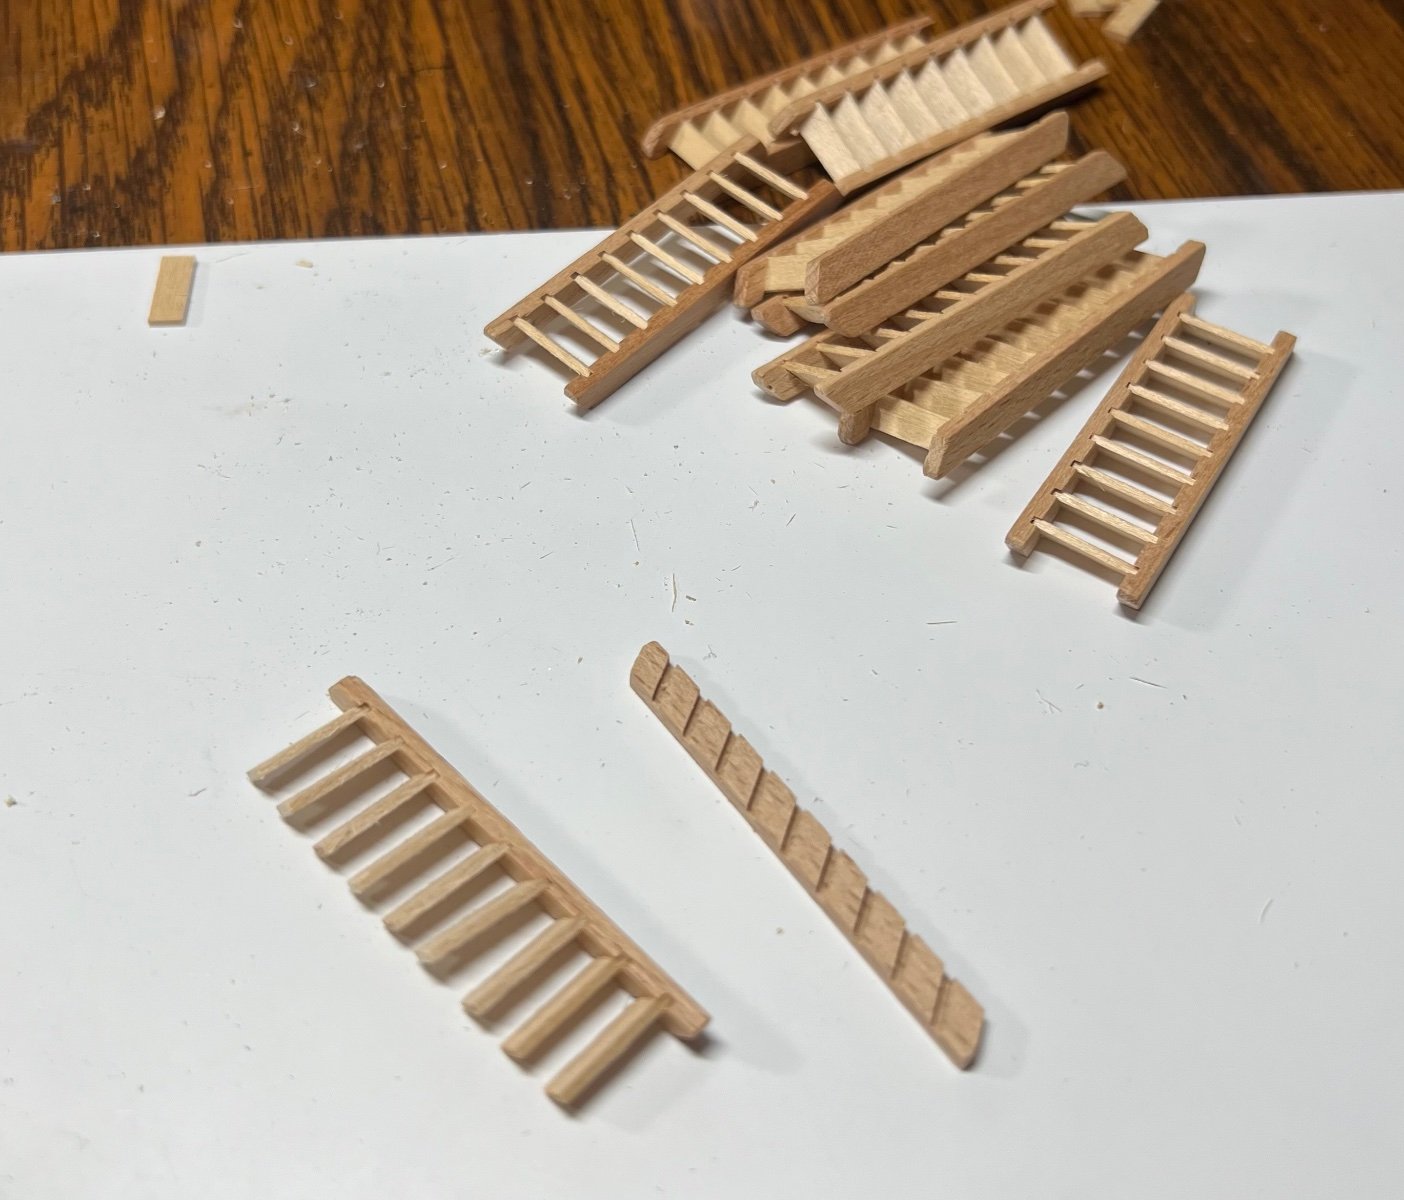
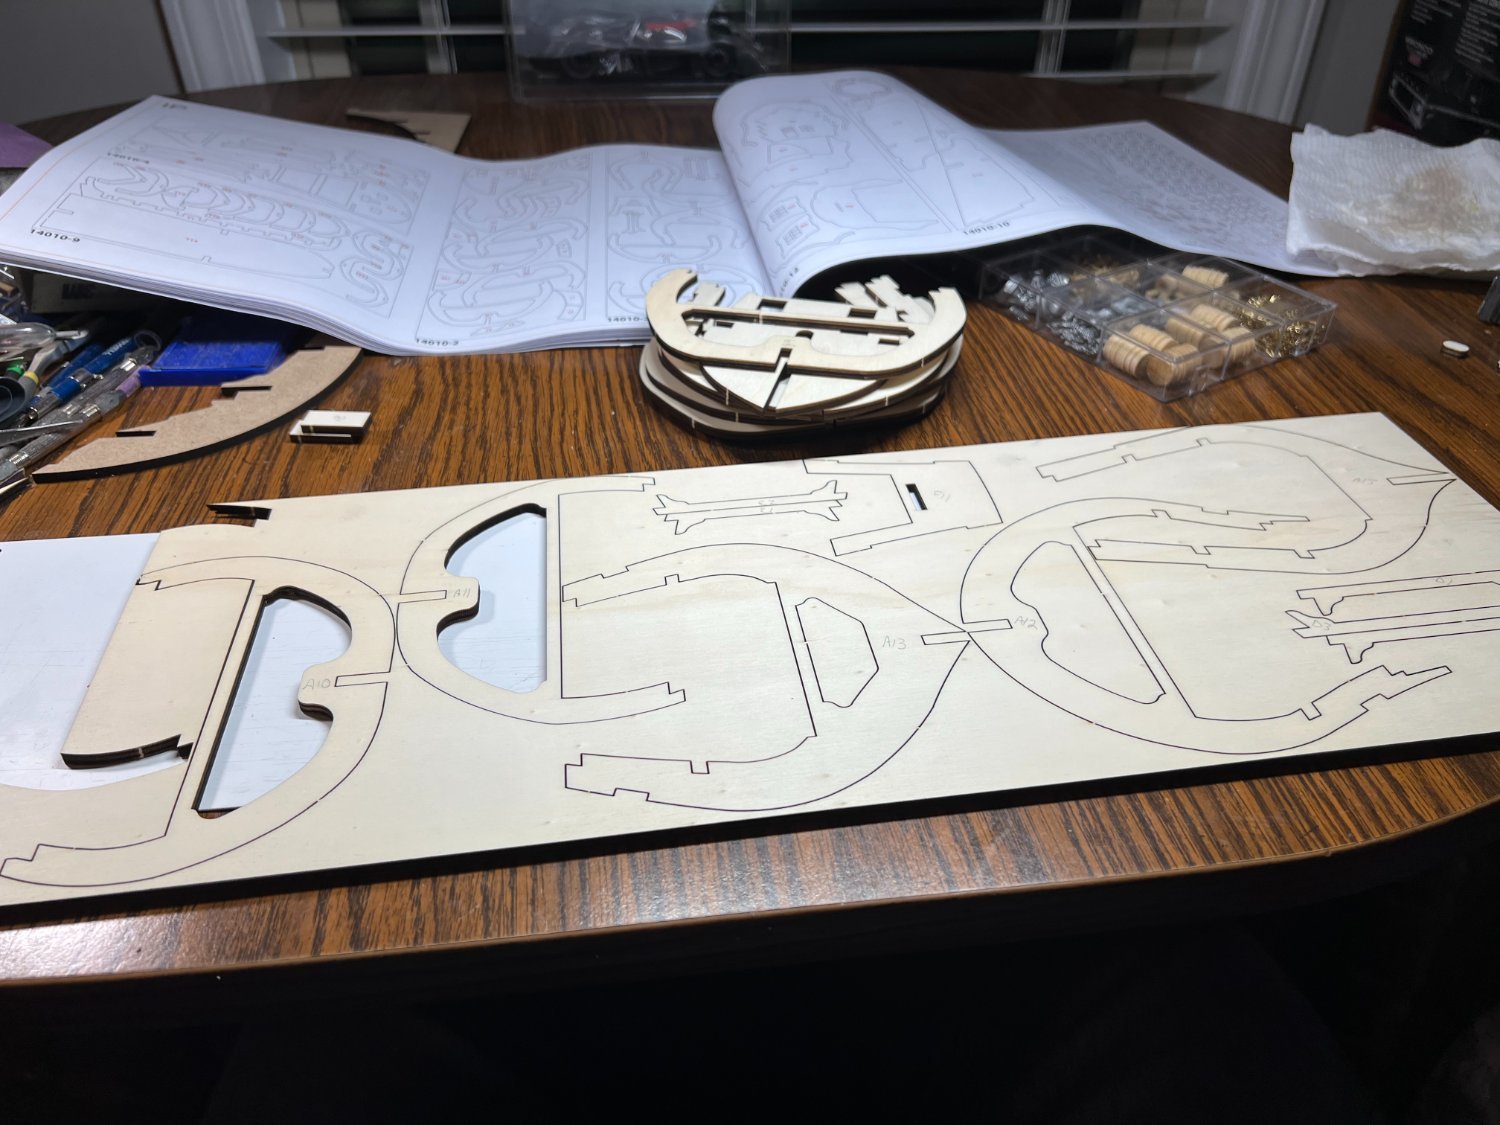
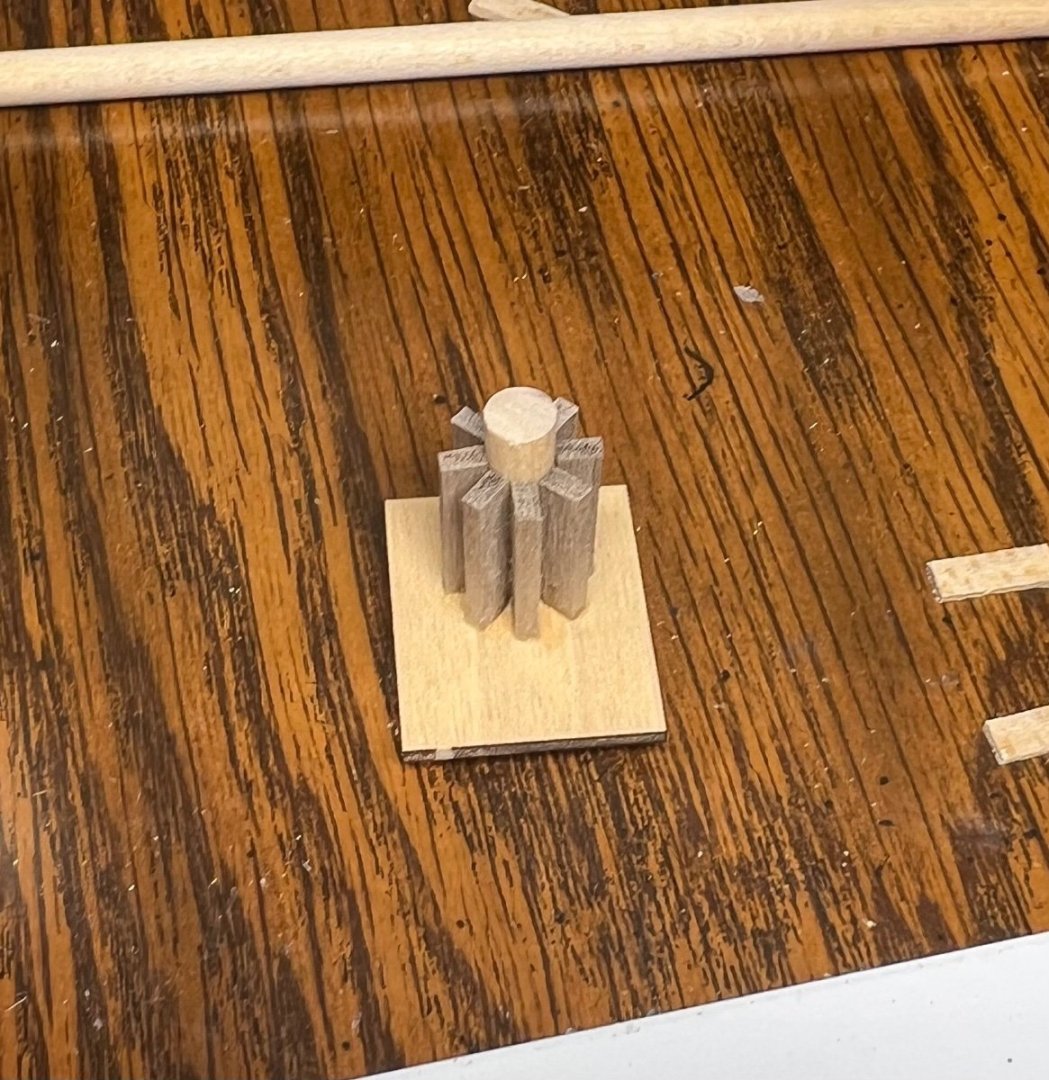
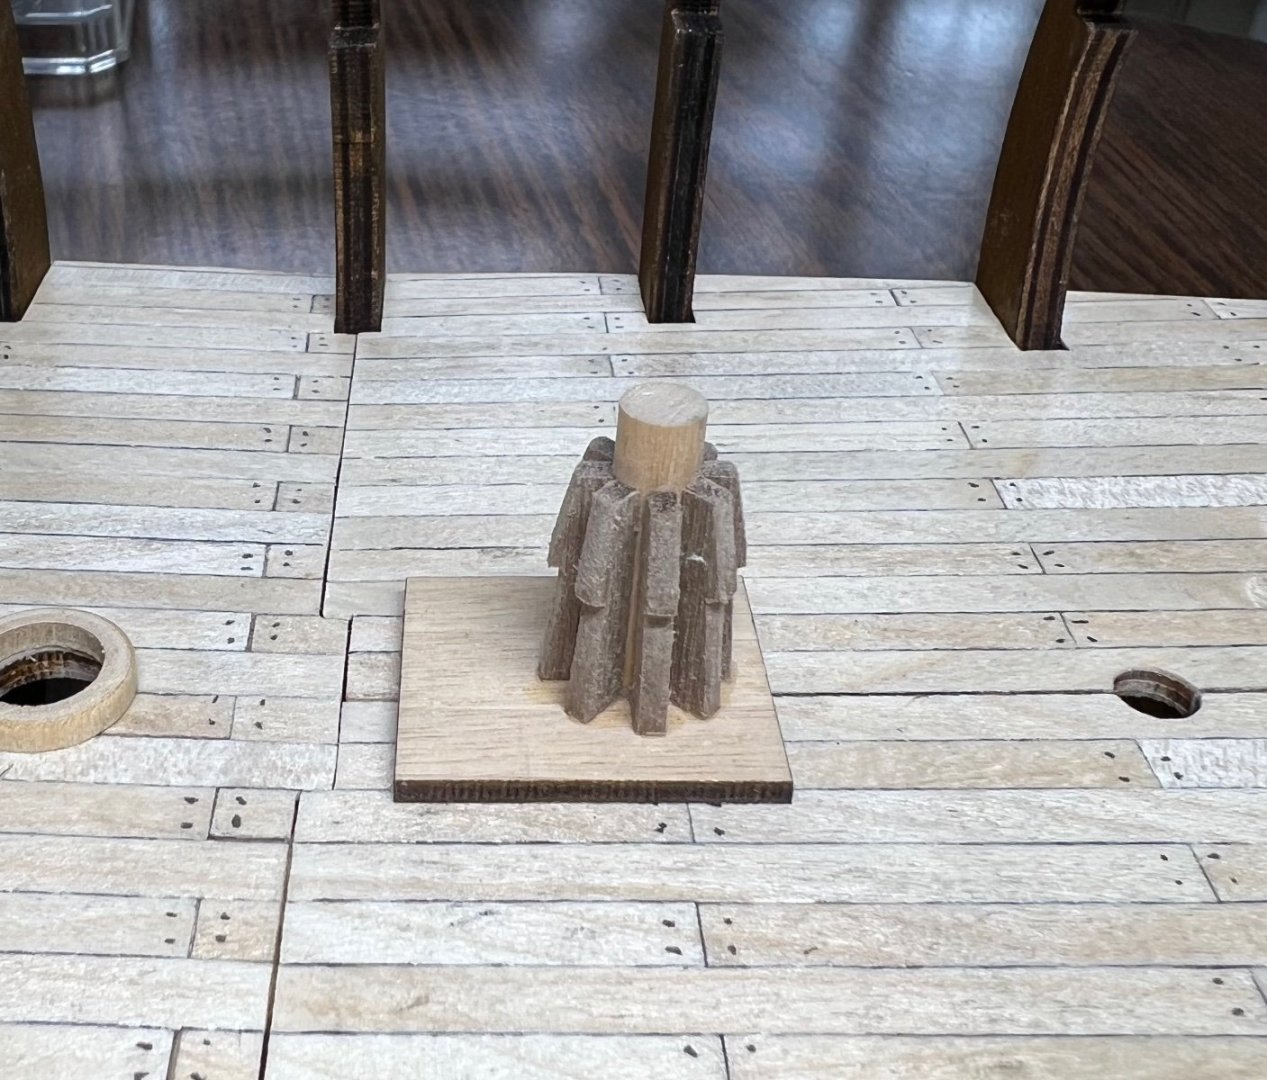
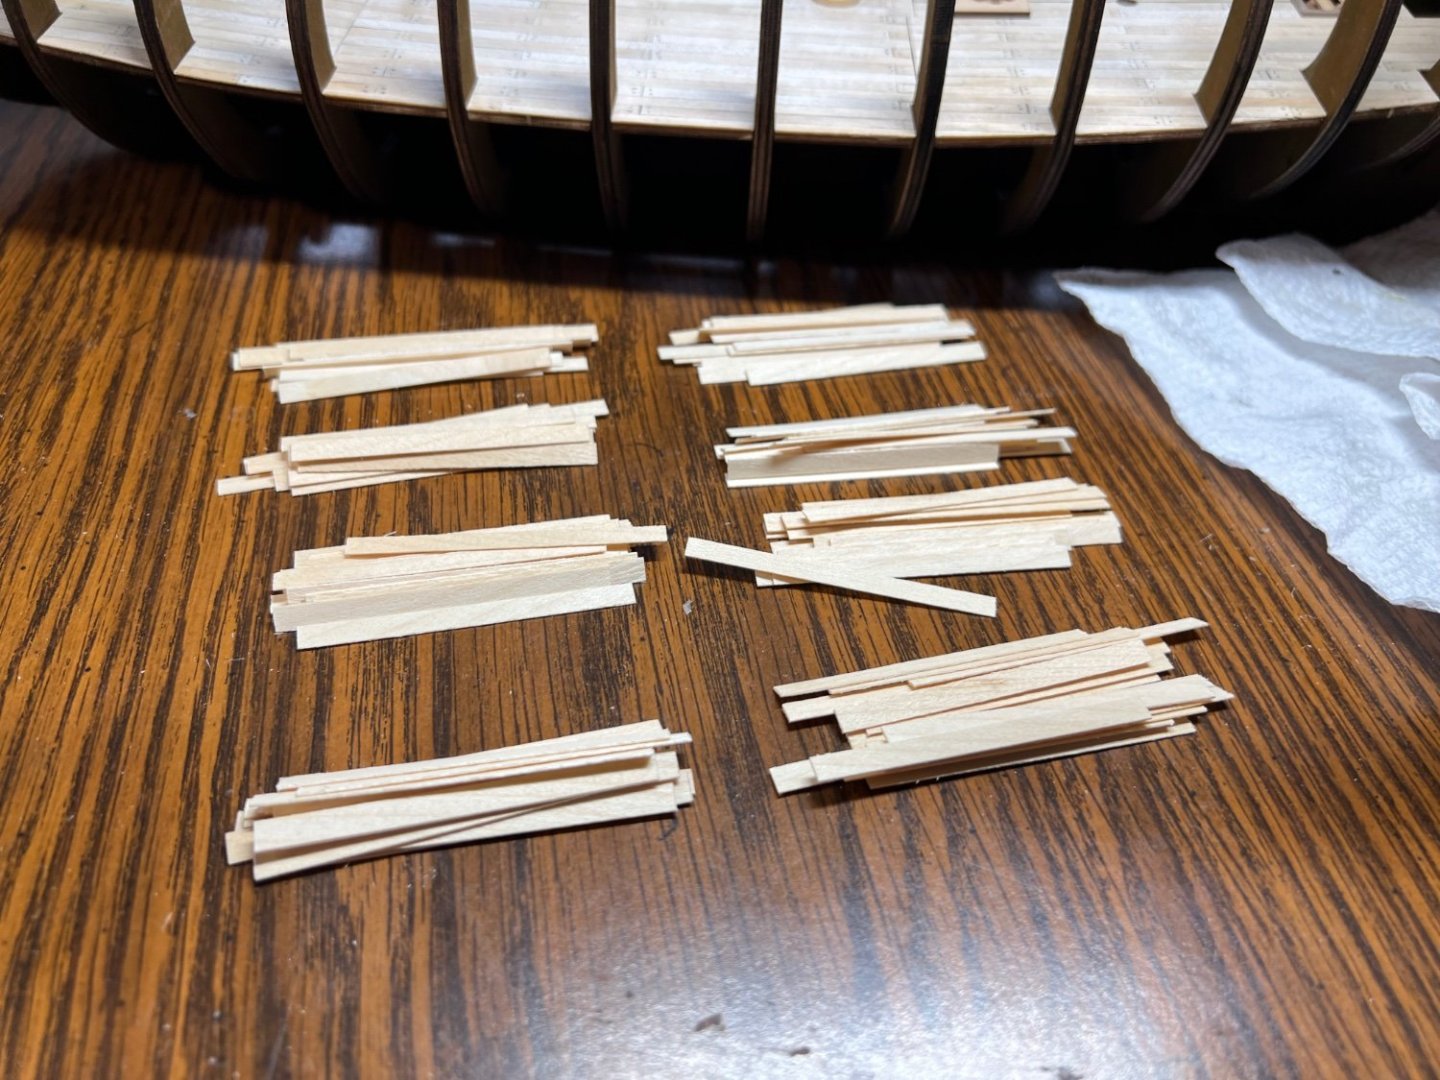
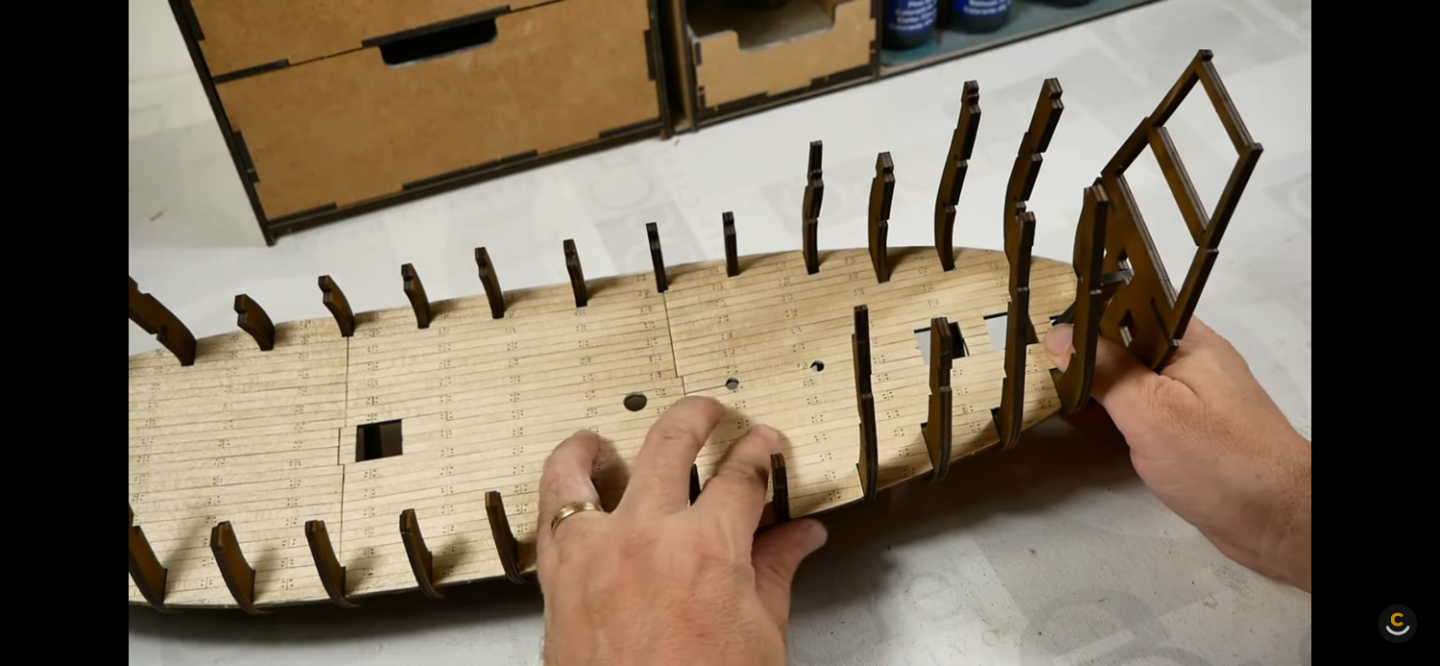
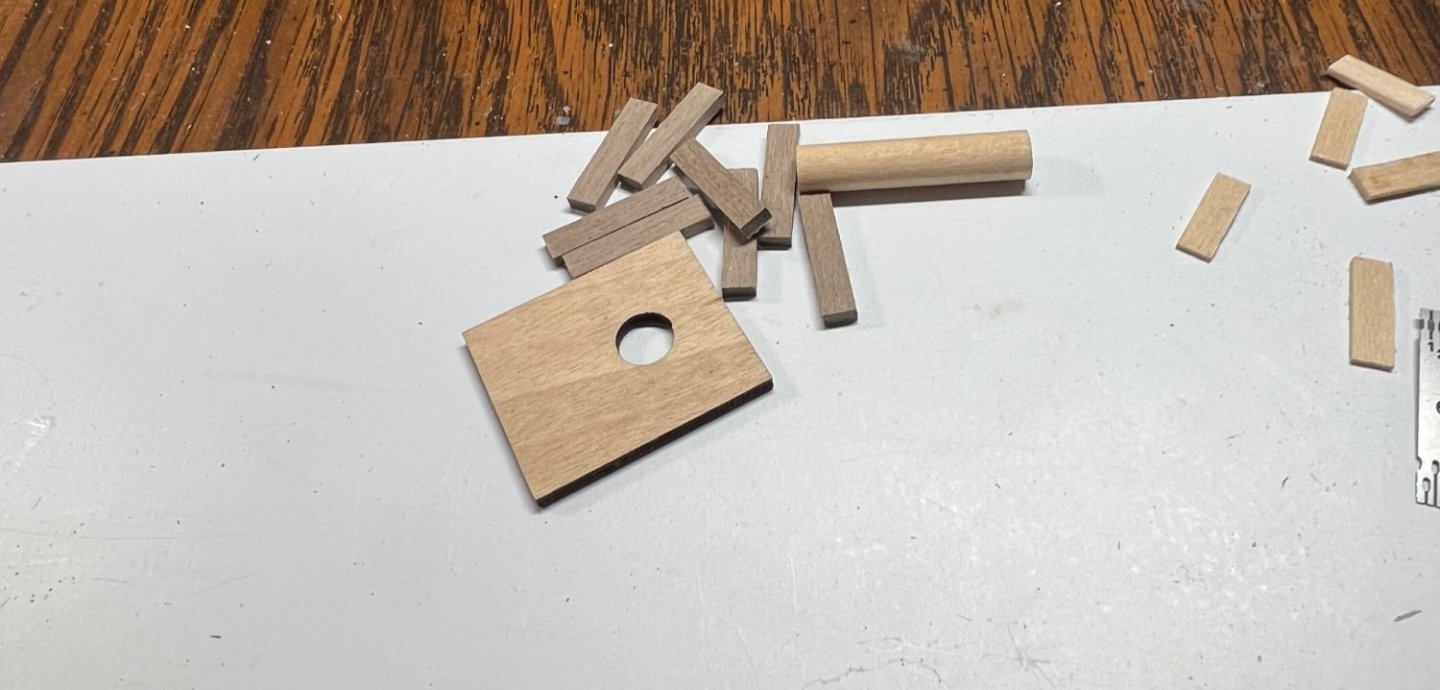
Video 3, instruction sheet C. Ha! They made the same planking mistake in the video. Mine don’t line up as good but, it’s all about learning. Making ladders was fun! I had to find consistent 1mm parts to make it work well. They seem to give some extra wood in the kit. I looked thru the list and this is the only place this size wood was used. Have the battle of this kit is finding the parts. The parts list is good, for exact size that is needed. But it doesn’t have any list of the stock included. It’s like a treasure hunt to find the right parts. It called for 2x4 walnut, and 2x3 walnut, I can only find 2x4 mm walnut. There is no 2x3 in the kit that I can find. I don’t care much but I don’t want to use something I’ll need later and not have it. The plastic bins have needed parts for this stage. I still have to make the mast base of what ever it’s called. This turret thing. I know it has a name, I just don’t know it. The parts are cut and ready to put together. Business trip flight incoming, no more work until next Saturday. I have to go people. I don’t want to but I need to. Boat fun, people suck.


-
Instruction sheet B completed. If every step looks at least this good, I might have a nice finished boat. I’m getting ahead of myself lol.


-
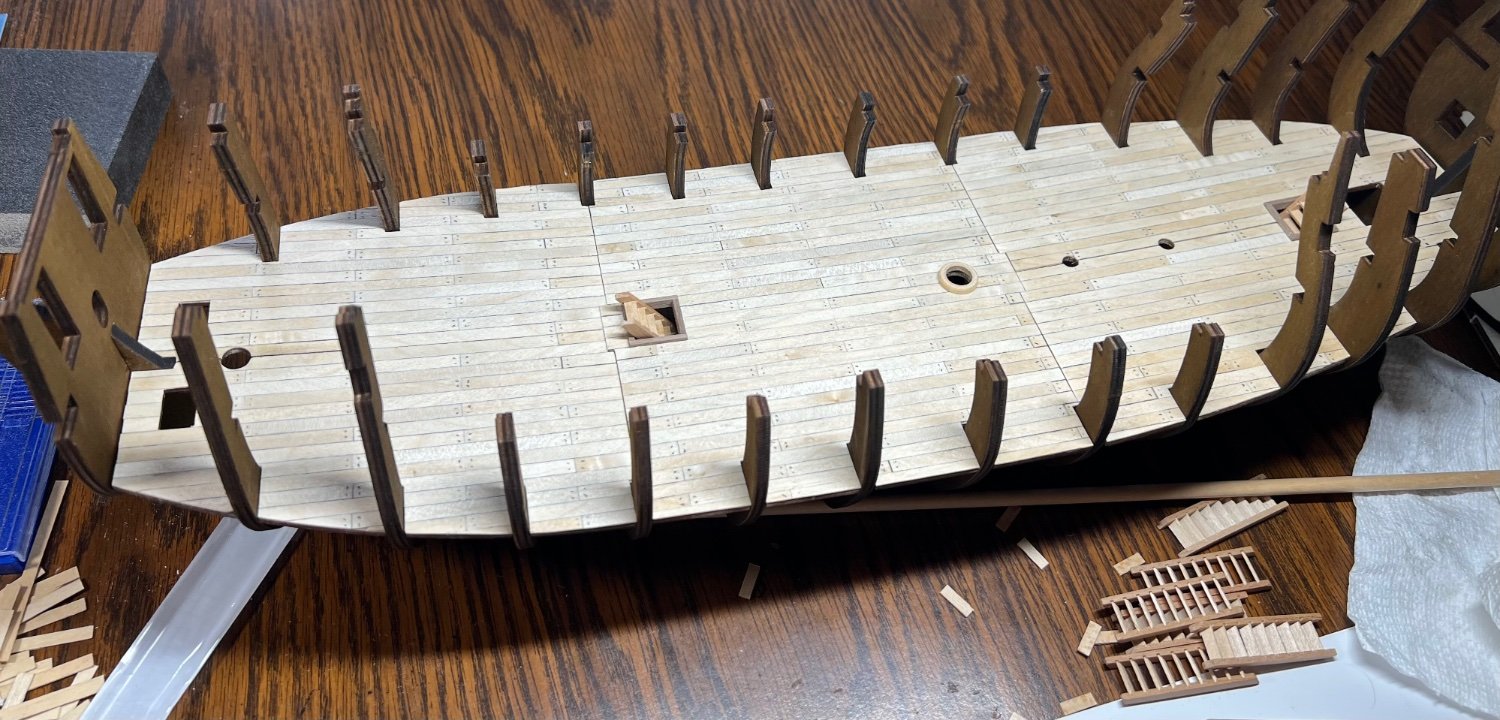
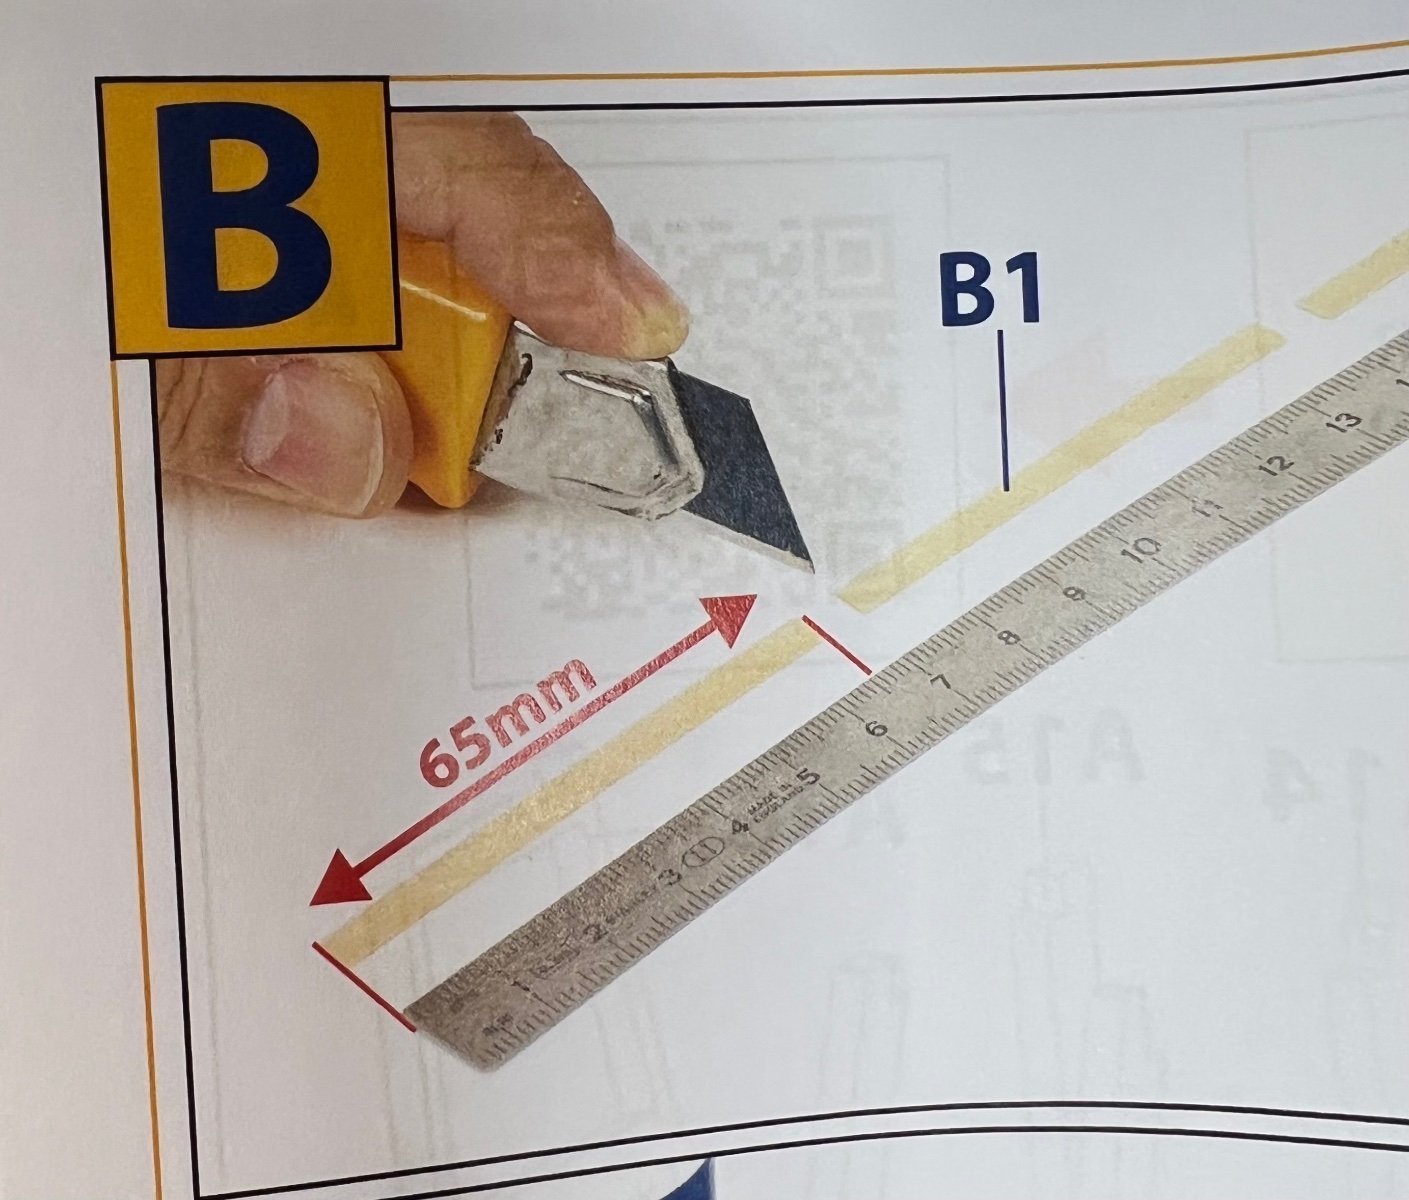
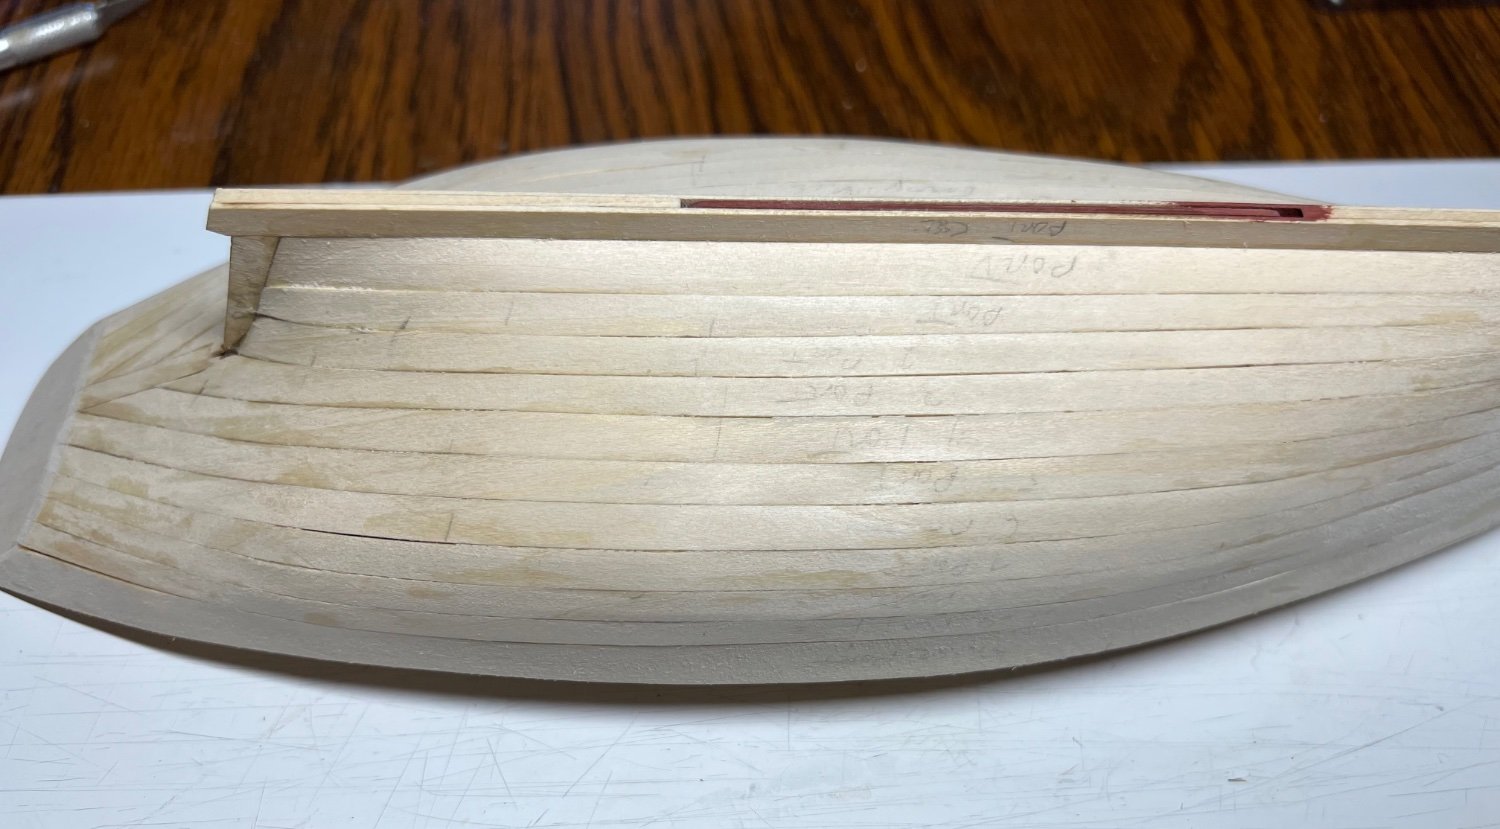
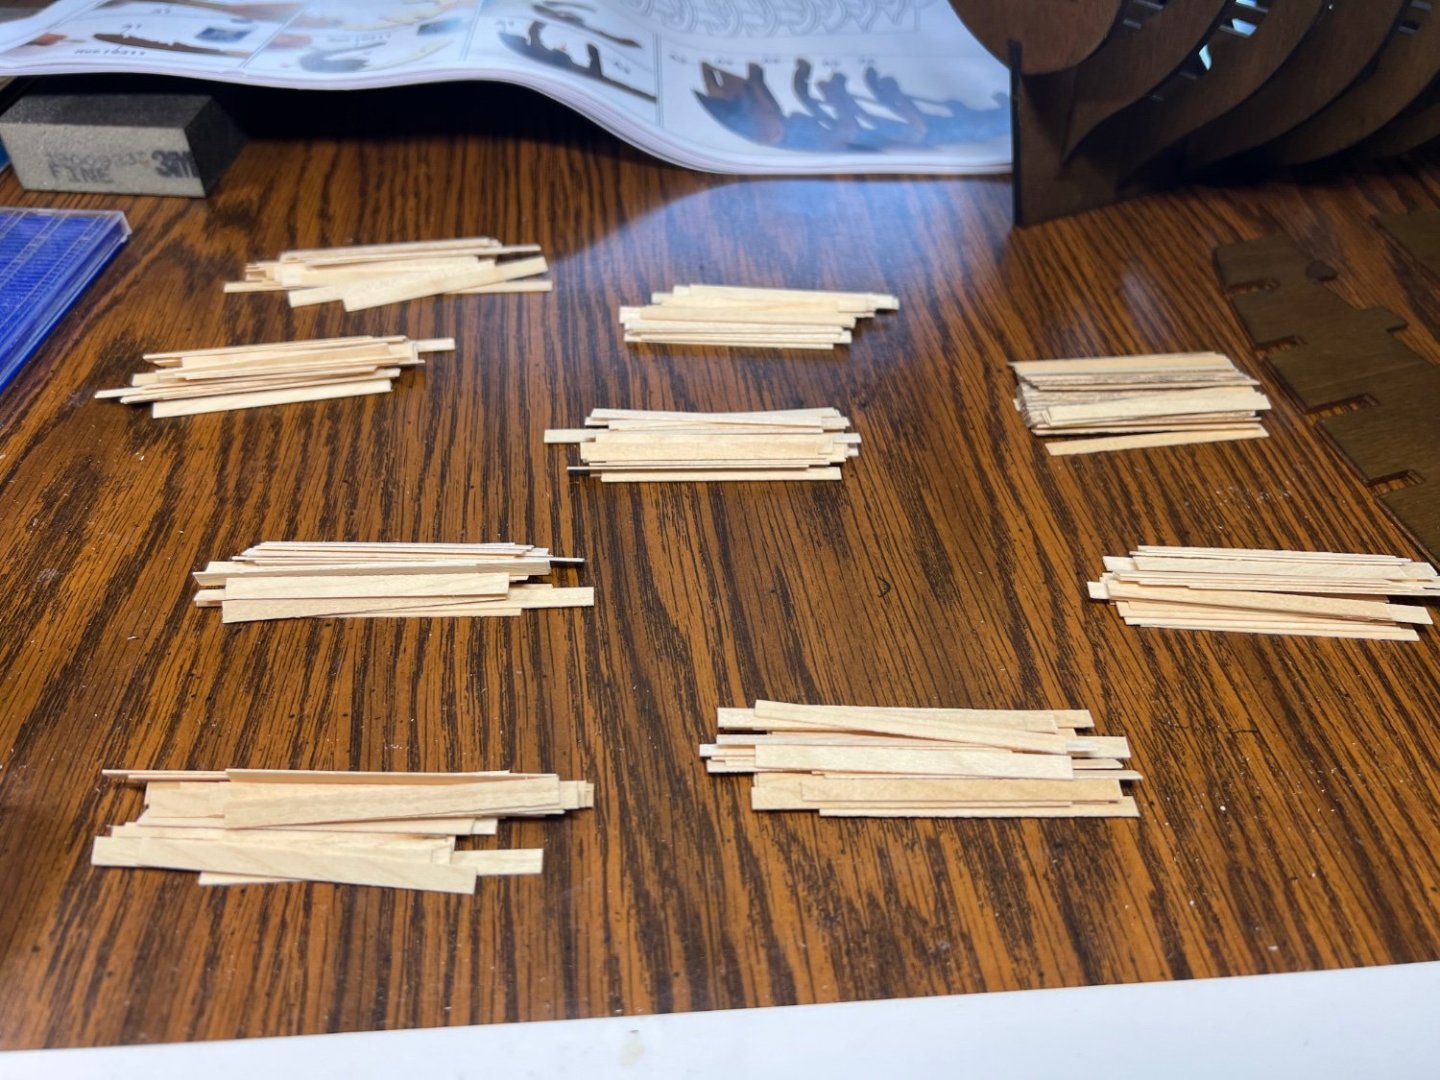
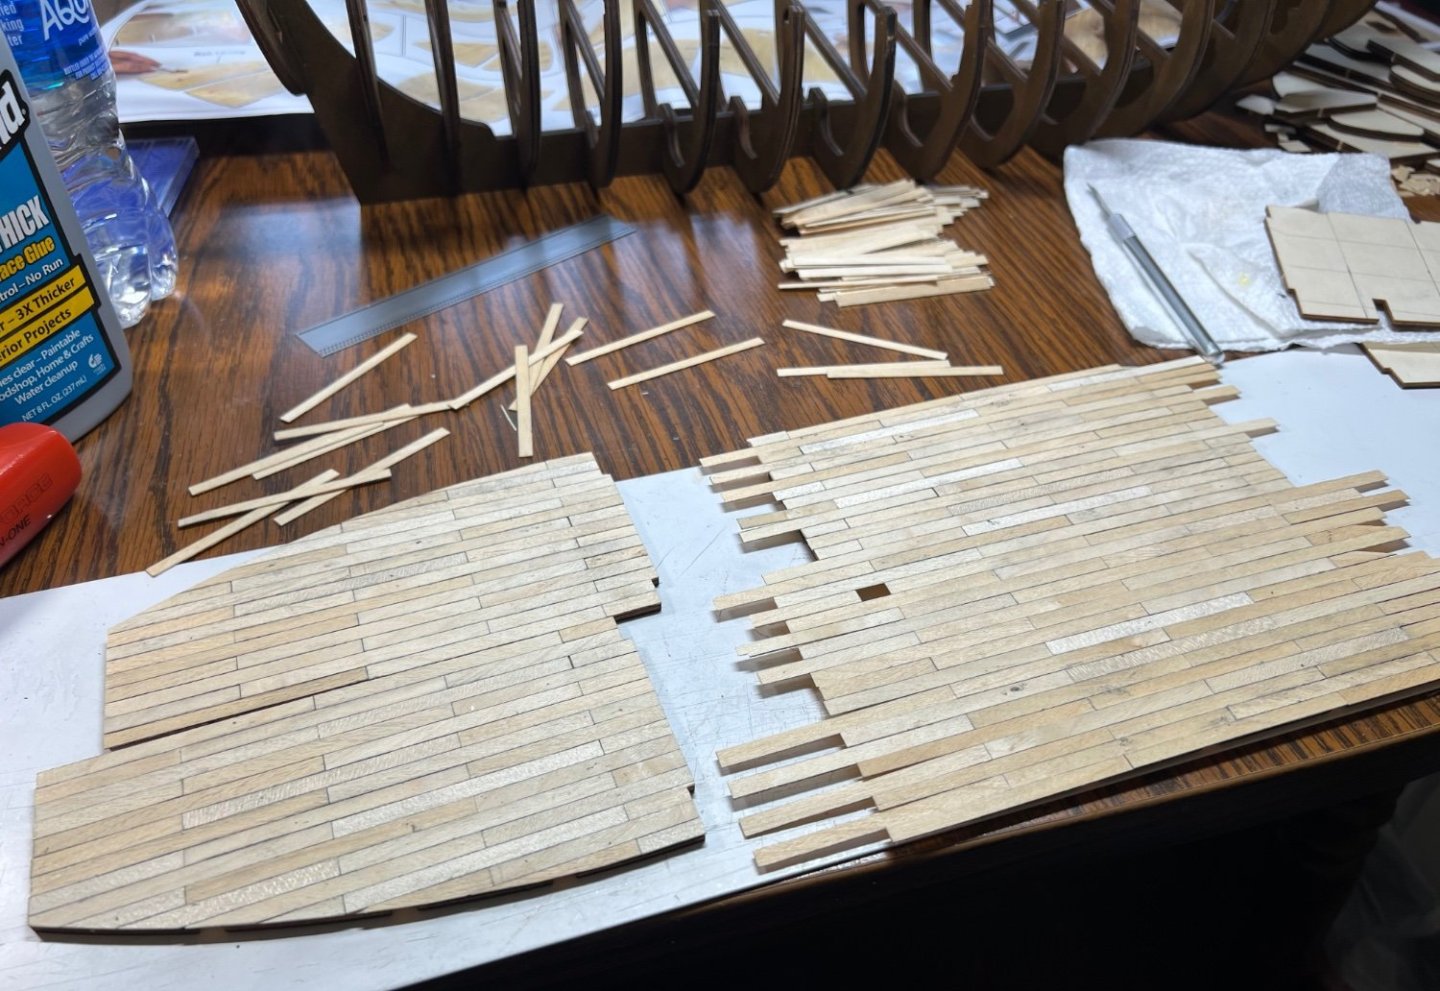
Video 2, instruction sheet B, almost complete. I need to let the glue set longer before trimming more. I rushed myself because the glue was setting really quickly. I was using more glue in wider areas than I should have. Building it in 3 sections I didn’t notice what I had done until I laid them together. To late now. One of those things when it’s done, I should be the only one to see it. I’ll do better on the top decking. This is almost all hidden anyways or covered mostly. Each strip made 9 planks. 30 strips. 270 planks. A small pile left over. Plans called for 266 of B1.


-
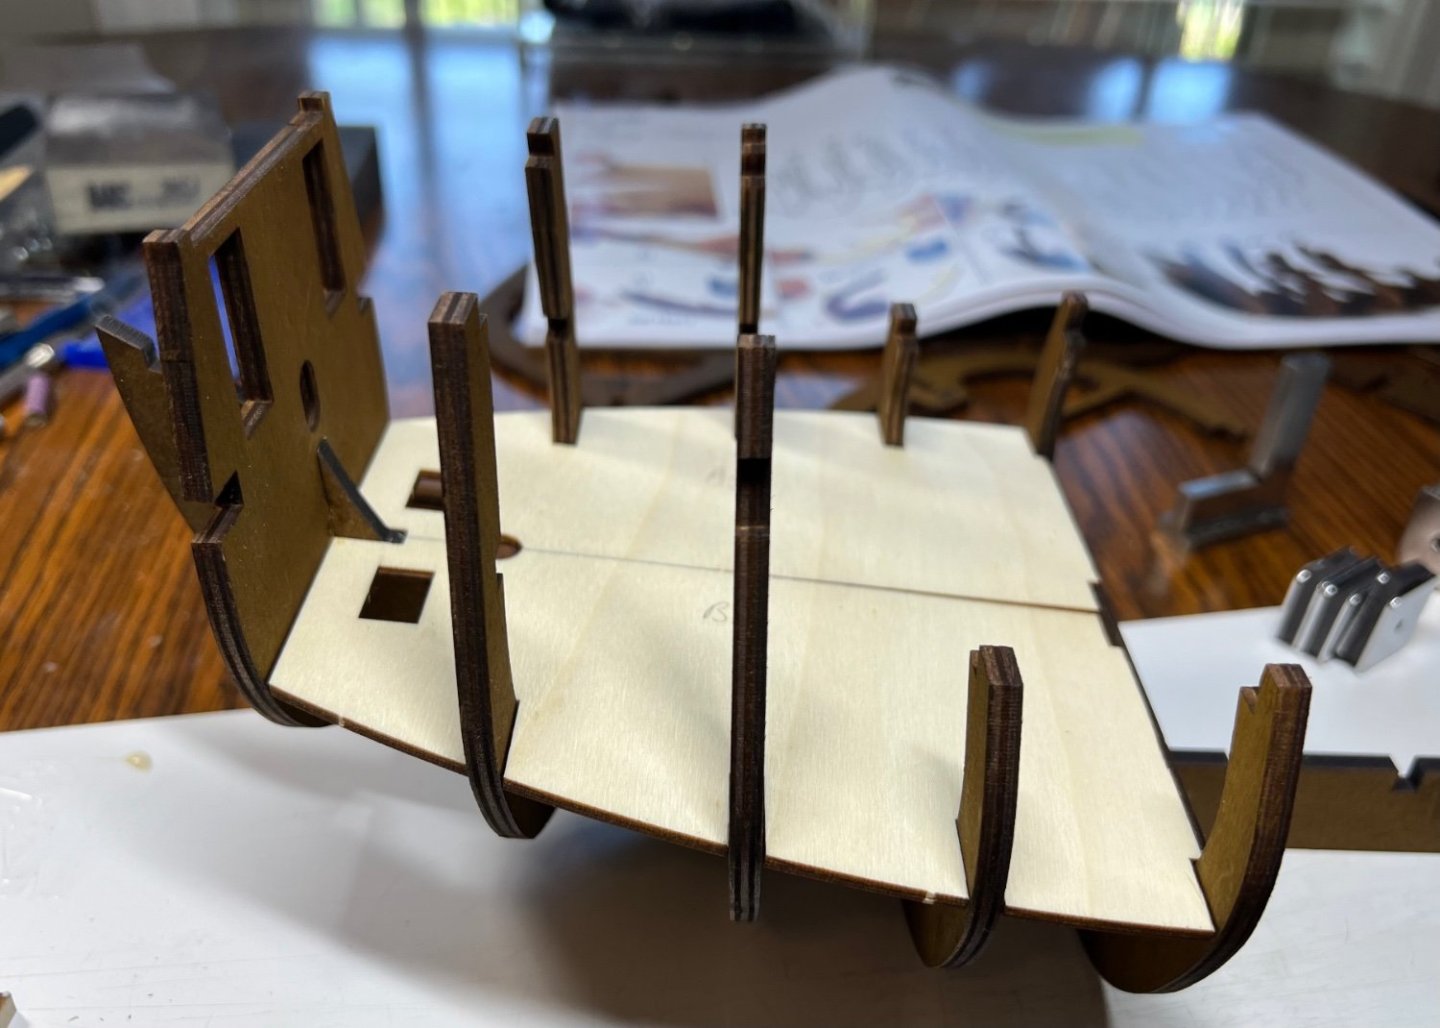
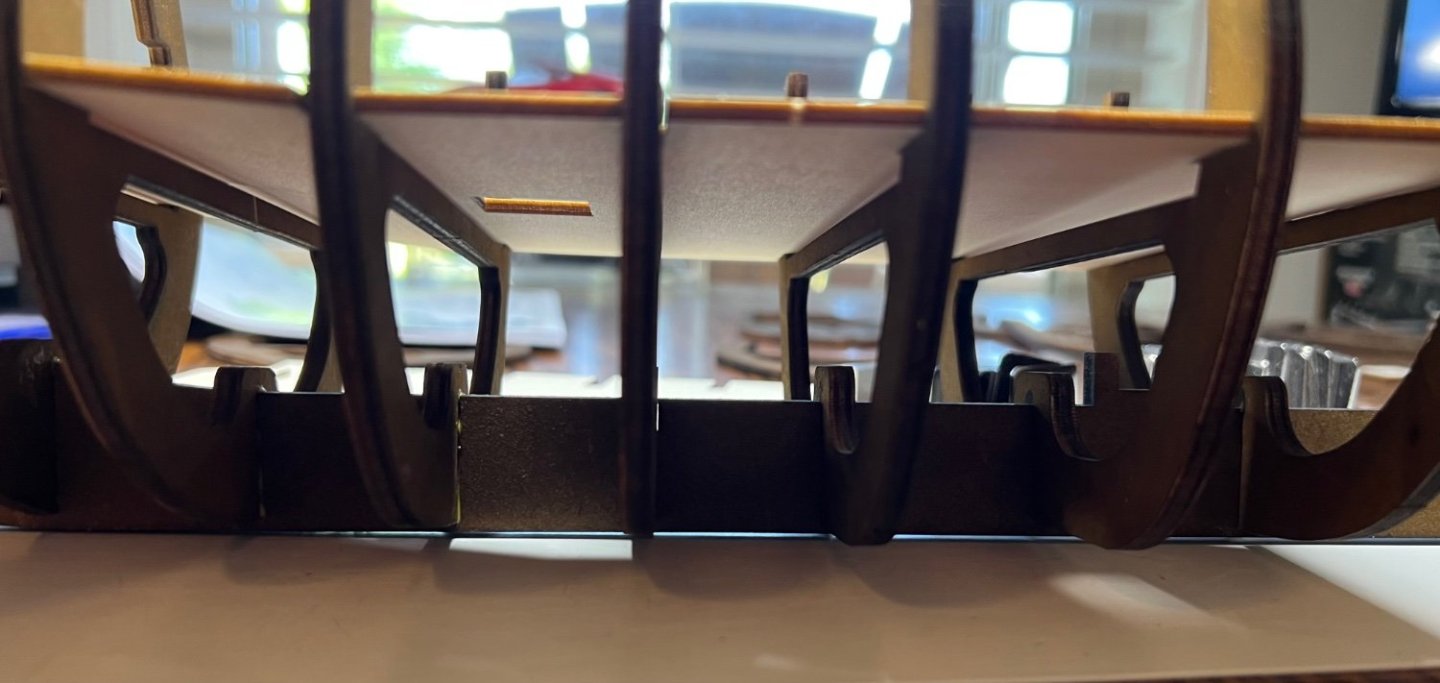
Video 1, instruction page A complete. I used the decking as guides and glued the formers in place per section. It seemed really important to keep it all lined up. No better way than to use the parts that will be fitted later to keep it square. This was something I could clearly see as helpful. I hope I can recognize other things like this before it’s to late haha. Using the decking as guides, not yet glued in place of course, worked really well. The glue I used a white PVA type so far seems like a good choice. It drys clear and it’s thick and easy to work with. It runs a little bit when I get to much on a part but it’s easy to use. It tacks quickly and holds quick like standard yellow wood glue.


-
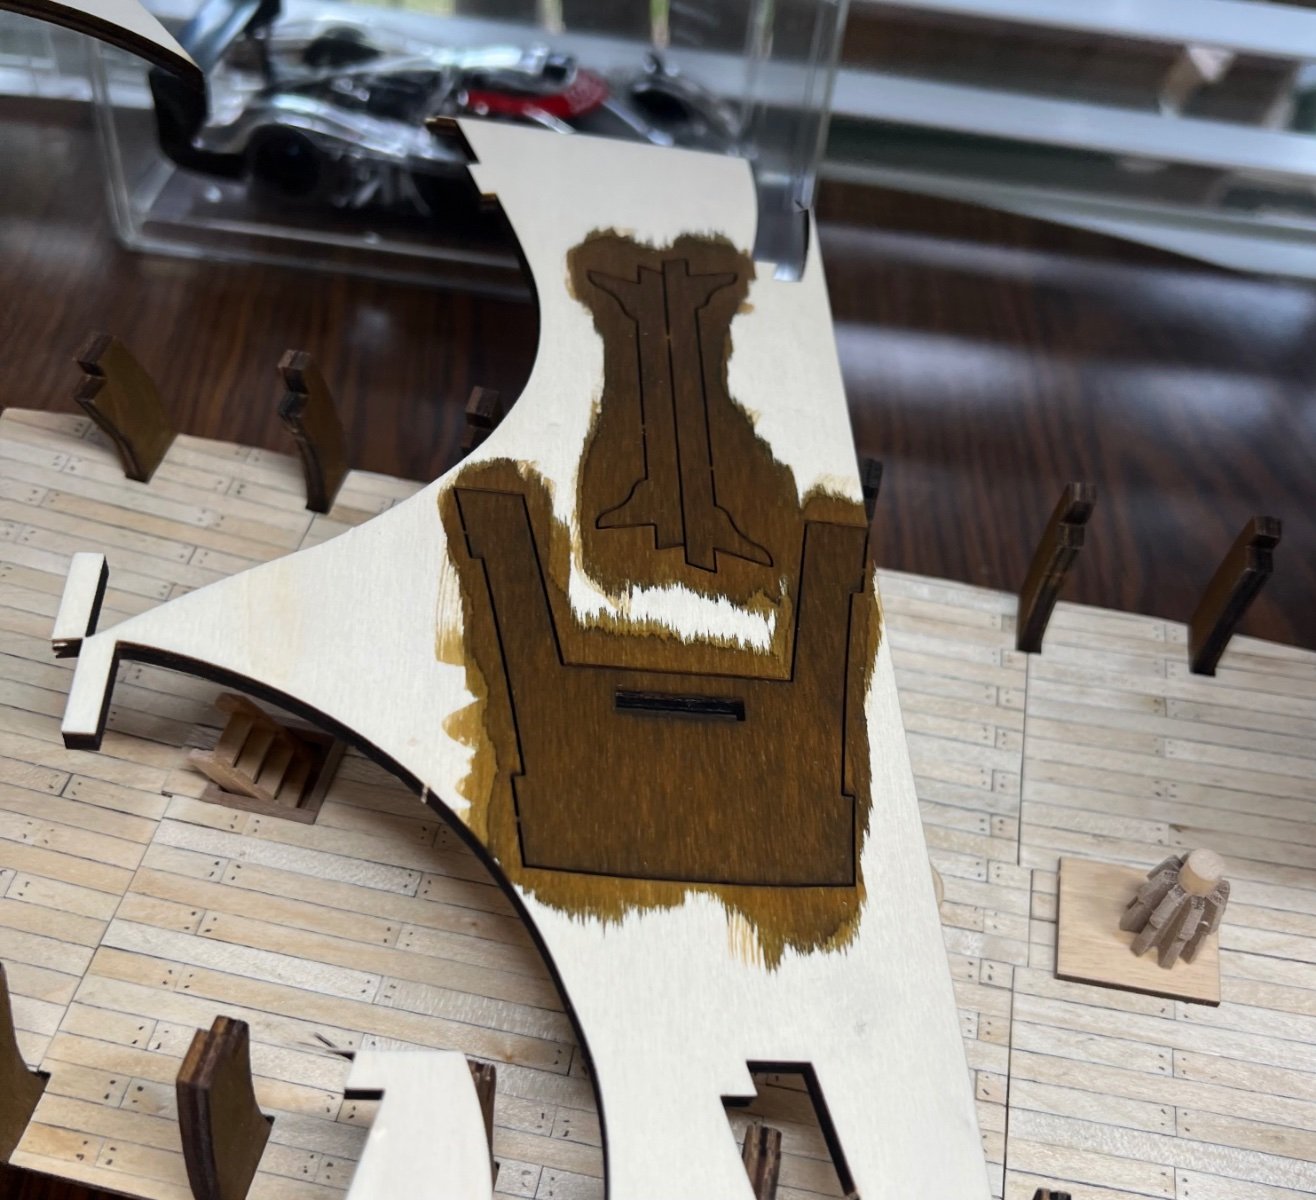
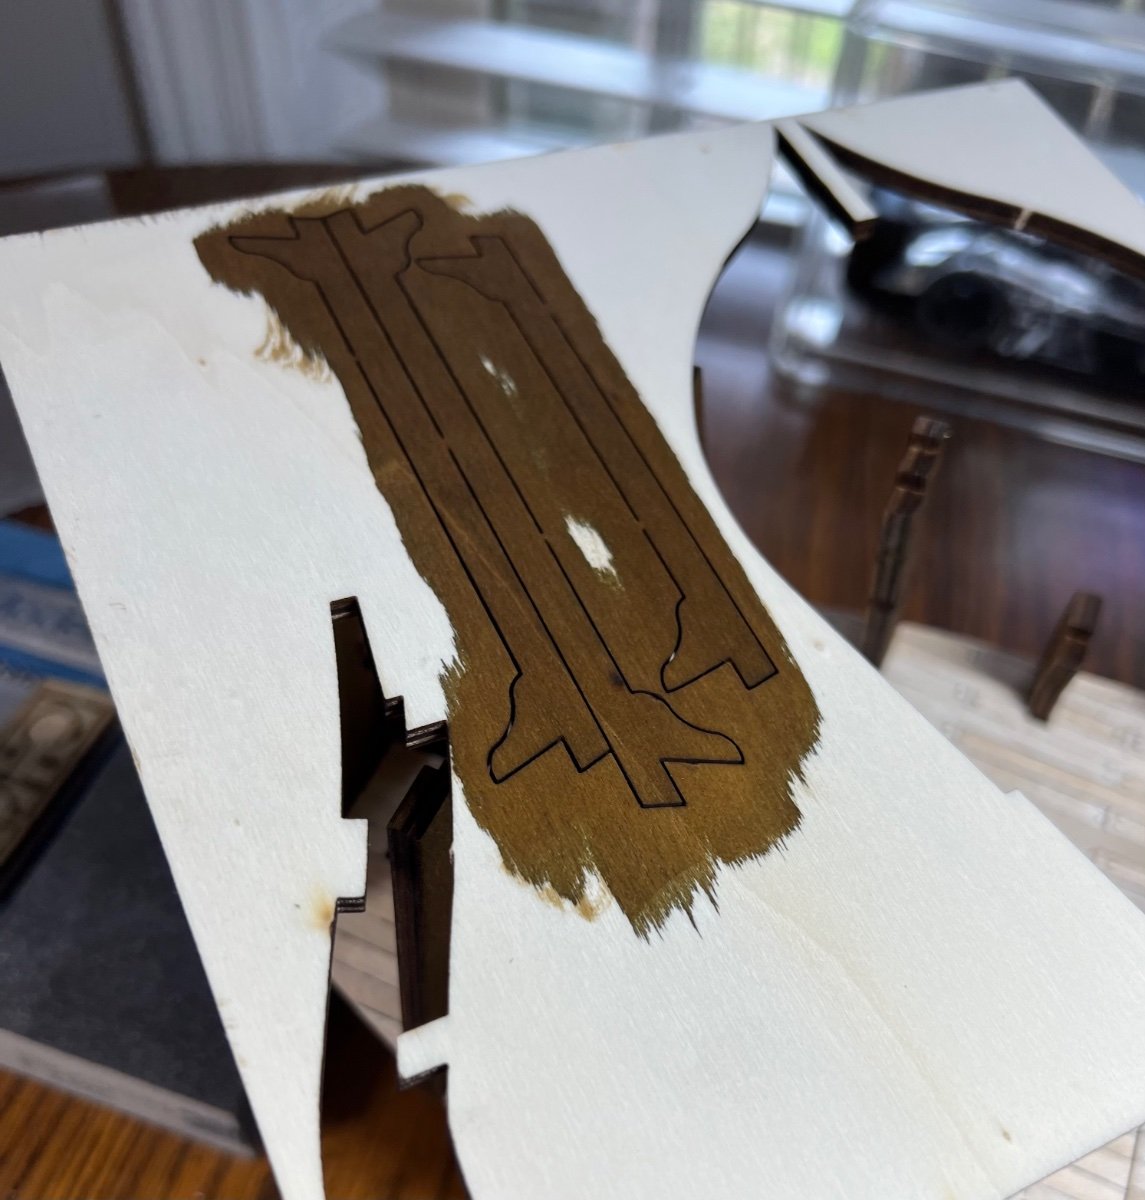
The 1st video shows this step taking about 2 minutes. This is not true lol. The stain does look good. Lightly sanded and stained. I’m debating on a second coat.


-
@Paul Le Wol I was doing that with the yellow wood glue. Every time I use white glue it shrinks to nothing and is 10% of its size. Maybe it would blend with sanding dust, I did consider that.
- 40 replies
-
- 2
-

-
- Model Shipways
- Muscongus Bay Lobster Smack
- (and 1 more)
-
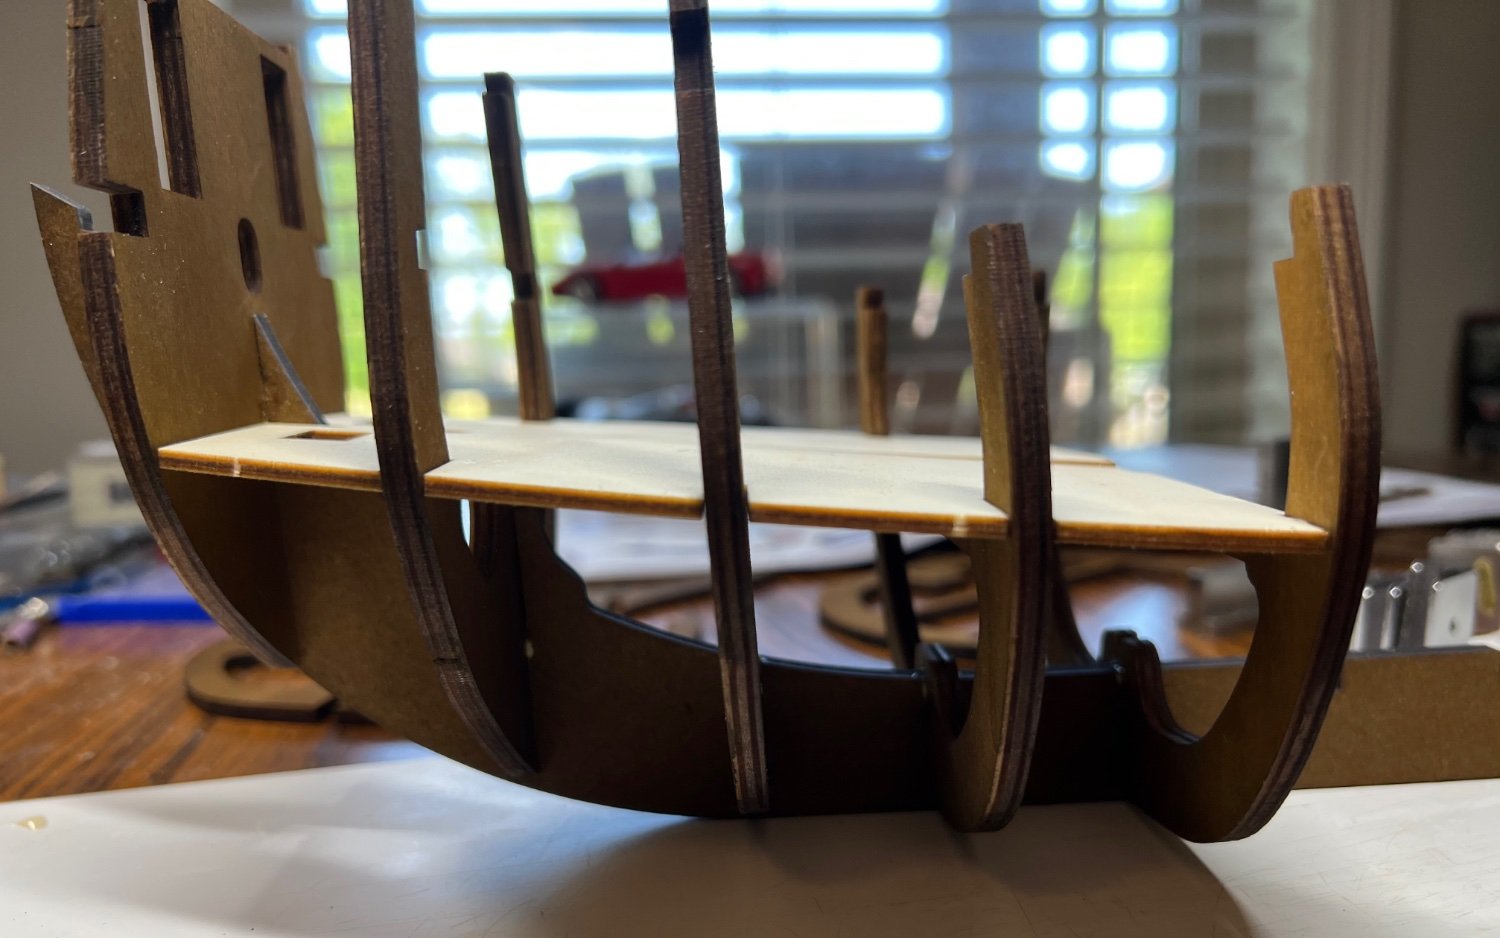
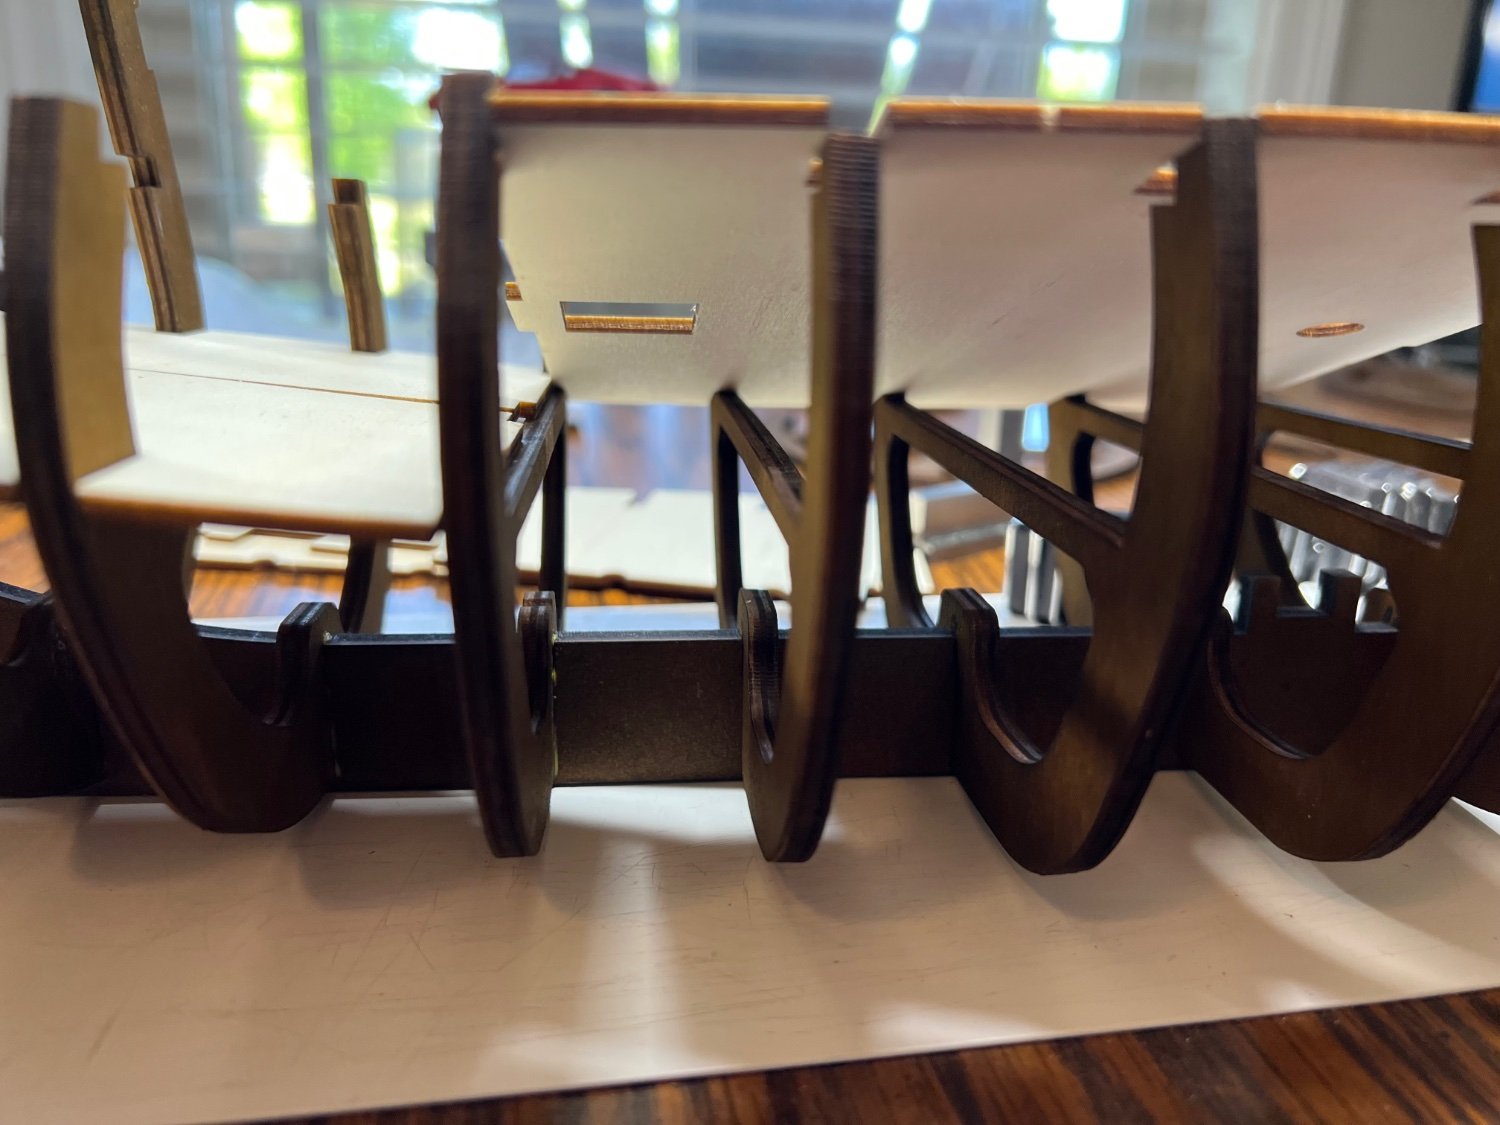
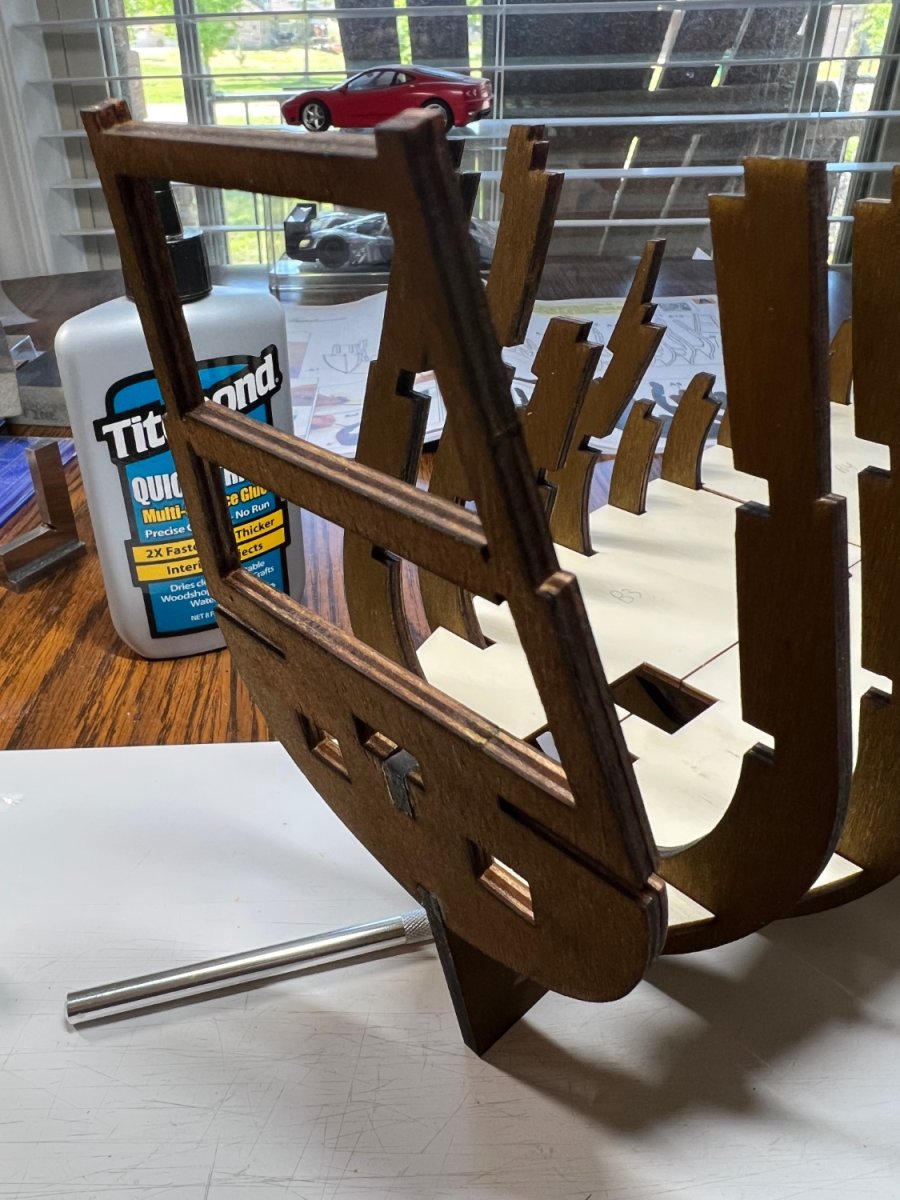
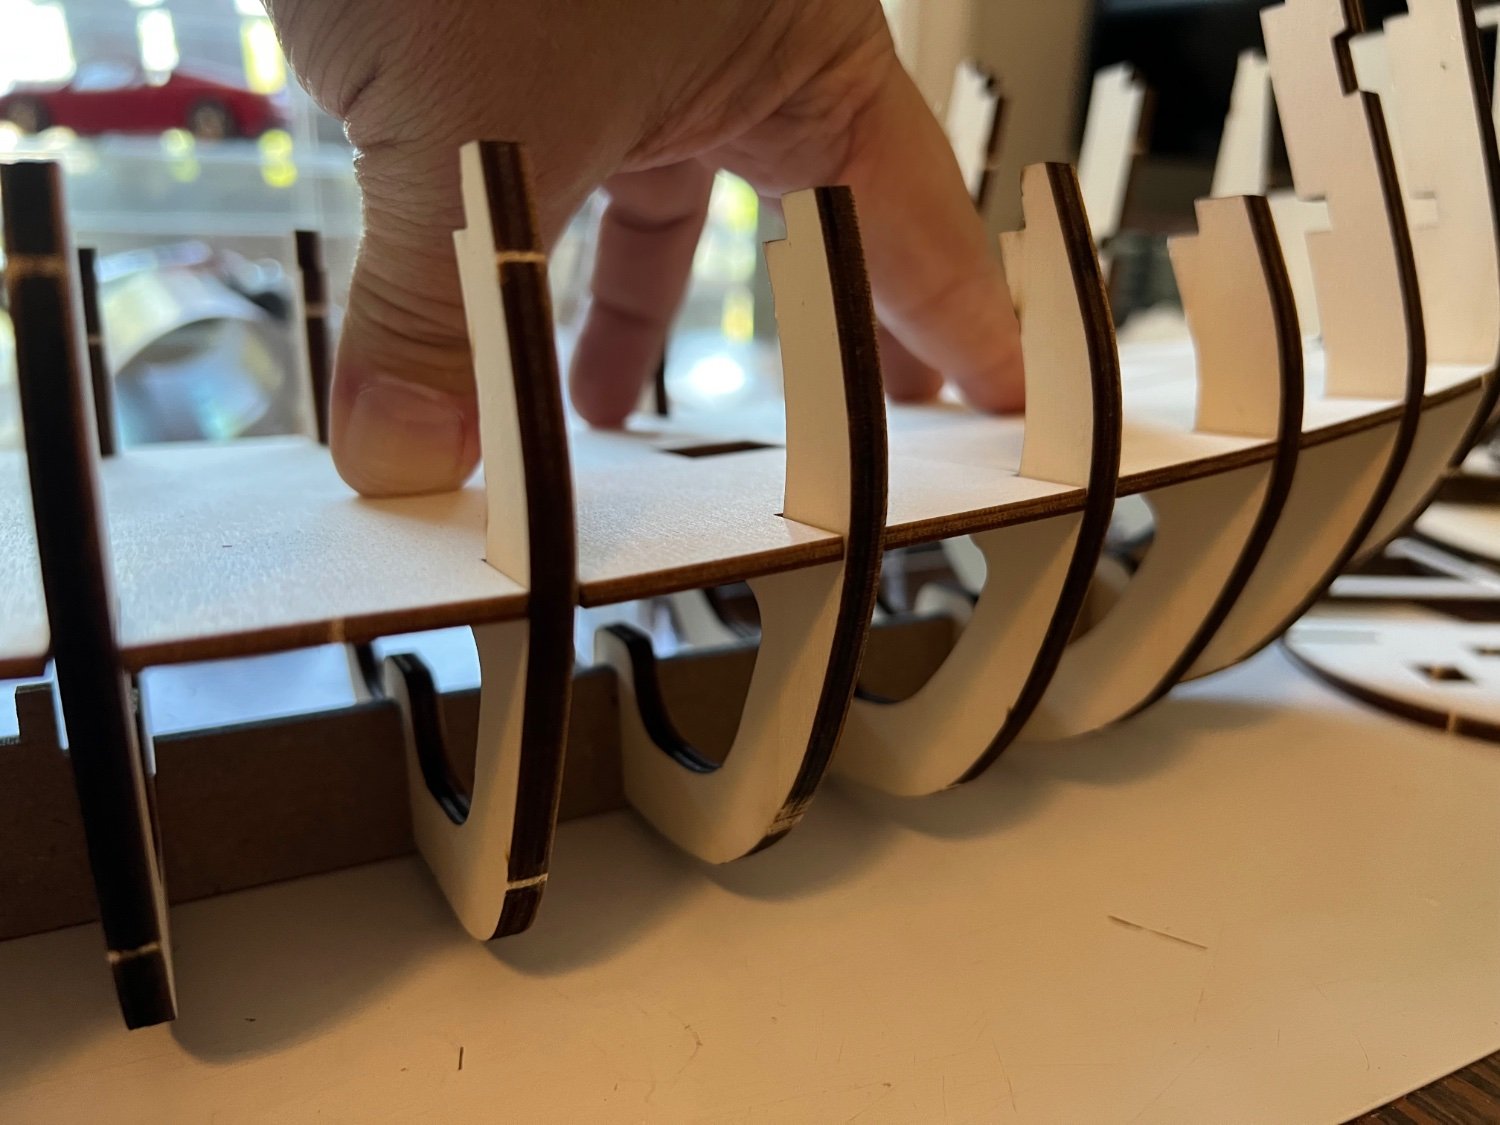
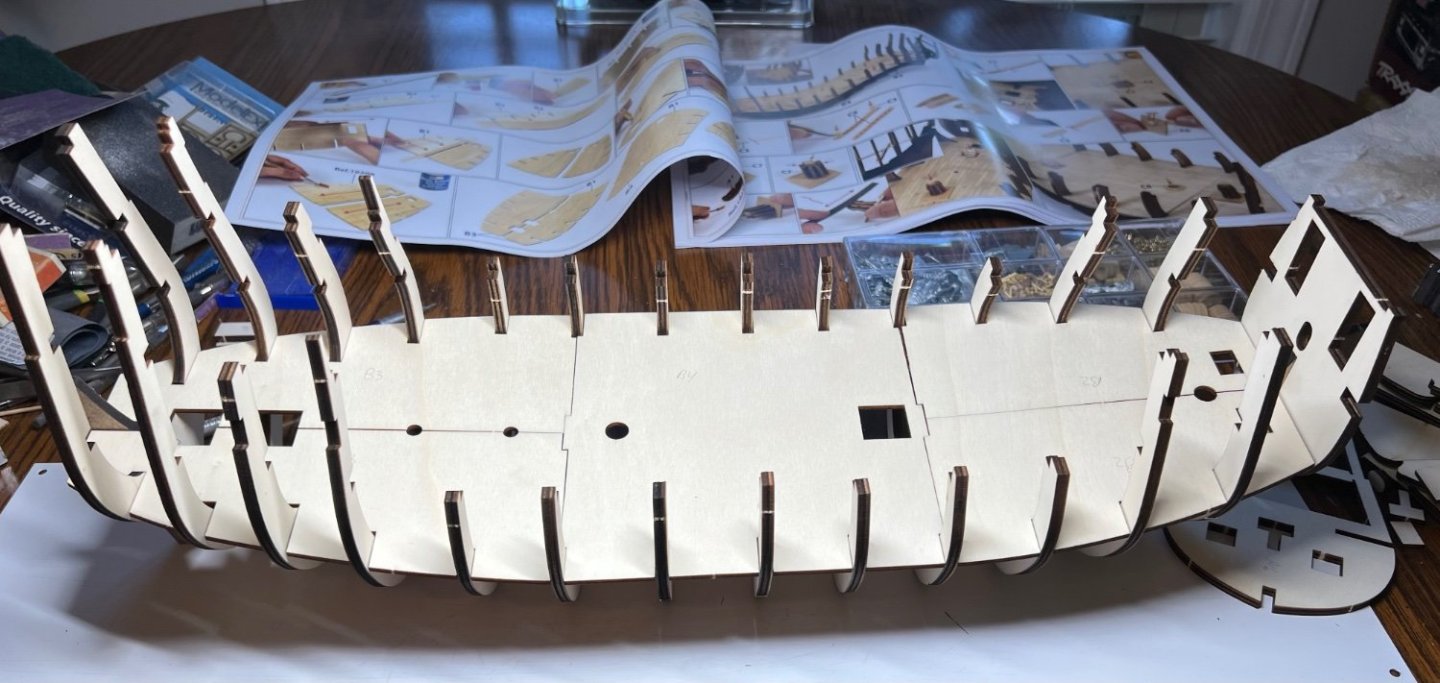
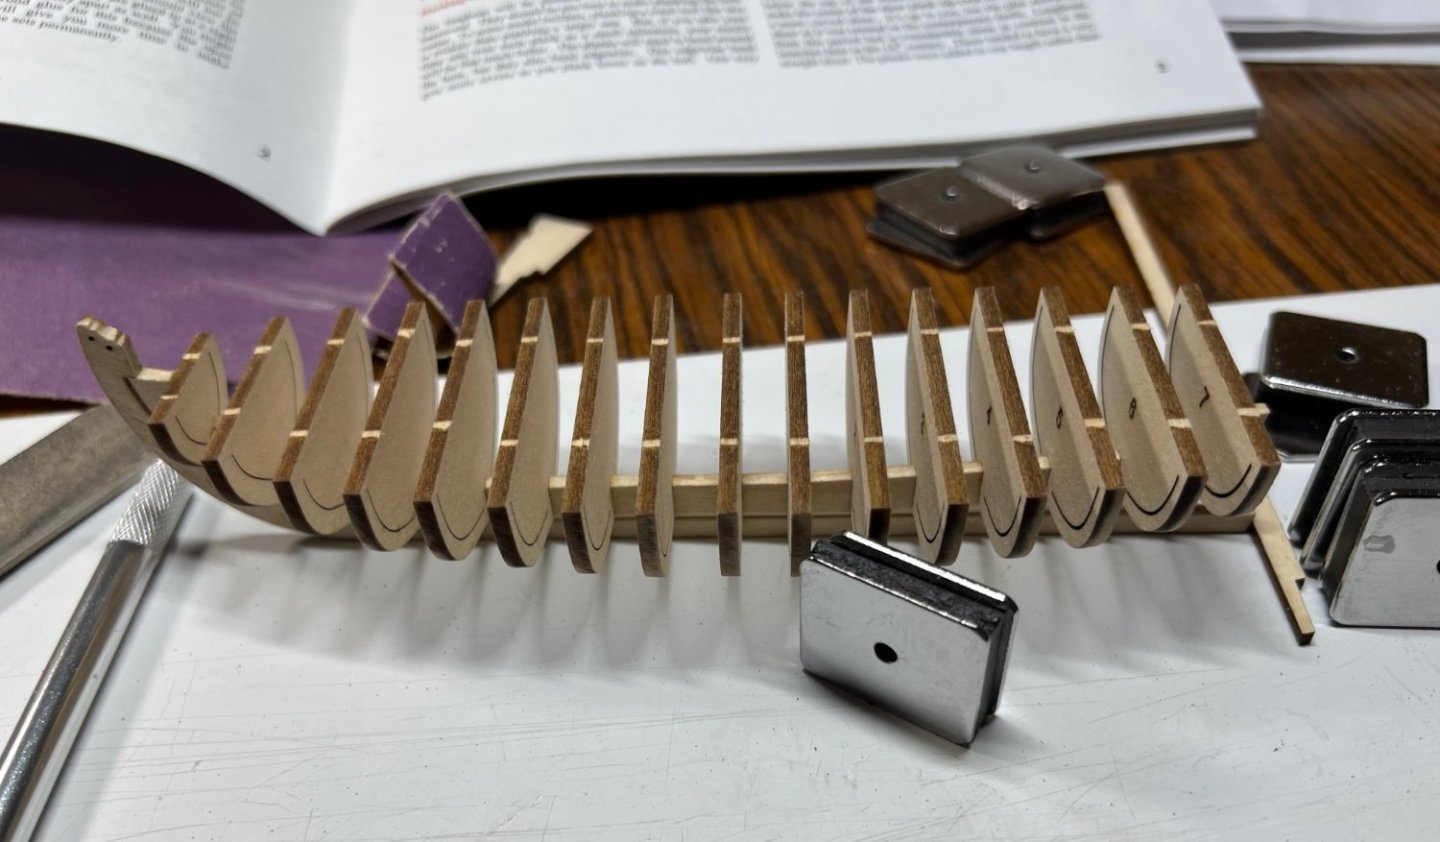
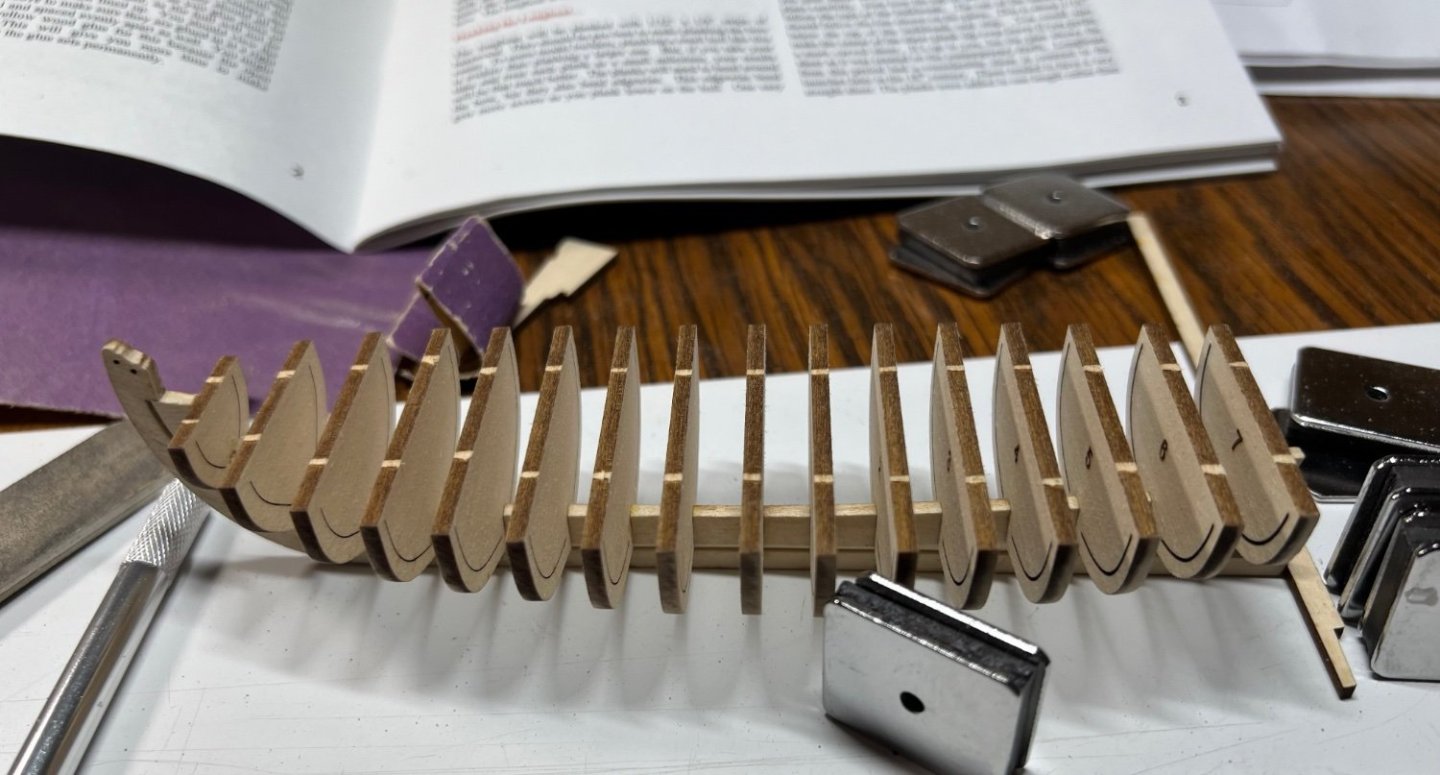
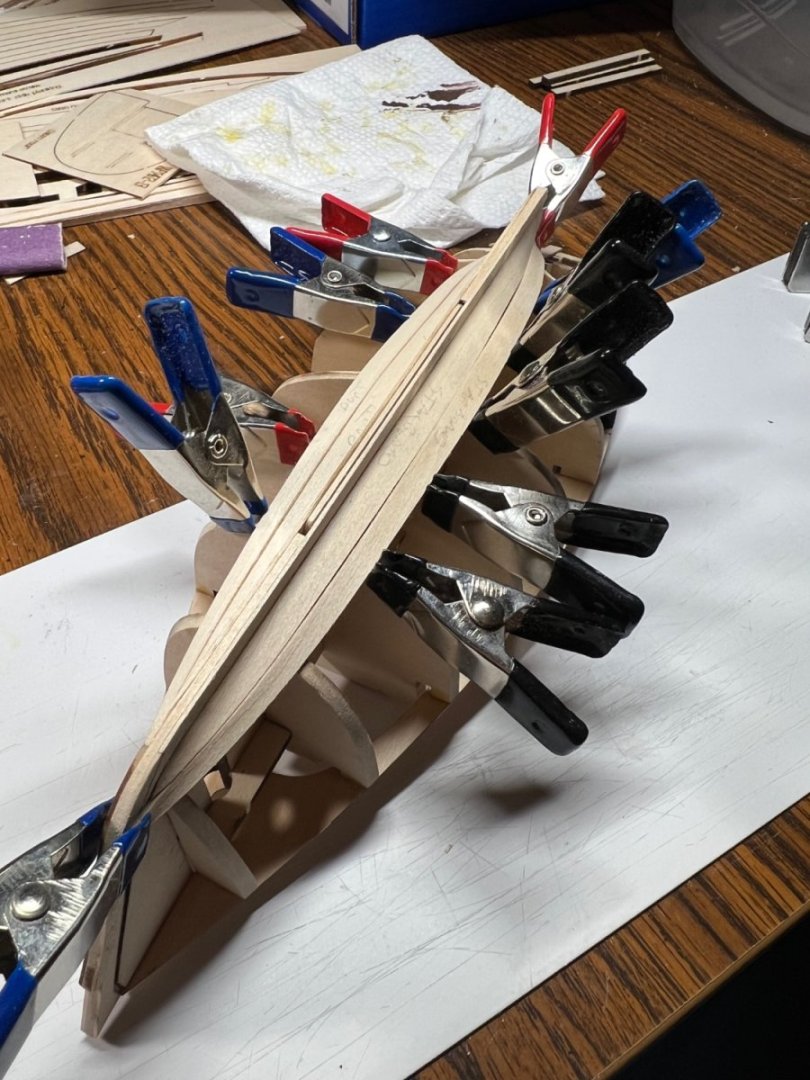
Mocking up the fit, I’ve wondered about this part for a long time, they are built flat but curve when mounted. So much of the pictures and other stuff make it look like it’s flat in 3 parts, it’s not. I’m excited to get this moving on!


-
Planking sanded a bit. I’ve looked at most wood fillers, Gorilla is to grainy. I ordered LePage out of Canada to the States, it will be a few weeks to get it. Then I can continue this project. It’s not bad so far. Fairing is a trick to learn well for sure.


- 40 replies
-
- 7
-
-
- Model Shipways
- Muscongus Bay Lobster Smack
- (and 1 more)
-
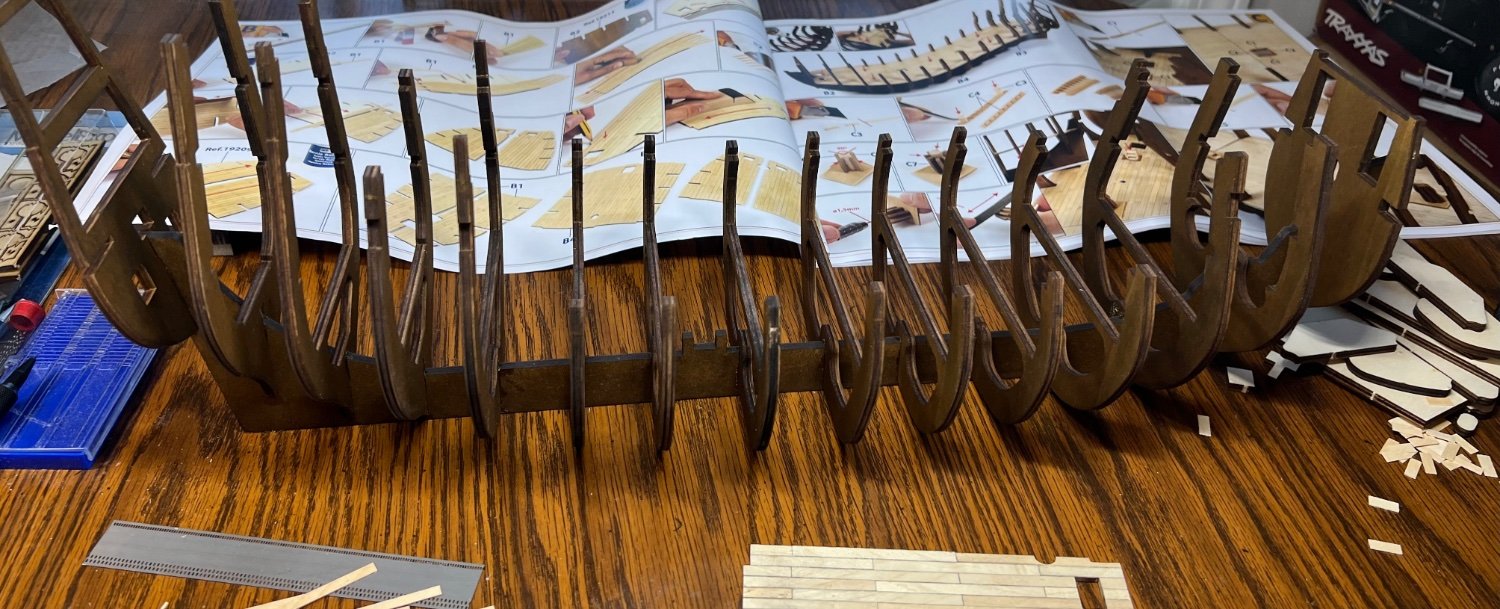
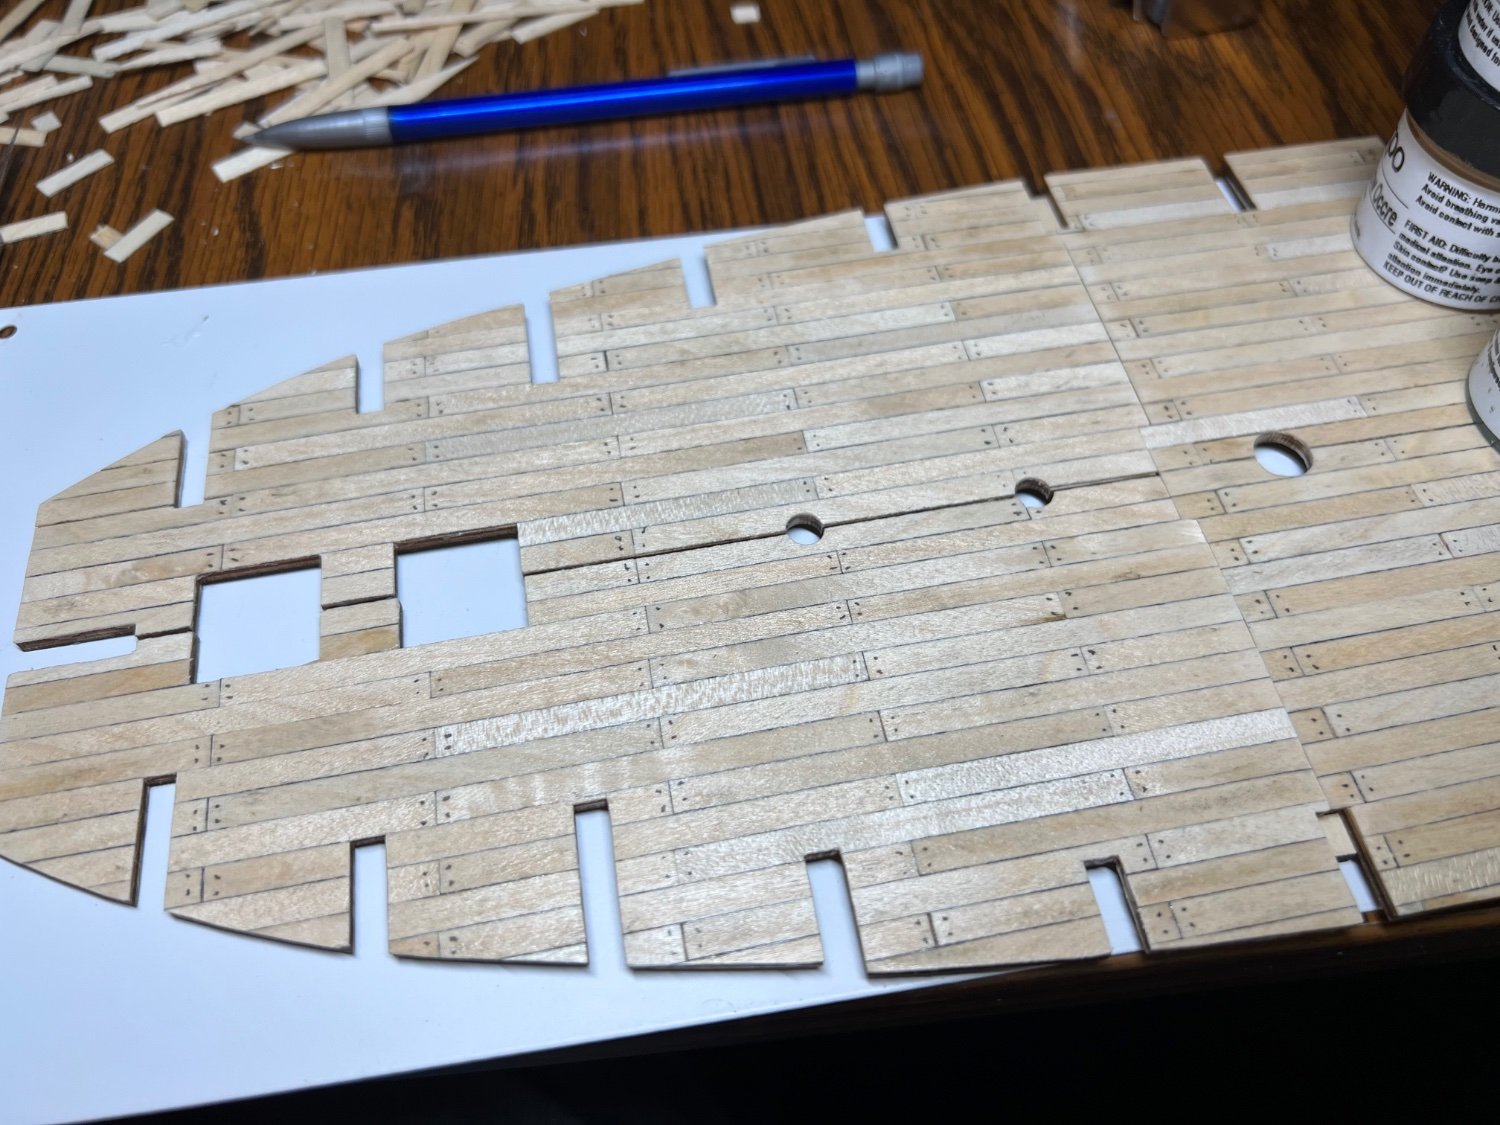
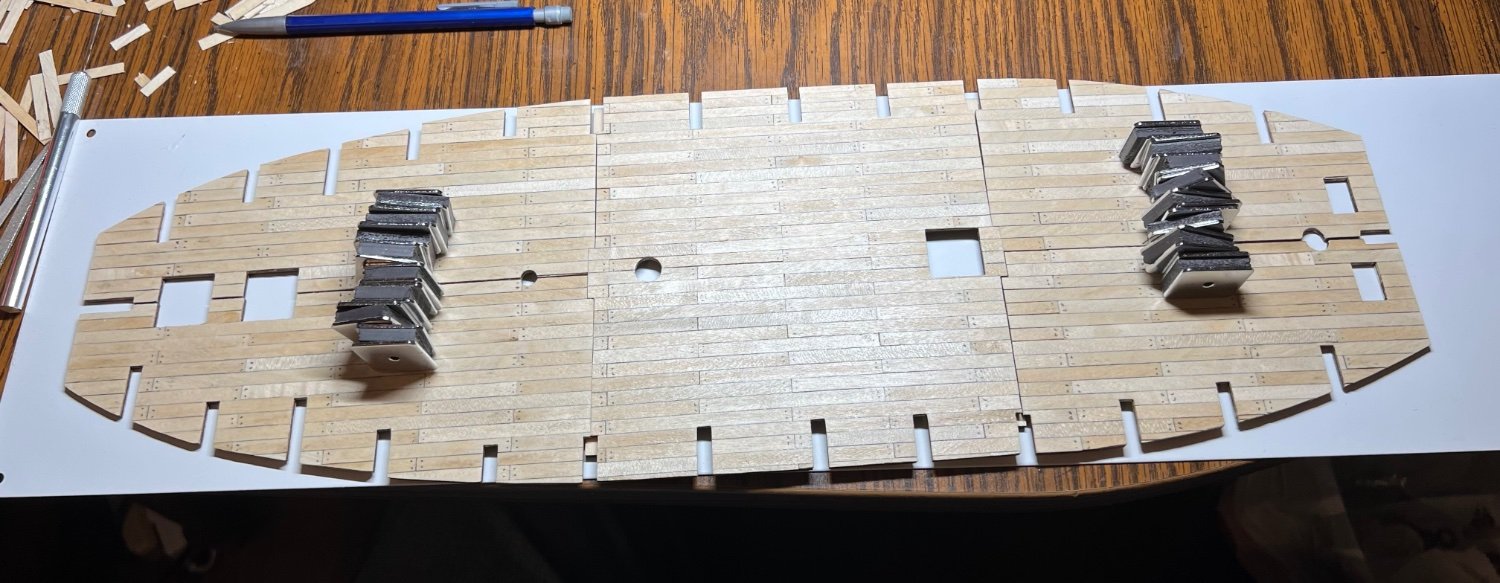
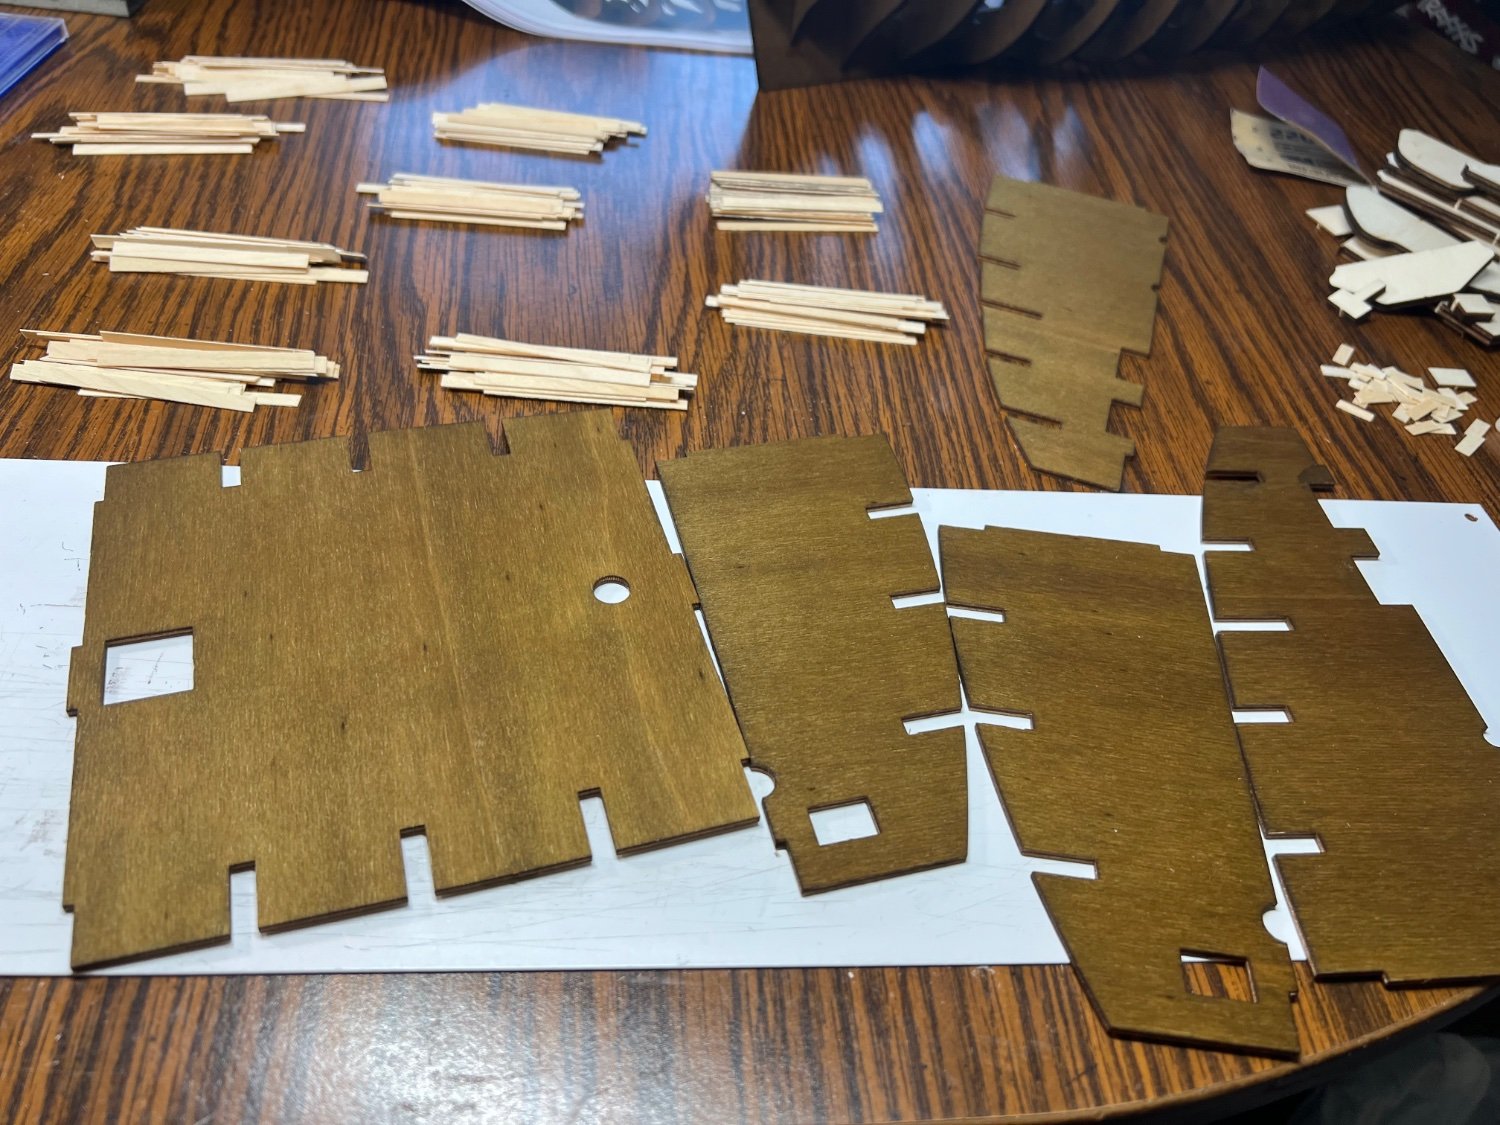
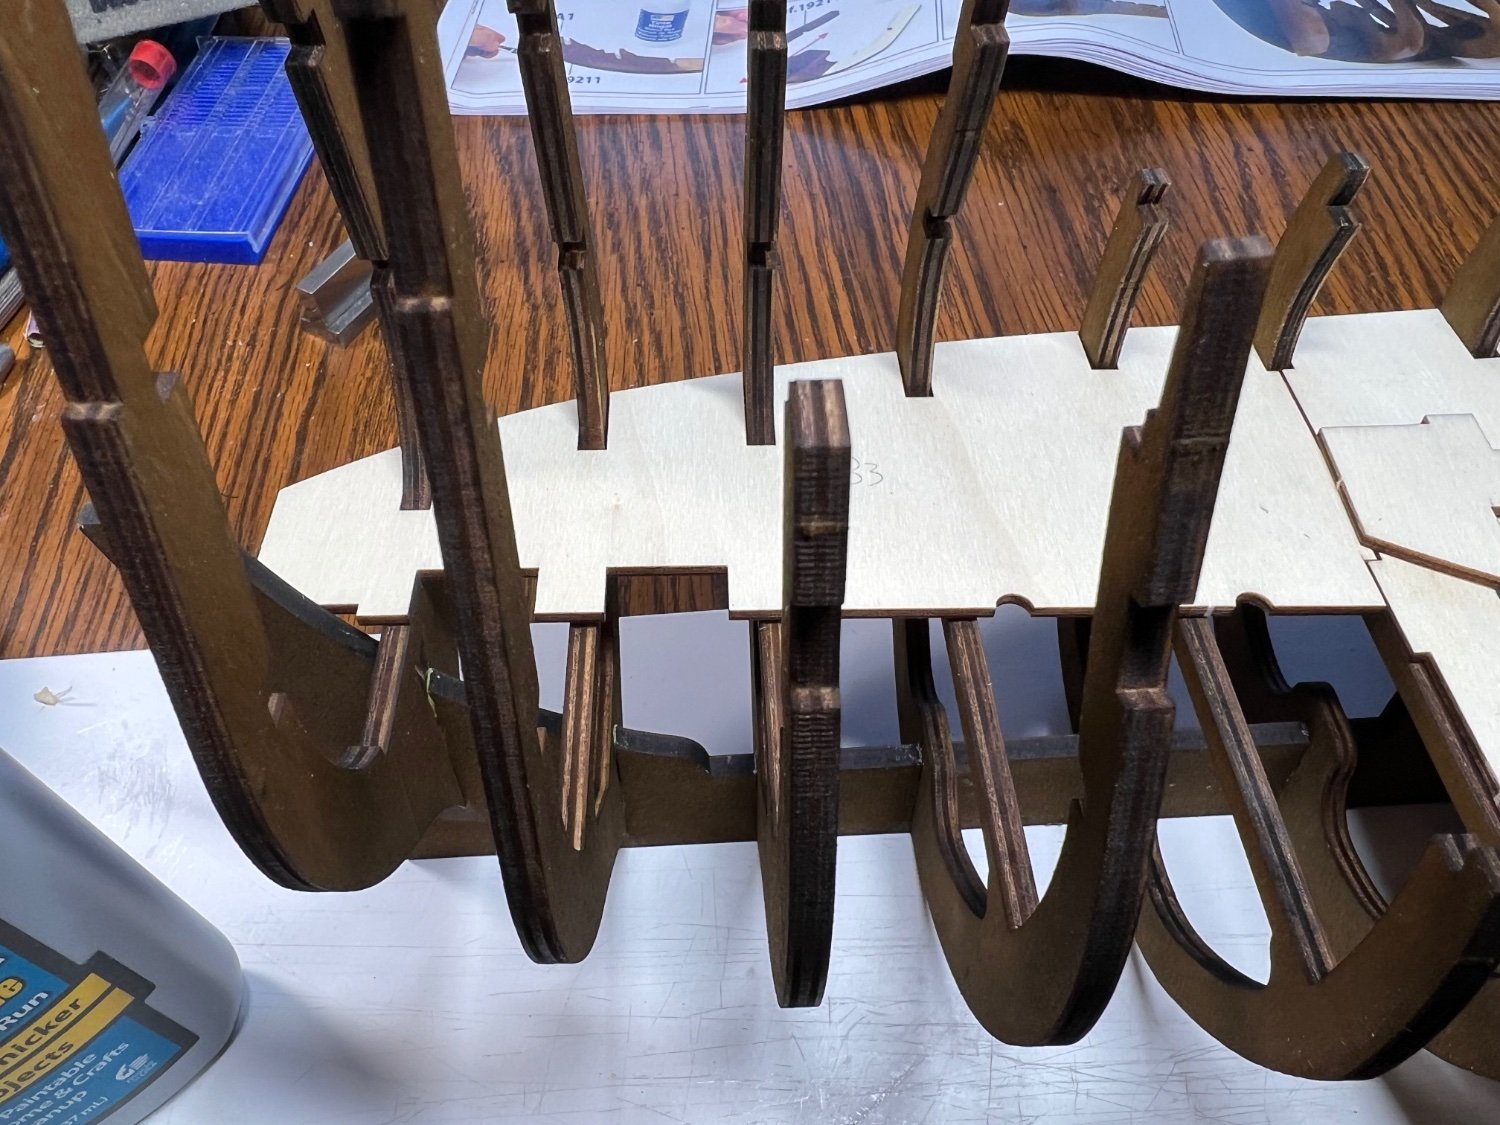
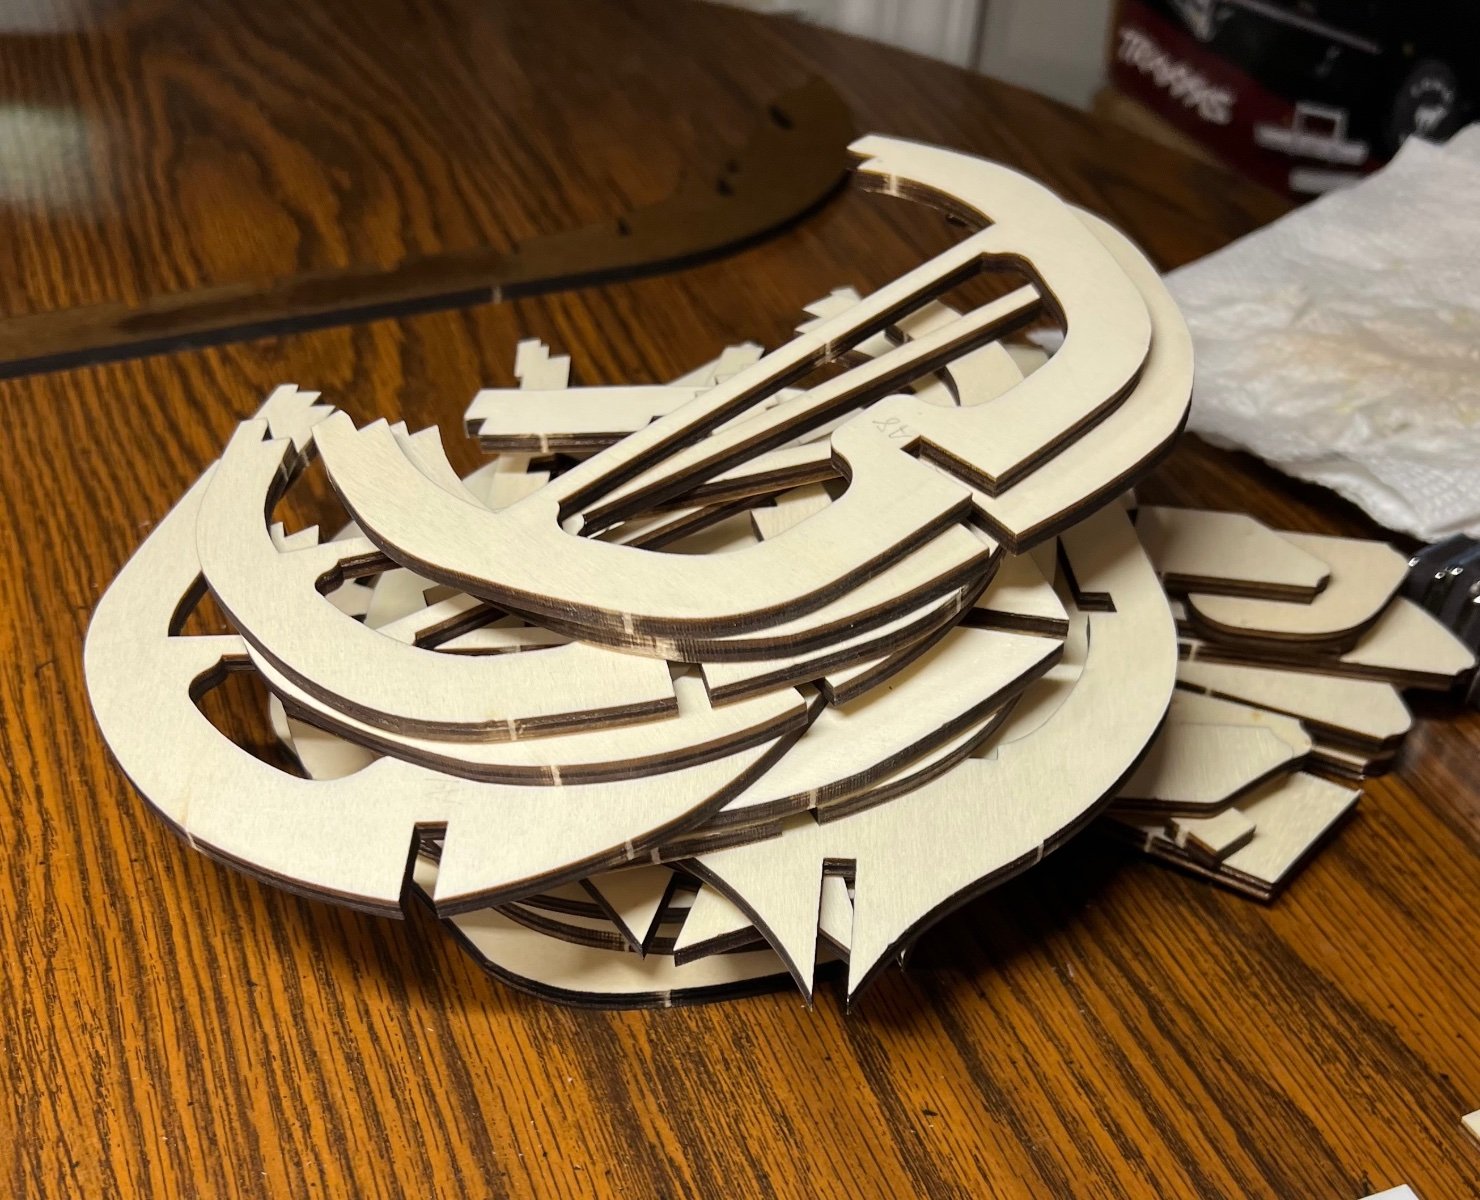
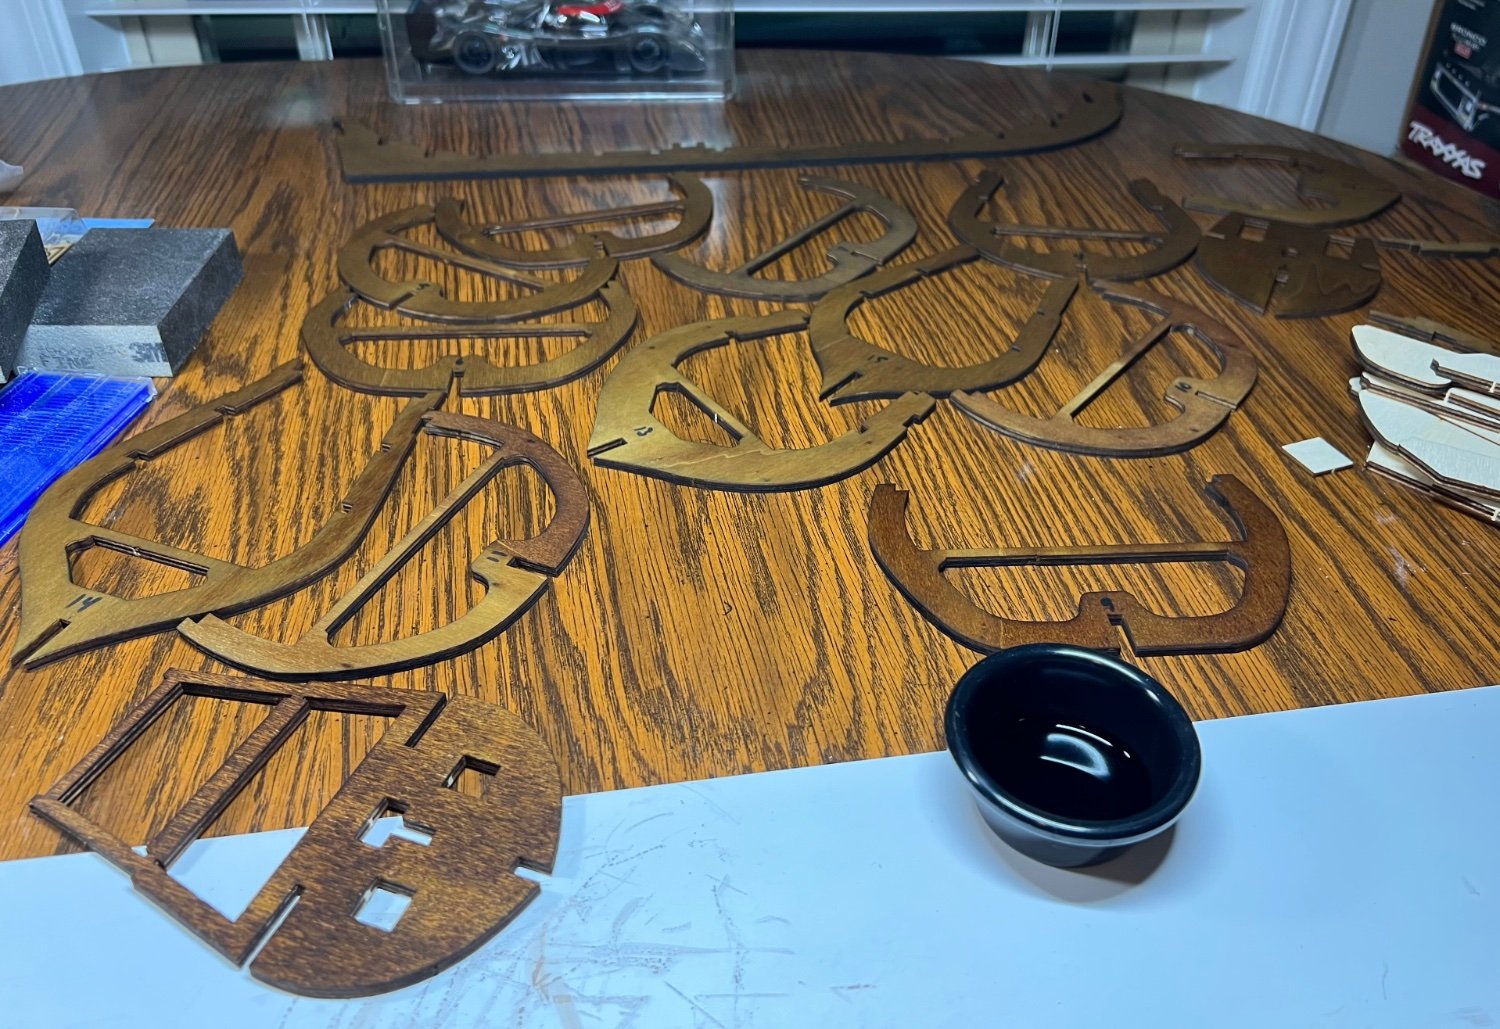
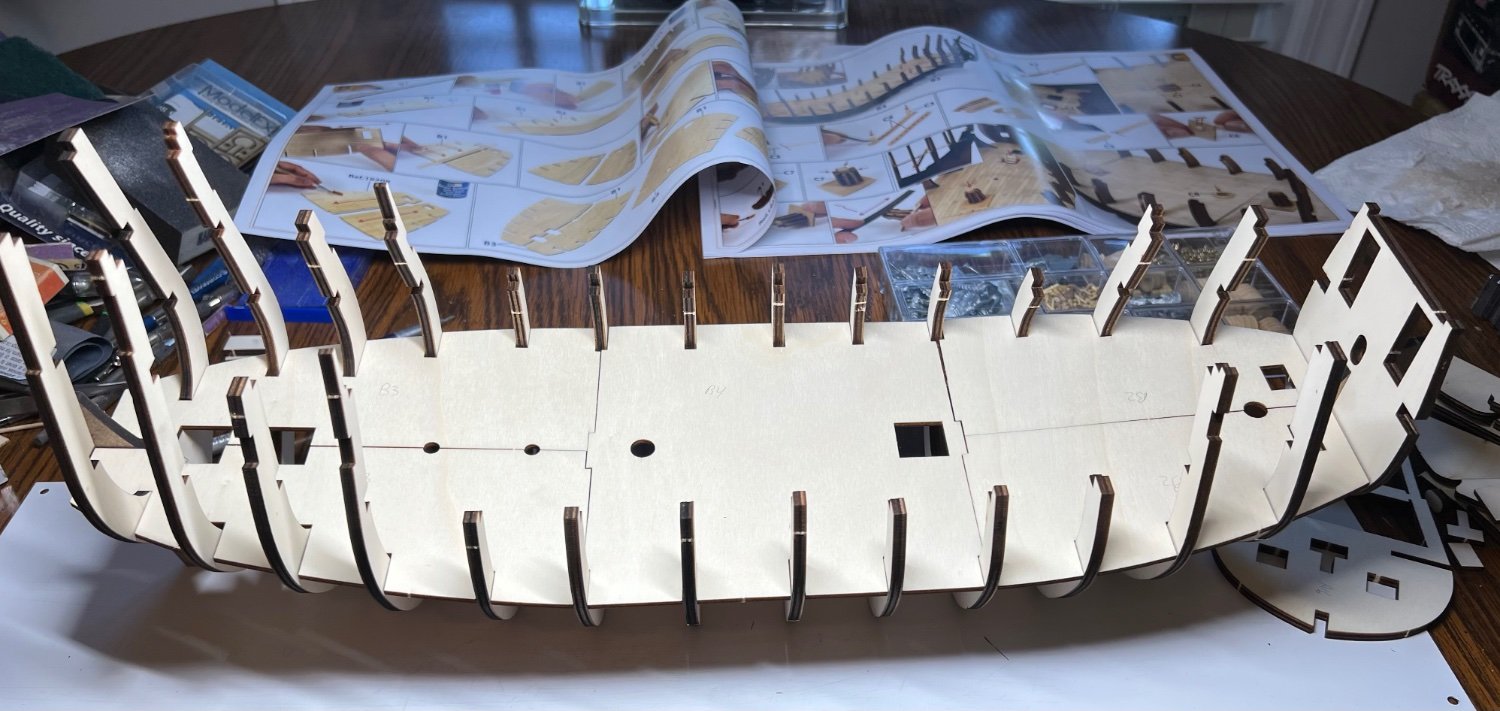
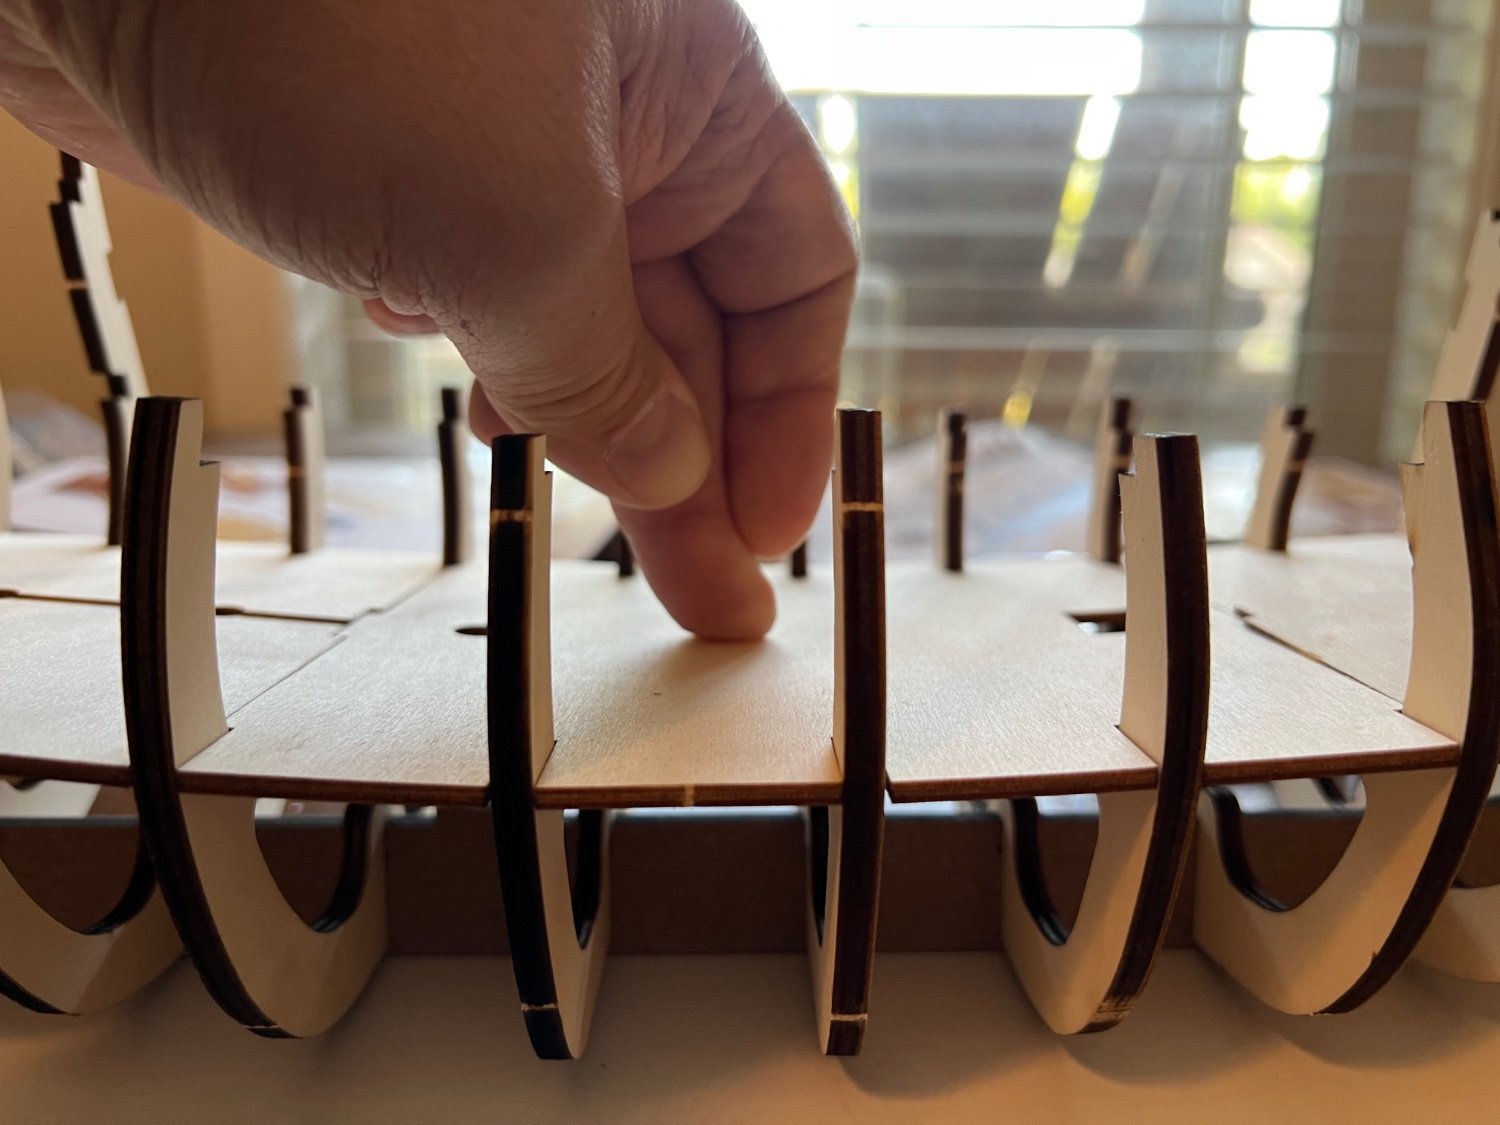
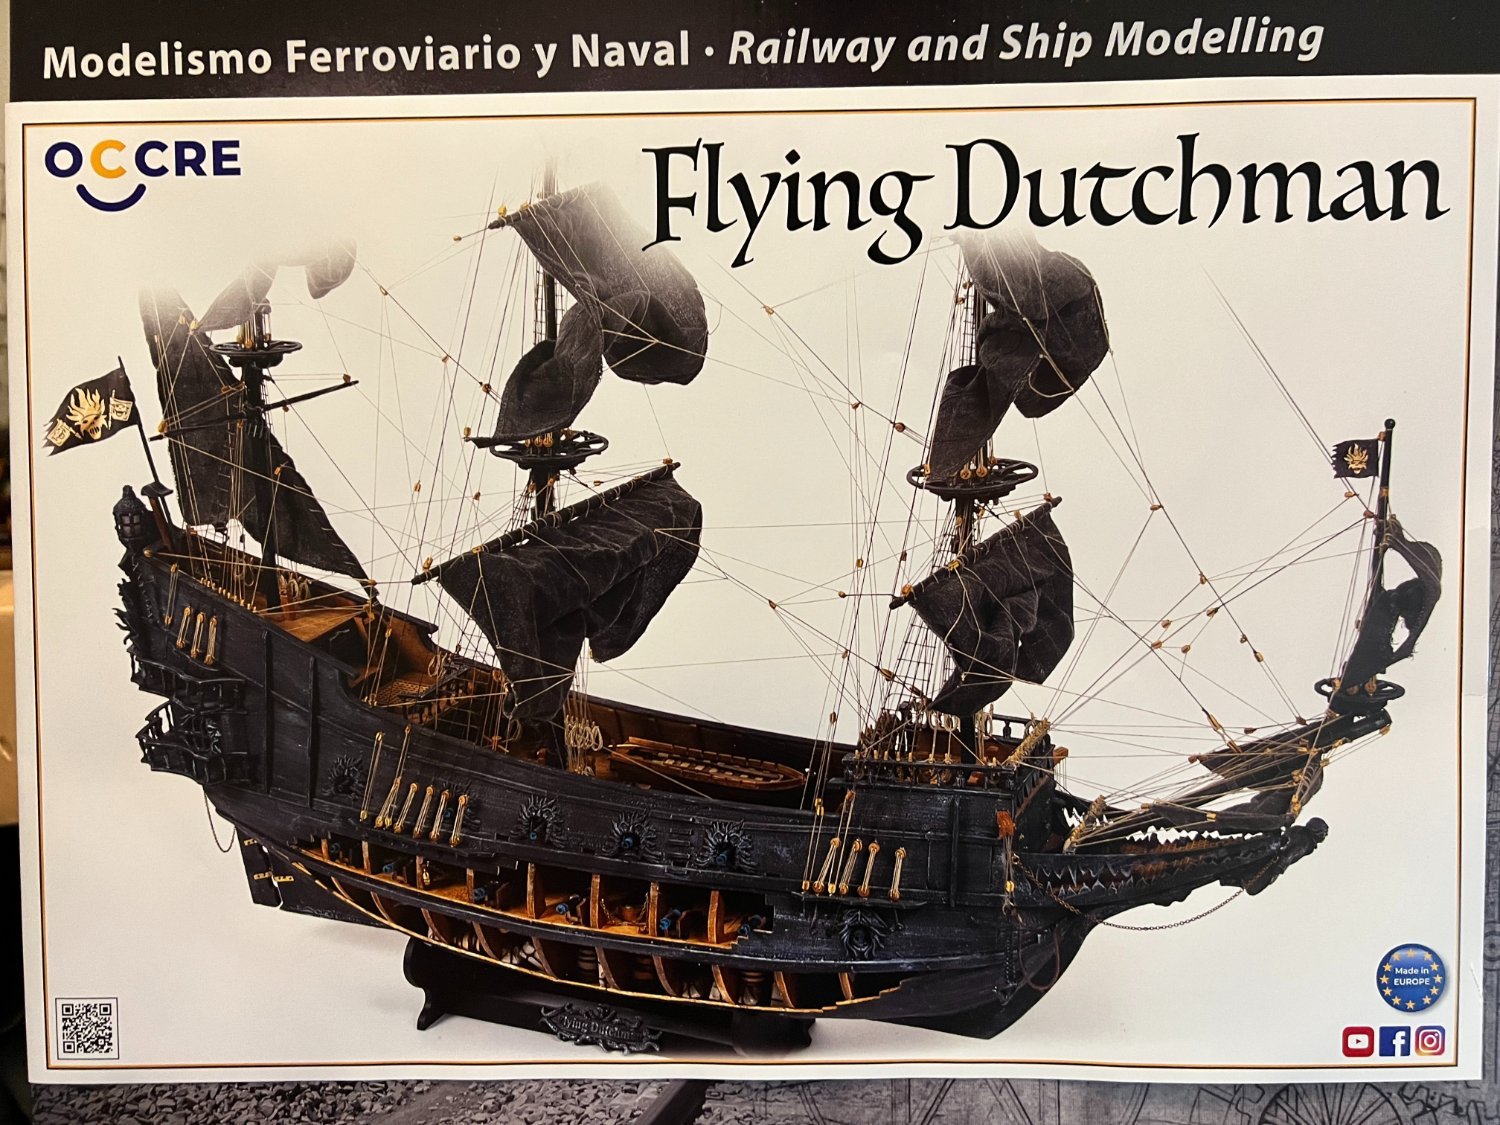
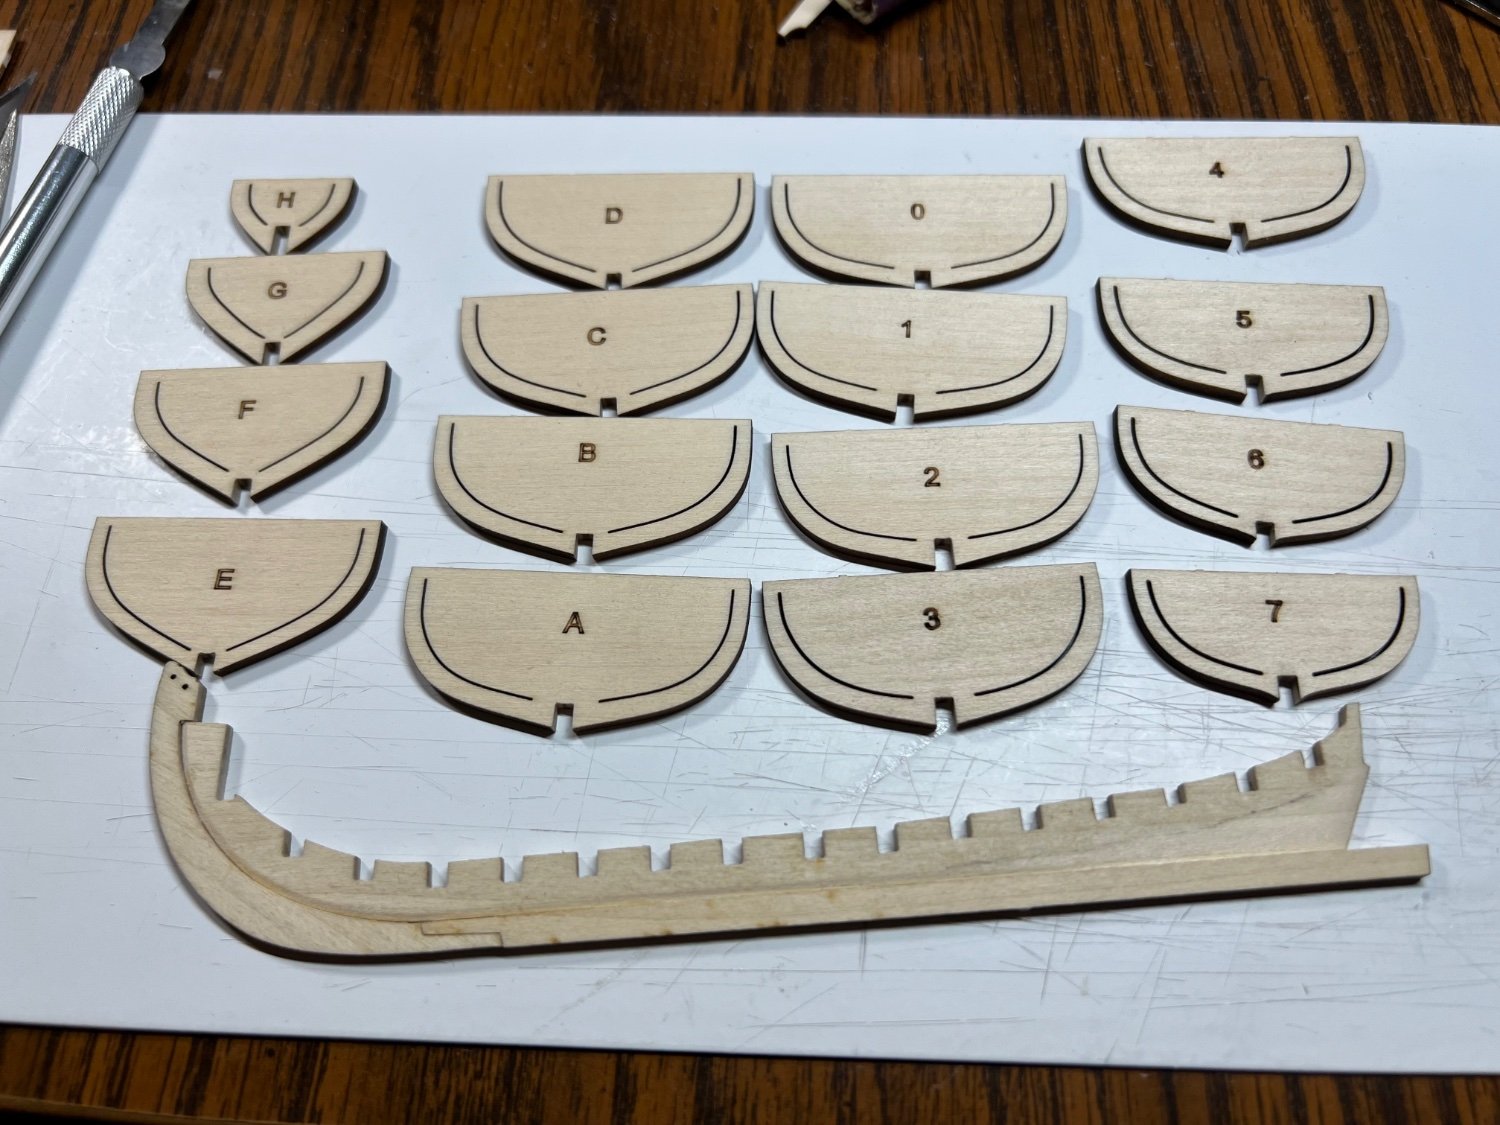
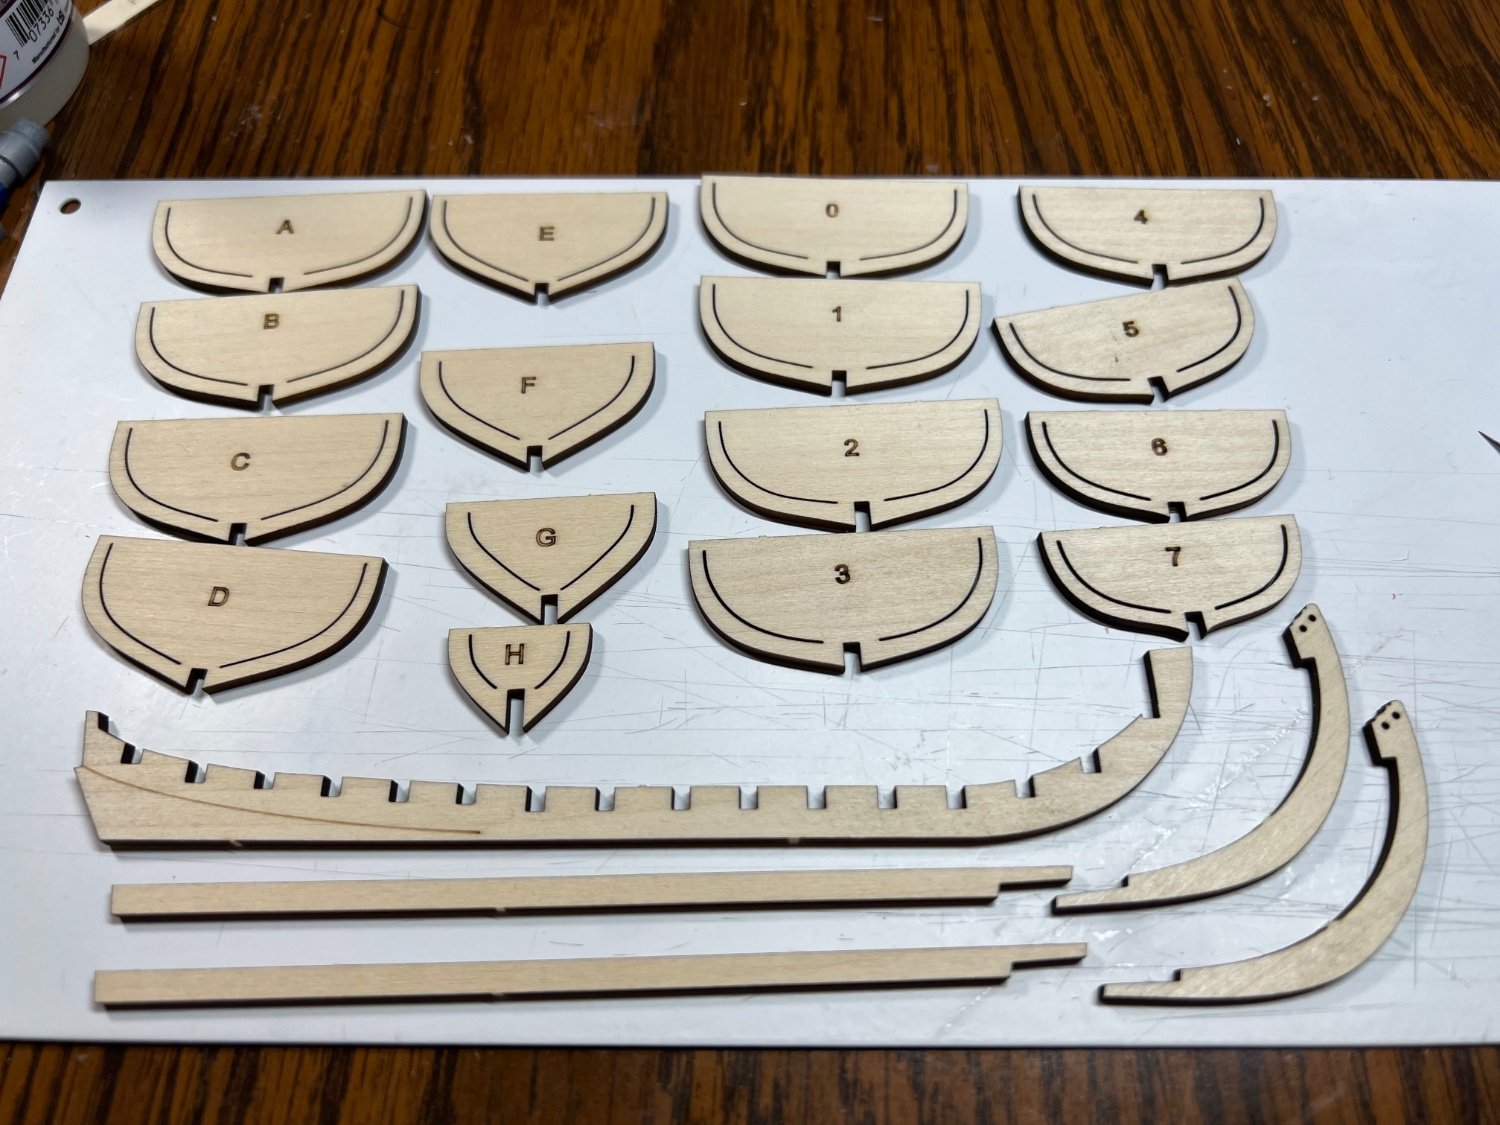
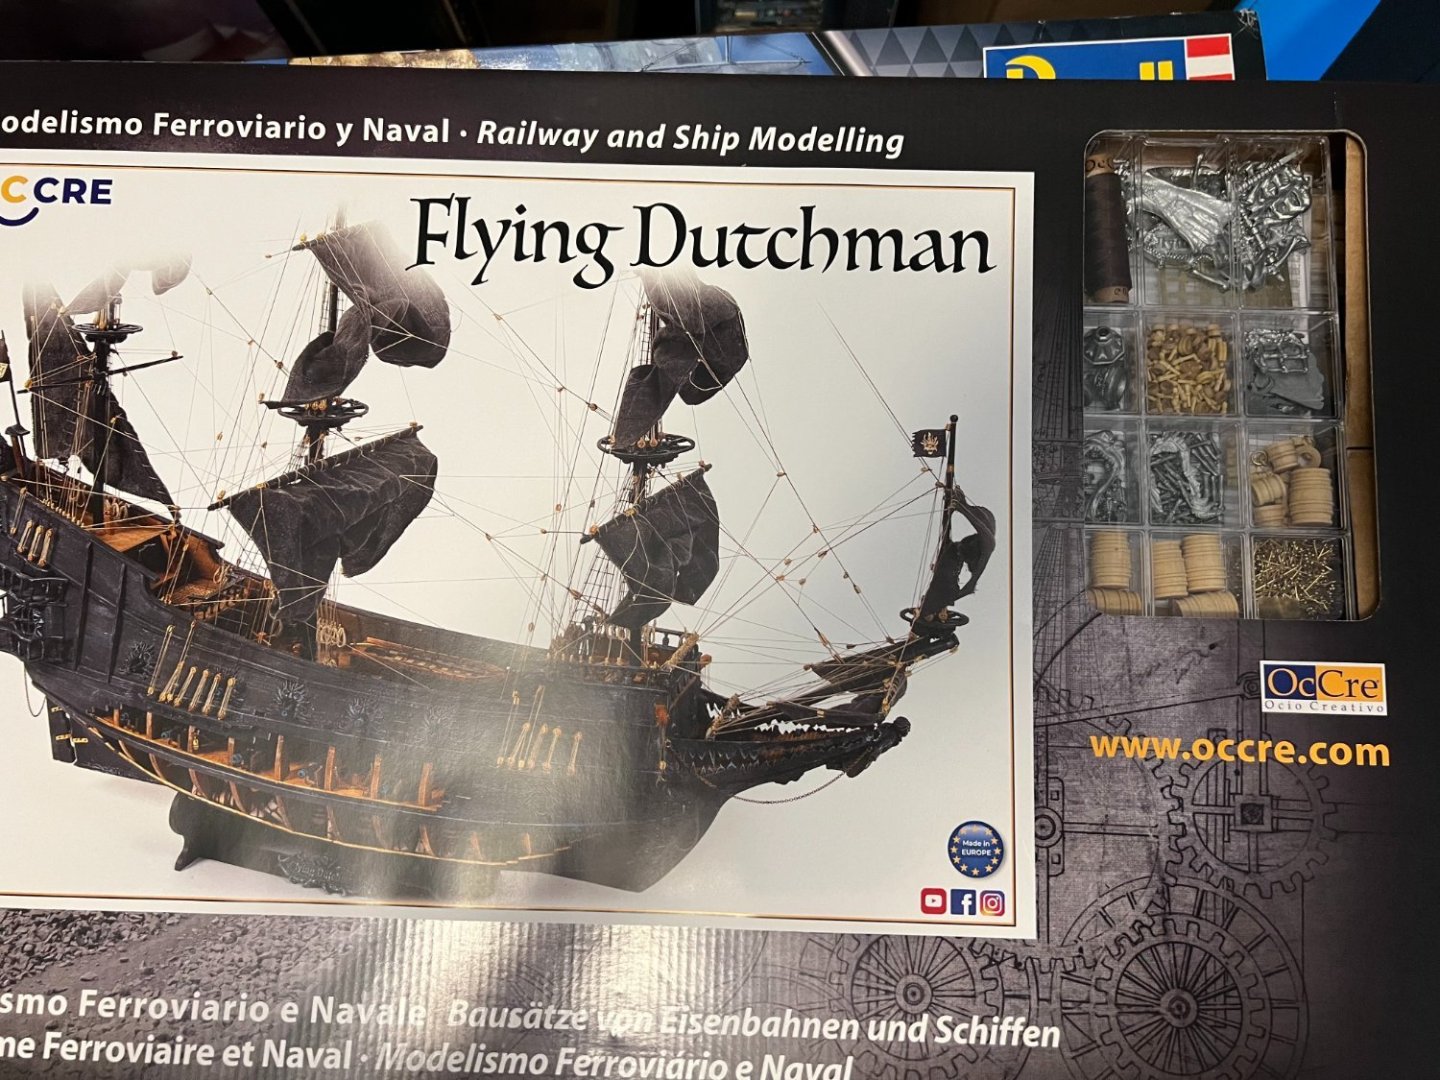
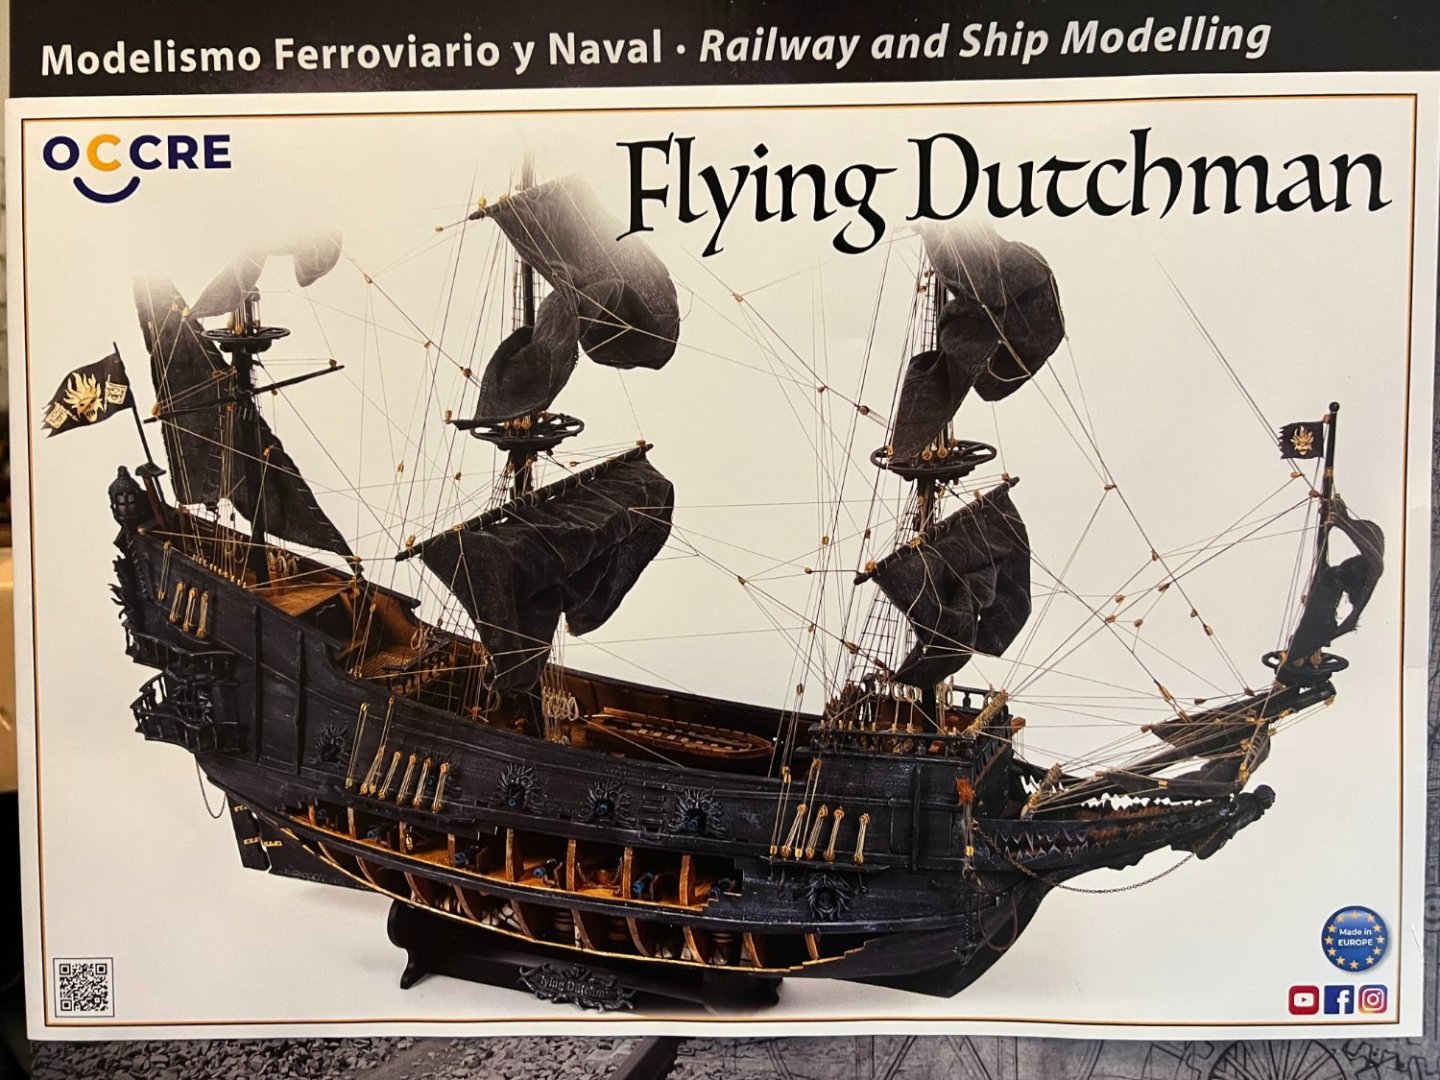
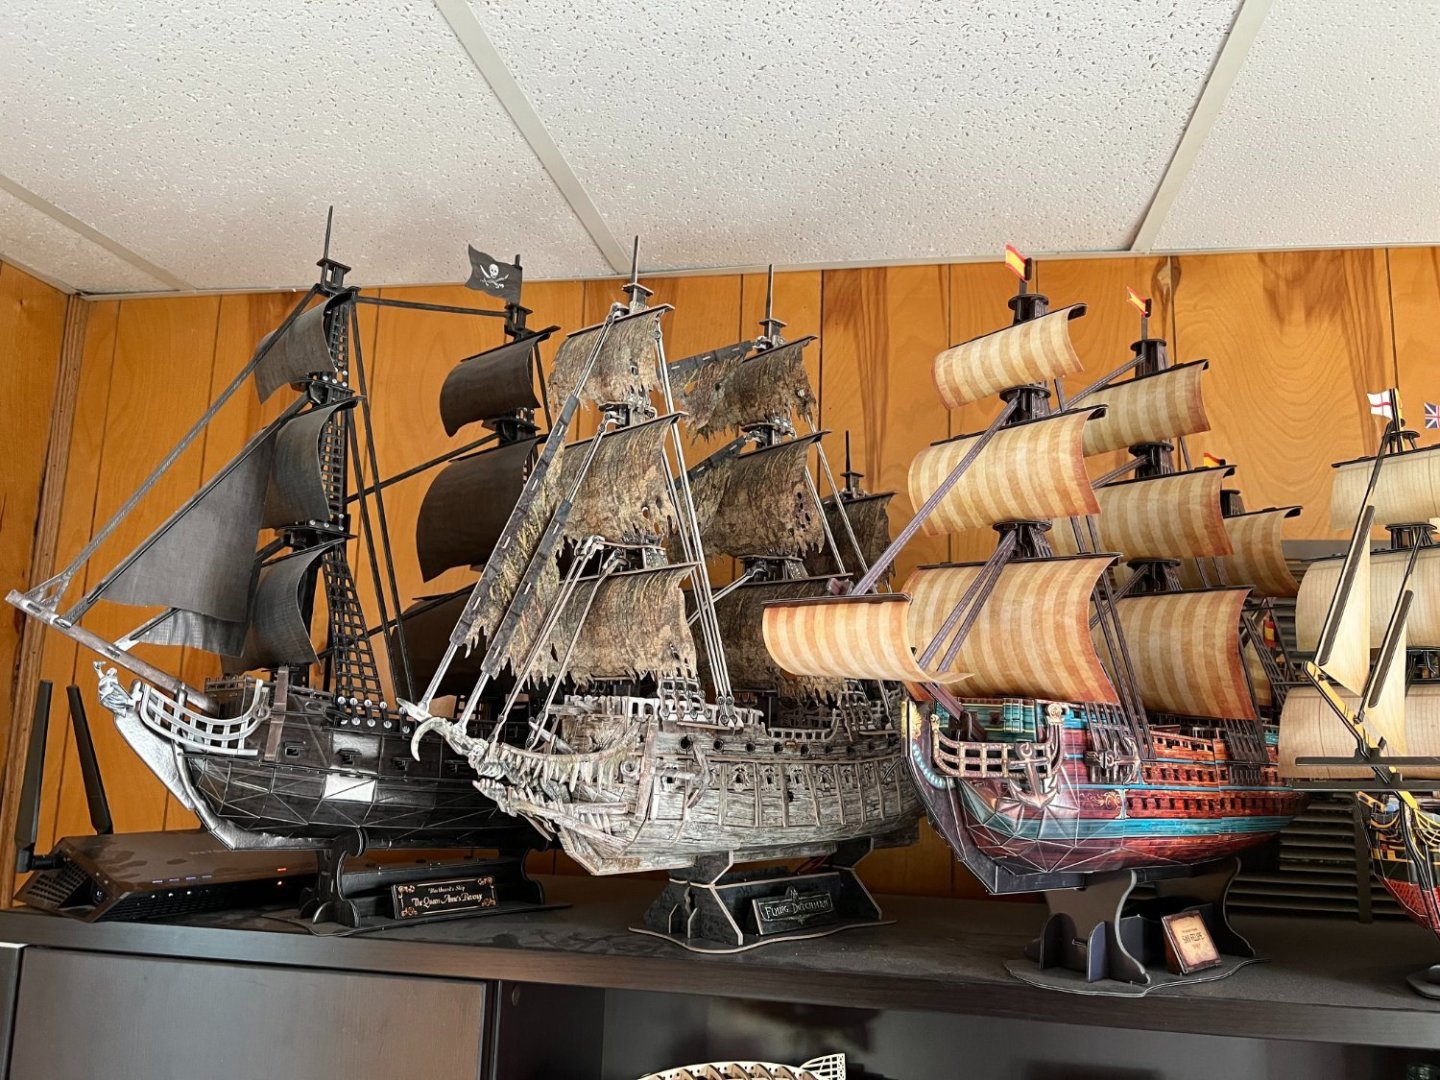
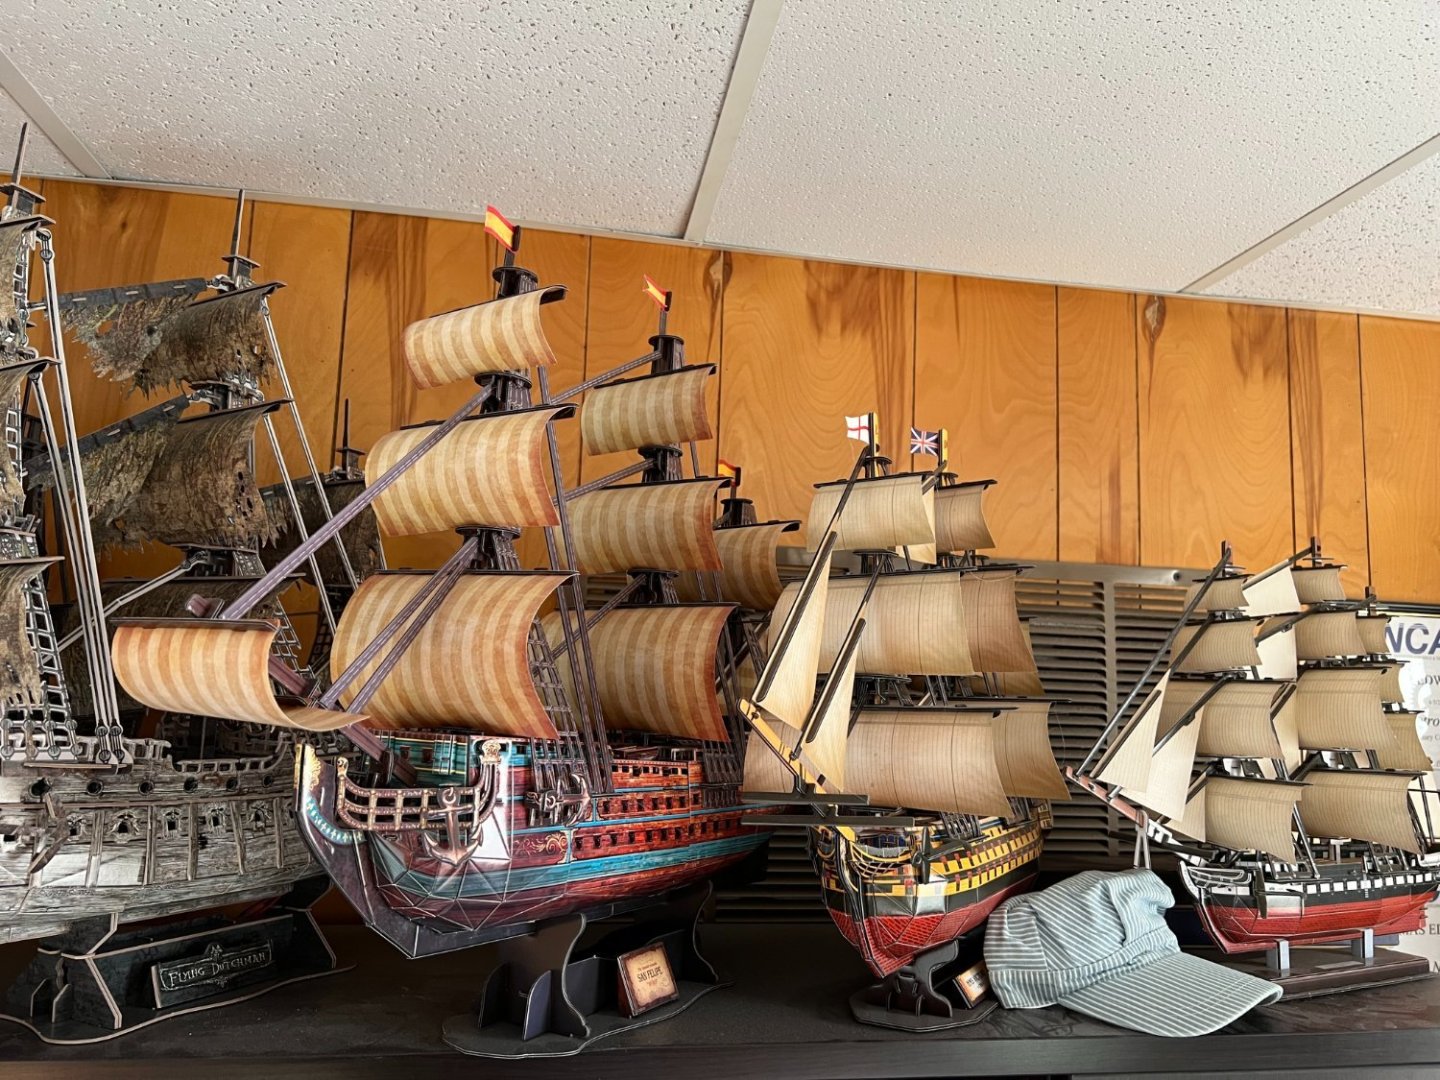
The Flying Dutchman by OcCre doesn't look like it will be perfect scale model of the real ship. But the kit looks like fun. I've had this kit for many months, getting brave enough to start it. I'm not sure how many build log posts you are allowed to have at one time, unfinished build logs, but this one will be a 3rd. I didn't see a rule, so here it is haha. I only saw 2 build logs of this boat, I don't really use logs to see what to do, more so to see if what I did turned out like another's build. This kit included the LED lights and fancy base. They are normally extra, but many of the sellers such as Model Expo sells it as a bundle, it goes on sale from time to time. I bought it last fall at was seemed to be the initial offering for sale. It won't be perfect, it won't look perfect (my skills), but it will be fun. It will replace a cheap press cardboard 3D adult puzzle version in my office at work. This is the plan anyways. The boats in my office scratched the itch but they didn't take long to build. They were fun to build but it was all over in 3 or 4 hours. The is the first OcCre kit I've had, it looks nice the instructions seem good. It has a 50 video series on YouTube for the build. I'm sure many don't need something like that, but it looks like a good idea to help modelers get across the finish line. The videos are up to part 30 of 50, my personal goal is to make an attempt to catch up the videos are be a good bit done when it hits 50 of 50. Looking at the instructions and the video, its clear the video will include details the instructions do not. Such as 16 formers, the instructions only show 5 or so completed and it seems implied to go all the way to 16 at that stage, the video shows all of them done. OcCre kits seem really nice. The parts are packaged up nice in plastic bins, not a bunch of bags. One of the things that looks like a turn off is some of the lower decking, it looks like it would be flat, but mocking up the formers and the decking it will curve with the formers in 3 larger parts. It won't be flat if glued to the formers. No pictures of that part just yet. Mocking it up it looked like to followed the flow of the formers in a curve, certainly not flat if done correctly. Getting all the formers vertical and the decking it fit looks like a trick. Its partially open so careful glueing is a must. Many builders layout the kit parts and take a picture, if everyone thinks thats a good idea, I'll do it before I get farther. It has pre made sails, in white, not sure how they get them black just yet, but they look nice, and NOT making sales for this first big ship will be nice. Lines and rigging will be enough of a brain stretcher for me. This build log is mostly for accountability, so I might stick with it. I have a business trip next week so I only have Friday and Saturday this week to work it.

-
Fixed the false keel. Transom installed. A little more fairing. This one might get parked at this stage, not sure yet. I’m ready and wanting to start a bigger something.

-
I see you started yours in 2013. Are you done yet? Lol. I’m starting to wonder which boat gets shelved for me. I have 3 airplanes shelved. I’m trying to finish any boat I start. But now I have 2 building. Oops, this one is hard to put down so far.
-
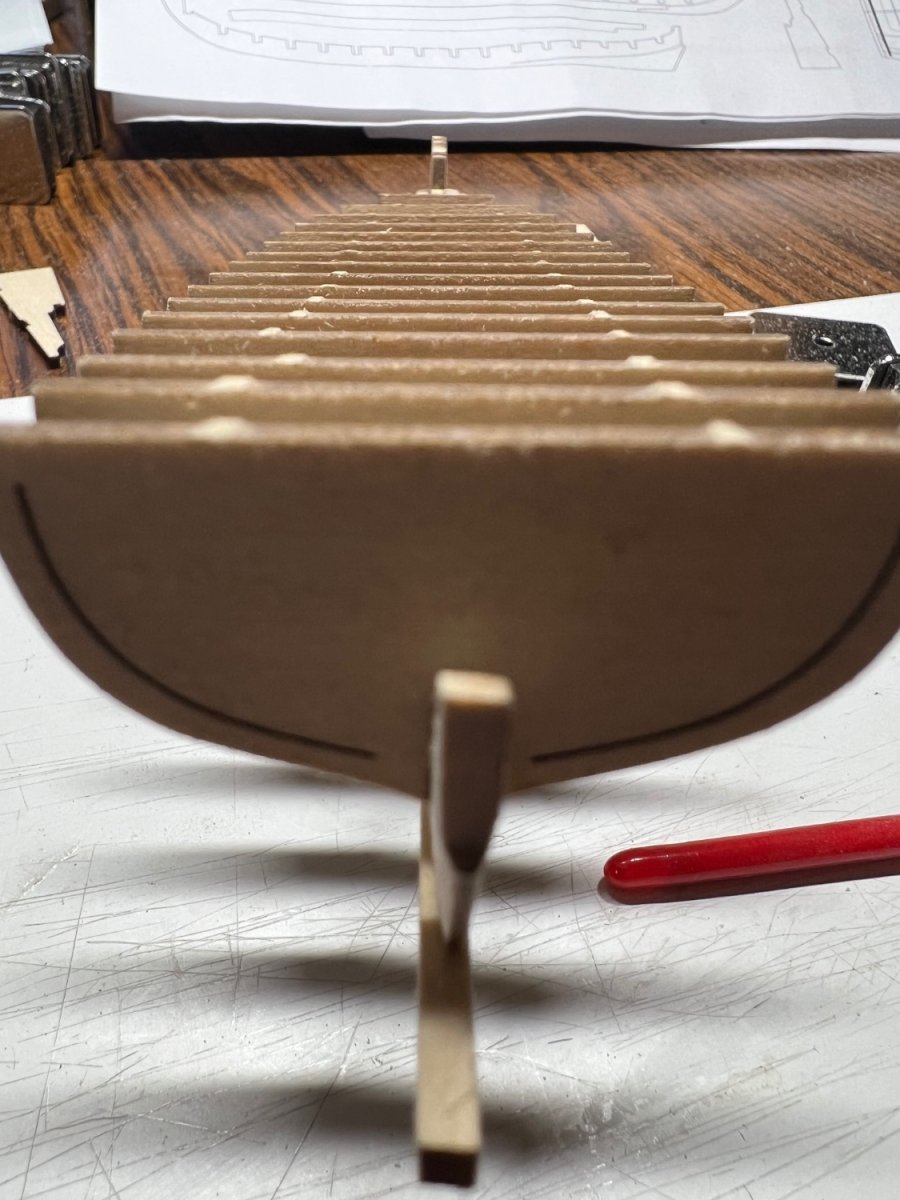
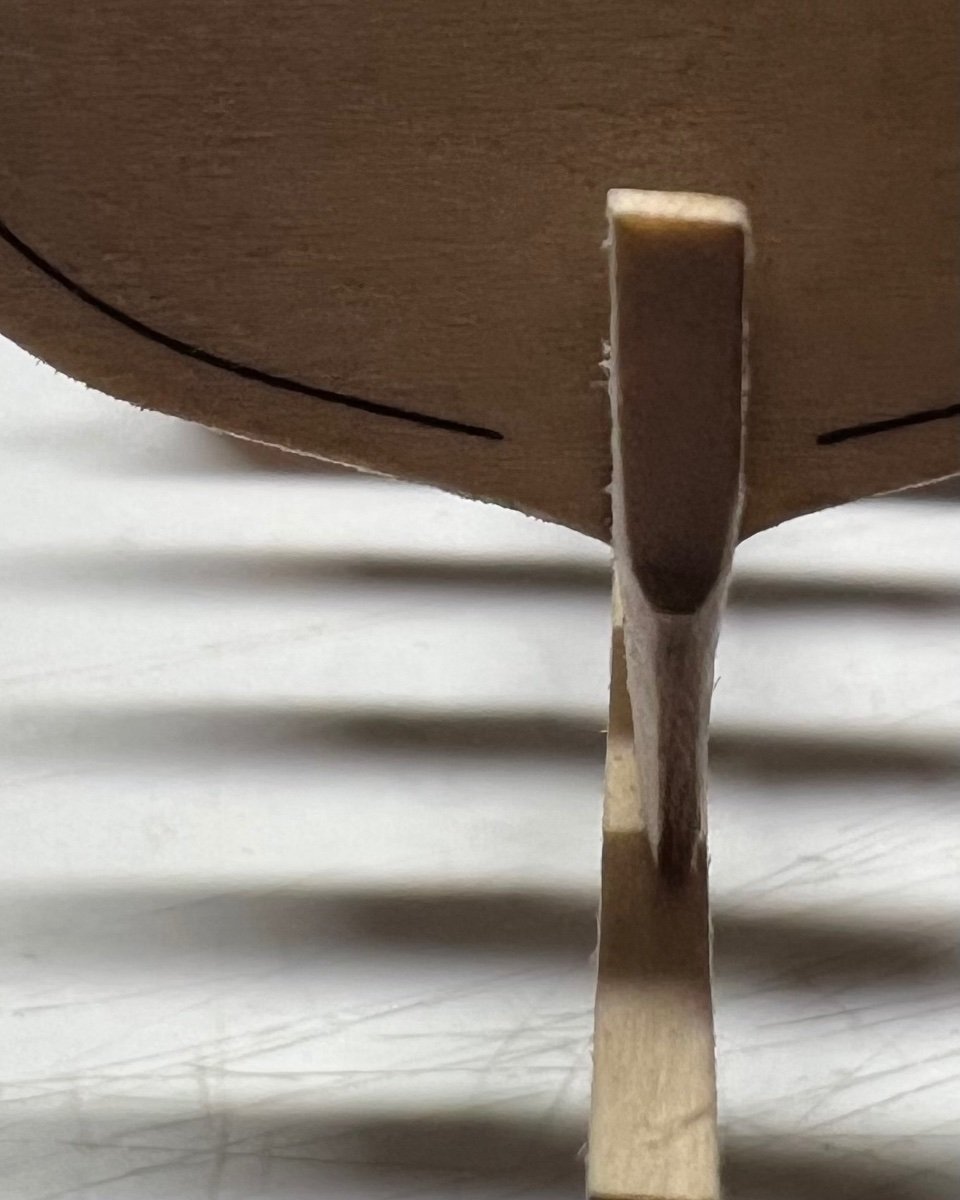
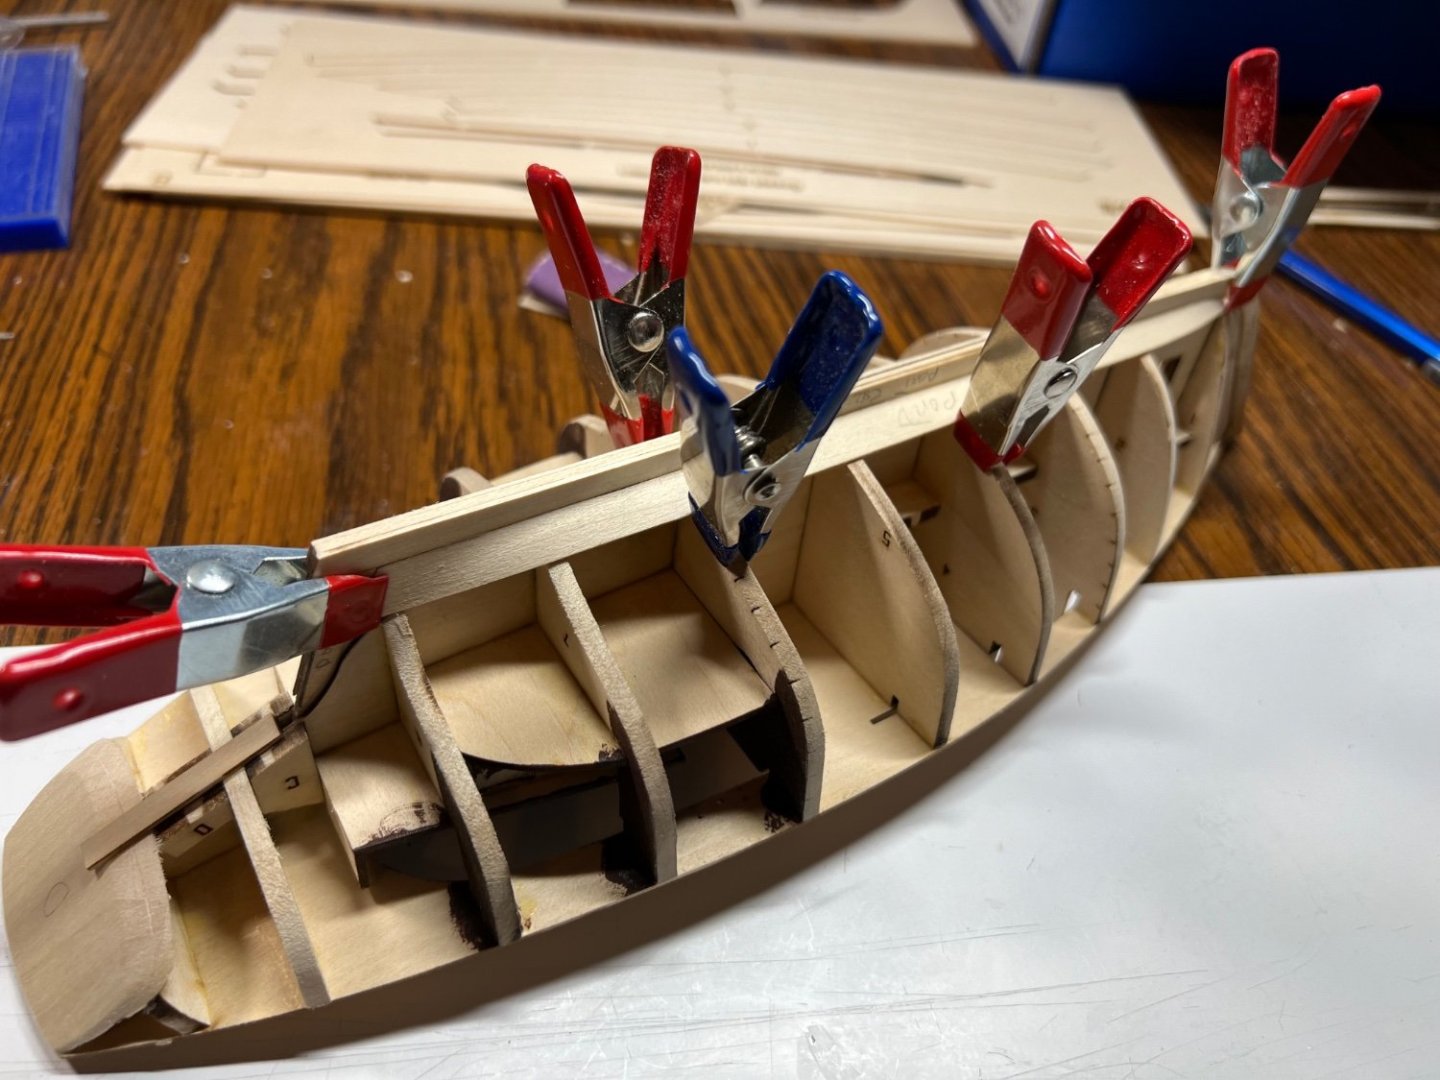
Posting these picture I see the false keel had cracked a glue joint during fairing. It was well centered, hopefully a bit a glue and it will be ok. Didn’t notice until I looked at the pictures close up. It’s so small it certainly requires extra effort to be sure everything fits and is faired well. Boats are new to me. I’ve built a dozen flying RC aircraft. I do have wood skills, just not boat wood skills. In relation some of the aircraft accuracy of parts is much greater than the boats. It seems like some parts on the boats are close enough and why they were never corrected is a shame. The accuracy to build a boat translates well from my airplane skills. Having an eye for angles helps.


-
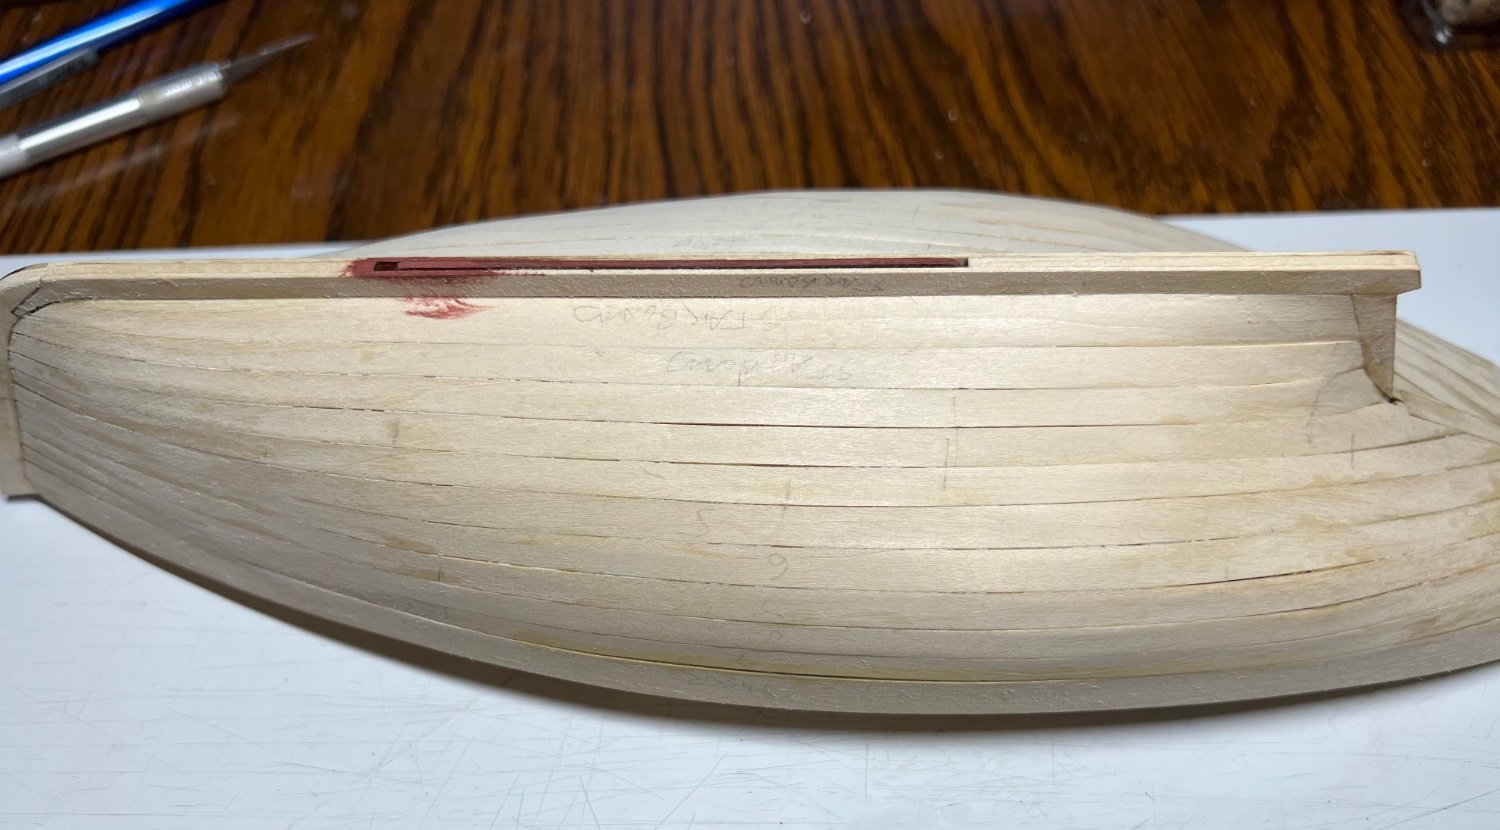
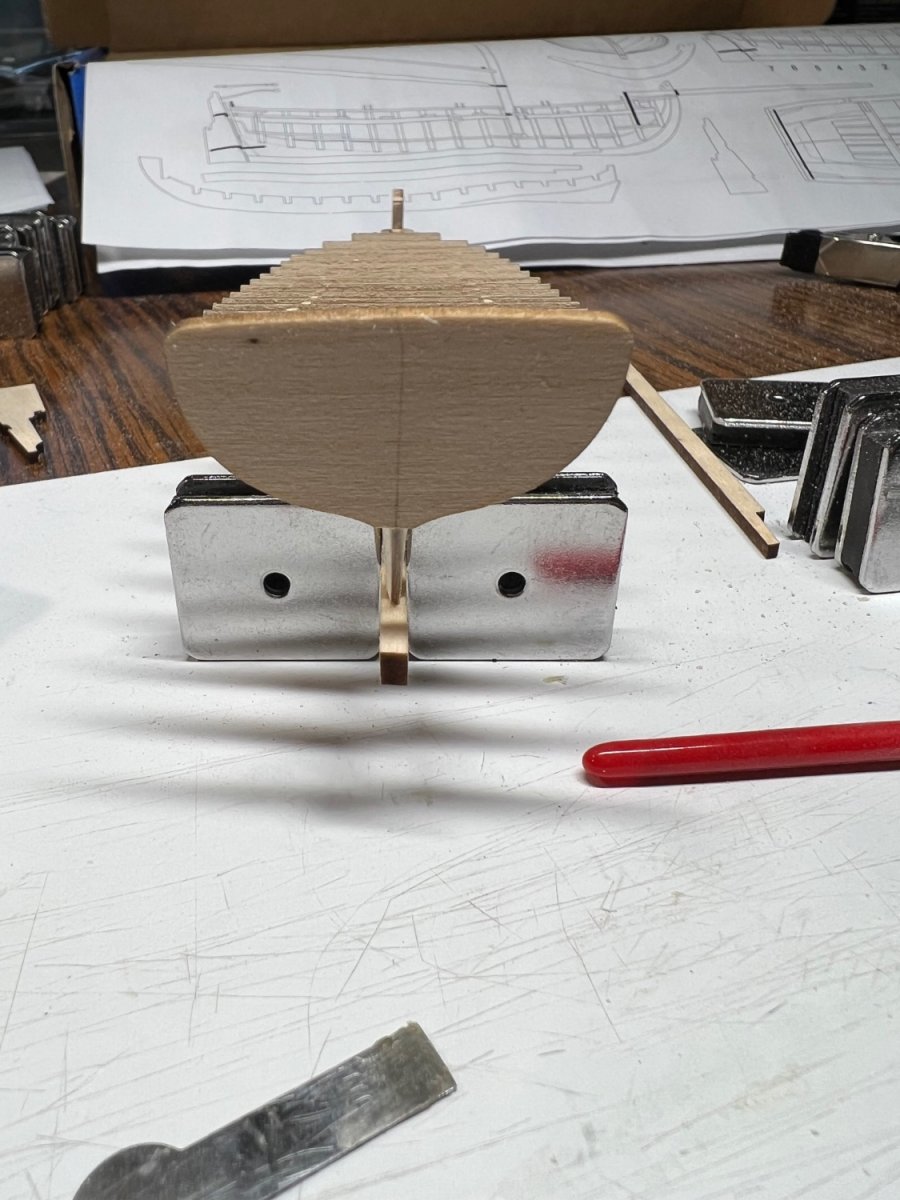
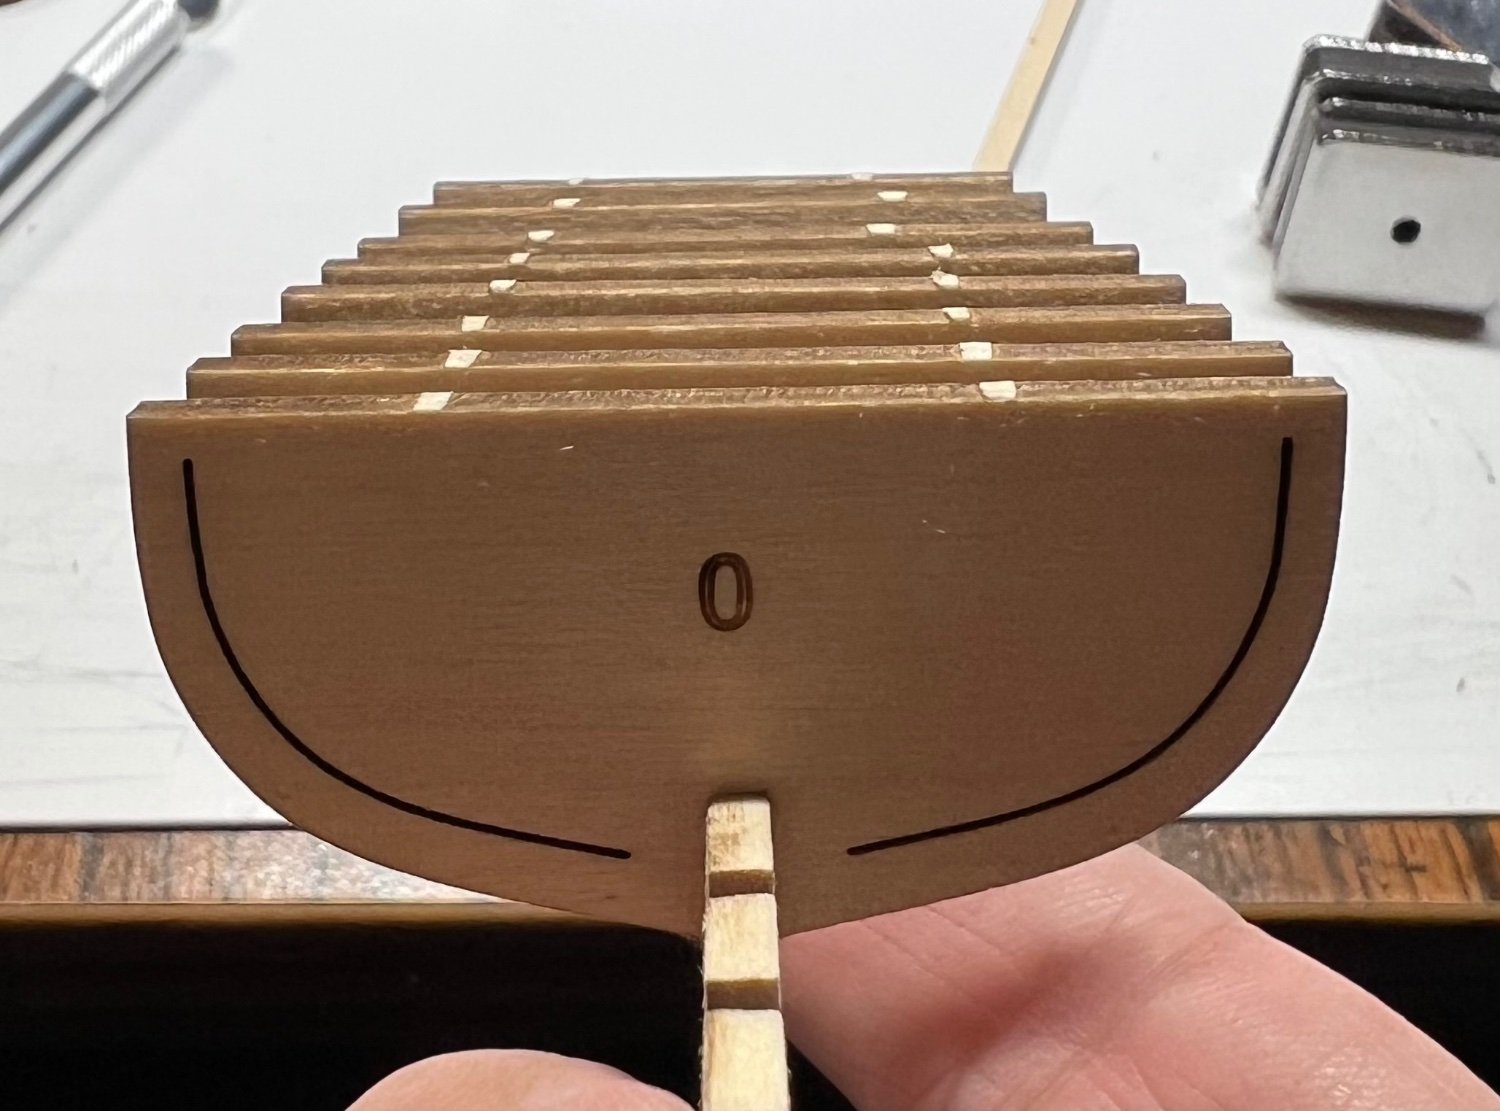
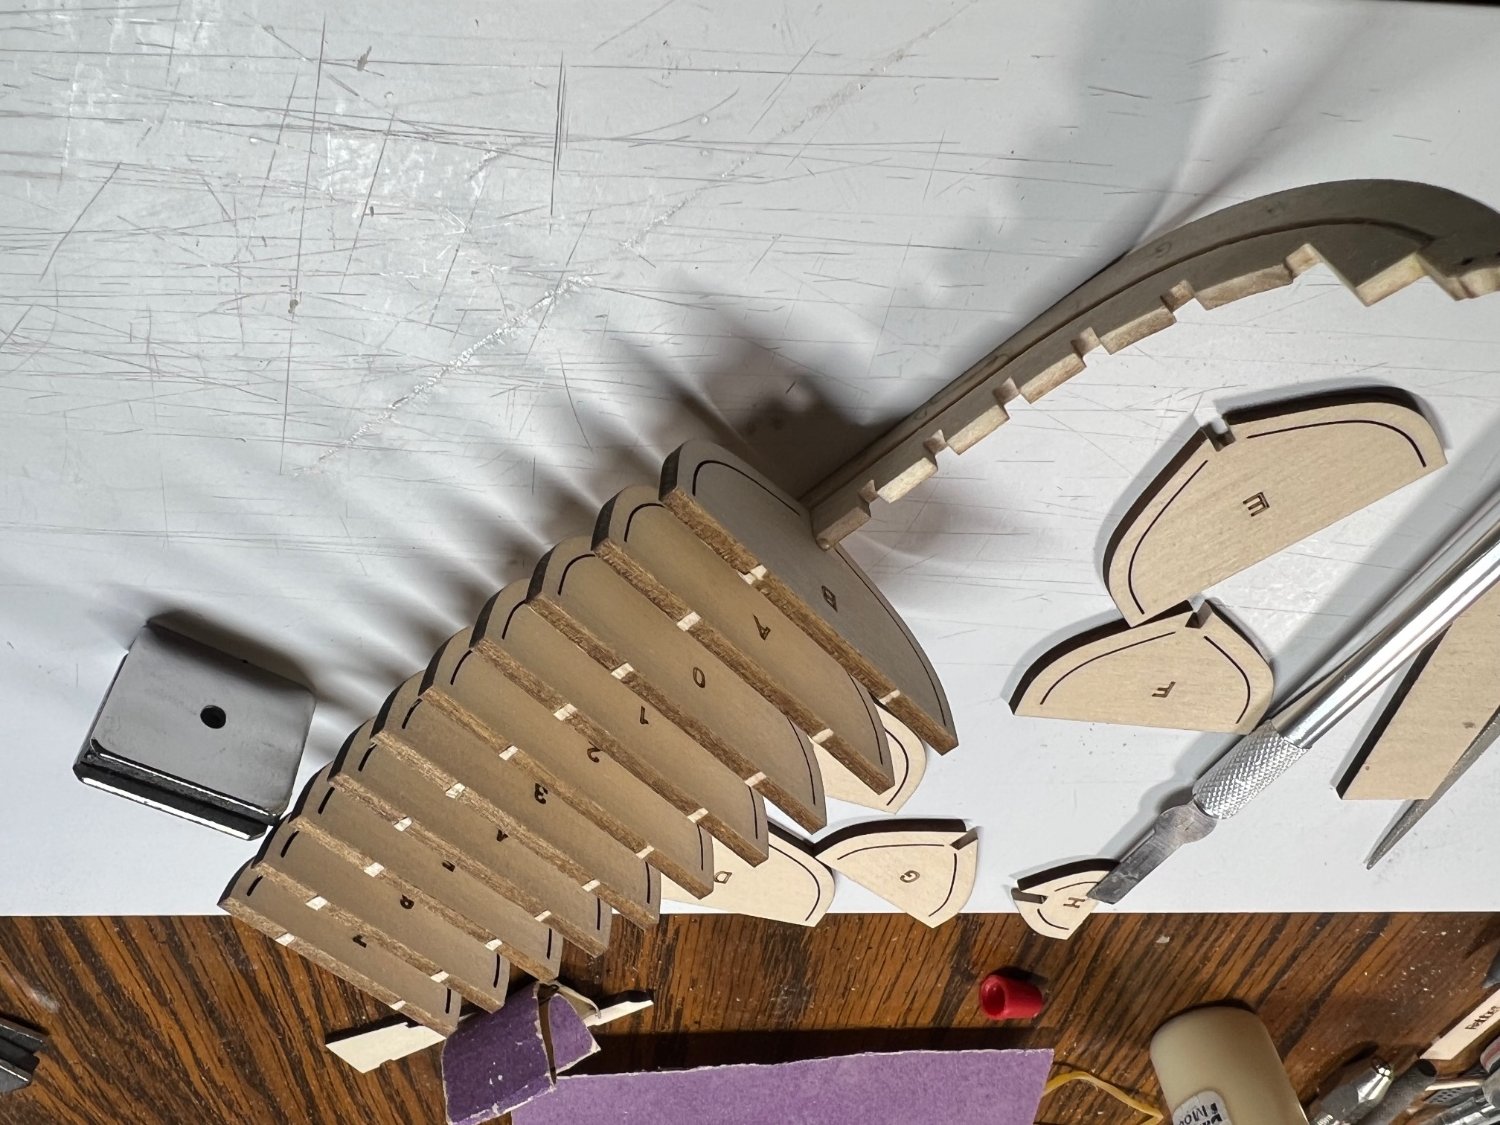
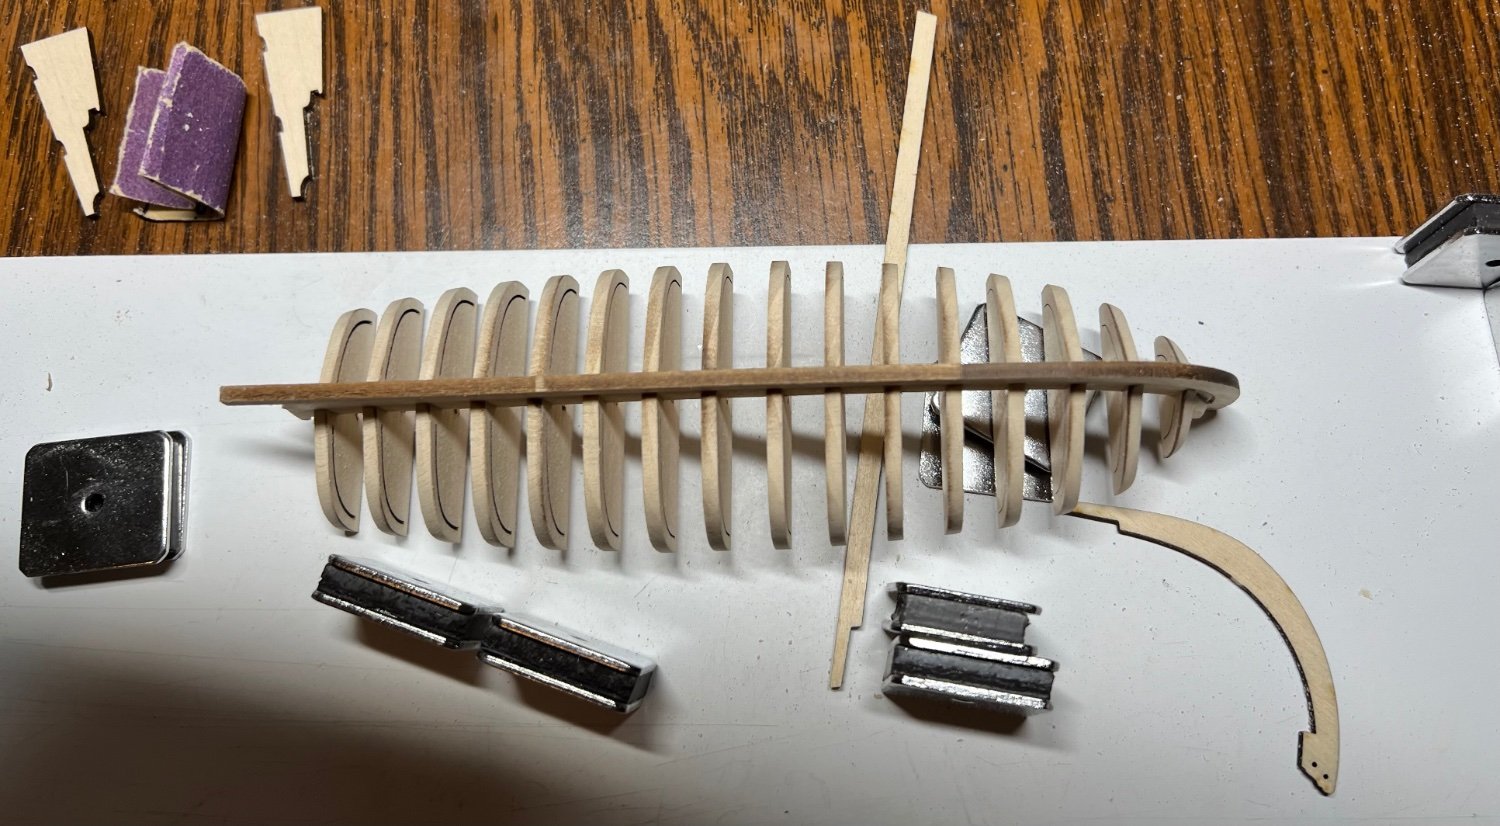
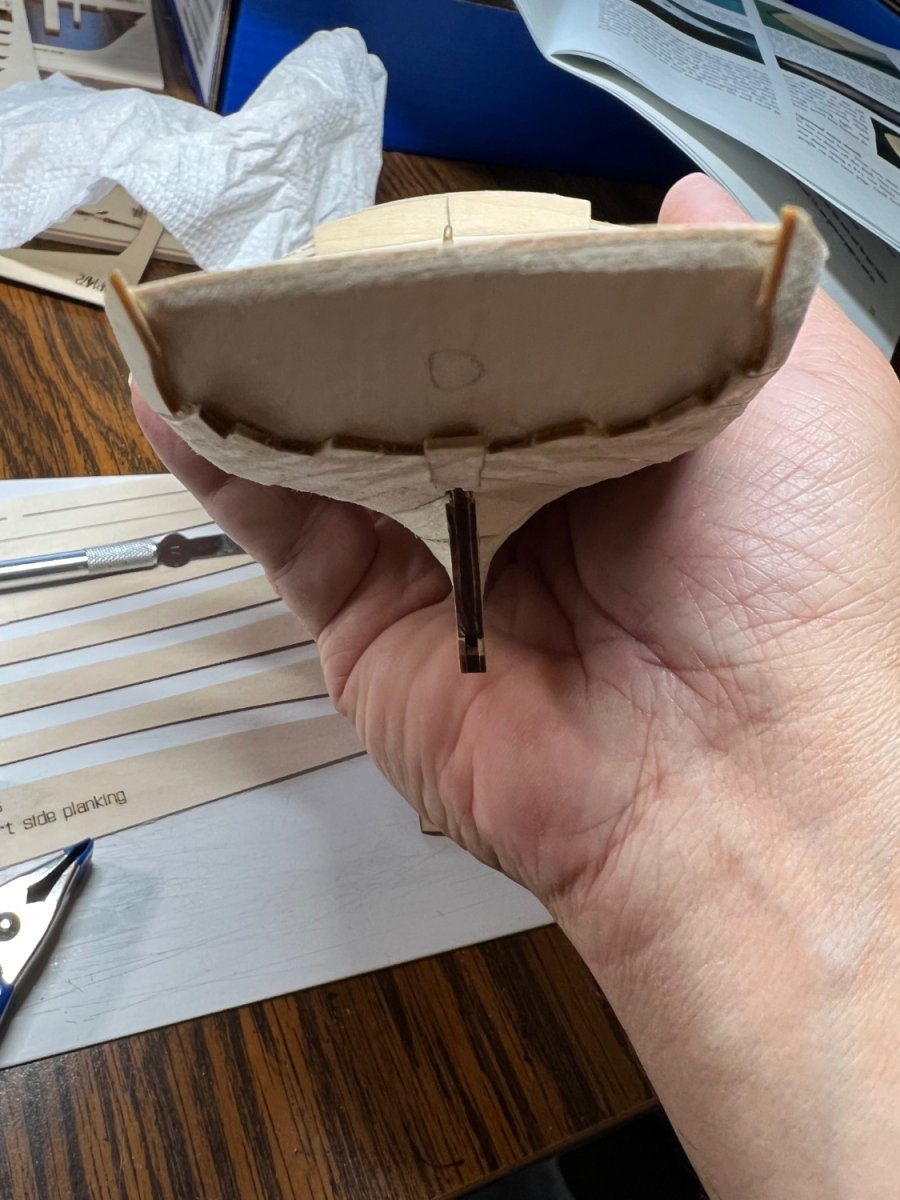
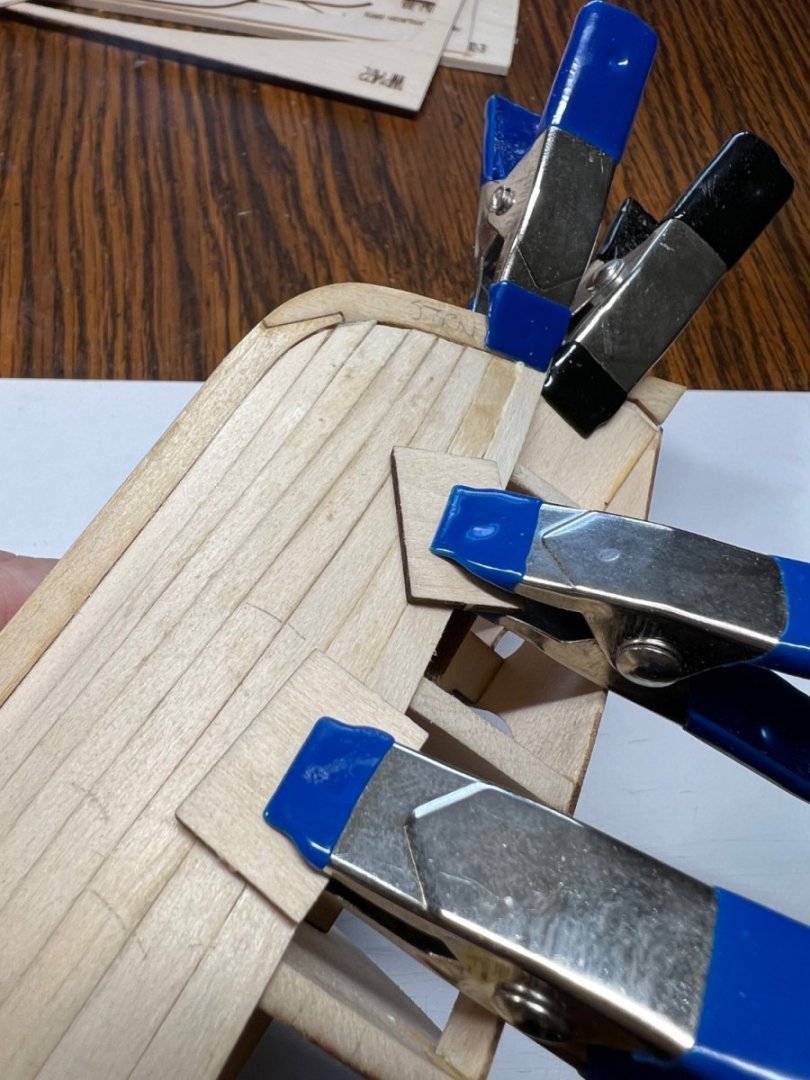
It doesn’t look like much but each bulkhead was fitted at each keel notch. Each notch was filed to fit. Using a piece of scrap to ensure clearance. It’s so tiny! Lol

-
We don't have Le Page brand in the states that I can find. You don't happen to be David, the model designer, are you?
- 40 replies
-
- 1
-
-
- Model Shipways
- Muscongus Bay Lobster Smack
- (and 1 more)
-
Thank you. I’m stuck on what to use for filler. I tried to not need it, but that ship has sailed. Lol.
- 40 replies
-
- 2
-
-

-
- Model Shipways
- Muscongus Bay Lobster Smack
- (and 1 more)
-
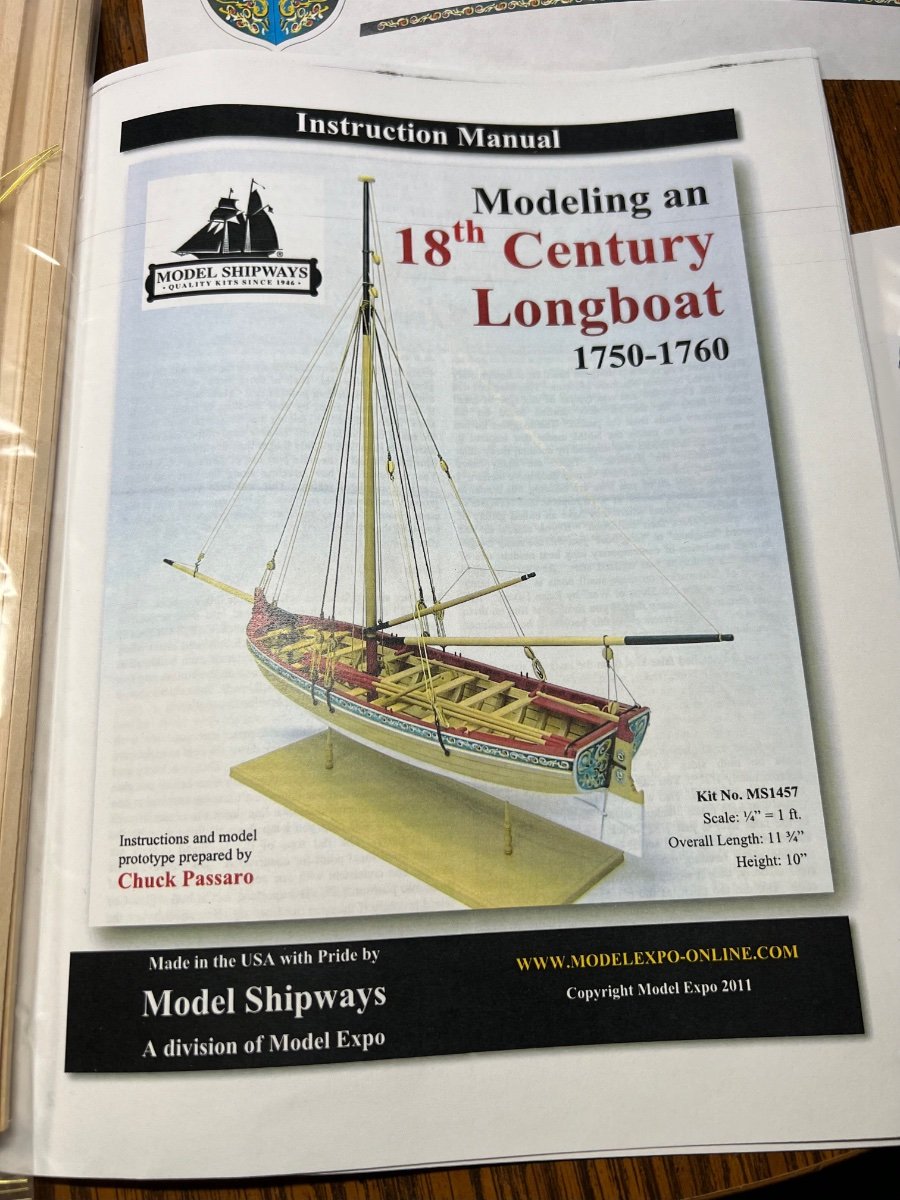
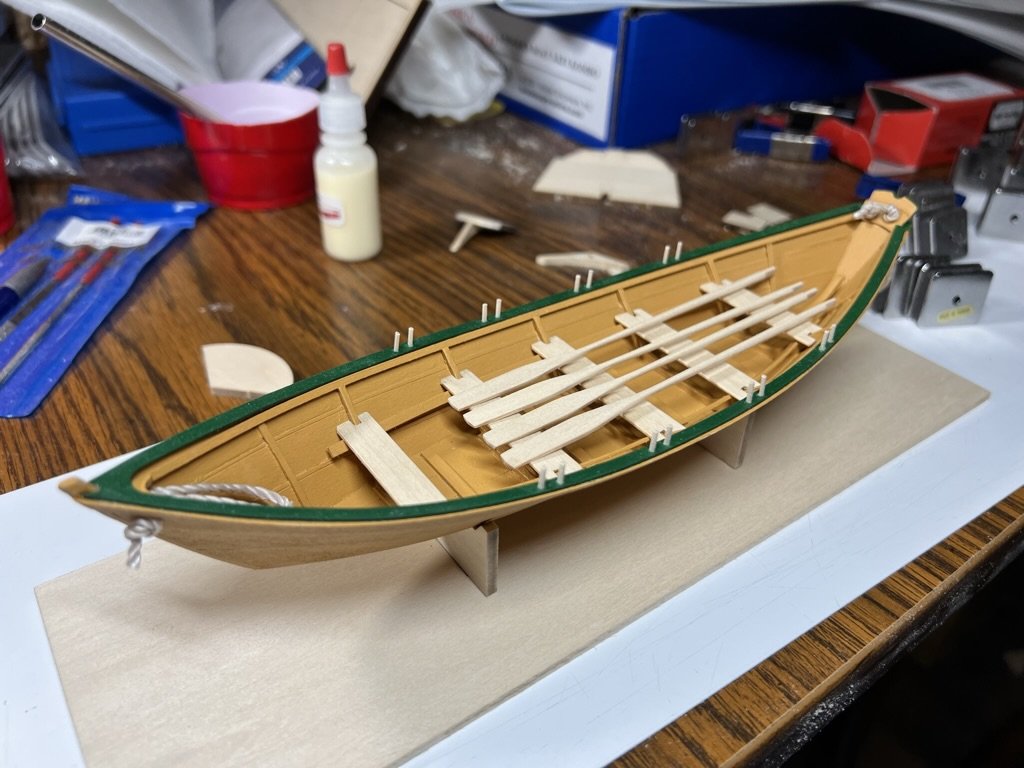
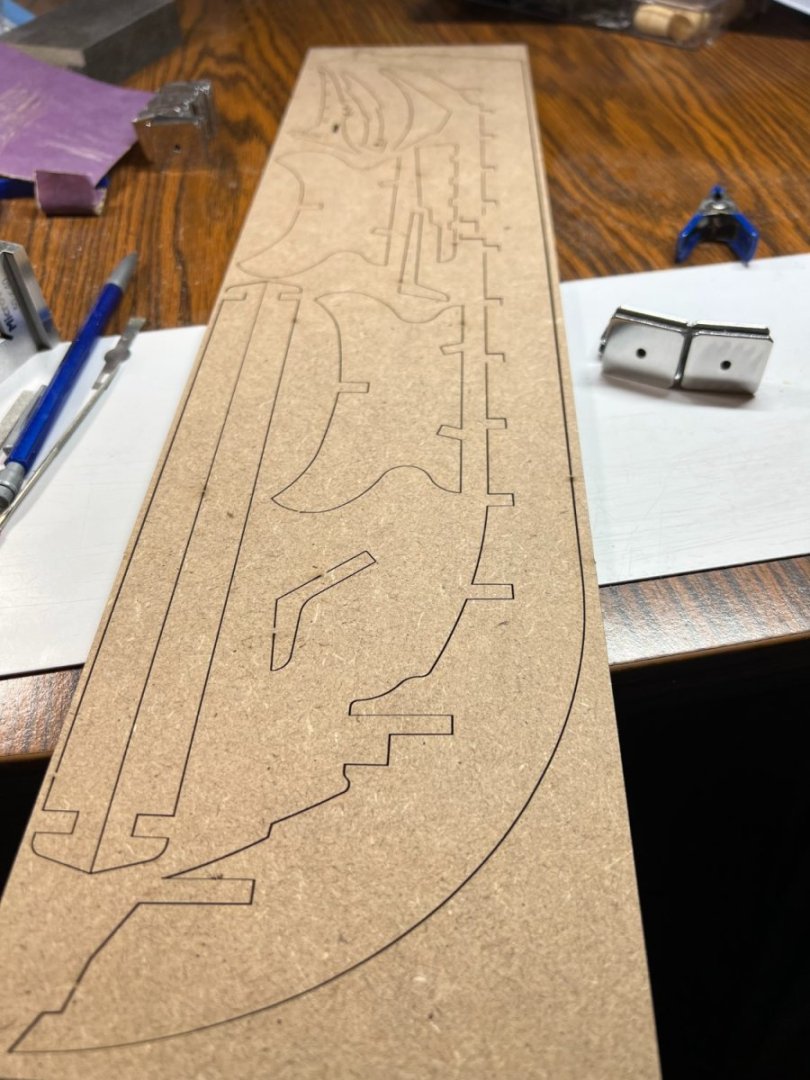
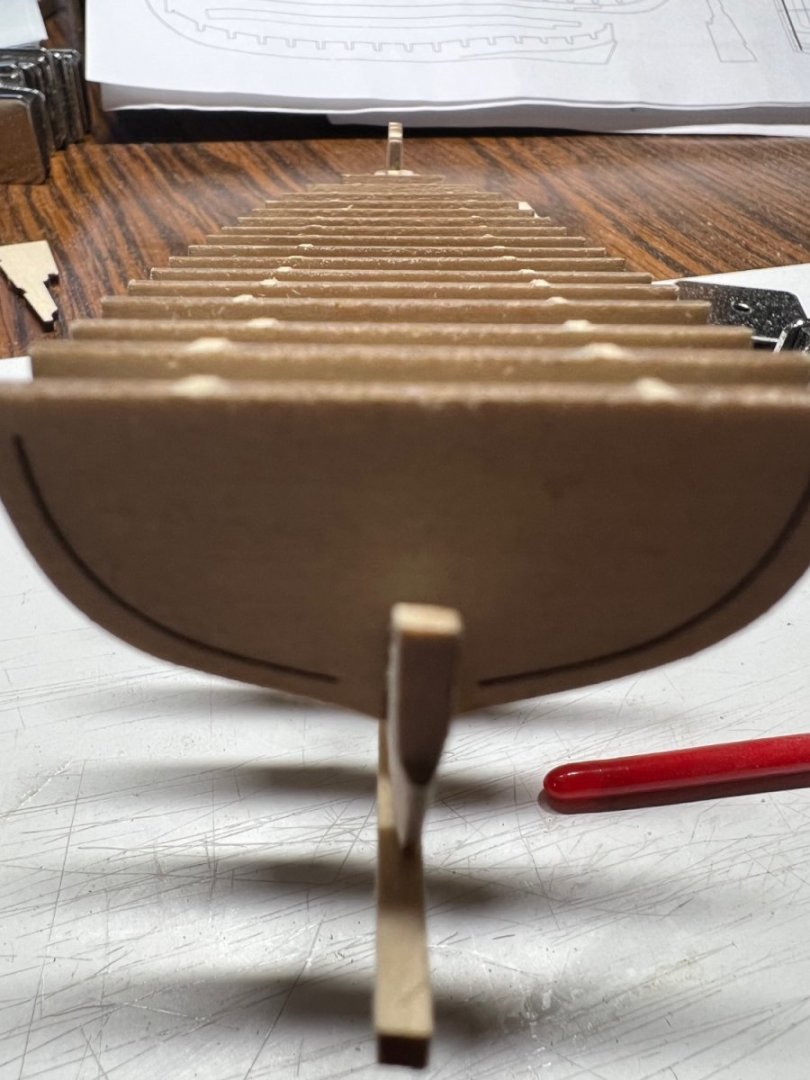
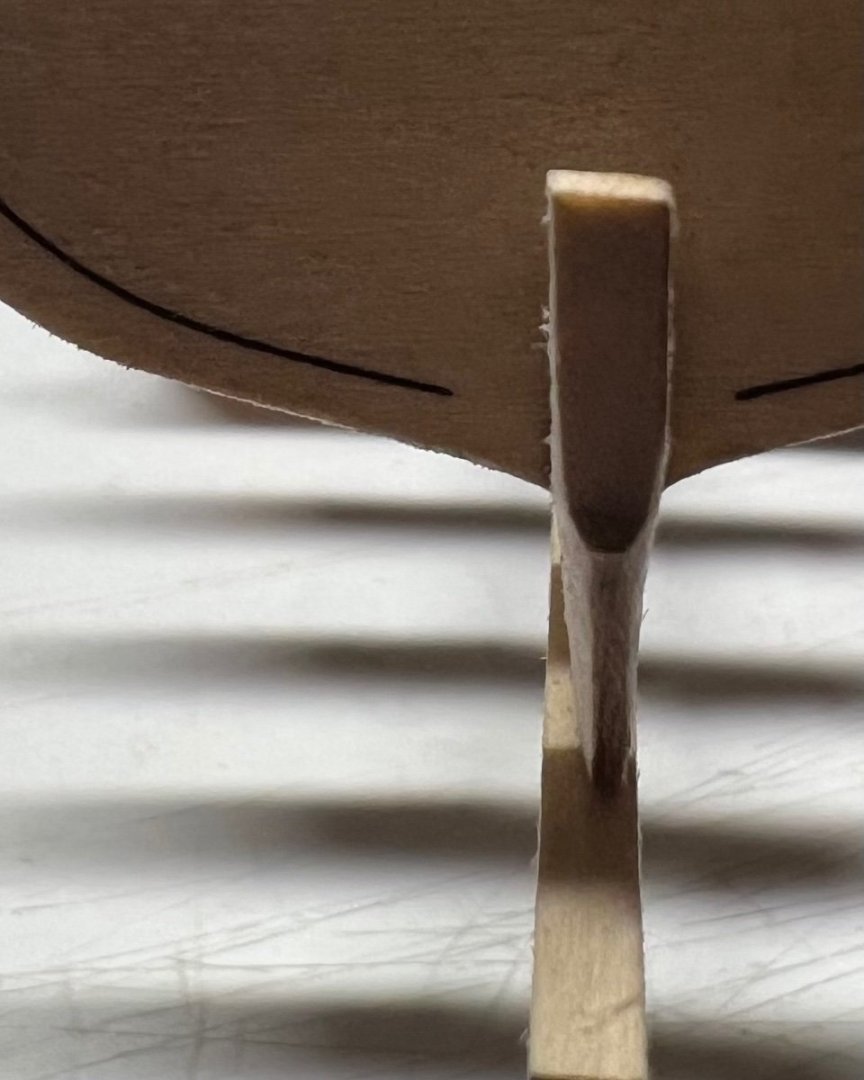
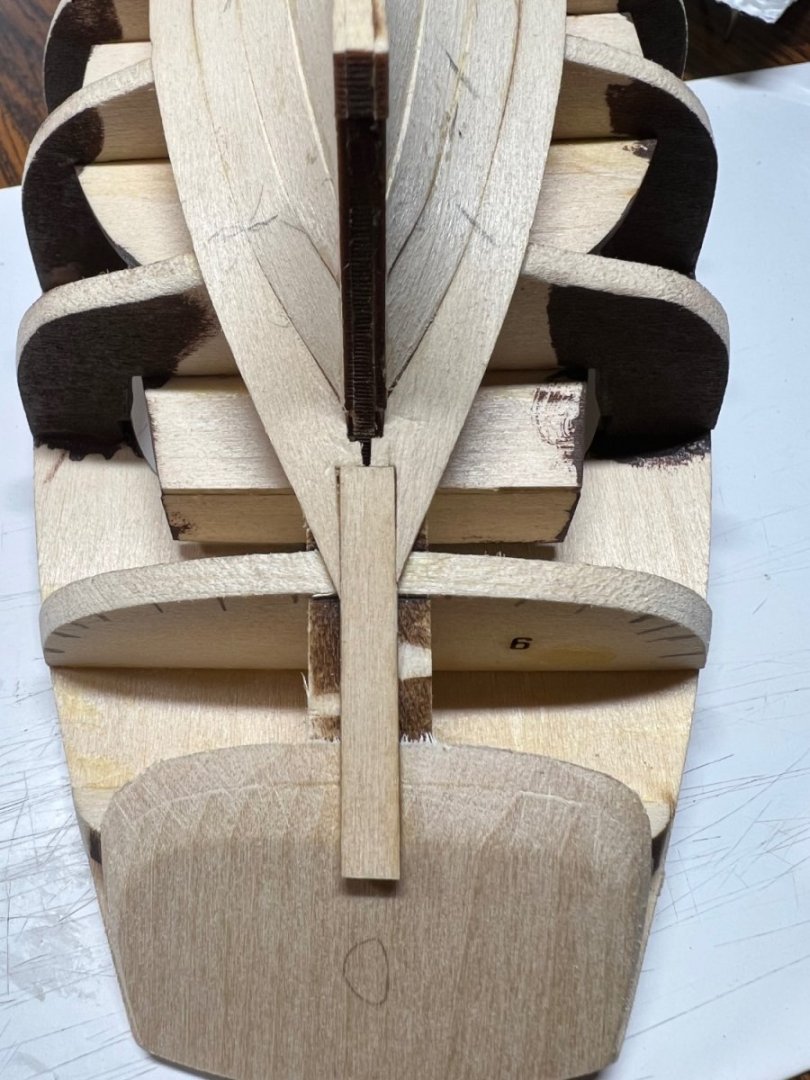
I think this is much smaller than I expected it to be. Overall Length 11 3/4 “. A quick start. It likely won’t progress until I finish the Muscongus Bay Lobster Smack.

-
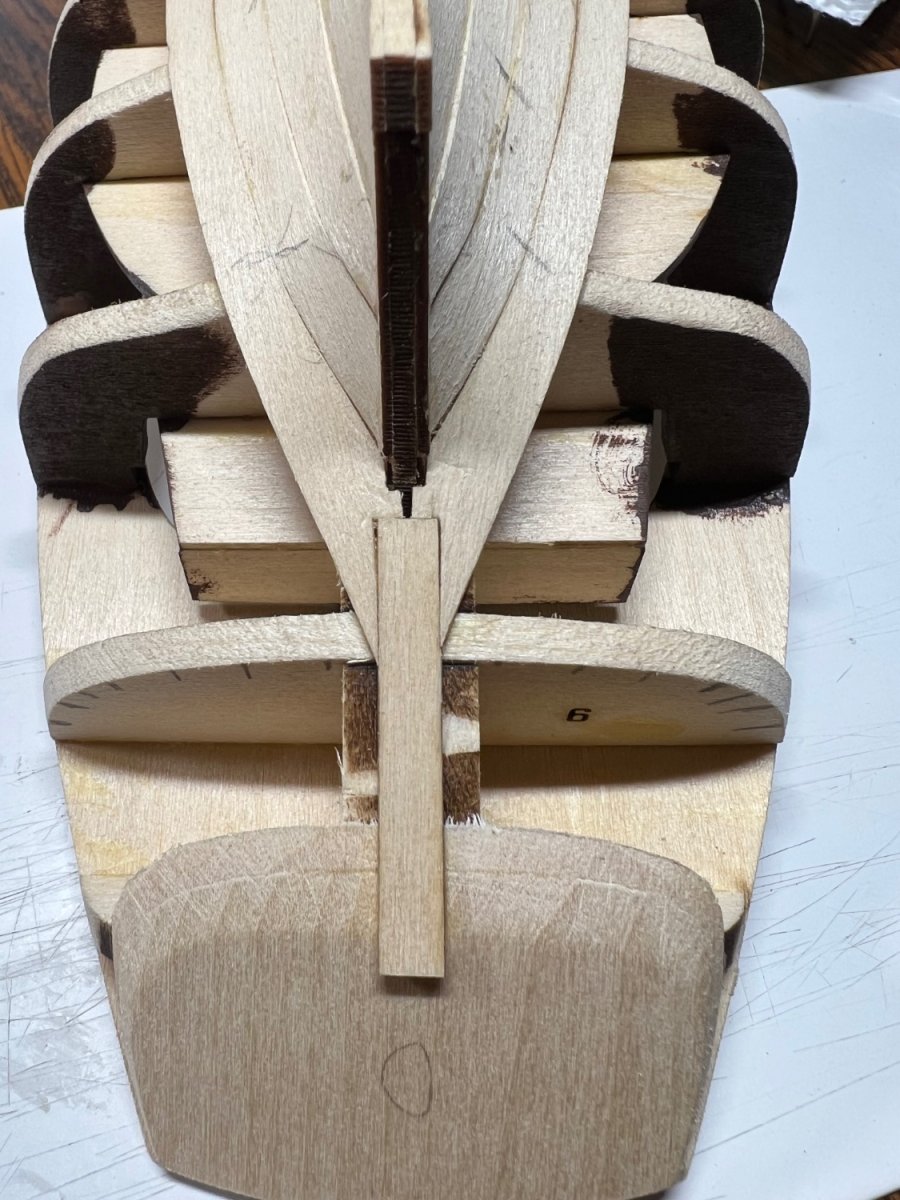
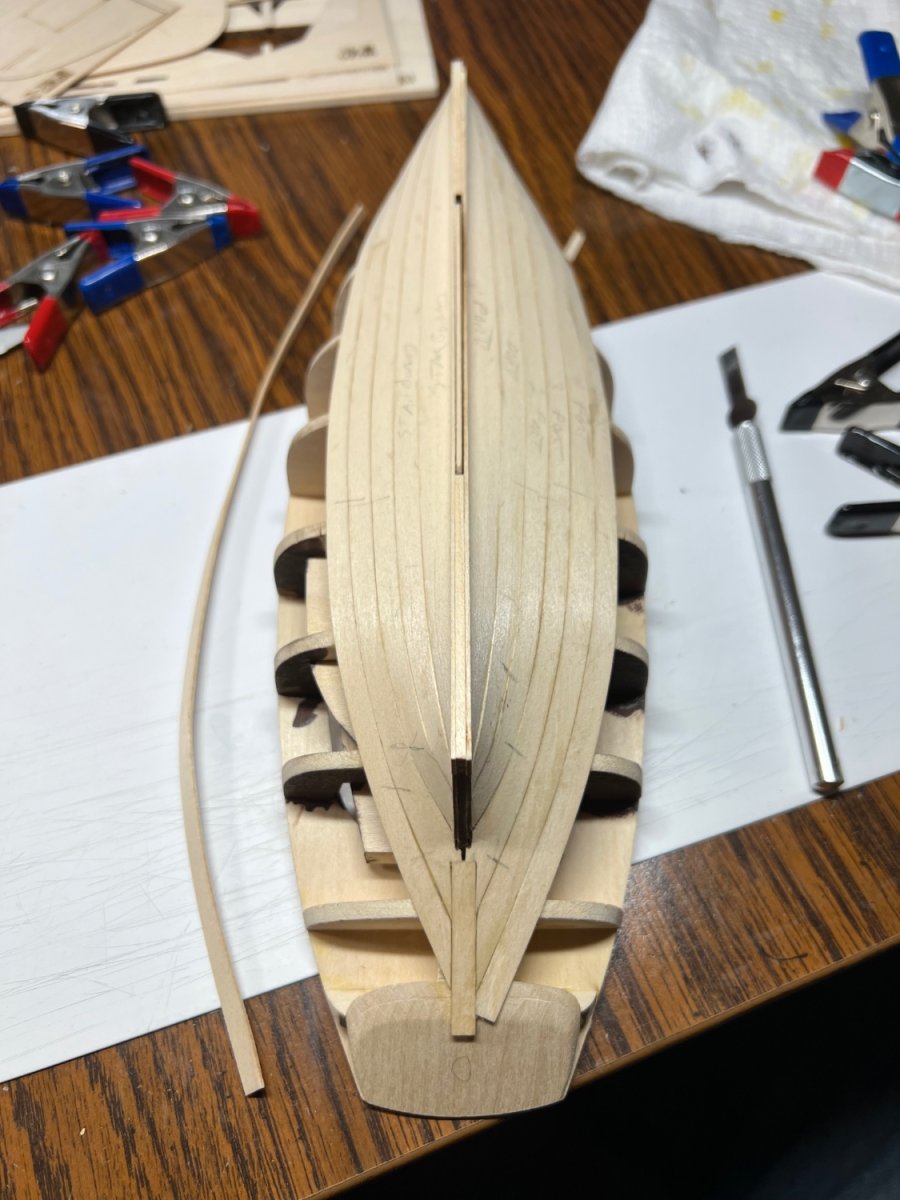
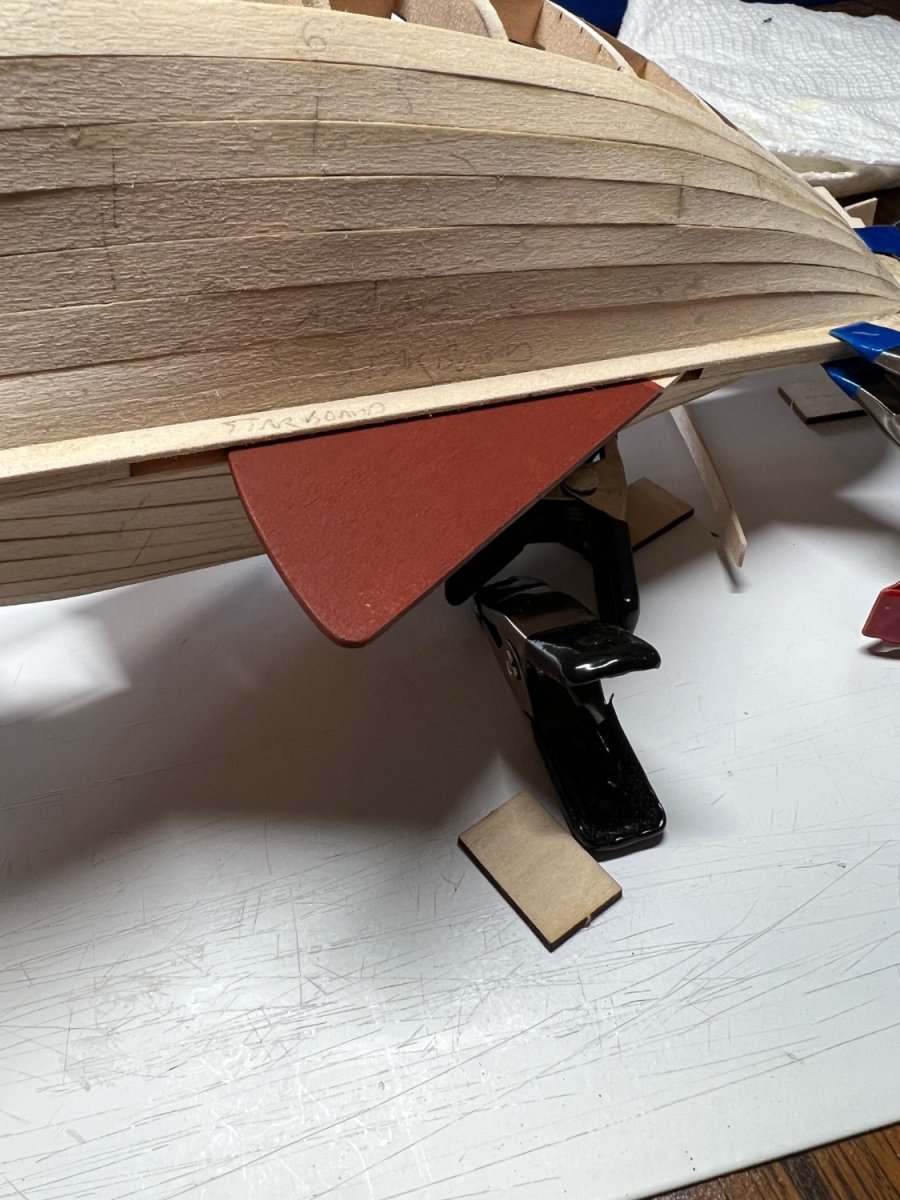
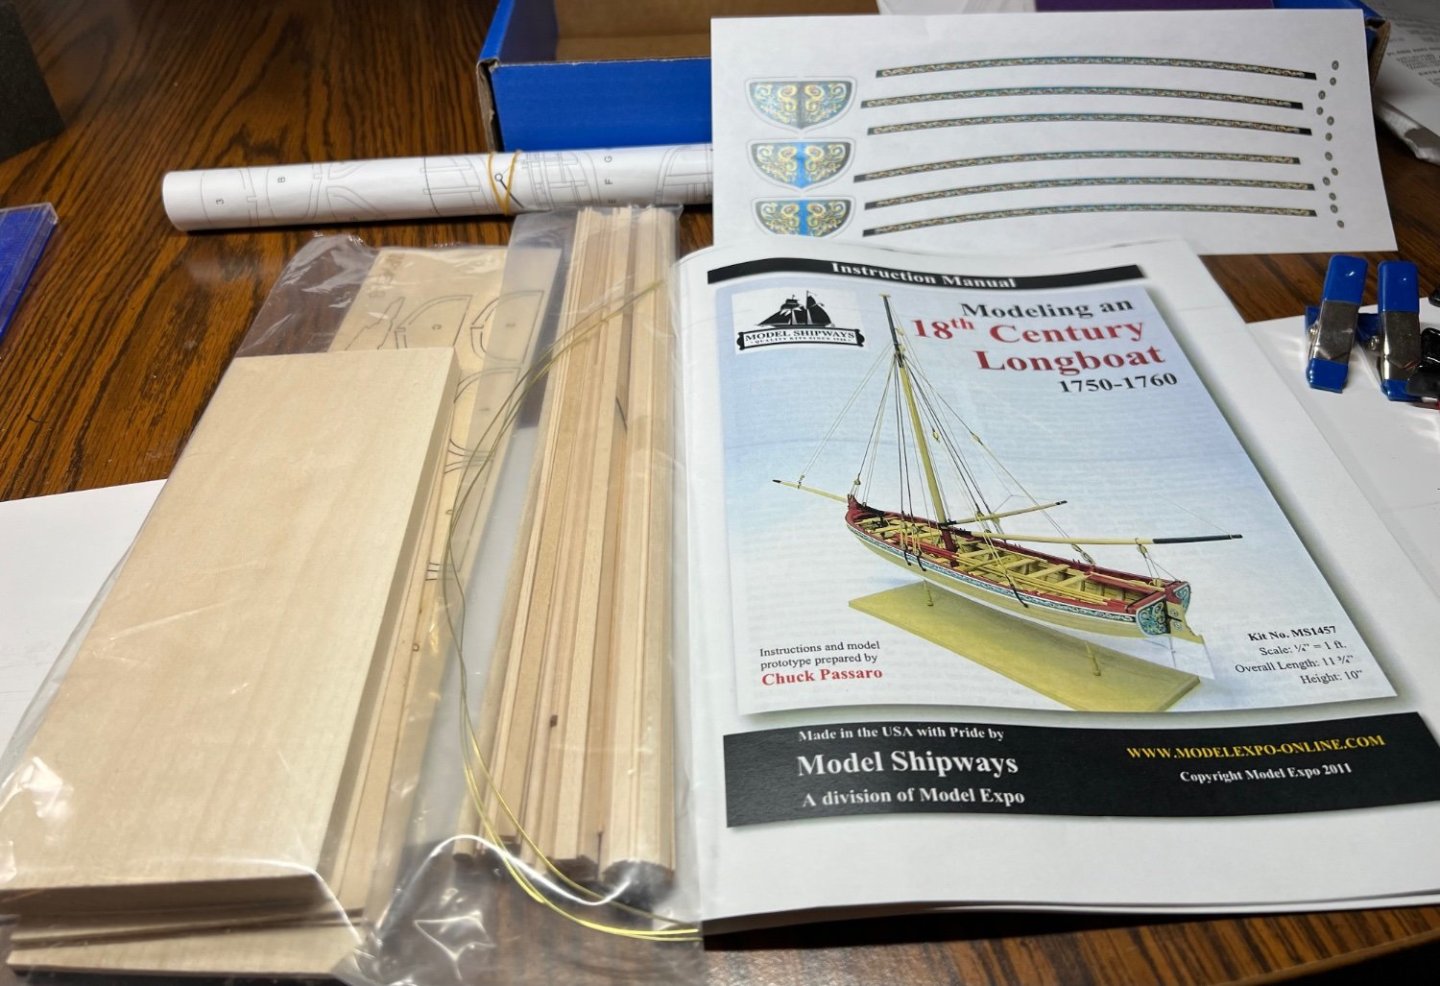
This is my fourth boat start. Still working on the third. Starting small to work my way up to something larger when my skills are ready. Model Shipways 18th Century Longboat.

-
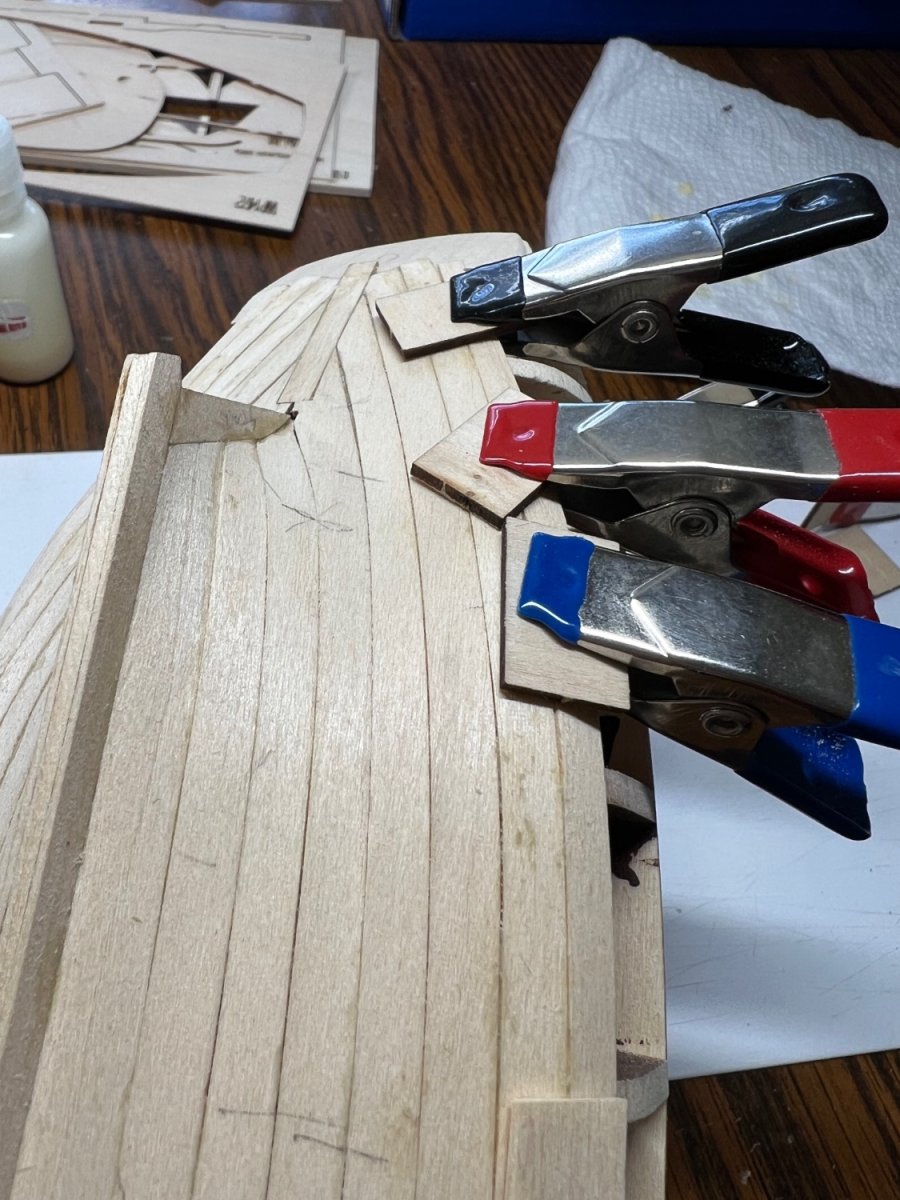
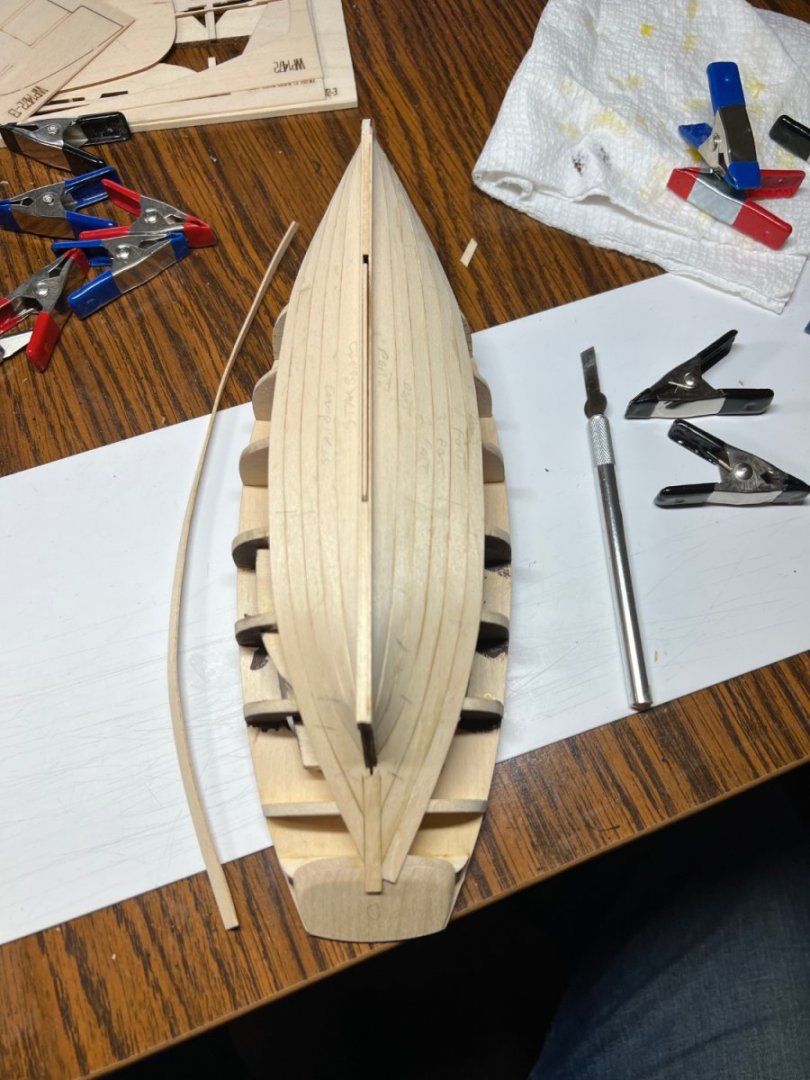
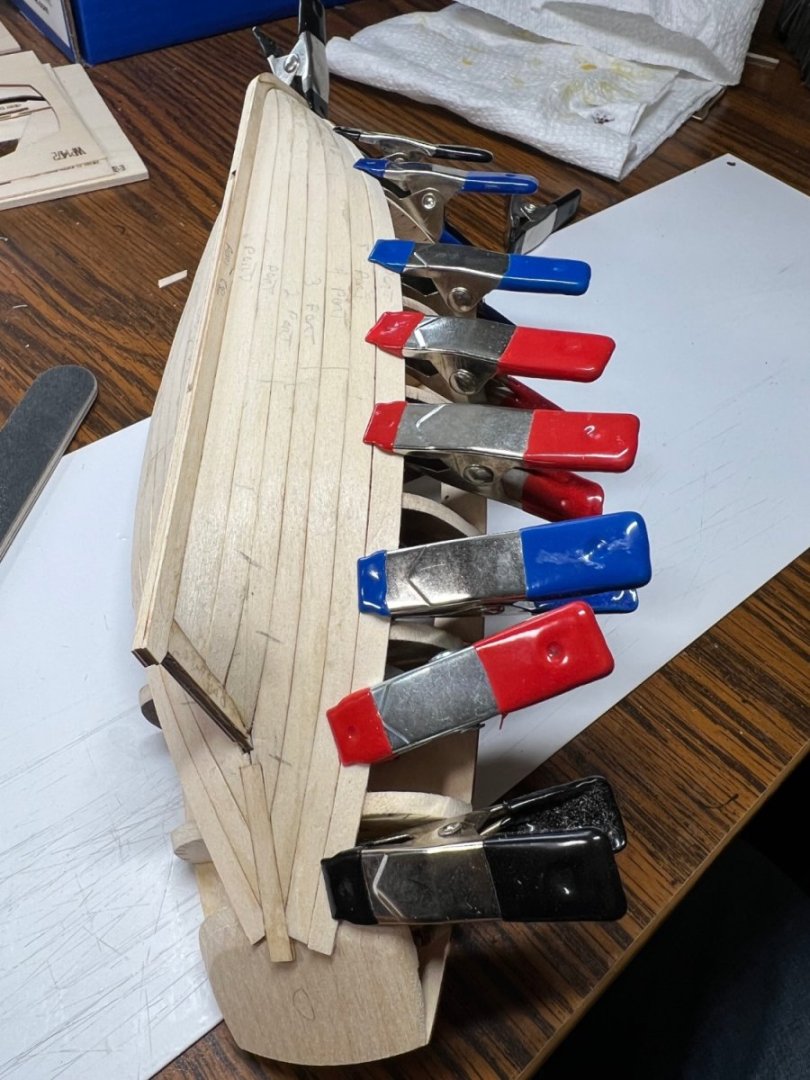
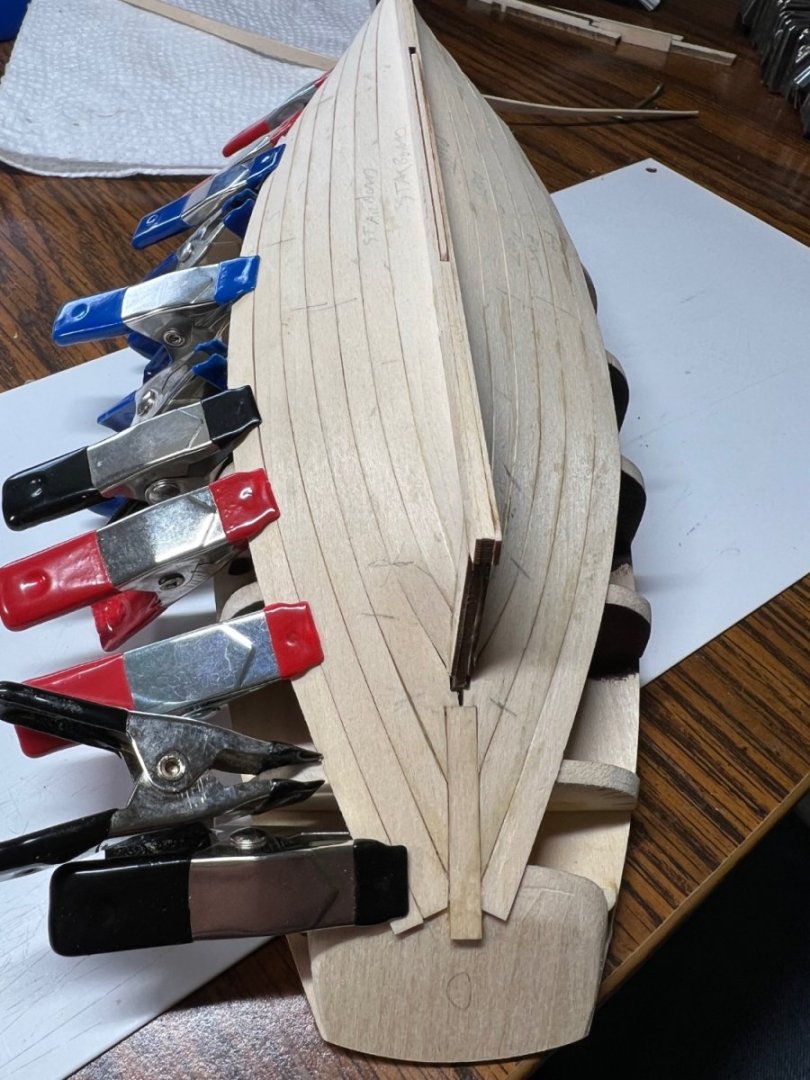
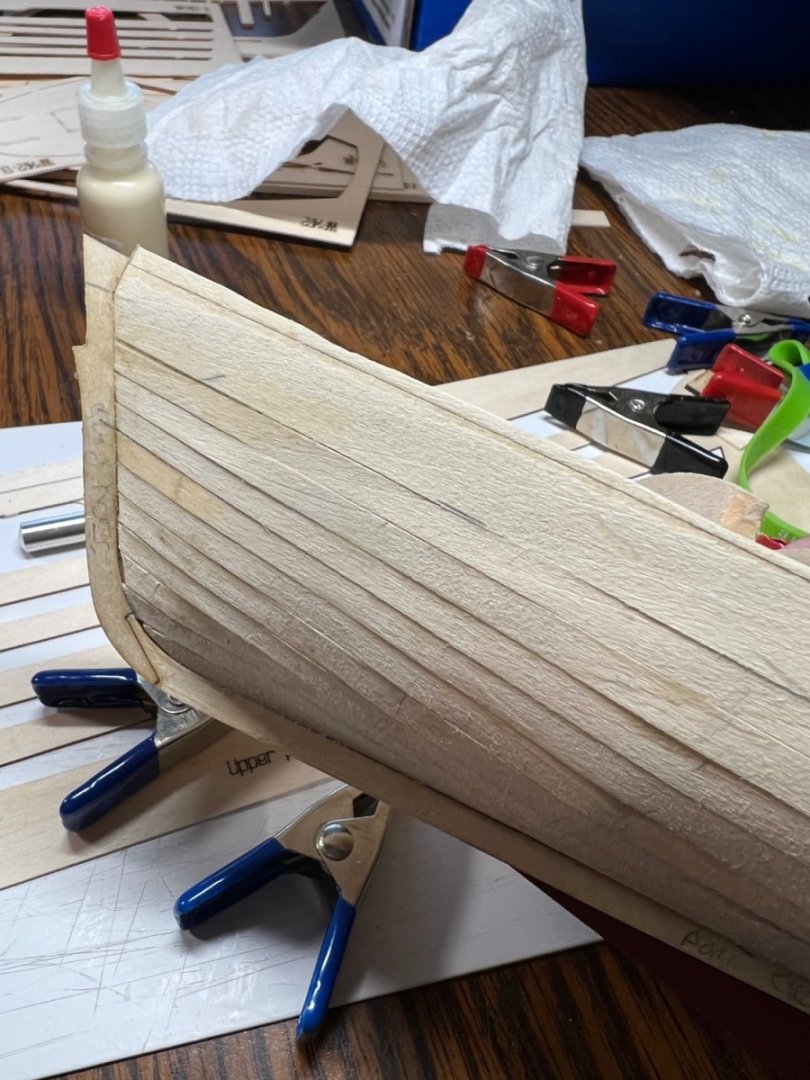
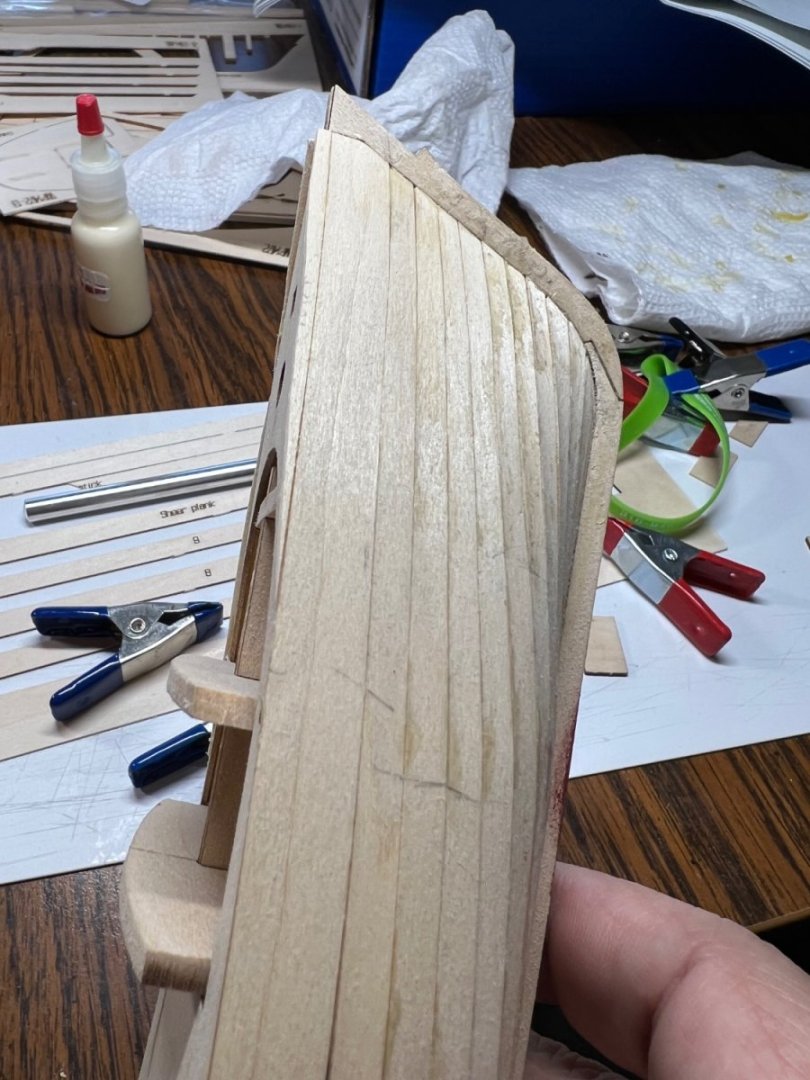
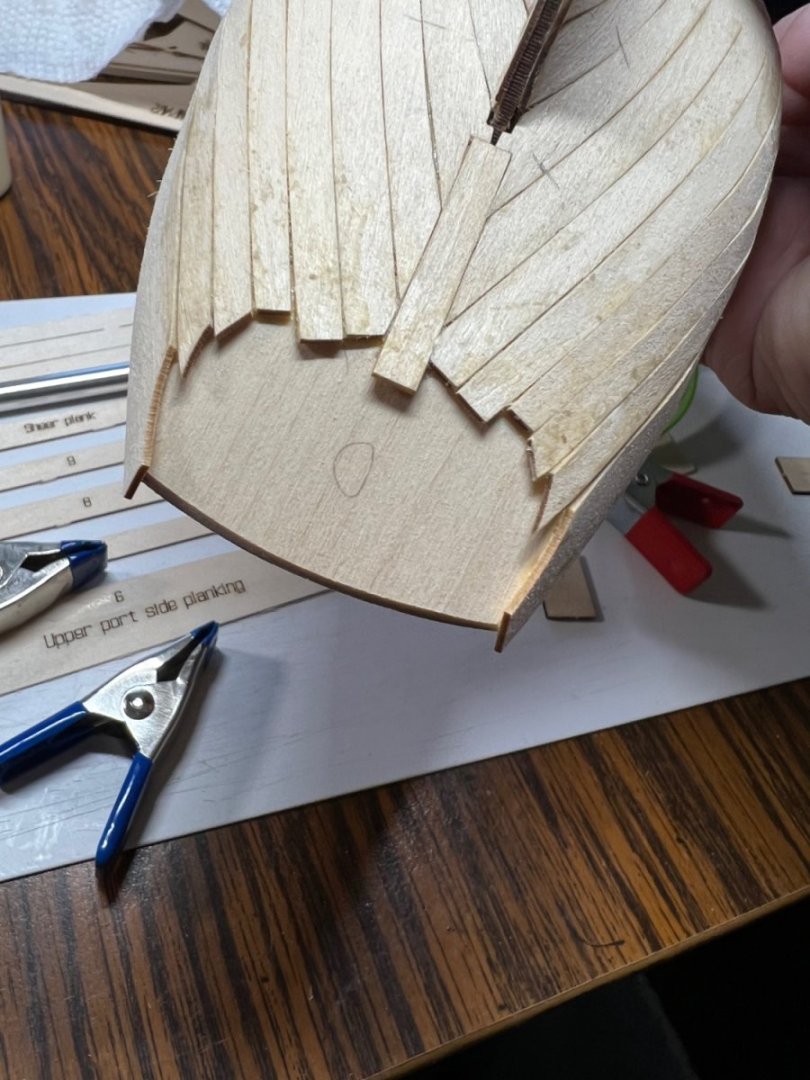
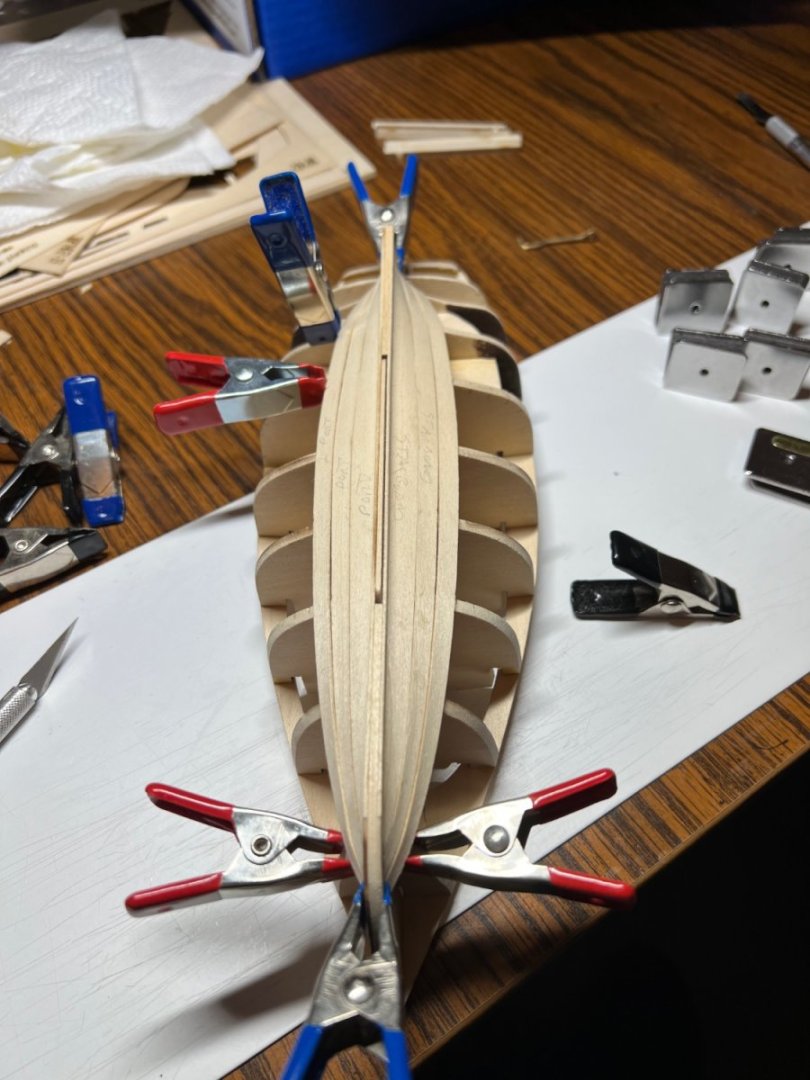
Planking is complete. The first layer should have been flat. No bending. I formed it into place and ran out of plank coverage on the bow. Wetting, drying with a small hair dryer and gluing took many hours. I did try to clean up gaps as I went. A larger model would be easier to keep the gaps smaller. I certainly learned a few planking tricks.


- 40 replies
-
- 7
-
-

-
- Model Shipways
- Muscongus Bay Lobster Smack
- (and 1 more)
-
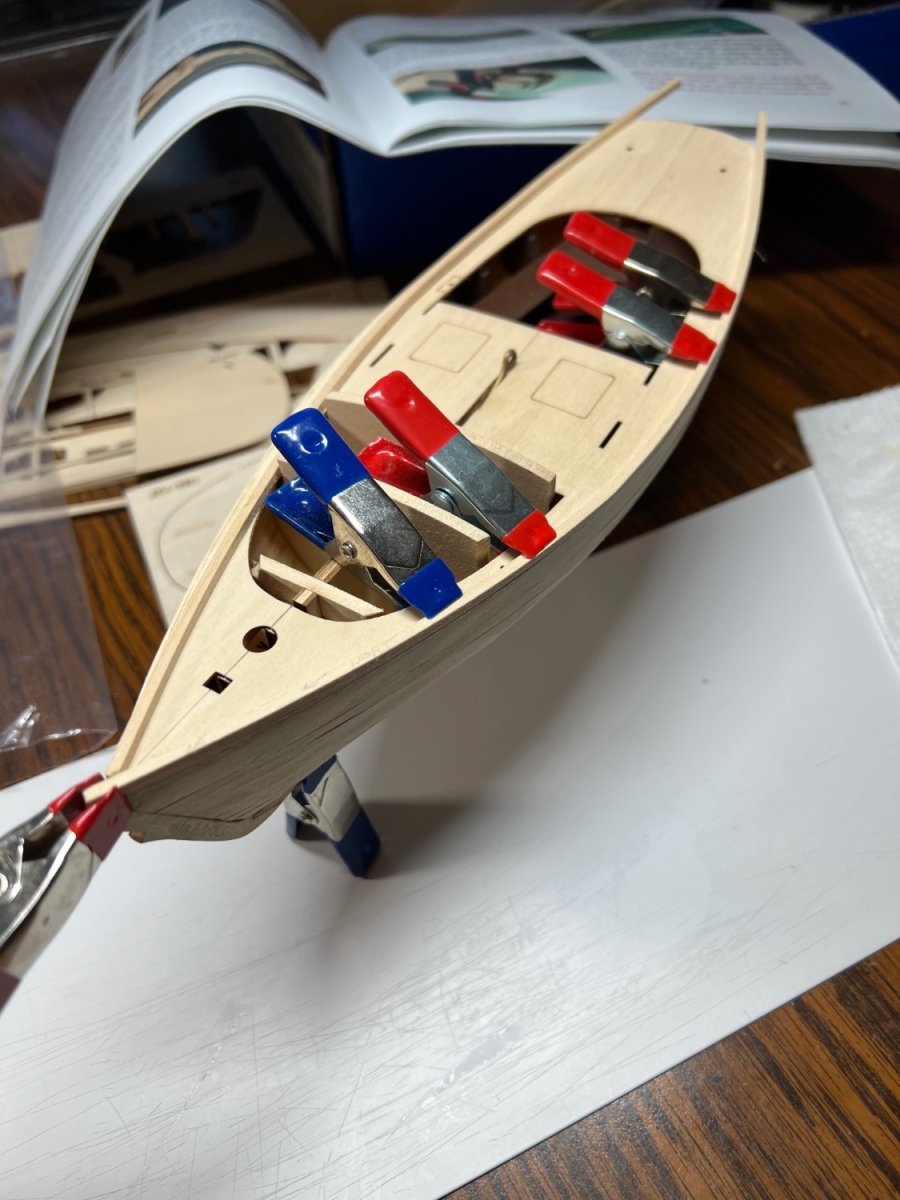
Another row almost ready to glue. This is going to take forever. Time to learn some speed tricks.
- 40 replies
-
- 3
-
-
- Model Shipways
- Muscongus Bay Lobster Smack
- (and 1 more)
-
Your Dory is beautiful! The stained wood looks fantastic! Great job.
- 39 replies
-
- 1
-
-
- Lowell Grand Banks Dory
- Model Shipways
- (and 1 more)
-
Wetting and training wood takes time. Waiting to let it dry back down to a normal moisture level is brutal. I have a dryer on the way to help speed up the drying time. Garboard looks great, plank 1 needs some trimming and sanding to lay in place. It’s close. My goal is no filler. I am just about ready for a bigger project.
- 40 replies
-
- 3
-
-
- Model Shipways
- Muscongus Bay Lobster Smack
- (and 1 more)
-
Outstanding boat! It looks fantastic. I like the living details.
- 38 replies
-
- 3
-
-
- Norwegian Sailing Pram
- Model Shipways
- (and 2 more)