HOLIDAY DONATION DRIVE - SUPPORT MSW - DO YOUR PART TO KEEP THIS GREAT FORUM GOING! (Only 36 donations so far out of 49,000 members - C'mon guys!)
×

MajorChaos
-
Posts
301 -
Joined
-
Last visited
Content Type
Profiles
Forums
Gallery
Events
Everything posted by MajorChaos
-
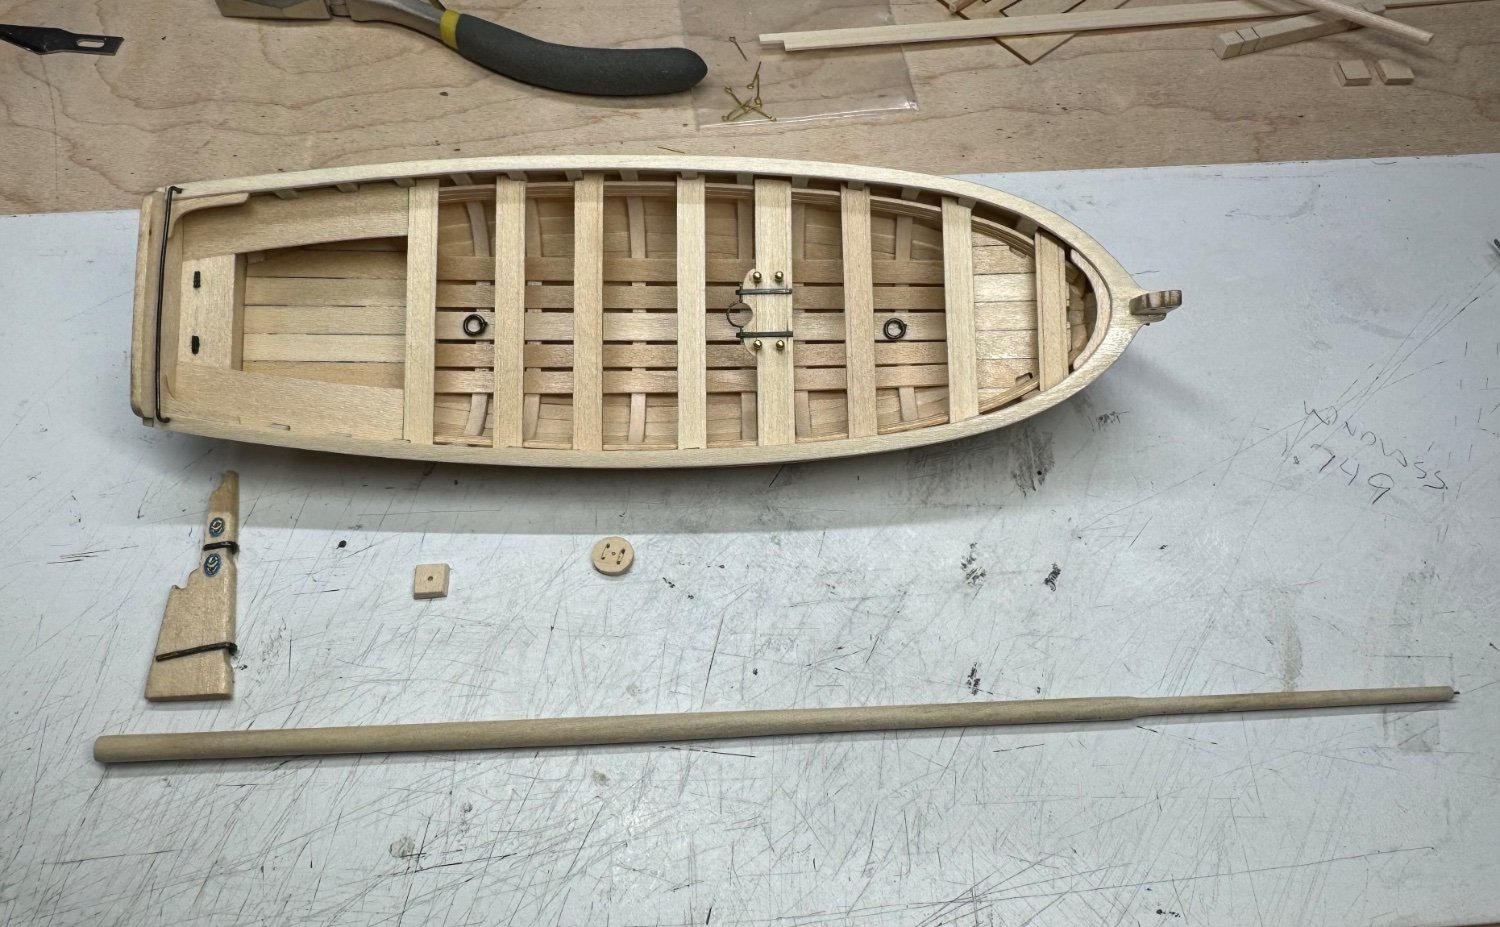
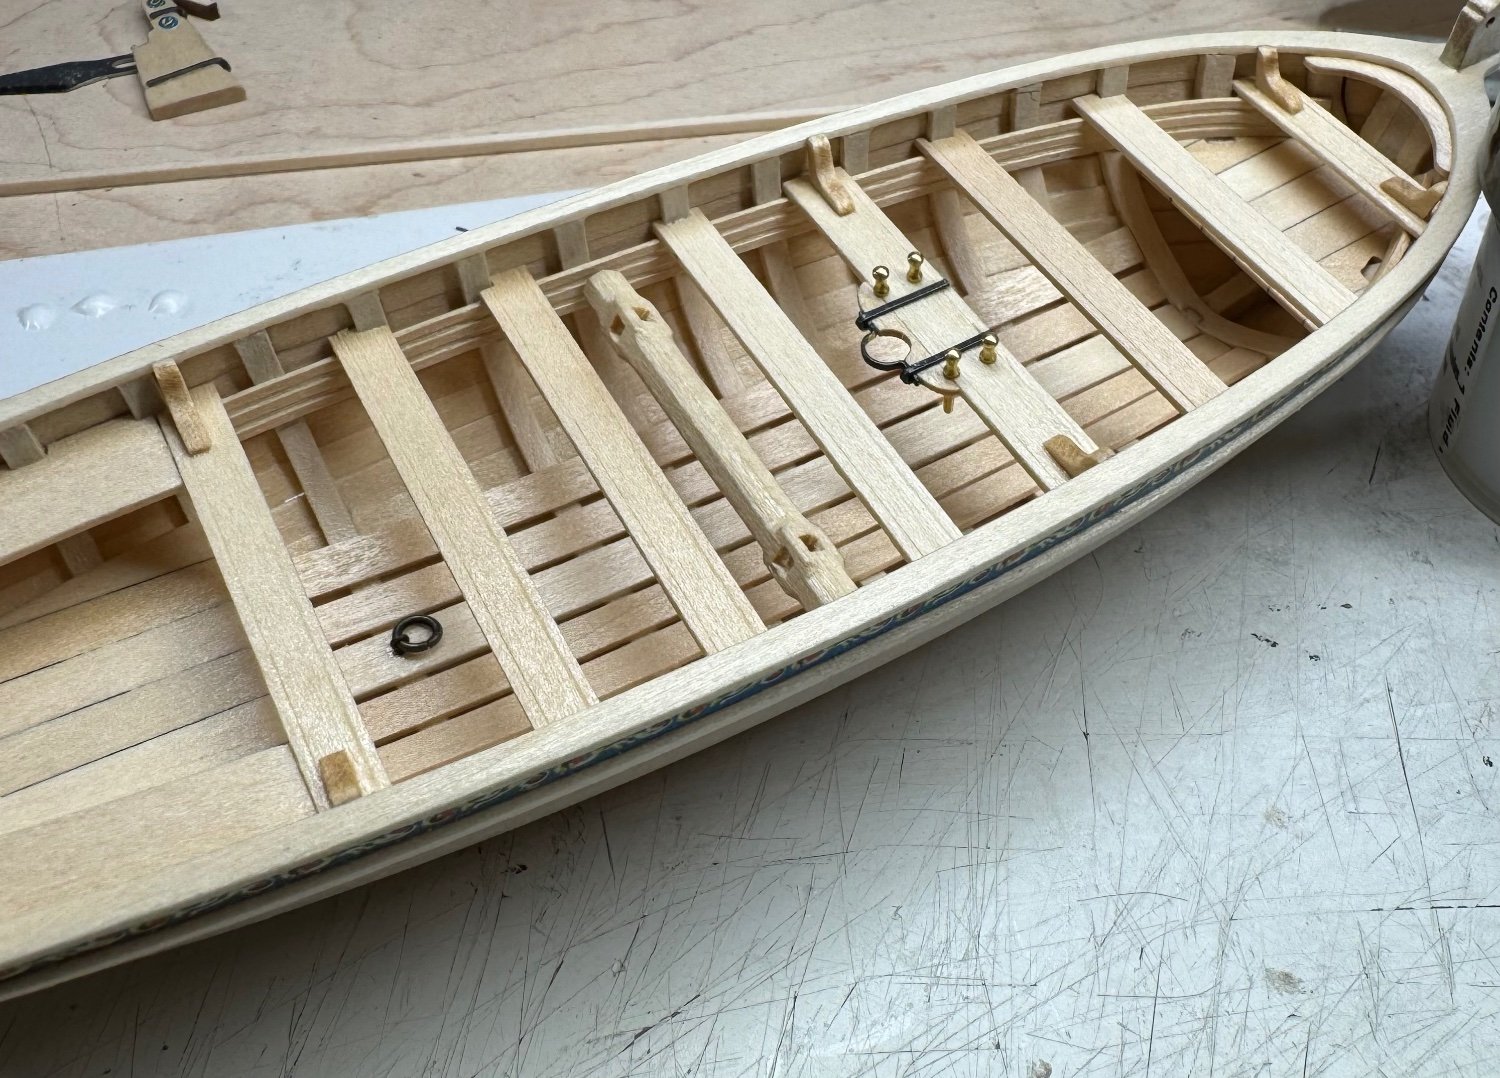
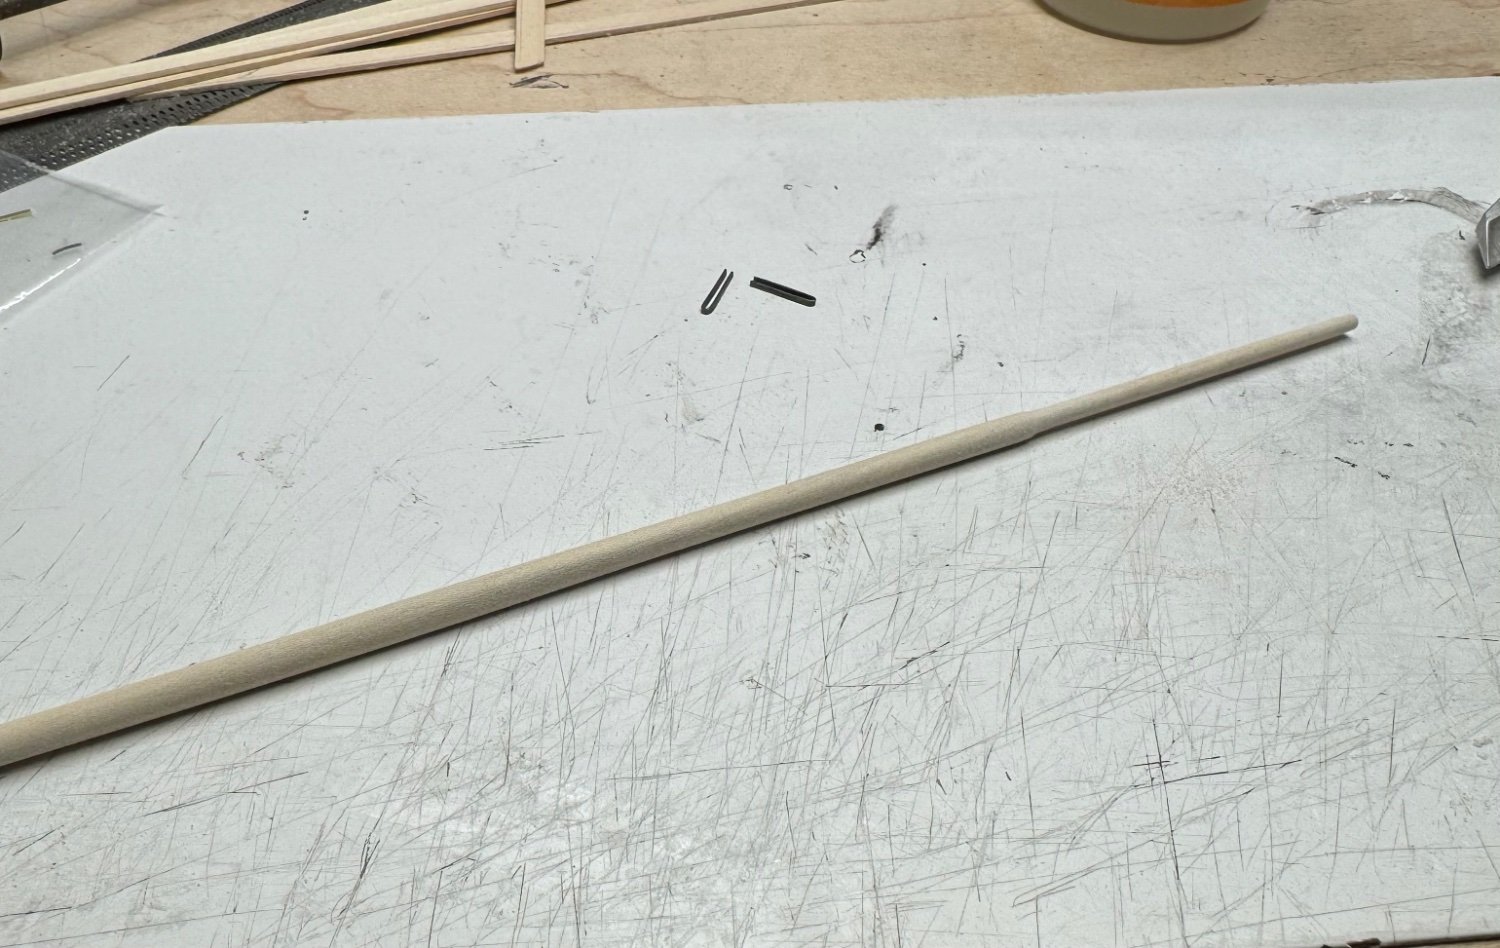
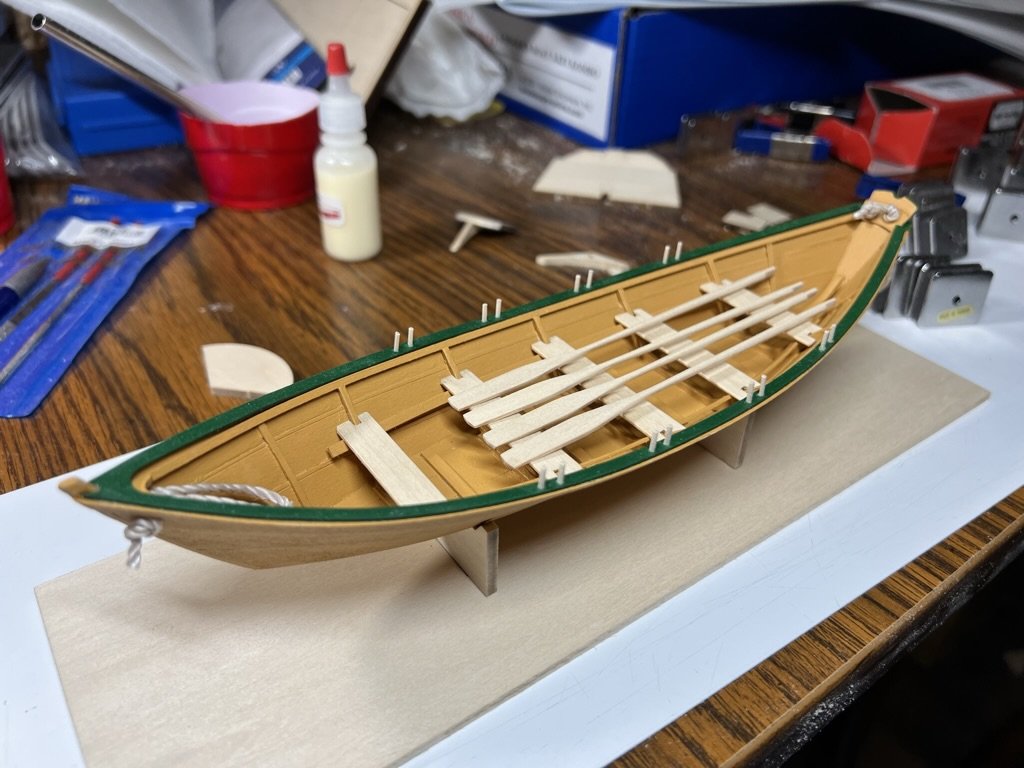
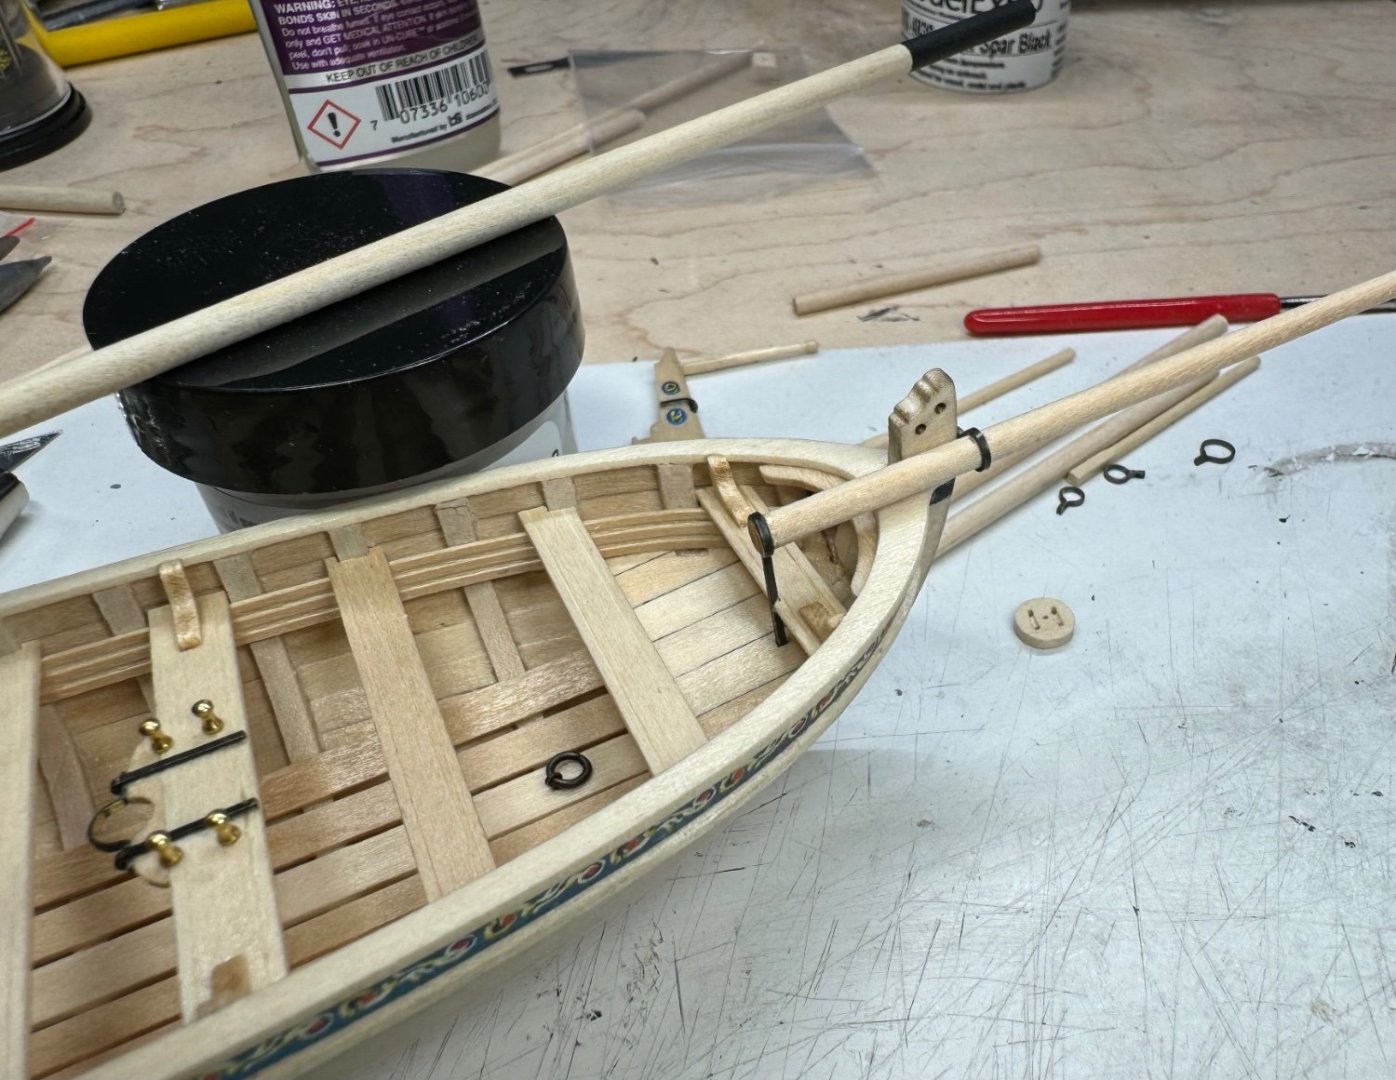
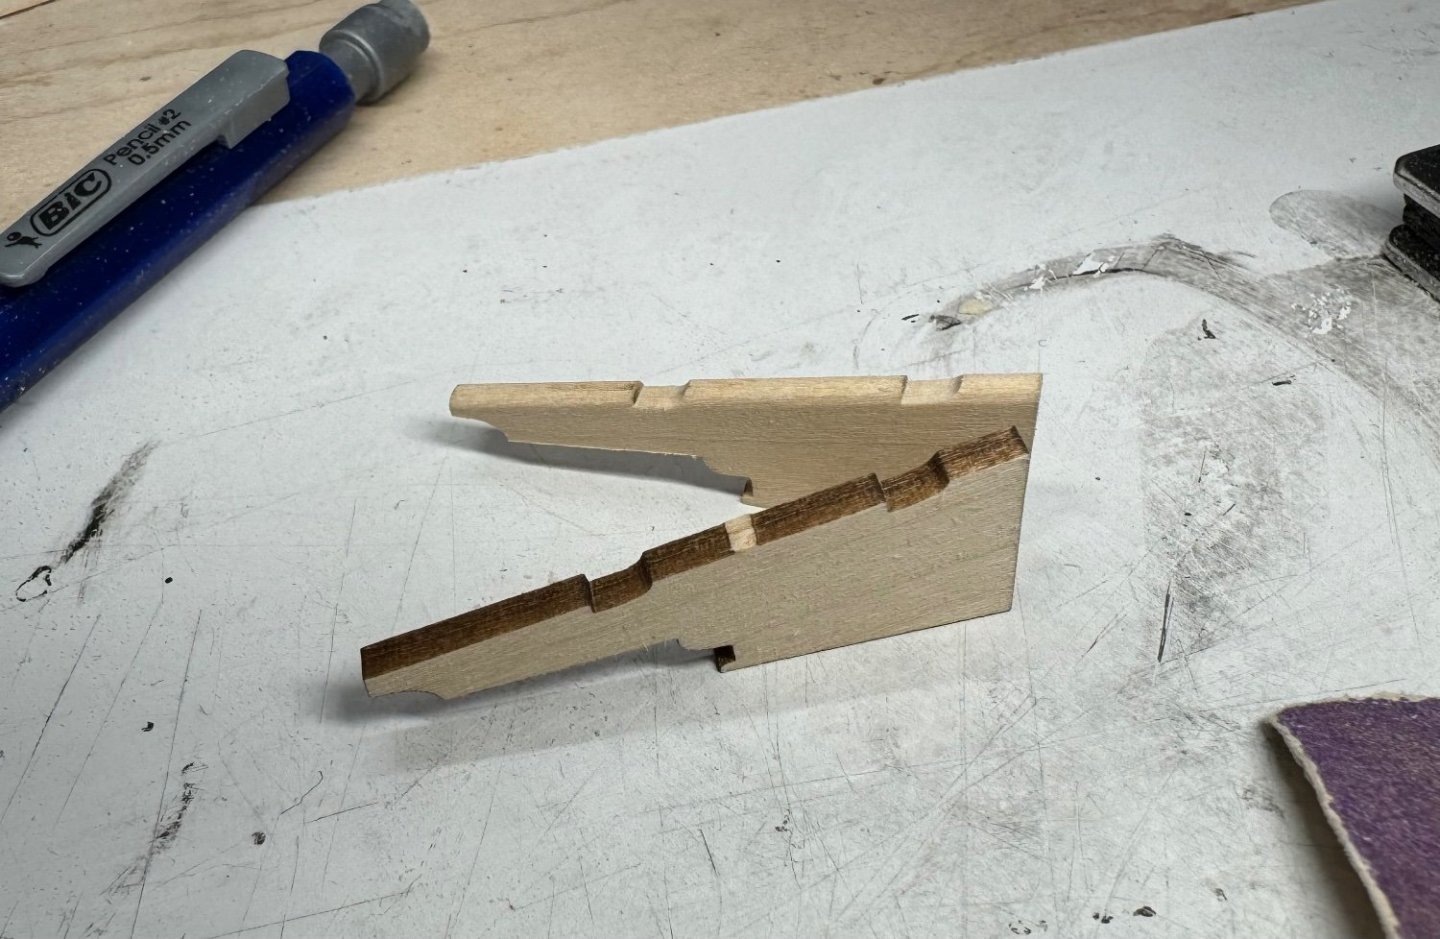
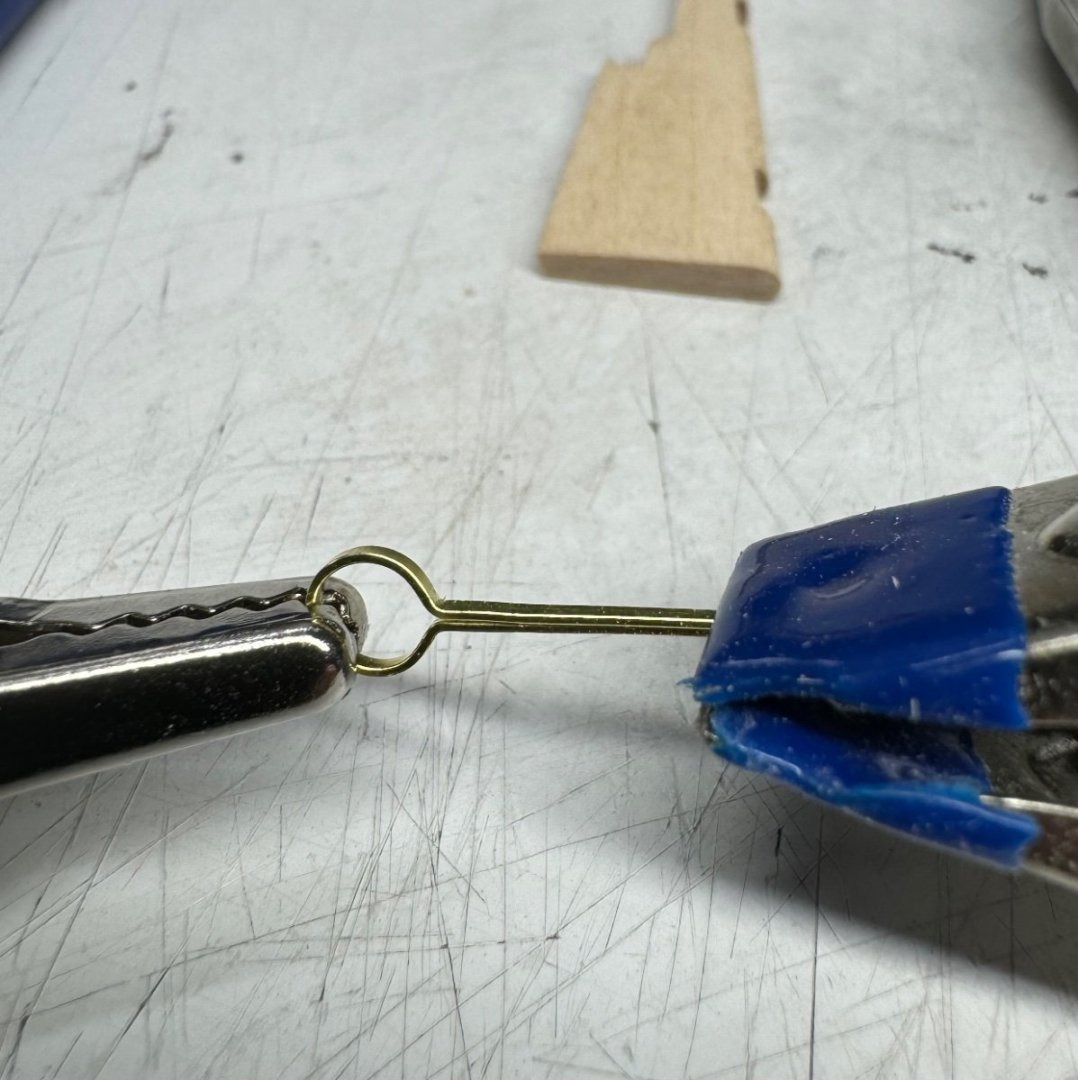
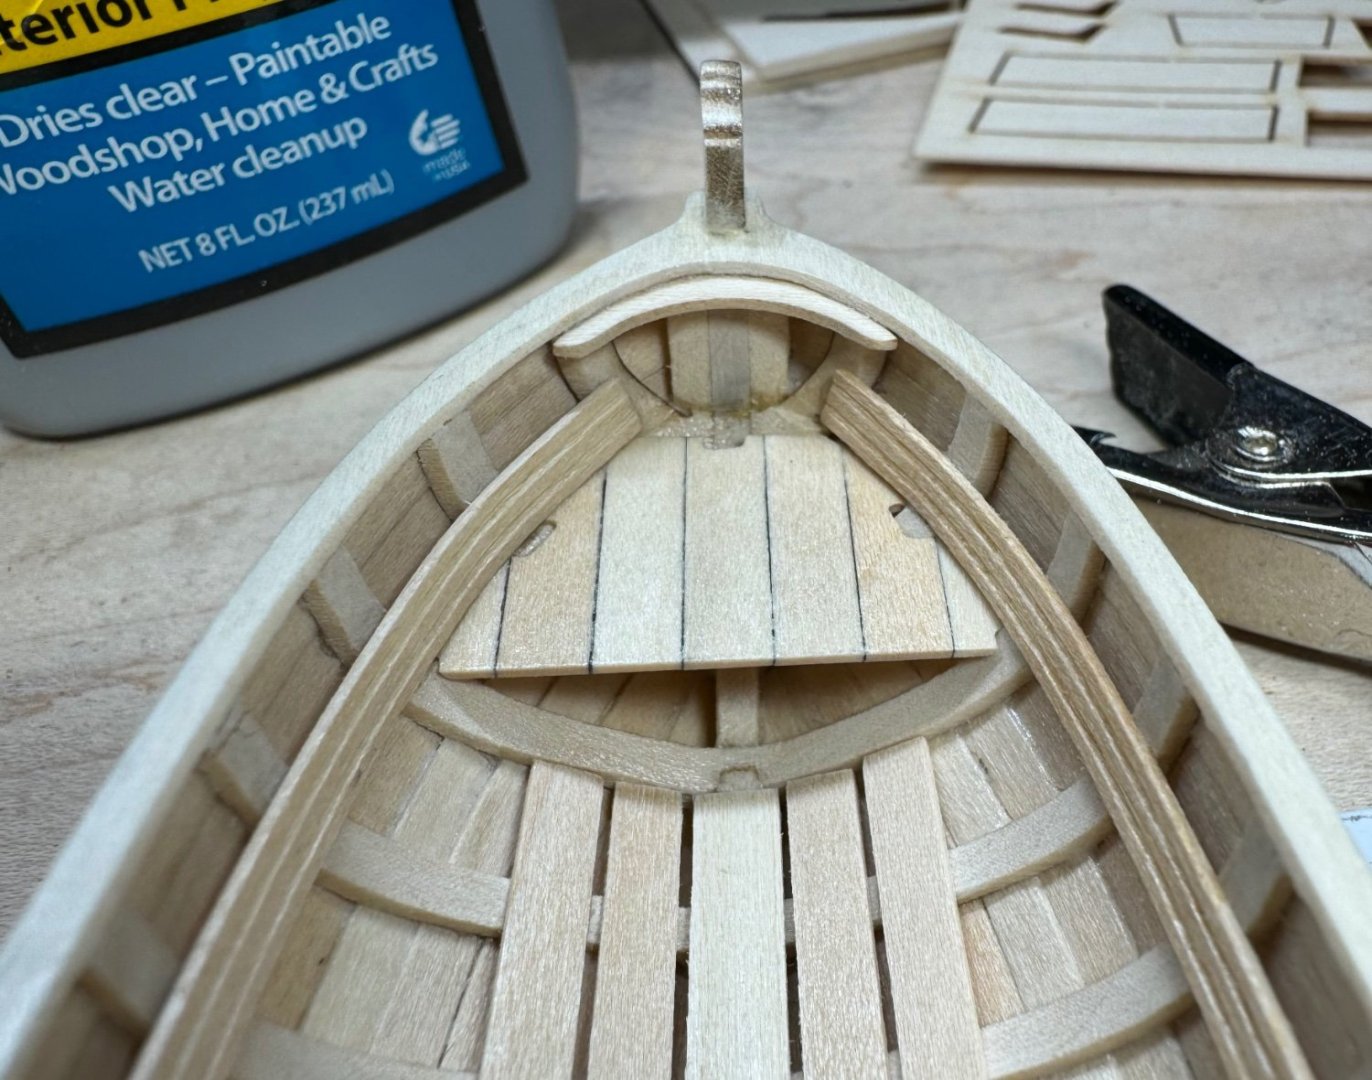
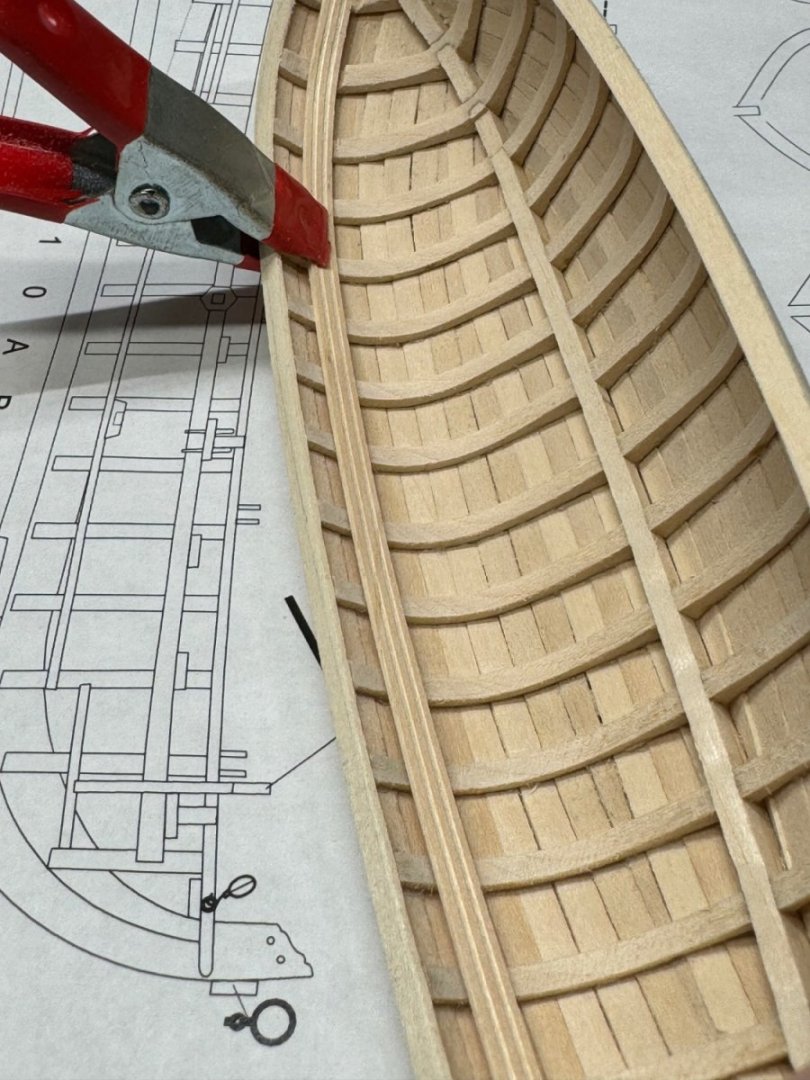
The metal work this small is starting to be fun. I would guess if I can work this small stuff something bigger should be easy. Many iron bands done. The resistive soldering set up and a high temp solder paste is great. The bowspirit looks good. I had to look up how to seize a rigging line. I have a lot to learn about rigging. This longboat has been very enjoyable to build. Training for the Bluenose work to come. I’m starting to understand it little by little. I finished up the rudder bits too.
-
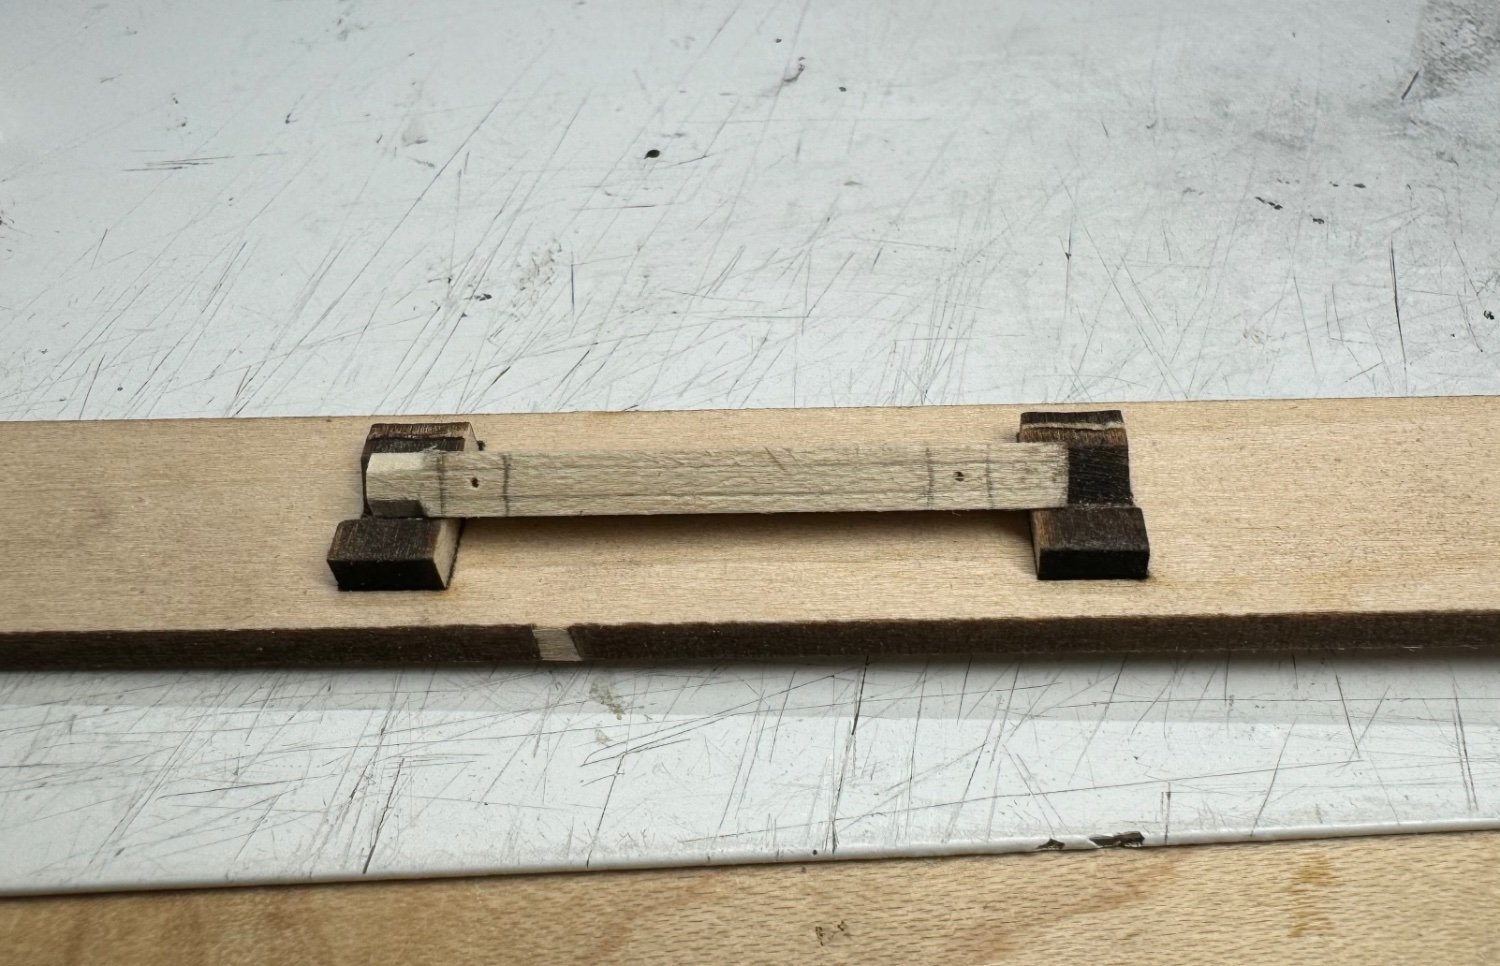
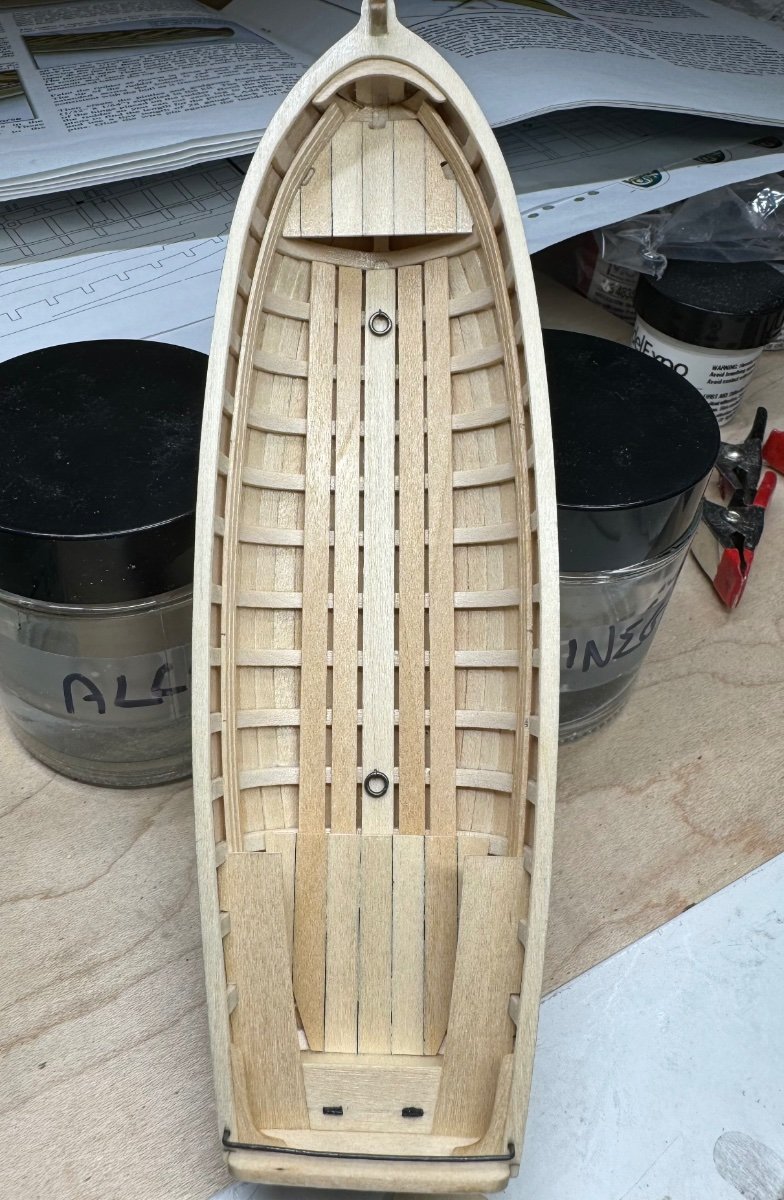
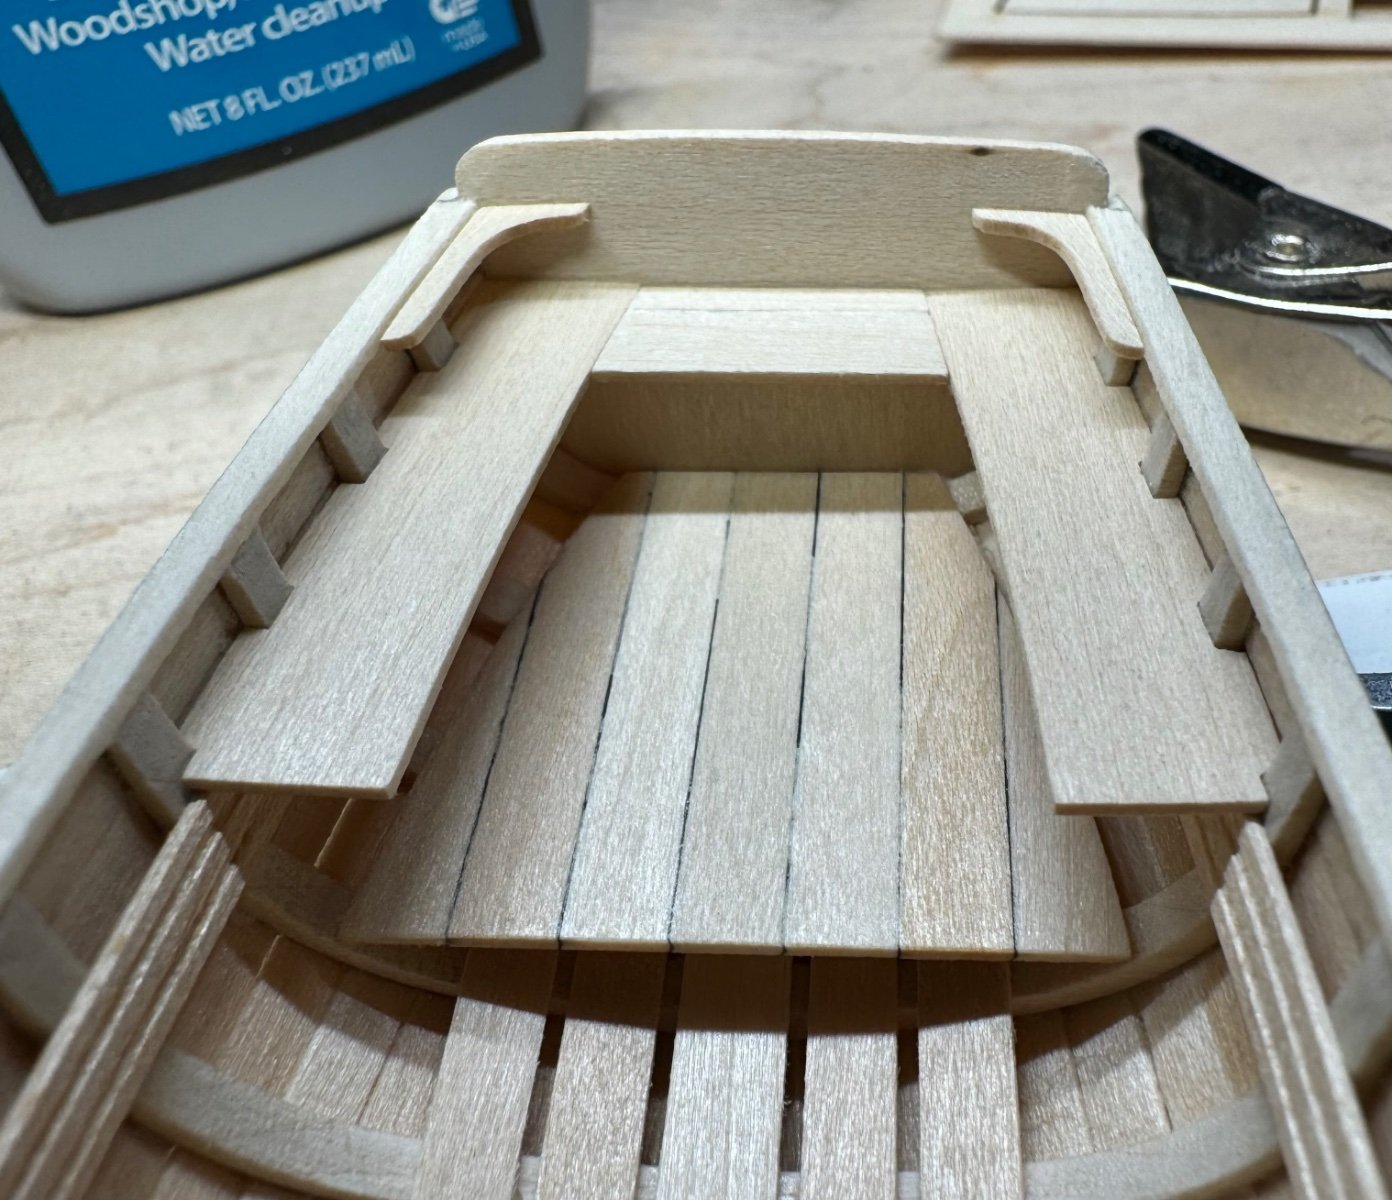
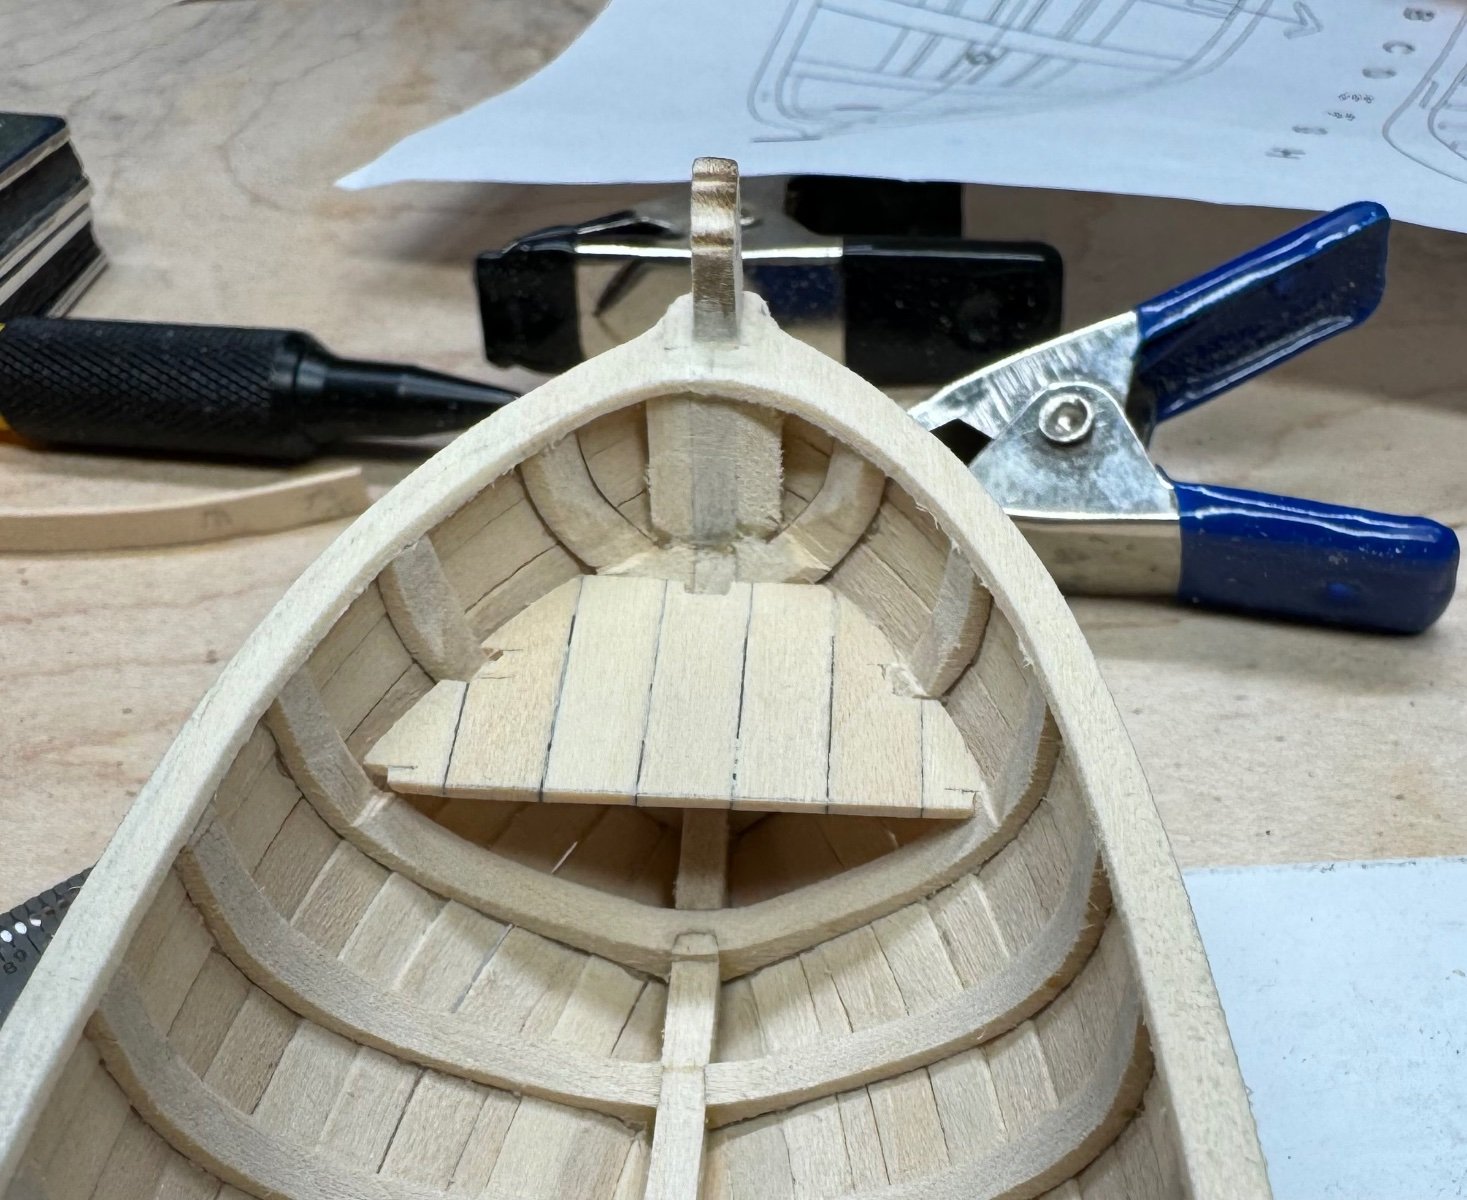
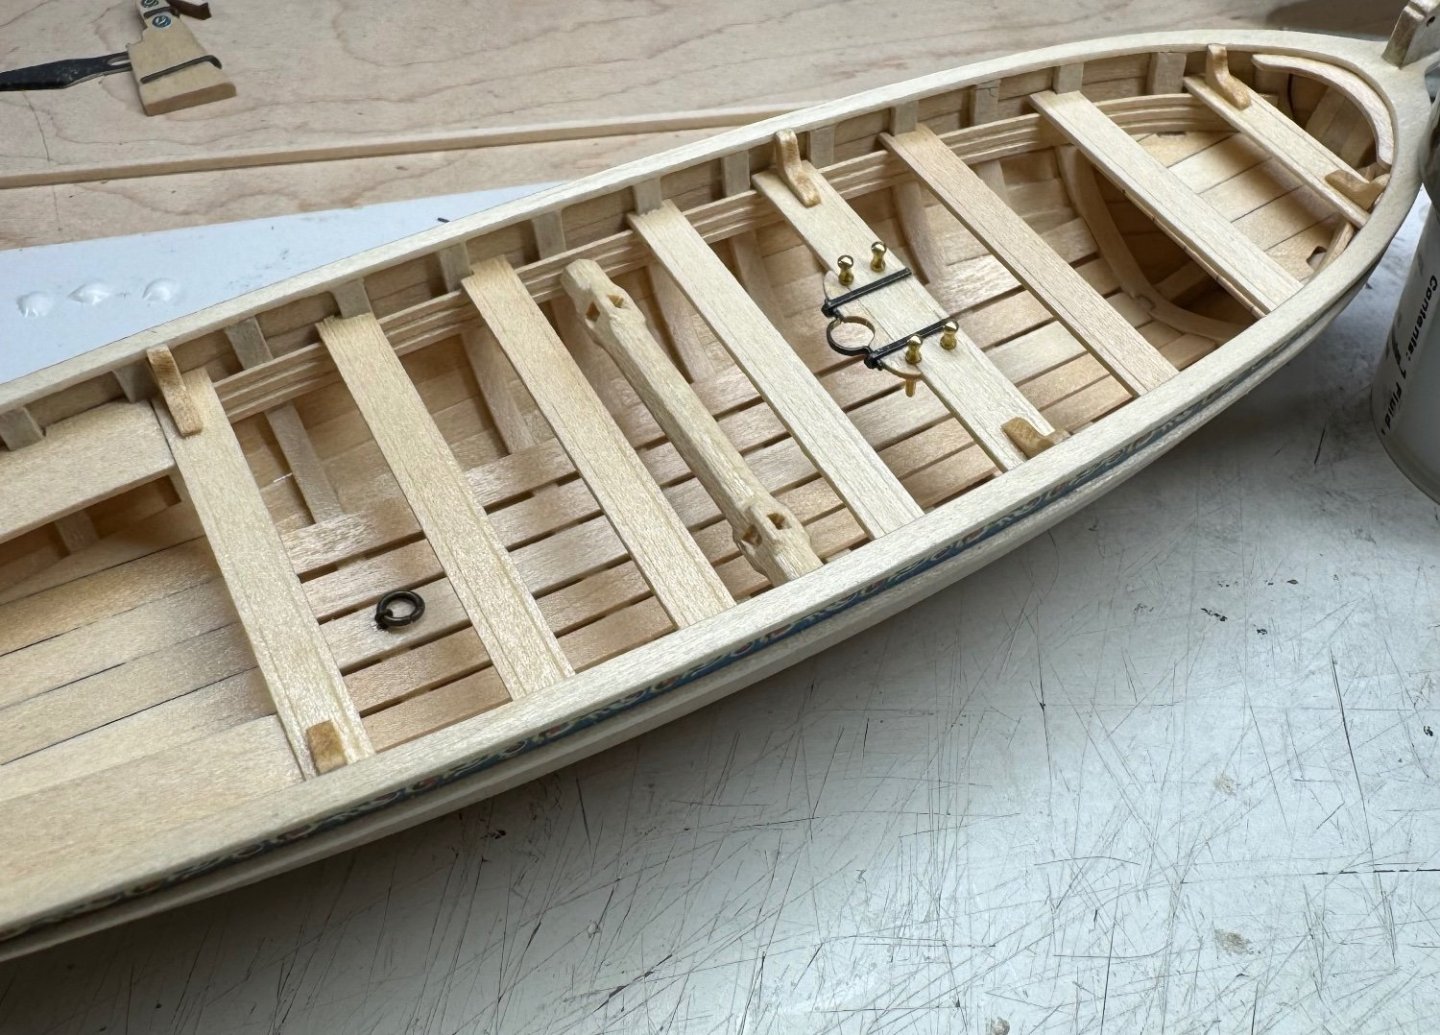
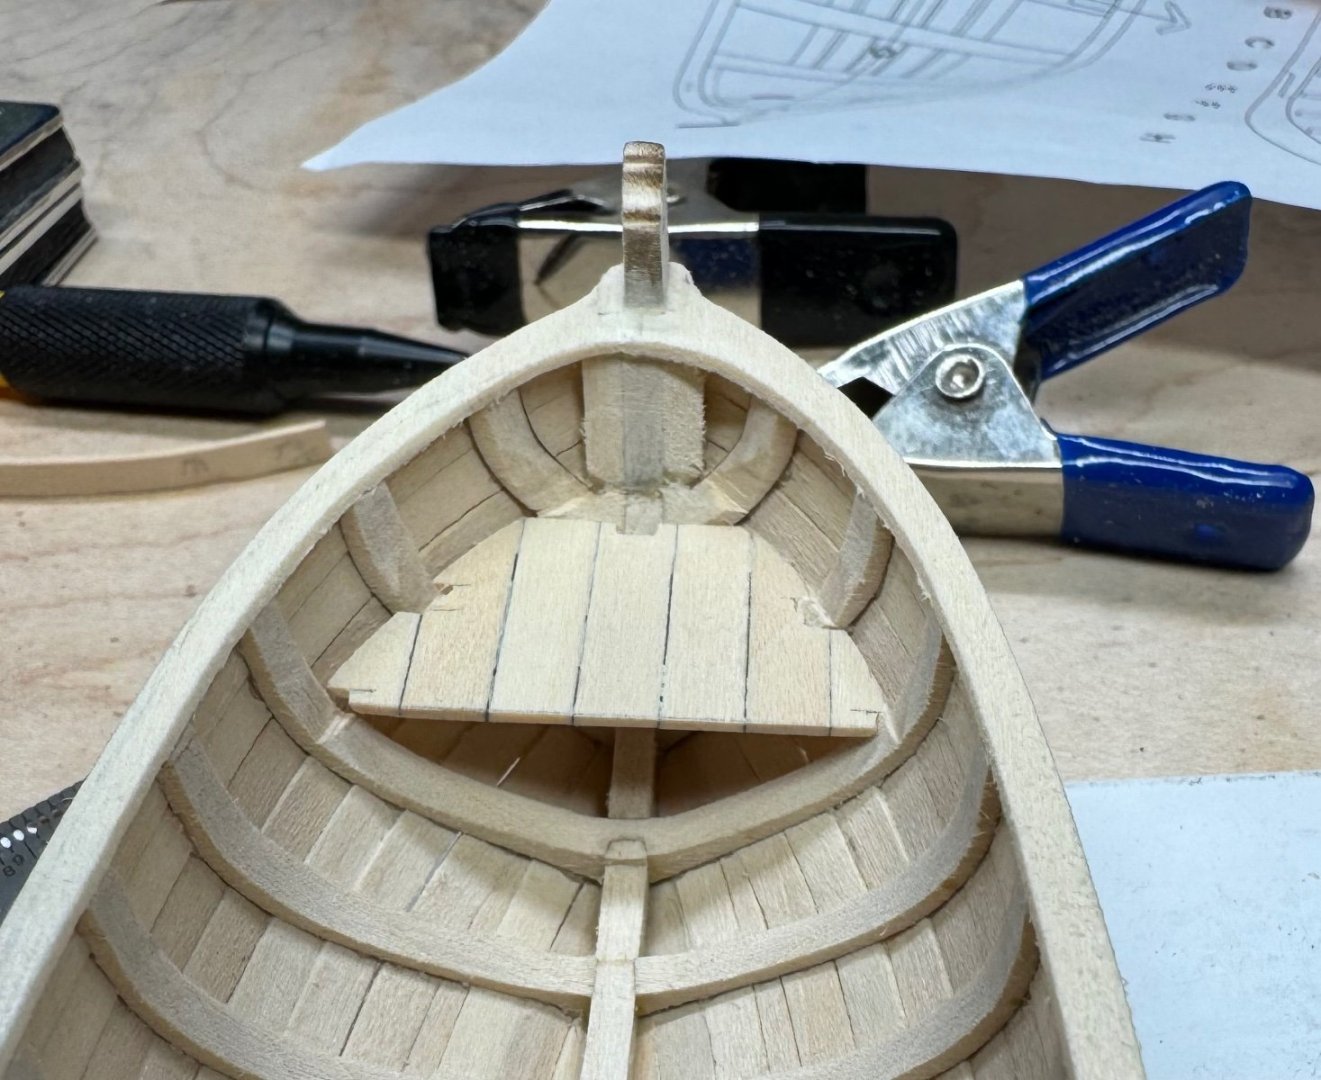
Rudder is finished. Windlass is done but the handles. I think I spent 2 hours fiddling with it. Thwarts are glued in place. The thwart knees are in work, they are so small. If the video loads and it’s too big for the page/post I’ll pull it down. It thought it was neat to see the windlass rotate. Edit, thwart knees finished. IMG_0850.mov


-
I did a 50% water 50% white Elmer’s glue mix, soaked it and then hung it off the edge of the table with a small bit of weight. This made nice straight ropes, I did try to draw them flat on a table but it didn’t do as good as hanging it off the side with a small clamp of weight. Someplace I read the Elmer’s glue is an animal product and will get ruined as it ages. I have bees wax to try for the next rope festivities. Your sail looks great!
- 62 replies
-
- 2
-

-
- Muscongus Bay Lobster Smack
- Model Shipways
- (and 1 more)
-
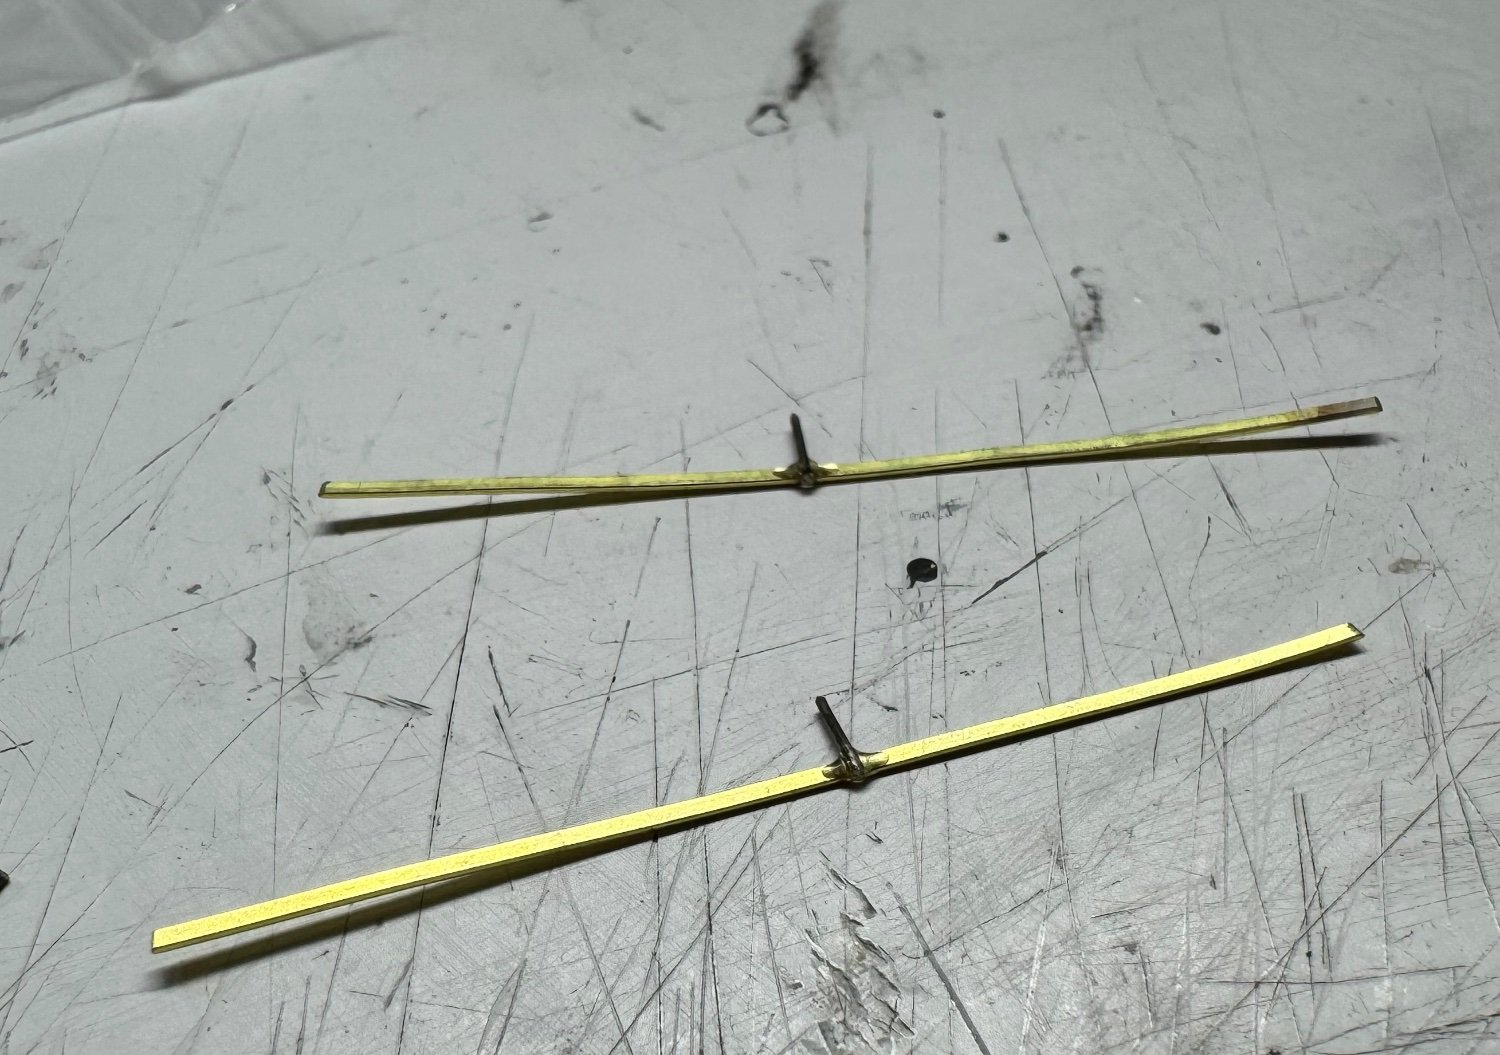
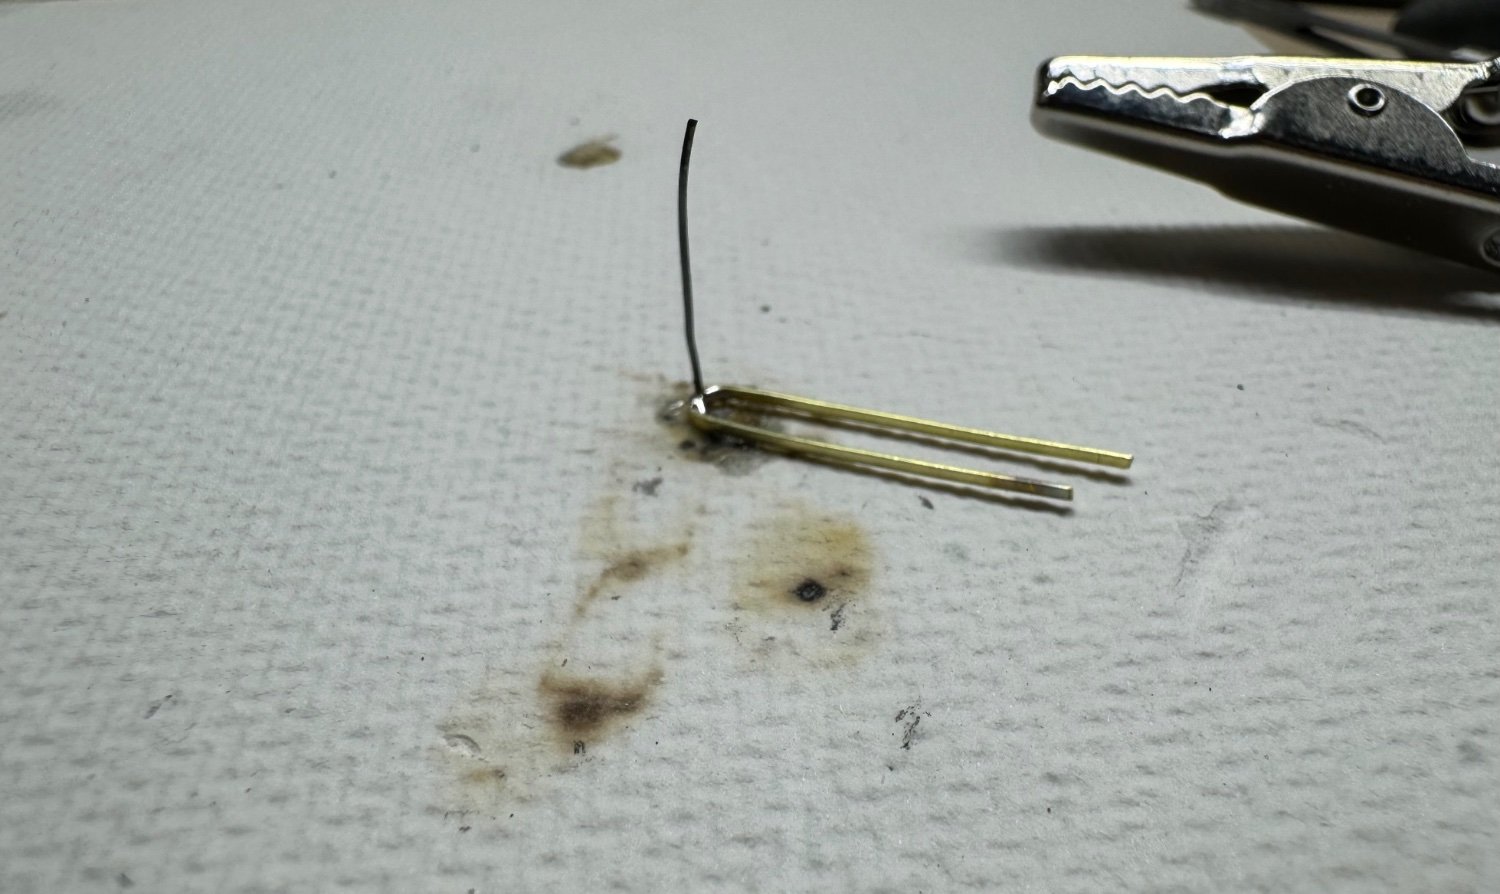
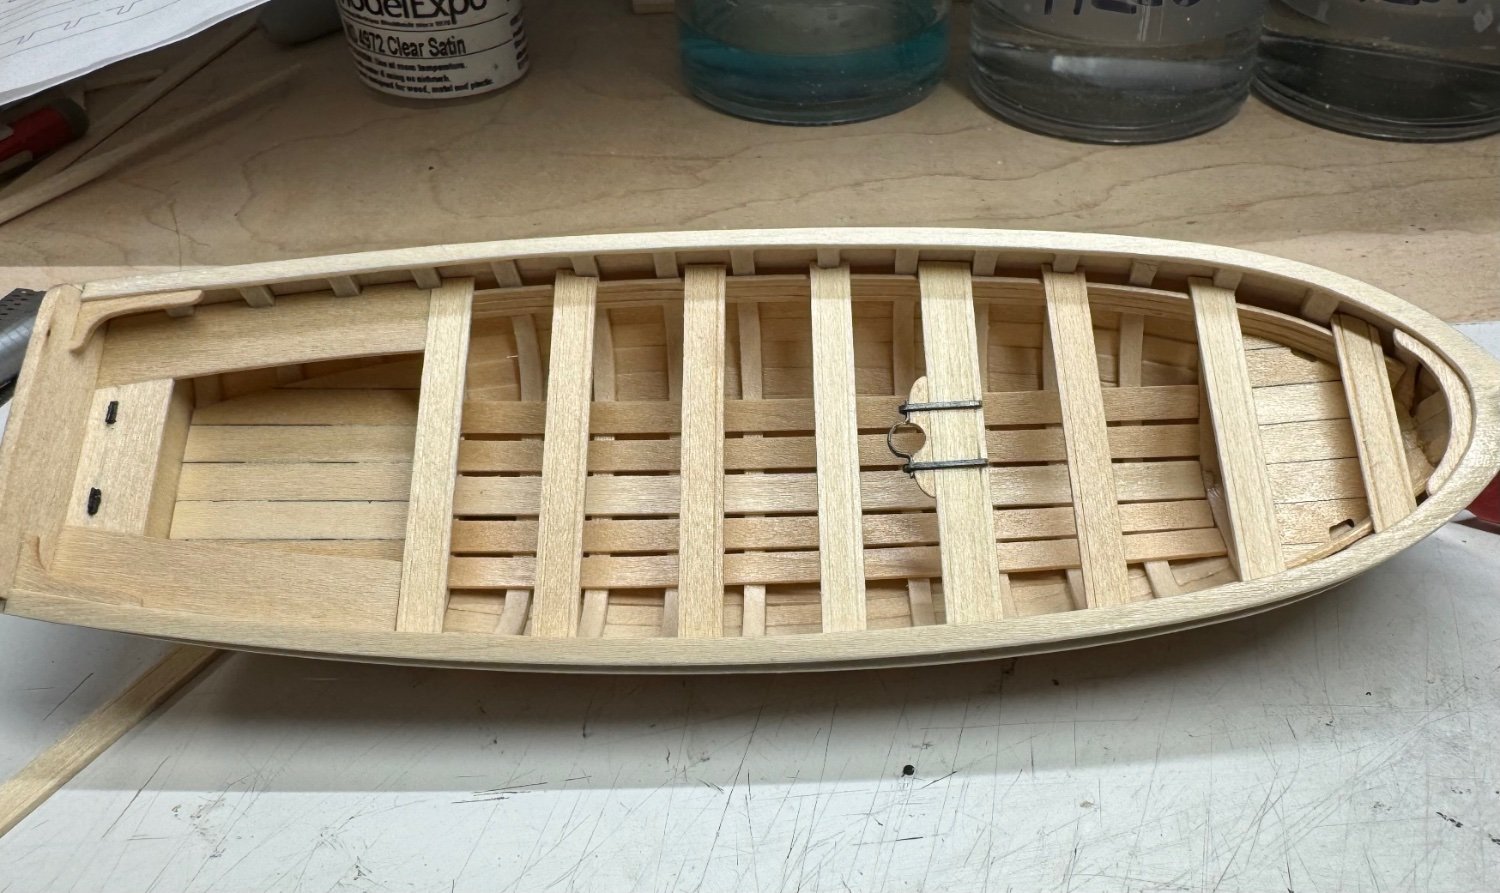
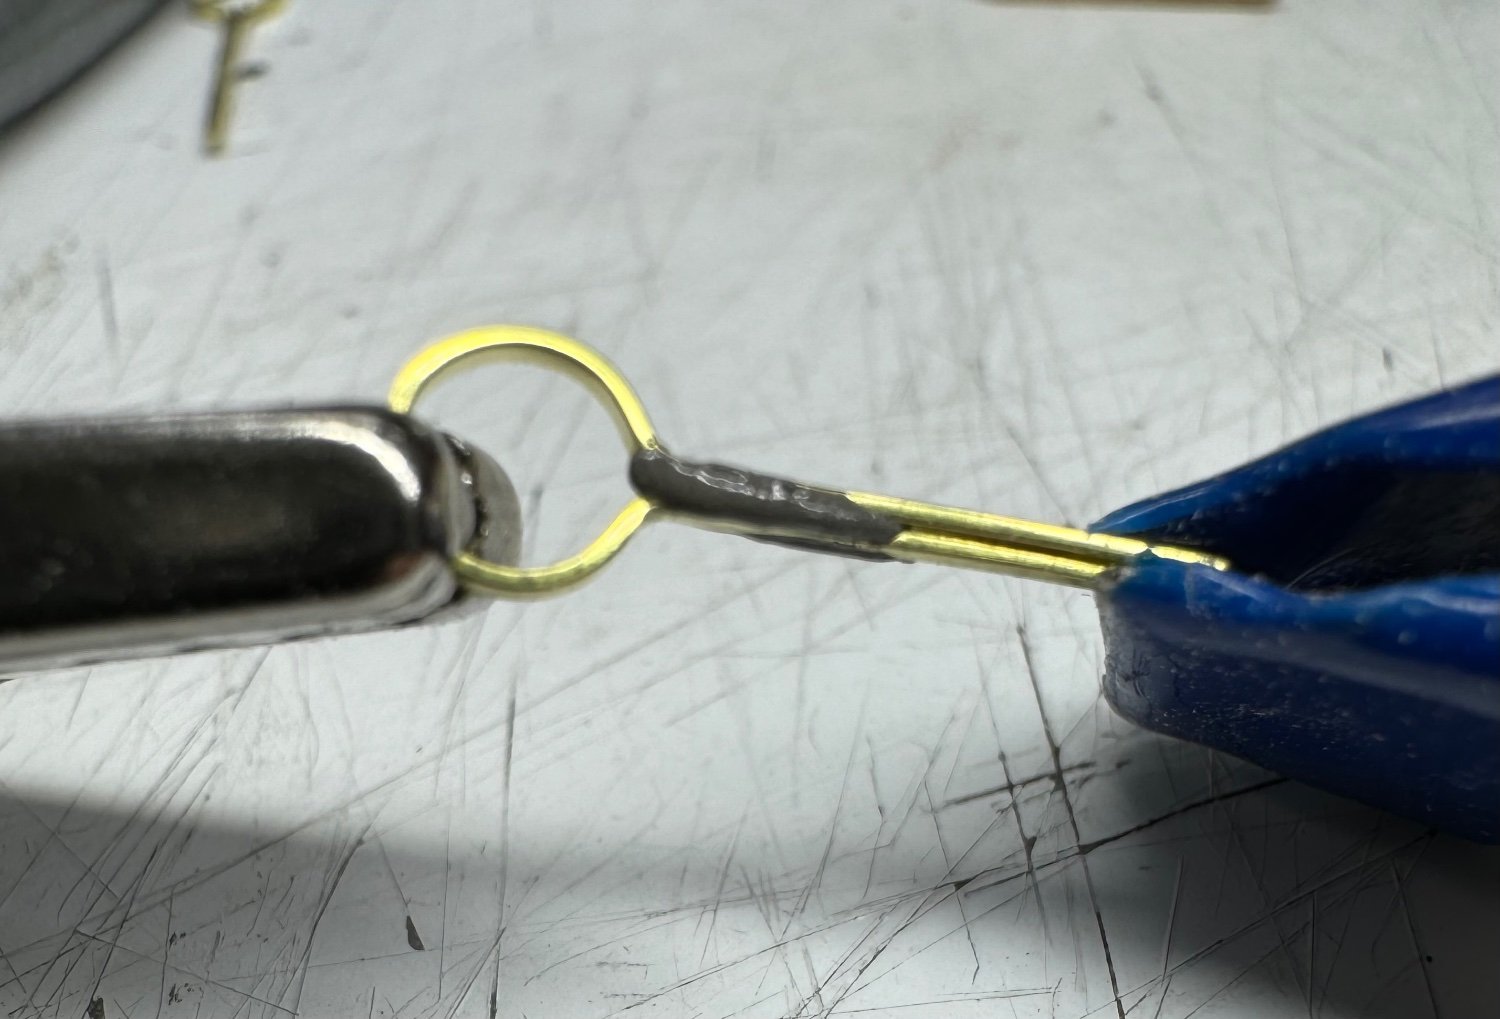
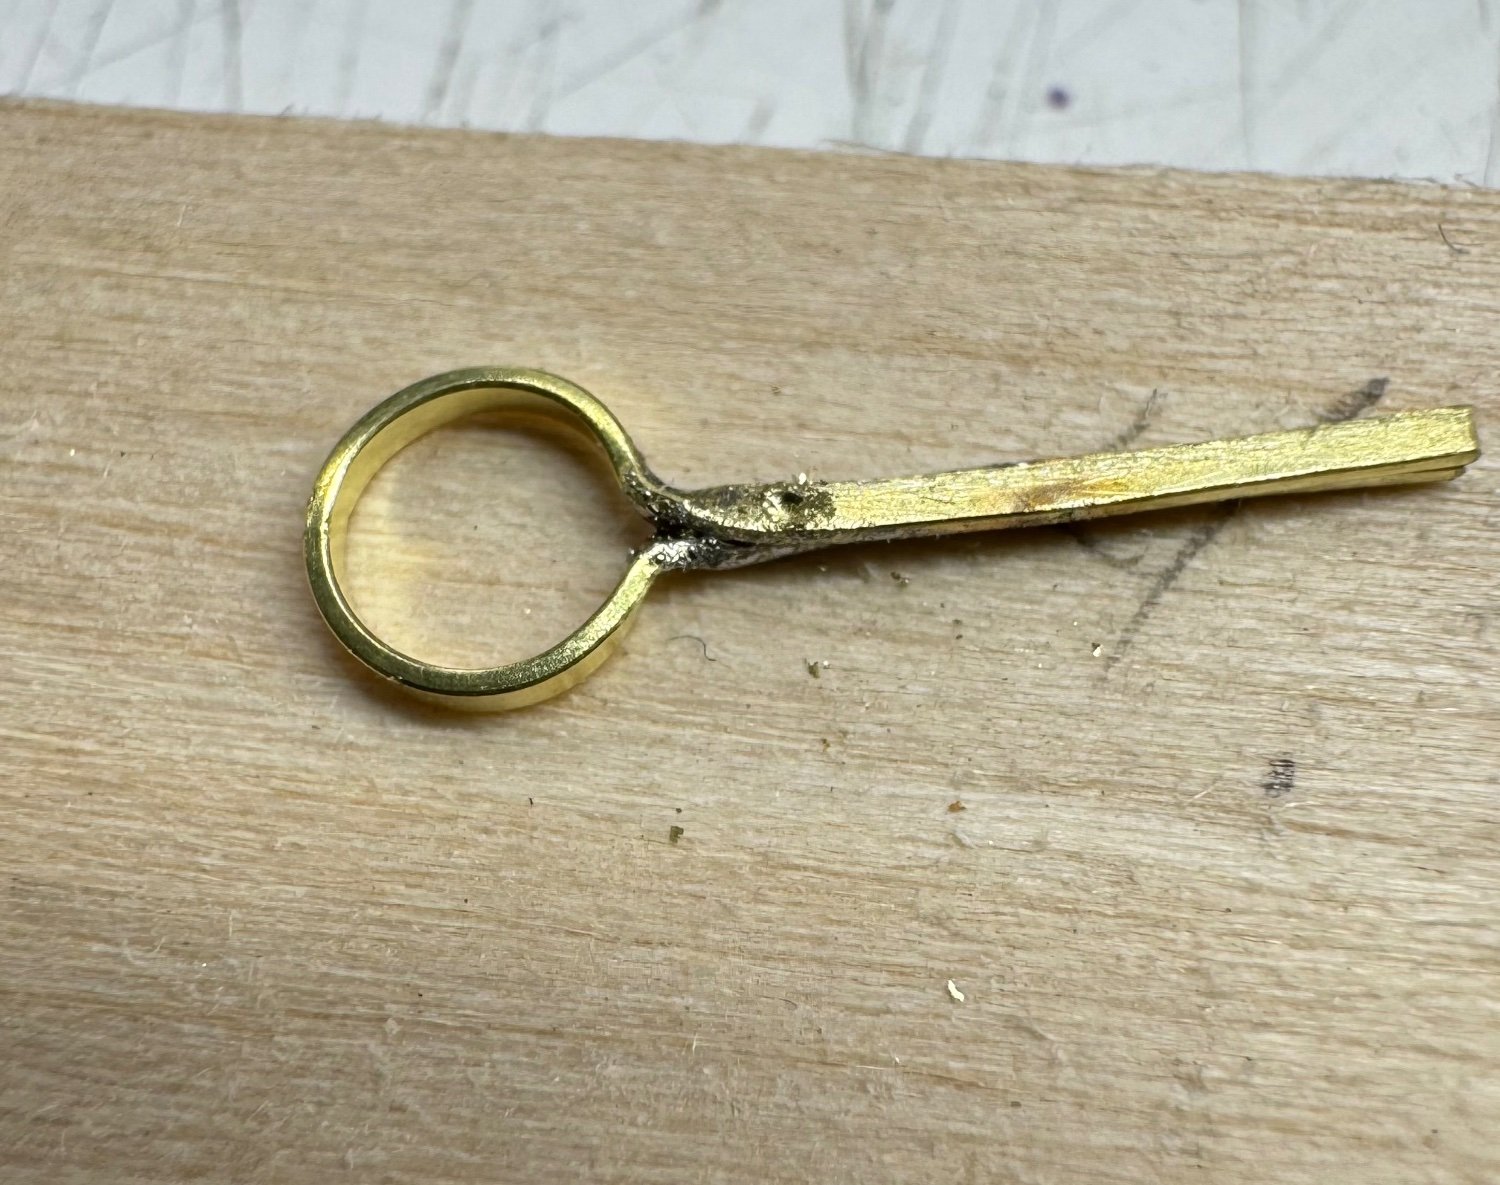
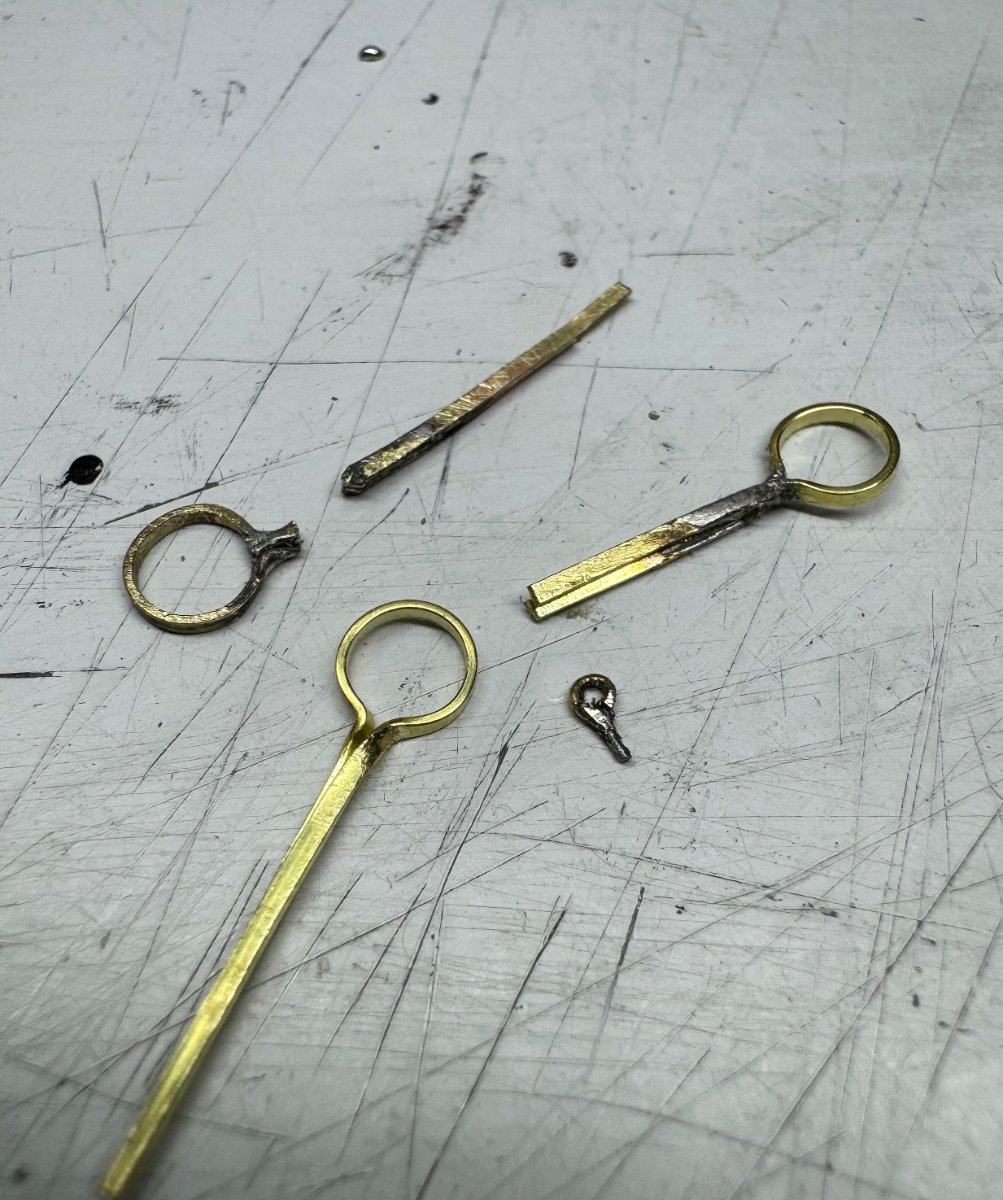
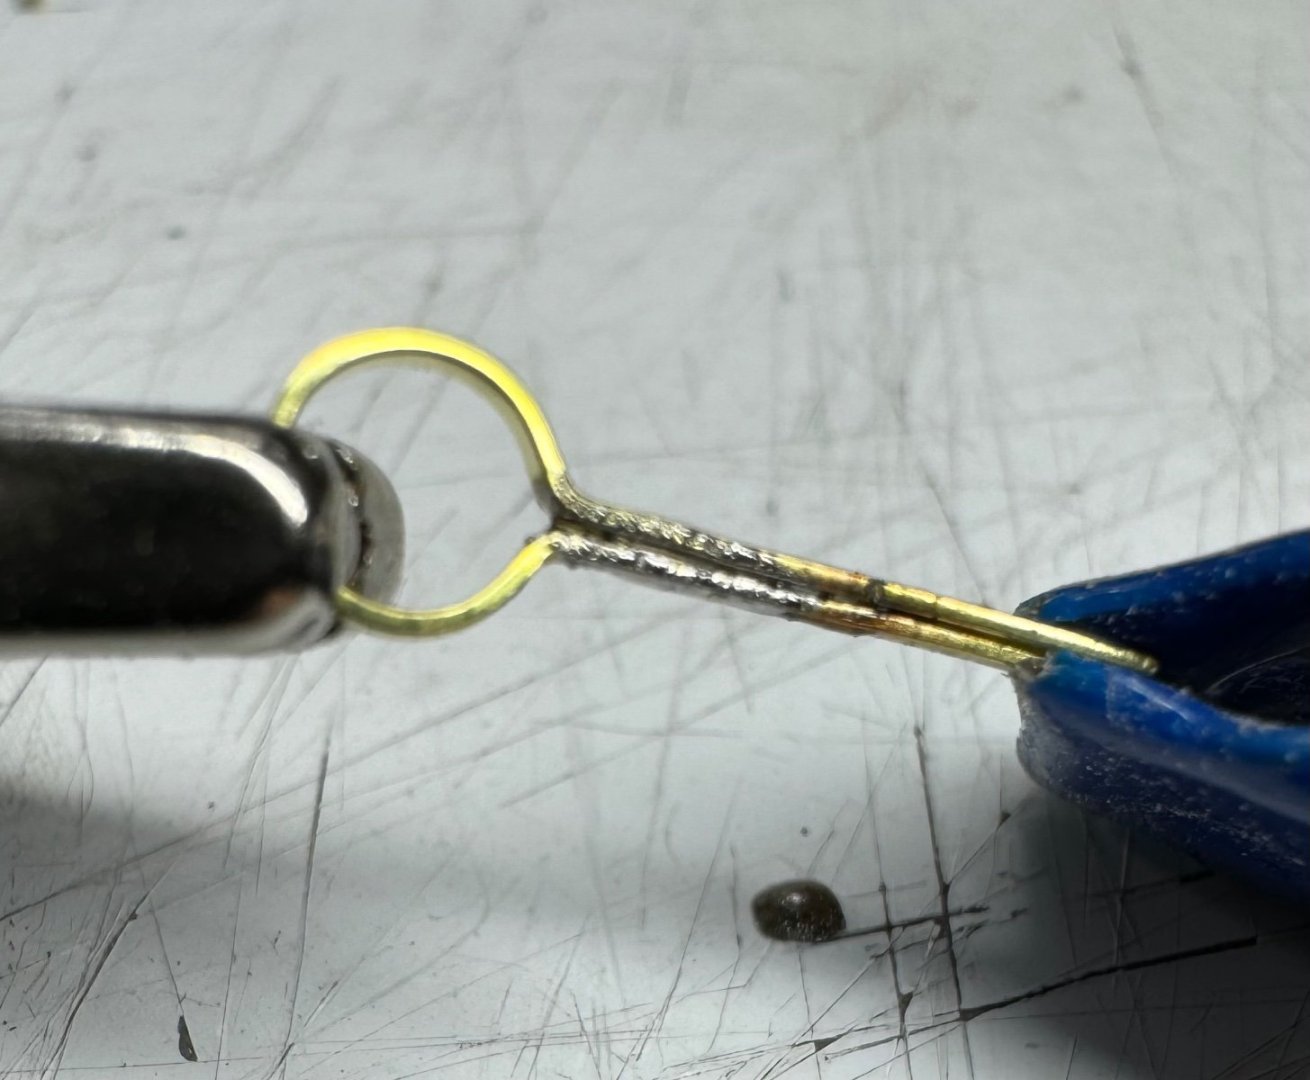
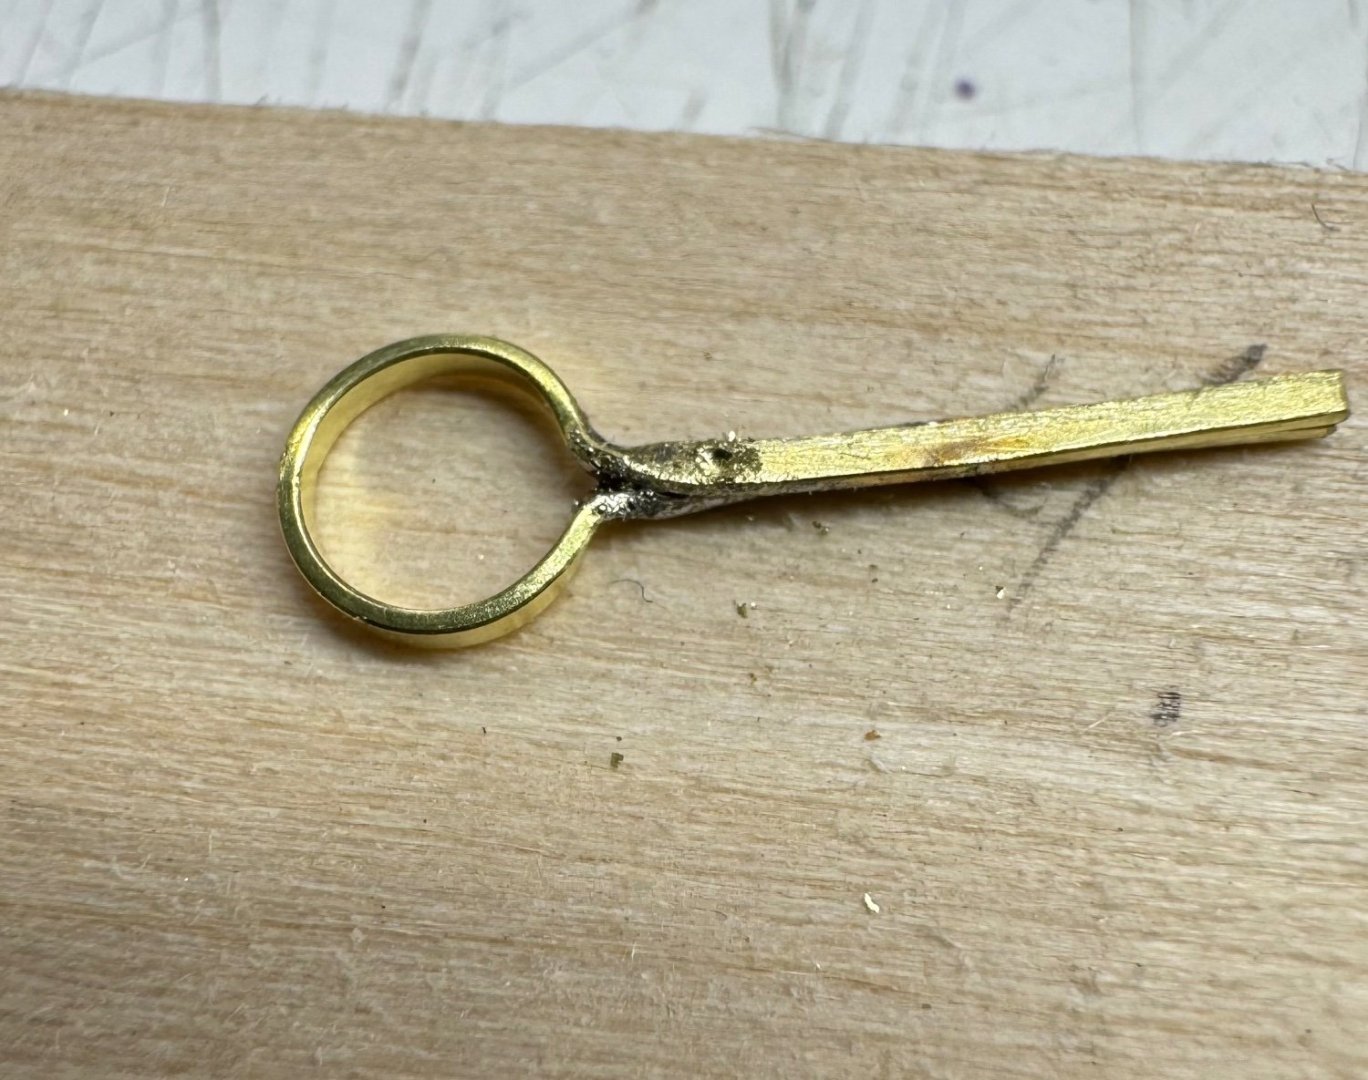
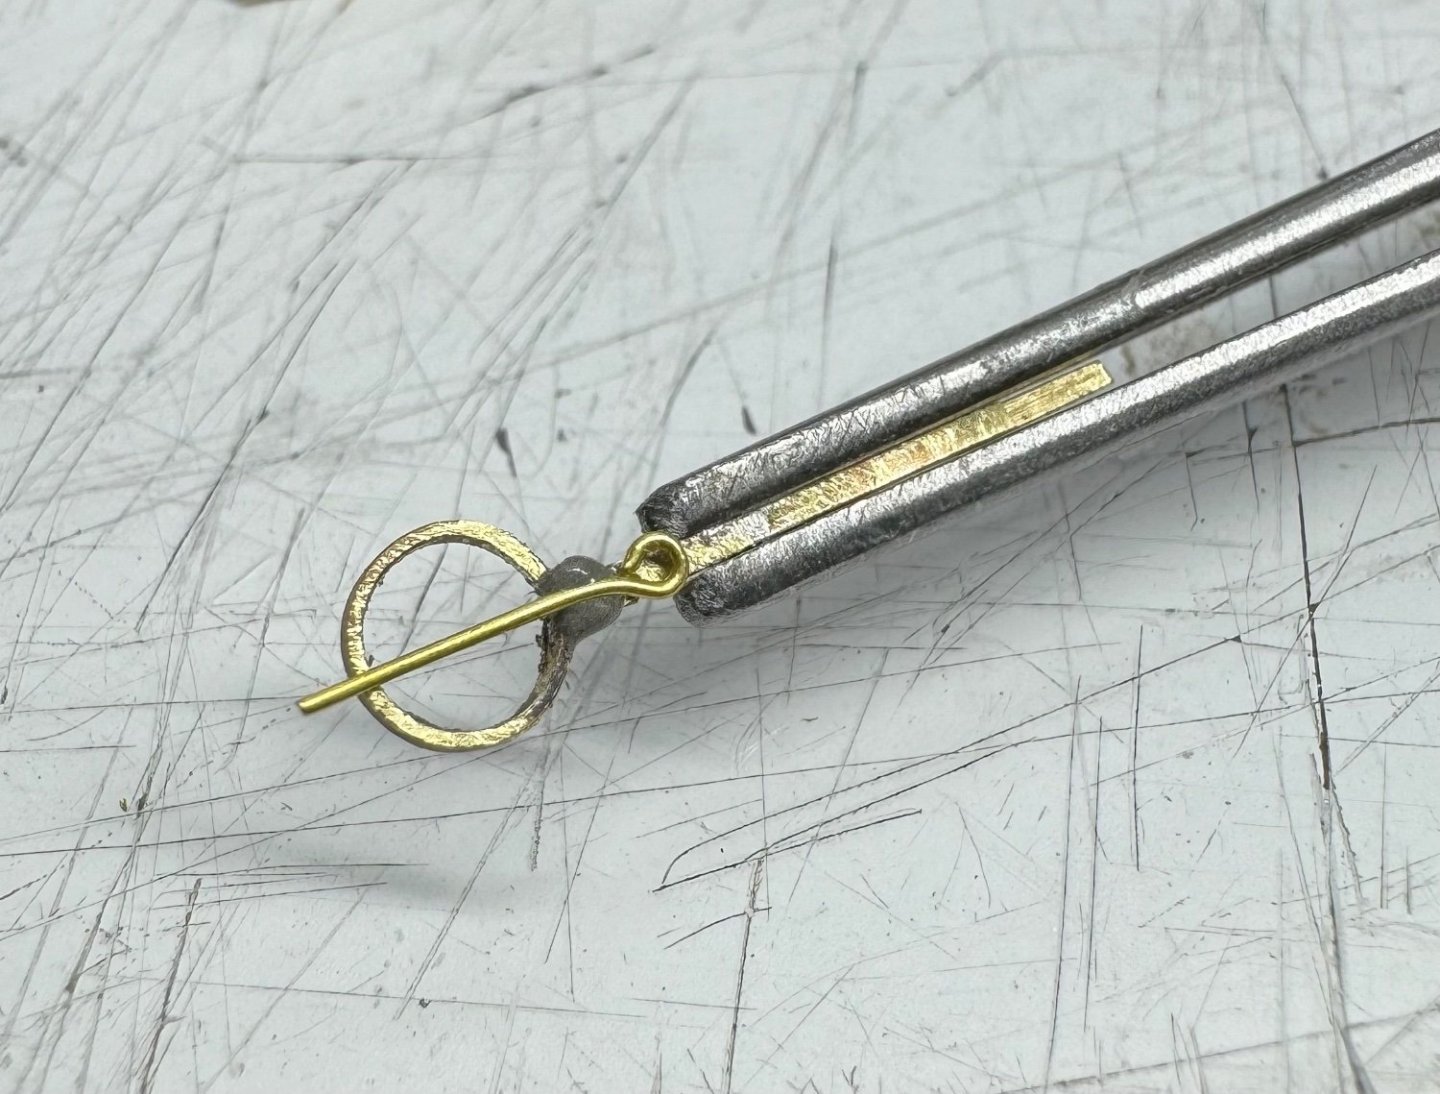
Horse and lift rings installed. I’m getting better at blackening. The rudder parts I tried gluing the metal. It didn’t hold. I tried soldering again with the resistive setup, that seemed to work, it didn’t bond solder to the wire, but it’s stable. Good metal work seems elusive for me at the moment.


-
I scribed the lines deep, I thought, when I added the clear the water based paint raised the lines back almost to normal. Of course most of us use this to fix dents and such with a drop of water. It did the same thing with water based paint. Now that I think about it, it explains why the scribed line on the Bluenose almost disappeared after I painted. None of the thwarts are glued down yet. I’m having a bit of trouble figuring out where some of the metal work goes. It’s not far from done now. So close…

-
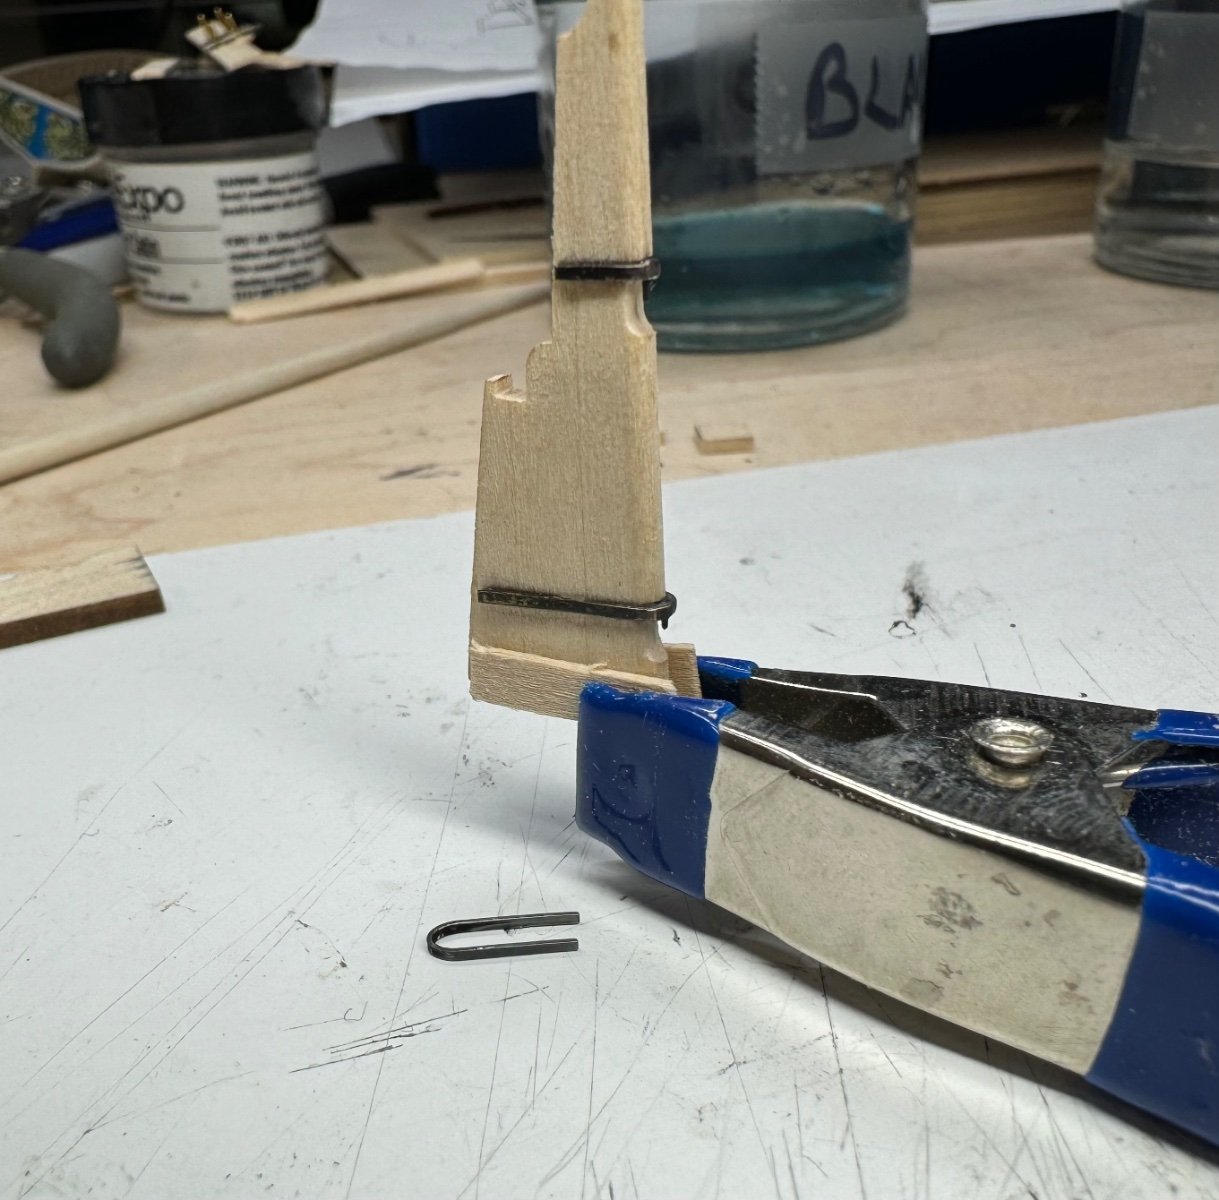
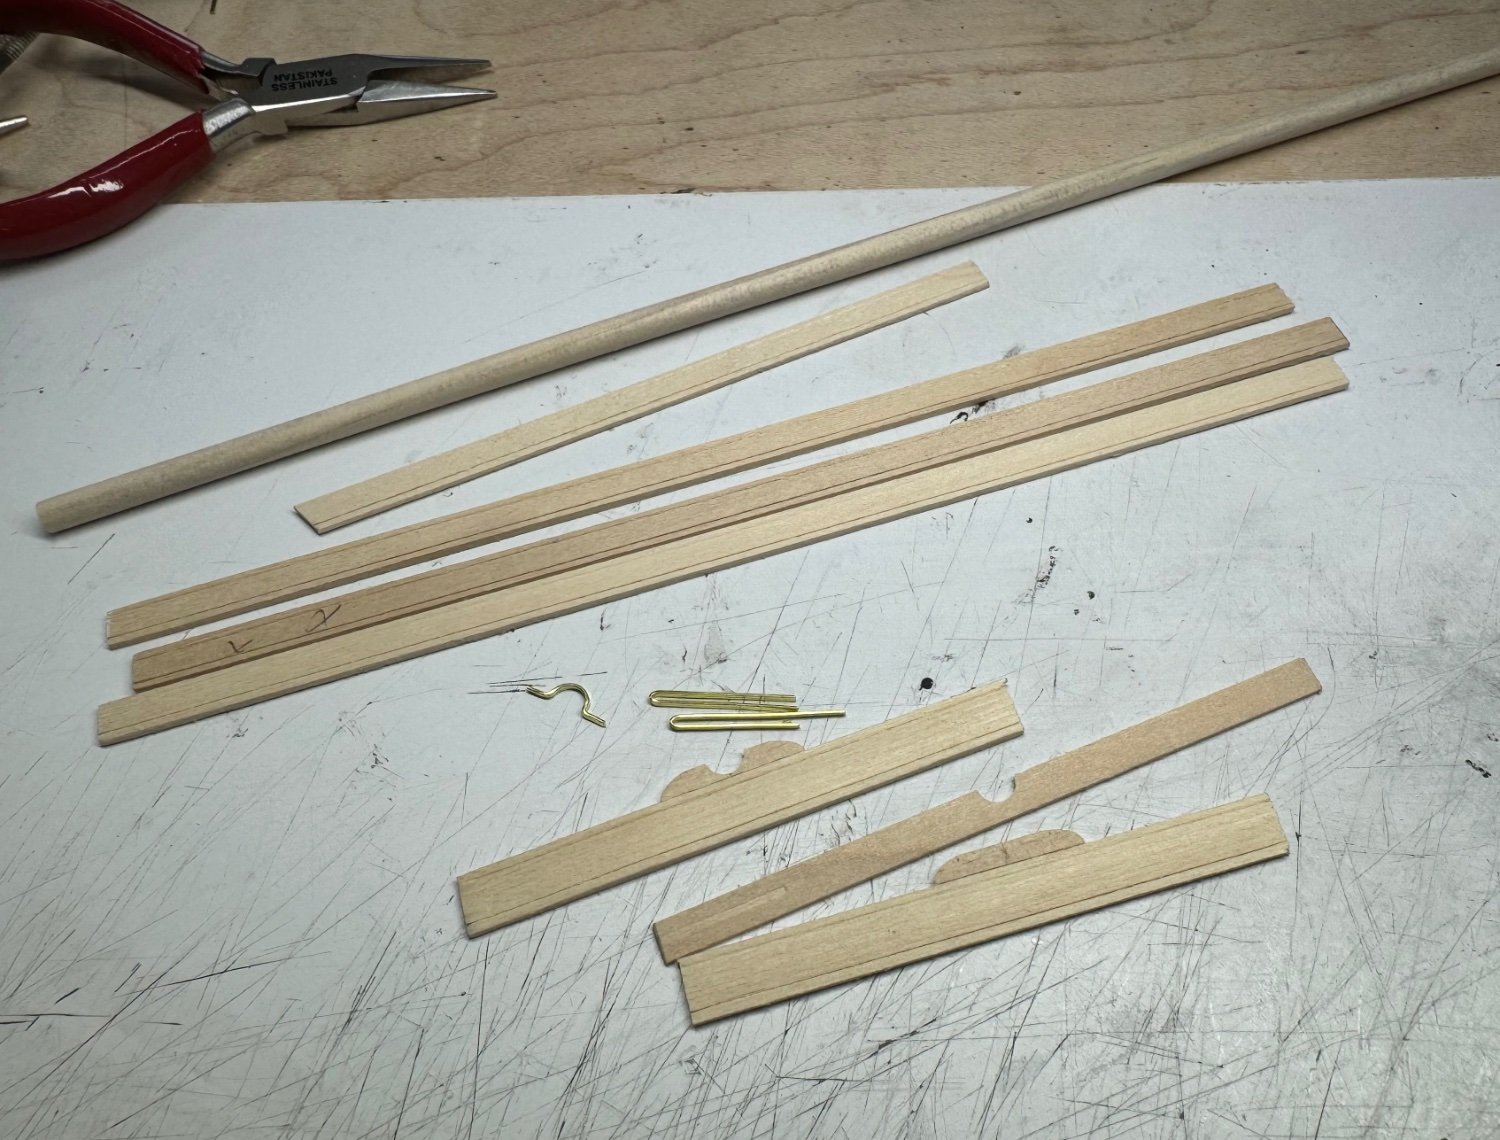
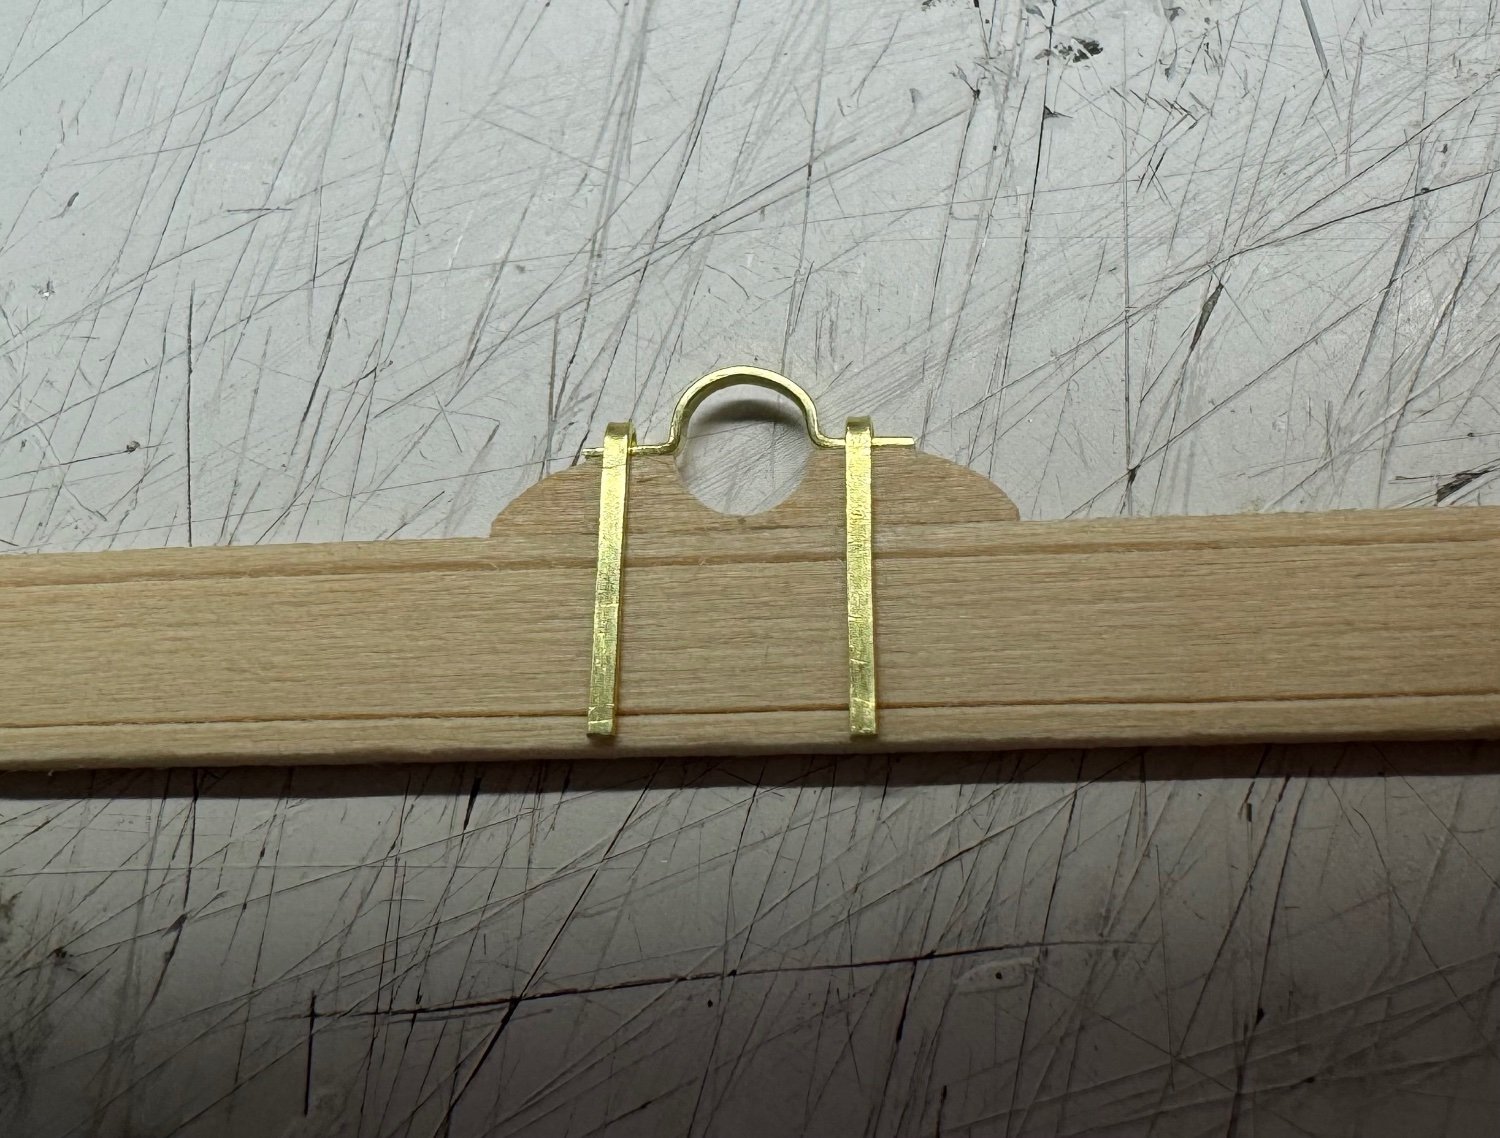
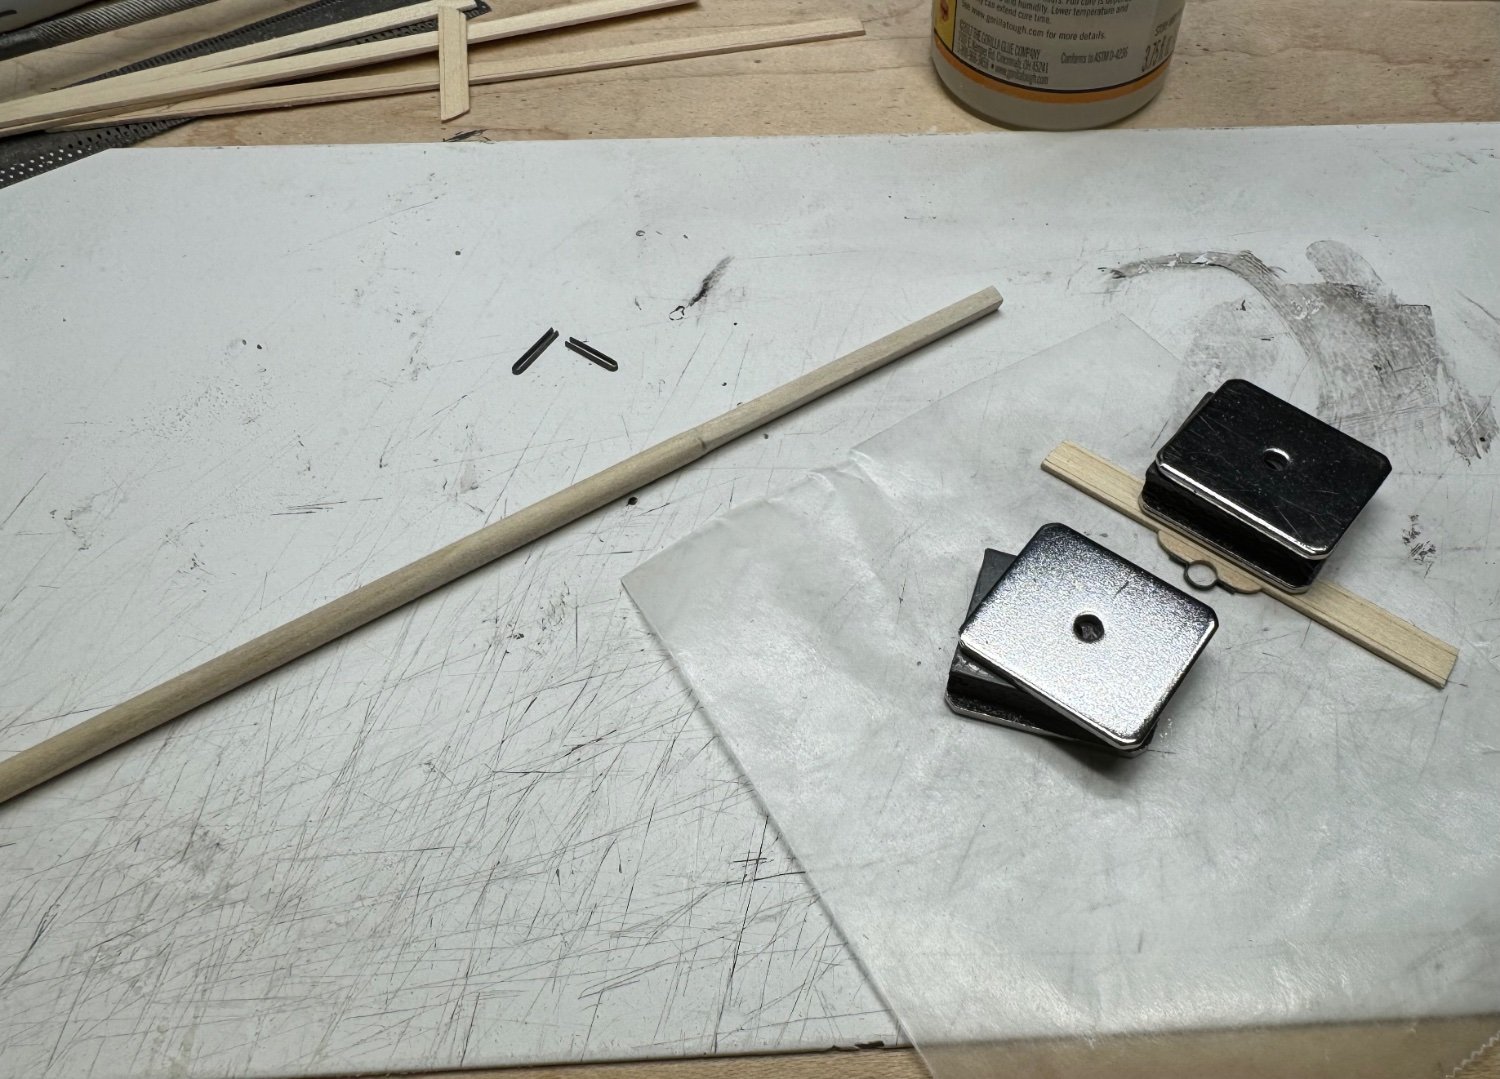
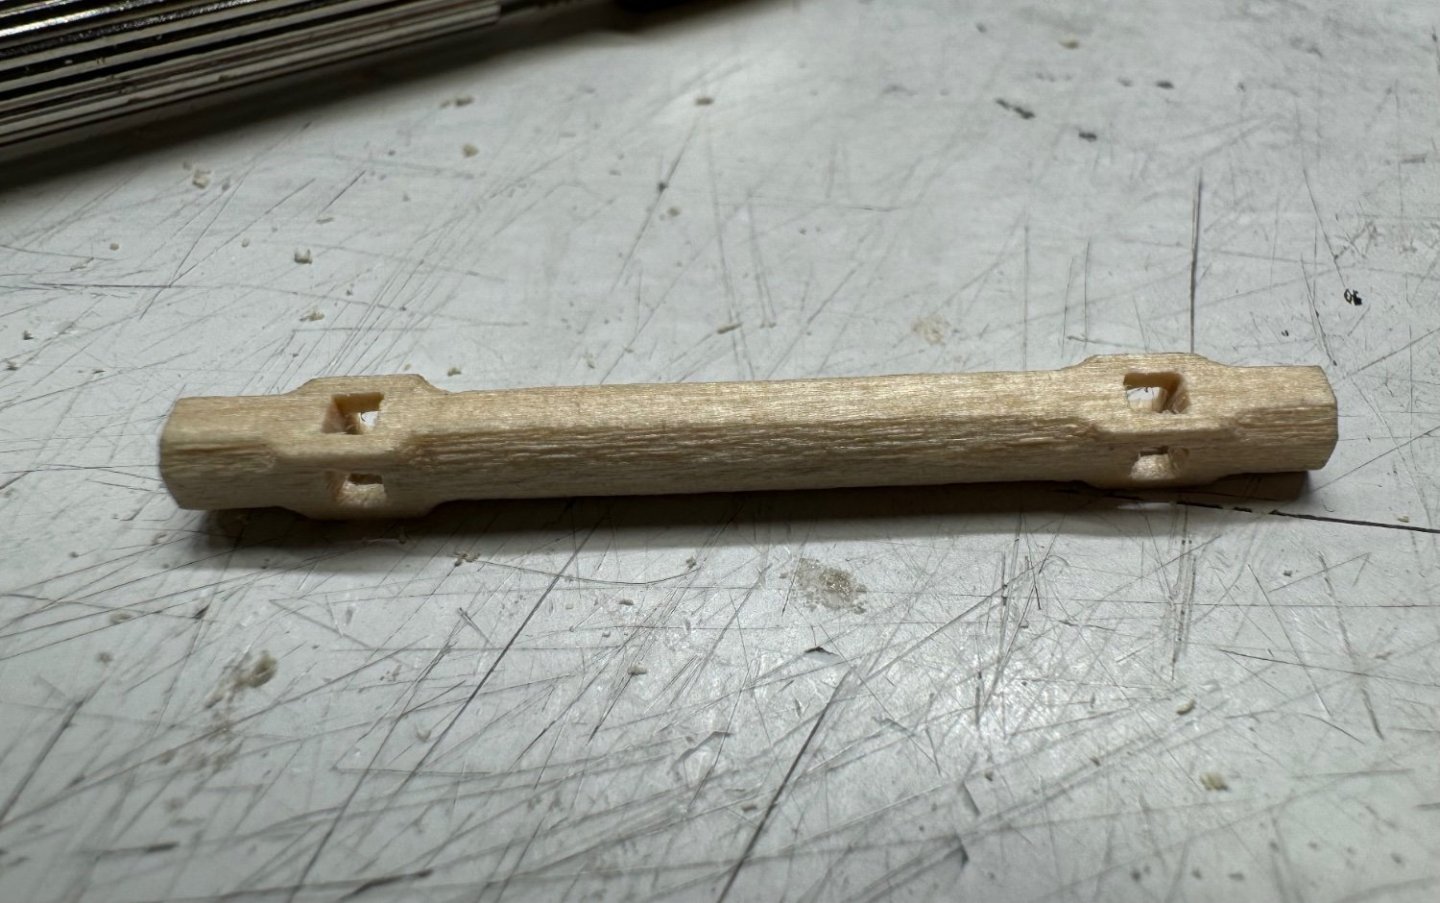
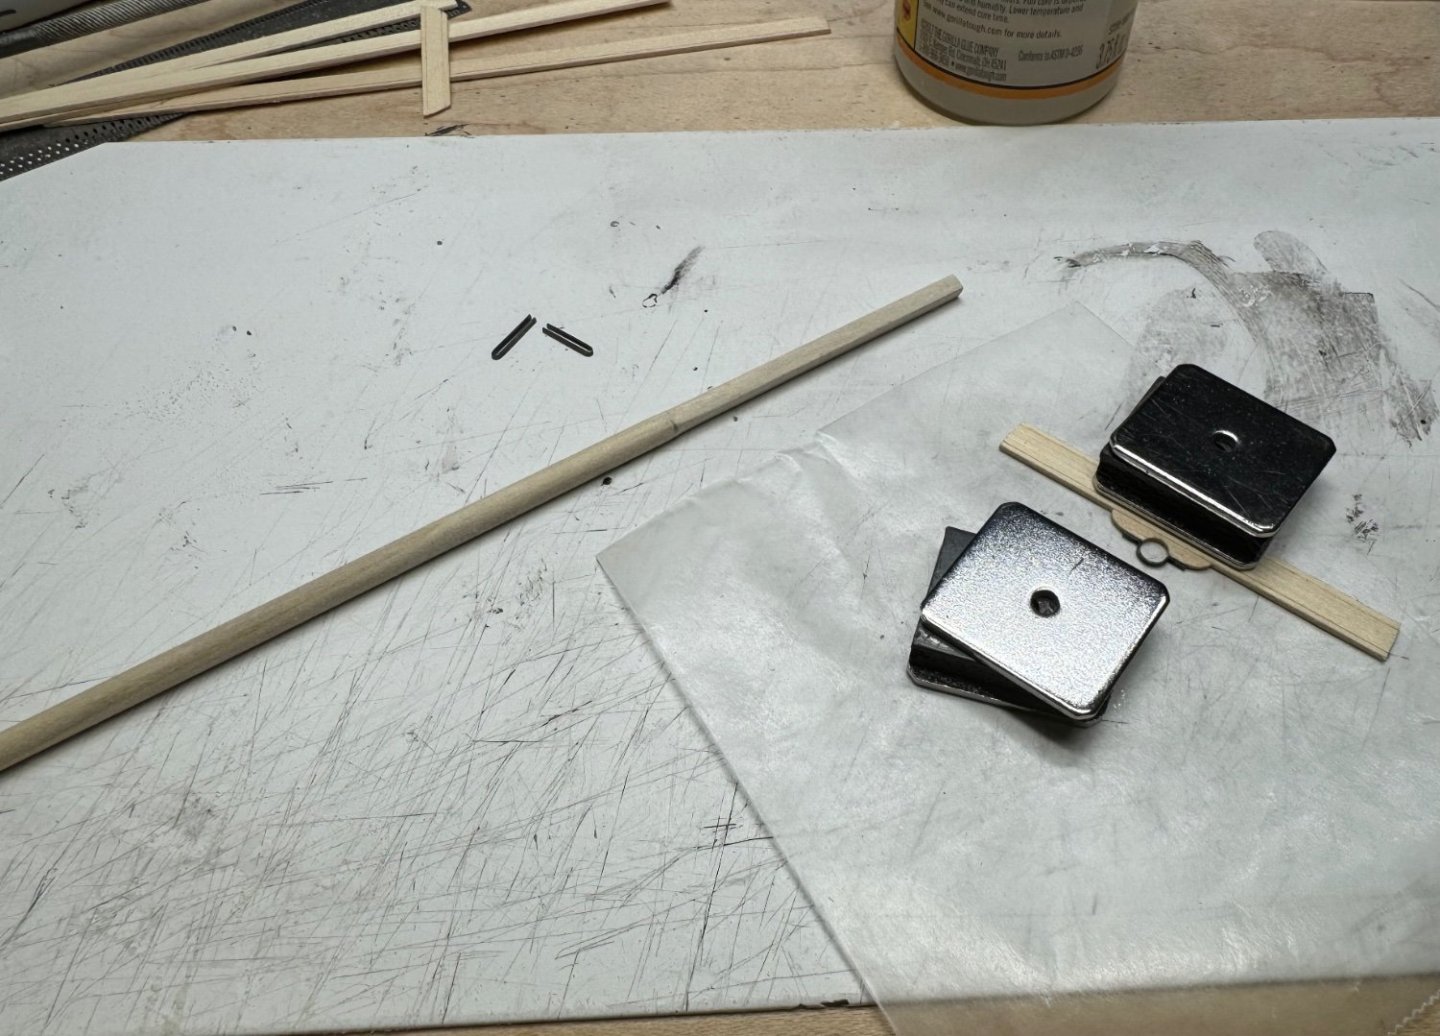
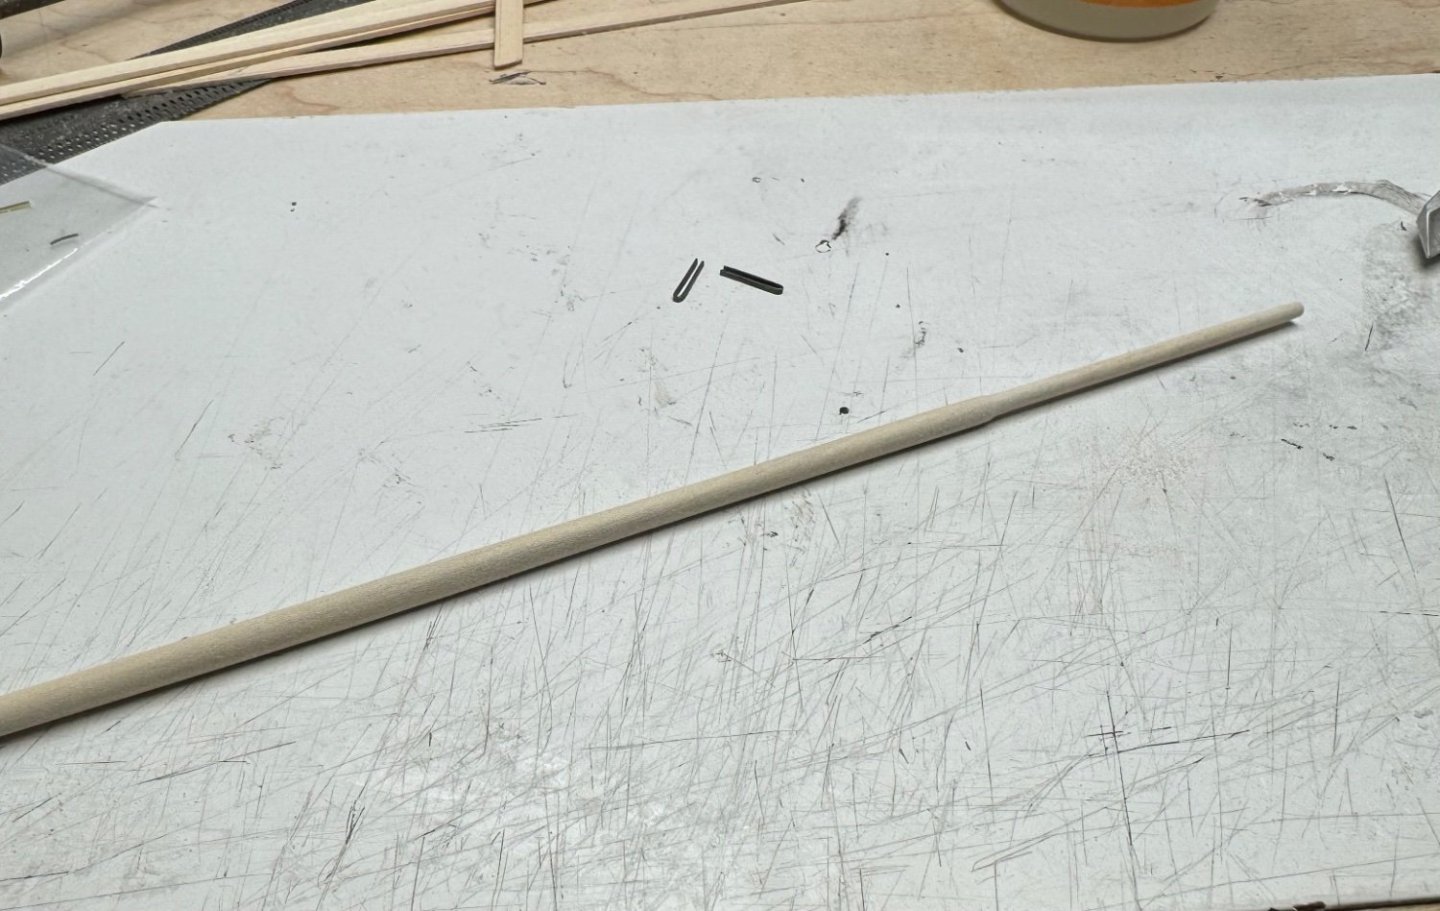
The rudder and some metal band making practice. 3rd time is not the charm. I broke 3 bits. And no drill bits I have will drill the brass, or wood now. I softened the last brass with a torch. It was softer but the bit was gumming it to death. I’ve got another set of 61-80 bits coming later this week. The blue set from what I think was model expo is awful. I need a good way to drill small holes. The bands were great but trying to drill holes broke them. .020 holes are tough in metal .032-034 wide. I tried a eyebolt, no joy. The resistance solder set is quick this small.


-
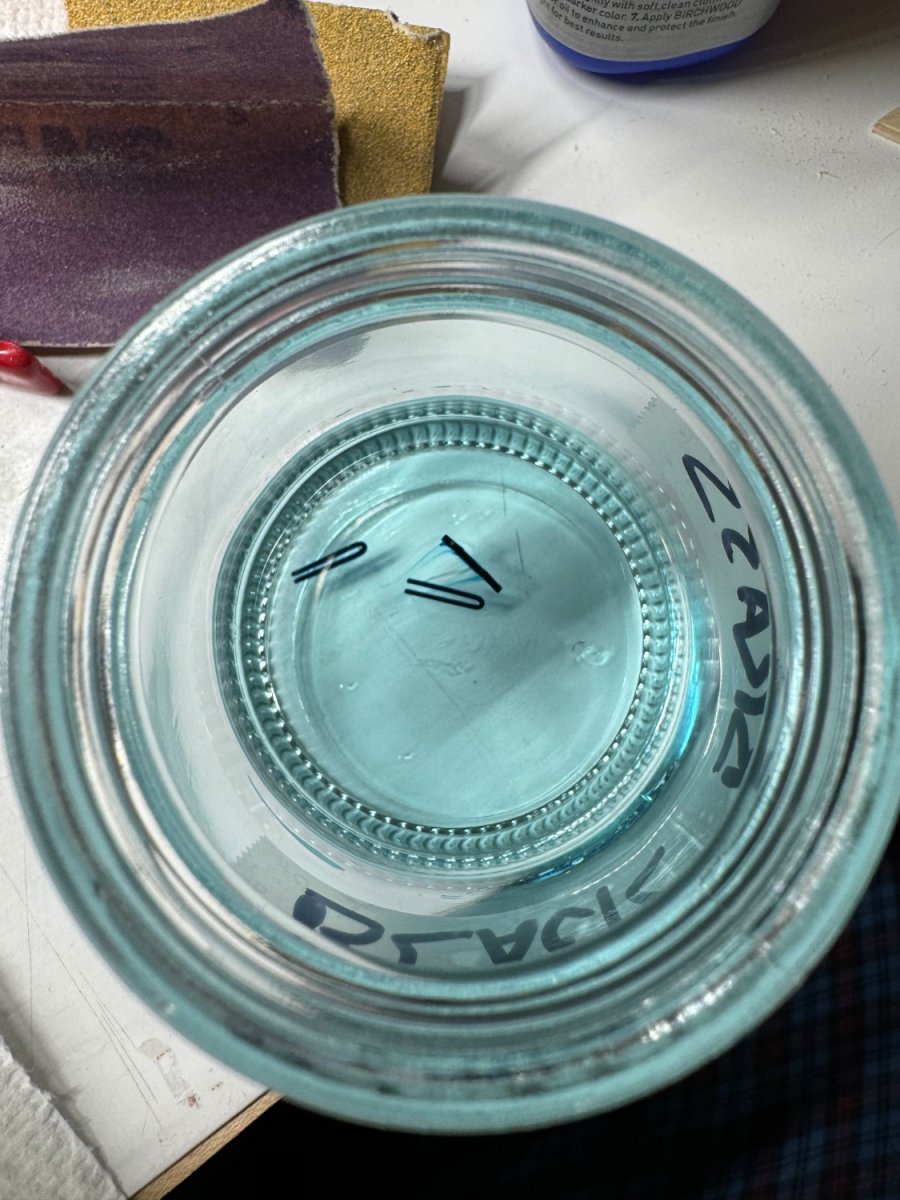
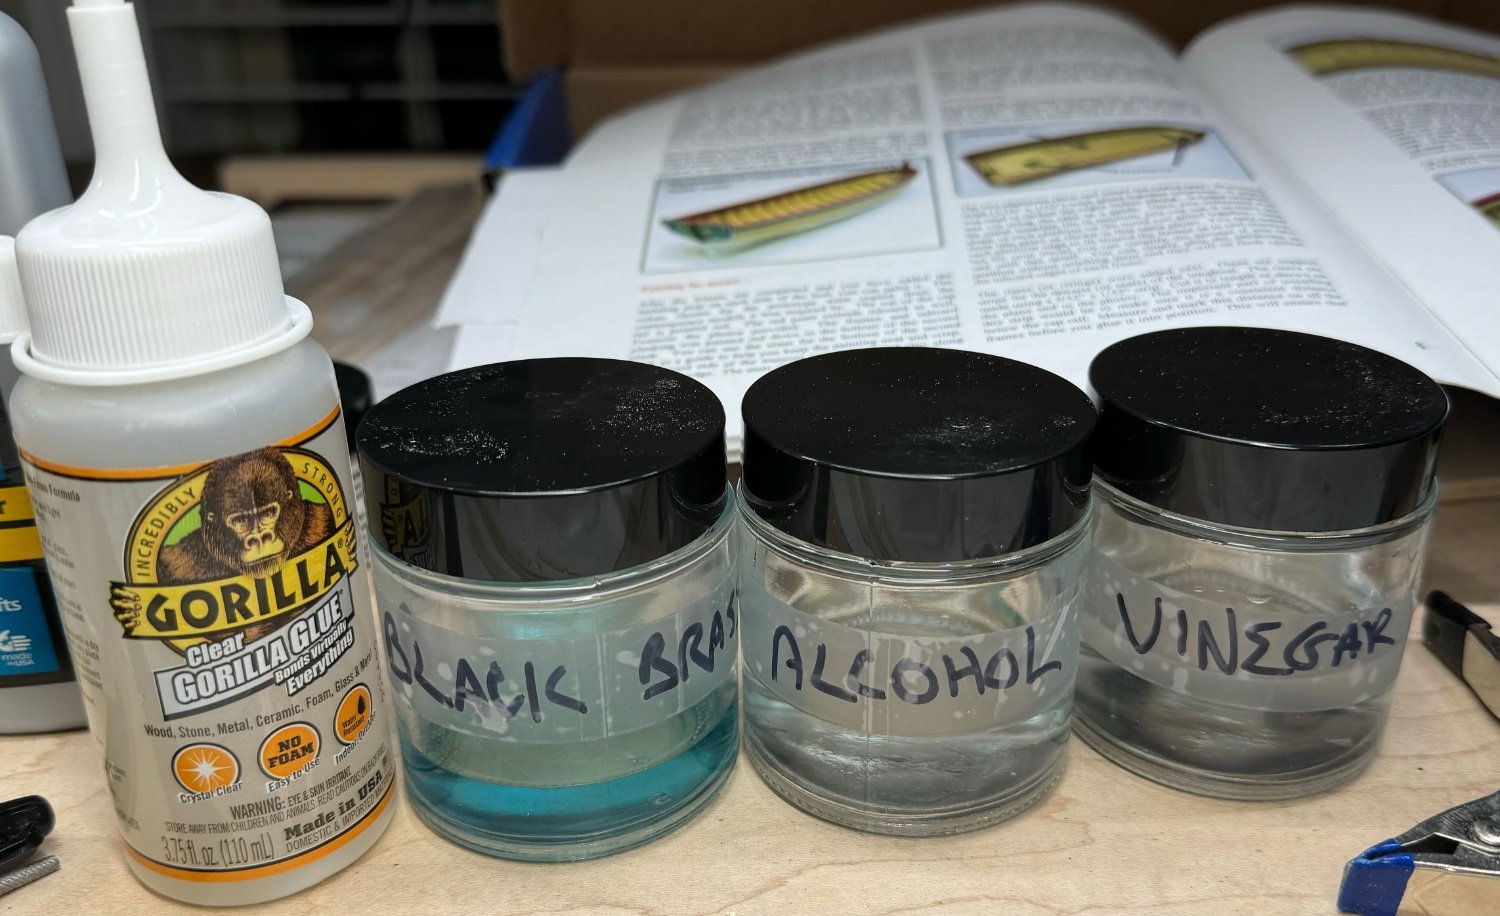
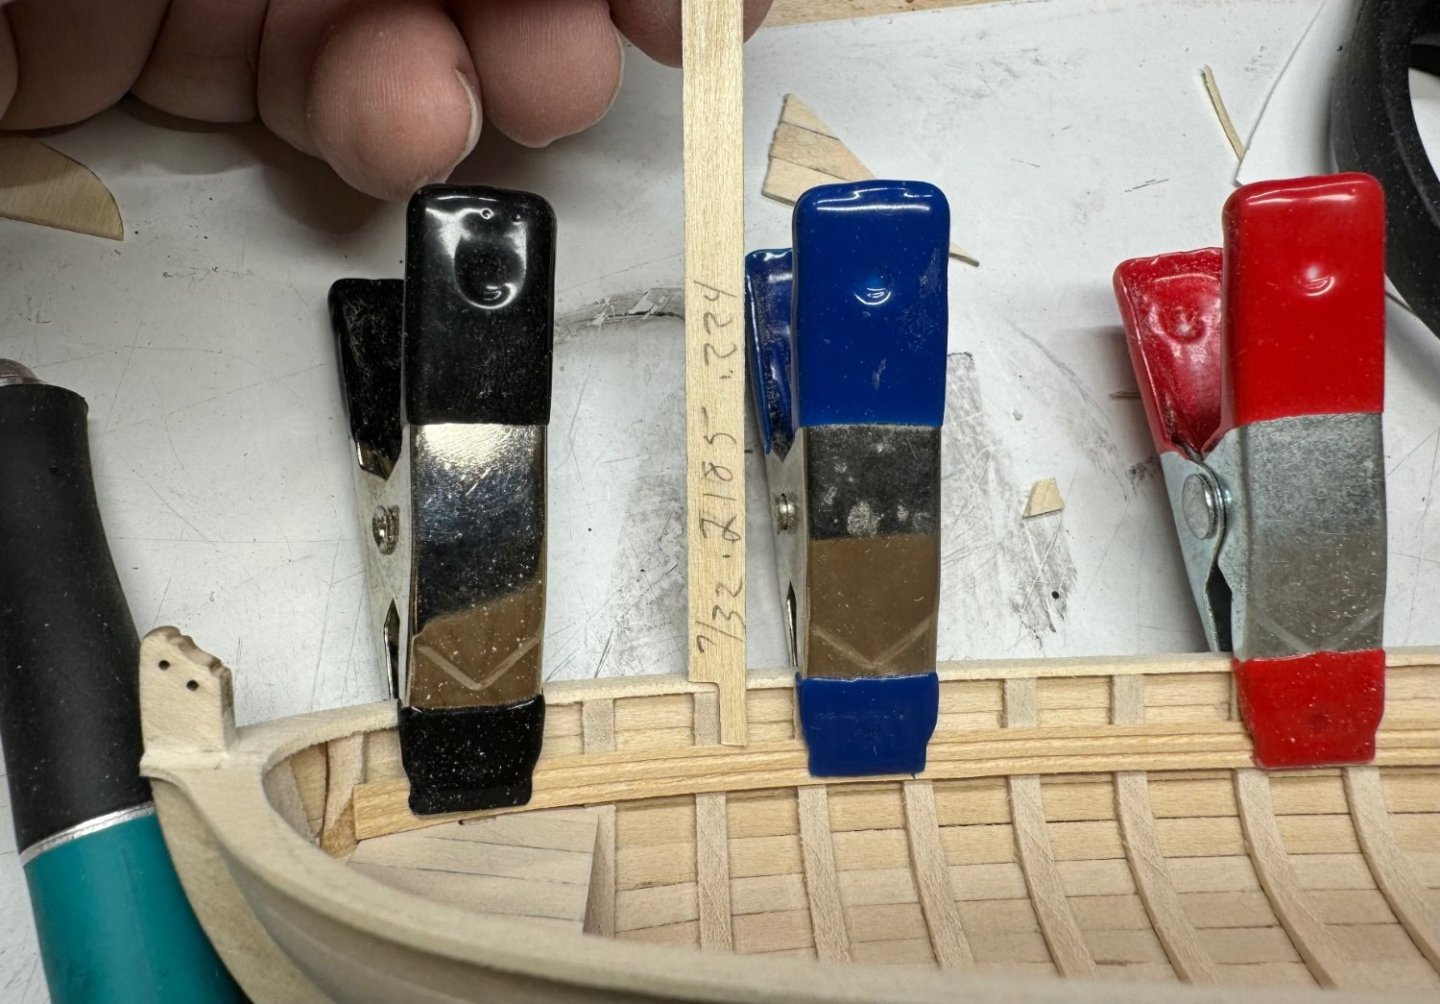
Maybe the metal work is easier when it’s bigger. I shaped the mast to ensure it would fit in the metal work. I’m not real sure how to glue the straps in place, how to get glue under them without getting it all over the place. I’m still working out how to get a good finish with the black brass, it seems to leave a dust layer that can be polished off. It leaves a nice finish under it. Seems durable. I did this twice and they look ok. I bought a dozen 4 oz glass jars. They worked great. I can use tweezers to fish out the items, they are not too deep and are wide enough for fat fingers. Today I learned standing rigging and running rigging terms lol. Black and tan colors for rope.


-
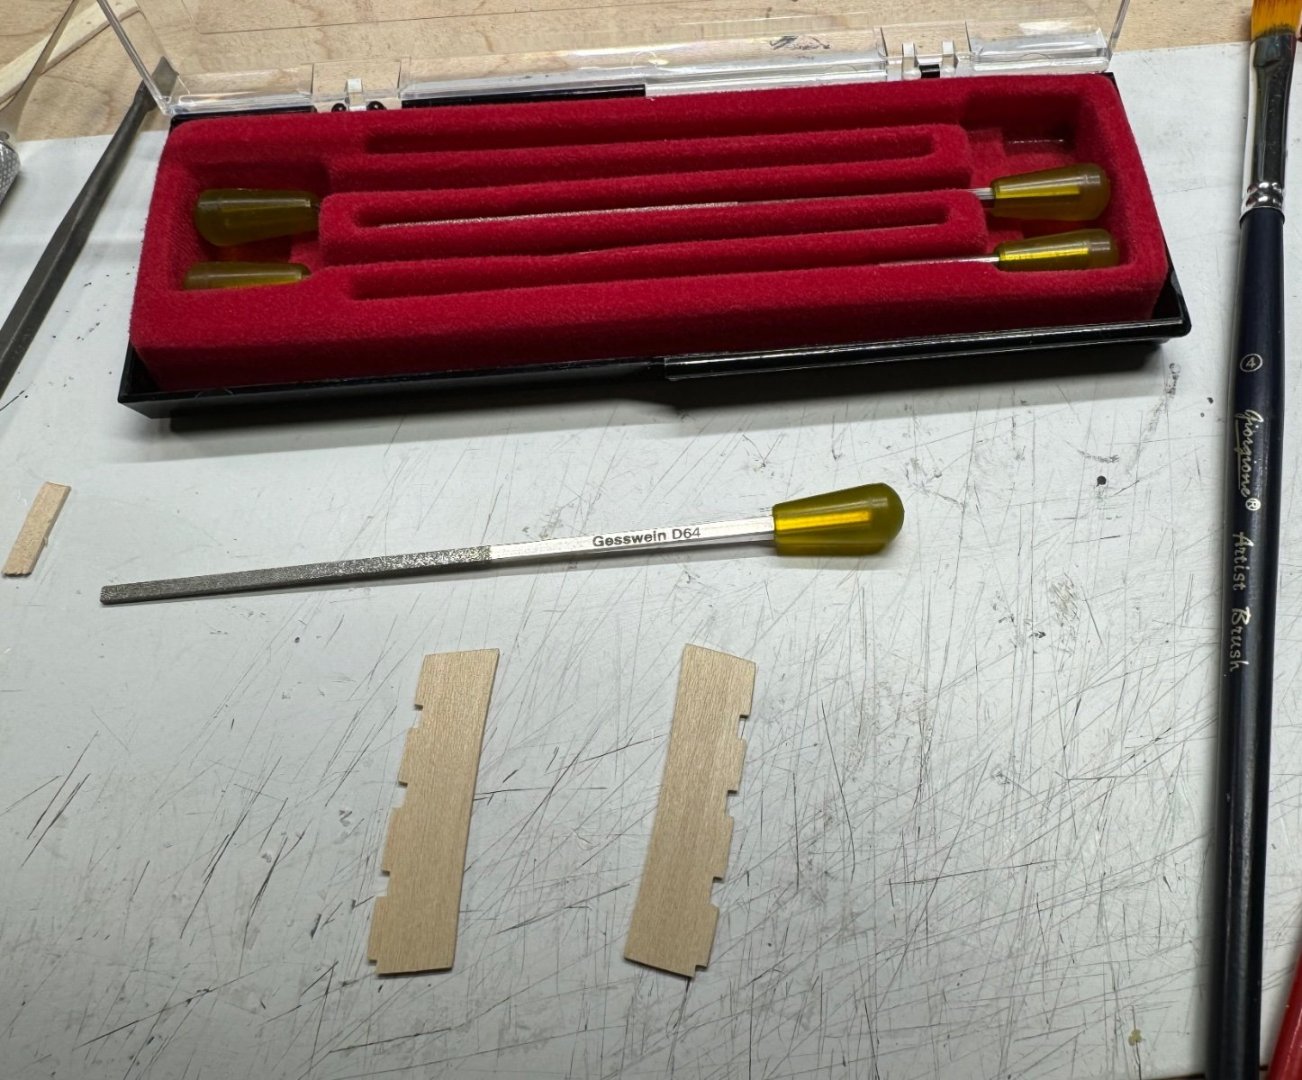
These are the best files ever for this work. I had not used them yet. The level of exactness and control is outstanding. They were pricey, but I’m very glad I have them. Nothing else I have can make sharp inside corners like this. I’m almost giggly with excitement for using them later on other projects. A tiny piece of 28 ga wire! Some of my tools are magnetic and the wire is ferris. Exciting.


-
Thank you. It’s looking nice like this.
-
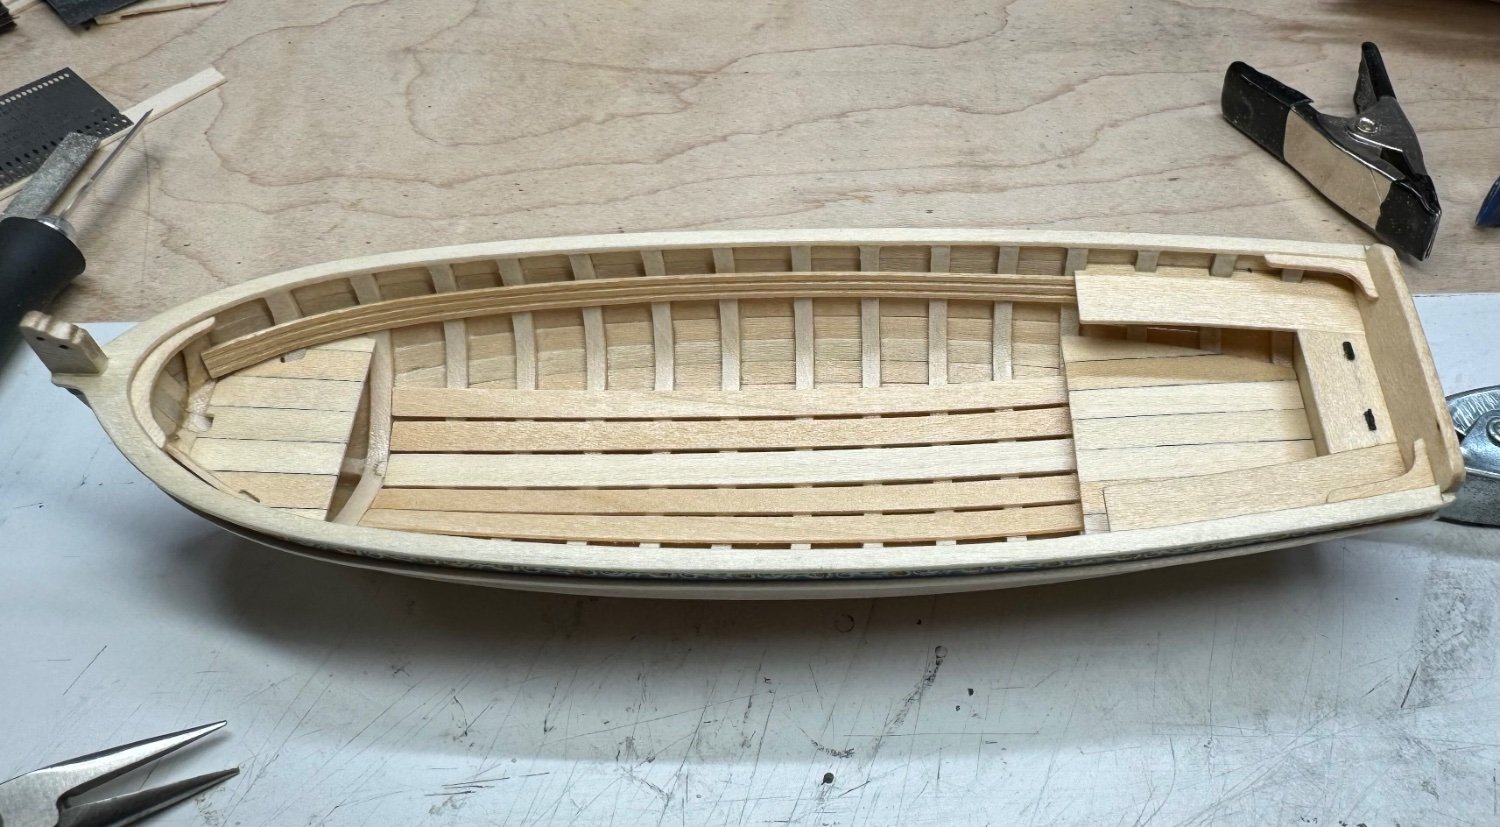
When I can’t figure out what to do next I make a pile of the next small parts. And I skipped the red color and started glueing stuff in place. I’ve got a natural finish theme going so might as well keep rolling. I kind of feel bad making micro updates. It’s moving forward and updating is keeping me motivated. I appreciate all the likes, views and comments. I try not to respond to every one to not make a mess of the log. Reading some of the logs with post after post of conversation it’s rough. I don’t want to subject anyone to that with my logs. I’ll spam ya with pictures instead lol.


-
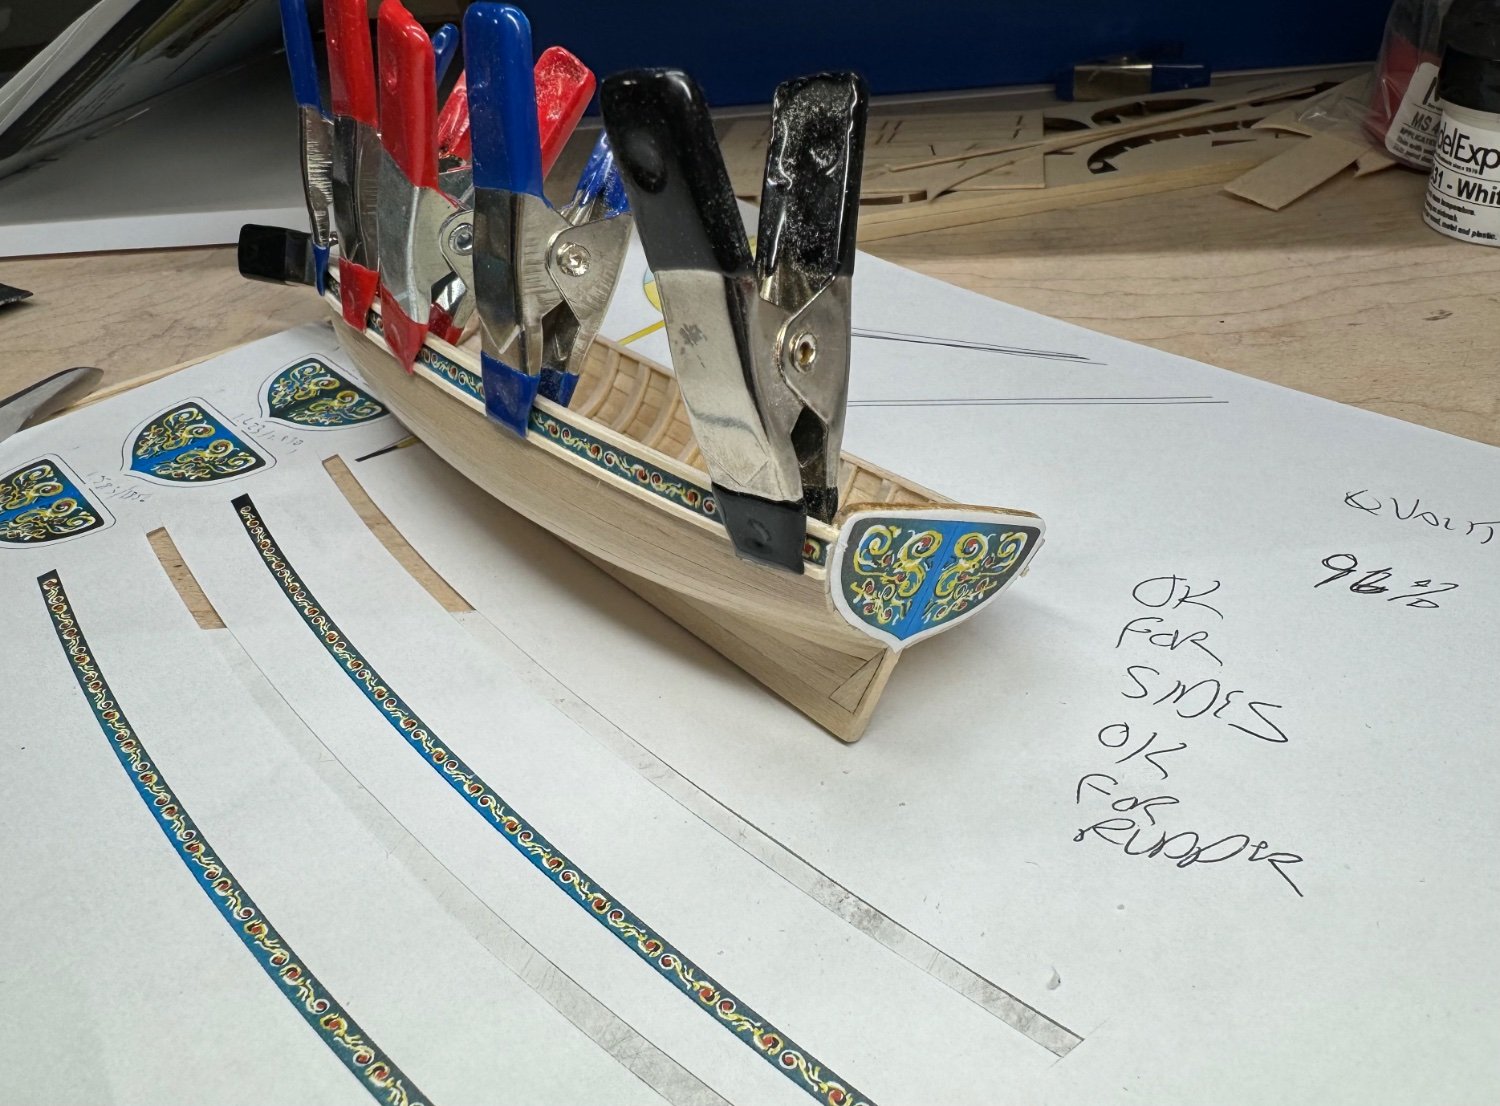
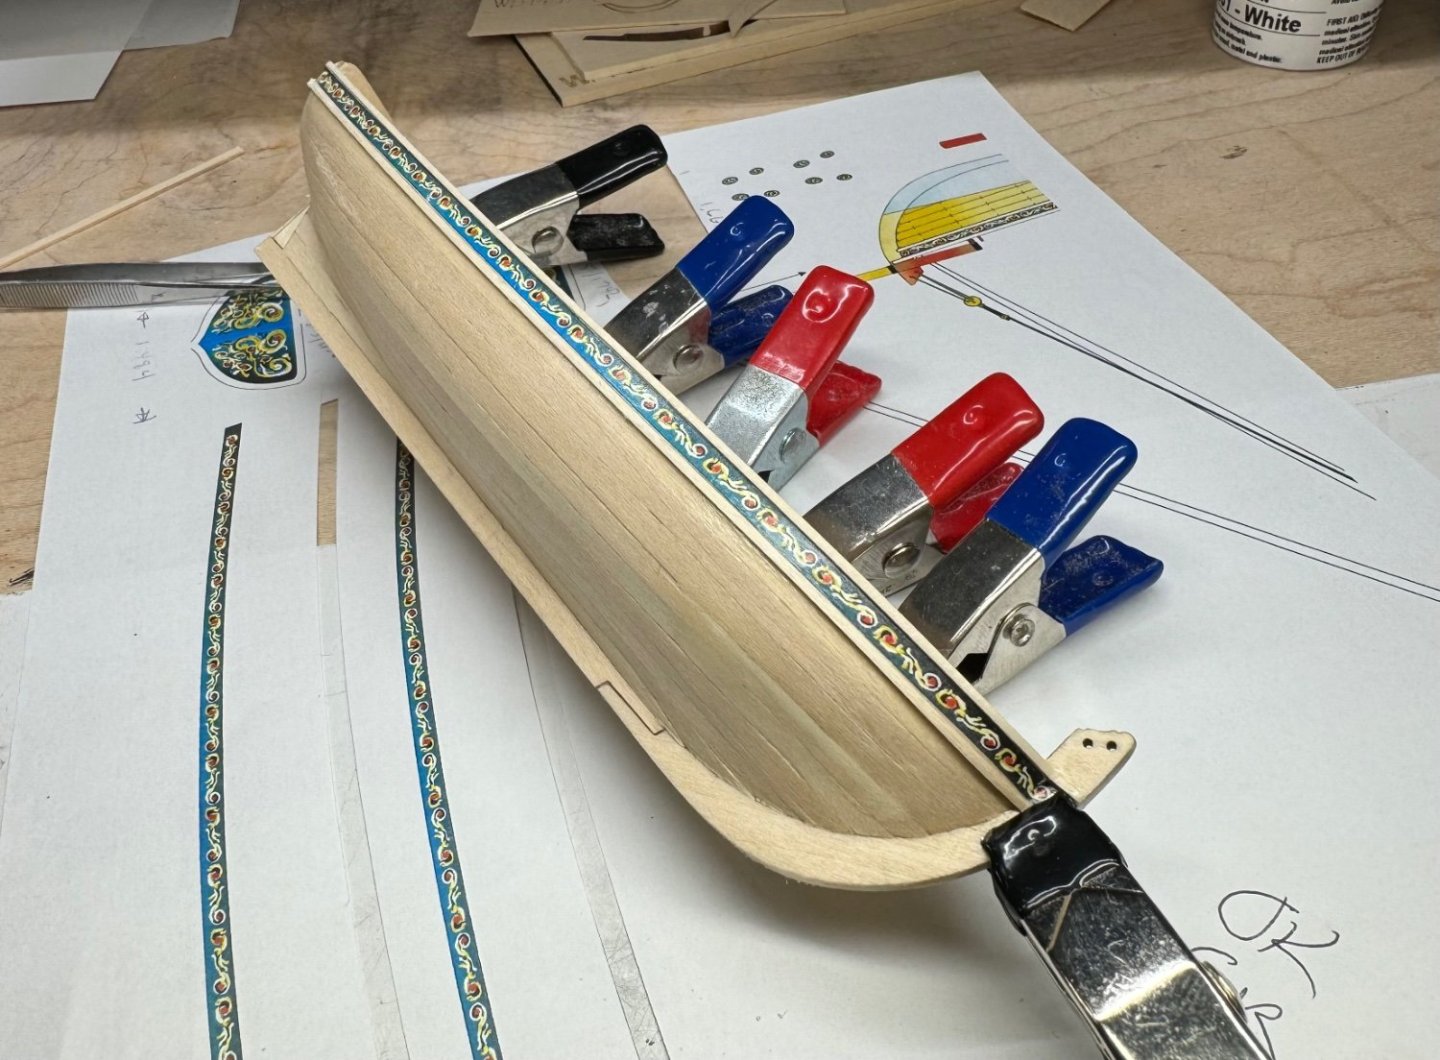
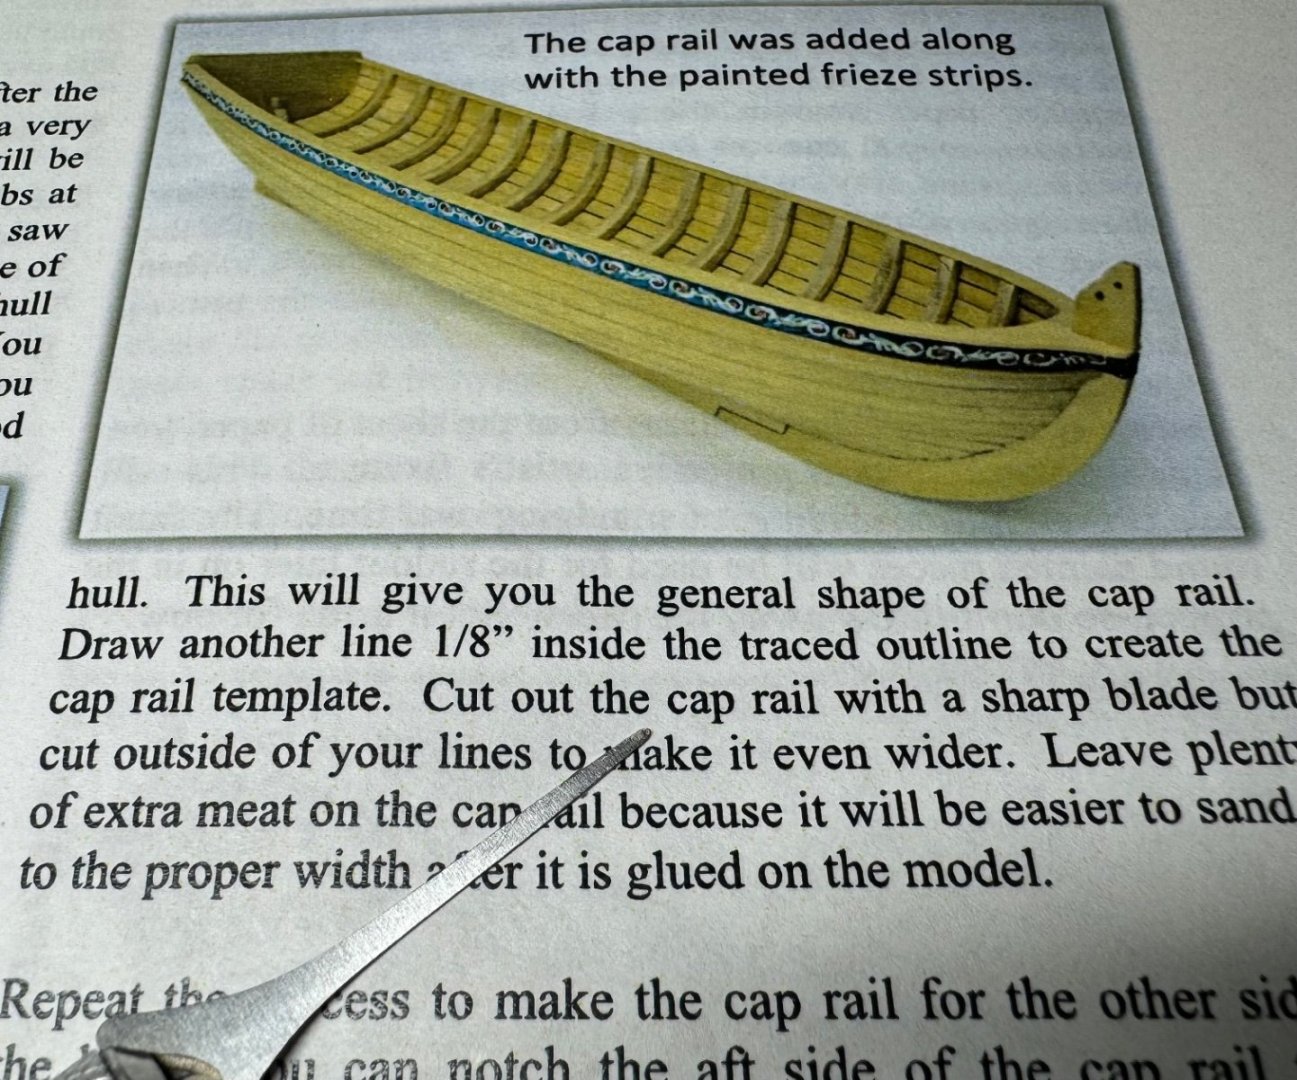
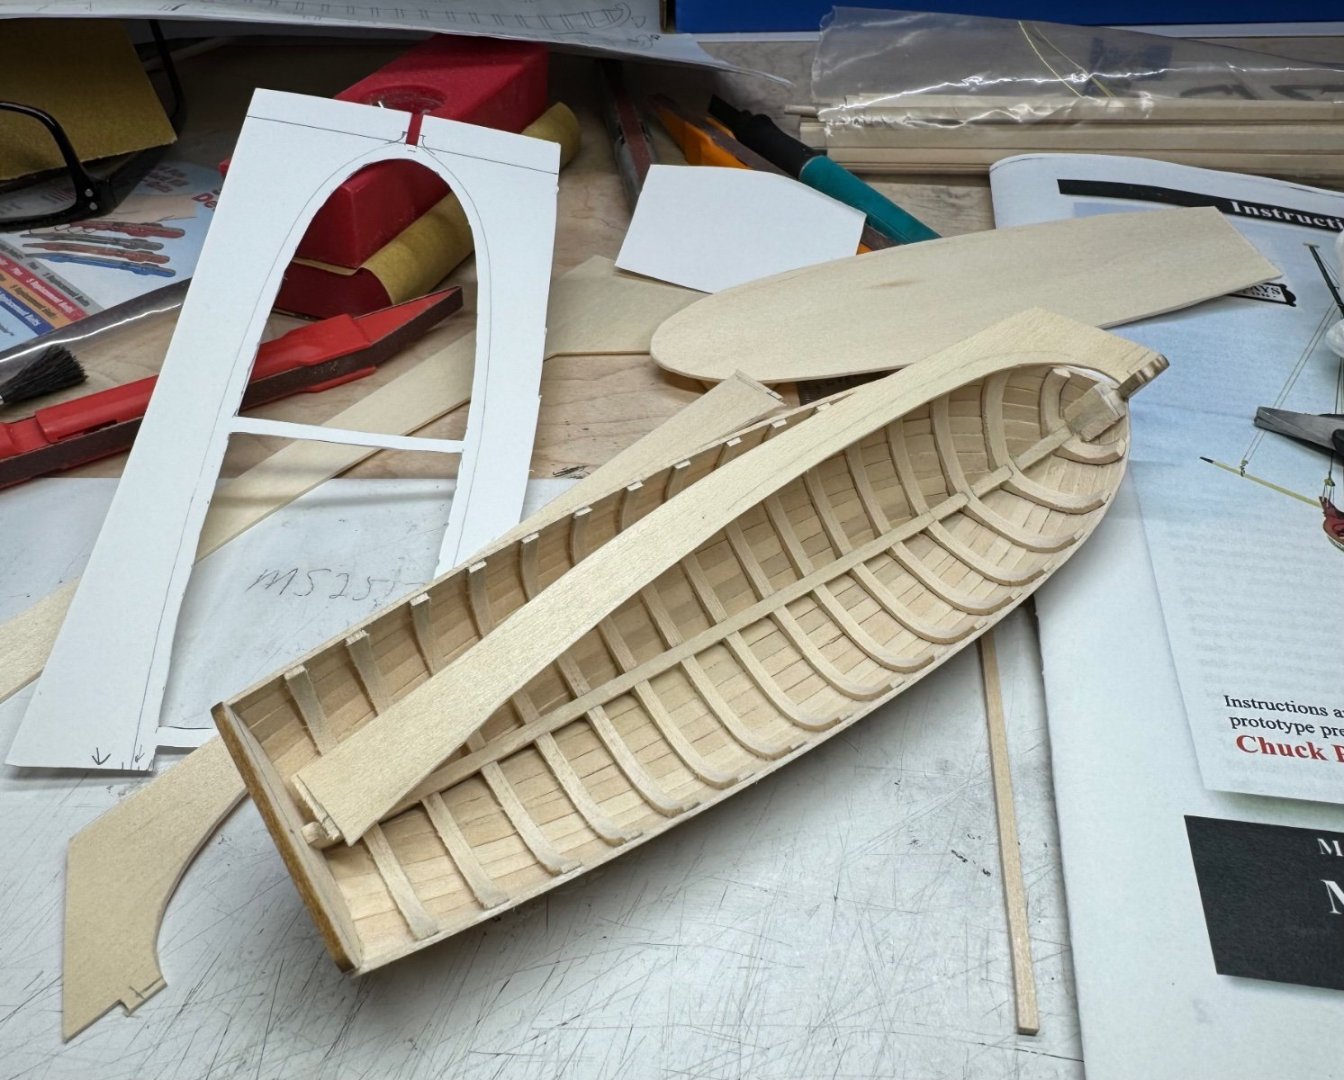
Frieze and rub rails. My friezes were ginormous. I had to shrink the sides to 96% and the transom did good at 86 or 87% reduction. My work copier did great, laser copier. I likely made the transom frieze too small, but it looks ok. Touch up with some white around it and it should look ok. Titebond Quick and Thick appears to bond thru acrylic coatings. I had not tried anything but wood to wood. I attached the frieze with the MS4972 Clear Satin under and over the paper. It didn’t bleed the colors on a test piece. Stain is out the window now, it’s sealed with clear satin top to bottom in and out. I did discover on another boat the clear satin makes a sealer of sorts and painting color on top of it is a tad easier with less coats. This is the plan for the red and white paint. 🤞🏻. I don’t think I will put white on the bottom, still thinking it over. The filler, Lepage natural blends ok. The worst of it is shown in the picture shown below. Must have spent 3 hours last night cleaning off wood fuzz. I’m convinced it grows back…. A handful of hours left and I’ll be at the rigging stage. Masting and rigging. This will be the 4th boat to reach that stage or near that stage, I hope it not stall. Again. I’ve looked at the bits, they are sooo small.

-
Thank you Ryland!
-
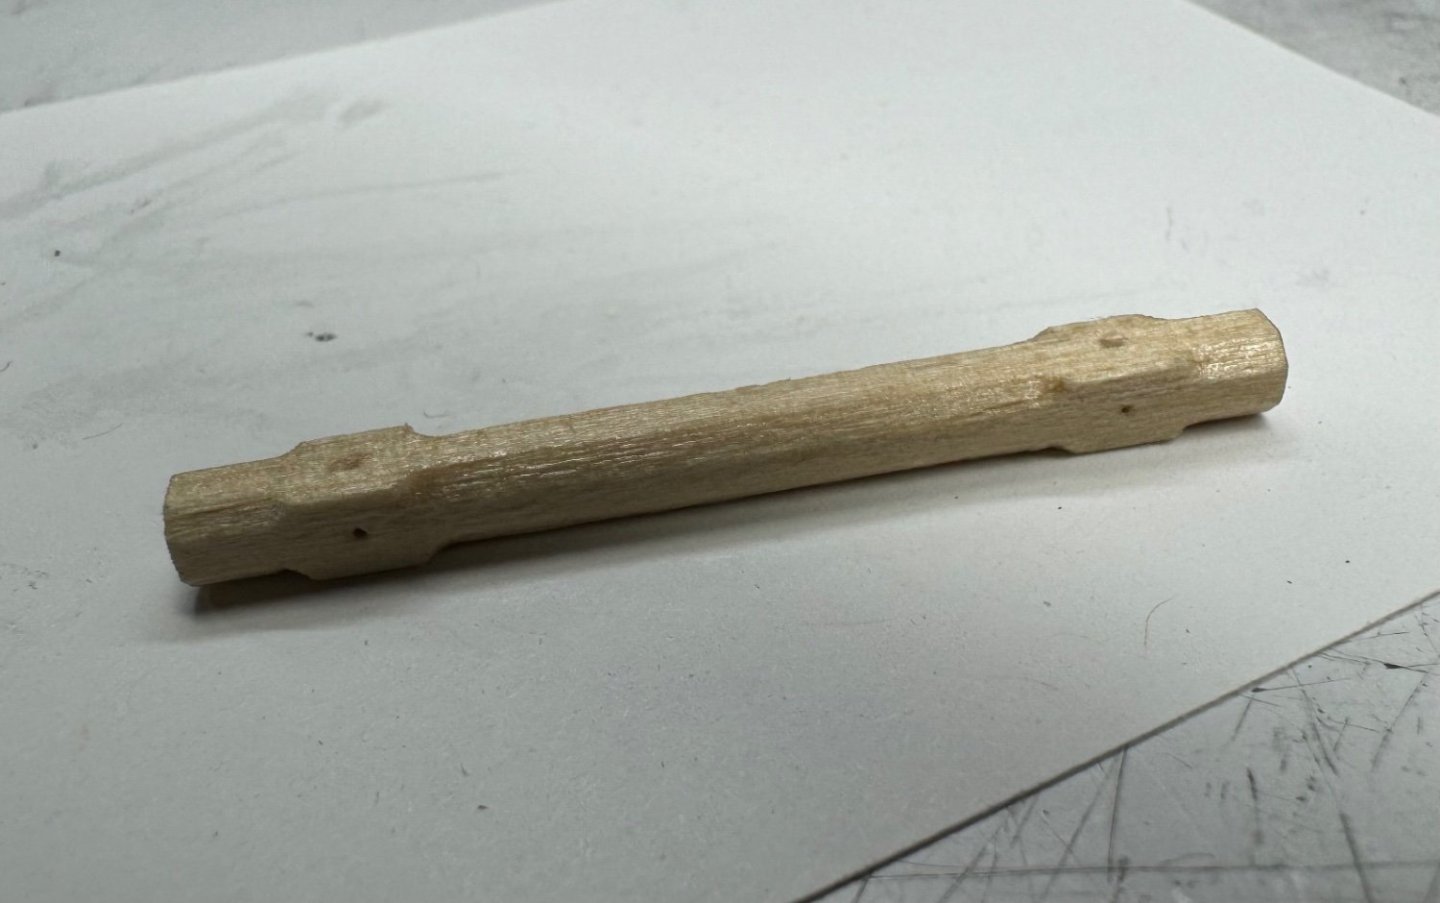
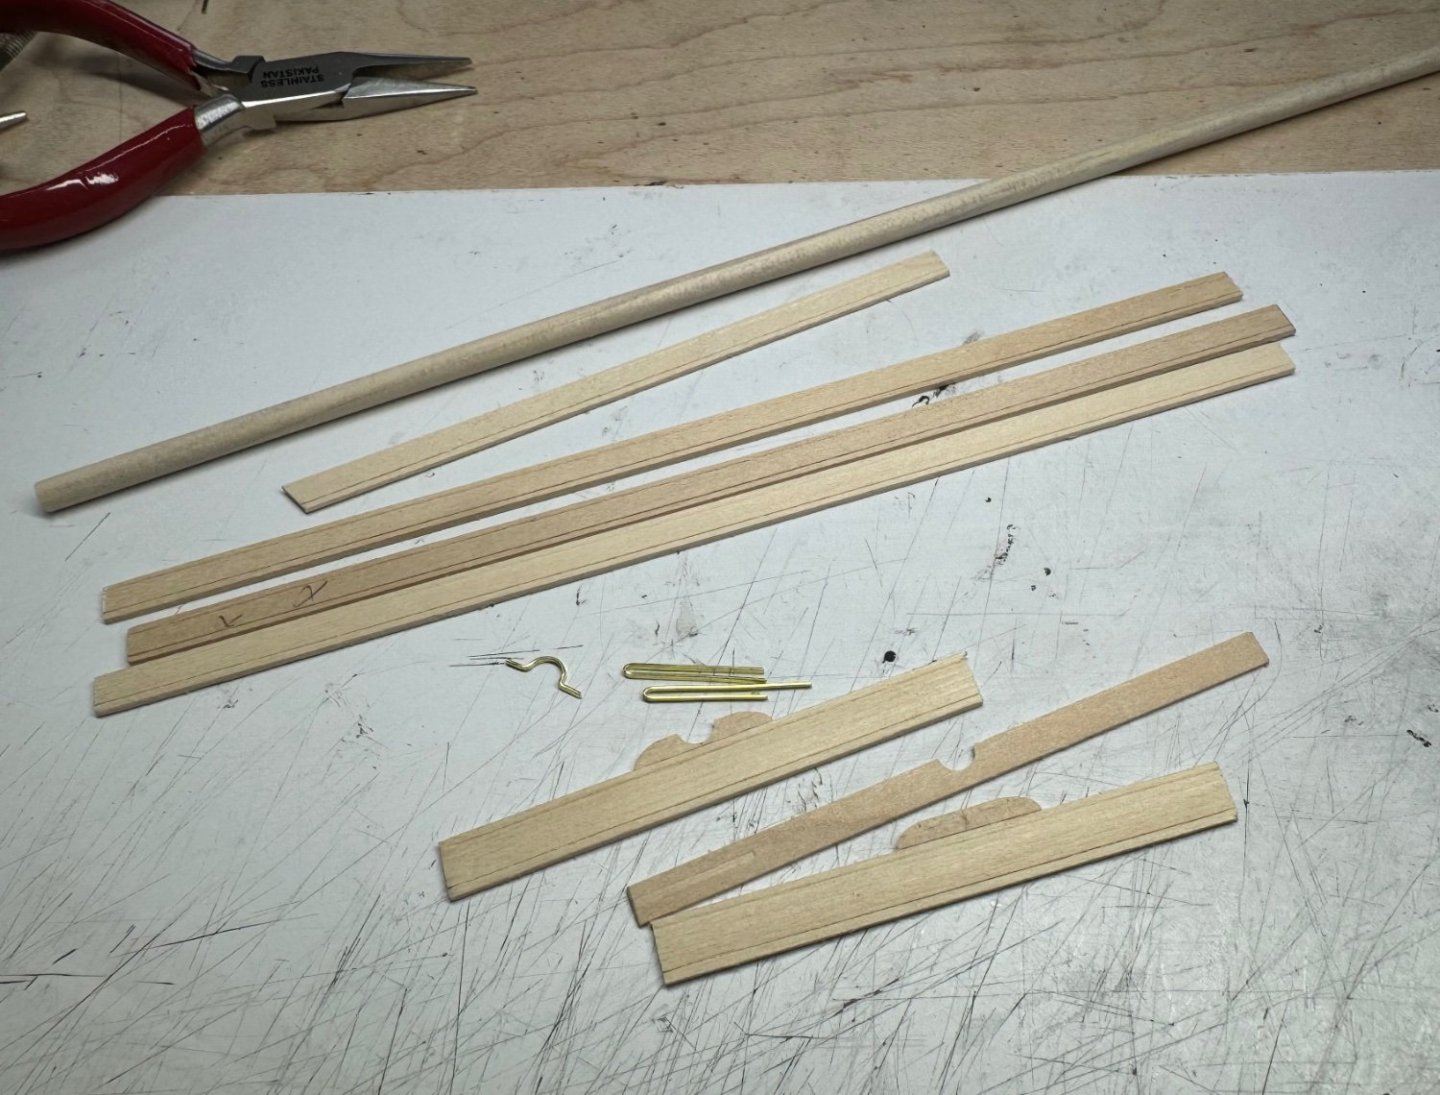
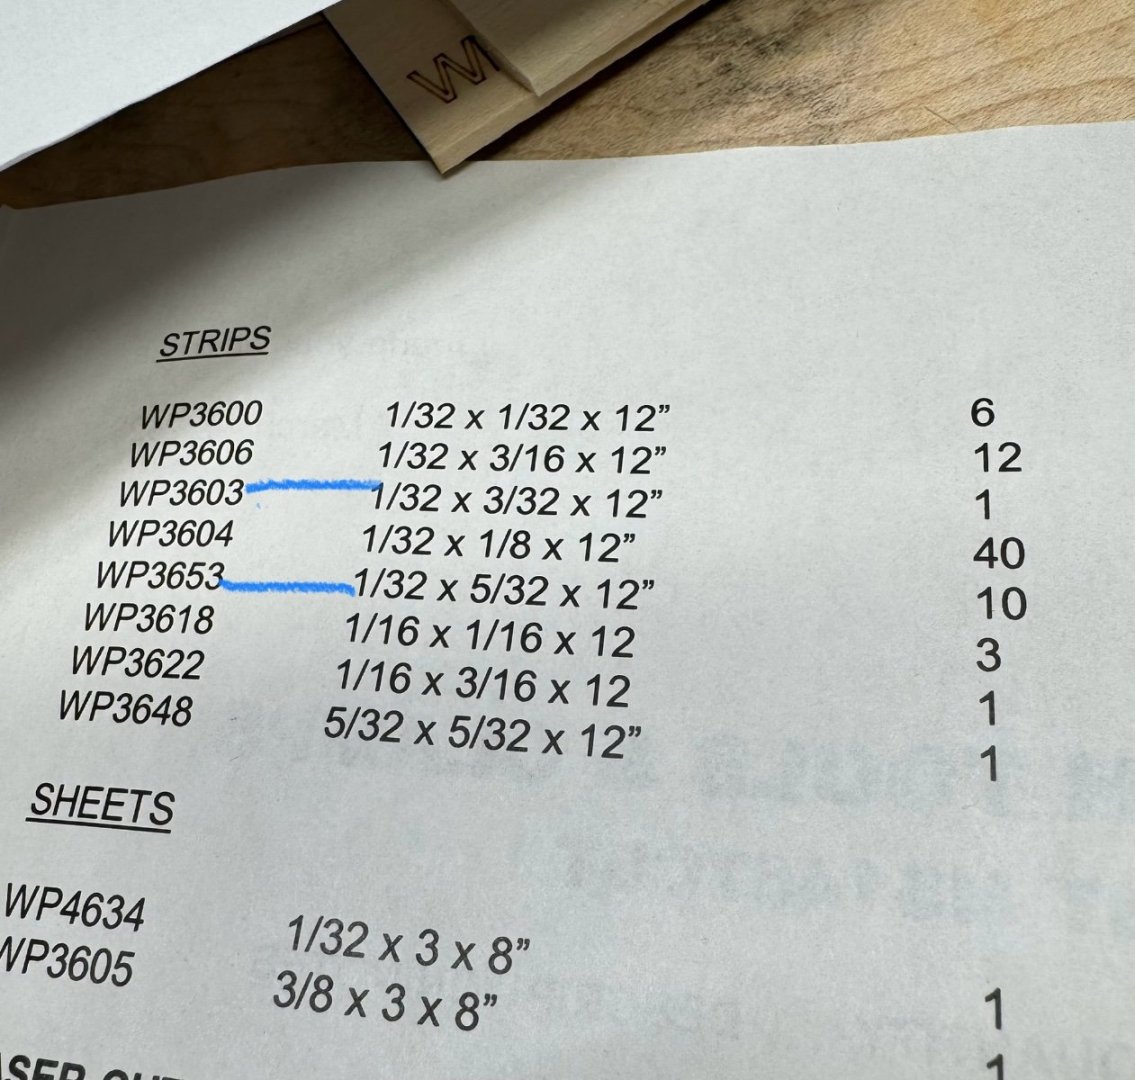
I think they put enough 5/32 in the kit and one piece of 3/32 to make this part. I can’t find anyplace that needs a 3/32 x 1/32 stick, not yet alway. 🤷🏻♂️
-
@Nirvana Your log was very helpful for some questions. I giggled at your cap rail (Gunwale) trimming to .04mm calculation. The thwarts issue I just ran into. They have a good amount of 5/32 x 1/32 in my kit, I’m searching for some 1/4 x 1/32 to make the mast part thwart. Thanks for a great log for this boat!
-
@allanyed Thank you! This is all I got in response. I’m just glad it looks good lol. I don’t think I’ve seen gunwale in this instruction book.
-
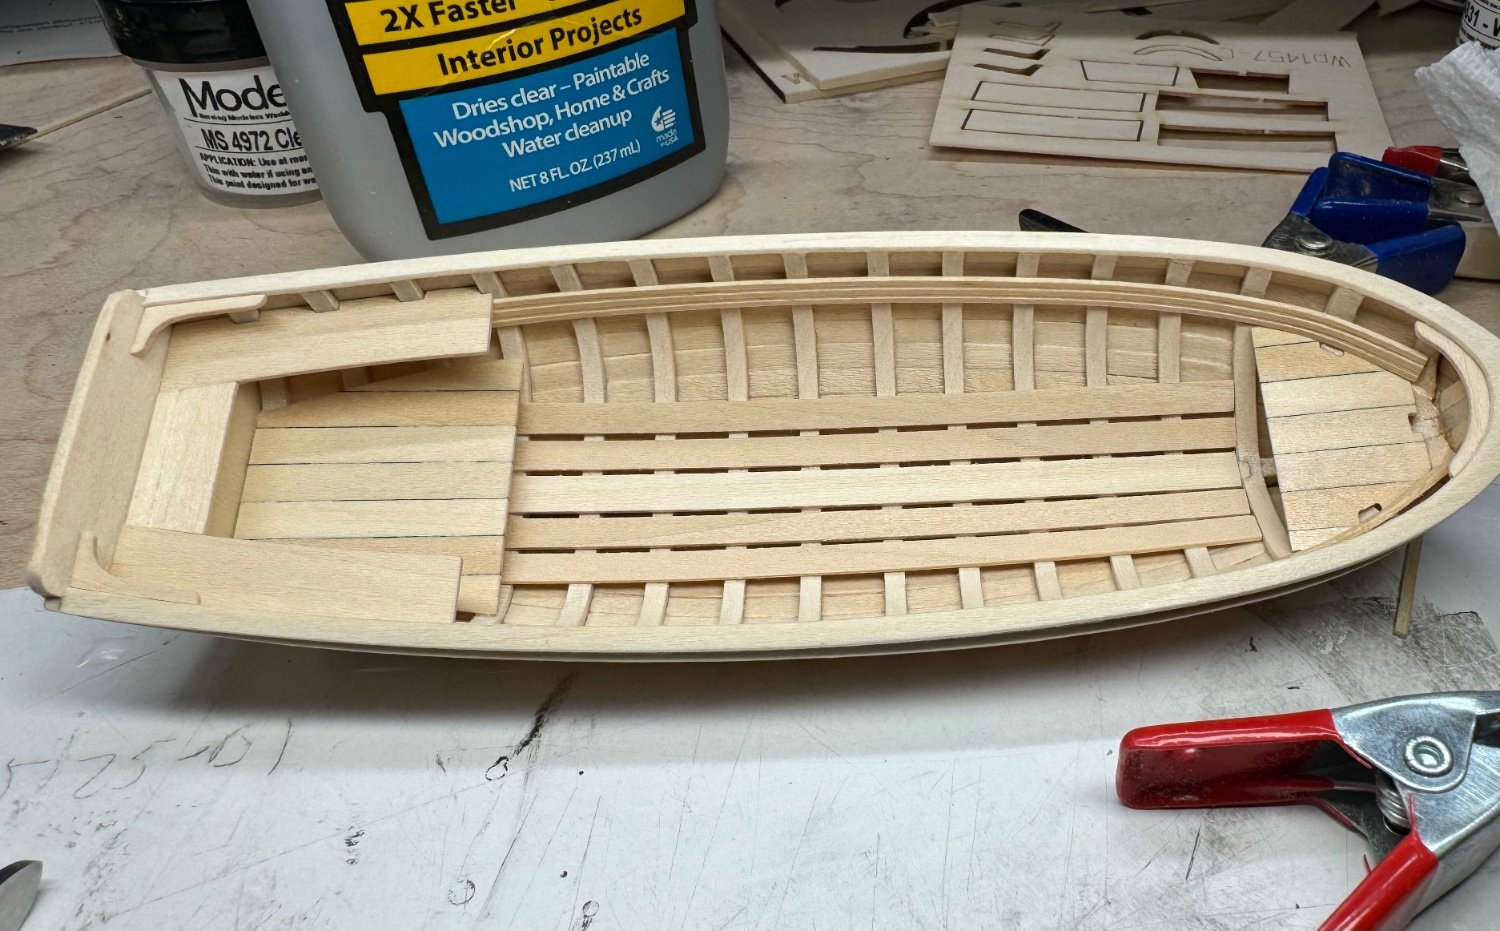
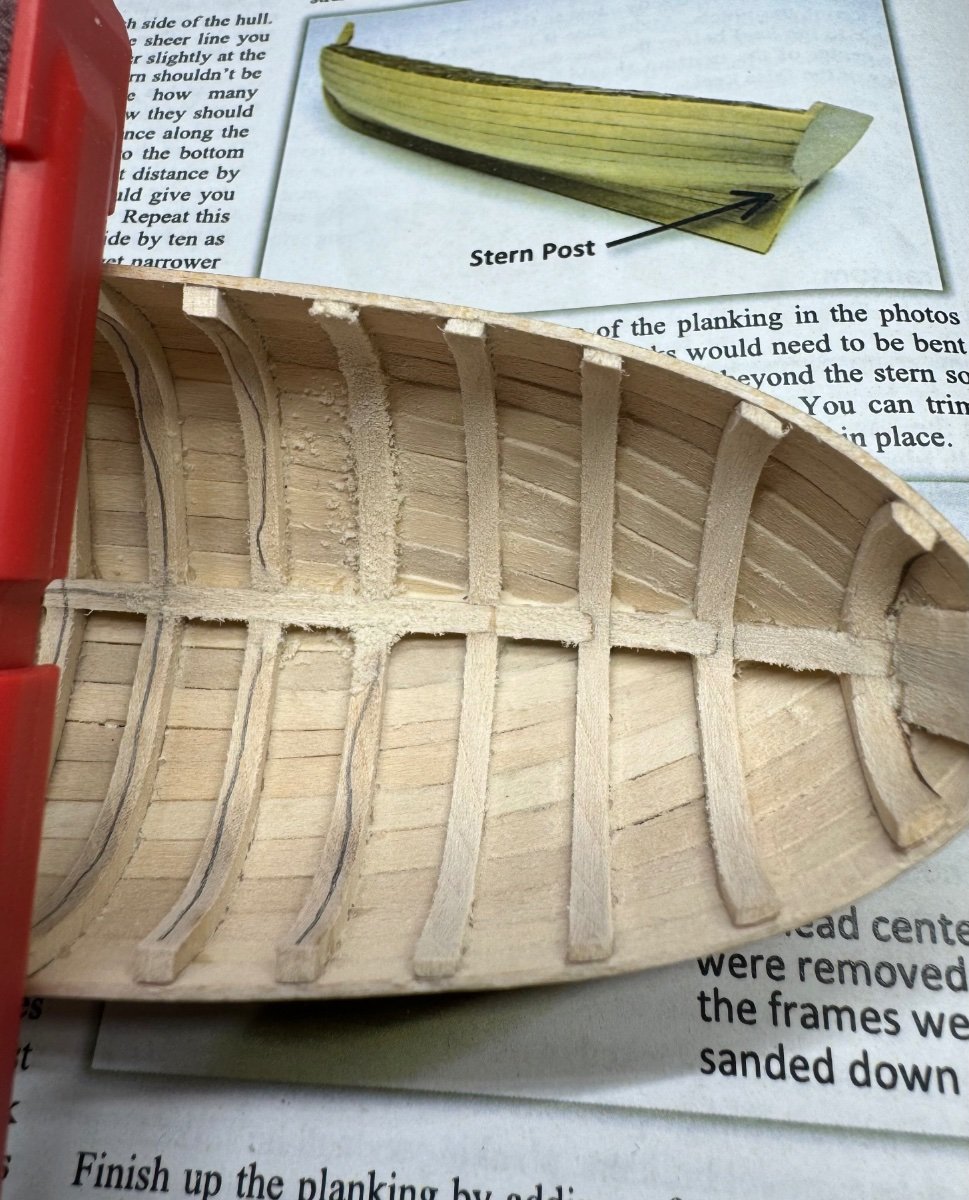
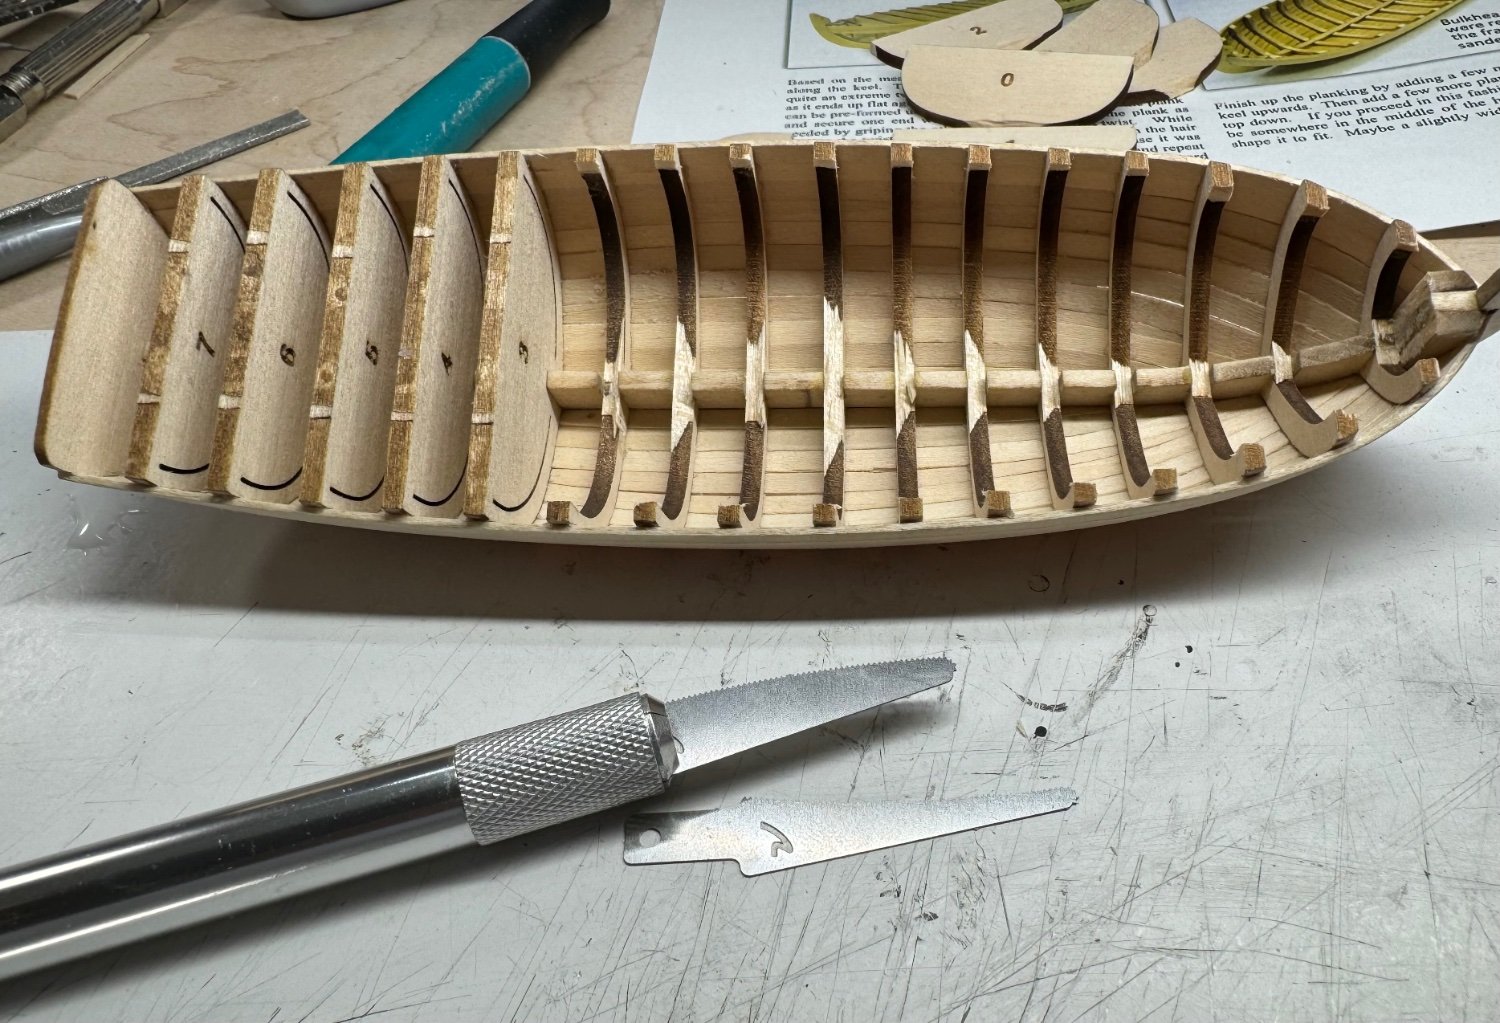
Platforms. Risers. The riser turns hard at the bow. I cut reliefs in the frames to make it lay down better. I’m sure it’s not scale, but the seats will sit better. I’m not real sure what was done on the prototype but the riser is flat at the bow. I made tool to measure the riser mounting quickly. Frieze prep spray ordered. I think the color frieze on the plans are way oversized, I may shrink them when I copy them. Esp the transom frieze. This is a fun project, even if it is frustrating at times. I’ve looked thru many build logs I don’t see picture at stages I have questions. I’m trying to get pictures of stuff that I either want to remember later or could help someone else answer a question. Either how to do it, or how NOT to do it.

-
The cap rail. .120 ish wide for now. Page 5 completed. I don't have anything to attach the frieze. More shopping. Amazon prime is great… Page 6 begins. The instructions picture 2 models, one with thin frames natural seats, fat frames and red seats. Mines kinda looking like the finished cockpit on page 8.

-
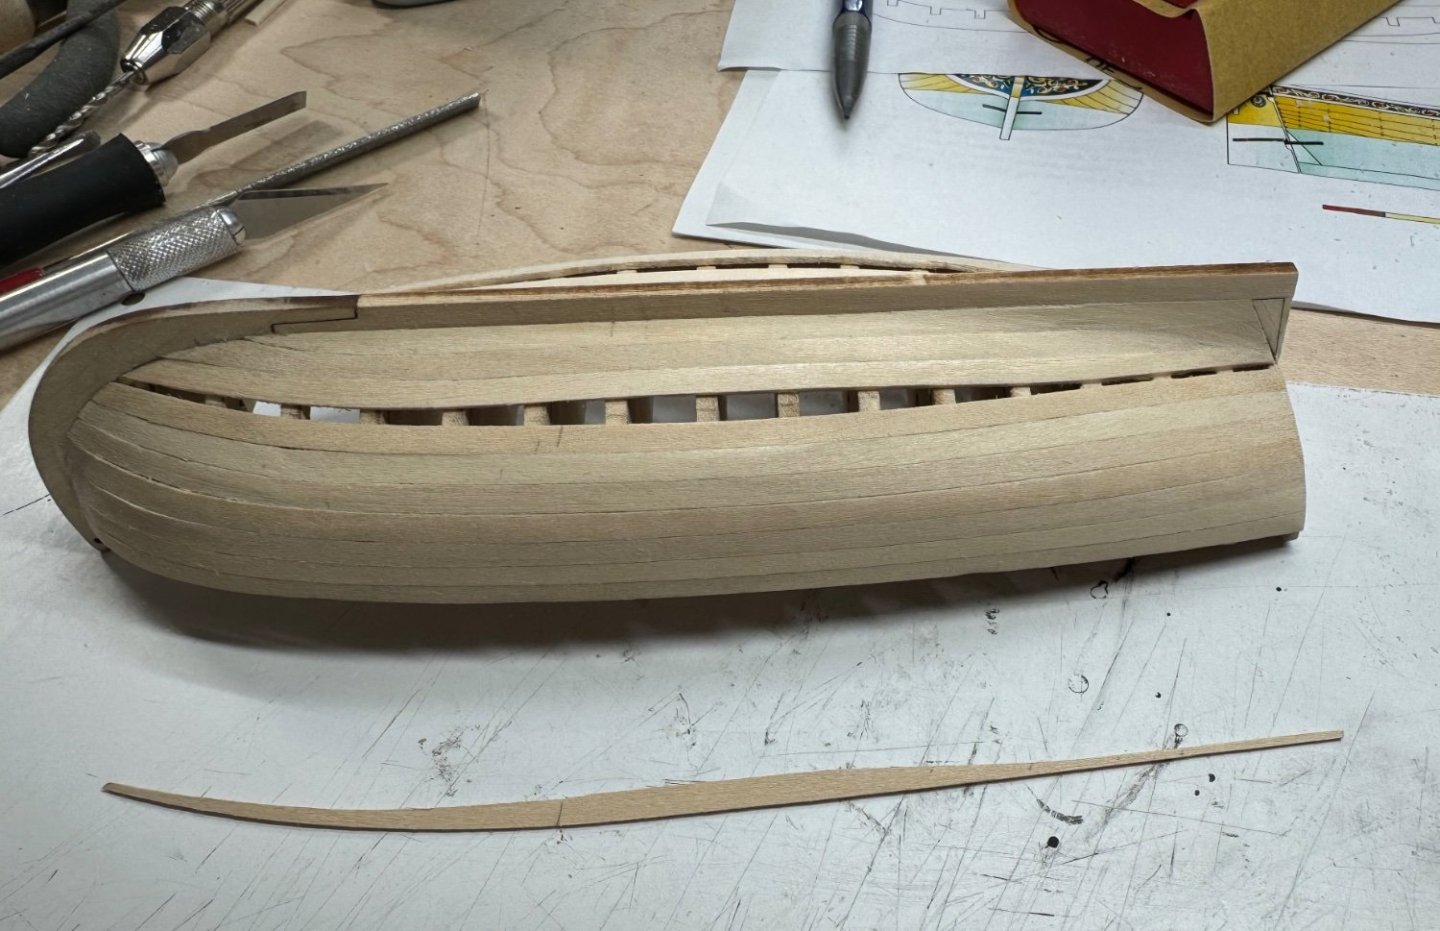
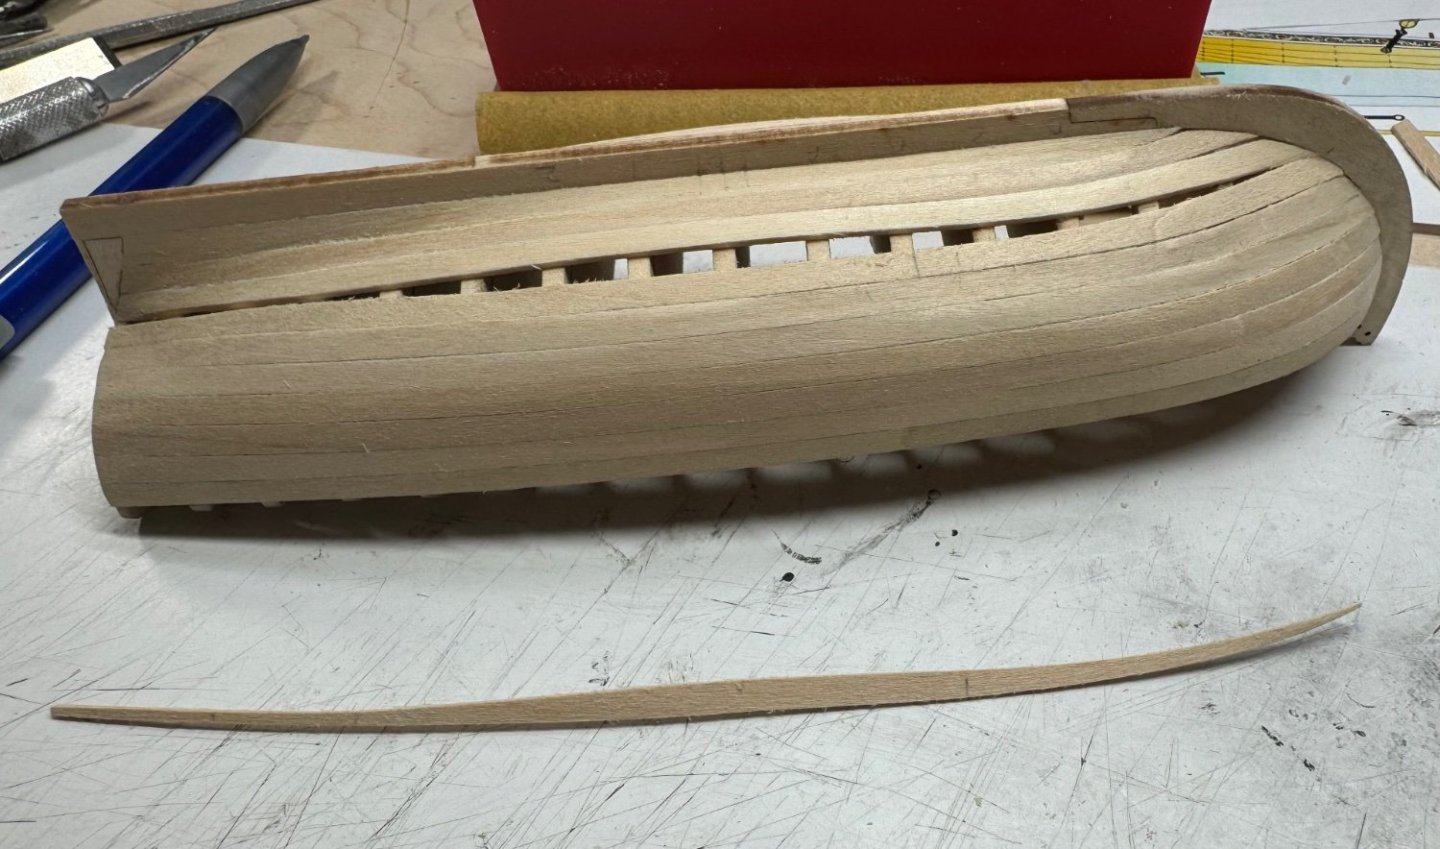
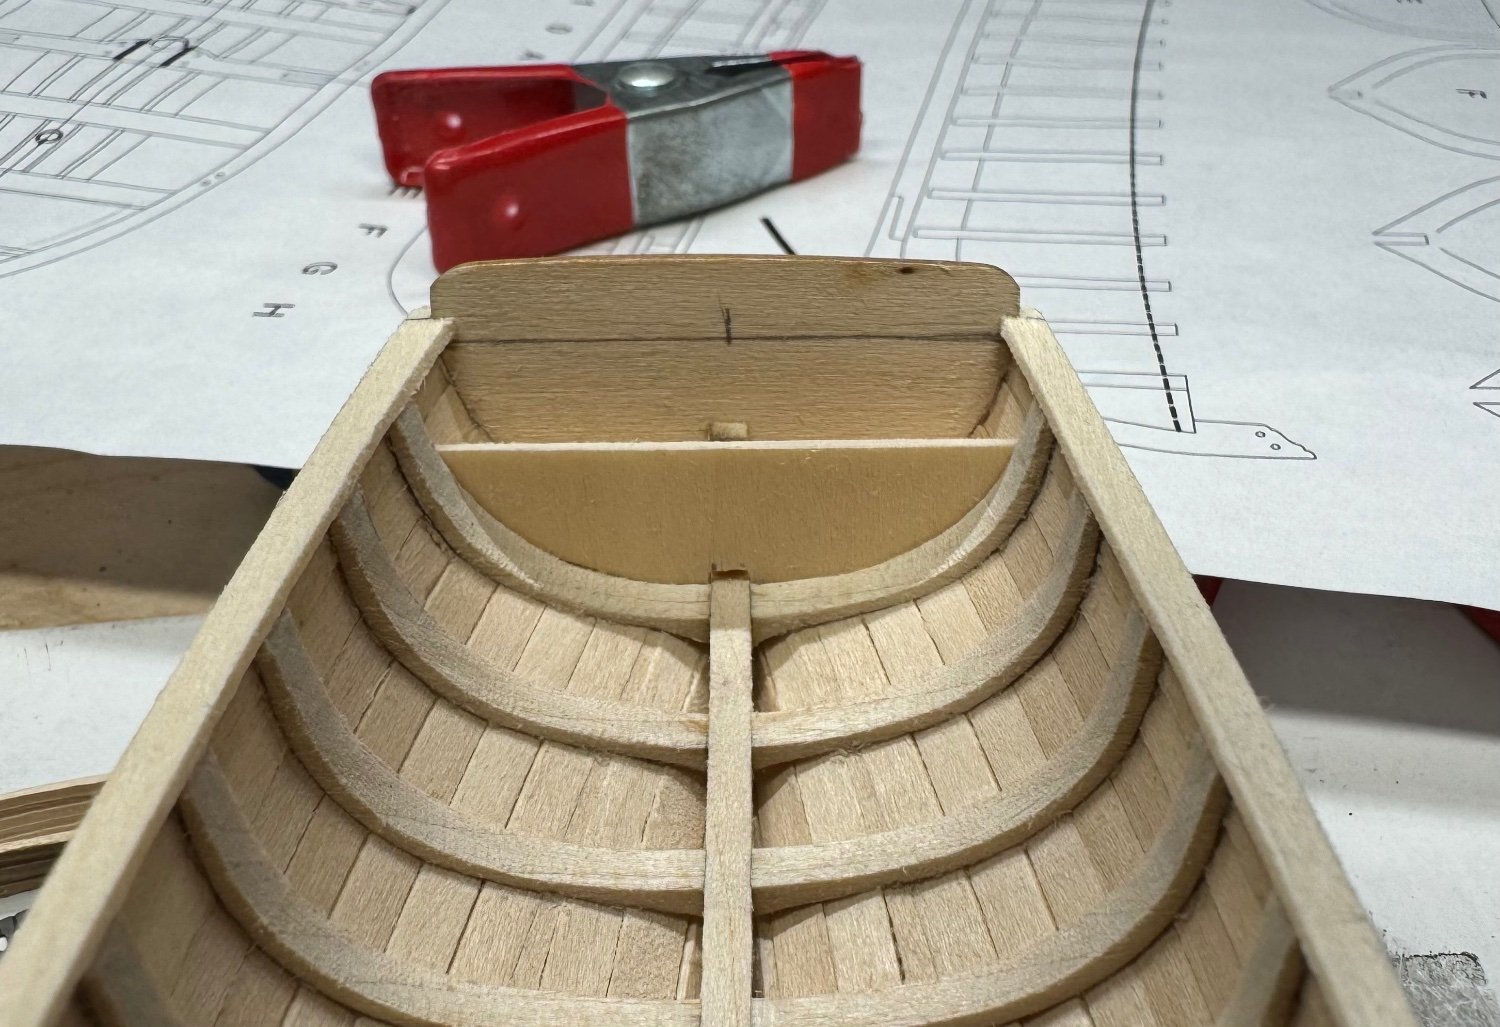
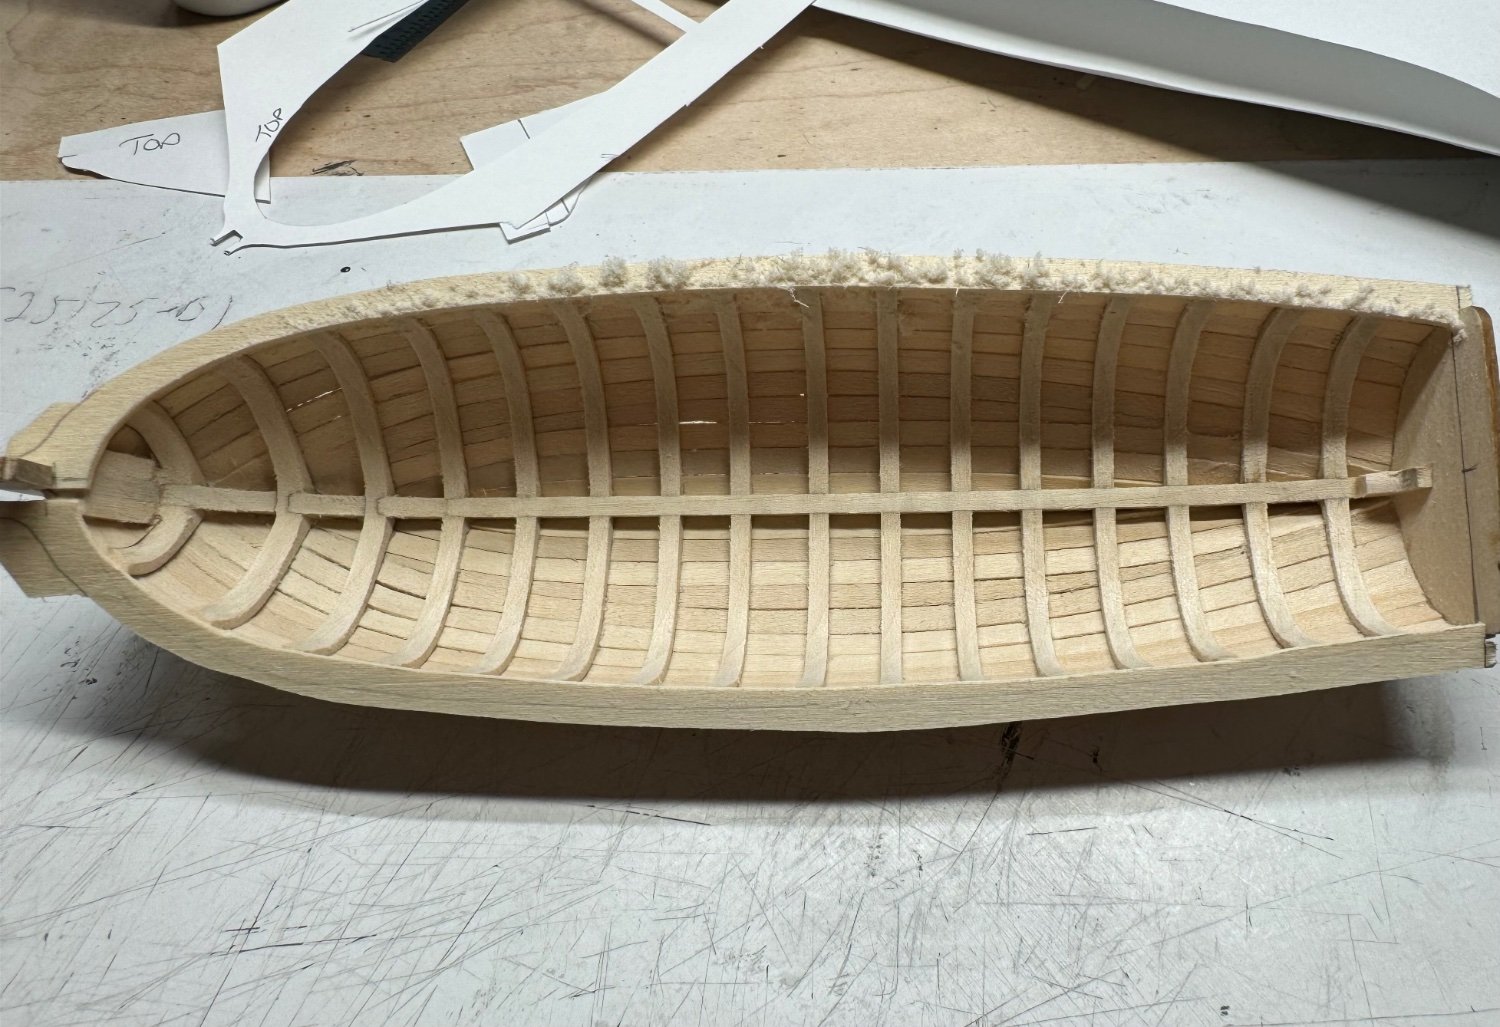
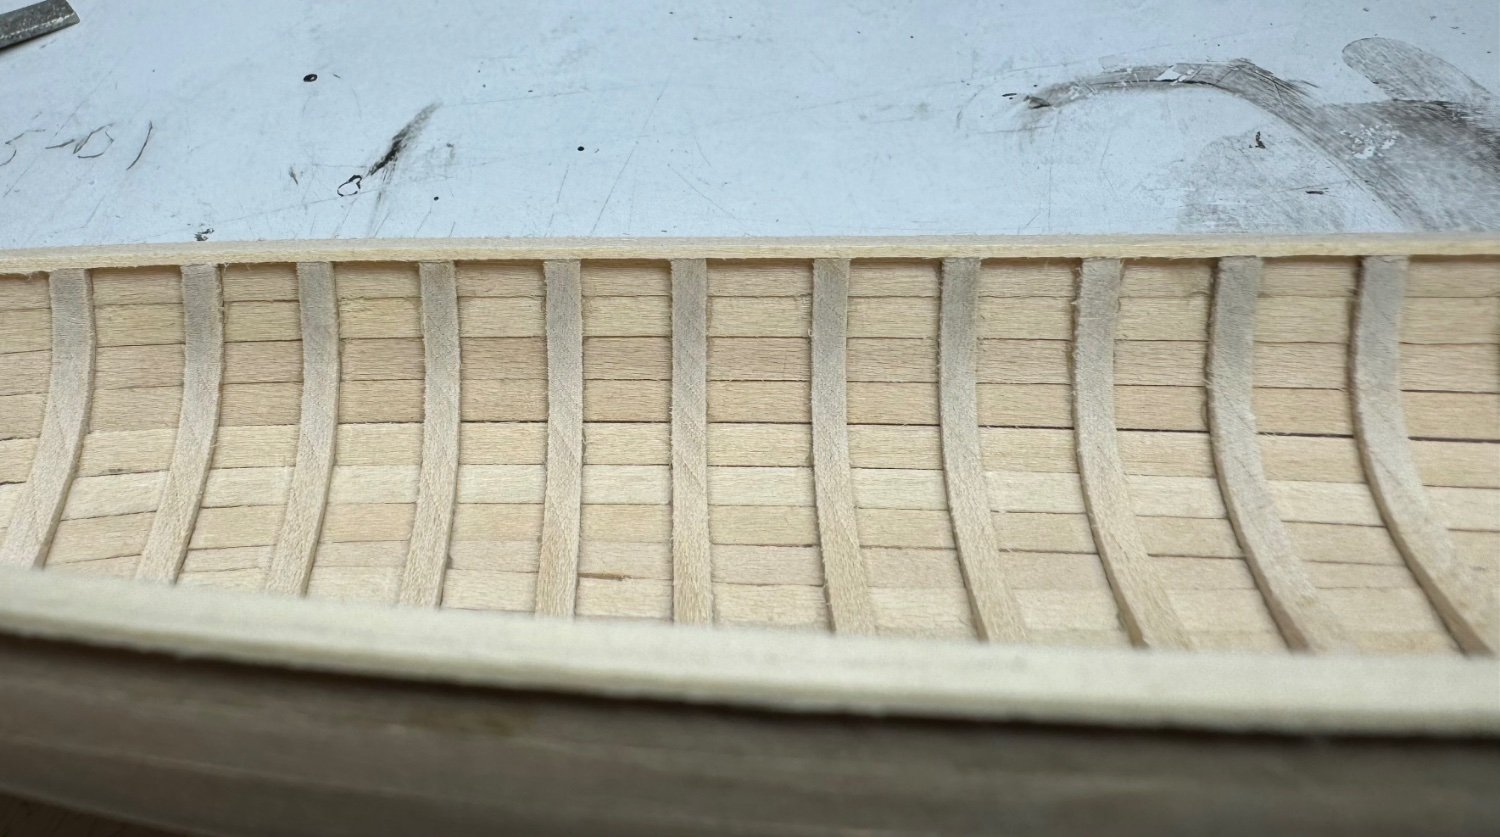
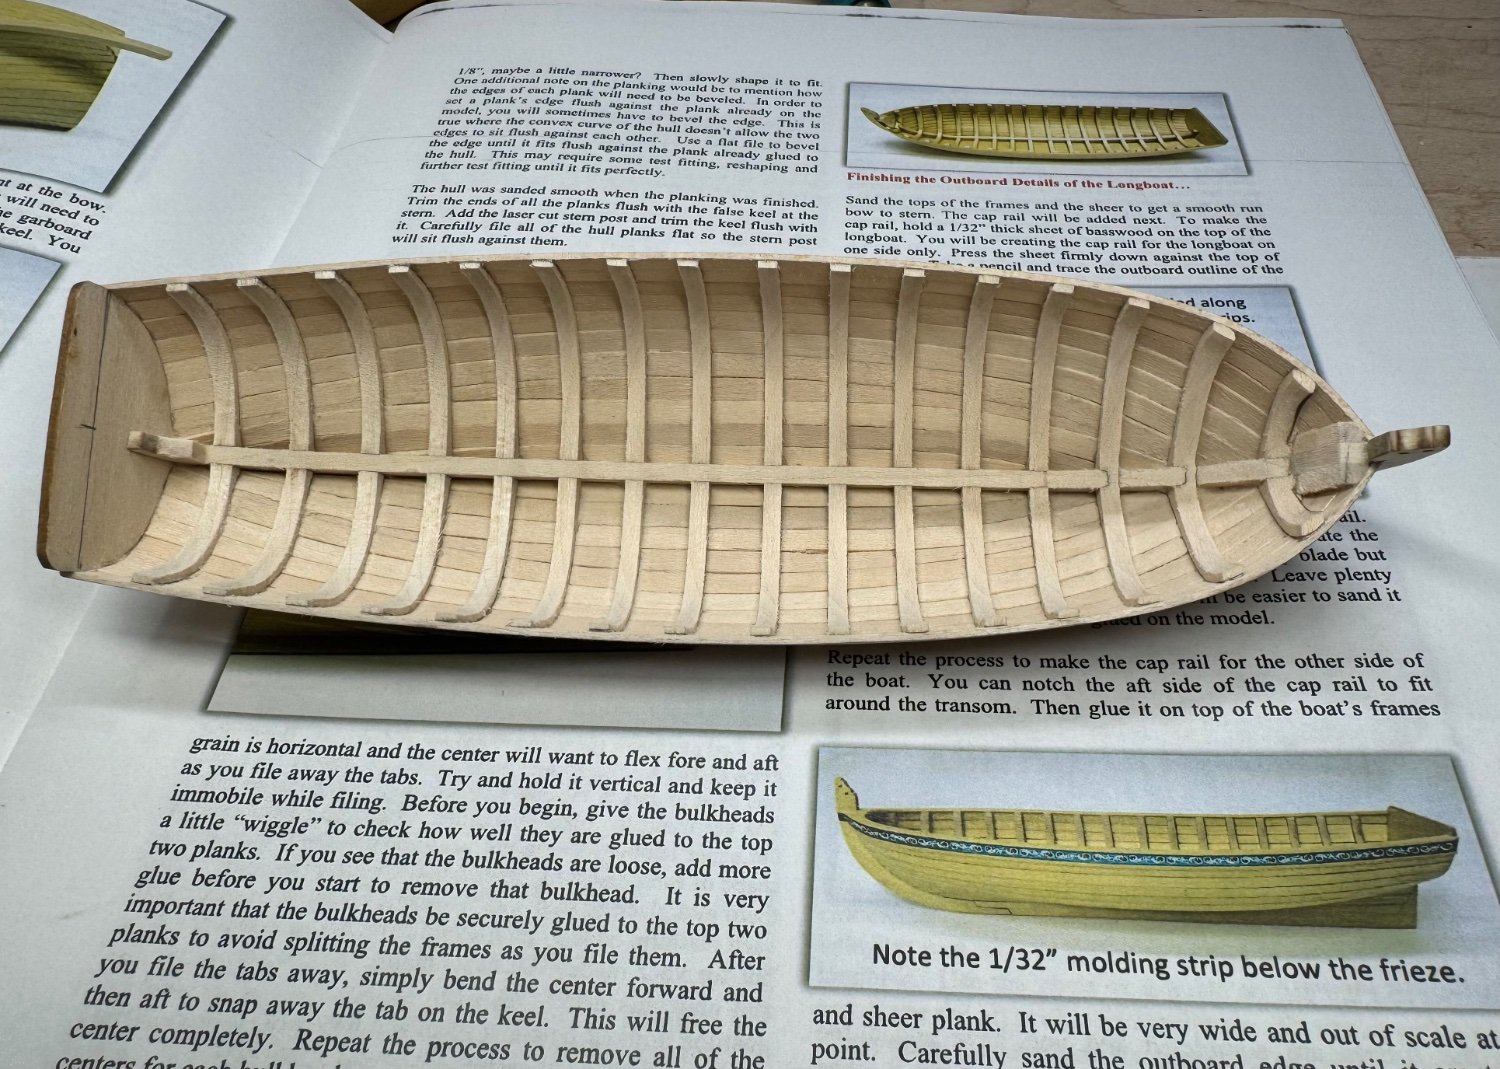
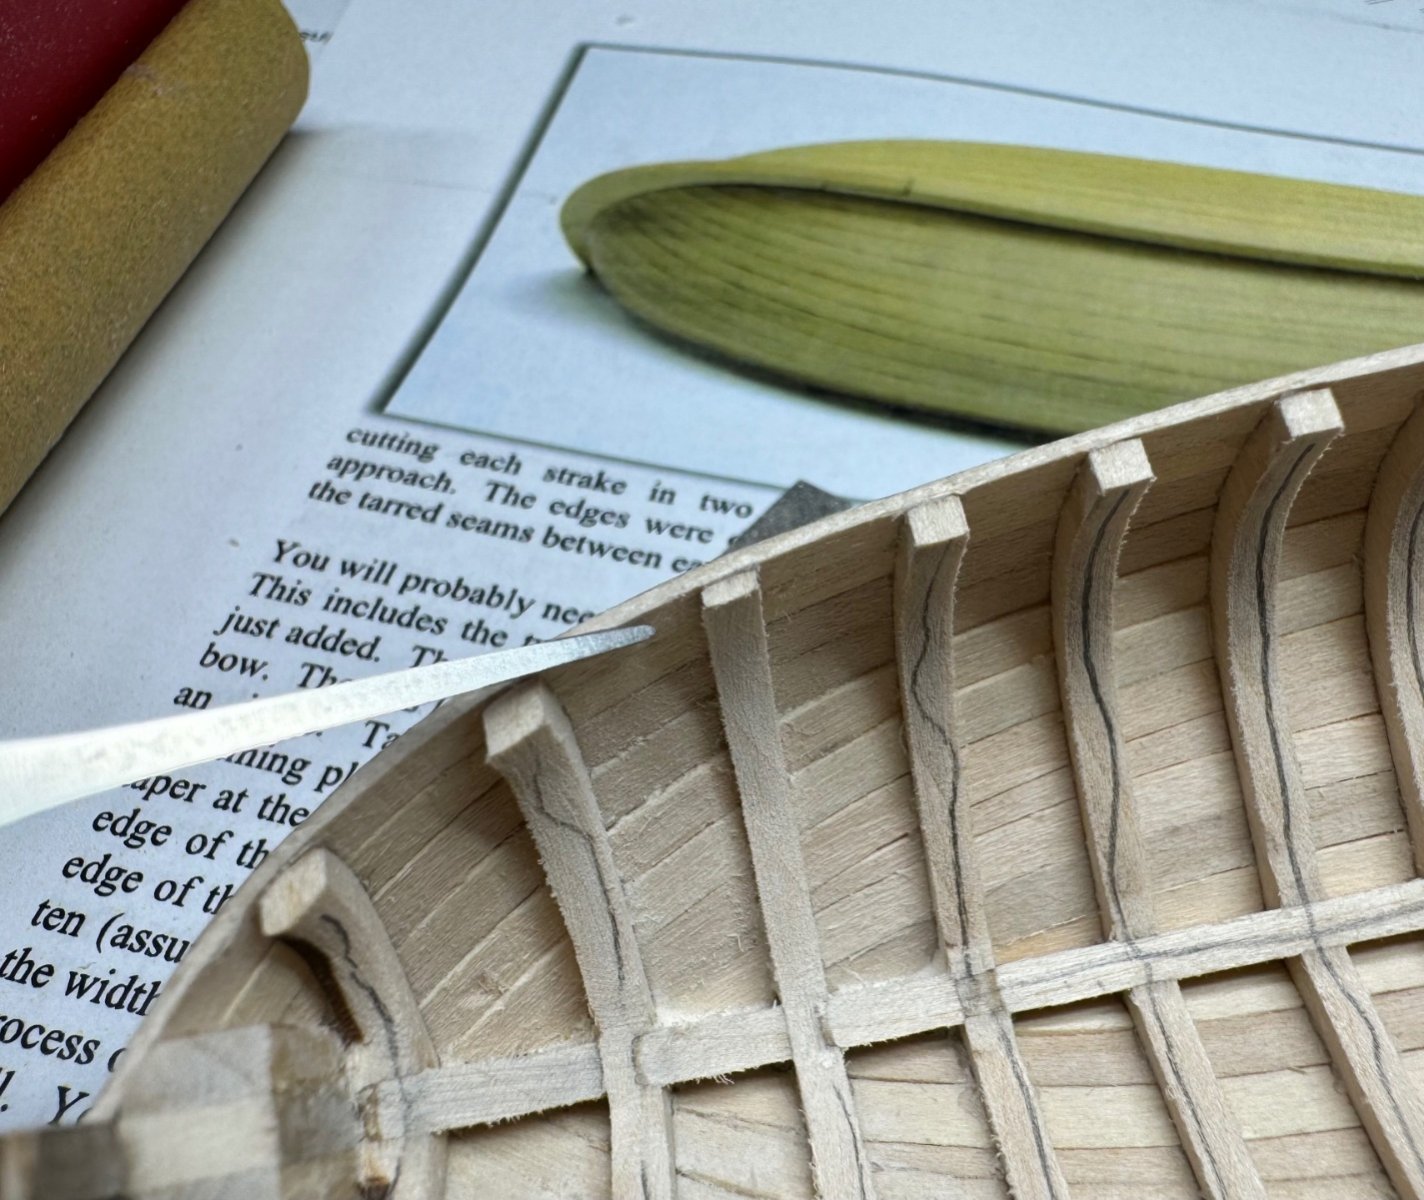
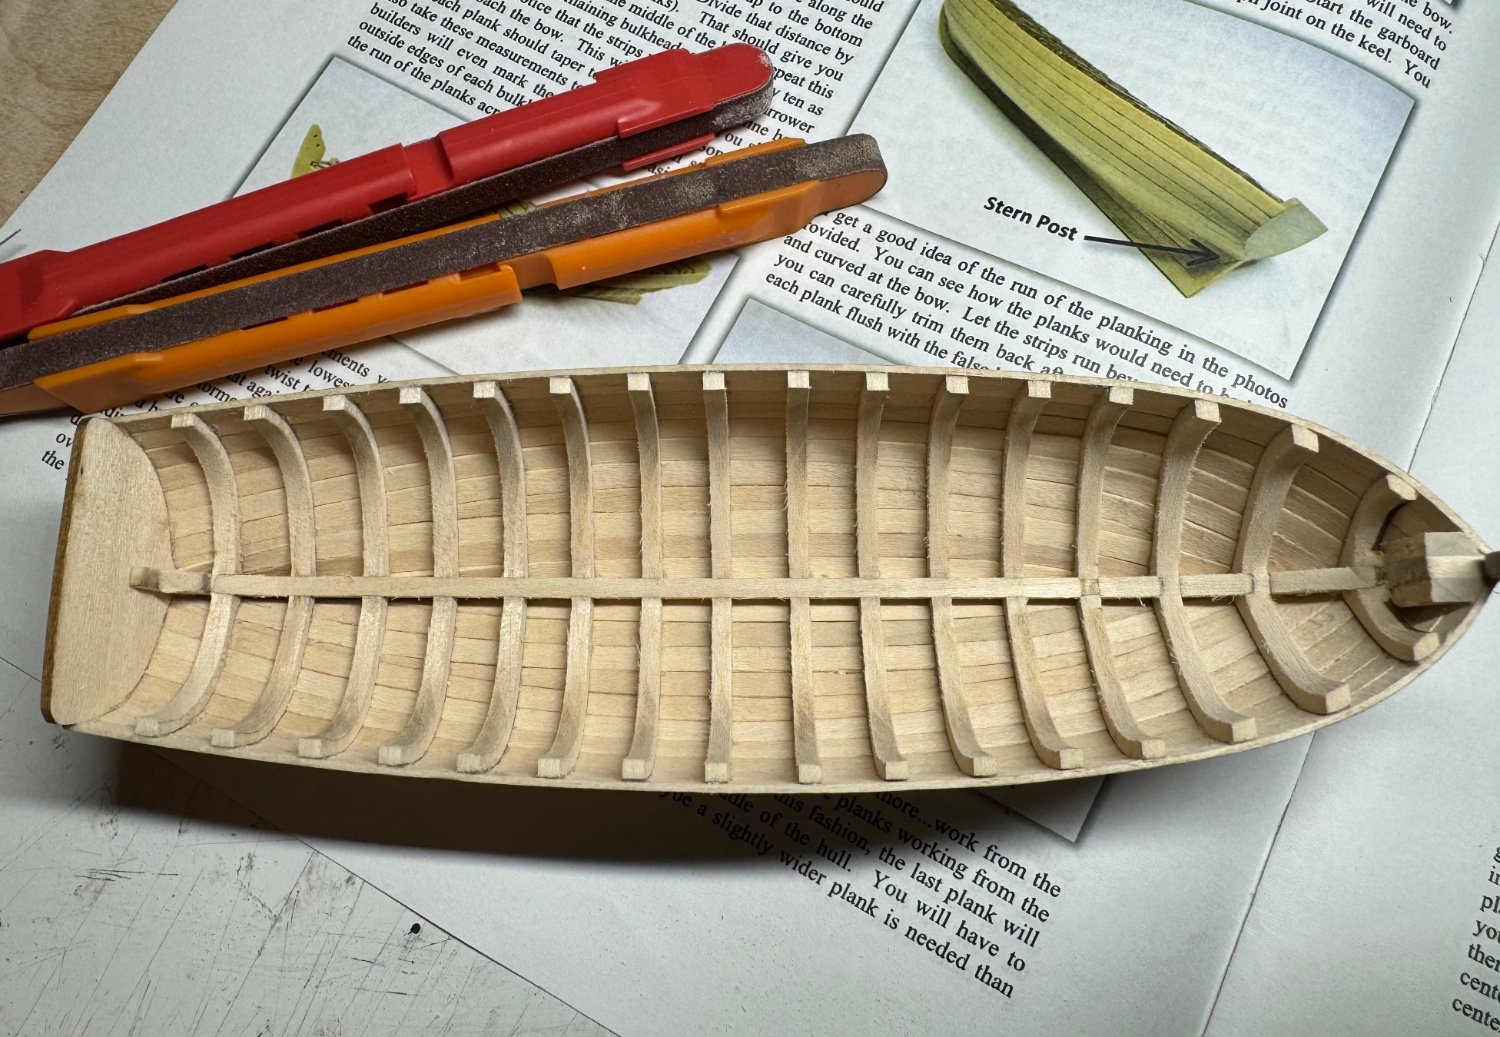
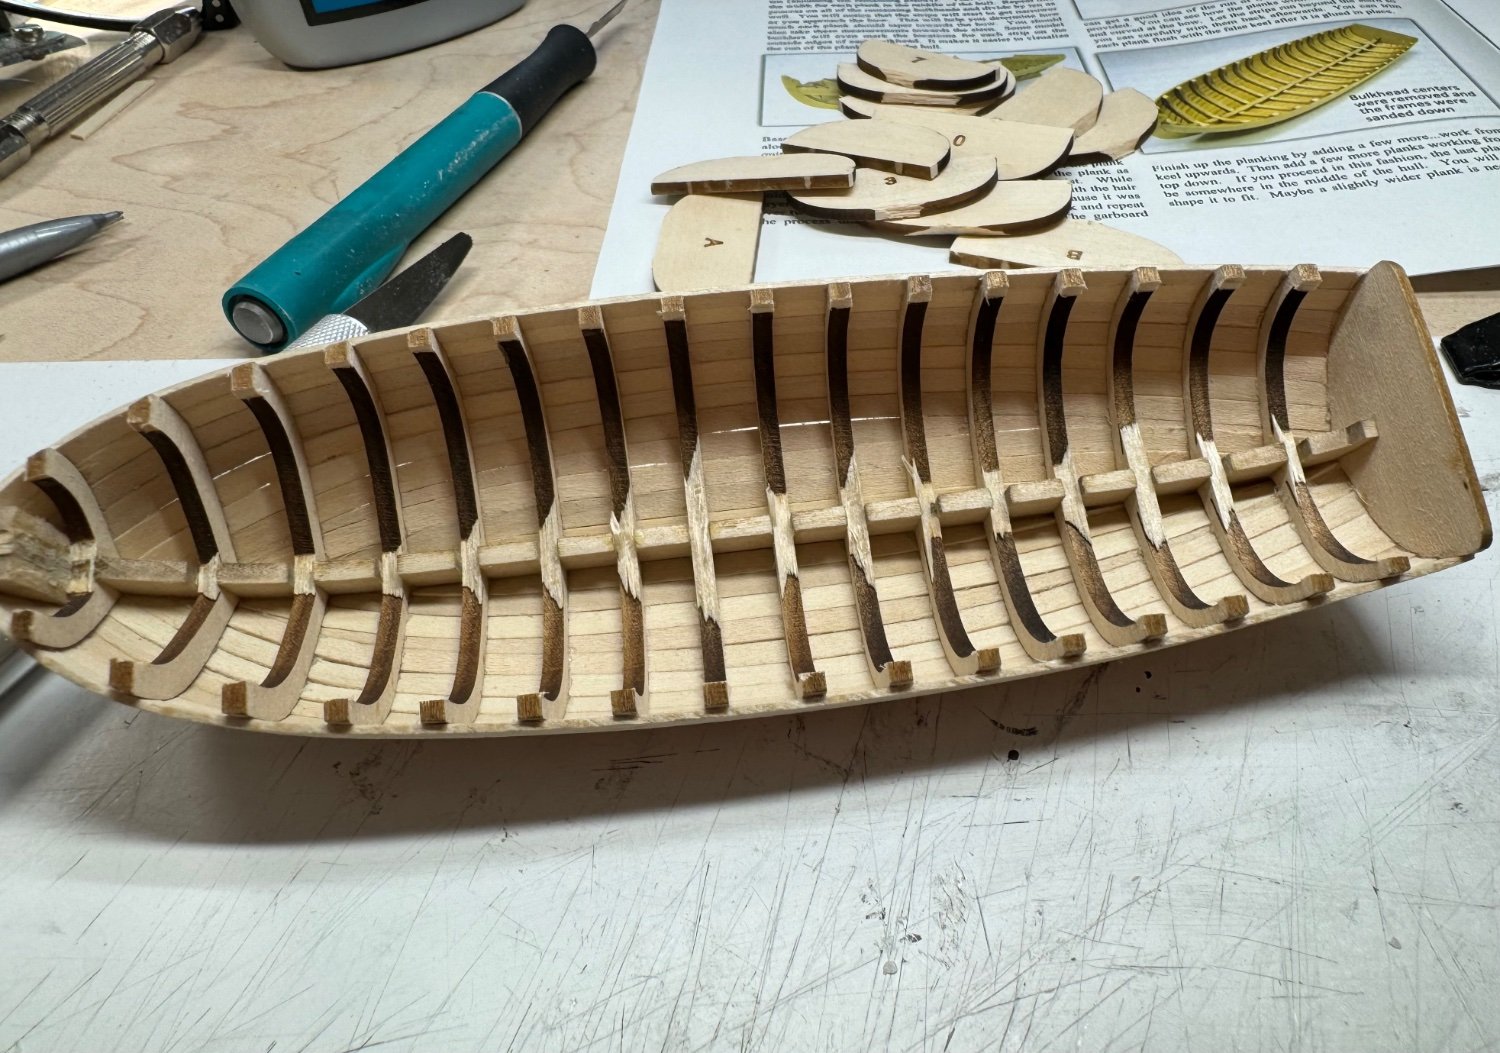
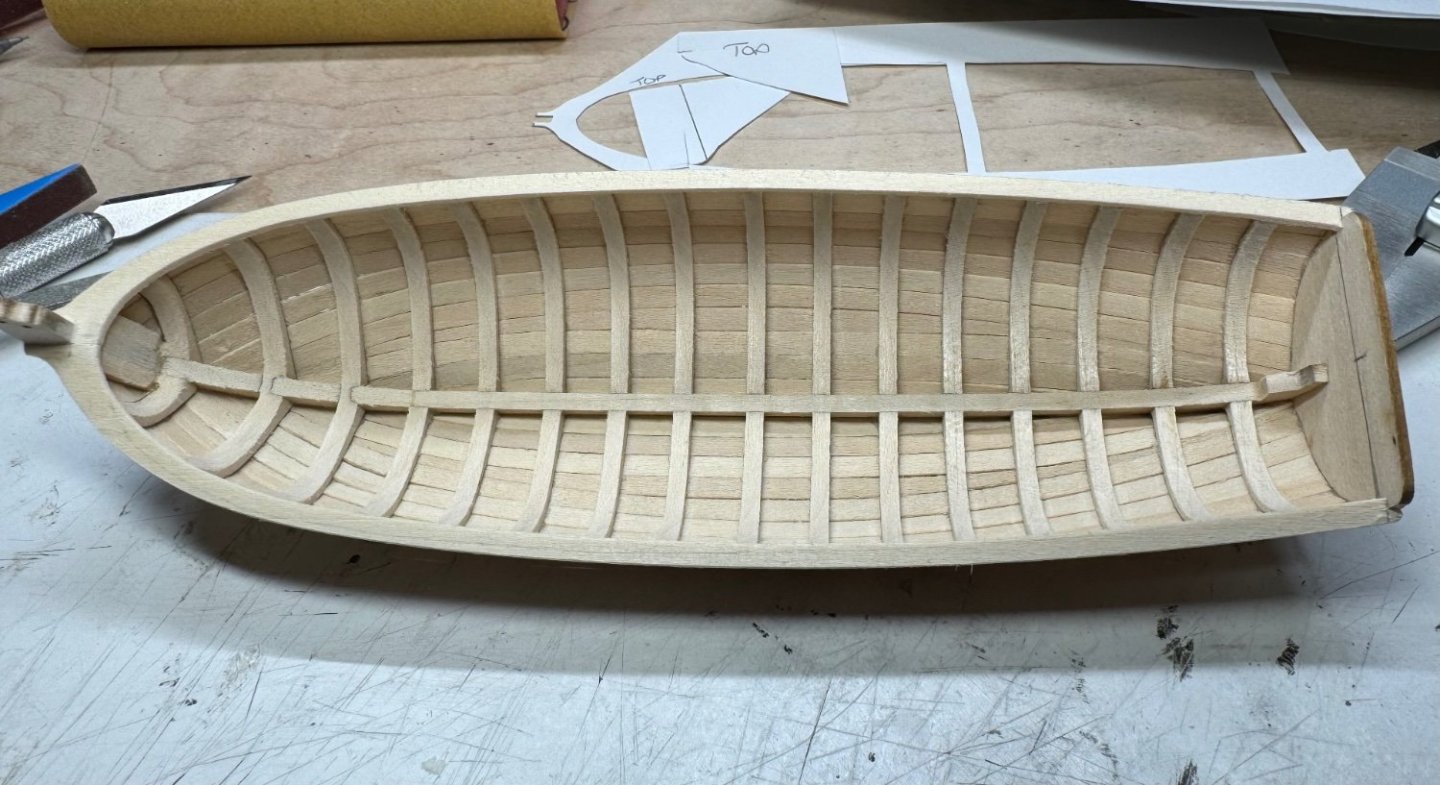
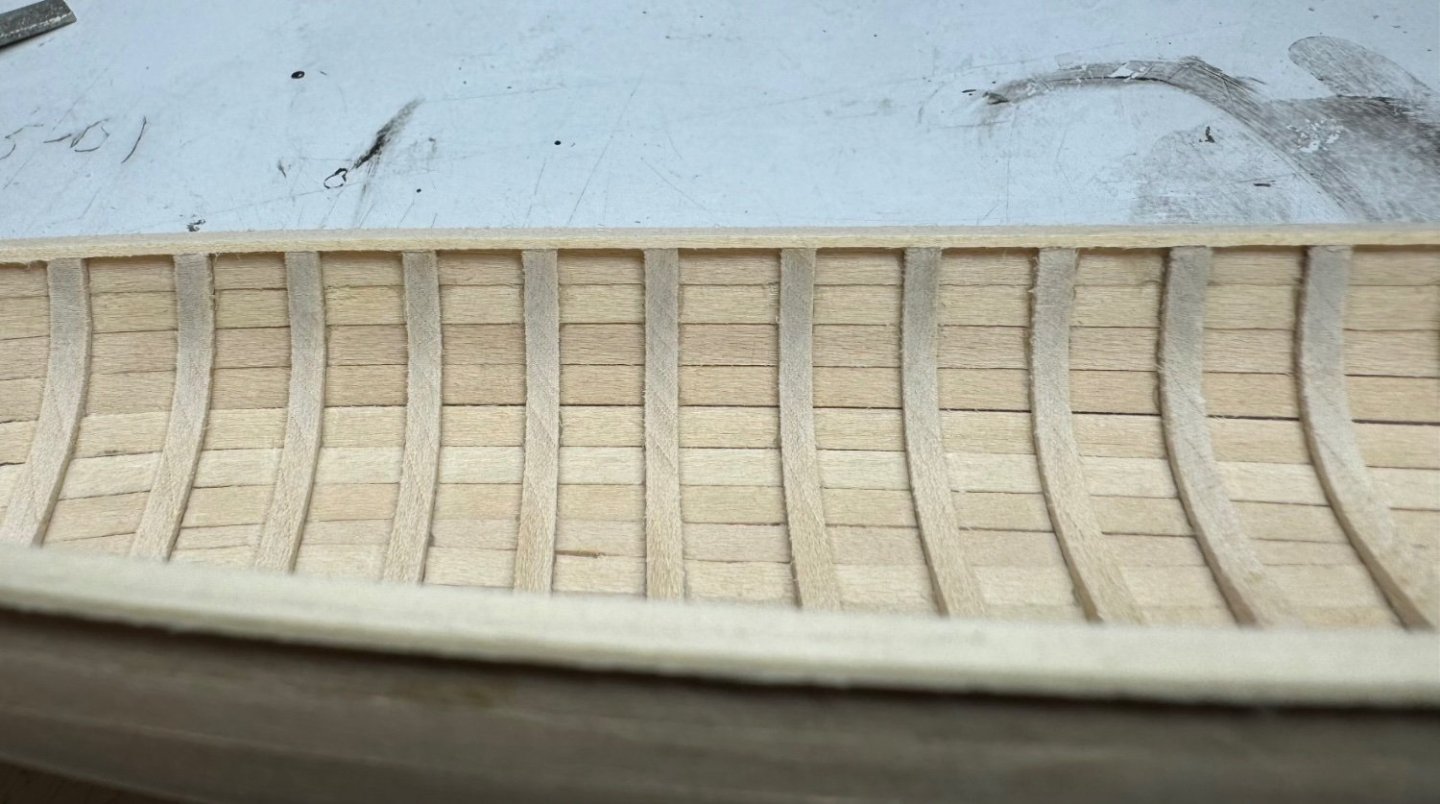
I’ve discovered I have 11 planks, not 12. They started at where I thought it should at the top. Maybe it could have been higher in the stern. Way too late now. It may have been easier to shape the planks if they were not as wide. I must learn to read instructions slower. I’ve sanded the frames. Faired the frames. Using the width expected to be the cap as a guide. I would not want it sand or fair the frames with the cap installed. The boat structure is very very strong. Shaping the frames was violent at some points. It holds up well with glue on each plank at each frame. Not much glue either. This is not a beginners boat. I’m not a beginner and certainly no master, it’s a struggle at times. I’ve started my train wreck the instructions call a cap rail. It’s it wrong? Is it right? This is my boat, their are none like it…..


-
Now I can’t unsee how thick the frames are. 3/32 or slightly wider cap. Well. I figured .081 (5/64) thick frames to outside plank should make it 5/64 thick 3/32 hanging over 1/64. I did one frame side. 20-25 min. Ima be here sanding a while, gently. Thanks for pointing it out @whitejamest

-
@whitejamest the pen cap is a great idea. I can see holding it would not be easy. The sanding sticks worked great. Very pleased with control of the sanding and it didn’t take too long, a solid 2 hours of sanding. The sanding paper held up well. Looking at the boat on the inside I wish I had done better planking. I do not have any glue showing! This was one of my major goals, which I did achieve. I tried to flatten the poorly laid pieces, they won’t stay. Of course they looked ok as I was installing them. Bending wood skills are progressive I guess. Not painting parts of this one makes no forgiveness for poor workmanship. Parts of it are good lol. Maybe I’ll build a second one someday to see if my skills can grow.

-
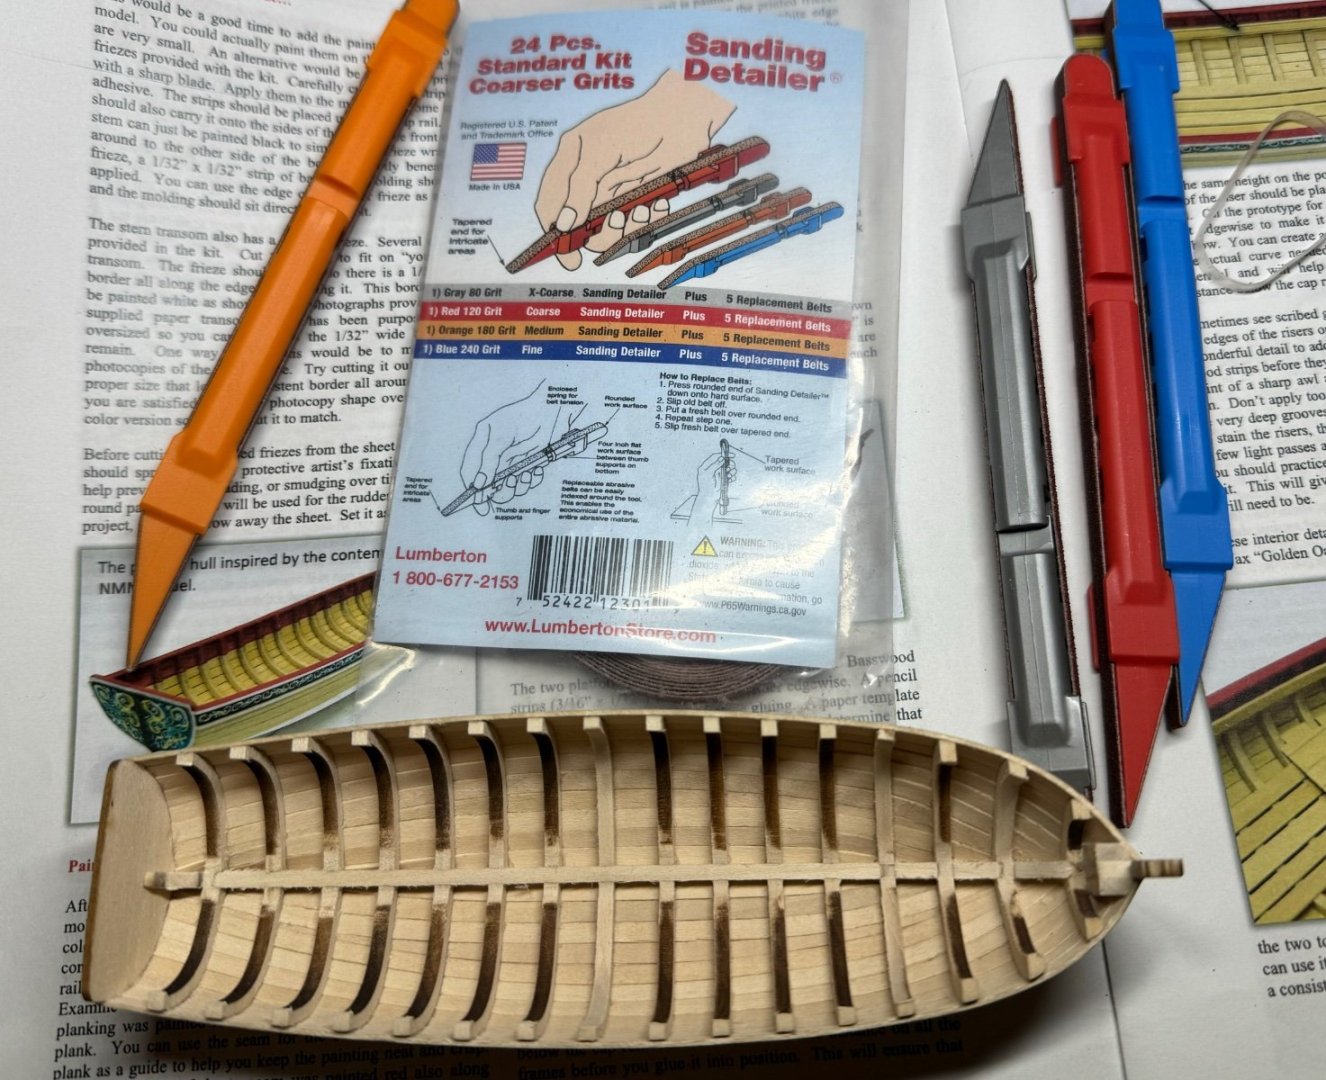
So far the sanding surface has held up will. It’s not as durable as the diamond files. It’s livable as a tool. I’m just happy to be able to easily reach the inside sanding surfaces. I was struggling with any other tool on the table. It comes with 5 refills each grit, that should last me.
-
I found a sanding tool I really like. I’ve been using some small diamond files, they work great for outside. These sanding detailers work great for inside work. It’s going to take a while to sand the inside, but it’s not hard. I’m trying to stay away from power tools. Nothing else I had was working. Learning one trick with each stage makes this fun. They make a finer and a courser kit. I bought both.
-
I read the instructions again. Had I measured the planks in the center and started the first plank lower and measured the front and back and divided the space to thin the planks it would have turned out better. Next time I hope to read the guidance slower. My fill planks were nice but each plank could have been thinned and it looked better. Next time.
-
Planking is done. It would sink if it was the real boat. It’s a real challenge to make it all fit well. Practice practice practice. The fill planks turned out ok. I had already started planking before I learned a good way to make caulk edges. On the next one it will be better.