Buckstrong
-
Posts
21 -
Joined
-
Last visited
1 Follower

-
 Scottish Guy reacted to a post in a topic:
Viking Drakkar by Buckstrong - FINISHED - Amati - 1:50 - First Ever Model
Scottish Guy reacted to a post in a topic:
Viking Drakkar by Buckstrong - FINISHED - Amati - 1:50 - First Ever Model
-
Scottish Guy reacted to a post in a topic:
Viking Drakkar by Buckstrong - FINISHED - Amati - 1:50 - First Ever Model
-
Scottish Guy reacted to a post in a topic:
Viking Drakkar by Buckstrong - FINISHED - Amati - 1:50 - First Ever Model
-
Scottish Guy reacted to a post in a topic:
Viking Drakkar by Buckstrong - FINISHED - Amati - 1:50 - First Ever Model
-
Scottish Guy reacted to a post in a topic:
Viking Drakkar by Buckstrong - FINISHED - Amati - 1:50 - First Ever Model
-
Scottish Guy reacted to a post in a topic:
Viking Drakkar by Buckstrong - FINISHED - Amati - 1:50 - First Ever Model
-
Scottish Guy reacted to a post in a topic:
Viking Drakkar by Buckstrong - FINISHED - Amati - 1:50 - First Ever Model
-
Scottish Guy reacted to a post in a topic:
Viking Drakkar by Buckstrong - FINISHED - Amati - 1:50 - First Ever Model
-
clearway reacted to a post in a topic:
Endurance by Buckstrong - OcCre - 1:70
-
Cathead reacted to a post in a topic:
Endurance by Buckstrong - OcCre - 1:70
-
Thanks so much.🤗
-
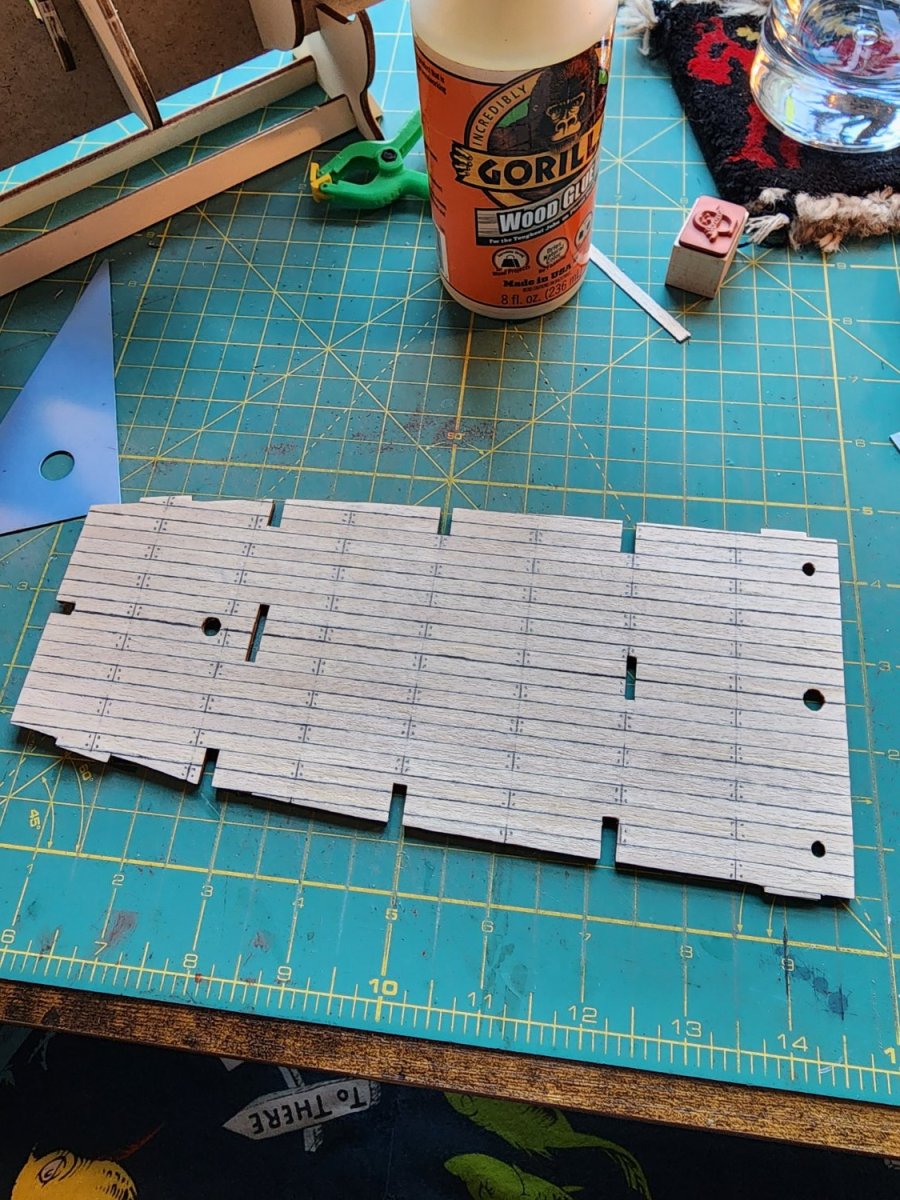
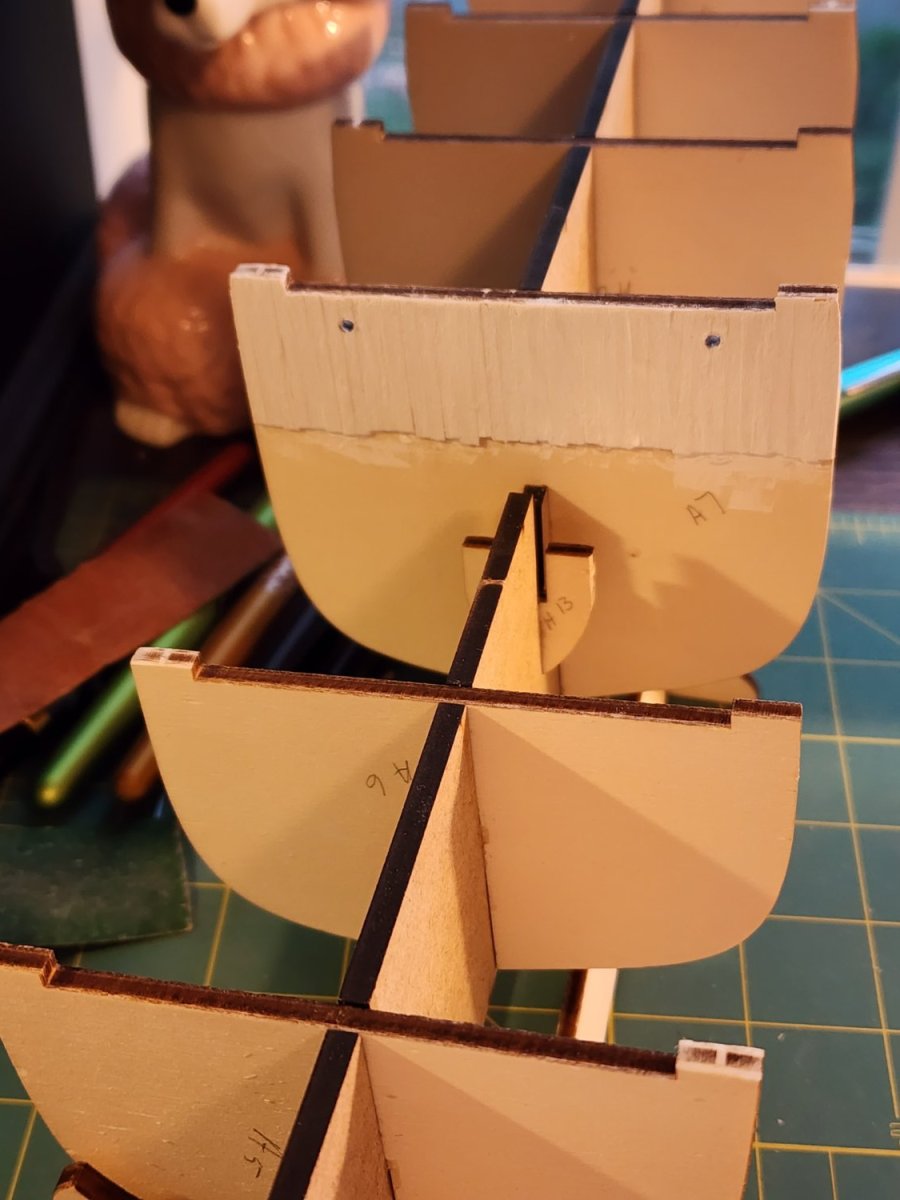
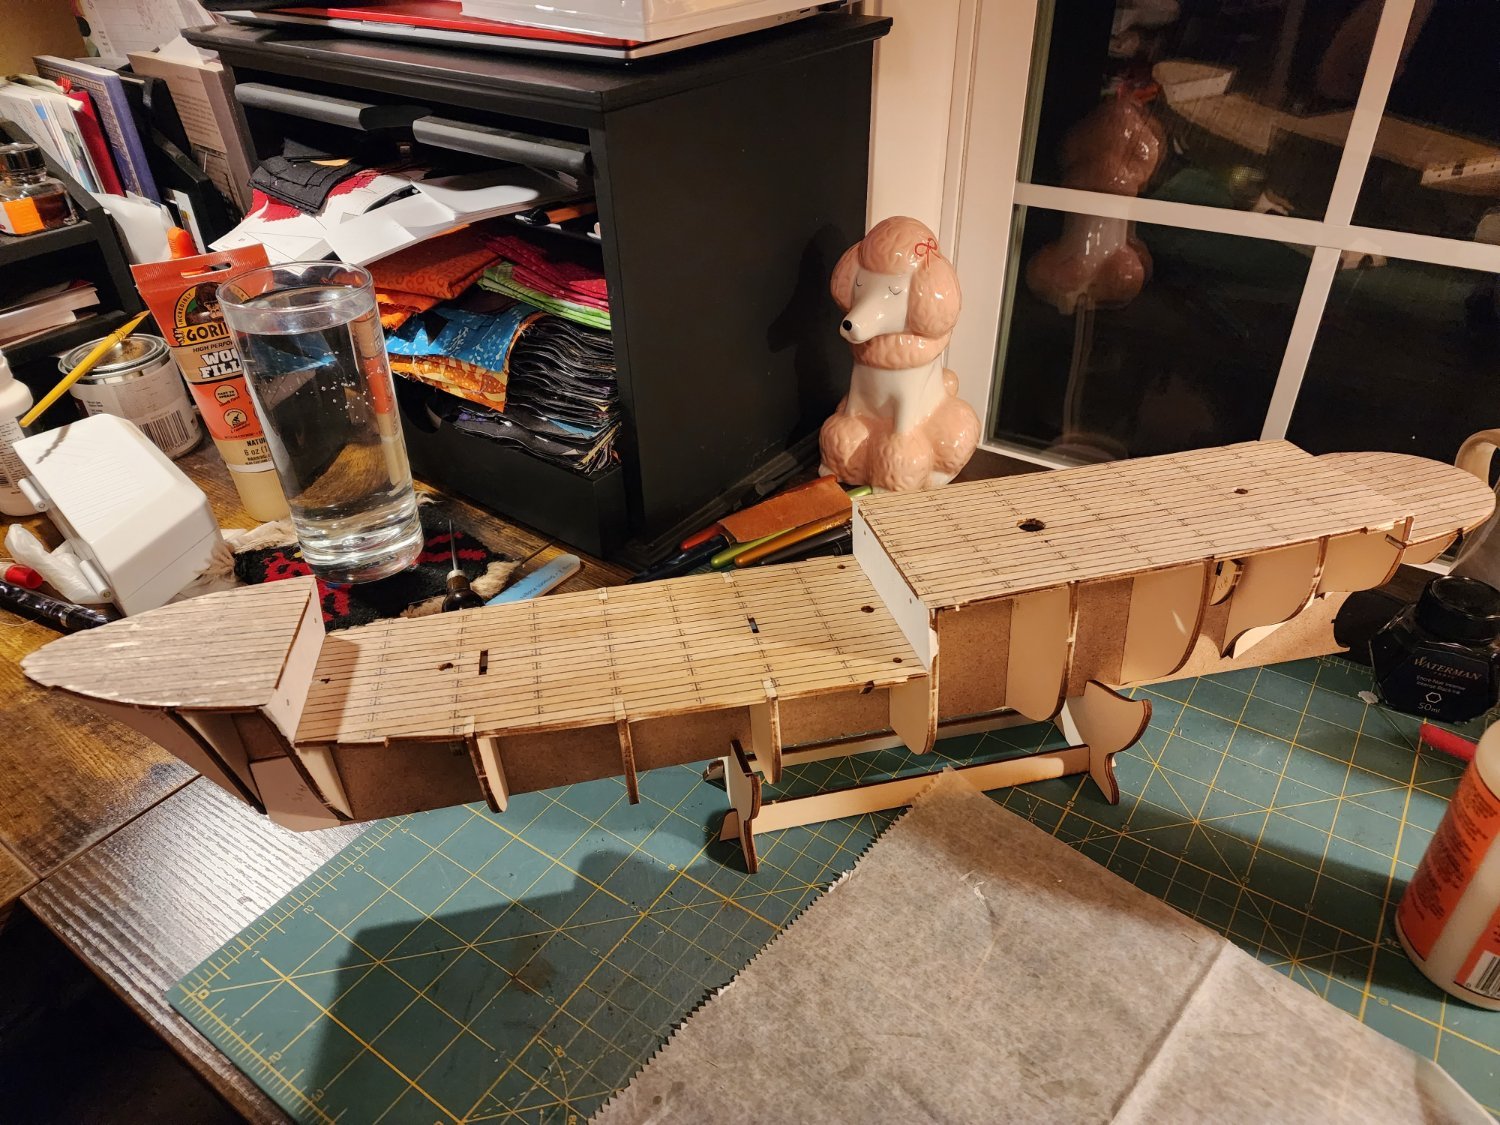
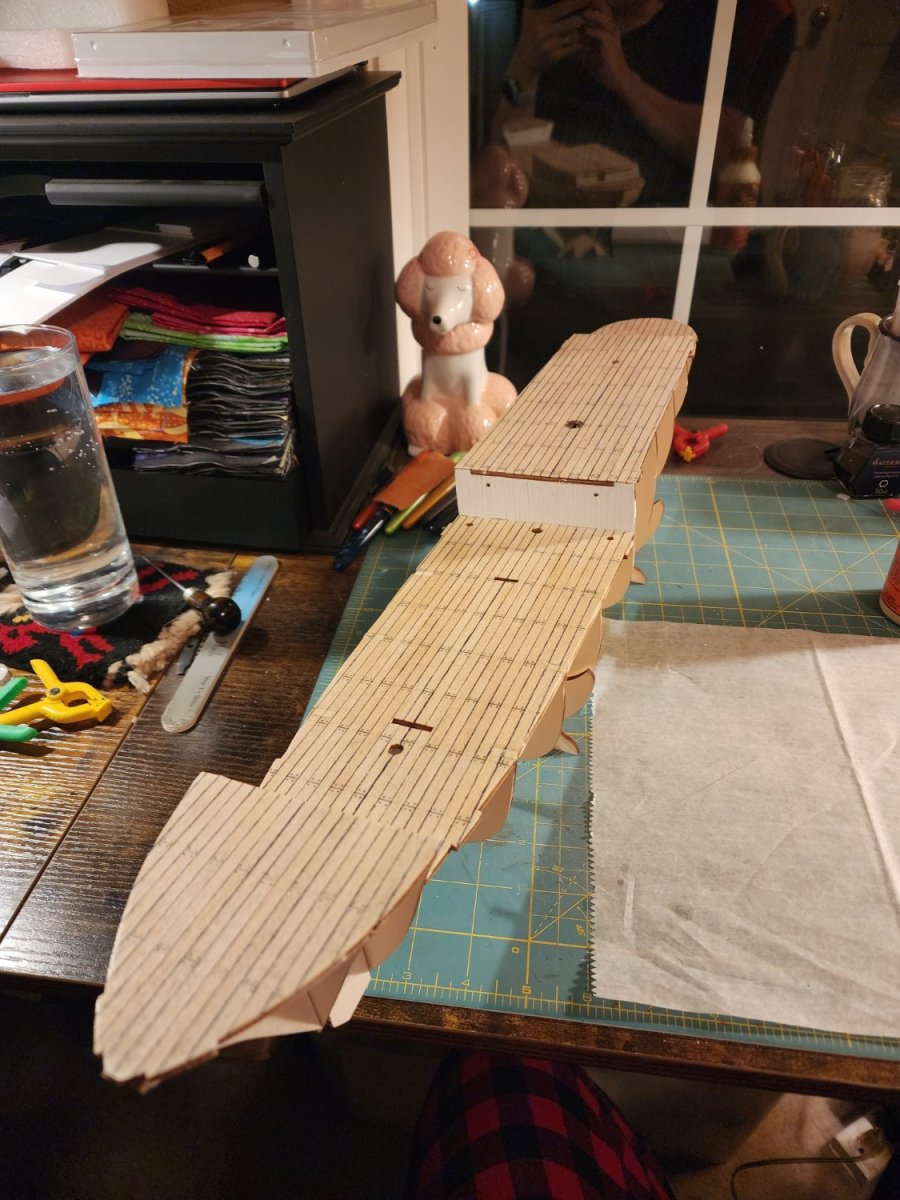
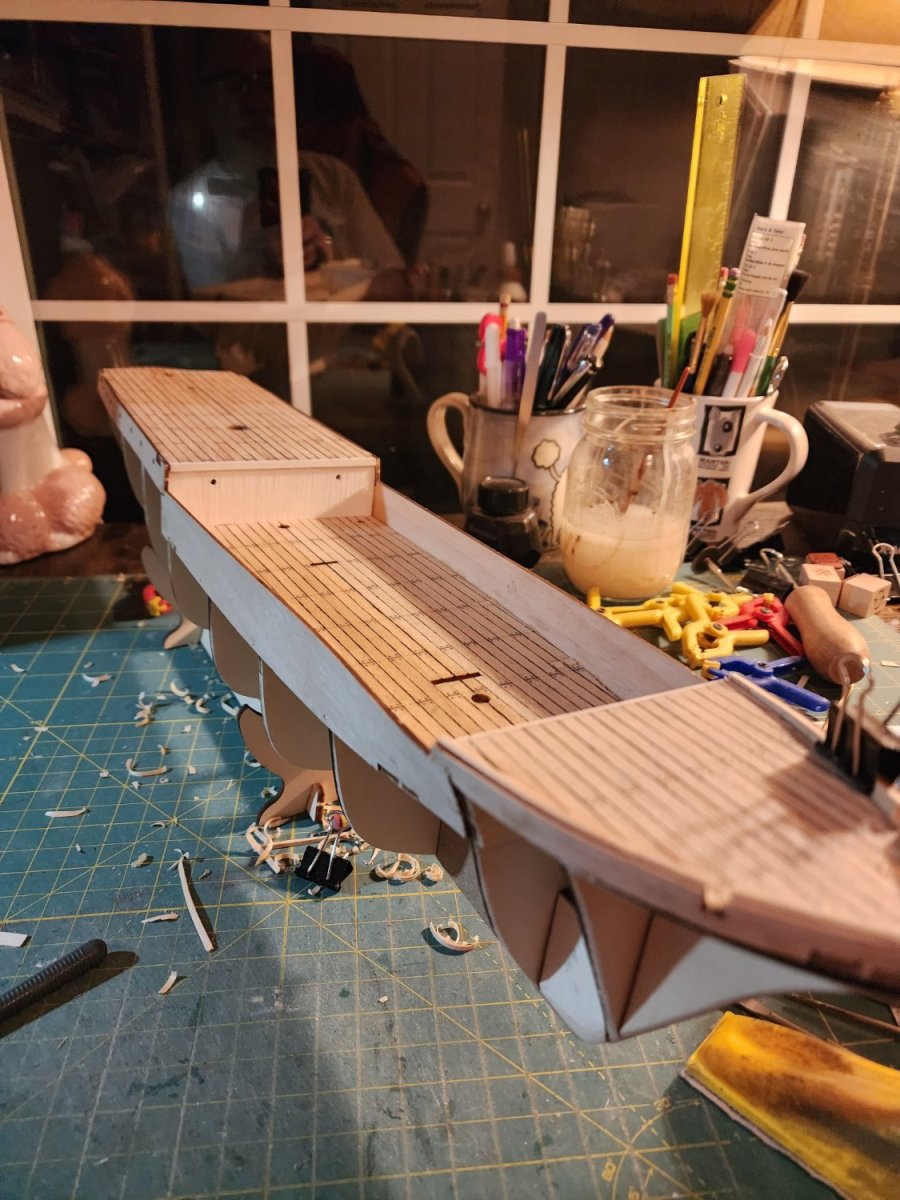
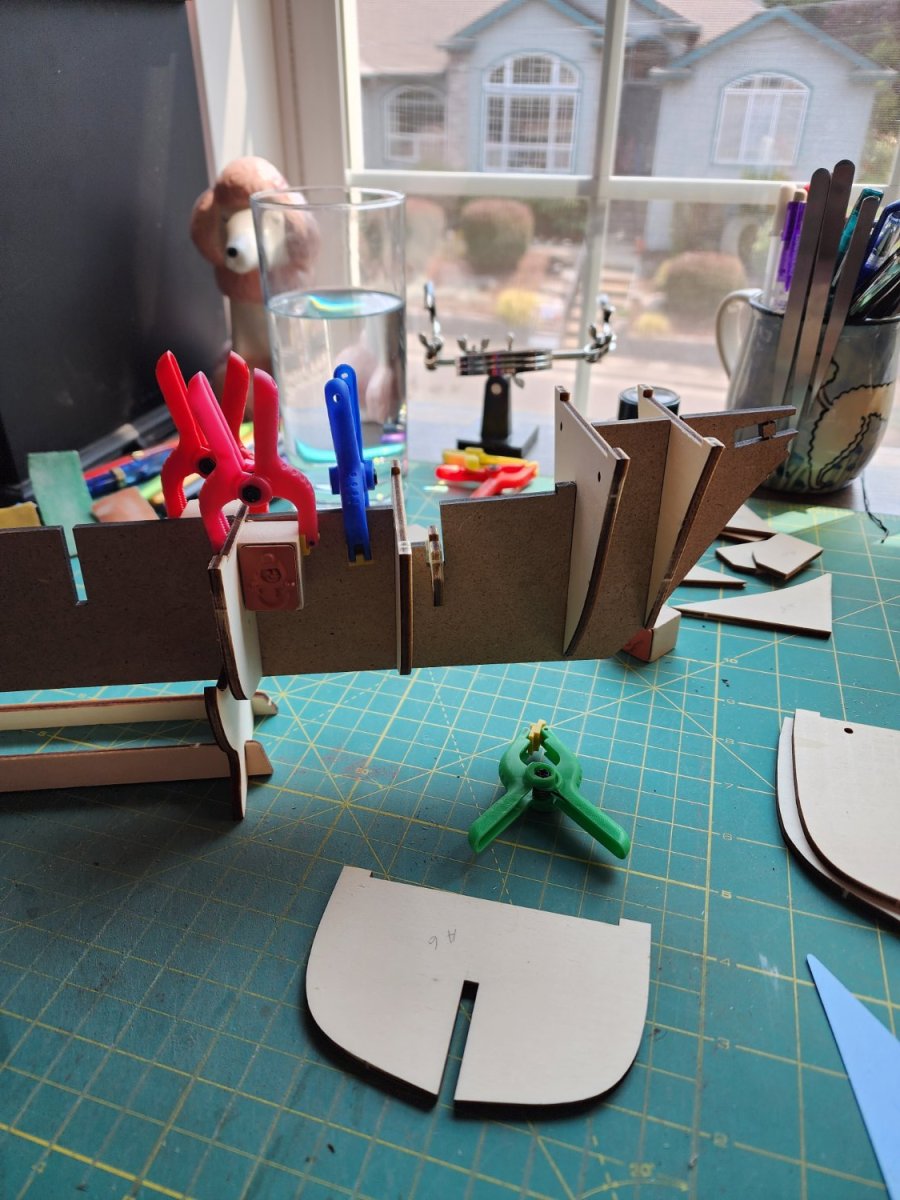
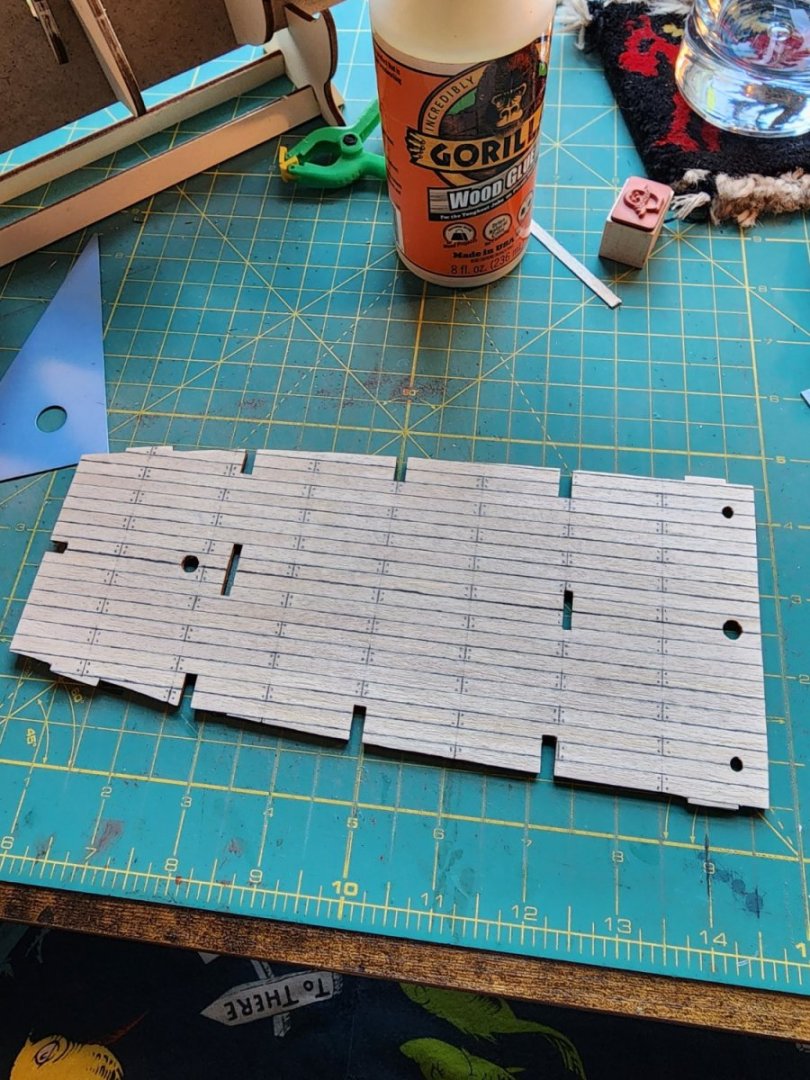
I've been getting more done on Endurance. The decking is done; although, I did cut out too much on this piece. It was fixed a little later. In reading other's logs, I opted to put planking on the deck walls as they had done. I really enjoyed this process and it does add a lot to the look of the ship. Currently, I'm working on the bulwarks and getting ready to do the bulwark finishes. Bending the pieces went well with the use of my trusty iron. I did order an electric plank bender mostly because my iron is huge and seems like overkill for the smaller pieces. In all, I'm happy with my progress. There have been a few mistakes, and several frustrating moments, but I was able to pound my way through them.


-
Thanks for the heads-up. At this point, I can't imagine throwing in the towel on the instructions. However, being proficient at other skills, I know the frustration when you know a better way or one that suits you better🤣.
-
Buckstrong reacted to a post in a topic:
Hello from Portland, Oregon.
-
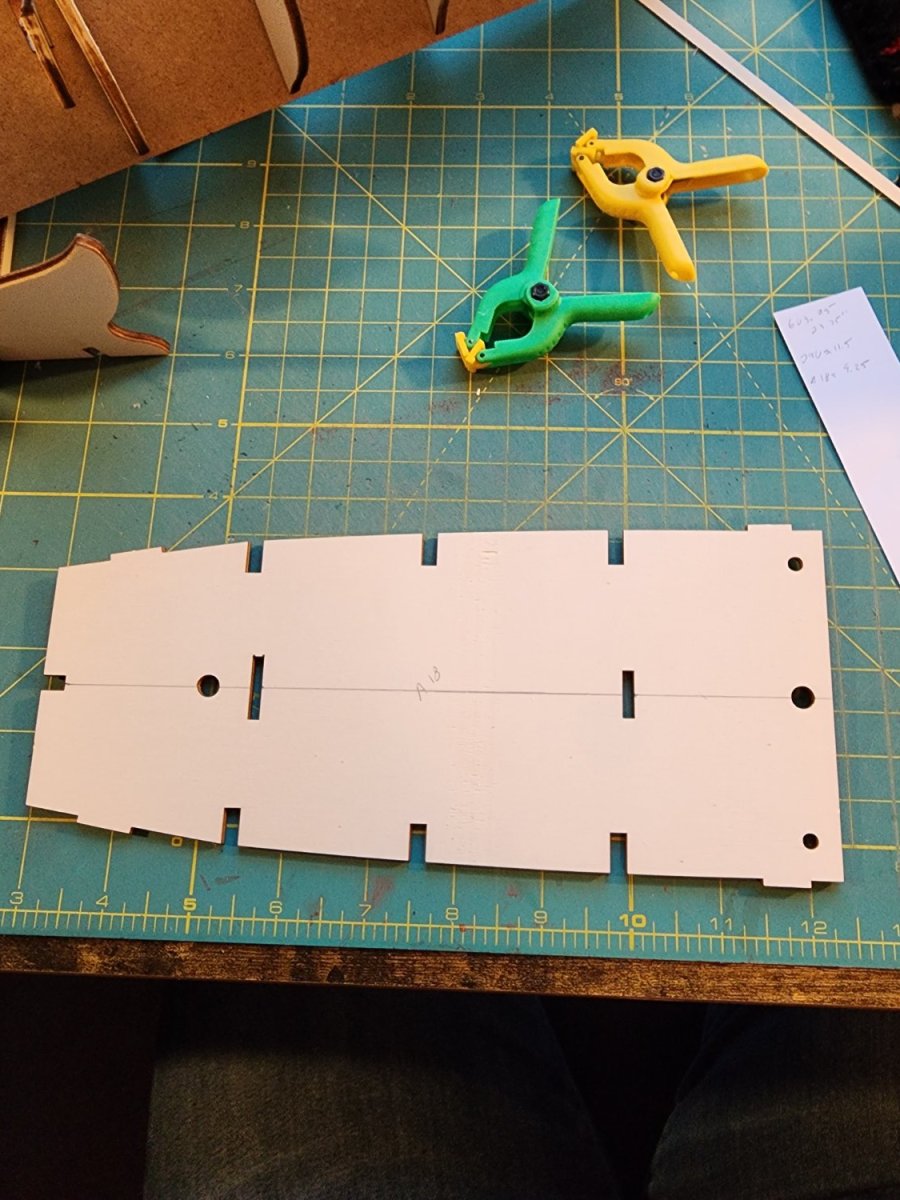
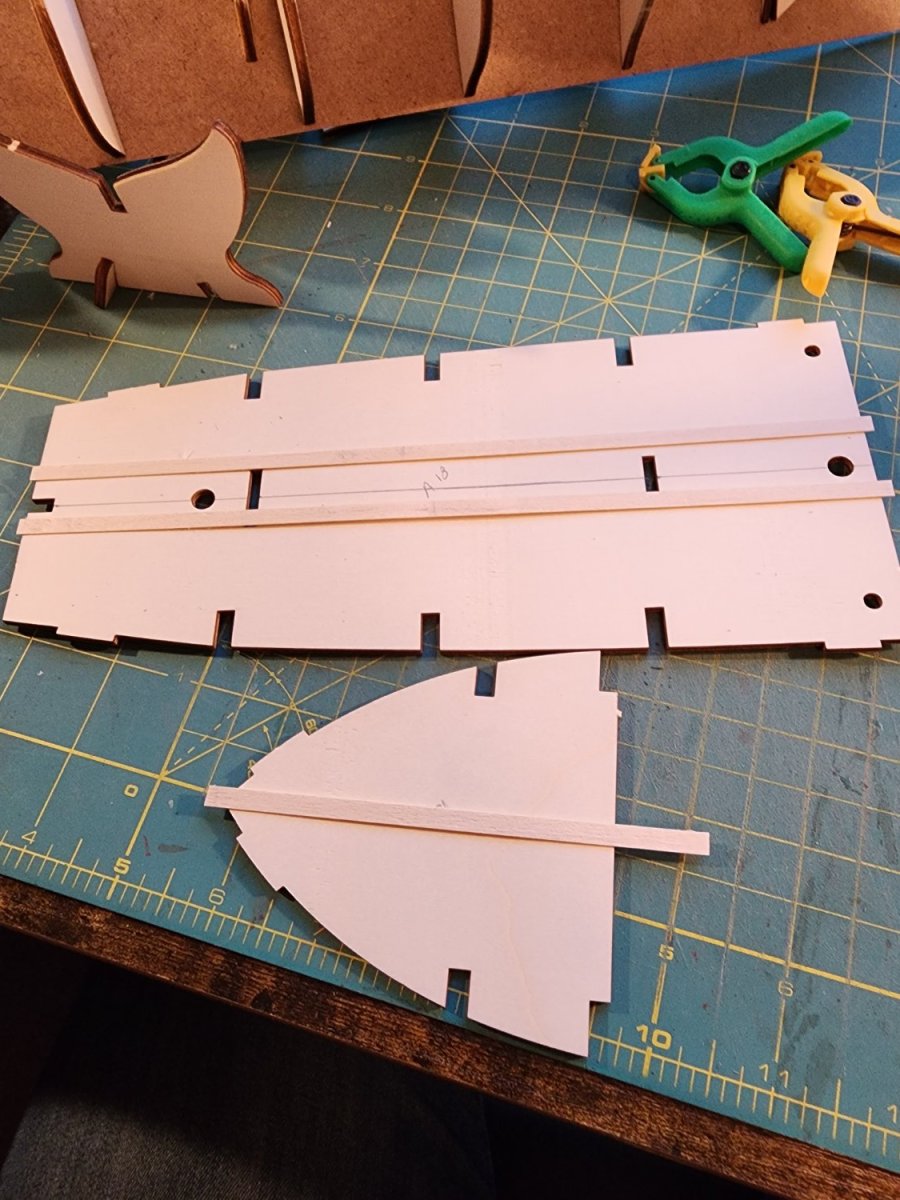
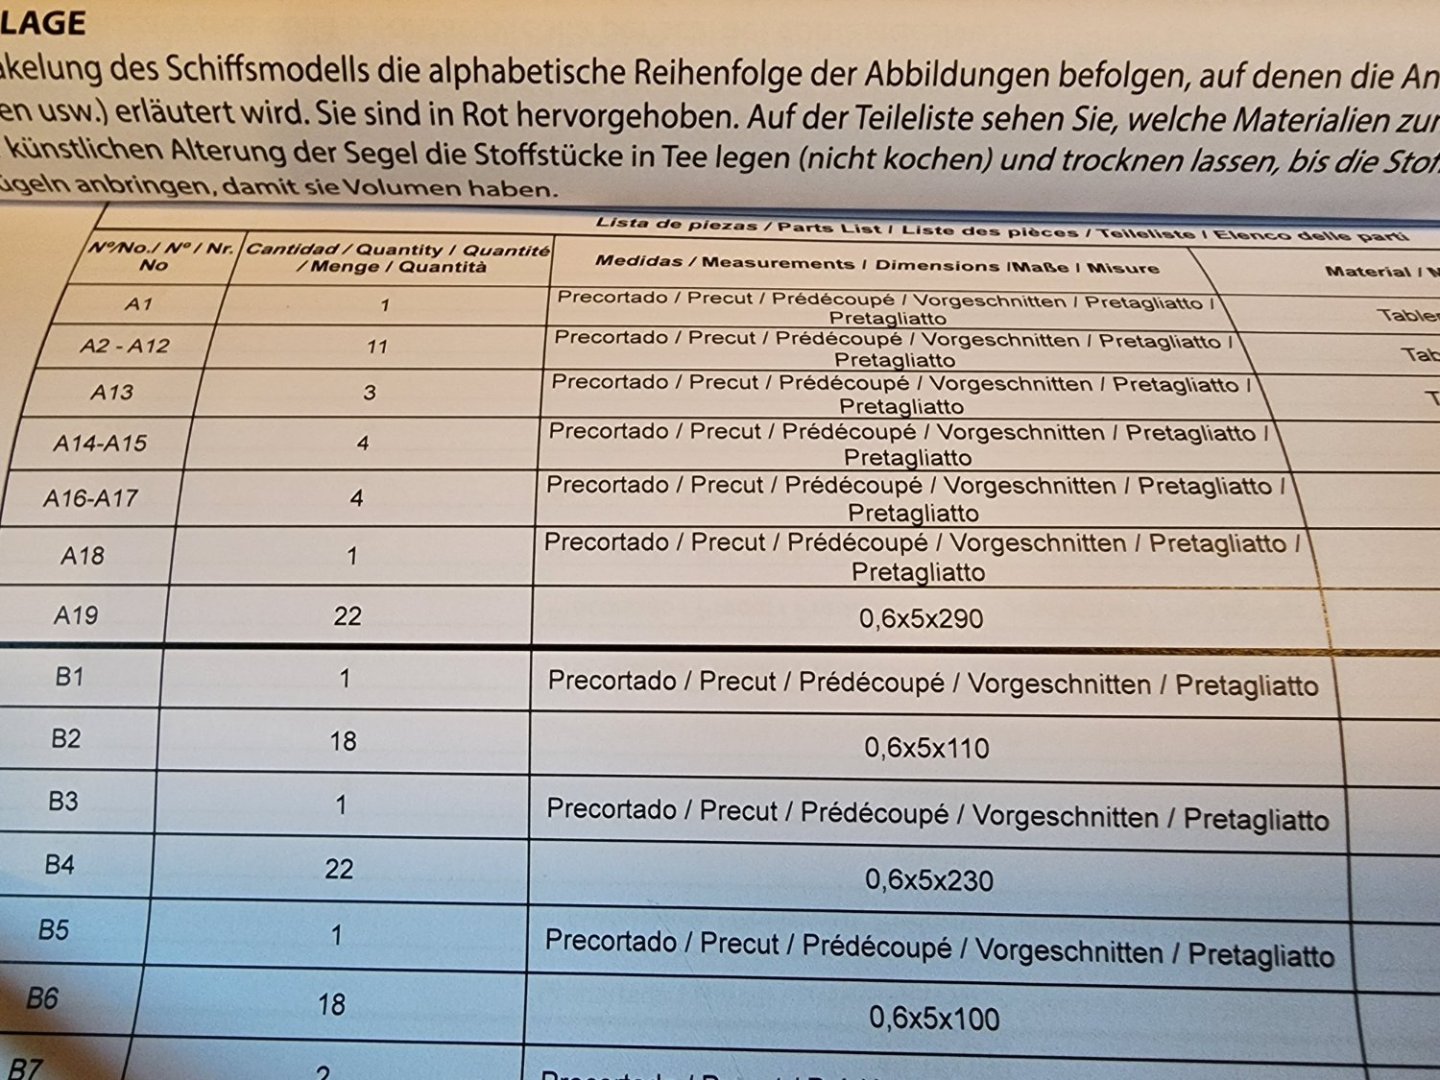
Just an interesting tidbit. In looking at the deck planking, the parts list is interesting. Part A 18 is the deck and A 19 is the planking. The length given for the planking is 290 mm or about 11.5 inches. The planking comes in lengths of approximately 23.75 inches. This puzzled me for a bit, but decided this must be the length needed to cover part A 18 adequately. However, A 18 is close to 9.25 inches in length. An extra 2.25 inches seems to be overkill. After trying a couple of different measurements, 9.5 inches gives good coverage. You can get two sets of 9.5 out of one strip of planking plus enough left over to cover part B 1. Sorry, but I totally geek out over stuff like this.

-
Thanks 😊. Your Golden Hind is amazing. That will probably be the ship I do next.
-
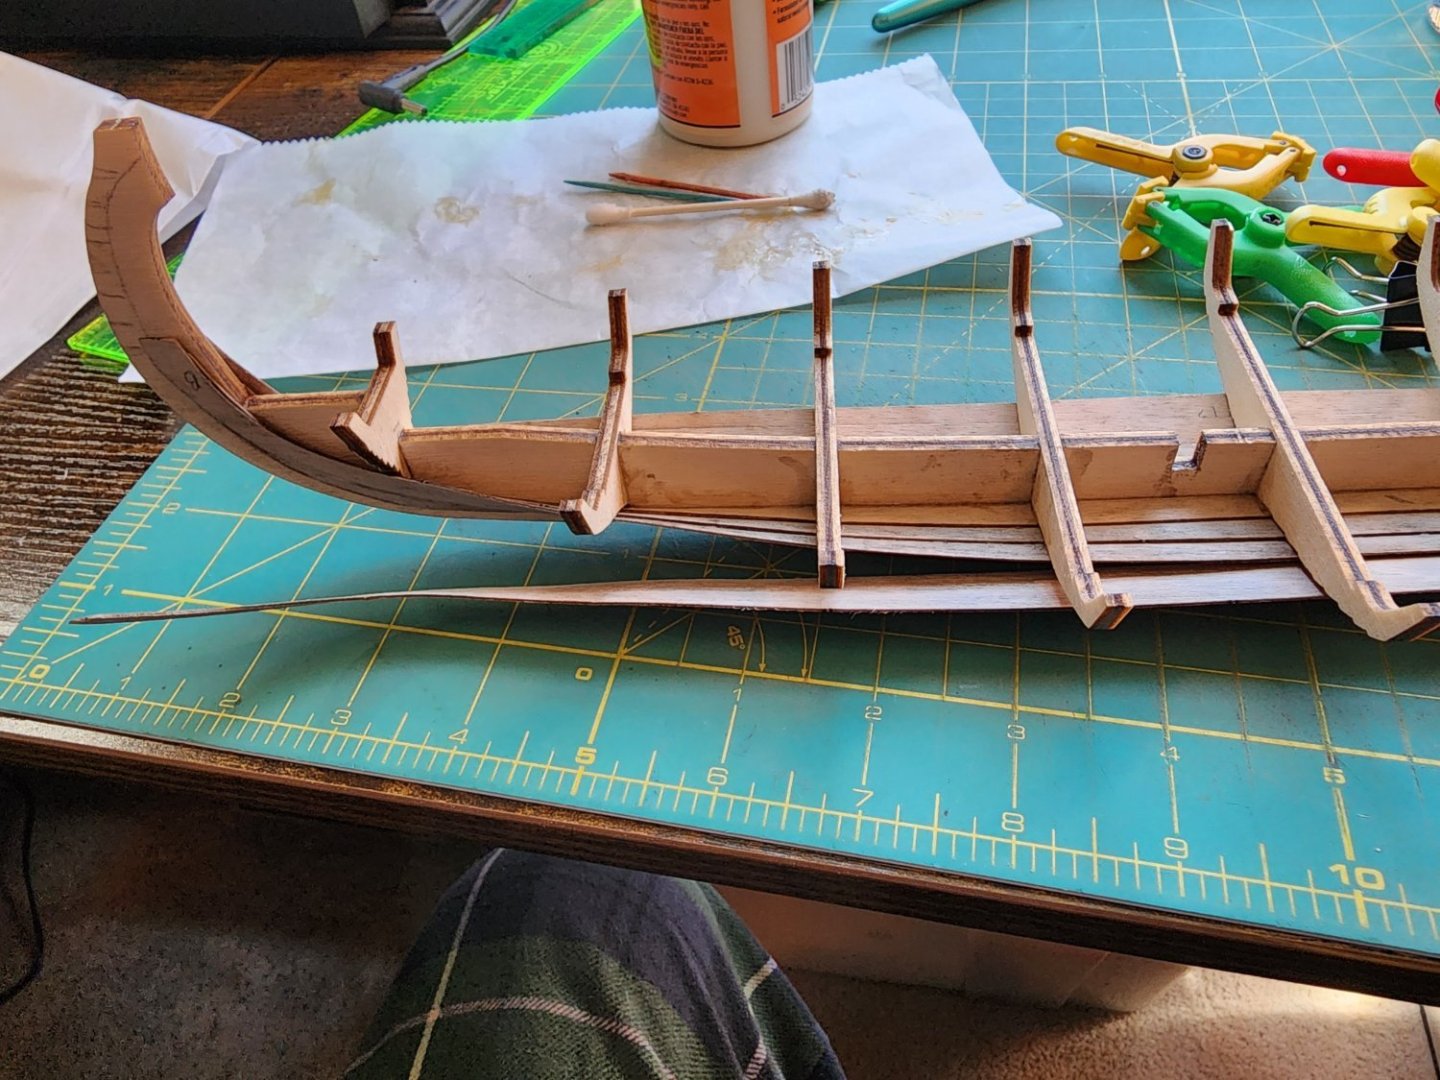
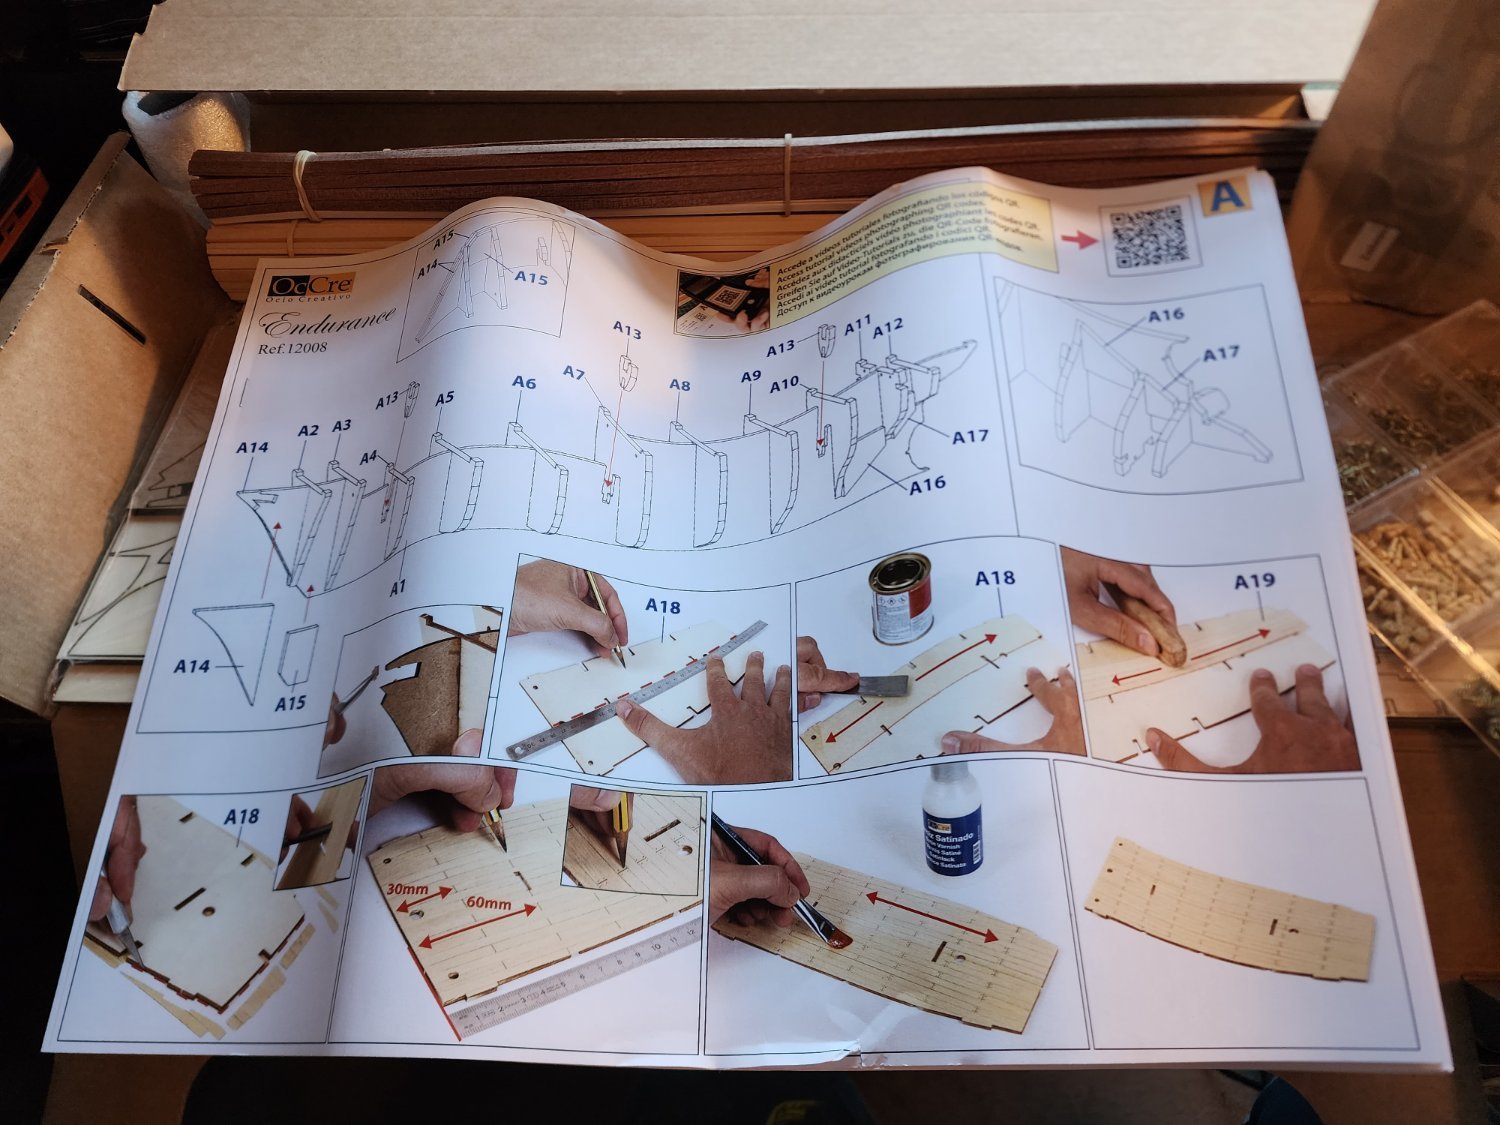
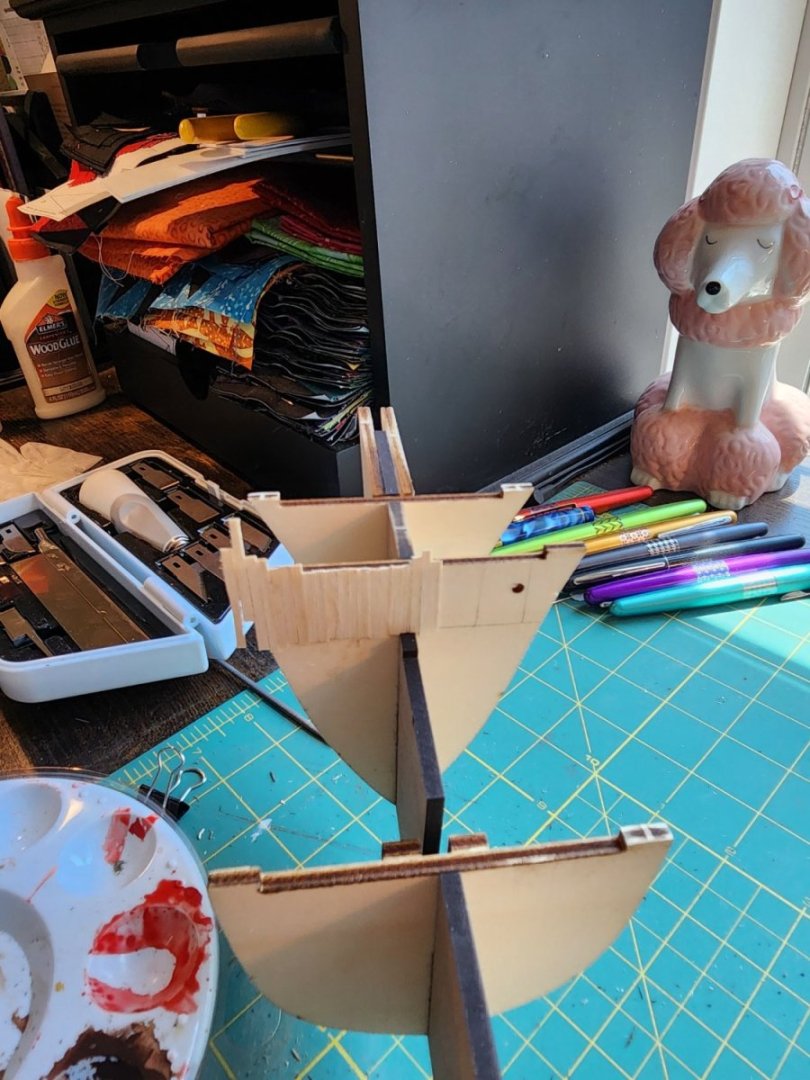
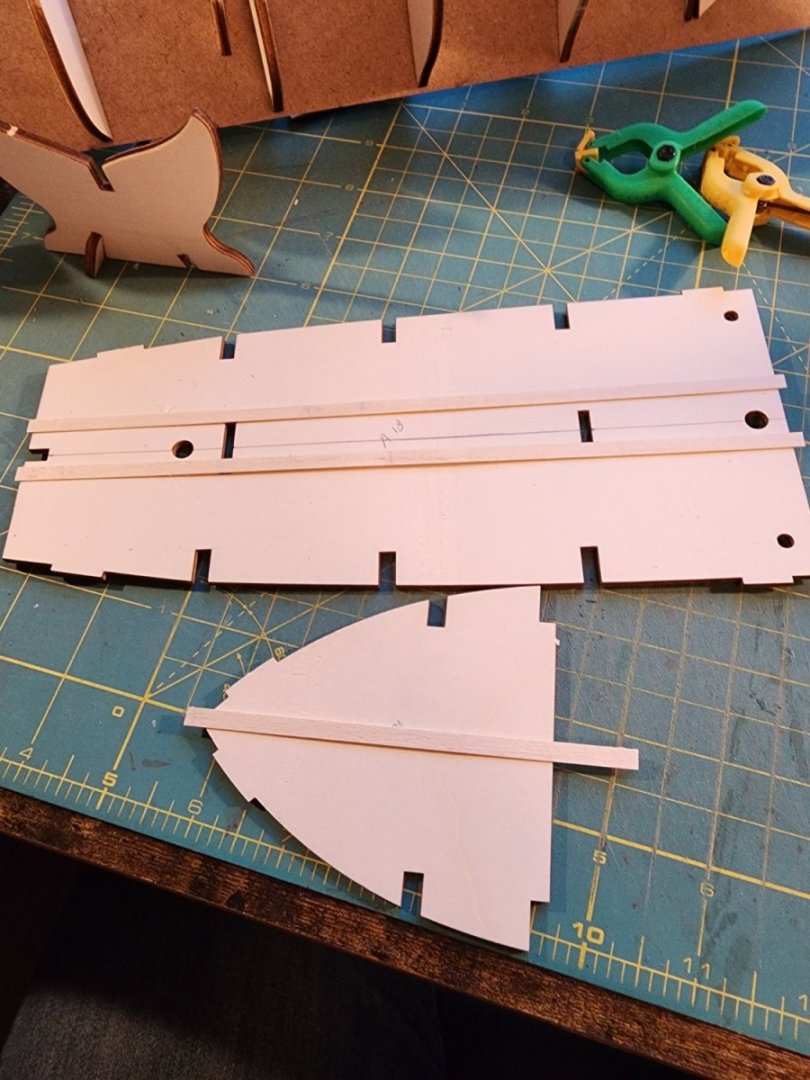
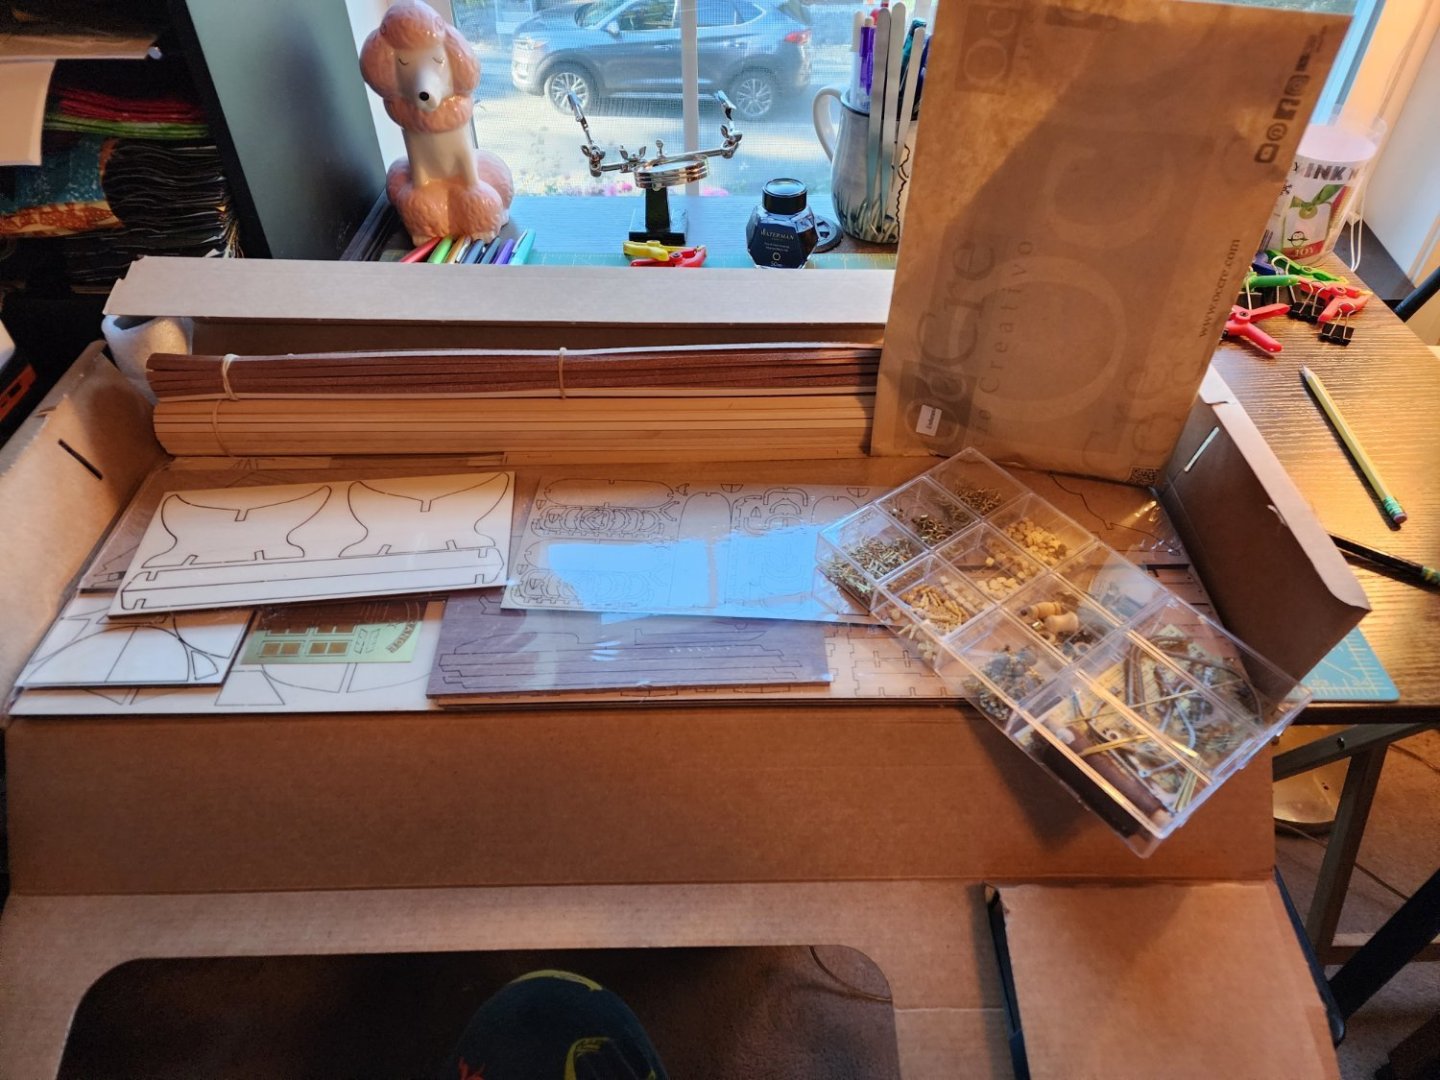
Having one finished model under my belt, I'm heading headlong into another, Endurance by OcCre. I may be biting off more than I can chew 😬. However, someone posted that an adventurous adult beginner could do this kit right out of the box (sorry if I didn't get the quote exact). I think I fit that description. I am further emboldened by all the masters who have made this and the tutorial videos from OcCre. Then there is this... I think it's a pretty ship and I really want to make it. This kit is so different from the Amati Viking Drakkar that I just finished. The materials feel like they are better in quality and the picture instructions are amazing. (Well, compared to the one sheet, poorly translated instructions from my previous build.) Everything is packaged so neatly and organized. I did a dry fit with the frames and the deck to make sure everything fit and now I'm diving in.


-
Beaverton! You're just down the street. I'm over by WA Square.
-
To sum this all up, I don't think I would recommend this to a first timer. The instructions were very poor and the materials prone to breaking. Also, my kit was covered in ash from the laser cutting and this got everywhere. I'm a very determined person when it comes to things like this but I can see a person setting this aside because it has lost its fun factor due to the lack of instructions and poor materials. In all, I'm glad I did it and I'm fairly happy with the end product.
-
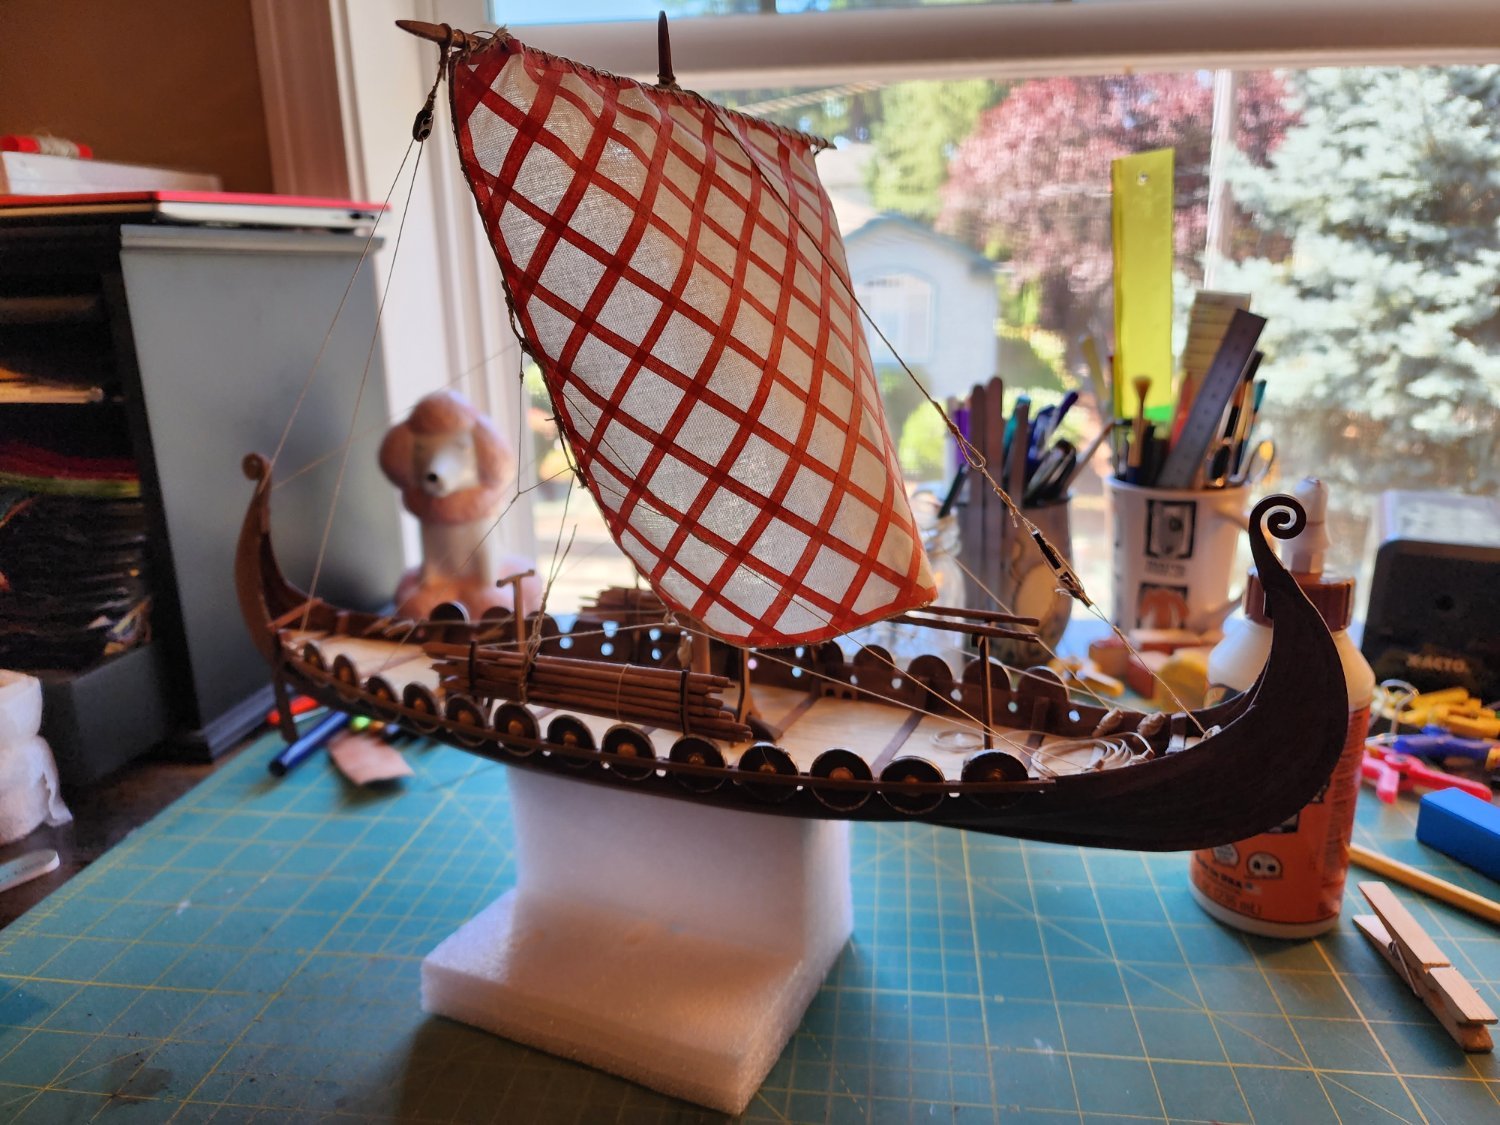
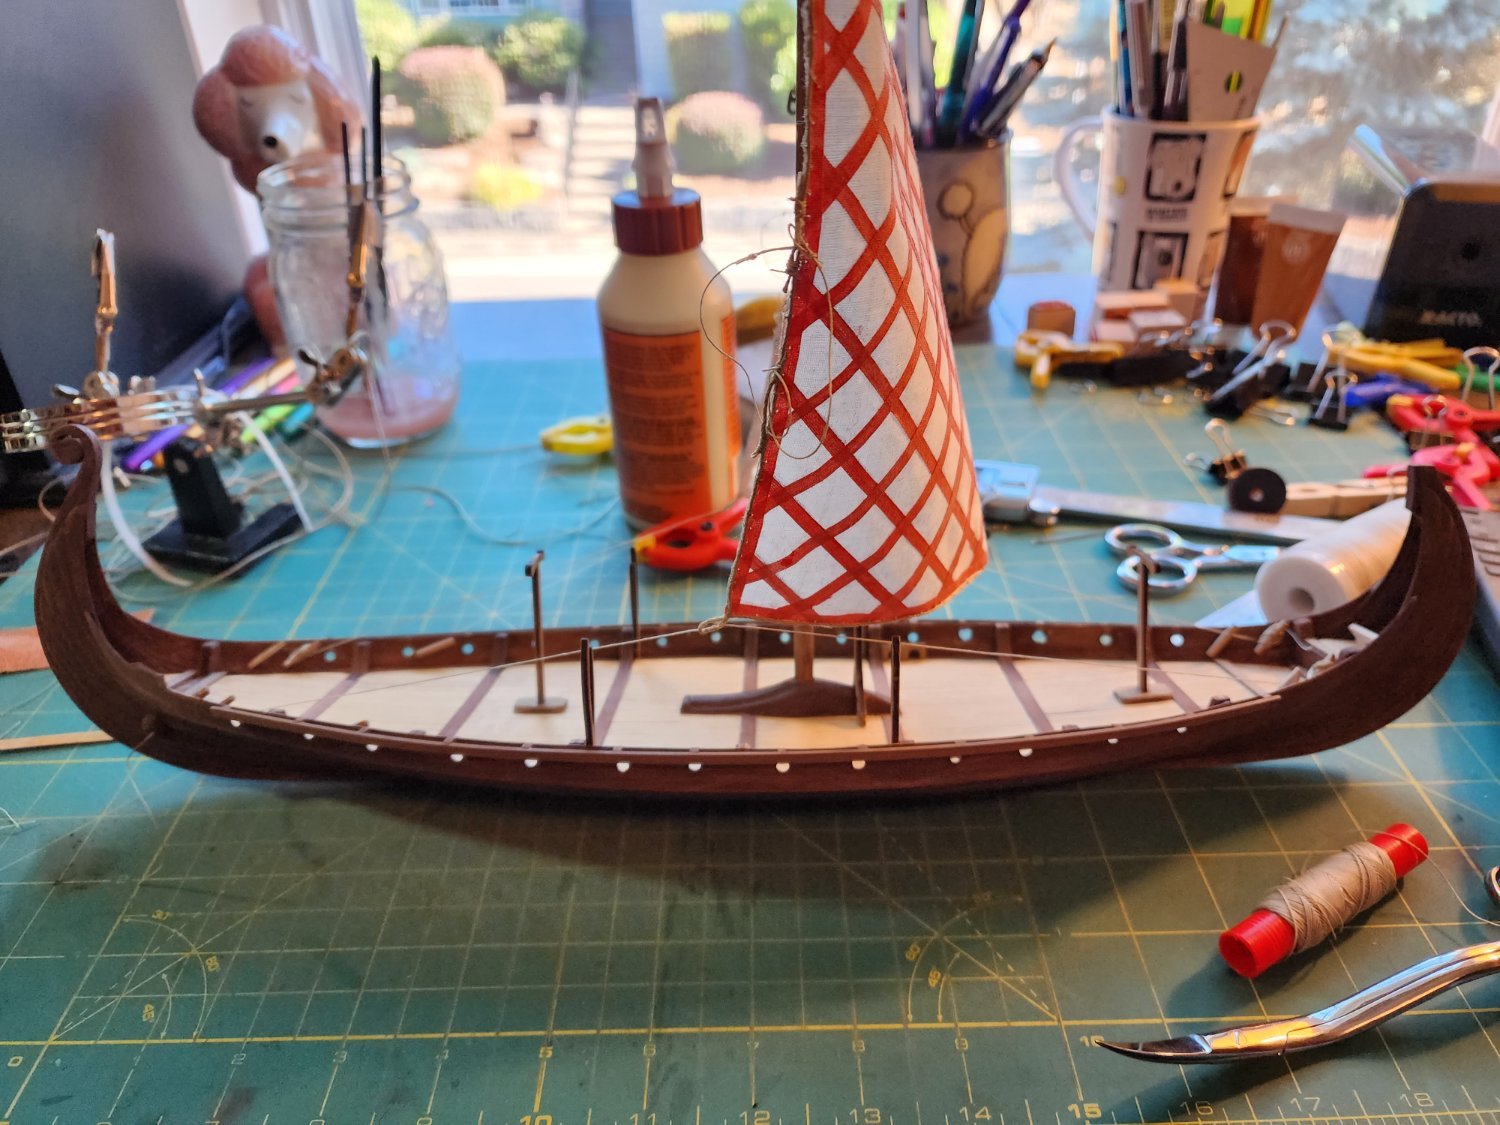
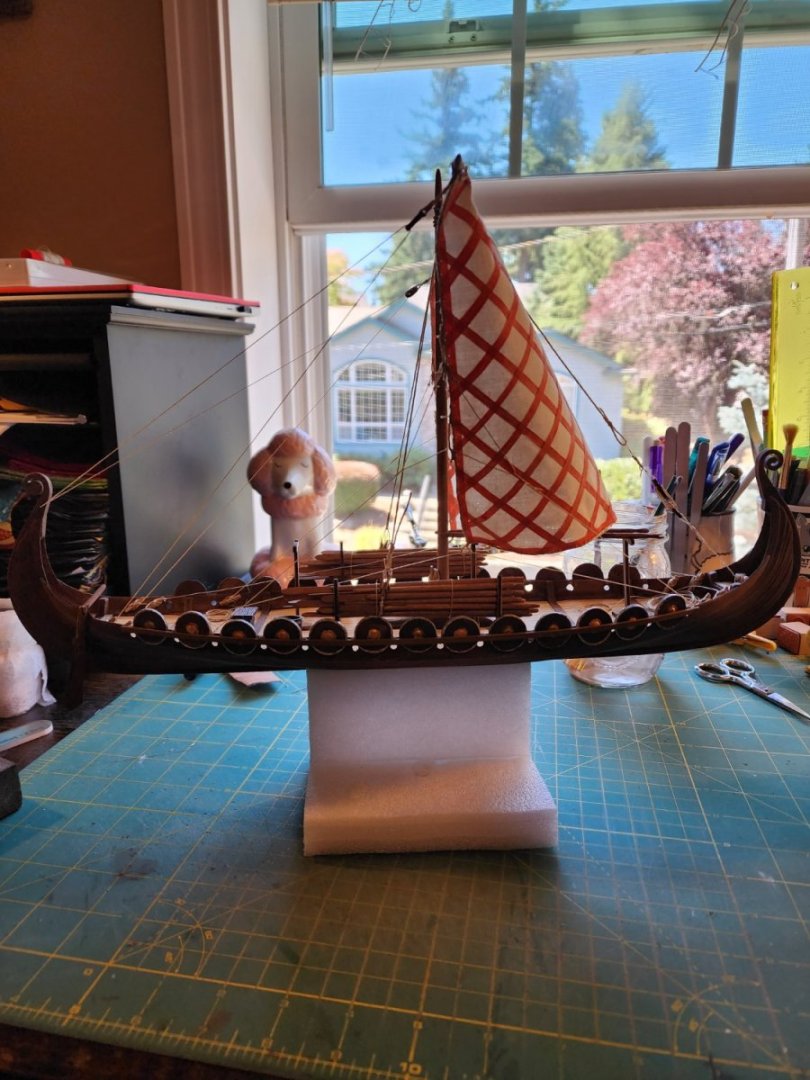
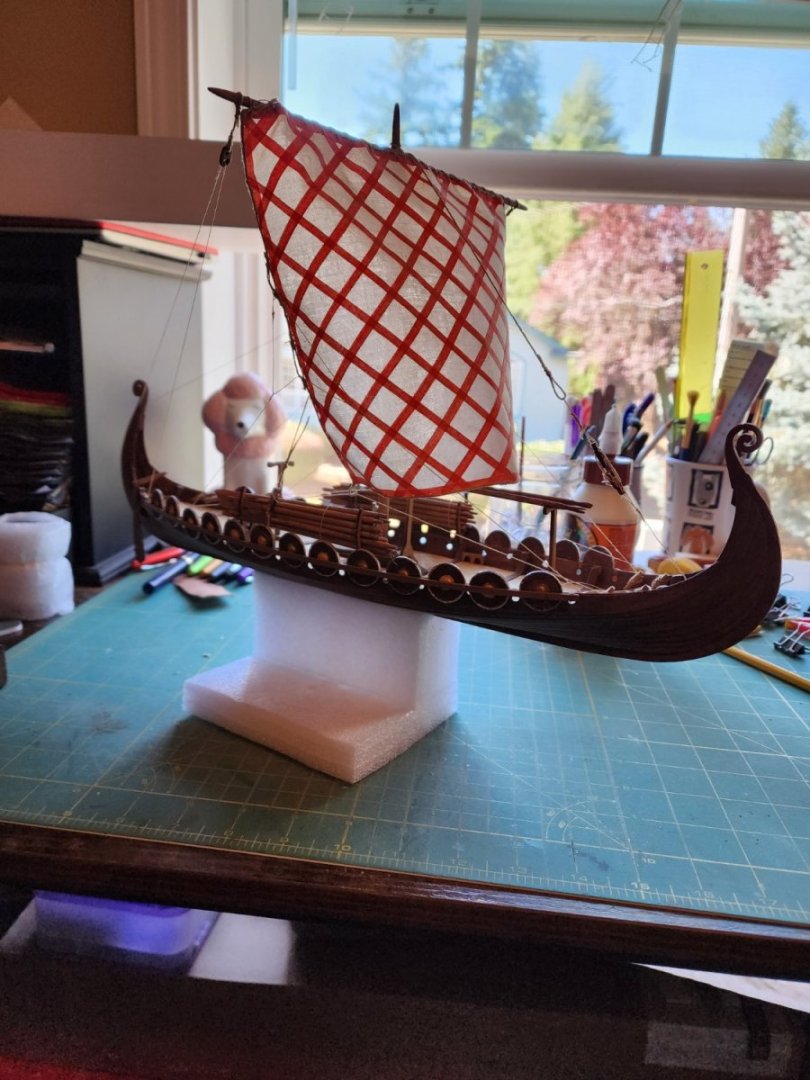
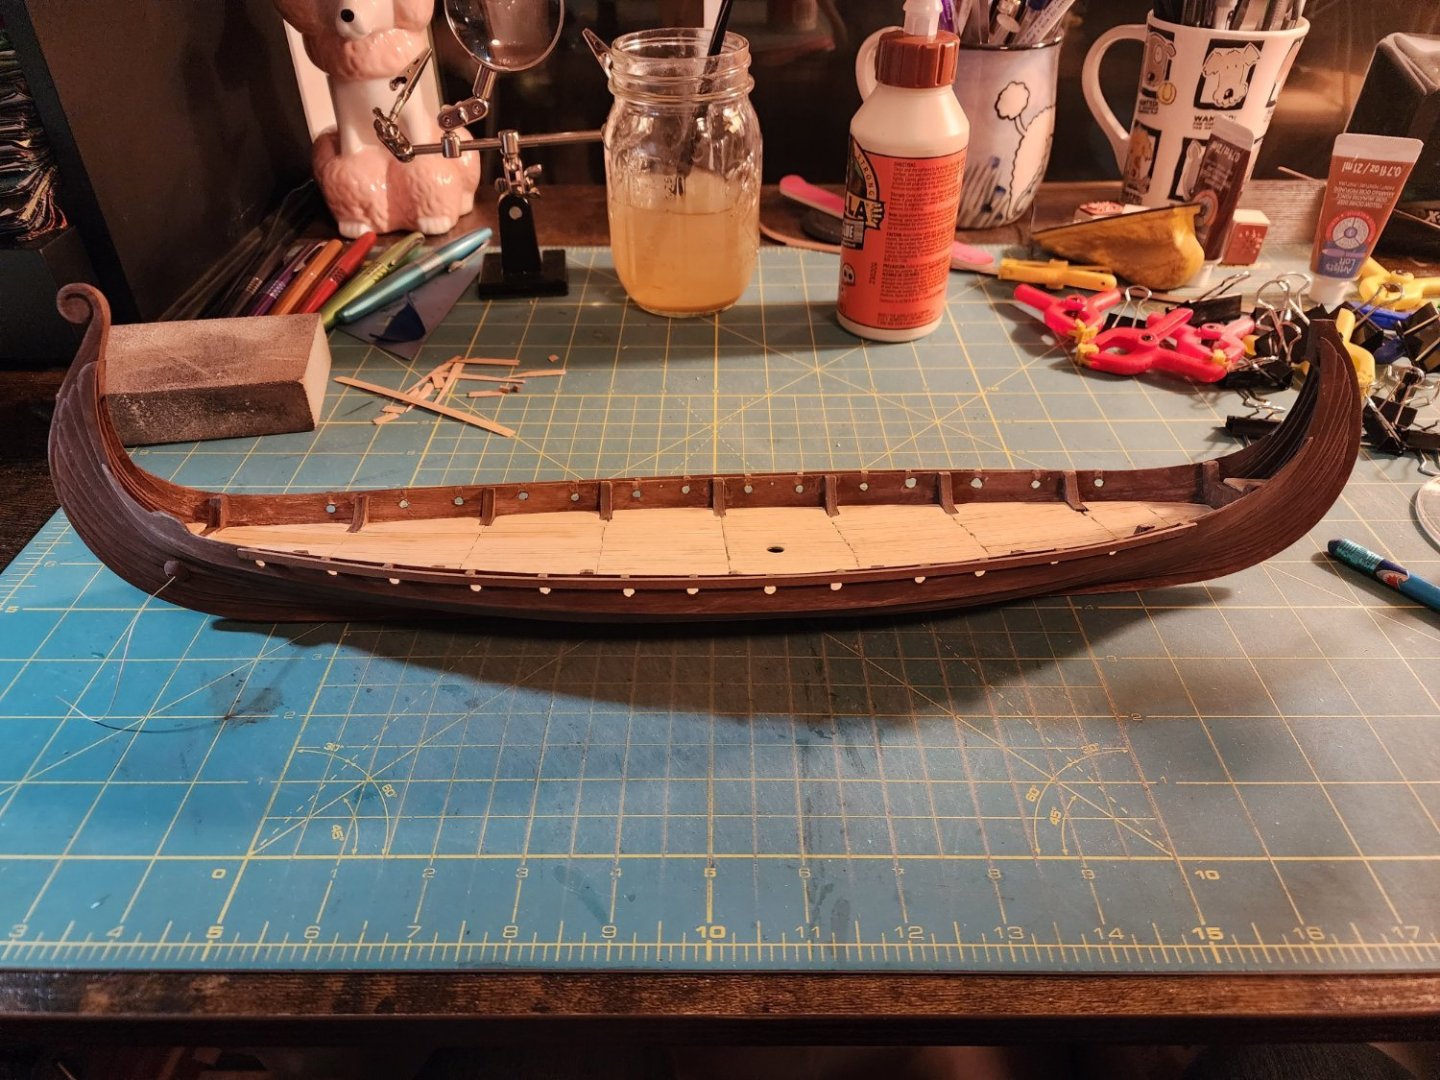
Here is where things get a bit muddy with the picture taking. At this point it was the middle of June school was coming to an end (I'm a math teacher) and I was getting ready to go to Spain for a few weeks. So, I don't have anything between the beginning of the rigging and the finished product. Here is my completed Drakkar. I opted not to put the dragon head on. To me it just didn't look right. I also left out the bow and axe. I'm not wild about my shields but they will do. I don't know what to do about a base. I can't seem to find anything on line. Is it customary to make your own? Anyway, it's doing well hanging out on some packing foam.

-
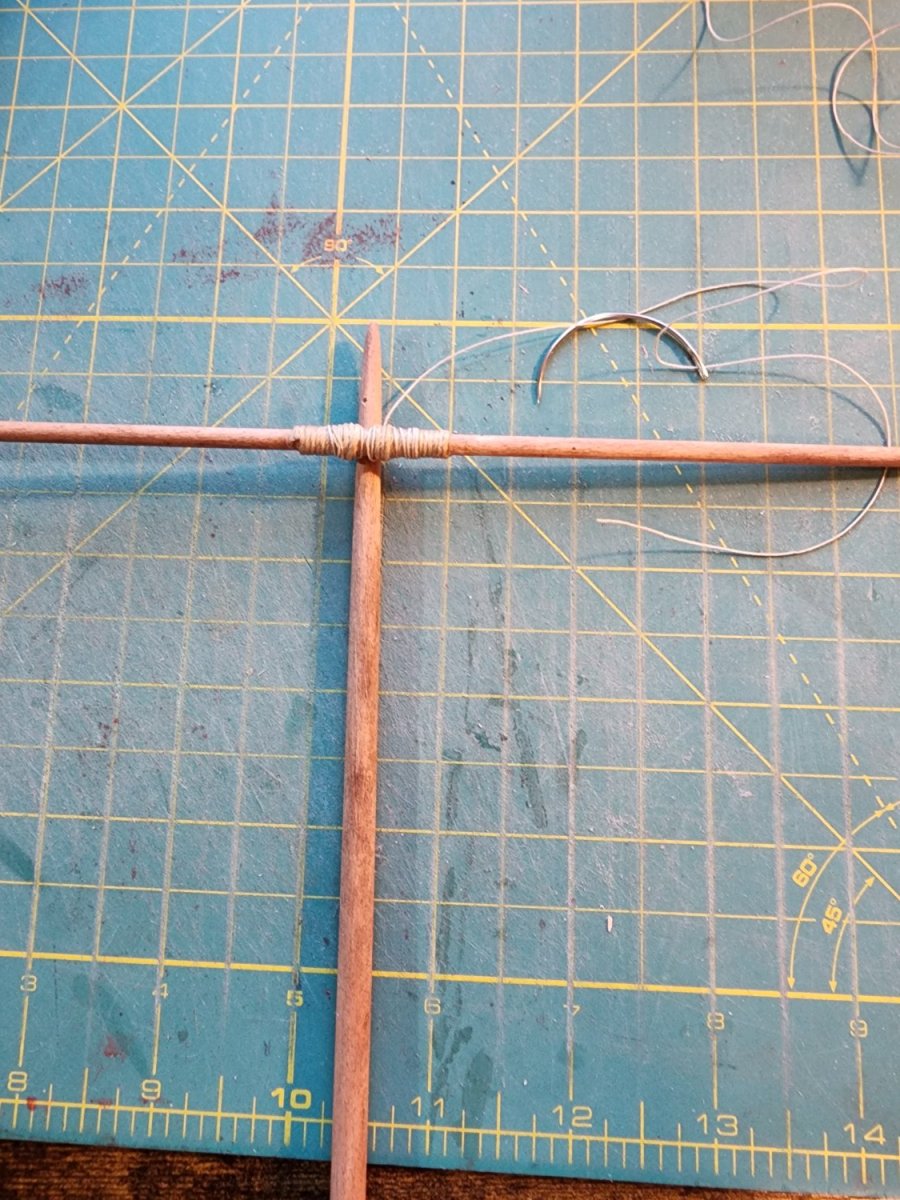
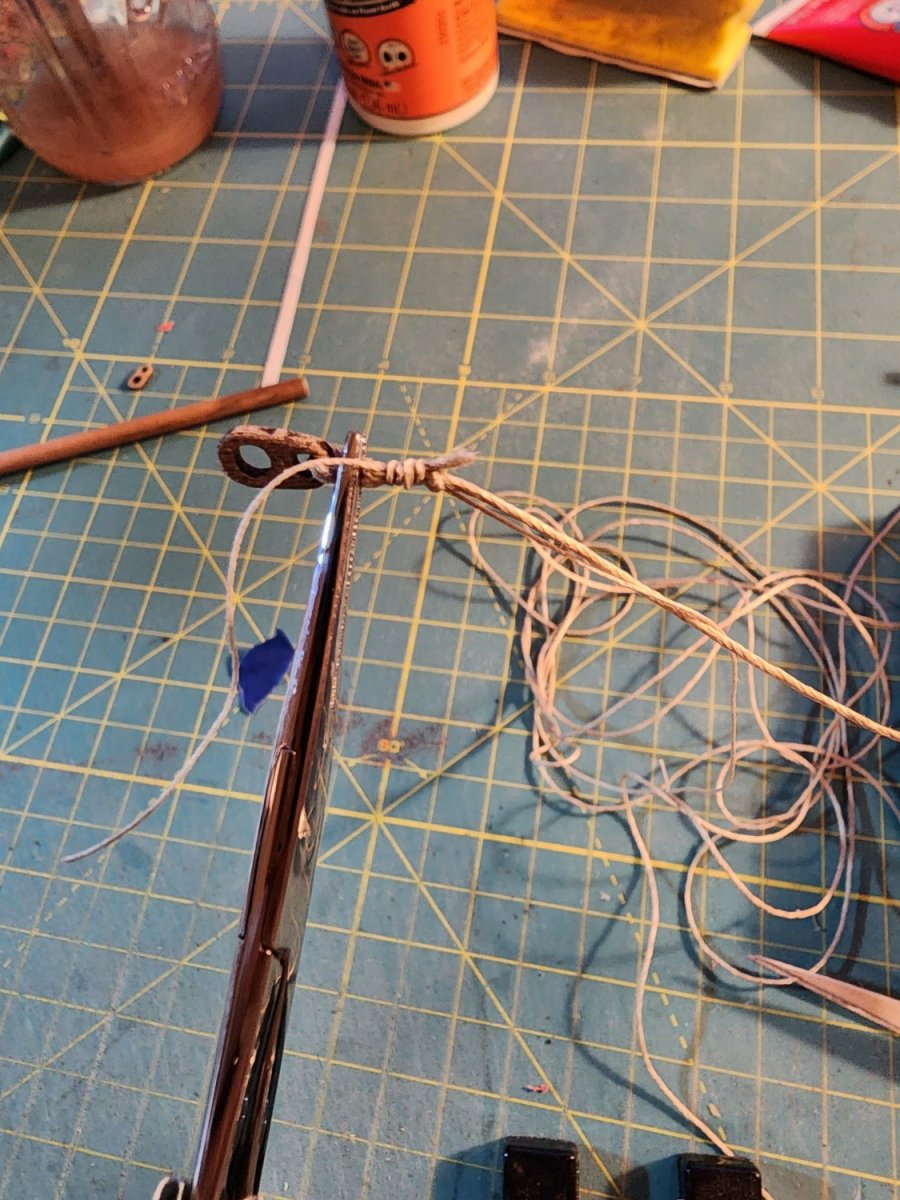
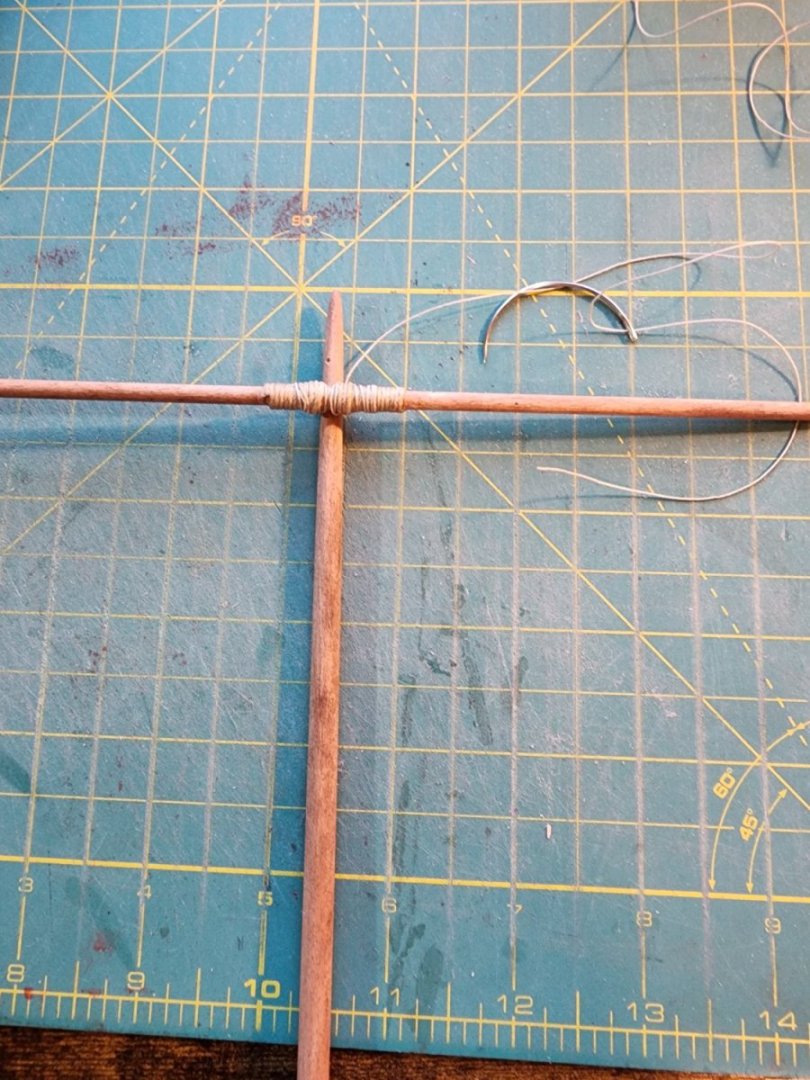
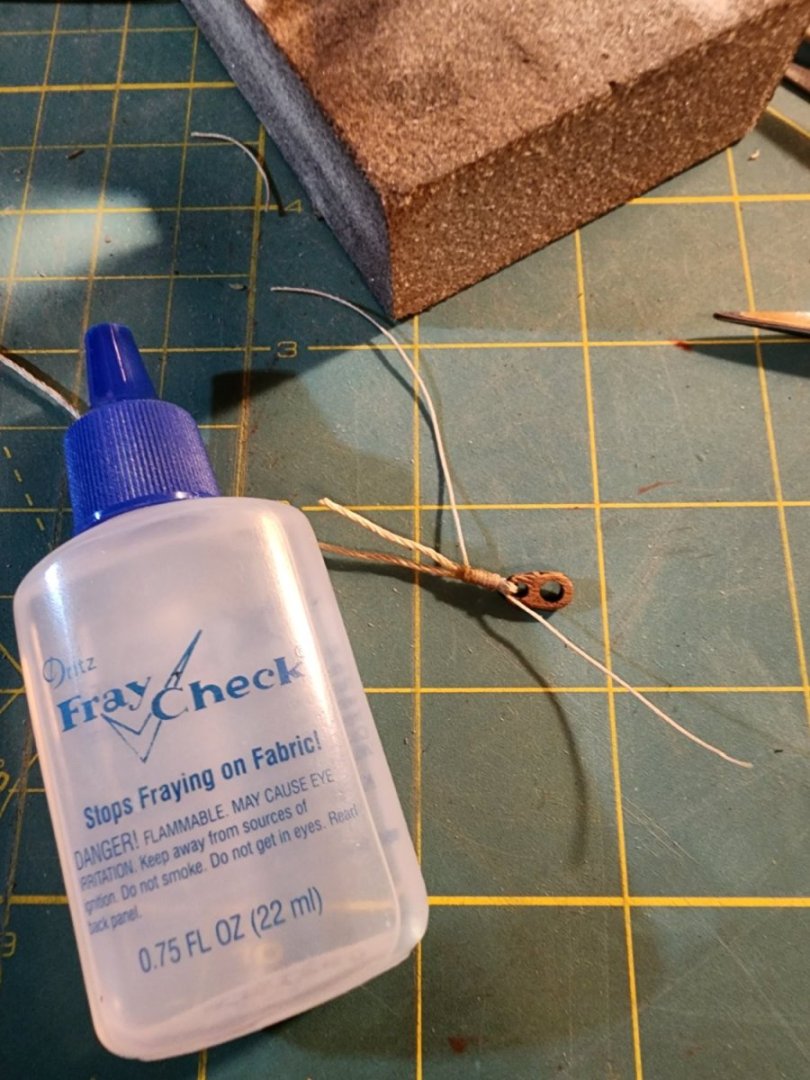
The mast and the rigging were next on my list. Now, I have issues with the included instructions, they aren't that great. However, when it comes to the rigging, they are basically none existent. I fumbled my way through this step mostly looking at pictures of other people's work. In making knots, I found that the supplied rigging materials were very slick and did not hold. I remedied this by using Fray Check on the knots. This stuff is magic on fiber and holds forever.


-
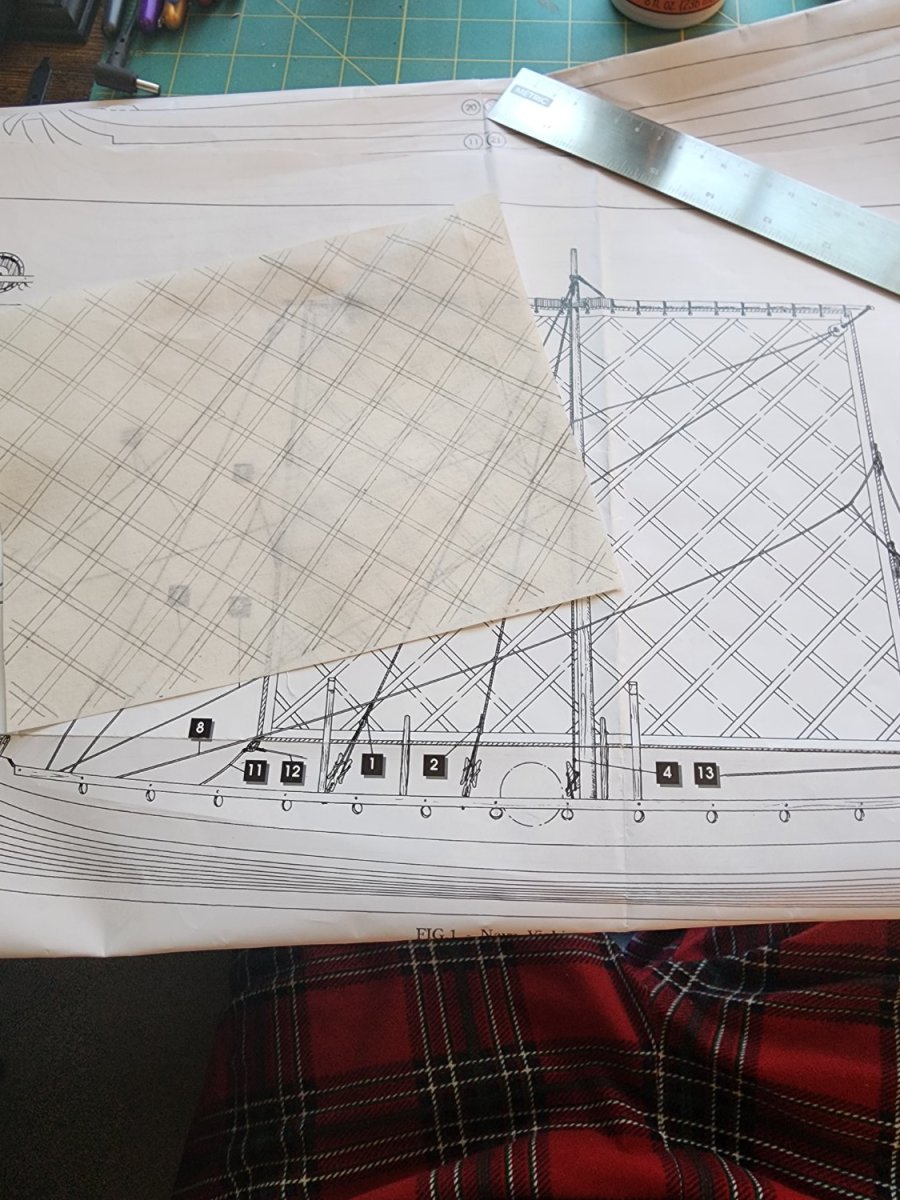
The sail was interesting and took more time than I thought it would. Most of this came from painting and gluing fabric strips on and then hand sewing the rope around the sail.


-
Next came the oars...lots...and lots of oars. I'm really okay with not doing oars for a few months.

-
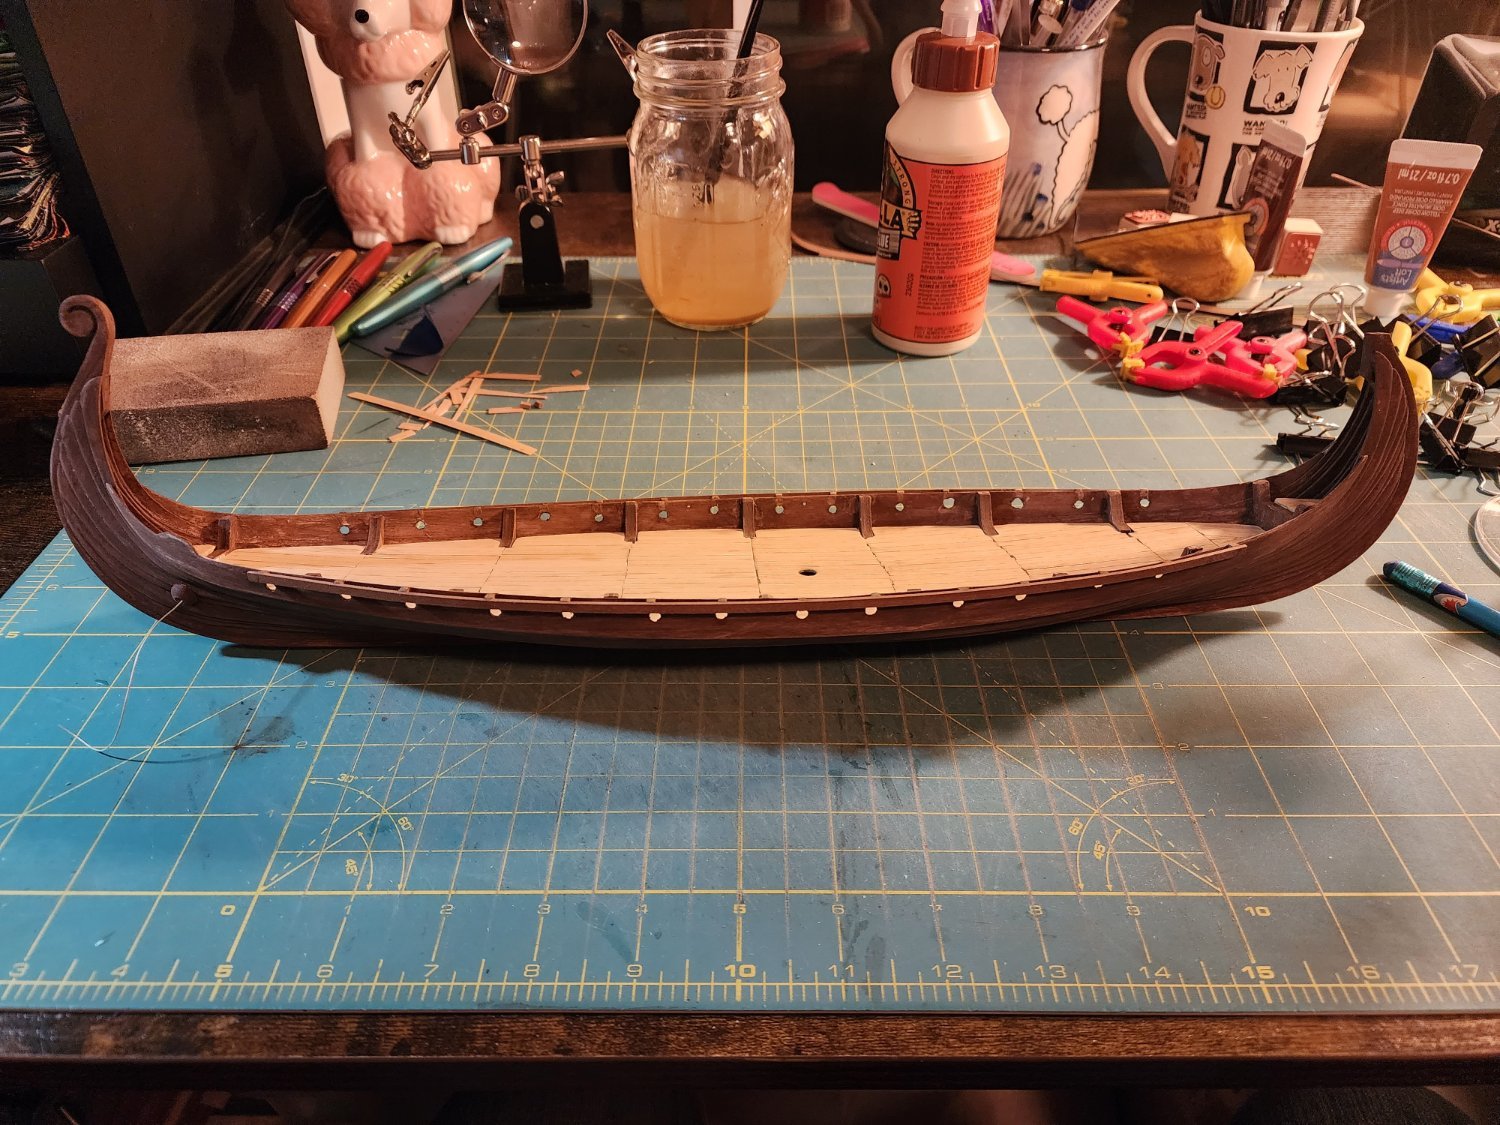
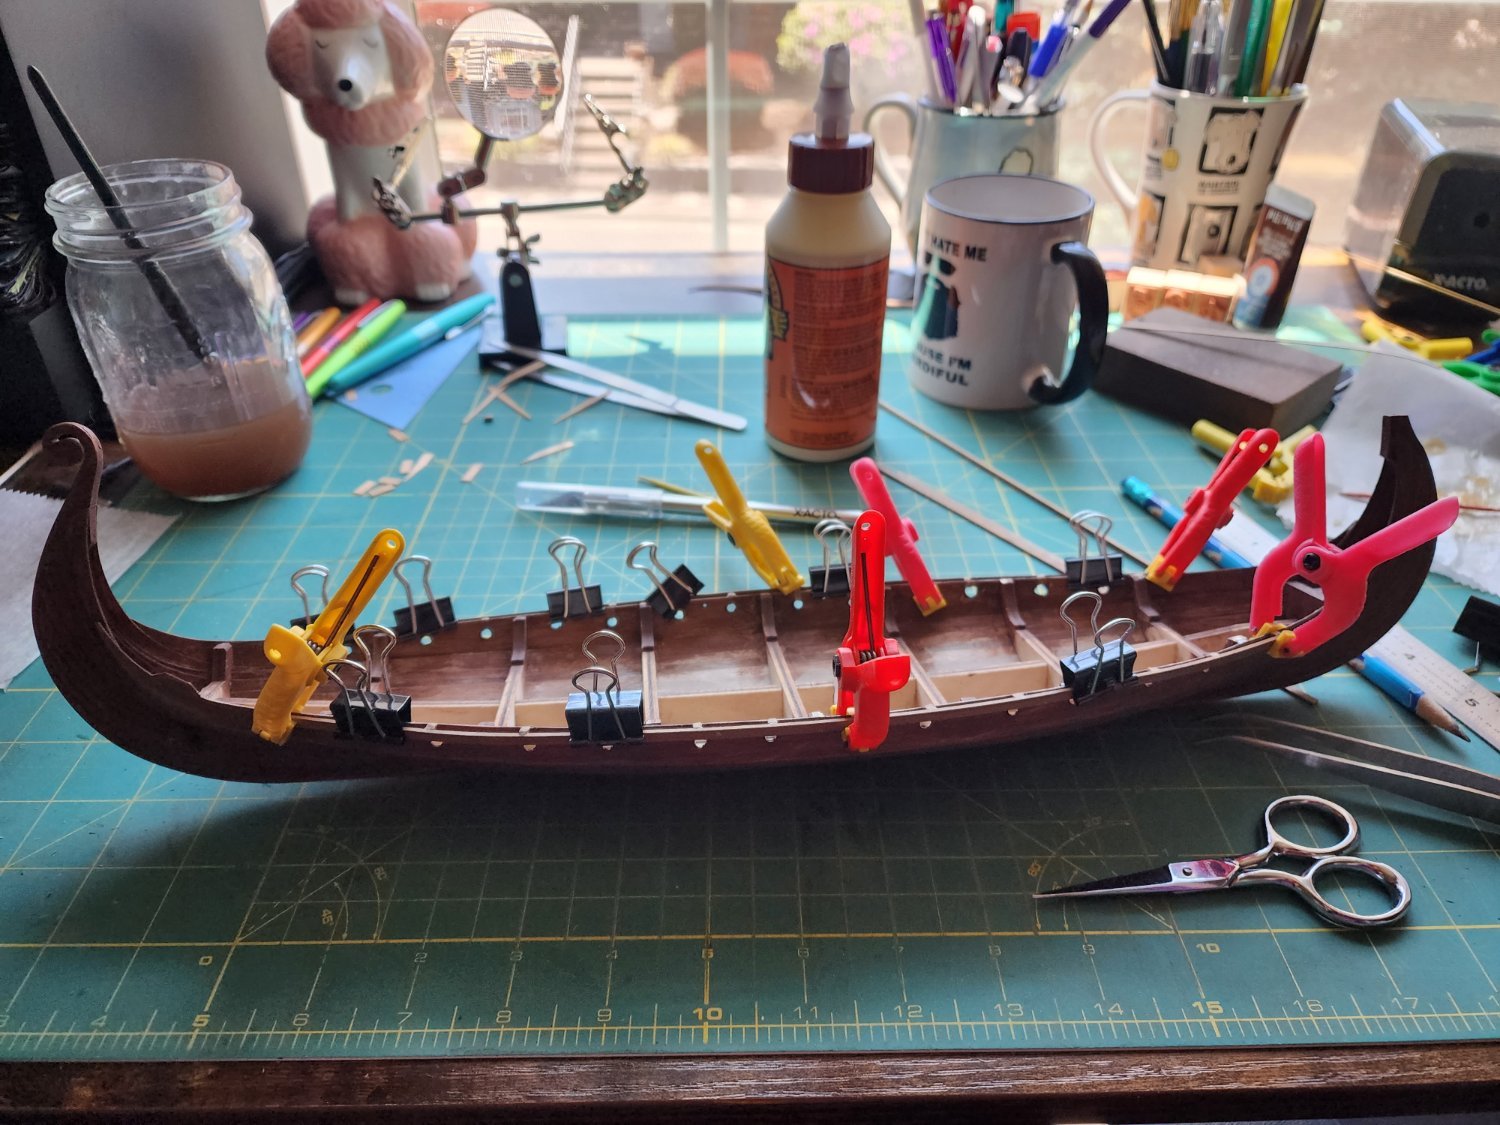
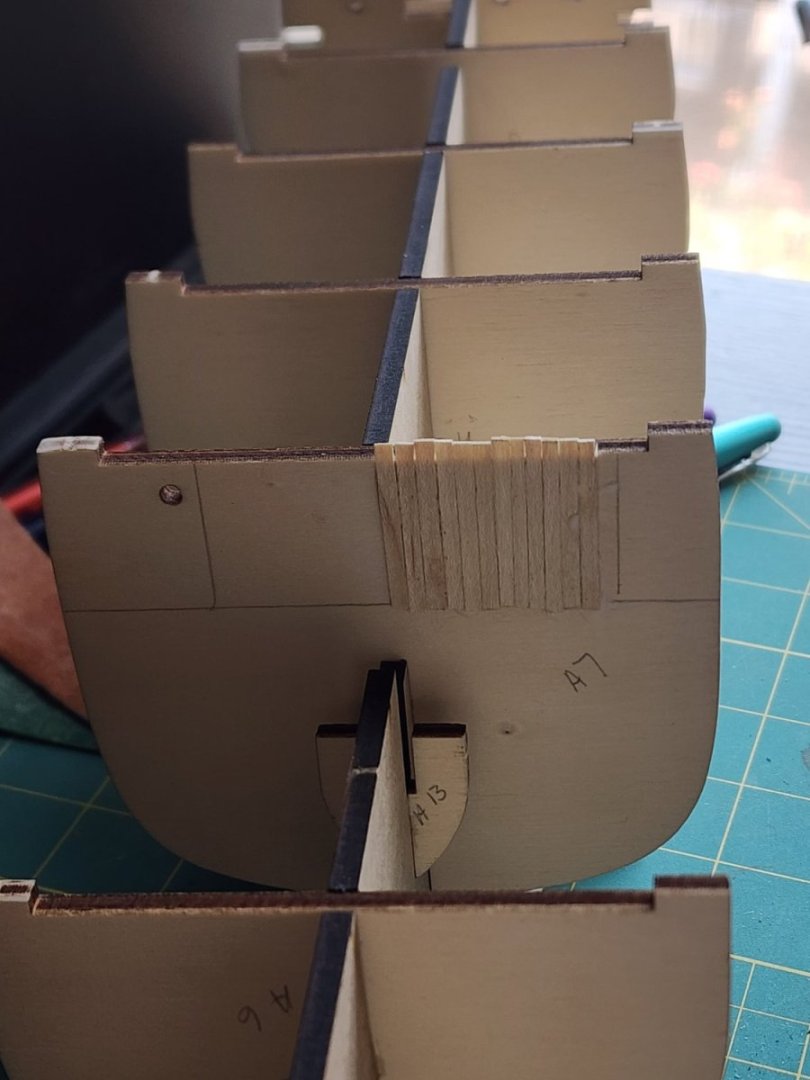
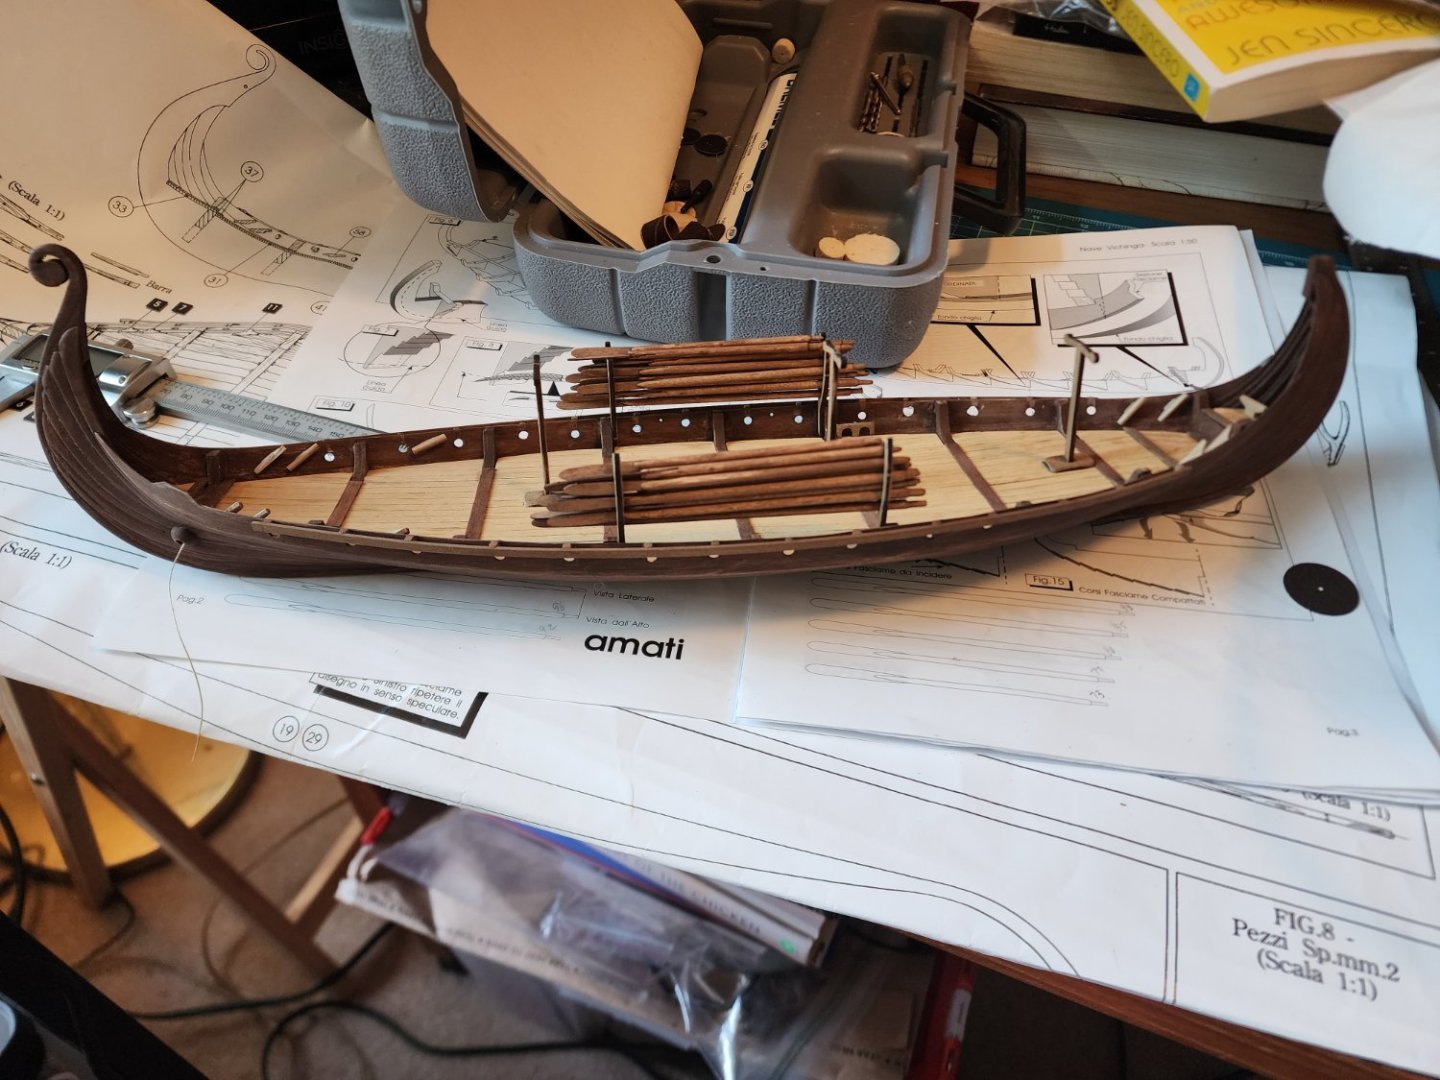
The decking was pretty straightforward as was applying the shield rail. However, a note of caution to others attempting this model, use one of the shields to check you spacing for the shield rail supports. I did not and some shields fit perfectly and others did not.


-
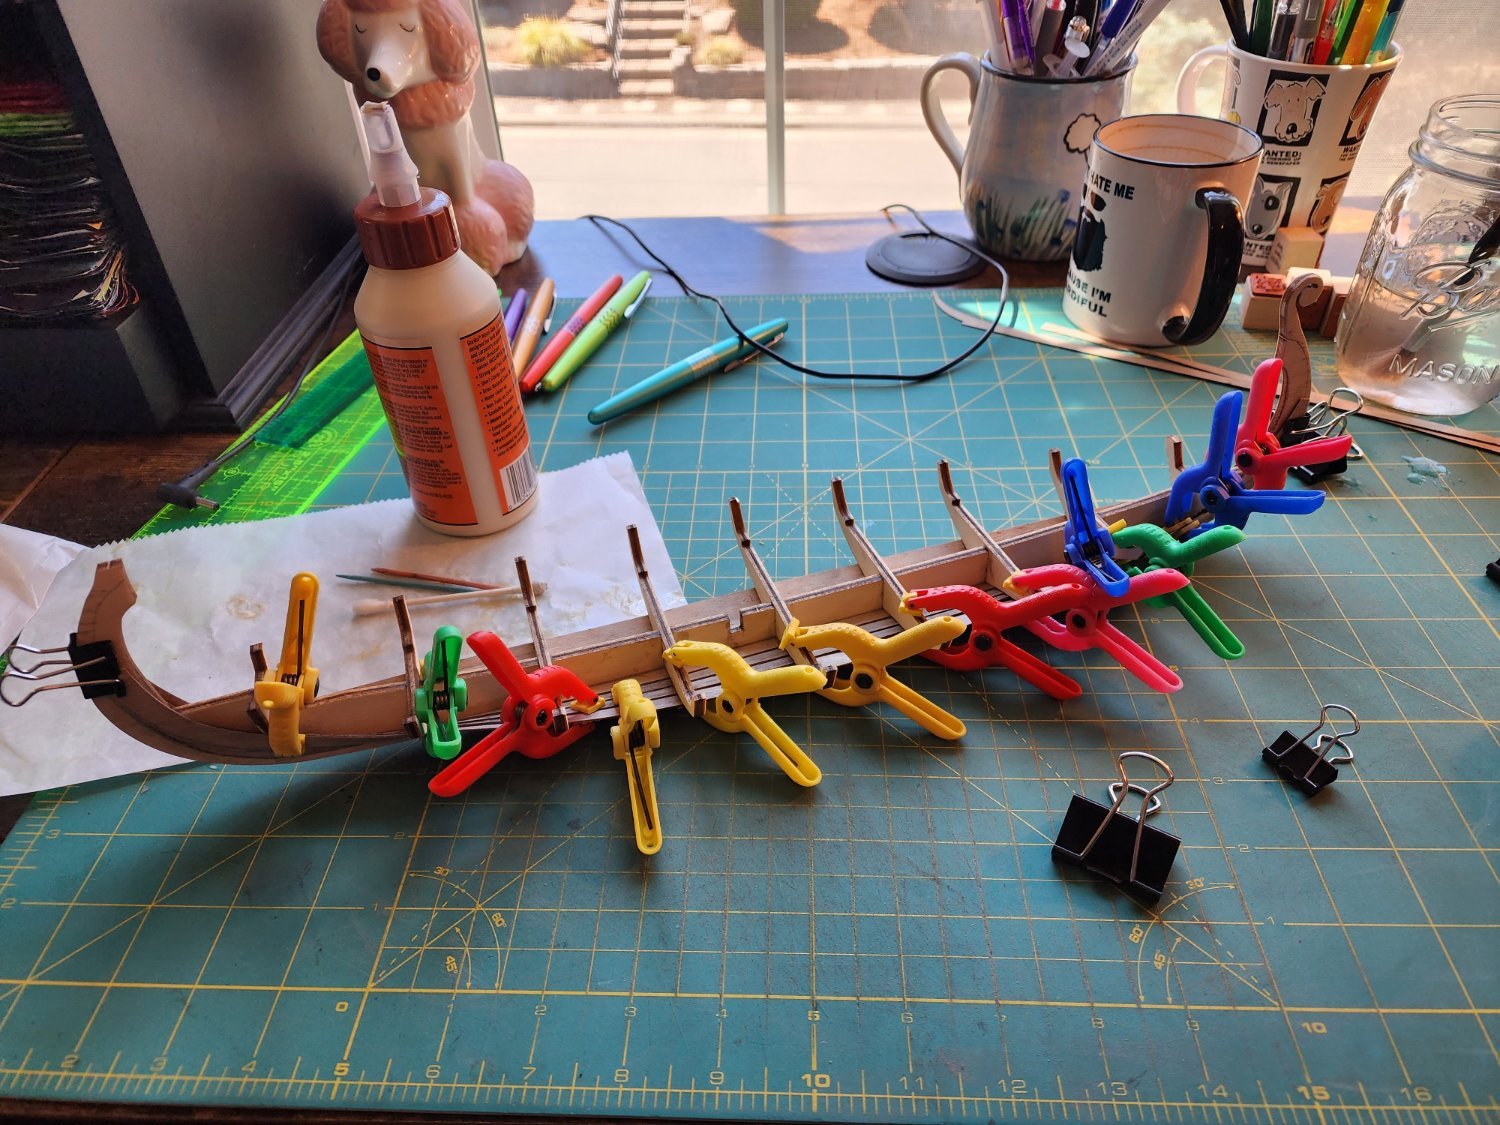
And... That step is done. However, this is when I realized that things weren't all that great. When I flipped it over, I could see how I did not place the planks evenly. I have several theories as to how I got off track. I'm not sure that it's just one but more likely a combination of a couple. First, I know that I was hyper focused on making sure the ends of the planks matched up with the lines drawn in at the ends of the keel. This led to the center shifting. I think what I should have done was measure the center of the plank, positioned that and then moved out from the center. I clamped my pieces in place; however, I believe I should have used the nails that came with the kit to hold the planks in place. The instructions never mentioned using the nails and I thought they were just decorative. It wasn't until the planking was done that I saw a video of planking being held in place with nails as the glue dried.

-
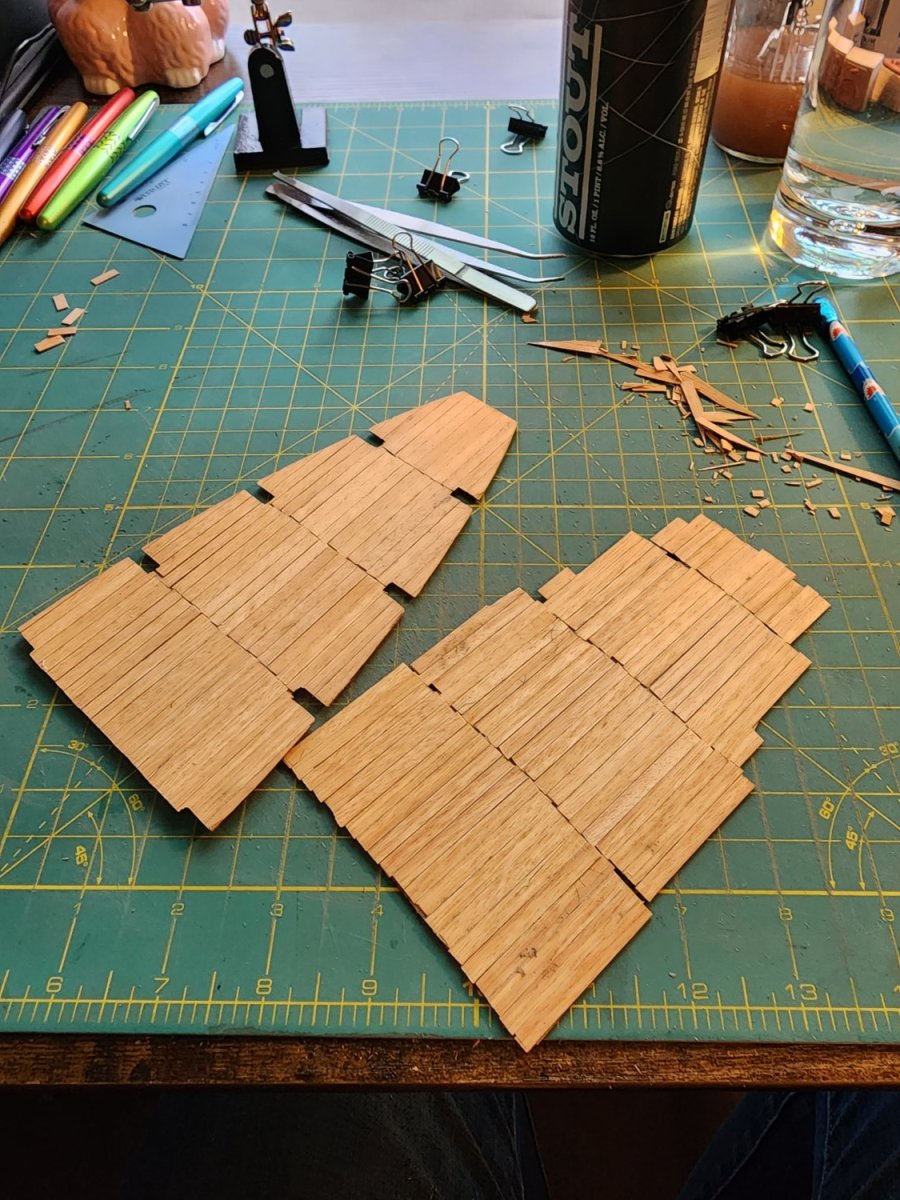
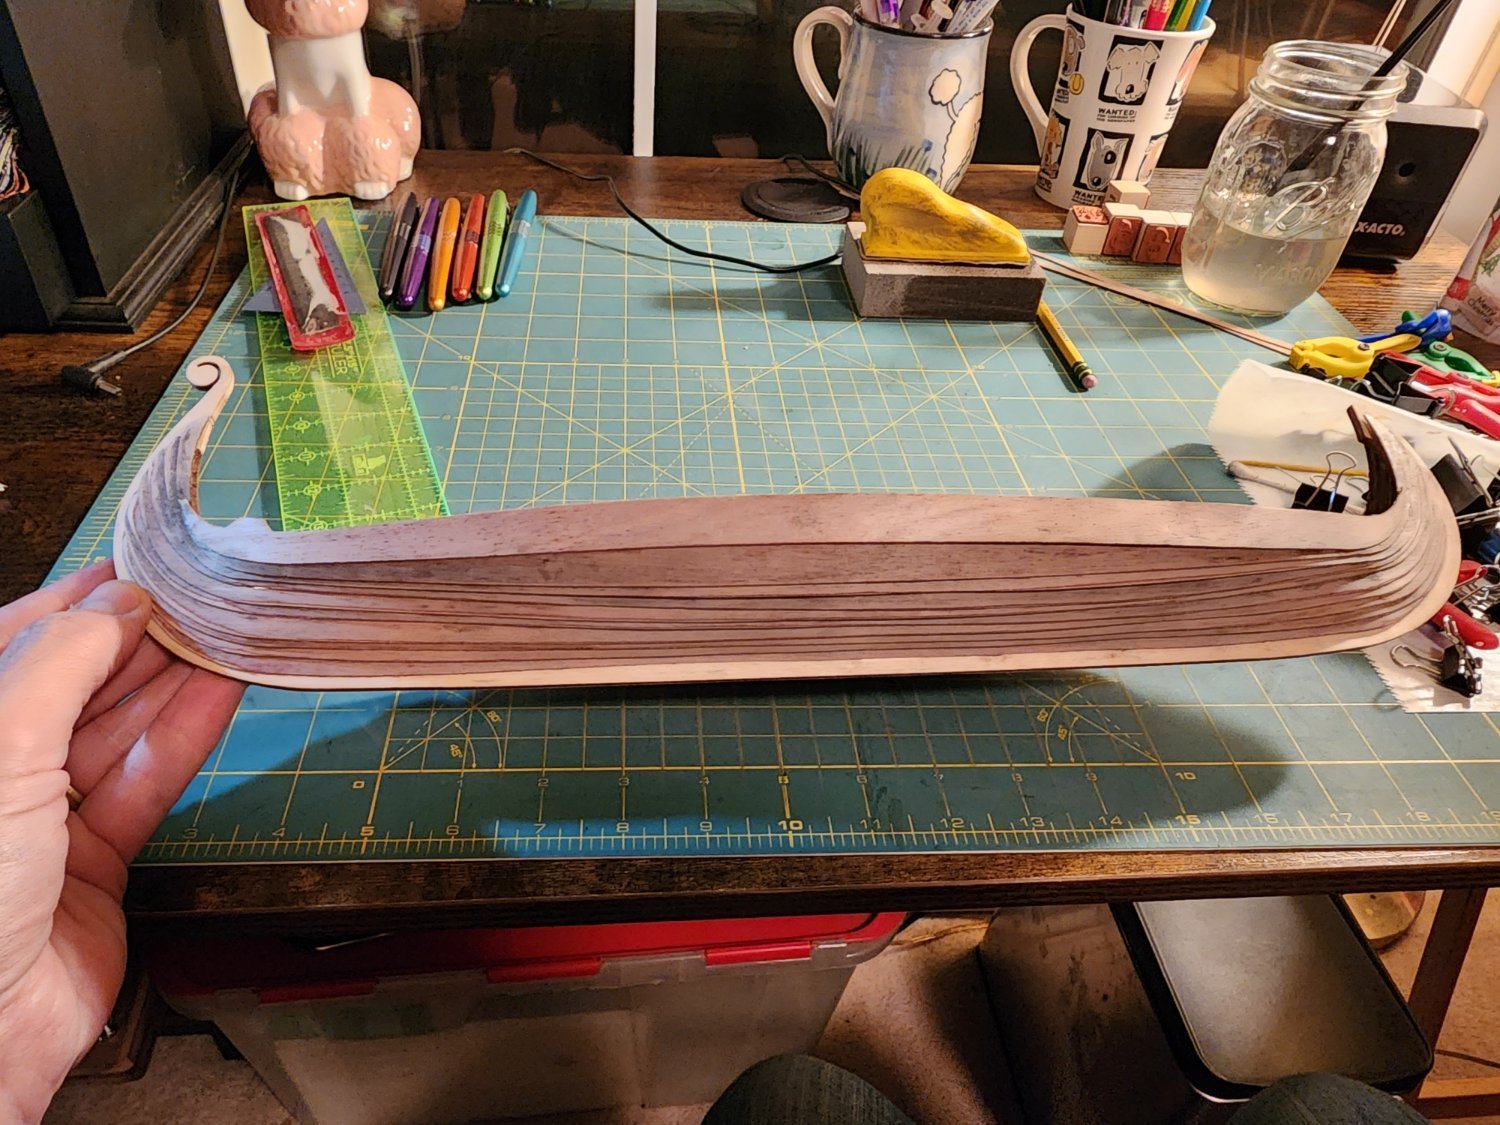
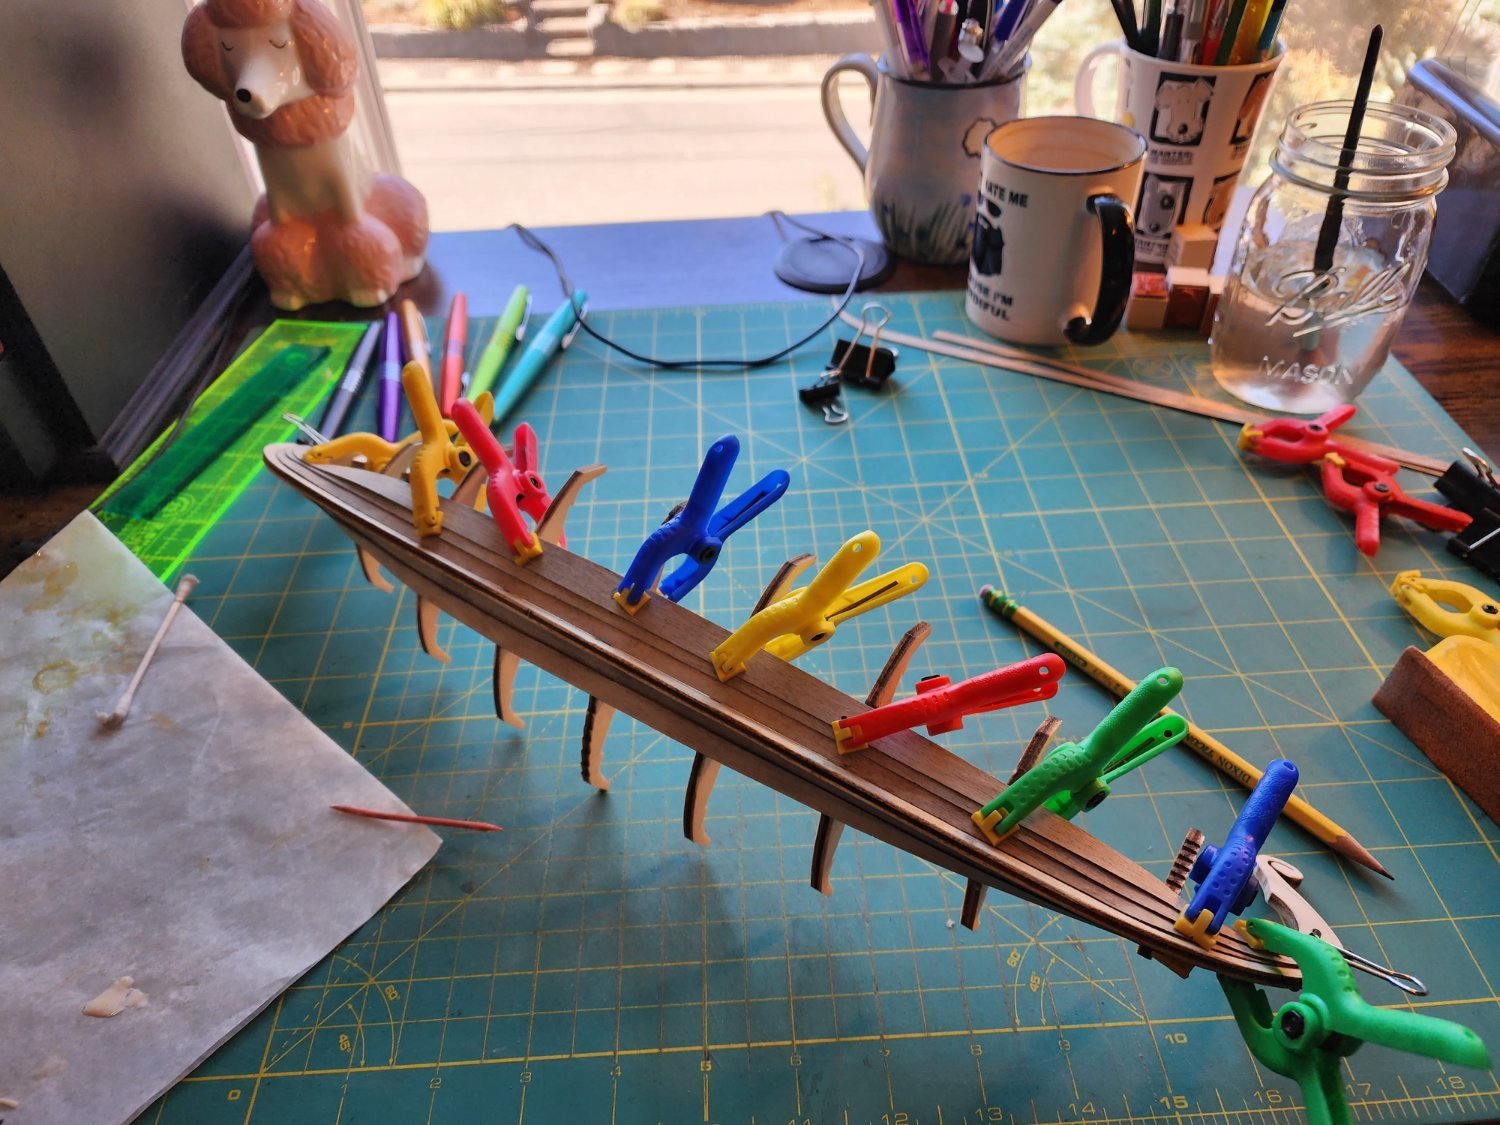
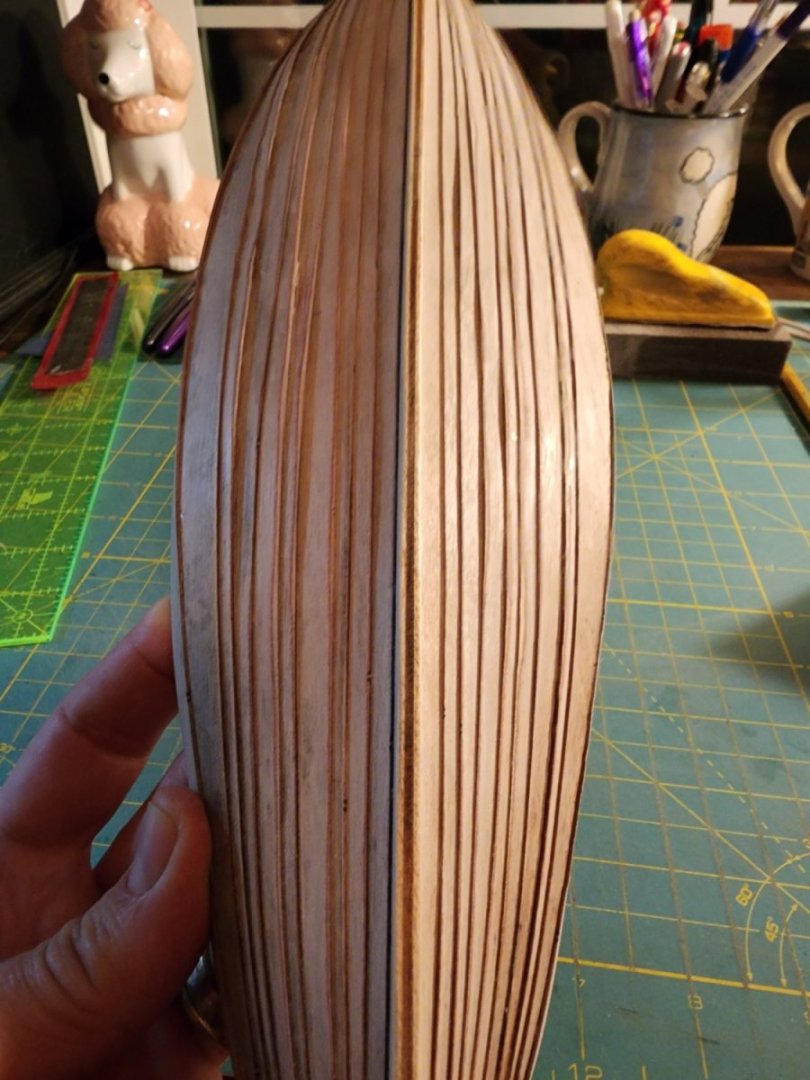
Next, planking. Here is where things got interesting. The directions would have you soak the planks in half water and half glue. Someone had written that they tried this but that everything got really sticky and that it really didn't work. I opted for soaking the plank in water and then clamping it to the hull to dry. This seemed to work, but what do I know, this is my first build. Here you can see the twist.