HOLIDAY DONATION DRIVE - SUPPORT MSW - DO YOUR PART TO KEEP THIS GREAT FORUM GOING! (Only 27 donations so far out of 49,000 members - C'mon guys!)
×

Boerscht
-
Posts
102 -
Joined
-
Last visited
Content Type
Profiles
Forums
Gallery
Events
Everything posted by Boerscht
-
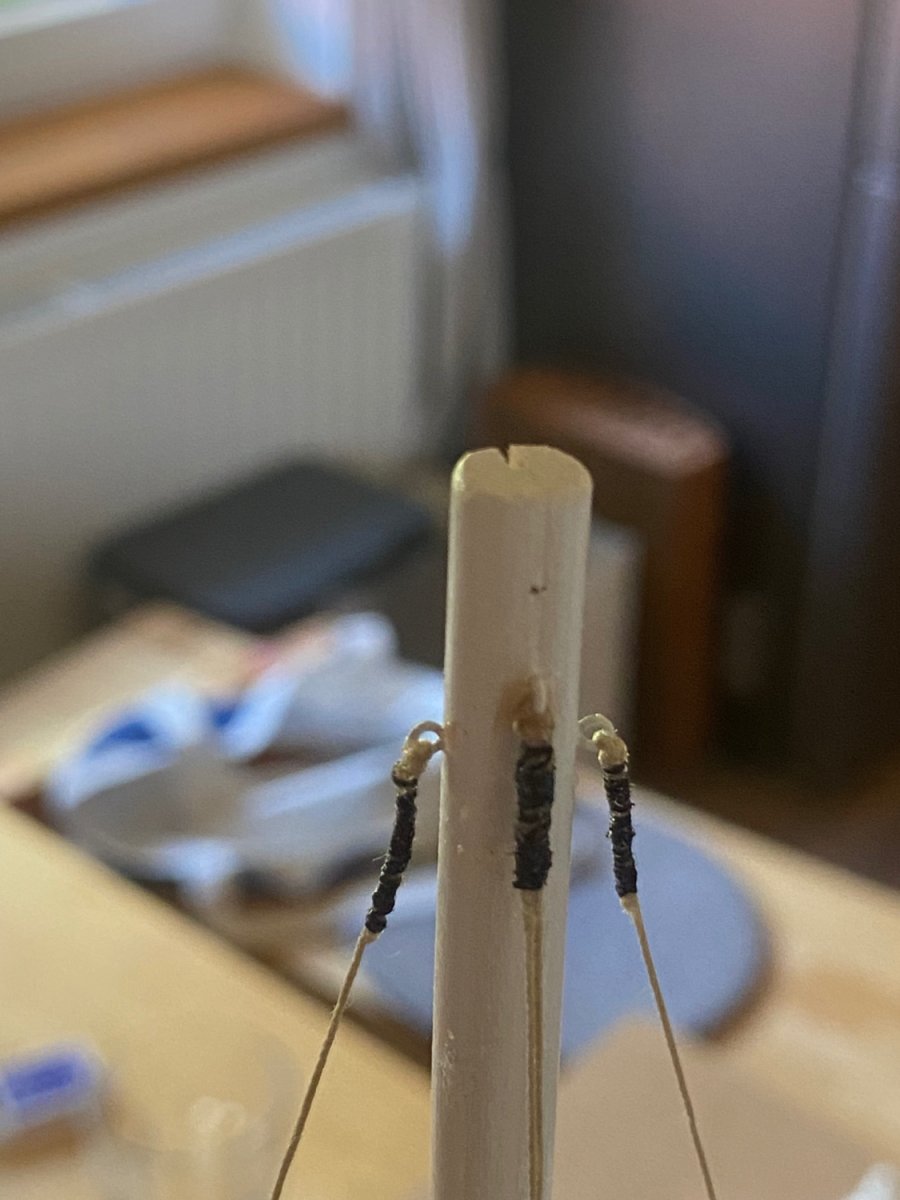
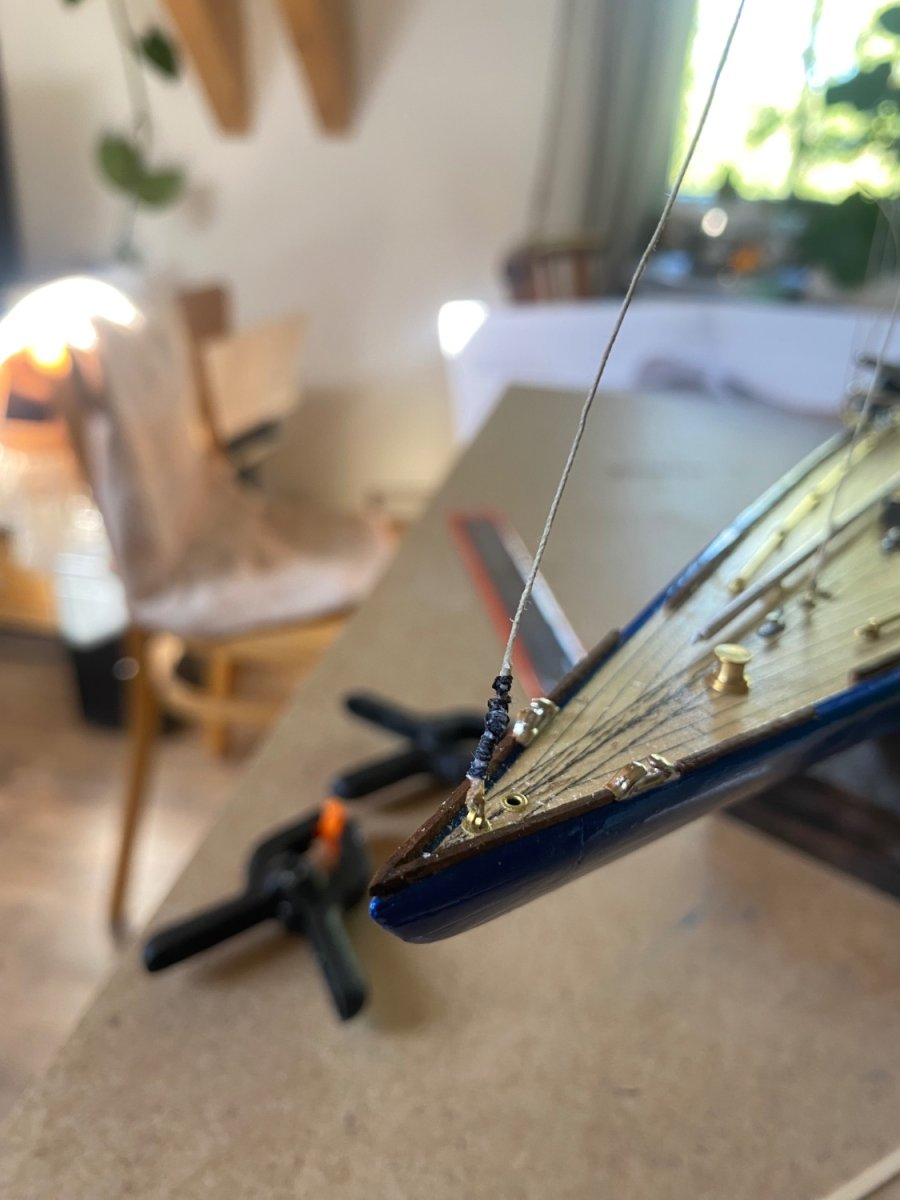
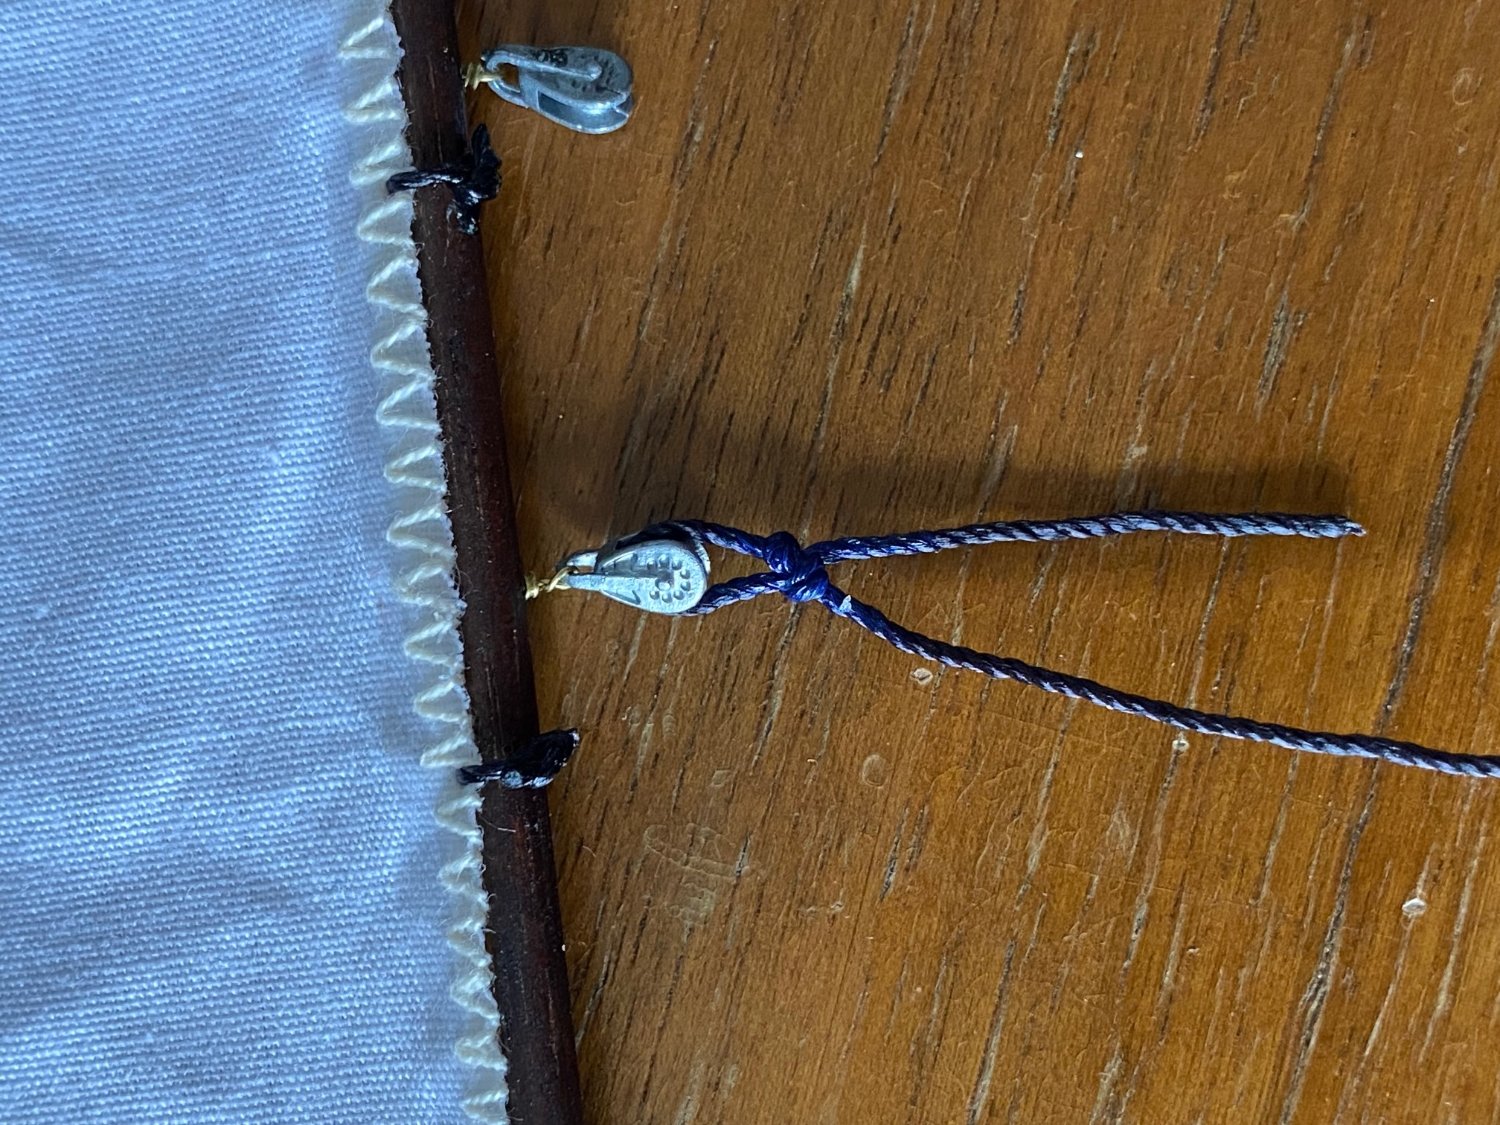
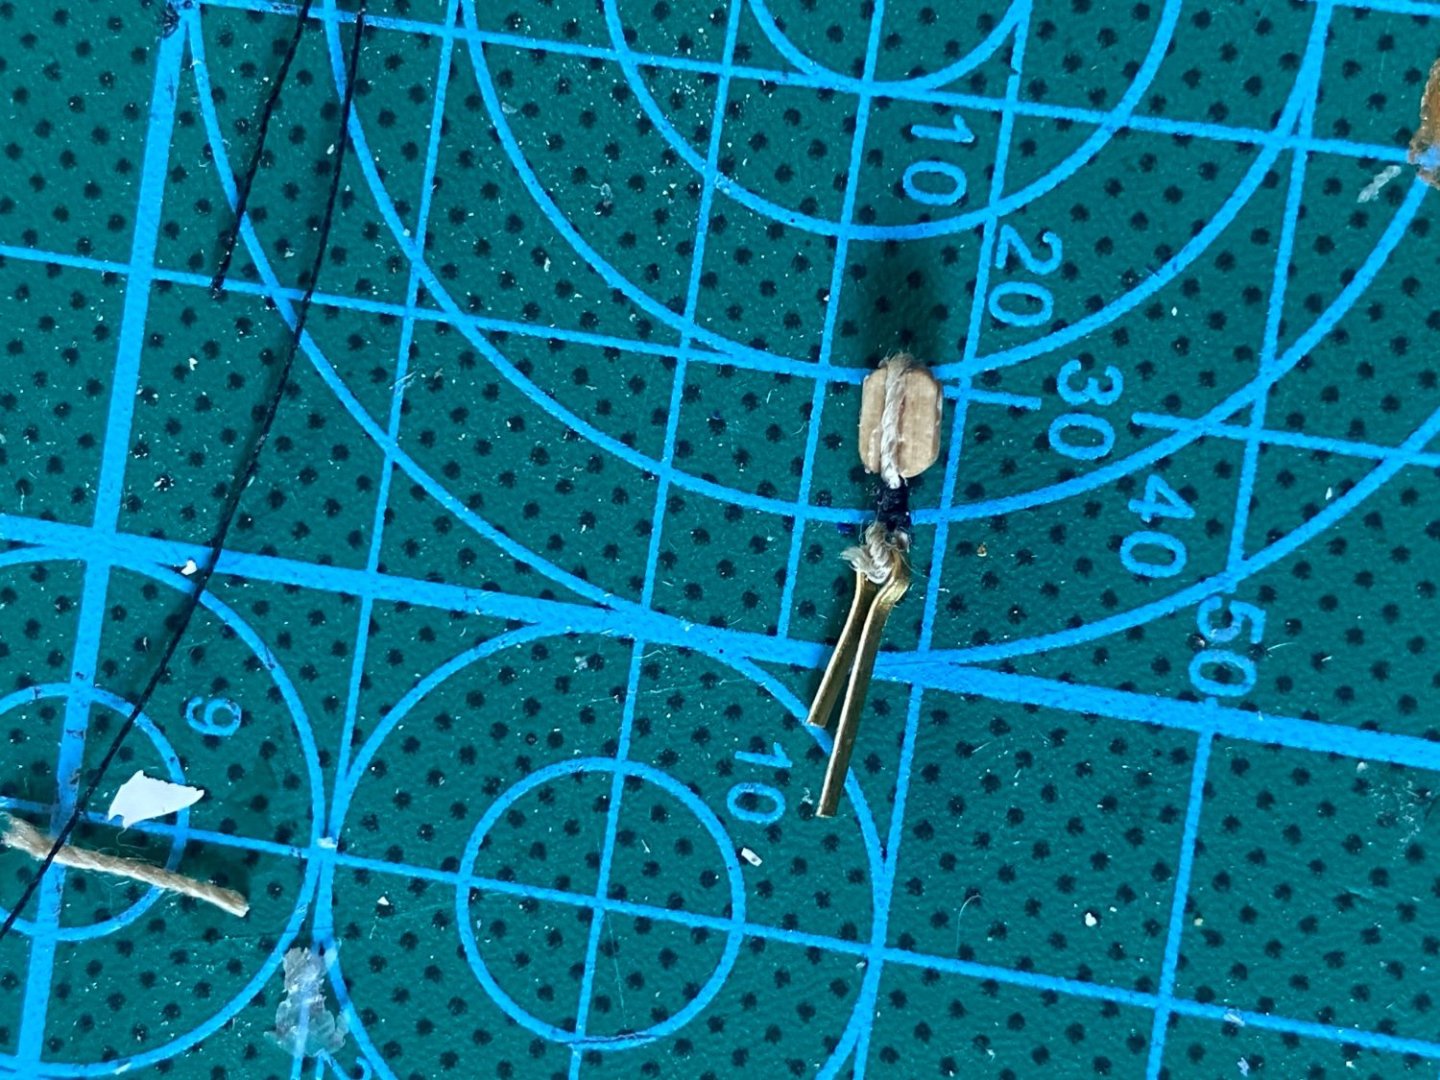
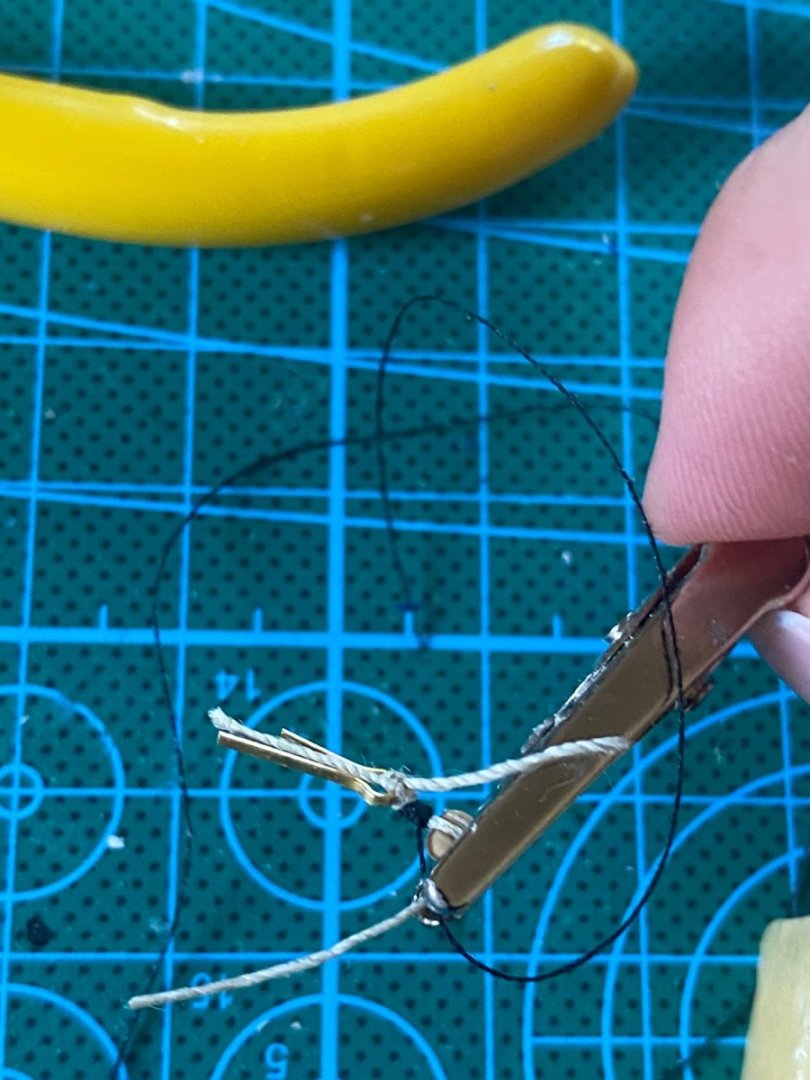
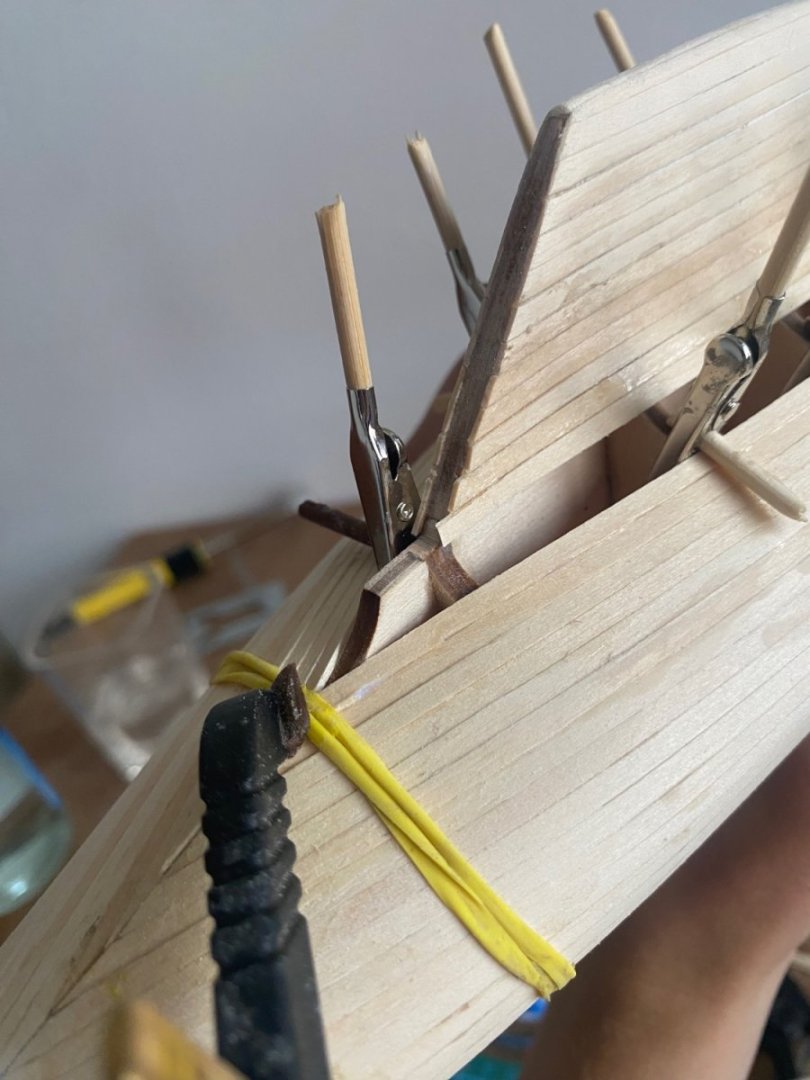
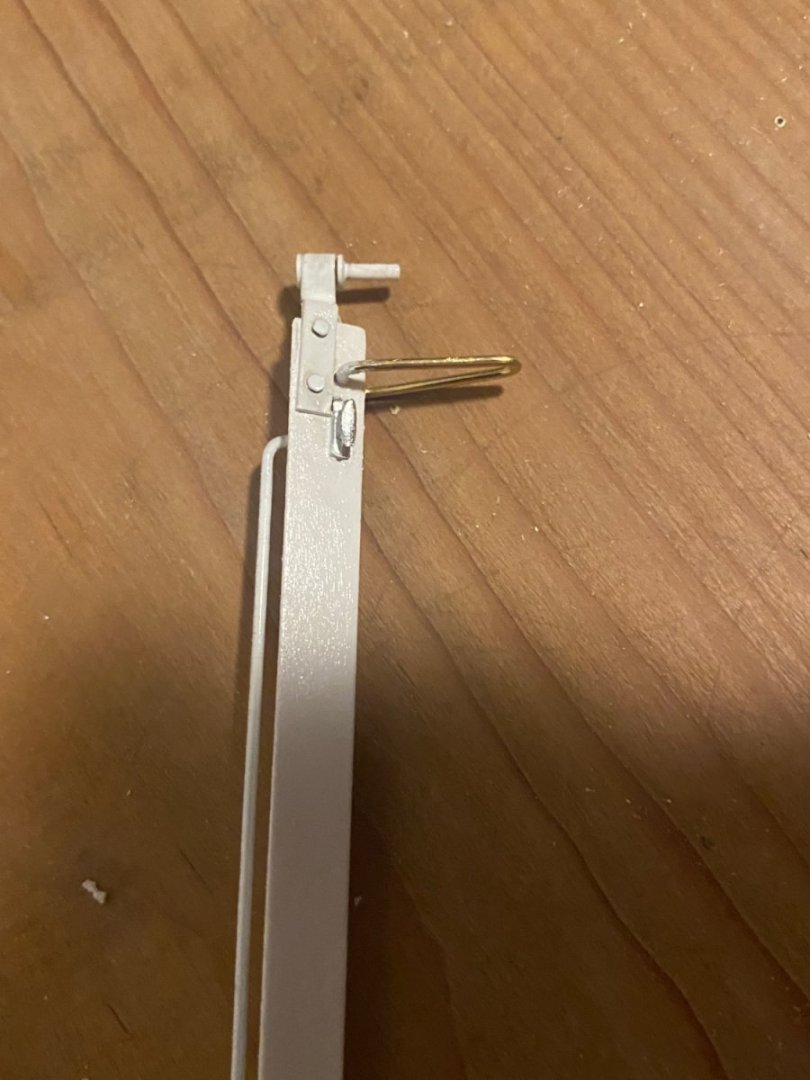
 Thanks a lot for the explanation and pictures! Thats really helpful for my next model. What you have shown in the first pictures was what I thought my mistake is. Anyways i will not change the already installiert blocks but will do it correctly in the upcoming ones. with the provided really small blocks by amati it’s really hard to see where the hole exactly is. The drilling is not always on one side sometimes in the Middle of the block sometimes even not in line so it will be on the rigt side on top left side downwards. Not too happy with the quality. Those syren blocks are looking georgeous!
 -
Thanks a lot for your hints! oh I See what you mean with the blocks..the hole where the rope goes through should be in the opposite direction of the tension? if the tension of the rope goes downwards the rope should go through the upper part of the block?
-
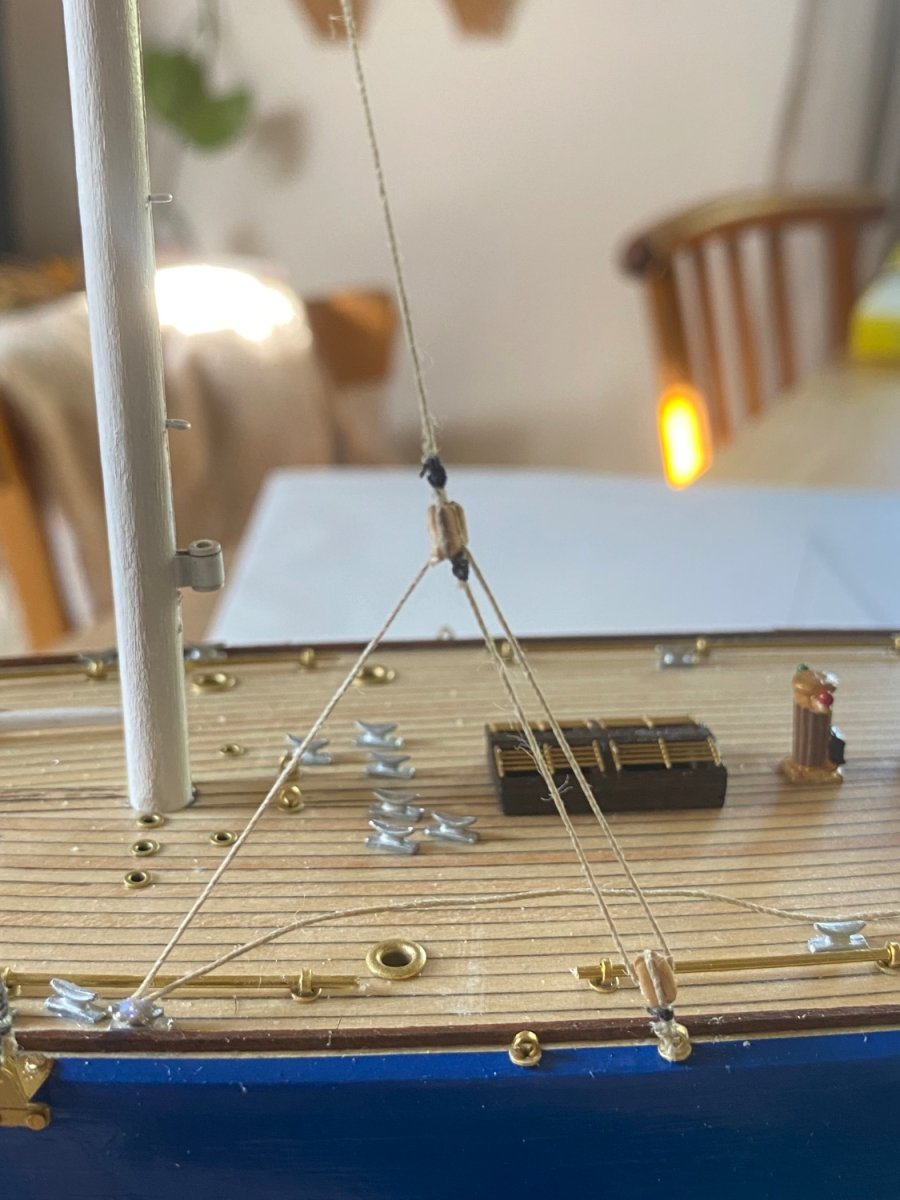
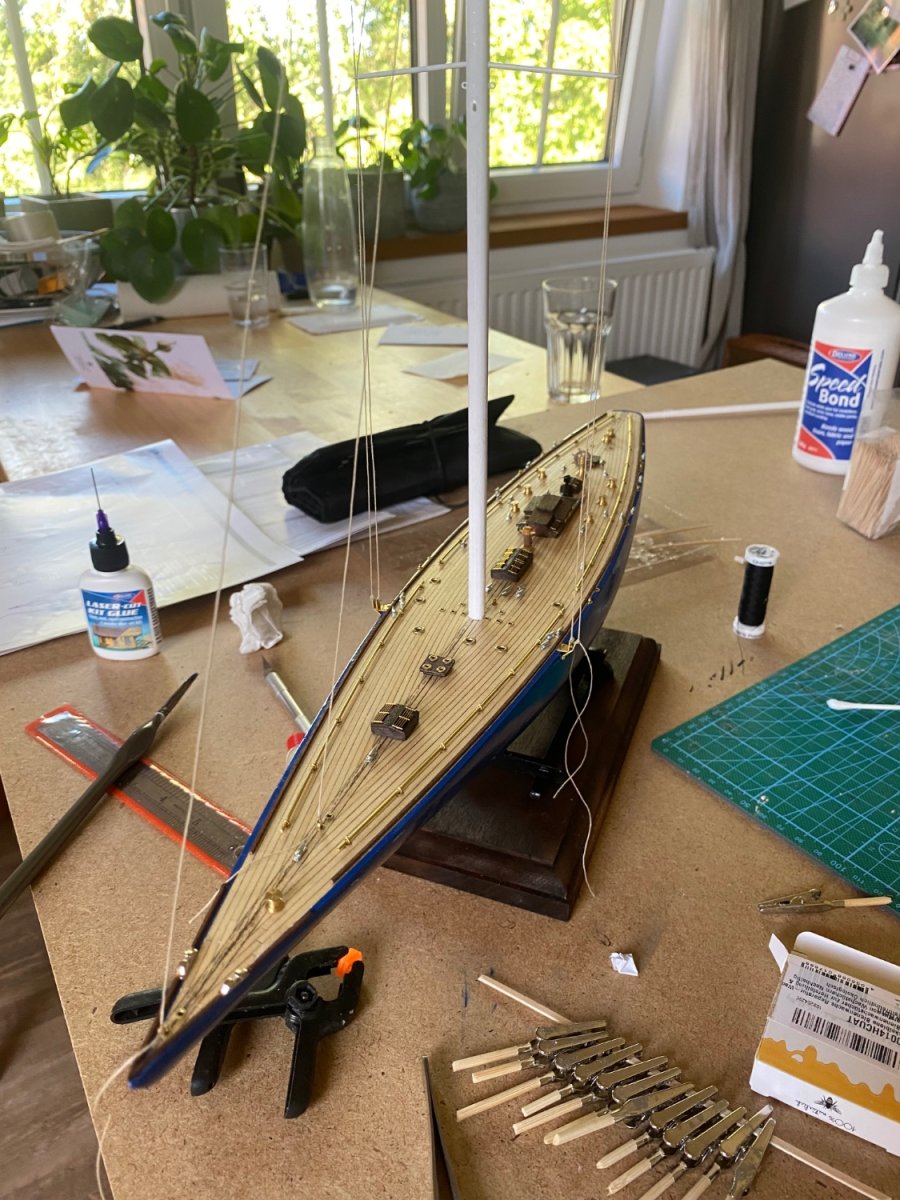
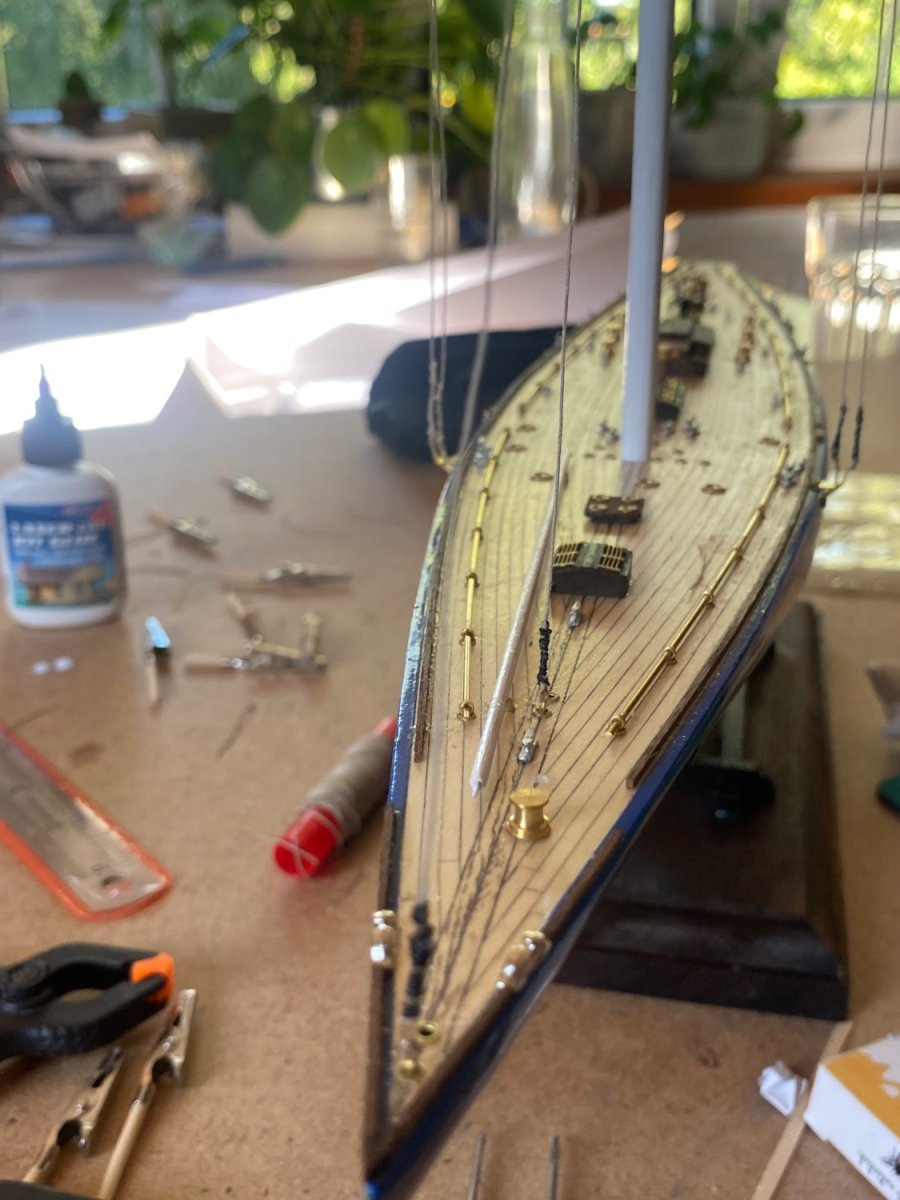
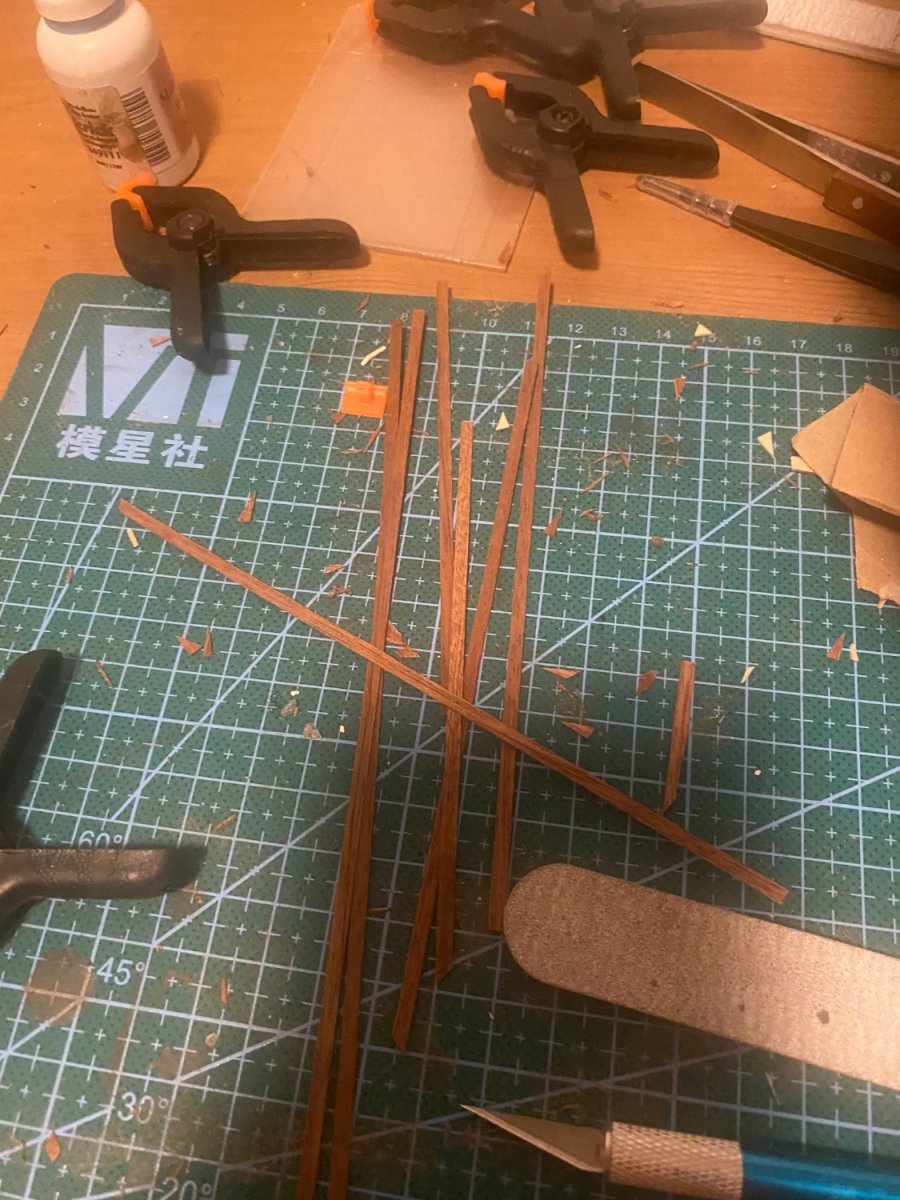
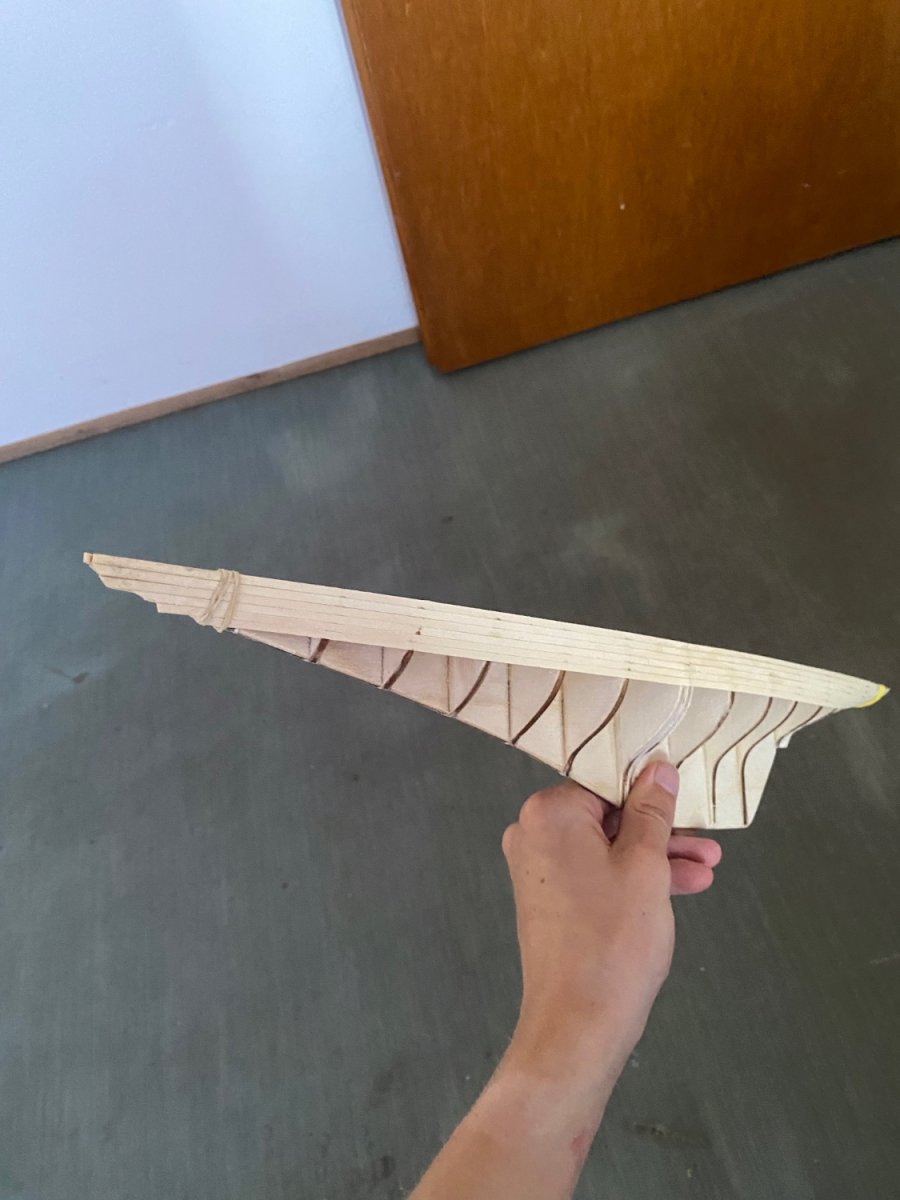
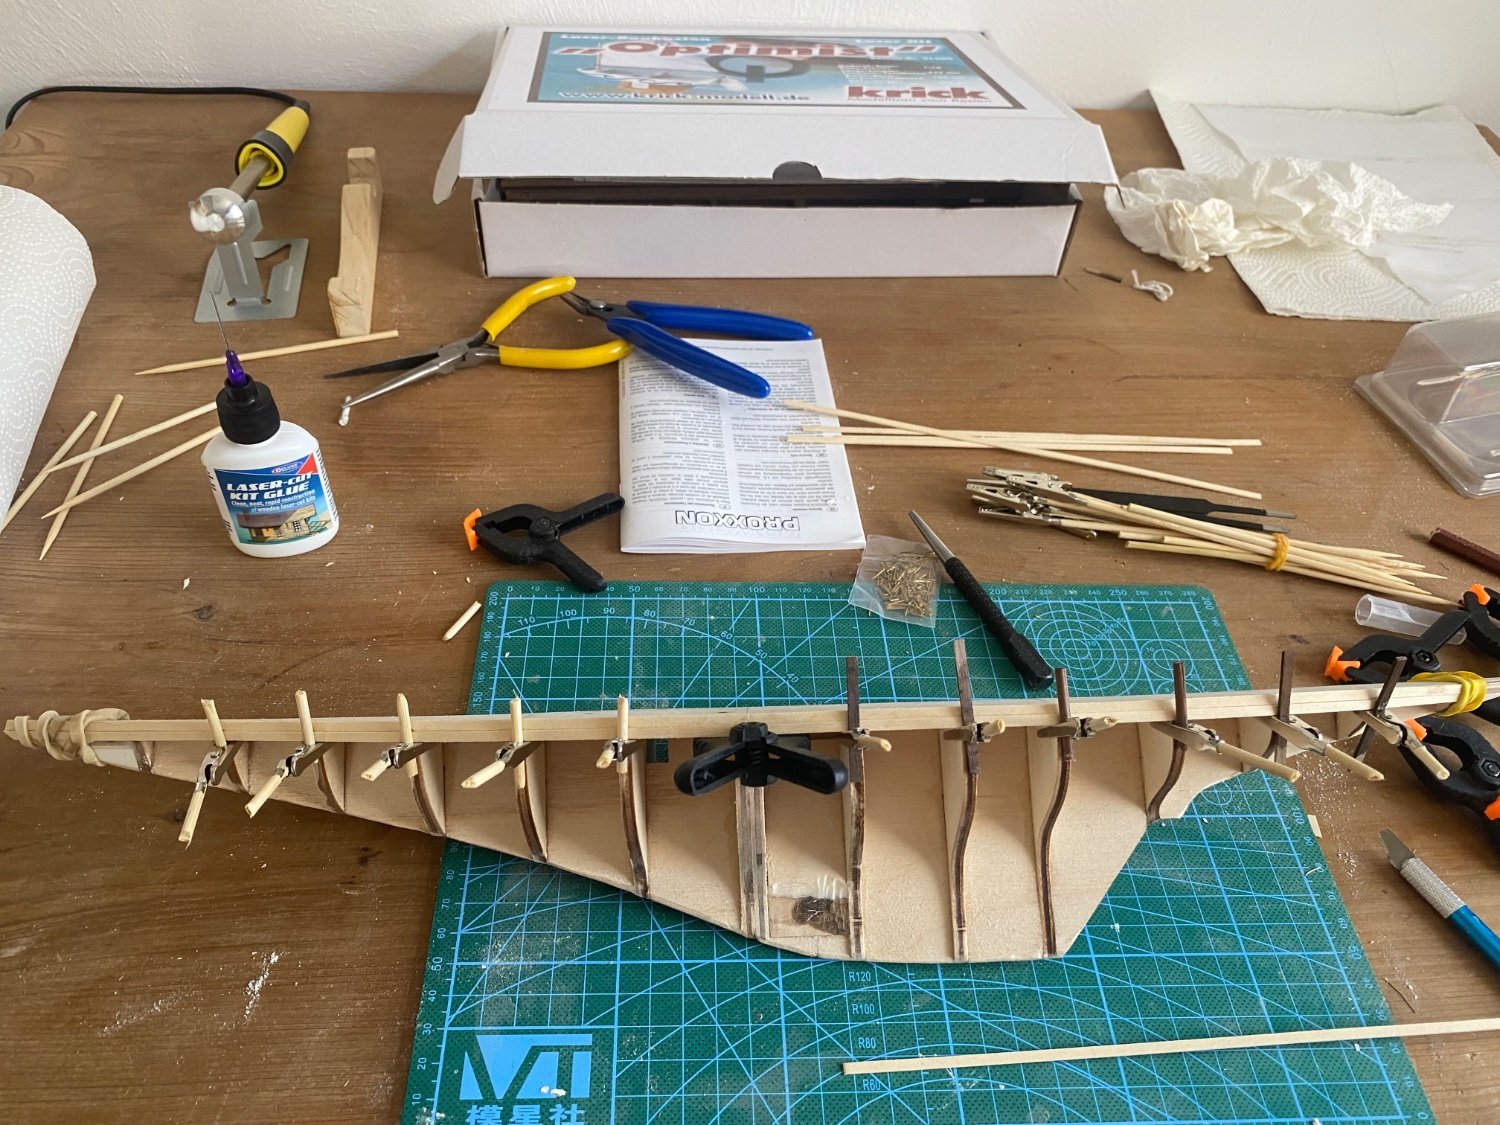
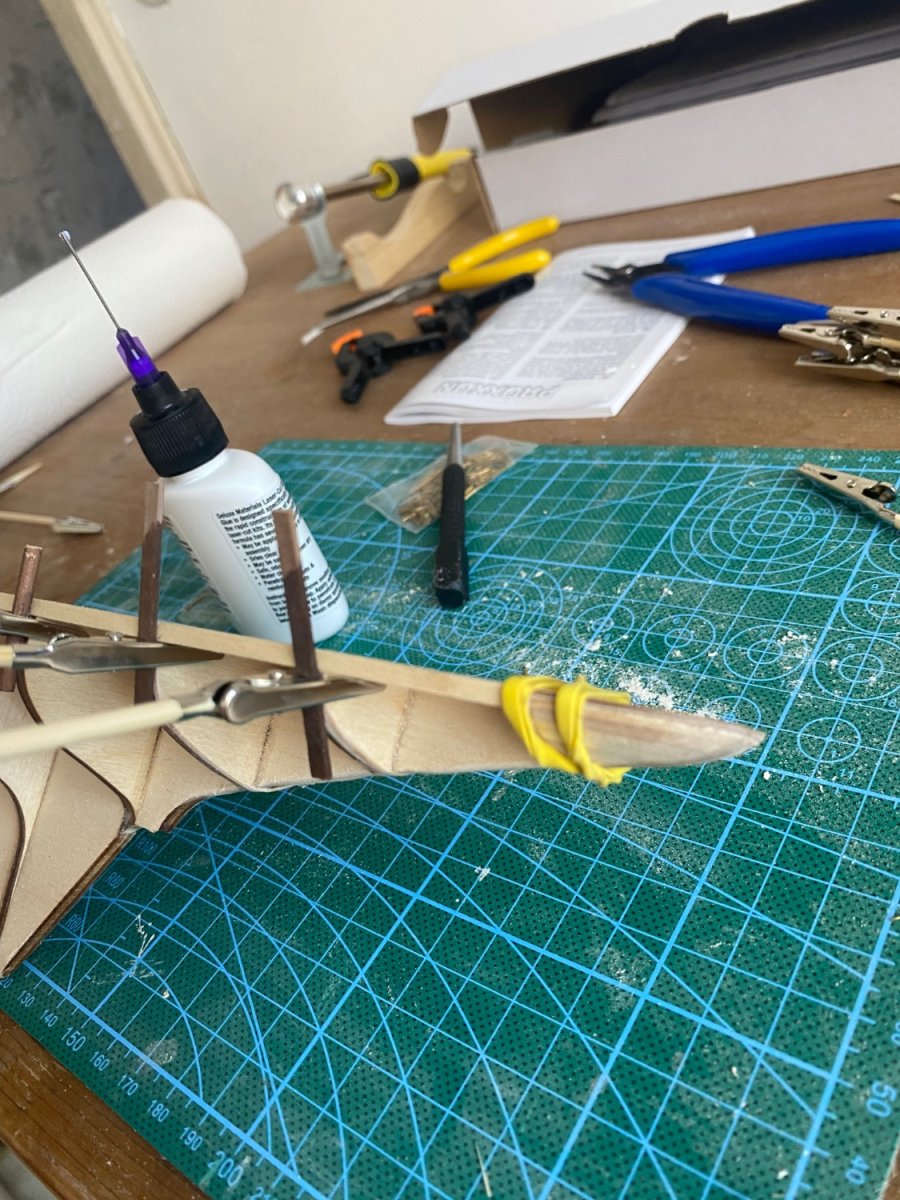
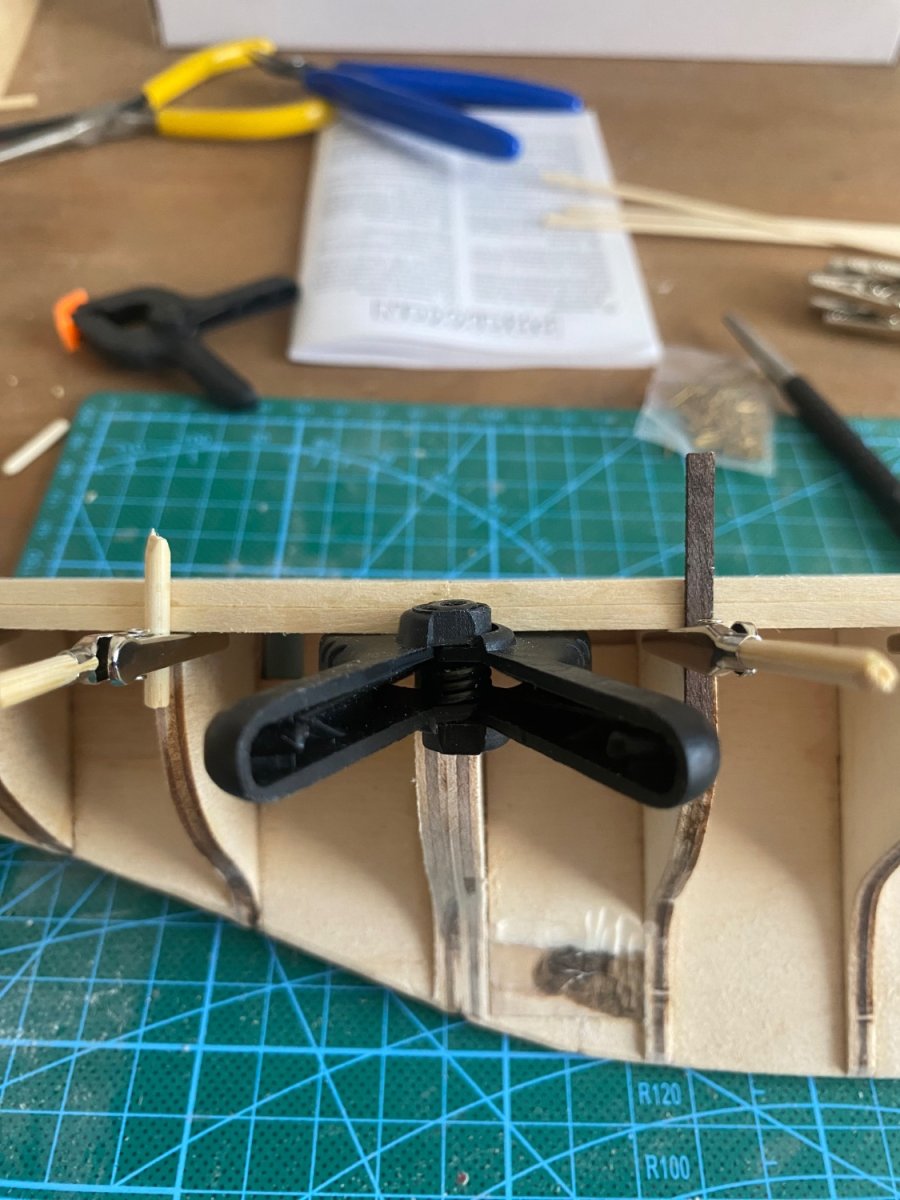
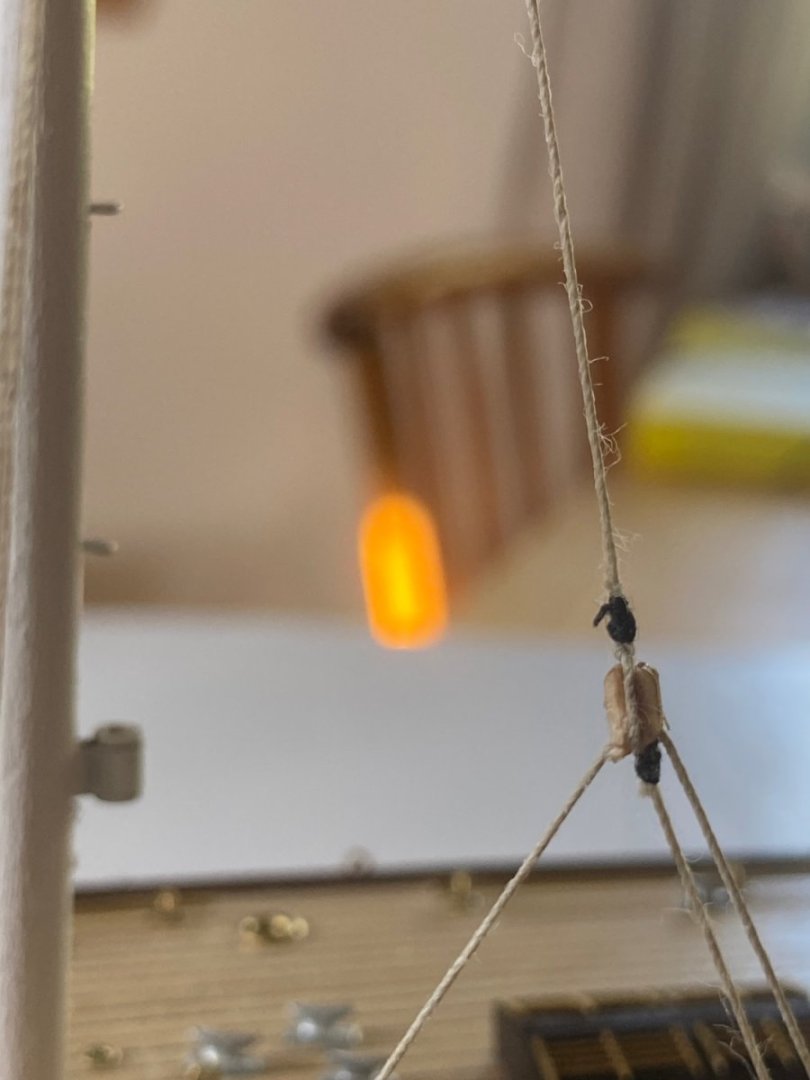
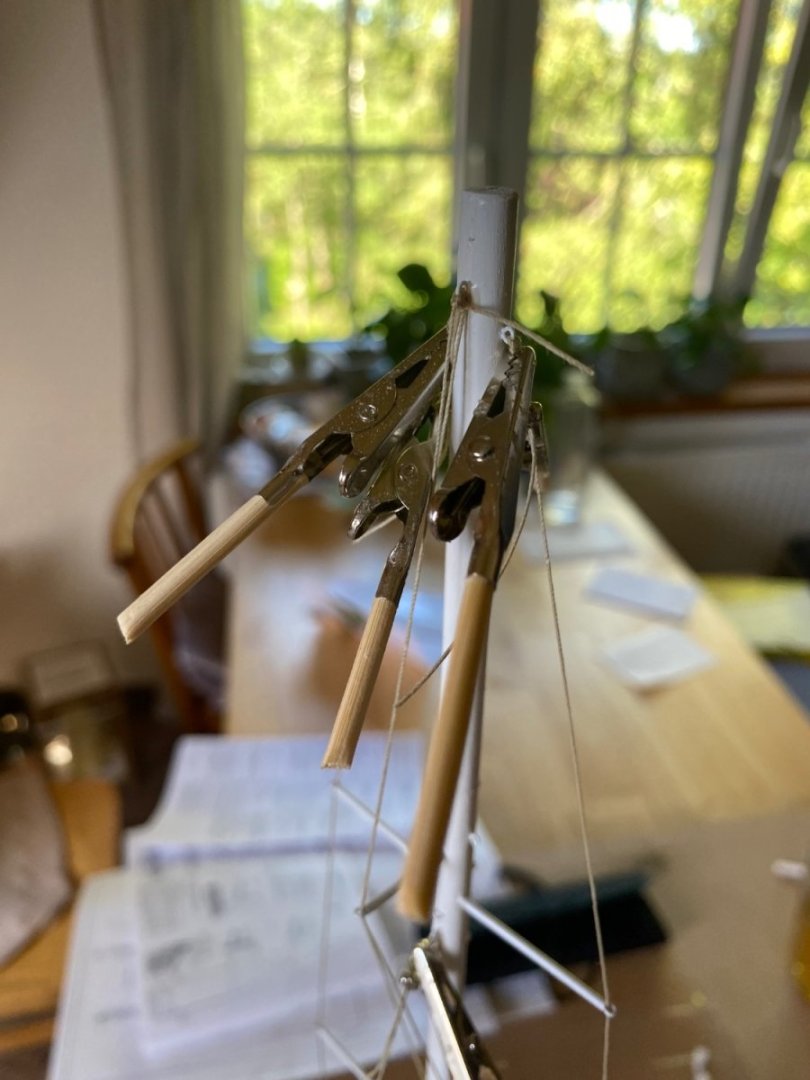
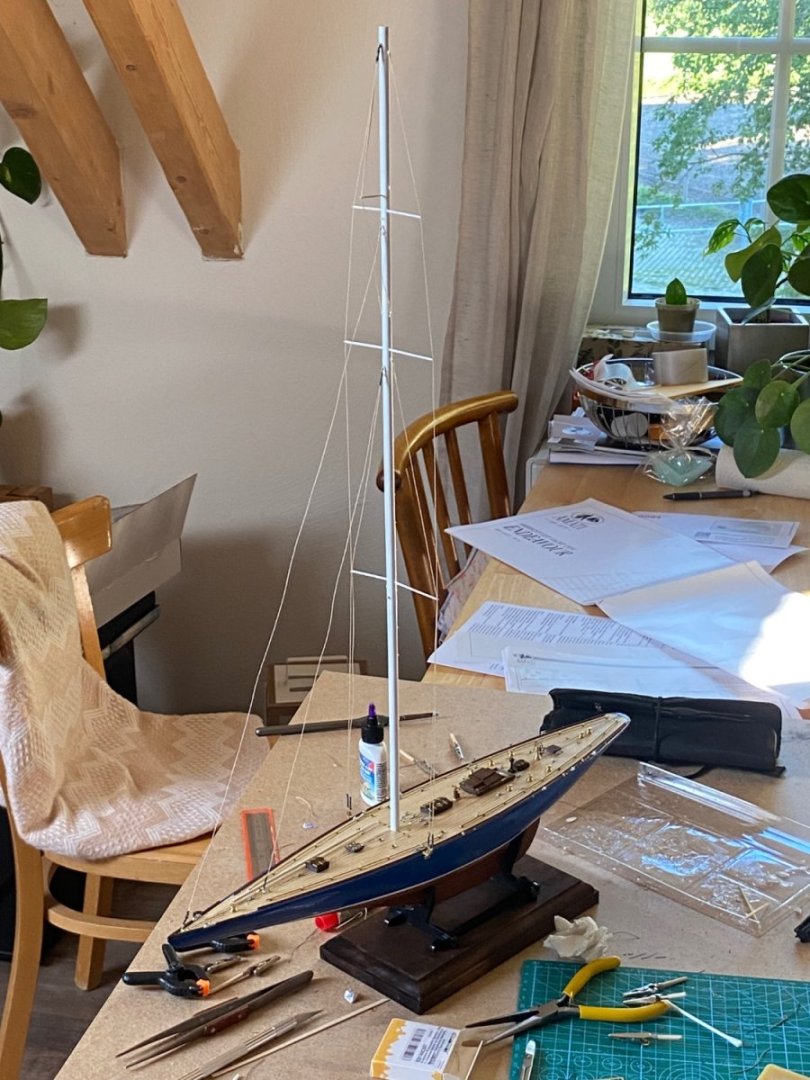
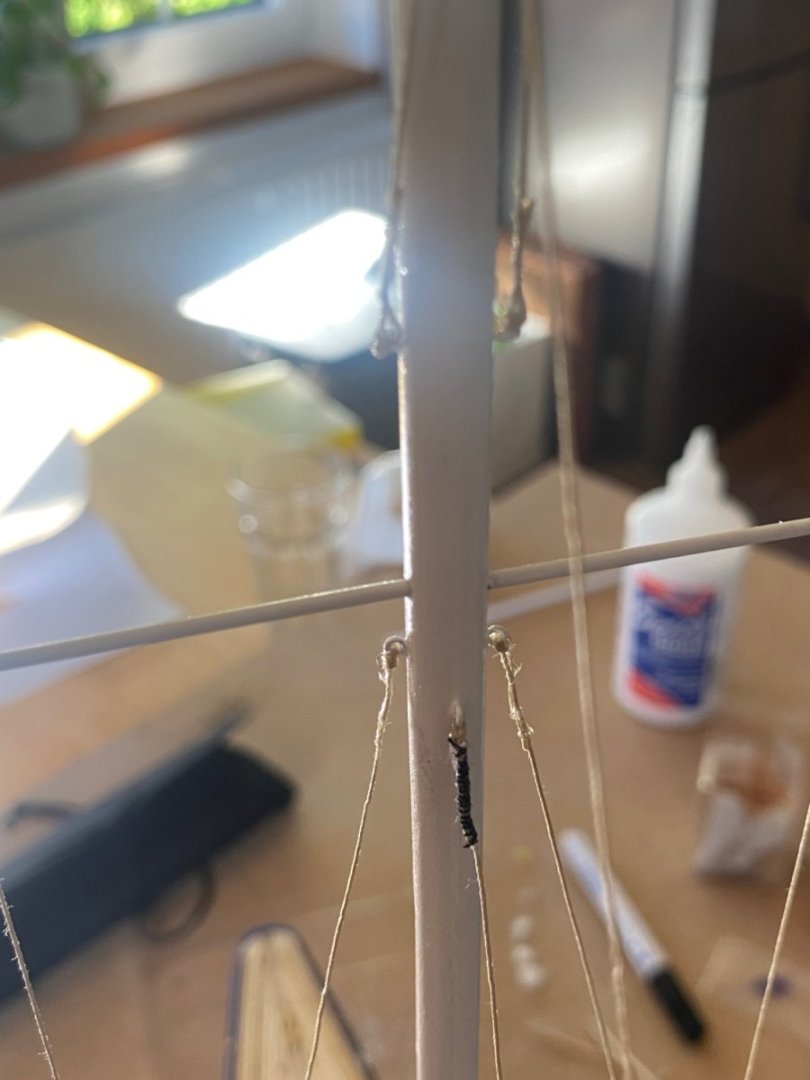
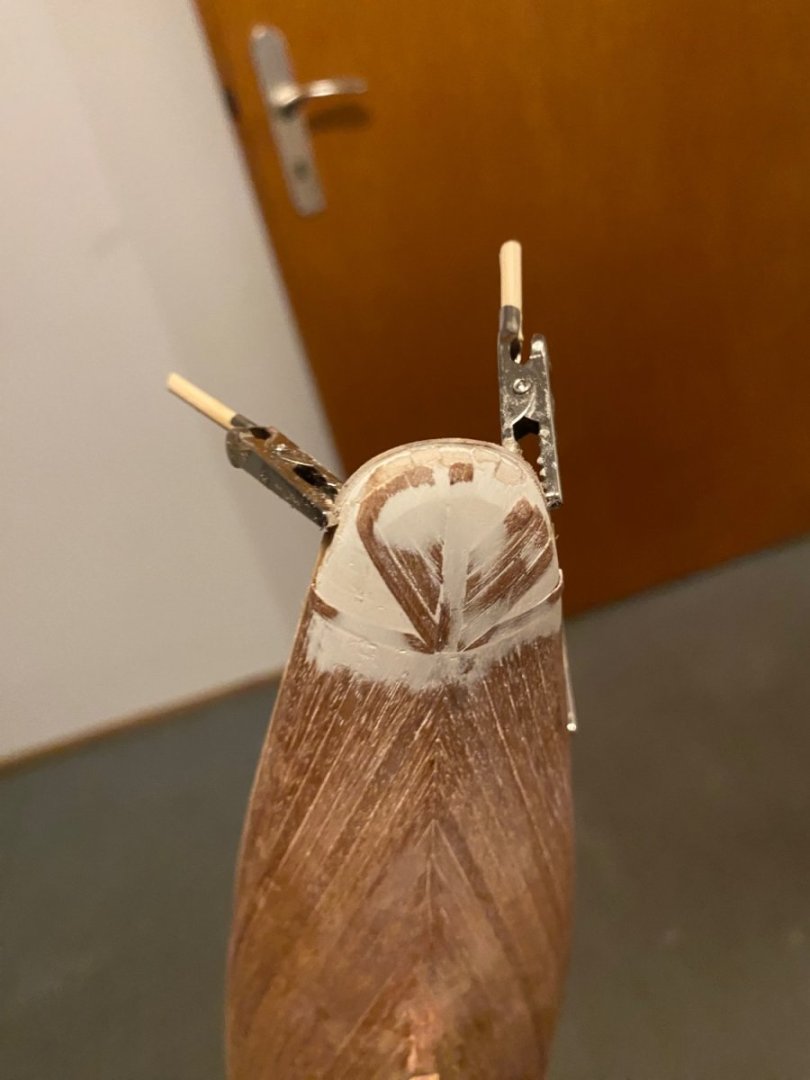
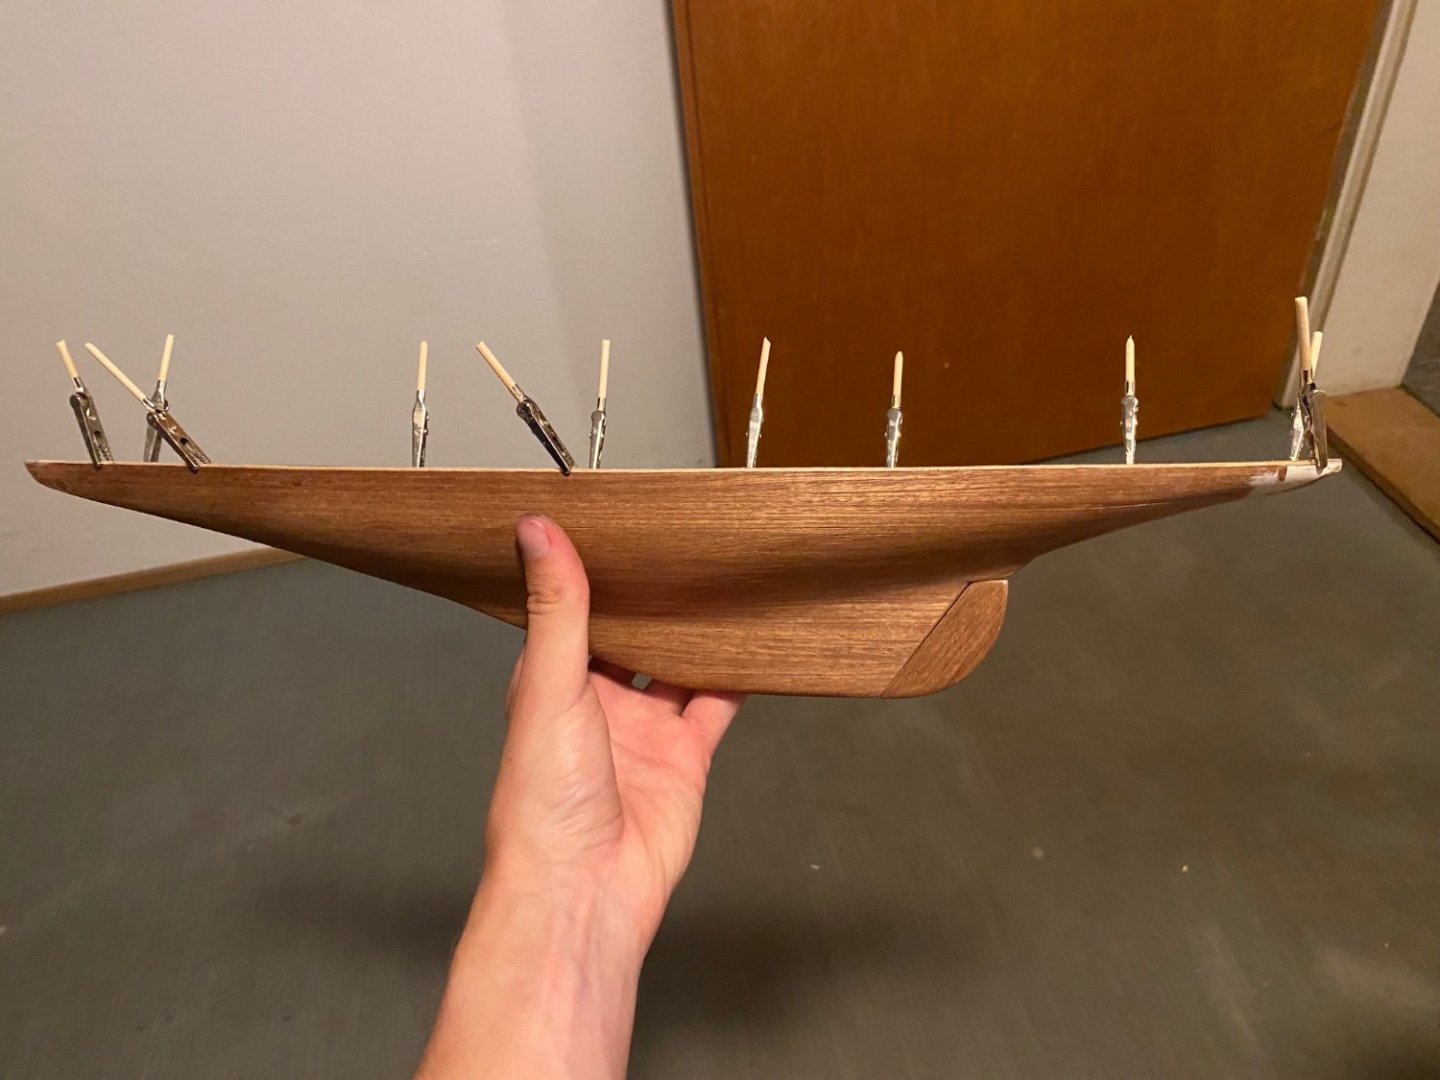
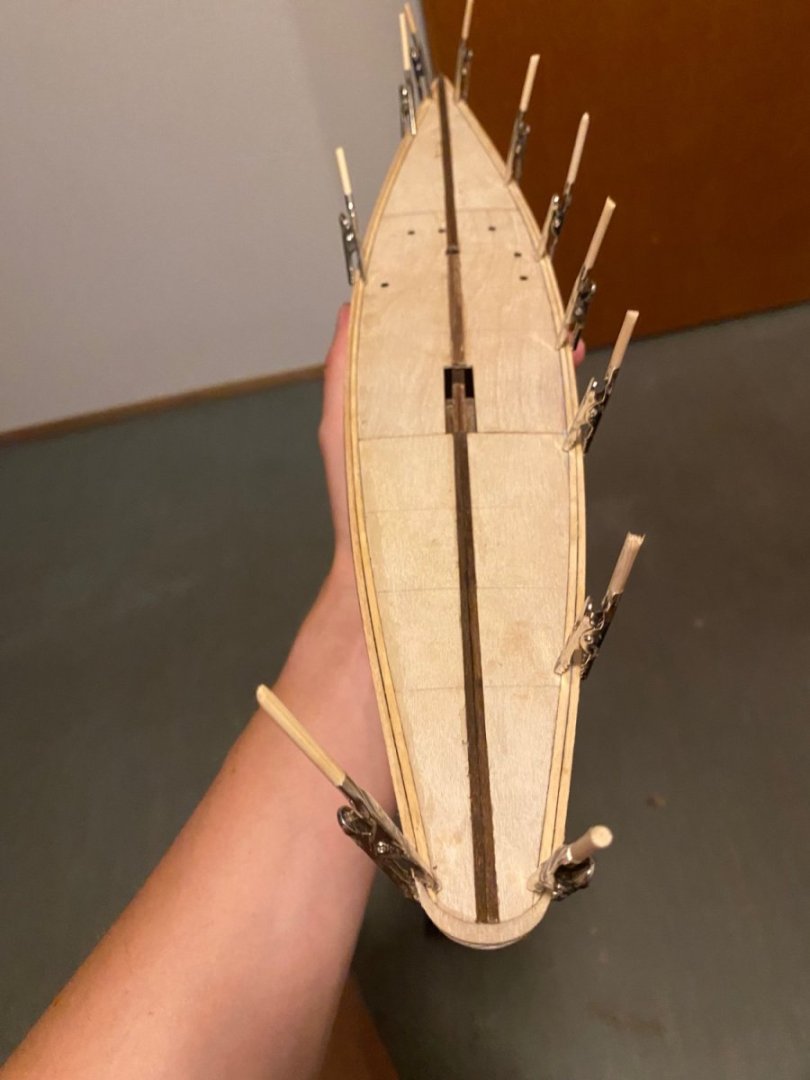
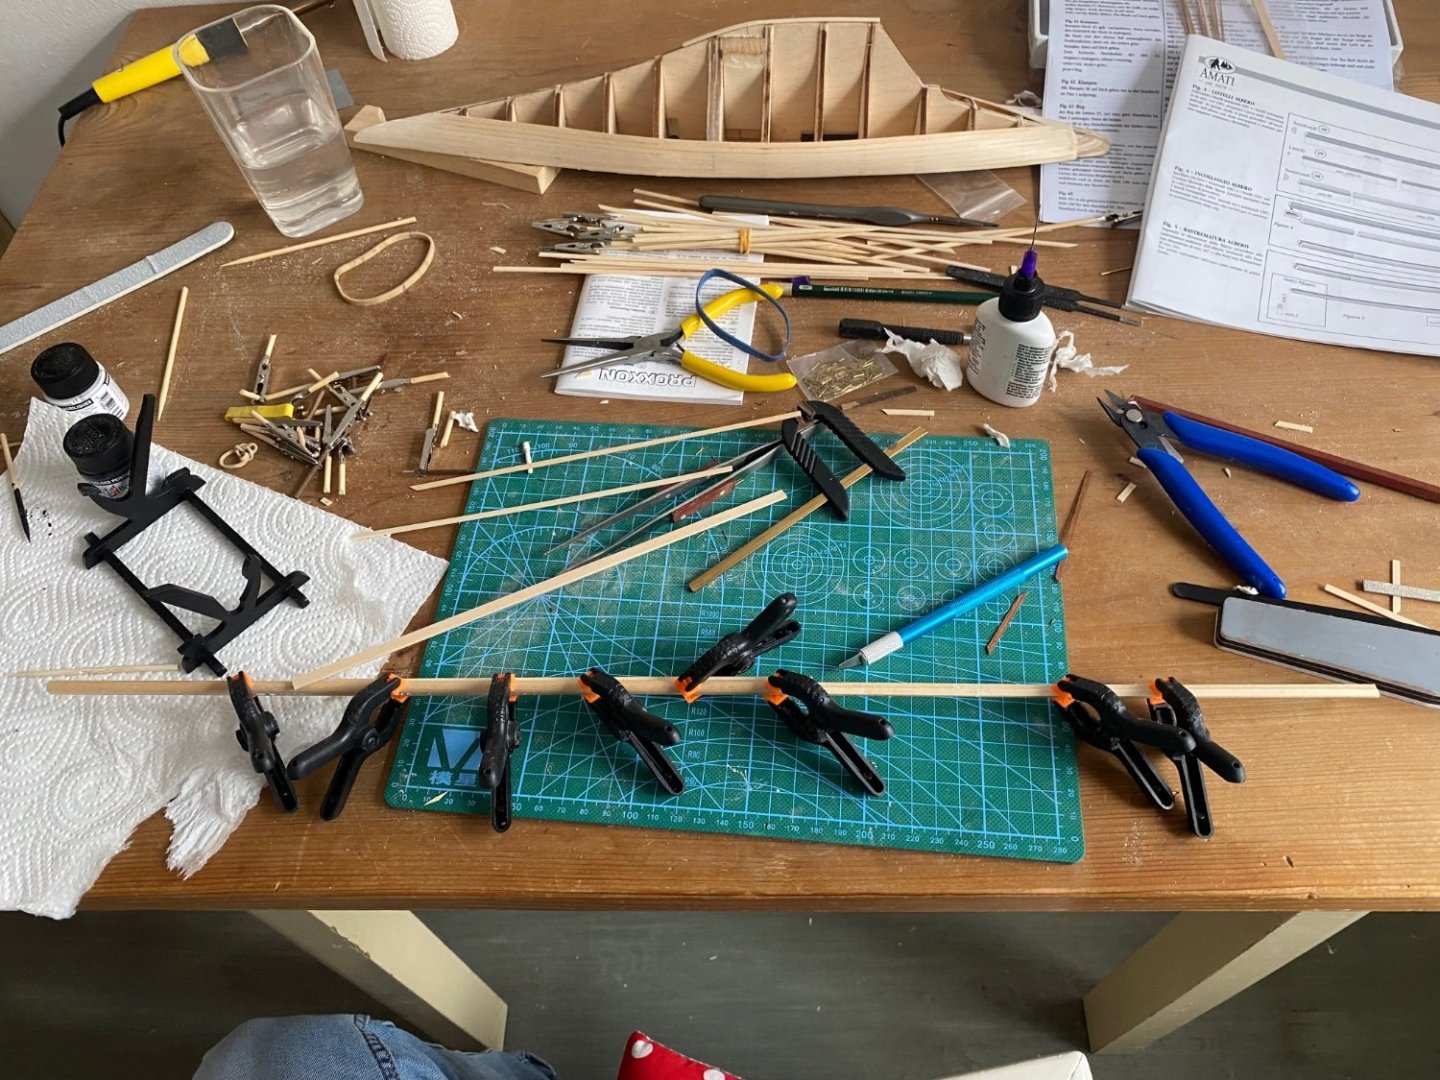
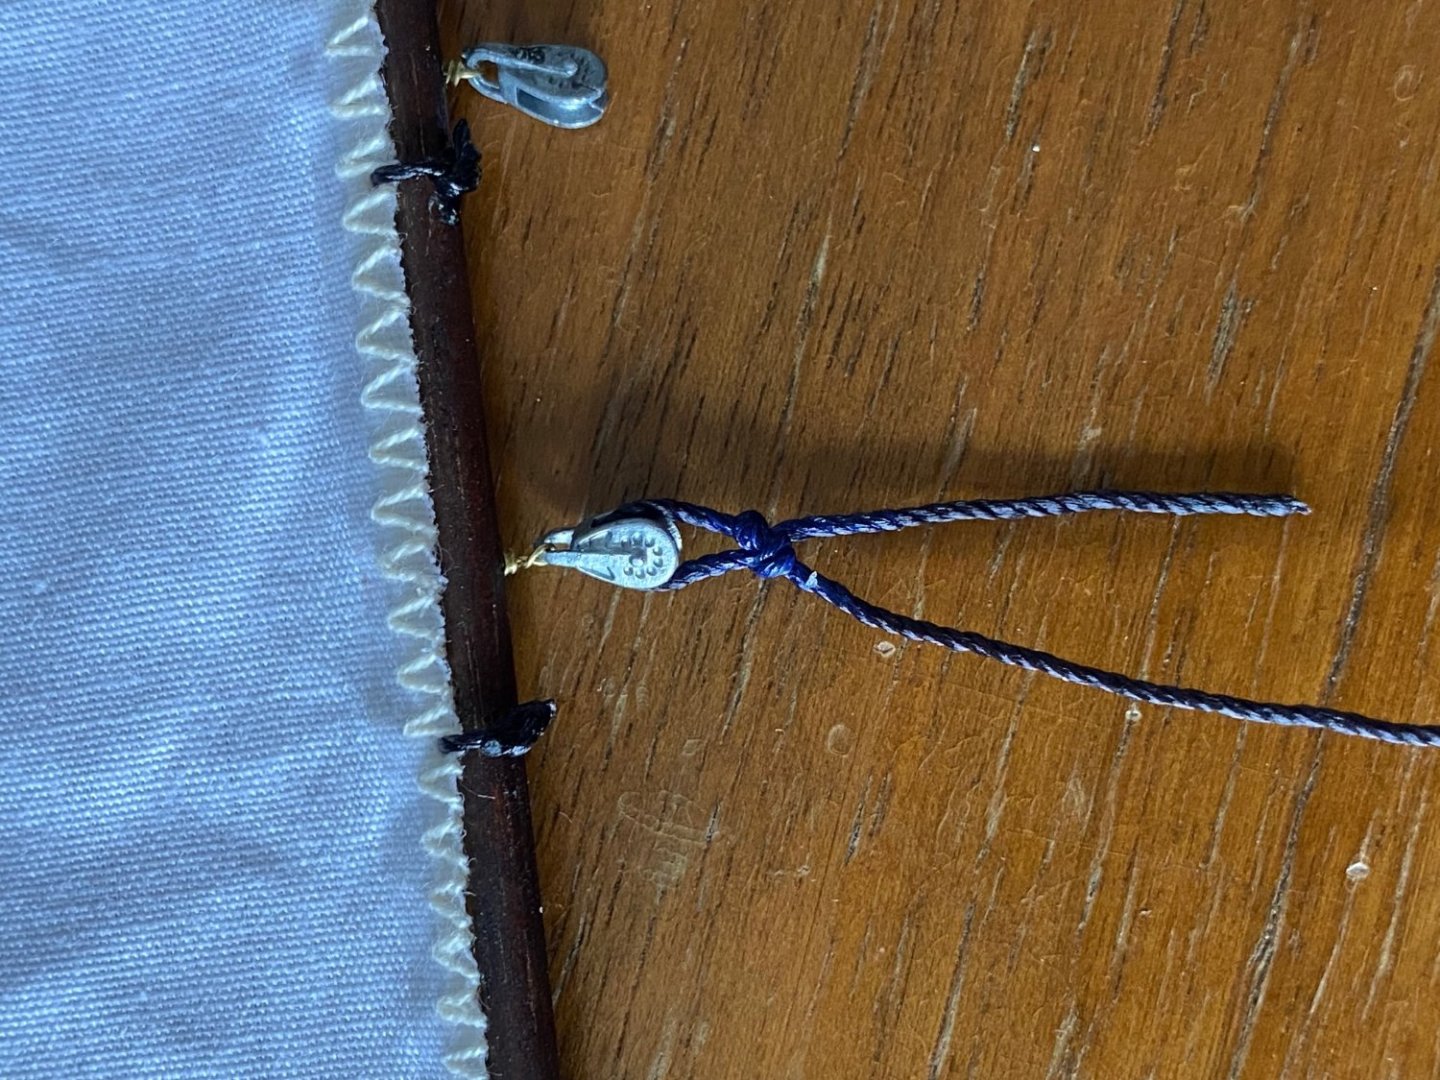
Puh that rigging is harder than I thougt it would be…finally know how to do the blocks 28 of them to do. That will take a lot of hours I think. rigging is going on:


-
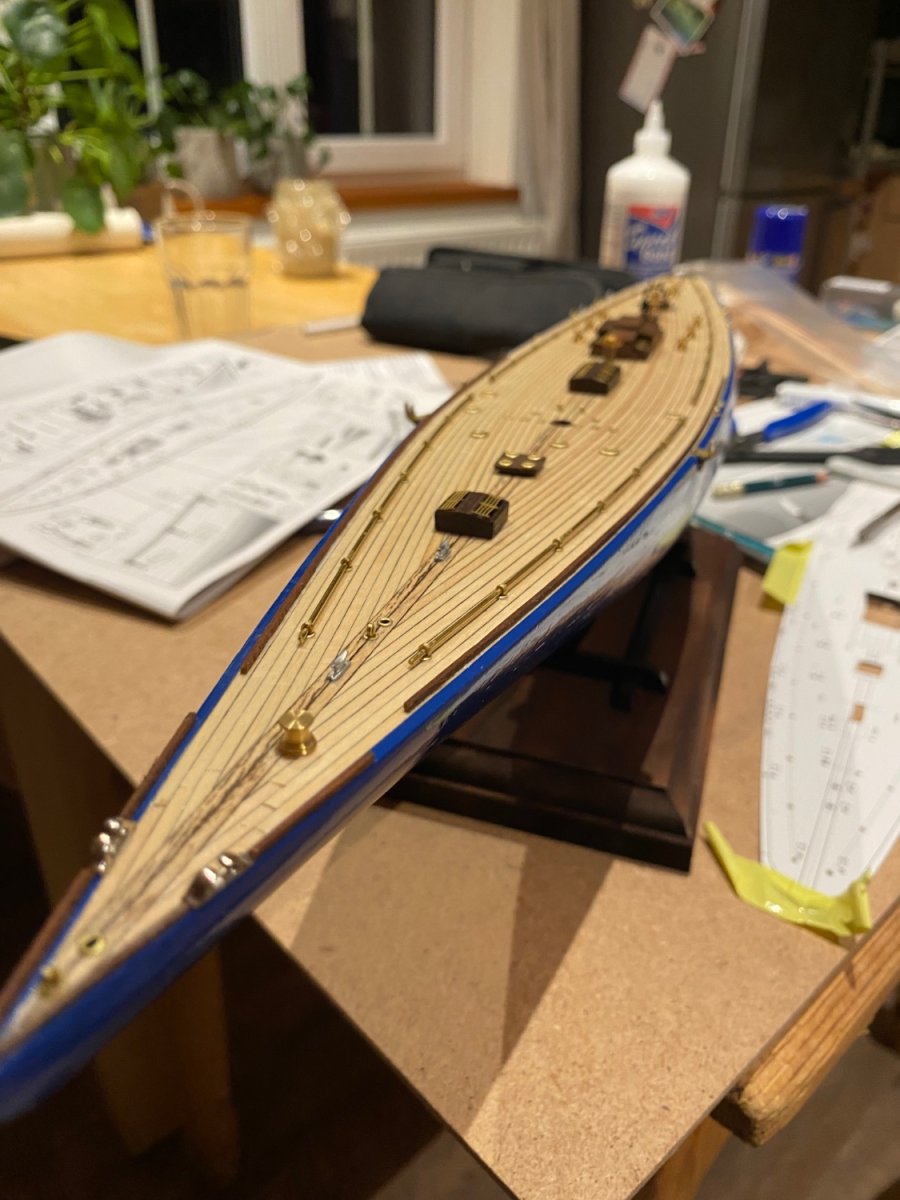
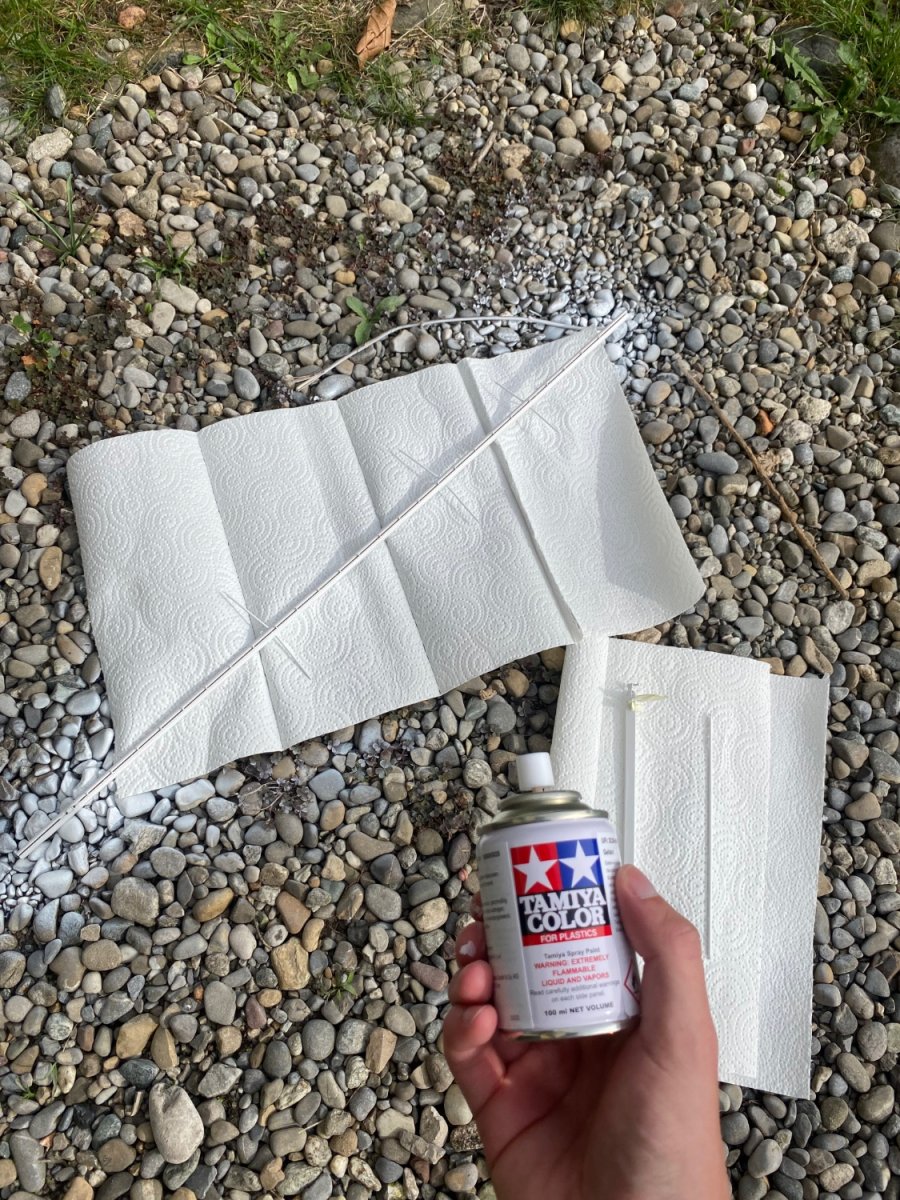
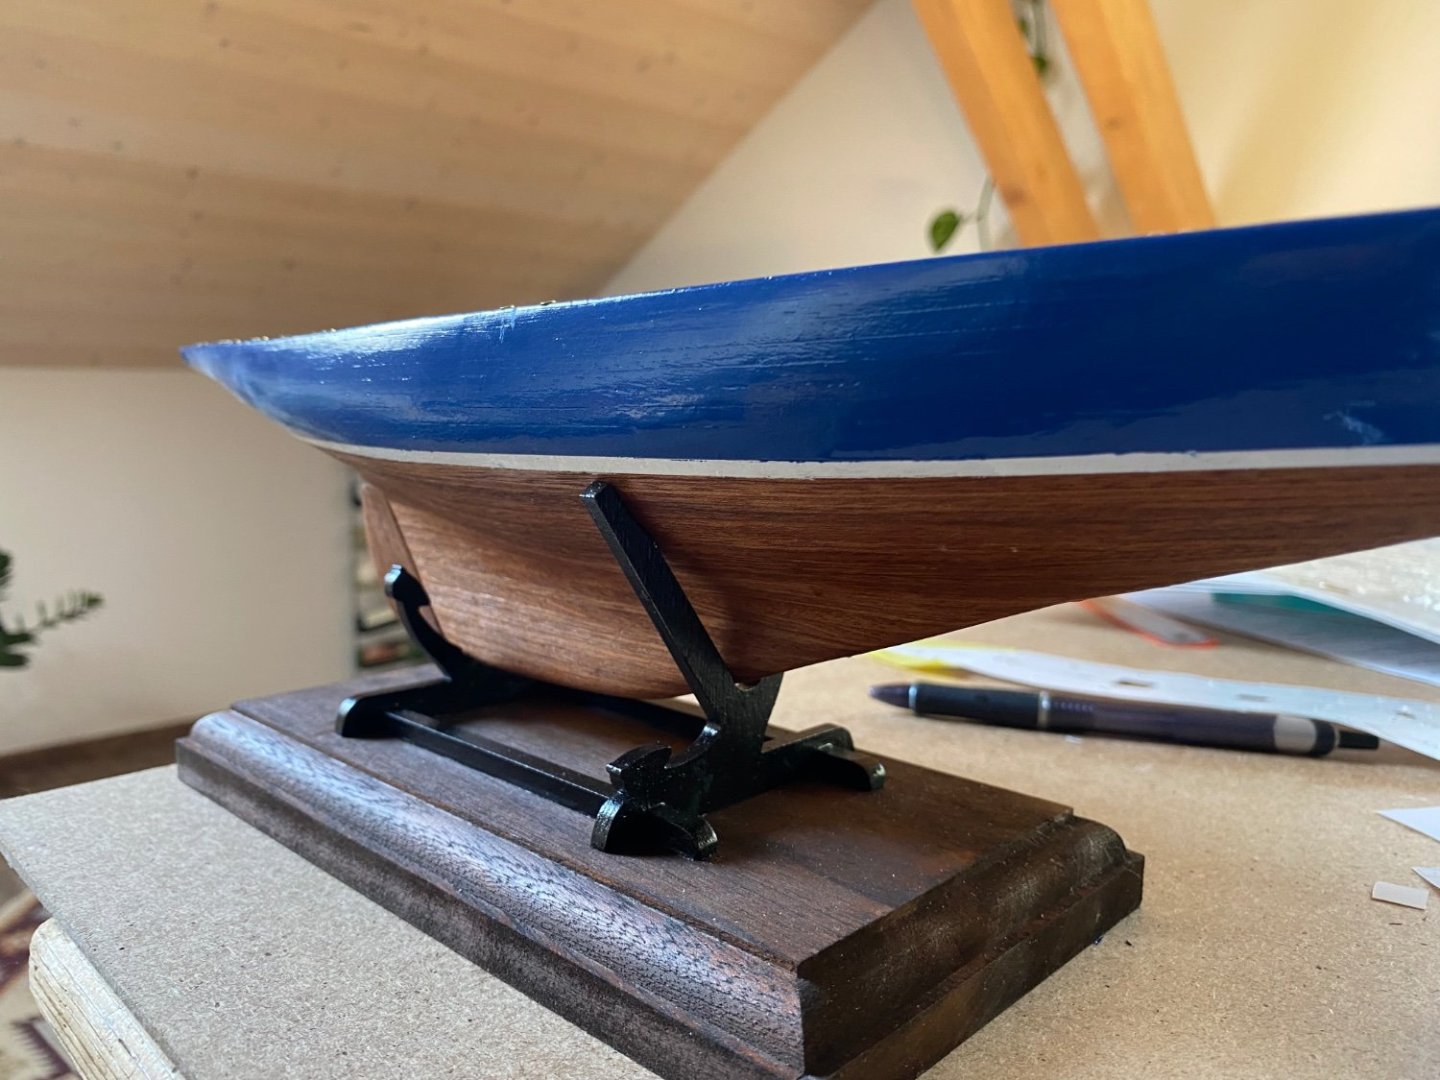
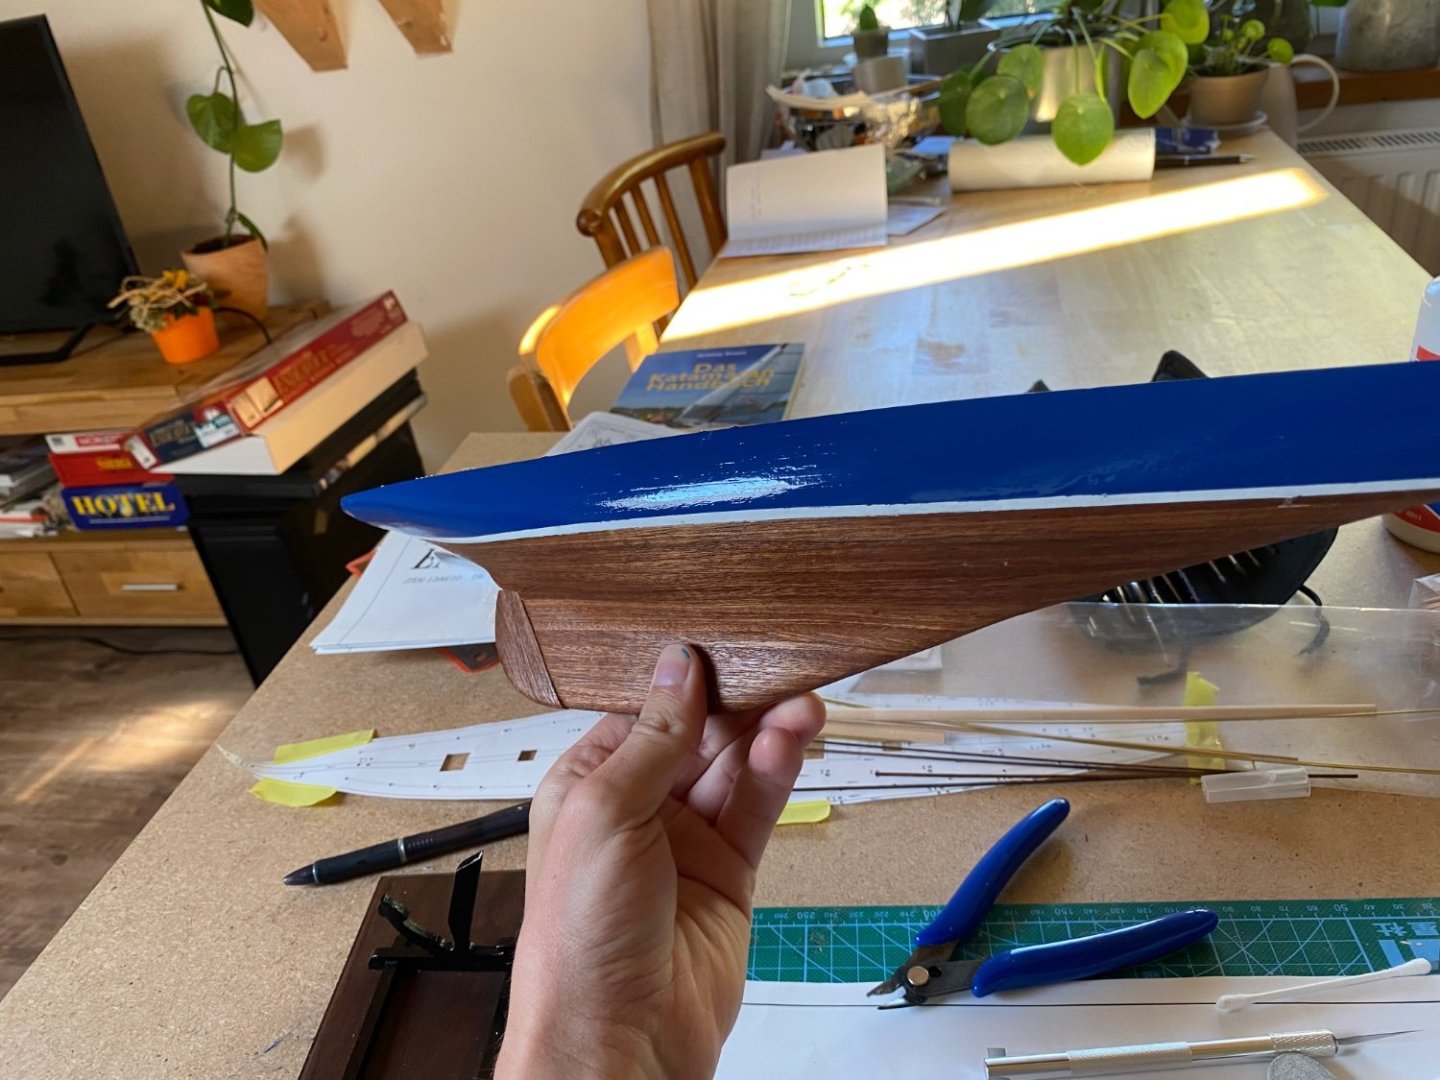
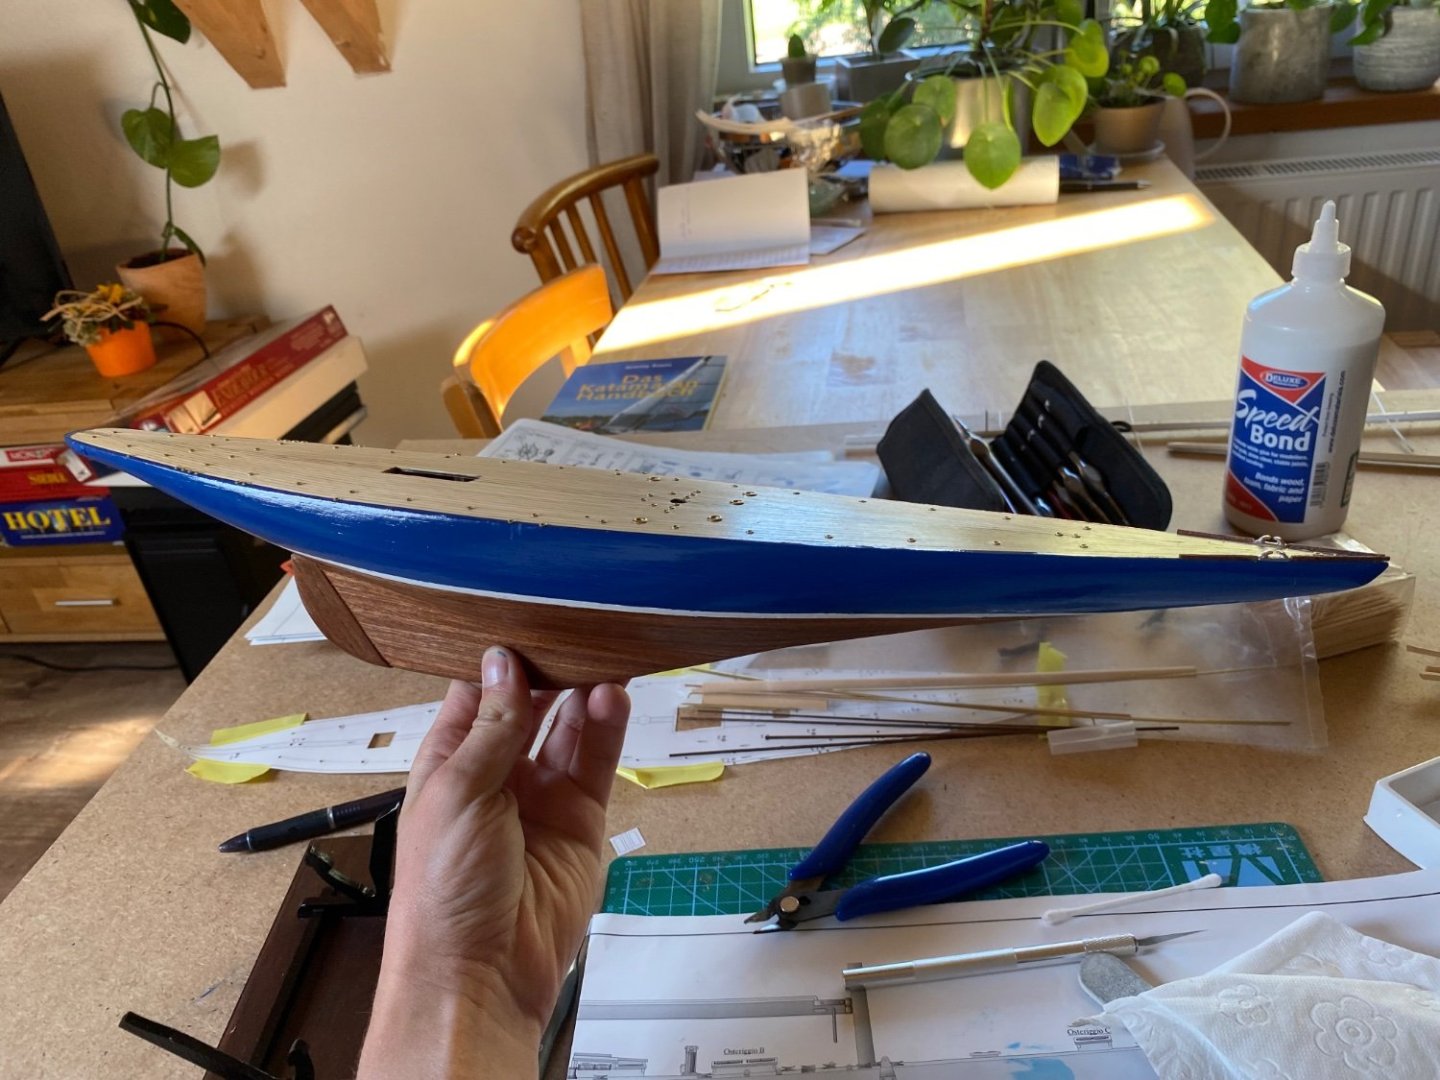
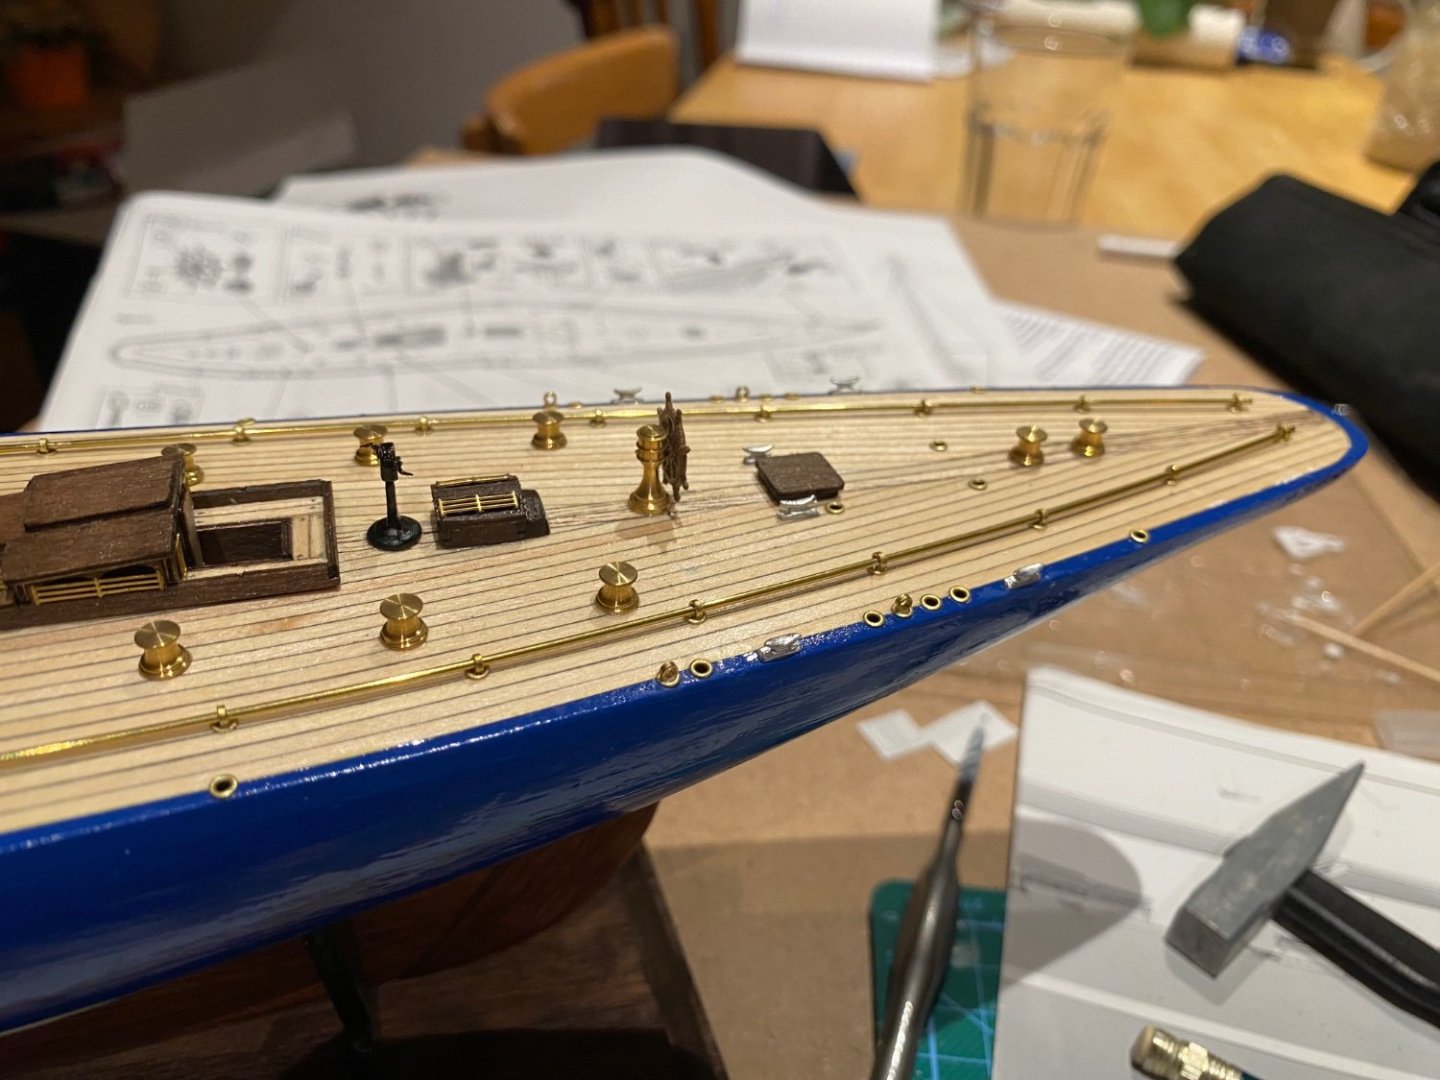
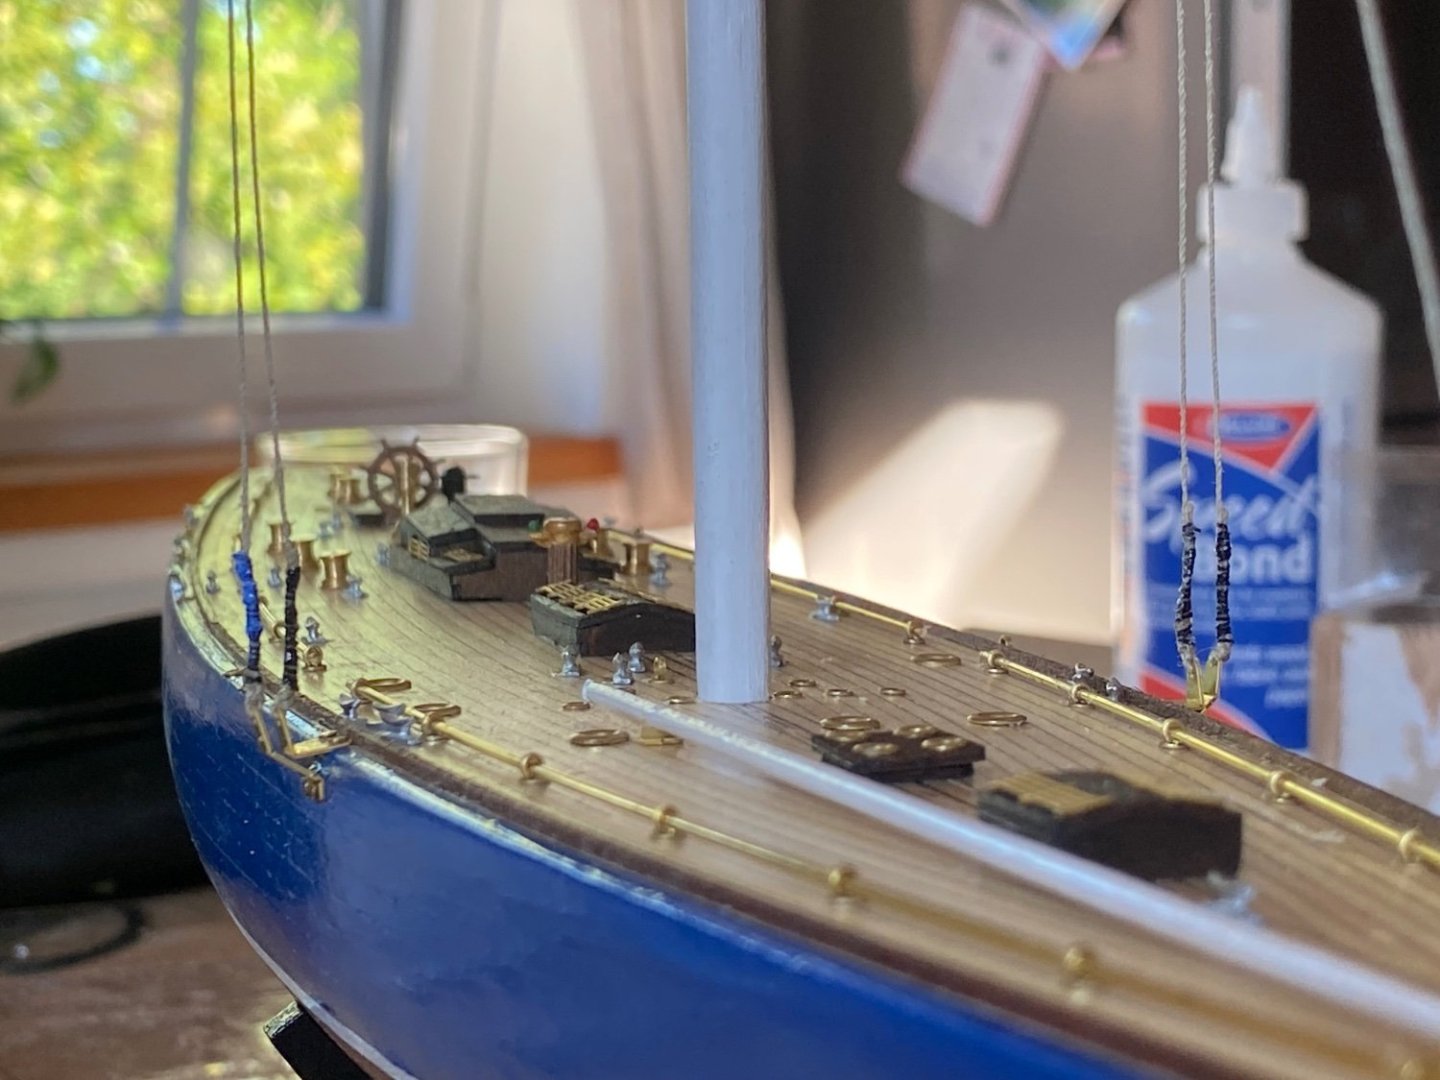
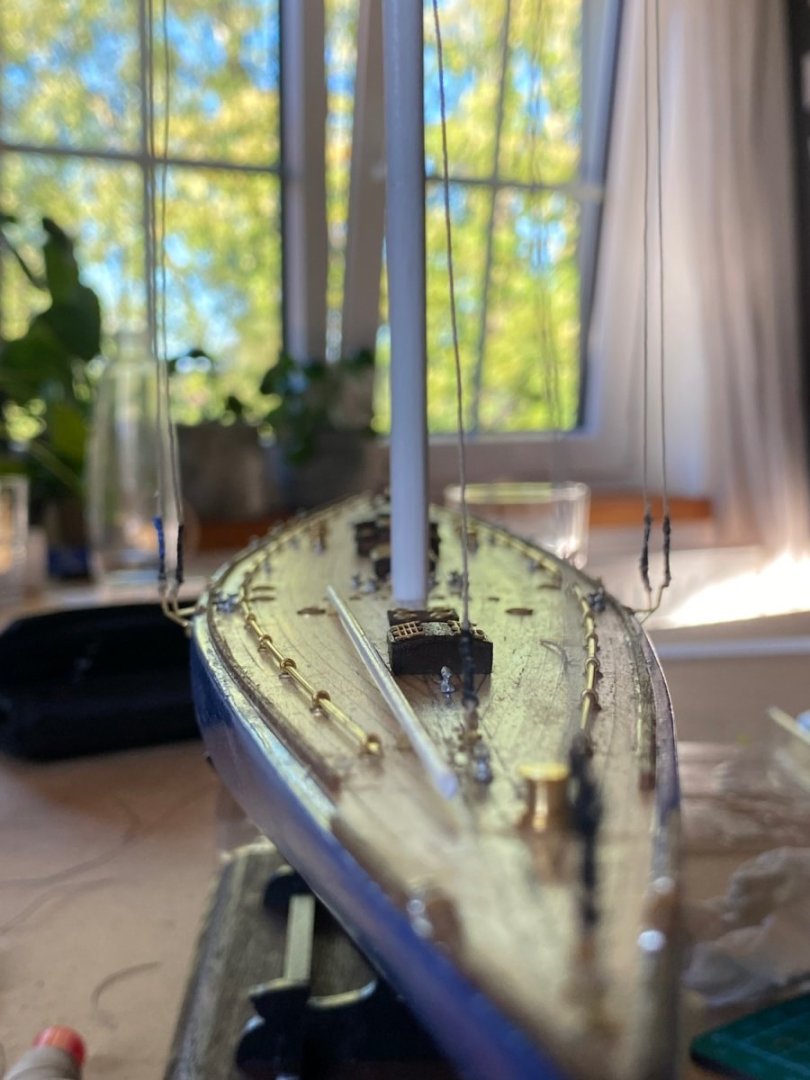
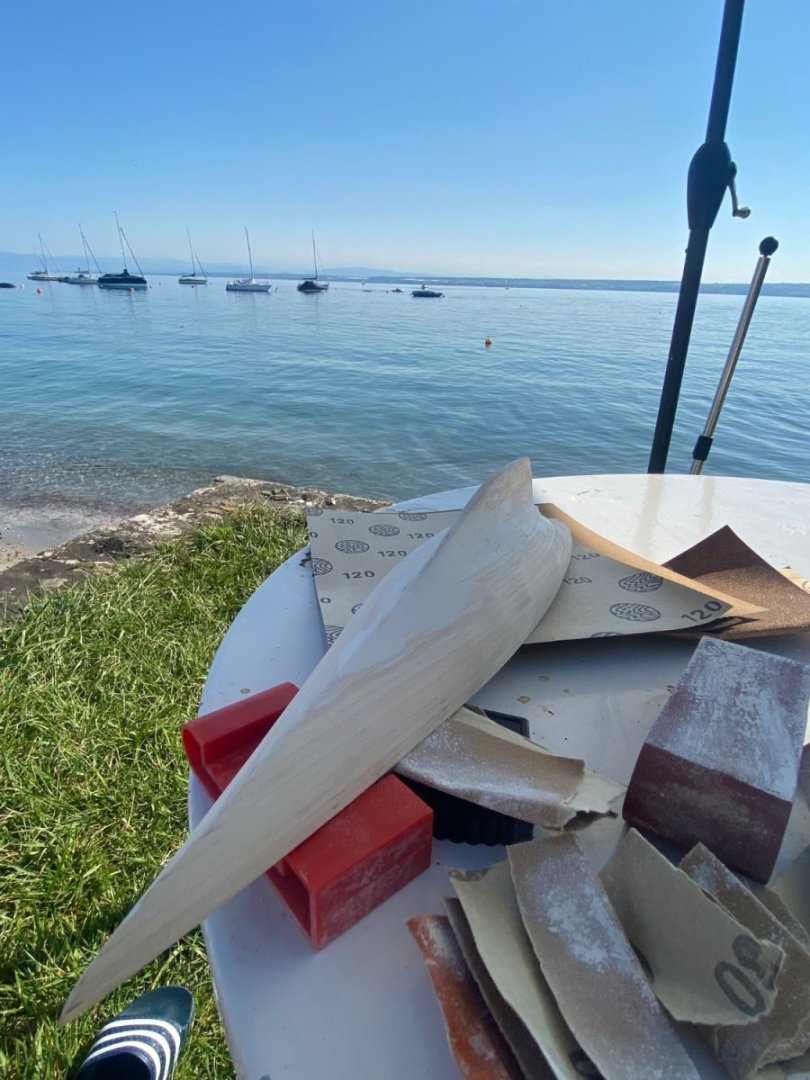
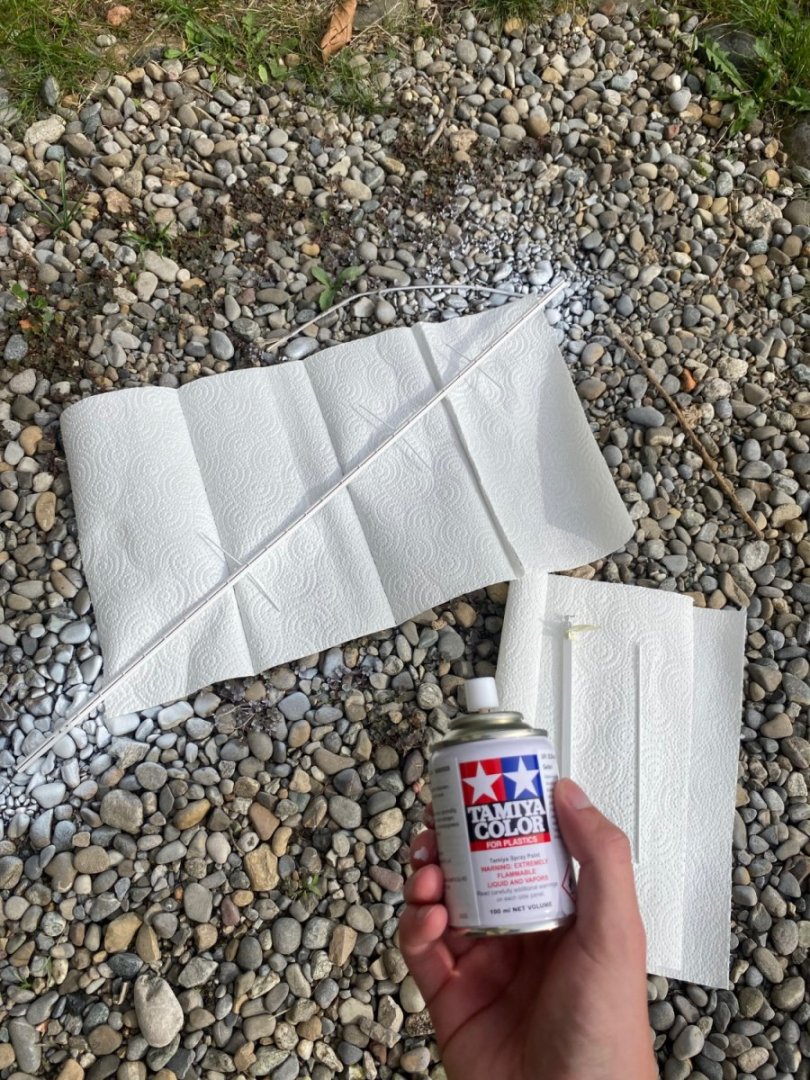
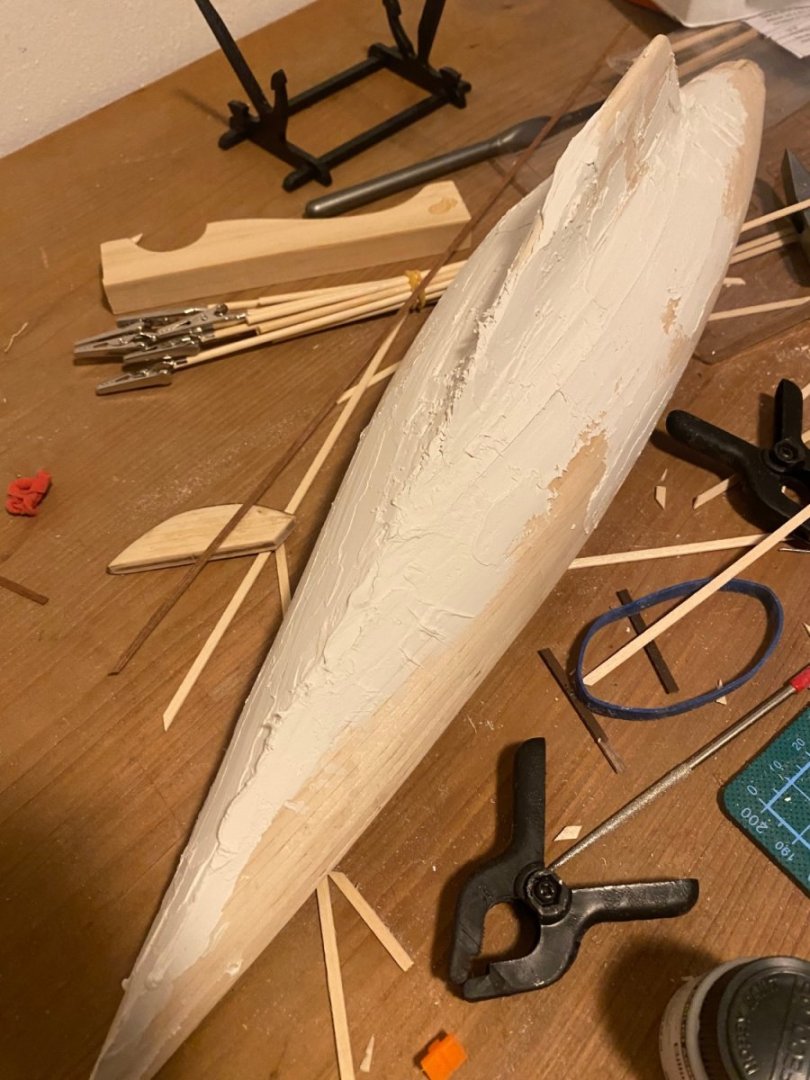
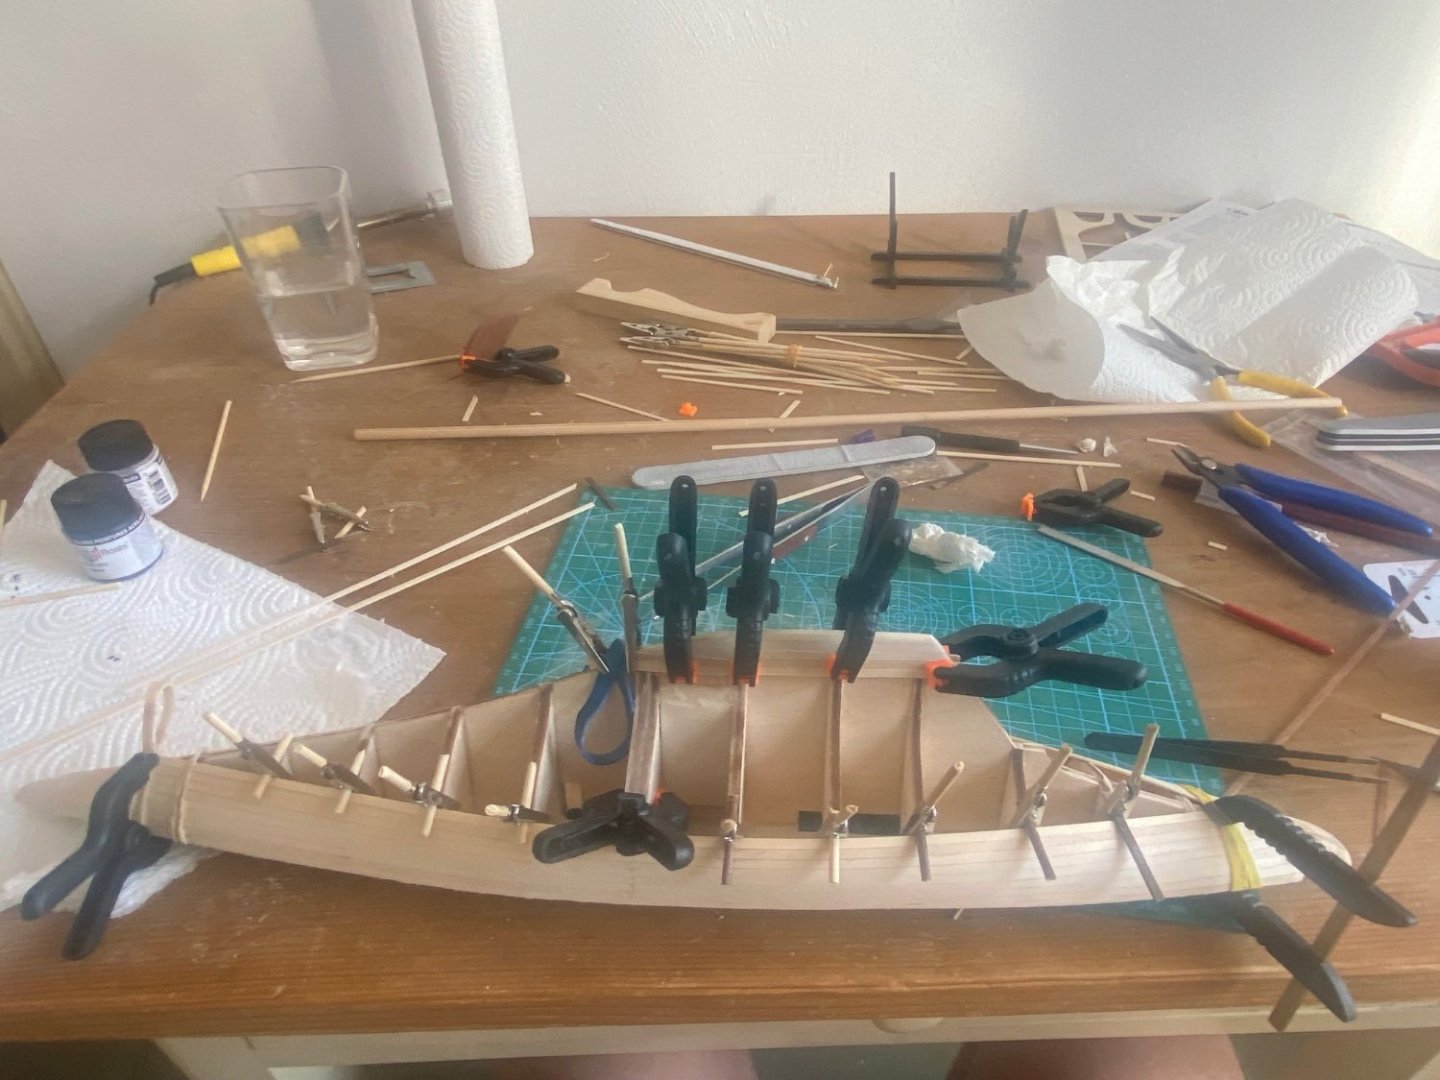
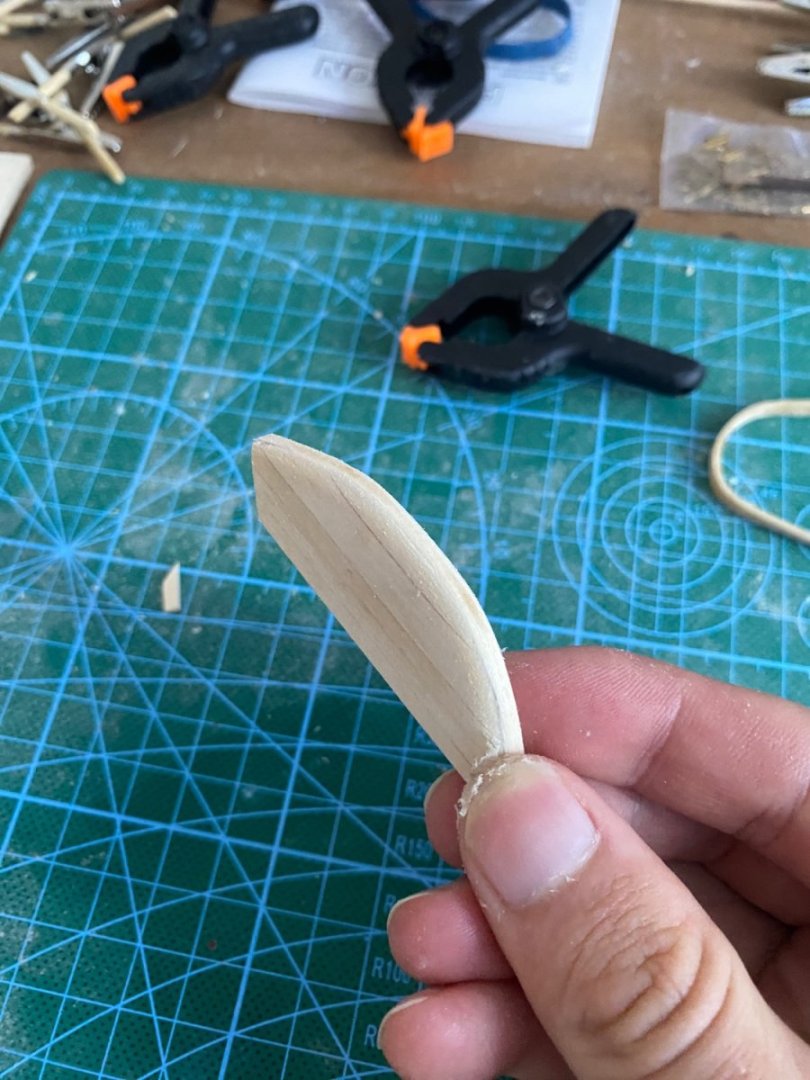
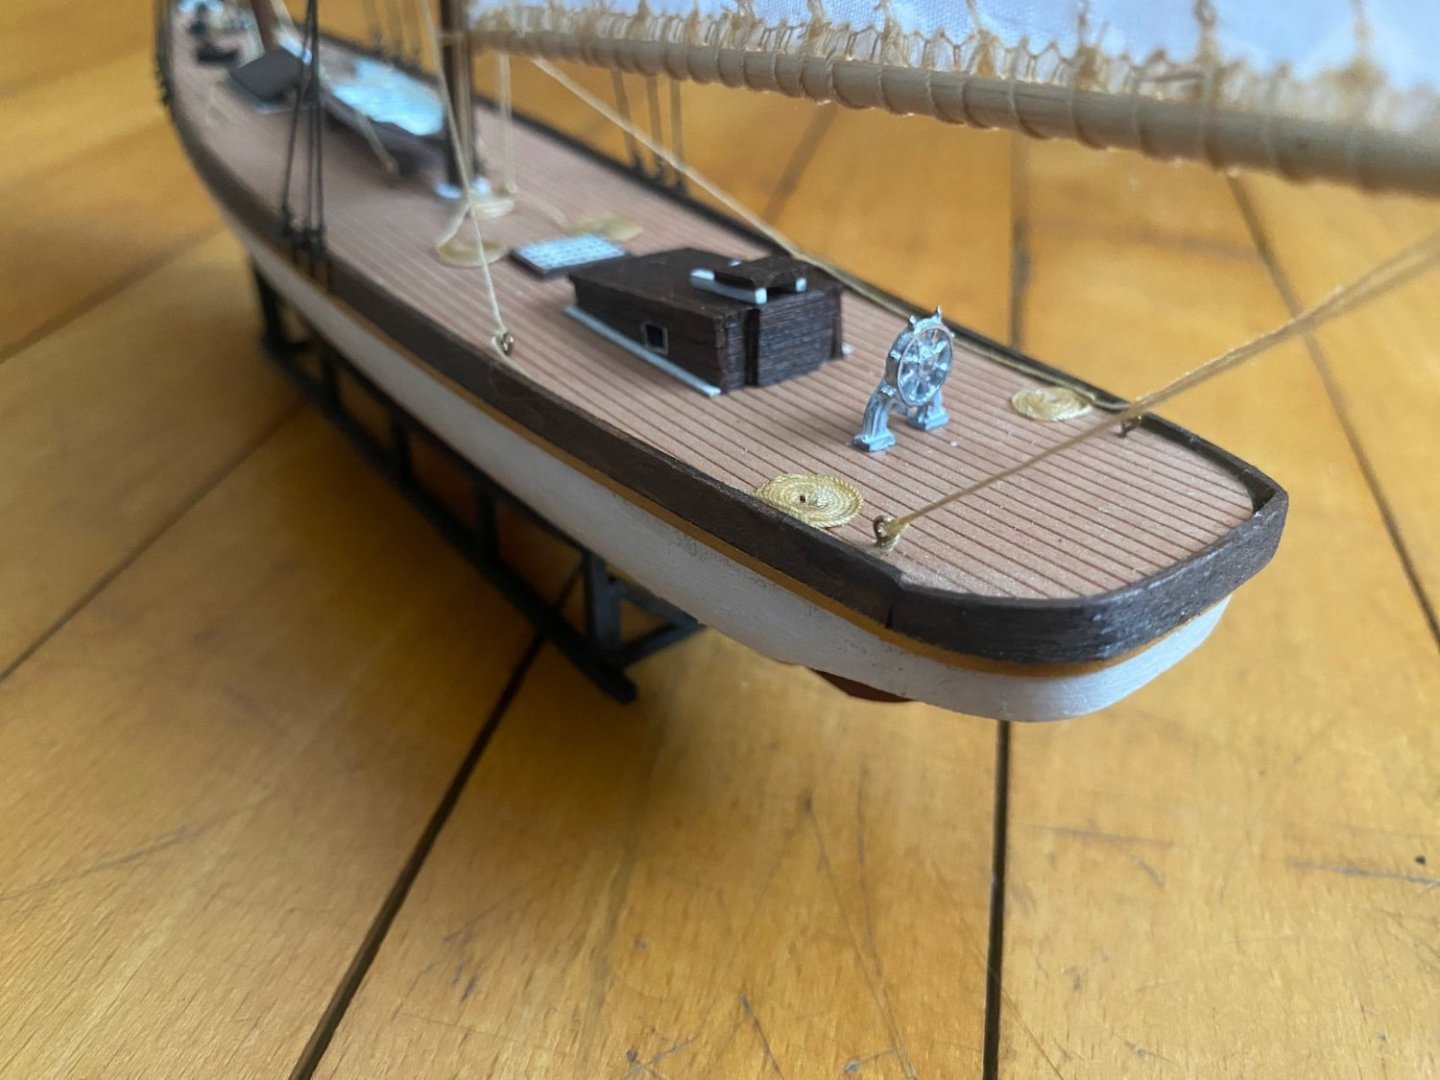
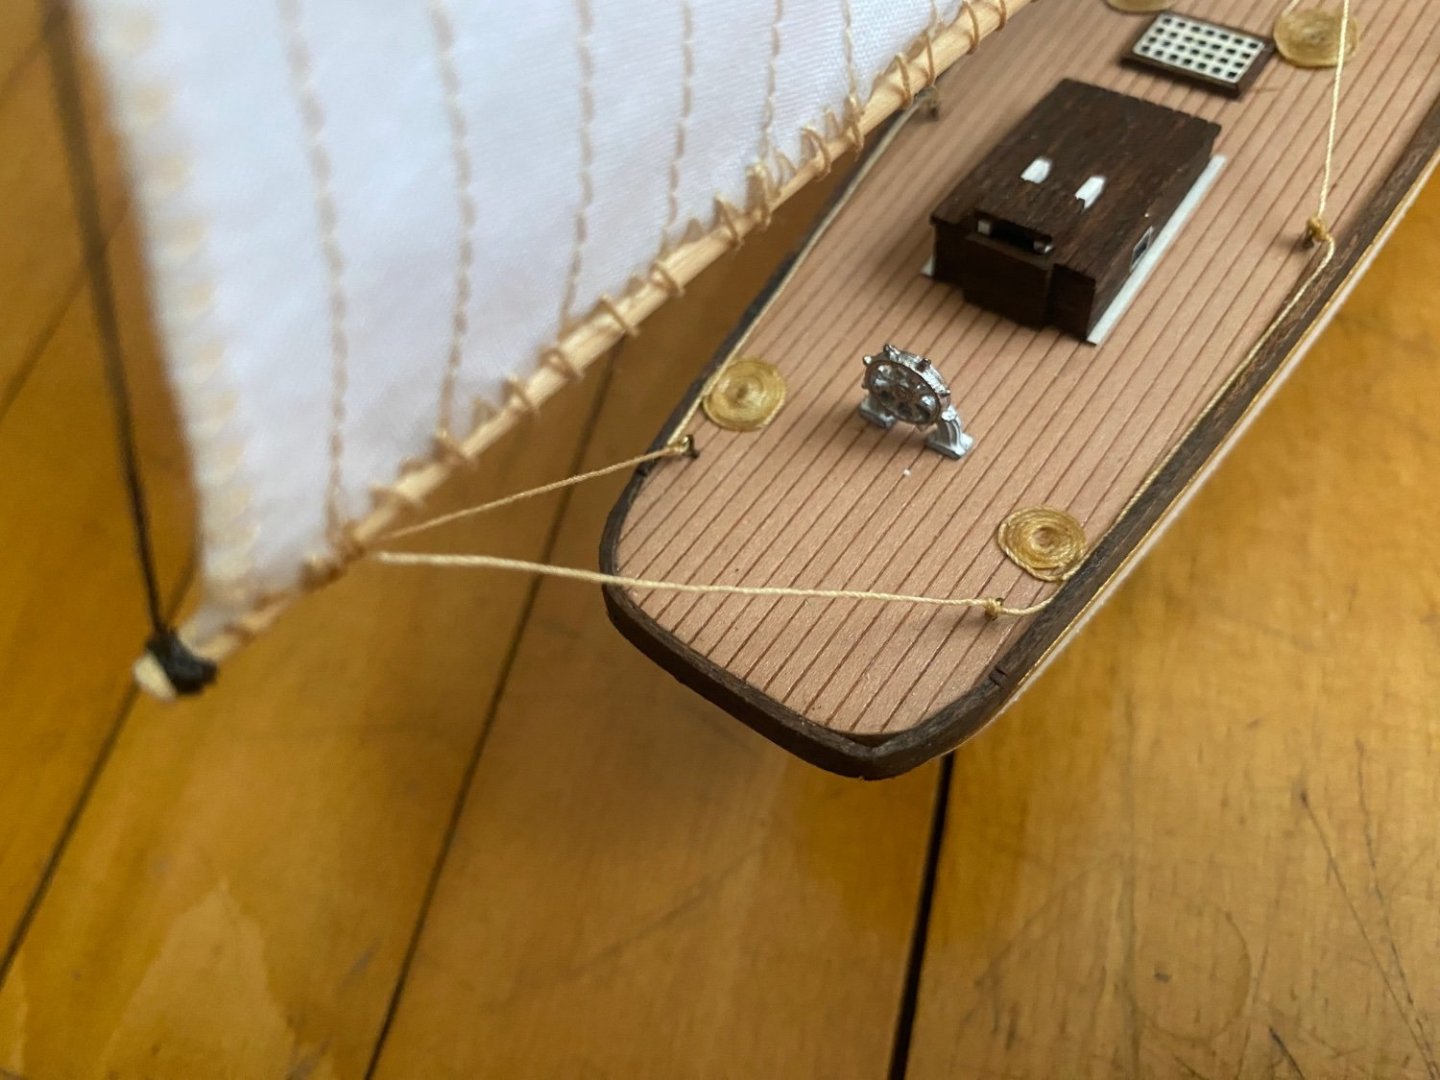
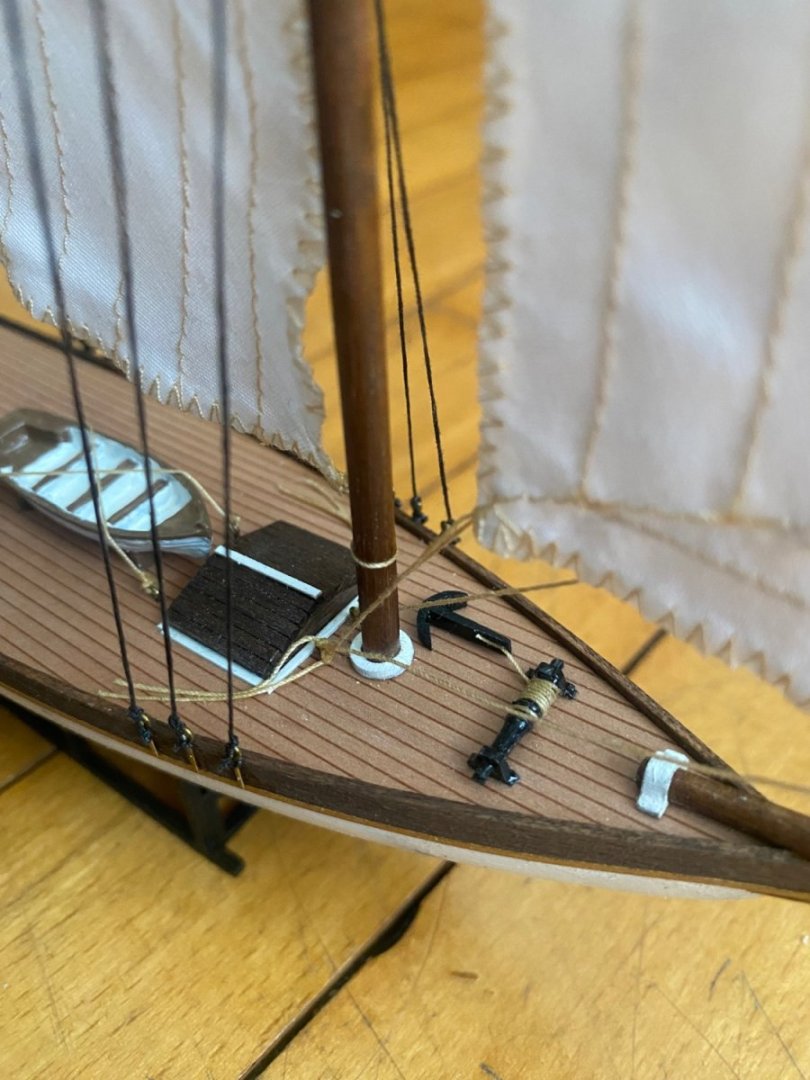
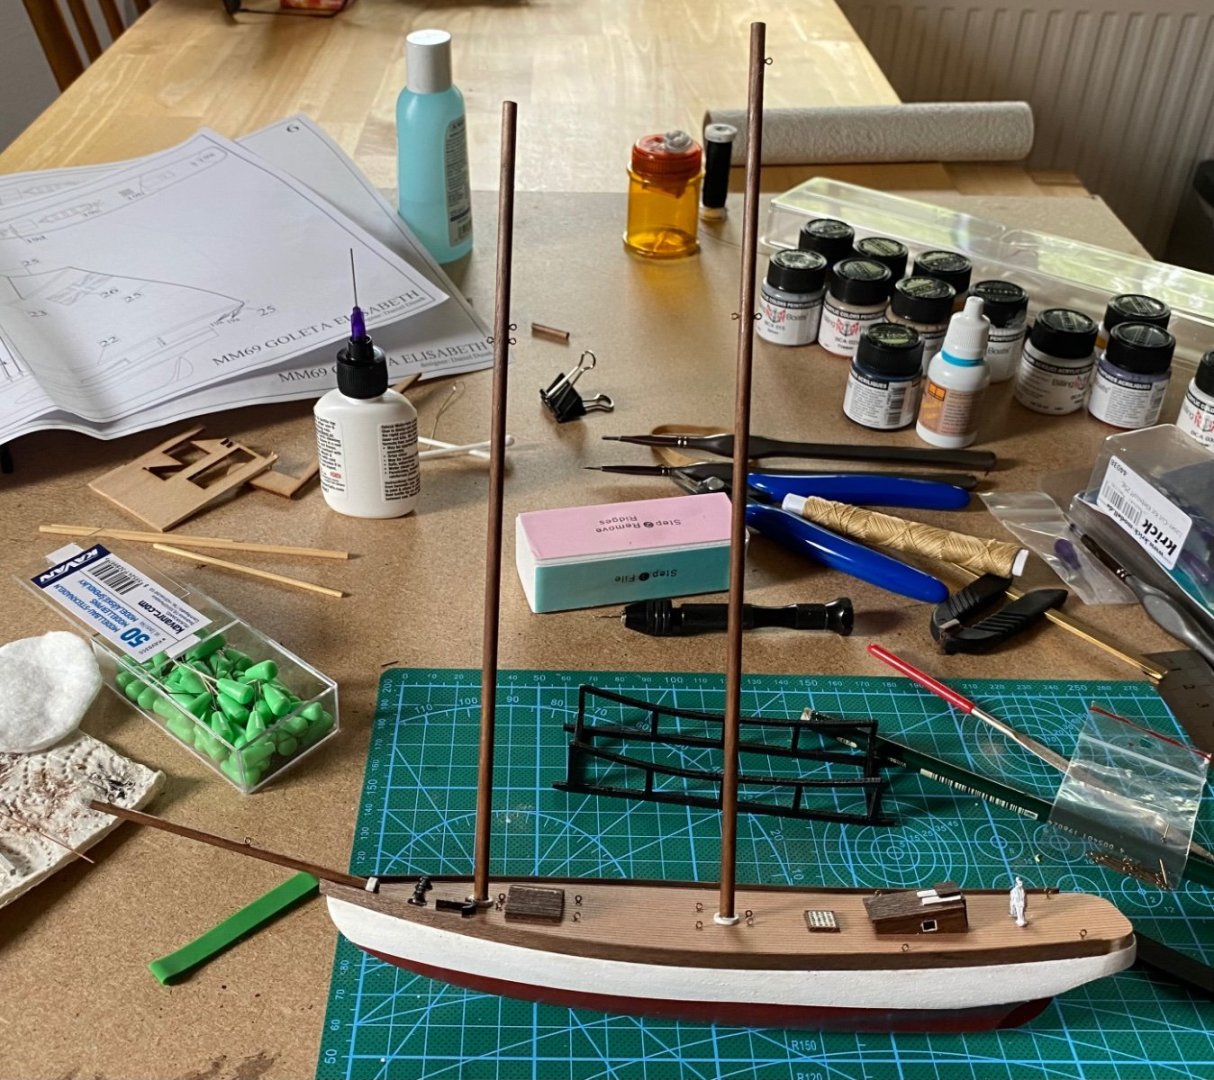
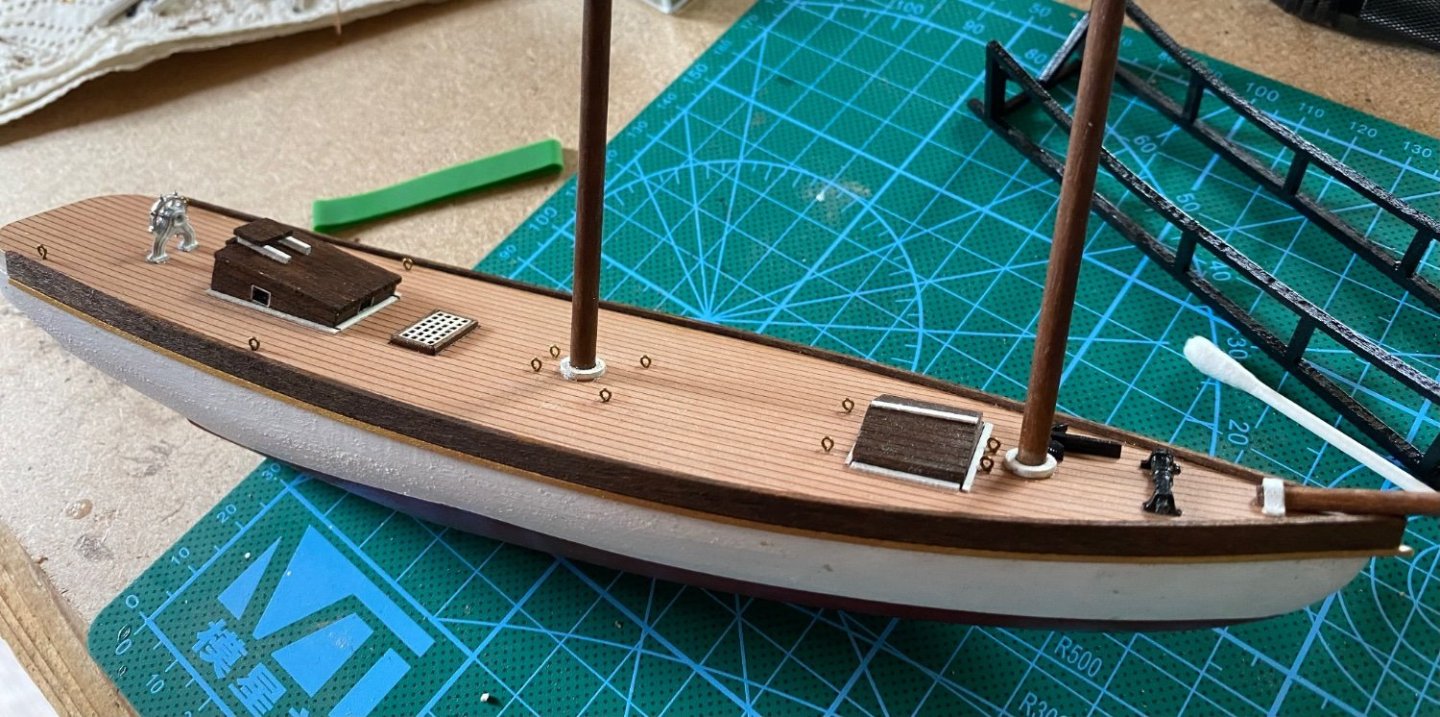
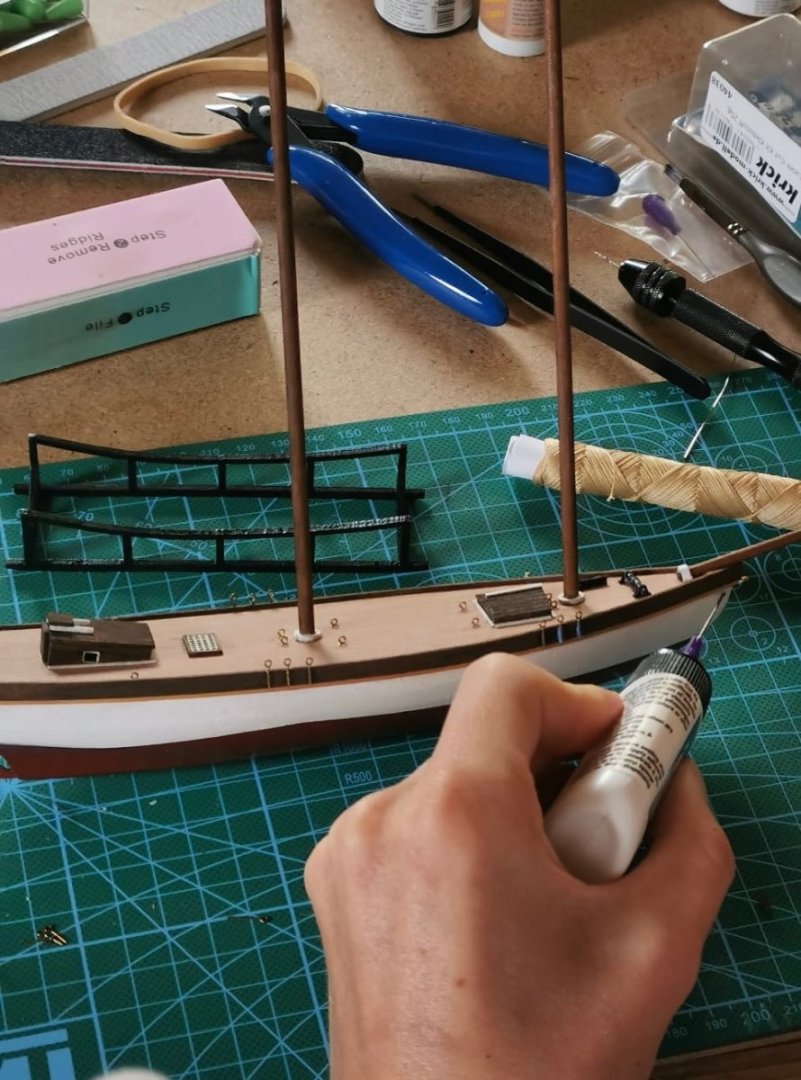
Lots of progress since my last post. So lets start with the painting of the hull. Decided to go like the original half half with blue colour and a white water line. At first I painted a layer of primer, than painted everything with three layers of white out of the spray can. The wood strucrure was still visible here and there. After the white layer covered the waterline and sprayed three layers of blue. Around the deck there should be a line of 5 mm also covered with paint. The outcome had some failures around the water line with some blue on the white stripe. But that was easy to cover with a brush and white acrylic paint. Removed all the tape and covered everything with two layers off clear acryilic gloss paint. The final hull: The deck with the small painted stripe on the sides: So after the most scary part of building this model I really like the outcome. The colour of the blue might be brighter than the original darker blue but I still like the look of it. In some pictures of the original boat there is a second, thinner waterline just below the deck. But I decided not to overload it with this line. Next up is adding the deck buildings and fittings which was kinda easy. Except the blocks of the rigging. Puh I still dont know how to do them. The instructions are unclear and the wooden blocks are really small. Dont know how to do that with the privided realatively thick rope. Main cabin fits perfect: Already most of the stuff attached: Added the missing deck parts and went already on with the rigging: Mast is set and the first 6 lines to the front and sides are in place. Still dont know how to do the blocks… The endings I will glue together as doubled rope and coil a thin black rope around it… First try of that was not perfect but I will get better with the next ones… Looking ok now. The mast is huge! Thats it for now. Lets see how the rigging goes on… I dont know if I will attach sails. The provided ones dont look good I think.


-
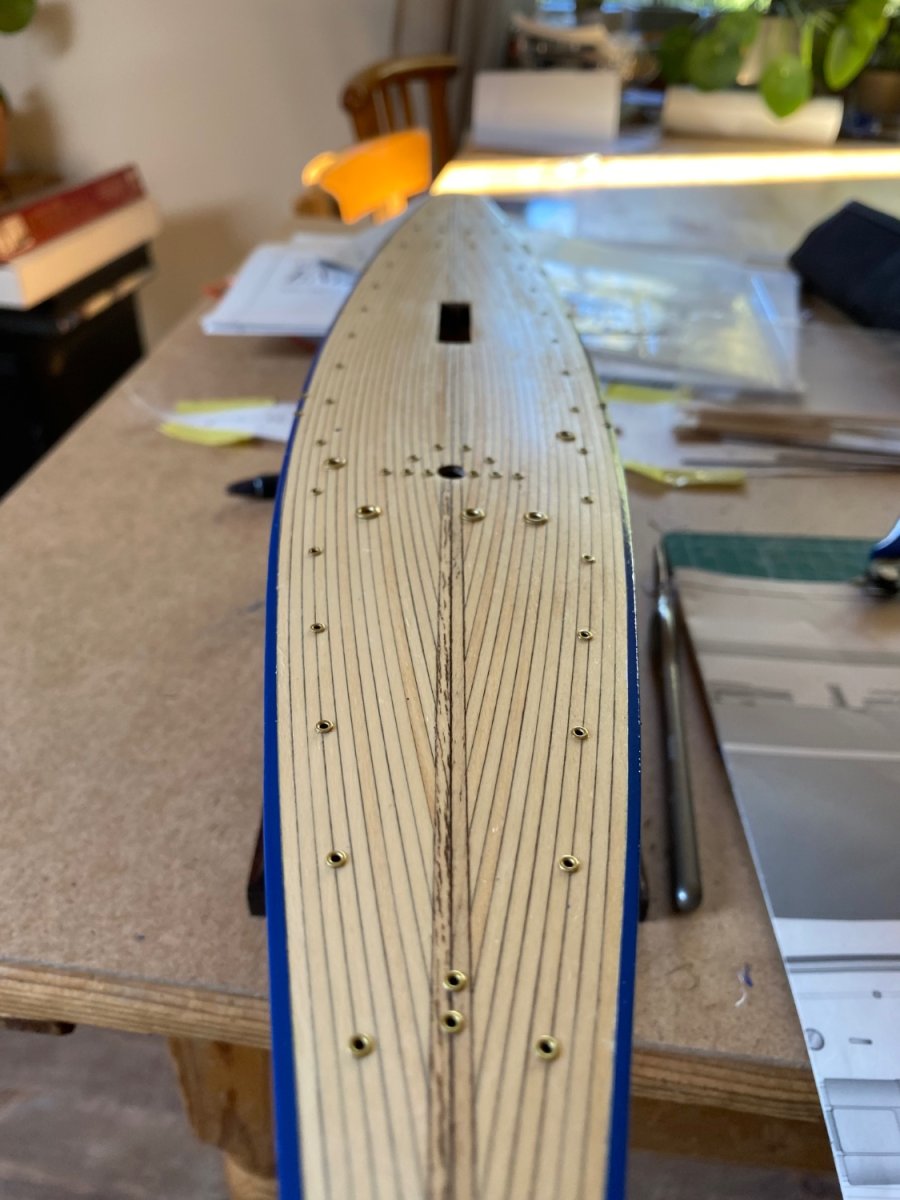
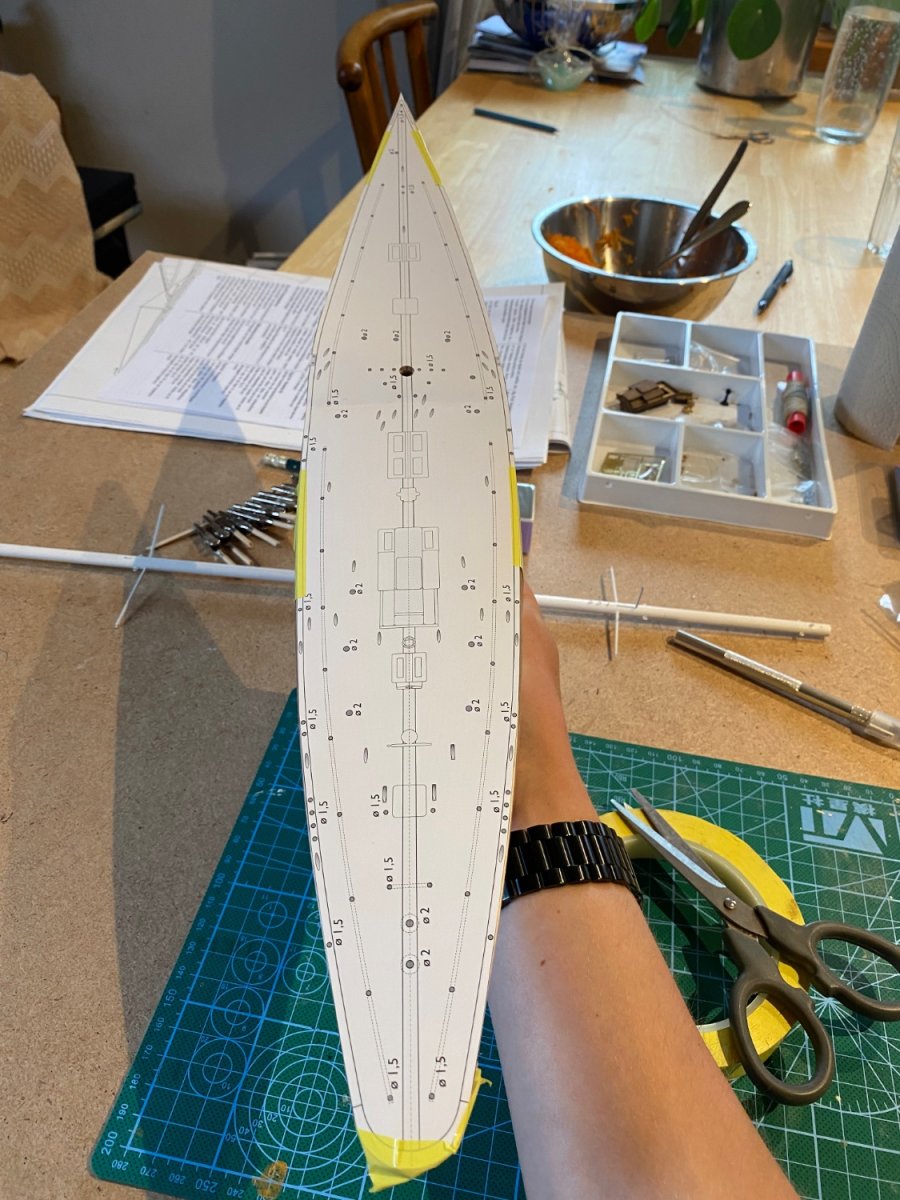
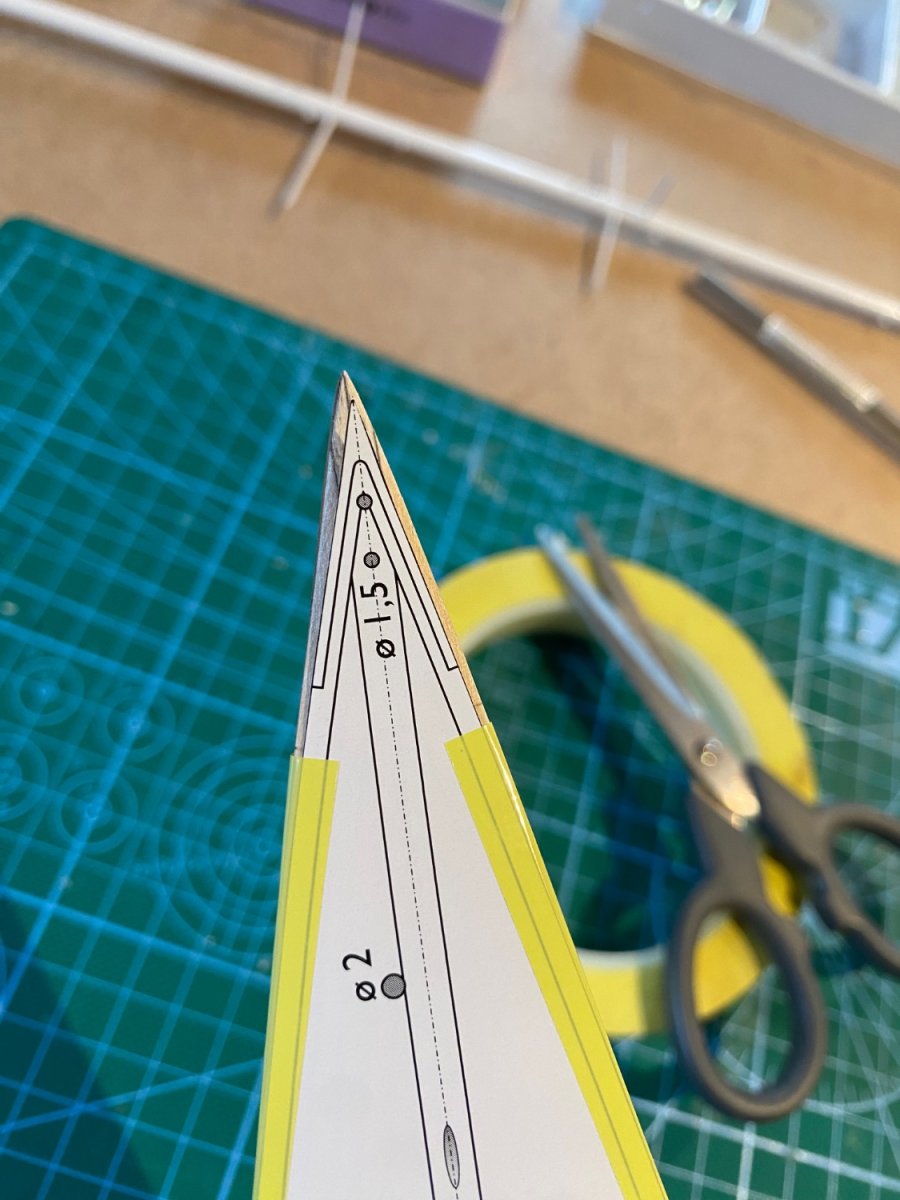
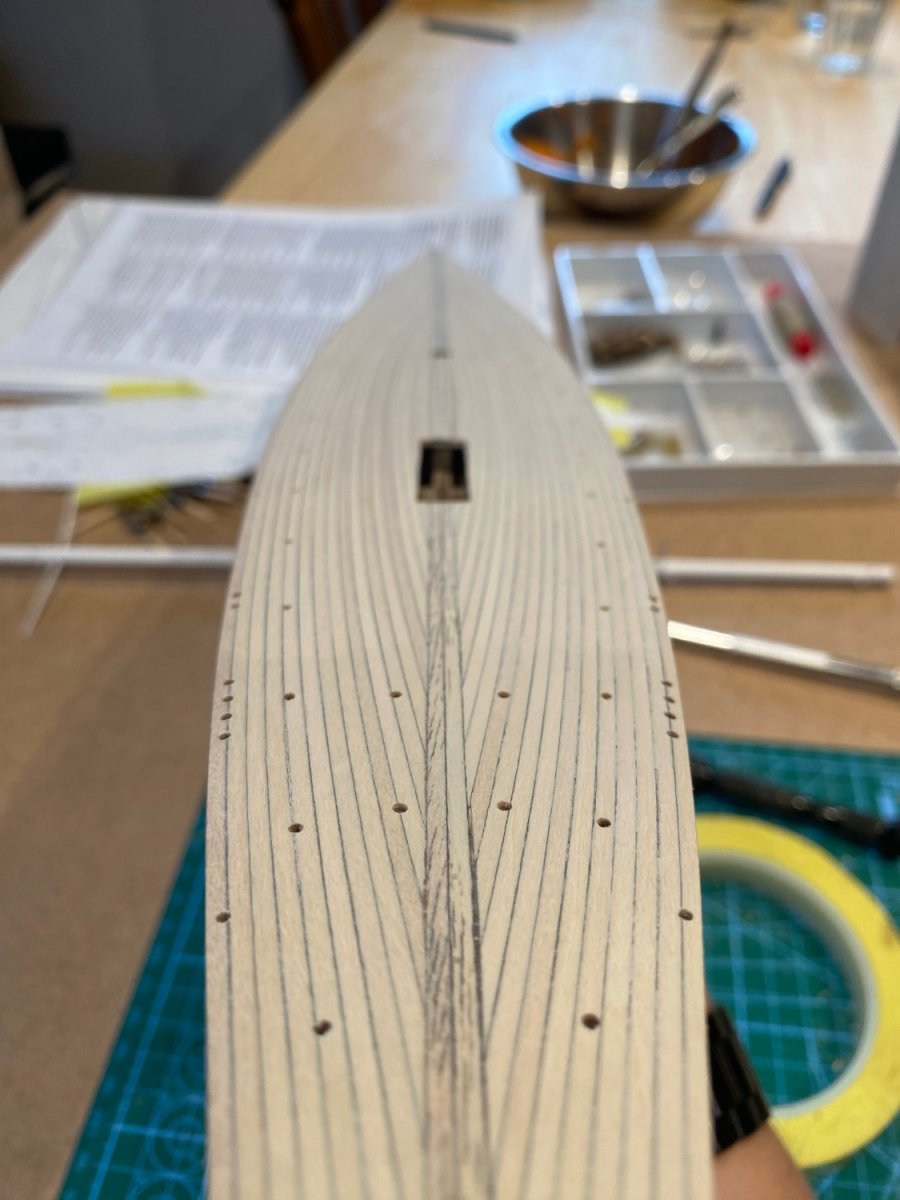
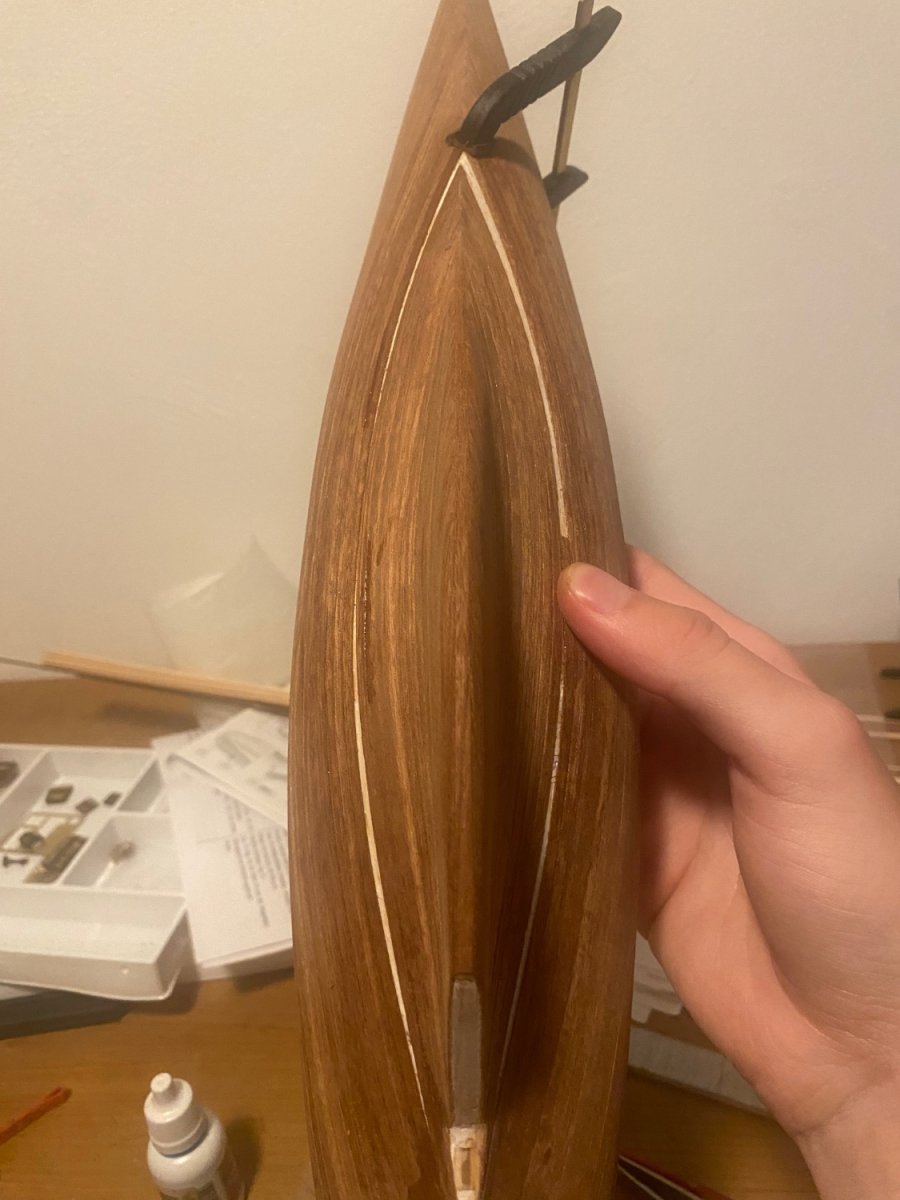
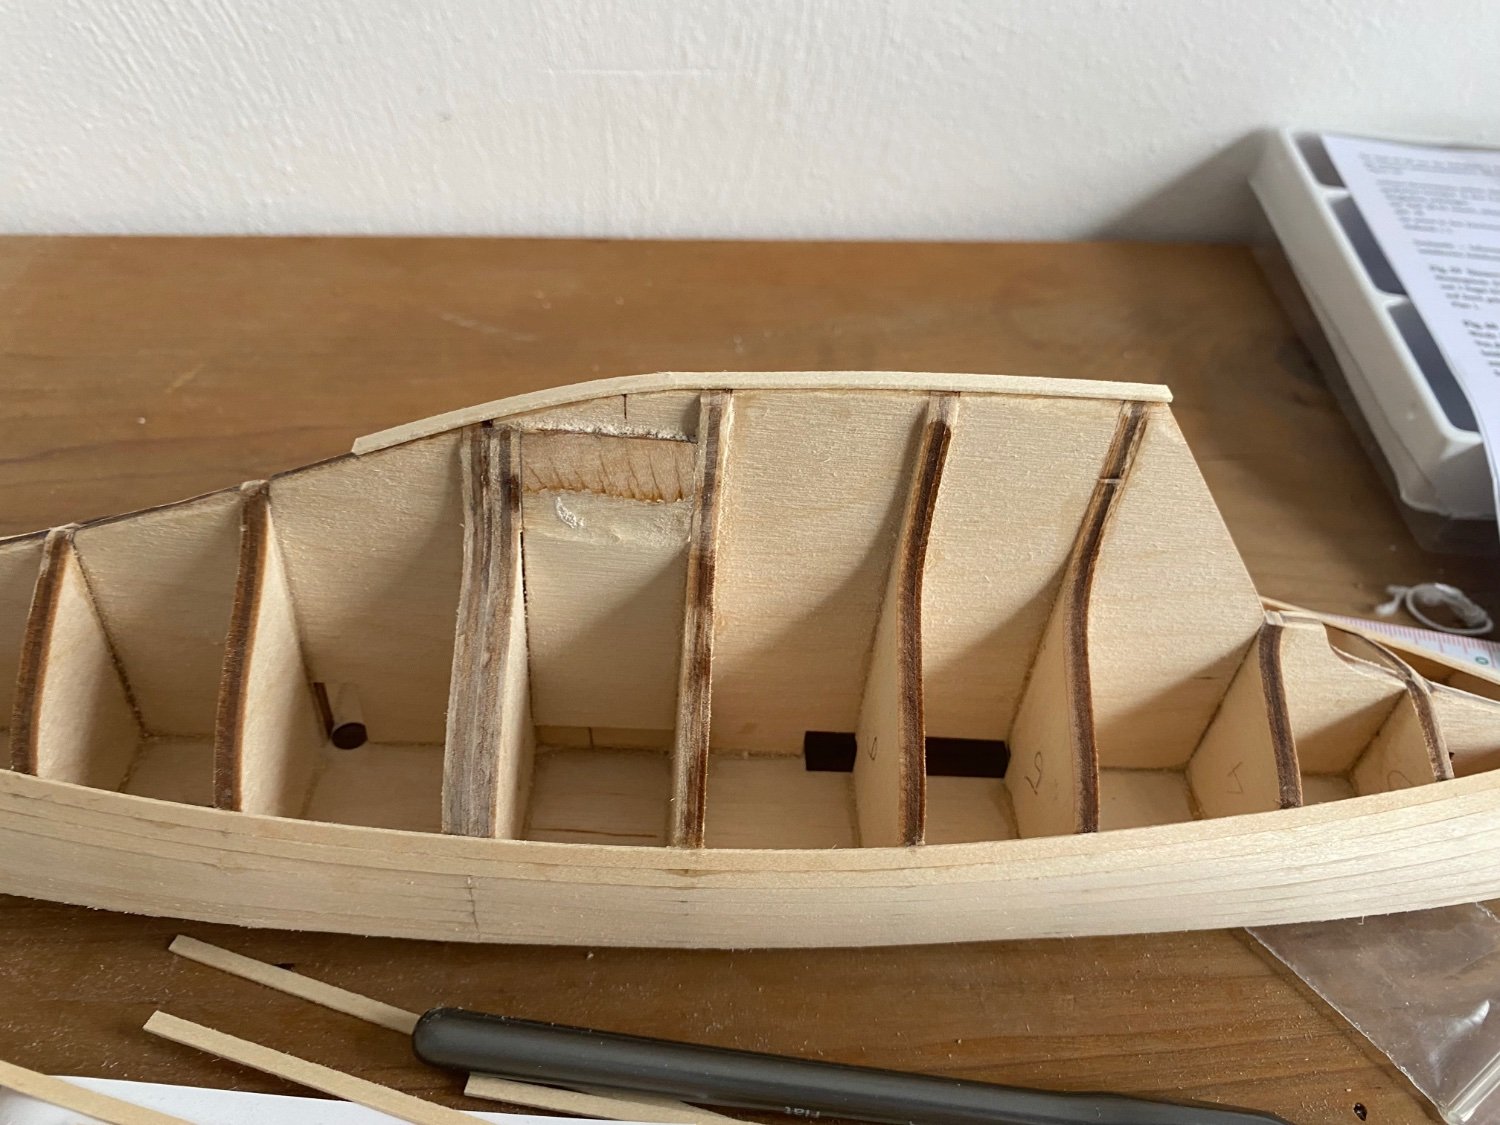
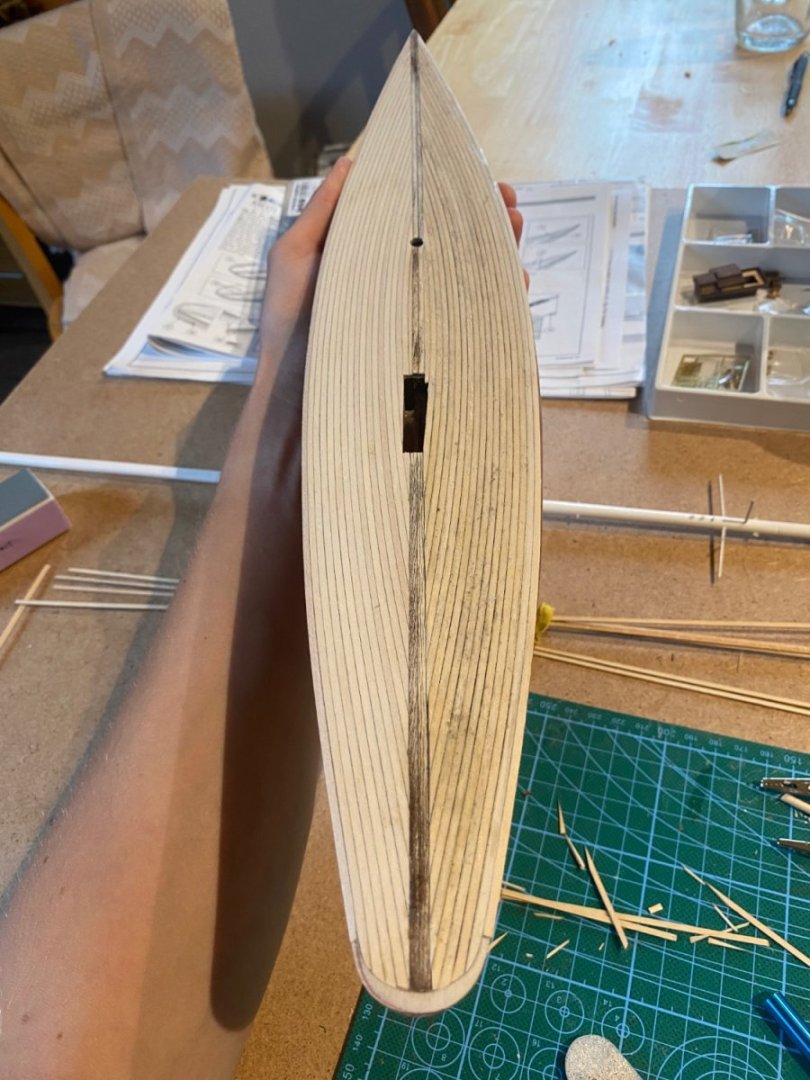
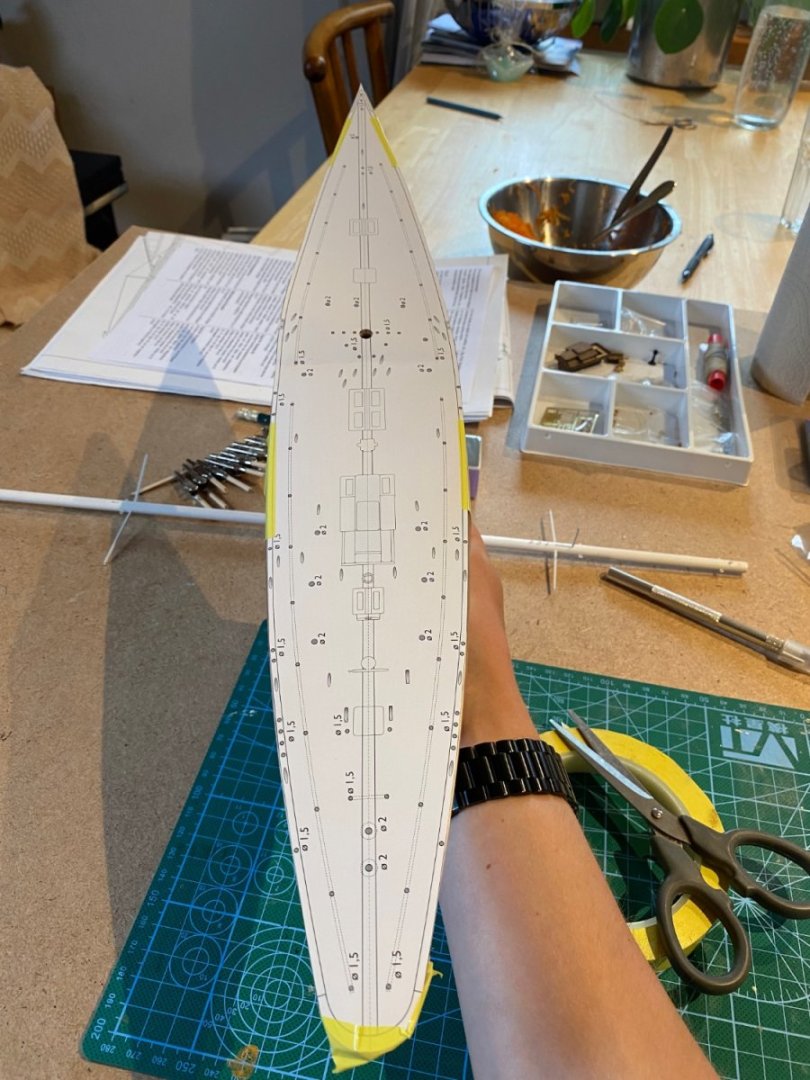
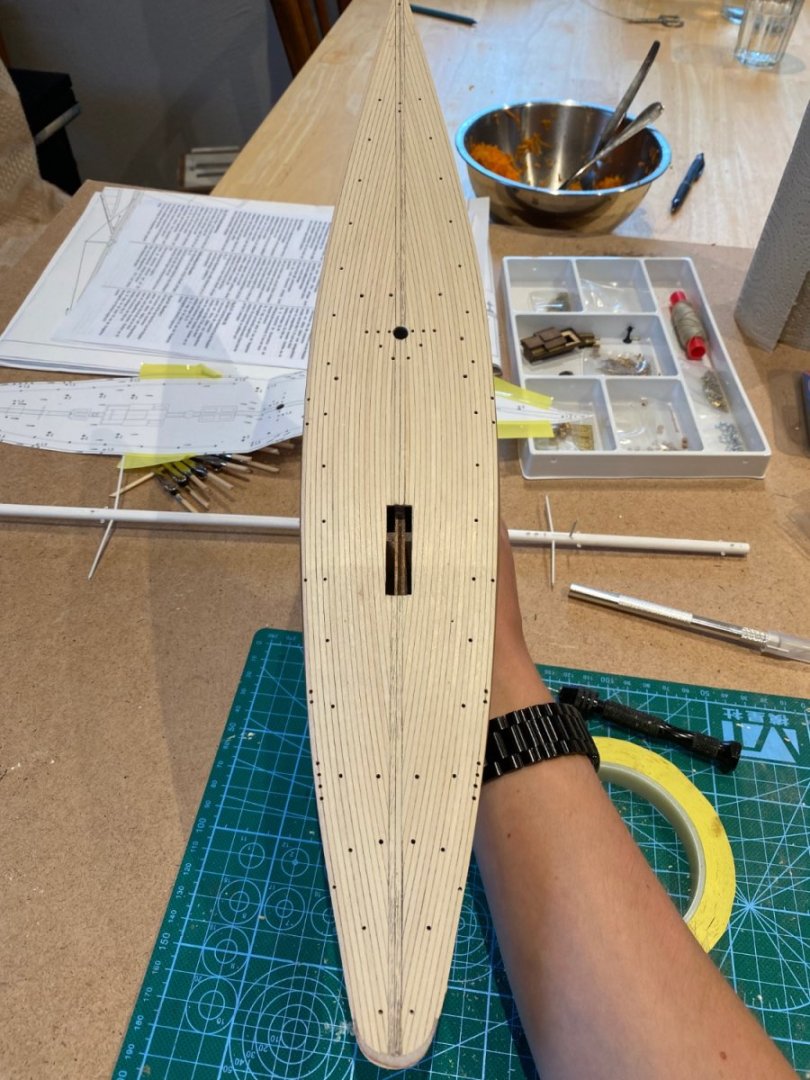
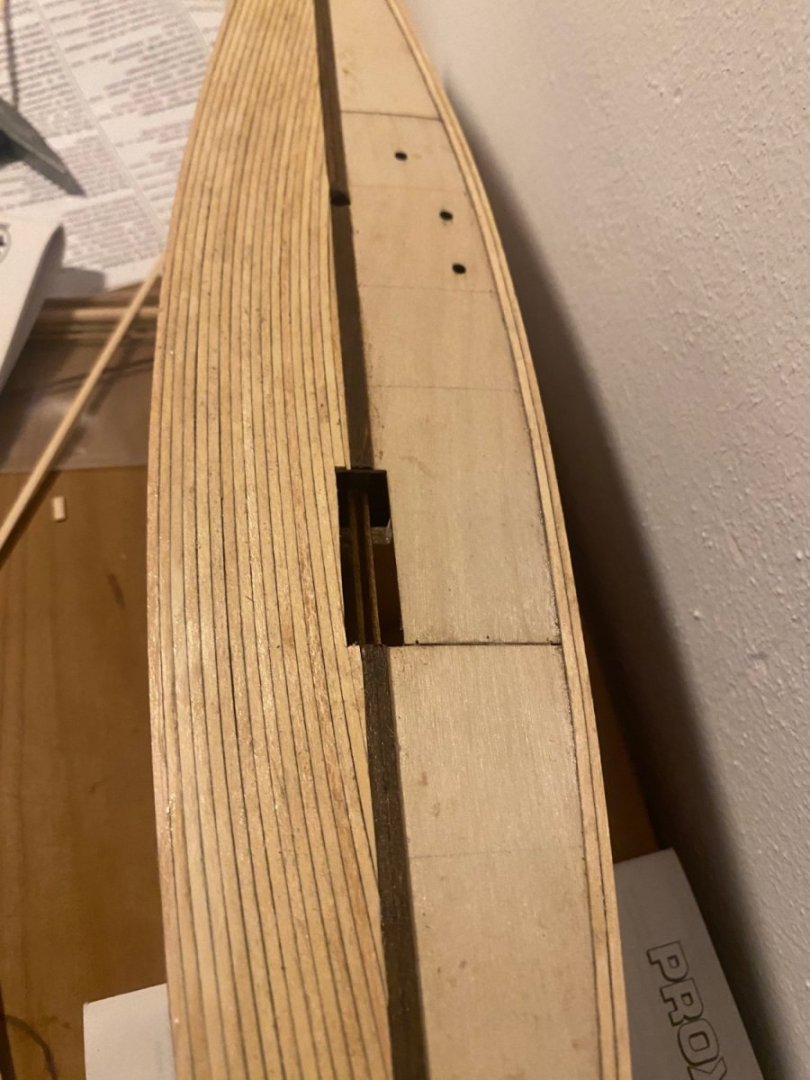
Bought an Occre preshaped plate and stained it in mahagony for the Endeavours stand. Added the with the kit provided one on top The deck planking is now finished and needed lots of sanding to remove all the glue. Next time I have to use less glue and remove it earliy… From the 1:1 plan I took the deck plan, fixed it on the model and predrilled the lot of holes with a small 0,5 mm drill. Then the 1,5 and 2 mm holes afterwards. The plan seems a little bit too small: the finished deck with all the drilled holes for the deck fittings and rigging next up is painting the deck with clear coat and afterwards the hull and waterline which gives me a little headics right now


-
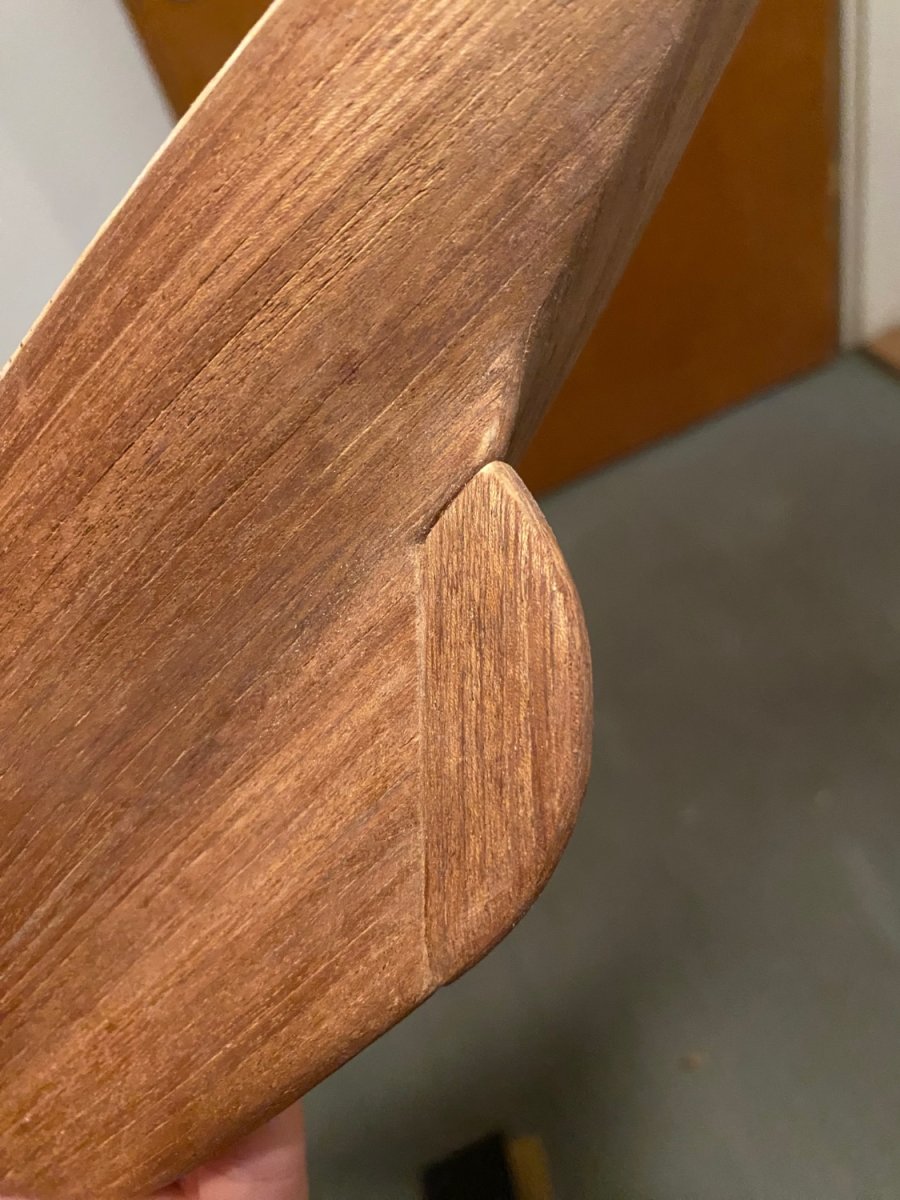
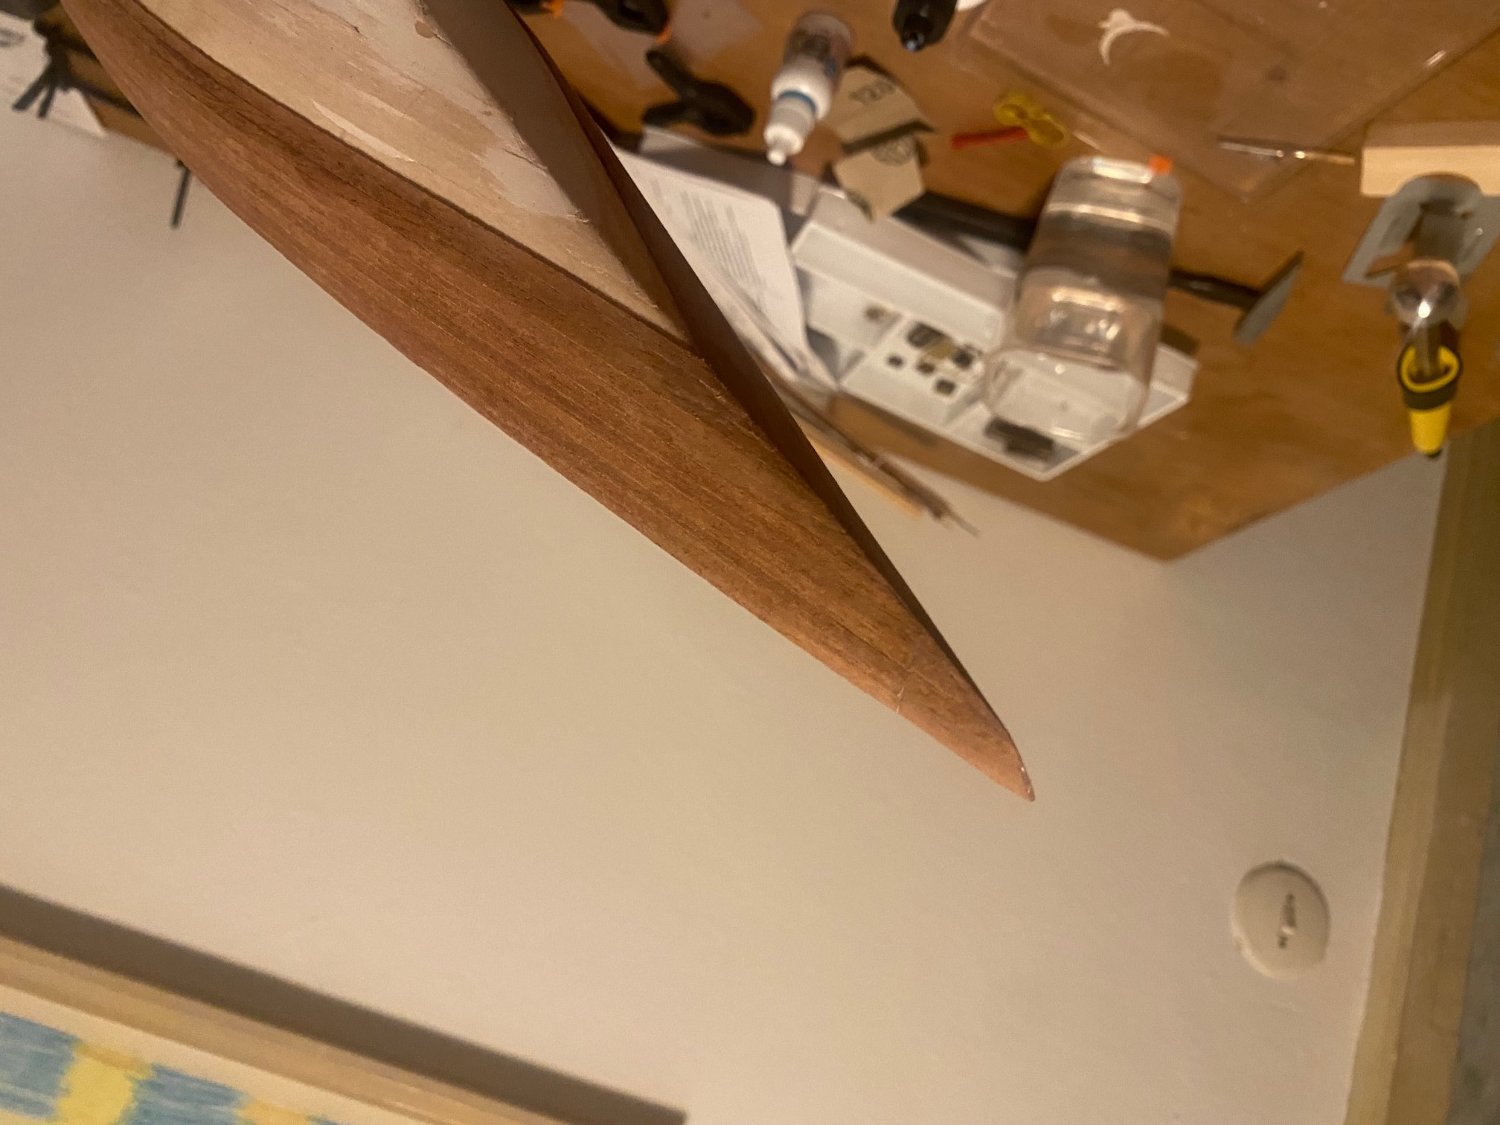
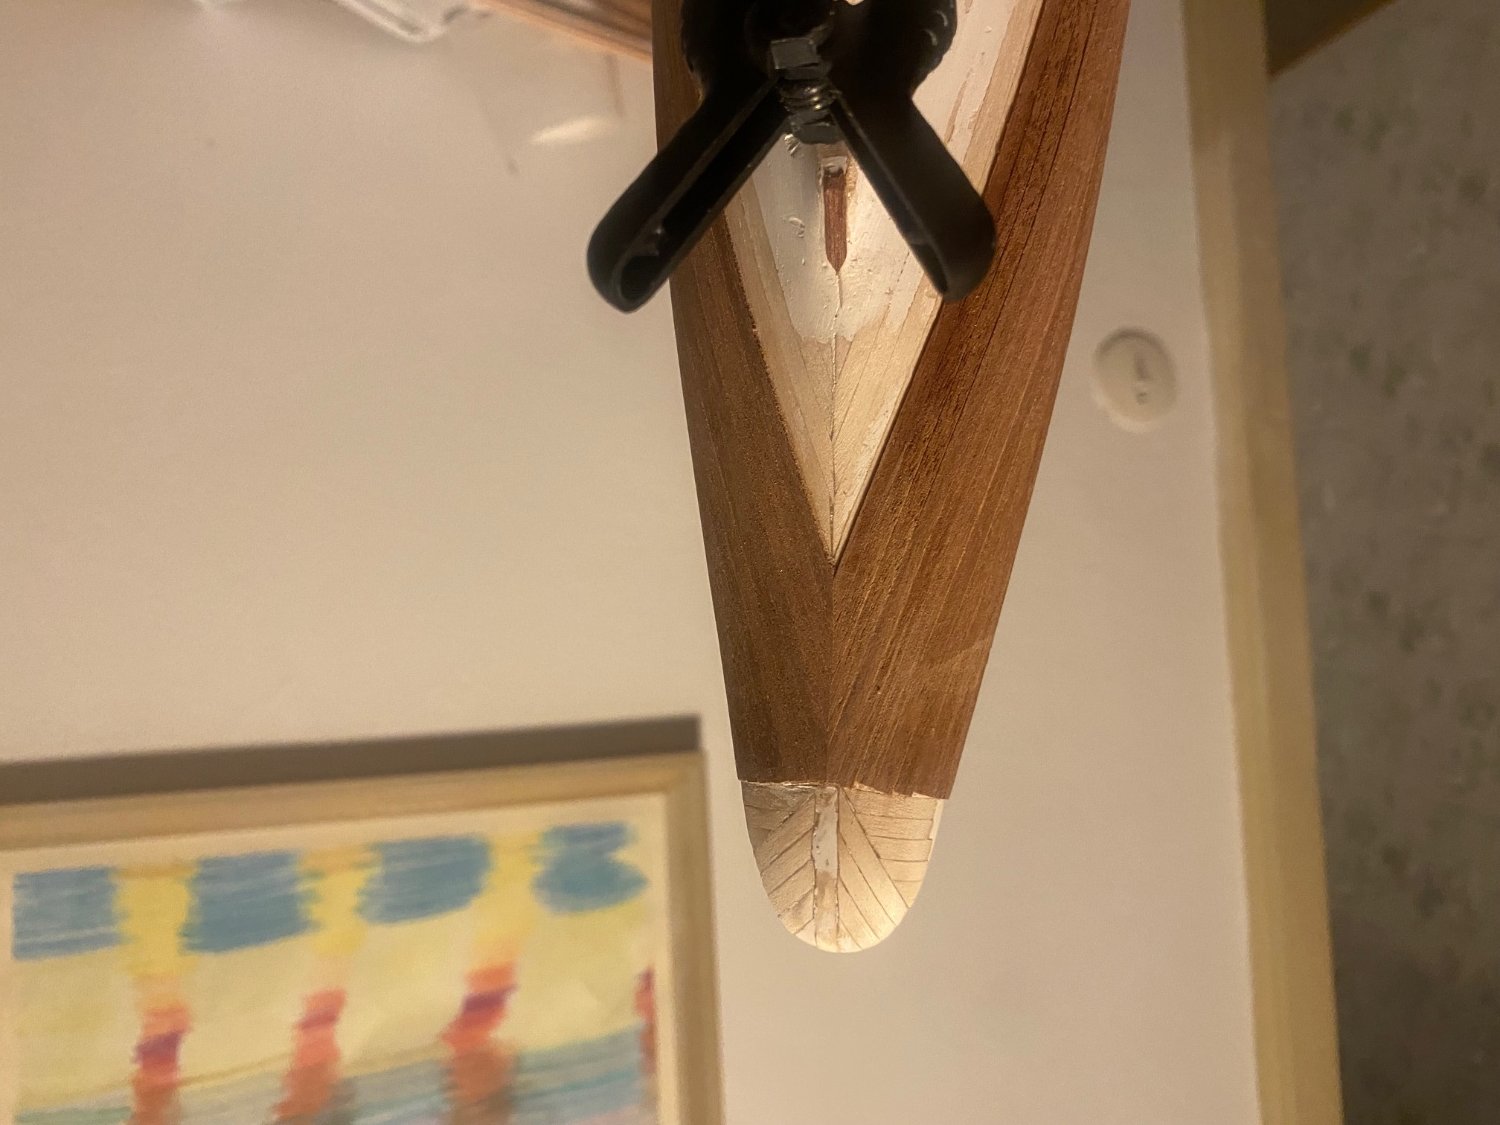
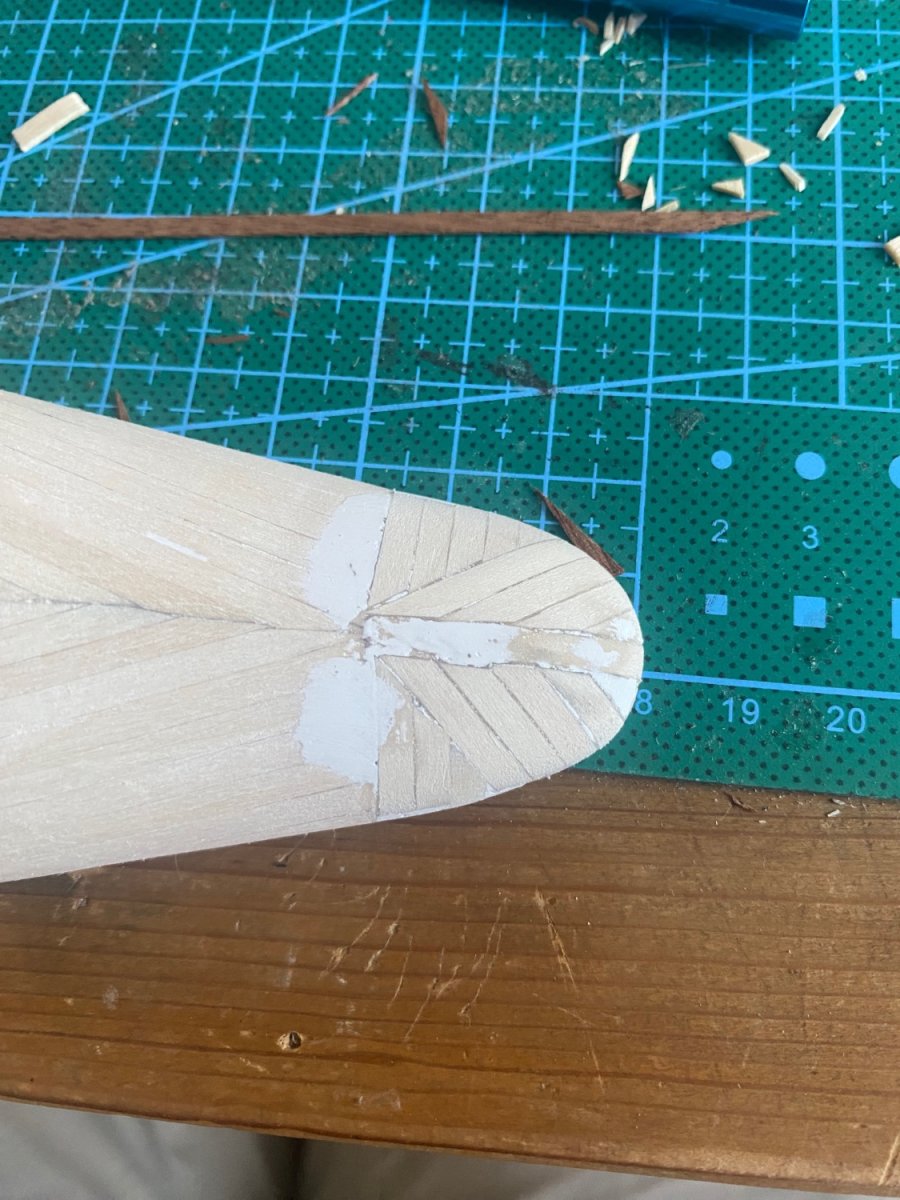
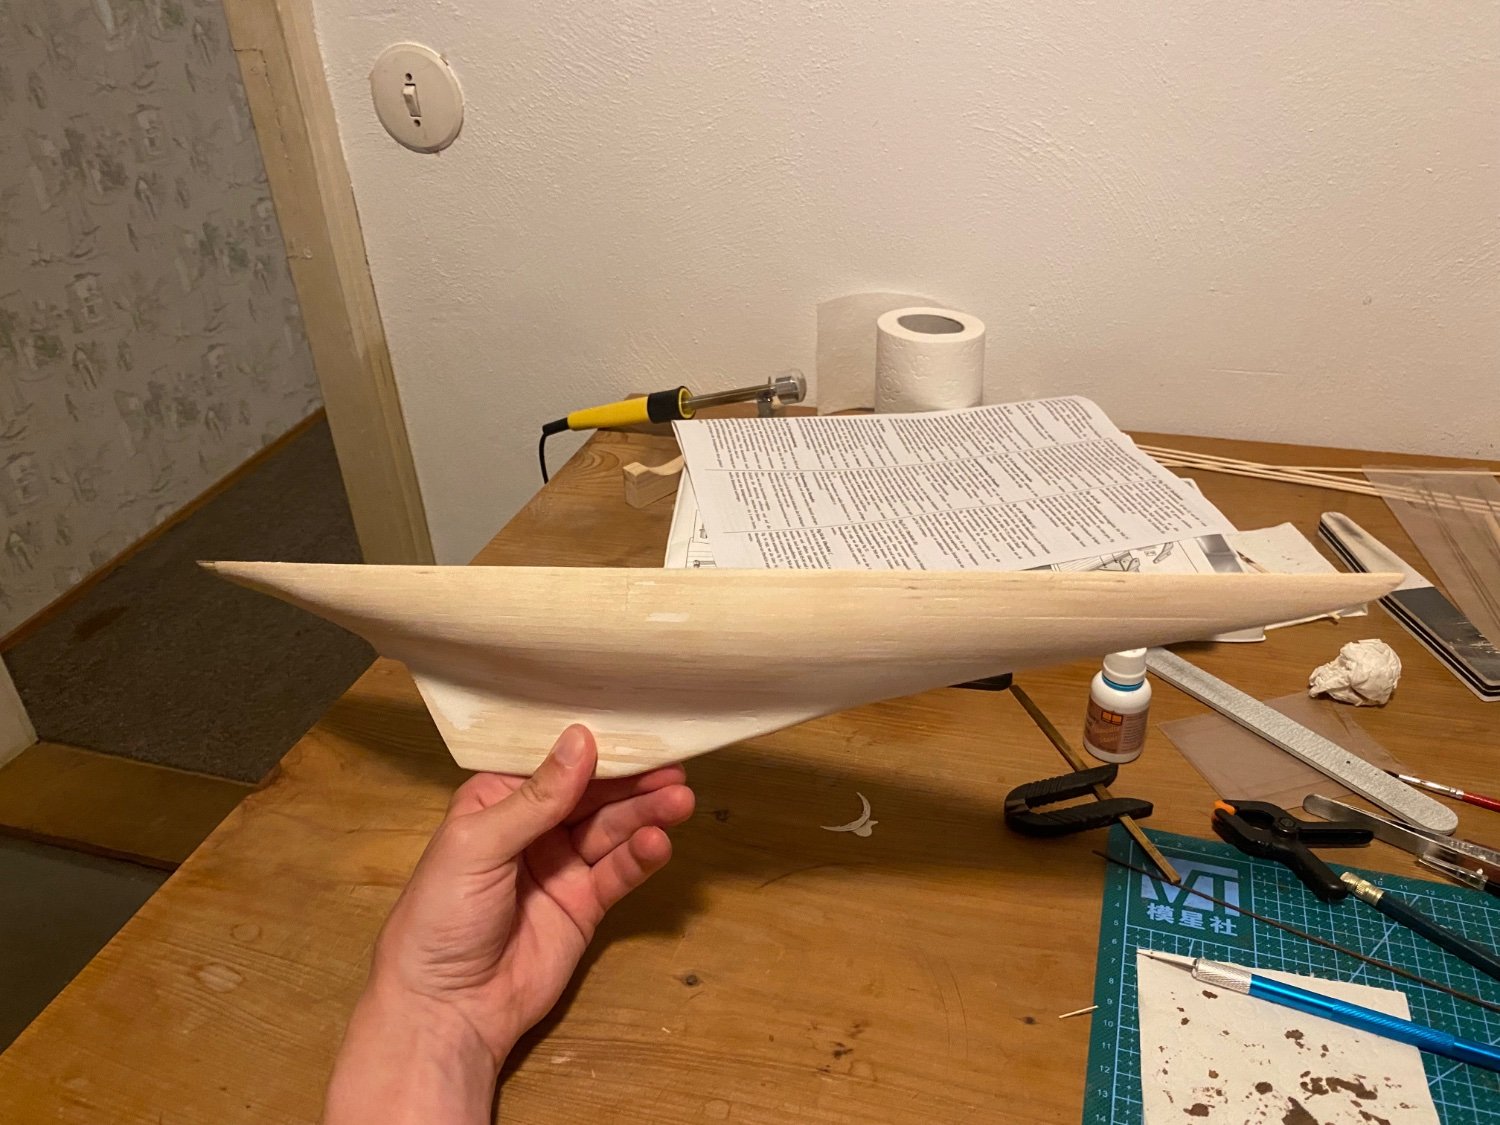
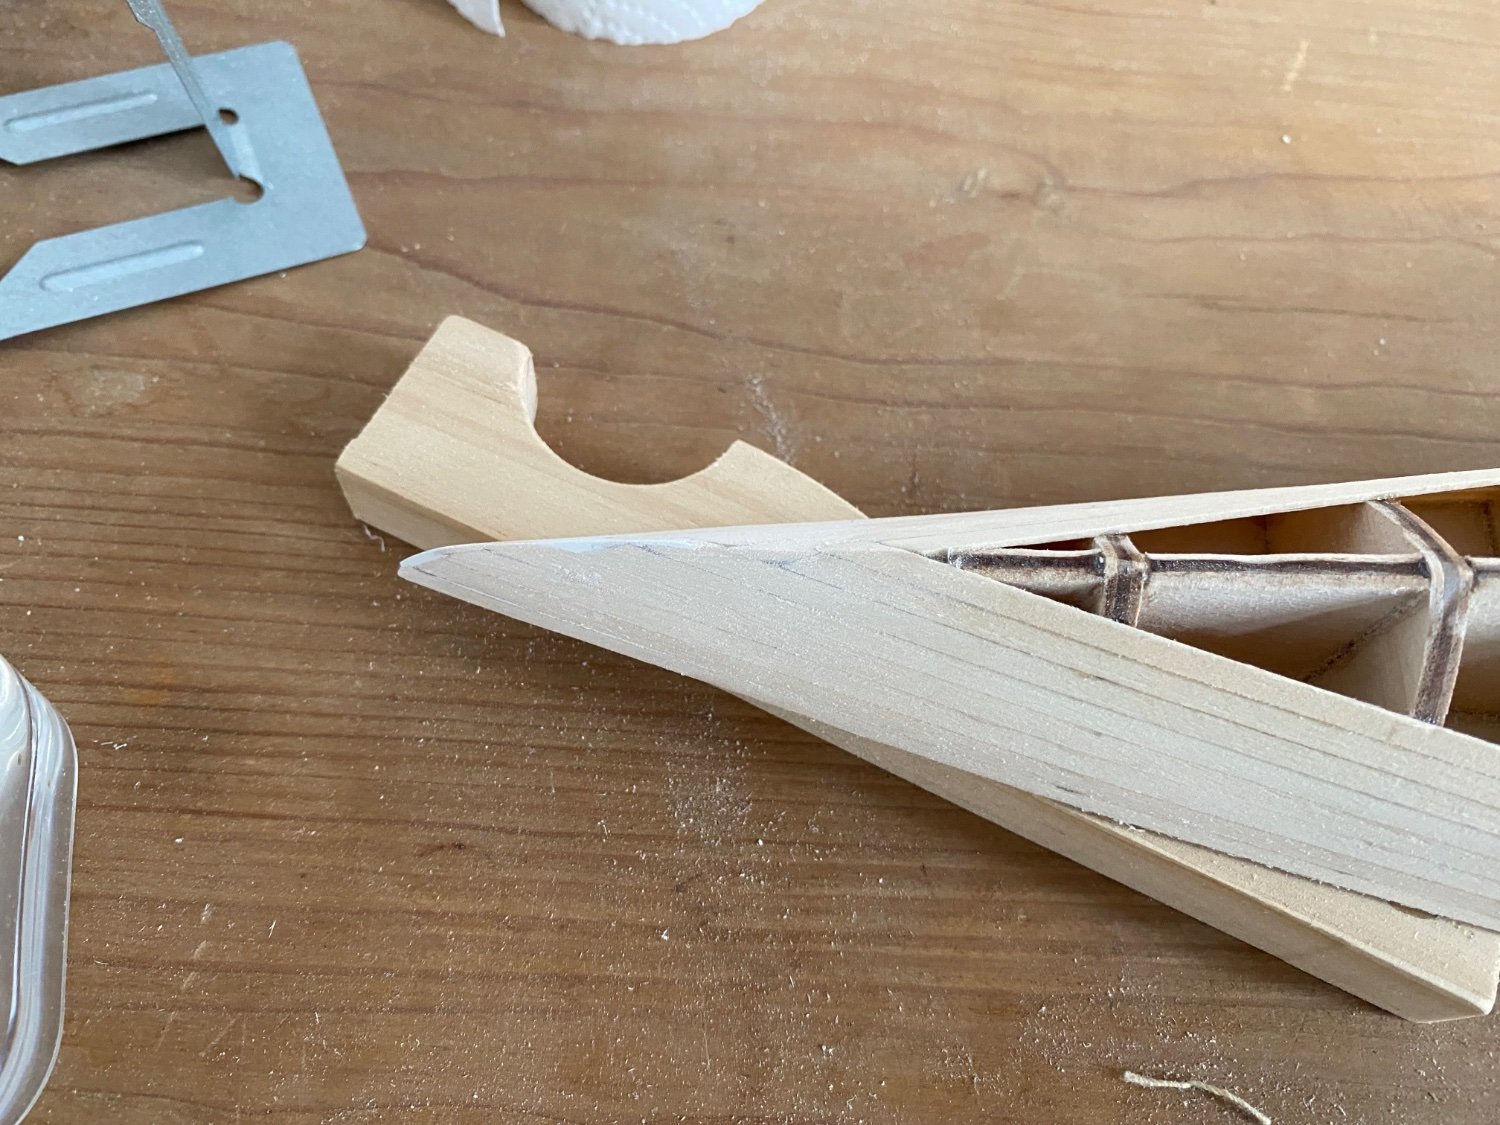
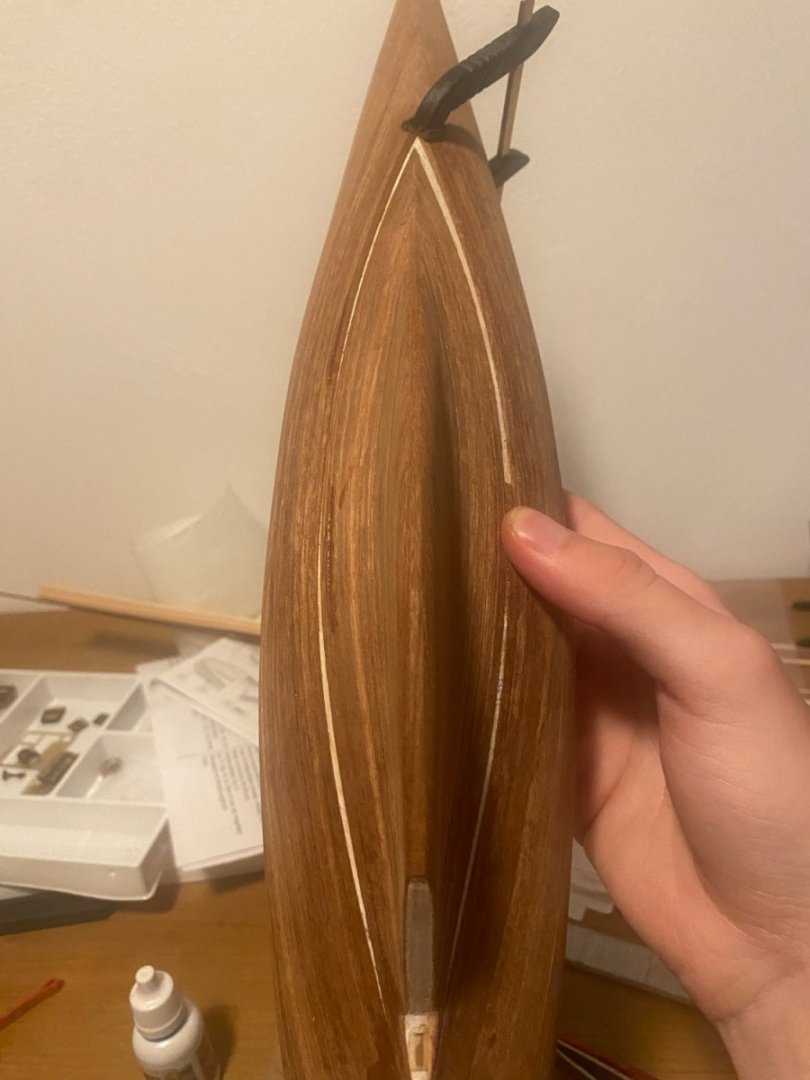
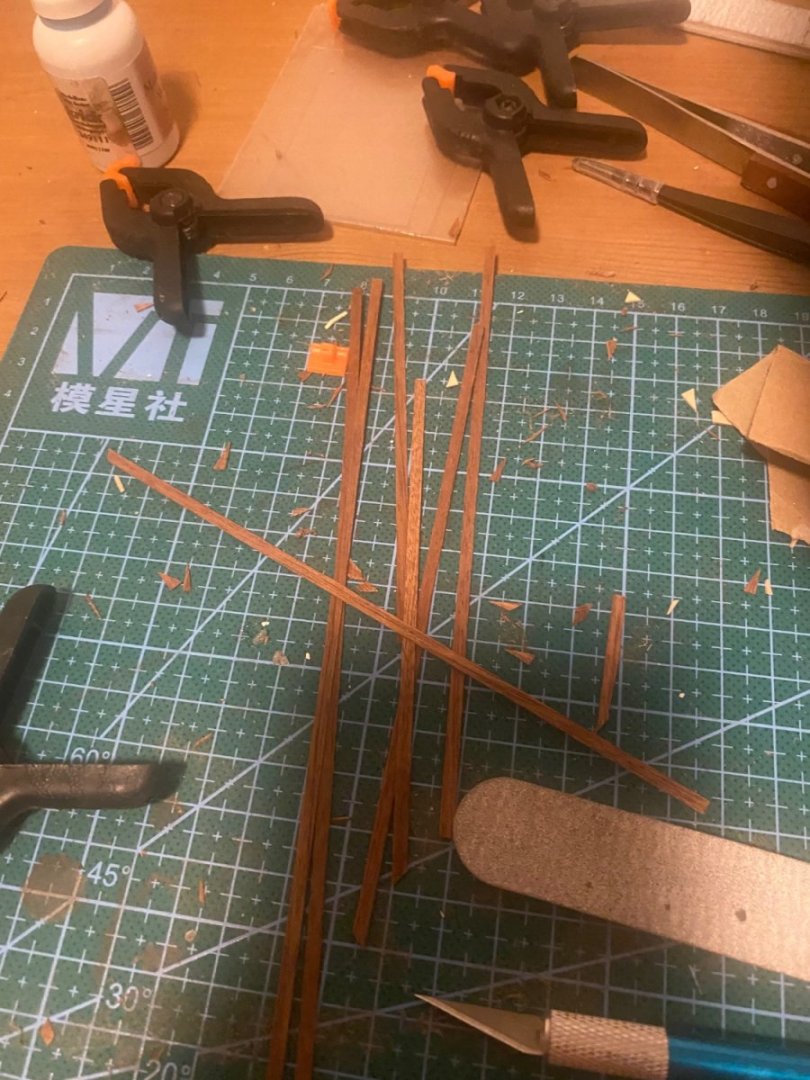
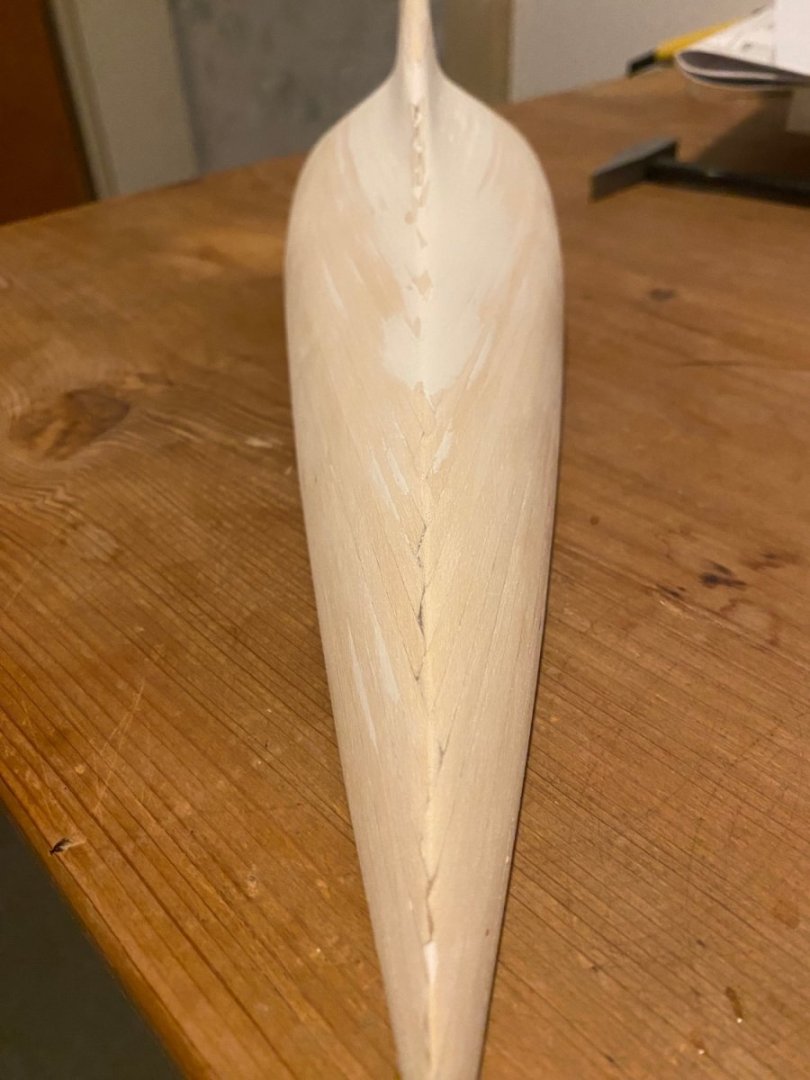
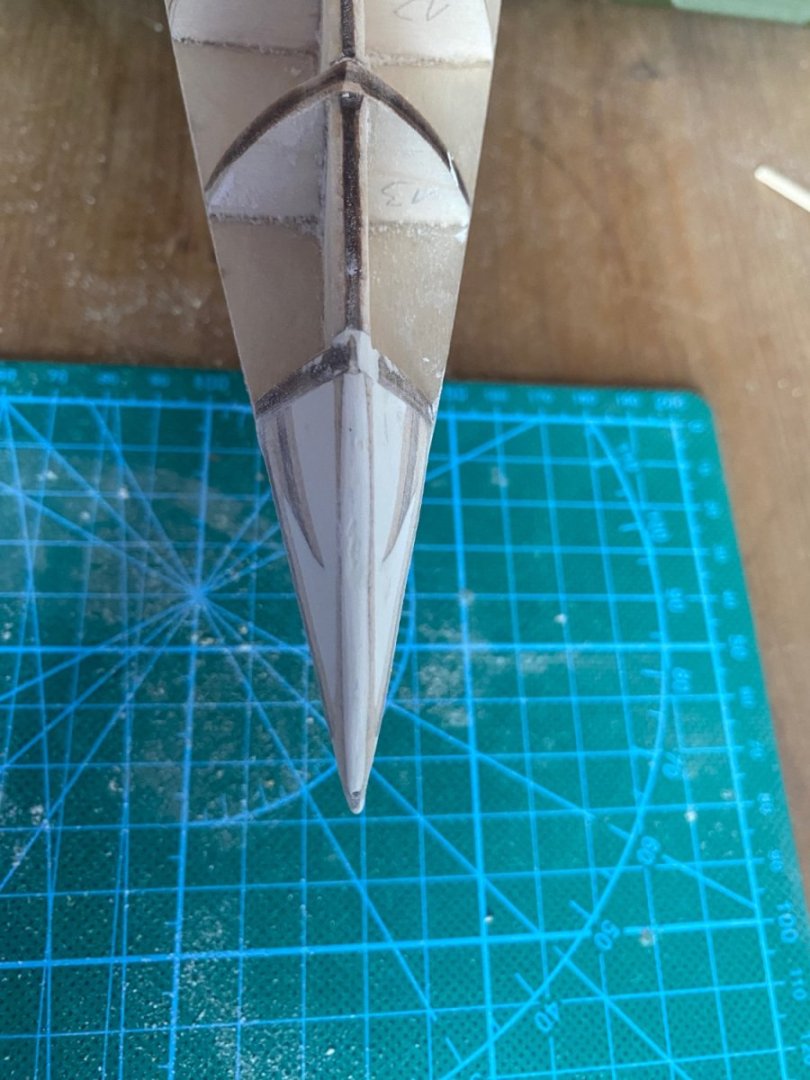
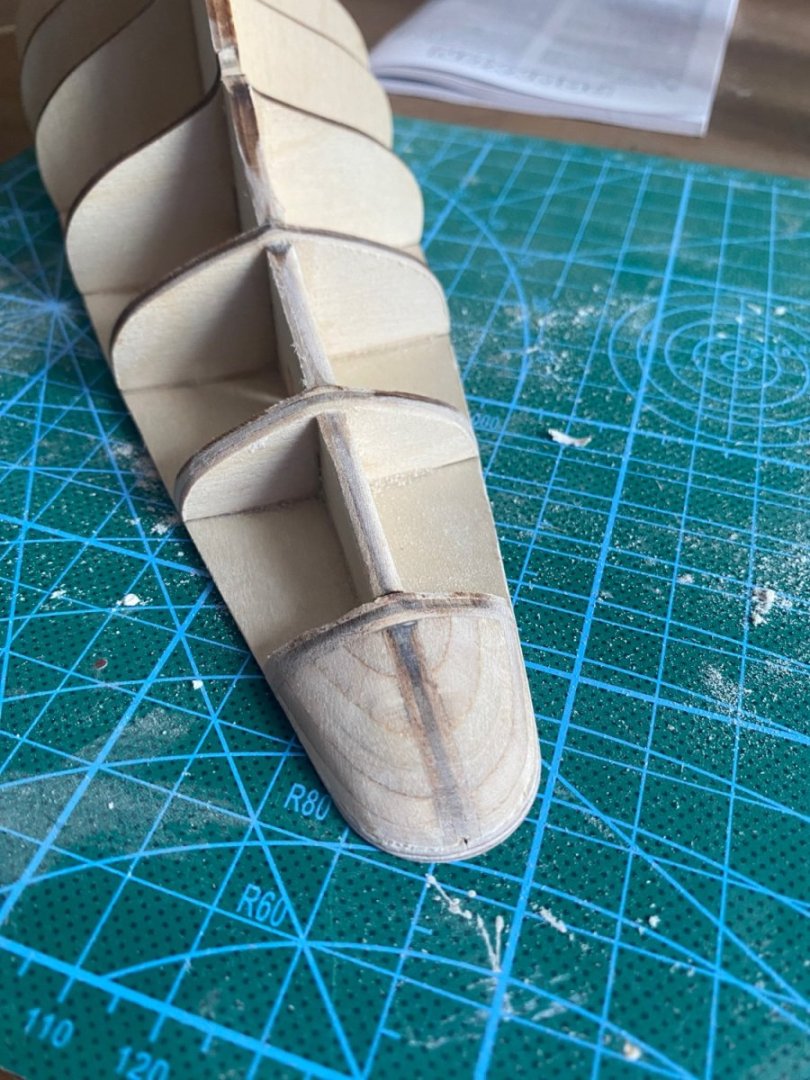
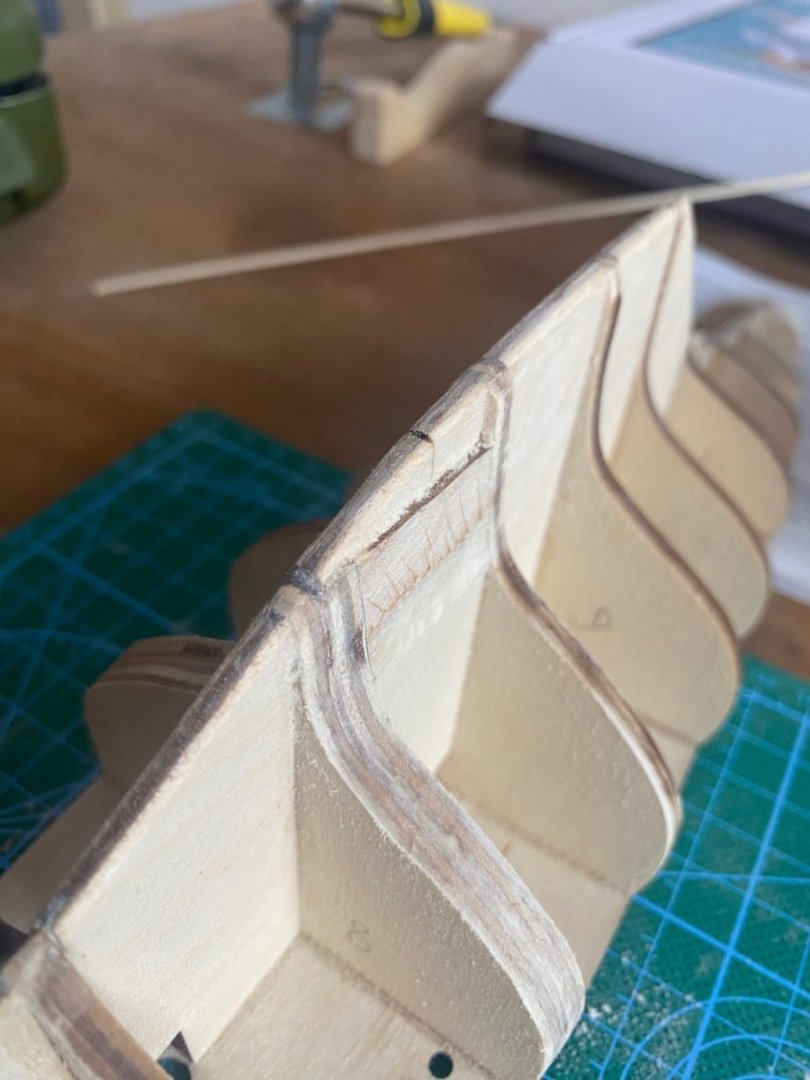
Had some productive last days. The second planking of the hull is finished and looks awesome. This shape is just looking so well. Decided to plank the difficult area around the rudder with some small strips otherwise used long strips for the whole hull. In the end I only needed 4 small filler strips. the filler strips needed: not much material left. If you brake one or two planks it will not be enough provided material: Area around the rudder is done: For the stern I had sadly need to use some filler, just couldnt figure out how to get the shape good there…that also made my decicion clear about painting half the hull blue with white water line. added the rudder: the final shape of the hull (will need some 240 sanding): also started the deck planking and already half way finished it:


-
Again some sanding needed for the stern. Interesting shape and not the proposed fishbone pattern but i think it is ok like this.

-
Today I started planking the second layer. Wow this is going somewhere and is looking great! Seems easier than expected…but the harder parts will come later around the rudder and the stern to get a good shape without fillings there. Counted the planks it’s 31 per side, 62 in total and one at the kiel. Puh seems like a lot compared to some other models here? for the two layers this makes 126 planks in total
-
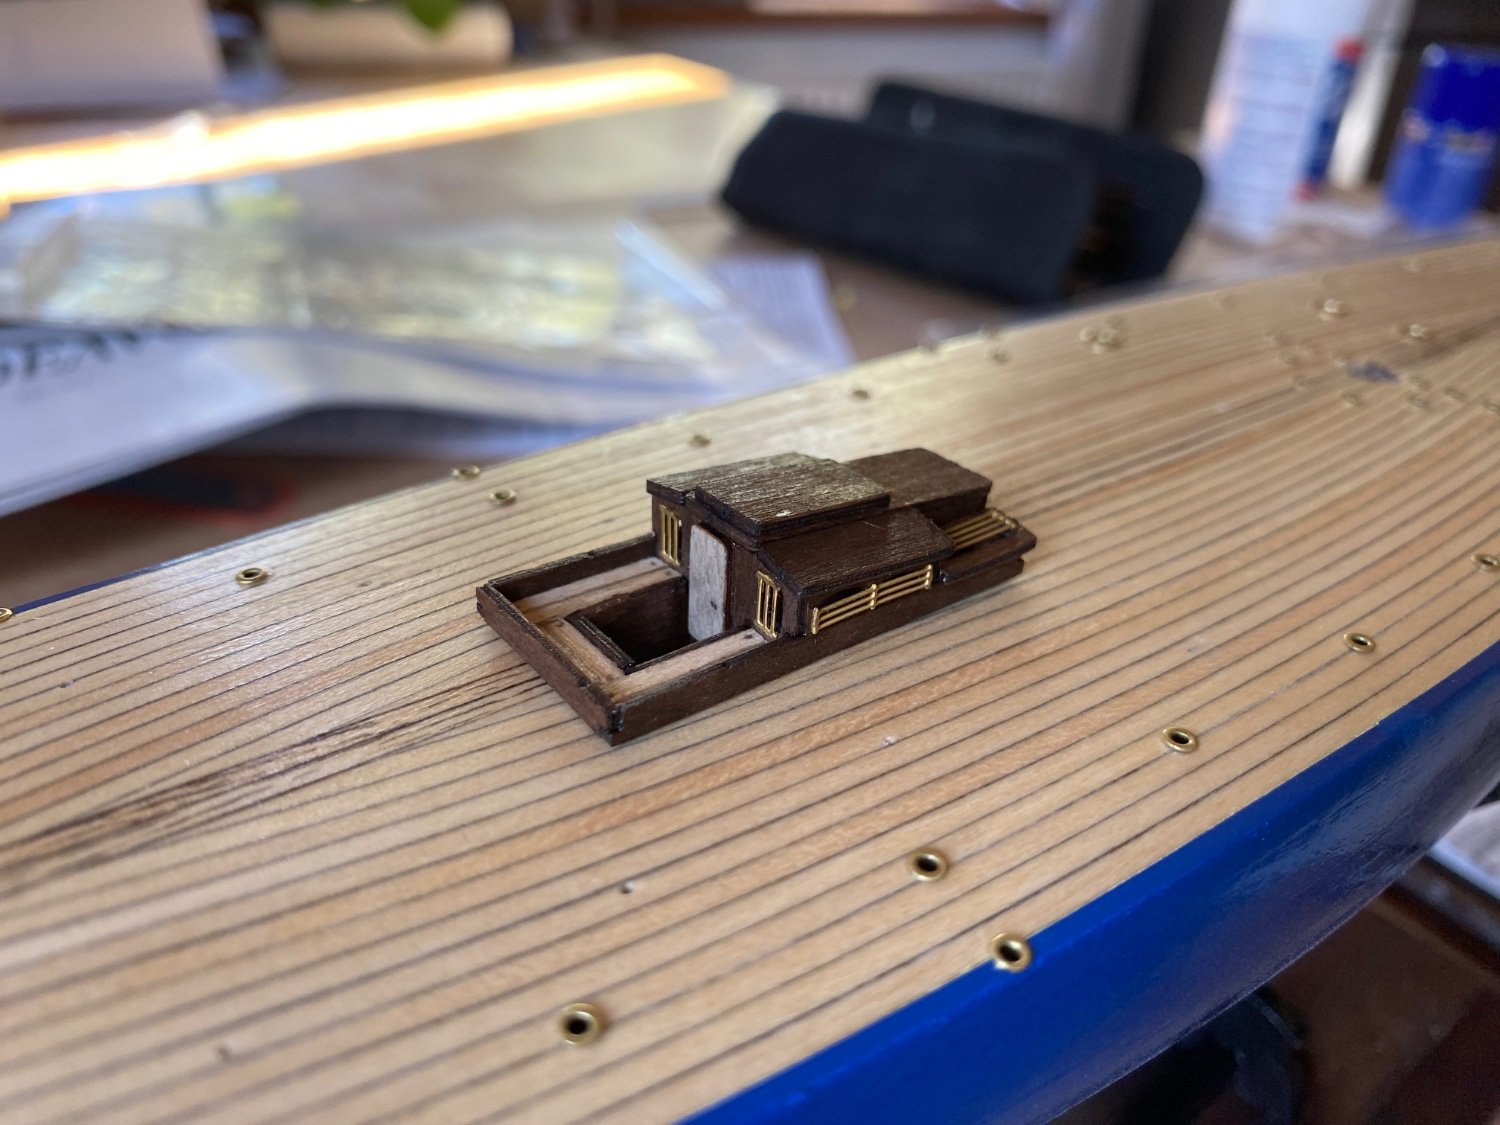
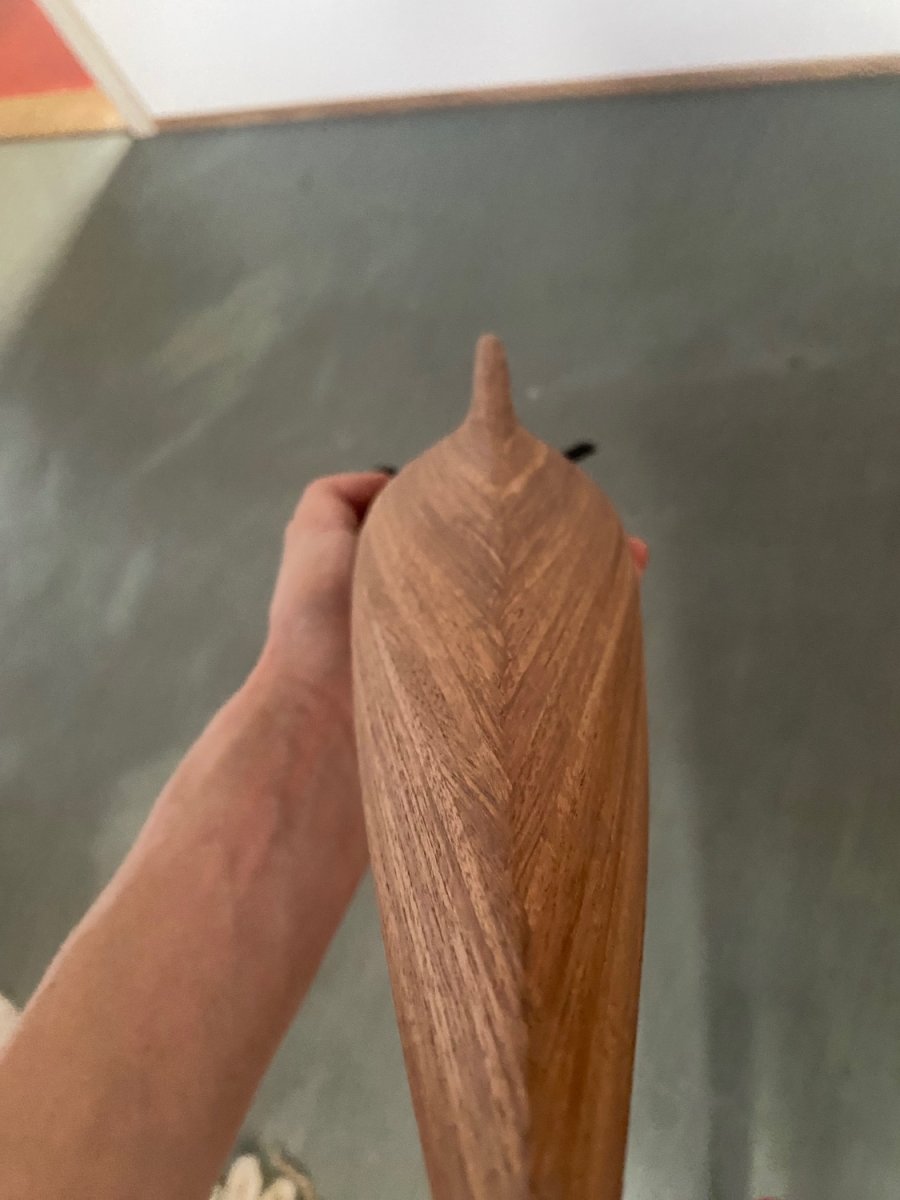
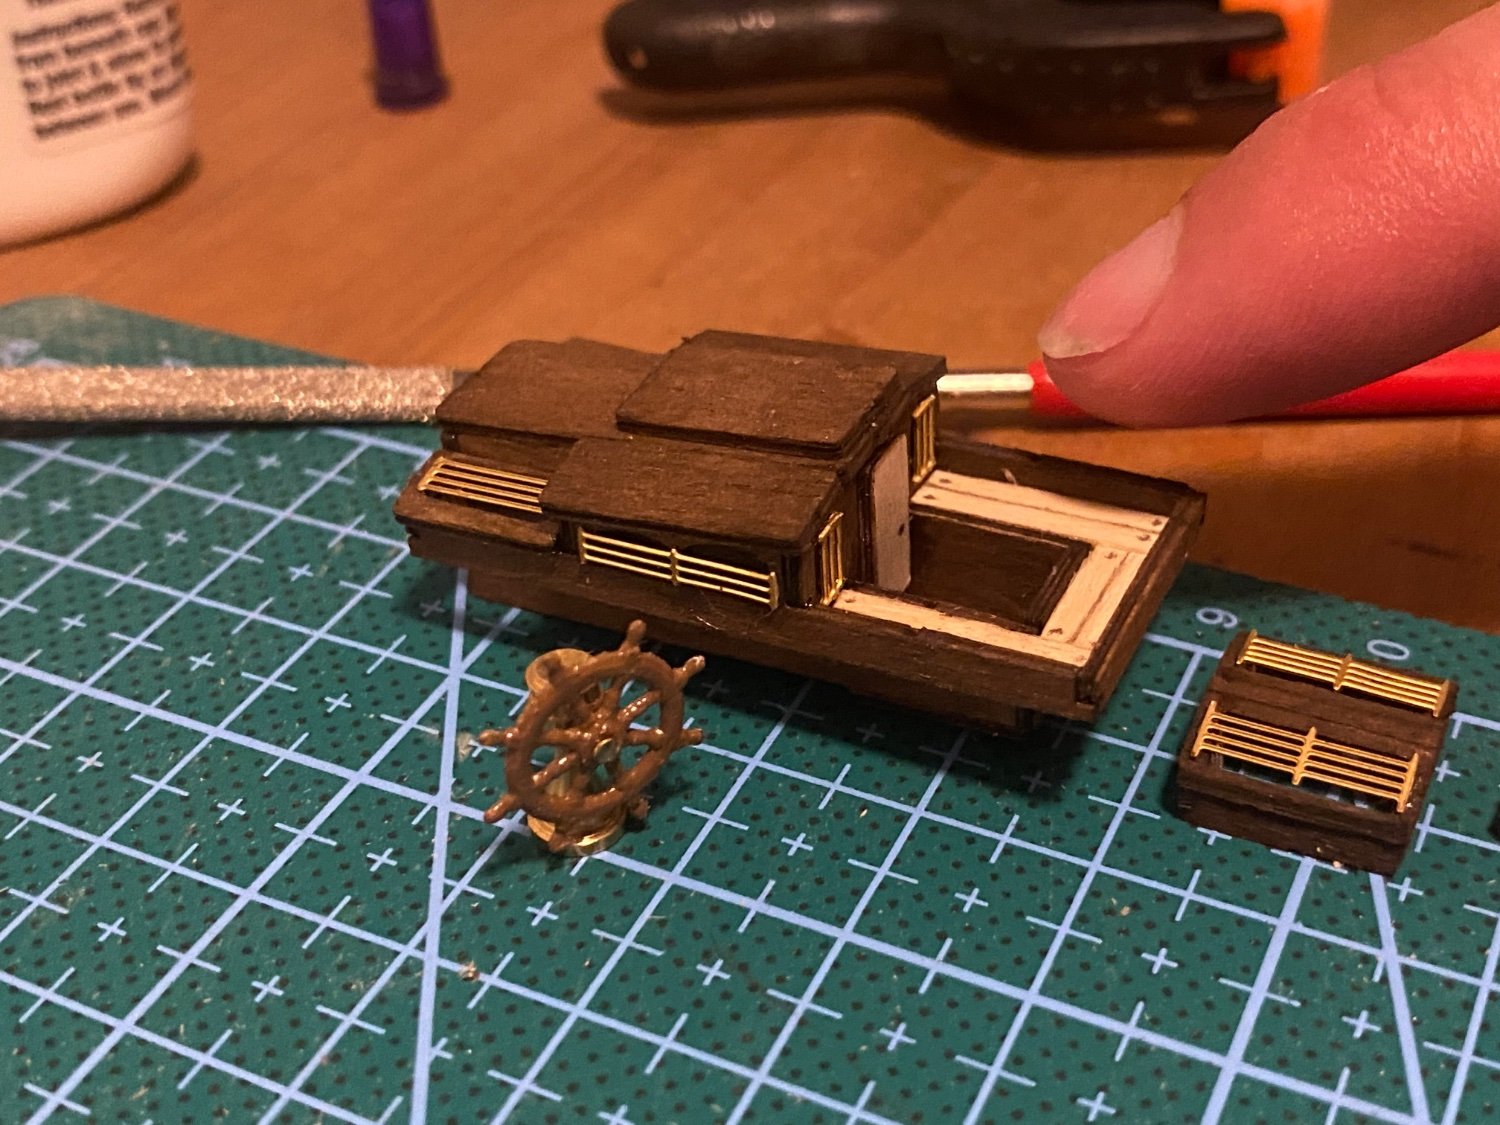
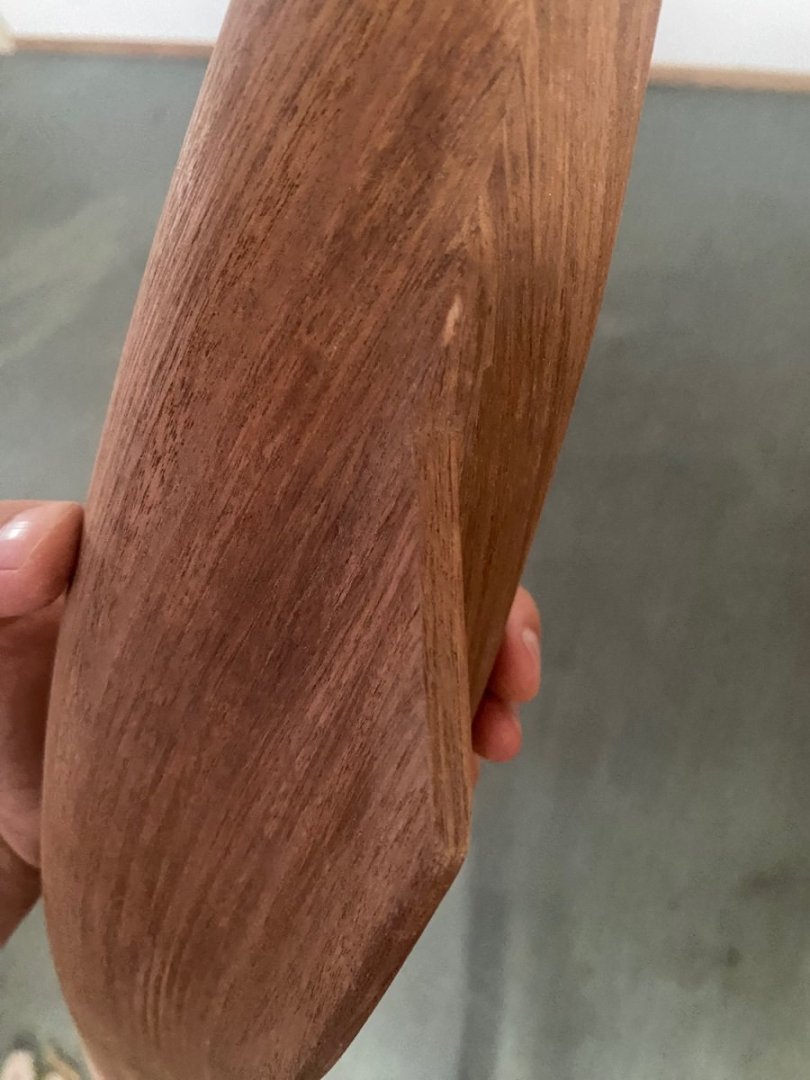
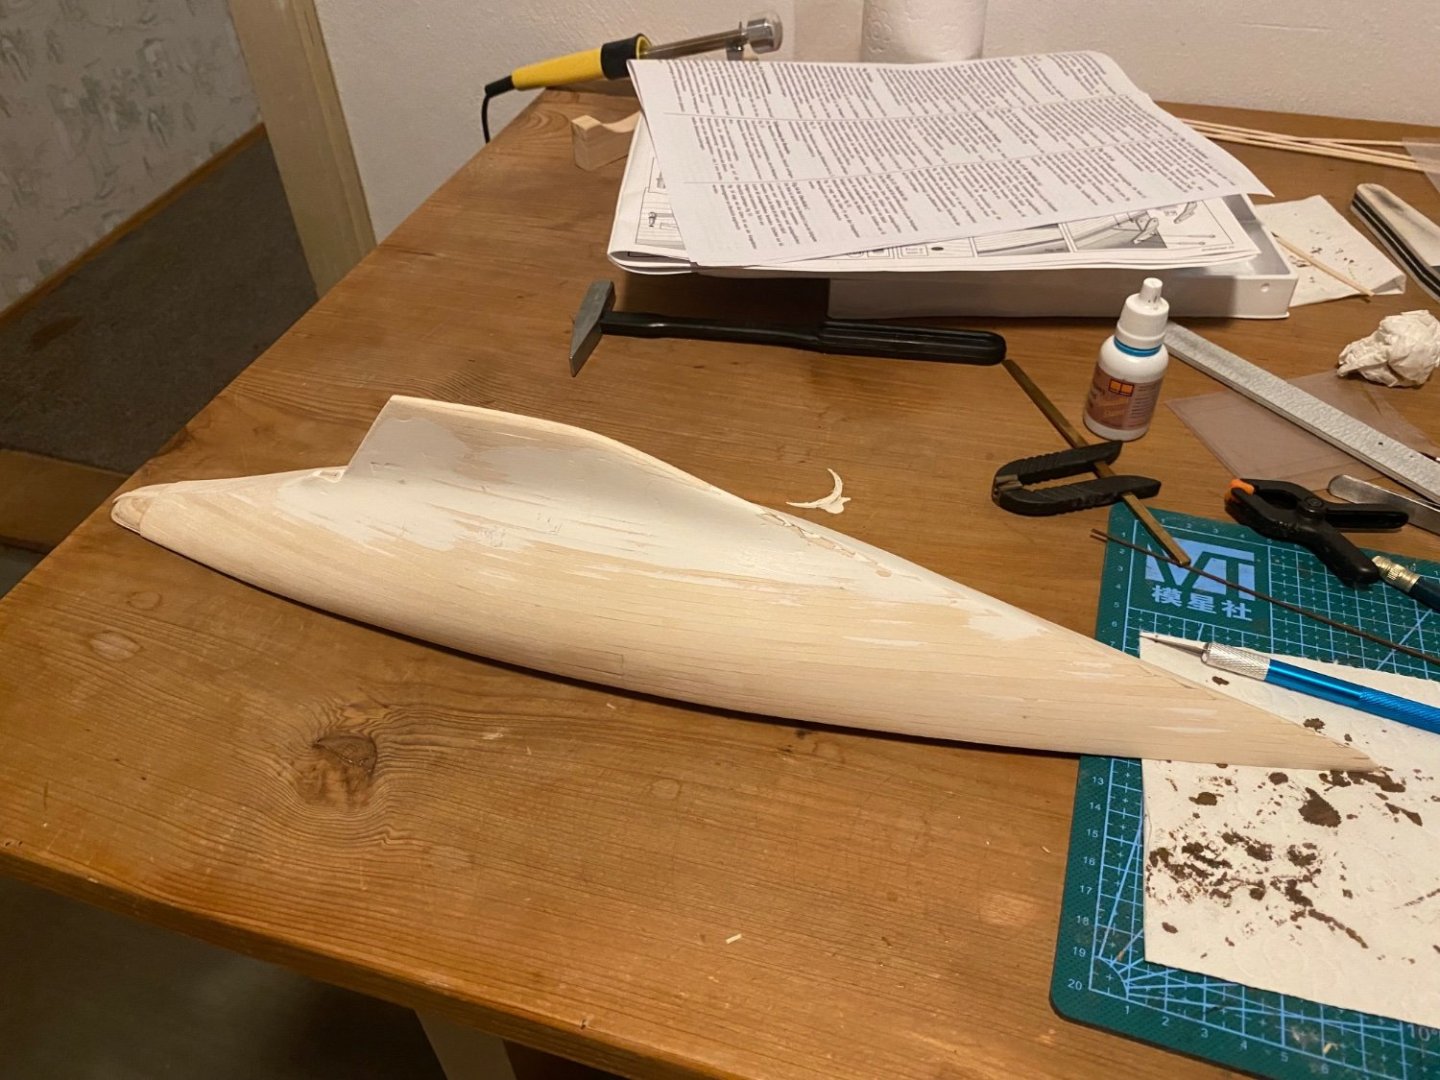
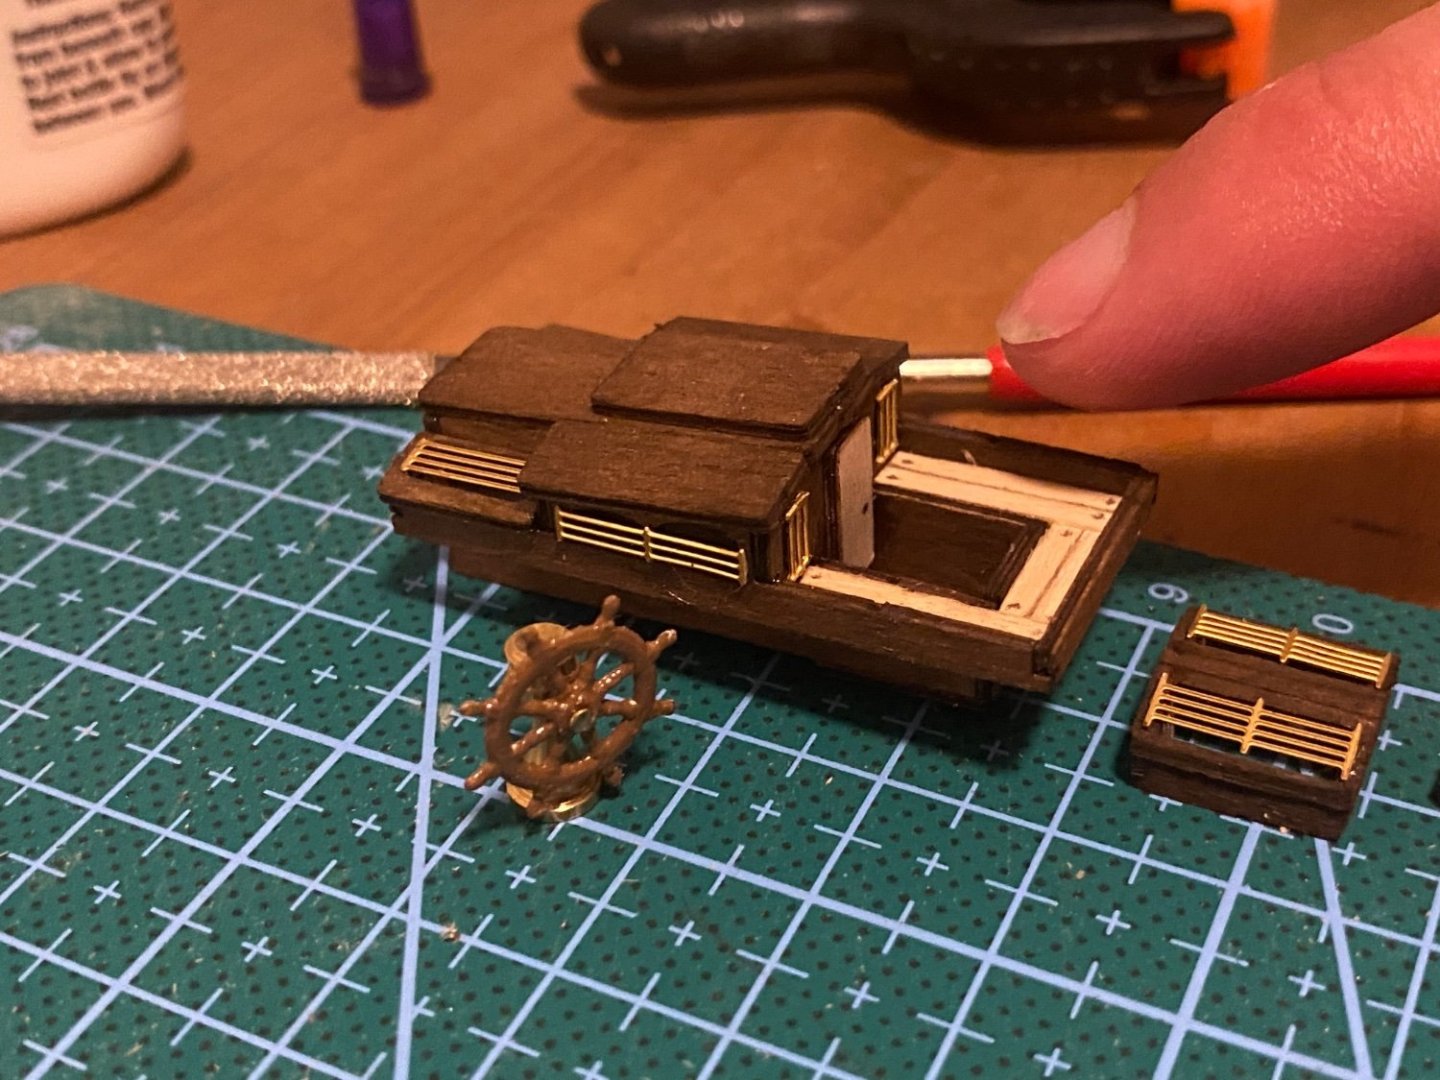
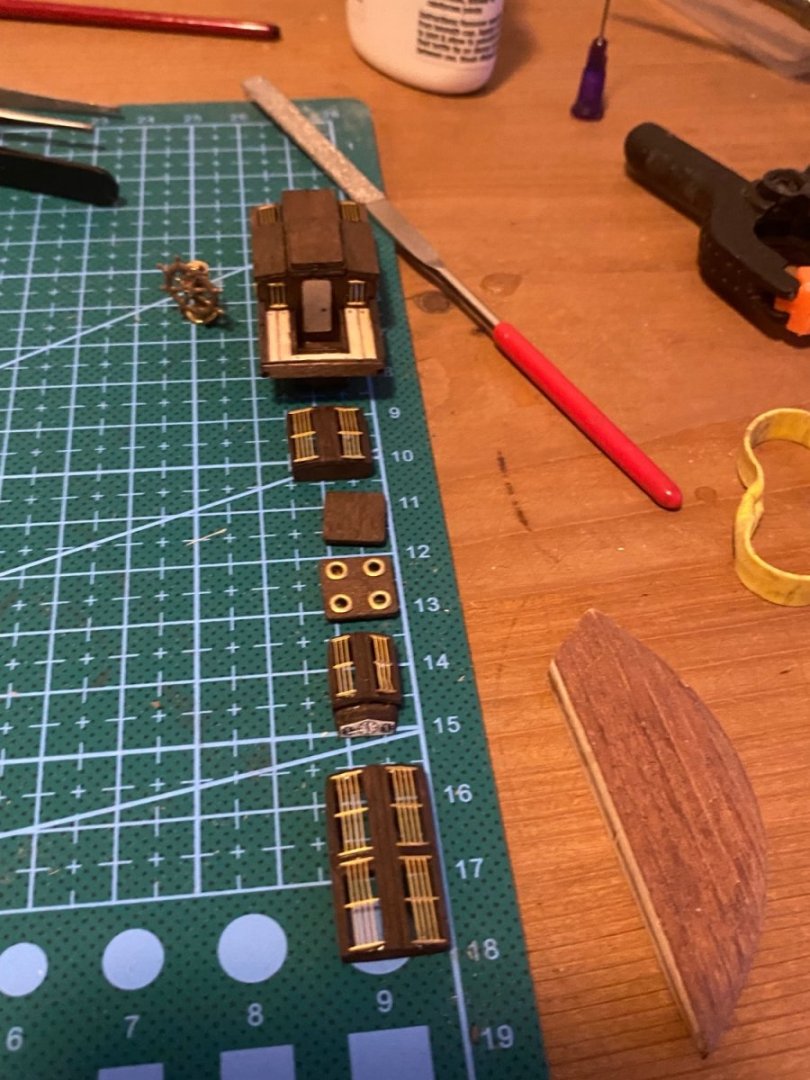
Yeaha the hull is now in shape. Needed a lot of sanding and it is still not totally perfect but the second layer of planks will cover some small cracks. sanding with a view the final hull…what an ellegant shape those J-Class boats have. Need to do the stern… All the deck buildings are finished as well as the steering wheel. Small stuff. Decided not to apply glass at the inner side of the windows behind the cages. You will not see it anyways…


-
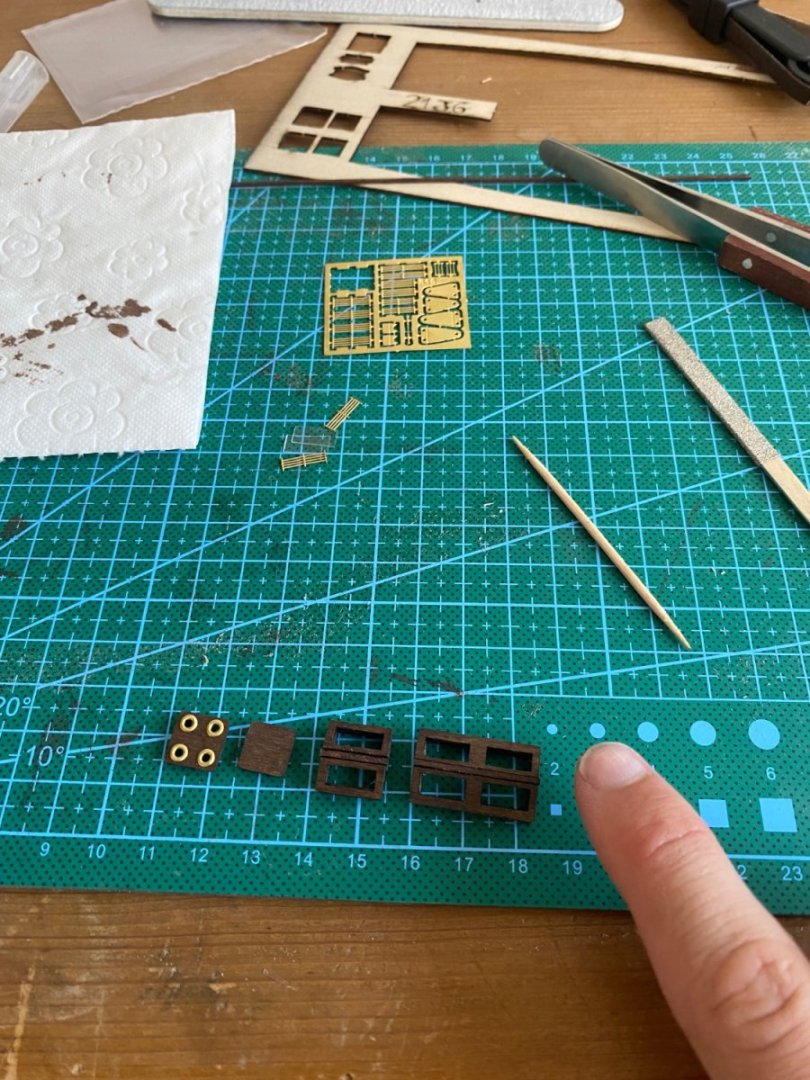
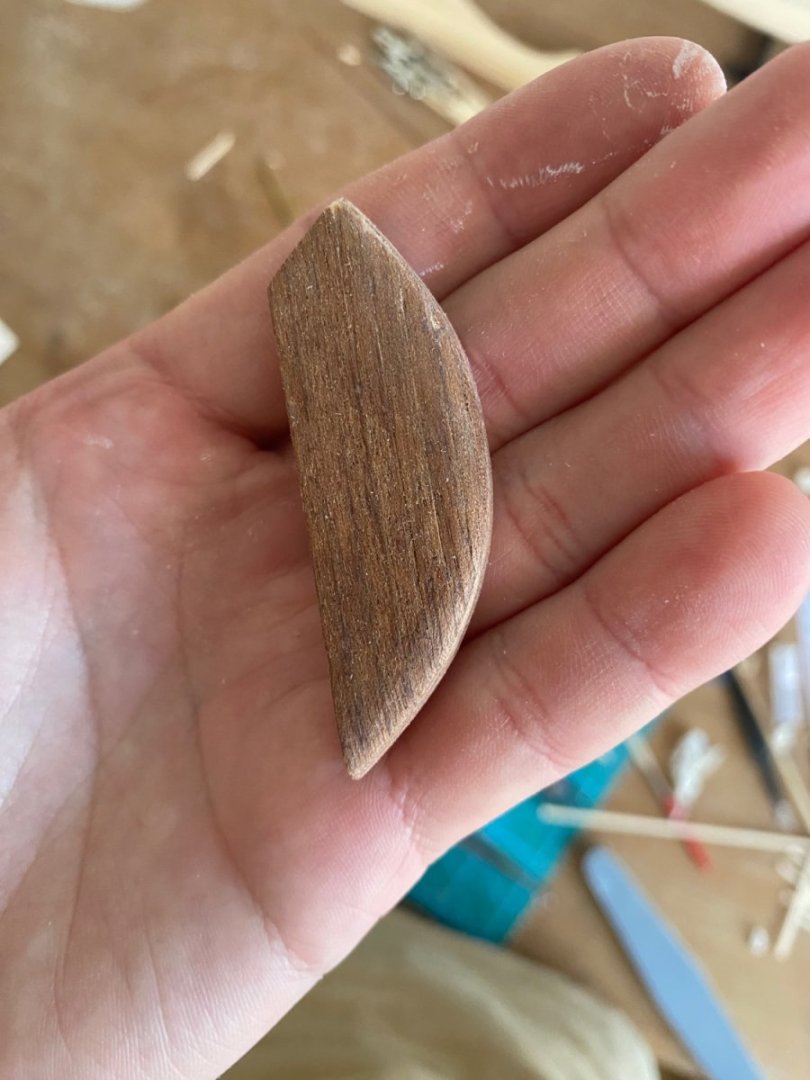
Mast is painted white now and looks great. After painting I remembered i forgot to sand the top thinner so now the mast is straight and doesnt get thinner to the top. Hmm too late to change now sadly. also the planking is going well and the first layer is done. Some parts around the rudder were tricky. I only needed one filler strip at the end othetwise the planking is straight forward. Added wood filler, which needs a lot of sanding next up. On the side I started the deck buildings. They are really small and hard to glue together in a good angle of the parts. Stained them in mahagony before glueing together

-
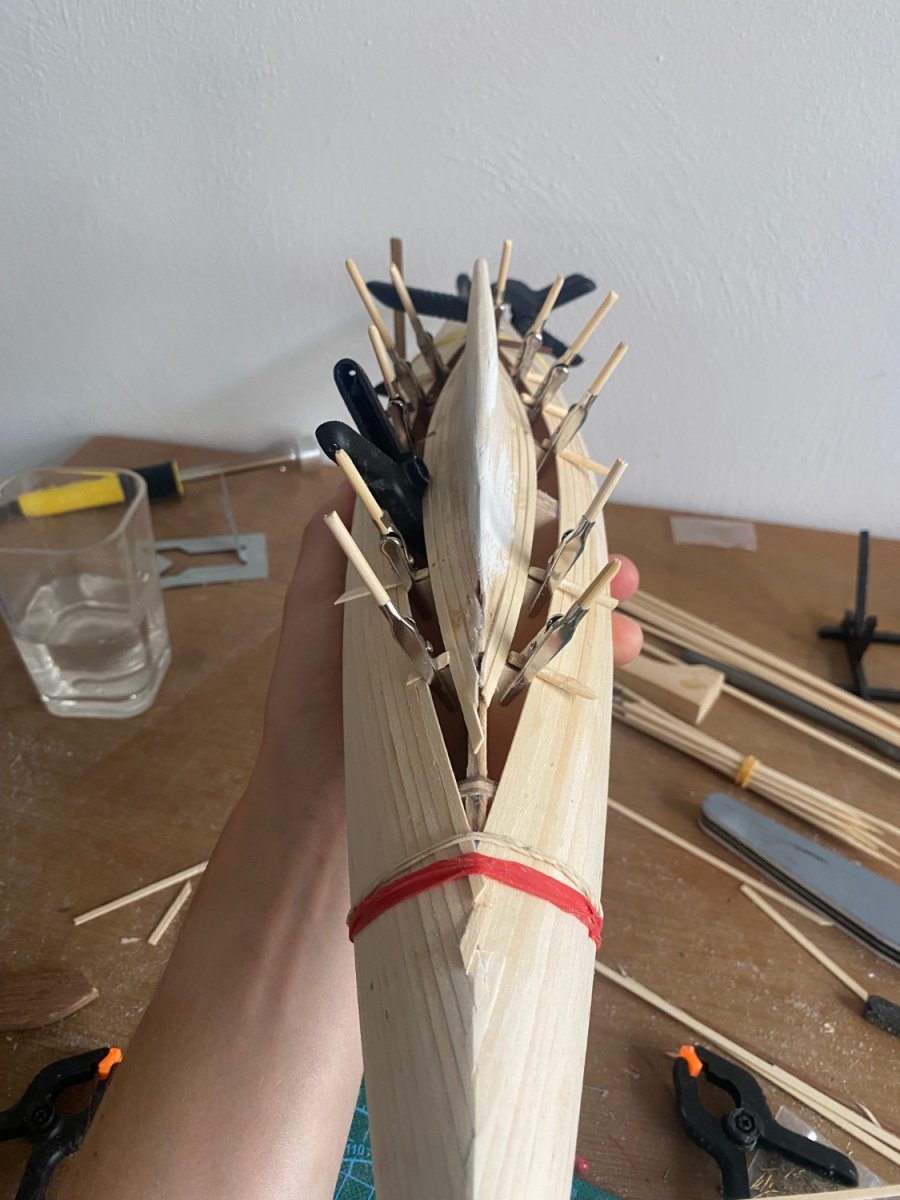
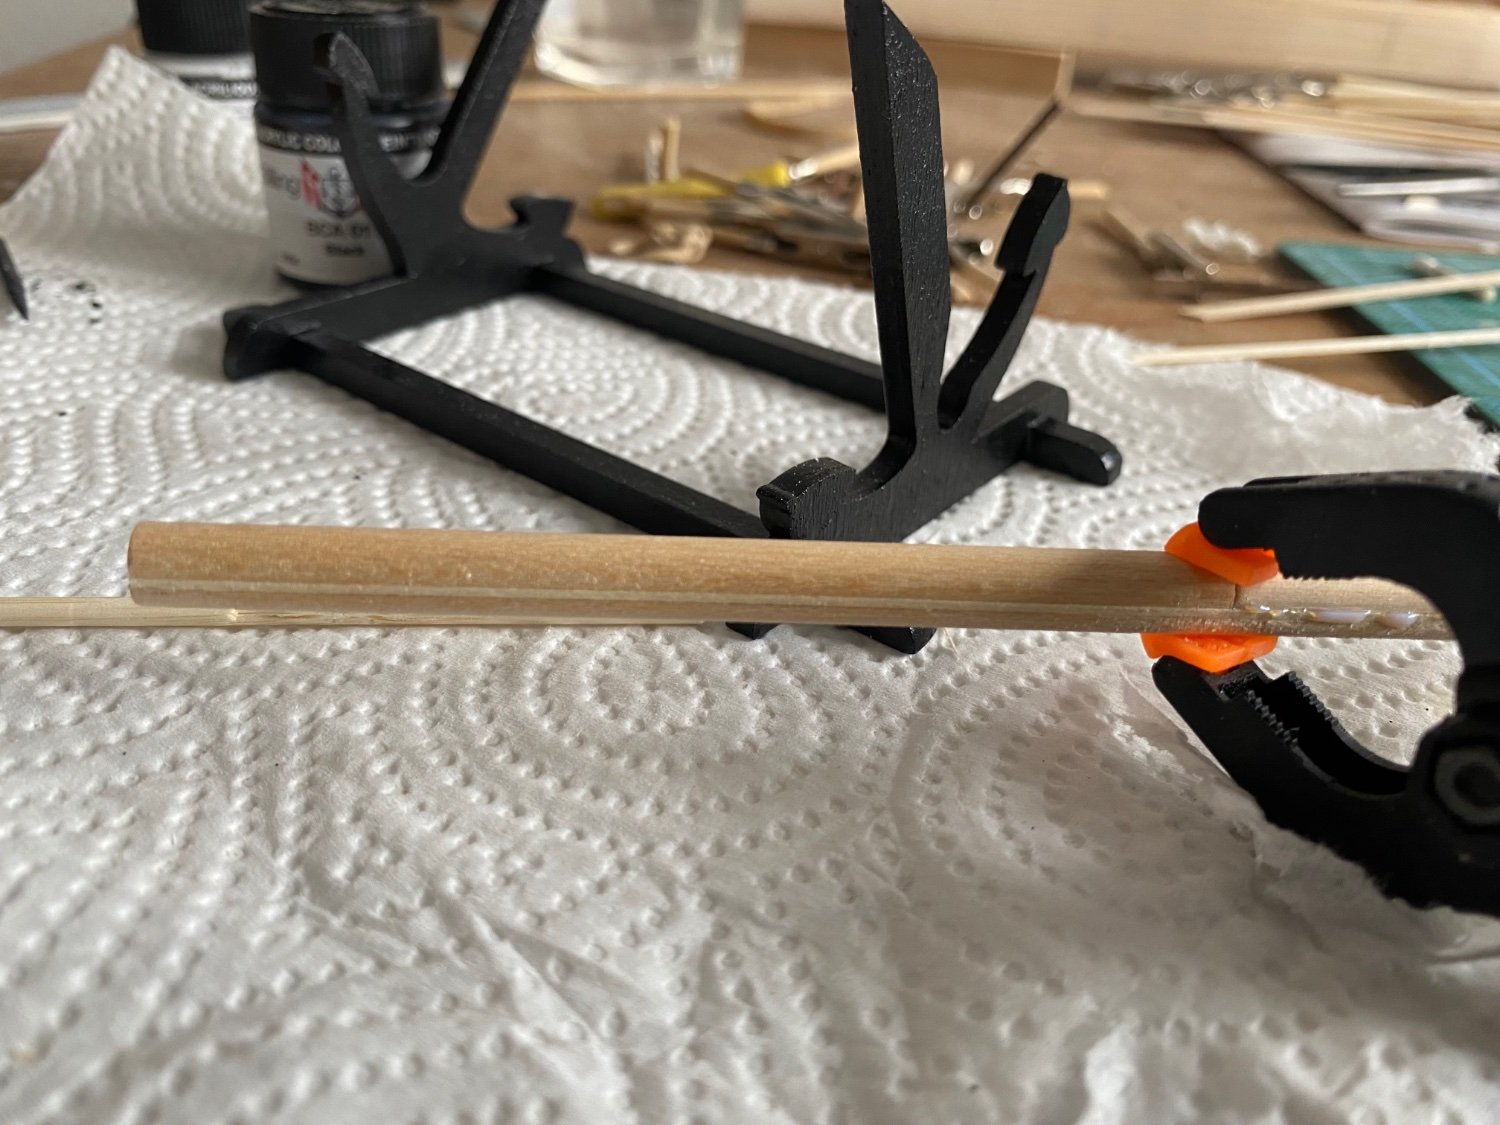
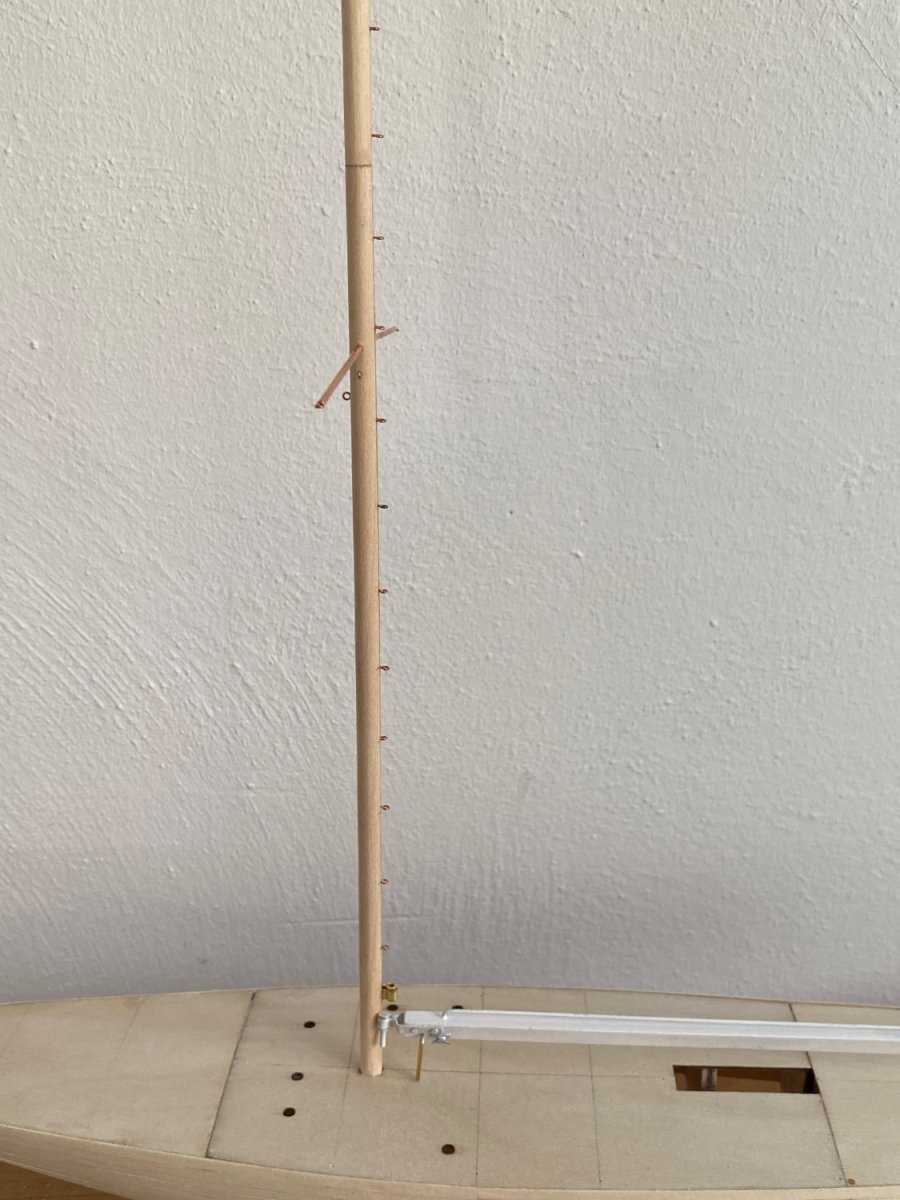
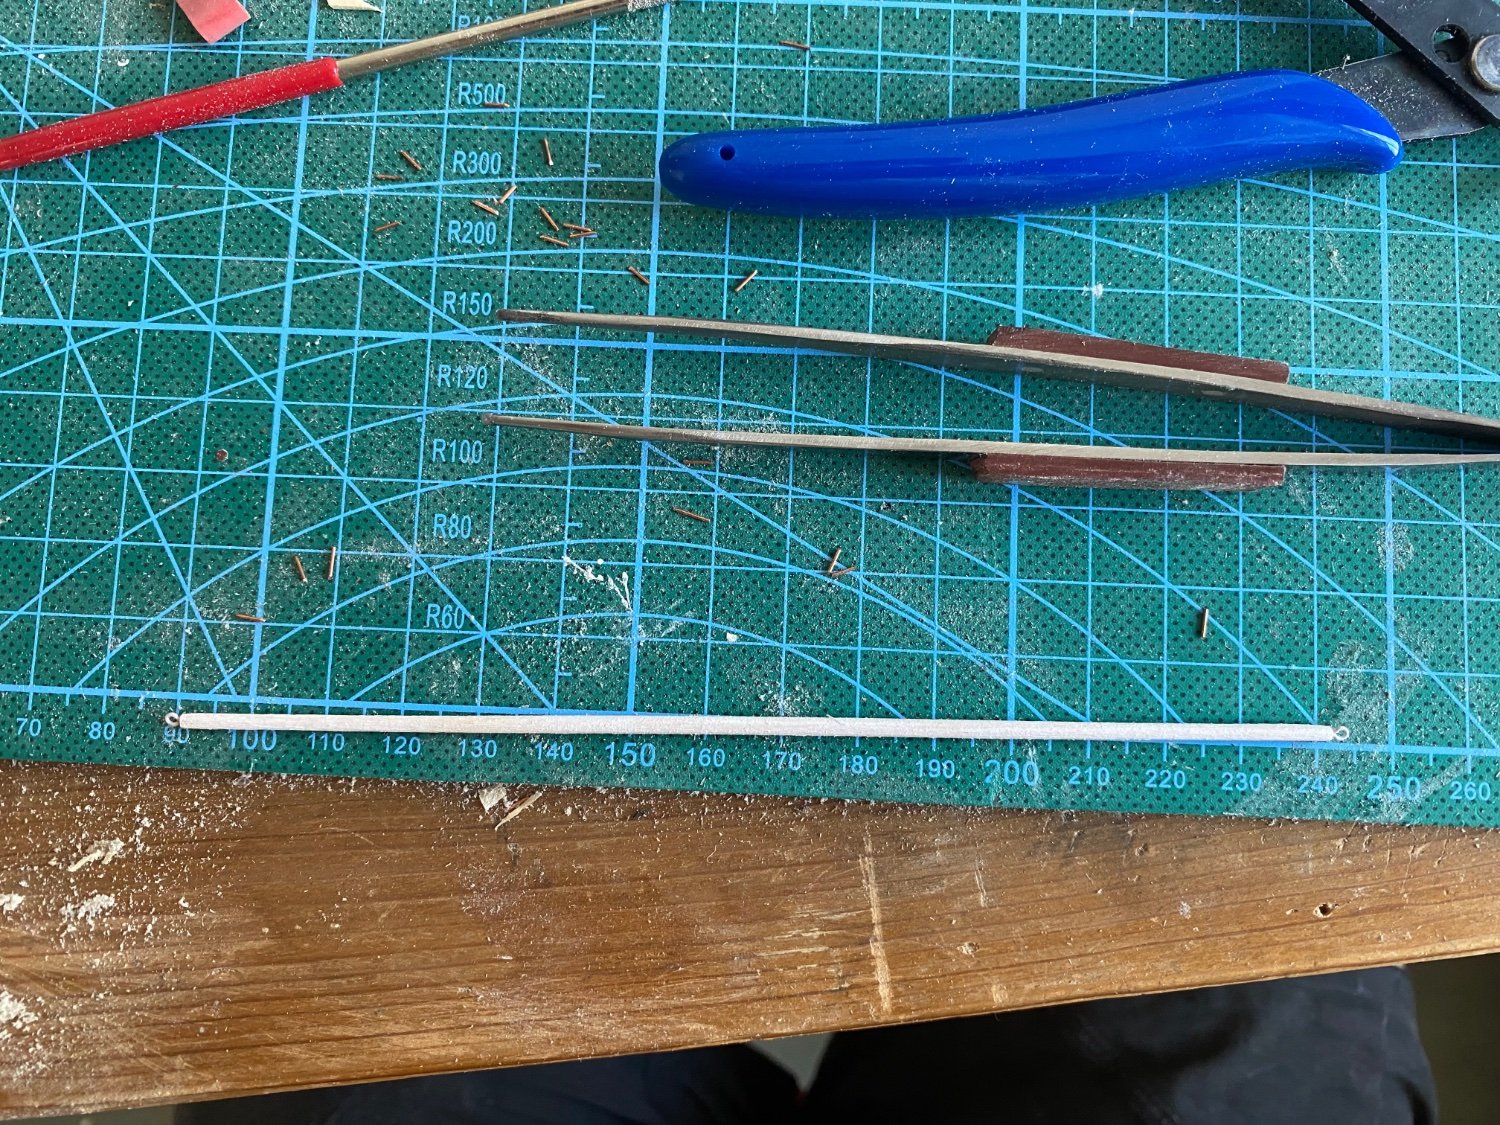
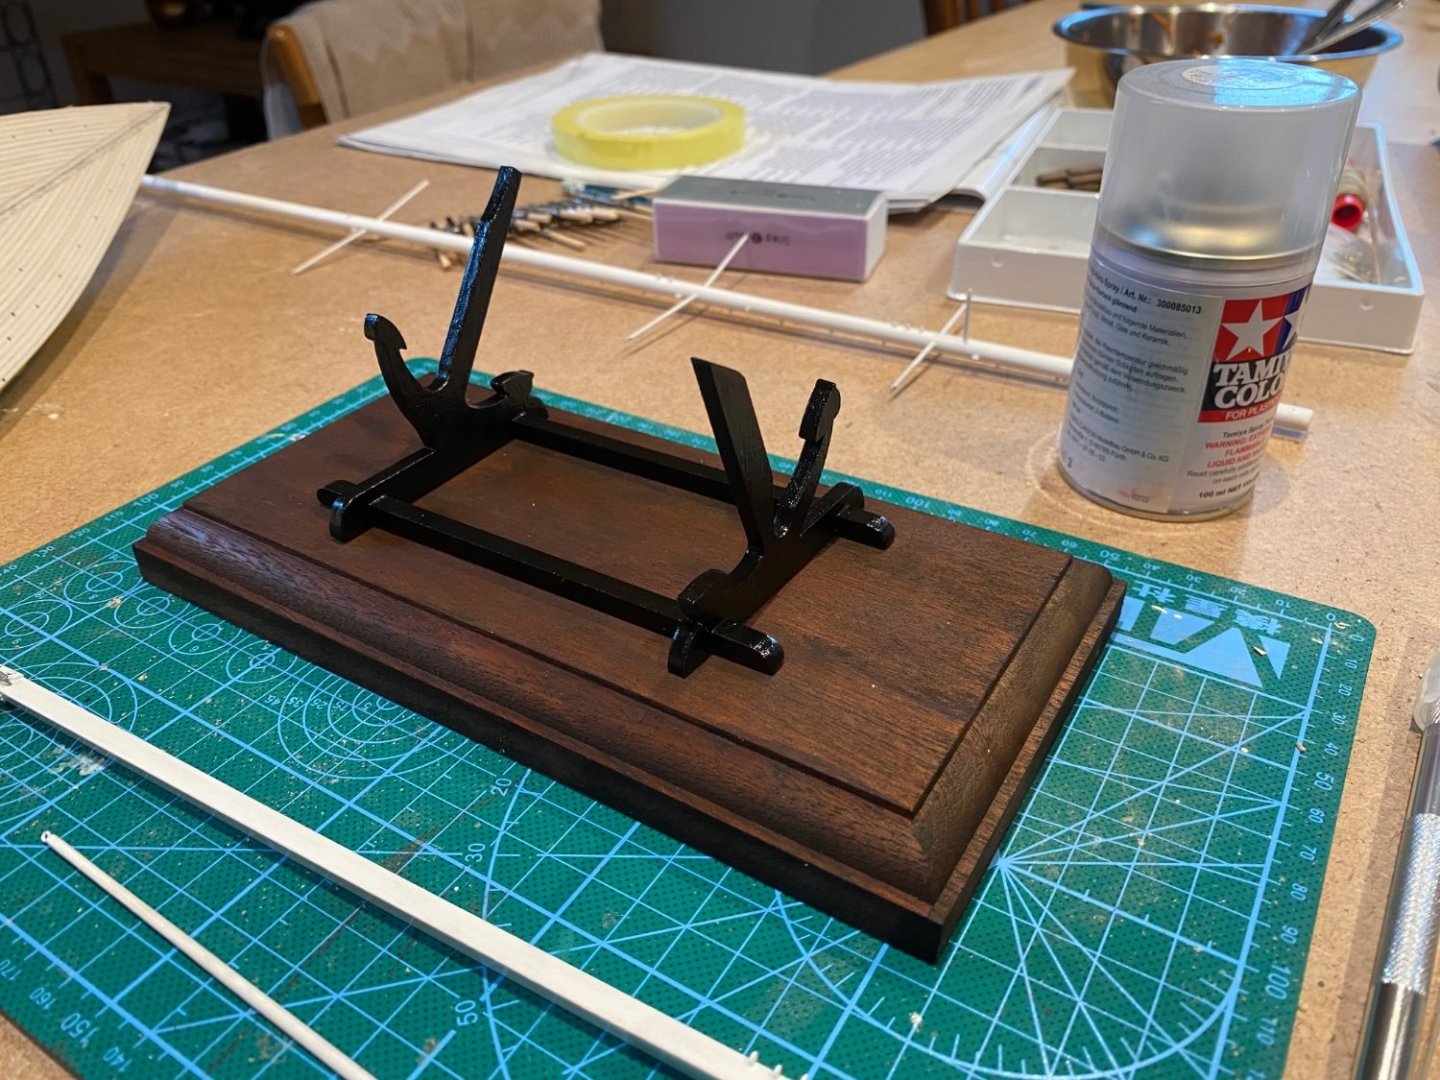
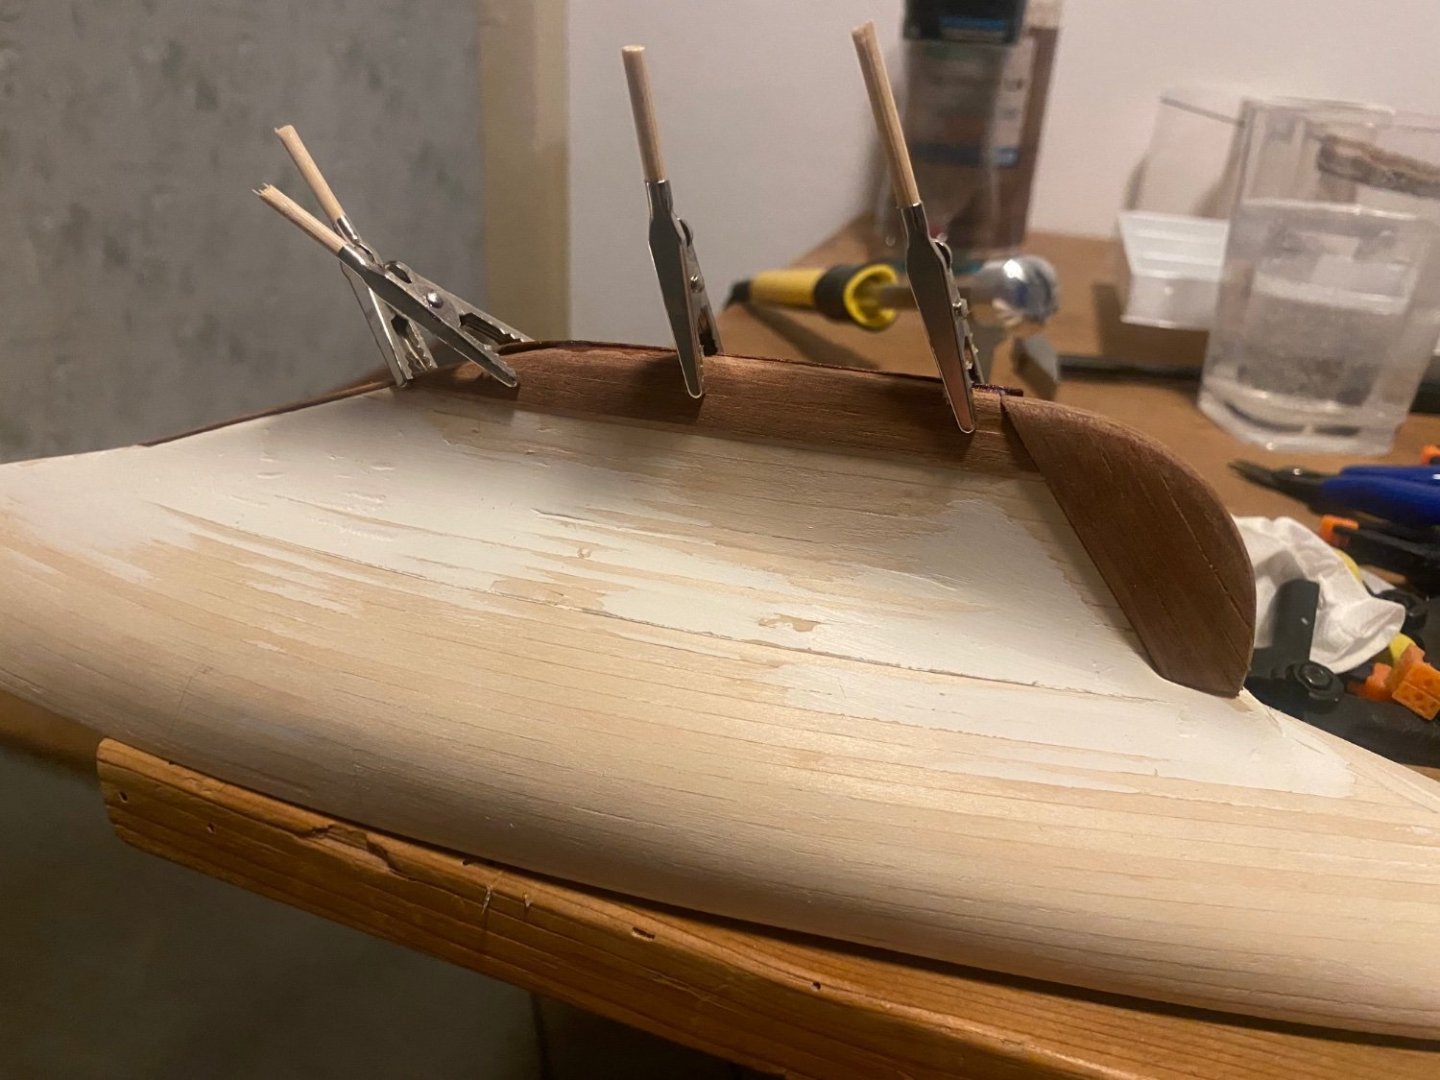
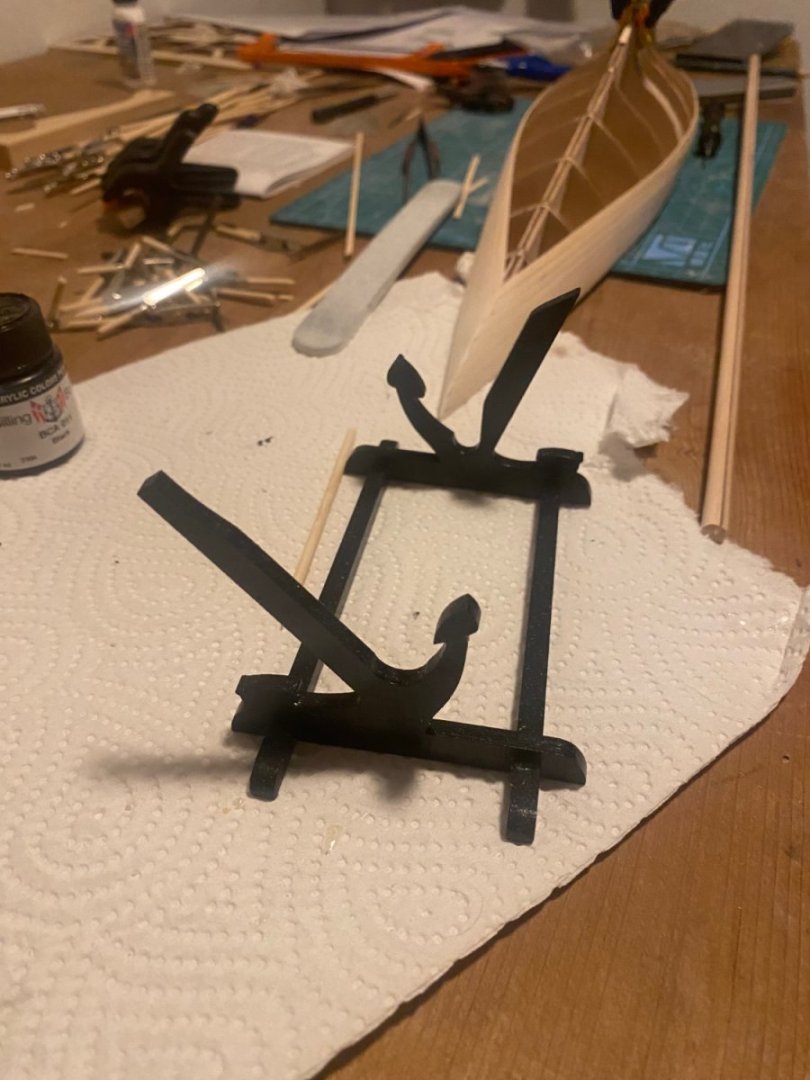
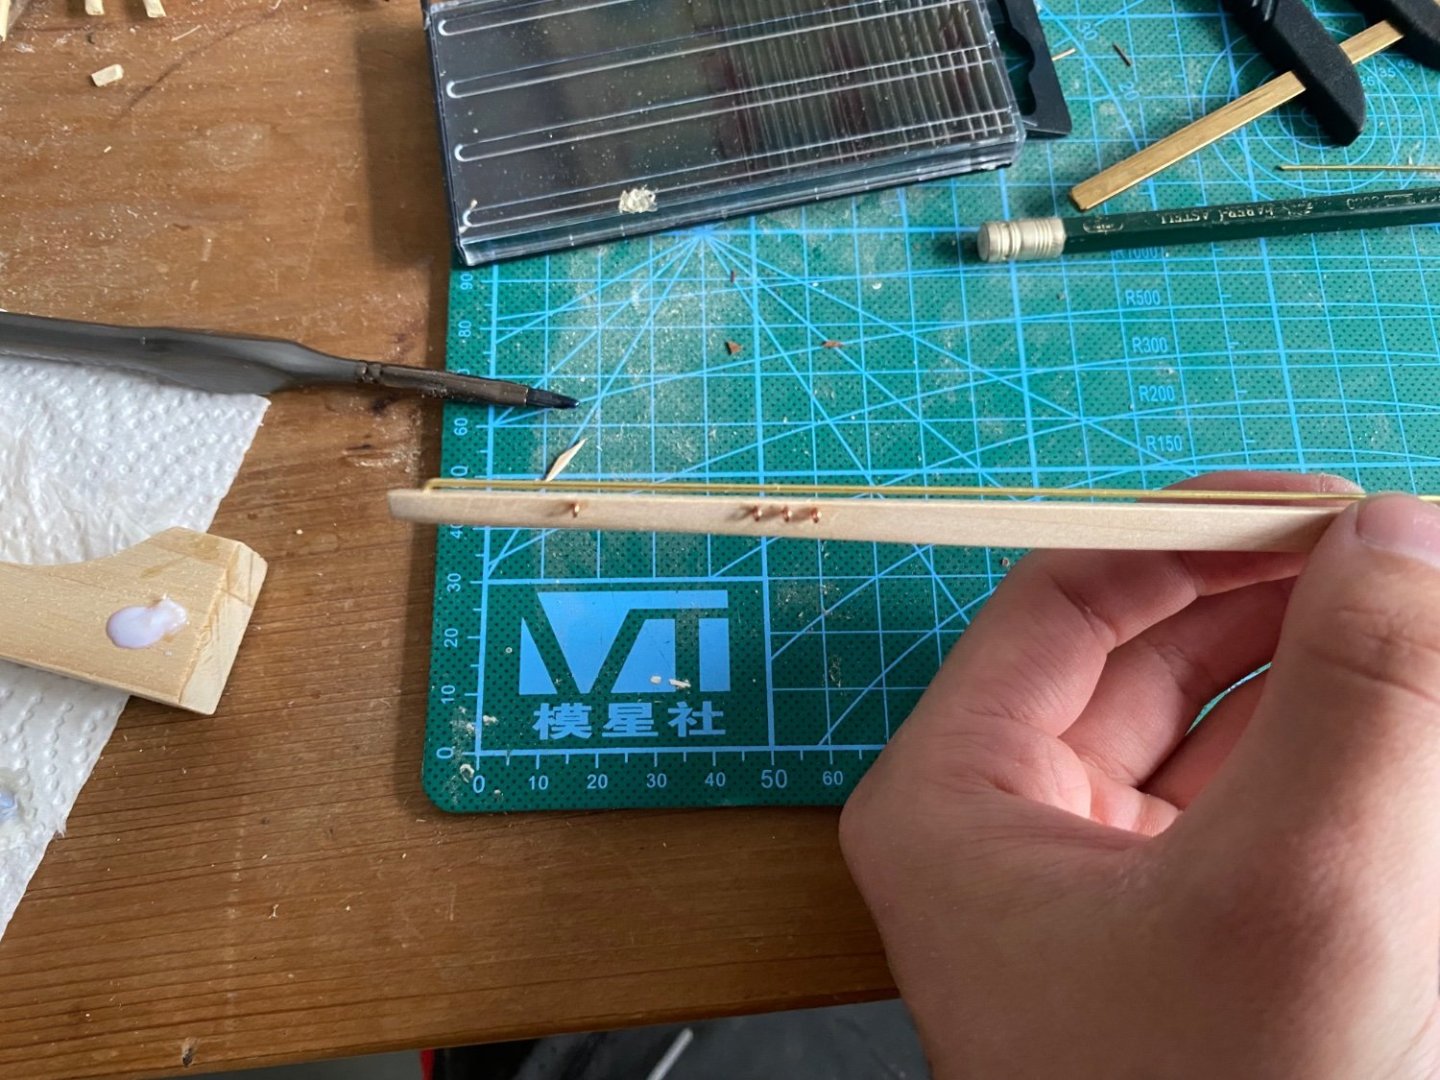
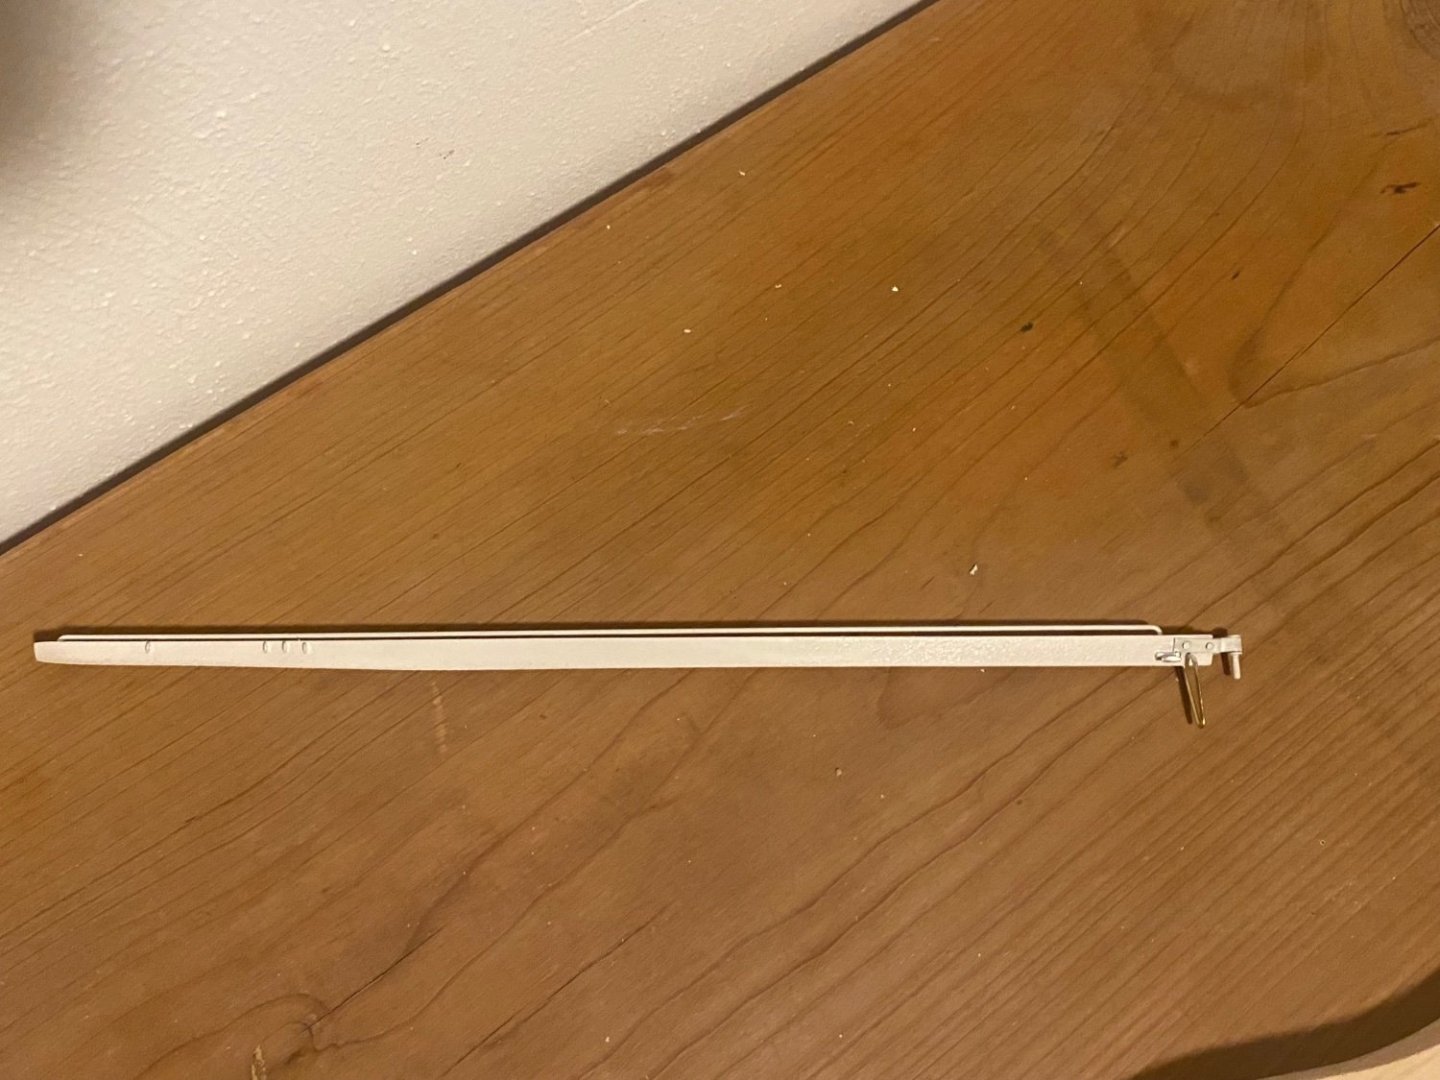
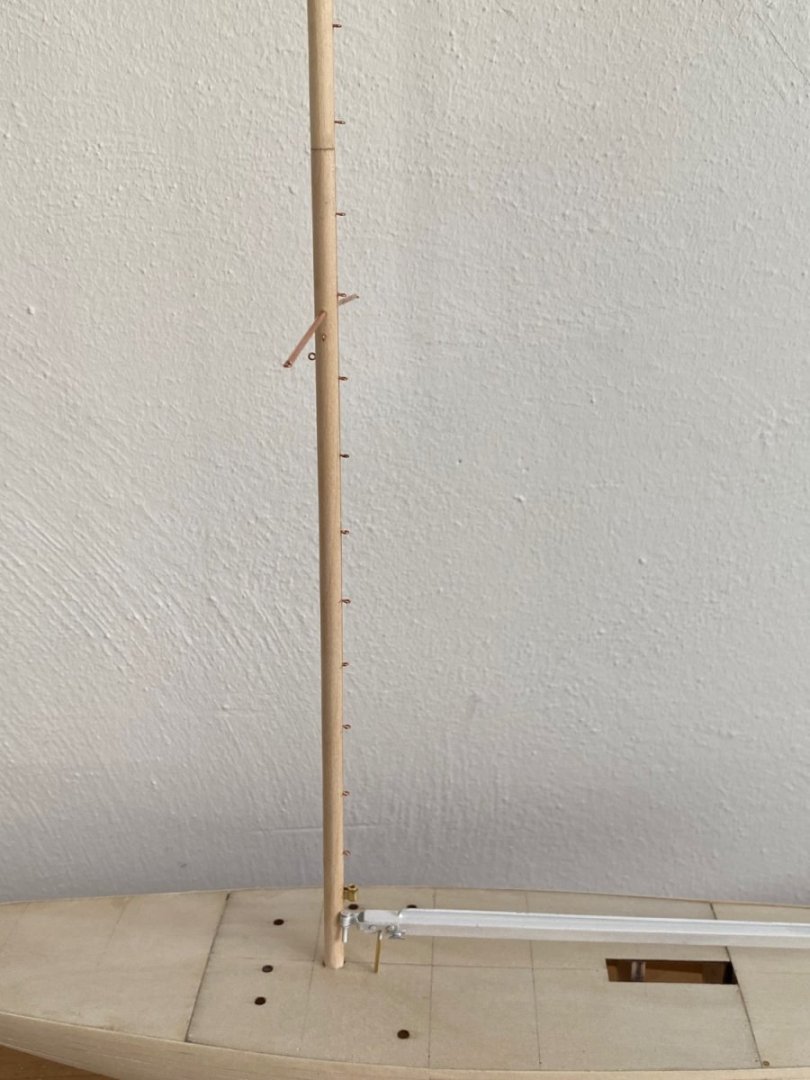
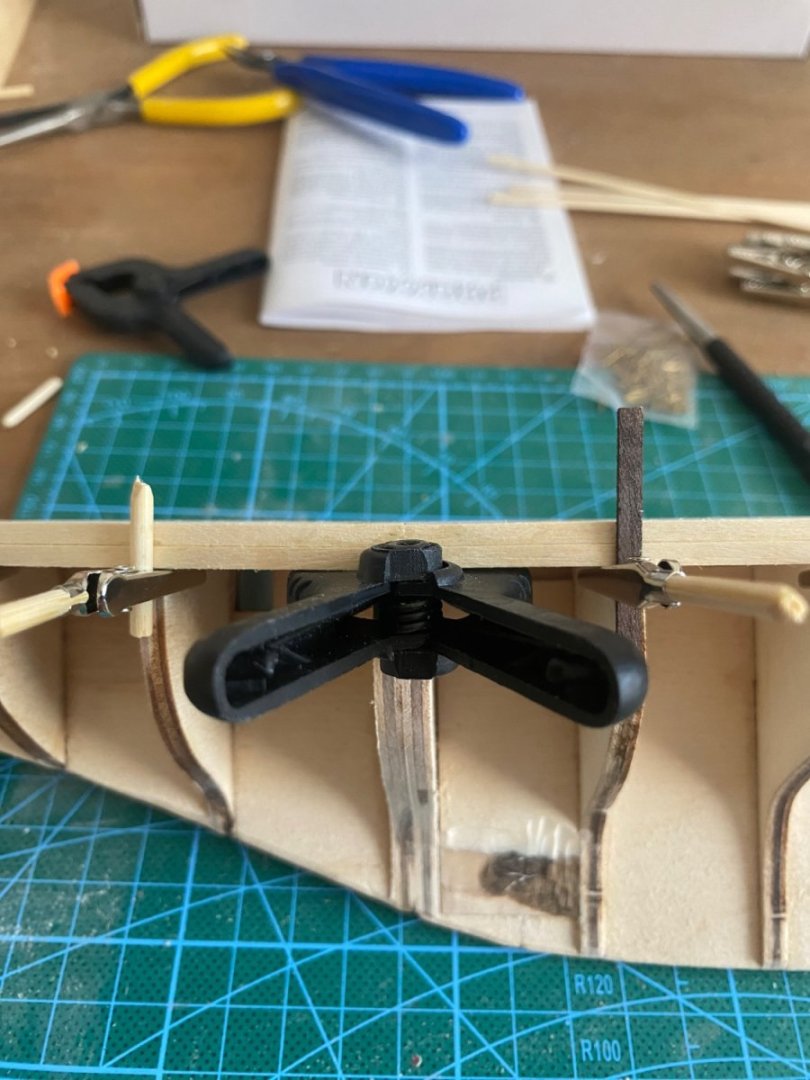
Time for an update on the Endeavour build: The second layer of the rudder planking is done. The edges were tricky and I needed some mini filler parts here and there but all in all it looks fine. Should look good because I will do the original colouring so you see the wood here. Maybe needs some finer sanding before it’s finished… Next up I built the provided stand, coloured it with primer and two layers of black colour. The anchor design is…lets call it „interesting“. planking the hull is so far going well but will need some more time to be finished. Puh lots of planks for a small model like this and thats only the first layer. Decided to start from the kiel upwards and meet in the middle. It’s faster like this. On the kiel I decided to add one strip (see first picture) and sand it round later. At the bow I already tried some wood filler to get a perfect shape. Will fix some small disturbings in the hull with Wood filler later wenn the first layer of planking is done. Parallel to planking I decided to start with the beam. The small parts and drilling 0,5mm holes needed calm fingers. To get the shape of the beam a lot of sanding was needed since an triangle part is provided and the beam should get smaller towards the back. After applying all the parts to it added a layer of primer and two white colour layers with a spray can colour. After the beam comes the mast, which has to be glued together out of 9 different parts. Turns out easier than I thougt to get it straight. Clamps did their job. Wow this mast turned out huge! next up was drilling a lot of holes with 0,5mm and 1mm into the mast around 50 holes I guess. The provided 1:1 plan was a big help to so some fast markings and don’t need to measure every hole. Added the 50 rings and the mast is finished. Just needs some white painting, primer is already applied. also sanded down the spi beam and primed it thats it for now…planking continues. I will probably build one or two of the cabins parallel to planking and colour the mast and spi beam.


-
Thank you Chris !
-
thanks a lot! Thank you Bob! yes altready doing the JClass Endeavour 1:80 by amati and have stated a build log for it. When this is finished the next one will probably be Lady Nelson, the Beagle or HMS Surprise…we will see
- 16 replies
-
- 1
-

-
- Optimist Dinghy
- optimist
- (and 2 more)
-
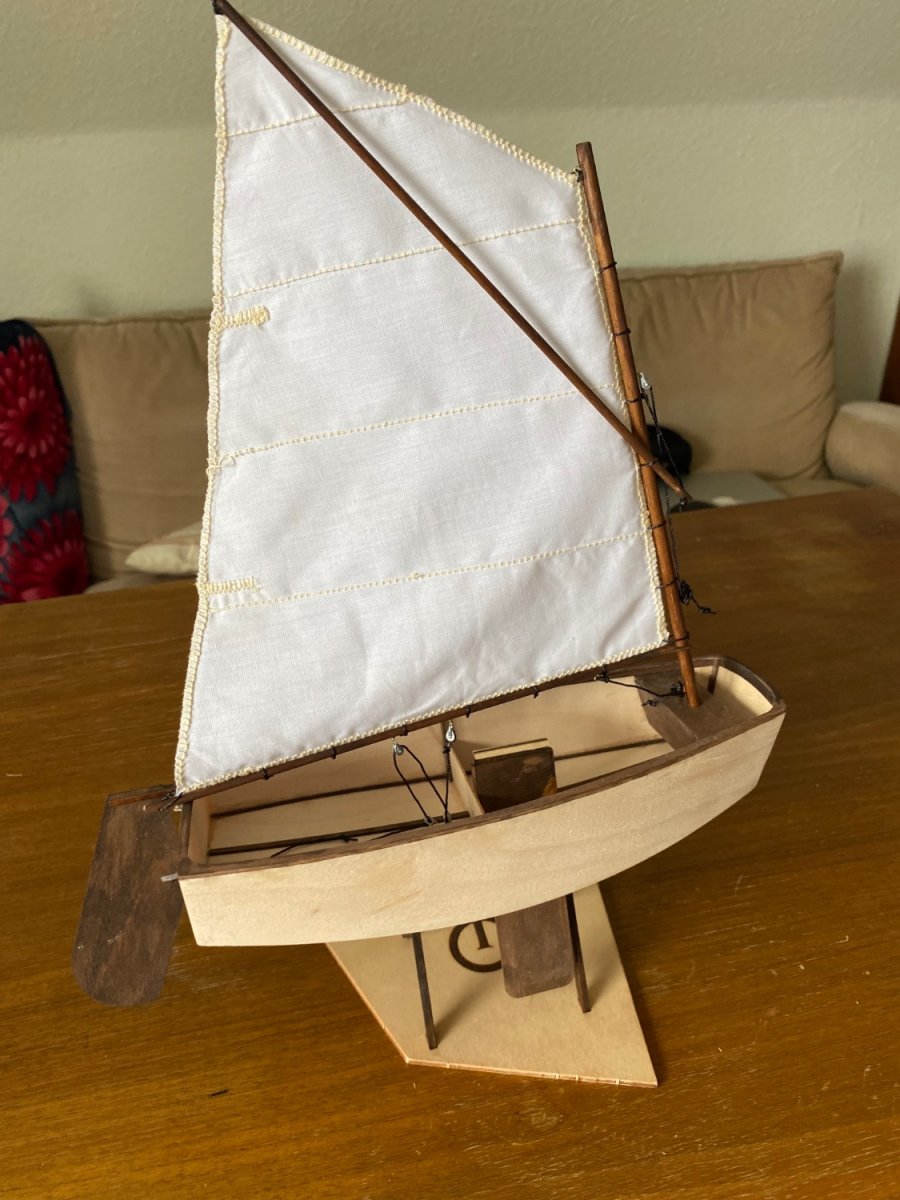
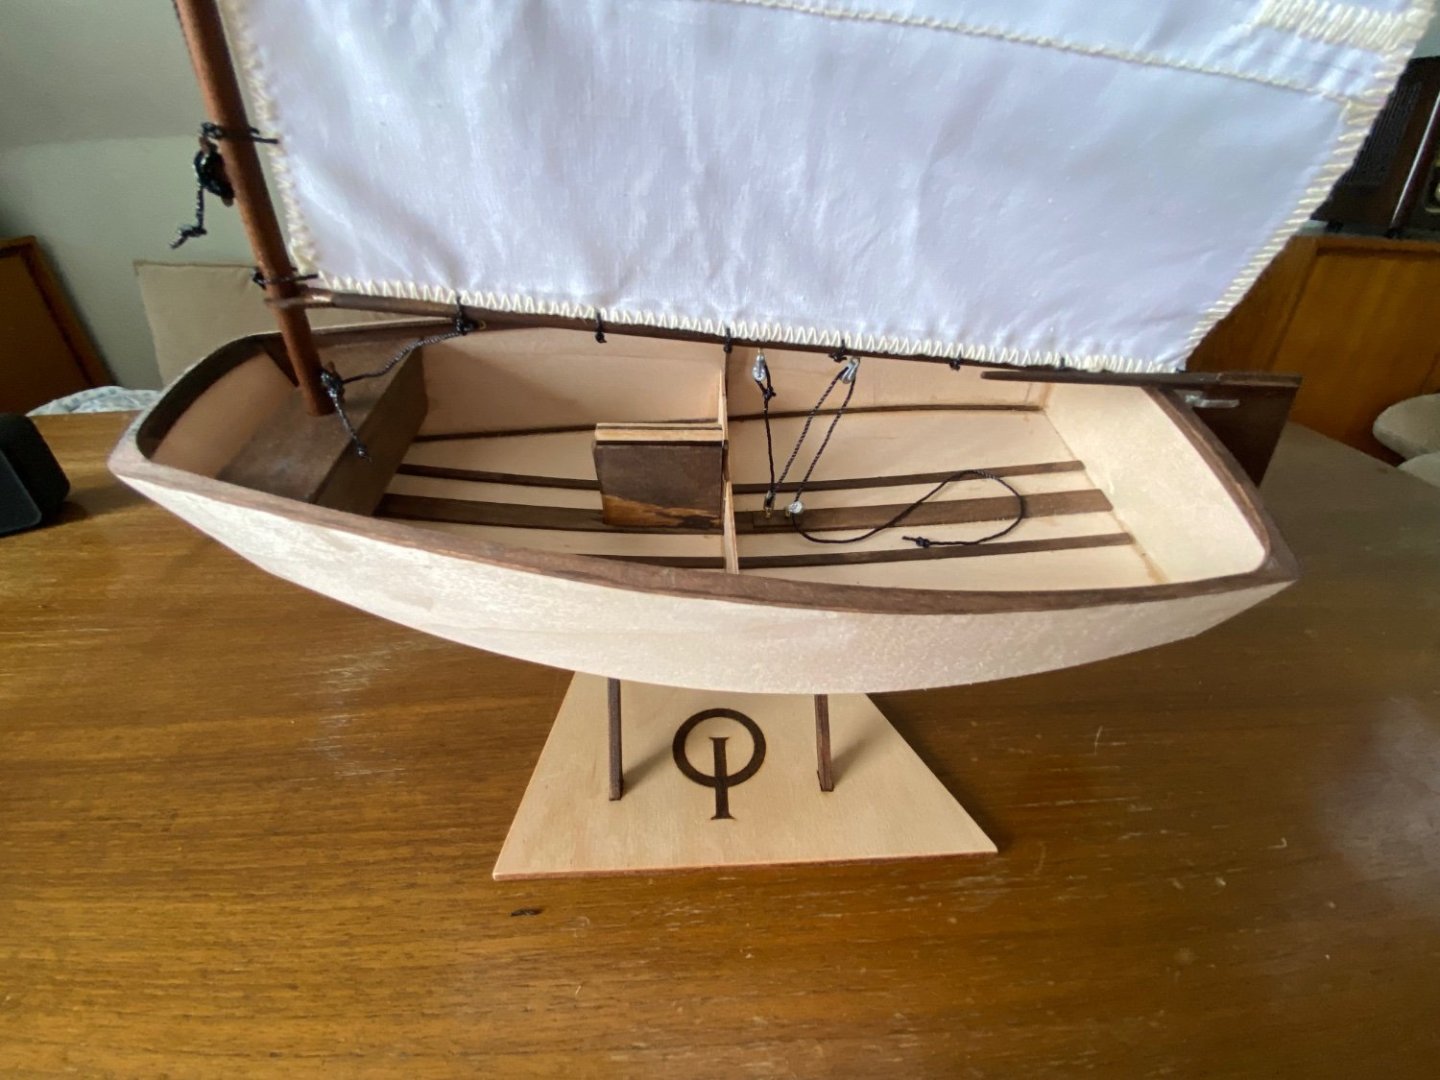
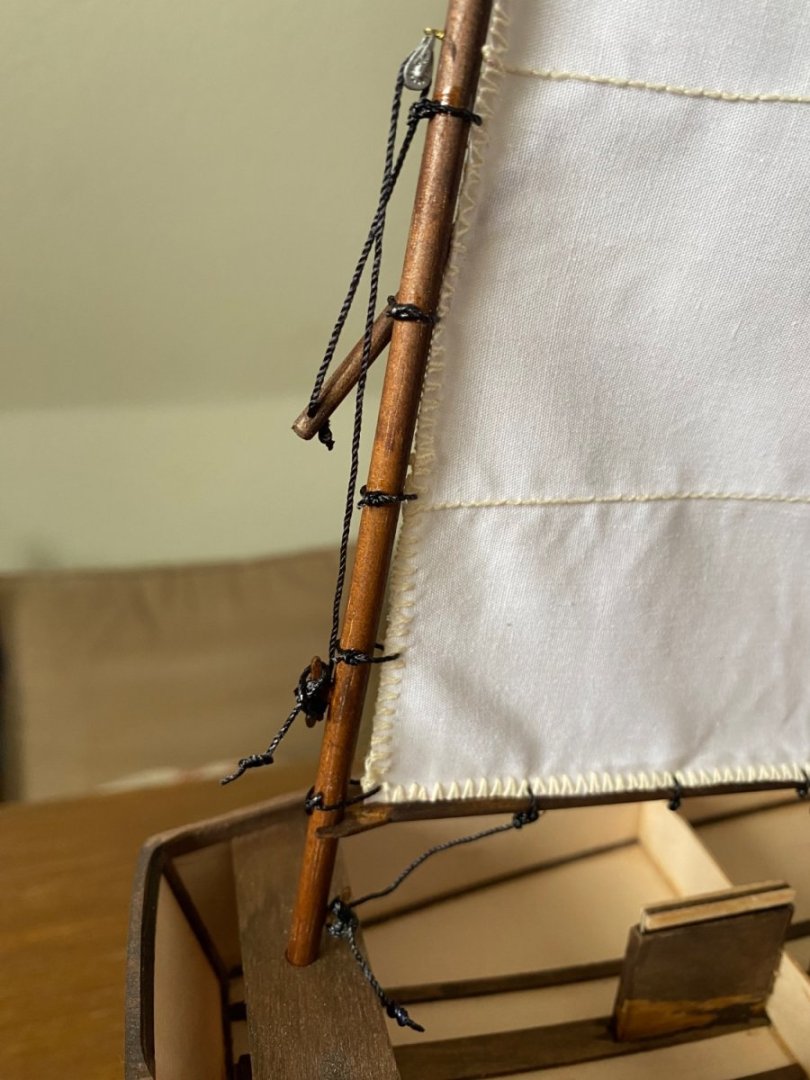
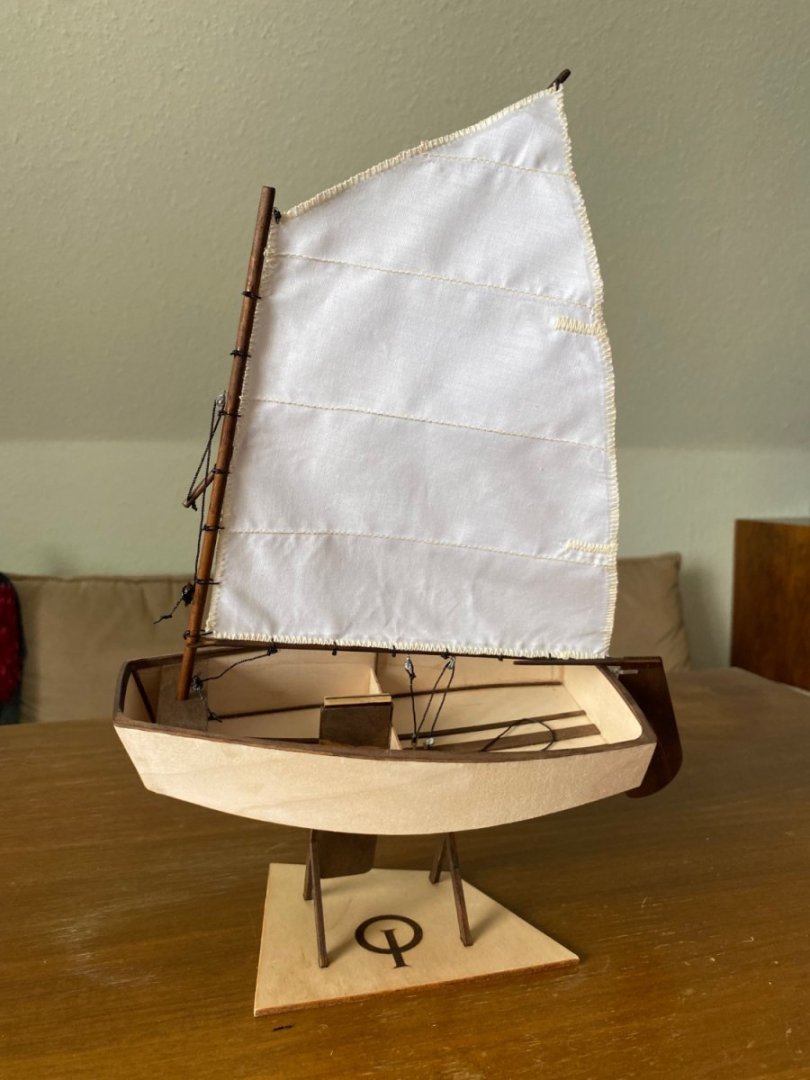
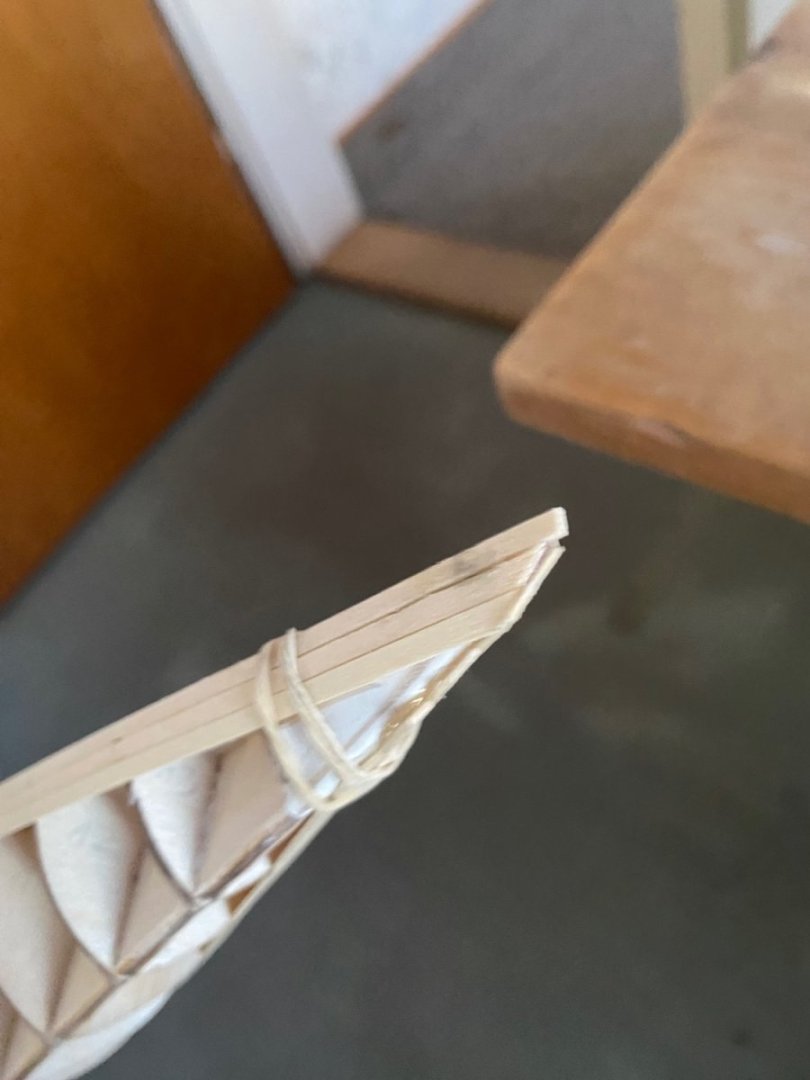
So the rigging is done. Did it like in the original with 8 and Palsteg knots, that was tricky with the provided strings. added glue to keep them in place the rig is done and just had to attach the mast do the body and add the mainsheet rope? (Grosschot) Yeaha and there it is the Optimist Dinghy 1:10 is finished. I will not paint it and really like the natural look. some pictures of the finished model:


- 16 replies
-
- 5
-
-
- Optimist Dinghy
- optimist
- (and 2 more)
-
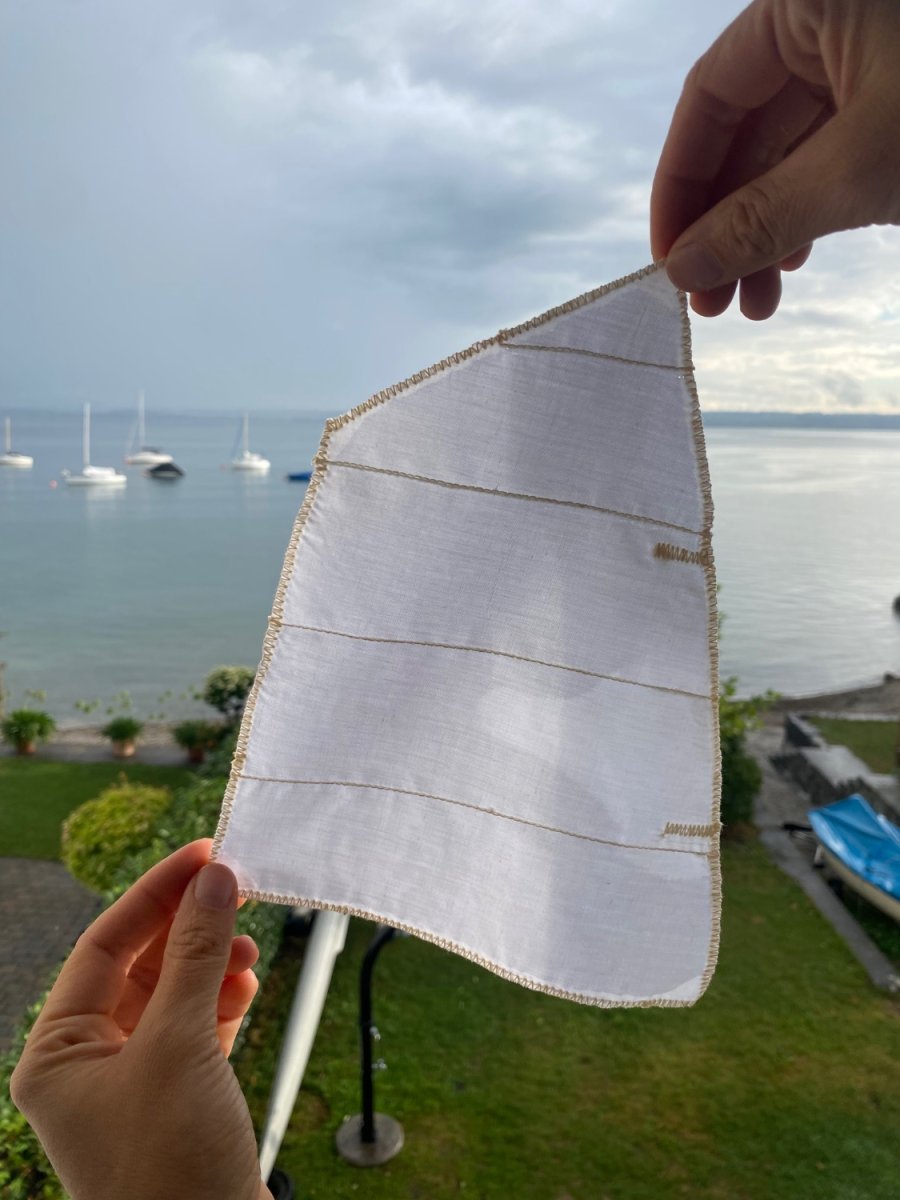
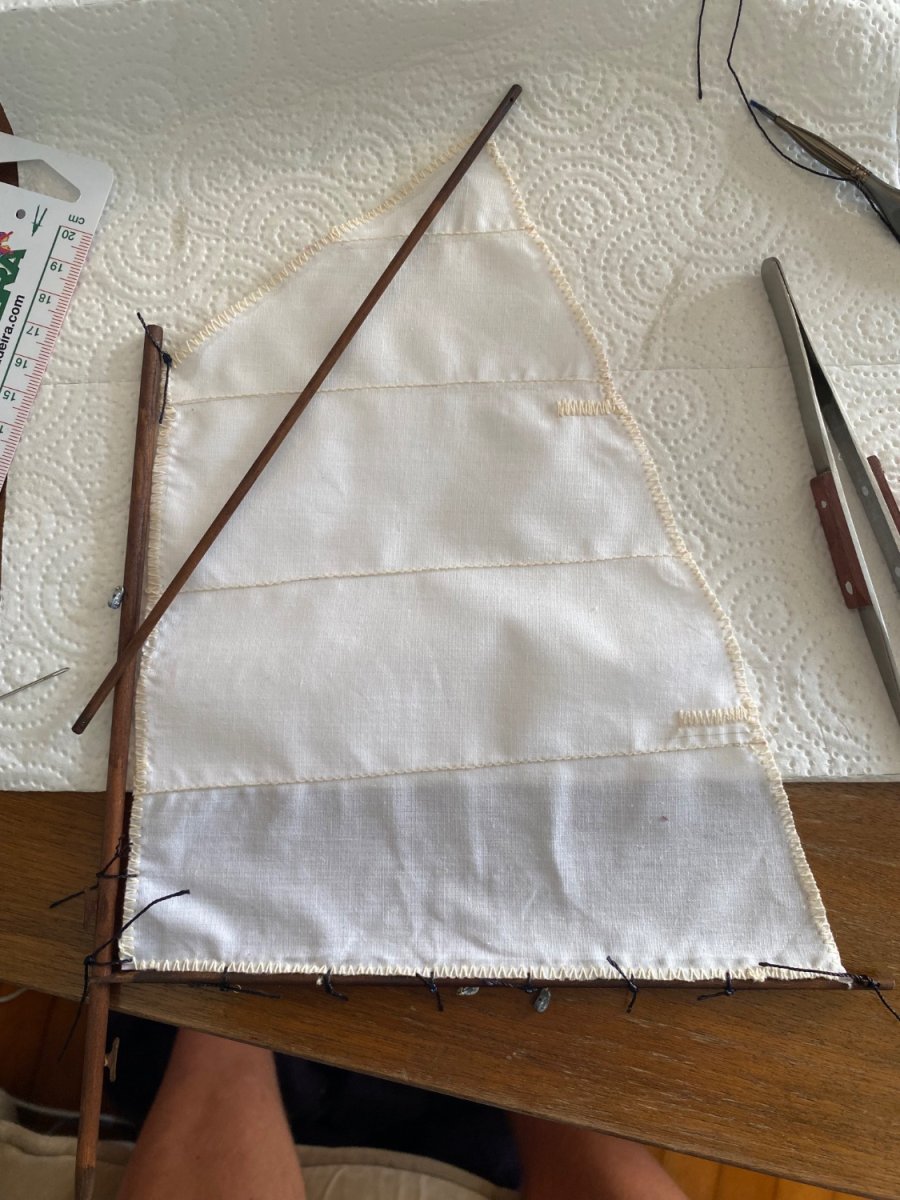
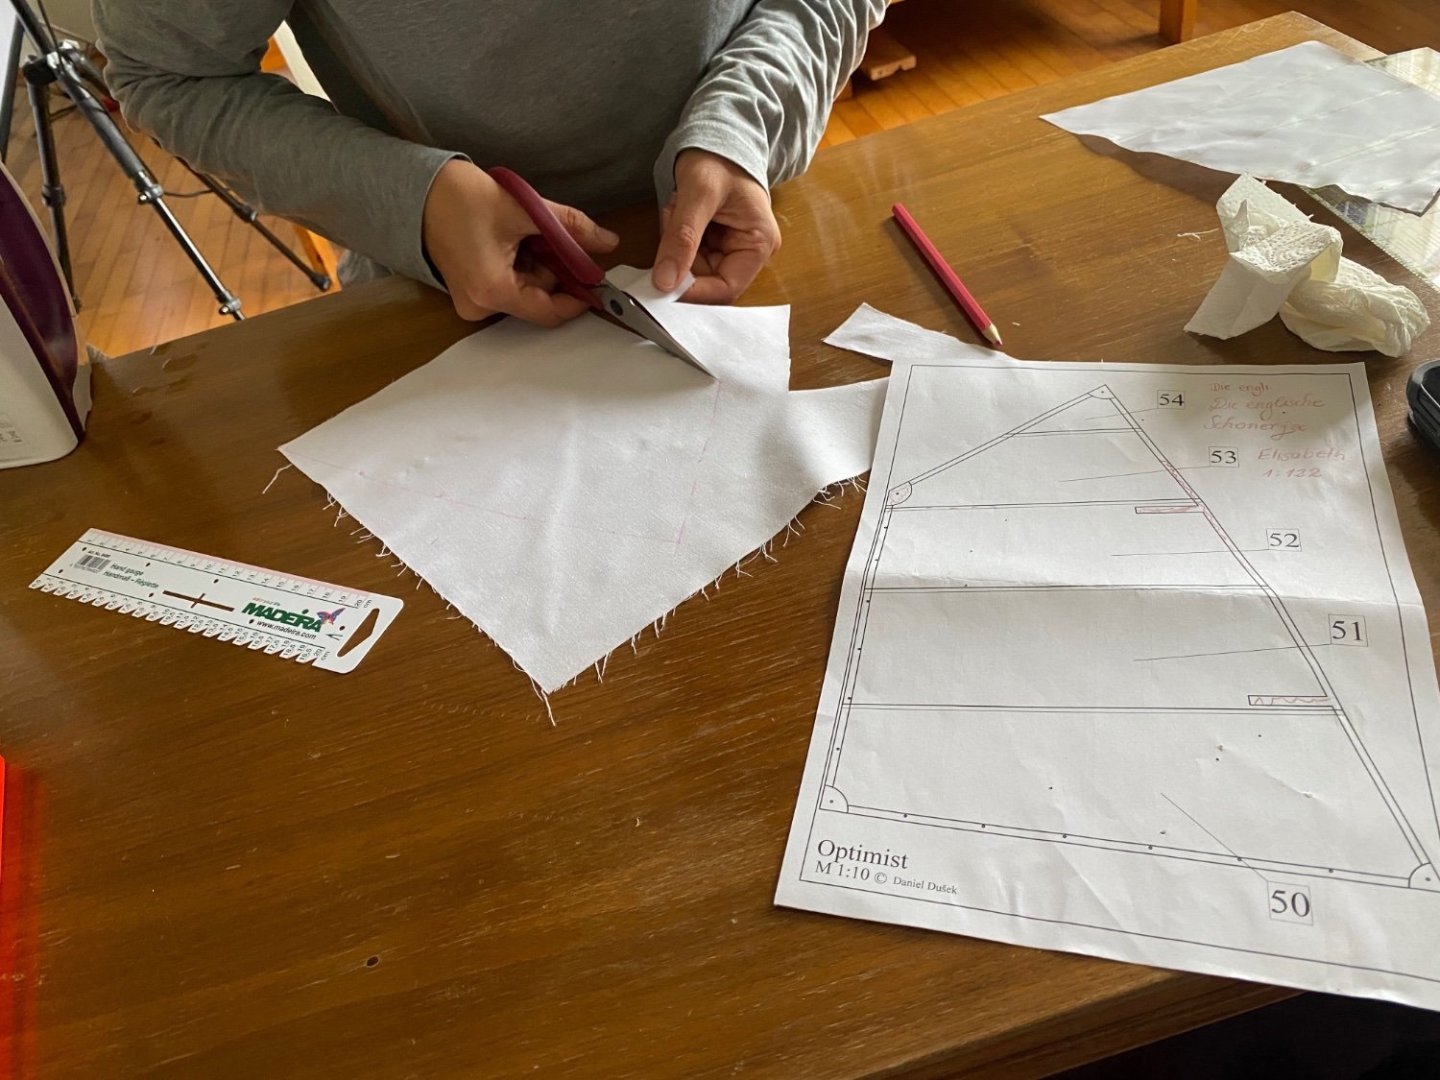
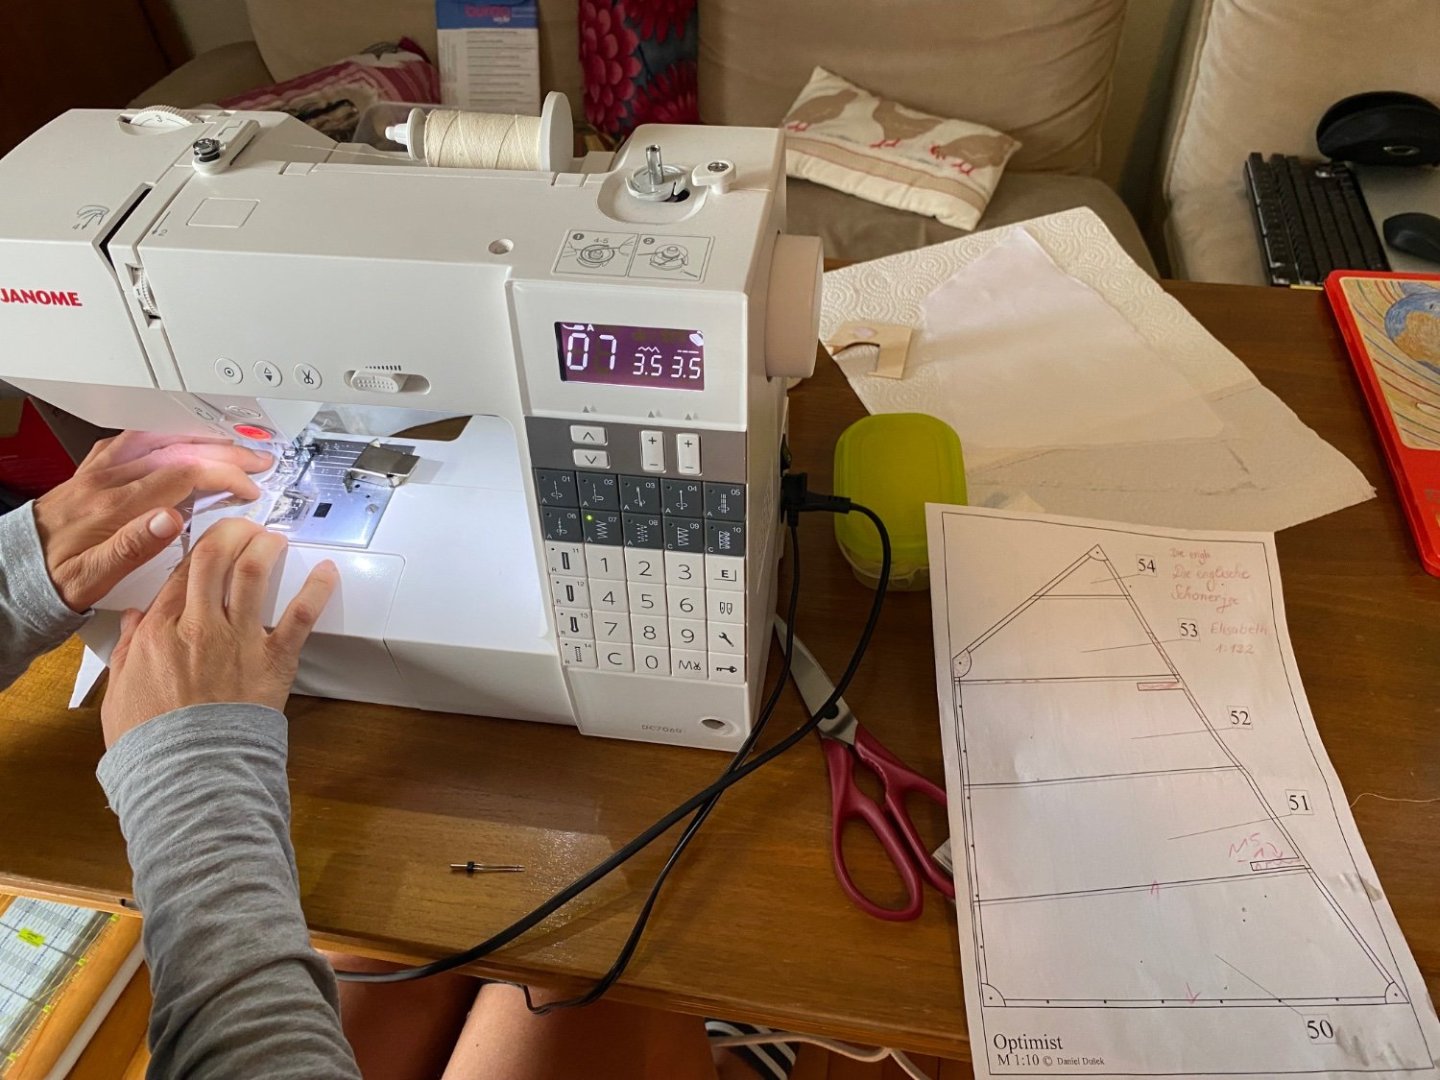
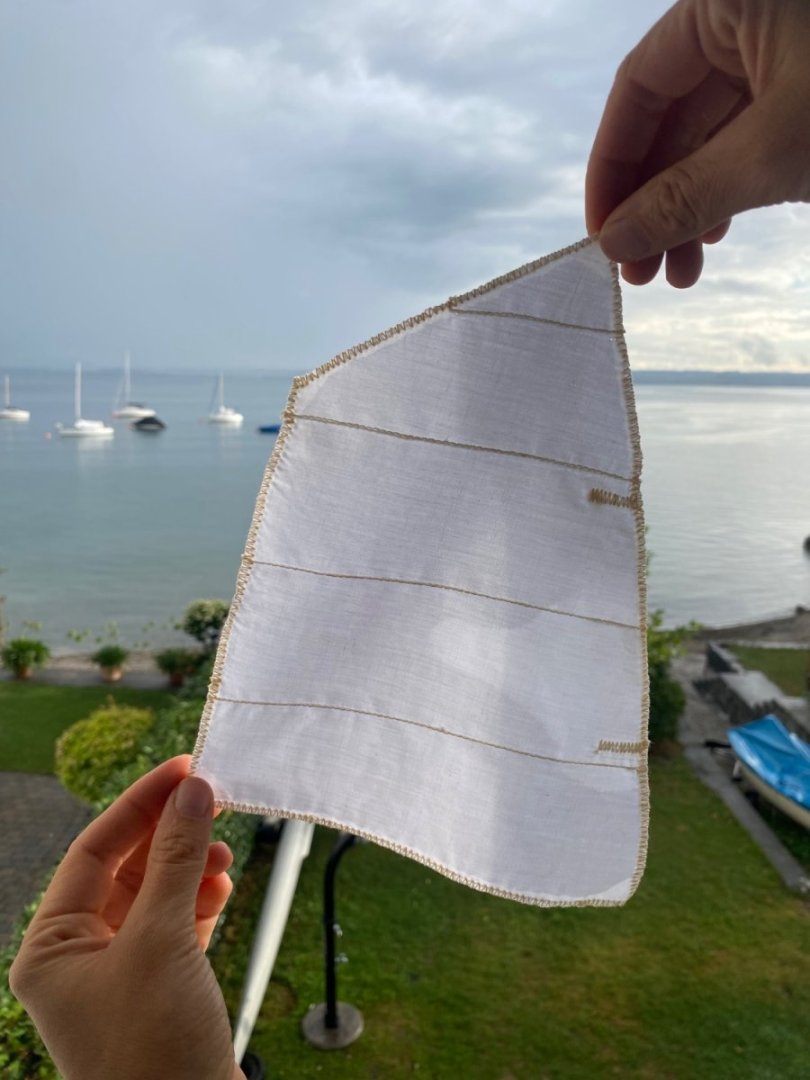
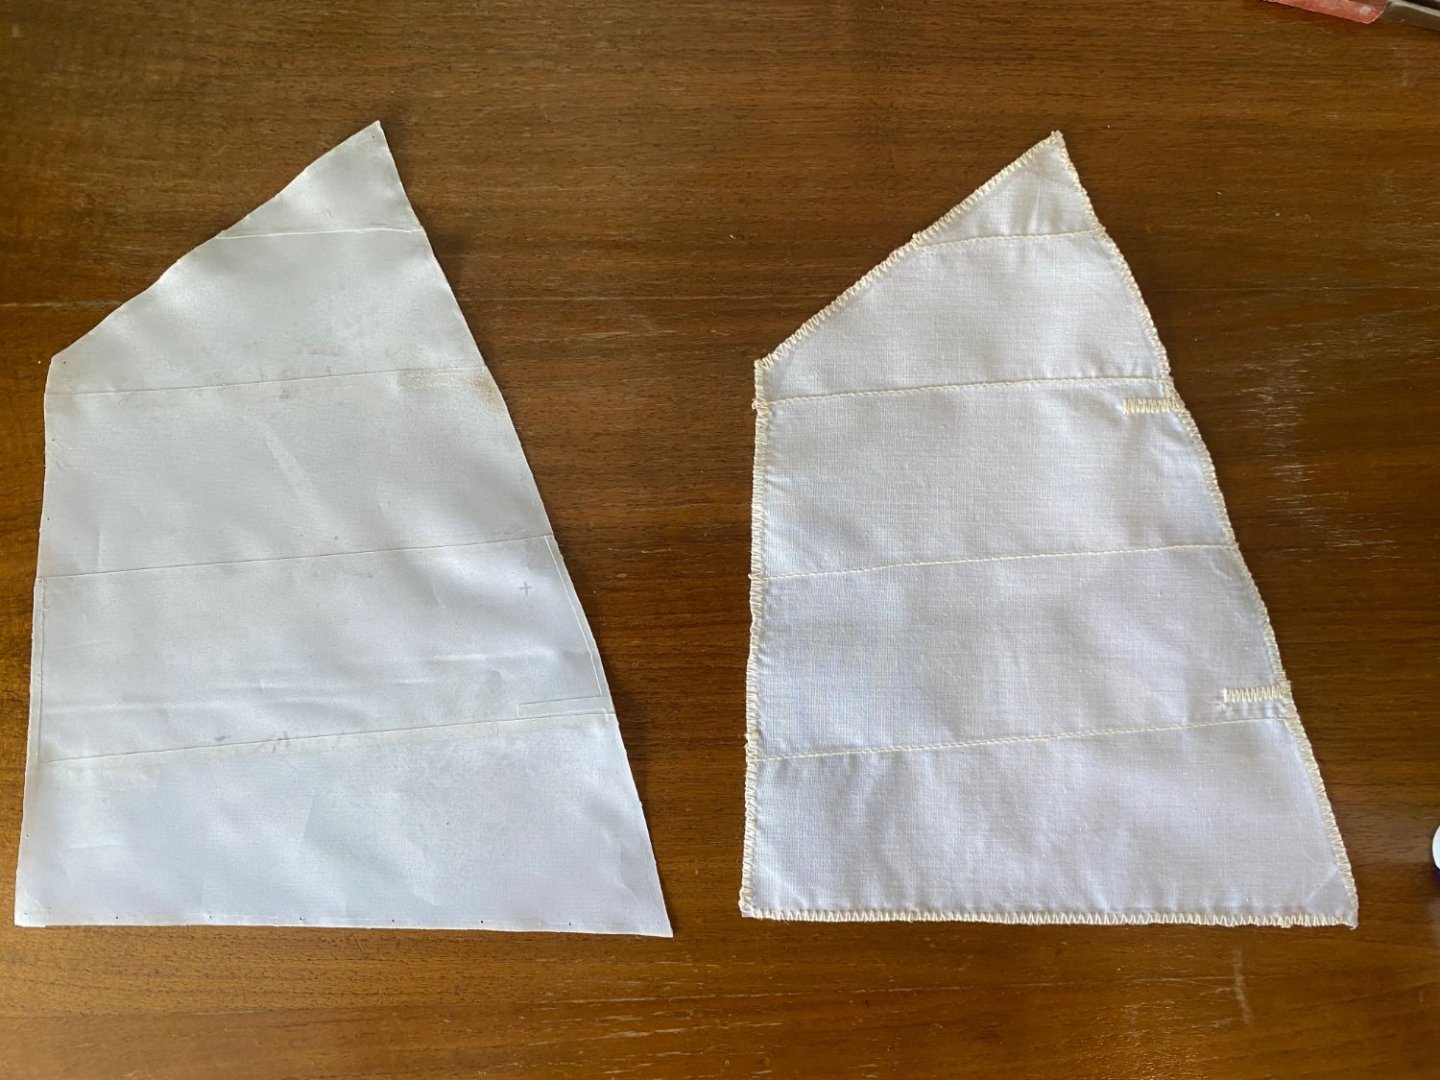
Today my girlfriend and I were sewing a new sail for the Optimist. Was tricky to get the right stitching but turned out well. At first cutting the material than doing the magic with the sewing machine and there it is compared to the kit provided sail also began the rigging but not finished yet. What a fine looking little rig this will be in the next update rigging will be done and the boat gets some finishing touches


- 16 replies
-
- 3
-
-
- Optimist Dinghy
- optimist
- (and 2 more)
-
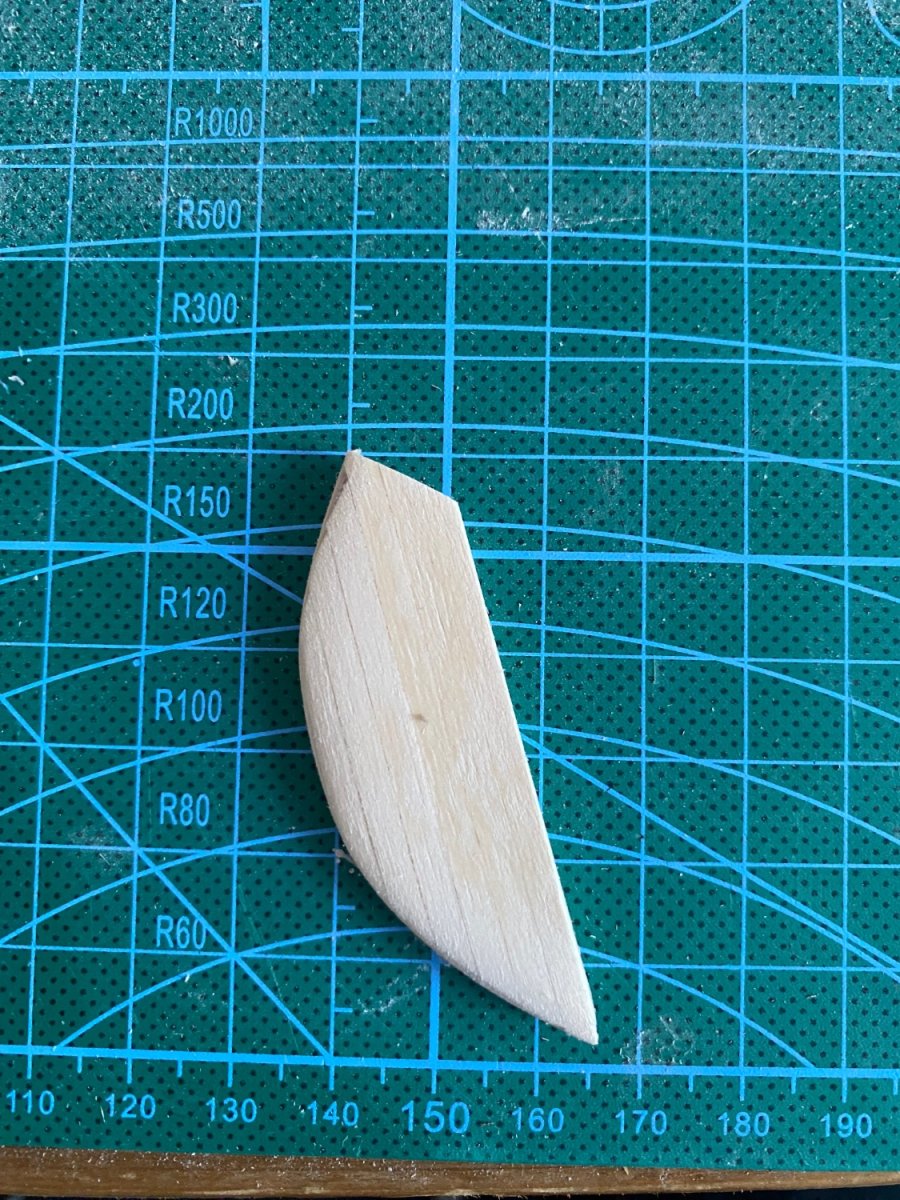
So planking is going well. Just the bow gives me a little headics…its so sharp, don’t know really how to get it right, but maybe Just try and see how it goes also did the layer of planking the rudder. Small stuff and lots of sanding needed but i think it turned out really smooth.


-
Let’s start with planking. First time planking a ship for me so i am a little bit nervous. Last time planking in the gym has also been a while 😅 my way to go looks like this: the rear has some heavy bending but works good with rubber band. for the first upper planks the provided strips are not long enough so i split them and make a match in the middle. Here: so far so good, seems like this will take a while to plank the first layer


-
Sanding the bow, rear and support parts in the middle of the skelleton were some good hours of work. At the bow I used some wood filler to get it in shape. Used a Dremel maschine for the most sanding and fine sanding per hand afterwards… seems like i am ready for the first layer of planking now.
-
Thanks 🫡
-
Thanks a lot, appreciate it!
-
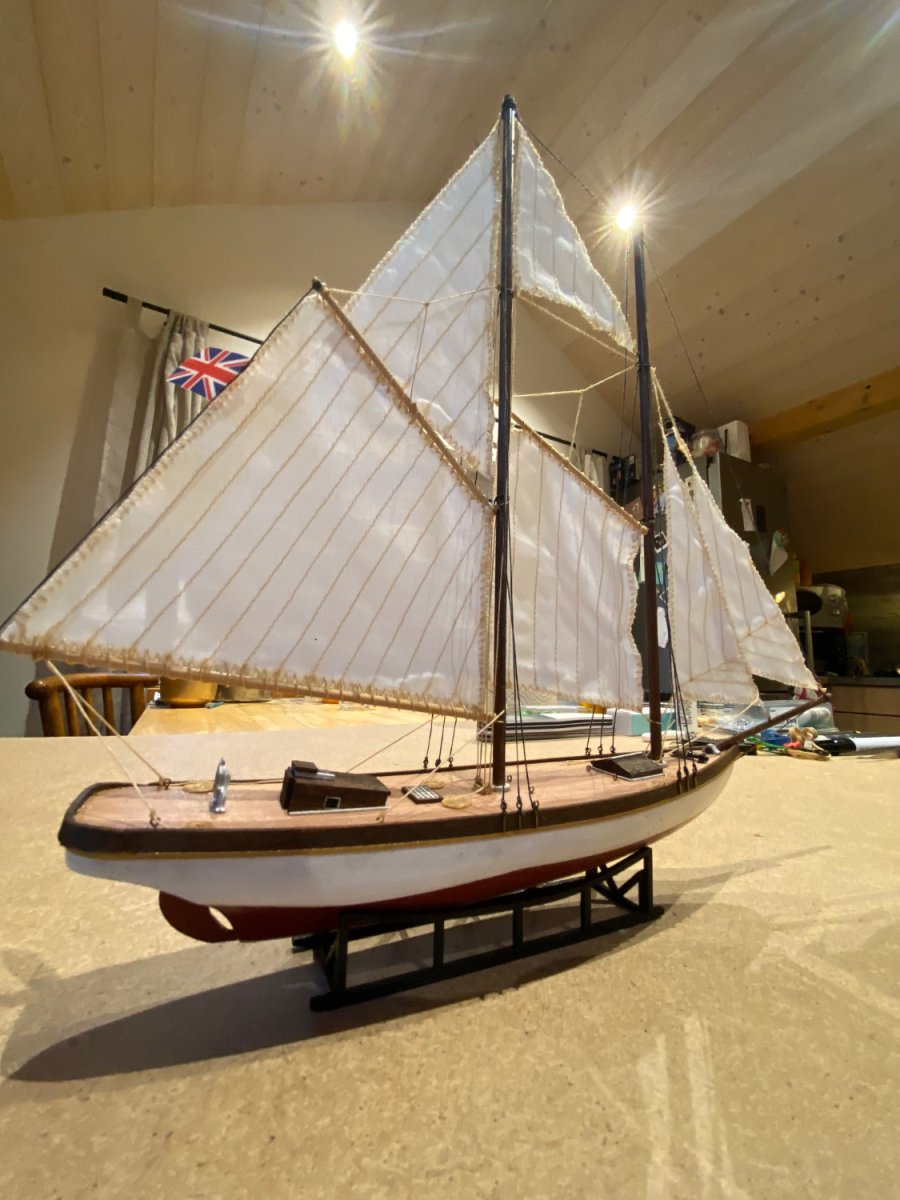
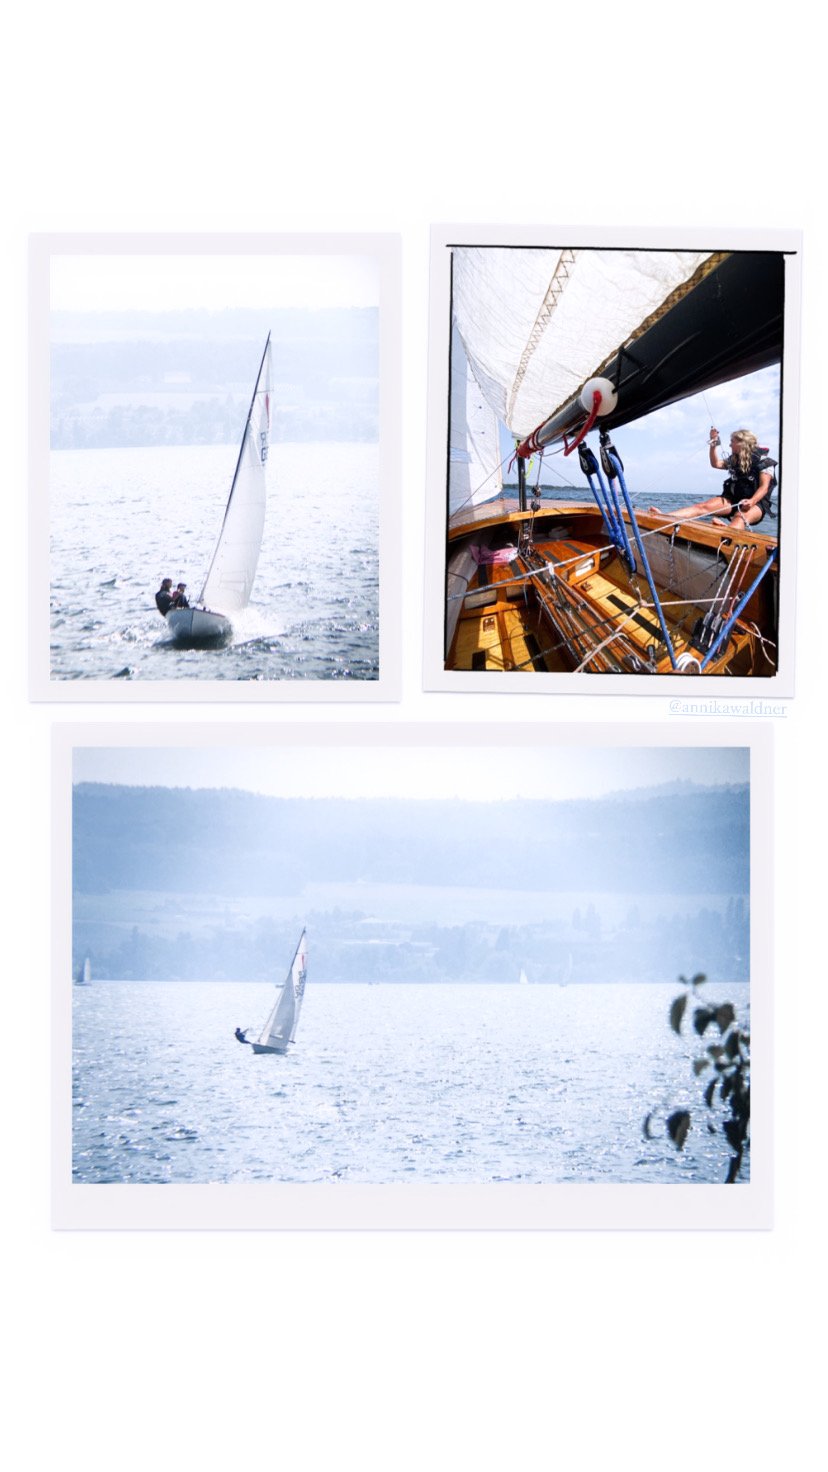
The rear railing is now done. Bending the almost 90 degree was not that easy and it still doesnt fit perfectly but I take it like this. as you can see the rig is done. The selfmade sails fit perfect and the rigging was easy done. It looks great and i am really happy with it for my first model. Added some rolled ropes on the deck for the mainsheet. Therefore glued the rope and rolled it in my fingers, worked pretty well. Also added an anchor chain with rope and added the now colored dinghy. Goletta Elisabeth by Mini Mamoli Scale 1:122 is finished! Yeaha did my first model and happy with it…

- 6 replies
-
- 4
-
-
- mini mamoli
- elisabeth
- (and 2 more)
-
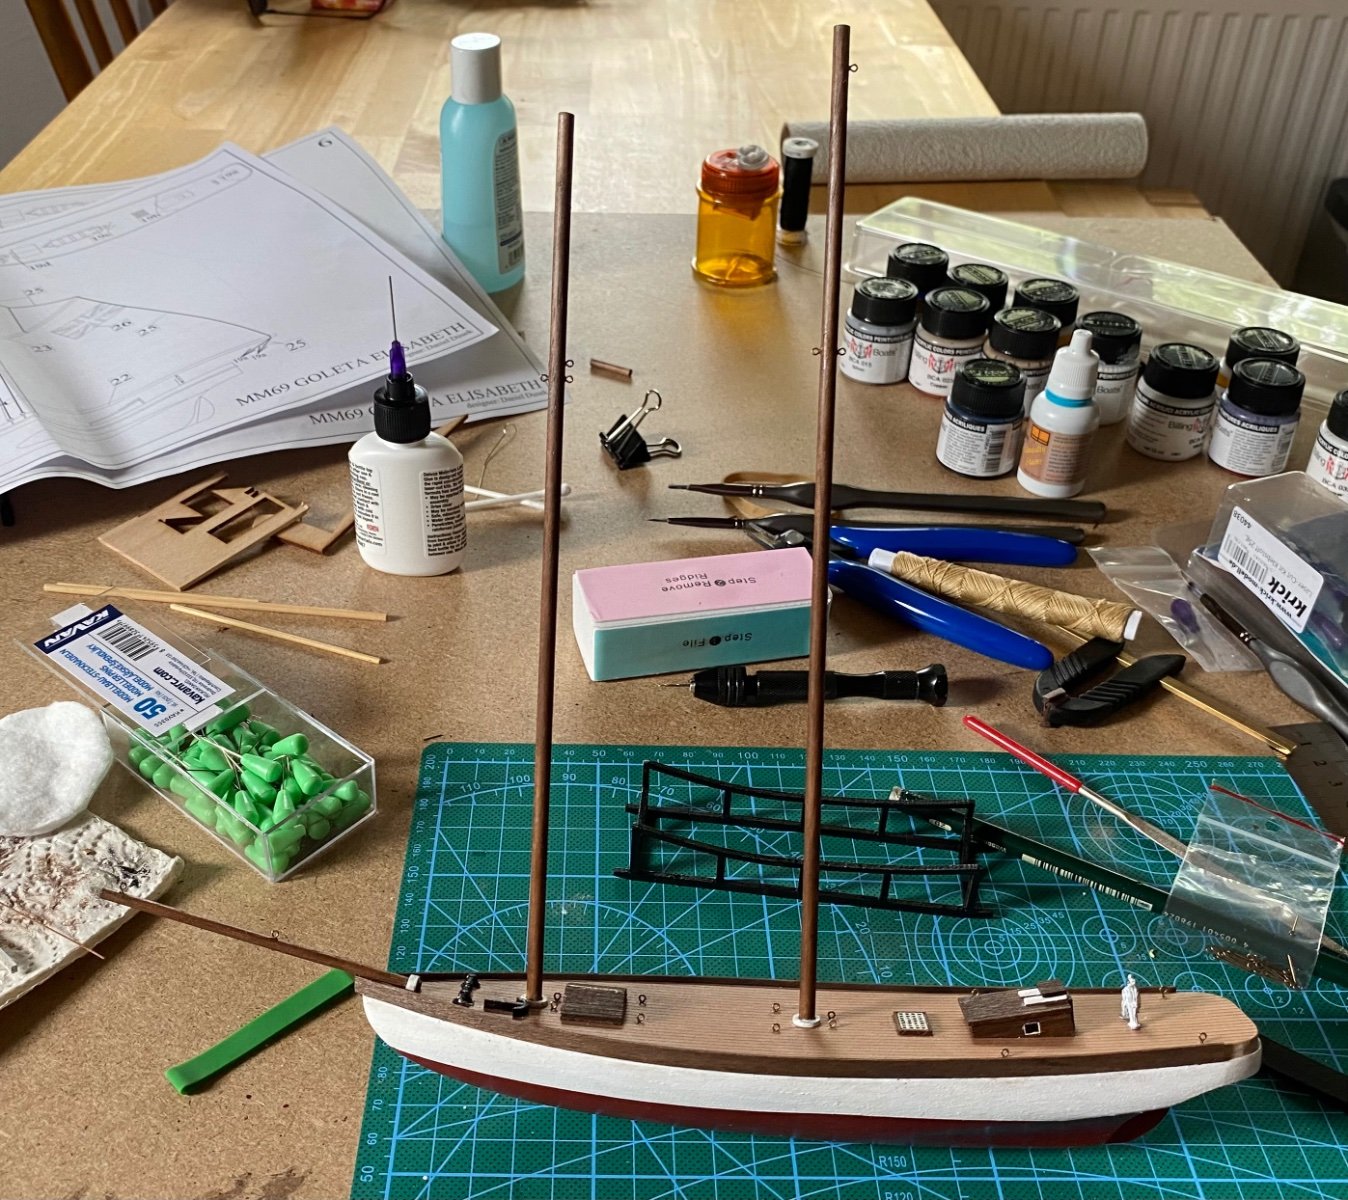
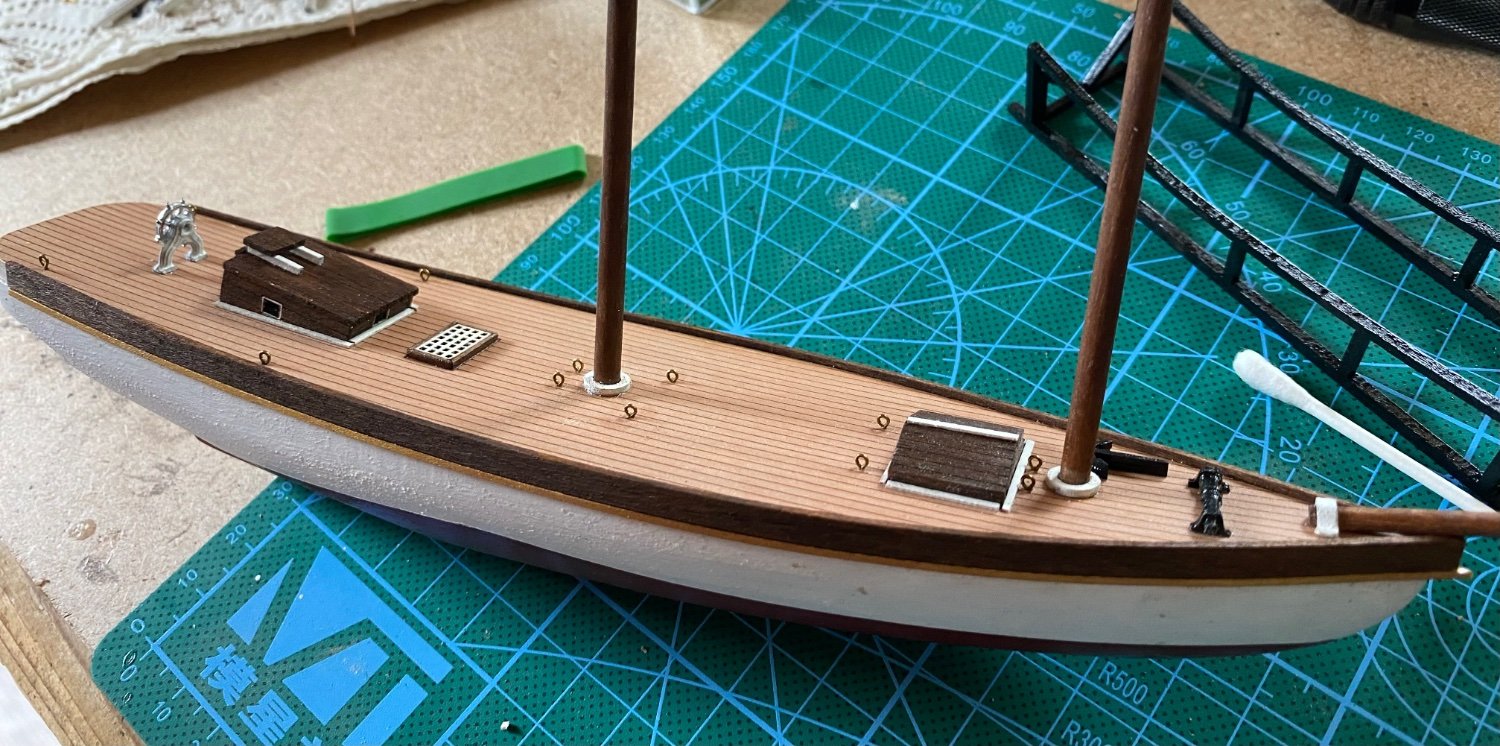
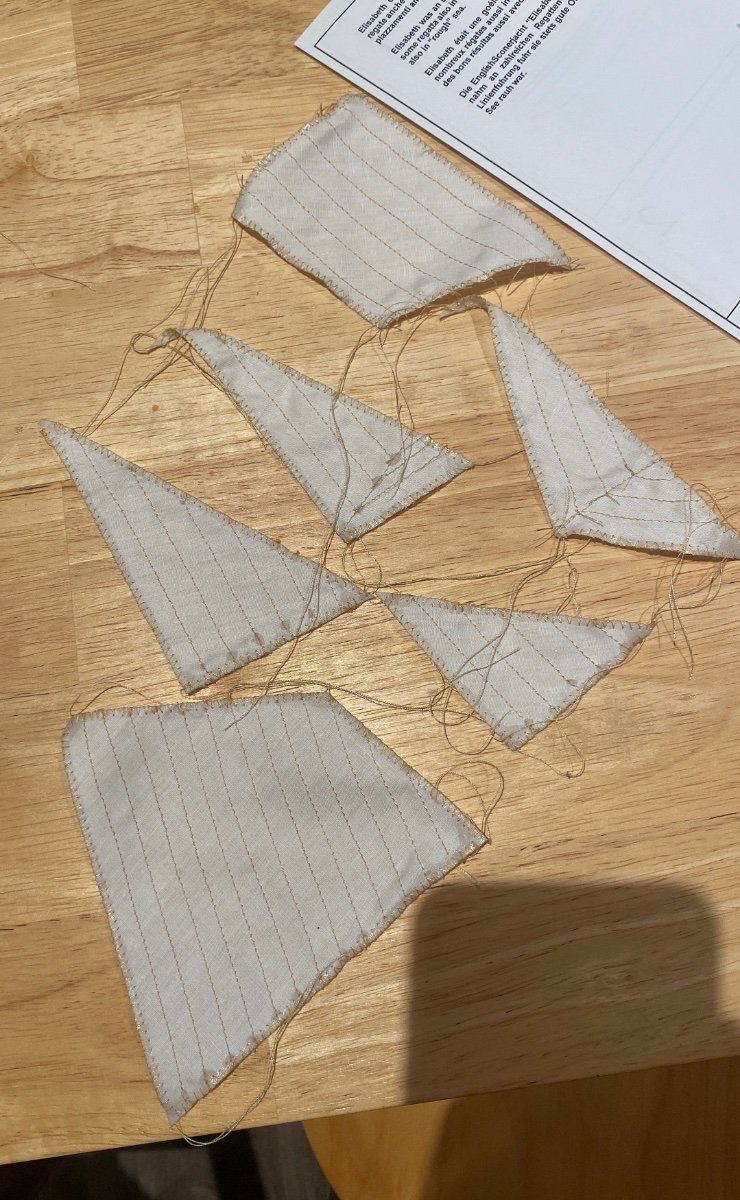
Added the mahagony coloured masts and bow spur. As you can see the back Part of the railing which requires heavy bending is still missing. next up I added some white painted thin decor strips on the builds which give a little nice contrast. Not included in the instructions. Also glued the golden thin frame beyond the railing which looks pretty nice. Back railing still missing. next up was gluing some hooks for rigging on the reiling. Measured the distances between and marked it beforehand. The provided material for the sails must be cut and sails self made. Instructions said just gluing the edges and paint the sailing structure…was a little bit too simple so I asked my Girlfriend if she can do some magic with this material and her sewing machine. And wow the sails turned out amazing I think and give the whole Mini mamoli a great touch and optic… glued the edges before sewing because of the thin material. Sail making and doing knots at the end of the stitchings took us two days but was worth it i guess thats how they look now:

- 6 replies
-
- 4
-
-
- mini mamoli
- elisabeth
- (and 2 more)
-
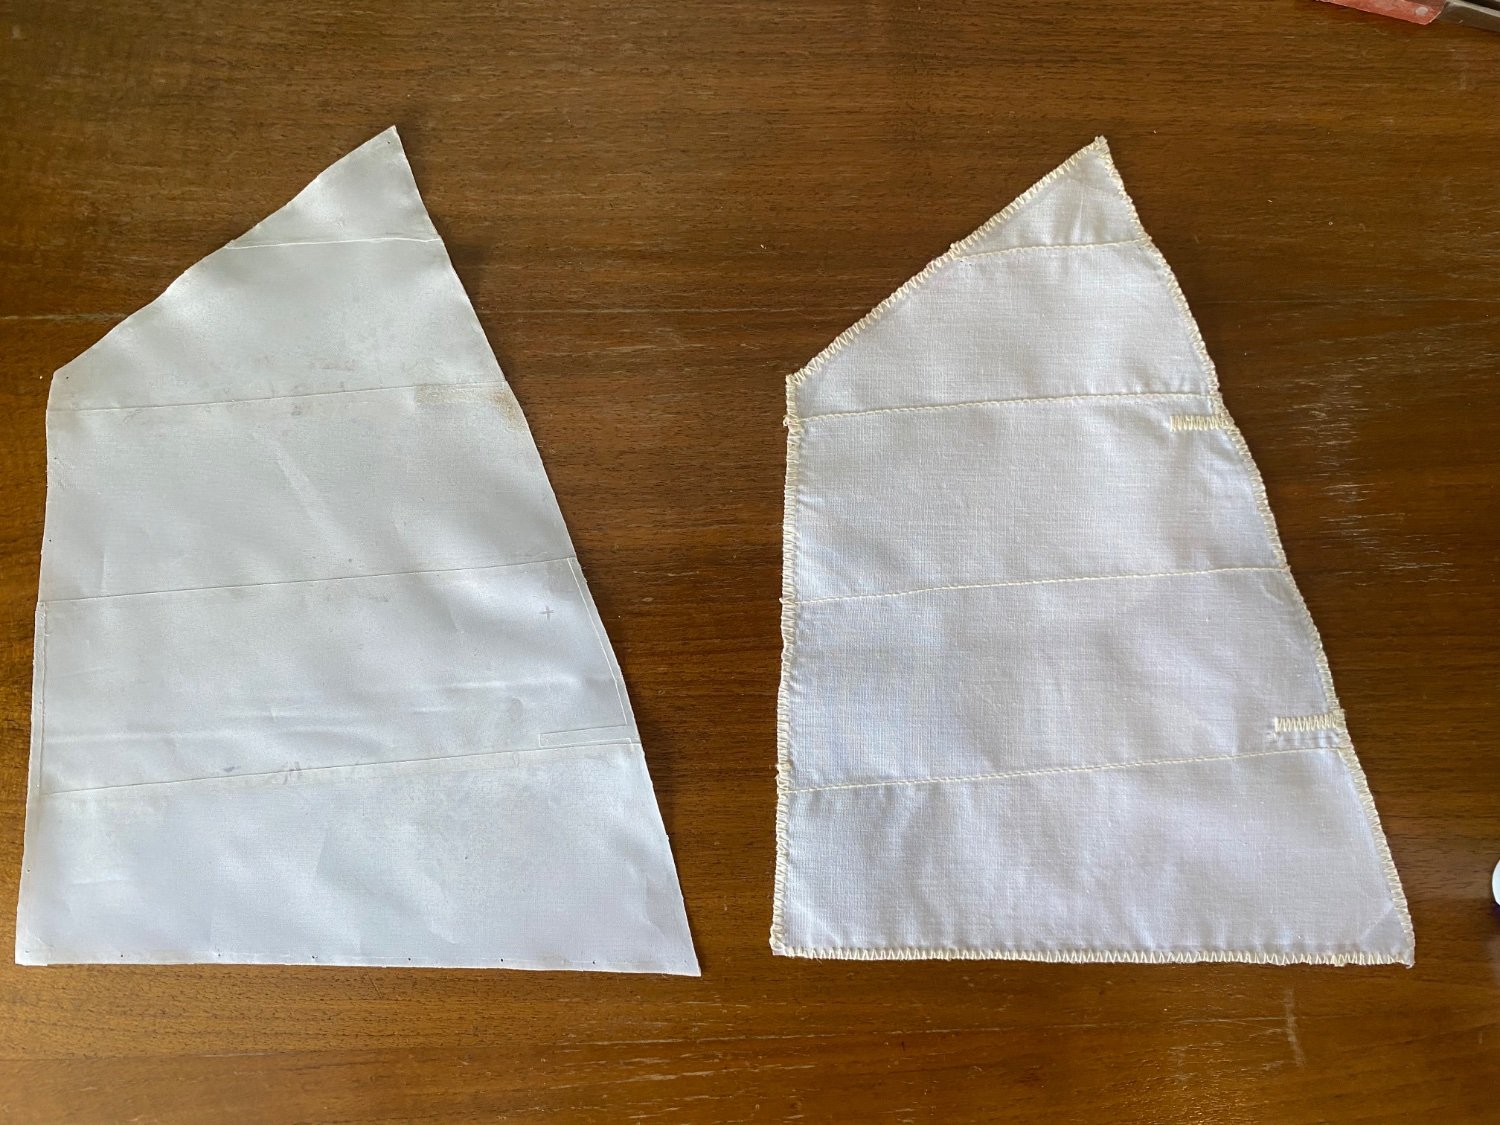
So finally decided not to use the with the kit provided sail. The glued parts just don’t look good at all and it would destroy the otherwise pretty clean picture of the model. My girlfriend will sew me a sail next week with thin white cotton material and white stitching for the panel structure as well as overlapped doubled edges. If I will ad an sail class logo to the sail I don’t know yet. Will get you updated end of next week…
- 16 replies
-
- 1
-
-
- Optimist Dinghy
- optimist
- (and 2 more)
-
Thanks John! Small but indeed interesting and I think every sailor knows the Optimist. Therefore I wondered that it seems like mine is the first build log of an optimist here at MSW…
- 16 replies
-
- 1
-
-
- Optimist Dinghy
- optimist
- (and 2 more)