HOLIDAY DONATION DRIVE - SUPPORT MSW - DO YOUR PART TO KEEP THIS GREAT FORUM GOING! (Only 24 donations so far out of 49,000 members - C'mon guys!)
×
madtatt
-
Posts
257 -
Joined
-
Last visited
Content Type
Profiles
Forums
Gallery
Events
Everything posted by madtatt
-
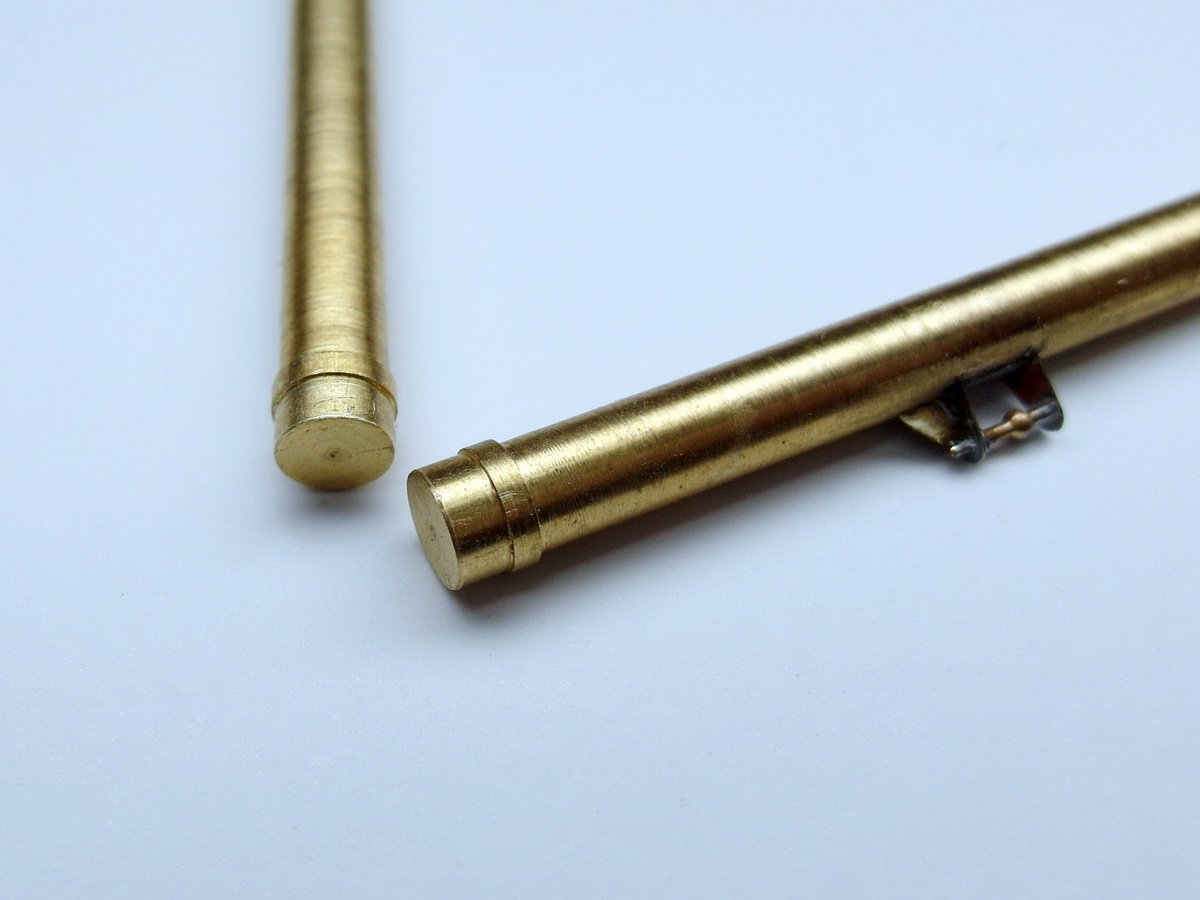
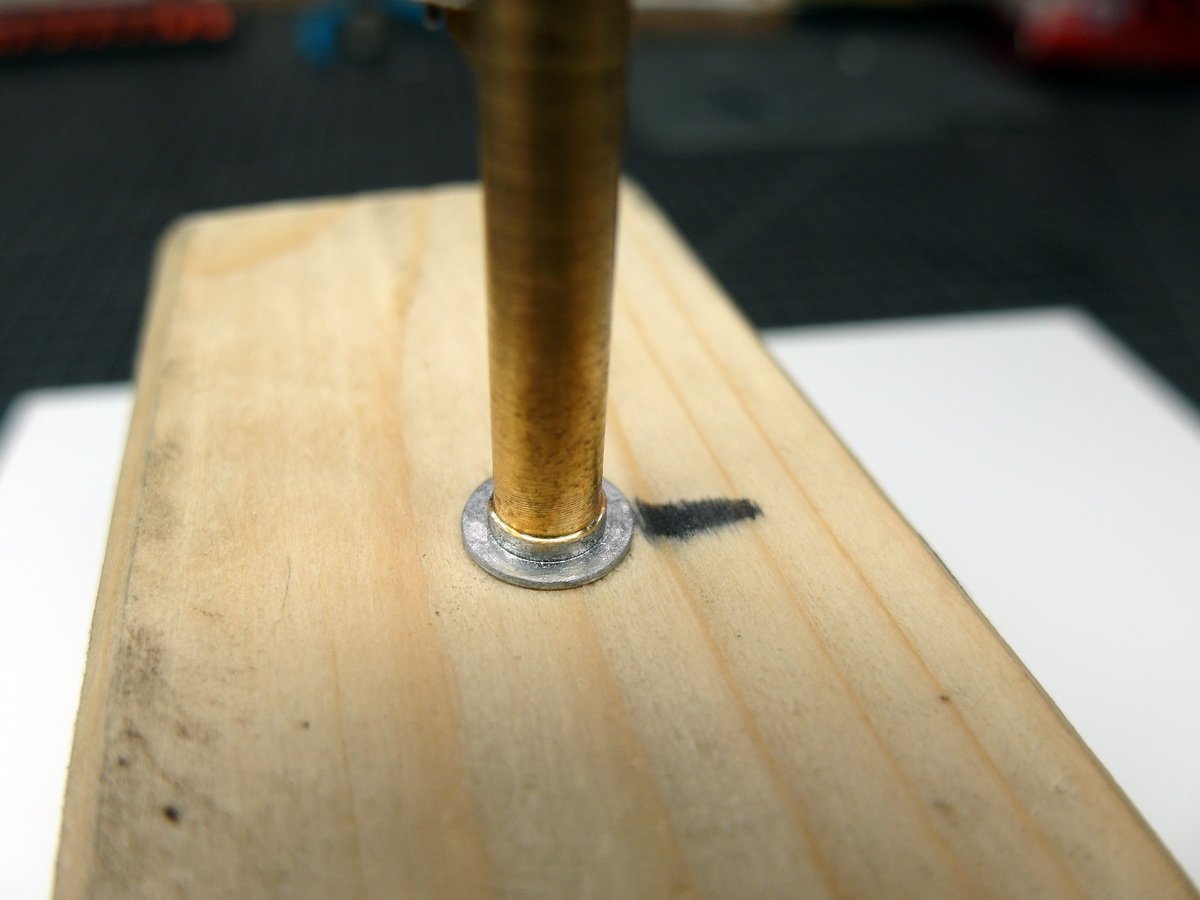
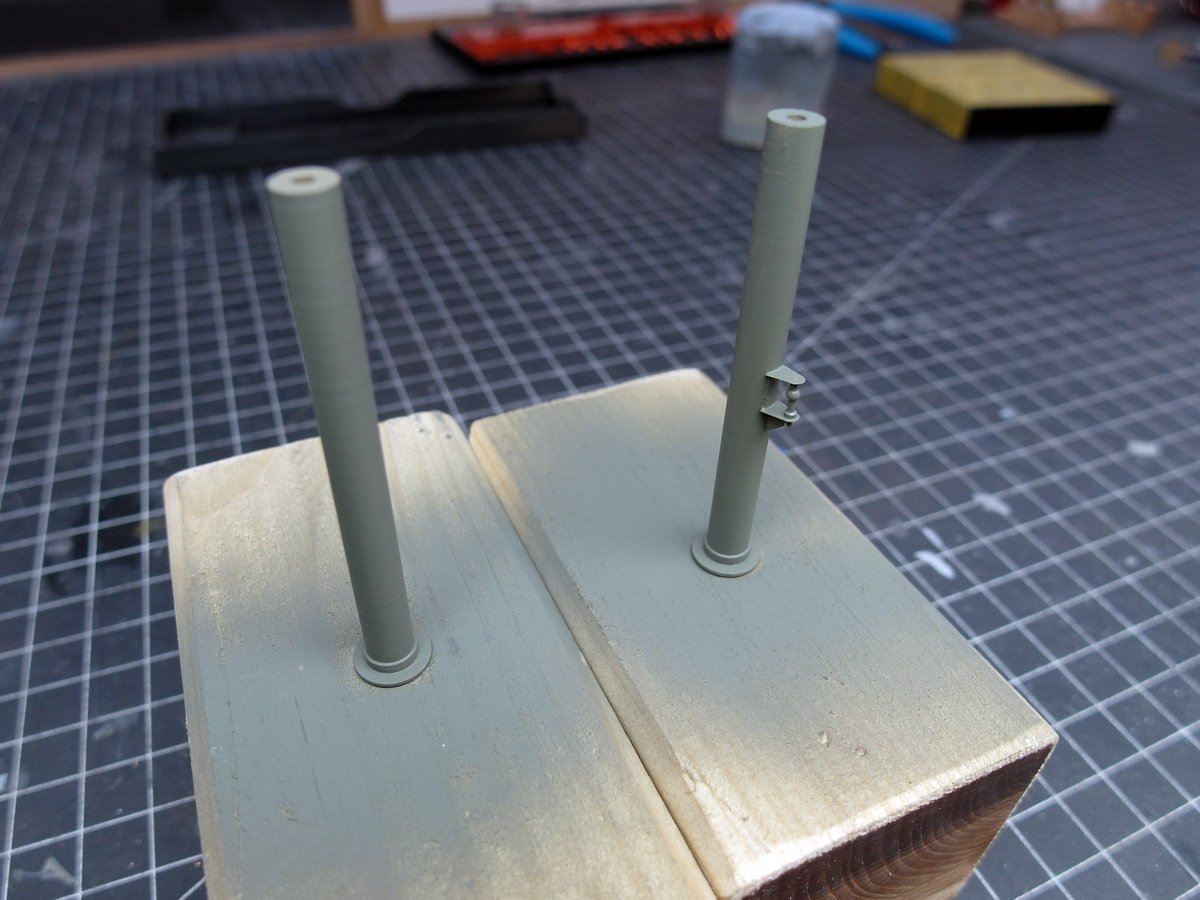
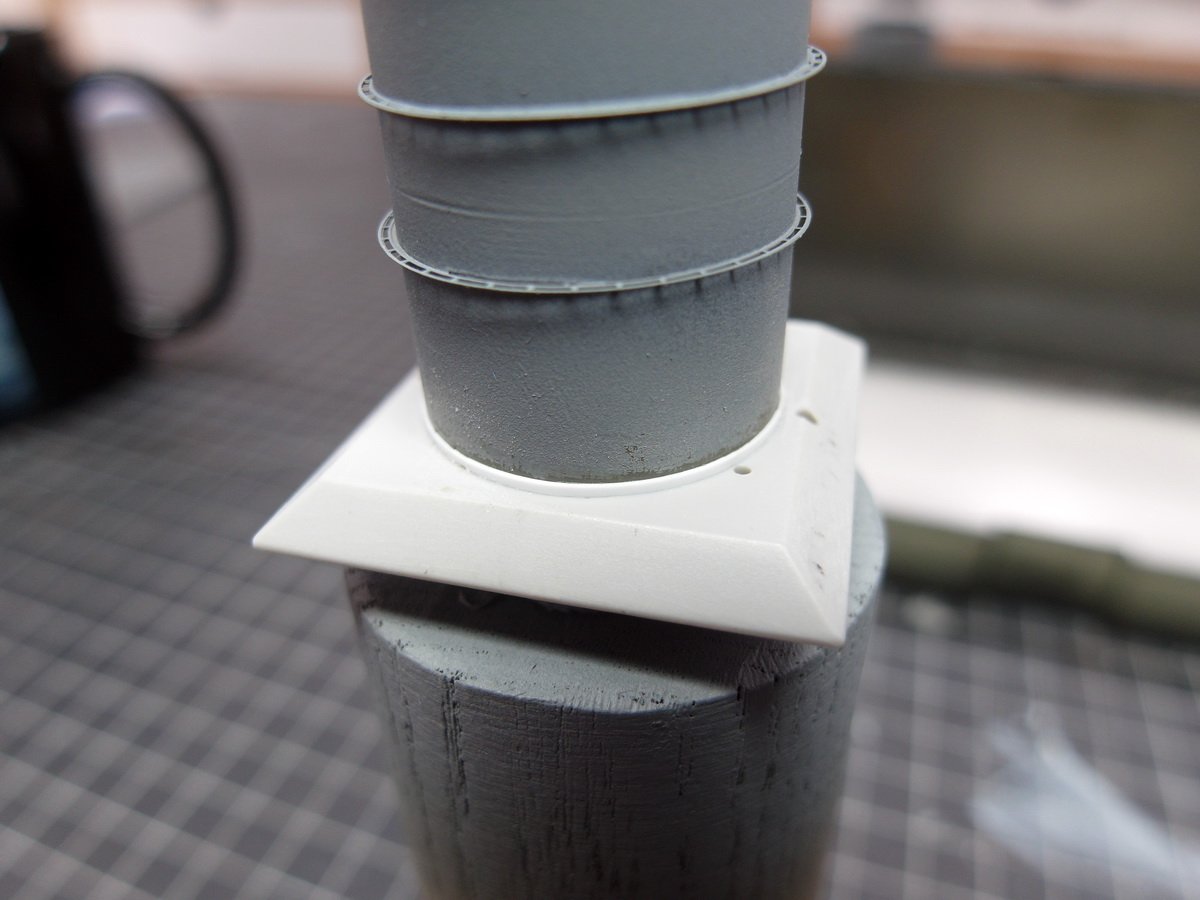
 Okay, let’s move on to the masts and pause for a moment with the bridge houses. I noticed the really tight space in which the masts have to be installed. Once the ladders leading from the bridge house to the deck are installed, there’s hardly any room left to properly secure and align the masts. There’s even less space toward the stern. That’s why I decided to attach the lower part of the masts in front of the bridgehouses. It’s nice that the lower mast is then split in two, so it won’t be a problem in terms of height. I also noticed the very limited surface area where the mast connects to the deck. I consider this a problem. Especially since I’d like to take this model to one or two exhibitions. A little more adhesive surface would be helpful. So I decided to make it larger. This was done using an M4 washer. I drilled it out to the appropriate size and reduced its thickness. I then soldered it to the bottom of the mast. Primed… …and painted and placed in the holes on the deck for testing. I quite like this so far. This should significantly increase the strength of the masts on deck and make aligning them at right angles easier.
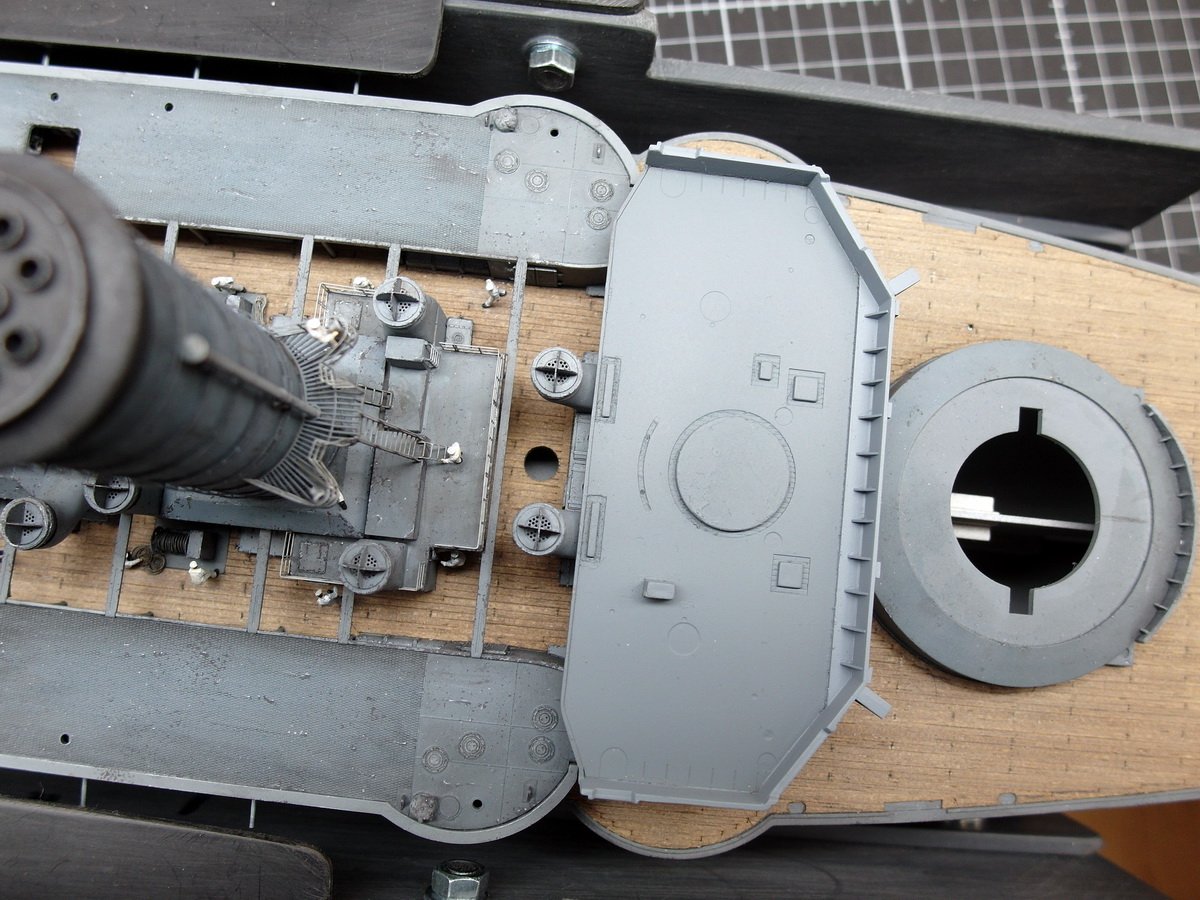
- 193 replies
-
- 5
-

-
- Russo-Japanese War
- Mikasa
- (and 2 more)
-
Thank you, Jeff, for the welcome to the delicate, nerve-wracking Mikasa Club. I feel honored to have been accepted. 😅 And thanks for the extremely valuable tips you've given me. I can really use them, especially on the bridge house. Of course, I'll be checking your build report again and again. Which brings us to the masts. I've thought long and hard about the best way to approach this. I've decided to first attach only the lowest part of the masts to the deck. I'm also concerned about the weak attachment of the masts; the adhesive surface is tiny. I'm therefore going to increase the contact surface by soldering a small perforated disc to the bottom of the brass masts. This will increase the adhesive surface and simplify alignment at right angles. We'll get to that in the next construction phase. Probably this weekend. Then let's see if I can get out of this tricky situation, as you describe, without any injuries, Jeff. 😉
- 193 replies
-
- 1
-
-
- Russo-Japanese War
- Mikasa
- (and 2 more)
-
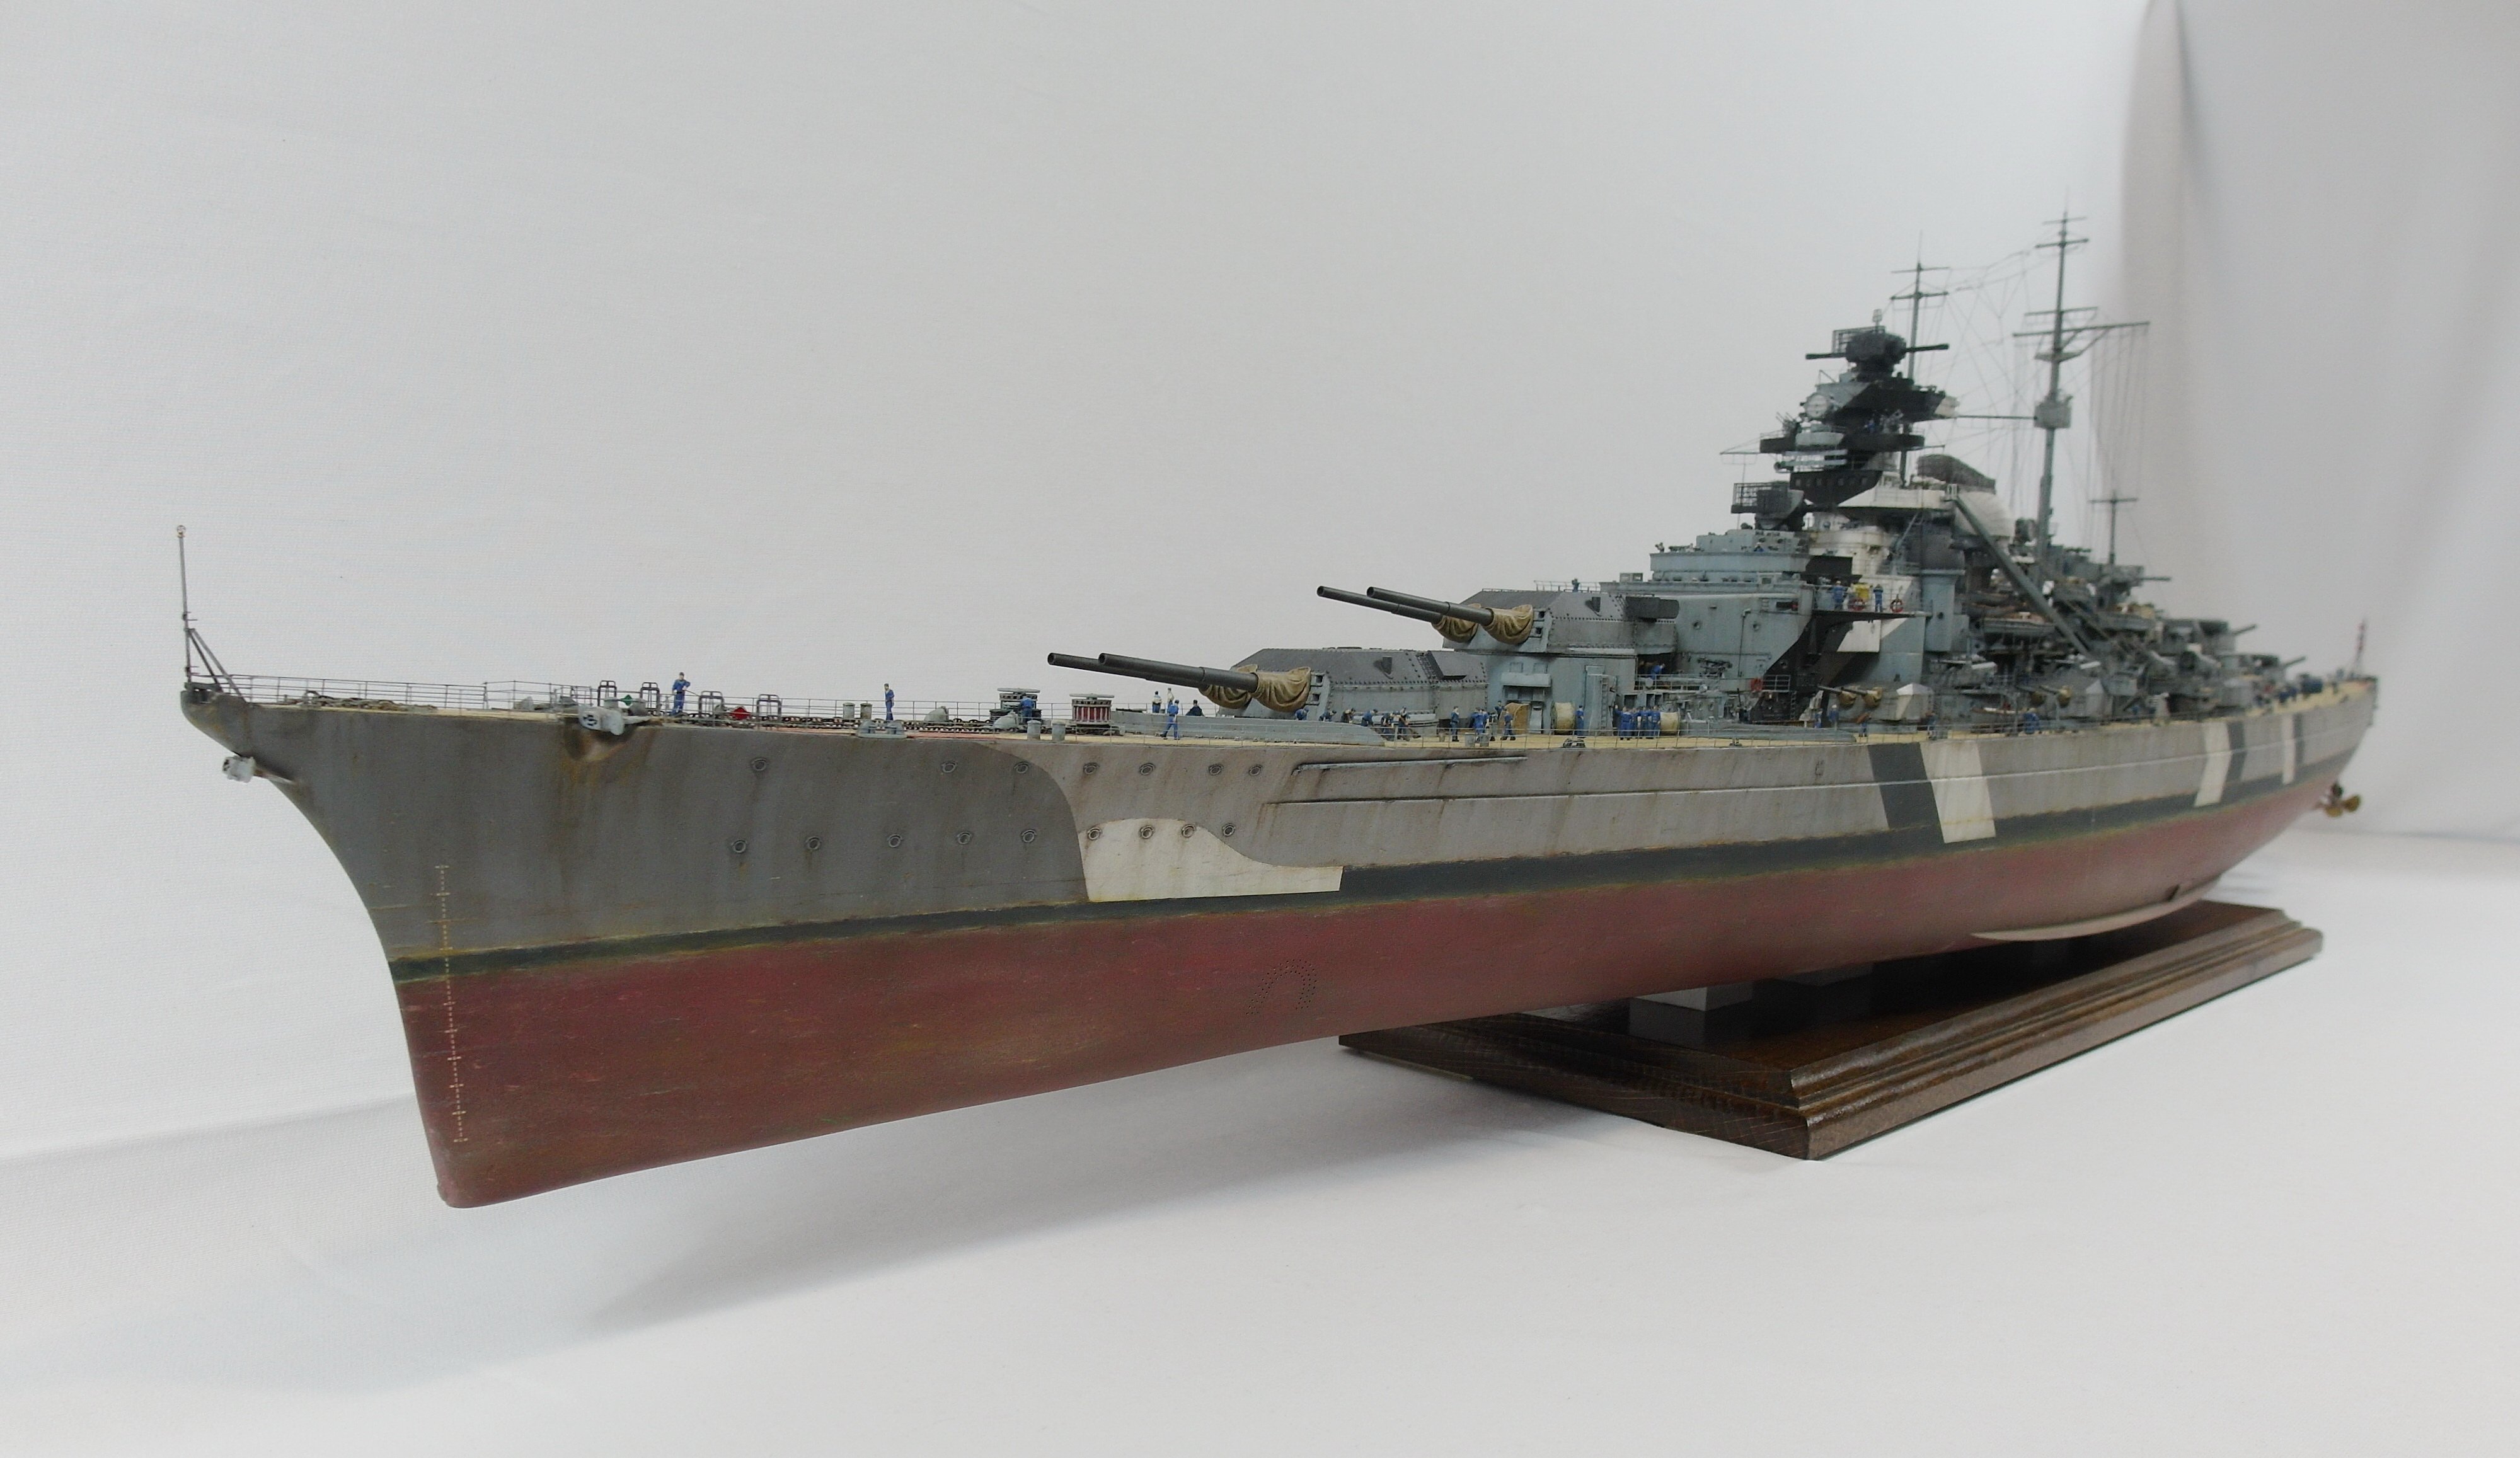
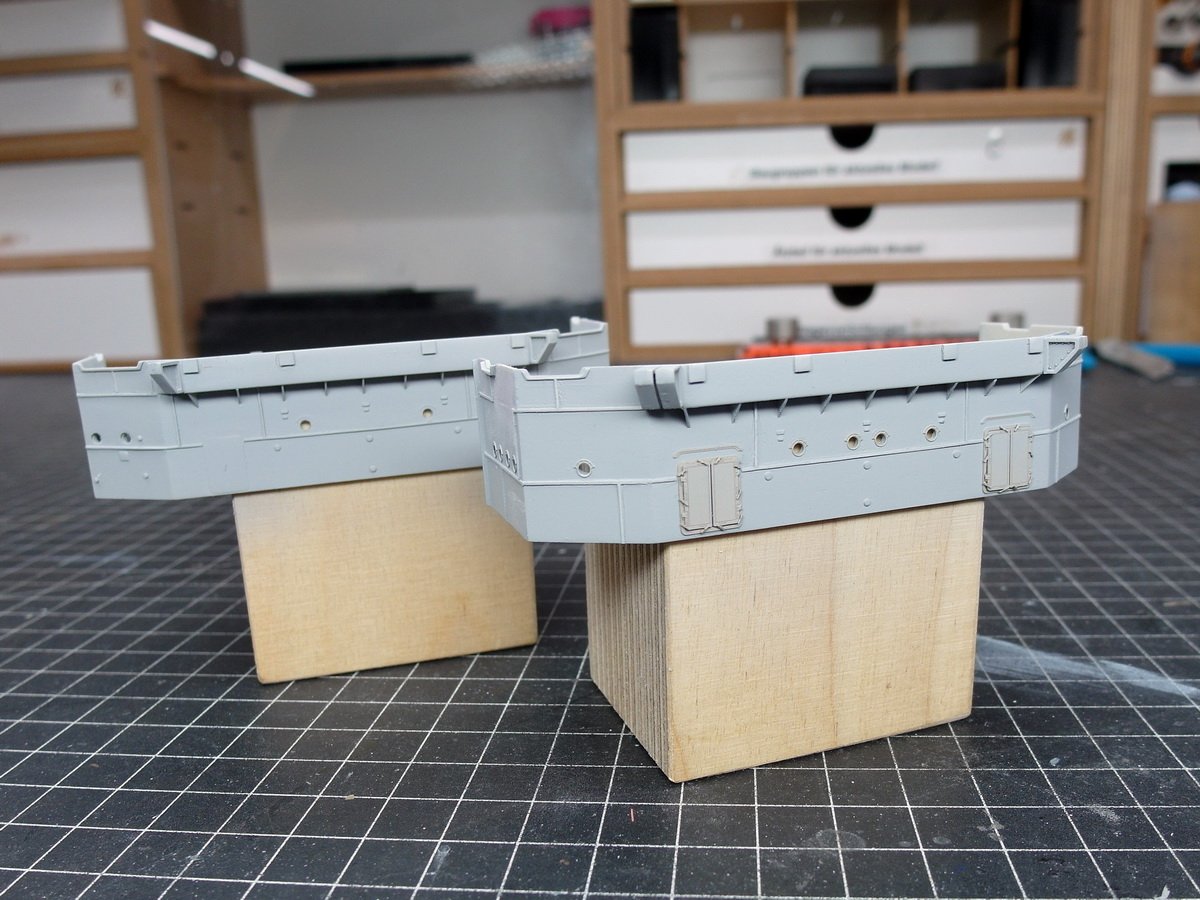
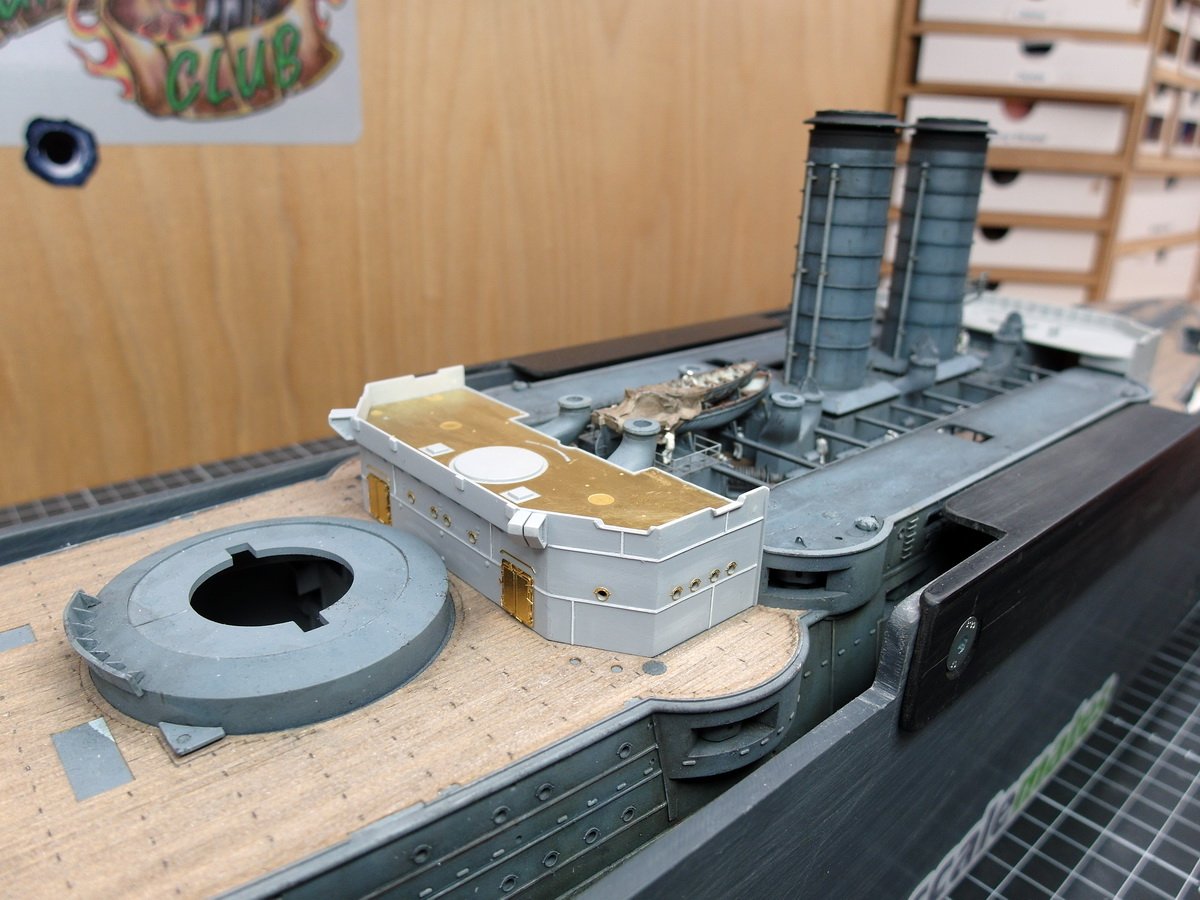
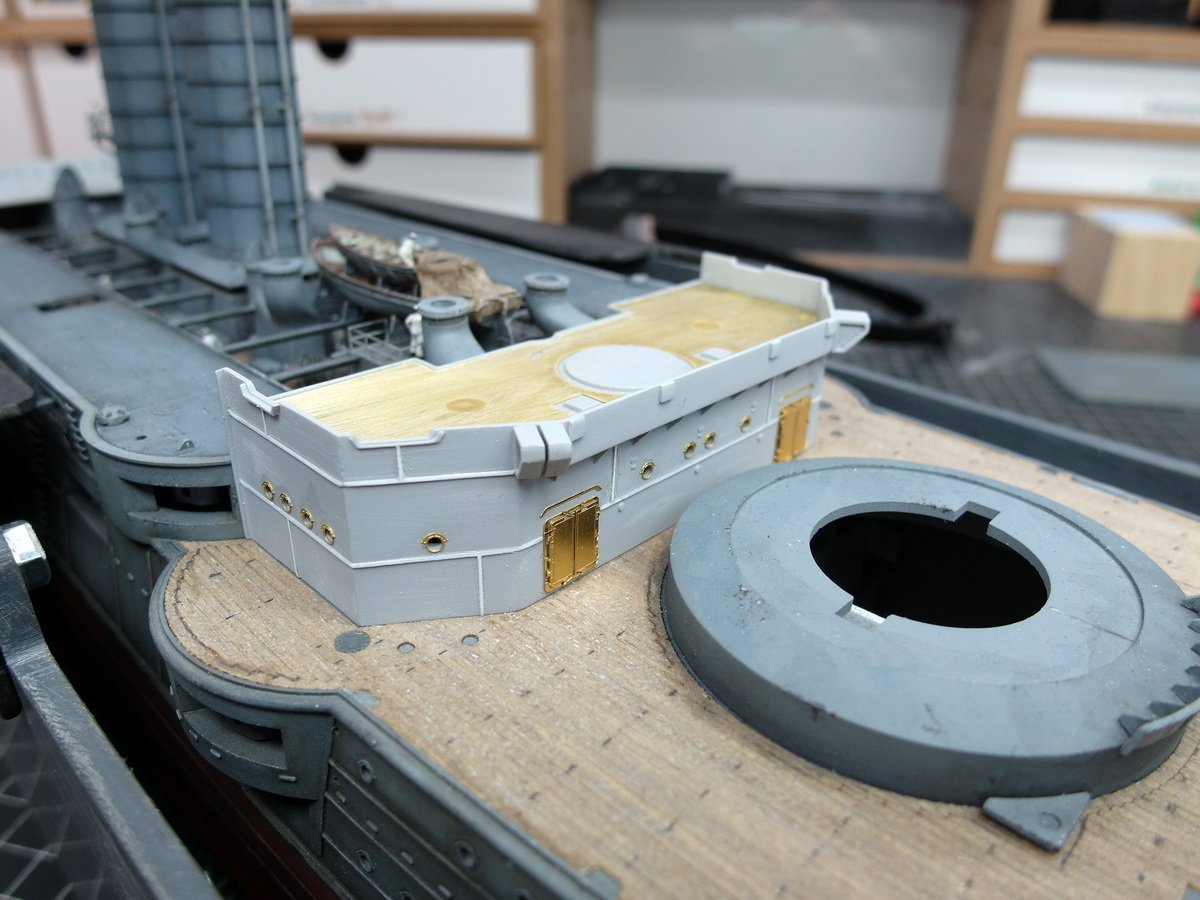
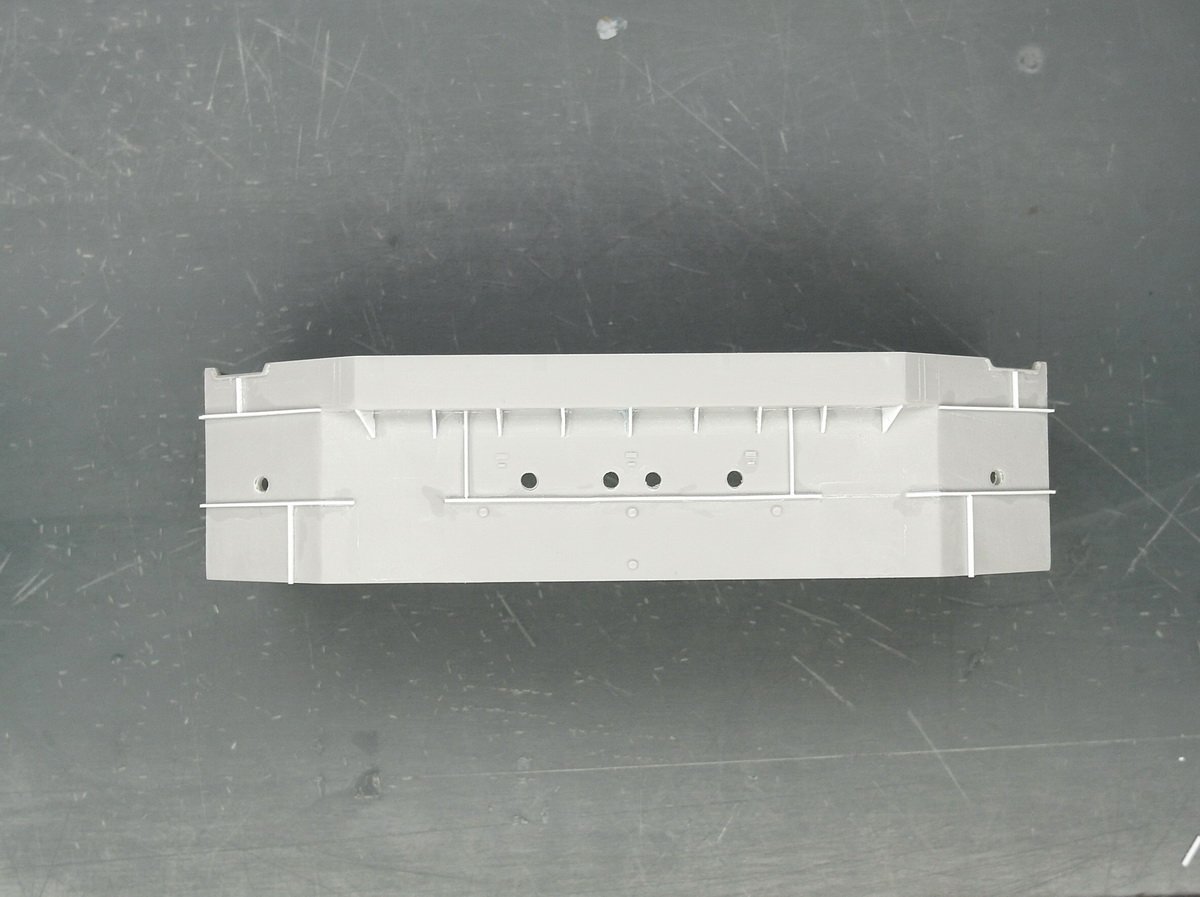
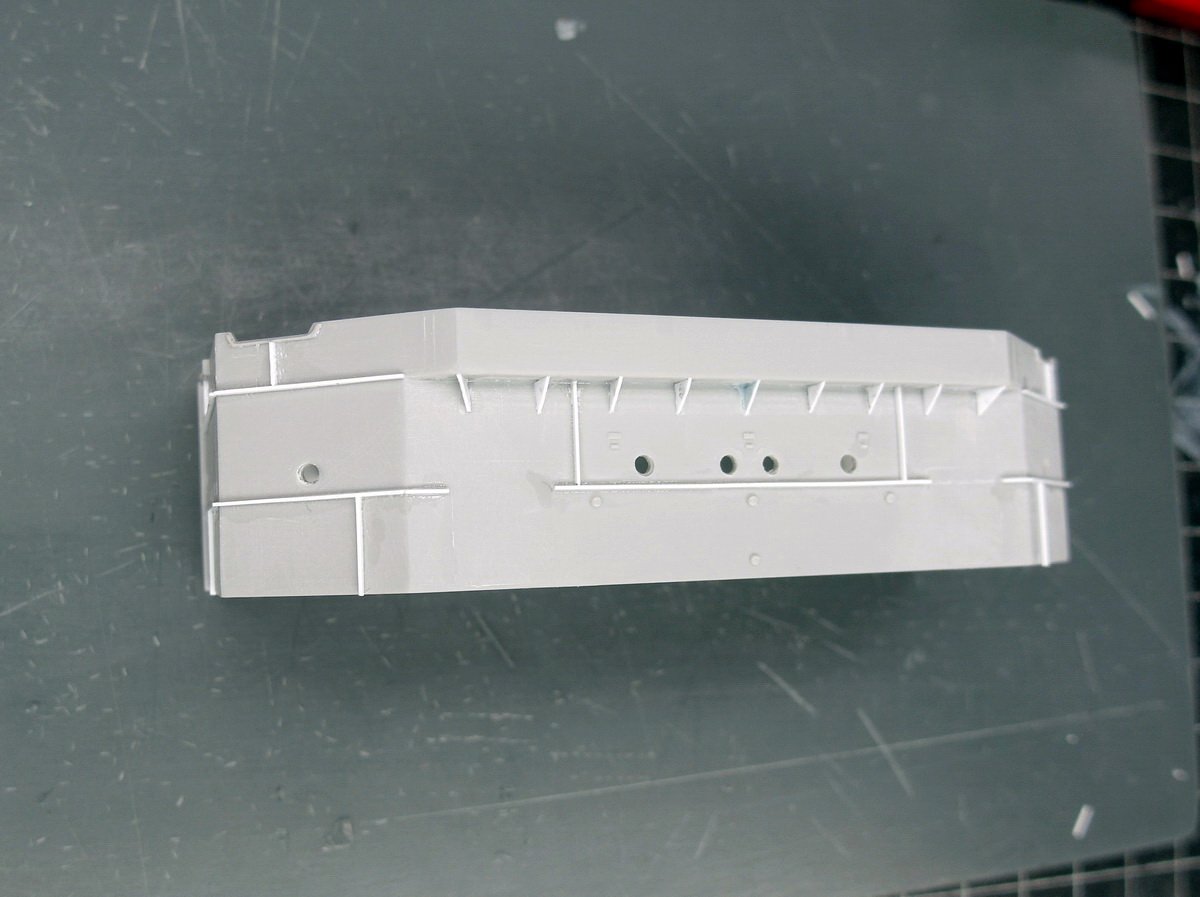
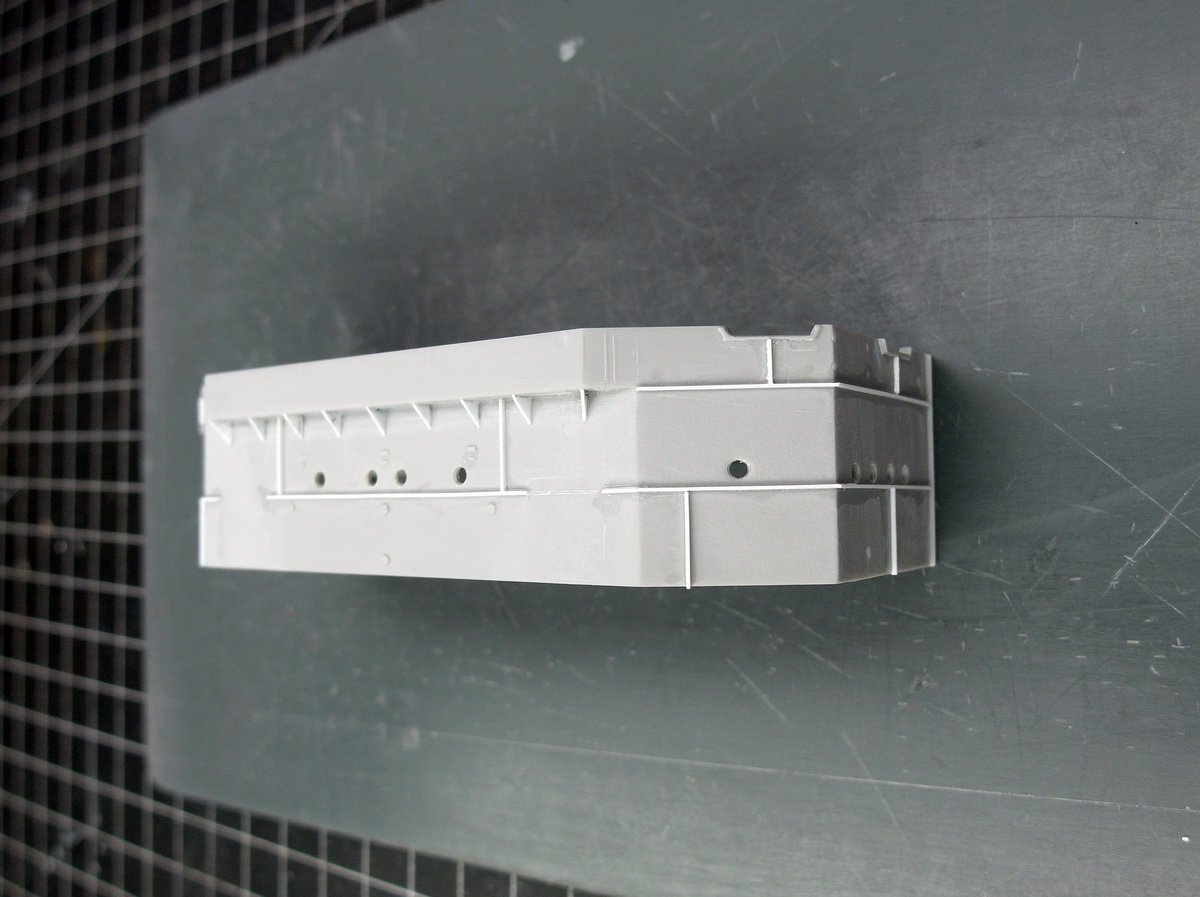
Hello together. It’s fun to put your own stamp on a model that’s produced in large numbers. However, you should be aware that sometimes things won’t work out as you hoped. That’s what happened with the last construction phase. Cost me a sleepless night, but first things first. A new coat of primer was applied very thinly to check the profile height and build quality. I quite liked it. As I considered how to proceed with the bridgehouse, I encountered a problem. I have to say that building this ship is considerably more challenging than, for example, the Bismarck, with its rather simple, straightforward superstructure. Everything on this old ship of the line is so delicate and intricate that you really have to think carefully about the order in which you assemble the model. The mast is another thing I’m racking my brains over, but that will come later. Now back to the bridgehouse and the culprit that made my life difficult. This one: This is the external connection from the bridge house to the deck above. The supporting structure is once again extremely detailed by Pontos and simply beautiful to behold. The problem is that this outer bracket on the bridge house extends very low and could conflict with my profiles. So, to be on the safe side, I removed parts of it and rearranged them. Believe me, that really bothered me. But I think I solved it quite well. Less is sometimes more. It was a bit frustrating to remove the profiles at this point, but I wanted to play it safe. With such delicate structures, I felt it would be too risky to just keep going, only to find out at the end that it wouldn’t fit together.
- 193 replies
-
- 4
-
-
- Russo-Japanese War
- Mikasa
- (and 2 more)
-
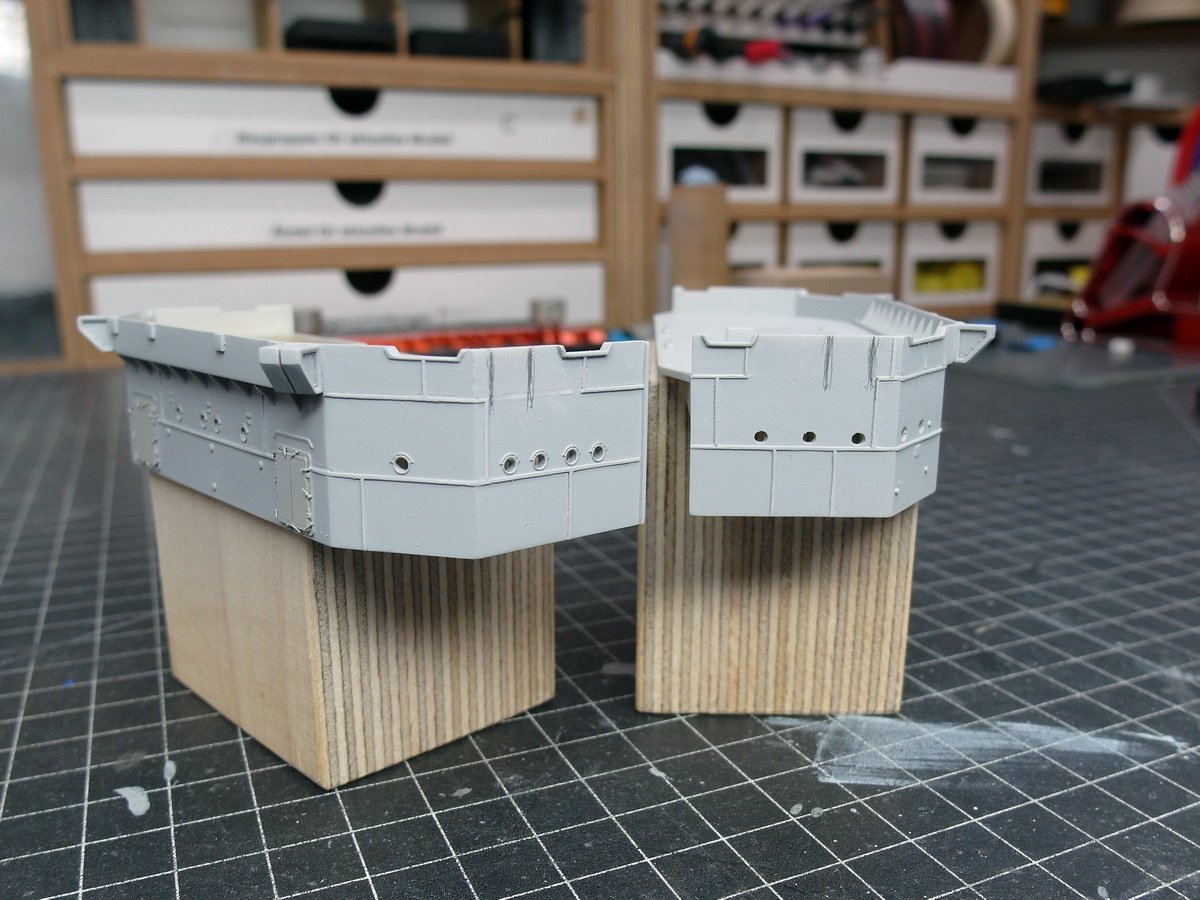
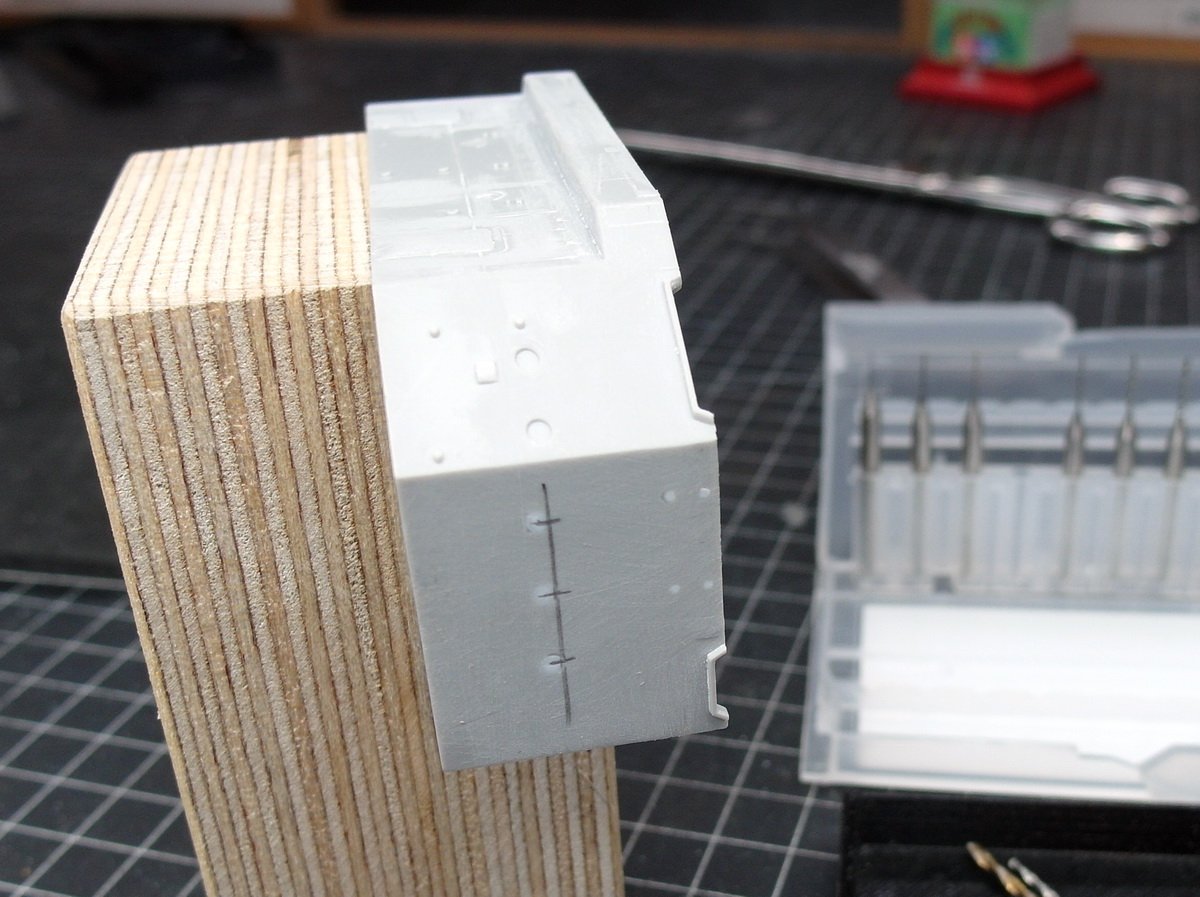
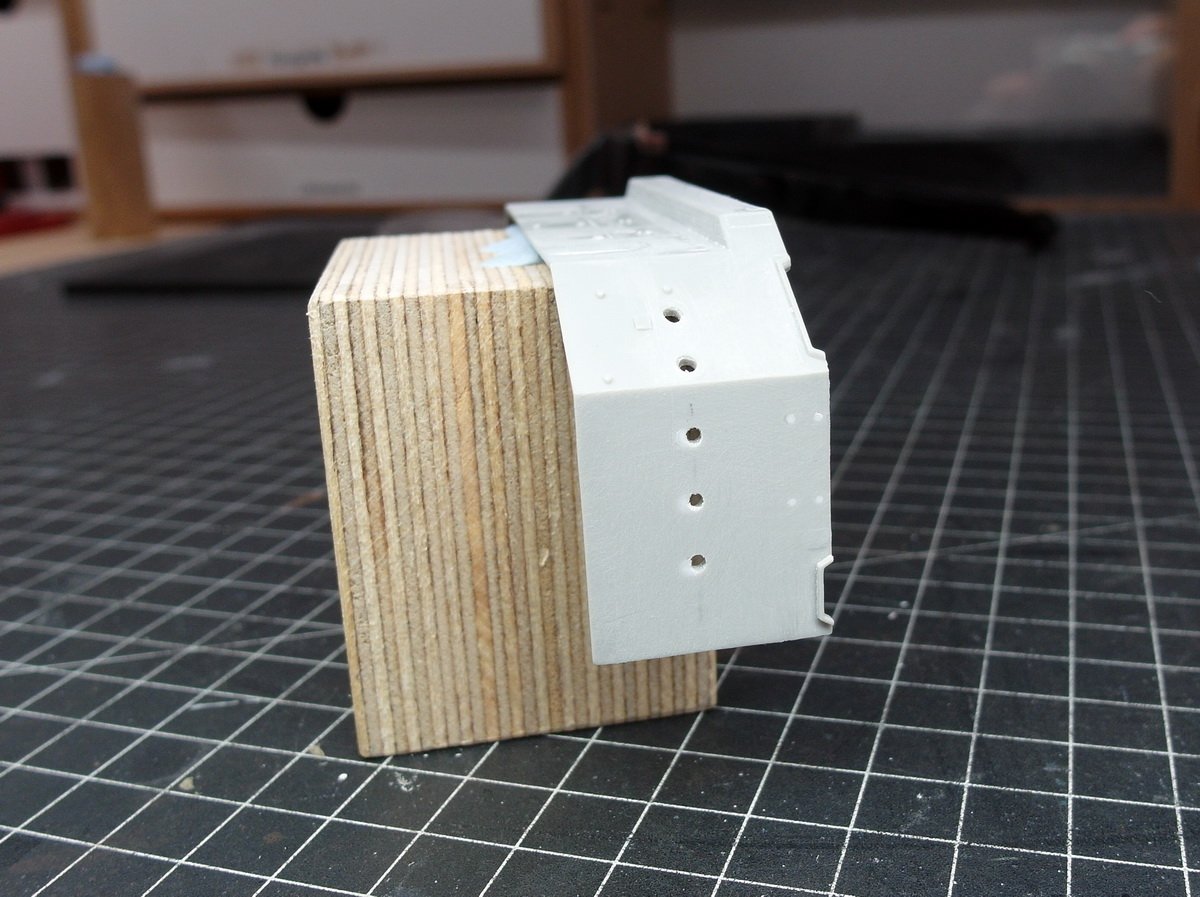
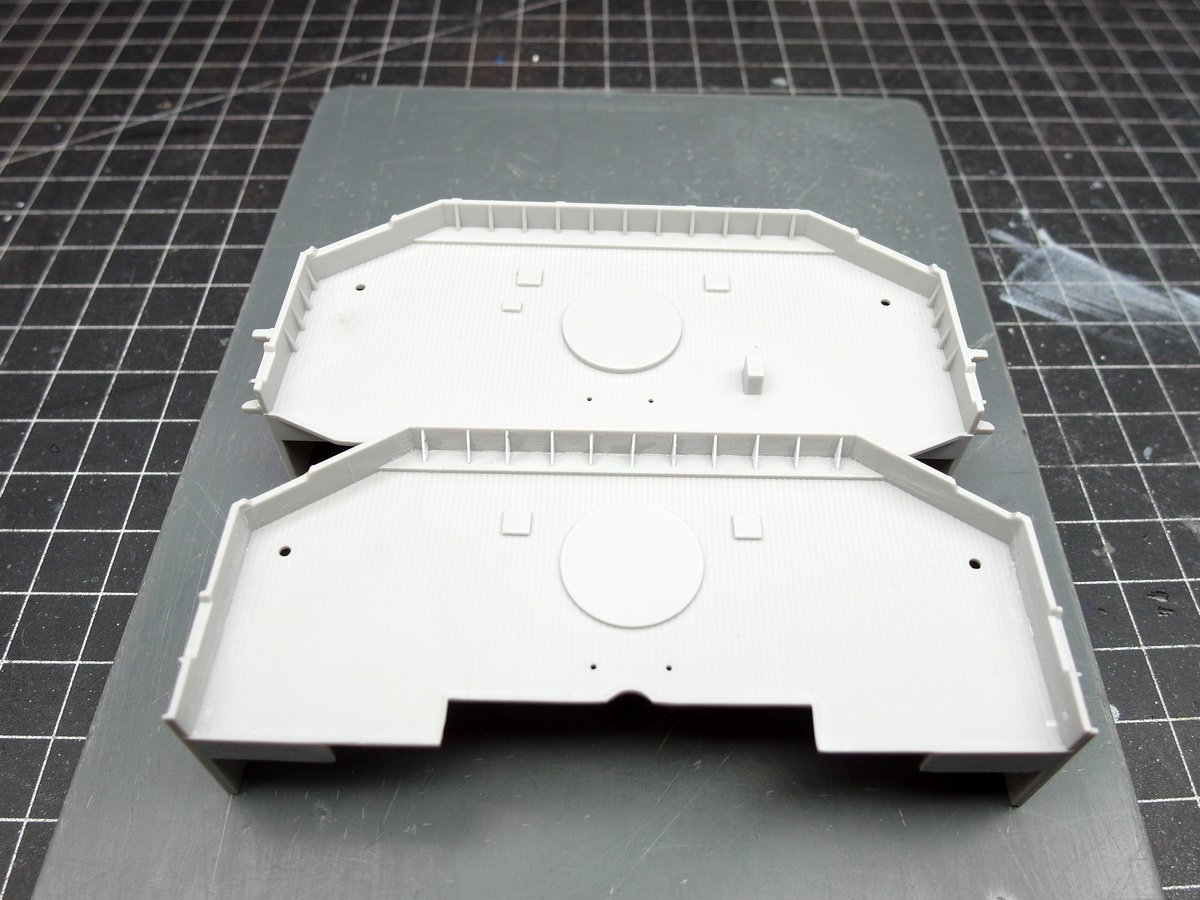
A first coat of primer to check the profile height. Then I sanded it down further and adjusted it. Now I’m satisfied. The rain deflectors for the portholes are neatly lined up, and the door looks great. Pontos, in fact. The height of the portholes on the front bridgehouse is completely wrong; they are positioned much too low. So, they were filled with styrene round material and re-marked. Drilled and better… The grinding orgy continues. 😅
- 193 replies
-
- 4
-
-
- Russo-Japanese War
- Mikasa
- (and 2 more)
-
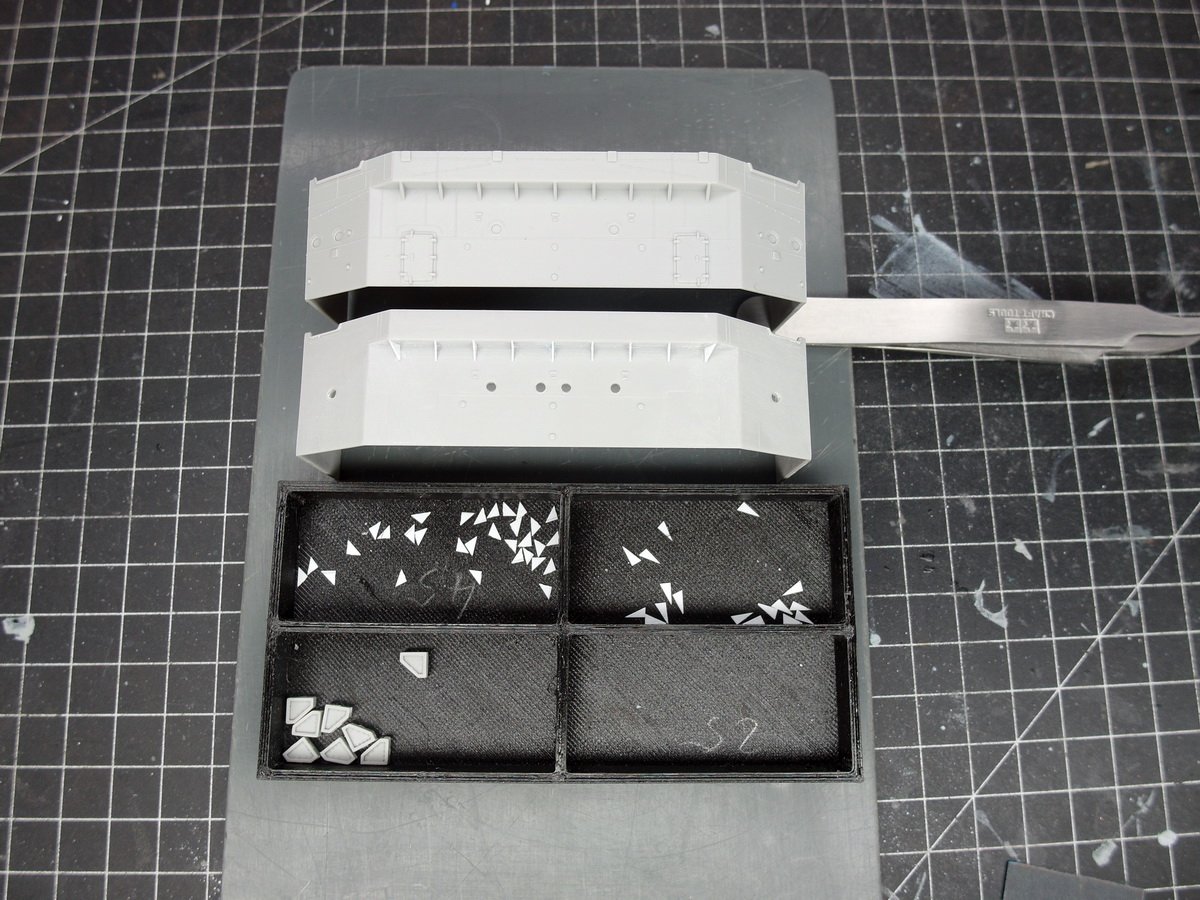
And now we continue with the application of the profiles. I used the same ones on the bridge house as on the hull, only this time I glued them on the short side. I thought they should look narrower on the smaller superstructures. That’s why they were sanded down quite a bit afterward. But today is the end of it for now, the whole thing needs to dry properly overnight before I sand it. Now I can repeat the whole thing at the front bridge house.
- 193 replies
-
- 6
-
-
- Russo-Japanese War
- Mikasa
- (and 2 more)
-
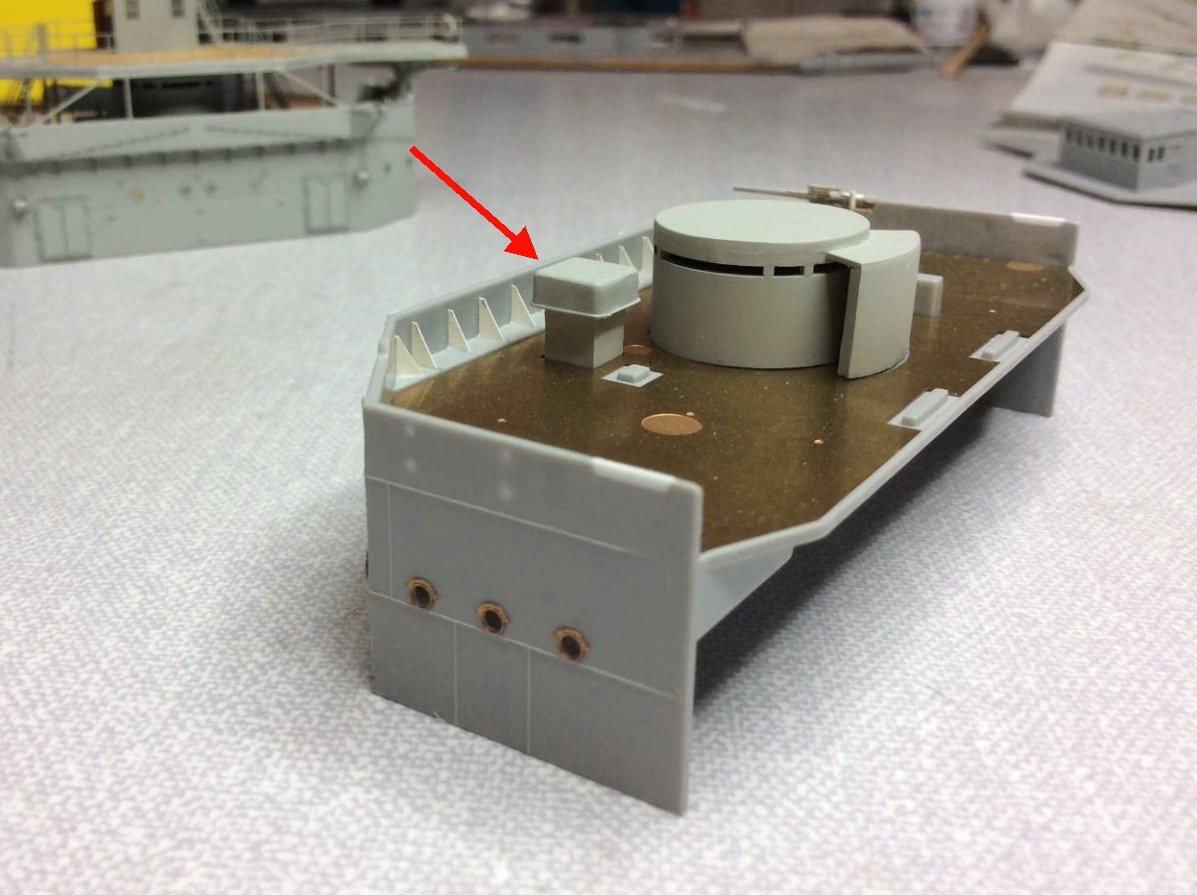
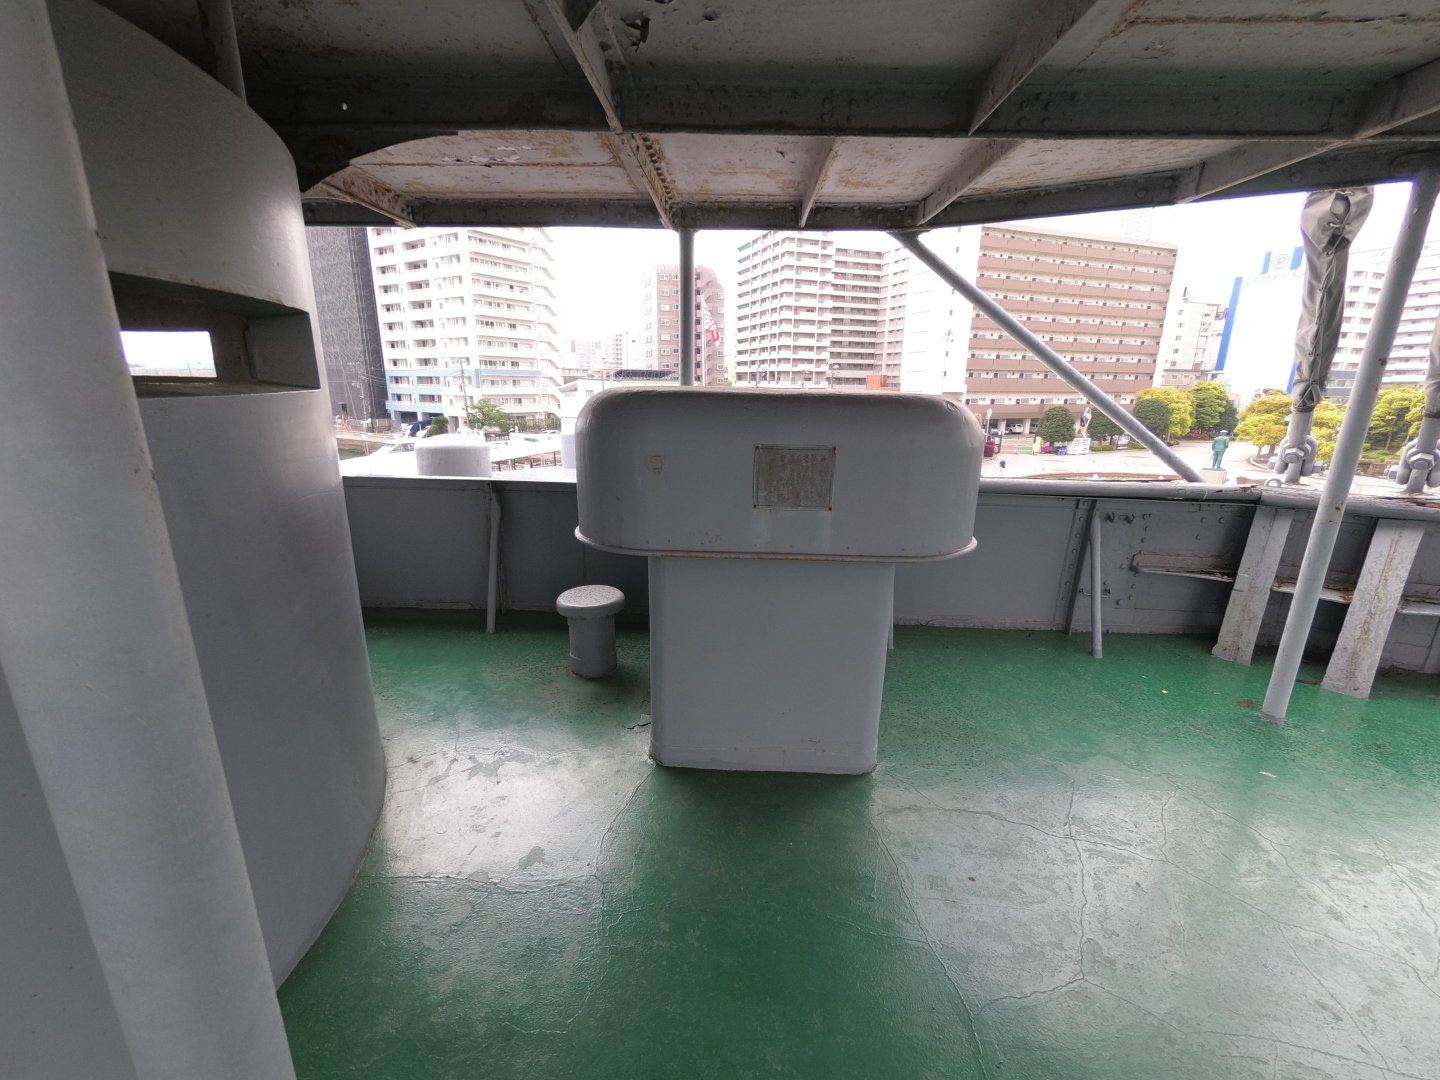
@Jeff59 Good morning, Jeff. I'm not sure which hatch you're talking about, but I think you mean this one.... You raised it higher and left out the handwheel, as you can clearly see on the museum ship.
- 193 replies
-
- 3
-
-
- Russo-Japanese War
- Mikasa
- (and 2 more)
-
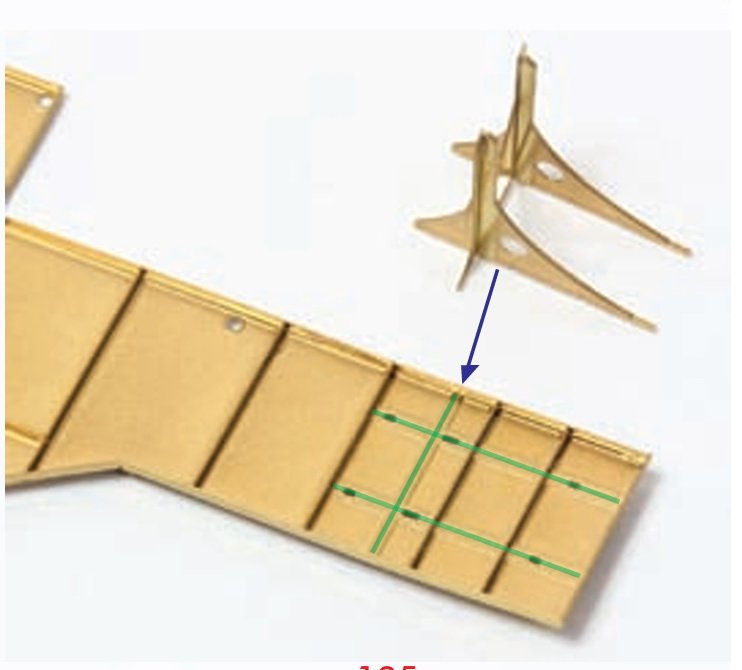
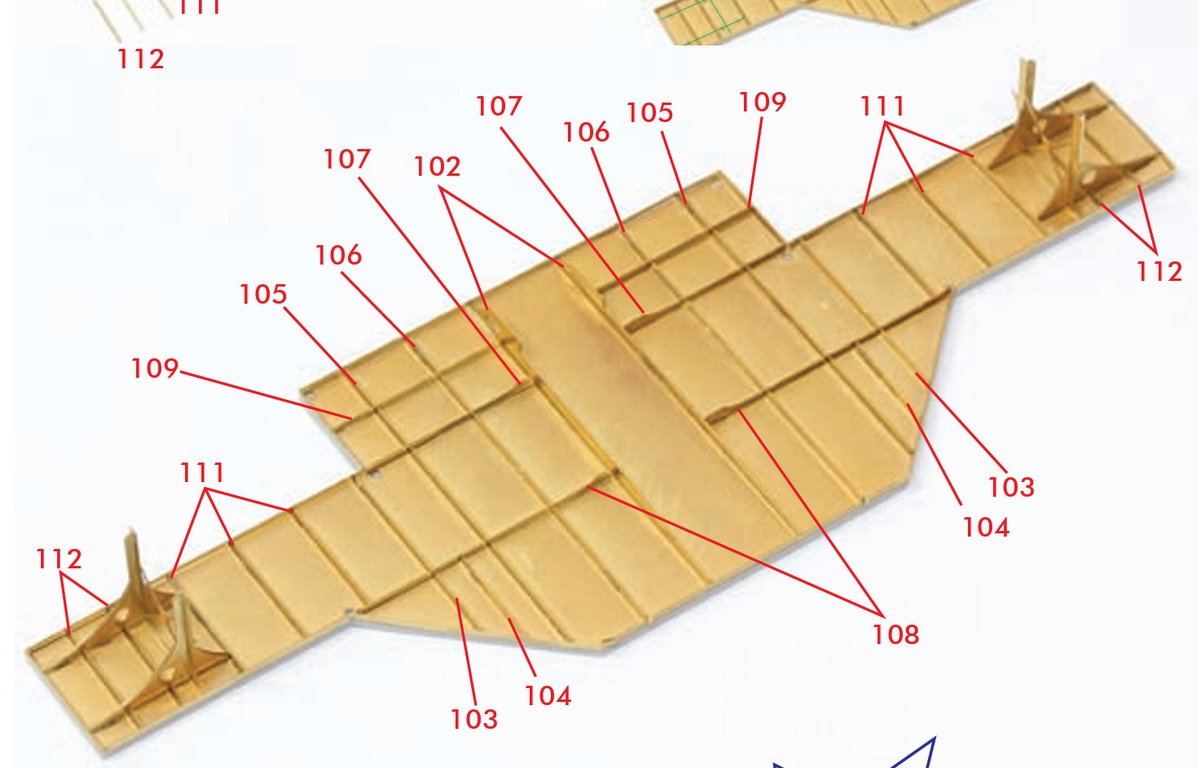
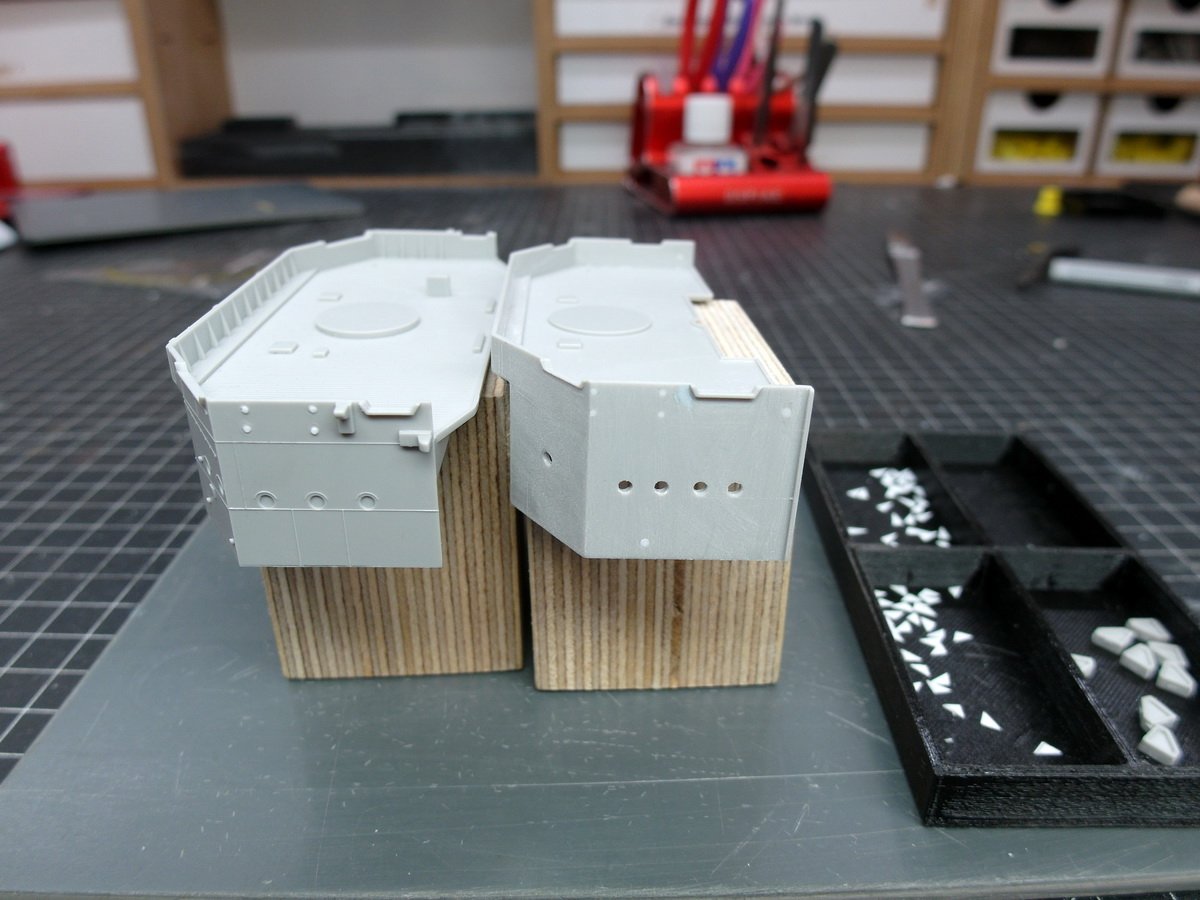
Once again, the details are sanded down, portholes drilled out, and holes filled in to replace and re-clad everything with beautiful brass. First, the rear bridge house. The gusset plates are too thick for me and will be replaced with 0.25 mm thick styrene. And again on the deck. Now the same with the bridge house on the bow side.
- 193 replies
-
- 5
-
-
- Russo-Japanese War
- Mikasa
- (and 2 more)
-
Glad I can help, Jeff. I'm still waiting for a response from my friend in Hamburg; he's very busy at the moment. The good thing is, we have plenty of time until you're ready. The ship model itself will keep you busy for a while. 😉
-
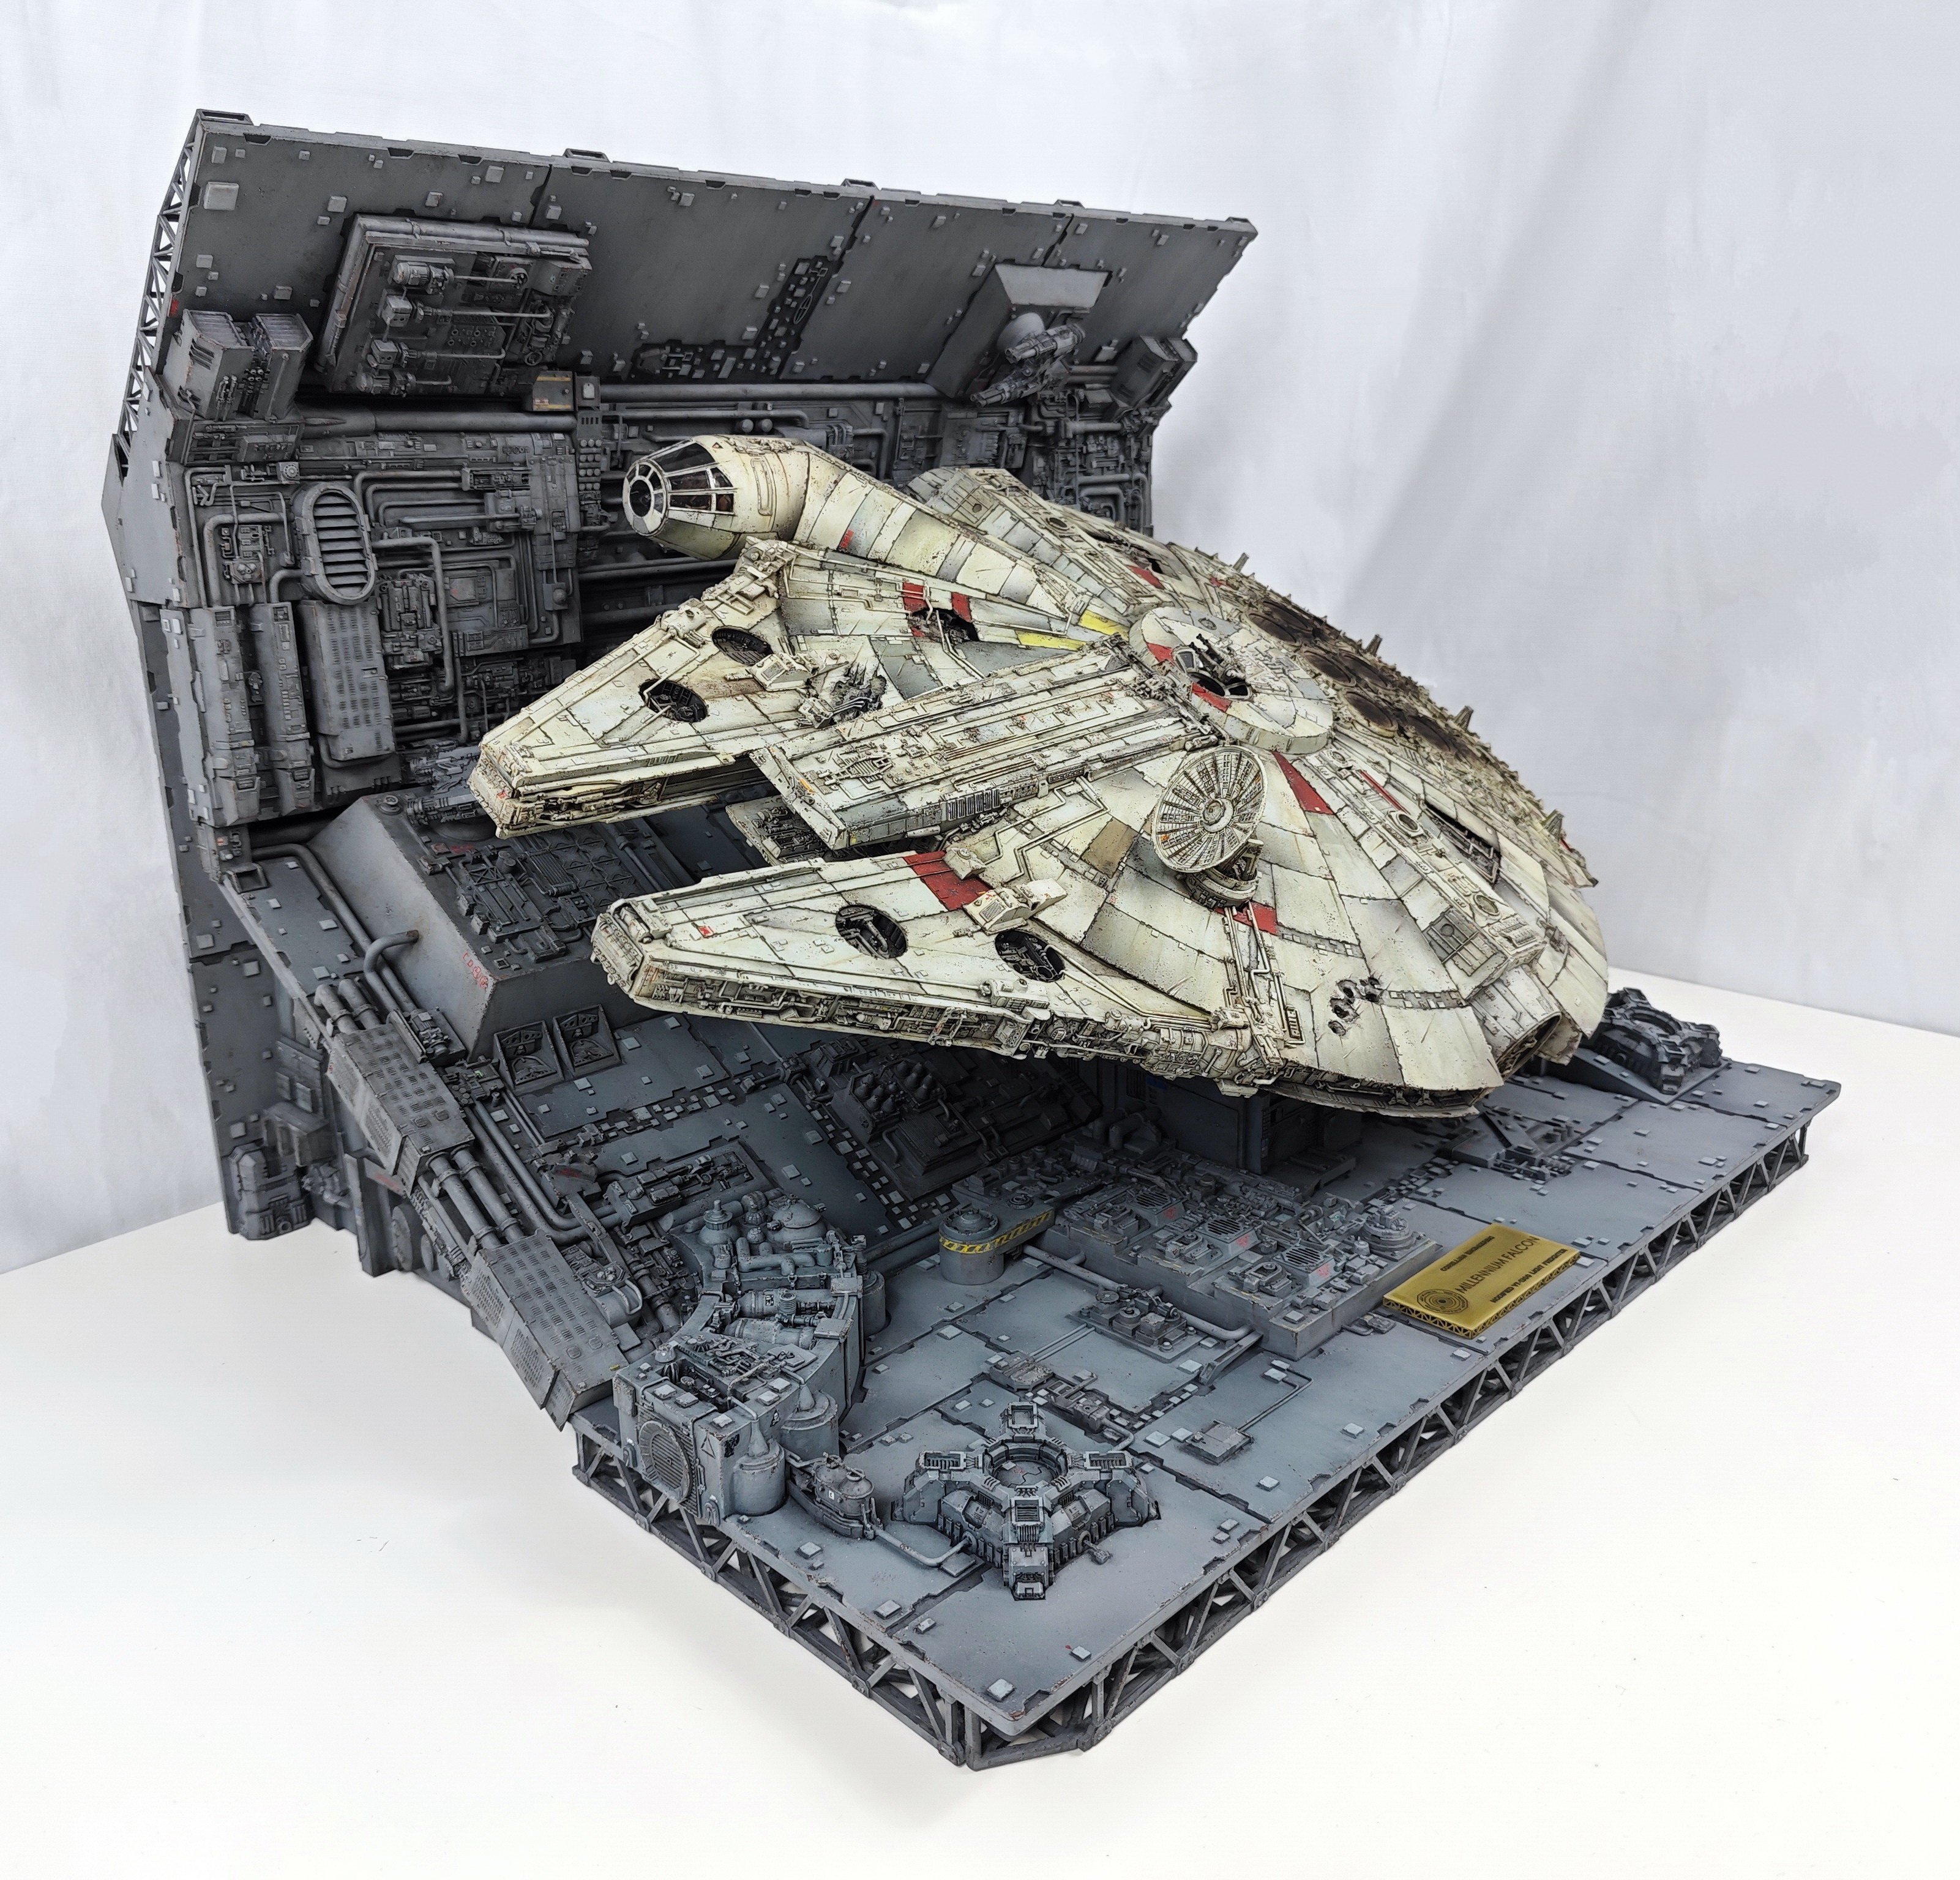
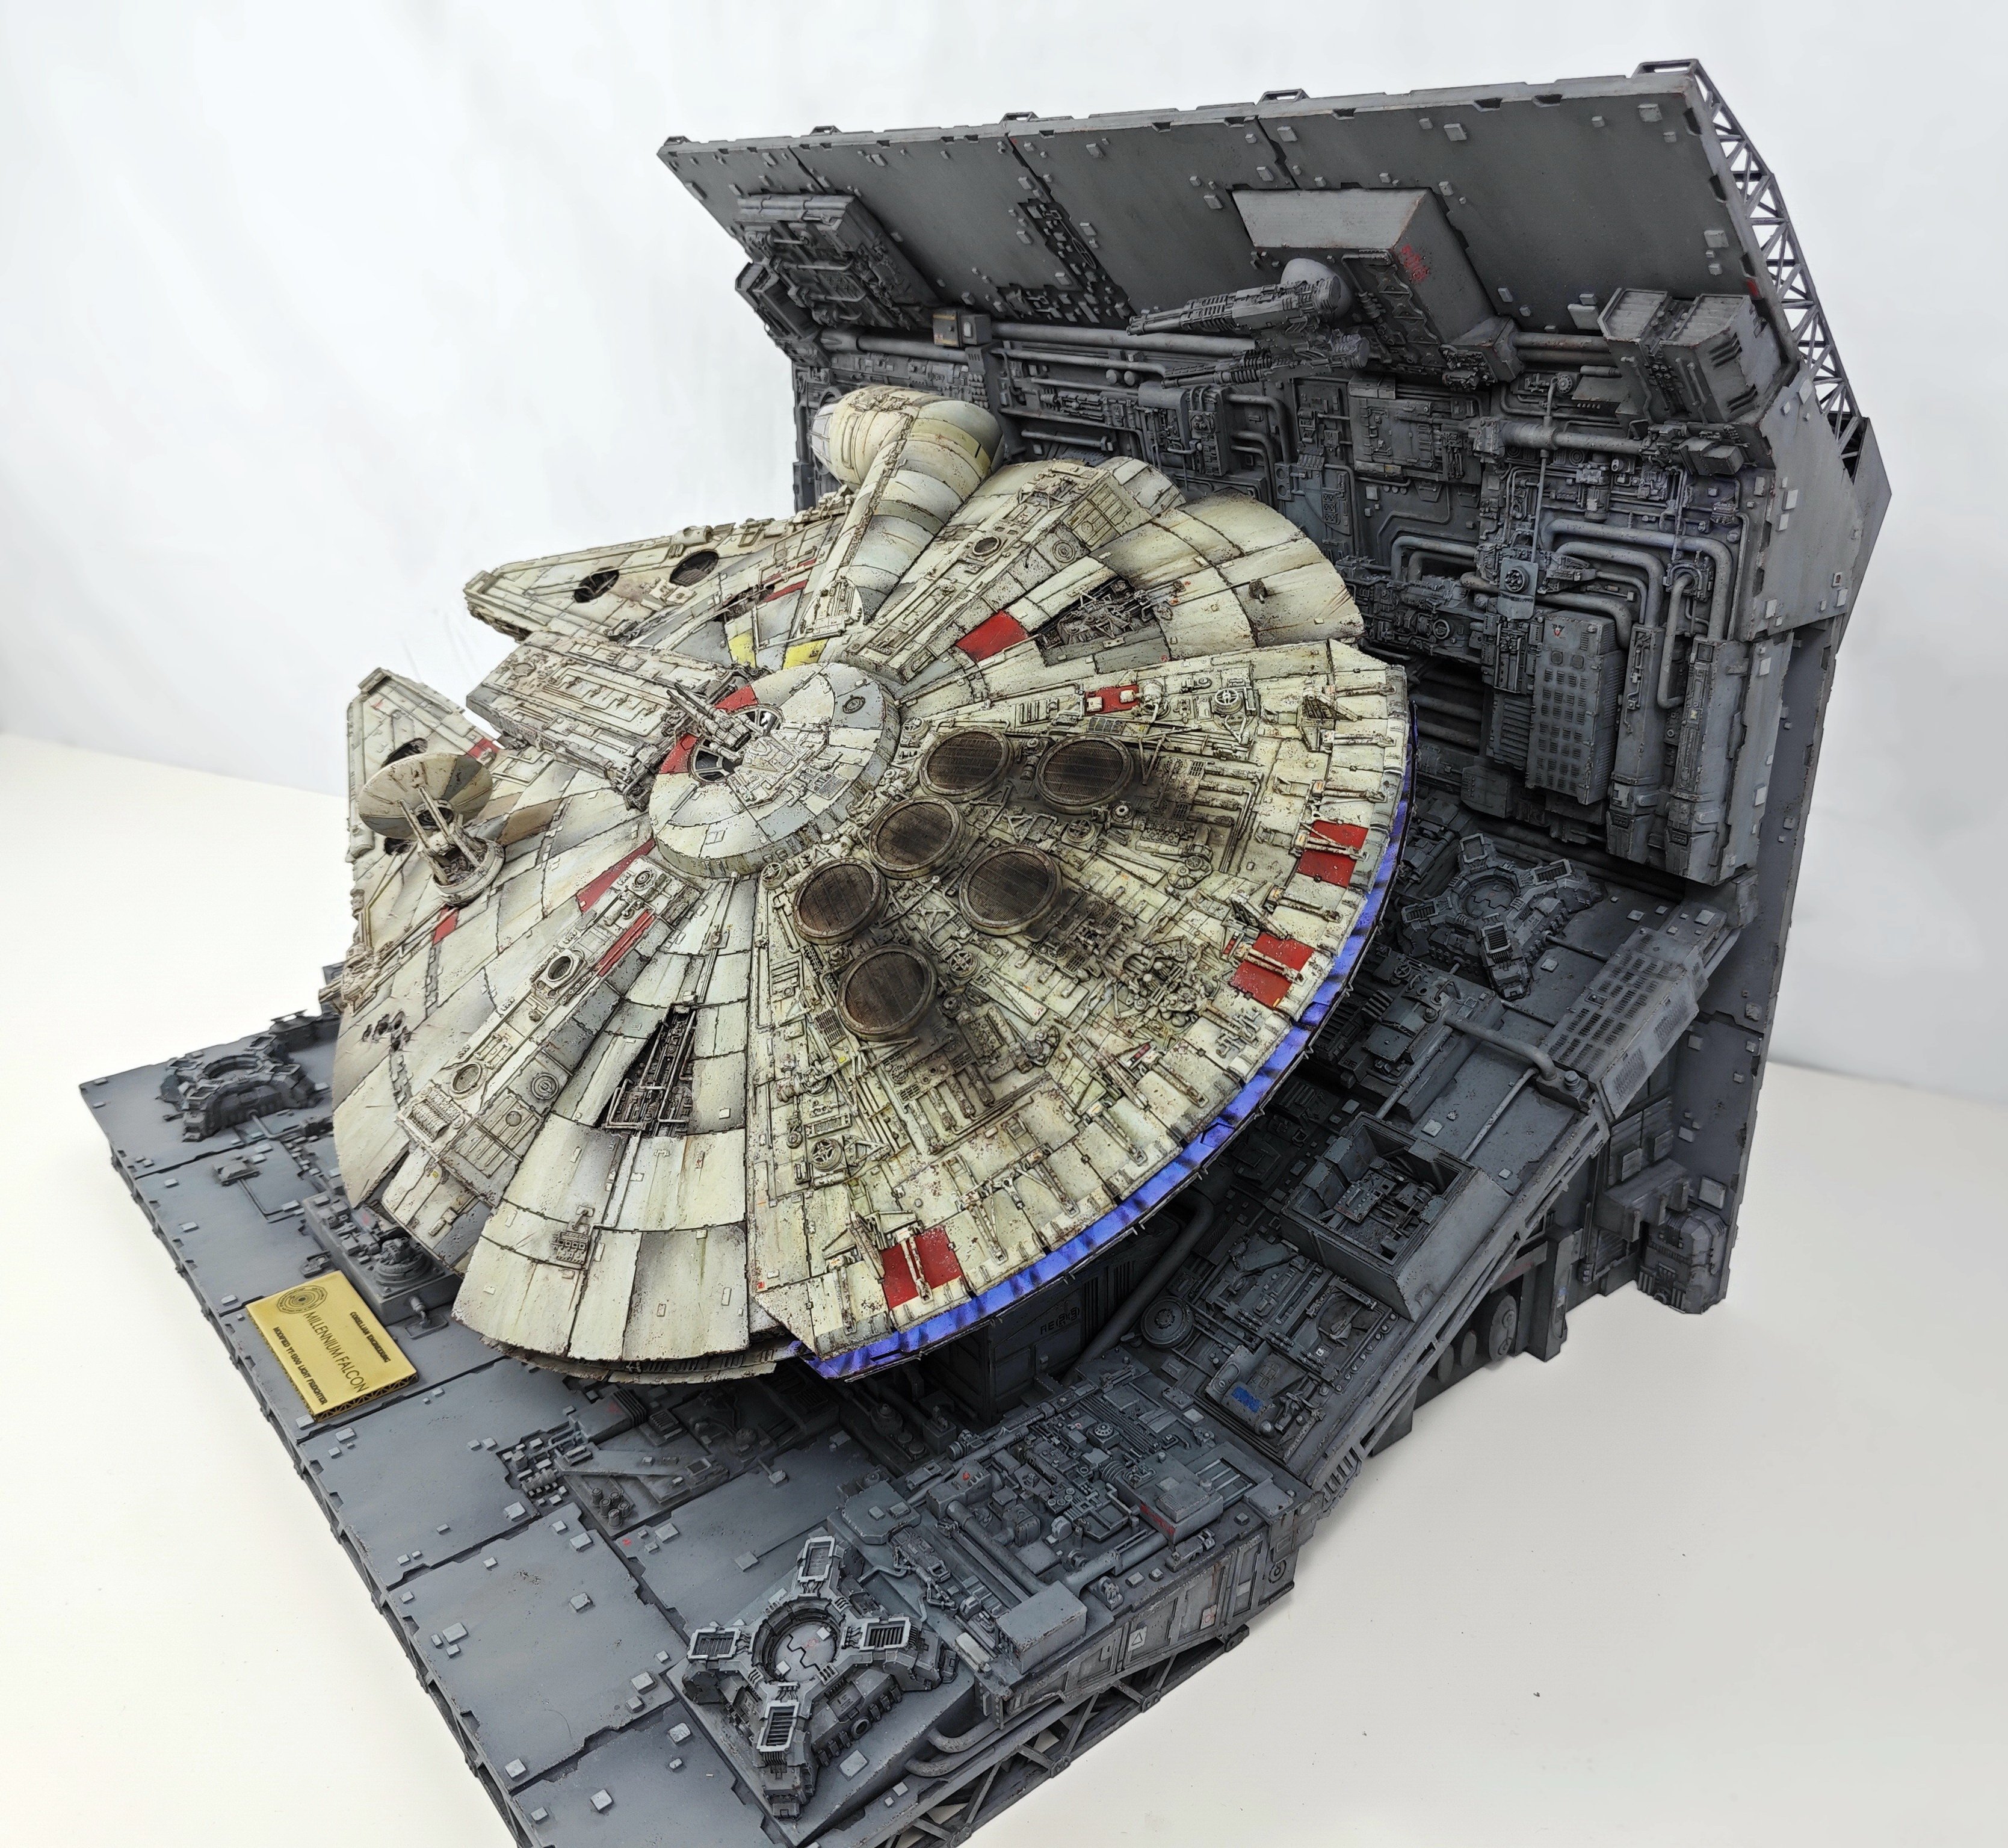
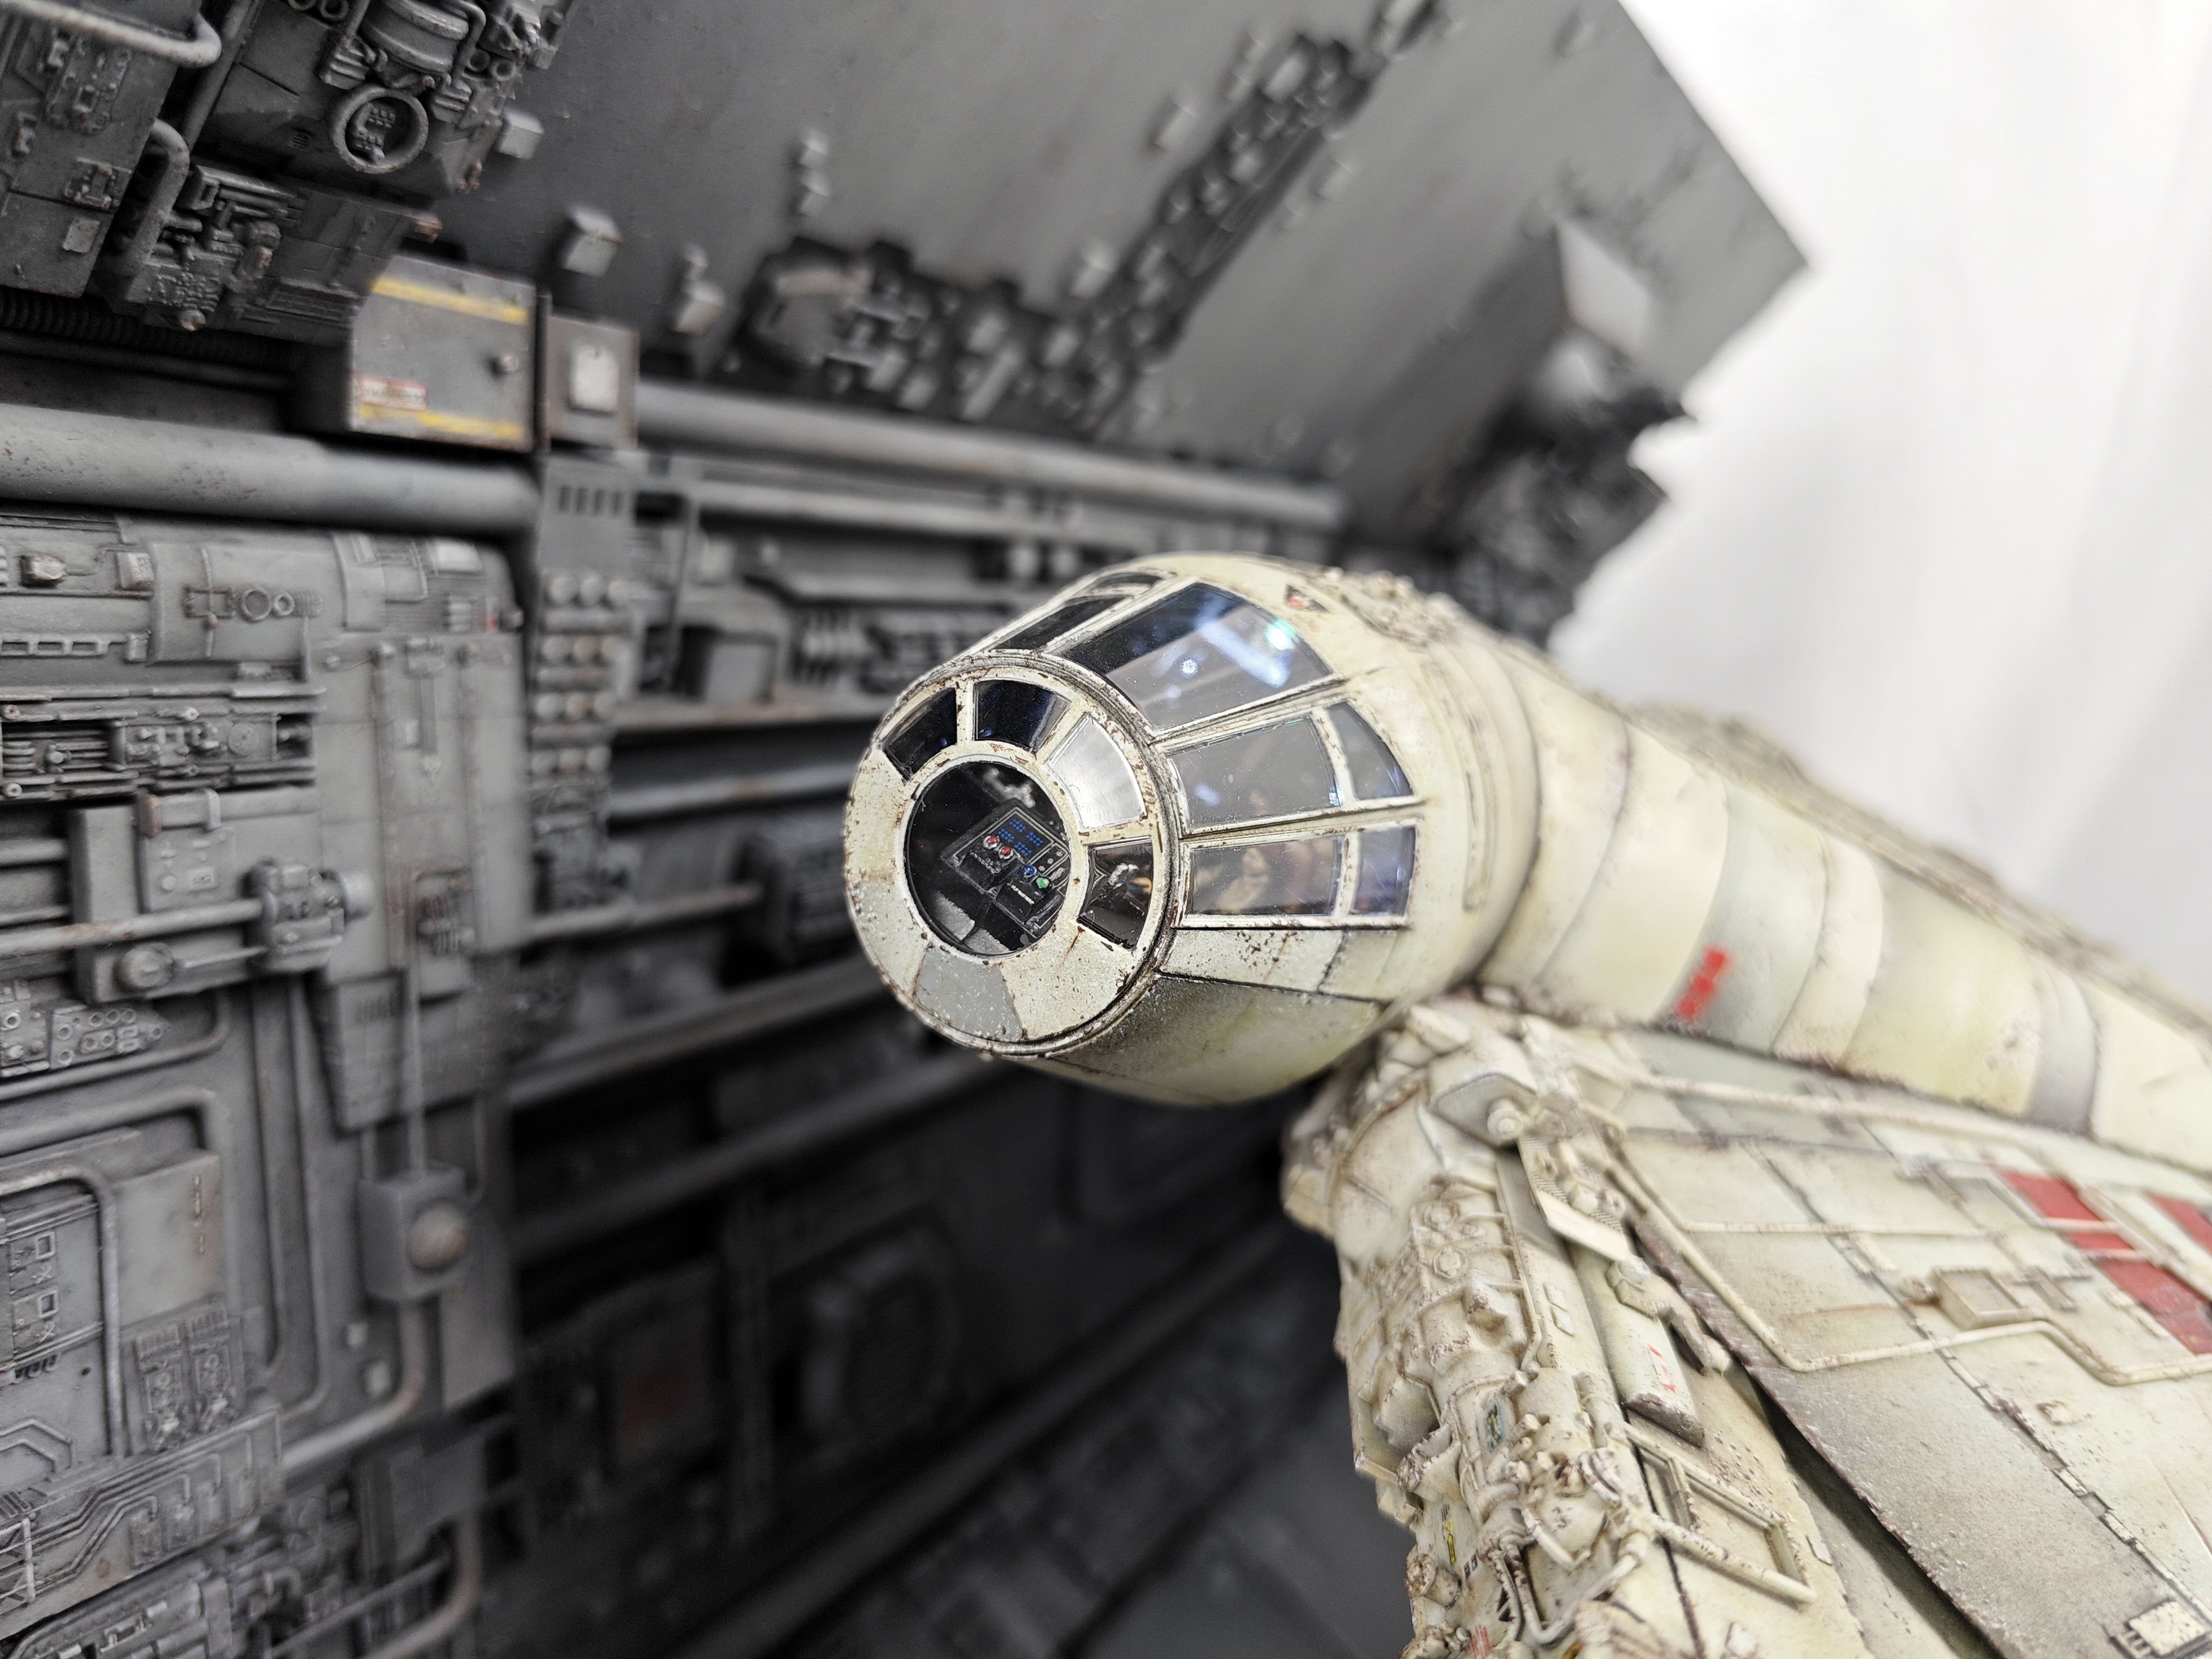
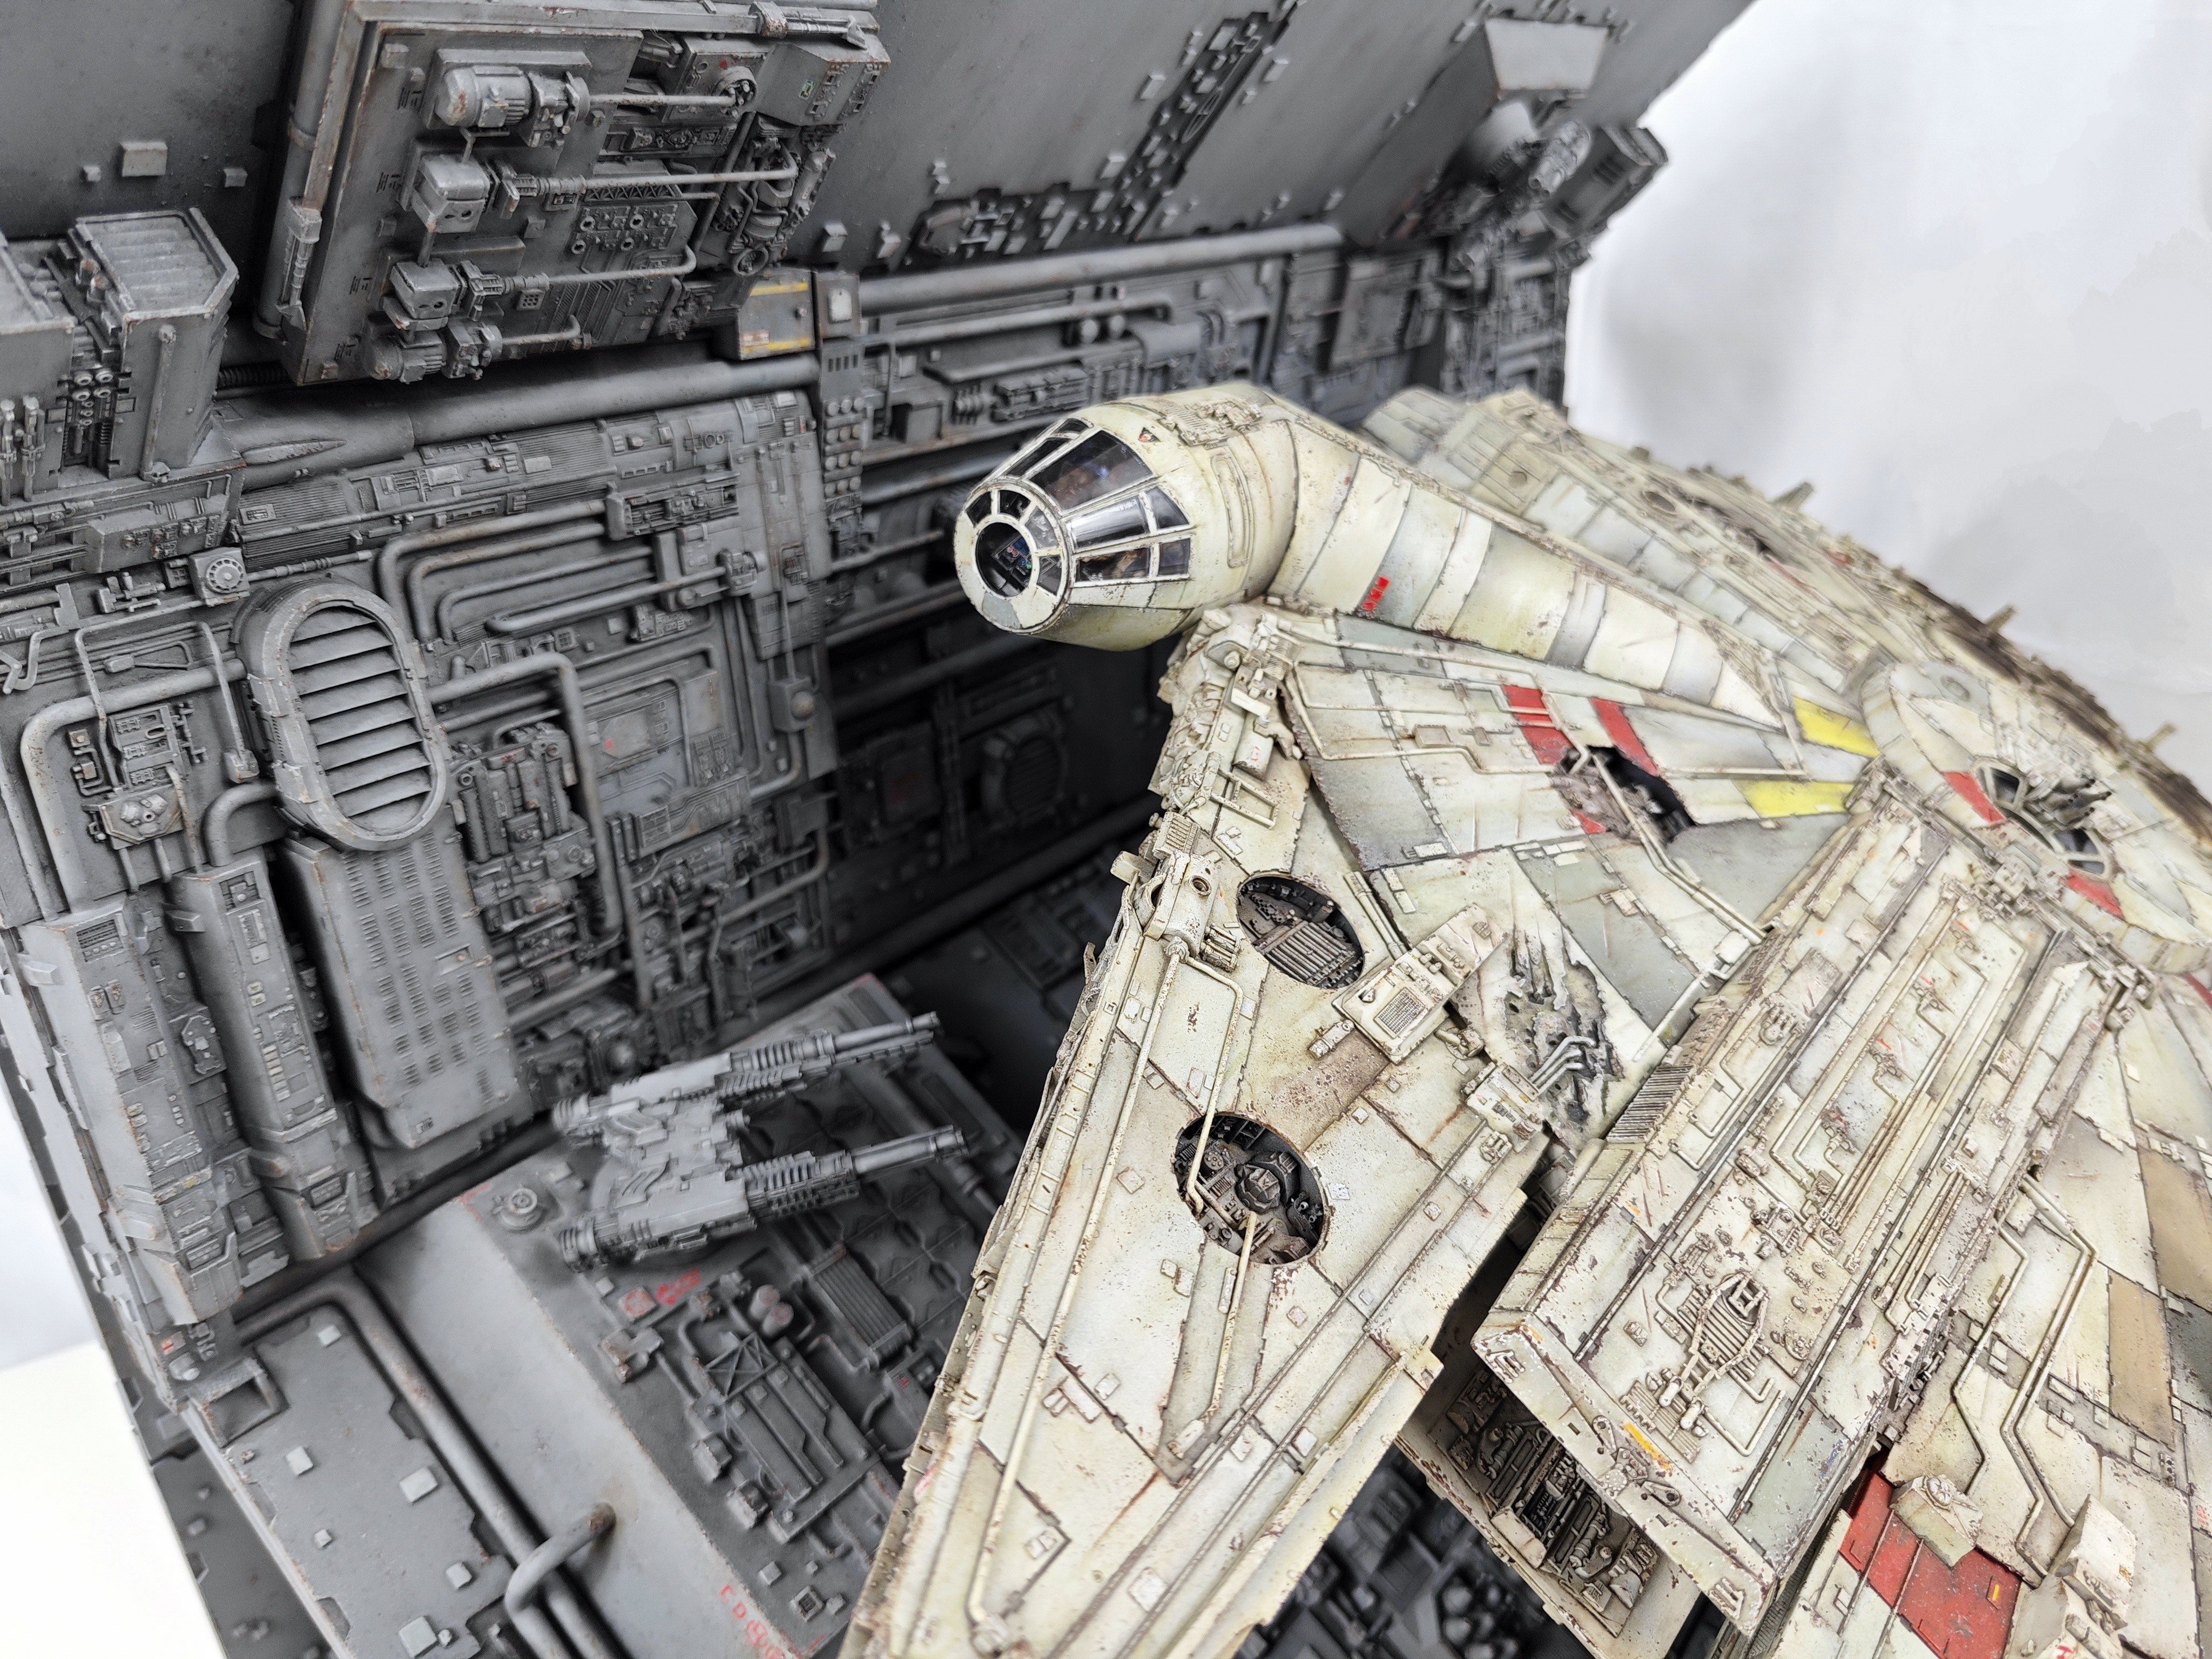
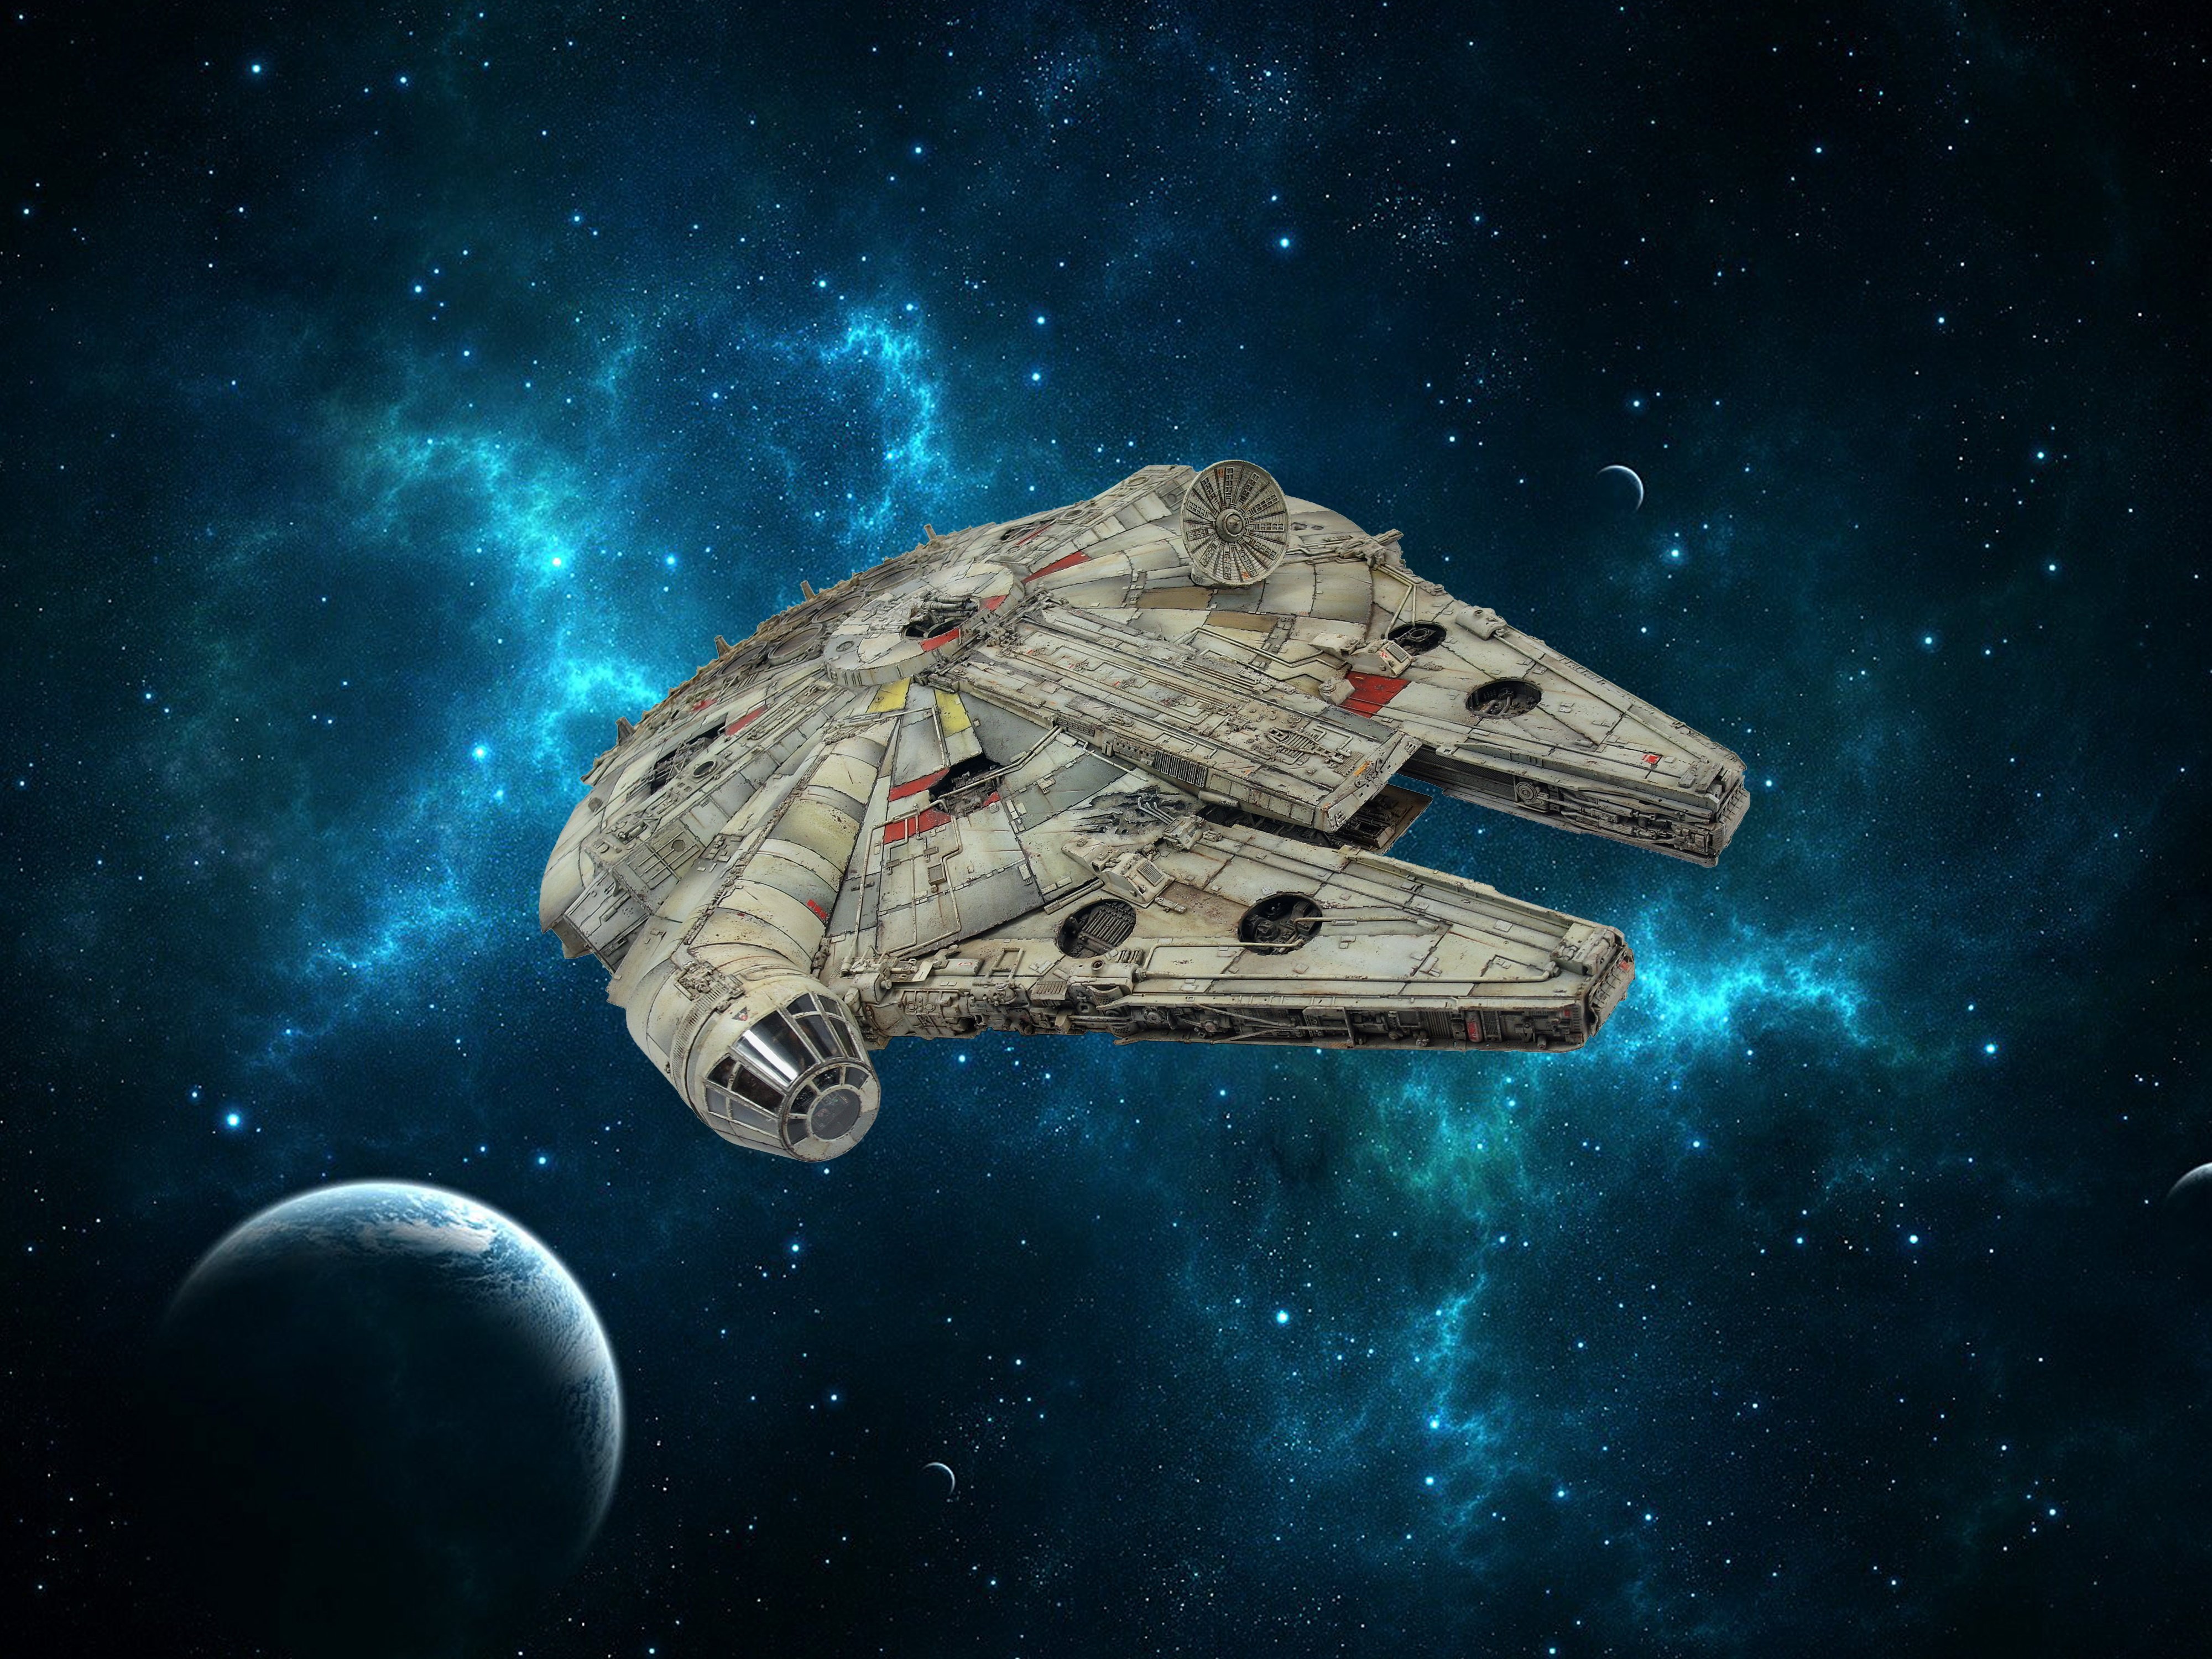
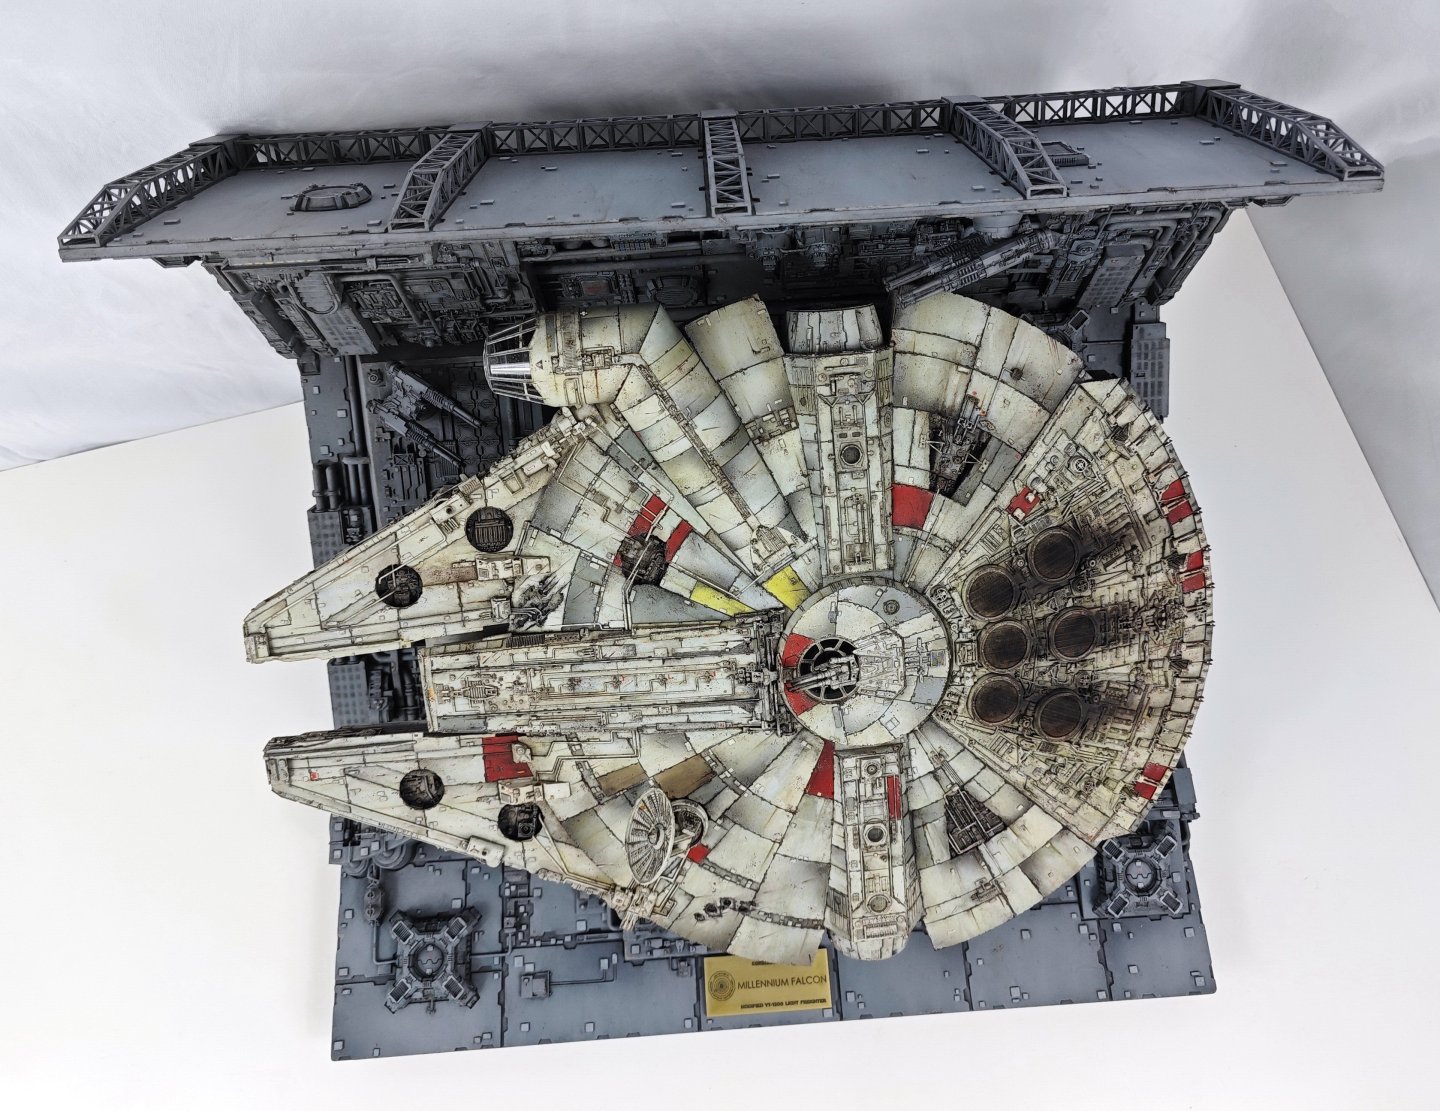
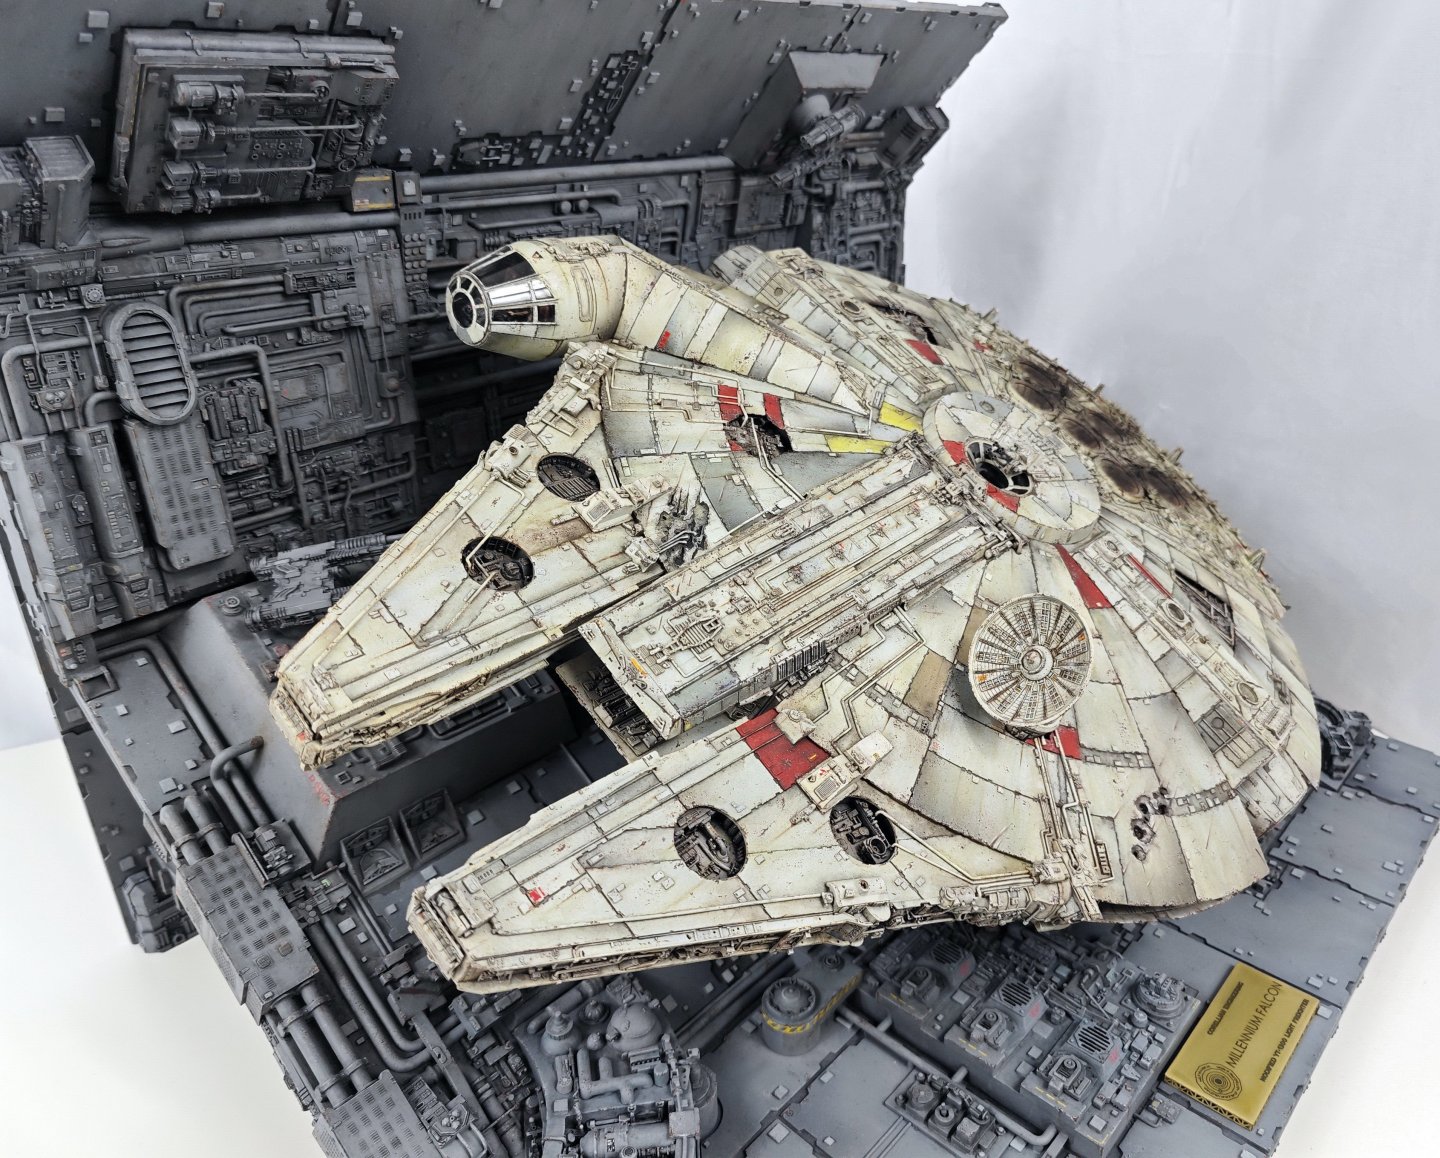
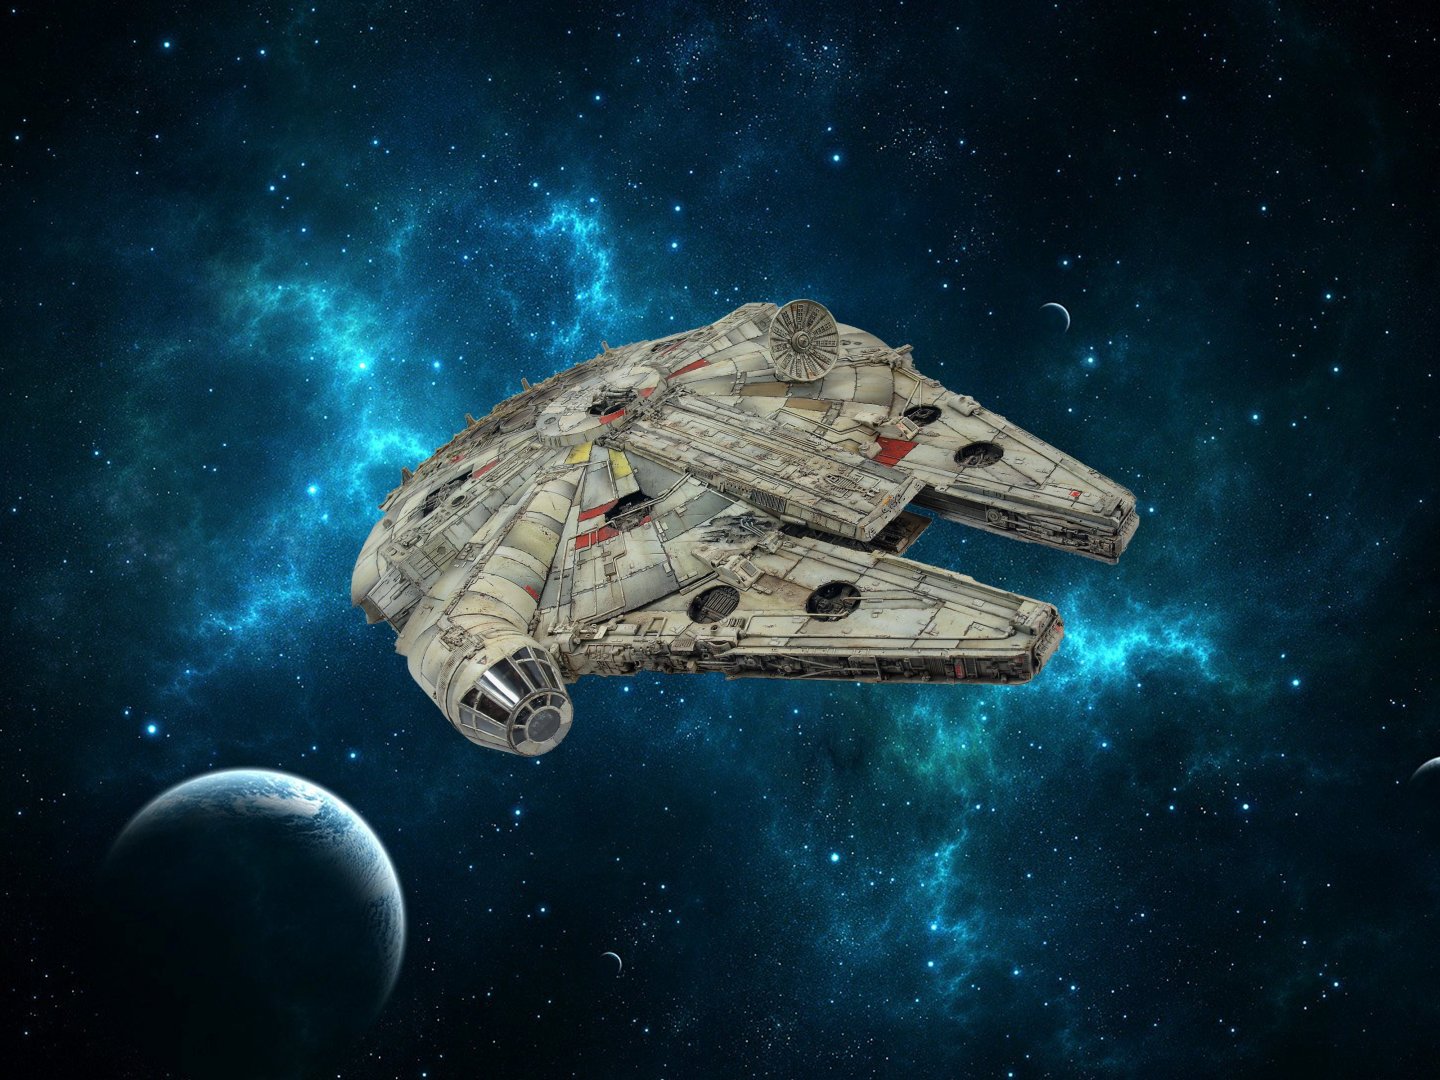
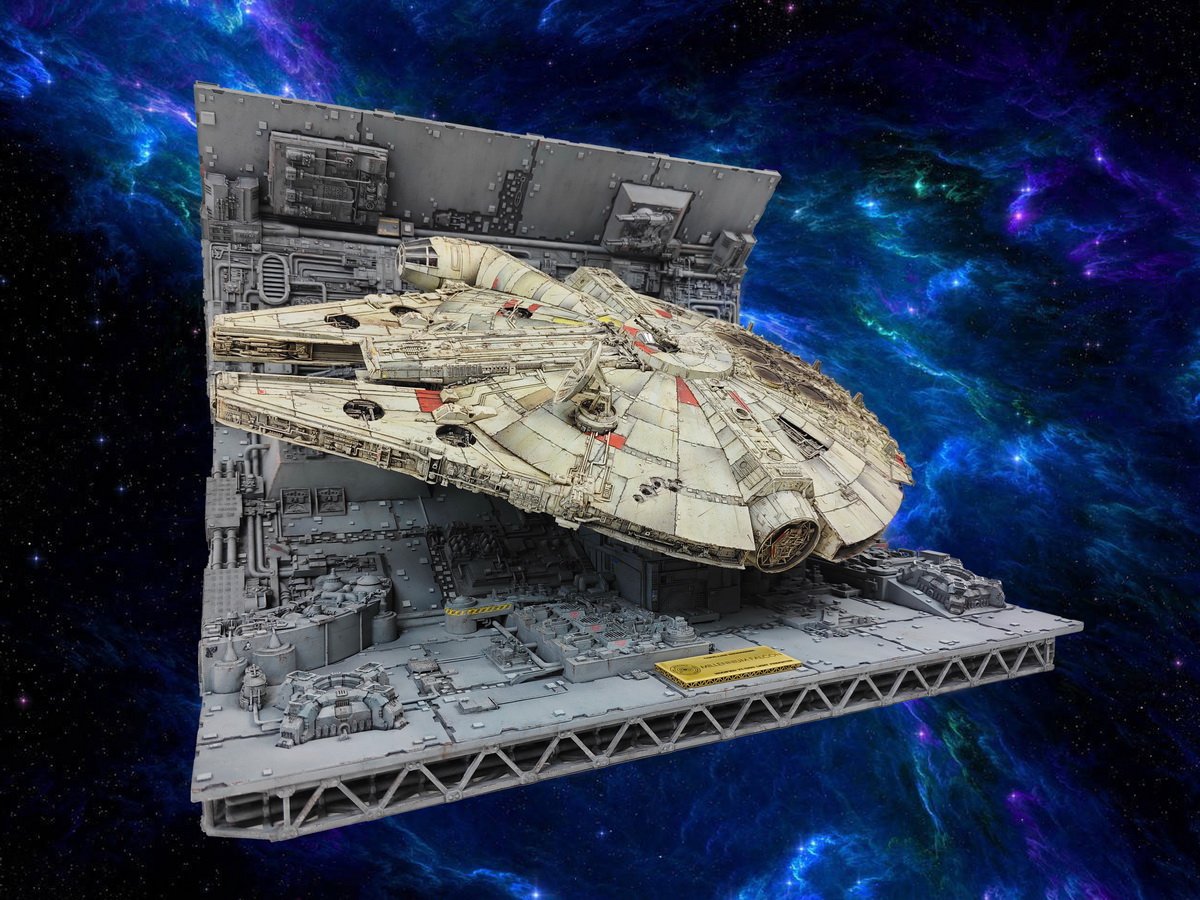
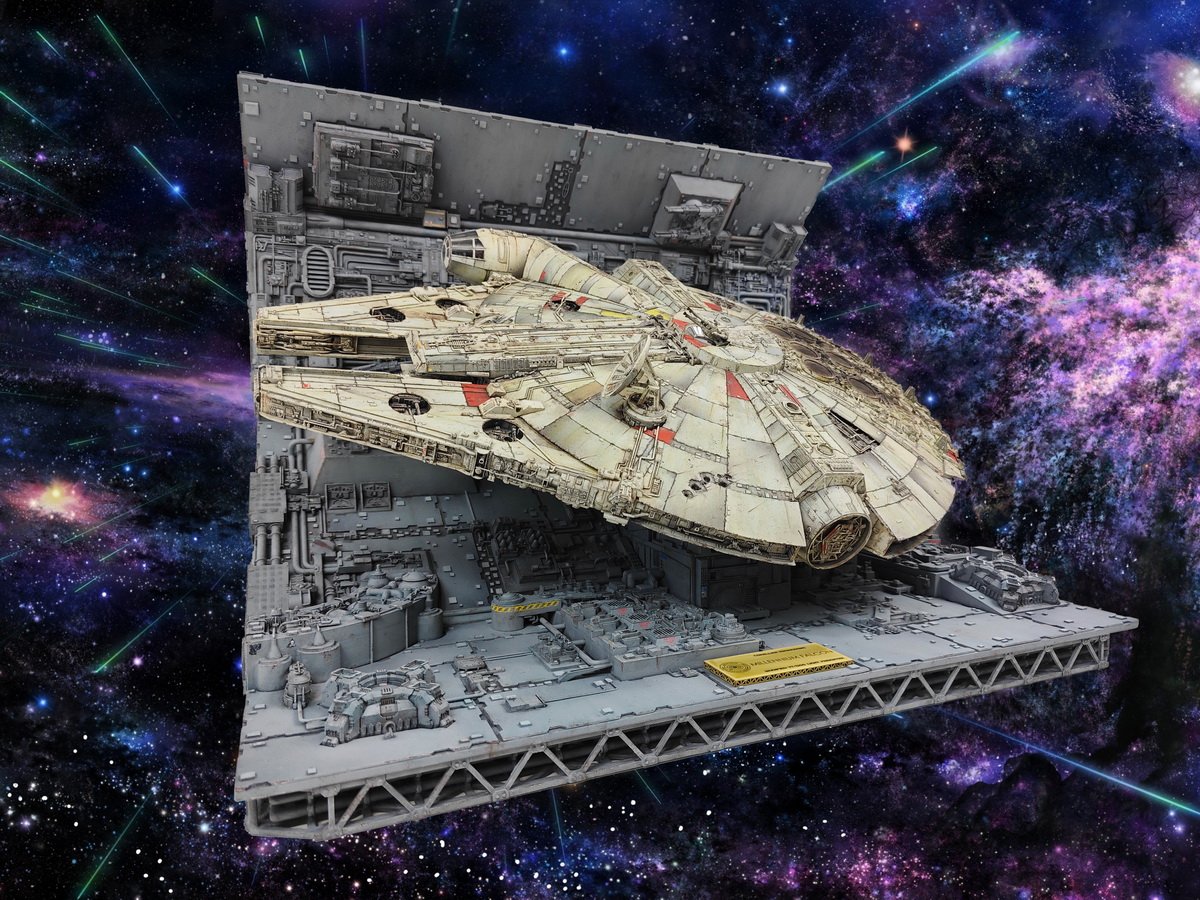
Und hier noch einmal: der schnellste Schrottbrocken der Galaxie. Möge die Macht mit dir sein.


-
- 6
-
-
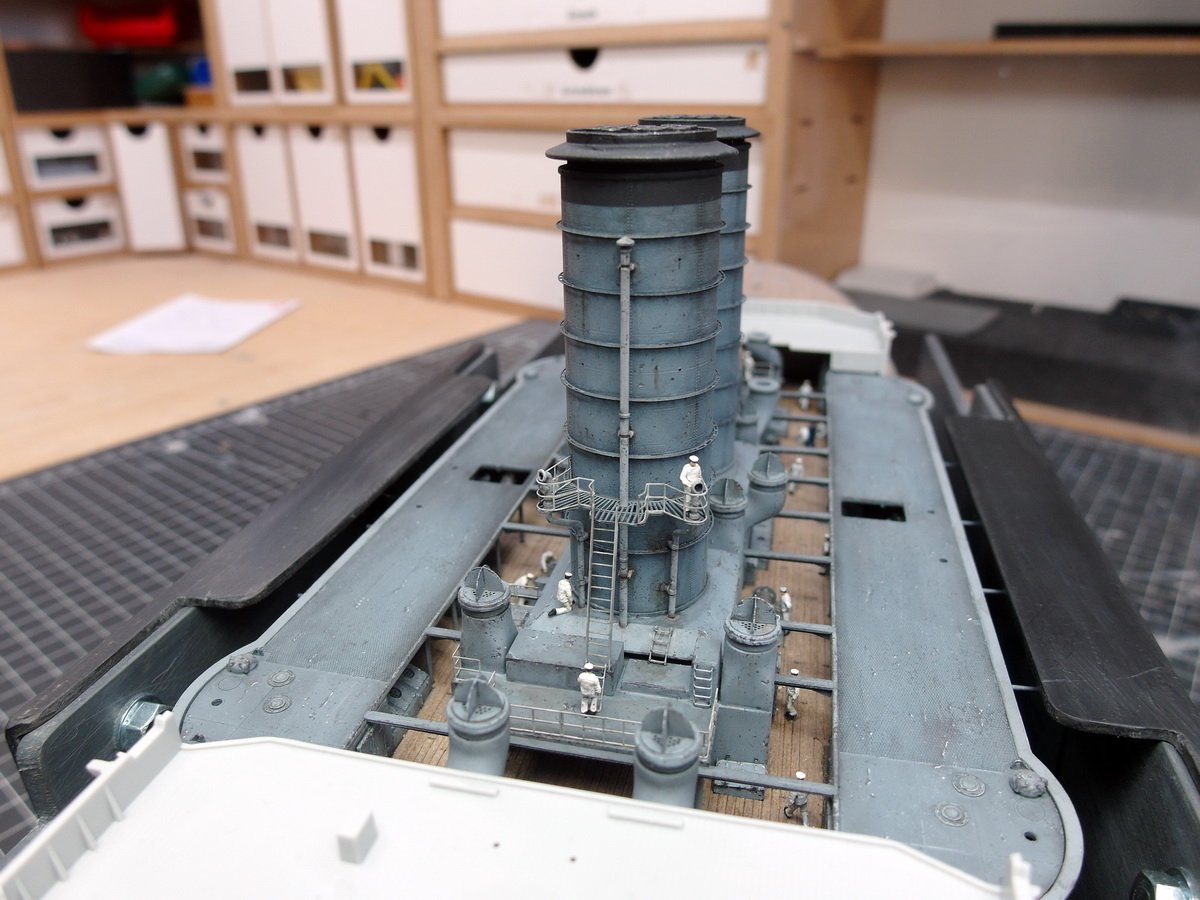
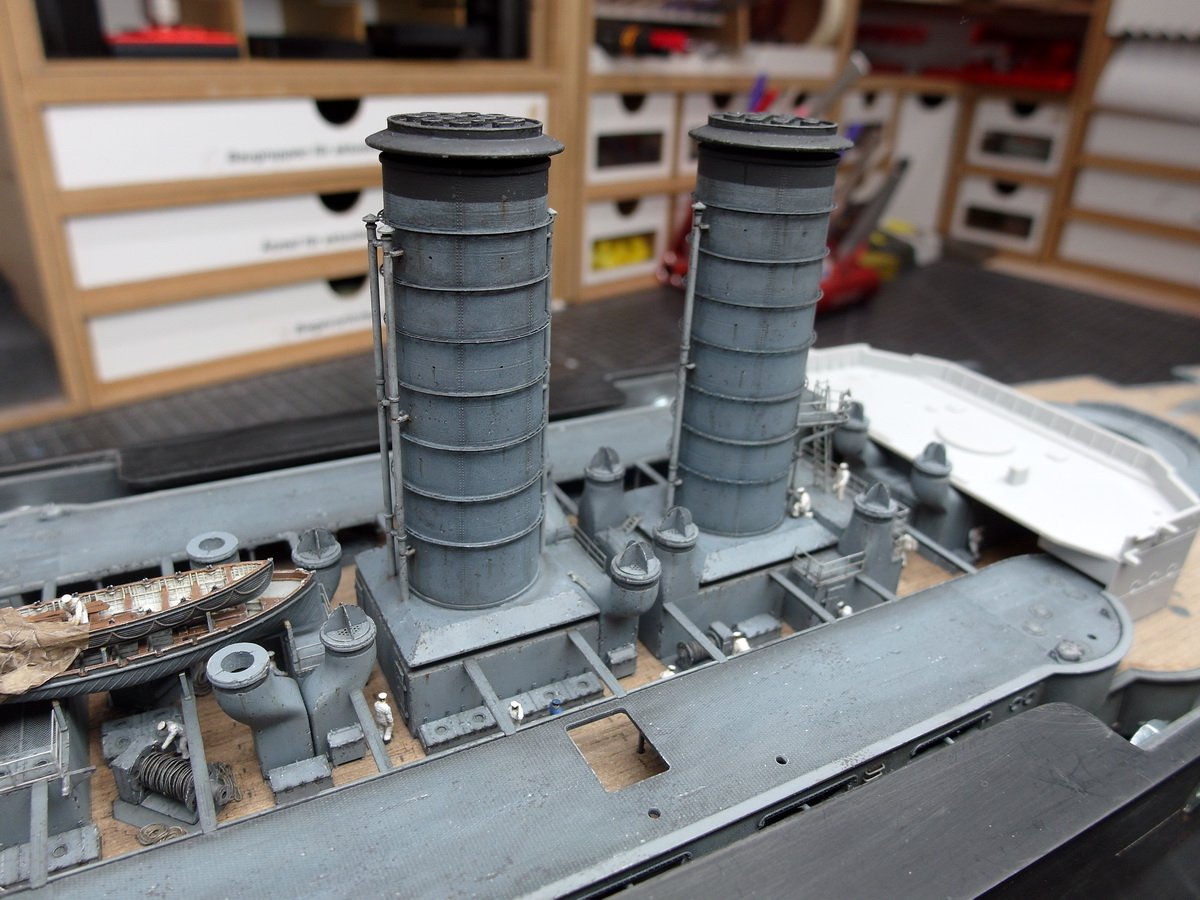
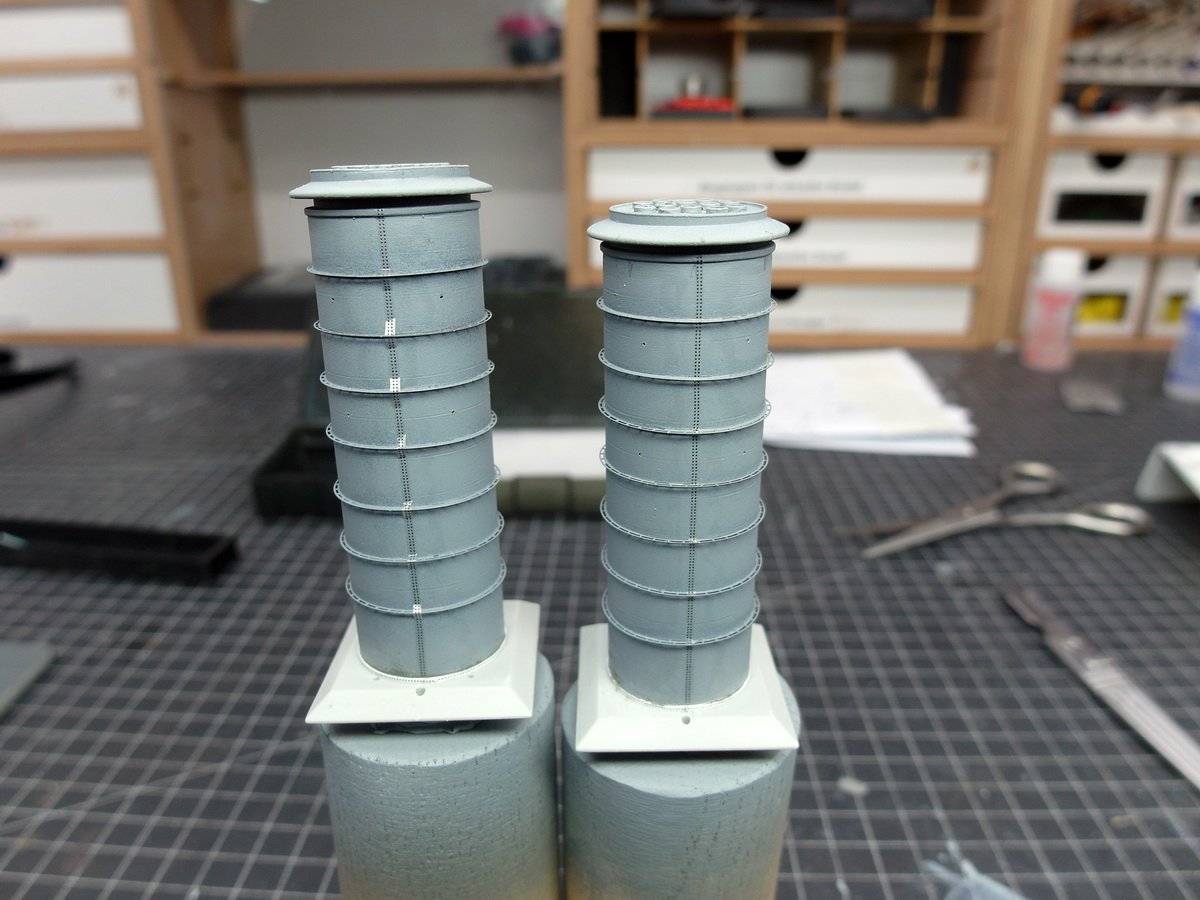
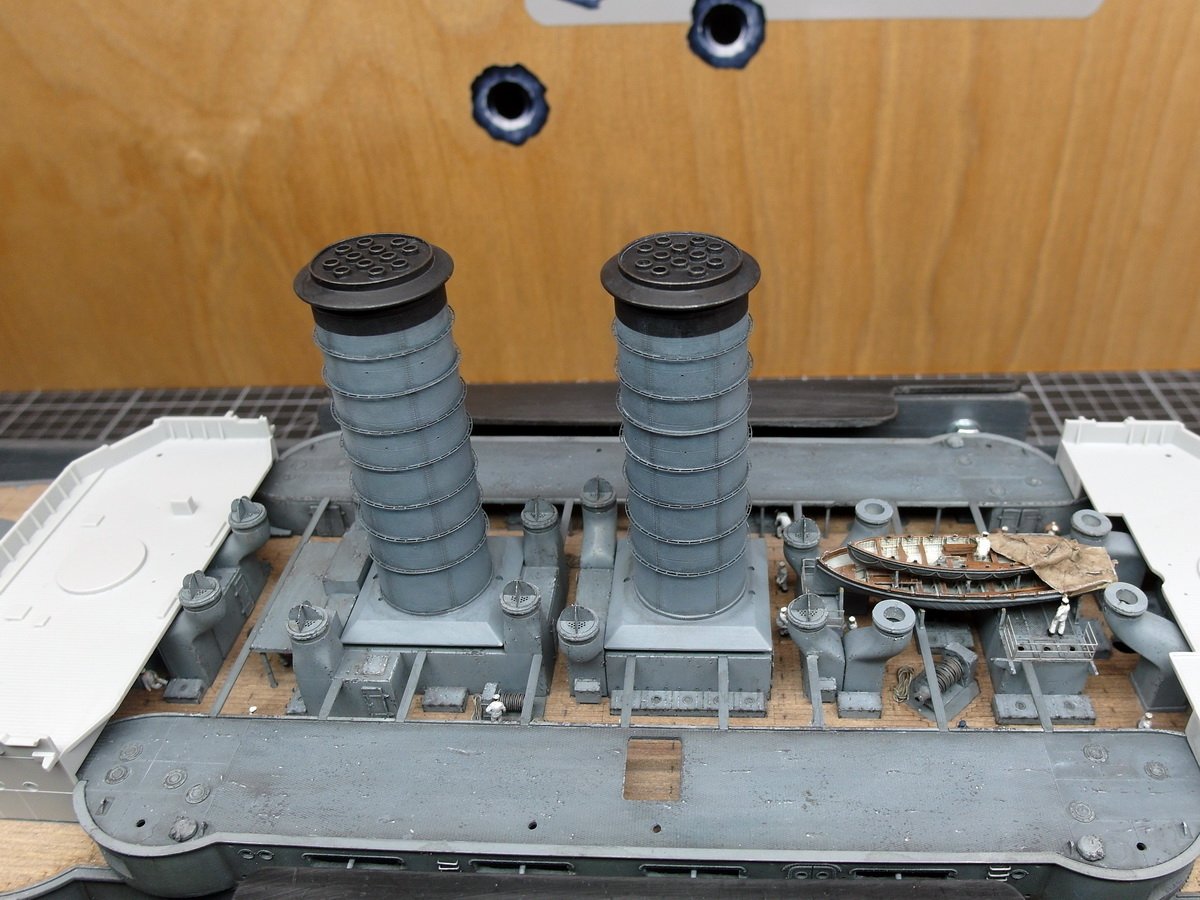
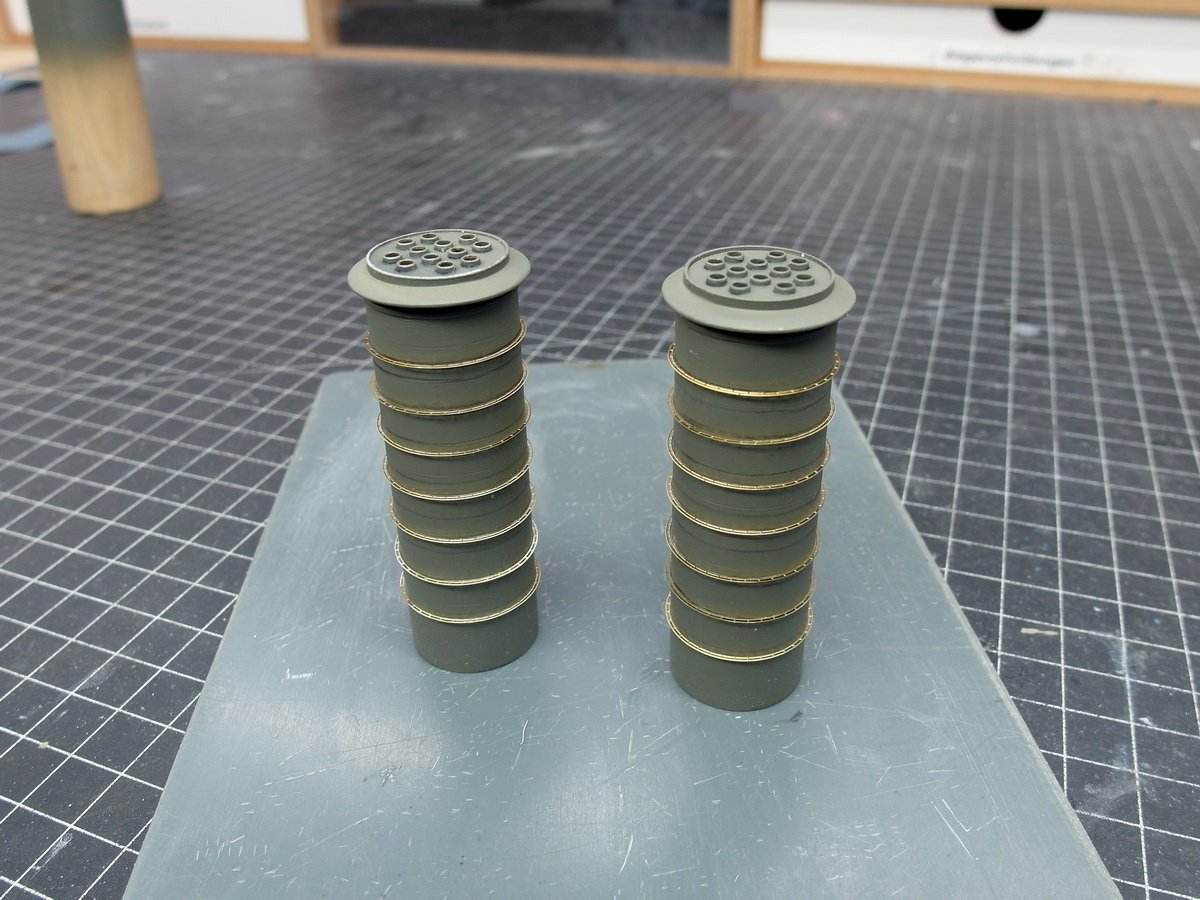
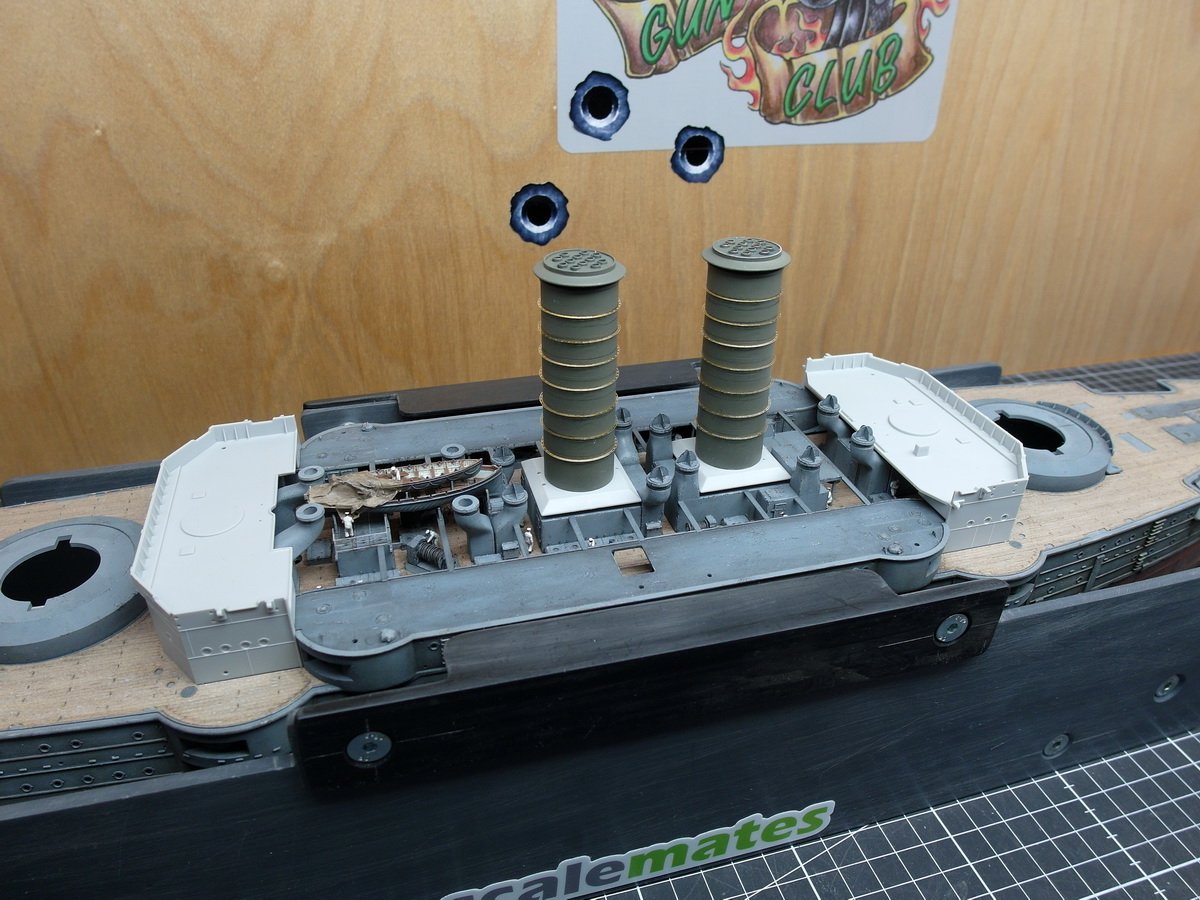
Thank you Jeff, yes I also really like the rivets, even though they are in 1:72 scale they work well. I can report that the symbiosis of Pontos and Ka Models on the Funnel has been a success. It did require a bit of trickery, but I think it looks impressive. Let’s start on the port side. I had to position the rings so that the second ring wouldn’t interfere with the gallery. Therefore, it was important to measure the ring spacing precisely. Next came the task of threading the pipe into the gallery. The lower pipe clamp could only be attached after the pipe had already been installed on the funnel. A serious fiddly job. Additionally, the rings were in the way of the tubes to the right and left of the center. As mentioned in the last post, they needed to be slightly padded. Otherwise, they wouldn’t fit over the rings. It was not intended that the two accessory sets would be mixed together. I did have some initial difficulties, but I think I got the most out of both sets. And the result feels very satisfying.
- 193 replies
-
- 7
-
-

-
- Russo-Japanese War
- Mikasa
- (and 2 more)
-
Then I have this for you, Jeff. The Battleship Bismarck War Diary. bs-ktb-oct2018.pdf Maybe that will help a little with the studies.
-
Wow, what an elegant, beautifully designed boat. I'm not a wooden boat builder, but I think you did a really good job. 👍
- 47 replies
-
- 4
-

-
-
- Annapolis Wherry
- Chesapeake Light Craft
- (and 1 more)
-
@ccoyle That's great, Chris. Just scale it down and you have an excellent template for scratching. @Jeff59 I need the exact time period you want to depict, Jeff. Do you mean the technical maiden voyage? The Bismarck was towed across the Elbe several times. Now an entry has surfaced from the war diary that the Bismarck collided with the lead tug Atlantik on September 15, 1940. So new tugboats keep popping up, and we need to narrow them down. I've also contacted an old friend who used to be a curator at the Hamburg Maritime Museum. We'll see what he can contribute.
-
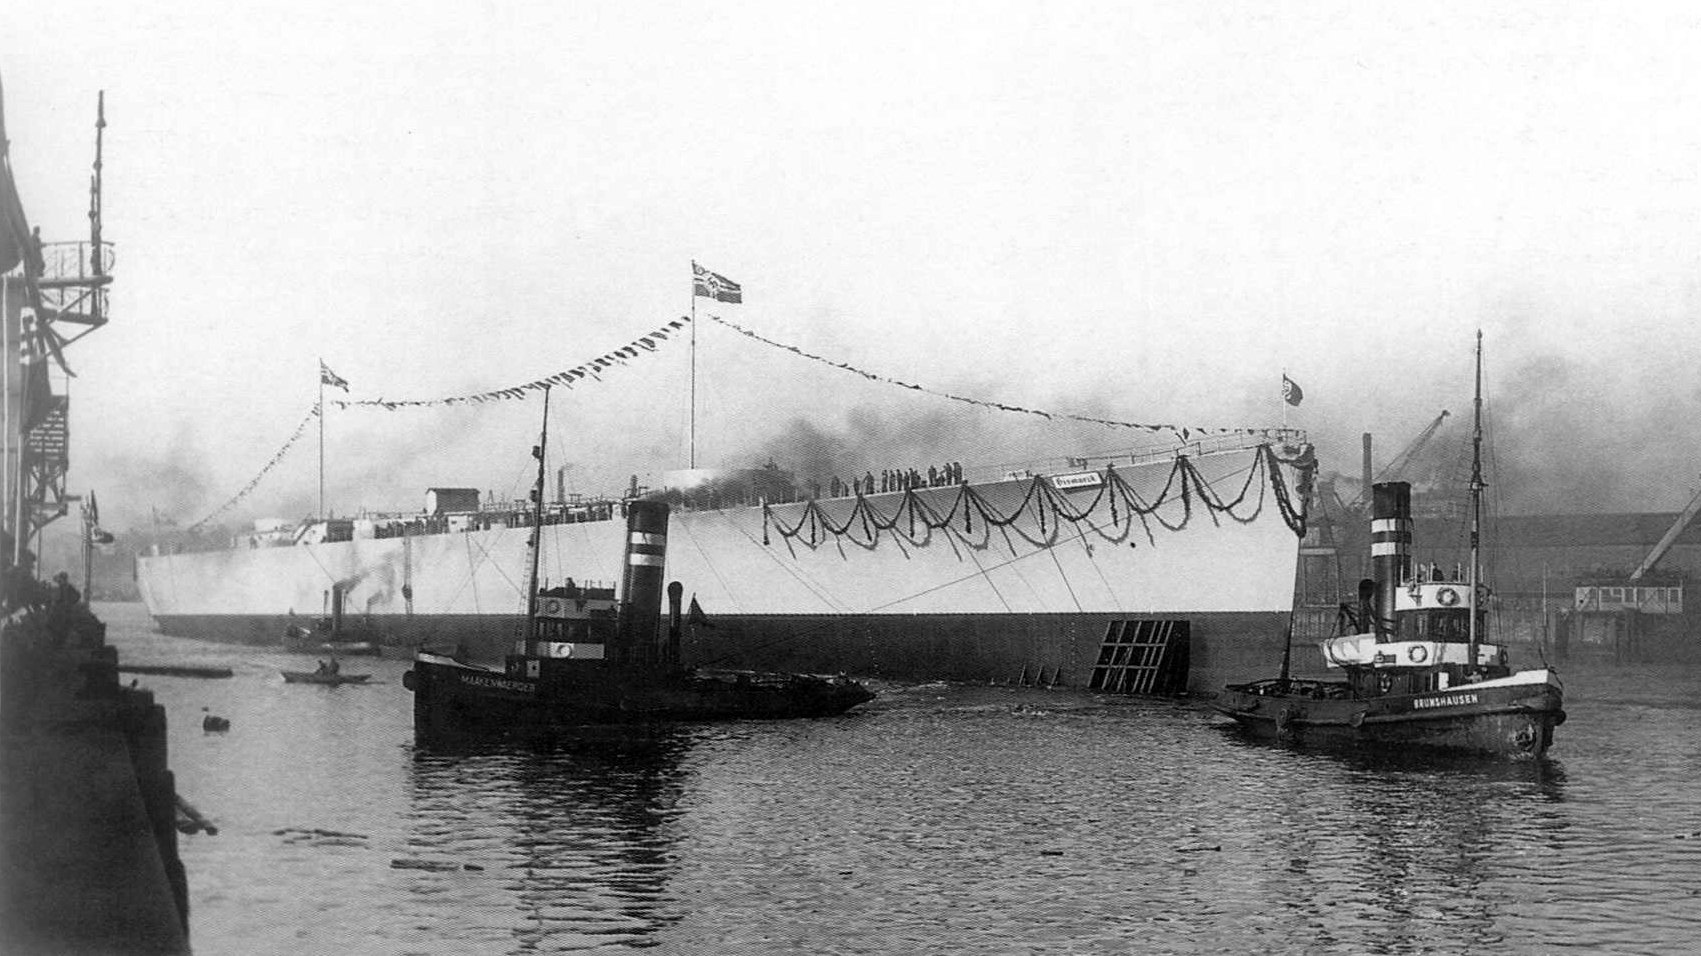
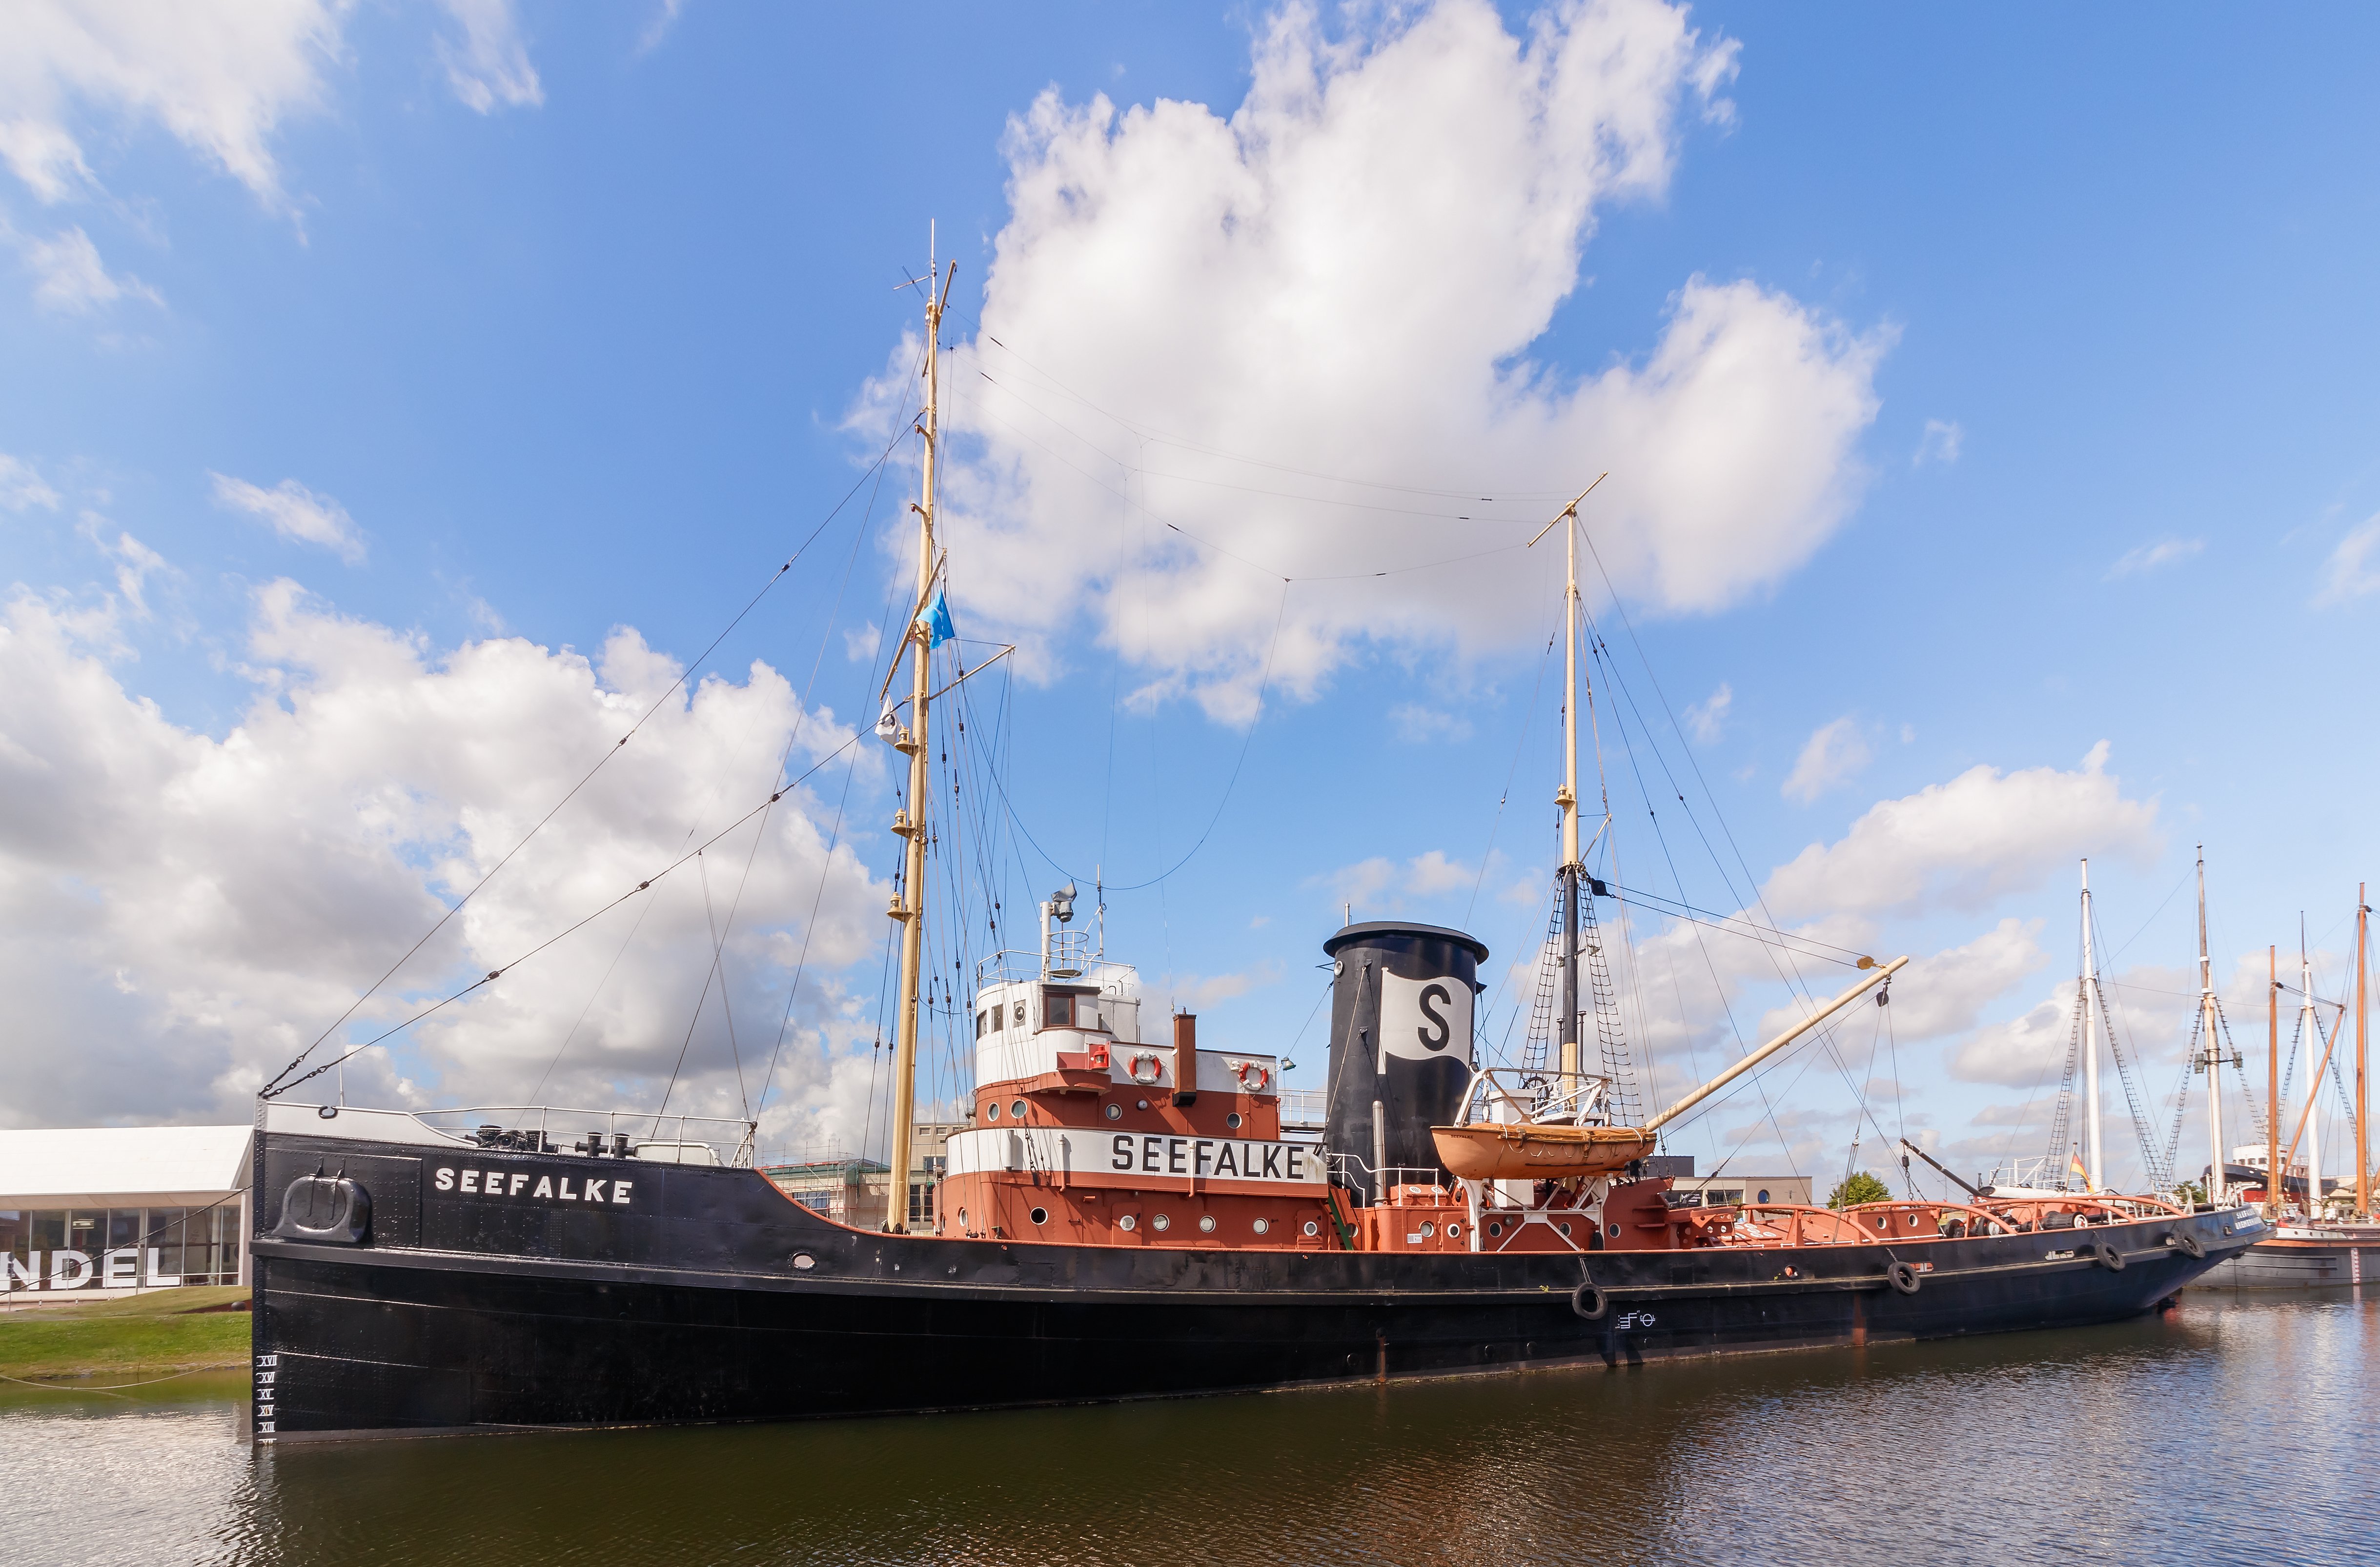
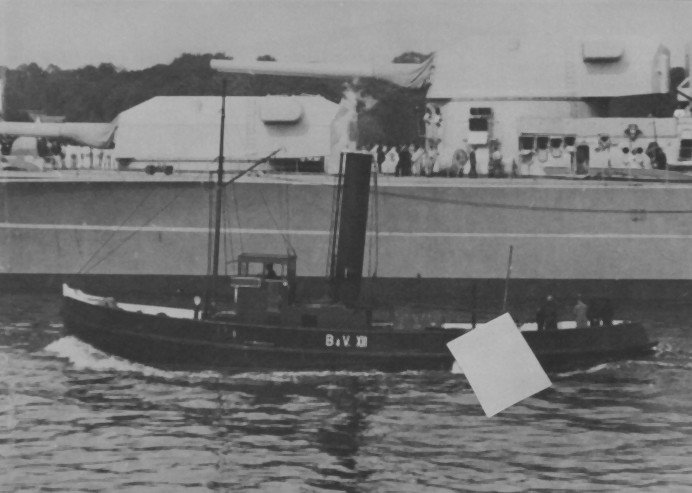
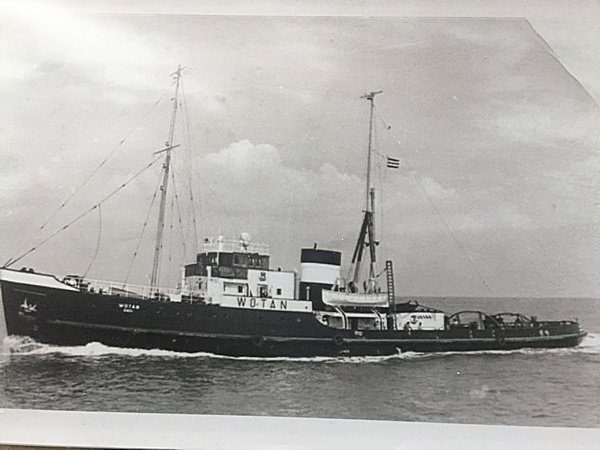
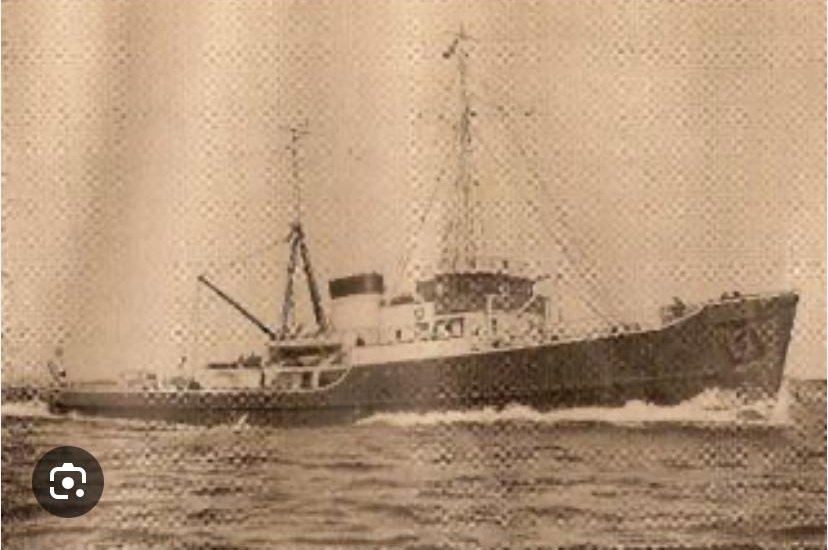
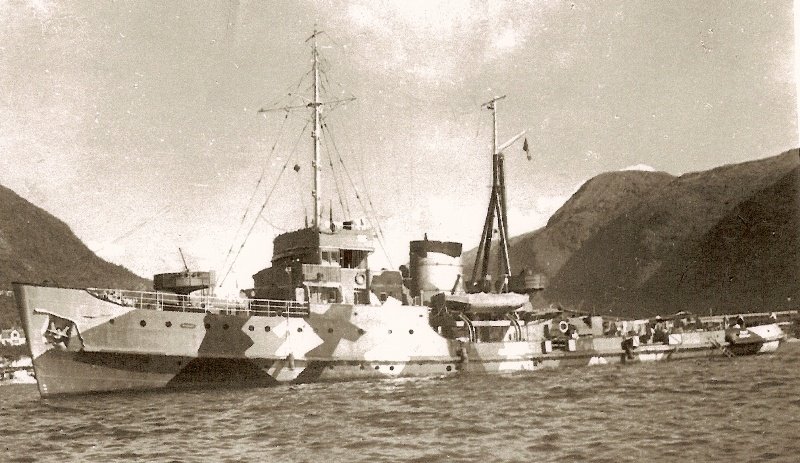
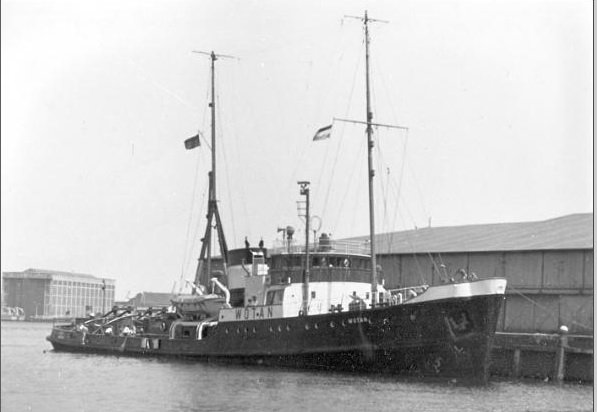
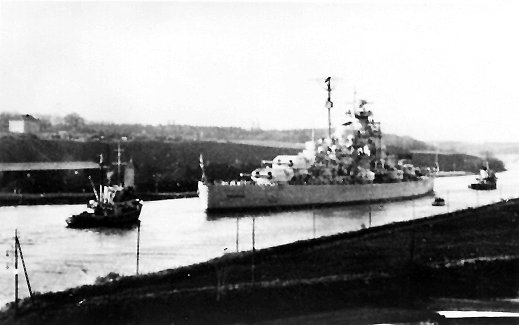
Hello Jeff. My friends and I are already researching which tugs and pilot boats might be involved. The problem with the whole thing is that there are many pictures of the Bismarck with tugs in them. But it's usually not clear which specific contract the whole thing is for. Here, for example, is a very good picture of the Bismarck with two tugs. The picture is so good that you can read the name of the ship. The tug on the right is the "Brunshausen". But in this picture it should be clear that it cannot be the maiden voyage, since that is only the hull. It's more about this situation, but even here it's often unclear which trip was involved. This is a picture on the way back to Hamburg. For me and my friends, the tugboat "Seefalke" is currently a possibility. That must have been at the back. It is now restored and in the German Maritime Museum. Here is a picture of the restored ship. Then the tugboat Wotan would have been at the head. And last but not least, there's the tugboat Arngast. That could also be considered. In the following picture in interesting camouflage paint. And then there are countless boats that simply have the B&V from Blohm and Voss and a Roman numeral on their side, and that you can also use. That's the current status. I'll continue to inquire and get back to you.


-
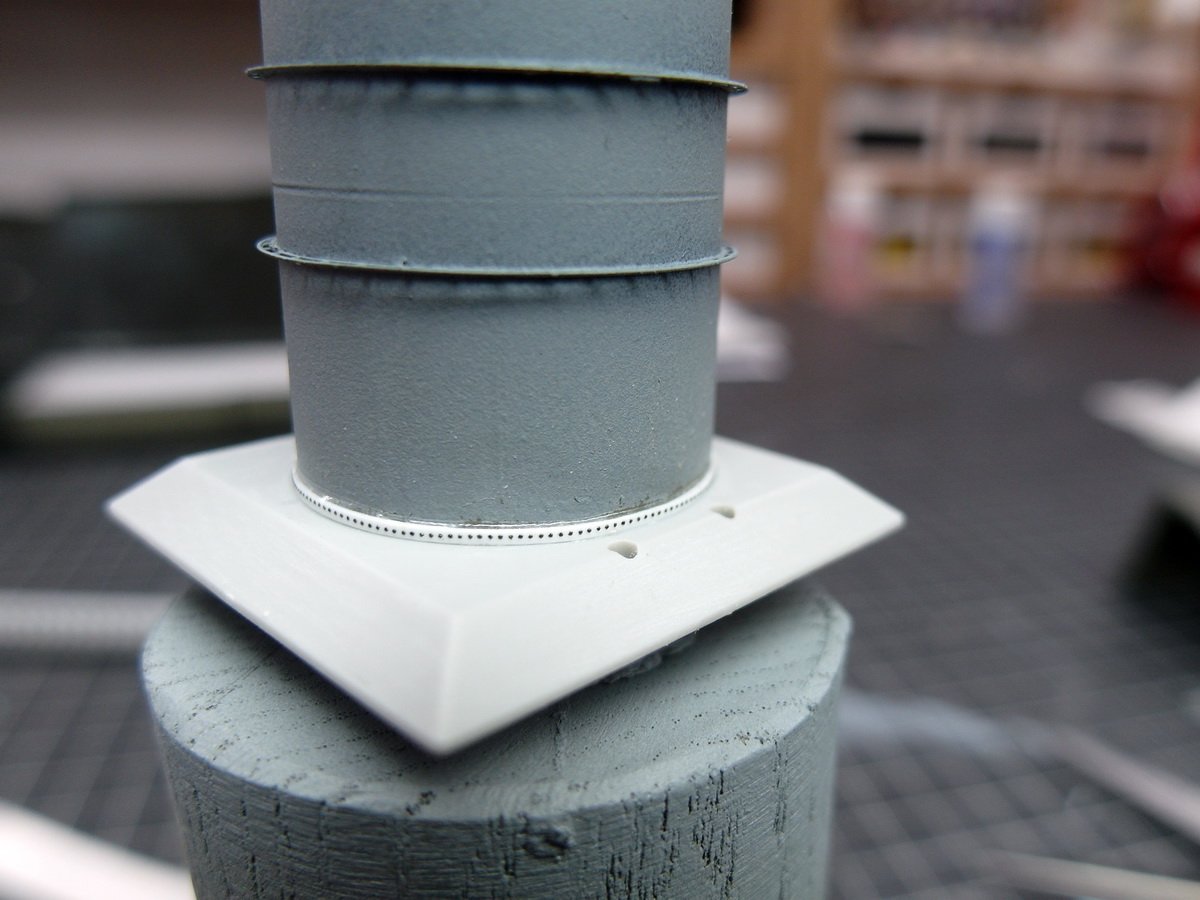
Many Thanks, Jeff. I'm saving the caps on the funnels until last. I don't want to bend them before then. I'll let you know if they've driven me crazy, too. 😅 Let’s continue with the funnel. I had to remove all the structures from the chimneys, otherwise I wouldn’t have been able to fit the rings onto the cylinders. Now they’re installed, and I’ve recreated them with styrene profiles. Like this ledge at the bottom of the funnel. I got resin rivets on decal sheets from Eduard to make the surface more interesting. The same thing in a vertical orientation. I had to do a little trickery here to get them nice and straight and parallel. I applied them, let them dry, and then cut them with my sharp scalpel. Fits. It looks good after the initial aging. It’s a bit annoying that I can still see traces of the rings’ original texture. I wasn’t paying attention.😒 But afterwards they hardly matter anymore. Now prepare everything for the next step. On the right, you can see the pipes leading to the gallery. Here, I had to add a little bit of styrene to the pipe clamps that hold them to the chimney. Otherwise, they wouldn’t have fit over the rings.

- 193 replies
-
- 5
-
-
-
- Russo-Japanese War
- Mikasa
- (and 2 more)
-
That'll definitely be wonderful. Do you want to create a diorama of the Virgin being dragged up the Elbe? That would be extremely cool. 😎
-
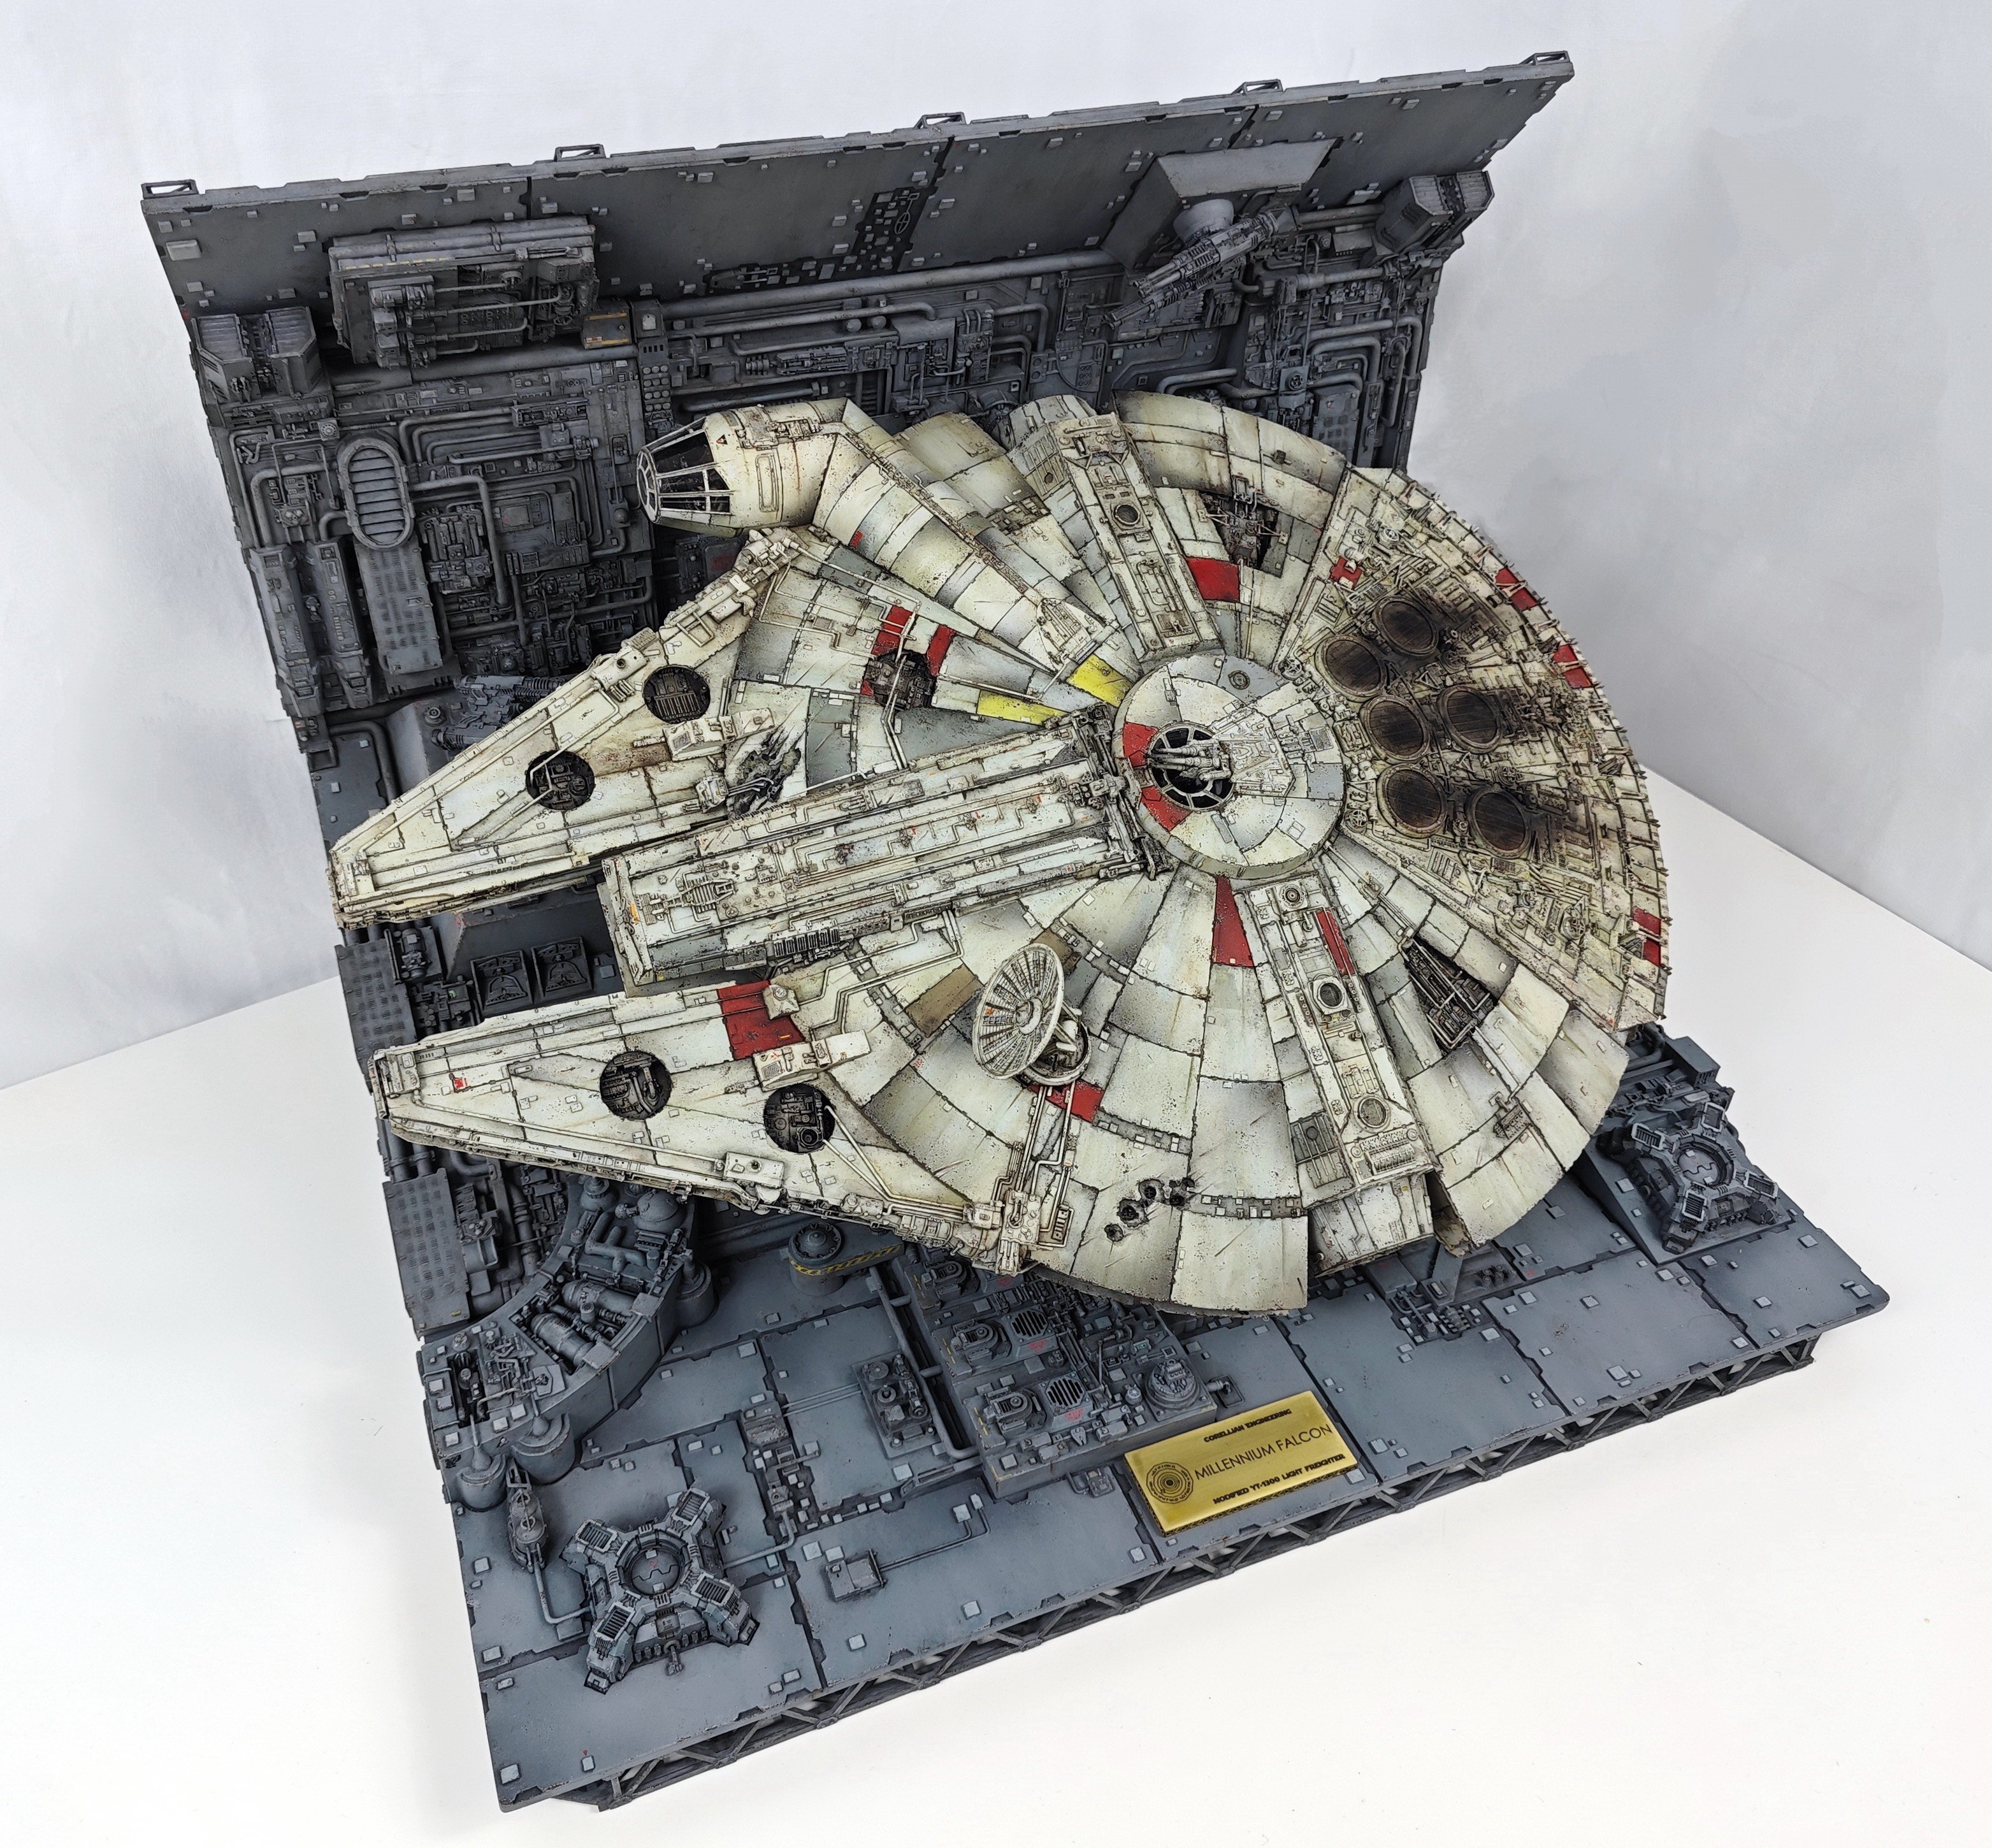
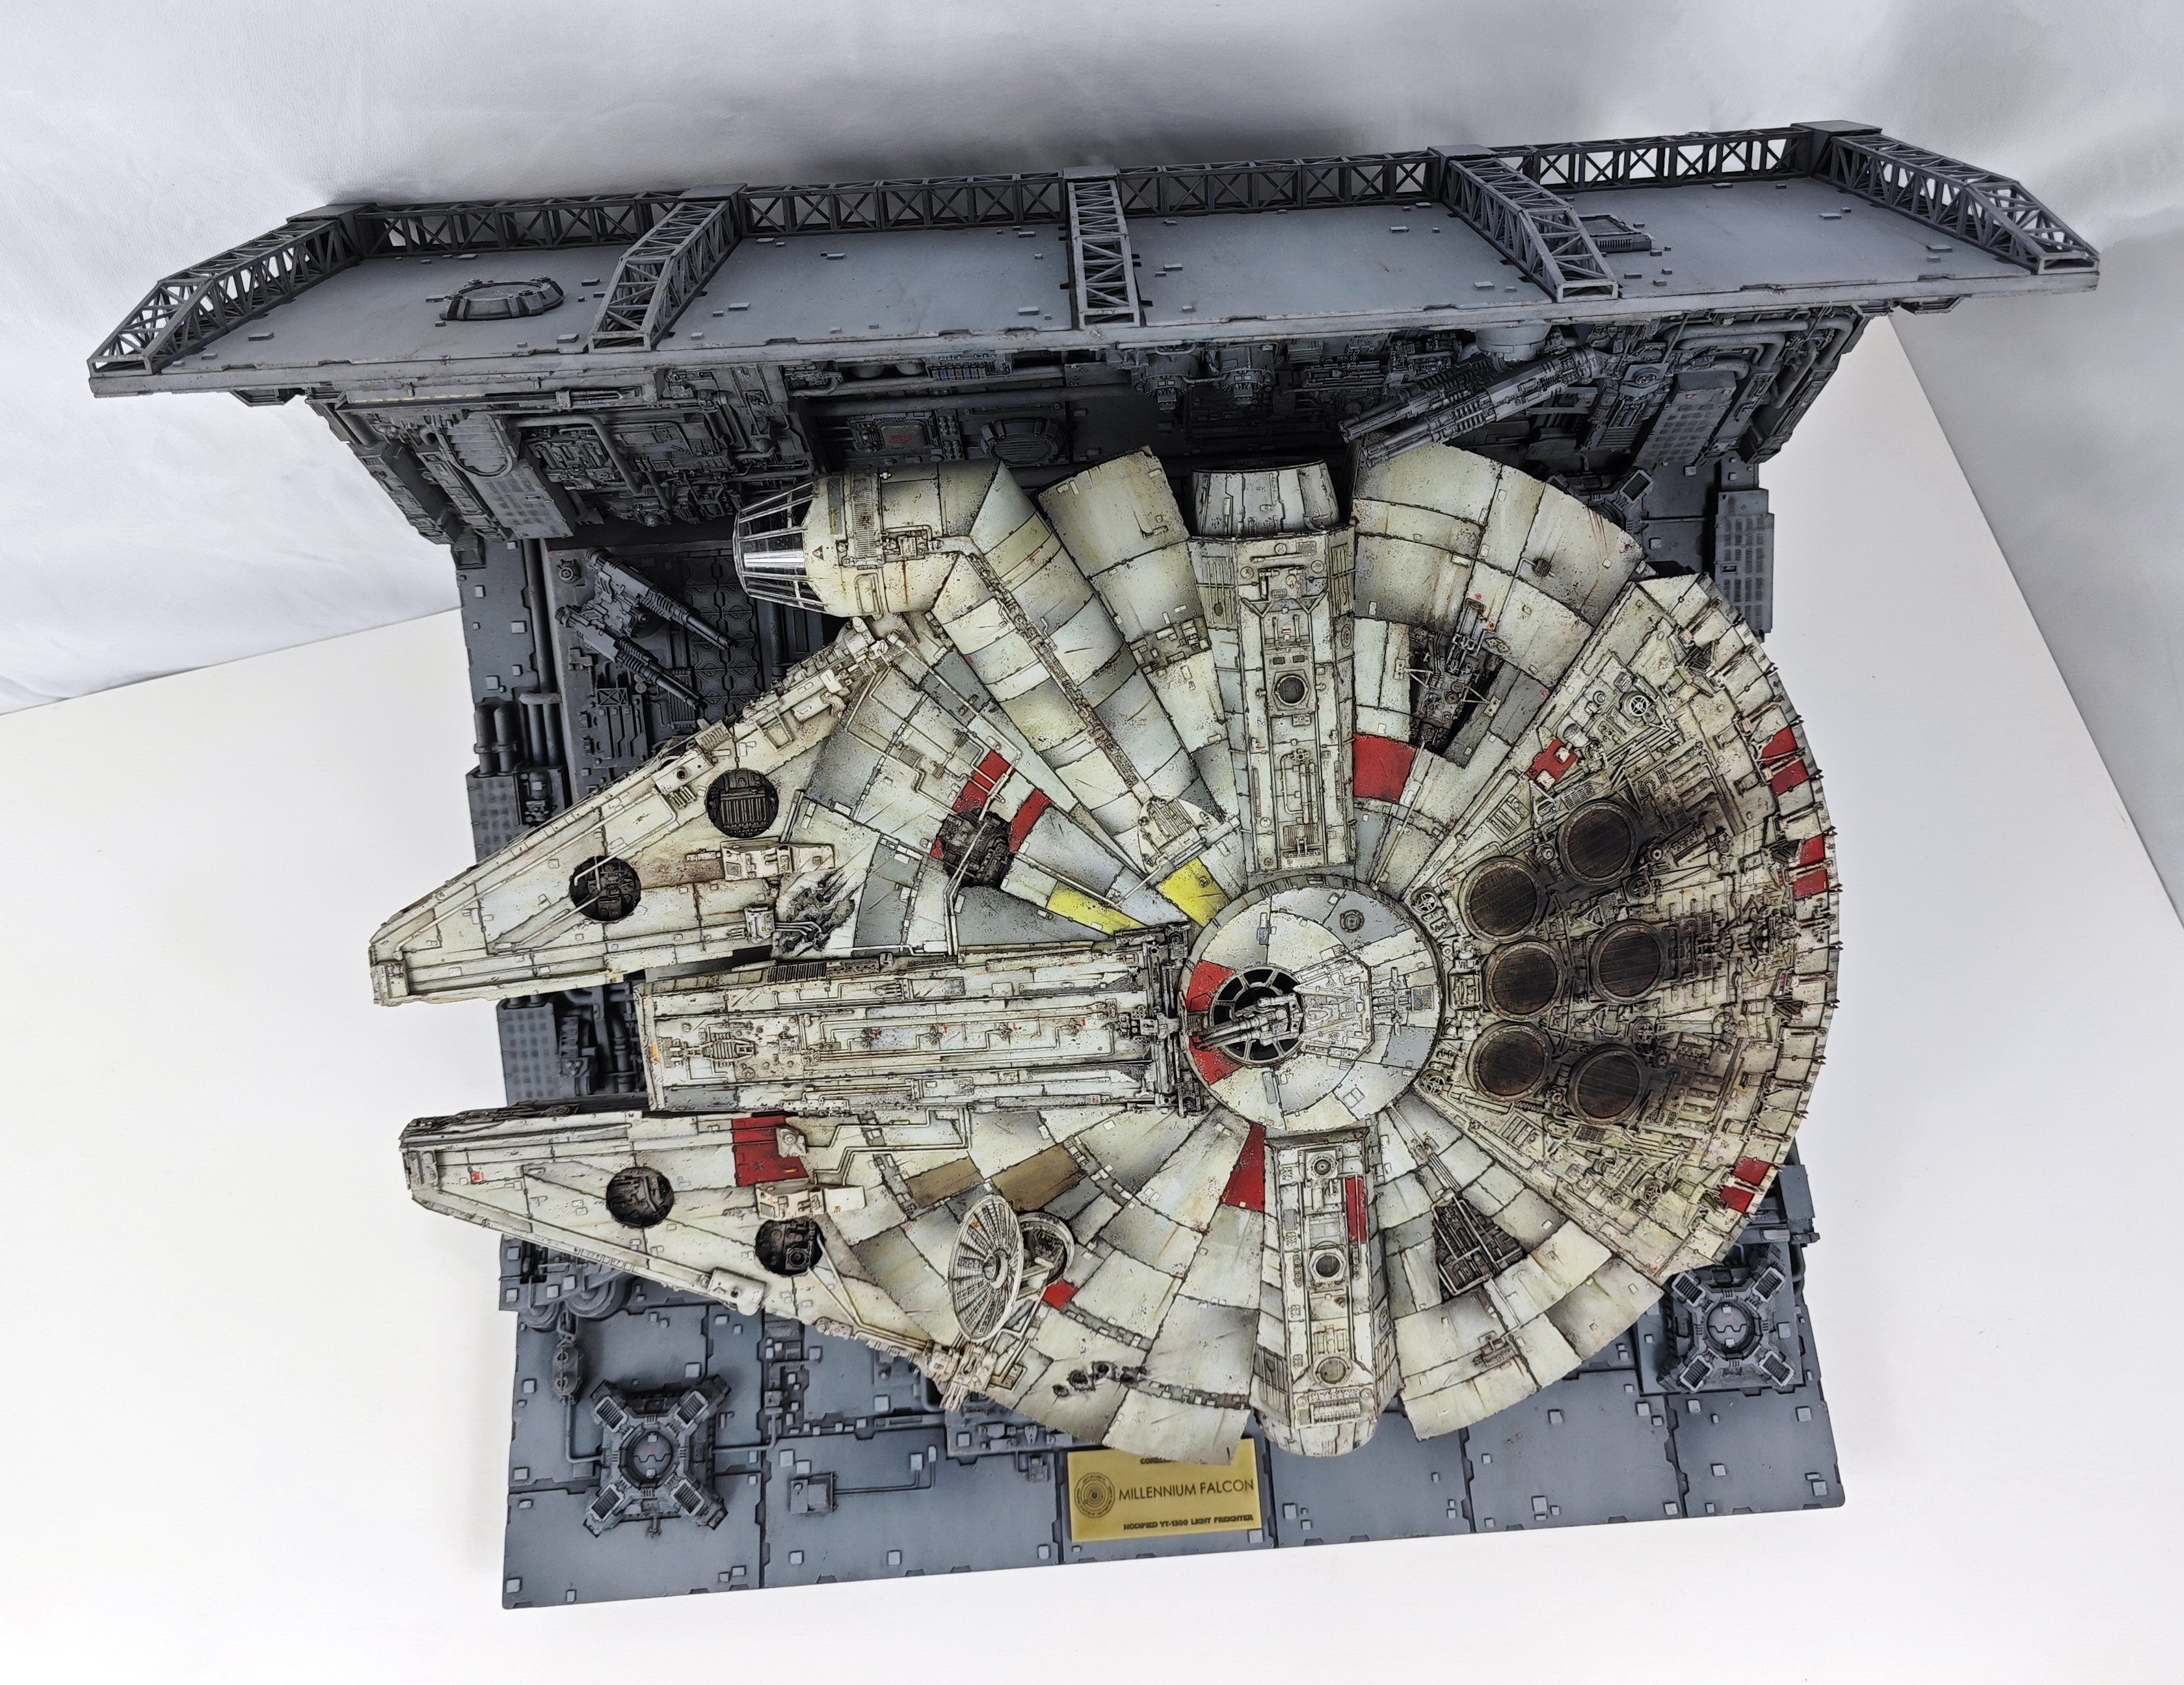
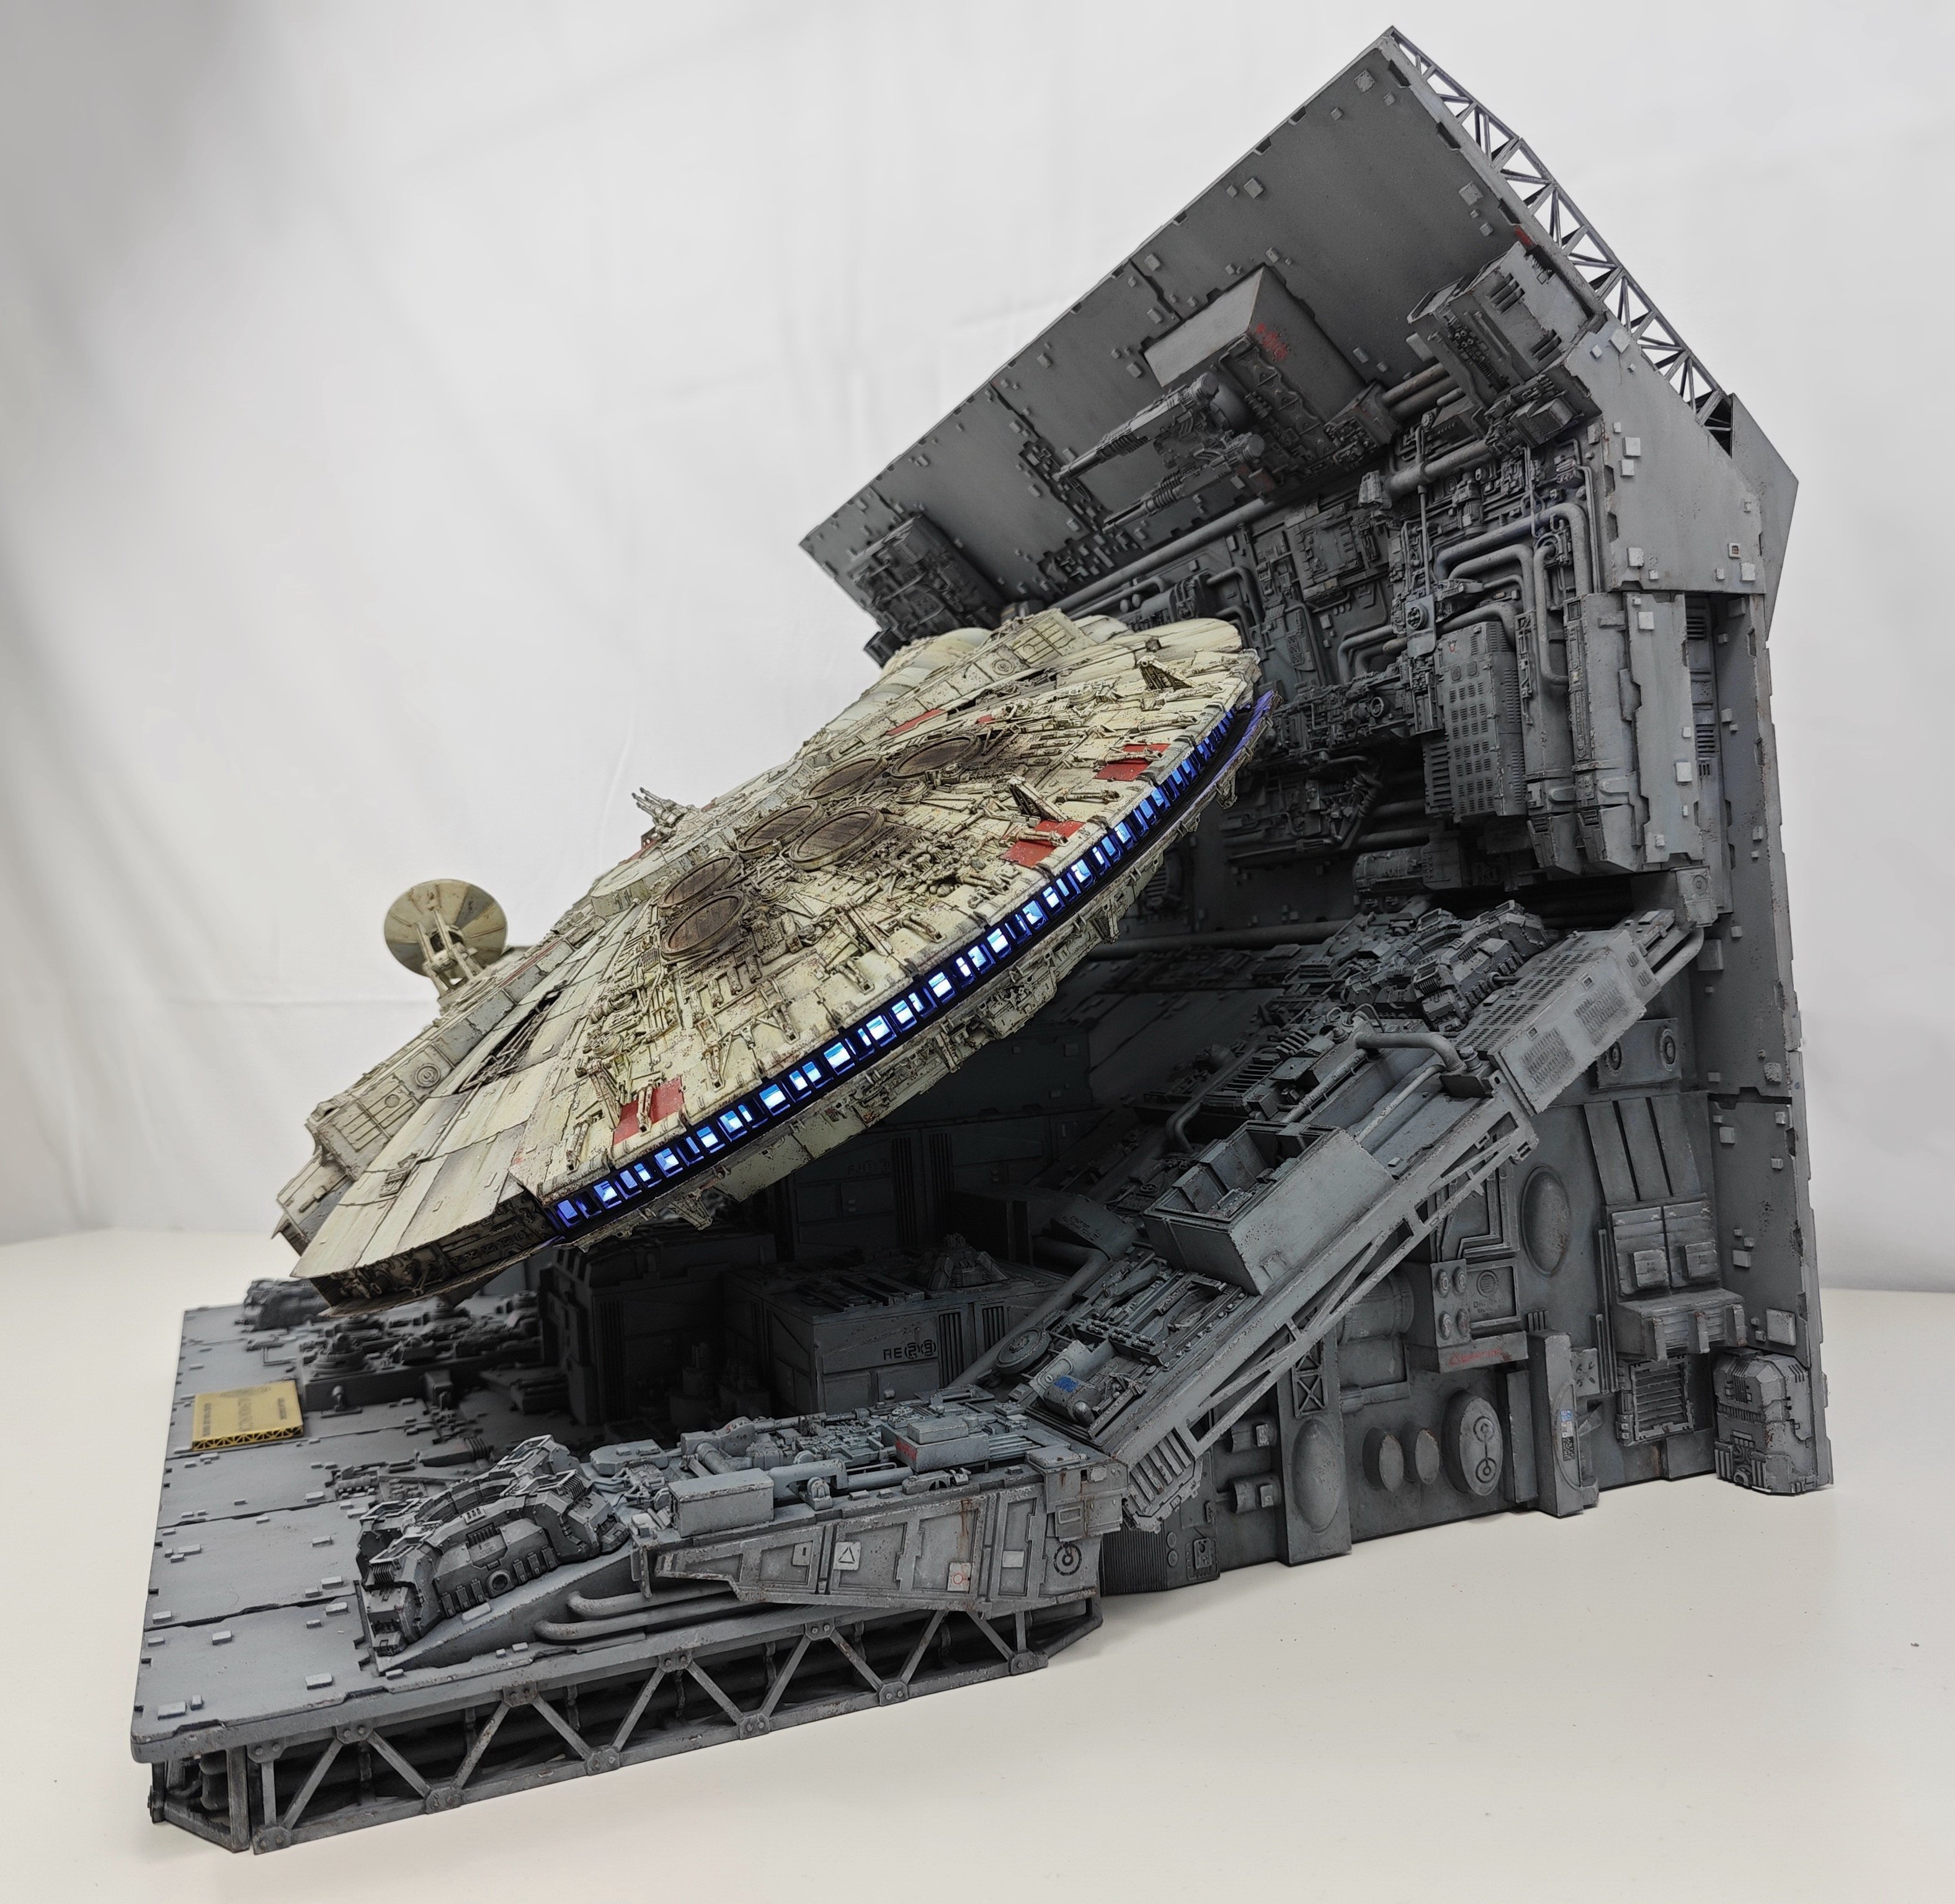
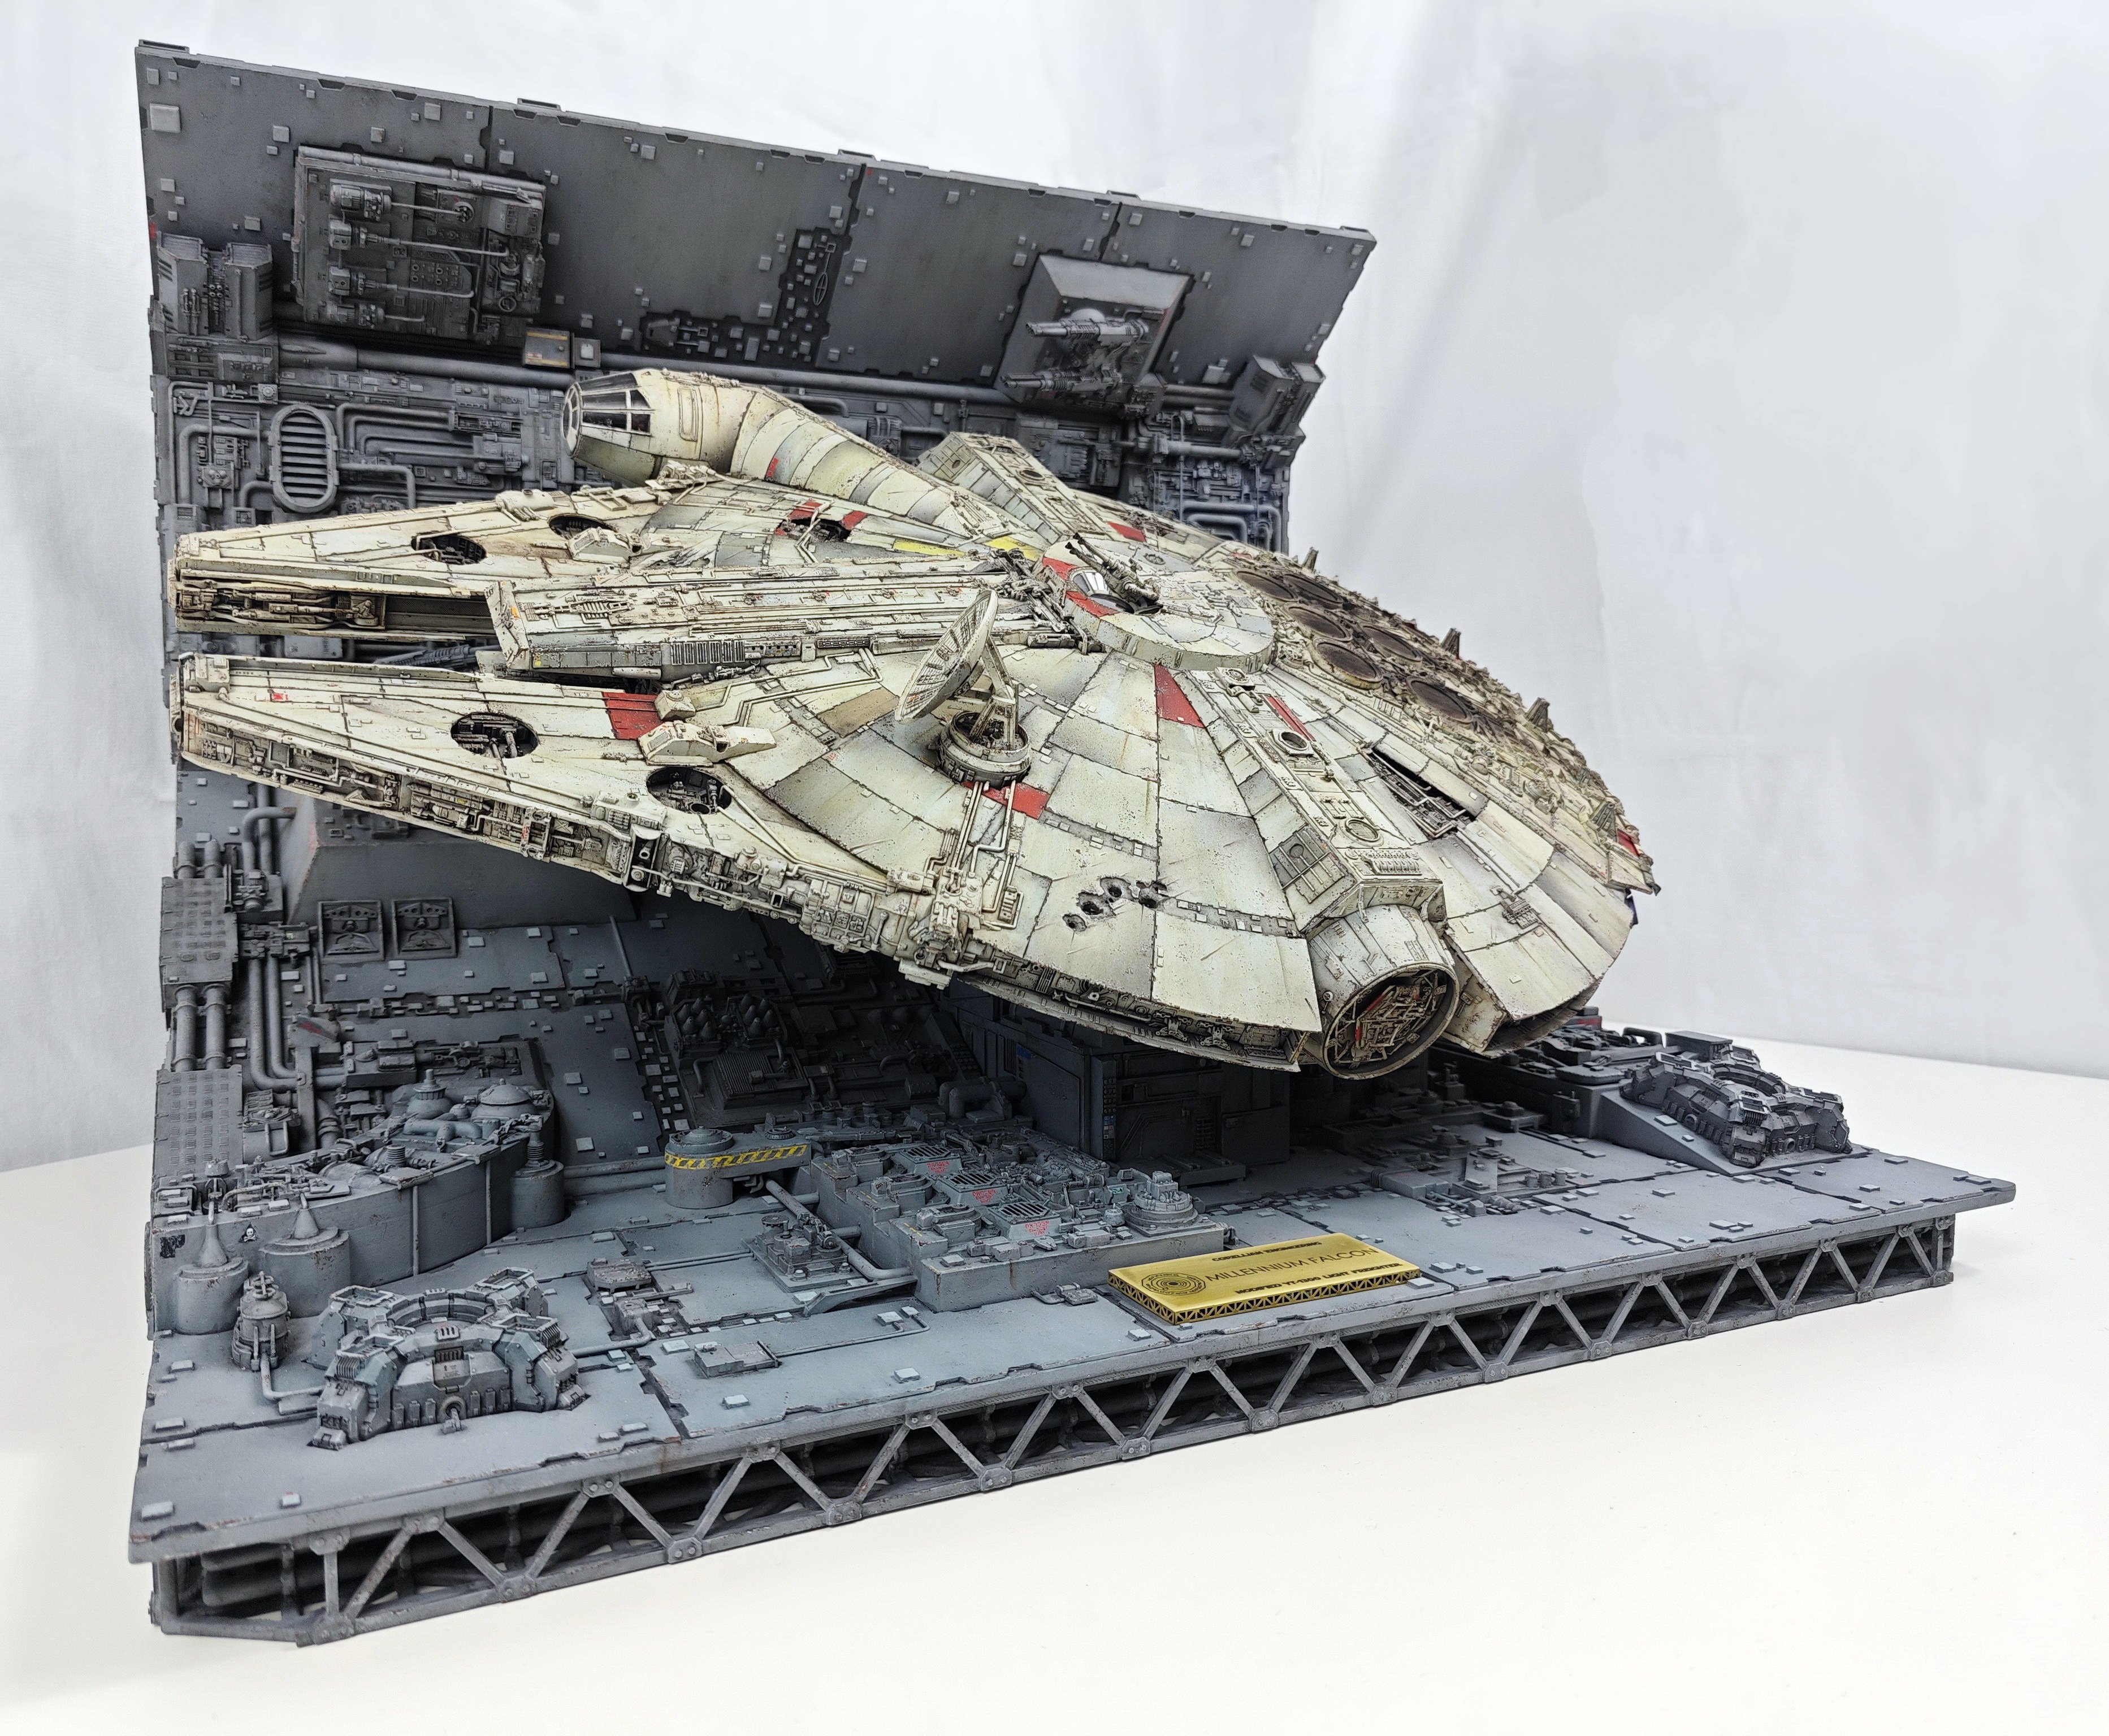
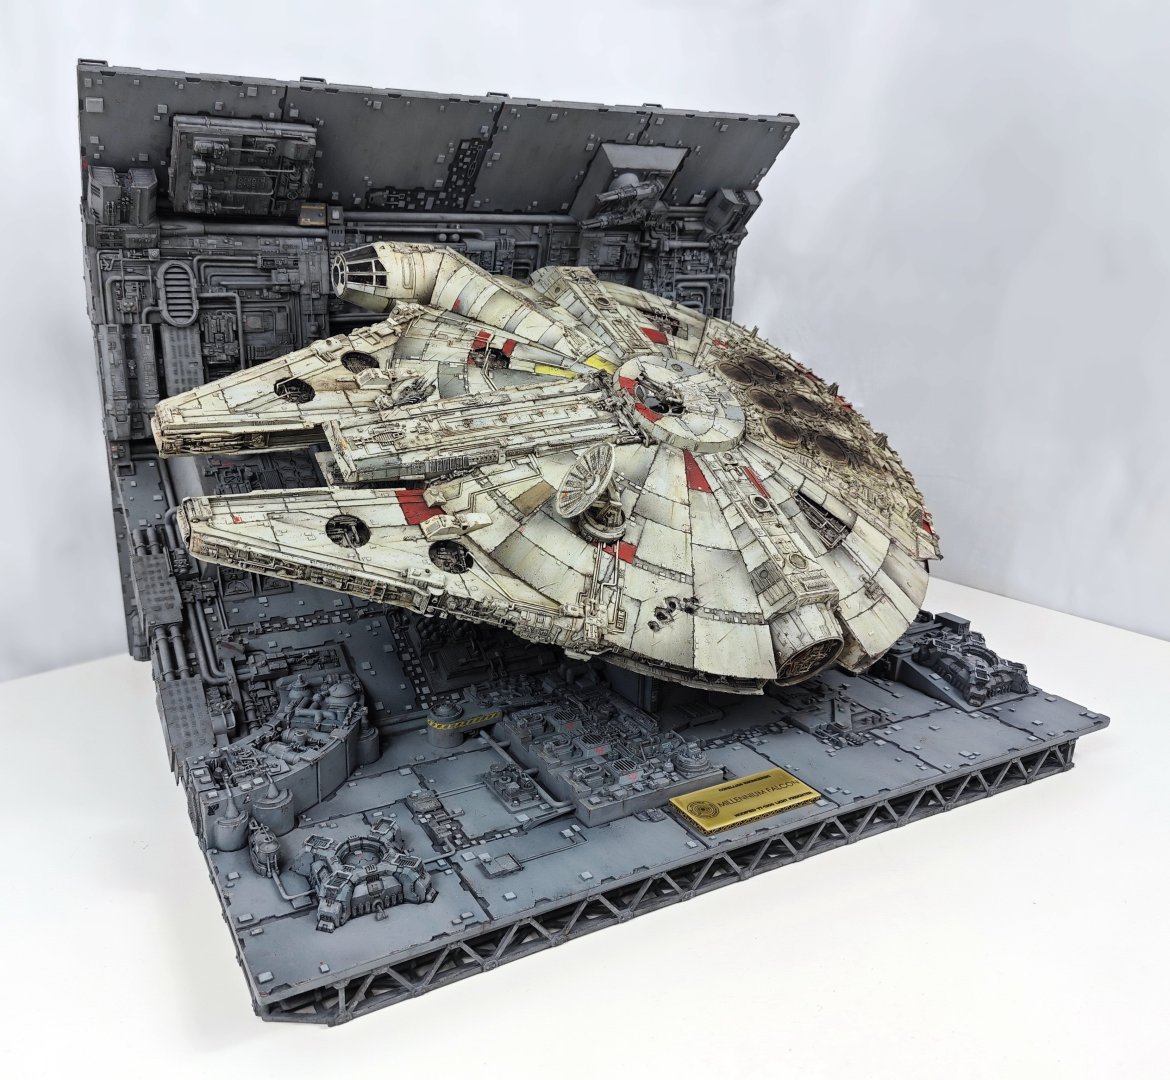
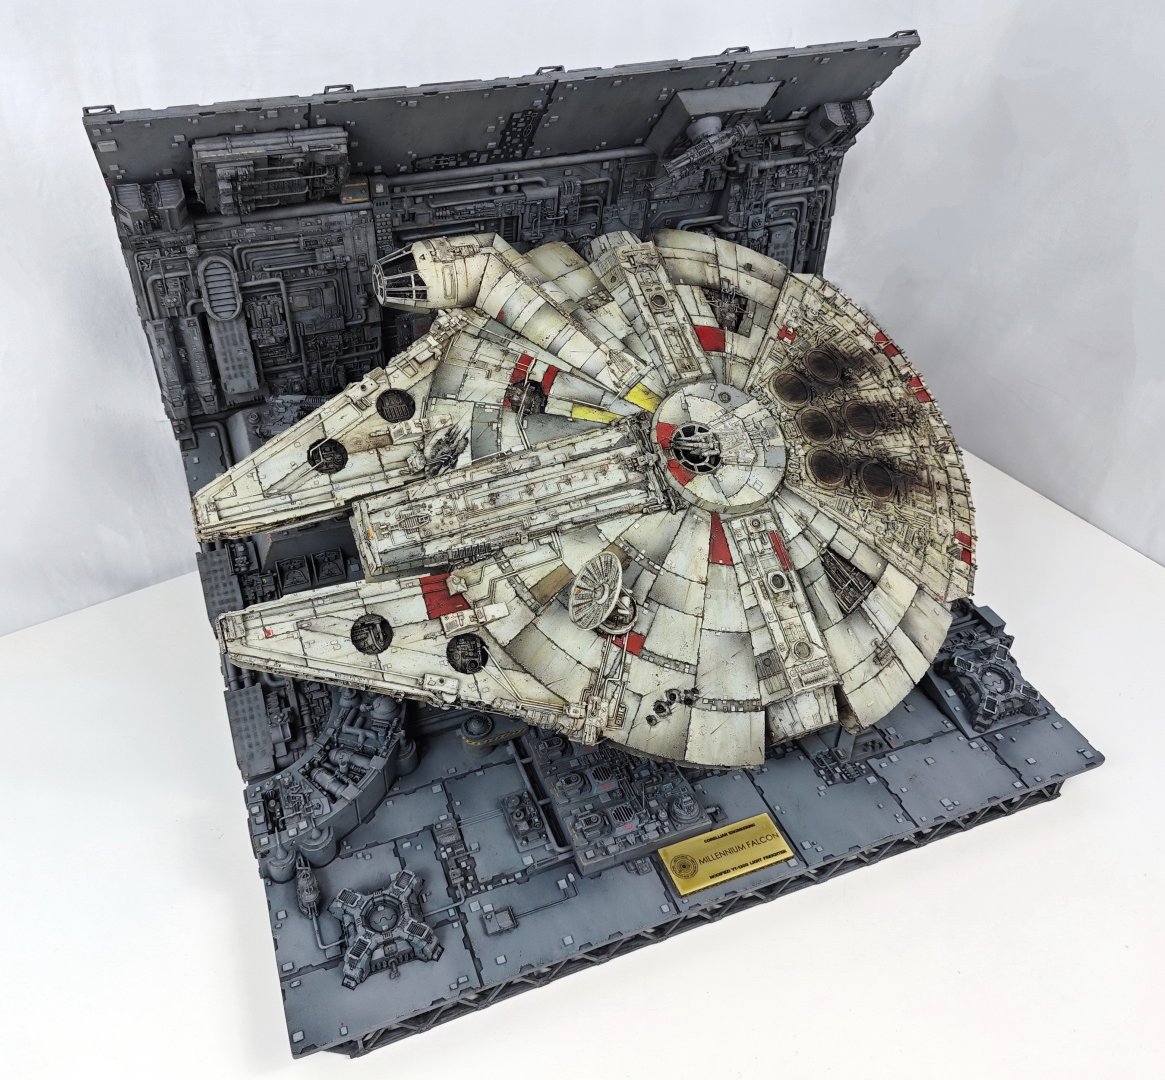
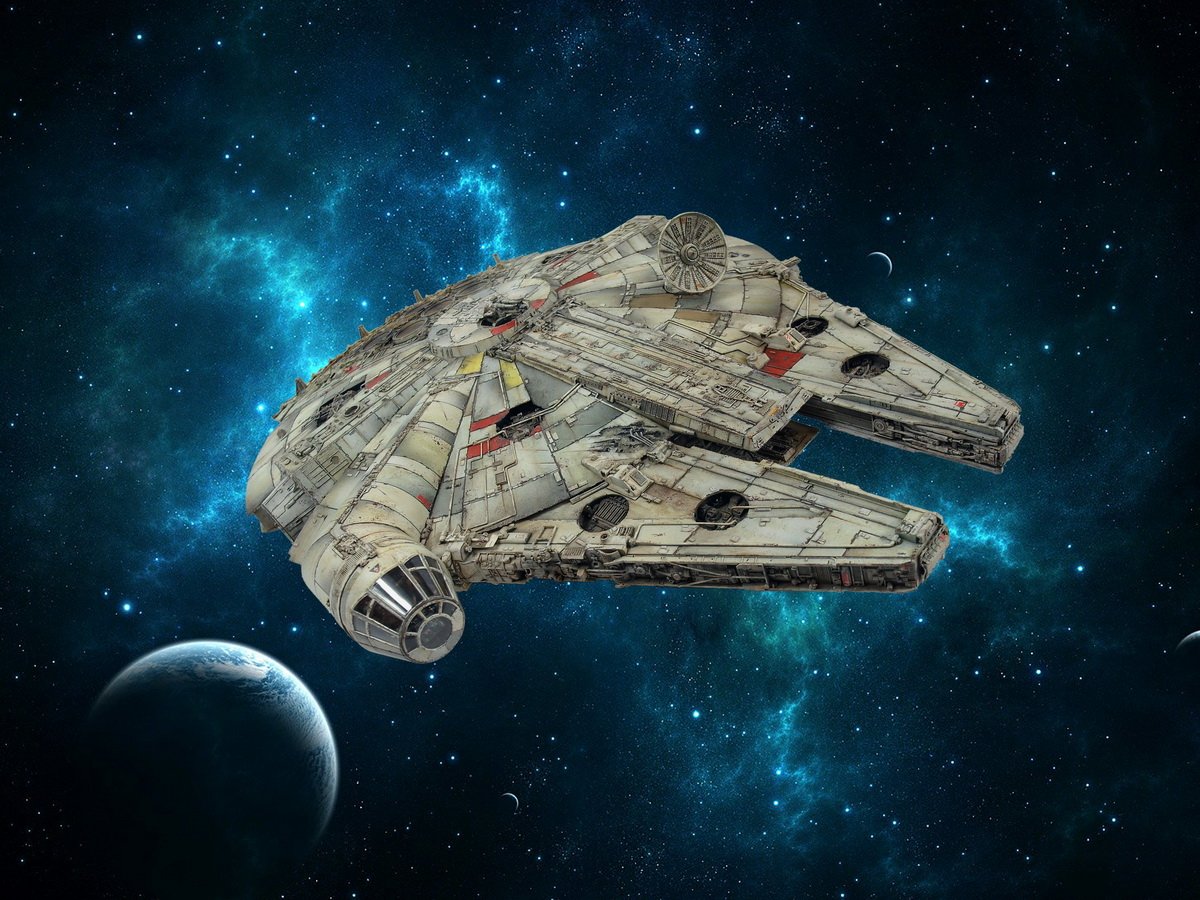
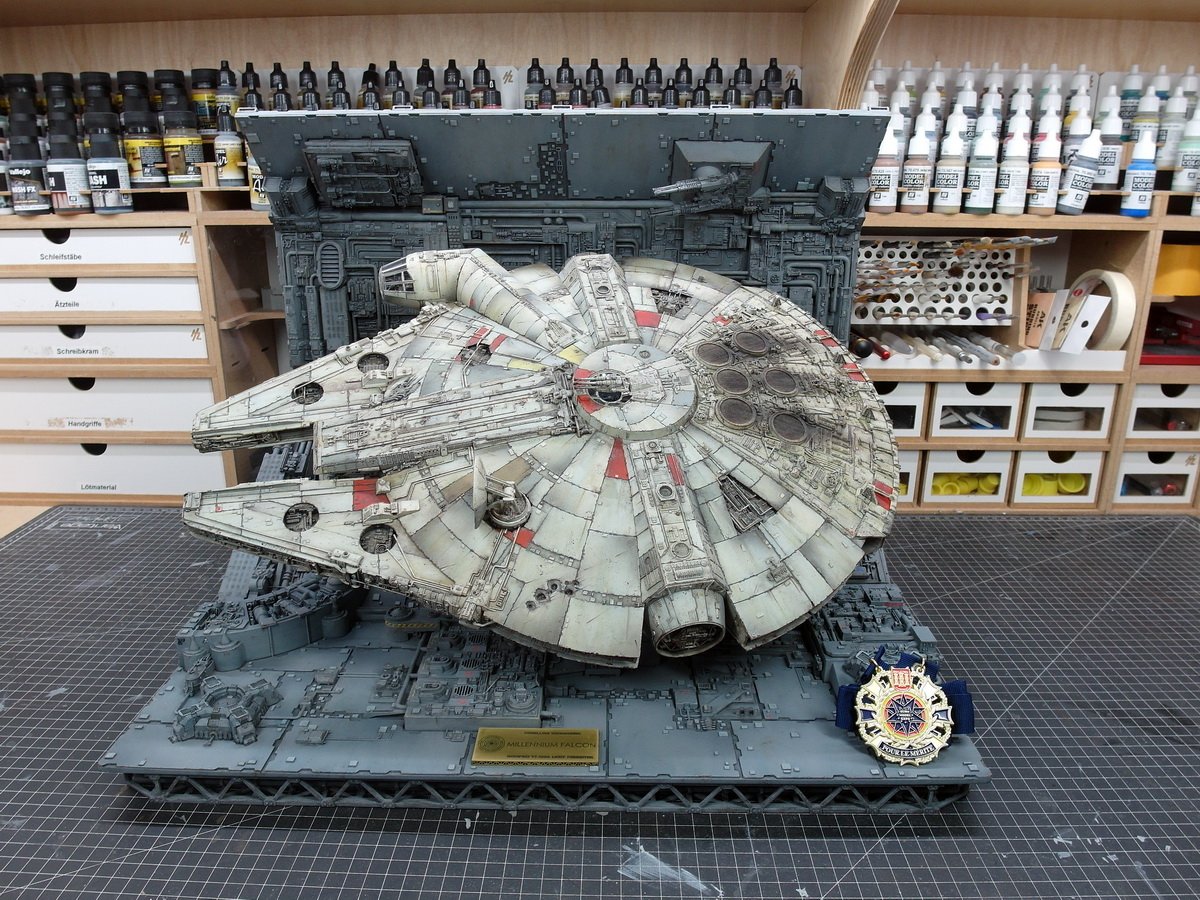
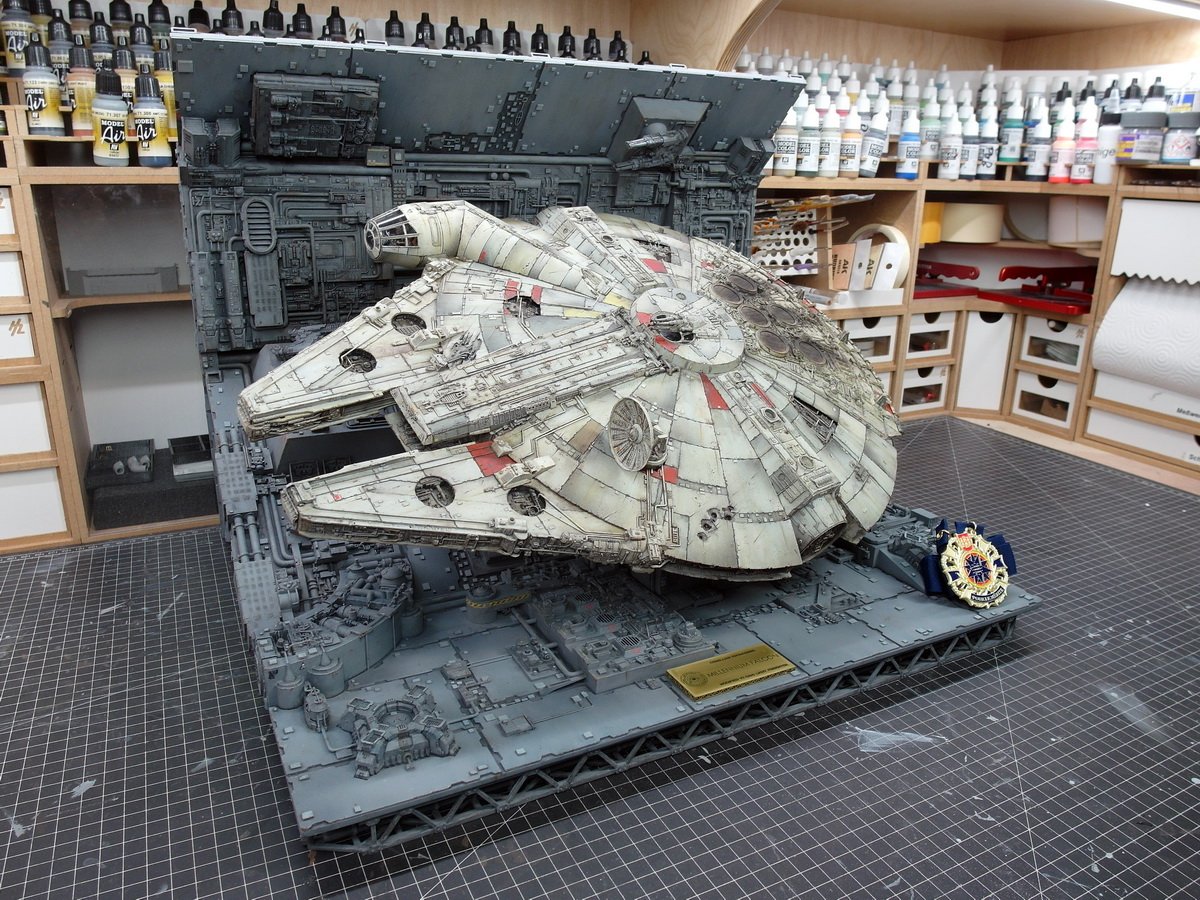
The falcon alone looks even more dynamic...
-
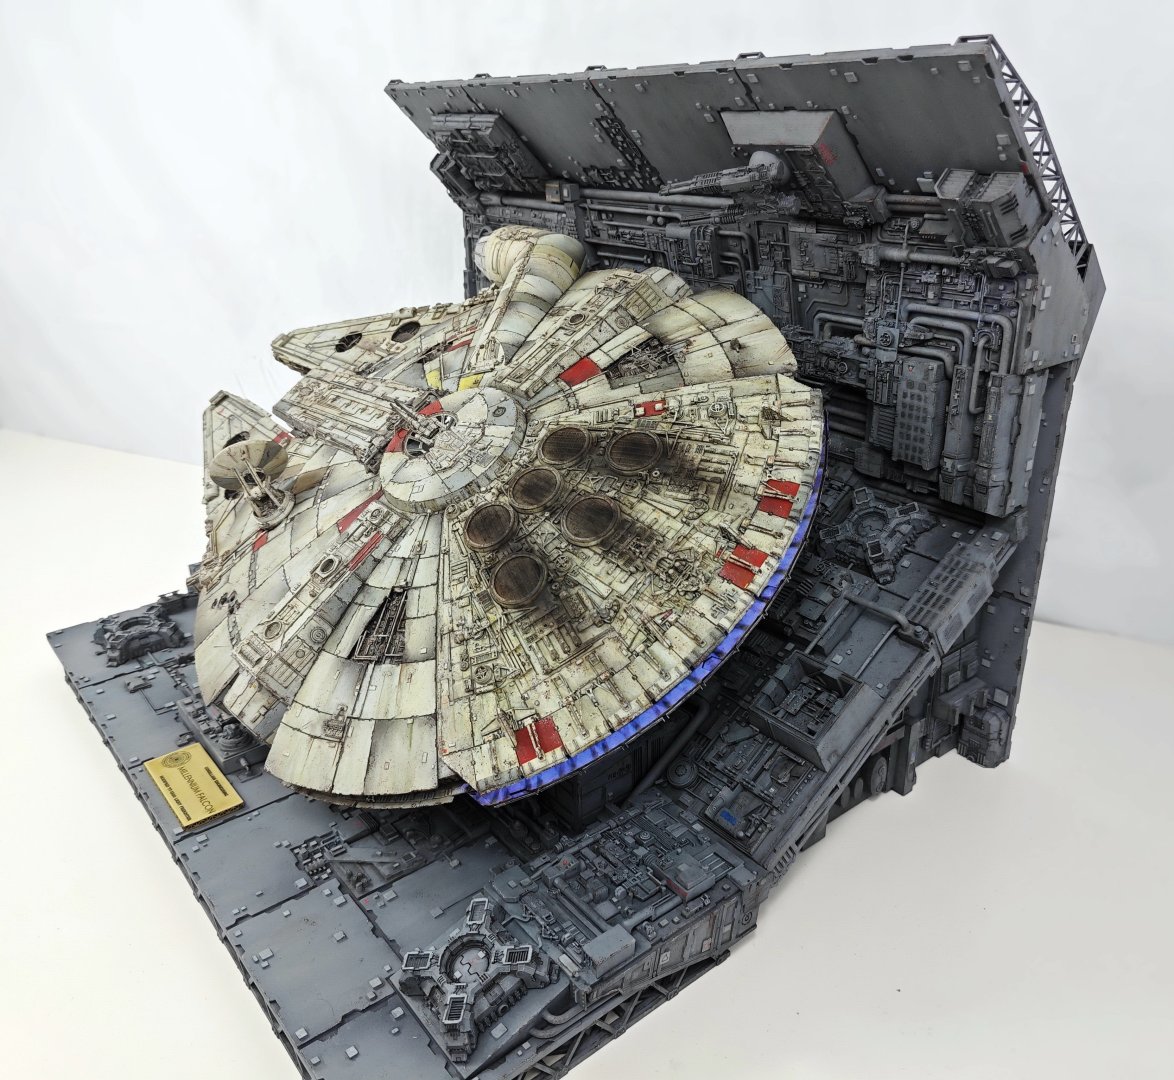
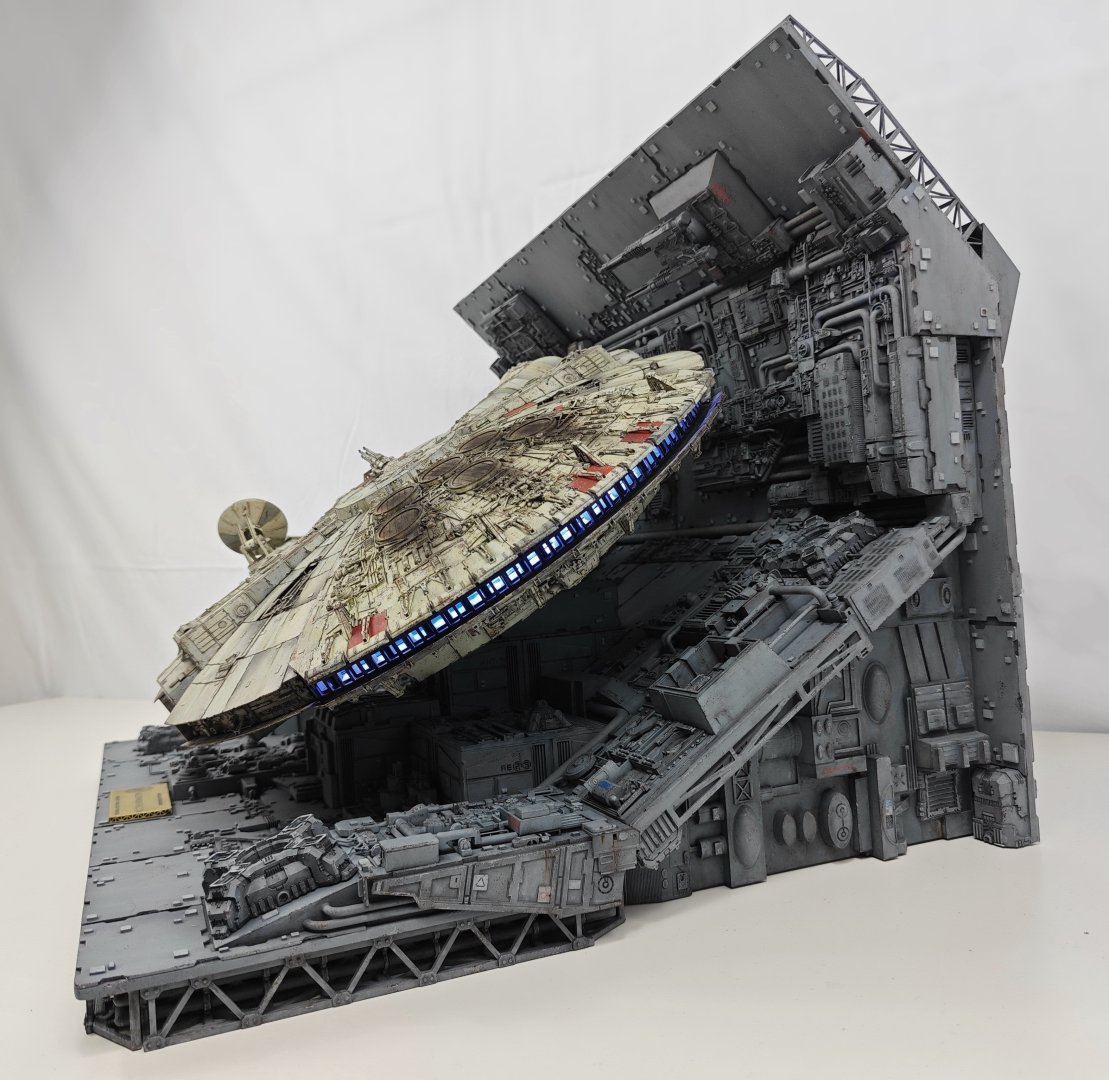
Thanks for the great video, Andy. So you friends of the fastest scrap metal mill in the galaxy. The crumpled sheet I used to photograph my model wasn’t that great. So I used Photoshop to isolate the falcon and give it a decent background. That’s what I call a galaxy, far far away. May the force be with you. 🫵
-
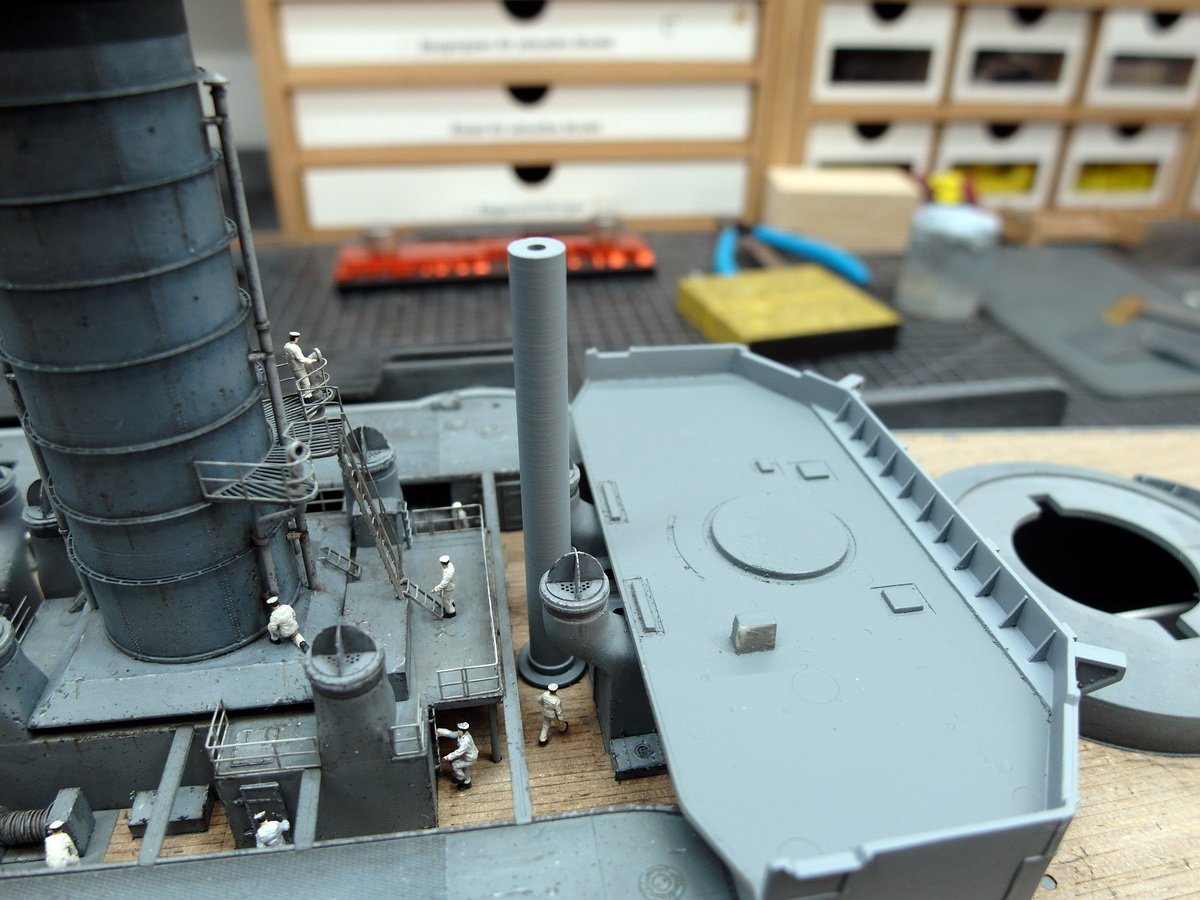
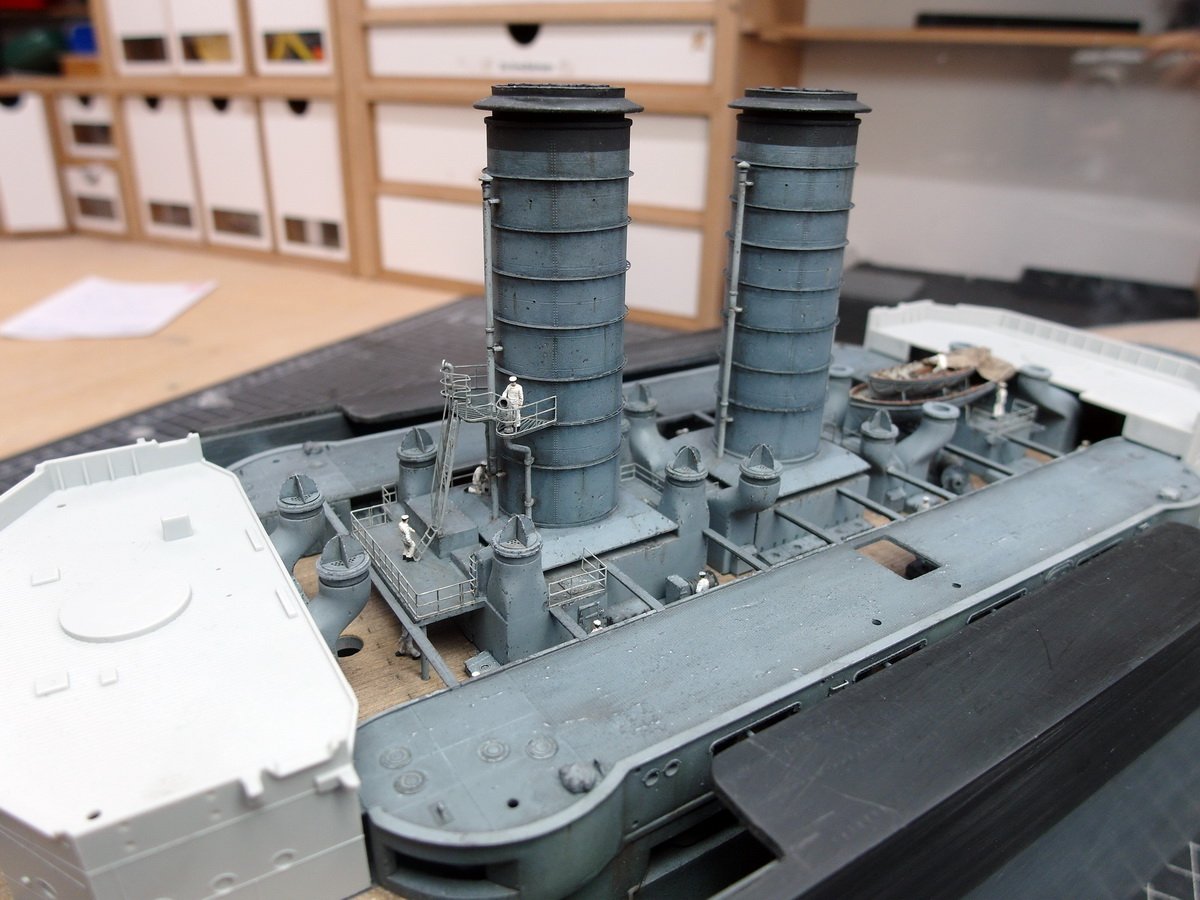
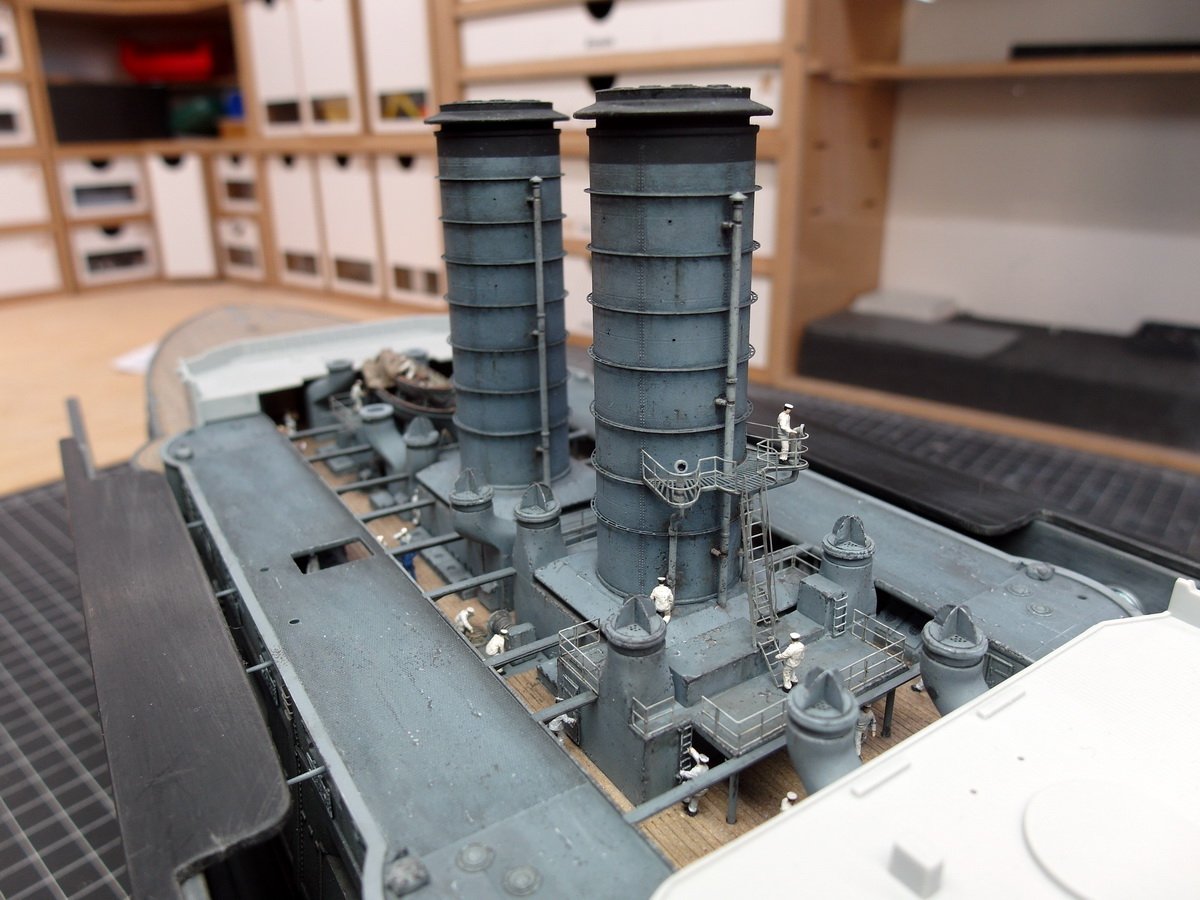
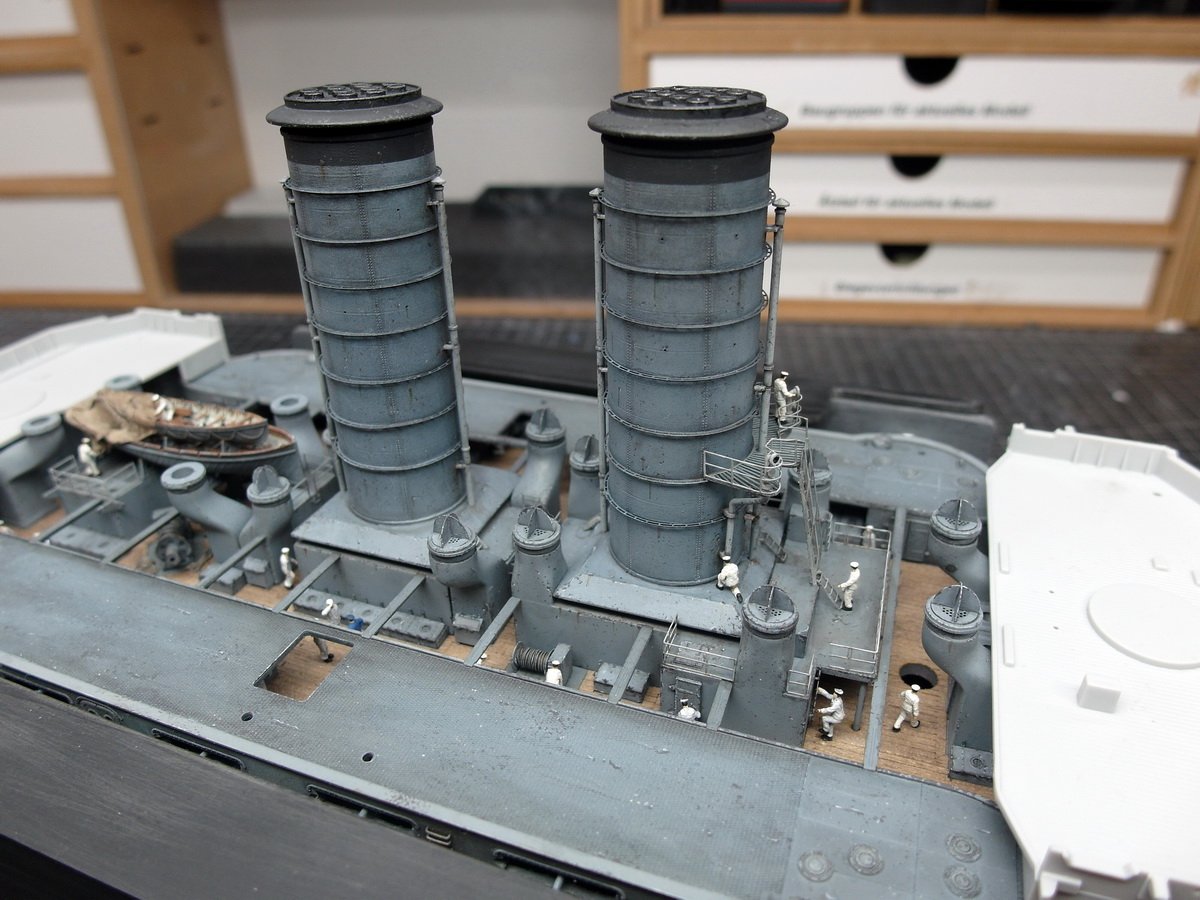
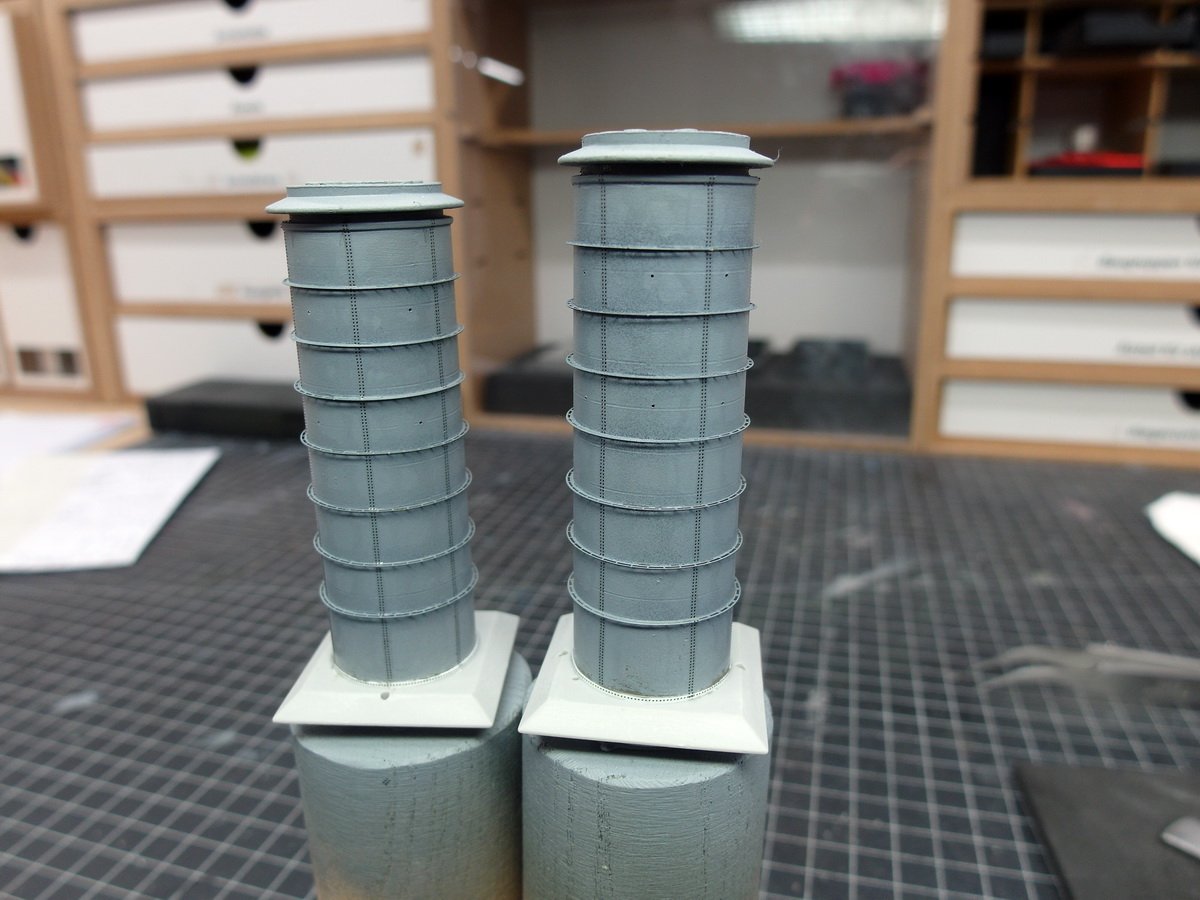
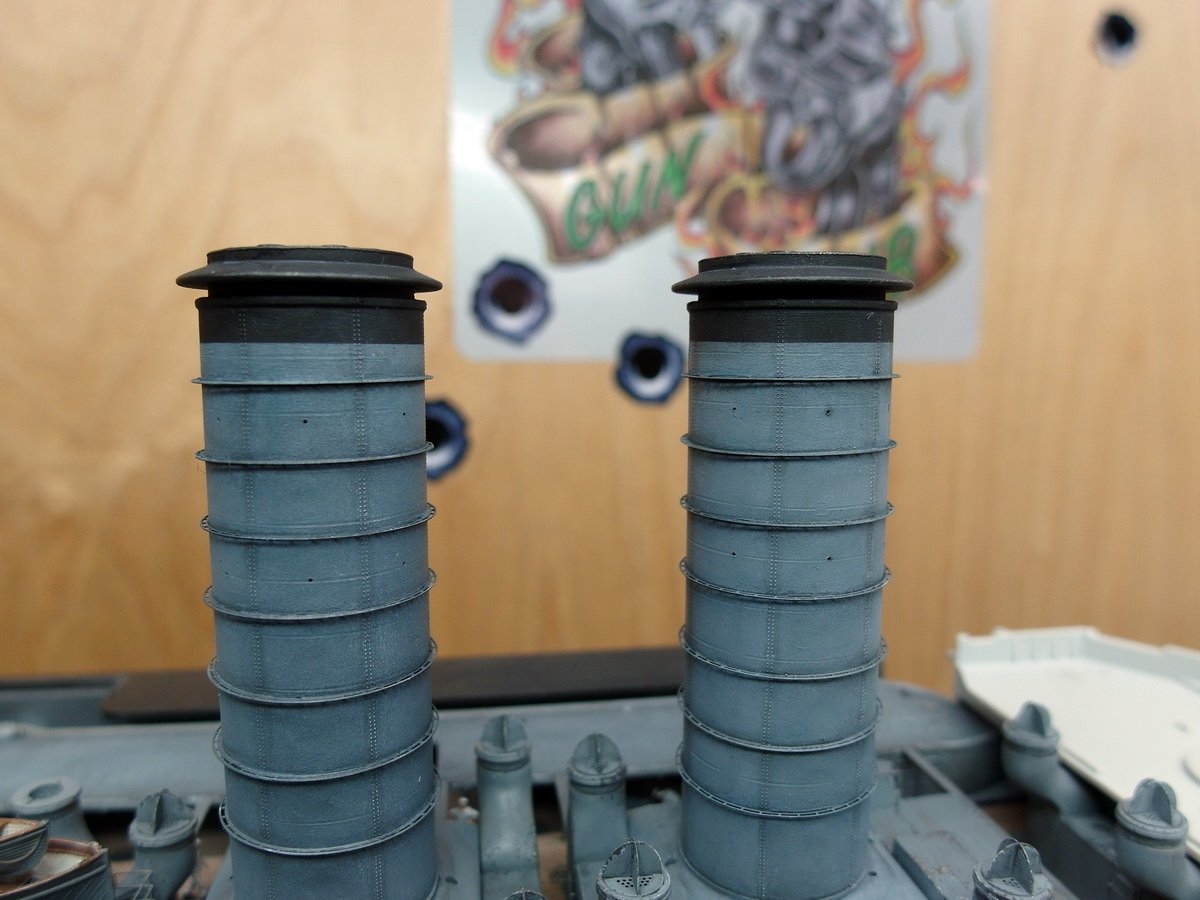
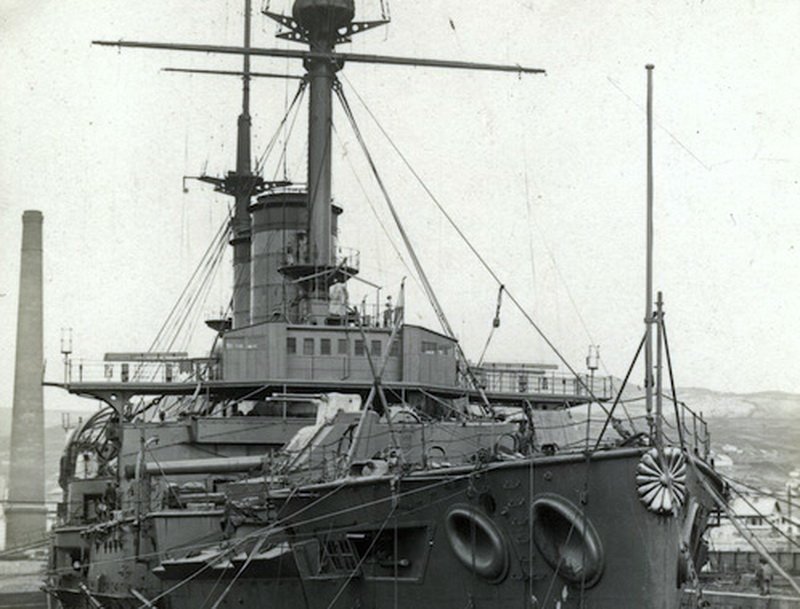
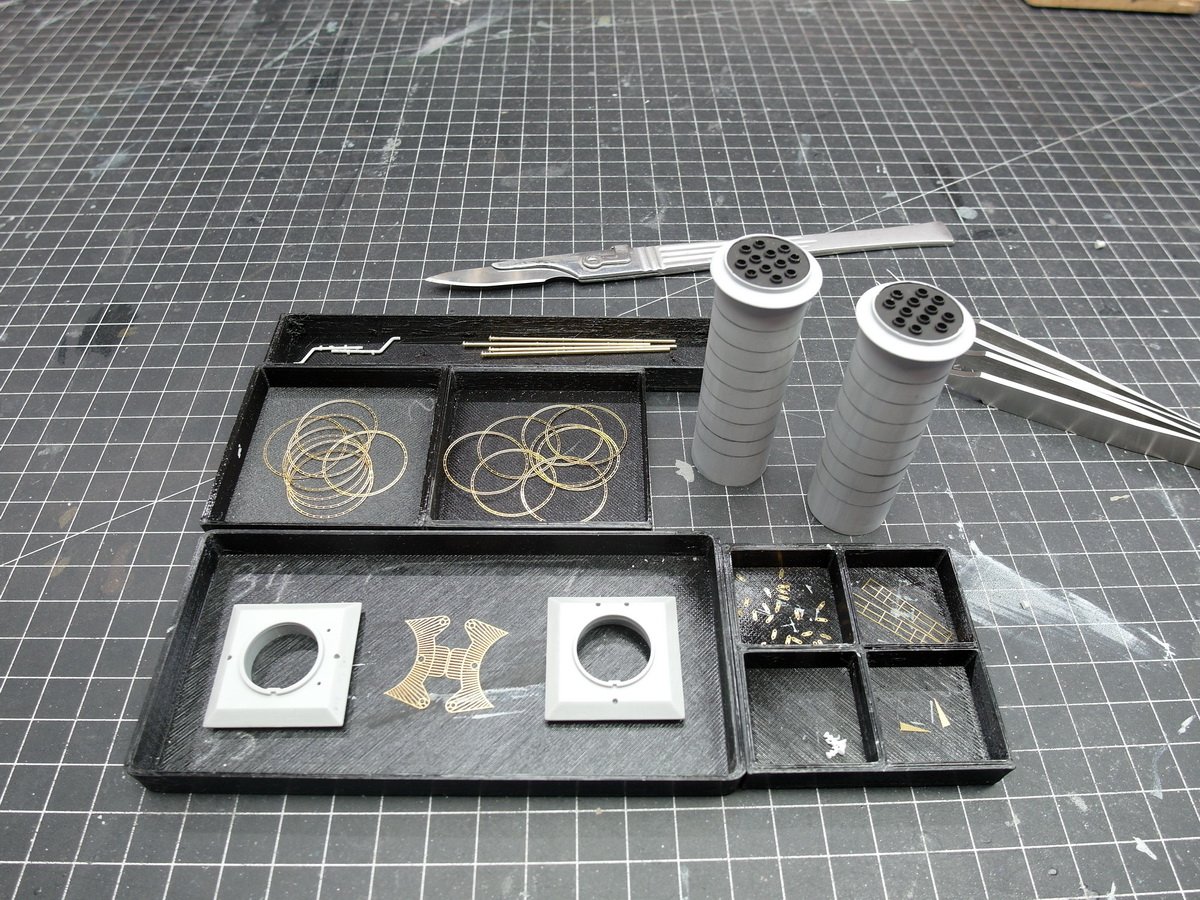
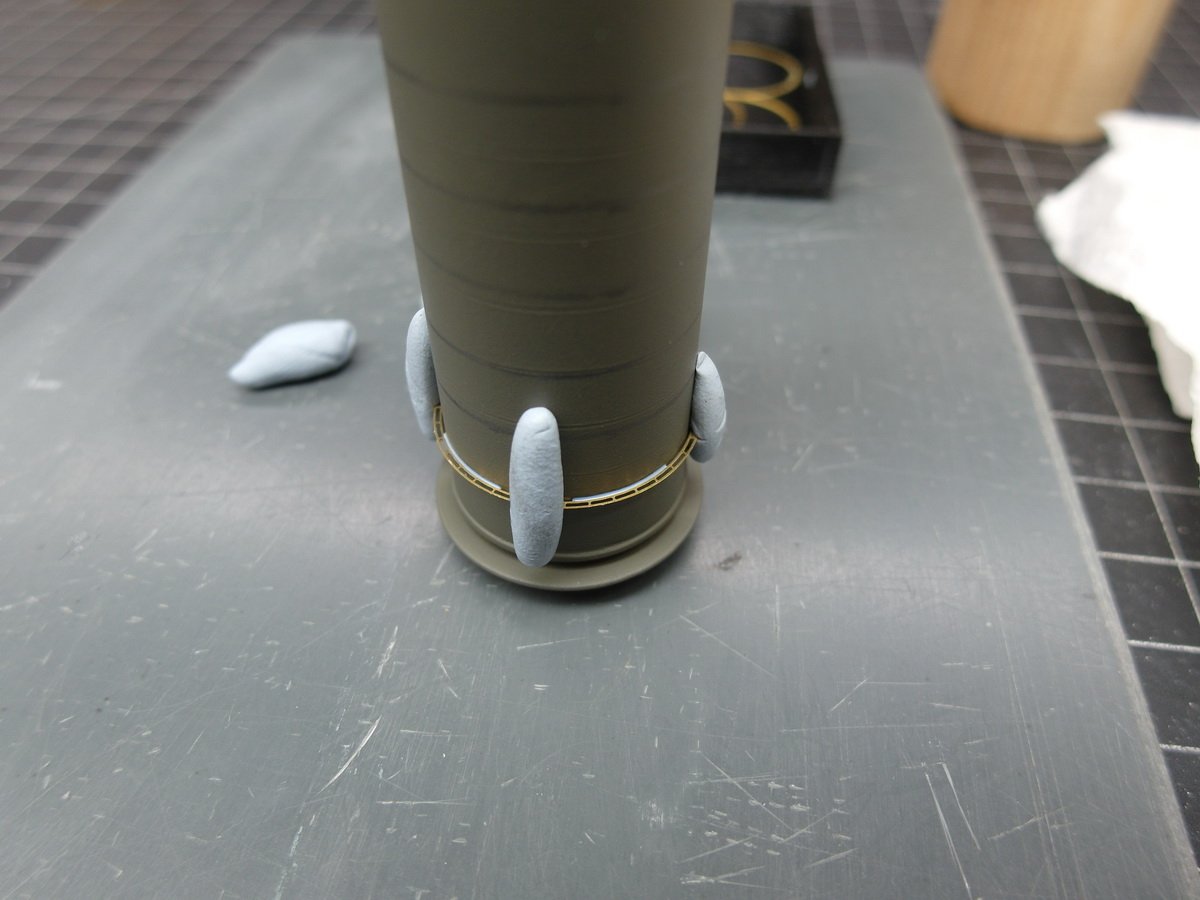
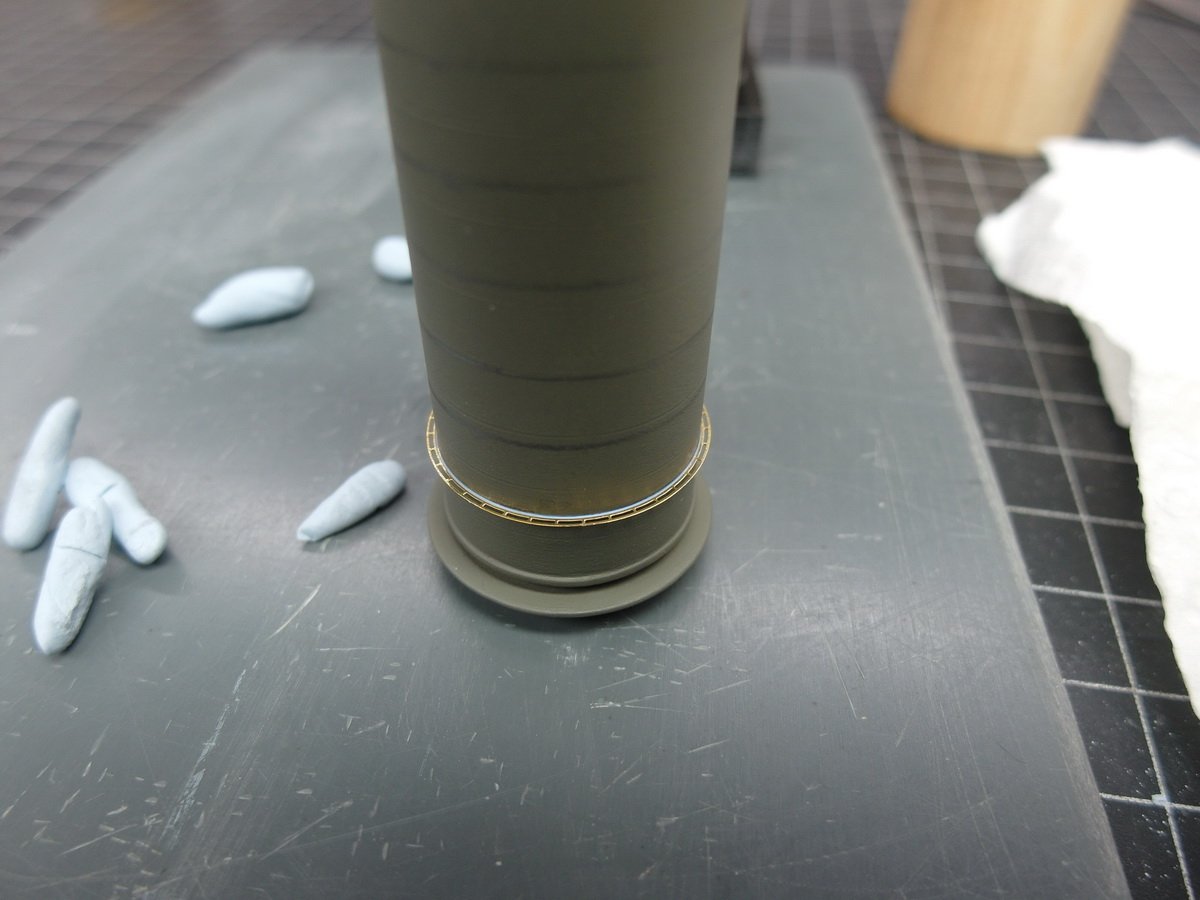
Let’s get to another mini-update today. It cost me a lot of nerves and the whole weekend. But first things first. I was once again spoiled for choice between Pontos and KA for the funnel surface. Pontos offers riveted struts, KA rings that run around the funnel. So, I once again rummaged through my archives of the original ship and looked at conflicting pictures. Of course, often of rather poor quality. The deciding factor was once again the quite good picture from Vladivostok, which I believe shows rings. And since it’s one of the last photos of the intact ship, I chose that one. I like it better anyway. So first I cut the components out of the circuit boards. And again, KA Model wins. My enthusiasm was dampened slightly when attaching the rings. They were a little too big. That’s why they were touching on one side, leaving an unsightly gap on the other. I took them off again, sanded them cleanly, and then primed them thoroughly. Another attempt with the blue BluTack putty. This allowed me to keep the rings centered. It works. And since I’m using Mig’s acrylic adhesive, there’s no mess like with superglue. Diluted and applied with a fine brush, it flows wonderfully evenly into the gap thanks to capillary action. Excess glue can then be easily removed with a brush. Ring by ring it continues downwards. It’s nice that I managed to solve it cleanly after all, since the funnels are in a rather prominent spot. So I set them up for a test. They look great with the rings.
- 193 replies
-
- 8
-
-
- Russo-Japanese War
- Mikasa
- (and 2 more)
-
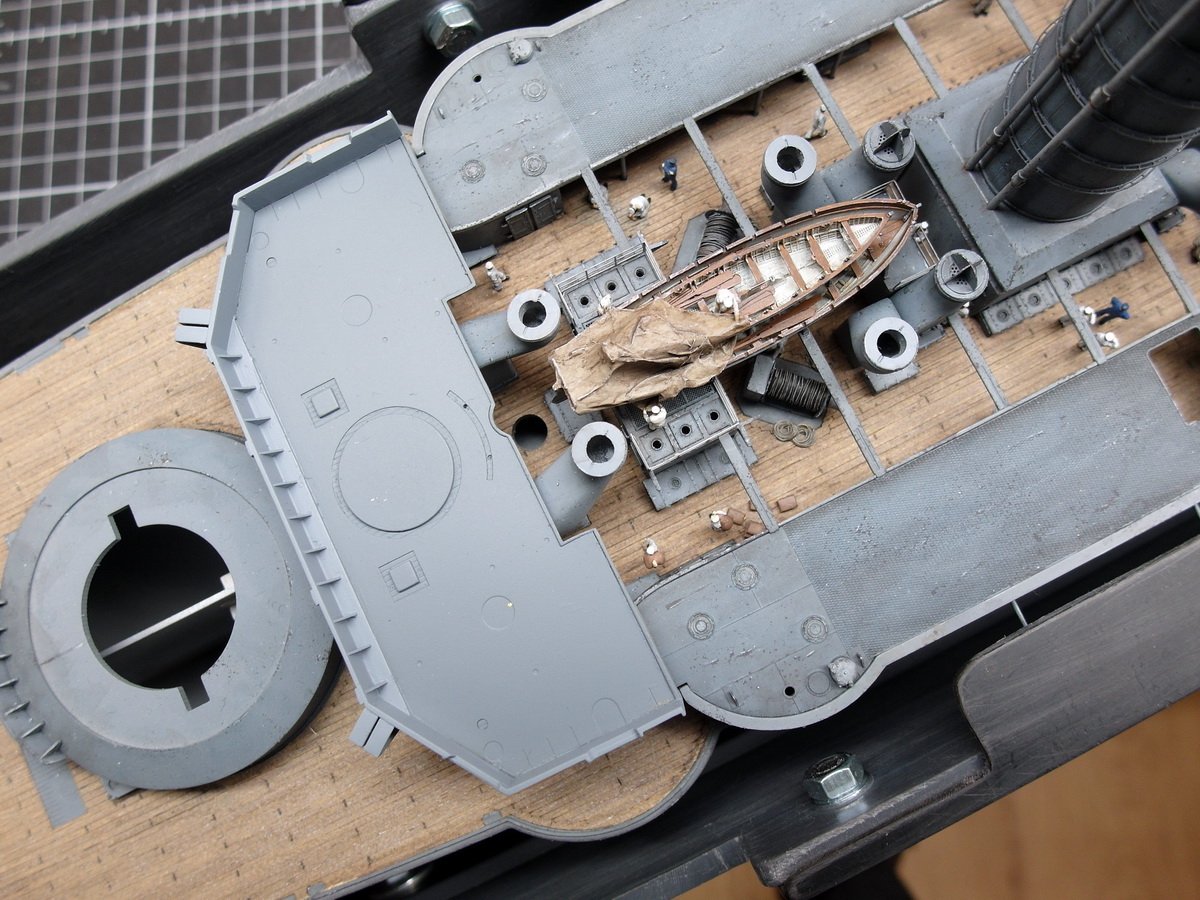
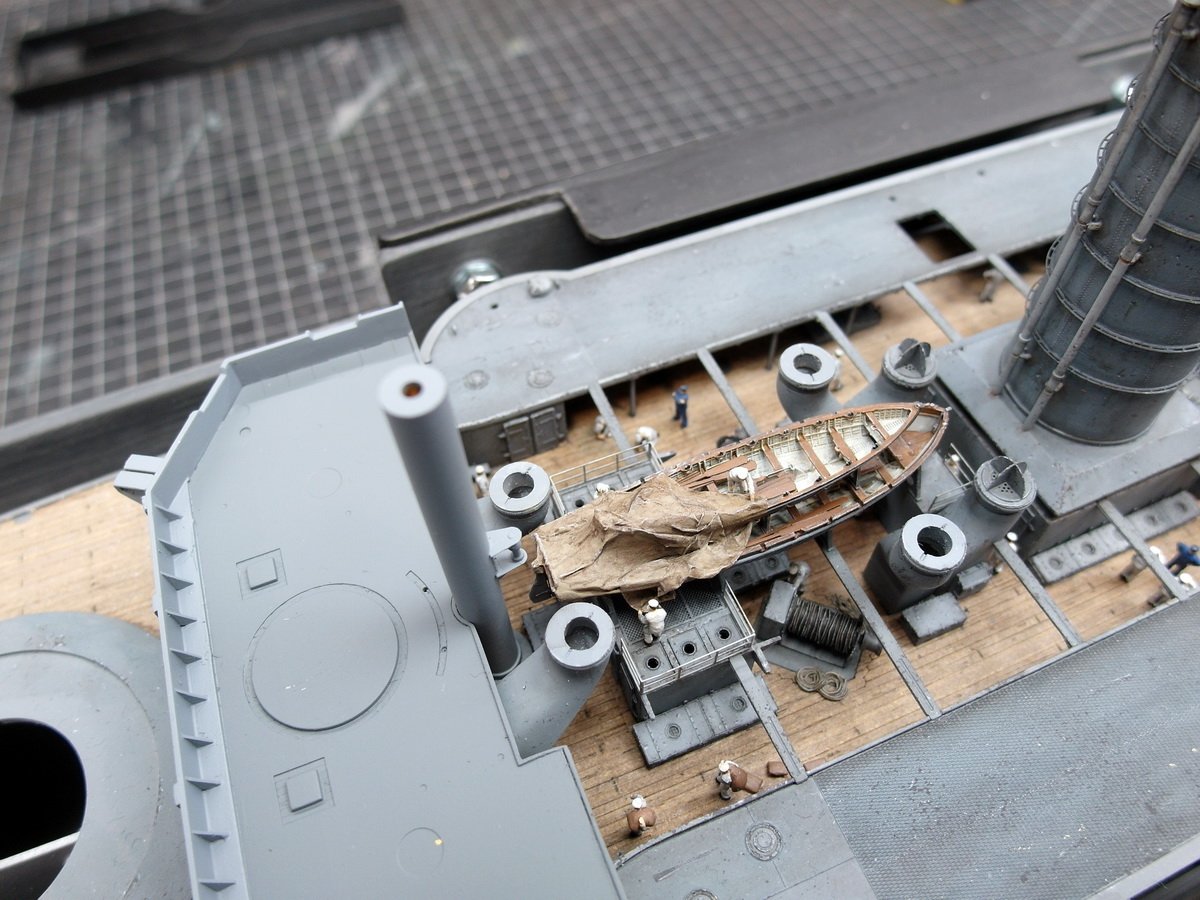
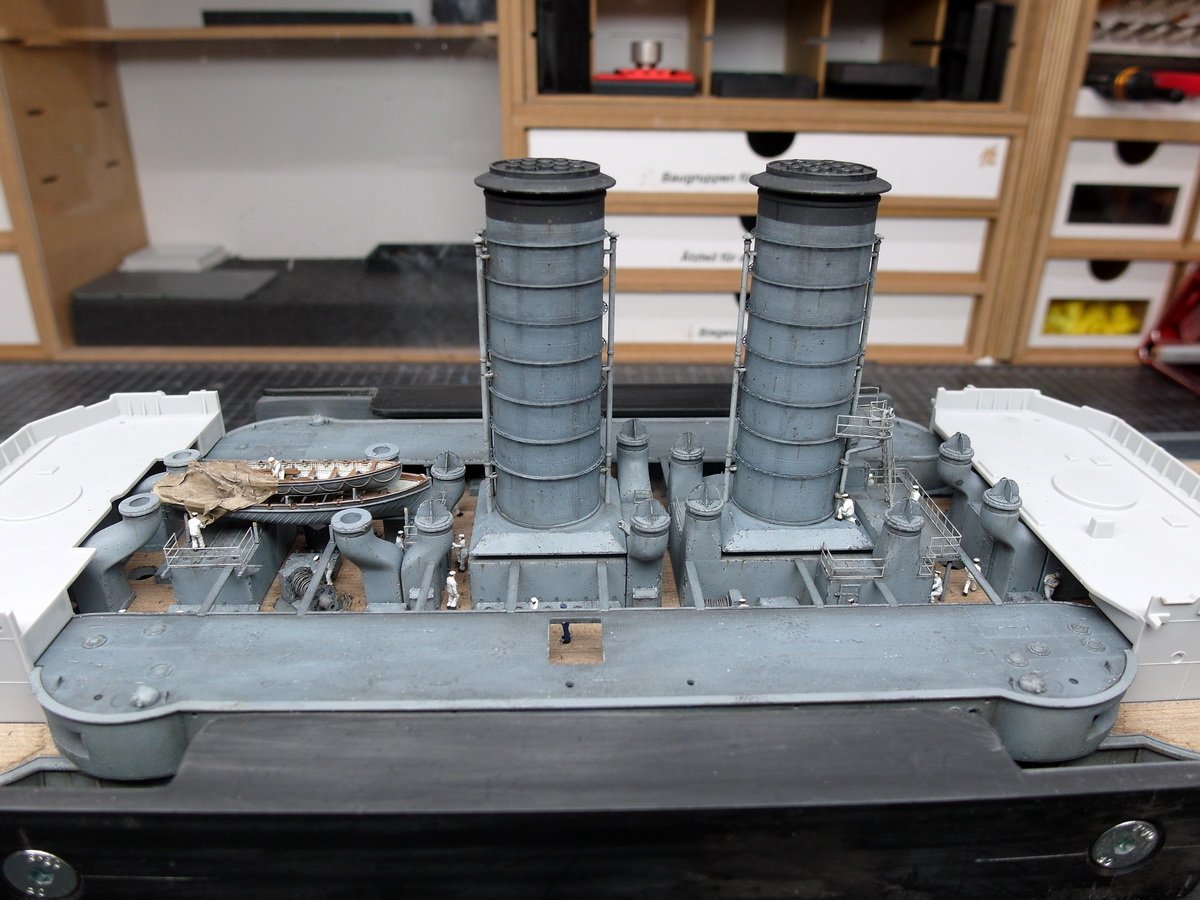
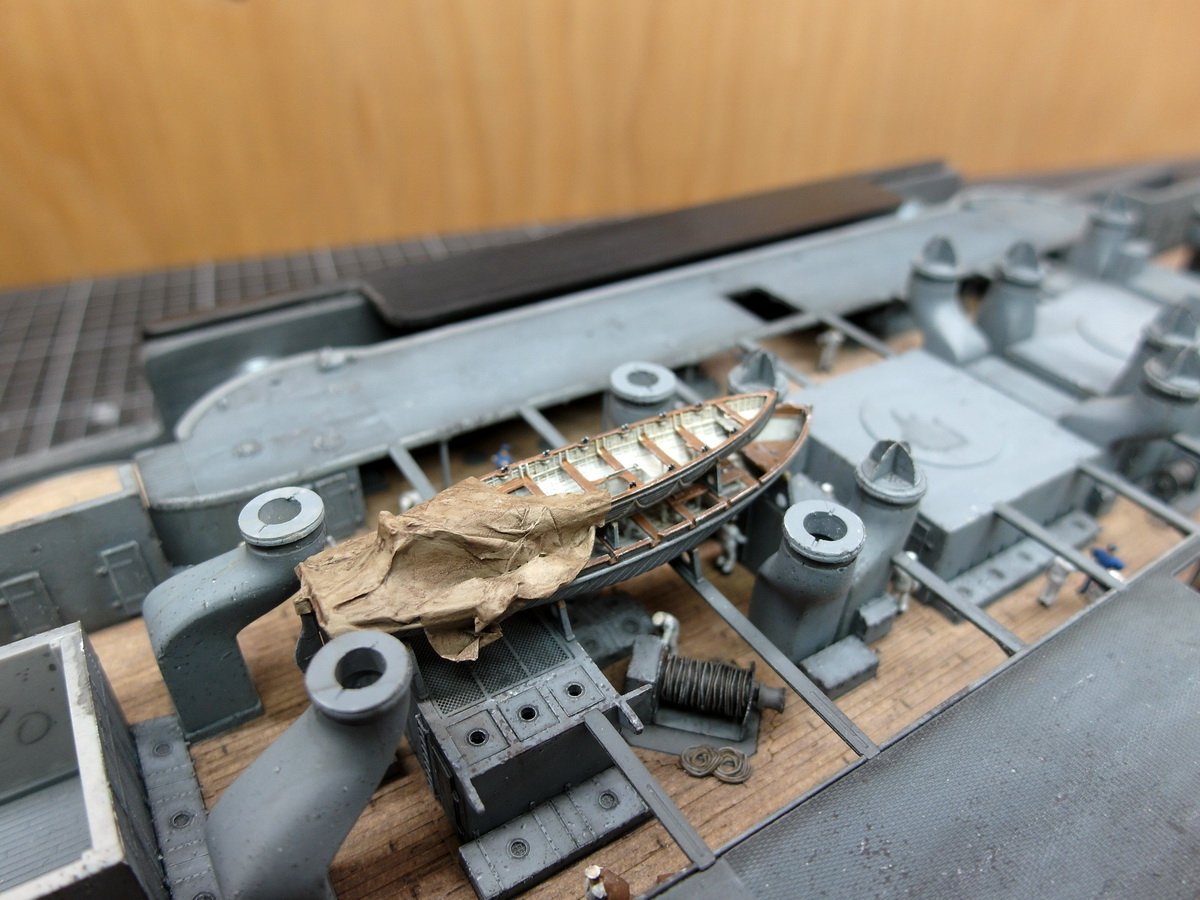
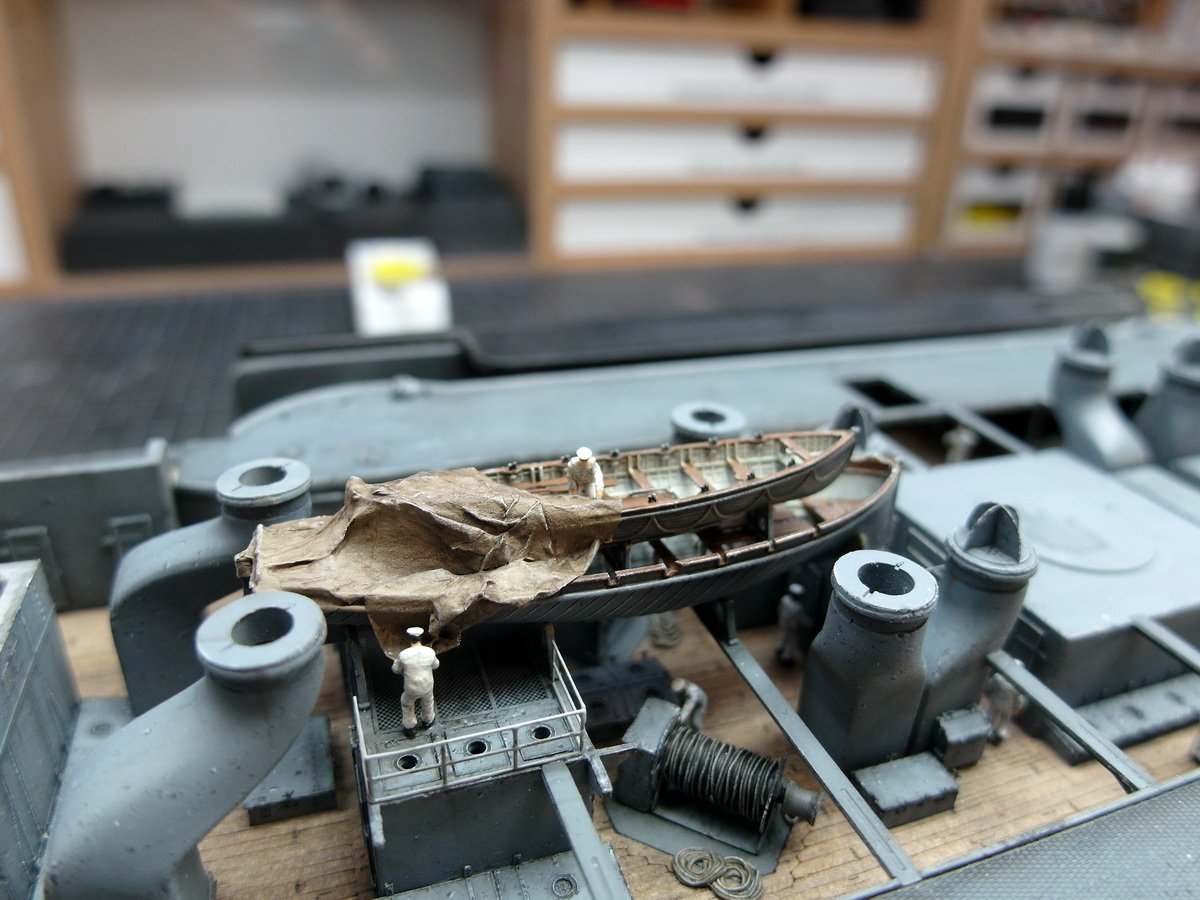
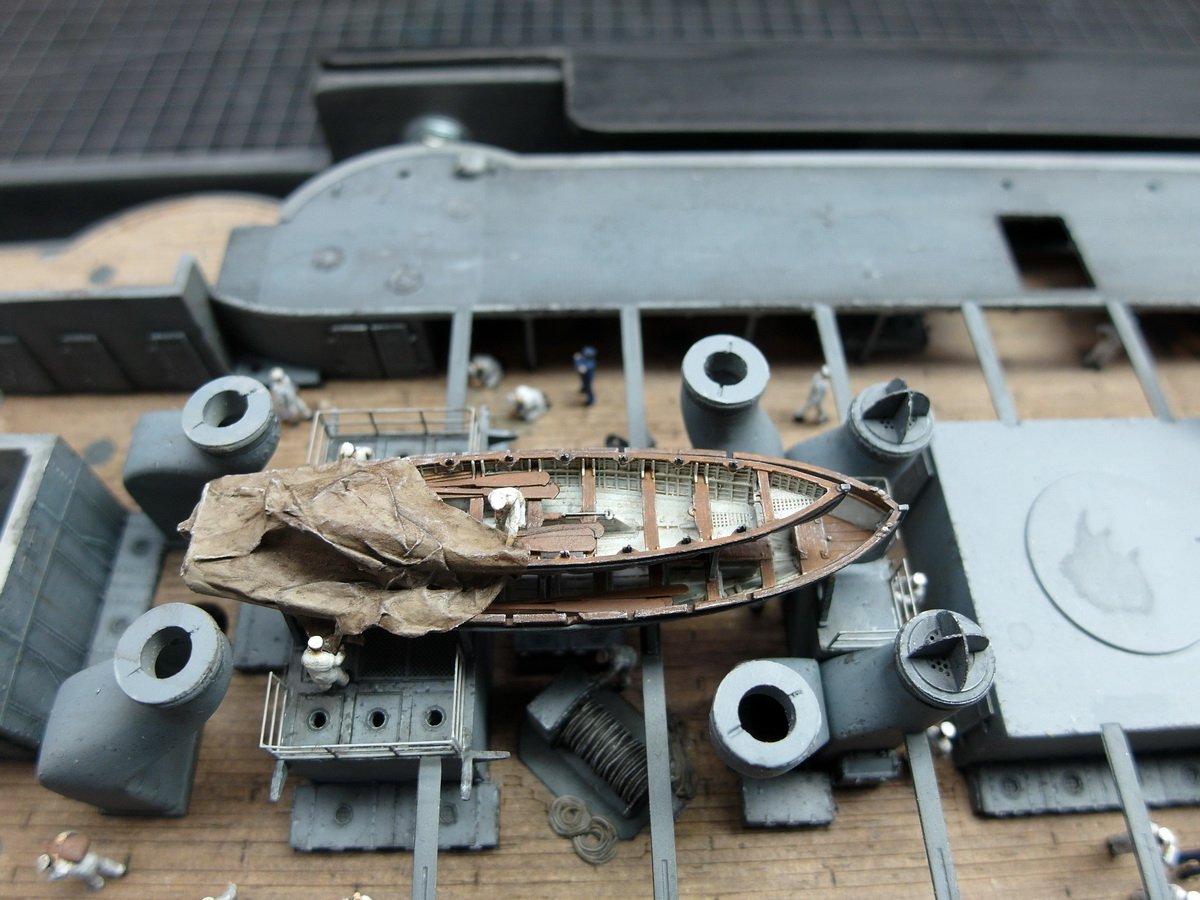
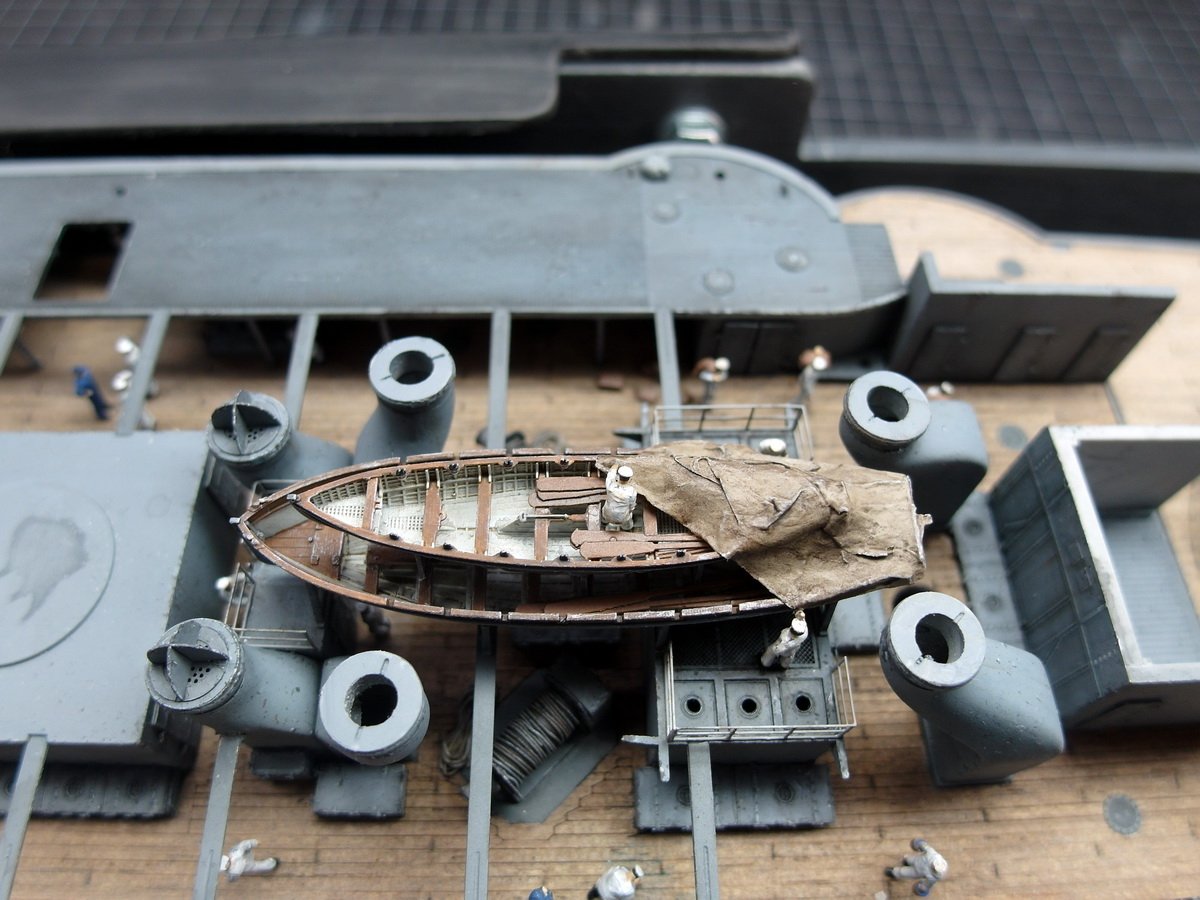
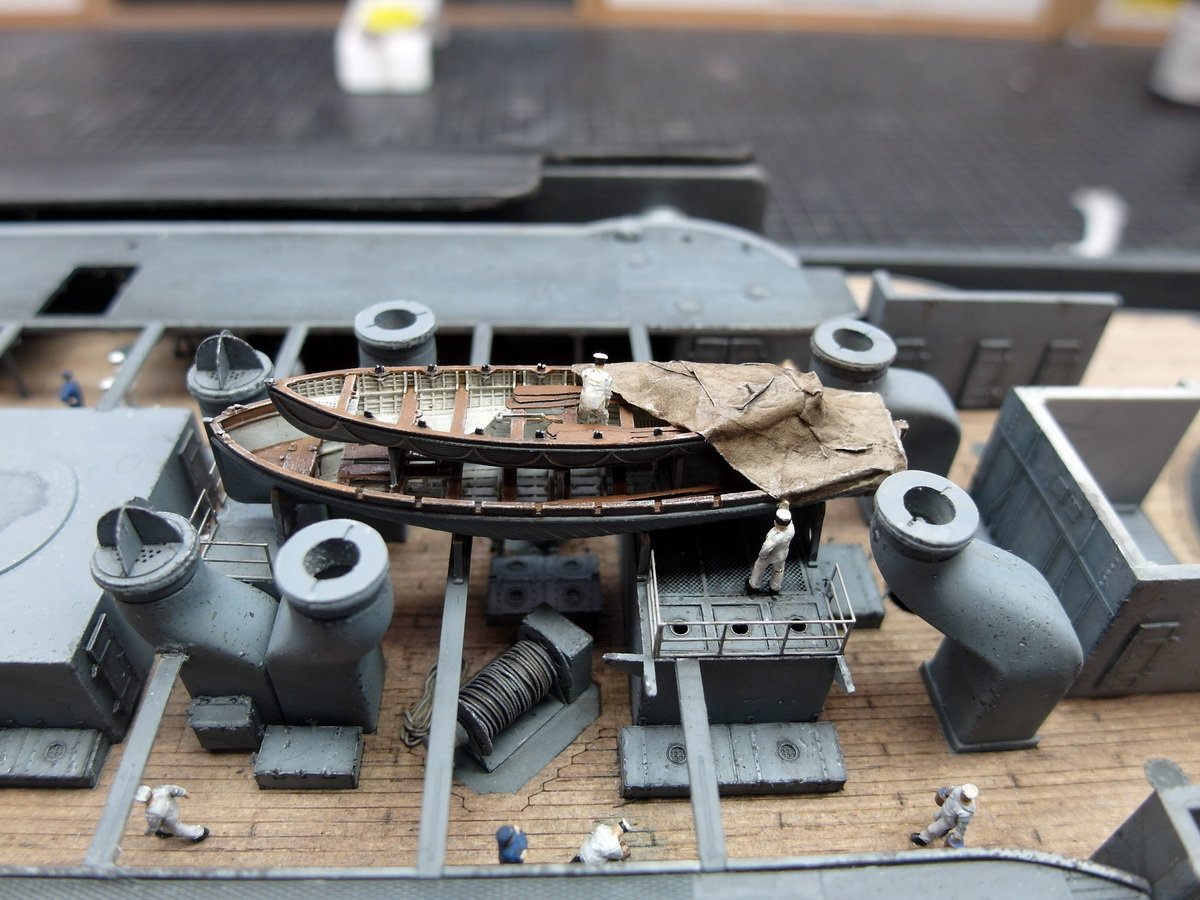
Hello everyone. The EME is behind me and the falcon is back in its home. Time to get back to work on my boat. To warm up, I turned my attention to the two dinghies. It was clear that I didn’t want to cover them completely. So I designed a little scene to get around that. I made a tarpaulin out of tissue paper and diluted wood glue. It took me a few tries. Then guys made to cover the boat. Add the railing and rudder blades. Nice extra income, I don’t have to tie down the cutter anymore. And the first railing was also installed. A few spots are still shiny, so I need to apply another coat of clear coat. I’m pretty happy with the way it is, and now I can move on to the funnels.
- 193 replies
-
- 11
-
-
-
- Russo-Japanese War
- Mikasa
- (and 2 more)
-
Thank you both very much. 😊
-
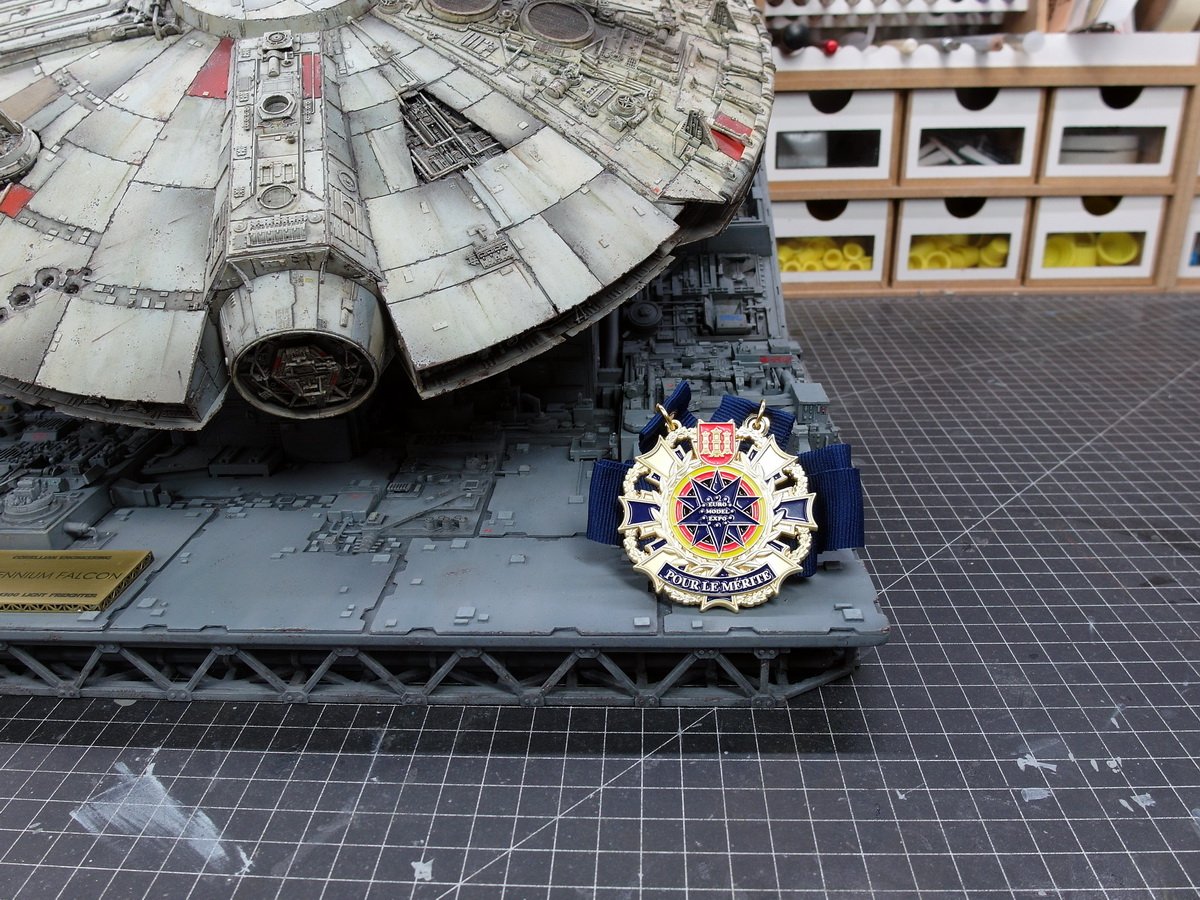
Good morning everyone. I’m back from the EME. Your fingers crossed and good wishes seem to have worked. The little bird brought home some precious metal. I’m very happy about the gold medal. And, almost more importantly, the falcon returned to its nest in one piece
- 86 replies
-
- 10
-
-
-
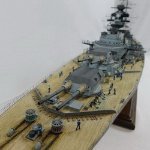
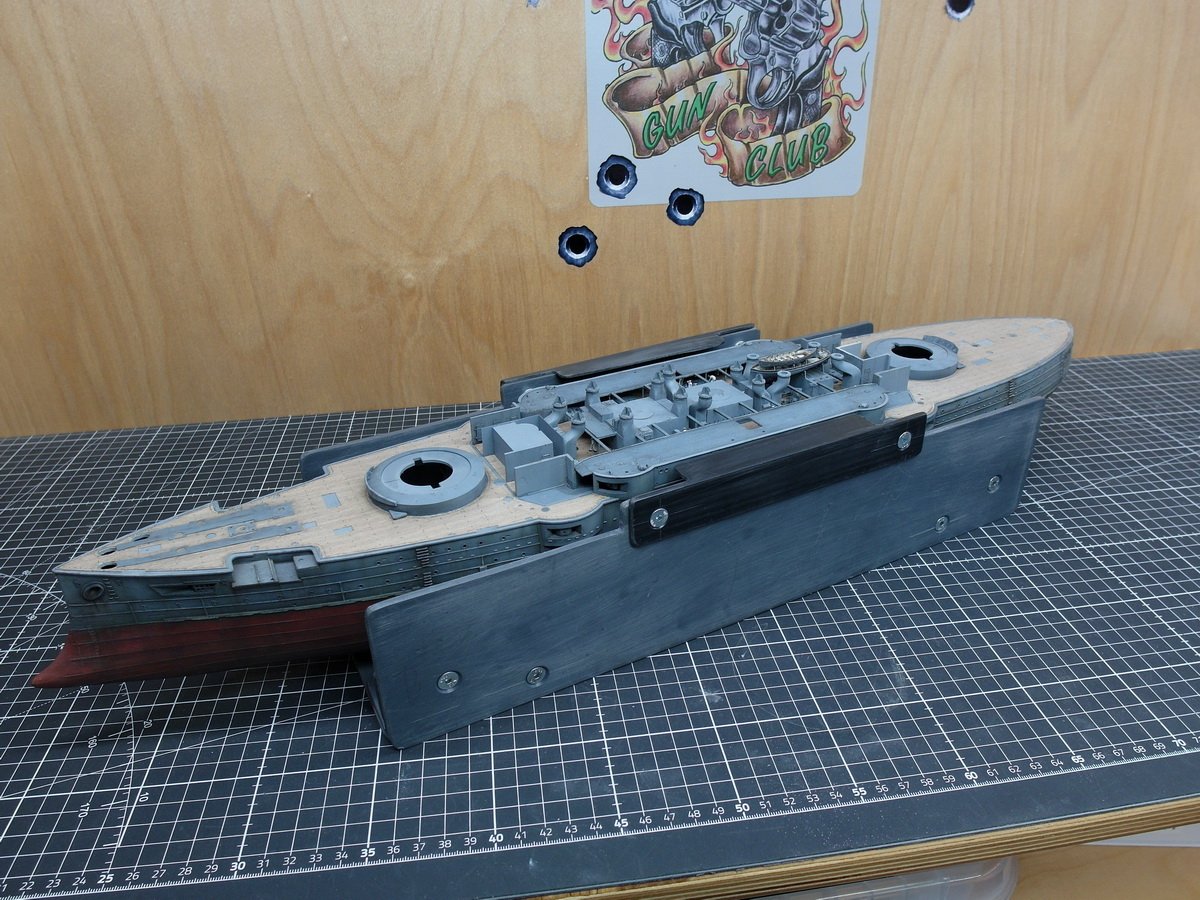
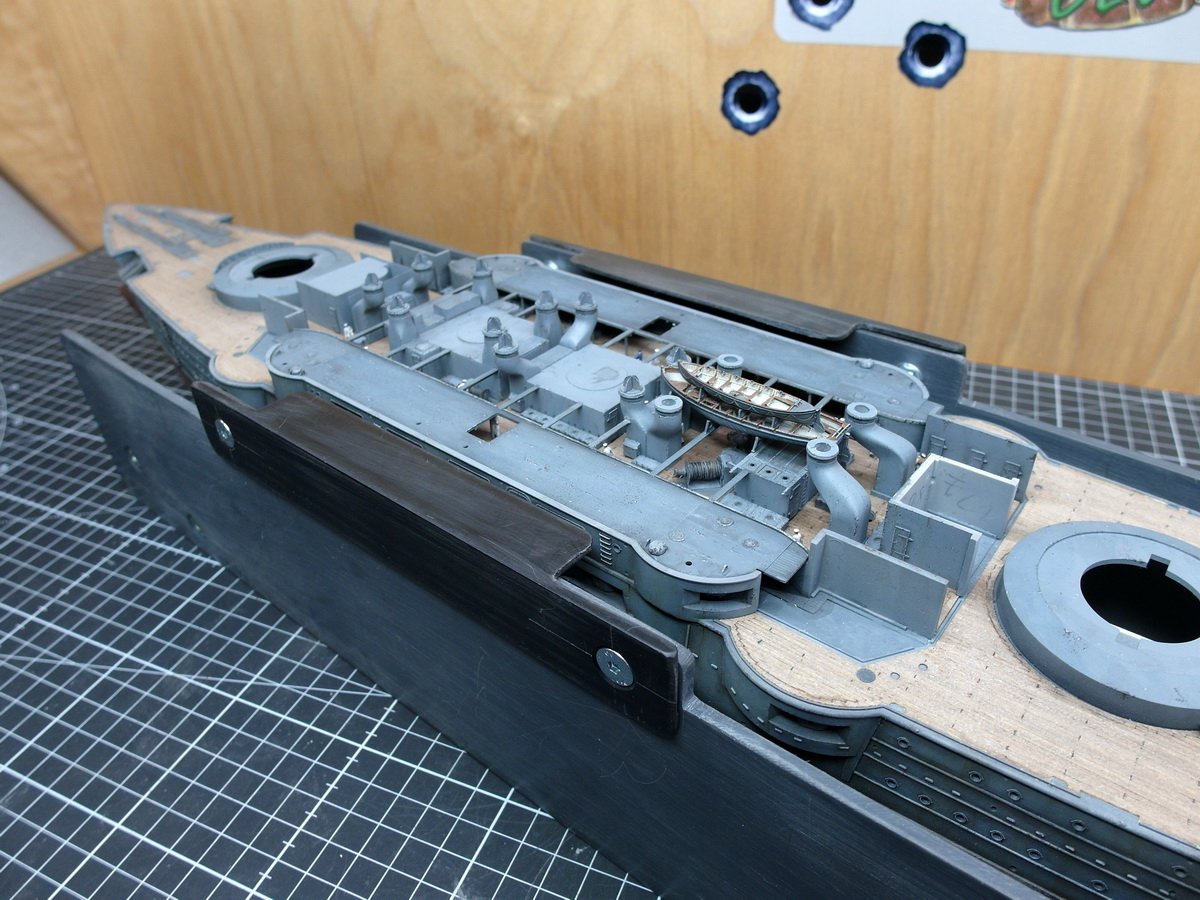
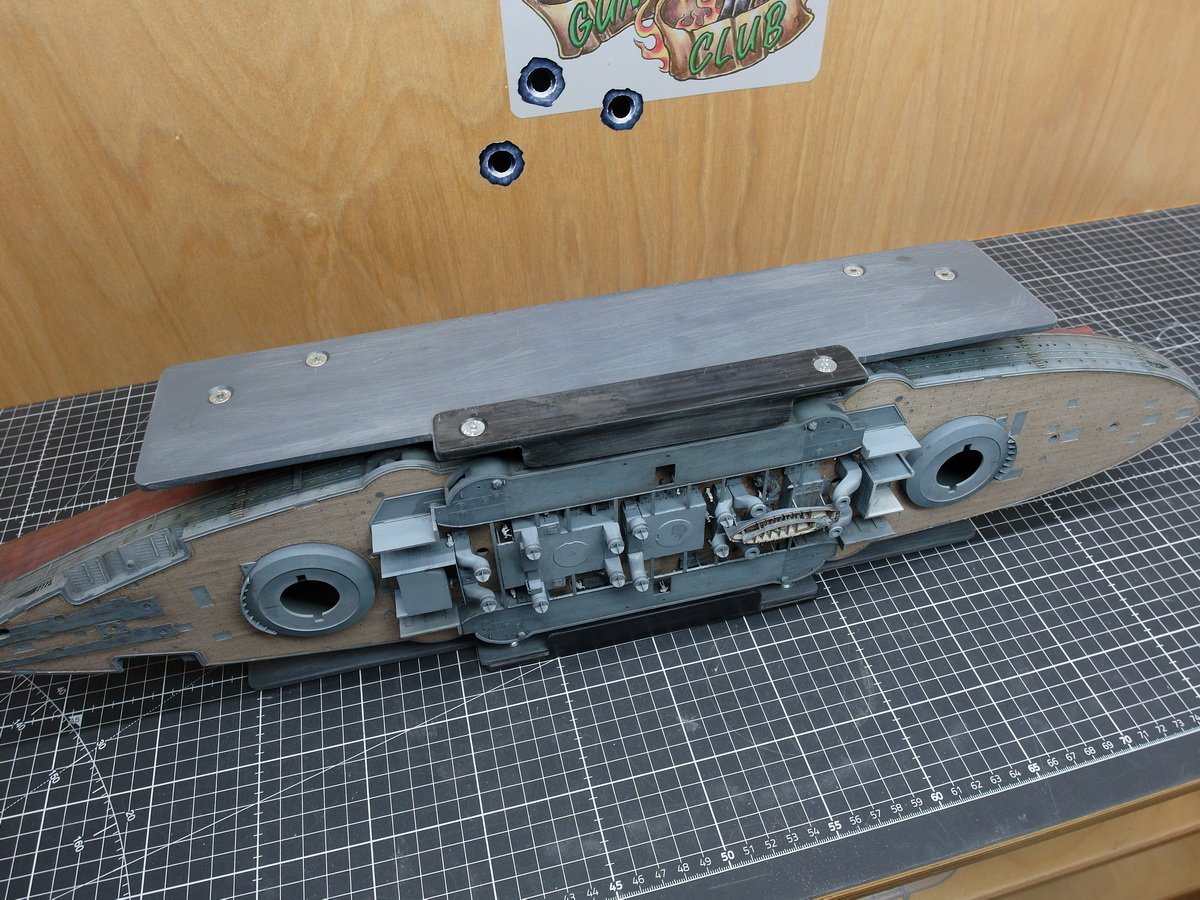
I had to expand my dry dock again. I know, it looks almost like a Mikasa in prison, but it’s necessary. Its creator is a bit of a clumsy person. While handling it, I pressed my thumb on a gun barrel and it cracked. It wasn’t a big deal; I was able to carefully glue it back on. But that’s why… …more protection Now I can continue working on the ship without worrying and don’t have to constantly worry about the guns sticking out of the sides.
- 193 replies
-
- 8
-
-
- Russo-Japanese War
- Mikasa
- (and 2 more)