
HOLIDAY DONATION DRIVE - SUPPORT MSW - DO YOUR PART TO KEEP THIS GREAT FORUM GOING! (Only 24 donations so far out of 49,000 members - C'mon guys!)
×
madtatt
-
Posts
257 -
Joined
-
Last visited
Content Type
Profiles
Forums
Gallery
Events
Everything posted by madtatt
-
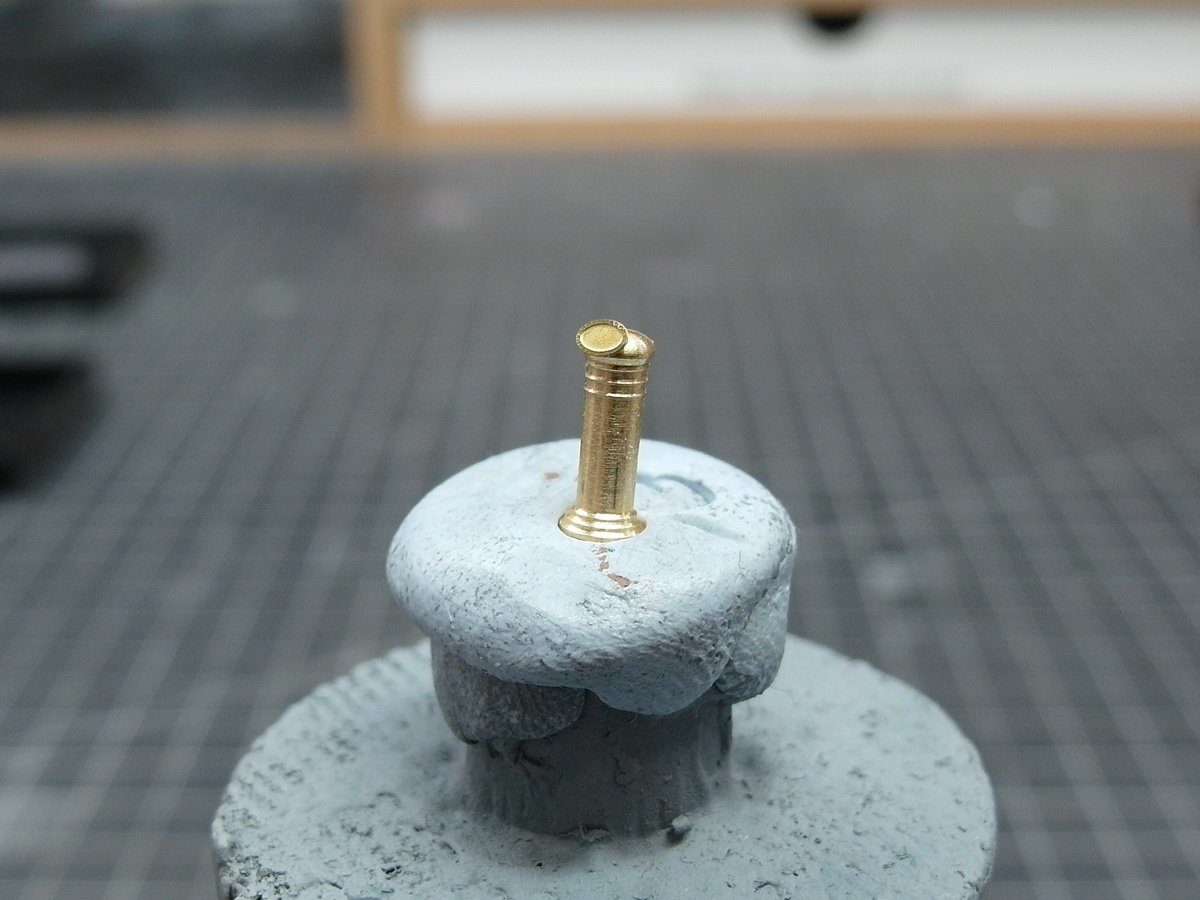
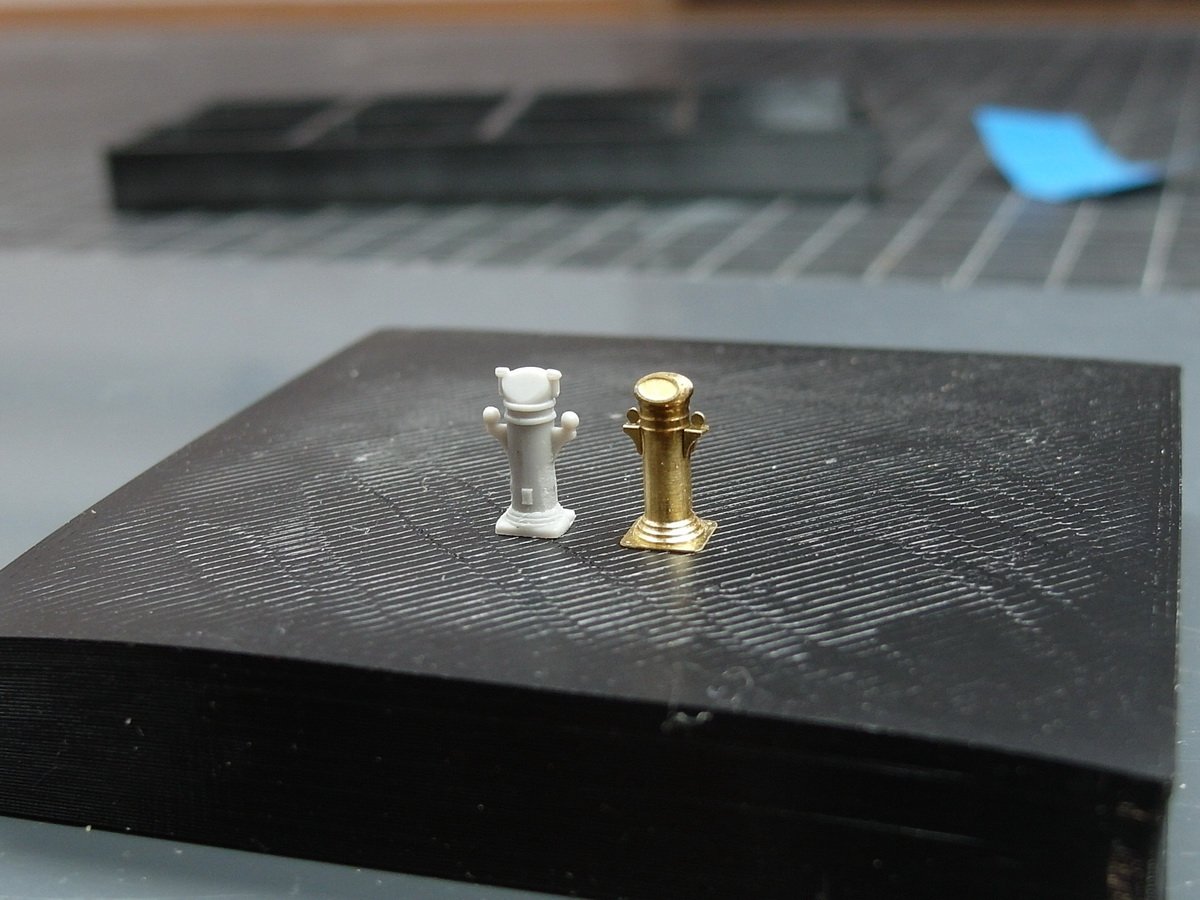
 Thanks, Ken. 😊 The only thing I don't like about the brass part is the way the adjustment balls look compared to the plastic one. But I'll fix that. I've ordered 0.5 mm thick steel balls to replace the flat disc.
- 193 replies
-
- 1
-

-
- Russo-Japanese War
- Mikasa
- (and 2 more)
-
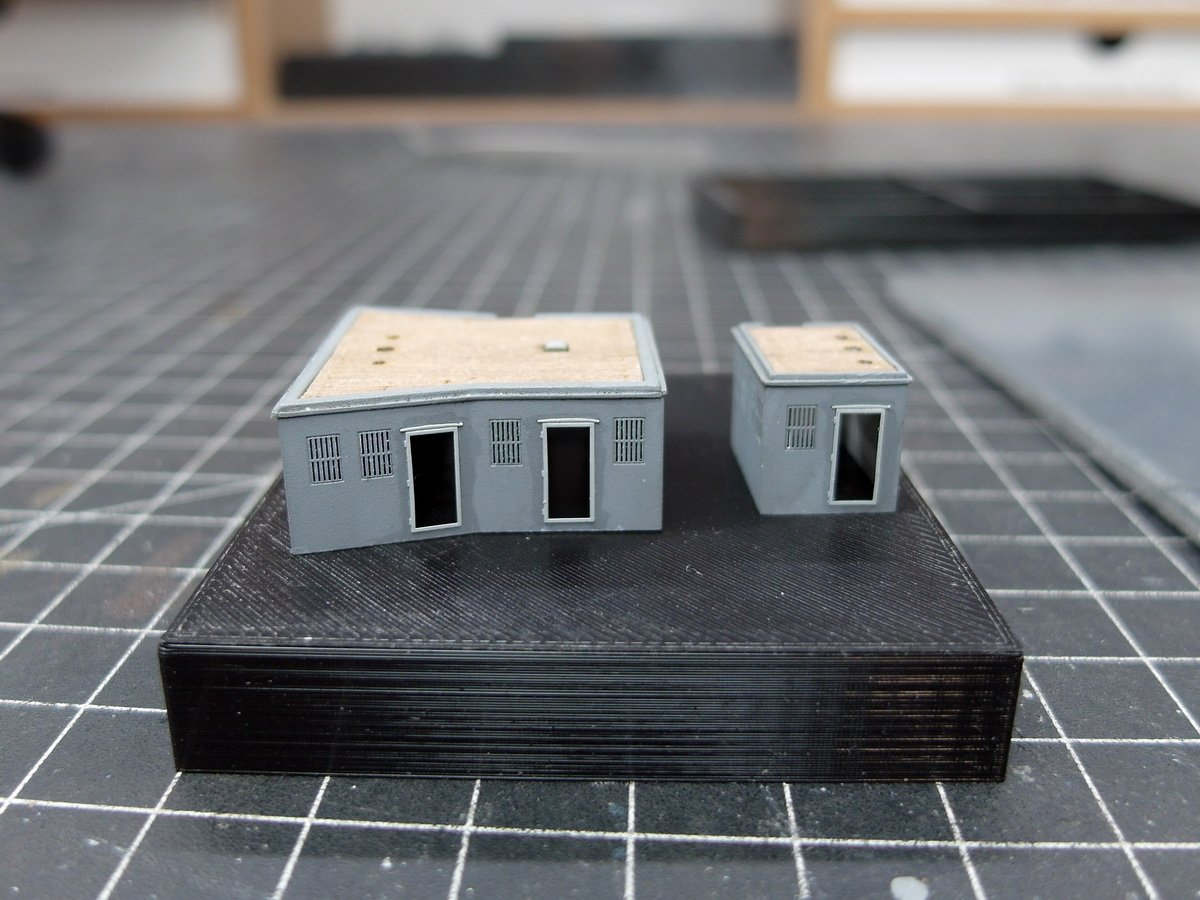
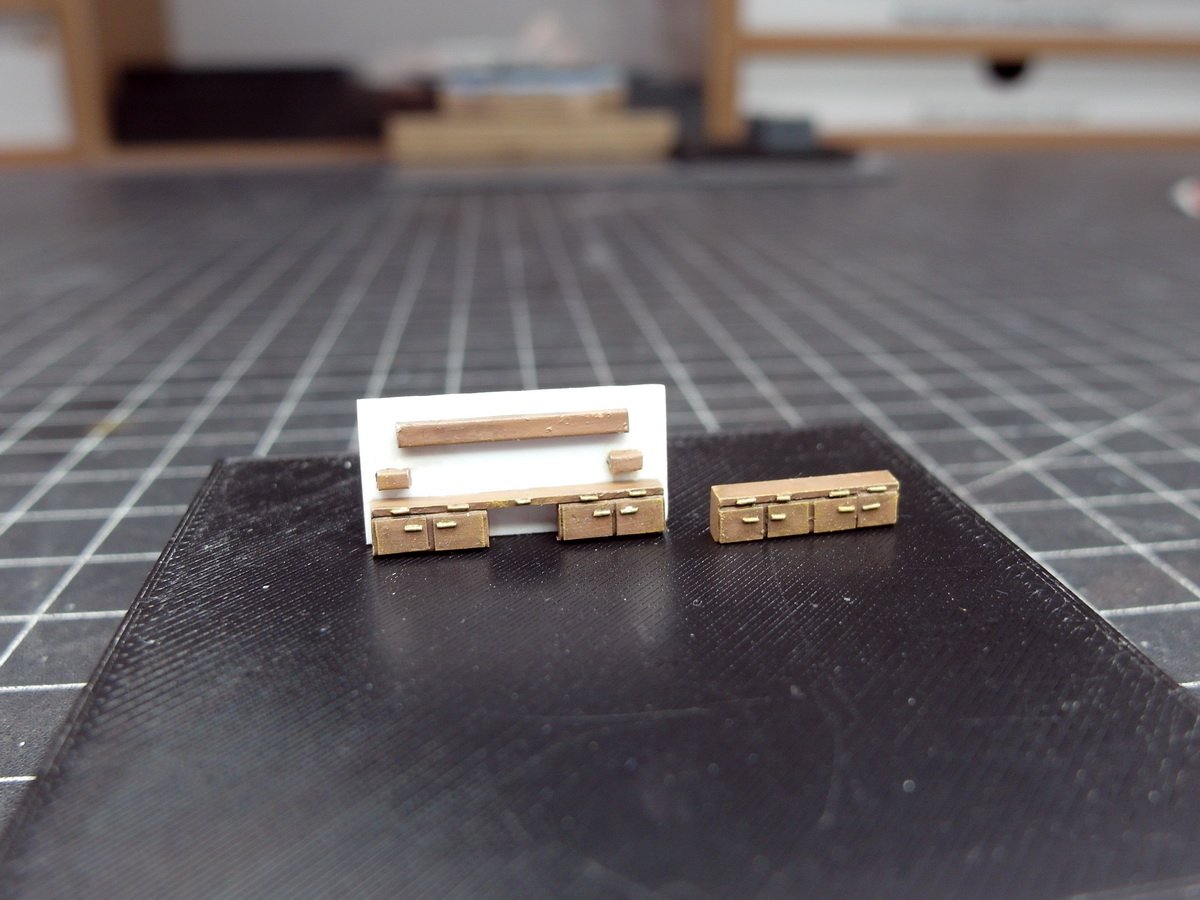
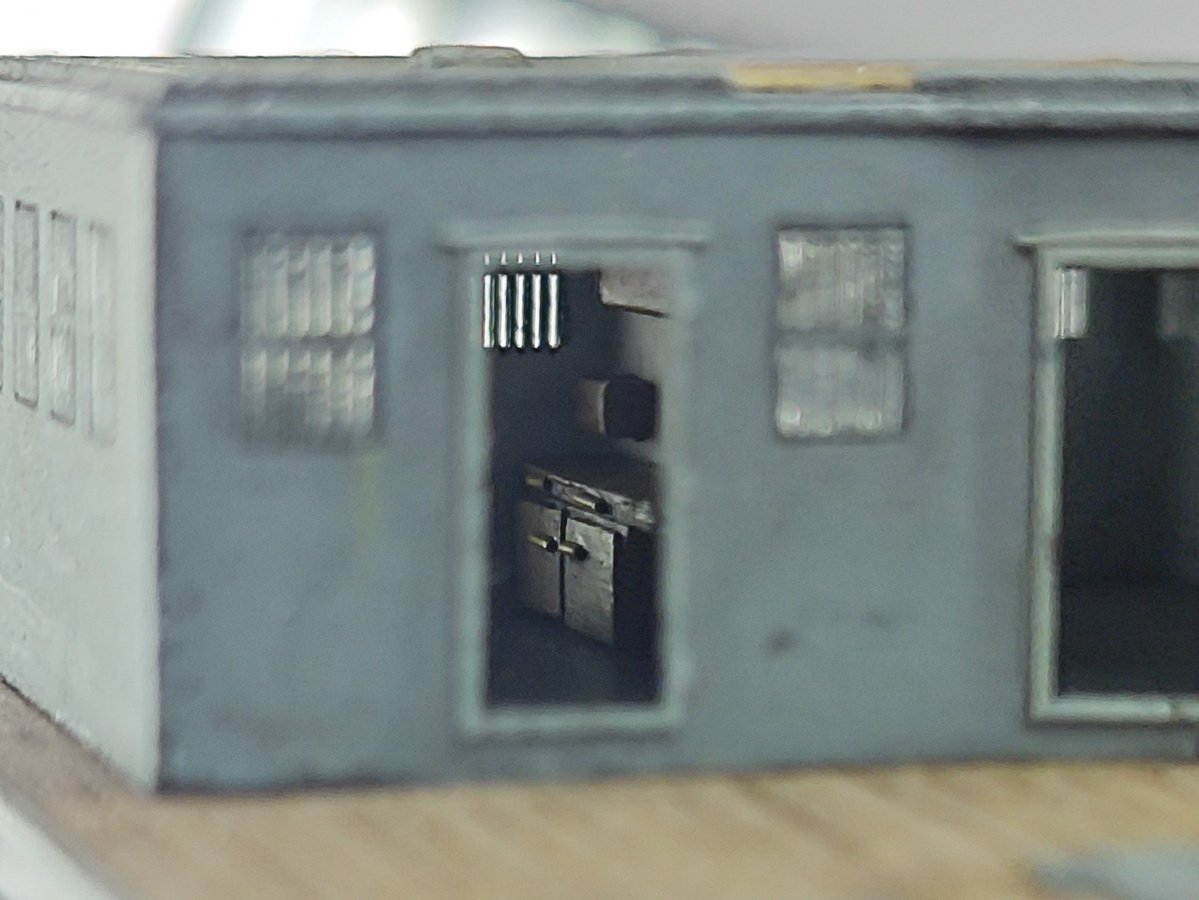
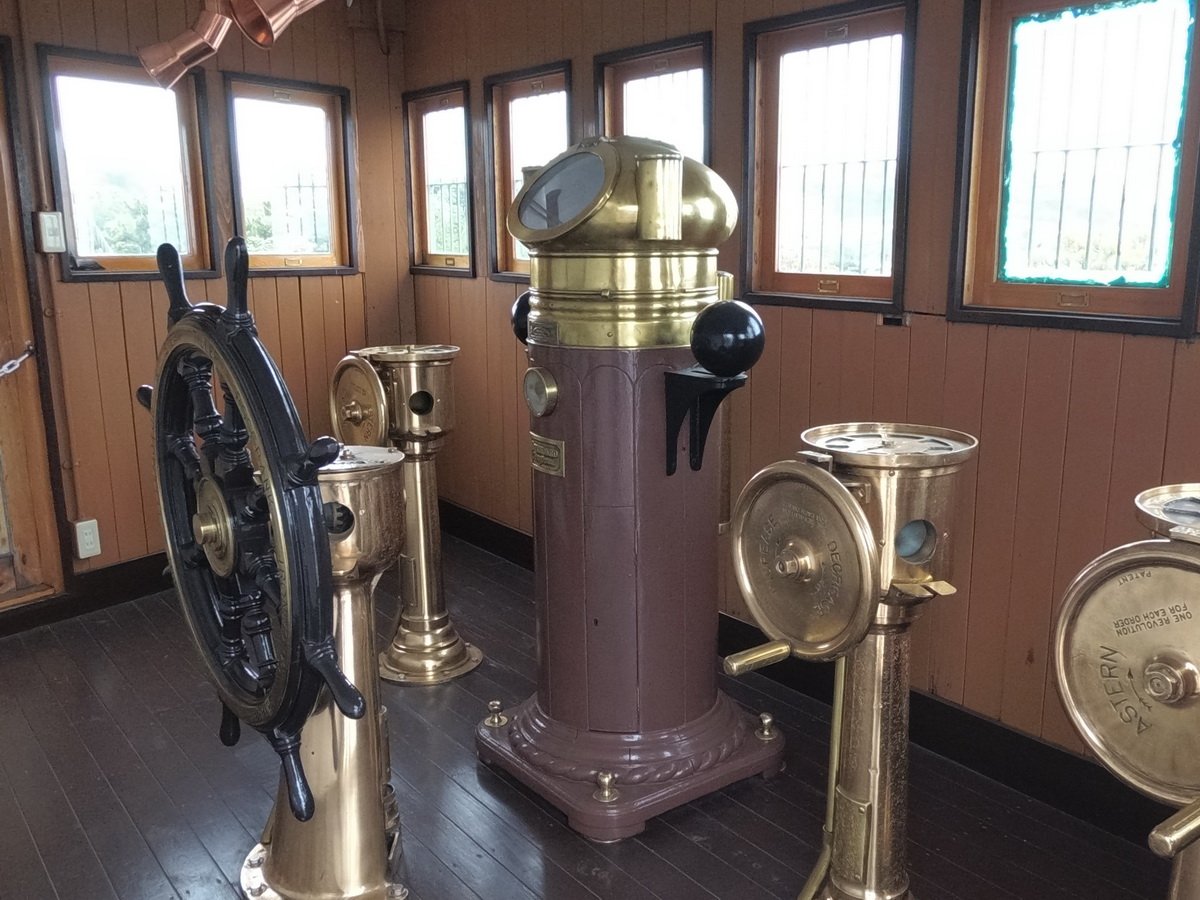
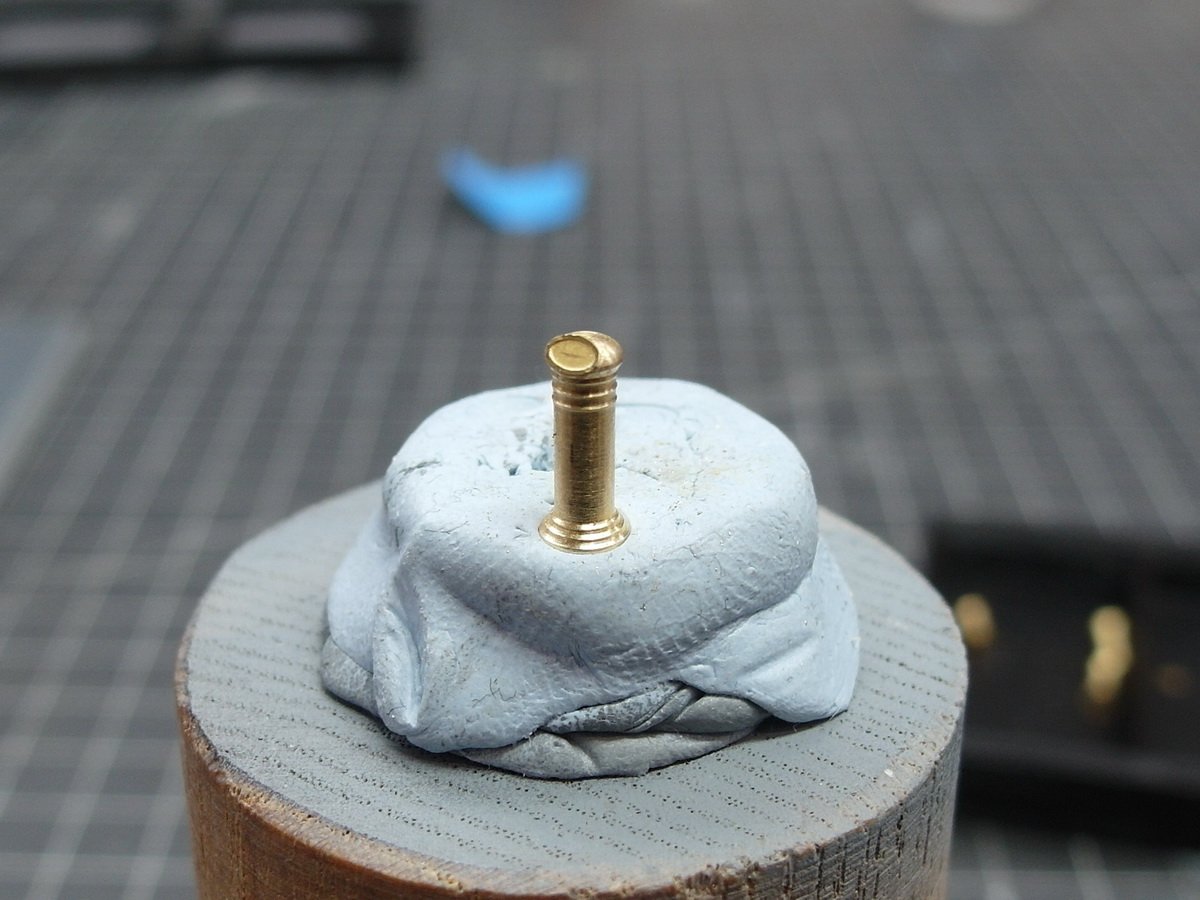
I don’t have too much to report today. I’m finding very little time for model building at the moment, and I’ve had to rethink and implement a few things. First, the ingredients for the next construction phase. First, the door frames were installed. These were painted with a slightly lighter grey to increase the contrast. The partition wall and interior fittings for the wheelhouse were then made from styrene. Difficult to capture with the camera, but you can get a sense of the room’s interior. More staff will arrive there later. On to the steering rudder station. Here’s another picture of the large compass. Only the MK1 kit offers anything here. But I didn’t like the way it was supposed to be assembled. The sight glass was simply placed on top of the brass turned part. Unimaginative. At first, I considered using the part from the original kit. However, I was annoyed by the poorly designed sprue attachment points. Why not just attach it from below? But I couldn’t really warm to that part either. It was too crude. So I looked at the brass part again and thought, hey, I’m a locksmith and I do have files… Better… And here’s a direct comparison. Which looks better? I think, for my part, the Ka set has won the race again. With a little help from me.

- 193 replies
-
- 7
-
-

-
- Russo-Japanese War
- Mikasa
- (and 2 more)
-
Amazing, the way you cut out the railings is impressive. I'm already cursing when I have to use them as photo-etched parts. But what you're doing here, respect. 💪
- 288 replies
-
- 5
-
-

-
- Card
- Pre-Dreadnought
- (and 3 more)
-
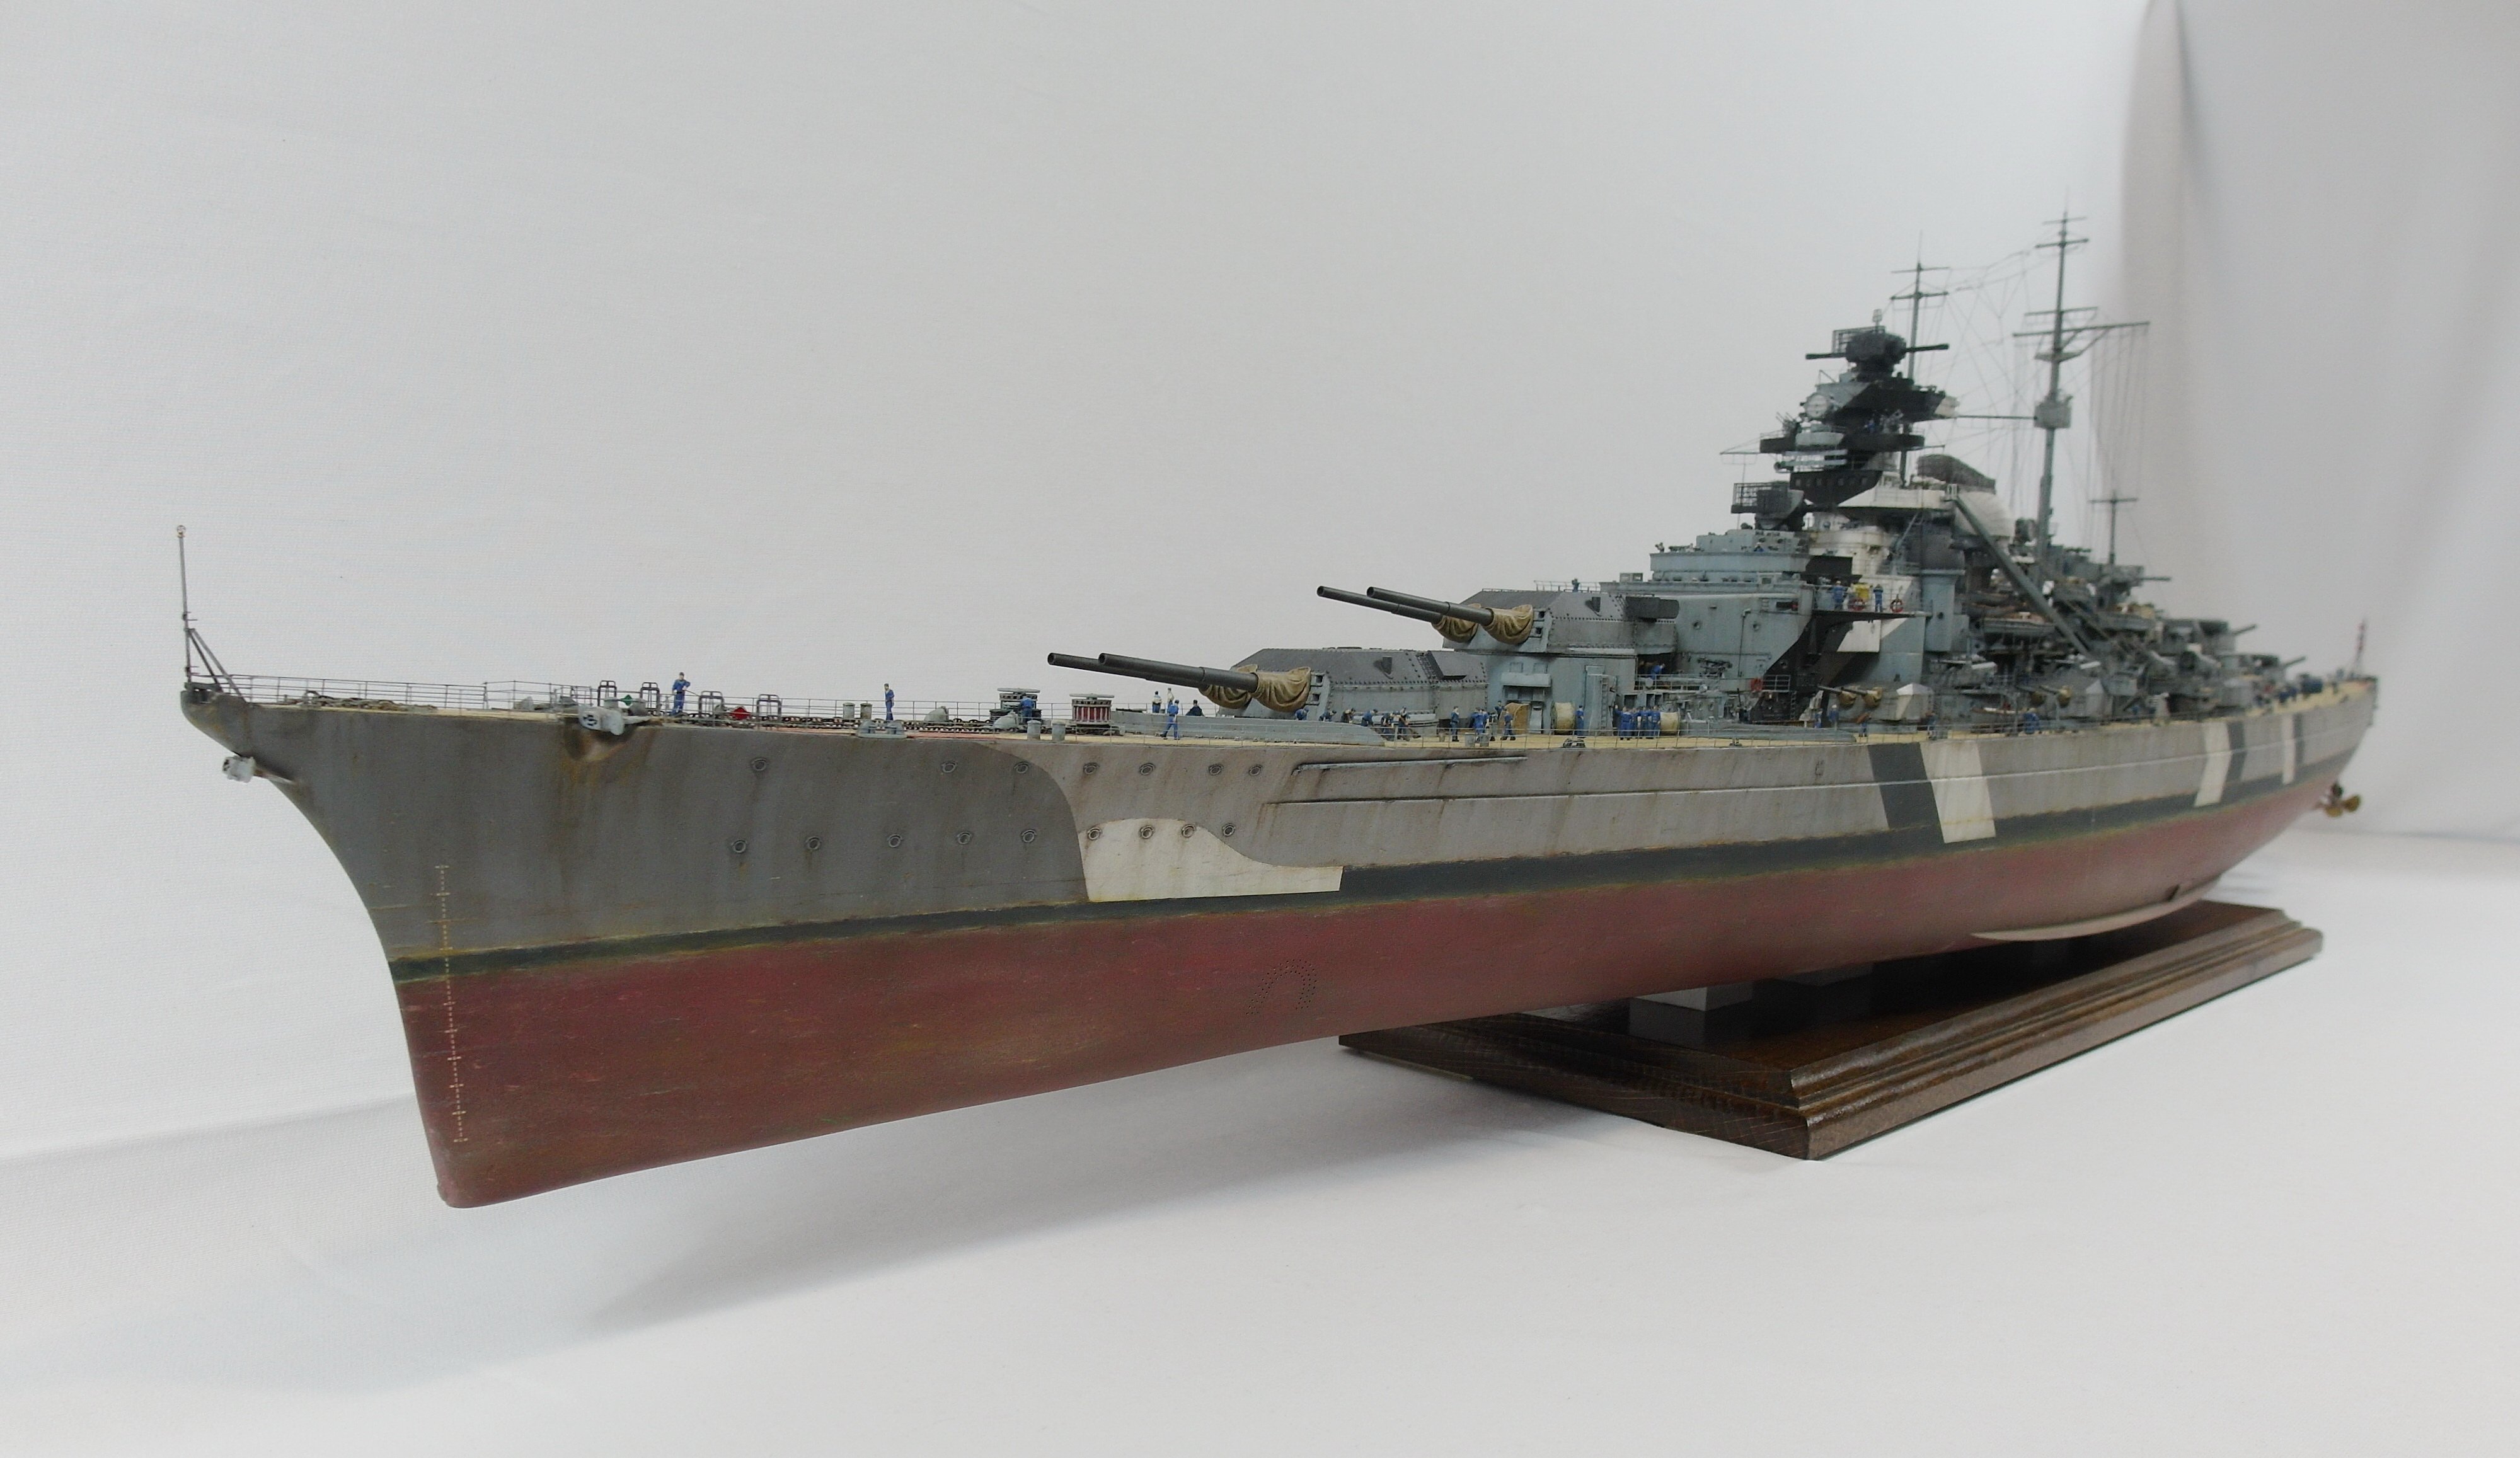
@Jeff59 Haha, you need strong teeth to bite into that cake. And believe me, Jeff, I know exactly what you mean. Compared to this small, complex model-building marvel, the Bismarck was as easy to put together as Lego bricks. Speaking of which, when will you continue with your Bismarck? I'm so excited to see how you'll make it. But I also think the finished Mikasa model will be worth every hour of sweating and cursing. And I'm very happy when you say my paint job looks realistic. @Jim Lad Thanks, John. Yes, that makes handling the delicate components much easier.
- 193 replies
-
- 2
-
-
- Russo-Japanese War
- Mikasa
- (and 2 more)
-
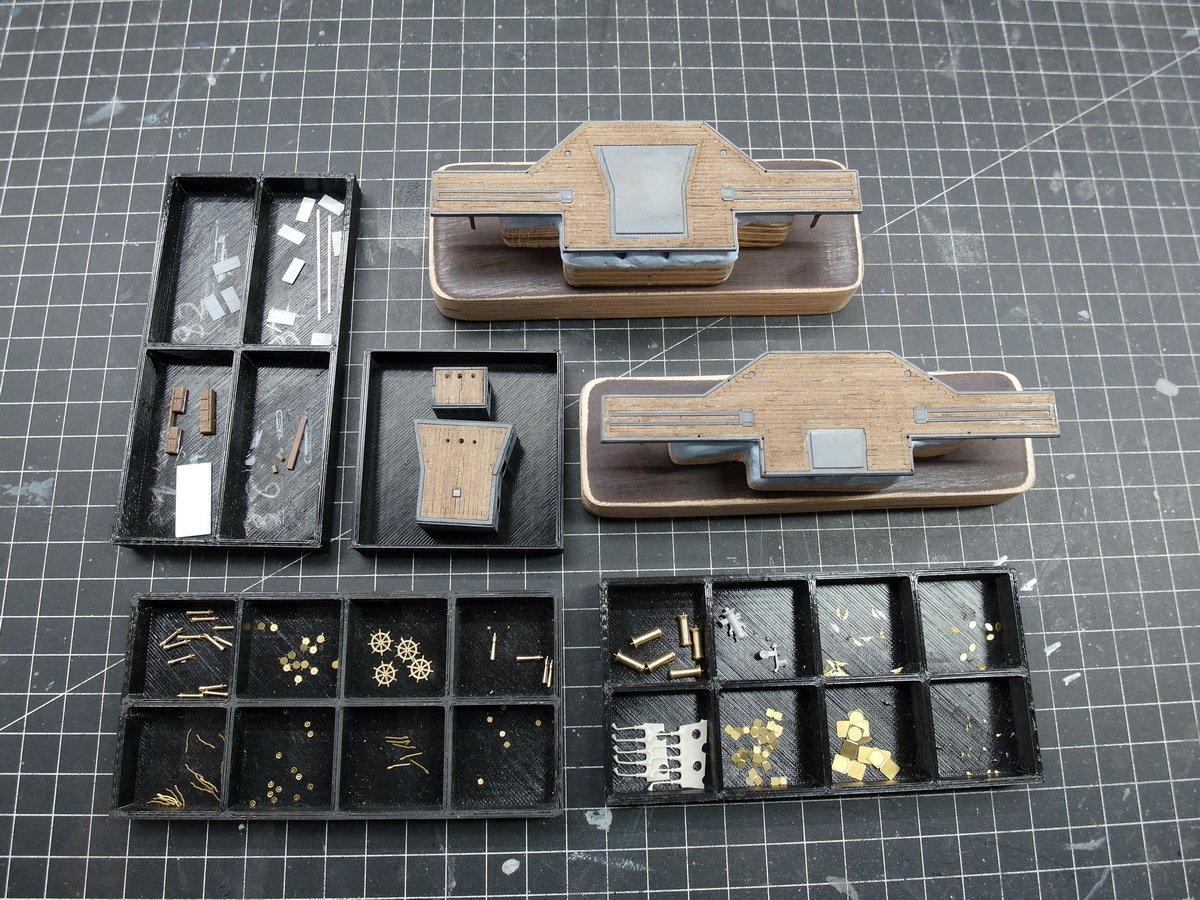
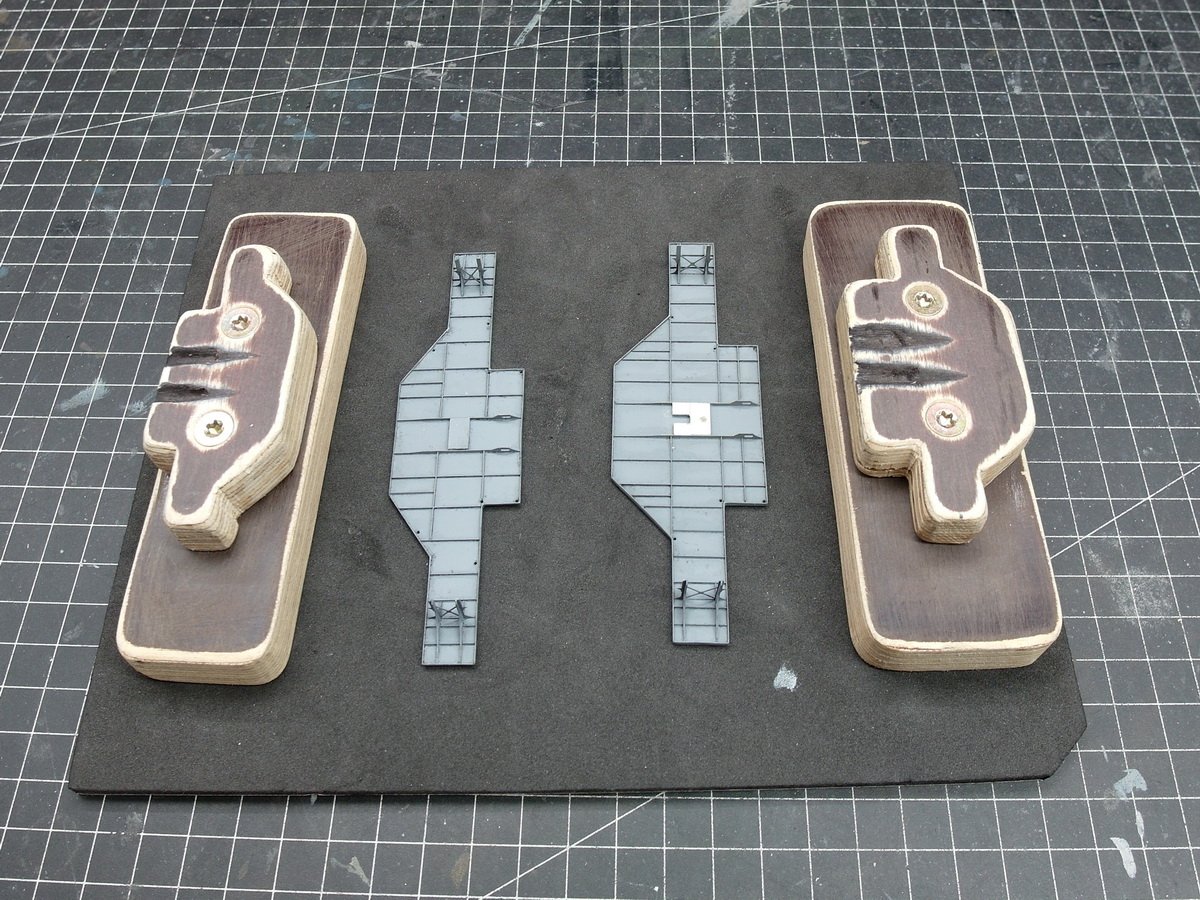
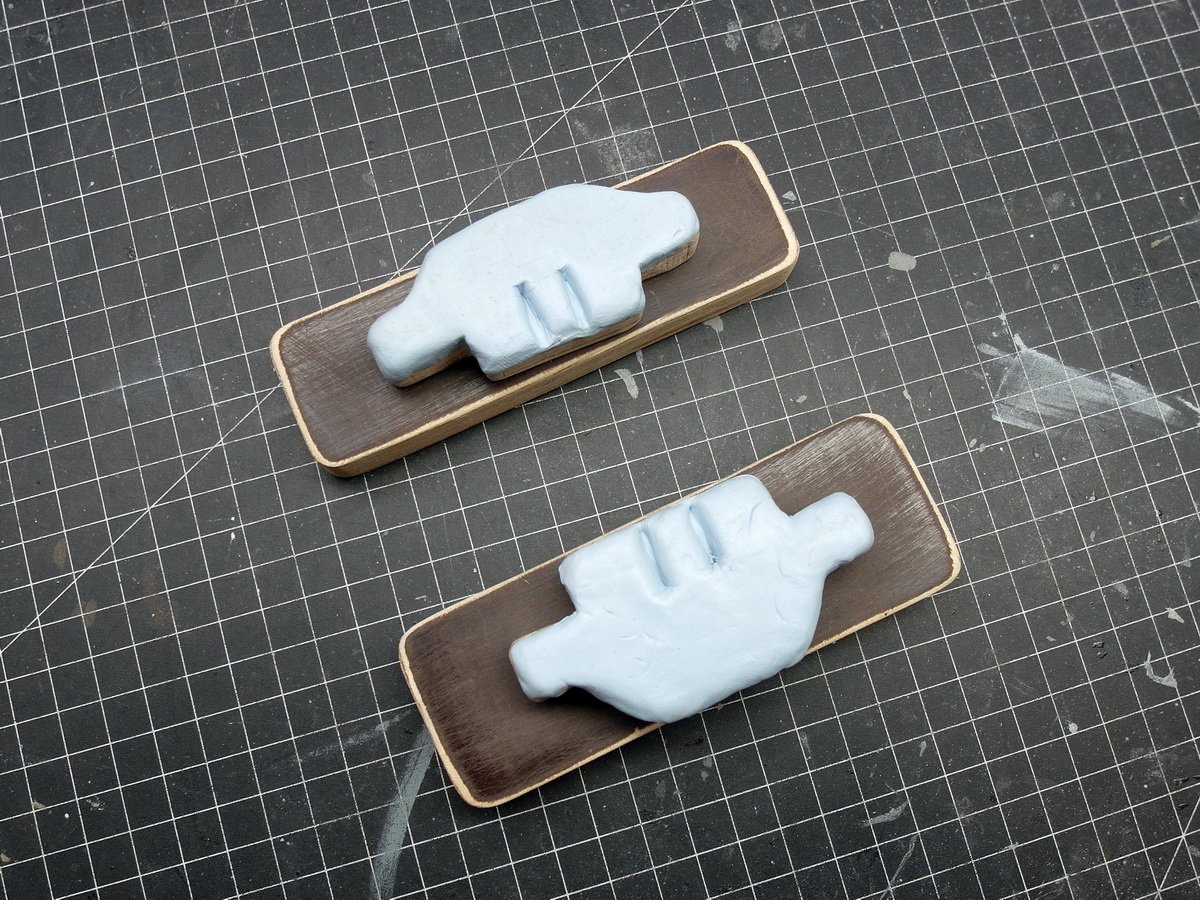
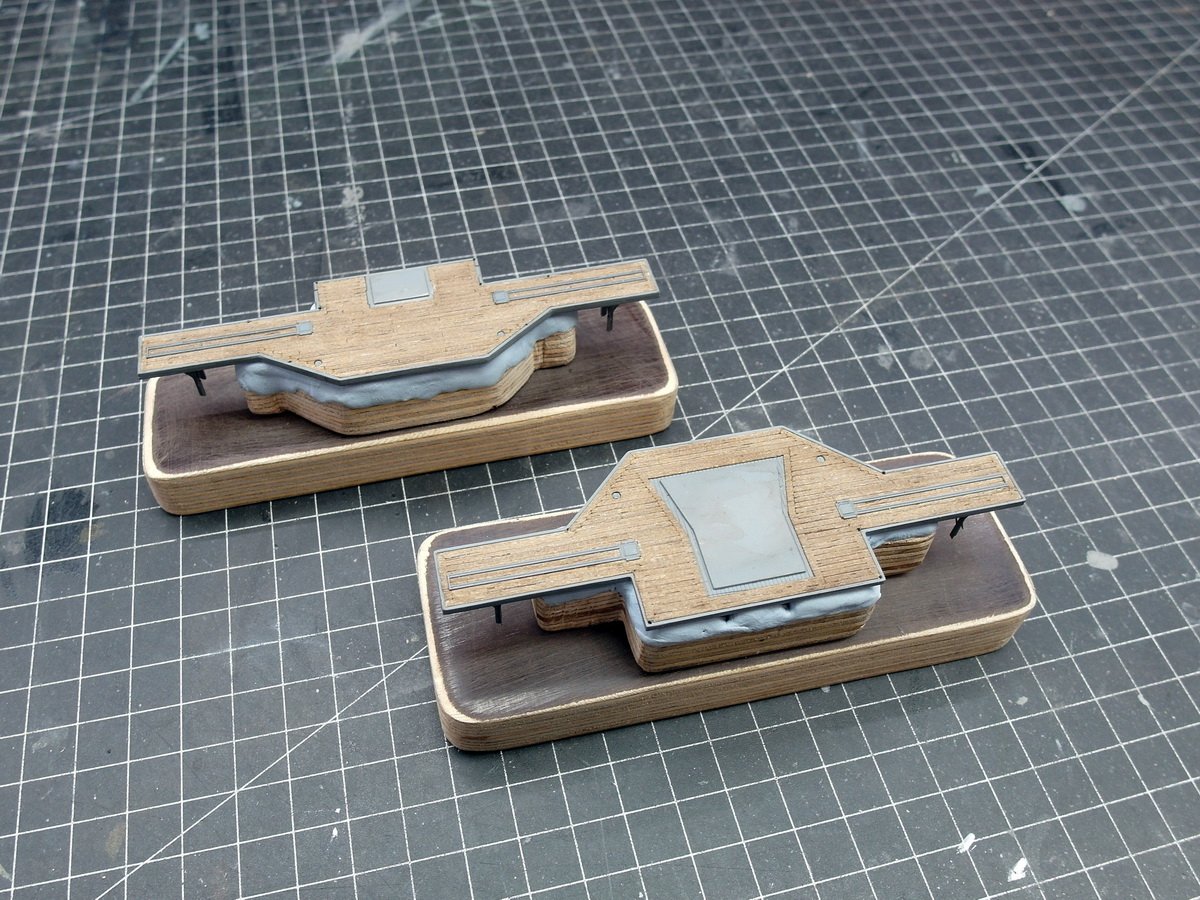
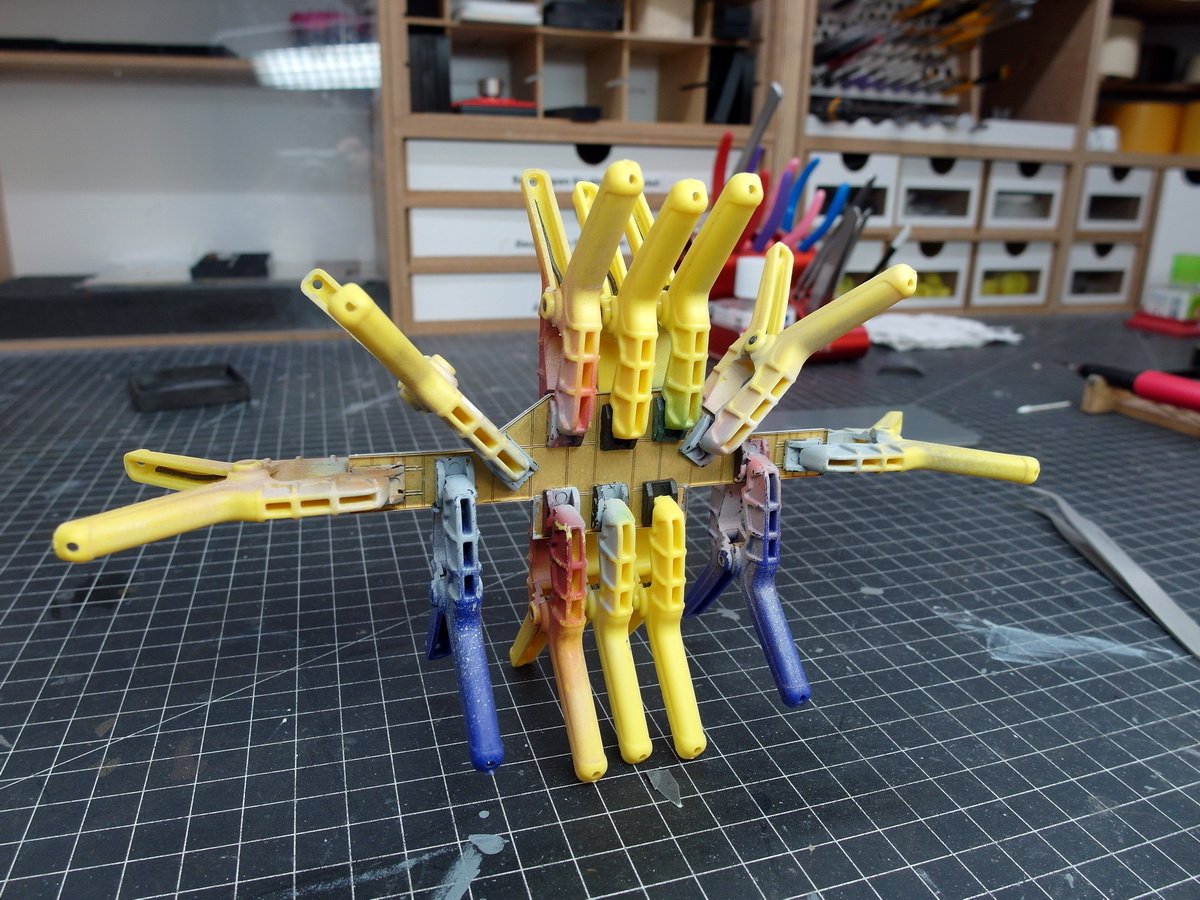
Just a quick snack at my shipyard today. Before I start on the bridge wing and the wheelhouse, I wanted to make a few neat handrails to simplify and make things safer. For this, I made small, custom-made handrails out of a multiplex board. Then cover the surface with BluTack. And the two components were placed on top. Now I can work on them properly without having to worry about tearing off the outer support struts again. I always play it safe whenever possible. That’s how my workstands, which I like to call dry docks, came about. By the way, if anyone is interested, I’ve created a short construction guide on the IPMS website. Dry dock
- 193 replies
-
- 5
-
-
- Russo-Japanese War
- Mikasa
- (and 2 more)
-
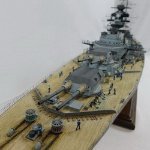
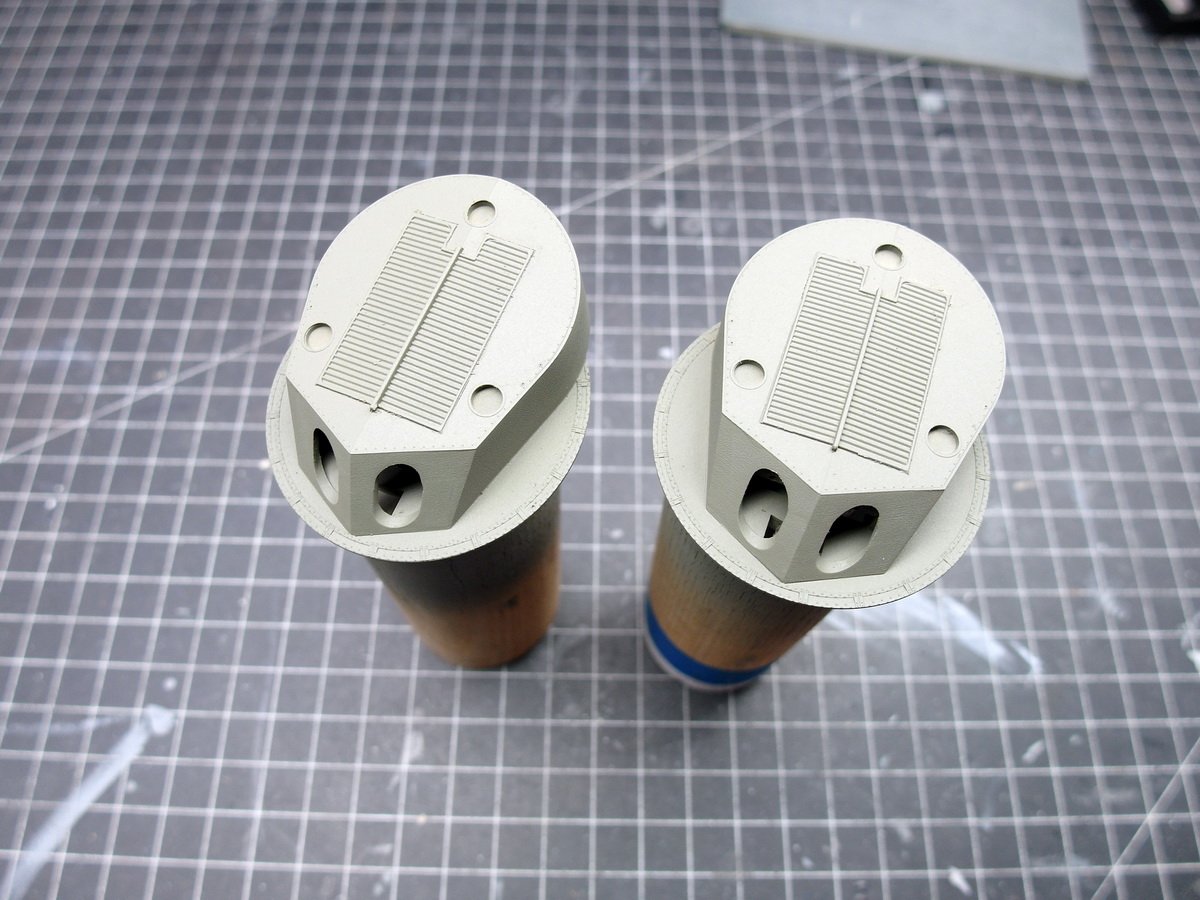
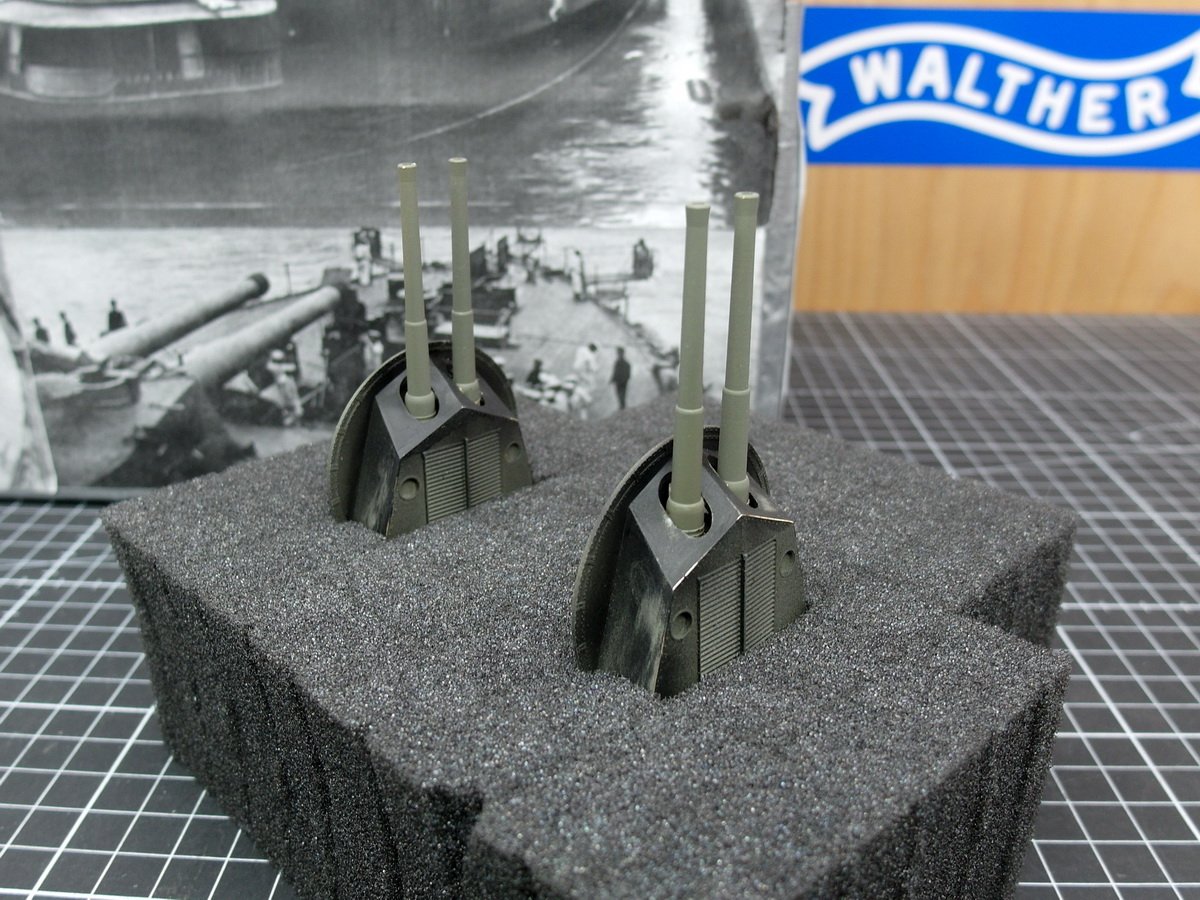
My big towers took a little longer, but they’re finished. So here’s another little update today. Into the barbettes. With their wedge shape, they could still win a design award today, I think. And towards the rear. Its unusual shape is truly impressive. This completes the main armament and I can now focus on the bridge. The Mikasa looks so cool from the front.


- 193 replies
-
- 5
-
-
-
- Russo-Japanese War
- Mikasa
- (and 2 more)
-
Thank you for this information, crazy model building friend. 😂
- 193 replies
-
- 2
-
-

-
- Russo-Japanese War
- Mikasa
- (and 2 more)
-
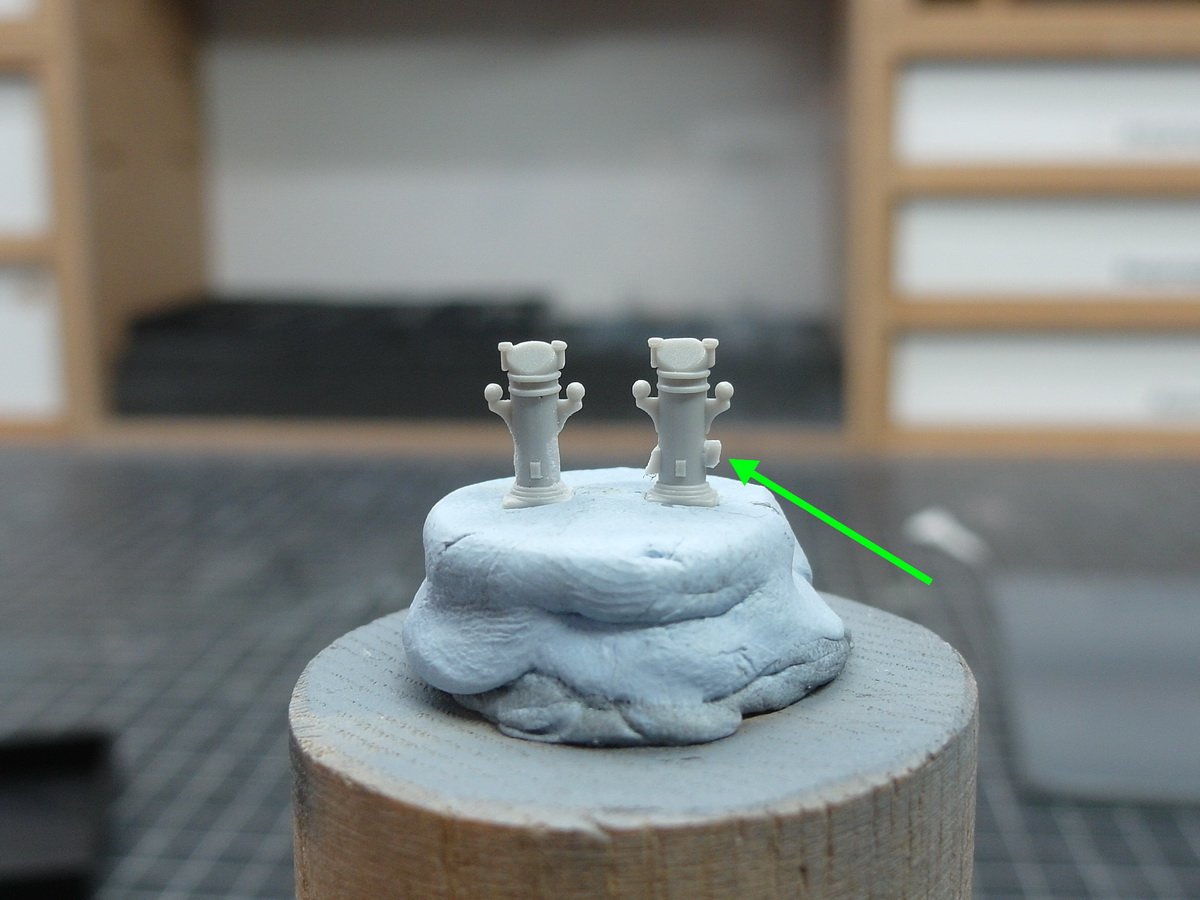
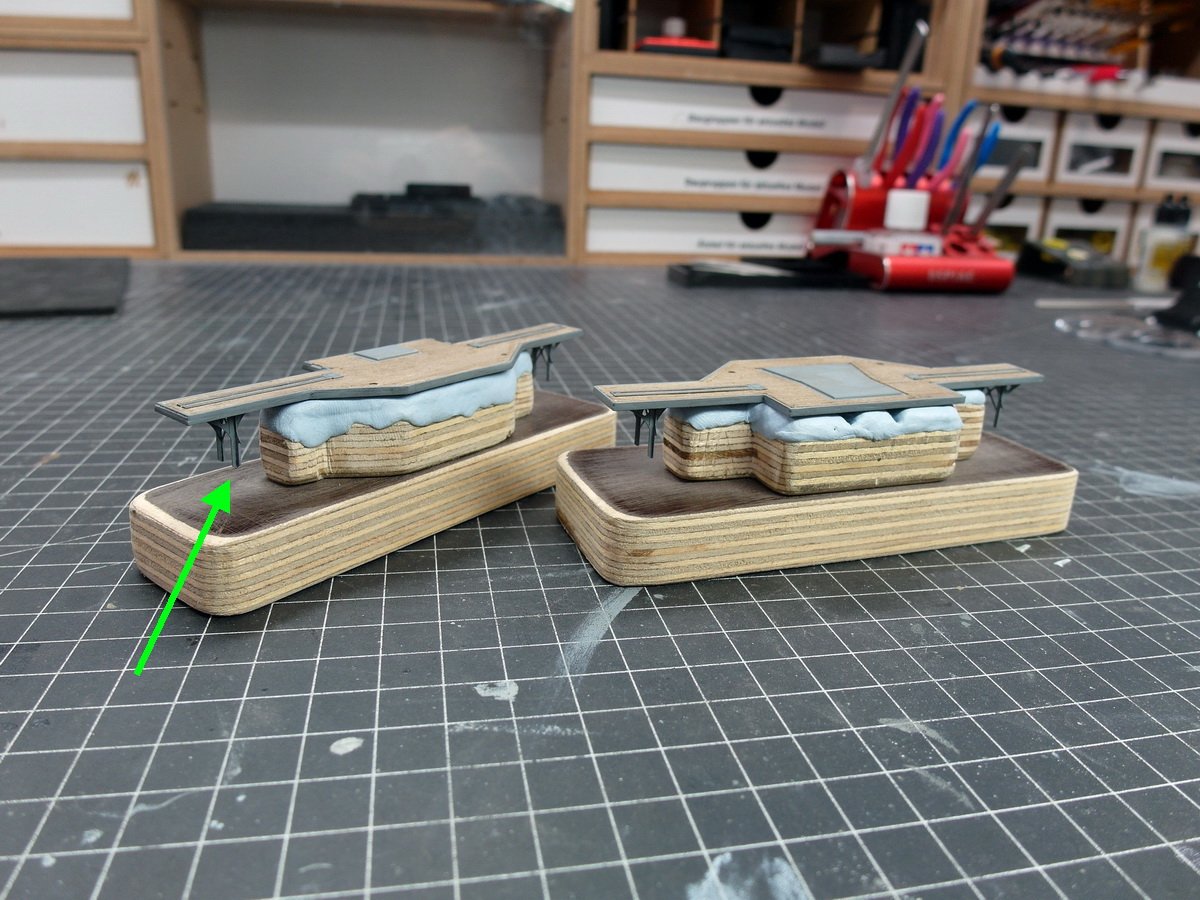
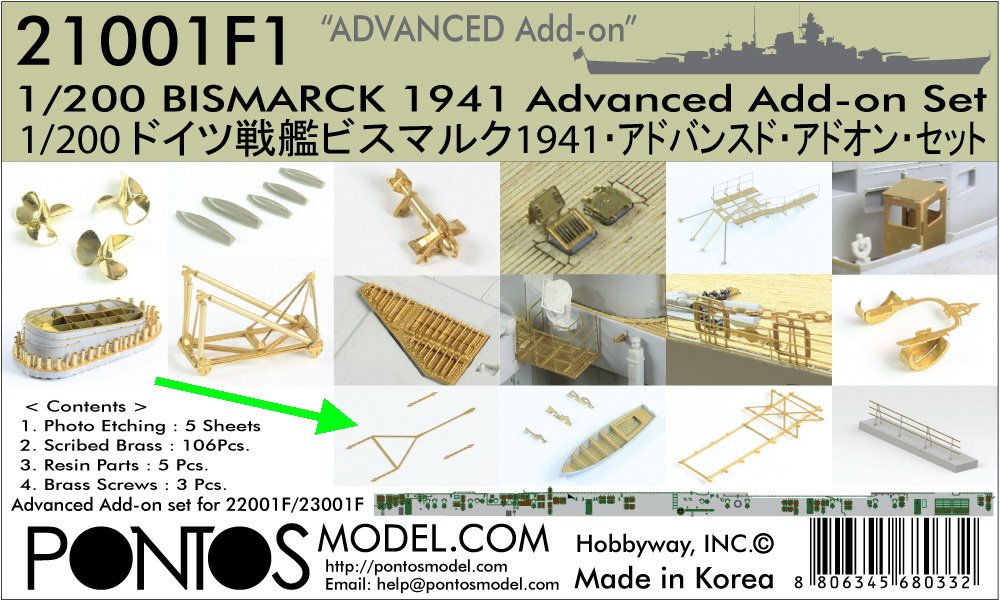
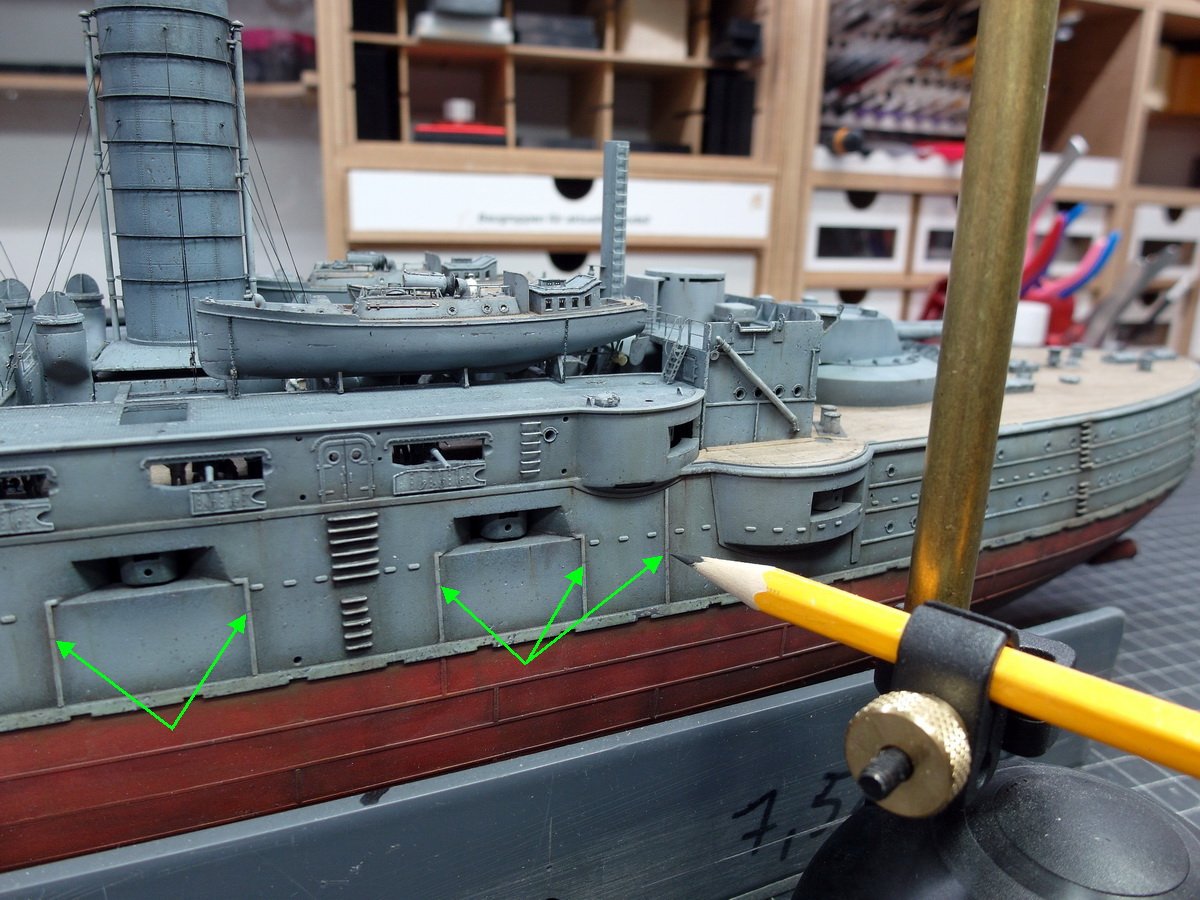
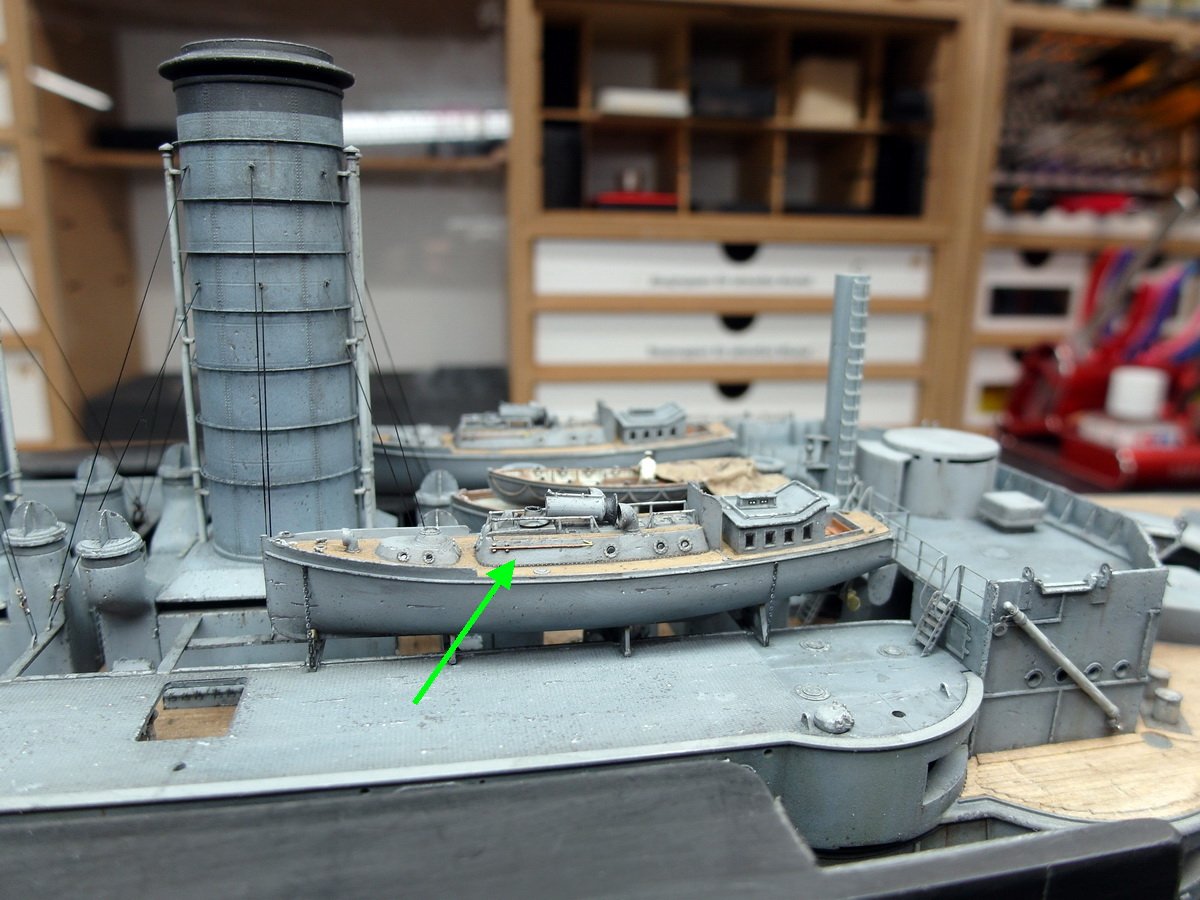
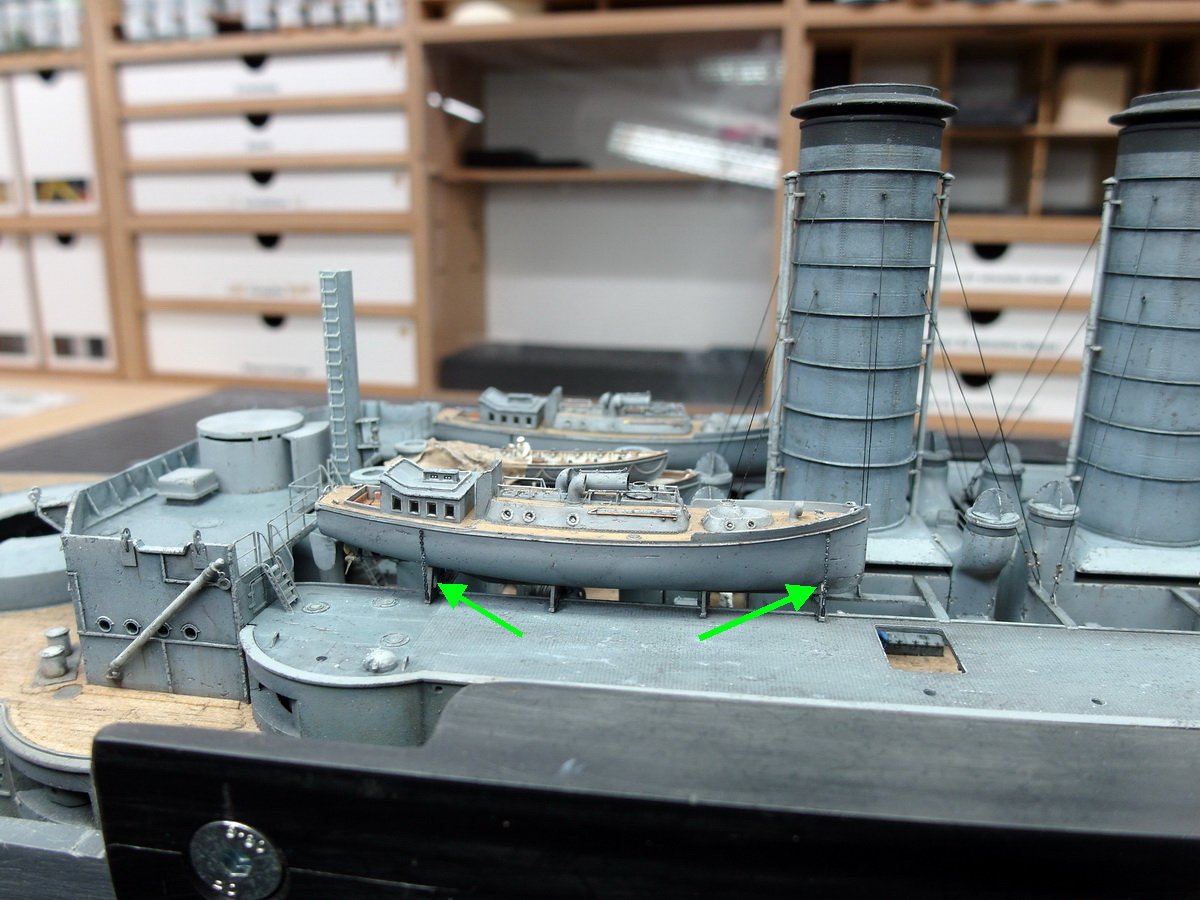
Thank you very much, Wolfmen. Unfortunately, I have to inform you that the antenna spreaders were not made by me, but are part of the Pontos expansion set. Look at the green arrow.
-
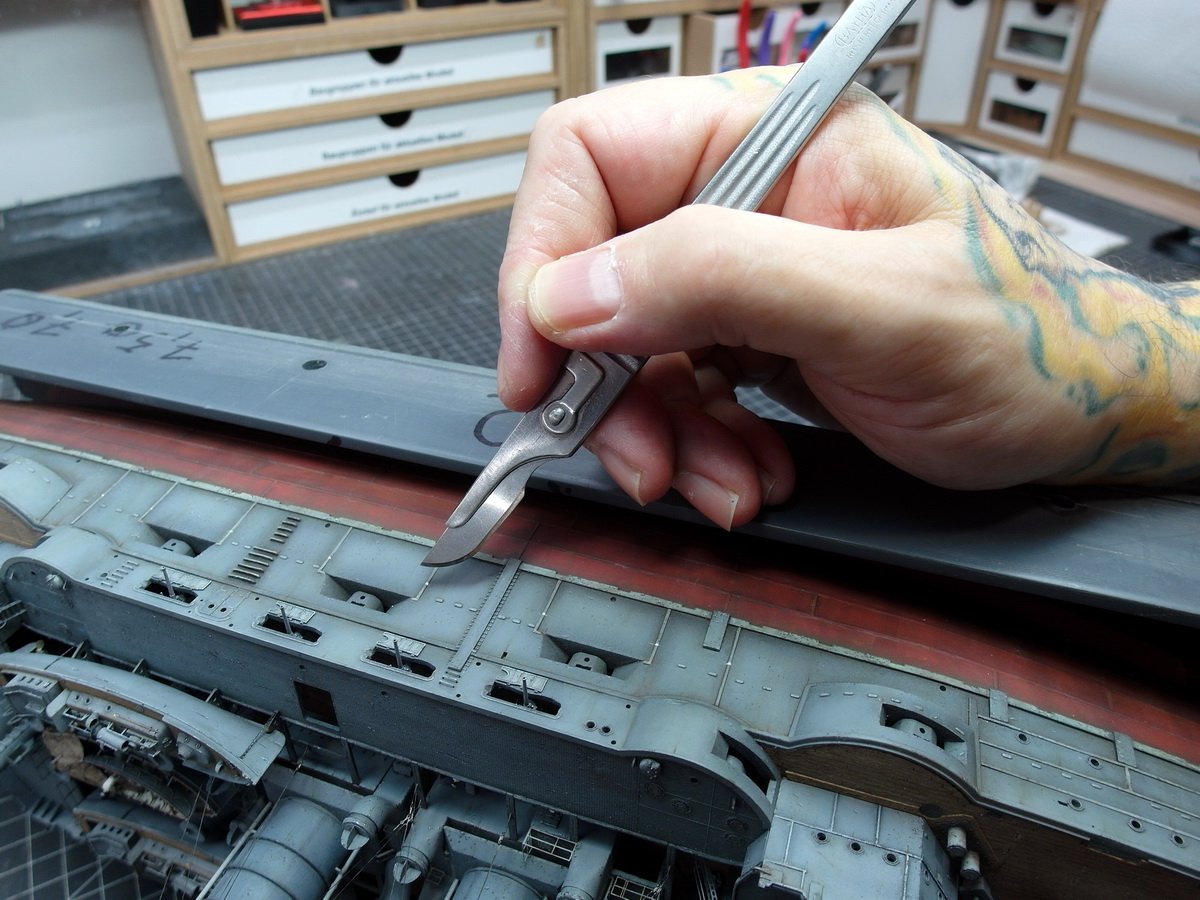
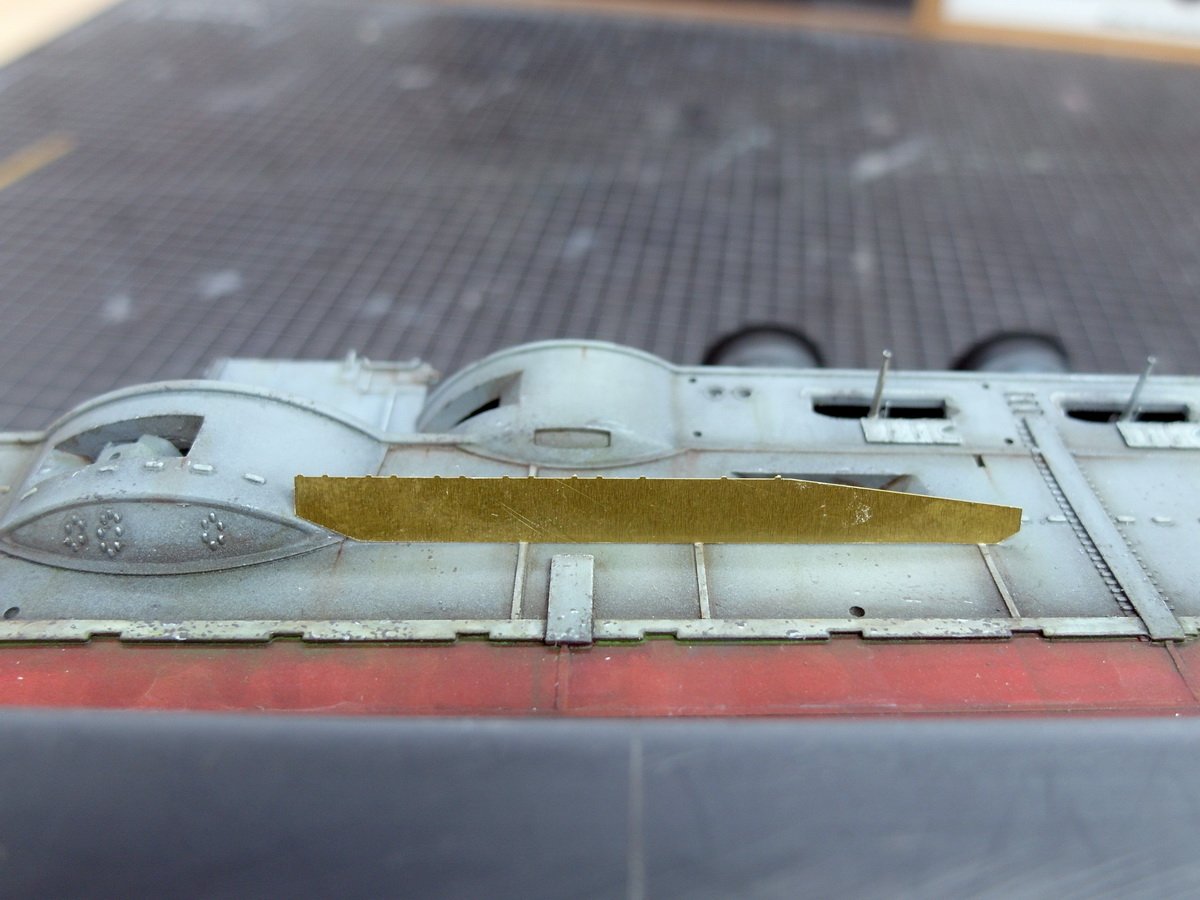
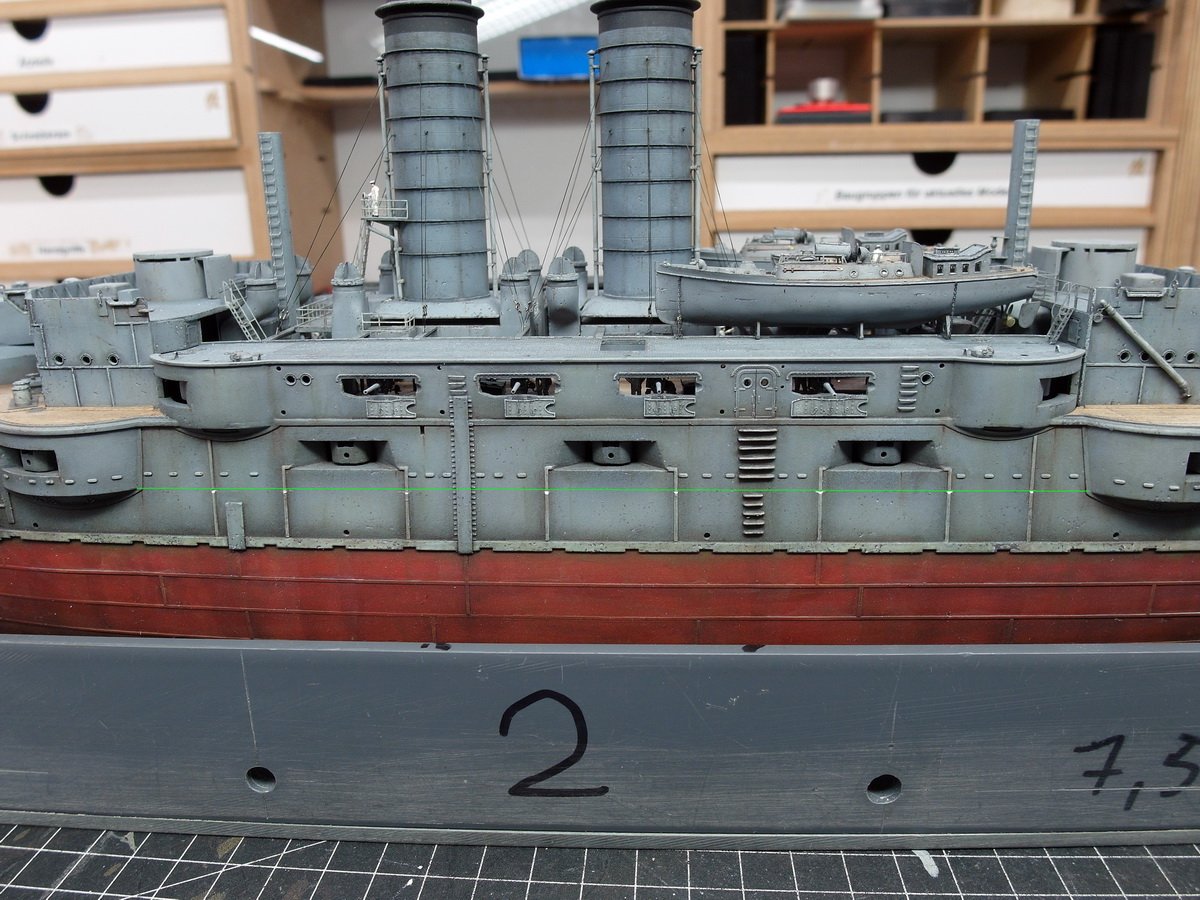
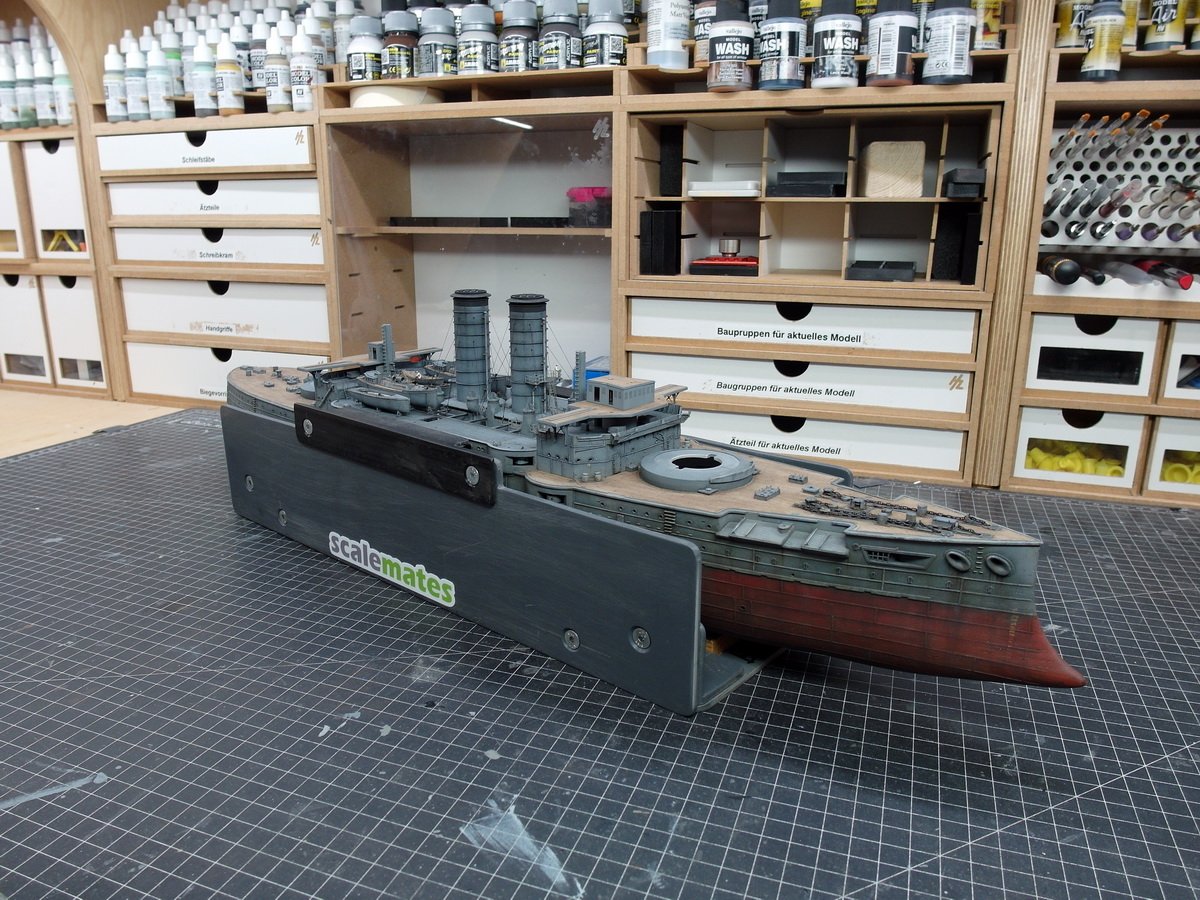
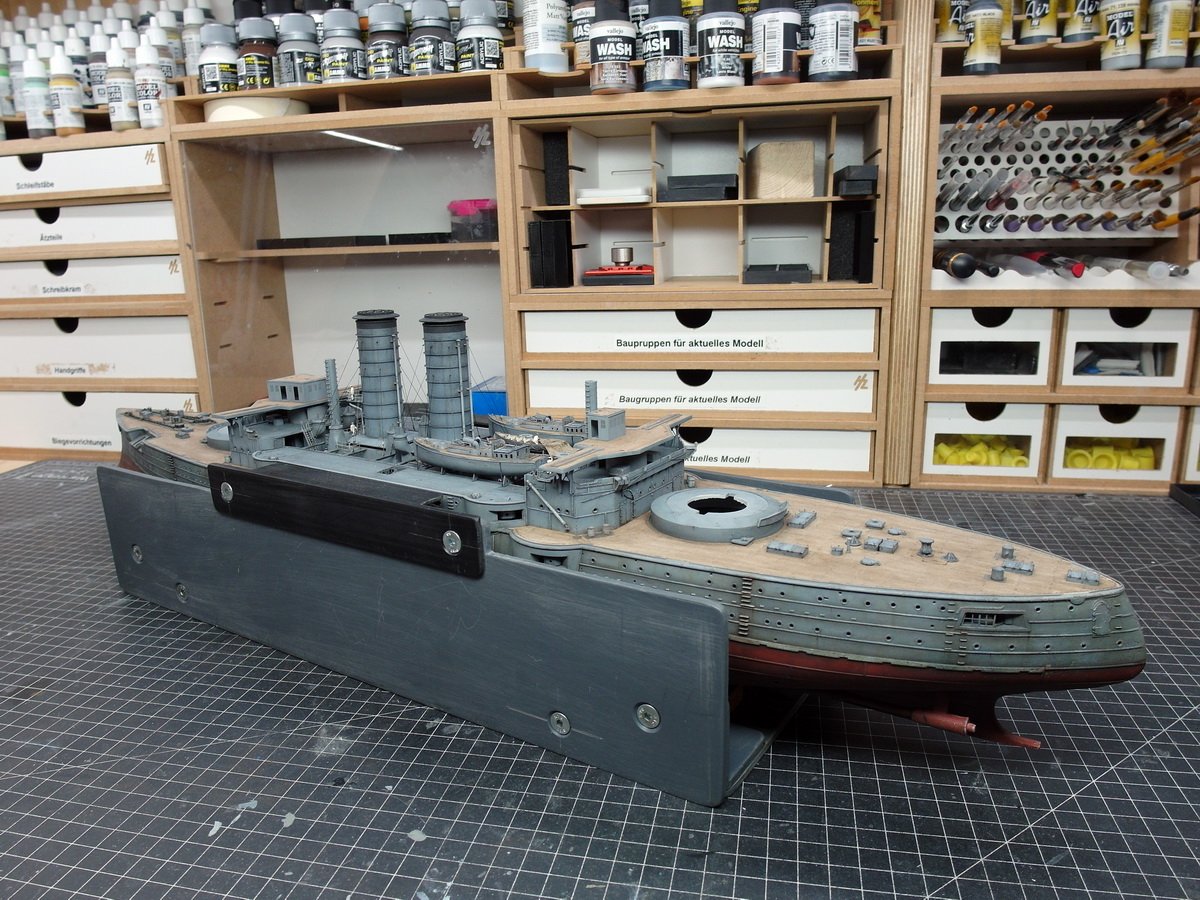
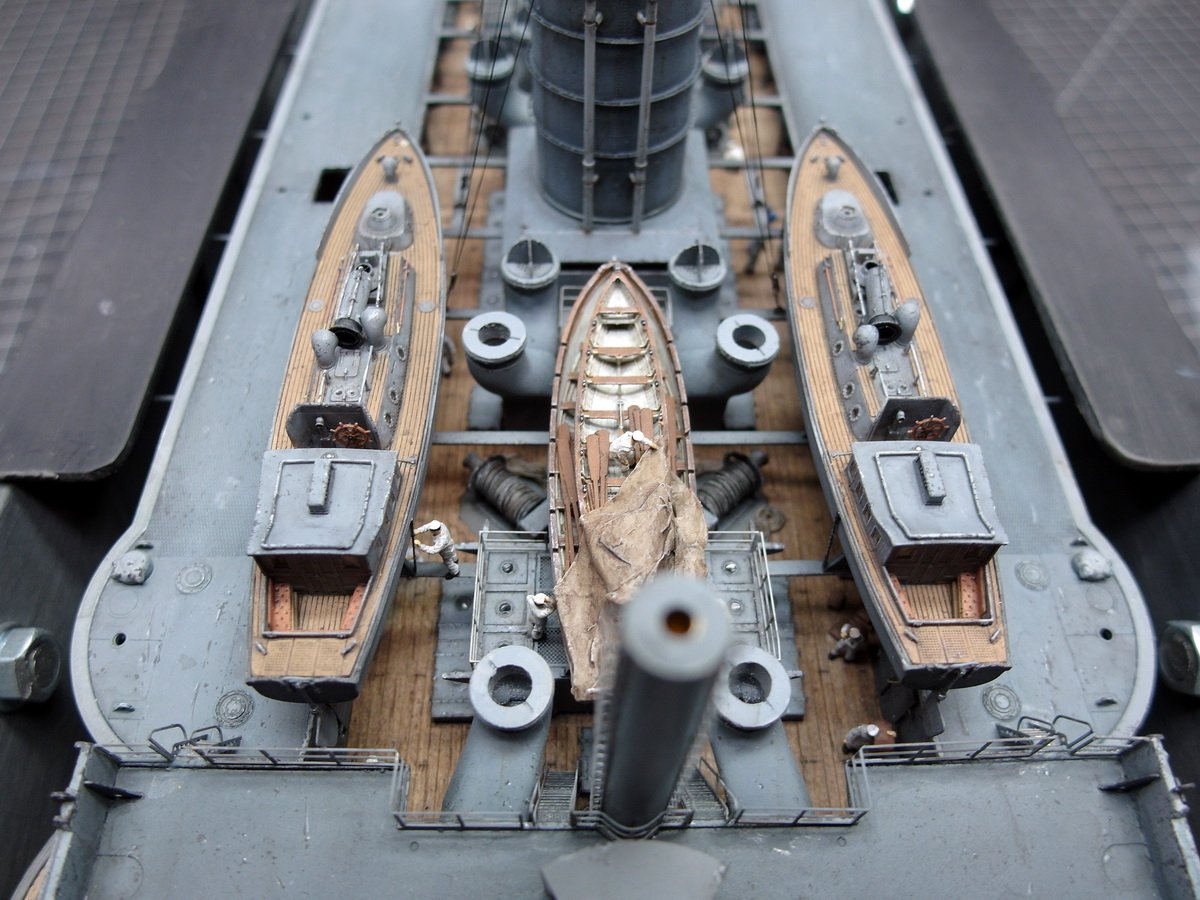
I actually wanted to finish weathering the towers today. But firstly, things don’t always turn out the way you expect, and secondly, they don’t, right?! While placing the large artillery pieces in their barbettes, my attention was drawn again to the bridgehouses with the structures I had modified from styrene profiles. Wait a minute, I thought, I did that on the hull too. And that’s where the supports for the torpedo nets are attached directly to the hull. Oh dear, open the dry dock carefully immediately. And indeed, the supports run along the hull at the points marked in green, and the profiles would create a large gap there. So, I marked the height with my waterline marker. I put the Mikasa on its side, put a new blade on the scalpel, and started carving notches. My little dry dock is invaluable again. It allows me to rest my hand properly and perform open-heart surgery with a steady cut. So far, so good. A scrap piece of an old etched circuit board was cut to length and applied. No gap visible anymore, perfect. So here’s the result. The notches run exactly under the green line, which is supposed to represent the torpedo net support. Then do the same on the other side. Since I’ve already opened the dock, I checked the positions for the barge and the cutters. That should be fine. Of course, I added the bridge decks for posing. I rarely see my model like this. This model really keeps me awake at night. But whatever, this beautiful ship deserves a little effort and attention.


- 193 replies
-
- 5
-
-
-
- Russo-Japanese War
- Mikasa
- (and 2 more)
-
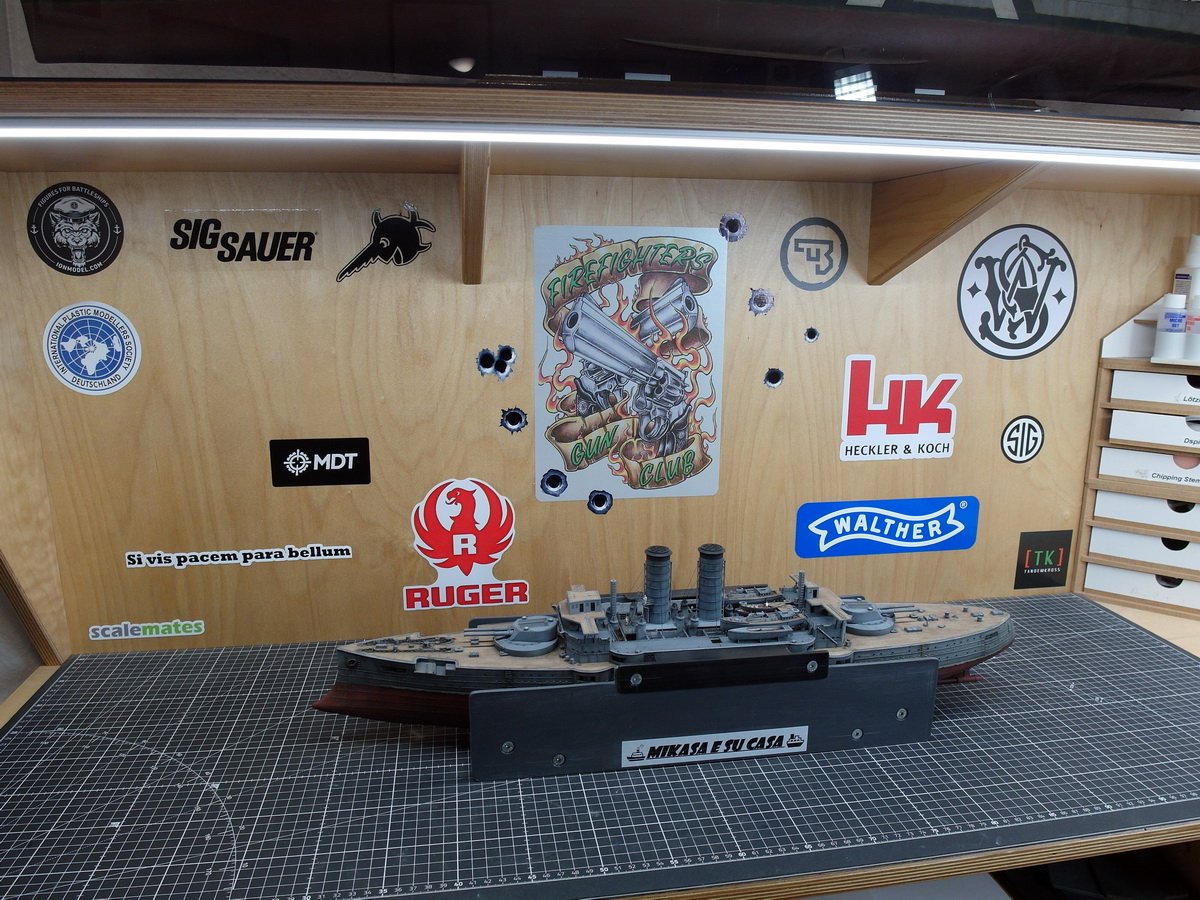
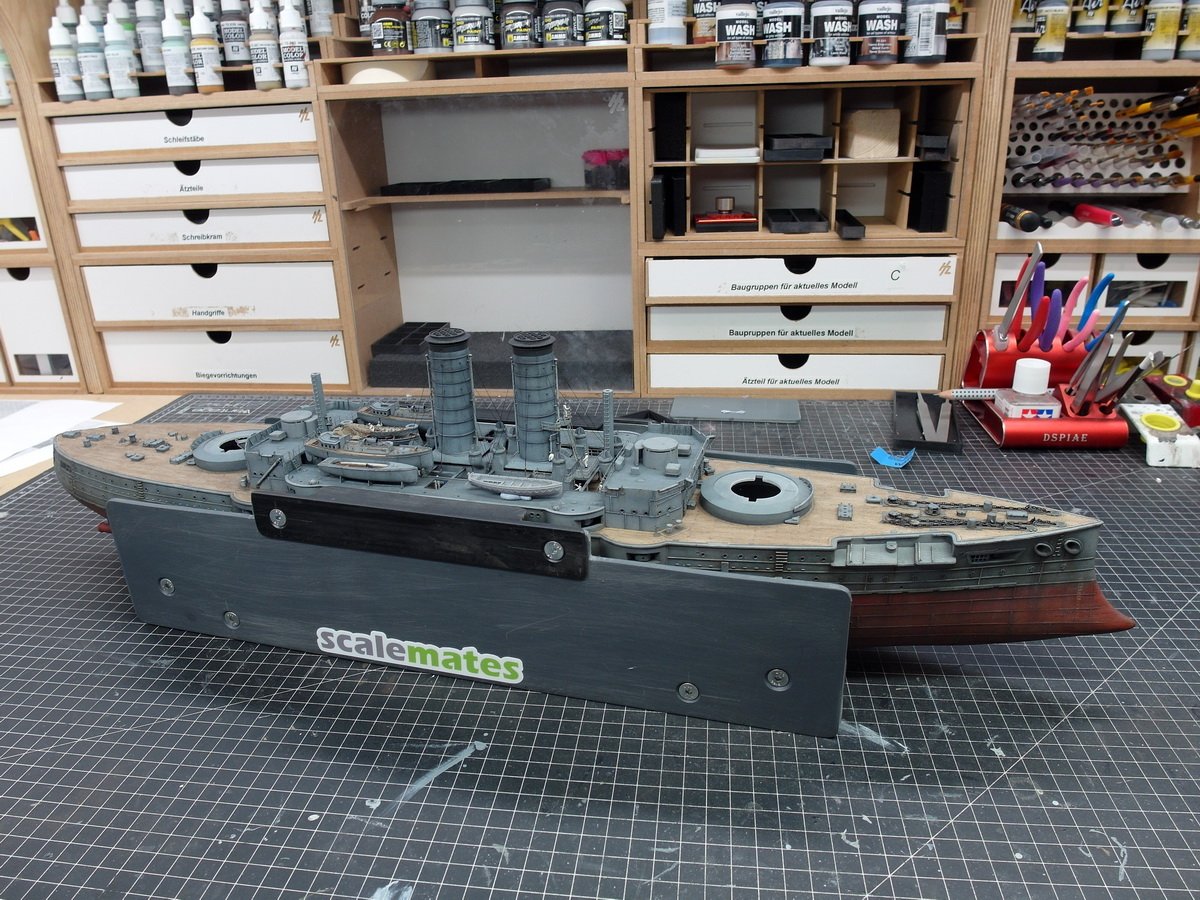
May or may not, that is the question, old Shakespeare would probably say. 😄 But that’s not the entire portfolio of stickers I own. 🤭😉 Have a look.
- 193 replies
-
- 4
-
-
- Russo-Japanese War
- Mikasa
- (and 2 more)
-
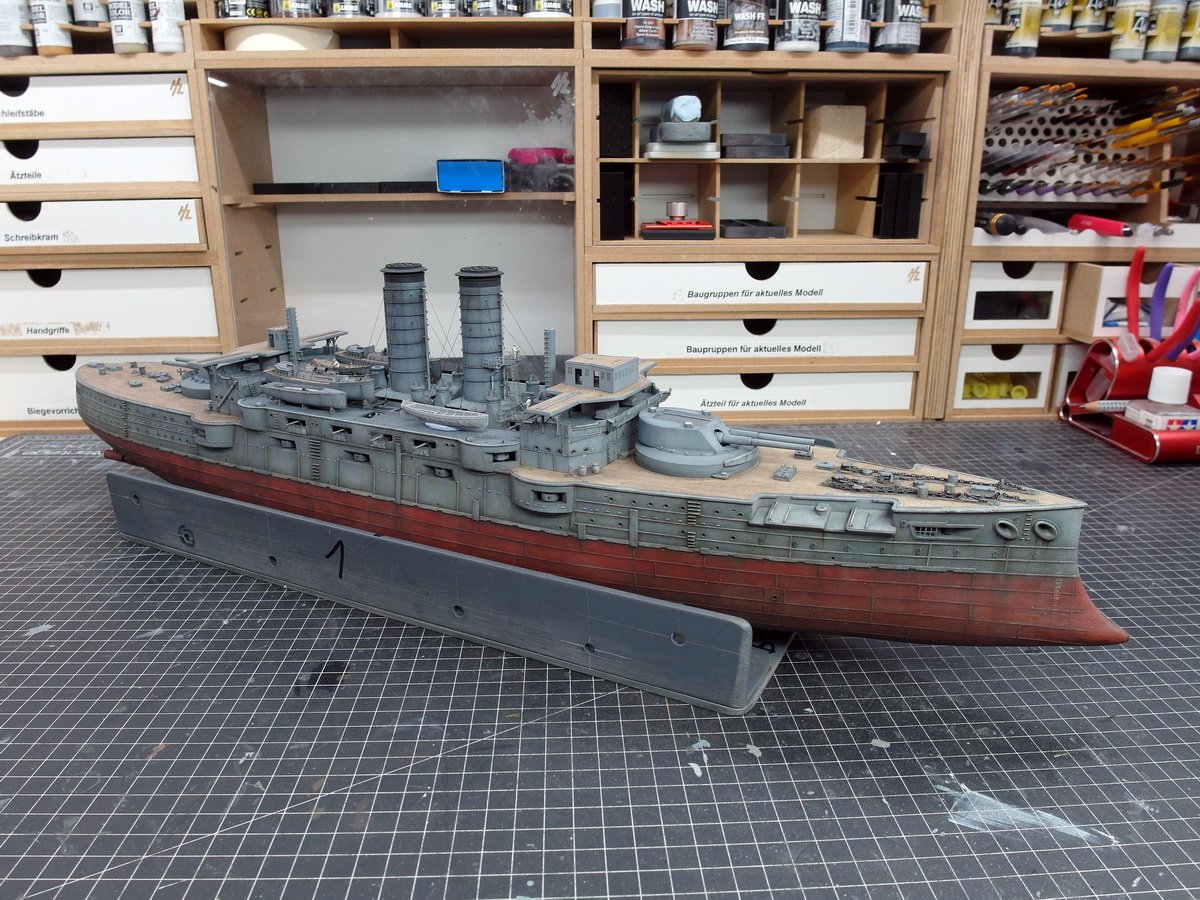
Brave new world, but cool that you can follow my report like this, Loyd. So, another little update today. The primer was smoothed and repaired again in the damaged areas with 1000-grit sandpaper. Then I cleaned and attached a lot of microscopic parts. The turrets are made almost entirely from the Pontos kit. Only the armor plates of the small turrets were provided by the KA kit. See green arrow. This allowed the base coat and a first wash to be applied. Bow: And stern: Mikasa’s face continues to become more complete. 💁♂️


- 193 replies
-
- 6
-
-
-
- Russo-Japanese War
- Mikasa
- (and 2 more)
-
So, the gun barrels are now rigidly mounted, glued together, and stable. This doesn't bother me, since I always build the main turrets in the moving position anyway. The green arrow shows the defective primer. After painting, you shouldn't notice any of it anymore. Now I can continue working on them next week.


- 193 replies
-
- 6
-
-
- Russo-Japanese War
- Mikasa
- (and 2 more)
-
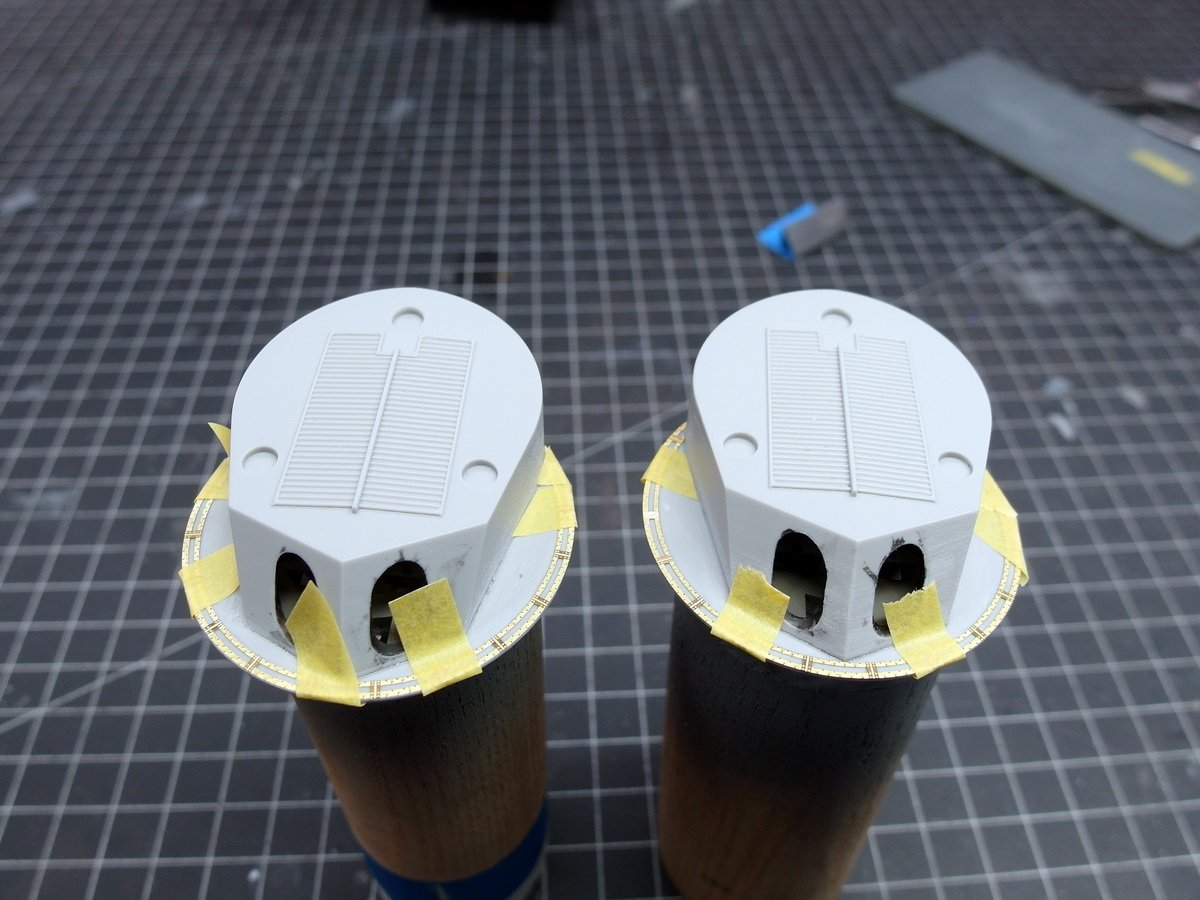
Ahoy, dear forum community. I’m back from my vacation. I hadn’t quite unpacked my suitcases yet, but I was already magically drawn back to my ship model. But since I didn’t feel like dealing with small stuff and wanted to make something big and simple, my eyes immediately fell on the large towers. First, I cut out everything and collected it. The interior was already prepared and only needed to be glued to the hood. Then the brass ring was attached to the base. A nice, easy start after the vacation. Things got a bit more difficult with the large brass component that goes on the turret lid. But that wasn’t a problem with MIG’s acrylic glue. Of course, unlike with superglue, you have to hold the whole thing in place while it dries. But that’s no problem. Then I primed it, checked for cracks, and closed them. So far, so good. And then came the unexpected setback. Getting the brass gun barrels into their mounts proved surprisingly difficult. The turret openings were very narrow and in some cases, the primer was peeling off the barrels. Furthermore, the barrels didn’t fit particularly well in their brass mounts and were relatively unstable. I then filled them with a lot of glue. Thankfully, you won’t notice any of that later. Standing upright like this, I’ll let the towers dry thoroughly before I continue working on them.


- 193 replies
-
- 4
-
-
- Russo-Japanese War
- Mikasa
- (and 2 more)
-
Haha Jeff, maybe I'll do that and hang it under the ceiling. 😁 That's true, you can leave your nerves at the cloakroom, as we say here in Germany. Good point about the davits, I'll come back to that when the time comes. But I can say that I agree with you on that. 👍
- 193 replies
-
- 1
-
-
- Russo-Japanese War
- Mikasa
- (and 2 more)
-
An interesting boat, very well built. 👍
-
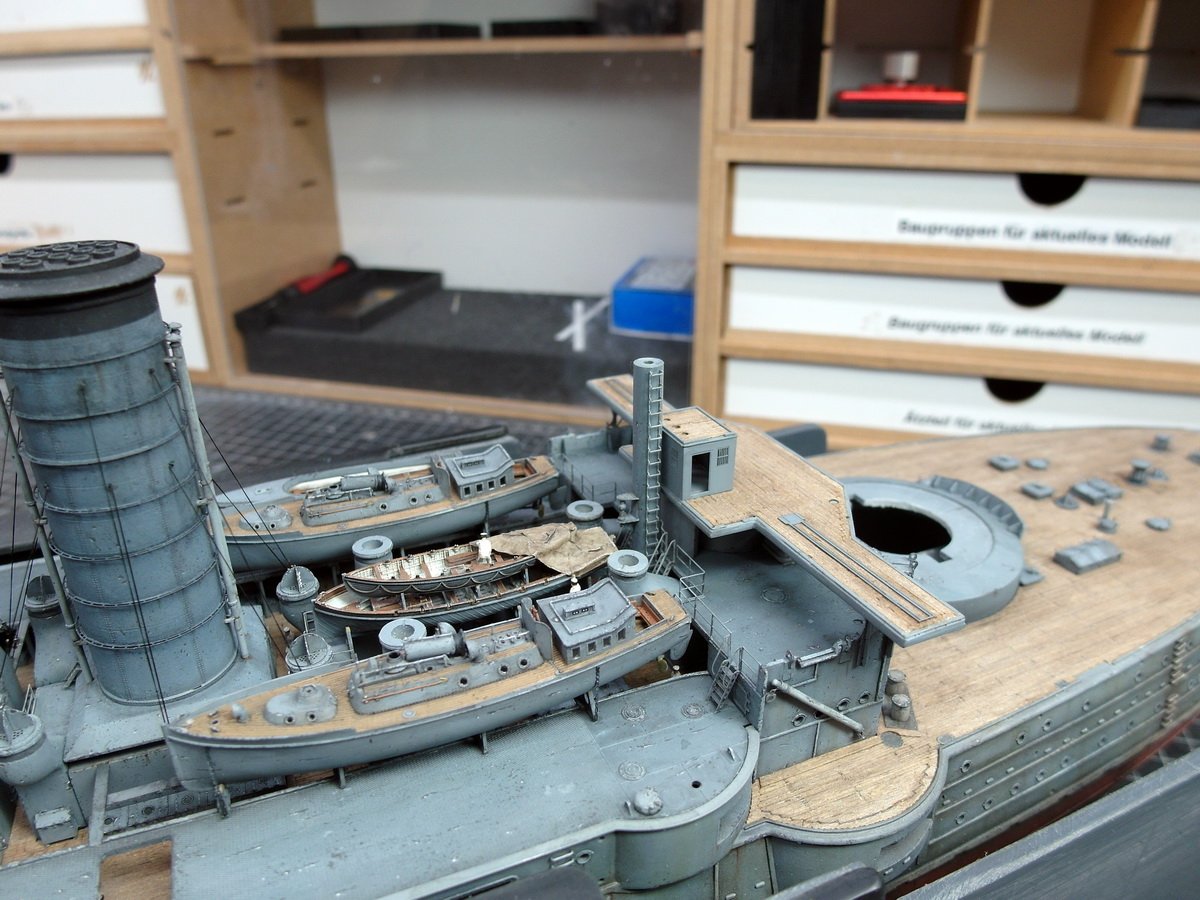
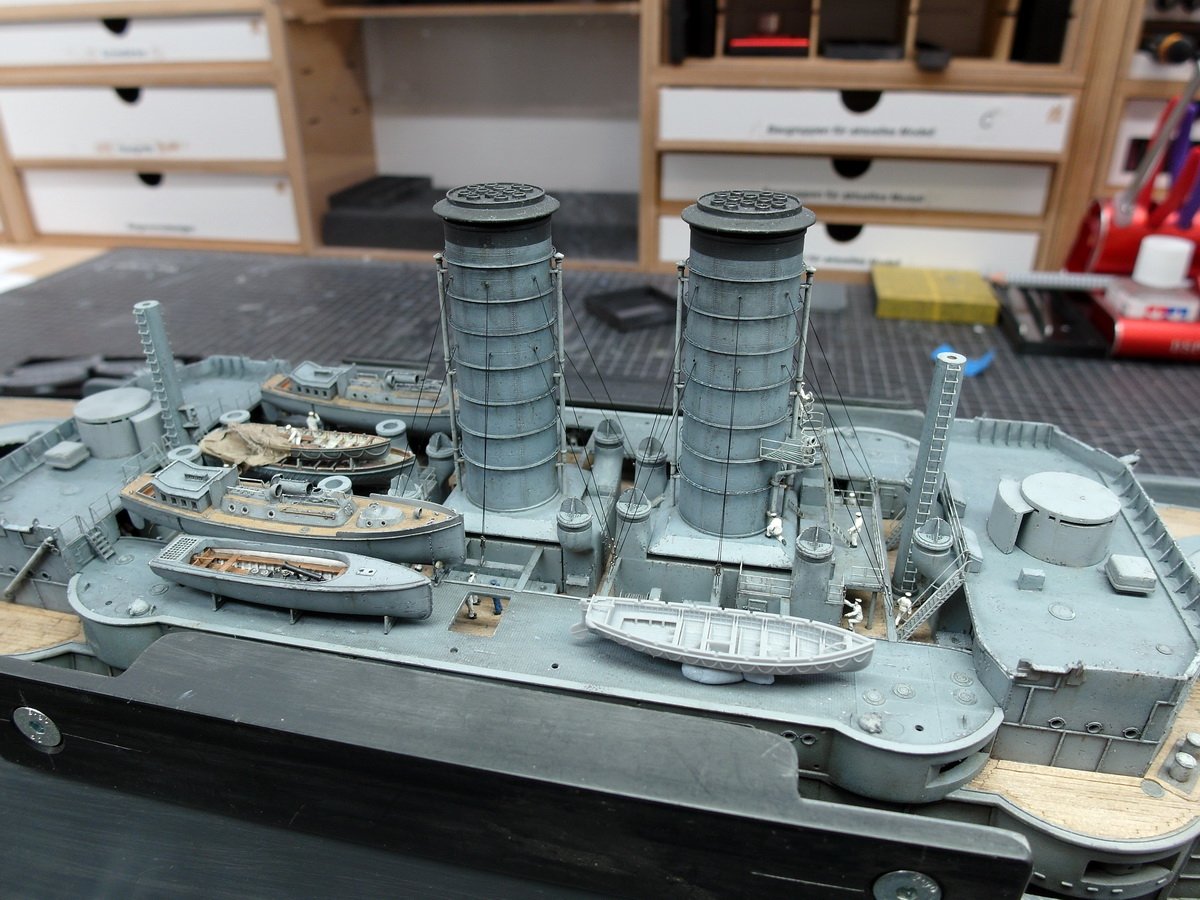
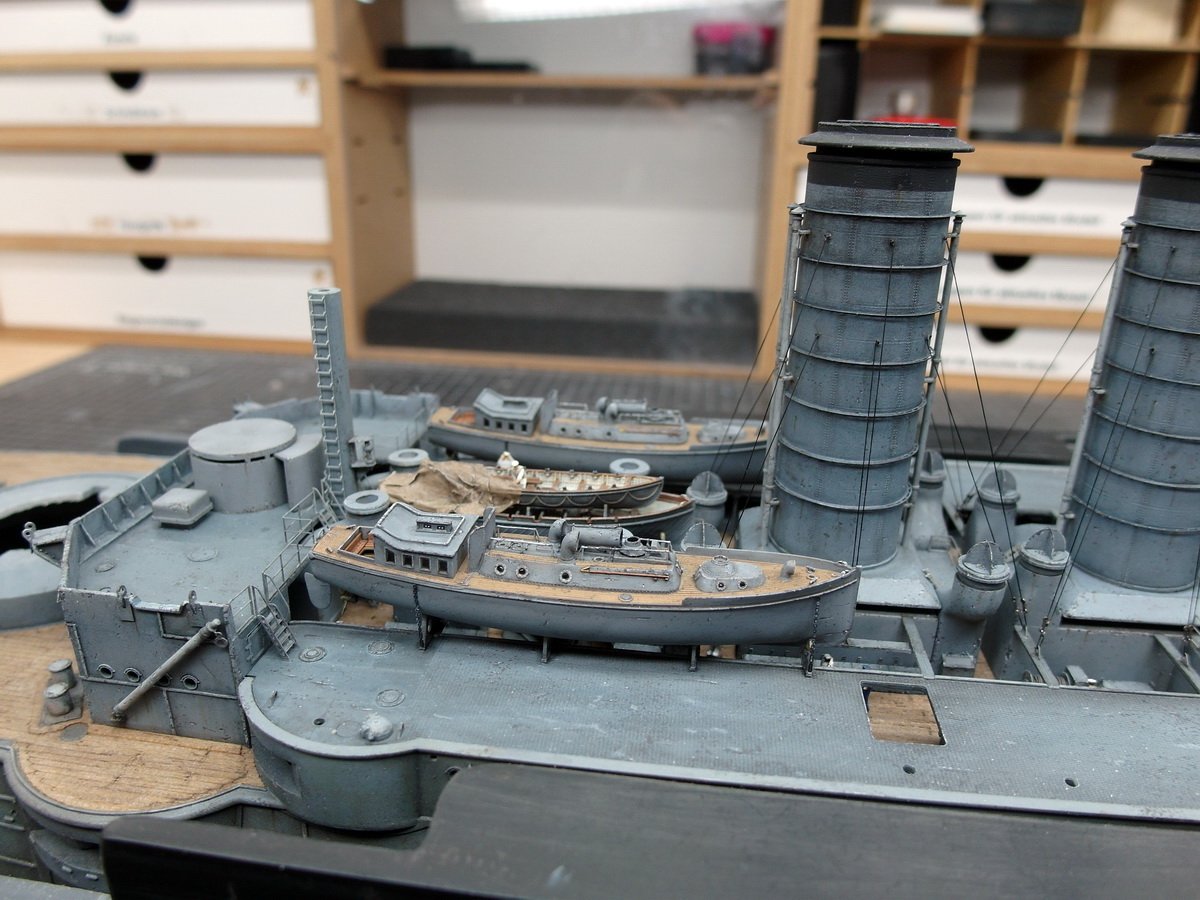
Good morning, model builders. Before I go on vacation, I wanted to post a quick update. The front wheelhouse has been soldered and assembled. And the deck, too. I added a small styrene profile in the middle. This ensures the deck rests firmly on the armored control station and gives the whole thing stability. You can’t see any of it. Once you hang up, you’ll see that it would have been really tight with my profiles. And that’s how the Mikasa got its two upper levels. stern… and towards the bow. That’s it in a nutshell before I set off on my journey tomorrow. And here are a few more impressions of my model in its current construction state.


- 193 replies
-
- 8
-
-
-
- Russo-Japanese War
- Mikasa
- (and 2 more)
-
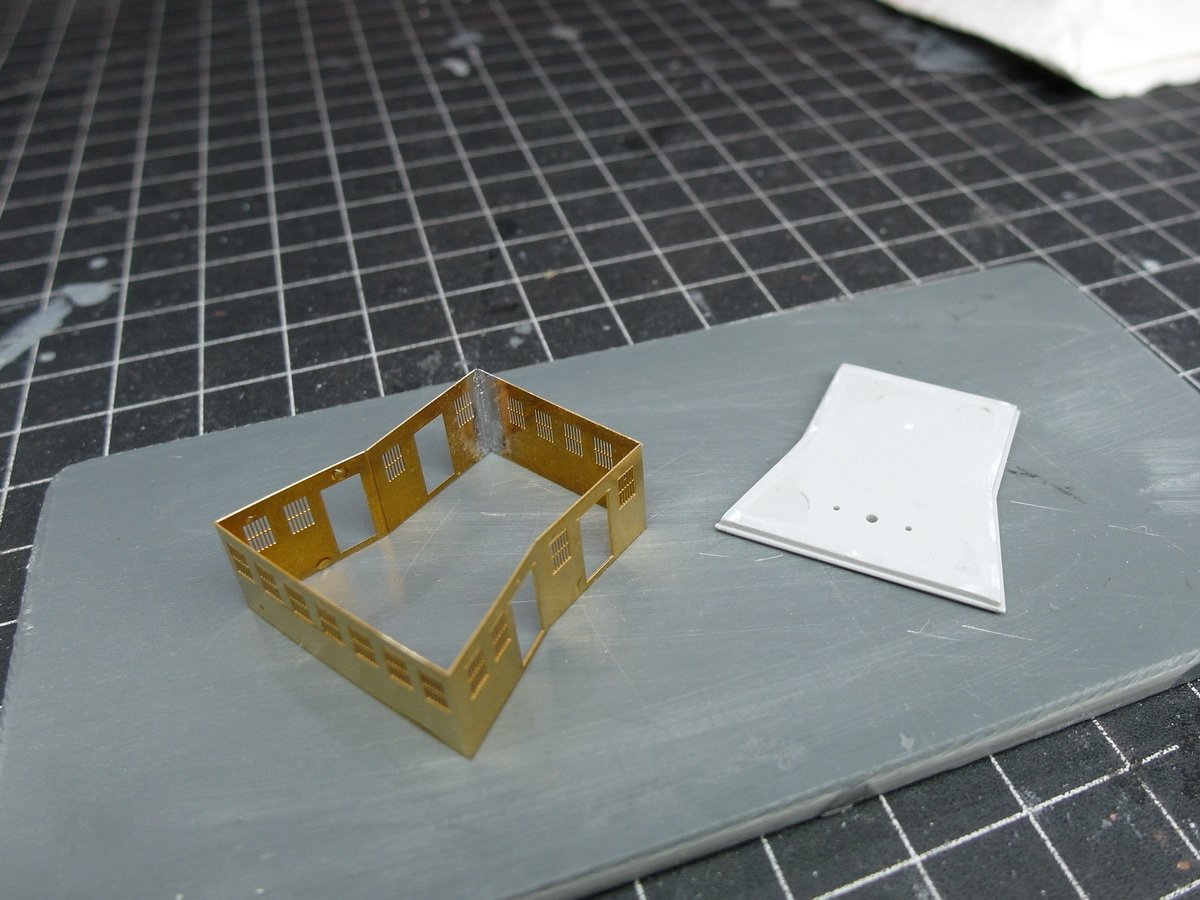
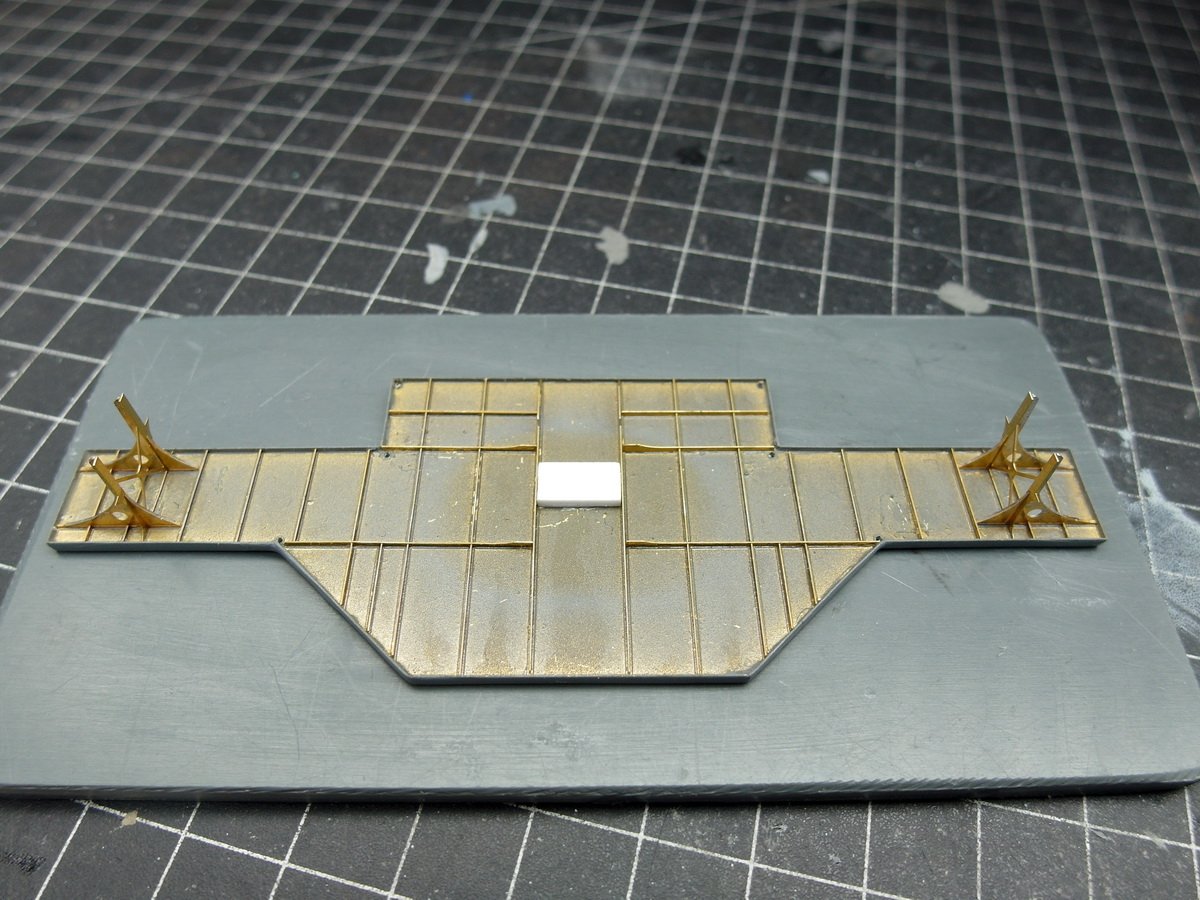
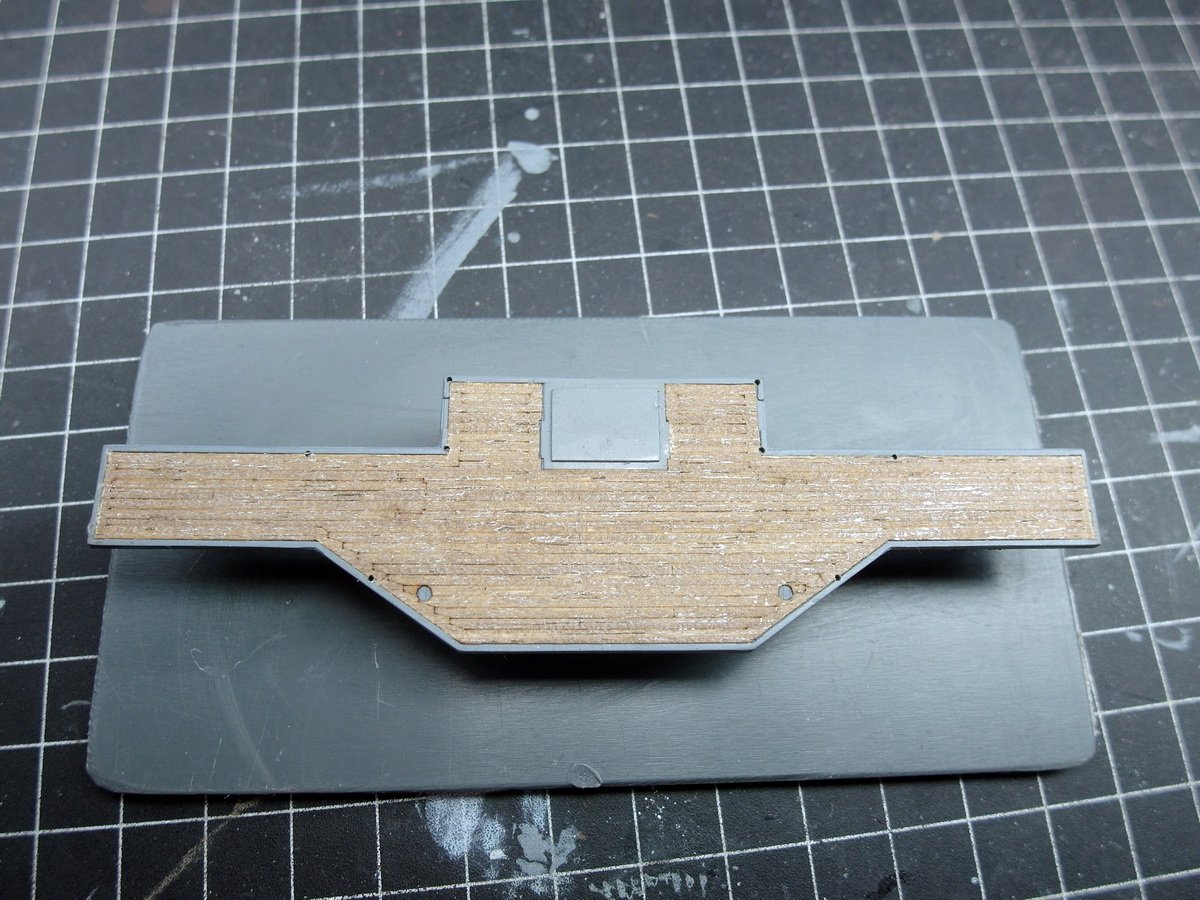
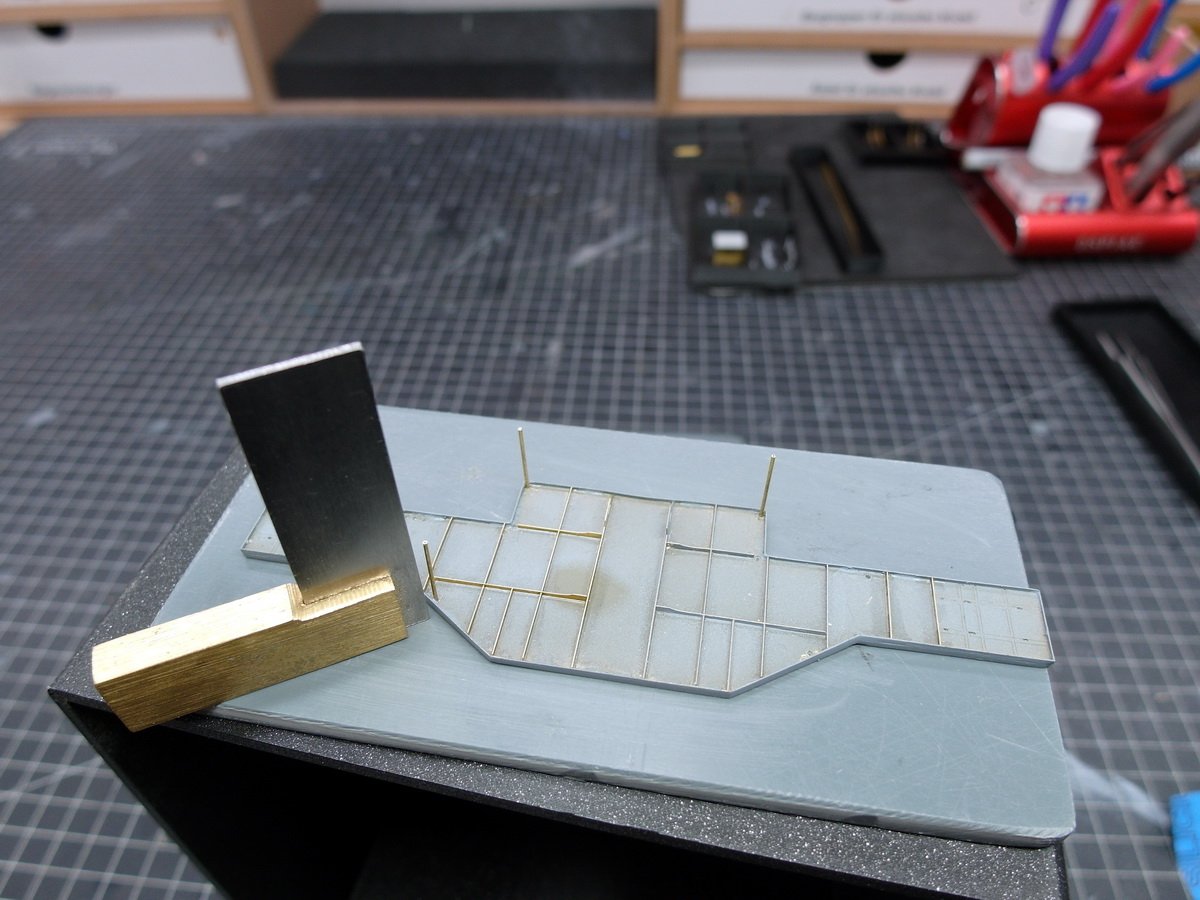
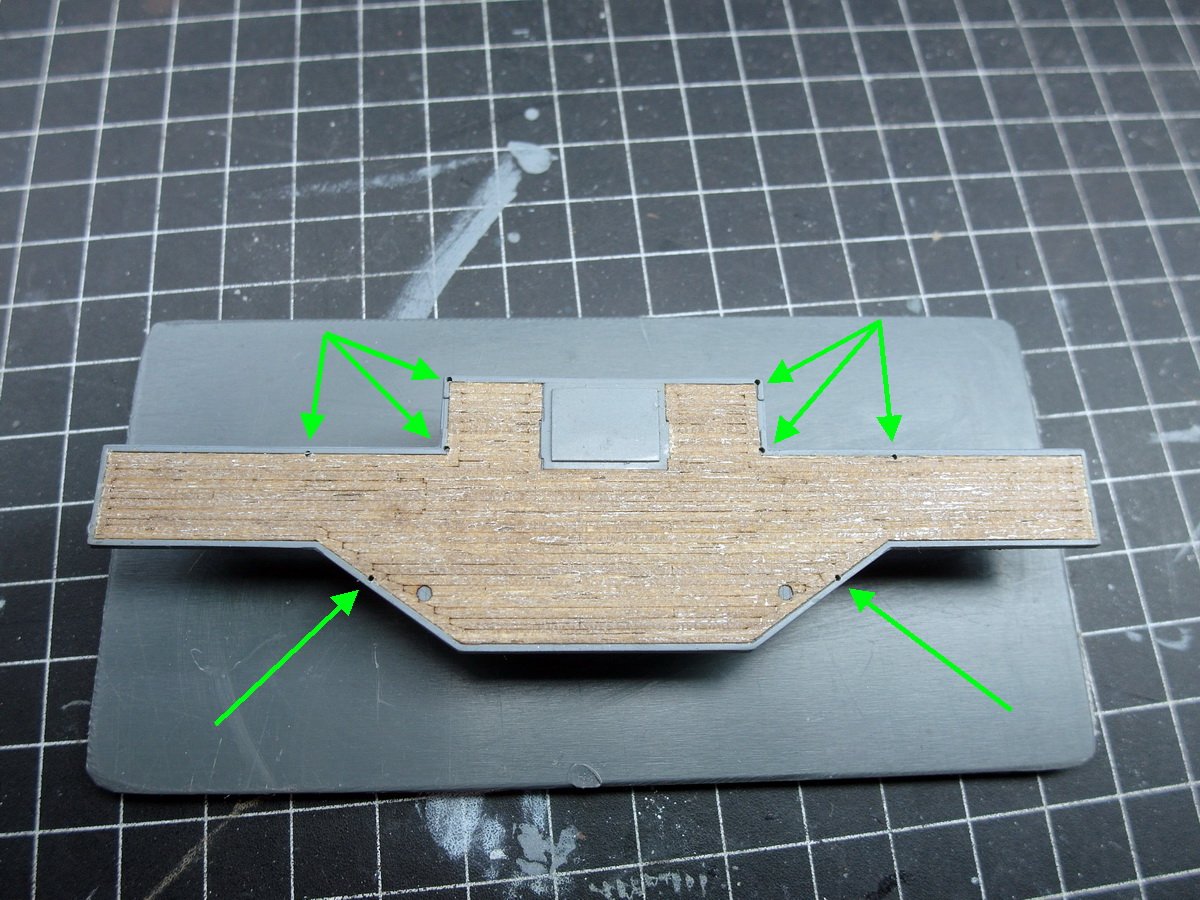
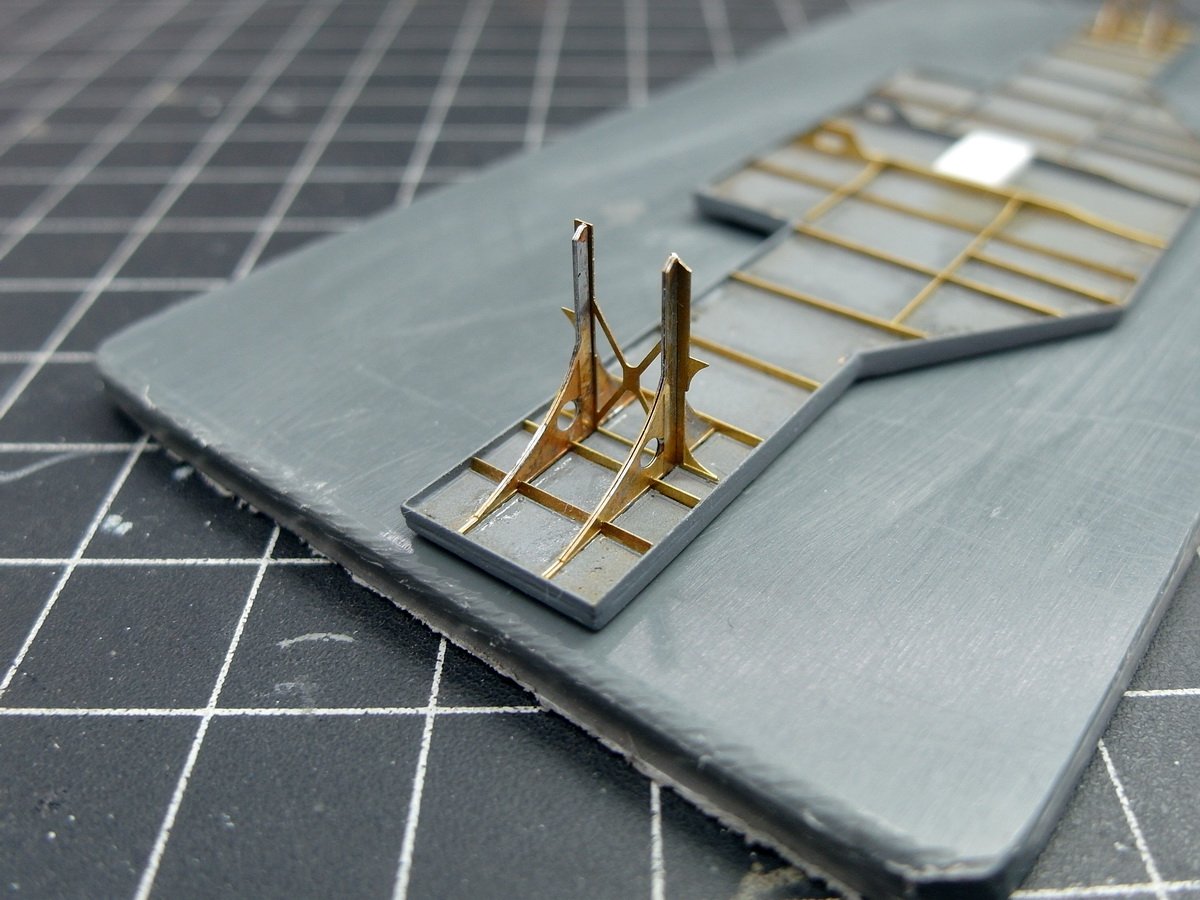
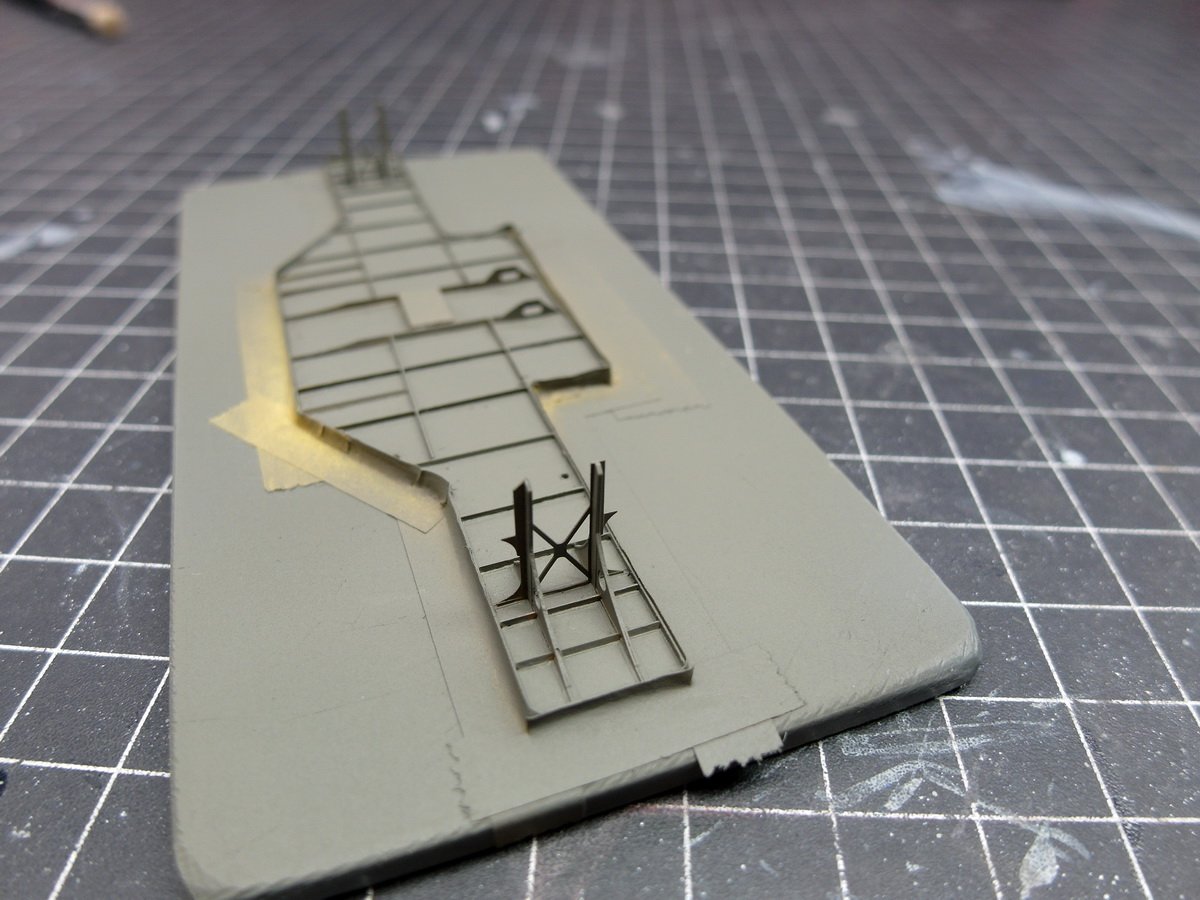
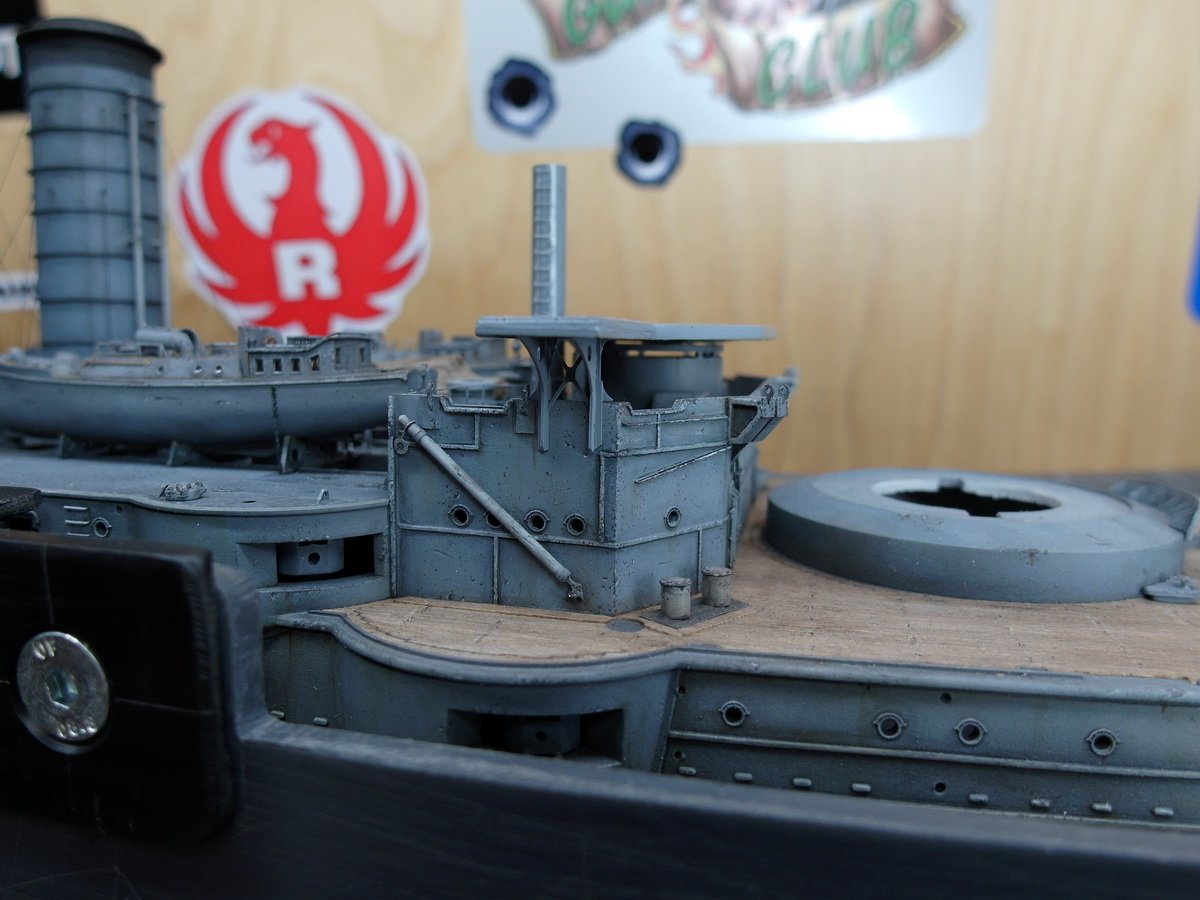
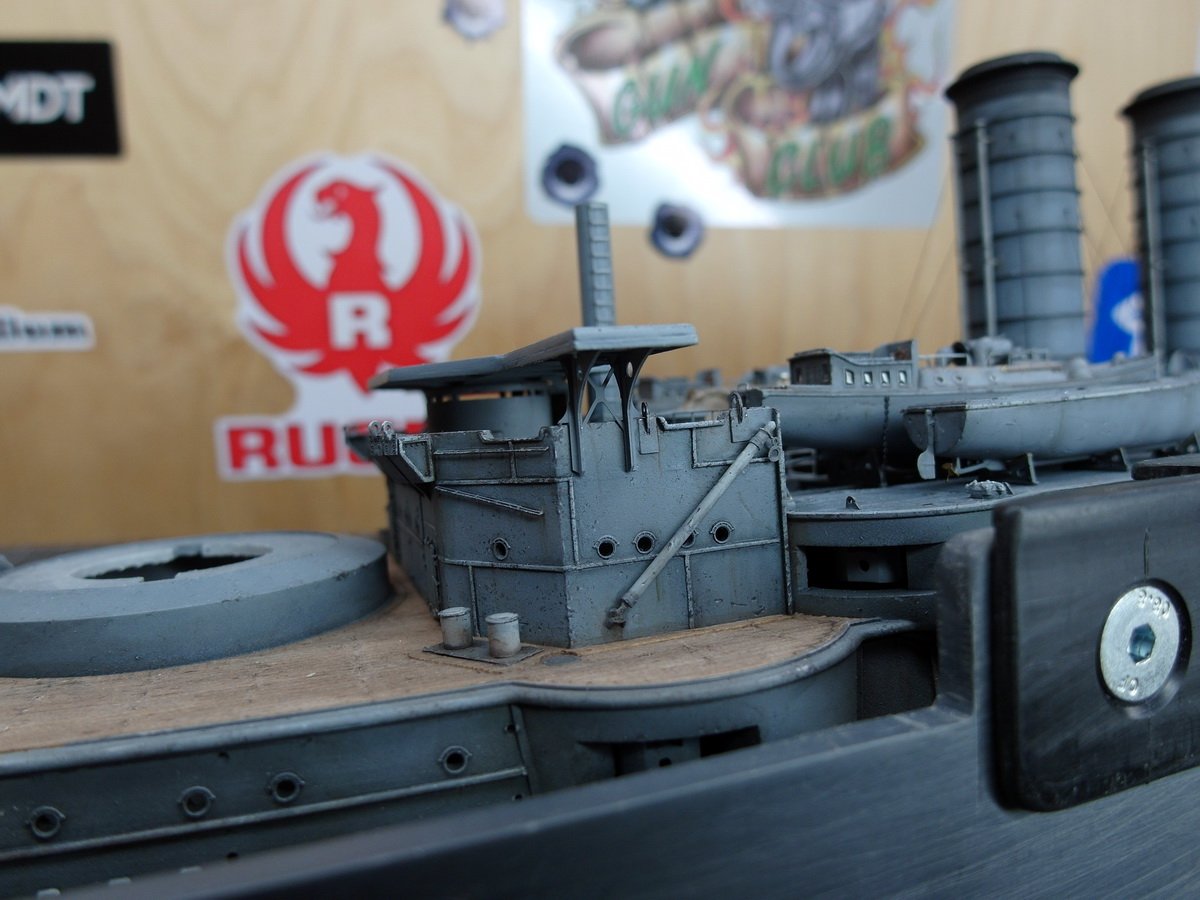
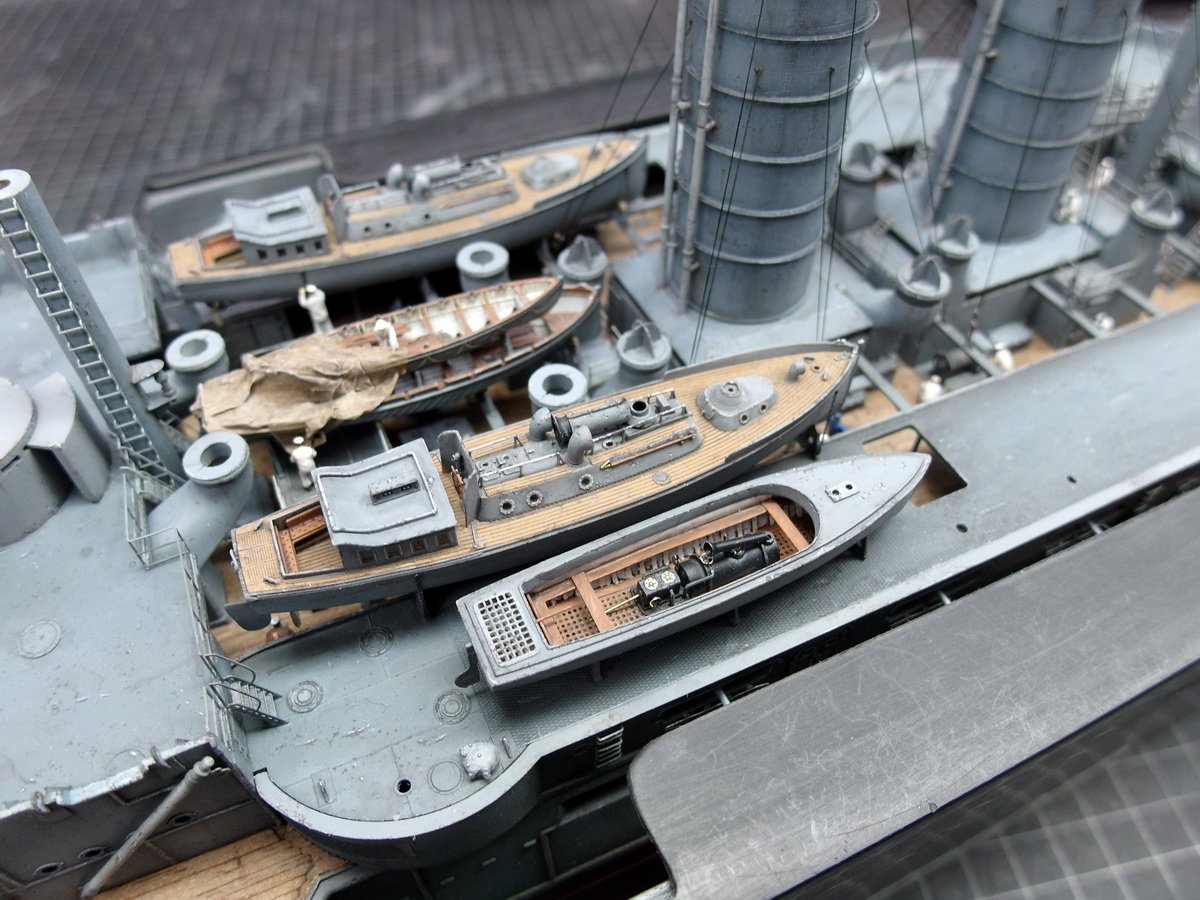
Hey Jeff, and thank you for your praise, it makes me proud. 😊 You speak from my heart. I really spend a lot of money on the high-quality additional details. But they catapult a model to the next level. And if they're not there, two crazy people like us spend days tinkering with the inferior original kit. But that makes us model builders, right?! 💪 I pushed the next cutters back for now, as the davits are missing and I can’t determine the optimal position. The steamboat isn’t glued down yet either. So I started on the rear bridge. I was a bit apprehensive about this construction phase. You might remember that I removed some of the profiles on the bridge houses because I wasn’t sure everything would fit in the end. But first things first. First, I laid the wooden deck while I could still exert pressure on the plastic part. This will stop once the underside has received its large brass component with the gusset plates. After everything had thoroughly dried, I wanted to attach the posts that support the bridge on the bridge house. They were originally made of plastic, but I immediately rejected that idea. I cut some out of brass to give them more stability. Attaching them, however, turned out to be a real test of patience. After testing the bridge, I realized, no, not like that. It’s completely unstable. So I’m starting from the back. I drilled holes for the posts so I could push them through from above later. Next, the outer support structure was attached. What a delicate construction phase. But it looks so good, doesn't it Jeff?! After I had completed that satisfactorily, I had to carefully tape everything off to avoid dirtying the wooden deck with the primer. The base coat is applied, and then the moment of truth. Does everything fit?! And you see, yes… everything fits together perfectly. So I wouldn’t have had to remove the profiles at all. It would have been close, but it would have worked anyway. Still, she’s confident. I’ve already soldered the little bridge house and placed it on the deck for fun. Very nice.

- 193 replies
-
- 6
-
-
- Russo-Japanese War
- Mikasa
- (and 2 more)
-
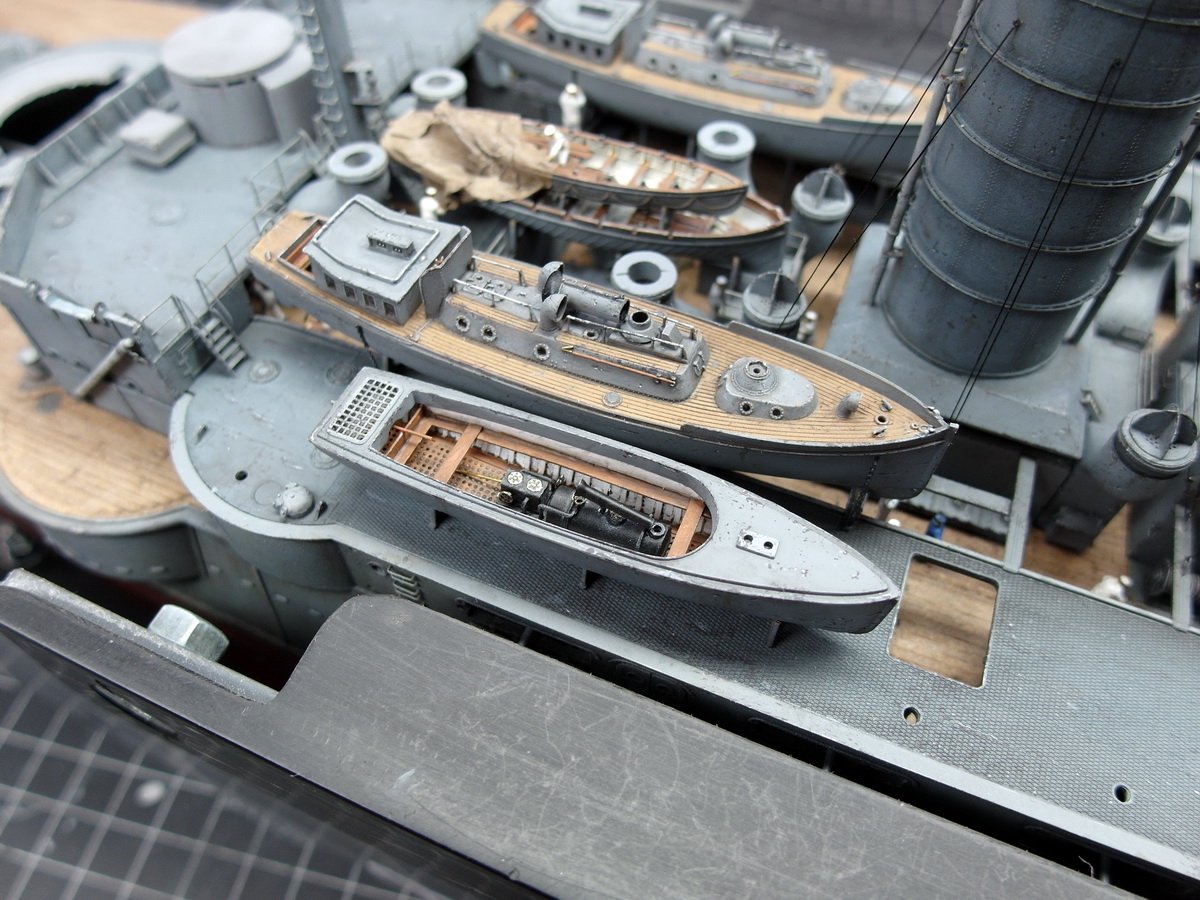
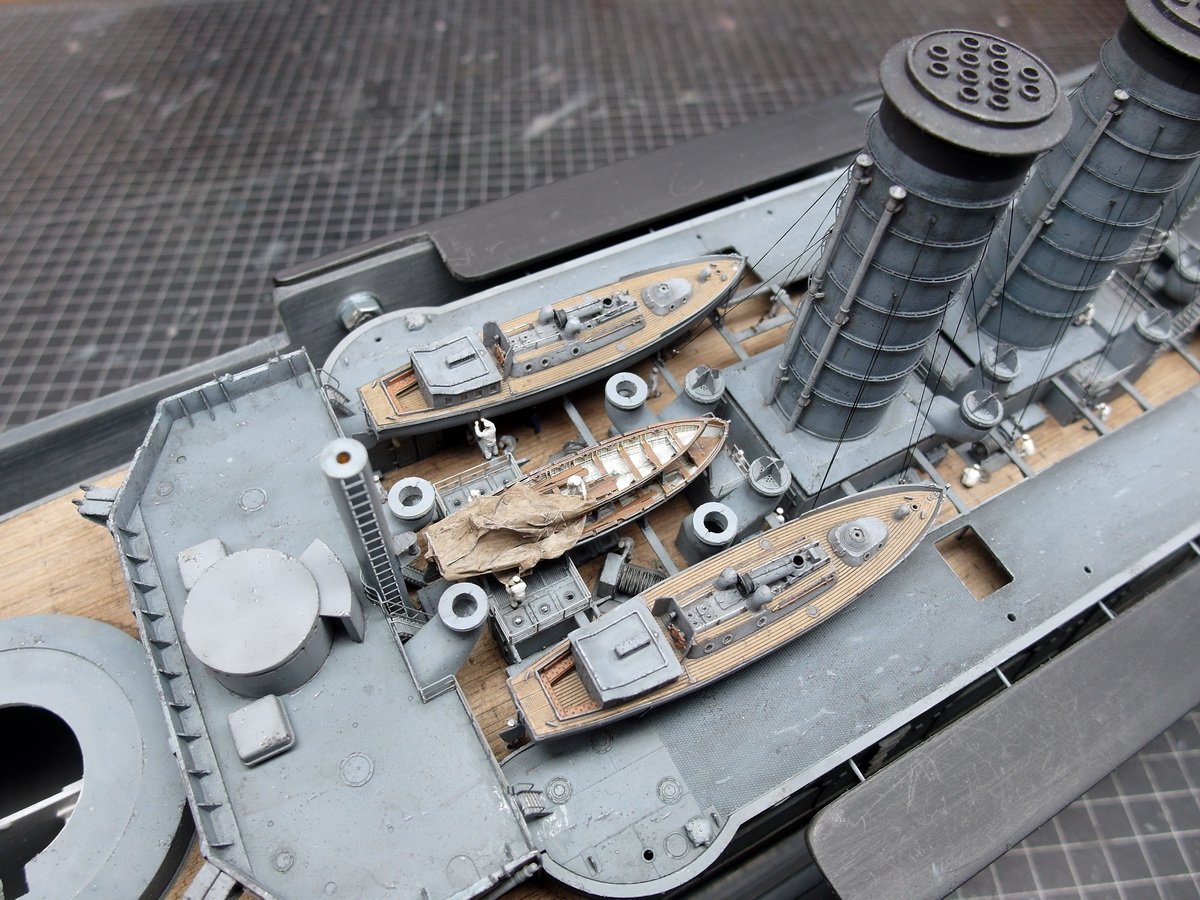
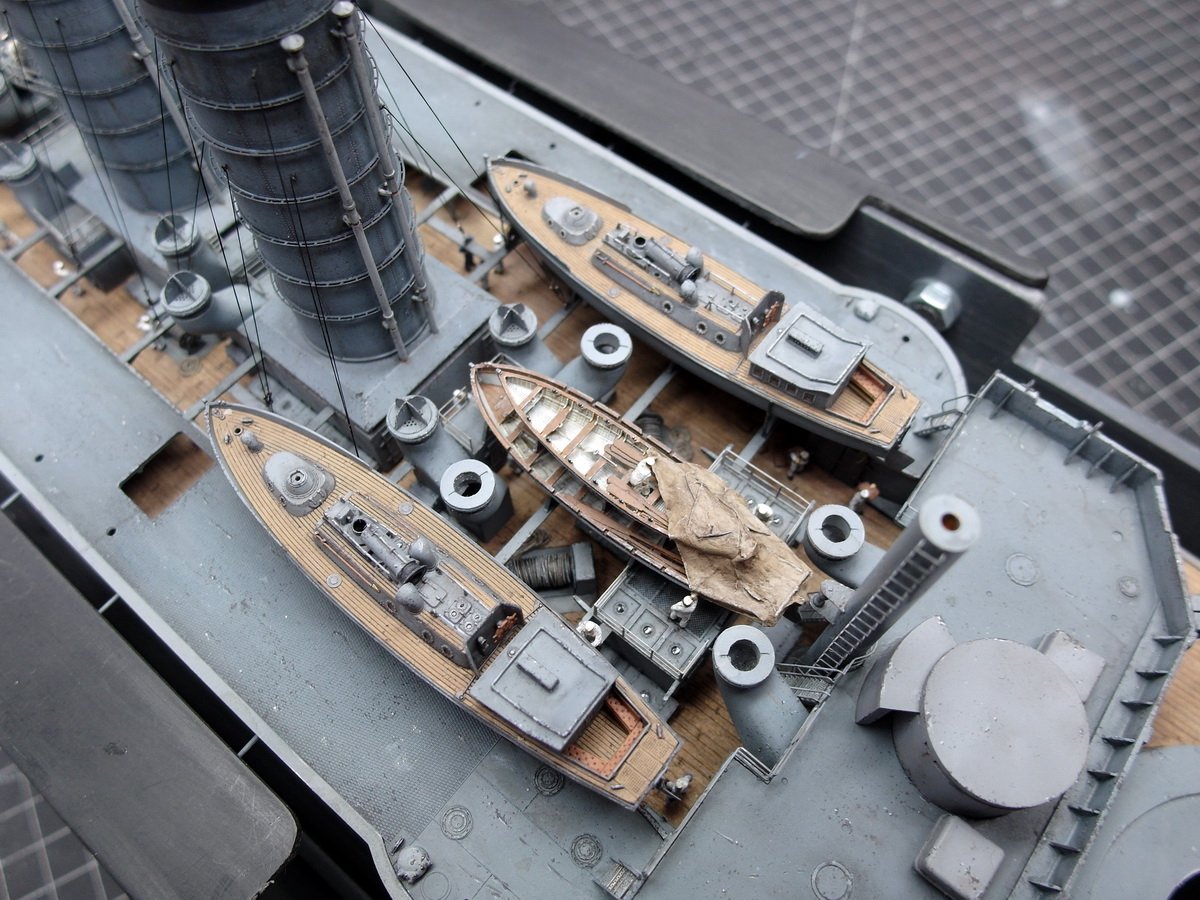
Okay, so it turned black. Today, the entire machinery arrived in the barge. Placed on the deck in its cradle for testing. The space is very limited and it is damn tight. Since the davits are still missing, the barge isn’t secured yet. The chain hoists for lashing it down aren’t attached either. The next cutters are again 3D prints. The shape of the Mikasa is slowly taking shape.
- 193 replies
-
- 6
-
-
-
- Russo-Japanese War
- Mikasa
- (and 2 more)
-
I have a question for you about the boiler of the steam boat, which I just painted in my favorite color, gray. Now I'm looking at the boiler and wondering, were they really painted gray?! Or were they perhaps painted black, since the gray wouldn't last long in the heat and might burn and peel off. Do any of you have any information about this? Edit: Hello everyone. This question has already been answered in other forums, and I'm going to paint the boiler black.
- 193 replies
-
- 6
-
-
- Russo-Japanese War
- Mikasa
- (and 2 more)
-
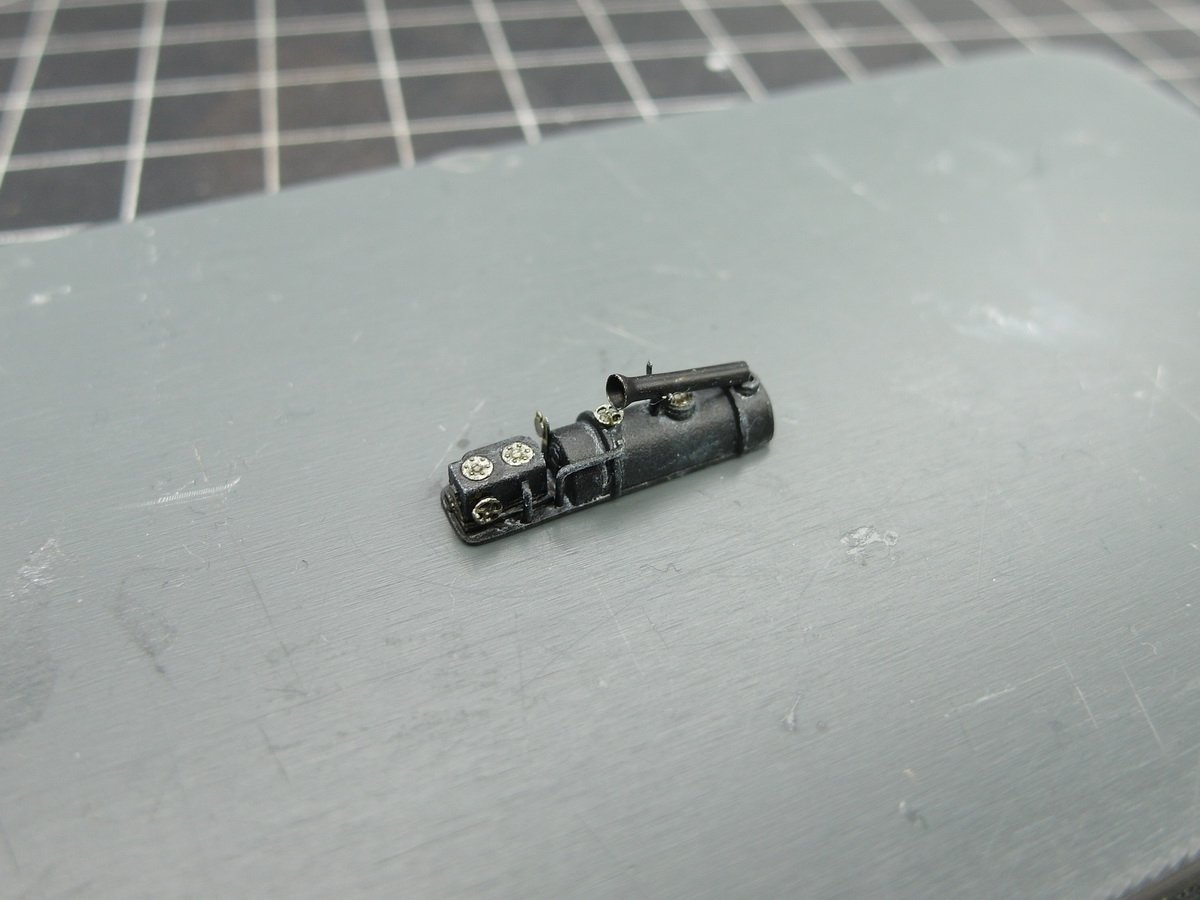
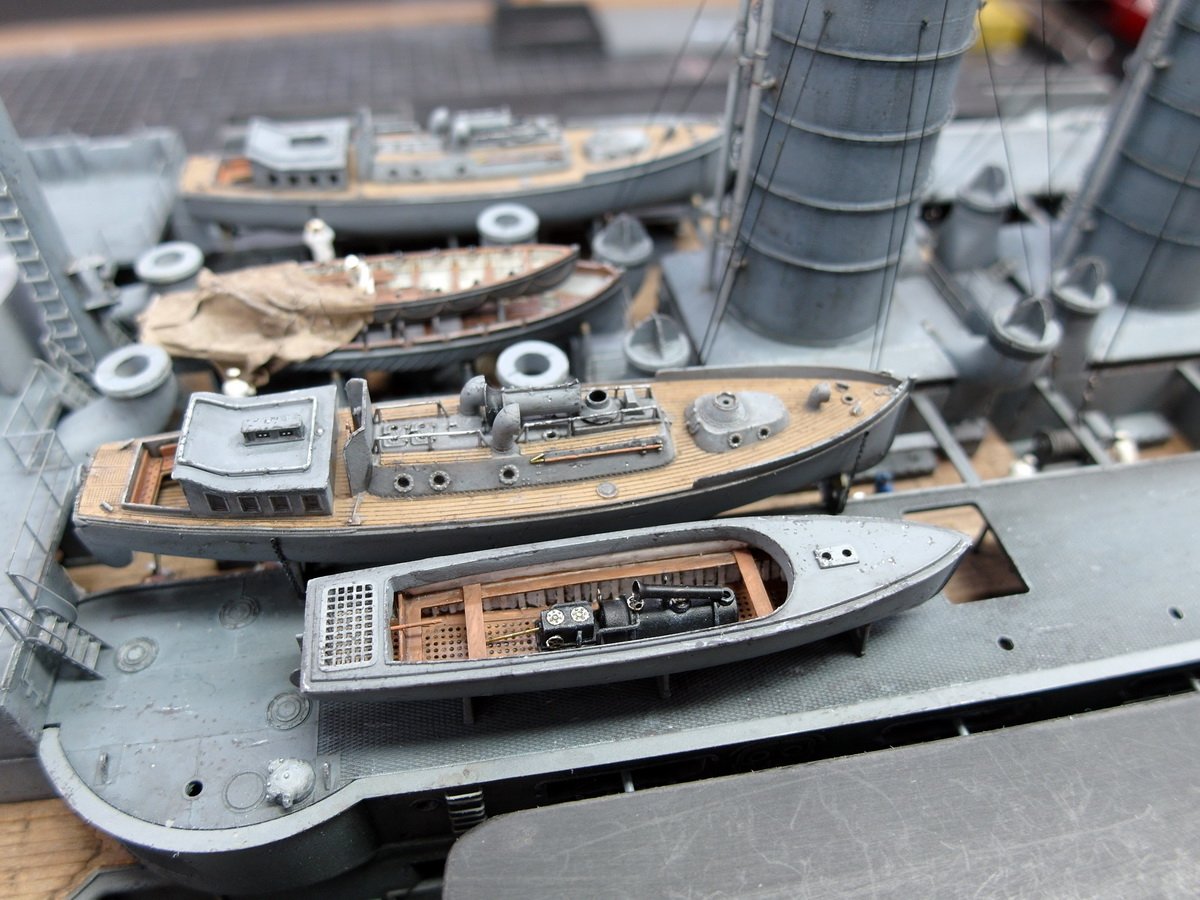
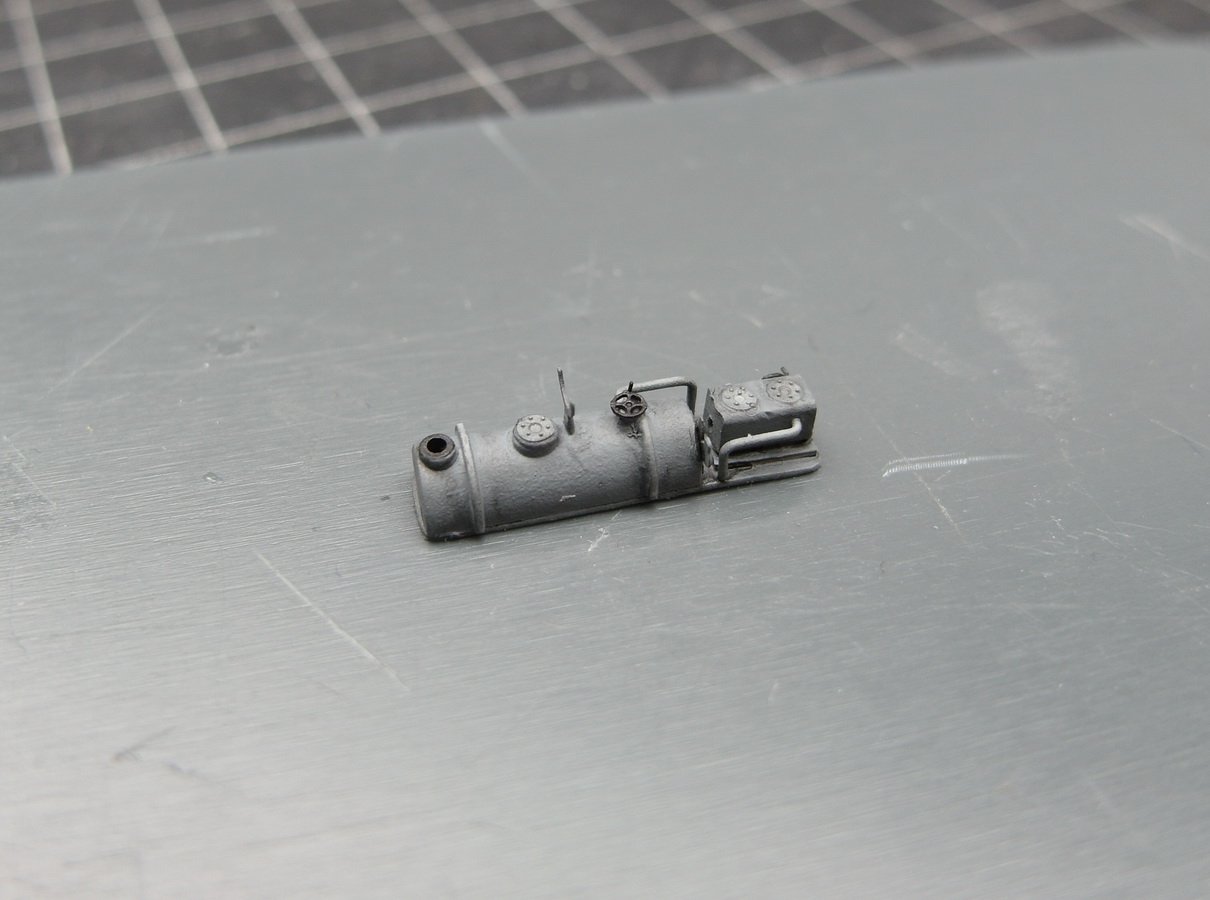
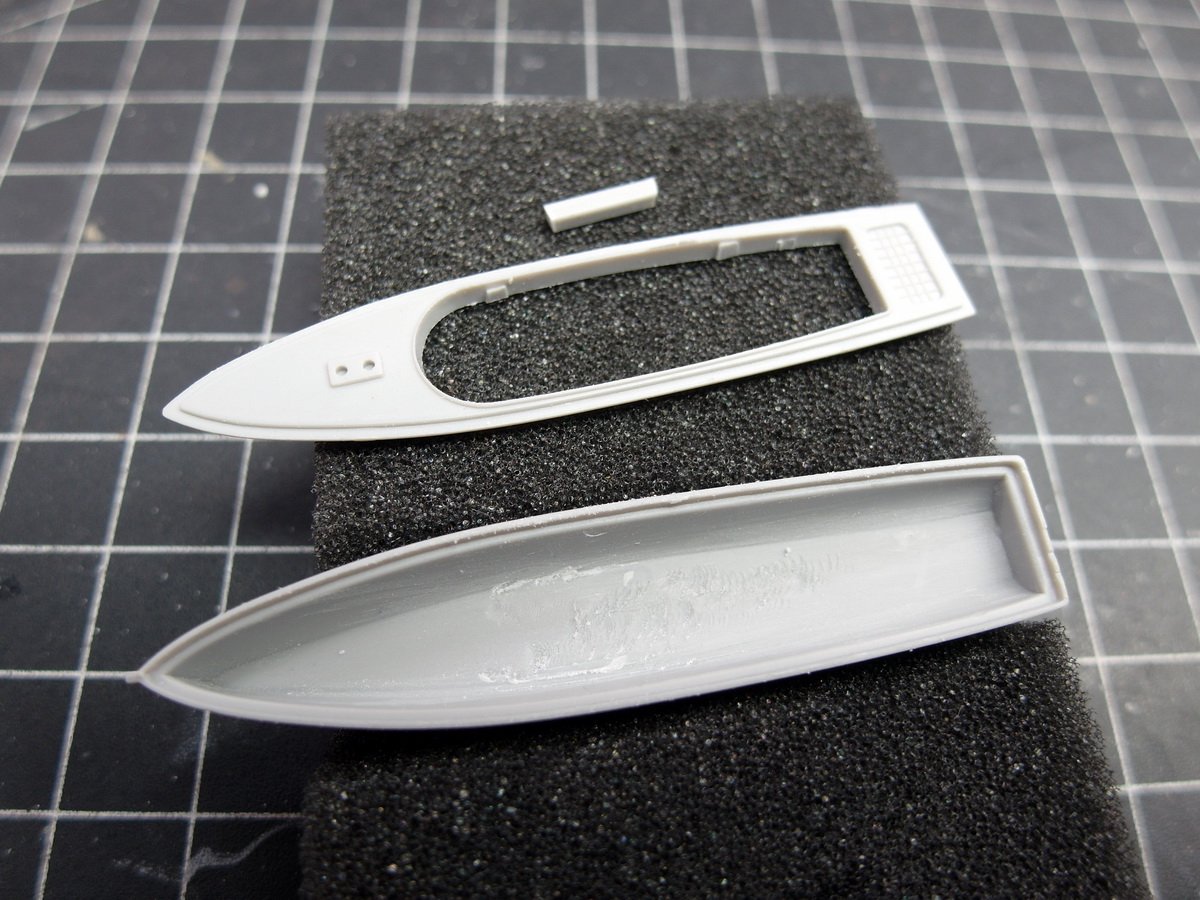
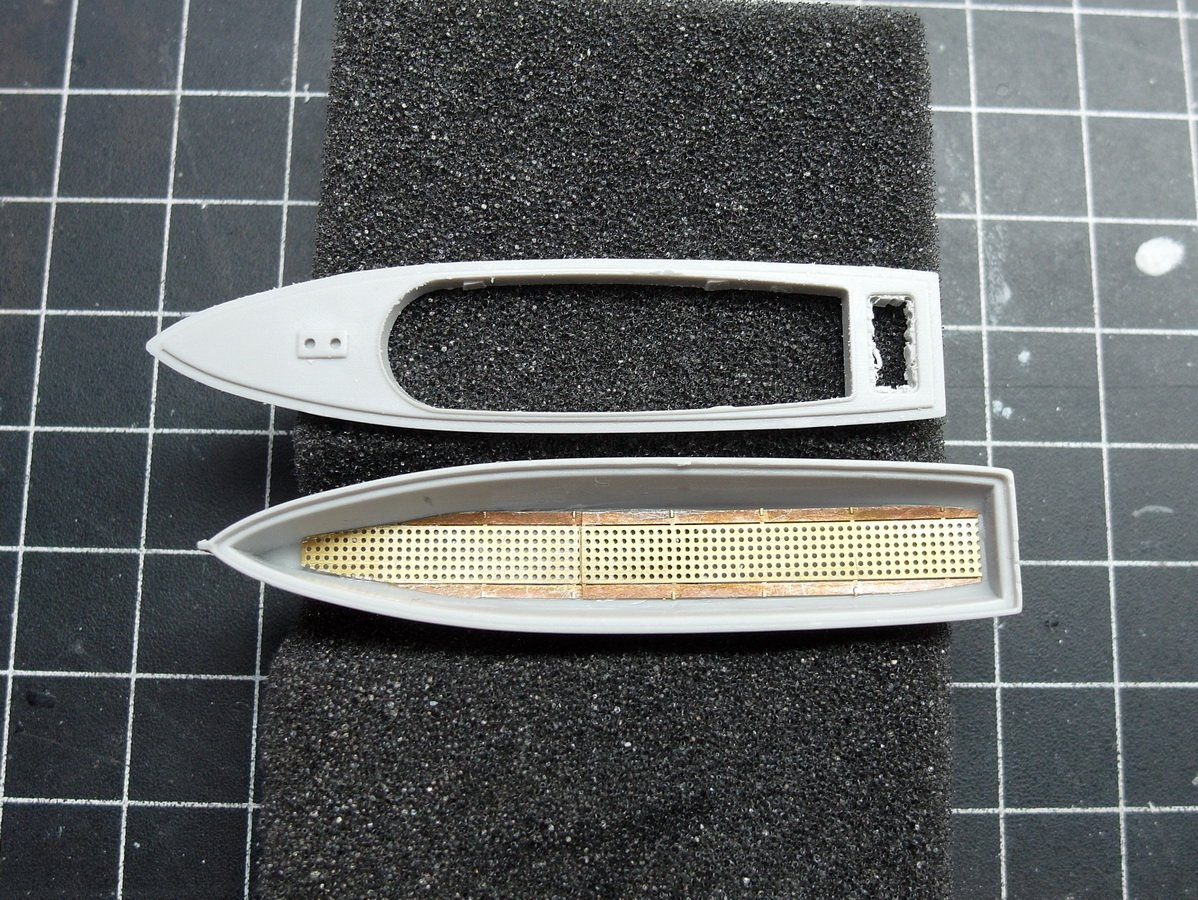
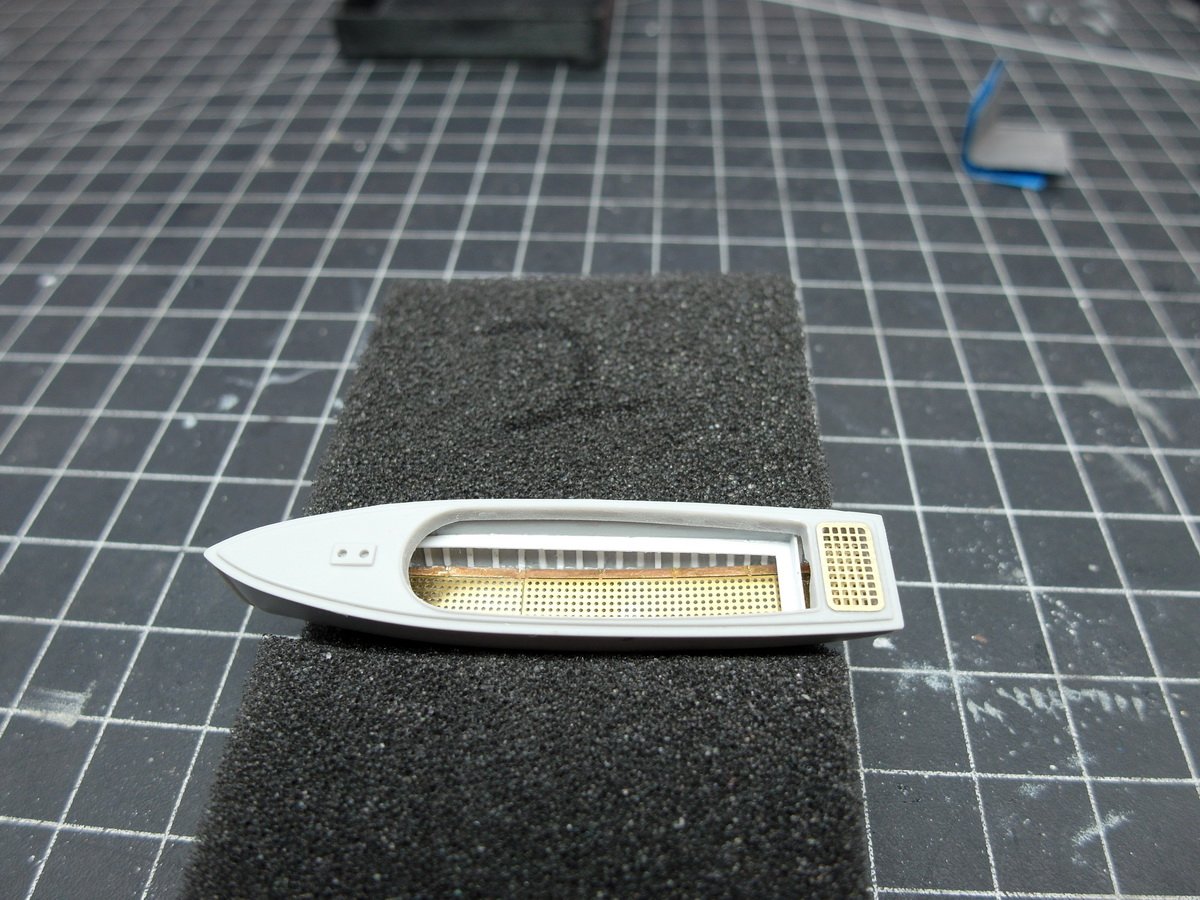
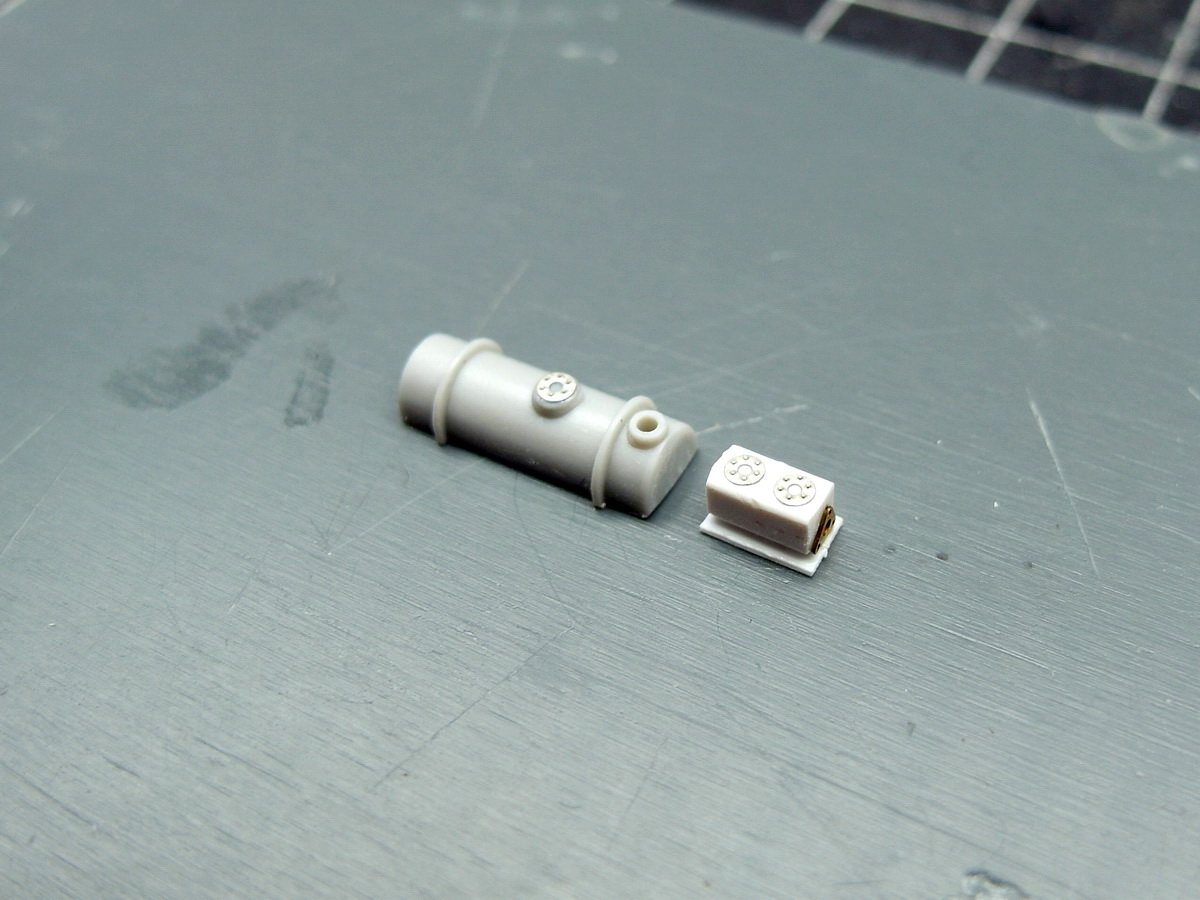
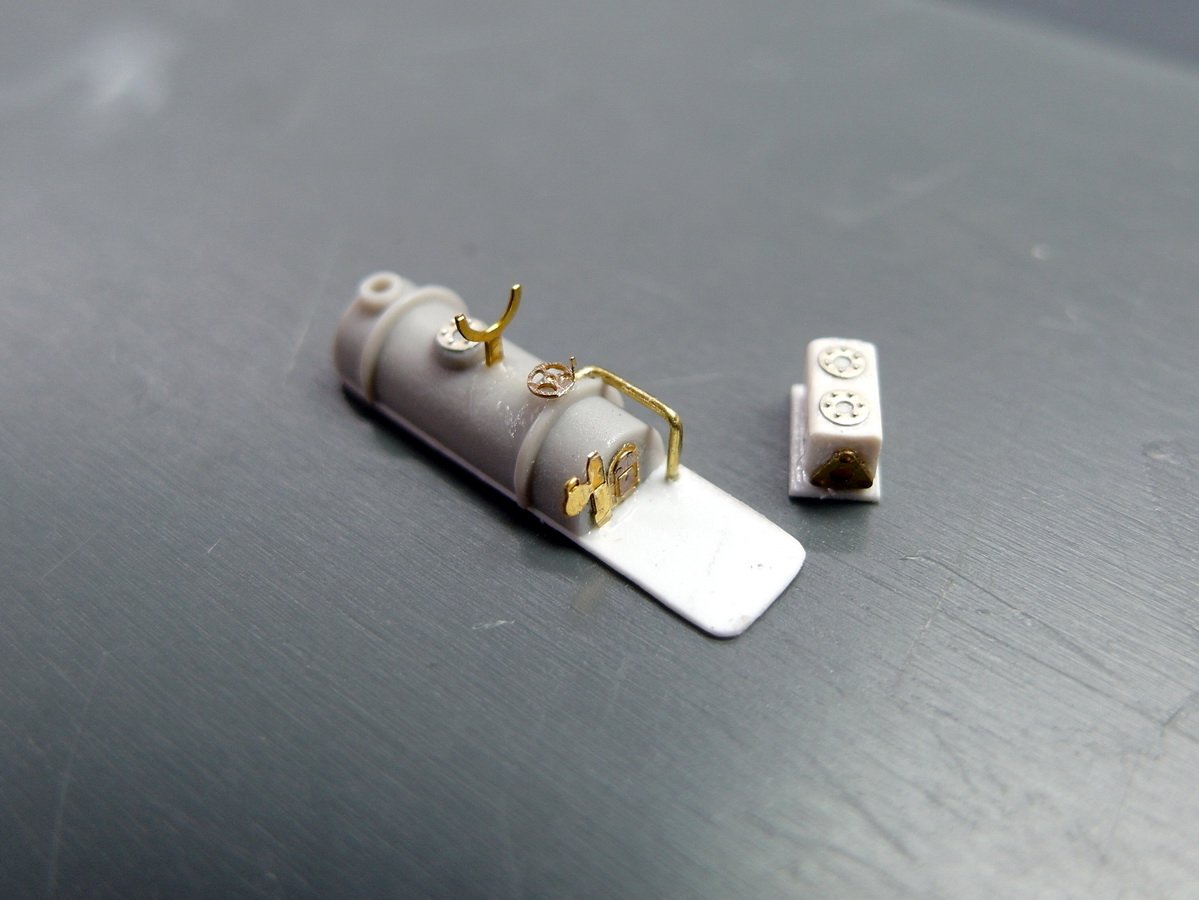
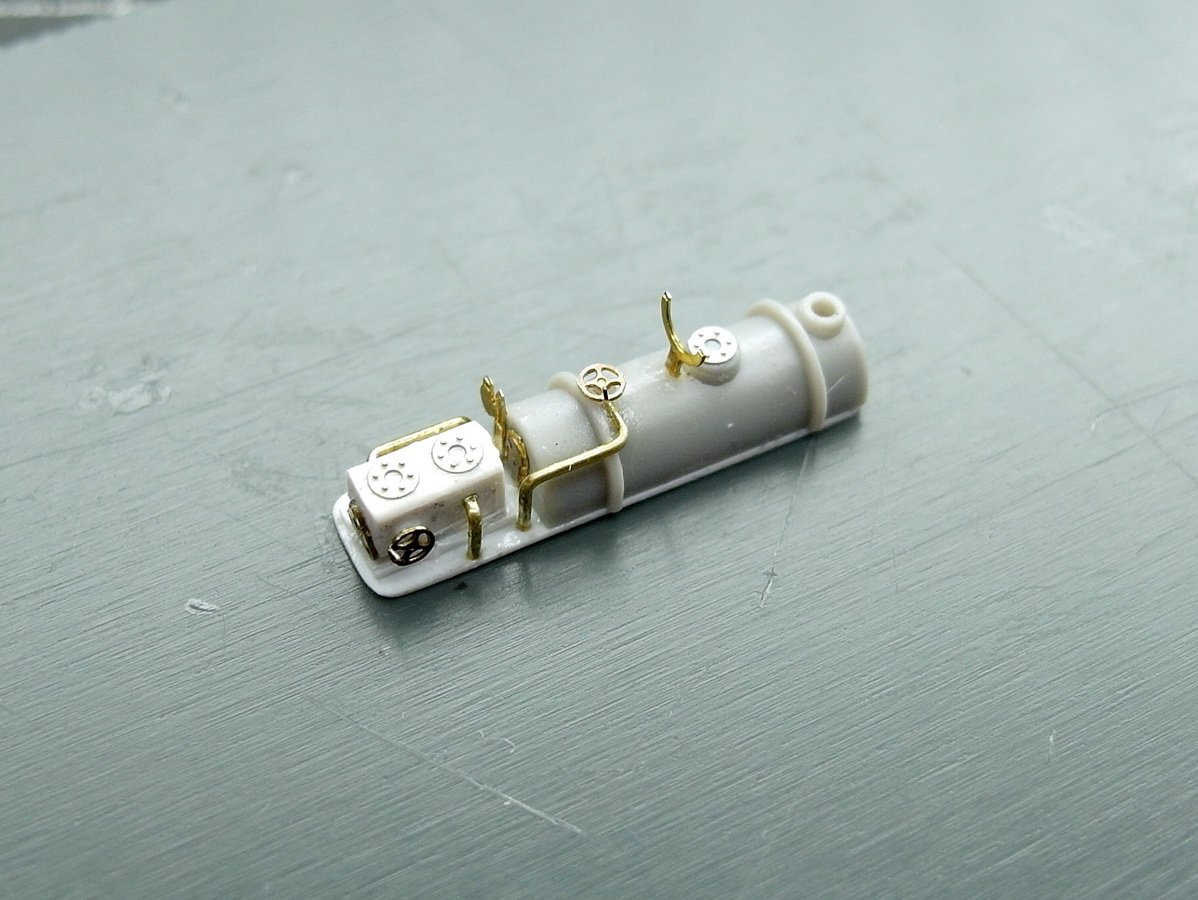
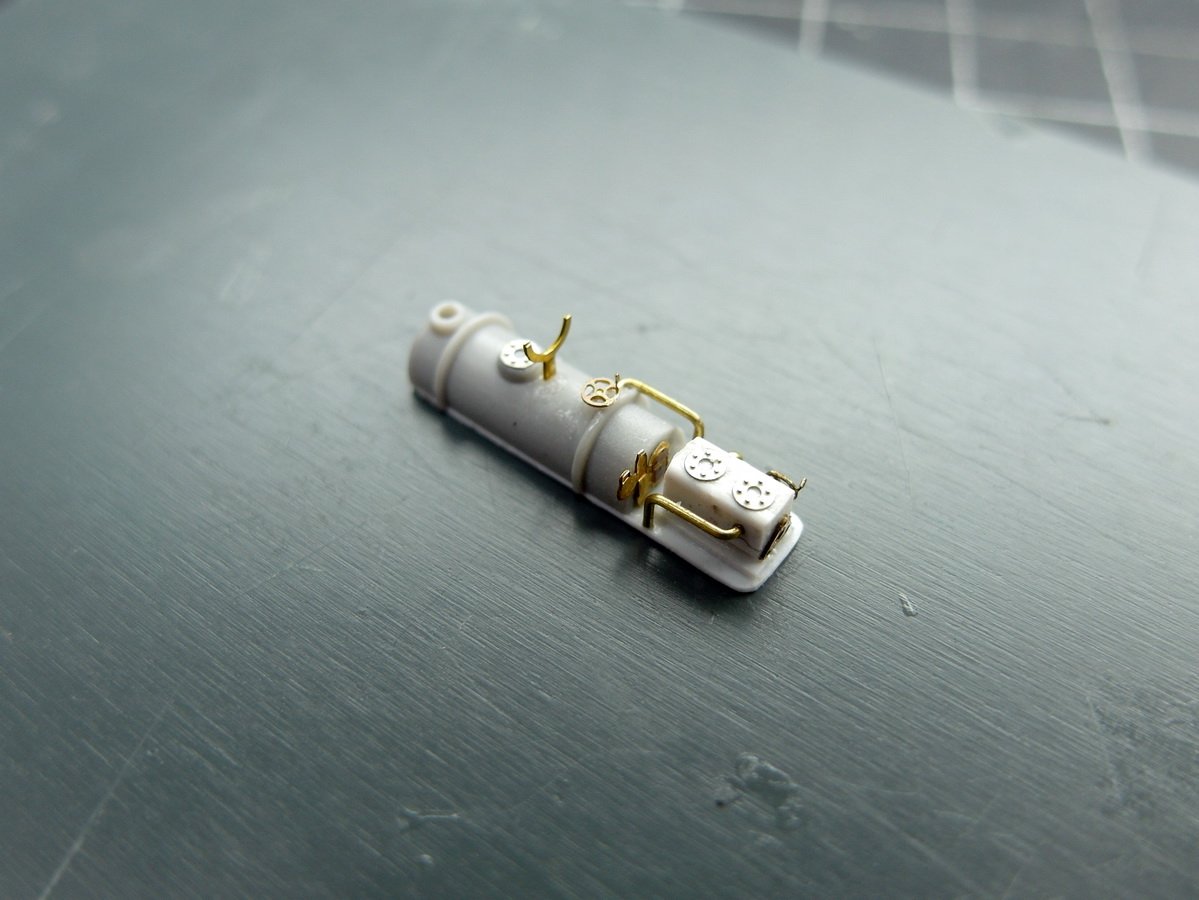
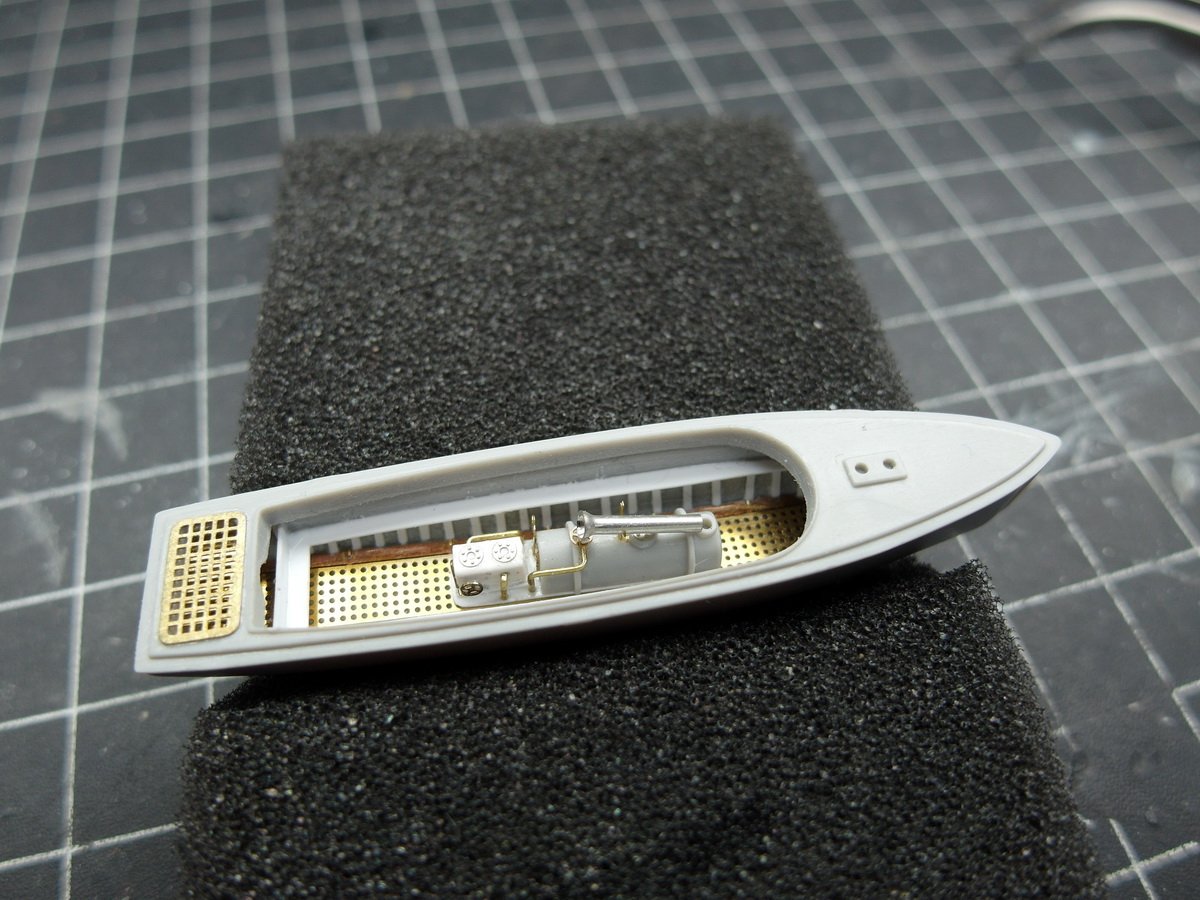
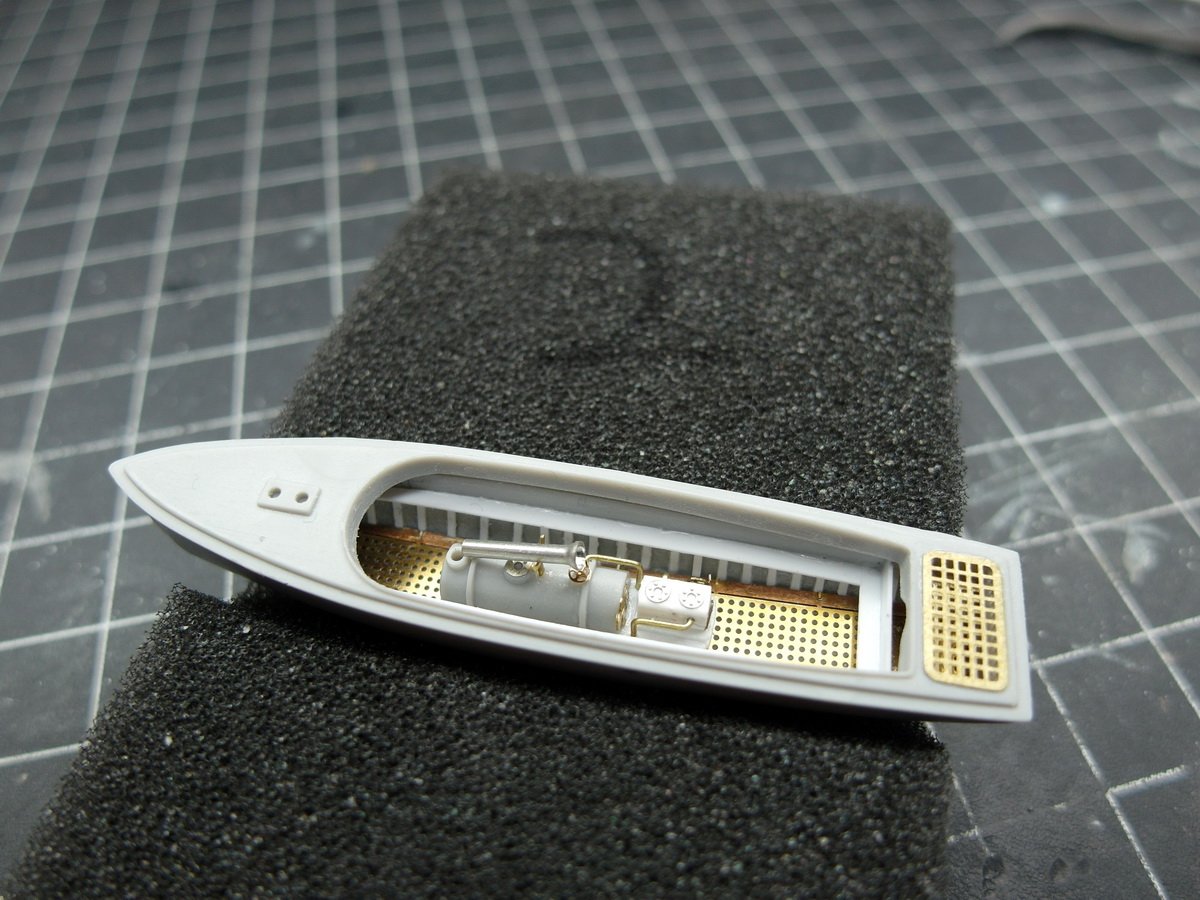
Thank you very much Jeff, very thoughtful. 😊 Let’s move on to the next yawls: the small steam launch. I haven’t found a 3D printer for this one, so I emulated Jeff.. Originally made from the box, the boat really doesn’t look anything like it. First, I removed the rough outline of the engine and the bulky center bar of the upper section. Then I inserted a grating floor. The Bismarck’s former bridge wing was trimmed and fitted. Cheers to the etched parts grab bag. And I removed the suggested grating at the rear. Now I made a bench seat and glued in the ribs from profiles. I attached an etched grille from the KA set to the rear. We still need a boiler. It’s also only rudimentarily represented in the original, so there’s room for more. A small profile should represent the engine and its cylinders. A few flanges on top—you can never have enough. Then, little by little, more details were added: piping, a handwheel, and a support for the tilting funnel. A small instrument panel at the front rounds it all off. Everything is then mounted on a styrene strip for easier handling. More piping and a second handwheel. It never hurts. And then I am quite satisfied with the whole facial expression. Let’s put the whole thing in the little boat. Let’s put the funnel in for a test. Ferrules are really great for small funnel. So far, so good. Now we’ll apply the paint, and then we’ll add the small parts like the propeller and rudder.
- 193 replies
-
- 5
-
-
- Russo-Japanese War
- Mikasa
- (and 2 more)
-
@Jeff59 Ah yes, if real life didn't always distract you from the beautiful things. 😁 Model building is like meditation for me when I come home from work and enter this little microcosm. 🧘♂️ I'm already looking forward to seeing what happens next with your Bismarck. 🫵😉
-
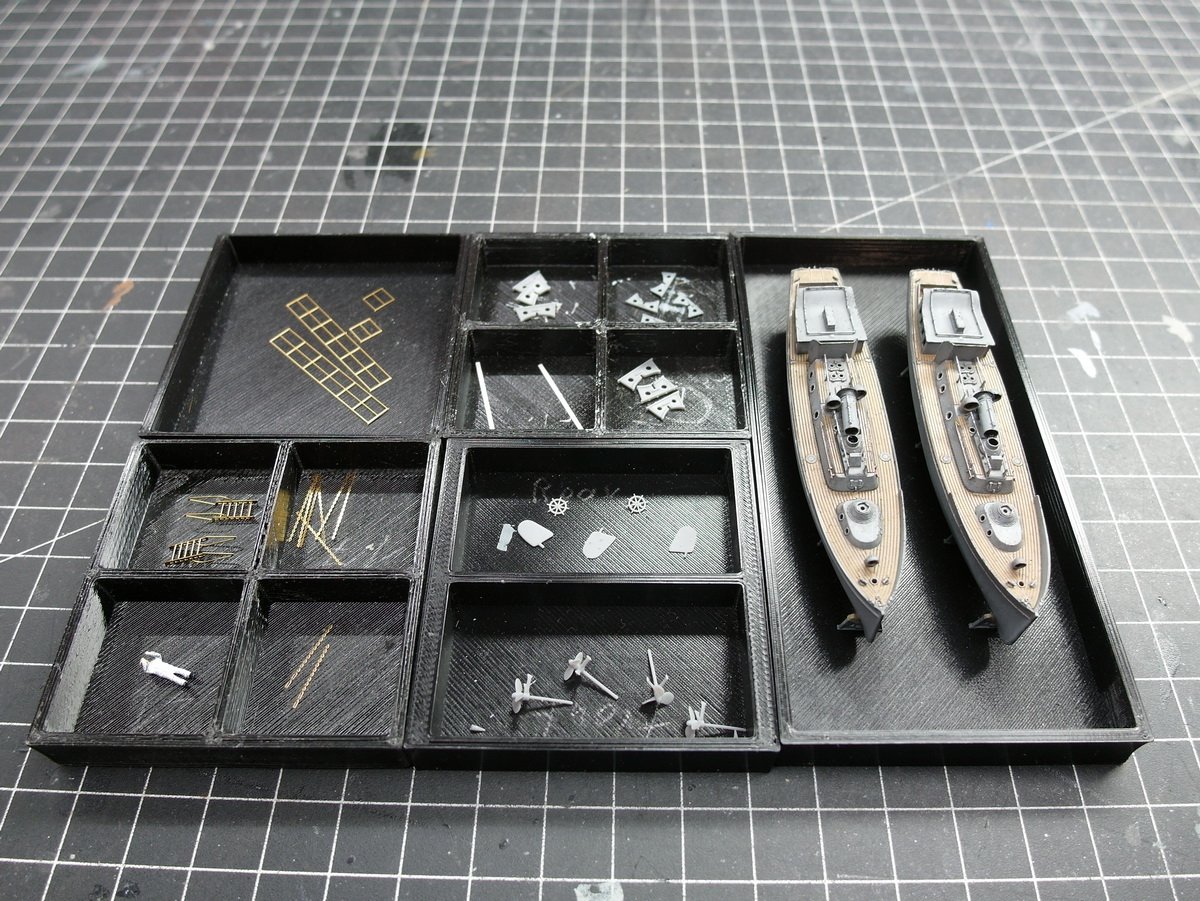
Many thanks again, Javlin. This weekend, I had planned to finally finish the pinnaces. The funnels had already been laid down and installed, but there were still a few small items missing that I wanted to add shortly before the end to avoid tearing them down again. Two more boat hooks scratched on each pinnace and the portholes glazed. A chain hoist is installed to secure the boats. Railings and companionways mounted on the foredeck. I need to refinish the deck where the pinnaces rest. During all the adjustments, I scratched the paint surface and had to patch it up. I’ll have to go back to that. Slowly life comes into the place. A new sailor has also started his service. He checks the tension on the pinnace’s chain hoist.

- 193 replies
-
- 7
-
-
-
- Russo-Japanese War
- Mikasa
- (and 2 more)
-
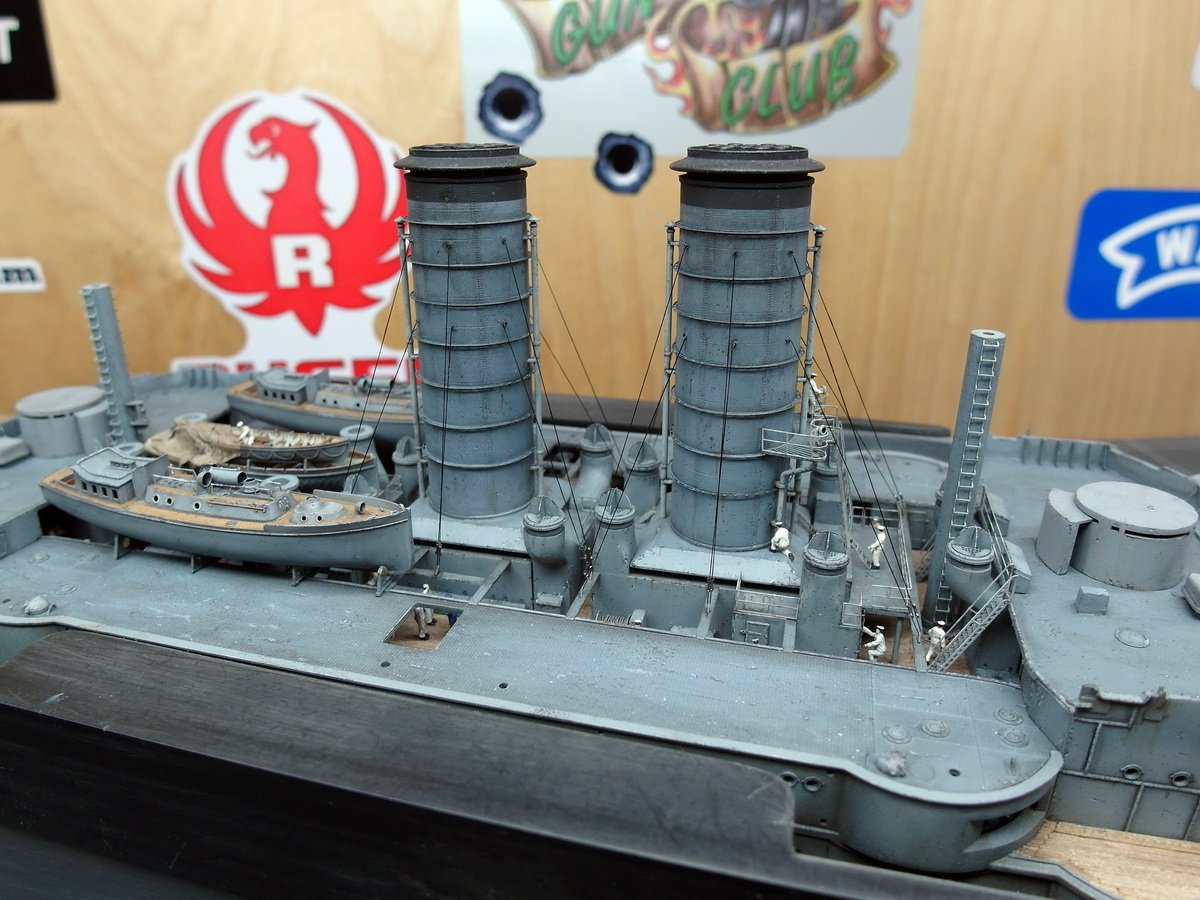
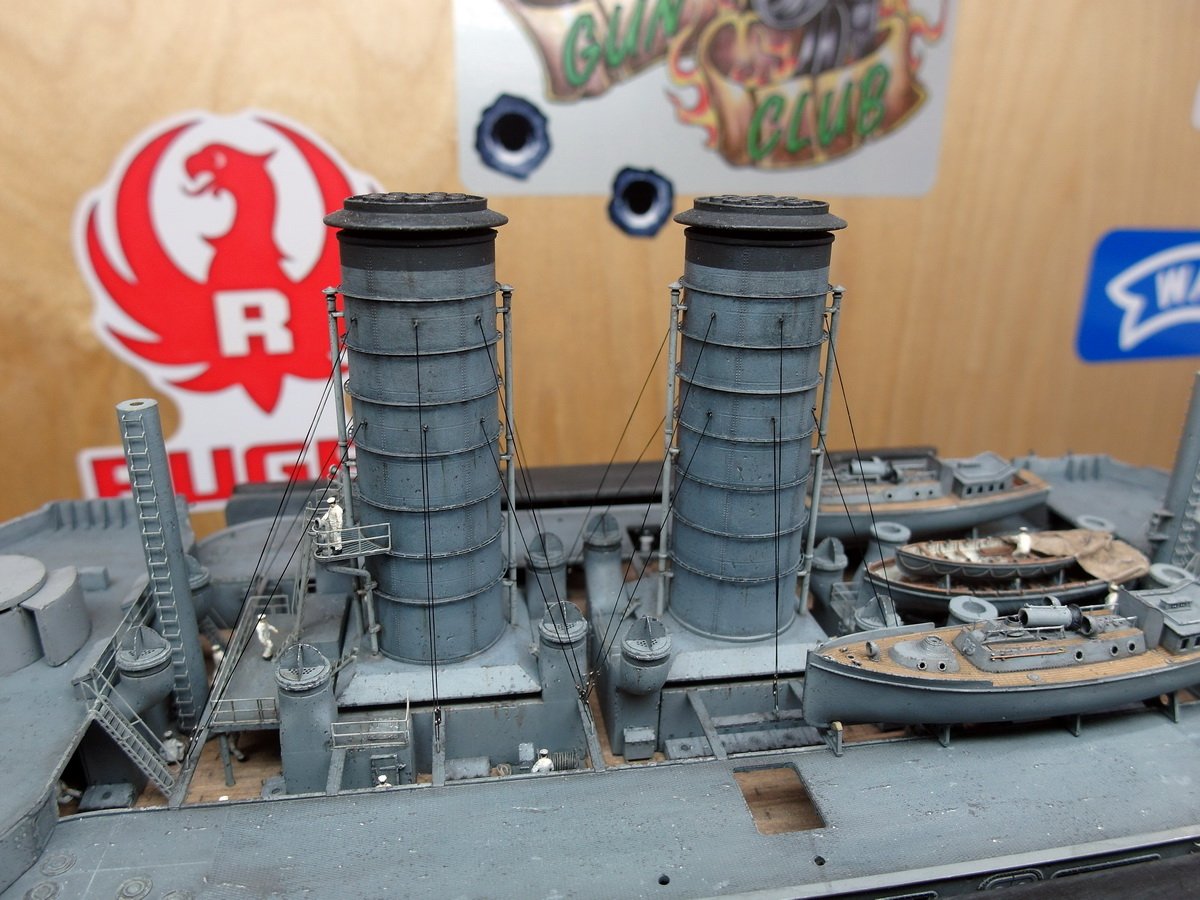
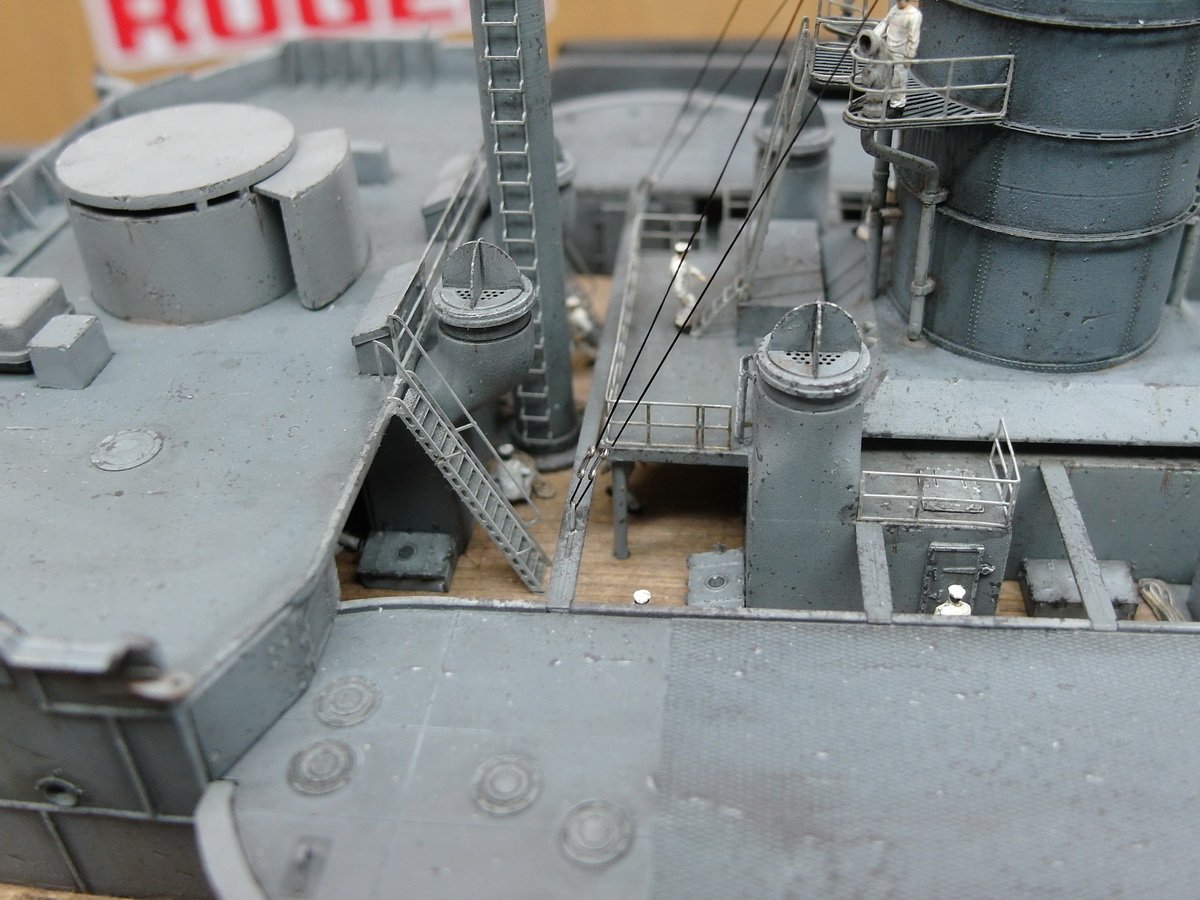
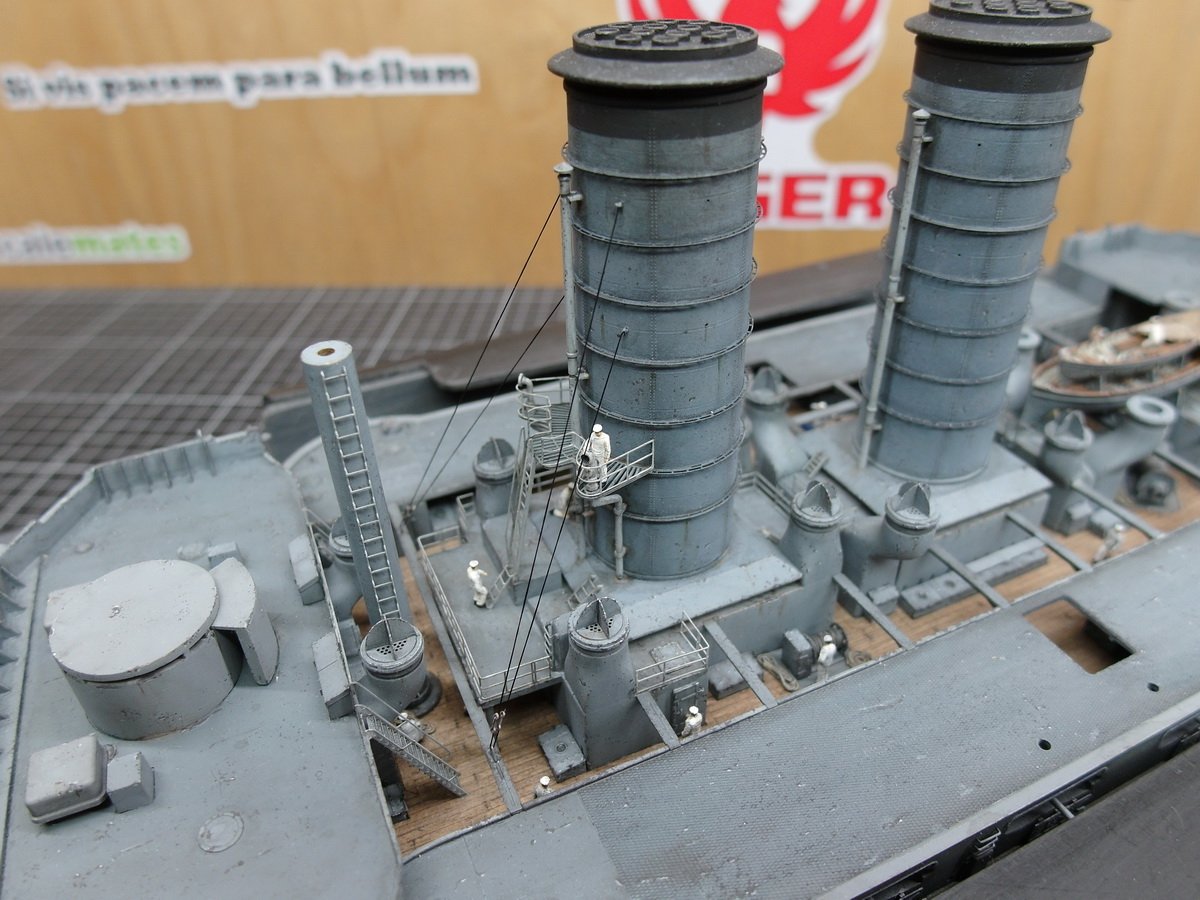
Thank you very much, Yves, for the great comment. Today just two pictures of the finished guyed funnels. This completes the first piece of rigging work. Now I can devote myself to the pinnaces again.
- 193 replies
-
- 7
-
-
-
- Russo-Japanese War
- Mikasa
- (and 2 more)
-
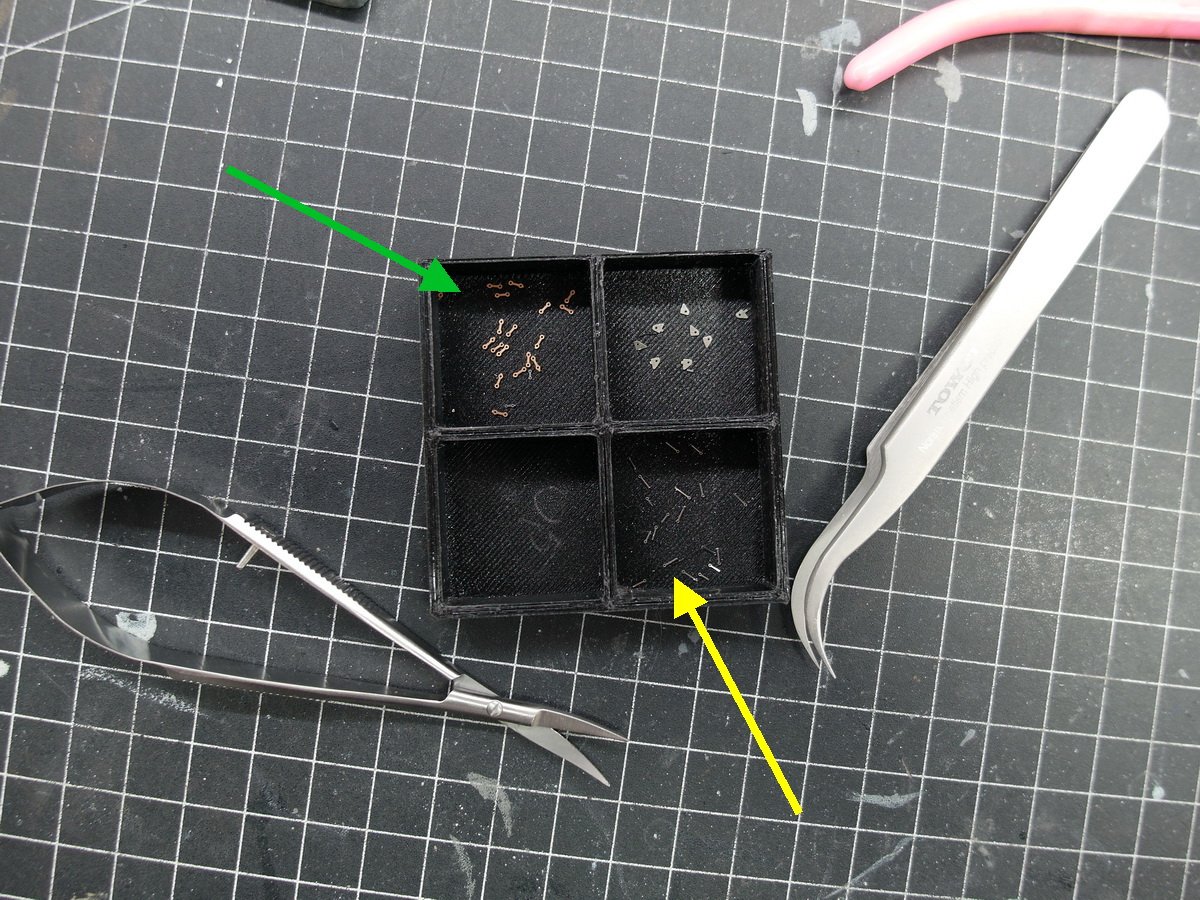
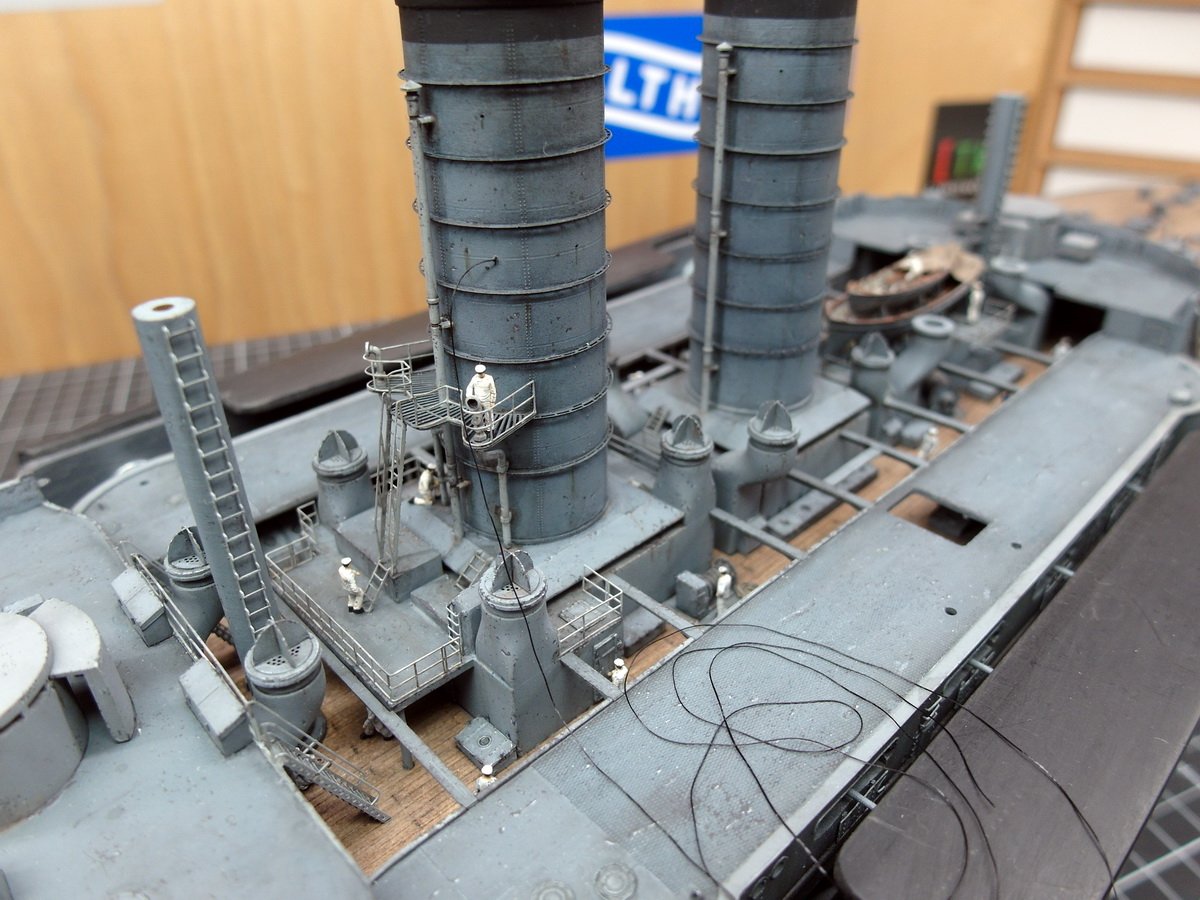
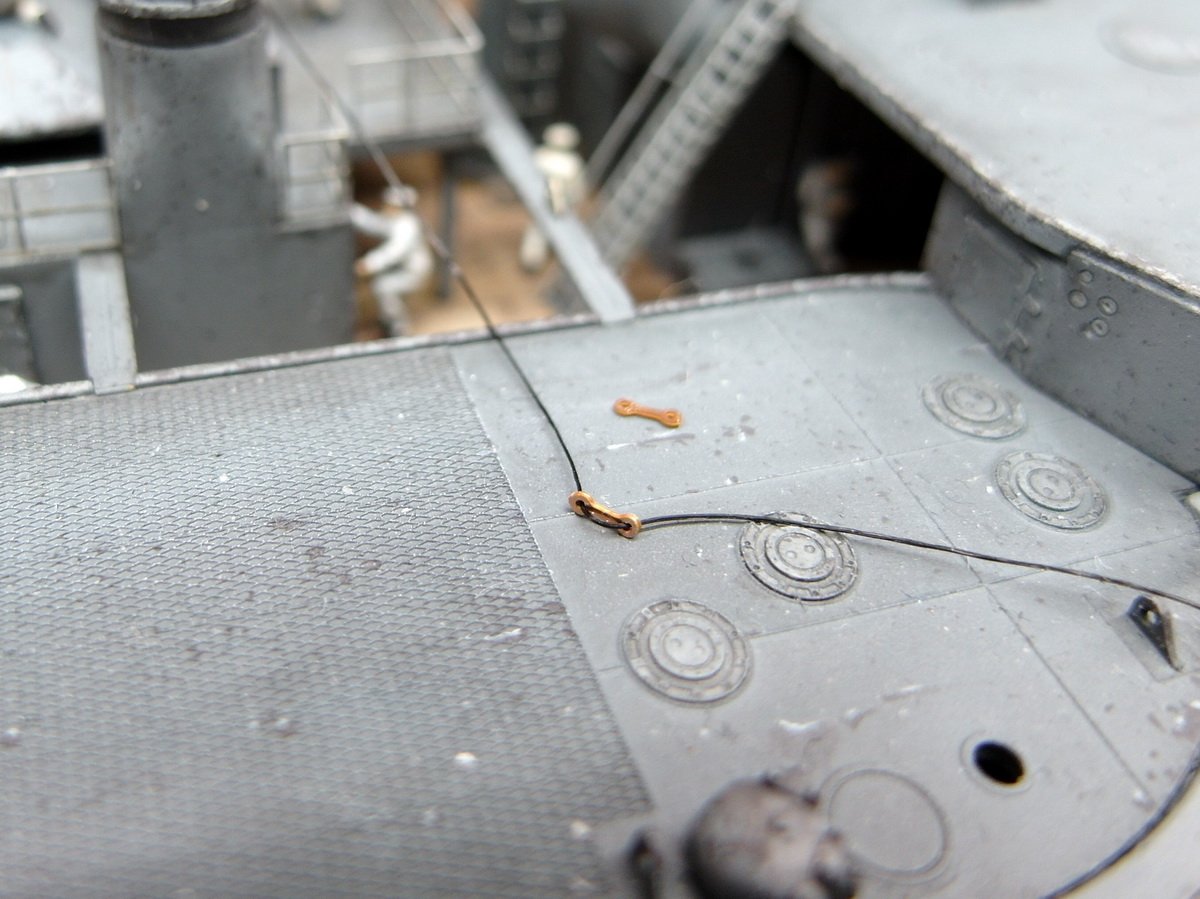
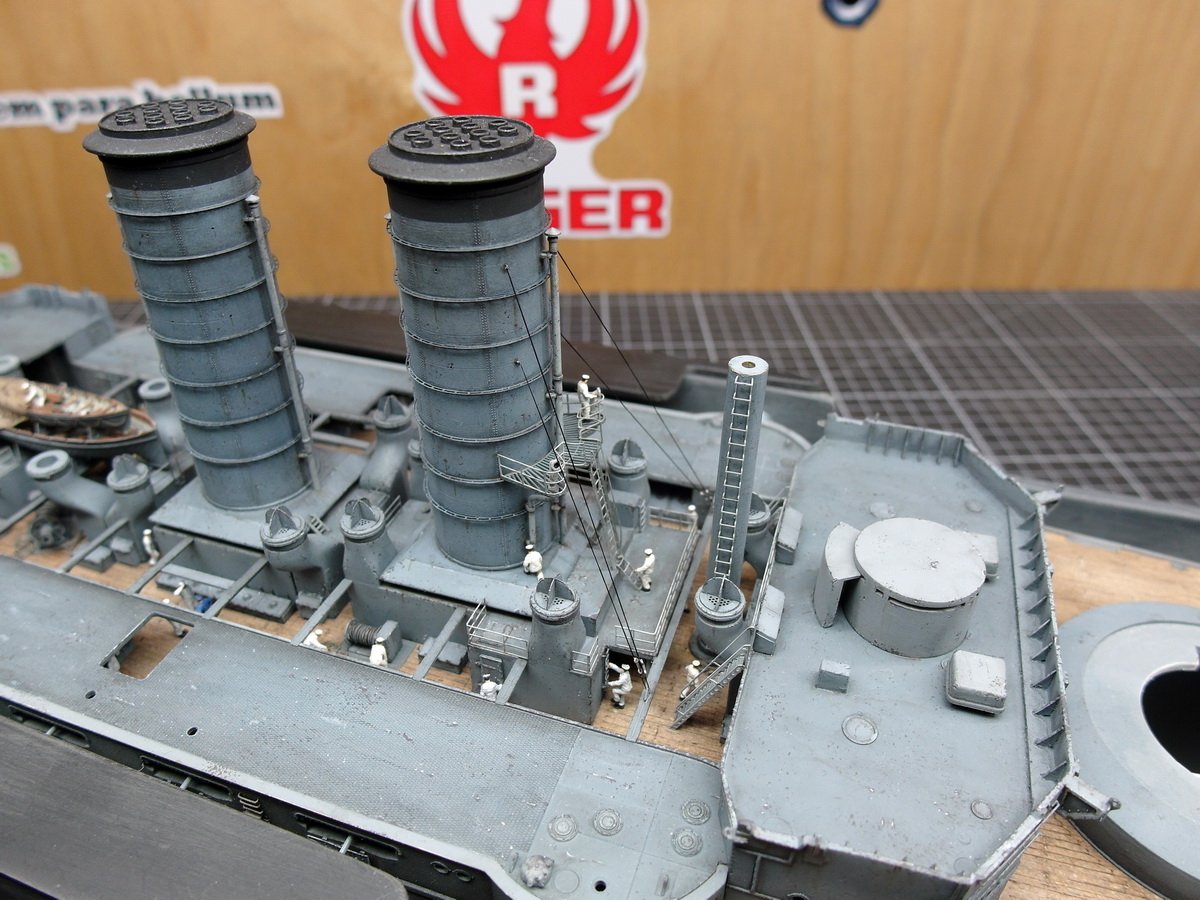
Ahoy, landlubbers. After a short creative break, I’d like to return with a mini update. I’ve pushed the pinnaces back again because I first have to take care of the funnel’s shrouds. I’ve given this a few thoughts. Rope tensioners definitely need to be installed; anything else would be illogical. How can I best do this without too much effort? Here’s my solution: First, I cut stanchions into small pieces. The green arrow points to pre-cut stanchions in a scale of 1:200. I want to use them as rope tensioners. The yellow arrow shows some in a scale of 1:350. They’ll serve as eyelets on the funnel. First, the rigging twine was attached to the eyelet and glued into the lower hole of the funnel. It’s working very well so far. It’s important for me to always use enough twine. This simplifies the whole knotting and threading process. Being cheap isn’t cool here. Then I thread the yarn through the two holes in the cut-off railing support. The yarn is passed through the deck eye and the second rope tensioner is put into position. The first piece of rigging on the funnel is finished. Painted with aluminum paint, the thread running along the outside of the rope tensioner is almost invisible. I’m happy with that and can now focus on the next pardunes.
- 193 replies
-
- 7
-
-
- Russo-Japanese War
- Mikasa
- (and 2 more)