HOLIDAY DONATION DRIVE - SUPPORT MSW - DO YOUR PART TO KEEP THIS GREAT FORUM GOING! (89 donations so far out of 49,000 members - C'mon guys!)
×


Caferacer
-
Posts
102 -
Joined
-
Last visited
Content Type
Profiles
Forums
Gallery
Events
Everything posted by Caferacer
-
 That's an idea.. I have a very low rent model, but it's paid for itself in useful prints. For my Latham build I made a "helper" items; a frame for gluing up the gutting trays and a "buck" for the main cabin, the main cabin is a trapezoid that tapered in the z axis. I don't think I would get the resolution for the eagle, I was going to attempt using Sculpy clay.
 -
My wife bought me a 3D printer 2 Christmases ago, so I have "relearned" some CAD (last used 20+years ago) and Fusion 360 for 3D. I like Fusion, I think it has 2D output abilities, though I haven't tried. YouTube as you can imagine has a wealth of tip and tutorials, I have imported a few things into Fusion and converted them to the 3D model. Something I want to try next is 3D scanning.
-
lol True.. I'm curious about your laser, the results you got on the Rattlesnake are amazing. I think in retirement that would be my purchase, as I would like to get into larger scales, or at least play around with scales, as well work directly off plans. Sure a scroll saw is cheaper, but going directly from the computer to the wood allows for more accuracy I think rather than trying to scale drawings.
-
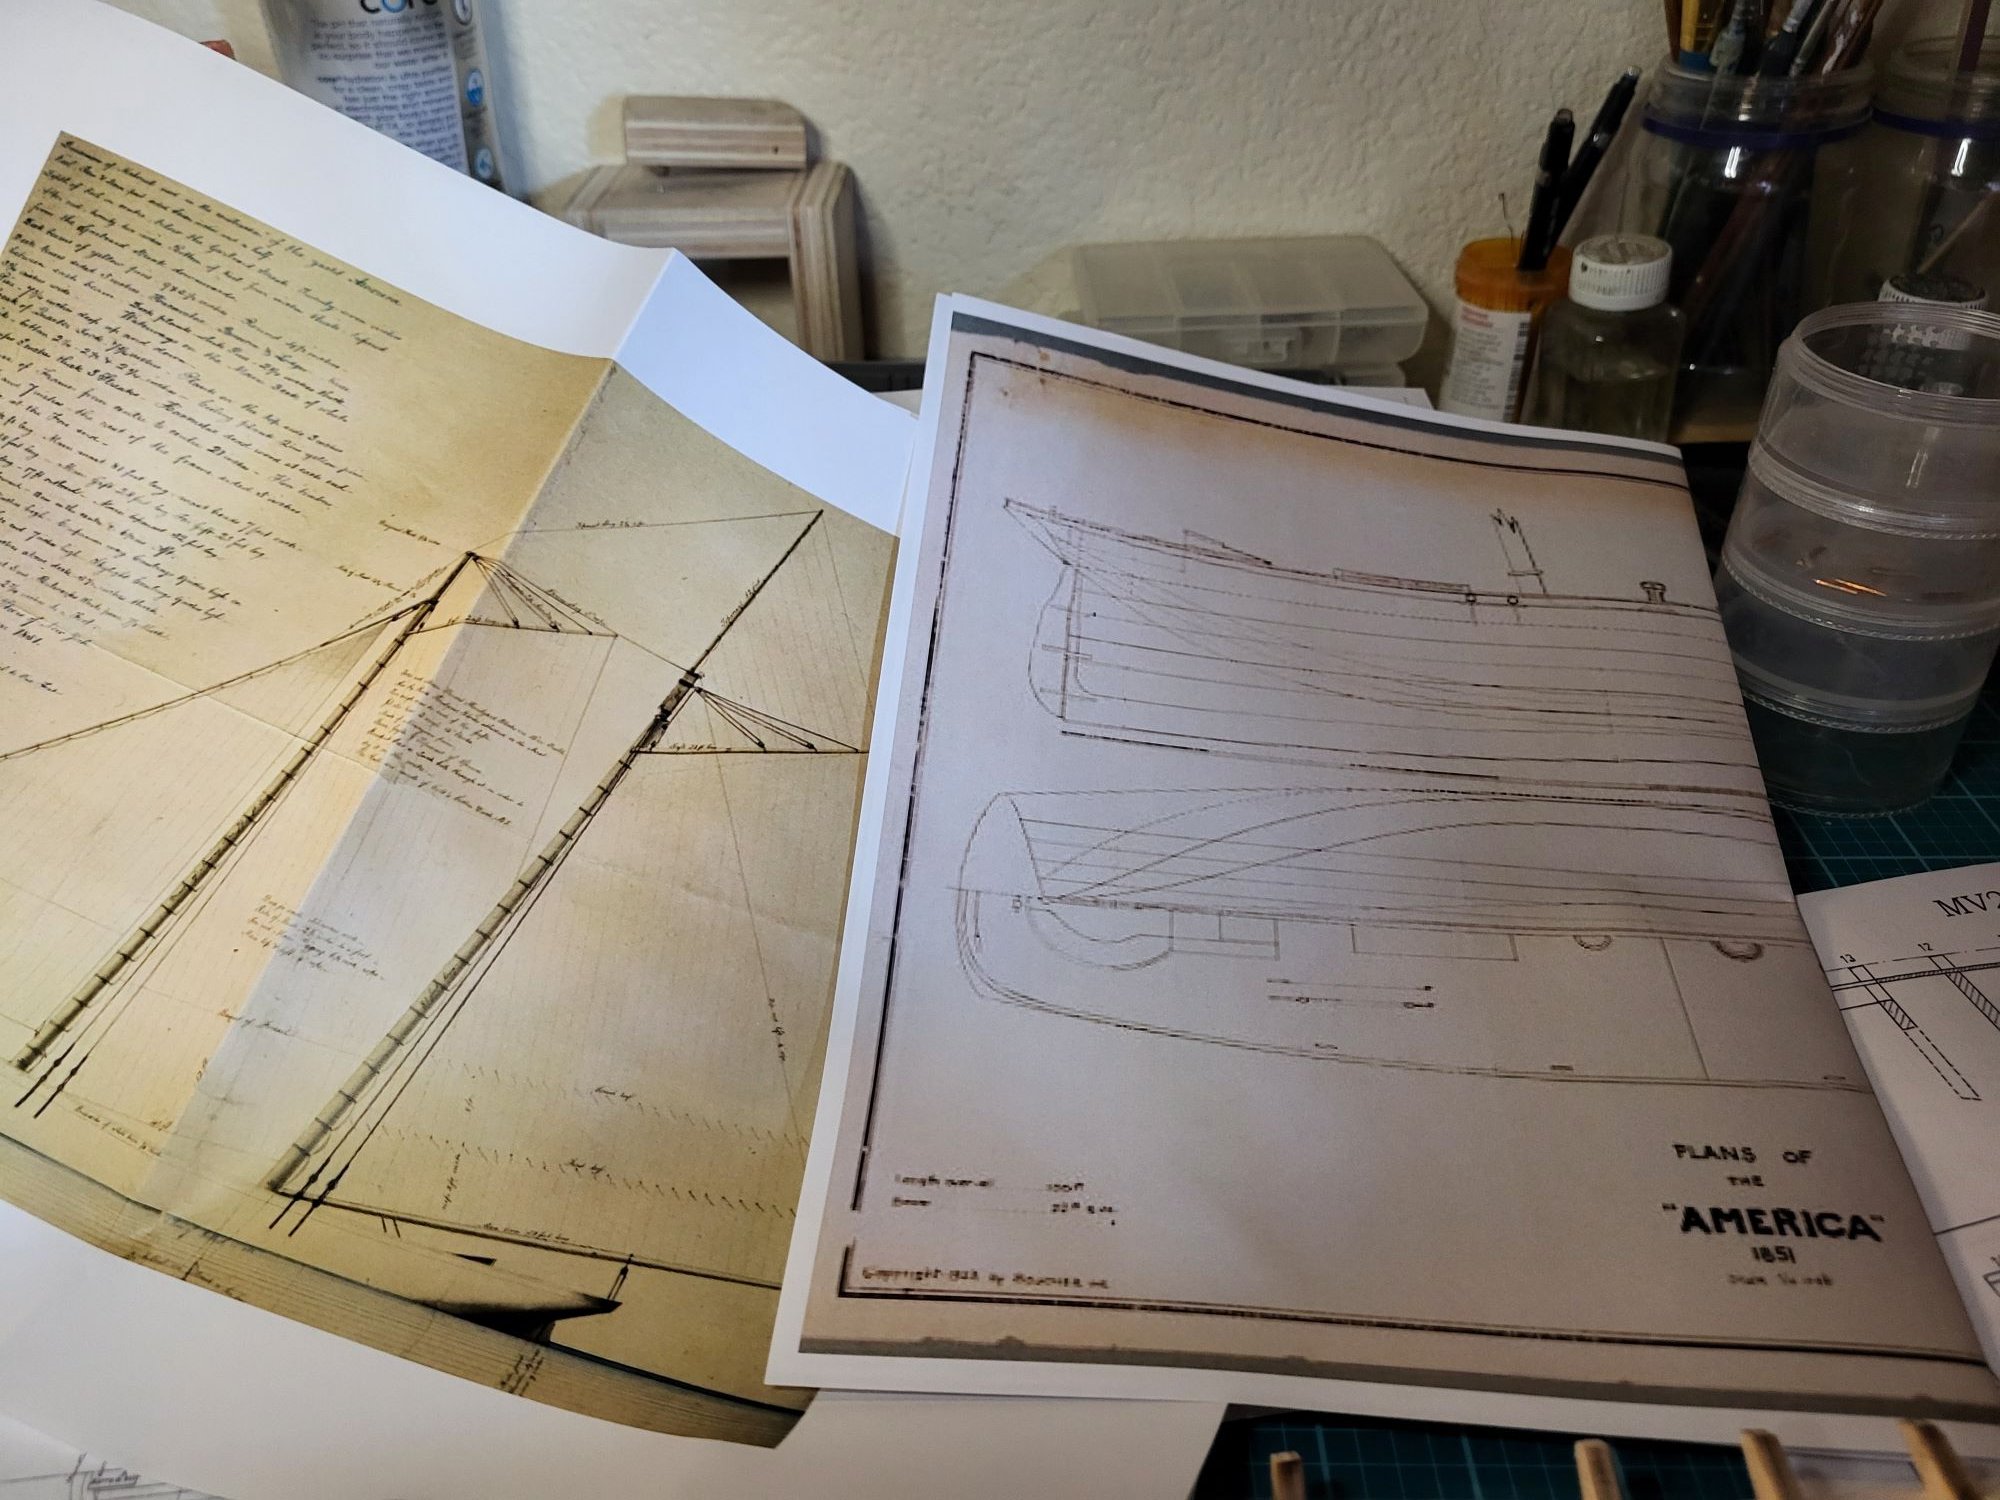
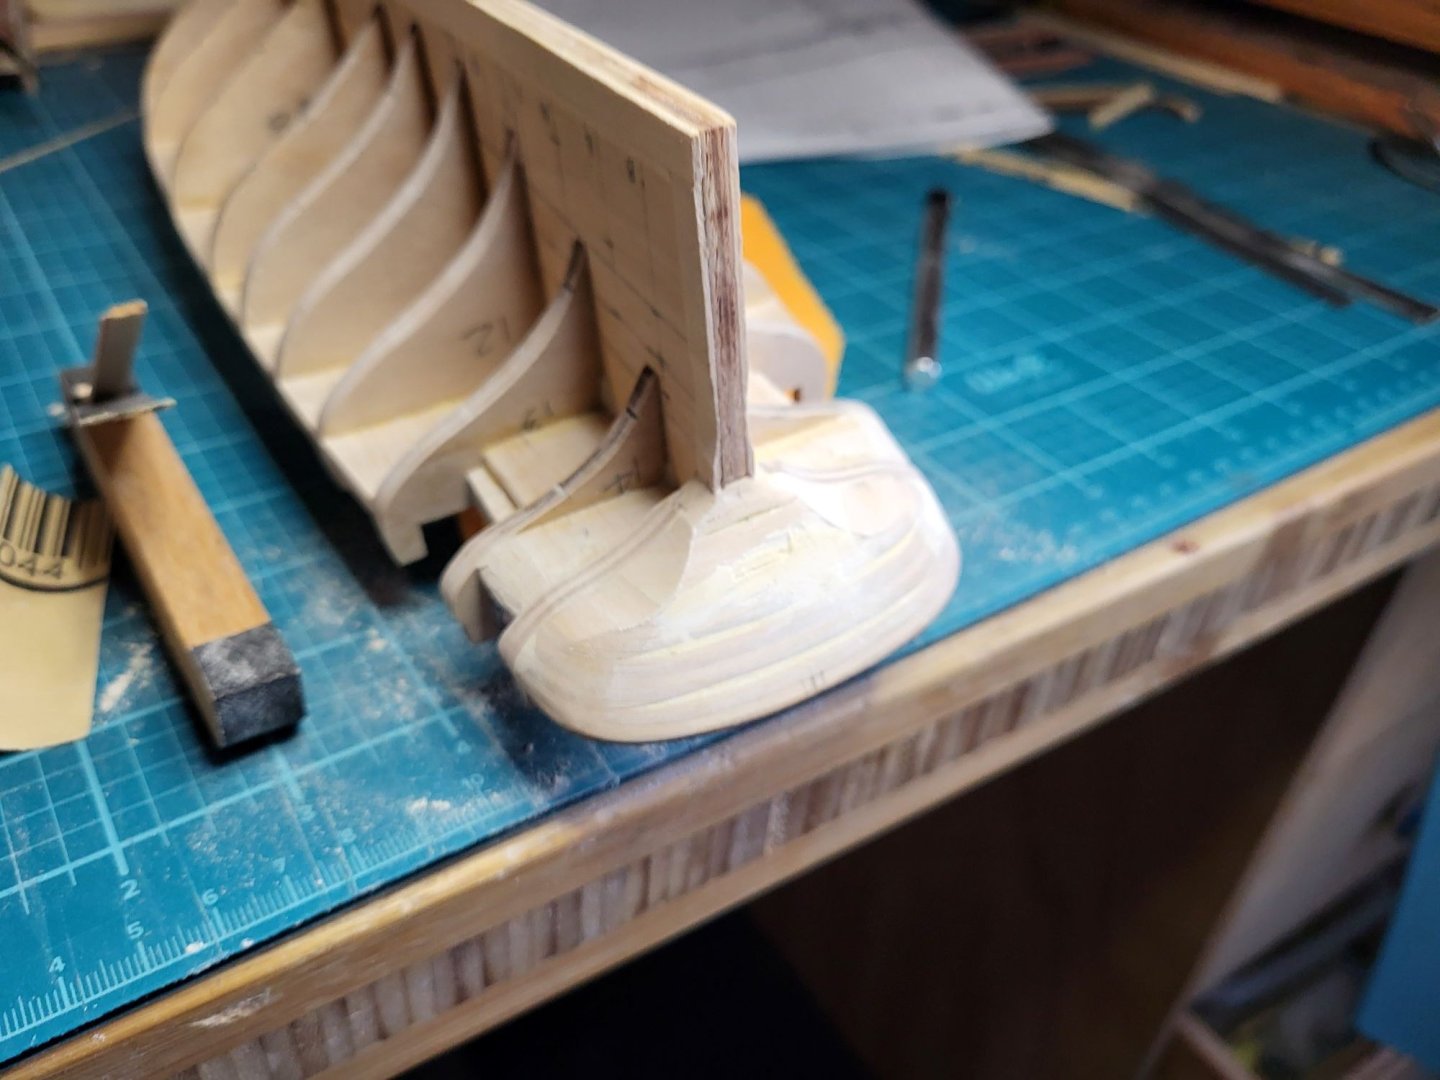
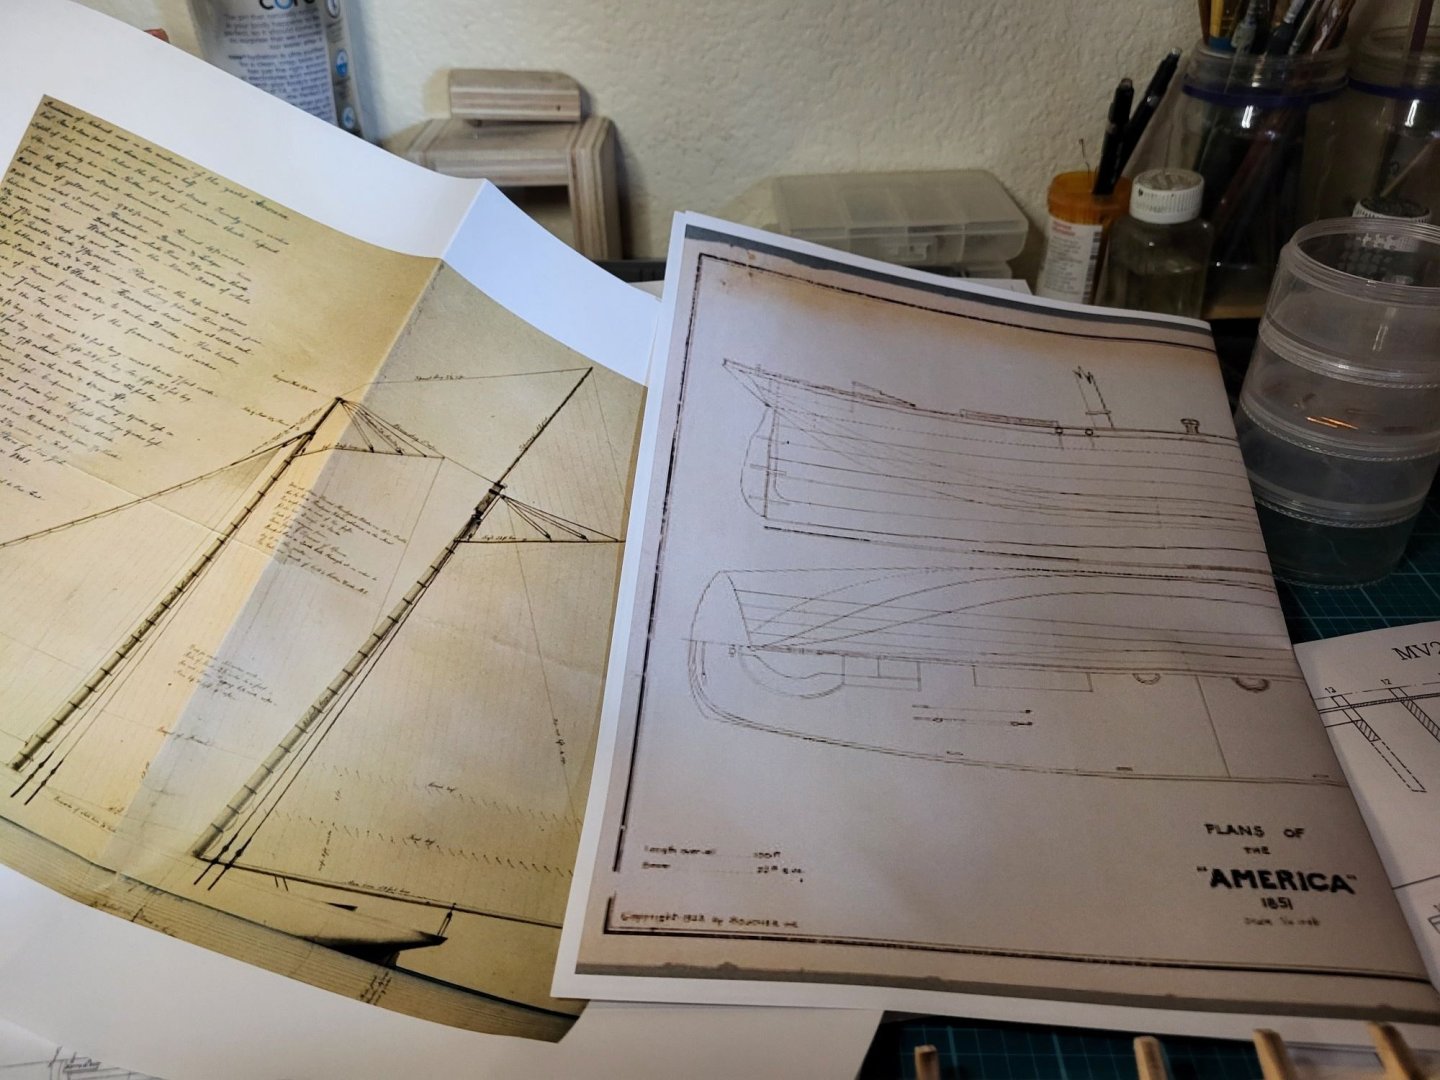
This is sort of the "question" of the America; which America are you building? The America that left the Yard with a grey hull, the America that left France for England with the black hull (and a lot of wine), or even the later one with the white hull? The America that raced on Aug 22nd, with the second Jib boom? What about the jolly boats, in fact the hangers don't seem to show up in the racing configuration. Then the America was reconfigured many times after the race, later with a wheel not a tiller.. I think in 1851, while the yacht had decent accommodations, it crossed the Atlantic, with Steers and his son and brother (and a lot of rum), in '51 as a racing yacht, I can see a single companionway. This seems to be what shows up on the paintings, sure, the paintings may not be the best "documentation" but they reliably show the forward, rectangular skylight, no companionway. Some older plans for modeling do show the forward companionway, but these are from the 20th century. I'm attempting the 1851 racing version, in fact I'm tempted to be a rebel and build the one that left New York, with the gray hull. Ahh but there there's that pesky jolly boat question...
-
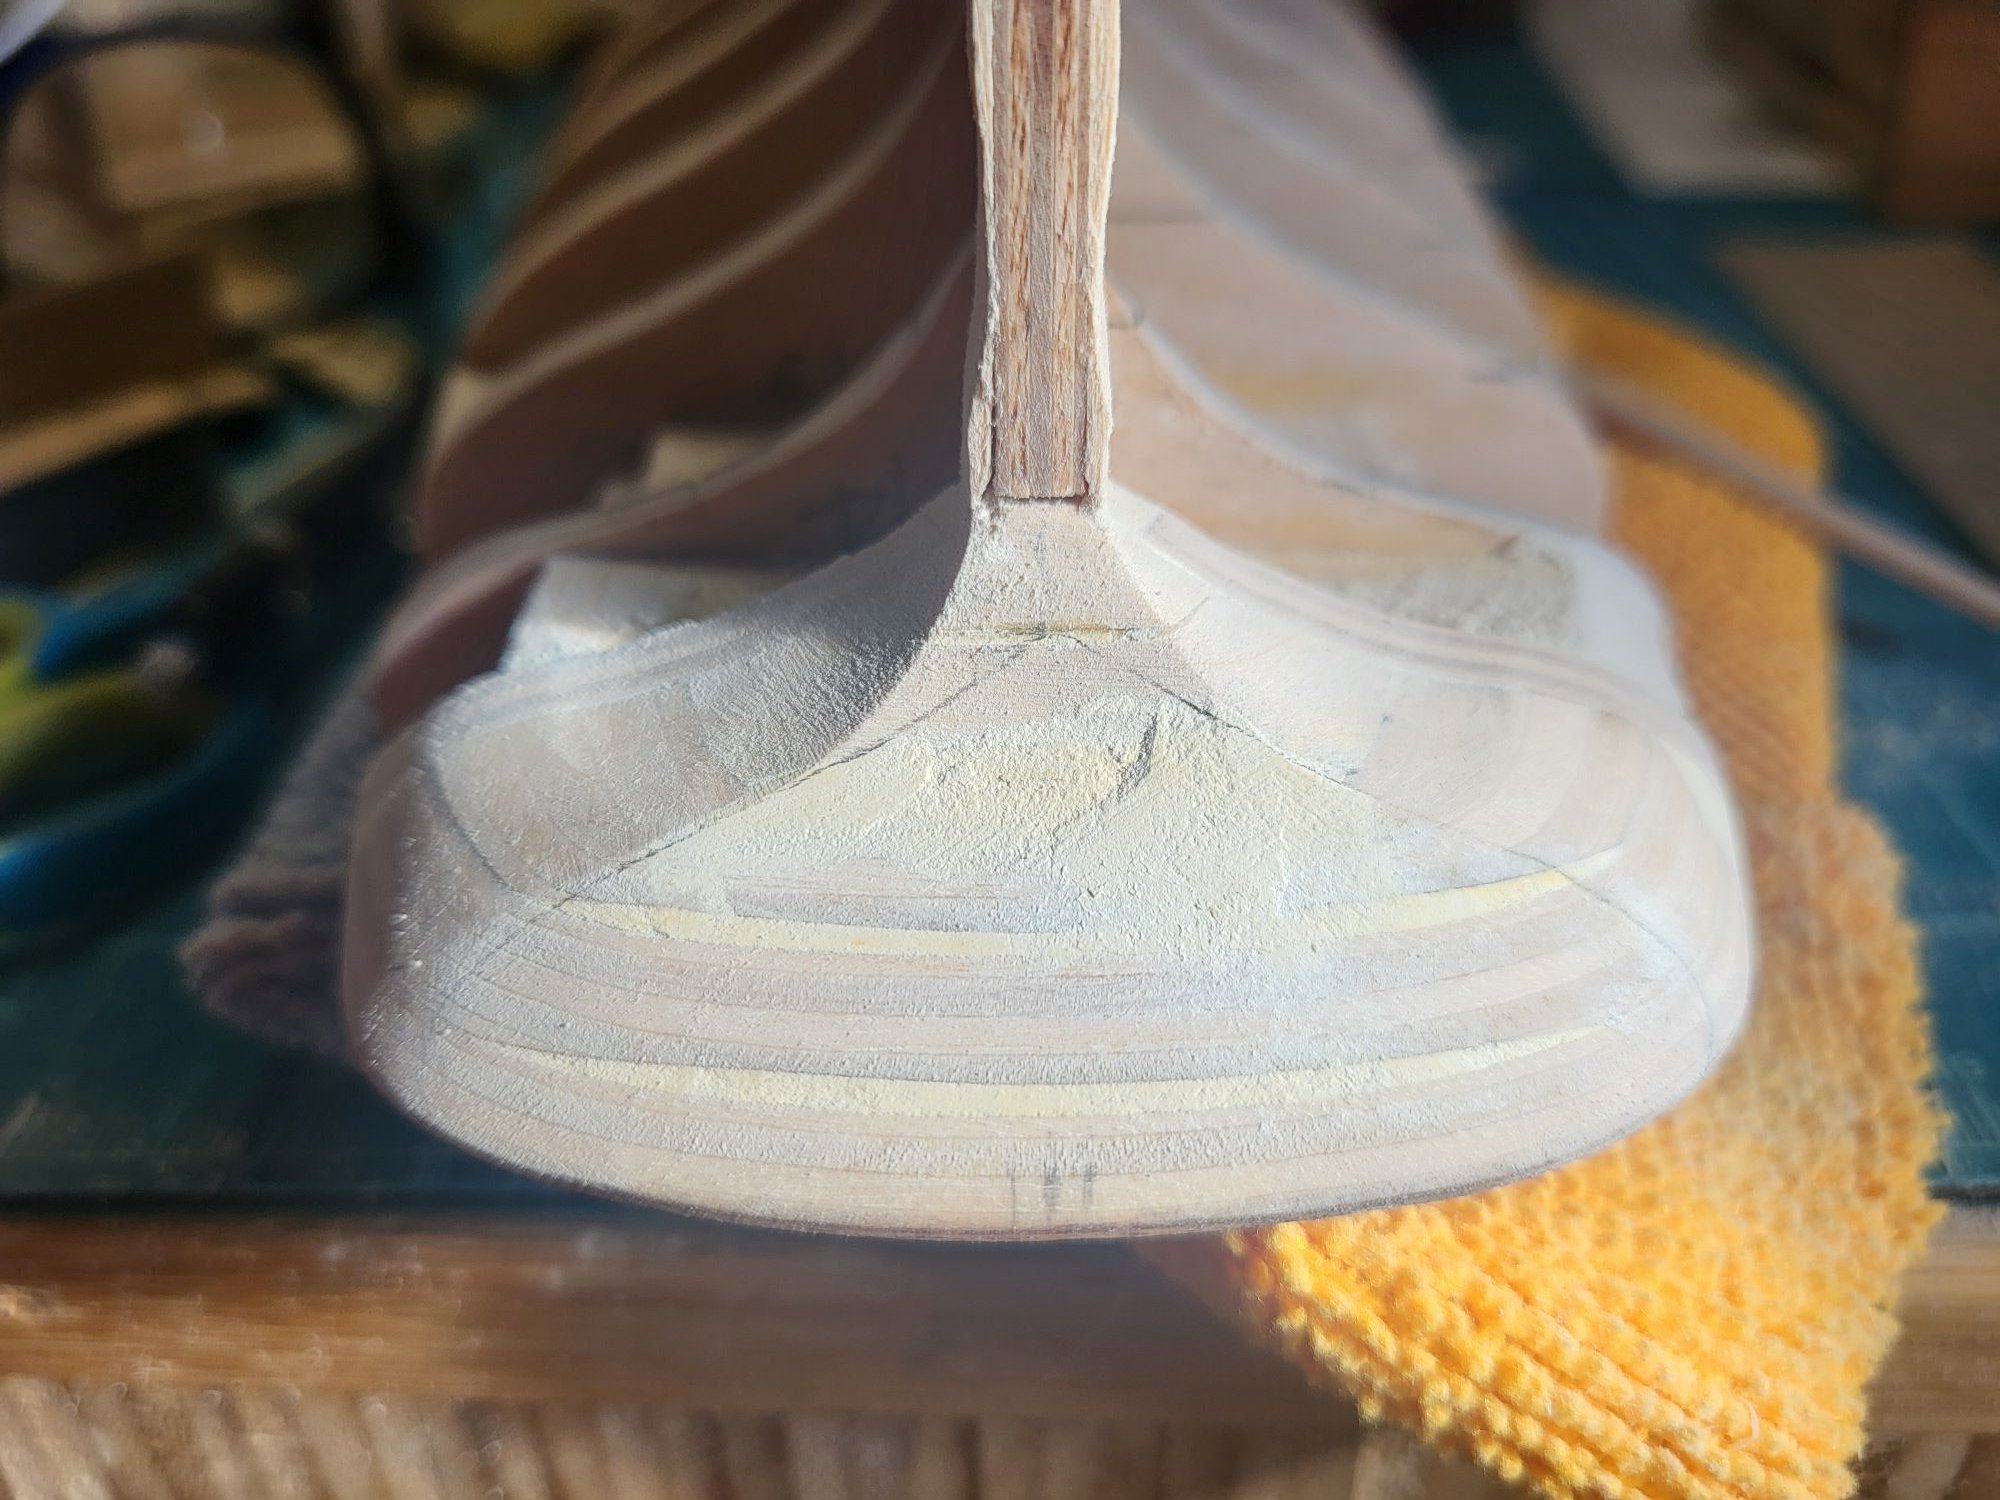
In addition to Steers' drawings, I'm also referencing Pehr Cedergren's detailed drawings of the transom found in the Low Black Schooner. Some of the rabbit I added to the keel is getting eaten away, but this is fine as I can cut it off and replace it. I'd prefer it happen to a replaceable part than the frame section. The rear most frame section had to be cut down a lot, otherwise it would have forced the hull to "flatten" out as it approached the transom rather that that famous taper

-
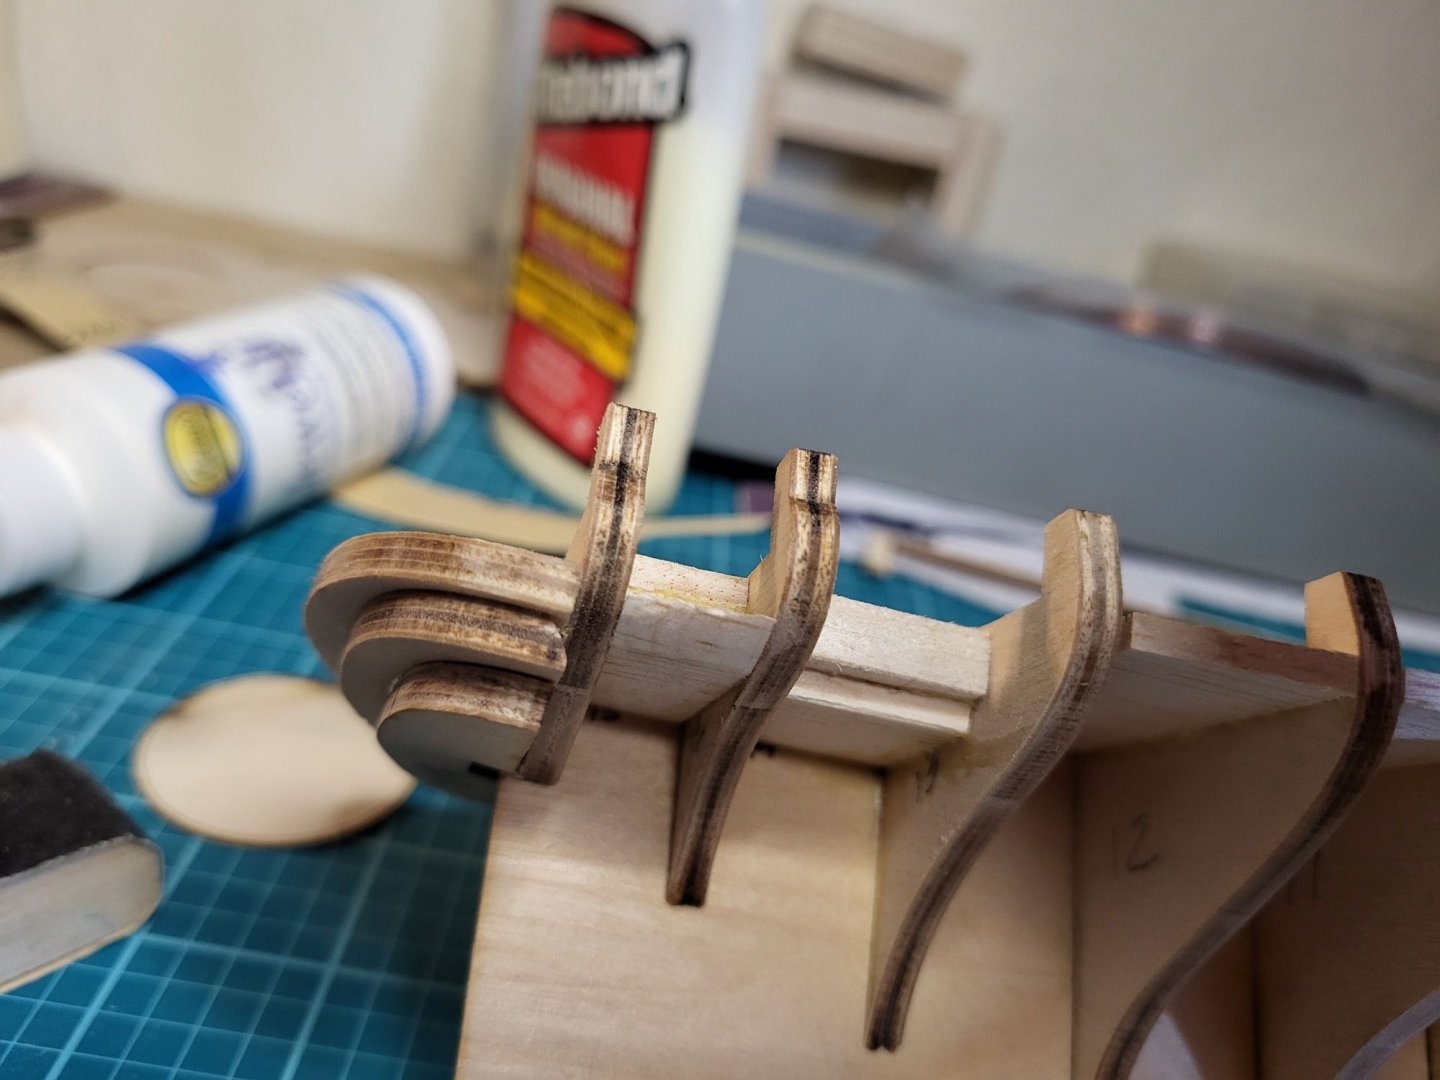
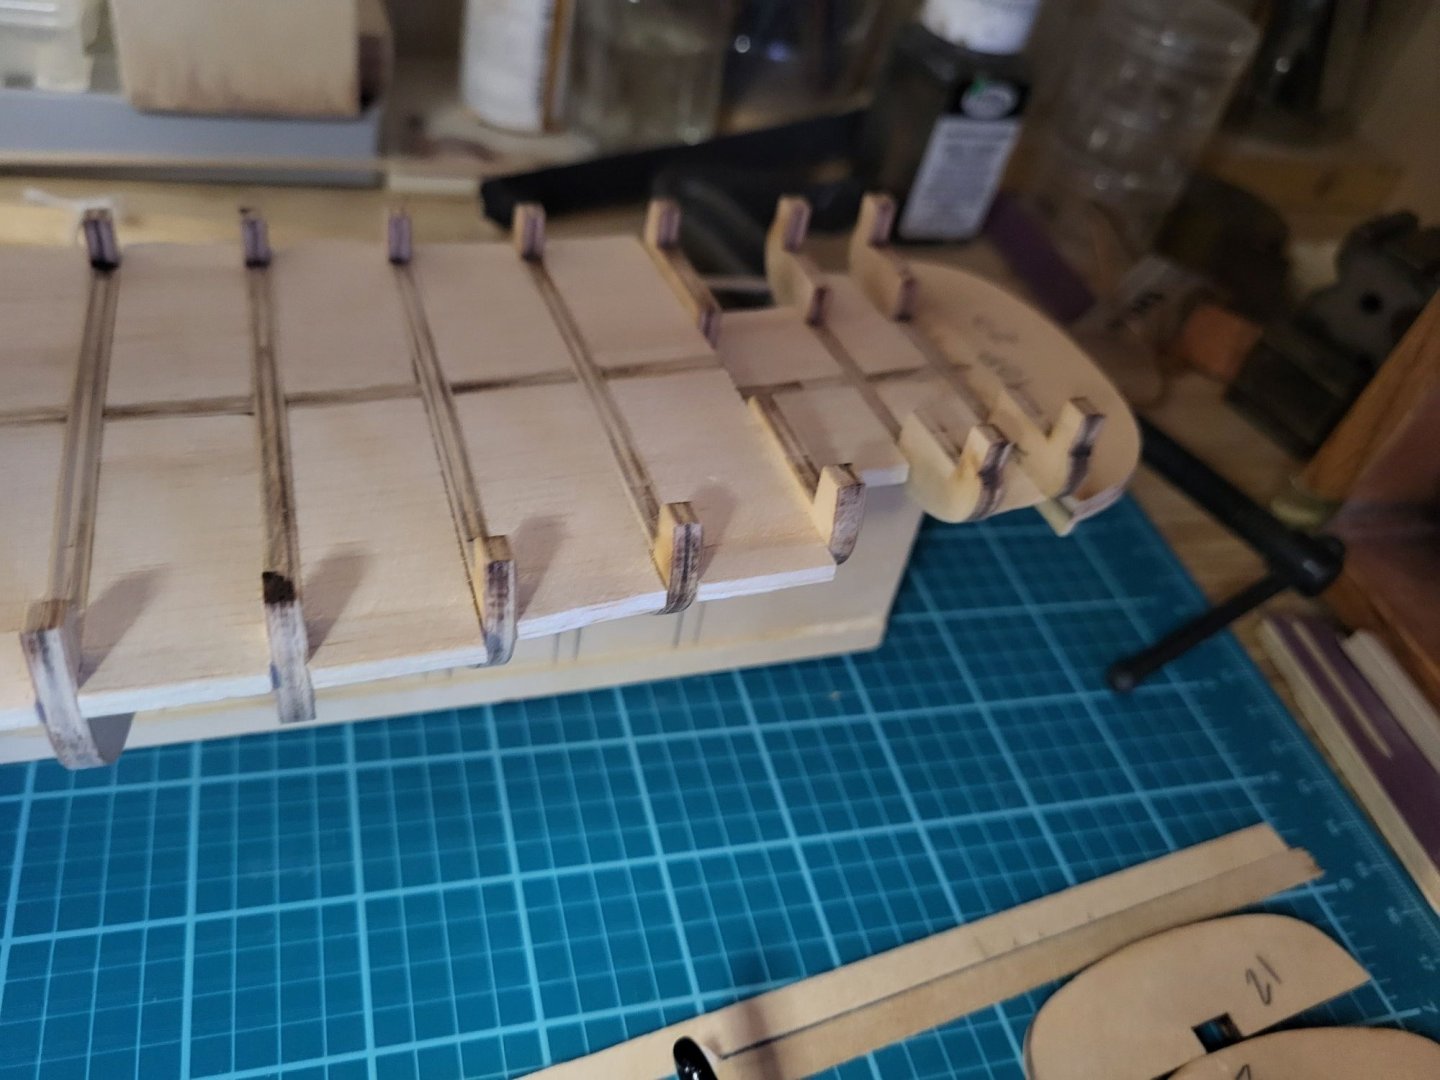
Time to start shaping the frames, I'm following Steers' half hull model for the keel shape.

-
One advantage to such a famous boat, is there is a lot of contemporary or at least period documentation. I found a few scaled sheer and waterline drawings as well at rigging drawings. Of course there are a few oil paintings, but I doubt those are worth using for accuracy, however, they do all agree that the jolly boats are not on board. I have also ordered "The Low Black Schooner" and "America's Victory" on eBay. A bargain at about $6 each.
-
Transom is built up and I added some additional material around the cockpit, so that when I add the planking around it, there is something to support it.

-
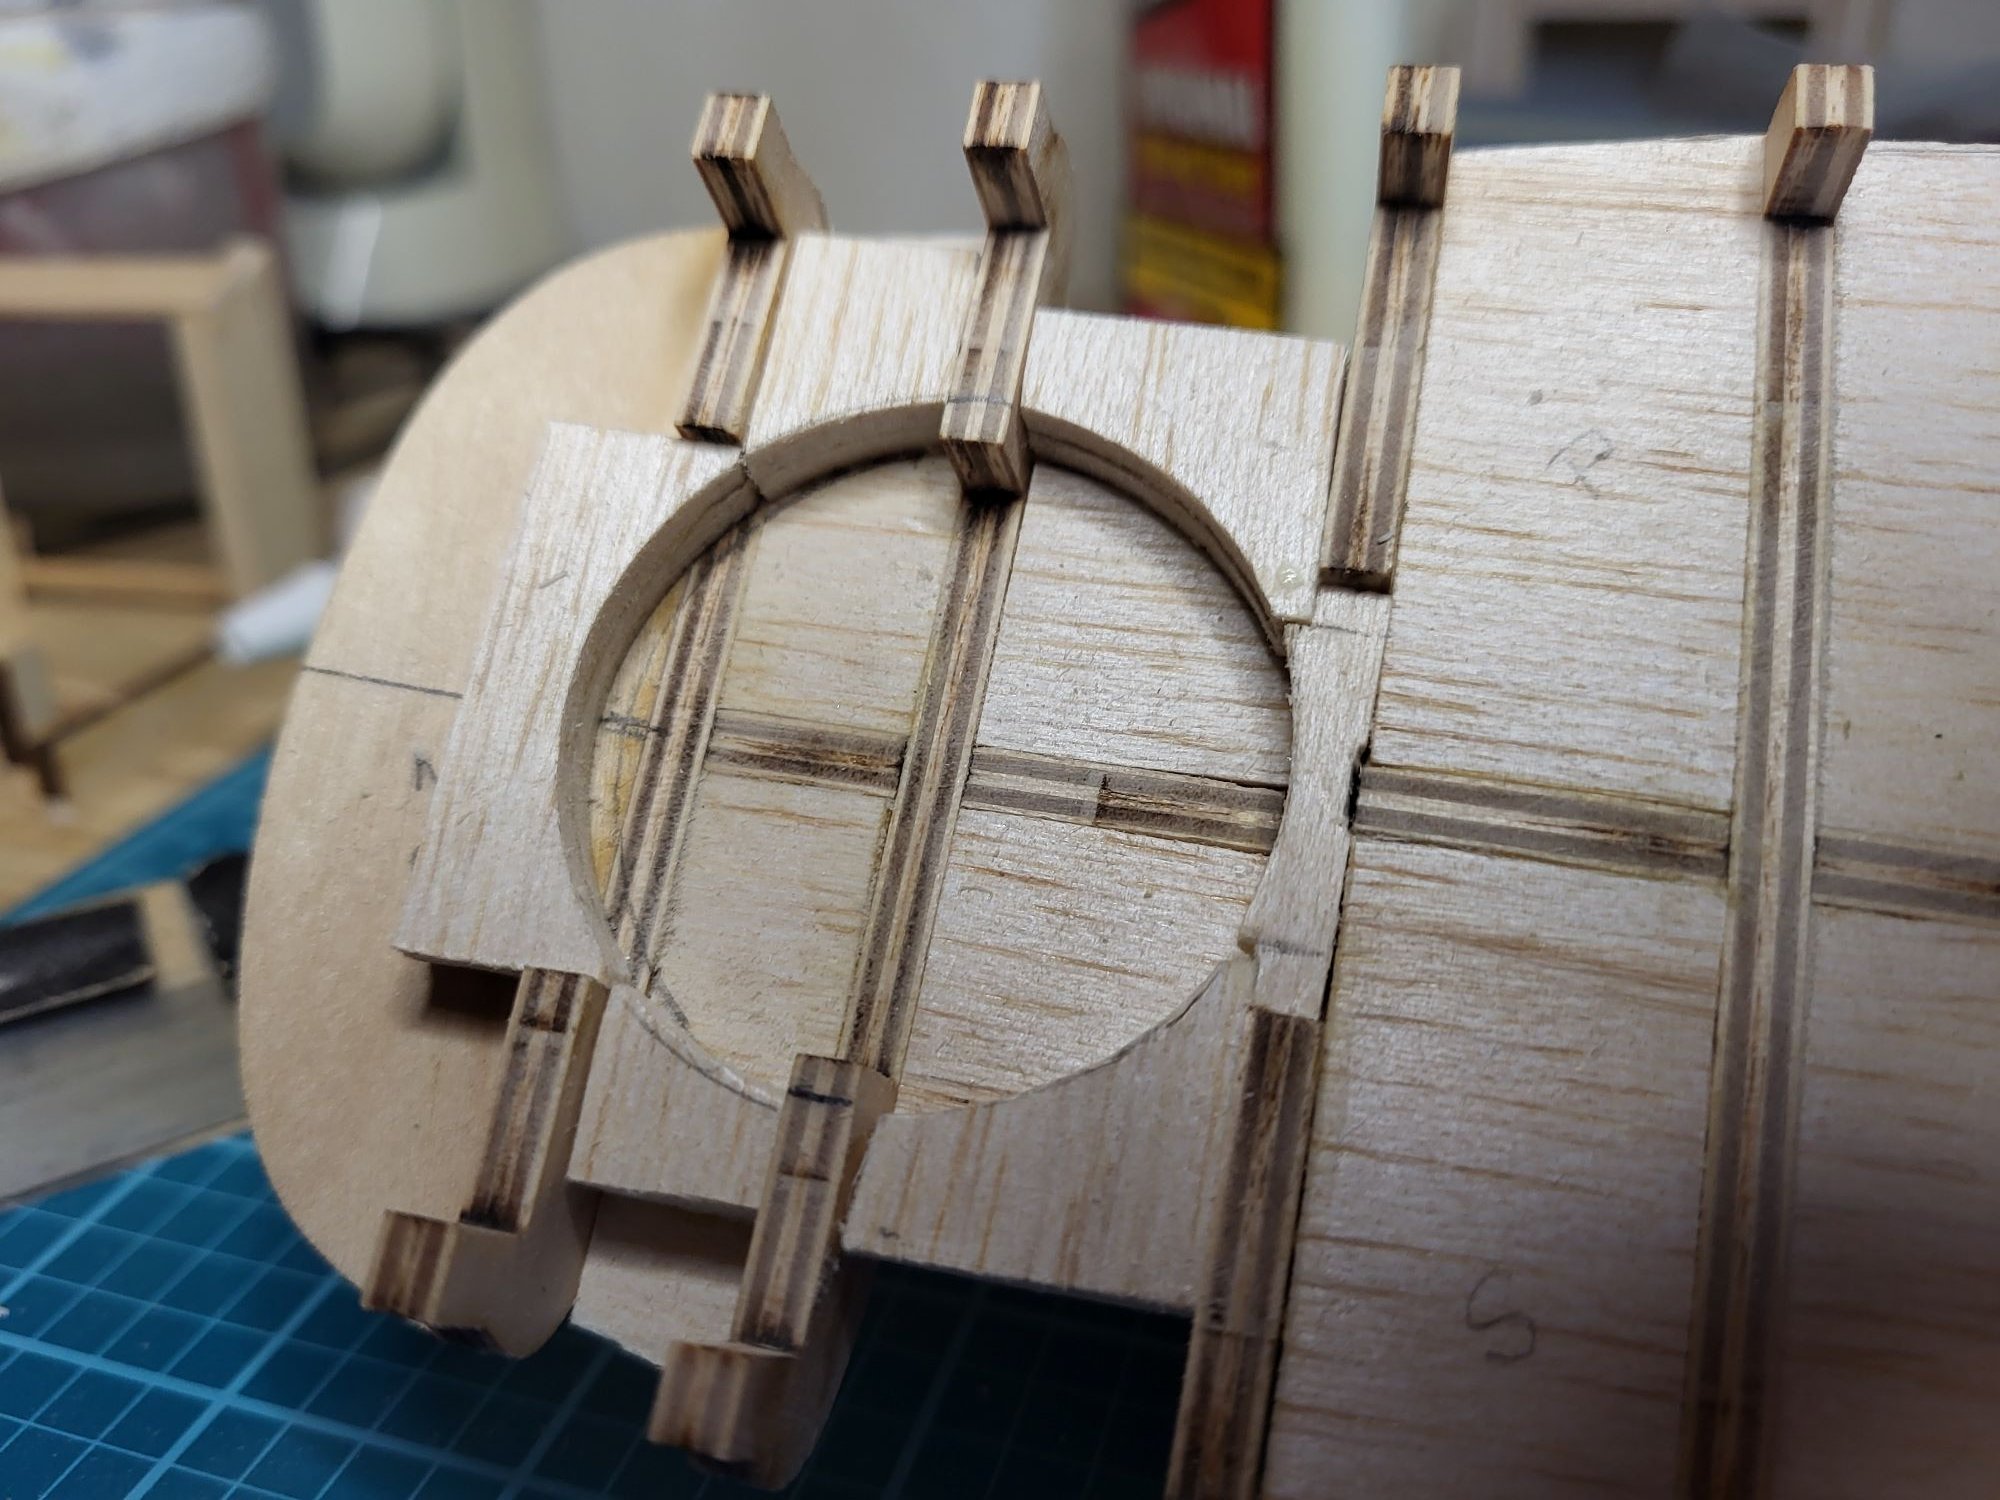
Mast supports built up. This kit though Italian (??) made in the Czech Republic, is in fractions, which is actually helpful because all the wood matches up, the 1/4 inch masts fit well once I added fractional stock. I guess what I';m saying is I'm not fighting between metric dimensions and fractional wood stock.

-
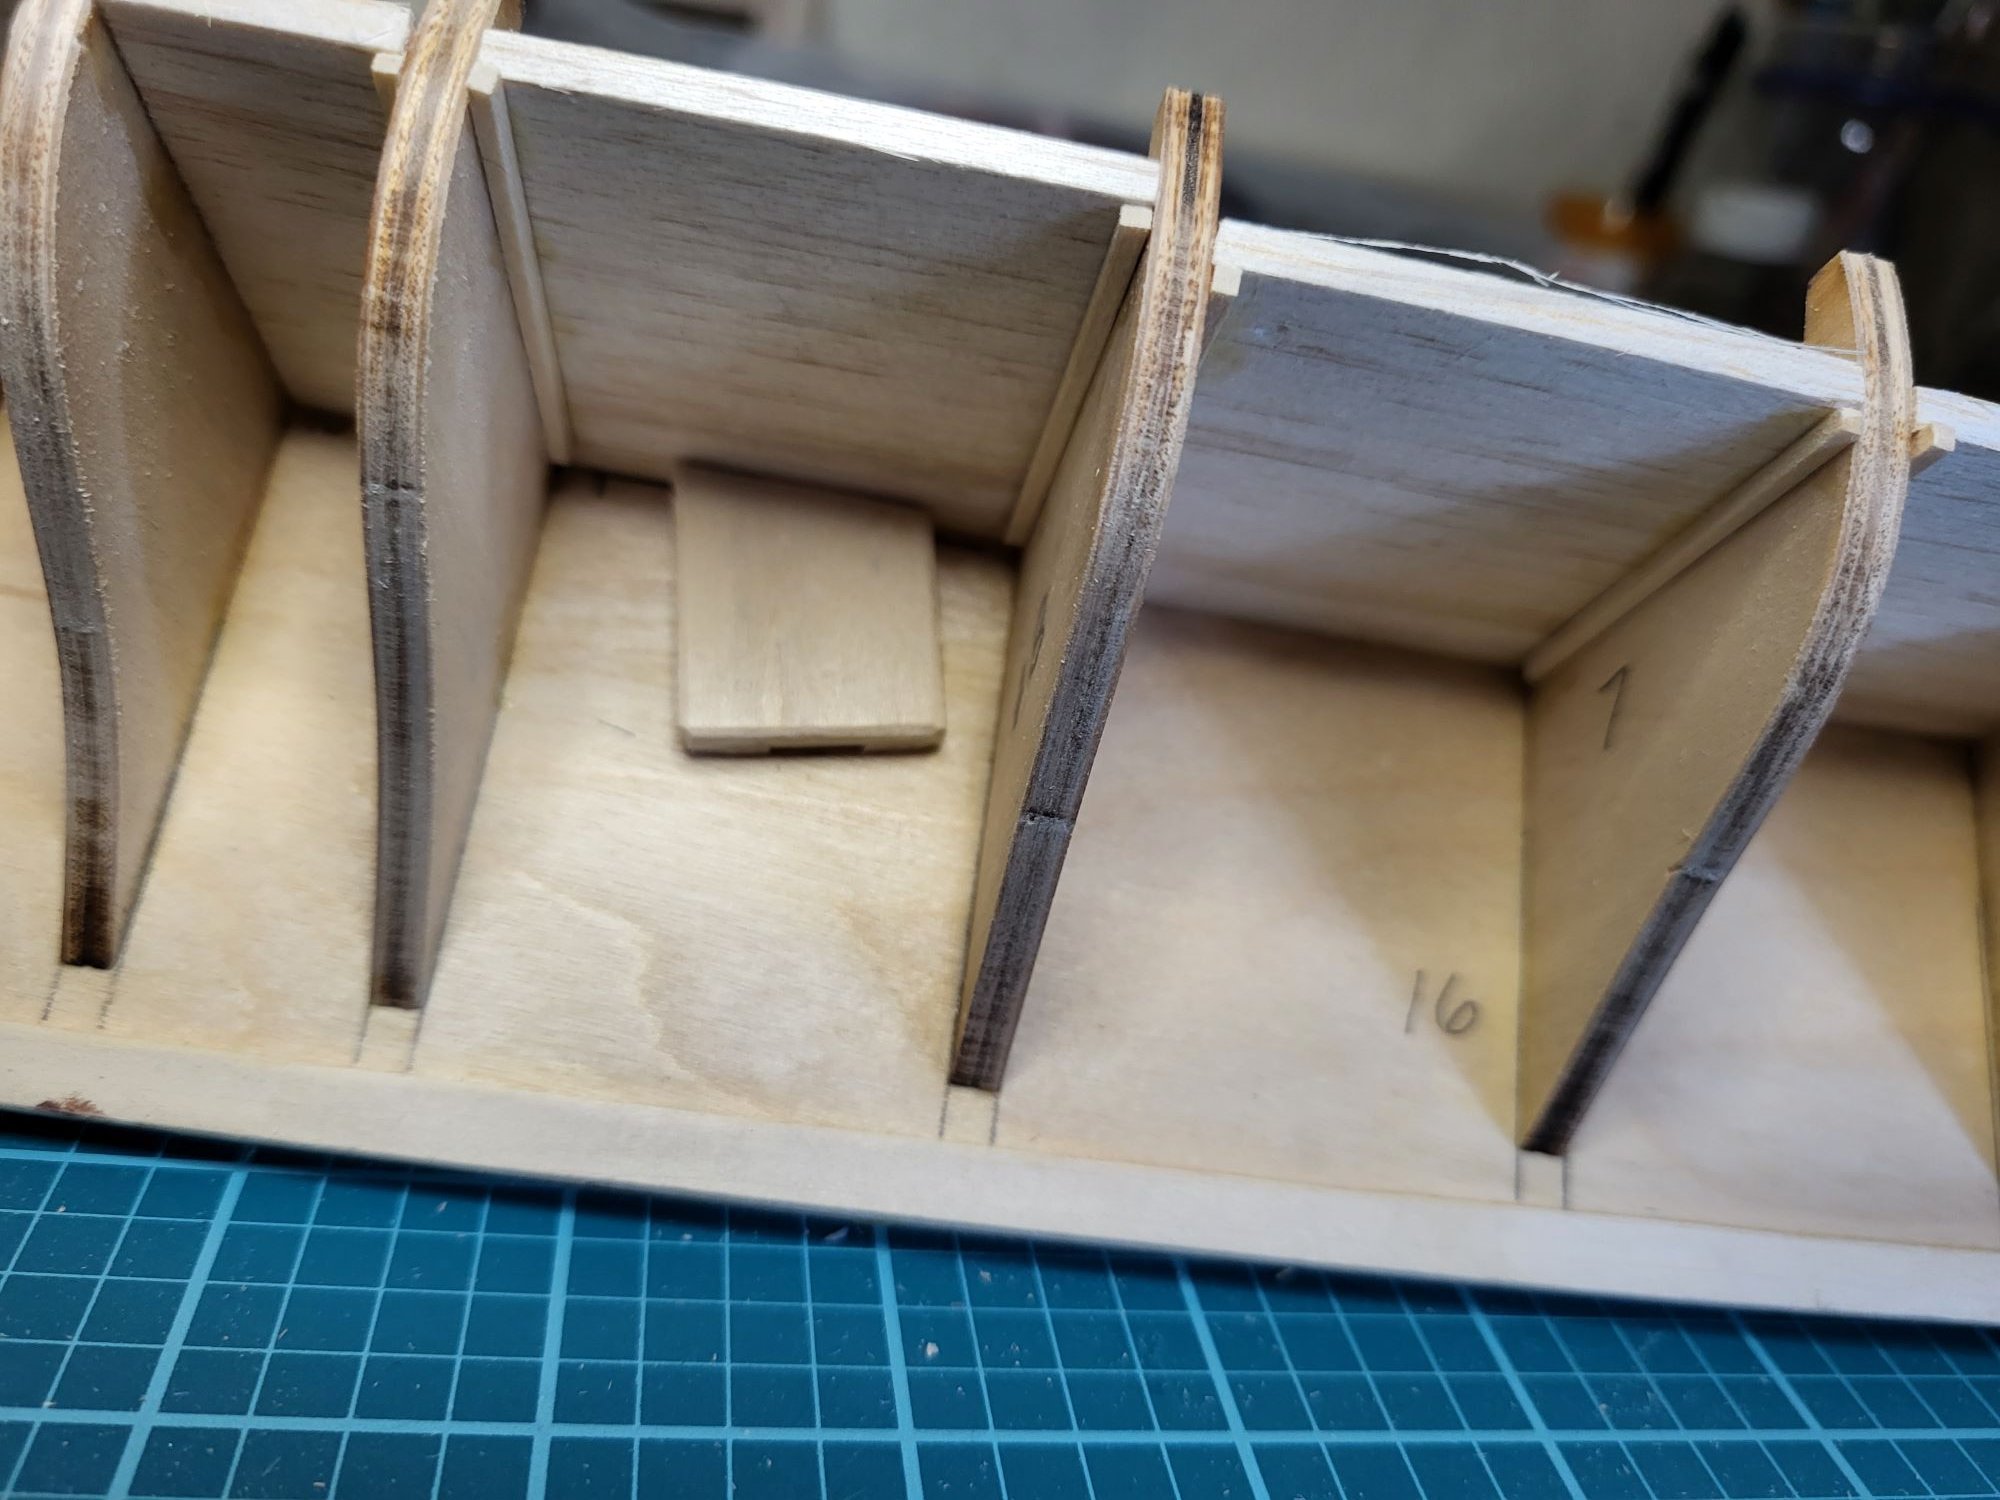
Even though the kit comes with what looks like a "subfloor" for the deck, I'm still filling the gaps. I like how the transom is built up, it will take a lot of shaping, but there will be a lot of structure to it.

-
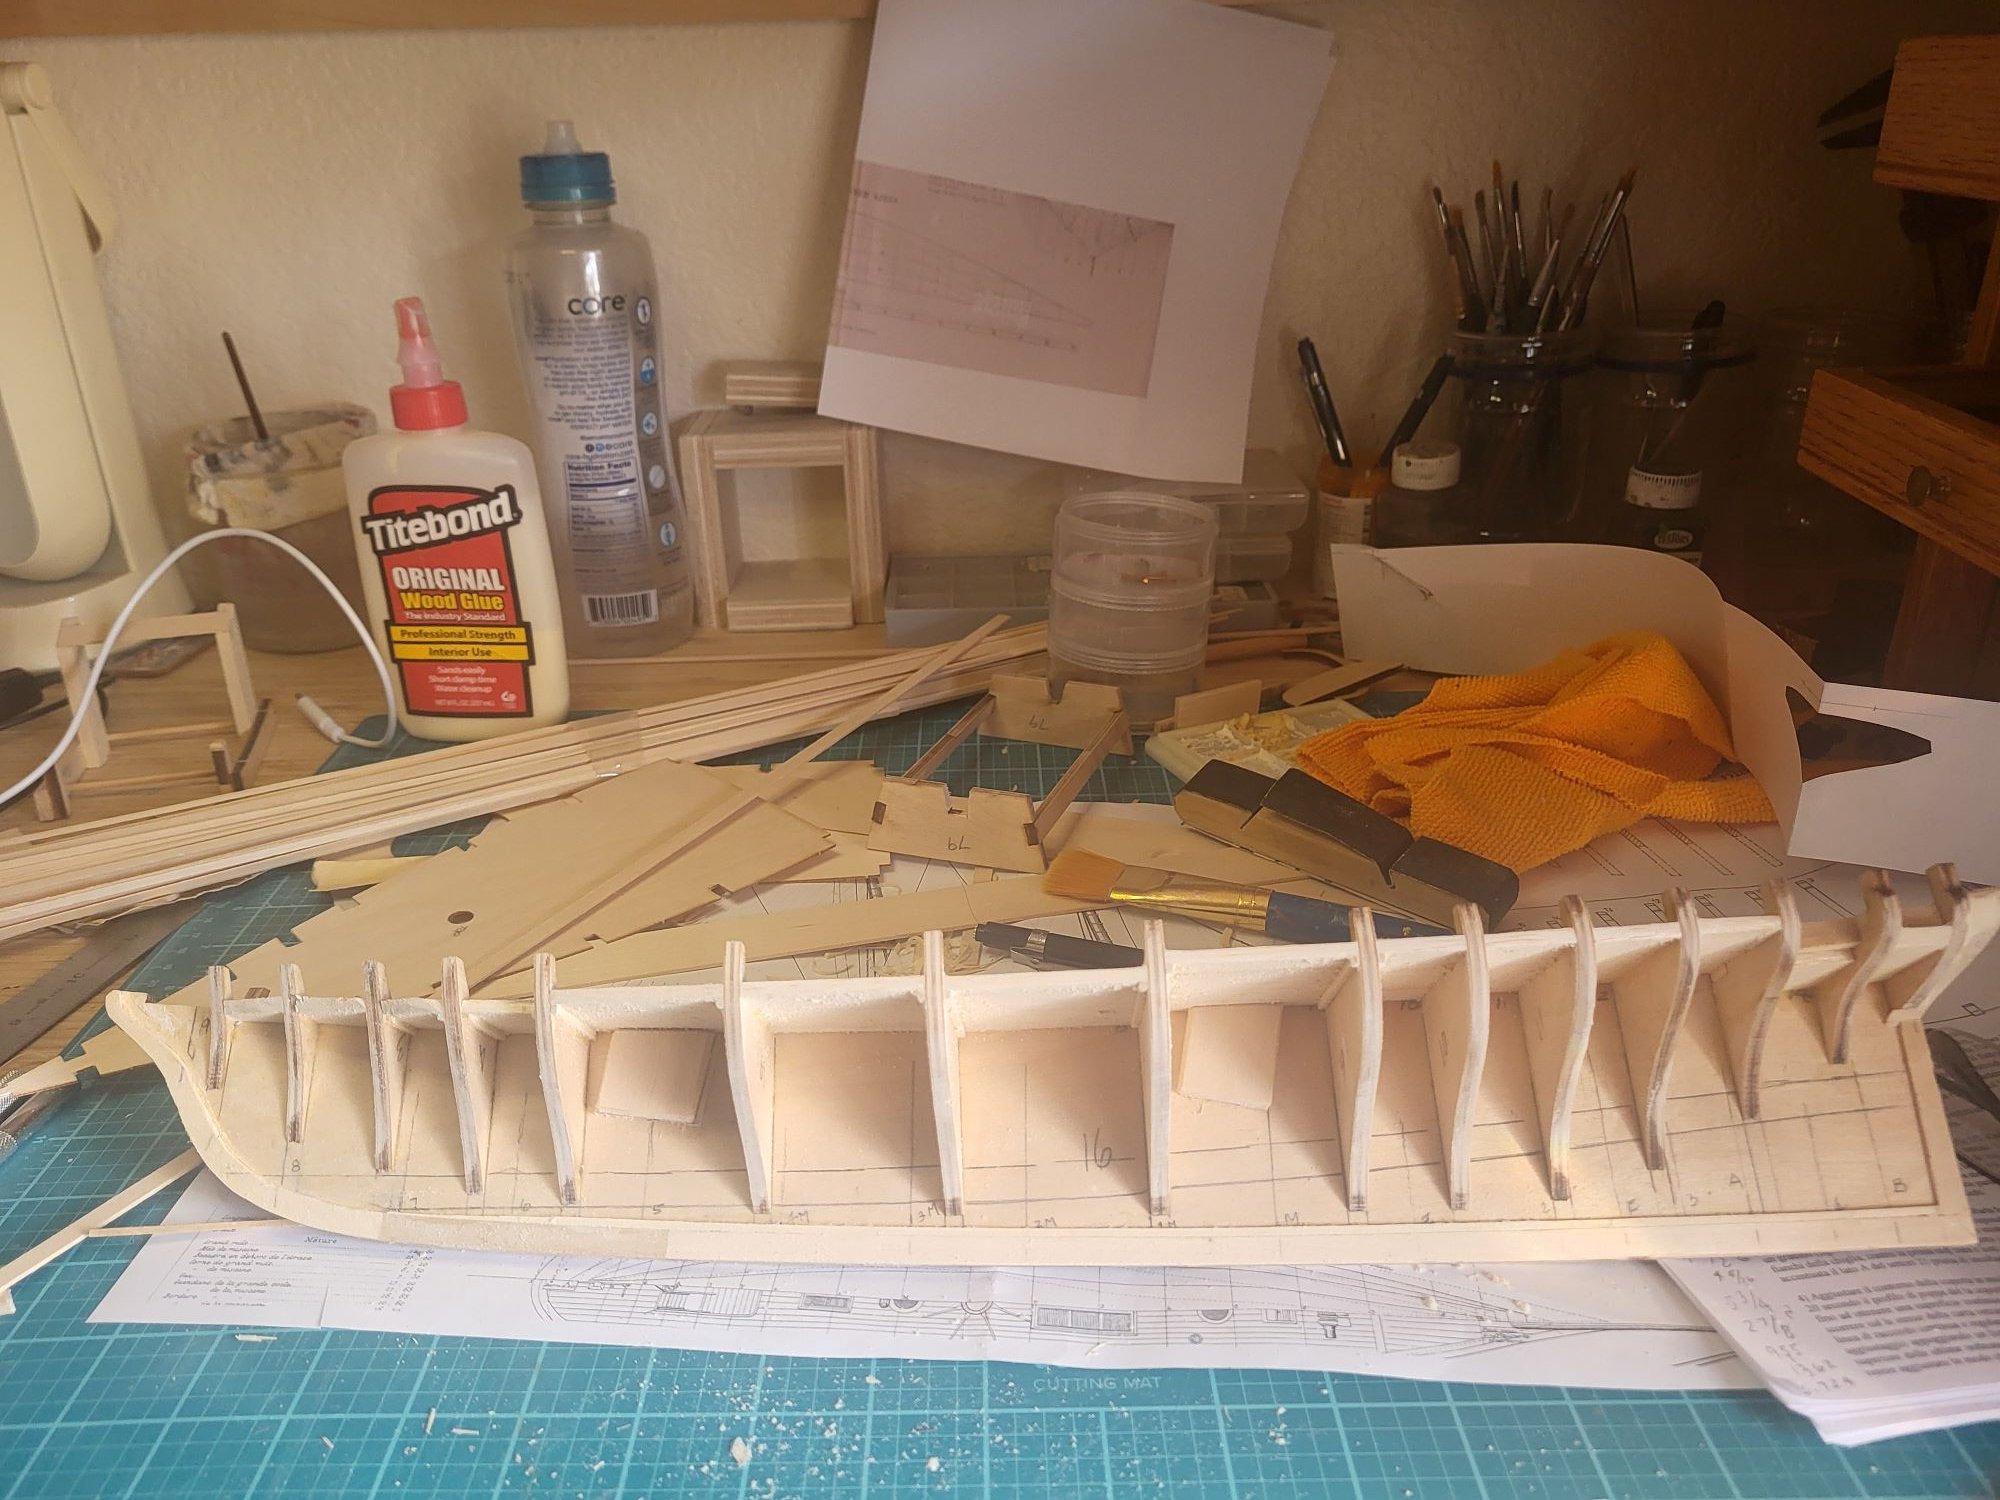
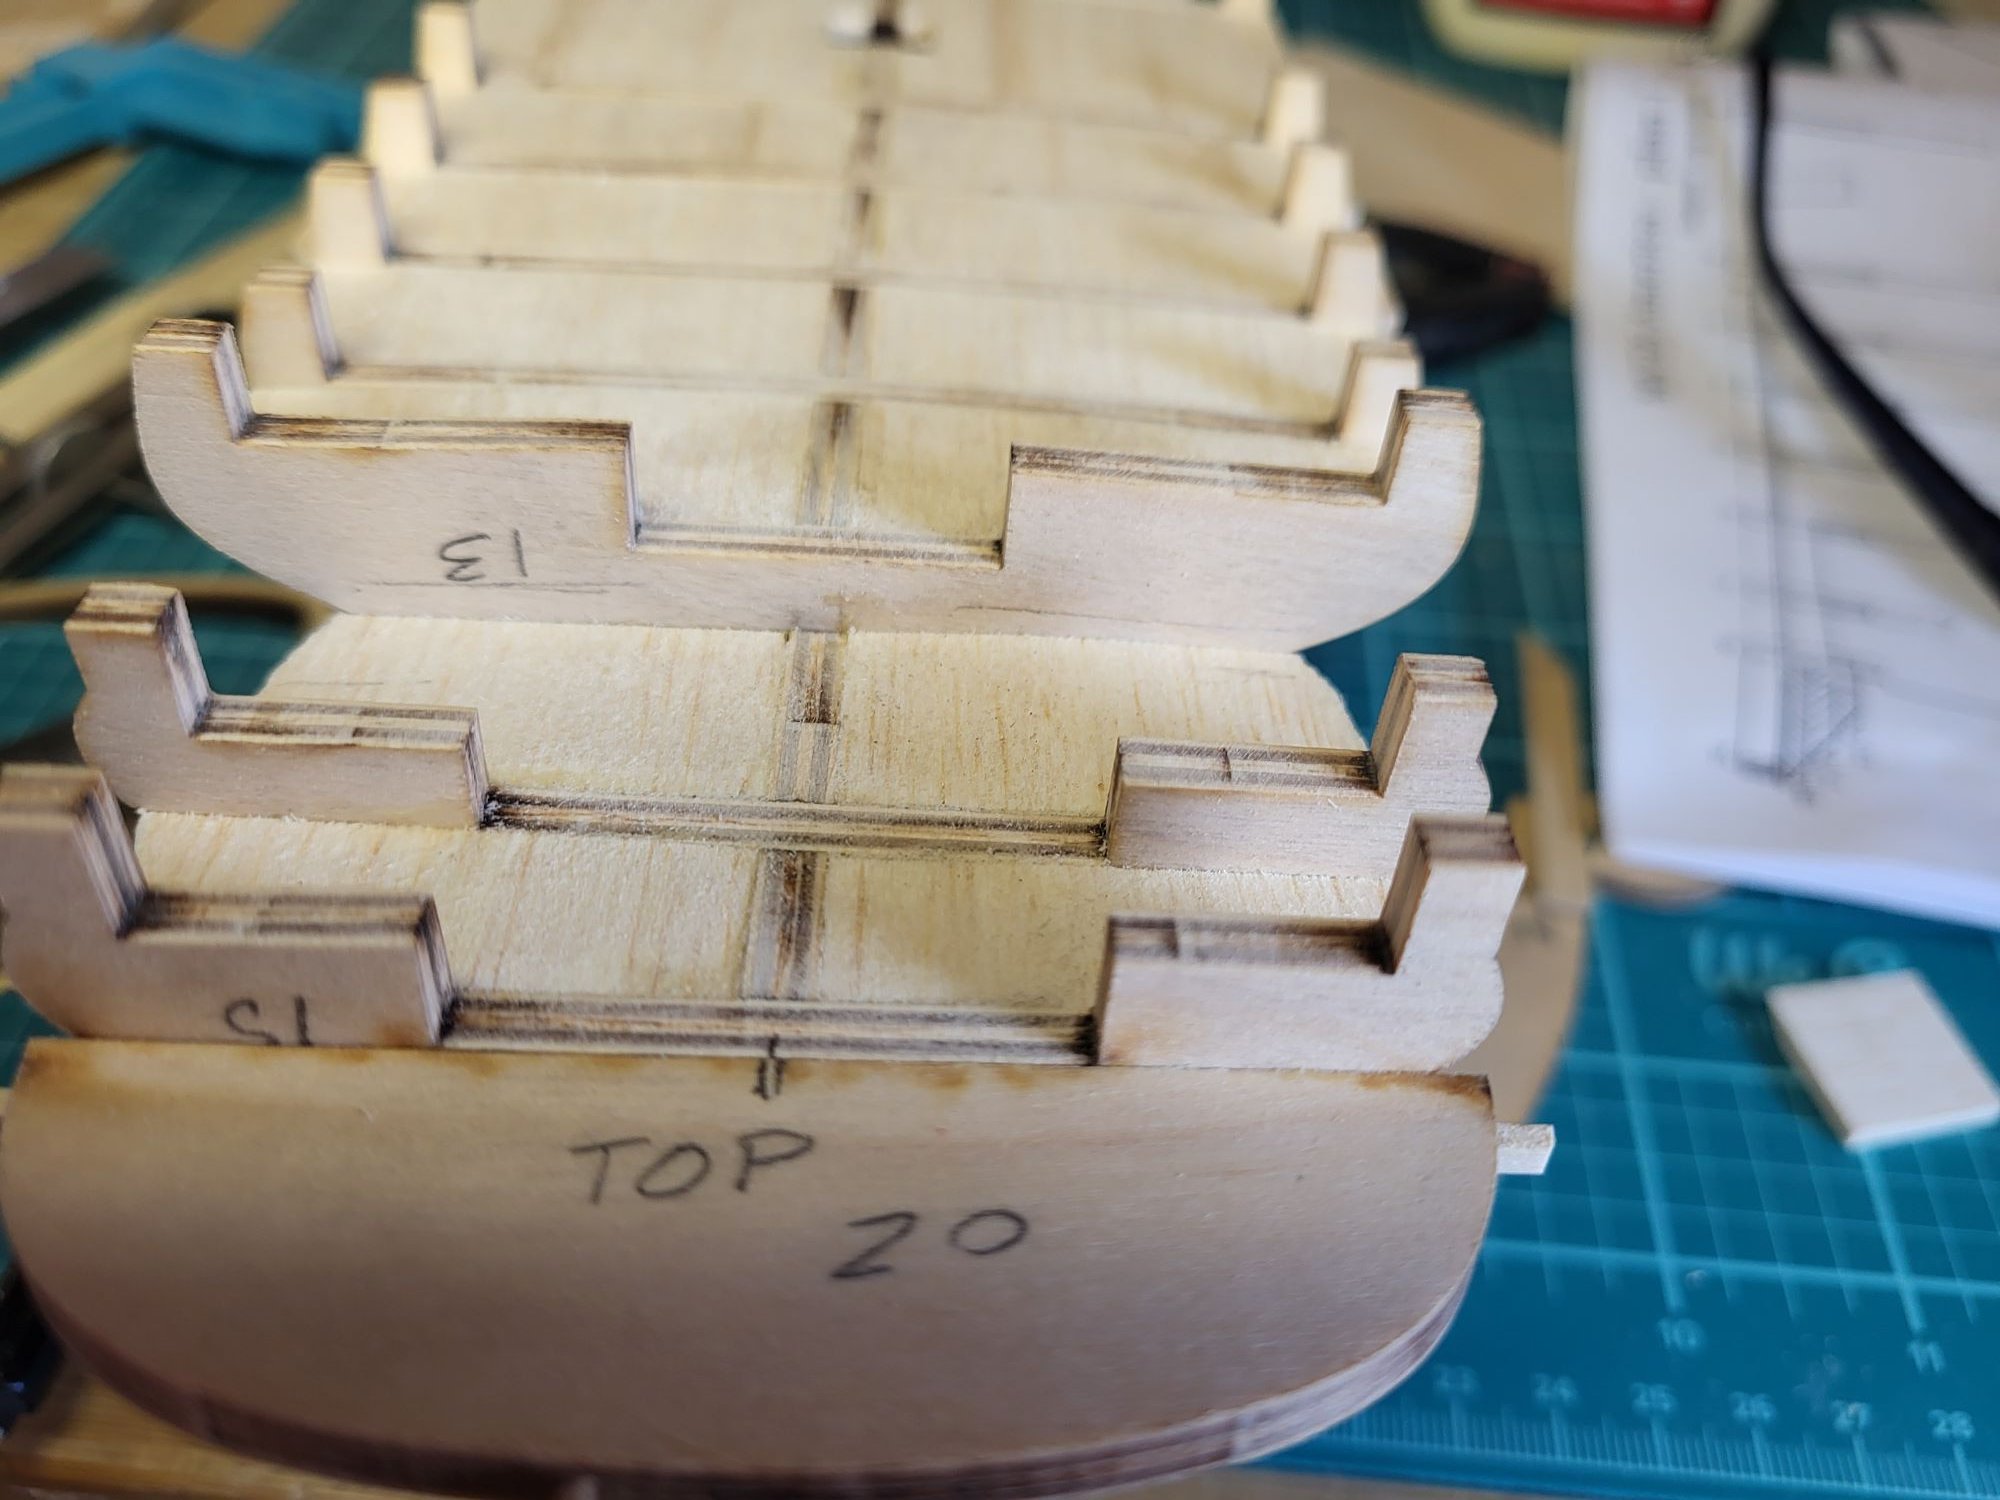
Well despite the difficulty removing these laser cut parts; they fit really well. I have only had to verify they are square, I have not had to clamp a square to the part while gluing them up. I did goof one piece (#13), not sure how but I was able to remove it and set it correctly.

-
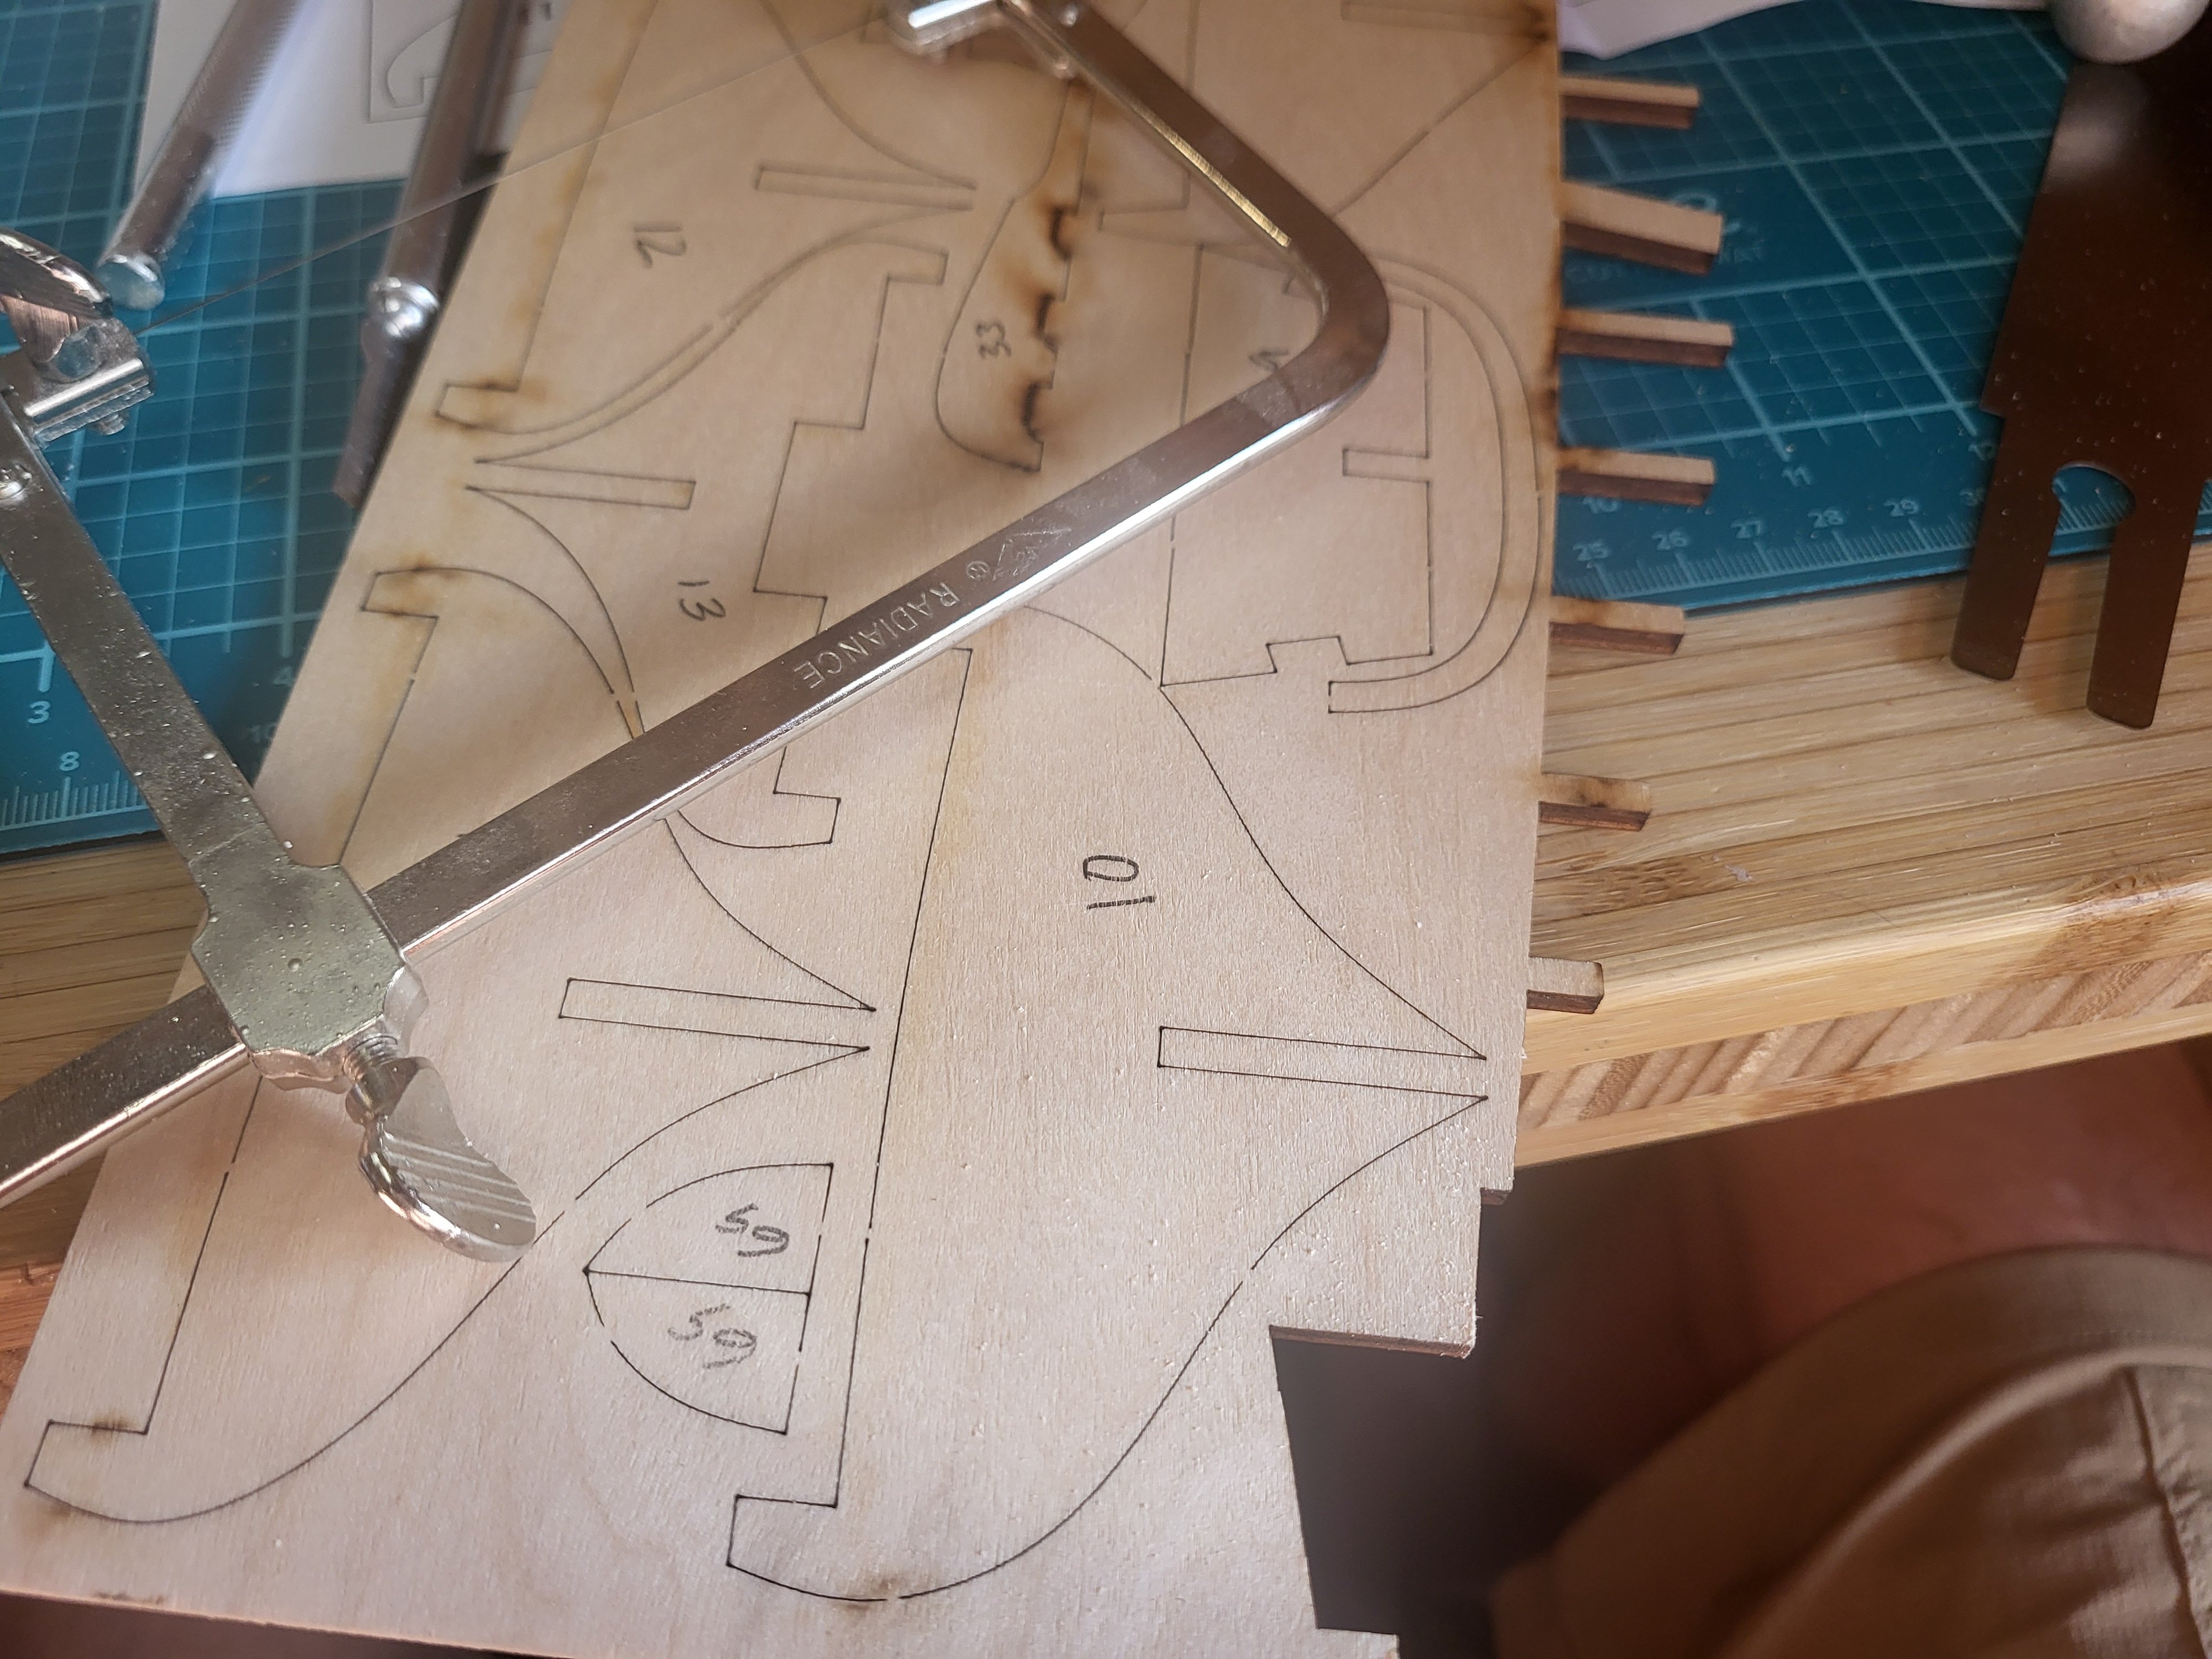
Normally you're right, but the plywood was too tough for a hobby knife to easily go through, and the gap cut by the laser was thinner than an 11 blade.
-
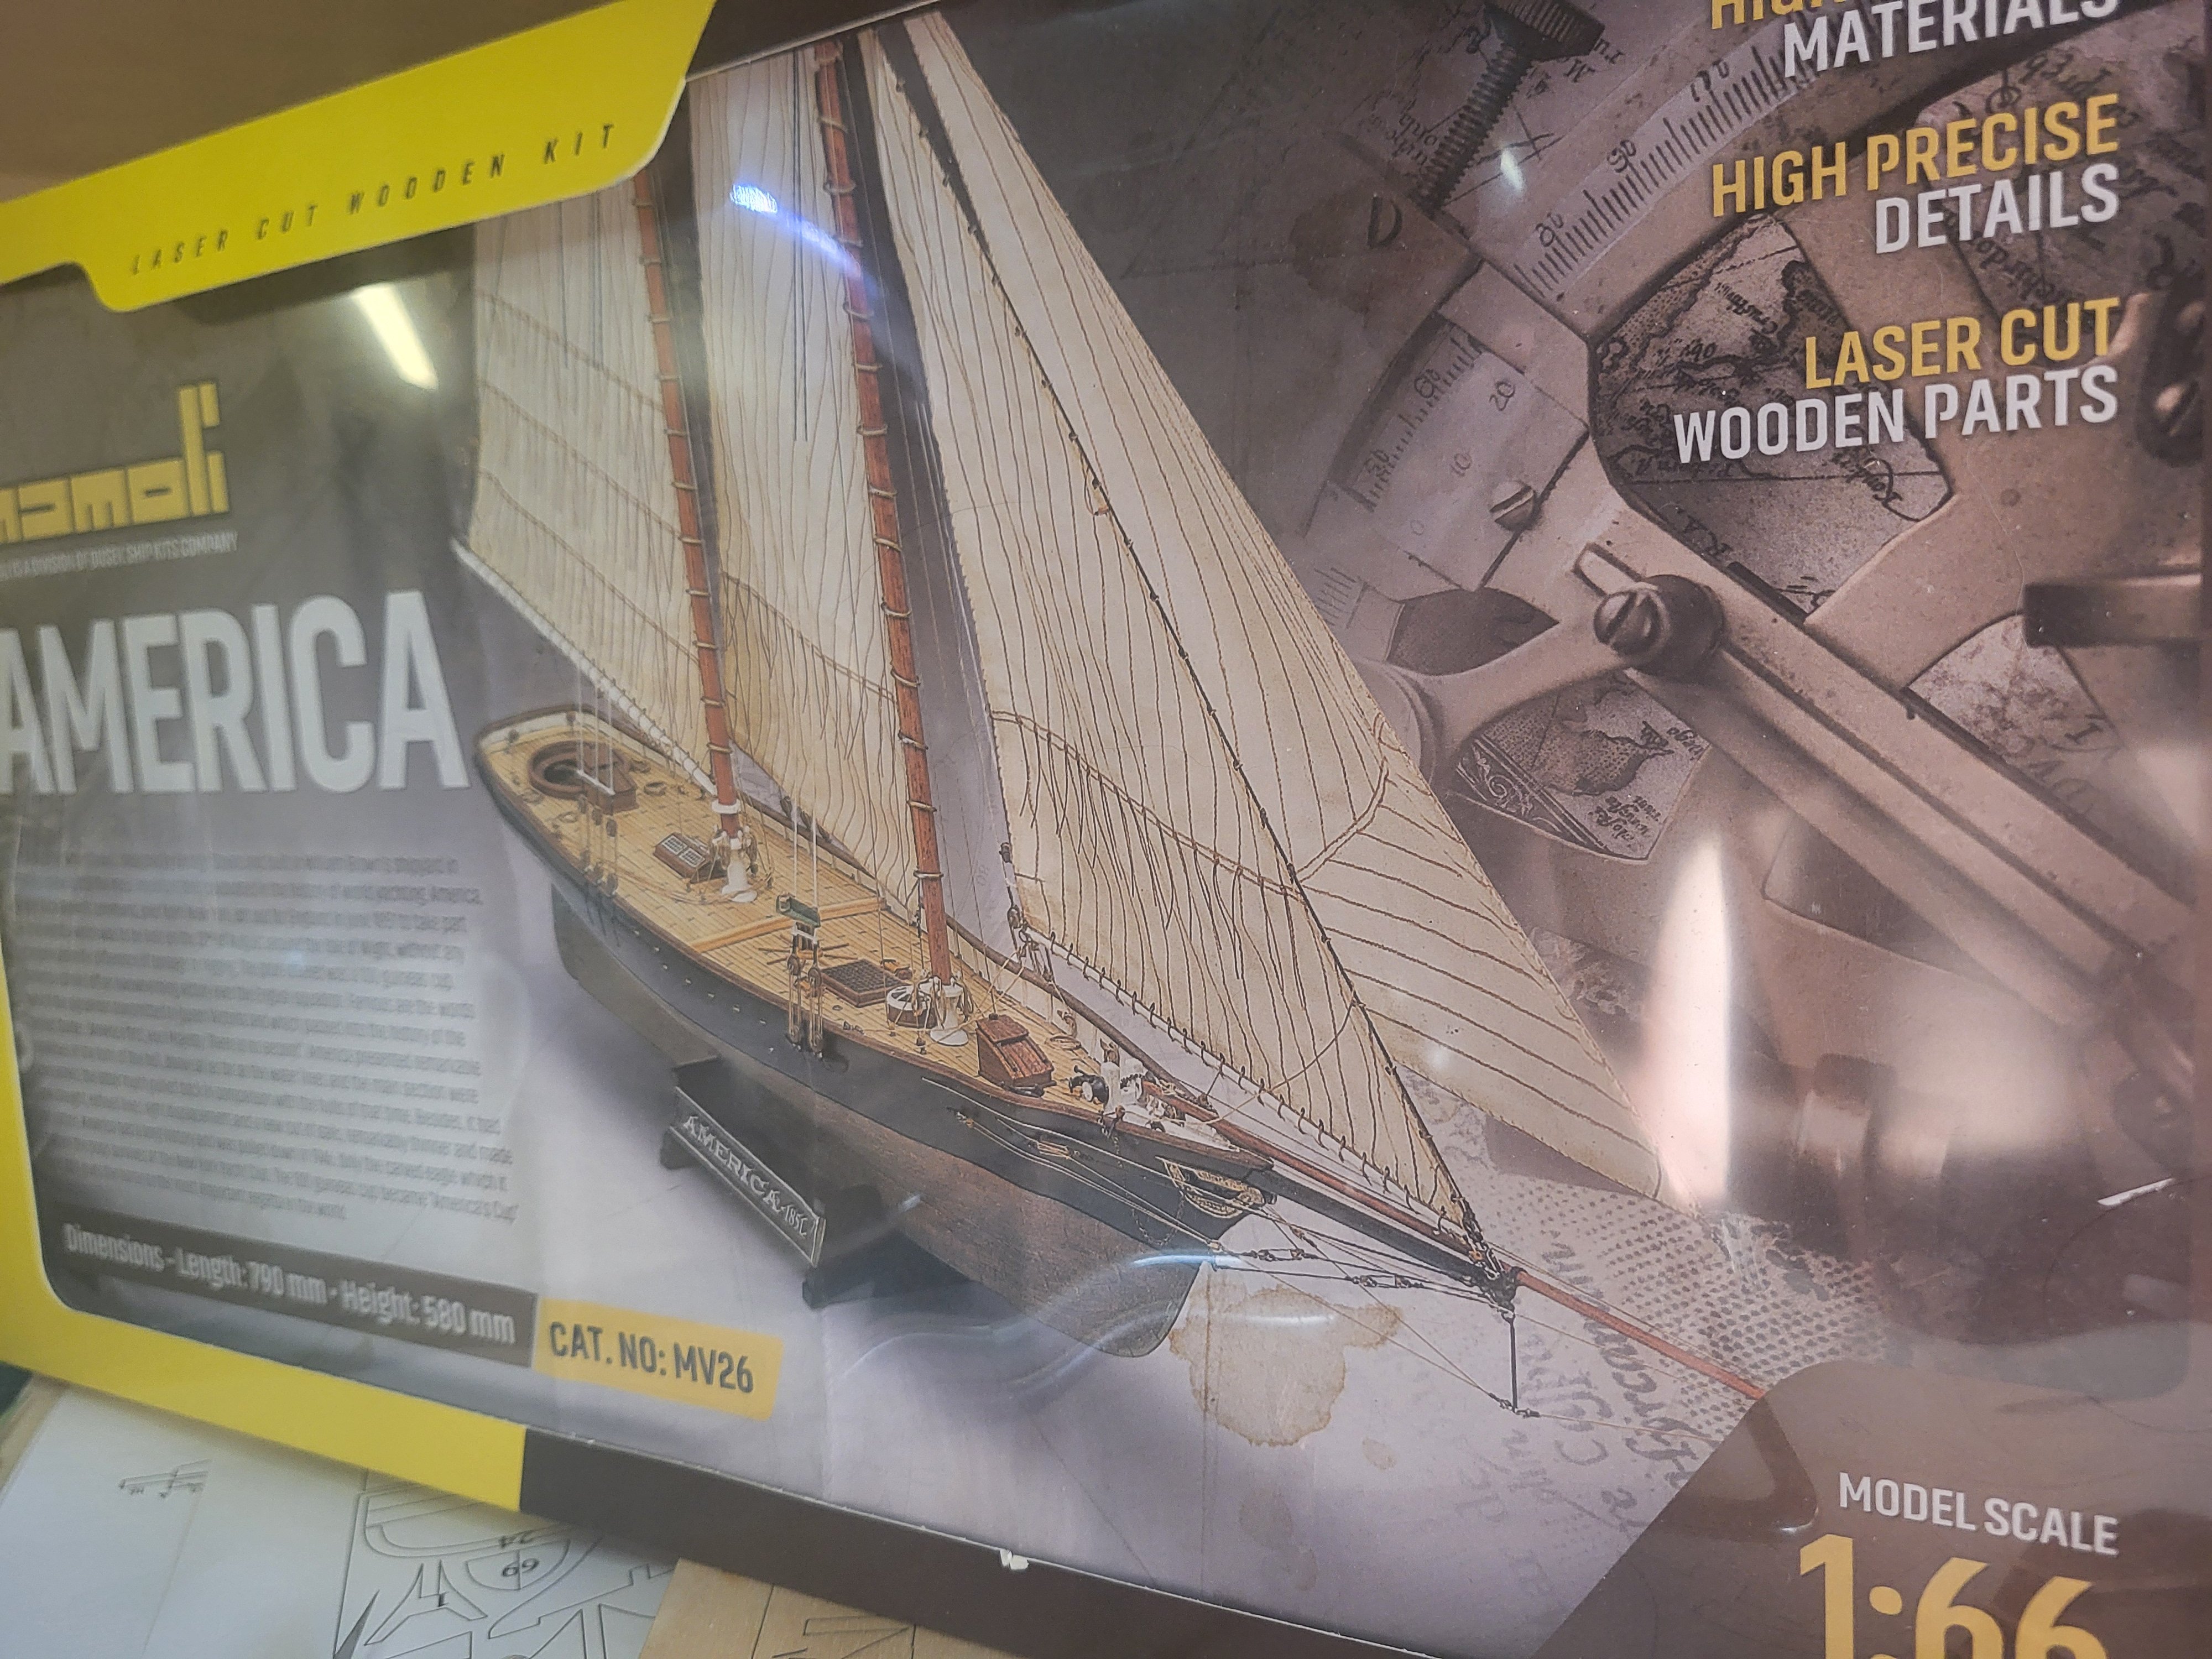
A really cheap eBay solid hull kit was my first model, since then I have looked for a nicely scaled model. Lo and behold just as I was a couple moths out from finishing the Benjamin Latham, Model Expo has a great sale and after a little research I went for the 1:66 Mamoli kit. Good news bad news, good news? Good news, the documentation is nice, details are good and the sheets are decently sized. As @frenchguy points out the text is... challenging? Bad news, the laser cut parts are in plywood, not solid wood, this made separating them a pain, I had to break out the jeweler's saw. Not the end of the world, but I suspect shaping the frames for the planking will be interesting. The frame sections are also a little on the thin side. Good news, some exotic wood supplied that's nice, and the cord supplied for rigging isn't on tight spools. Whenever using those small flat "bobbins" of cord, I have to soak it in hot water to get the kinks out. Anyway, here we go!


-
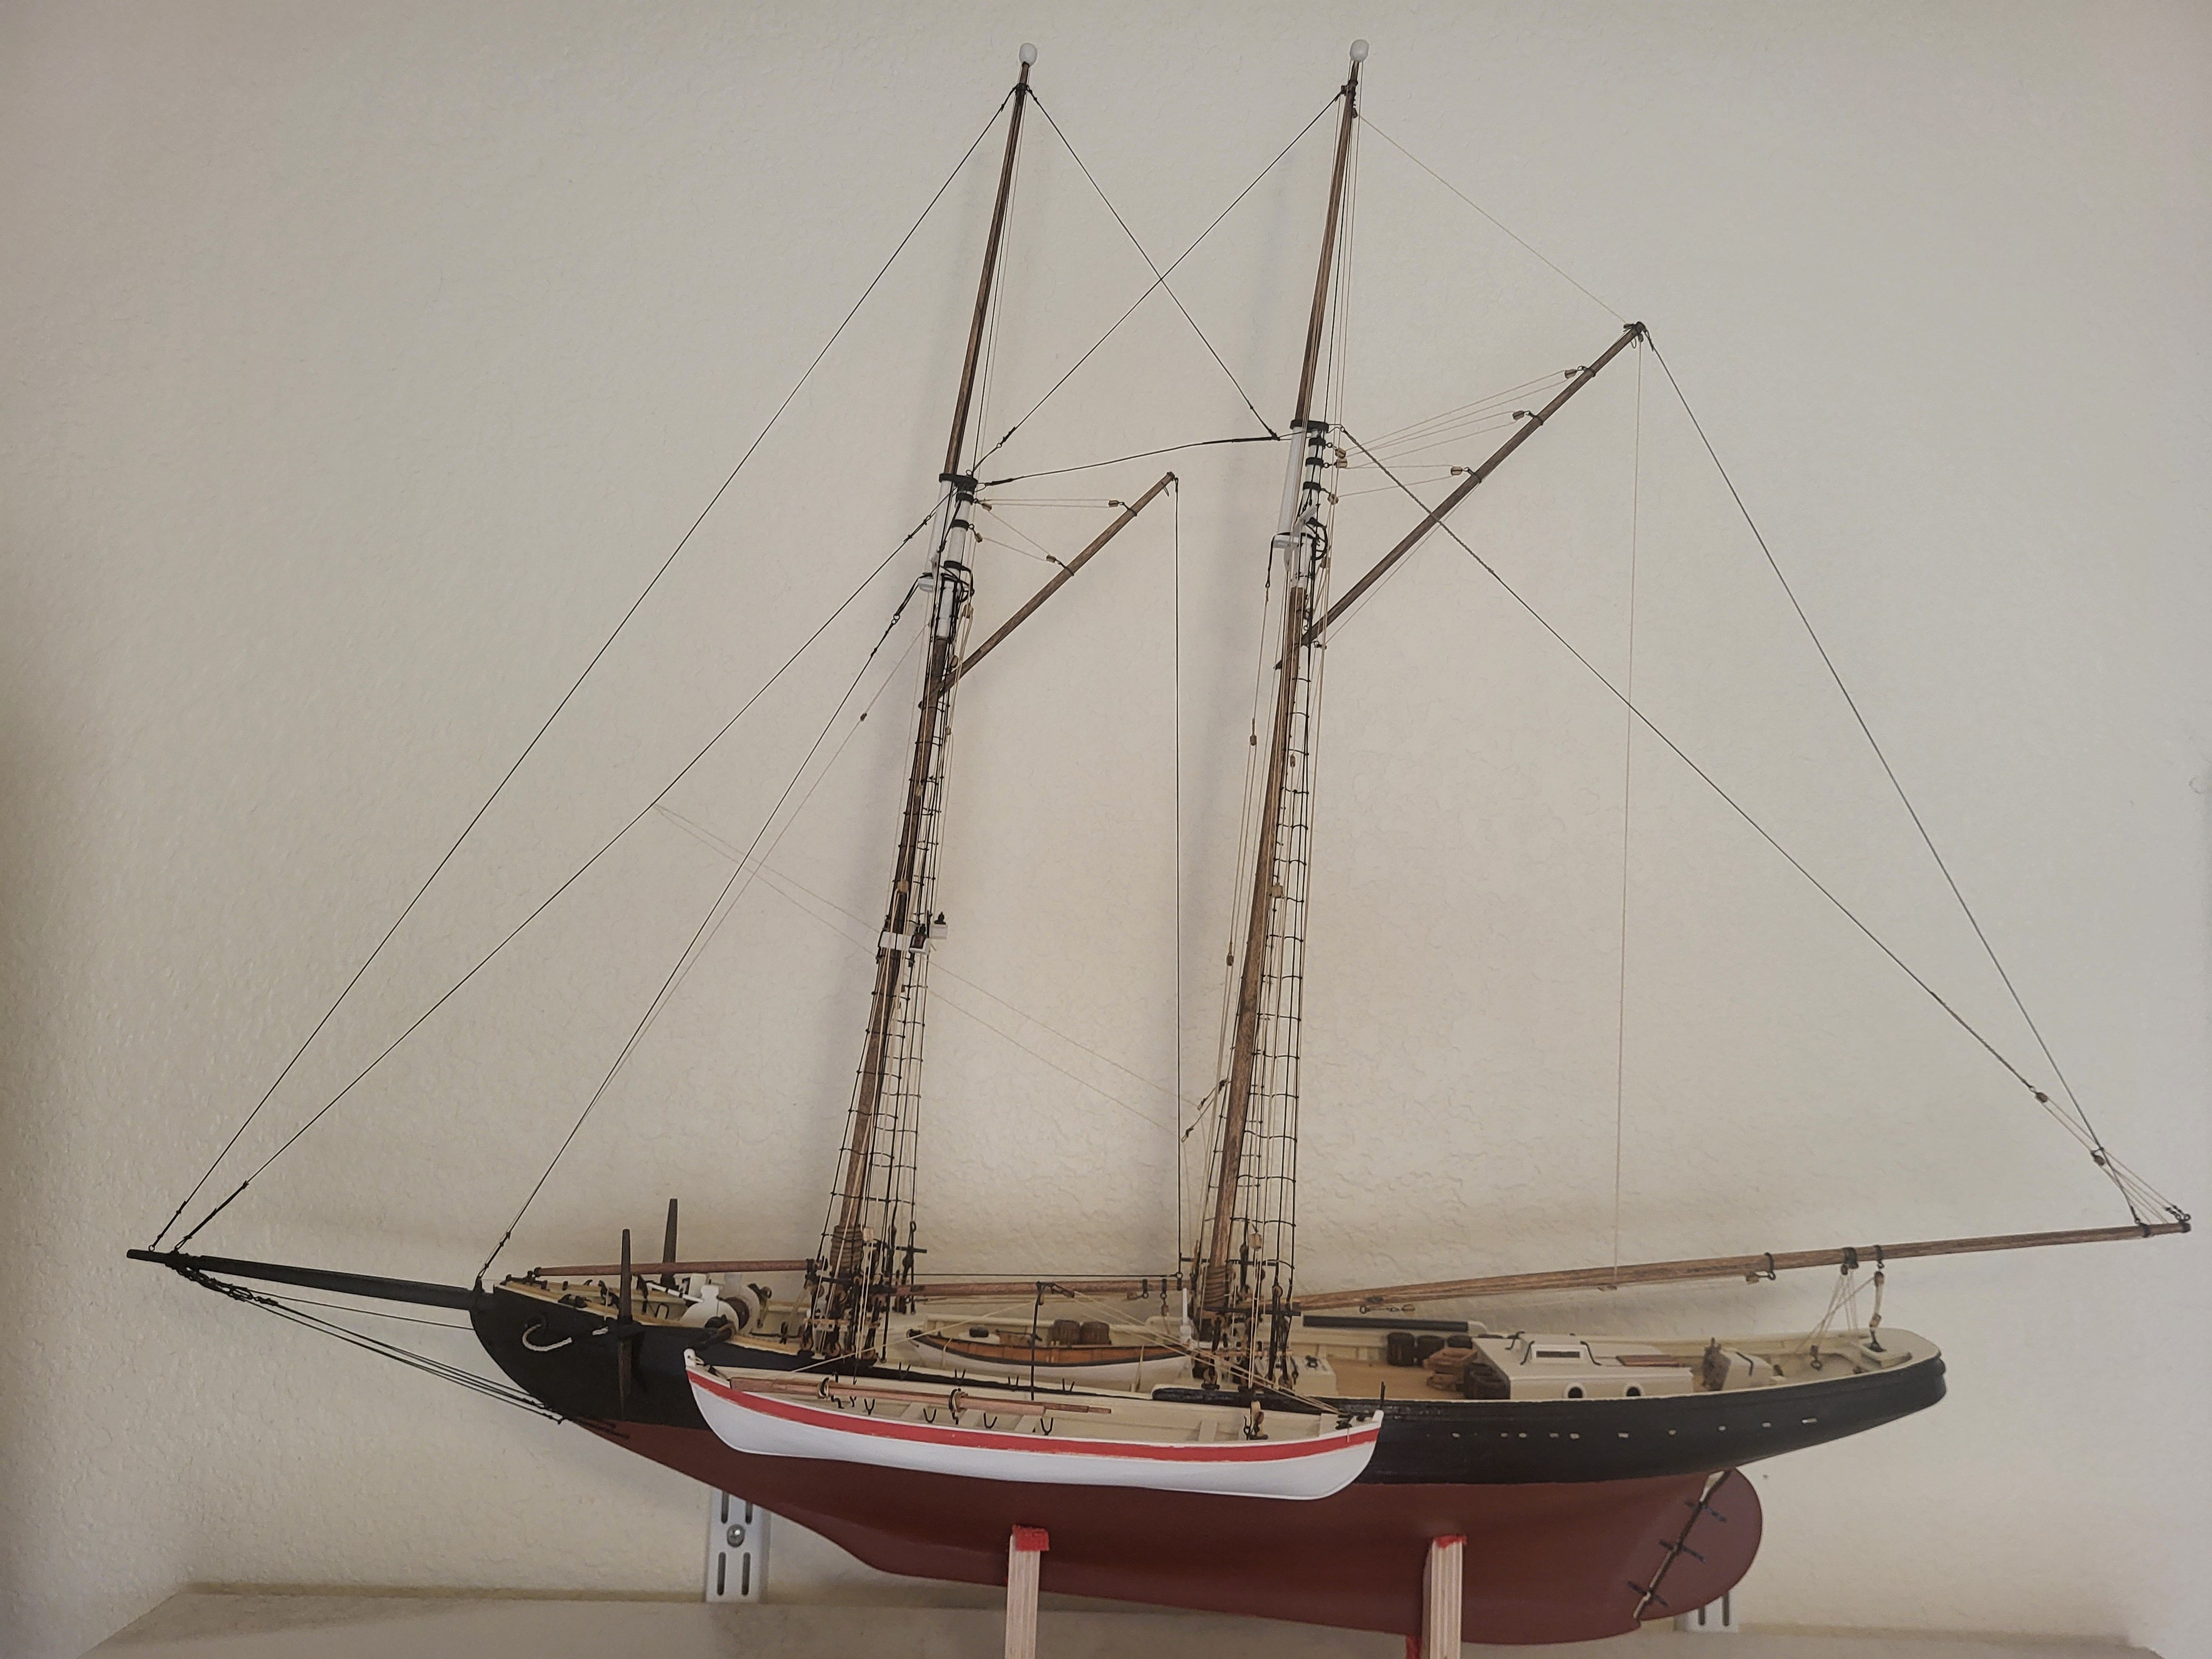
Well, we are complete. On to the next project!

- 51 replies
-
- 7
-

-

-
- Model Shipways
- Benjamin W Latham
- (and 1 more)
-
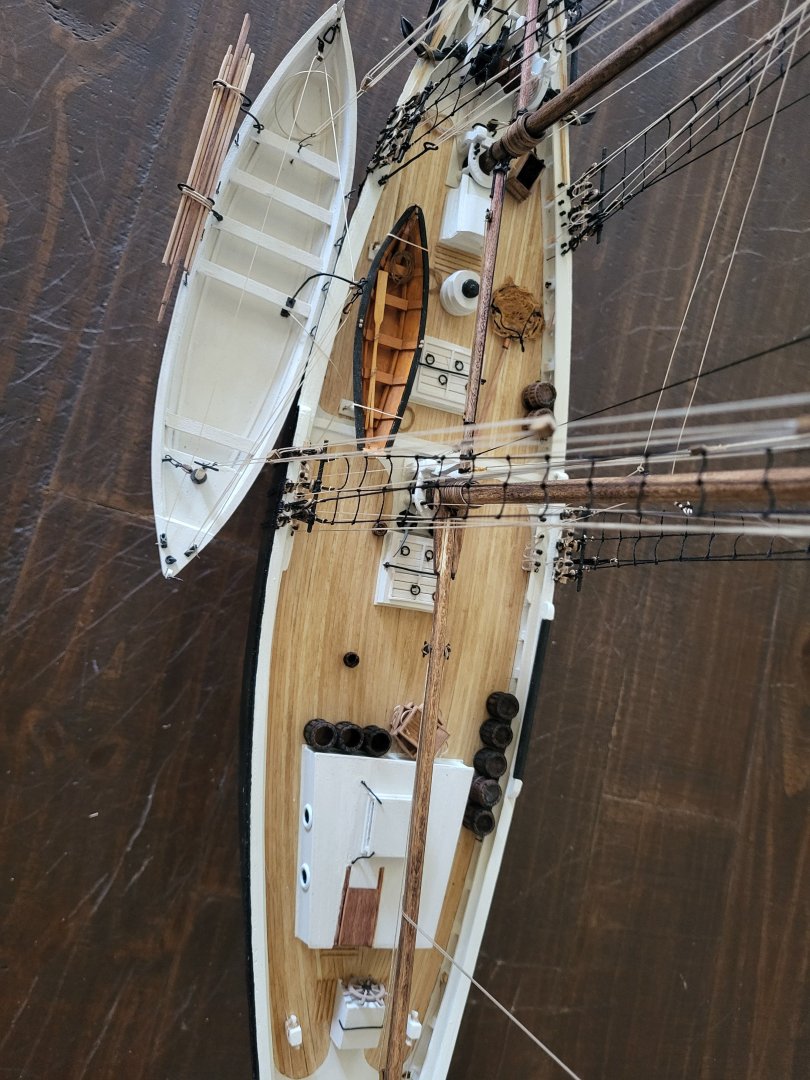
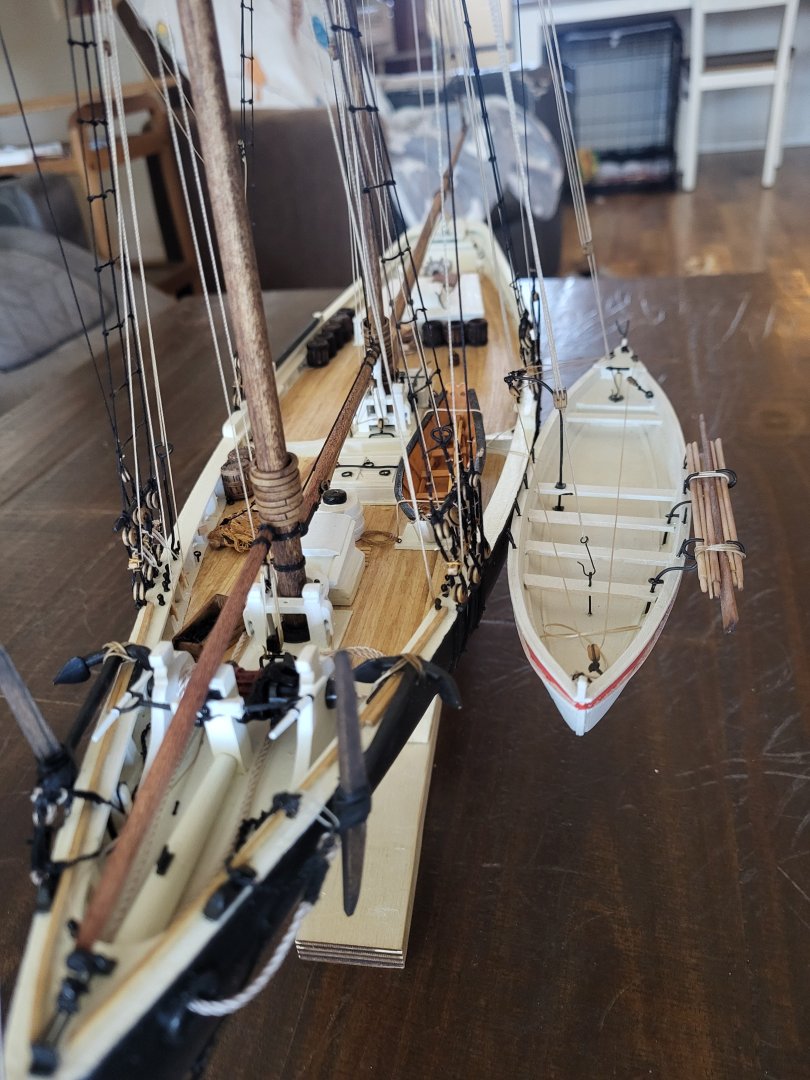
I didn't know what to do with the seine boat until, I saw another model with had it hung on the side, I like this look, as I'm striving for a more static than active model. The barrels are not attached, I'm still thinking about that part, I'm probably going to mount them more in a storage location maybe against the rail, than an active location as it they were being filed.


- 51 replies
-
- 3
-
-
- Model Shipways
- Benjamin W Latham
- (and 1 more)
-
Some catch up.. Lots of rigging.. However not as much a I was expecting, all of the booms and yards were pre-made a while go, so it's all assembly.A
- 51 replies
-
- 3
-
-
- Model Shipways
- Benjamin W Latham
- (and 1 more)
-
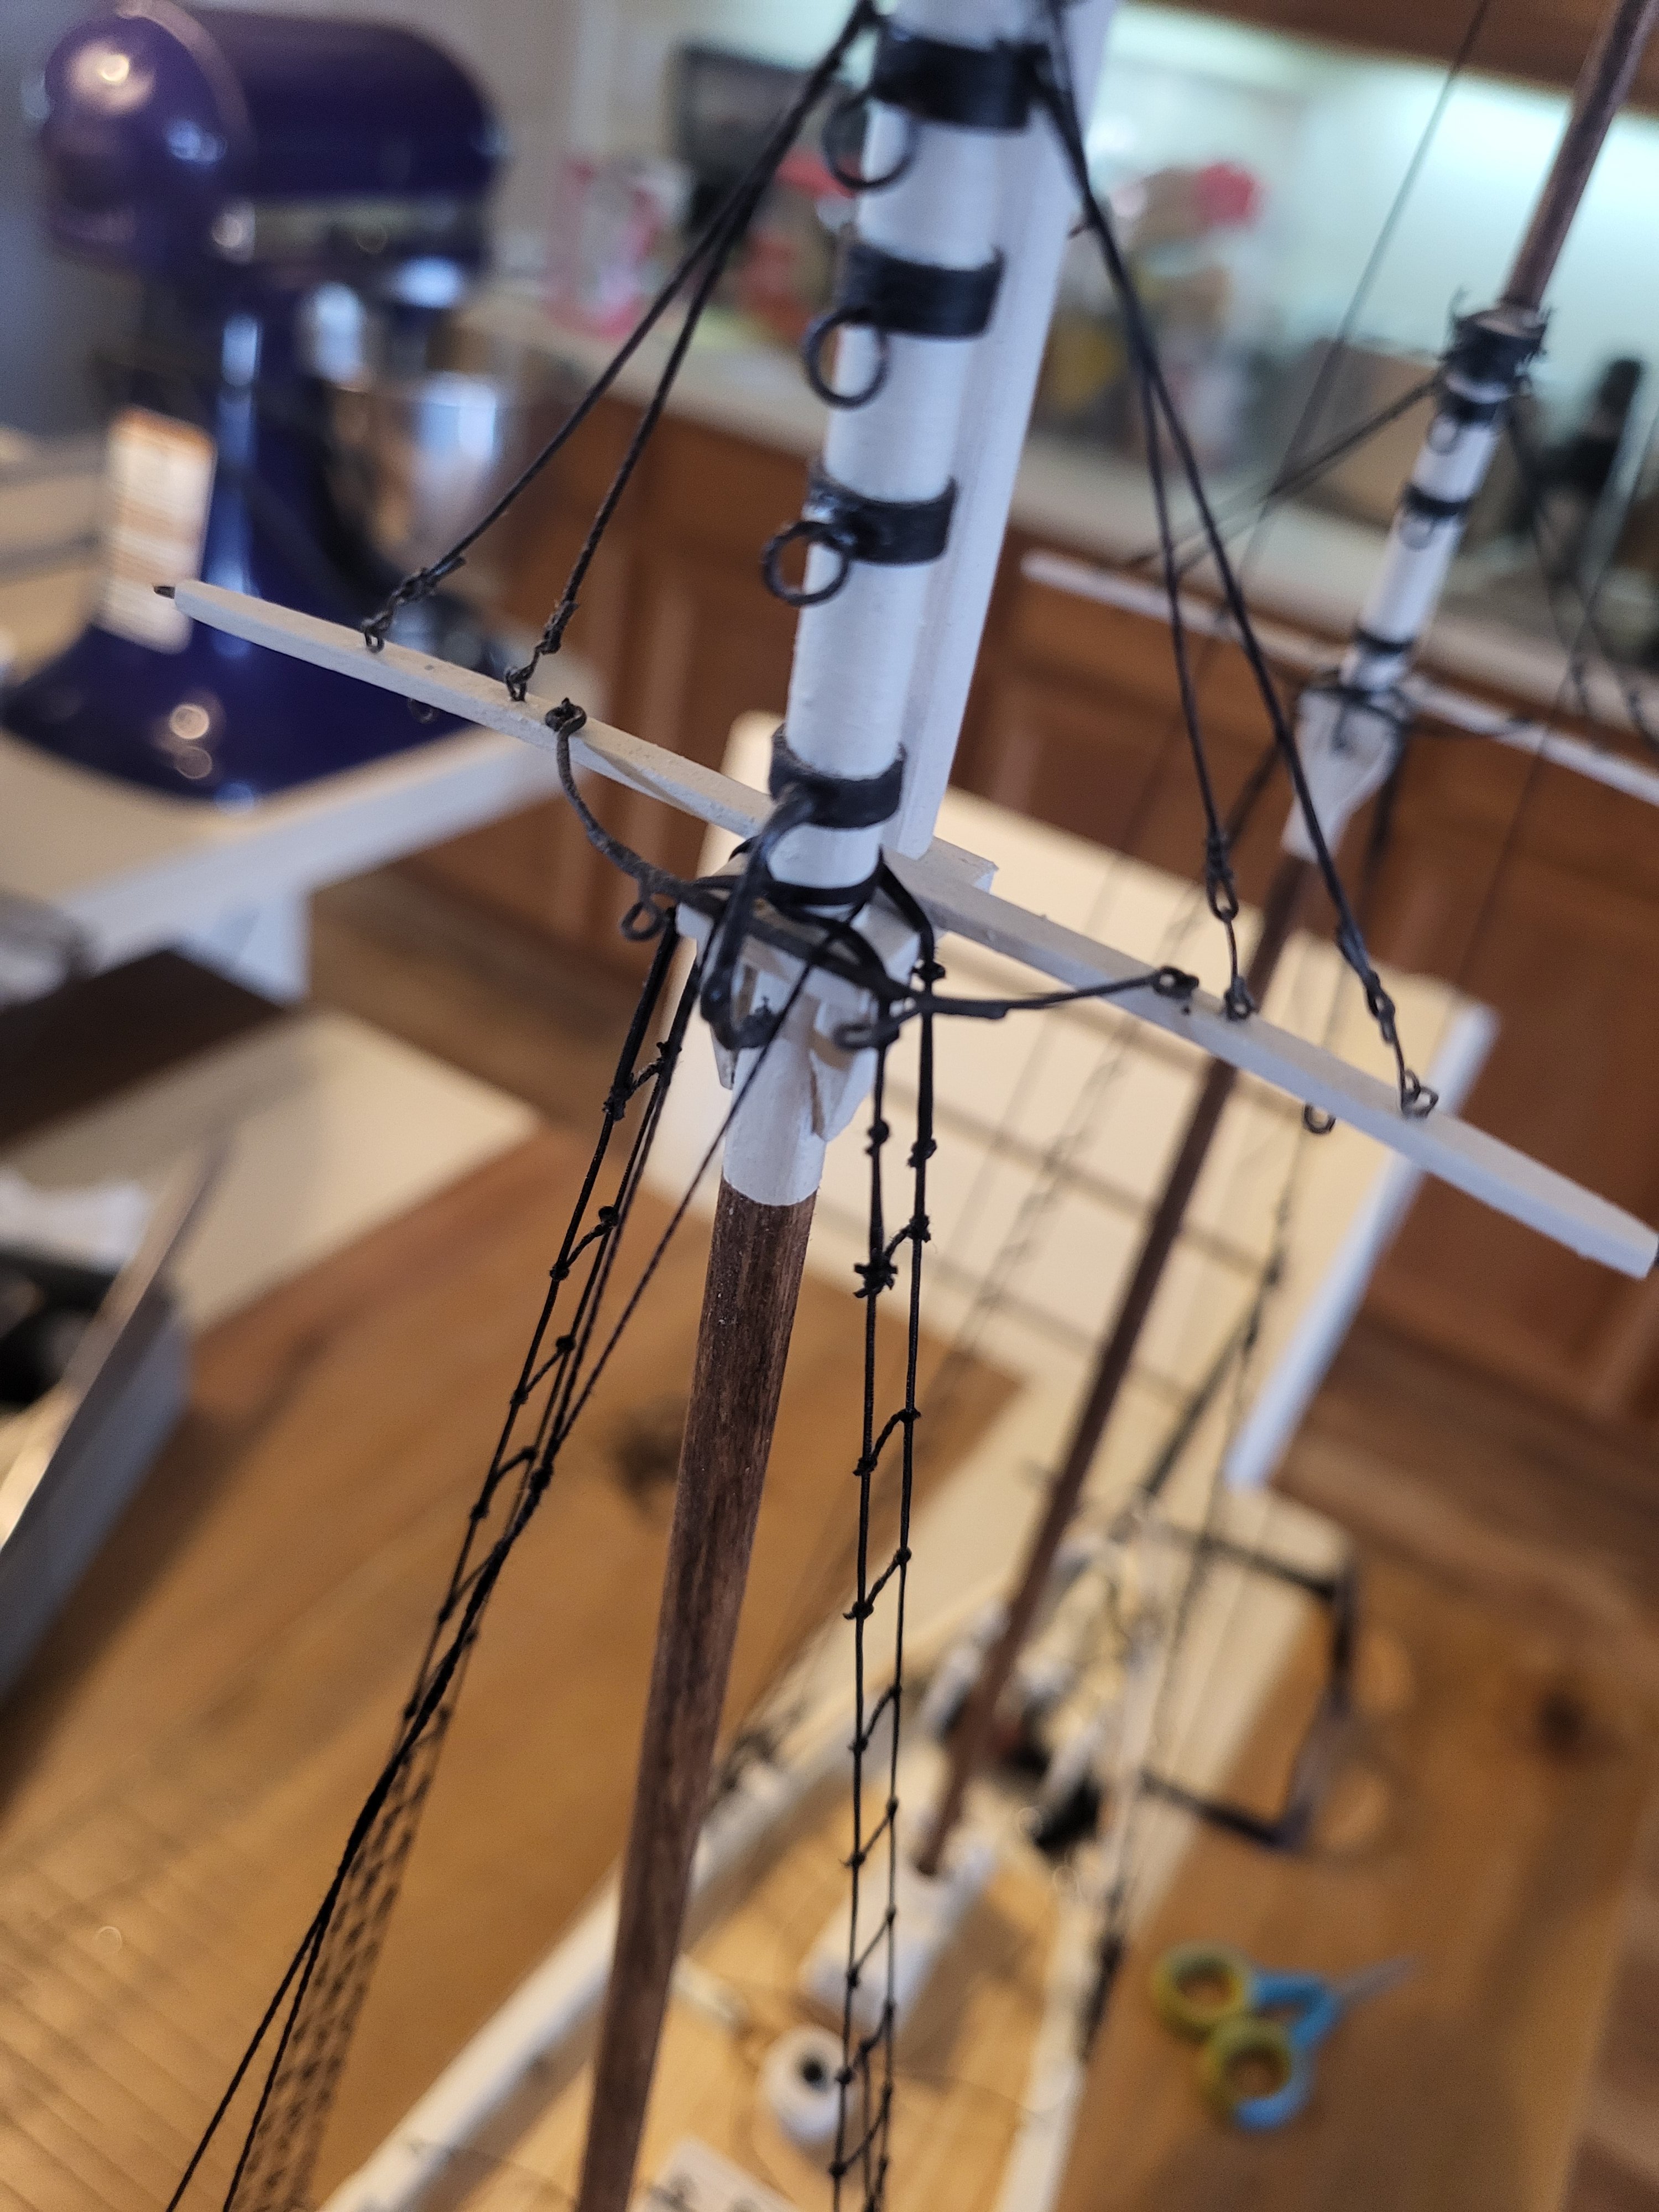
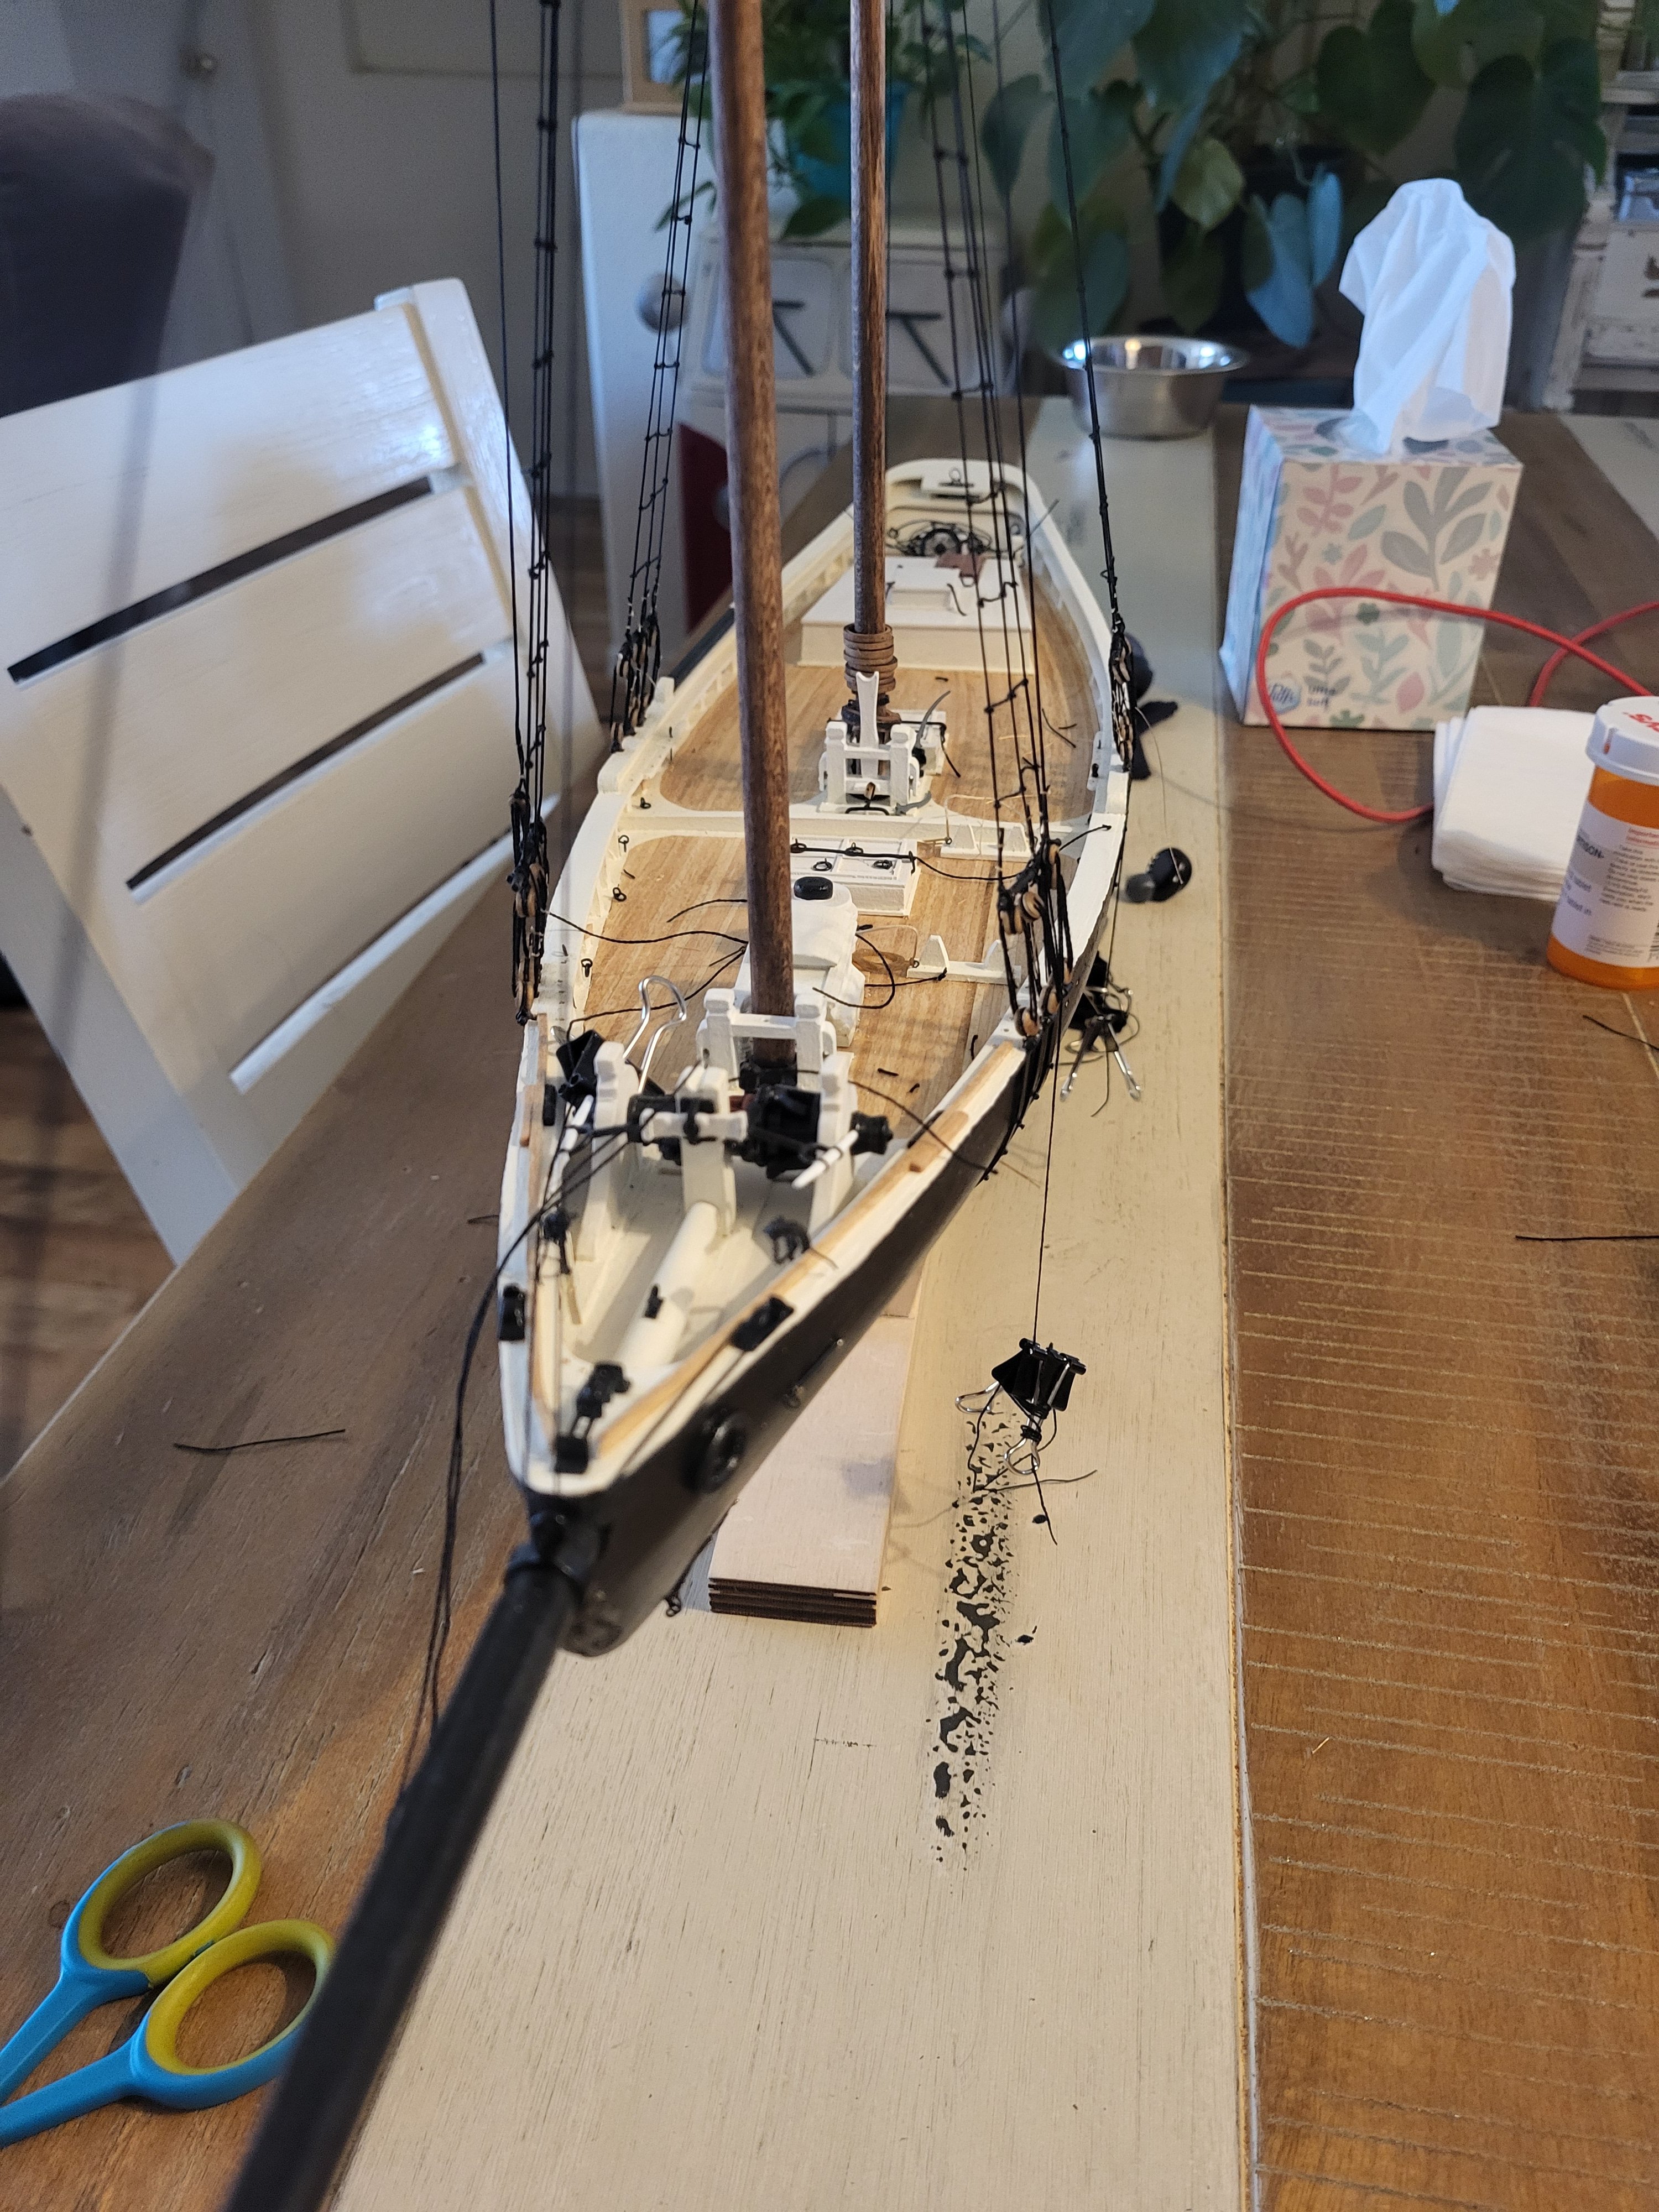
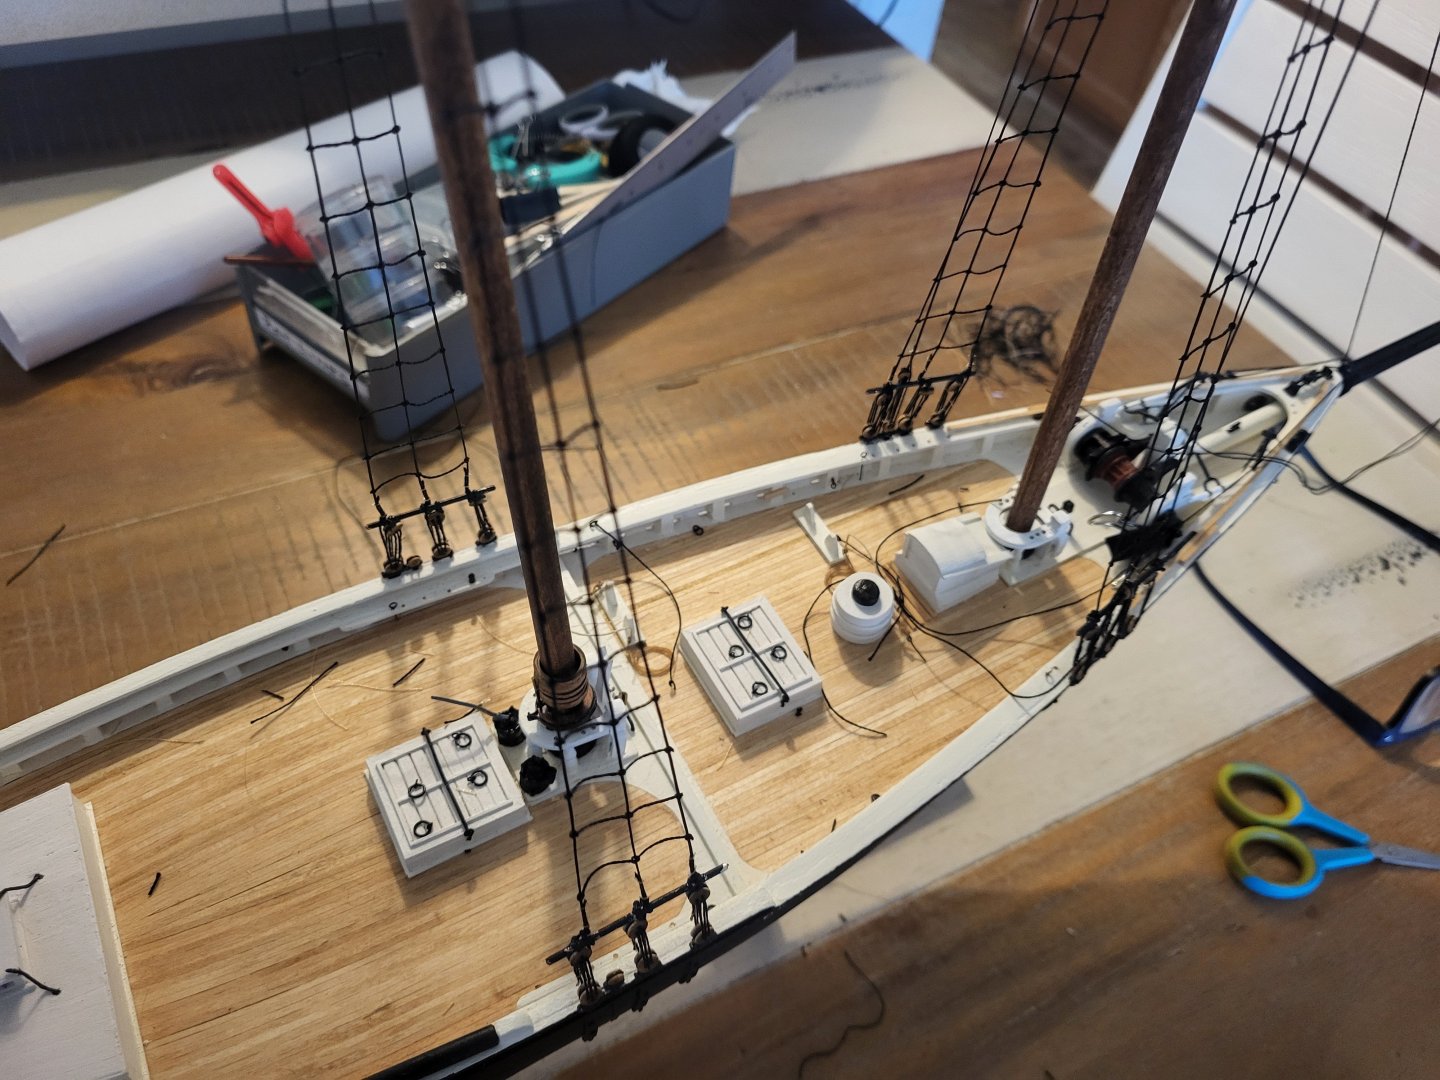
Catching up on some updates; Masts are up, and the ladders are on. I used some temporary lines to get the foremast into position and then used the ladders to actually draw the mast tight. There isn't an glue in the sockets of the masts, I decided this for a few reasons, I wanted to be sure to get them in the right position based on the rigging plan, I also didn't think of a great way to glue them and make sure I could take the time to get them in the right position before it set up. Anyway, the deadeyes are tight and seized, I'll go back and paint the ladders flat black to knock the shine off of them. The rat lines are also on the bowsprit. My granddaughter is visiting (she does every summer) and has kicked me off my hobby bench, so I'm at the kitchen table


- 51 replies
-
- 2
-
-
- Model Shipways
- Benjamin W Latham
- (and 1 more)
-
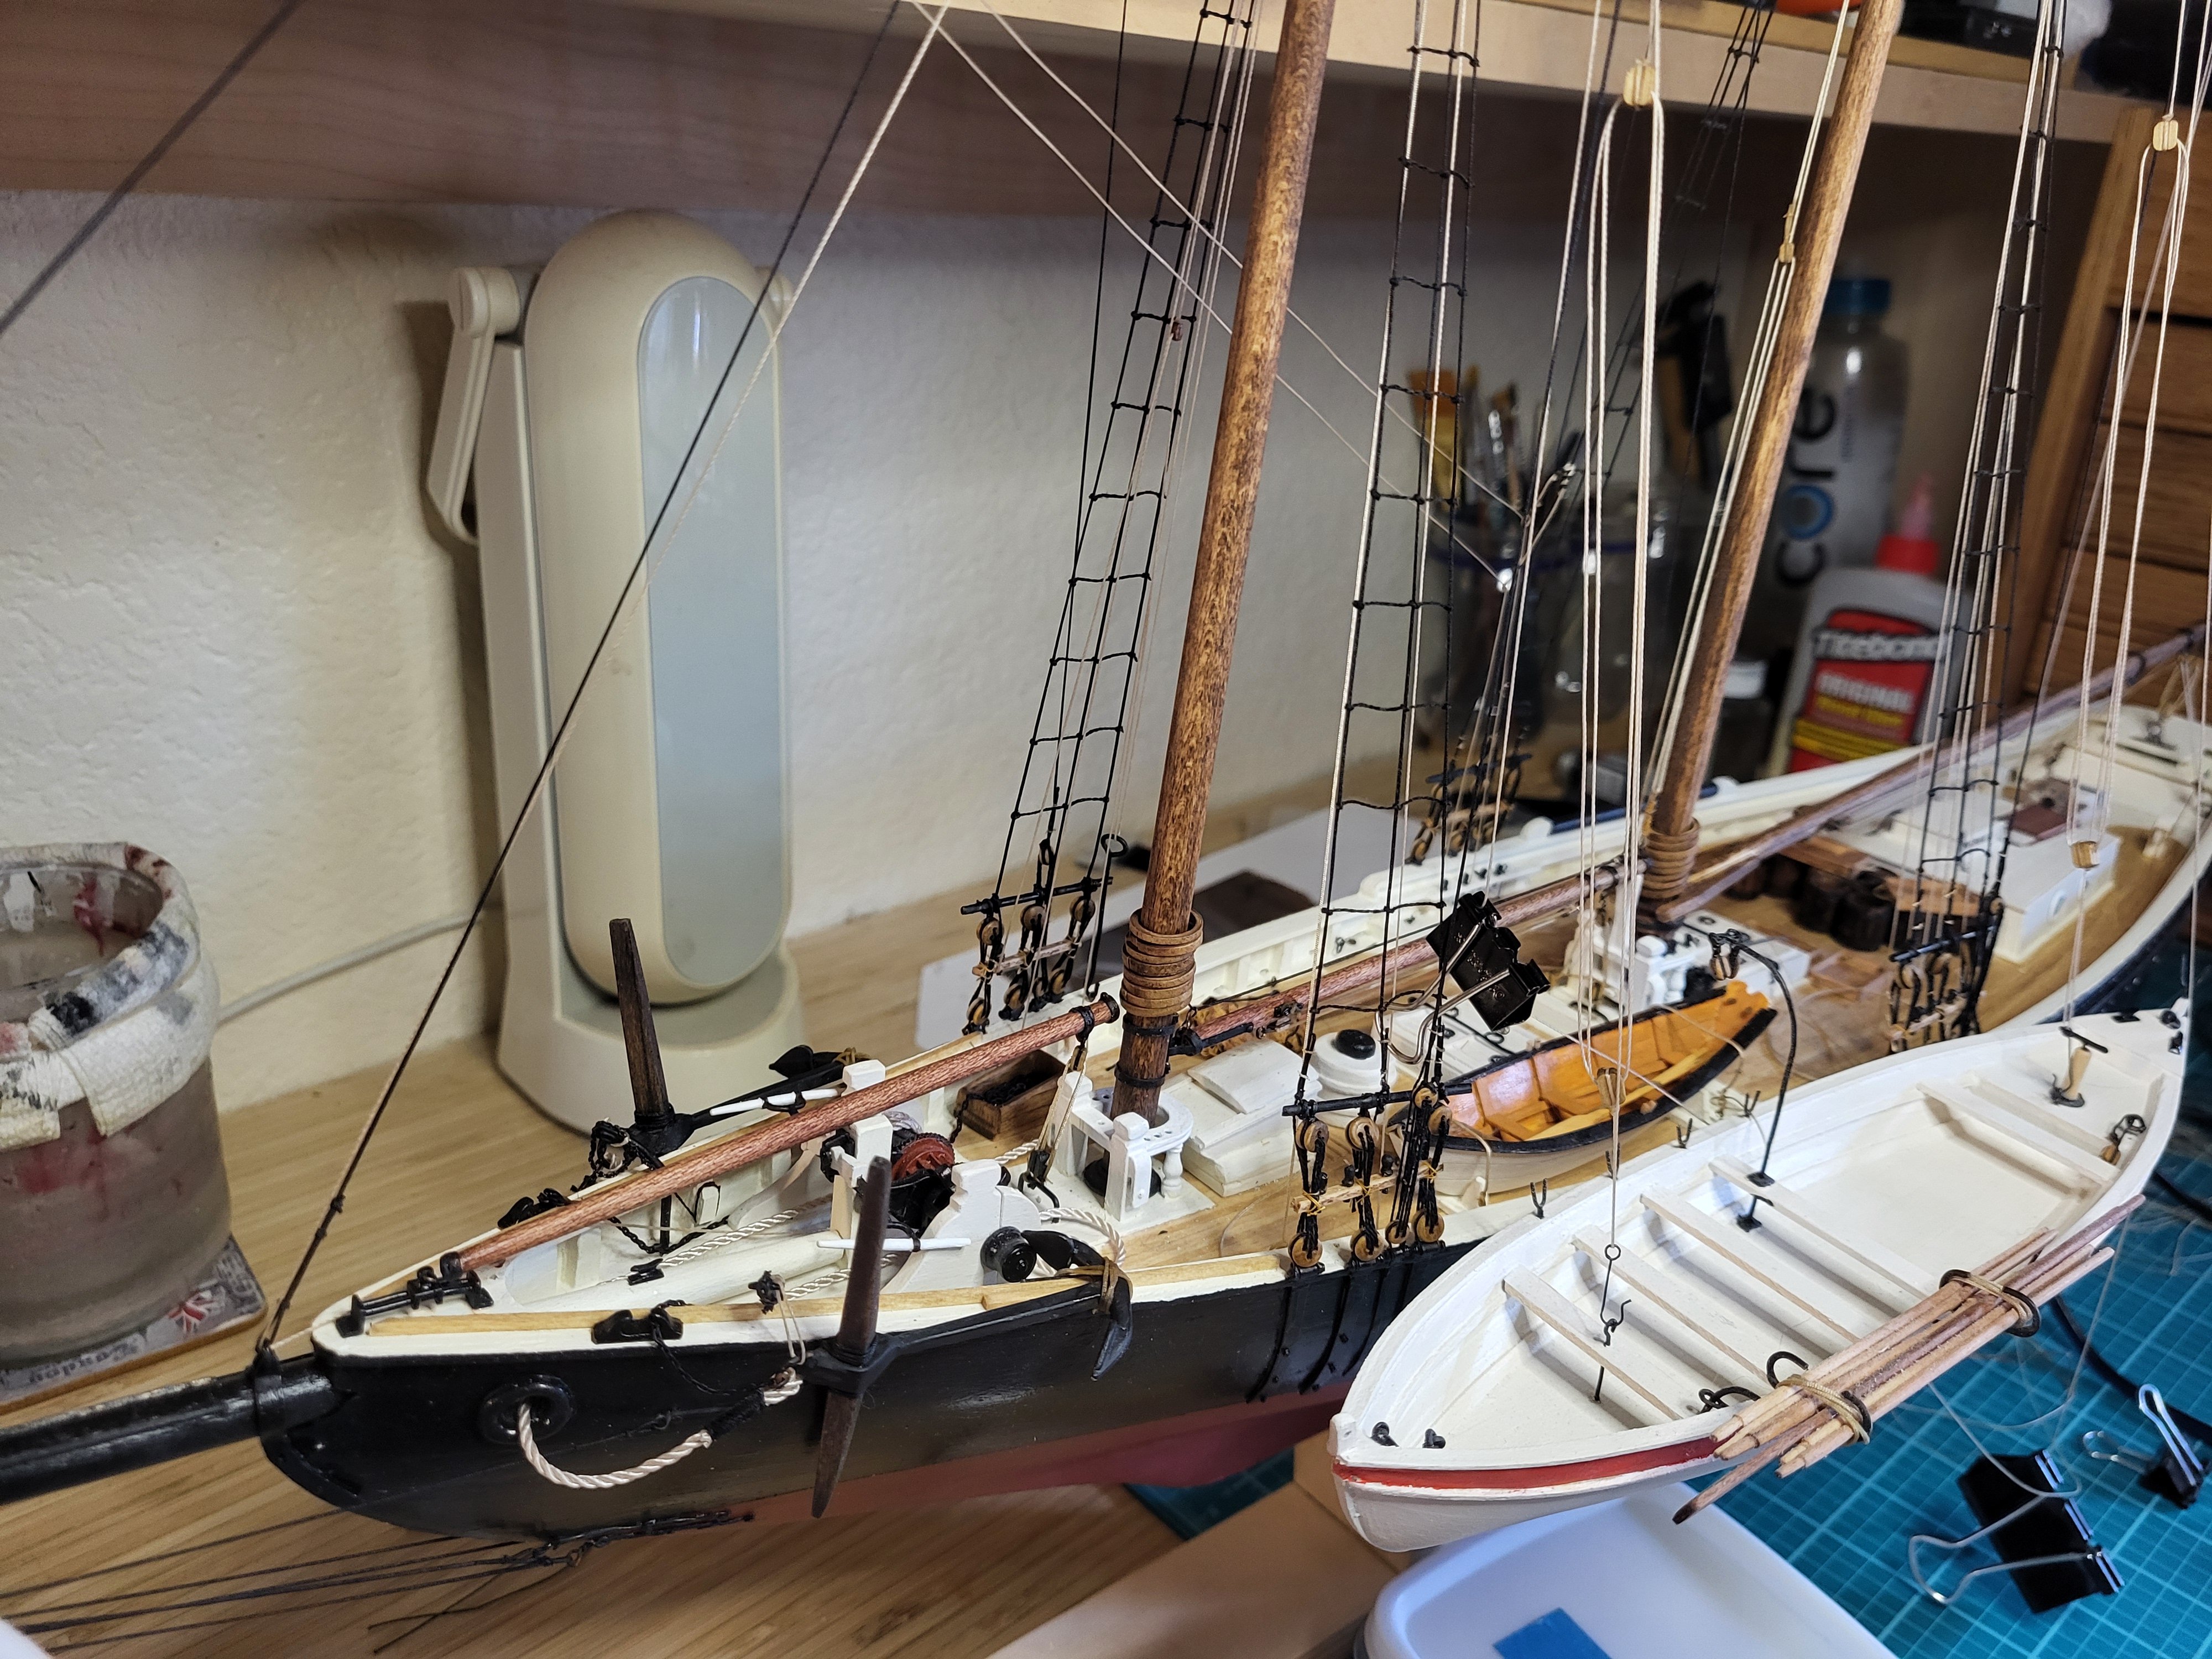
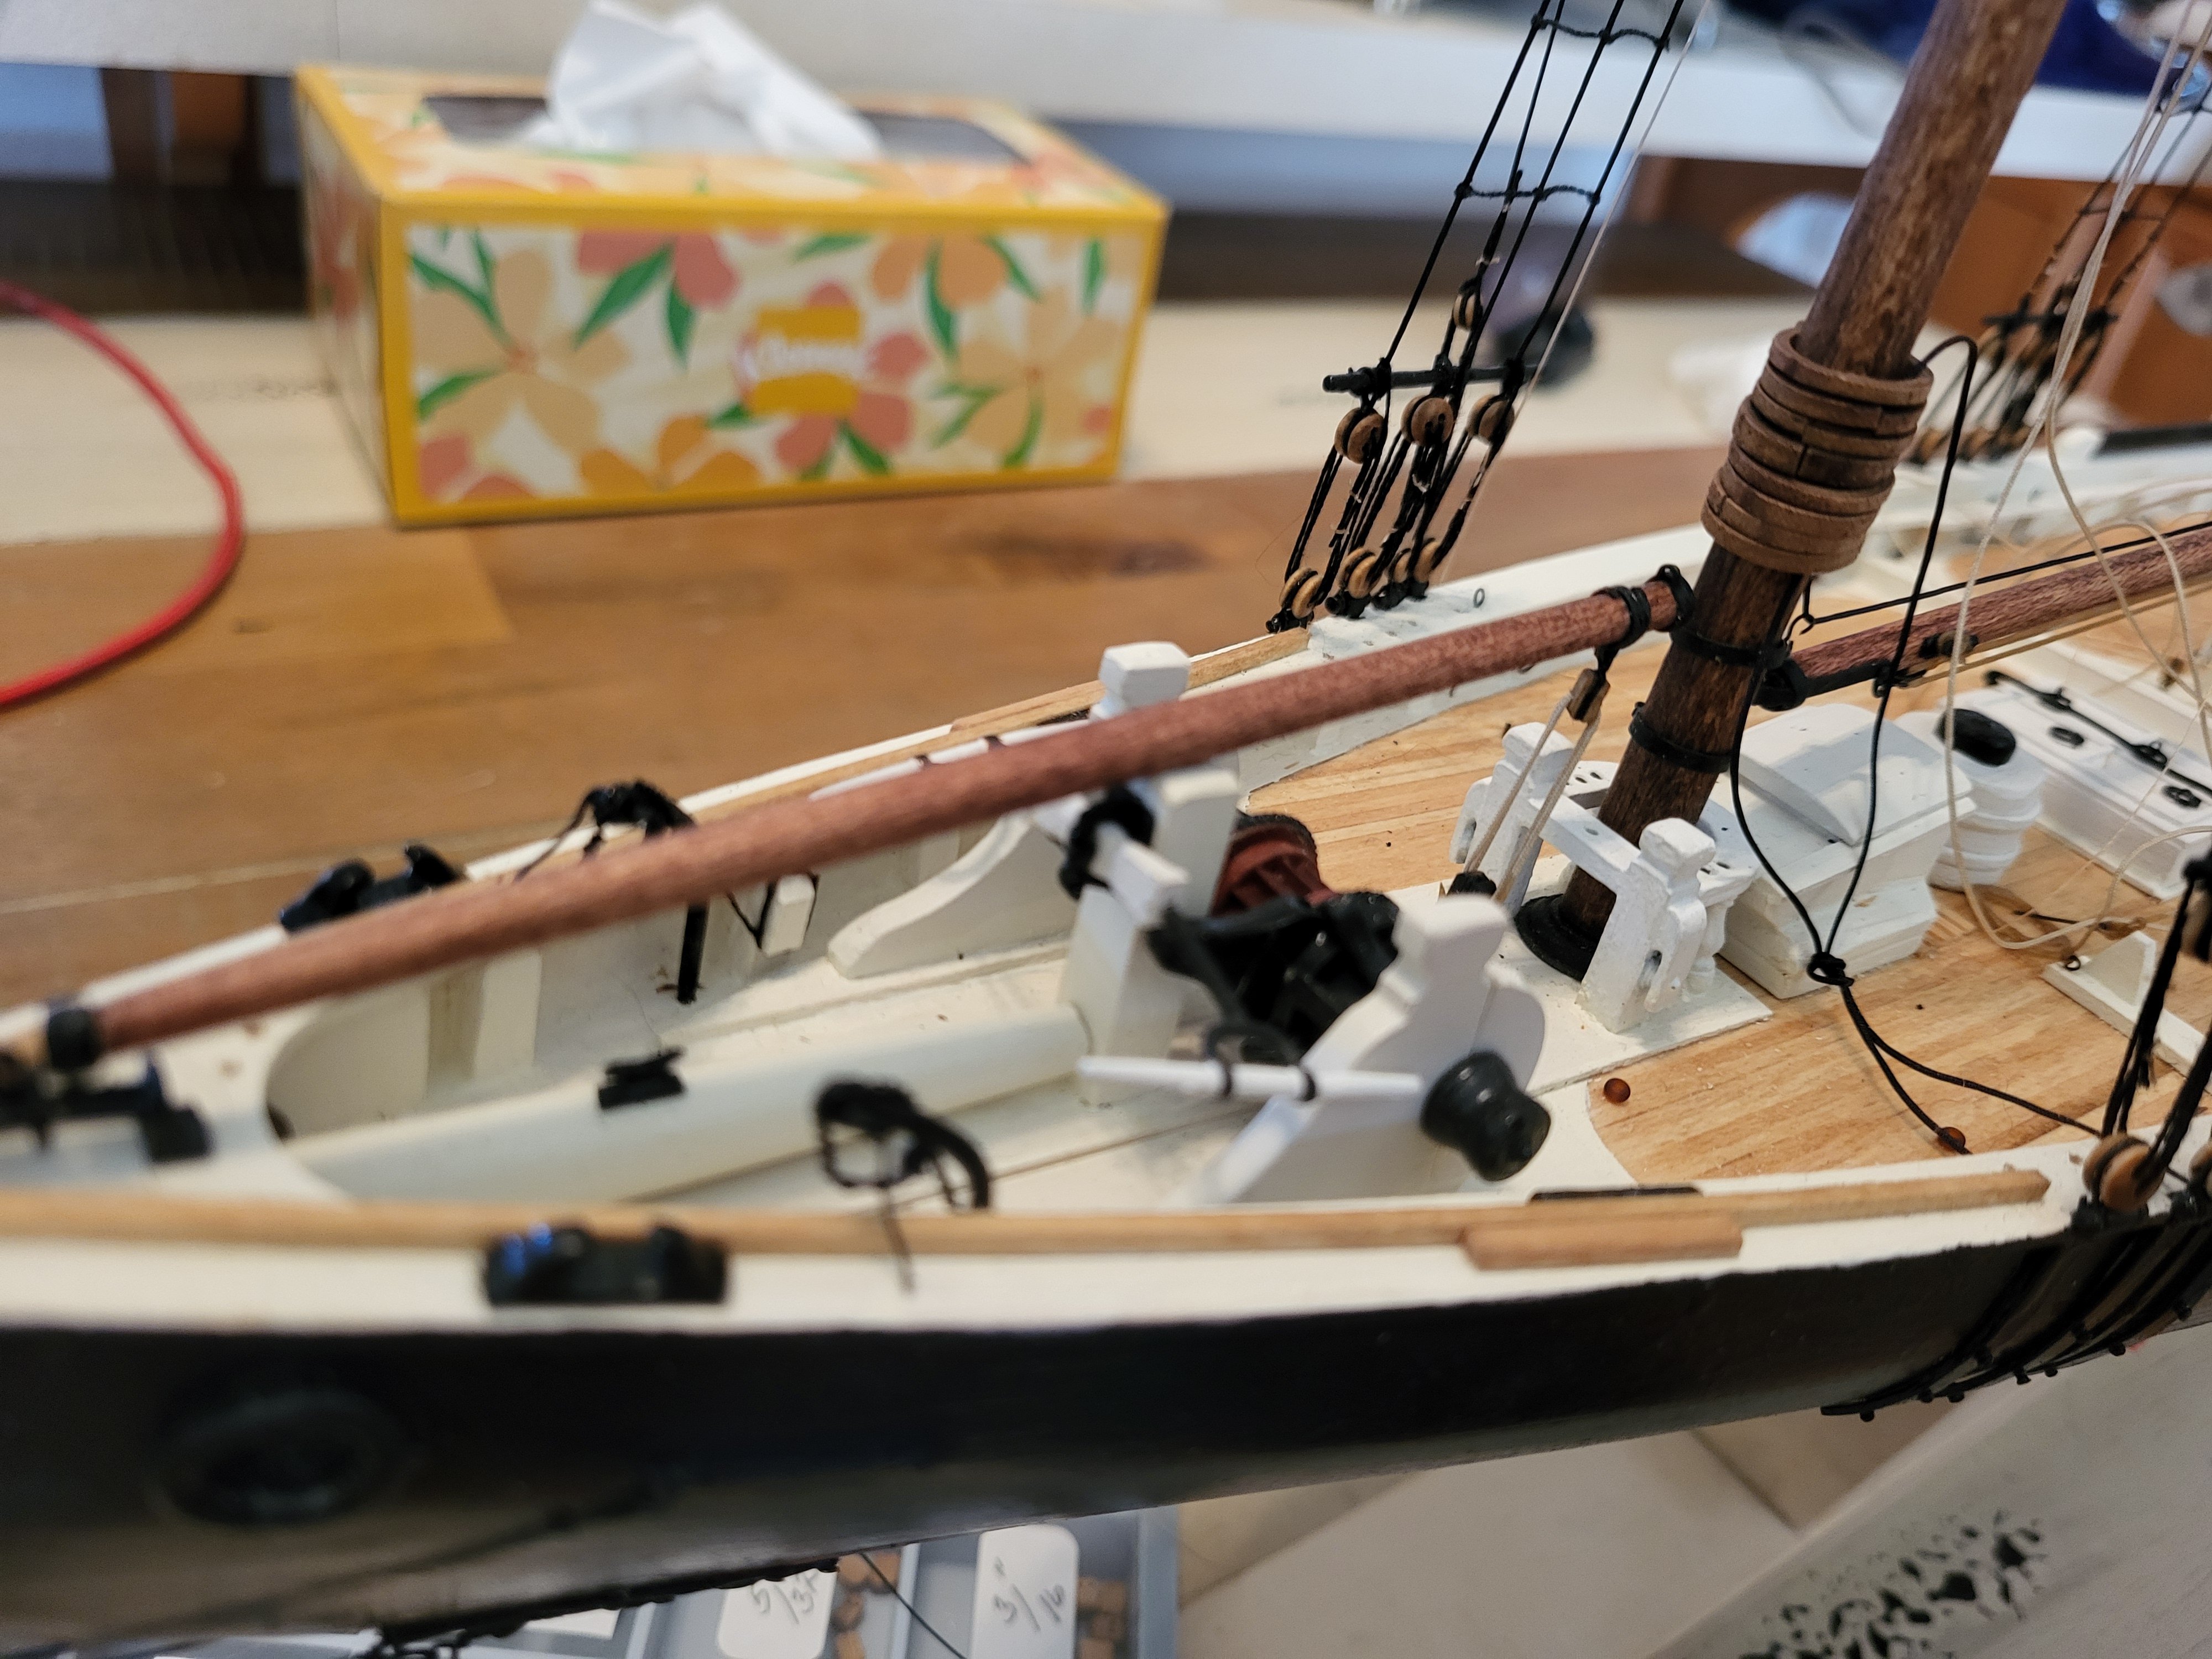
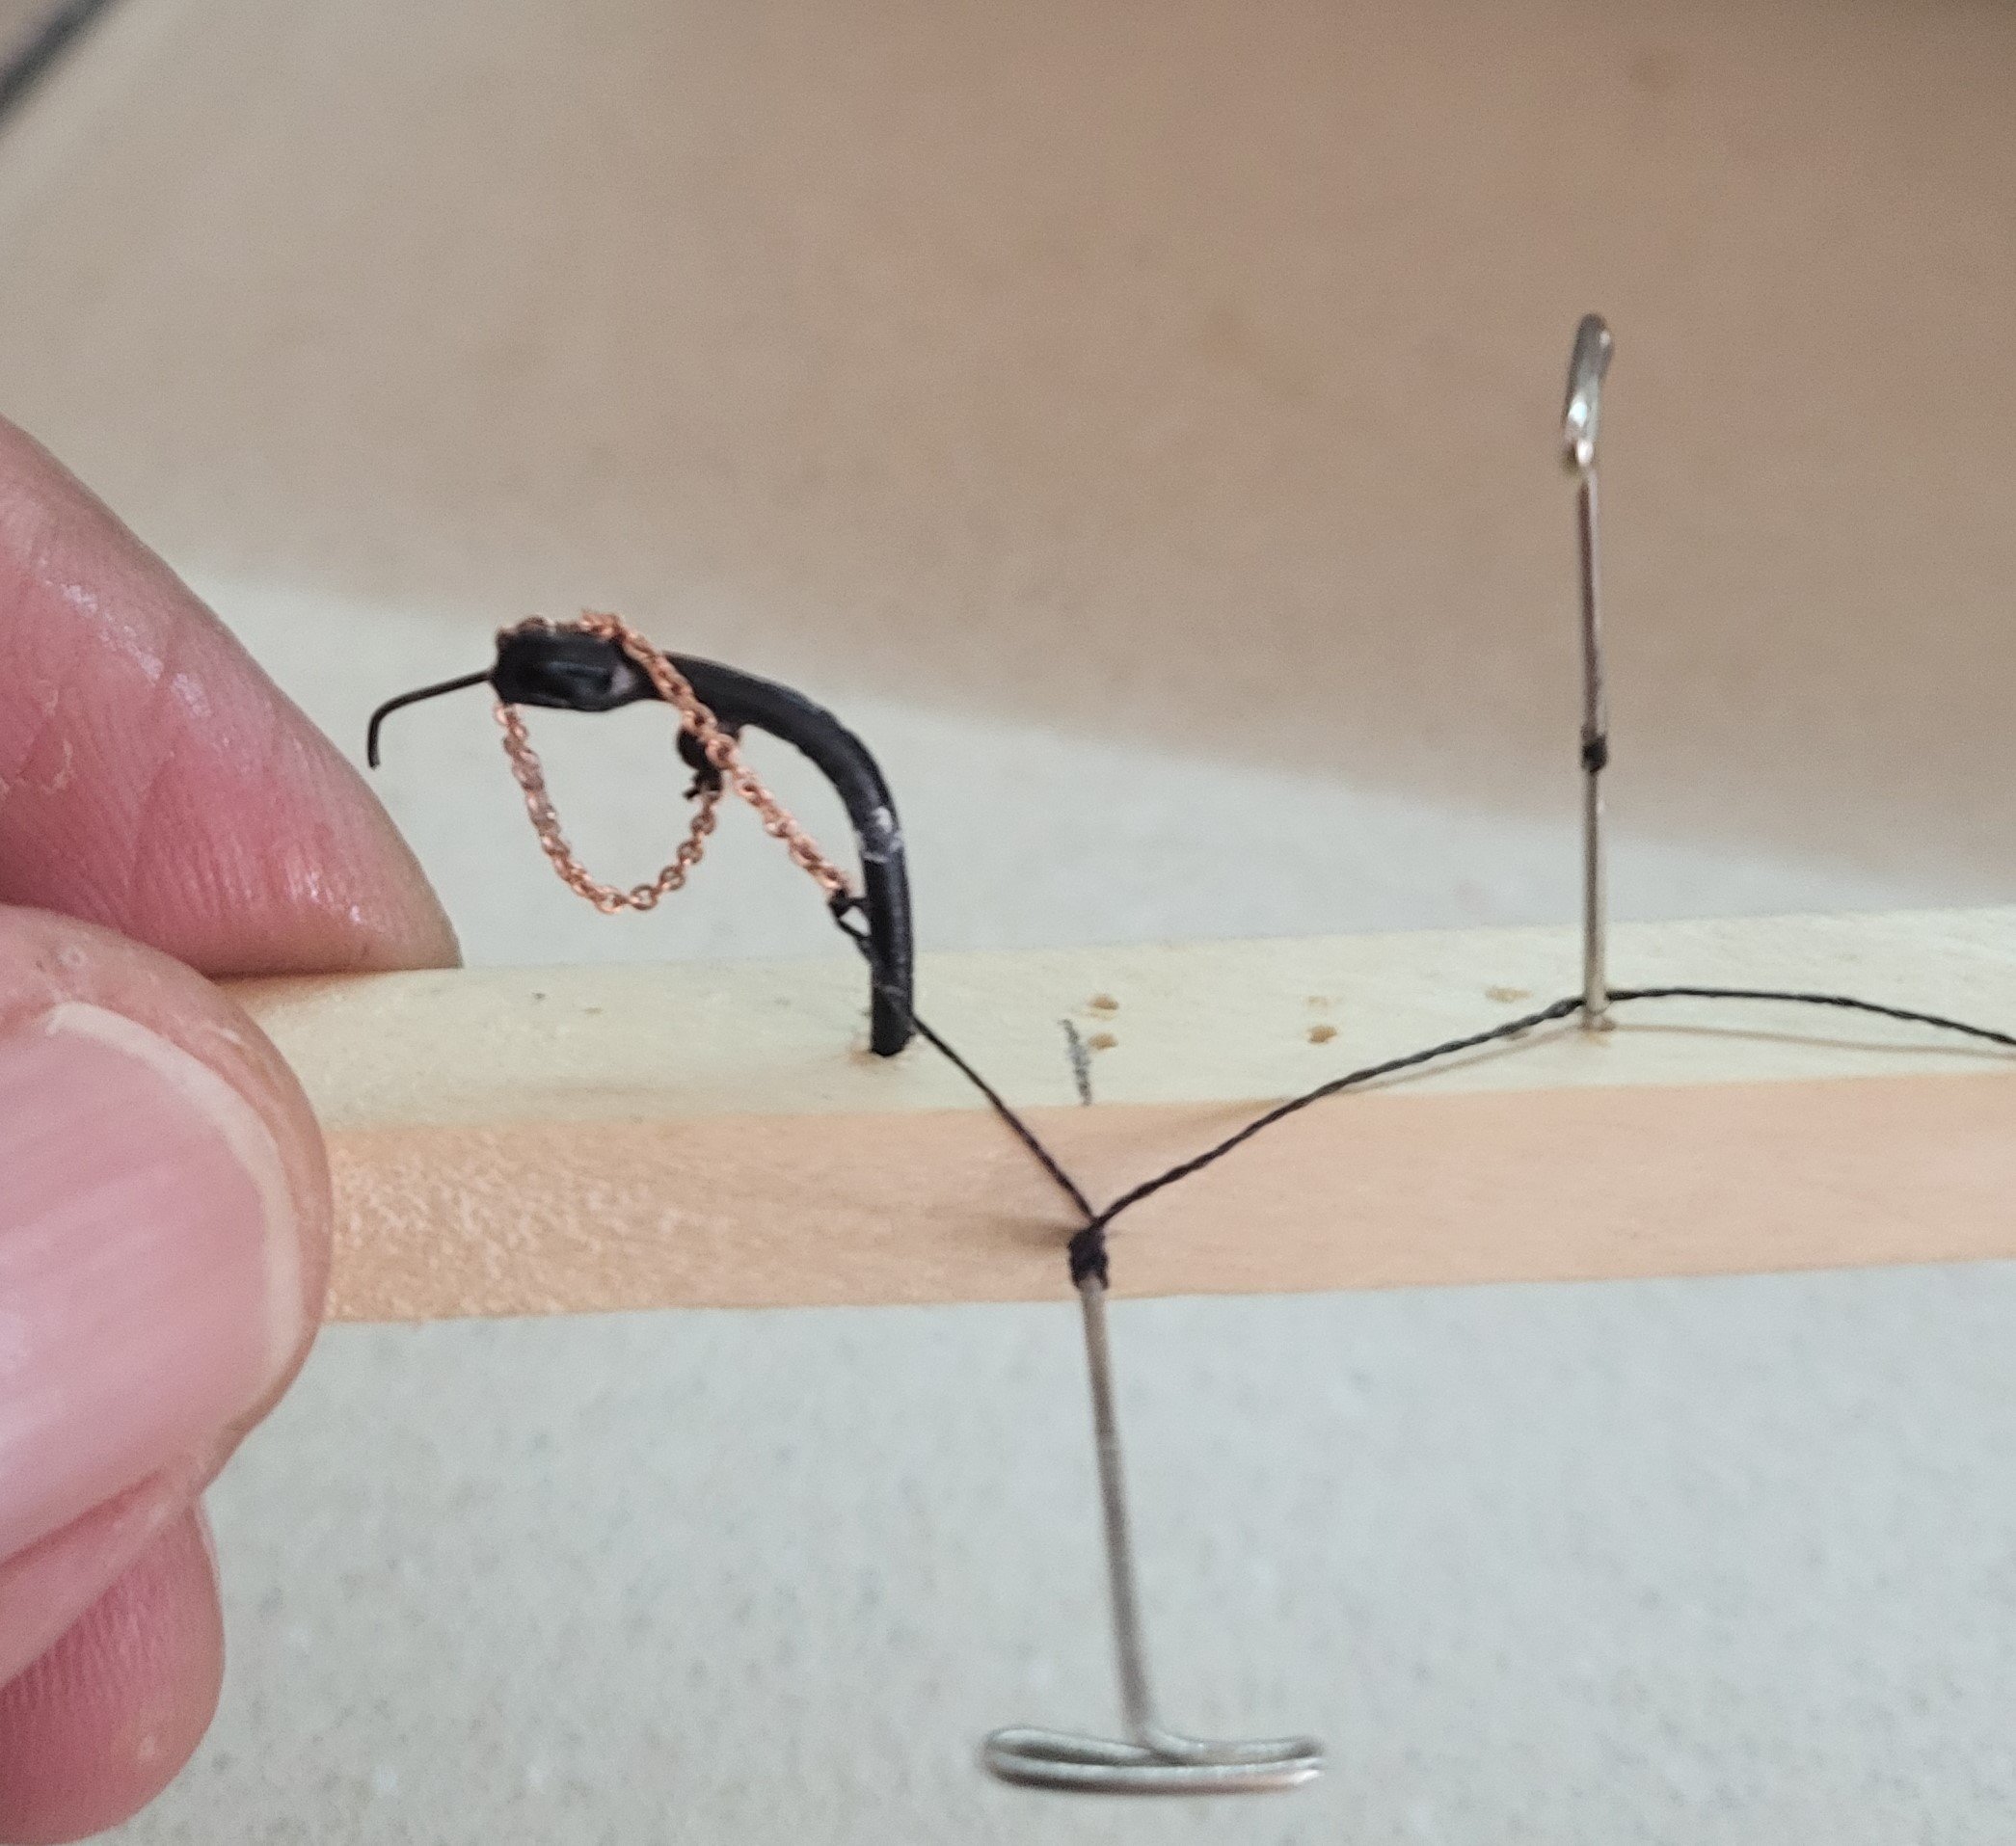
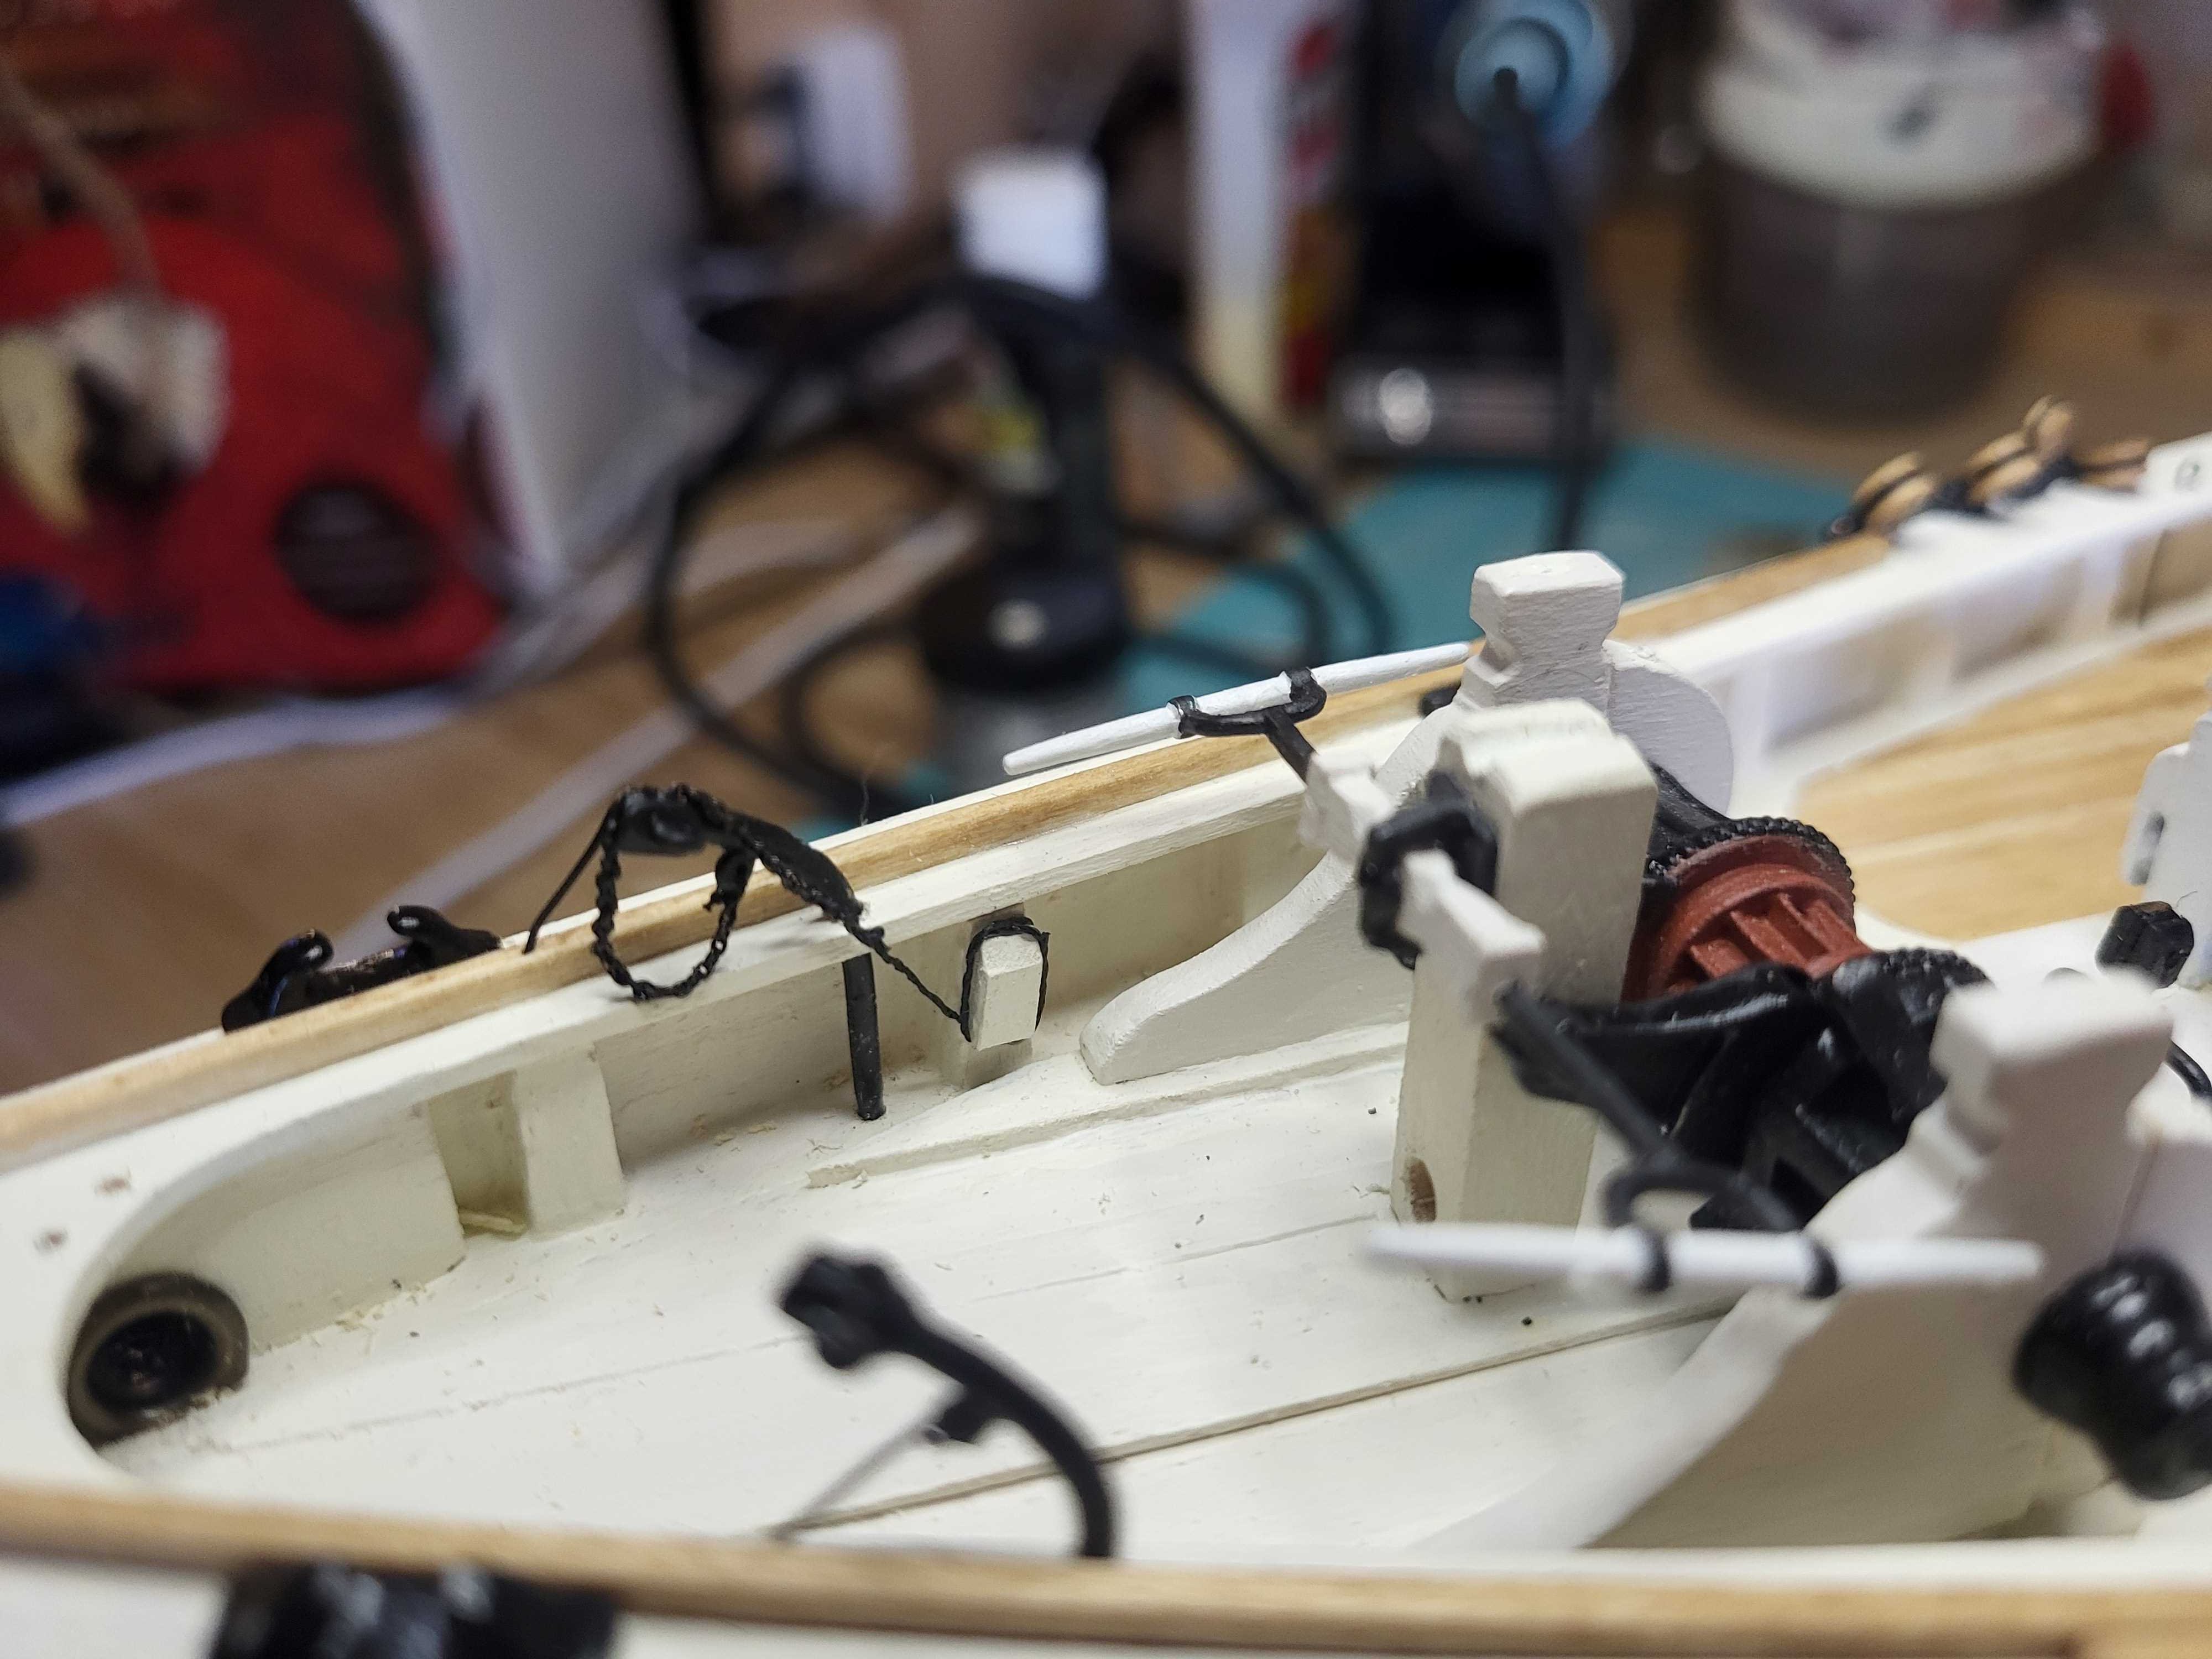
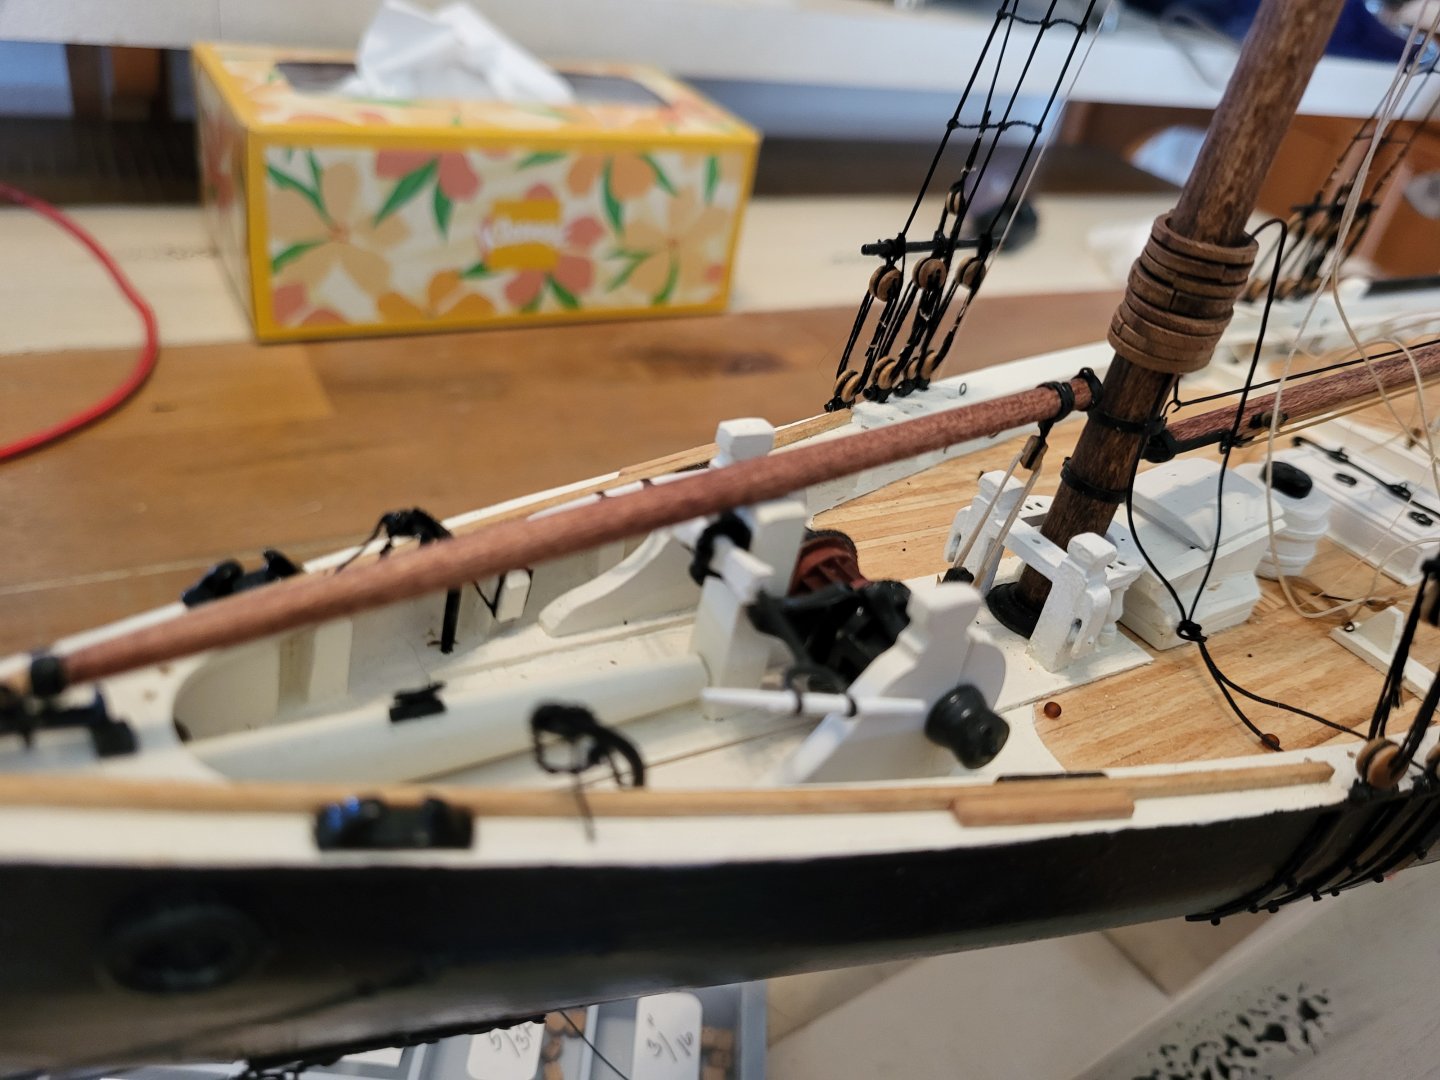
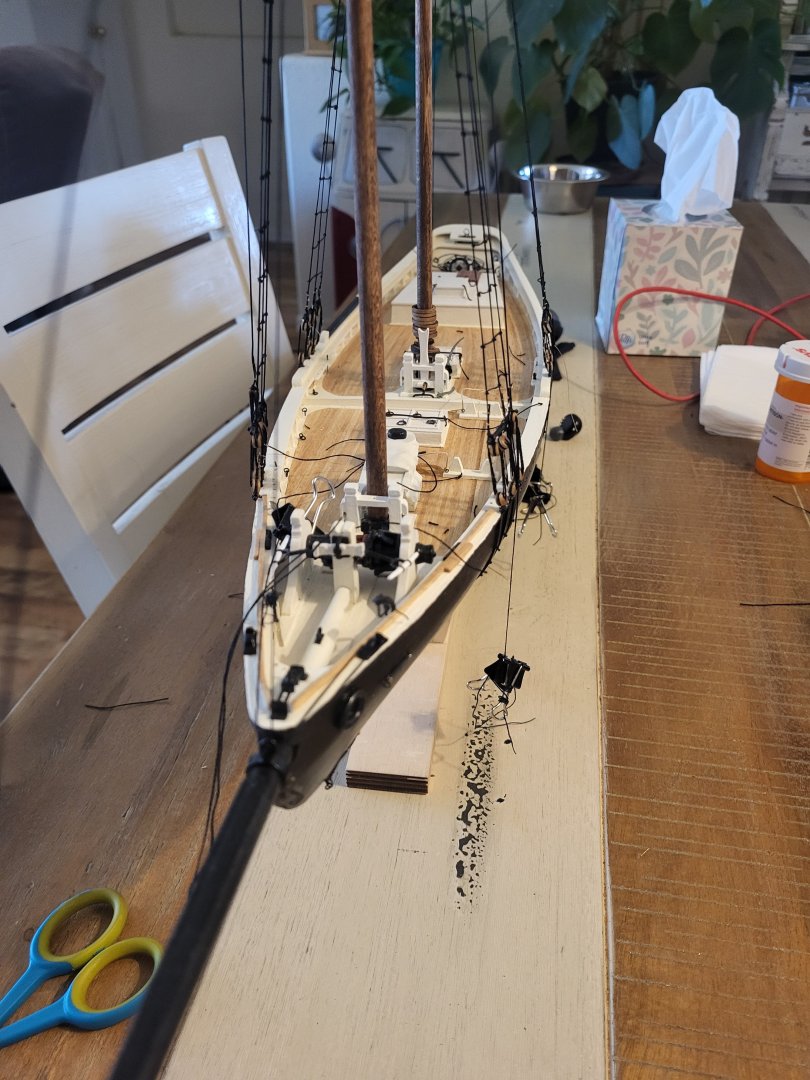
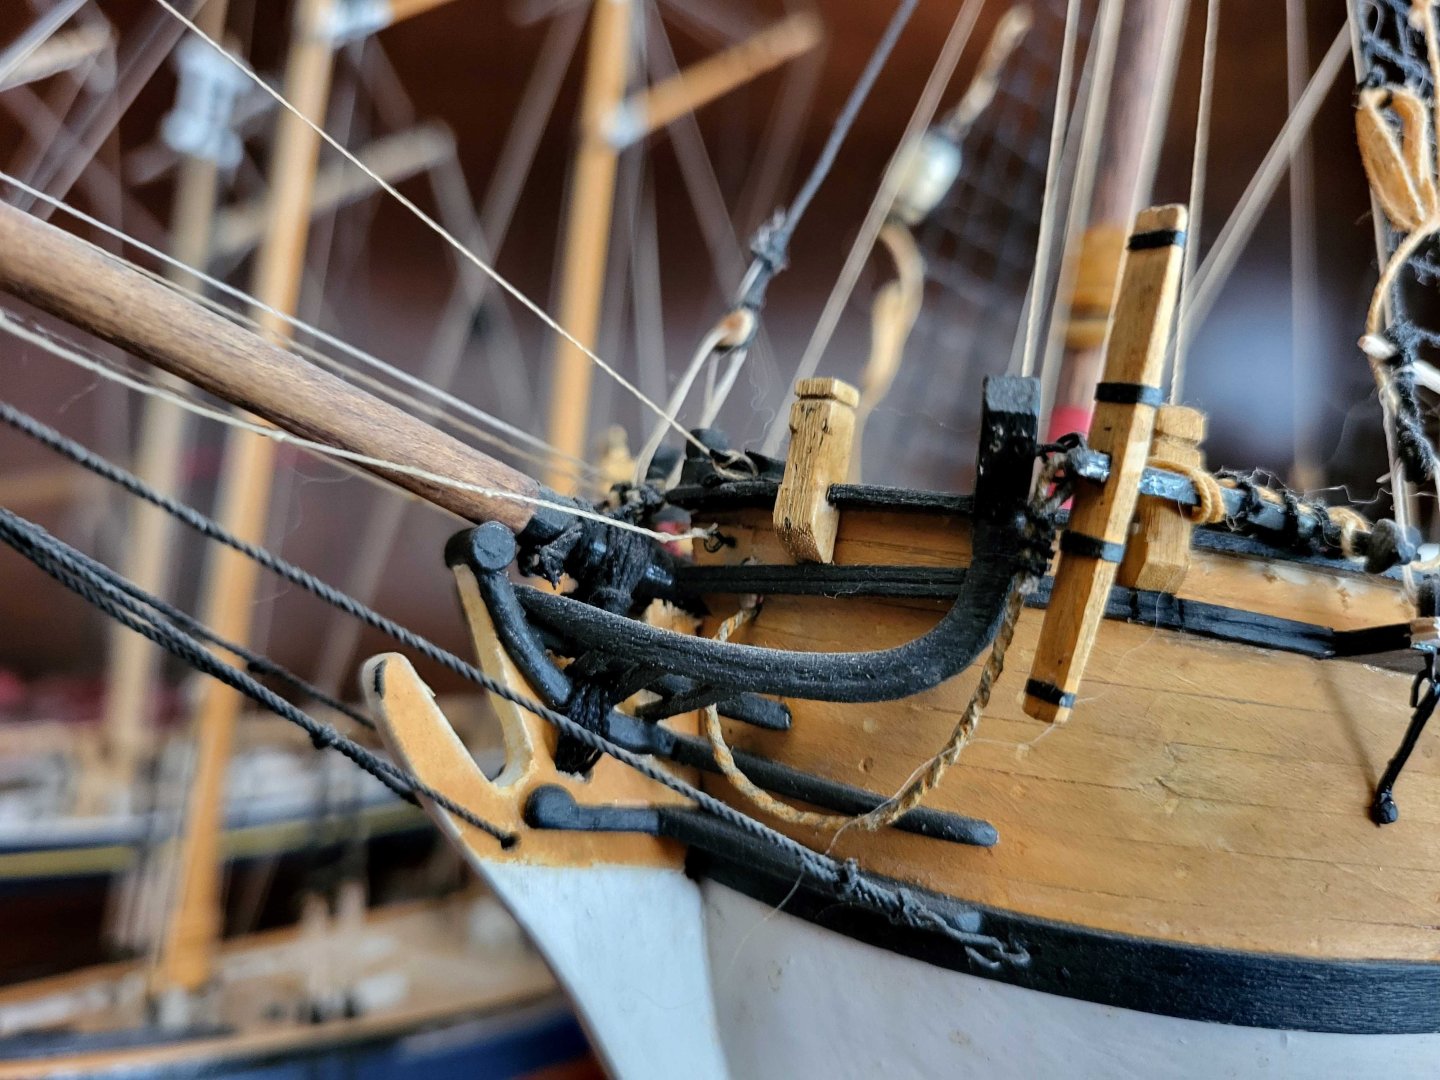
Details keep coming, just when you think you're done. It took me a while to figure these catheads out, but here we are. The drawings were confusing me until I realized the swing out. I'll be leaving them in the "parked" position as the anchors will be stowed. I didn't have wire small enough to create rings for the chains, so I seized them with some thread. I mocked it up with the line, arranged about how it would be on the model and painted it. The windlass drove me a little crazy to be honest. I couldn't seem to resolve all the dimensions between the bowsprit, windlass position and the other parts. The windlass would have fouled on the top rail if it were farther forward, or the Samson post needed to be farther back. I'm only guessing but I think it's tolerance stack up between all these parts and the contour of the top rail/hull.


- 51 replies
-
- 3
-
-
- Model Shipways
- Benjamin W Latham
- (and 1 more)
-
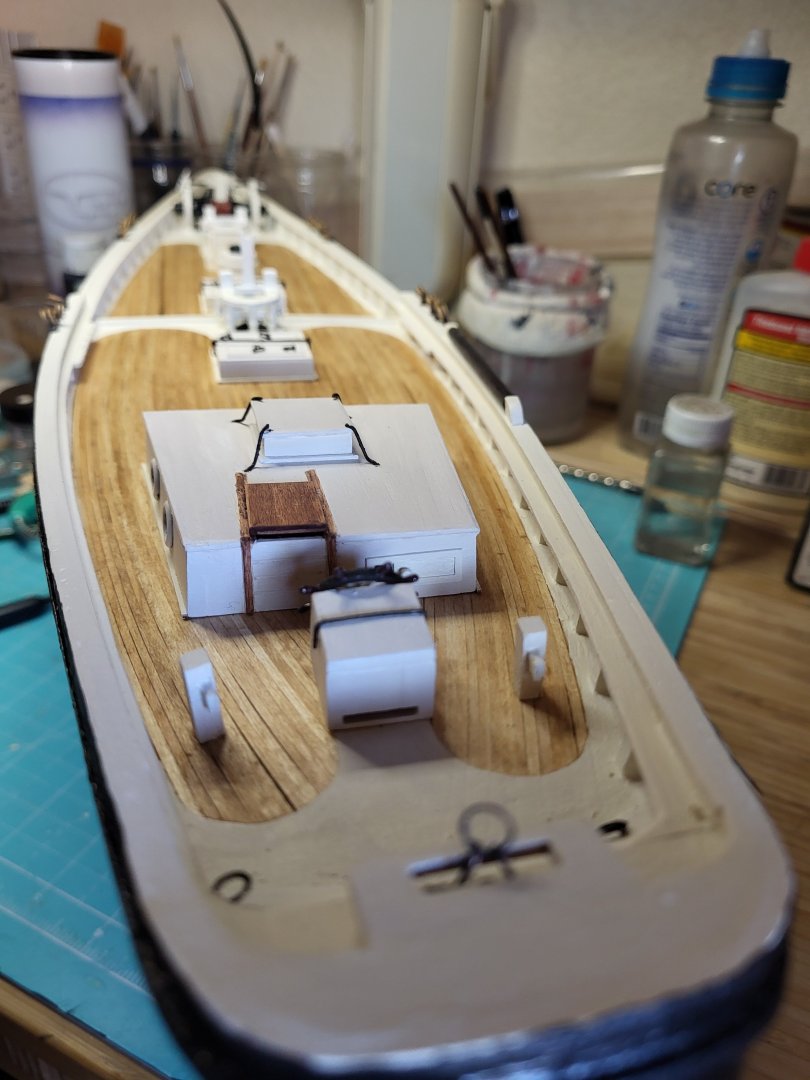
I stained the deck with Danish oil and a little stain as pigment. I think next build I will try to darken the plank edges with a pencil, I didn't get as much staining in the joints as I would have liked, but overall I'm pleased.

- 51 replies
-
- 4
-
-
- Model Shipways
- Benjamin W Latham
- (and 1 more)
-
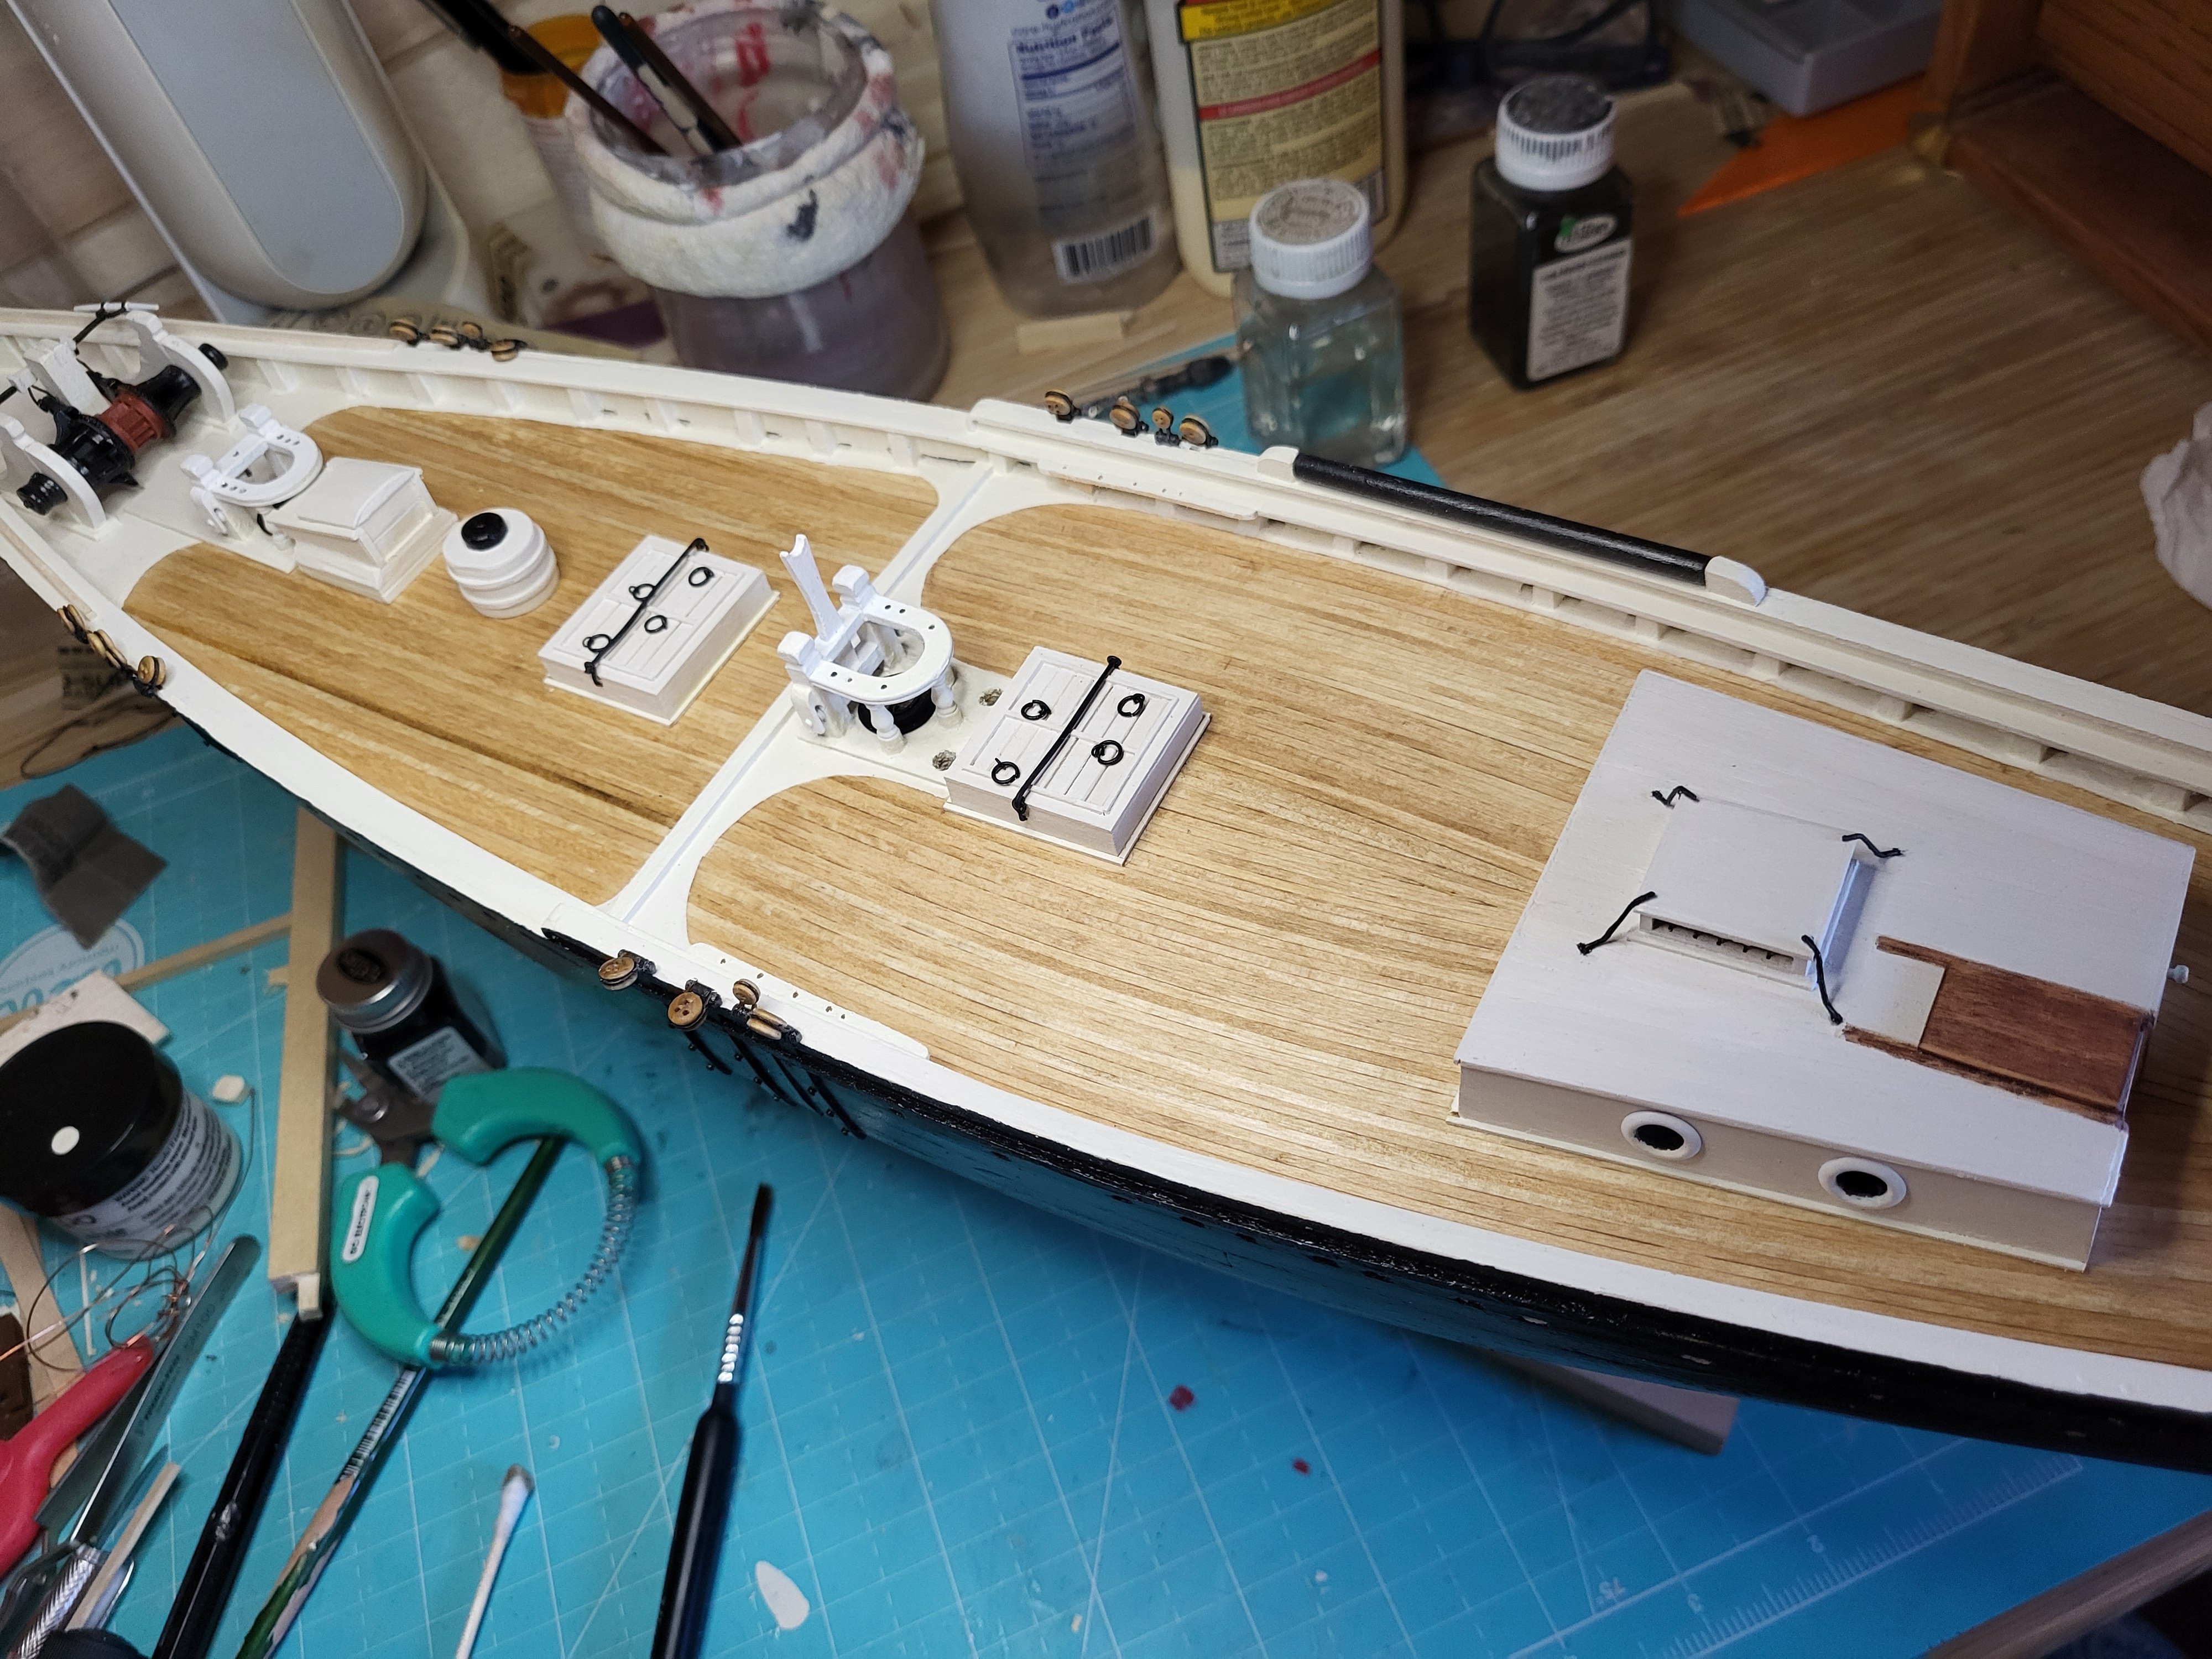
Would the scuppers be the deck color or the hull color? I glued the seine roller mounts in place, you can make out one pin in the mount now, the other mount has a through hole. Once the deck and rails are painted fully I can fit the roller (painted black) into the mounts. Still contemplating the deck finish, I won't finish it until the furniture is in place, as I want to be sure I have good adherence (maybe over abundance of caution). I'm thinking of something simple like thinned down poly, or danish oil, something that will seep into the joints and darken them, but leave the top fairly blonde.
- 51 replies
-
- 2
-
-
- Model Shipways
- Benjamin W Latham
- (and 1 more)
-
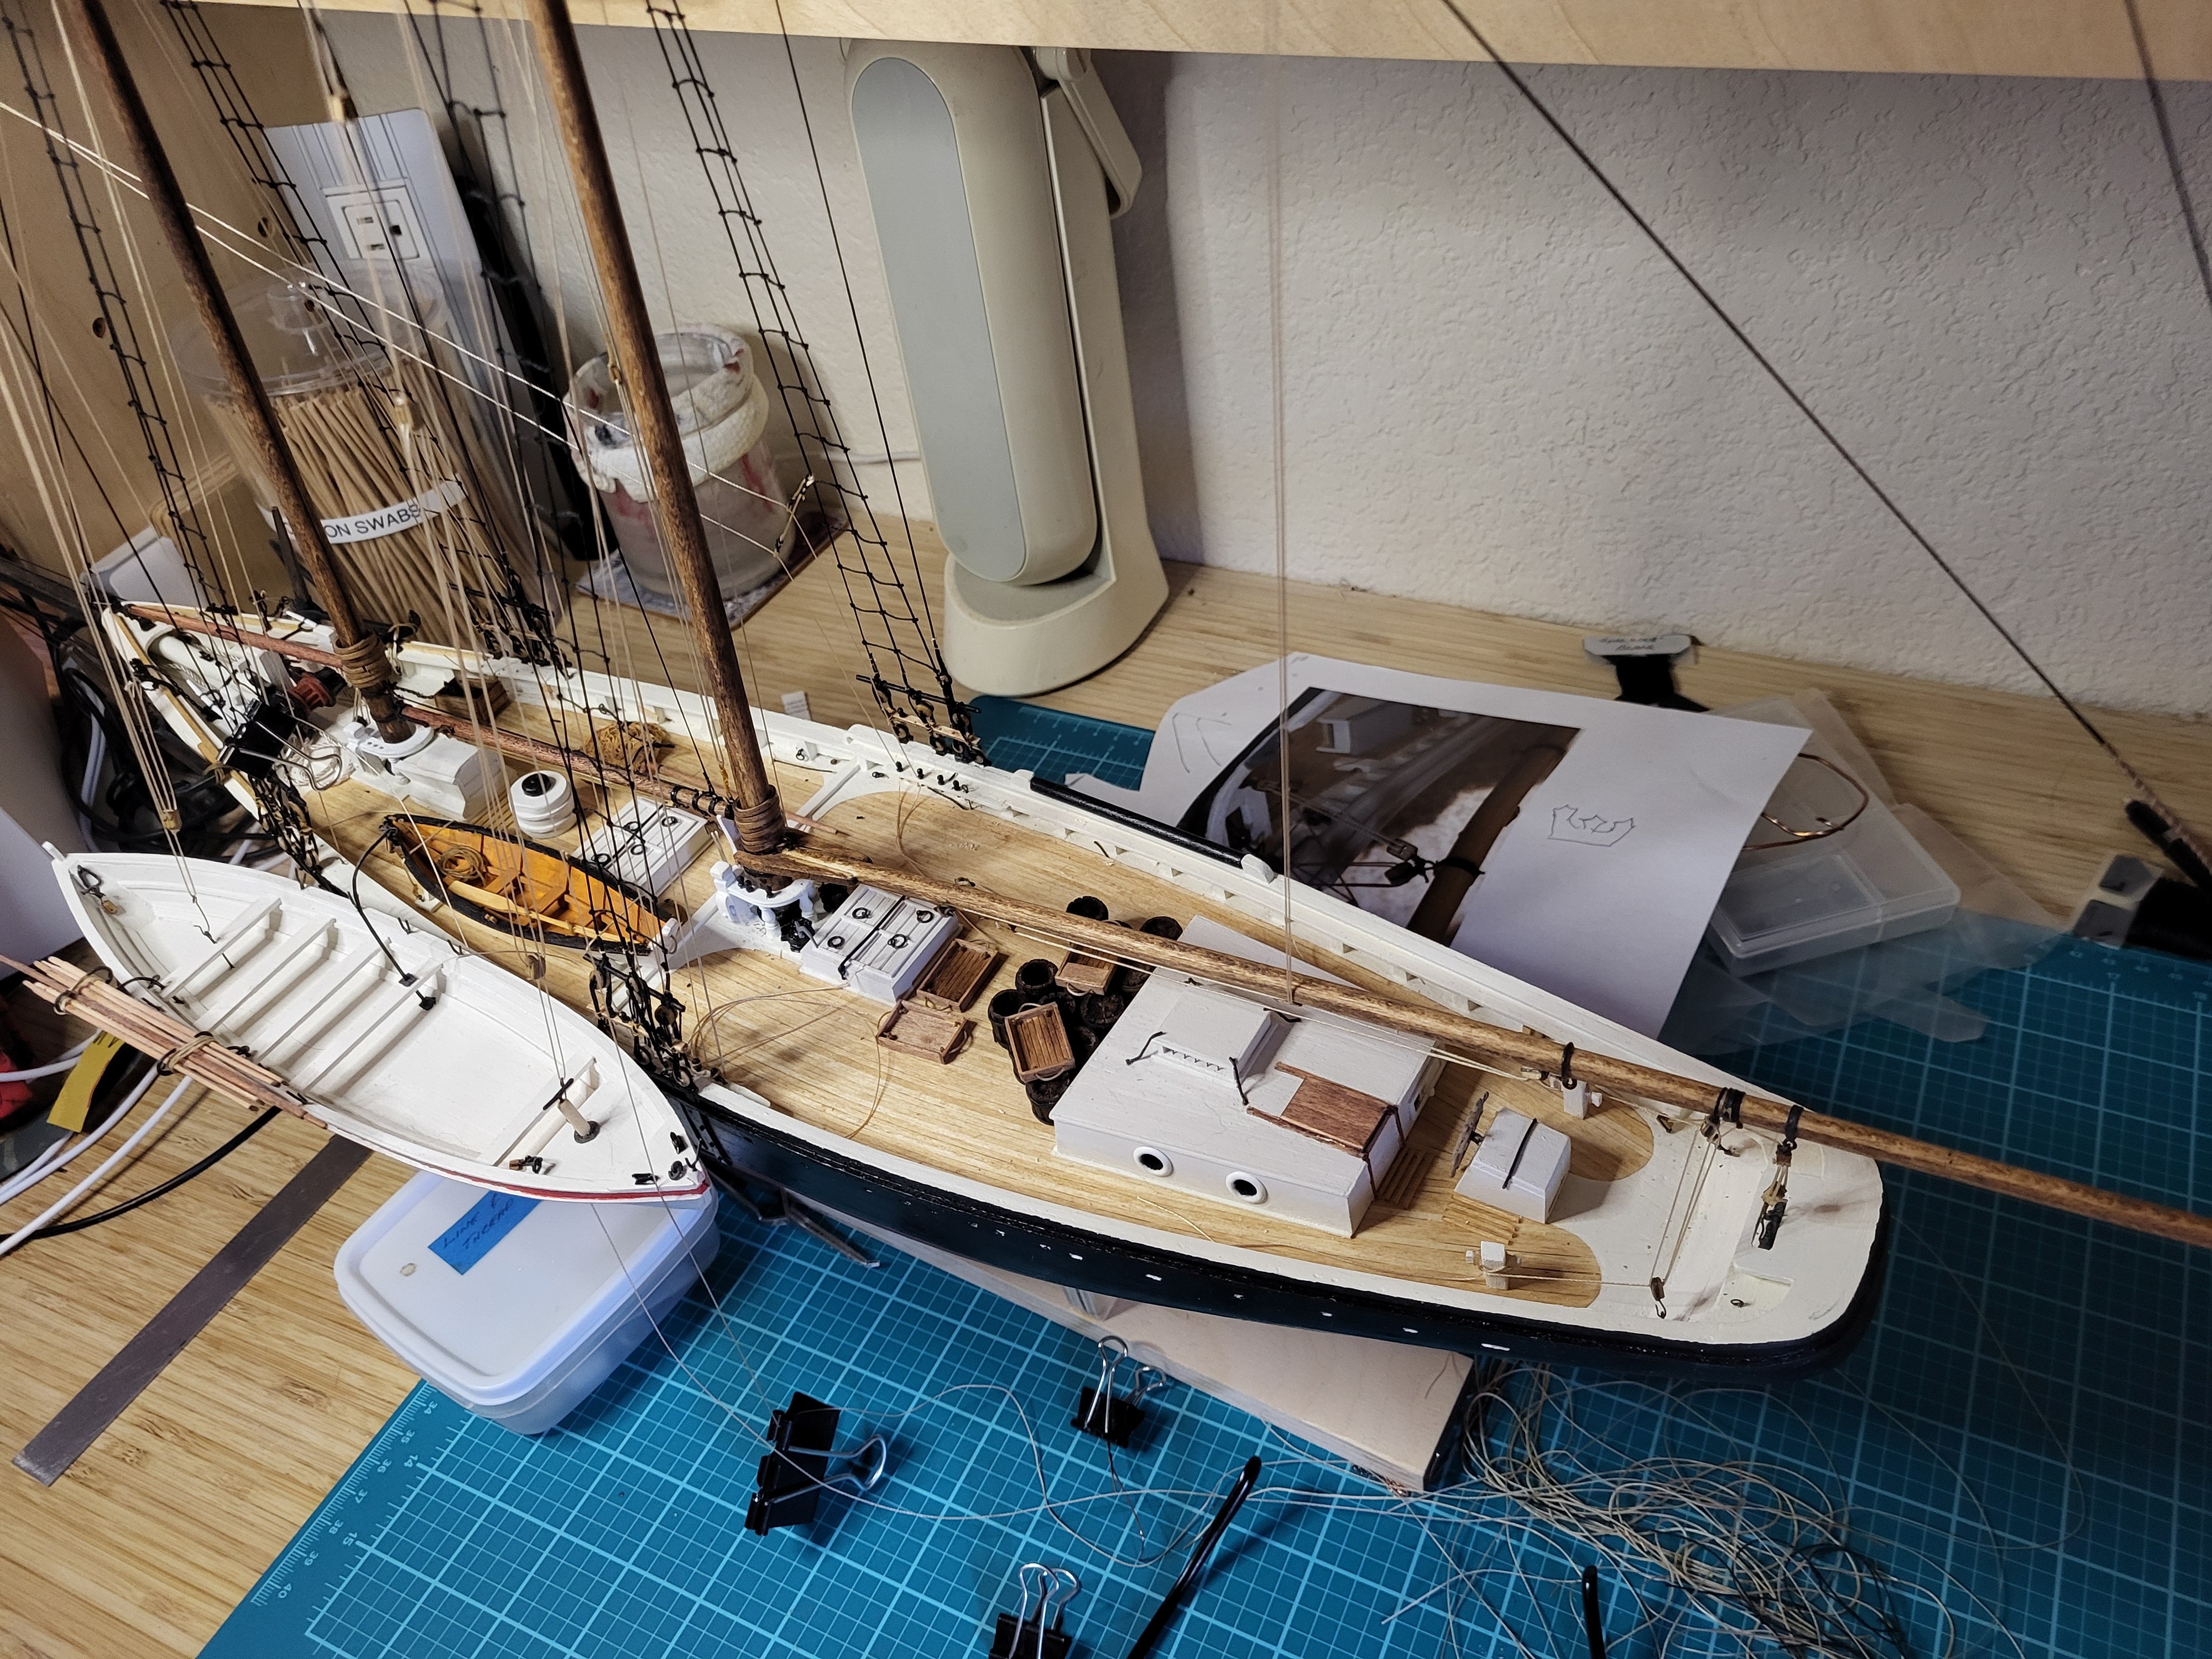
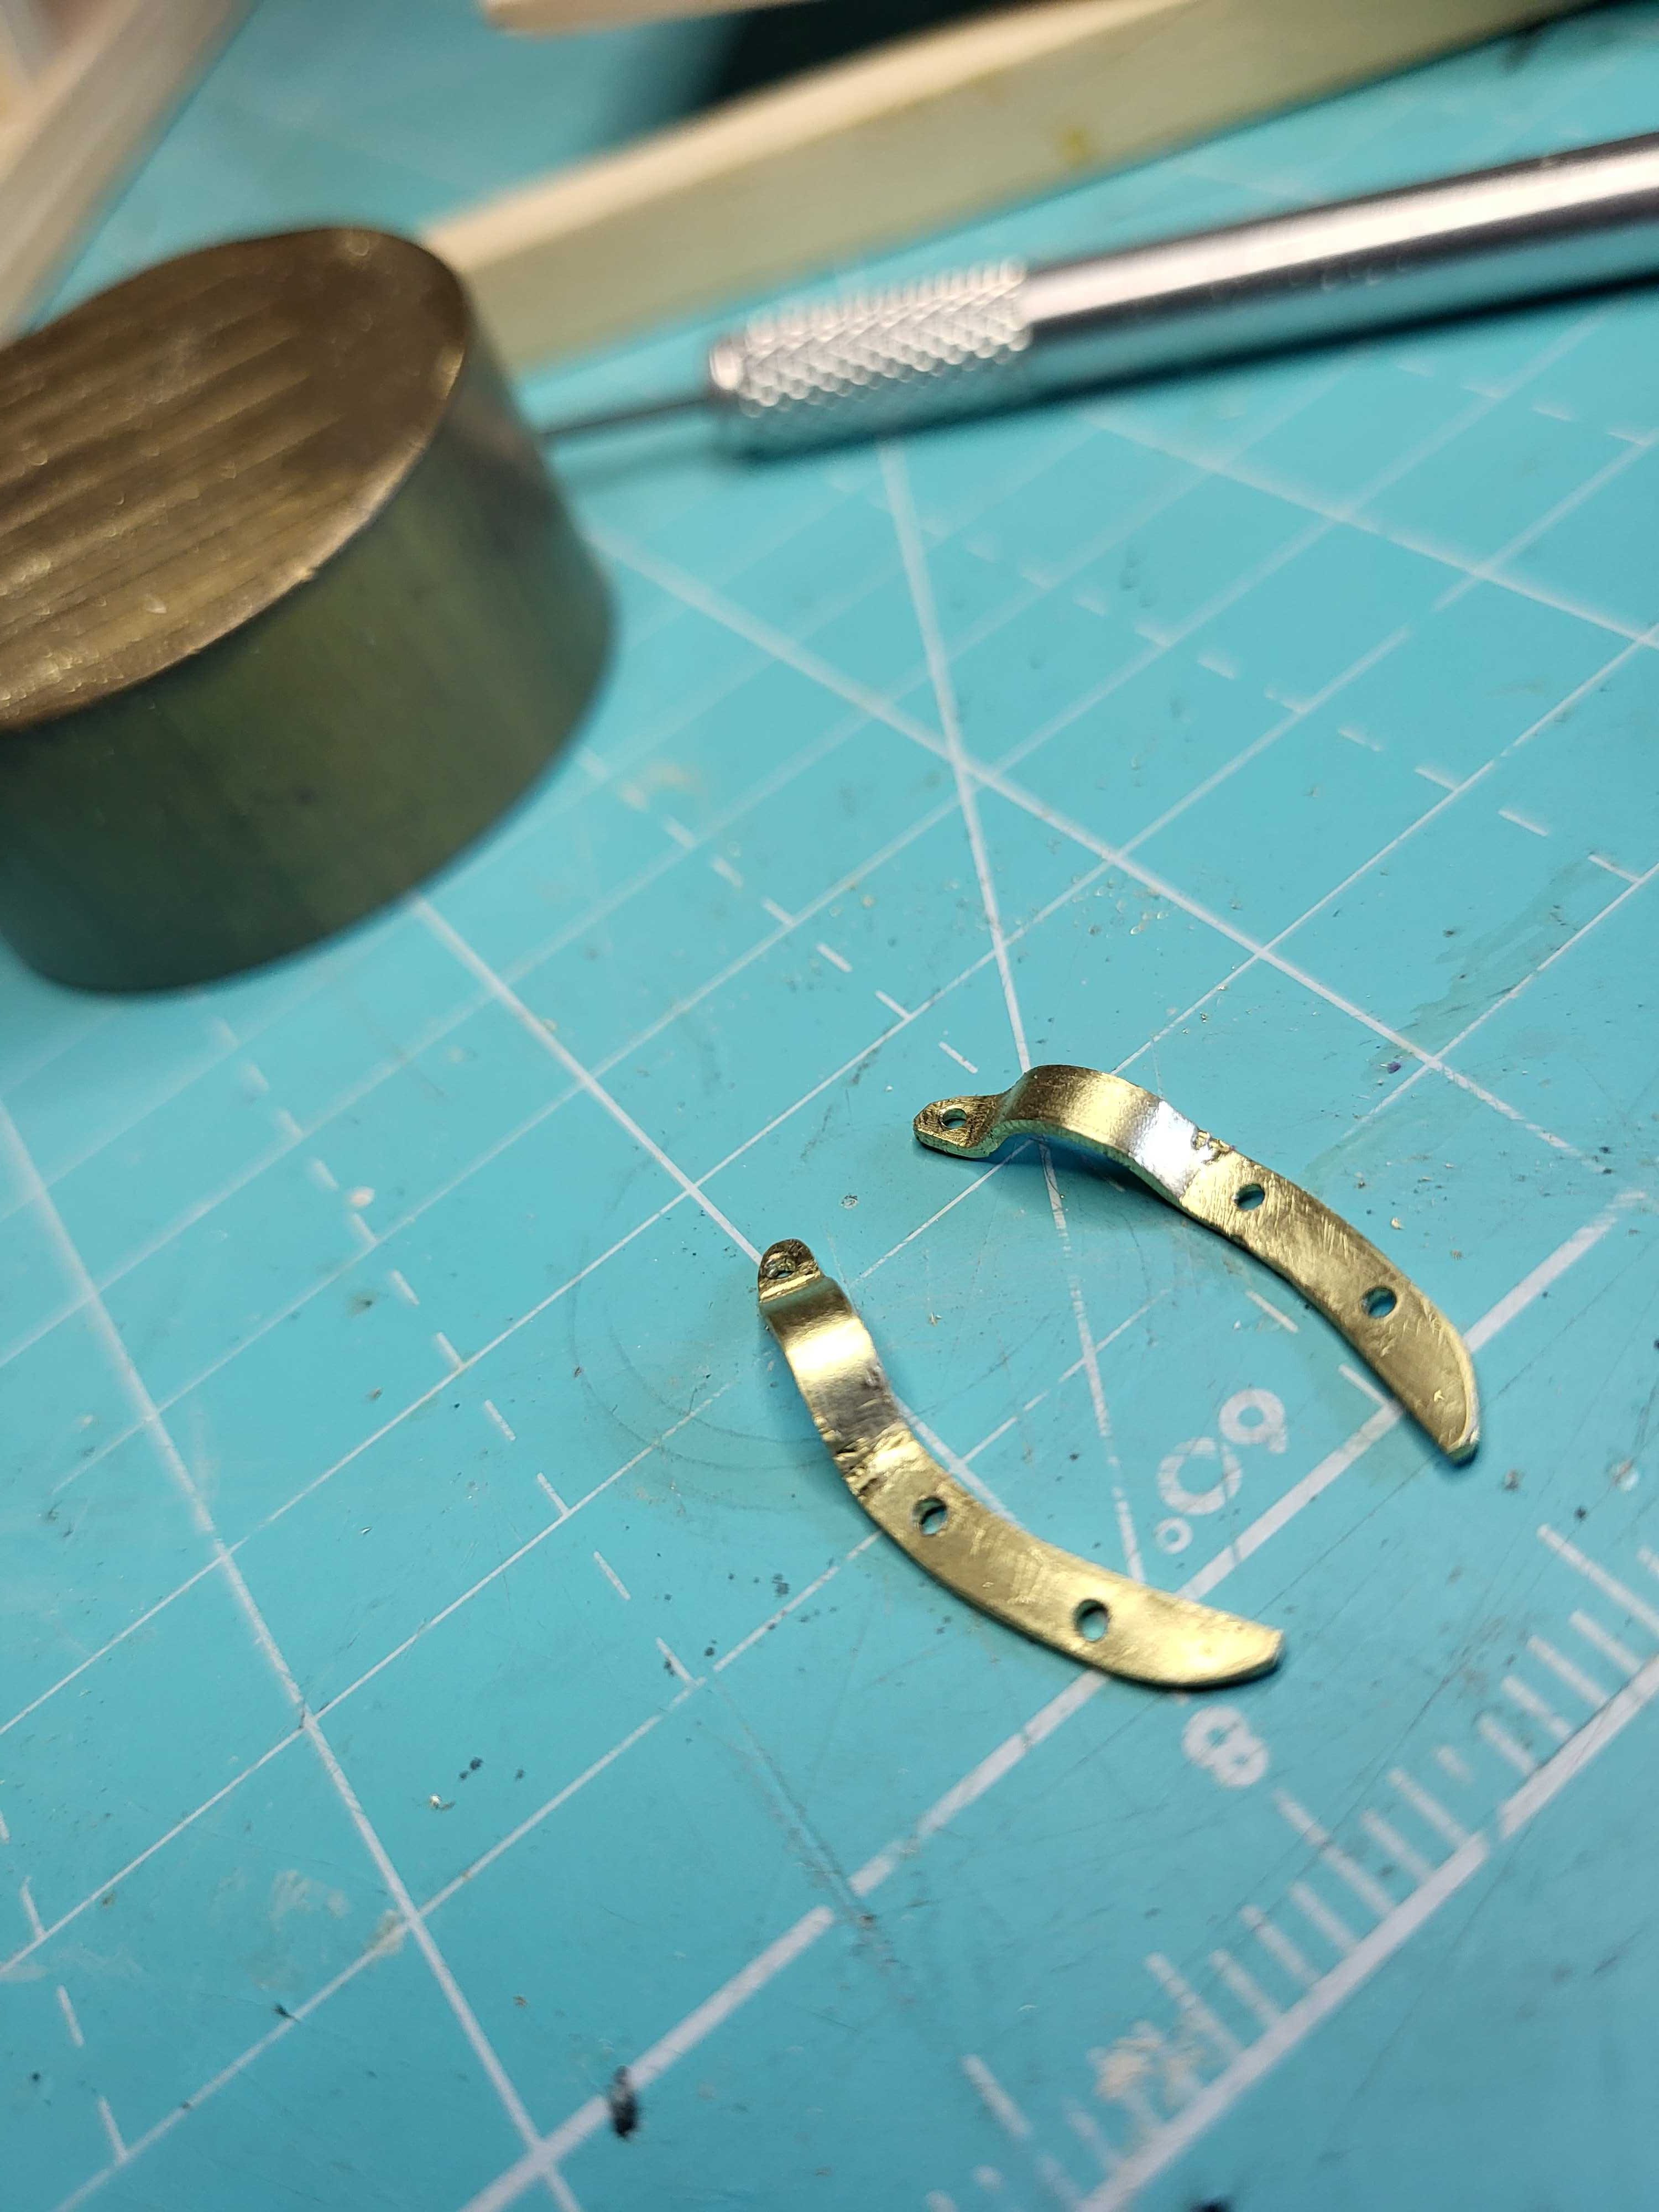
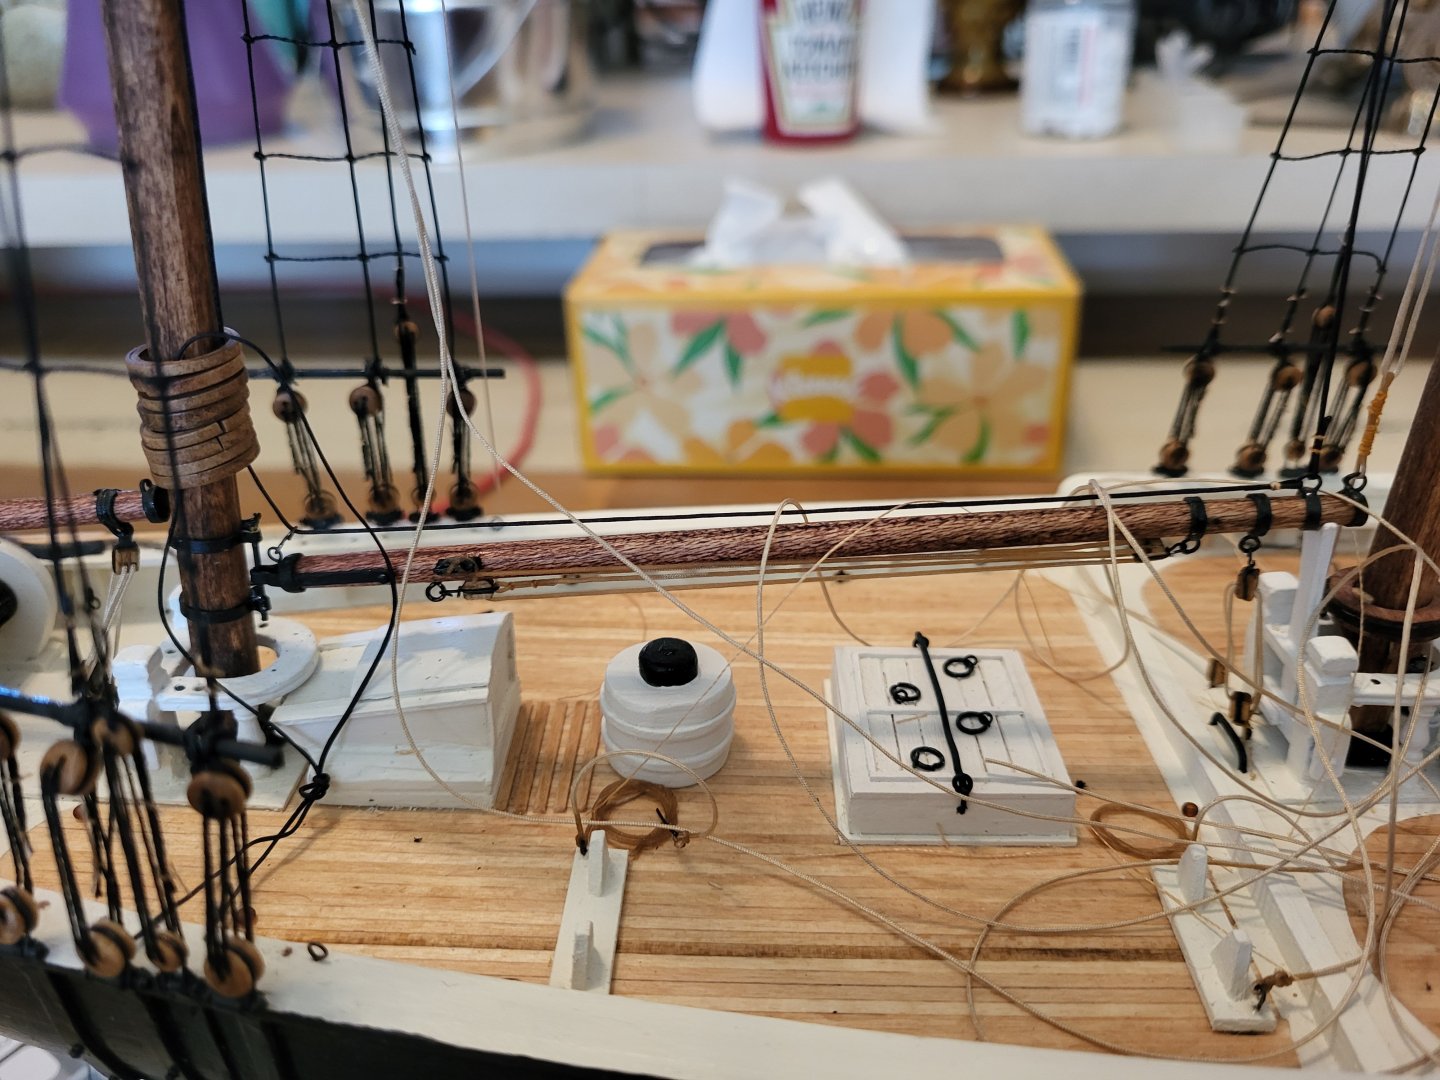
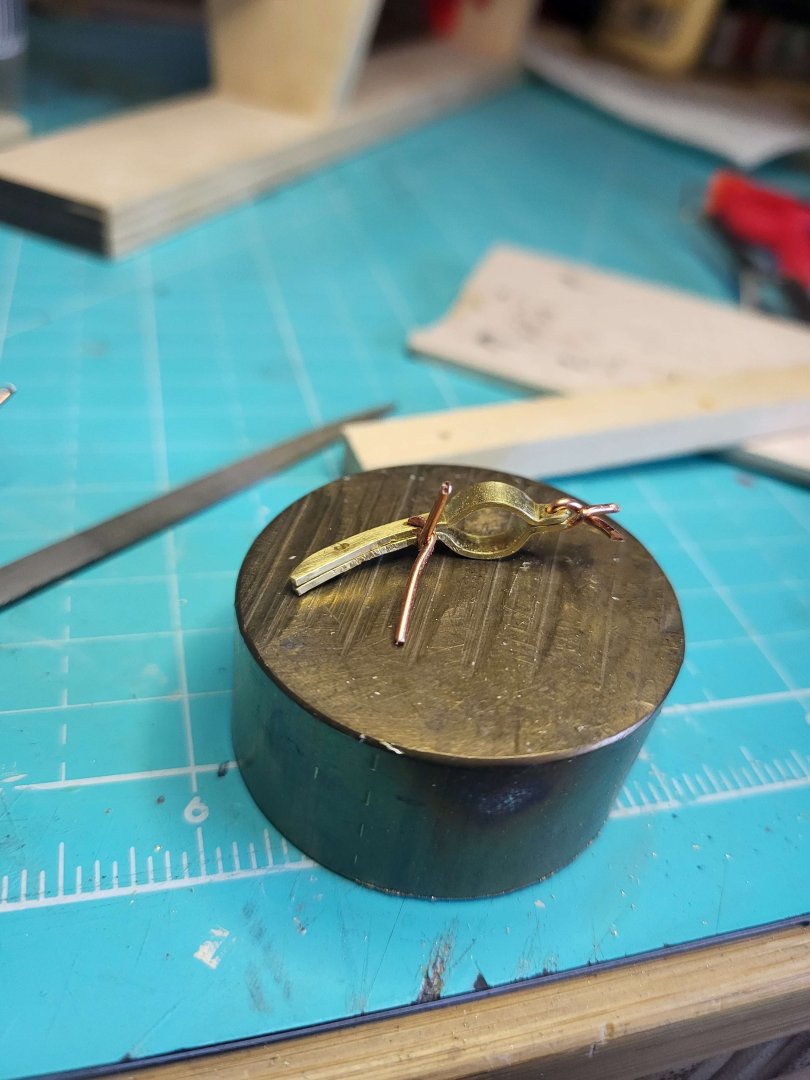
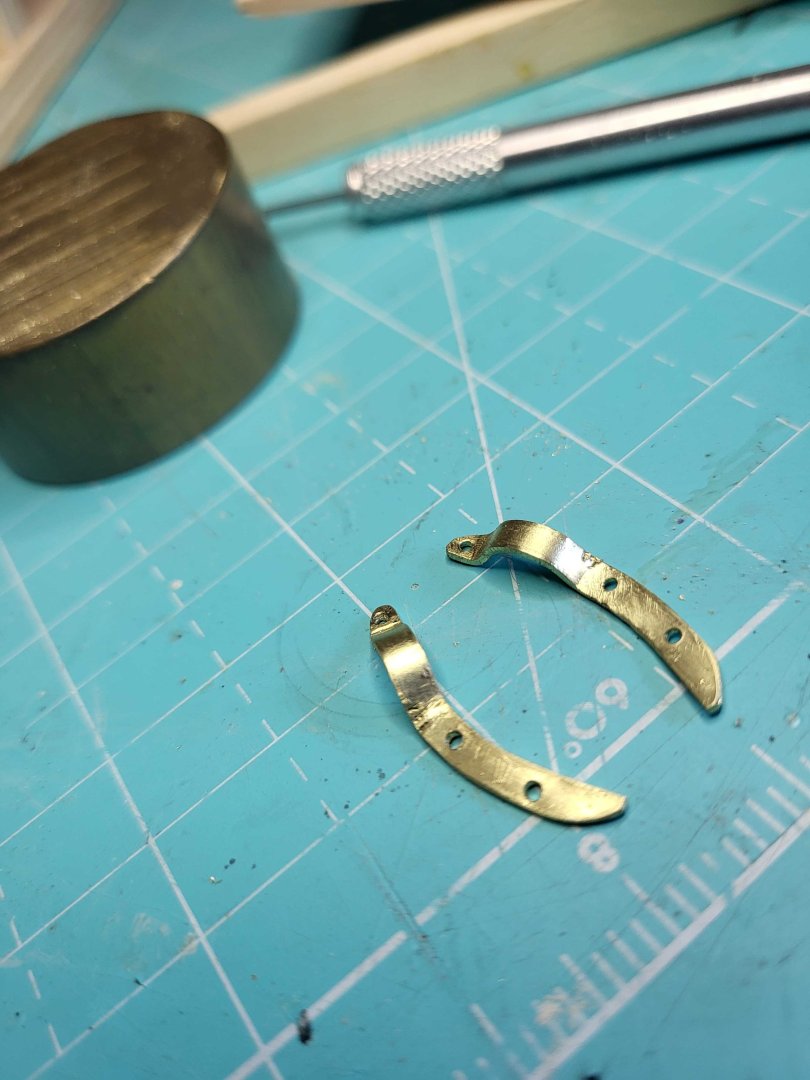
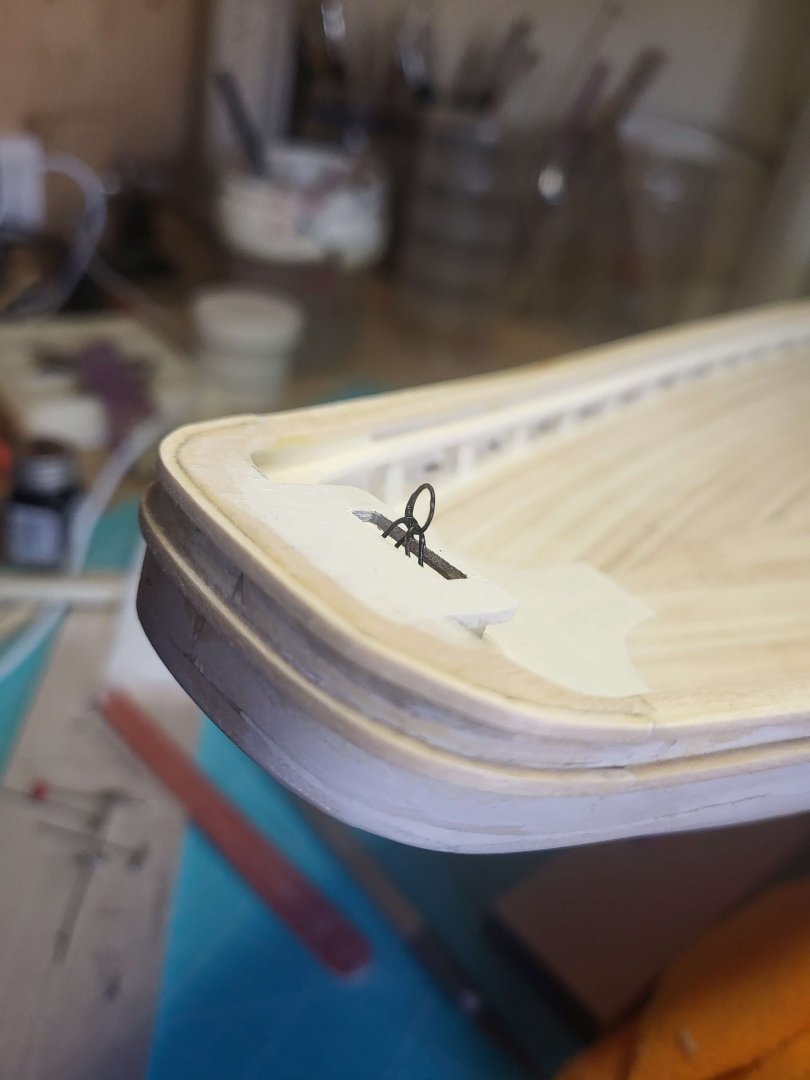
I'm trying to foresee what rings or other rigging features are needed on the deck or rails before adding the furniture. I just know once a place a piece of furniture I'll need to drill a hole somewhere nearby, and it'll be blocked. So to that end I started the gammon strap, This is a good time to do it as well because I haven't finished the bow where it meets the bowsprit so fitting the gammon, especially before painting the bowsprit will save rework or damage. Once I got the first one where I liked it, I made a mirror version, wiring them together to even them up with a file and ensure the holes were drilled properly.
- 51 replies
-
- 1
-
-
- Model Shipways
- Benjamin W Latham
- (and 1 more)
-
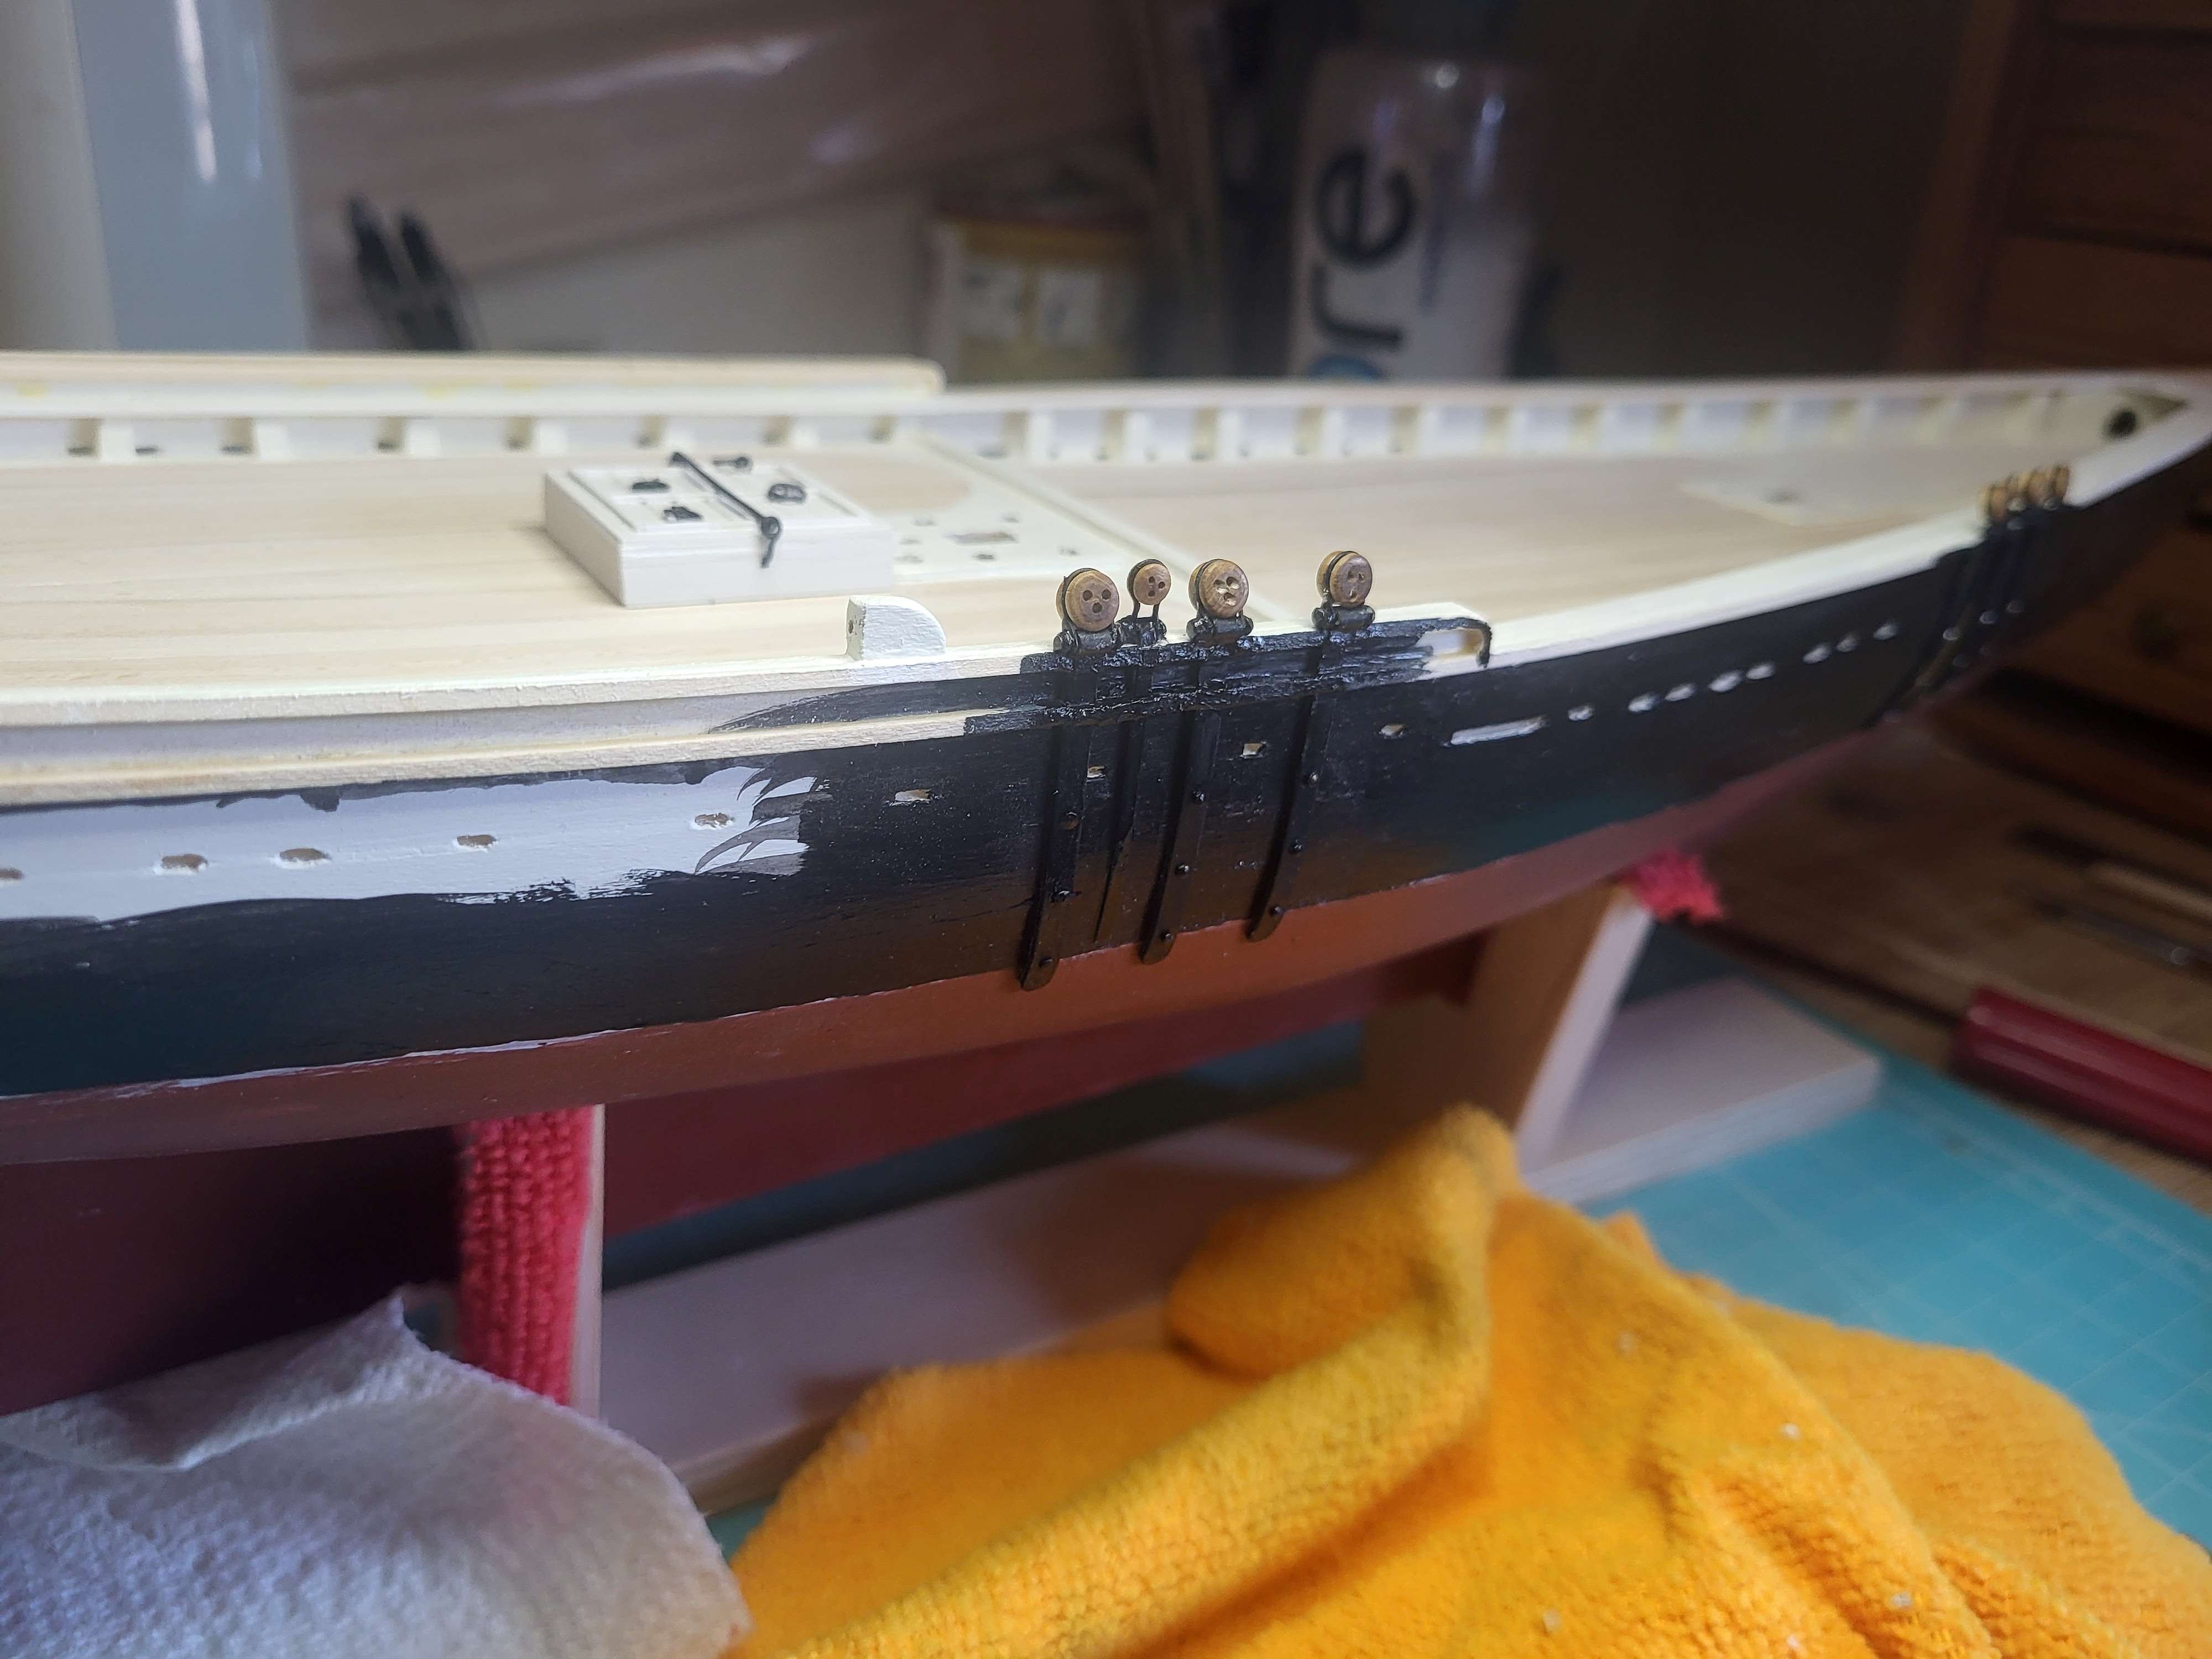
On this build, I have discovered just how much bend you can put into wood, with proper prep and some patience. I honestly figured "I'll give it a shot" and dang it worked great. I added the boom buffer early, because I wanted to be sure it fit under the plate, and I painted most of it in advance. While some seams might show, I think adding these strips later, was easier than over sizing the top plate/monkey board, and getting the profile uniform and even.
- 51 replies
-
- 1
-
-
- Model Shipways
- Benjamin W Latham
- (and 1 more)
-
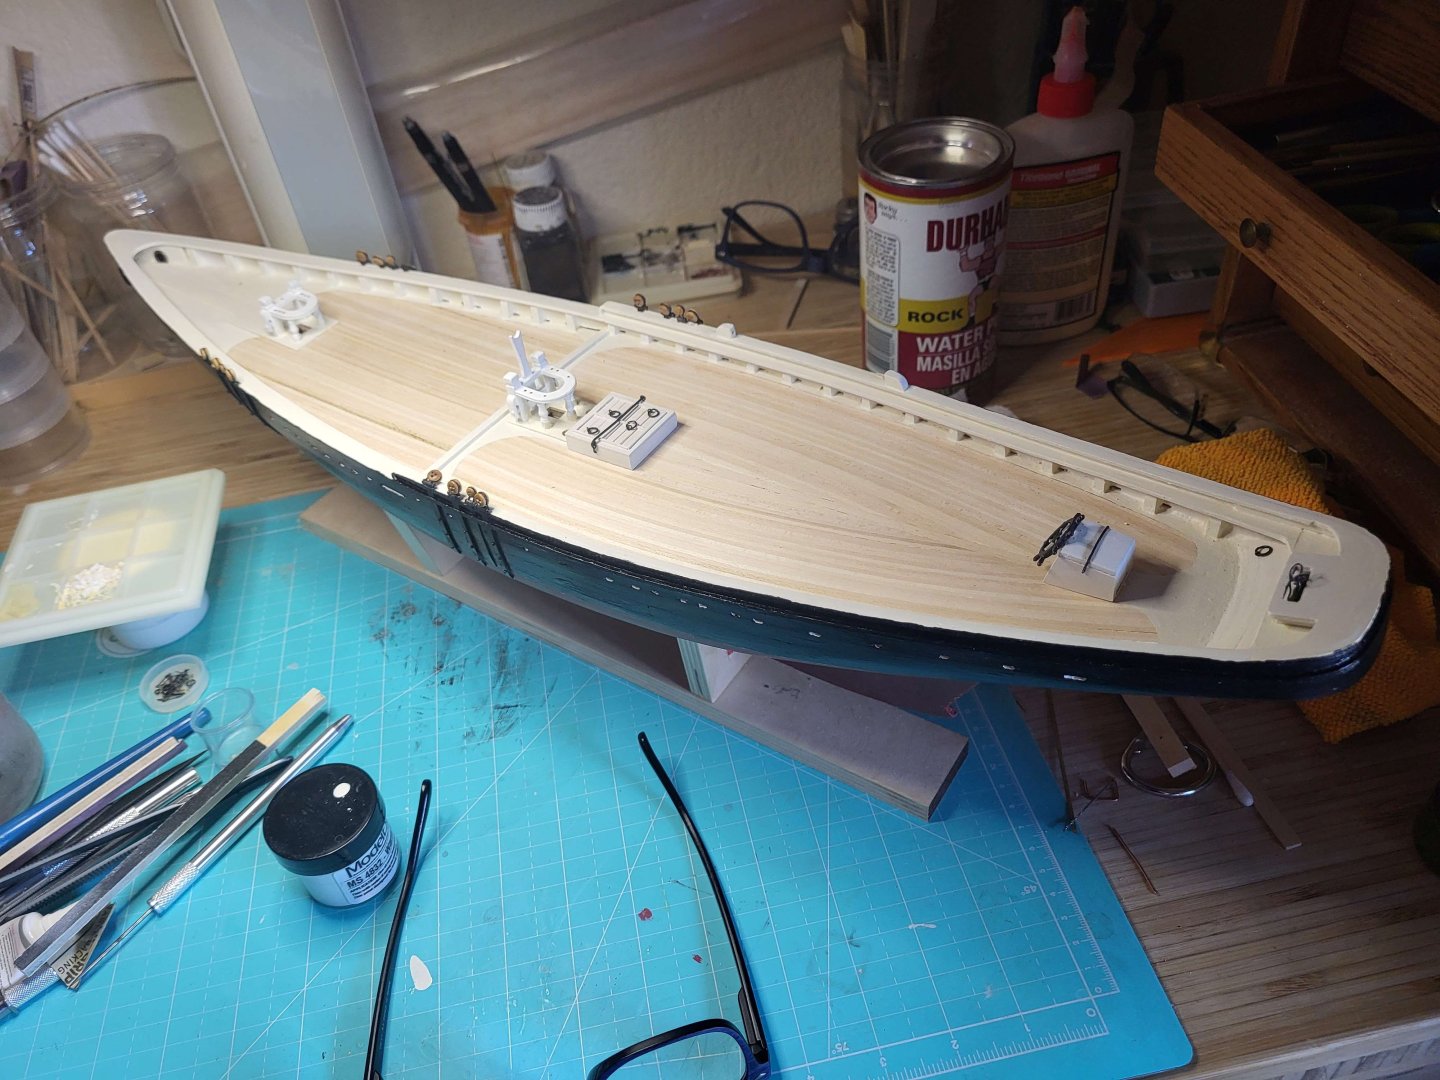
Working on several aspects at once in a way. Finishing the top rail details, and adding the chainplates. I'm also picking away at the hull painting.

- 51 replies
-
- 2
-
-
- Model Shipways
- Benjamin W Latham
- (and 1 more)
-
As an aside, here is how I have used Sculpey in the past; for the cheeks on the bow of the Sultana and the decorative windows. The cast pieces didn't look great nor did they fit against the hull properly, so I used Sculpey to fit them and bring some detail.

- 51 replies
-
- 3
-
-
-
- Model Shipways
- Benjamin W Latham
- (and 1 more)
-
Thanks for the kind words!