Tony28
-
Posts
27 -
Joined
-
Last visited
Content Type
Profiles
Forums
Gallery
Events
Everything posted by Tony28
-
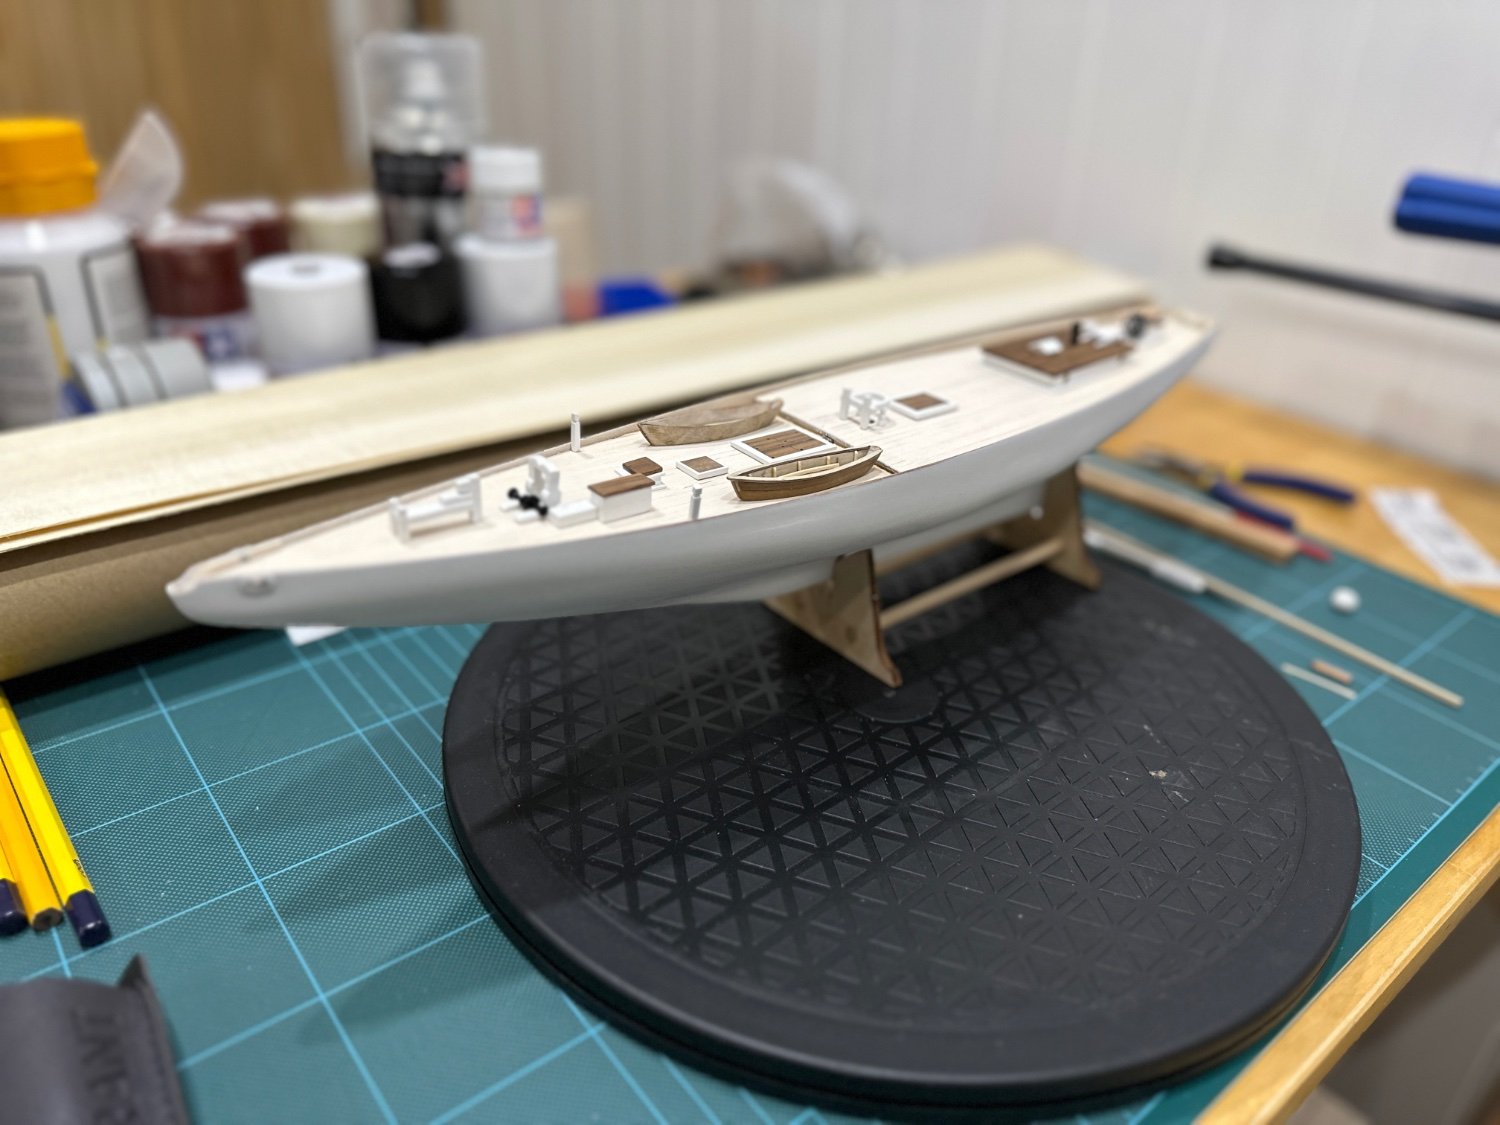
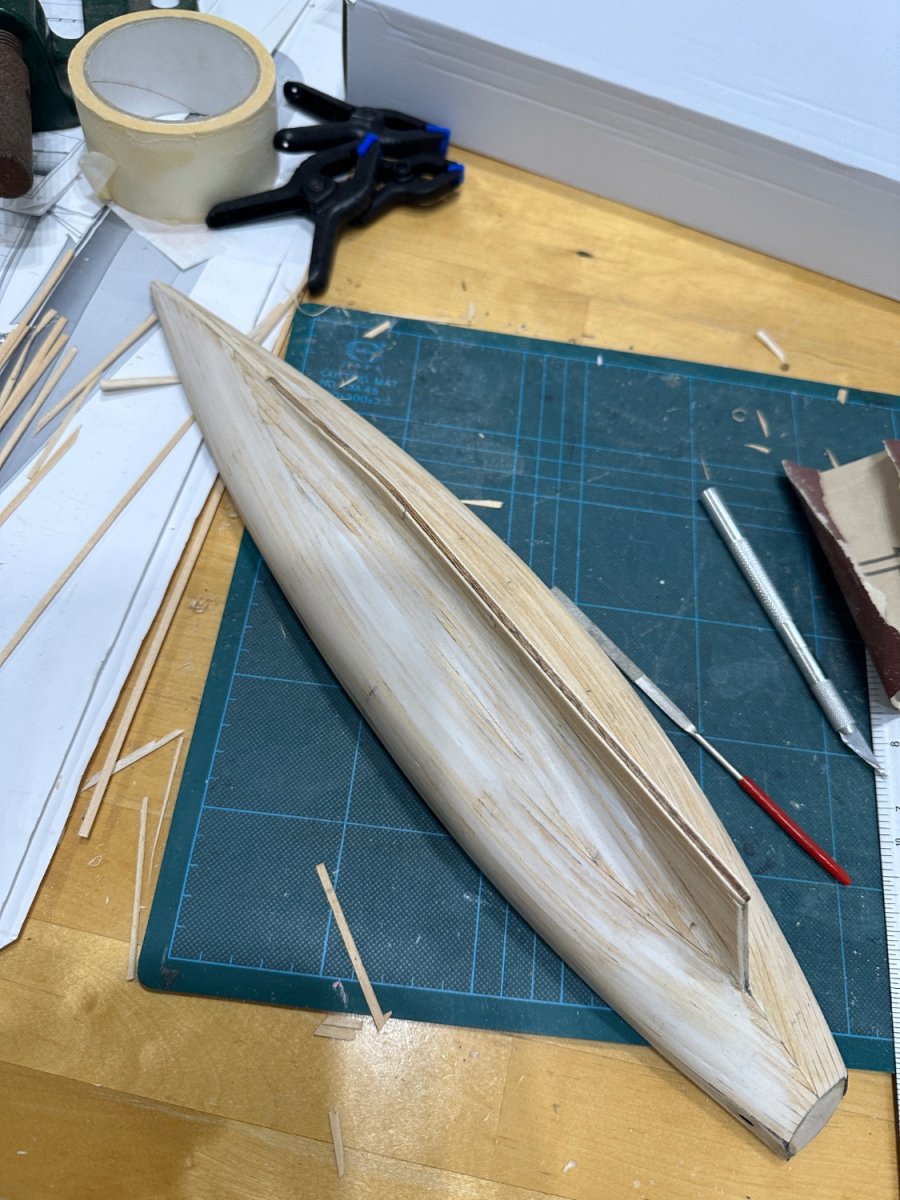
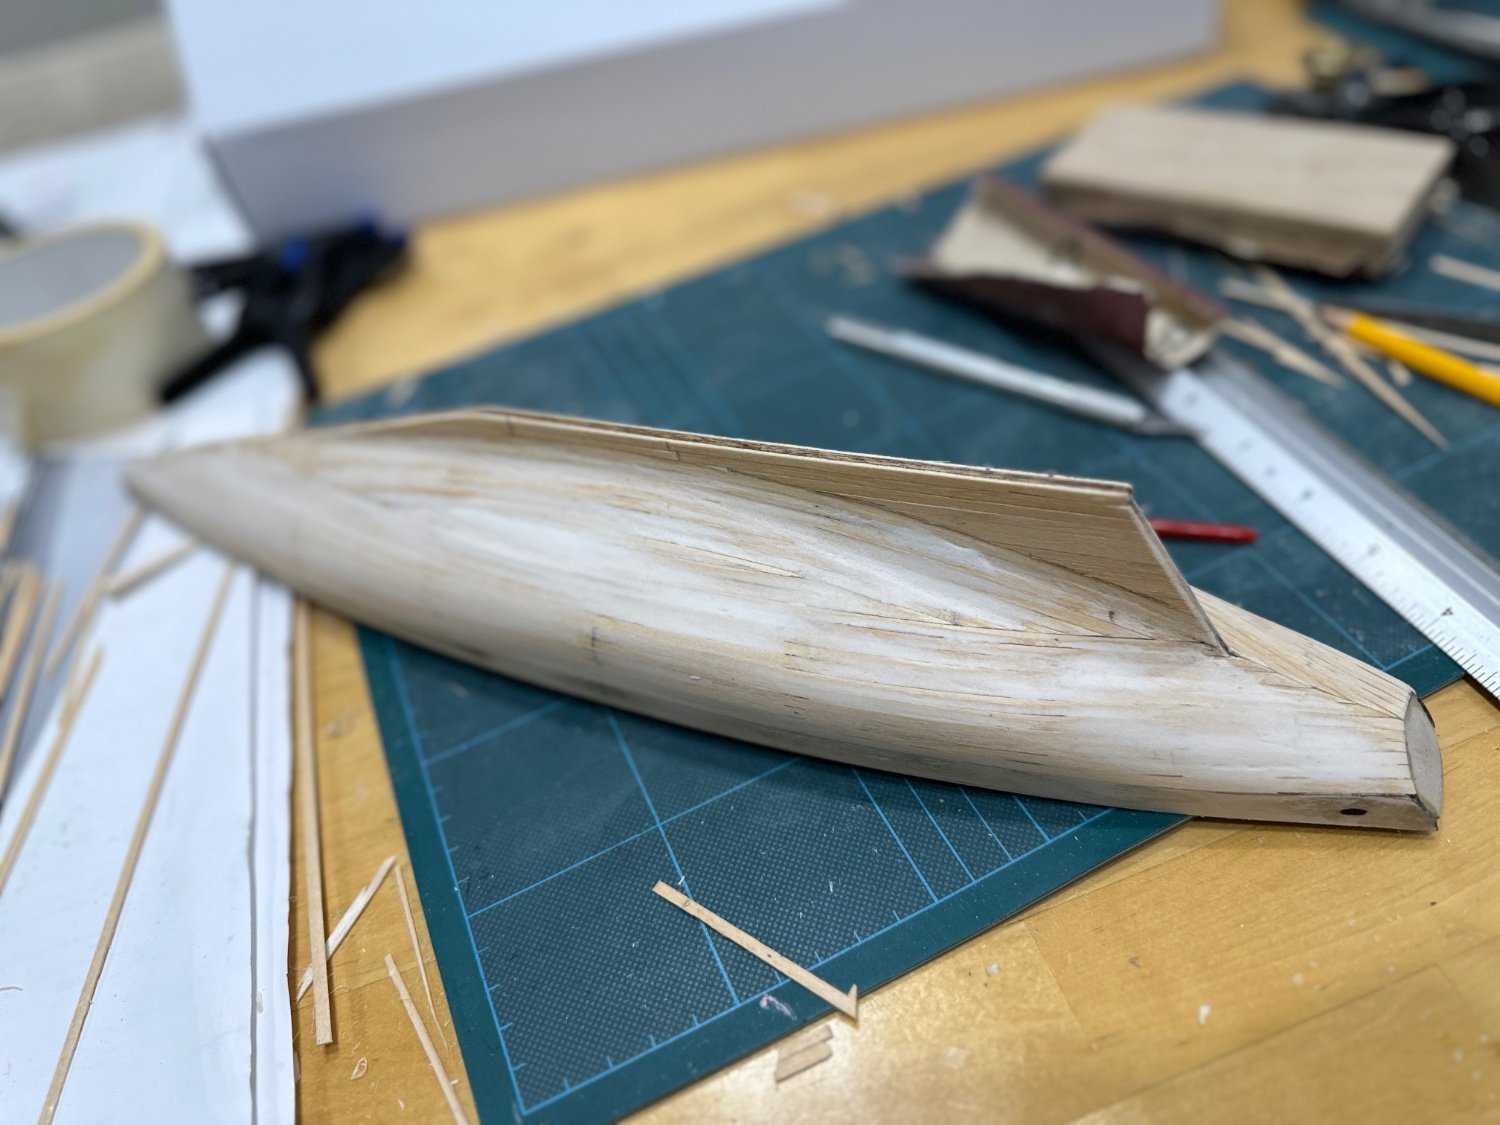
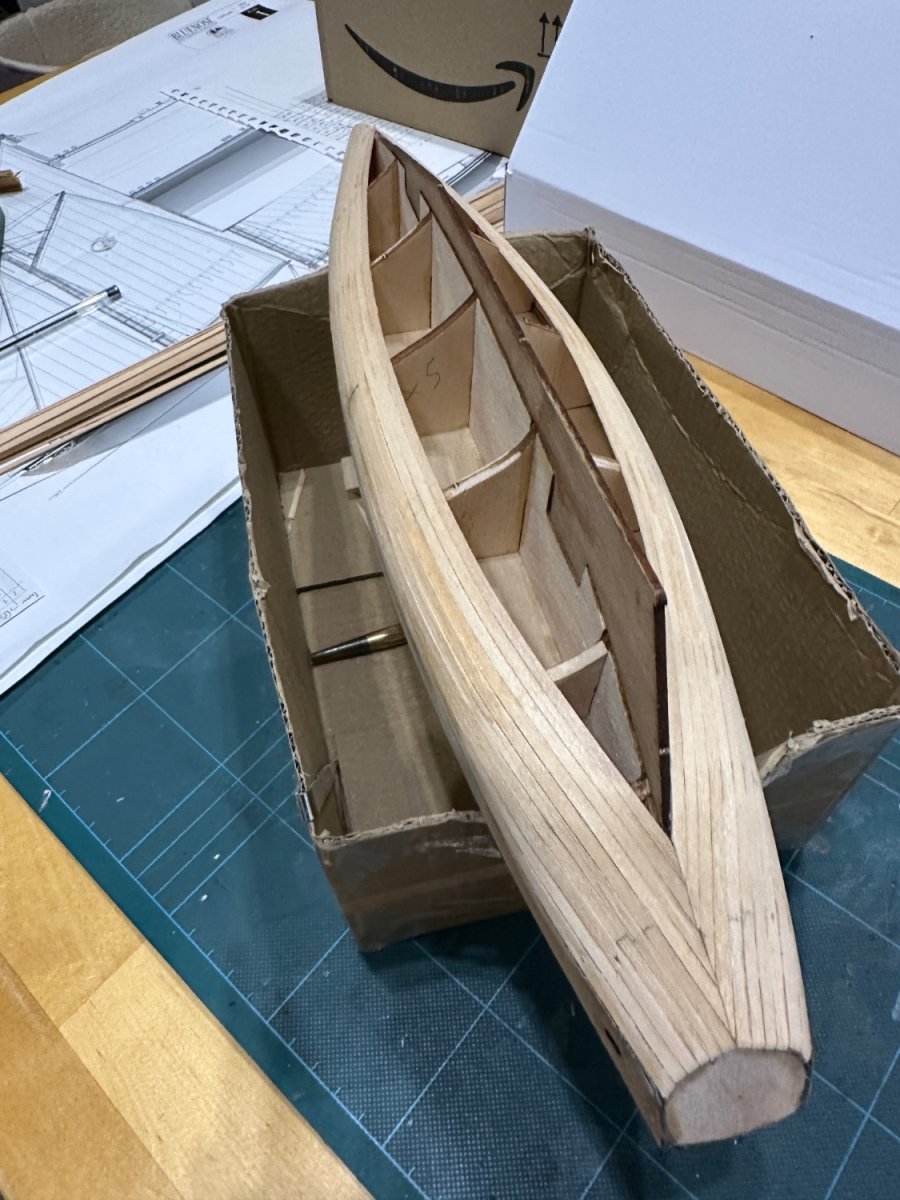
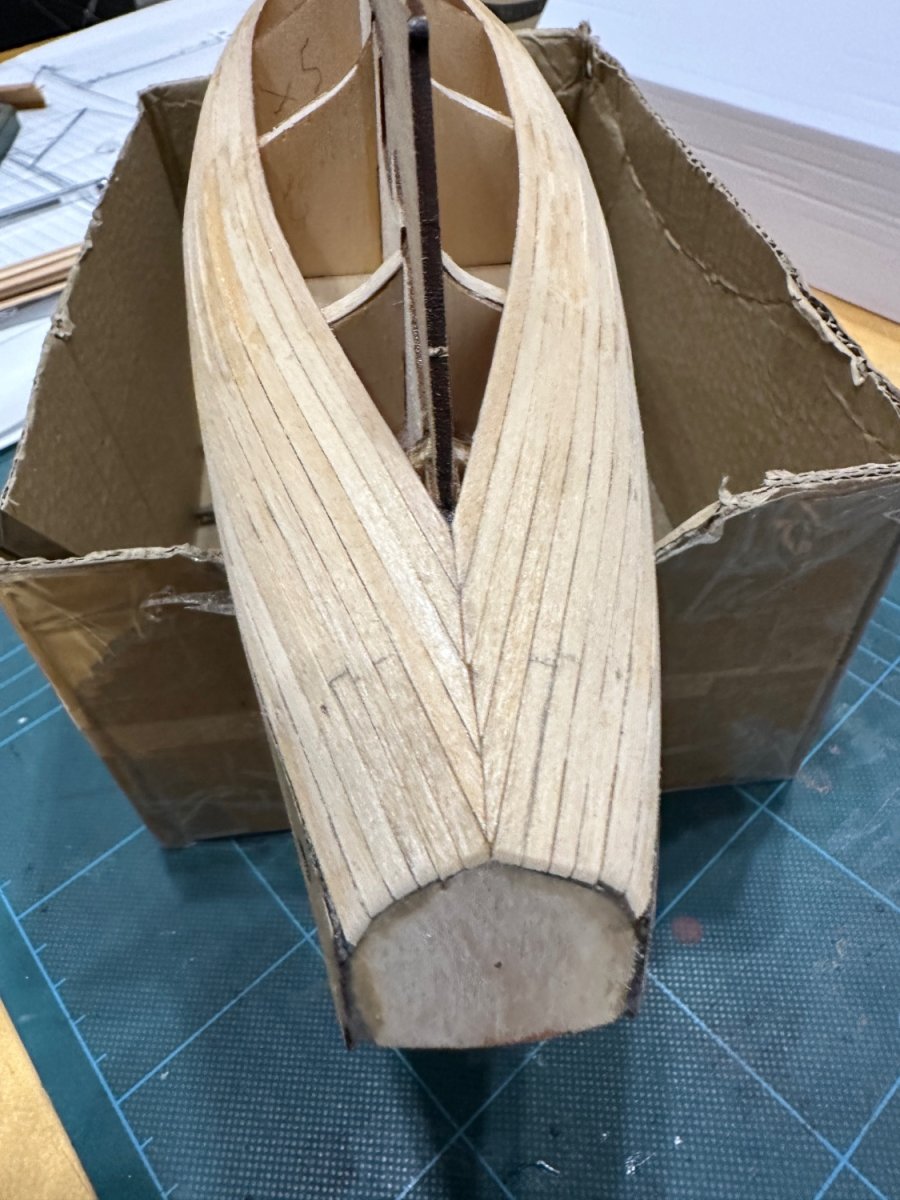
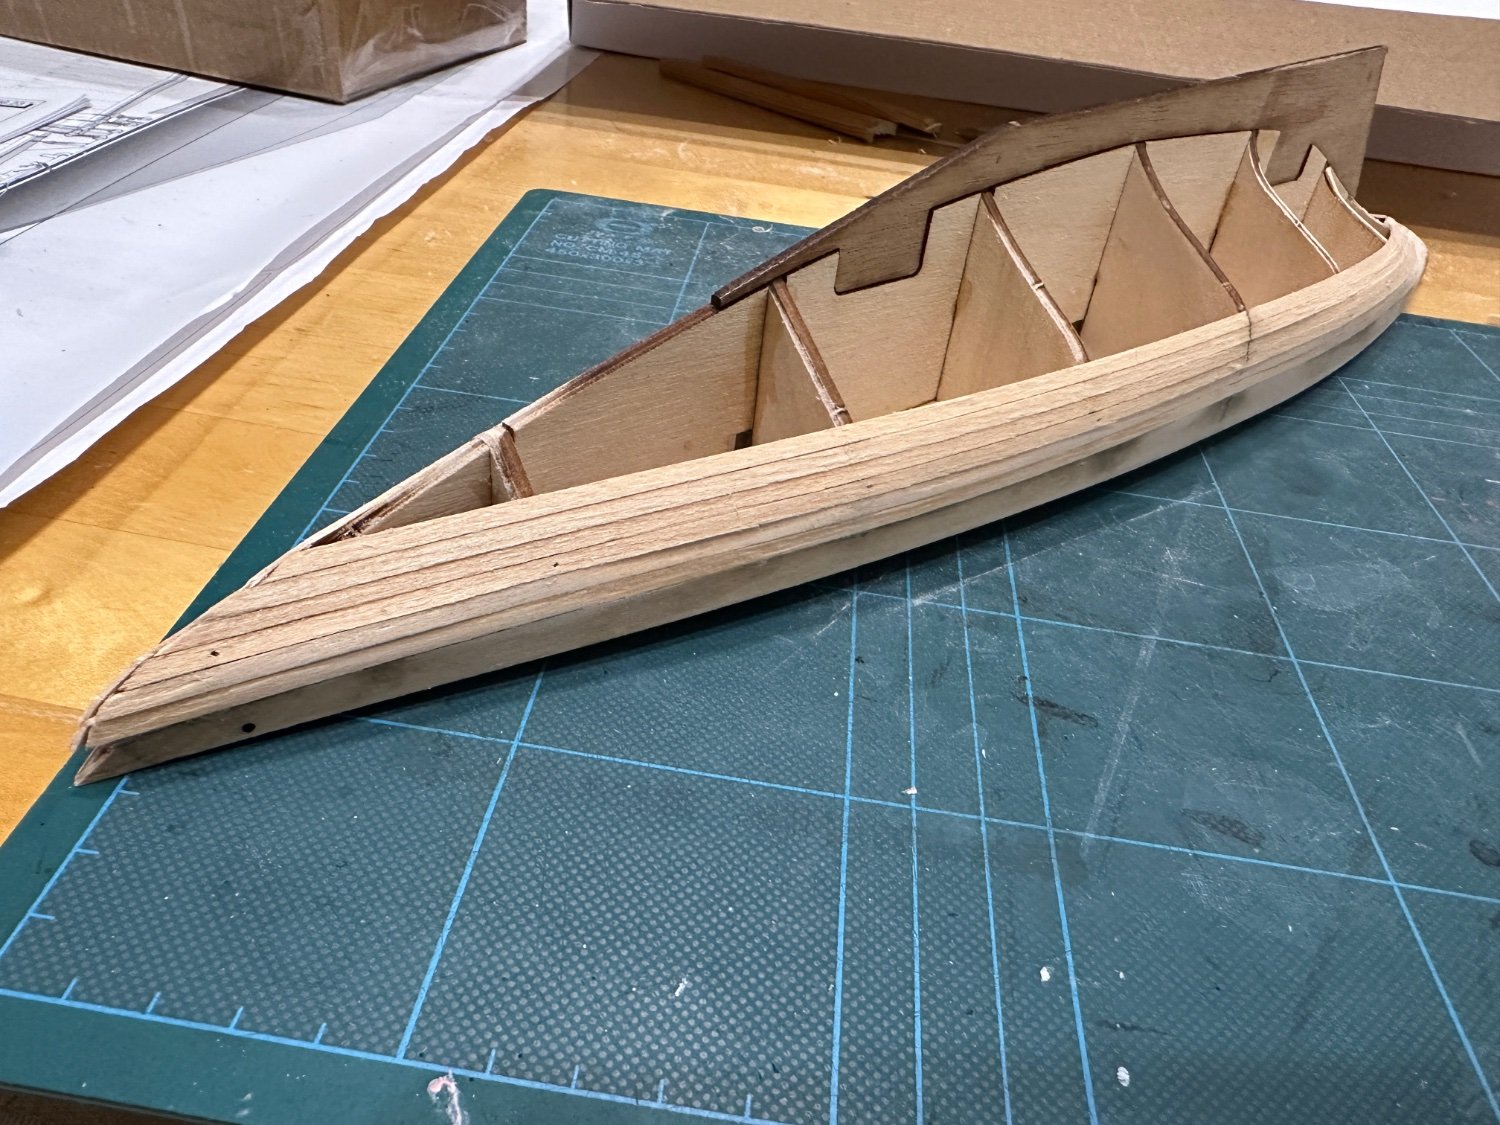
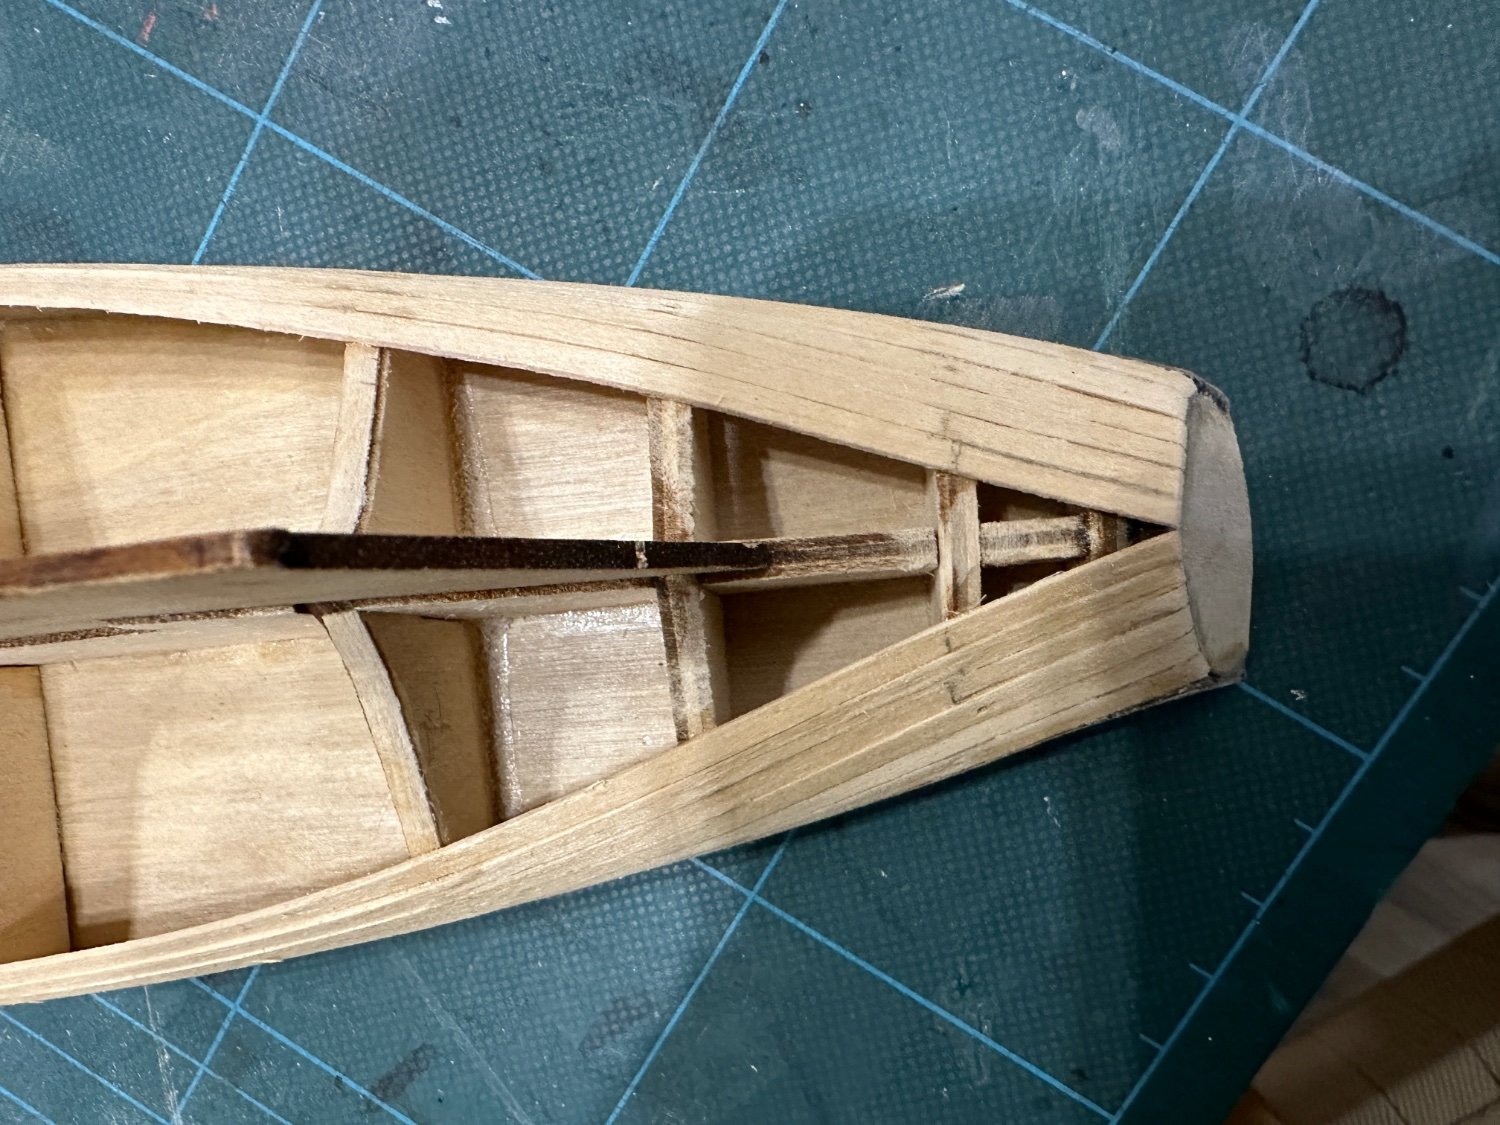
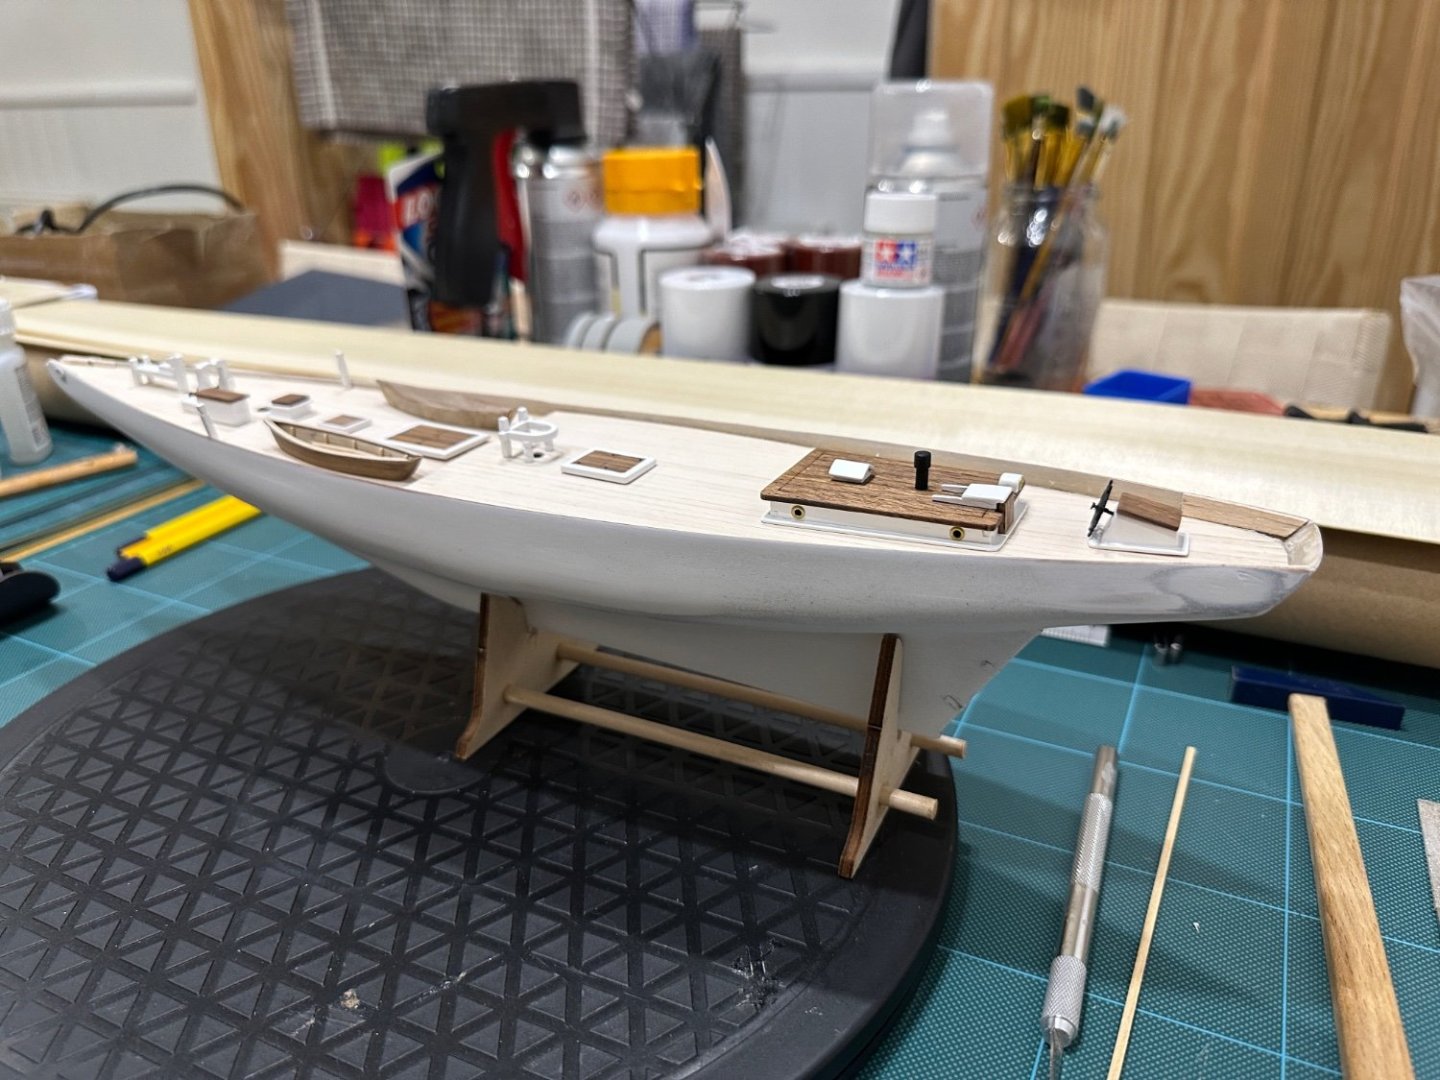
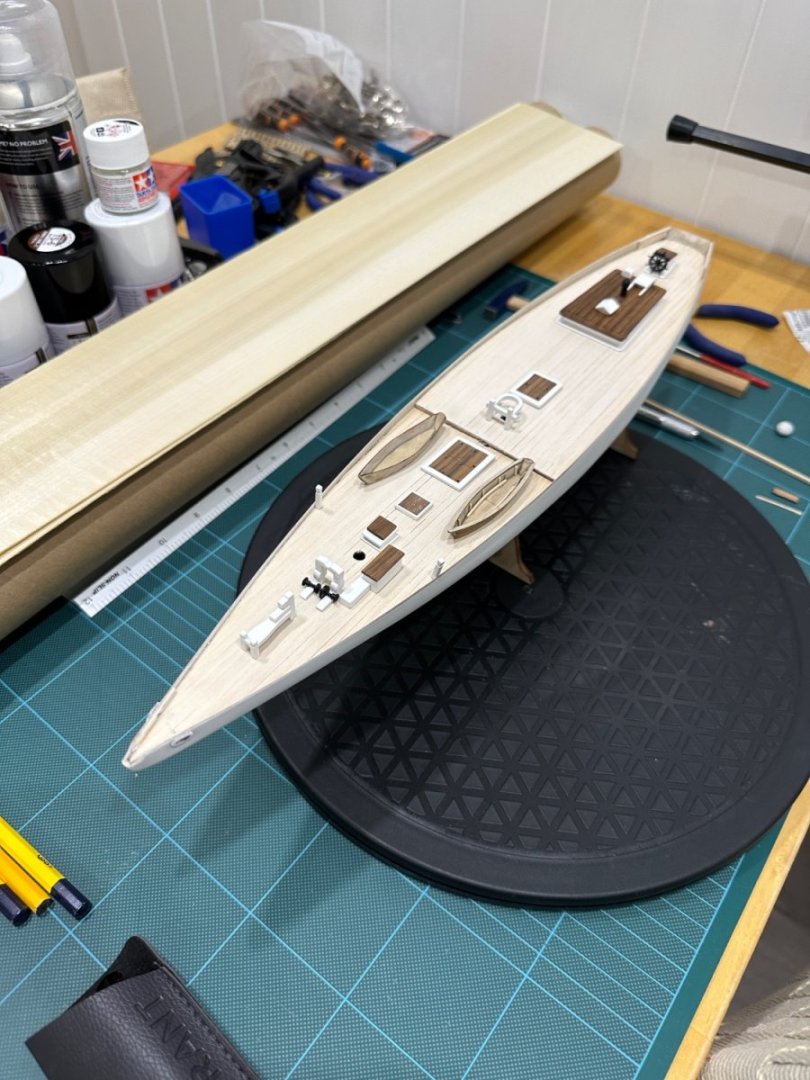
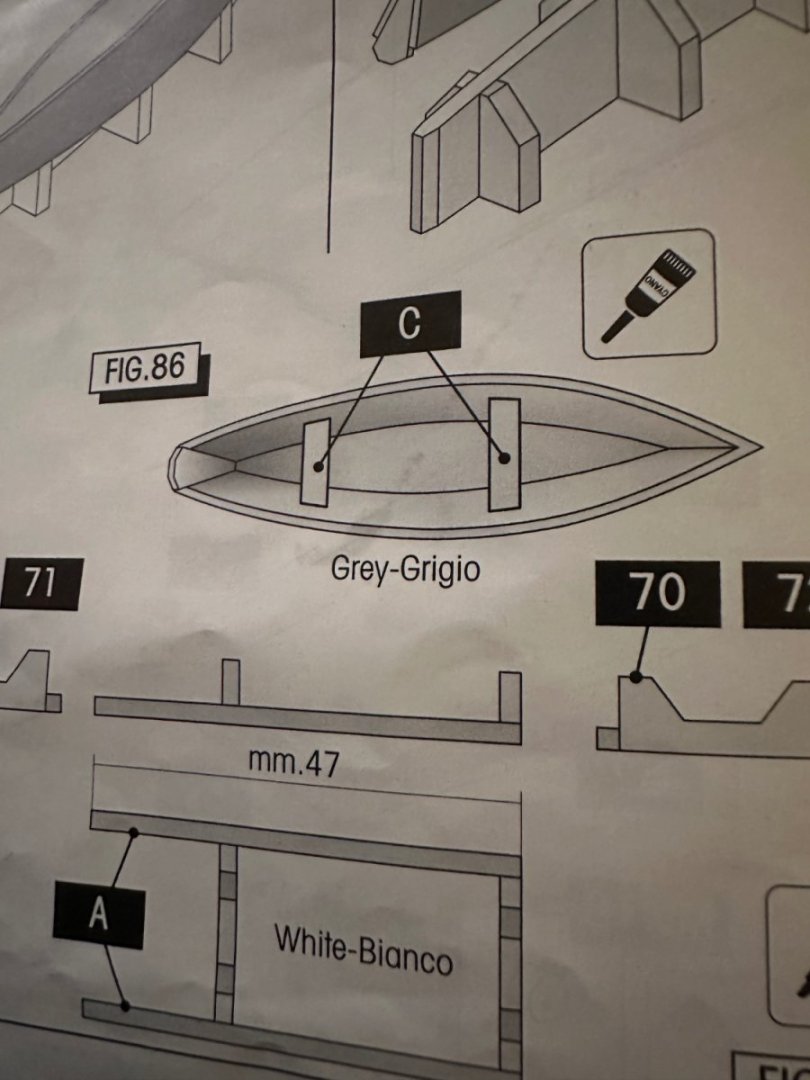
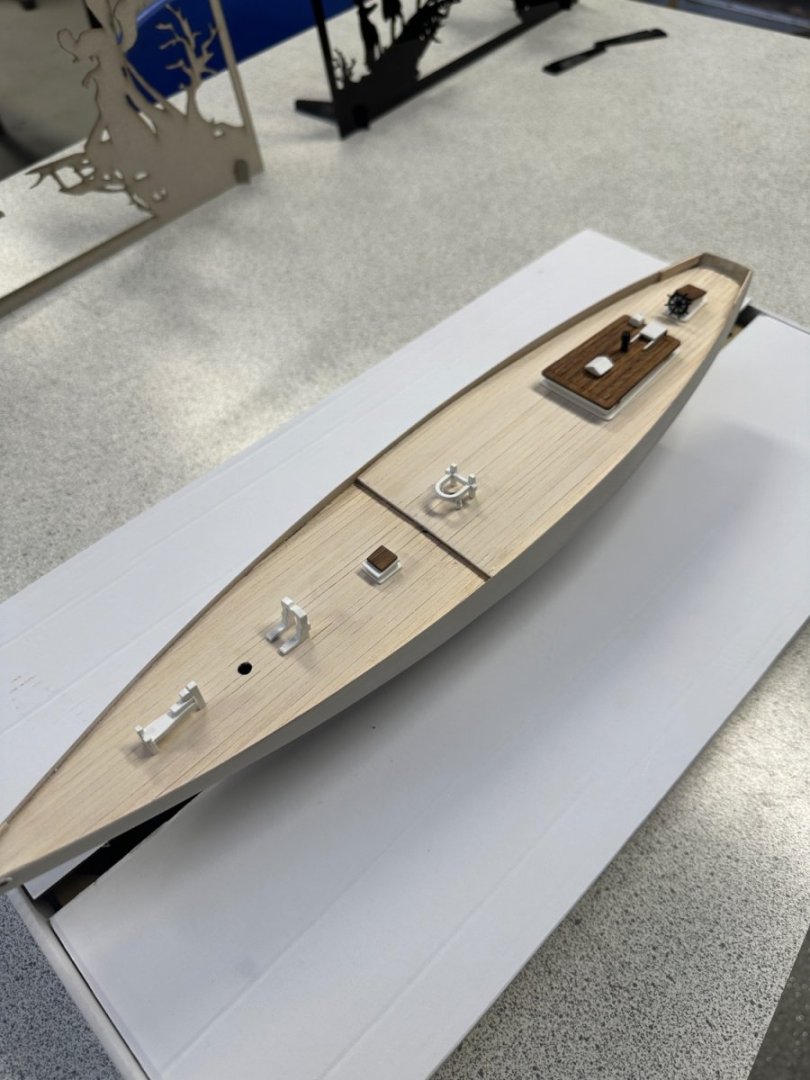
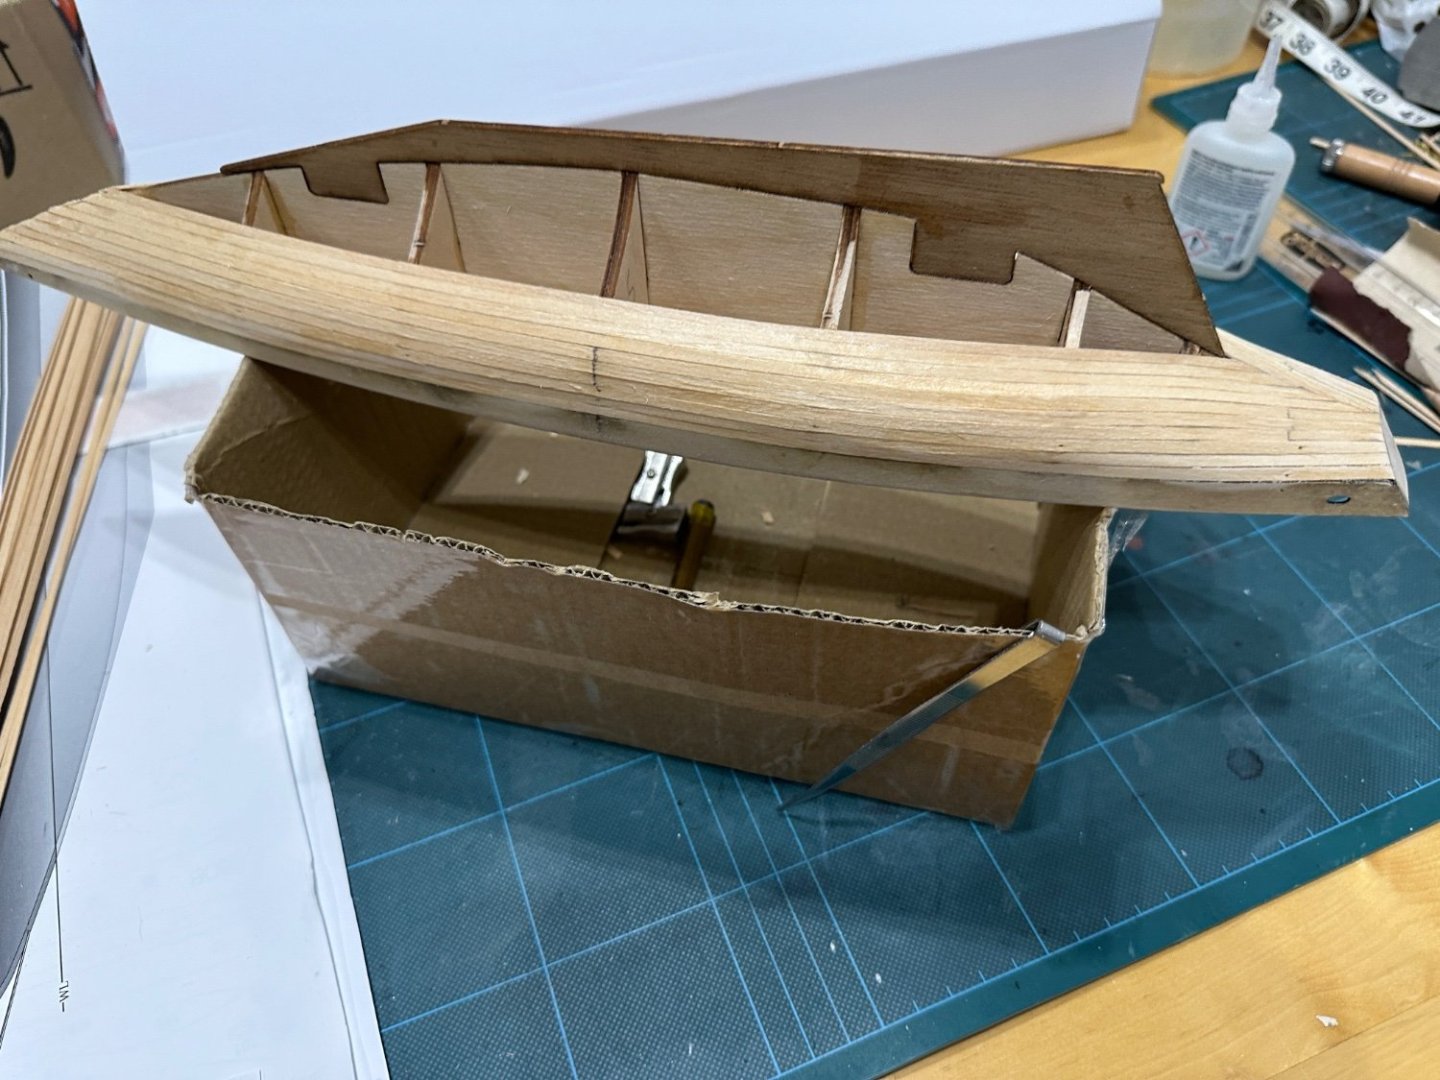
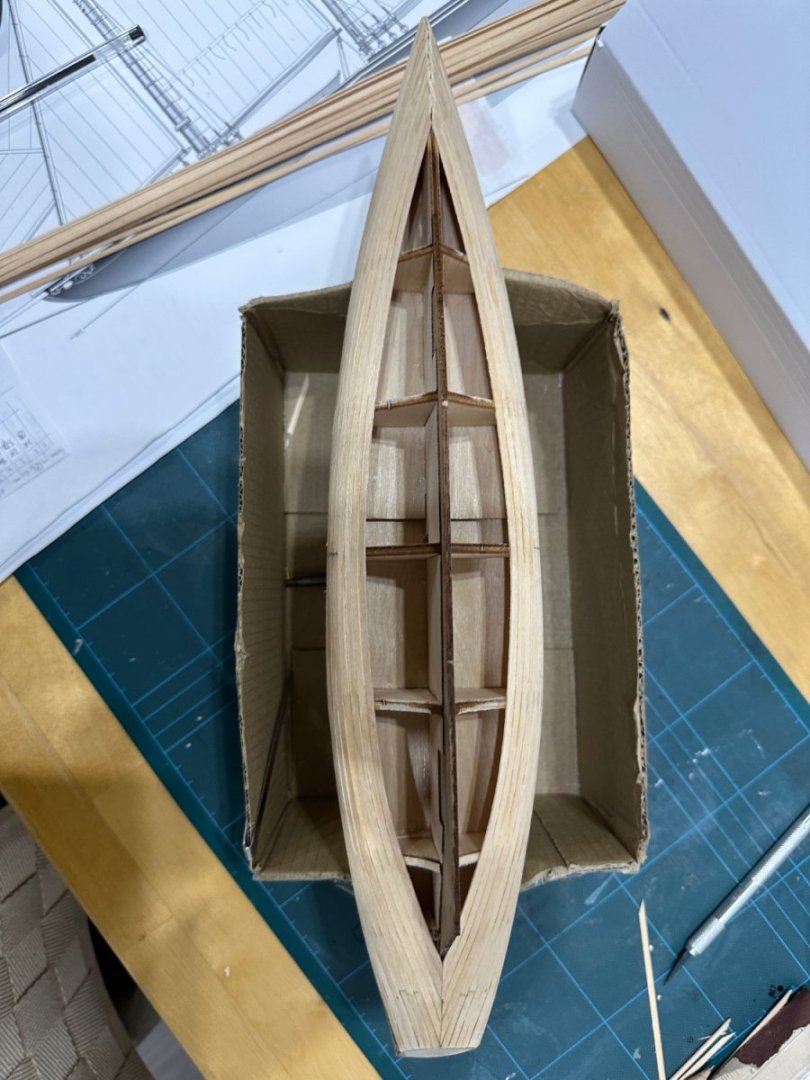
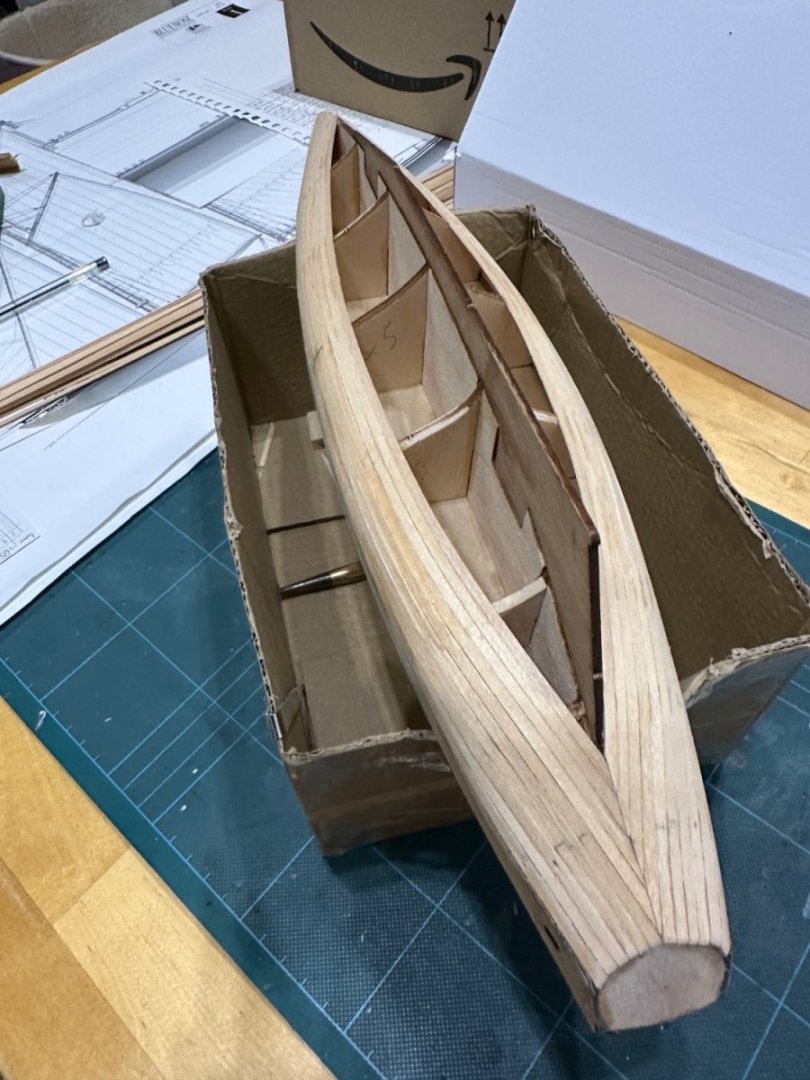
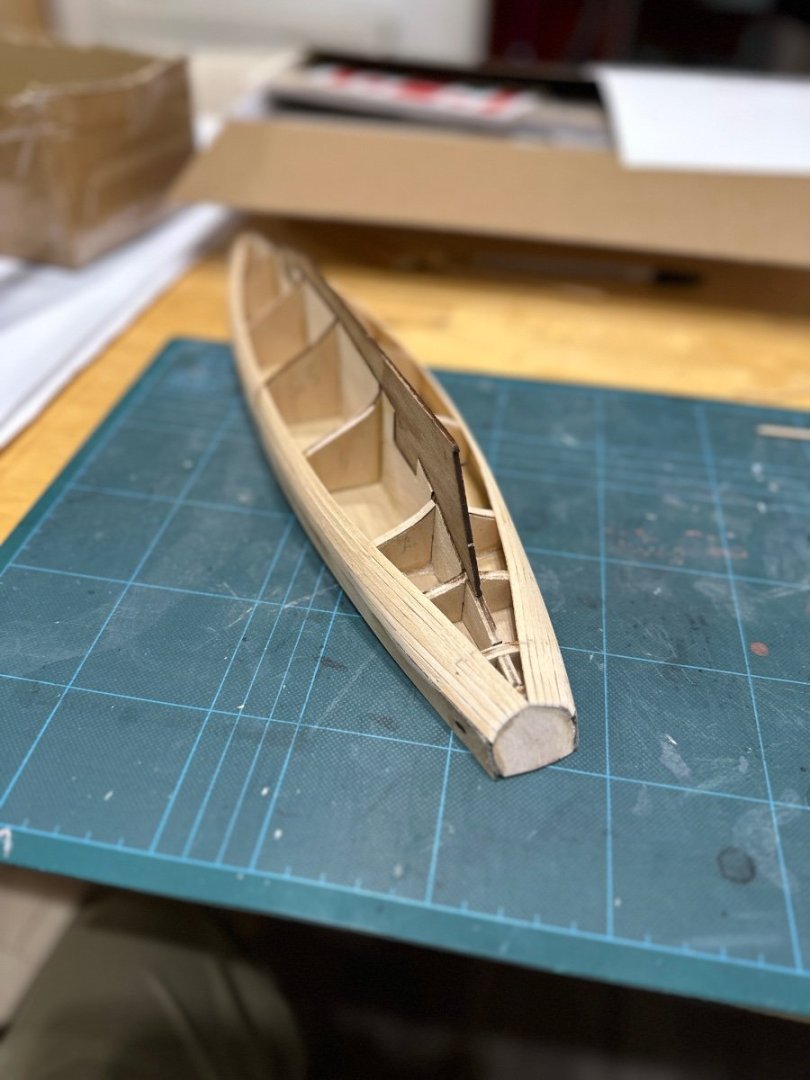
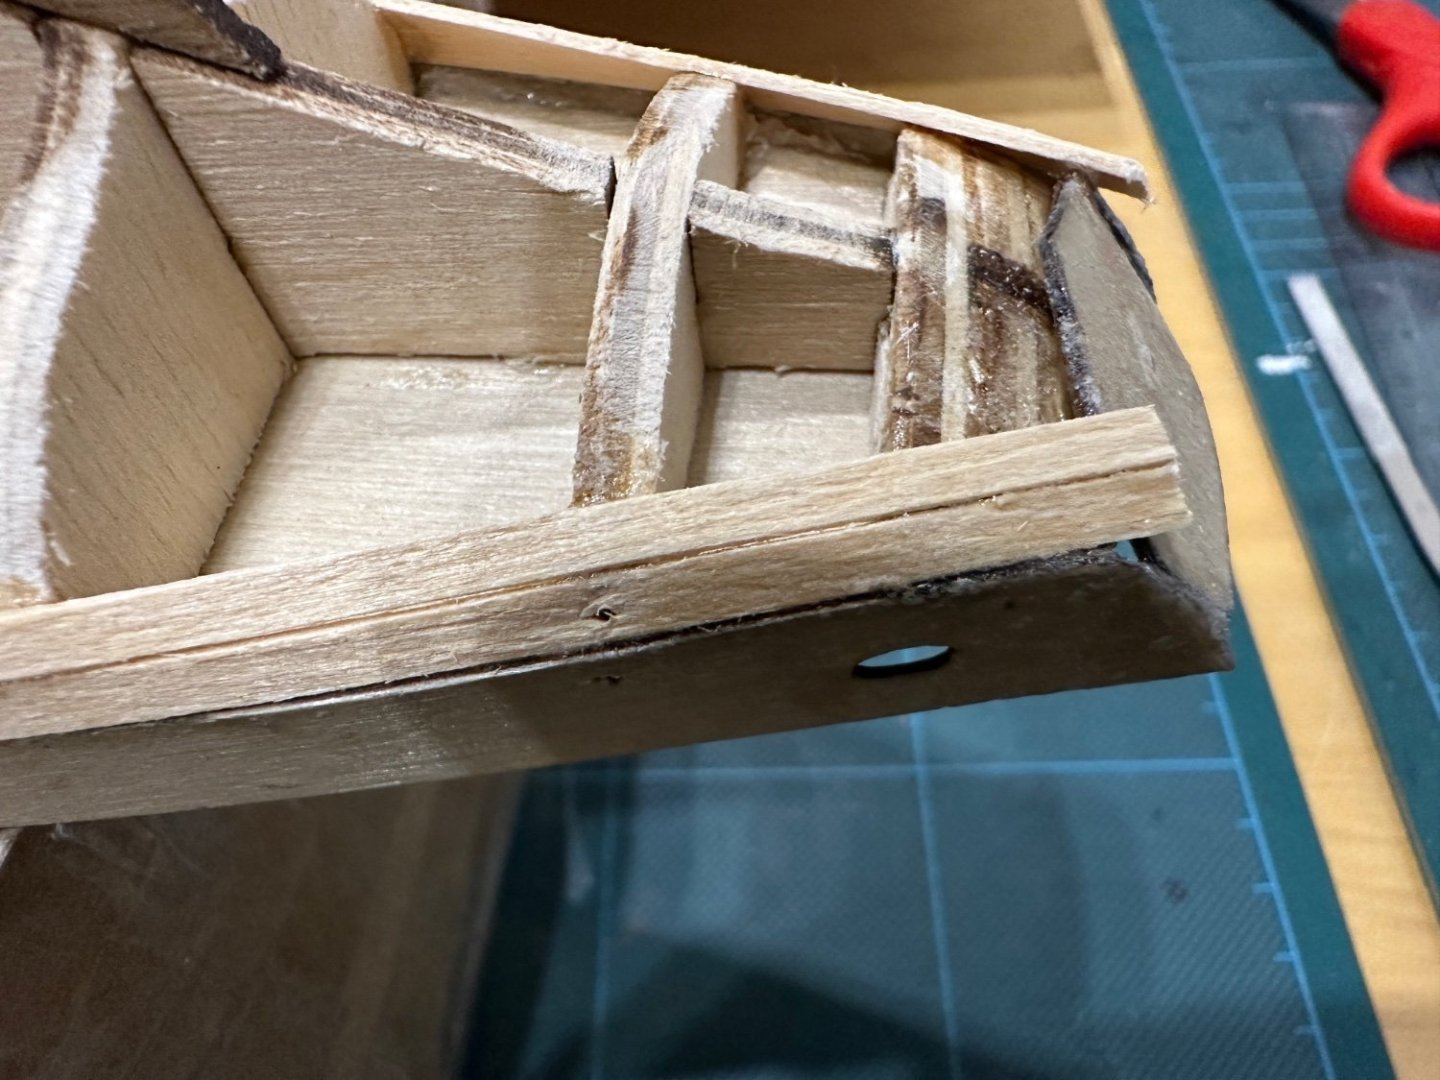
 Okay, not much more done but wanted to see what it all looked like. Deck items not all completed or stuck down yet, hull not painted. I decided to do things like this, despite the instructions. 1) Complete hull and prime to get as perfect as possible. Not glued on the gunwales as I want to paint inside of the rail on ship before gluing. (Not sure what this is called) 2) Complete all deck items. This is because I want to then finish the deck before painting the inside of gunwales as mentioned above. And to finish the deck, I want to mask off the deck items..so I need them done. I decided to do a fair bit of extra work to the dory boats. The instructions are to create a very basic boat and add a couple of seats. I haven’t finished them yet but had a look on here for larger scale models of bluenose (scale 1:64 I think) and try to emulate these. Not easy at all at 1:100 scale but I’ve had a go. They are better than what was given in the kit I think anyway. Will finish these next. 3) I then plan to (as I then haven’t done it yet) to mask deck where items will be glued and give 3 coats of Danish oil. 4) Paint inner wall Deck (not sure of the name still) 5) Glue on gunwales. 6) Paint the hull. So easy to just say like that! 7) Attach all deck parts. Some gluing and some with slight mechanical fixing like 1mm brass dowel. Hull will then be done. It’s taking time!
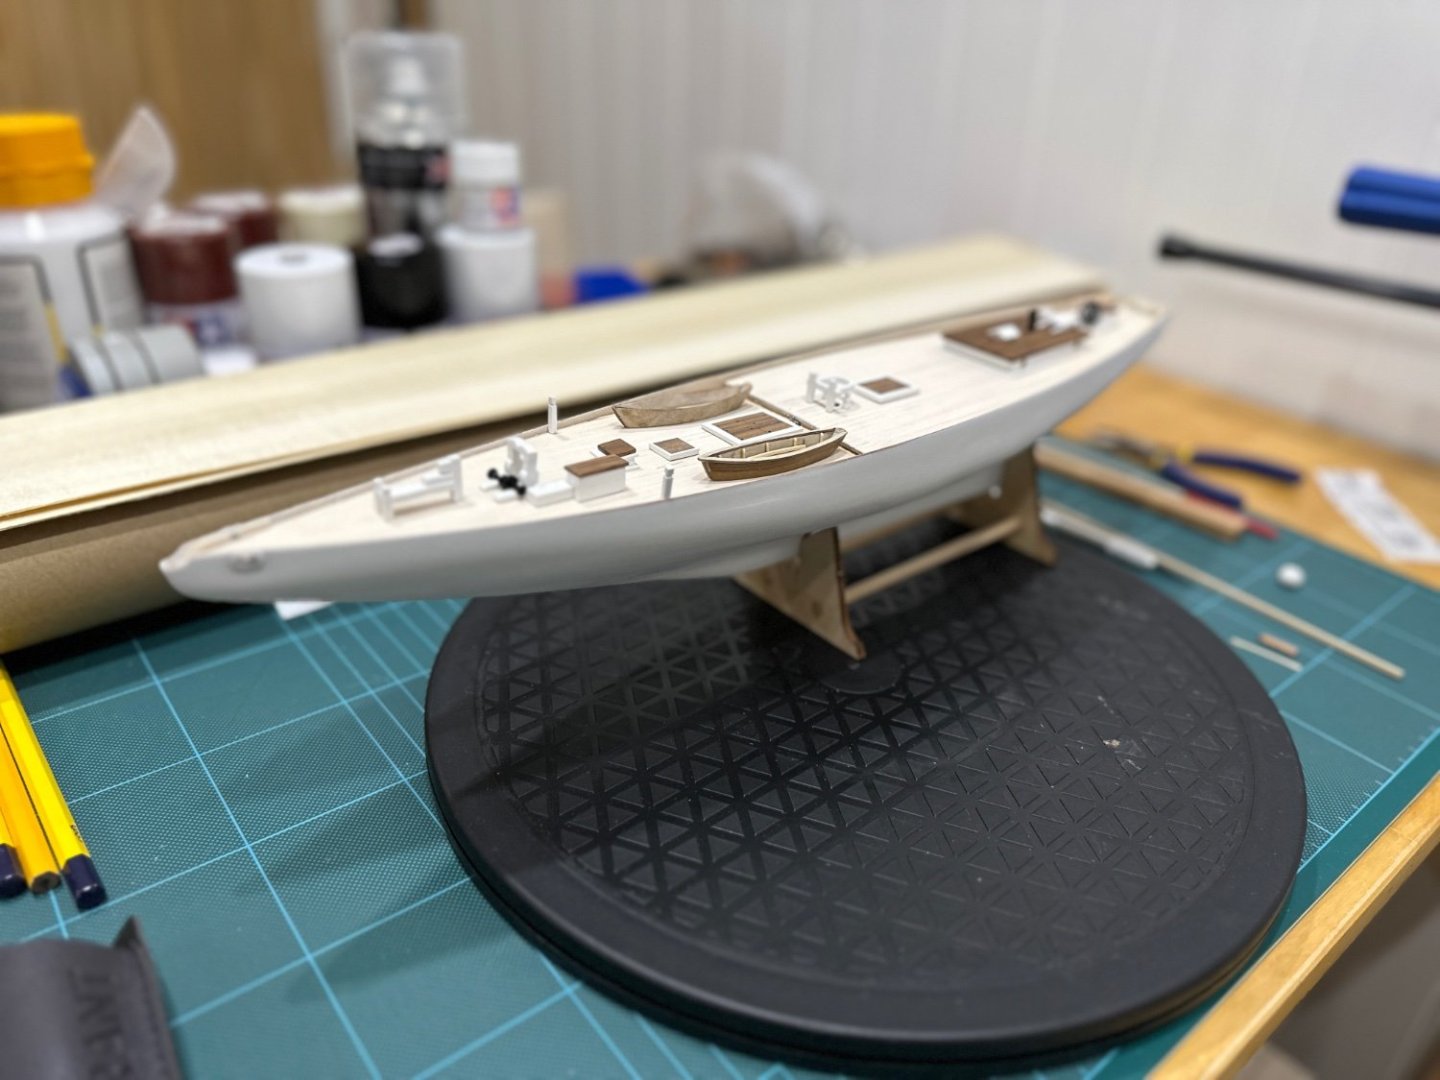

-
Love this. Awe inspiring stuff. Maybe one day I might be building this. ⚓
- 104 replies
-
- 1
-

-
- model shipways
- new bedford whaleboat
- (and 1 more)
-
Thank you Jaager. Danish oil is my usual choice but like I say, never done this before. Getting hold of shellac seems not as straightforward in the UK. I do have some sanding sealer. yes, I was talking about polyurethane, horrible stuff I think. will experiment with some ideas and see if owt sticks to it! Thanks again, Tony.
-
Thank you Allan. Got part of a winch that is 1.5mm thick. About 4 mm long. Have just do it carefully I guess?? Got at least two other parts like this. As for oil. I’ve always used oil for all my woodwork. (Not models as I’ve never made one before). Varnish is just horrible in my opinion so not sure about that. I guess I could try by thinning some out. I think perhaps like you said, stick everything down then maybe oil around it. Not ideal but probably best. Maybe oil the majority of the deck where it’s easily masked with the large deck pieces. I usually oil with a cloth. I went to this finish for all woodwork after years of trying and hating varnish. I just don’t like the look of it I guess. Thank you again Allan.
-
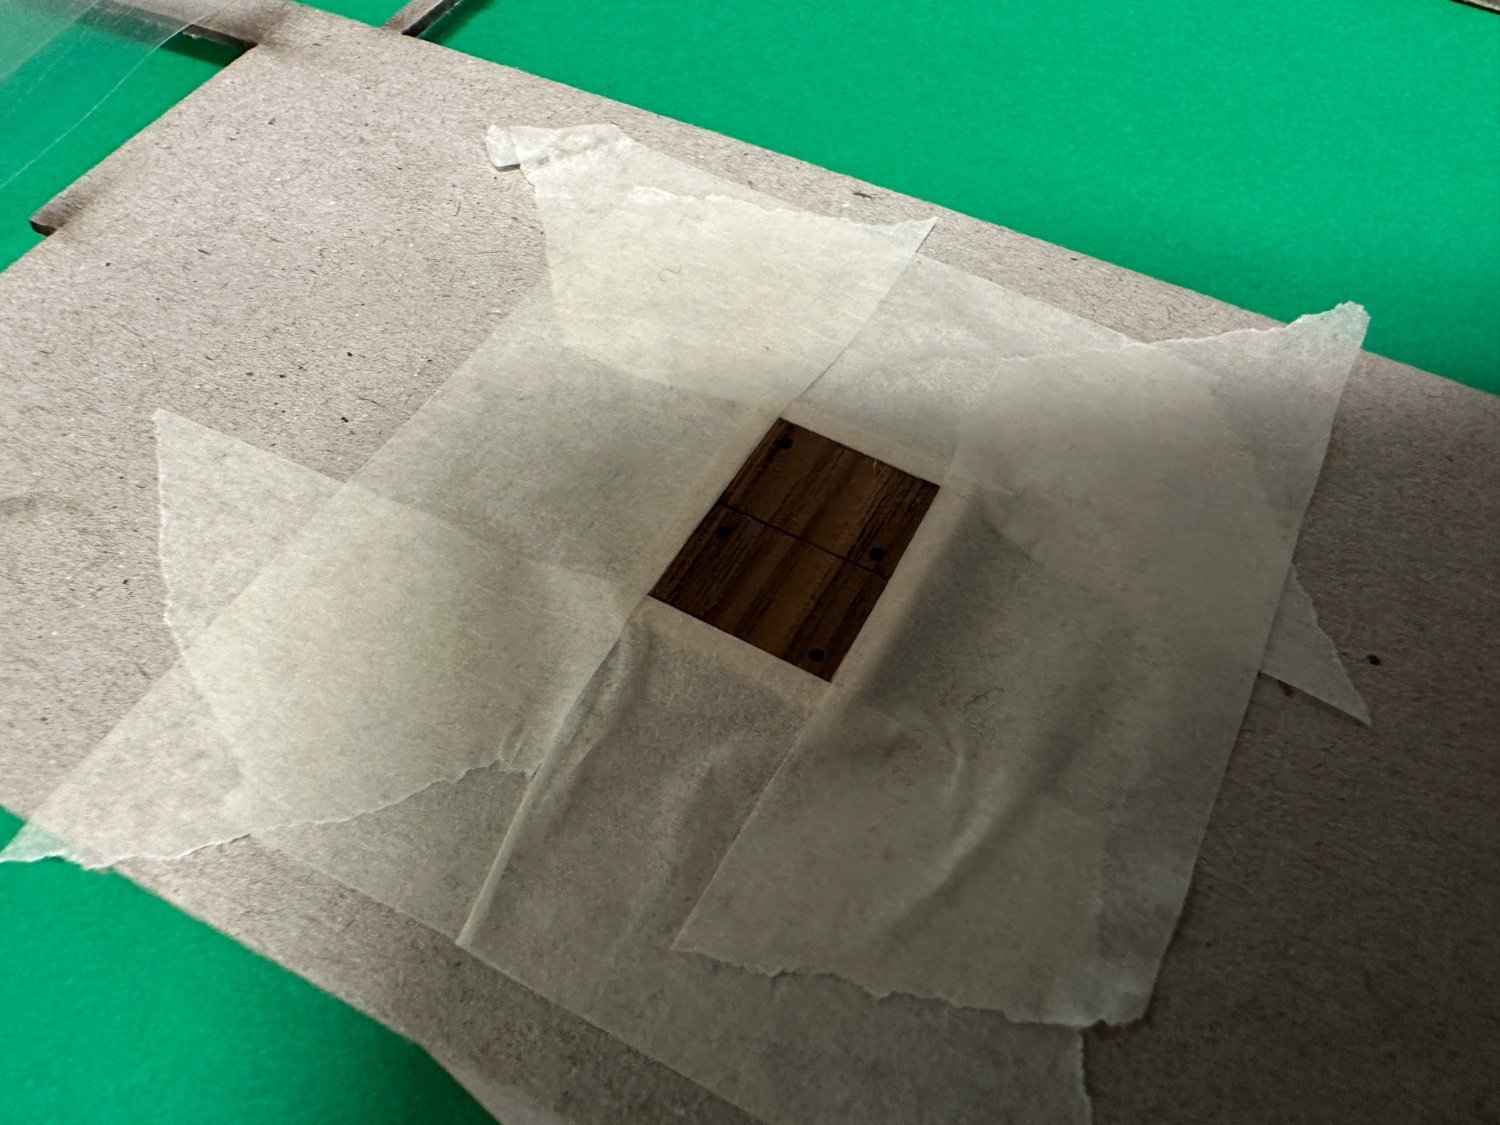
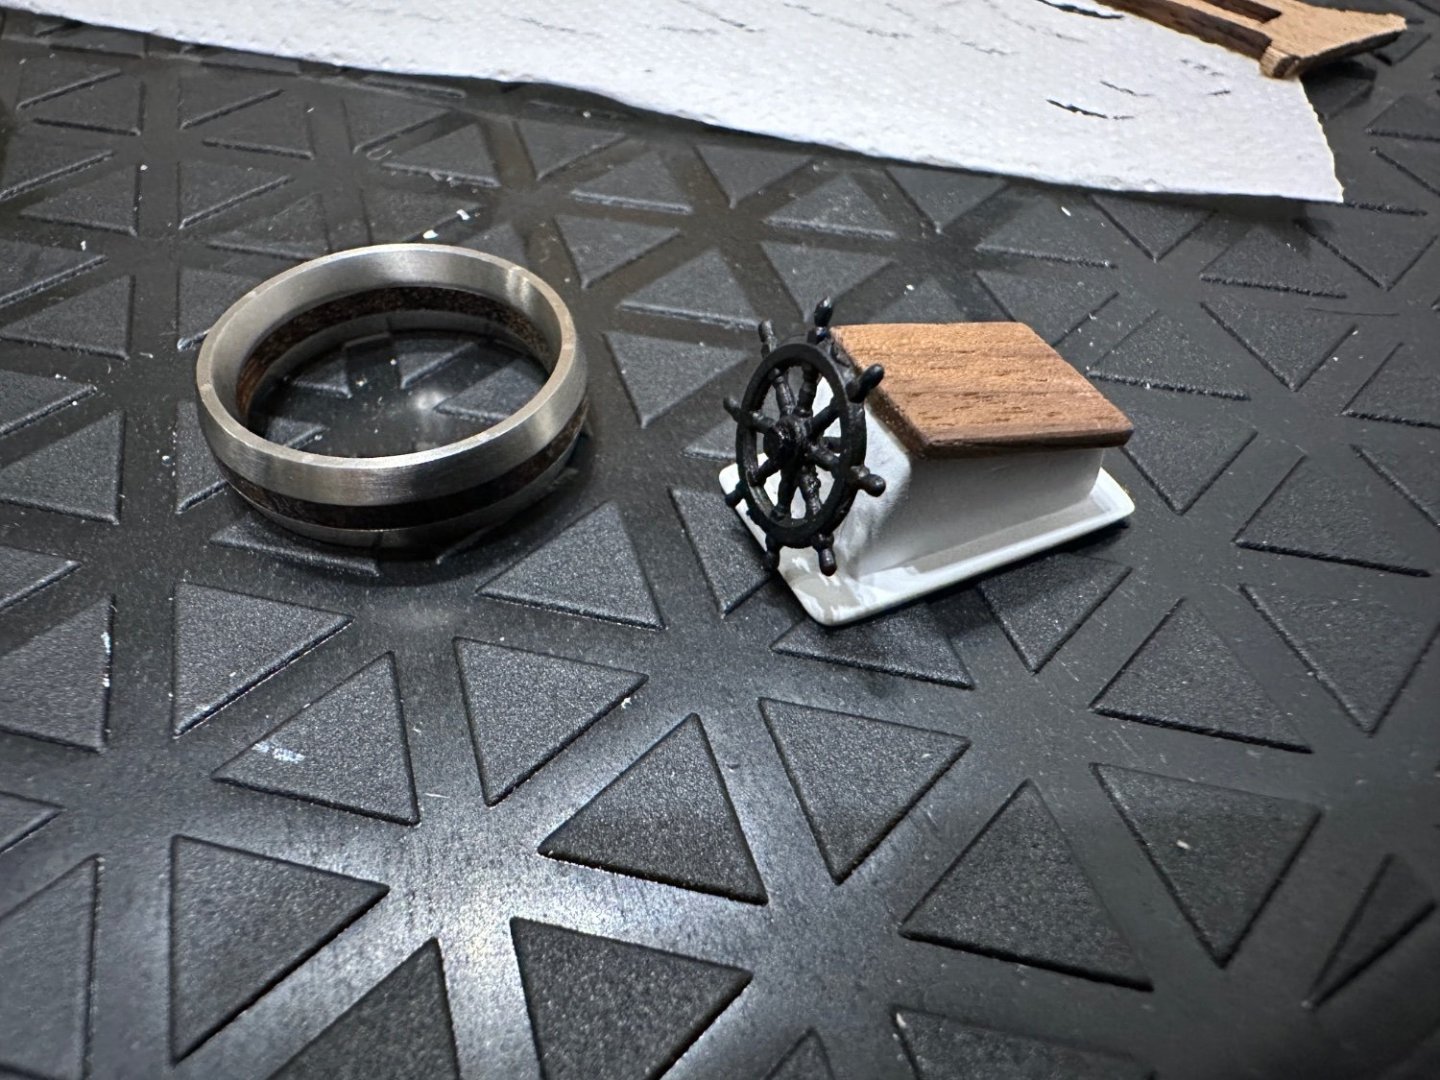
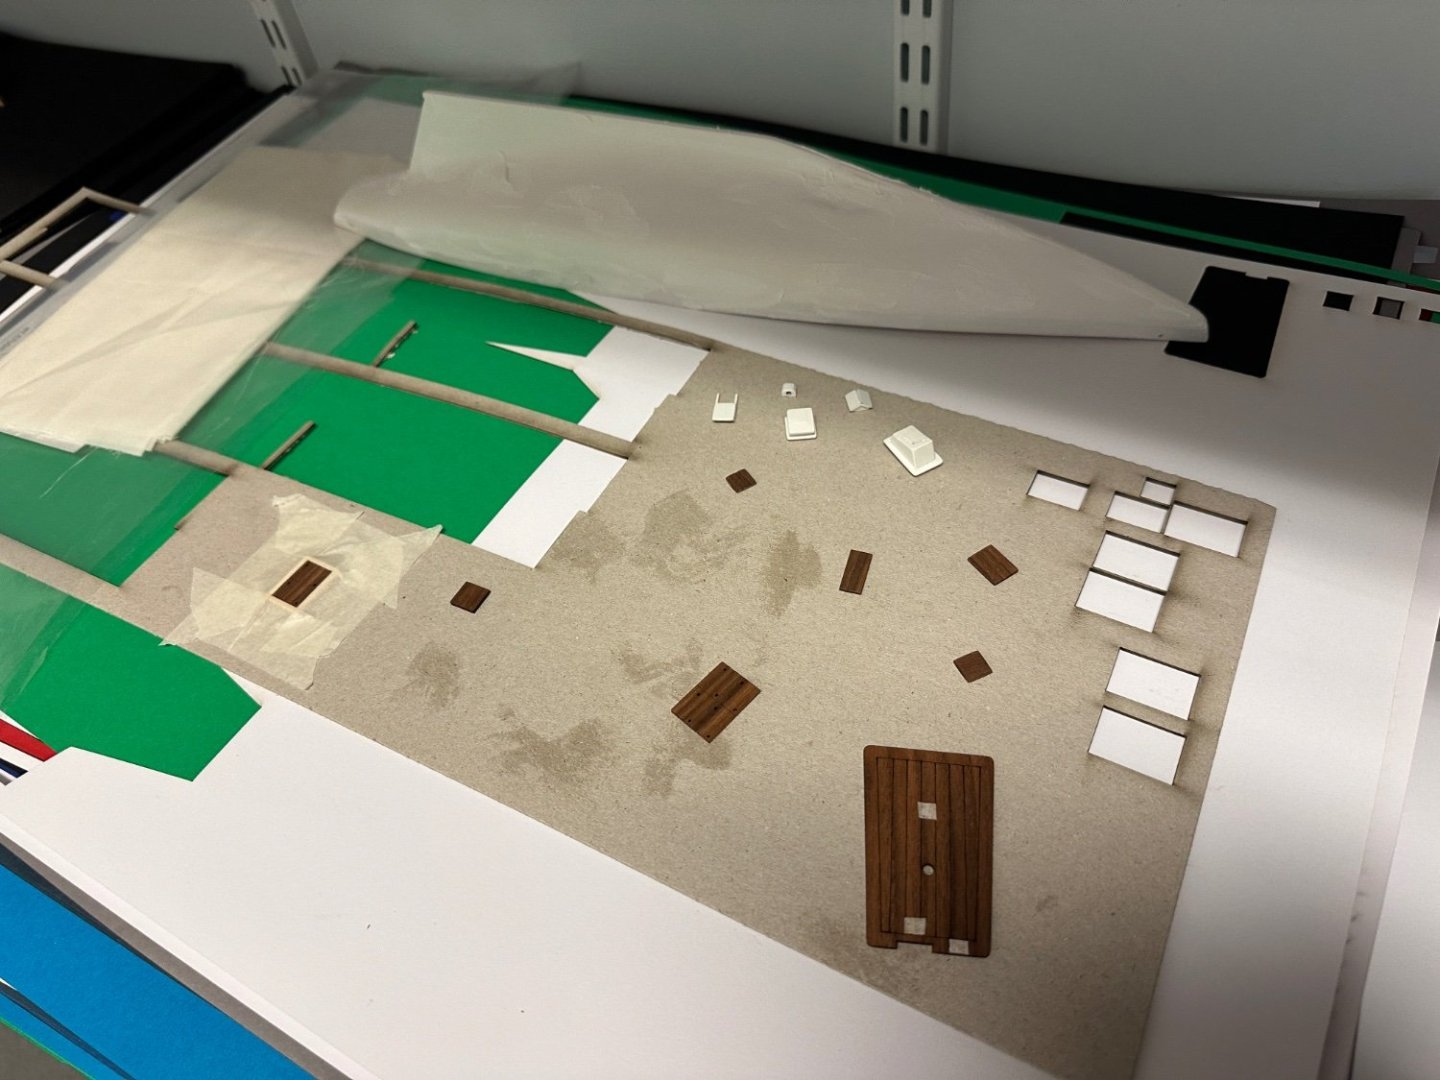
Hi all. First build. Amati Bluenose scale 1:100. I’ve got to stage where I need to oil the deck then paint inner gunwales, then attach all the deck items. Not sure about this. Some items have a 1/2mm footing to glue and it’s going to get messy. Also, do you mask off where such items are going before oiling? Not a problem for some things but others are so tiny. Any advice appreciated! Some items in photos, some smaller yet to be made!
-
Thanks Allan. ⚓
-
Thanks Gary, appreciate your thoughts. It’s a whole new level of detail for me. Bits of wood 1 and 2mm thick and whole deck parts made of several pieces smaller than a ring. Huge learning curve..and I have rigging and sail making to look forward to. Thank you.
-
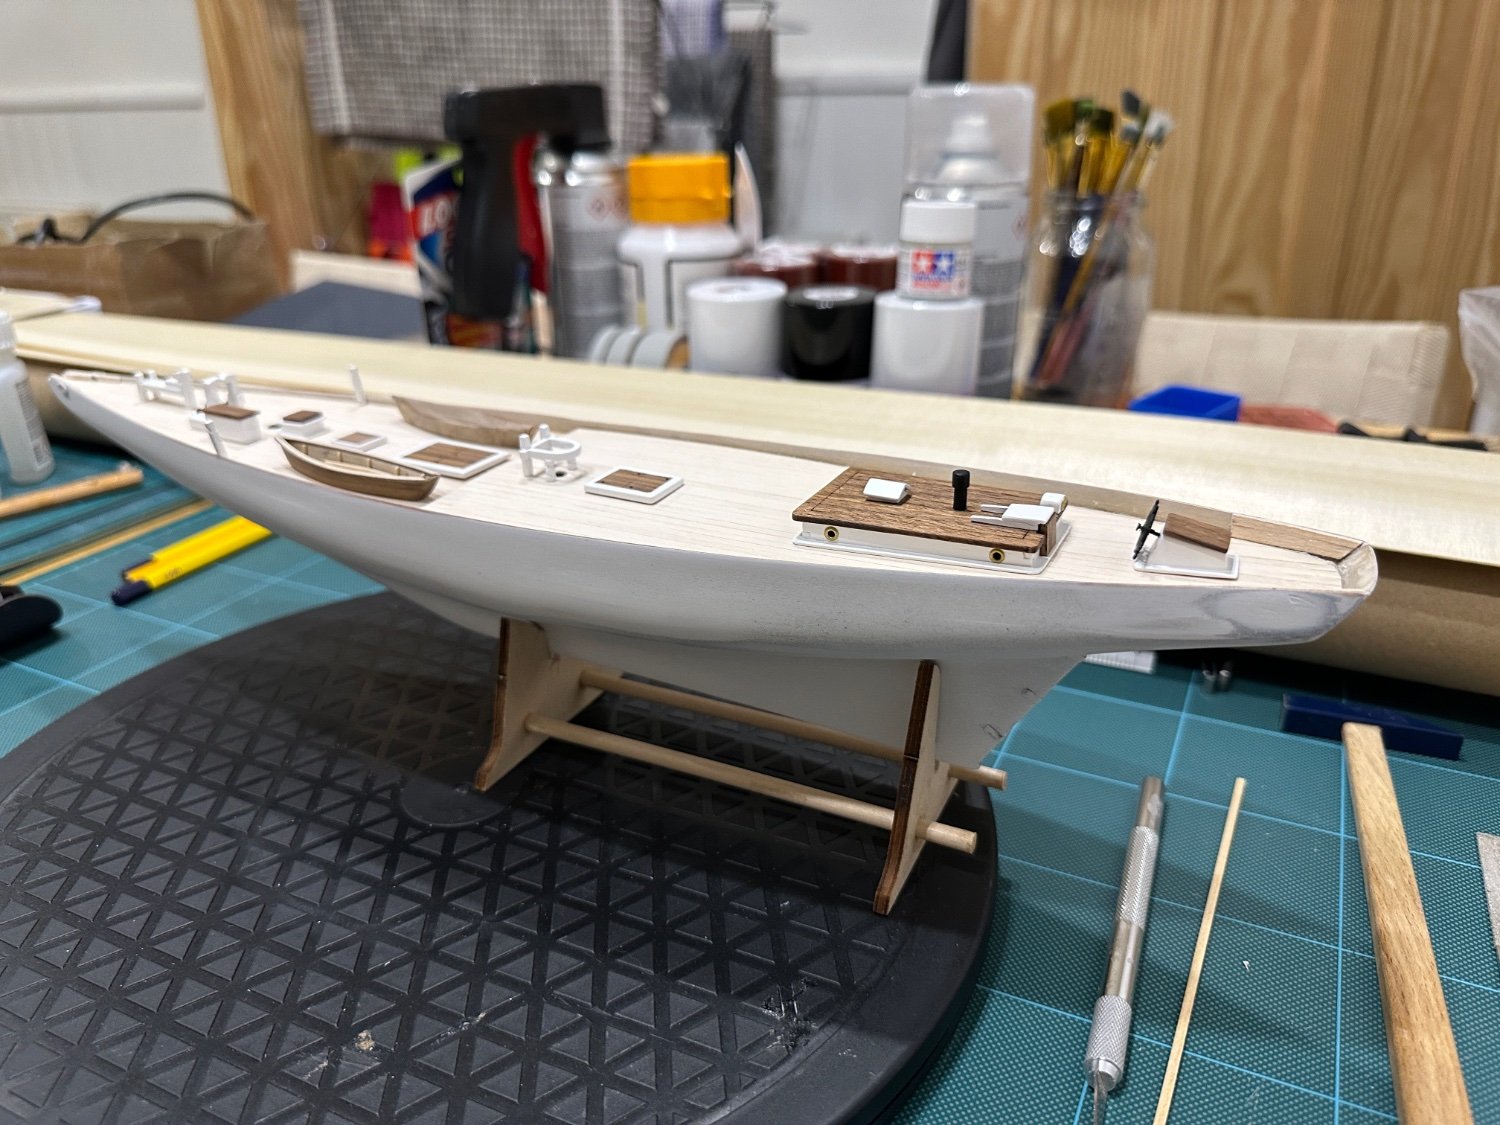
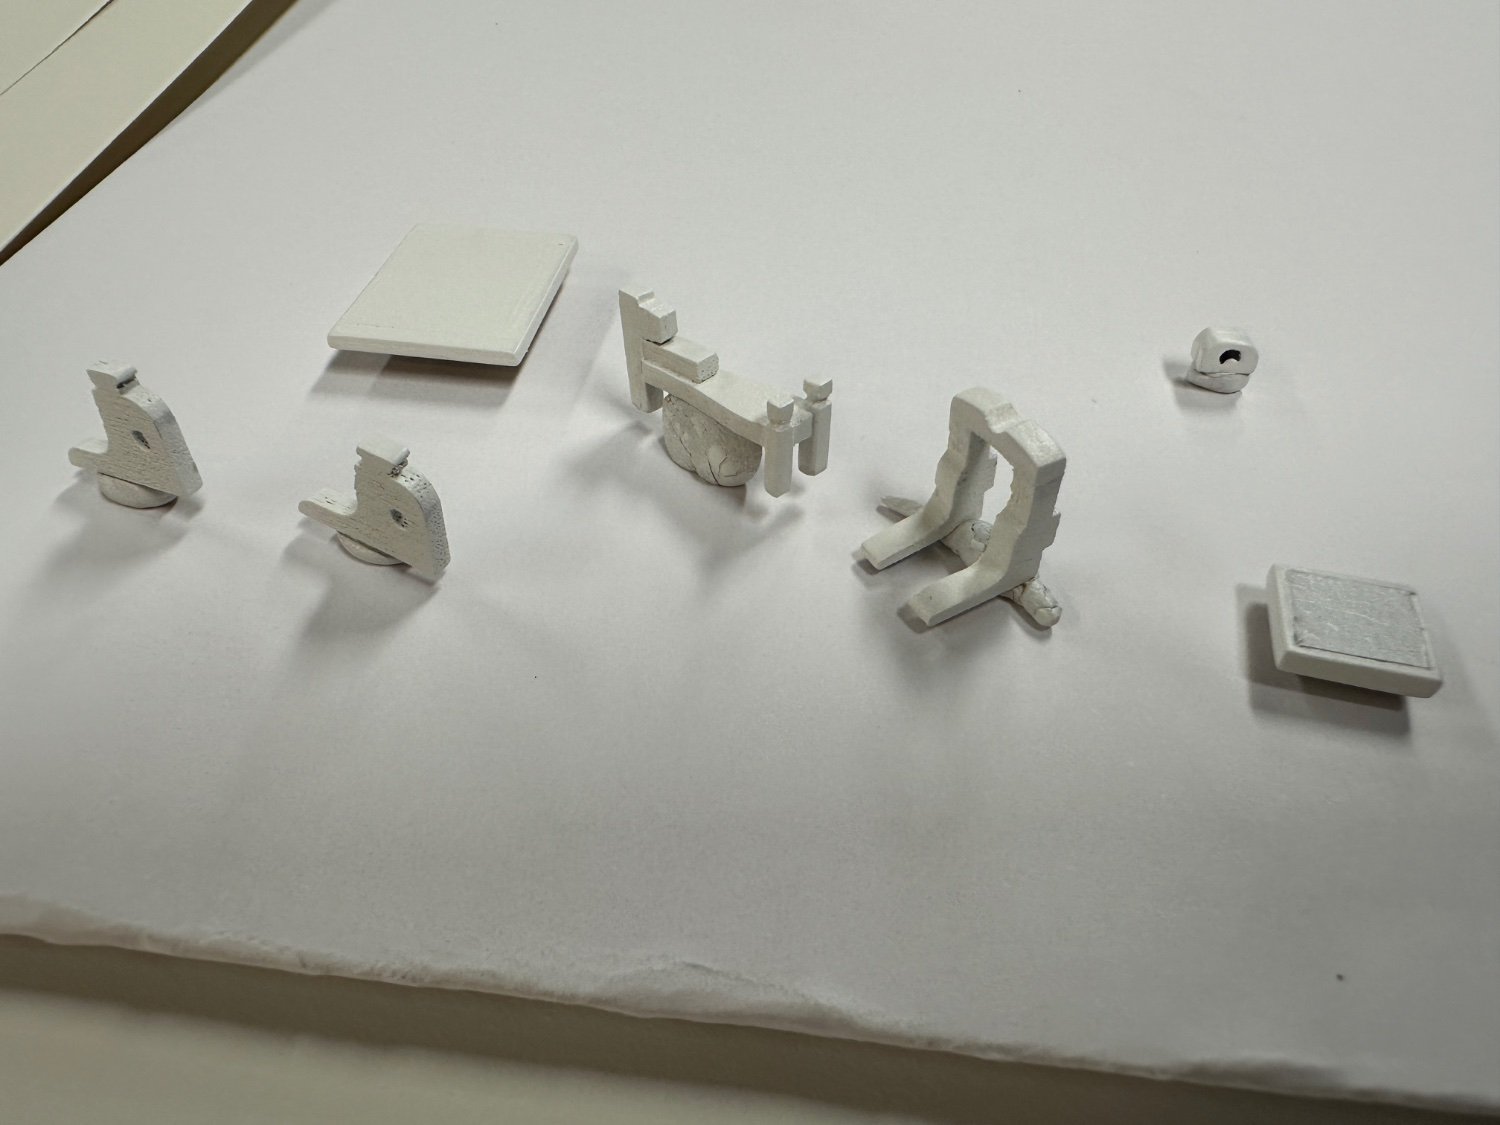
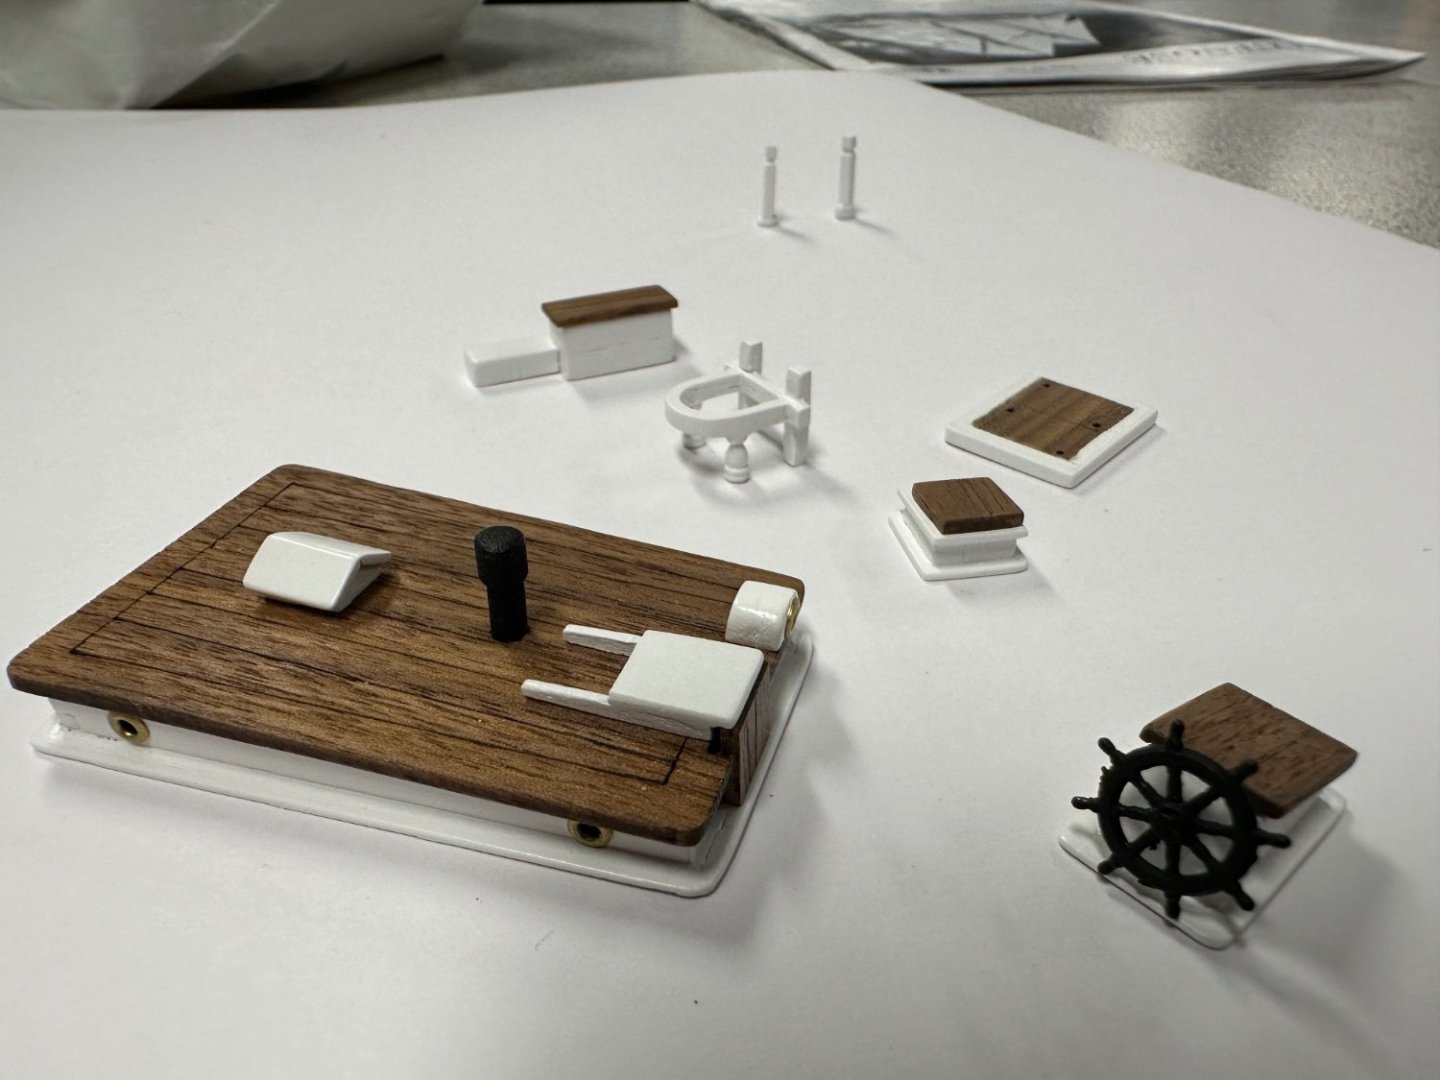
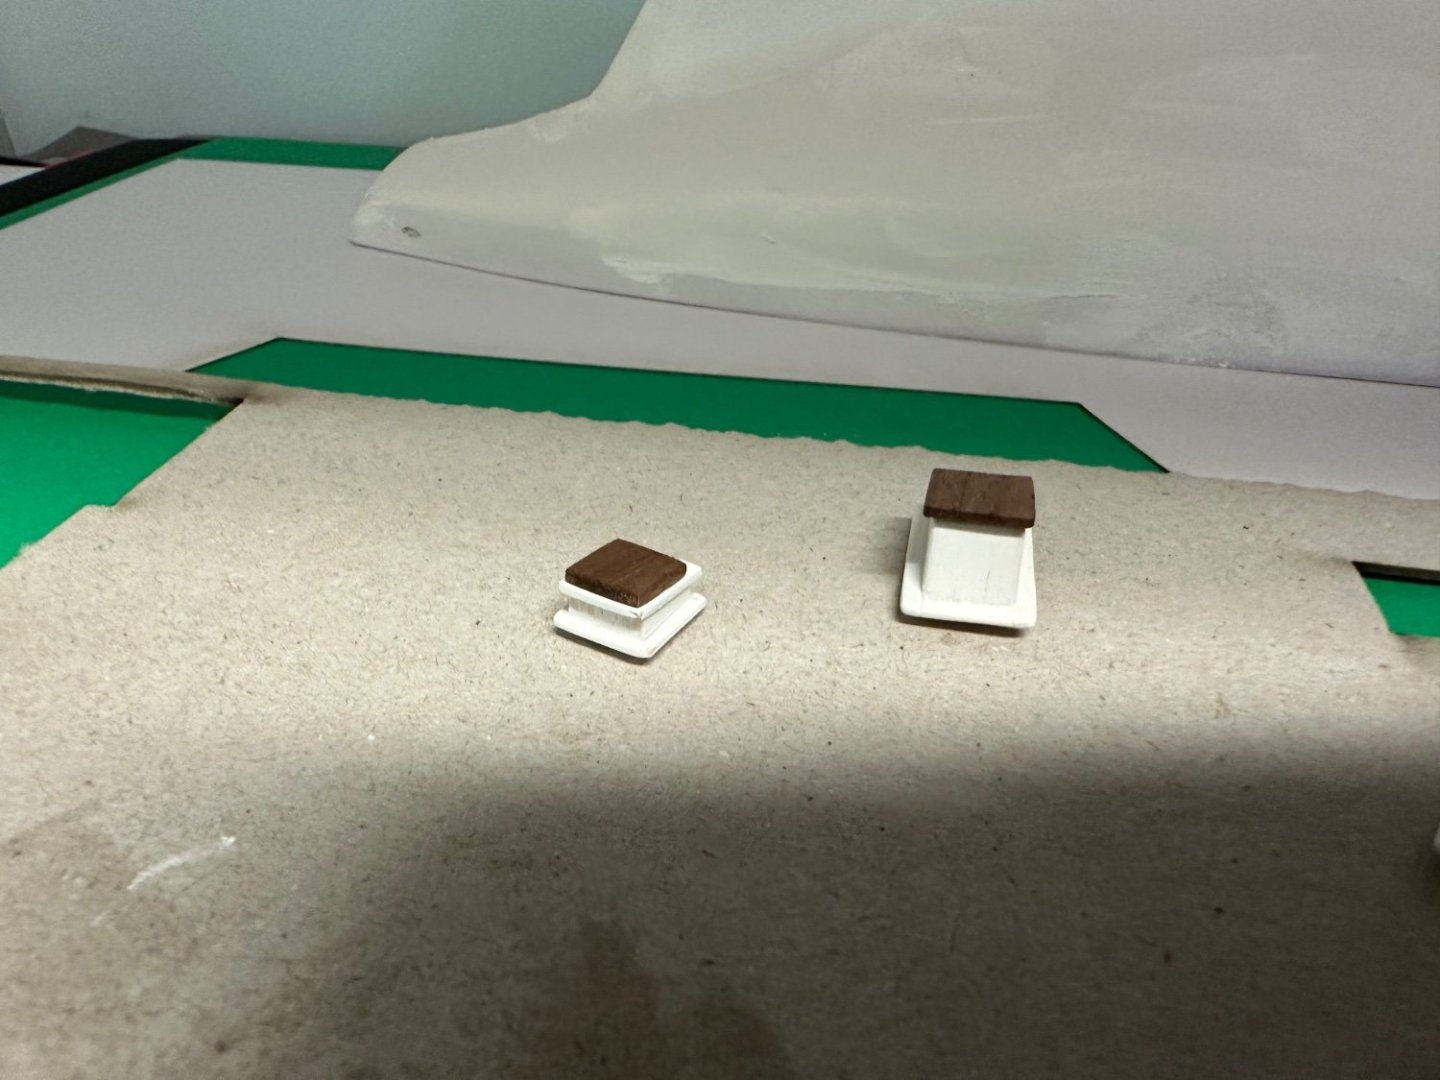
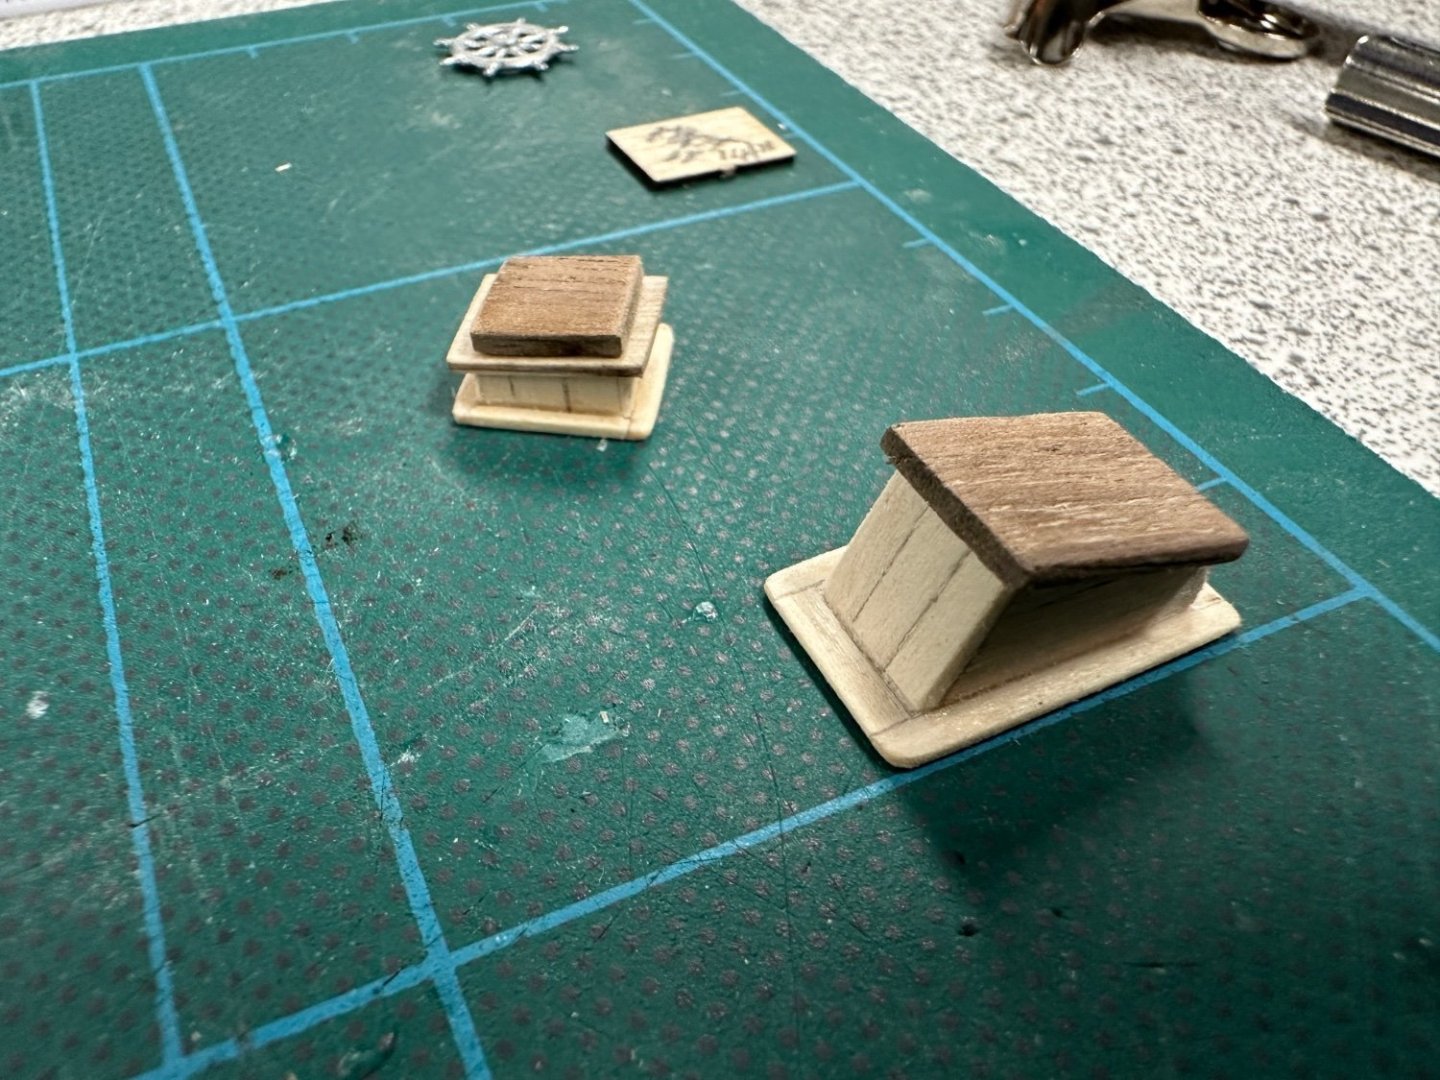
A quick update on deck stuff. Largely finished except for a winch wheel. The finish is okay unless you look real close. I’ve got in a nasty habit of photographing, zooming in and despairing at the results. I really have no idea if what I’ve done is any good. The scale is 1:100 so I’m finding it very tough.

-
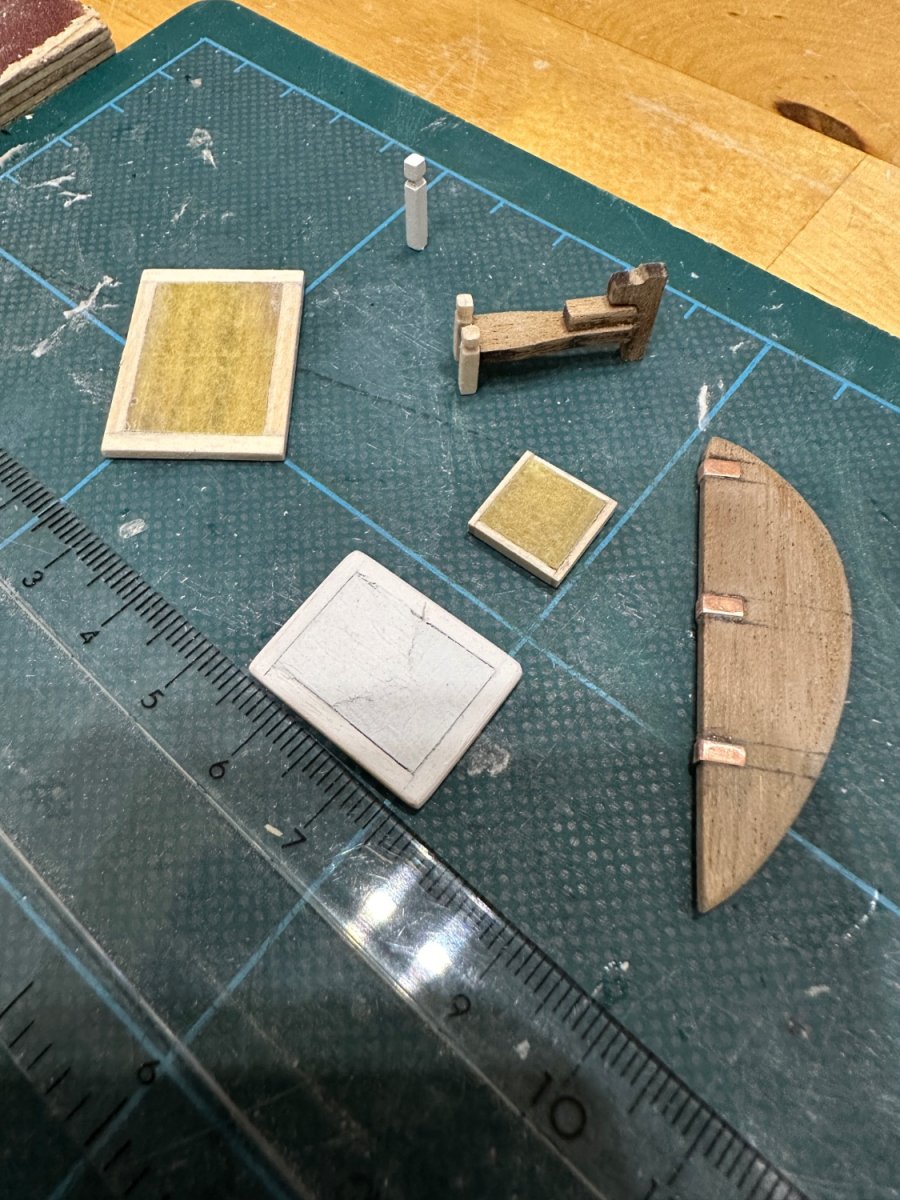
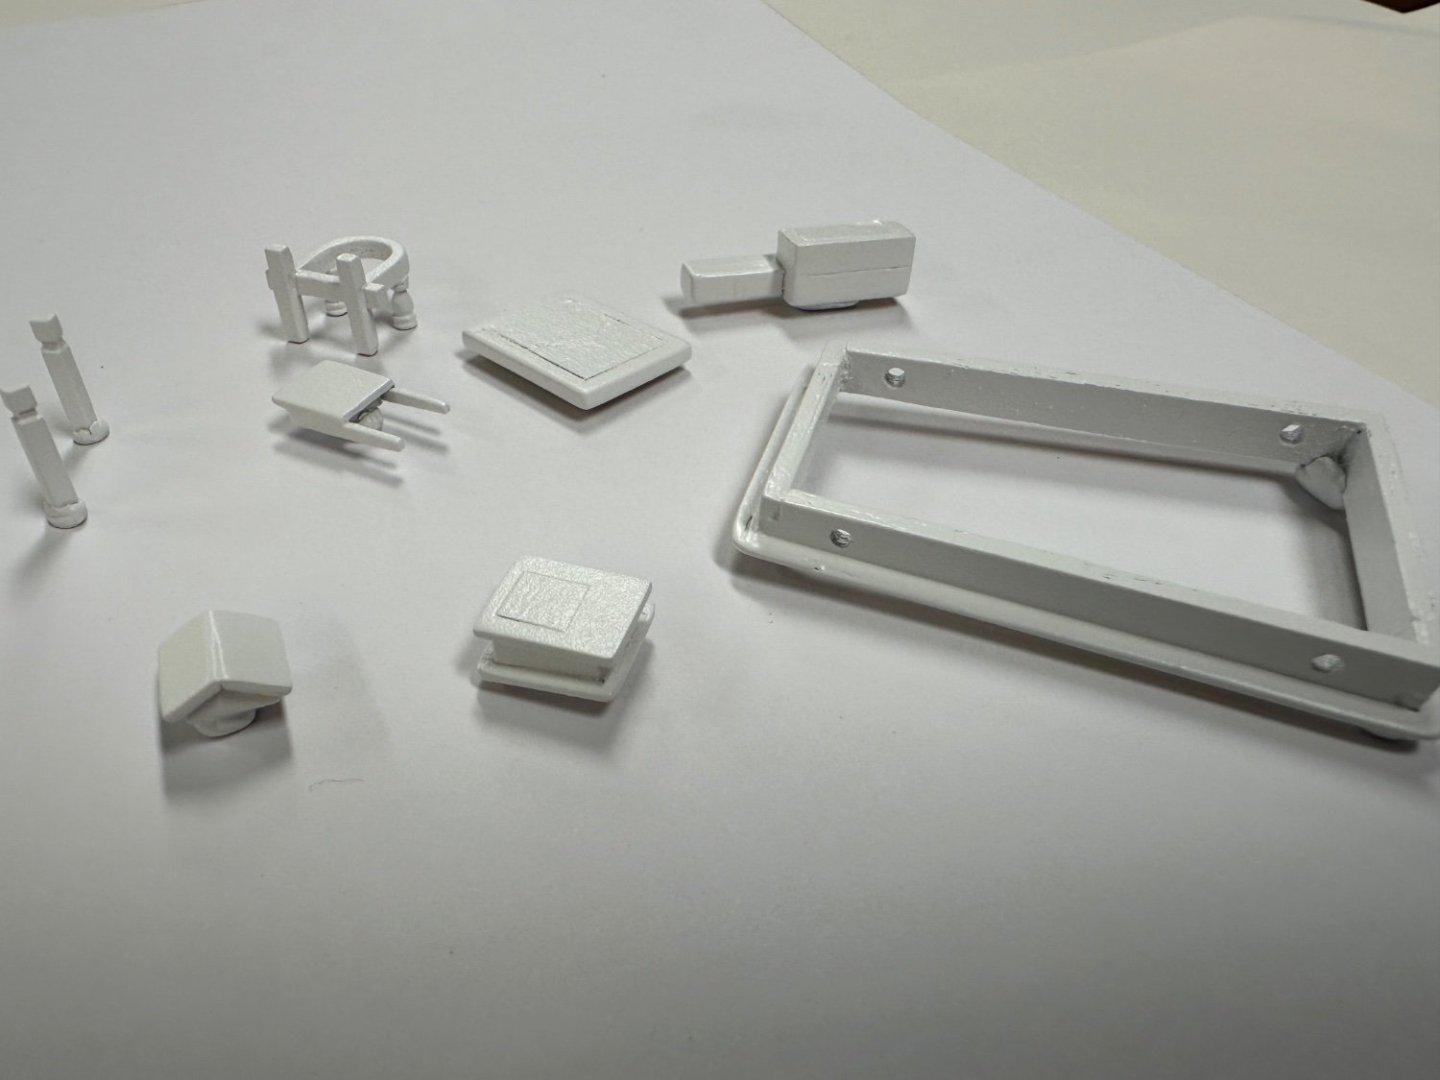
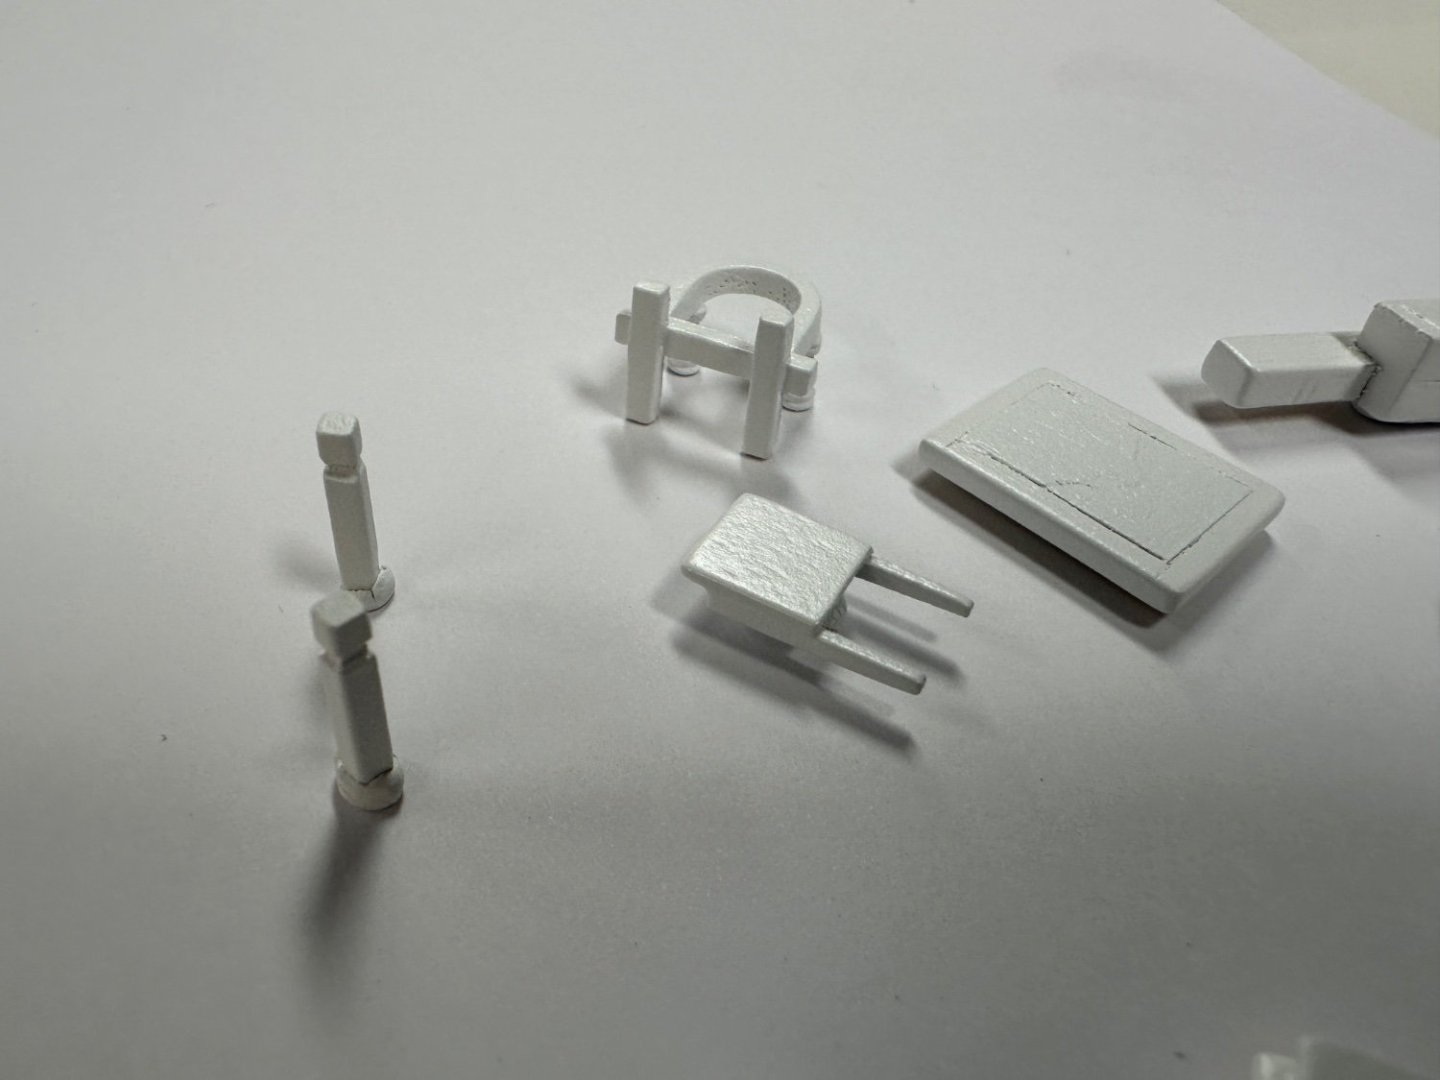
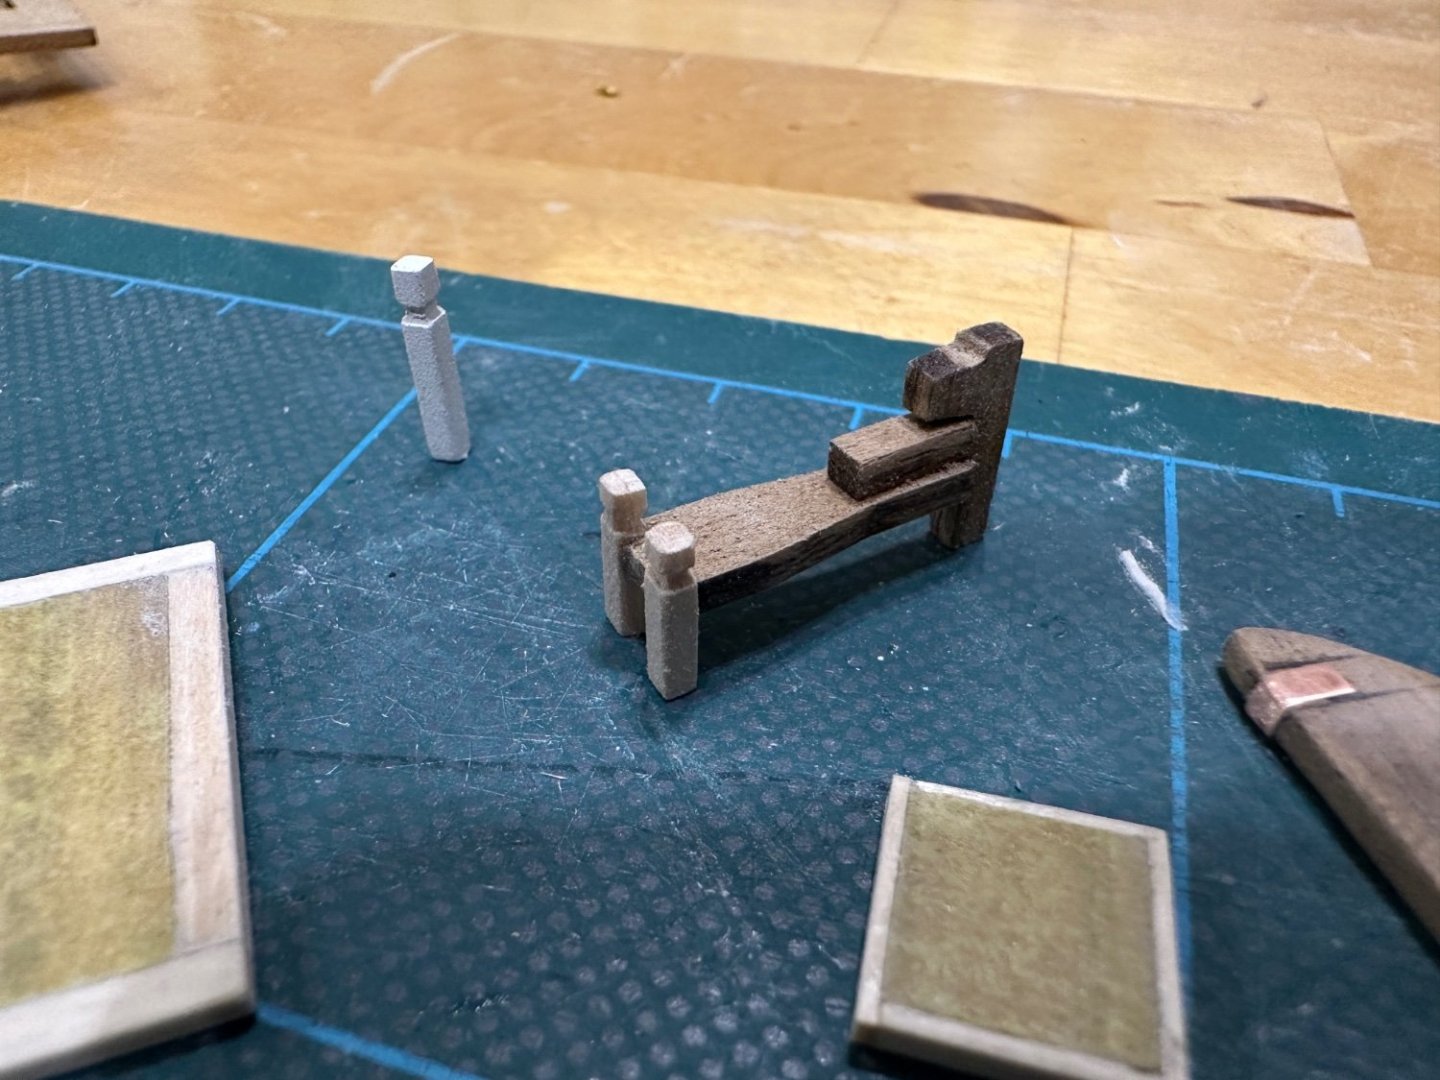
Bit more done. Sorted rudder and part of winch. Tiny little posts made also. Get some painting done tomorrow I think as lots of parts are black and white together. Hull has had 4th coat of primer. Needs one more.


-
Thank you all!!!! Fantastic responses and very helpful. will crack on with this tomorrow now I know what I’m doing!
-
Yes! I think that’ll do it. will try this tomorrow and let you know how it goes! Thanks John!
-
Yes, I’m making bluenose, not bluenose 2. It’s my first model. They are 1:100 scale. Tiny! the blocks have one hole. I need to do exactly as in the diagram, I just don’t know how. A single rope with two ends so not sure how to make it a loop to go over the brass rod on the deck. (The photo shows this but it’s not my build) I can sieze the rope fine, just can’t get to that stage. How do you make this little loop? Not sure I’m being very clear tbh. don’t see a possibility to start splicing. The thread is so small. Dunno, guess anything is possible but I’m not sure how.

-
Can’t find out how to do this. Siezing rope fine, but how do you make the loop to attach to the brass deck rods? I know how you make full scale strops but you’d make a continuous loop by splicing the rope. Not possible at this scale. What trickery is this!
-
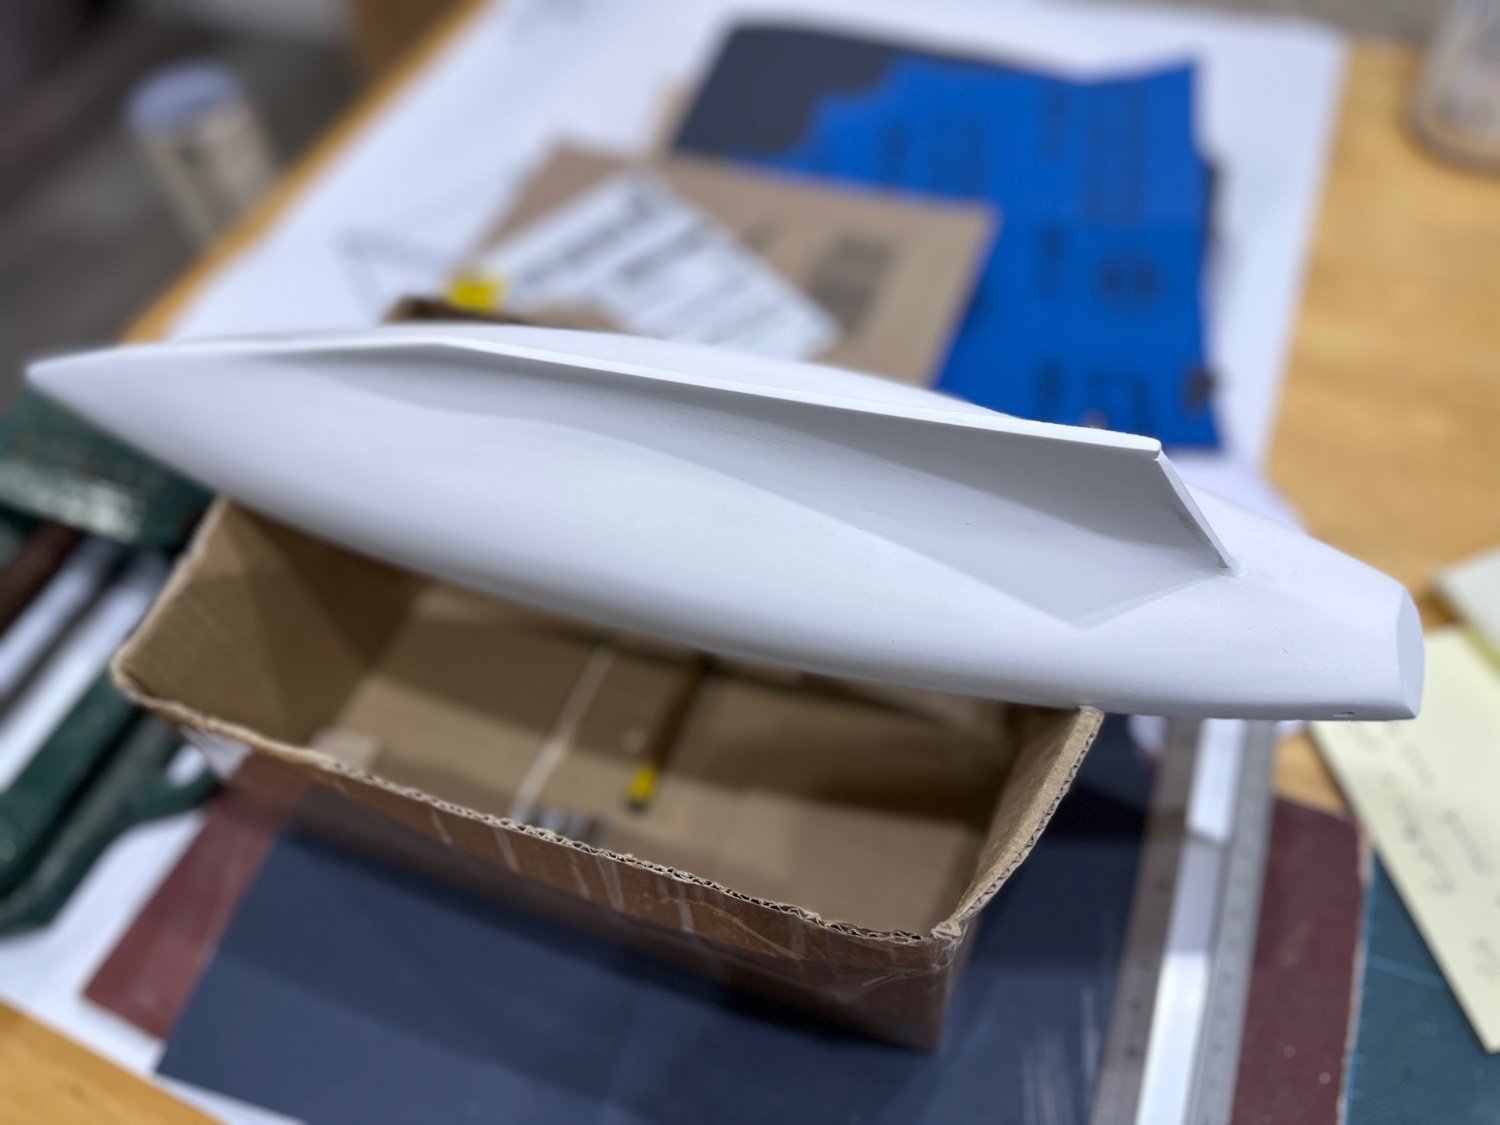
Quick update. More spray n filler on hull. Also made some custom parts for bits I didn’t like. Walnut very thin and delicate but should be okay when glued.

-
Not painted yet but decided to do some deck building stuff. Got to this stage and was going to attach wheel with a brass pin….no sign of said pin?? Any ideas? EDIT. The pin is basically a brass nail. Not great but I ended up using it as the small scale didn’t show up any issues, especially as it’s painted black. (Not that the instructions tell you this).
-
Similar stage to me, albeit a very different build obviously. Looking forward to watching your progress and I’ll hopefully learn many things along the way. ⛵🤓
-
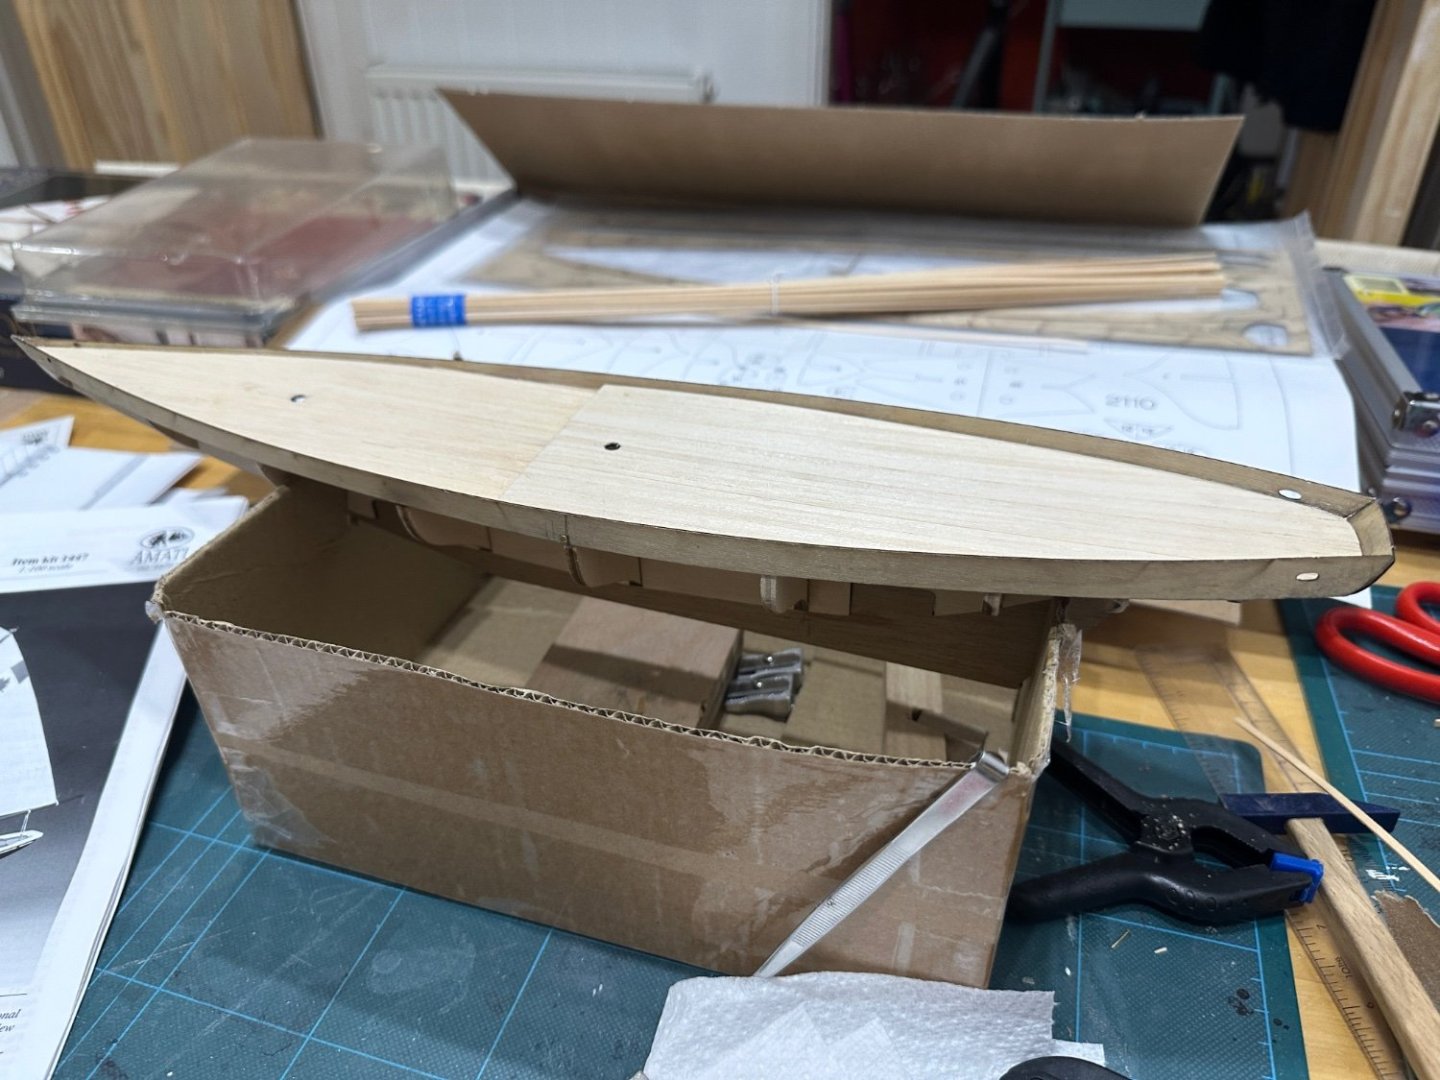
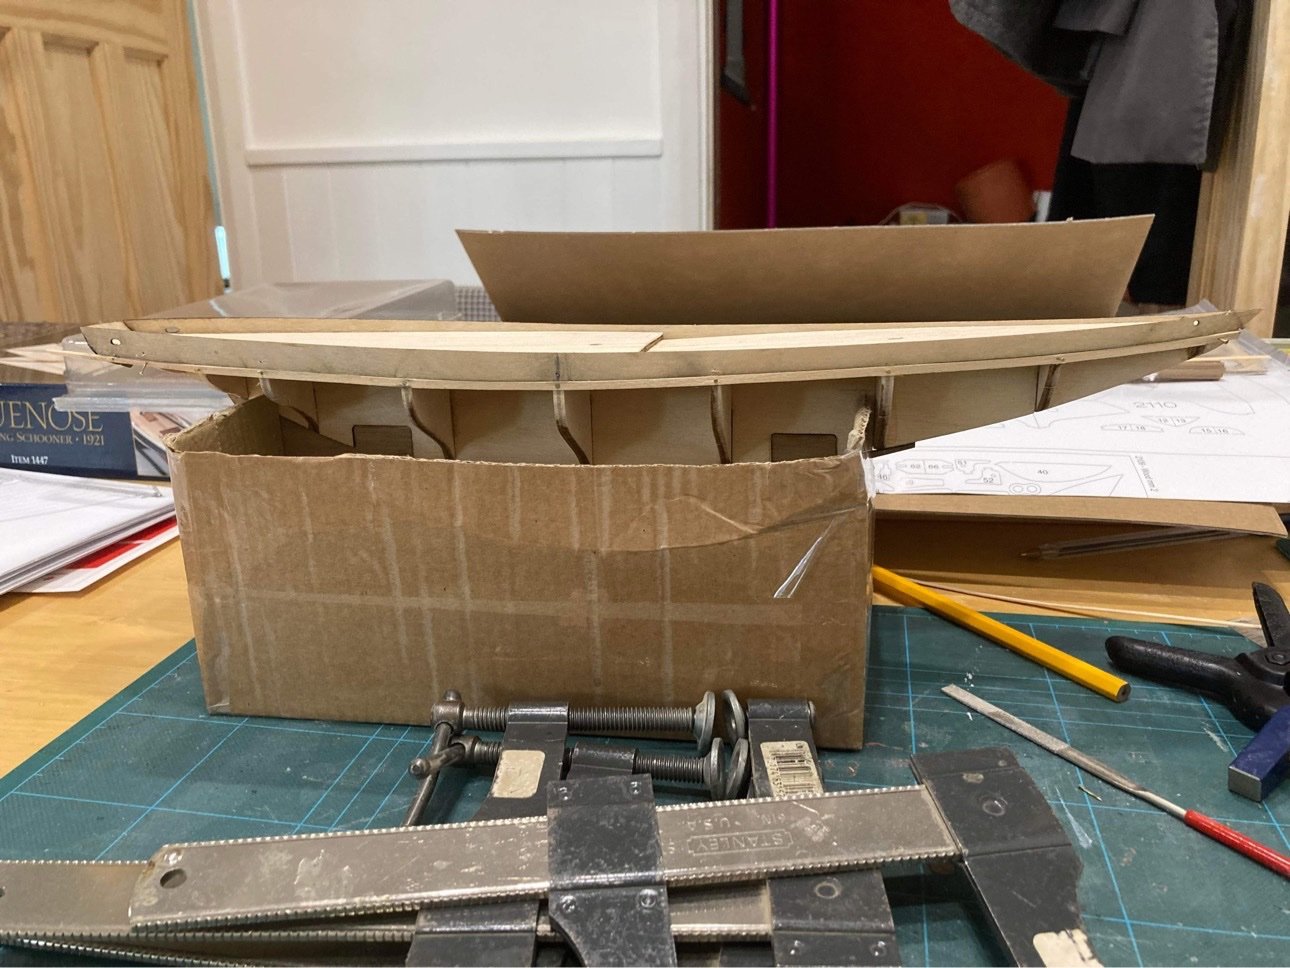
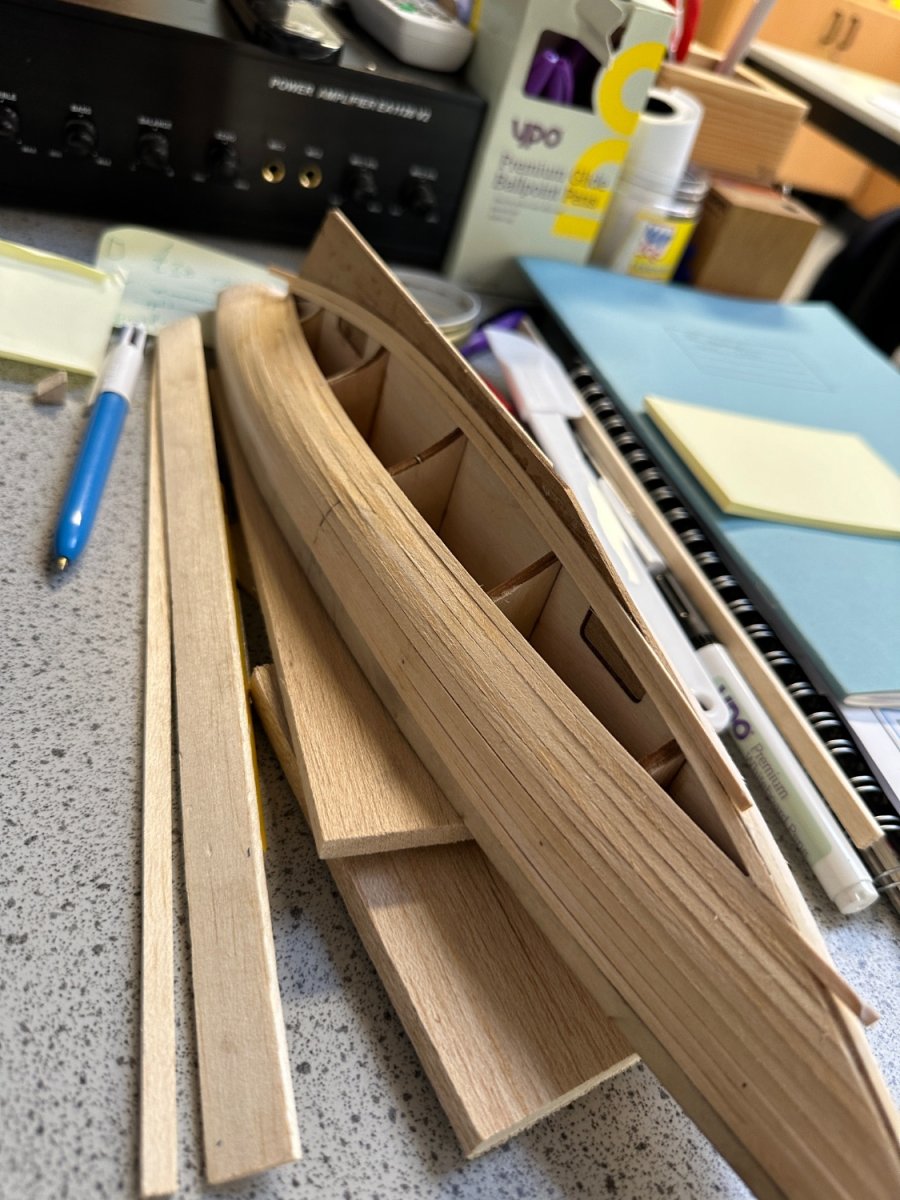
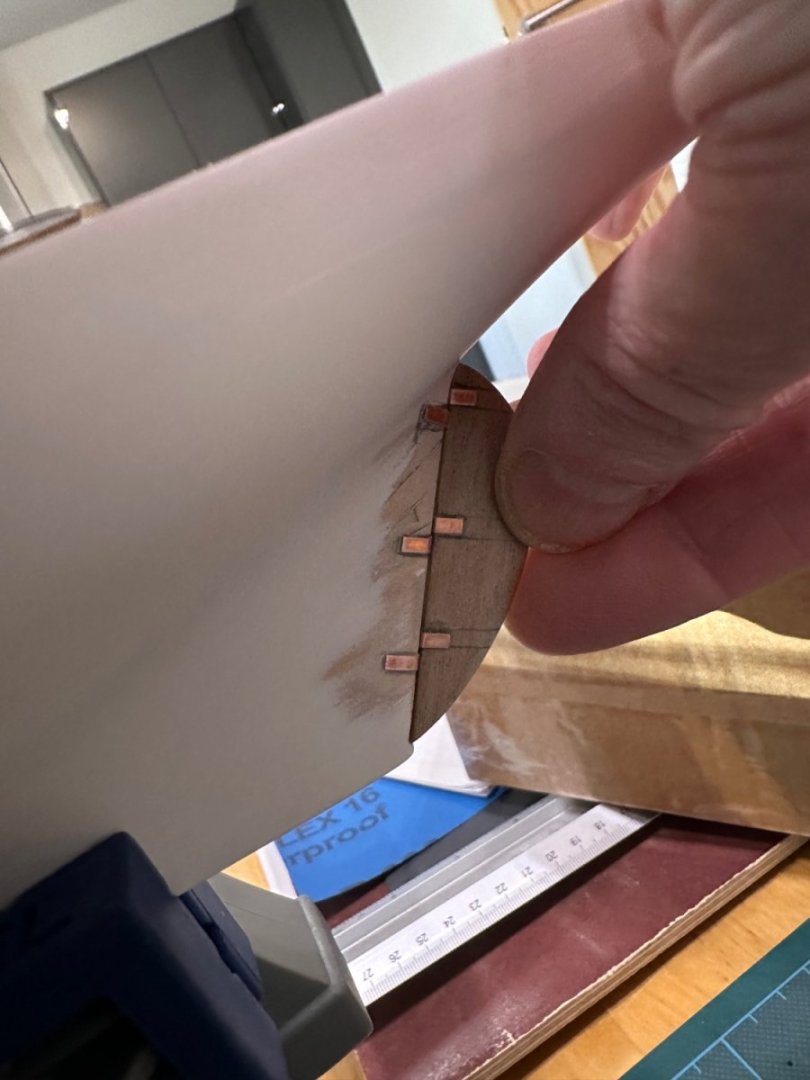
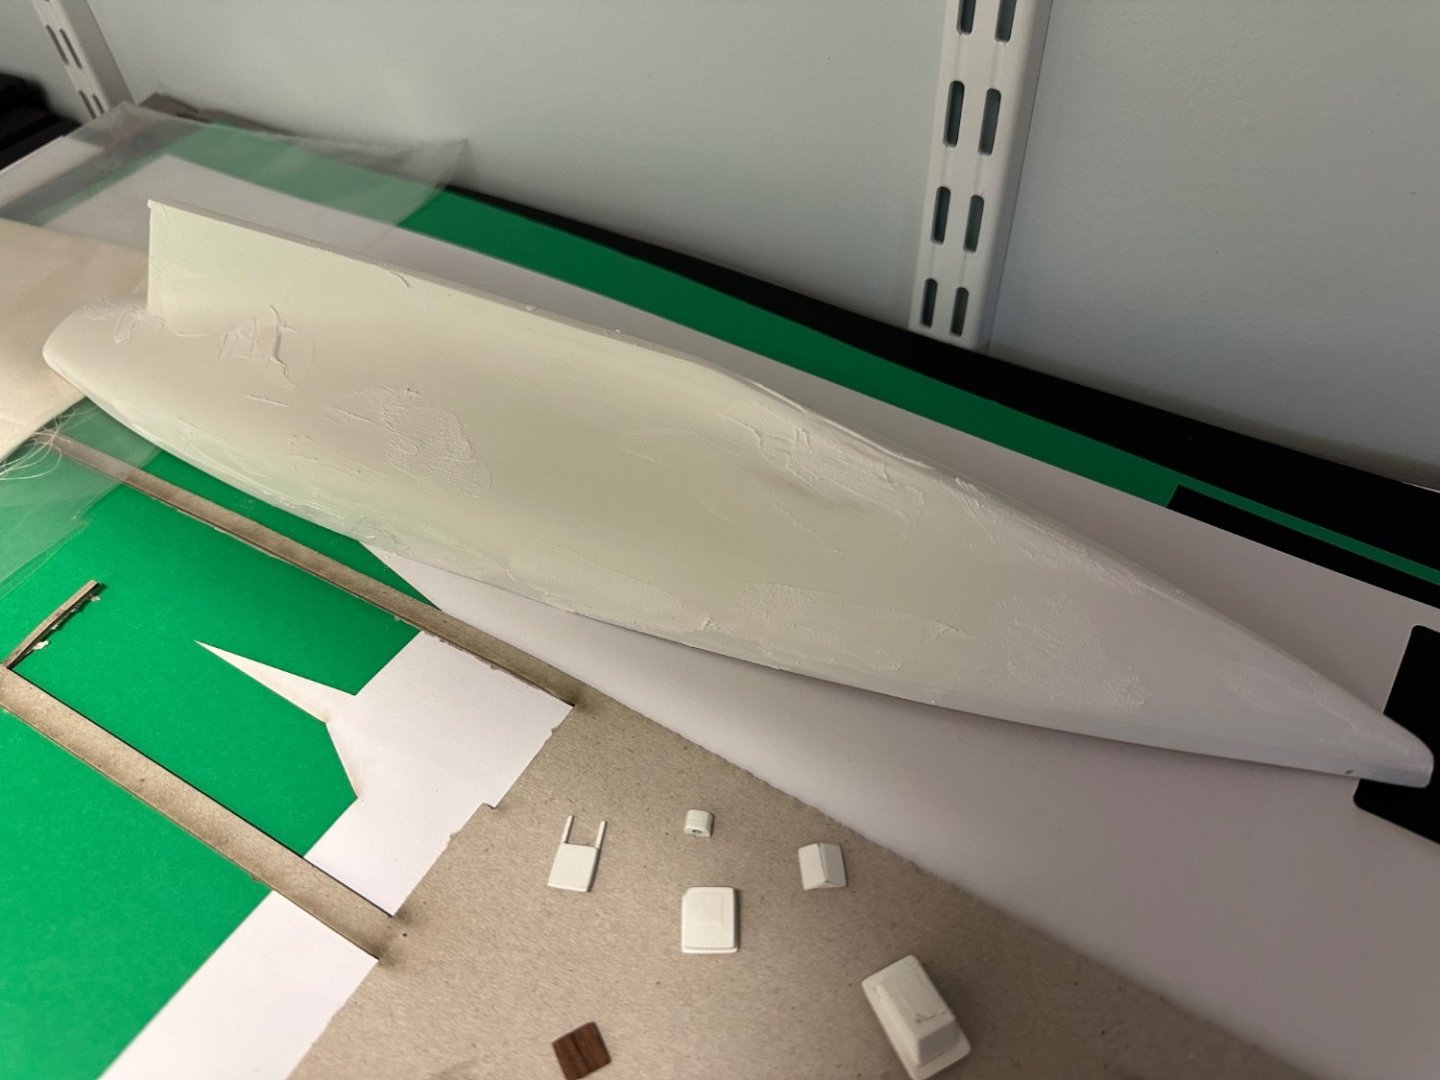
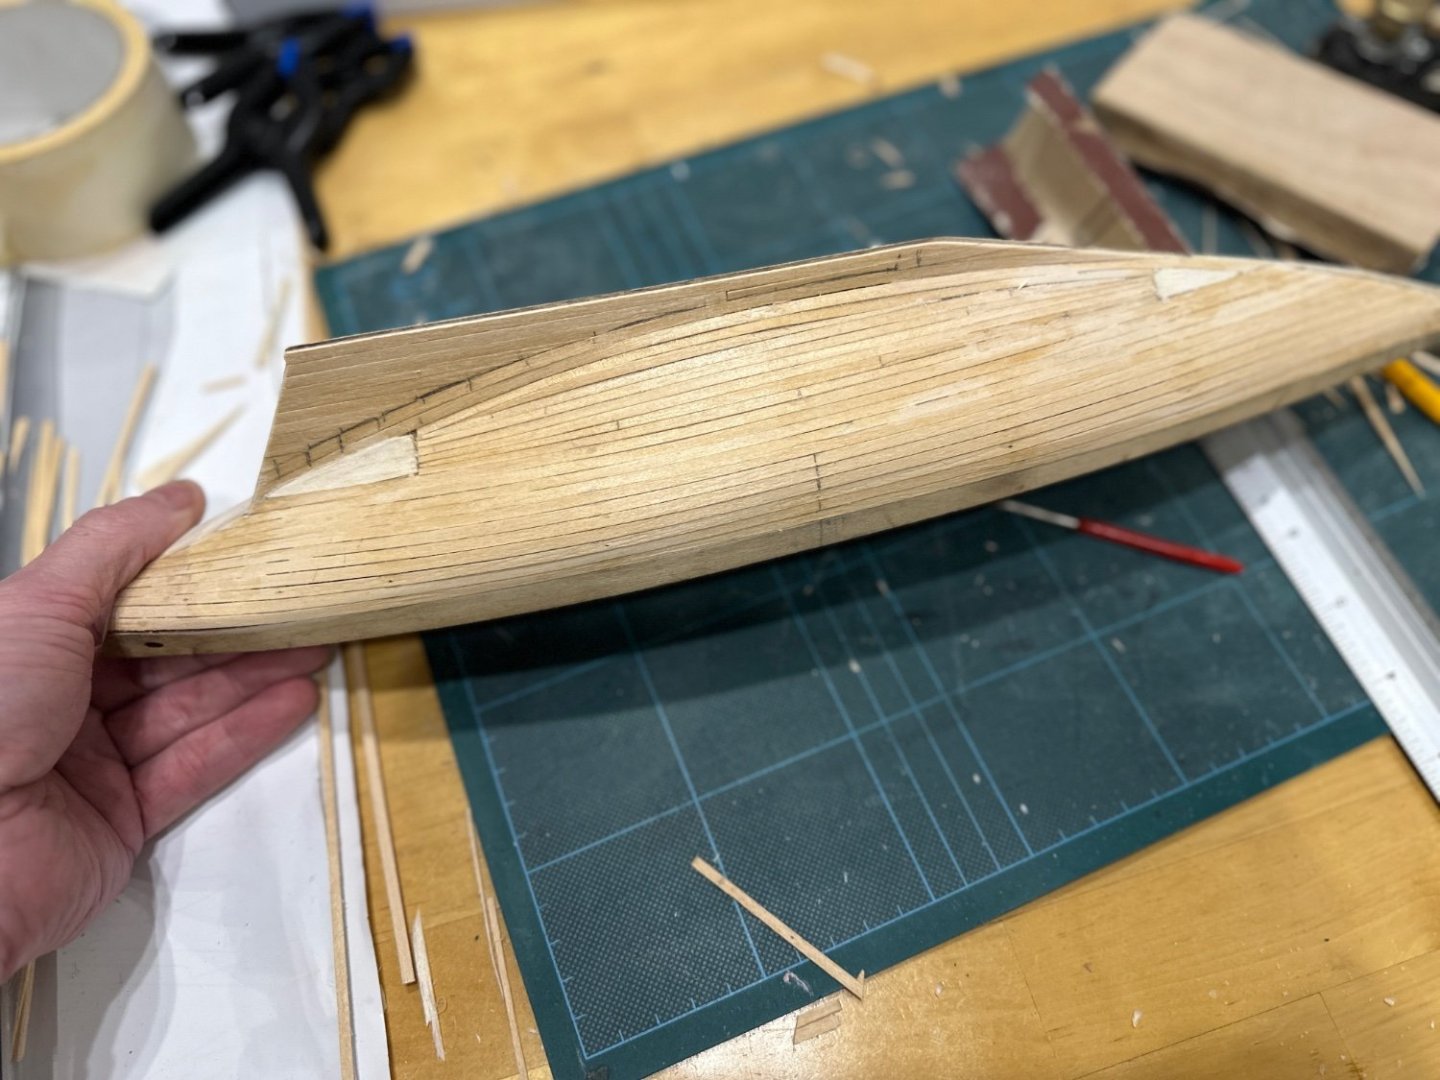
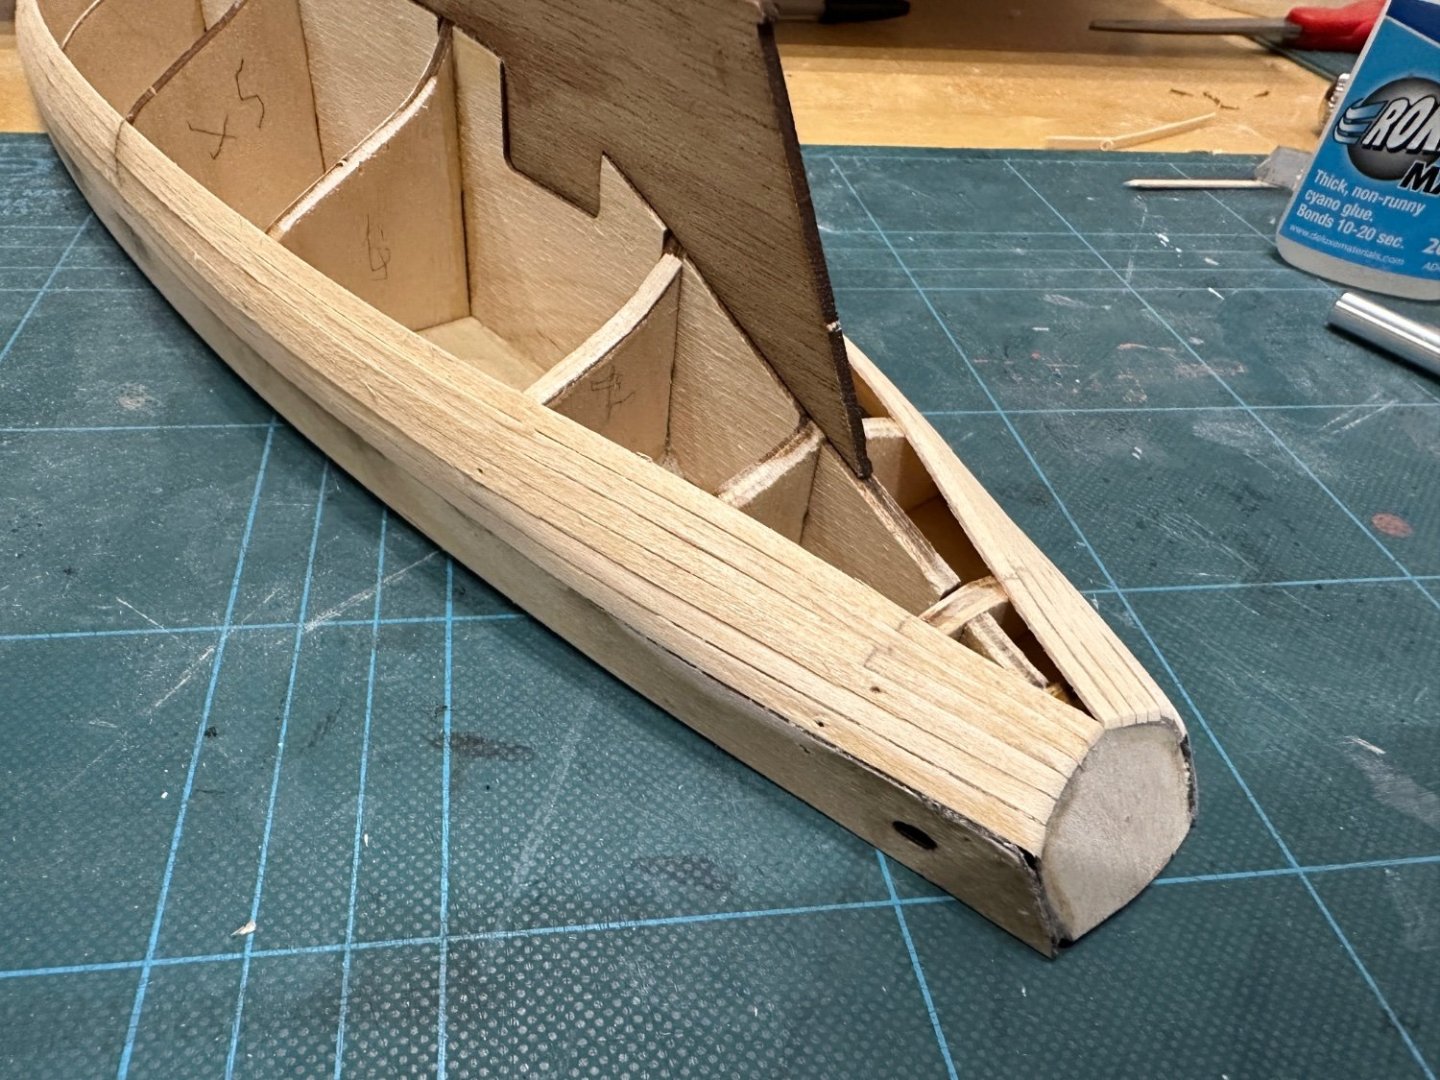
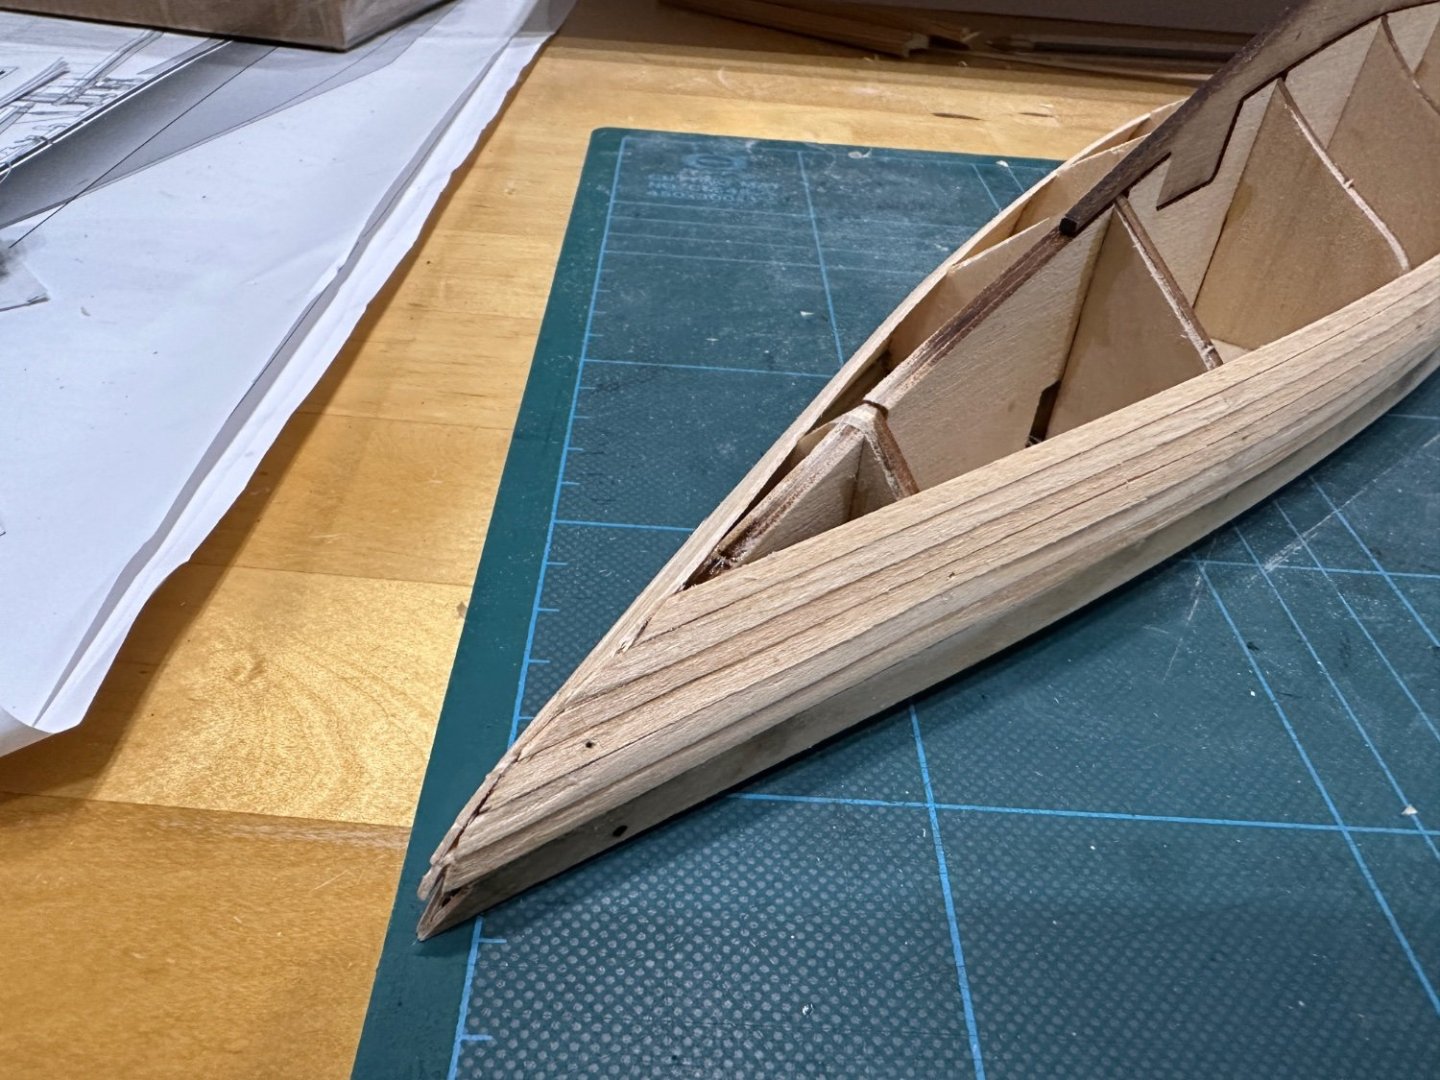
Well. Just got on with it. No idea if it’s any good or not. Fill the rest tomorrow and see. Planking is difficult and on such a small scale with a hull like this, it’s bonkers. I’d do a few things differently but I can’t find a single video of planking a hull similar to this. Not one and I’ve searched and searched. I didn’t split the hill into sections before starting and that was a mistake. I was left with slithers of wood on a single bulk head. ADVICE TO OTHERS WITH THIS EXACT MODEL. put in more bulkheads, fill bow and stern bulkheads with a solid infill. Finally, plank in 3 sections. I am sure advice was given to me regarding this, but I guess you learn best from your own mistakes! This appears to be standard practice and it’s good advice. I am now certain, despite previously being unsure that this model does NOT need planking over the keel, but I did it anyway. I think like others, I made this choice as it’s just better looking. I used modelling filler which I really didn’t get on with. Sanding just creates rubbery little pieces. Later, I went back to good old polyfiller and it’s so much better. Fills and sticks really well and sands beautifully. (See pics in later post for this filler rather than in this post).


-
Had a bit of a mare. Got this far. Messed up I think. Not tapered enough bow and stern. But even if I had gone from 5mm to 2.5mm it’ll still look similar. I did the maths for each bulk head, but when I try to fit 8 planks to the bow and stern ends, they need to be 1mm or even less. How do you cope with this? I can botch this first layer a bit, but I’d like to get the second planking right at least. help appreciated please!!!

-
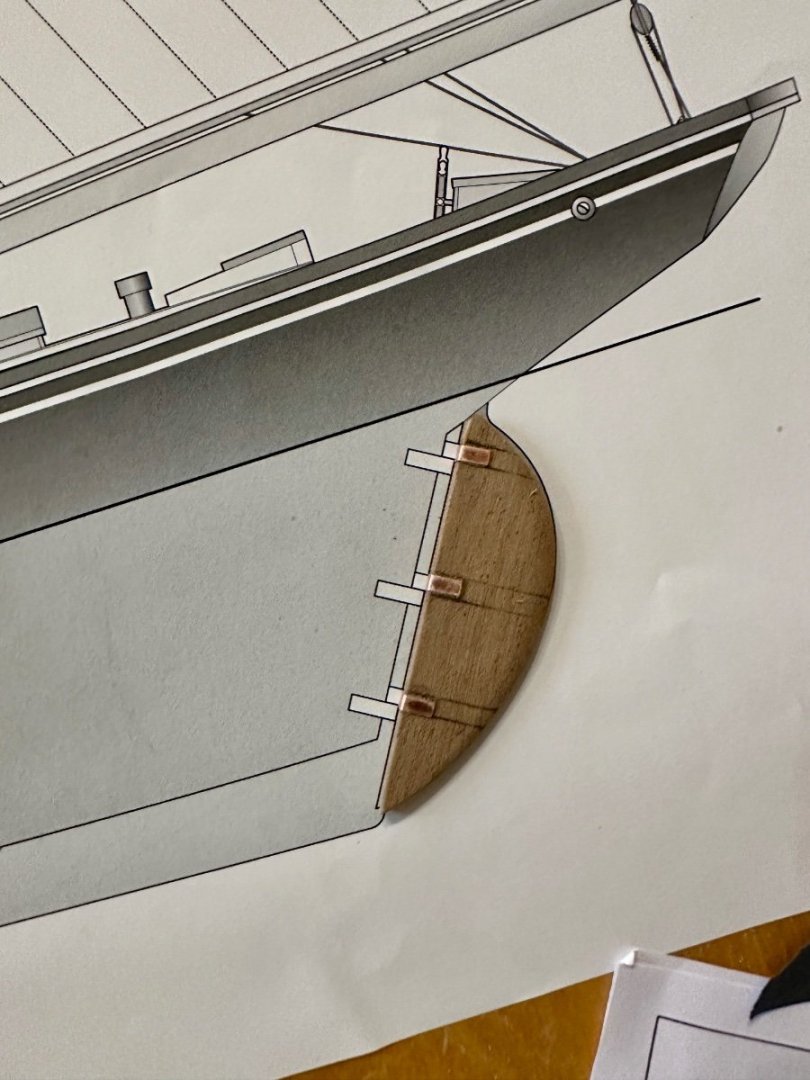
Okay, so a bit done over the weekend. Felt crap so not a great deal. I'm kinda stuck now. I’ve seen two build logs on here of this ship. One stops planking at the keel, the other goes on over it completely. I can’t see a good way of blending in the planking with the keel. No rabbet to glue into. I think they’ve kept the design simple but in doing so, seriously compromised the details. If I now cover the keel, will that give any issues later? It’s all being painted but wanted to practice for future and possible second planking. Most importantly though, if I do cover the keel, how should I now proceed? Start at top edge of keel with straight plank then go down to meet where I’m currently at? Or continue building up to it (carry on as I am) Or do I start with the awkward one where keel meets bulk heads then work up and down. Help much appreciated as always!!

-
Thank you Gary. You never know if what you are doing is right so thank you. Yeah, I’ve studied that build. I must admit, I’d be very happy with a similar outcome so might just do what they did. I agree, it’ll be hard to get a good transition at the keel. I’ll try mocking it up and see what it looks like. If I do decide to go keel down from this point, any pointers? Yes, second plank is 0.5mm walnut. I’ll paint it anyway as I don’t think it’ll be good enough to varnish or oil. thank you again. Tony.
-
I’m building the same ship but Amati. Looking good so far! I’m also a newbie so interested in this one. Good job and looking forward to an update.
-
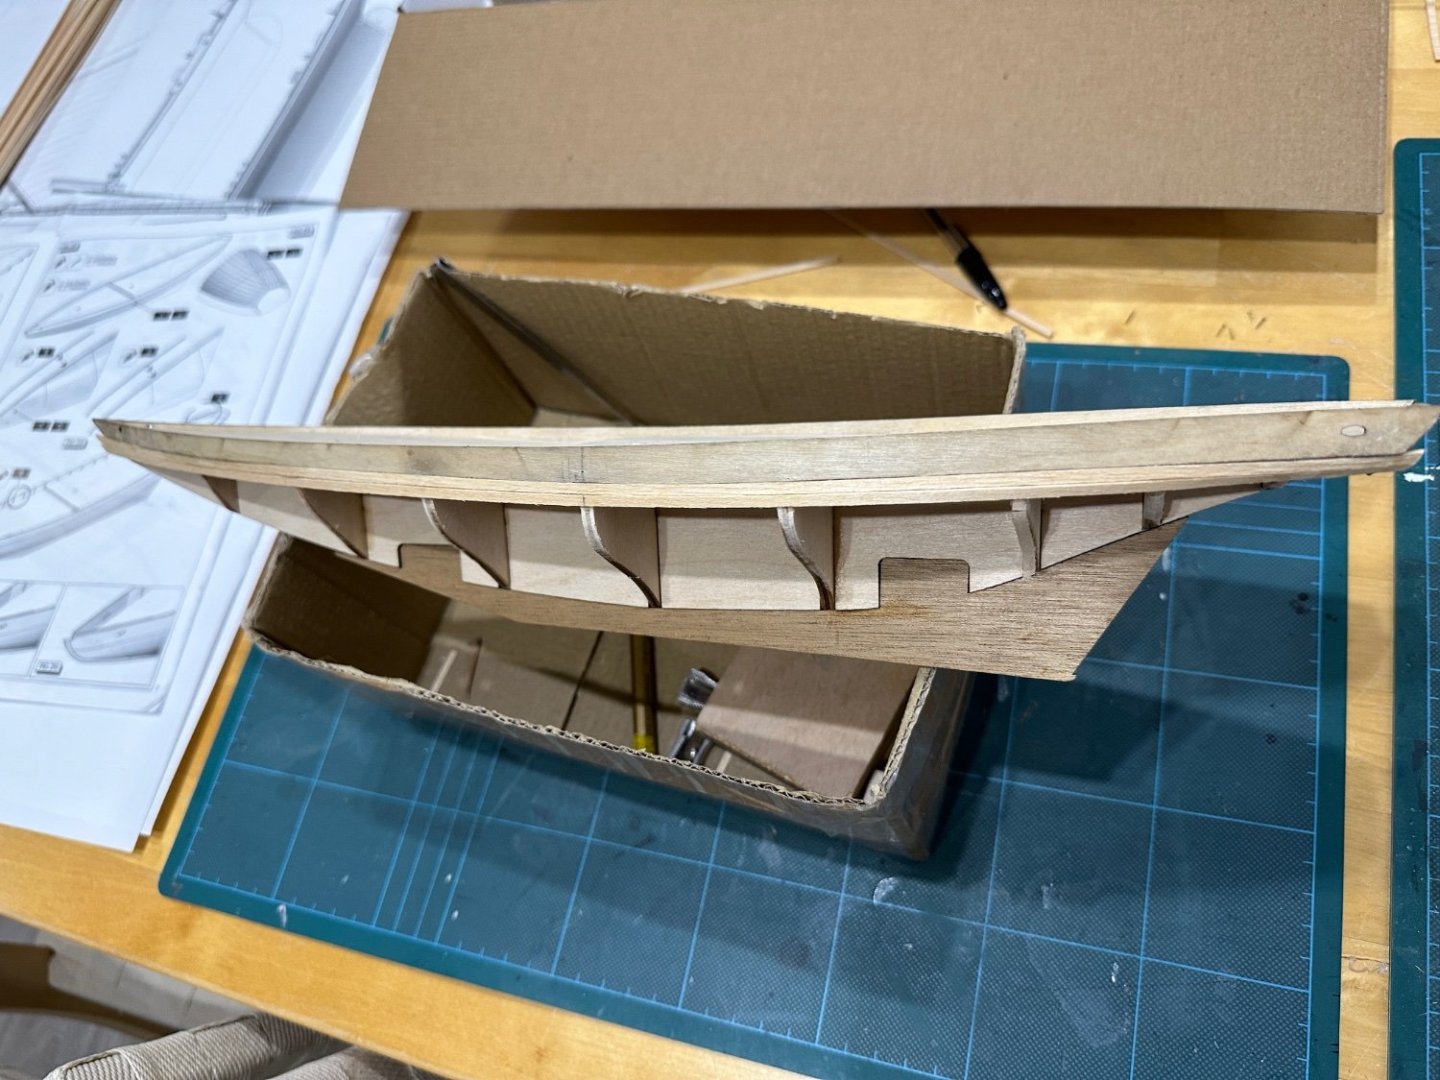
Thanks hamilton. I’ve ordered some paste. Here tomorrow but won’t be needing it for a week or so I guess! latest pics below. 6 planks either side. Tapered back but haven’t at front. If I’m honest, I’ve no idea if it’s right. Any thoughts appreciated! this is double planked so not too bothered about a few issues. Keel looks like it’s not planked. How should I proceed now? Same as I have? Or go to keel then down? thanks everyone, it’s killing me tbh, and patience is not a trait of mine!!


-
Thank you both. I bought a copy of that book. Good read and learning. I’ve set up a couple of planks each side. I think it’s time to start tapering them a bit. I think. Wondering about sanding first planking. I’m worried that my planking is not great and not level. But I don’t t see how I’ll ever get it level. Sanding is just going to flex the 2mm planks in between the bulk heads. I’m assuming I should add more bulk heads then? Fillers like? My problem with that is it seems like a bit of a cheat. I mean, why bother with filling in between bulkheads…might as well start with a solid hull if you’re going to do that, no? Anyway, this is where I’m at. Do others think I should now be tapering? Should I rip off what I’ve done? All seems like a botch really.
-
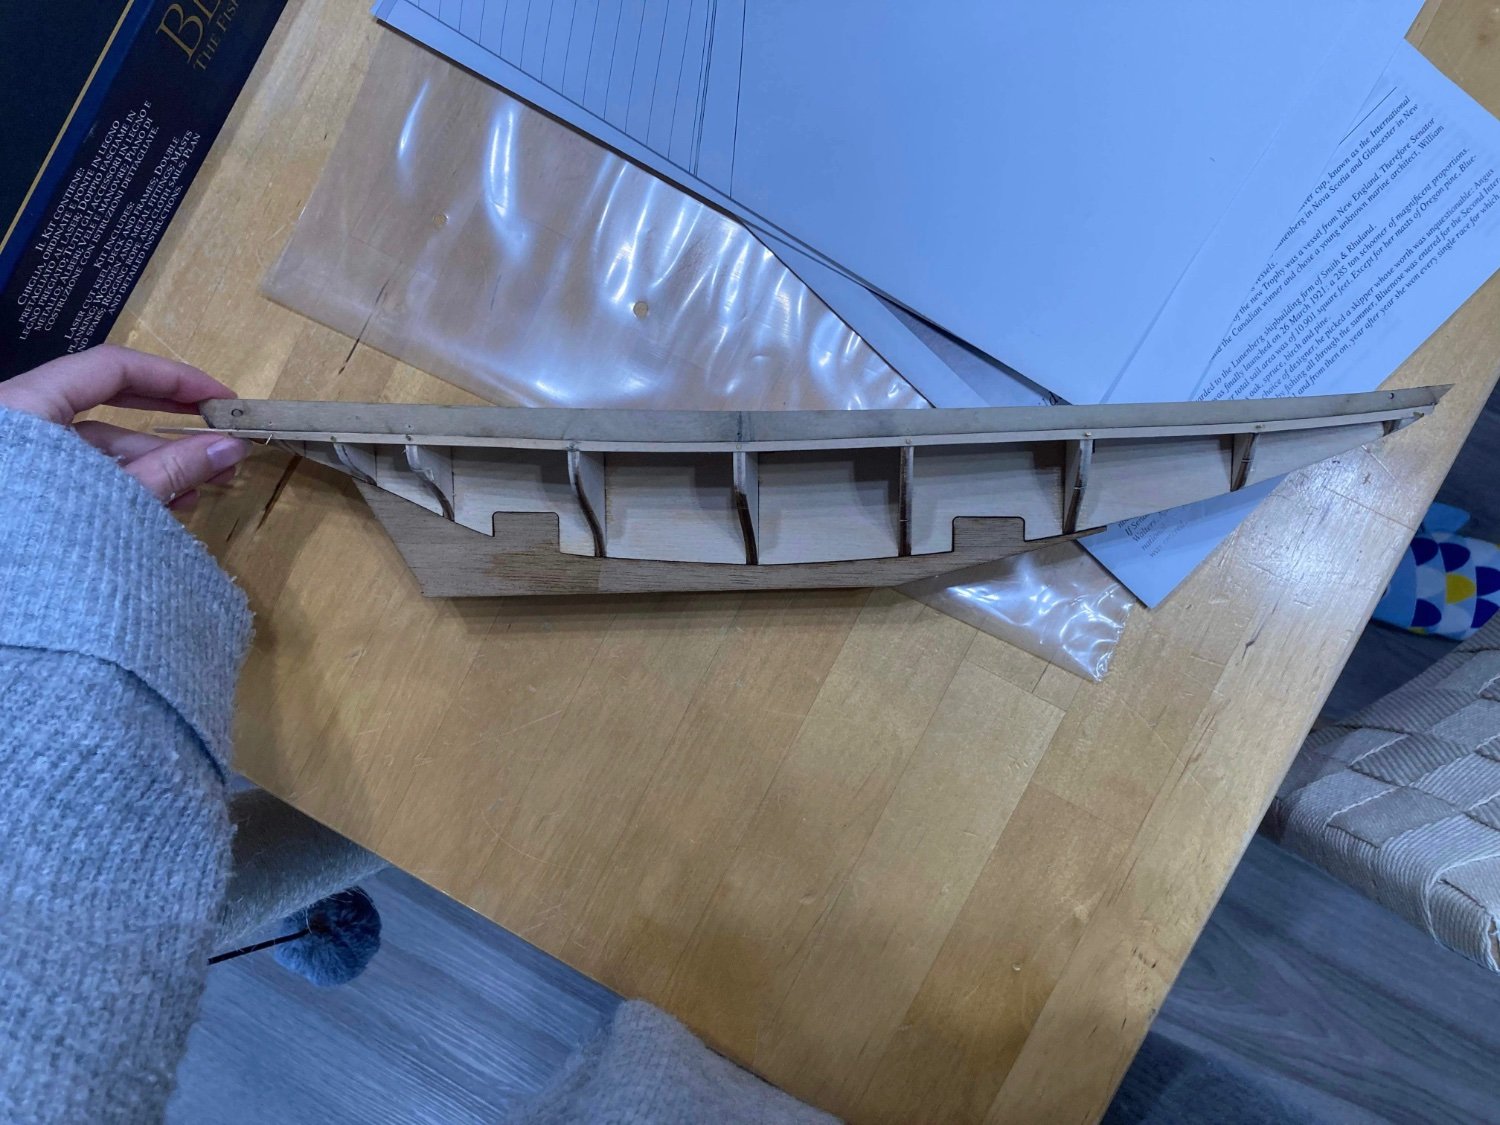
Hi all. I’ve started my first build. It was a 50th Birthday gift from the in-laws. Made an okay start but now struggling. I’ve always fancied a go at model shop building and finally now have the opportunity. As you will see by the photograph below, I’ve made an okay start but now approaching a difficult section. I’d wrongly assumed that instructions would be specific, accurate and helpful. What I have in front of me now reads as follows… “Apply first planking. Some nails will help. At stem, leave enough space for cutwater positioning. Check thickness of keel.” It then goes on to say sand hull prior the second planking. okay, so that’s the entire planking instructions!?? Great. Q1) what is leave enough space for cutwater positioning on this ship specifically? Q2) check thickness of keel. Can anyone explain why? What do I do? I’ve read and watched many videos on planking but nothing is the same as this hull. I’ve also seen many videos now all showing several different methods of planking so no idea what to now do. As you will see, the deck is complete, bulwarks on…now the planking. any help will be much appreciated!