Malcolm Brown
-
Posts
63 -
Joined
-
Last visited
Content Type
Profiles
Forums
Gallery
Events
Everything posted by Malcolm Brown
-
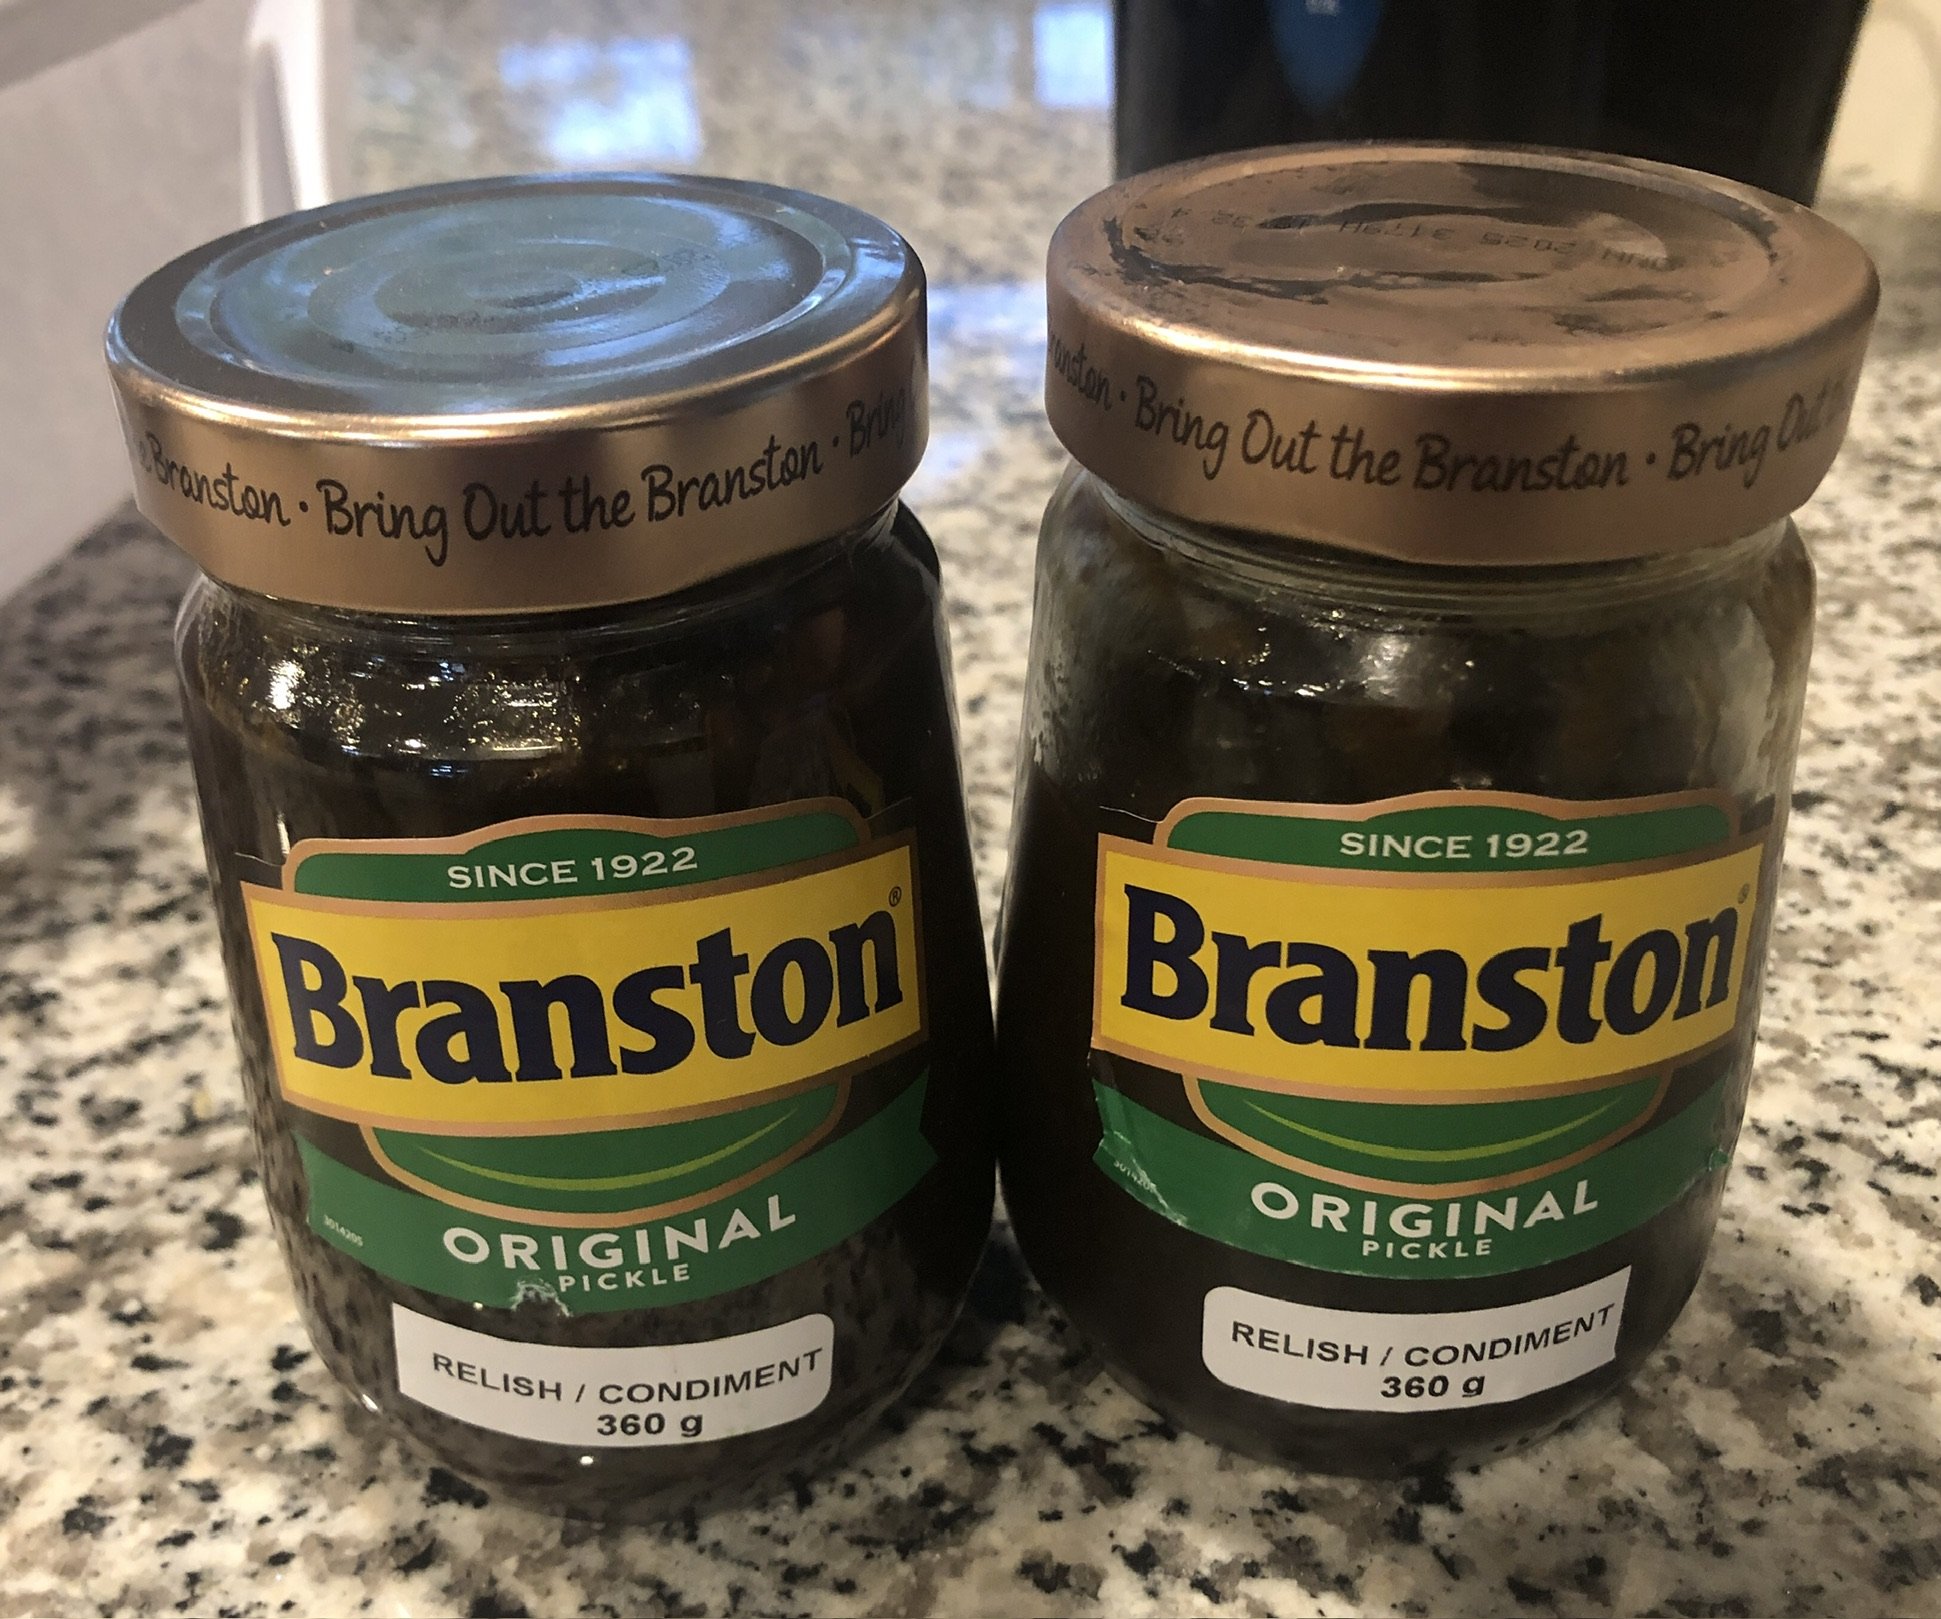
Oh yes, Branston is God’s condiment. I’ll be serving it up with some good ‘ol pub fare with cheese, crusty bread, my homemade Scotch Eggs and a pint or two of draught beer! 😋 To top it all off, a wee dram of single malt from Campbeltown, Argyll, aka, the ‘Wee Toon’ from whence my family originates🏴😁
-
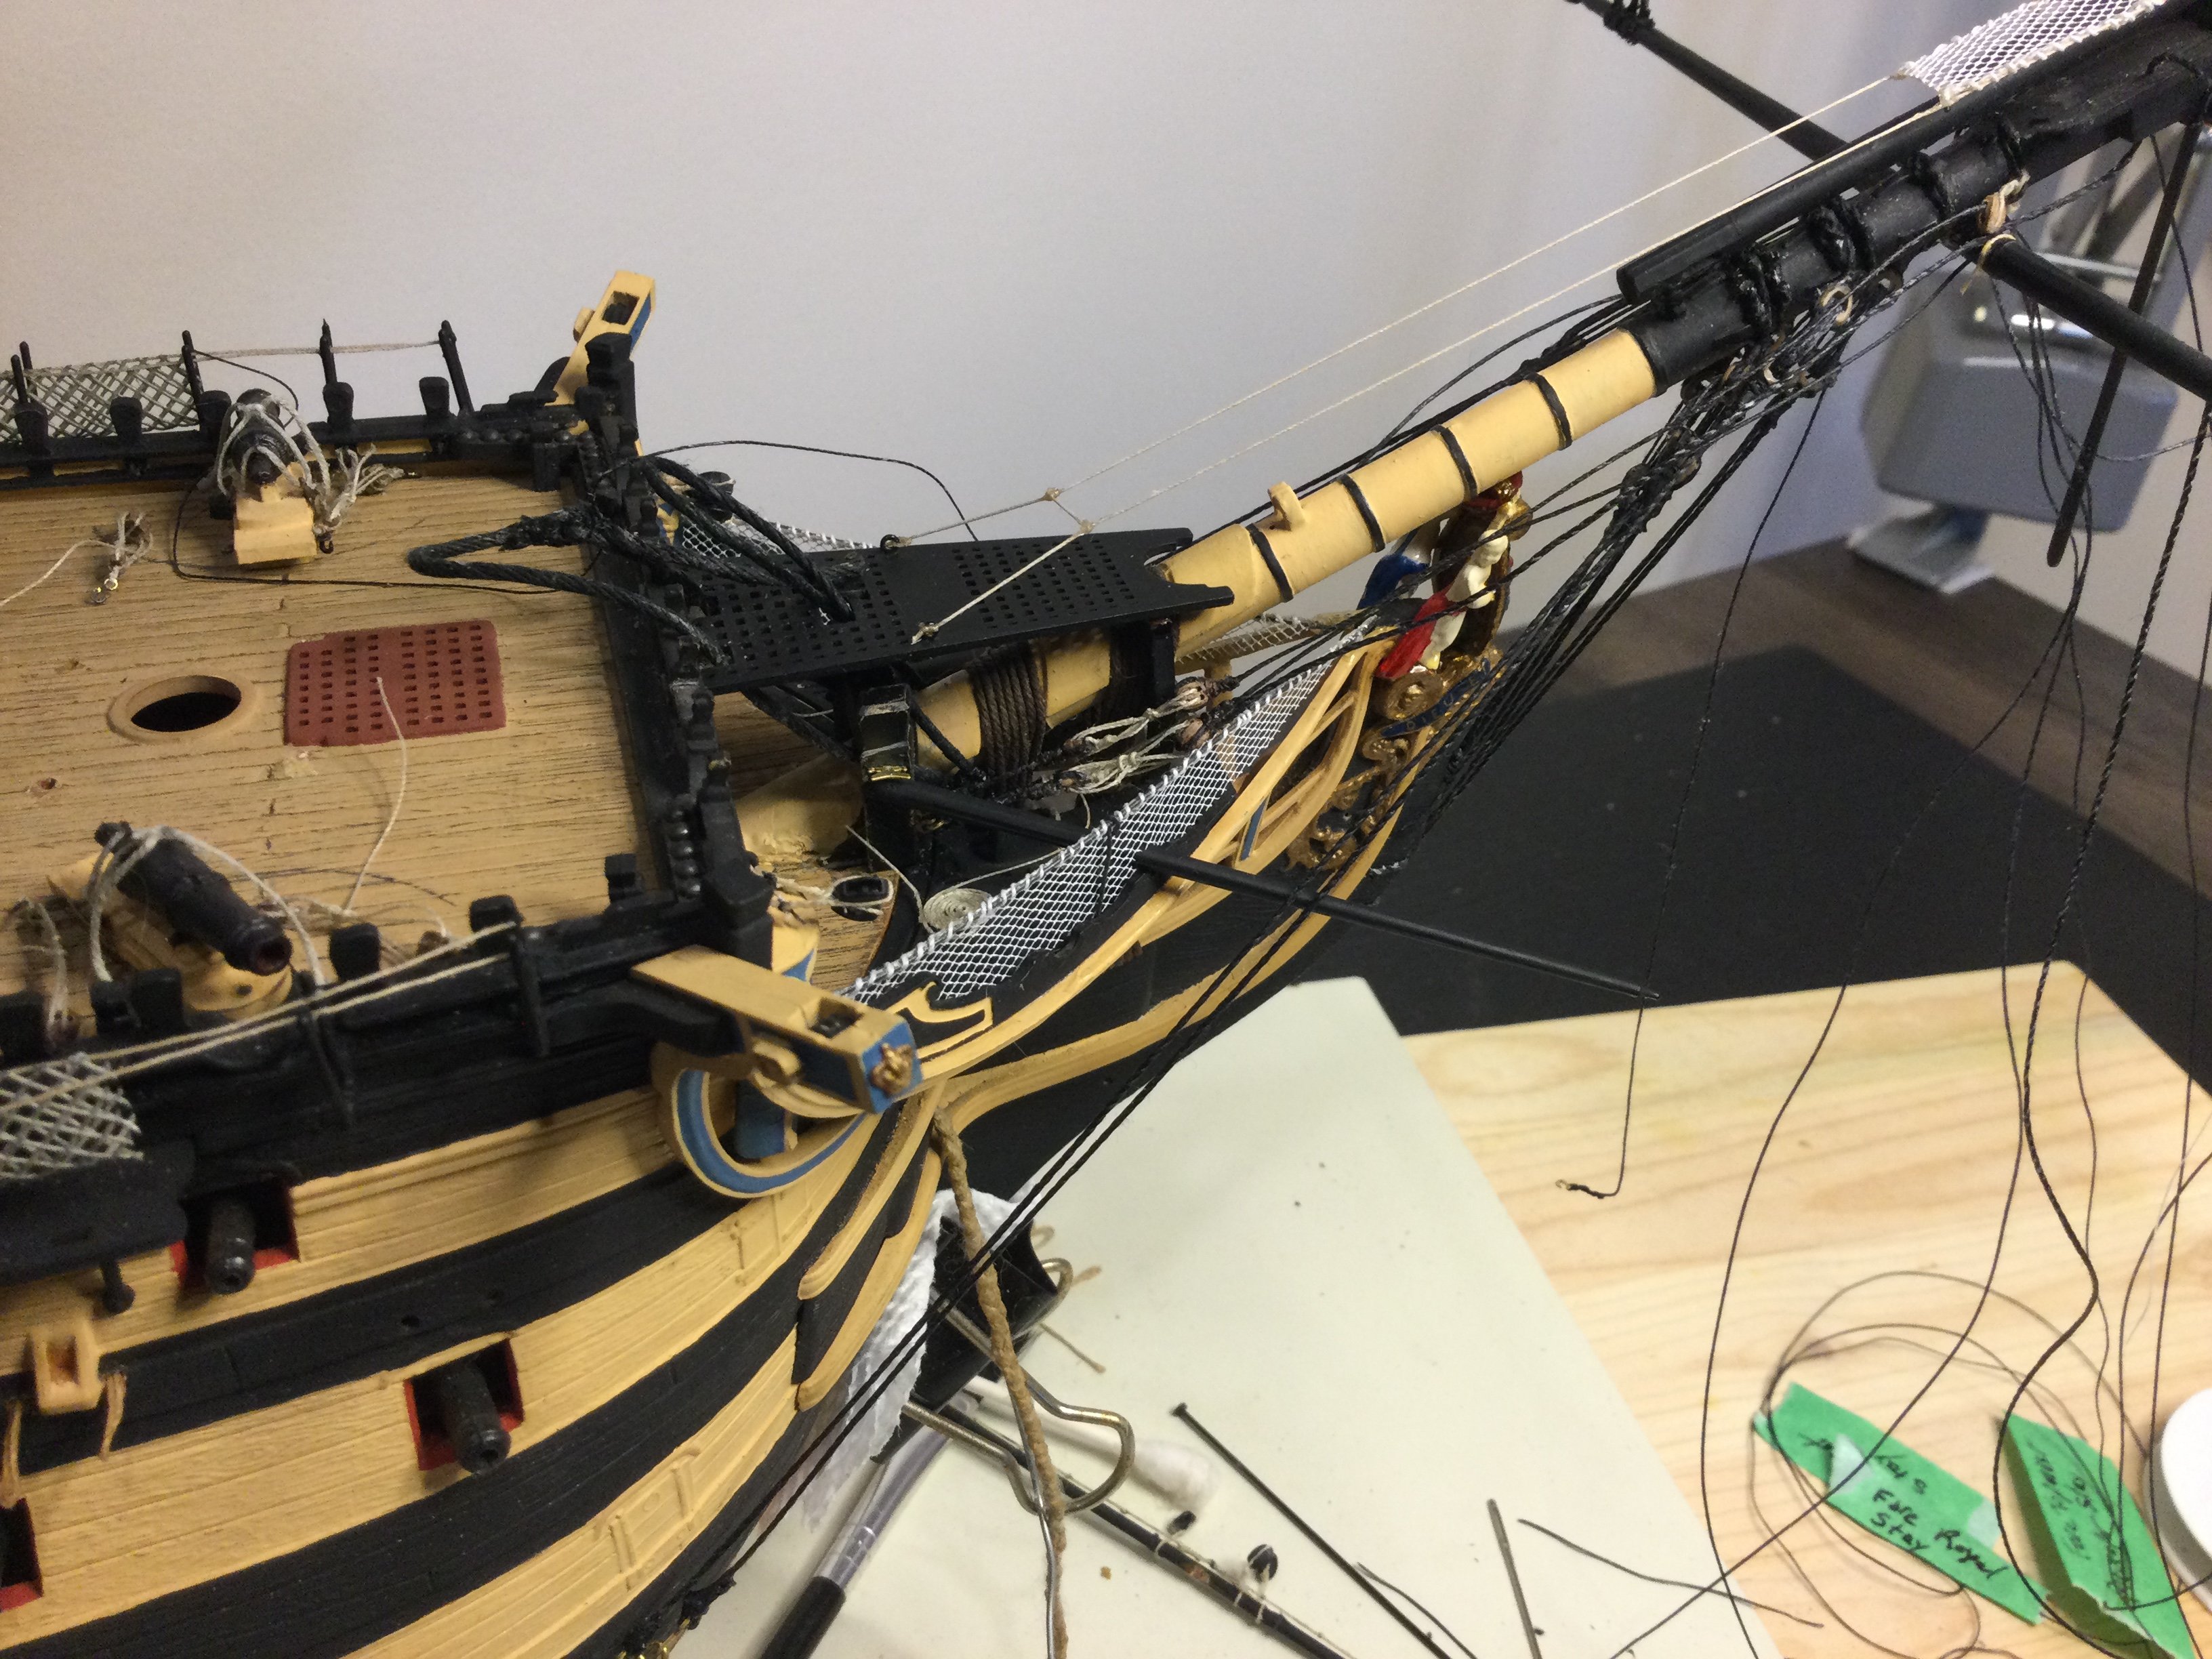
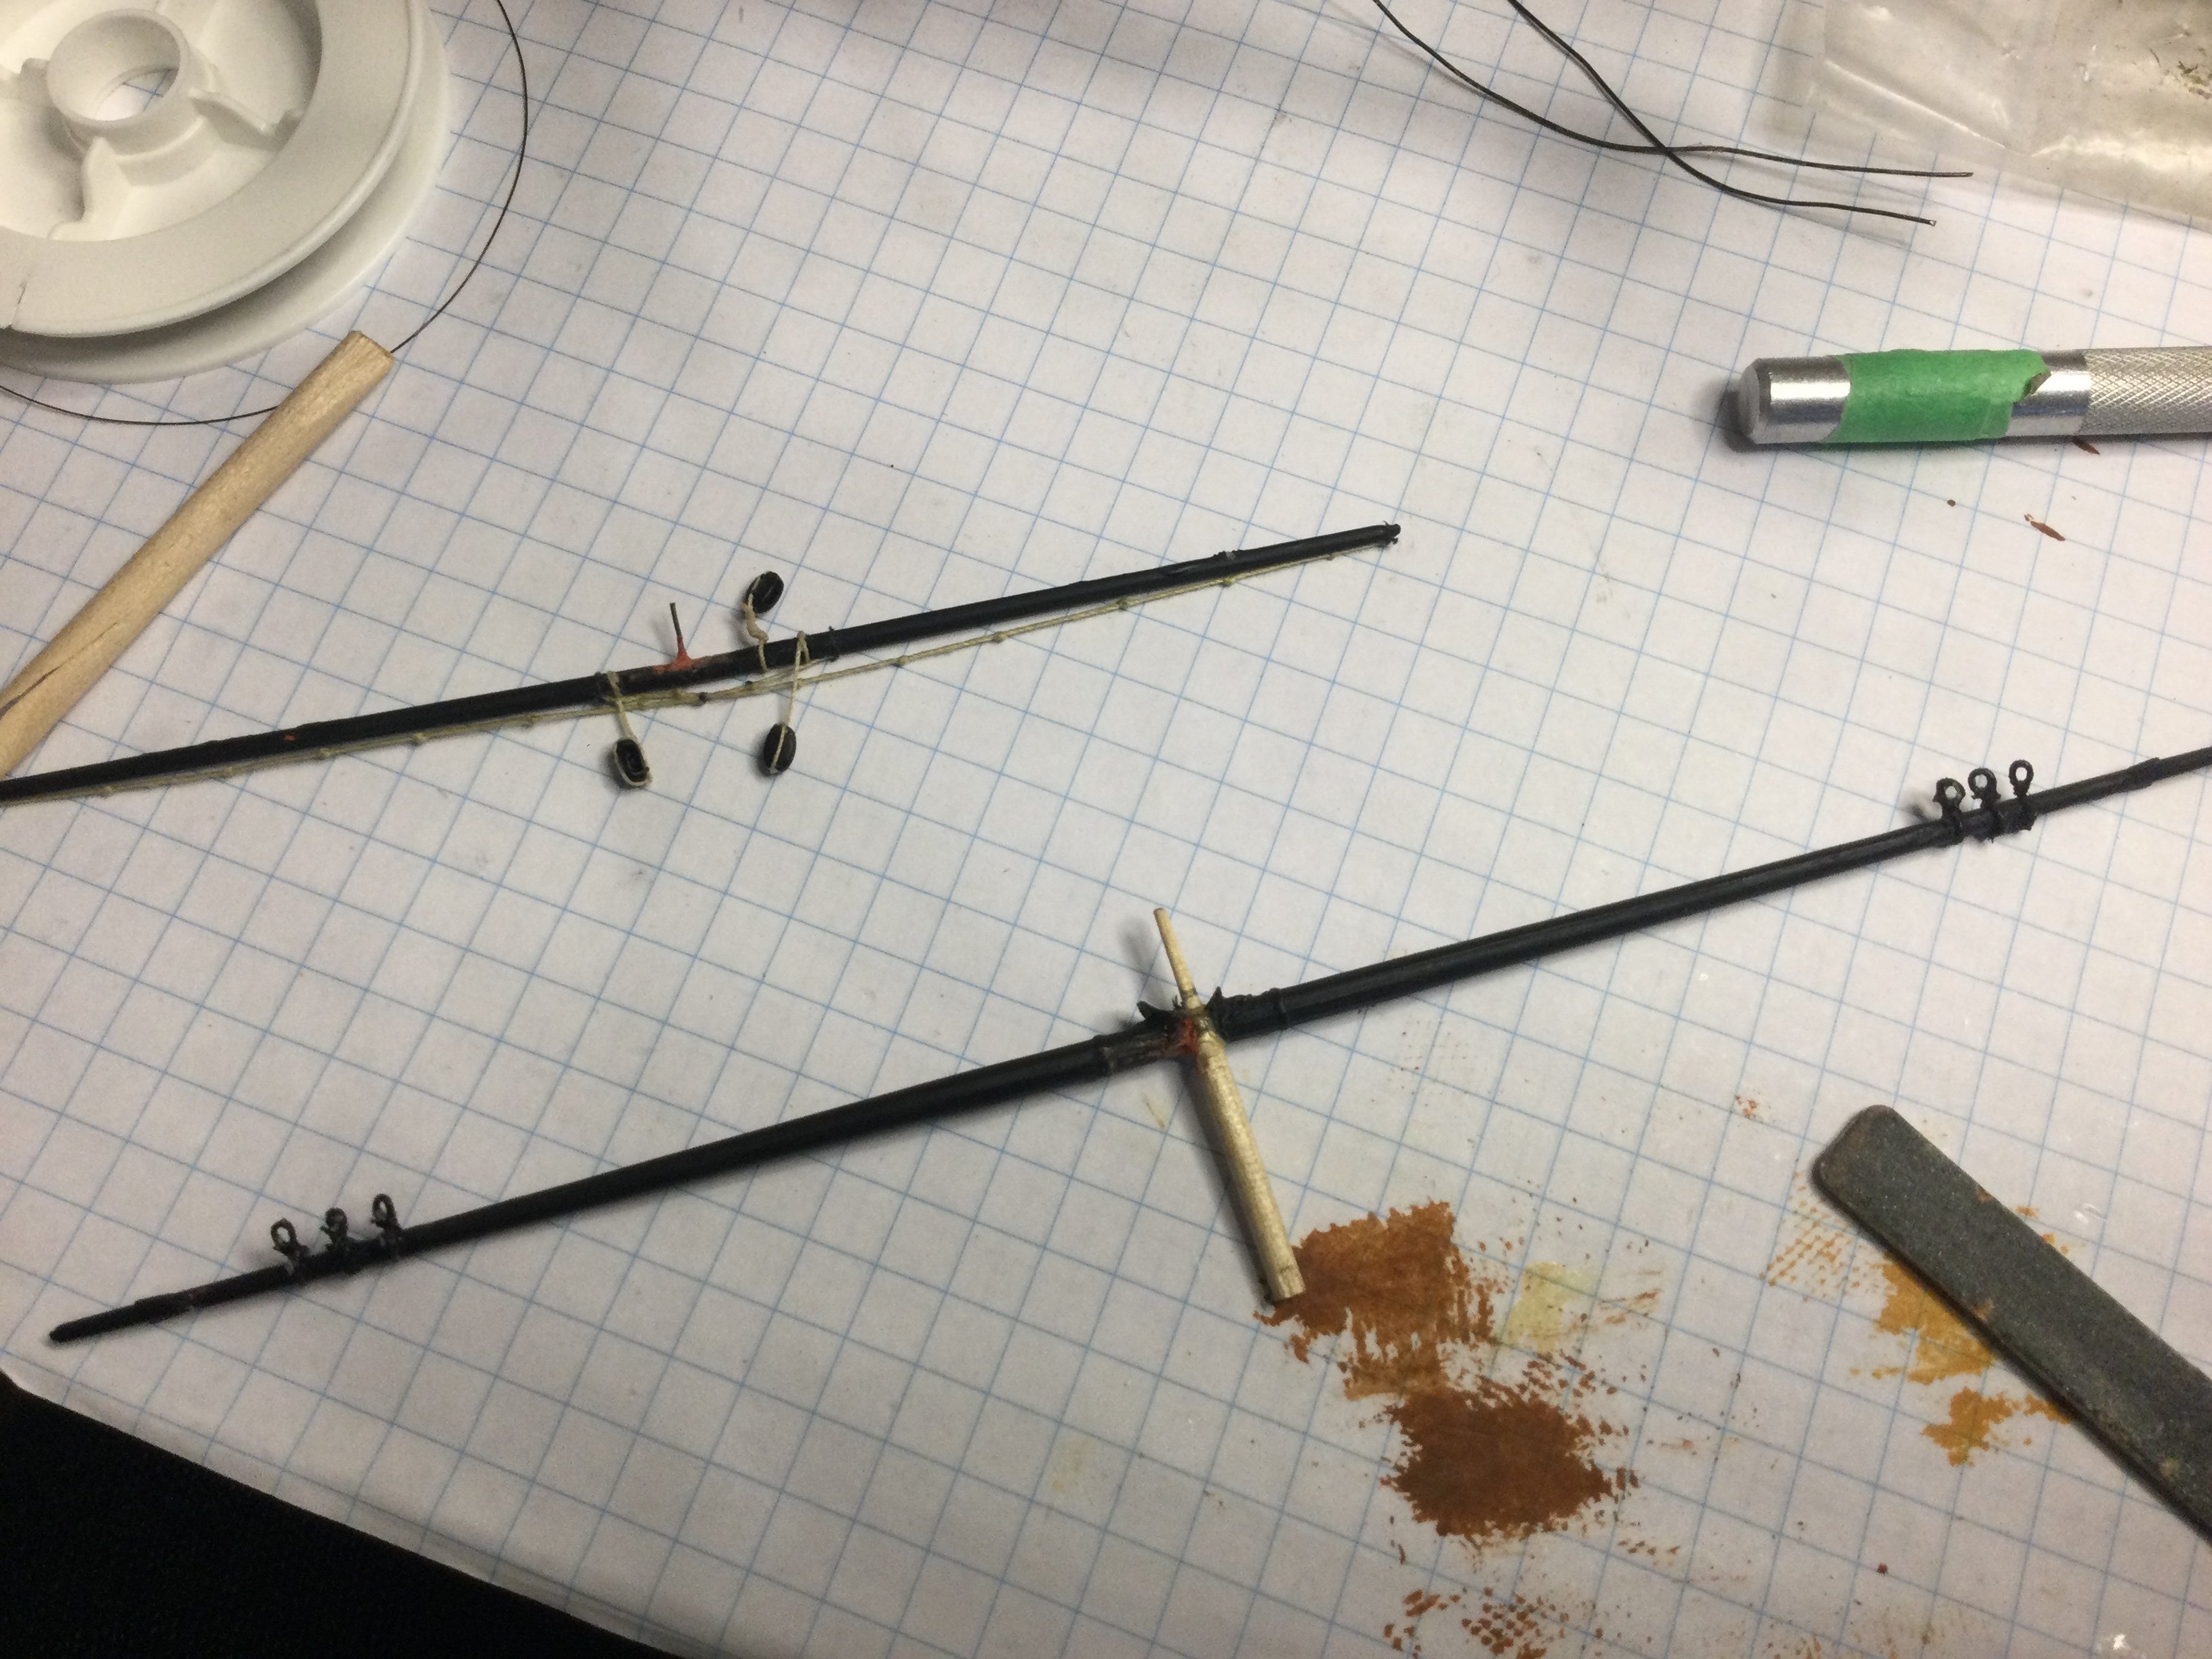
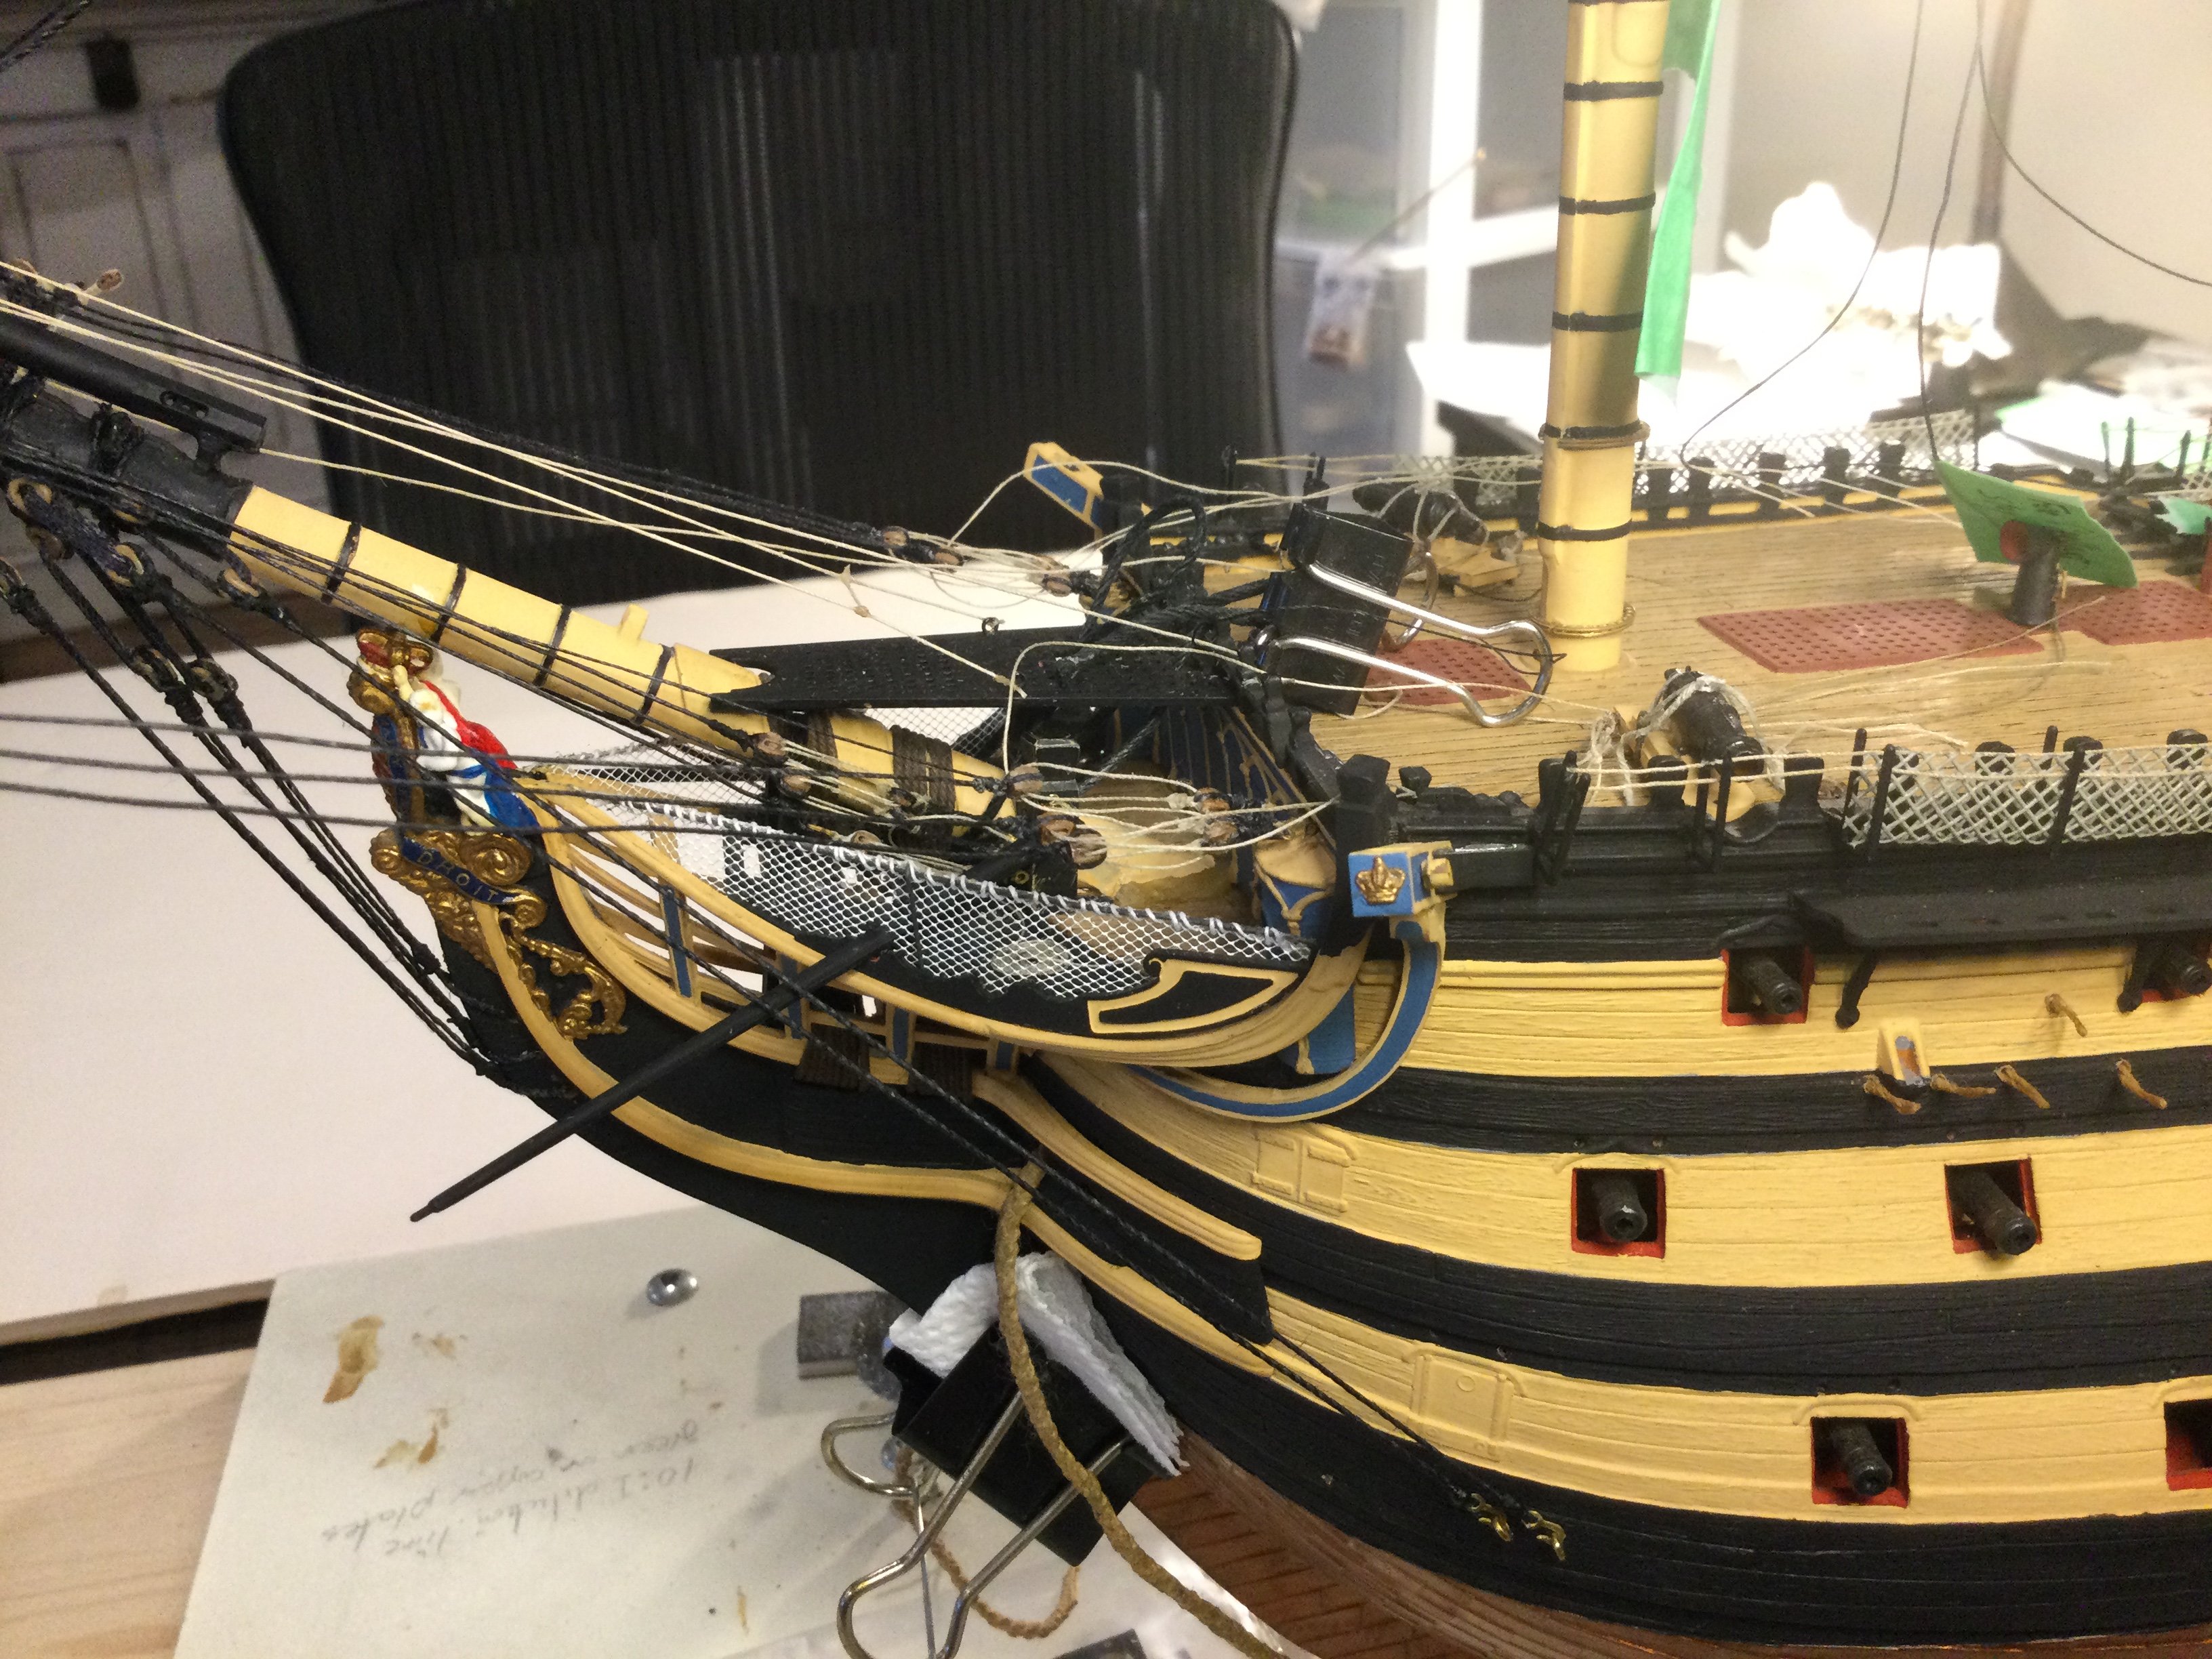
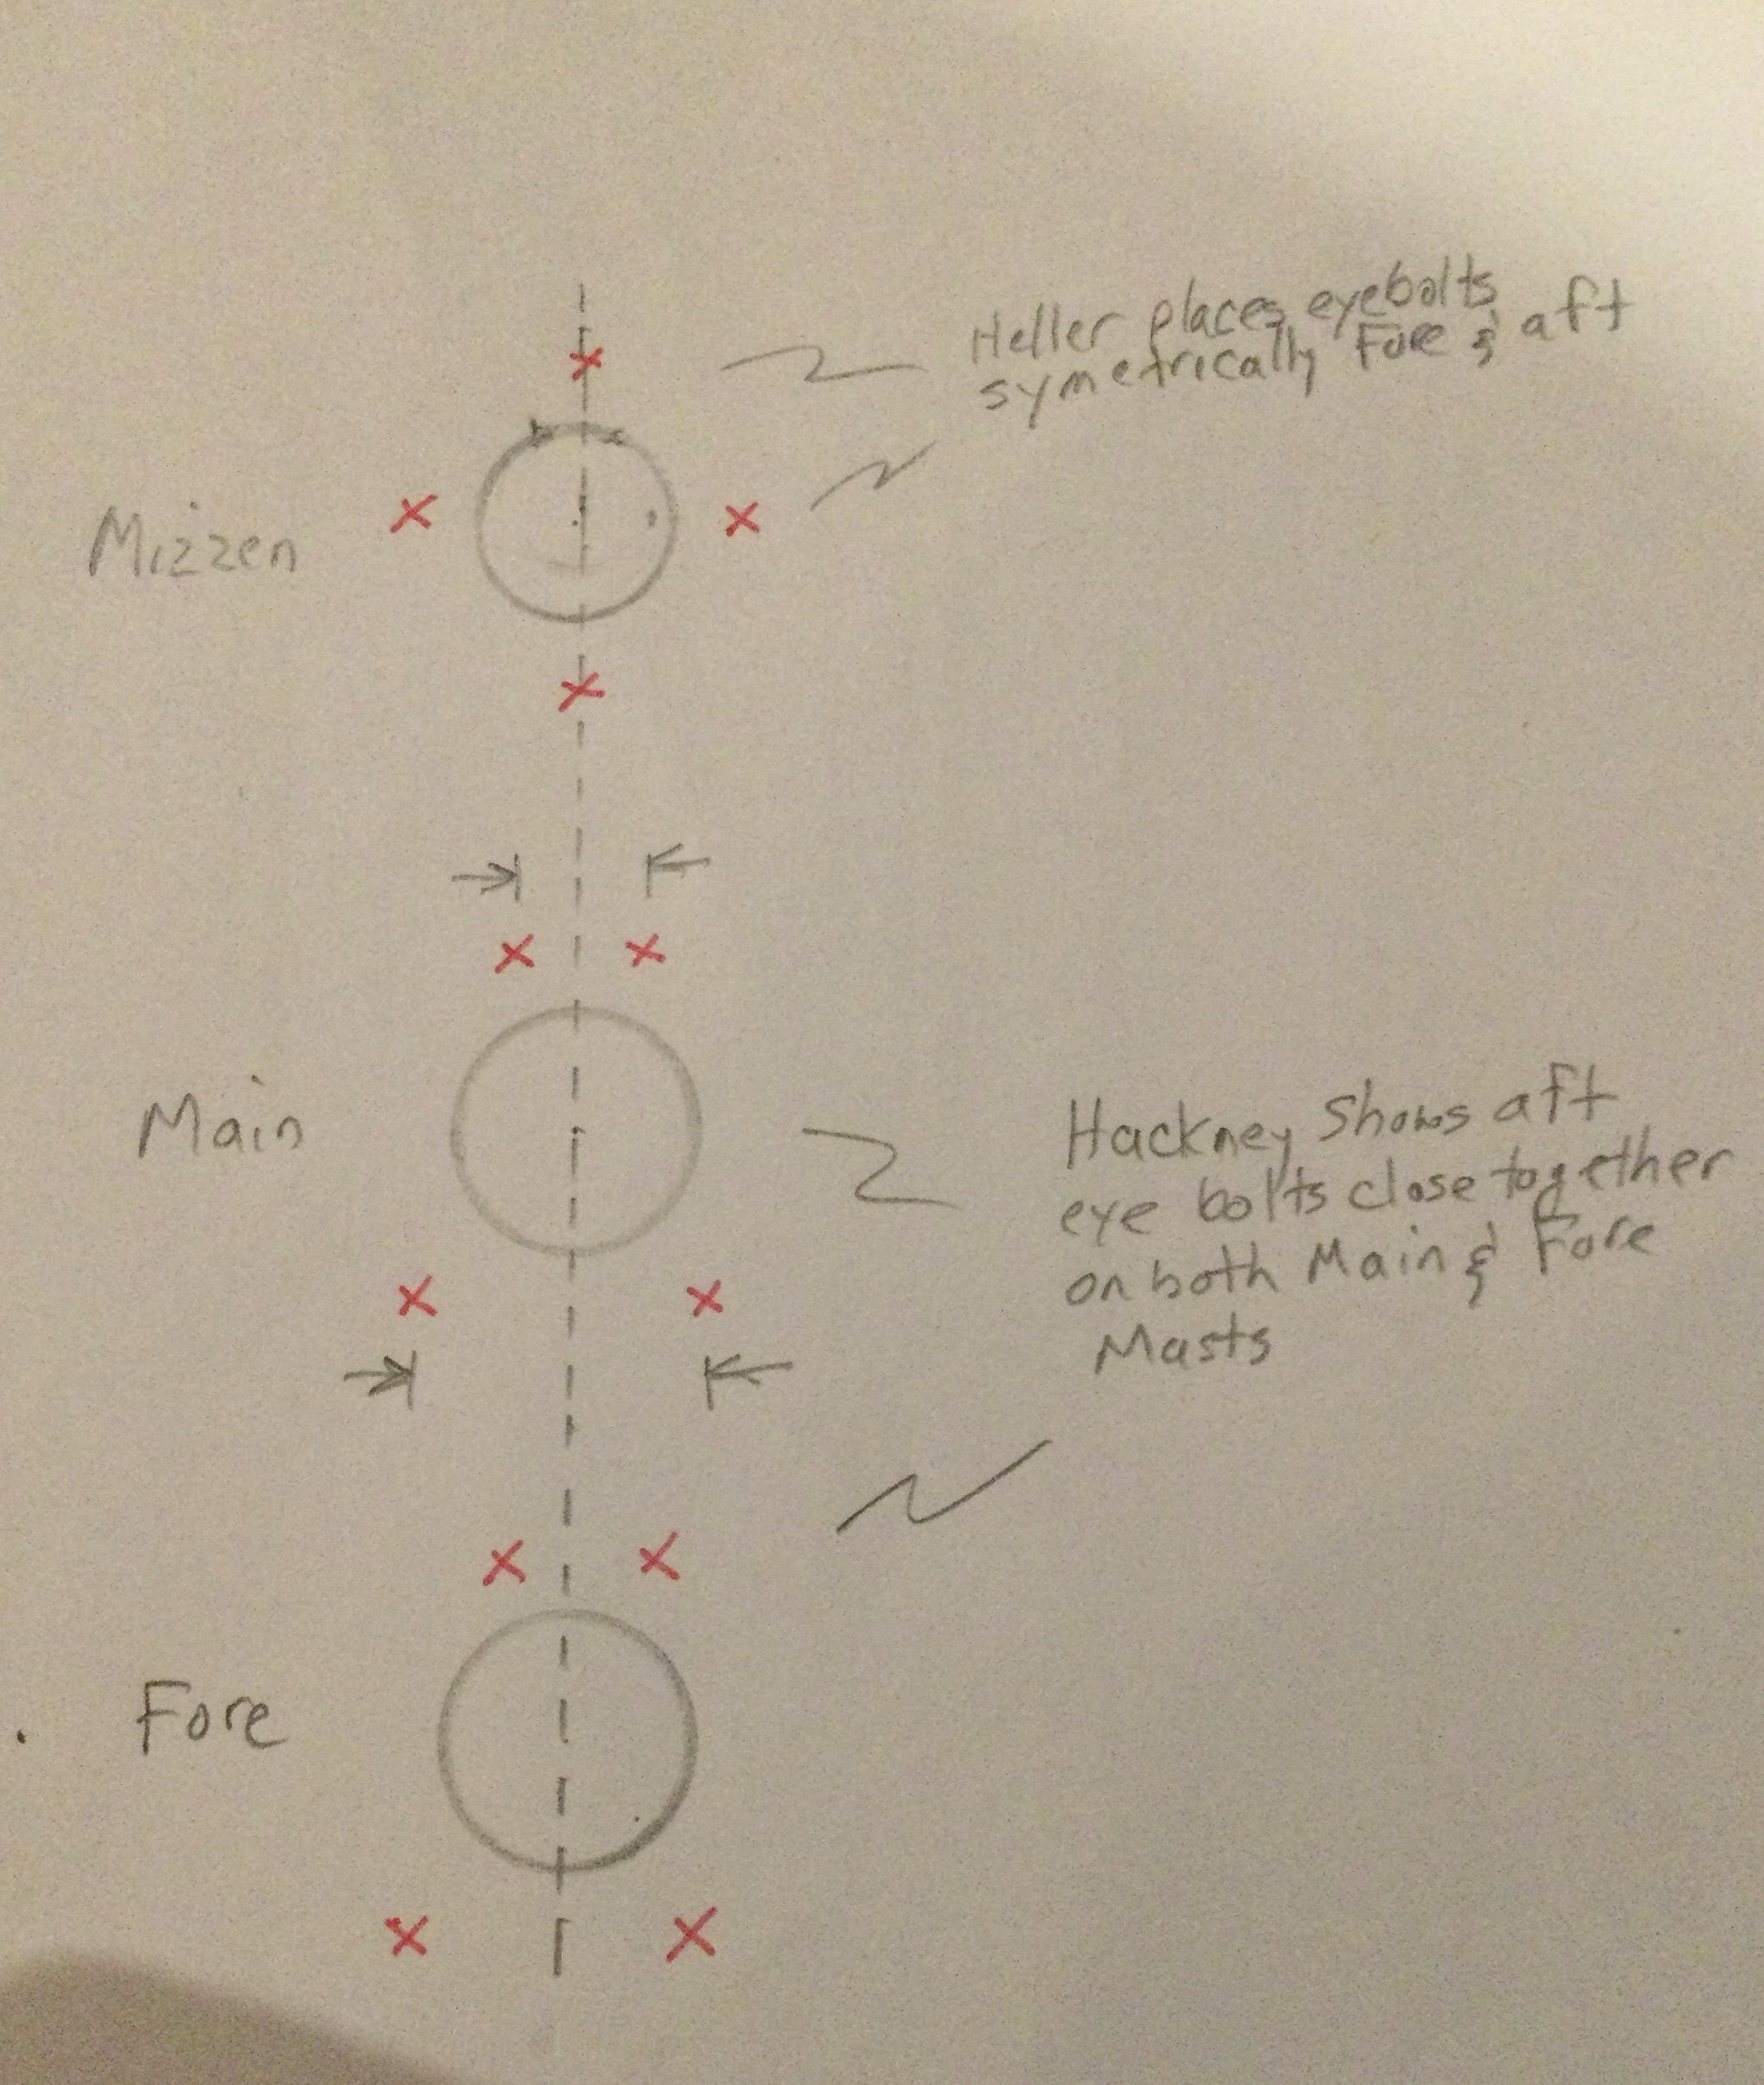
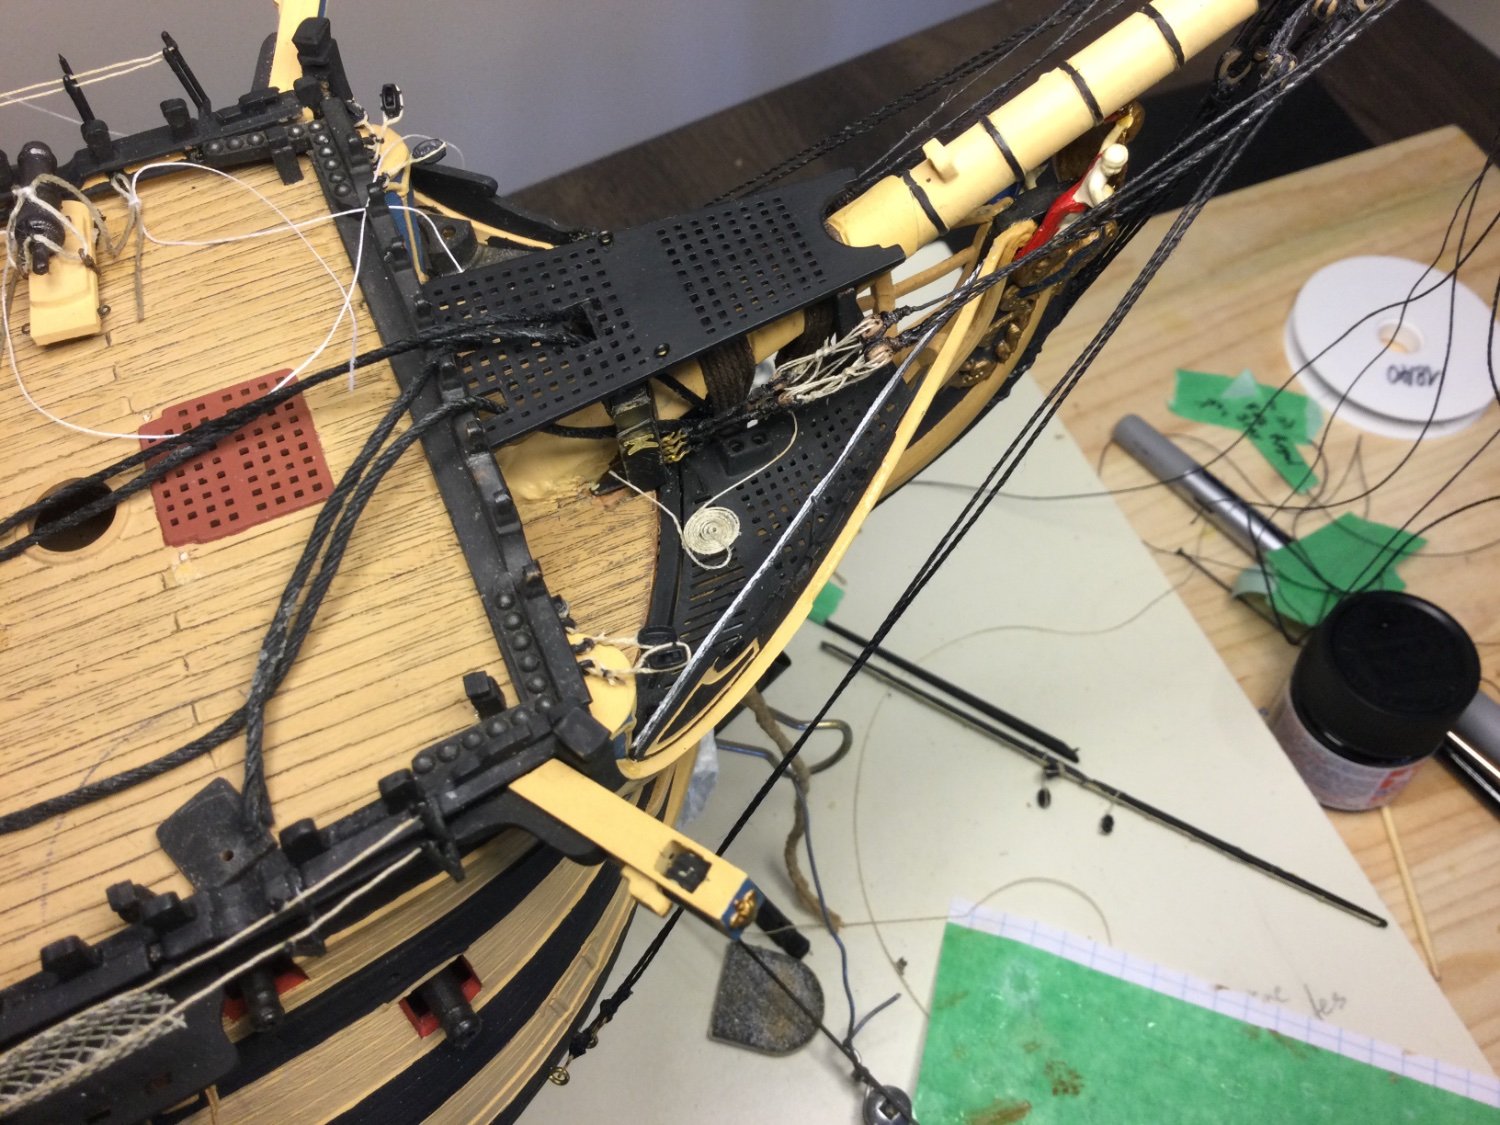
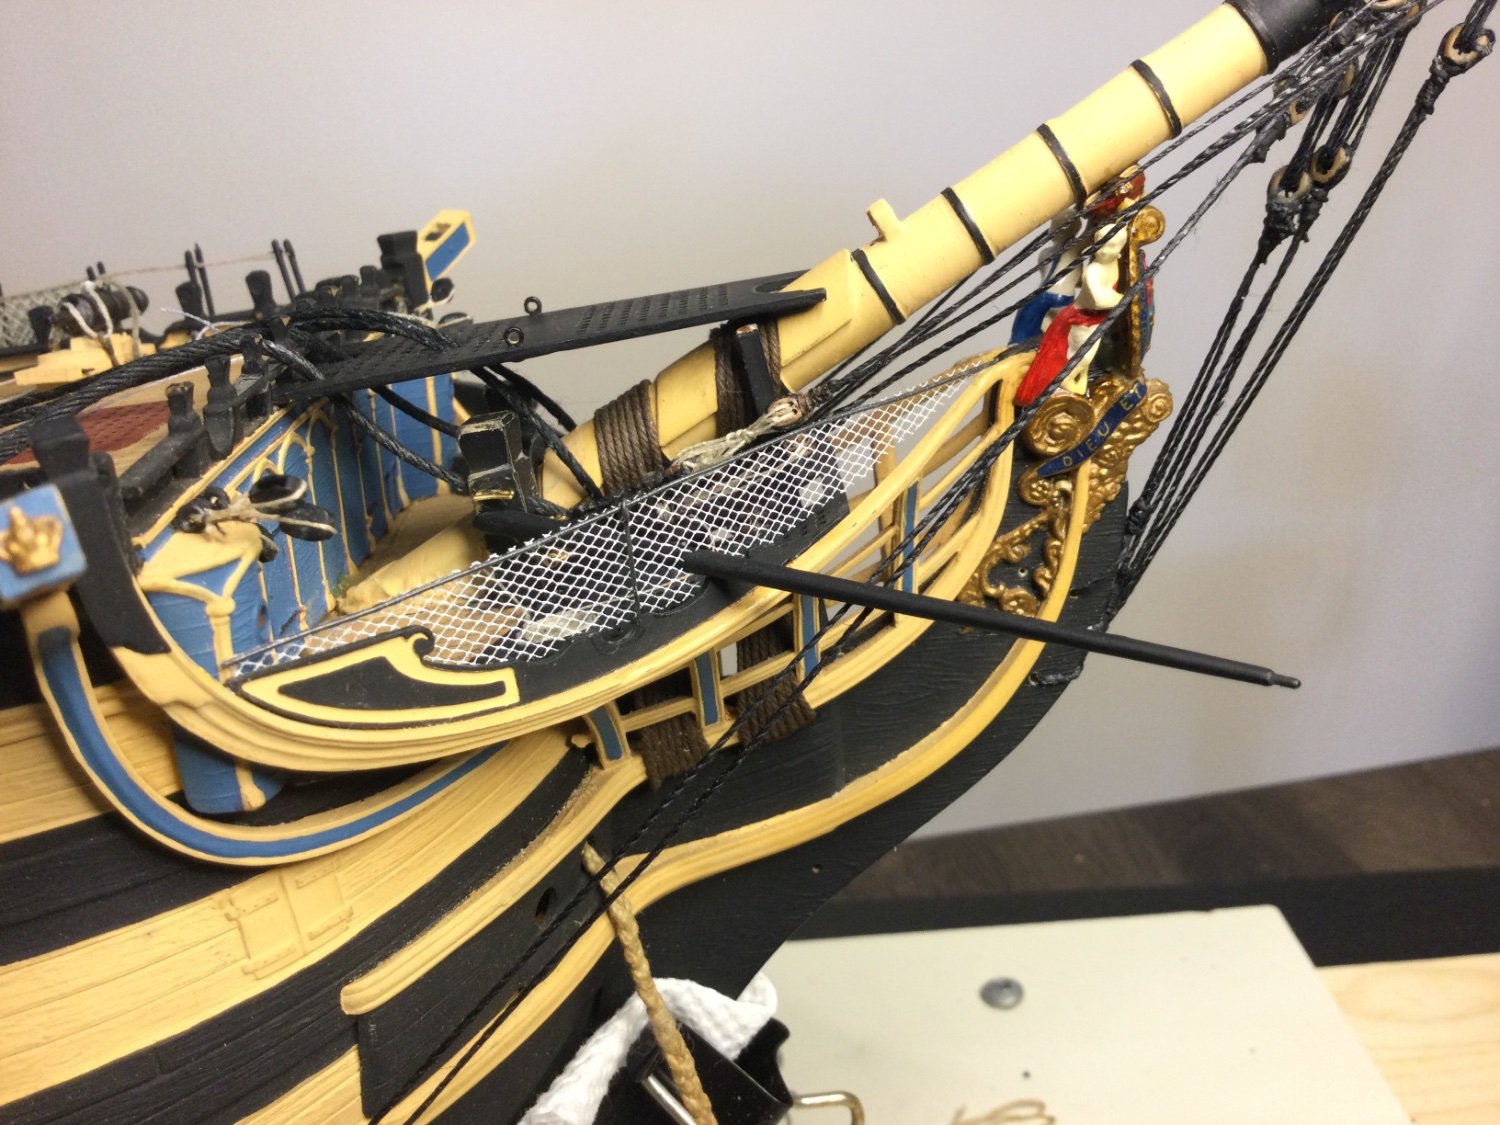
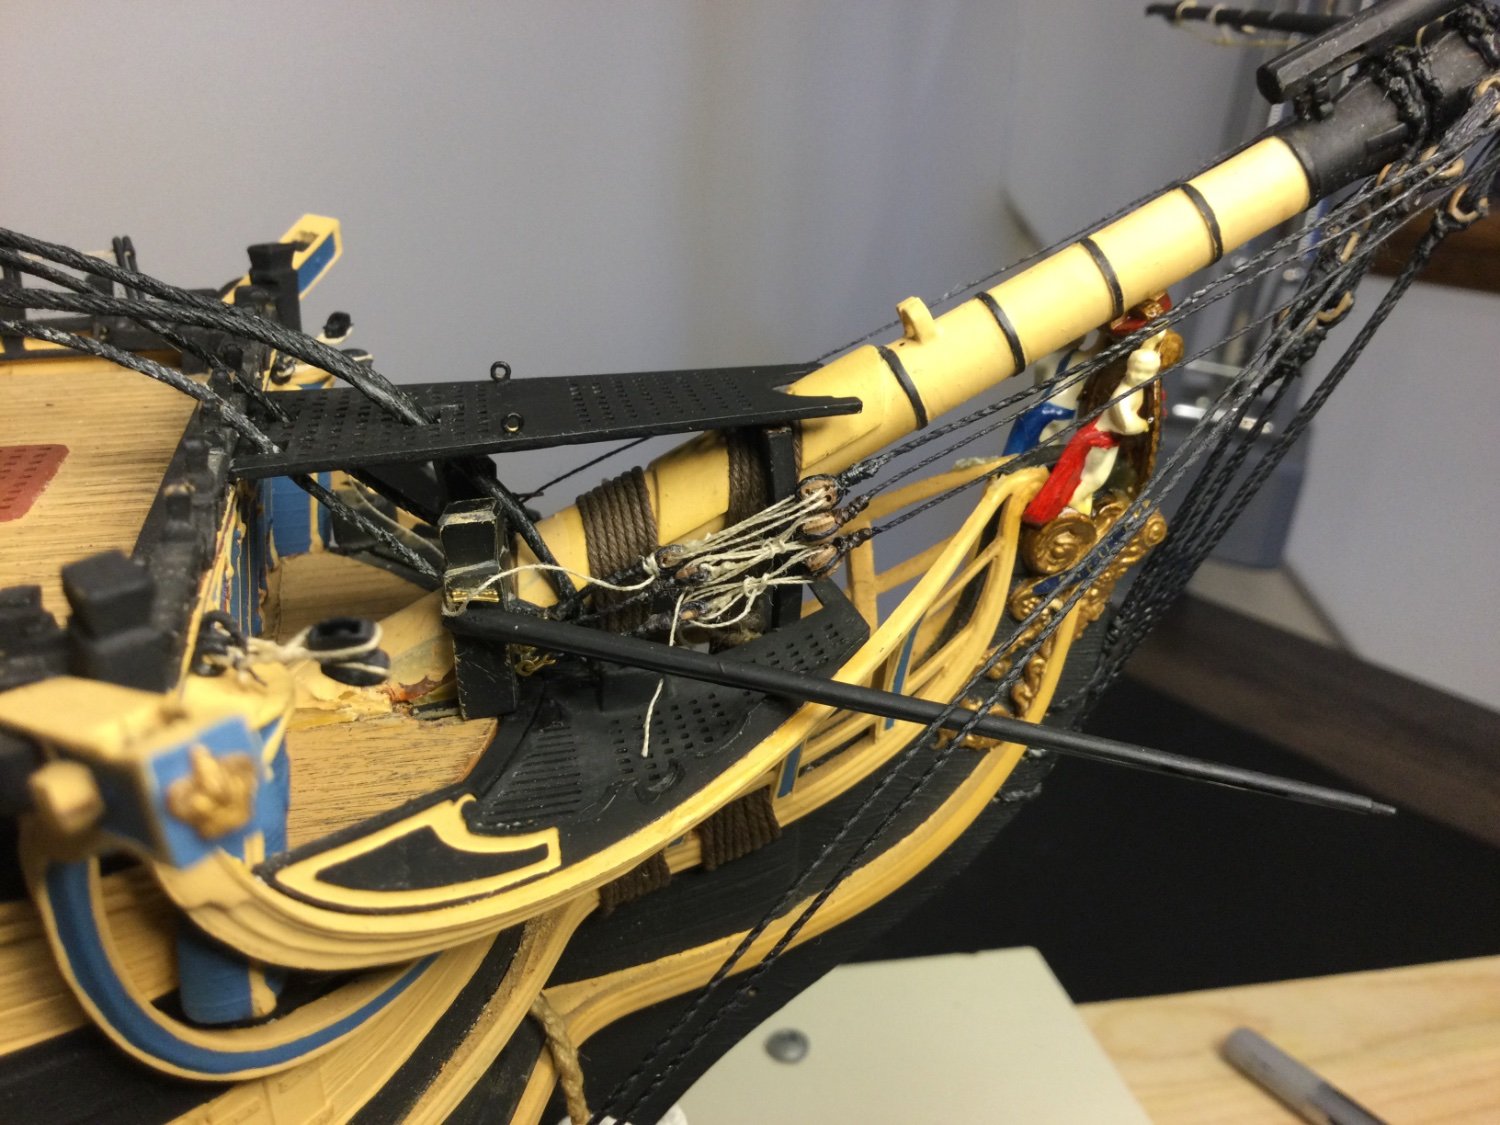
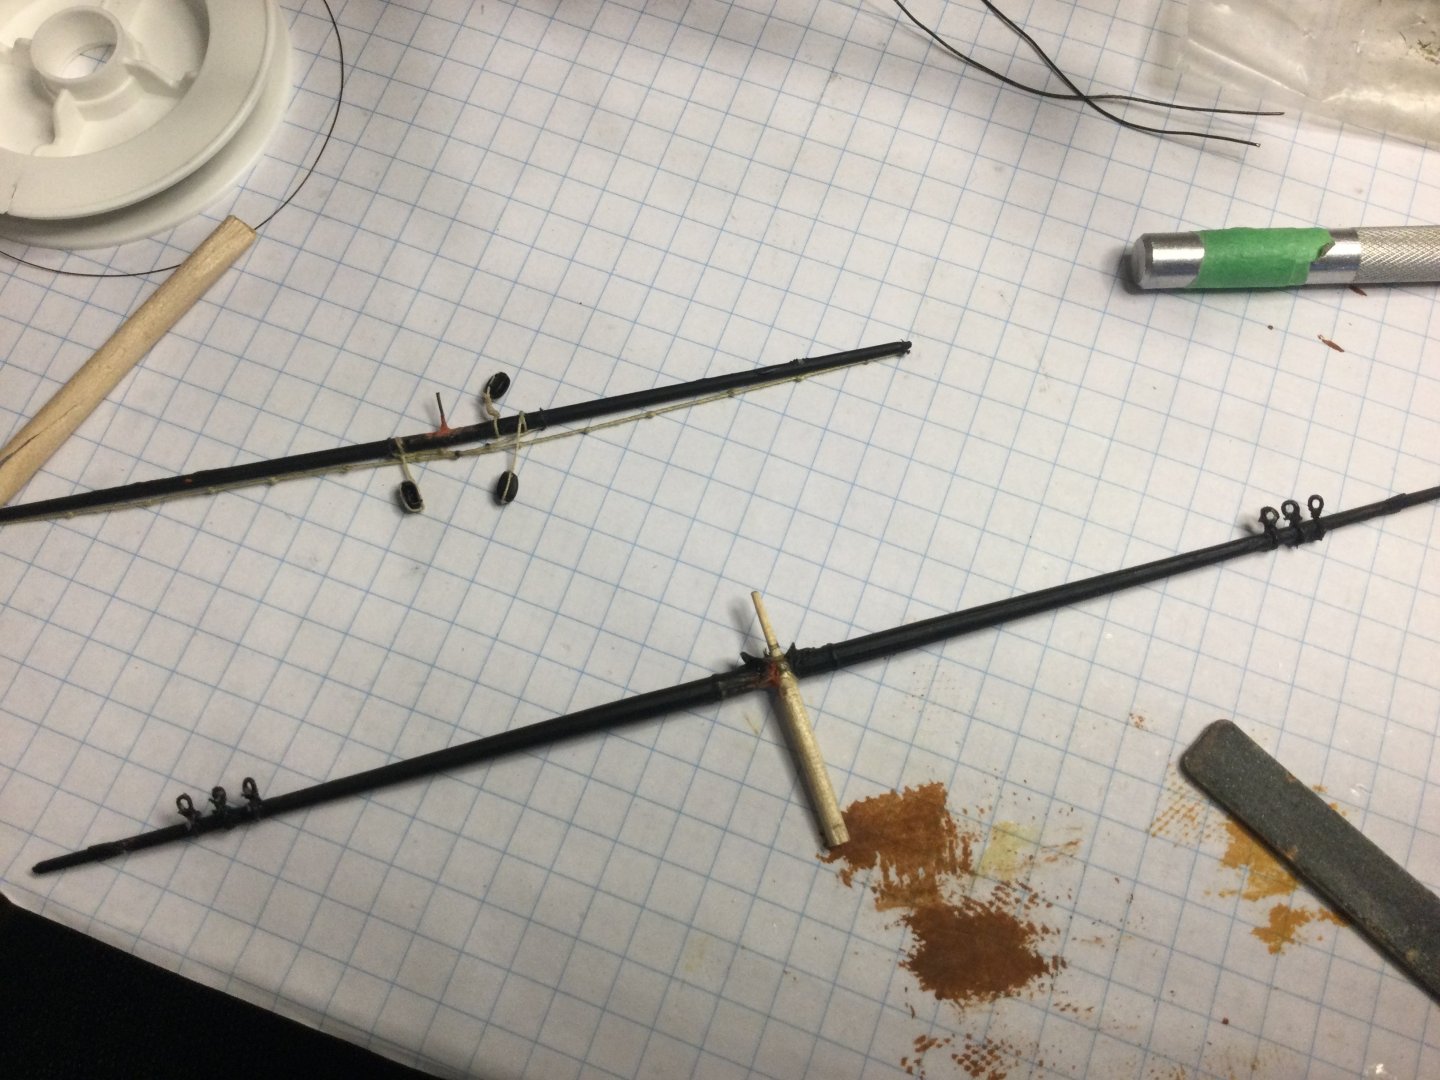
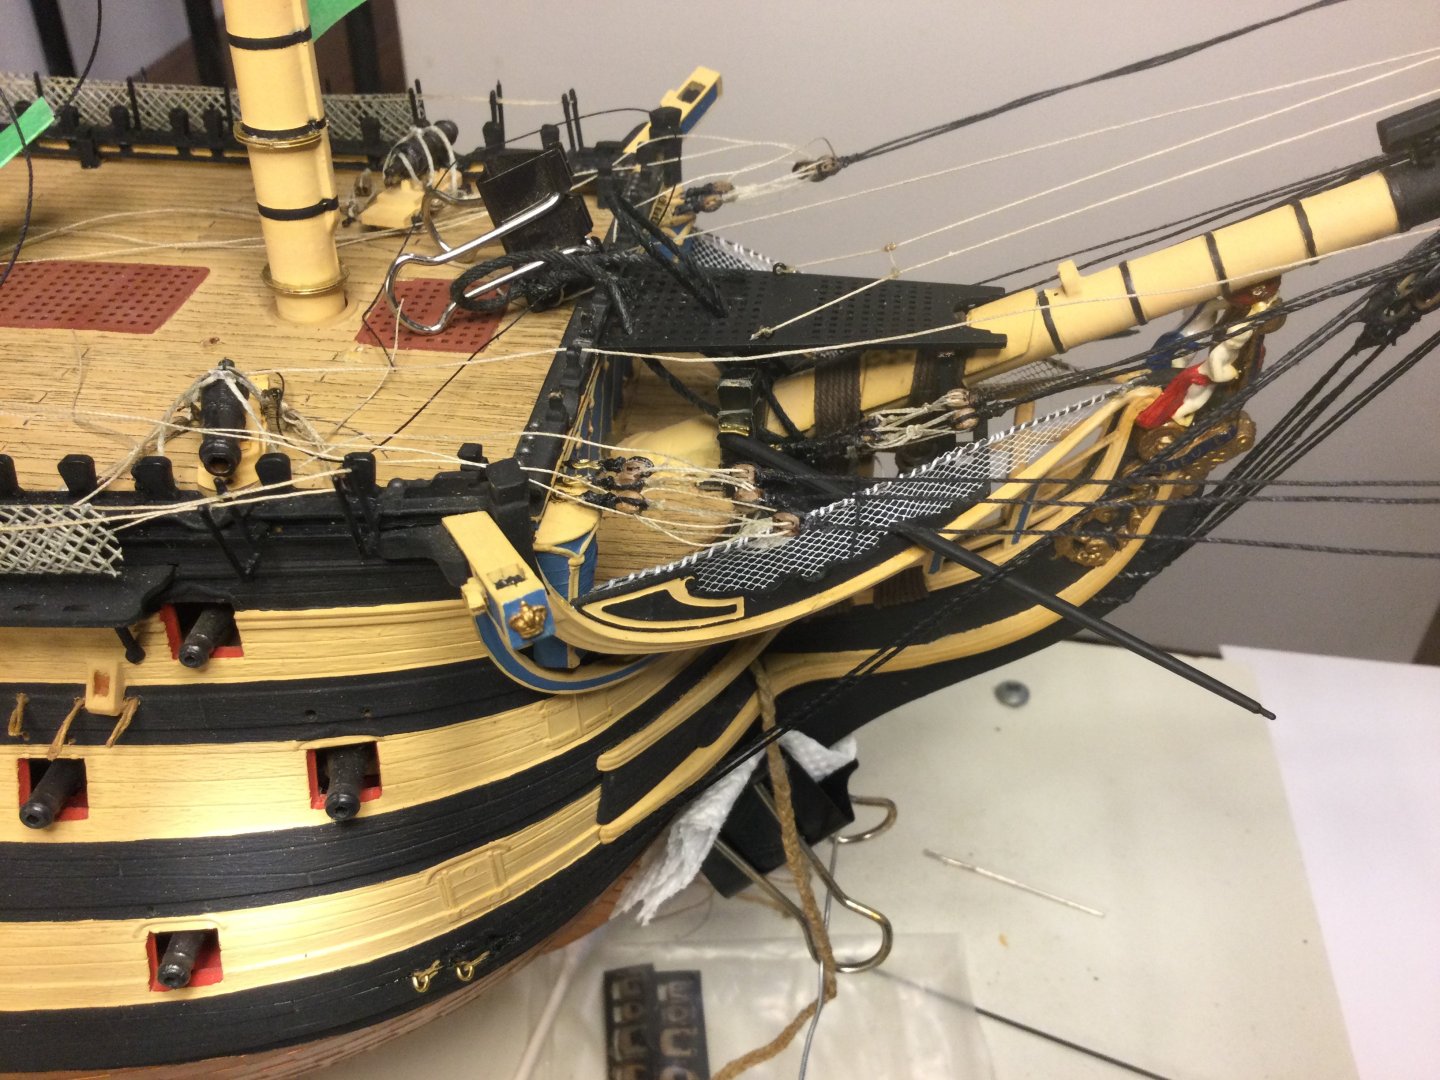
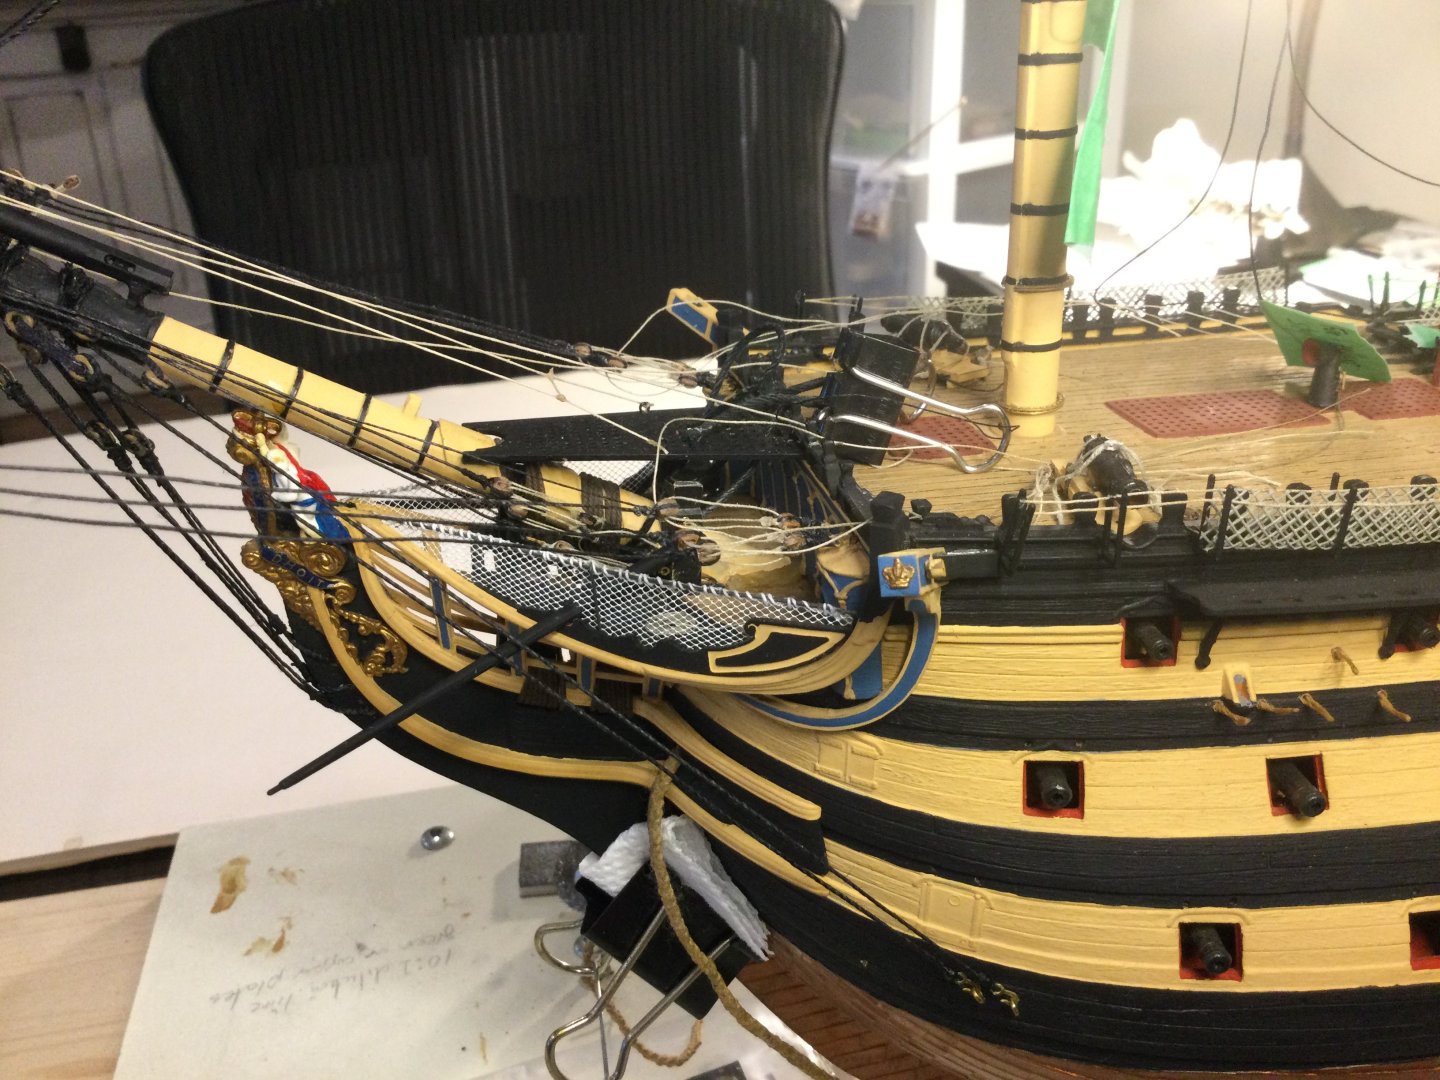
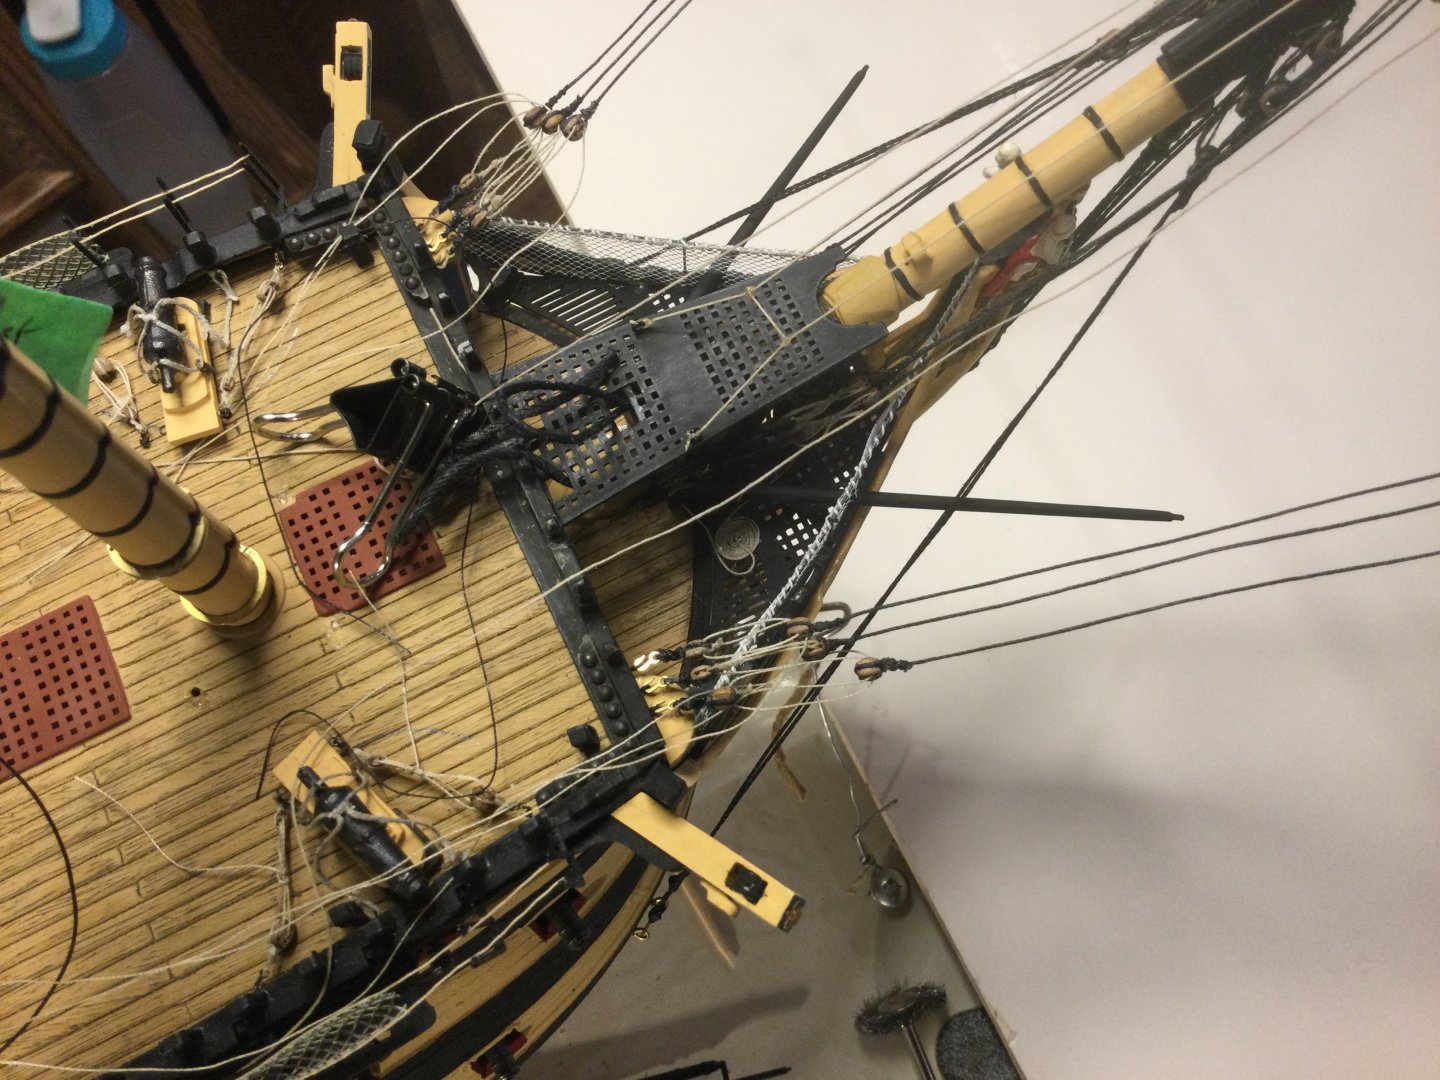
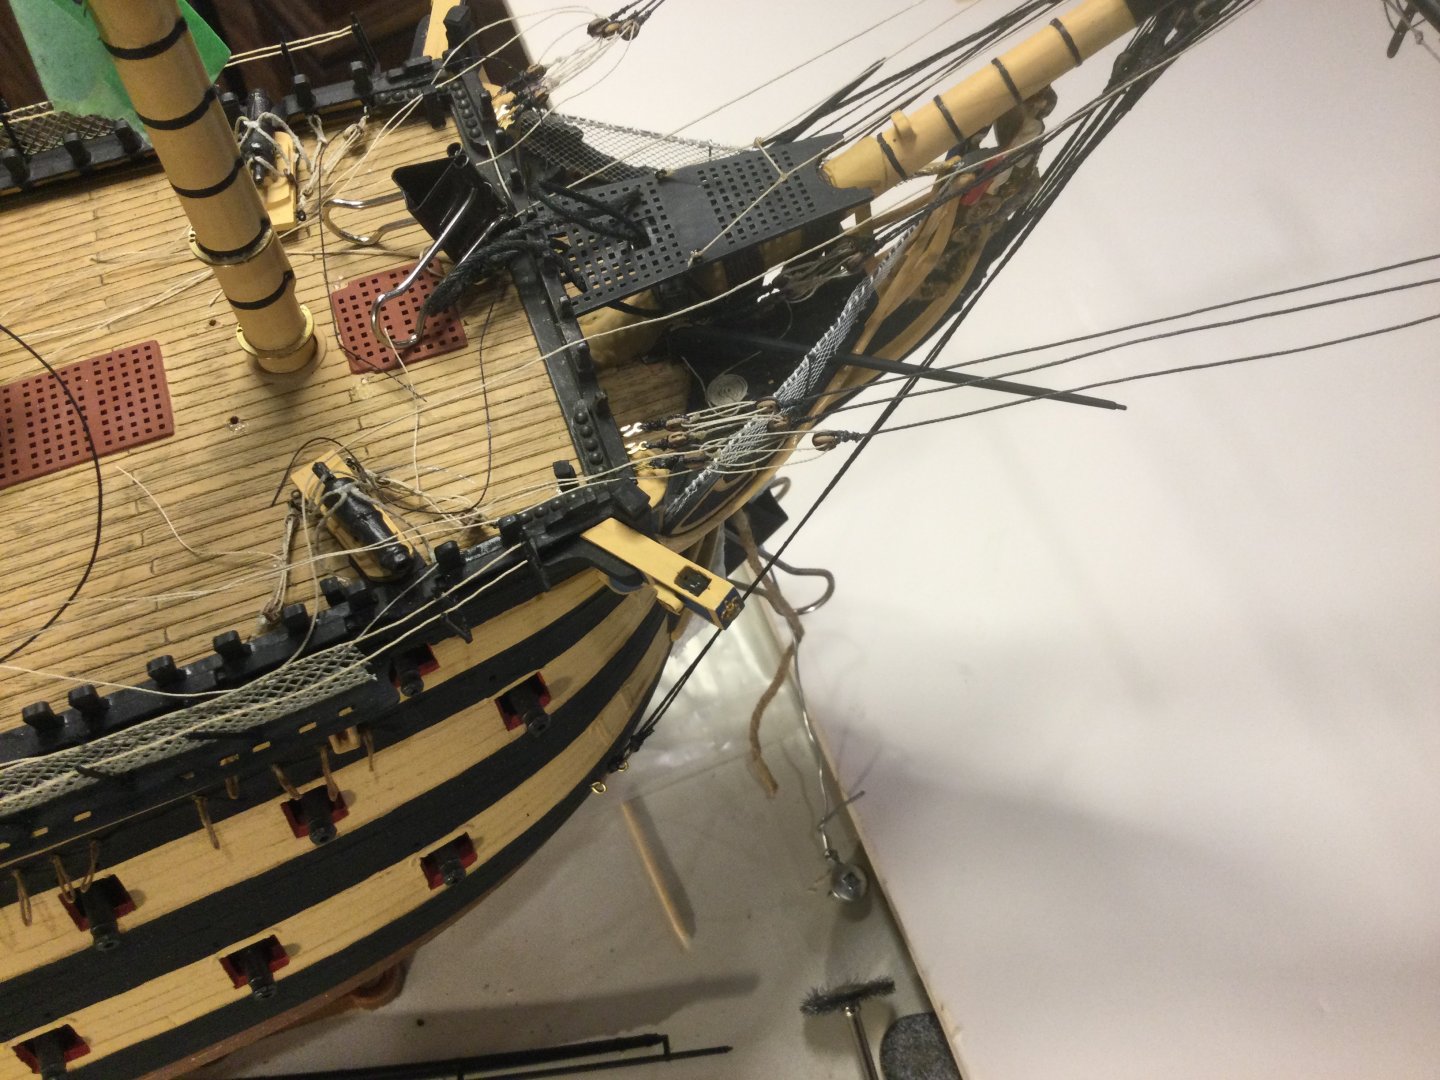
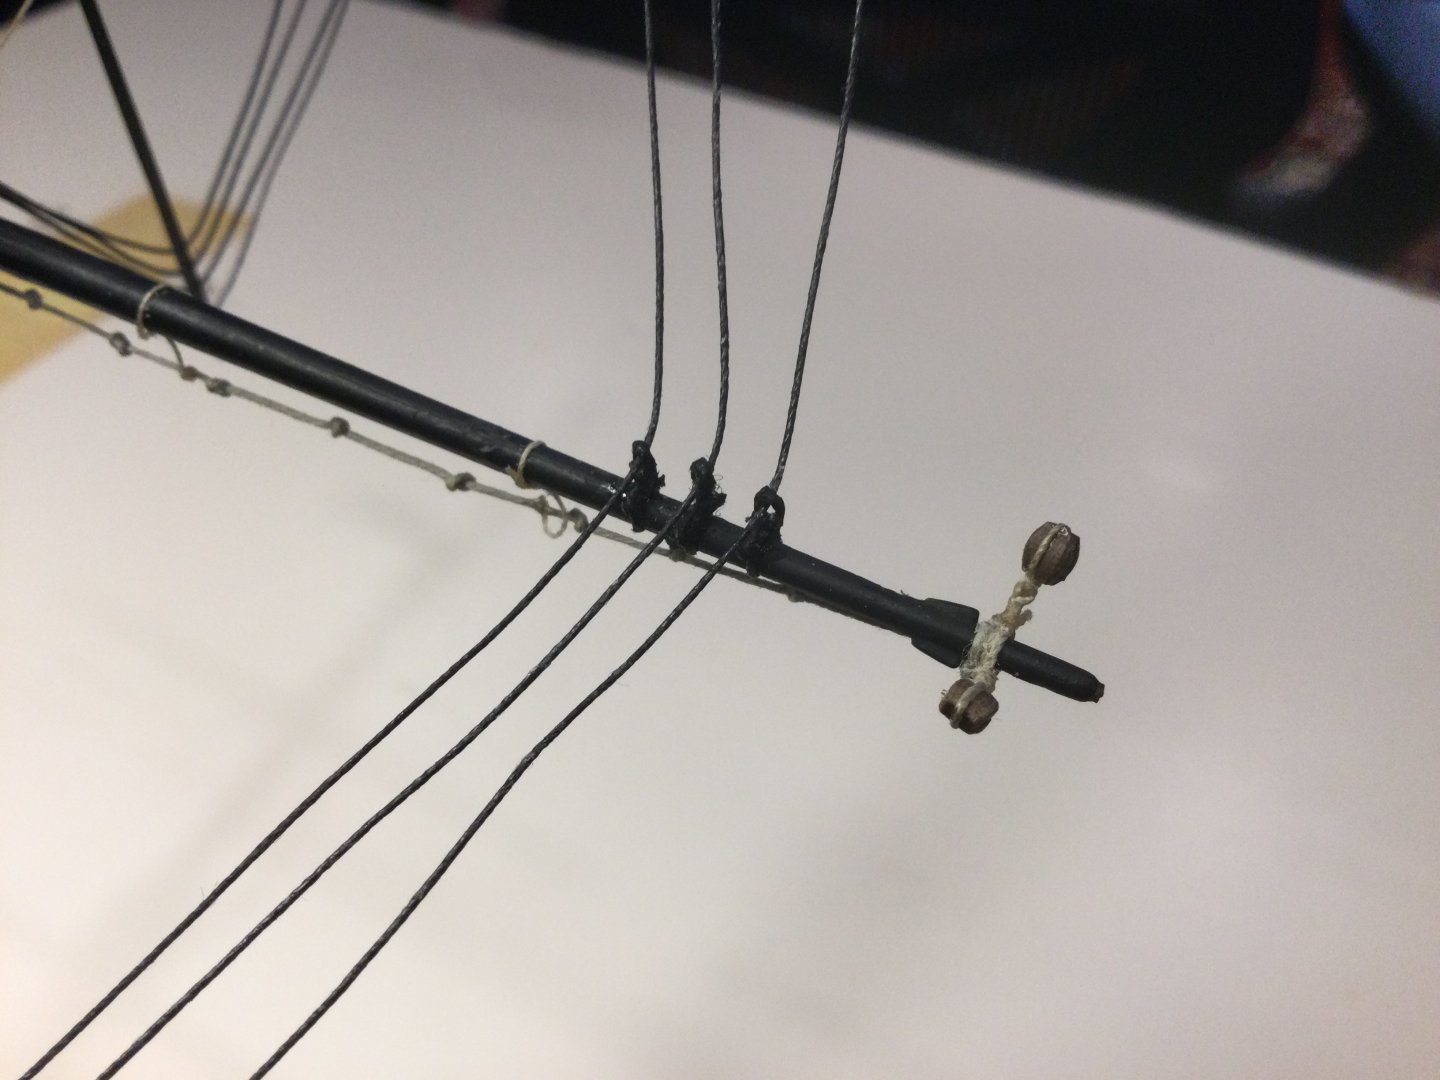
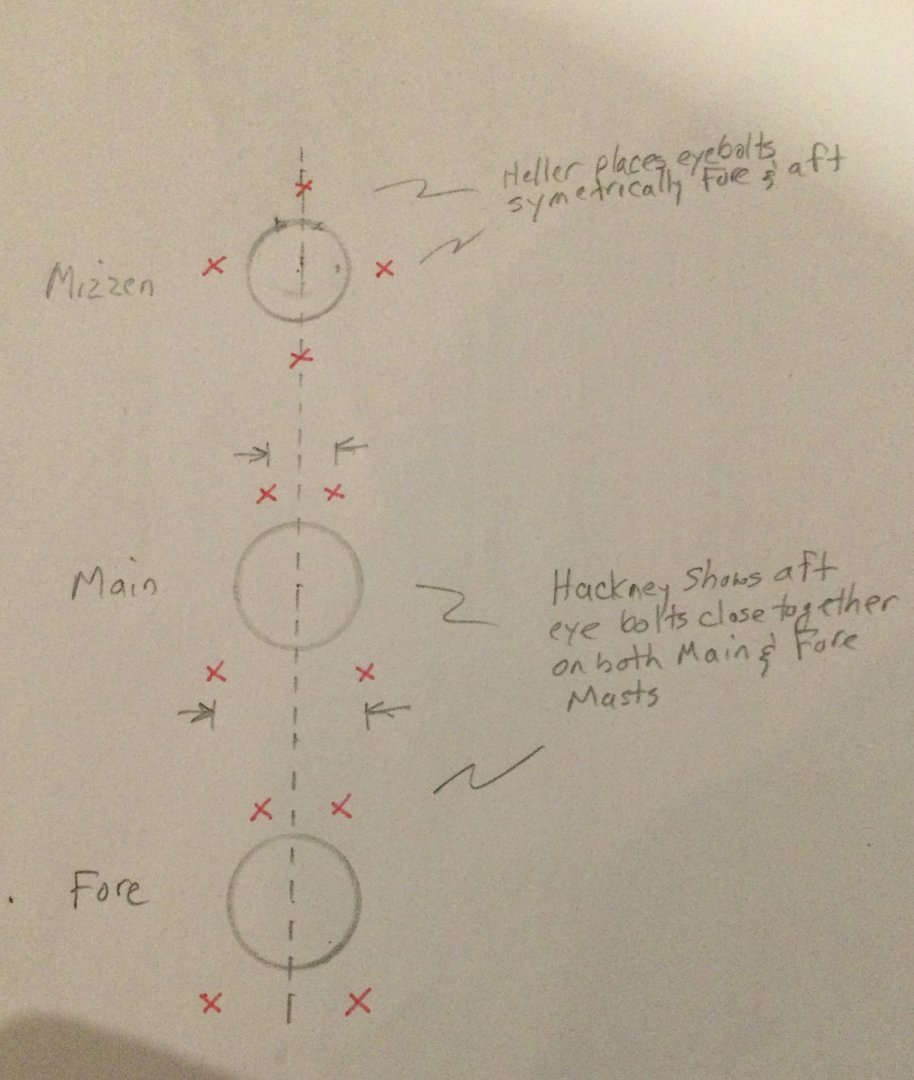
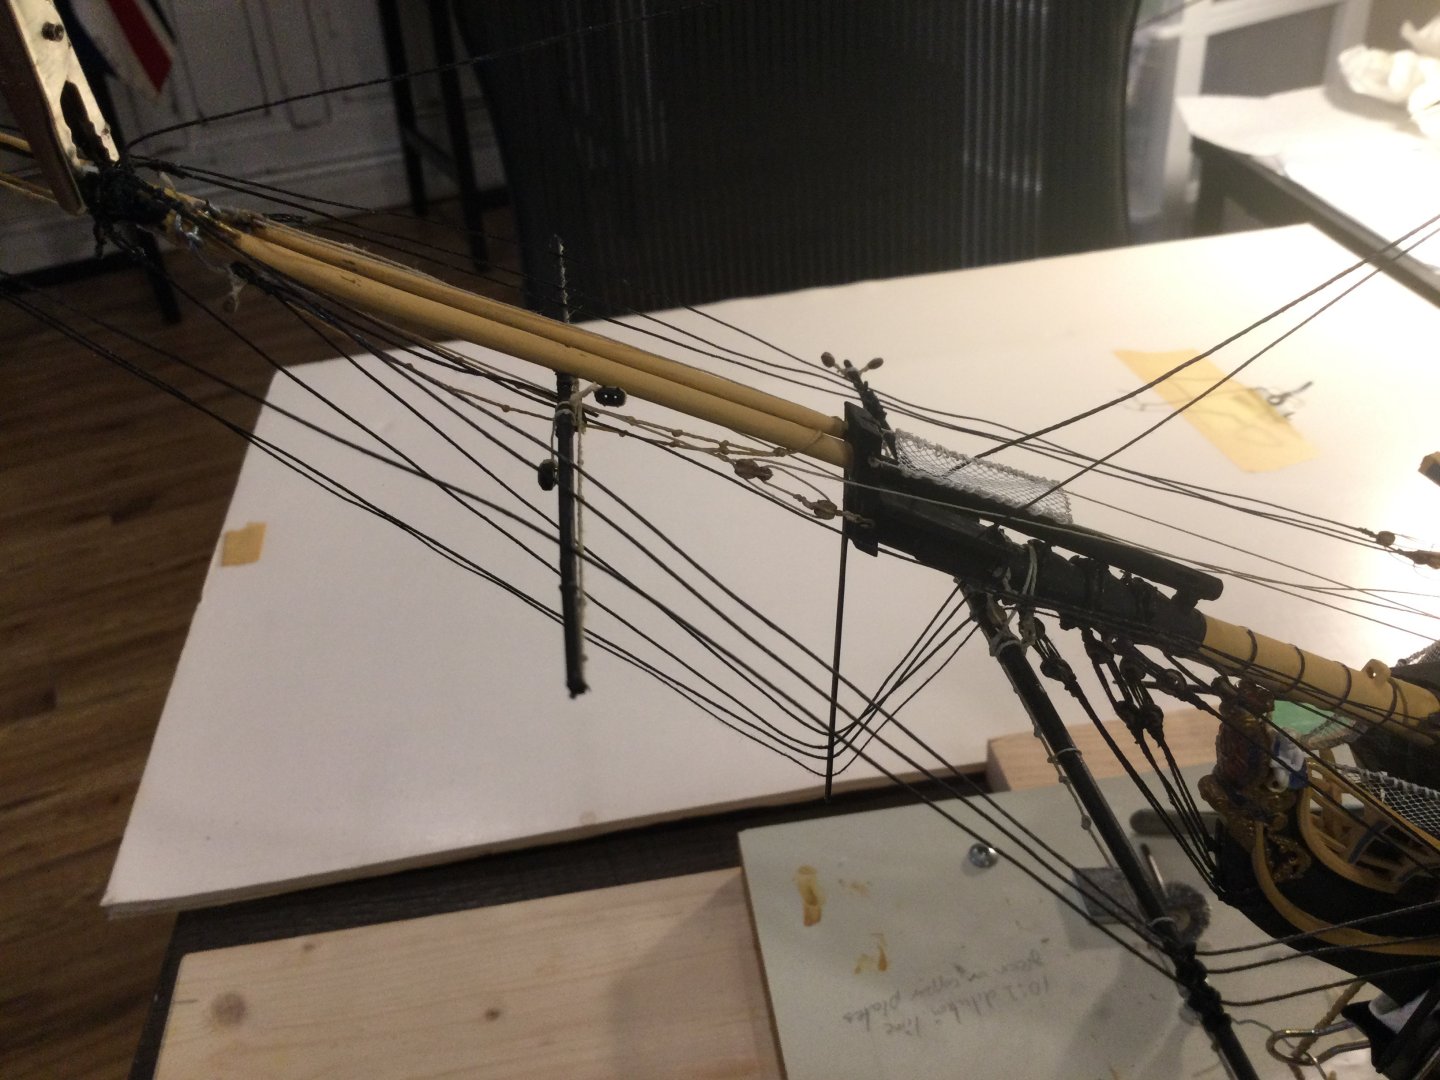
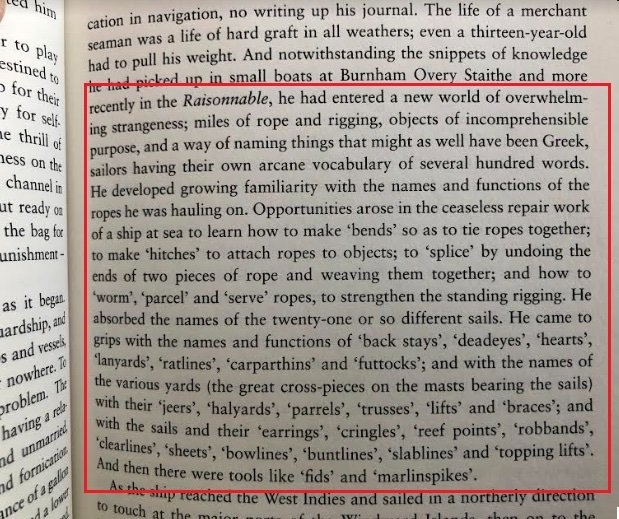
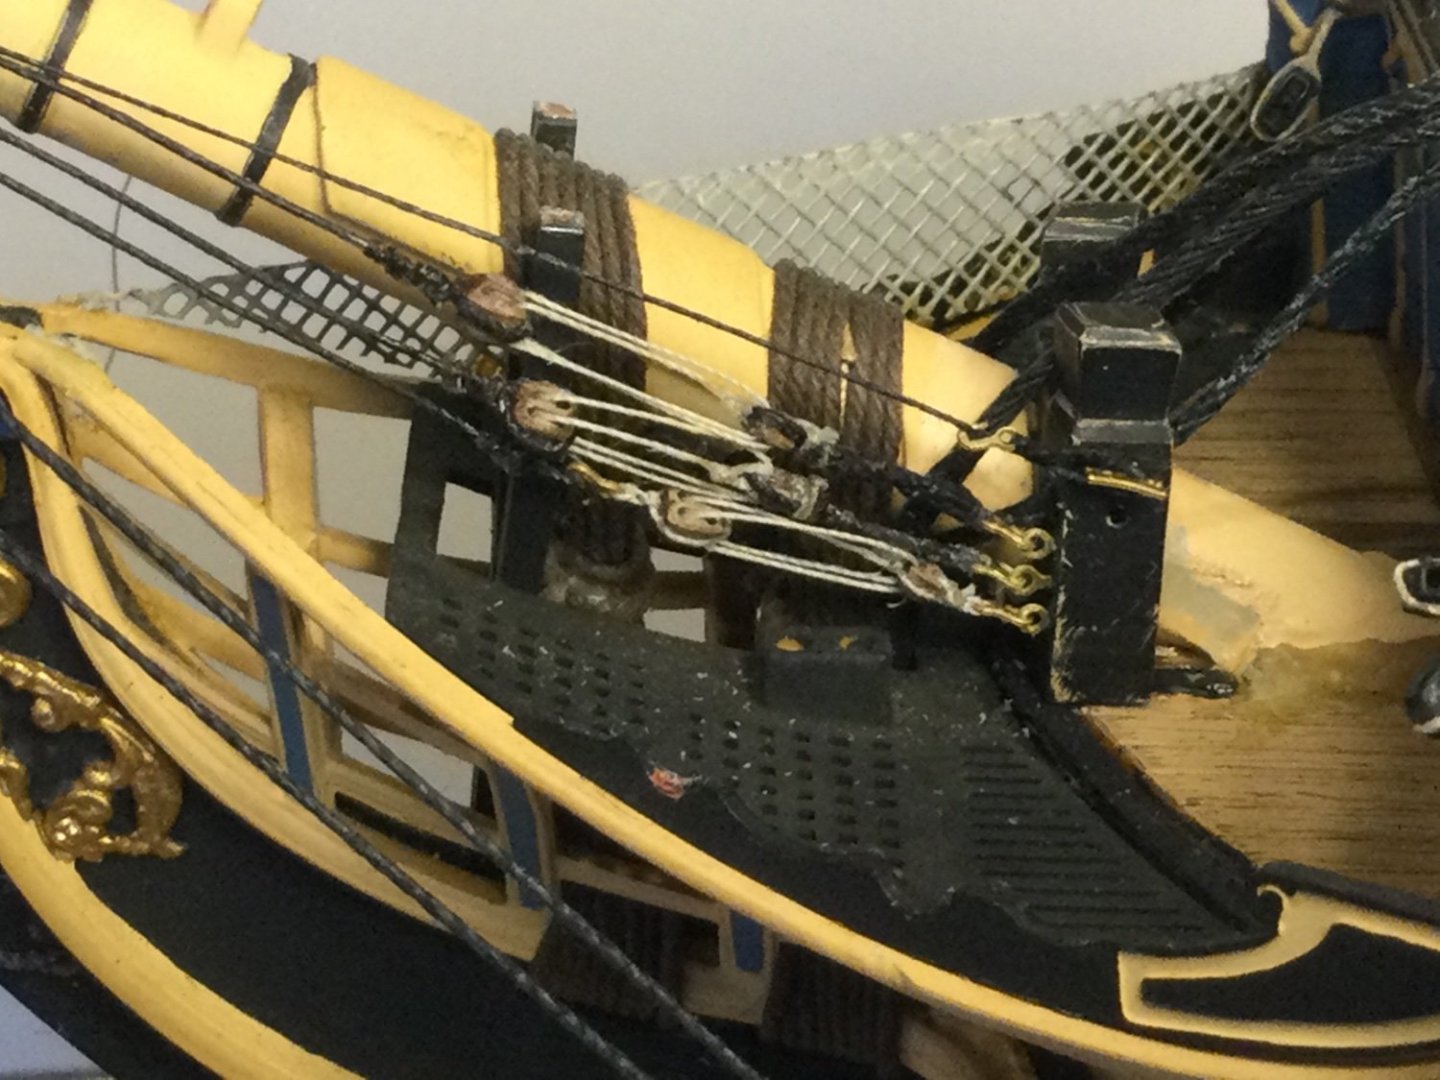
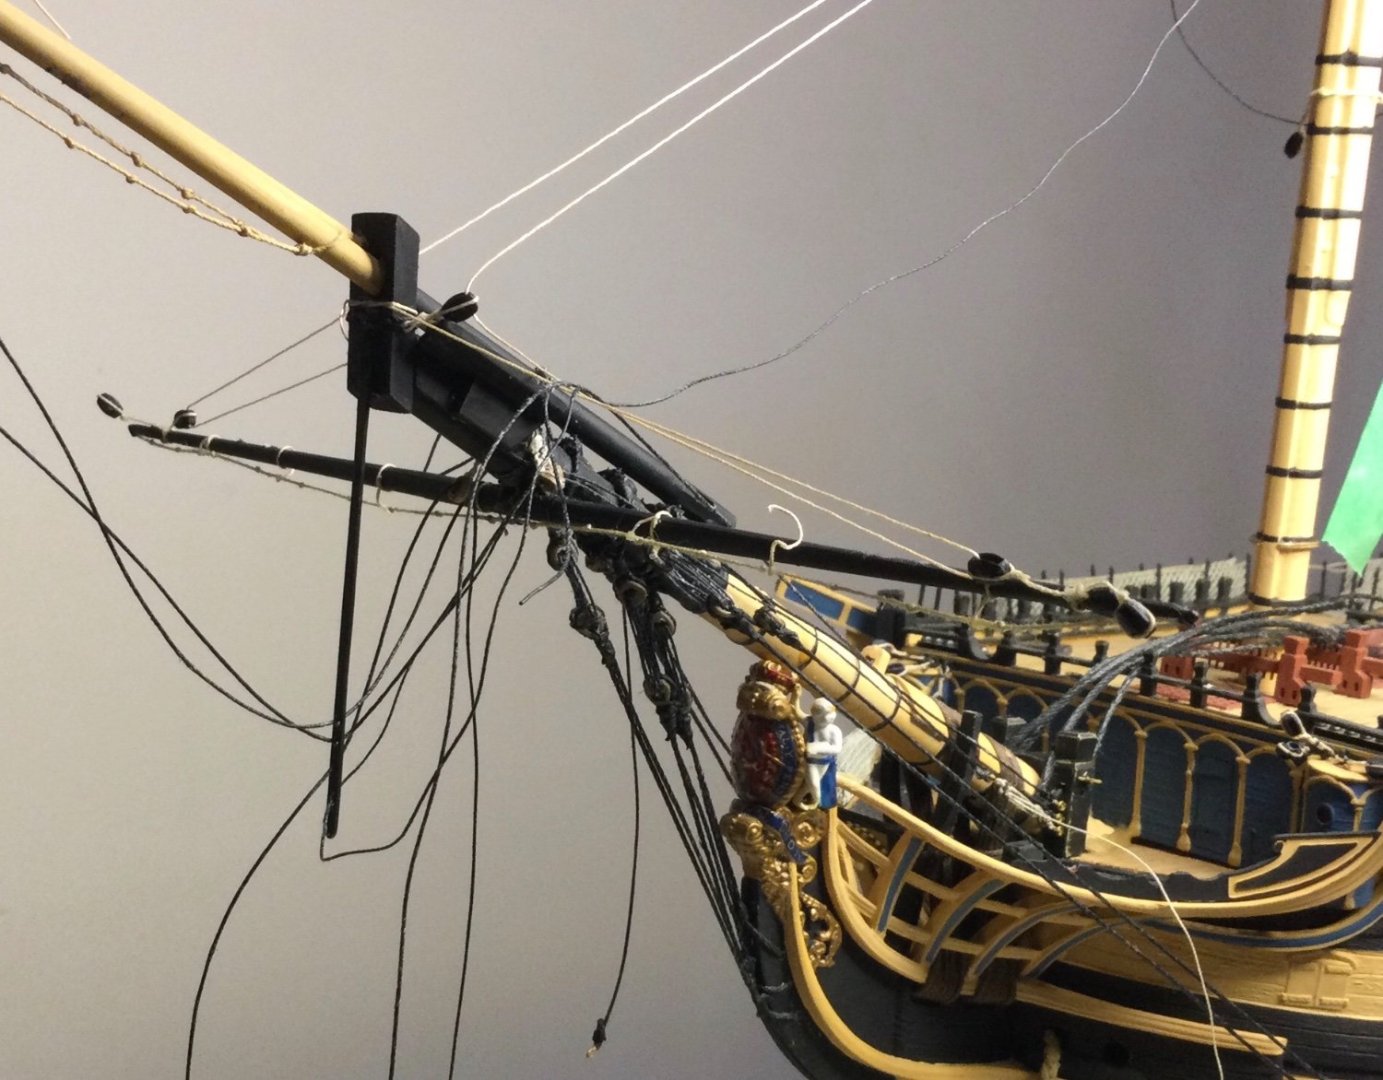
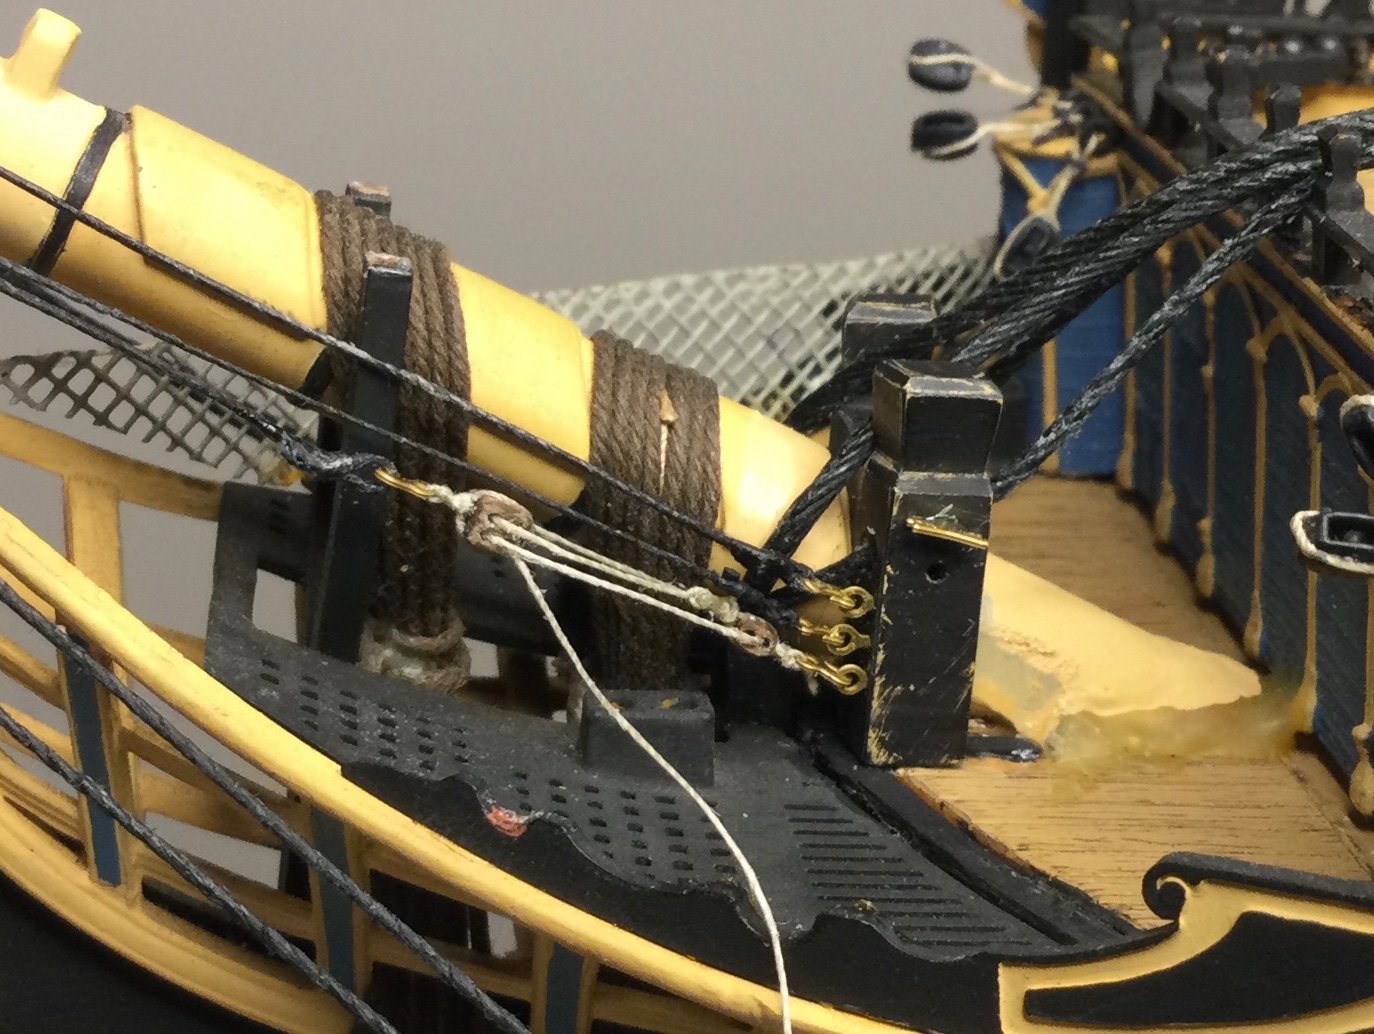
I’m almost resentful of this fine spring weather as it takes me away from the ‘dock yards’ and my work on Victory. I said almost. 😊☀️ Regardless, in between outdoor chores I’m making slow but steady progress on the bow. ‘Guys’ and Martingales rigged and under tension, Jib inhaul & outhaul installed, spritsail yard sling & horses installed (jib boom horses were already in place), fore netting and gangboard netting ‘sewn’ in place. I’m quickly running out of real estate on the jib boom but I still have lots more to go (rigging AND questions 😉). Comments, questions, and suggestions, always welcomed! In the meantime, I have a few questions of my own. Many thanks in advance! Eye bolts on bowsprit block: How many are there? I can account for 4: 2 on the upper port/SB edges for the gangboard netting. One on the port fore face for the jib outhauler and another one the SB side for the jib inhauler. I’m certain there’s at least 2 more - for the halliards? Plus, there appears to a pair of blocks lashed to the block. Ropes that belay on the timber heads: Longridge makes no mention of 'excess' rope. Do a make a coil of rope for each timber head? ‘Guy’ tackle: I left plenty of excess rope where the tackle hooks to an eyebolt at the beakhead bulkhead, but how do these finish - as with the other tackle, do I frap around the running end a couple of turns between the blocks? Eye bolts at the base of the masts: per the below sketch, is this the correct arrangement? I had originally glued fast the spritsail & spritsail topsail yards against the bowsprit & jib boom. This made the area even more difficult to work around so I carefully prised these off and installed a dowel and a small wire and so the yards would hang slightly below the bowsprit and jib boom. Maaybe a bit too low on the spritsail yard but the extra clearance helps with all the rigging bits that are starting to accumulate. I fashioned eyes from thread hardened with a touch of CA in place of the thimbles specified by Longridge for the guys. The mandatory jars of Branston pickle for our Saint George’s Day get together this coming Saturday (official day is Sunday) 😁🏴


-
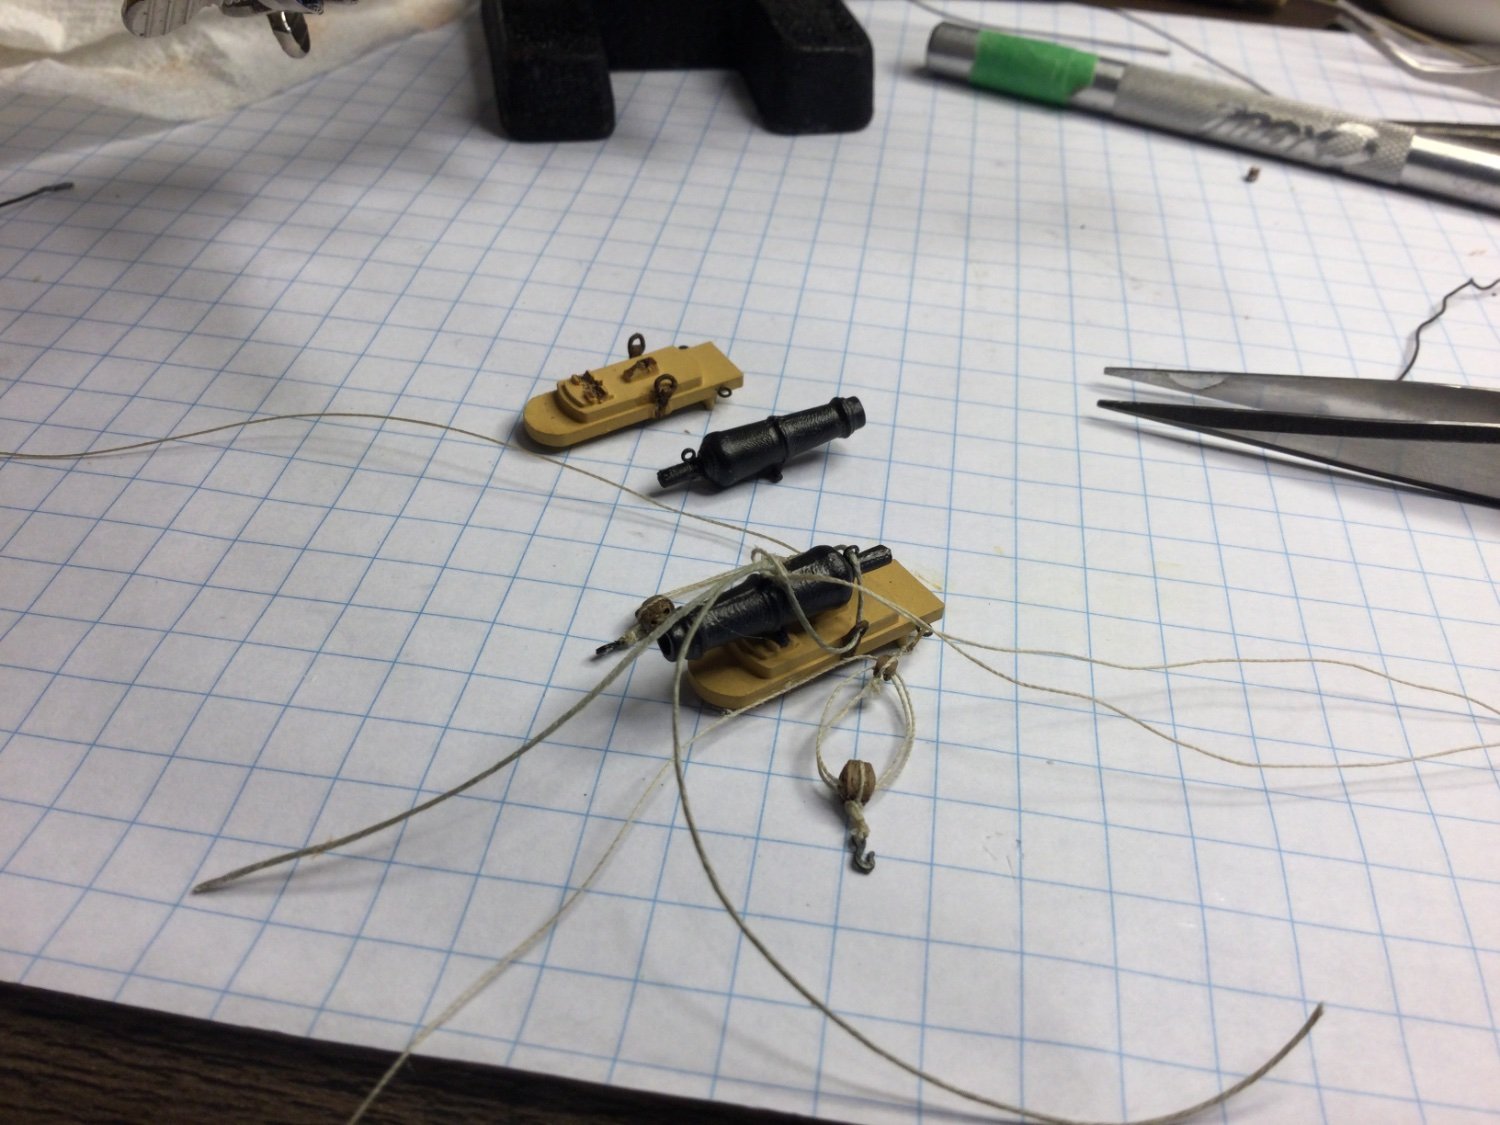
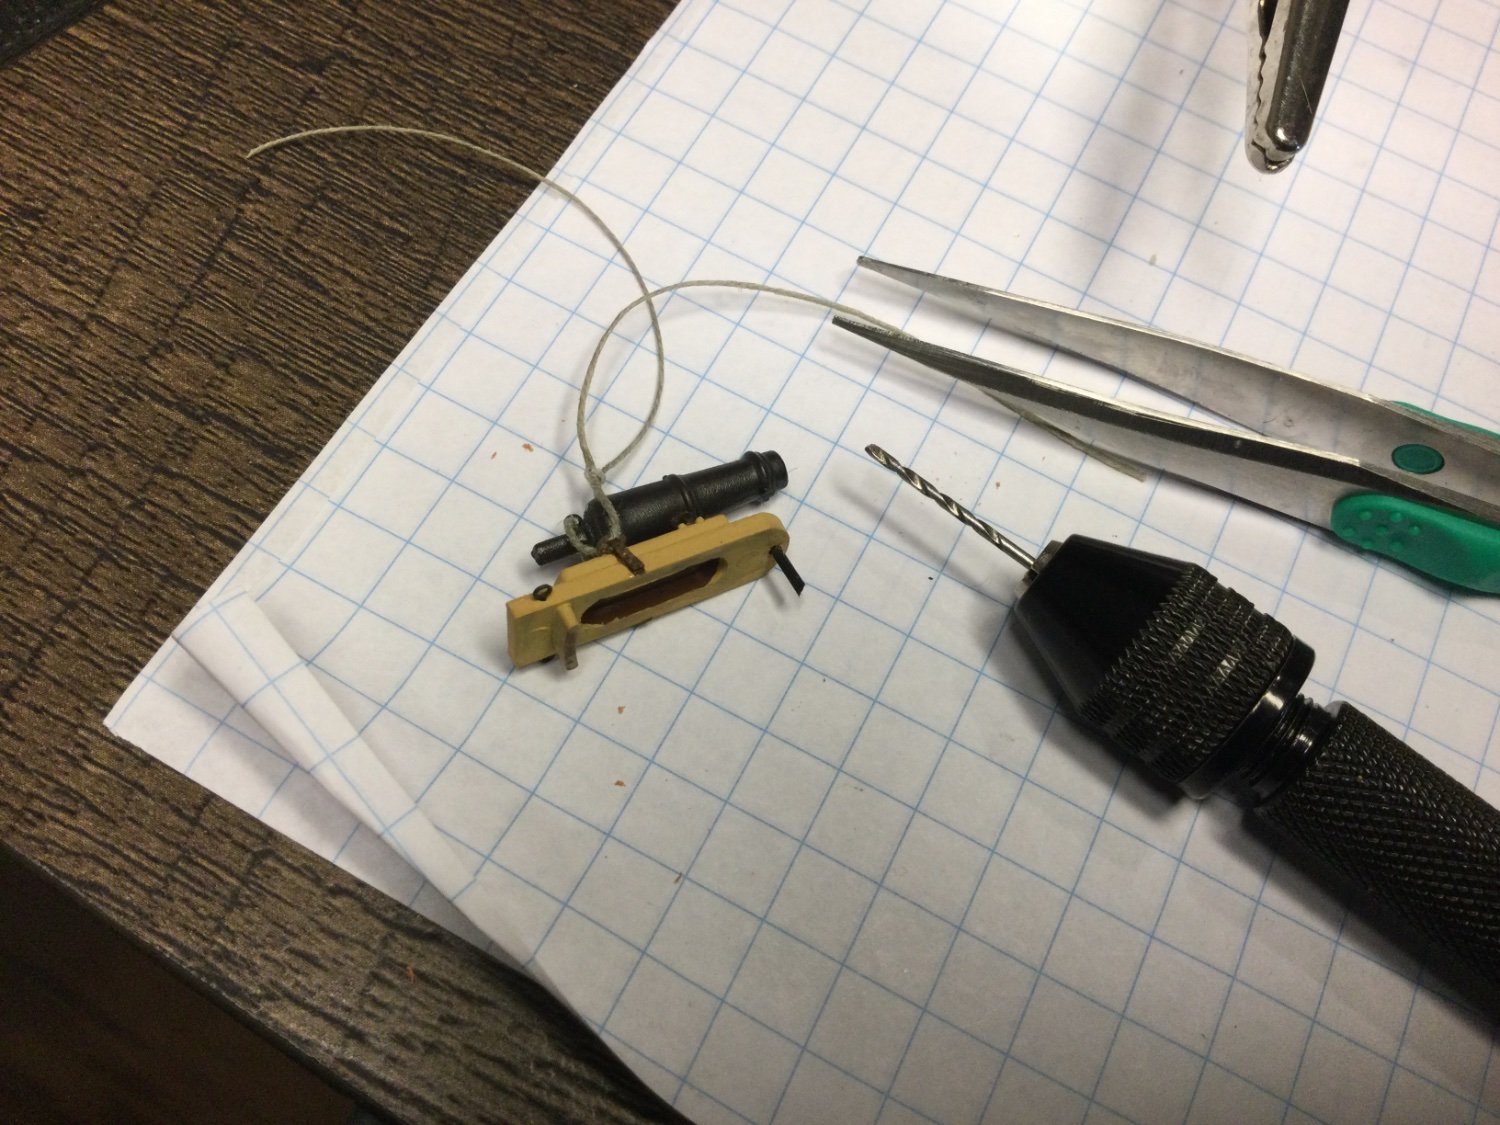
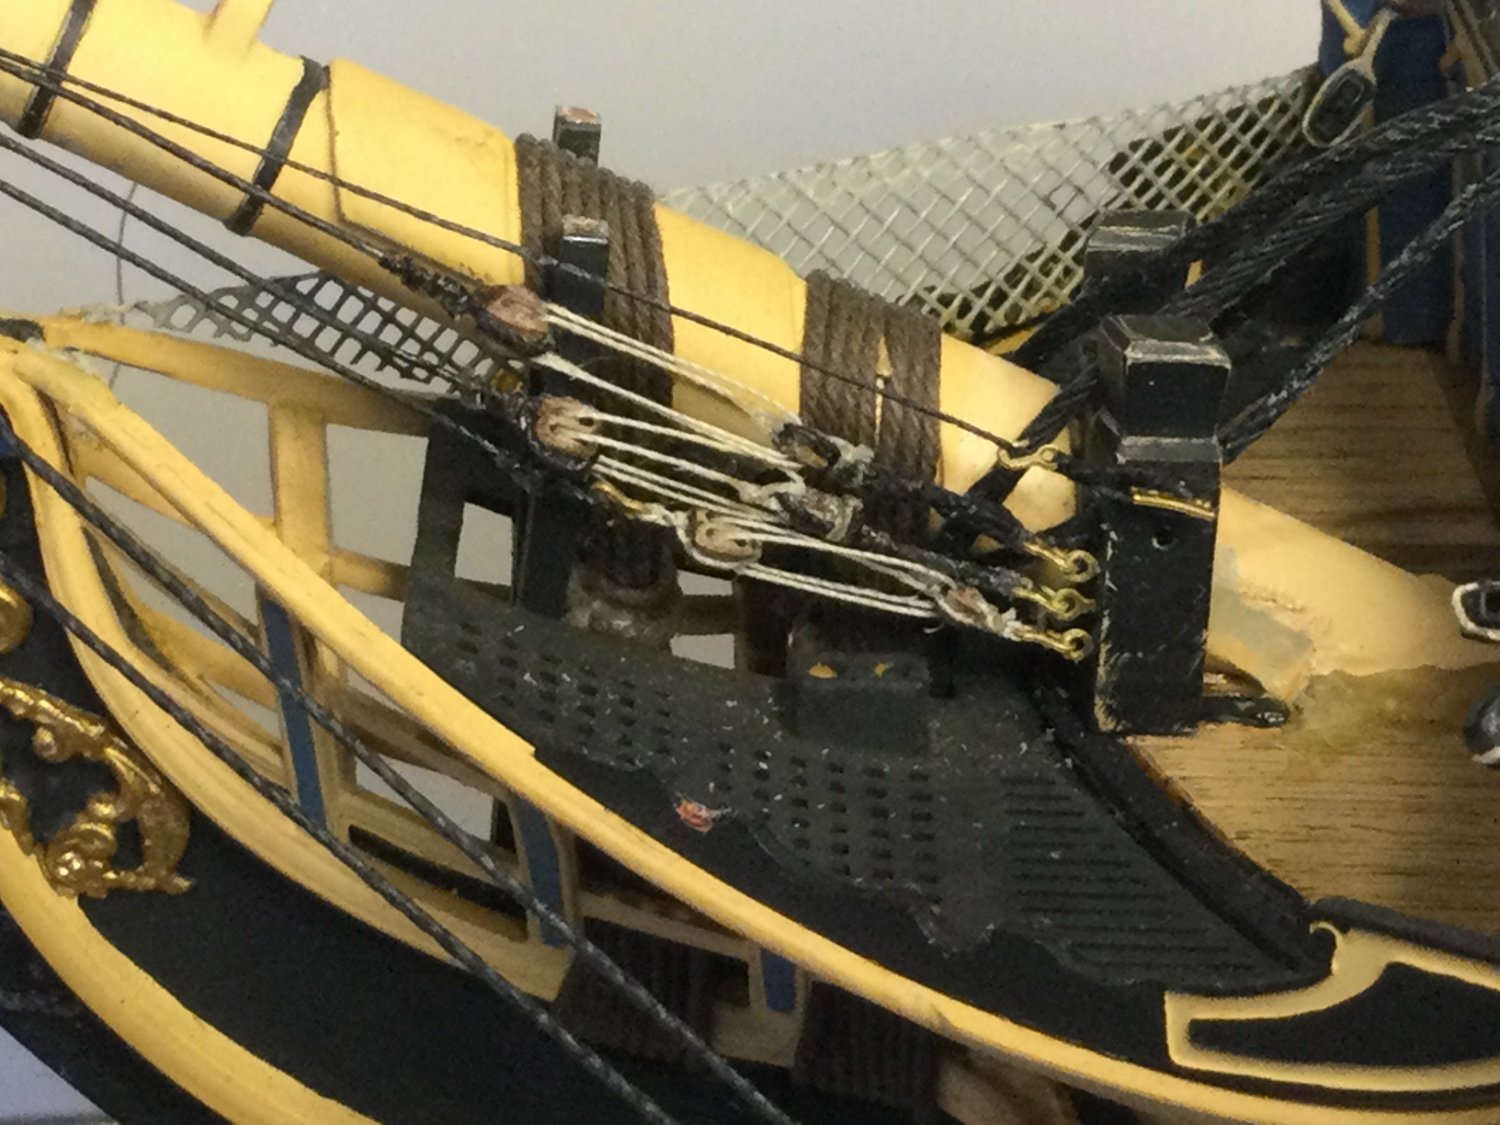
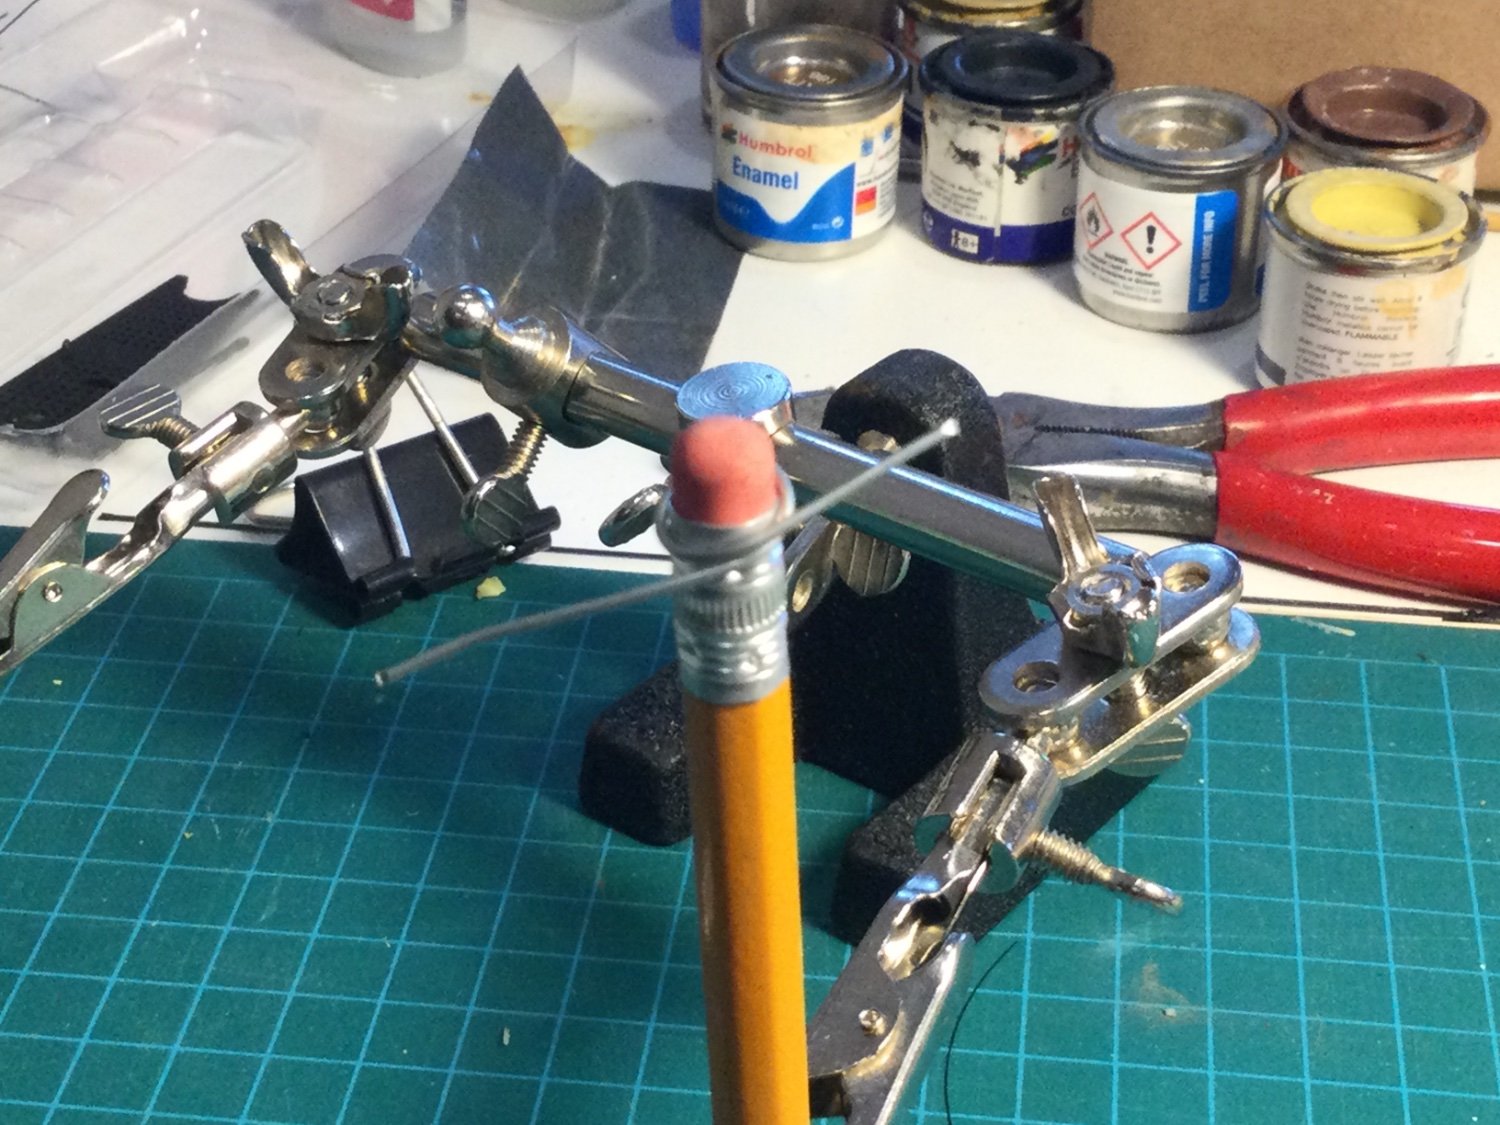
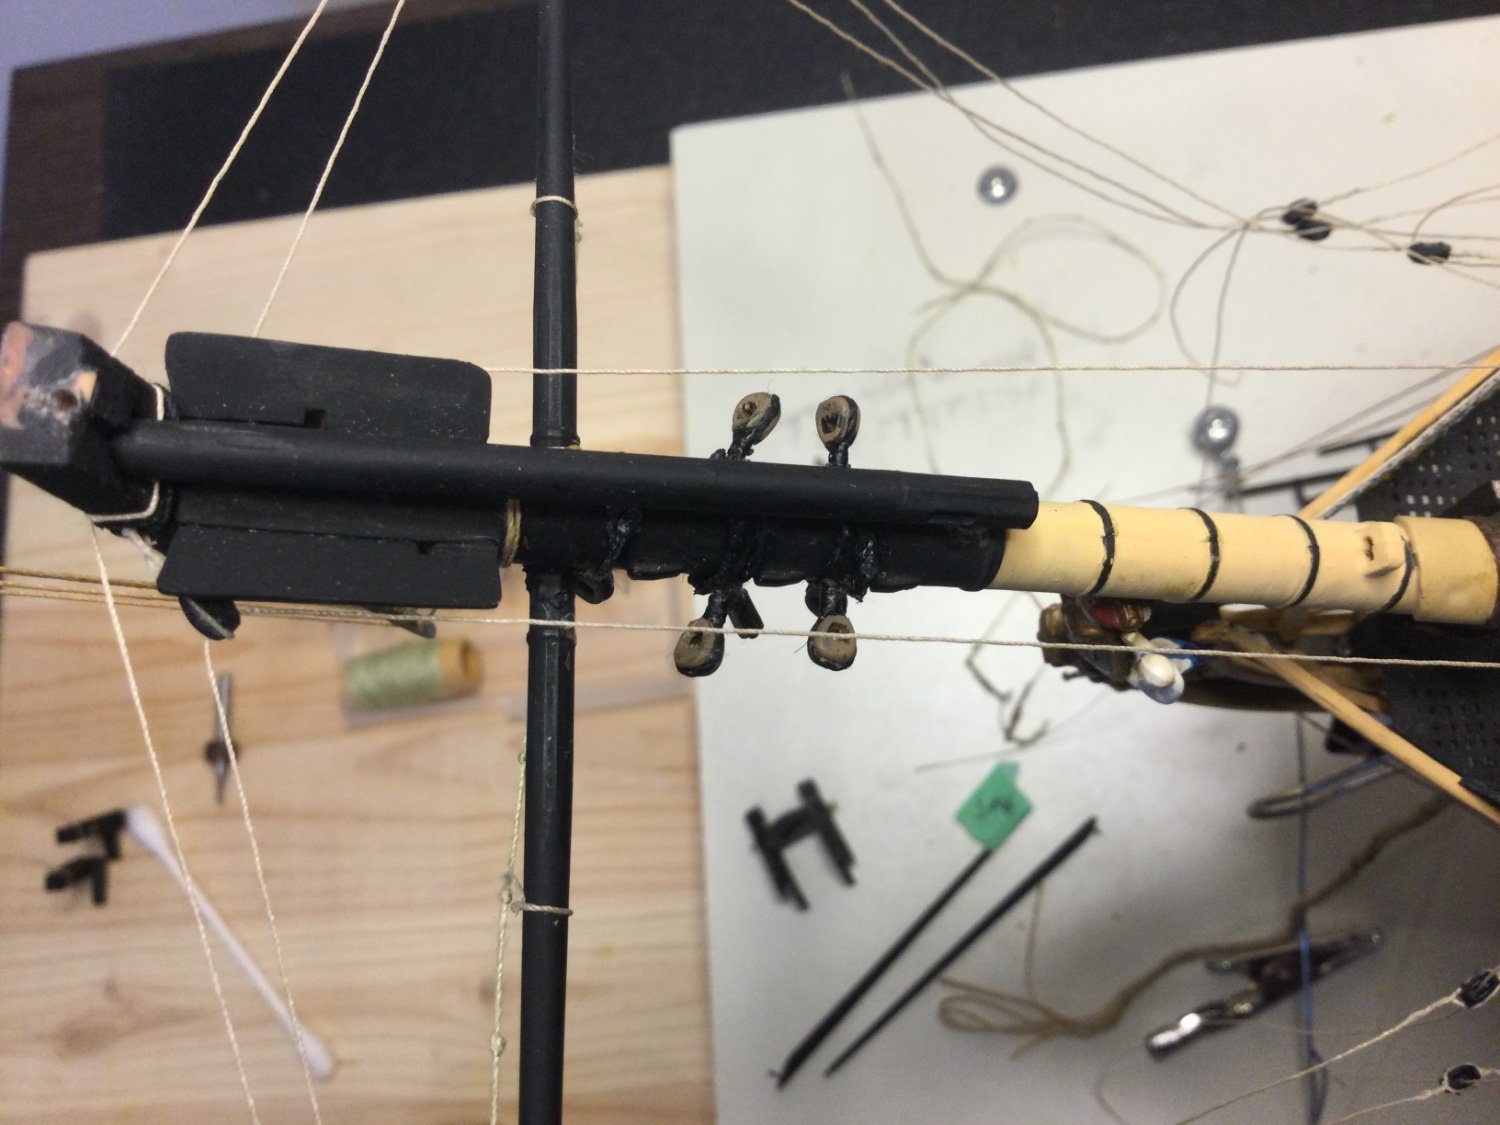
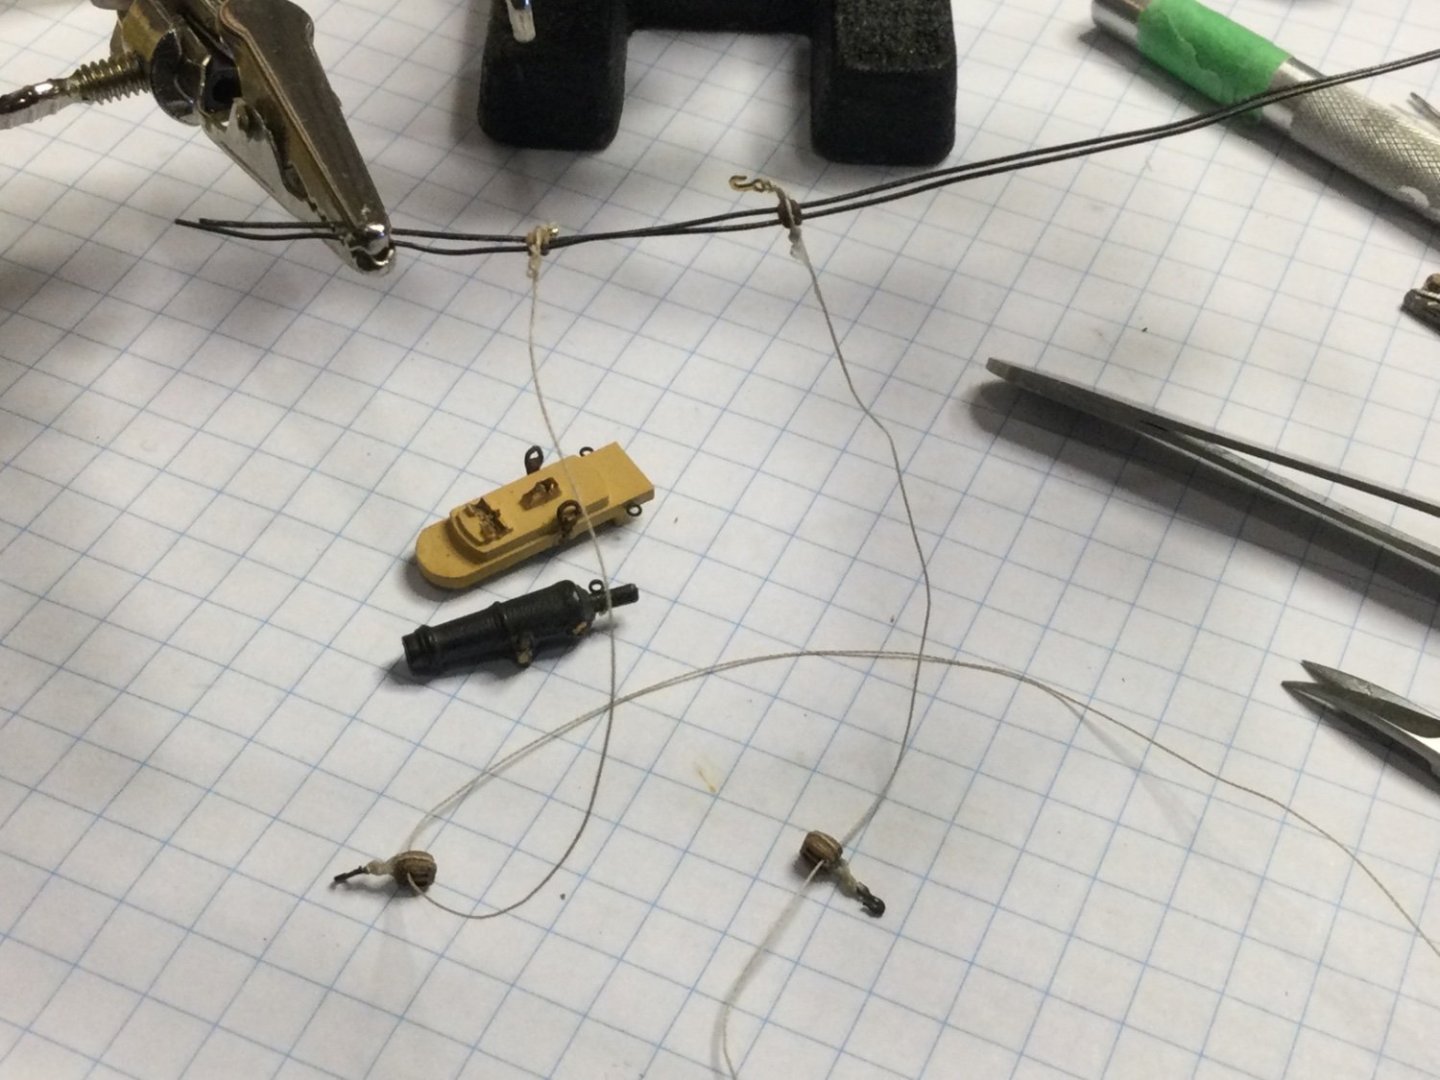
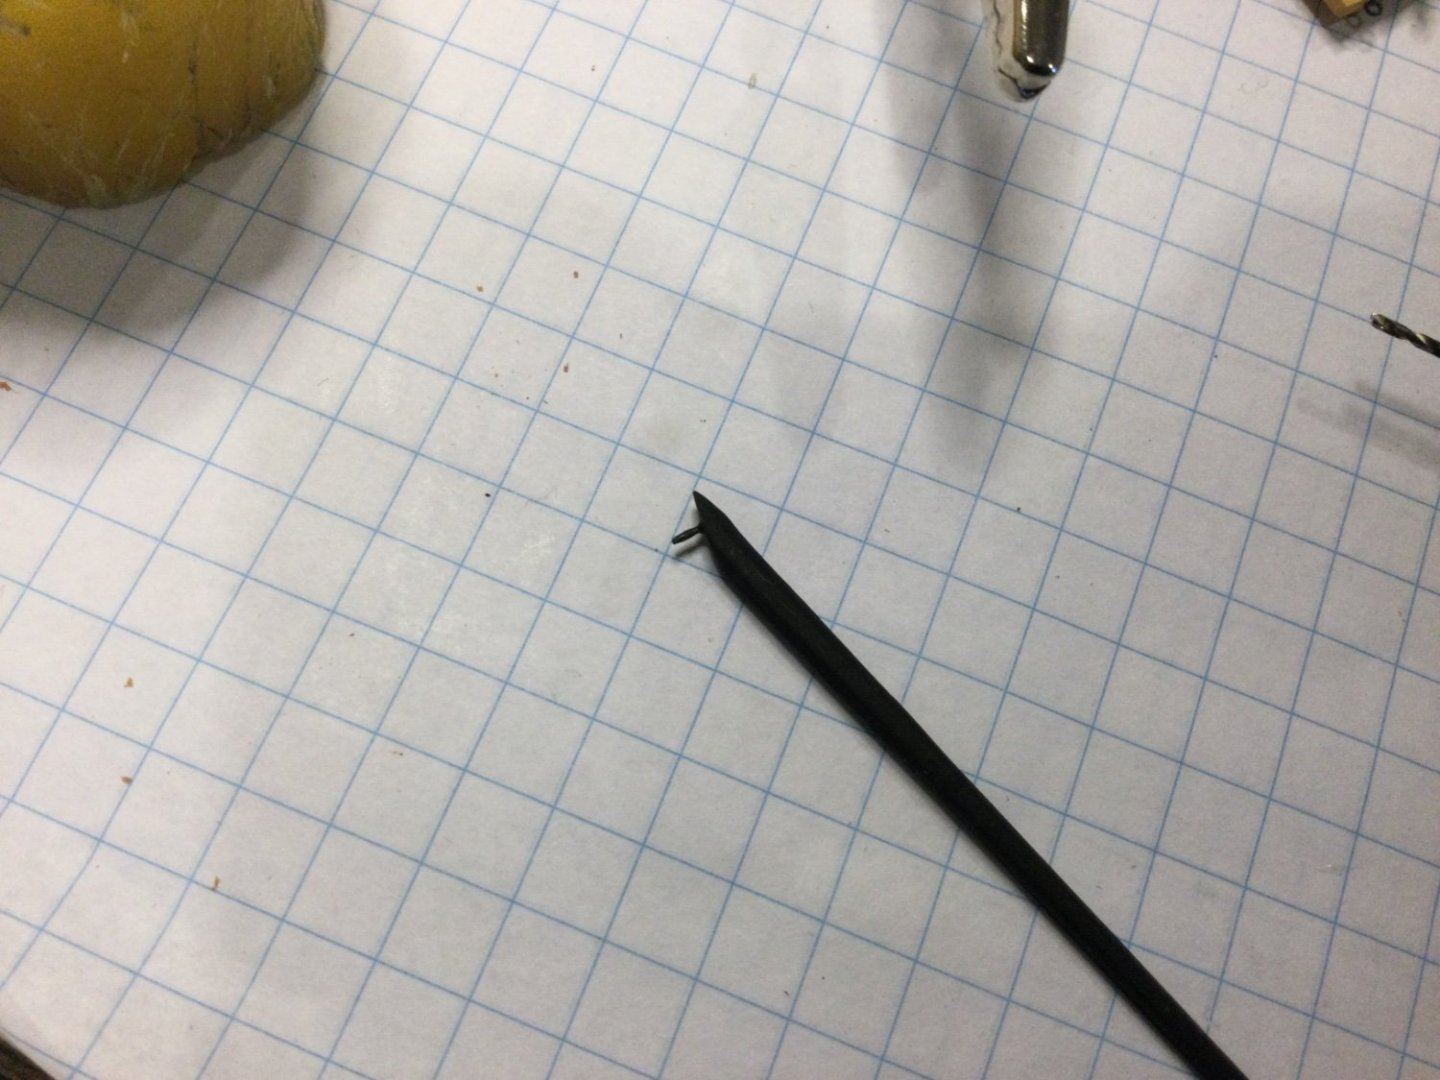
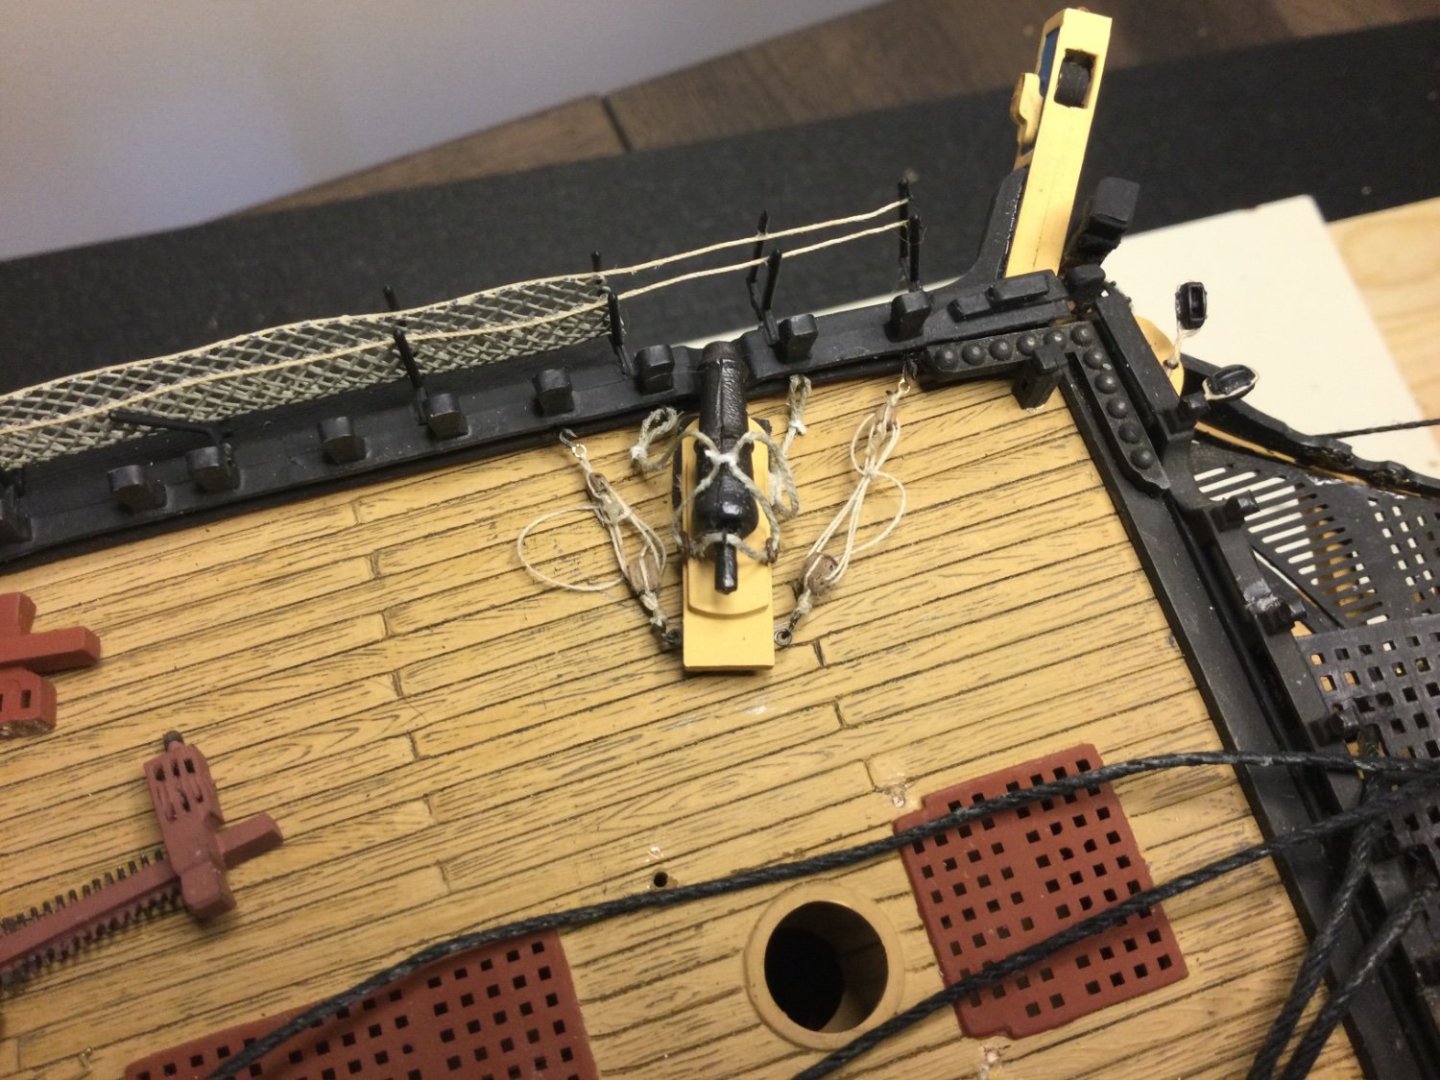
Finished rigging out the carronades adding the necessary ring bolts to the carriage, barrel and inner bulwark. I’m still trying to find a good and repeatable process for stropping blocks but threading thin wire through the blocks and then clamping them helps to stabilize them. At this scale, even the finest of thread has a certain amount of ‘spring’ to it forcing the near-weightless gun carriage out of its pivot. As such, I lengthened the pivot with a short section of carbon fibre rod. After hooking up the tackle, I dampened the thread with a wet paint brush to get it to lay flat(ter) on the deck. I considered adding a weight to the underside of the carriage but it seems to be working out ok as is. Way back (mid 80s) when I first assembled the cannon one trick I had read about to give the barrels a more metallic appearance was to rub powdered graphite on the barrels after painting them black. This is achieved by rubbing a pencil over a piece of sandpaper. A carpenter’s pencil is best. I suppose nowadays there’s a paint that would do the same but the graphite did its job quite well giving the barrels a bot of a metallic sheen. Comparing this picture to Longridge gun tackle (fig. 67), I see I have the single and double blocks and where they are hooked reversed. That’s an easy fix. Note: all of the old netting and plastic stanchions will be replaced. With a compass, I scribed an arc on the deck where the carriage would travel on its rollers. May need to darken it some, albeit, it’ll be near invisible to anyone but myself 😁 Added a coil of rope beside the knighthead to mimic the image in Longridge Plate 72. For the purists, maaaybe that’ll compensate for the fact that I dispensed with a long-tackle 😁 A short length of wire drilled through and glued in the end of the boomkin will help to locate it in the hole in the resin knighthead. Fashioned a rail and stanchion with wire and trial fitted the fore netting.


-
I suppose most or all of us can say that, at some point in our modelling endeavours, we have walked a mile in Horatio Nelson’s shoes. I just started reading a biography of Nelson entitled, Nelson, Love and Fame by Edgar Vincent. The opening chapter profiles a very young Nelson during his early years and when he first joined the merchant marine at the age of 13 to start learning the skills of seamanship. As described in the highlighted passage below, the young Nelson had also entered “a new world of overwhelming strangeness”. I sure can relate to that, as I attempted to point out in #25!😁
-
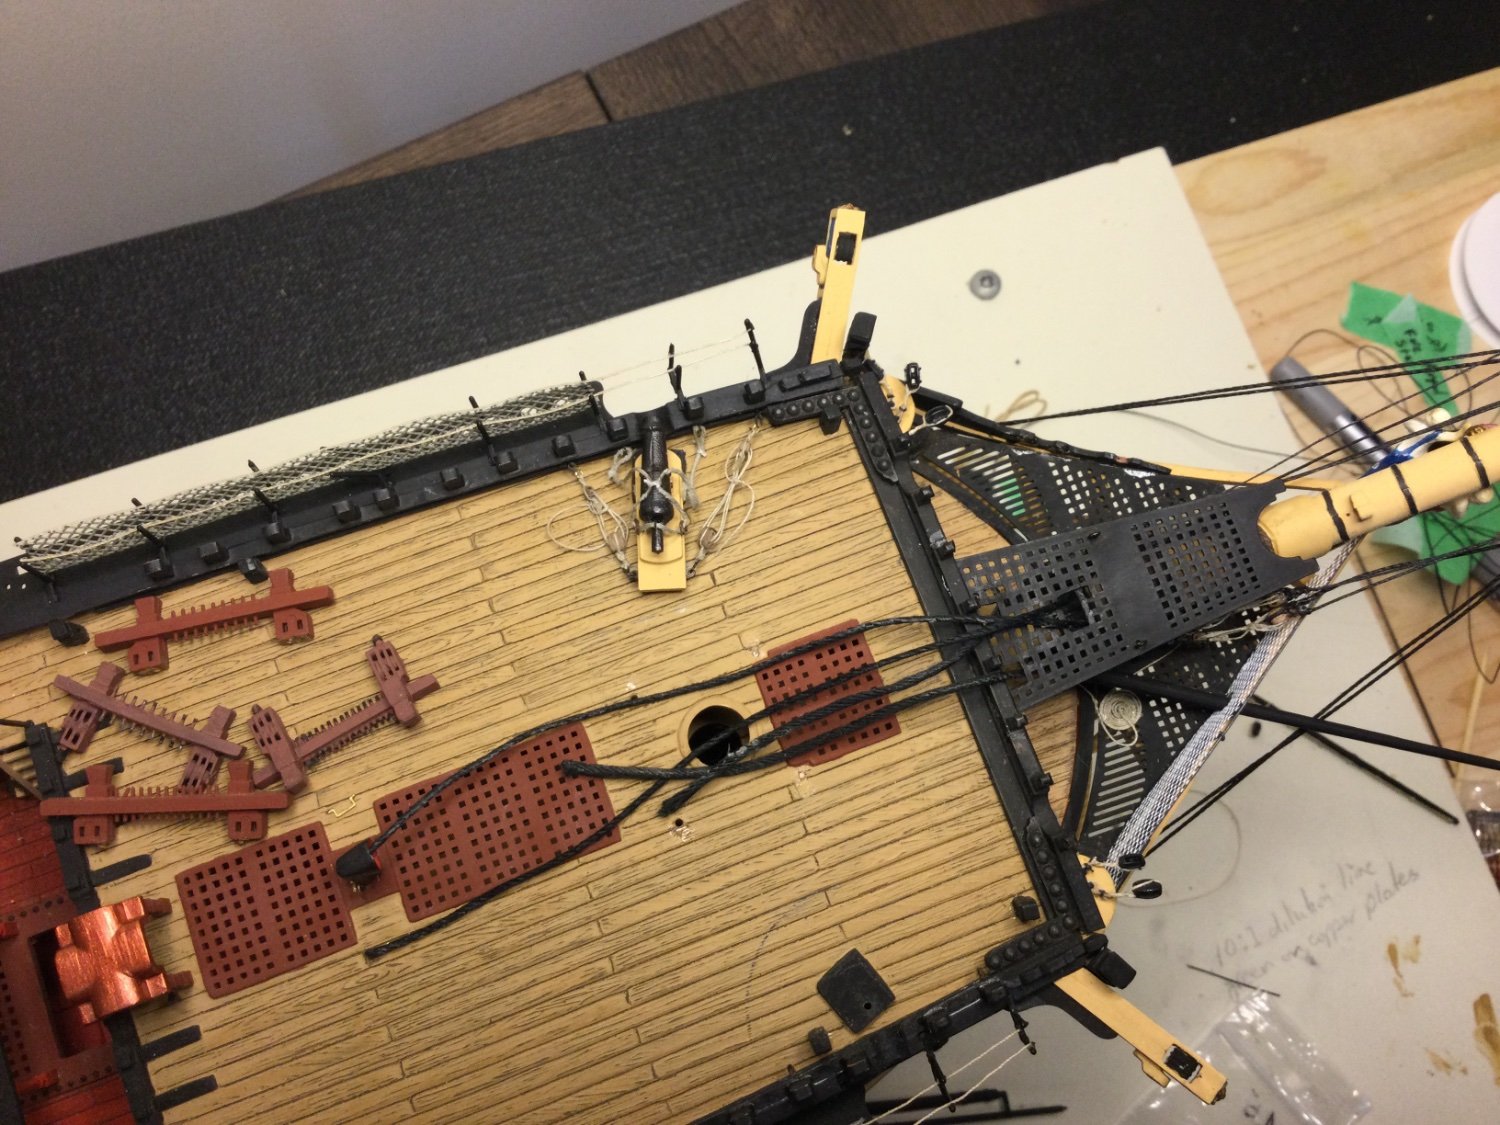
In between watching the Women’s World Curling Gold medal game (GO team Homan!), I tackled (literally) the starboard side purchases on the knighthead. Worked my way over to the port side and did same, with slightly different treatment of the loose ends. Temporarily parked the Fore Royal Stay on the cleat on the port knighthead since, as Longridge states, the Fore Royal Stay “makes fast to the fore stay collar, or with a purchase to the port knighthead” 🤷♂️ Loosely installed the gangboard/mariner walk and port boomkin. Top view of gangboard/mariner walk I see I have the opening for the Main Preventer Stay a couple of grates further forward than others I see in this forum. Is that an issue? I also see I have the main and preventer stay collars reversed (an easy fix). Fashioned a temporary collar with the three thimbles (the centre of which supports the fore topgallant stay) from .75mm thread reinforced with CA. The collar wraps around the “necking of the jibboom”, as described by Longridge. I call it temporary but since it’s a fairly obscure bit of detail it may end up being the permanent solution.


-
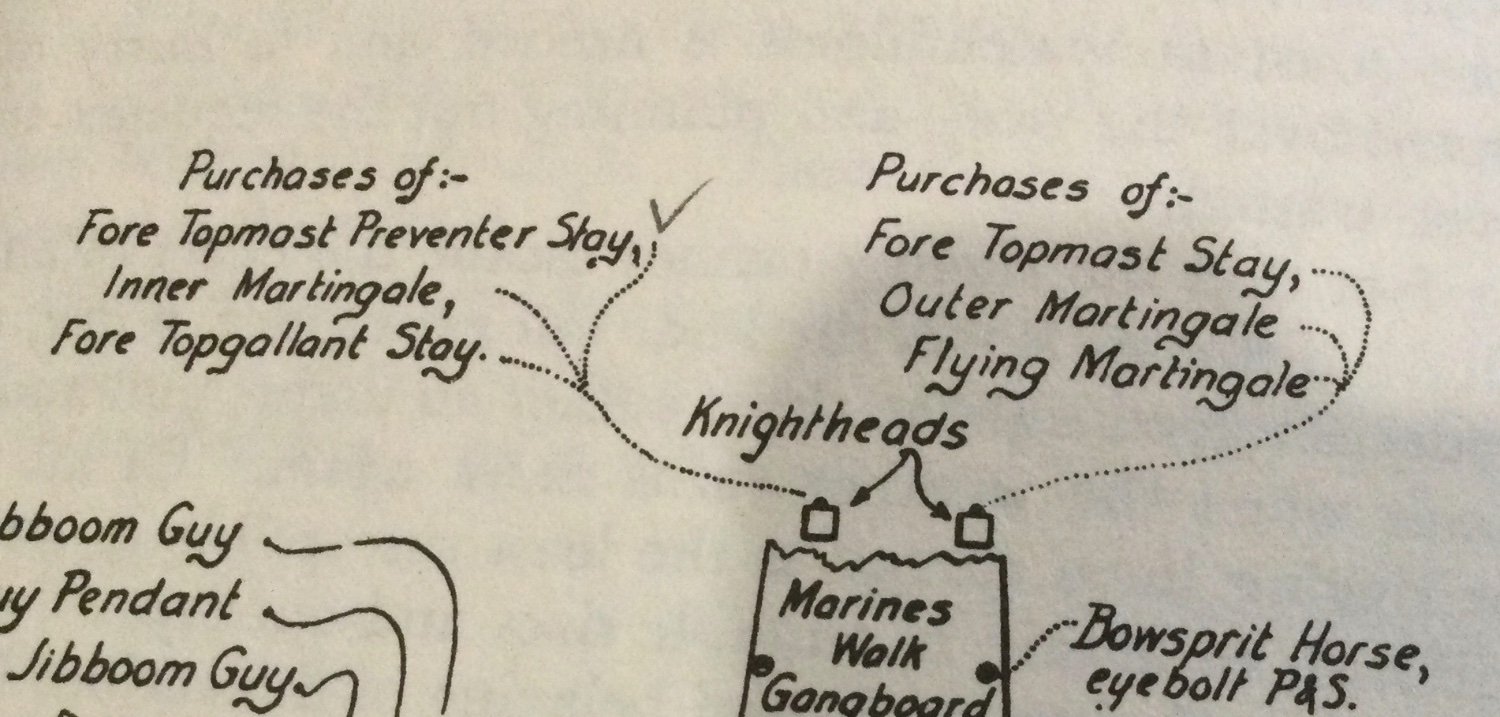
Hi Ian, Many thanks for your guidance!! I was eager to install the resin knighthead so as I indicated in #25, I wanted to account for all of those purchases. LOL, I guess this is one case where I took Longridge a bit too literally. Is that even possible? For the Inner, Outer and Flying Martingales, he finishes the description by saying each of these “sets up with a purchase to the knight head”. Whereas, for the other three terminations - fore topmast stay & preventer stay, fore top gallant stay - he specifically mentions “tackle”. Obviously I interpreted this as meaning, tackle, no tackle 🤦♂️Good news is, I can fix this.
-
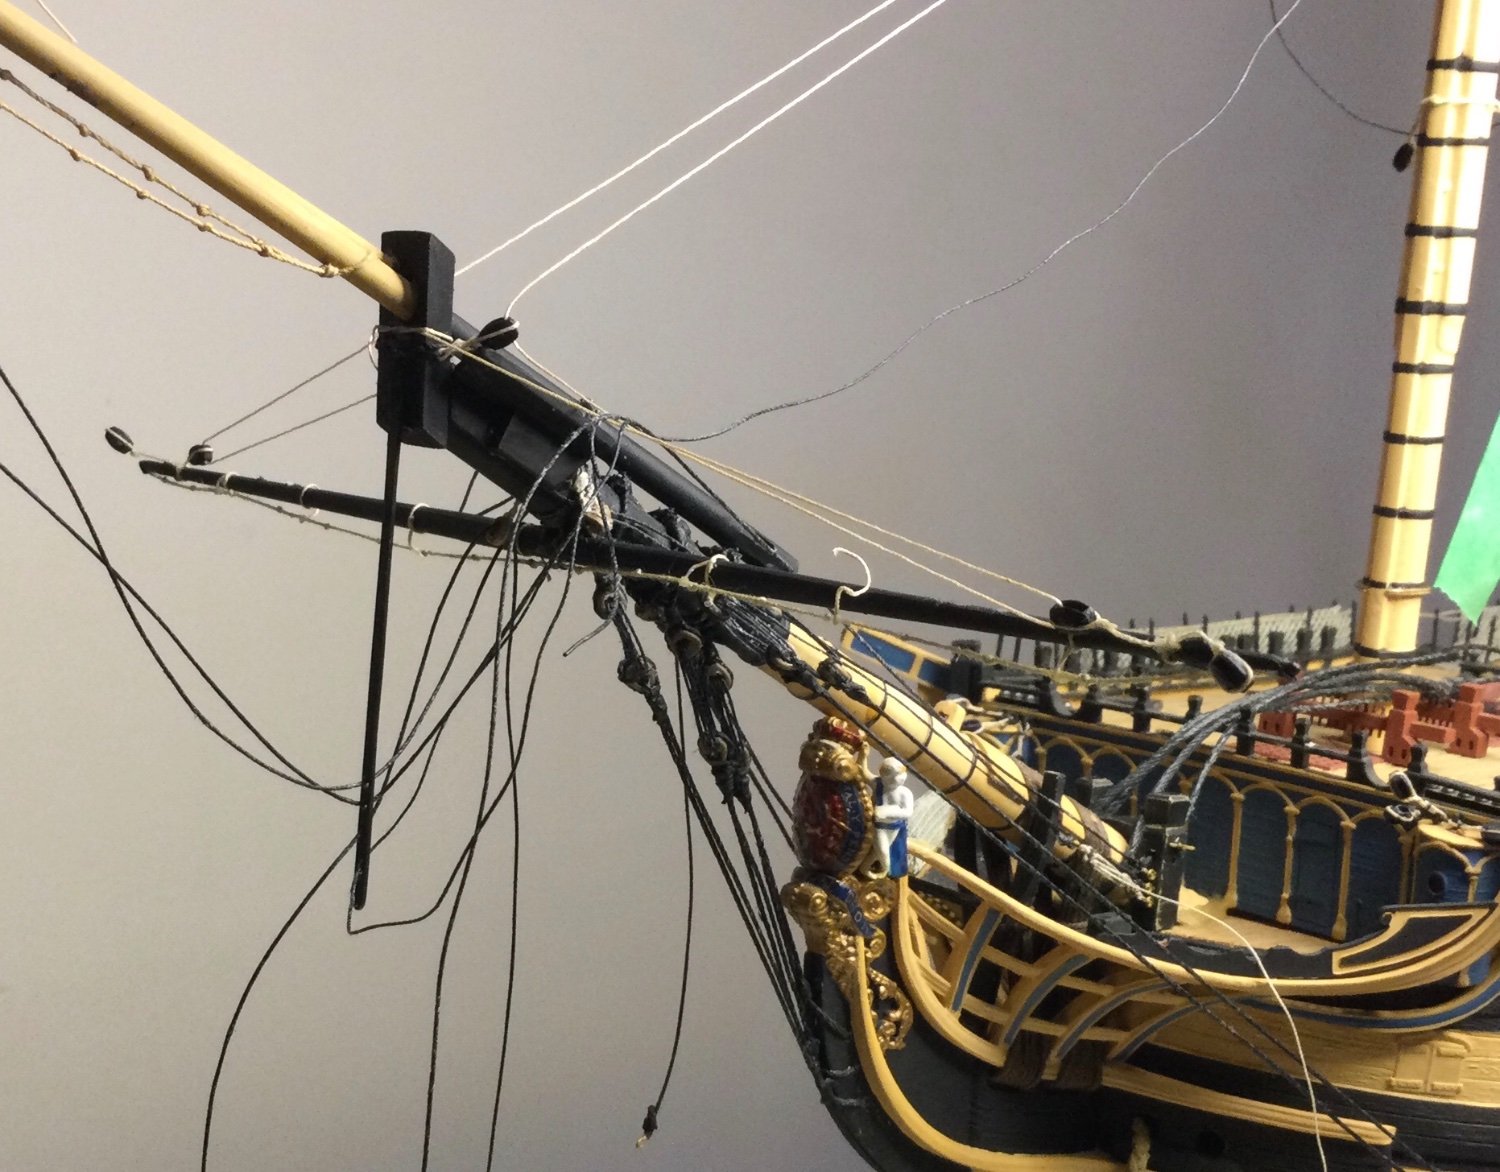
I’m making steady progress on the bowsprit rigging and finally got around yesterday to installing the new resin knighthead (pictures below). But I have a question. Longridge’s Plan No. 10 (pg. 266) shows six purchases on the knighthead - shown below. The descriptions that follow in the relevant pages lead me to believe that these ‘purchases’ are the 6 Ringbolts installed on the knighthead. But the Fore Royal Stay (described on pg. 224) also finds purchase on the knighthead, per Longridge: “the Fore Royal Stay then makes fast to the fore stay collar, or with a purchase to the port knighthead”. 1. What/where is the Fore Stay Collar? The for royal stay passes through what Longridge describes as the 2nd bowsprit collar, the starboard side of which supports the block for the Flying Martingale. 2. Ignoring the above (since it’s an “or” statement), where on the knighthead does it purchase (the cleat?) and by what means (hook, eye splice, etc.)? It certainly starts to get crowded on the bowsprit. Note: the natural thread and black blocks are from the old Heller config and are to be removed. The tackle below is for the Fore Topgallant Stay. What do I do with the loose end - make a coil? And is this loose end what Longridge refers to as, the “fall”?

-
Got it, thanks!
-
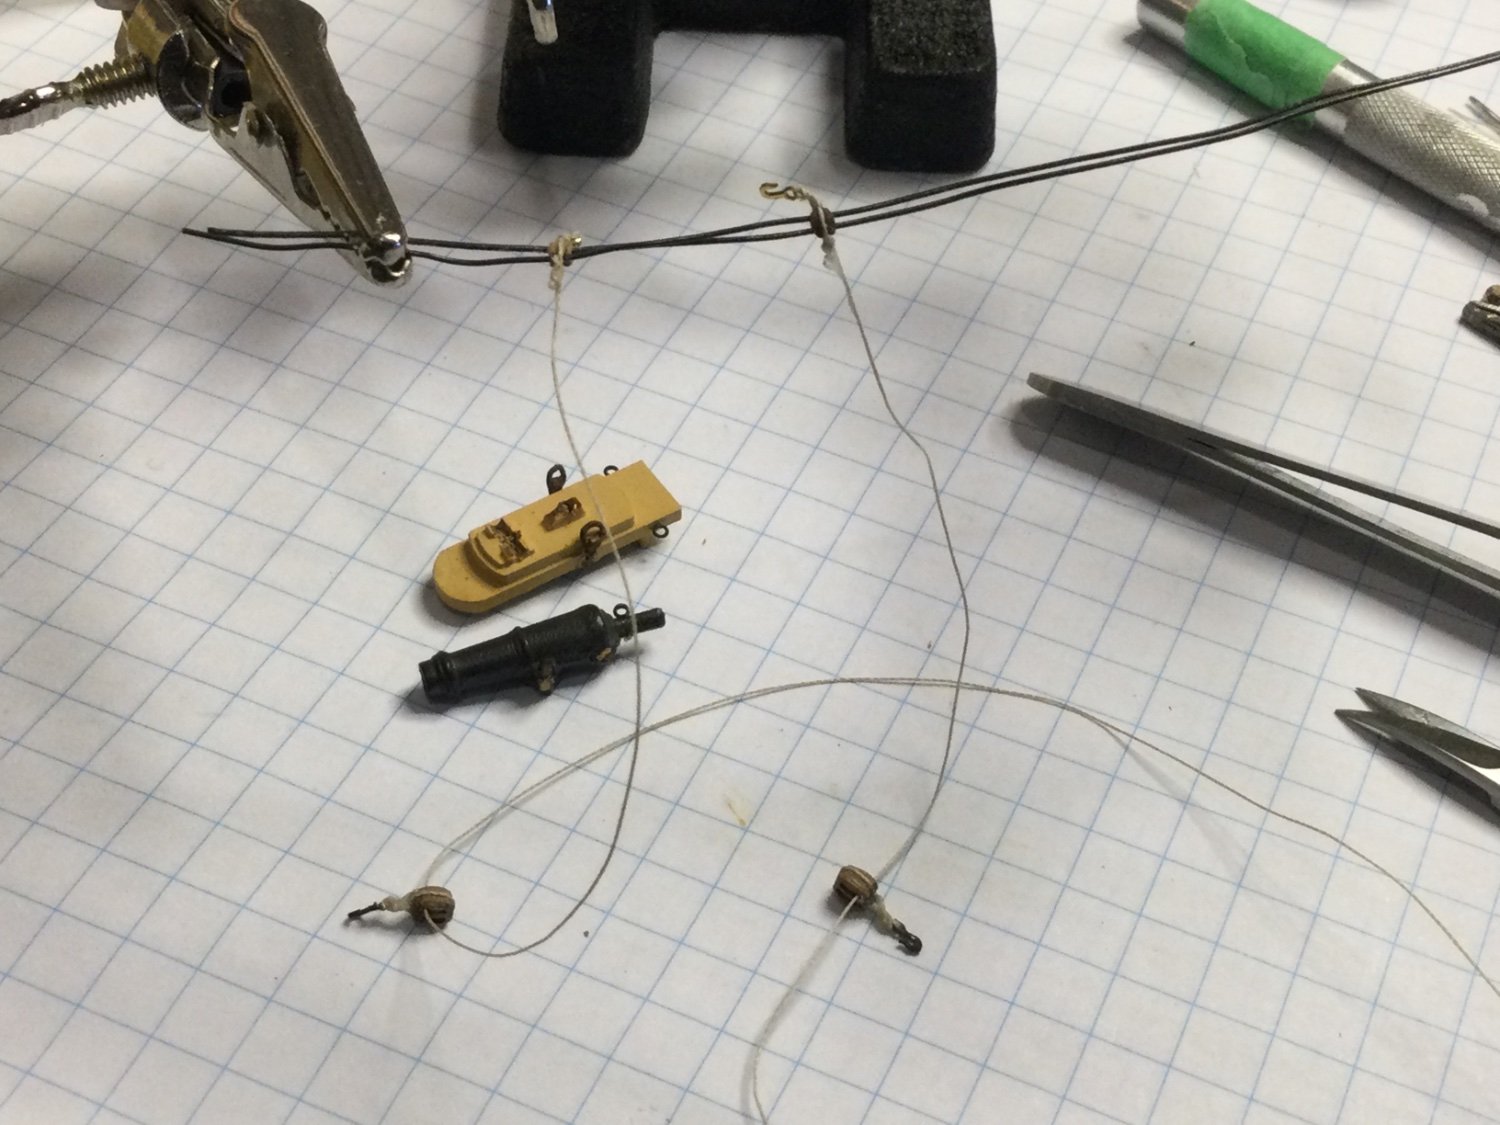
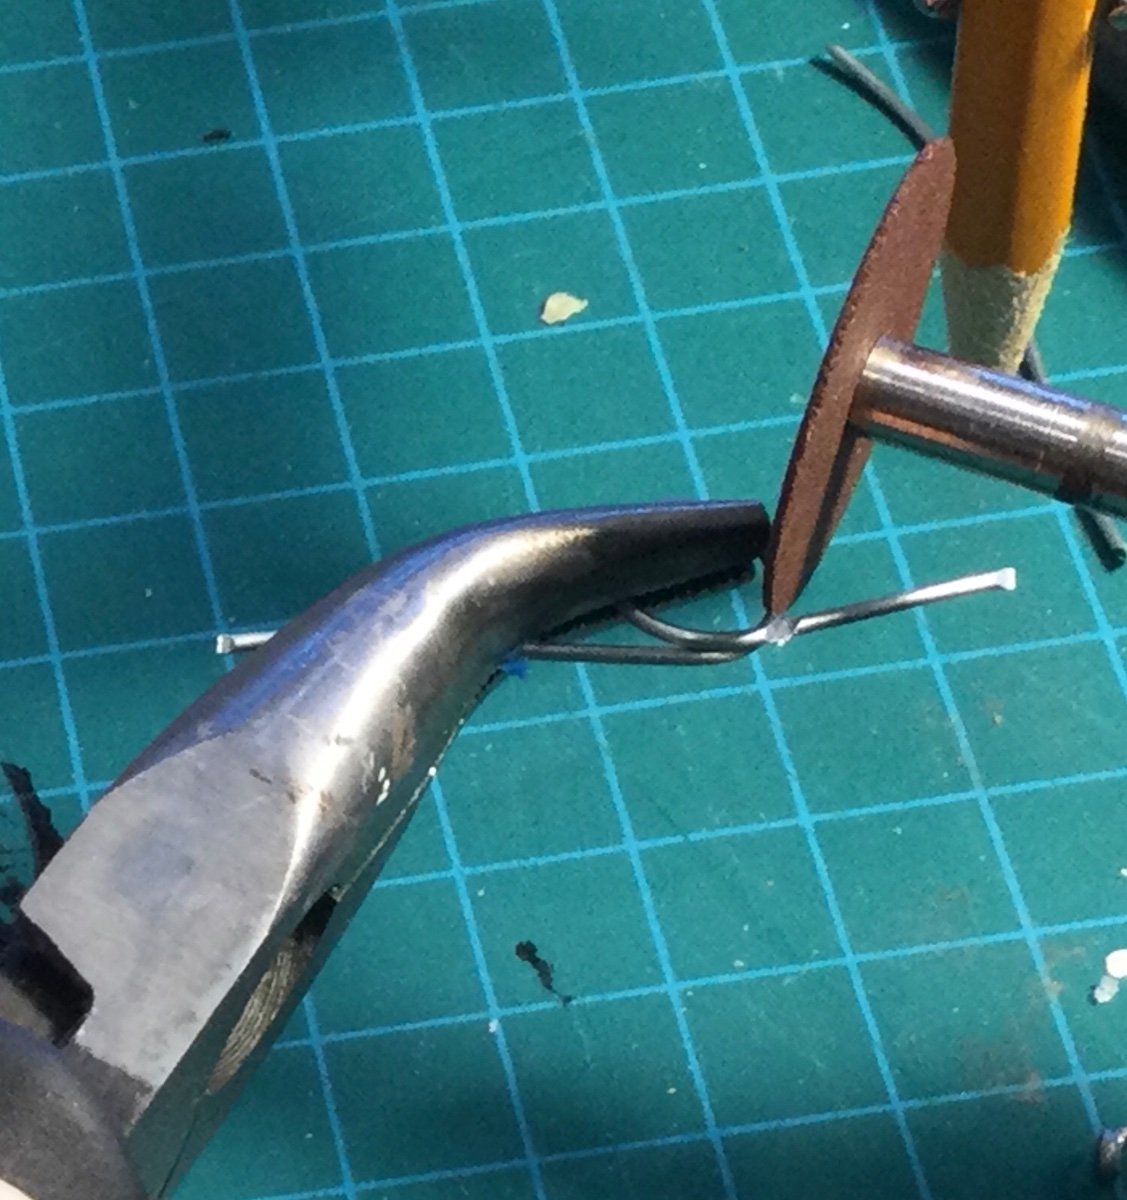
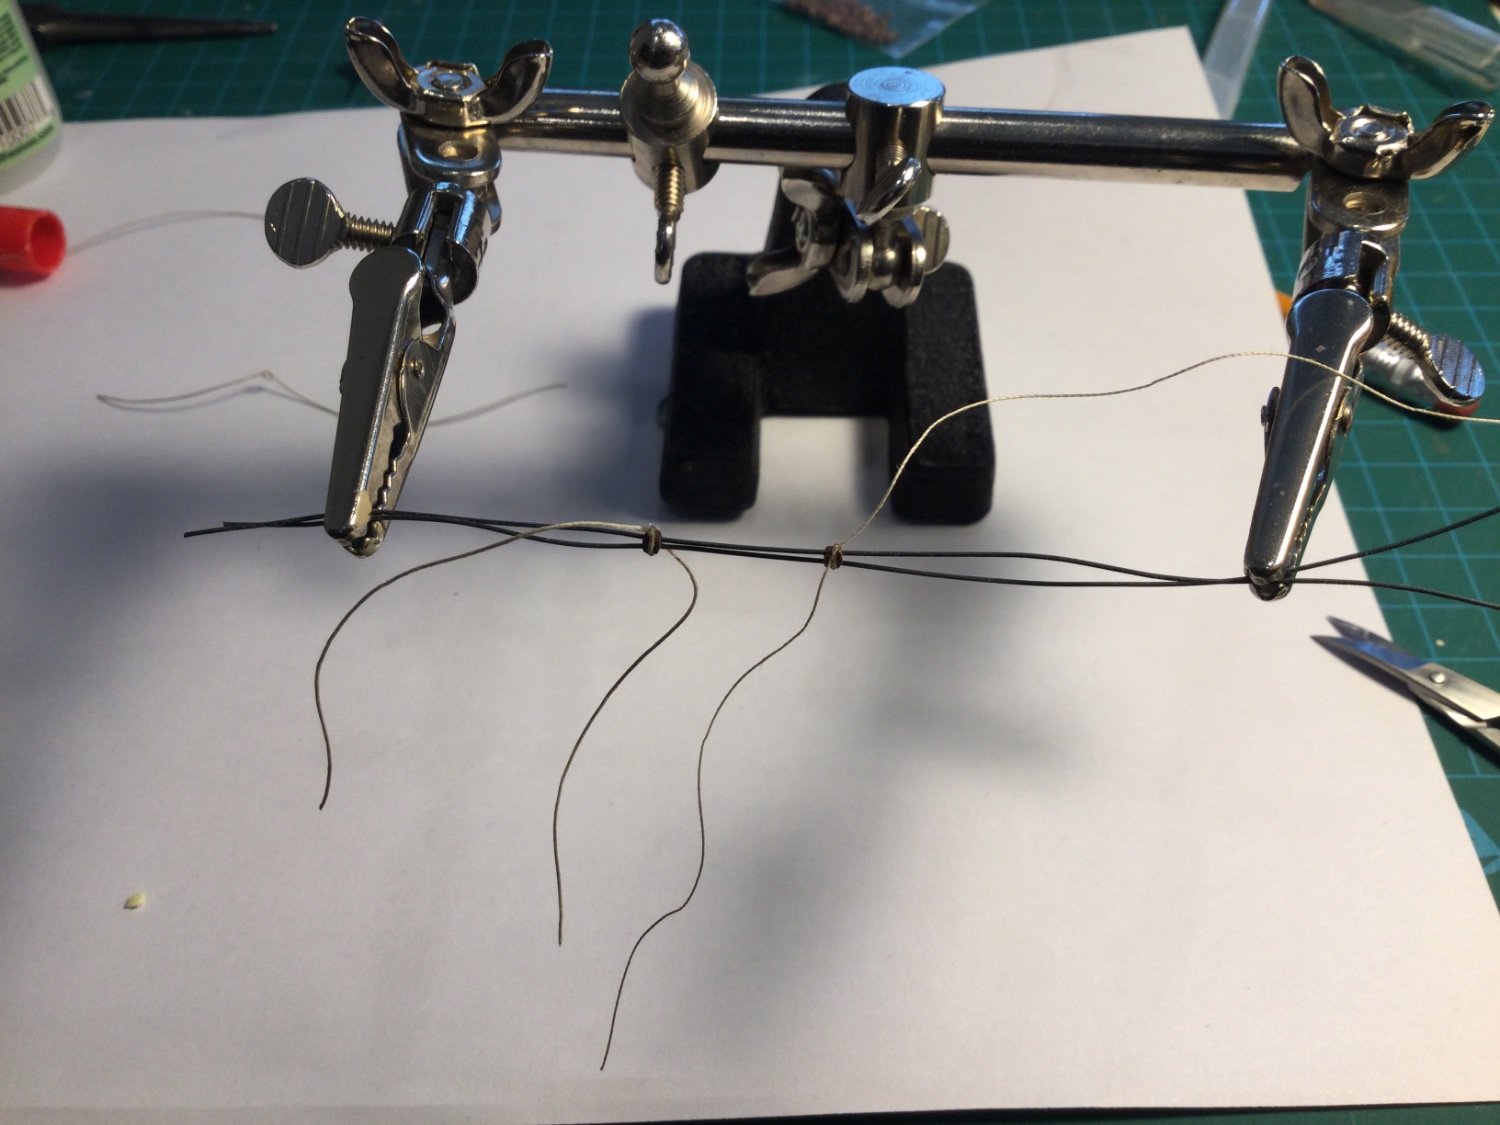
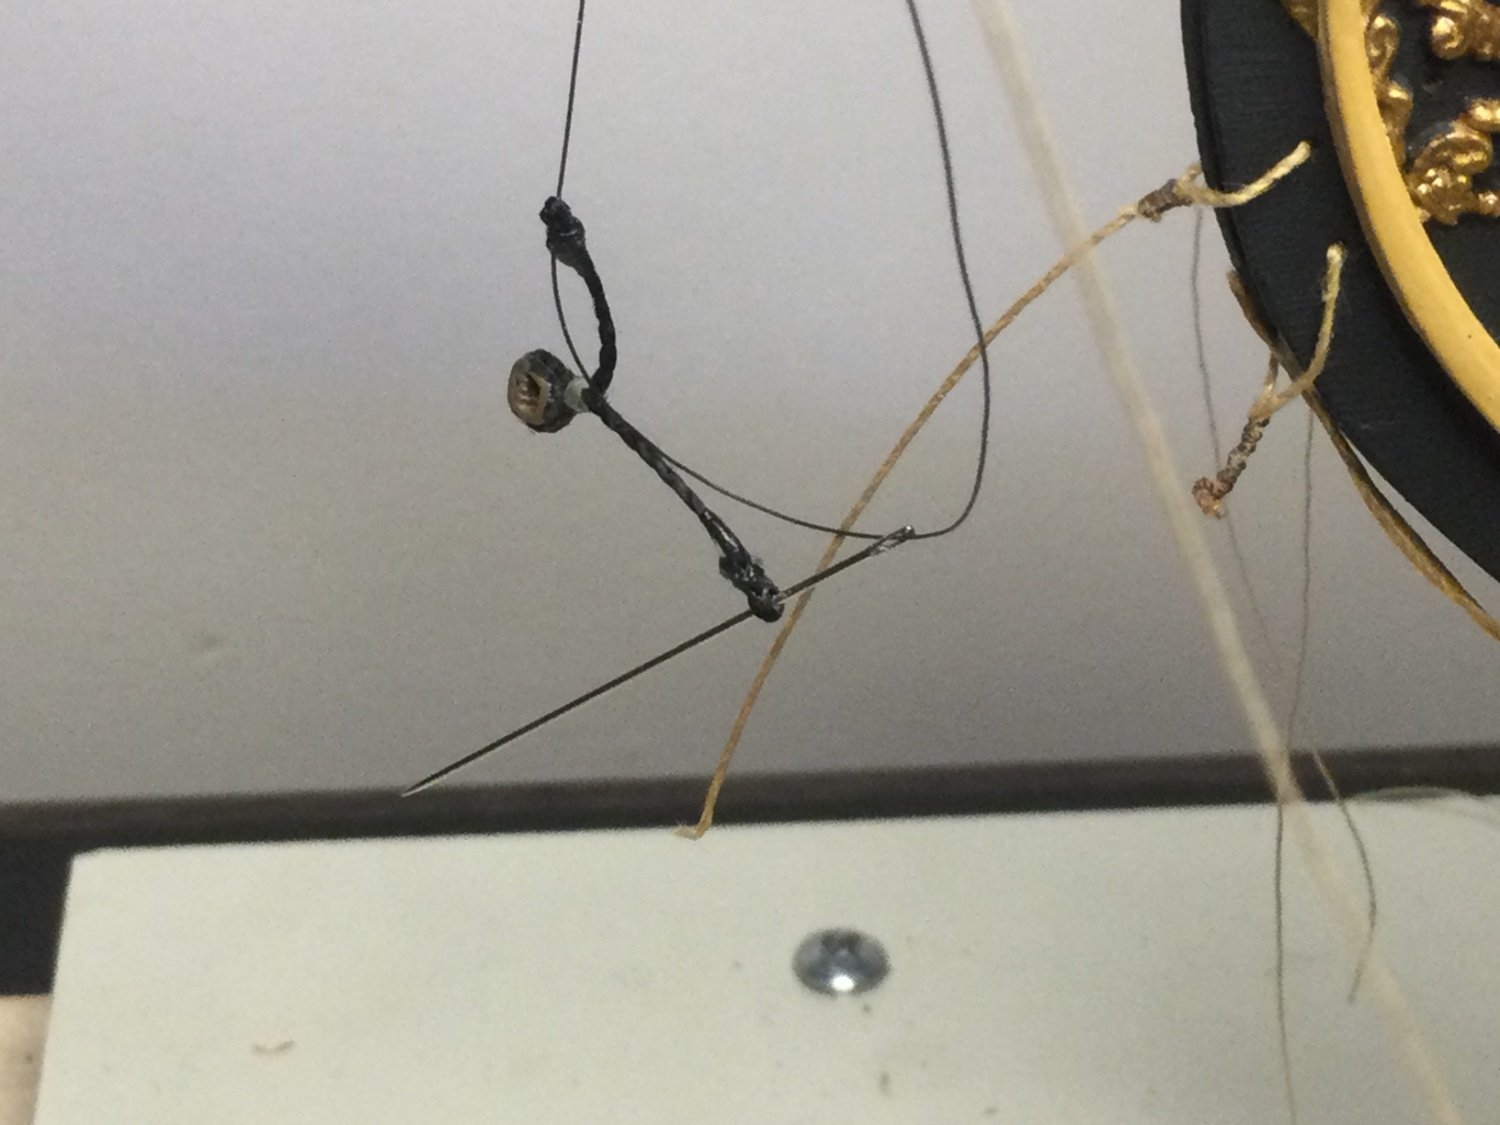
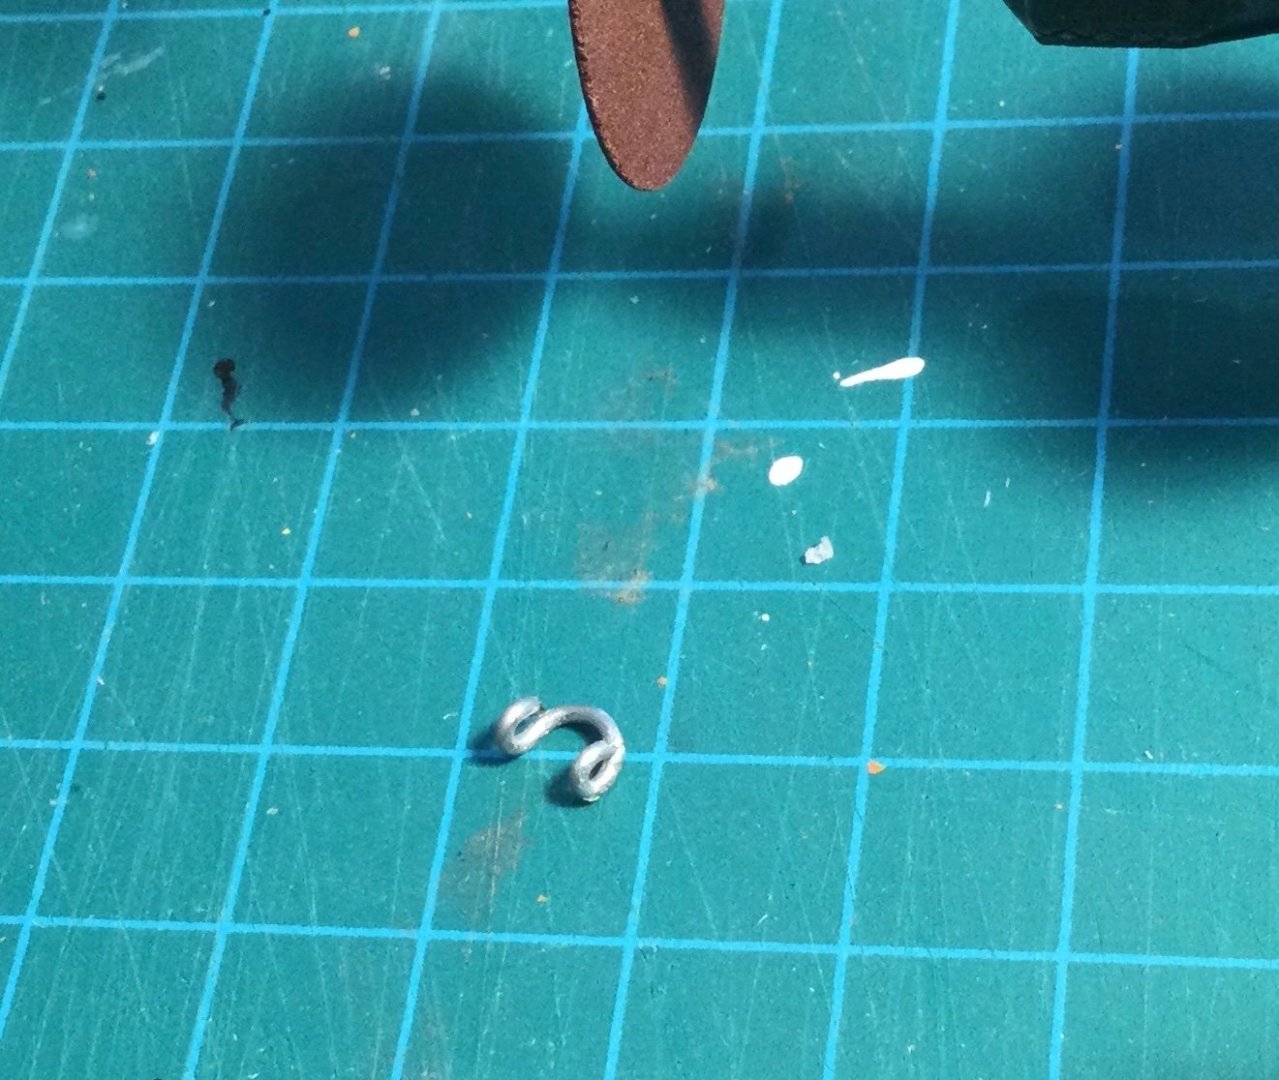
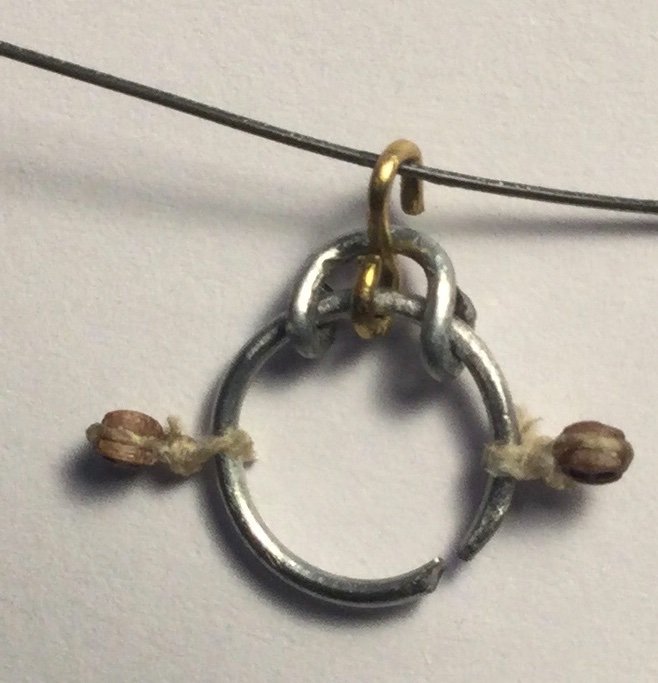
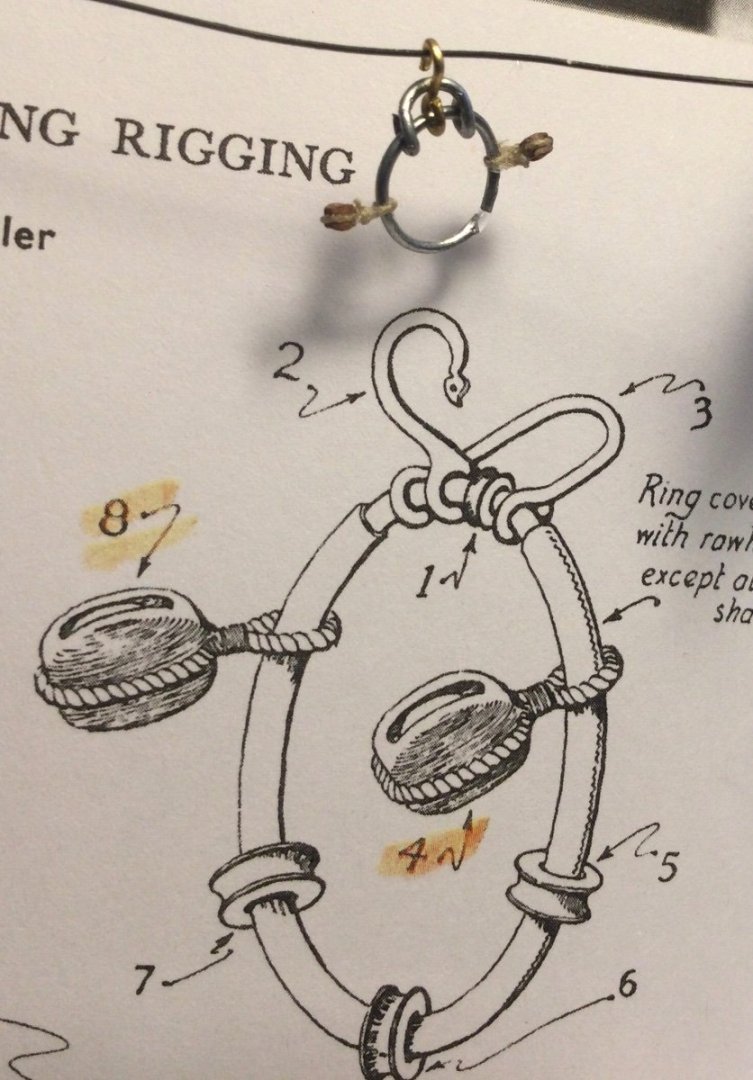
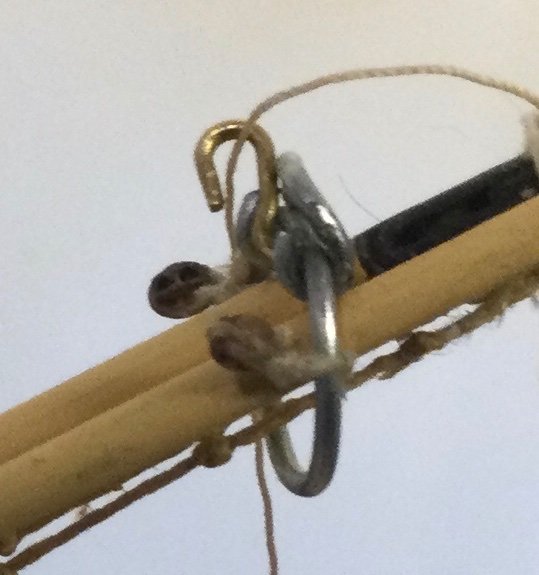
I’m still focused on the bowsprit at the moment so now that I’ve mapped out the various lines, how they’re routed, and the associated blocks and other rigging bits, I tried my hand at making the jib traveller. On reflection, I realised that although this is a kit, there’s still a certain amount a scratch building required so it makes for a good blend of skills. Anyway, I’m quite pleased with the results. I started with the shackle and bent a length of wire around a 1mm drill bit for the ‘eyes’. No idea what gauge the wire is but it too is about 1mm. Repeated for the other side and got pretty close to the desired shape. Moved on to the main ring and wrapped same wire around the end of a pencil. On page 224 Longridge states the travellers (rings) are, “considerably larger than the circumference of the spars to enable them to move freely”. I did a test fit and the circumference seemed about right. I cut off the extra lengths of wire with my Dremel and left the end of the ring open so I could slide on the shackle and hook. I bent the stem of a brass eyelet for the hook and stropped two 2mm blocks, one per side. I superimposed my creation onto Longridge’s drawing and ‘reasonable facsimile’ comes to mind. I pinched the ends of the ring closer together and closed the gap with some thick CA. Note: I do not have any thimbles (there should be 4) so when I get to that point of the rigging, I’ll simply seize the appropriate lines around the traveller. Test fit on bowsprit. Not sure I have the orientation correct bit it fits. Phew 😮💨 Btw, if anyone has any suggestions as to how they strop 2mm blocks I’d love to hear them. They’re so diabolically small, to steady them, I first passed 2 wires through each of the holes and clamped them in my alligator clips. I then proceeded with the ‘stropping’ (that sounds like a punishment…arguably, at this scale, it is!😜). I tried two methods: 1. I tied a simple knot and sealed it with a tiny drop of CA. 2. I wrapped the line around the block, put a tiny drop of CA on the top of the block and proceeded to twist the two halves of the line together. One of each method is on my traveller.


-
Thank you so much! This group is off the charts amazing. I love the feedback, helpfulbuilding tips, and the camaraderie that goes with it 😊👍 Oh, and back atcha 😁

-
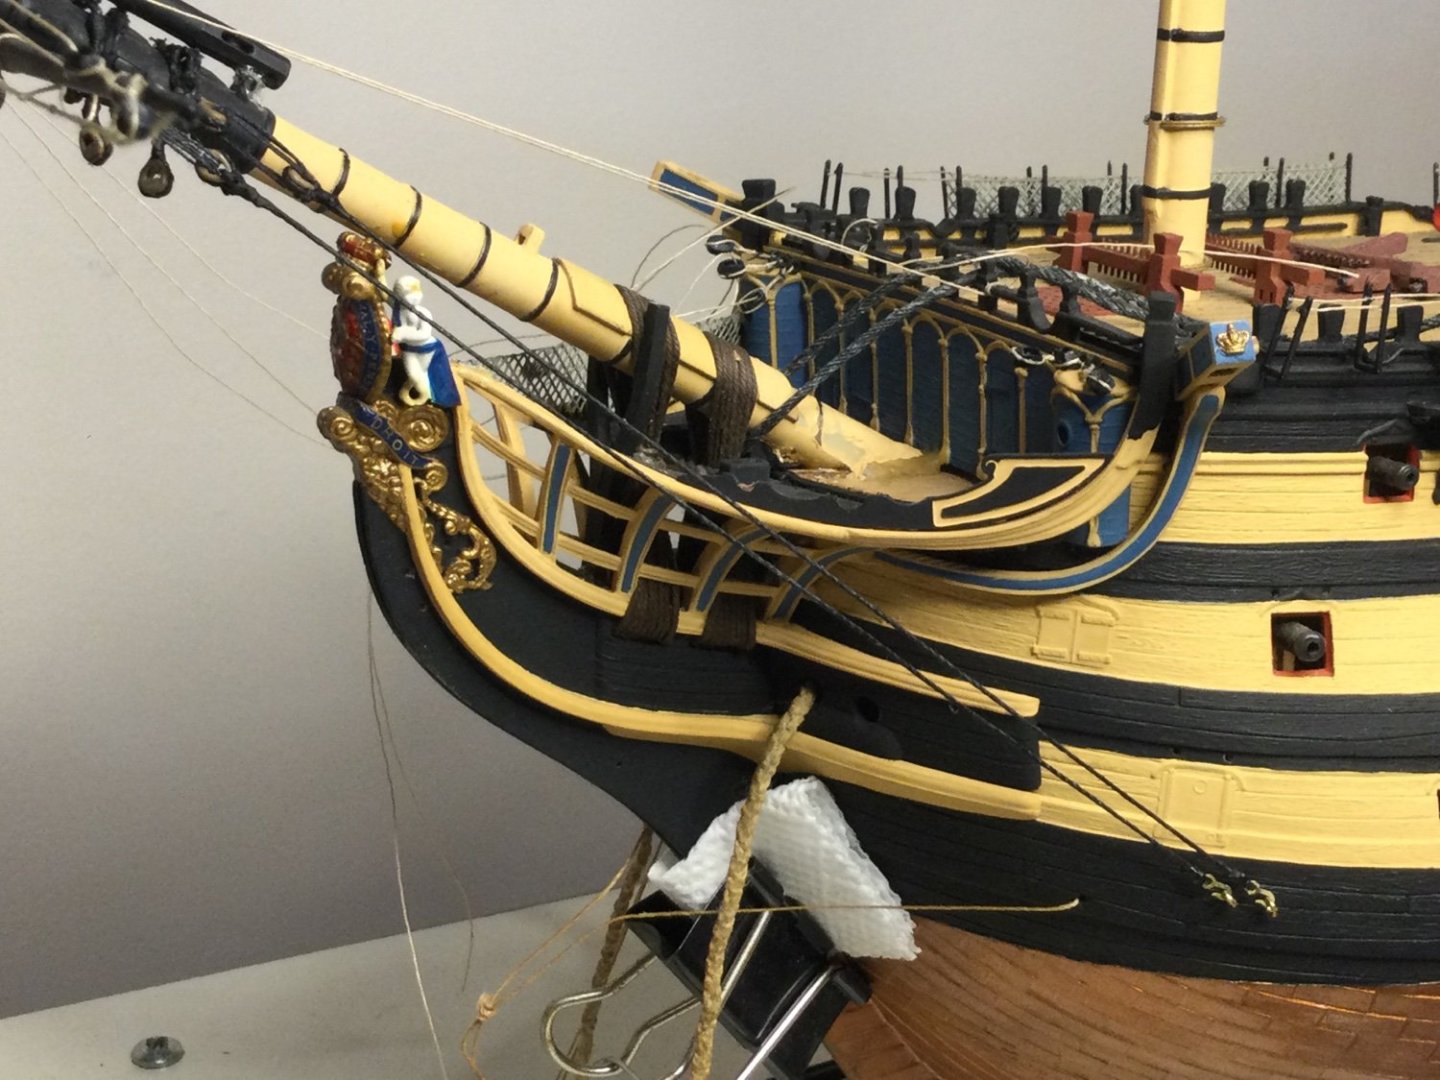
Well, I finished the starboard bowsprit shrouds and installed the bobstays. Fuzzies abound and one of the bobstay lanyards got away on me length wise 🤷♂️ As my daughter would say they’re kinda, meh 🫤


-
Ha ha, no worries I love digression (especially when I’m trying figure out how to strop 2mm blocks!). I love those episodes too but I’m a Rabbit of Seville kinda guy: 🎶Welcome to my shop, let me cut your mop, let me shave your crop, daintily, daintily...🎶😂😂
-
No kidding. I expect Elmer Fudd has been disarmed by now. Humour has left the building 🤦♂️
-
Thanks, Ian! I’ll see if I can smooth those fuzzies as you pointed out. LOL, so I guess I can expect those random bits of beeswax will just keep be reappearing. Like those explosive darts Wiley Coyote deployed to attack the Road Runner, only to have them reappear constantly during his subsequent attempts to snag that annoying little *@#&^! Talk about random 🤦♂️ Good catch on the natural threads coming out of the hull. They are from my original bobstay configuration that followed the Heller instructions, i.e., where the 2 segments of the outermost bobstay originated in the hull and had two splices. Dafi corrected me on this so those are now removed and, per his guidance, I drilled a 3rd hole below the original 2.
-
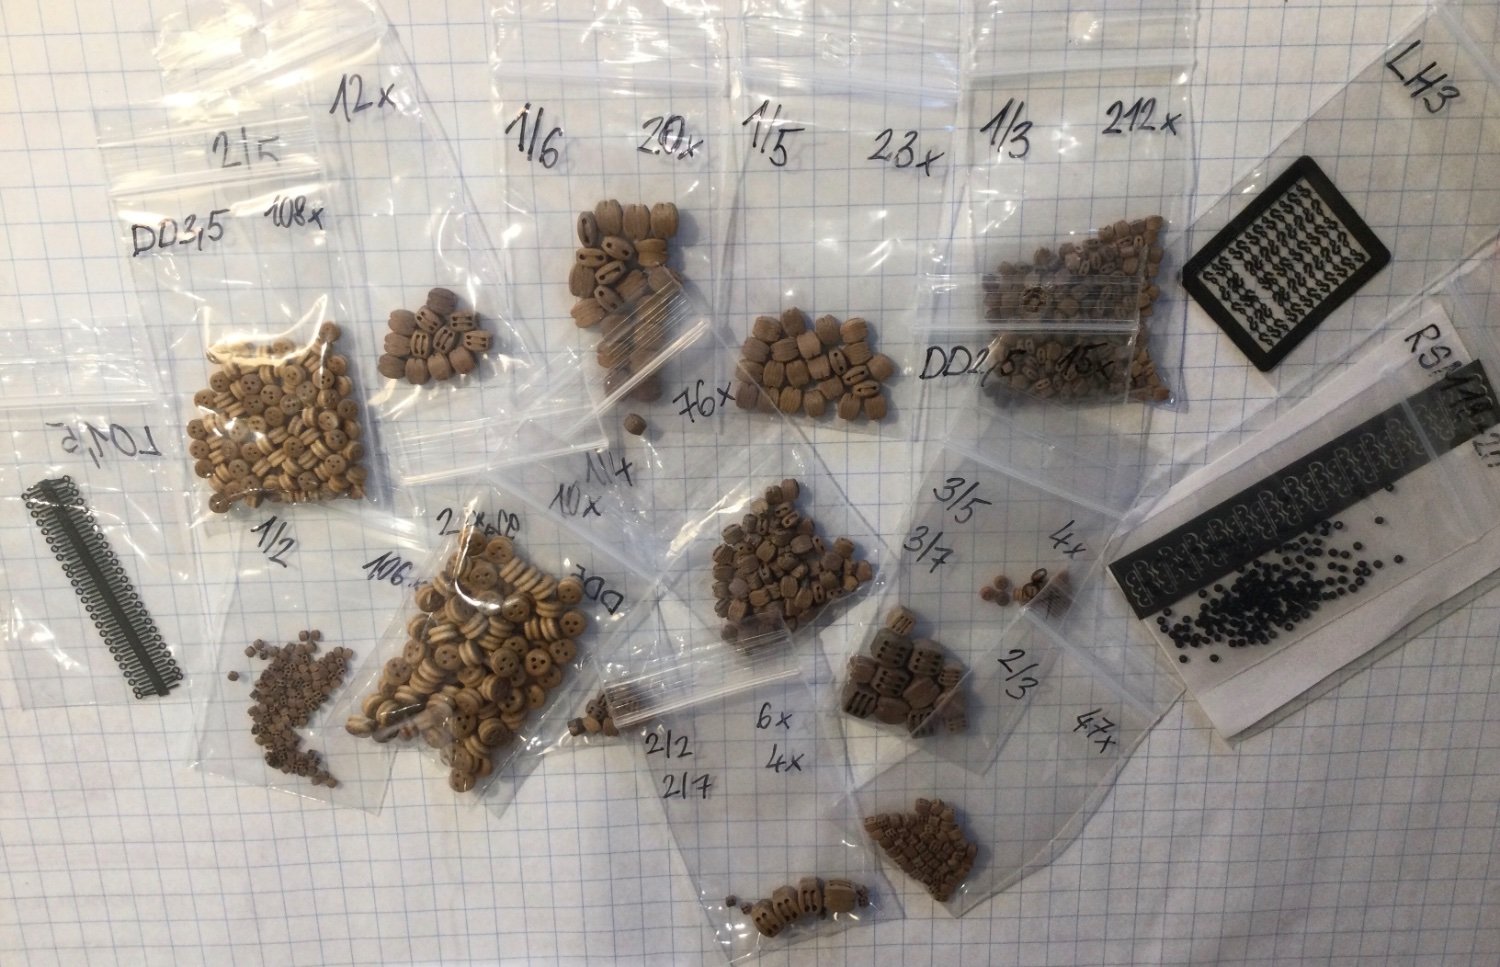
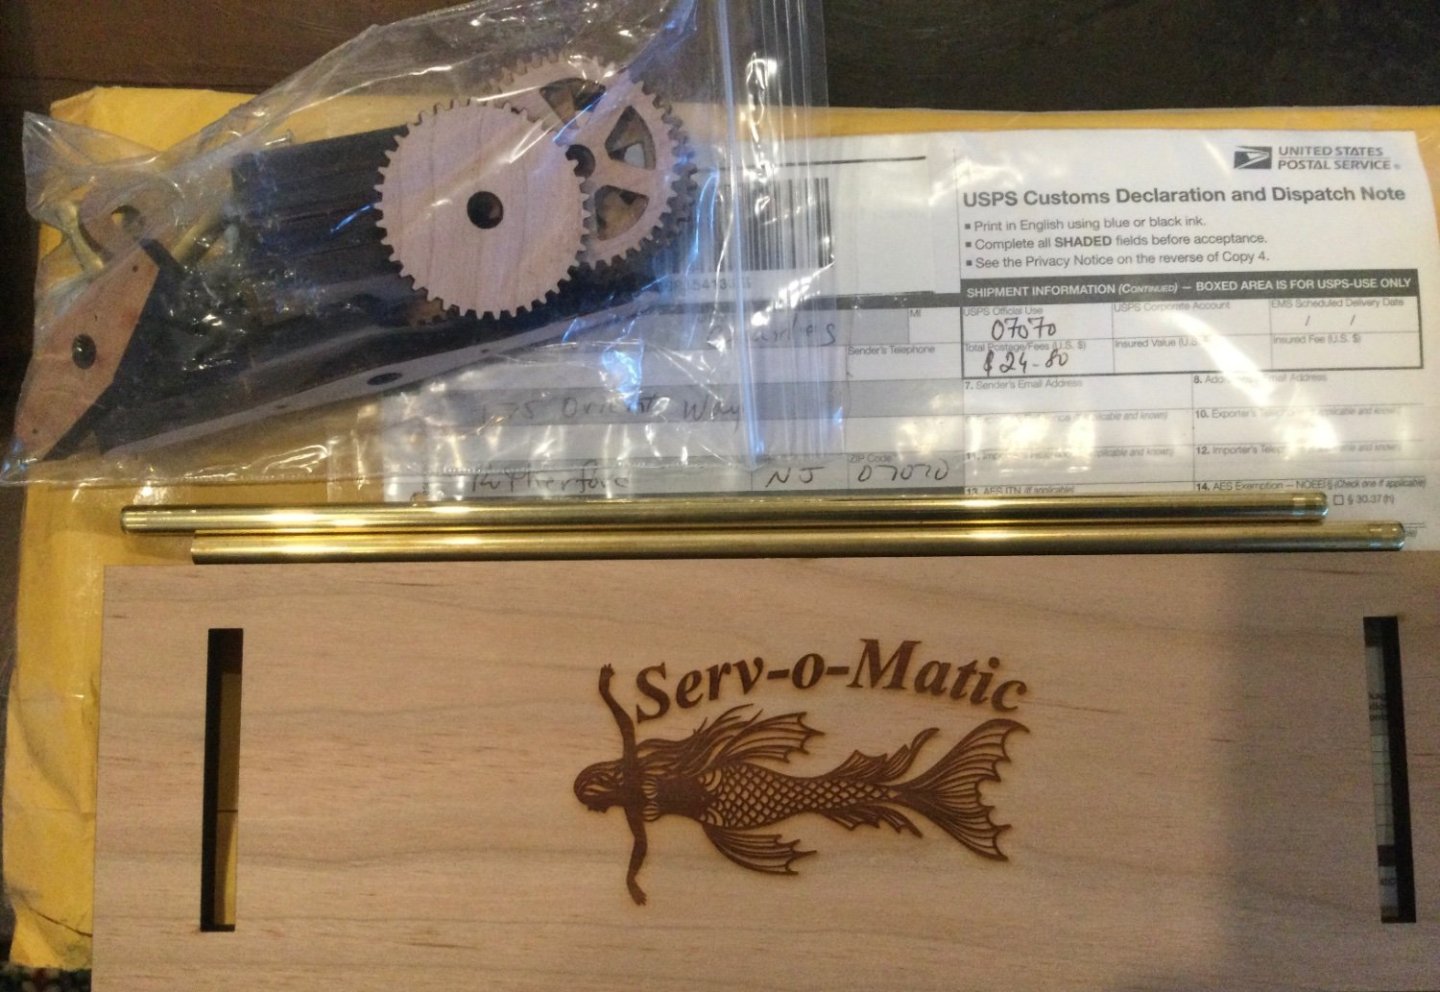
The mail carrier was good to me this week (as I sprinted to the mailbox ahead of my wife😱). I’m still far off from serving shrouds but I’m glad to have my Serv-O-Matic at my disposal. The rigging book will be a great complement to the other books I have already. I love the fact that it’s almost entirely pictorial 😁👍 I managed to snag this near-perfect used copy from eBay at half the price of new.

-
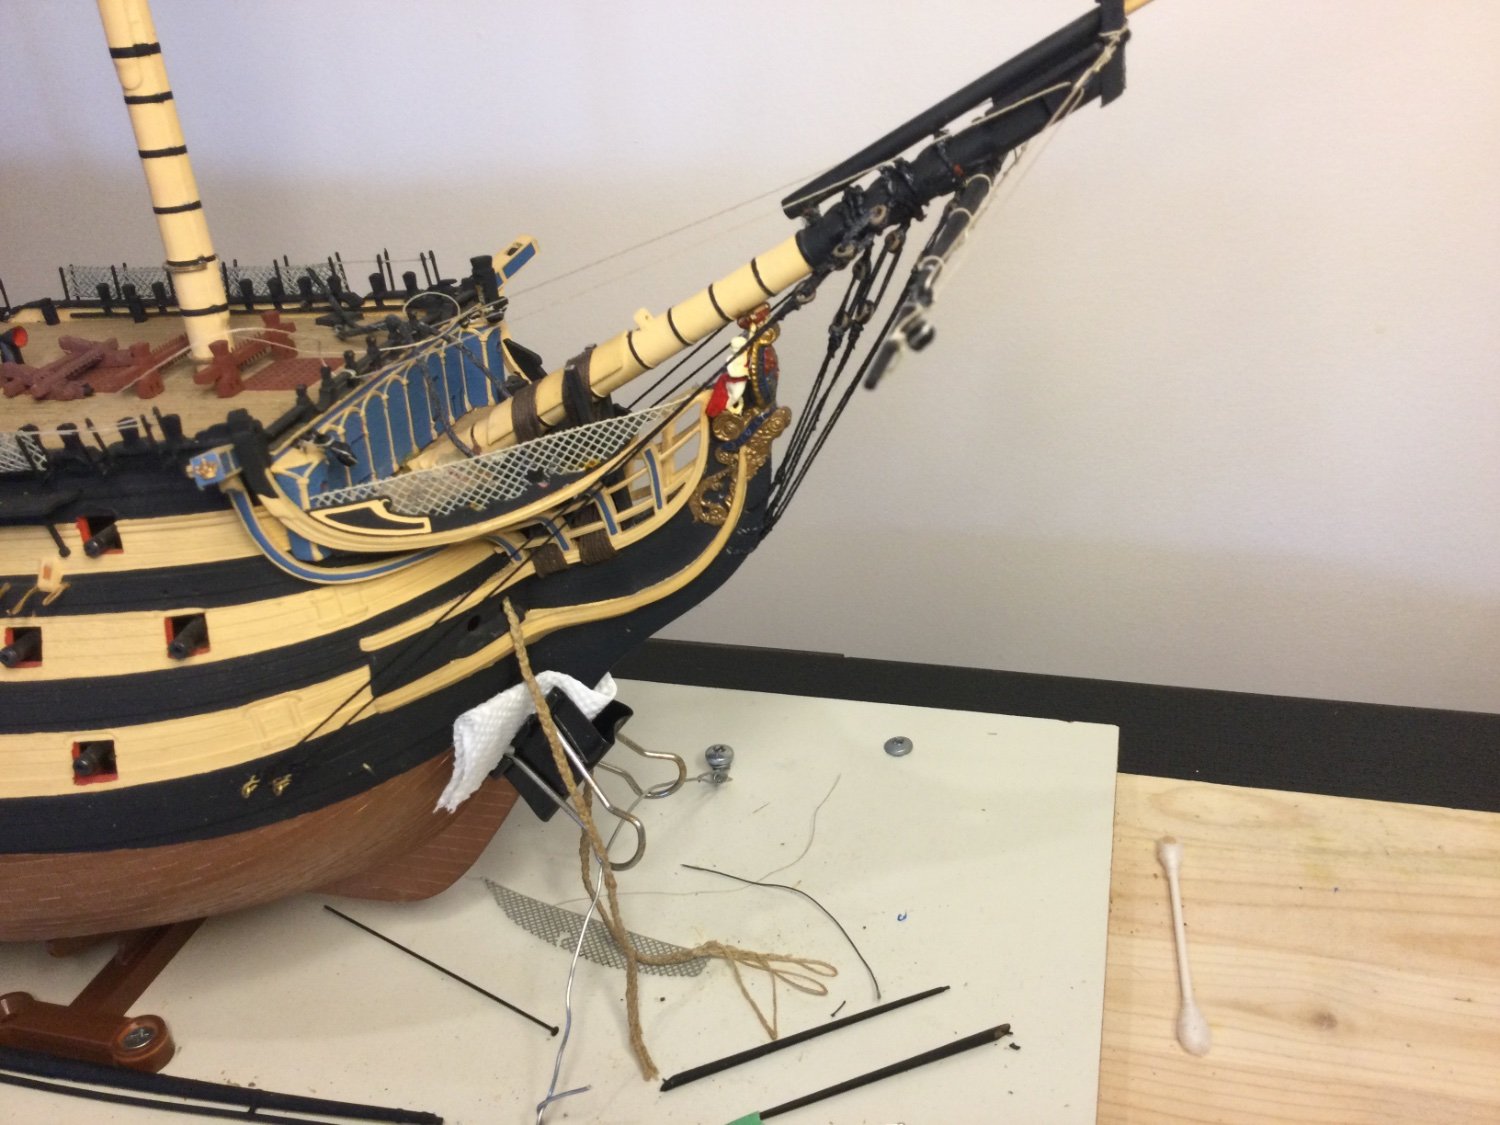
Installed port-side bowsprit shrouds earlier this week. Turned out ‘ok’ but taming the fuzzies while manipulating the lanyards through the hearts and keeping them neatly aligned was a challenge. As always, lanyard and shroud ropes were pulled through beeswax. I noted the beeswax was very visible and clumpy so I tried the trick of running the coated thread over a light bulb to seal the wax. Even a 40W bulb generates quite a bit of surface heat! Seemed to work reasonably well but not consistently as is evident in the foremost lanyard. I’m wondering if my beeswax needs to be ‘reconstituted’ or something by warming it. Any tips or hints would be appreciated. I am doing my build in the lower level of our house so it’s inherently cooler. You may have noticed I dispensed with thimbles on the hooks (I currently don't have any) and just realised I didn’t twist the hooks at a right angle to the the eye - should I have? Still trying to achieve a good and repeatable seizing & serving technique. Next up, starboard-side shrouds and bobstays.

-
Many thanks, Dafi, it’s perfectly clear to me now!! I’m relieved to see that I don’t have to wrap both segments around the heart as I was showing in my chicken scratch diagramme 😁👍
-
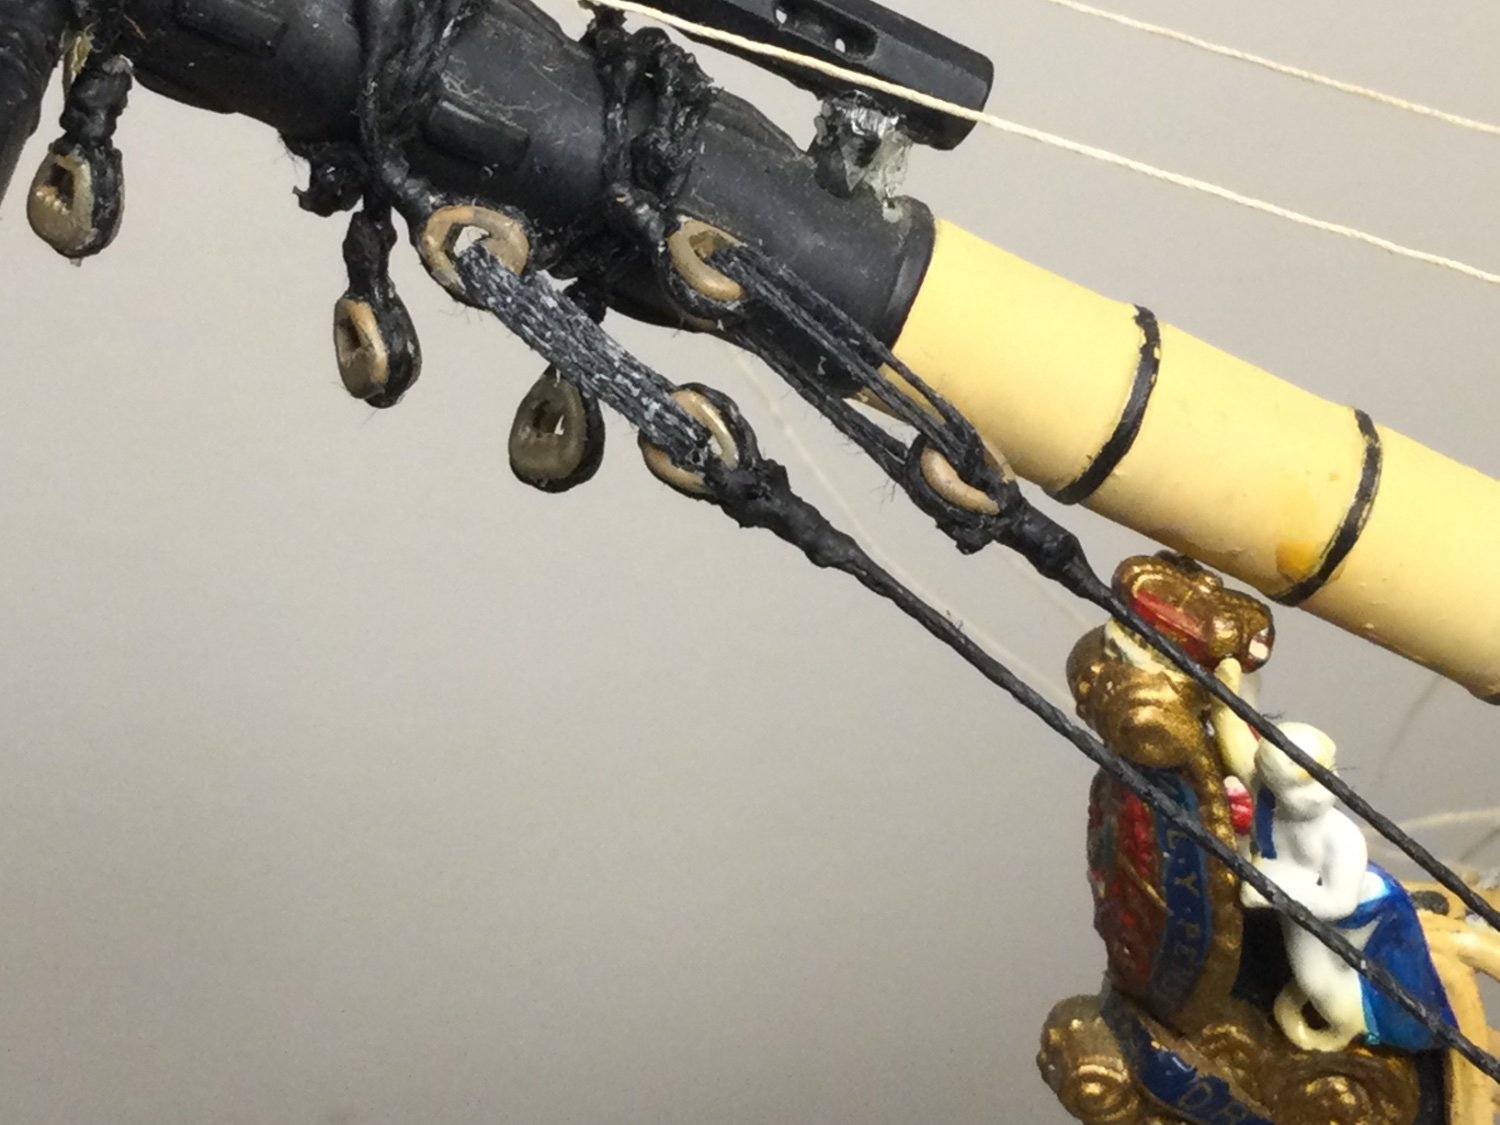
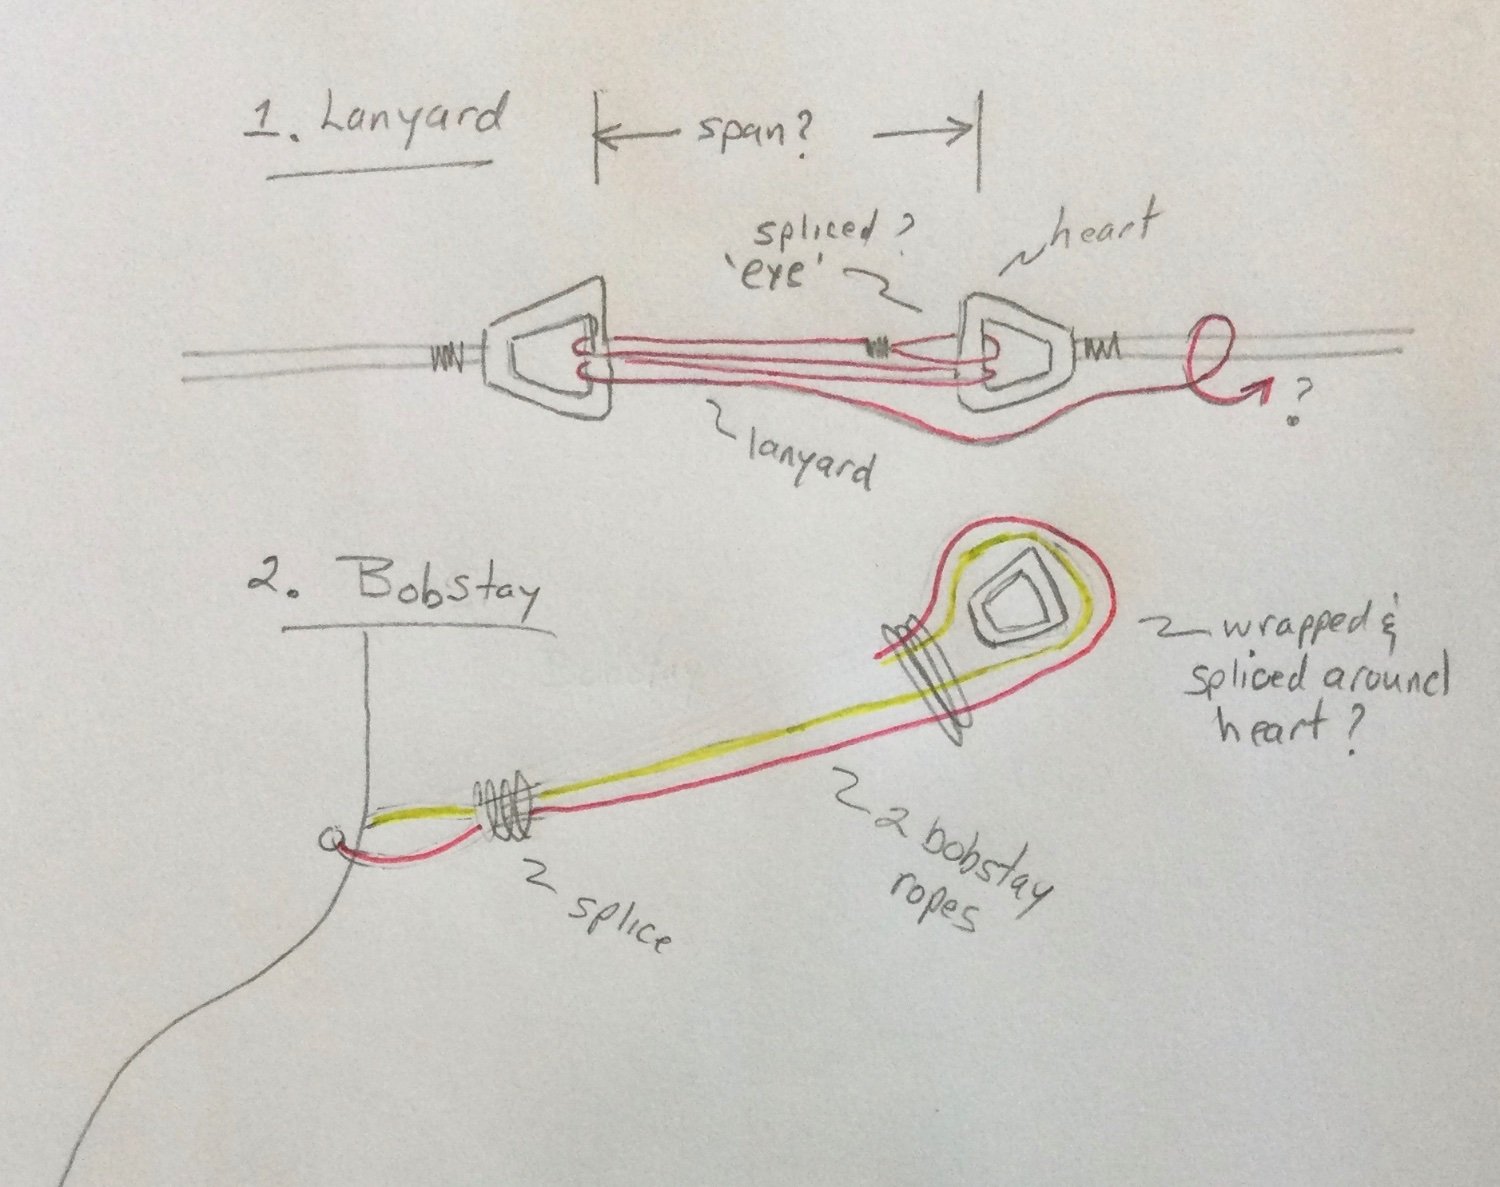
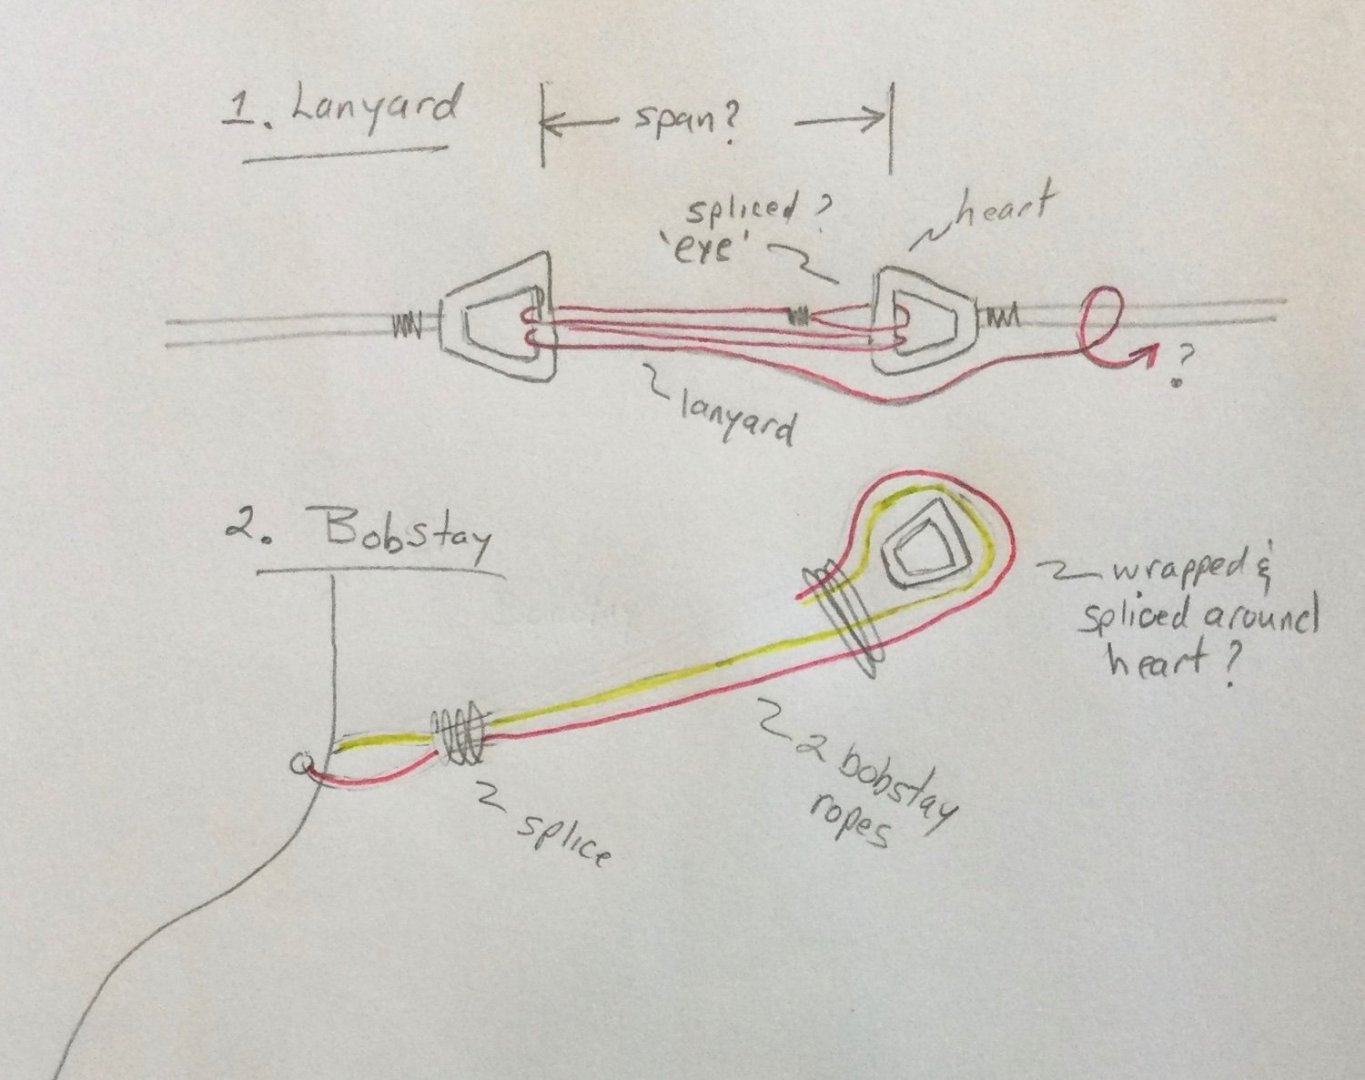
A few questions re: lanyards and bobstays for my learned MSW colleagues: 1a. It’s not 100% clear to me how hearts are lashed together. As best as I’ve been able to gather, the lanyard starts with an eye splice through one of the hearts but how does the lanyard tie-off at the end - does it wrap around the shroud/bobstay where the end is spliced? 1b. What is the length or span of the lanyard at this scale or is it by eye? 2. The bobstays pass through the holes in the “knee of the head” and then spliced on the fore side. Two independent lengths of the same rope then take a turn around the heart and are spliced together at the heart? Hopefully the attached pictures, will help clarify my questions. To be clear, in the latter case it’s the same rope but I coloured each segment for clarity. Thanks!!
-
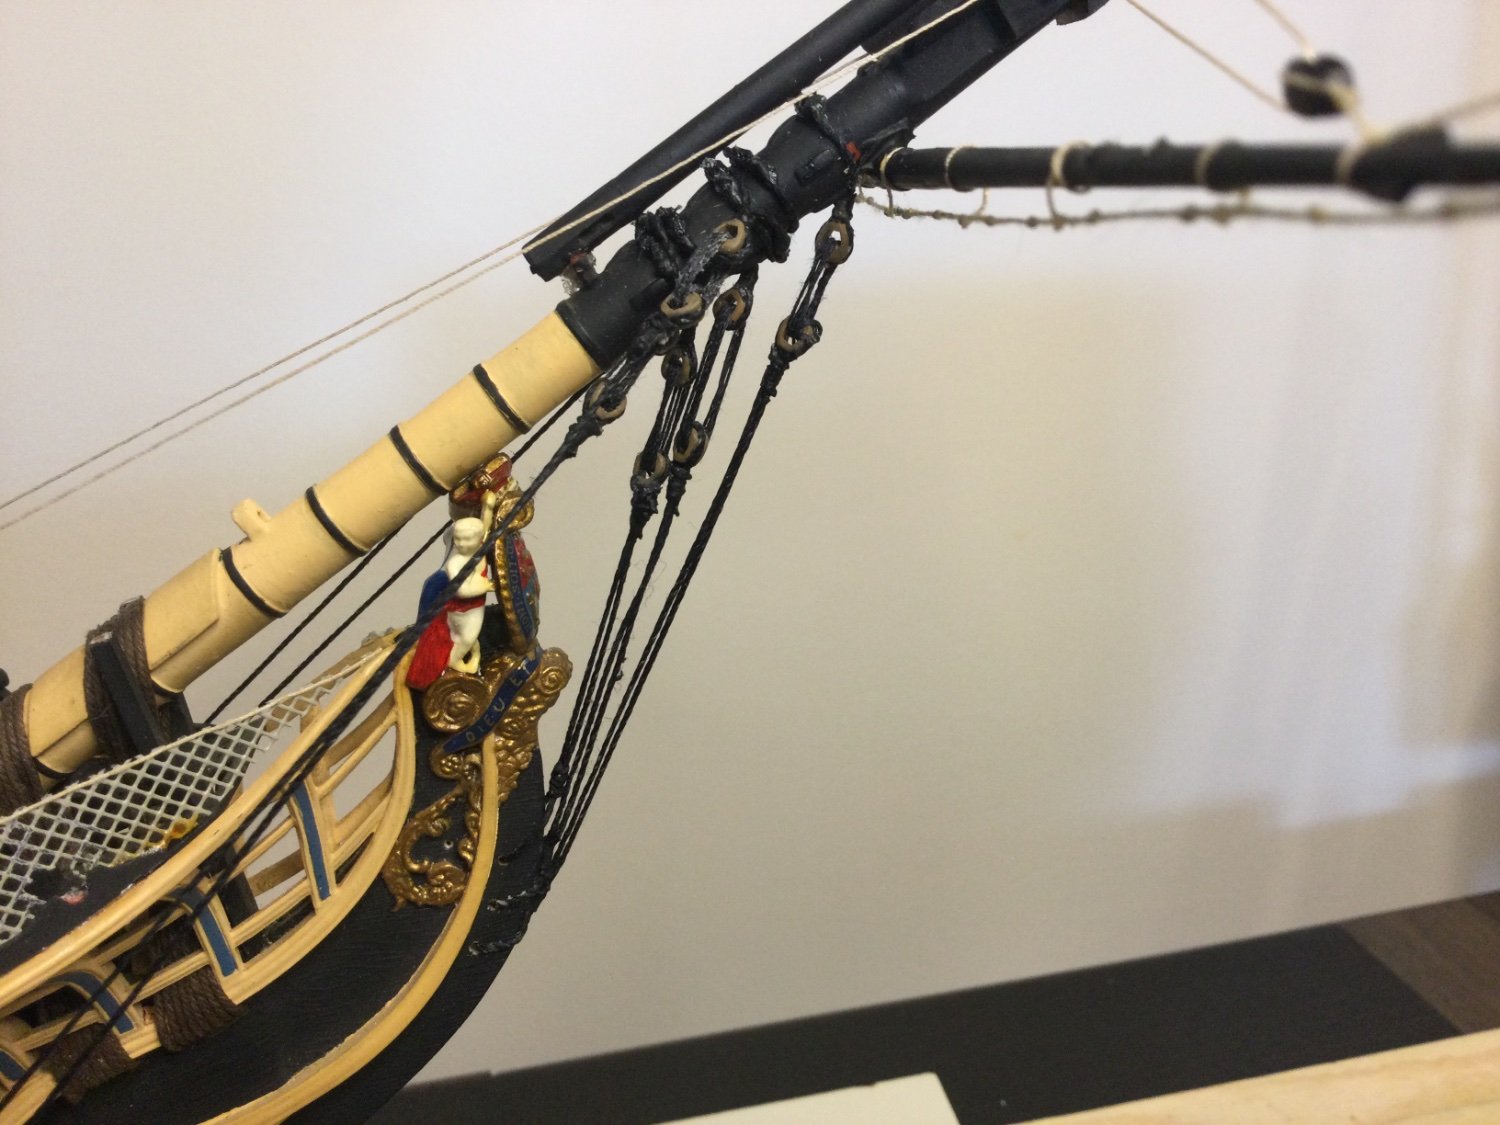
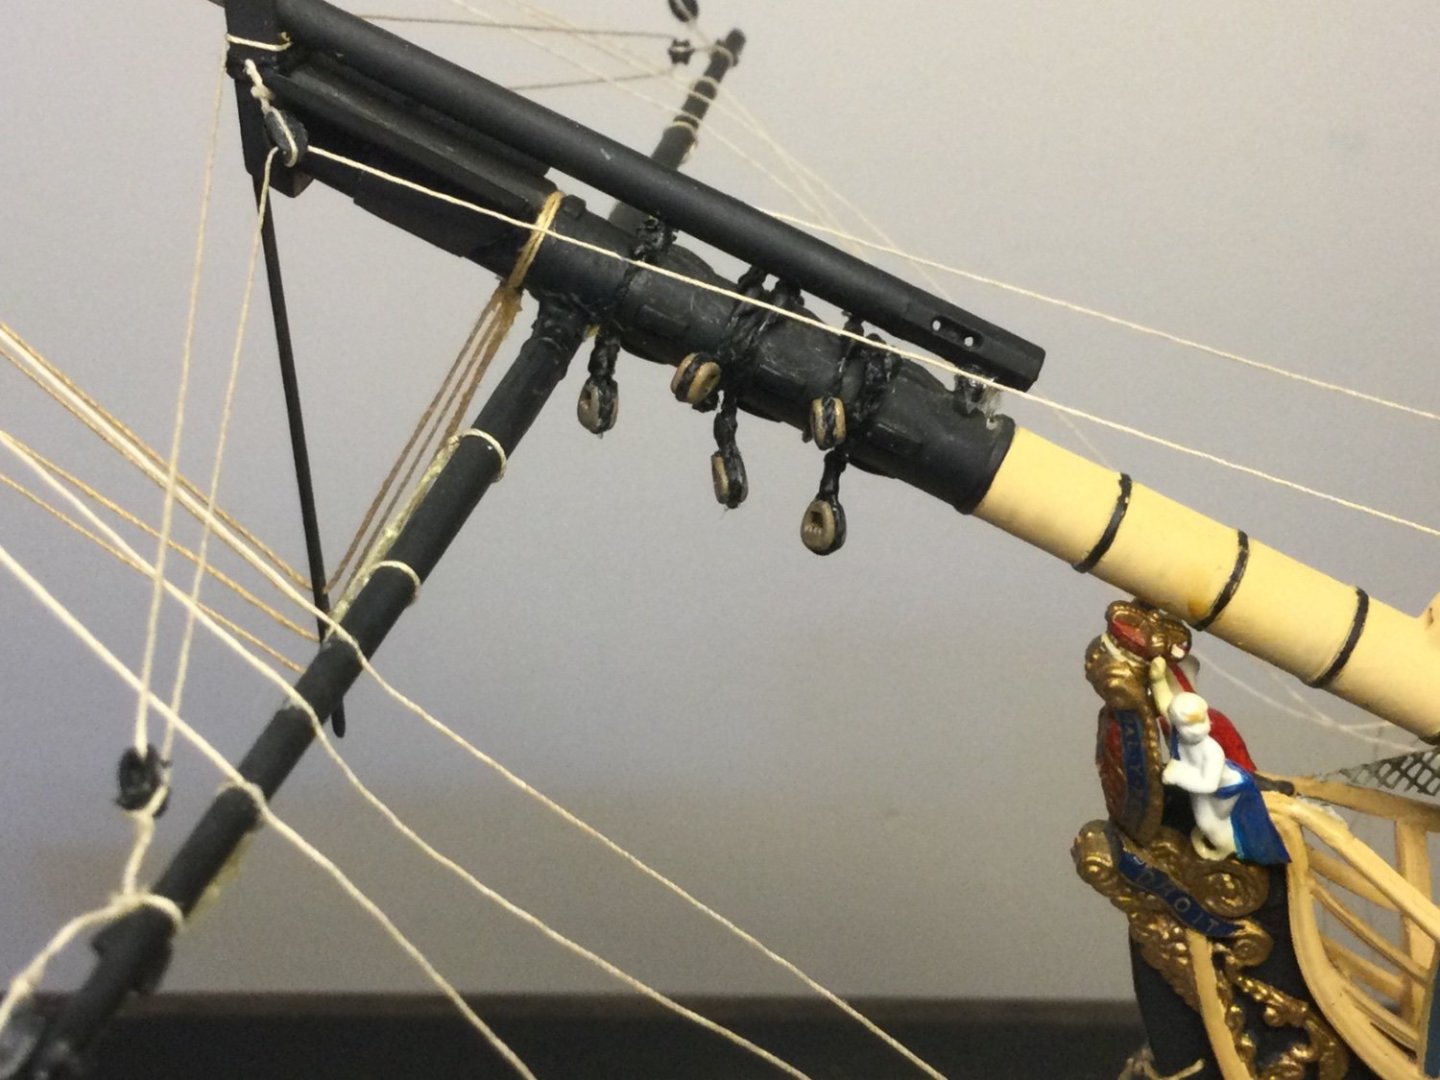
Took a break from drawing pictures to actually installing something on the Victory 😀 The collars and hearts I had previously assembled went on the bowsprit today. It seems I was a little generous with the length of the legs so the spliced eyes came together on top of the bowsprit and look a bit clumpy. Not super happy with it but I expect once the additional hearts, shrouds and bobstays are in place it won’t be so obvious. Going forward, I’ll definitely be refining some of my seizing and splicing techniques. Needle and thread definitely the way to go. Btw, all of the visible natural thread is the ‘old’ version and will be removed.


-
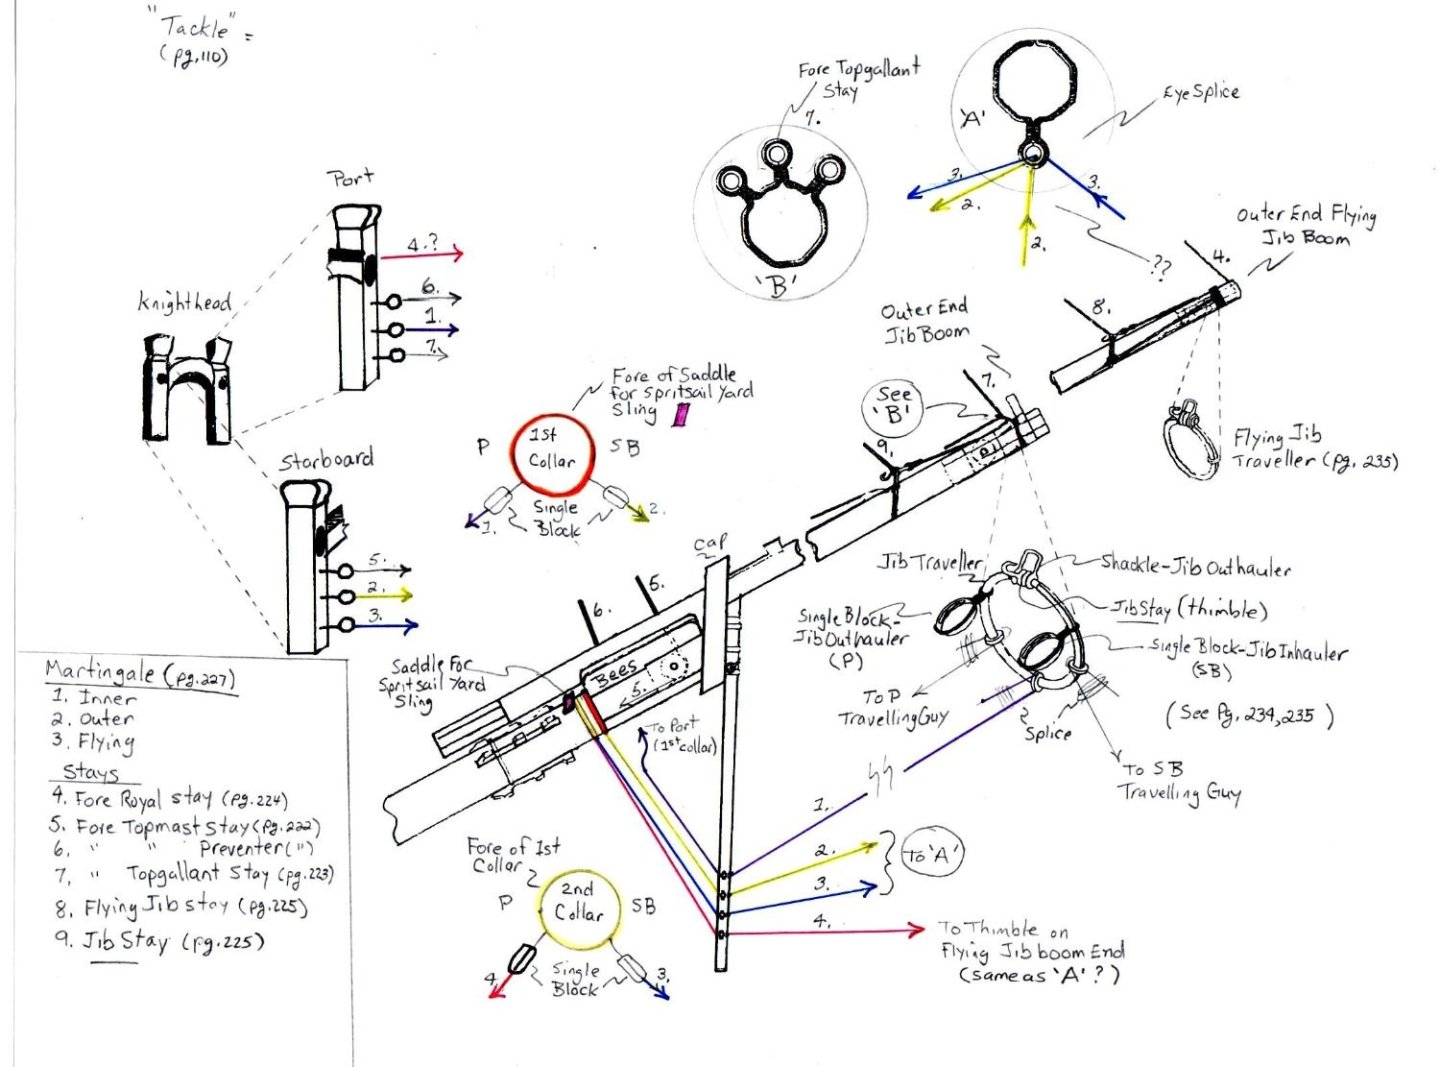
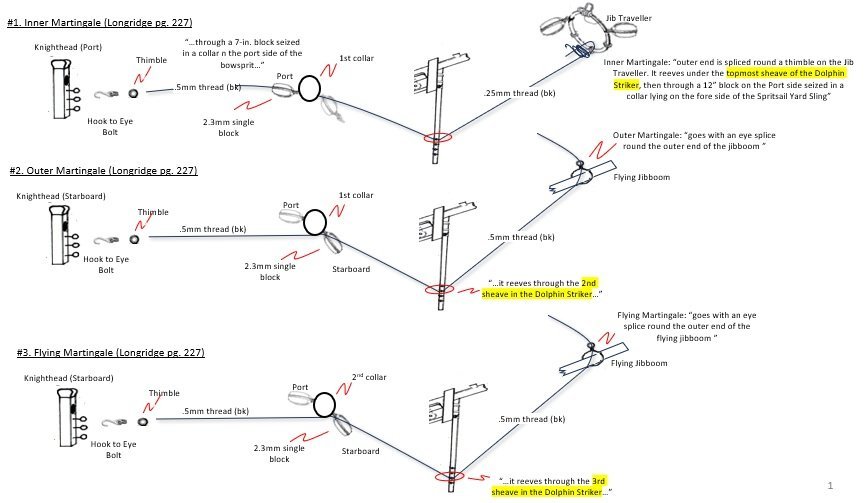
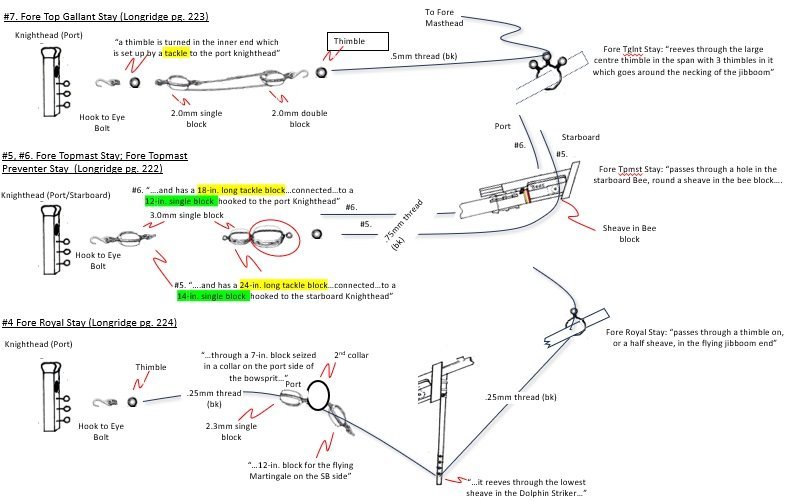
"Oh Victory!, Victory!, how you distract my poor brain." Those were some of the last words spoken by Vice-Admiral Horatio Nelson on the 21st of October, 1805. Mortally wounded, Nelson lay below deck in the surgeon’s quarters while the battle raged above. Whether the good admiral was expressing anxious anticipation of a British victory or, he was reflecting on his flagship each time the mighty ship shook to the roar of her guns, his words echo in my head every day. But it's the myriad lines/ropes and their associated blocks, hearts, deadeyes, thimbles, eyes and hooks that need to be ‘seized’, ‘served’, 'sized', ‘spliced’, ‘stropped’, ‘lashed’, ‘wormed’, ‘parceled’, ‘gammoned’, ‘snaked’ and ‘frapped’ that are "distracting MY poor brain". But I wouldn't have it any other way! 😃In my never ending quest to render words into pictures here's my 'simplified' (hardly) take on the bowsprit standing rigging. The first picture is a sort of consolidated view focusing on the lines/ropes that 'reeve' through the Dolphin Striker, the outer ends of which terminate elsewhere on the bowsprit/jib boom/flying jib boom. The other two pictures are my take on how those lines are routed and eventually 'purchase' on the knighthead. I still have plenty of research/questions to go but please fire away with any suggestions, comments, corrections, etc. 👍 Knighthead Purchases:
-
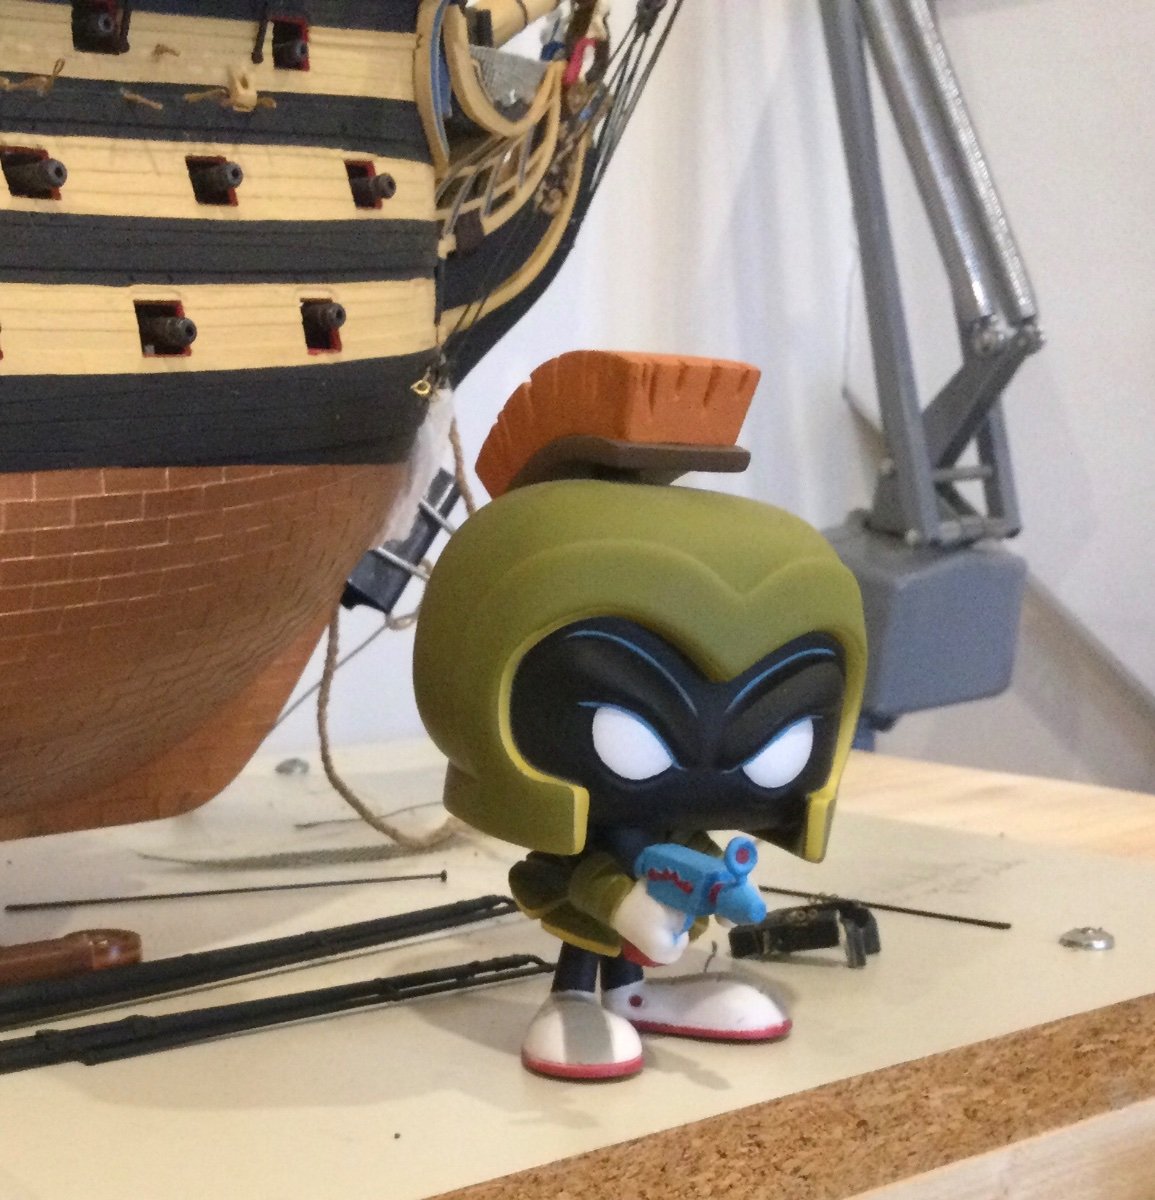
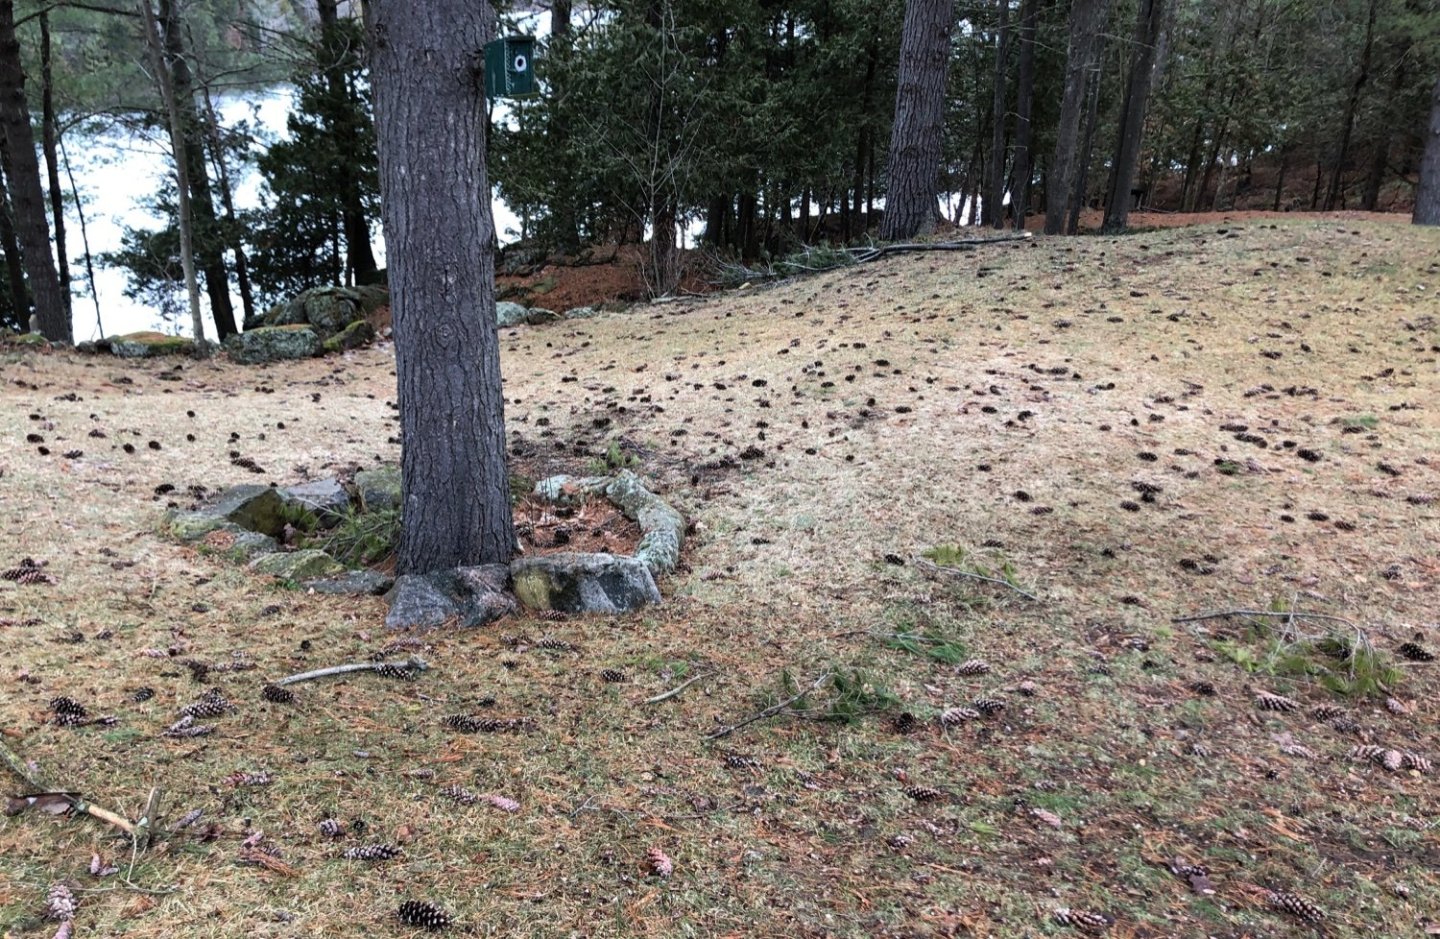
My wife was remarking on the sheer volume of pine cones that dropped on our property this year. All of which will need to be picked up… …then I showed her this! 😱

-
One of the things I struggled with while assembling the collars for the bowsprit shrouds and bobstays was keeping a reasonable round opening for the eyes that would be lashed together around the bowsprit. The fact that these are wrapped around a push pin does not leave much tolerance. A couple became misshapened, one closed altogether which I had to redo. For experiment, I tied-off an eye, as above, then soaked it in CA. After hardening, I gently reamed the eye open with with one of my small hand drills. Here’s how that looks. Could almost substitute for a small thimble?