Malcolm Brown
-
Posts
68 -
Joined
-
Last visited
Content Type
Profiles
Forums
Gallery
Events
Everything posted by Malcolm Brown
-
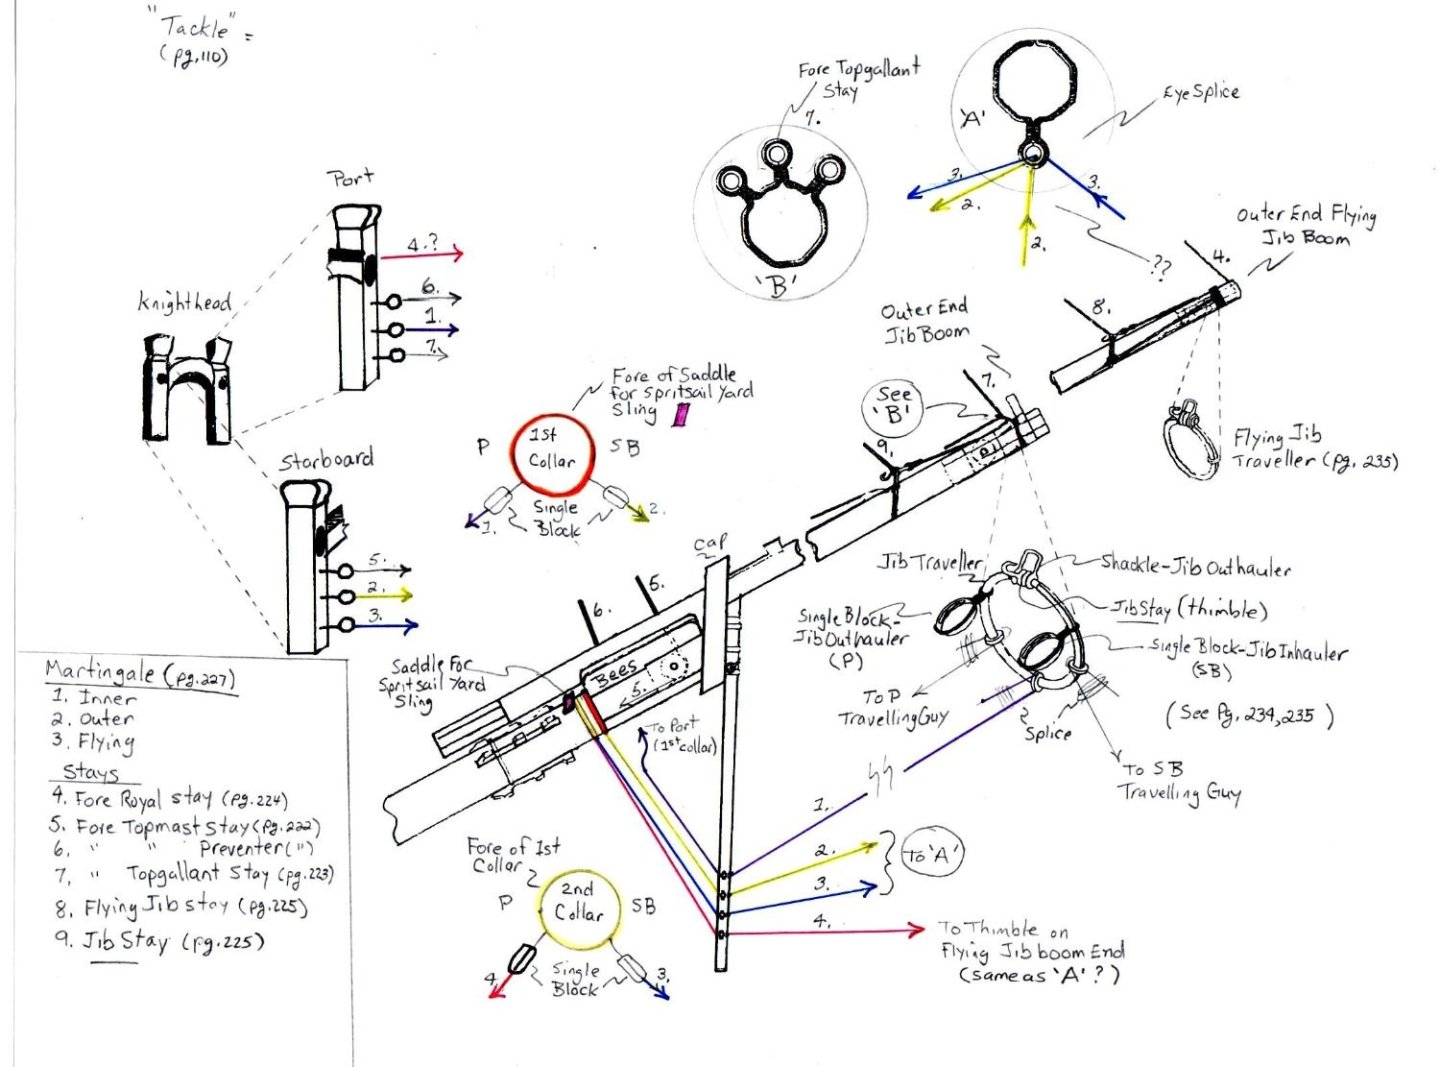
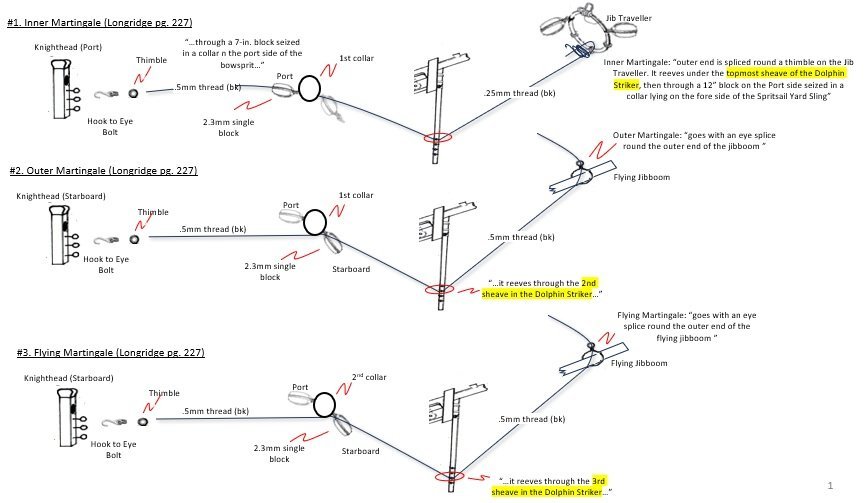
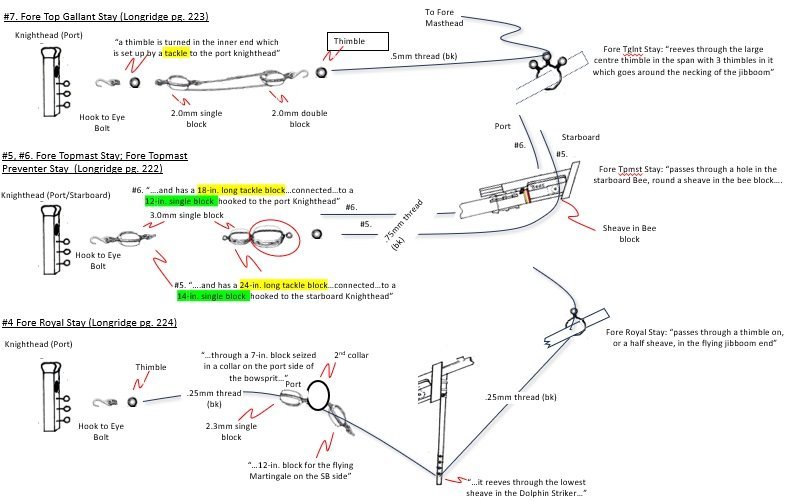
"Oh Victory!, Victory!, how you distract my poor brain." Those were some of the last words spoken by Vice-Admiral Horatio Nelson on the 21st of October, 1805. Mortally wounded, Nelson lay below deck in the surgeon’s quarters while the battle raged above. Whether the good admiral was expressing anxious anticipation of a British victory or, he was reflecting on his flagship each time the mighty ship shook to the roar of her guns, his words echo in my head every day. But it's the myriad lines/ropes and their associated blocks, hearts, deadeyes, thimbles, eyes and hooks that need to be ‘seized’, ‘served’, 'sized', ‘spliced’, ‘stropped’, ‘lashed’, ‘wormed’, ‘parceled’, ‘gammoned’, ‘snaked’ and ‘frapped’ that are "distracting MY poor brain". But I wouldn't have it any other way! 😃In my never ending quest to render words into pictures here's my 'simplified' (hardly) take on the bowsprit standing rigging. The first picture is a sort of consolidated view focusing on the lines/ropes that 'reeve' through the Dolphin Striker, the outer ends of which terminate elsewhere on the bowsprit/jib boom/flying jib boom. The other two pictures are my take on how those lines are routed and eventually 'purchase' on the knighthead. I still have plenty of research/questions to go but please fire away with any suggestions, comments, corrections, etc. 👍 Knighthead Purchases:
-
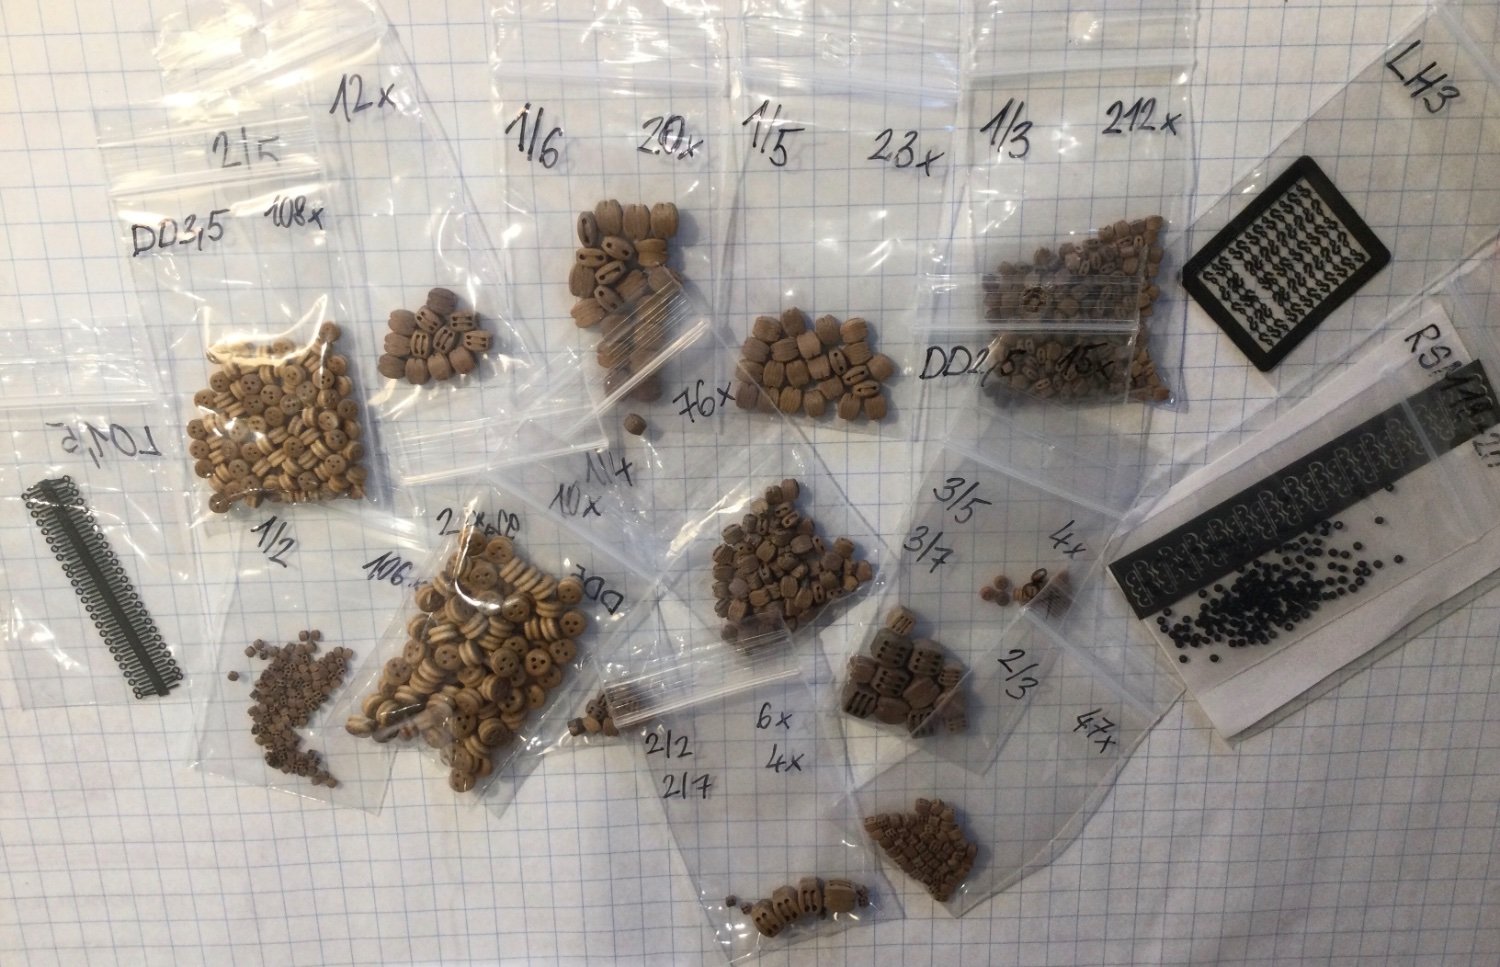
My wife was remarking on the sheer volume of pine cones that dropped on our property this year. All of which will need to be picked up… …then I showed her this! 😱

-
One of the things I struggled with while assembling the collars for the bowsprit shrouds and bobstays was keeping a reasonable round opening for the eyes that would be lashed together around the bowsprit. The fact that these are wrapped around a push pin does not leave much tolerance. A couple became misshapened, one closed altogether which I had to redo. For experiment, I tied-off an eye, as above, then soaked it in CA. After hardening, I gently reamed the eye open with with one of my small hand drills. Here’s how that looks. Could almost substitute for a small thimble?

-
Thank you for this feedback, Dafi! That certainly would simplify things since the 3rd bobstay is considerably longer than the other two, is hauled quite far back on the bow and requires the two splices. Got it! 😁👍
-
Merci beaucoup, Monsier Grant!! So much rigging. So little time 😁
-
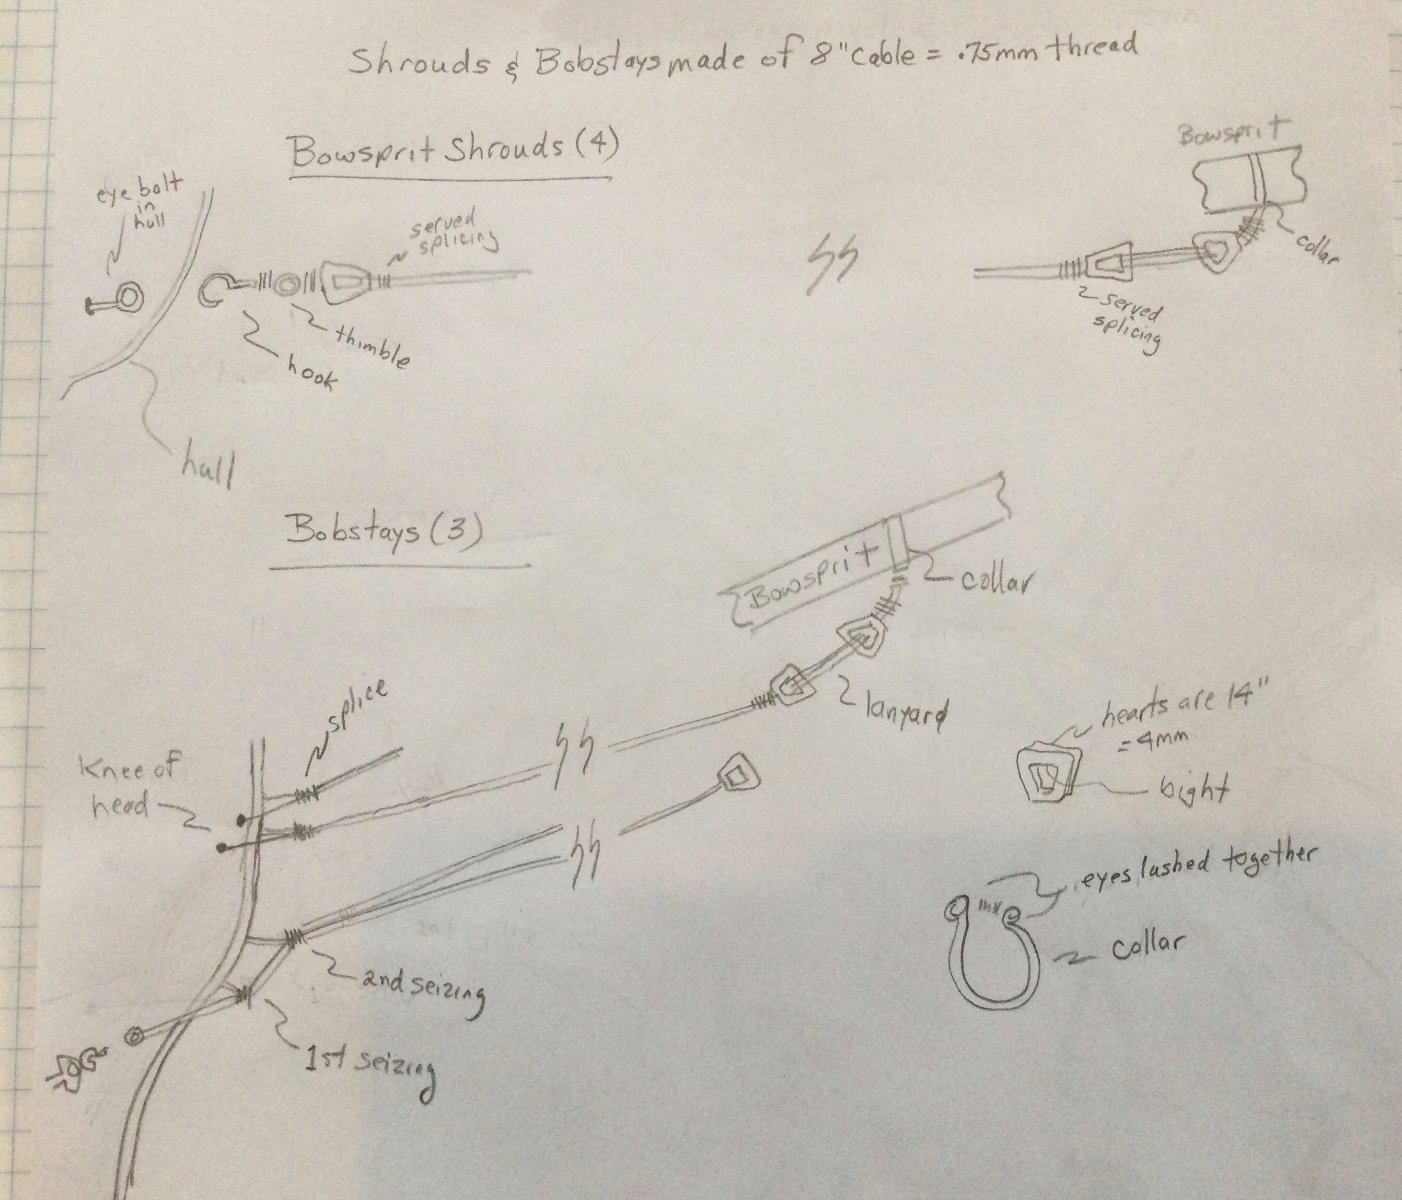
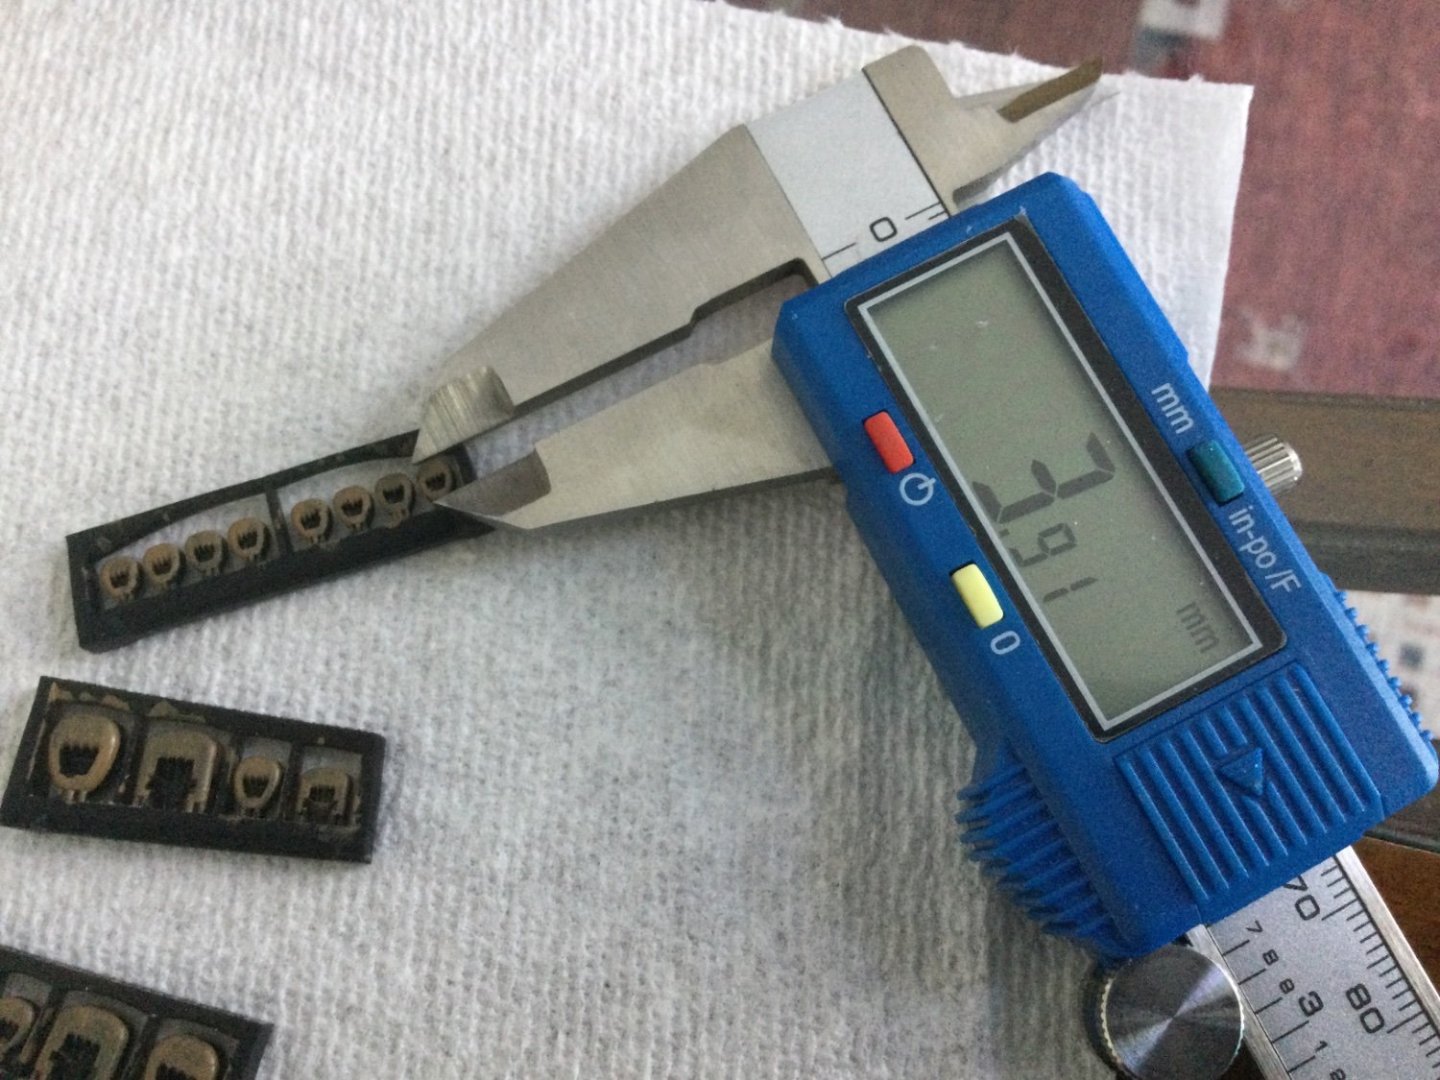
I’m still figuring out how to use MSW so my apologies I missed your message from last Friday. For the bowsprit shrouds and bobstays, I’m using .75mm thread (from Amati). I am using the resin hearts from Dafi. I measured the smaller hearts for shrouds and bobstays at ~4mm and the larger for main and preventer stays at ~7mm. Those might not be the ‘official’ measurements but they’re what my micrometer suggested😁
-
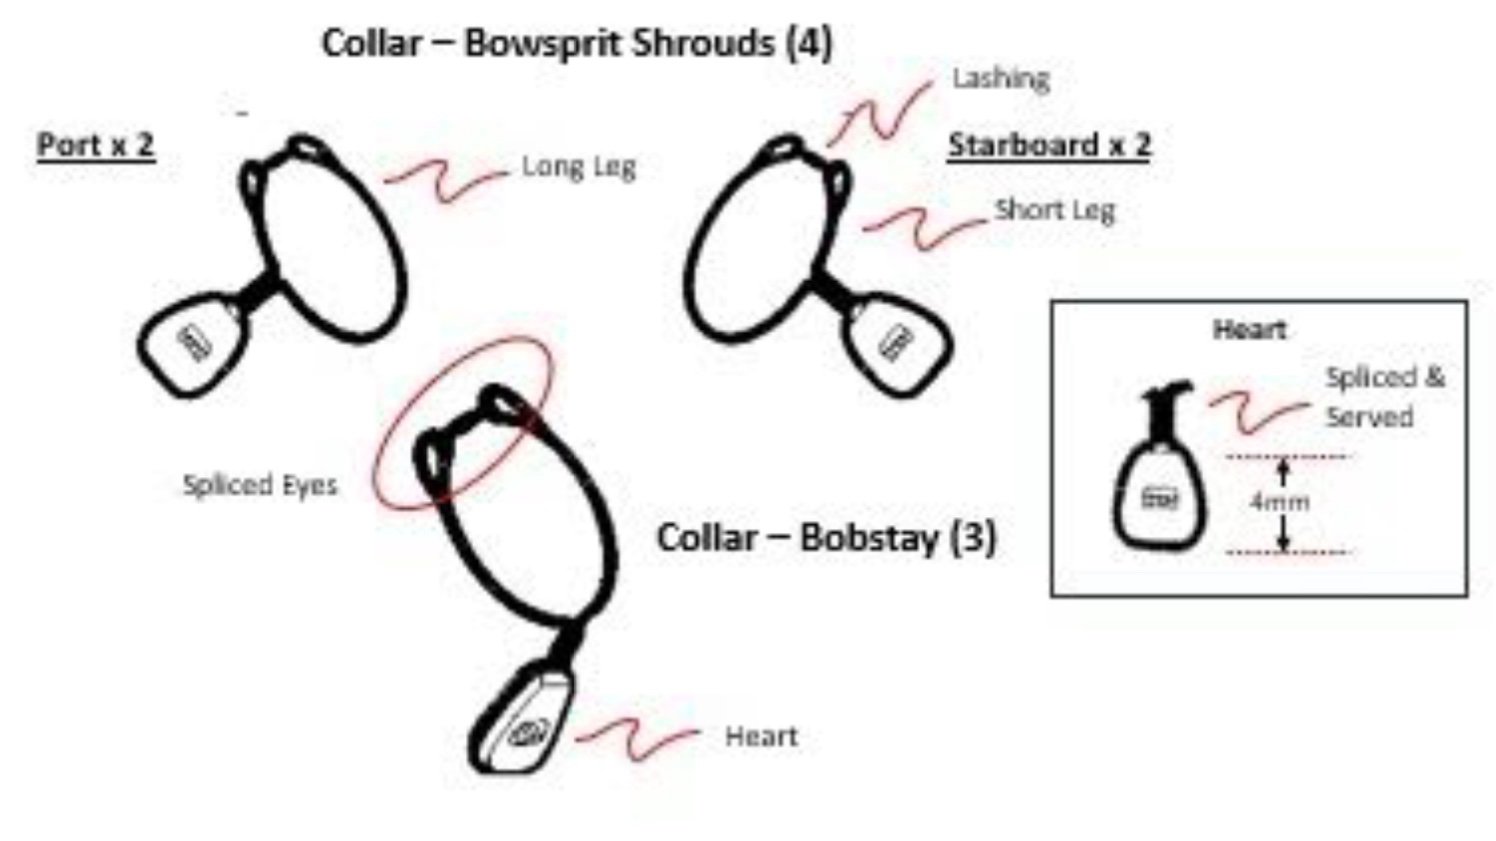
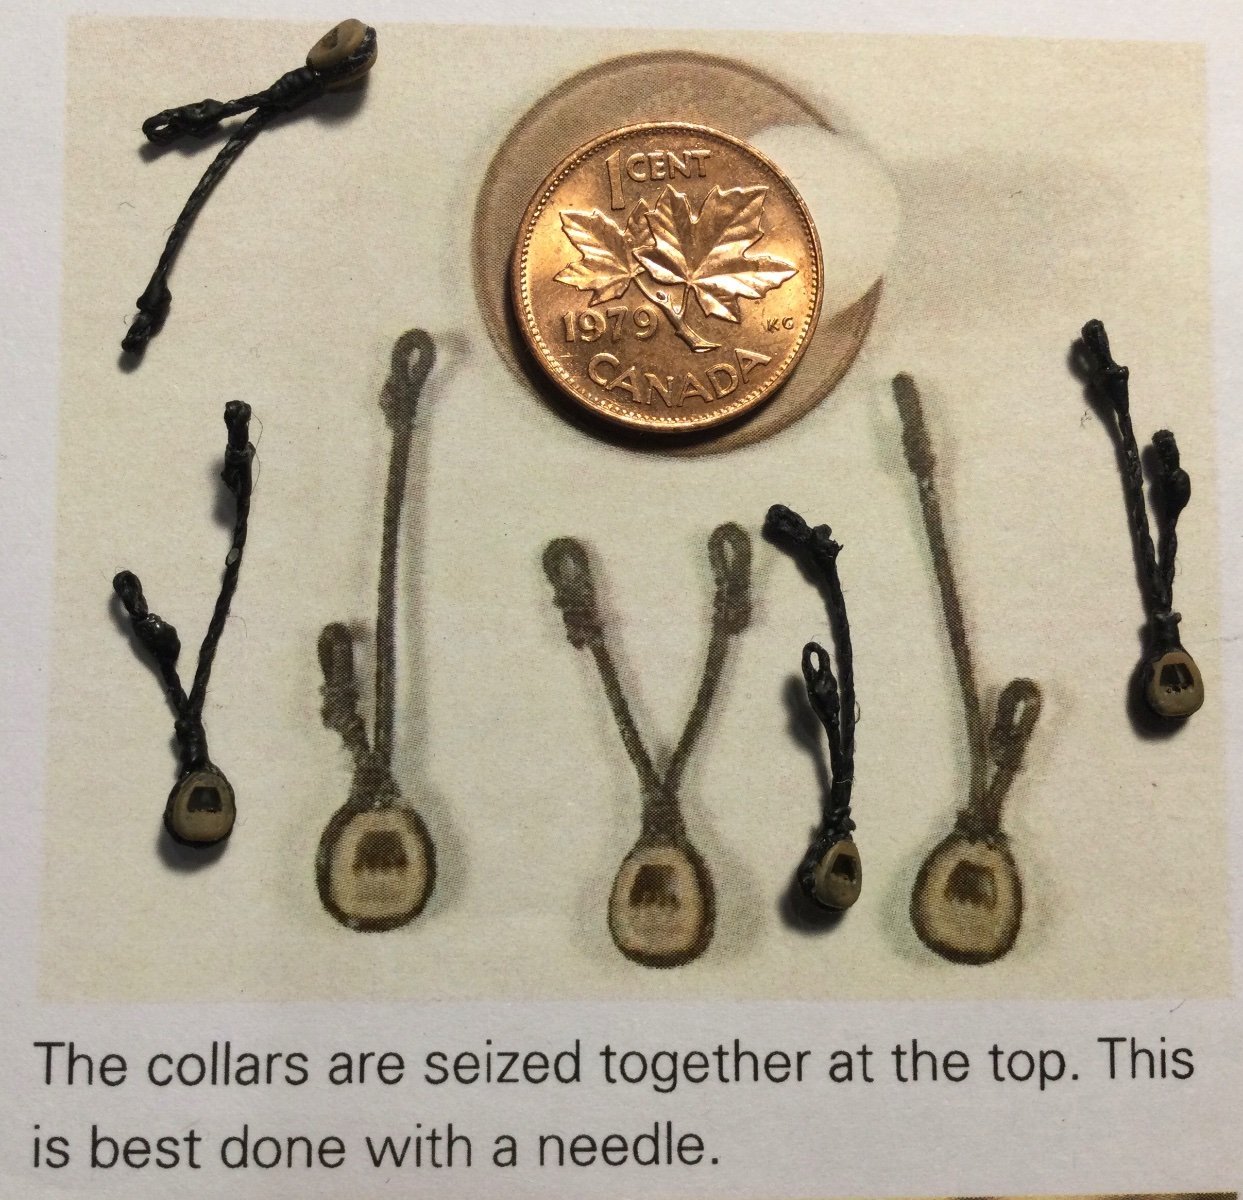
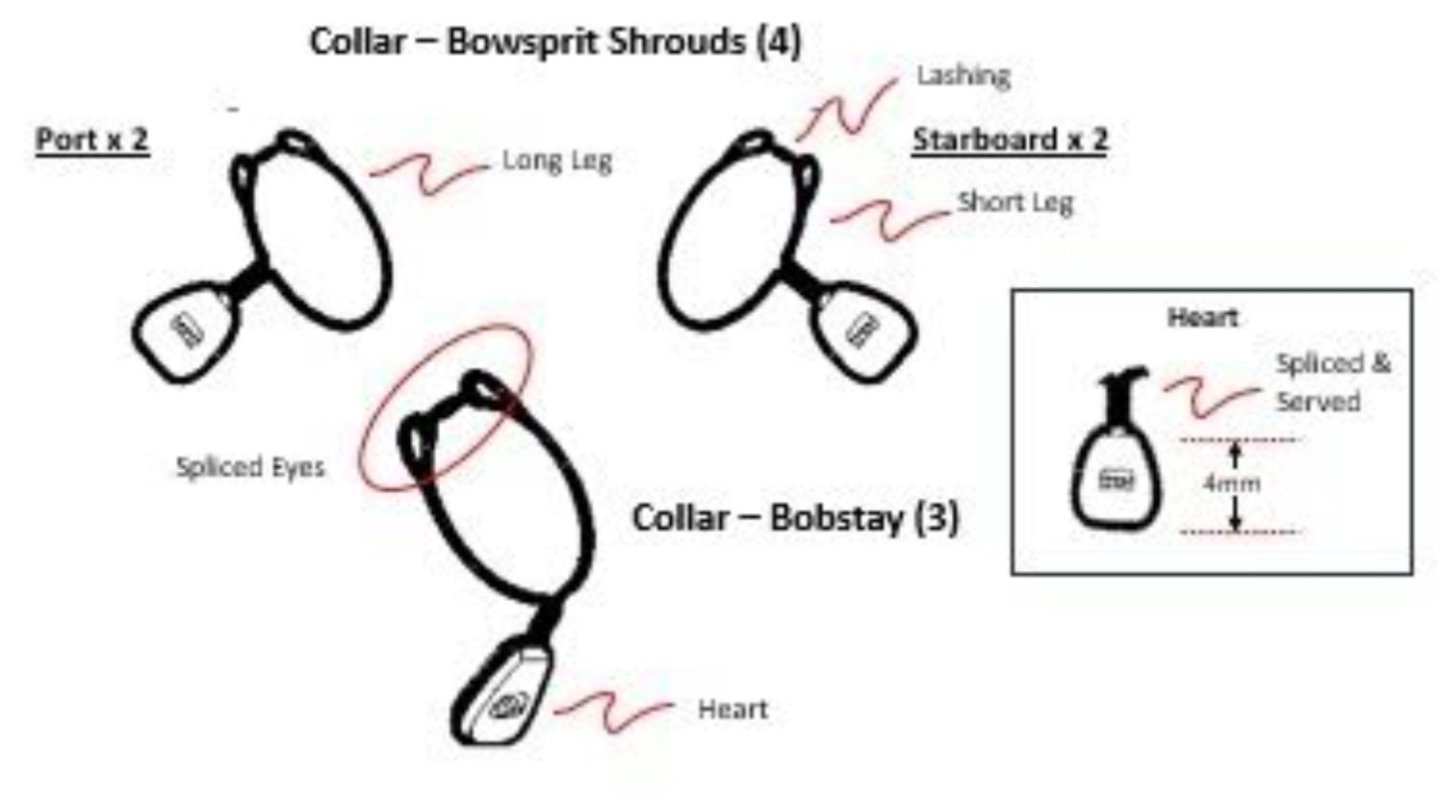
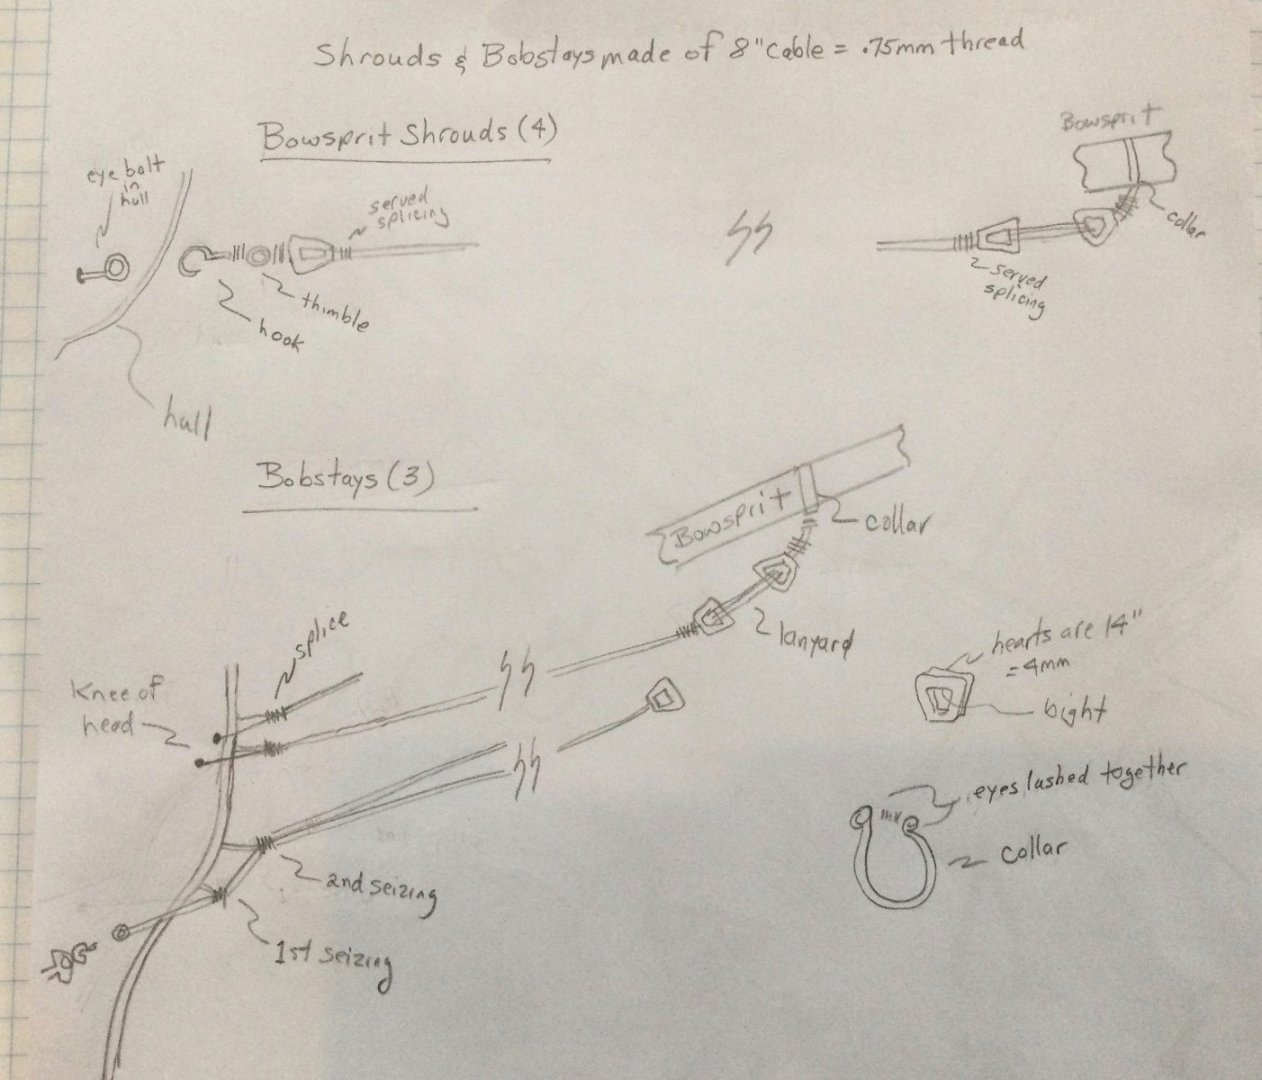
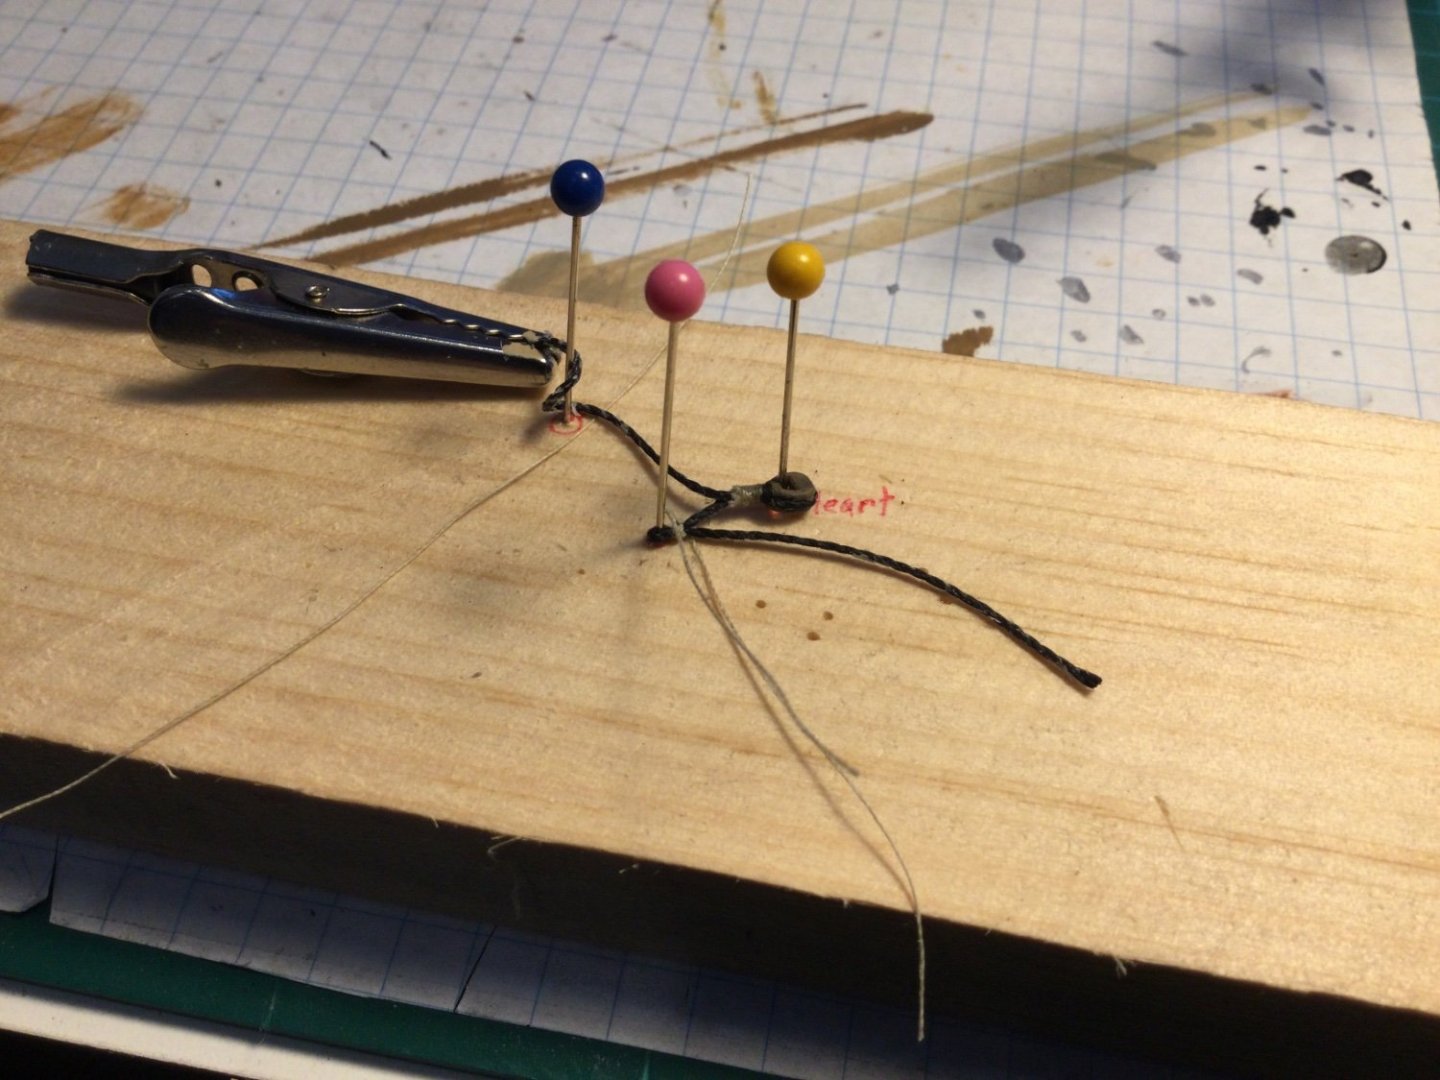
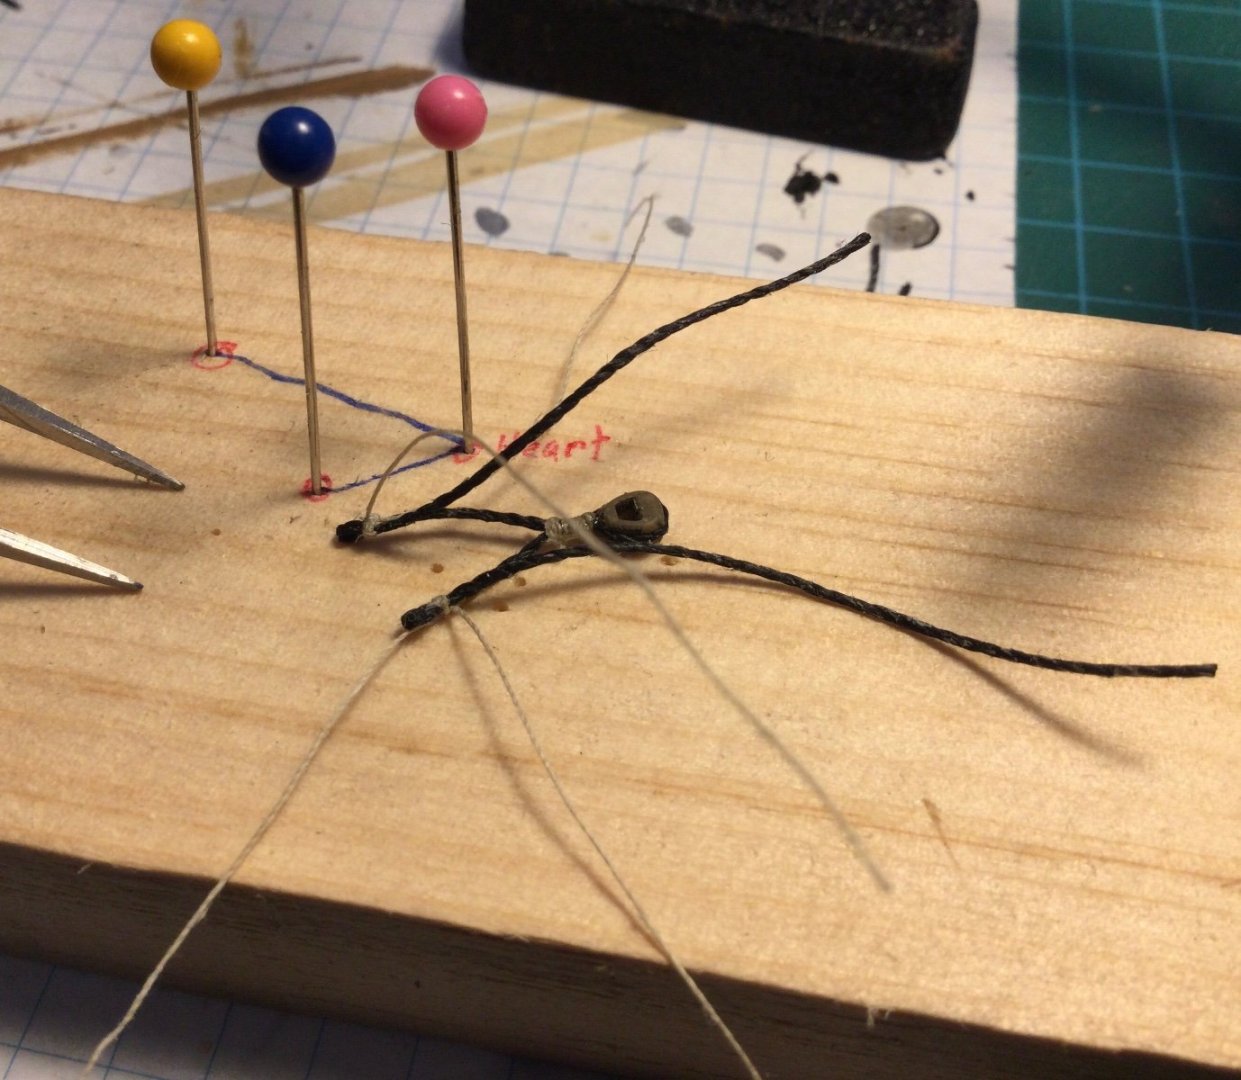
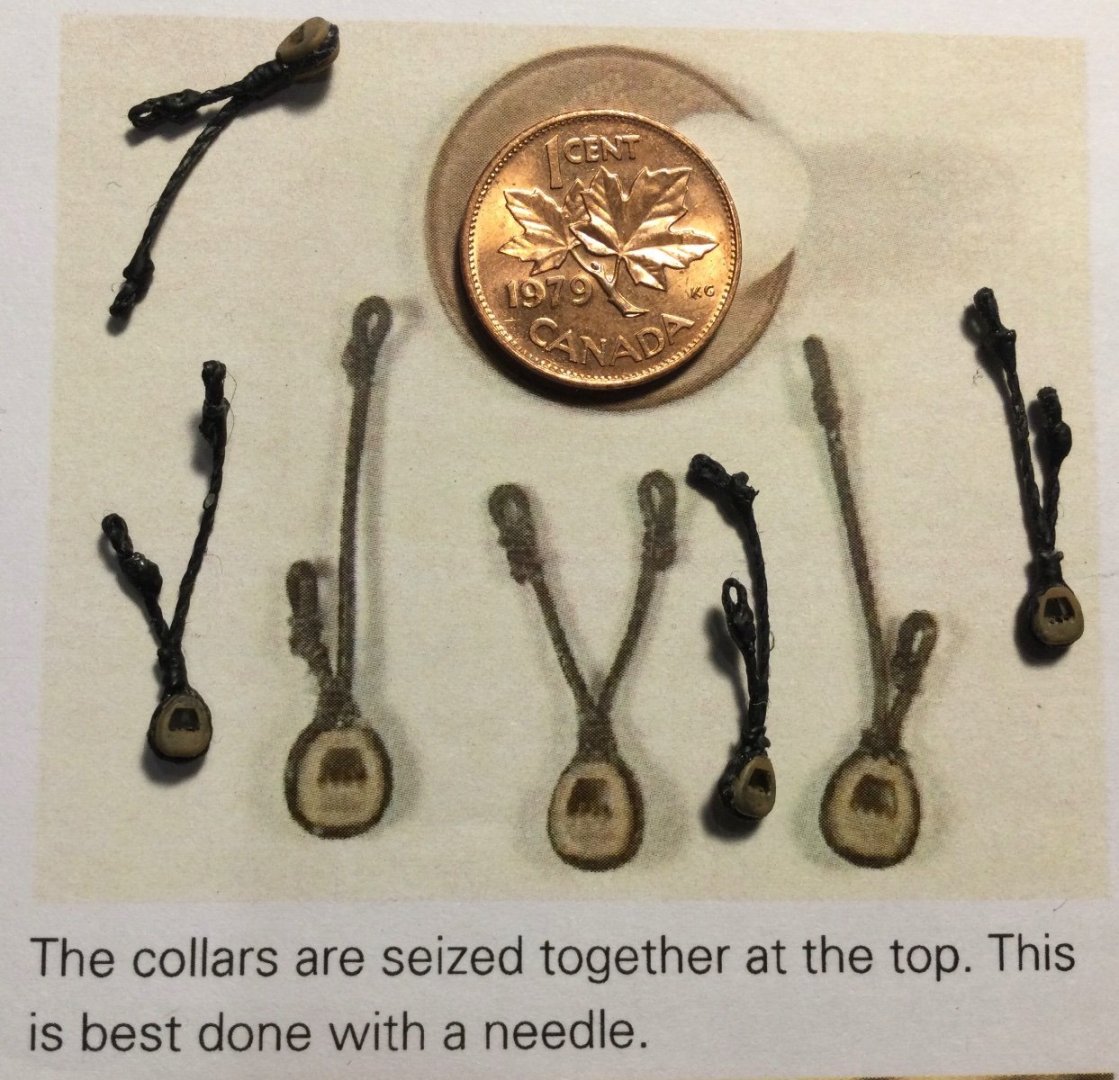
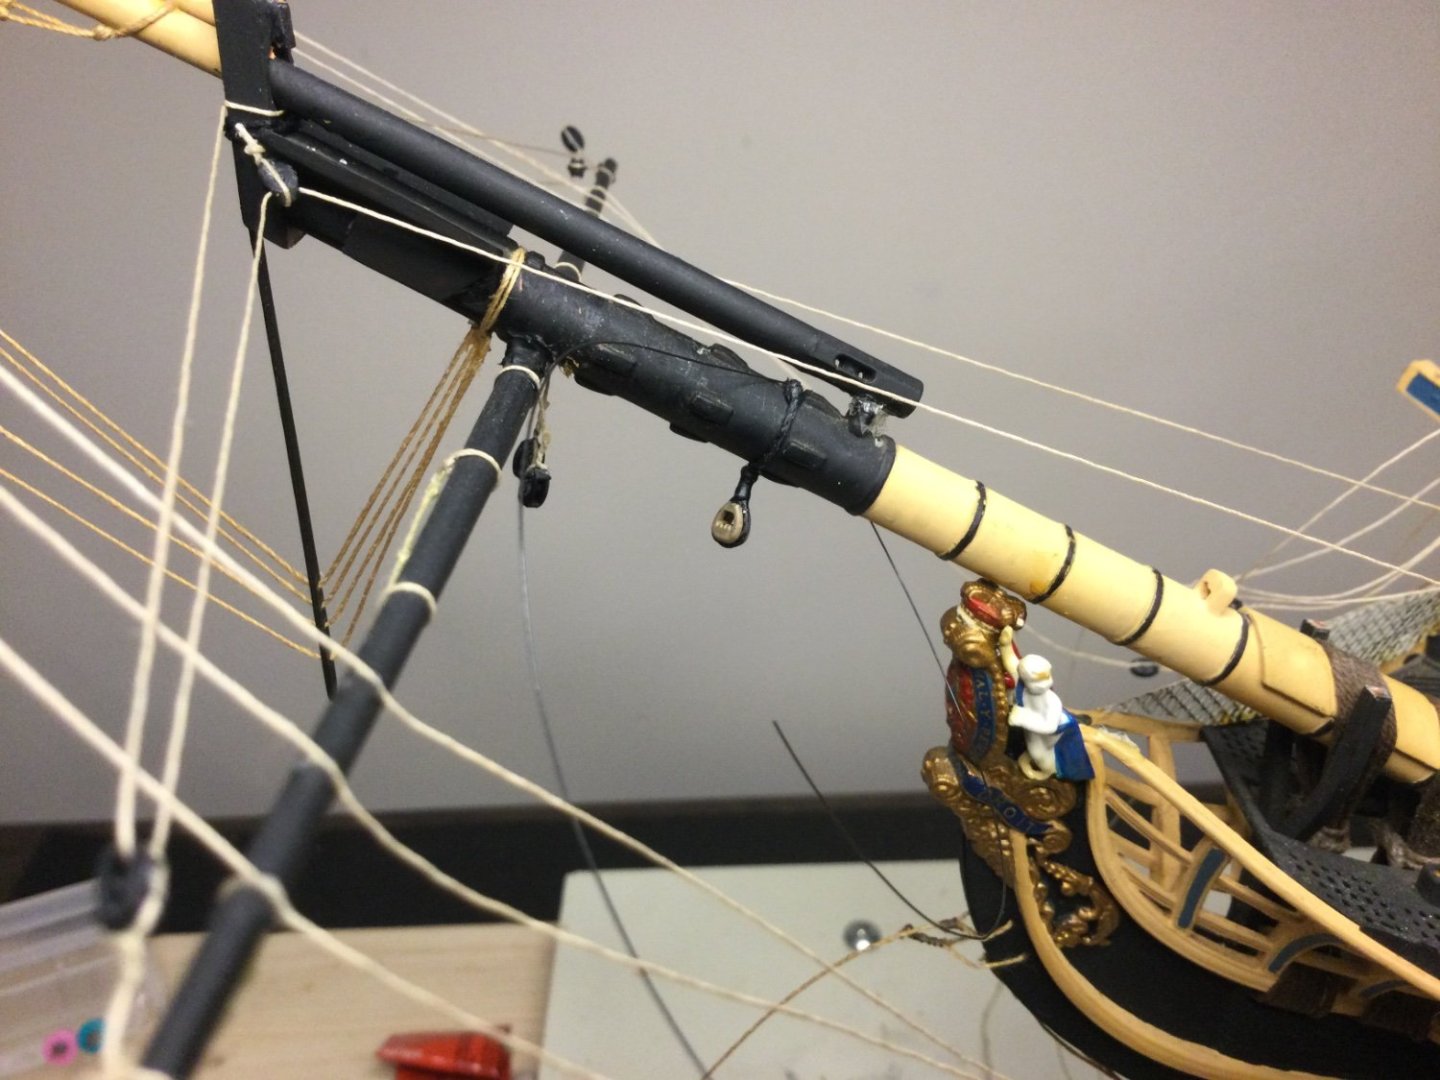
I’m starting to learn how to speak “Longridge”. But what I find helpful is if I can render Longridge’s copious text and multiple figures, plans and plates into a simplified, ‘actionable’ picture, i.e., what I can build at the ‘dock yard’. Compared to other parts of the Victory, the bowsprit rigging is comparatively straight forward 🤔 Good place to start. Thanks to Longridge, and Dafi’s revised assembly instructions for the resin parts - which are nothing short of BRILLIANT (thank you, Dafi!!) - these issues have been mostly resolved. The first image is my rough, hand drawn take of the bowsprit shrouds and bobstays. I had originally thought that a single collar would support both port-side and starboard-side hearts for the shrouds. Seemed logical, but not so (see 2nd image). By all means, shout out if you see any errors. Fortunately, Longridge gives the exact order in which these collars are assembled on the stop cleats on the bowsprit (per figure 118, page 187). On the practical side, I followed Dafi’s example and created a simple jig to tie-off the bowsprit shroud and bobstay collars. Pictured is a work-in-progress shroud collar with unequal legs, followed by a bobstay collar with equal legs. For fun, I superimposed my assembled shroud and bobstay collars atop a copy of Dafi’s revised assembly instructions (Dafi’s sheet #53). The scales are obviously different but for comparison purposes I substituted a Canadian penny. While the copper penny is no longer legal tender in Canada you could argue the size difference roughly corresponds to the relative dollar values 😜 Here’s a test fit of one of the bobstays on the first stop cleat on the bowsprit. It fit very well and I’m reasonably satisfied with the appearance but wondering if there’s too many turns on the serving. Any thoughts? Next stop, yet to be deciphered, is the knighthead and all of those ’purchases’.
-
Hello from Perth, Ontario - On to Victory!
Malcolm Brown replied to Malcolm Brown's topic in New member Introductions
D’uh! on my part. We used to say, “it’s 5 o’clock in Newfoundland” - which meant starting an hour and a half earlier 😂- 31 replies
-
- 2
-

-
- Victory 1:100
- Heller
- (and 1 more)
-
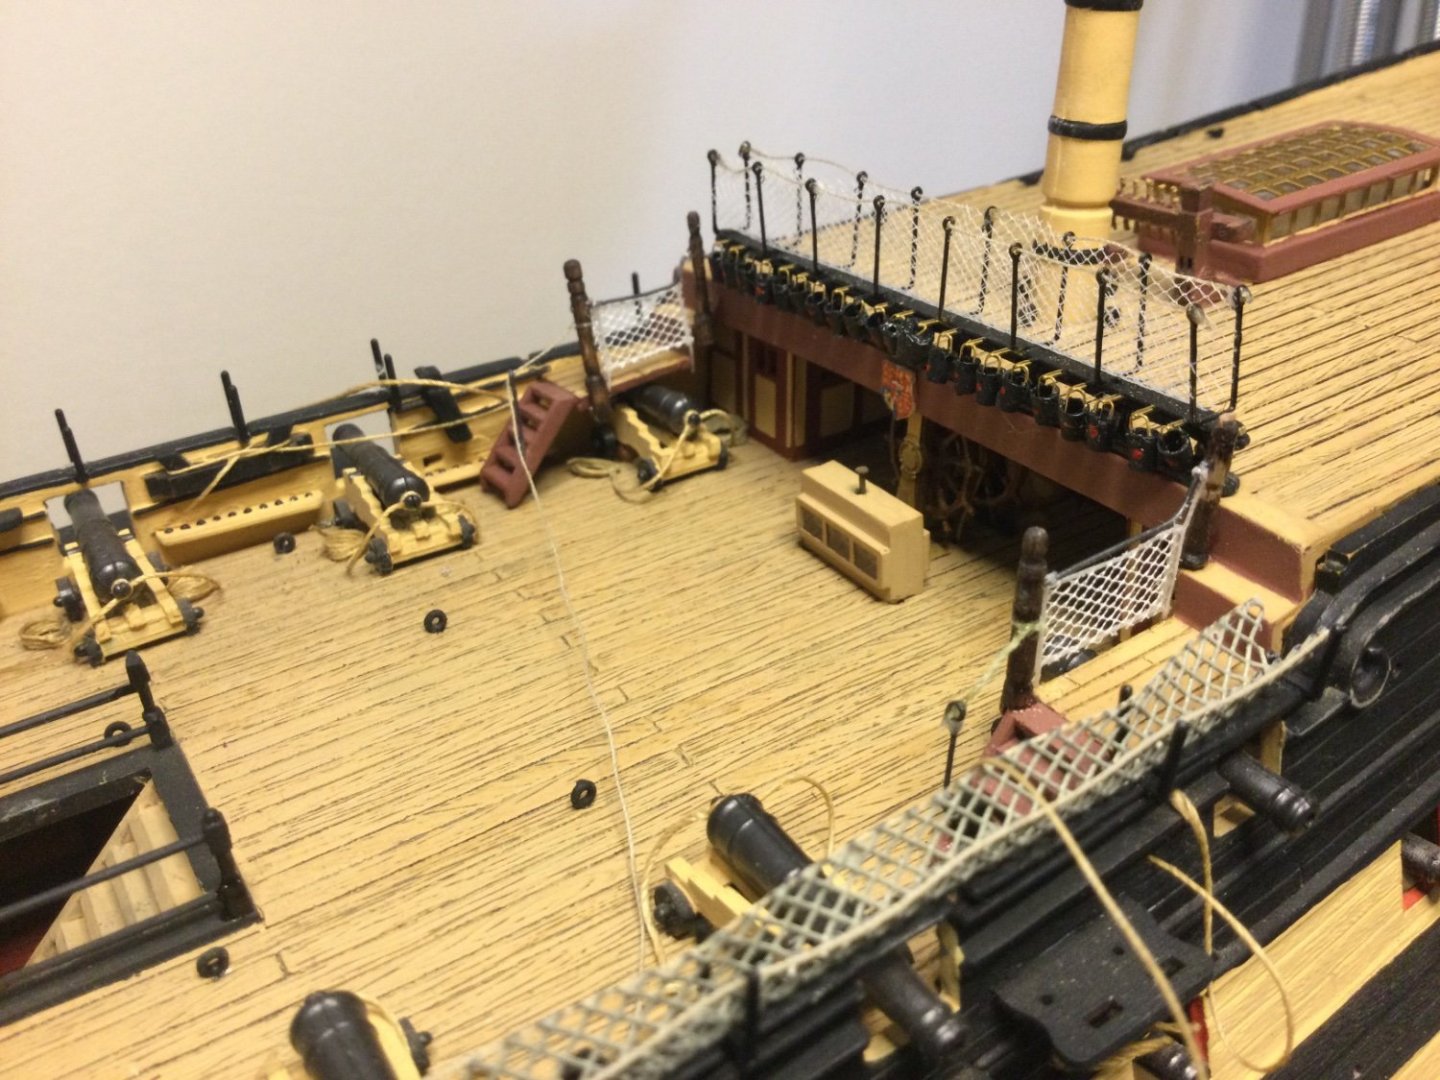
Thanks so much, Ian! Yes, the poop deck and quarterdeck netting is all new and was supplied by Dafi. I’m still figuring out how best to work with it but on the quarterdeck rail, here’s what I did. I cut a slightly larger than needed piece of the netting and spray painted it white. This gives it a bit more substance and was also recommended by Dafi. I initially tried staining it by dipping a small sample into some tea. I thought it might emerge looking like an aged bit of rope. Not!! It totally resisted the tea (I should buy some shirts made from that material 😂). I then laid out the netting on my work table (I had previously stuck down some clear packing tape to make the surface more stick resistant) and taped down the edges with some painters tape. I put a few drops of white glue on a scrap piece of paper and drew a white thread all the way through. I then stretched the thread along the edges of the netting and let it set. So, essentially framing the netting in cotton. Seems to work ok. Makes it easier to handle and manipulate the netting so I will follow this process as I replace the rest of the bulwark netting - as you noted. Which also means removing all of the plastic hammock cranes supplied by Heller, filling the gaps, drilling holes to accept the etched brass cranes, etc 😜
-
Hello from Perth, Ontario - On to Victory!
Malcolm Brown replied to Malcolm Brown's topic in New member Introductions
LOL, you got me on a technicality, why 5 o’clock - Nelson’s ‘TOD’? (been watching too much Chicago Med lately). Btw, that clock is an old Waltham that was pulled out of a 1936 Cadillac during the Great Depression years when cars were expendable. It belonged to a friend of my parents whose father owned the Cadi. The windup stem would have projected below the dashboard. Sadly, the main spring is gone but that means it can be stuck at any time I deem appropriate 😁- 31 replies
-
- 3
-

-
- Victory 1:100
- Heller
- (and 1 more)
-
Thank you so much!! I hope I can do her Justice but with the help of the good folk on MSW, I believe I have a pretty good chance of doing so 😊
-
Hello from Perth, Ontario - On to Victory!
Malcolm Brown replied to Malcolm Brown's topic in New member Introductions
Dual taps, comfortable seating, excellent service and fully Nelson-ified 😂🍻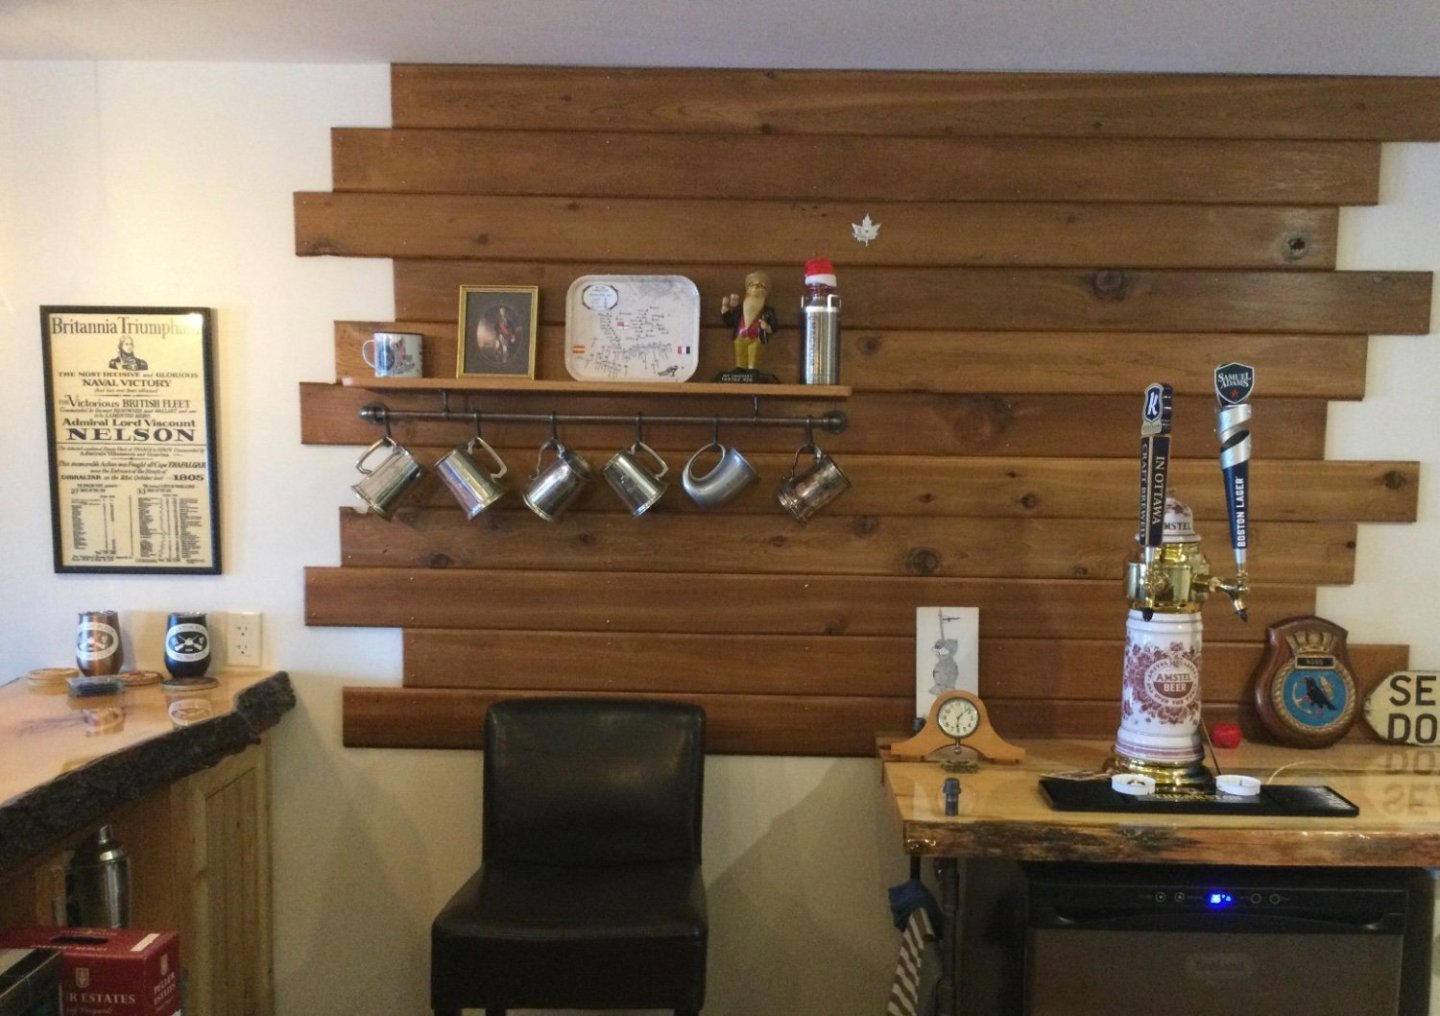
- 31 replies
-
- 2
-

-
-
- Victory 1:100
- Heller
- (and 1 more)
-
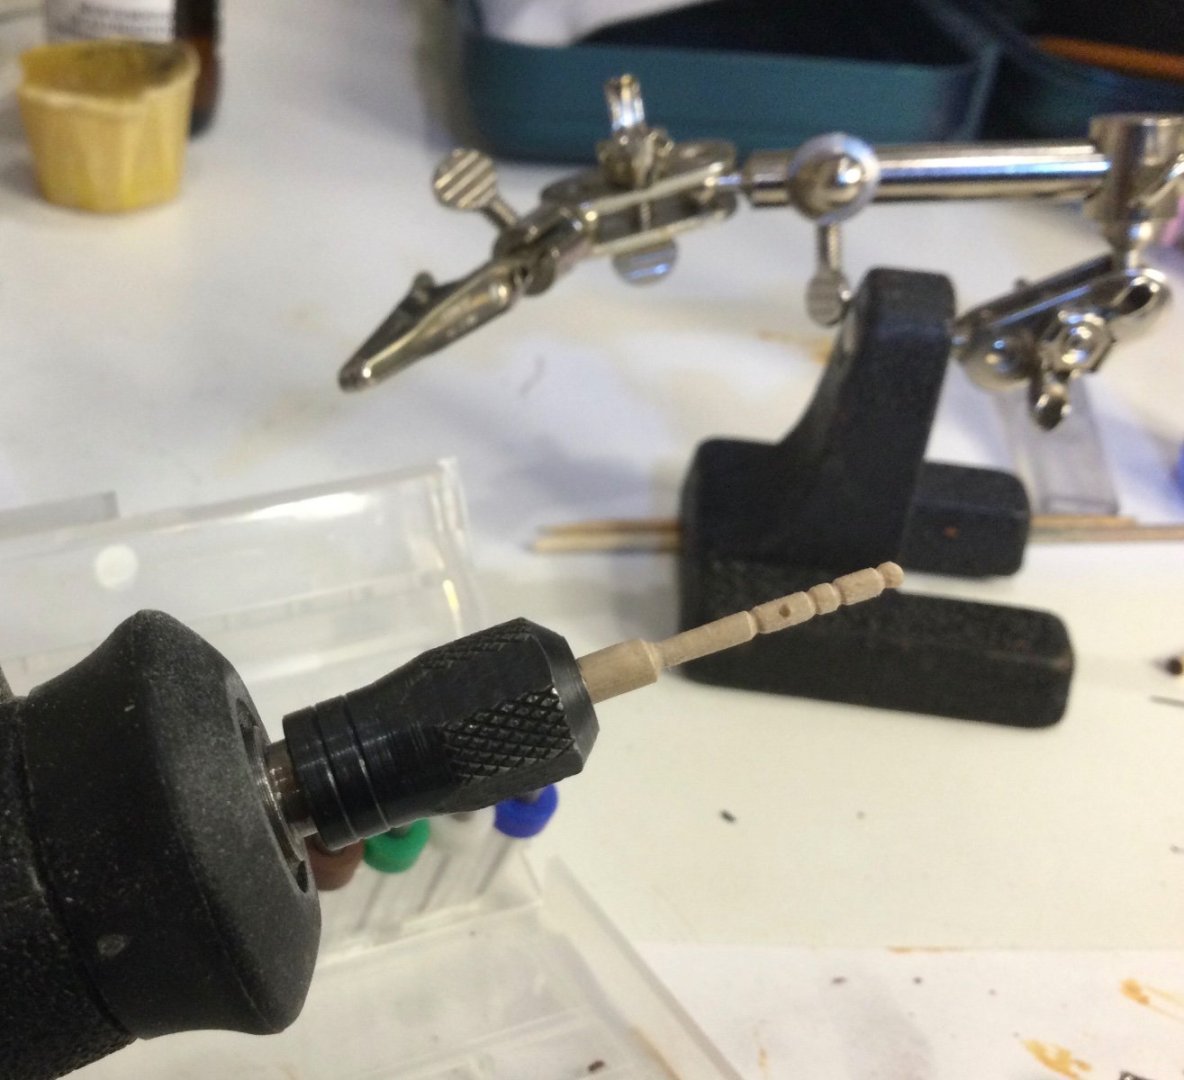
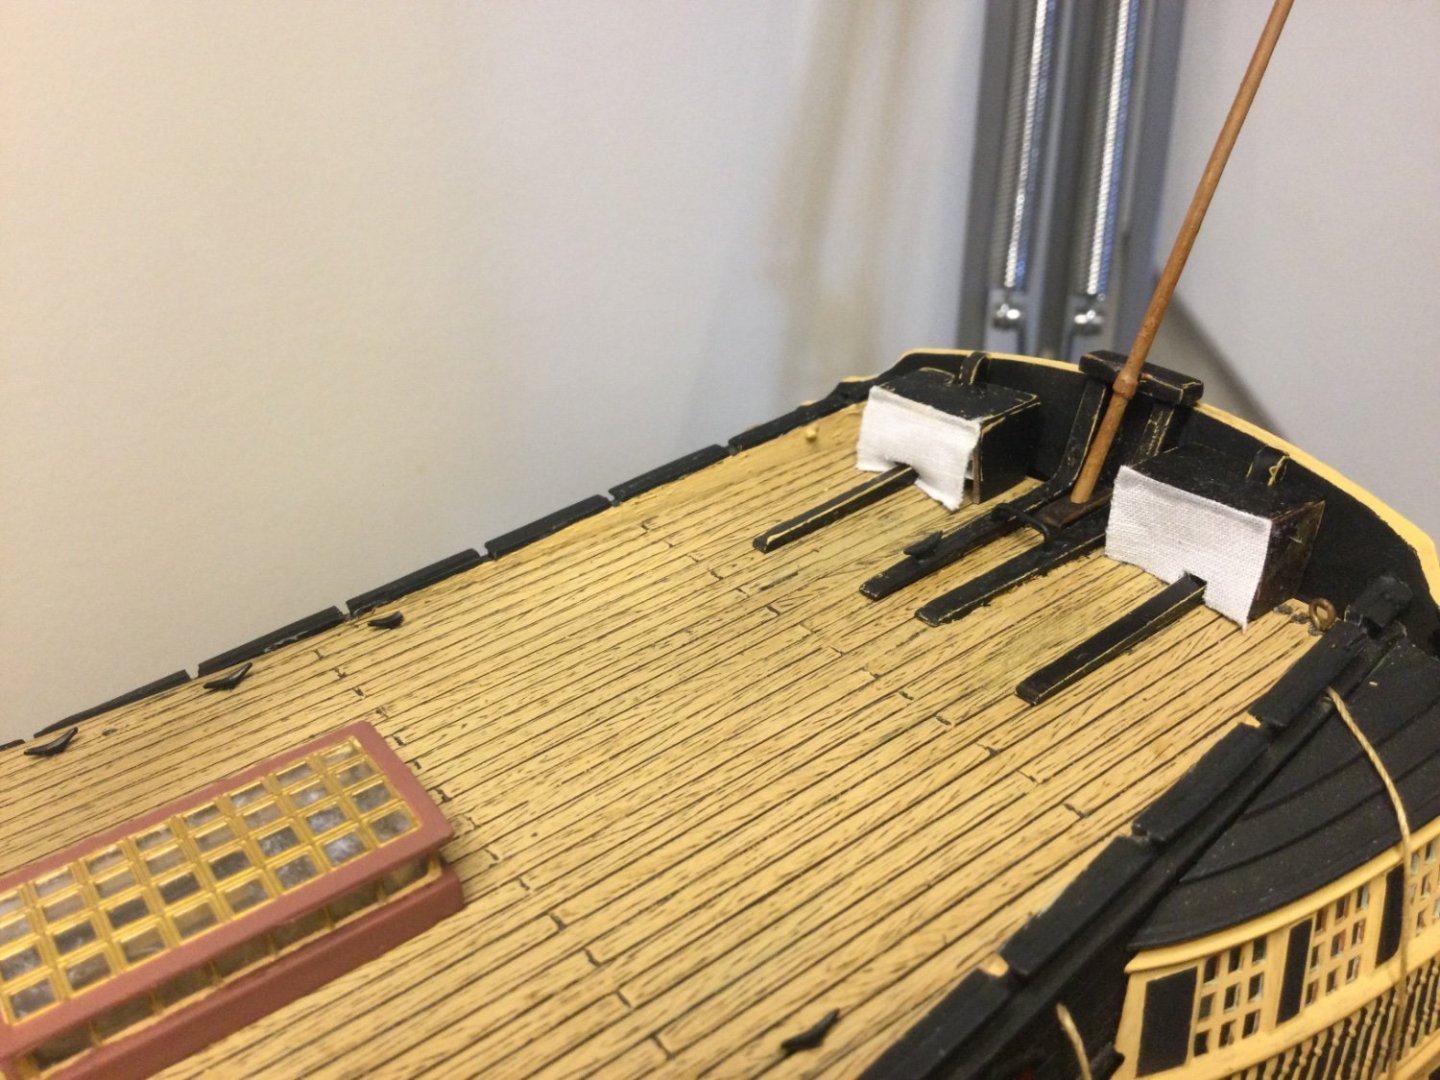
A few other mods I’ve been working on include: replaced skylight with Dafi’s etched brass version. I glued a thin strip of carbon fibre to give the base some added thickness. Added etched brass hammock cranes with integrated fire bucket holders to the poop deck. For some added detail, I printed a tiny picture of King George III coat of arms and added this to the bulkhead directly above the binnacle. Speaking of the binnacle, I rather made a mess folding the brass etched version so opted to stick with the original plastic one from Heller. I’ll add the eyebolts and tie-down lines later. Outer hammock cranes are yet to be added. Since I built the hull several years ago, I’ll be replacing all of the other original plastic hammock cranes with Dafi’s etched pieces. I fashioned railings for the ladders from the poop deck to the quarter deck. I discovered my Dremel tool could double as a mini-lathe. Pictured is an early proto-type with more size reduction yet to go. I pre-drilled it to accept a 0.4mm wire railing. I suspect the netting I added to the railing may, in fact, be more of a modern day measure to keep the tourists safe vs being historically accurate. It was educational for me just to learn what those two rather nondescript looking boxes at the back of the taffrail were in the first place. Who knew they were signal flag lockers. That said, I couldn’t resist the challenge of modifying these to include the segments for the various flags. At this scale I managed to cram in only 10 segments suggesting the good admiral would have to have used some sort of shorthand messaging. Otherwise, I fear any signal instructions provided from the flagship could easily be misconstrued. God forbid had the fleet misinterpreted the message to split the “French line” as being, don’t forget the “French wine” 😁Ok, that was pretty sad🤦♂️ I also added a wooden cross piece between the two knees to support the ensign staff. On the deck between the knees I added a block of wood to act as the the step for the ensign staff. Btw, is the flag staff natural wood colour, painted black or the lower portion only black?
-
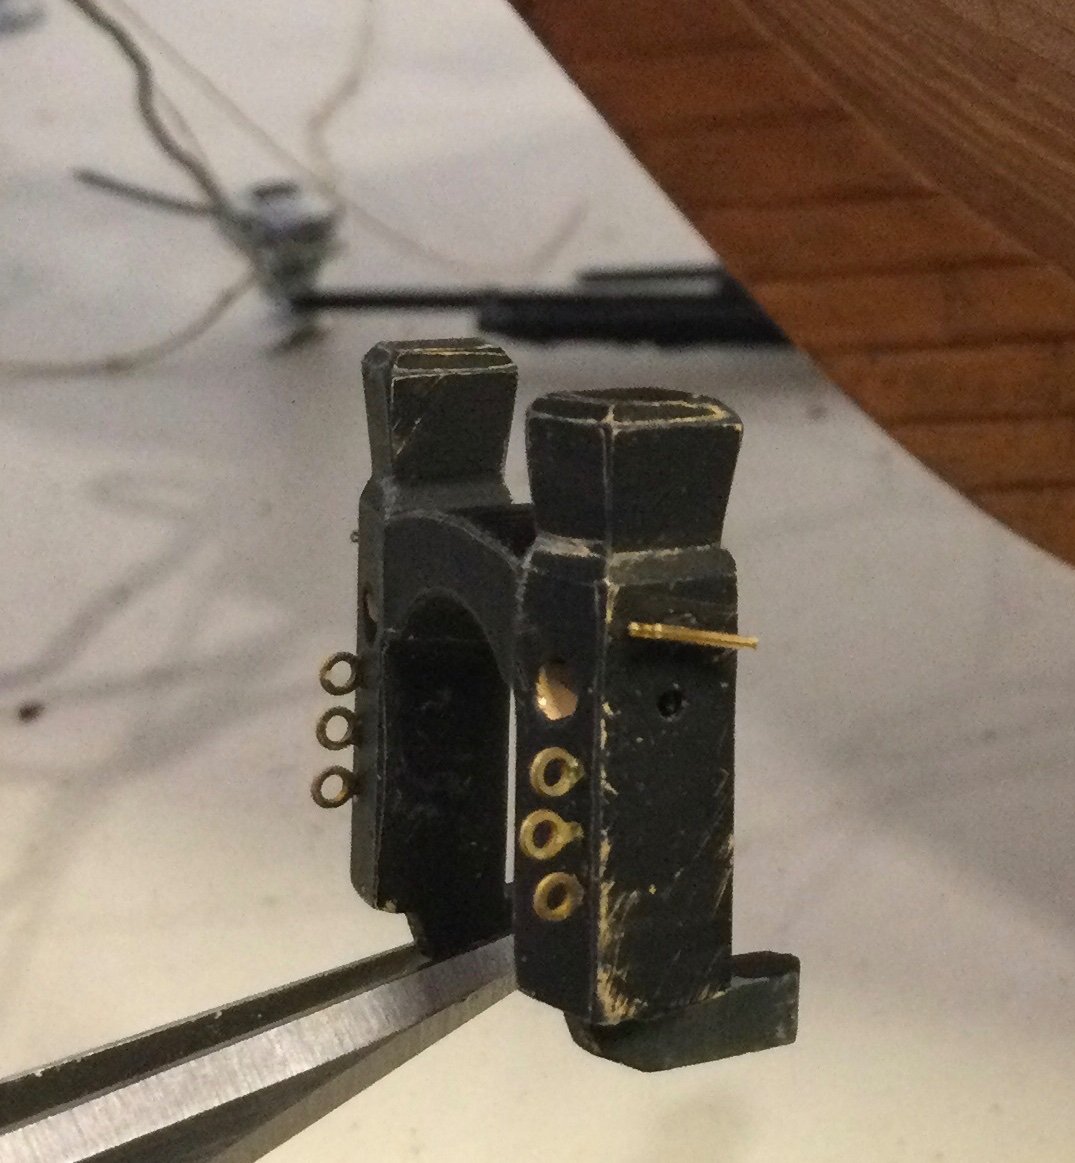
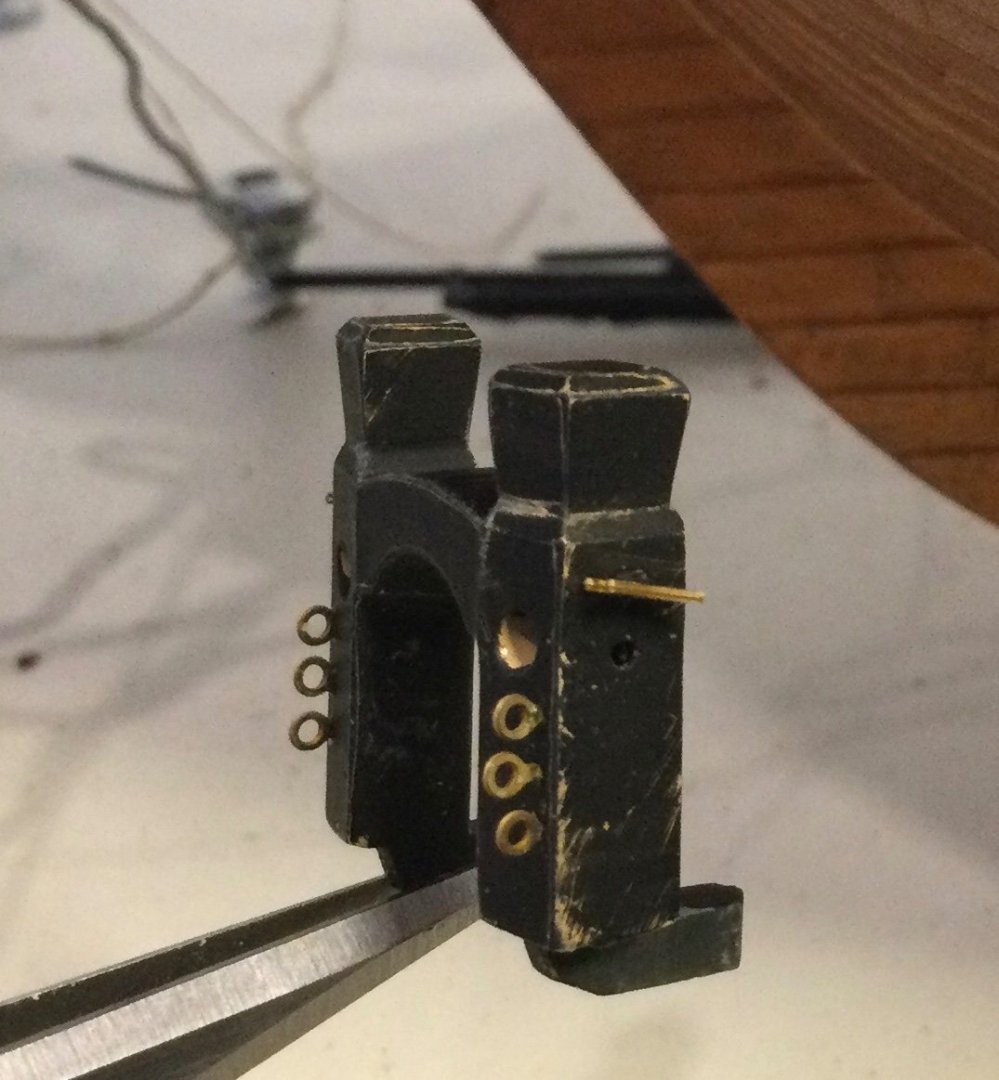
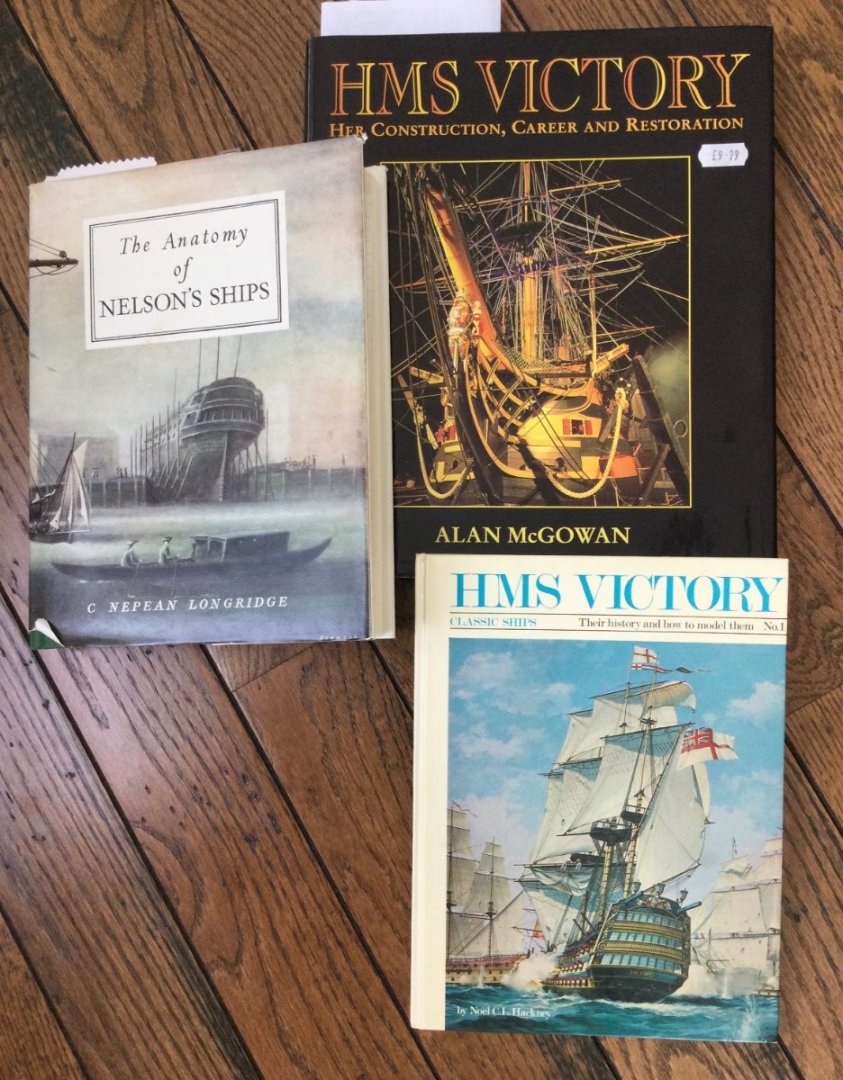
Much of mine time lately has been spent researching. And while it’s redundant to say in this forum, I do have most of the usual ‘suspects’ as far as printed material is concerned. Longridge, of course, has long been considered the bible for builders of Victory and other ships of the line from that period. But it’s a heavy read. I find myself reading and re-reading the same sections, and then flipping to other sections to find the appropriate picture or set of pictures. For example, as part of my bowsprit do-over, I received Dafi’s improved resin knighthead. Thanks to Longridge (and a nudge from Ian), I now have a good understanding of the various purchases on the knighthead. But I also wanted to account for how the lines/ropes are routed, what fittings they pass through, how/where they’re affixed to the bowsprit, etc., etc. After pouring through Longridge’s copious text and multiple figures, plates and plans, and other sources as well, I thought I could distill all of this into a single diagramme for the bowsprit standing rigging. Let’s just say, it’s a work in progress 😁 In the meantime, I have set up the knighthead per Longridge and Dafi’s instruction set (3 ring bolts and 1 cleat per side). In the same mailing, I also received the resin bitts and etched plates for the gun port lids and gratings. I have most of the other plates already.
-
Hello from Perth, Ontario - On to Victory!
Malcolm Brown replied to Malcolm Brown's topic in New member Introductions
Thanks, and I’m excited to be following your progress as well since we seem to be at about the same stage. I have been spending a lot of time lately just researching. As great as Longridge is, it’s a heavy read and I’m a visual person, i.e., I need pictures! 😁- 31 replies
-
- 2
-
-
- Victory 1:100
- Heller
- (and 1 more)
-
Hello from Perth, Ontario - On to Victory!
Malcolm Brown replied to Malcolm Brown's topic in New member Introductions
I’m in!! I do the exact same loop coming from our home that is off of Elm Grove Road. Elm Grove turns into Lally Road (Rte 21) just after Murphy’s Point PP. The Narrows Lock Road is a blast to drive. Especially in my convertible😁 Did I mention I have a pub in my basement? 😁- 31 replies
-
- 1
-
-
- Victory 1:100
- Heller
- (and 1 more)
-
LOL thanks, Ian! You have no idea how glad I am that you’re following my build. And many thanks for that advice about the mastheads! 😁 Speaking of “served shroud pairs”, my Syren serving machine is in the mail (and guess who will be racing to our mailbox to be first!😂).
-
Hello from Perth, Ontario - On to Victory!
Malcolm Brown replied to Malcolm Brown's topic in New member Introductions
Perfect!- 31 replies
-
- 1
-
-
- Victory 1:100
- Heller
- (and 1 more)
-
Hello from Perth, Ontario - On to Victory!
Malcolm Brown replied to Malcolm Brown's topic in New member Introductions
That’s awesome! We’re on Long Lake (there’s a Long Lake closer to you in Frontenac County but we’re in Tay Valley). We go to Westport frequently - more so in the warmer months. Maybe we can connect some time.- 31 replies
-
- 1
-
-
- Victory 1:100
- Heller
- (and 1 more)
-
Hello from Perth, Ontario - On to Victory!
Malcolm Brown replied to Malcolm Brown's topic in New member Introductions
Love Kingston! We shop there frequently since it’s equidistant from Ottawa 😊👍- 31 replies
-
- 2
-
-
- Victory 1:100
- Heller
- (and 1 more)
-
Hello from Perth, Ontario - On to Victory!
Malcolm Brown replied to Malcolm Brown's topic in New member Introductions
Thanks for the warm welcome, Mike! Me too from Ottawa - I grew up in the Glebe. My wife and I retired here on Long Lake (Tay Valley) in 2018 on what was my family lakefront property. We go to the Stanleyville dump at least once per week. Let me know if/when you’re at your cottage and please stop by for a refreshment. Here’s that view out our window 😊
- 31 replies
-
- 3
-
-
- Victory 1:100
- Heller
- (and 1 more)
-
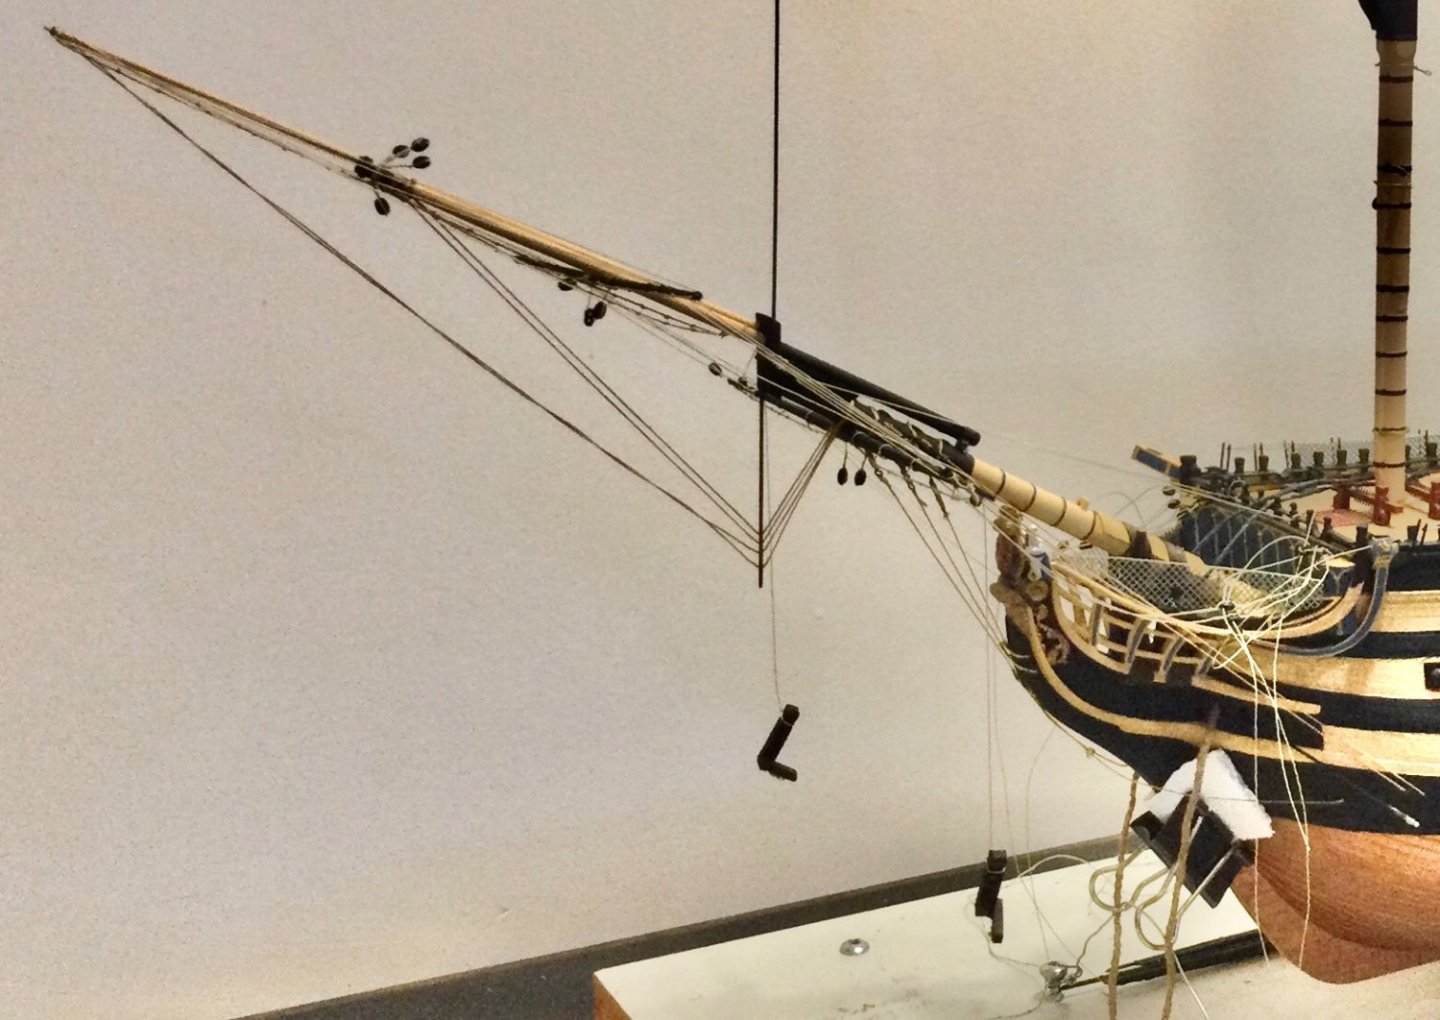
I had originally rigged the bowsprit according to the vague Heller instructions and using some homemade rigging bits. That was about 15 years ago. I didn’t know what anything was called back then and some or most of the aftermarket stuff, particularly that which is specific to the Heller kit and scale, wasn’t available, e.g., etched brass parts, resin parts, wooden blocks, deadeyes, etc. I used some wire to approximate the appearance of the hearts for both the bowsprit shrouds and the bobstays. I also used natural coloured instead of black thread for the shroud and stays. All of this has been removed and will be corrected in the next iteration. Also, the original flying jib boom supplied by Heller is far too flimsy and would bend easily once any rigging tension is applied. Same goes for the dolphin striker. I used a carbon fibre rod for the jib boom and a carbon fibre flat for the dolphin striker. I note others in this forum have used brass rods, etc. I like the carbine fibre because it can be sanded and tapered as needed and can be easily drilled. Fortunately, I figured this much out way back when. This is is how it looked originally. Note to self: either buy a proper camera or improve the lighting in your work area 🤦♂️
-
I get it now, thanks and Dafi also confirmed what I suspected: 1 collar for each of the port/starboard-side shrouds (4 in total) and 1 collar for each bobstay - total of 7 collars 😁👍