


CaptJoe
-
Posts
15 -
Joined
-
Last visited
Content Type
Profiles
Forums
Gallery
Events
Posts posted by CaptJoe
-
-
For some reason, the audio is not working, and I can't tell how this method works. Cutting wire with dull implement creates the heads?
- mtaylor and Keith Black
-
 2
2
-
Never mind! Operator Error. Duh!!!
- GGibson, mtaylor and Ryland Craze
-
3
-
-
Forgive me newness, but WHERE exactly does one add a "signature"? I cannot find it on the profile, account settings, etc. What am I missing?!!!
-
Checked the build logs, and a couple reported a similar problem, but no one mentioned any type of solution or recommendation. I'm surprised there aren't more articles on some of the basic metal fabrication processes. For the tiller arm, it would be easy to just cut the wire flush and glue it in on both sides. But the extension handle must rotate, so that's not an option.
- mtaylor, Keith Black and Bob Cleek
-
3
-
Below is the present state of the model.
-
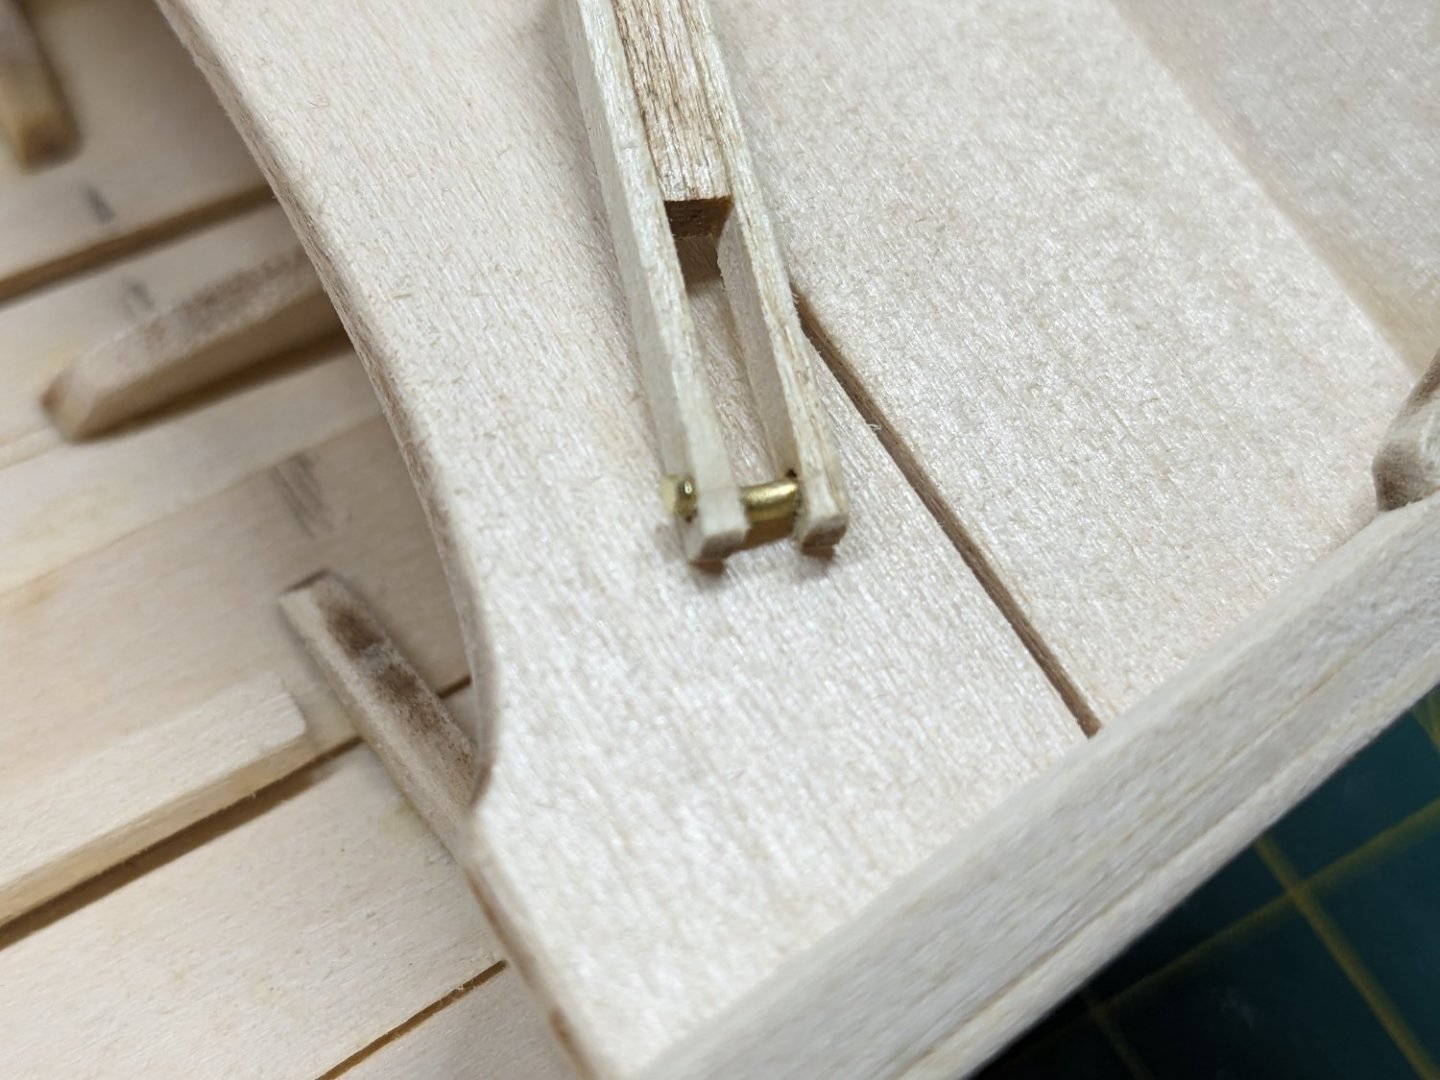
Just started modeling. Got the three-vessel starter kit and finished the dory. Lot's of learning there, mostly, make sure the base is secure and properly positioned or EVERYTHING goes sideways. I'm just finishing the hull on the Norwegian Sailing Pram. The instructions for this boat seem to be much less comprehensive. The metal work (on the tiller assembly) is really making things difficult. Anyone have any pointers for hammering the end of a wire into a "mushroom" for a rivet? So far, I've bent one wire and split two pieces of wood. This is far more difficult than portrayed in the instructions. Thanks!!!
-
On 4/25/2023 at 7:36 AM, Claire7 said:
As @druxey suggested I am going to wait for the Brass Black. Consider this tiller a trial run! I wanted to understand how it all goes together. But I realized I want to stain it first before any glue, and I want the darker metal parts. So I will be re-making this, and also preparing the other wooden pieces/mast etc. Then stain everything, then do the metalwork. My ceramic soldering plate was broken in transit so I’m waiting for another as well as some soldering tweezers. I filled the soldering torch yesterday and it works ok, doesn’t always light but I just turn it off and wait a few seconds and try again.
Good luck with the hammering the wire into mushroom heads. I haven't had a lot of success with this and would be interested in hearing comments and suggestions from others. [I'm at this point on the same model.]
- robert952 and Bryan Woods
-
2
-
On 4/17/2023 at 3:03 PM, Claire7 said:
P.15 “Check now” My boat is almost a 1/4” narrower than it’s meant to be… but I think I can live with that. Nothing I can do now!
Yup. I have the same problem. Lots of trimming to the thwarts, but so far, no other issues. And, my shear strake was also high so I trimmed it down to the lines shown on the stern transom.
- robert952 and Bryan Woods
-
2
-
Any word of wisdom on the tiller metal work? The "gentle tap" required to create a mushroom on the end of the wire is extremely oversimplified. So far, I've split the wood on both tiller extensions (easy enough to make more) and bent the wire on the main tiller. I think simply gluing heads on the ends might be far easier.
-
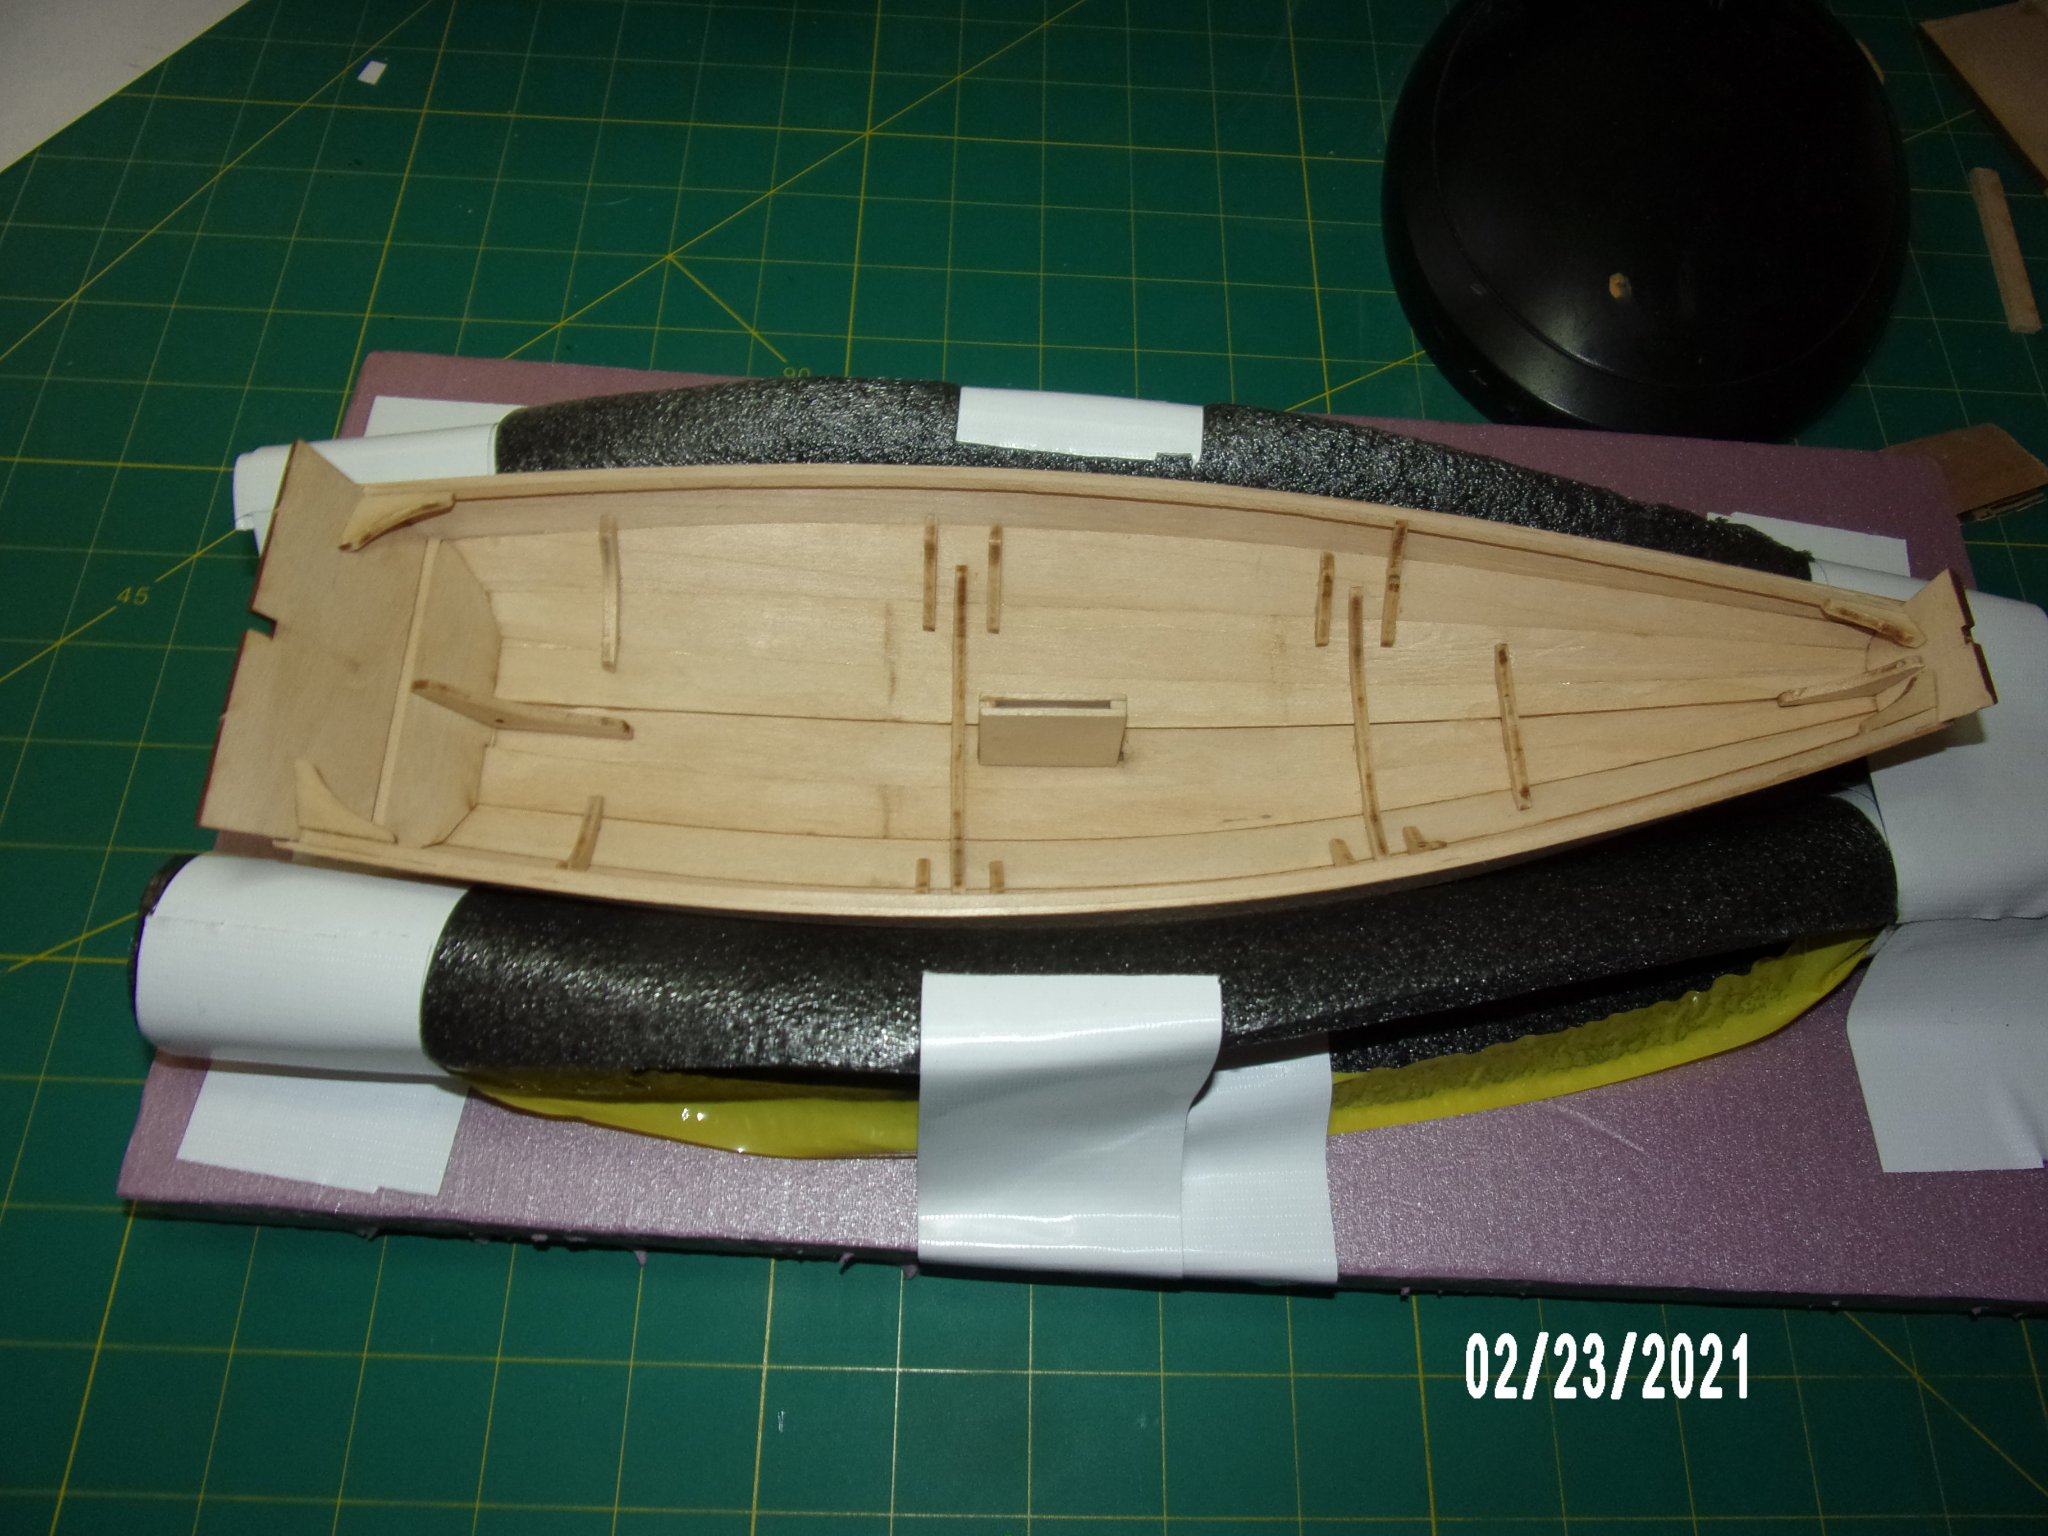
On 2/23/2021 at 5:07 PM, bobandlucy said:
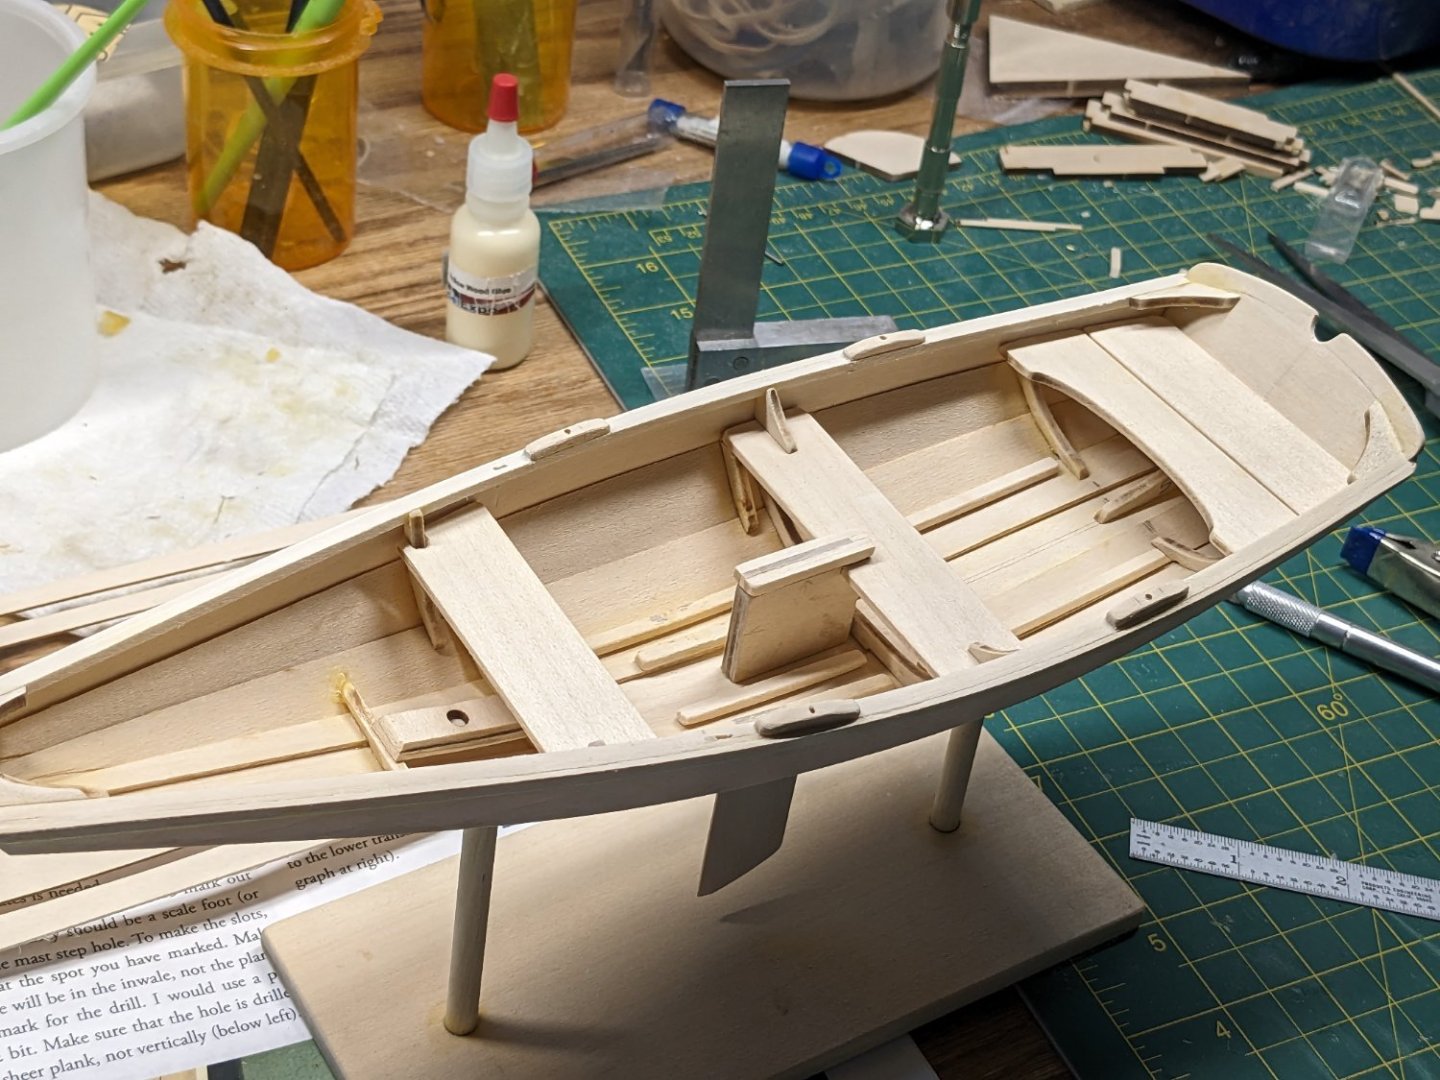
She is free of the building board! Glued in the quarter knees, dagger case, and internal frames. I found these parts difficult. Will have some gaps to fill, and I can see that material might have to be subtracted at some support points for the thwarts and stern sheet in order for these to sit nicely. I have done a better job controlling/removing glue squeeze out this time. Getting close to painting of the hull, which will take me a while, going by my experience with the dory.

I couldn't understand how to place the supports without shaping and fitting the thwarts at the same time. Very difficult to get the supports "level" for mounting the thwarts. Also, the stern sheets are to be "connected by two cleats", but no source for the cleat material or placement is noted (sigh!!).
-
On 2/8/2021 at 8:03 AM, bobandlucy said:
I'd like to give credit to John and Ed at Model Expo. They have been very responsive in providing the replacement part, listening to feedback, etc. Ed indicated that there is no errata sheet for this model at this time, but he was open to the idea of producing one. This attitude will weigh in my decision to order the lobster smack model next or just plunge into one of the more advanced models which I have.
An errata sheet is definitely needed. Several mistakes and MANY omissions are making this project more difficult than it should be.


CSS Alabama by Glen McGuire - FINISHED - Mamoli - 1:120
in - Kit build logs for subjects built from 1851 - 1900
Posted
Have you looked at the USRC Harriett Lane (Model Ship MS2270 kit)? Sail/steam 1857. It's on my to-do list.