brunnels
-
Posts
337 -
Joined
Content Type
Profiles
Forums
Gallery
Events
Everything posted by brunnels
-
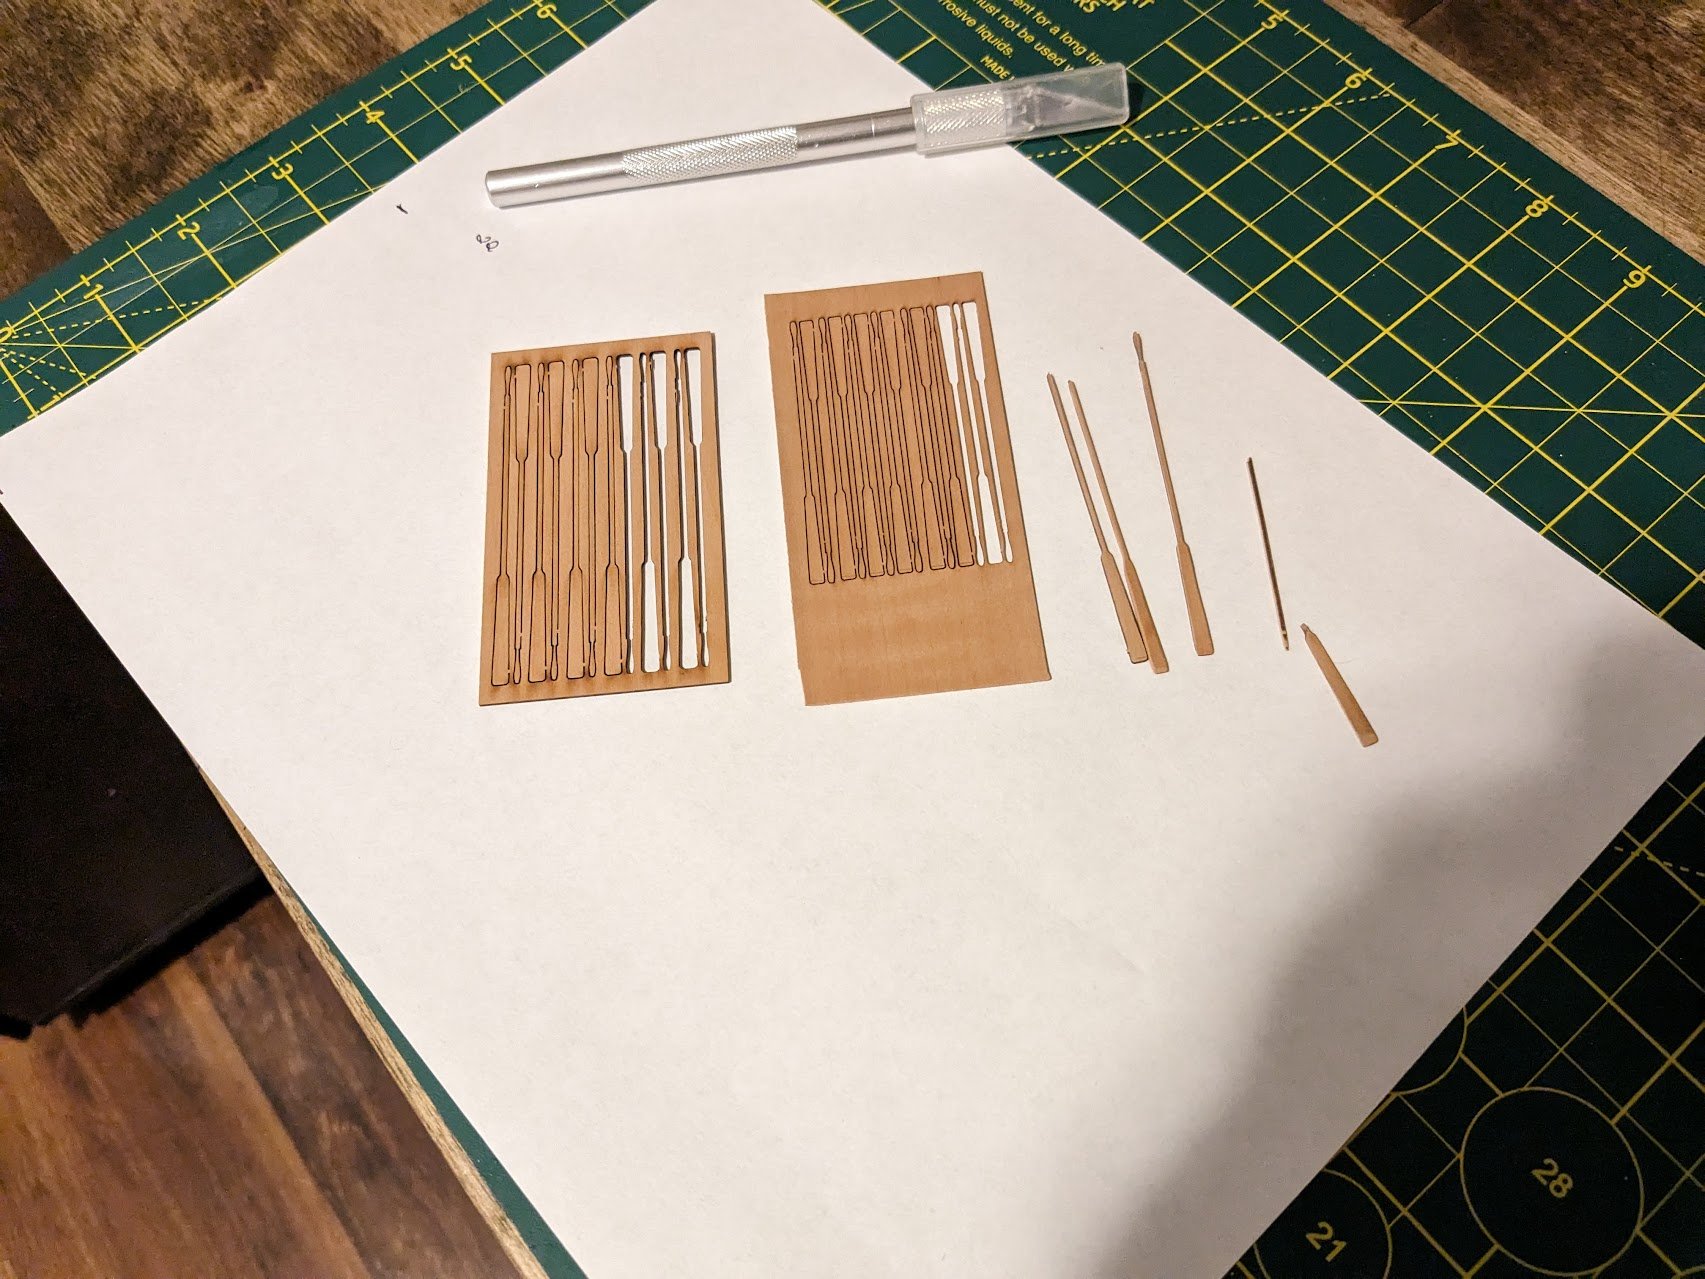
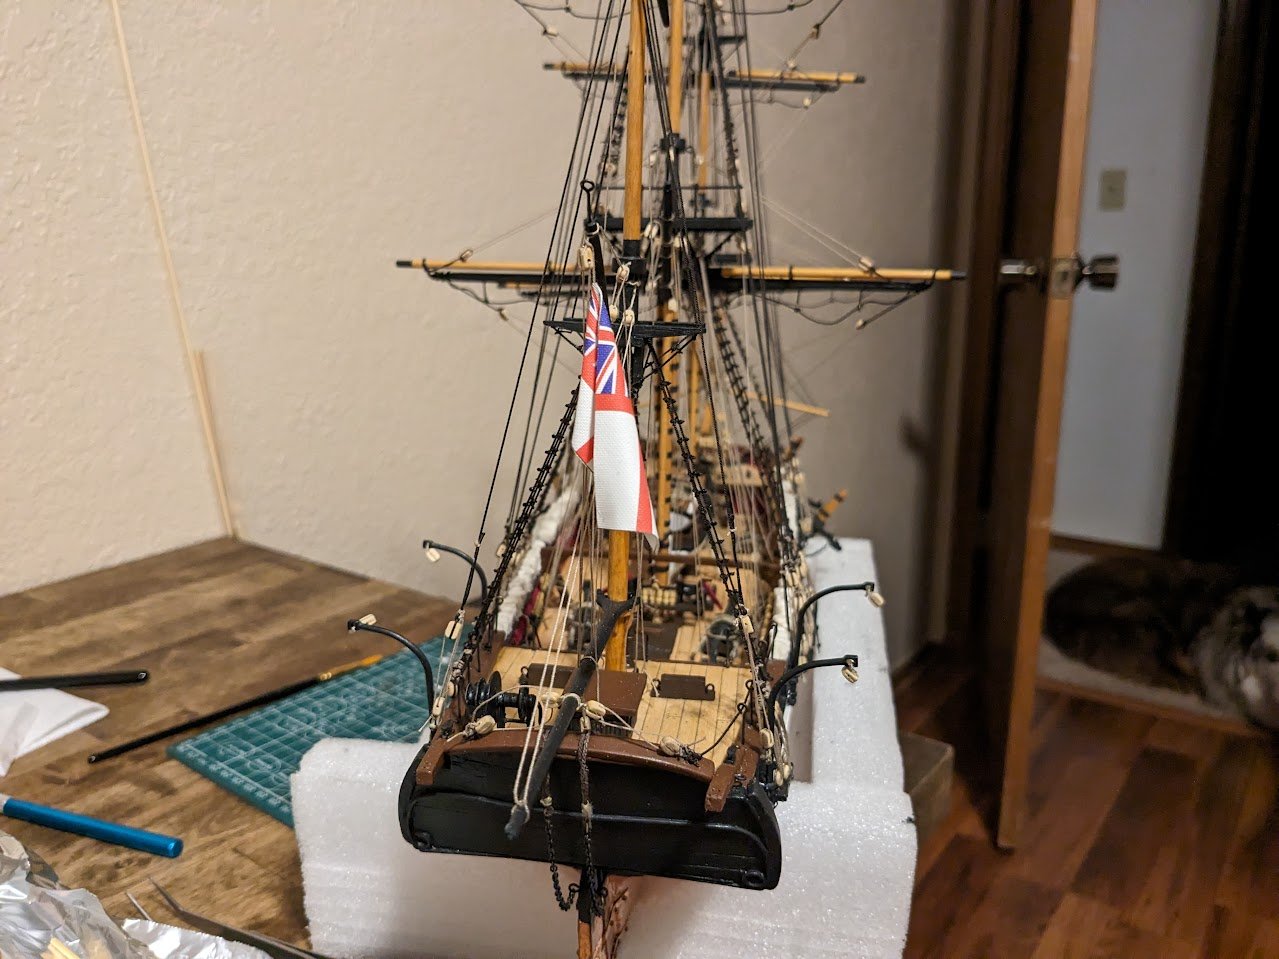
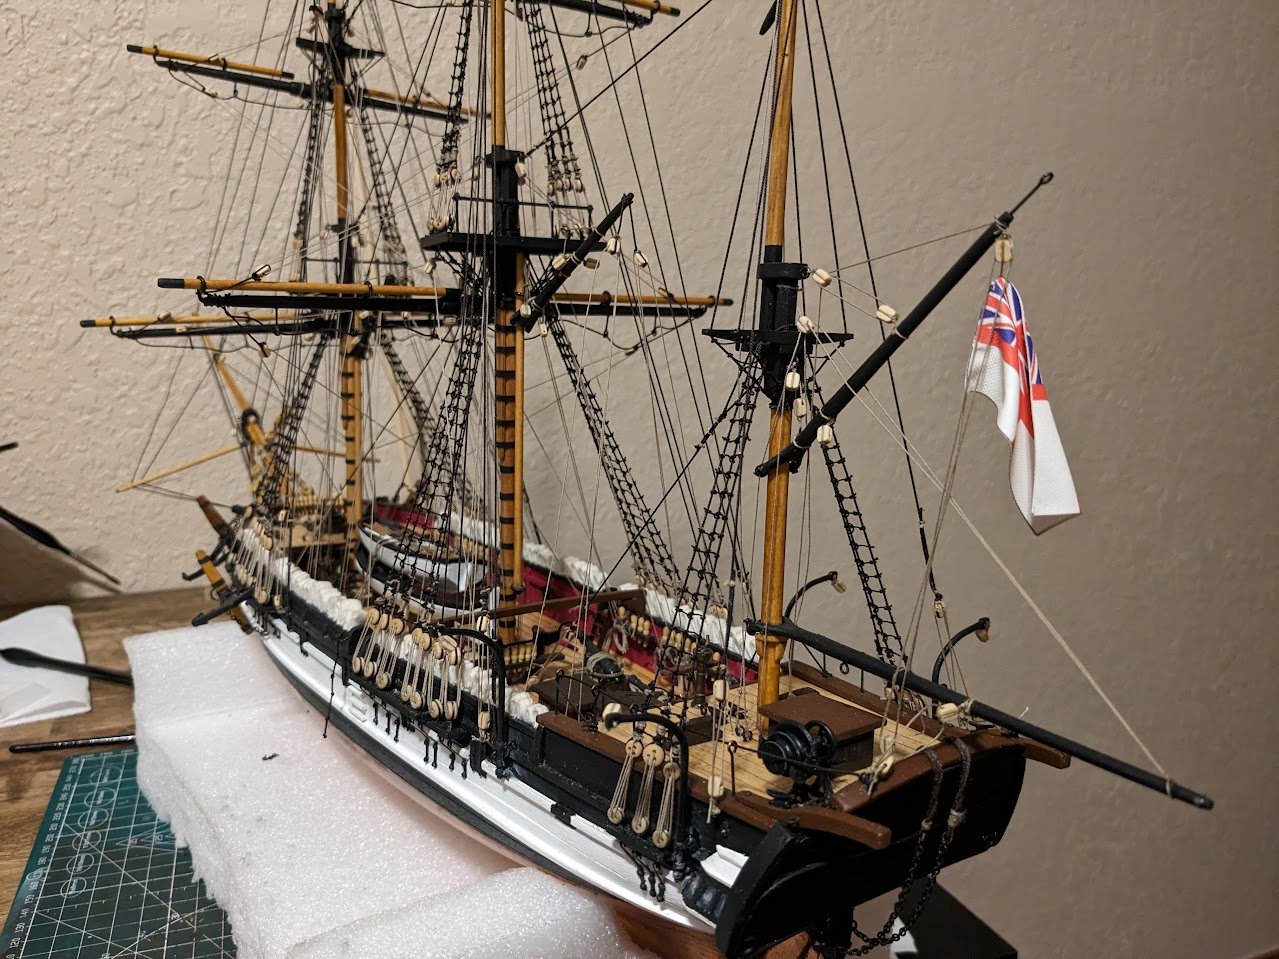
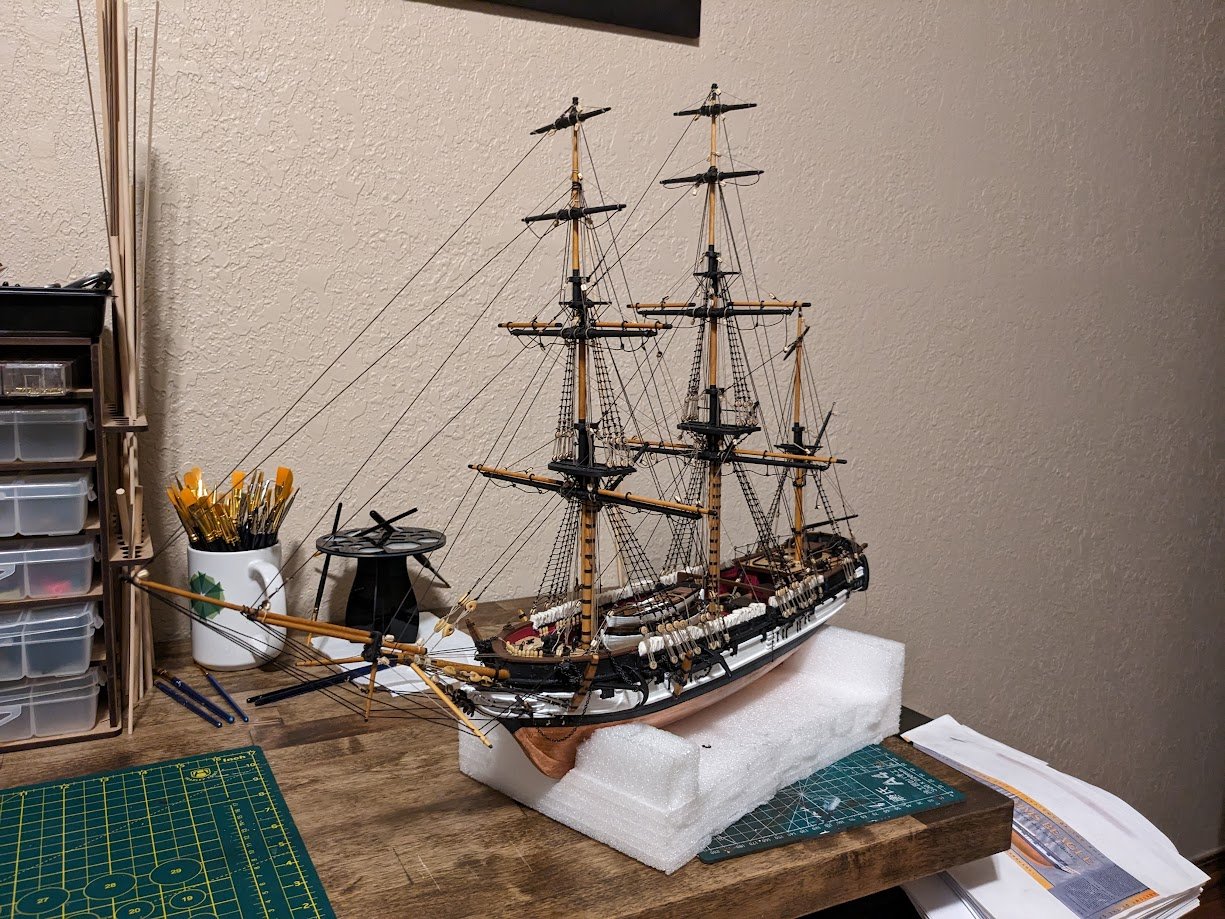
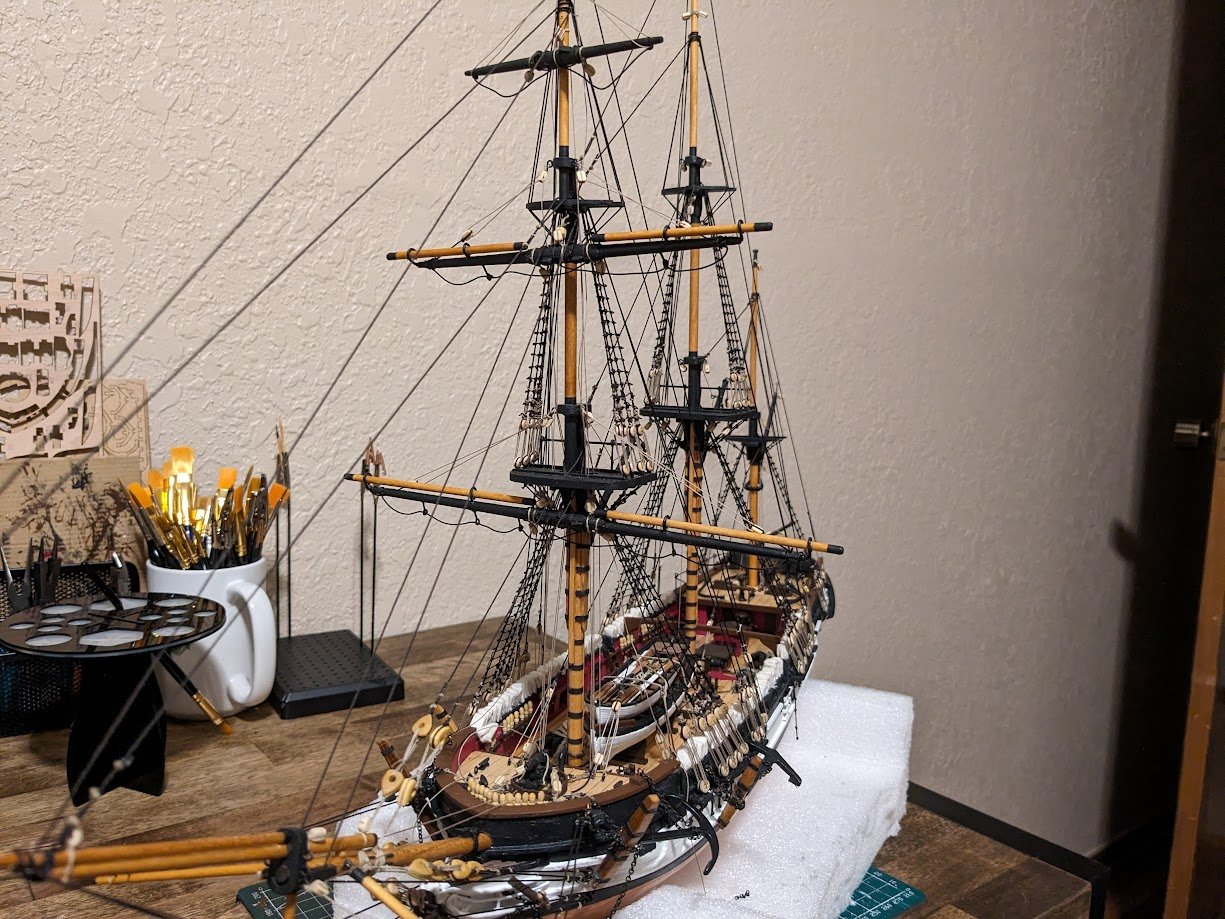
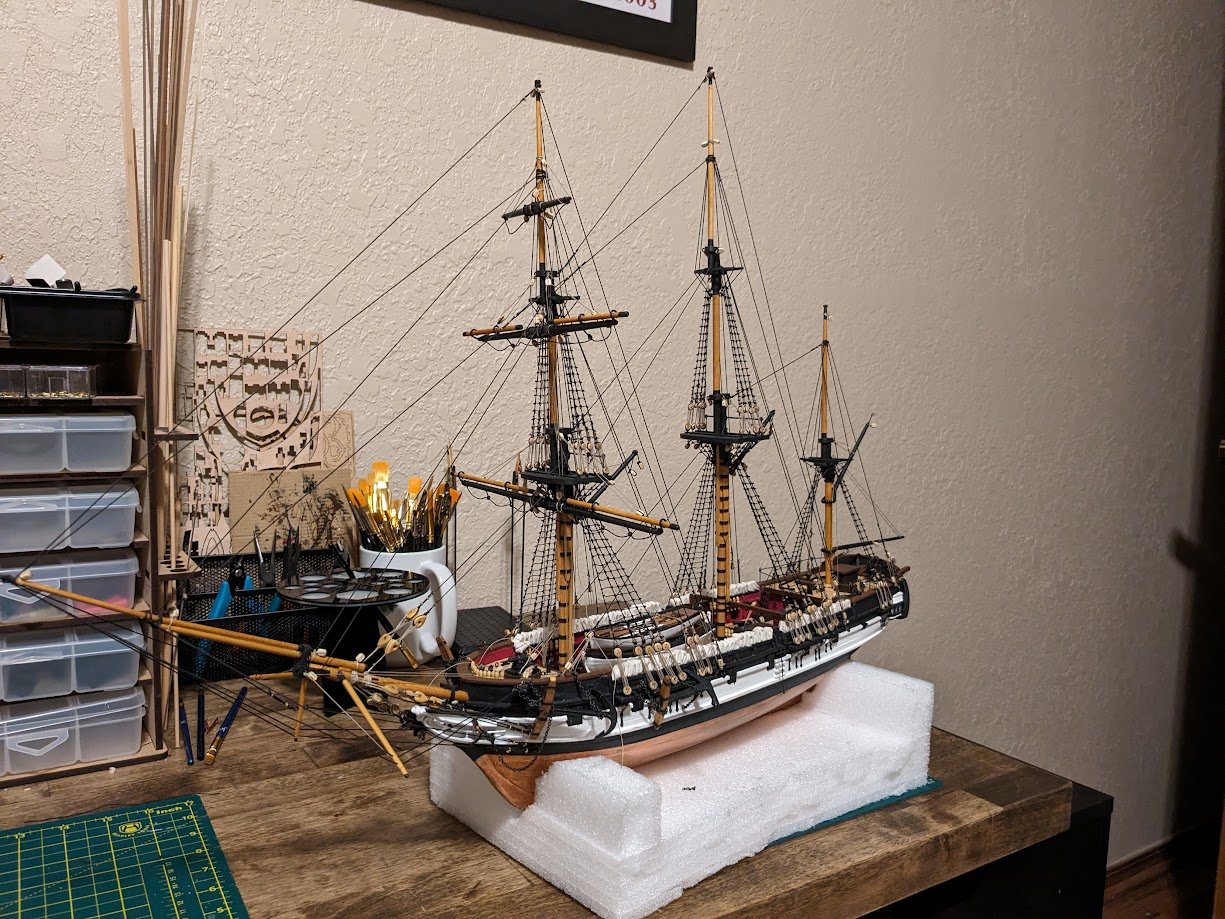
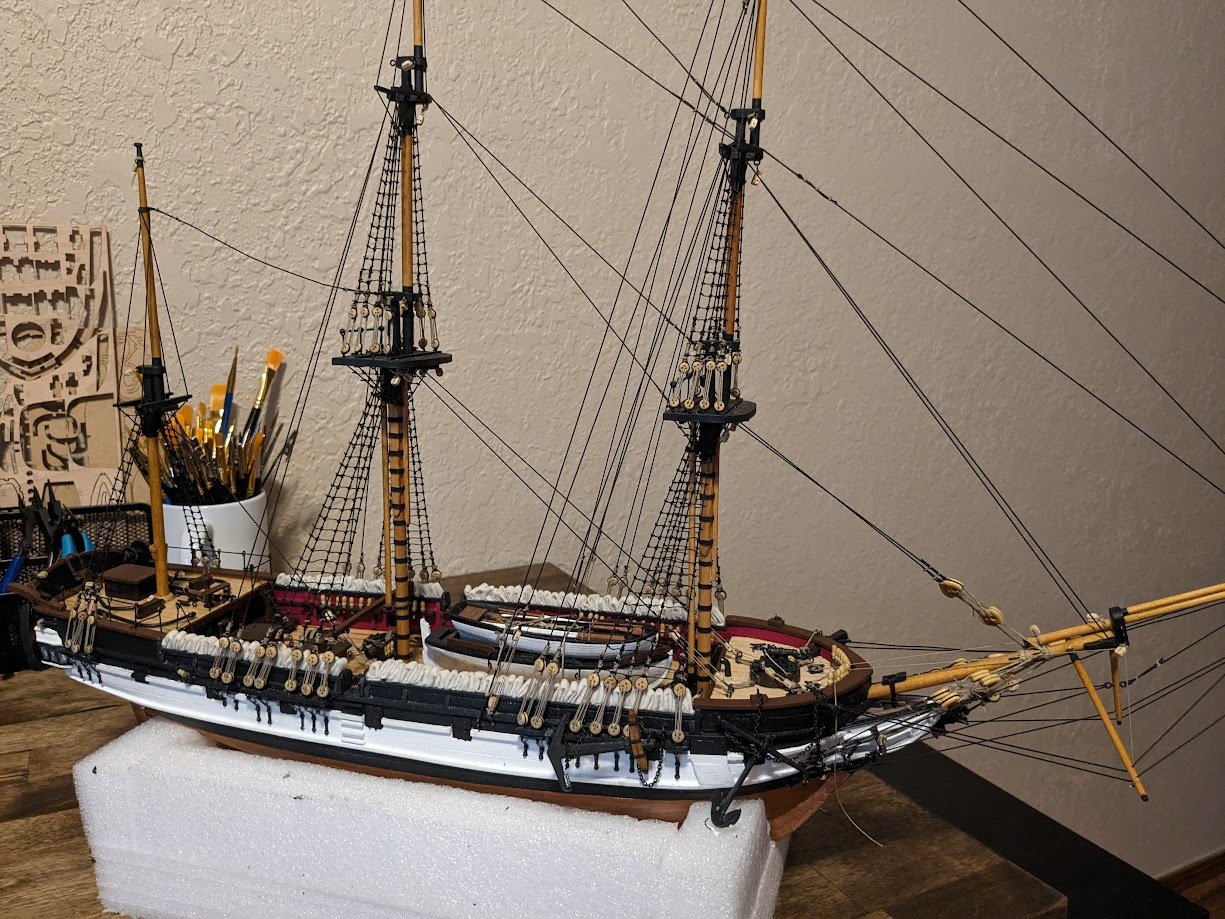
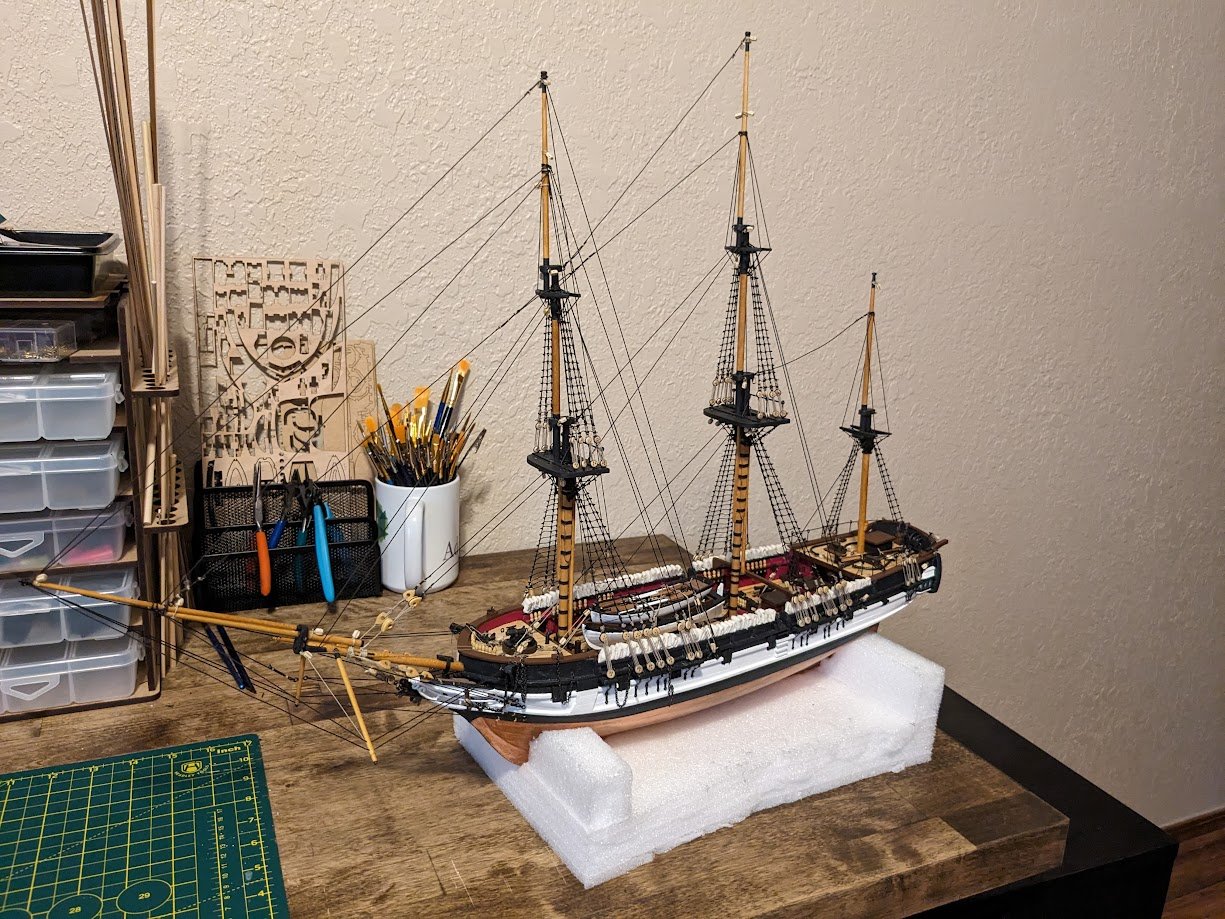
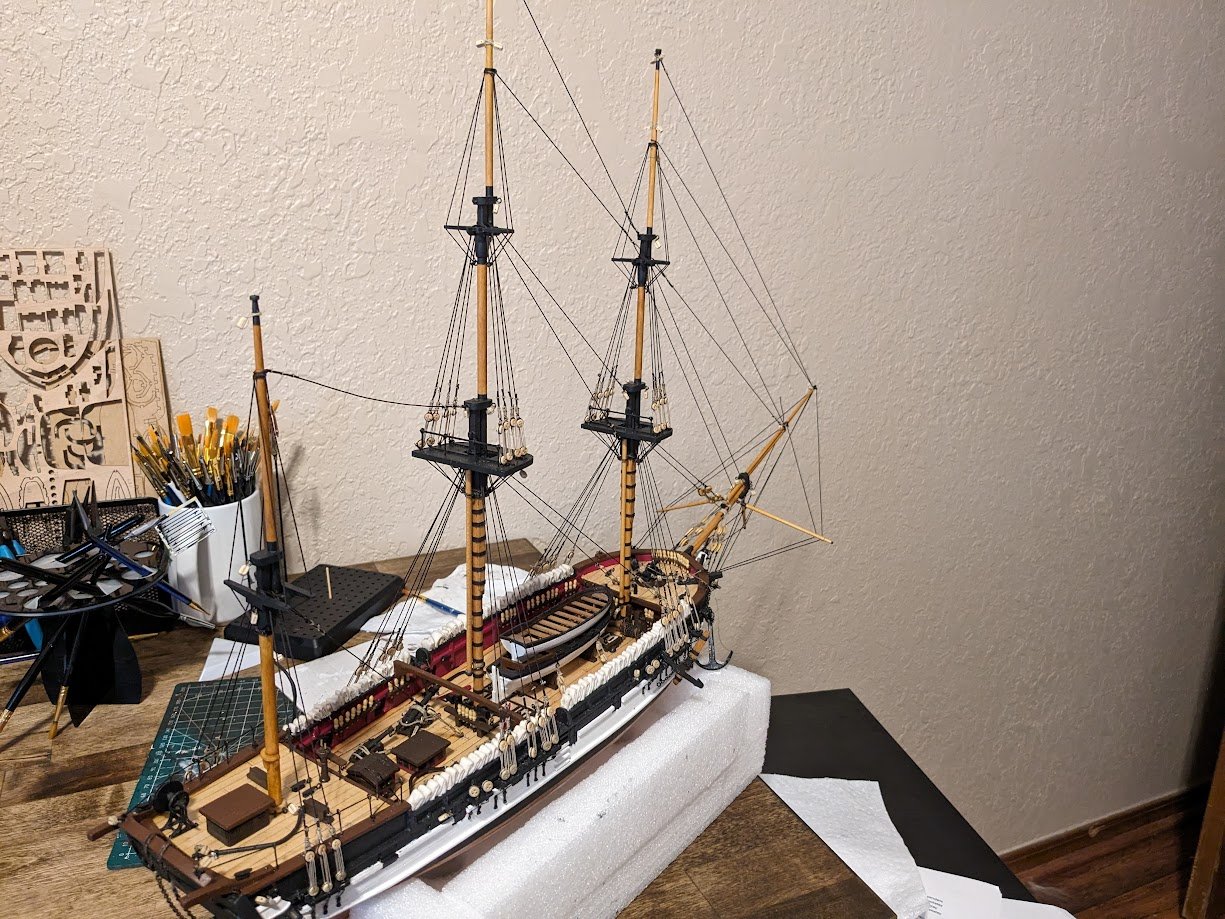
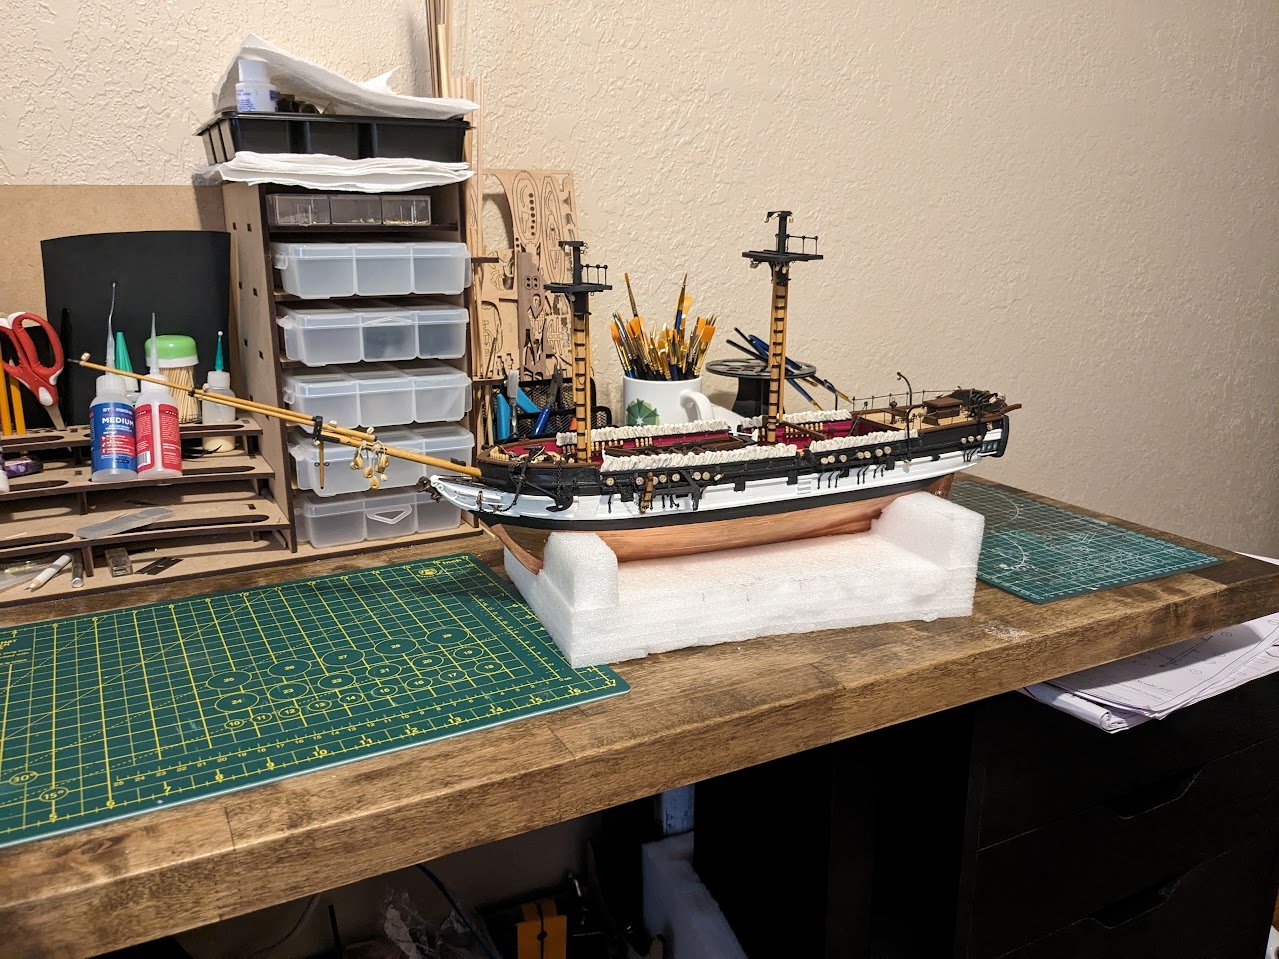
 I ran out of Syren rope last week right towards the end of the running rigging, so while I was waiting for more rope to come in I tried my hand at the ensign flag. My goal was to make a flag that looked like it was naturally hanging in a light wind as I felt that would look a little more in place on a ship without sails than a flag fully sideways. My method was to coat the flag in diluted PVA glue and pin it up at a similar angle to which it would sit. I then added several small clamps and alligator clips to add weight and pull the flag down. I move the clamps around the flag until I got what I felt looked like a naturally hanging flag. I then pulled out my heat gun and added heat for a couple minutes and the flag started to fall down very nicely and retained a nice memory of the shape I wanted. I then added another coat of diluted pva glue and let it sit overnight. I have also started on the last 3 small boats. I really am not a fan of planking those little boats lol. Along with the boats, I am working on making rope hanks for the belaying pins, then I just need to finish the rigging, clean up my mess around the ship and add touch ups and I should cross the finish line.
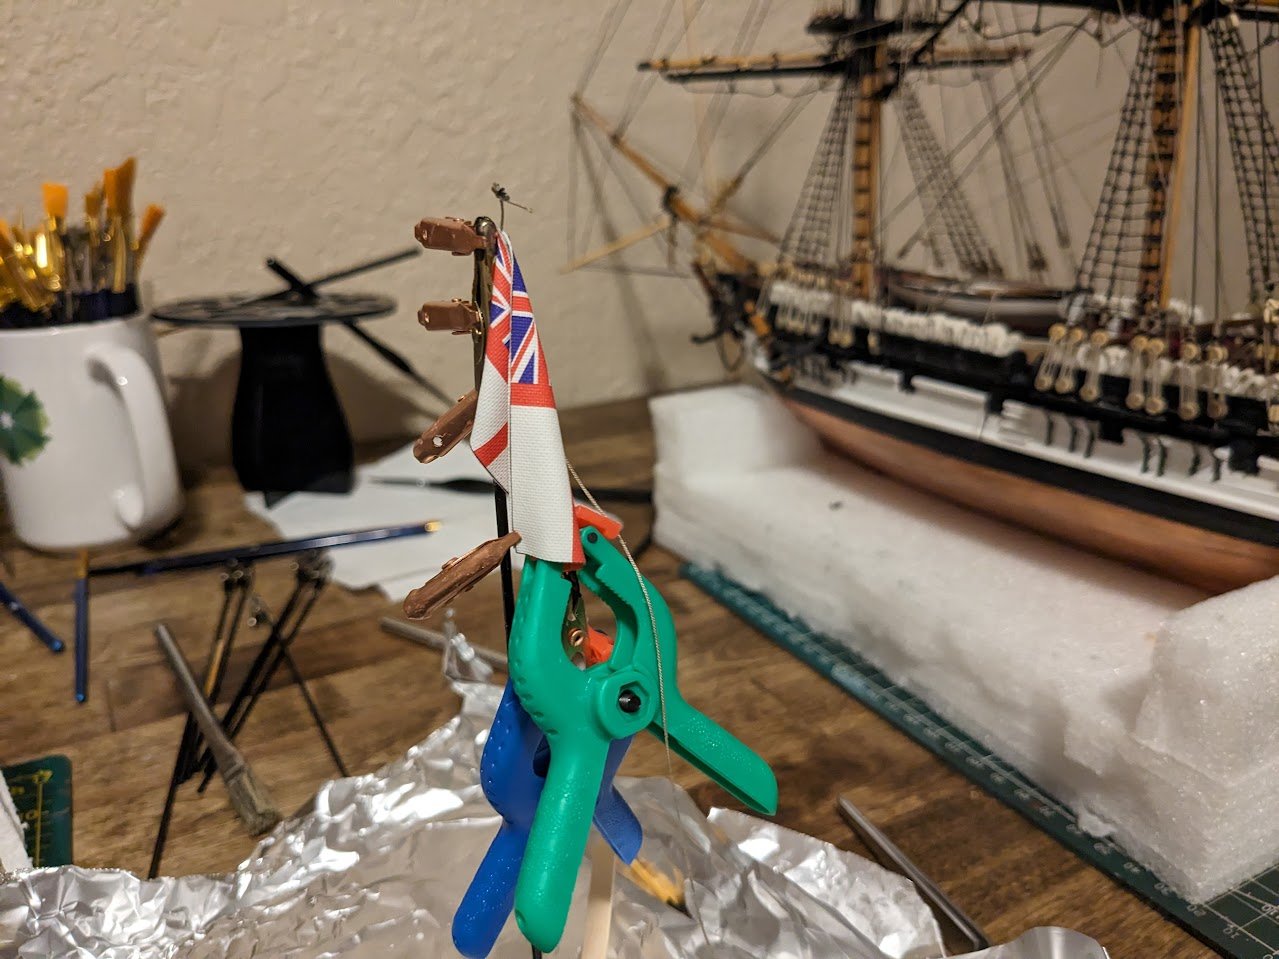
-
Beautiful model, you have done a fantastic job. I'm going to have to add either the Flirt or the Speedy to my "To-Do" list, you have sold me on the beauty of this brig.
- 95 replies
-
- 1
-

-
- flirt
- vanguard models
- (and 1 more)
-
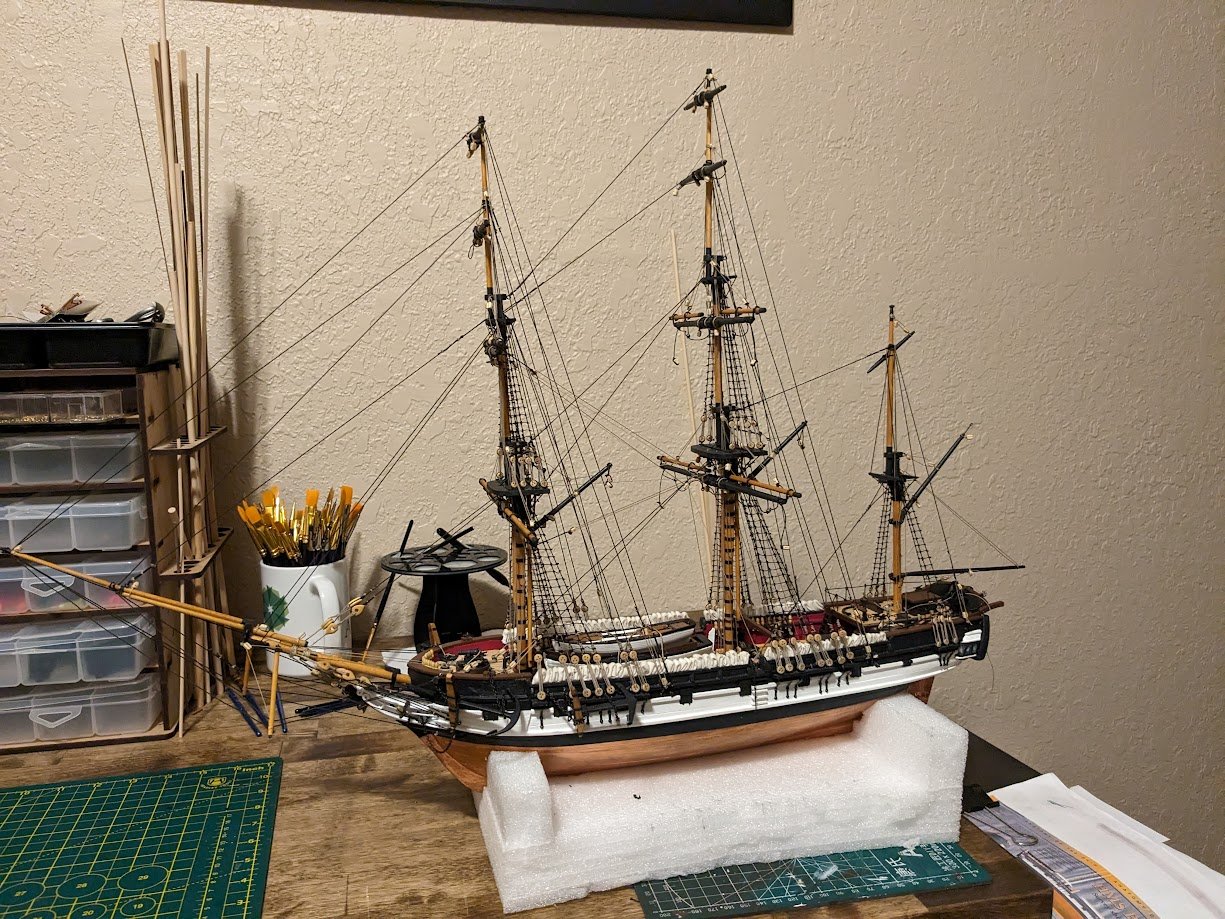
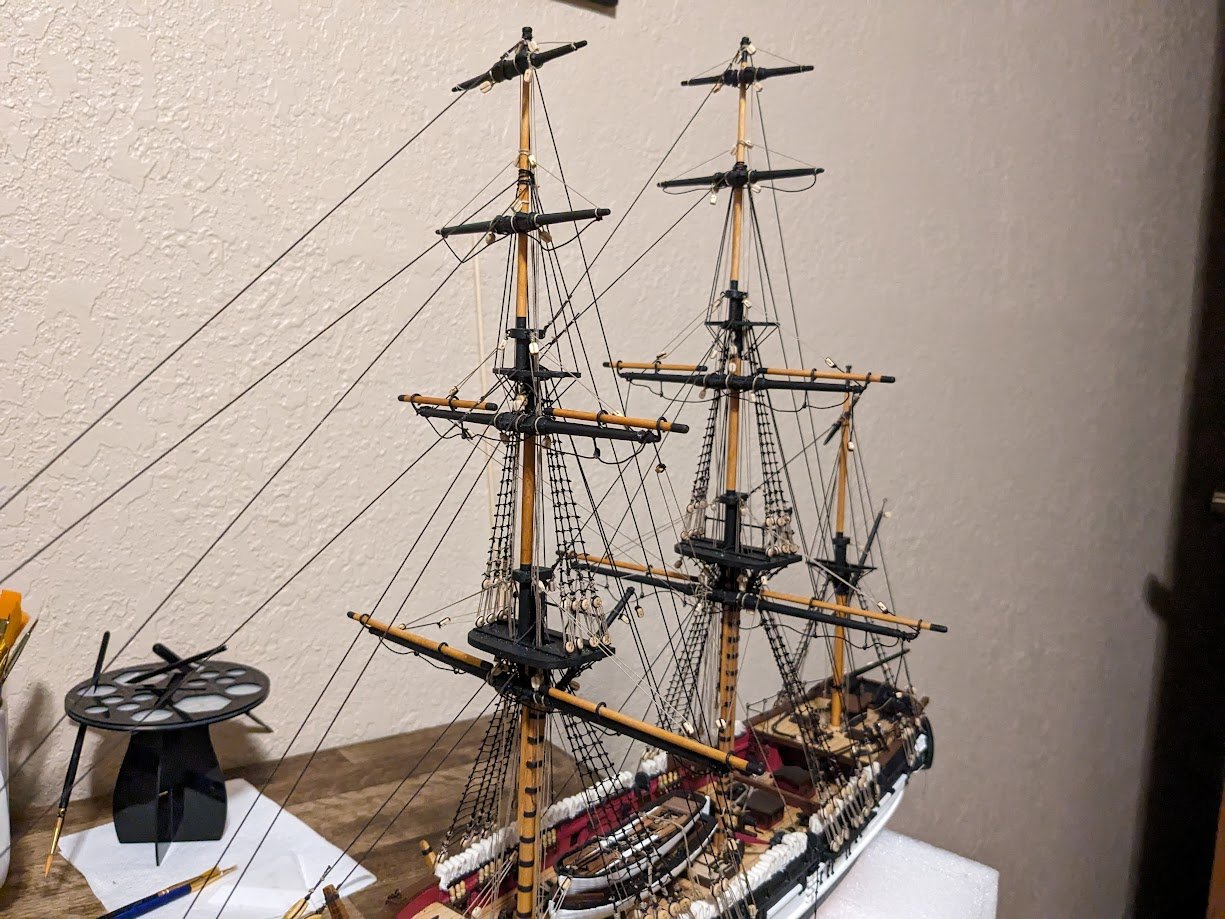
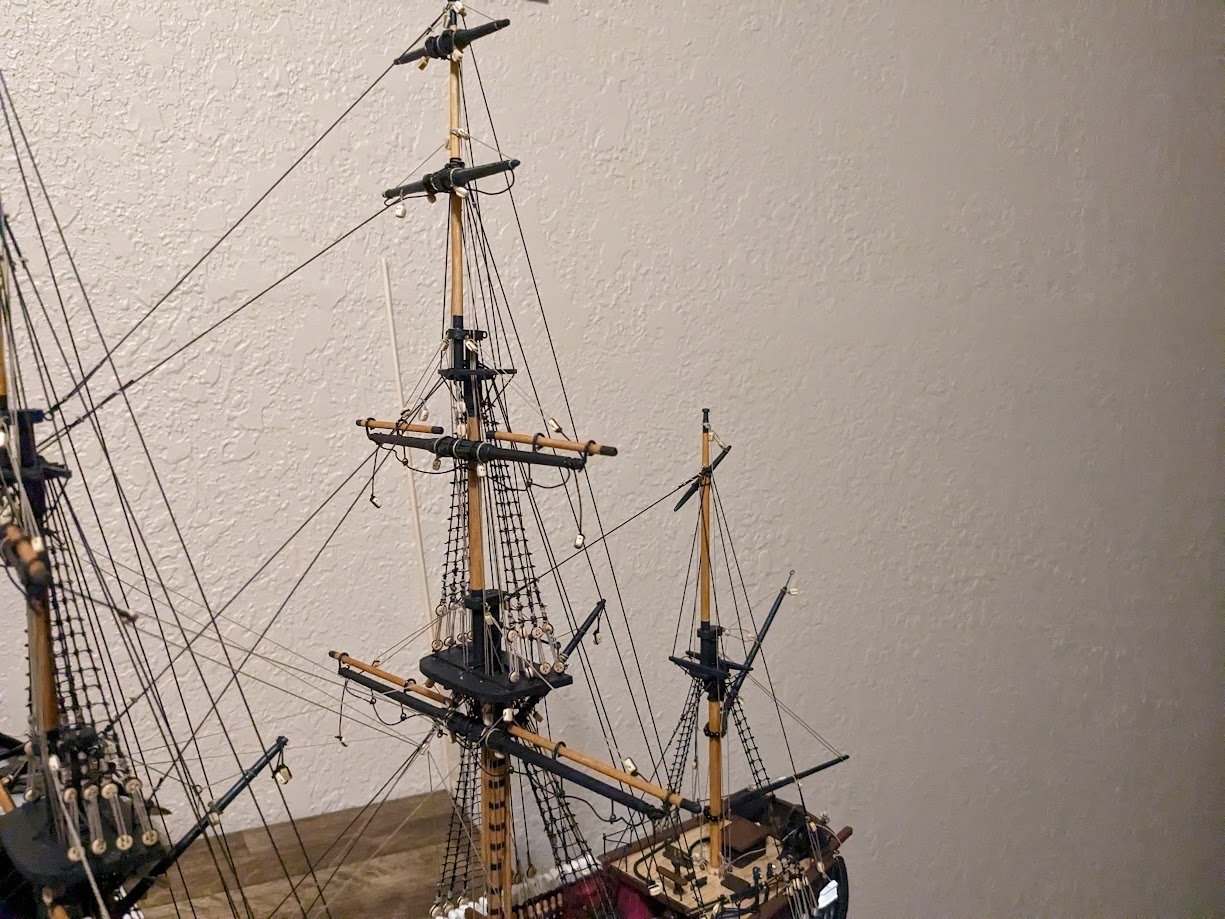
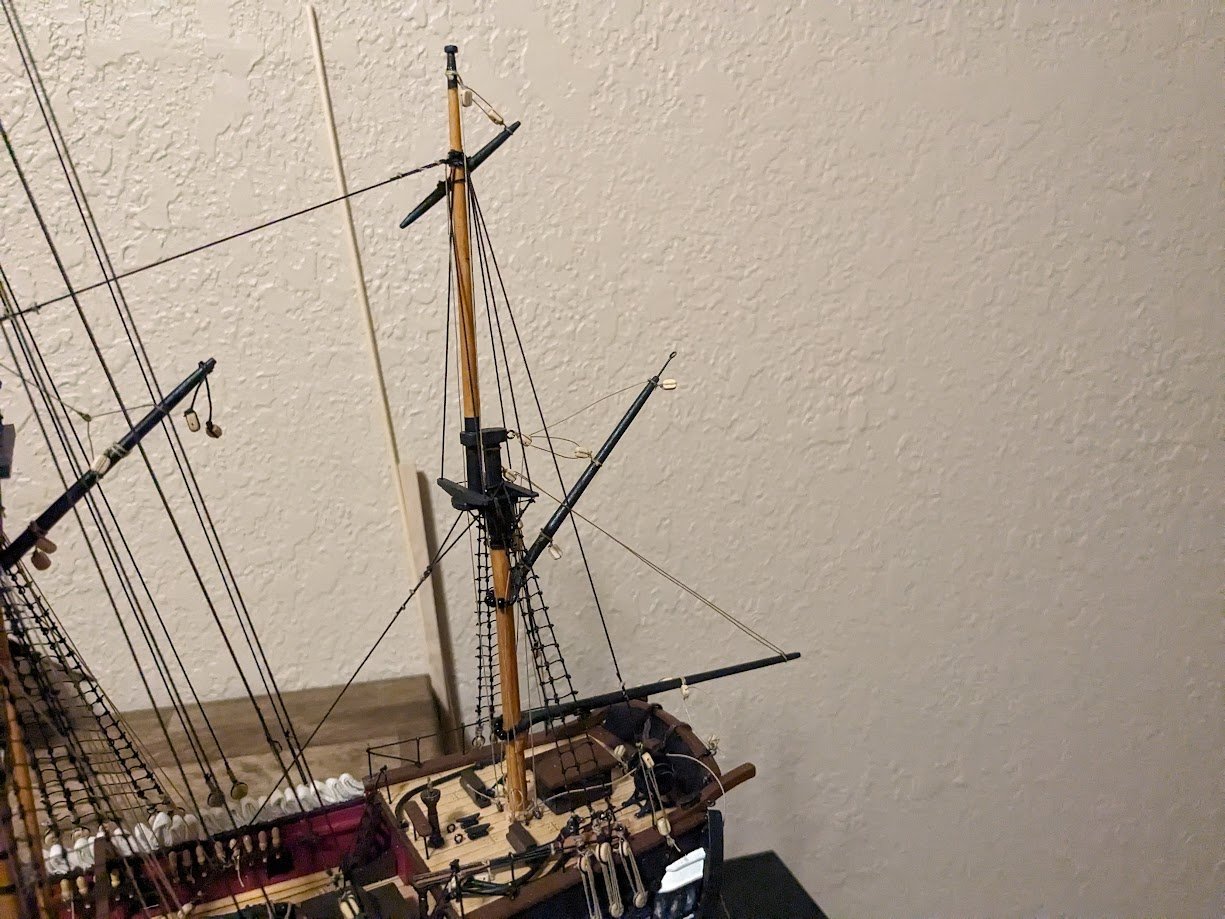
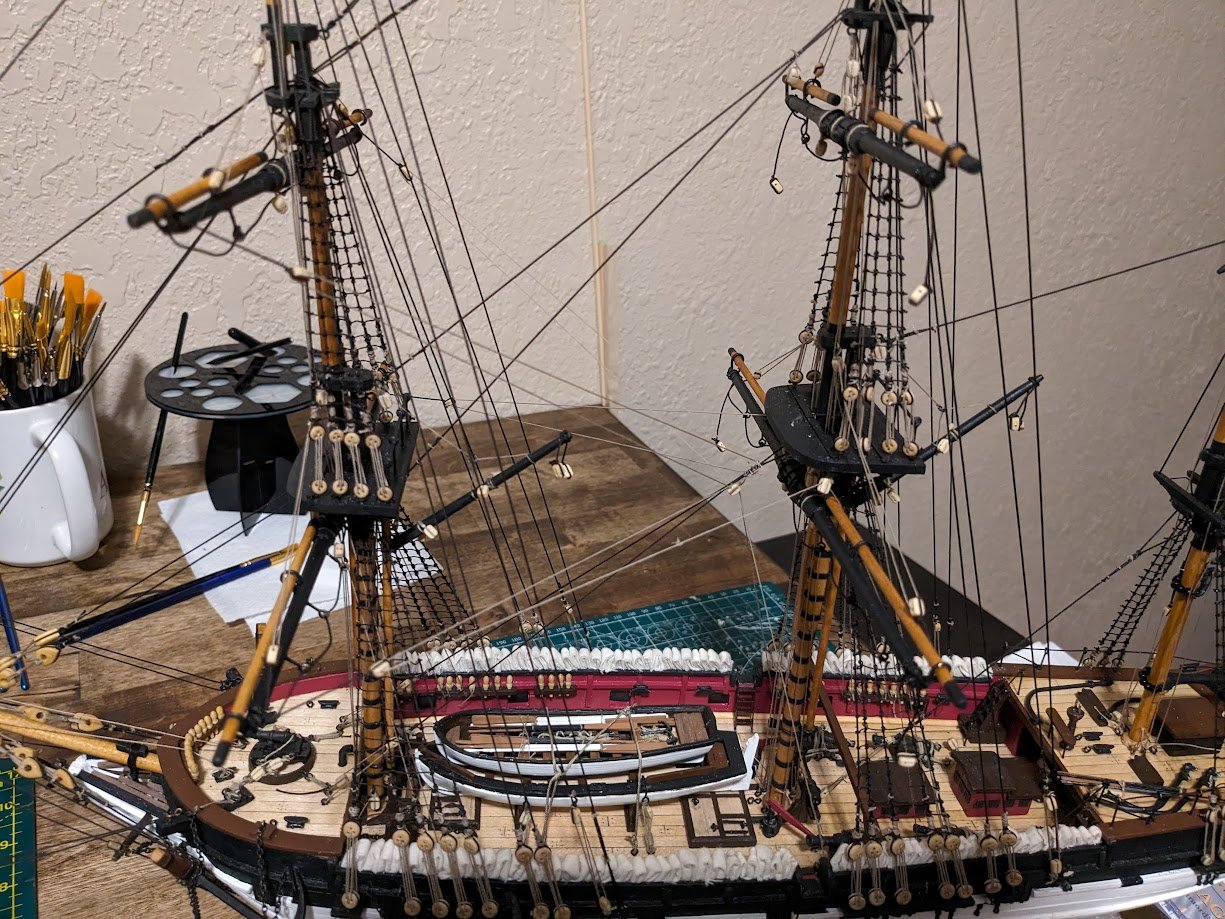
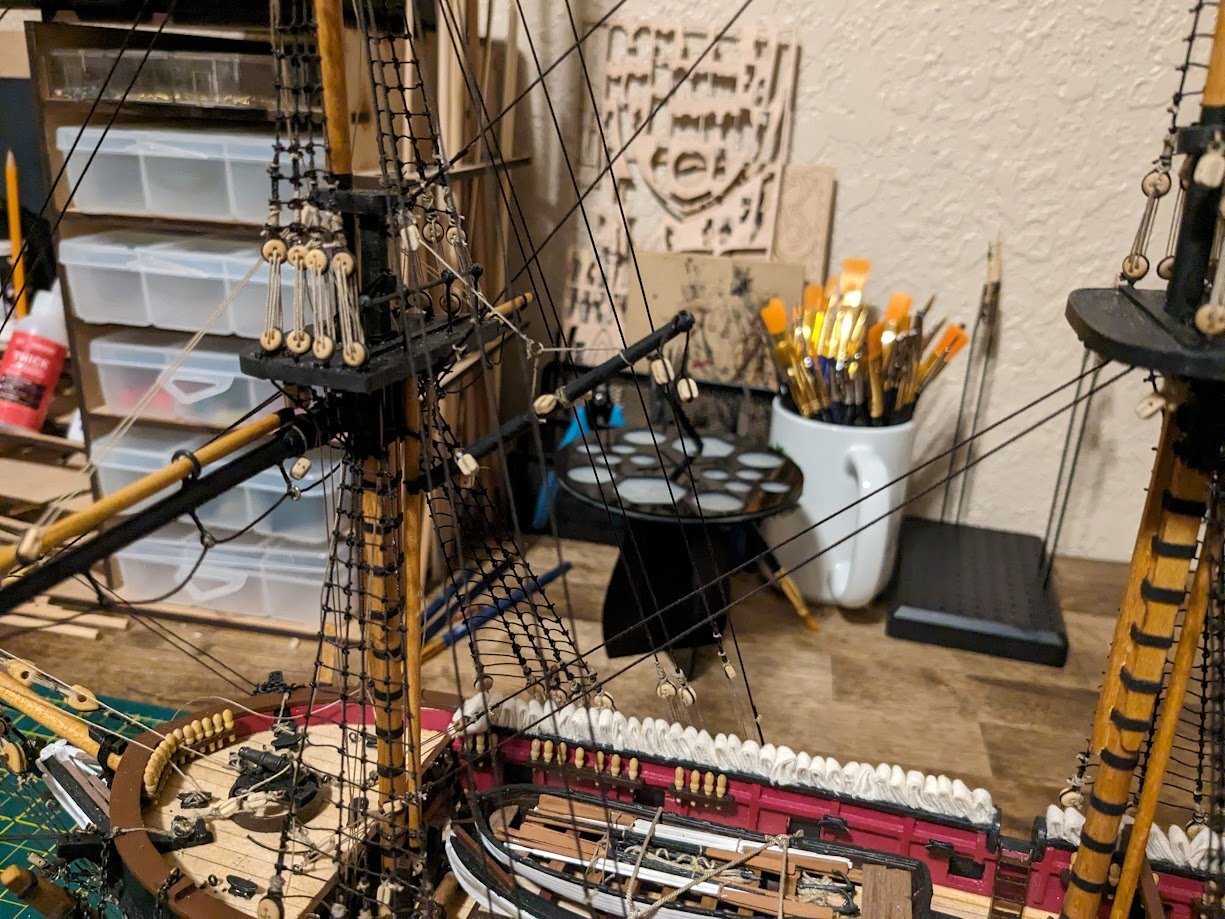
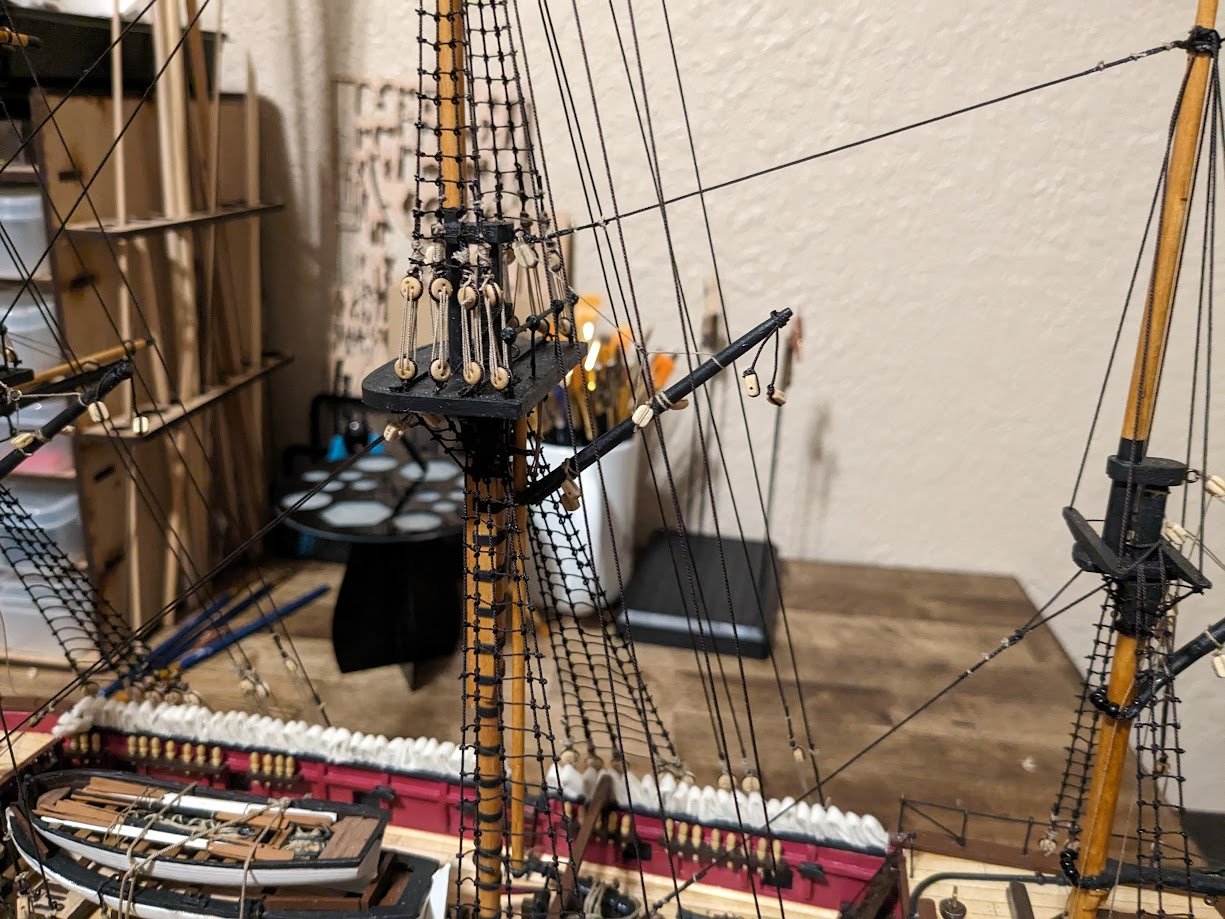
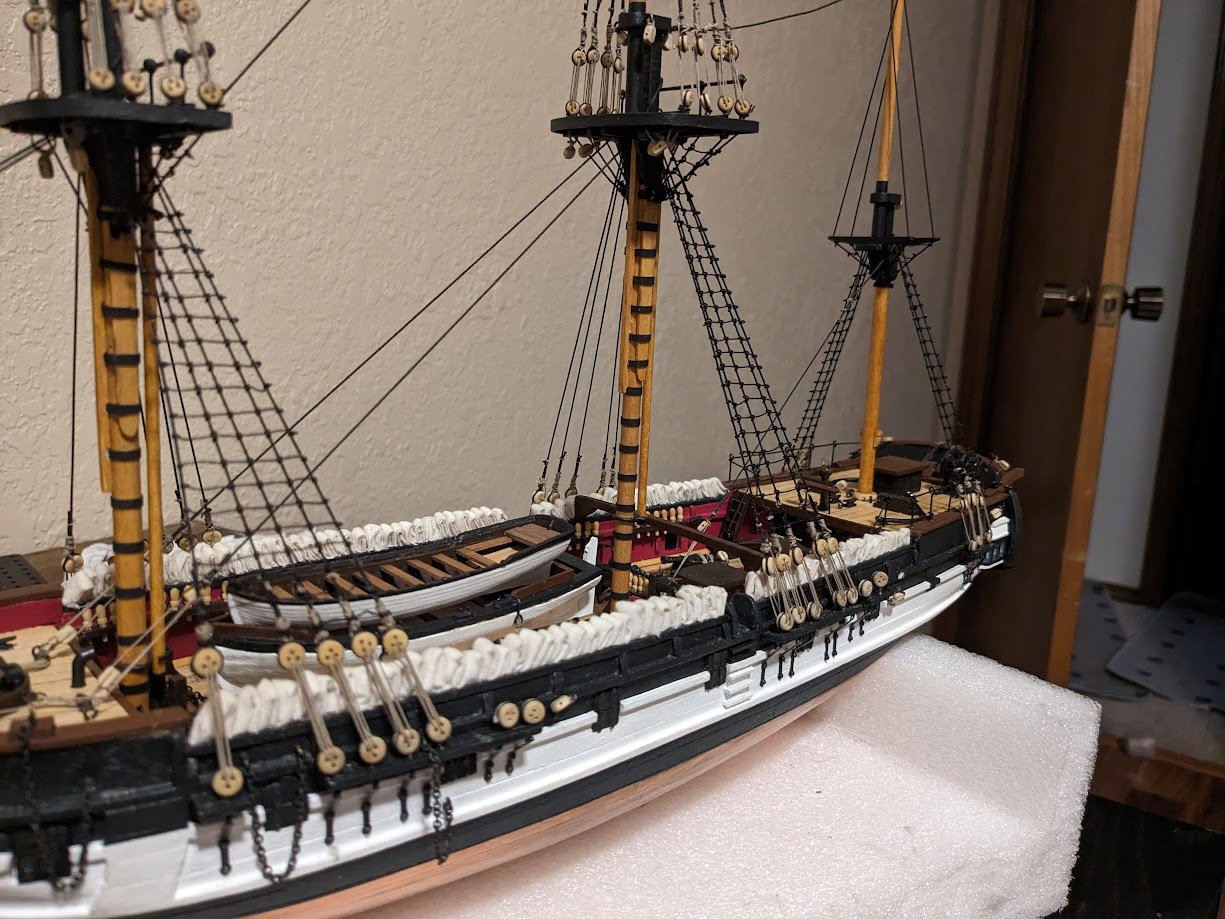
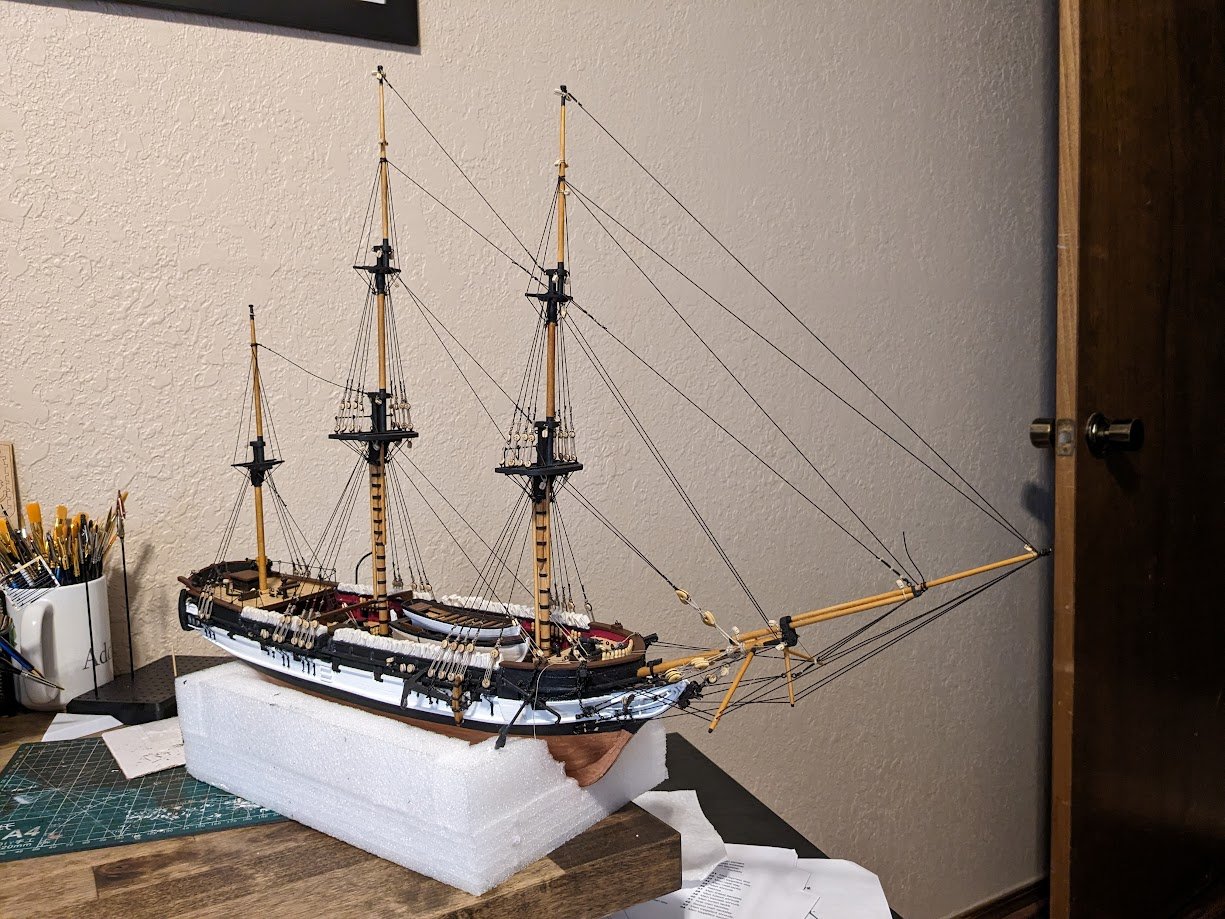
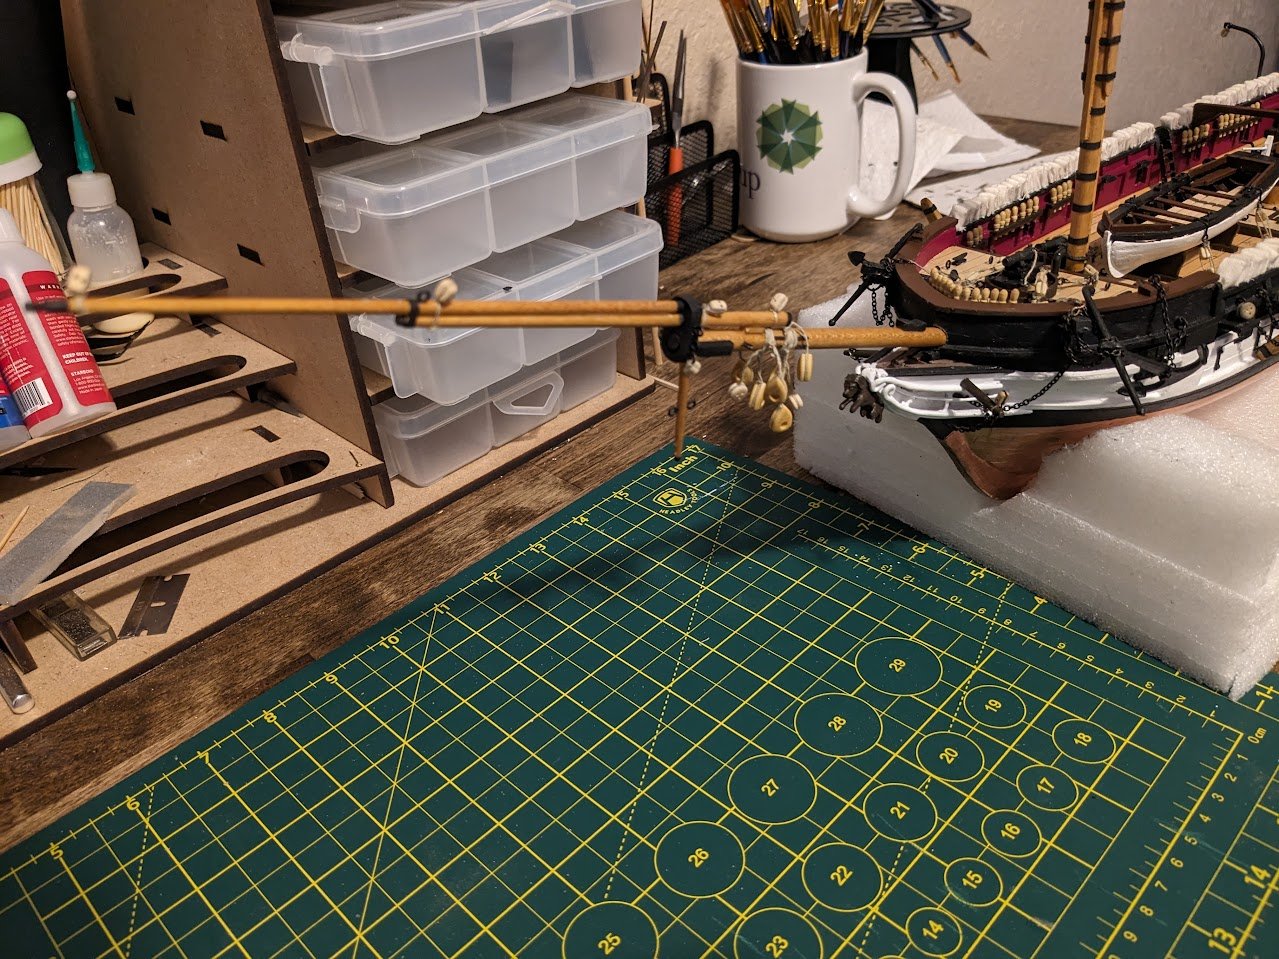
Yards have all been completed and are now hanging off the masts. Now to finish the running rigging. I'm definitely glad I bought some rigging tools to help with the hard to reach places, sometimes I feel like a contortionist while trying to get into the right position to tie a rope off to a belaying pin. Here are the completed yards I've decided to leave some of these ropes loose until the end as I keep accidently bumping the spanker boom. The start of some of the running rigging. Here is how the Beagle currently sits Question on non tensioned ropes like the horses hanging from the yards. I see many builders use alligator clips or small clamps to hang from ropes to simulate the weight on the ropes hanging, is the technique to just brush these ropes with diluted PVA glue and then hang some weight on them while they dry?
-
Thanks for the help allan and the compliment, I'm still a fish out of water when it comes to the blocks and rigging so any help is greatly appreciated.
-
After finishing up the backstays I have started on the gaffs, boom, and yards. I have completed the yards for the foremast, hopefully this weekend I can get some good progress on the yards for the main mast.
-
The Flirt looks fantastic great job. Thanks for the size comparison photos next to the other ships, I honestly wish more people would do this as it's hard for some of us to picture how big some of these different ships are when everything is a closeup shot, plus I just love seeing photo's of multiple ships.
-
Appreciate the compliment, your build log actually inspired me on several parts, such as doing the hammocks although yours definitely turned out much better than mine, I wish I would have made mine a bit smaller for scale.
-
Those extra whale boats look fantastic, I was debating on adding them to my beagle as well, but I don't think I am skilled enough yet to do them from scratch.
-
B-25J Mitchell by Chadwijm6 - HK Models - 1/32
brunnels replied to chadwijm6's topic in Non-ship/categorised builds
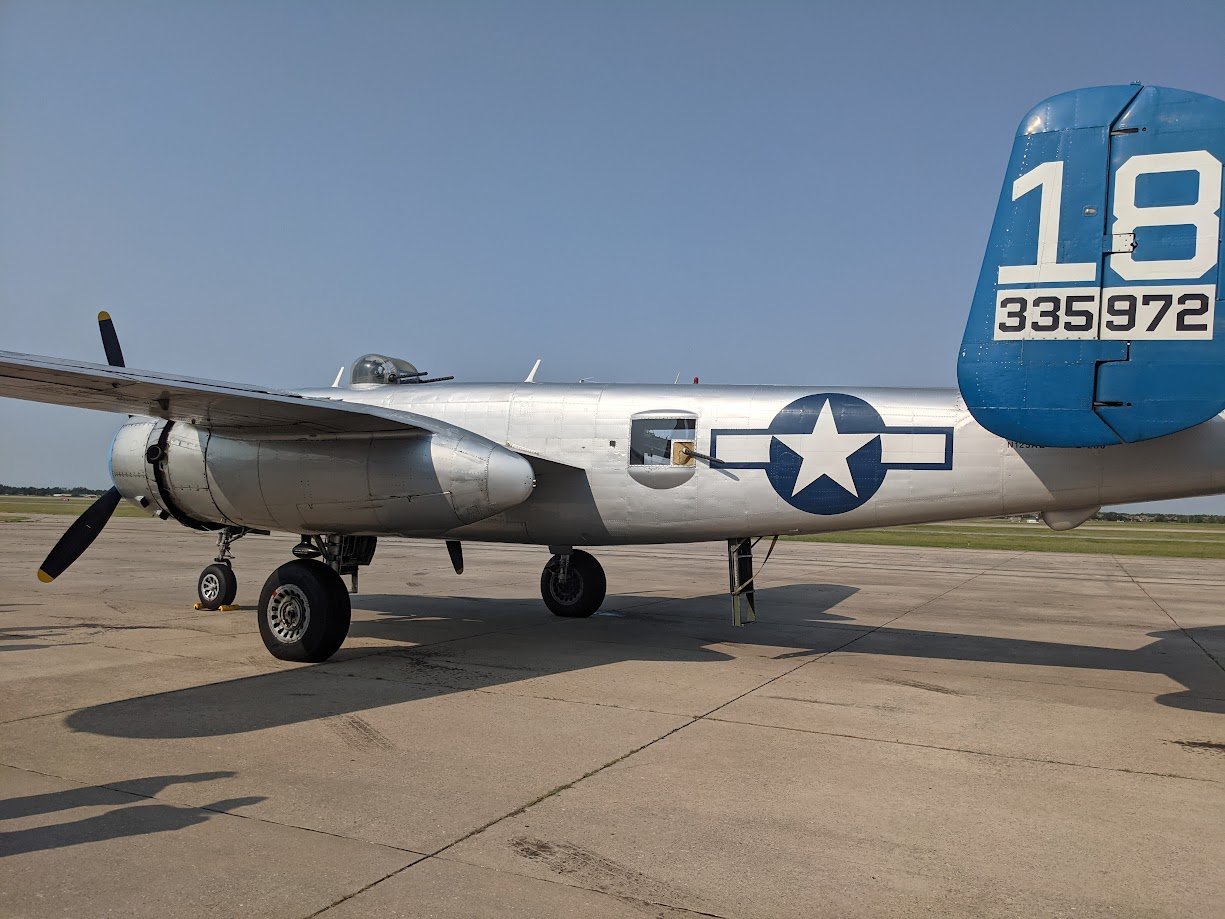
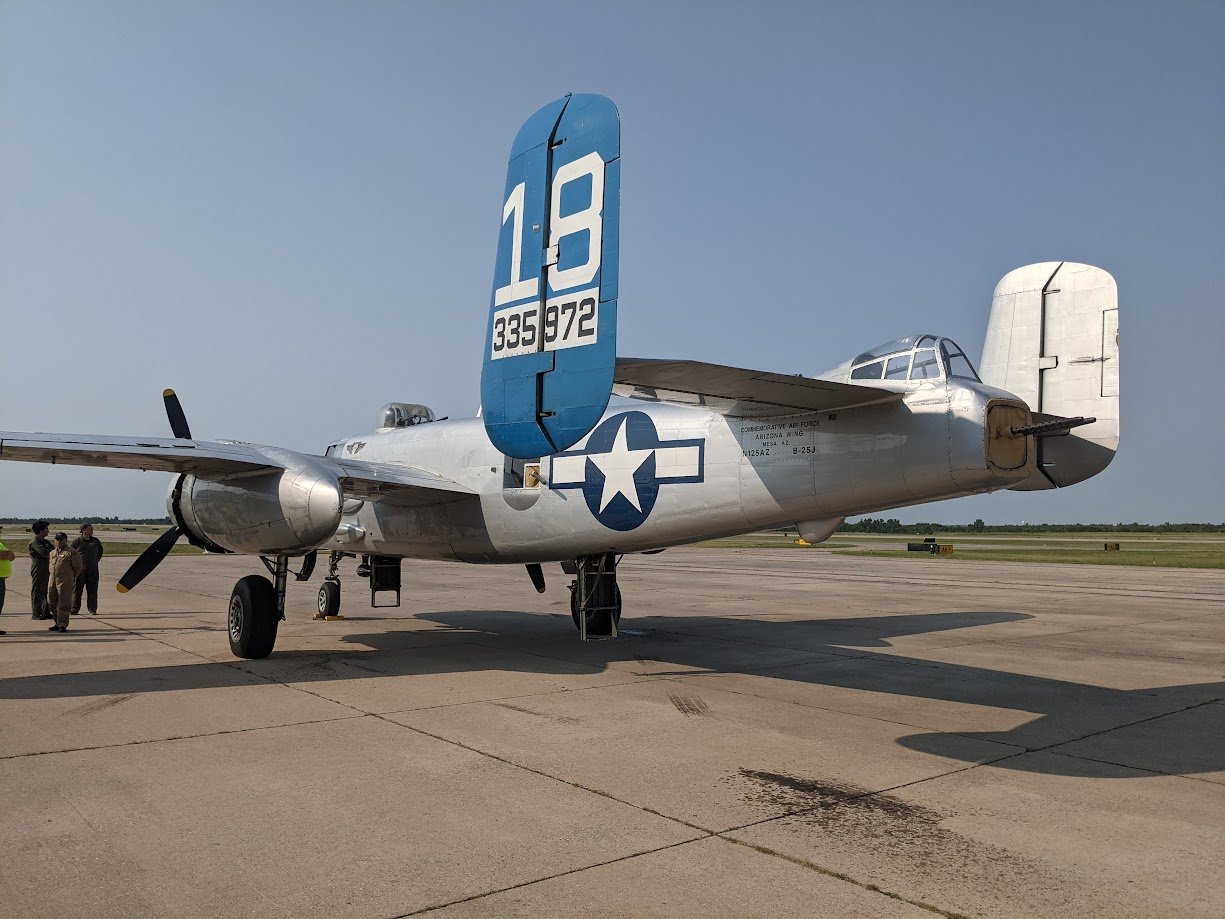
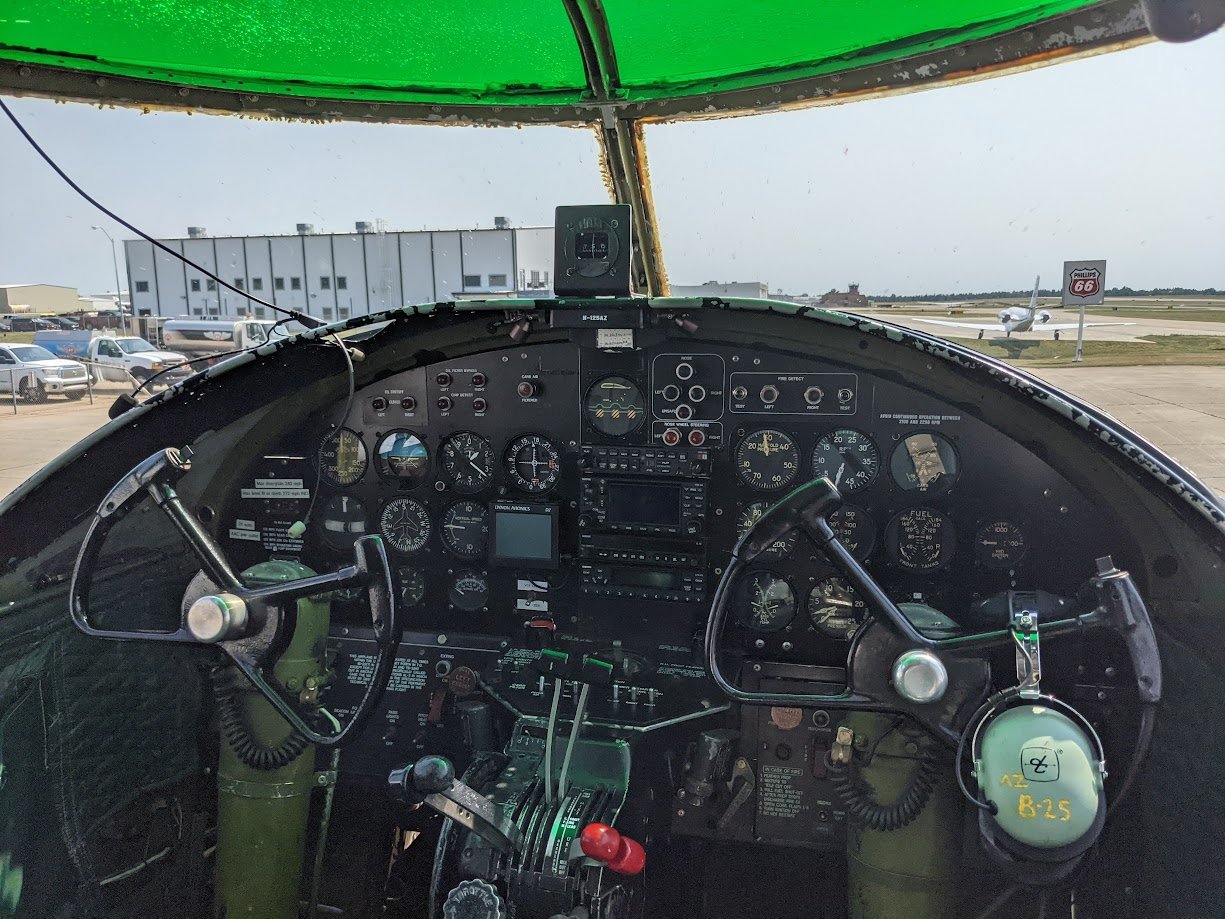
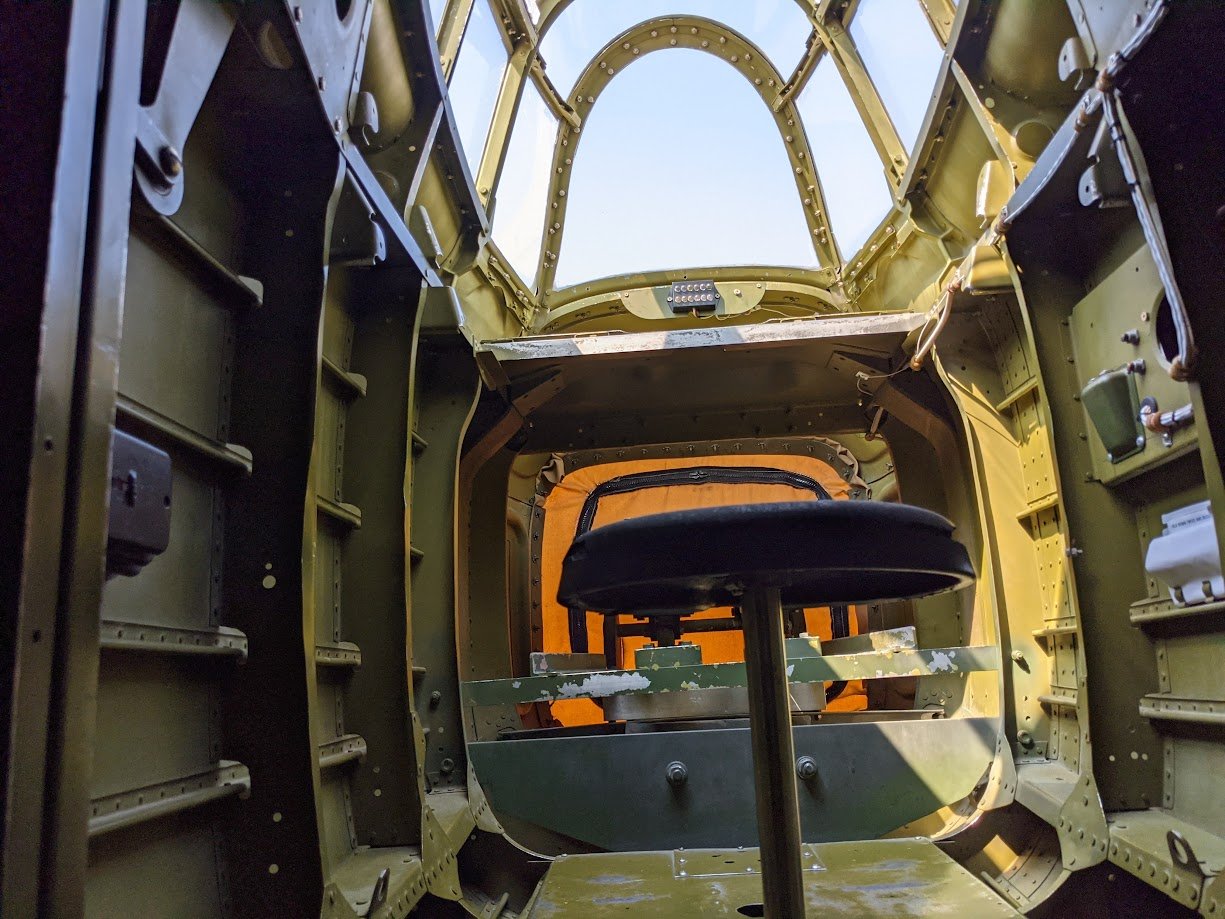
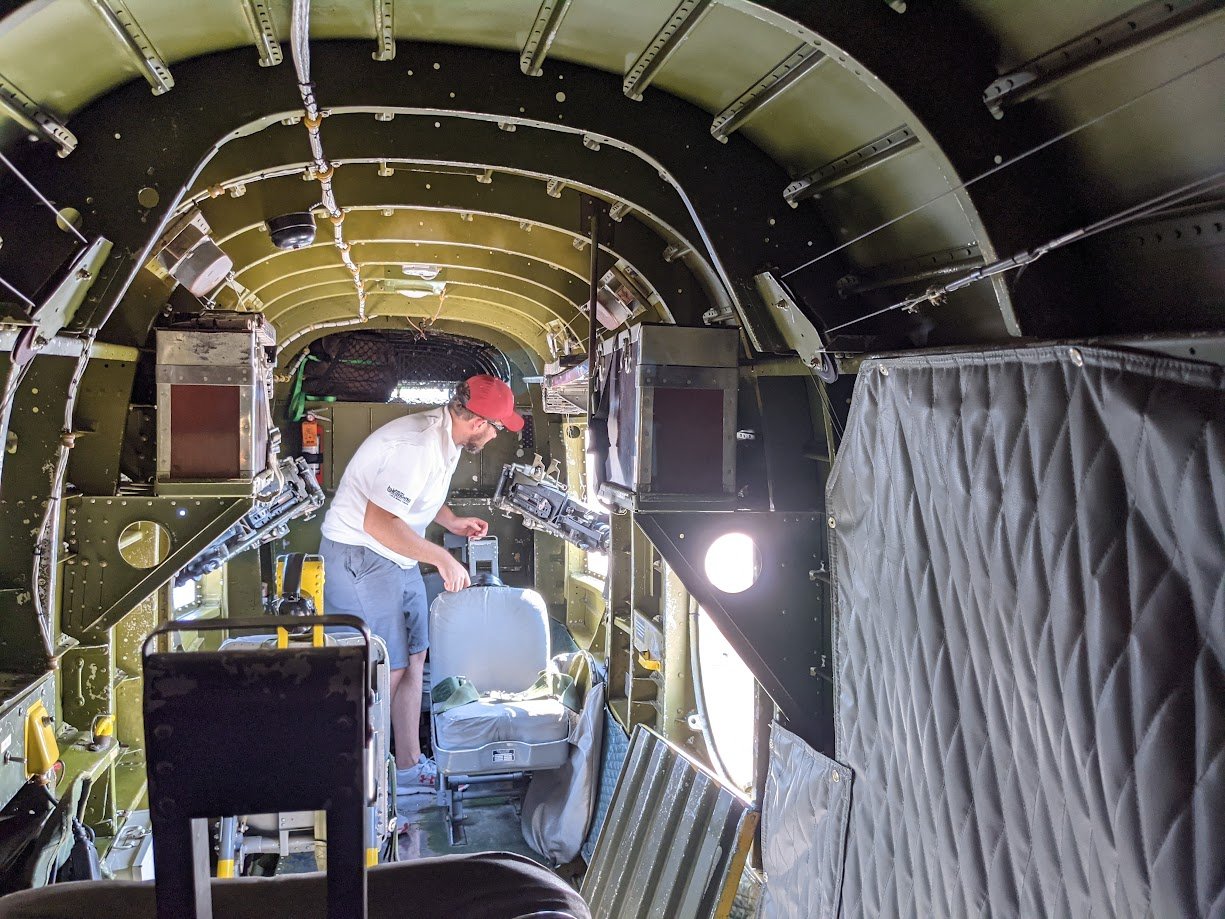
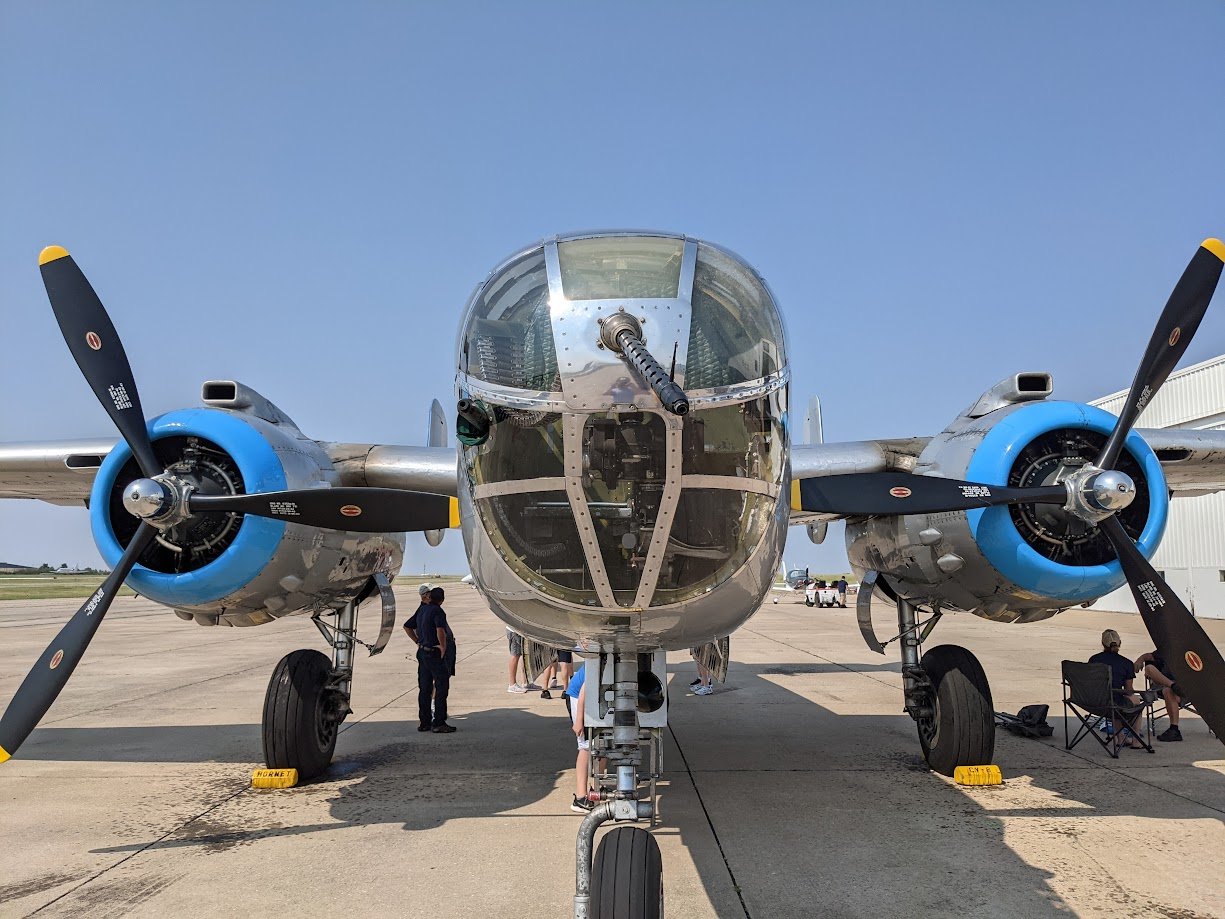
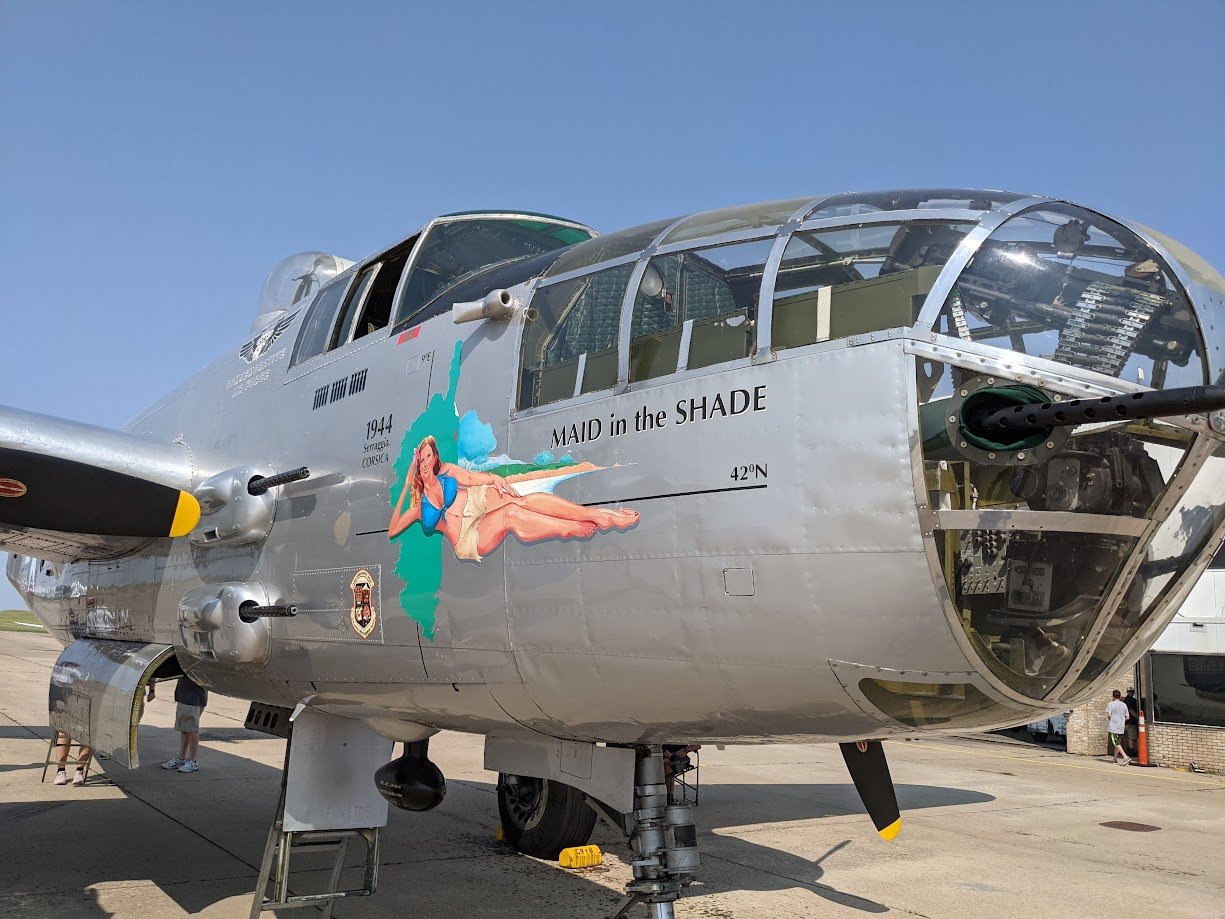
I'm definitely following along on this build. The first scale model I ever built was a Revell B25 which implanted my love for the medium bomber, and it doesn't hurt that it's one of the best looking planes of WW2 in my opinion. A couple years ago we had a B-25J "Maid in the Shade" come to our local airport, as soon as we heard it was in town my father and I had to go down and crawl around it. Here are some photo's of the B25J we got to check out. The sound of those Wright Cyclone engines purring will put a smile on anyone's face. PXL_20210911_152141147.mp4
-
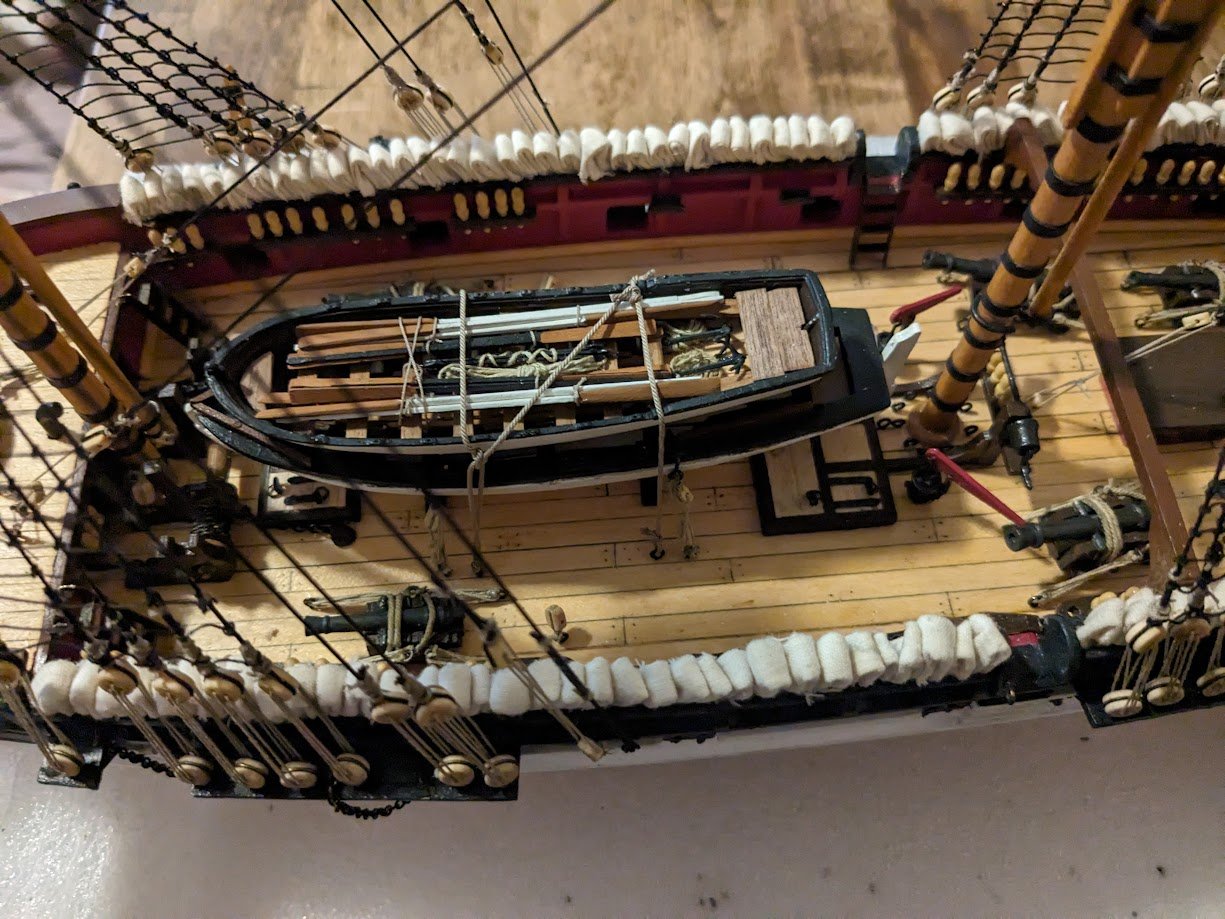
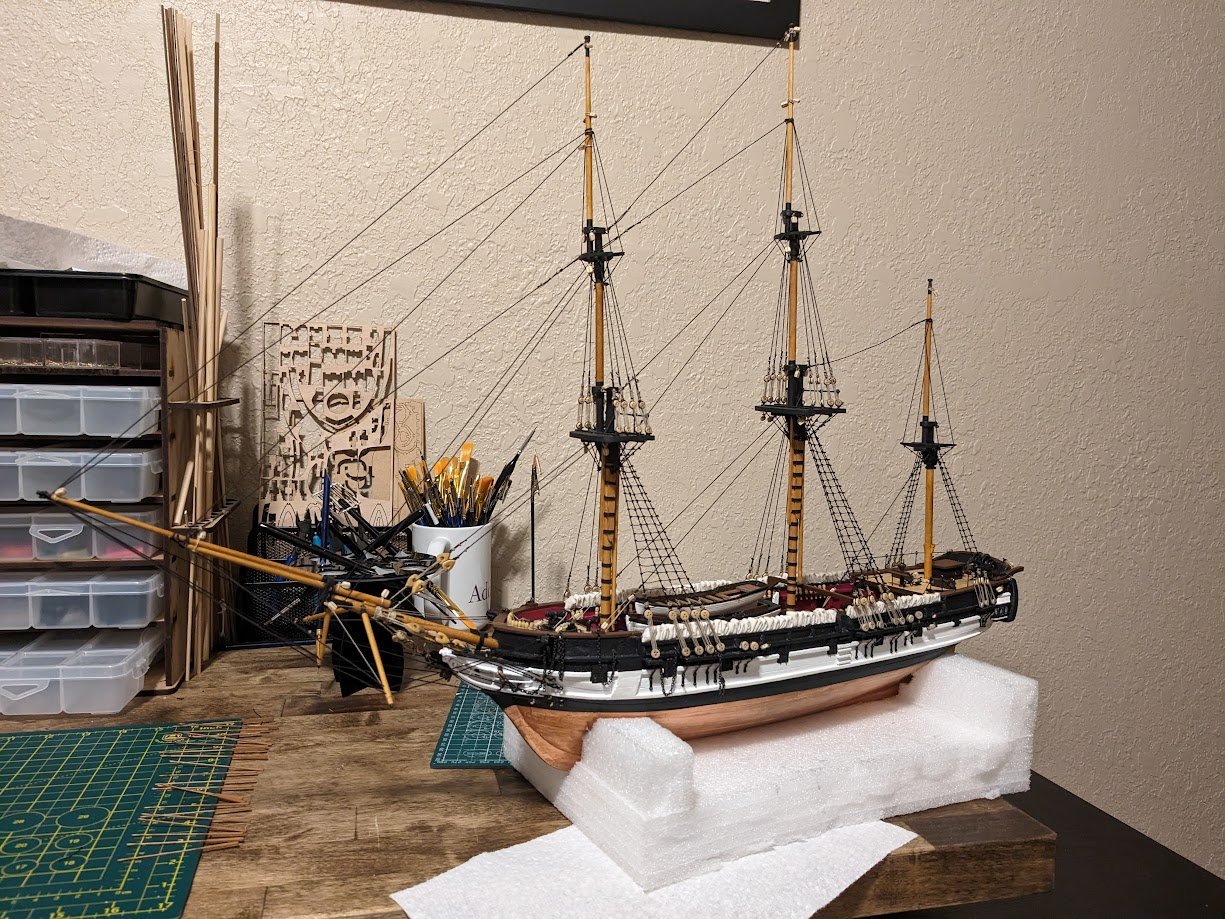
Finished up the ratlines, there's plenty of mistakes but I feel like by the end I got the hang of the process and I am happy with my results for my first go around. Before I continued any further I wanted to complete a few tasks on the ships boats before it gets closed up by the rigging and got too hard to work with. Inside the top boat I added some oars, boat hooks, anchors and some coiled ropes. I got the oars from Vanguard models, and boy are they small and fragile, VERY hard to work with and I broke probably half of the larger ones while trying to shape them to be less square. I am now working on the backstays, these are the last task of the standard rigging. After the backstays I will start on the yards and then start on the running rigging.
-
Last couple nights I have been working on the rat lines, probably another couple nights before I complete them. The rat lines definitely take a while to complete, but they are easier to complete than I what I had imagined.
- 90 replies
-
- 12
-

-

-
Congrats, your finale model is fantastic, I'll definitely be following your Sherbourne log as well.
- 177 replies
-
- 1
-
-
- Perseverance
- Modellers Shipyard
- (and 1 more)
-
Thanks for all the suggestions, a sanding stick didn't even cross my mind and I think I have a few. I'm not sure if scraping would work unless I use really light pressure, I have pulled one of the oars handles apart just from pulling a piece of sandpaper down the oar so I'm not sure they are strong enough for a razor, but I will give it a shot.
-
I'm needing some help sanding some laser cut oars I purchased from Vanguard models. I have been trying to sand off the char and shape the oar handles to be more round but pretty much no matter what I try I end up snapping a part of the oar as they are so small and fragile. How do you all normally shape the handles or even just remove the char without breaking these little guys? I have tried using 240 and 400 grit sandpaper, but no luck so I figured I would seek help from the veterans of the hobby before I break anymore.

-
Your attention to detail on your rigging is exceptional.
- 419 replies
-
- 2
-
-
- Victory Models
- Pegasus
- (and 2 more)
-
In my experience the Syren rope has not unwound at all on its own, the only time it has unwound on me is in situations where it snags up on something while being fed through a hole or tight spaces.
-
Haven't posted for a couple weeks, father in law passed away, and my Australian Shepard who has shadowed my side for the last 14 years has been in pretty poor health and required nearly full time attention. I have actually been working on the model quite a bit to take my mind off of things, but I haven't been very good with pics, so sorry for the lack of progress picks but here are few shots of the whole ship to show my progress. I finished the masts, and have started on the standing rigging. I decided to replace my rope with rope from Syren, the difference in quality is staggering. Since this is my first ship model I have been focusing on how the rigging works and what the purpose of each rope is and I am not quite as focused on making sure all the correct knots are being used and everything is whipped etc., but I am trying to add those things and learn how they should be done where I can if they aren't too much effort.
-
Which is exactly the situation as I said earlier, the kit doesn't show WHAT should be done in multiple points of the instructions.
-
This is also my first kit, so I don't have experience building with others yet, but I do have 3 other kits for future builds I have recently purchased from Vanguard, Amati/Victory, and Model Shipways and just thumbing through the instructions all are leaps and bounds better than my Beagles instructions. I have even pulled out the instructions of those other kits to help me better understand some of the rigging parts because the Occre rigging plans are so awful. Honestly I didn't feel the Beagles instructions were that bad until you start to get towards the masts and rigging, It feels like they just rushed through the end of the instructions because they were short on time, got tired of the project, or they got another employee to finish them or something. I don't mind having to study plans and figure stuff out, but there are multiple parts (bowsprit installation, undersides of the mast tops, rigging eyebolts on the outer hull) that aren't even shown in the instructions, and their video series isn't always helpful either as they skip a lot of stuff in those as well. Sorry for the rant, the Occre instructions have been getting under my skin for the last couple weeks haha.
-
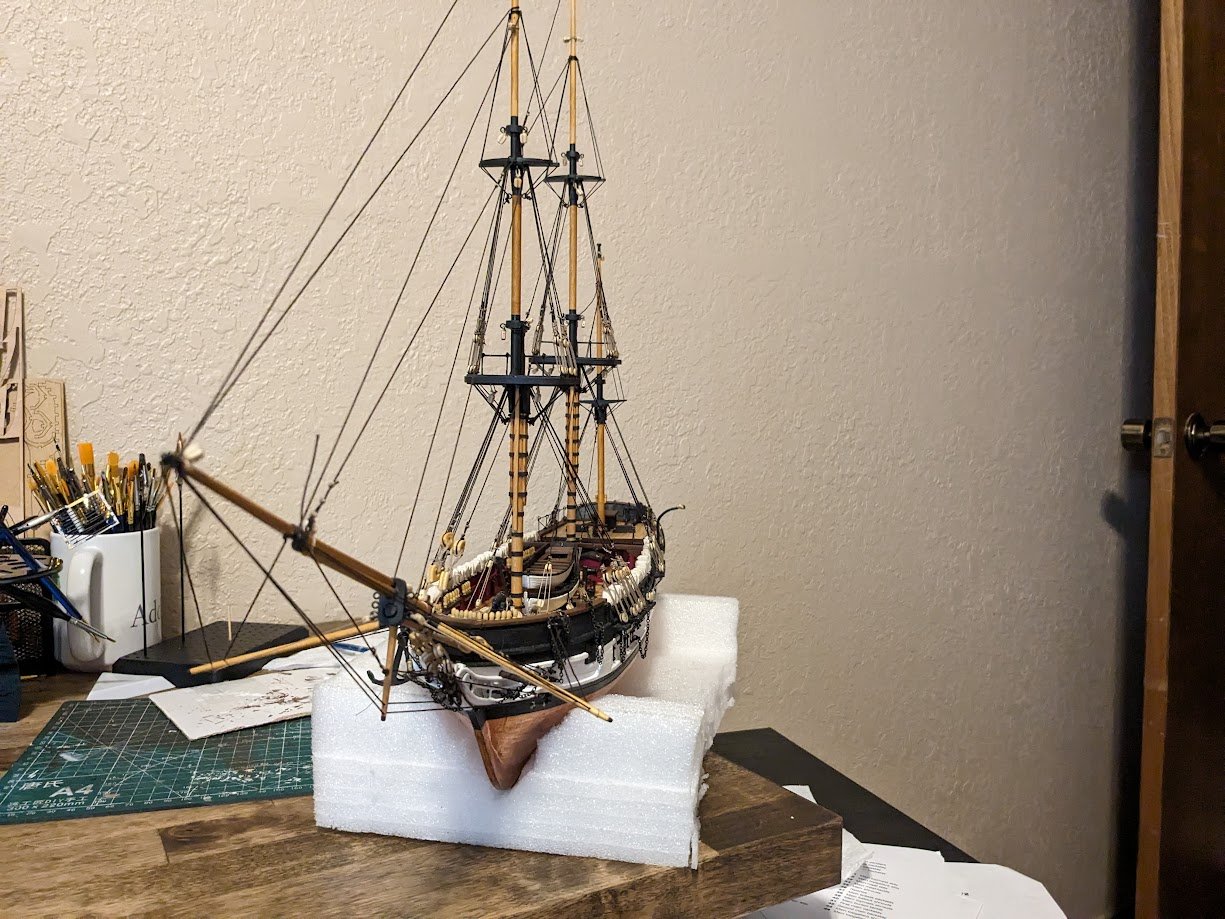
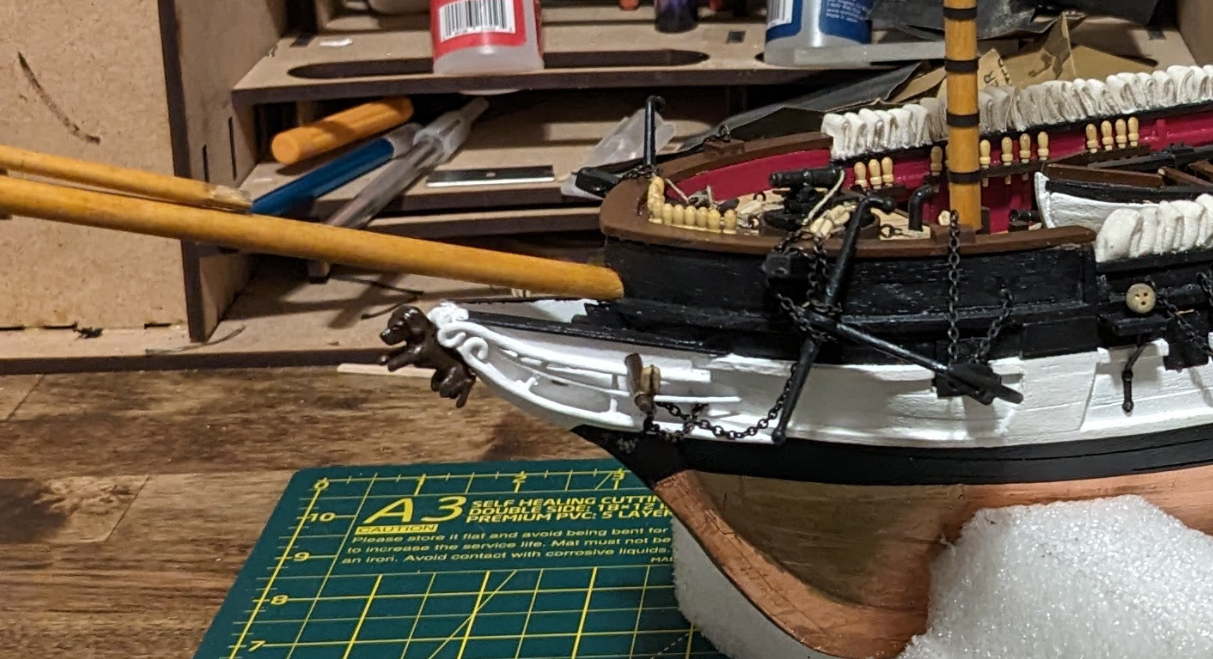
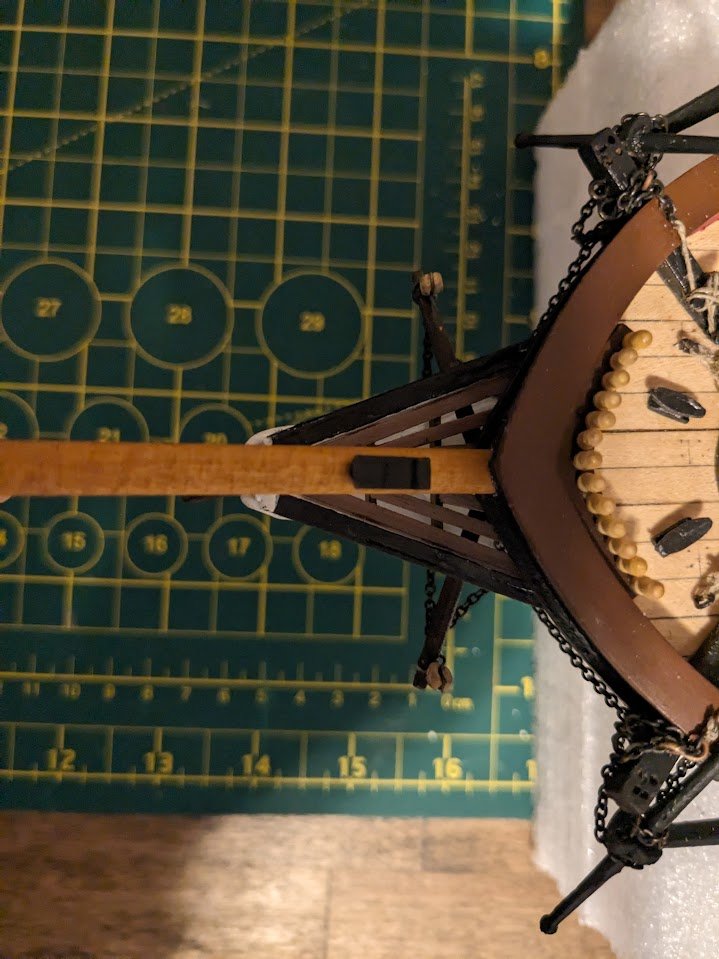
I've just started rigging my Beagle, and I have found Occre's instructions from Bowsprit installation (in which there were no instructions) to end of rigging to be pretty much useless to the point I probably won't buy another Occre kit. Even the guy making the model for their official videos is doing things differently from the parts I can make out in the instructions, and John Aliprantis who has a youtube Beagle series is doing things in another way. For the bowsprit, I found the general location the Bowsprit hole should be located and started to dig around with my hobby knife until I found the slot that is intended for the bowsprit, I then made a small hole and slowly opened it up with a round file and sandpaper until it fit the dowel pretty snuggly. Here is a pic of my bowsprit inserted so you can get a general idea of where it needs to be installed.
-
Loving the color scheme, and you are confirming my choice with going with Boxwood when I eventually do the Pegasus. I am going to have to pickup some of that Vallejo New wood paint, It looks like a useful color to have in the inventory.
-
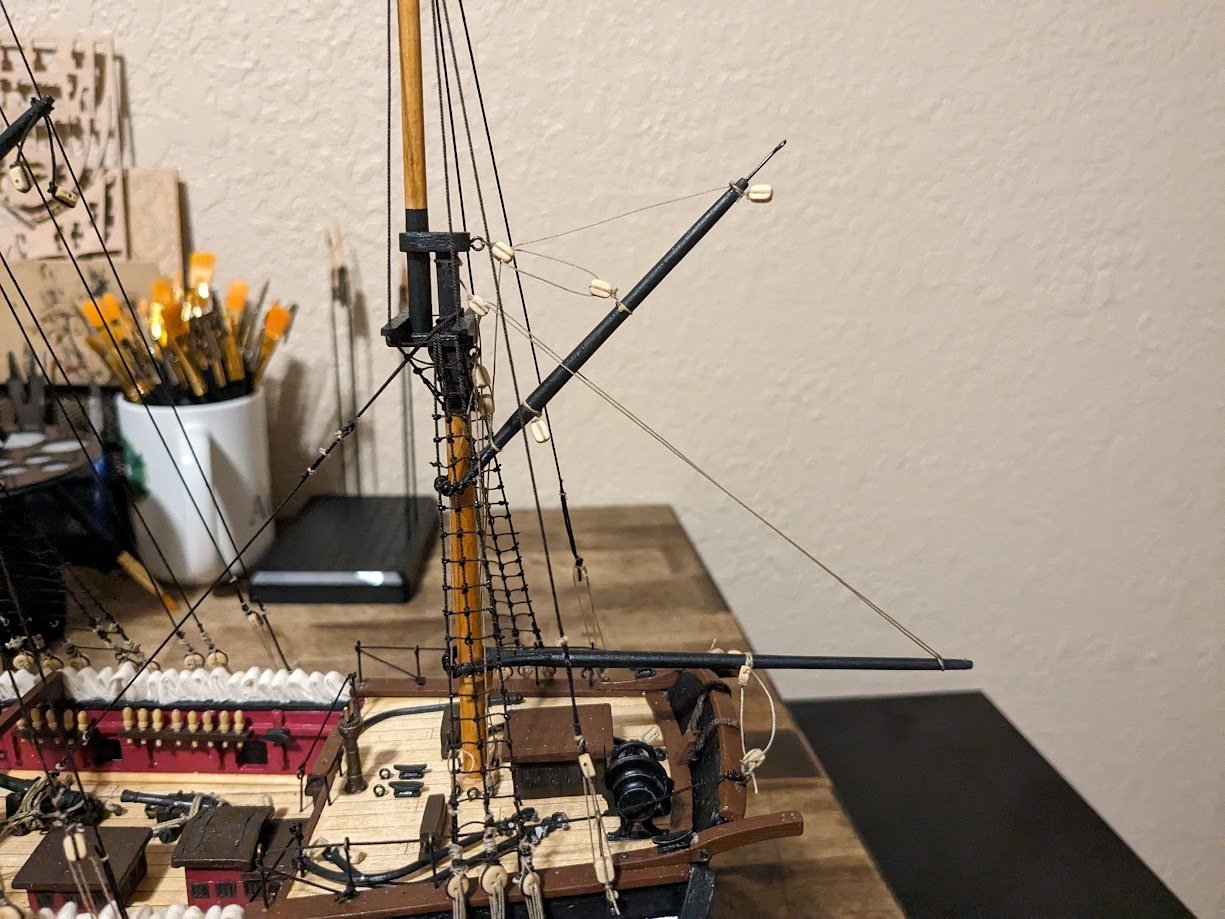
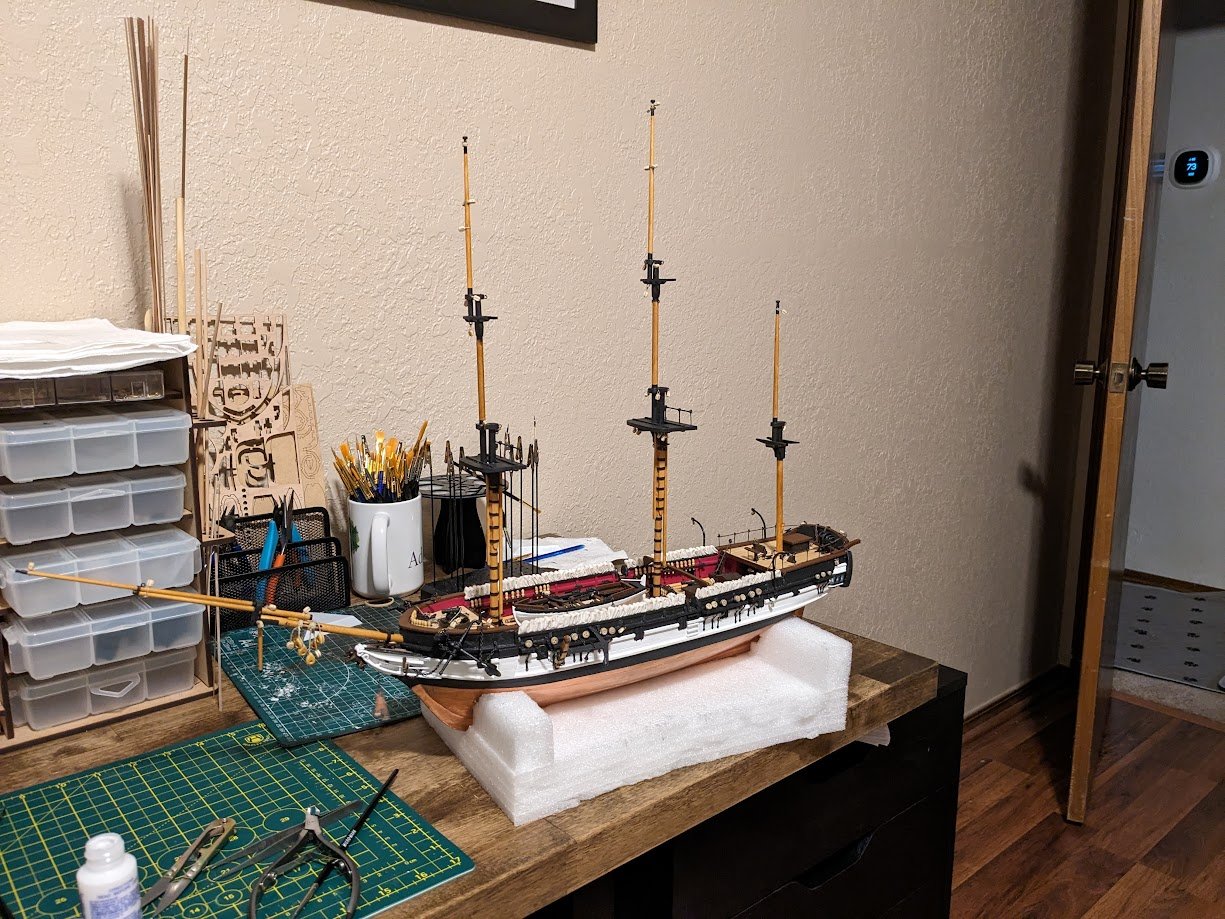
Started on the masts last week. I was pretty ignorant to how many parts were involved in building them up, and the Occre instructions are borderline horrible especially regarding the mast tops, I had to watch quite a few videos just to show steps that aren't even in the instruction book. I'm really starting to understand why people avoid kits that have bad instructions. Another common complaint I see about this kit is most of the builders seem to run out of 1mm brass rod. I ran out before I even started on the masts, and the masts require quite a bit of the material for the railings on the tops, I broke down and just ordered 10 bucks worth of brass rod from amazon and that should last me for many future kits. Lower mainmast and foremasts, Mizzen mast work has just started and was in the garage drying with a fresh coat of shellac. Bowsprit ready for some rigging. I also decided to add a head to the ship with some 2x1 walnut strips, this wasn't part of the kit but I thought the ship looked a little naked with nothing there to fill the void. It's not accurate to plans or anything, and I may add a seat of ease and toilet paper holder in the future. How the ship is currently looking.

-
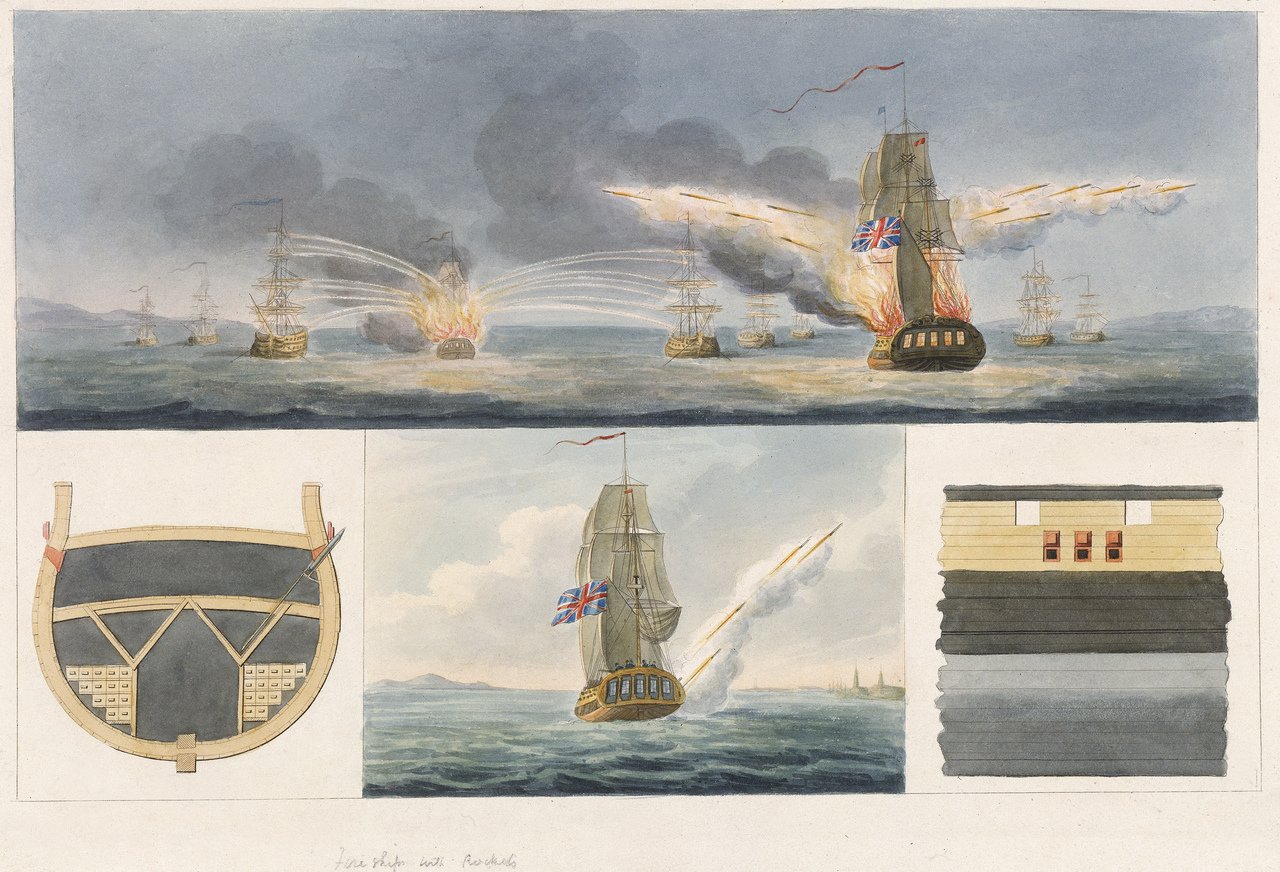
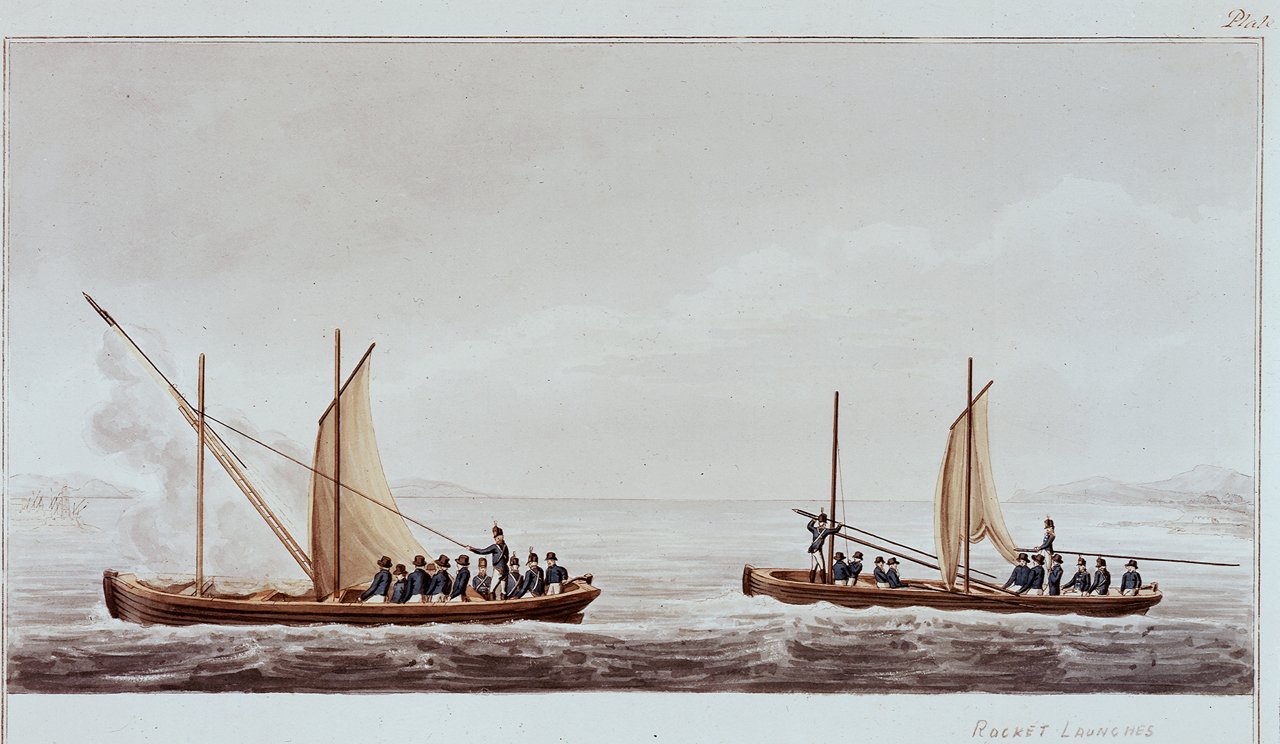
Good suggestion, did a bit of googling on the Congreve rockets and it does show several pictures of their use on boats and ships on the Wikipedia page. Interesting how it looks like they were basically inserted into the hull of the ship like a bottle rocket. I think this really helps, I was just trying to visualize how a ship would be designed for a rocket. In my mind I was picturing a large emplacement in the deck sort of like a Bomb Vessel, but now I see some pictures I can better understand they probably used a simple rail system off the side of the ship.
-
I'm currently reading the book "Post Captain", by Patrick O'Brian. When describing the sloop Polychrest, they often describe that it was built around an experimental weapon that is from what I can gather some form of a rocket. I know rockets had been around for a few hundred years by this point, but I'm having trouble visualizing what this weapon would look like on a Sloop, and how the boat would need to be designed around it. Are there any real world examples of a weapon remotely similar used on a ship of the time that I could reference, or was this just a purely fictional weapon that O'Brian came up with?