

brunnels
-
Posts
337 -
Joined
Content Type
Profiles
Forums
Gallery
Events
Everything posted by brunnels
-
 Looks like a fantastic kit, can't wait to see more.
 -
Great to see another Sphinx, one of the best kits on the market in my opinion.
-
Can you make a few without the resin parts for those of us with printers?
-
That was the plan, I don't have a laser cutter though so I was just wanting to get all the non 3d printed materials.
-
Is it possible to order a kit without the 3d printed parts?
-
I really like the unpainted look, had mine looked as good as yours do I probably would have left them with only varnish.
-
I'll be following along, I got this kit in my stack to eventually build. I was surprised there weren't any build logs as it looks like a really nice kit and a beautiful cutter.
-
I can do this in Blender pretty easily if you don't find any other solution.
-
I'm insanely impressed. I love your color choices, and the aged copper roof on the Quarter galleries is very well done.
- 148 replies
-
- 2
-

-

-
- Christiania
- Vanguard Models
- (and 1 more)
-
I'm in my 30's with my first child born this year, so I'm probably the outlier in both groups. I occasionally visit reddit's ship modeling sub forum, and there are plenty of younger people into ship models. Remember though that even a cheap $100- $200 kit can be a large investment for young people in an ever increasingly expensive world, then you have to account that the factors of space and time to build the model are also things that most younger people don't have until they get a little older. Plastic scale modeling is bigger than ever, so don't think that younger people aren't into scale modelling anymore, wooden ship modelling just requires a lot more resources that younger people don't have yet.
-
This black looks fantastic, I just ordered some dye to try it out. Do you need to do any surface prep other than removing support knubs? I designed some deadeyes to print in black resin as I hate painting tons of small deadeyes, but I think you have convinced me to just dye them as well.
-
This looks amazing, I love the color scheme. I'm not at your level, but I have been trying to accomplish the same sort of thing with the stern of my Pegasus kit in blender, you are definitely inspiring me to keep on trucking.
- 148 replies
-
- 1
-
-
- Christiania
- Vanguard Models
- (and 1 more)
-
Those deck cutouts look fantastic.
-
Review Le Cerf - Dusek - 1:72nd Scale French Cutter
brunnels replied to brunnels's topic in REVIEWS: Model kits
Yes eventually, I got a couple other kits in line first. -
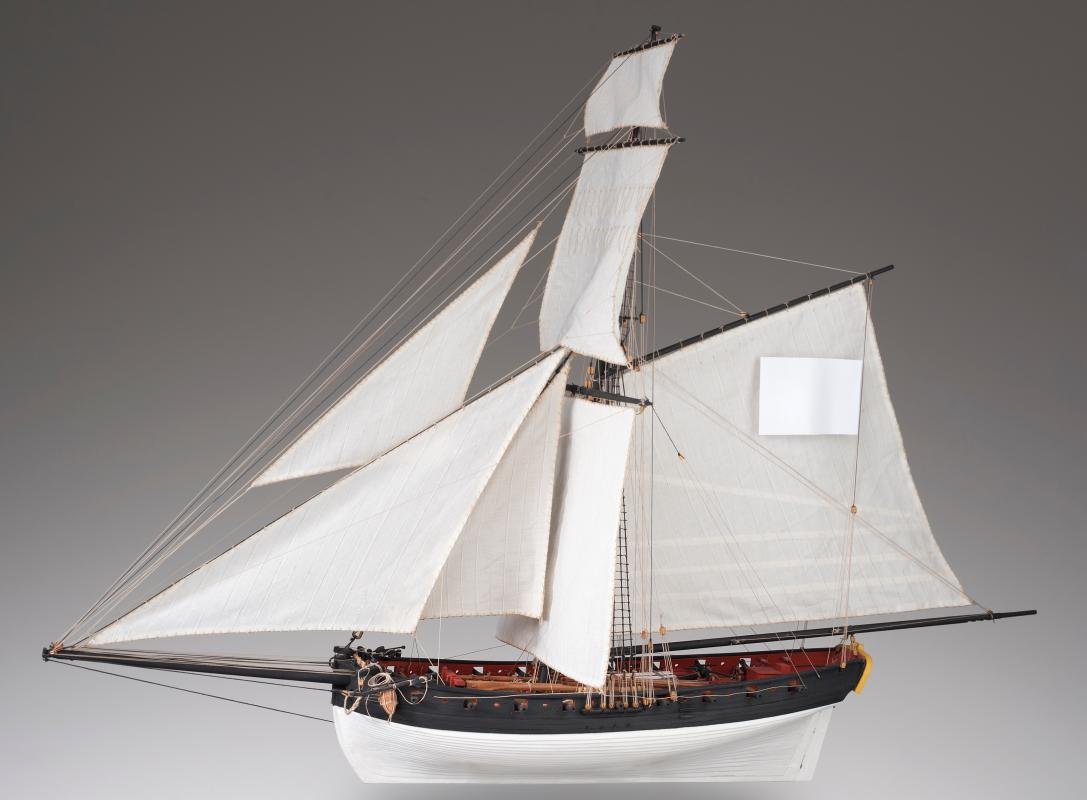
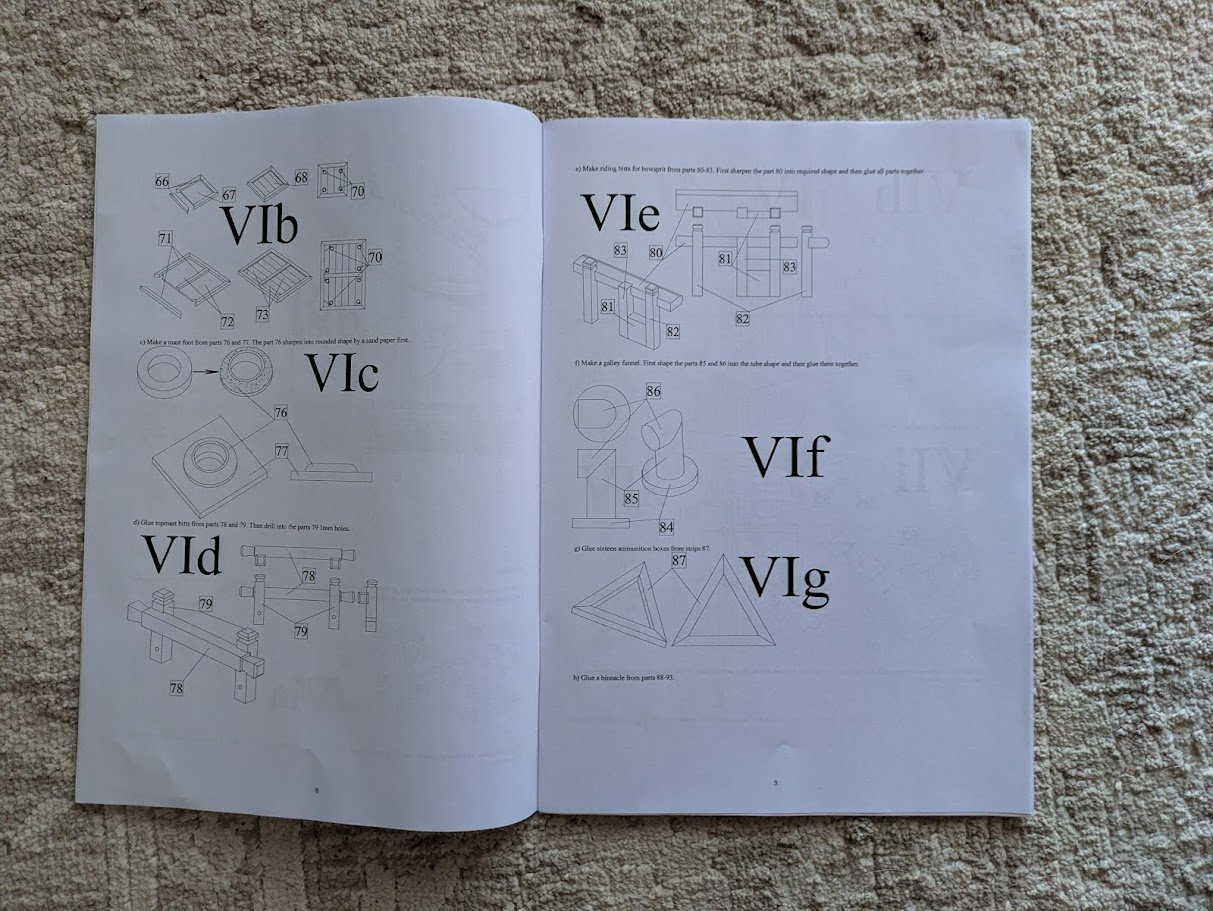
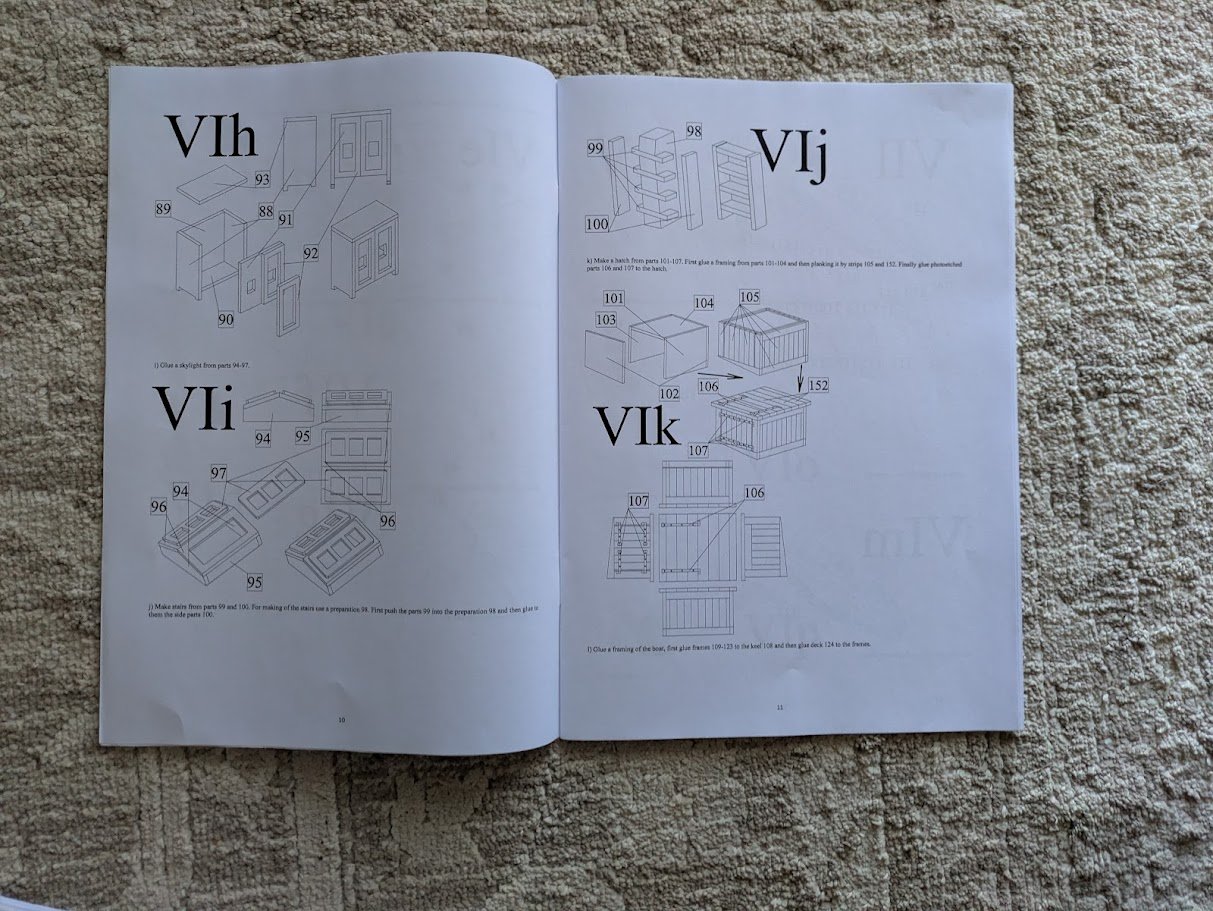
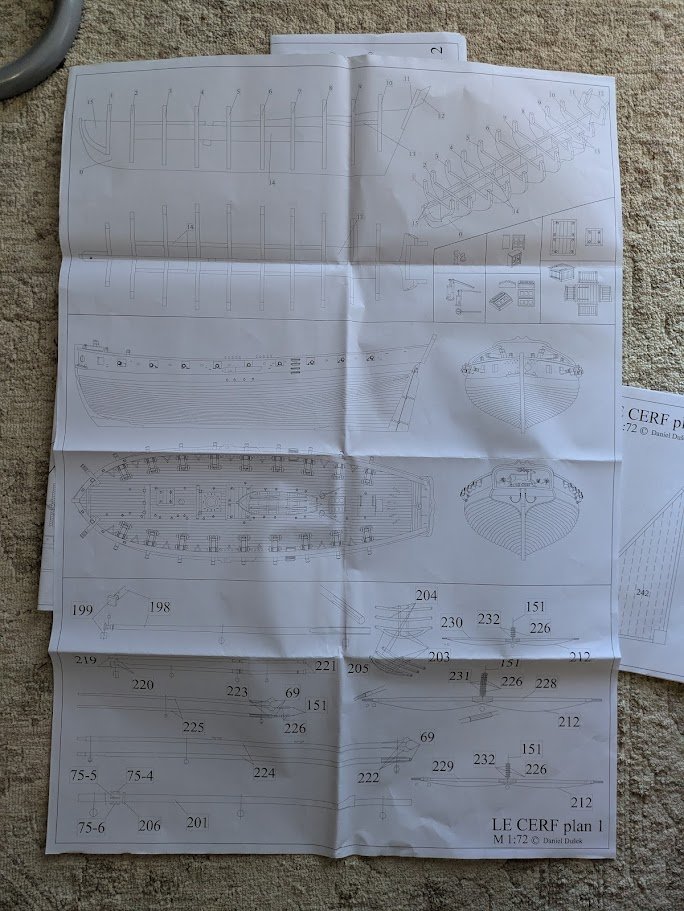
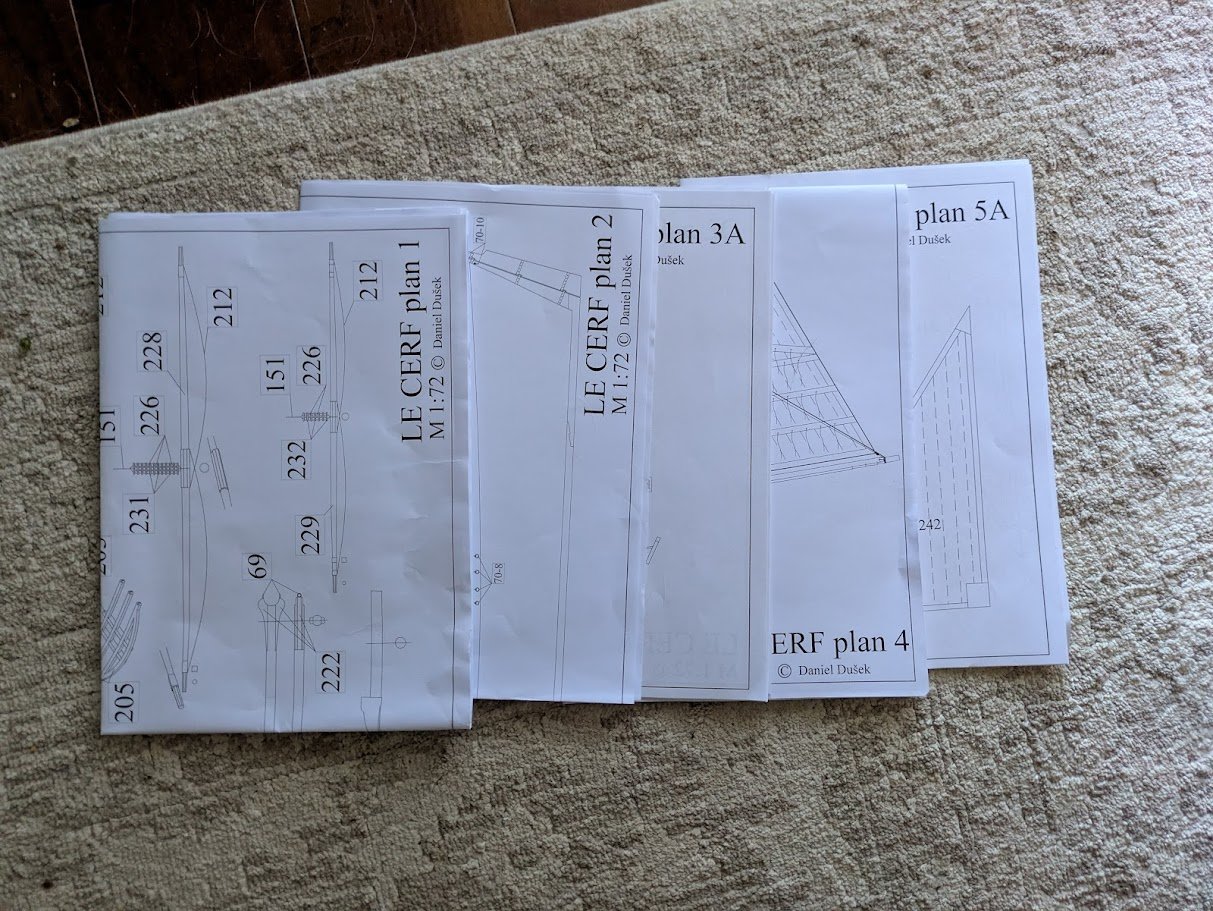
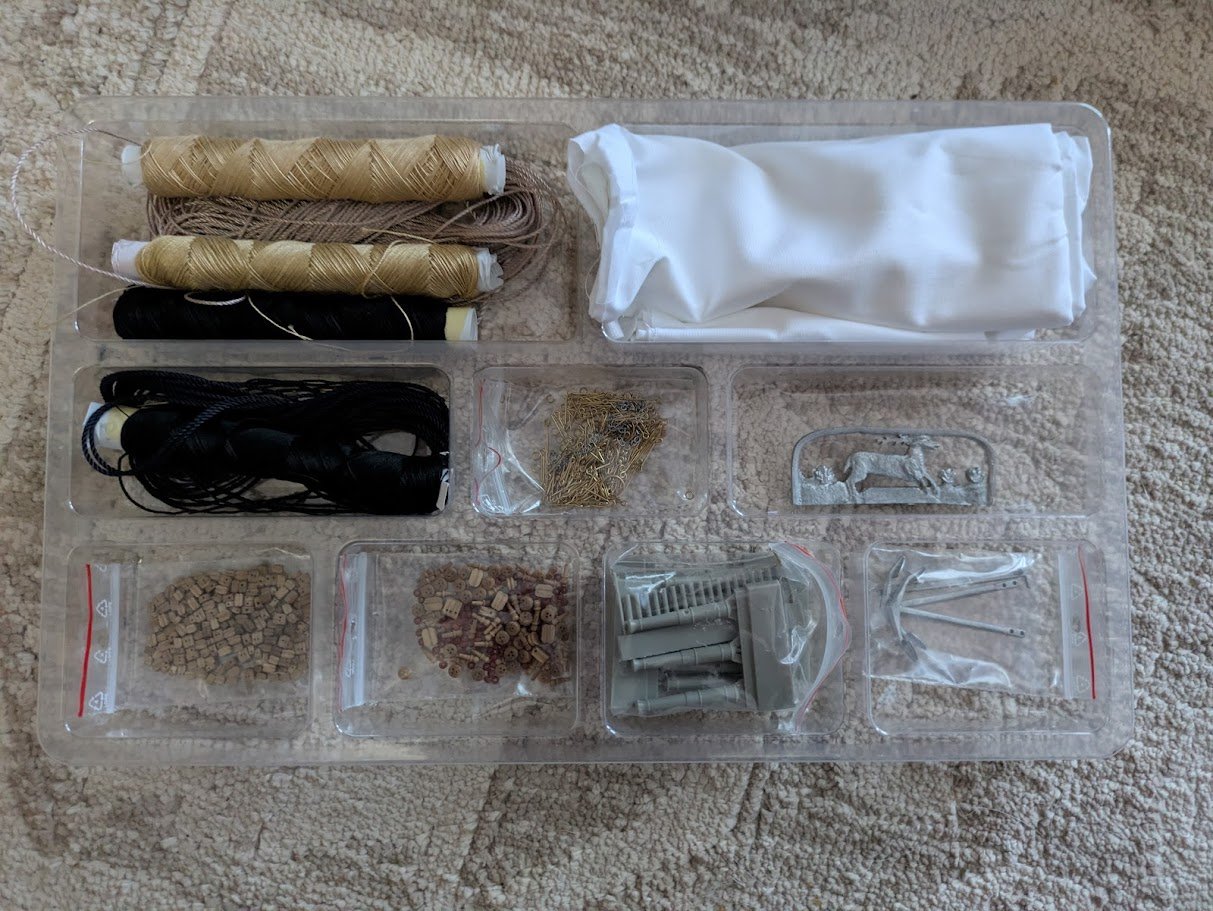
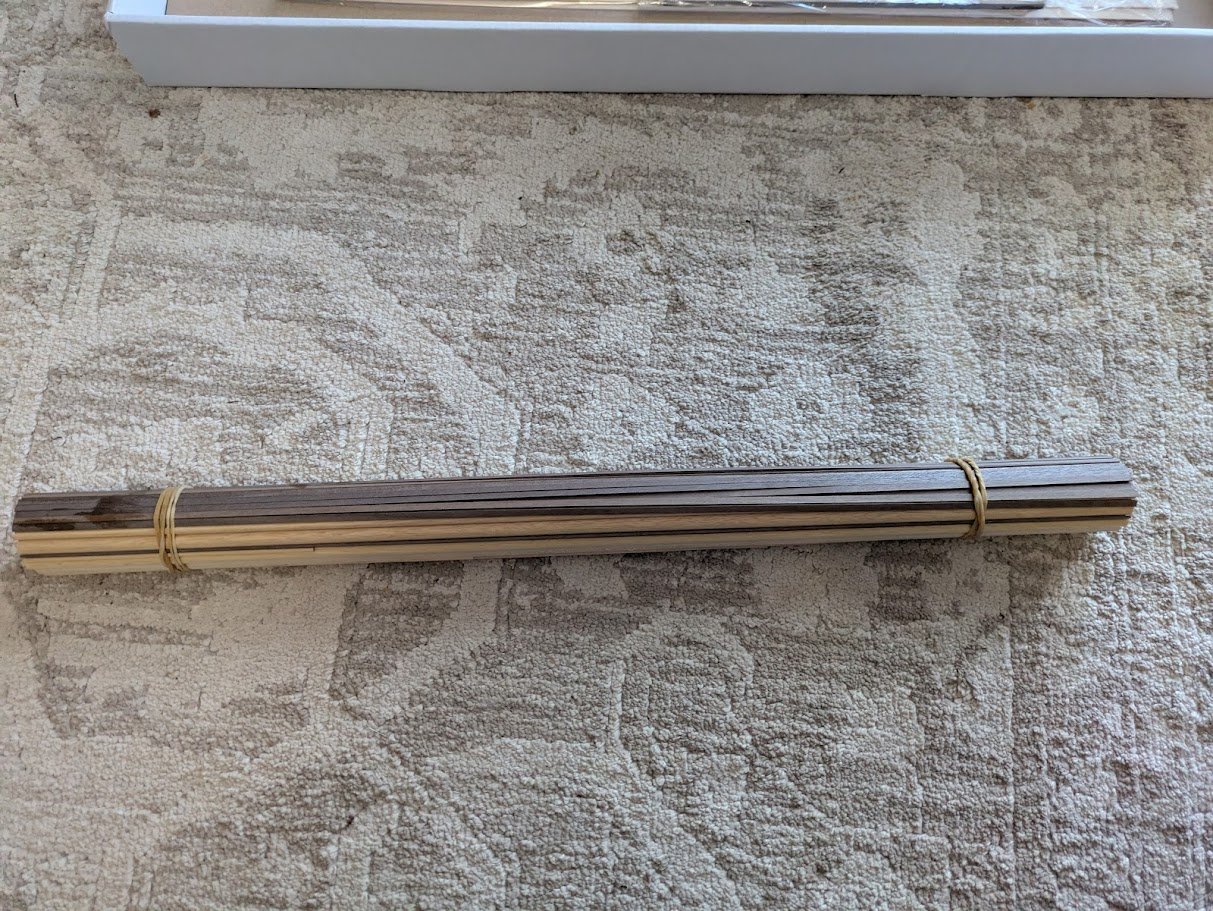
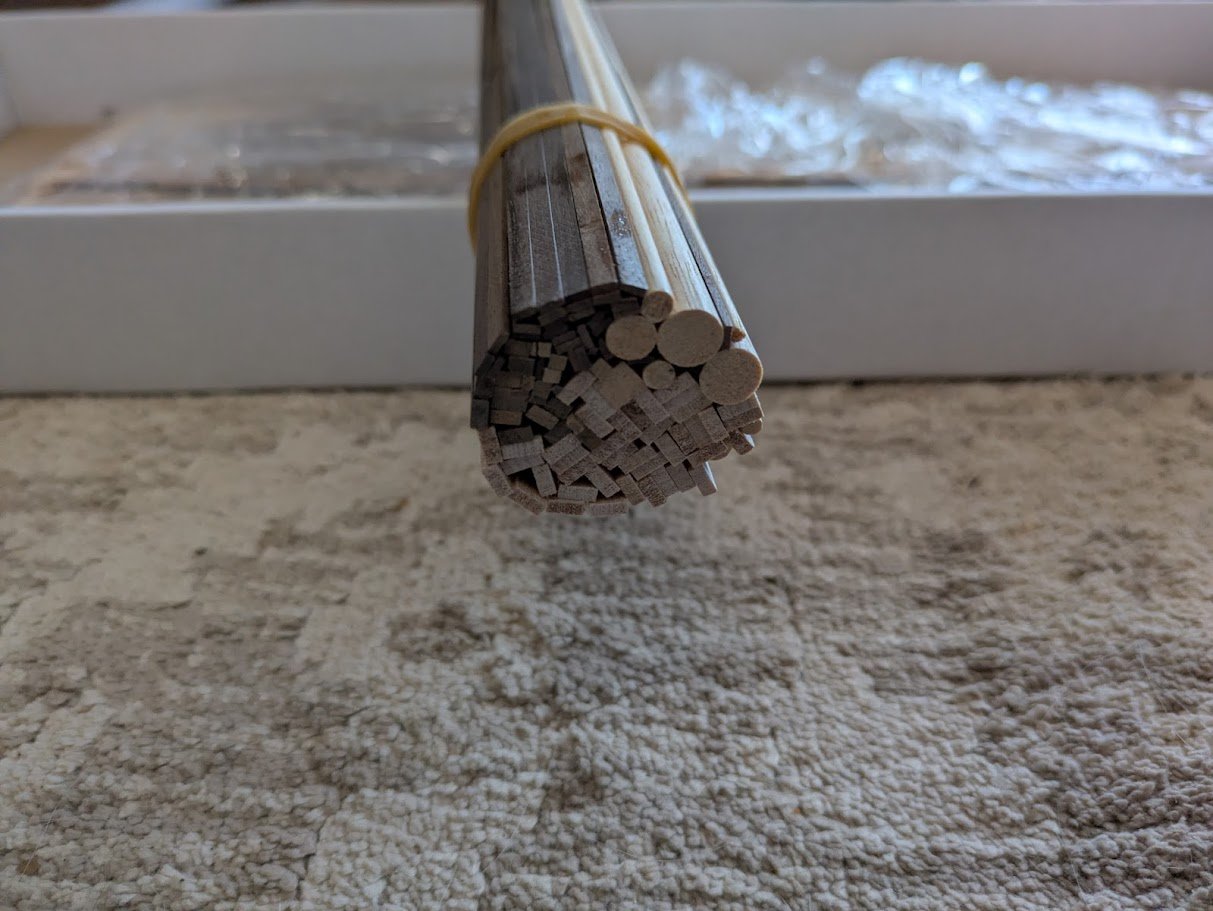
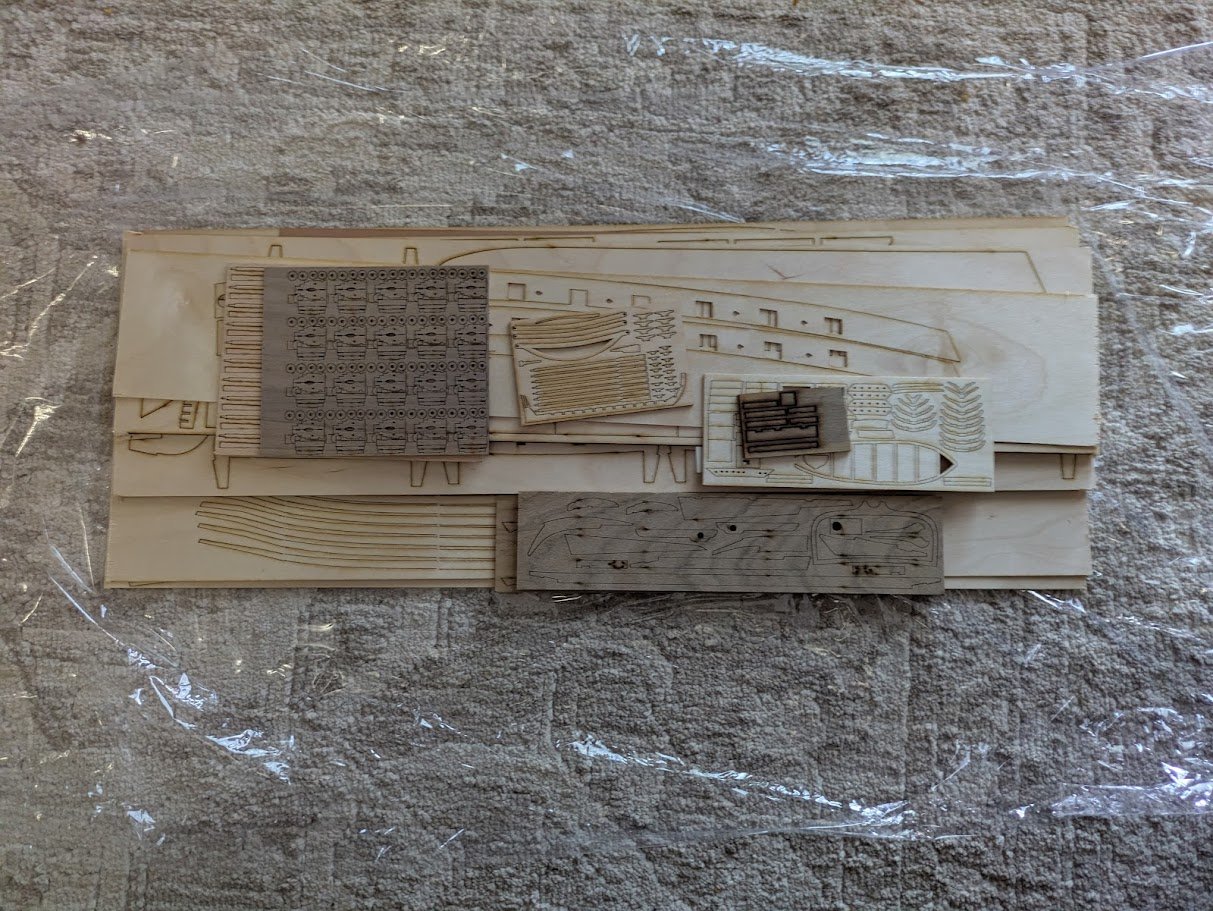
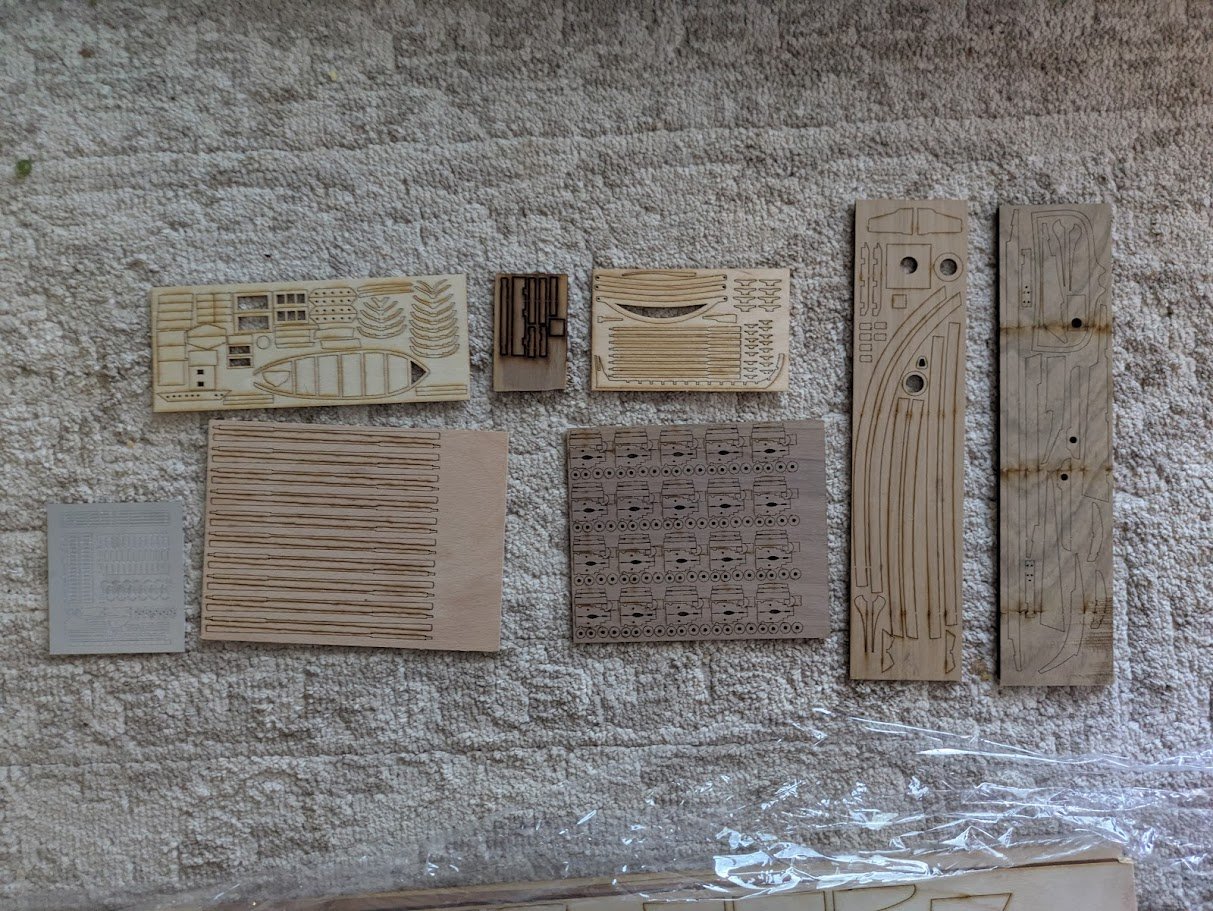
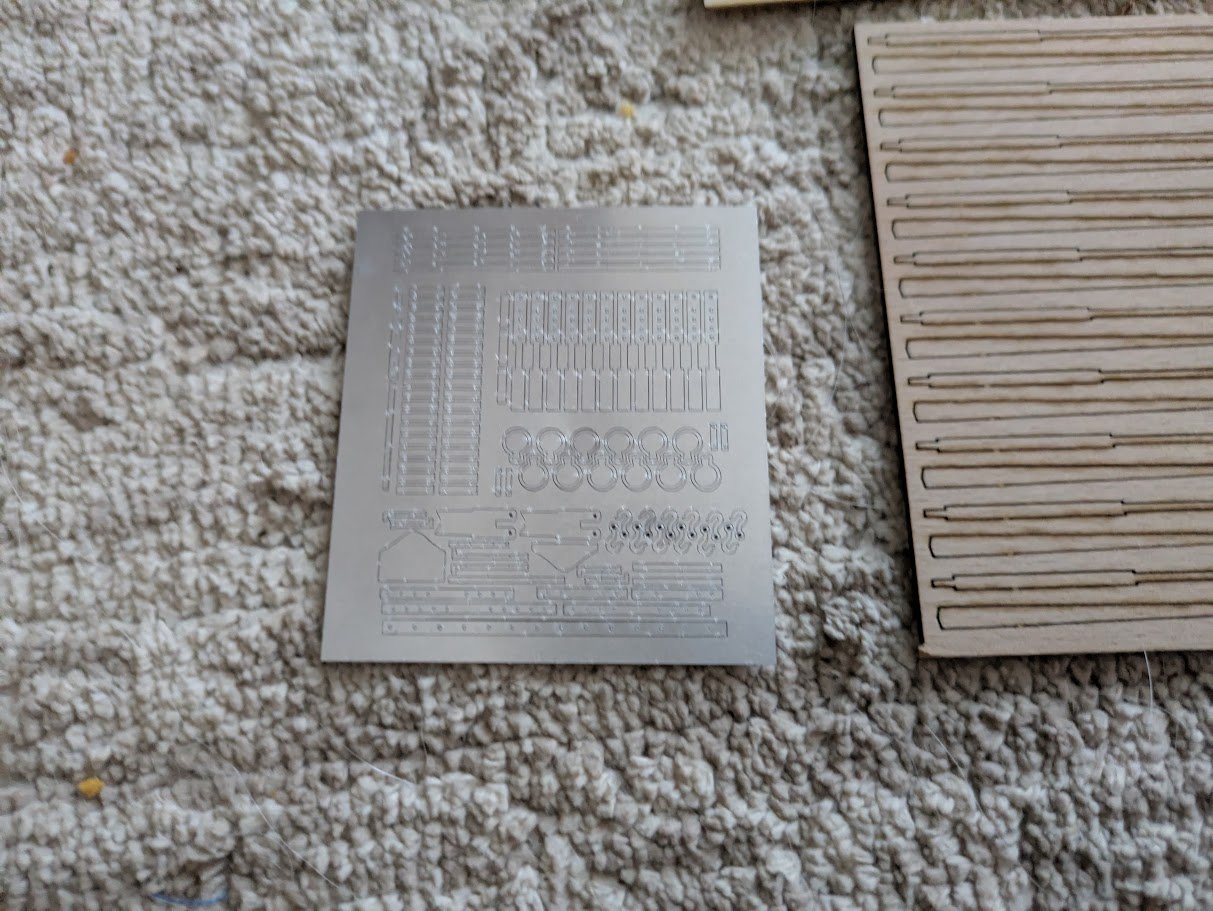
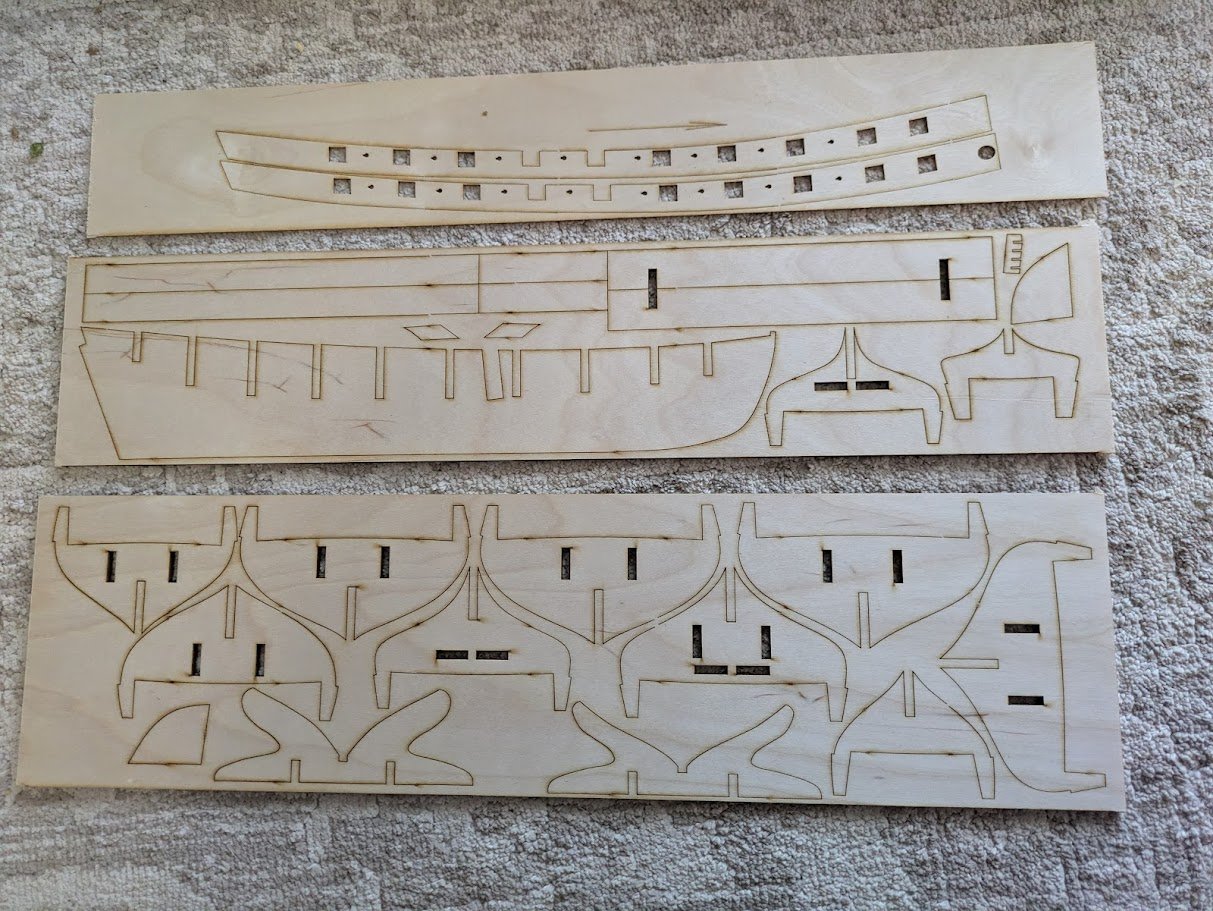
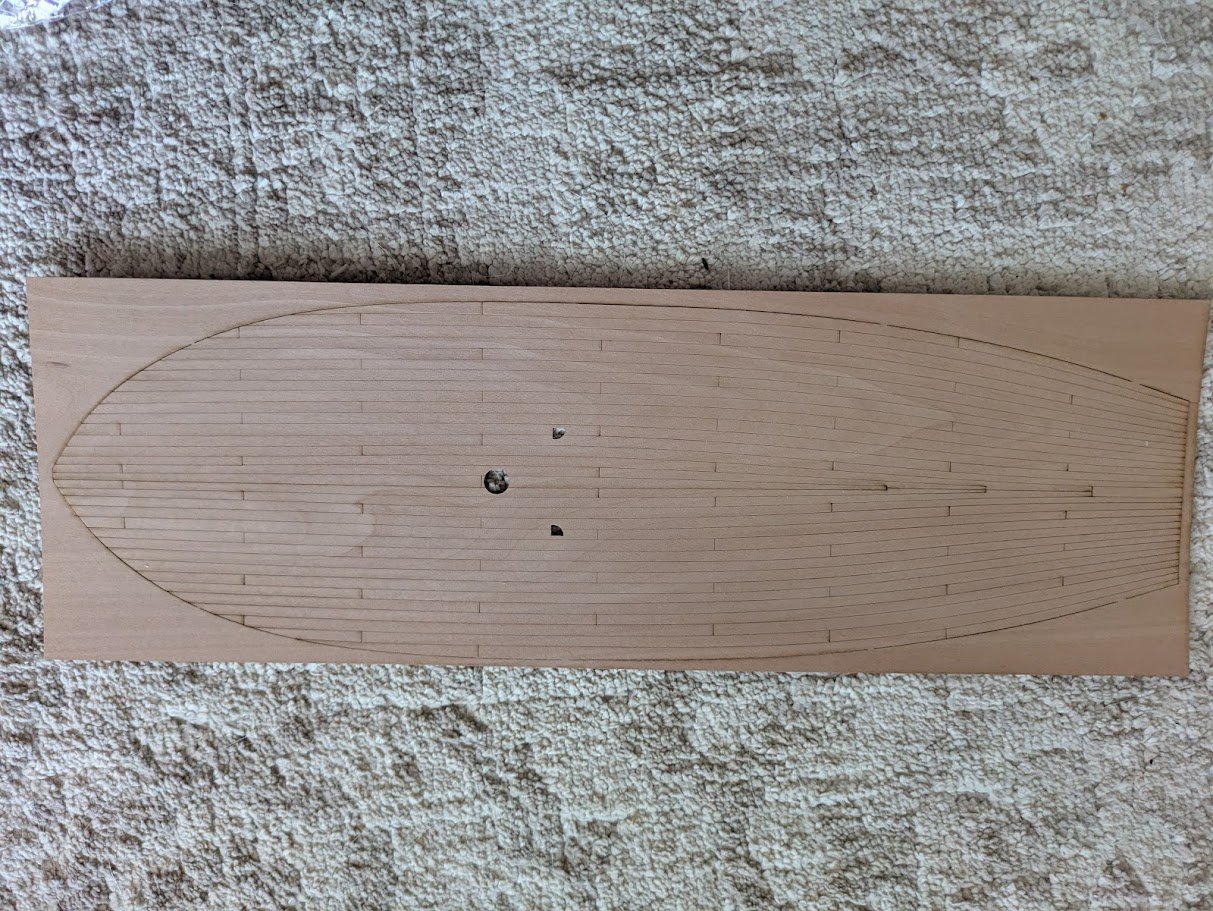
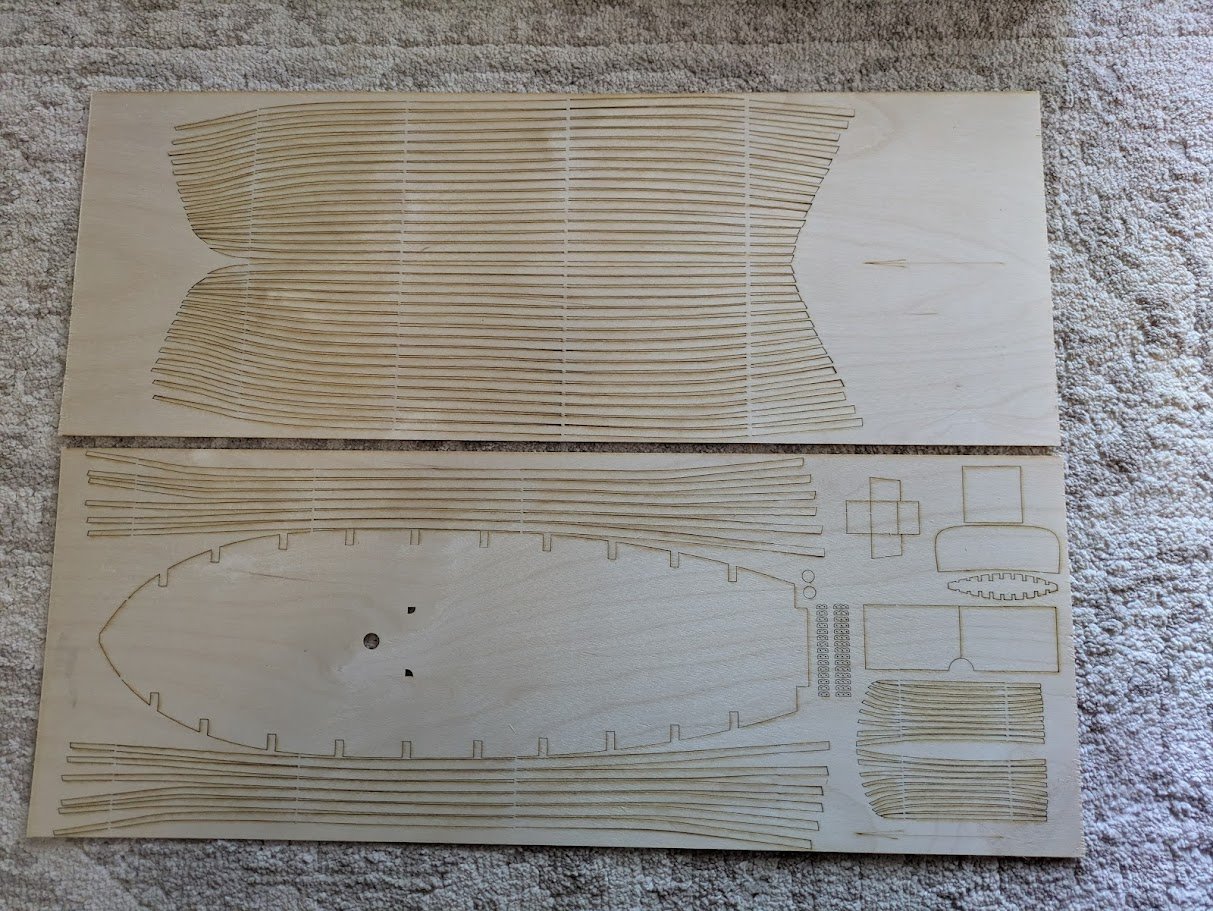
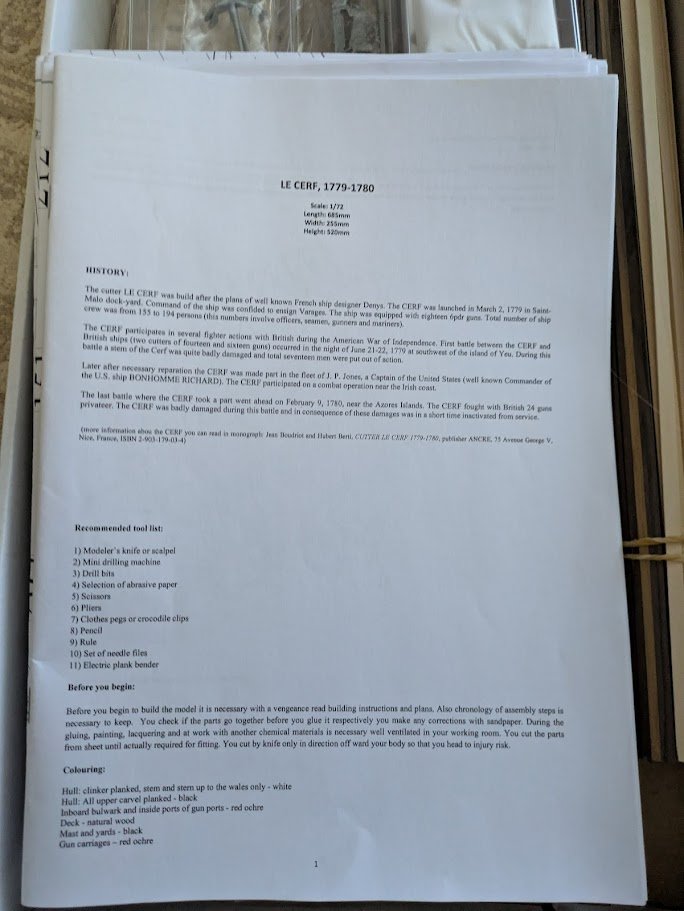
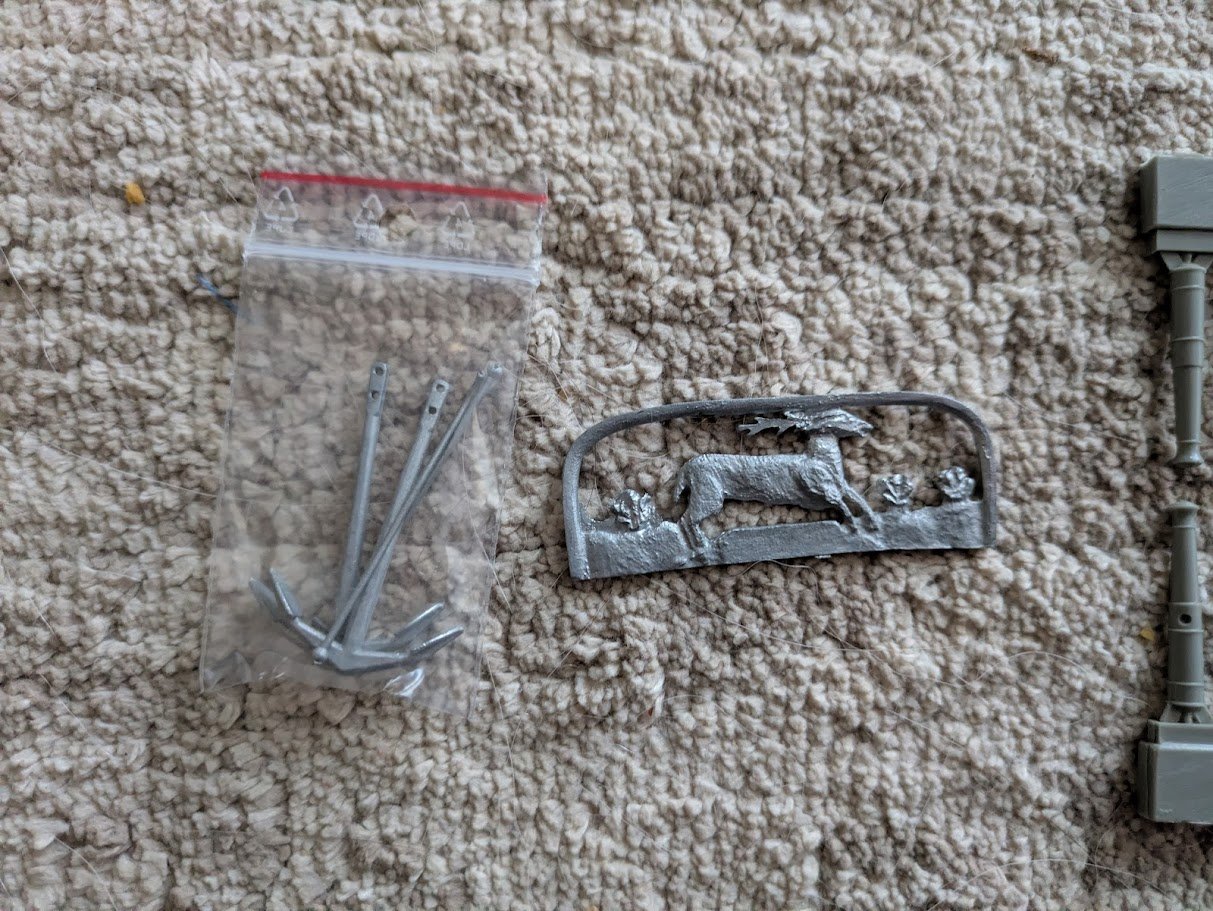
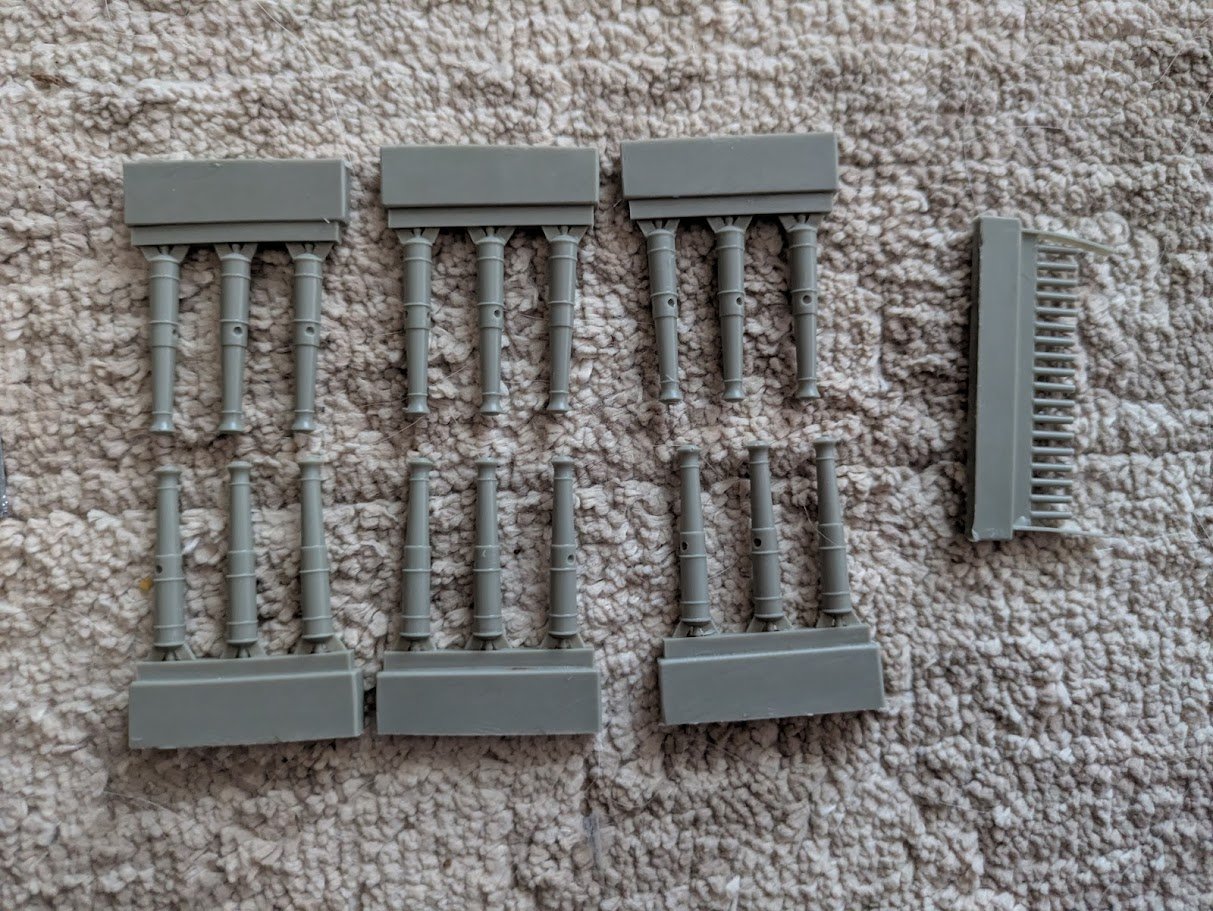
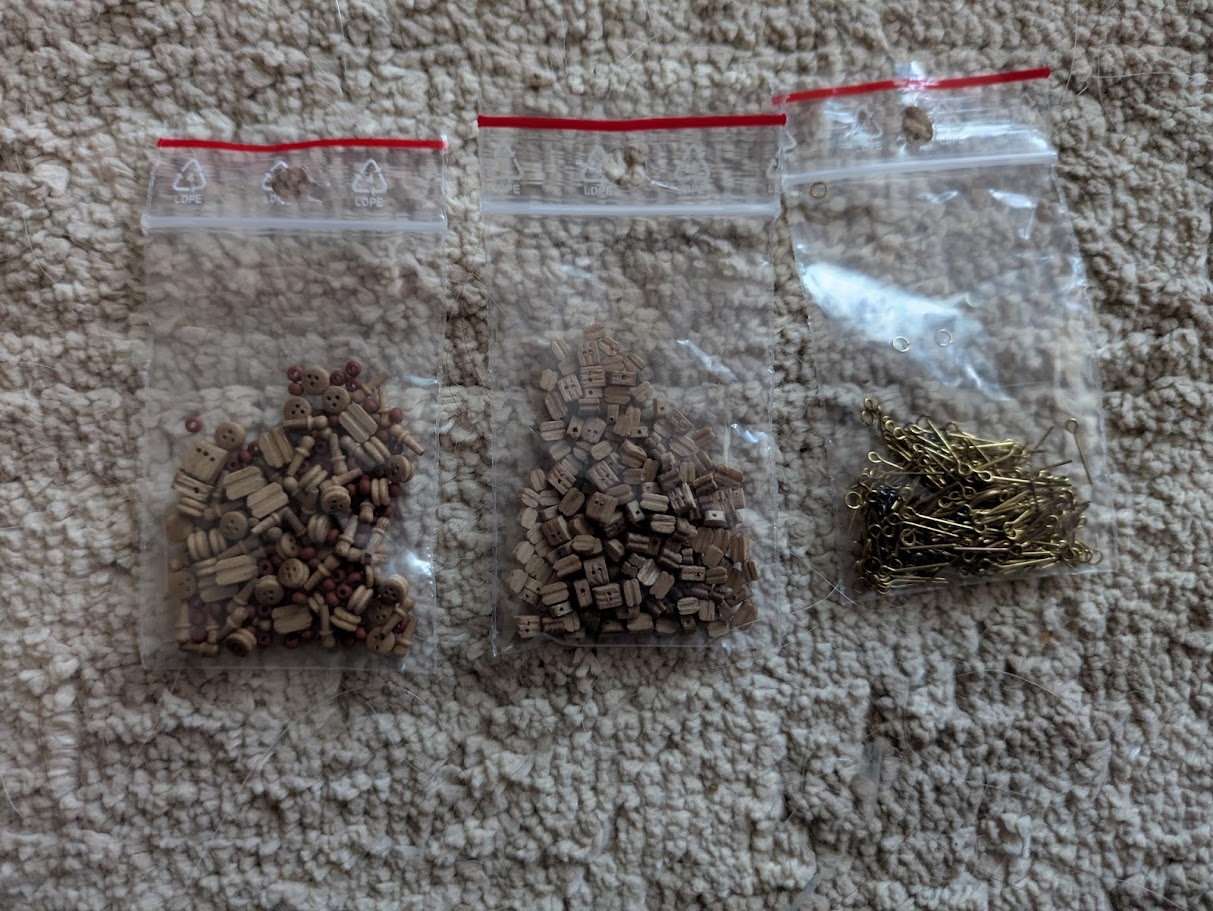
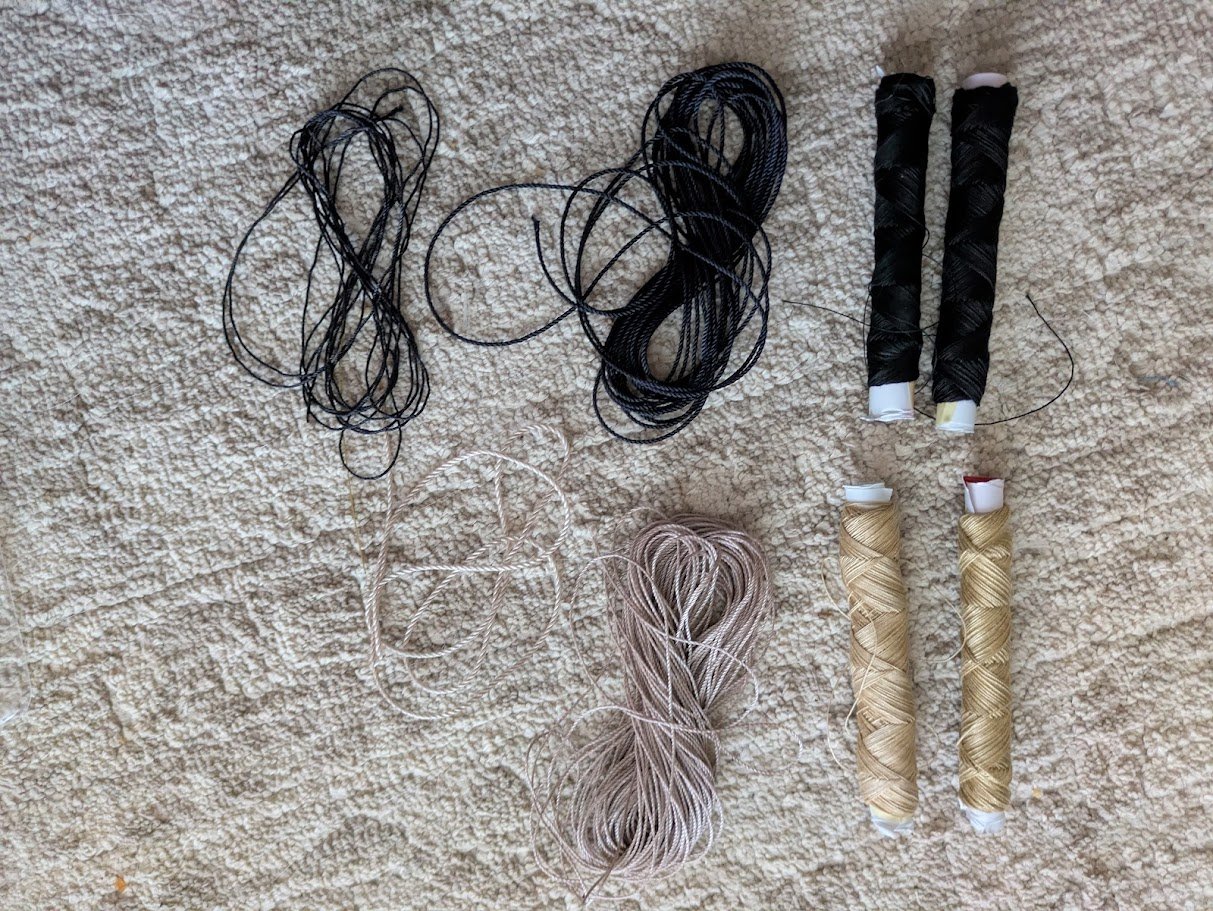
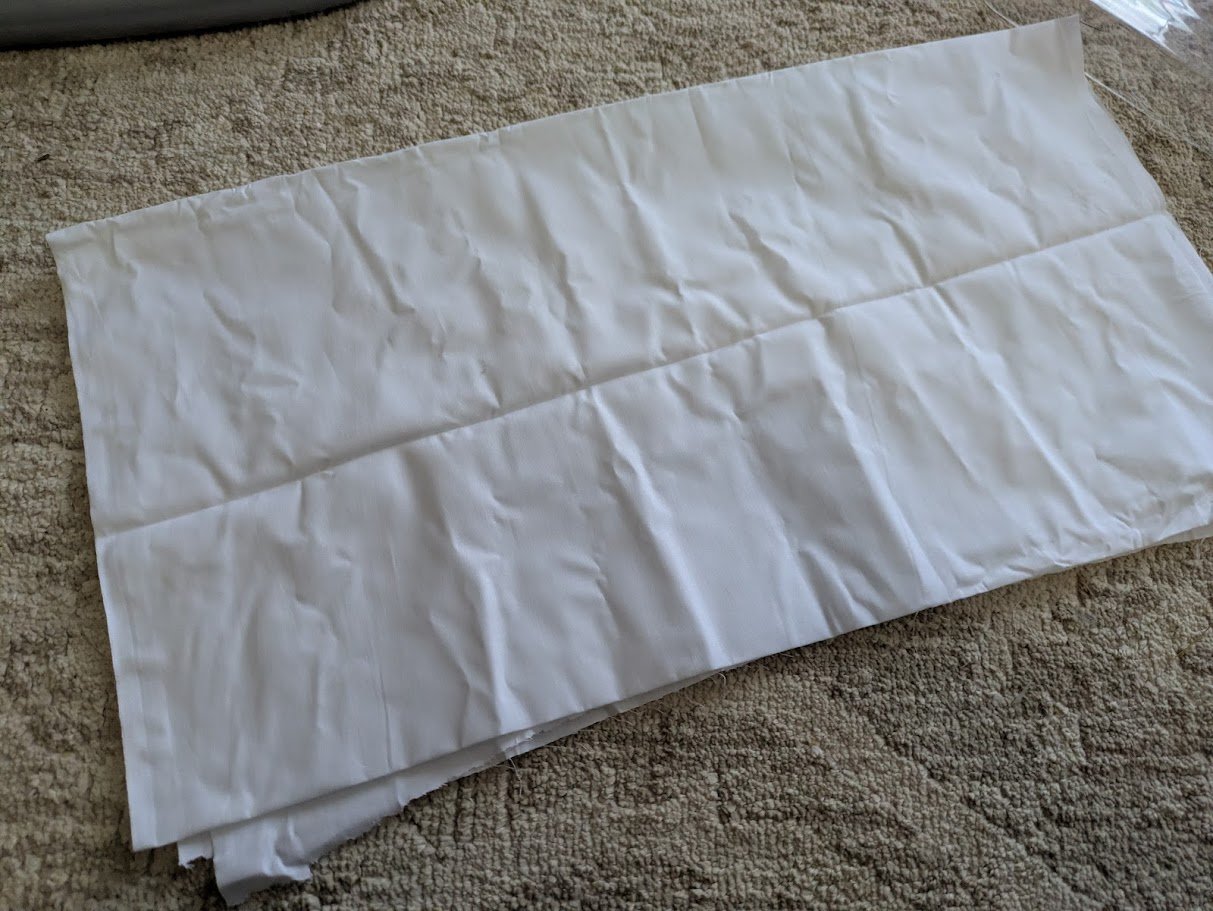
Howdy all. Here is my review of the "Le Cerf" Kit from Dusek. I believe this kit has been around for 10 or more years, but I surprisingly found very little about it online. No build logs, no reviews, only a 10 year old video from Dusek showing what's in the box. Due to the lack of content I figured I could show what came in the kit. The contents were all nicely packed, no loose bits rolling around in the box, nothing looks broken. The kit comes with a printed instructions manual in English with nice drawn images of each step, the instruction booklet is around 30 pages. Also included are 5 different sets of plan sheets. In my opinion the instructions look pretty good, an experienced kit builder should have no issue following along, but a brand new builder may struggle as the descriptions are pretty brief. The plan sheets are very nice with lots of detail. Getting into the fittings. The only cast metal parts of the kit are the anchors, and the stern decoration. The anchors actually look pretty nice, the stern decoration could look ok with some cleanup, but personally I will probably replace that piece with a 3d printed one. The guns are cast resin, but Dusek also sells the same kit with some brass turned cannons. Personally I don't think the resin ones will look that bad once painted up, but I think some nice detailed 3d printed French cannons will be a nice upgrade when I build the kit. The blocks will probably end up in the garbage can, but they are comparable with all the other crappy blocks most manufacturers use. The rope in this kit actually surprised me. It's not Syren, or Ropes of Scale quality, but it's much better quality compared to what I have seen the majority of kit manufacturers use. Lastly in the fittings box was a large piece of sail cloth. I've never made sails before, but this looks to be plenty enough cloth for a couple of these kits. Next up is a stack of laser cut wood. First the small boards There is only 1 small sheet of laser cut metal. Here are the bigger boards. This kit has clinker planking which is all laser cut. Laser etched decking, this looks like pear veneer, but I could be wrong. The strip and dowels that comes with the kit are a mix of Walnut and Lime. All looks to be of good quality and nicely cut. And that is what's in the box of the Dusek Le Cerf kit. My thoughts. I think this looks like a really nice kit that is currently flying under the radar. Its a beautiful French cutter, it has Clinker planking which is very unique for an out of the box kit, and Ancre has a Le Cerf monograph that would make a great companion piece to anyone wanting to take the kit up a notch. I would love to see some build logs of this kit, I think it provides an good out of the box kit, but it also has the ability to be kit bashed a little into a really nice model.


-
Also a popular technique within the Collectible firearms community to highlight arsenal/manufacturer stampings.
-
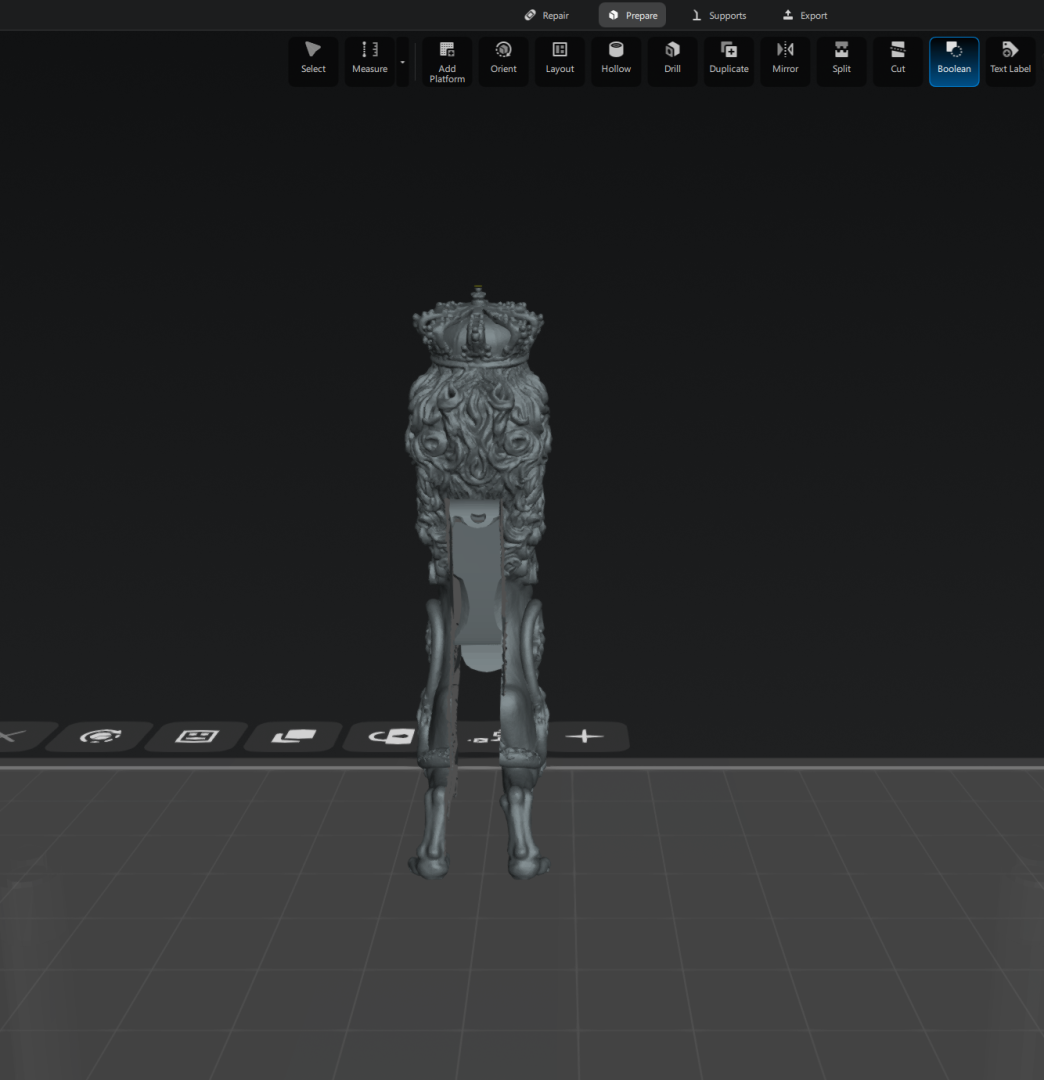
Chuck since I noticed you use Chitubox, that software has a boolean function built in as well. -Import a stl of the figurehead, and a stl of the shape you want cut out. Im using the Pegasus head piece I used blender to trace. -Align the pieces to how you want them to sit on the model - Up top select the "Boolean" option and then select the configuration of which piece you want to cut. -Hit apply and it will give you a new "Cut" piece.

-
Another option for Bas reliefs that I have been using is the basify add-on in blender. Blender and the addon are both free, blender does have a bit of a learning curve, but it's a very powerful software that can be very useful, I'm already using it for all sorts of things on my models. I have tried a couple of these AI generators and the quality of their output usually depends on the quality of what you input from my experience.
-
Bower anchor project by Sizzolo
brunnels replied to Sizzolo's topic in - Build logs for subjects built 1751 - 1800
I'm impressed with your anchor and blender skills. I tried to make one in blender a couple weeks ago to replace the crappy ones that came in a kit, I used the same blueprints you used and have failed terribly haha. It was more complicated to model than I was expecting but I am still learning blender. -
All six of those pumps around the mast looks really cool.
-
This looks incredible, having recently acquired a Resin 3d Printer I am looking forward to this.
-
I'll be following along, I've been thinking about buying this kit.
-
I'm currently working on The Pegasus kit from Amati/Victory models, and I have decided to print a set of new cannons to replace the cannons the kit came with. While looking through the 3d Cannon print files in the NRG Resources, I noticed there were quite a few barrel lengths for the Armstrong-Fredrick 6 pounders. How does one determine the barrel length appropriate for any certain vessel? Are there any reference materials that will have this information? I can't seem to find much info on the topic online or in any of my books. I assume smaller vessels had shorter cannons due to deck size limitations and vice versa, but surely the English standardized this to some degree.

-
M3A1 Scout Car by brunnels - Tamiya - 1/35 - PLASTIC
brunnels replied to brunnels's topic in Non-ship/categorised builds
Great find, just ordered a set. I really appreciate everyone's help on this. -
As a lifelong fan of the Mobile Suit Gundam shows I have somehow never managed to build a Gunpla kit. I really need to put one together one of these days and the Zaku was always one of my favorites. I was looking at them at my local Hobby Store but got a bit overwhelmed by all the different grades of kits and decided I needed to do some research on them.


