HOLIDAY DONATION DRIVE - SUPPORT MSW - DO YOUR PART TO KEEP THIS GREAT FORUM GOING! (Only 64 donations so far out of 49,000 members - C'mon guys!)
×

brunnels
-
Posts
330 -
Joined
Content Type
Profiles
Forums
Gallery
Events
Everything posted by brunnels
-
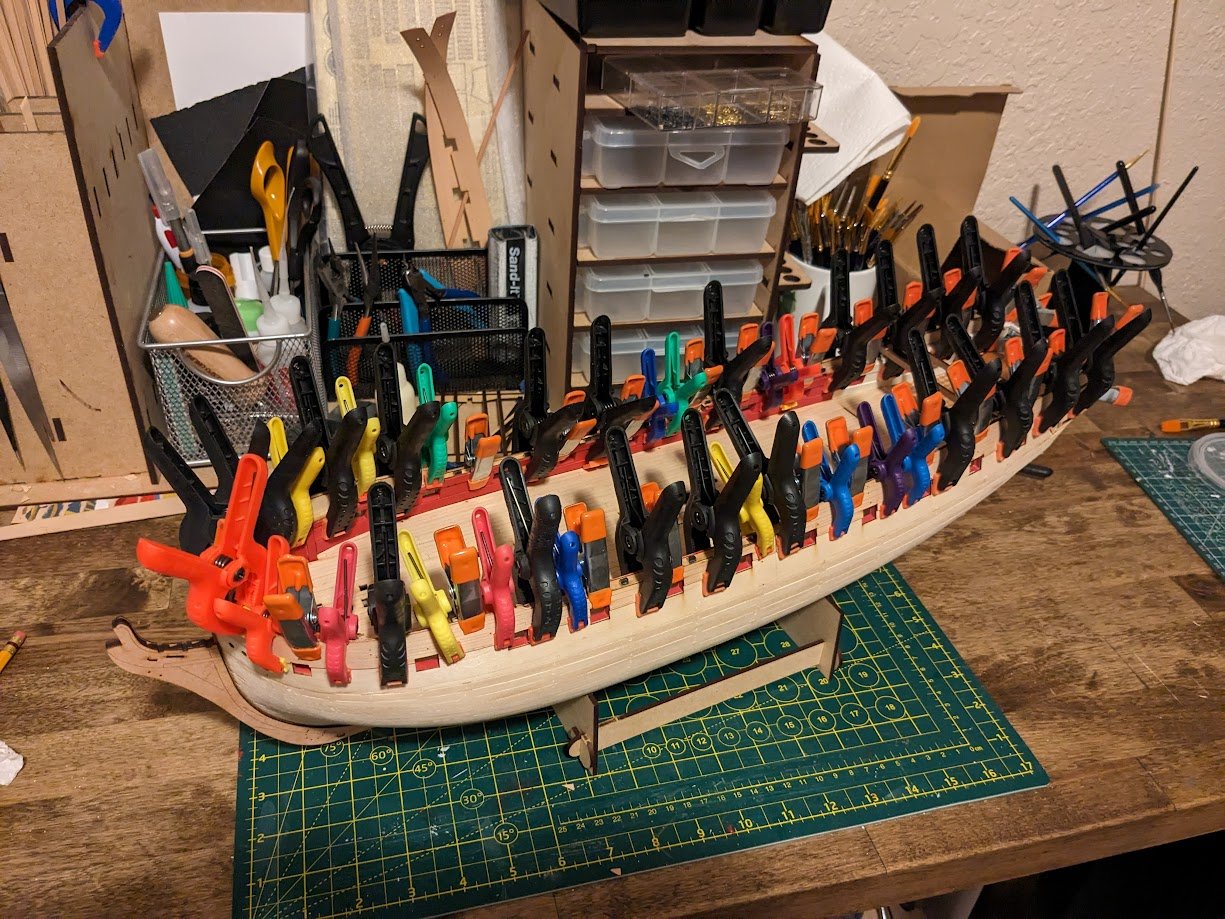
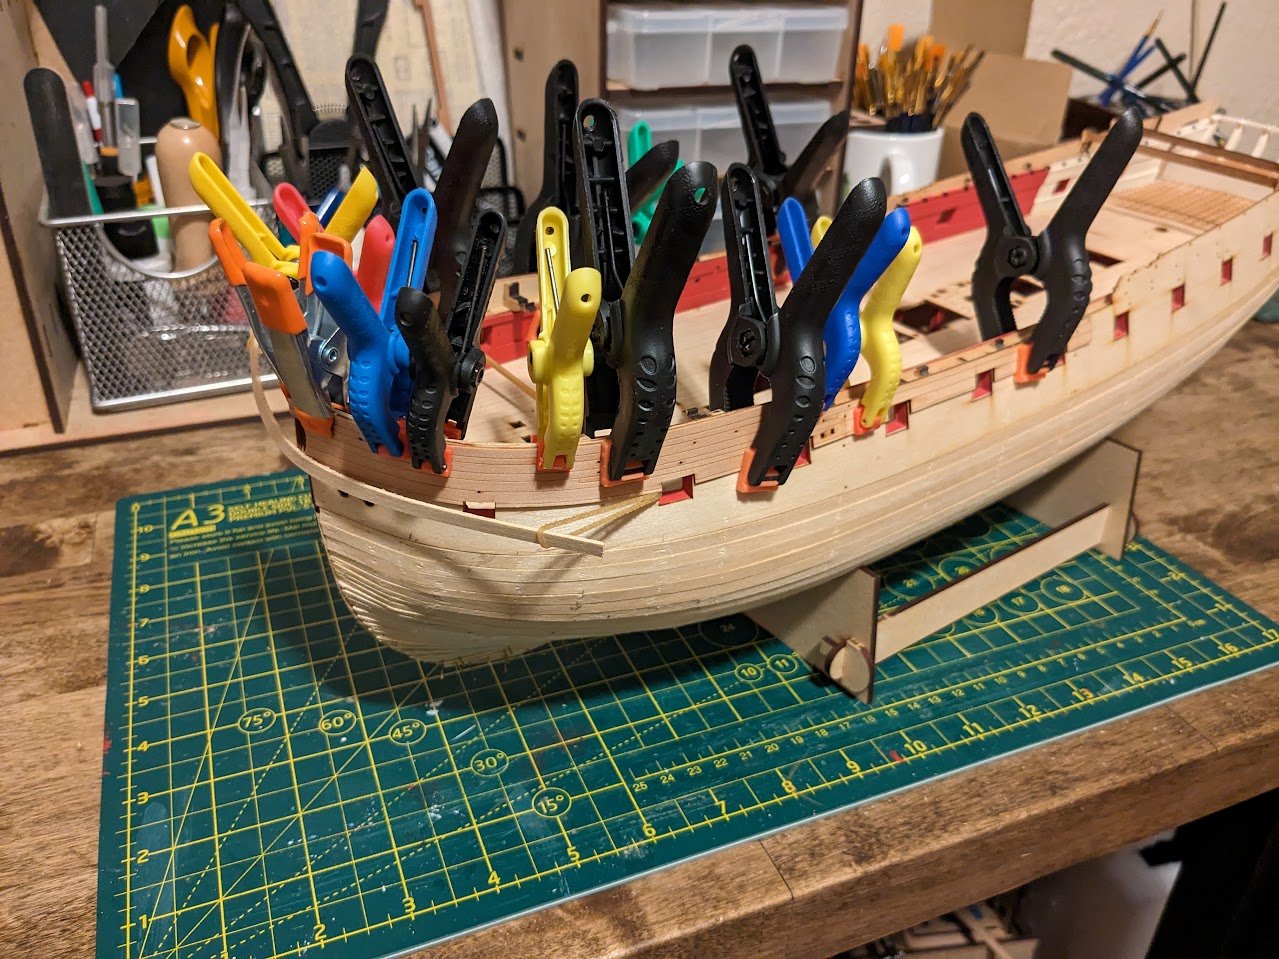
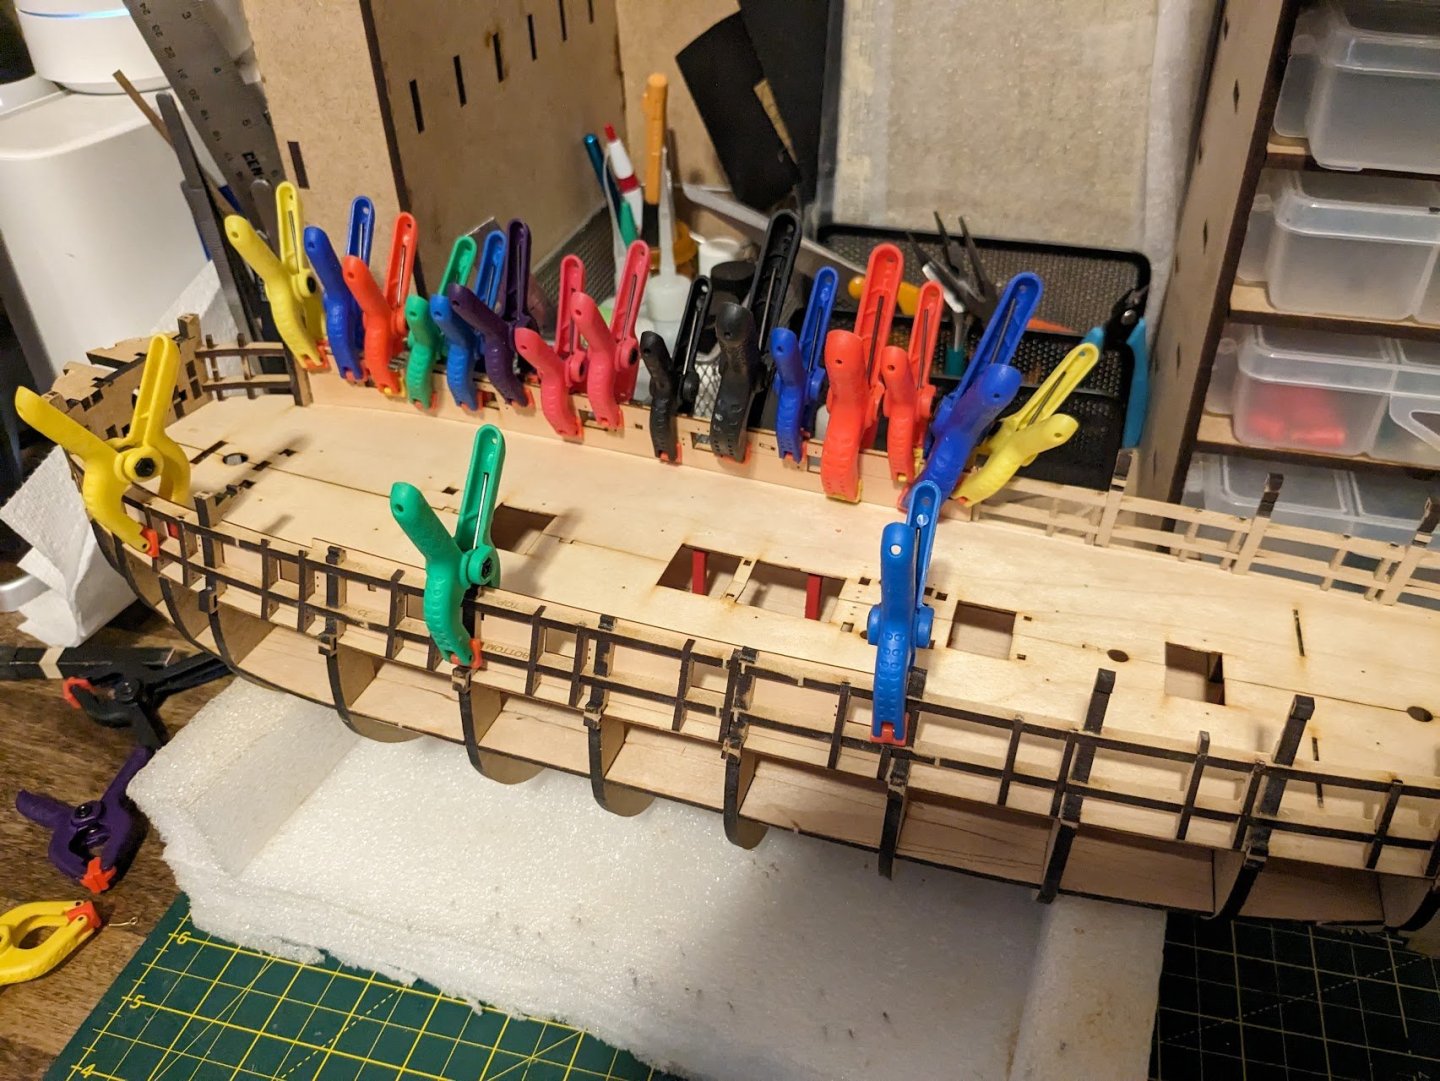
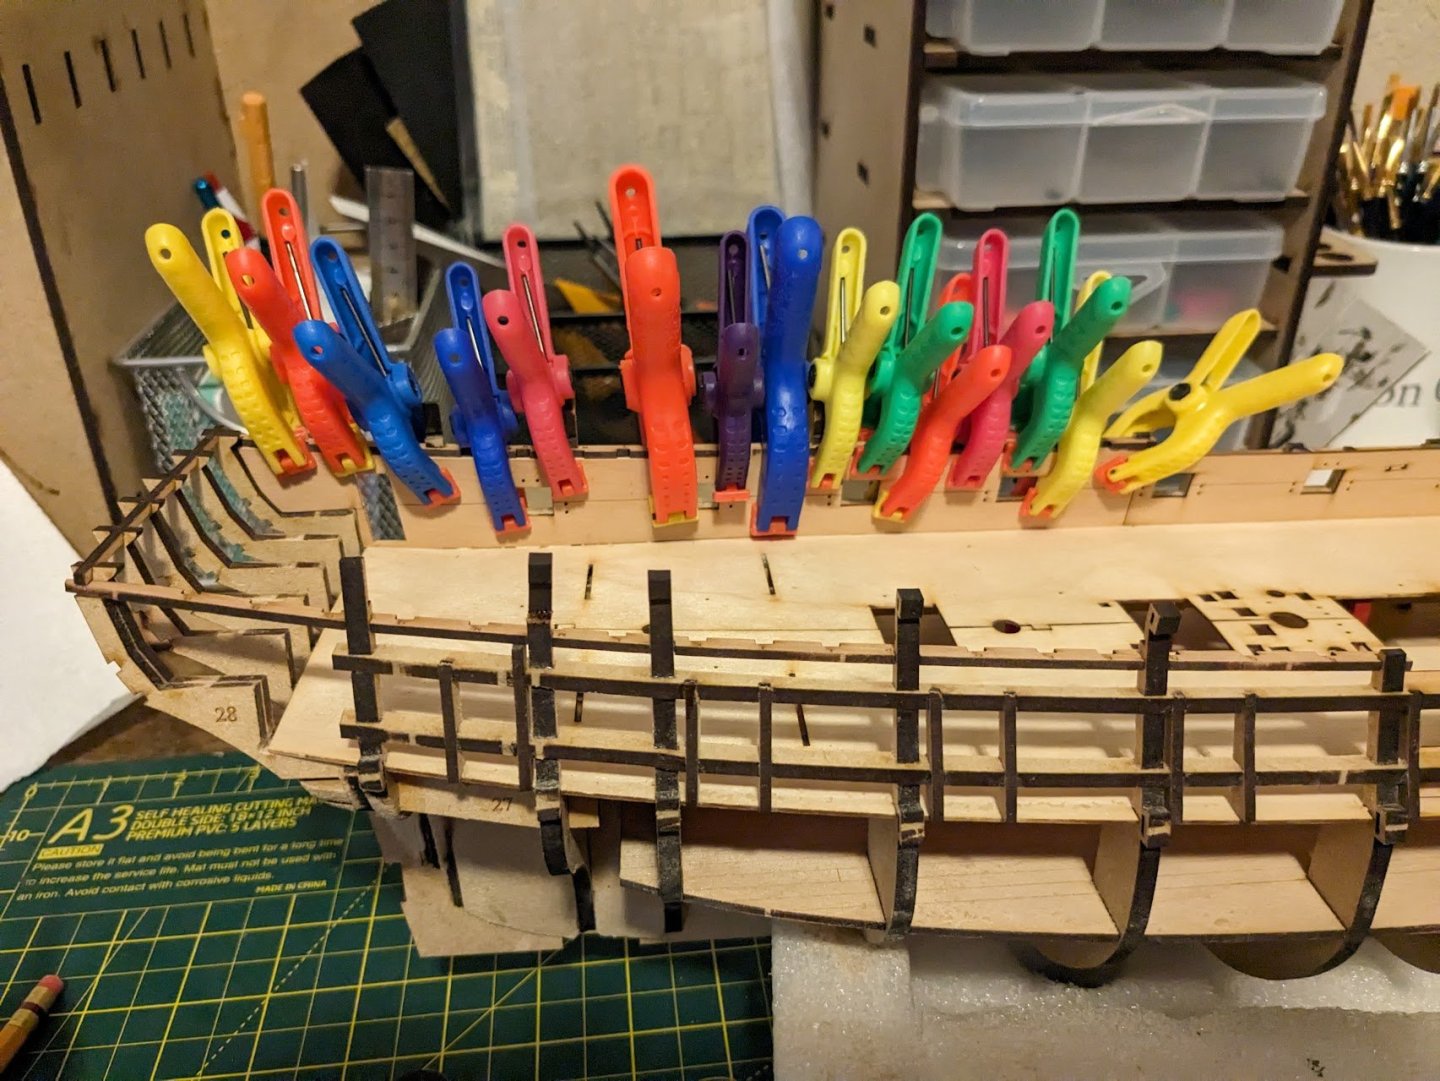
 I have been pretty bad at remembering to take photos the last few days, but I have been making some progress. I spent a day sanding and filling the hull. After that was completed I glued on the keel, and stern and rudder post. Once those were dry I glued on the laser cut coverings for the keel and stern post. While the glue set on those pieces, I brushed on diluted glue and started on the port side laser cut pear pieces. After the keel pieces had set and I had some more clamps freed up I glued on the starboard laser cut pear pieces. I'm glad I invested in more clamps.
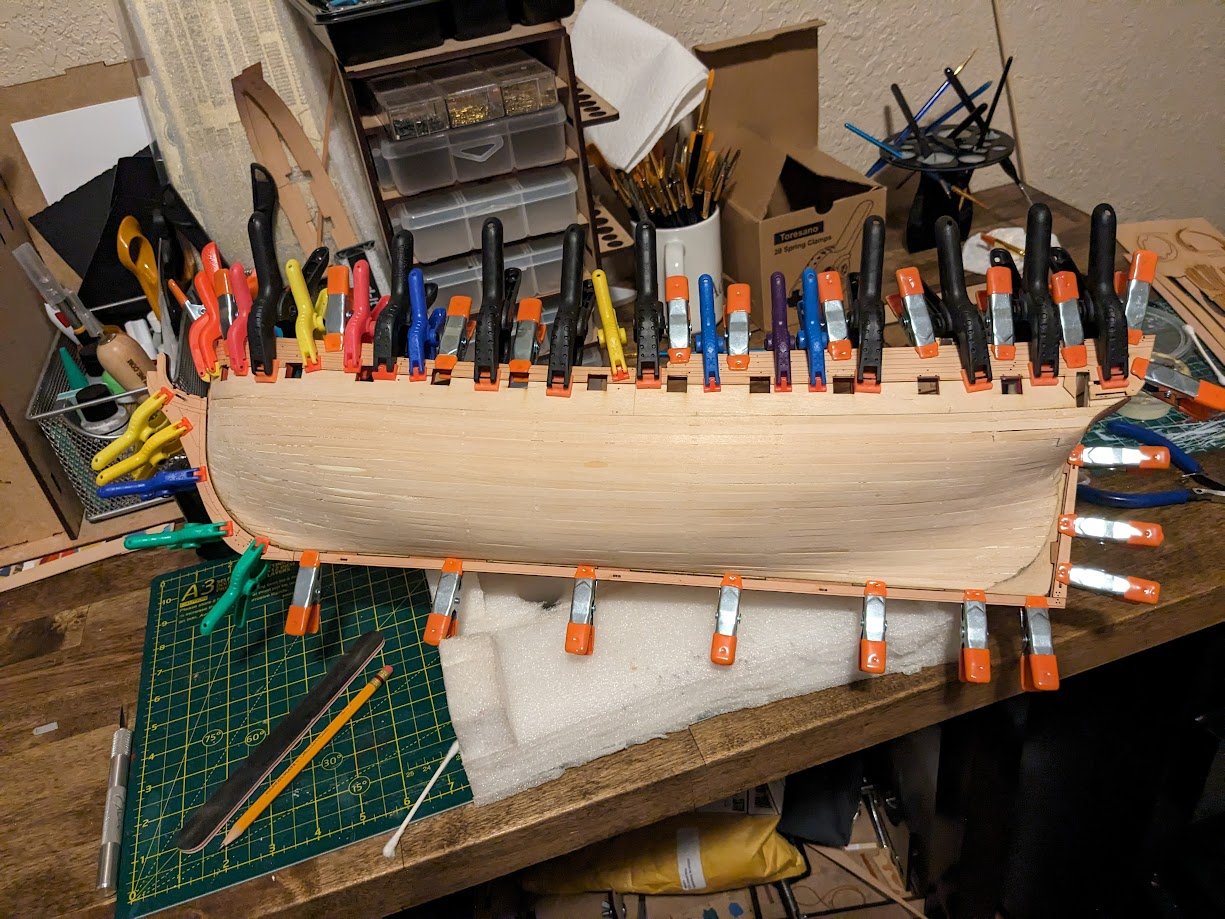
-
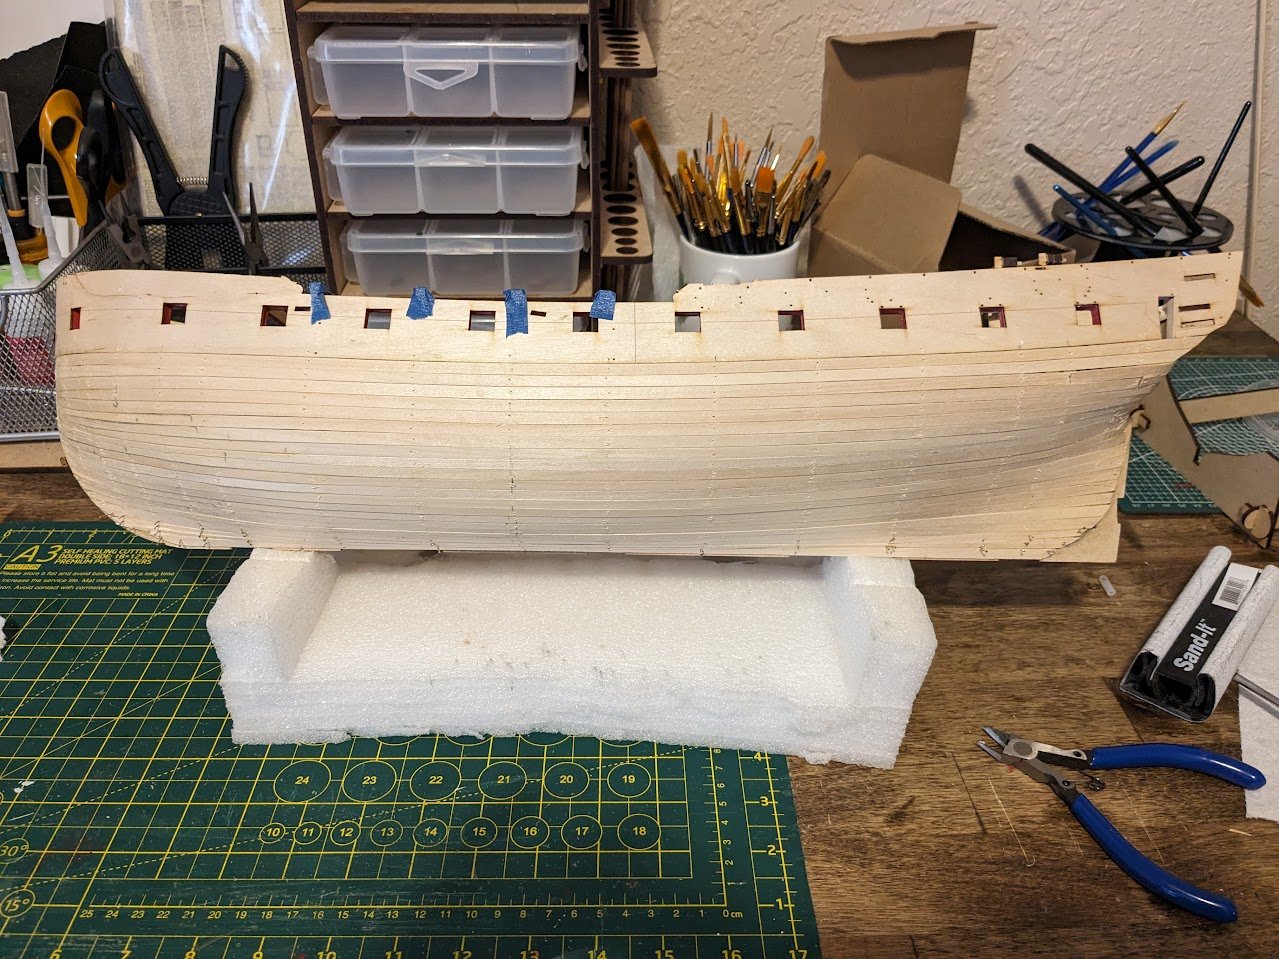
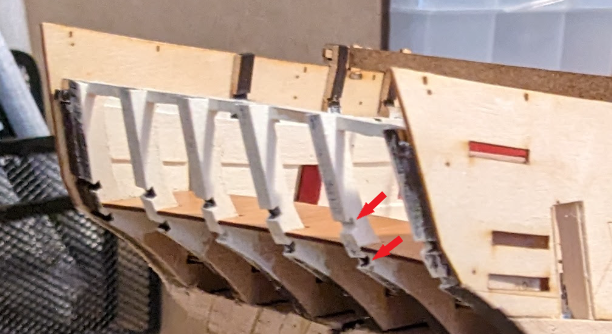
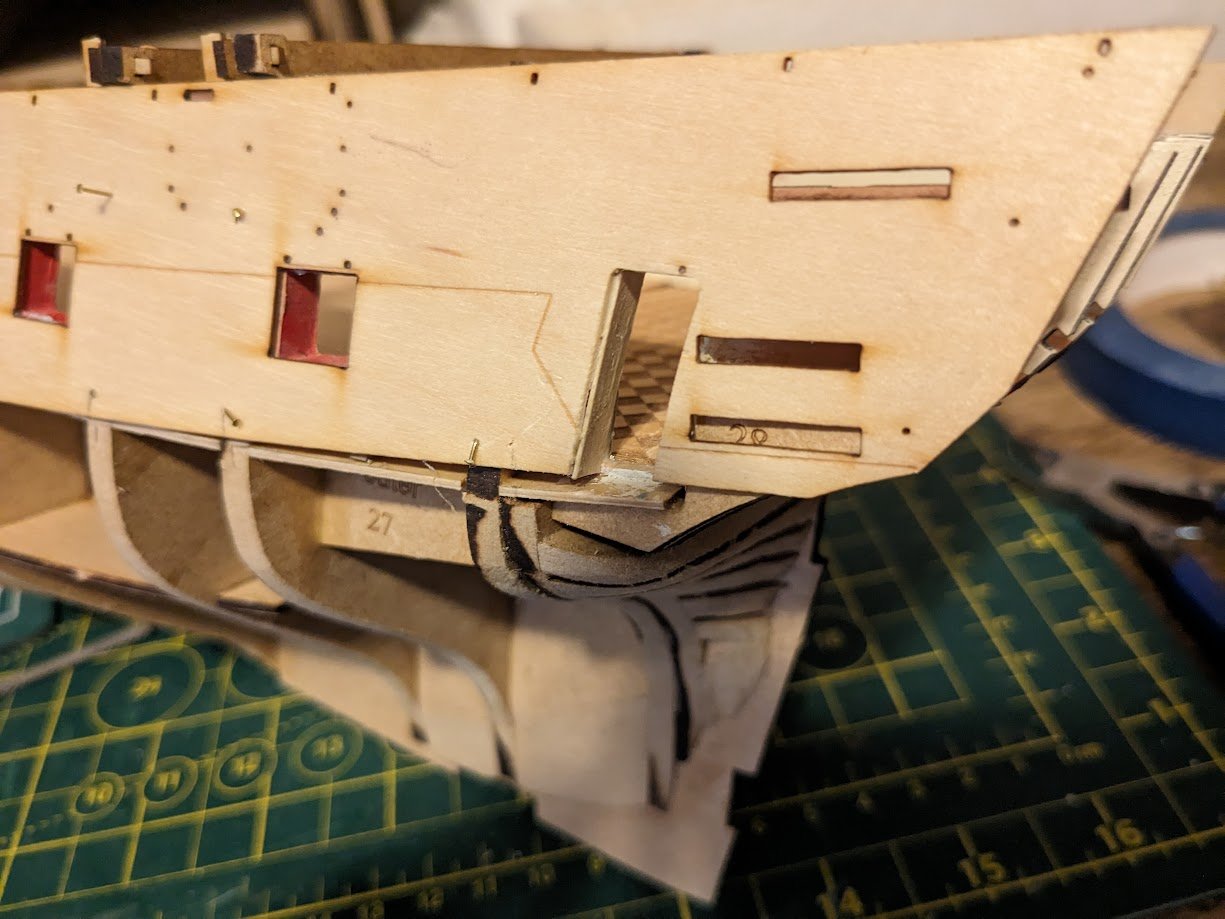
Finished putting the boards down for the first layer. A few gaps that need some filler, and a few bumps that will need to be smoothed out, but I'm happy with the result. I decided to not plank some of the deadwood area on the first layer as it will need to be sanded down to 0mm per the instructions anyway, I have seen a few others go this route on various models and decided to try this method. While the PVA glue was drying for the final planks, I decided to start wet forming the pear laser cut patterns for the out hull. While these won't be used for a few more steps, I wanted to give them ample time to dry in position over the next day. Question for the experts. I have been thumbing through the instructions and it doesn't look like these slots in the stern frames are utilized, is this assumption correct? I just want to make sure I haven't missed anything as it looks like the stern fascia pieces will cover them.
-
Beautiful planking, I can already tell you mine won't be as good as that lol.
-
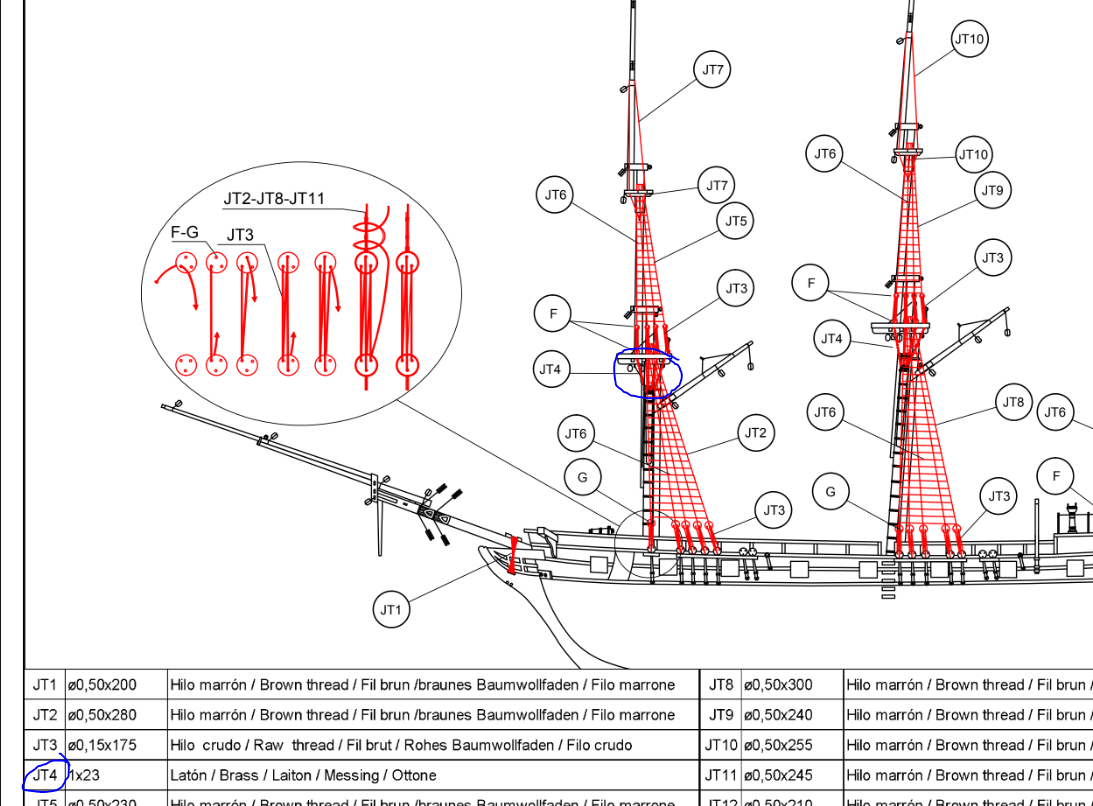
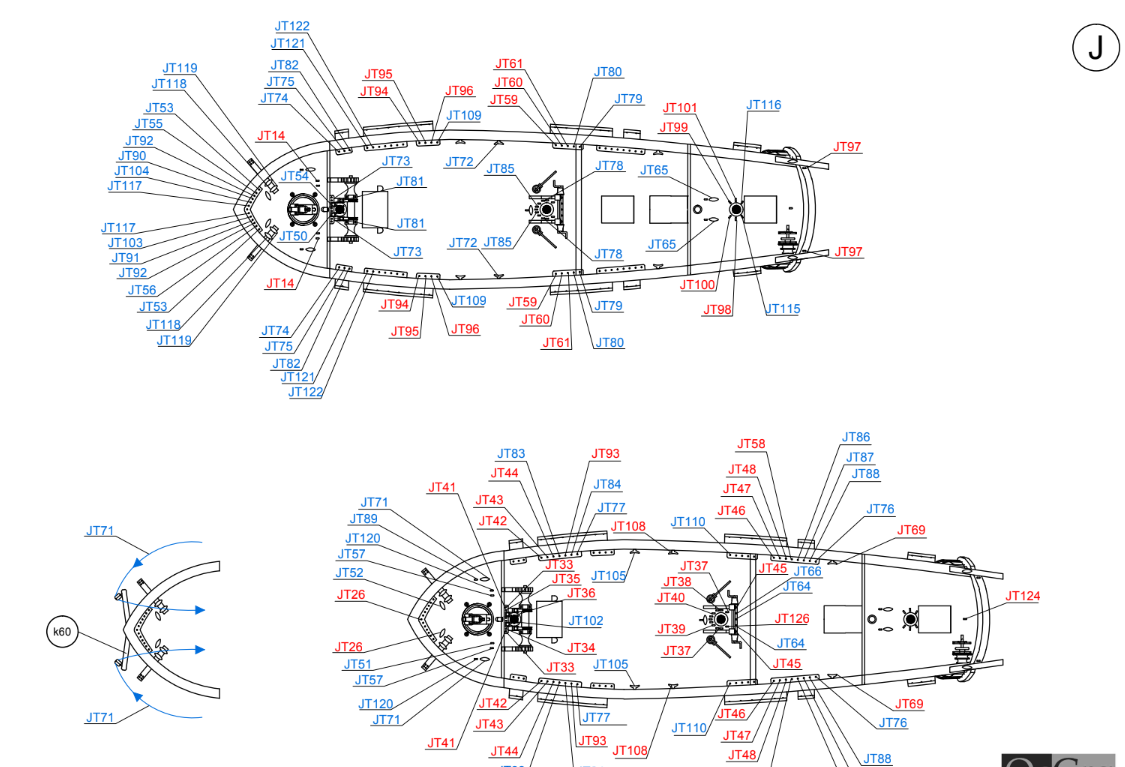
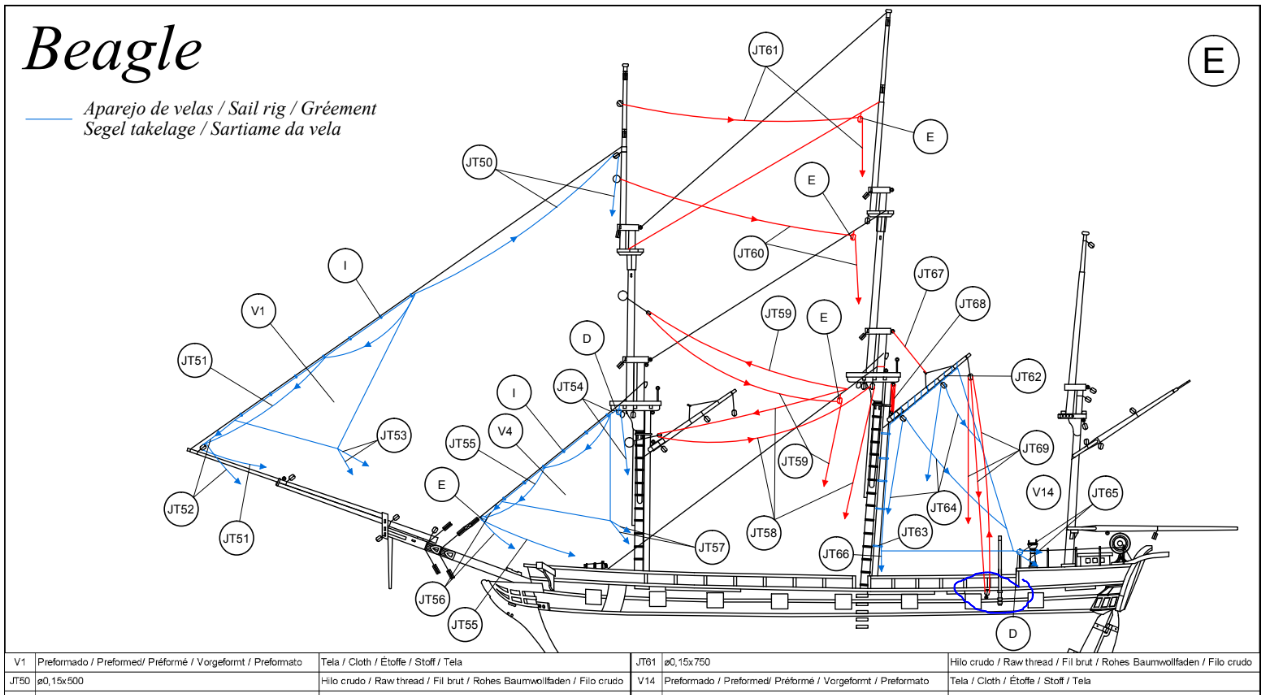
@JFMJr Everyone else has already given you great advice, since I just finished the Beagles rigging I will give a few tips on reading the instructions that took me a minute to figure out. This one may be obvious, but this page tells you where all the lines end up being belayed at. I assumed this page was just for the running rigging, but there are several standing rigging lines that will end in places on this page. I would look up some youtube videos on belaying lines, It was one of the more difficult tasks on the rigging, but getting the right tool and technique you will eventually get the hang of it fast. On this page the circled areas (JT4) are supposed to be brass chain. My kit didn't provide enough brass chain for this task (along with many other items), but even the official youtube Occre build channel used rope for this section. I have yet to see anyone use brass chain for this section. These circed lines look like they just end up in the ships hull which had me confused. You need to install eyebolts on each side of the bow for the lines to tie to. I wrongly assumed that all the needed eyebolts had already been installed as the instructions have you put in a ton of them earlier in the build. But that is wrong, there are several eyebolts and blocks that you will still need to add onto the ship that show up in the rigging instructions. Here are a couple more eyebolts that you will have to add. These blocks look like they should be on the outside of the hull, but I believe they should go to the blocks already installed on the deck that aren't being used. The official Occre video also ran these to blocks on the deck. Also the blue lines on the plans are for the sails, if you aren't installing the sails you can ignore them. If I think of anything else I struggled with I will add more, but overall I actually really enjoyed the rigging process. I thought it was going to be super difficult and grueling, but it was a nice change of pace from the rest of the model. The model really starts to come alive and look like a ship when you start adding rope.
-
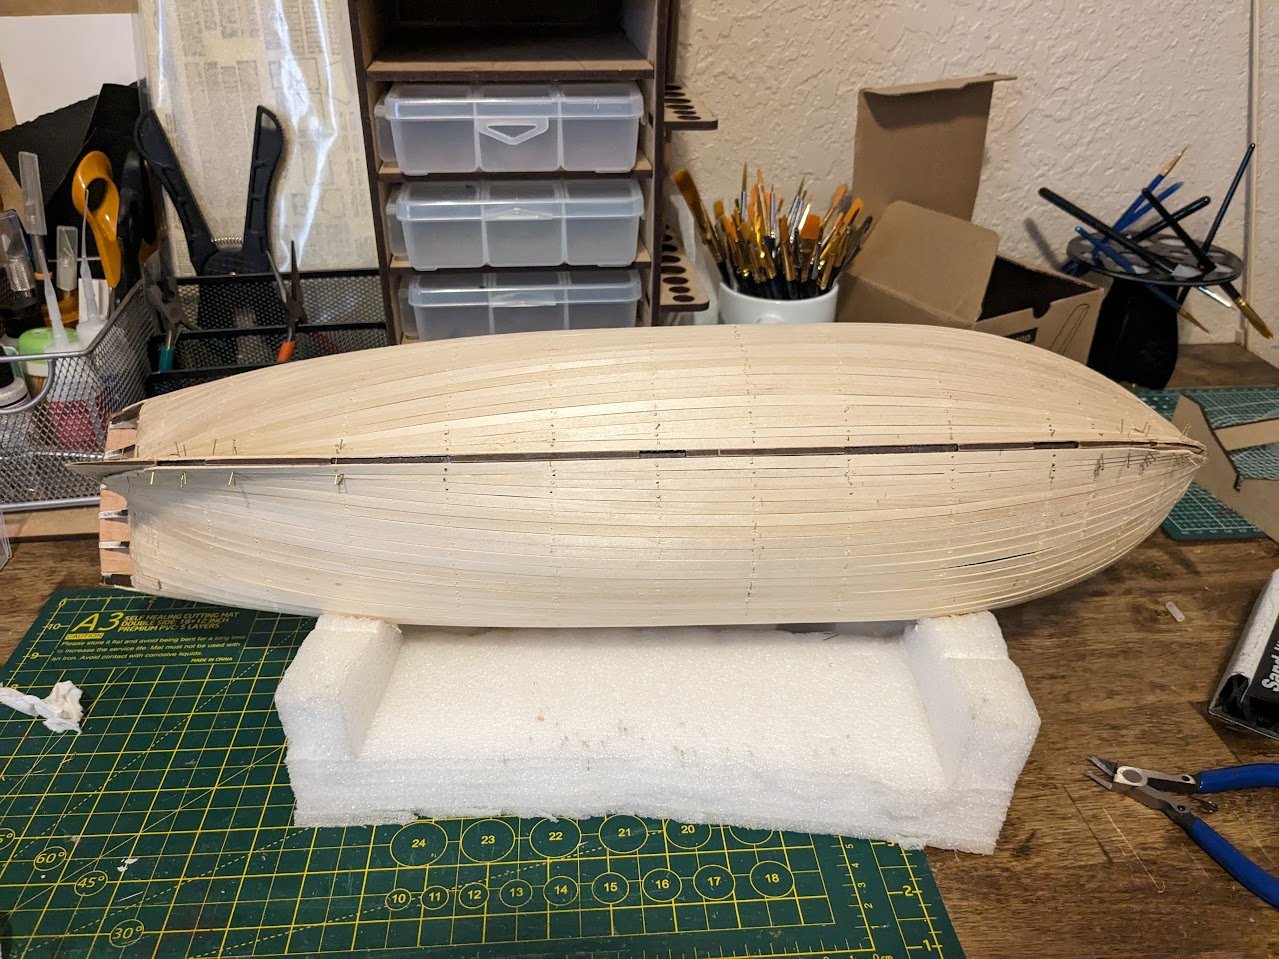
1st layer planking still ongoing, I'm averaging about 2-3 boards per side each night. I will say this ship has been pretty easy to plank so far, this is only my second kit, but its much easier going than my Beagle kit was. I have not soaked any wood yet, and have been using the plank bending tool that Vanguard sells on their website. I have a few spots that need some light sanding from the bulkhead needing a little more fairing, and a few minor gaps that will need some filler, but every thing is laying flat against the bulkheads which I am happy with.
-
Thanks for the compliments all. My father and I were brainstorming some case ideas this last weekend when he came to view the model. But holy cow did I under estimate how expensive cases are, probably going to have to build my own to make it affordable.
-
Got a start on the first layer planking. Only put down 3 planks per side, but it was a nice warm up. I'm really loving the lines of this ship so far.
-
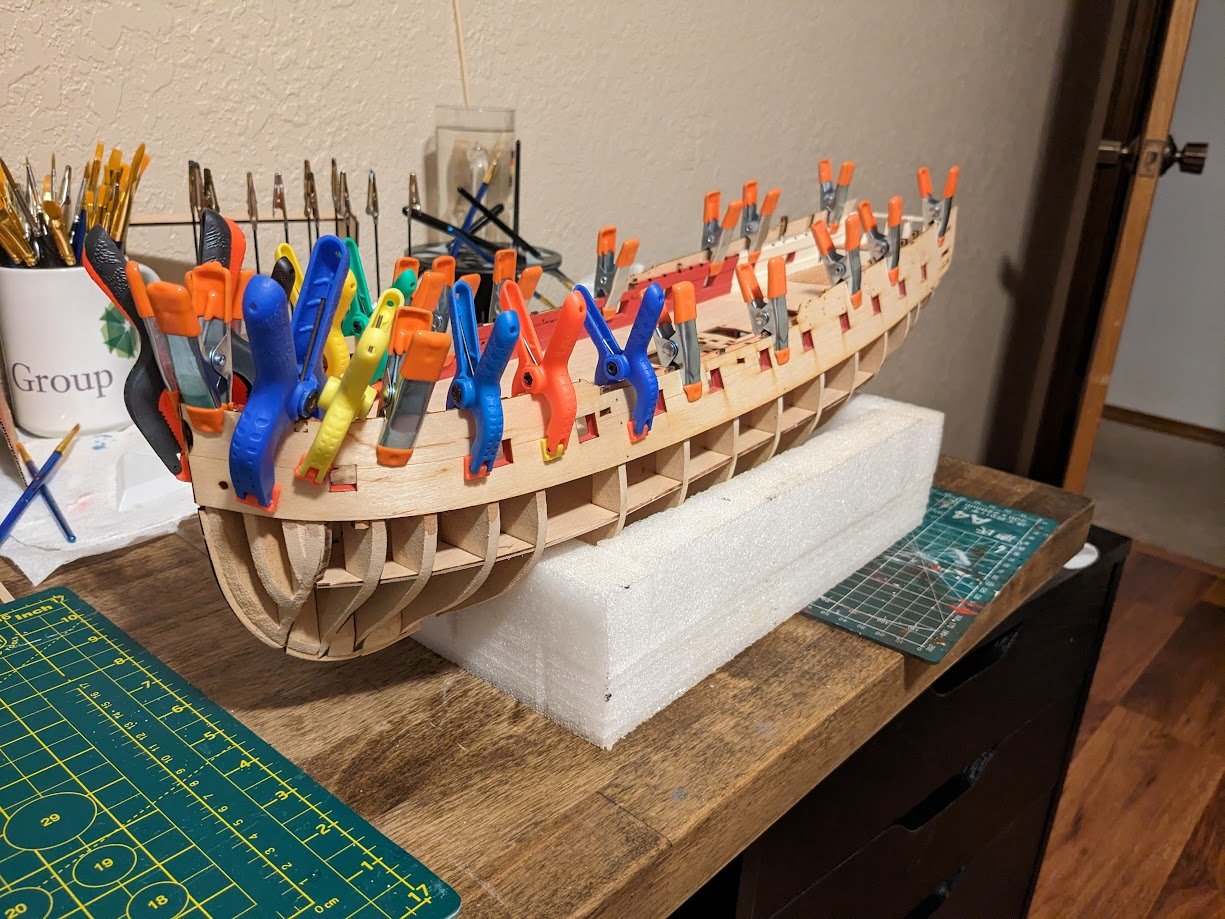
I spent the better part of Saturday sanding down and fairing the hull. Once the sanding was complete I soaked the plywood patterns for the recommended 45 minutes, and then clamped on the ship to dry out until the next day. The next day I spent a while dry fitting to find the best alignment, so much alignment of future parts depends on pieces like these being properly aligned. I then applied diluted glue and then started to clamp and nail the pieces in place. The Vanguard nails are smaller than the nails in my Beagle kit, the Model Expo nail pusher I have is just too large for the Vanguard nails and would bend a significant amount of the nails, a smaller diameter nail pusher is going to go on my research/shopping list. I didn't cut the quarter galley doors open on the plywood piece while gluing, this was intentional as I figured the piece might not retain the needed shape at the rear and wouldn't be glued down as strongly if I cut it first. So once the glue had dried long enough, I opened up a slit in the doors with knife until I had a slot big enough for a file, I then filed the doors open to match the interior. I then added small strips of leftover .5mm basswood to cover the gaps between the hull. I intend to fix the floor area between the pieces as well when I tackle the quarter galleys in the future.
-
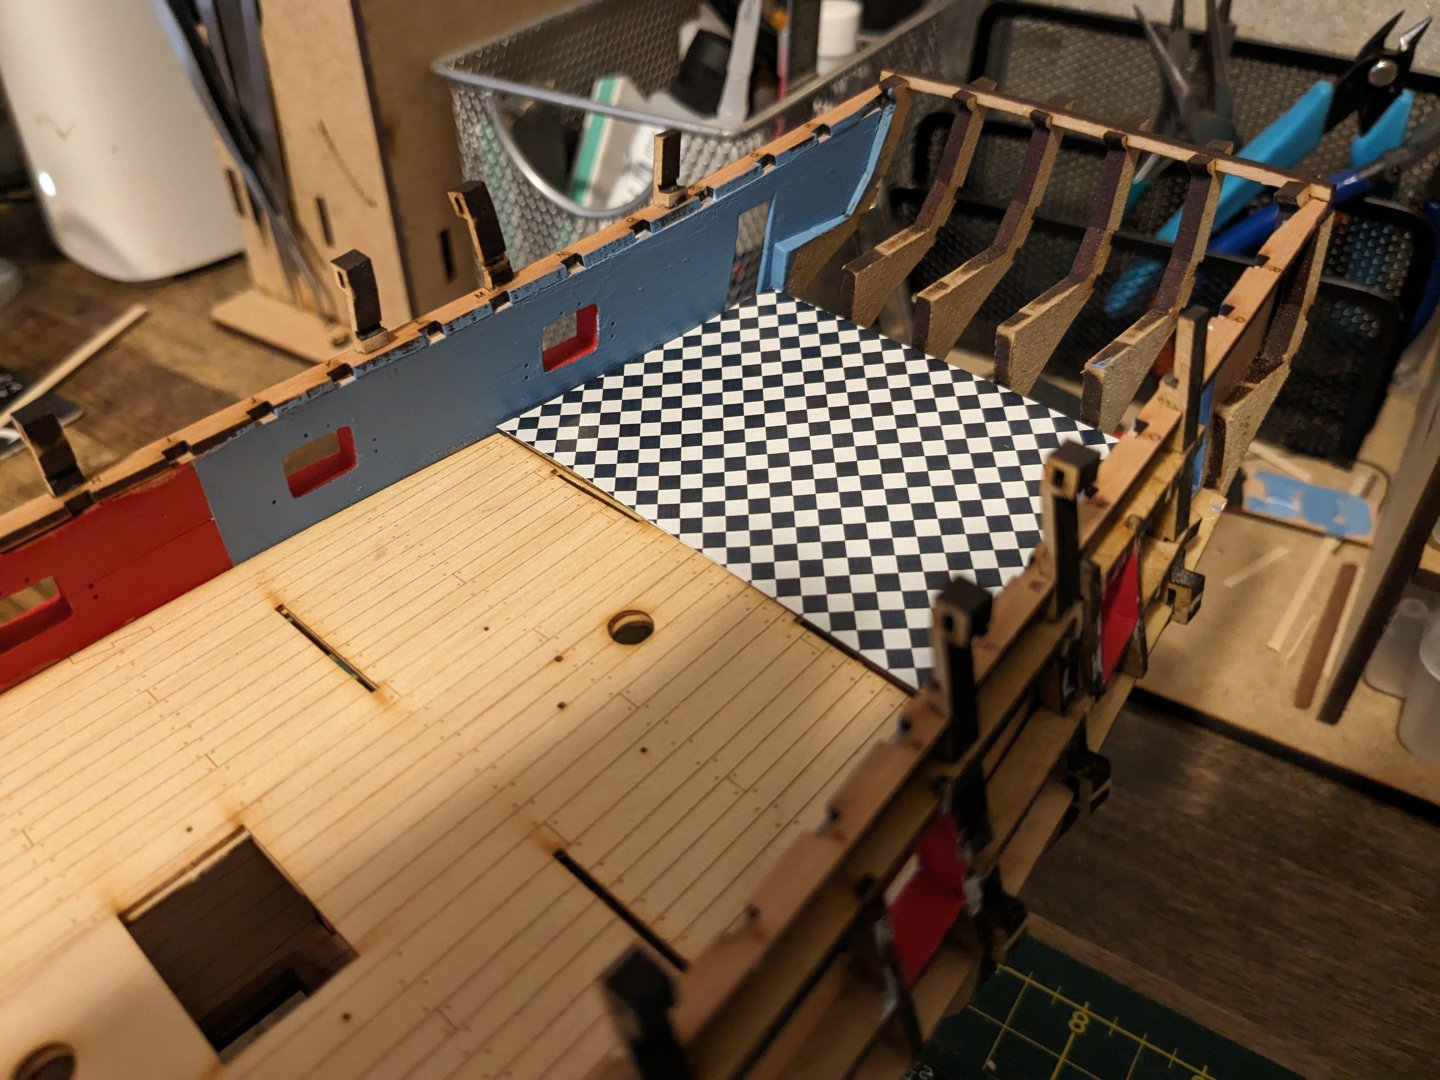
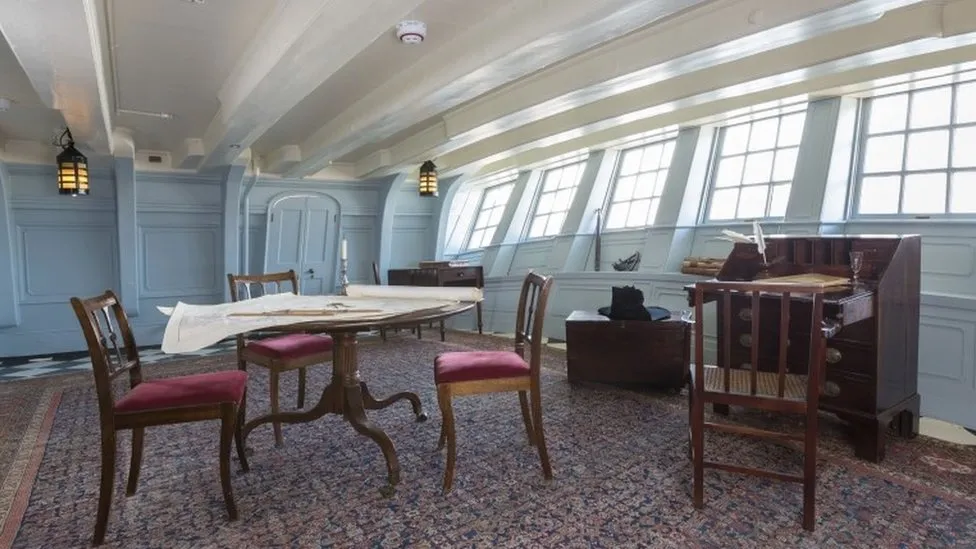
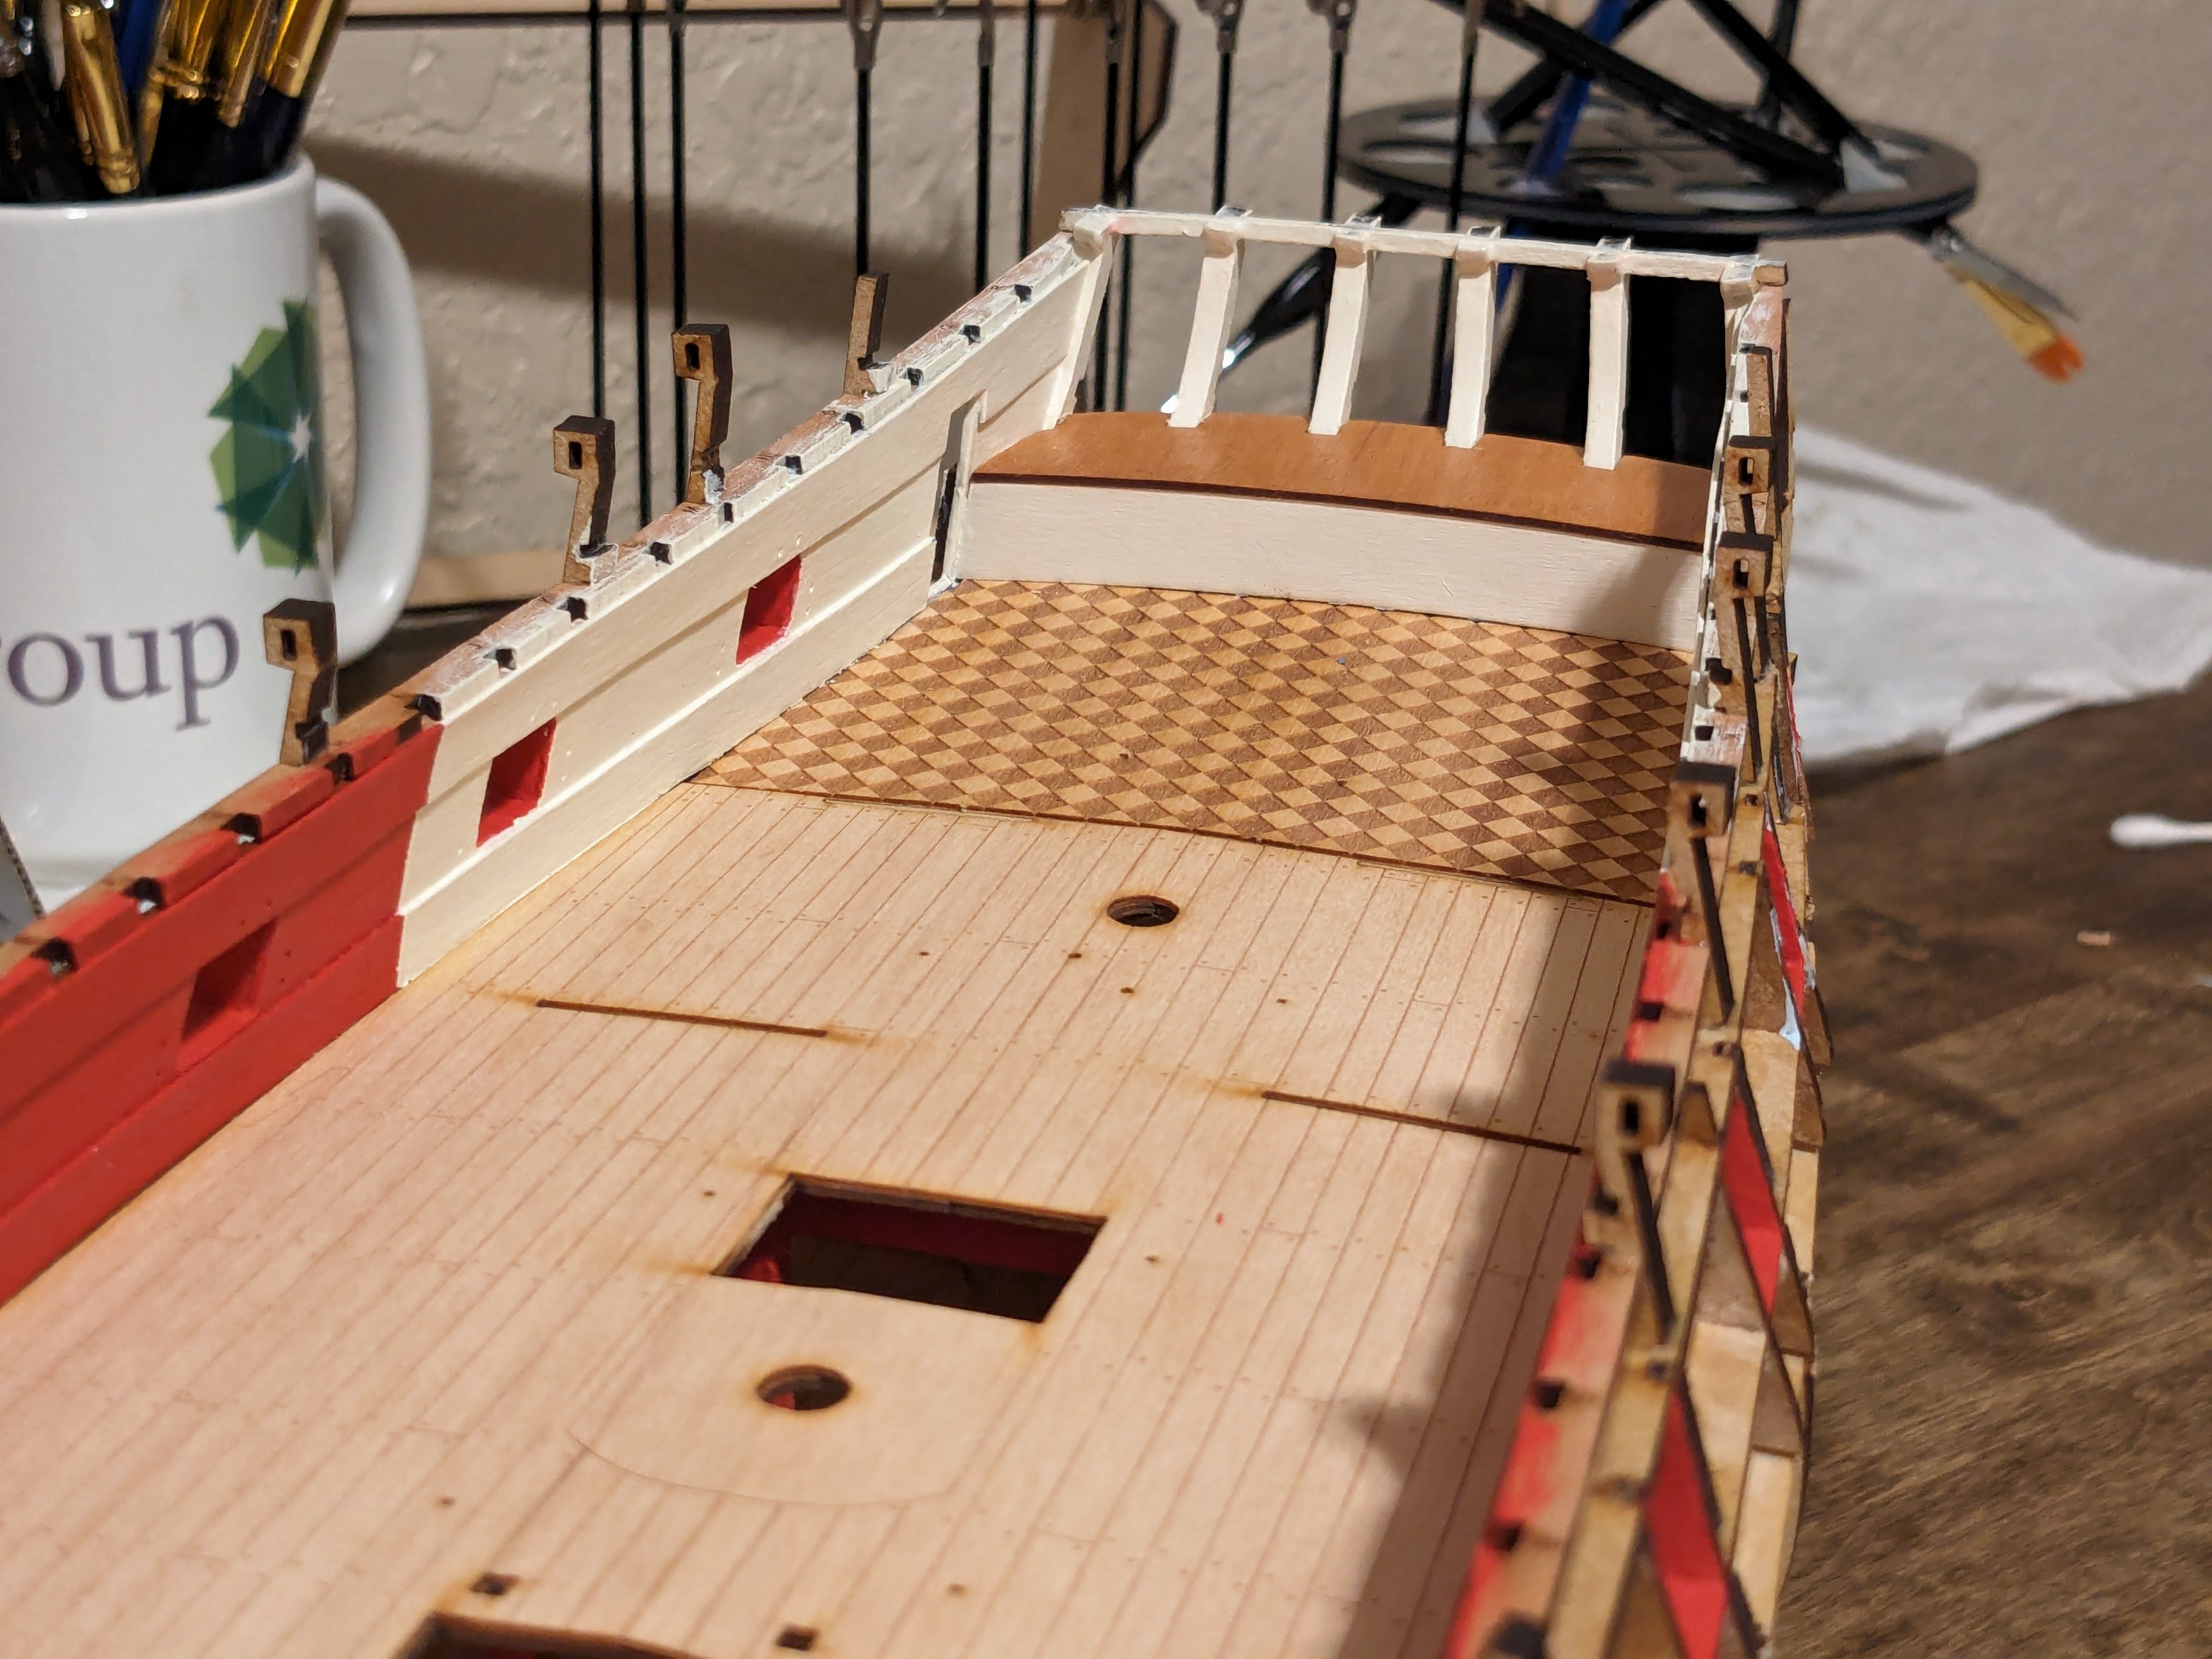
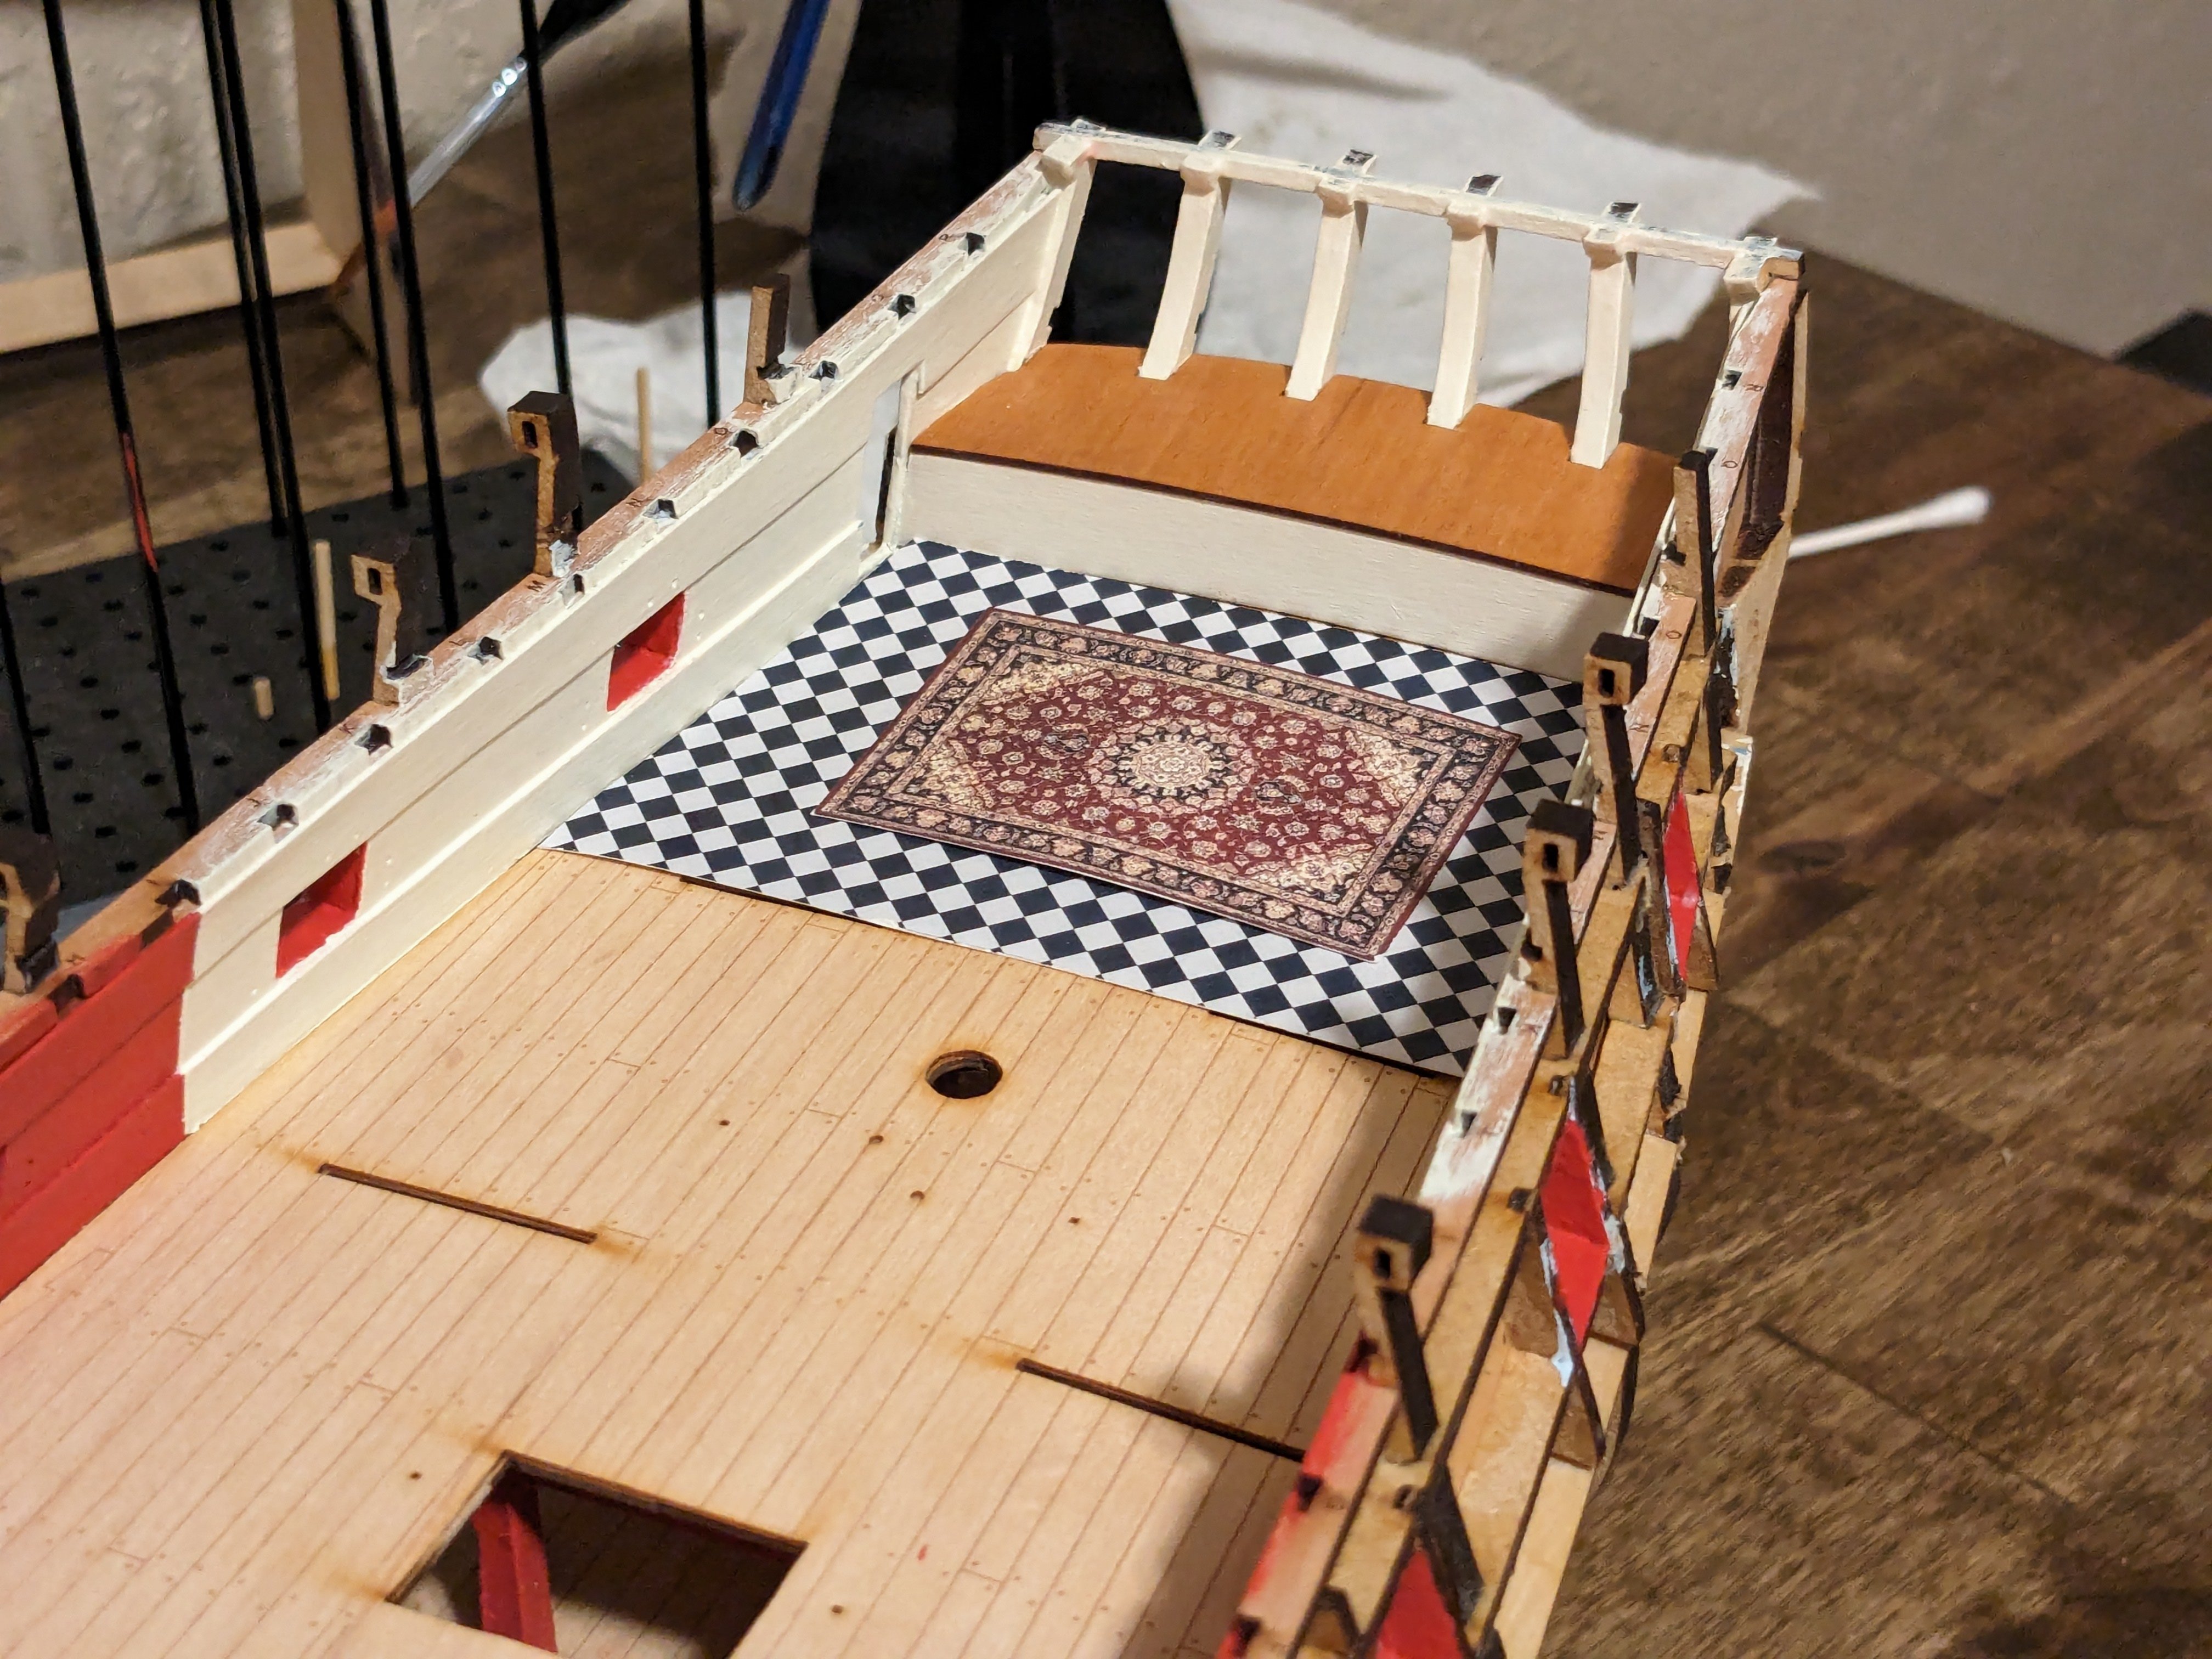
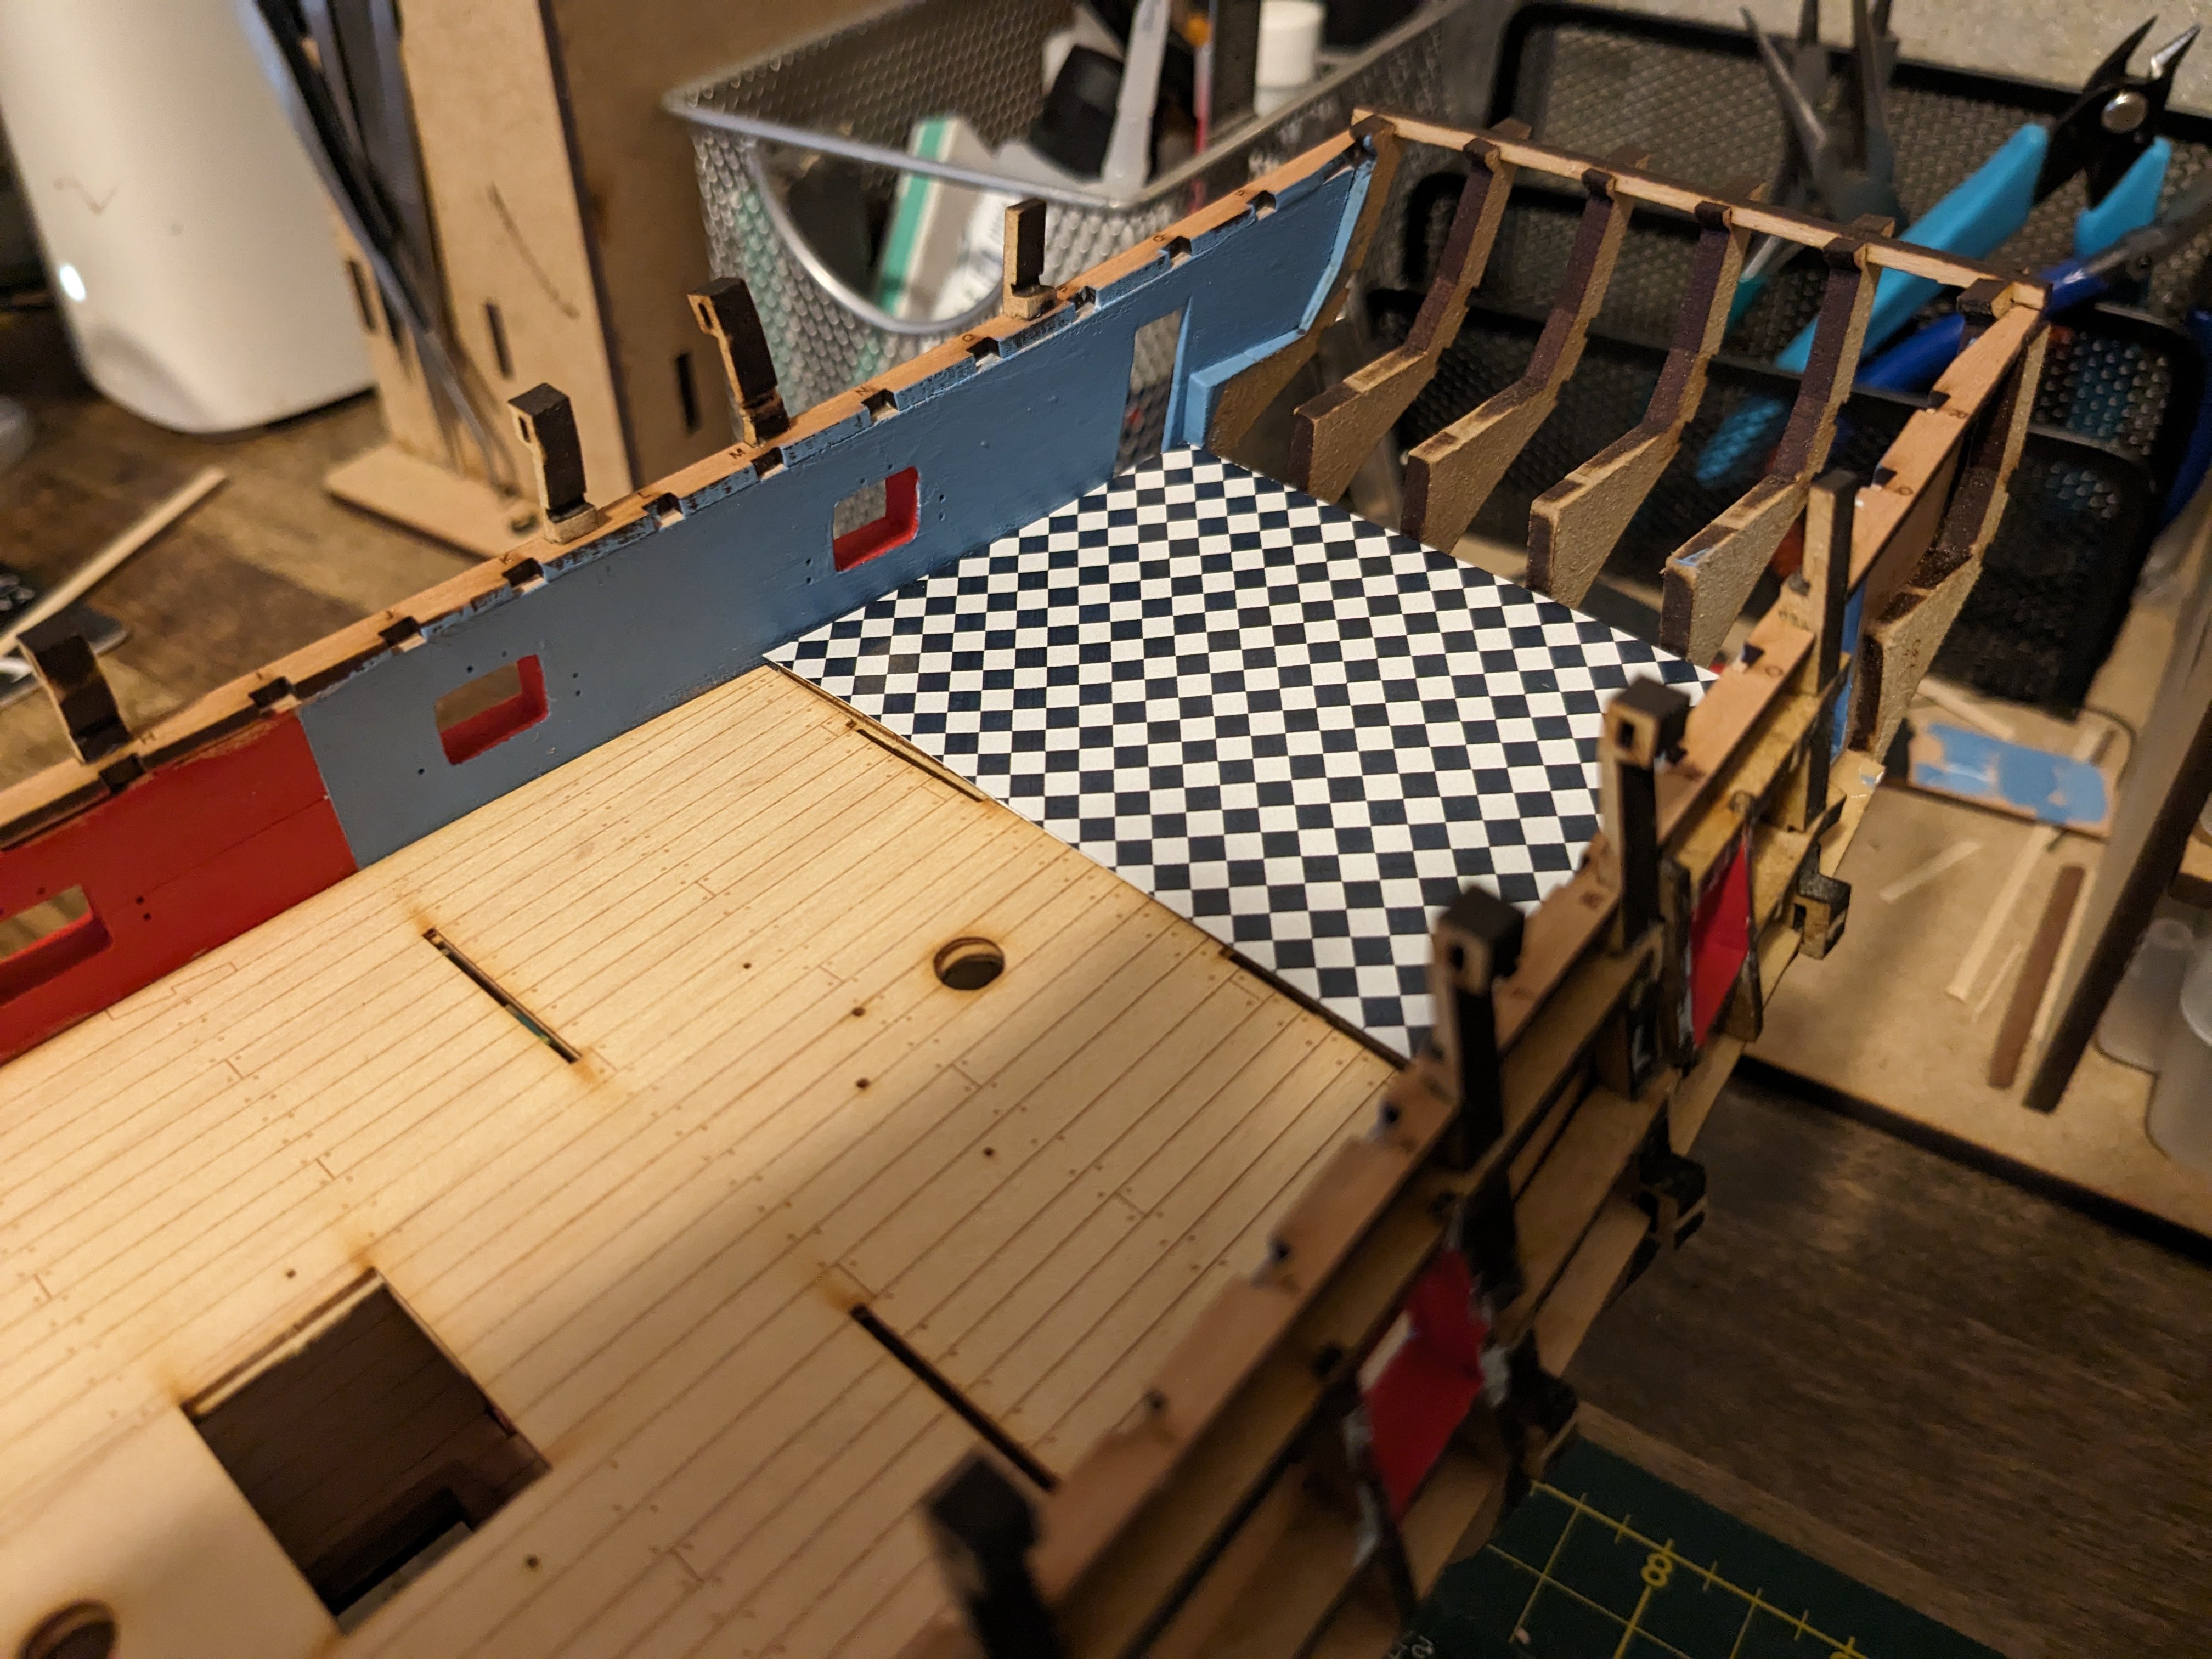
Well, something about the blue just wasn't sitting well with me, before I started this kit I had in mind to make it similar in color to Victory's cabin. But I think i just couldn't find the right shade, and the one I had on there at times I liked it, and then the next day I wouldn't be a fan, plus I wanted to paint the cabin window pillars as I didn't like that the MDF was visible, and I thought the pillars also being blue was just too much blue. So I went with my backup choice Vallejo Ivory White, and I'm very glad I switched as it looks much better to me. I also painted the cabin rear bulwark in white, and hit the cabin seat/counter with some amber shellac. I think the amber shellacked pear wood goes pretty good with the original floor and now I'm debating on which floor to use. Black and white checker option Also printed a rug to tie the room together.


-
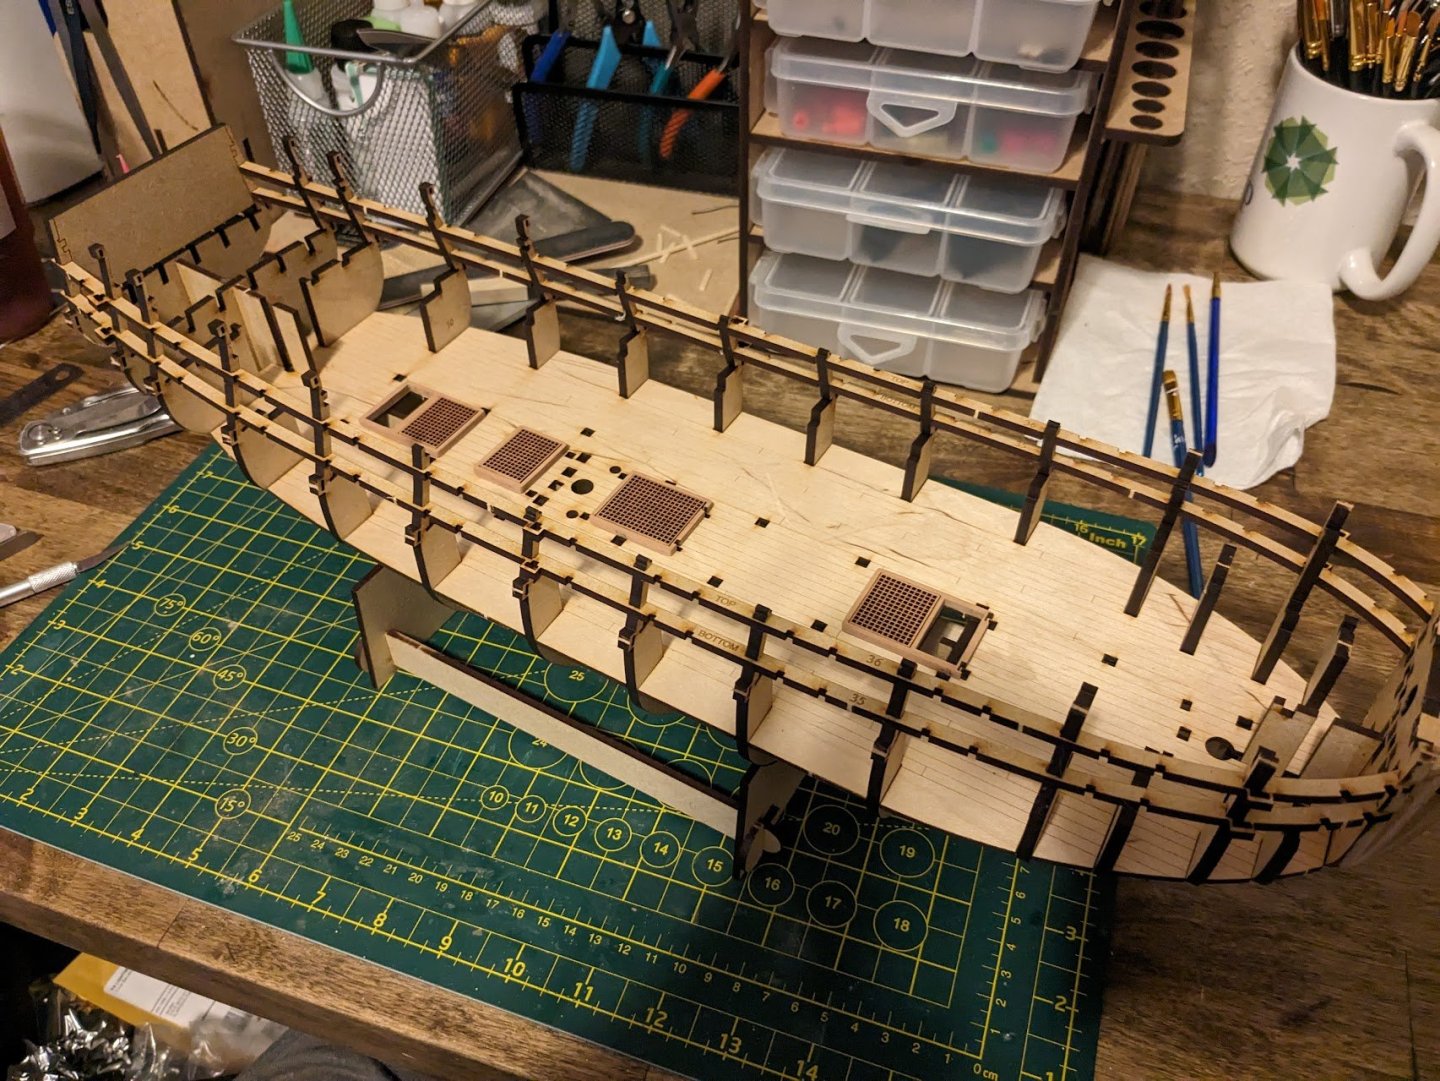
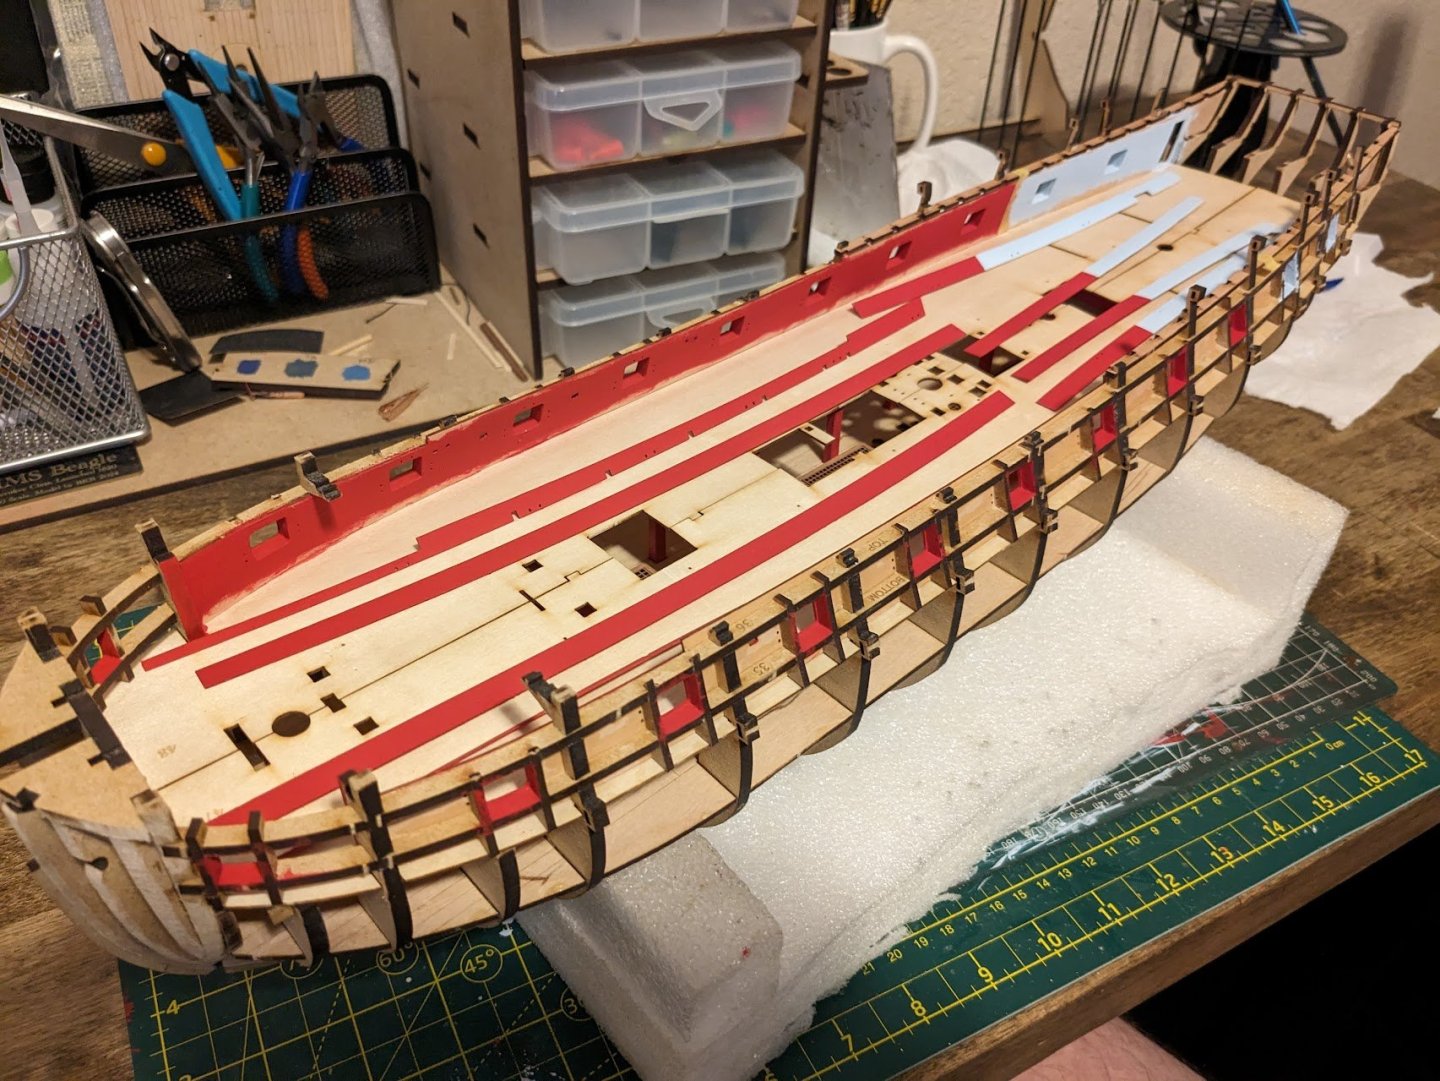
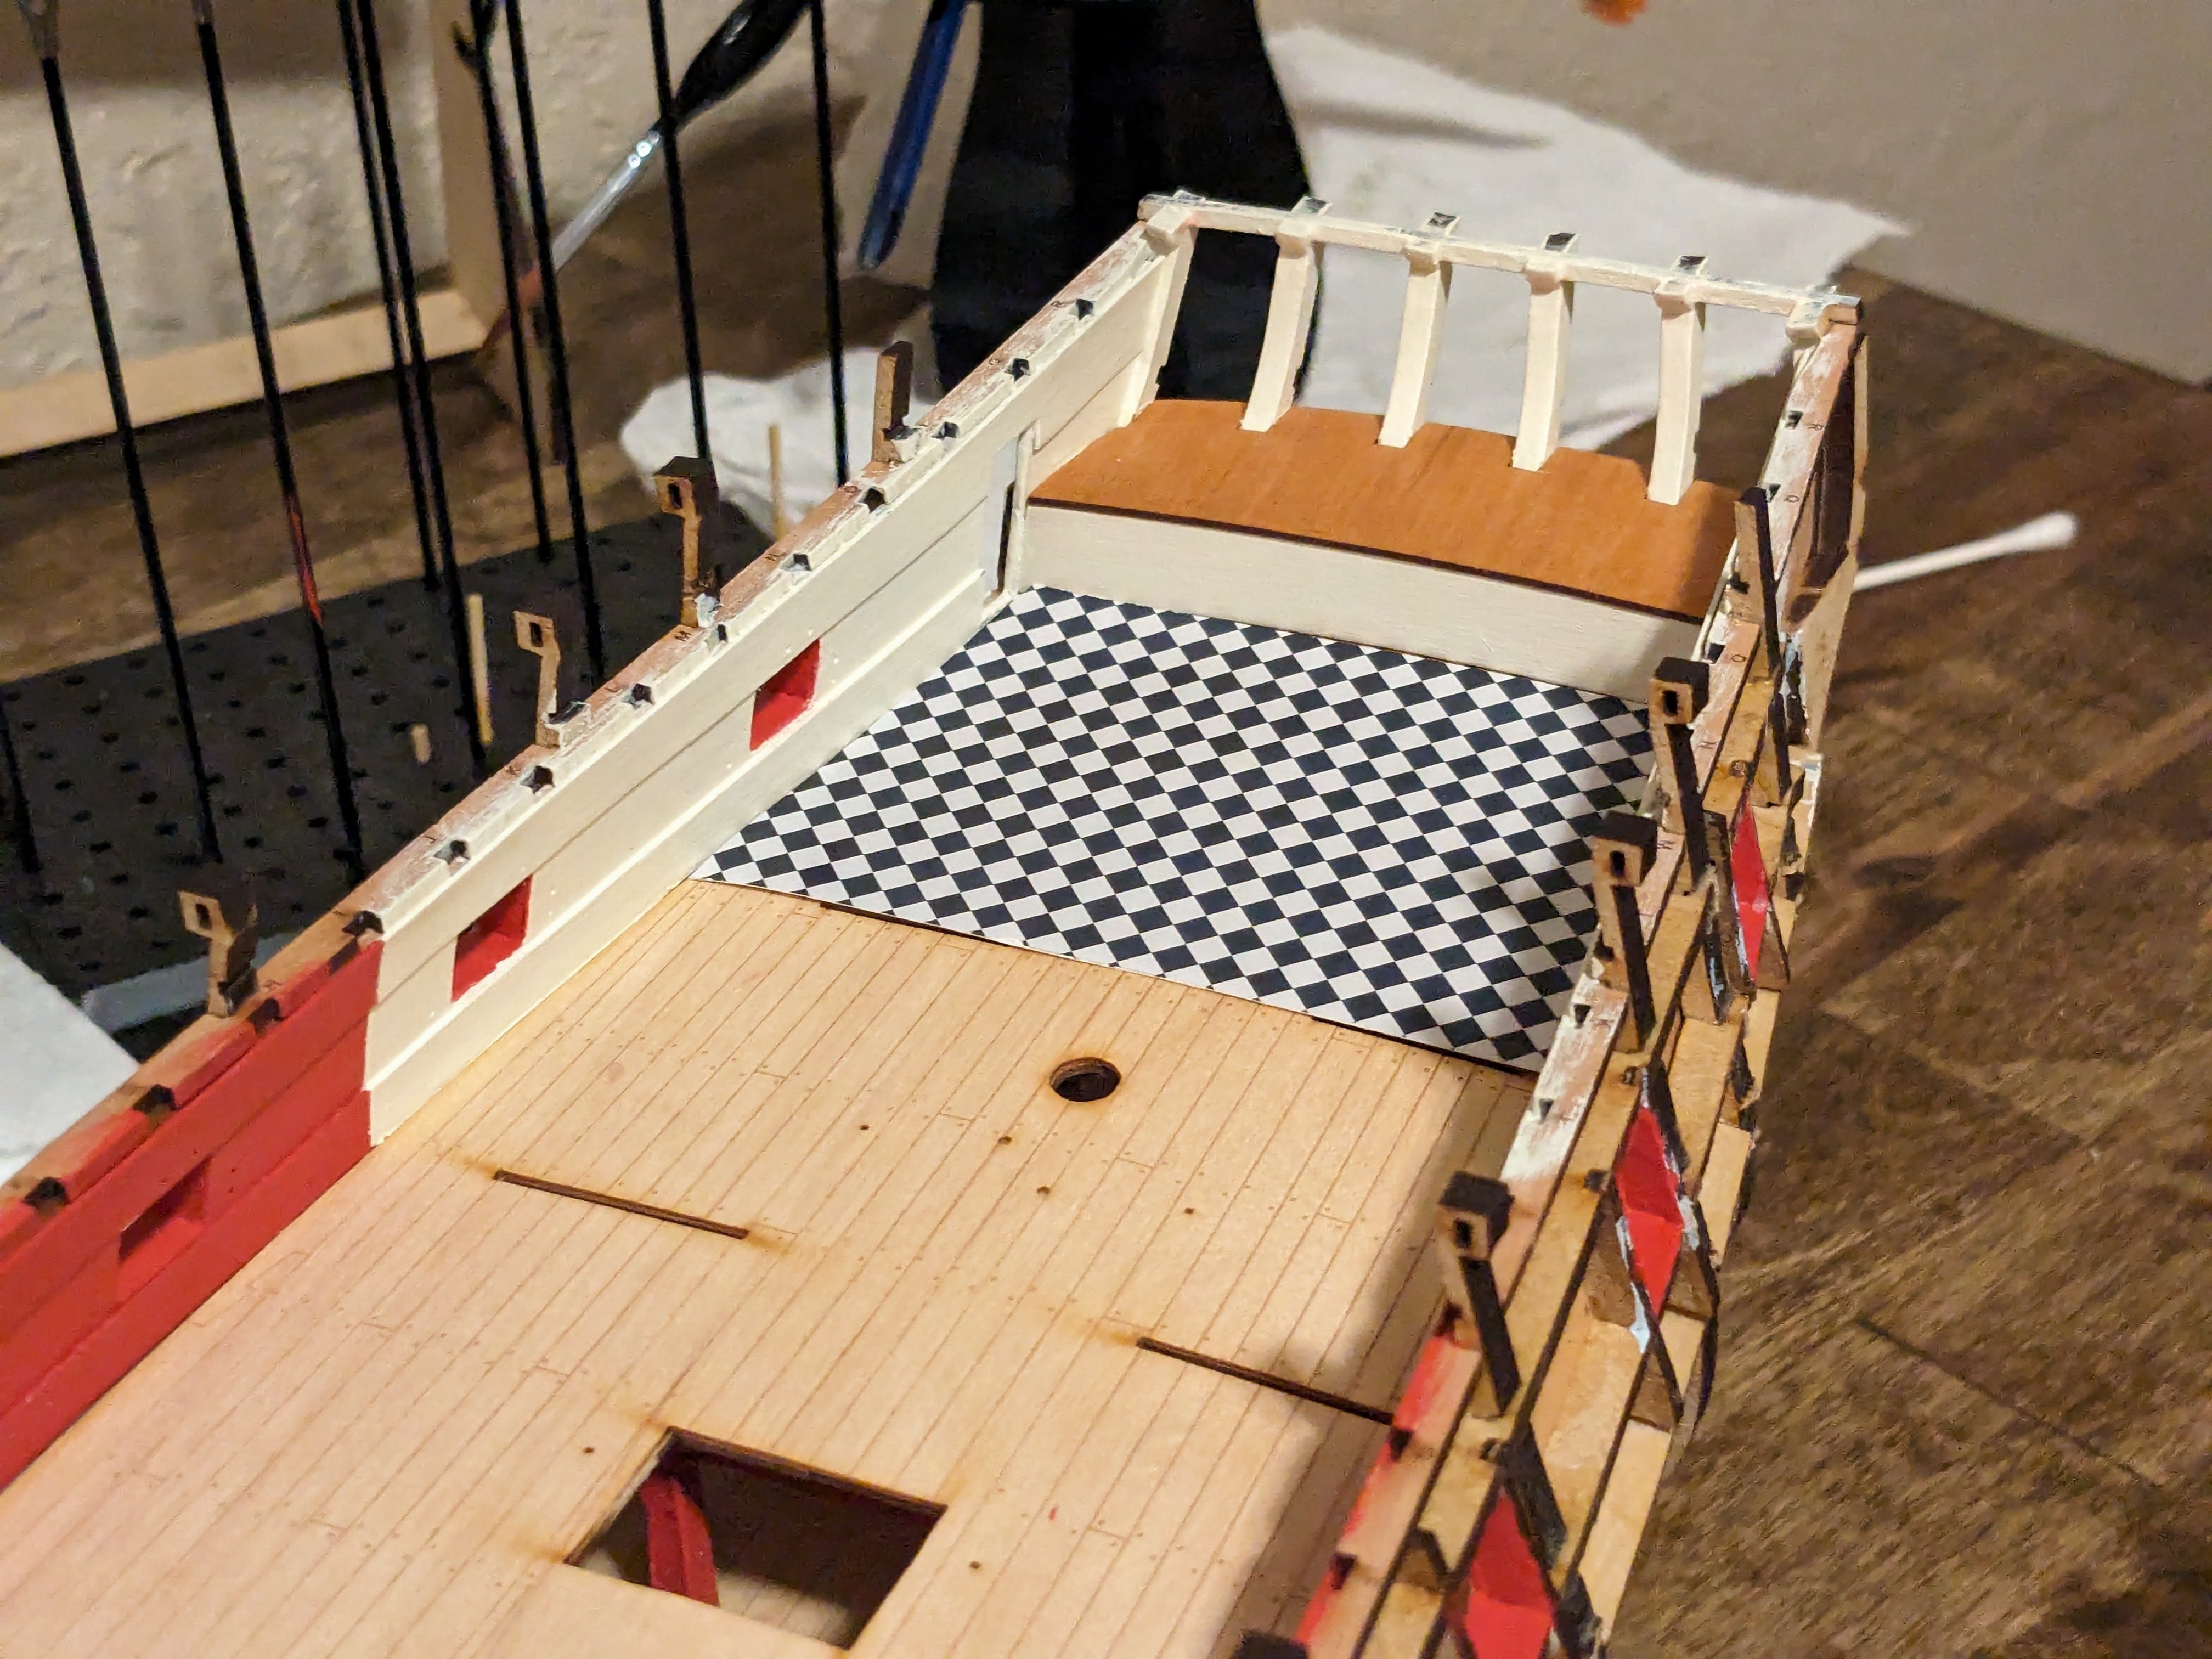
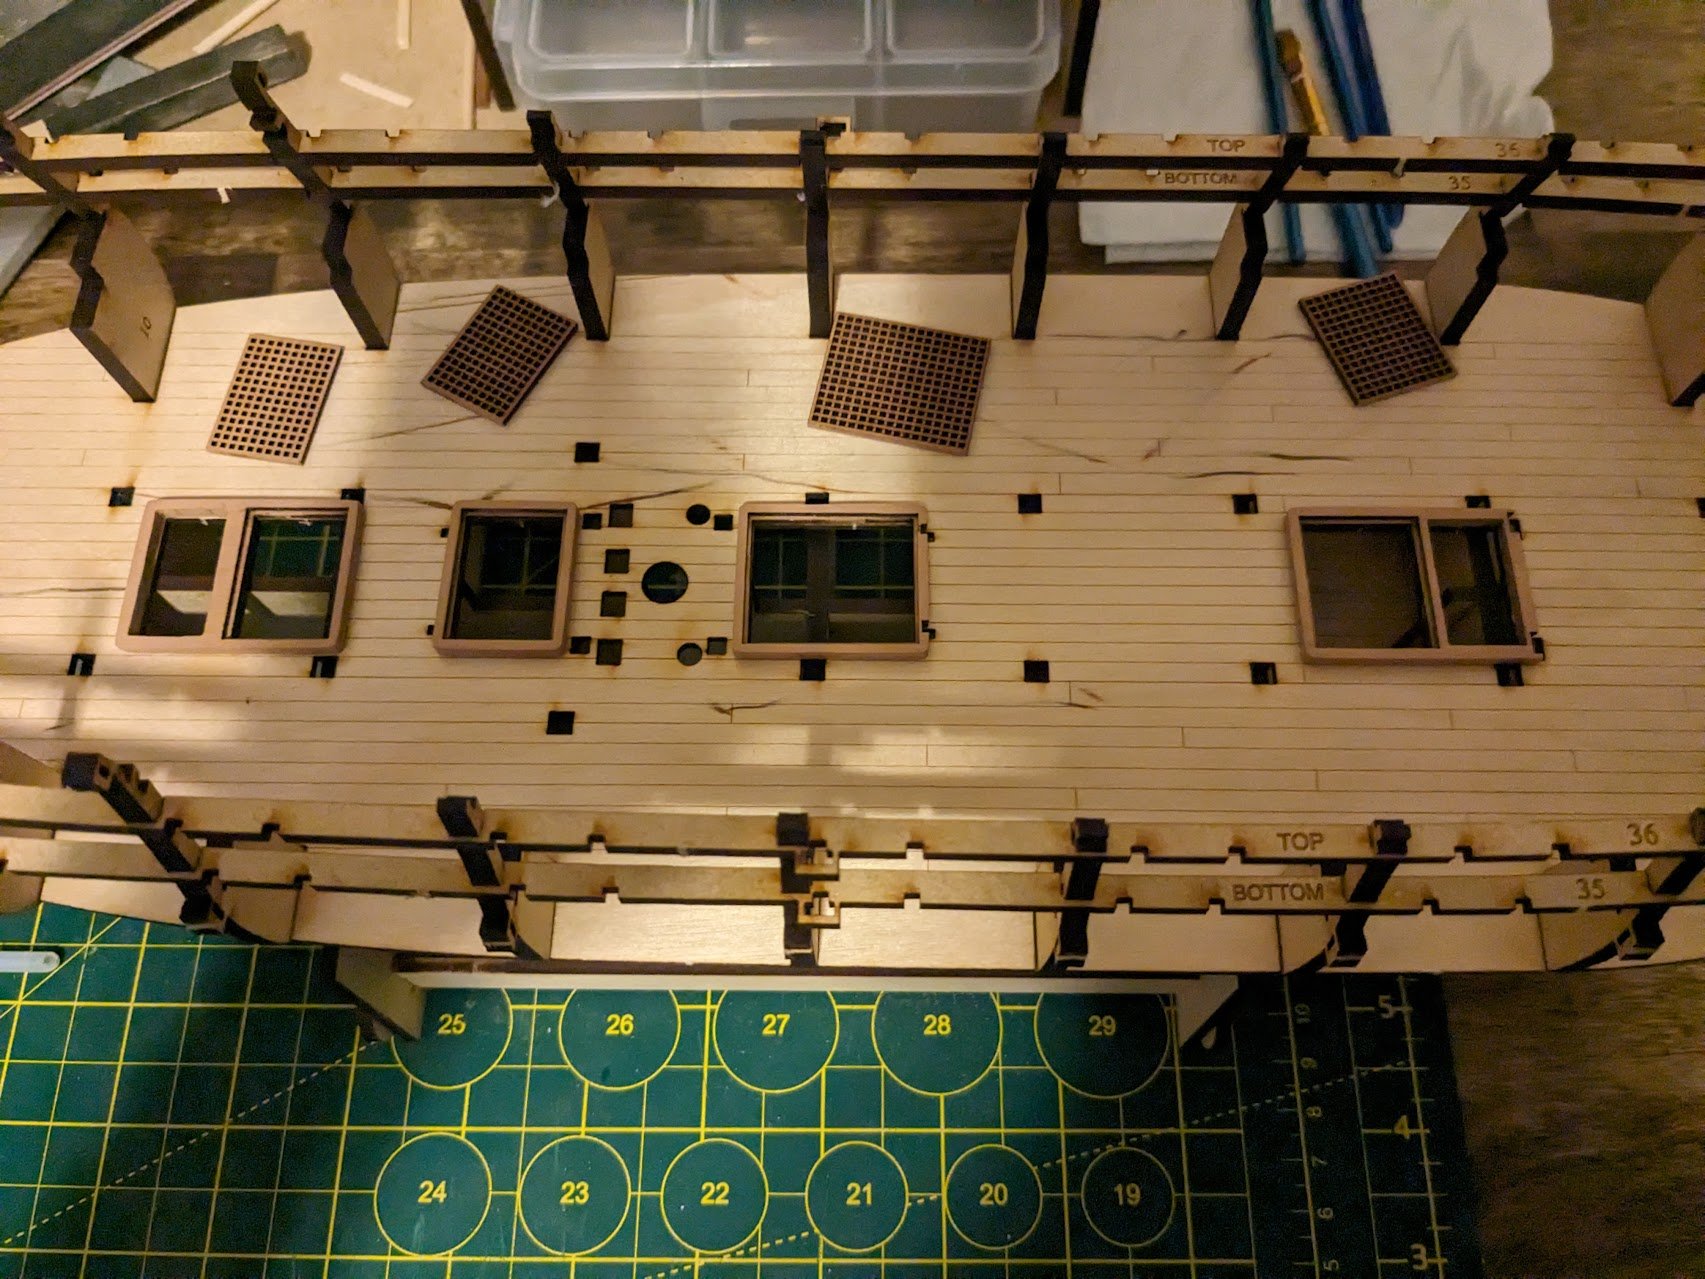
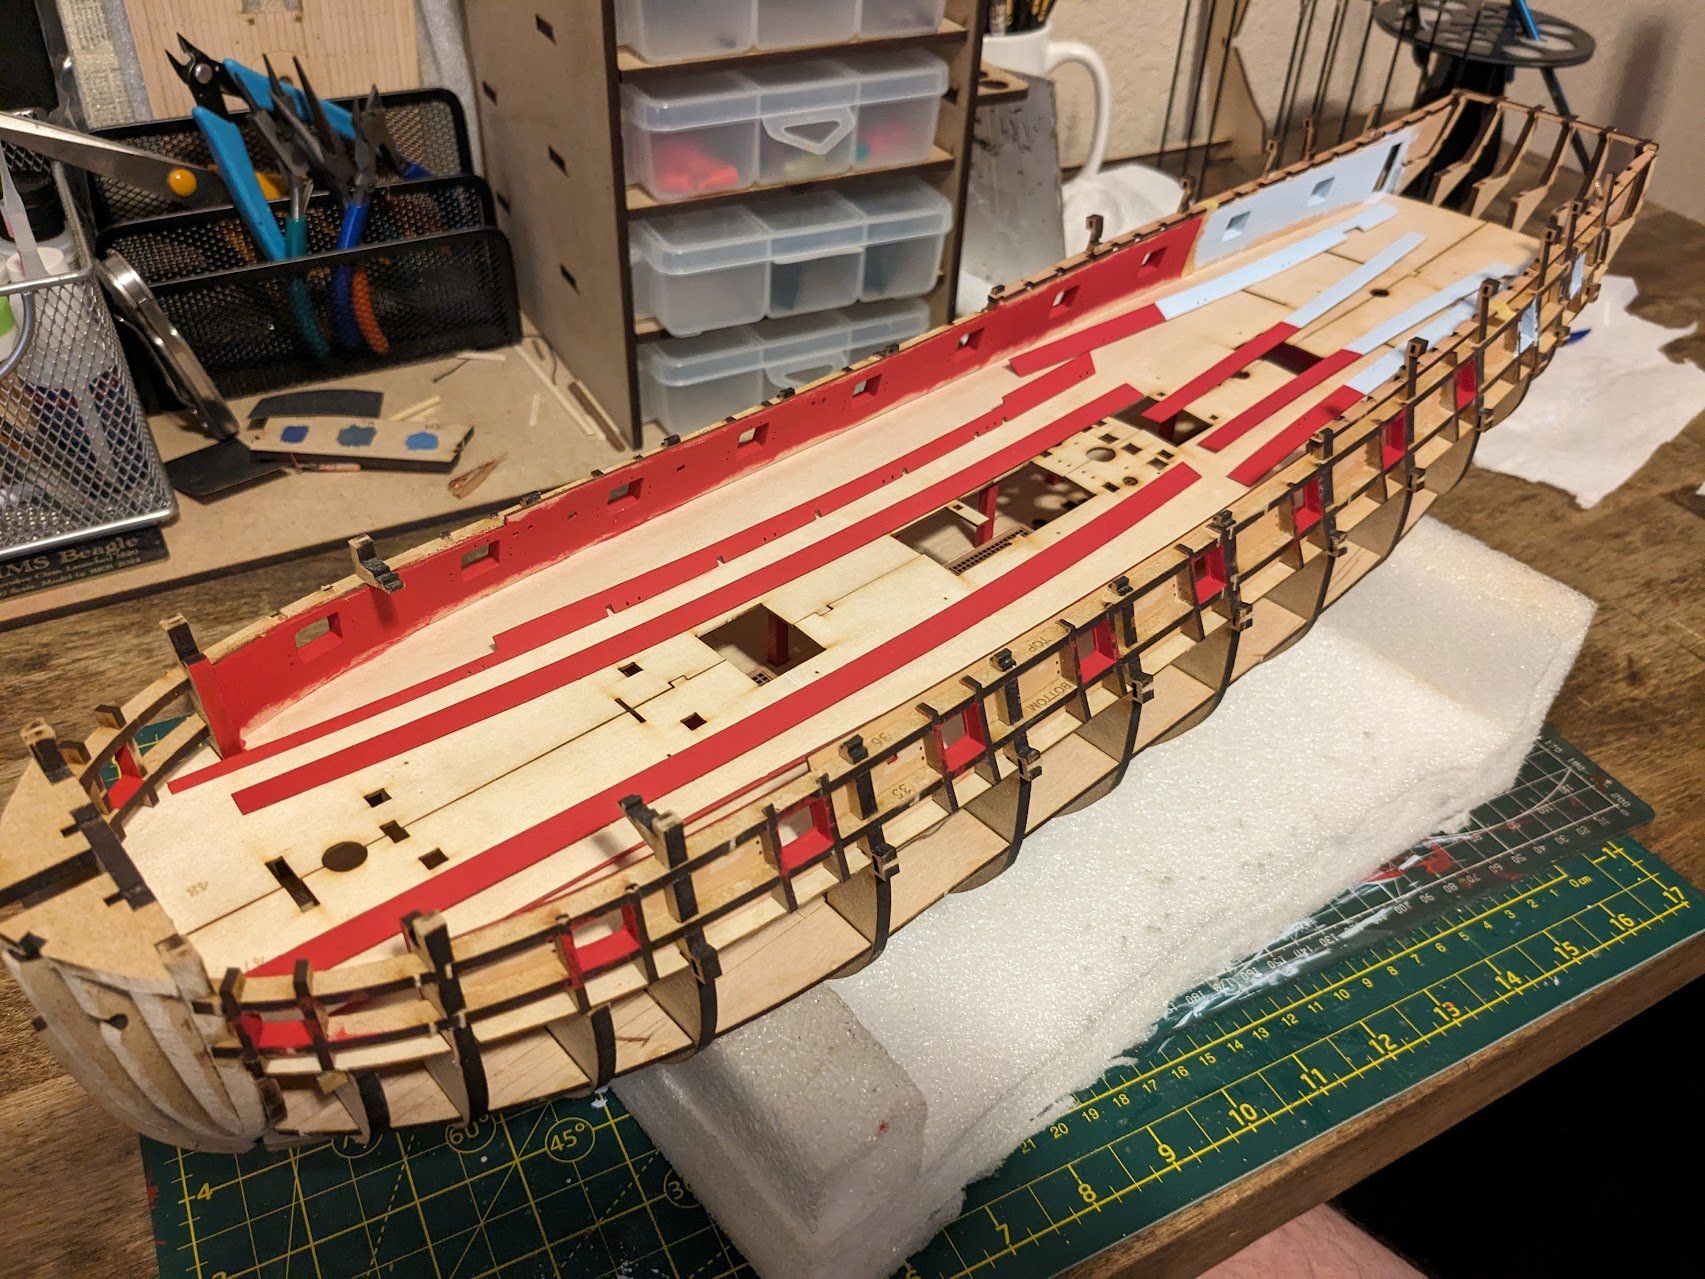
Here is the end result of my checker pattern I made in GIMP. I made the squares the same size as the laser cut pattern which is right about 3mm per square if I remember correctly. I printed them on some 200g Brochure paper we had at the office. I tried to make the white a little "off white", but it doesn't really show that well in the photos. I am happy with this result and will glue it in place at a later time. The next step in the instructions was to glue the deck sheets down. Once the glue set on the deck, I started on the lower trim pieces for the bulwarks. Once again I ran short of small clamps, but should have more coming in the mail today or tomorrow. Can never have too many clamps!!

-
I think the GIMP software that @Thukydides mentioned might be the ticket. I spent about 15 minutes in GIMP and already have a solid checker pattern I like, I just need to play around with the sizing, and figure out a suitable shade of white. I will share my image file once done in case anyone else want's to use it.
-
I thought about making one, but my graphic design skills pretty much start and end at Microsoft Paint, I'm more of a spreadsheets guy lol. I may give GIMP a try, thanks for the suggestion. I thought about painting it by hand, but there would probably be more rectangles and other odd shapes than squares if I tried that.
-
Thinking about adding black and white checker flooring instead of the laser cut pattern the kit comes with. Does anyone have a link to a good high resolution printout of a black and white checker flooring pattern? All the images I have been able to find online print out very poorly. I'm assuming printing the pattern is how most do this task?
-
Inspired by @James H I decided to darken the blue in the great cabin a bit. I like this shade quite a bit more. I also decided to plank the portion of the bow that isn't covered by the kits bulwarks, I used some spare 0.5x5mm basswood I had. I'm still trying to figure out what to do with the front mdf portion where the bowsprit comes through the hull, I know most won't see these details, but I'm the kind of person who enjoys looking in every nook and cranny of a model.
-
I like your blue much more, maybe I just need to go a bit darker in color.
-
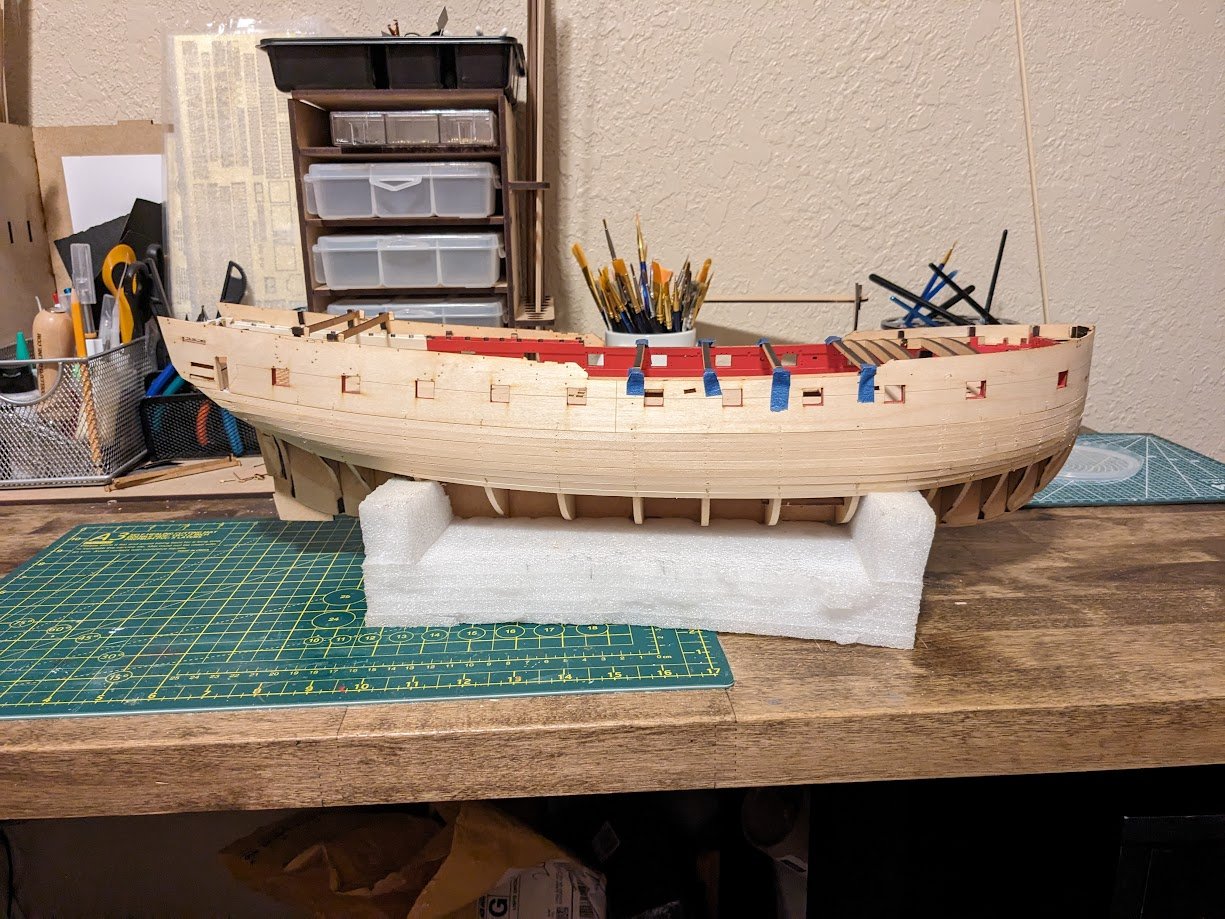
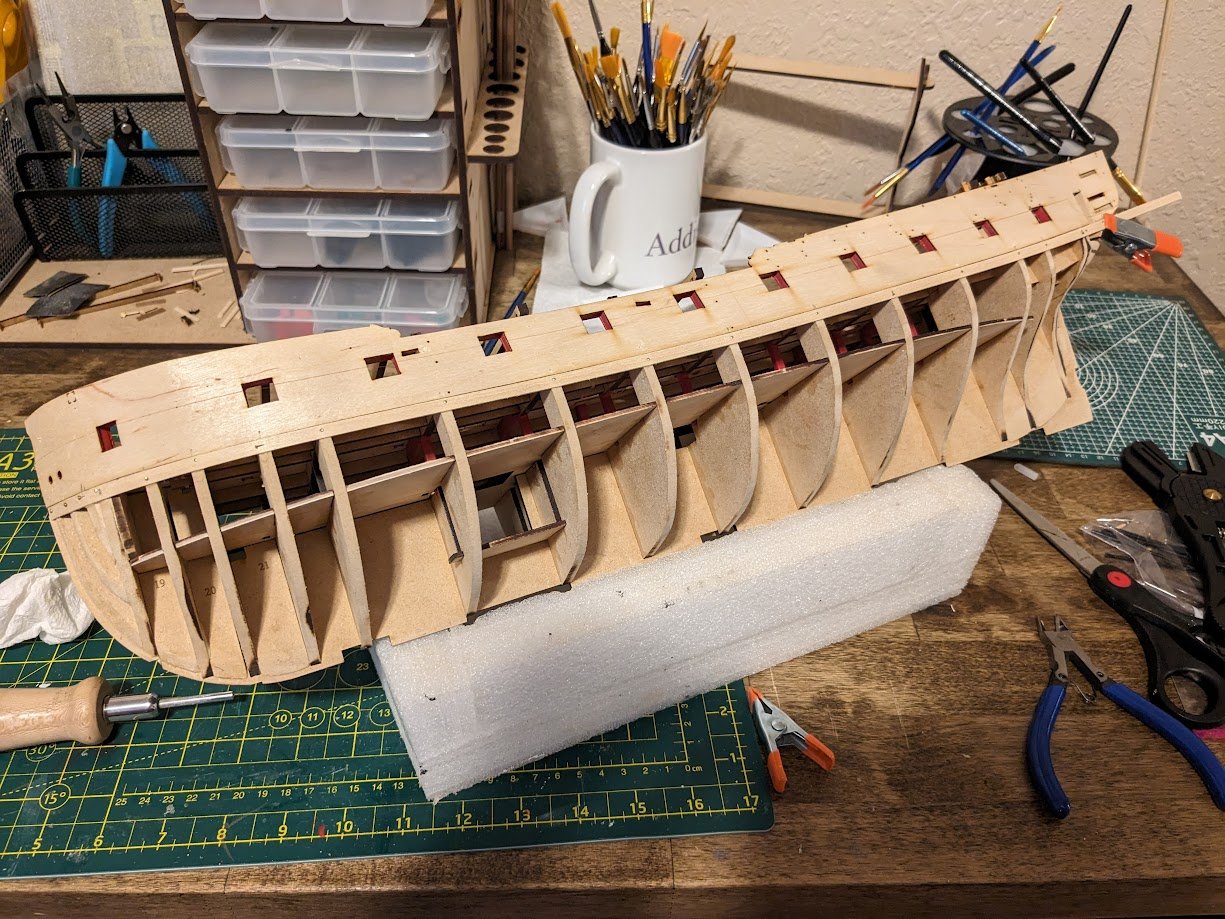
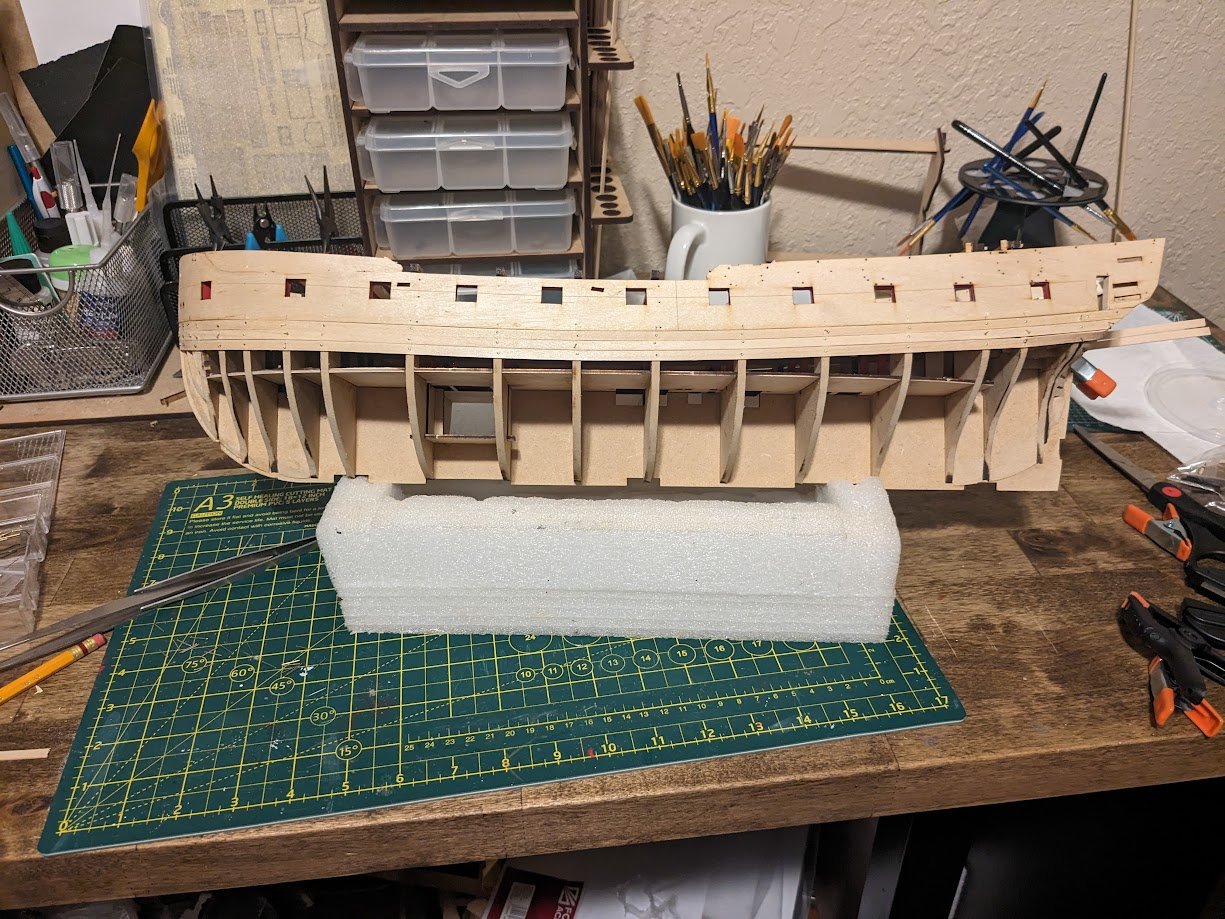
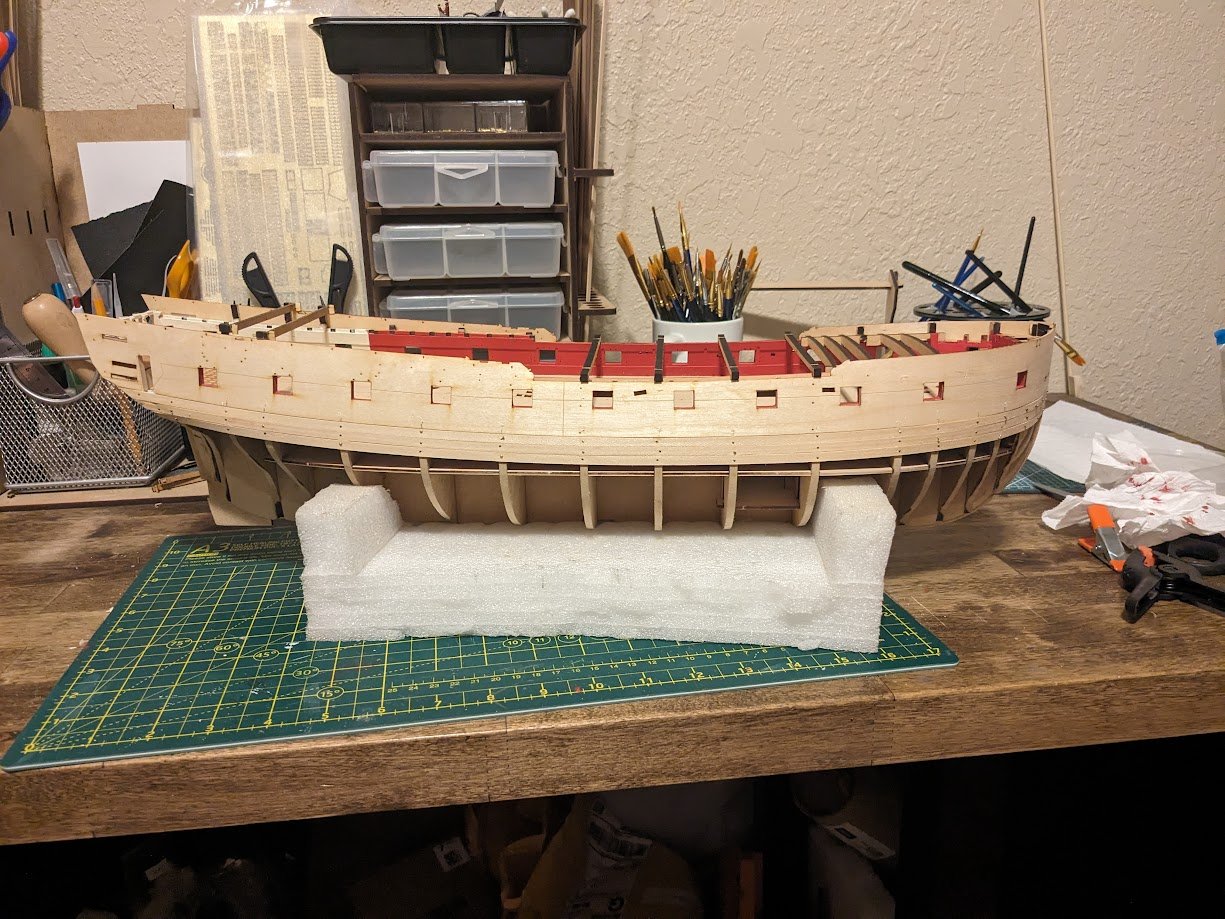
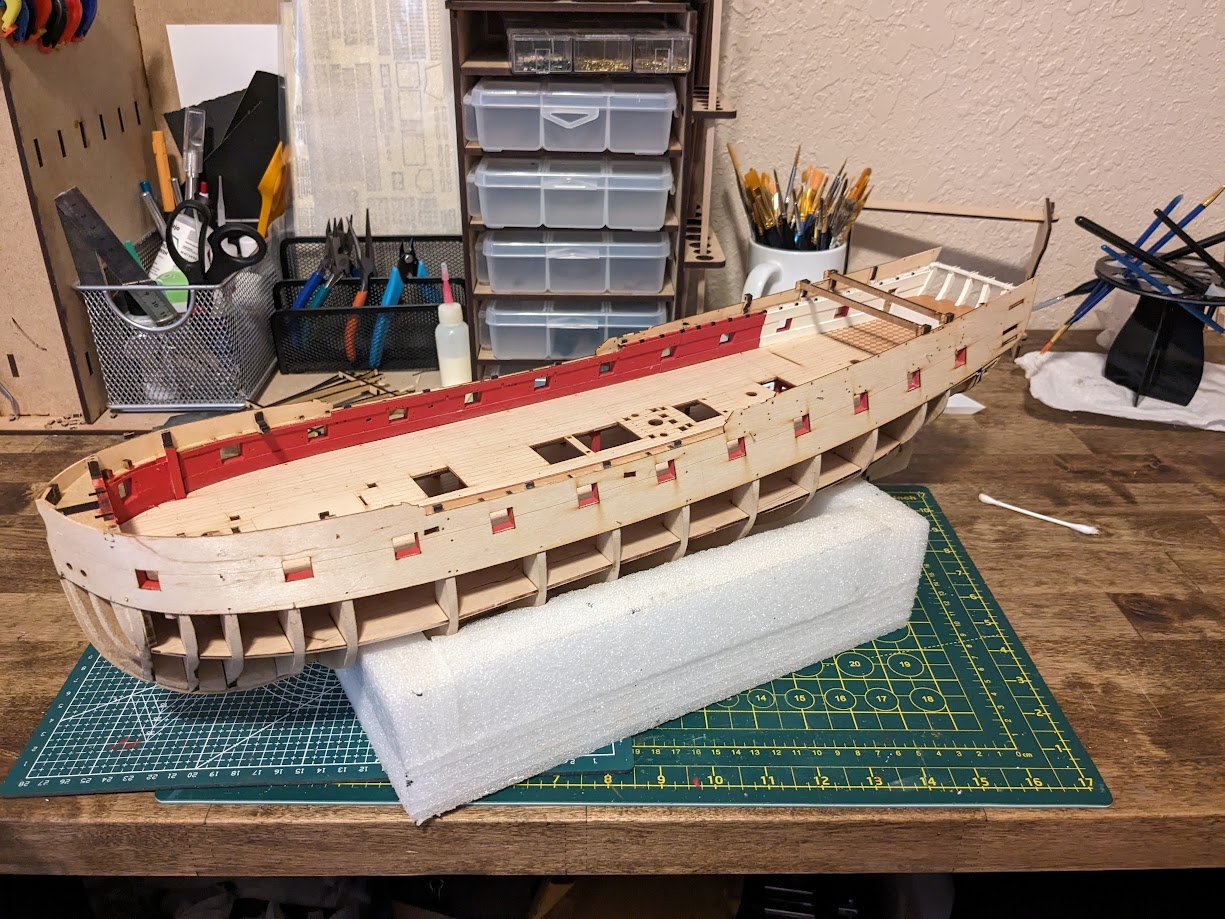
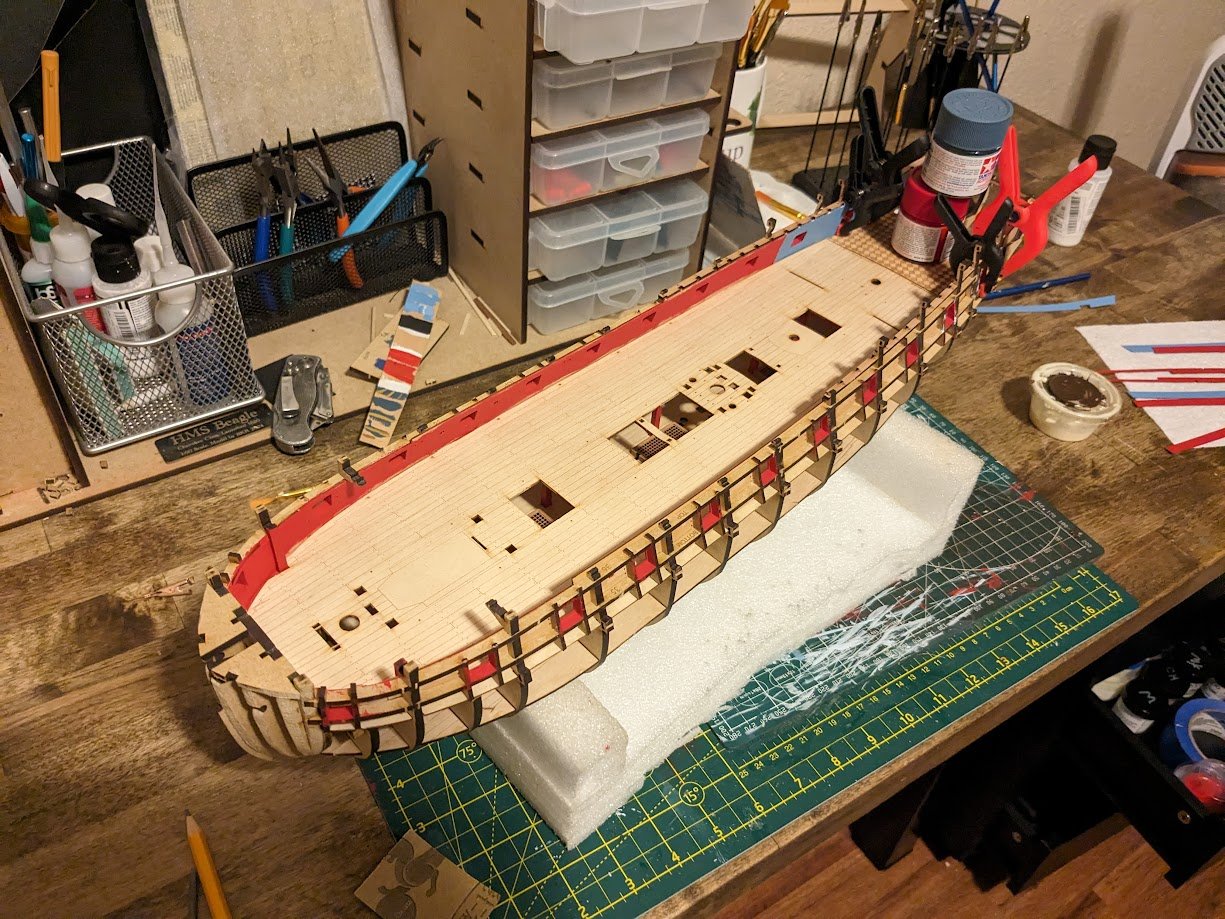
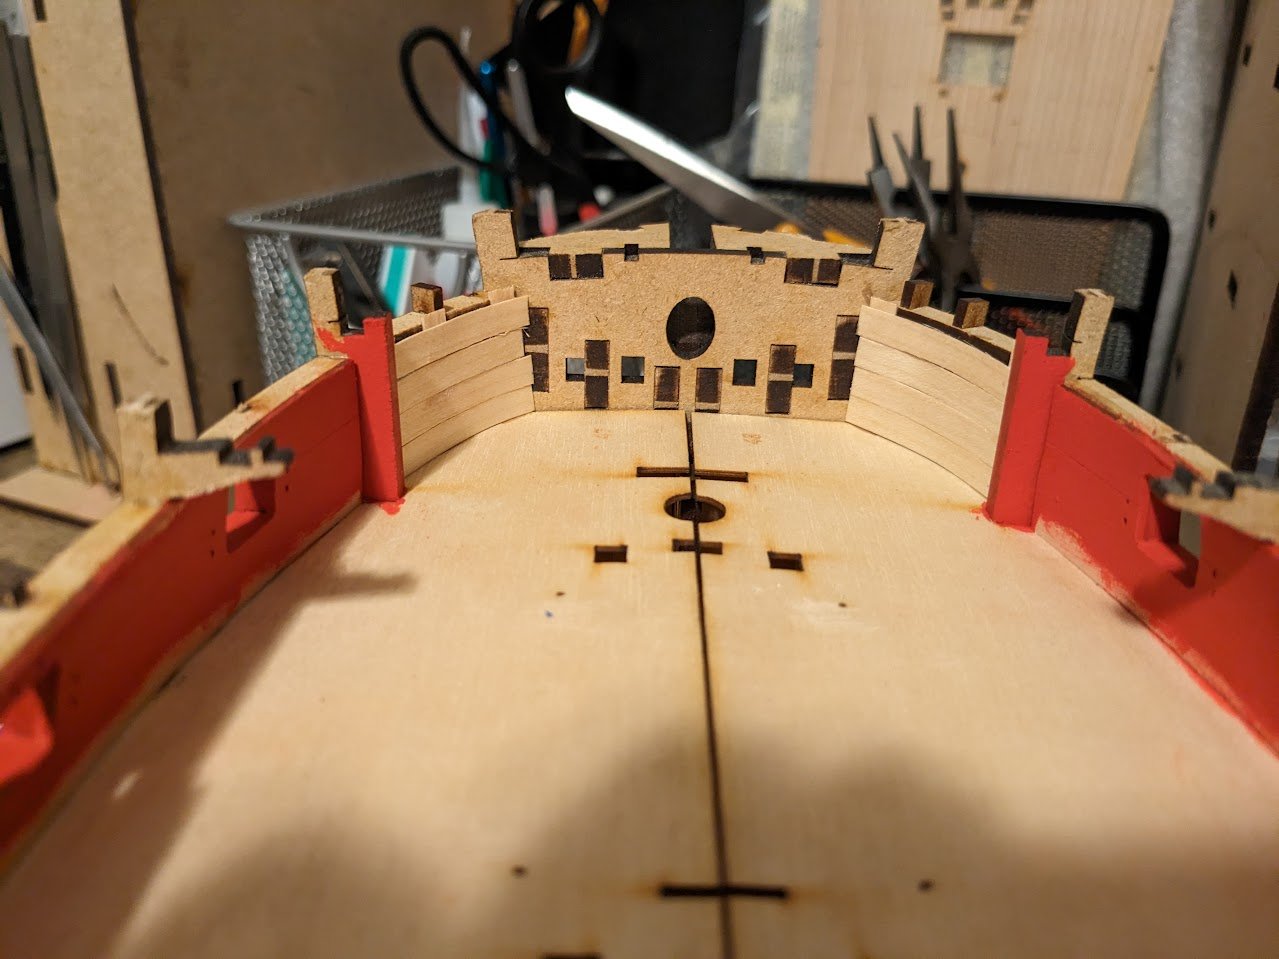
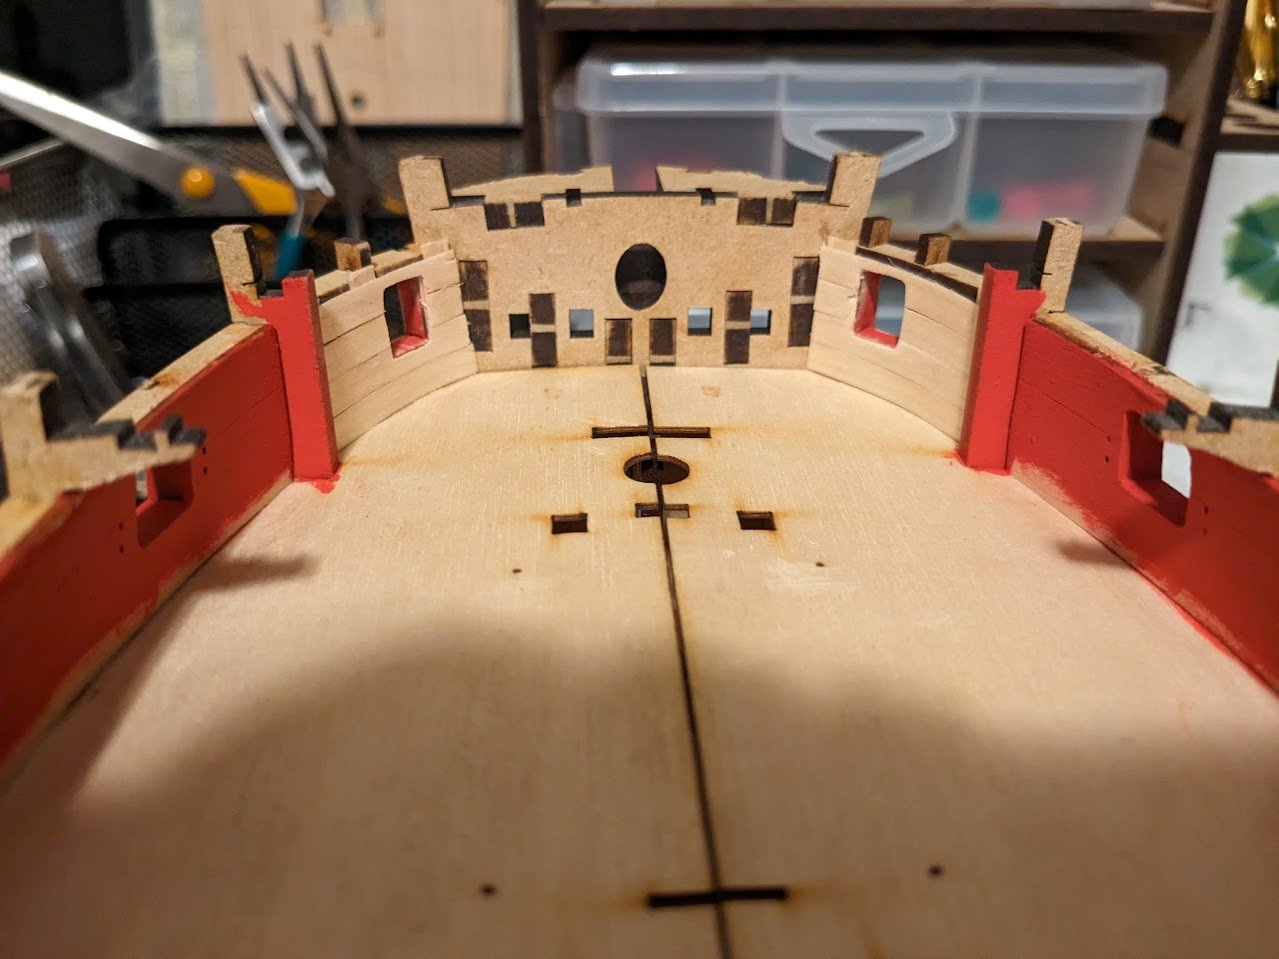
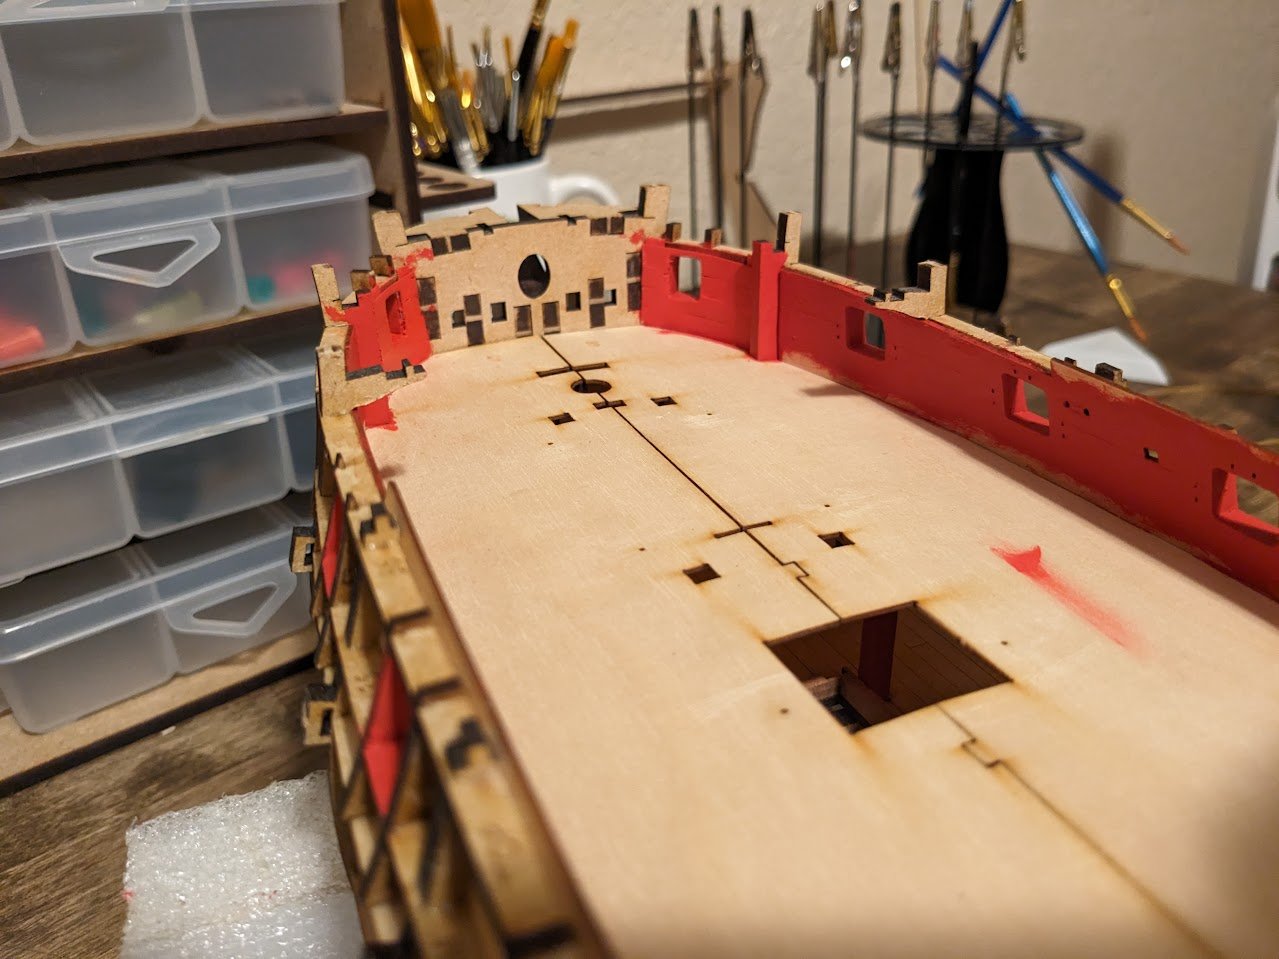
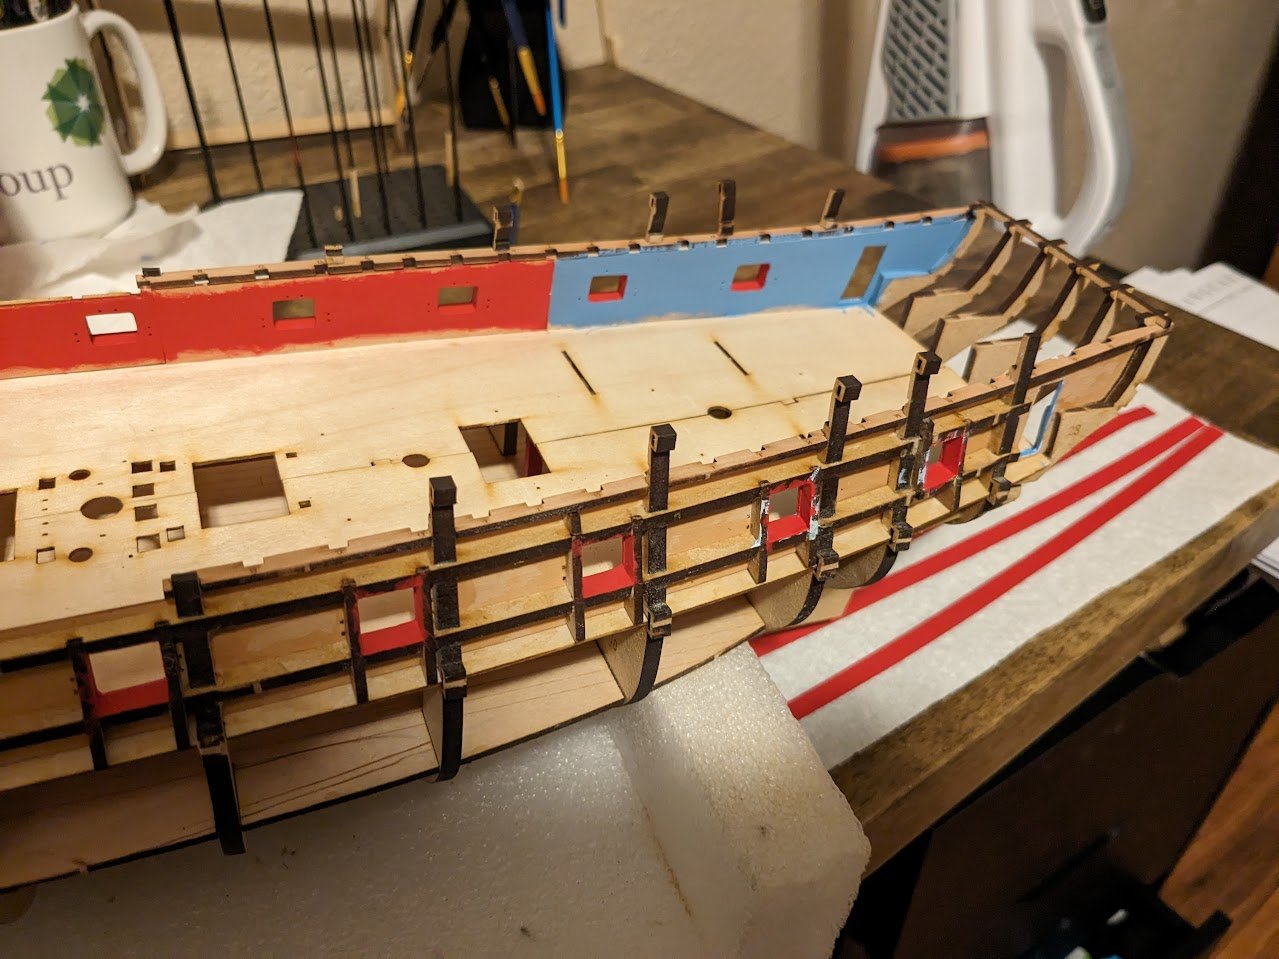
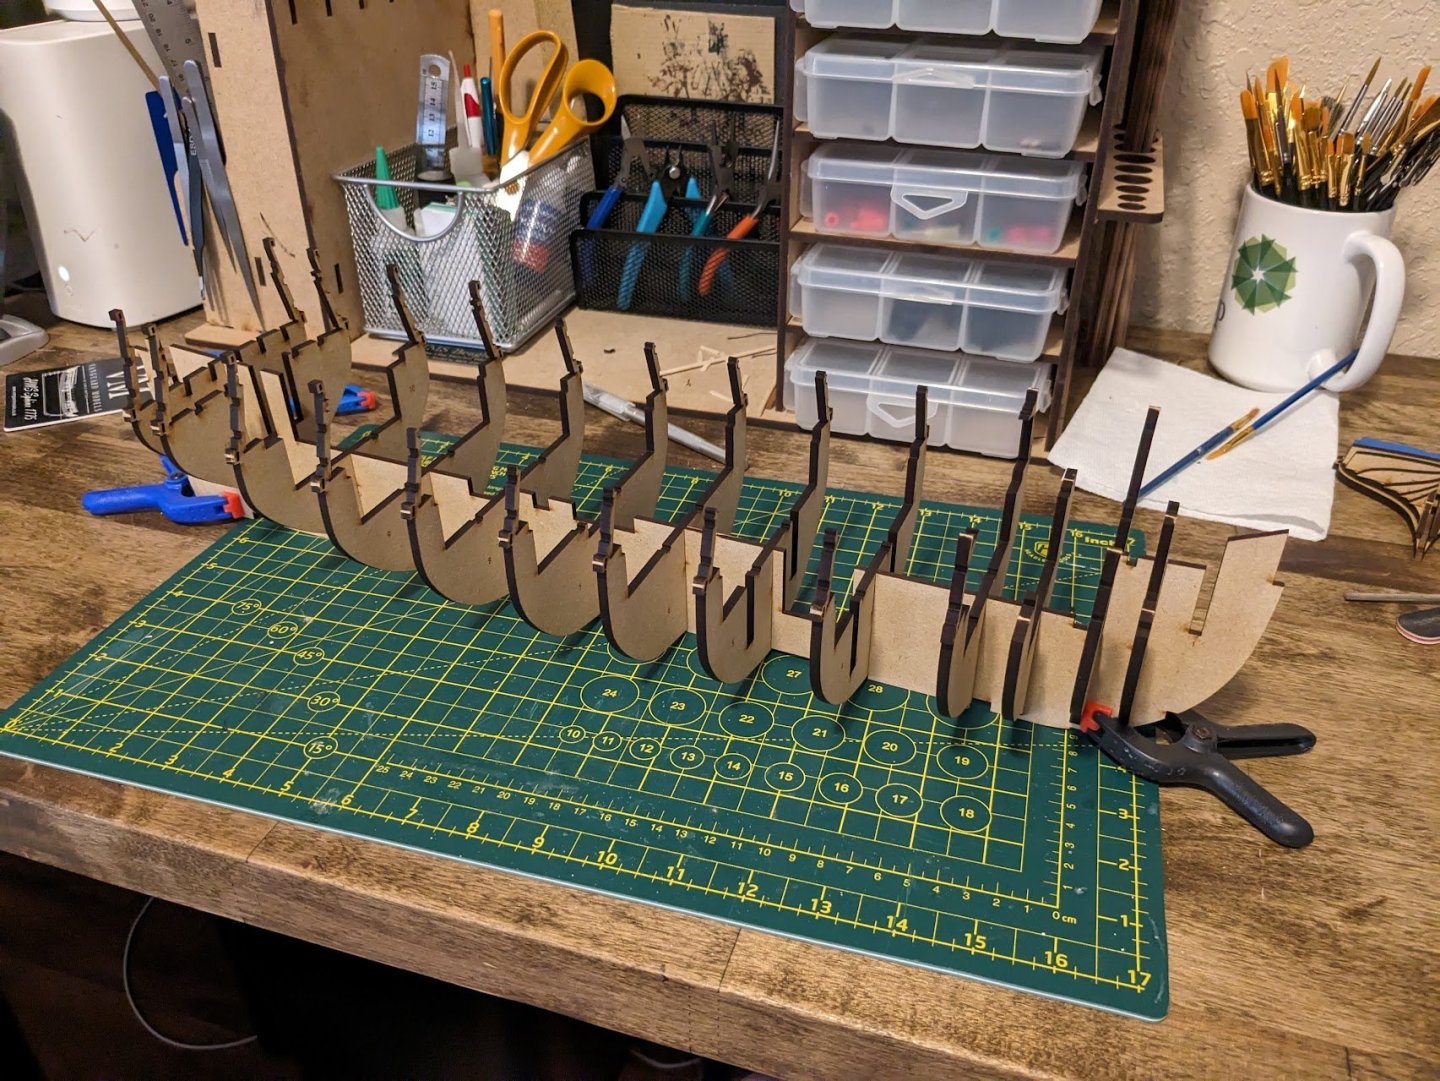
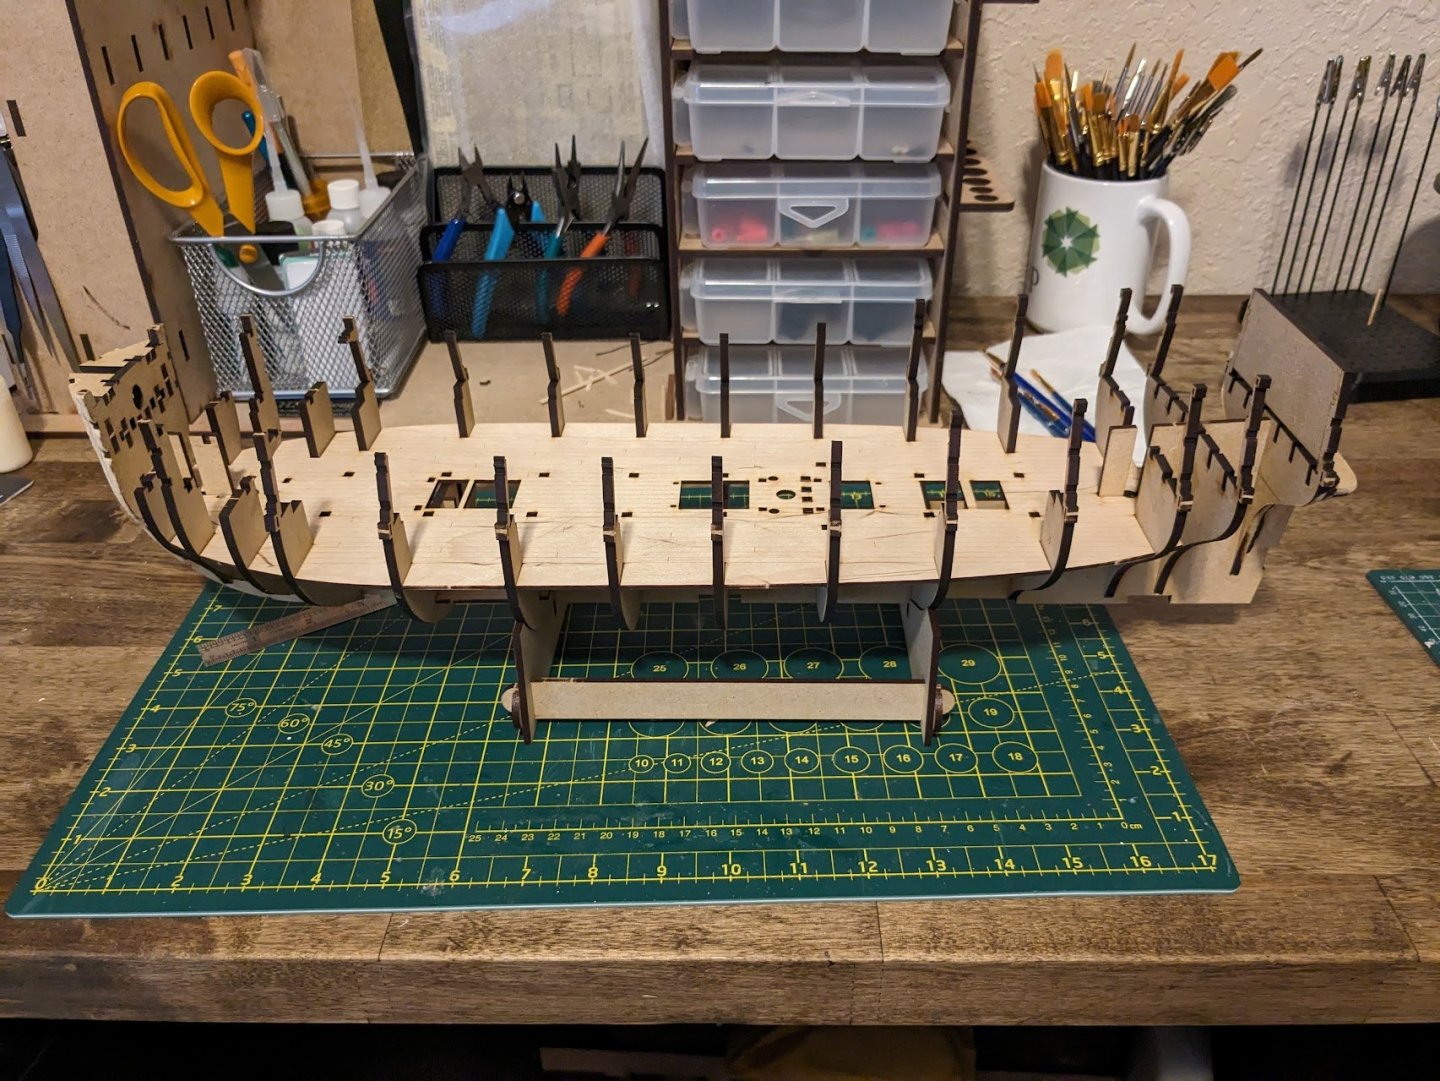
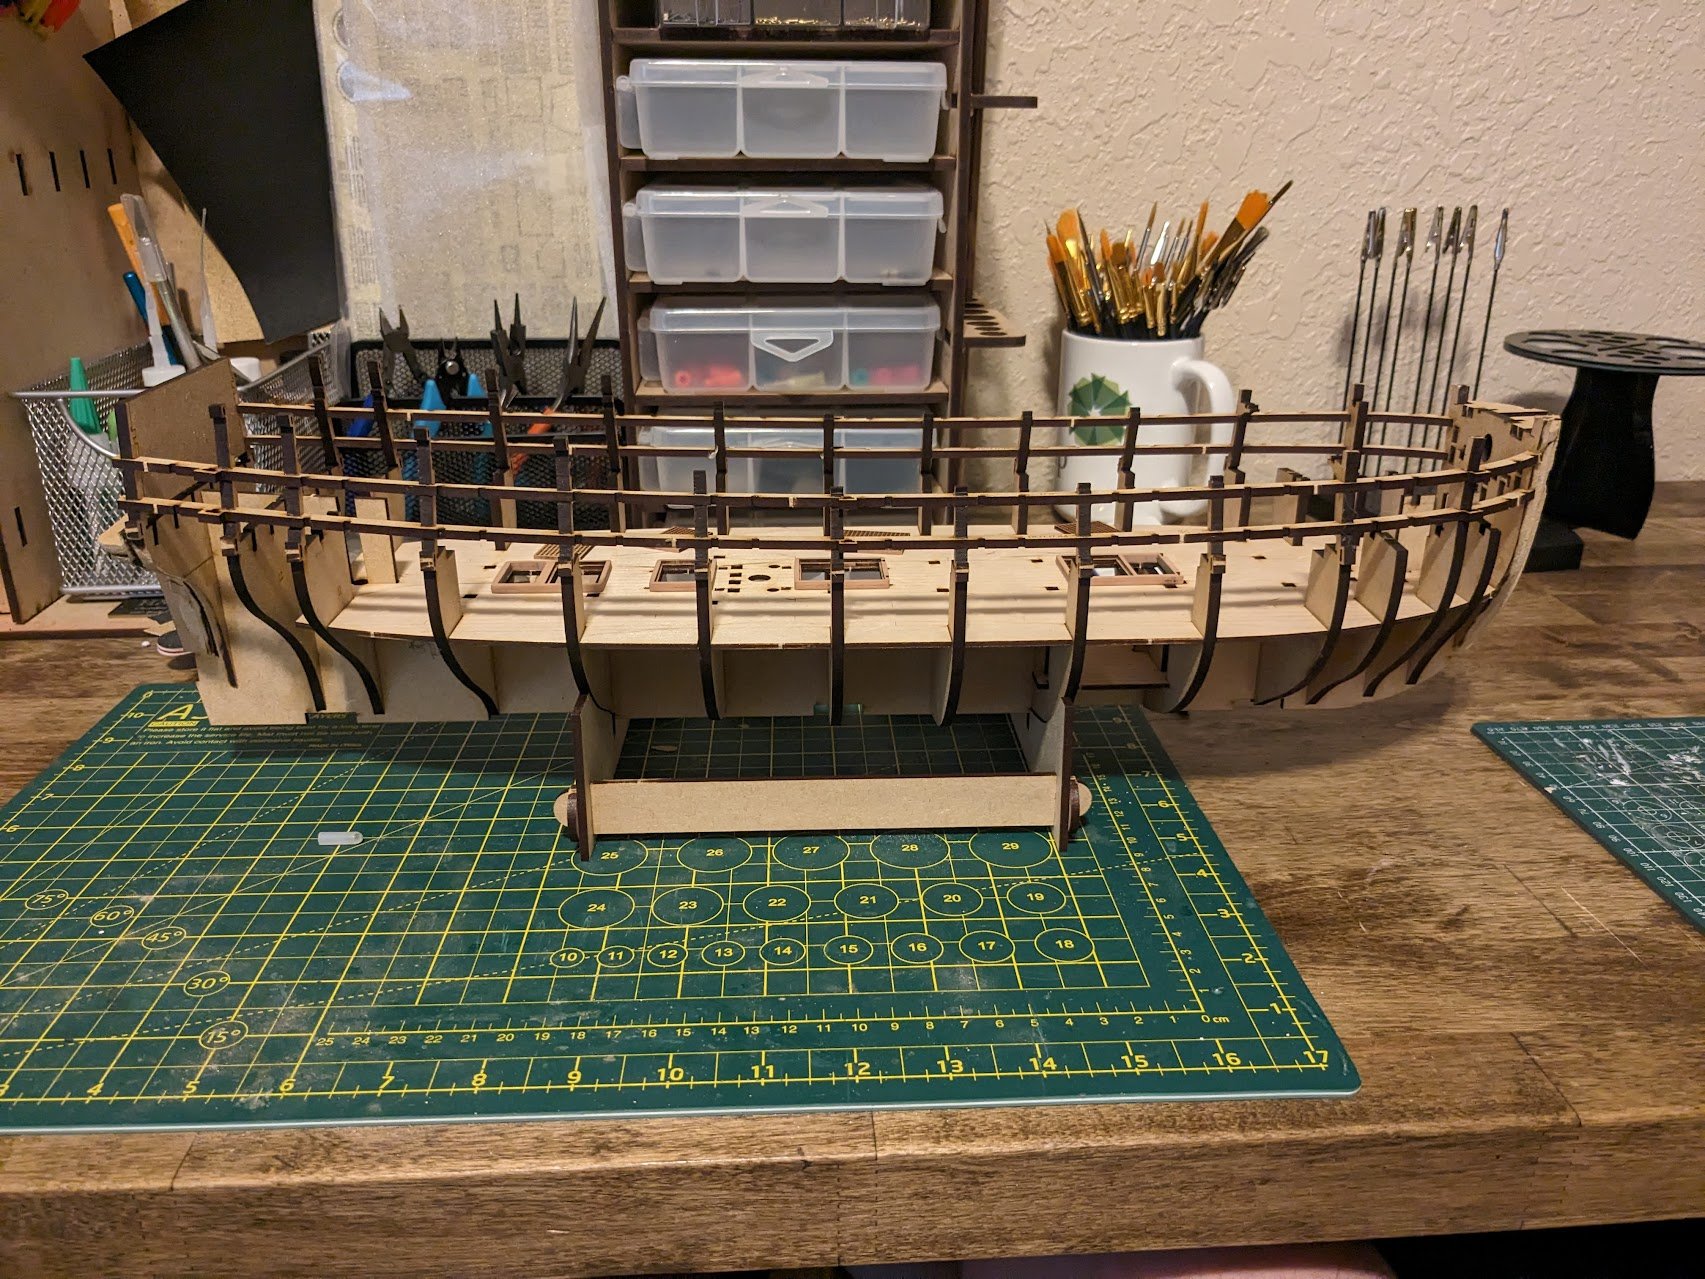
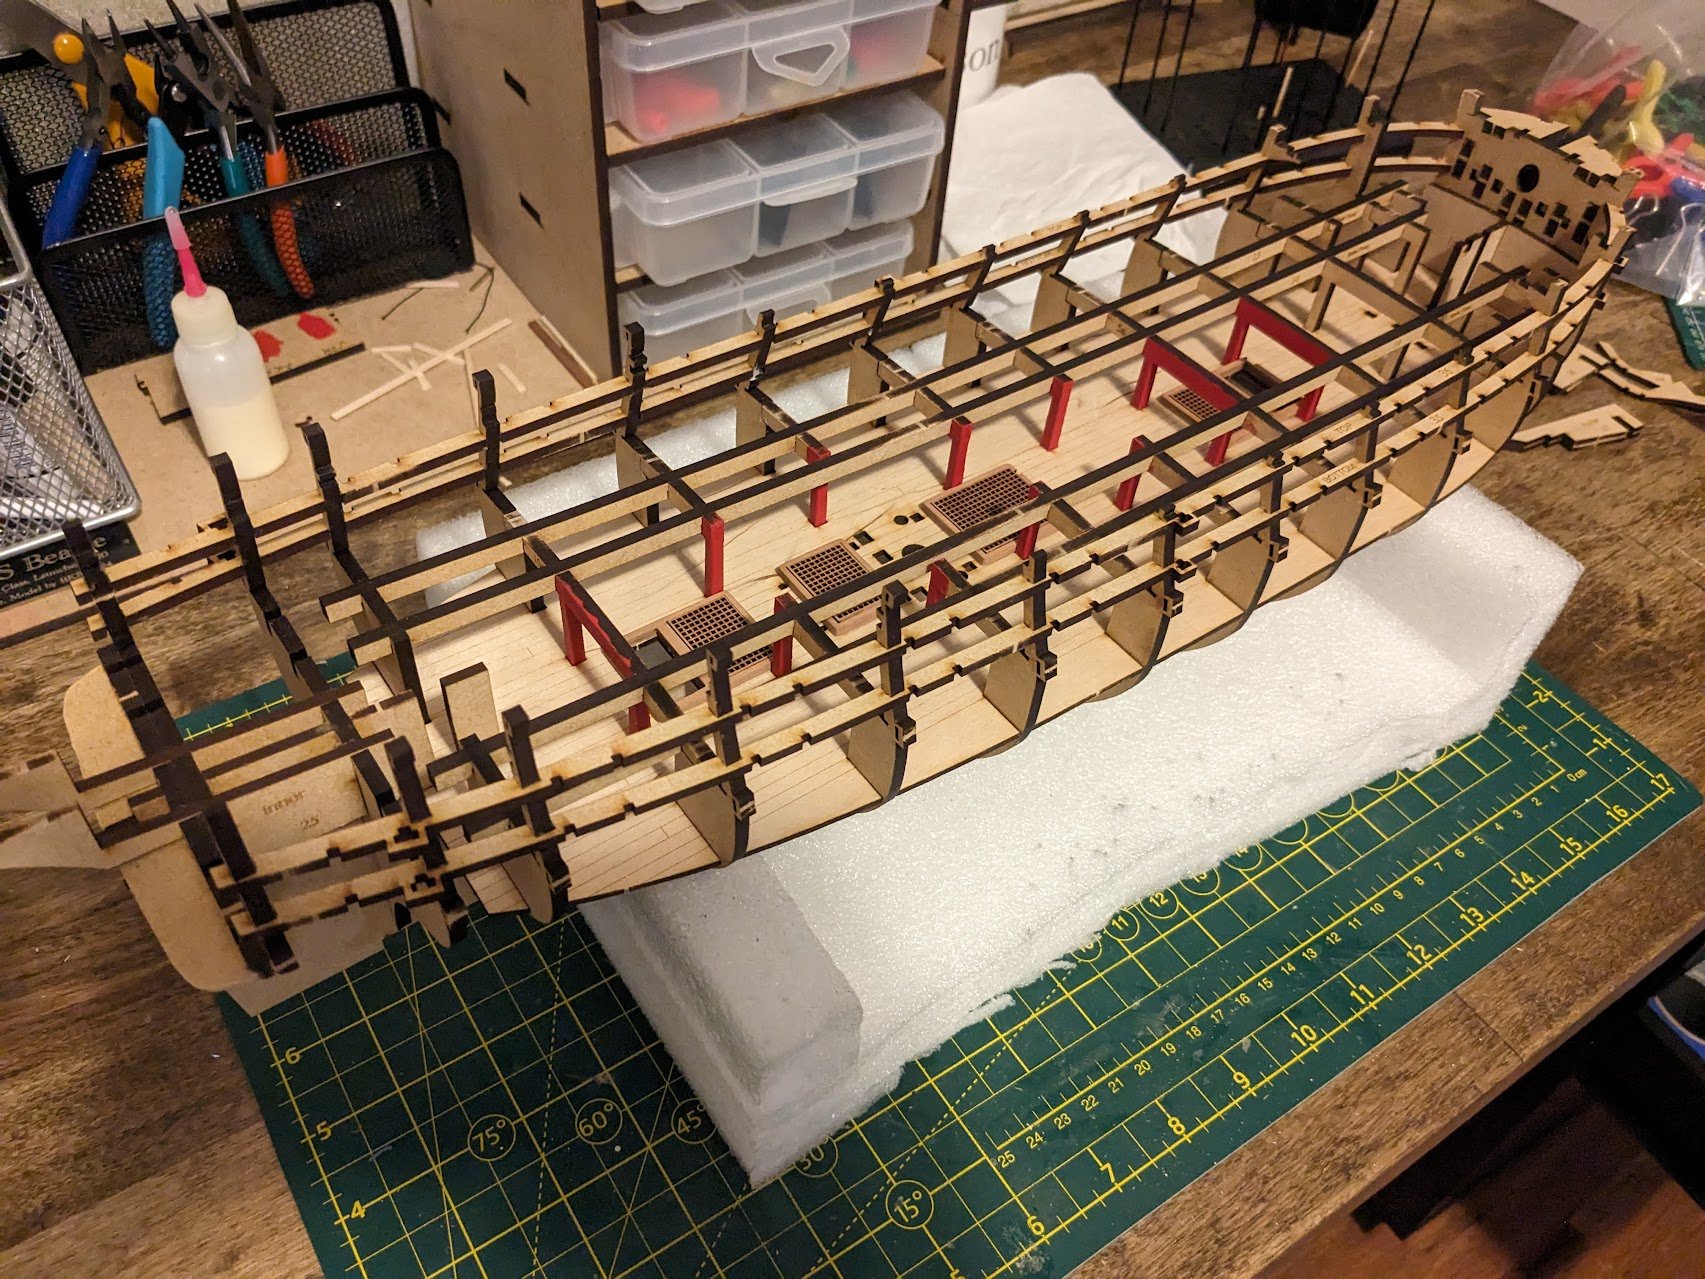
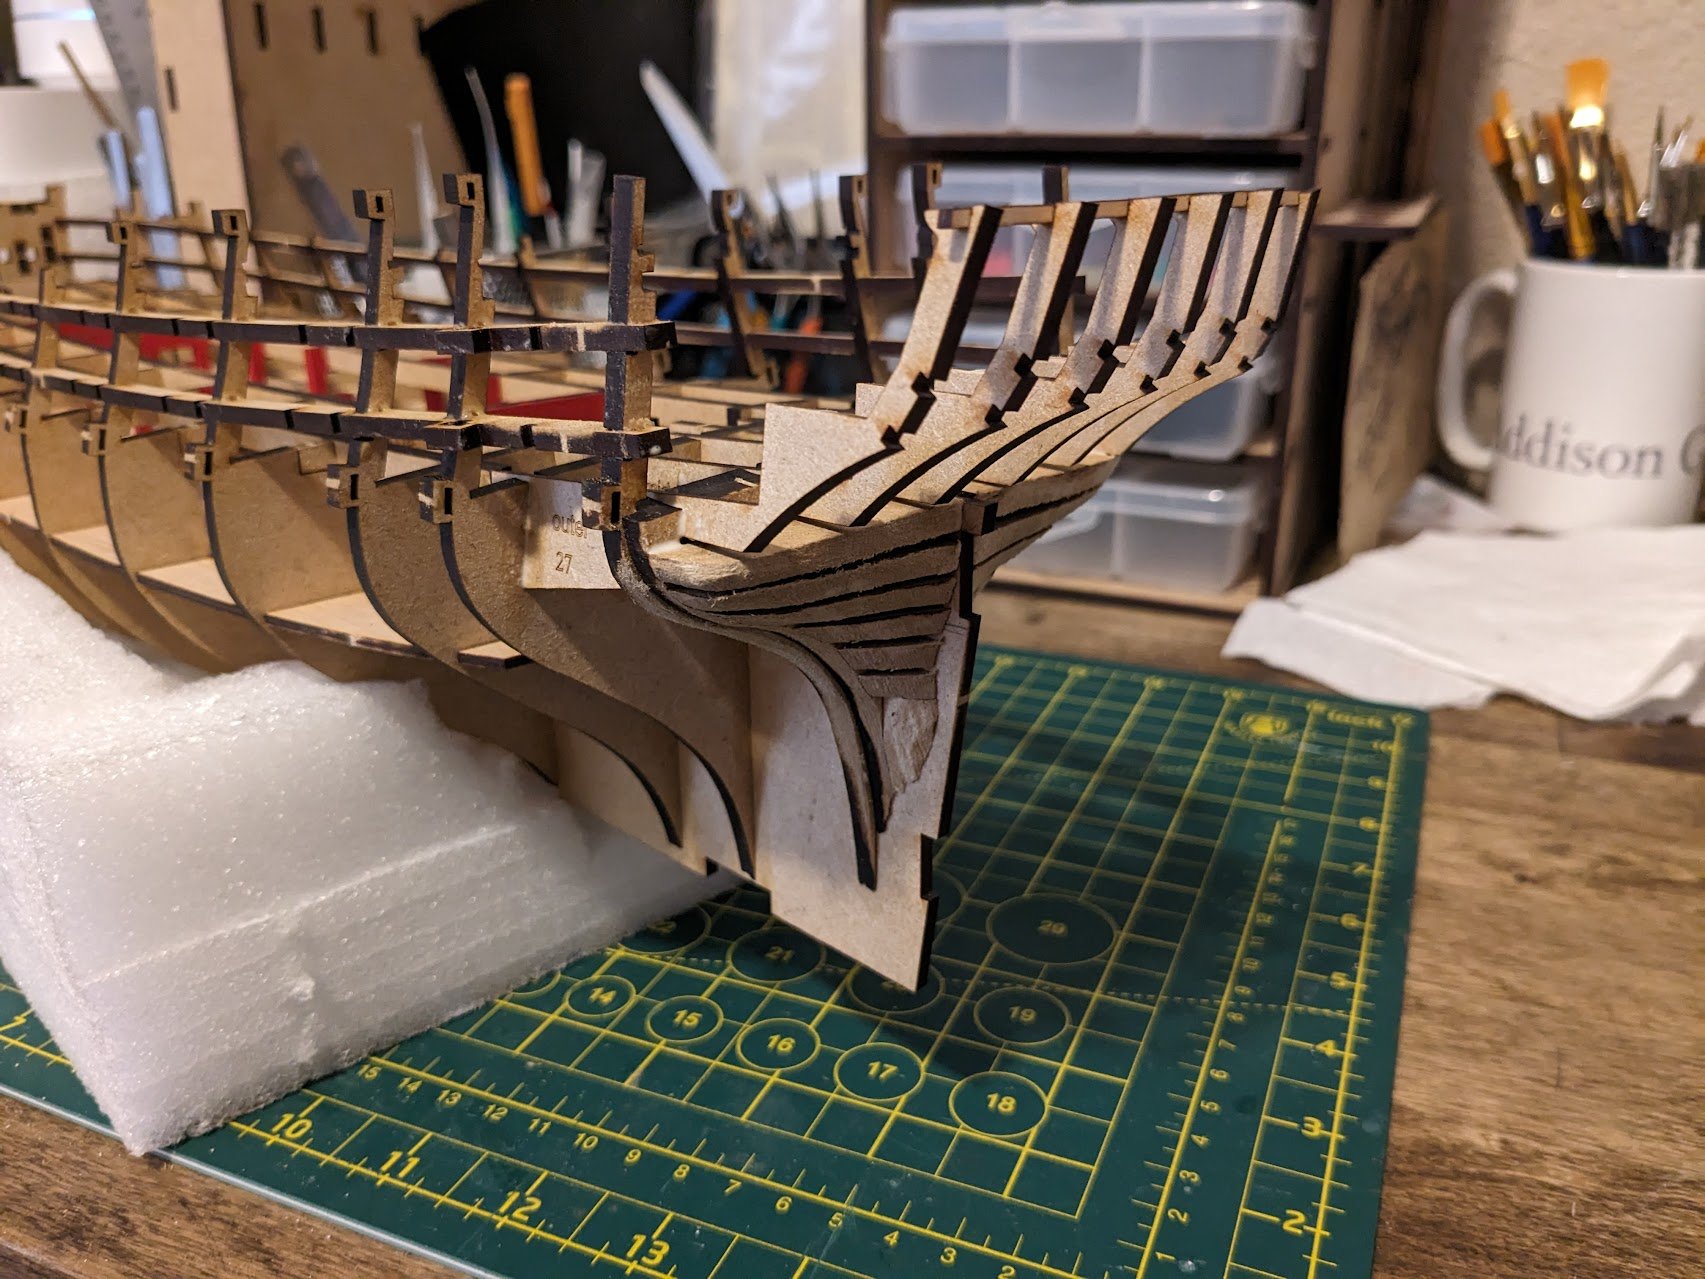
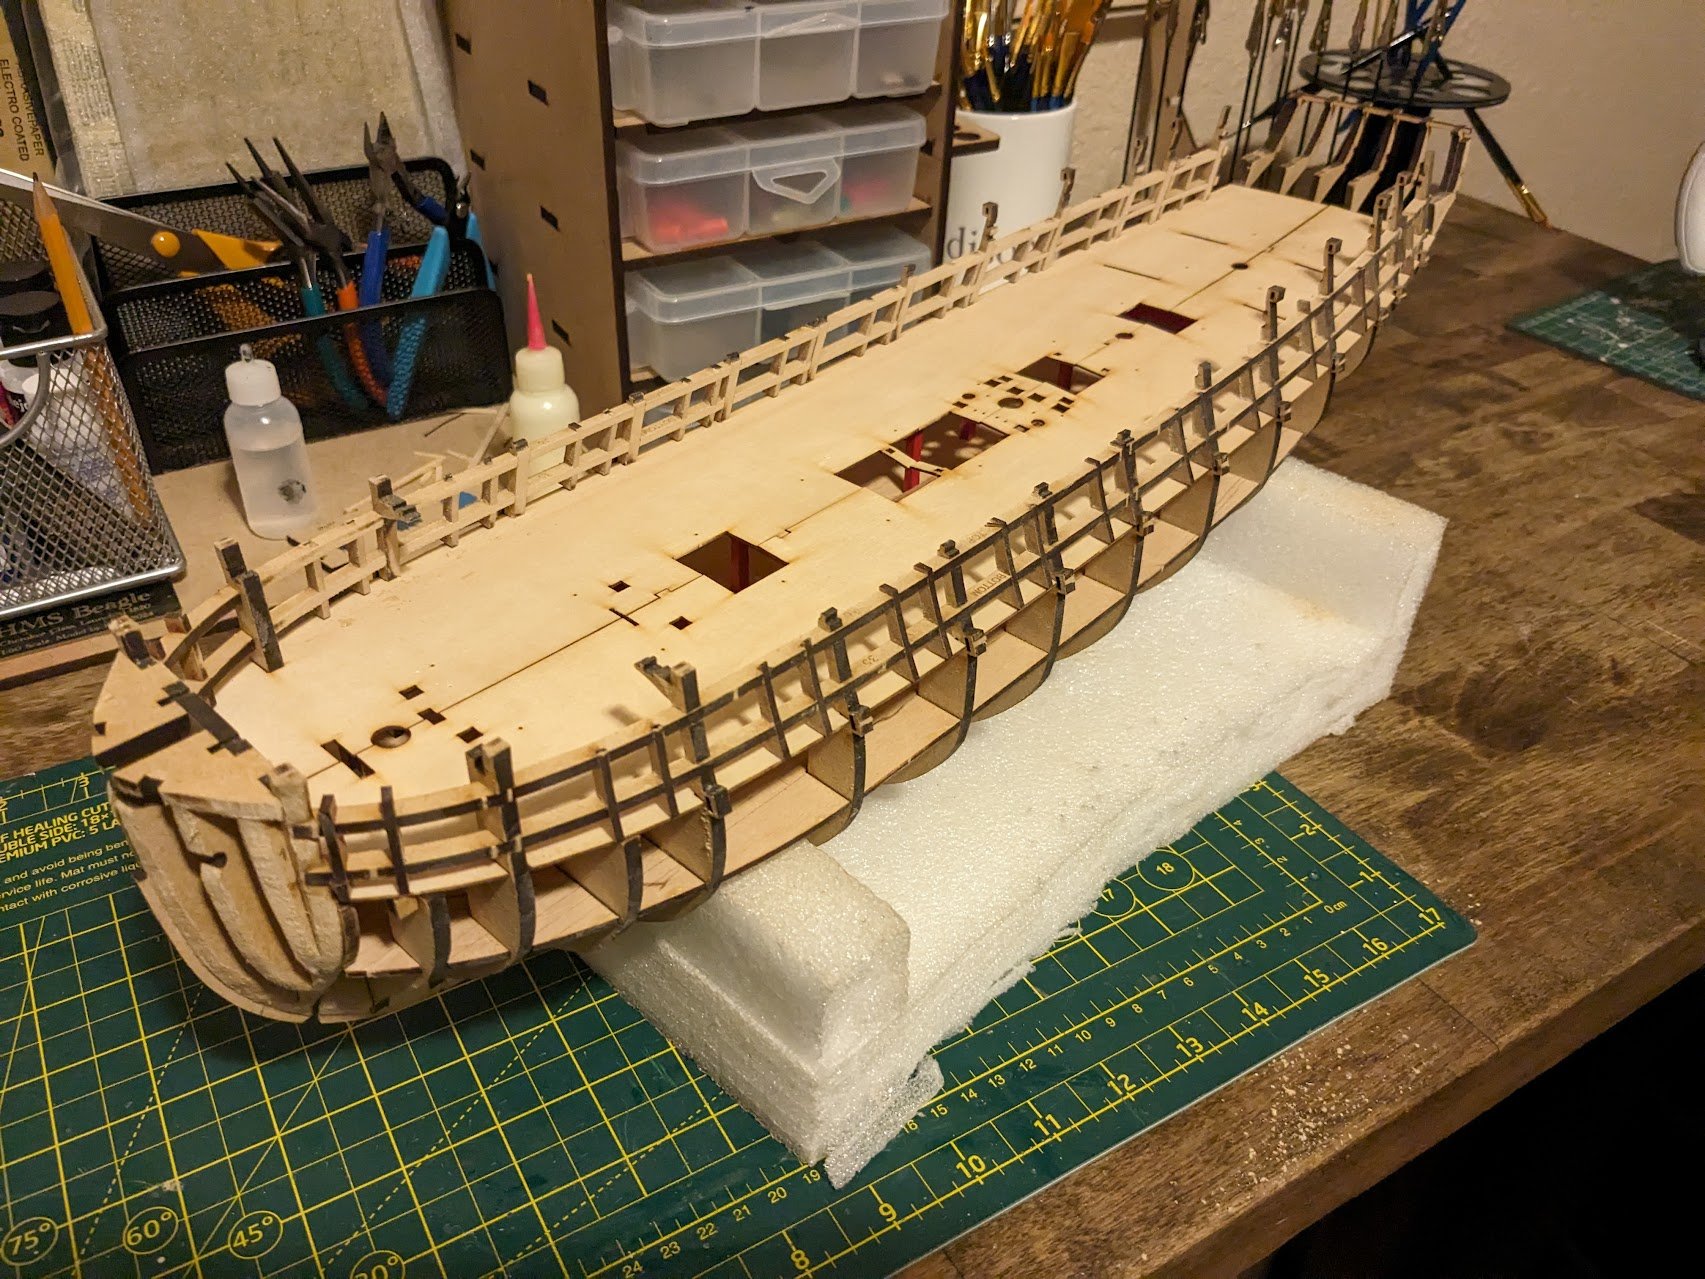
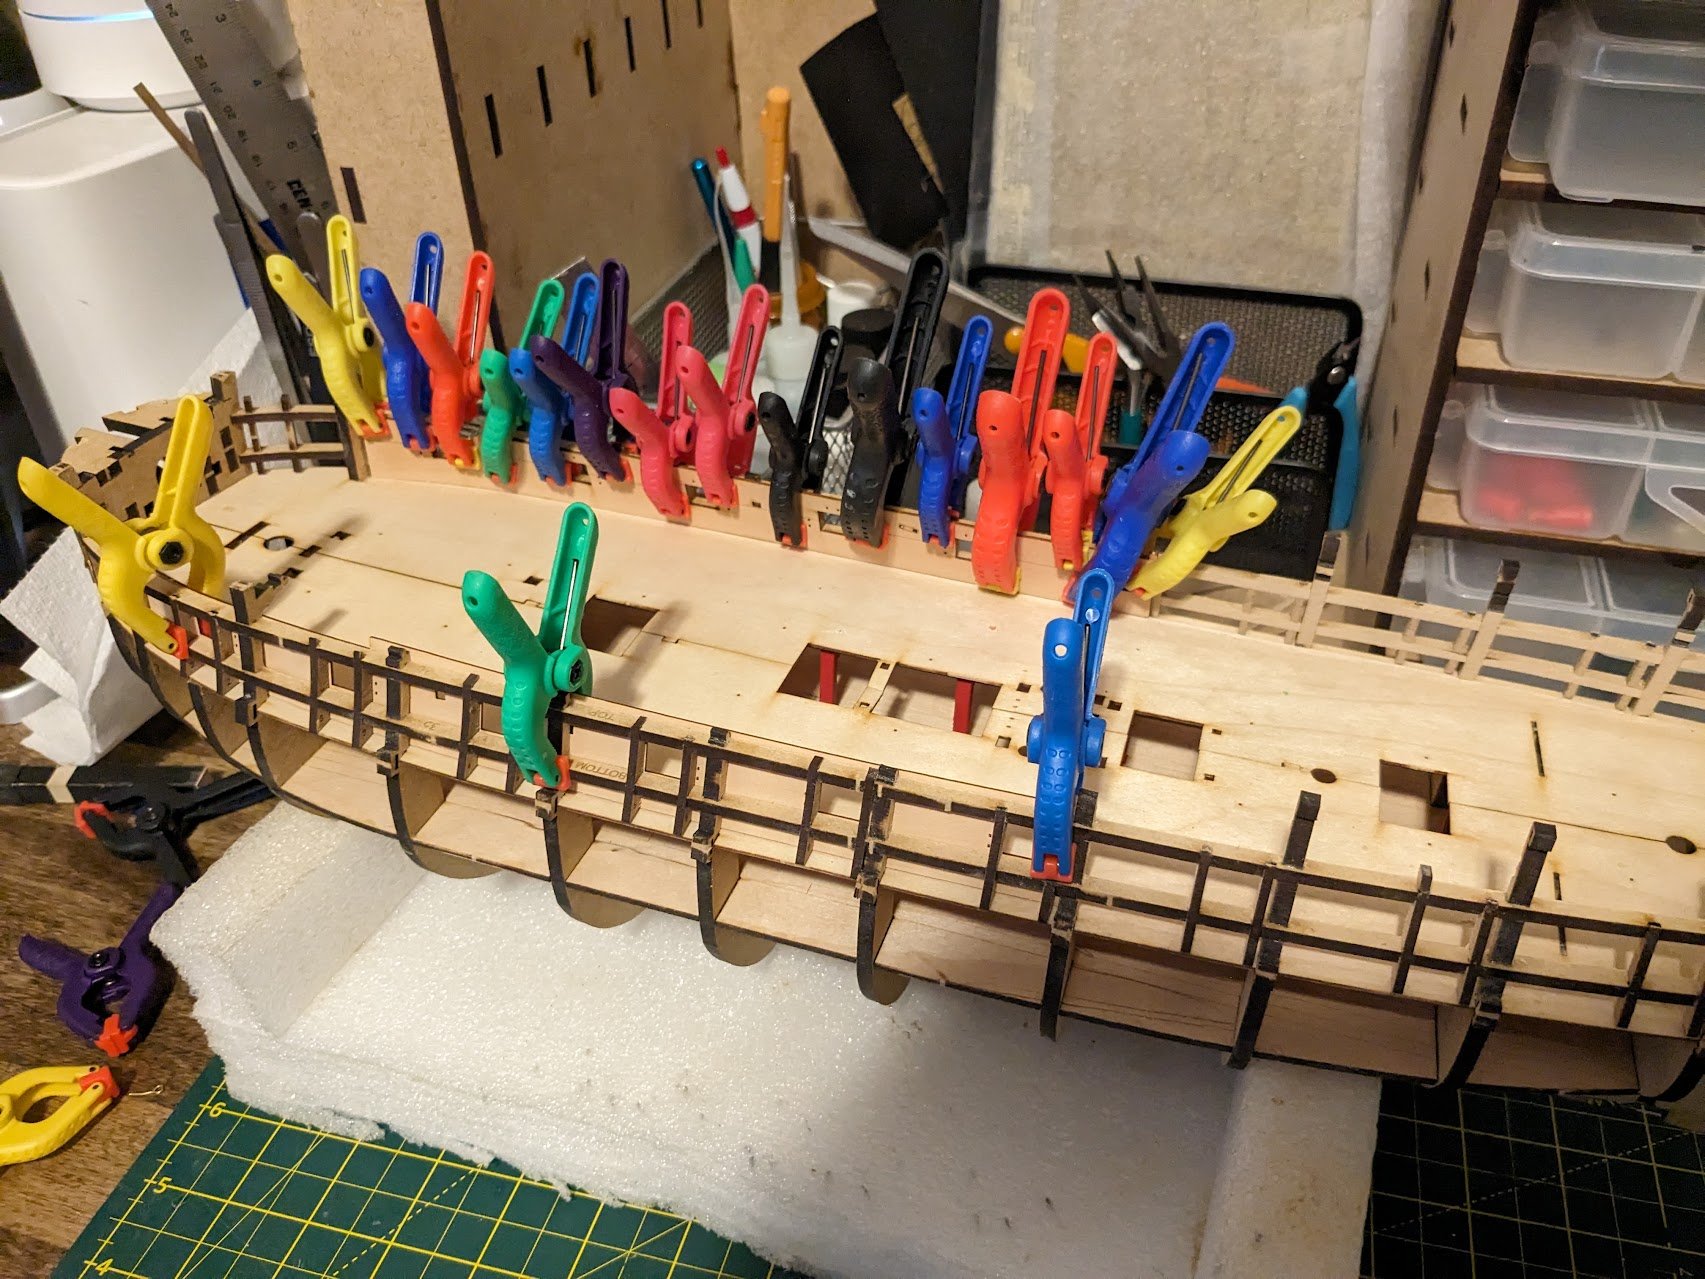
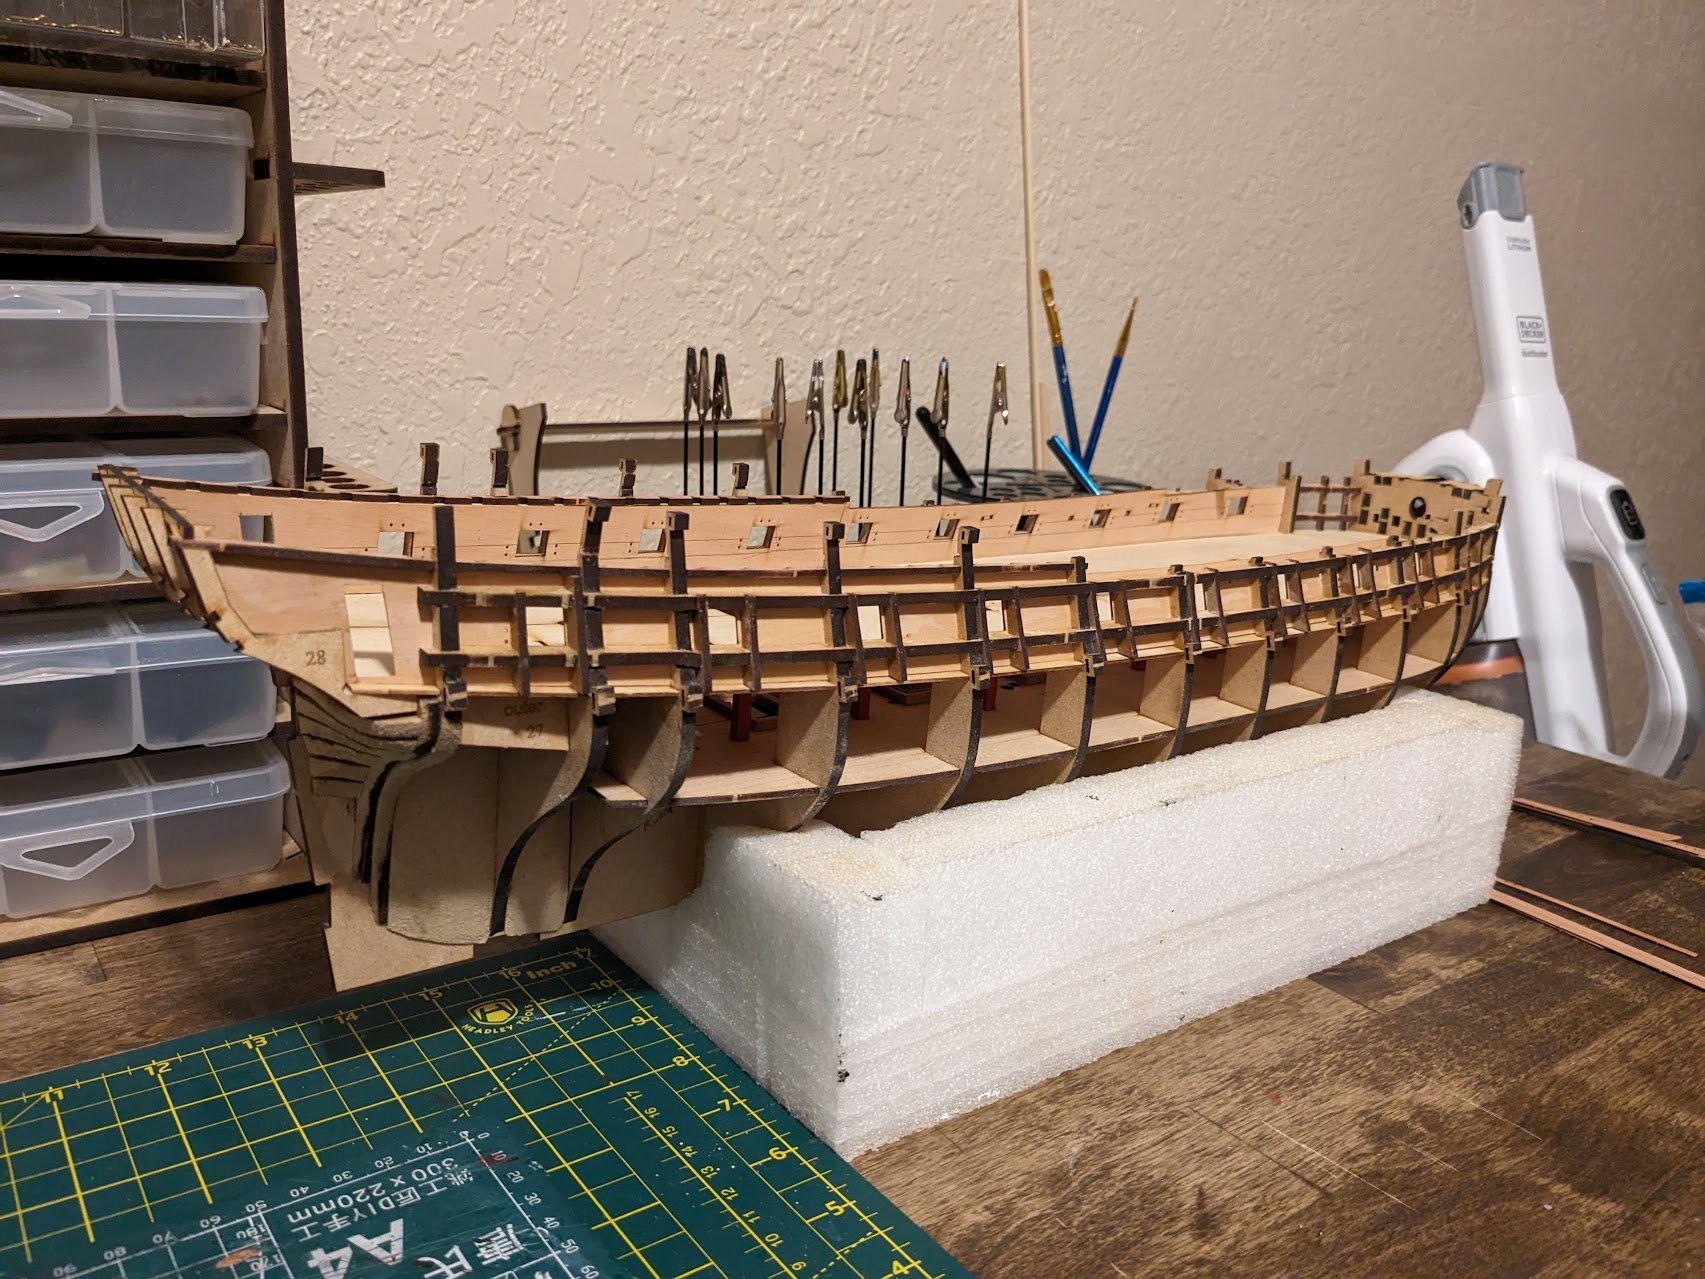
I'm very excited to start this model, I have been wanting to try out one of Vanguard Models offerings and the Sphinx is probably the top kit I have been drooling over for a bit. Just opening the box I can see a completely different level of quality from the packaging, instructions and the materials. I plan on making the ship fully rigged, adding some personal touches and modifications to make it my own, but this is only my second kit so I will try to keep within my limits. I have taken many inspirations from all of the phenomenal Sphinx logs that have come before me, and I am excited to join the Sphinx club. I took a couple of days off before this Memorial day weekend, so I was able to get a nice start on this Sphinx. I think we all have seen how the bones of this model goes together so I won't post a ton of those photo's. Chris's engineering is quite clever on how the model is assembled, I keep telling myself "thats clever" while putting it together. I think the worst part about building a Vanguard kit is that I'm not sure I will be able to go back to older style kits.\ Gun ports installed Inner framing sanded Forward Inner bulwarks being glued in. I think its time to invest in more small clamps as this was almost all I had. Rear inner bulwarks being glued Inner bulwarks in, you can see here one of the modifications I am planning with opening up the quarter galley doors and opening up the quarter galleys following Blue Ensigns method in the future. Painted the bulwarks and great cabin walls. For the great cabin I was going for very light blue like HMS Victory has. I mixed a couple drops of Model Shipways blue trim in some white paint until I got similar to the photos of Victory's great cabin color. I'm not certain if I like it or not, It just doesn't feel like it fits next to the red and the color dried a little bluer than I was expecting and reminds me of a color you would see in a children's nursery. Another option I was considering was a shade of white as that seems like another common color for the great cabin. What I was going for, maybe it will look better when I put some walls in between the red and blue and add some furnishings.


.thumb.jpg.6a9b773662a854b0edee3084ae0f72a4.jpg)
-
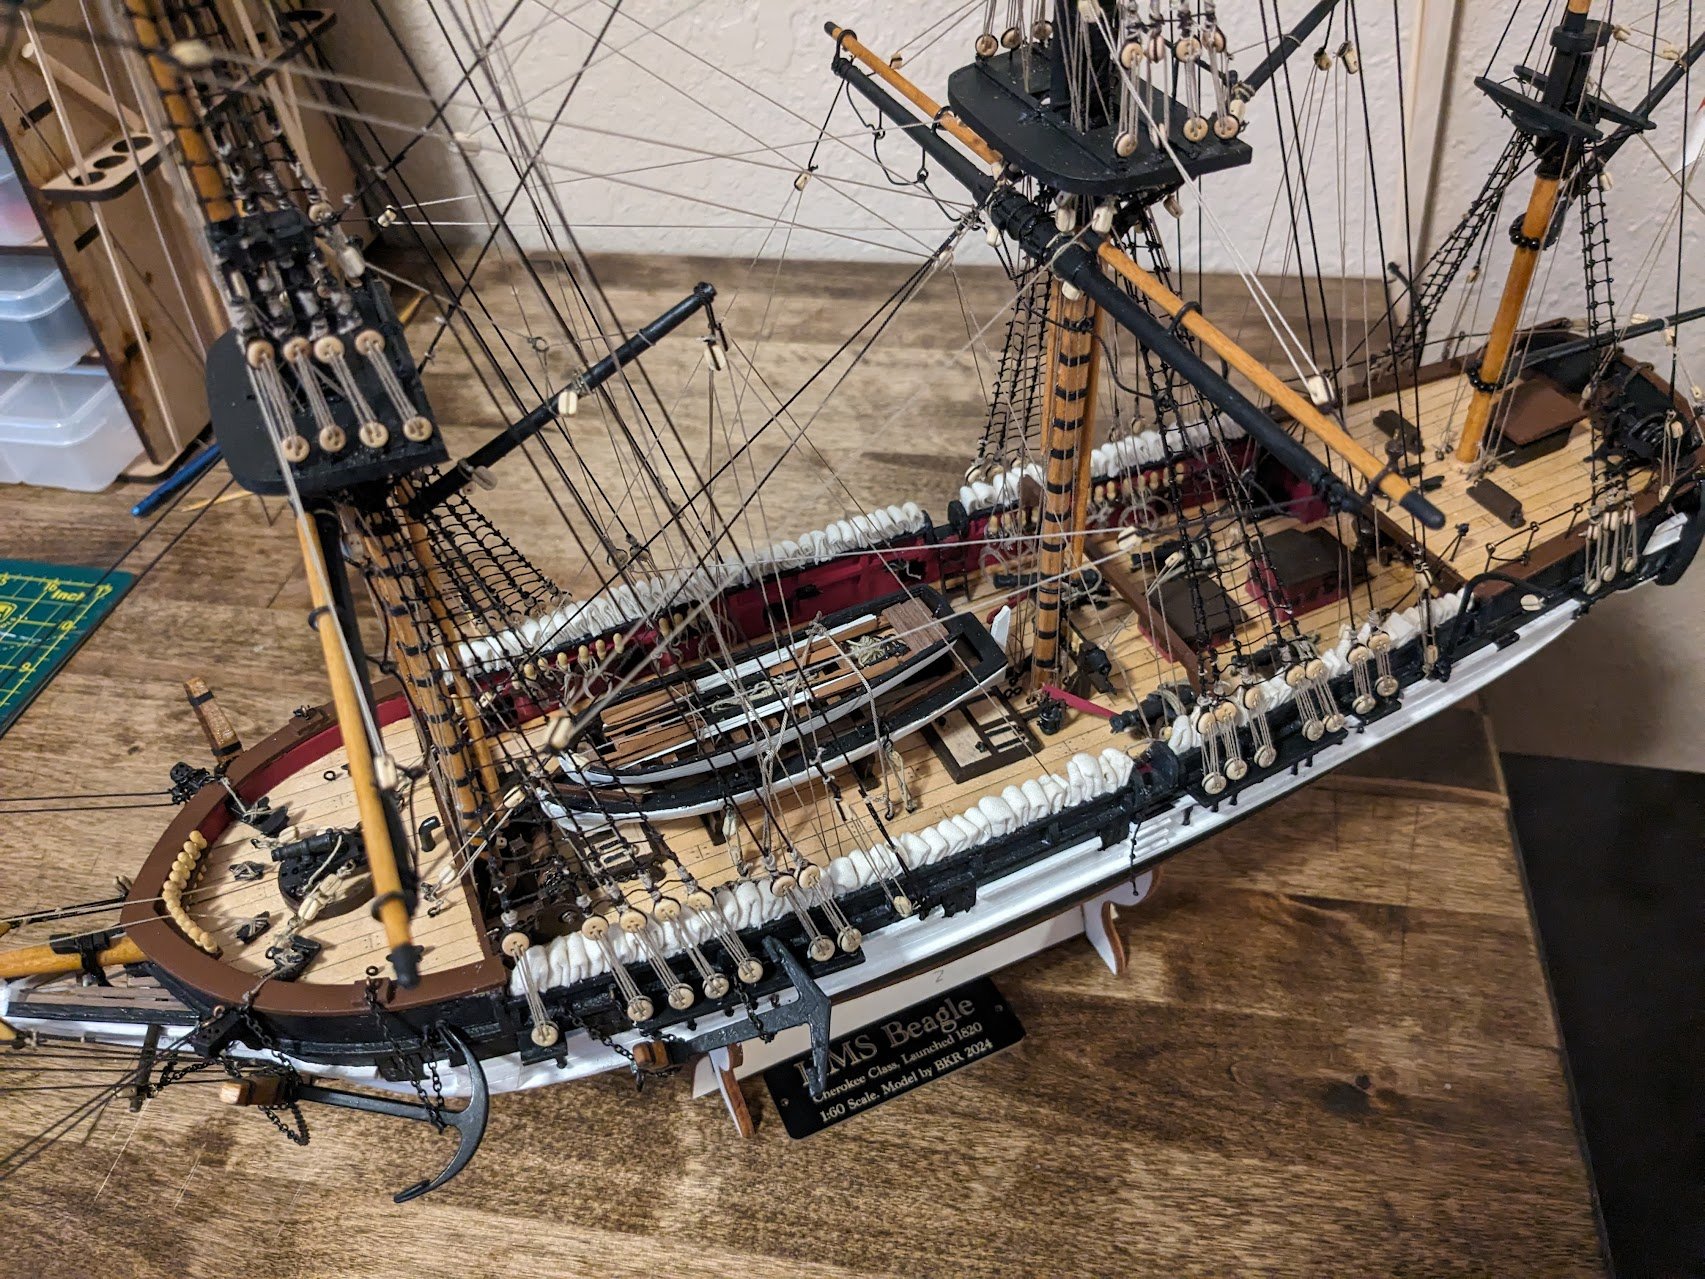
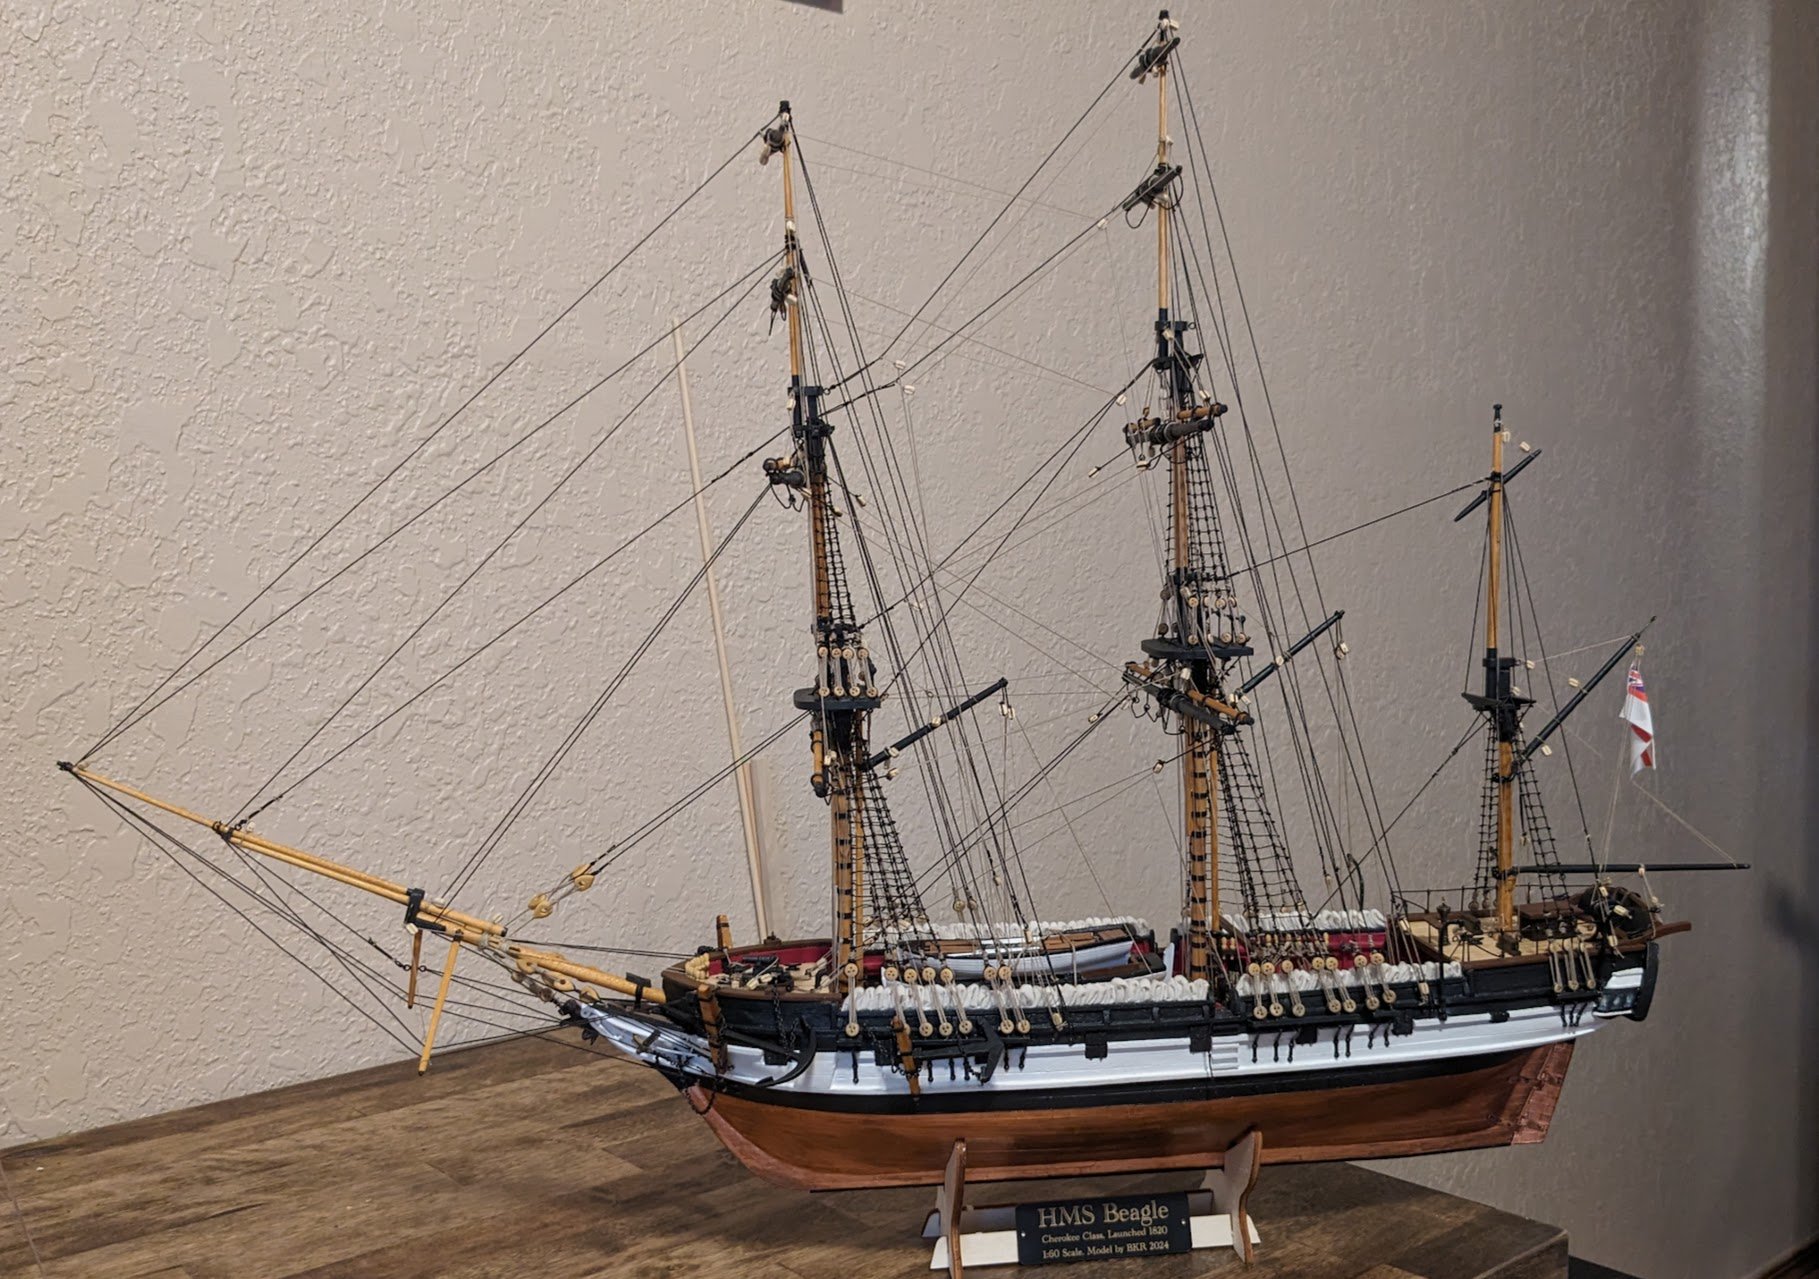
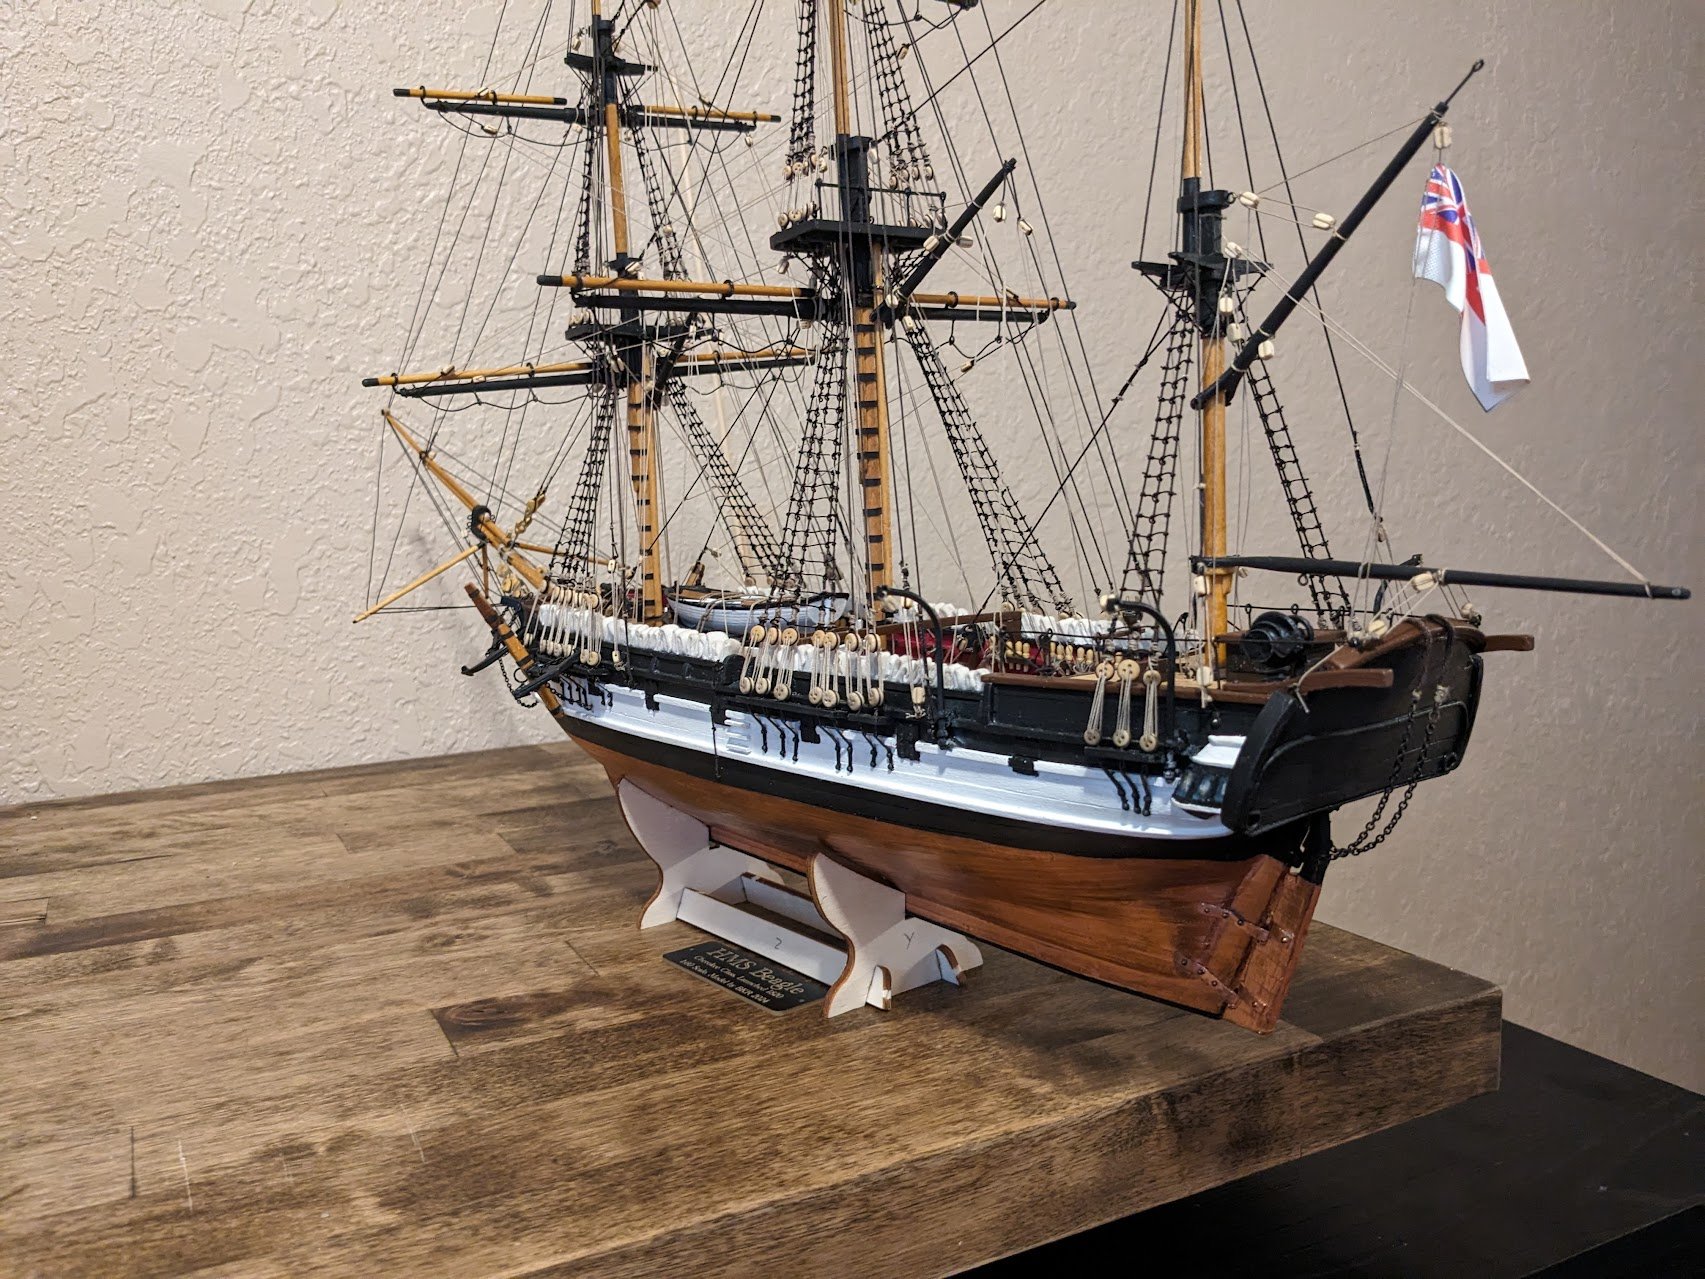
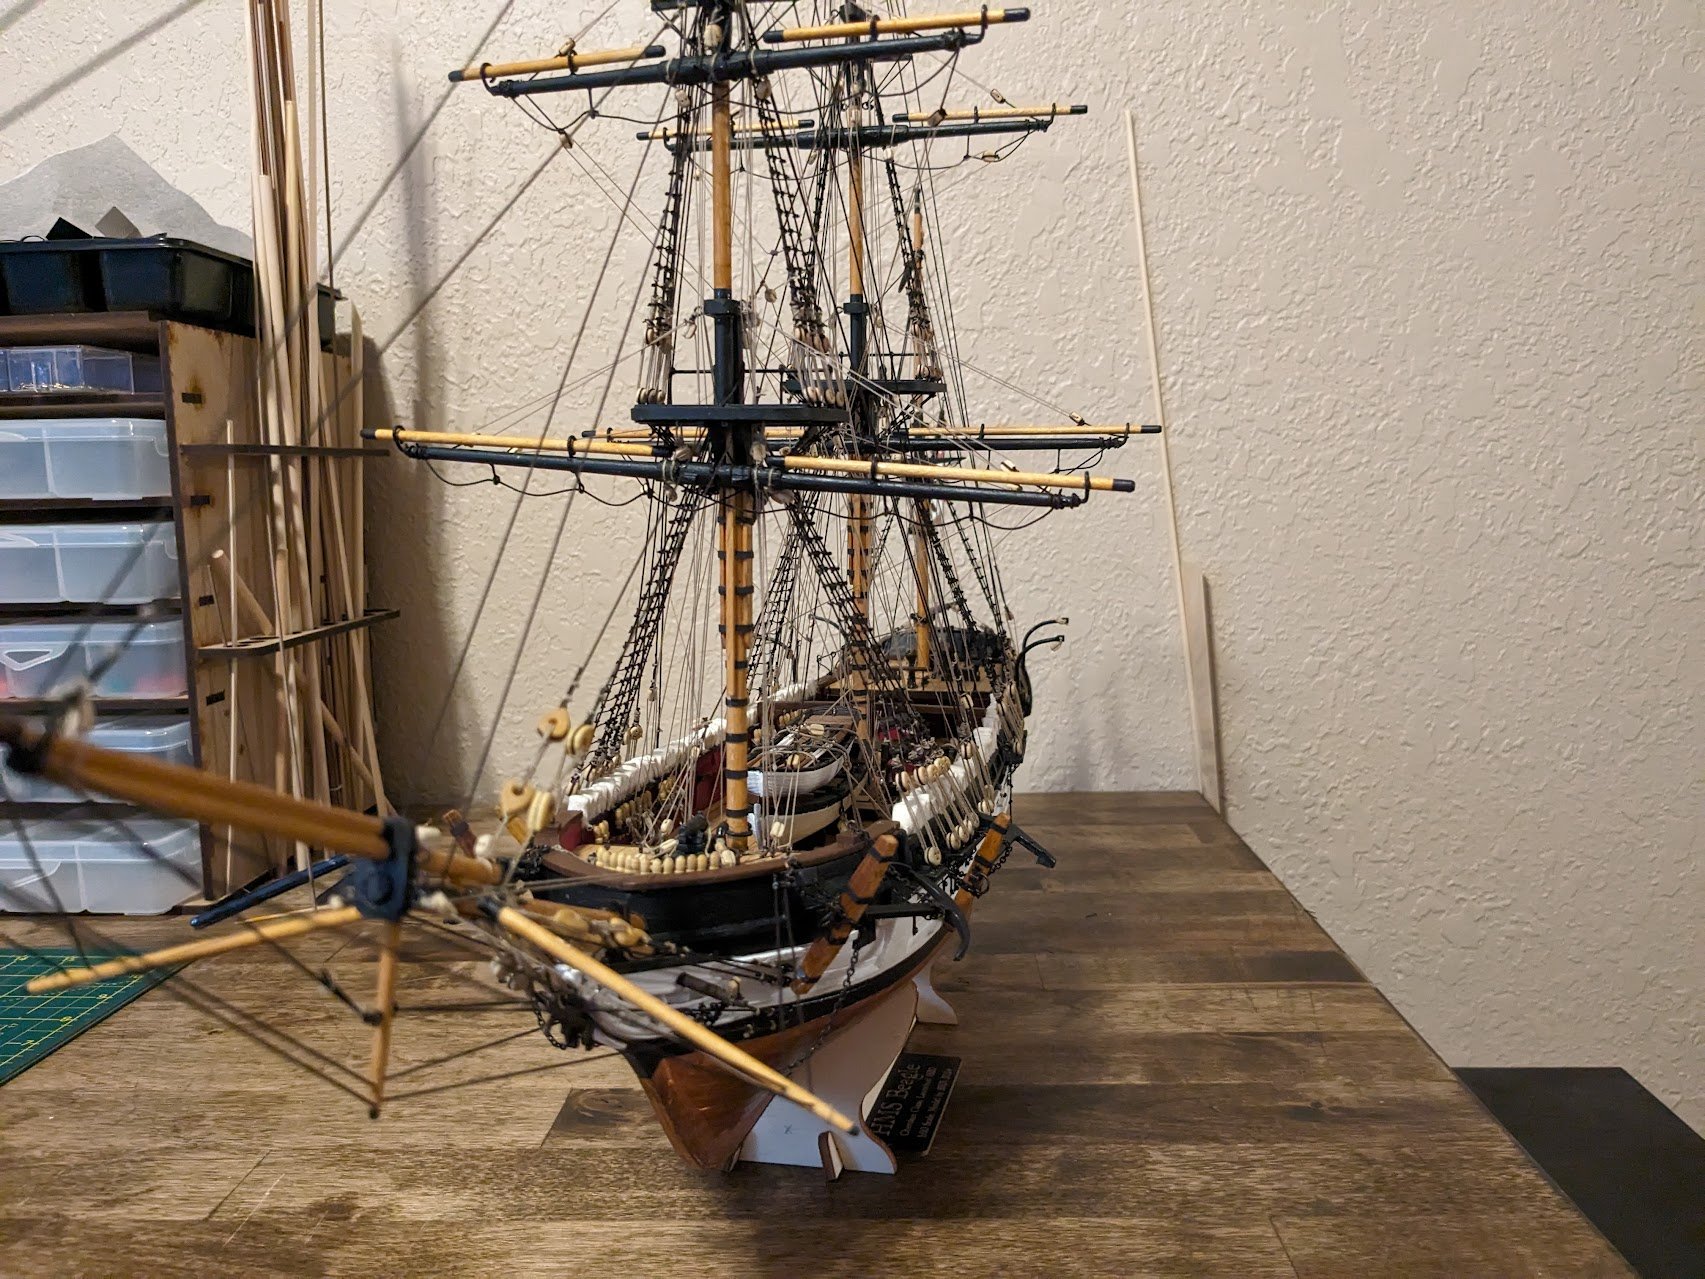
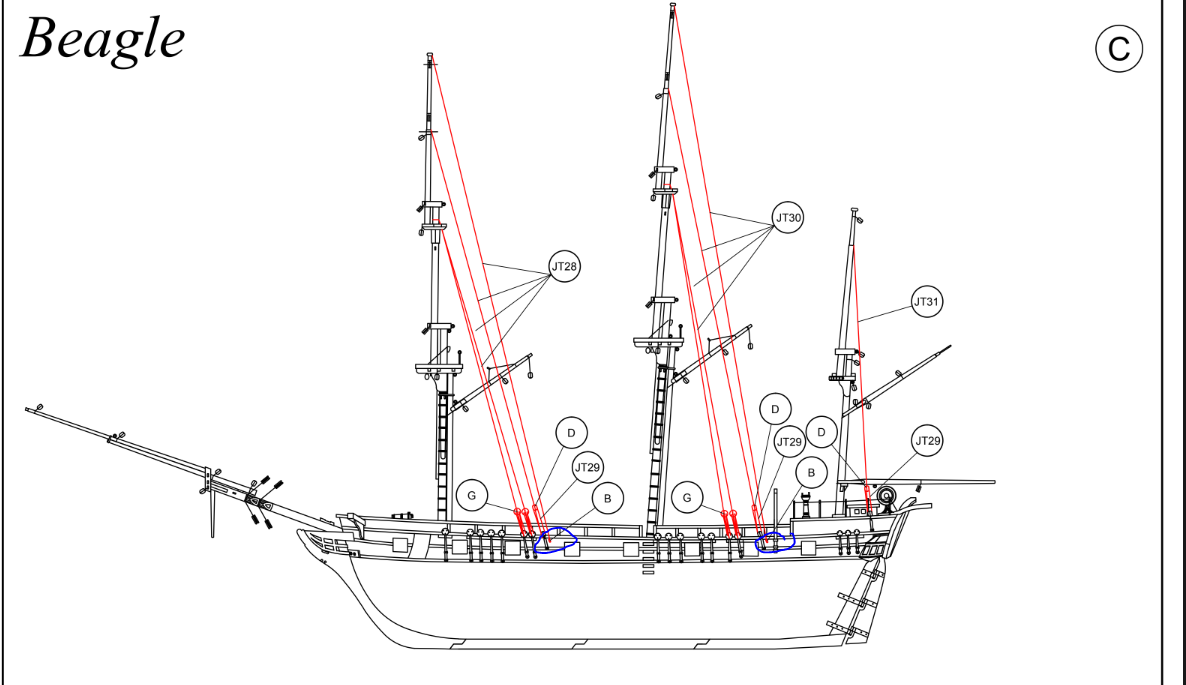
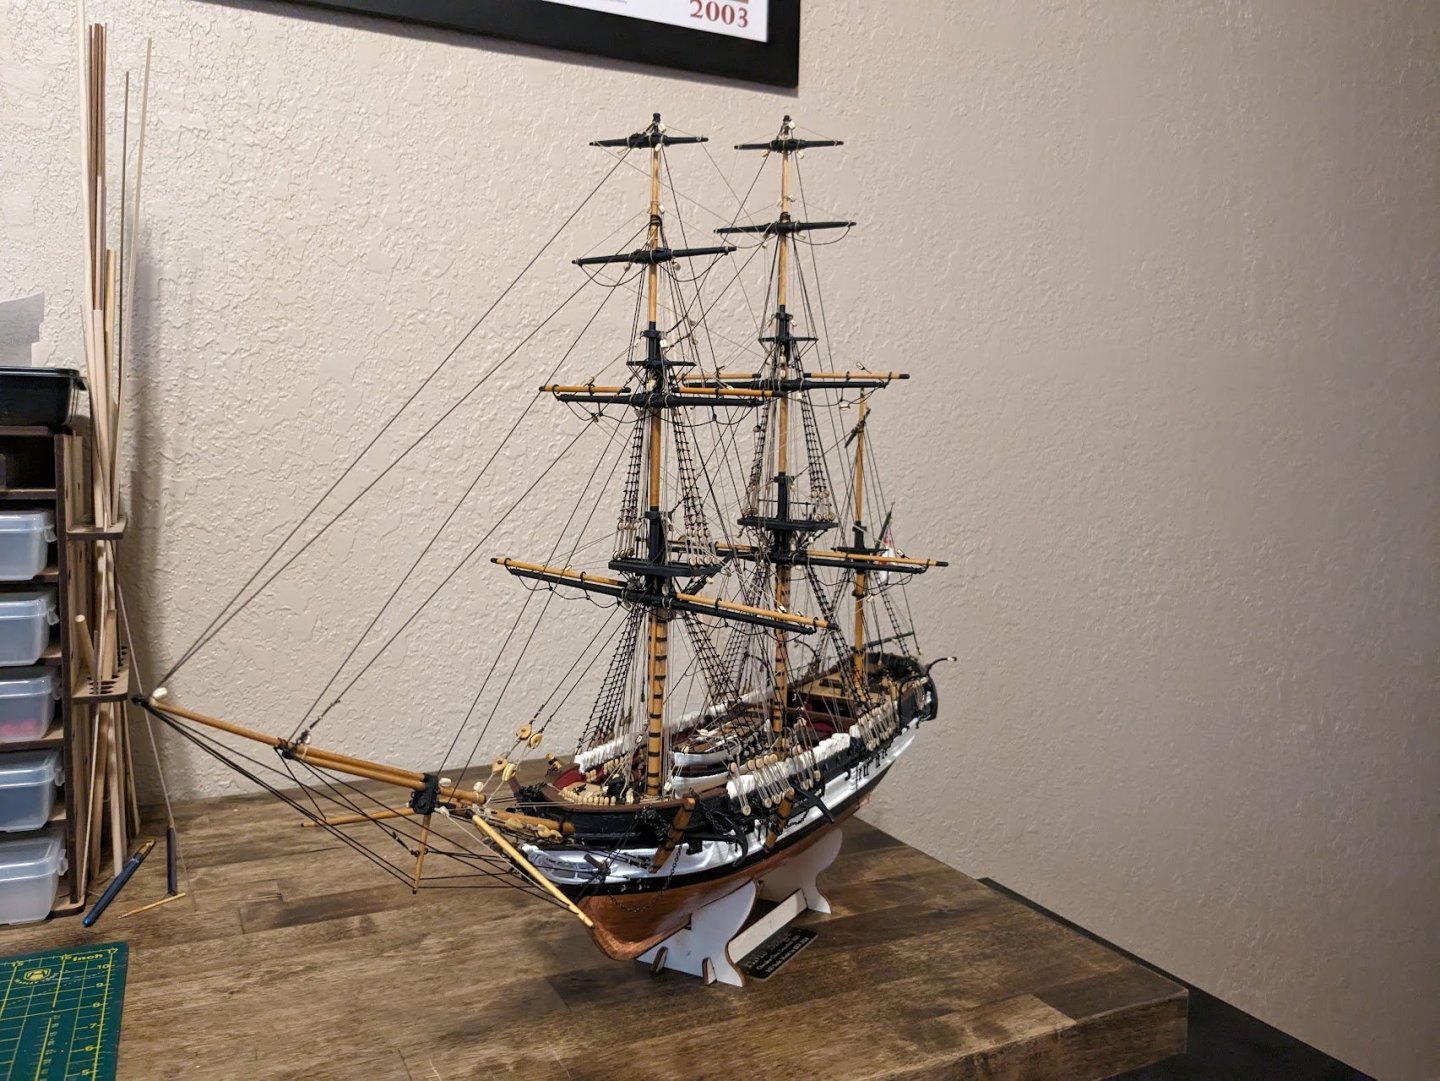
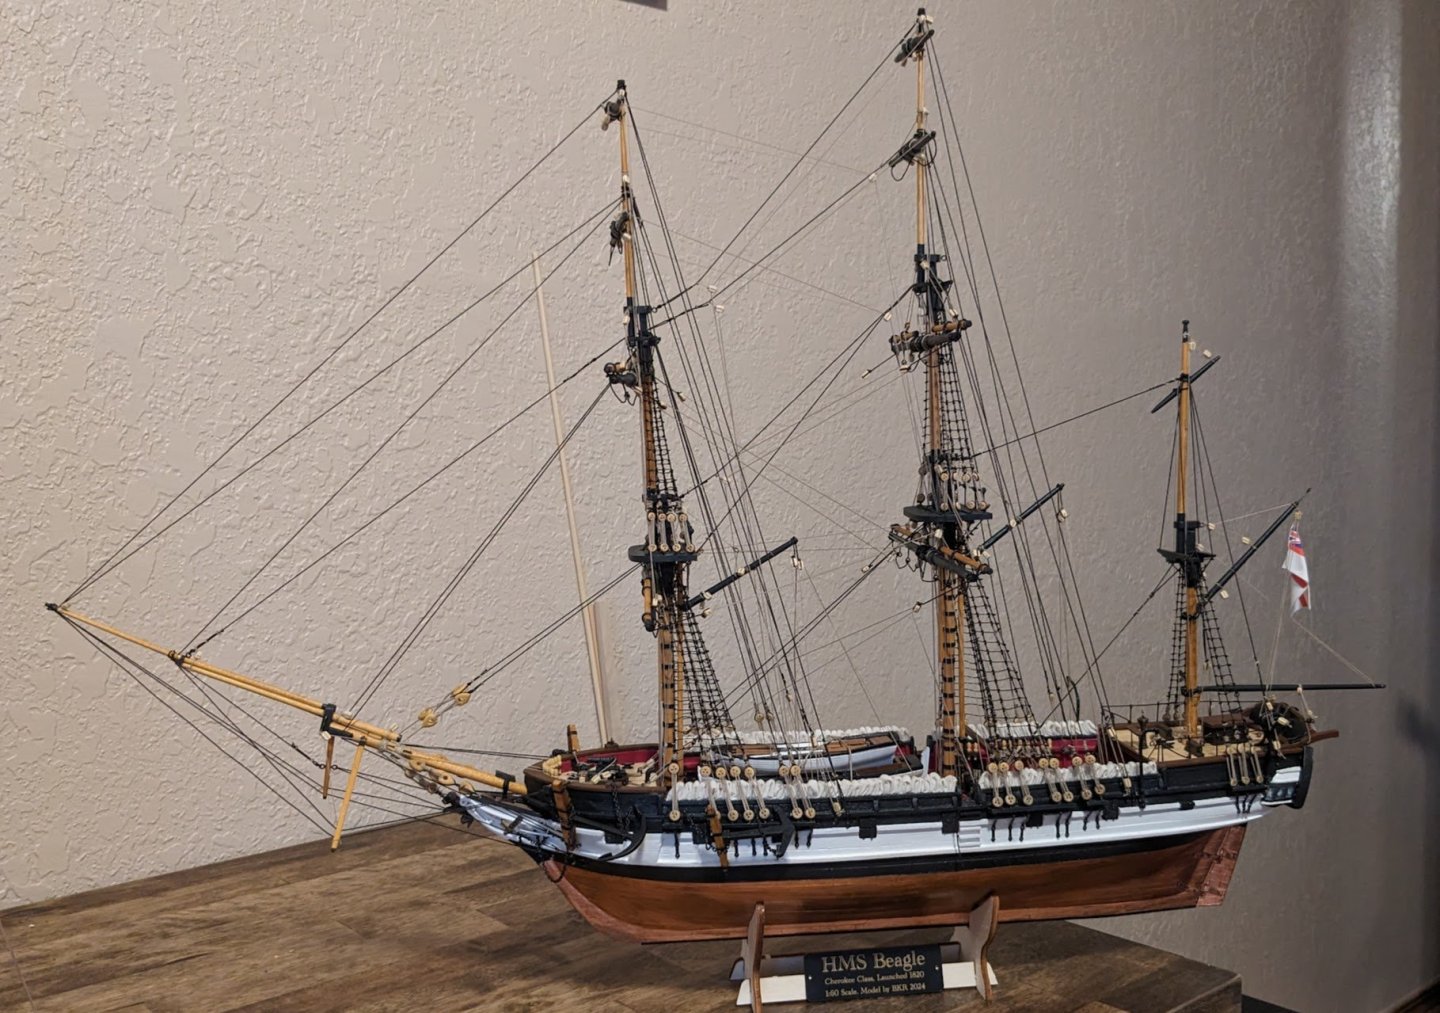
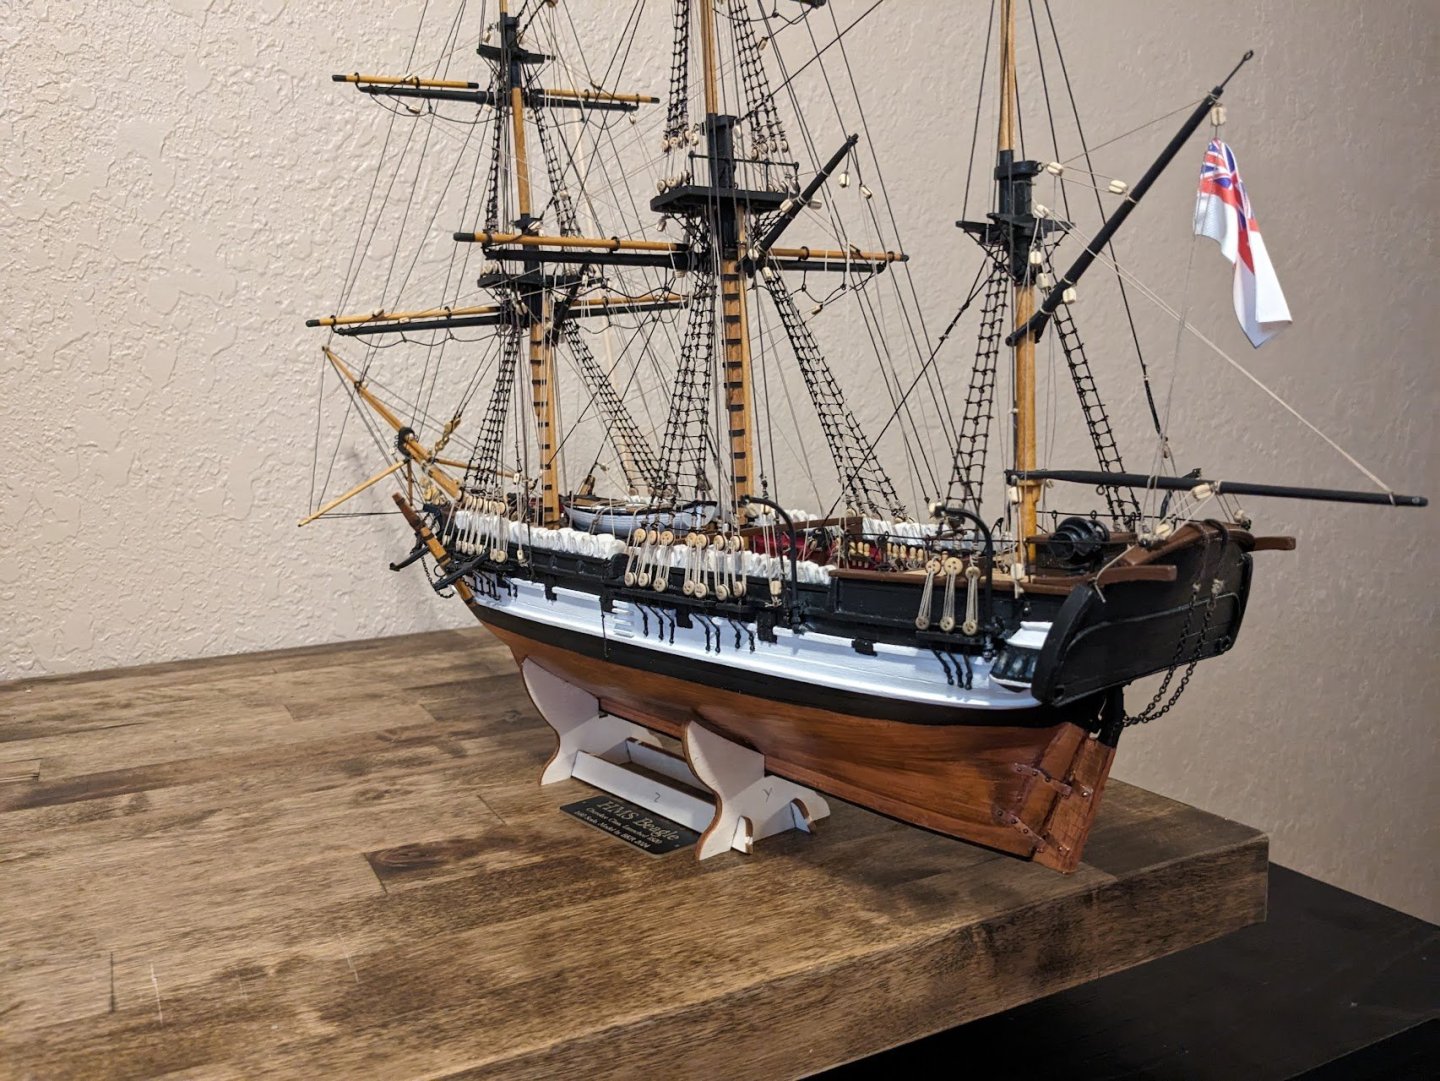
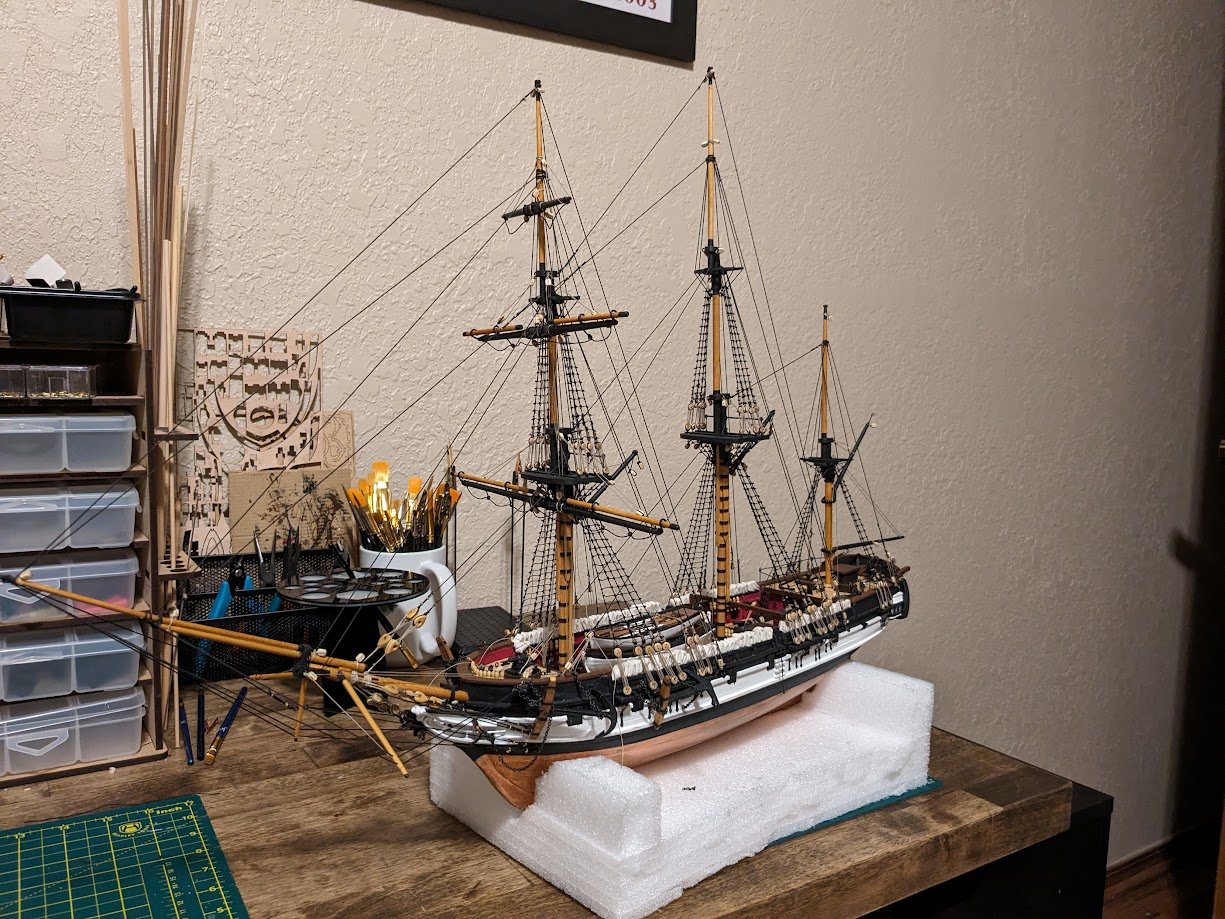
The main ship is now complete. I still have three more small boats to complete which I'm going to put off for a while. I started the small boat frames, but I honestly have not felt motivated to work on them, so I think it's better to put them off for a bit and do a proper job on them when I have the motivation for it. Plus I keep staring at my Vanguard Sphinx kit that I've been itching to start, so I will probably call it good on the Beagle for a while. I will make a proper stand for the Beagle though once I decide what type I want to build. Here are the pictures of the completed main ship less the boats. I bought this name plate on amazon for $11 with custom engraving, I will add it to the new stand I put together.


- 90 replies
-
- 14
-

-

-
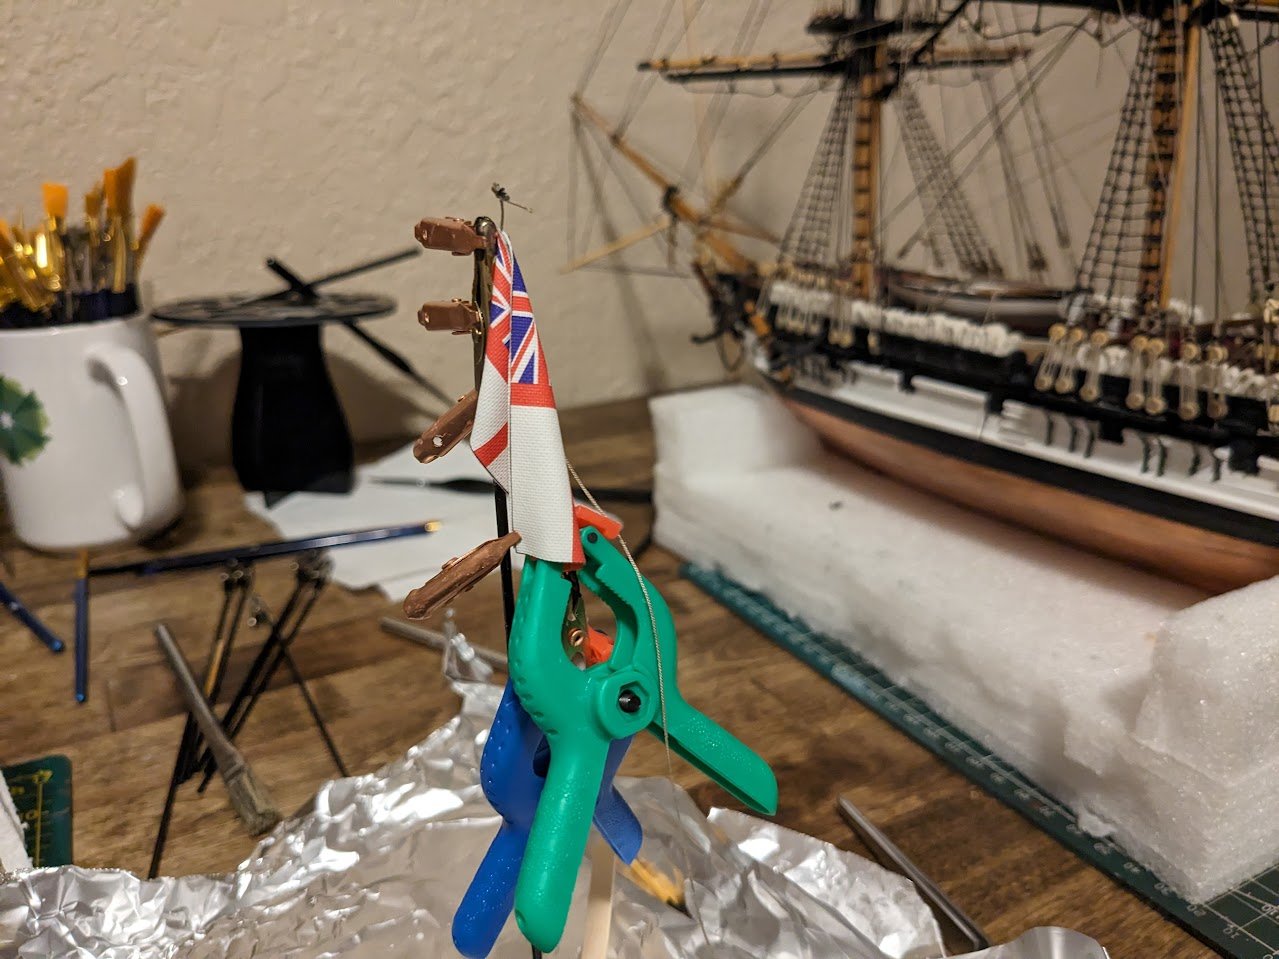
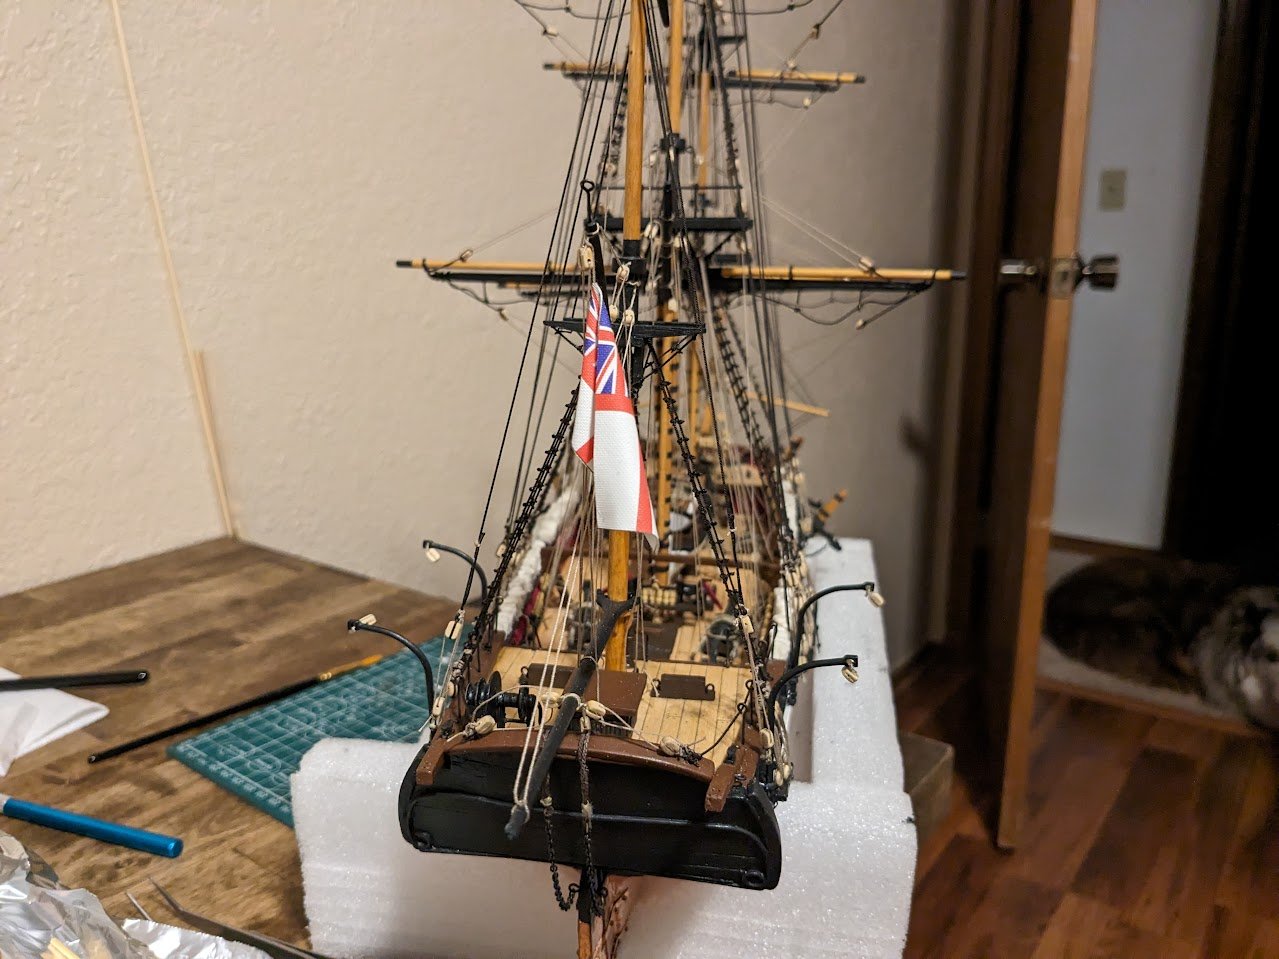
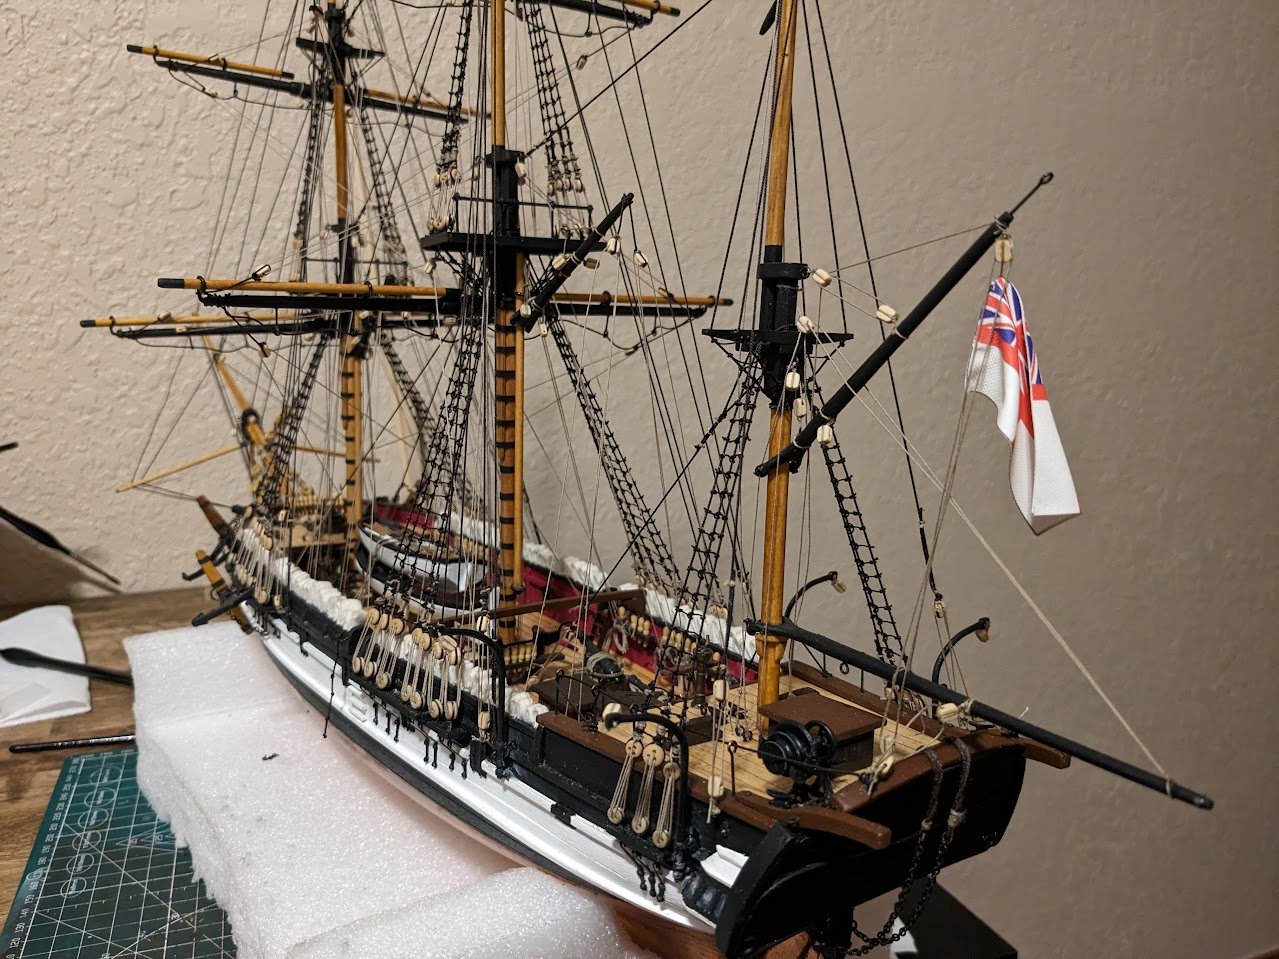
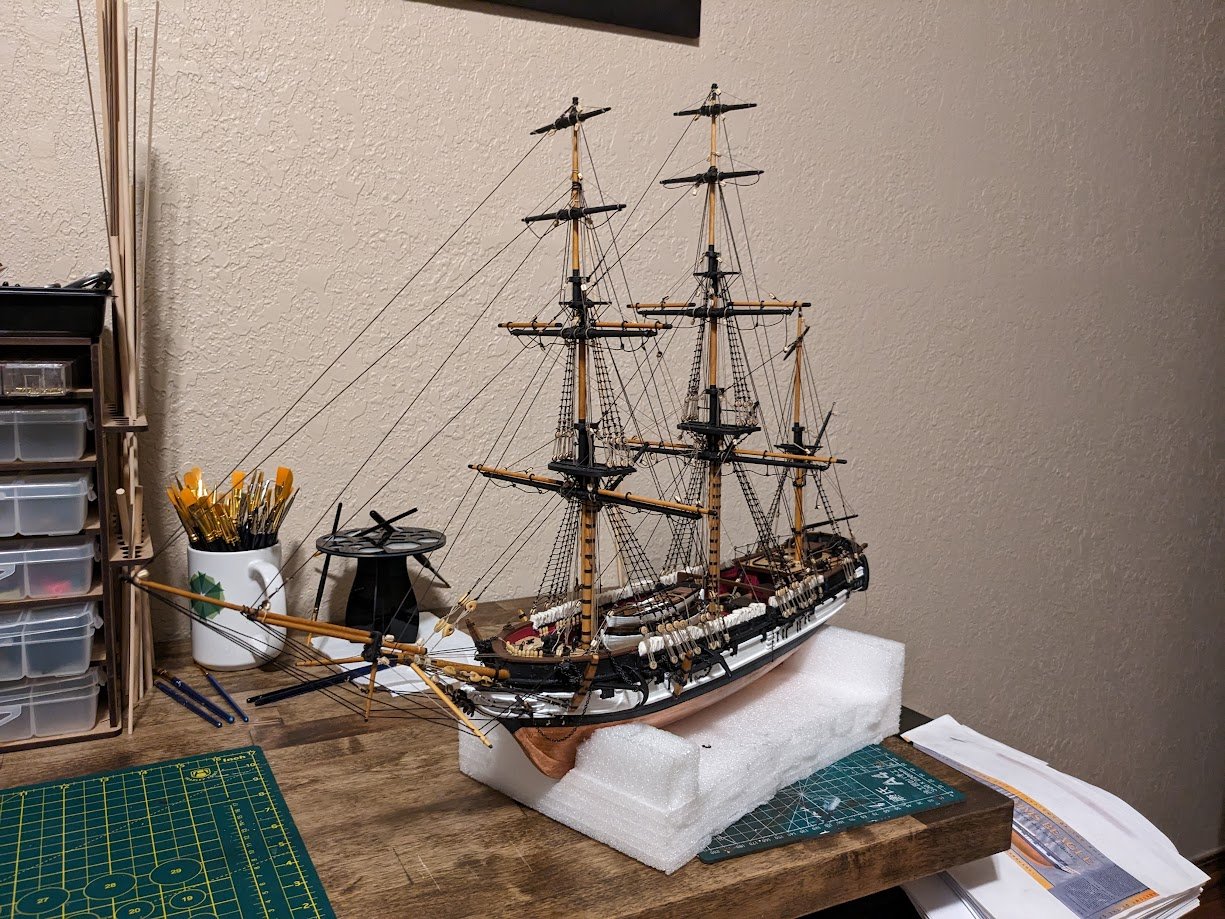
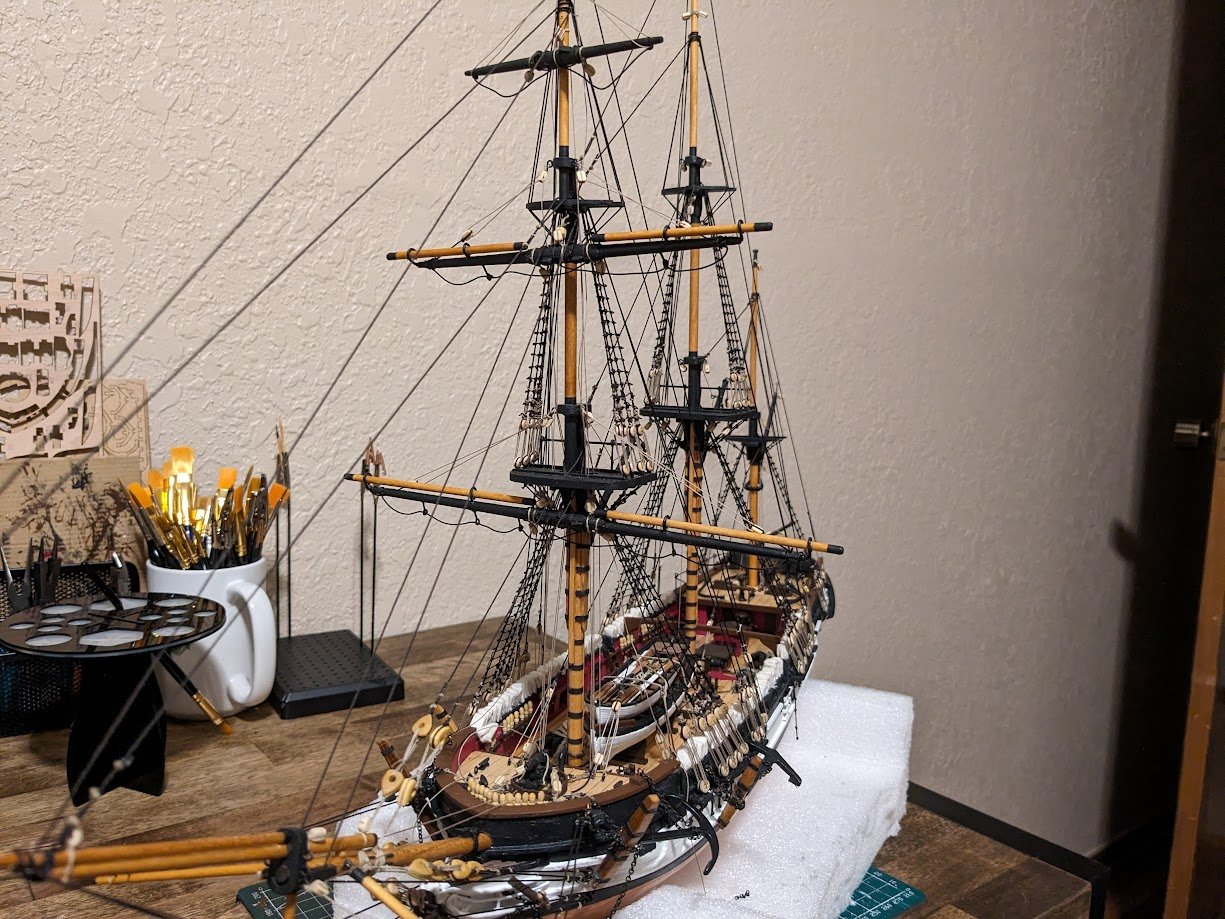
I ran out of Syren rope last week right towards the end of the running rigging, so while I was waiting for more rope to come in I tried my hand at the ensign flag. My goal was to make a flag that looked like it was naturally hanging in a light wind as I felt that would look a little more in place on a ship without sails than a flag fully sideways. My method was to coat the flag in diluted PVA glue and pin it up at a similar angle to which it would sit. I then added several small clamps and alligator clips to add weight and pull the flag down. I move the clamps around the flag until I got what I felt looked like a naturally hanging flag. I then pulled out my heat gun and added heat for a couple minutes and the flag started to fall down very nicely and retained a nice memory of the shape I wanted. I then added another coat of diluted pva glue and let it sit overnight. I have also started on the last 3 small boats. I really am not a fan of planking those little boats lol. Along with the boats, I am working on making rope hanks for the belaying pins, then I just need to finish the rigging, clean up my mess around the ship and add touch ups and I should cross the finish line.
-
Beautiful model, you have done a fantastic job. I'm going to have to add either the Flirt or the Speedy to my "To-Do" list, you have sold me on the beauty of this brig.
- 95 replies
-
- 1
-

-
- flirt
- vanguard models
- (and 1 more)
-
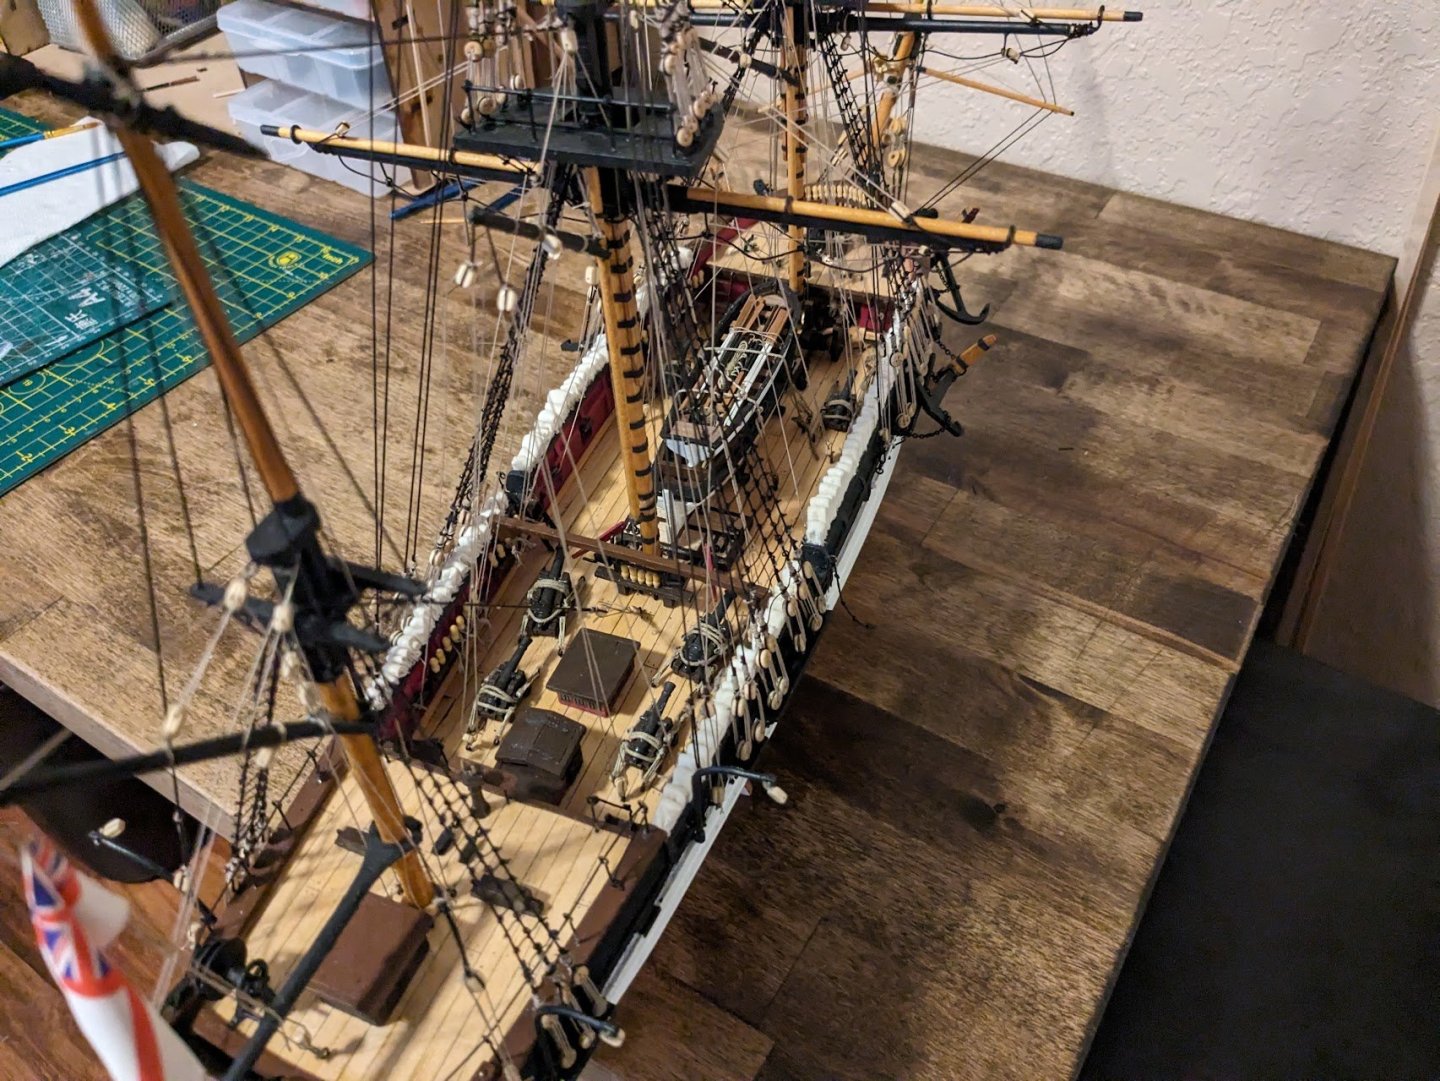
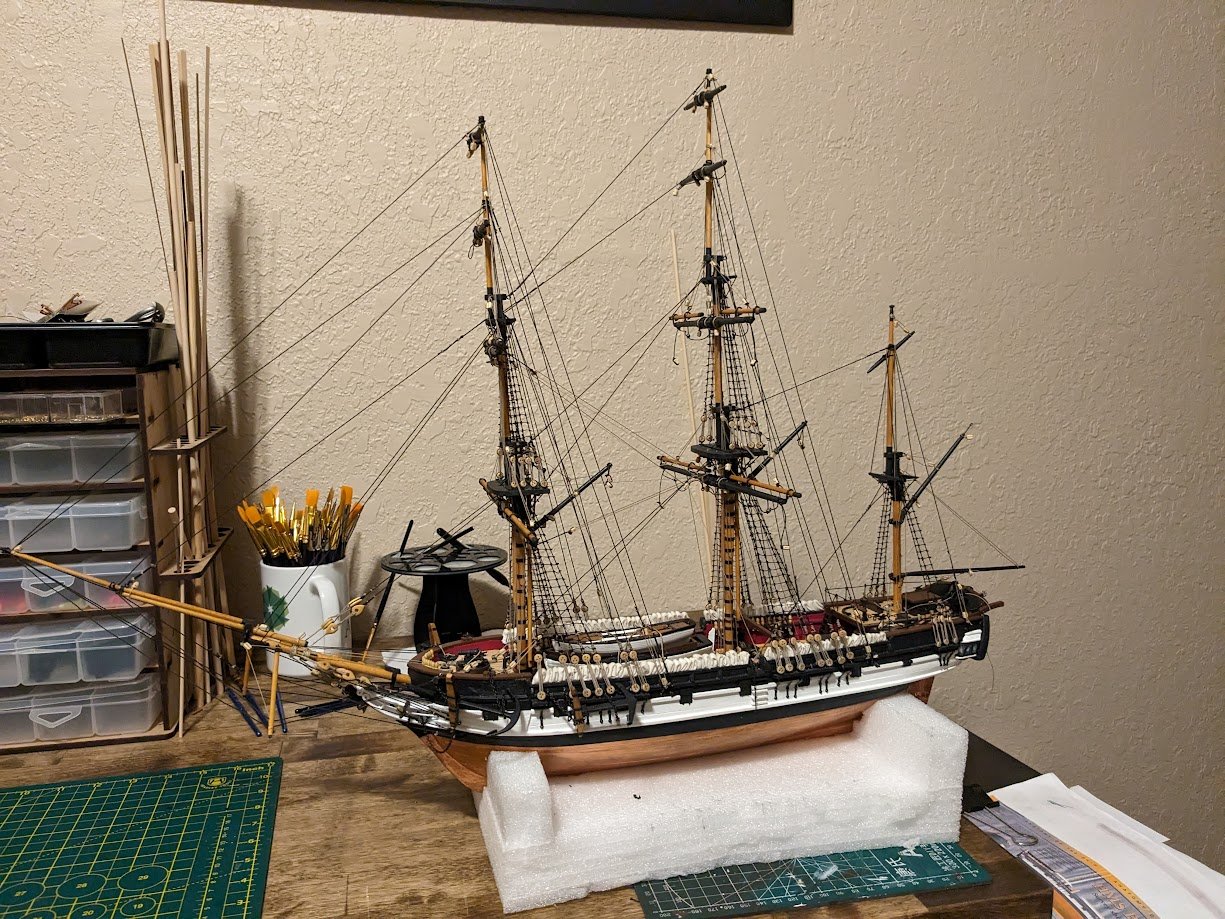
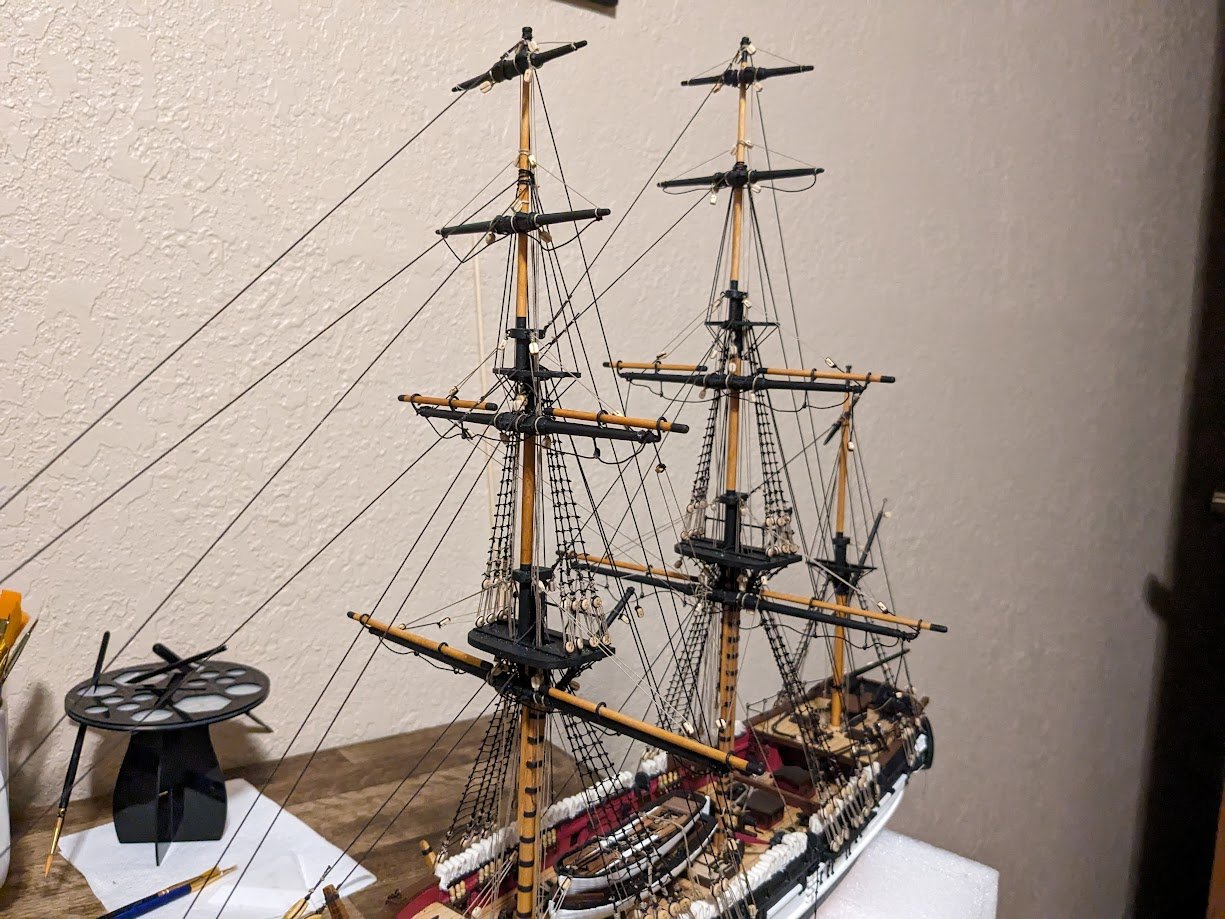
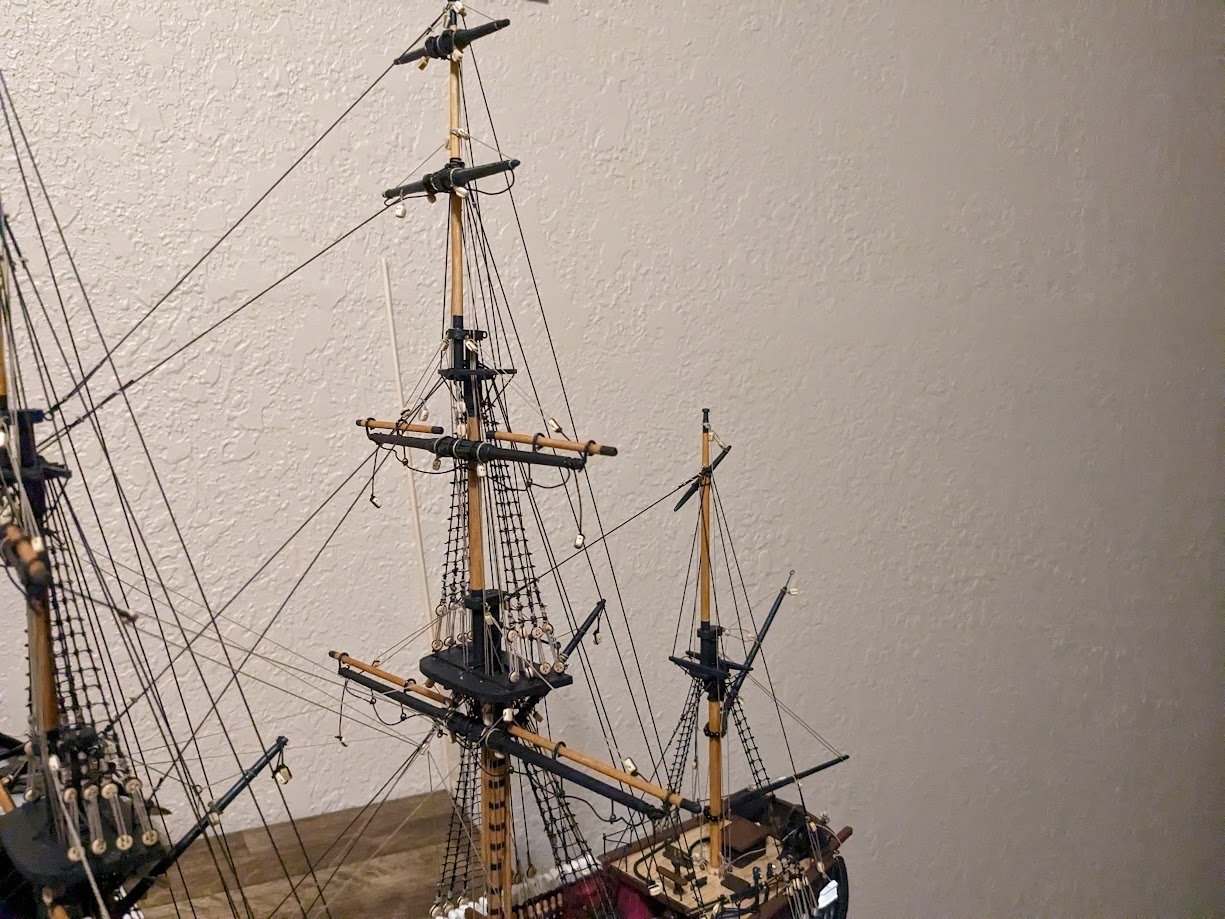
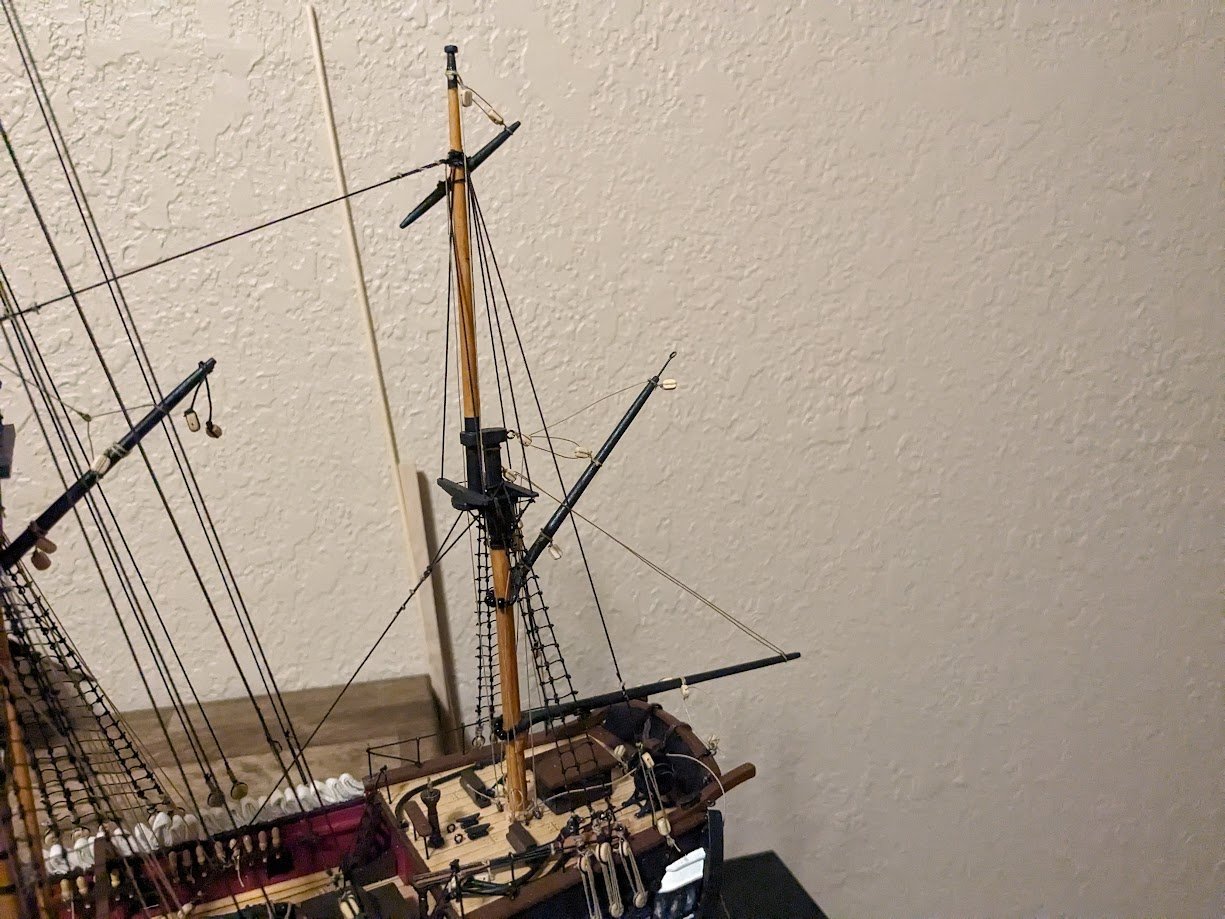
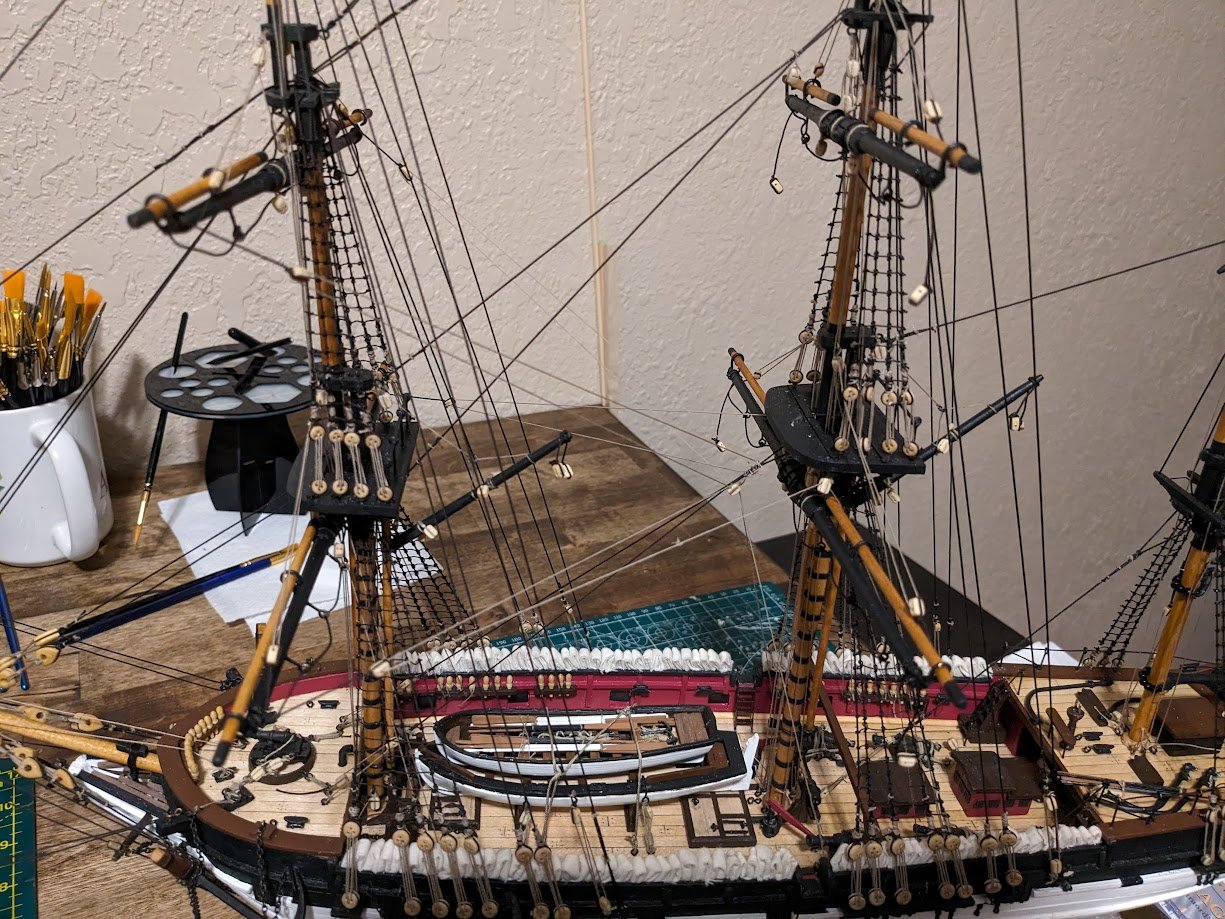
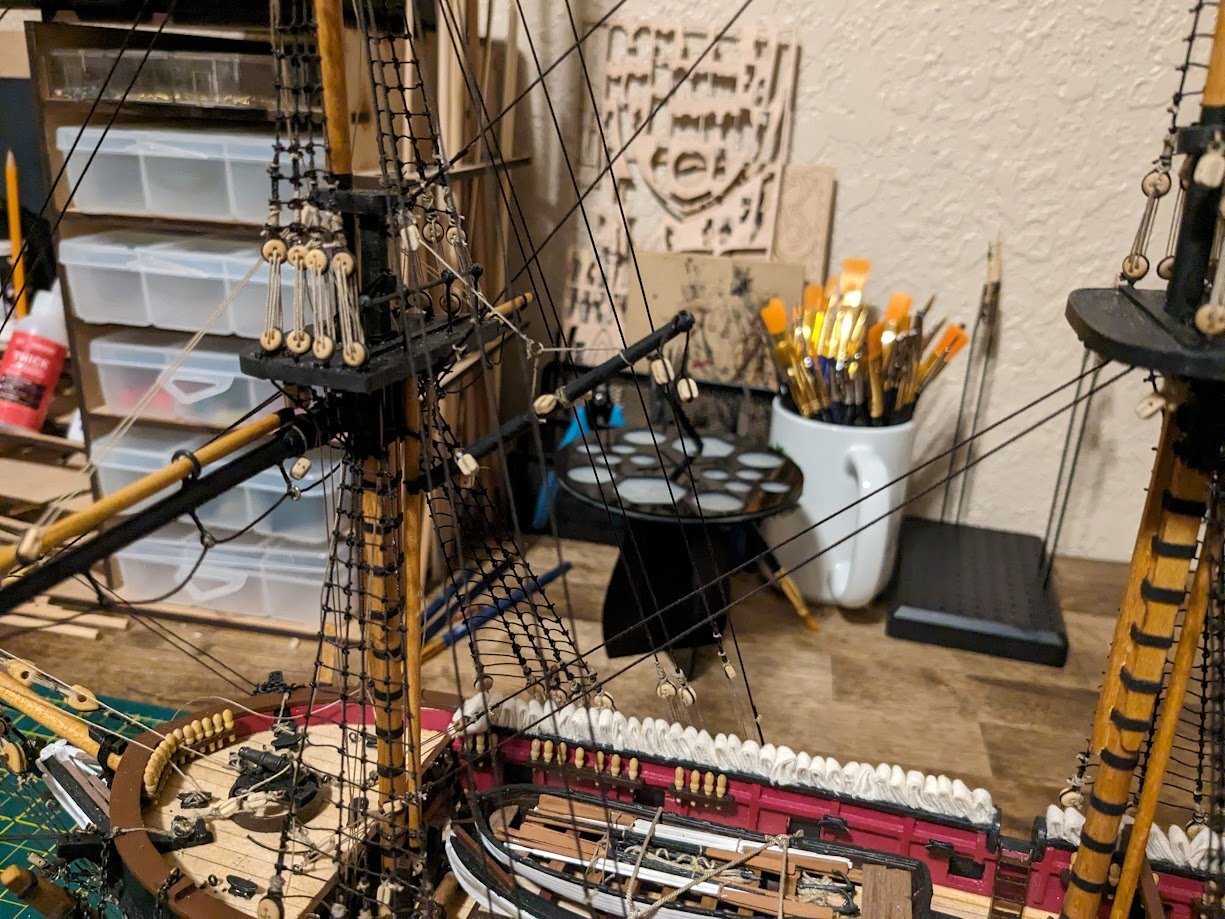
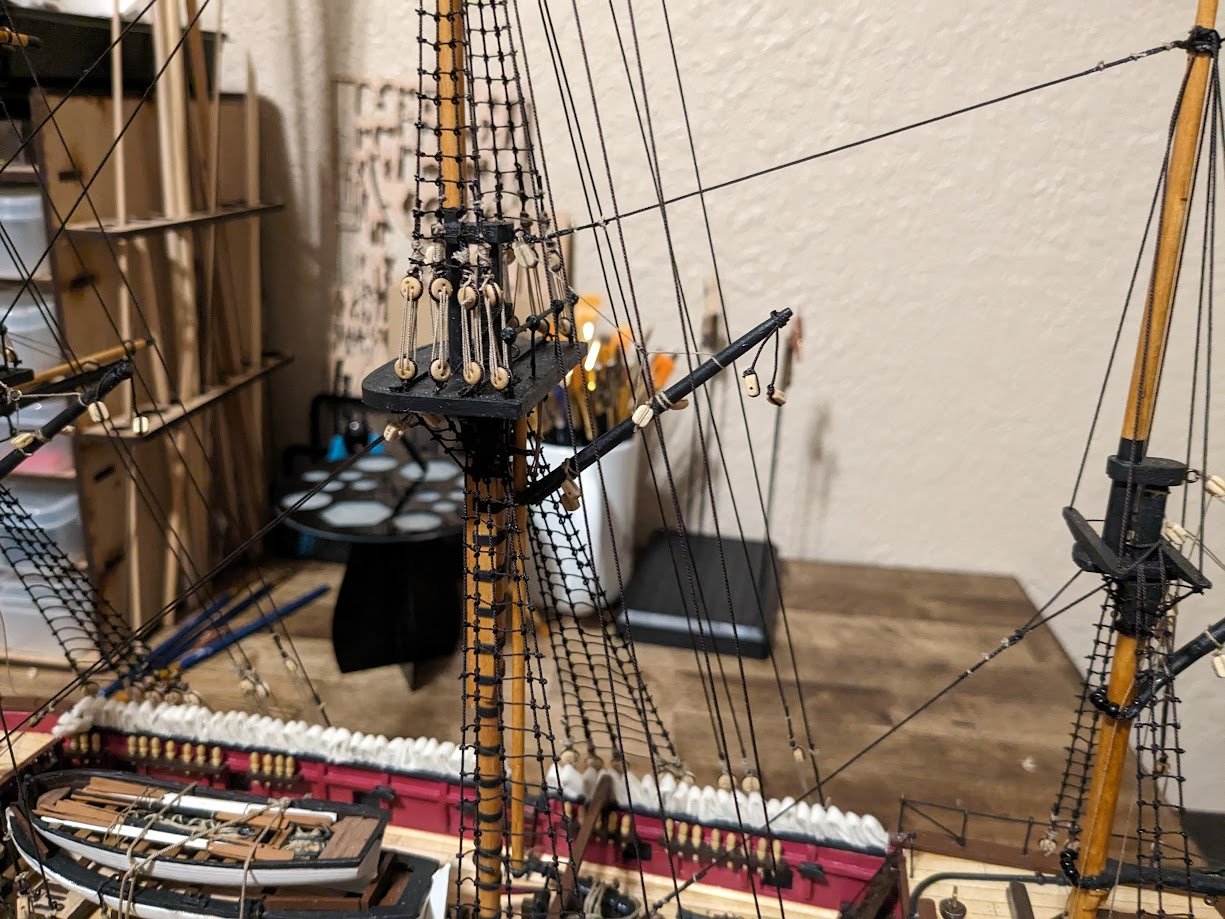
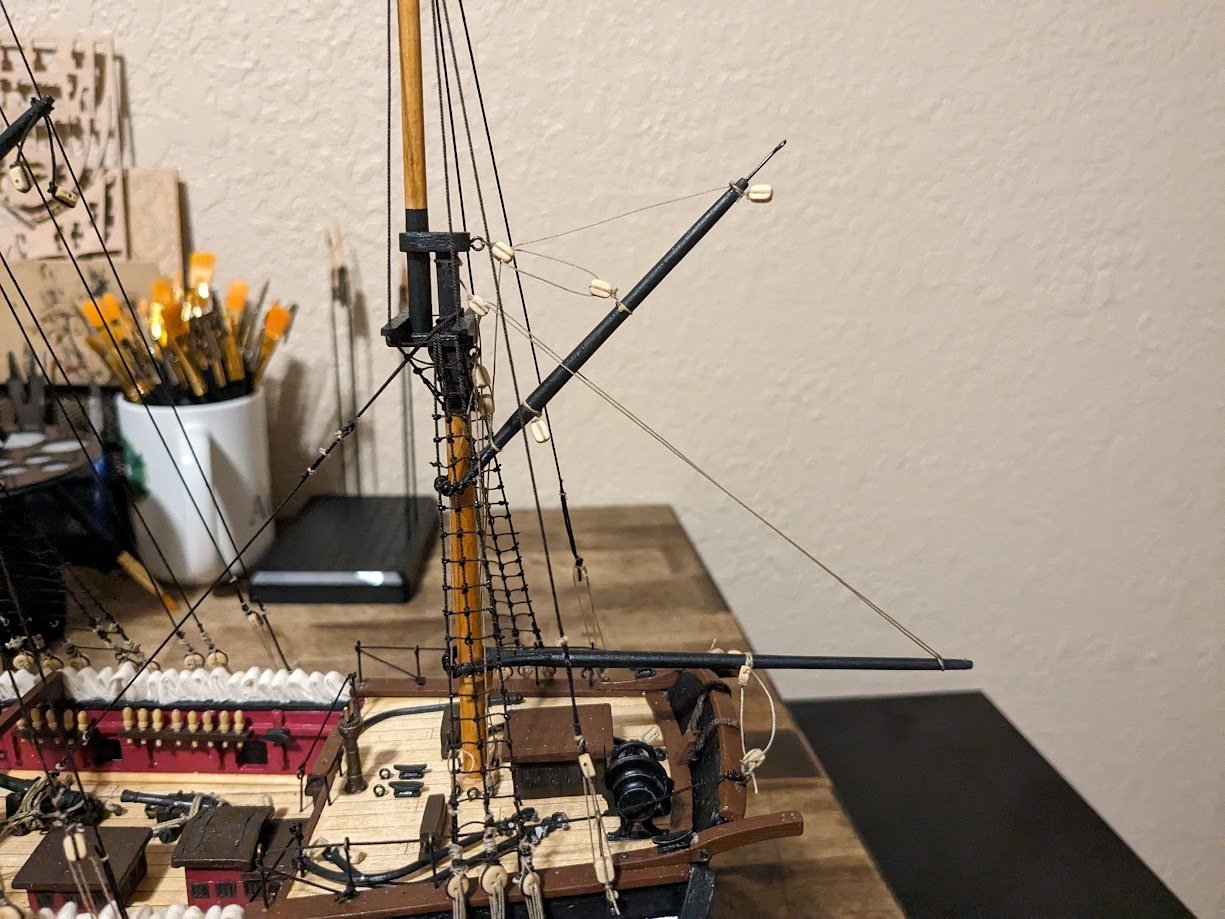
Yards have all been completed and are now hanging off the masts. Now to finish the running rigging. I'm definitely glad I bought some rigging tools to help with the hard to reach places, sometimes I feel like a contortionist while trying to get into the right position to tie a rope off to a belaying pin. Here are the completed yards I've decided to leave some of these ropes loose until the end as I keep accidently bumping the spanker boom. The start of some of the running rigging. Here is how the Beagle currently sits Question on non tensioned ropes like the horses hanging from the yards. I see many builders use alligator clips or small clamps to hang from ropes to simulate the weight on the ropes hanging, is the technique to just brush these ropes with diluted PVA glue and then hang some weight on them while they dry?
-
Thanks for the help allan and the compliment, I'm still a fish out of water when it comes to the blocks and rigging so any help is greatly appreciated.
-
After finishing up the backstays I have started on the gaffs, boom, and yards. I have completed the yards for the foremast, hopefully this weekend I can get some good progress on the yards for the main mast.
-
The Flirt looks fantastic great job. Thanks for the size comparison photos next to the other ships, I honestly wish more people would do this as it's hard for some of us to picture how big some of these different ships are when everything is a closeup shot, plus I just love seeing photo's of multiple ships.


.jpg.bcb746b8d1e29a2911d46e0a88c40bd6.jpg)