brunnels
-
Posts
277 -
Joined
Content Type
Profiles
Forums
Gallery
Events
Everything posted by brunnels
-
 Fantastic job, what blue are you using? I really like the shade of it.
 -
I was scratching my head on those as well, I ended up tying them around the bitt in front of the main mast.
-
Fantastic build, one day I can hopefully do half as good on that kit.
- 443 replies
-
- 3
-

-
- Indefatigable
- Vanguard Models
- (and 1 more)
-
Is a long narrow hull like this easier or harder to plank in your experience so far?
-
Seeking recommendations for next Build
brunnels replied to BurgundyModels's topic in Wood ship model kits
I'm currently building the Vanguard Speedy kit and its a great kit, instructions are very good and the materials are fantastic. I have the Syren kit in my stash, the instructions look really good and I could probably learn a lot by just reading through them, but I was somewhat let down by the quality of materials in the kit. -
I am very impressed with your wood color painting, that is a skill I still have yet to grasp.
- 443 replies
-
- 1
-
-
- Indefatigable
- Vanguard Models
- (and 1 more)
-
I'm going to have to remember this technique, sounds much easier than using the nails.
-
Looks great, I wish I had done the same with my Beagle, I'm not a fan of that top layer of super thin planking that Occre likes to use in their kits.
-
I had to add a little filler to mine.
-
I can see how that would be a pain to work with, especially the cutaway side, but your end result looks very nice.
-
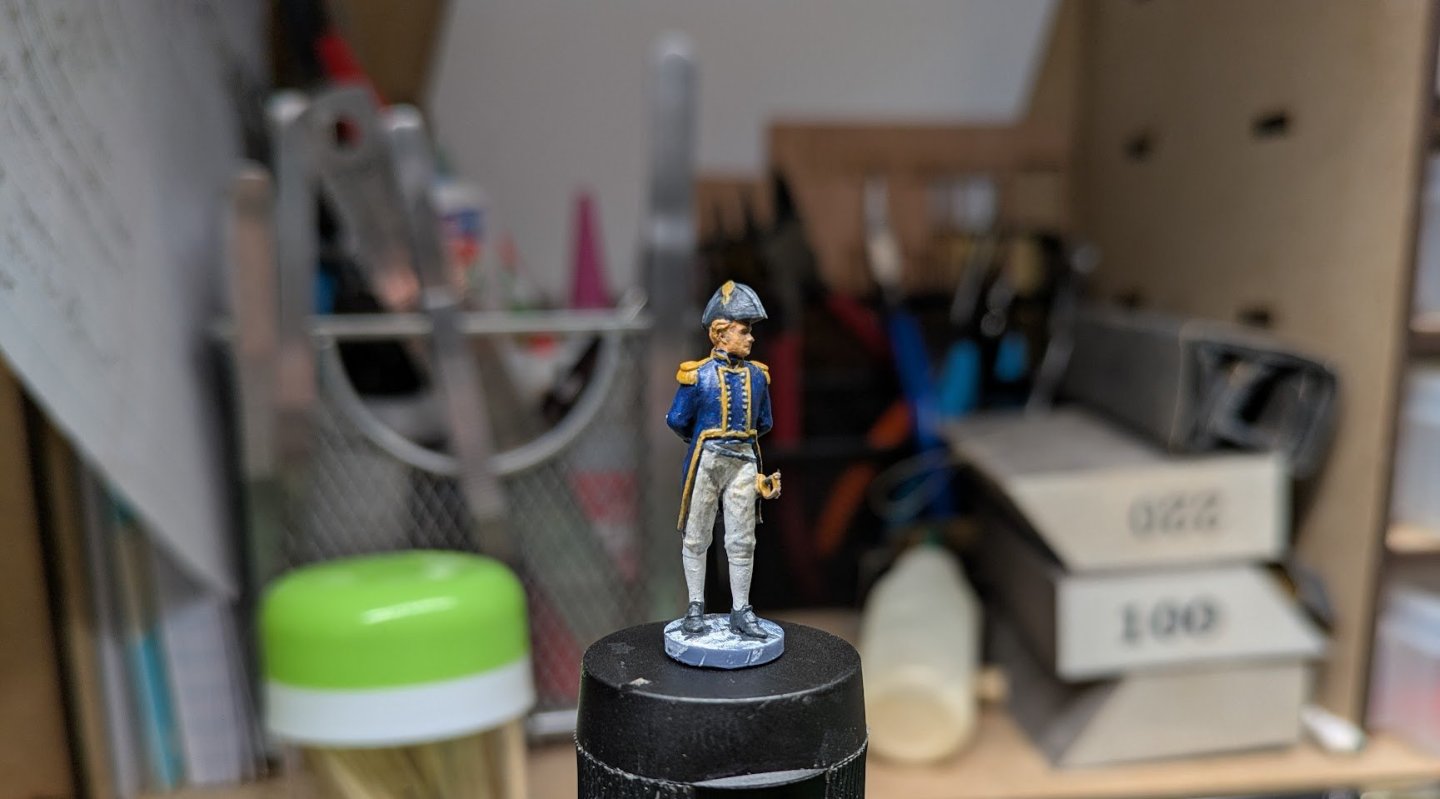
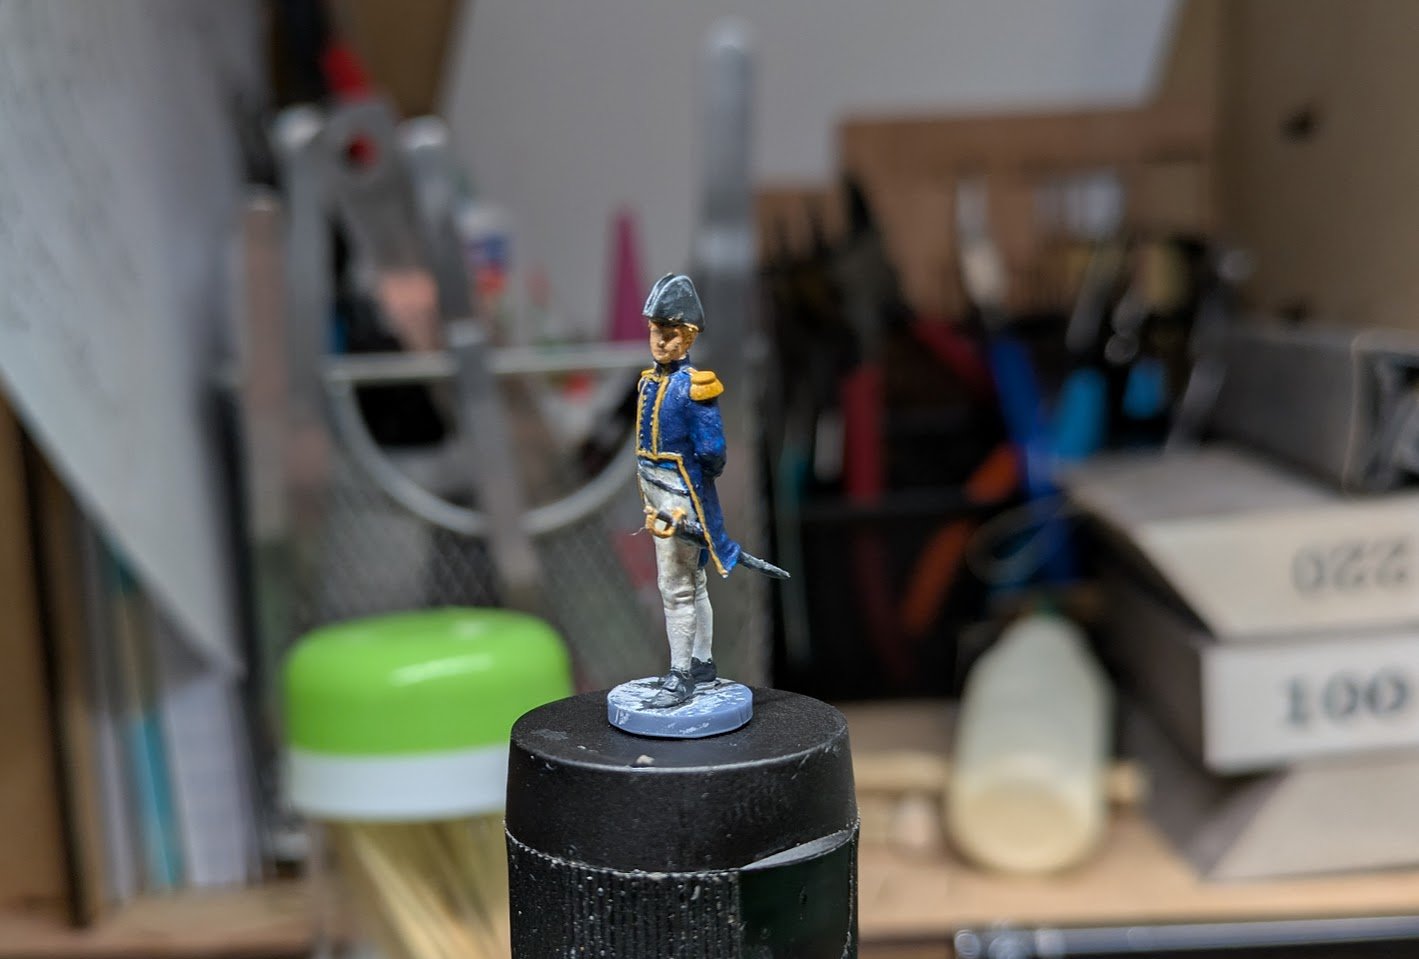
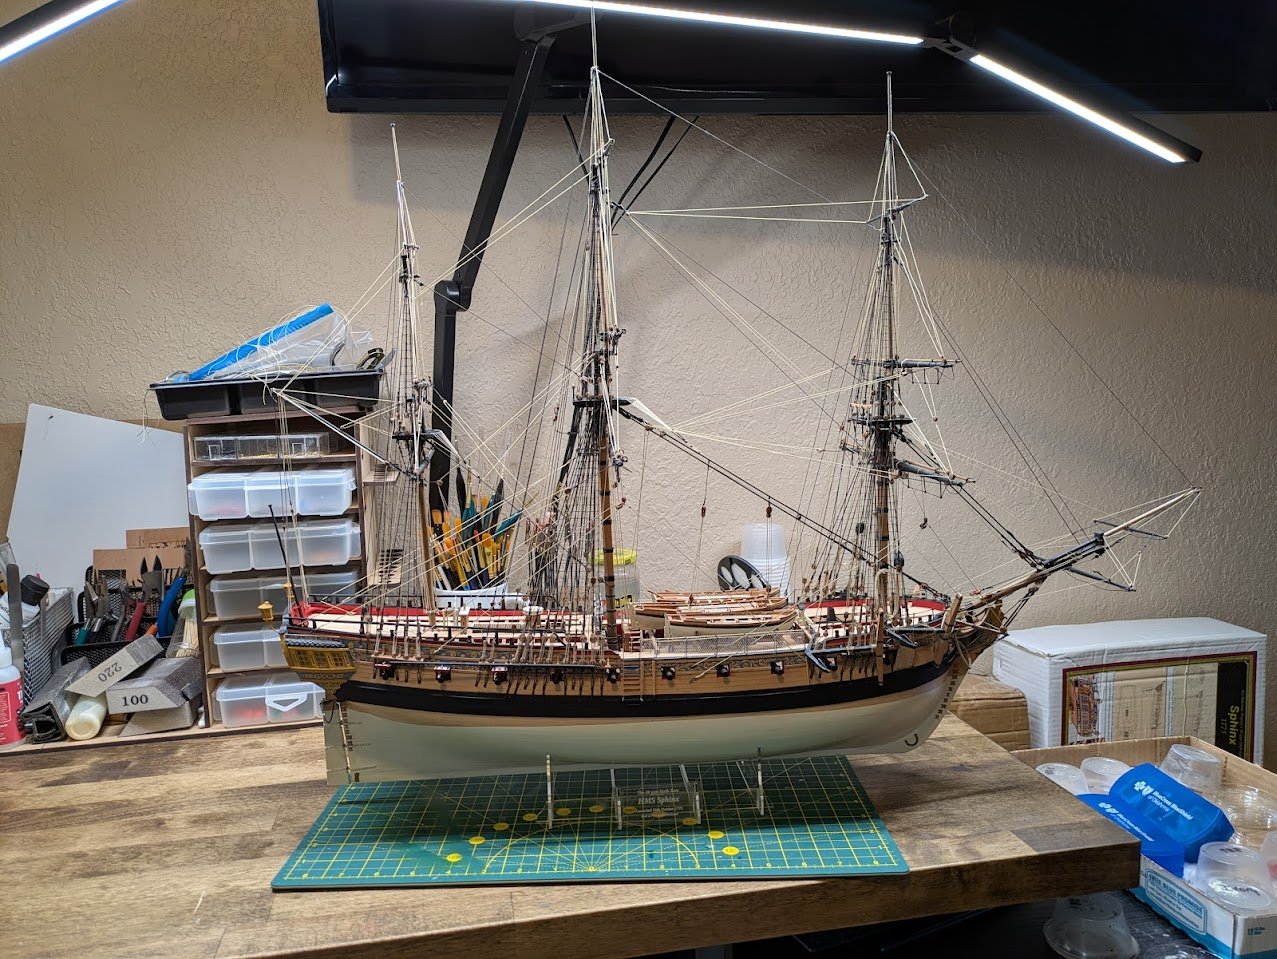
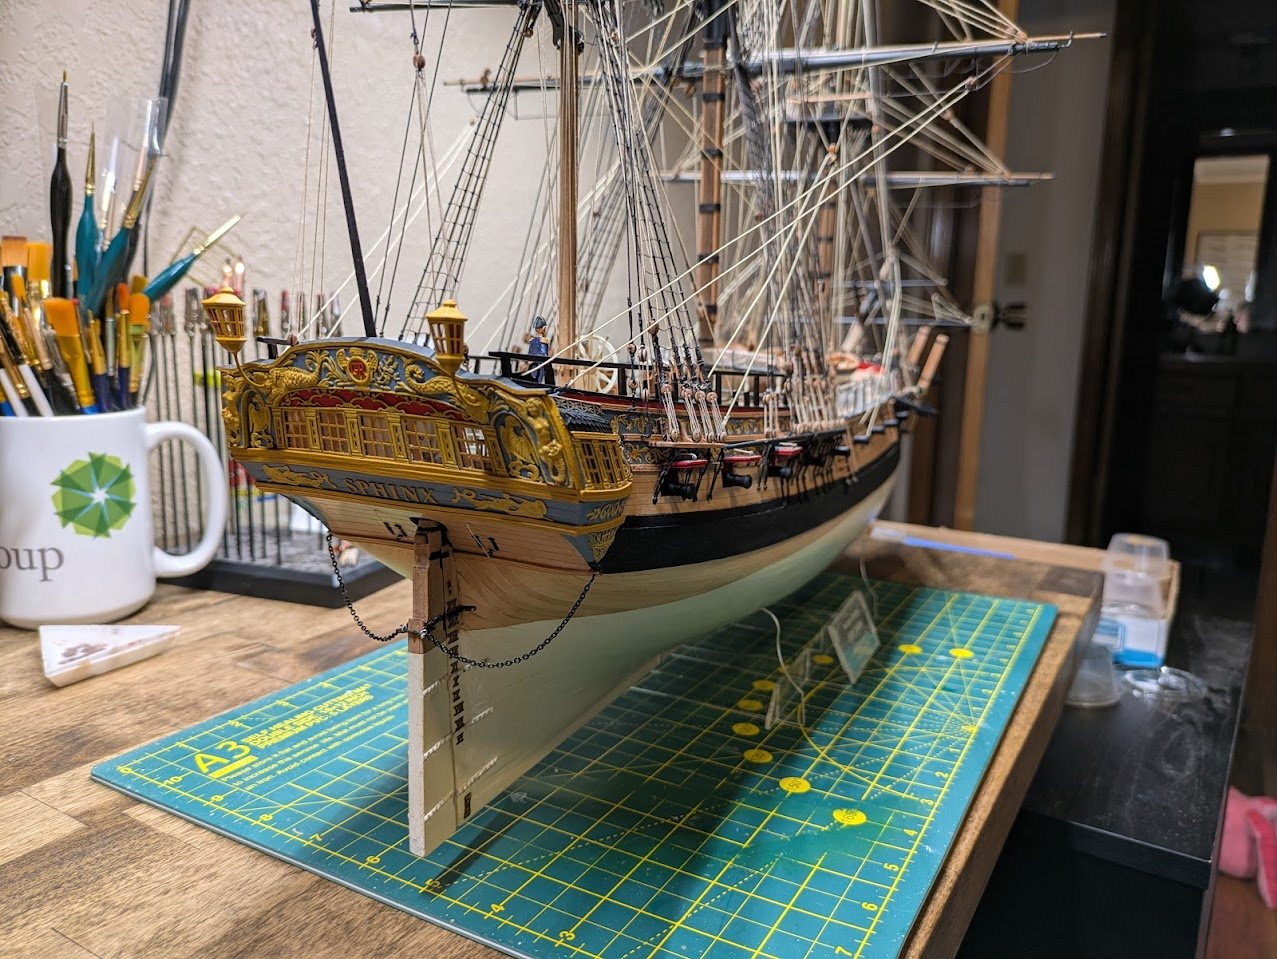
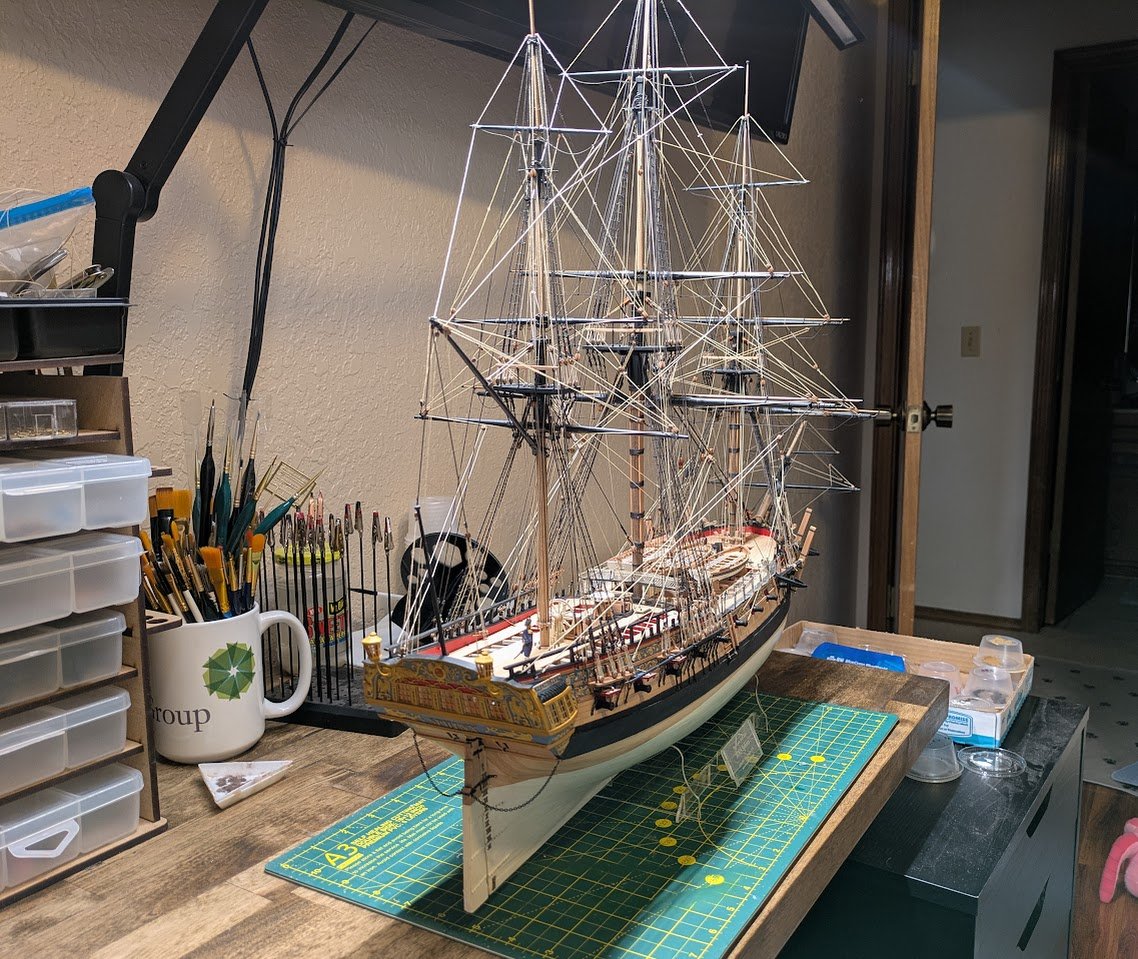
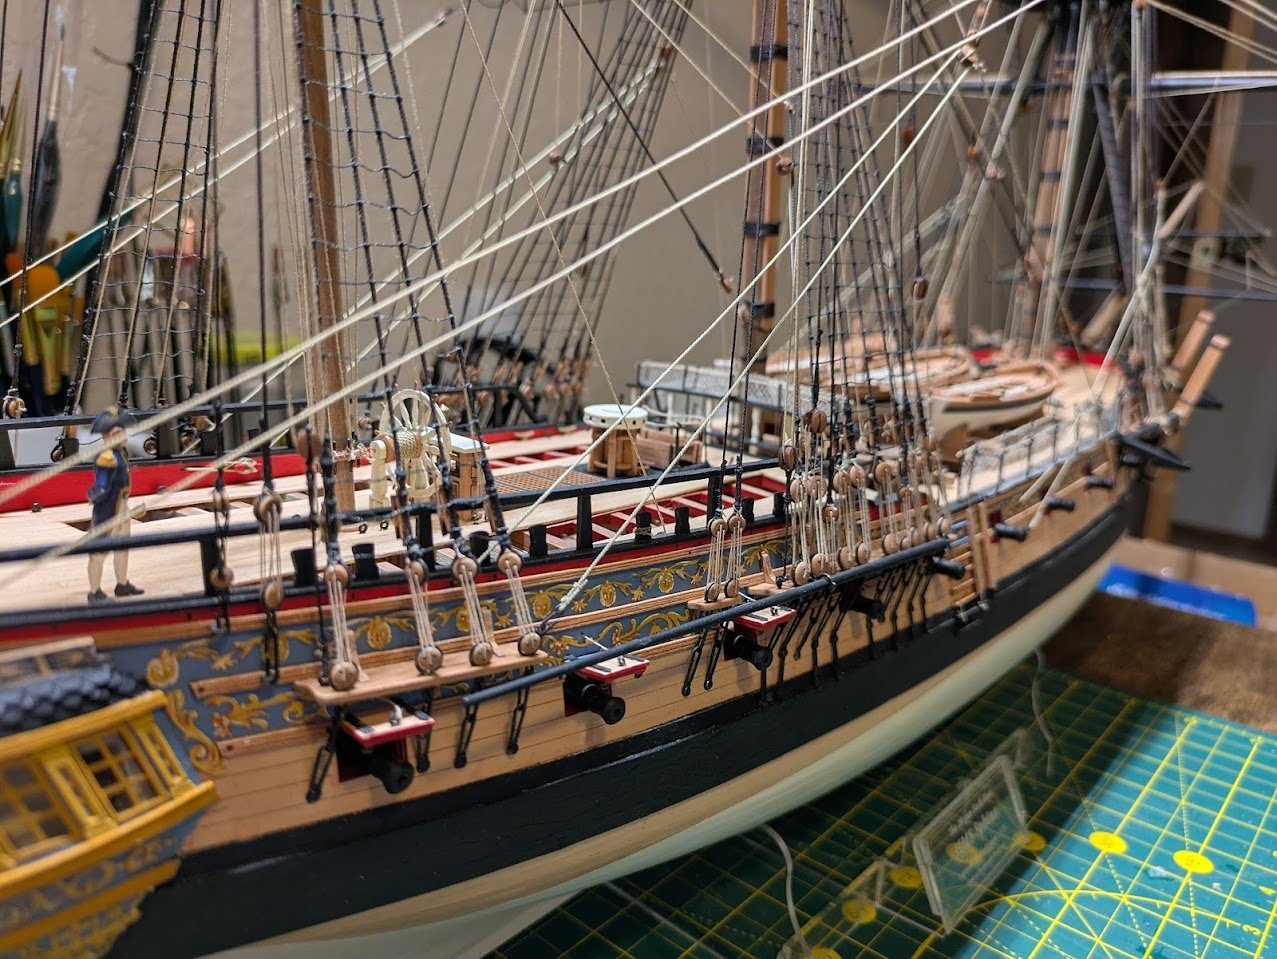
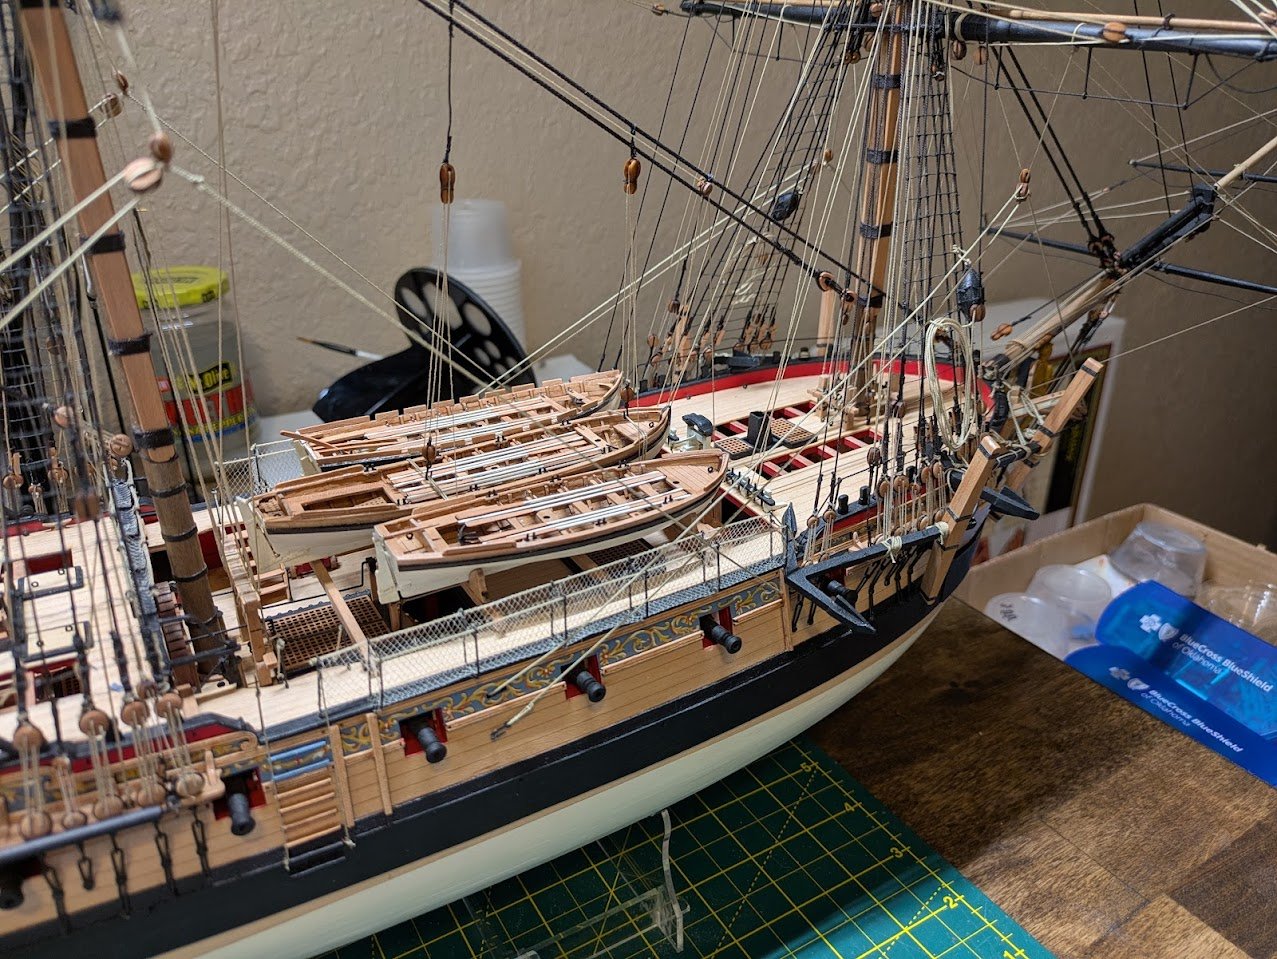
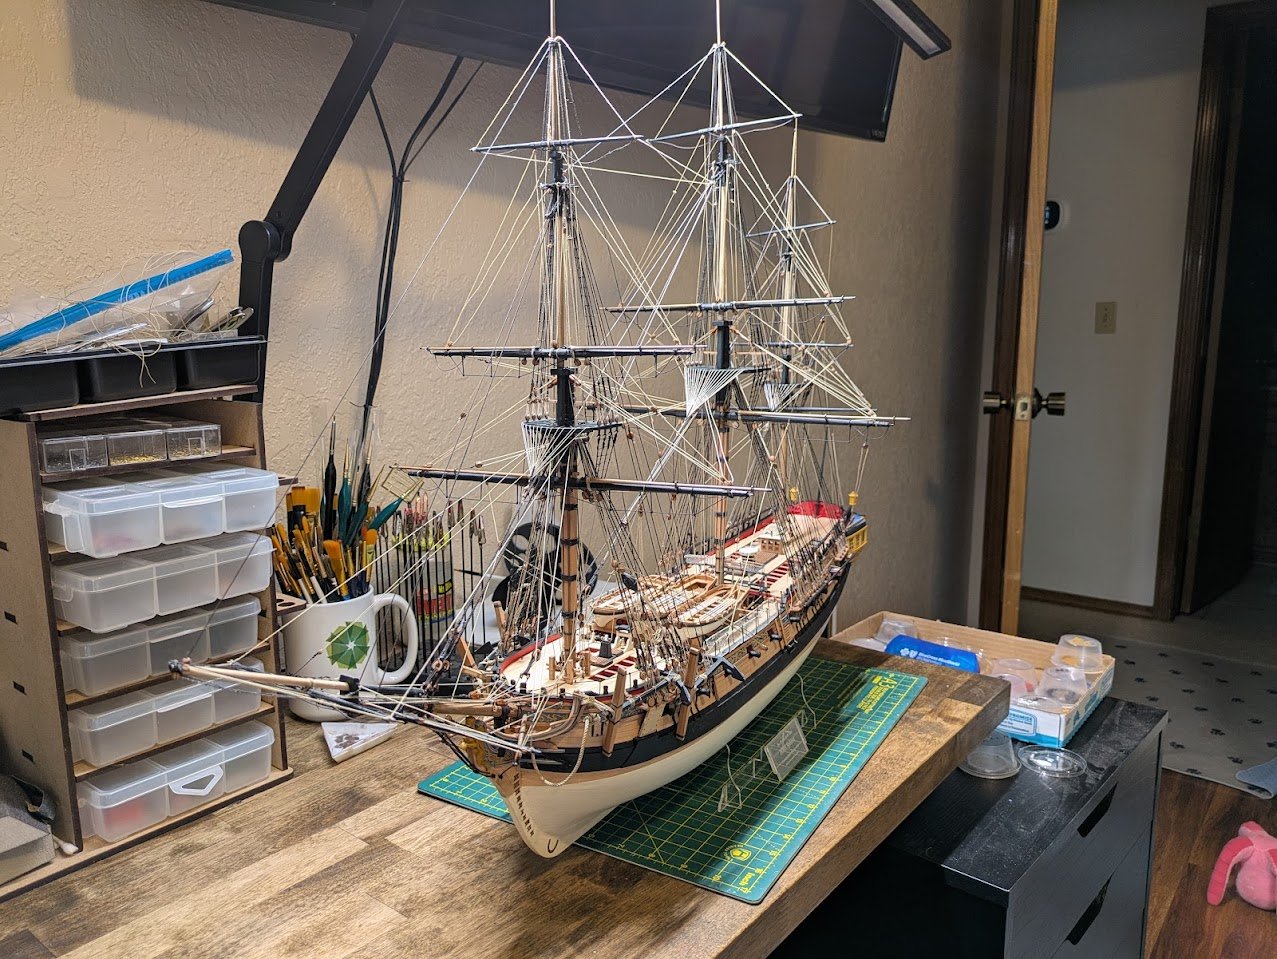
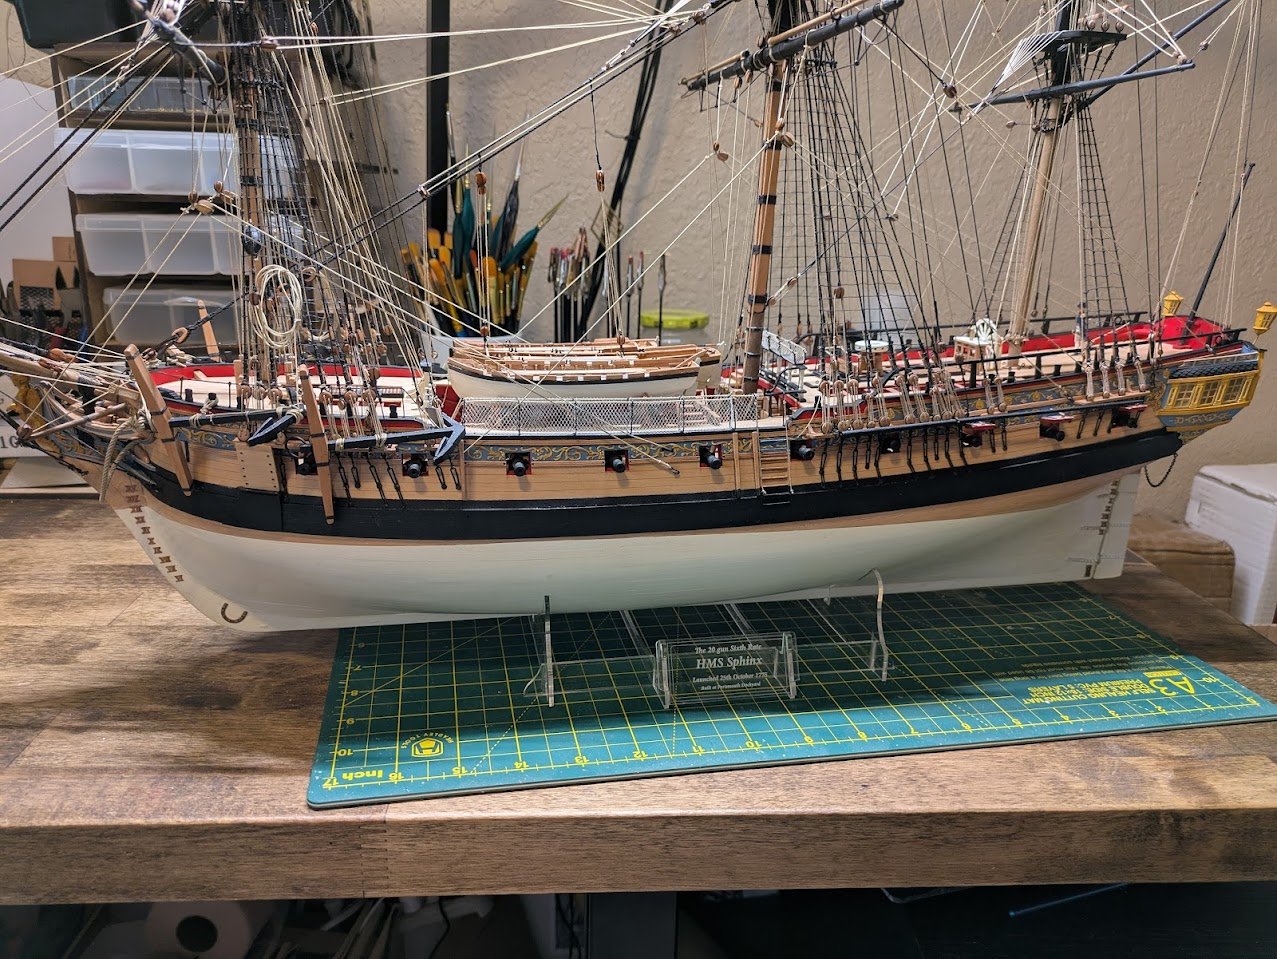
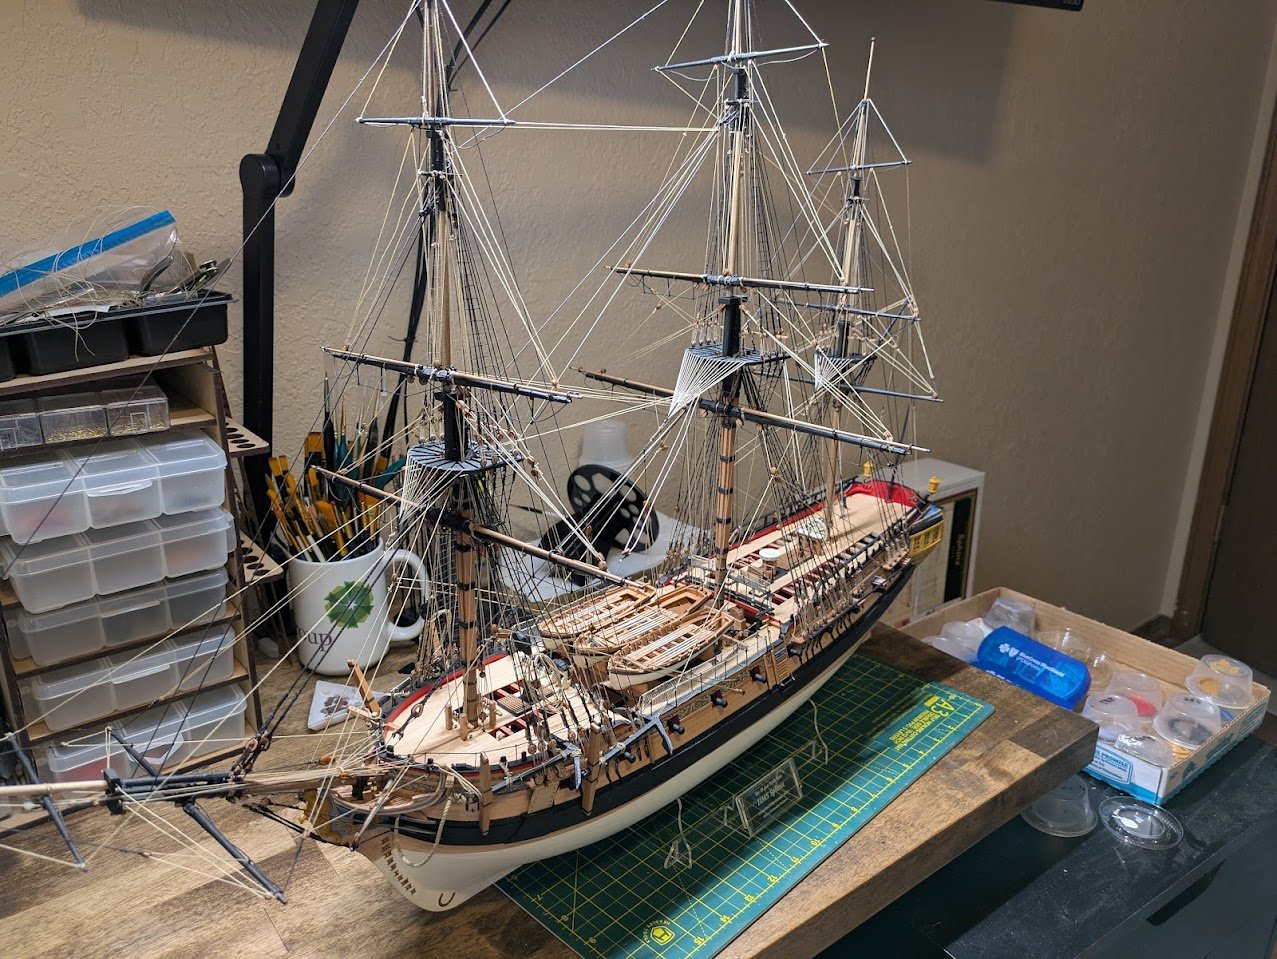
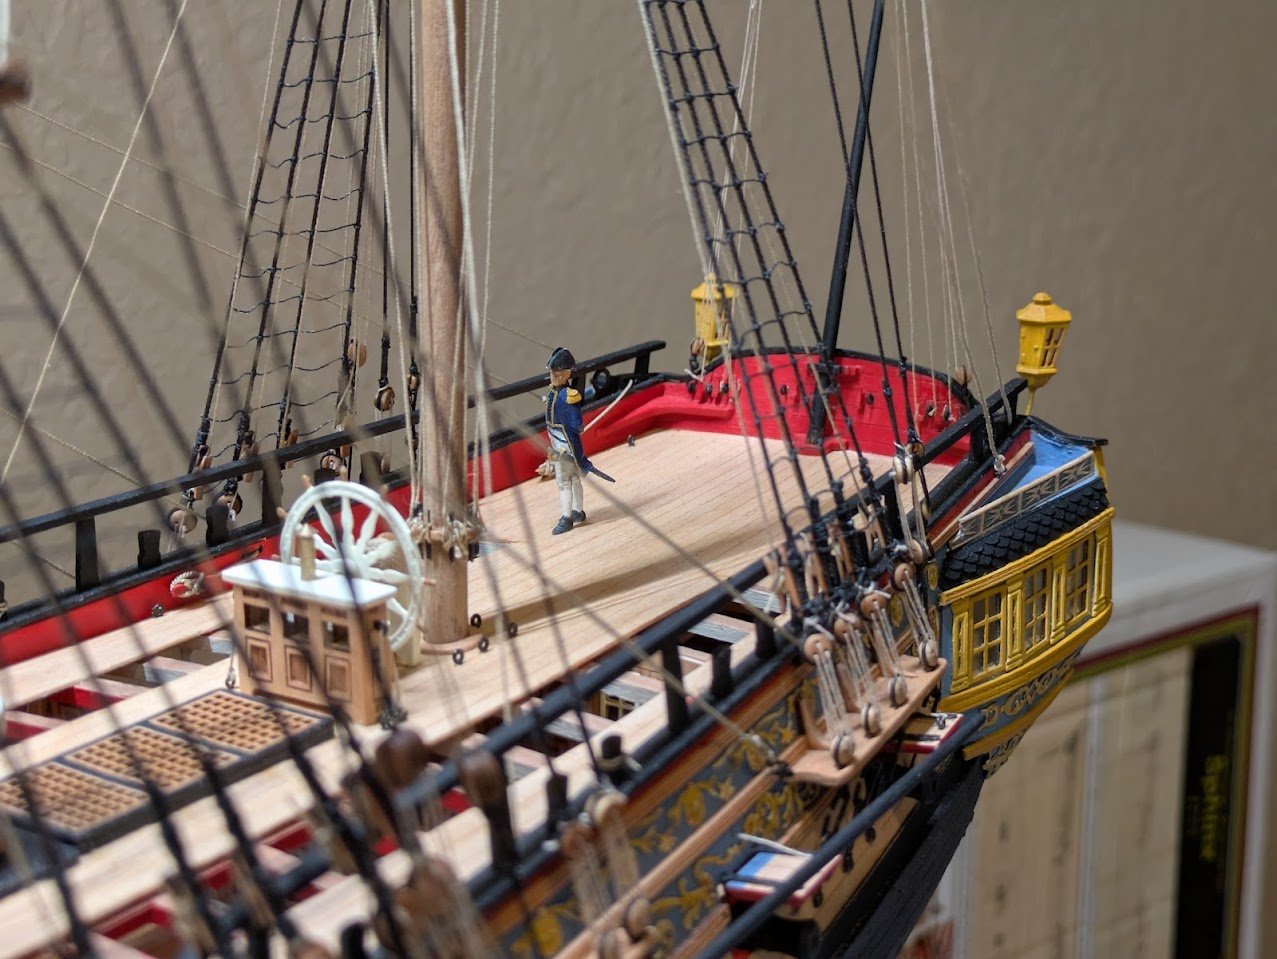
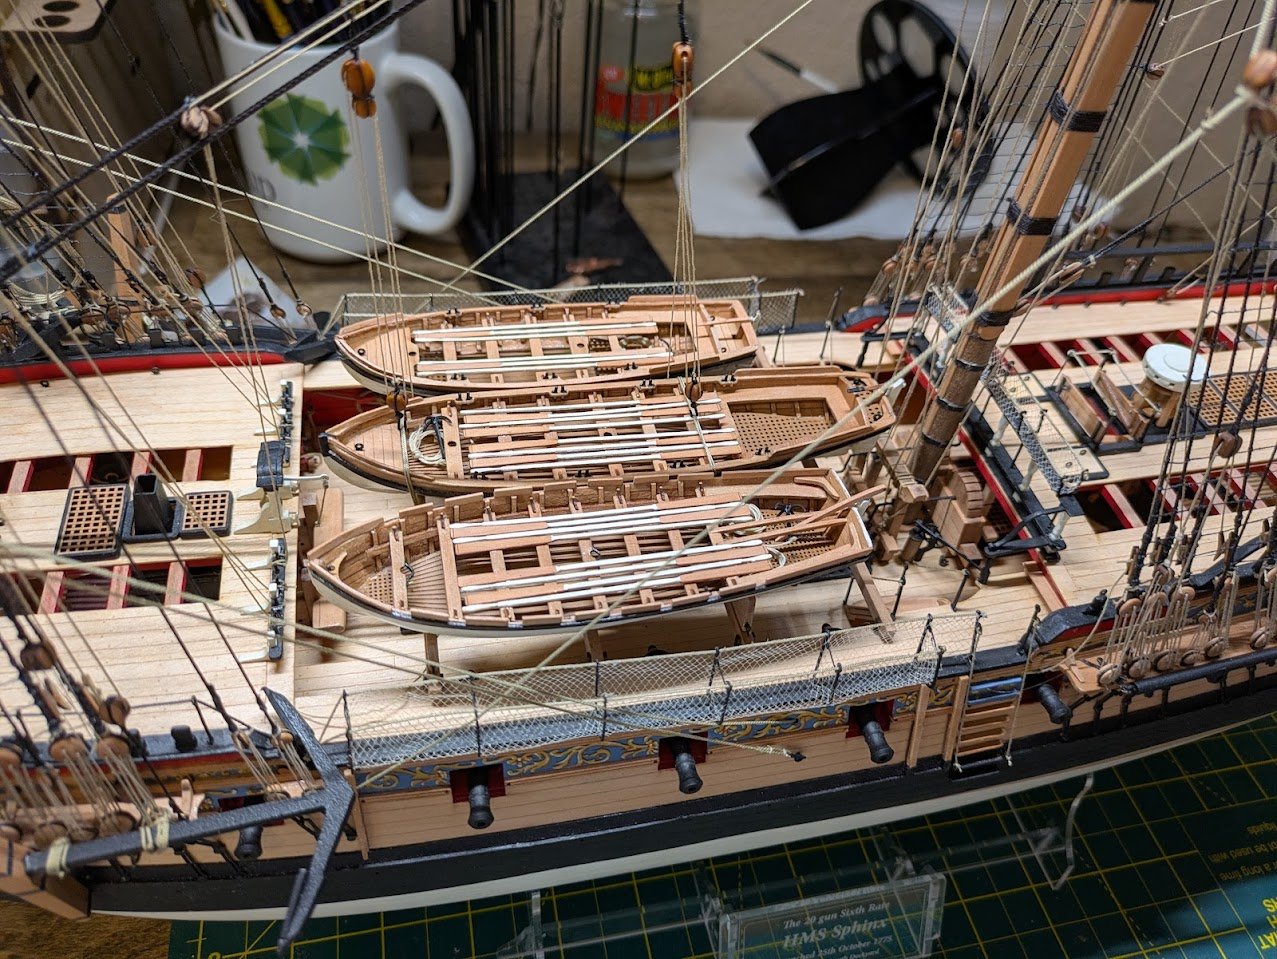
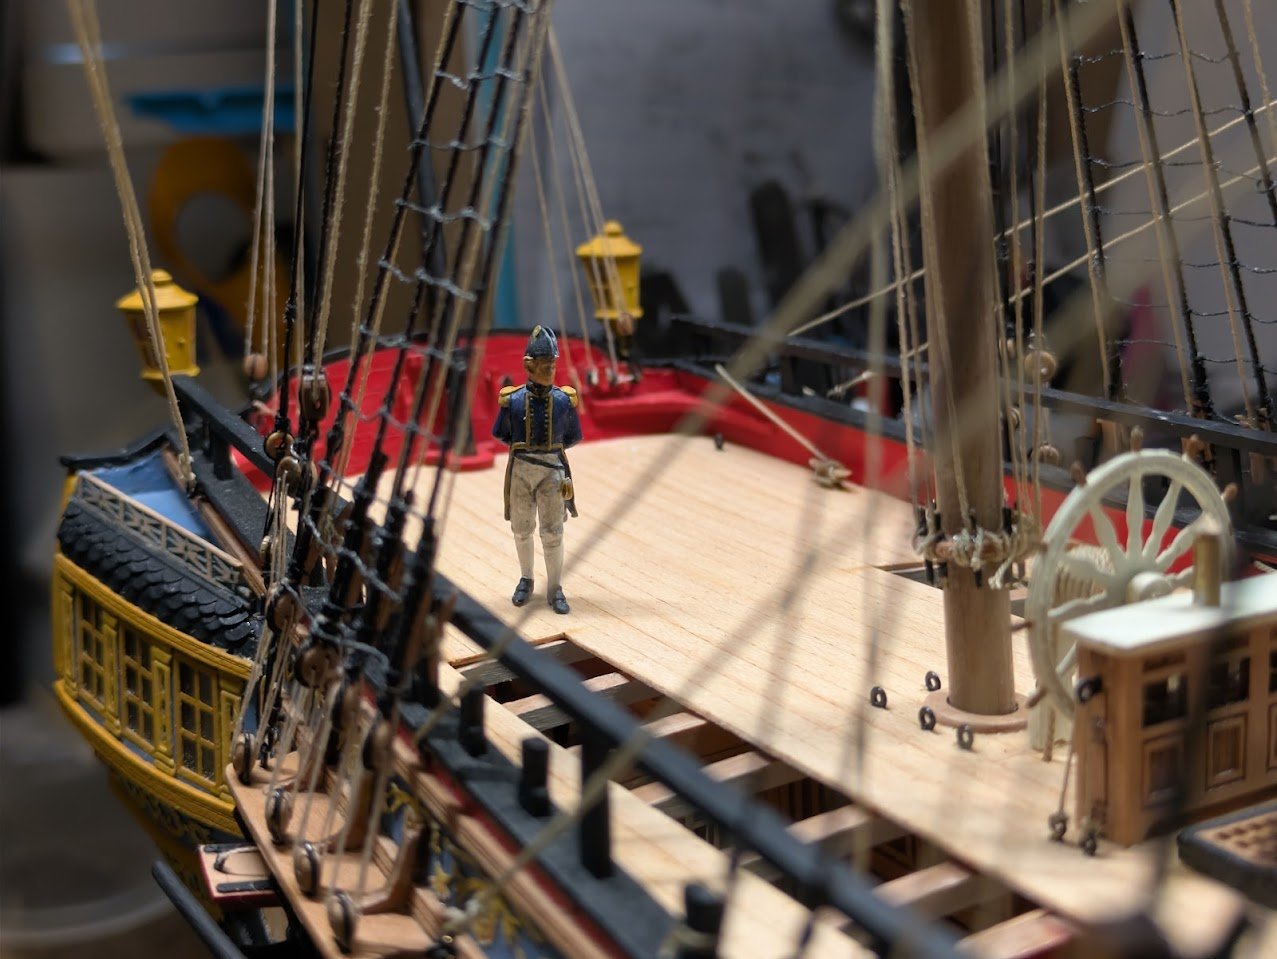
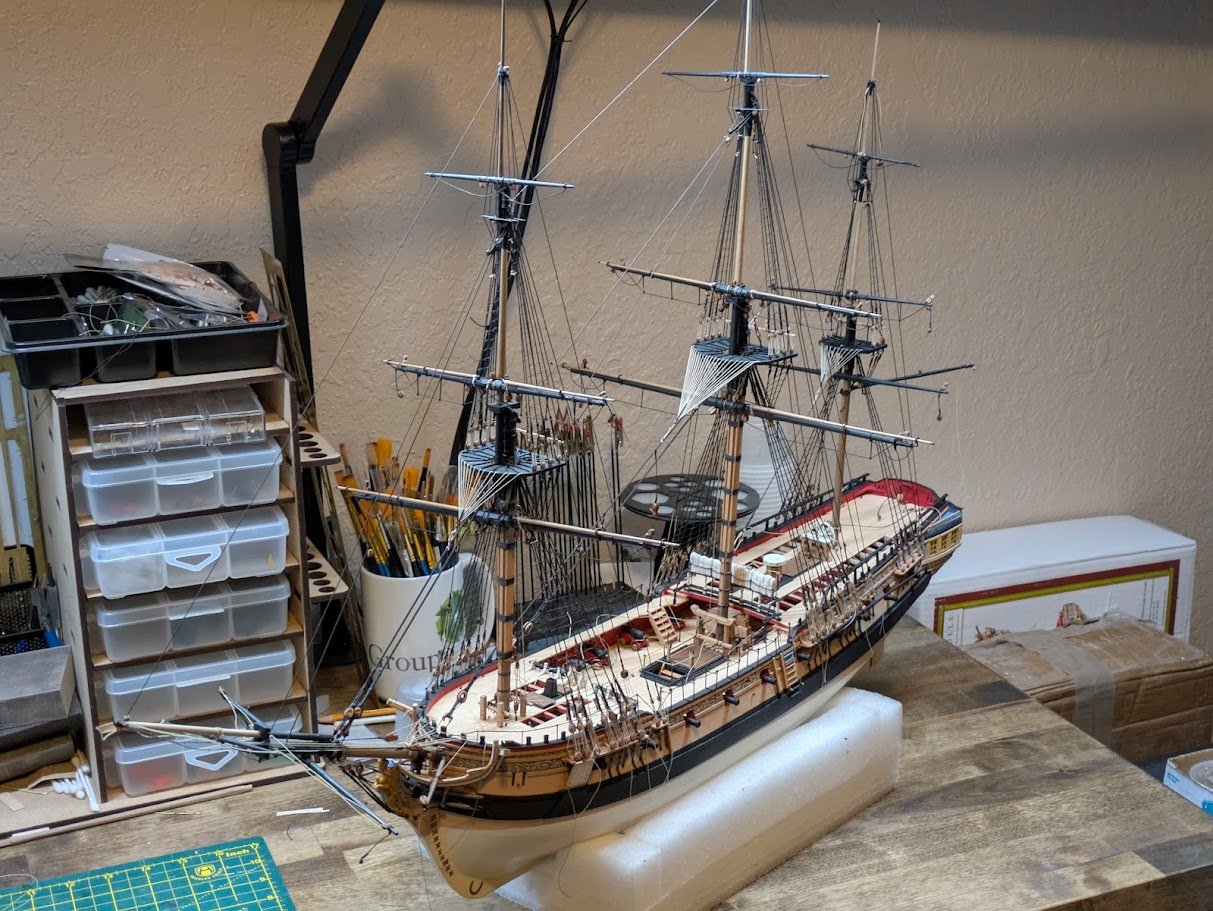
Over the weekend I was able to finish off the running rigging, and start attaching all the external pieces that were prone to be knocked off during rigging such as the anchors, lanterns, port lids, Captain figure, ships boats etc. Captain Figure This is the first miniature figure I have ever painted, while I have modeled off an on since I was a child, my model subjects were always vehicles. This was a first for me and I enjoyed it a bit more than I expected I would, while it isn't something I want to do a ton of, I do feel more comfortable painting figures in the future. The only tip I had received beforehand about painting mini figs, was to paint them in the order that they would be dressed. So I did a flat flesh for the skin tone, I then painted the socks and pants in Vallejo Off White, then the jacket in Prussian Blue with Ochre Brown trim, then the hat and shoes in grey black. I then went over the pants with a light wash. I basically have little clue if this is the best way to paint these, but I am happy with the result for my first time. Once the model was complete I cut away the base and slowly sanded away the remainder until the fleet were flat enough to be glued to the deck. Completed Model!!! My Second ship kit the Sphinx is 99% complete, the 1% left to do is rope coils but I probably won't get to those immediately as we are having a our first child, a little girl, at the end of April, plus I could use a change of subject from the Sphinx. Here are some photos of the 99% complete ship, I may try to setup a light booth to get some more professional looking photos as I think it deserves it after a year of work. I decided to only lash down the middle boat so I can display more of the gun deck if I wanted in the future. Overall I am very happy with my model, it turned out much better than I was expecting mainly due to Vanguard just making an excellent kit that goes together so smoothly, plus it really helps when you have excellent database of knowledge on this site and excellent build logs to copy from such as @Blue Ensign, @hollowneck, @Moonbug's Pegasus and numerous others which I have taken Ideas from. There are a few sore spots like the decorations above the Quarter galleys roof that I goofed up, but maybe one day I will have the means to make something to replace that parts. Thank you to everyone who helped and followed along the way. The Sphinx was a fantastic model kit and I highly recommend Vanguard models to anyone looking for a kit. My next kit will be to squeeze in the Speedy 2023 version before the Surprise kit releases, but I am undecided if there will be a build log or not with the baby coming, plus I'm not sure I can really offer much other Speedy log's haven't already covered.
-
Yes, this is the thread.
- 1 reply
-
- 1
-
-
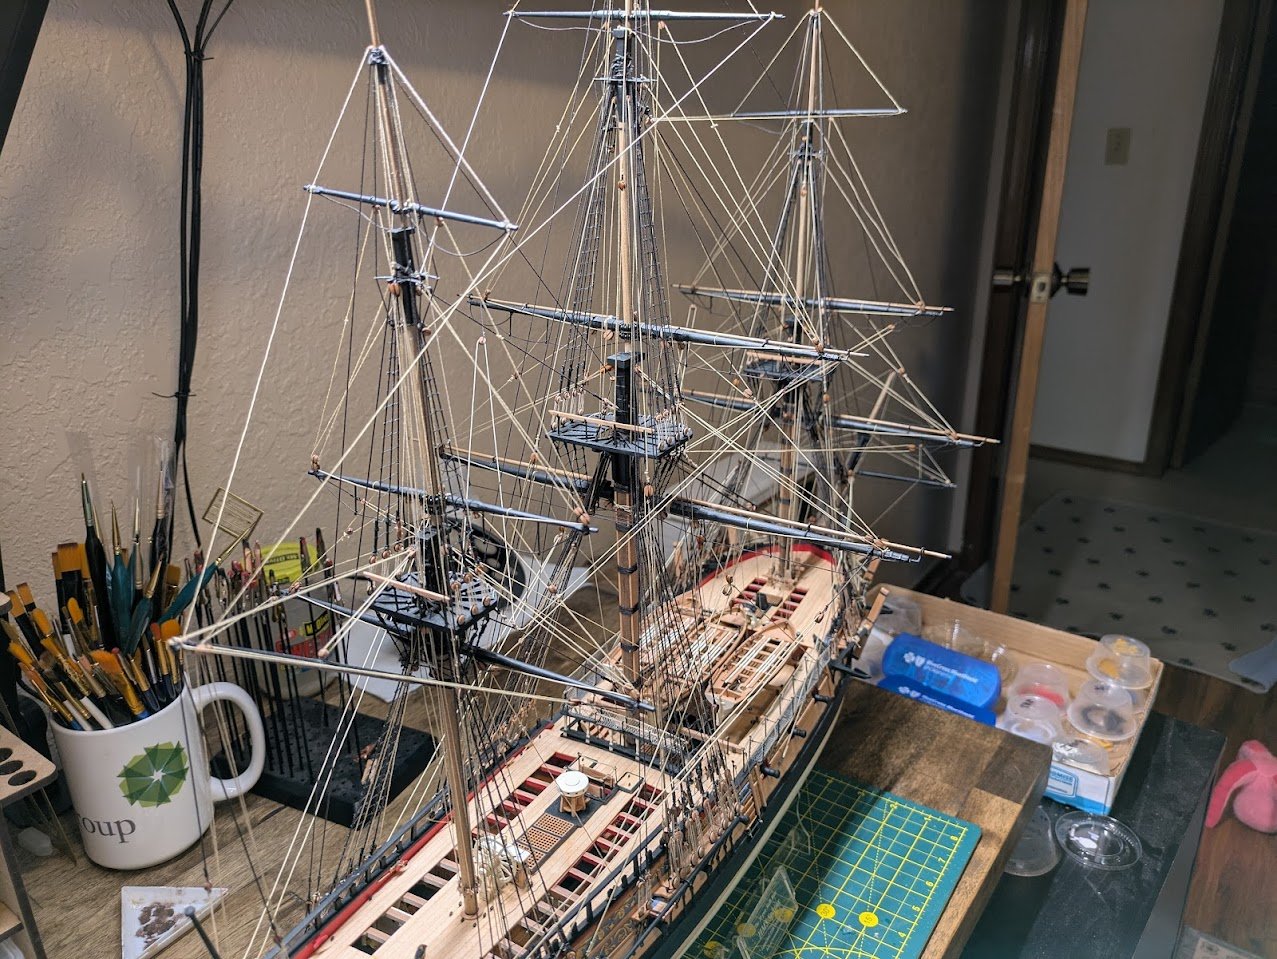
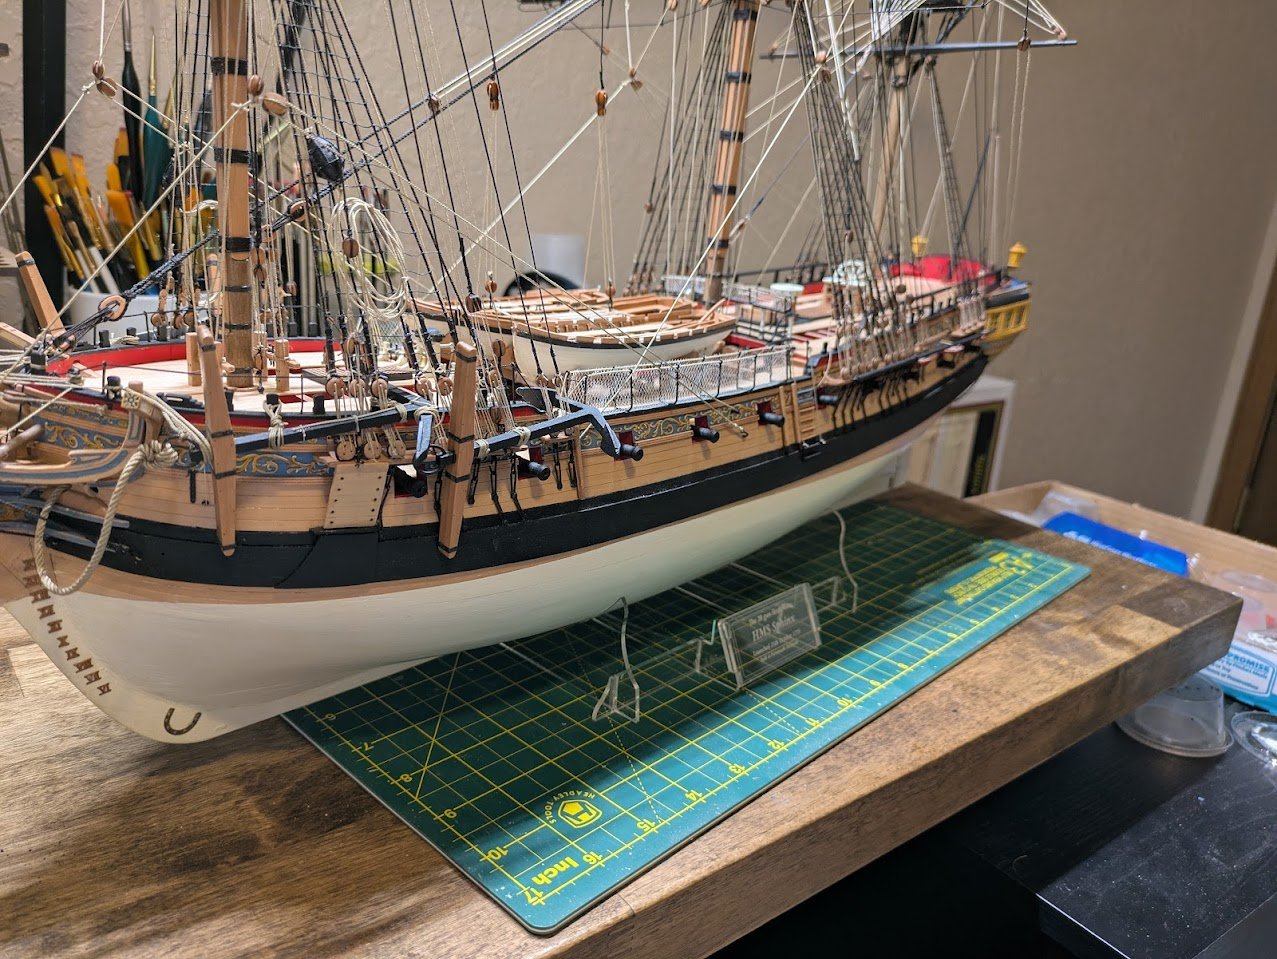
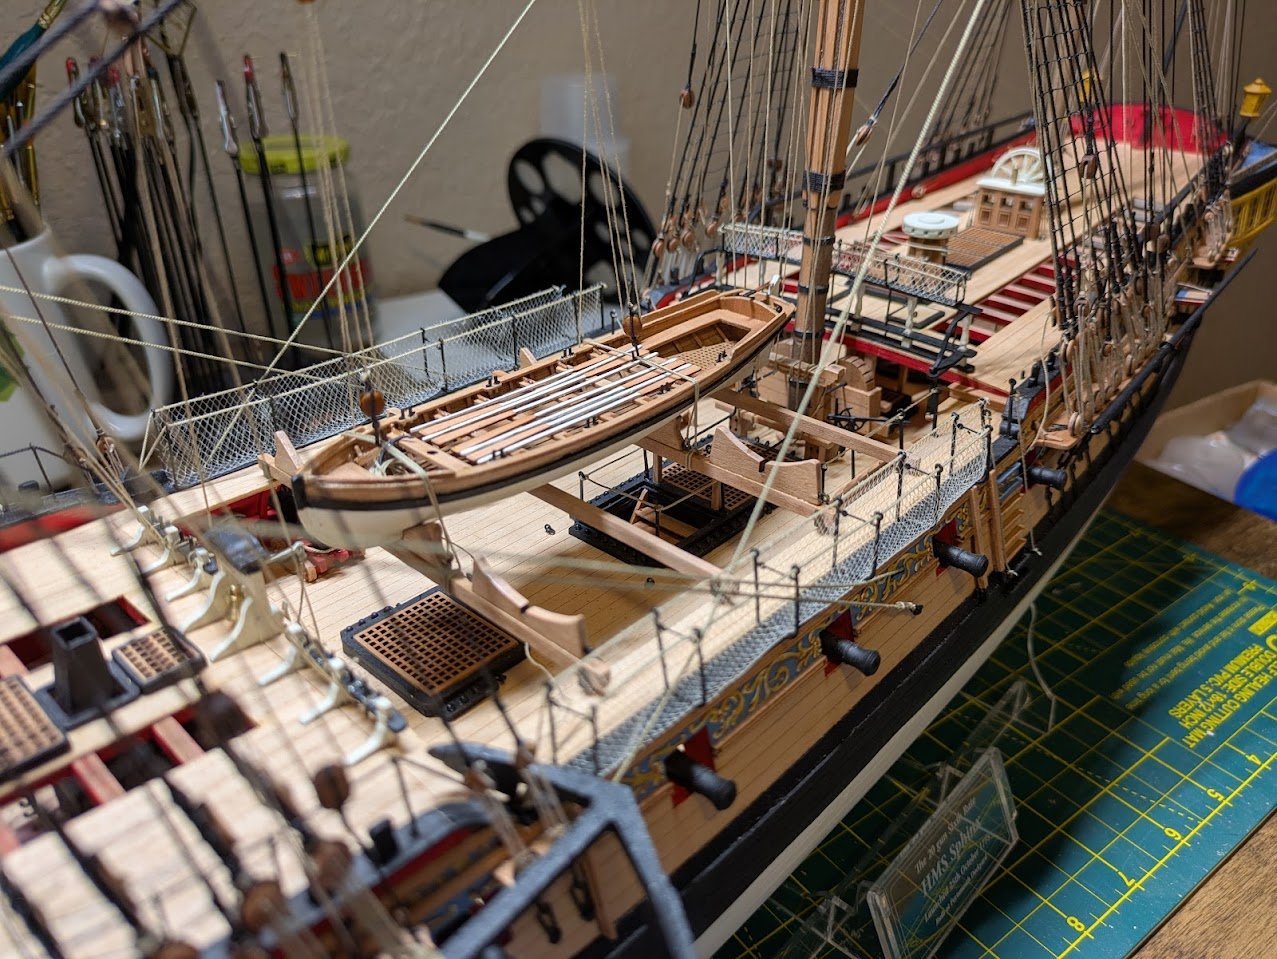
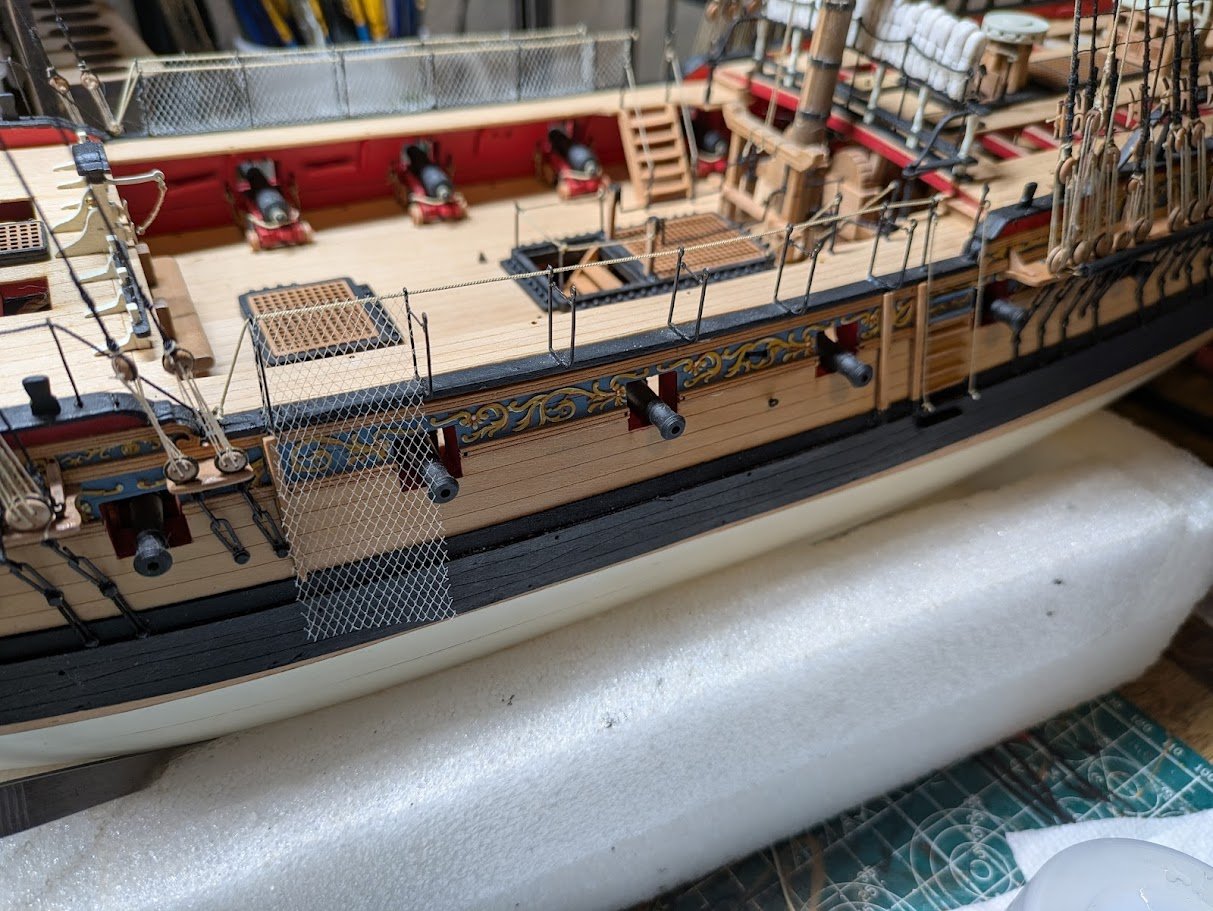
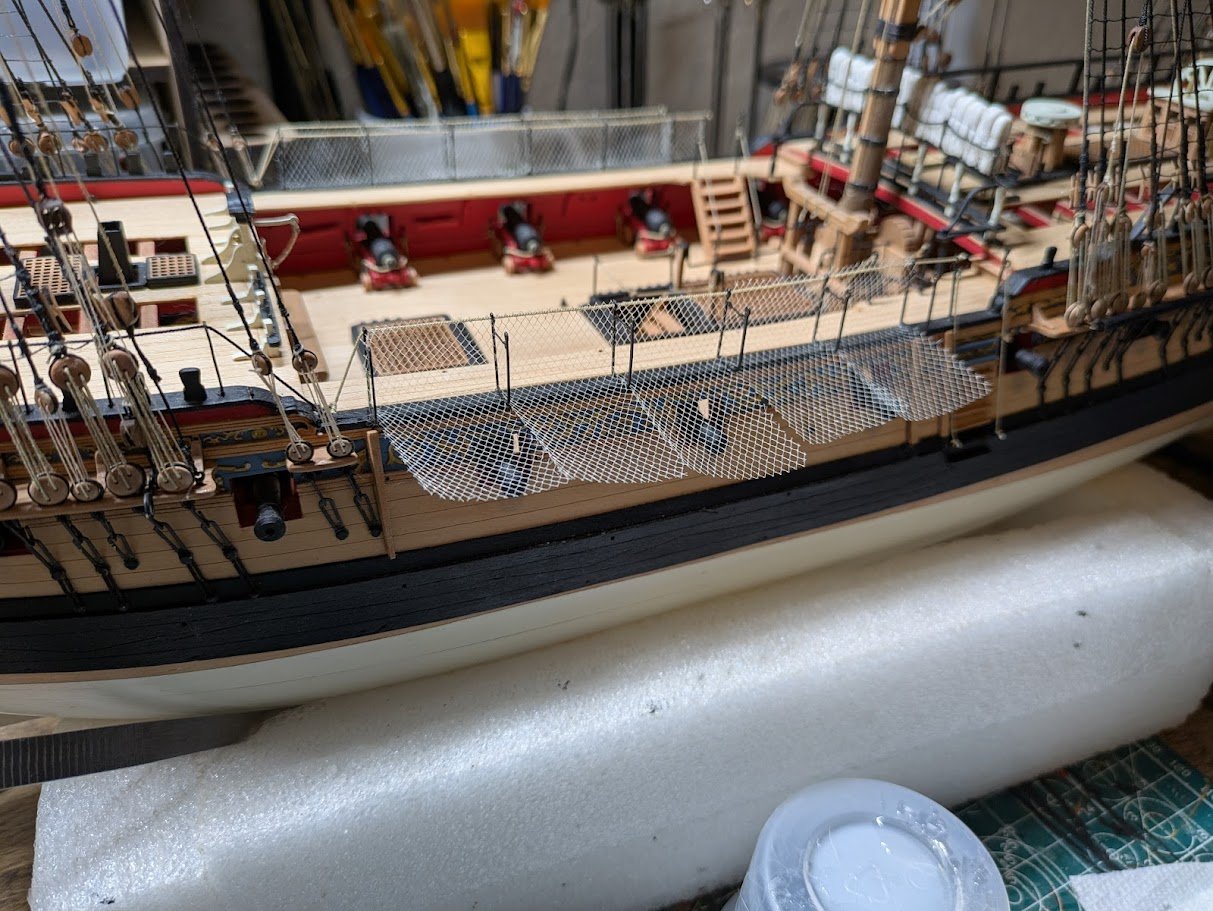
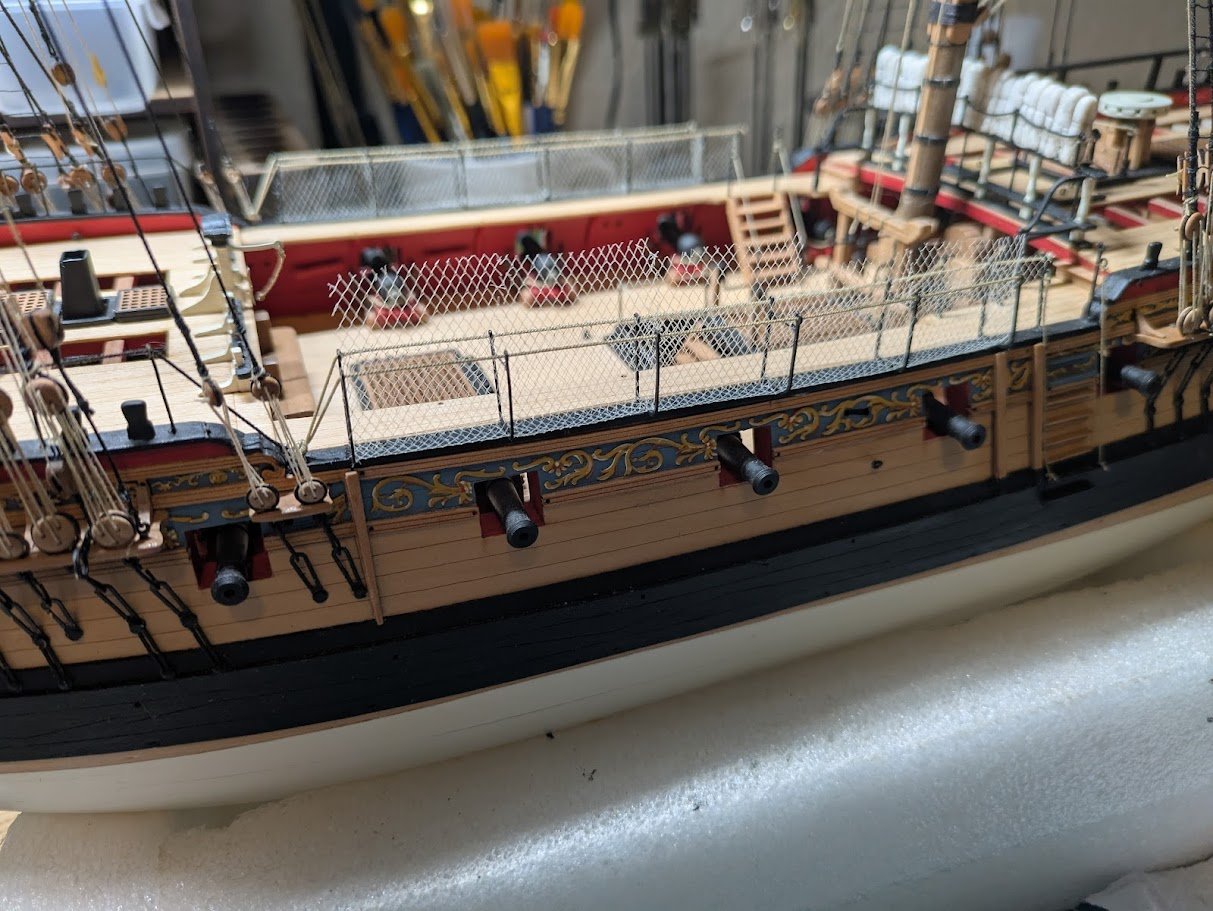
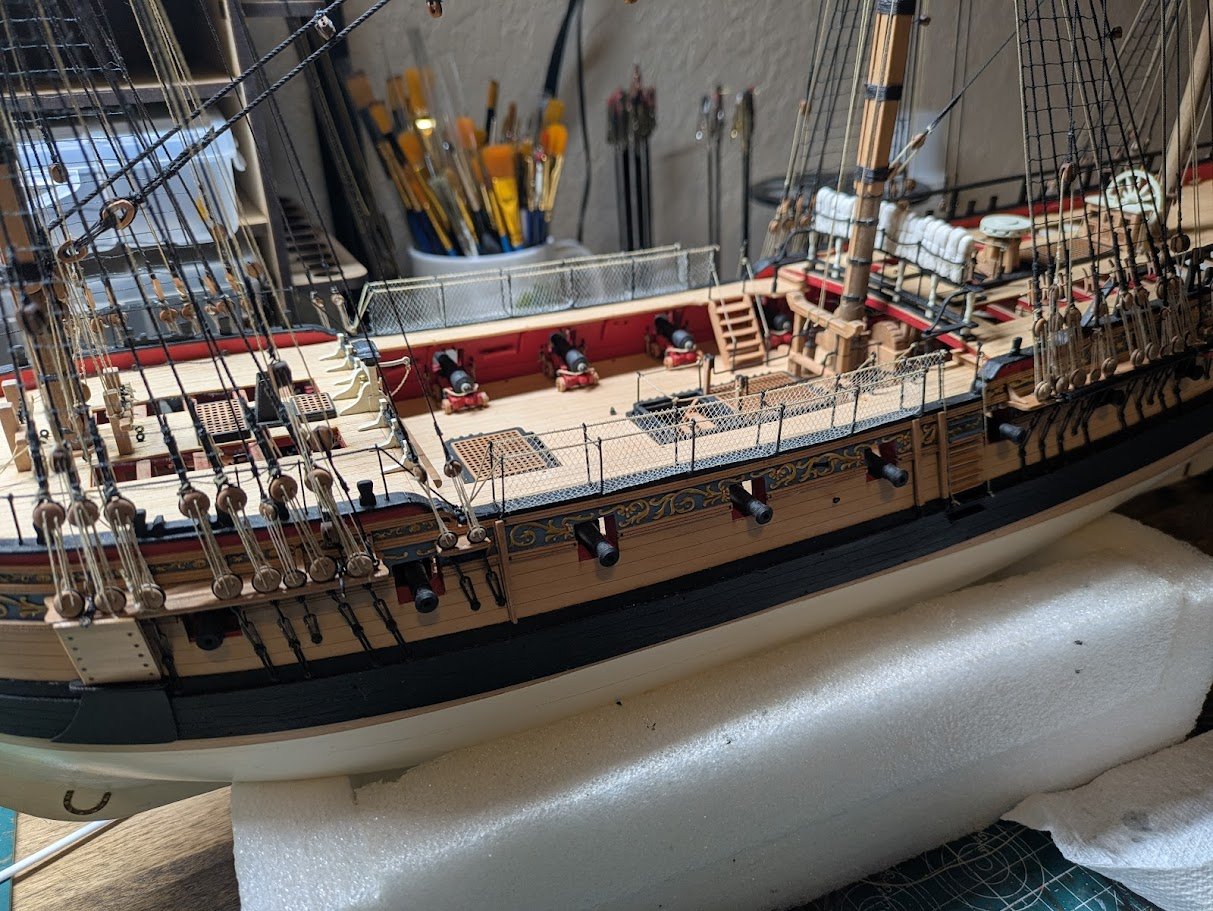
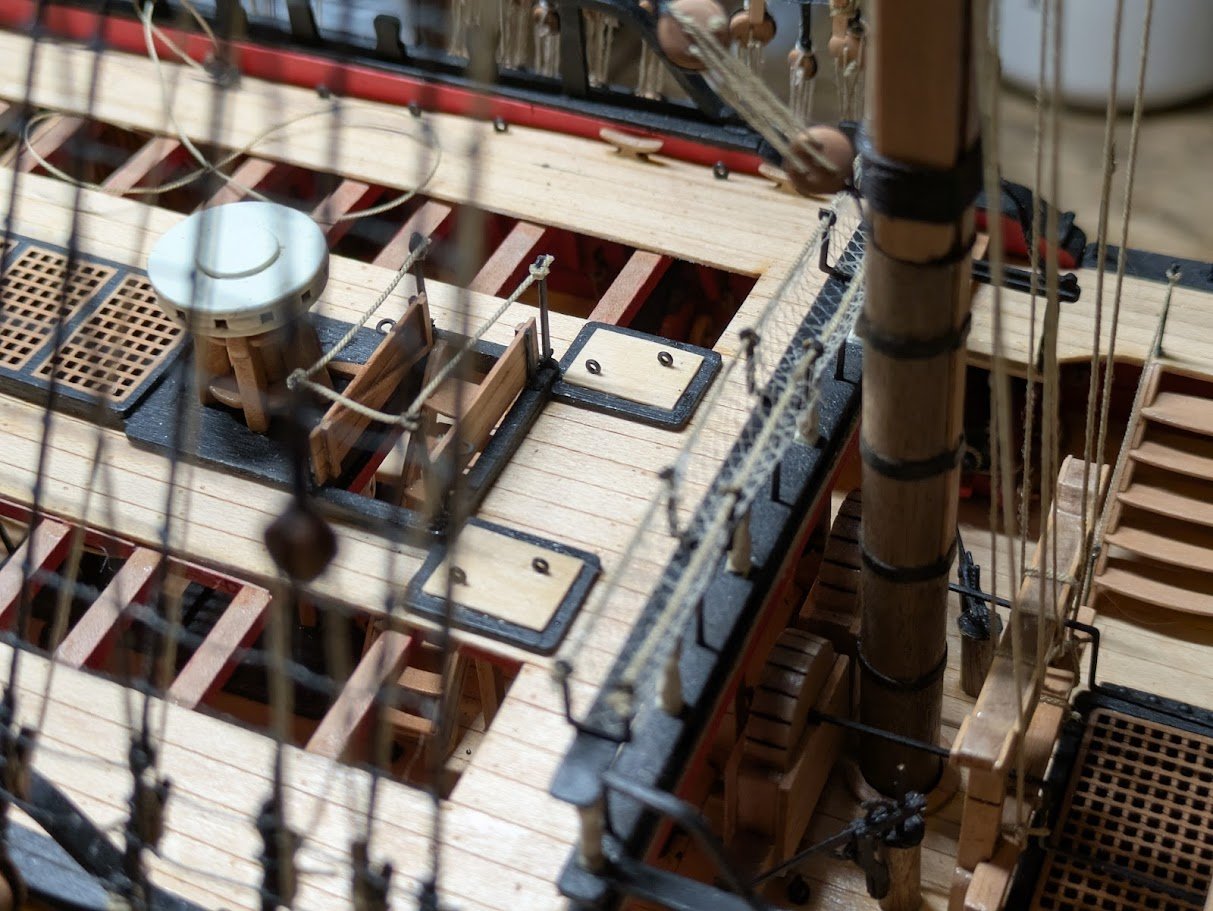
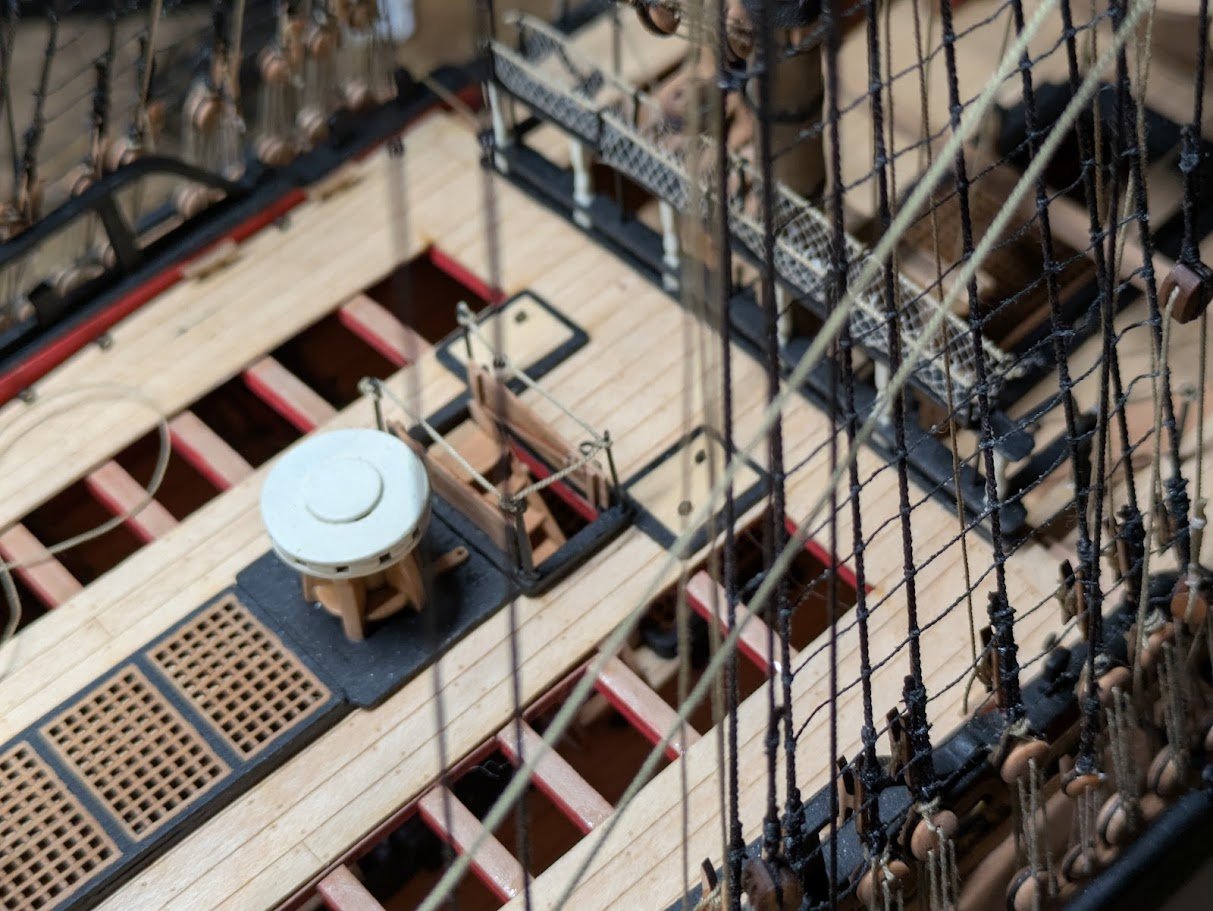
Small update, I have been working hard on the running rigging and should be able to complete the rigging by the end of the week. I took a few breaks in the rigging to check a few more tasks off of my build list. Quarter Deck Cable port lids - Not sure the correct term for these, they are the openings right in front of the Quarter deck companionway intended to run cables up to the capstan. The kit does not offer anything to cover these up, and I felt the openings just looked off, so I fashioned up a couple quick easy lids out of some spare wood. Nothing special but they satisfied the captain. Hammock Crane netting- I was at the point in the rigging where I needed to put the netting in the hammock cranes at the waist. I am using some tannish color toule for the netting. When I put the netting in on the Quarter deck rail, I used on piece length wise and it was super fiddely and frustrating to work with the netting just caught on everything. This time i followed what @hollowneck did on his Camilla, and cut the toule into smaller vertical strips, I found about 25mm wide is just about perfect. I start by attaching one end of the net to the inboard crane rope. I experimented with several types of glue, but CA glue ended up being the winner as I needed something that set really quick. I go down the line attaching all the pieces before moving to the next step. Once all the pieces are glued on the inboard rope I then brush Matt Acrylic (Vallejo) over the netting where it meets the deck, this will secure the bottom of the netting, this makes the netting hold place securely while I lift up the other end for gluing on the next step. Next I add the outboard rope to the hammock cranes, and then glue the other end of the netting to the outboard rope again using CA glue. Lastly I trim the tops of the netting with some cuticle clippers and the netting is finished. As you can see in my very top photos I also decided to redo the netting and remove the hammocks from the quarter deck hammock cranes. My initial plan was to outfit the Sphinx's hammock rails with hammocks, but after I finished the waist netting I experimented with hammocks and realized they almost completely blocked what little view of the gun deck I had visible underneath the ships boats. I slept on it, and the next day decided on going with no hammocks as I didn't want to hide the gundeck, I also decided to remove the QD hammocks and also redo the netting as I wasn't completely happy with my first attempt.
-
One of the first things I noticed, I really like the new design. Do you know what ships boats will come with the kit yet? Also do you plan on using photo etch or 3d print for the toasted cheese?
-
Fantastic result, your rope coils look really good. I like the cannons on the quarter deck, I have been tinkering around with the idea of adding a couple myself just to give some to look at since most will be covered with the boats.
- 422 replies
-
- 1
-
-
- Vanguard Models
- Sphinx
- (and 1 more)
-
Looking great, I also had to fix a few broken feet on my deck beams, they are much more fragile than they look.
- 422 replies
-
- 1
-
-
- Vanguard Models
- Sphinx
- (and 1 more)
-
Buying Filler Blocks
brunnels replied to mikiek's topic in Building, Framing, Planking and plating a ships hull and deck
I don't know if you all have Hobby Lobby's down there in SE Texas, but I was in my local Hobby Lobby and they had a pretty good assortment of basswood blocks that I thought would be perfect sizes for filler blocks. -
I just want to clarify my post, I wasn't trying to make any assumptions that you all were ripping anyone off. I just felt that at the current price it might turn some prospective buyers away, and shipping prices can vary greatly depending on who you ship through.
-
Apologies for the confusion, I don't always know the terminology. I am referring to the lower yards that attach to the fore mast channels. These are what I am referring to but on the fore mast.
-
Not sure if there are two versions of the kit but I know there are multiple versions of the instructions, I believe I have the earlier version as well because the instructions aren't as complete as what is on the Instructions on the Vanguard website. Yes I am referring to the yards that hook onto the fore mast channel.
-
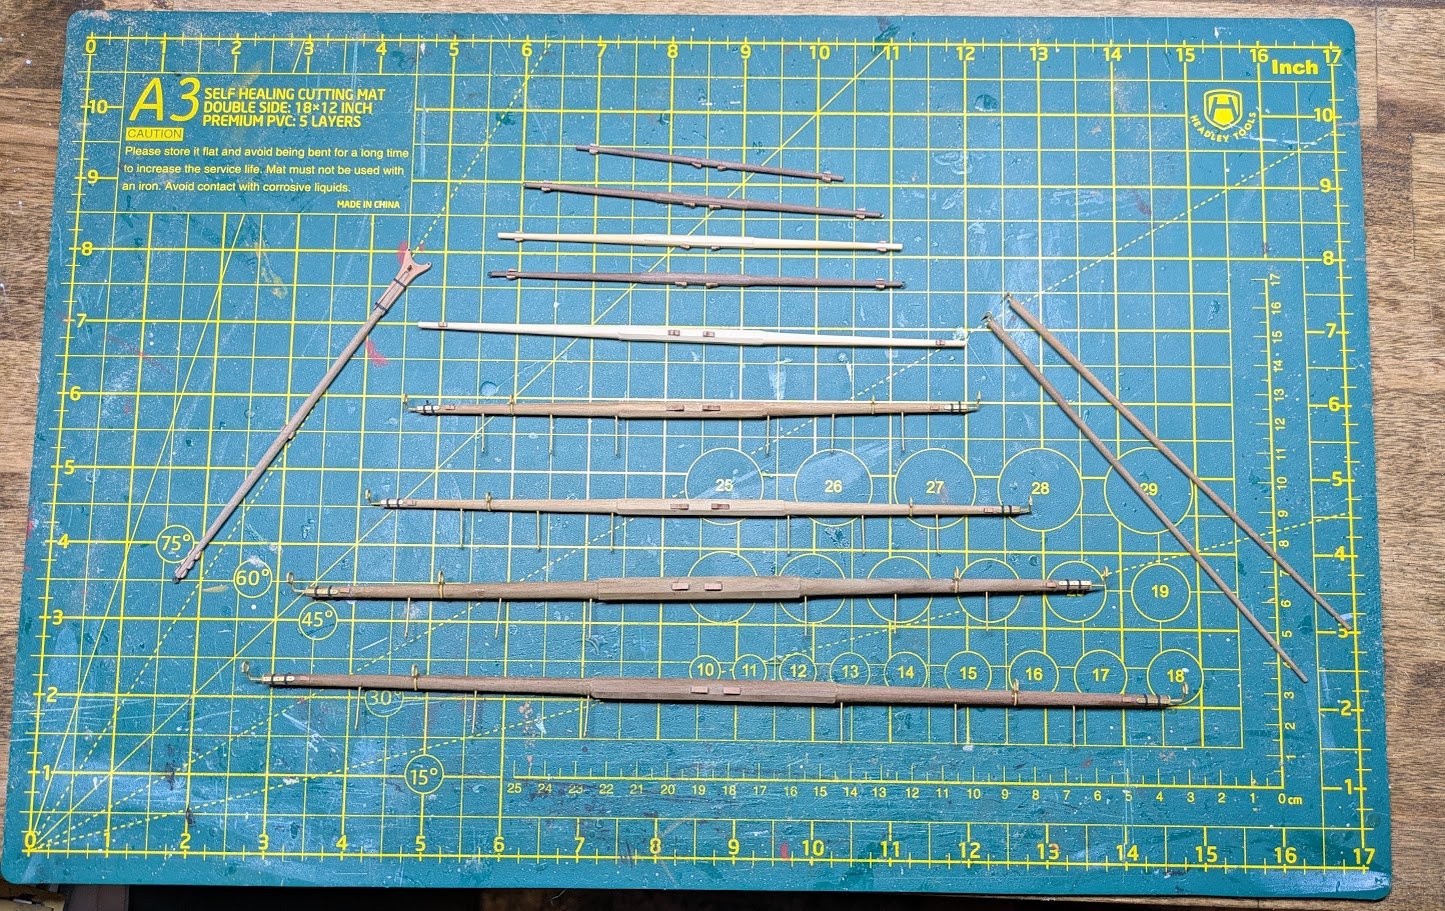
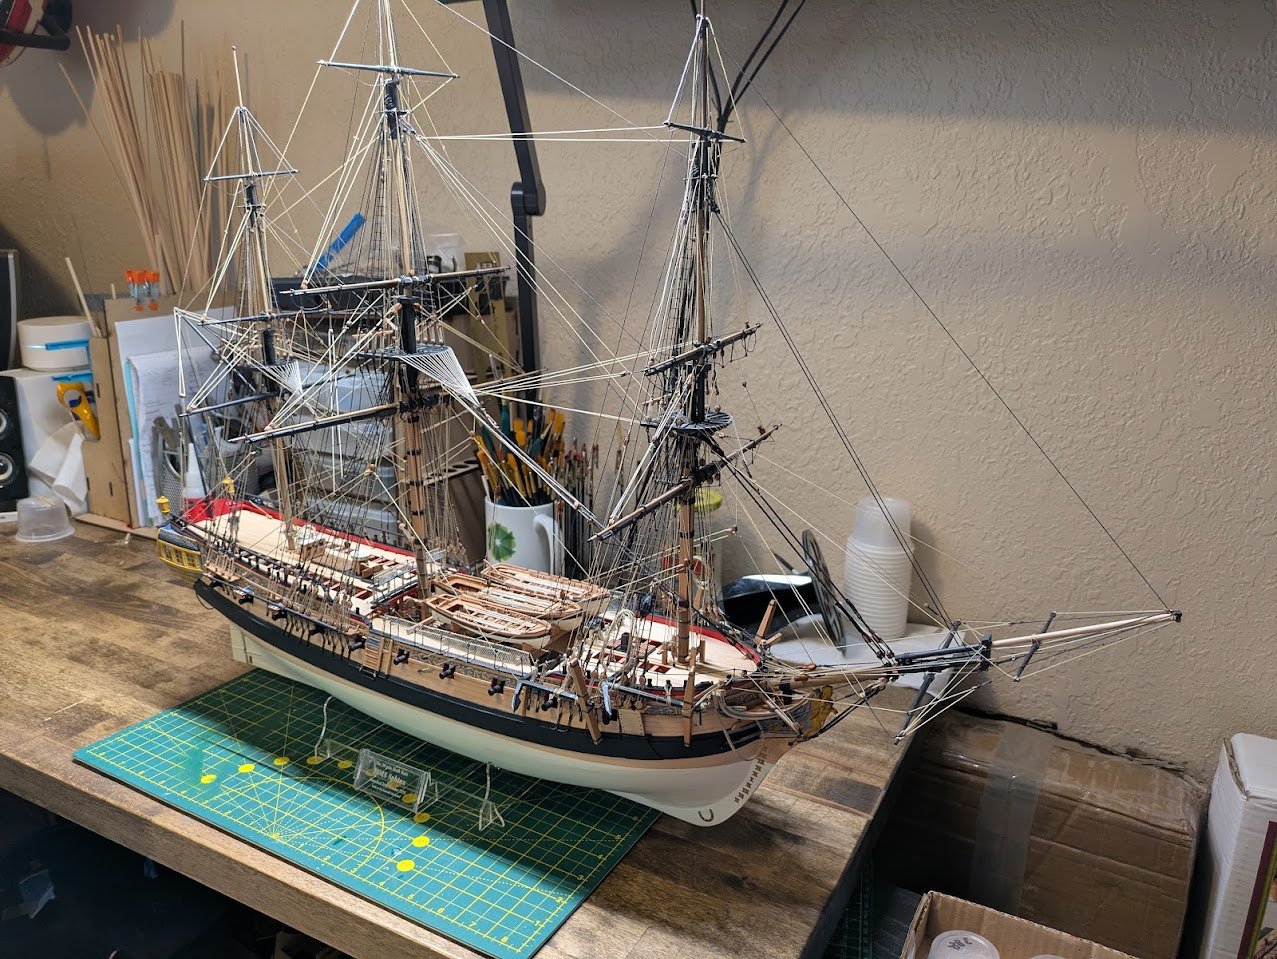
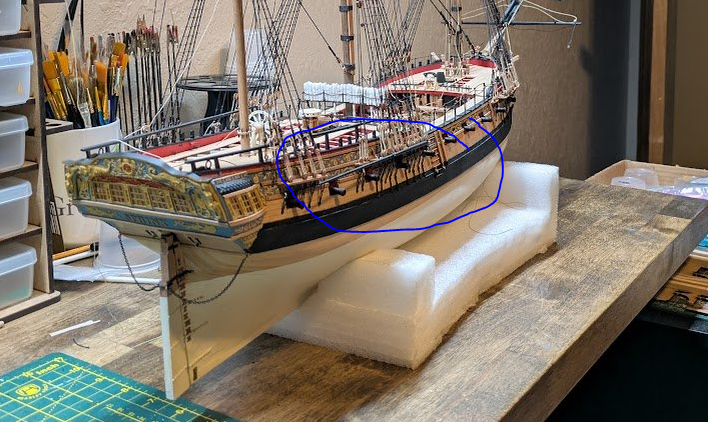
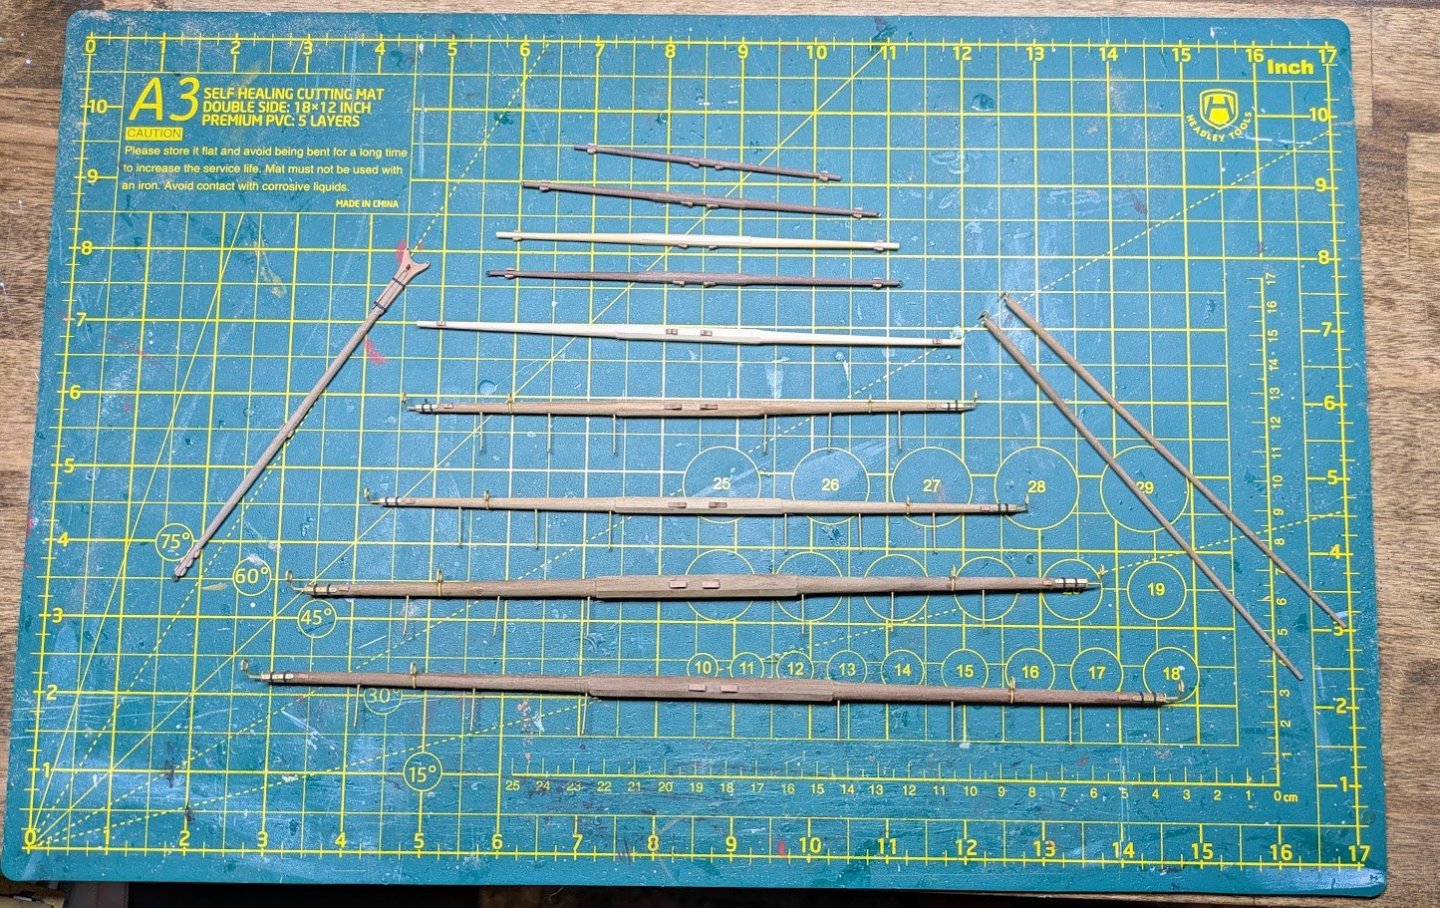
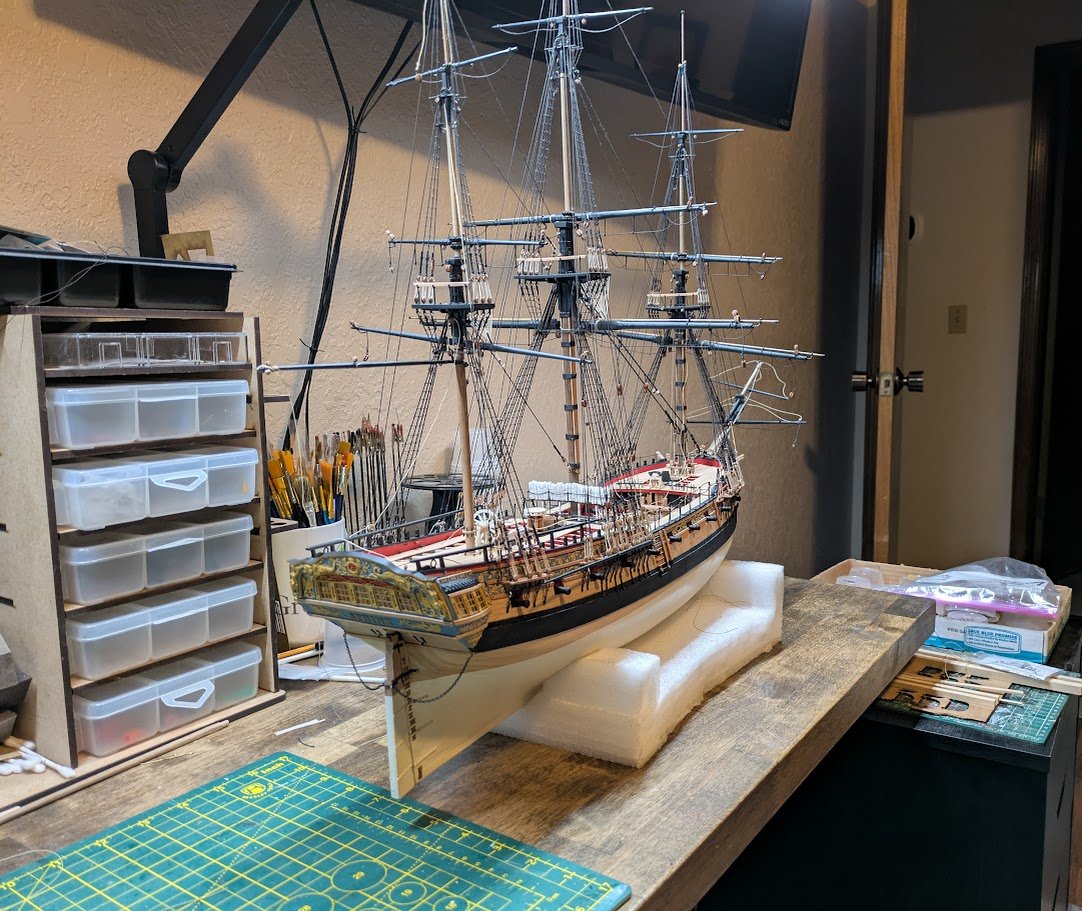
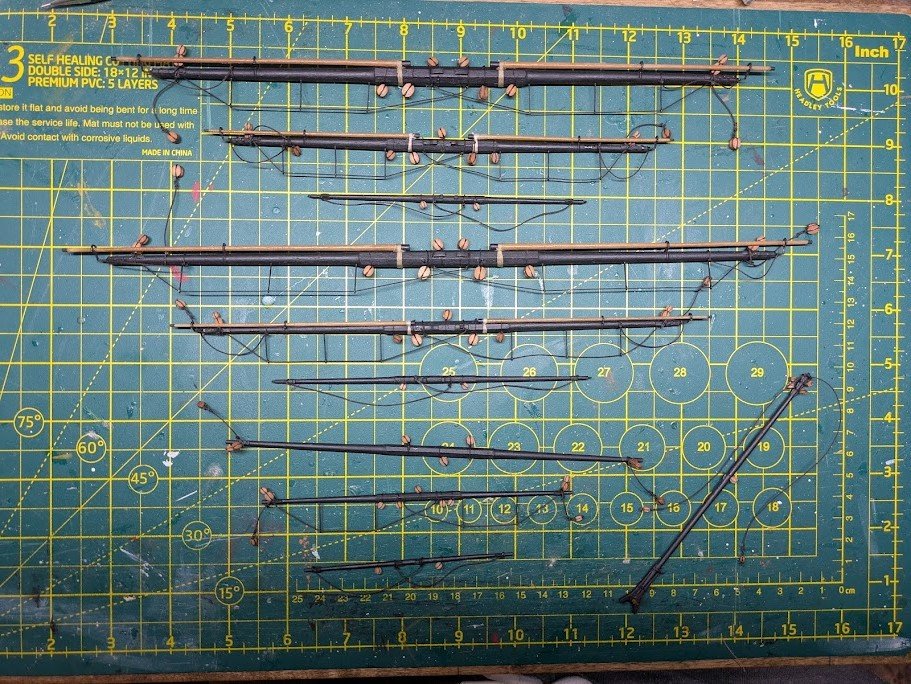
Yards I've been working on the yards for the last several weeks. Yards definitely took longer than I was expecting and my kit was short on a couple sizes of the dowel rods so my progress kept being halted. My local hardware store didn't carry walnut dowel, so I had to go with the basswood for a few which isn't a big deal as the yards were painted. Completed yards Yards are hung up, it took me the better part of the weekend to make the harnesses and get the yards on the ship. I started on rigging the lifts but my progress was halted as my kit didn't have enough of several of the blocks so I ordered some pear 3d resin blocks from Syren. Question on the fore studding sail yards The kit shows the dimensions and plans for the studding sail yards for the main mast, and comes with the hardware to install the main and foremast studding sail yards on the channels, but I don't see any dimensions or plans for the fore mast lower studding sail yards. Should these be on the ship? Am I overlooking them somewhere on the plan sheets? I don't see them on anyone else's build, but if the ship should have them I would like to put them on and will need to purchase more dowel.
-
I really don't want to make this thread too much about the shipping cost, I was just very surprised at the shipping price and nearly cancelled my order because of it, and others might consider doing the same. At that price the magazine is competing with actual reference books on my wish list. I decided to purchase to support the new magazine and NRG, but it might be hard to justify in the future. I know shipping prices are on the rise, but as a person who frequently ships stuff I can't imagine it costs that much to put a magazine in the mail in a envelope.
-
Ordered a copy, any way to lower shipping in the future? $8.50 is crazy high for mailing a magazine.
-
I guess it really depends on the subject, but personally I find weathering to look wrong on Military Age of Sail ships. Those ships were packed with men who spent the large majority of their work time on board doing nothing but maintaining the ship.
-
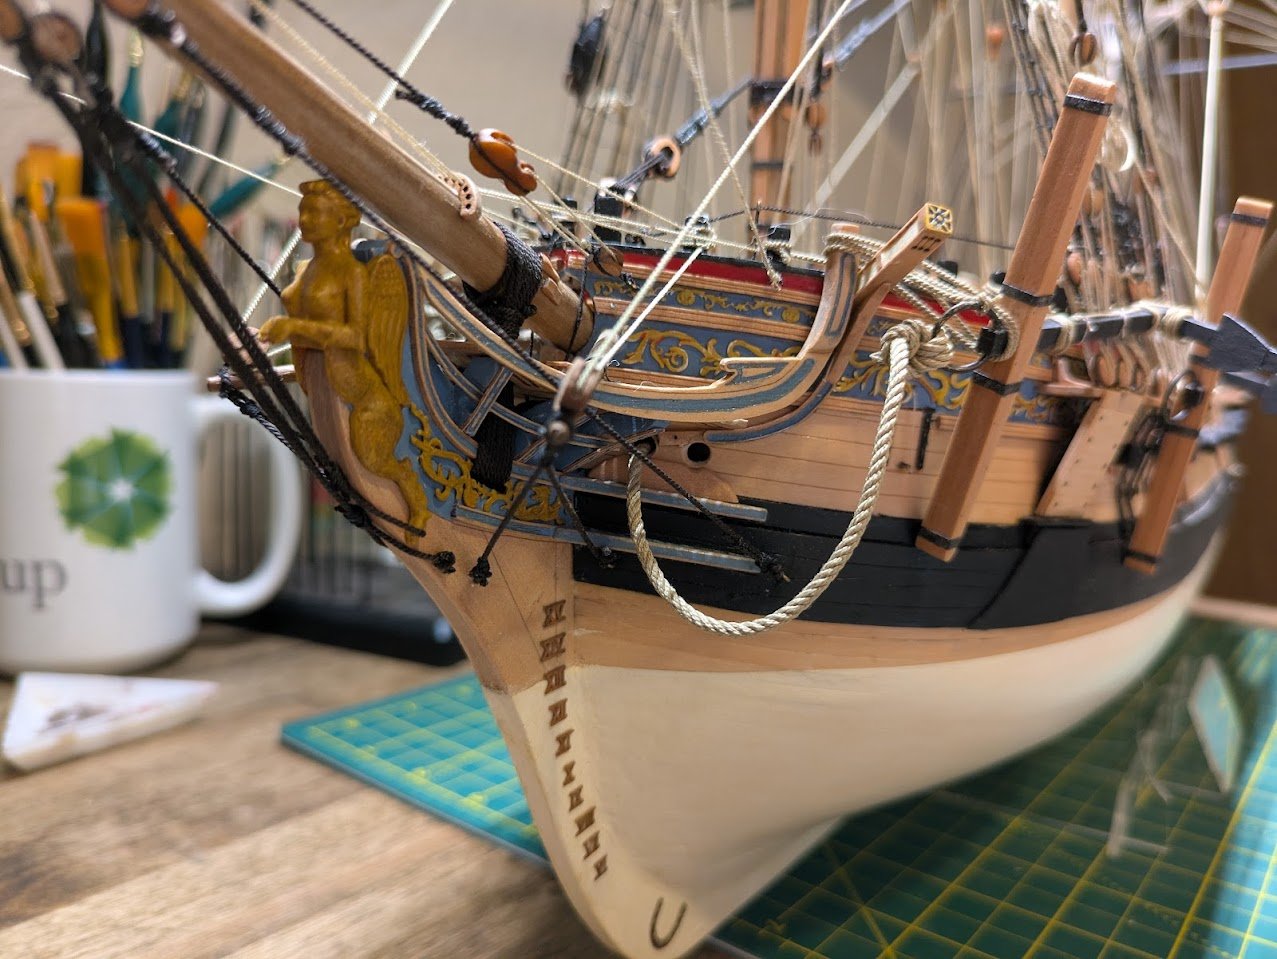
That yellow and black is starting to look really sharp, can't wait to see how it looks with the copper.