brunnels
-
Posts
337 -
Joined
Content Type
Profiles
Forums
Gallery
Events
Everything posted by brunnels
-
 You do fantastic work Moonbug, your Build log is definitely going to be one of my "go-to" logs to source ideas when it is time to start my Pegasus kit.
- 419 replies
-
- 3
-

-
- Victory Models
- Pegasus
- (and 2 more)
-
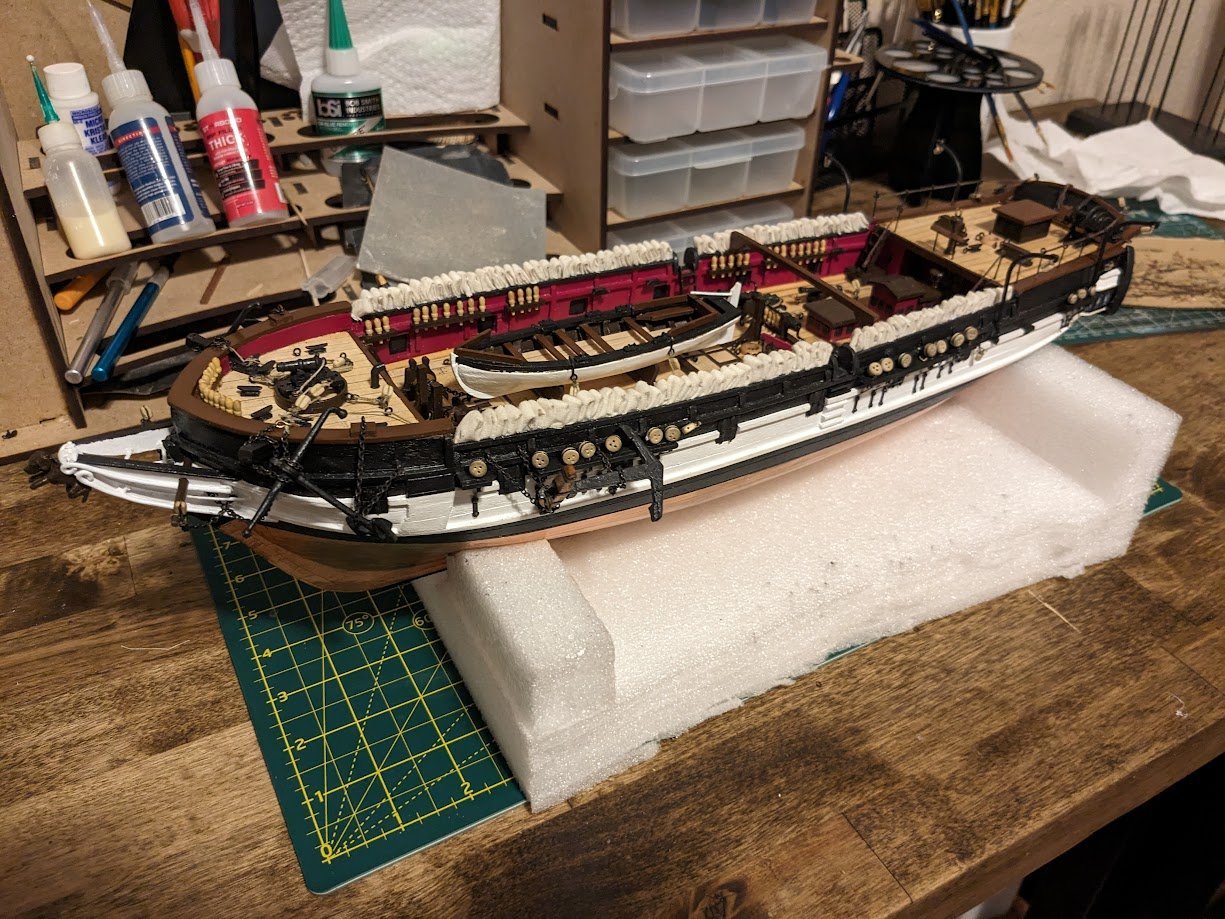
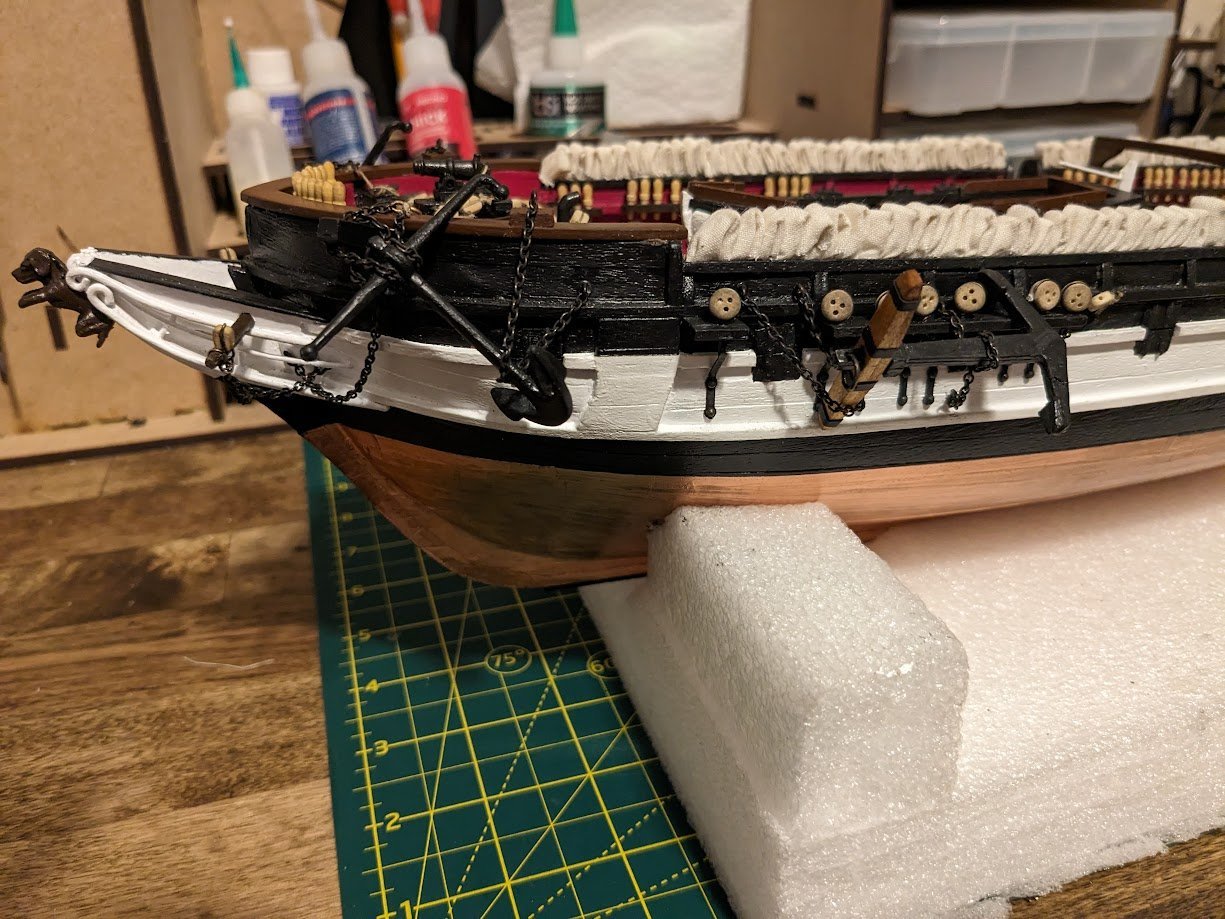
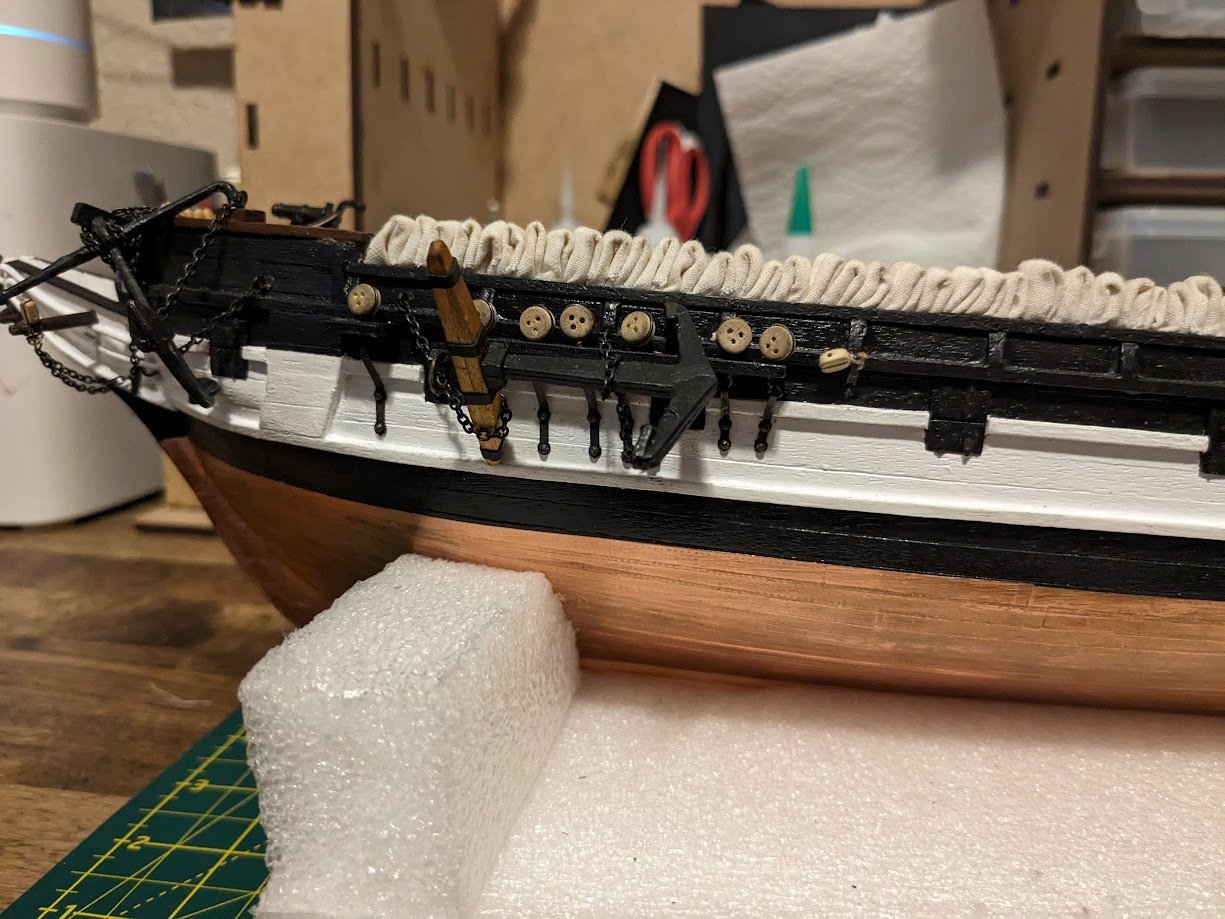
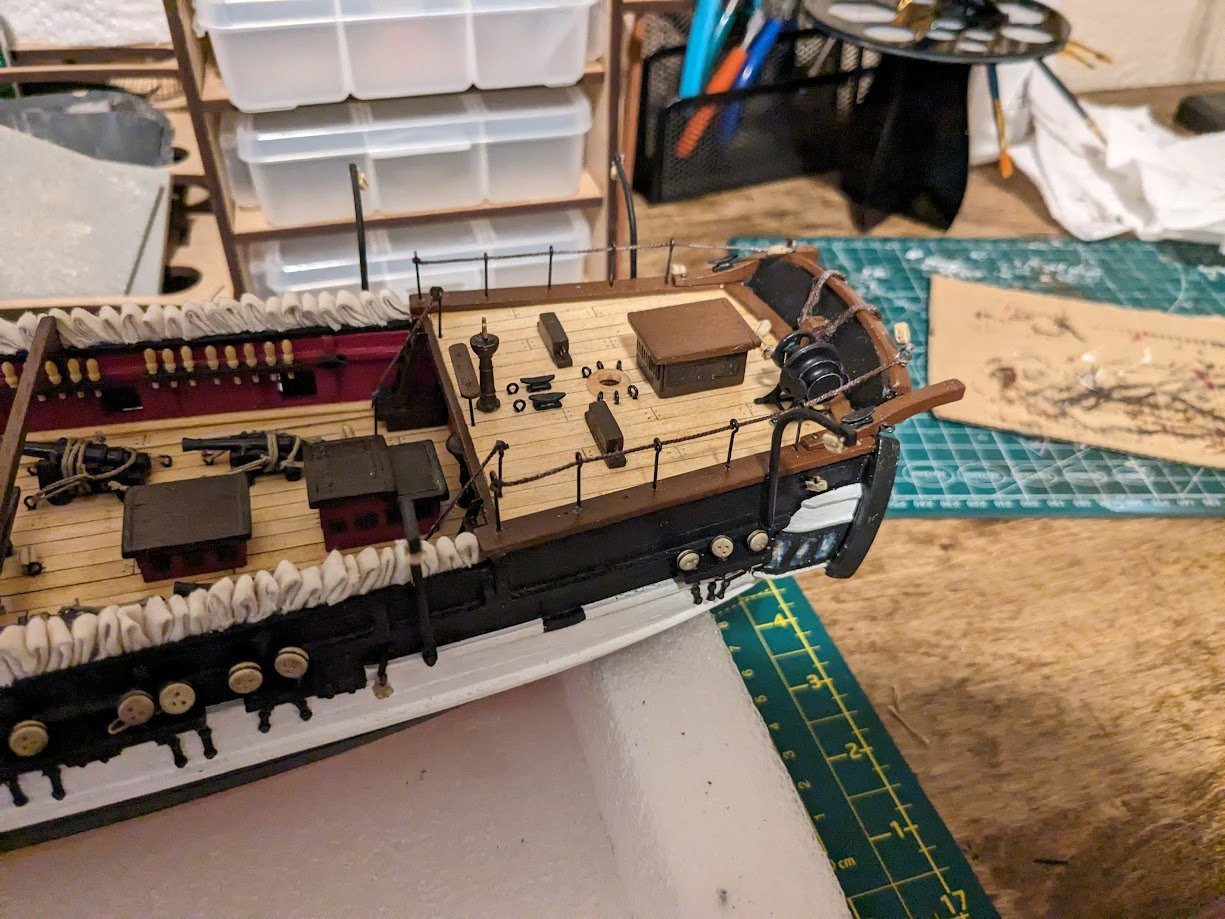
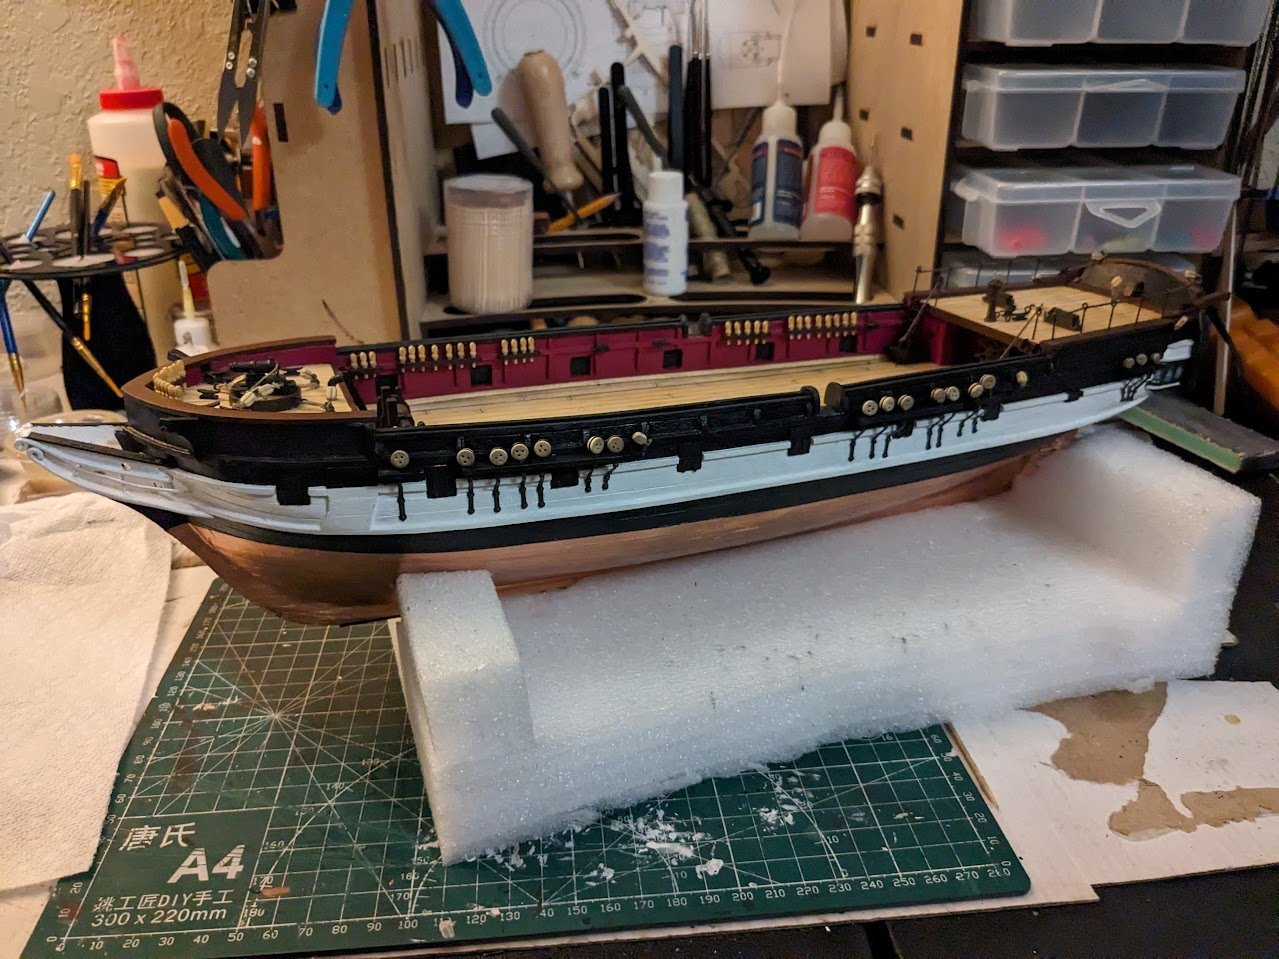
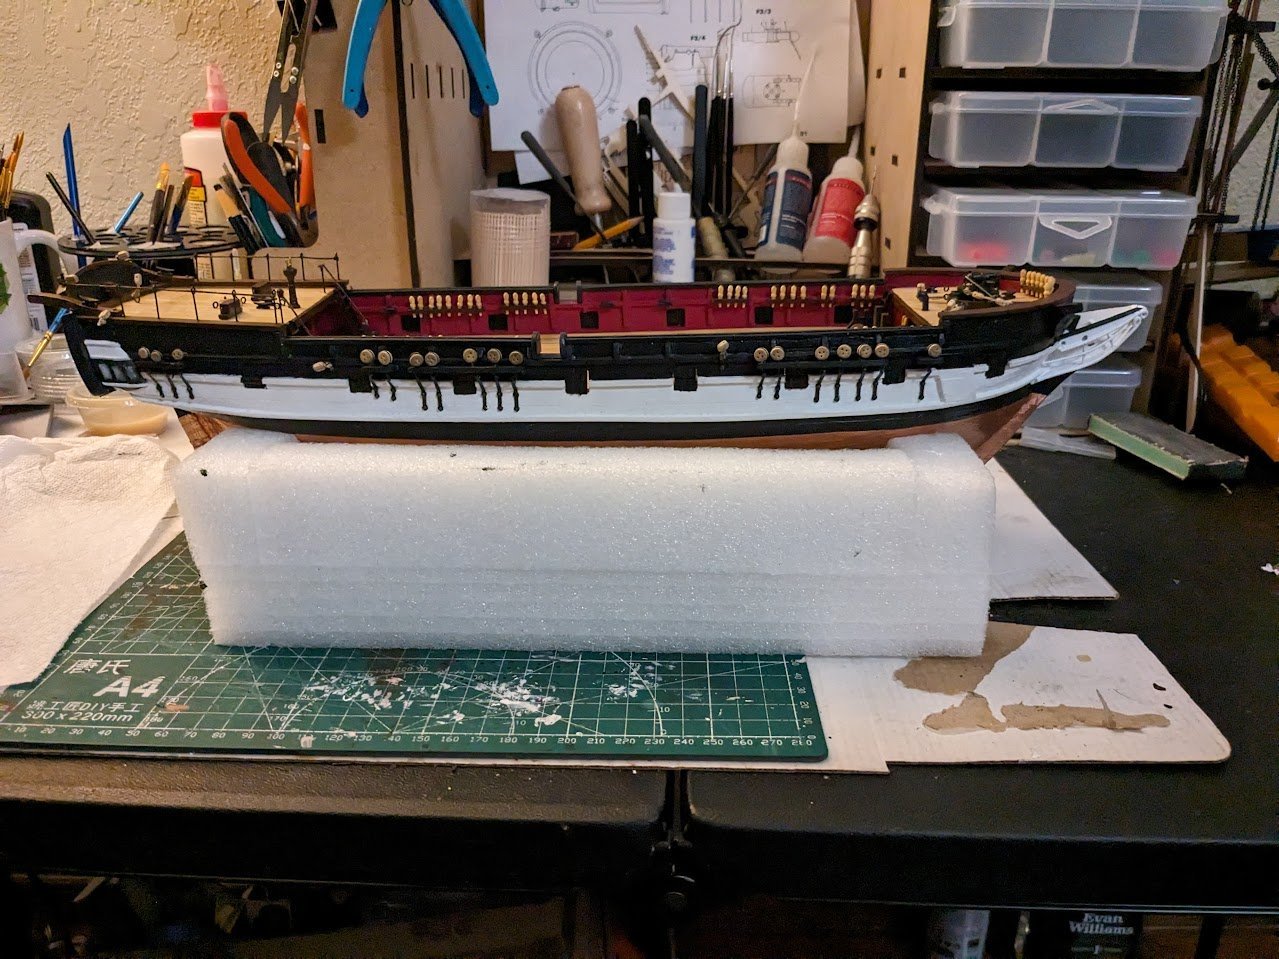
Feels like I hit a milestone in the kit. The hull and deck are complete other than the last 3 ship boats and hardware to attach them to the boat. I plan on completing the last 3 boats after rigging as I think they will just get in the way while rigging. But for now my mind is shifting gears to the masts and then rigging which is something brand new to me. Here I added the 4 Quarter Davits that will secure the boats when they are ready. I also installed the rudder safety chain, which the ropes can be seen in the photo hanging off the rear of the ship. The Beagle comes with two types of Anchors, one with an Iron stock, and one with a wooden stock. The wooden stock provided by the kit was pretty terrible looking and was pretty far out of scale for the size of the anchor it was attached too. So I fashioned up a new set out of basswood, sanded to shape, coated with Amber shellac, and used electrical shrink wrap for the iron straps. Anchors and chains installed along with the Beagle figure piece. Here are a couple full ship shots to show the milestone point before I start adding masts and rope.
-
Kit received. Dave is an A+ seller, great communication and fast shipping.
-
Just the wood.
-
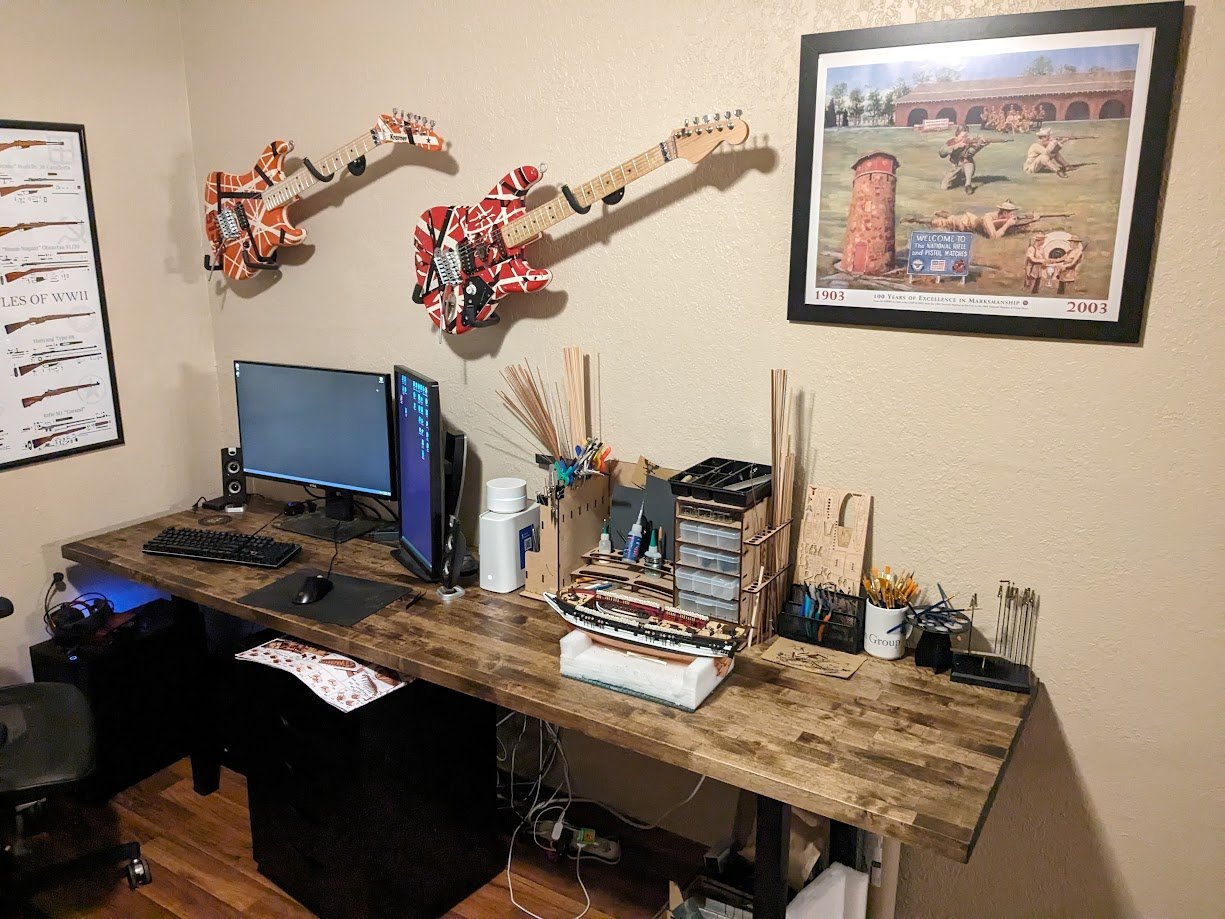
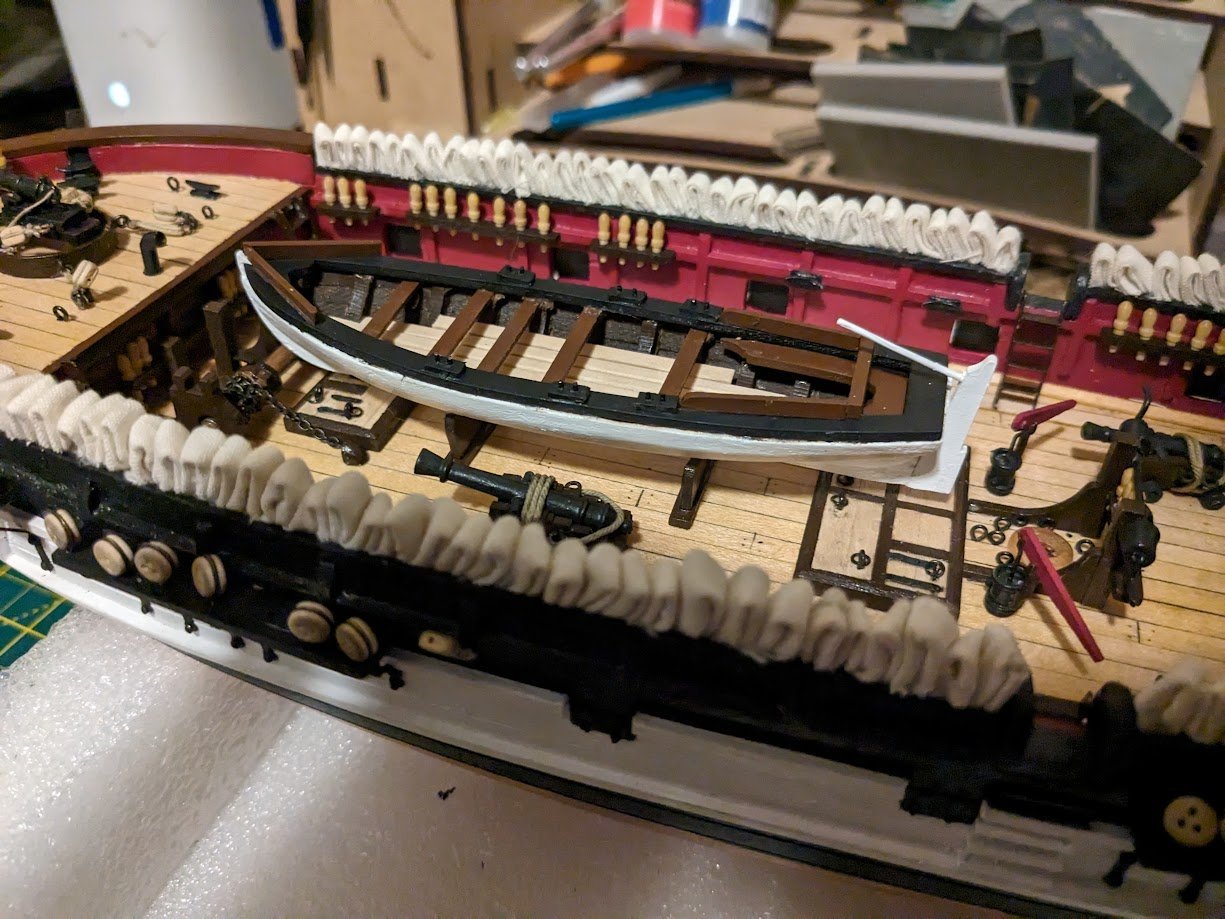
Spent the last weekend building a new office desk/hobby desk. Previously I had been working on a small foldout table relegated to the corner of the living room, the cramped space had really starting to frustrate me and my office computer desk was also on its last legs. I decided to solve both problems and went to the hardware store bought an 8 foot butcher block counter top, ordered some metal desk legs online, along with some under desk cabinets. It's already so much nicer to work on the boat having some space to breath and lay my tools out. My next plan is to eventually get rid of the cheap pdf hobby organizer rack I am currently using and expand with something more permanent and with more useful organizational space. Only thing I see that needs improvement is some better lighting. Back to the Beagle. I started on the ships boat carried on the deck, these little boats are harder to put together than I was expecting and I made quite a few mistakes that I will try to improve on the other 3 boats. I have also started on the cannons, I am doing a pretty simple rigging for them since they aren't really the focus of a boat like the Beagle. Next step is to get them fastened to the deck.

-
Quick update. I sent an RMA Request to ModelExpo requesting a refund and they approved it. I am going to ship the product back to them and buy some wood from one of the other recommended suppliers. I appreciate everyone's help and input.
-
Guess I got swindled then, considering all the high praise people have for Model Shipways kits, I assumed their parent company would be straight shooters as well. If there is any plus side I got it all for 48% off during their sale, but being ripped off at half price is still getting ripped off. I will test out their customer service to see if they will take it back and try to find strips elsewhere.
-
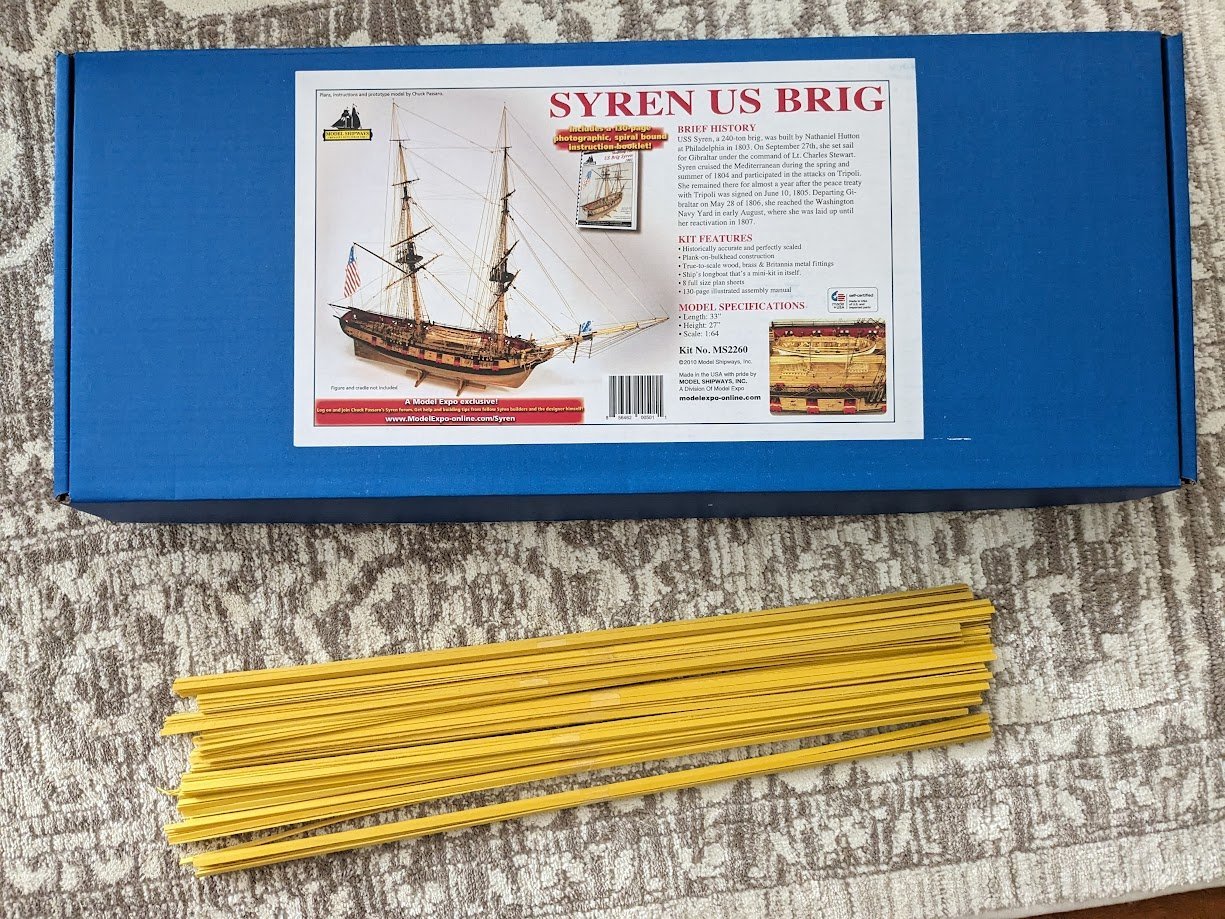
Yes, it appears to be that color the whole way through. In moderation I think the yellow strips could be used in really cool ways on a kit, but I was planning on planking my Pegasus kit with it in the future and it might be a bit too much yellow for a whole ship to be planked in.
-
Is Boxwood normally very yellow in color? I bought some strips a couple weeks ago during the Model Expo anniversary sale, but it seems very yellow compared to what I normally see pictured. Below is what I received.
-
Per our PM's I'll take this beauty.
-
Two of the last major additions that I wanted to add that weren't part of the Occre plans were better hammocks, and gangway steps on the hull. Spent the last few nights working on the hammocks. I used some sail cloth that I bought online, which was hard to work with as the cloth seemed to unravel faster than I could work with it, plus the gap in the railing to place the cloth was only about 1mm wide, so it was very hard to work with until I decided to open the railing up a bit with a chisel. Not the best, probably larger than they should be for scale, and I know I added way too many of them, but I am happy with the result with how frustrating it was to add them. After the hammocks I added up the gangway steps on the hull.
-
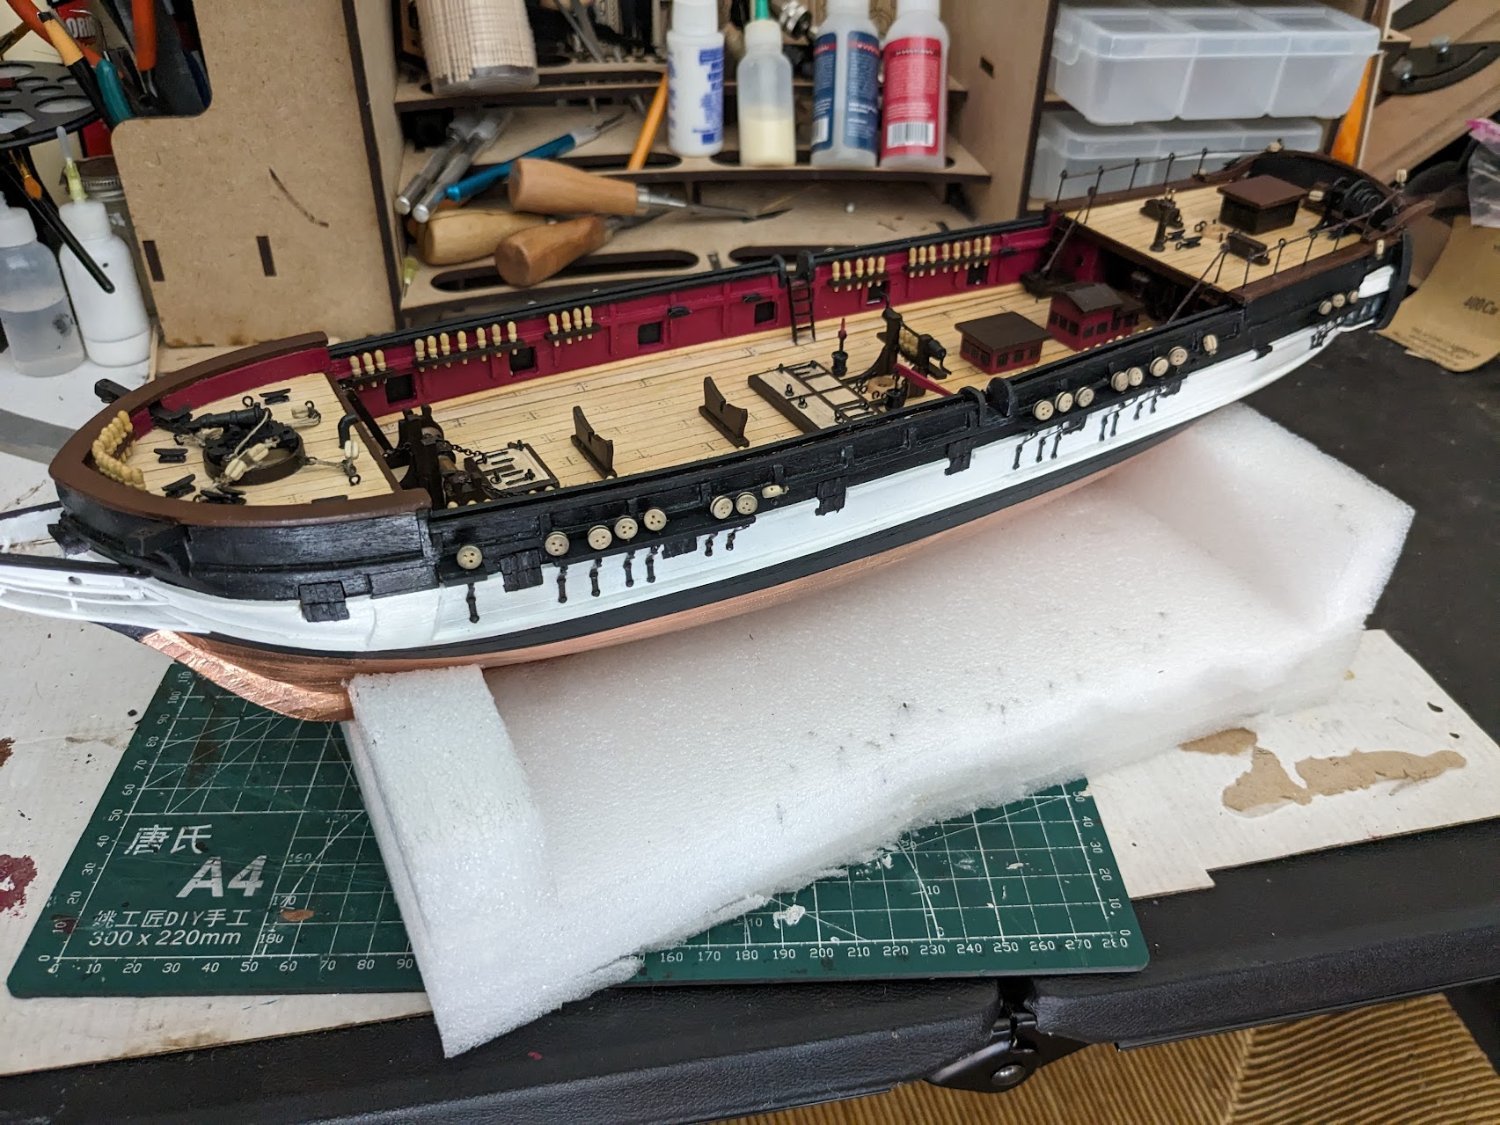
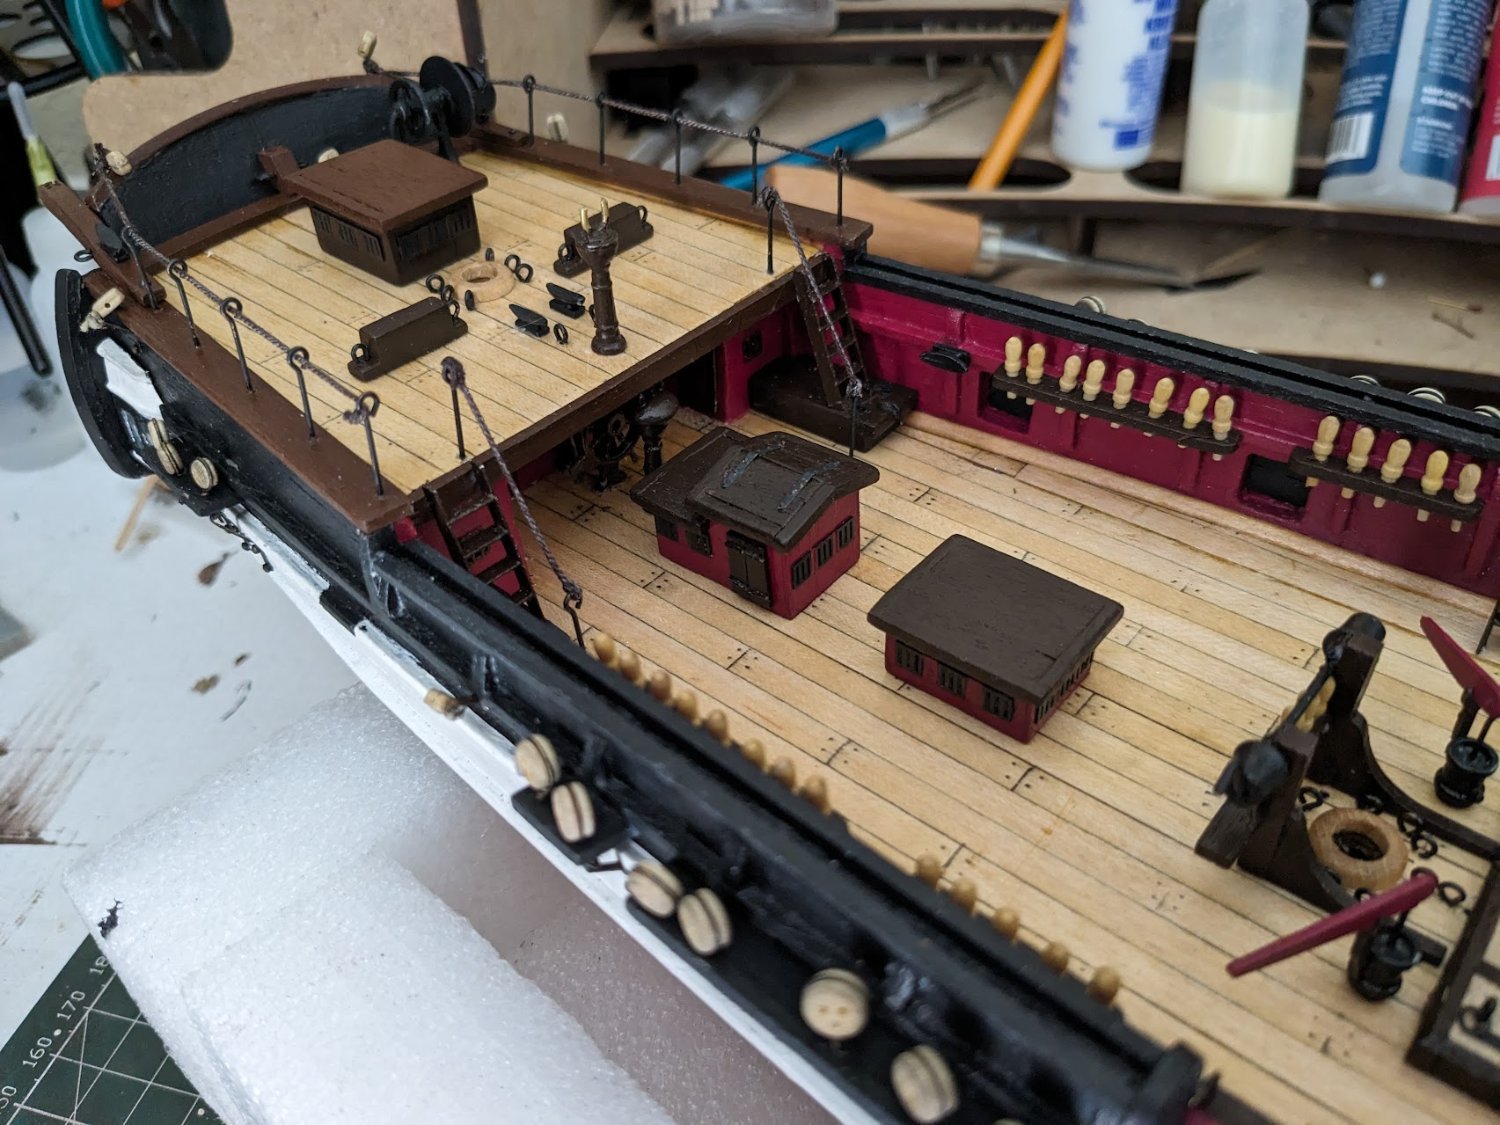
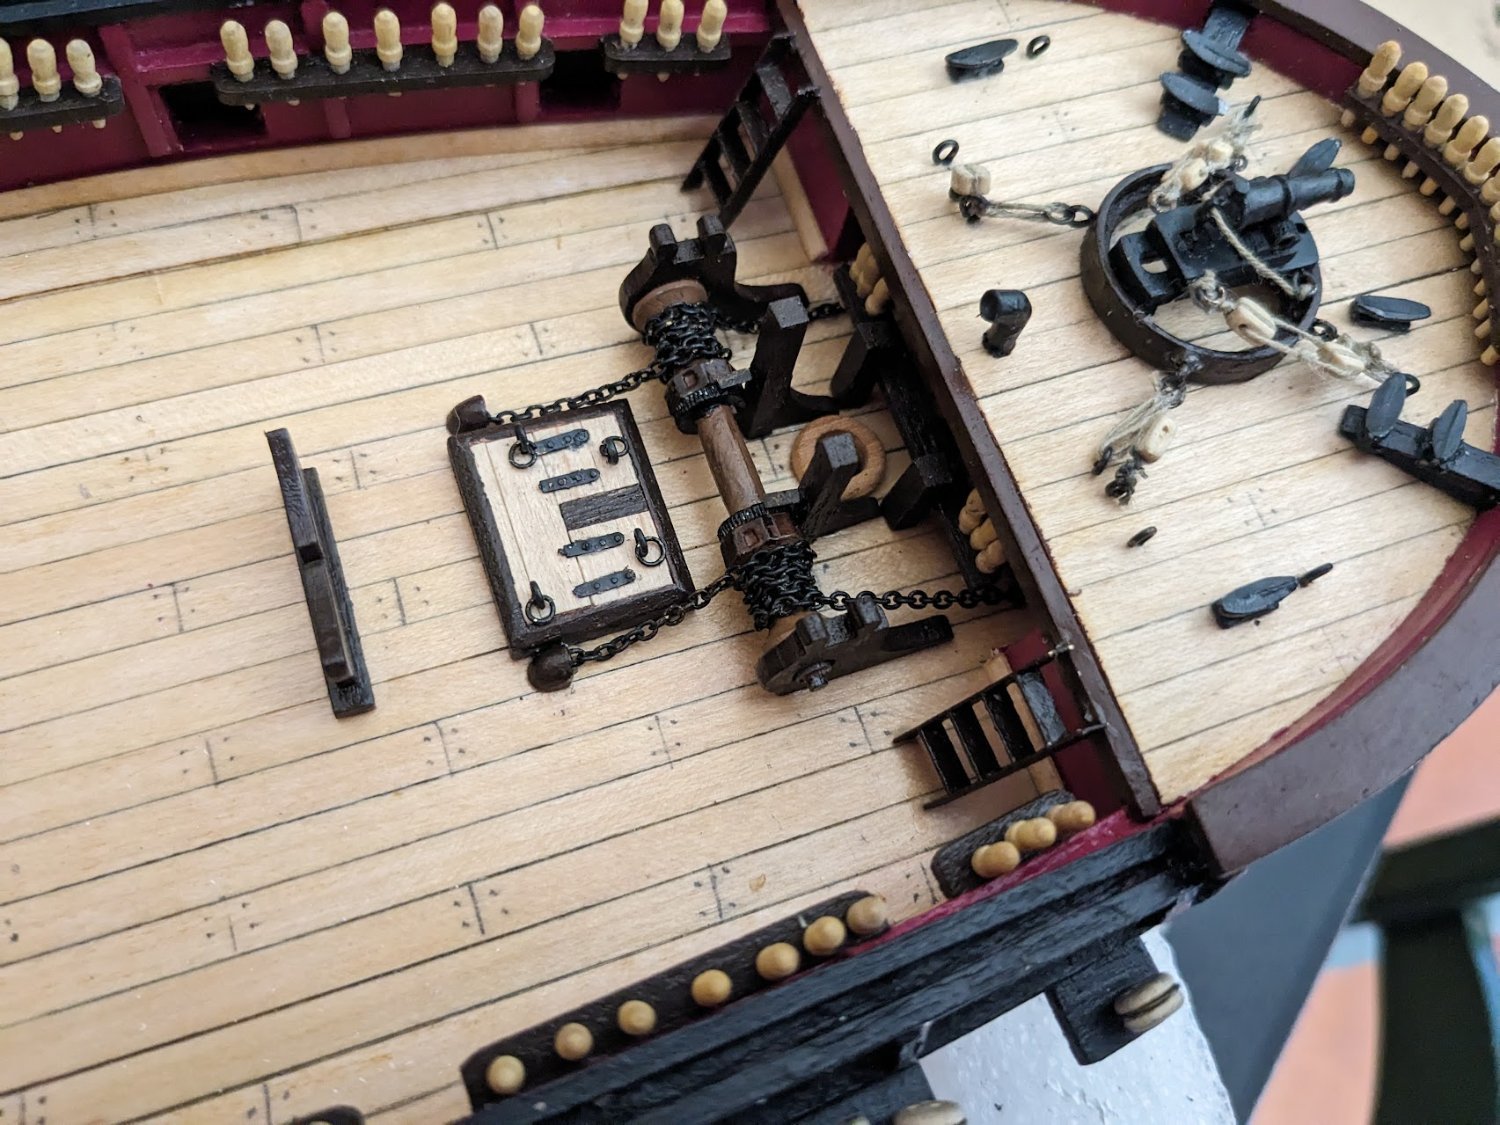
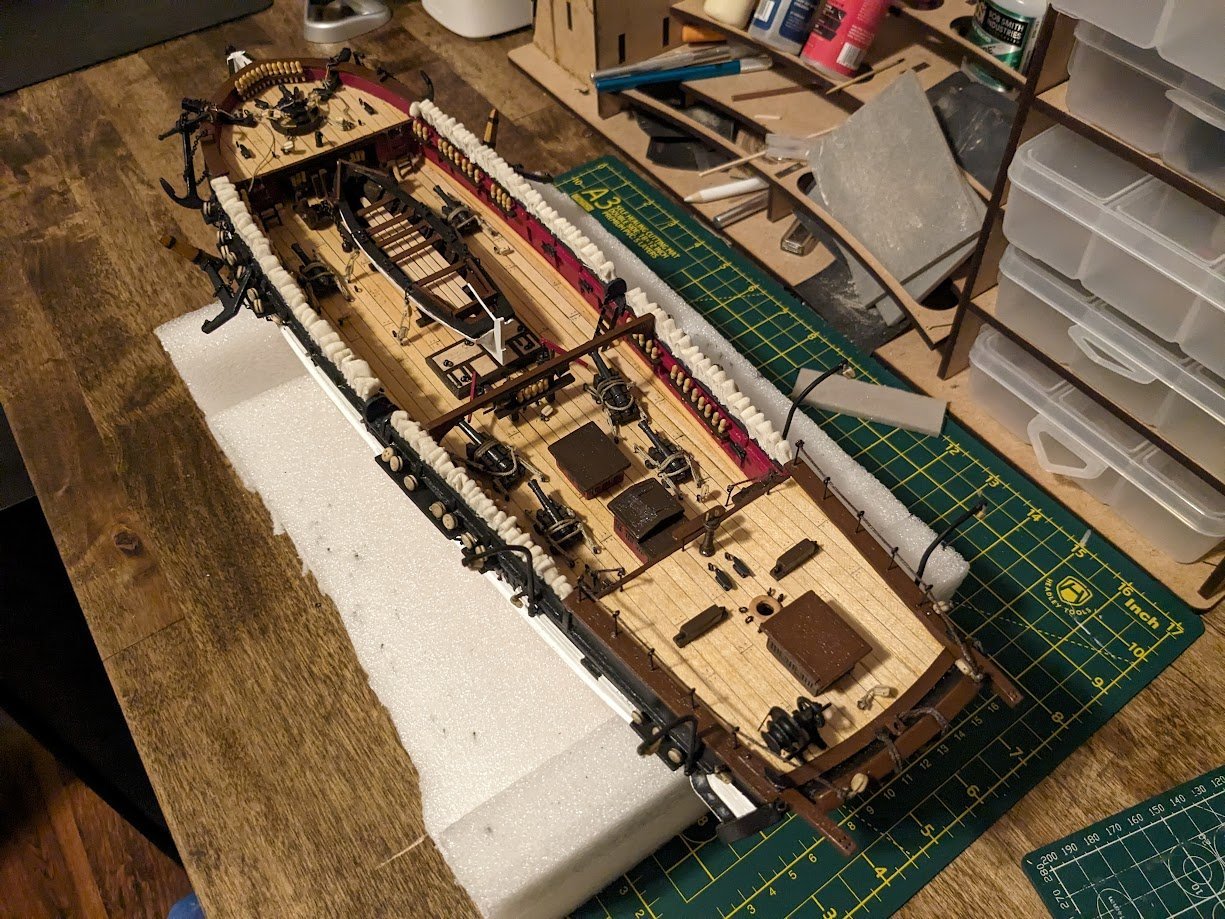
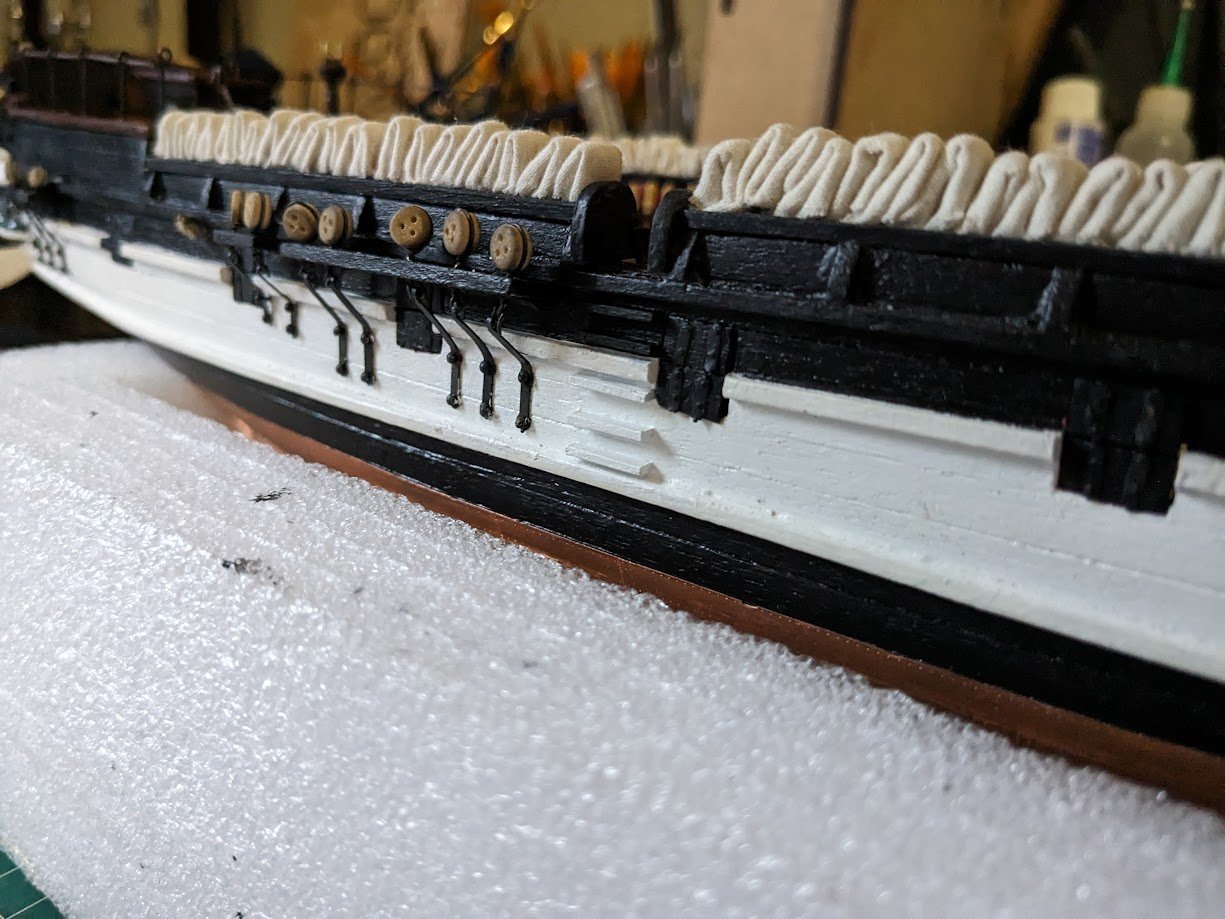
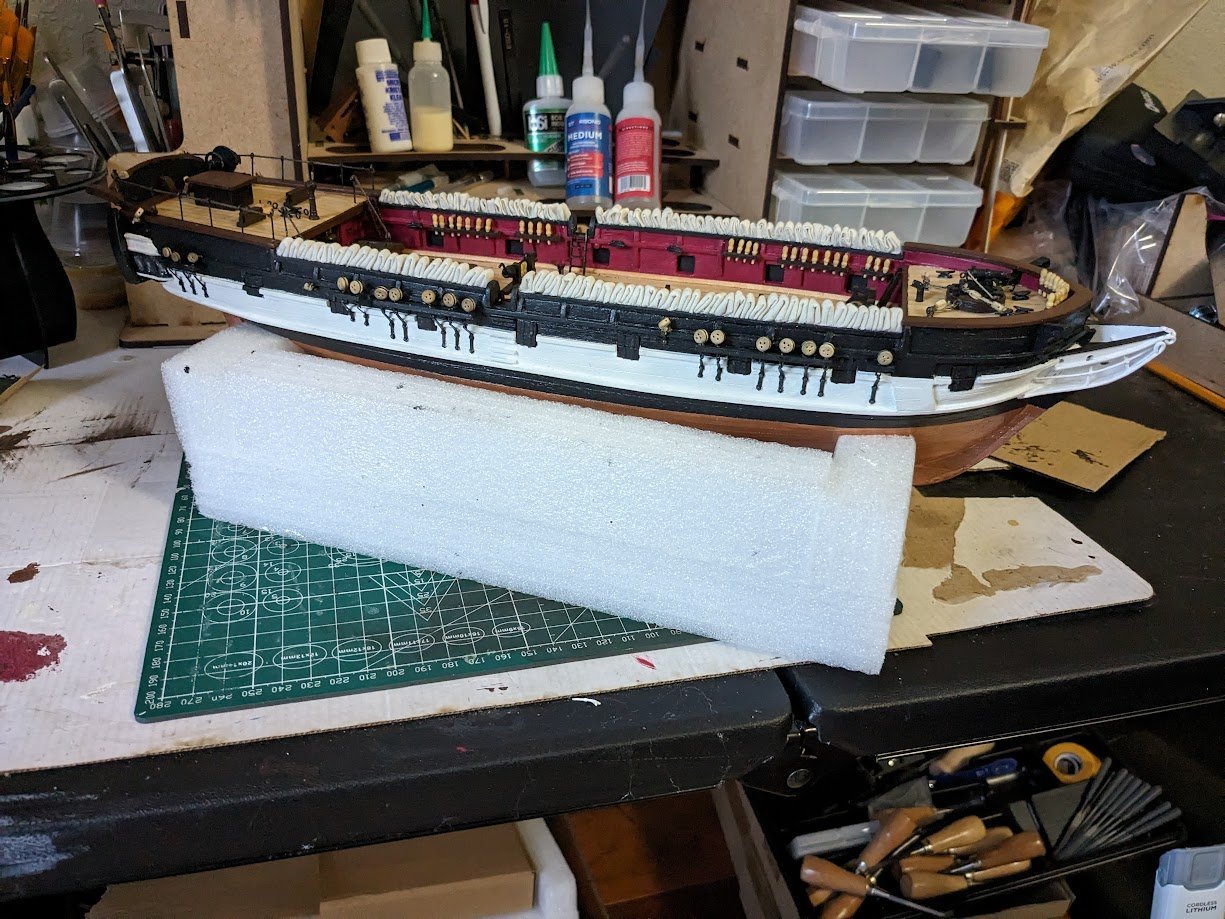
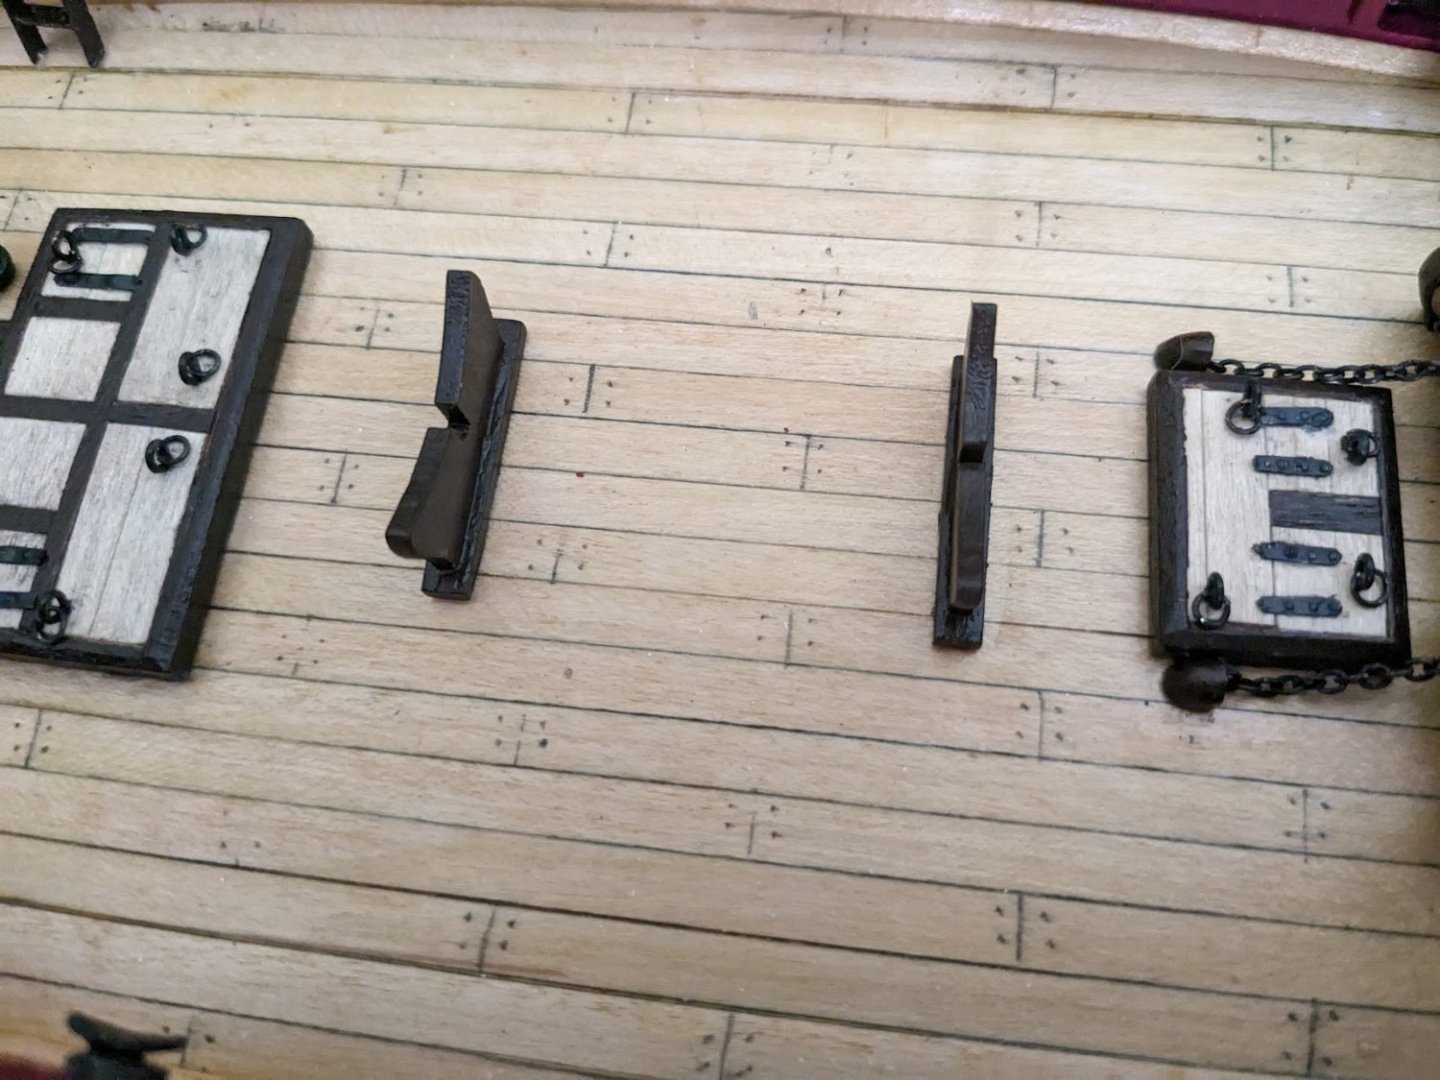
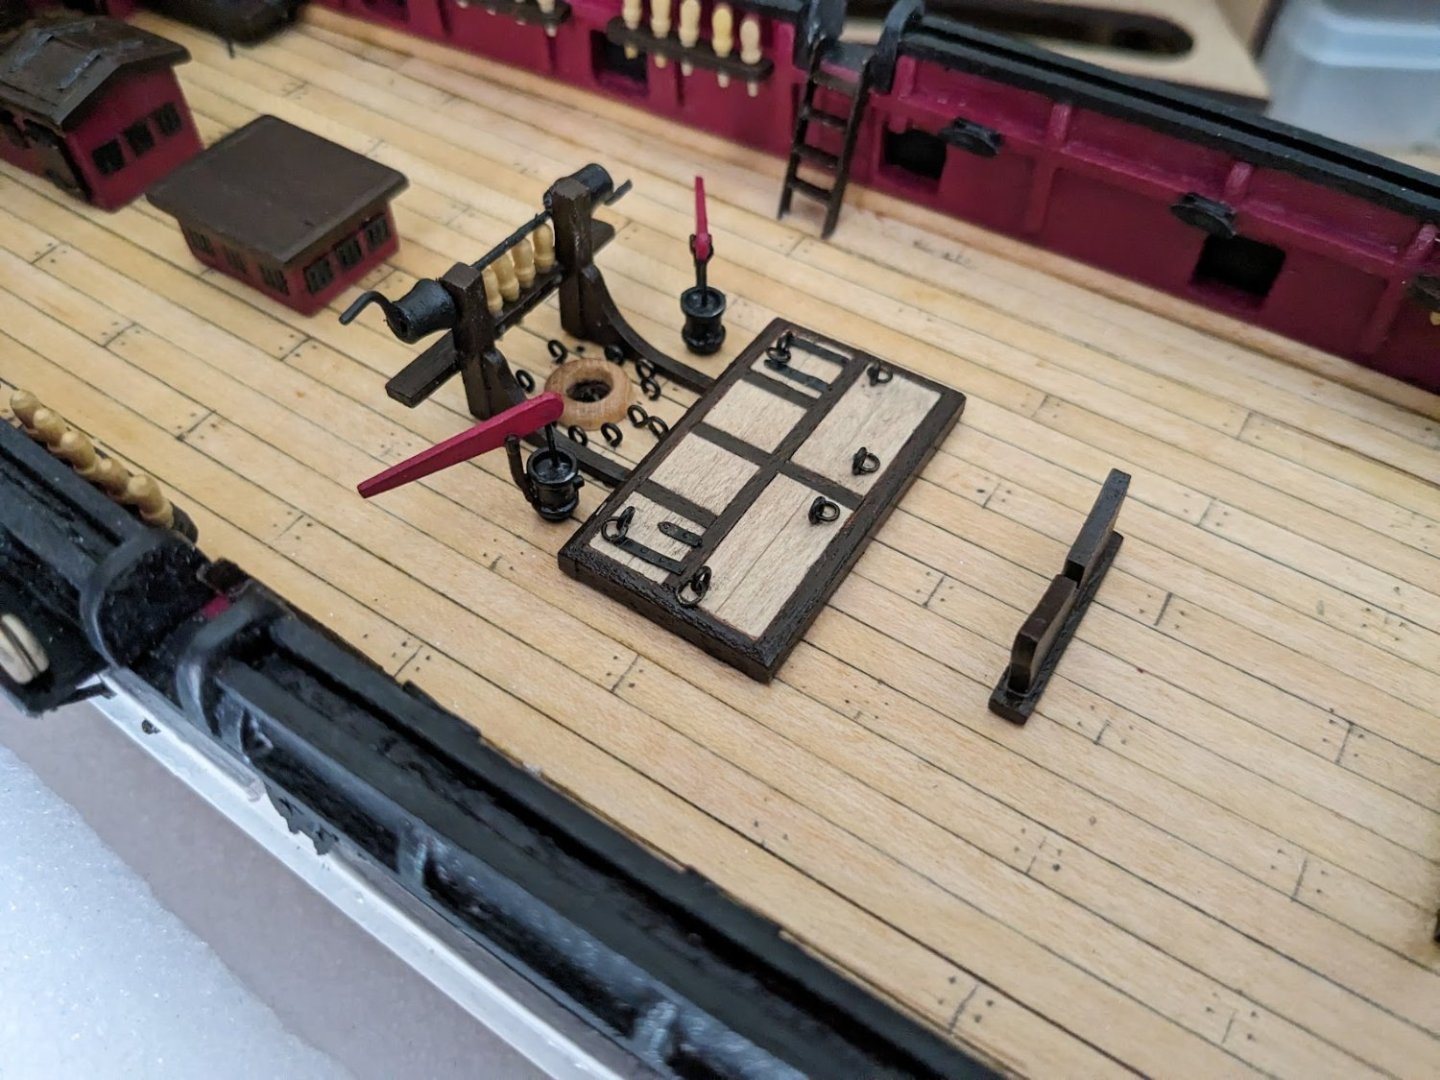
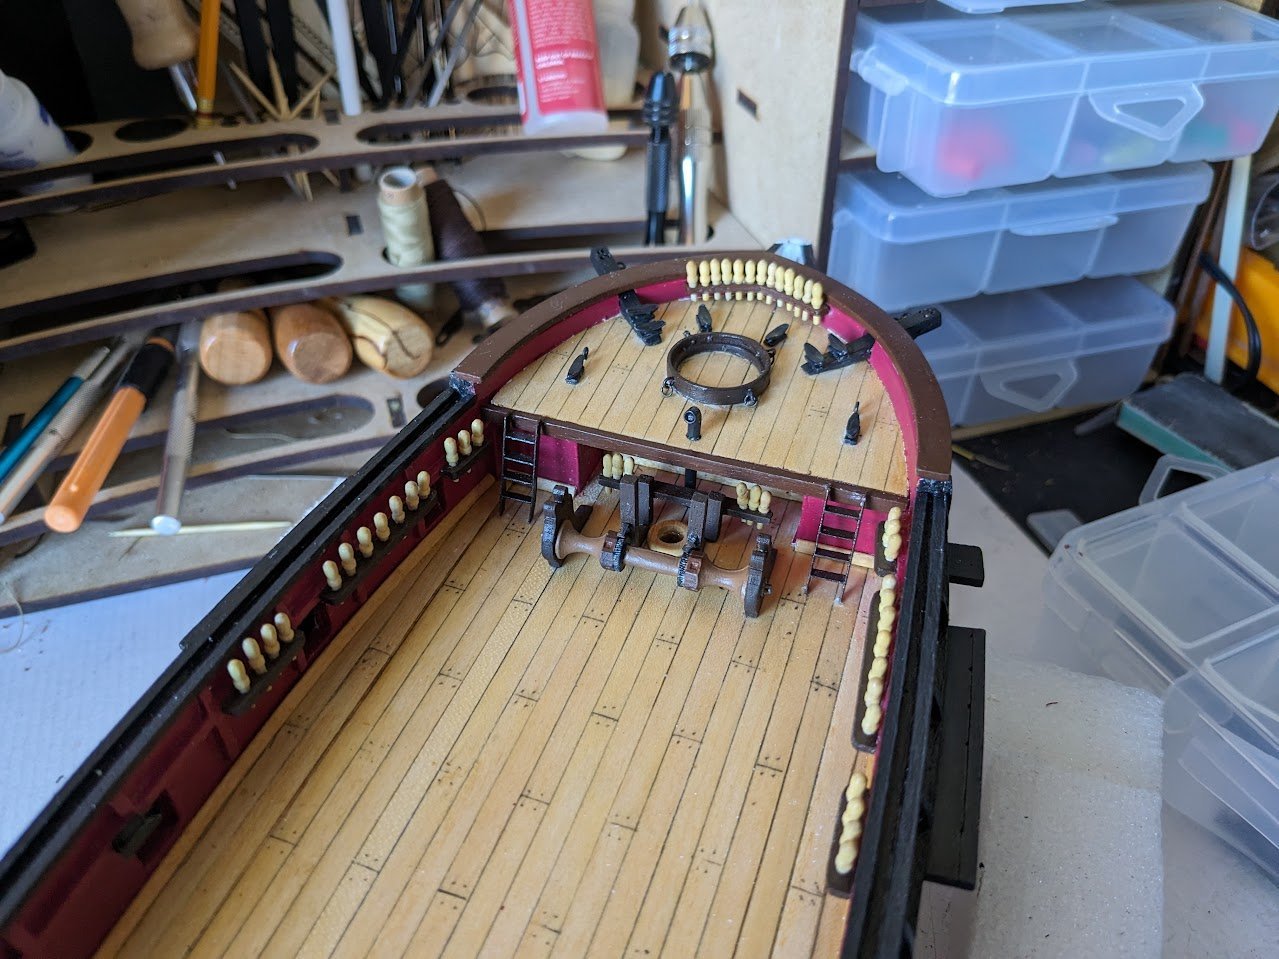
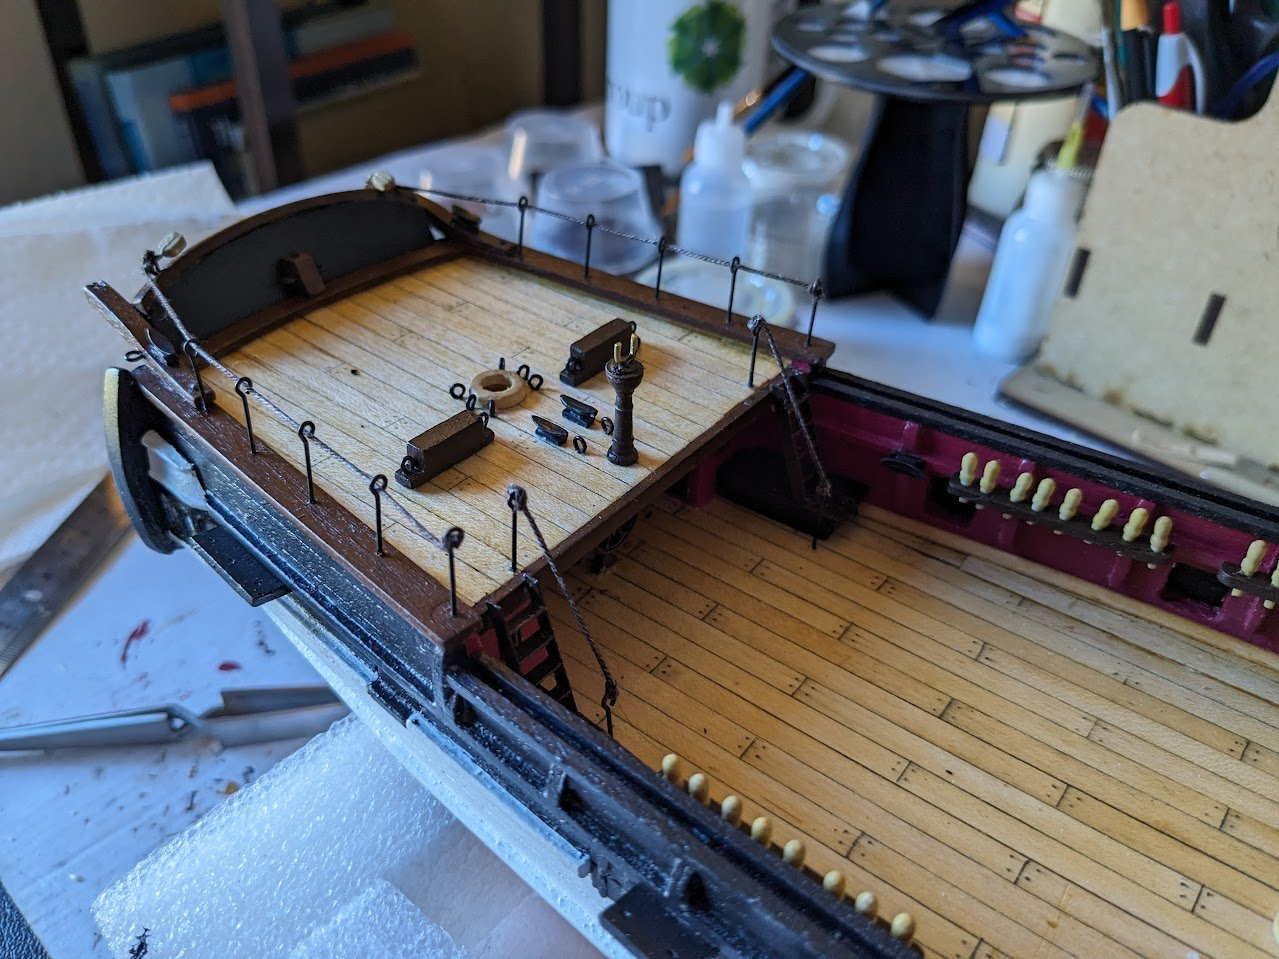
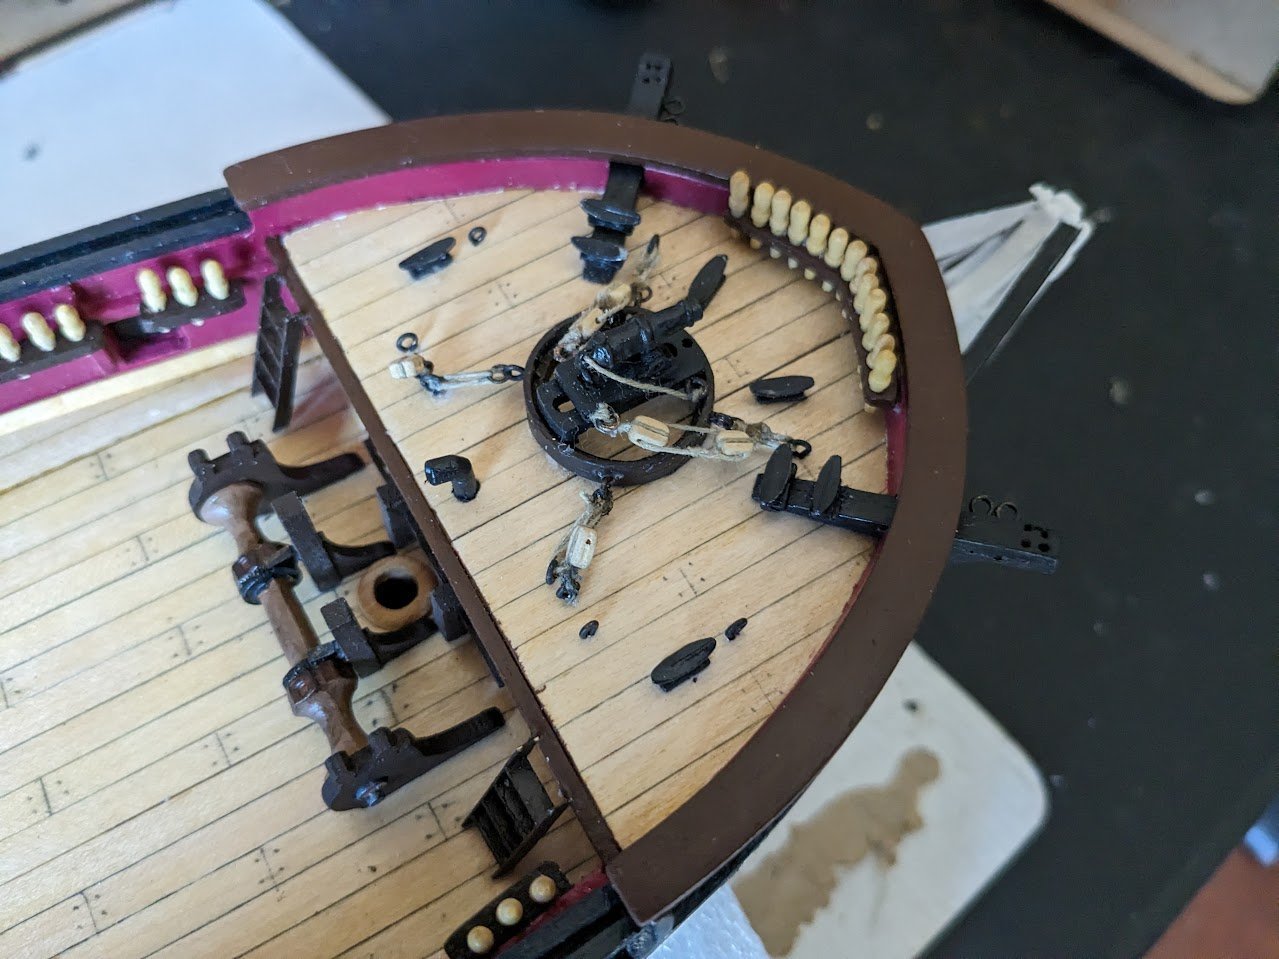
Spent the last week working on deck furnishings, all these attachments to the deck are deceptive with how much time they take to complete. Also looking at these pictures makes me just want to pick up a touch up brush, its crazy how a camera points out so many imperfections that you can't see with the eye. Got the chain wrapped around the windlass after I spent nearly an hour looking on the ground for one of the chain pipe outlets I dropped. I even saw exactly where the piece landed, but by the time I got on my knees to grab it the piece it had been sucked up by the small parts black hole. Main jeer bits, water pumps and main hatchway. Skylights and companion ways. Boat mounts And that takes me up to how the ship currently sits. Just a few more items for the deck, I need to figure out how I want to rig the stowed cannons, start making the hammocks, then the ships boats. After that then Its time for the masts and rigging.


-
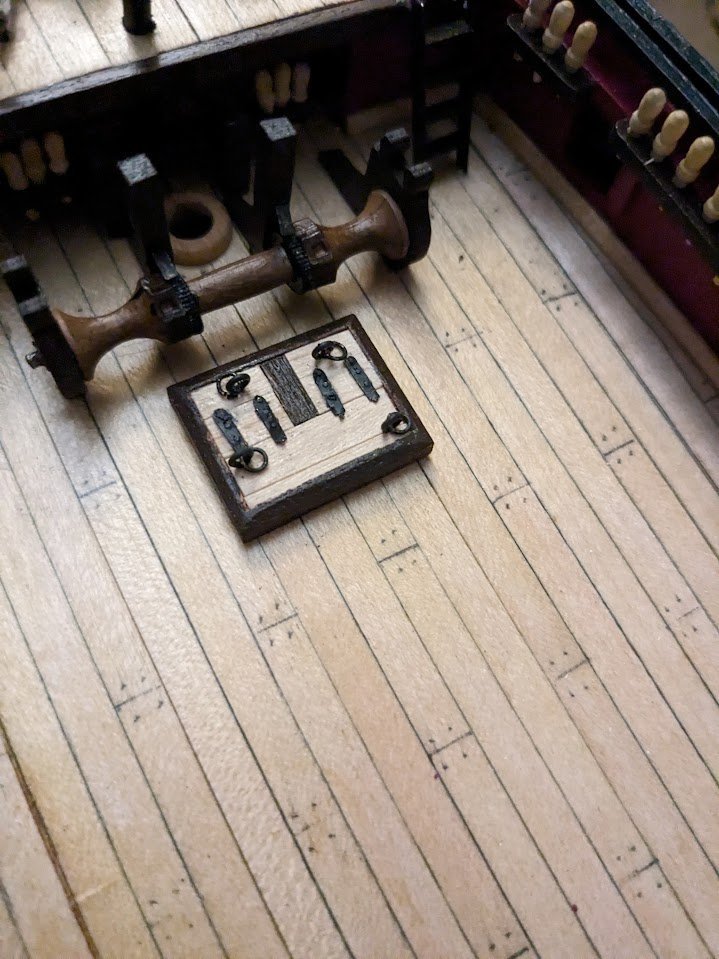
Couple more items completed. Forward deck hatches. Deep sea sounding wench. Does anyone know if they stored the rope on the wench, or just attached it when in use? Instructions don't show any rope on the wench, and its hard to find any images of deep sea wenches of the period. I think it would look good with some rope wrapped around the drum.
-
Looks great, fantastic work.
-
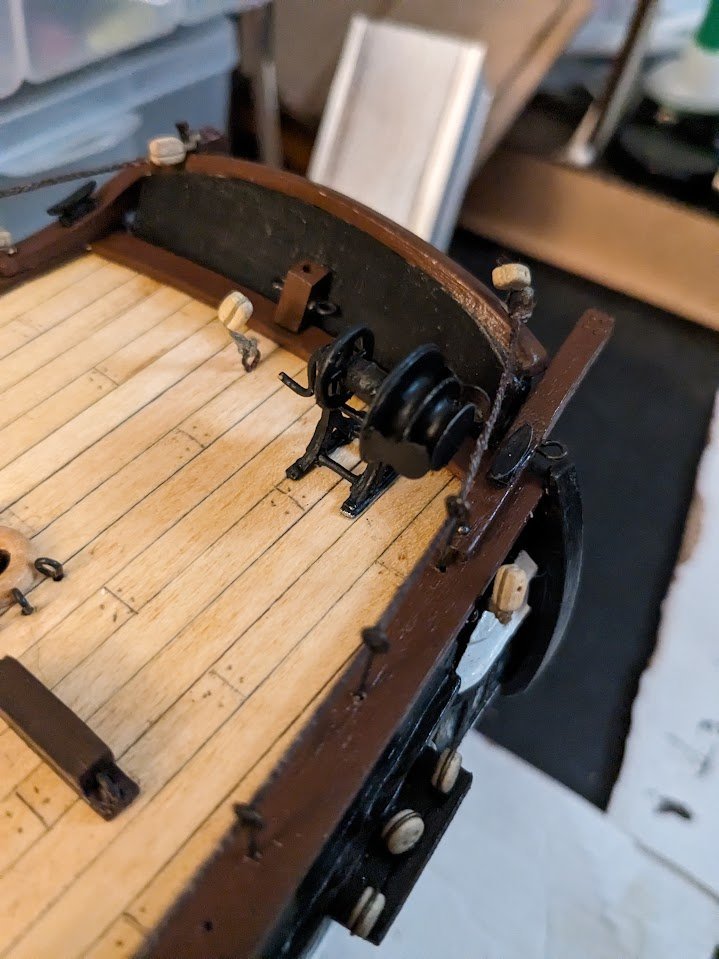
Been working a lot on all the deck fixtures which means lots of painting and brass blackening of tiny parts. Poop deck hardware, azimuth compass, and hand railing. Windlass painted and glued in place. I'm going to have to figure out what to do for the windlass handles, i formed up the brass rod to exactly match the kits template and they turned out not to be long enough, I tried to reform them to work but they just looked way to mangled up and I wasn't happy with them. The one material that Occre seems to be stingy with on this kit is the brass rod, so I am either going to have to order some more or find an alternative solution. Spent a while saturday night trying to rig up the carronade to somewhat match up how it is in the AOTS book. It doesn't look great and the blocks look way out of scale, but it's way better than just the single rope the kit instructions called for. Sunday I finally decided to tackle the deadeyes, these took the better part of the day to install but weren't nearly as difficult as I was expecting.
- 90 replies
-
- 10
-
-
That thought has crossed my mind, I haven't put together any of the ships boats yet, so I'm not sure if that would be beyond my current skill level at the moment.
-
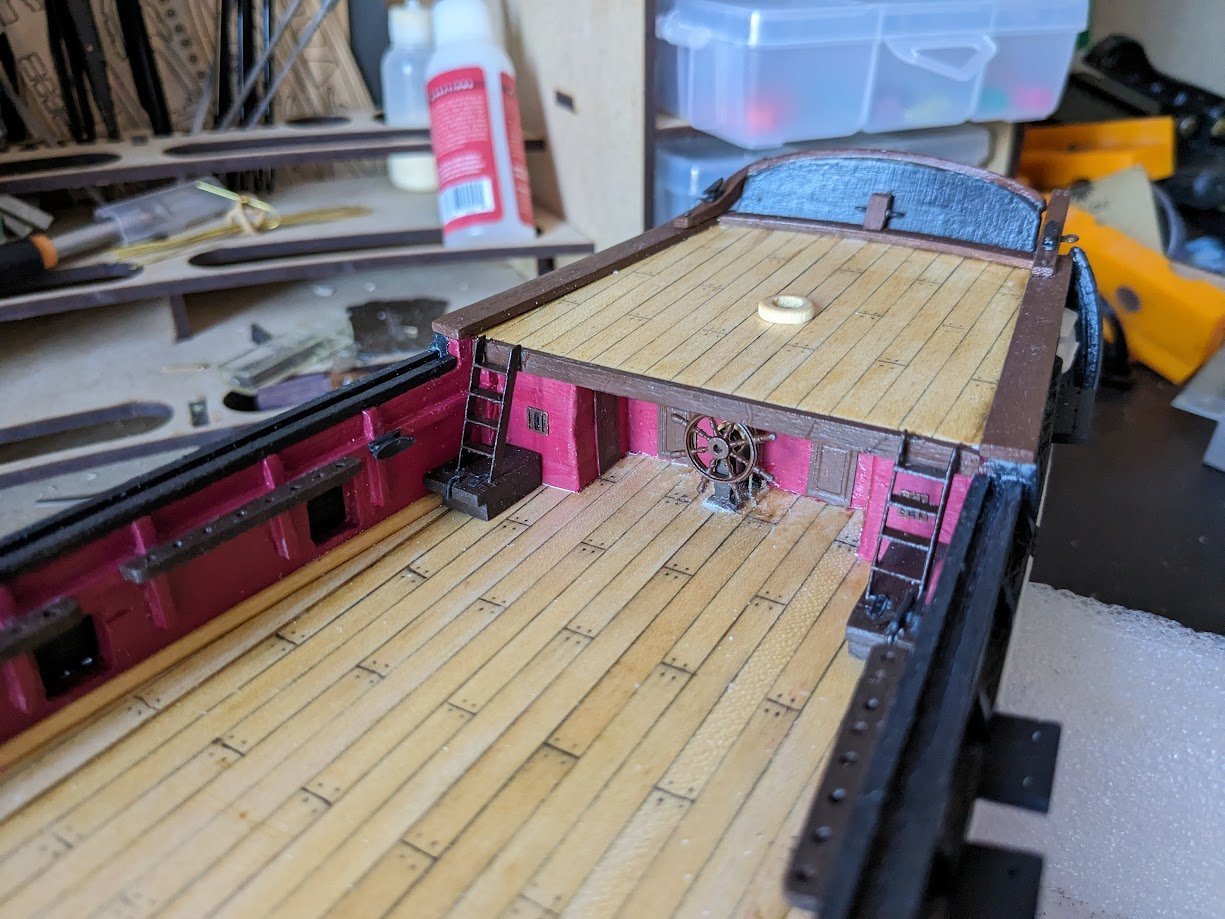
Few updates, been working on all the deck furnishings the last few days. It takes way longer than I was expecting to get all these little pieces put together and painted and I have only just begun on them. Ships wheel and ladders, still cleaning up the CA glue mess I made while struggling to glue down the wheel. Pin rails, I really need to get a drill press or something, because the hobby pin drill took forever on these. Poop deck hardware and mounts for the 28ft whaleboats that the kit doesn't include. Might have to see if anyone sells anything close to a 28ft whaleboat in this scale. Forecastle hardware, I glued on the carronade mount and not two seconds after i glued it something looked off and i realized i forgot to install the hardware hooks on the mount so i quickly pried it off before the CA glue got too hard, but you can see the remaining residue.

-
I found a little hobby saw blade attachment for my razor blade made tasks like cutting the cannon ports way easier. They will need to be cut open a couple more times during the planking. This is what I use. https://www.amazon.com/gp/product/B08SQQHD9M/ref=ppx_yo_dt_b_search_asin_title?ie=UTF8&psc=1
-
I don't think CA Glue will hold the bent wood on the first planking. You are going to want use PVA glue and either nail it down or clamp it down. I personally used Titebond PVA glue and the nails that were included in the kit and it worked great.
-
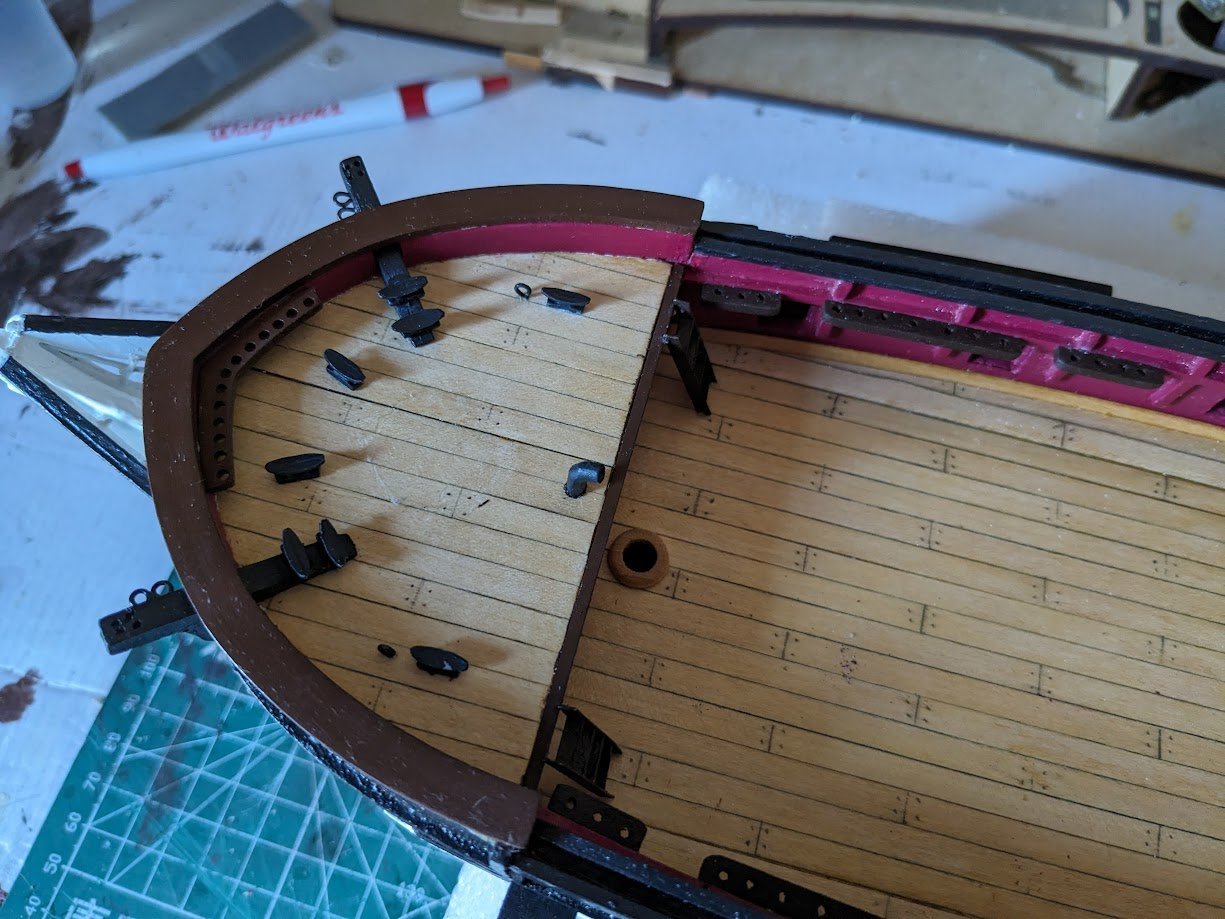
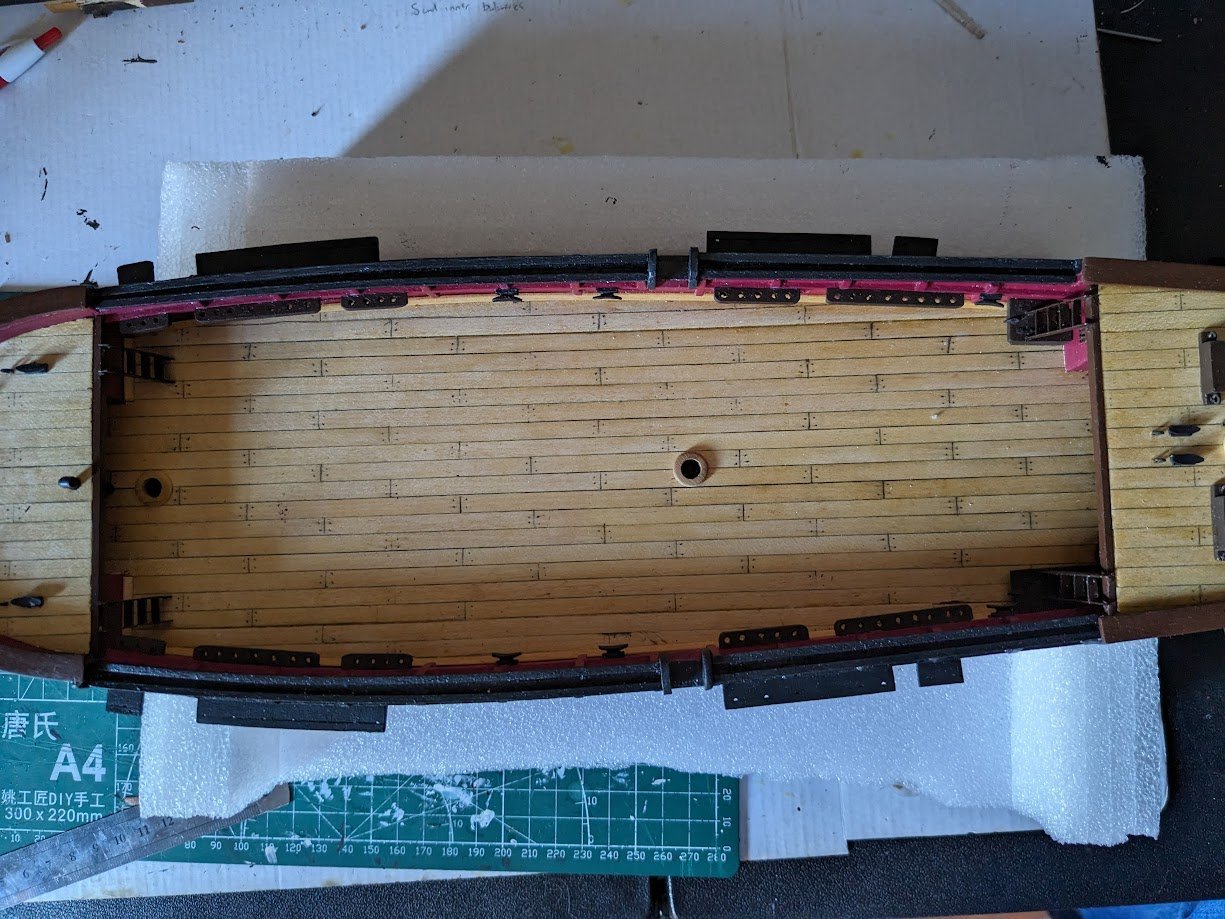
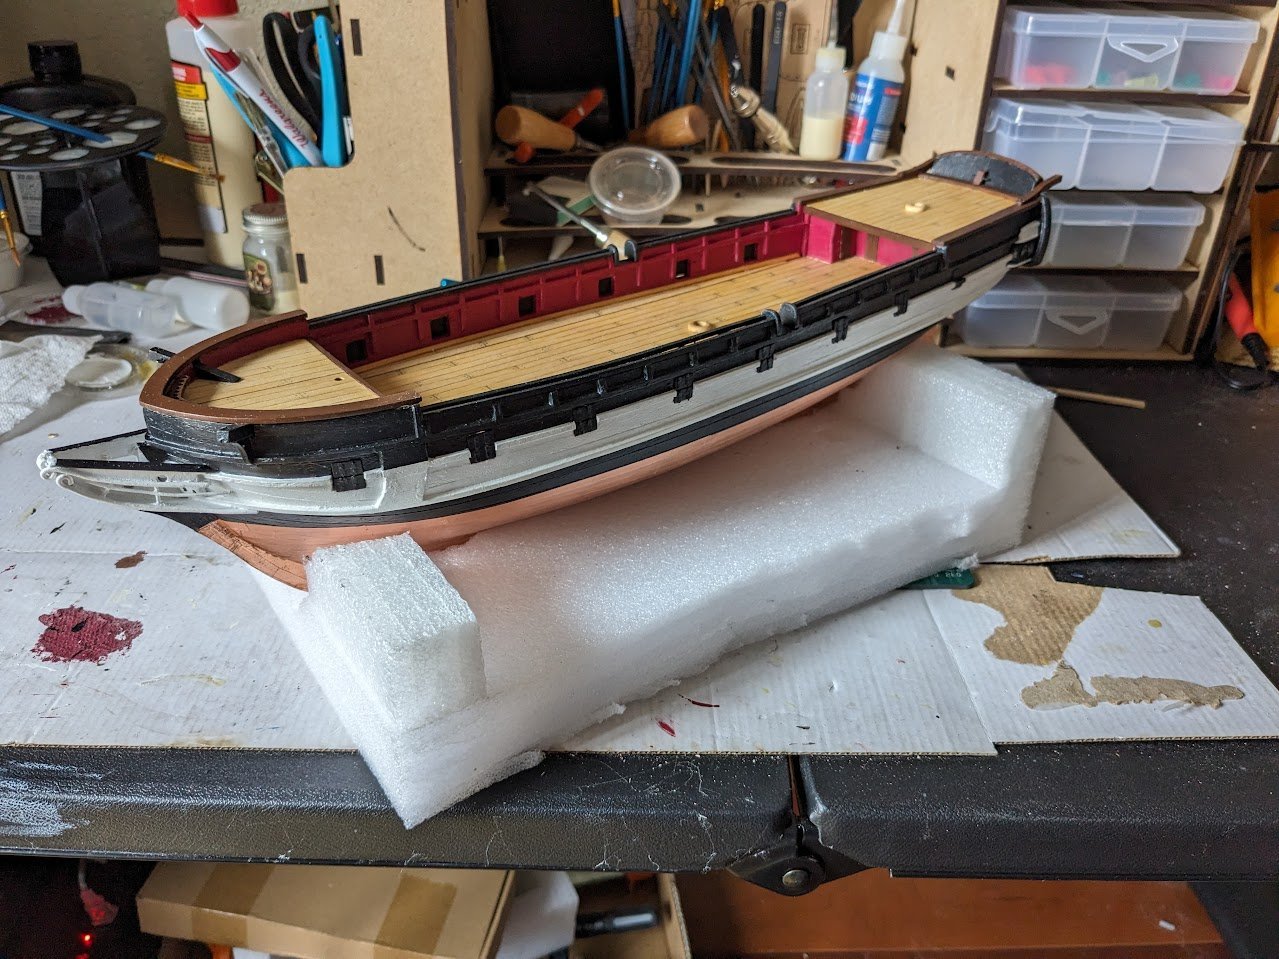
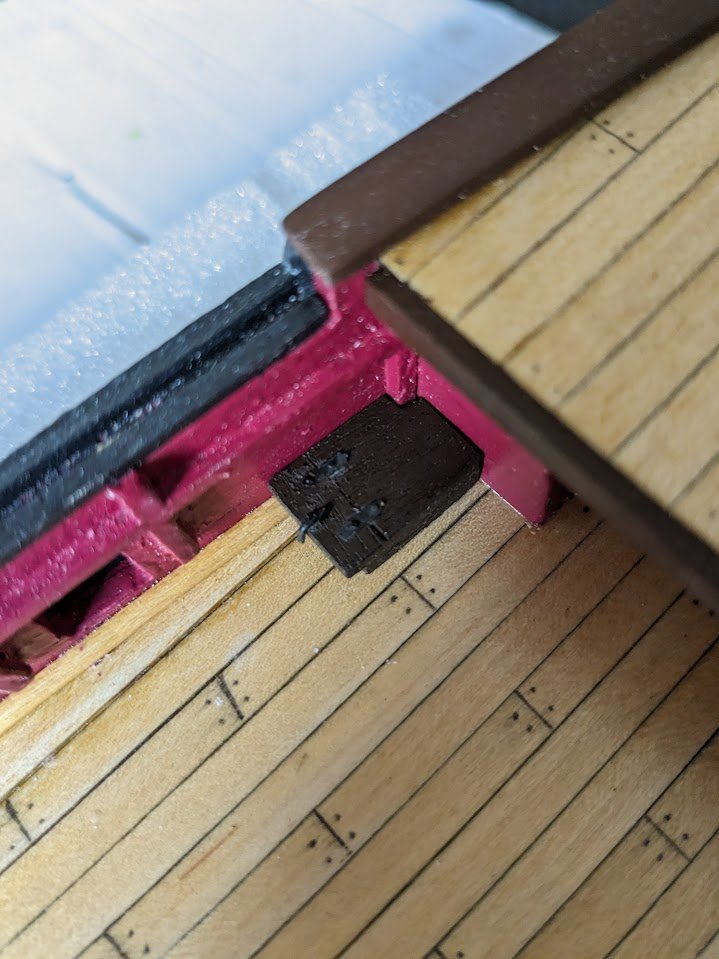
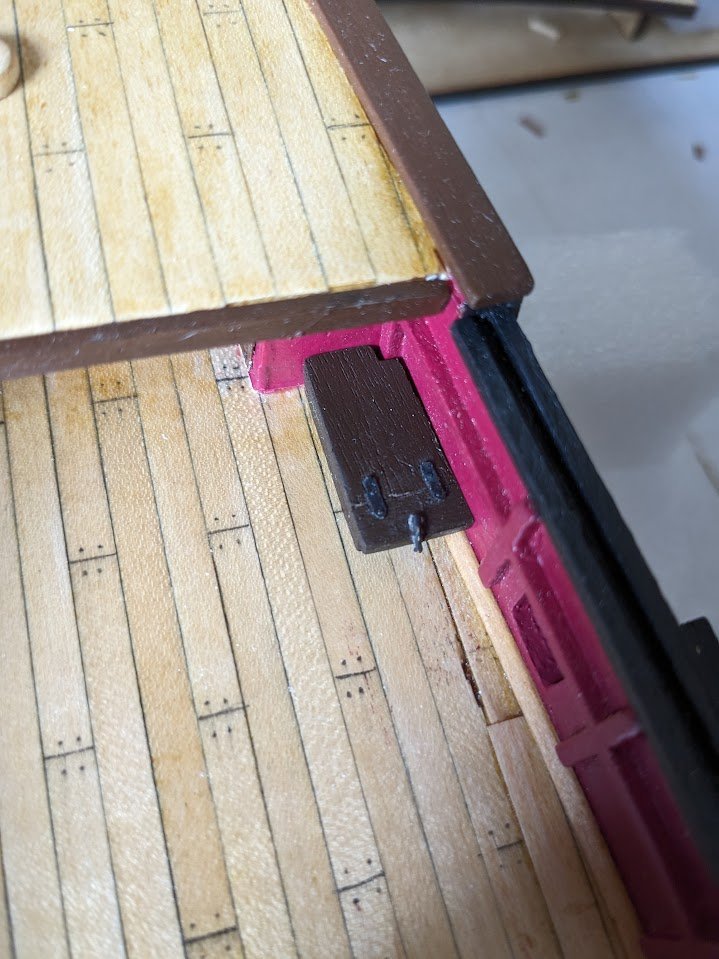
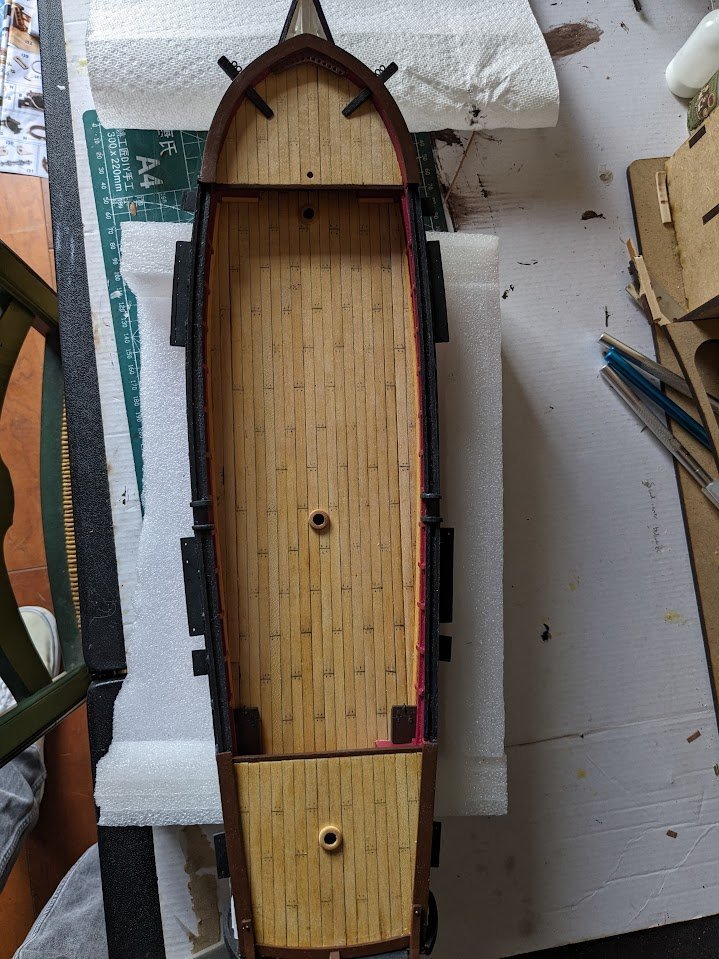
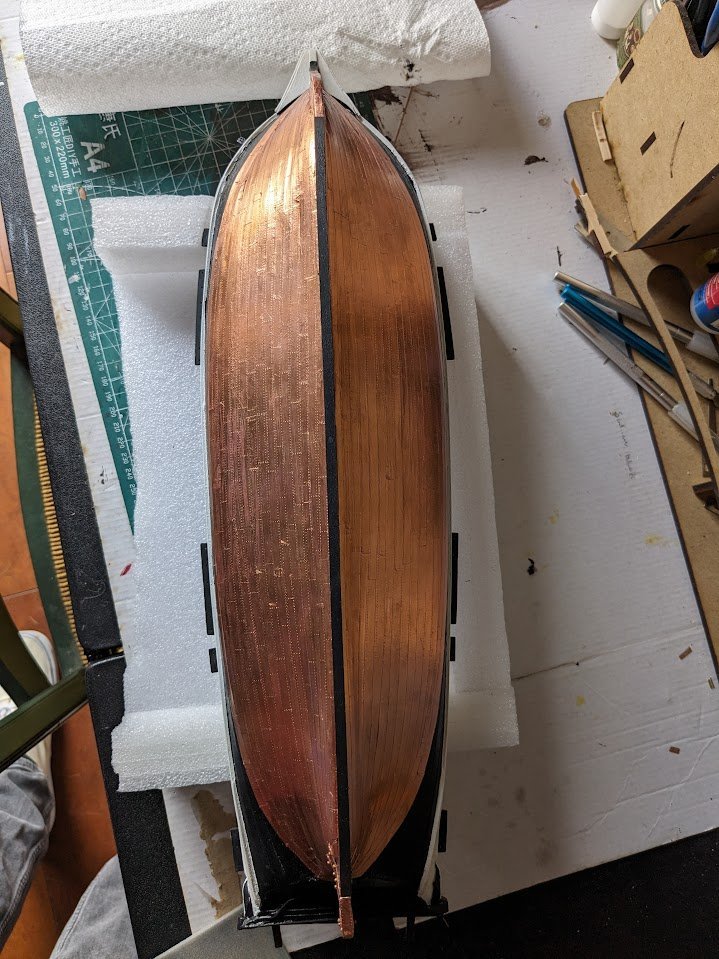
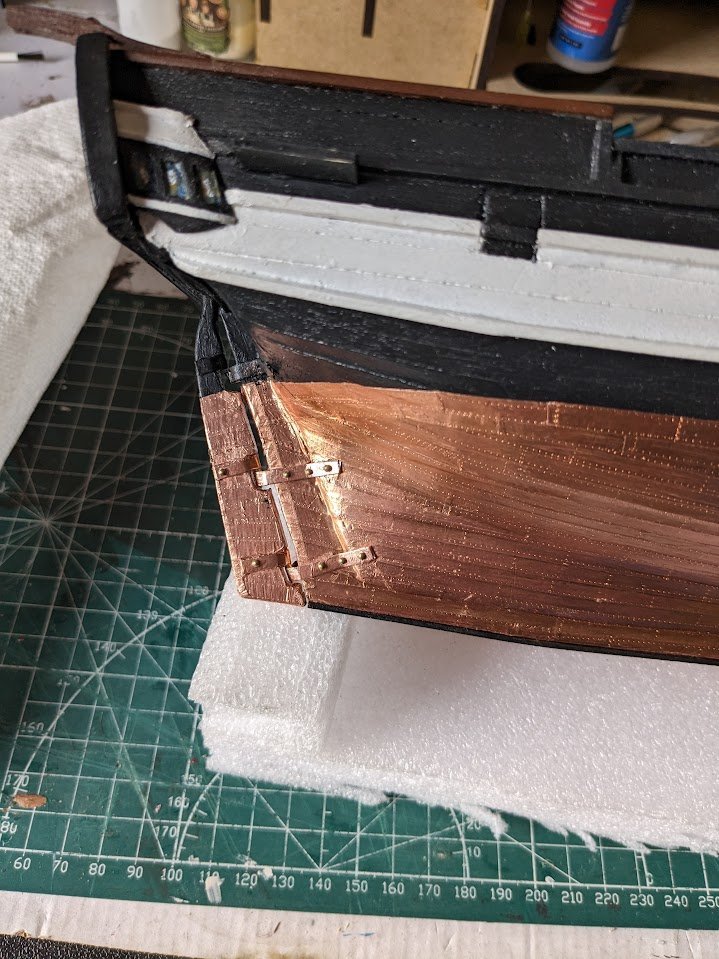
Got a few more items checked off over the past few weekdays. Got the port doors painted, hinges installed and glued onto the ship. Those little hinges were not an easy item to deal with, I really wish the kits would have given extras as they are insanely hard to hold onto and work with, and very easy to lose if you drop one. Copper plated the rudder, and installed it on the boat. Painted and glued on a strip of timber for a false keel. Installed the channels Started on the first pieces that go on the deck. Happy to get to this stage as it feels like a bunch of mini projects. I started with the two storage lockers at the rear, I used the spare port door hinges from the port doors that were planked over, I wasn't a fan of the instructions way of simulating hinges with cut pieces of brass rod. The red bulwarks have a really weird color tone in these pics for some reason.
-
Occre seems to have fantastic customer service from what i have seen. Have you checked if your kit came with enough extra timber to replank? My Occre beagle came with quite a bit of extra wood, almost enough to plank the boat again.
- 10 replies
-
- 1
-
-
- OcCre
- First Build
- (and 1 more)
-
Blades for Artesania Latina Cutter
brunnels replied to brunnels's topic in Modeling tools and Workshop Equipment
Thanks, that is what I already have and use and it is great. The AL Chopper was a gift, I am trying to be polite and find some use out of it with better blades. -
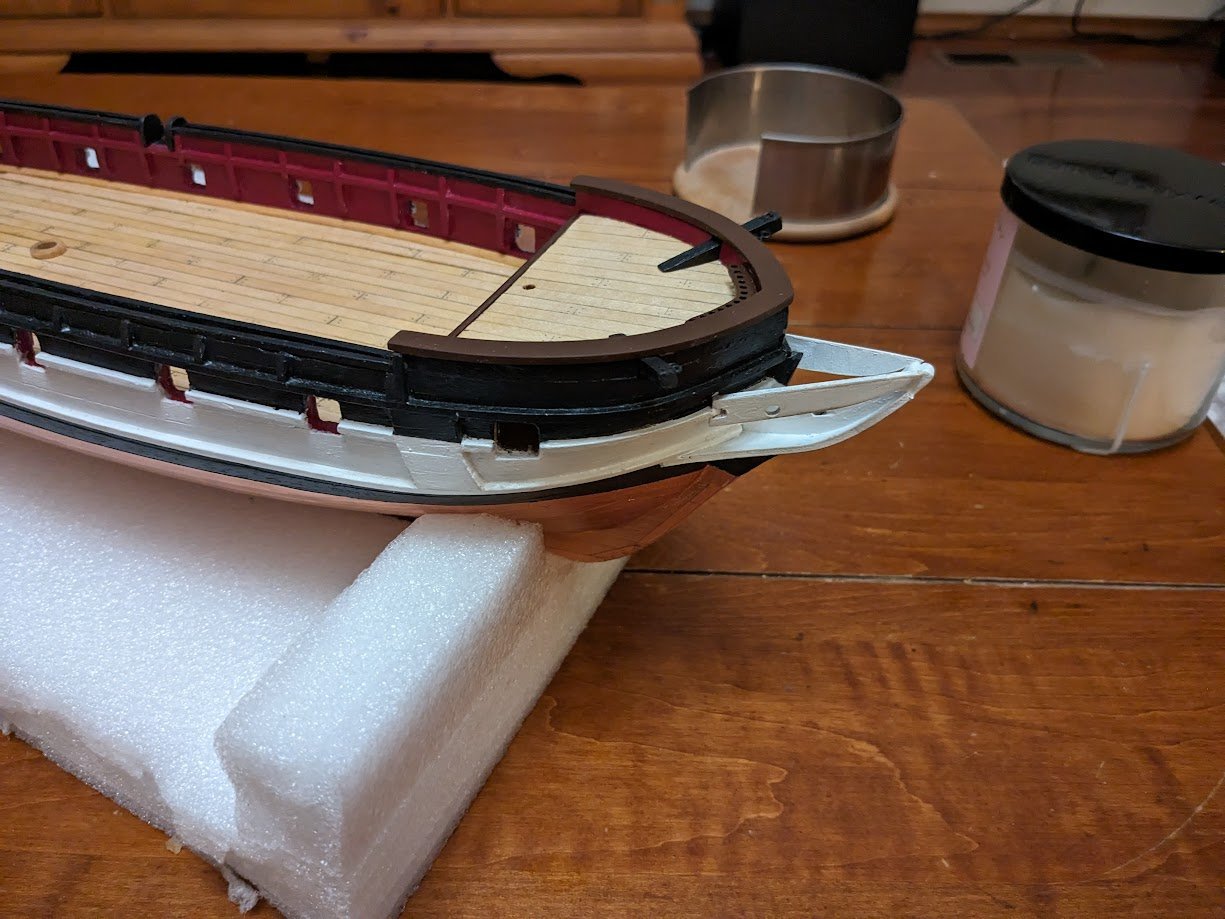
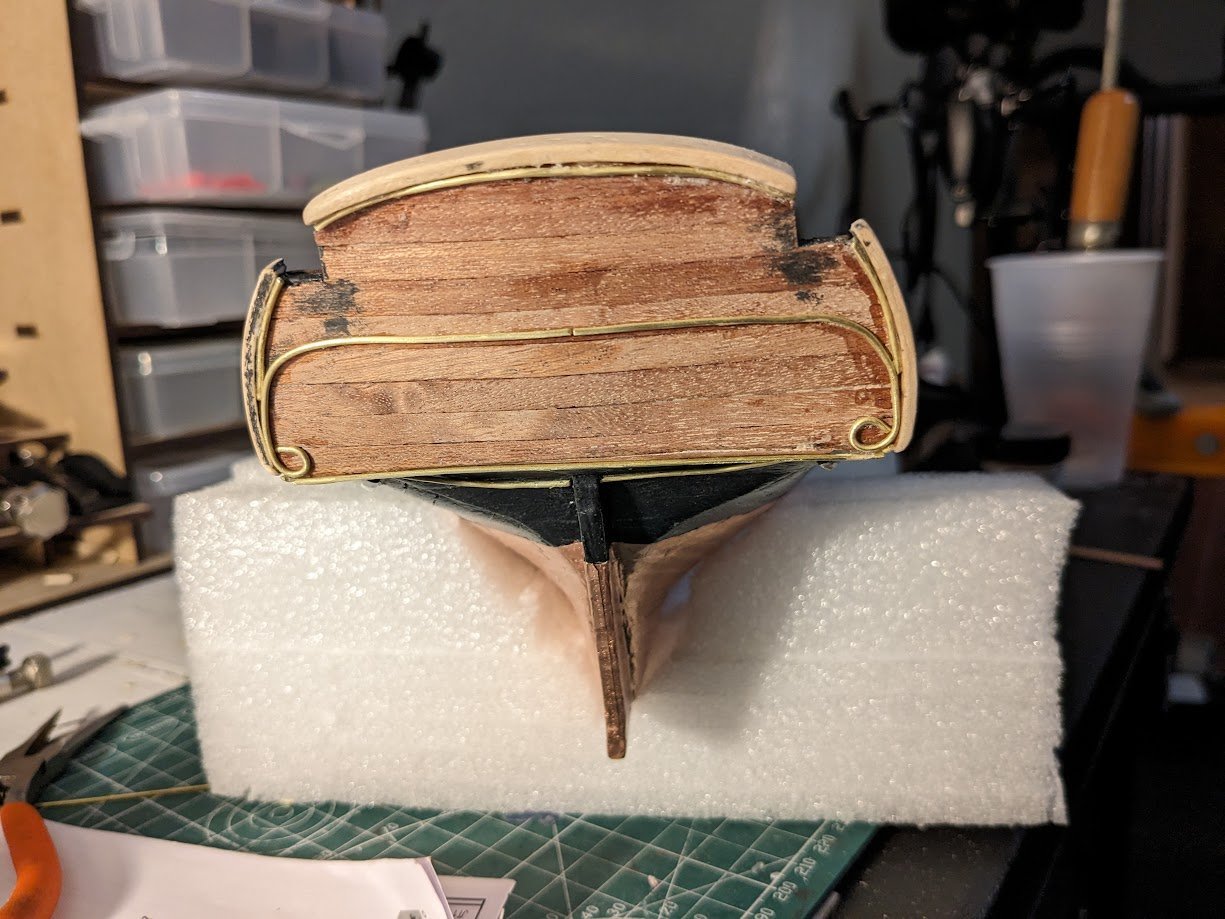
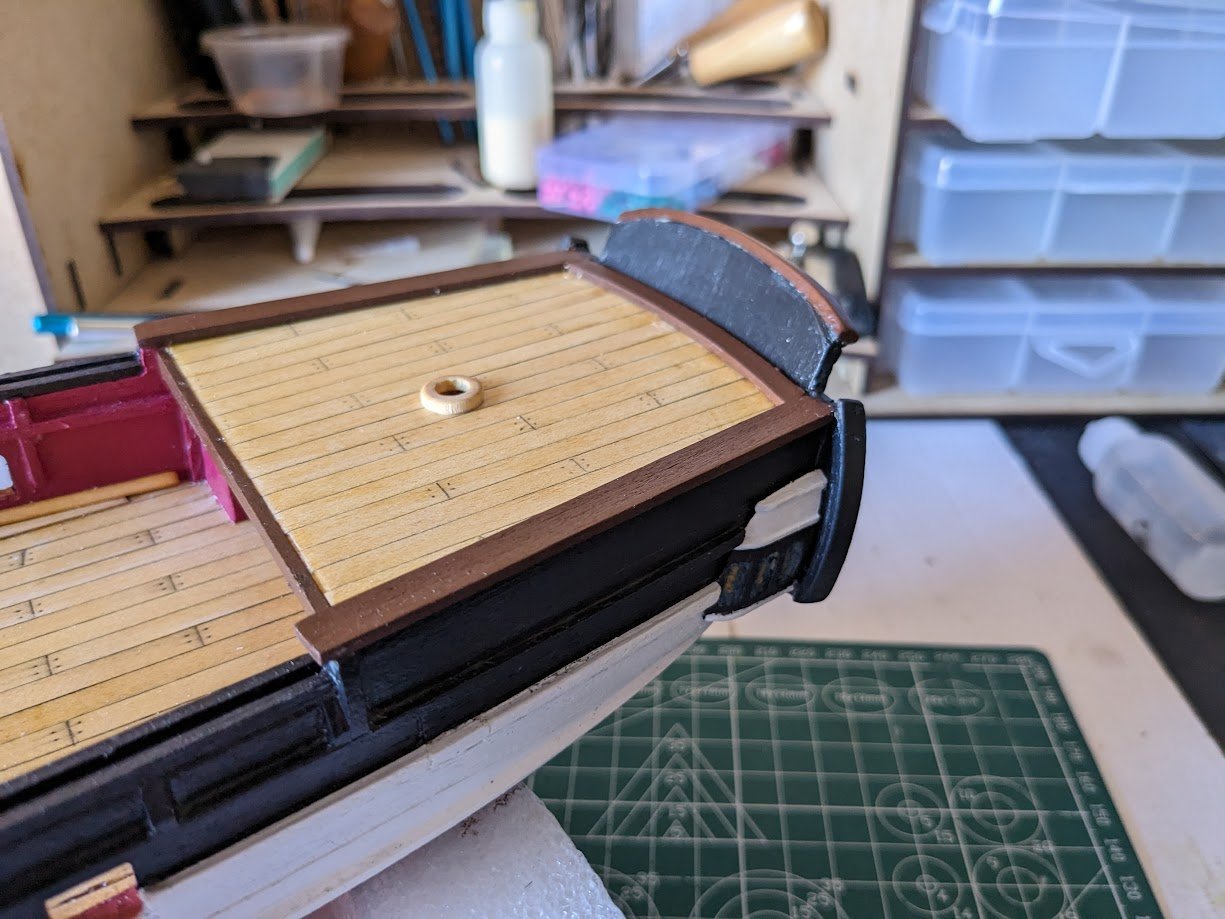
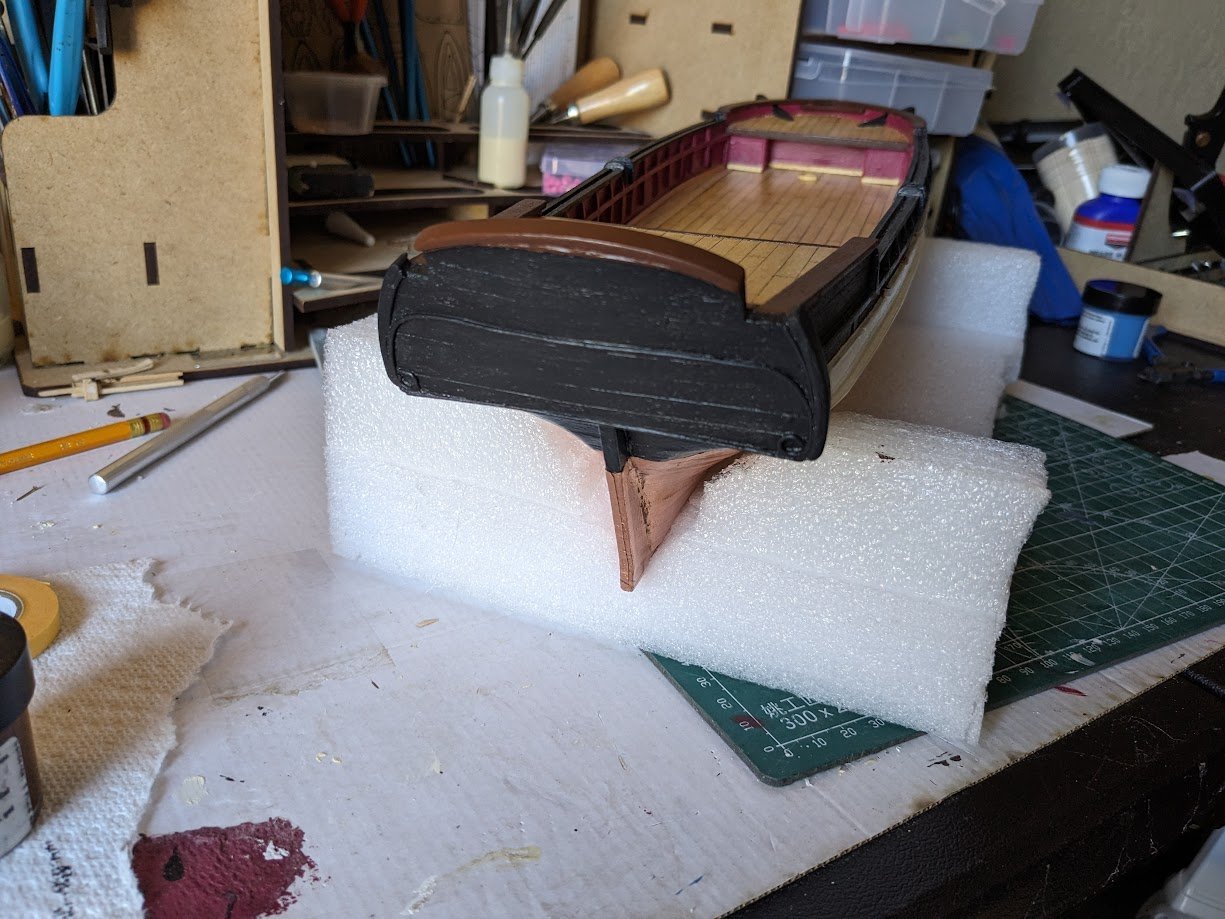
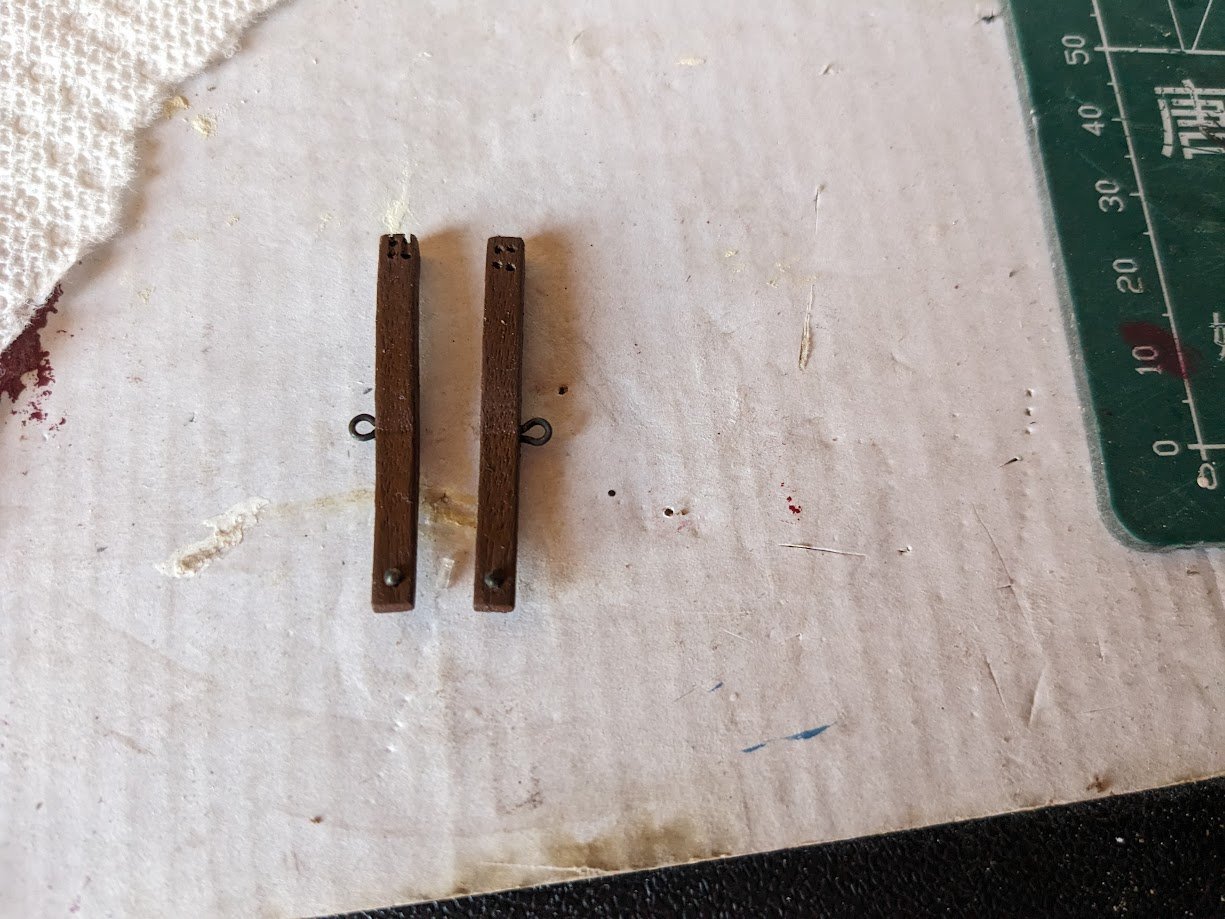
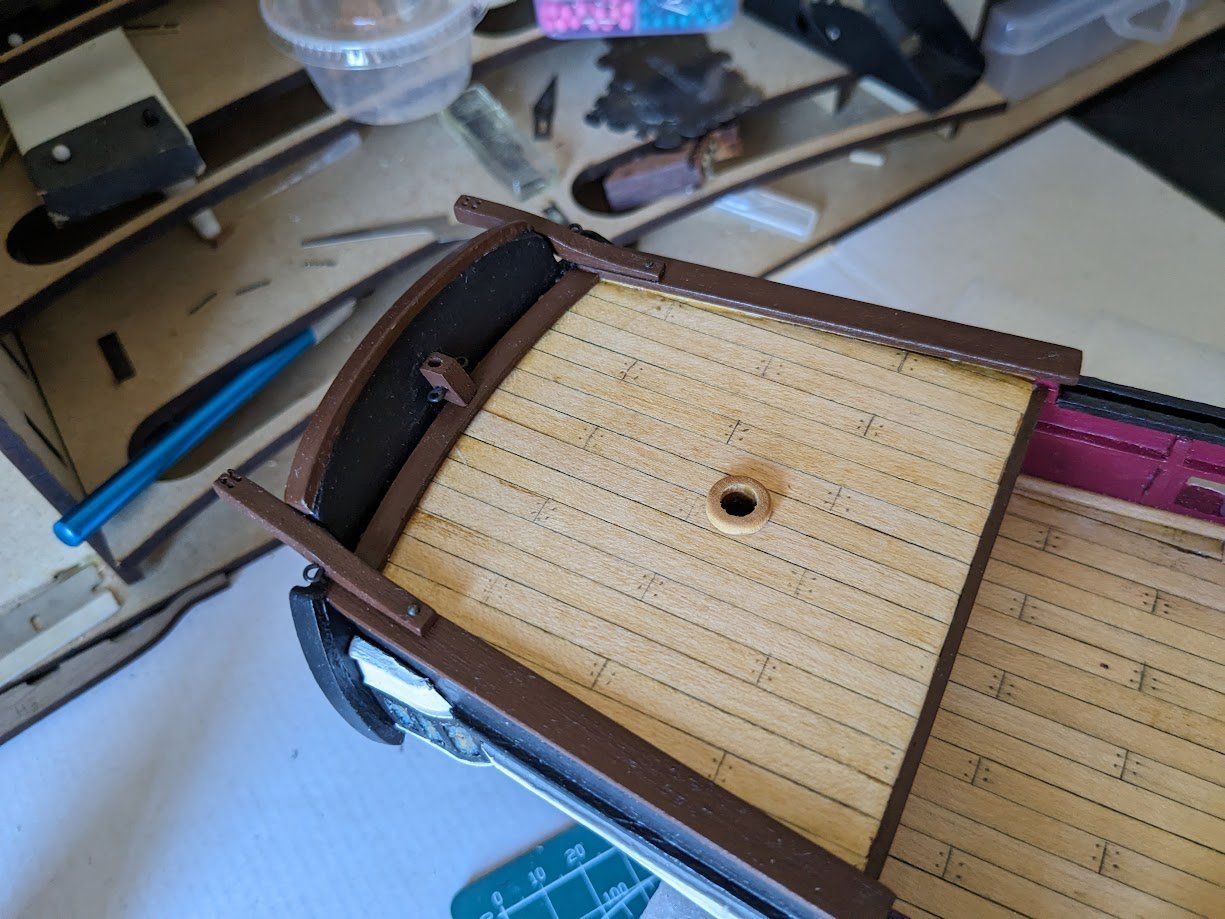
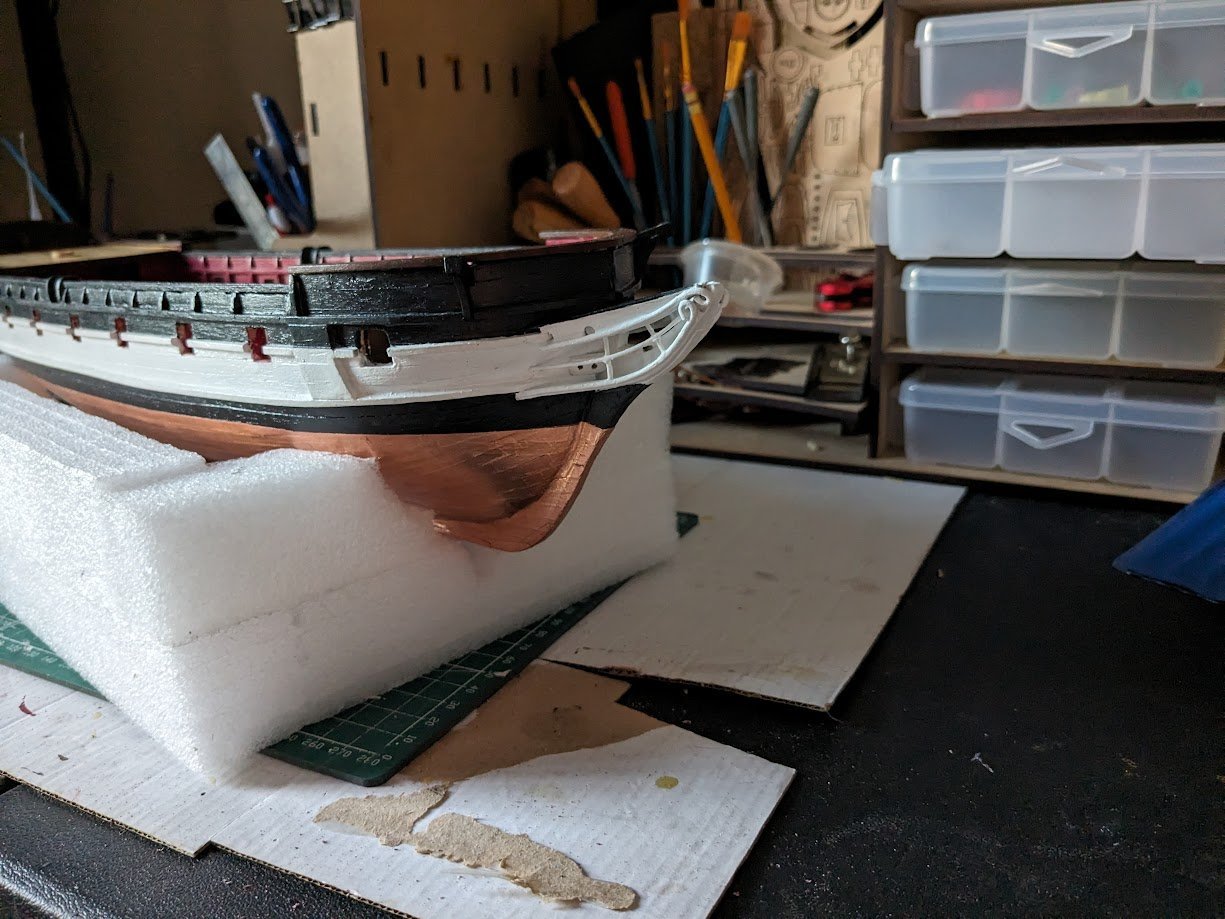
Spent the week on the bow and stern of the ship, both taking far longer and more challenging than I was expecting. I started the week planking the bow, the instructions showed the planking on the stern as vertical, but the AOTS book showed the planking was done horizontally. I'm starting to learn to double check all the Occre instructions to the AOTS book. I then added the boards that outlined the stern. This was probably the most frustrating part of this model I have done so far because the wood needed to be bent in two directions to match the lines of the stern piece. I snapped many pieces attempting to make it look good, but after spending a couple nights and getting very frustrated trying to make it look how I wanted, I decided my skill level wasn't up to my expectations for this step and decided to do the best I could with the shape, add a little wood filler, and move on. I then formed the brass rods into stern decorations. I wasn't a fan of the use of brass, and I spent some time trying to do this part with wood, but this was another step that my skill level wasn't good enough to make me happy, so I settled with the brass. I followed up the picture with some wood filler to fill in some of the gaps. Then some clean up and paint. Other side of the stern painted, also got the quarter galleries and boards on the quarter deck glued in place. Horn davits with holes drilled and hardware installed. Unfortunately one of the holes chipped while drilling out. I need to start pre-drilling, even for 1mm holes. Horn Davit's and flag staff mount installed. While pieces were drying on the stern I was also working on the bow. OH JOY, more brass to bend. And bow painted. My next task is to get all the port doors and hinges installed, and then maybe I can start on the furnishings on the deck.


-
Blades for Artesania Latina Cutter
brunnels replied to brunnels's topic in Modeling tools and Workshop Equipment
Because one is new to the hobby and wasn't sure what the tool would be able to cut.