bcochran
-
Posts
615 -
Joined
-
Last visited
Content Type
Profiles
Forums
Gallery
Events
Everything posted by bcochran
-
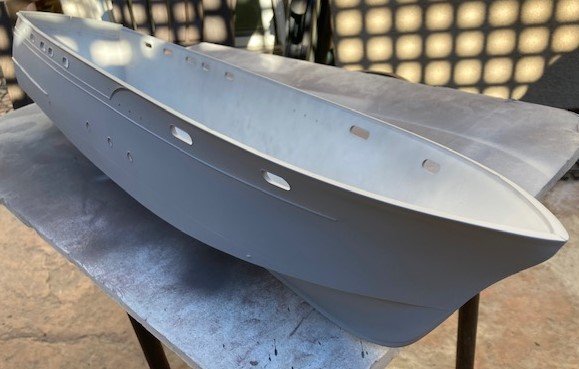
 I completed painting the hull. I wasn't able to remove the paint with oven cleaner, so I sanded out the rough spots and touched up the paint. Now it is time to learn about placing and using the R/C equipment. The decks are sitting there temporarily.
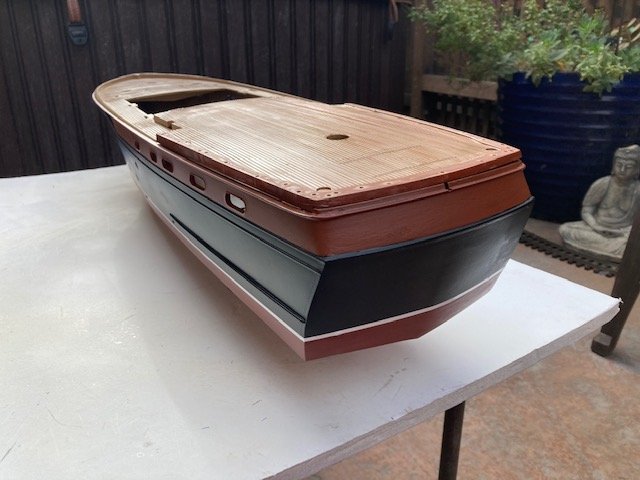


- 296 replies
-
- 10
-

-
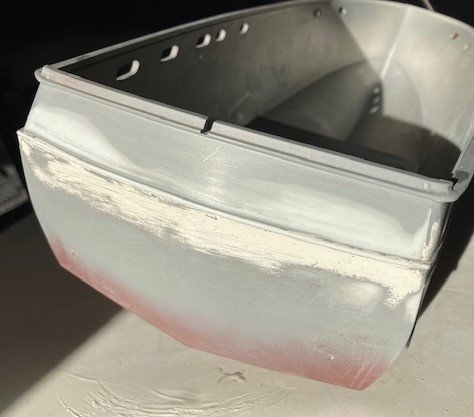
The hull painting job I did looks like crap. I have to strip the paint off and start over. That will take some time. I hear oven cleaner works. I am going to try that. I also don't like the color I used for tan or mahogany. So stay tuned, and I will be back when the hull is repainted.
-
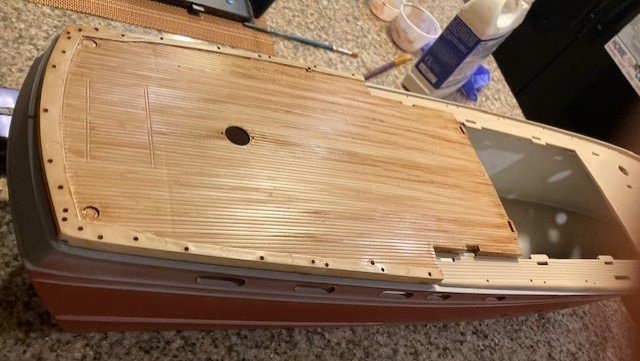
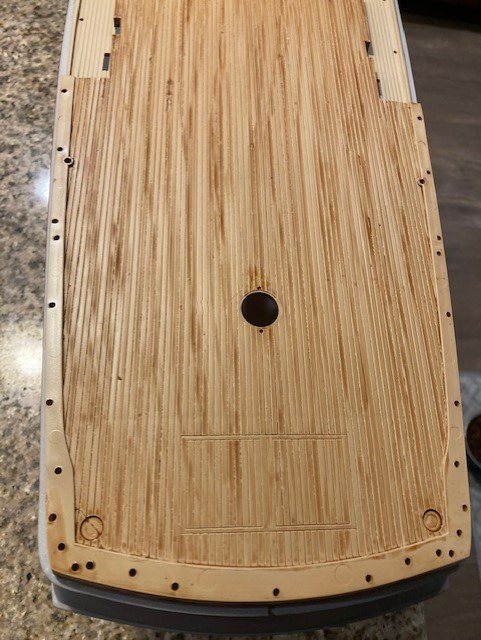
On the rear deck, I used the black ball point pen only. You can see the left side of the deck in the picture is done, the right side is not done.

-
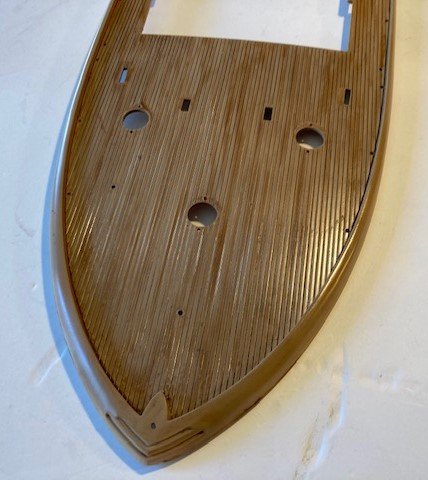
I used an ordinary mechanical lead pencil and a black ball point pen to darken the space between the boards on the deck. It is supposed to represent caulking. It is pretty subtle. On the real boats, what looks like three boards is actually one board. They cut grooves to make it look like three boards. They caulked the grooves and the actual board separations so it looked like three boards.


-
Well, I have the hull just about refinished. The best news for me is that a pond in a county park near me is used by R/C boater. There are a lot of ducks and geese there, but I am told there are not bothered by the boats. I think the fast racing type boats might bother them, but the sail boats do not. I don't plan to run my boat fast. The C C Constellations top speed was around 14 knots or 16.11 MPH.
-
I used to say you have to destroy a lot of kits before you complete one you are willing to show off. It's kind of like folks who tell you how much they won at the casino, but never tell you how much they threw into the slots between winnings.
-
Unfortunately, I did a lousy job of painting the hull. It will take some time to recover. Since the Tamiya paint is durable, I am going to have to sand the bad spots before I paint over. I was in too much of a rush and now, I added a bunch of hours to the job. I set the boat aside for now and come up with a new plan to painting it. I don't want to look at it for a while. If it were a small model airplane, it would have crashed into the wall at a hundred miles an hour. So I will be back in about a week or so.
-
I decided I have to break out my airbrush. The mahogany colored trim on the decks need a very clean color separation line, and I can only do the with masking tape and an airbrush. I may as well spray the cabin walls while I am at it. Also, I want to cover the gray stanchions with Alclad II chrome. That requires an airbrush.
-
I could not find a color I wanted for the cabin walls. I am not sure what kind of wood they are made of. I finally settled on Testers rust. I will have to brush paint the walls and the side of the hull. I don't want to break out my air brush. The hull painting is all most complete except for the black color. After the rust paint is dry for a day, I will complete the hull painting.

-
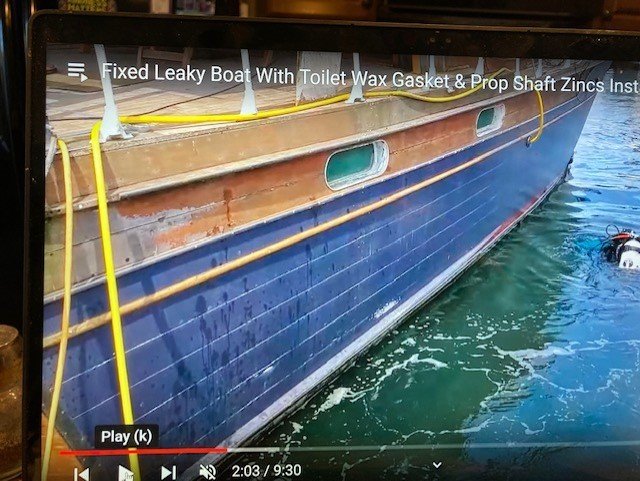
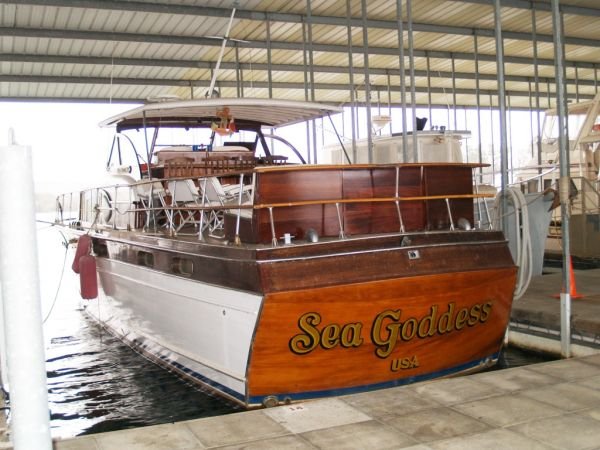
This is the only picture of a black hulled 1956 Chris Craft Constellation I can find. It is from a YouTube video. A guy bought this boat to live on instead of motels when he is away at work. He made several walk around videos and shows his restoration work. I'm using it as a reference where I can.


-
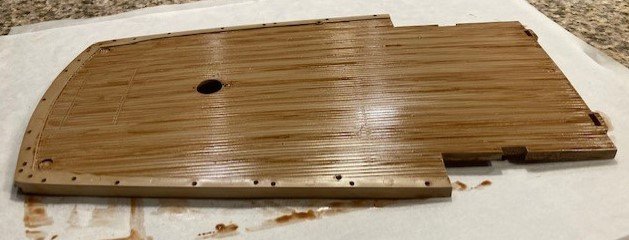
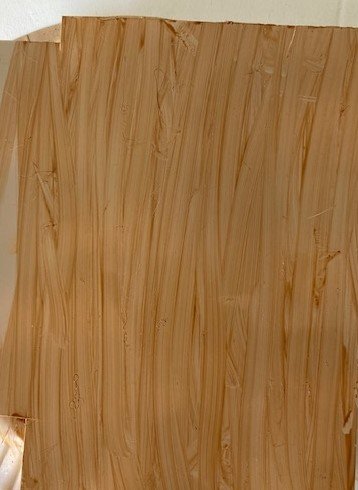
Here is the rear deck with artist's oils streaked on. I read that this was called the promenade deck. The oils are not dry yet. I don't know how realistic this is, but it's better than the tan by itself. It shows up the caulking lines better than a single color.
-
This is the deck painted Tamiya TS-68 Wood Deck Tan. I am waiting for my red-brown paint to arrive via USPS. It got hung up at a post office somewhere for two days. I want to paint the mahogany part of the hull before the black because it makes the masking easier.

-
I am experimenting with some artist's oils to create a stained wood effect for the decks. I first sprayed Tamiya "wooden deck tan" paint on a sheet of styrene, then used burnt sienna and burnt umber artist's oils streaked on randomly with a small paint brush. I use turpenoid to thin the oil paint in small plastic storage cups.


-
That is a good idea Yves. I am going with the black hull version, like the kit box shows. The black hulled Constellations that I have seen pictures of had a black transom.
-
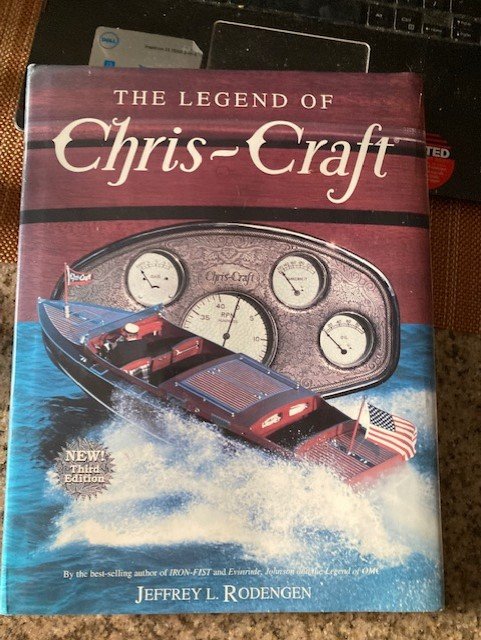
If anyone looked at my Cutty Sark build and my Robert E Lee build, you may have picked up the fact that I like to learn the history of the models I am building. So with that in mind I bought the book, "The legend of Chris Craft" by Jeffrey L. Rodengen.
-
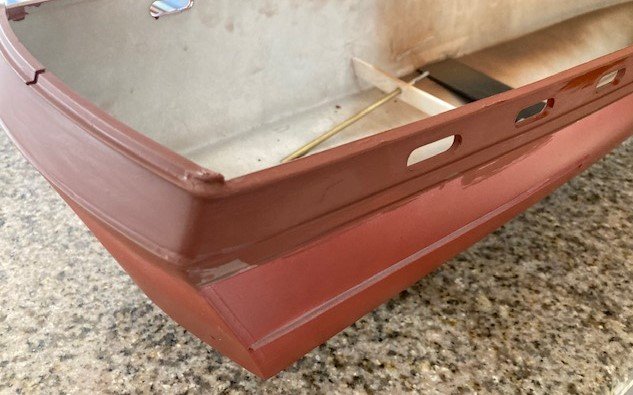
When looking at reference photos of a Chris Craft Constellation, it looks like the transom has a ledge just below the top edge. I am trying to duplicate that on my boat. I flattened one side of a piece of plastic rod and glued it on the model transom. I then filled in the edges with Tamiya body putty. Next I will shape the place with sand paper, files and sanding sticks made from gluing sand paper to flat tooth picks.


-
I will most likely build a support. My first try was not successful.
-
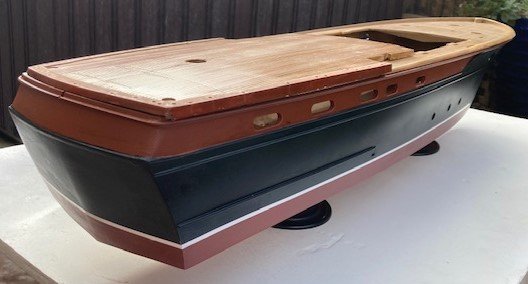
I am waiting for the Tamiya paint to arrive in a few days to finish painting the hull, then I will install the R/C components and test them out. I bought a used stand on eBay that someone had built. The plastic things the kit supplies for stands are useless in my opinion. I hope the new stand are ok.
-
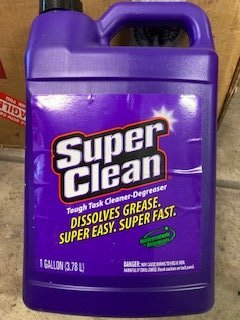
I added the props and a pad to attach the motors. I could not use the kit parts for the motor pad because the motors I am using are much larger than the kit supplied ones. I stripped the chrome off of the shaft brackets with Super Clean. I think it is the best product for stripping chrome and paint off of plastic. It is hard on your skin. Wear gloves. It works in minutes on chrome. I am going to paint the rudders and shafts to match the hull.


-
I am using Tamiya spray paint. It is tough, goes on smooth and dries fast. And I ordered some white striping tape. I am going with the black hull. Supposedly the Constellations were delivered that way. I don't know this for sure. The colors I am using are: Light Gray Fine Surface Primer TS-6 Matt Black TS-33 Dull Red TS-27 Matte White TS-68 Wooden Deck Tan TS-1 Red Brown
-
I have the filing and sanding of the transom piece done. You can see where I had to add plastic to some areas. A coat of primer shows me where there is more work to be done.