


bcochran
-
Posts
615 -
Joined
-
Last visited
Content Type
Profiles
Forums
Gallery
Events
Everything posted by bcochran
-
 We have a lake nearby, and I want to check it out to see if there is a nice place near the shore where I can float this boat. Not having done R/C boats before, I am worrying myself about the boat going out too far or sinking.
 -
I used to repair wrecked planes in my hobby shop long ago. I'd repair the frame and recover them and hang them from the ceiling. Often a guy would crash his plane and rush in to buy one of my repaired ones. They just needed to fly that day.
-
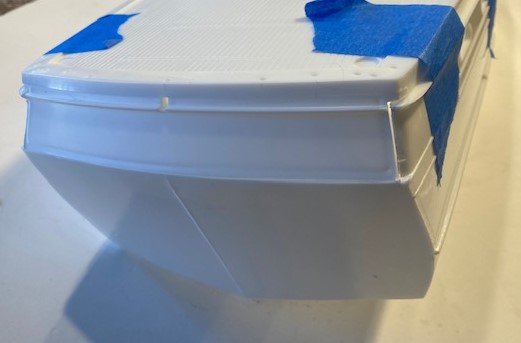
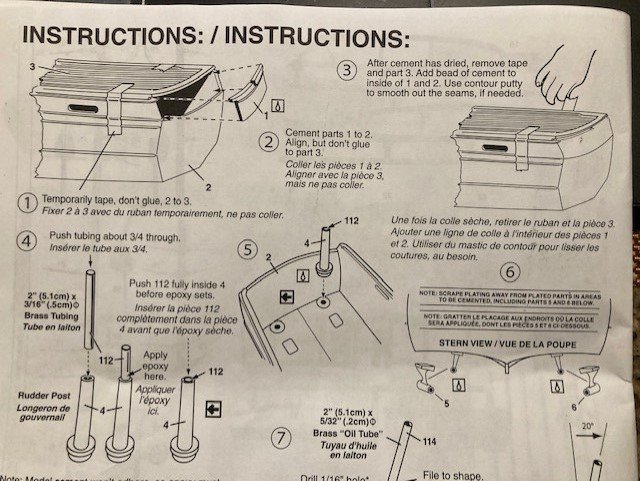
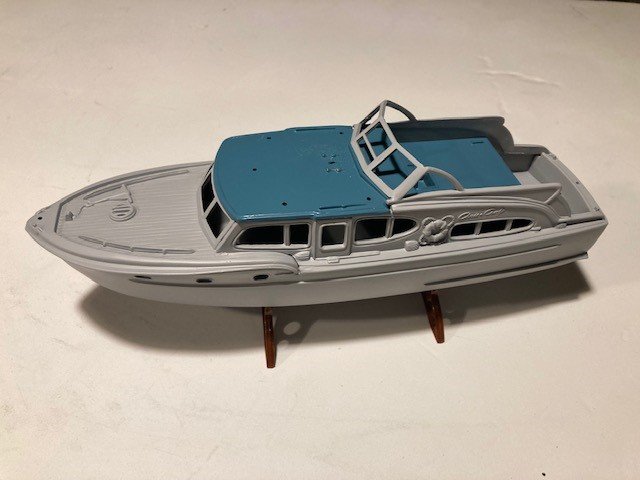
The first step in the boat kit instructions is to add this piece of the stern to the hull. It will need some filling and shaping to fit well. I had to force the stern piece in to position on the starboard side and hold it in place with tape while the glue cures. I put some thin plastic sheet in the cracks on both sides. These will be trimmed, and the needed places will be puttied, sanded and shaped. I used Tamiya Putty white to fill the seems. I also used some superglue in the seams


-
Ian, yes, the hull is plastic. It is very thick and heavy. I don't think I have to worry about the hull when on the water. But since the rest of the boat is plastic, I do worry that I'll break parts off when handling it. I am going to have to find a way of carrying it safely.
-
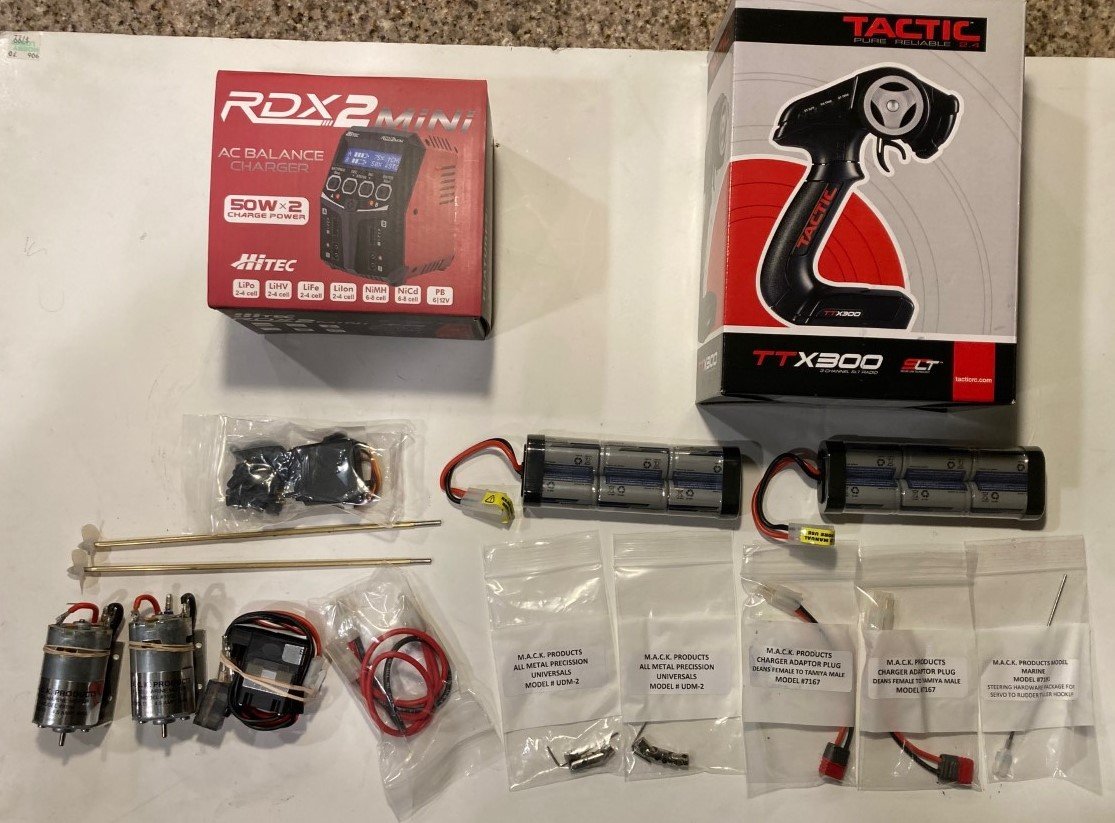
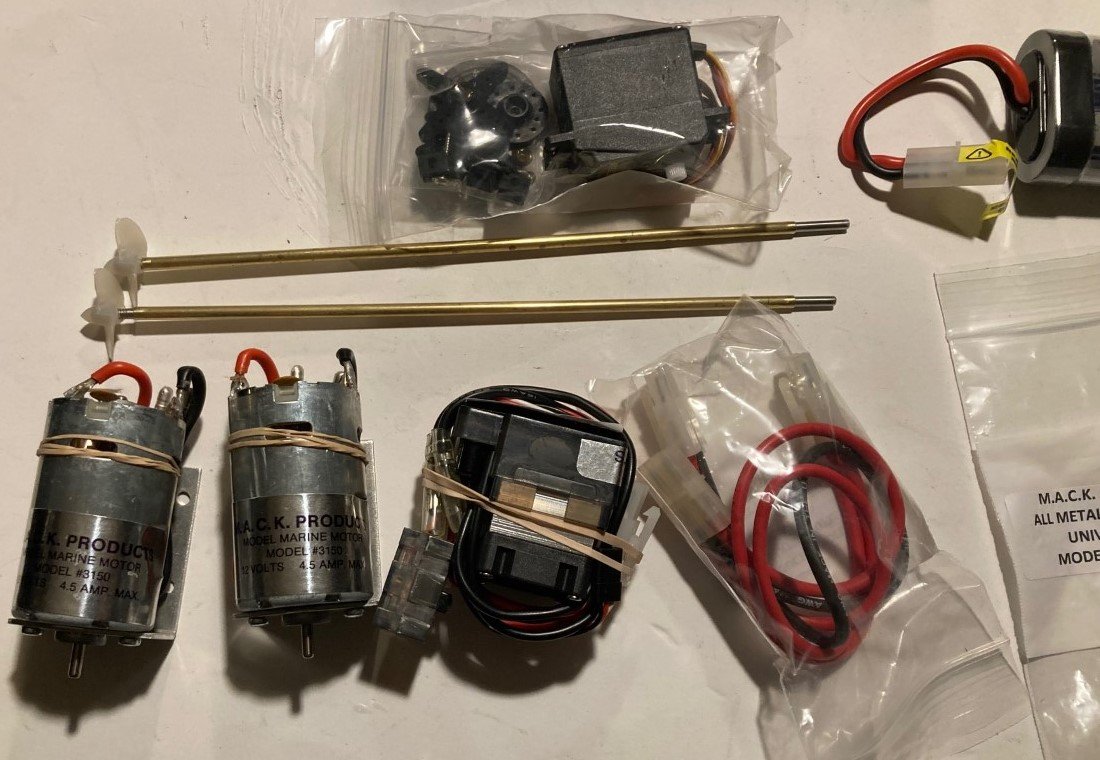
Hi Ian, I am so new to R/C boats that I don't know anything about the components from personal knowledge. Rich Koll (bigrichmodels@optonline.net) at http://www.mackproductsrc.com/power packages - v.htm put these components together for me. His site has quite a few power packages for various boats. He used to sell the kit to power the Lindberg Constellation when the model was on the hobby shop shelves. He still has the parts in stock. I talked to him on the phone, and he told me what I needed. I just ordered what he suggested. I believe the motor has brushes because the speed control is for brushed motors. See the image of the data from the kit below. I don't know what KV.....T.....4S-6S means yet. Like I said, I am new to R/C boats. You should call Rich, (732) 870-2966. He should be able to answer any questions you have. I like your boat.

-
The M.A.C.K. instructions say to build the kit up to step 6 first. After that, you install the R/C components. In planning this build, I have come to a decision point. Should I paint the hull before installing the R/C parts? What color scheme should I paint the boat? What type of paint should I use since this is going to be in water? Here also is a Revell 1/52 Chris Craft flying bridge cruiser I am using as a painting experiment before painting this kit. I think I should paint the hull before adding the R/C components. The motors and batteries add a lot of weight, and it seems to be a clumsy task to paint with them in place. I would have to protect the painted hull while adding them. I want to make a better stand to rest the boat on while working on it, while displaying it, and to help carry it to water. I like the way the boat on the box is painted. I also like the way the boat on the original Marx box was painted.


-
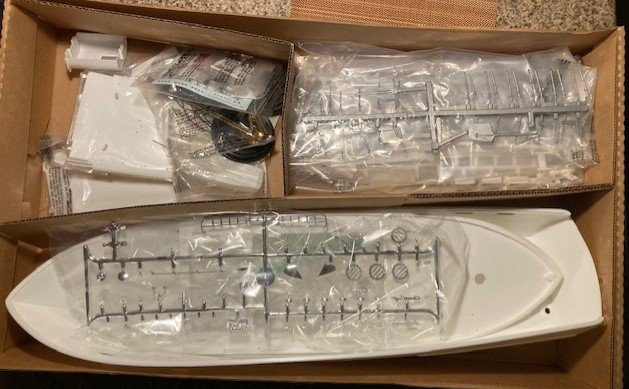
Here are pictures of the kit. I was lucky to find this on eBay in like new condition for a reasonable price. I believe it is a 2006 issue. I paid $250 including shipping for the boat and $478 for the R/C components in case anyone is interested. It is an early Christmas present to myself. Who better to shop for than you? At times, I have sold things like this I have built on eBay for more than I paid for them. That's where this boat may end up one day.

-
Here are the R/C components I purchased for the boat. I haven't worked with anything like this before so this should be an adventure.


-
Hello friends, I bought a like new, mint, in the factory packaging, Lindberg 1/20 Chris Craft Constellation model. I bought all the R/C components that I will need to put it on the water. I plan to build the boat as an R/C equipped model. I know nothing about R/C boats, even though at one time I owned a hobby shop and sold R/C planes and supplies. I am experienced with radio-controlled garden railroad engines. I've done over ten of those installations. I don't even have a pond nearby to float it on. I have two other build logs here, One is a Revell 1/96 Cutty Sark that still needs the rigging done. And the other is a Lindberg Robert E Lee steam boat. I know there is another build log of the Lindberg Constellation on another site and I have been reading it. As usual with me. I ask is anyone interested in another Lindberg 1/20 Christ Craft Constellation build log? My first name is Bob, so you don't have to call me bcochran.
-
Thank you for your replies. I was afraid to come back here to see what anyone wrote. Some day in the future I may take up the rigging again. I keep the hull in a safe place on a shelf next to where I work on models. I have a new boat project that I am considering making into a build log. I have a Lindberg 1/20 Chris Craft Constellation. I am going to add R/C to it.
- 481 replies
-
- 2
-

-
- Cutty Sark
- Revell
- (and 2 more)
-
I think that not only my wood deck but also the fact that I left the boat white and the hurricane, Texas and pilot house roof blue make my Lee look different from most. I notice other builds online of the Lee and everyone is entitled to their likes, but I feel most builders know very little about steamboats. Their builds reflect it.
- 117 replies
-
- 2
-
-
- Pyro
- Robert E Lee
- (and 2 more)
-
I feel I need to post this. I don't know when or if ever I will return to the rigging of my Cutty Sark. To be honest I am intimidated by the idea. Secondly, this plastic model seems too fragile for my abilities. I've had so many accidents with this model that I am tired of it happening and having to recover. I've had extra parts but I am running out of my supply. I am wanting to move onto other things and it seems like rigging is putting salt on my tail. So thank all of you all for your interest in my build. I am going to leave it here.
- 481 replies
-
- 1
-

-
- Cutty Sark
- Revell
- (and 2 more)
-
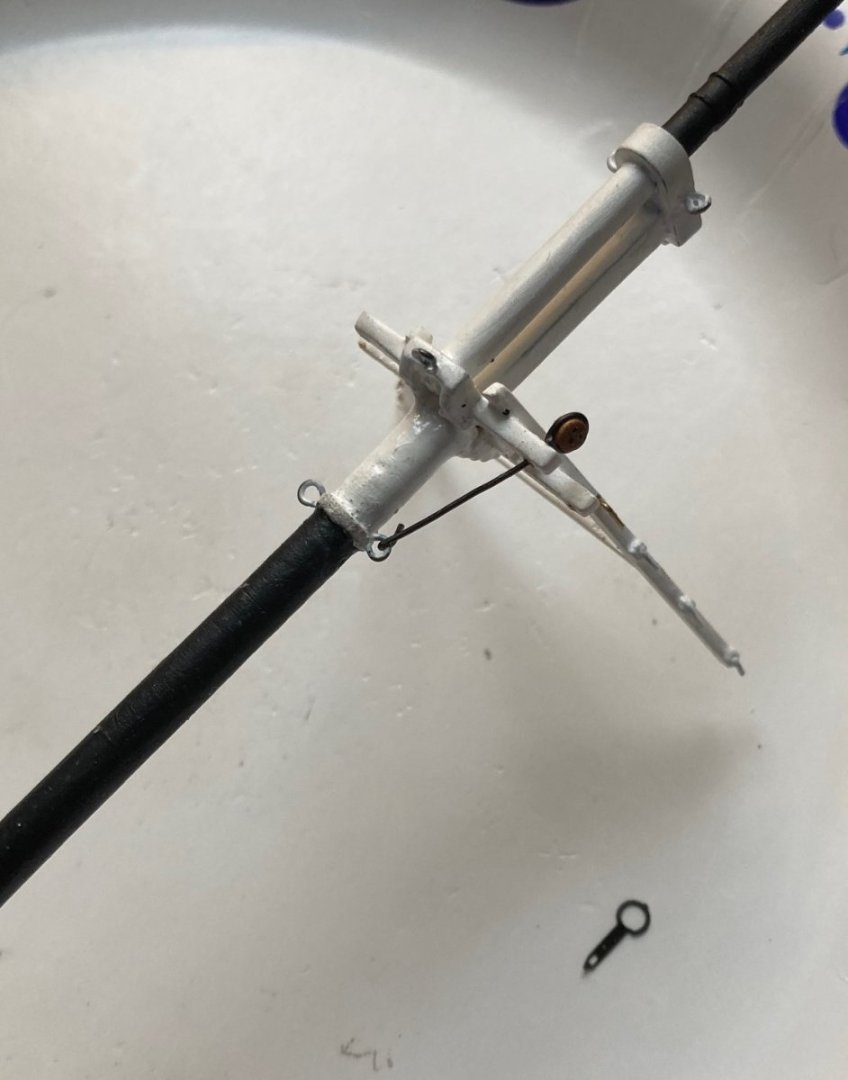
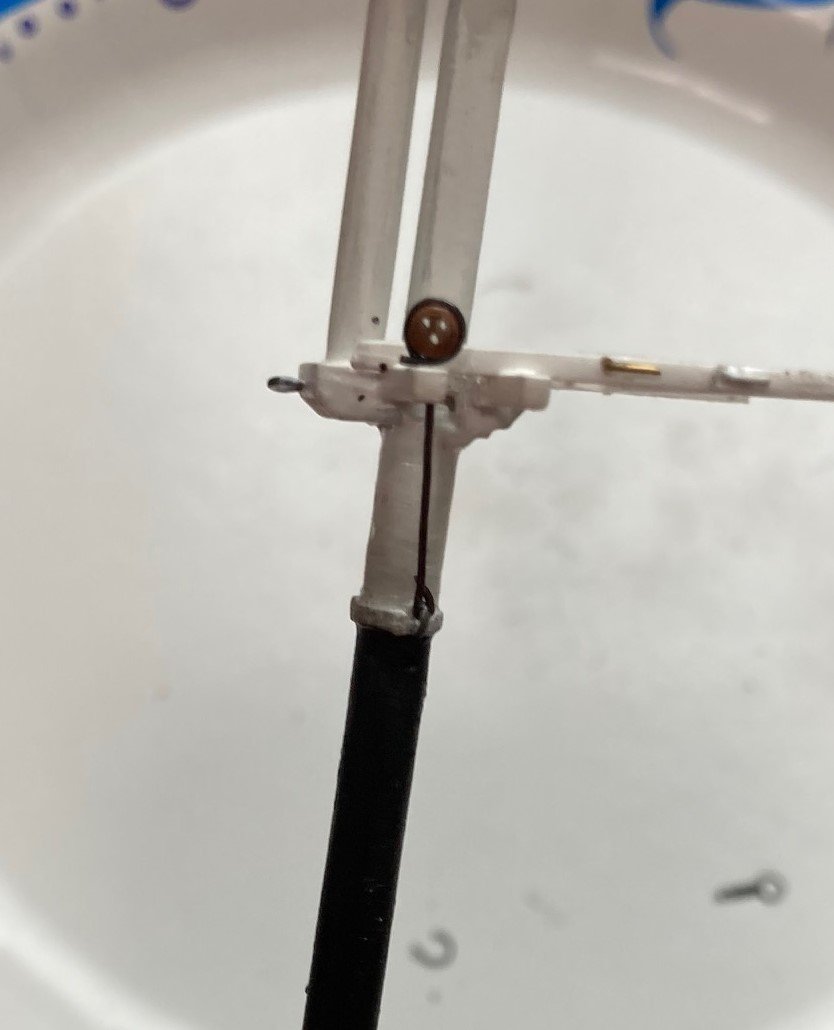
I gave up on that idea. I can't get the wire I am using to look right. Do people use rigging line for these deadeyes?
-
I am stuck on how to mount the small deadeyes to the cross tree. Any advice? Here is my latest attempt.
- 481 replies
-
- 1
-
-
- Cutty Sark
- Revell
- (and 2 more)
-
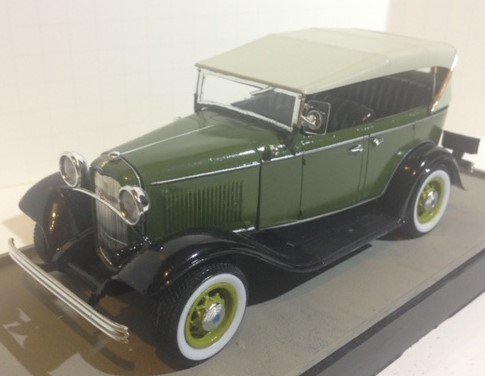
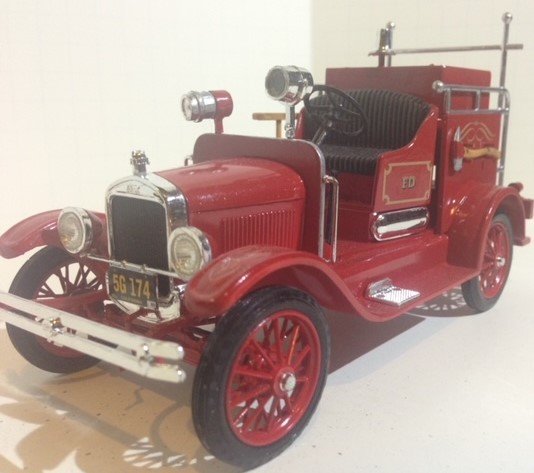
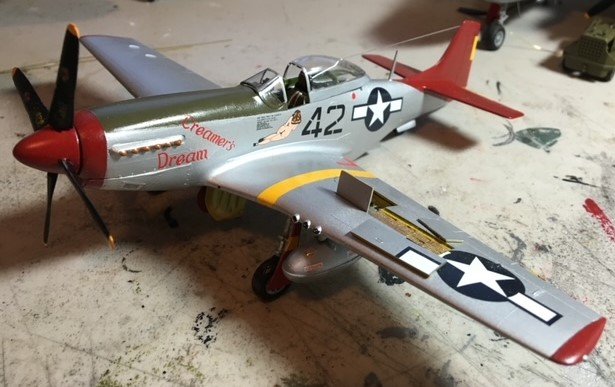
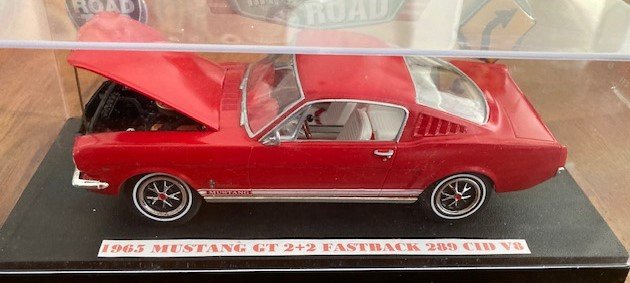
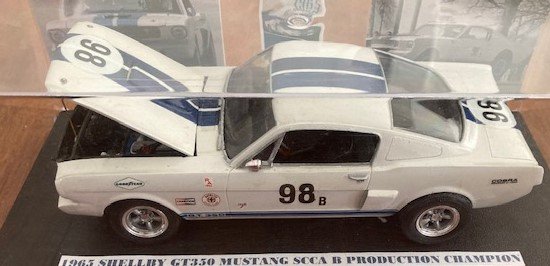
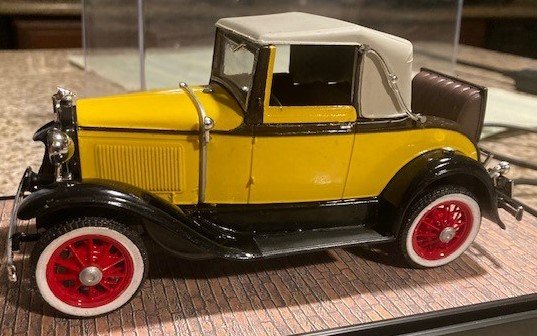
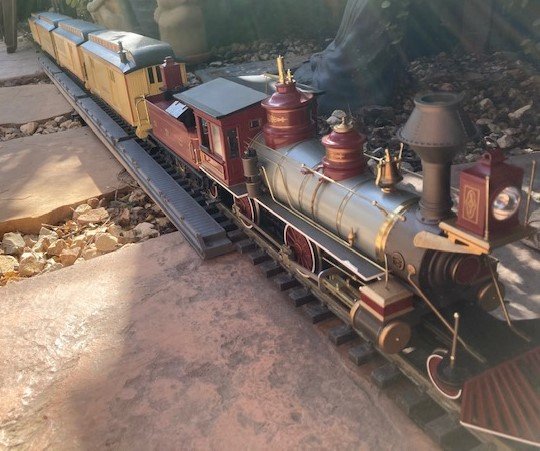
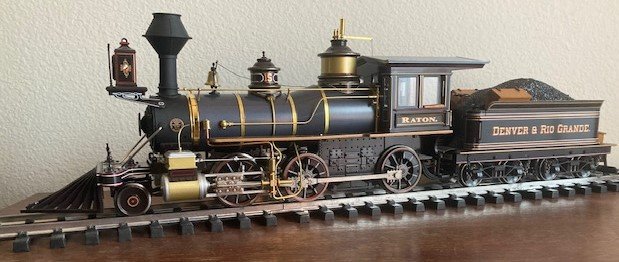
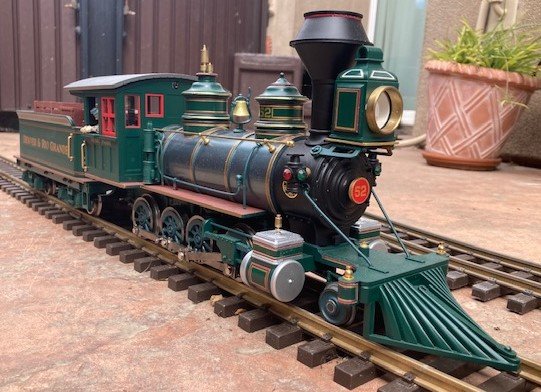
They are not kits. They are G scale garden railroad locomotives that are complete, ready to run when you buy them. I add details to make them more realistic. They are models of actual 3 foot narrow gauge engines that operated in the late 1800s, three from Colorado and one from California. I also add sound and radio control and battery power. When the great clipper ships unloaded, it was these type locomotives that distributed the goods inland. Also, the clippers that rounded the horn brought the materials to build the railroads in the west. The locomotives were built at the Baldwin Locomotive Works in Philidelphia. The autos and planes were from kits. The Santa Fe passenger train is on a HO gauge layout I am building in my garage. I have a lot going and at times it is hard to choose which I want to work on. Building the Cutty Sark is long and involved and takes me away from my other hobbies.
- 481 replies
-
- 1
-
-
- Cutty Sark
- Revell
- (and 2 more)
-
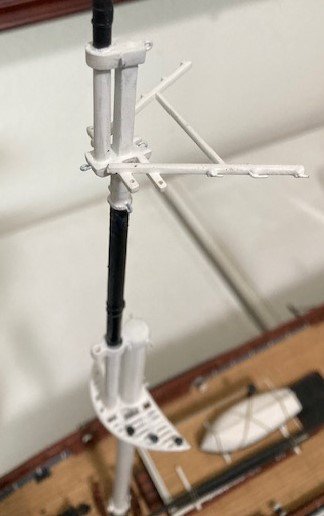
Here is a view of my modified fore mast cross trees. I removed the cheeks that Revell erroneously added. I added eyelets and made provisions for the upper shrouds to be added soon. I added cleats to the spreaders for the back stays. I painted the doubling per Longridge, but not the masts themselves. I read that during the wool days, the masts were painted black.
- 481 replies
-
- 1
-
-
- Cutty Sark
- Revell
- (and 2 more)
-
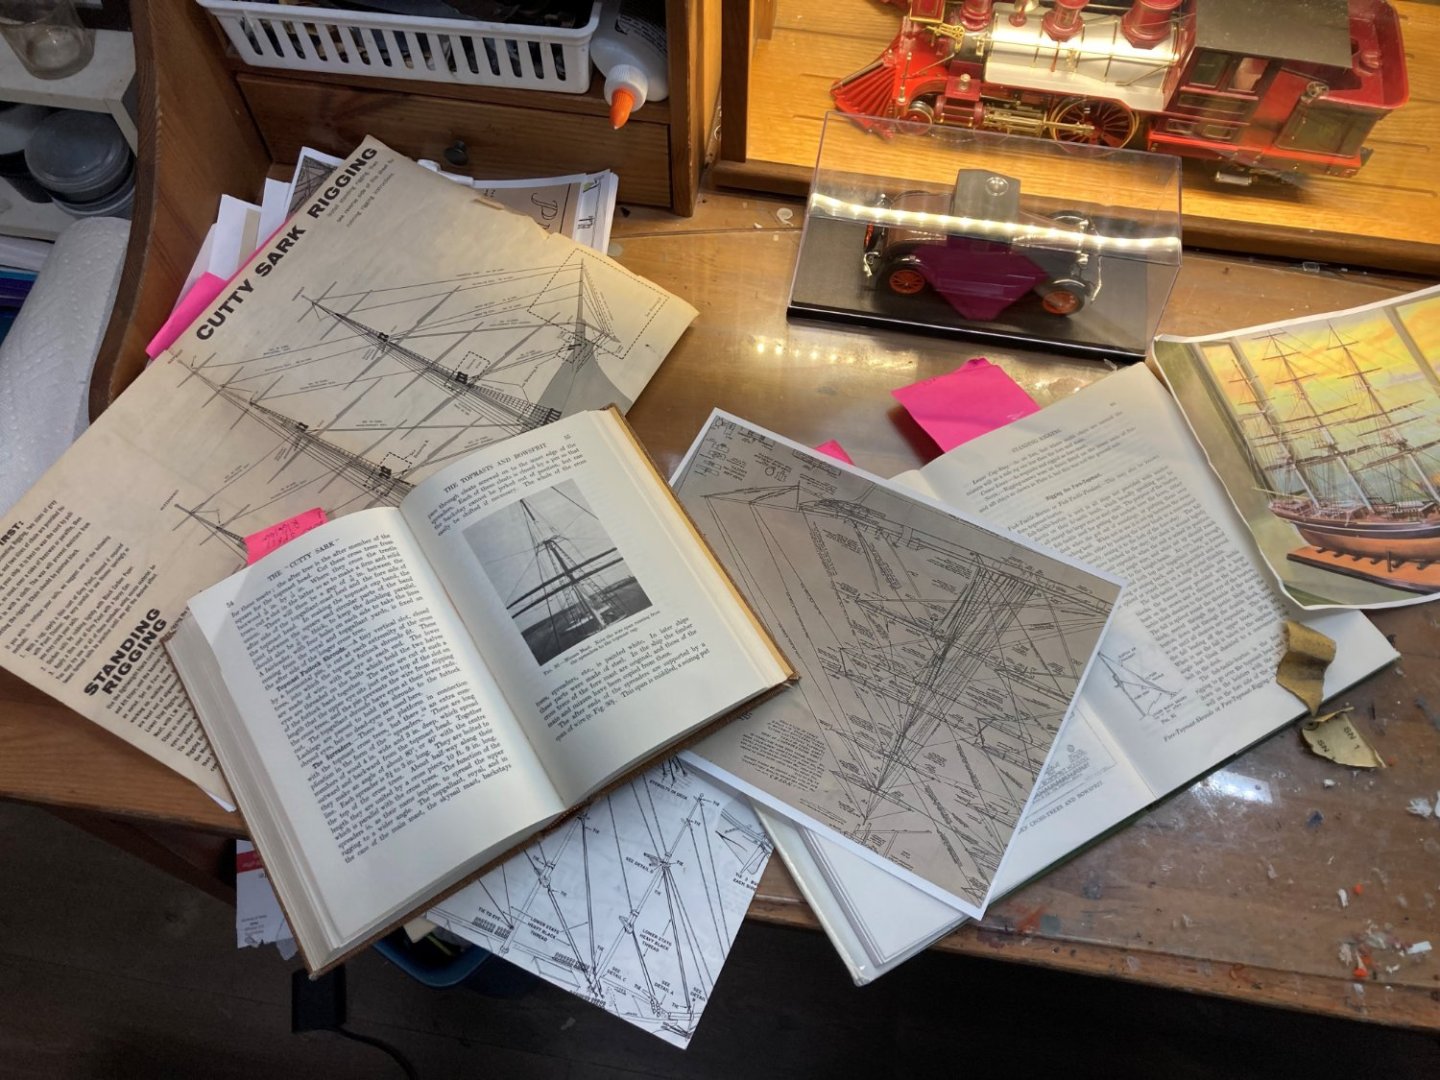
Here's a picture of my pile of reference material. I am looking up the same item in each source I have and making comparisons and choosing which on to use. I also build model cars and trains.
- 481 replies
-
- 1
-
-
- Cutty Sark
- Revell
- (and 2 more)
-
I am studying the standing rigging. I pretty much understand it. I have three references: Campbell, Underhill, Hackney, Longridge and Revell Underhill and Revell are similar. Campbell is different from those two. Hackney jumps all over the place rather than staying at one part of the ship. He is too difficult to follow. Campbell would be more difficult to add back stays, since his plan seems very confusing and hard to see. Longridge's rigging plan from his book is also hard to follow, and I have the larger foldout plans from the pocket in the back of the book. I think I will stay with Undehill and Revell for the standing rigging, at least I can get that done. So my plan is to work on the masts off the ship, add eyelets to the masts where they go. Make any detail changes. Add the shrouds. That is what I will be doing this week and maybe some weeks after. I will post a picture if the foremast when it is done. I am feeling squeamish about adding lanyards to the deadeyes and adding foot ropes to the shrouds. I have never done either one.
-
Hi Kevin, I have been away having surgery and recuperating. Your Cutty Sark looks really magnificent. Seems we are about at the same place with the rigging. So I will be following along with you as we go. While I was getting over my surgery, I built a model of the steamboat Robert E Lee. I have a build log of it here. You are just doing a super job on your ship. I read the discussion about the jackstays. Another Revell error is to put jackstay (posts?) on top dead center of the masts. From what I have been reading, they should be at the eleven o'clock position on the fore side of the mast. My plan is to scribe a line along the mast at the eleven o'clock position on the fore part of the mast. Then drill holes for the jackstays supports aligned with Revell's molded supports. Then sand off Revell's supports and add eyelets in the holes I drilled, and using thin brass rod for the jackstays. I won't be adding sails so I should make this look right.
-
I am working on understanding the rigging I must do. Since I know very little bout it, I will have to study my references. I will be making a spreadsheet listing all the lines needed to give myself a visual of the scope of the job. I haven’t yet made any more progress since I left off, but doing the spreadsheet is progress in a way, but there is nothing here to show for it.
- 481 replies
-
- 1
-
-
- Cutty Sark
- Revell
- (and 2 more)
-
We were on vacation with my wife's family when Diana died. It put a dark cloud over us all for a couple of days. I liked Queen Elizabeth as a person, not because she was Queen. I especially like the talk she gave during the war to the British kids living in Canada. I think she was 14 at the time. Then she joined the army as a driver, but she could have been in the fighting at times. The royal family stayed in country rather than to go to Canada or something. I was in the army in the Vietnam war. Even though I was a radar repairman, I had times when I was just an infantryman . doing the fighting.
- 481 replies
-
- 1
-
-
- Cutty Sark
- Revell
- (and 2 more)
-
Did you like the Queen? I really liked her and will miss her. Her passing makes me sad. My ancestors came from west of Paisley in Scotland.
-
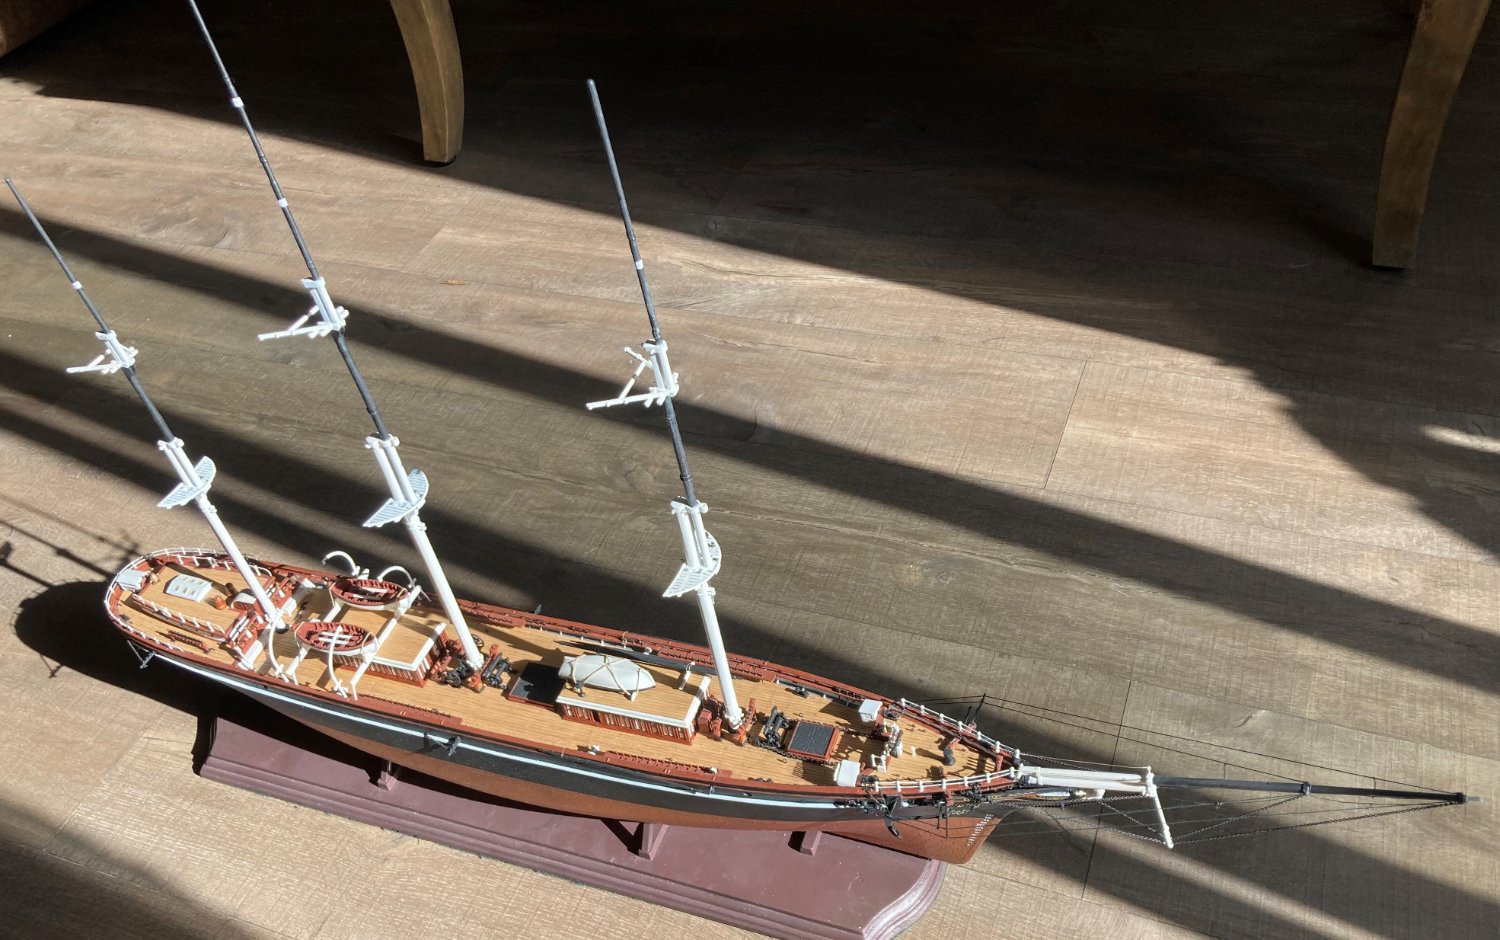
Hello everyone. I am back. On July 20 I had major spinal surgery. I am ready to do physical therapy. I am almost able to walk without pain. While I couldn't move much, I built this model of the steamboat Robert E Lee. I have a build log on it. So I was thinking it is about time I get back to my Cutty Sark. When I left off, I was working on the masts. So that's where I will pick it up. This is where things stand. I'll post more when I get more done.

.thumb.jpg.78c4f3ce63bee06e88c6f47679addb06.jpg)
- 481 replies
-
- 5
-
-
- Cutty Sark
- Revell
- (and 2 more)
-
The display case was made by Acrylicjob. I ordered it online. You tell them the dimensions you want, and they make for you.i https://www.acrylicjob.com/
- 117 replies
-
- 1
-
-
- Pyro
- Robert E Lee
- (and 2 more)


.jpg.9e4d373a1392aec7608819a2adab2ef9.jpg)