Yabuhebi
-
Posts
206 -
Joined
-
Last visited
Content Type
Profiles
Forums
Gallery
Events
Everything posted by Yabuhebi
-
 Very nice! Isn't it nice when you check off a task? Especially in the manuals, makes it easy to go back and make sure you've done everything!
 -
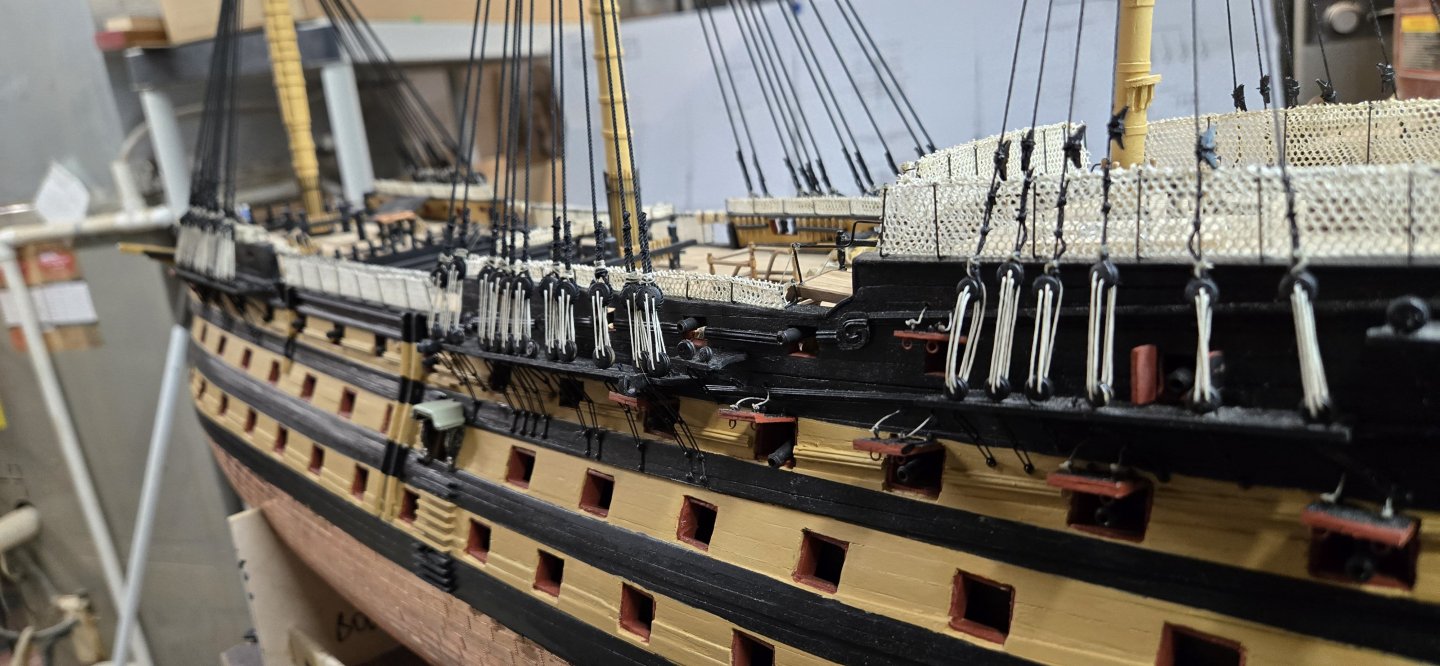
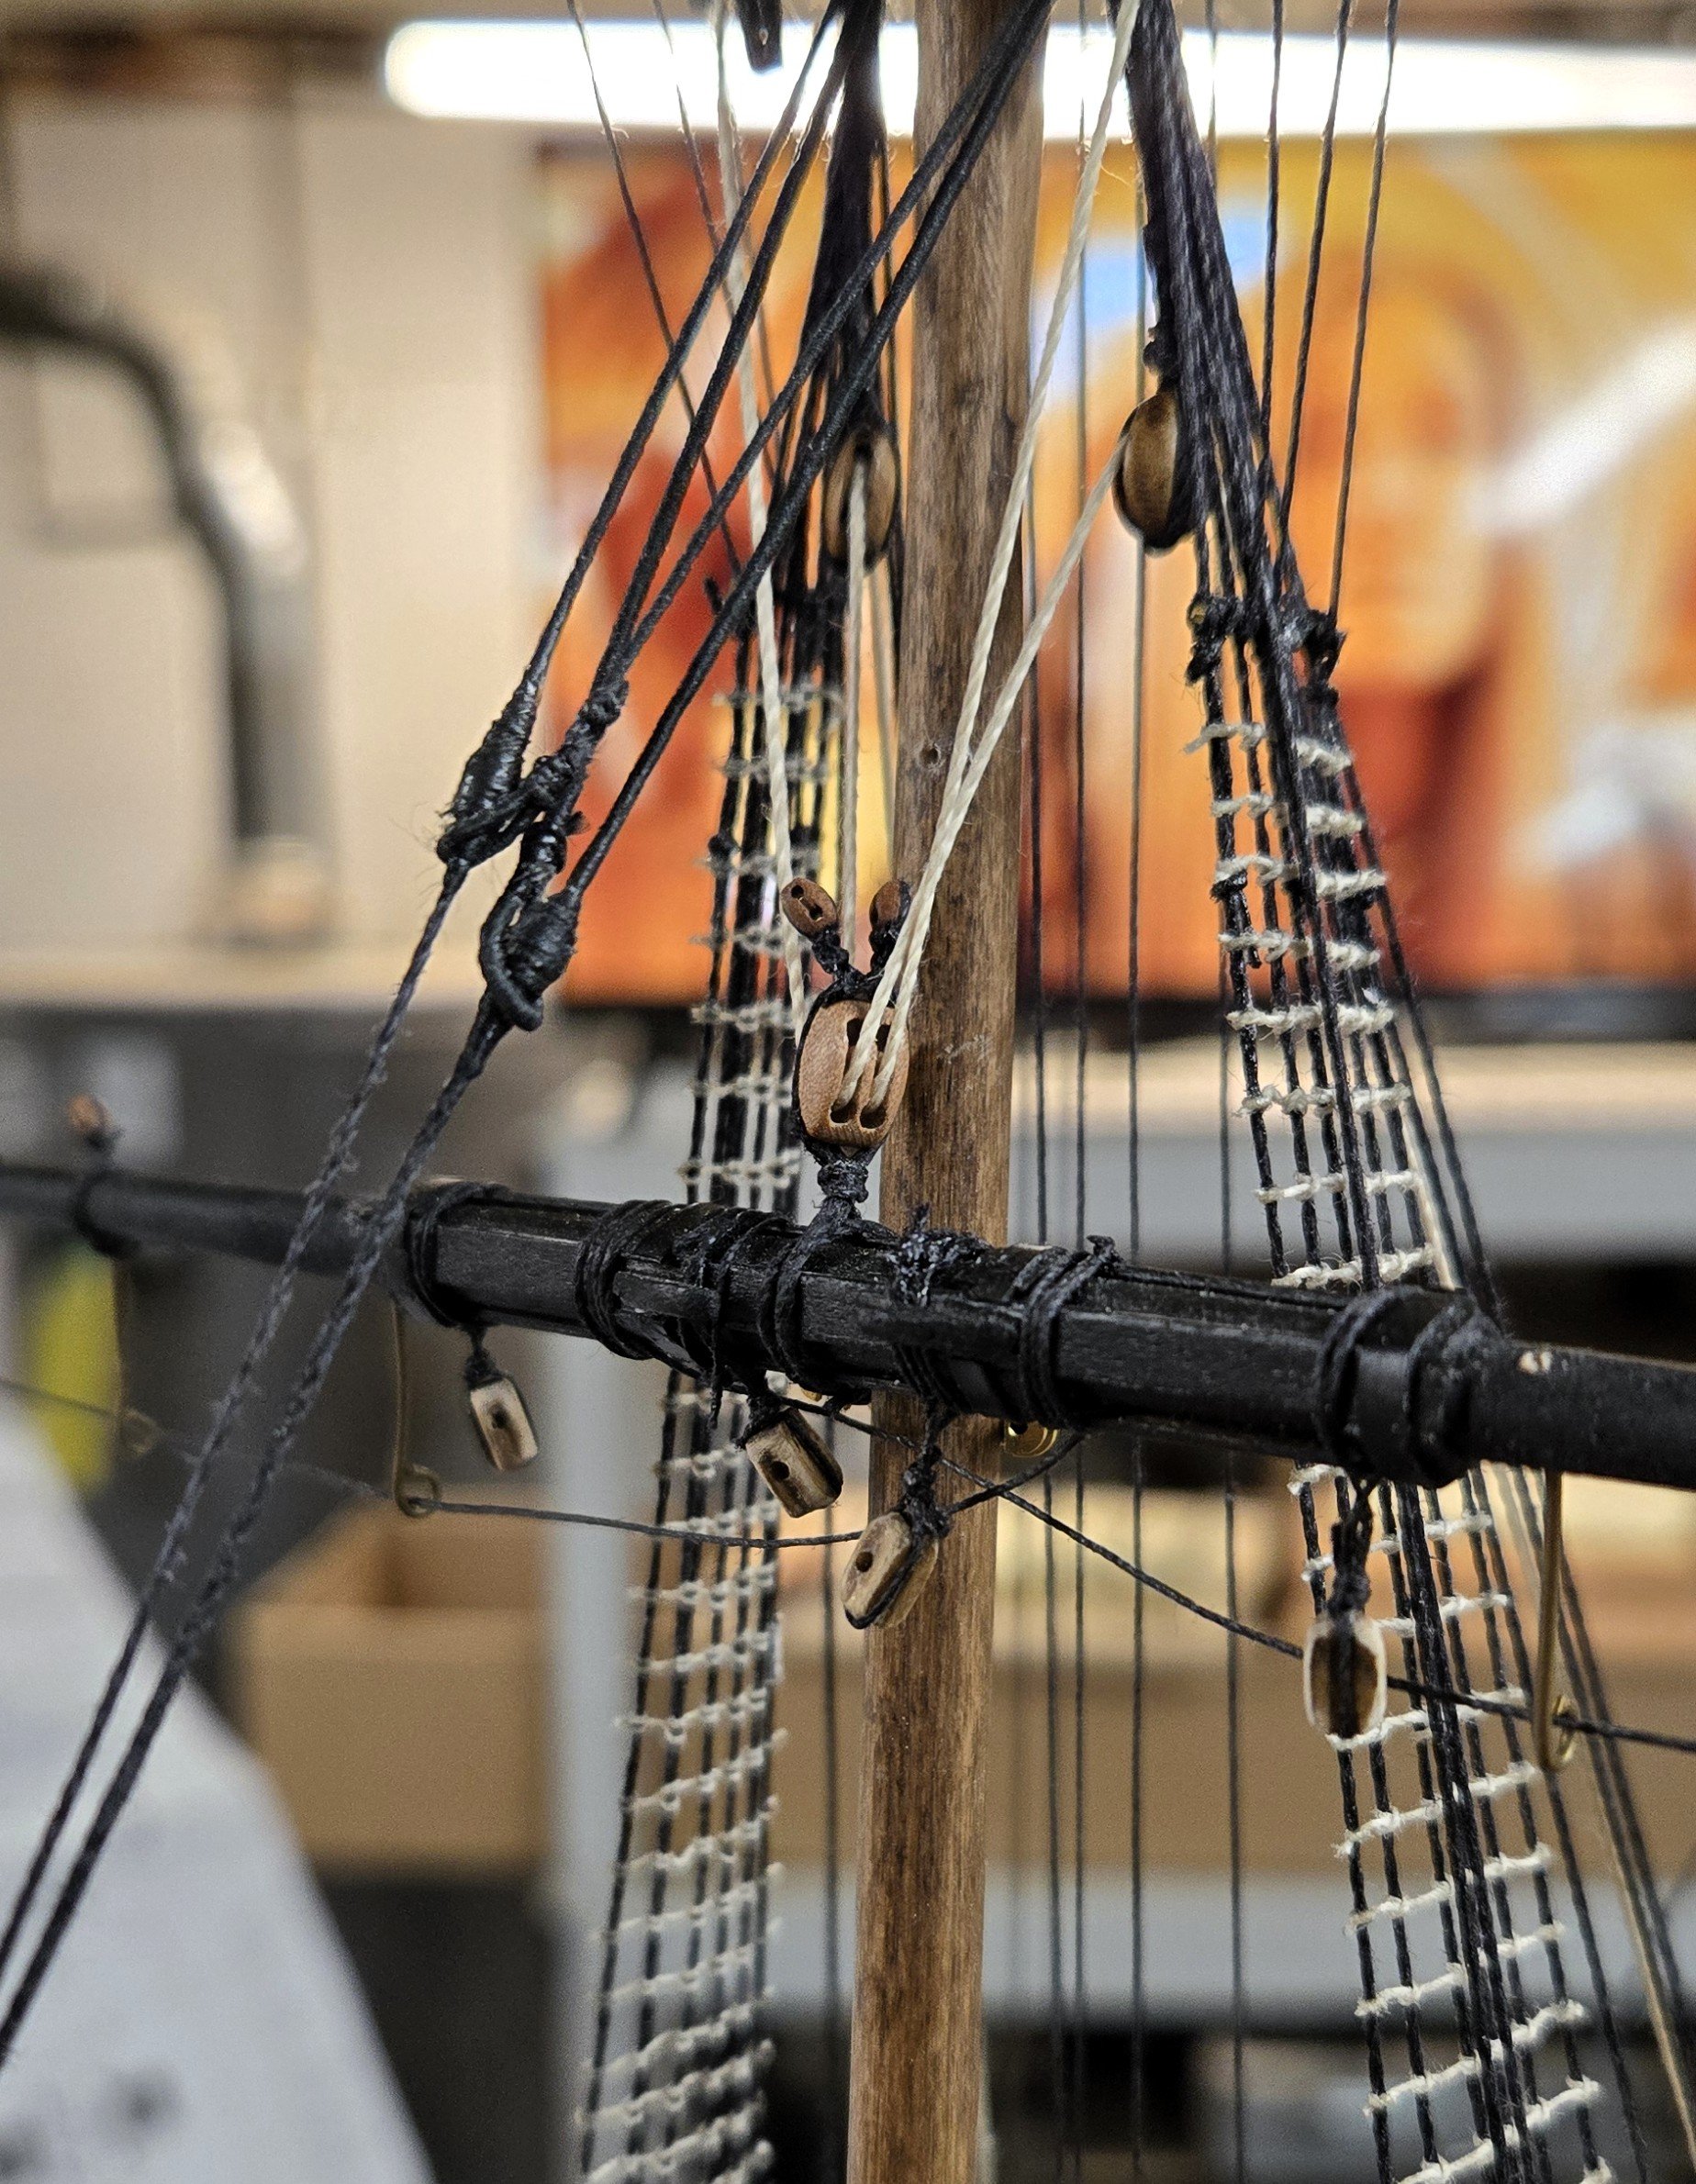
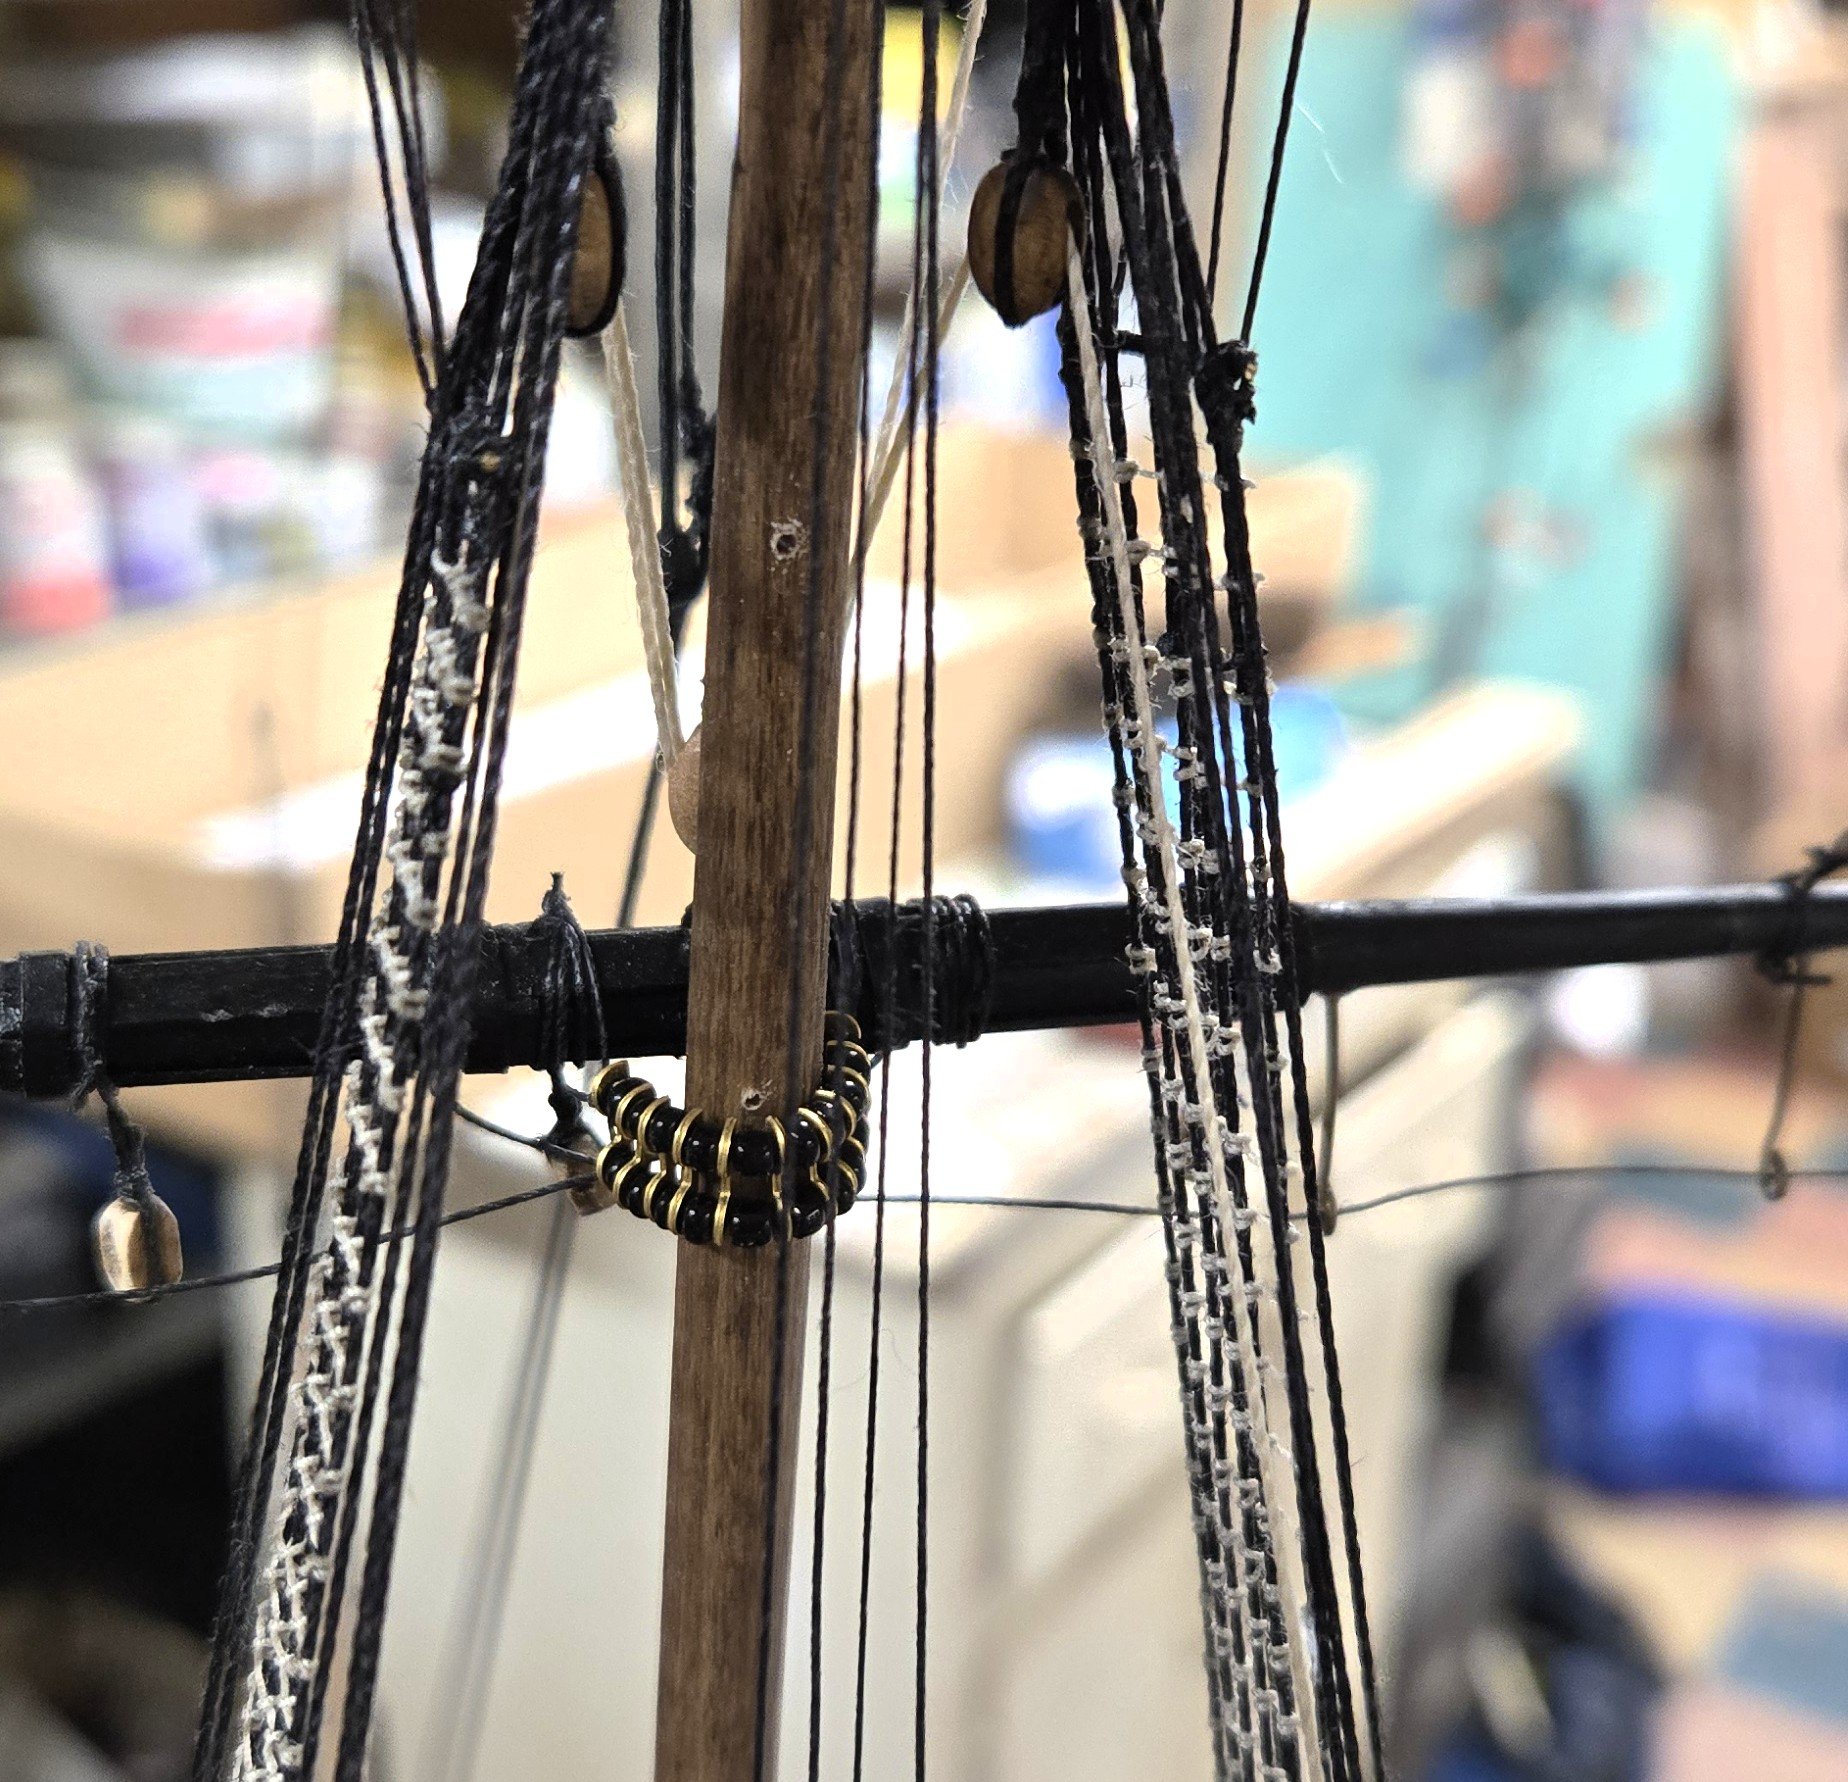
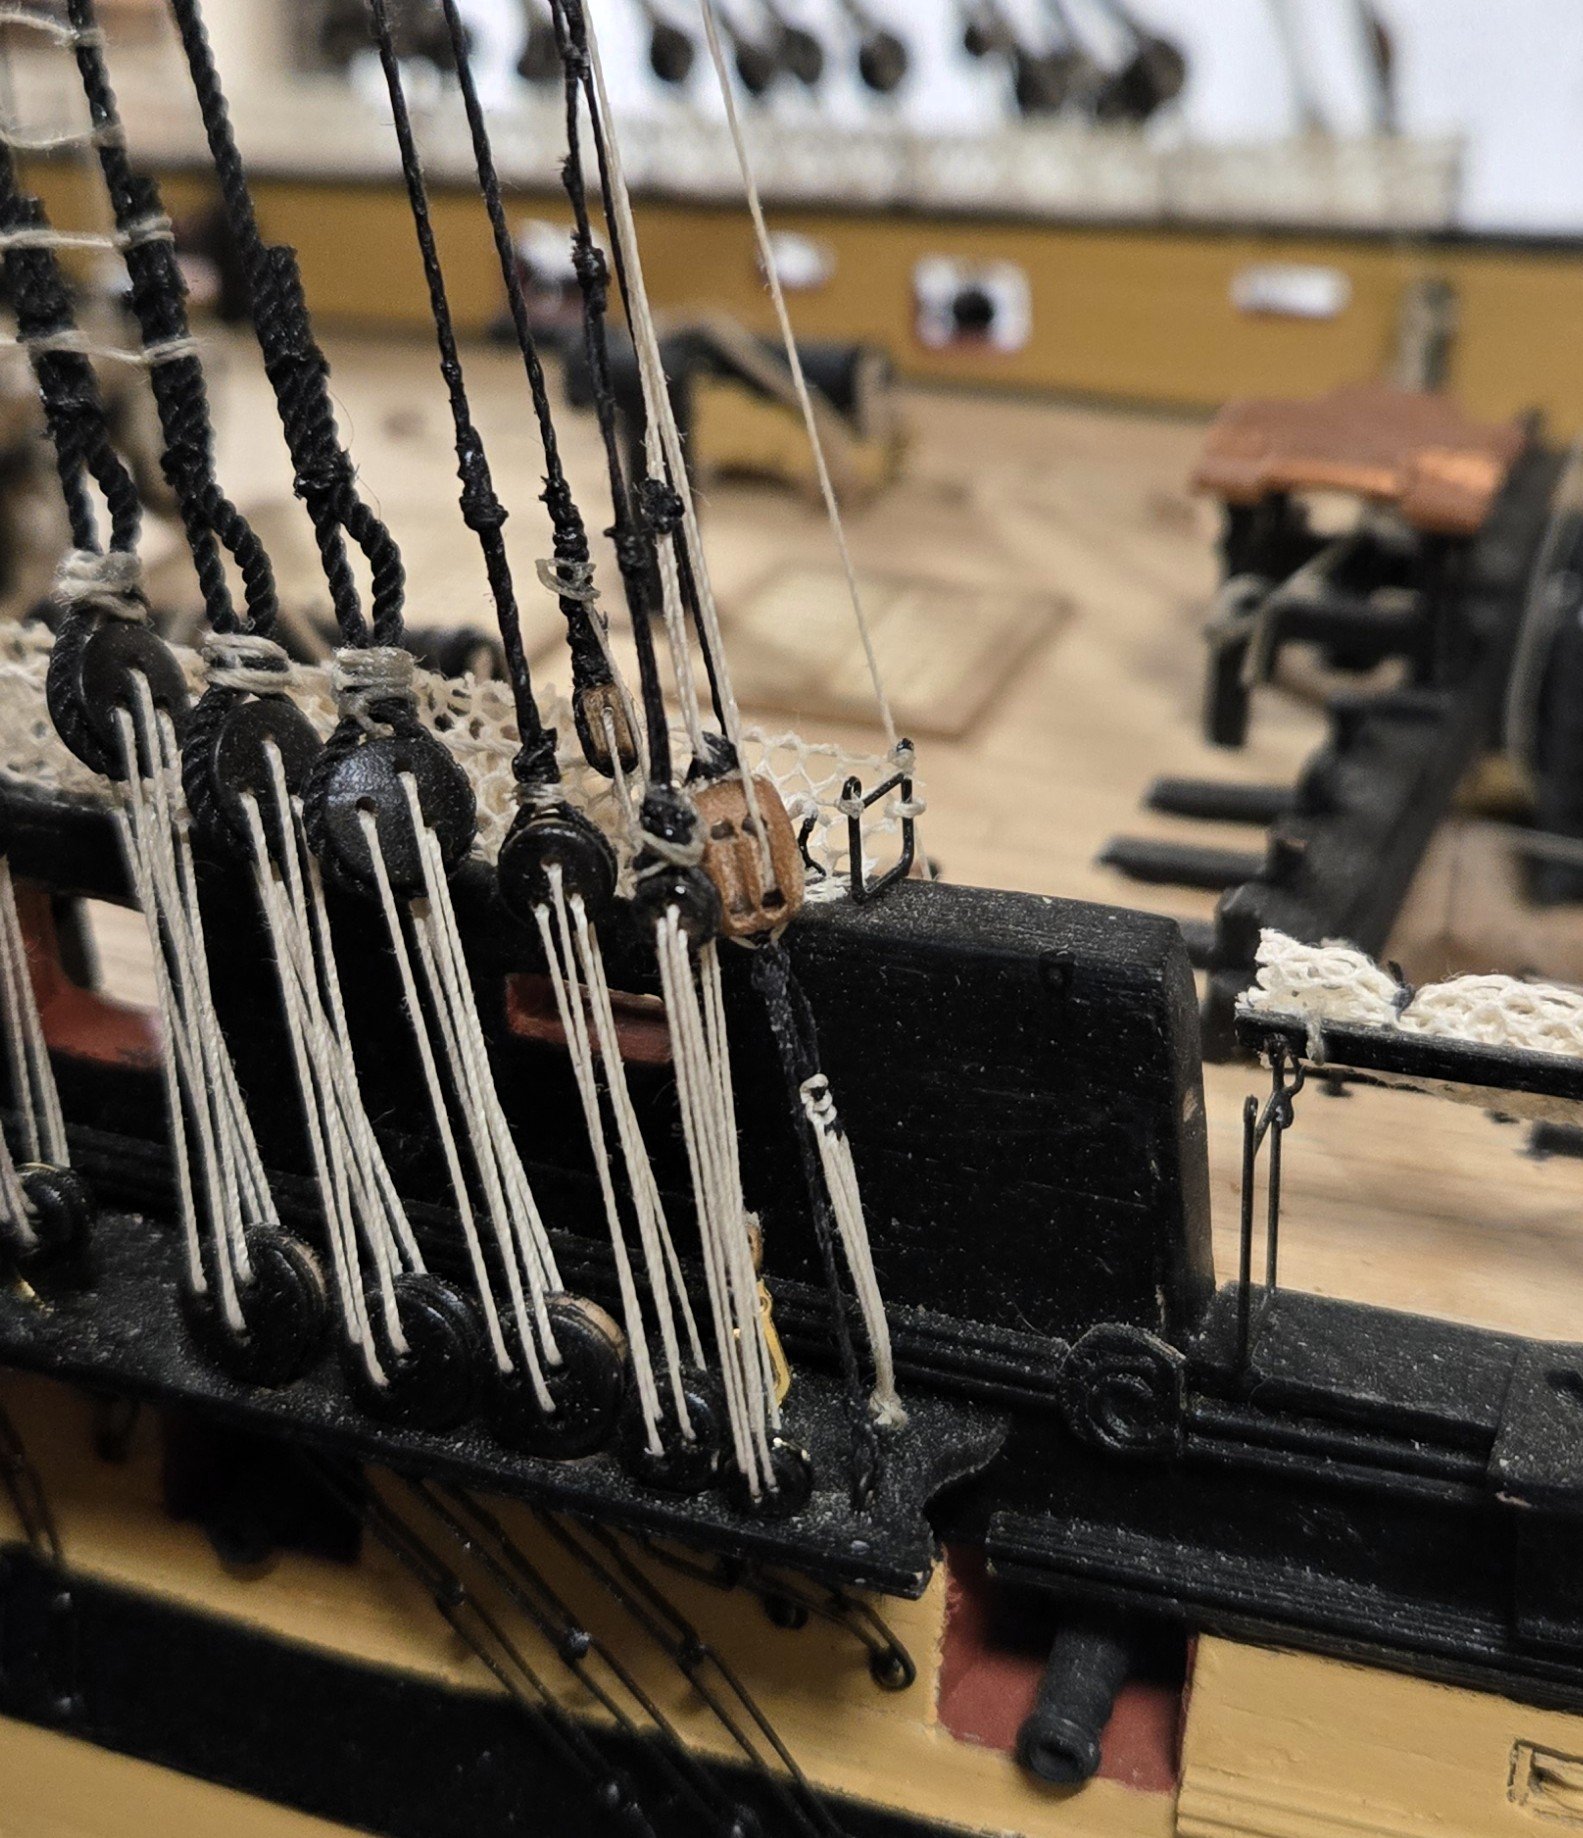
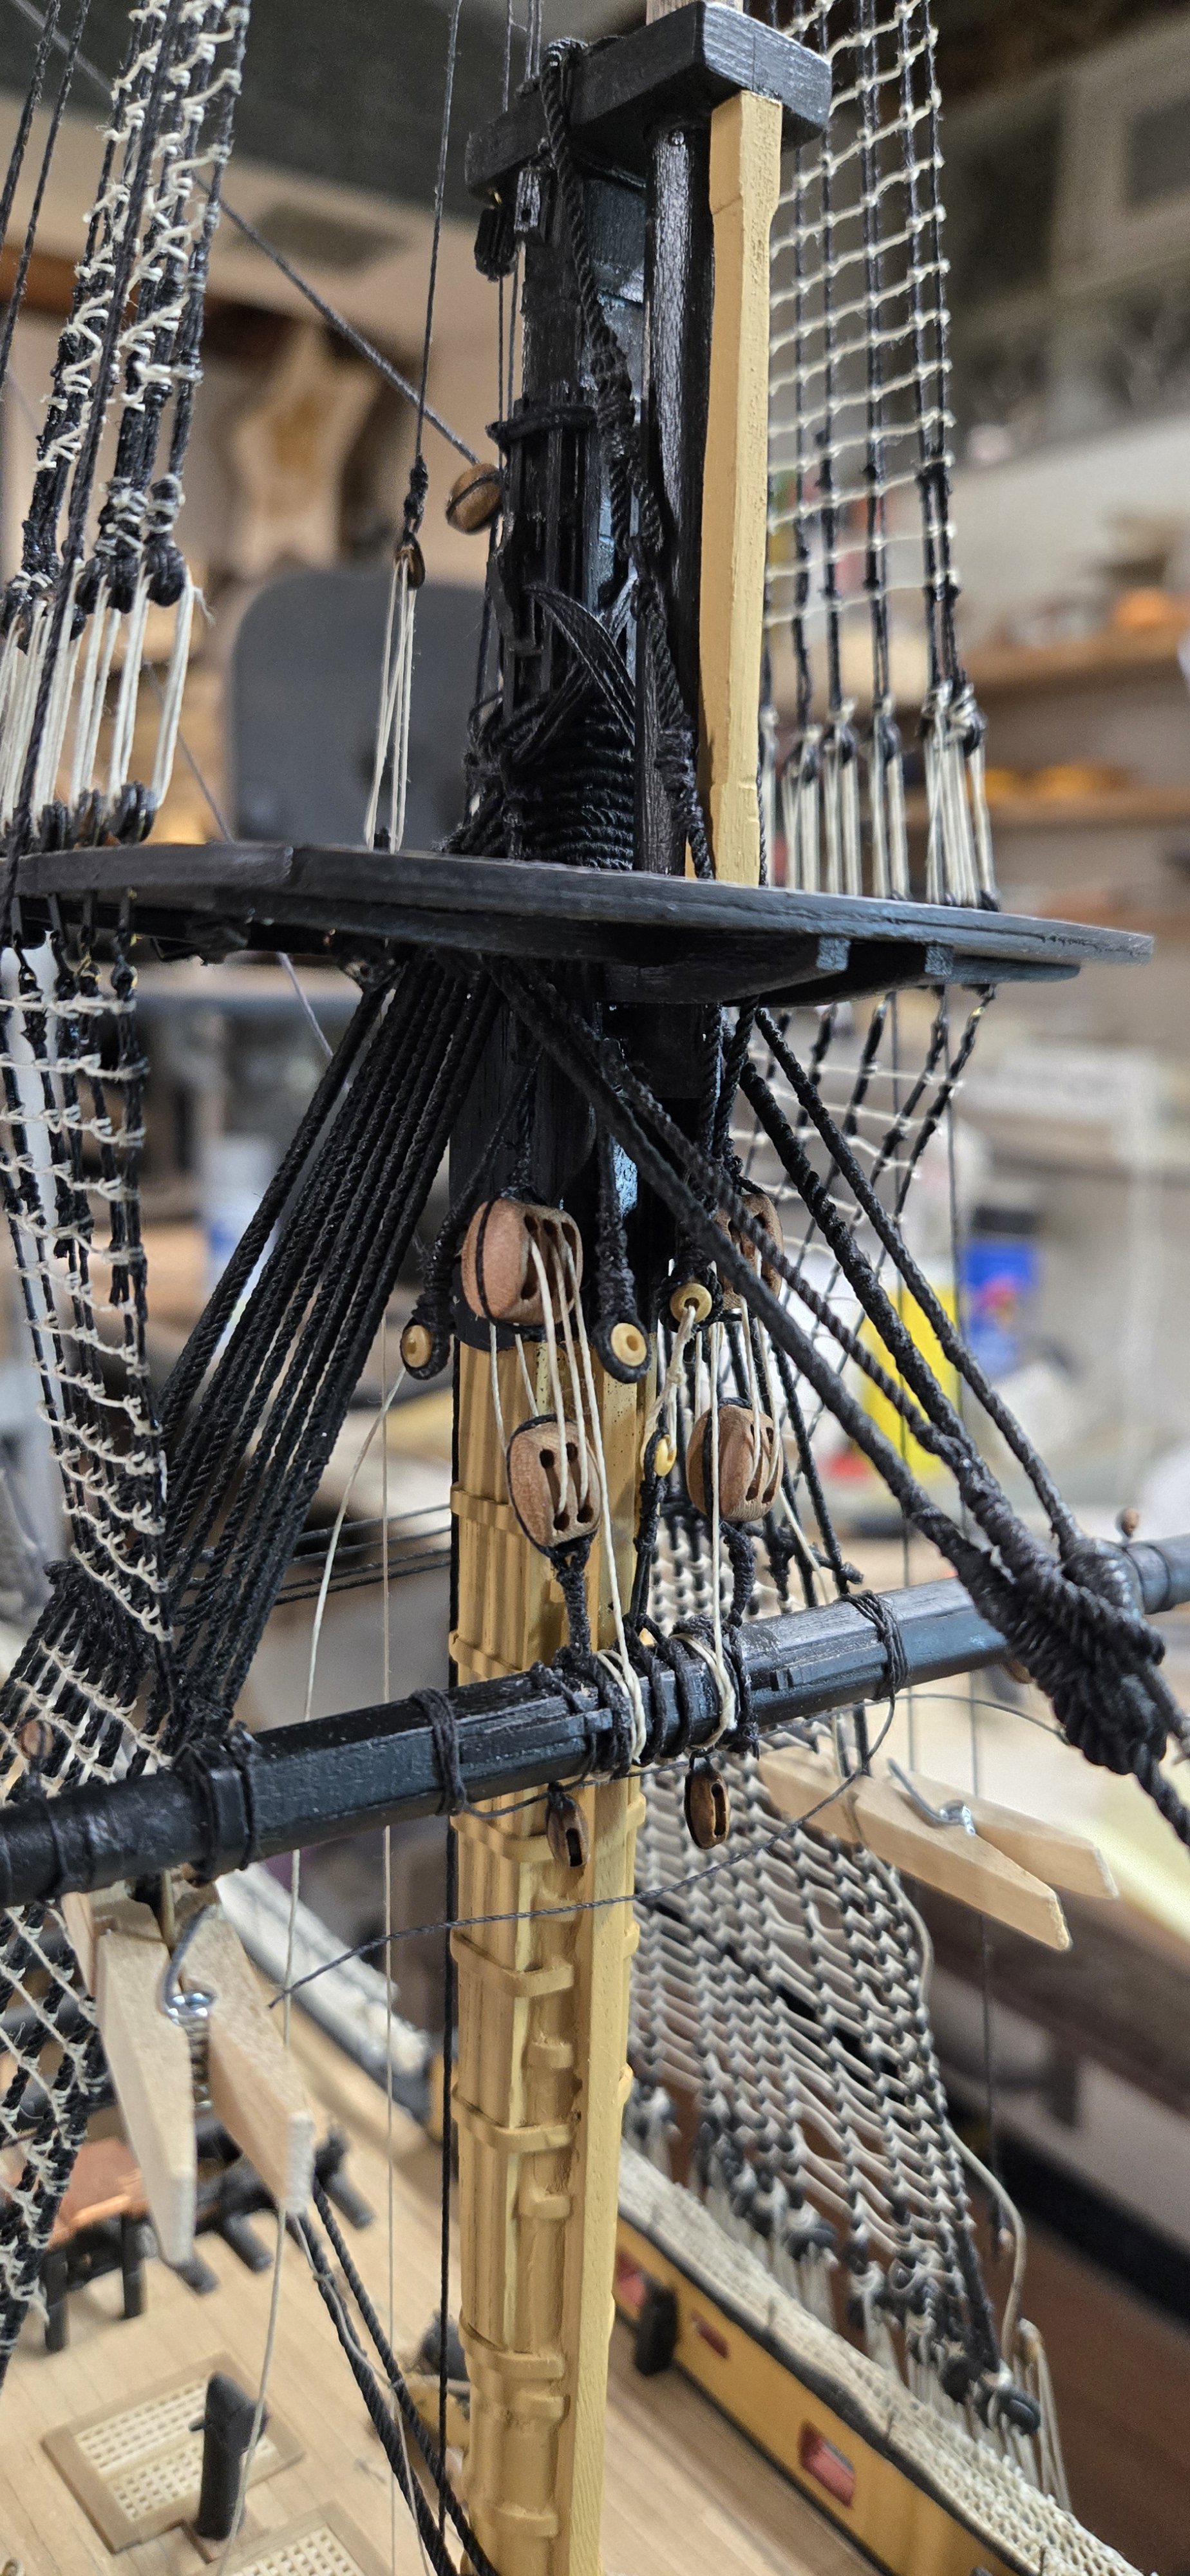
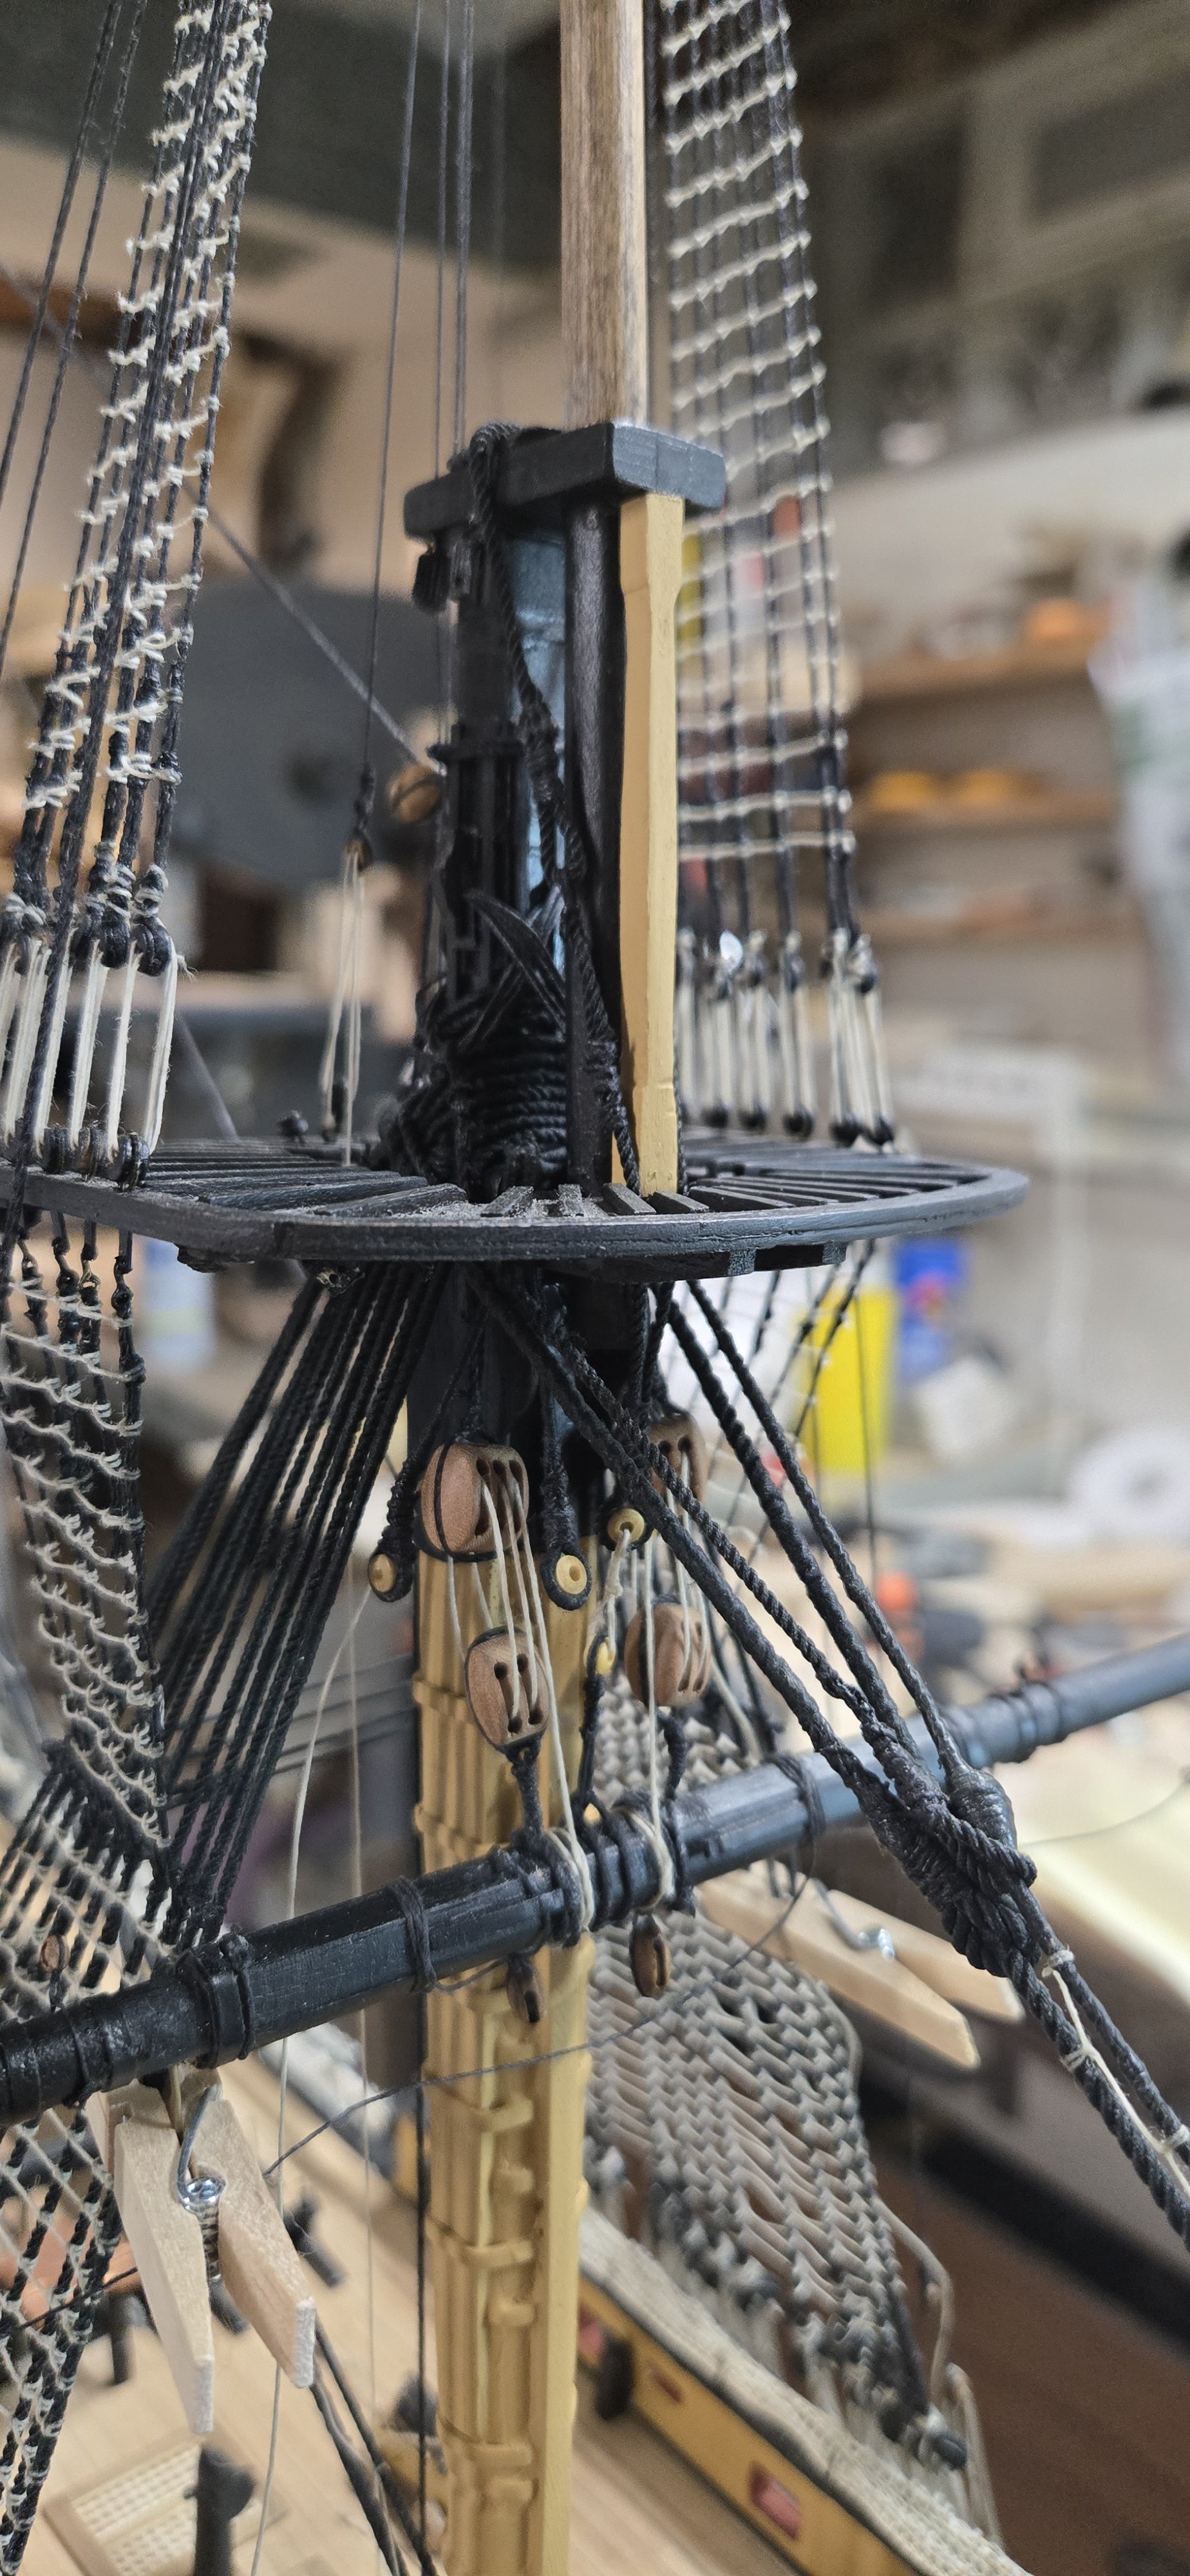
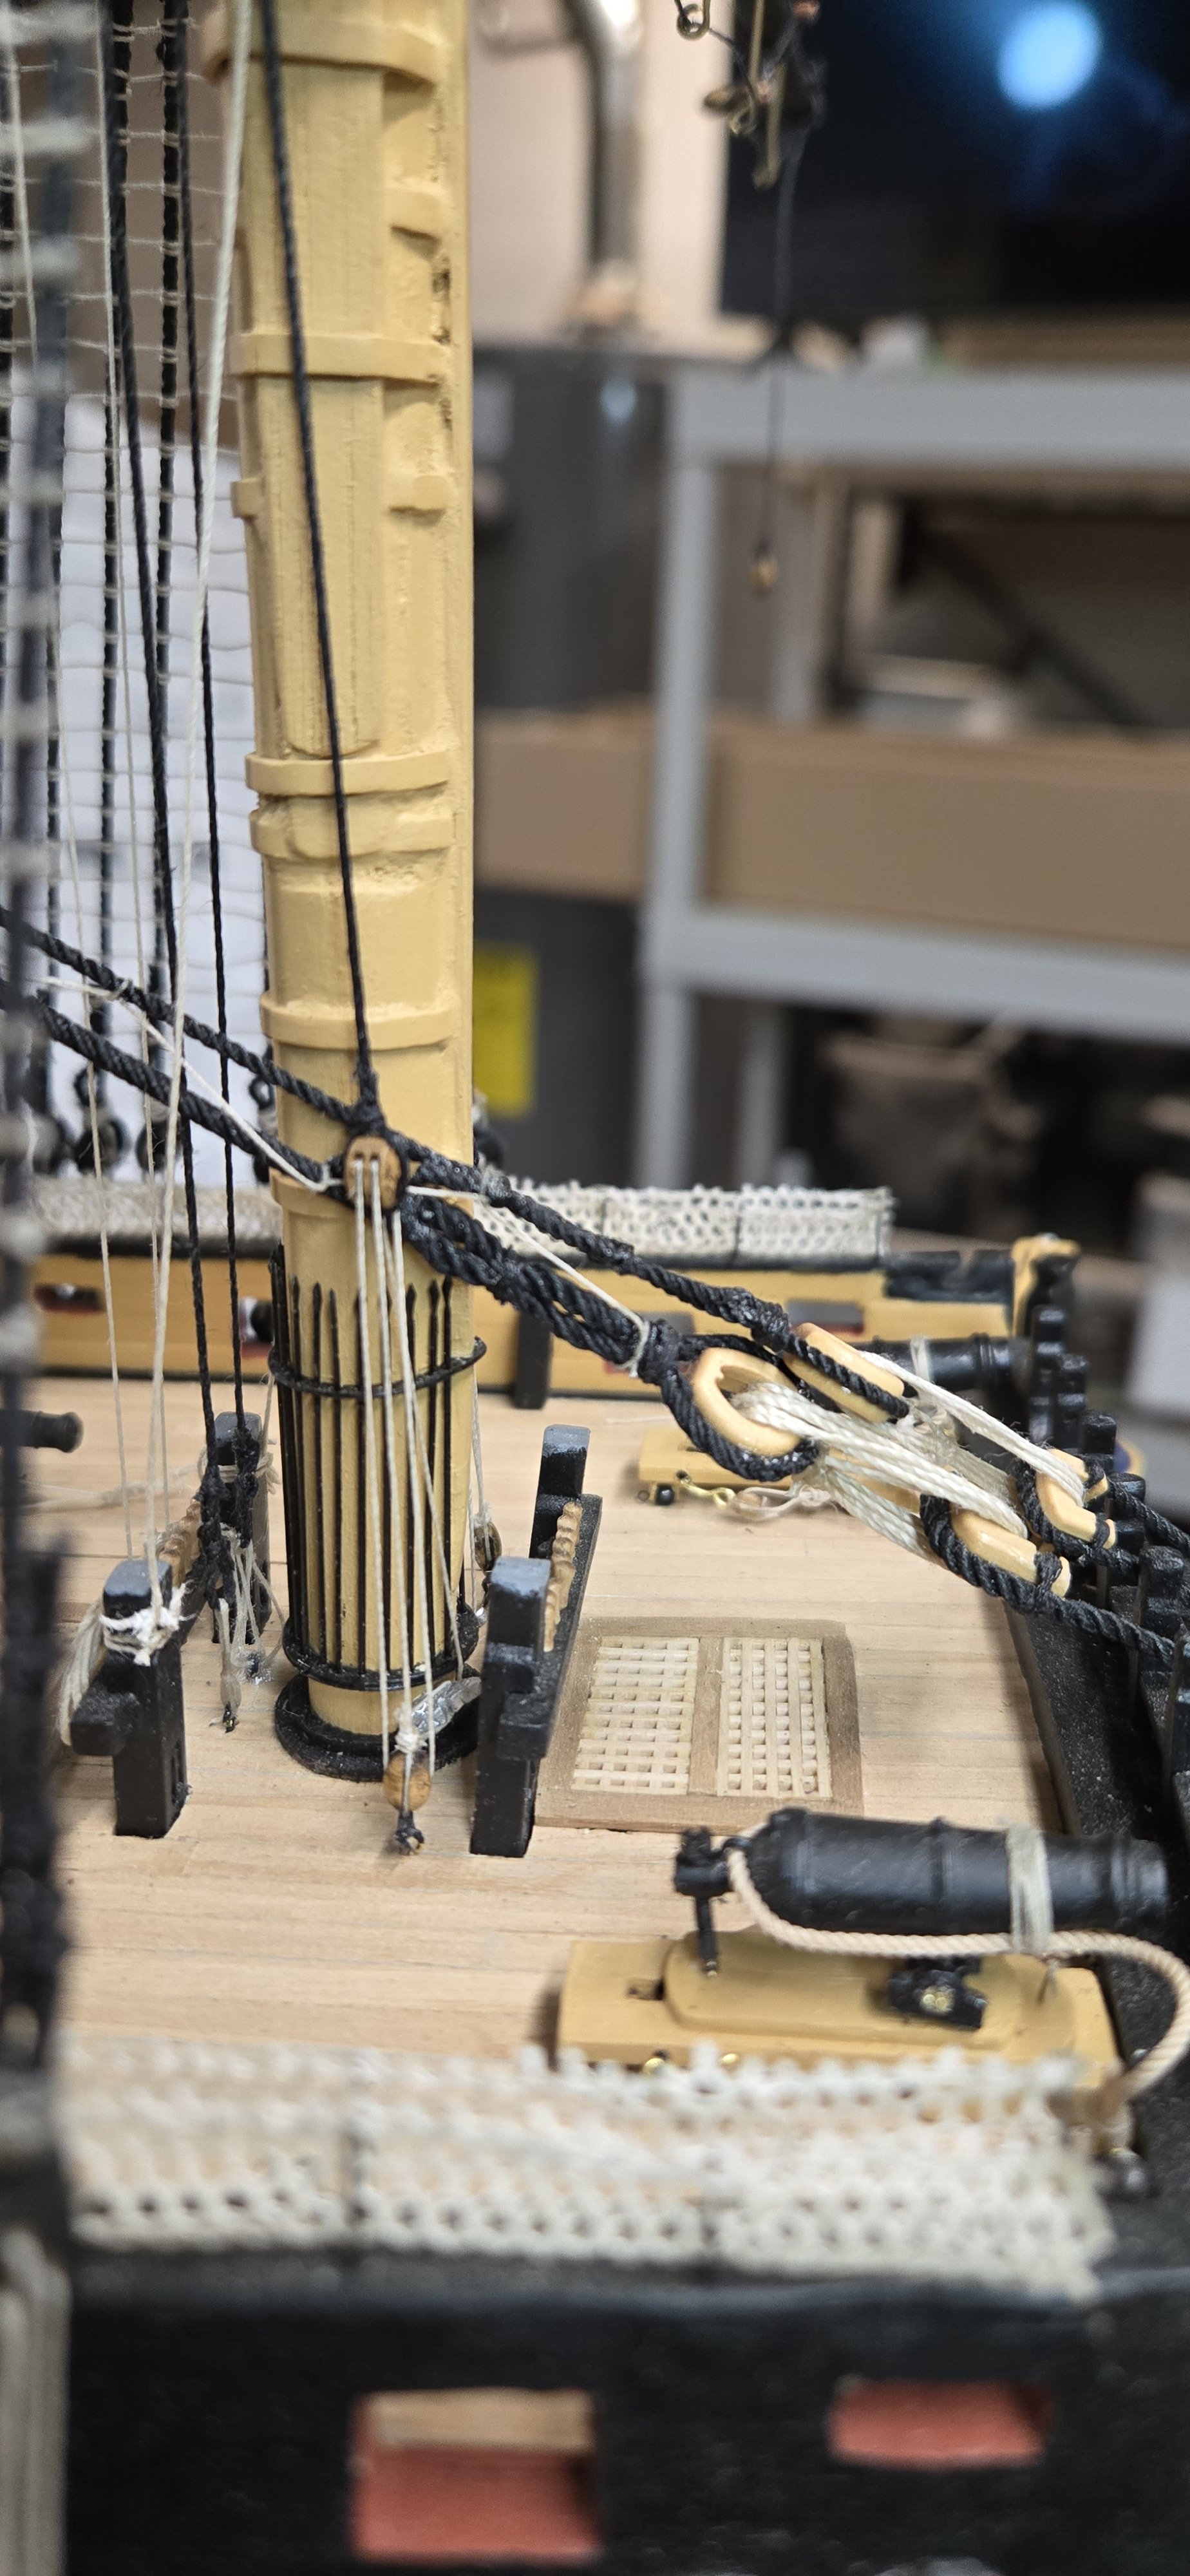
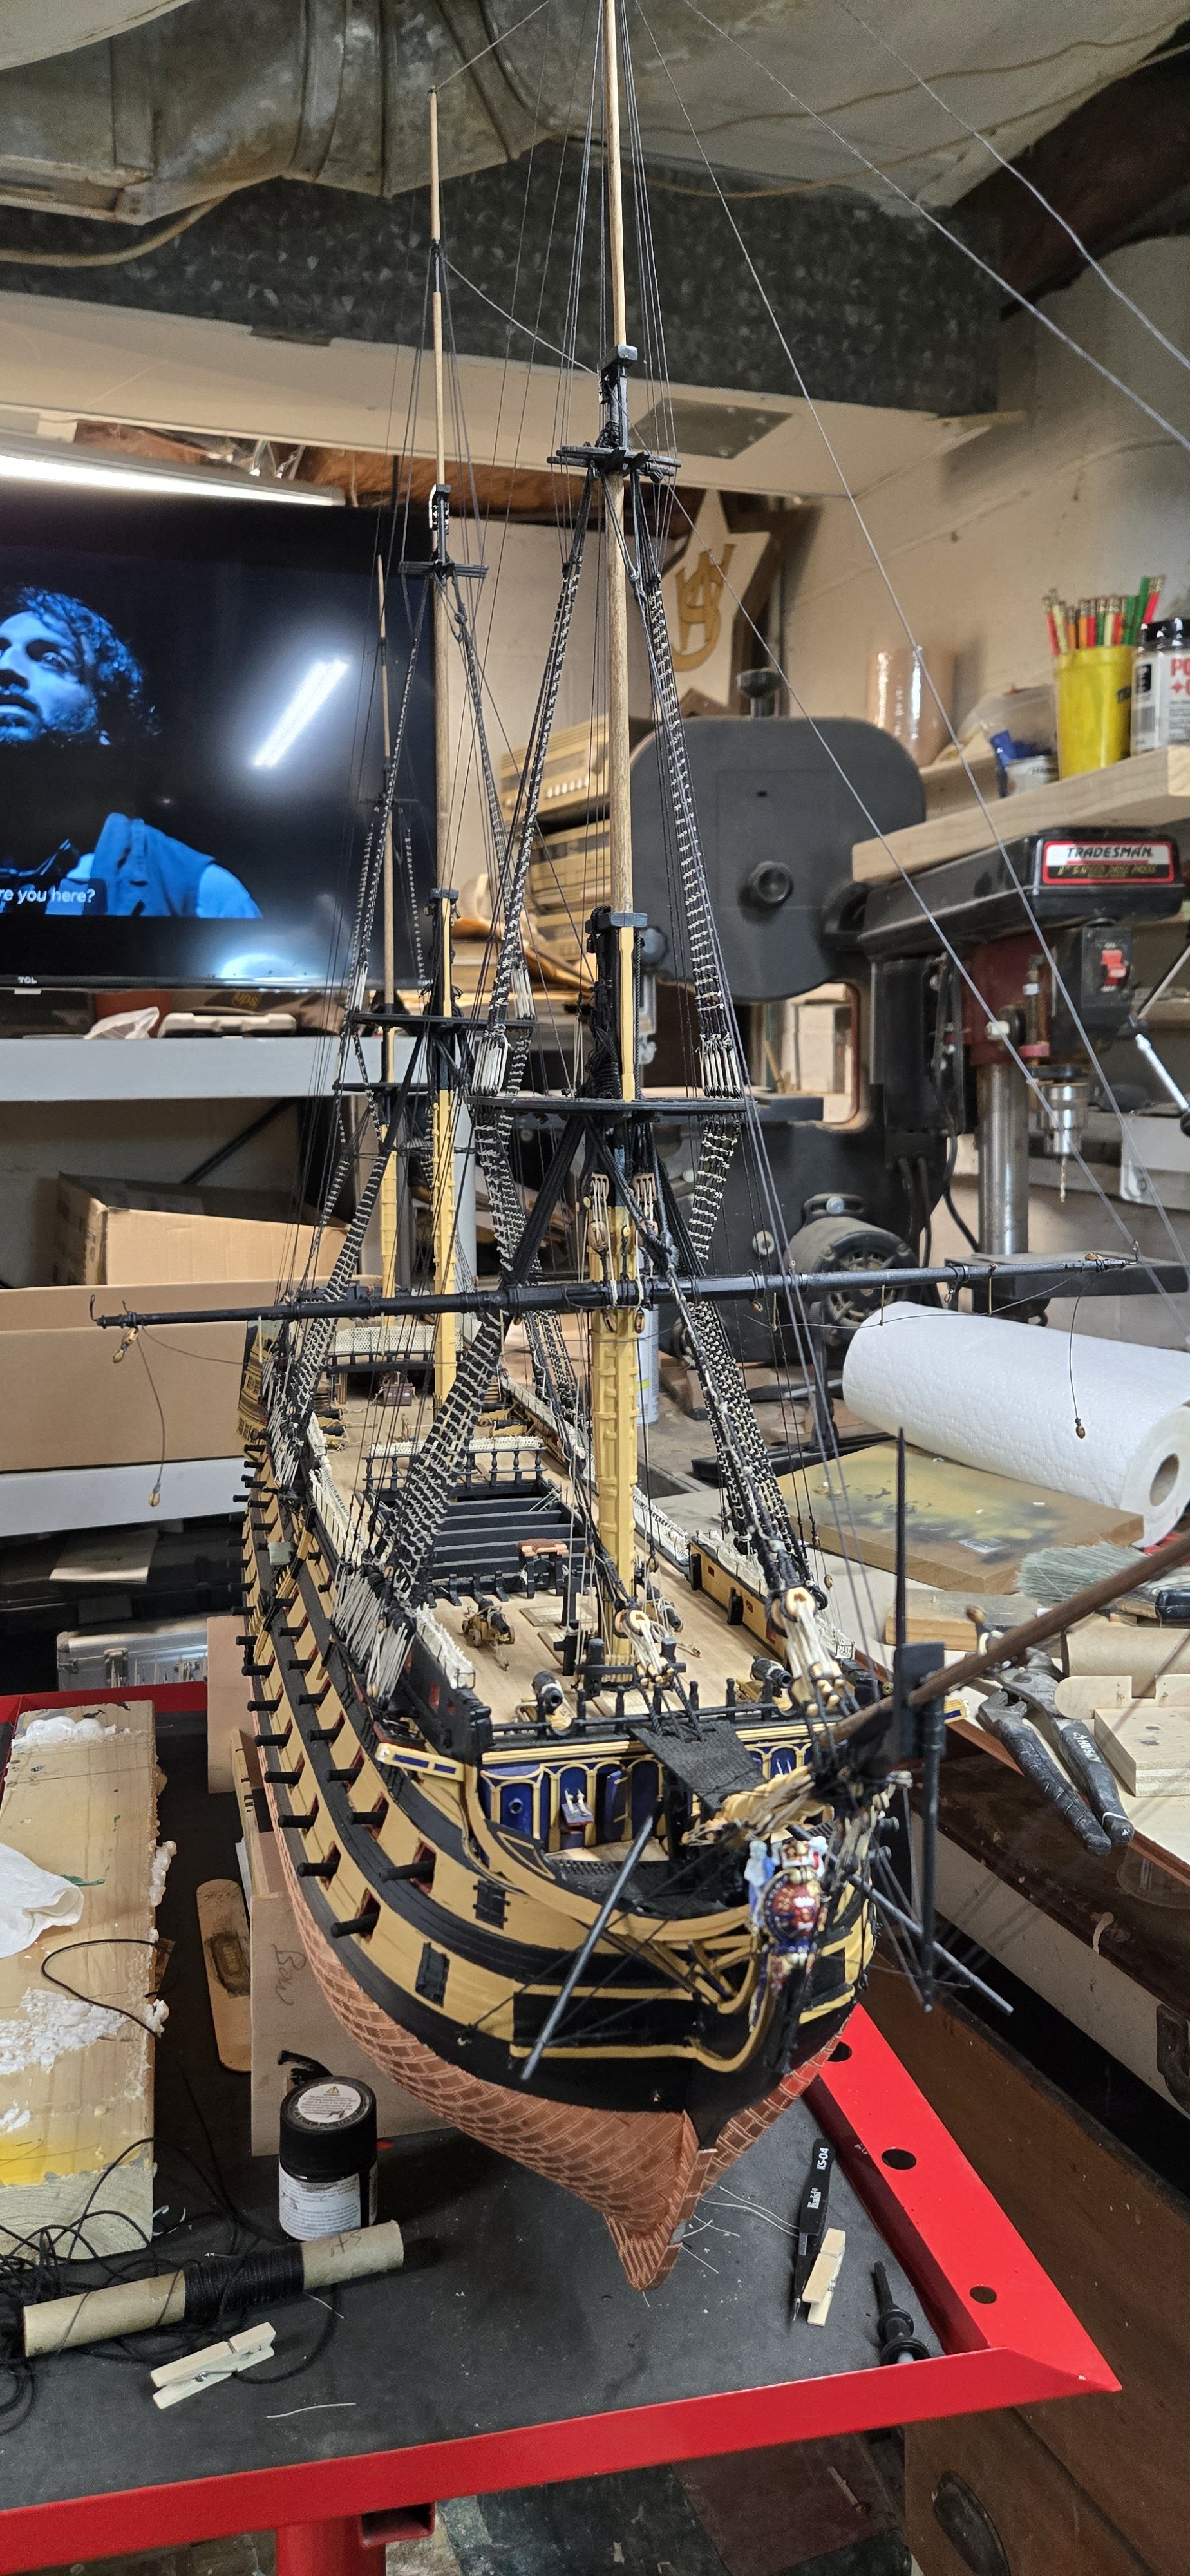
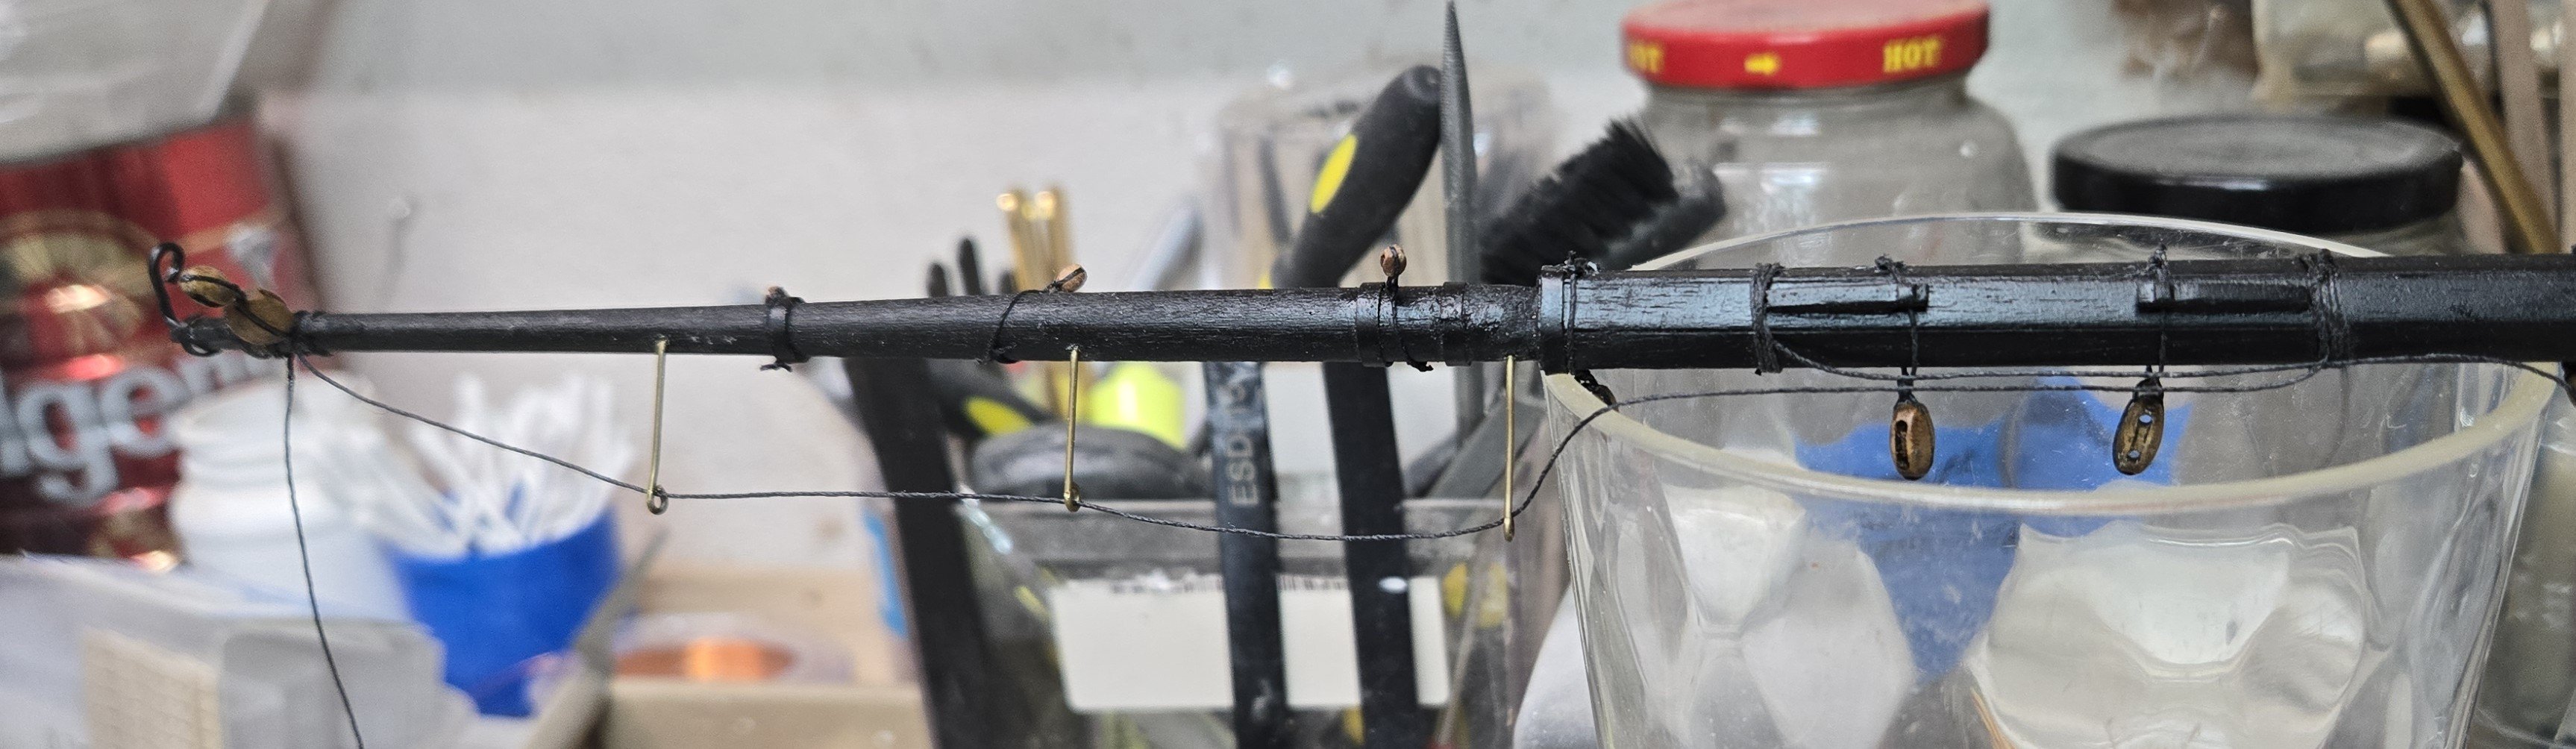
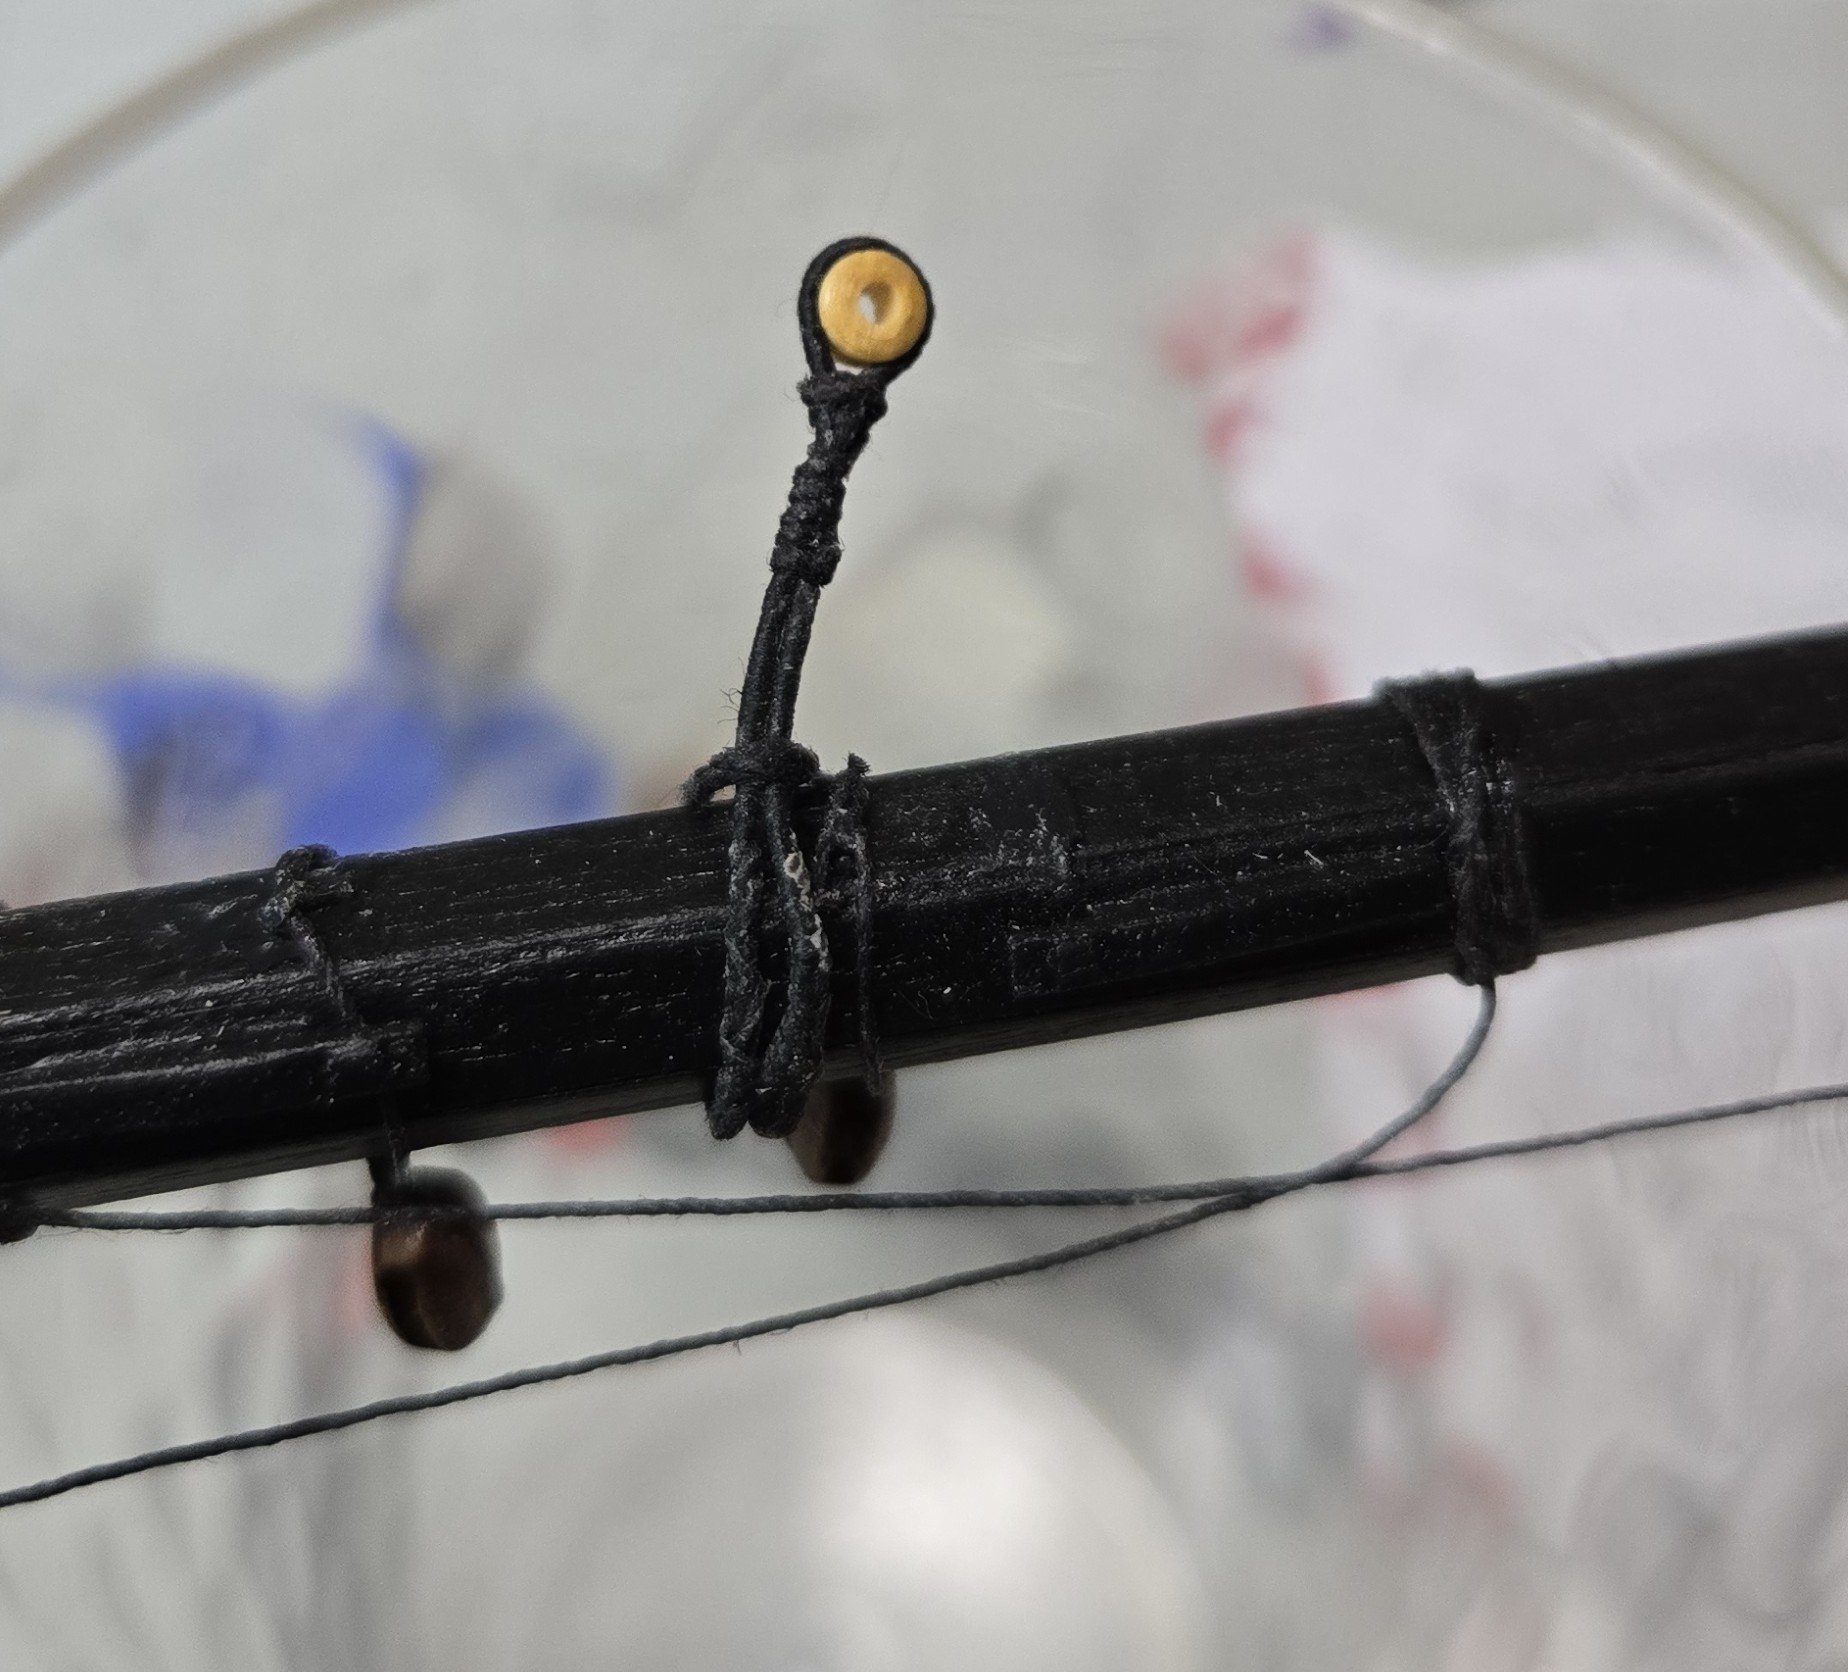
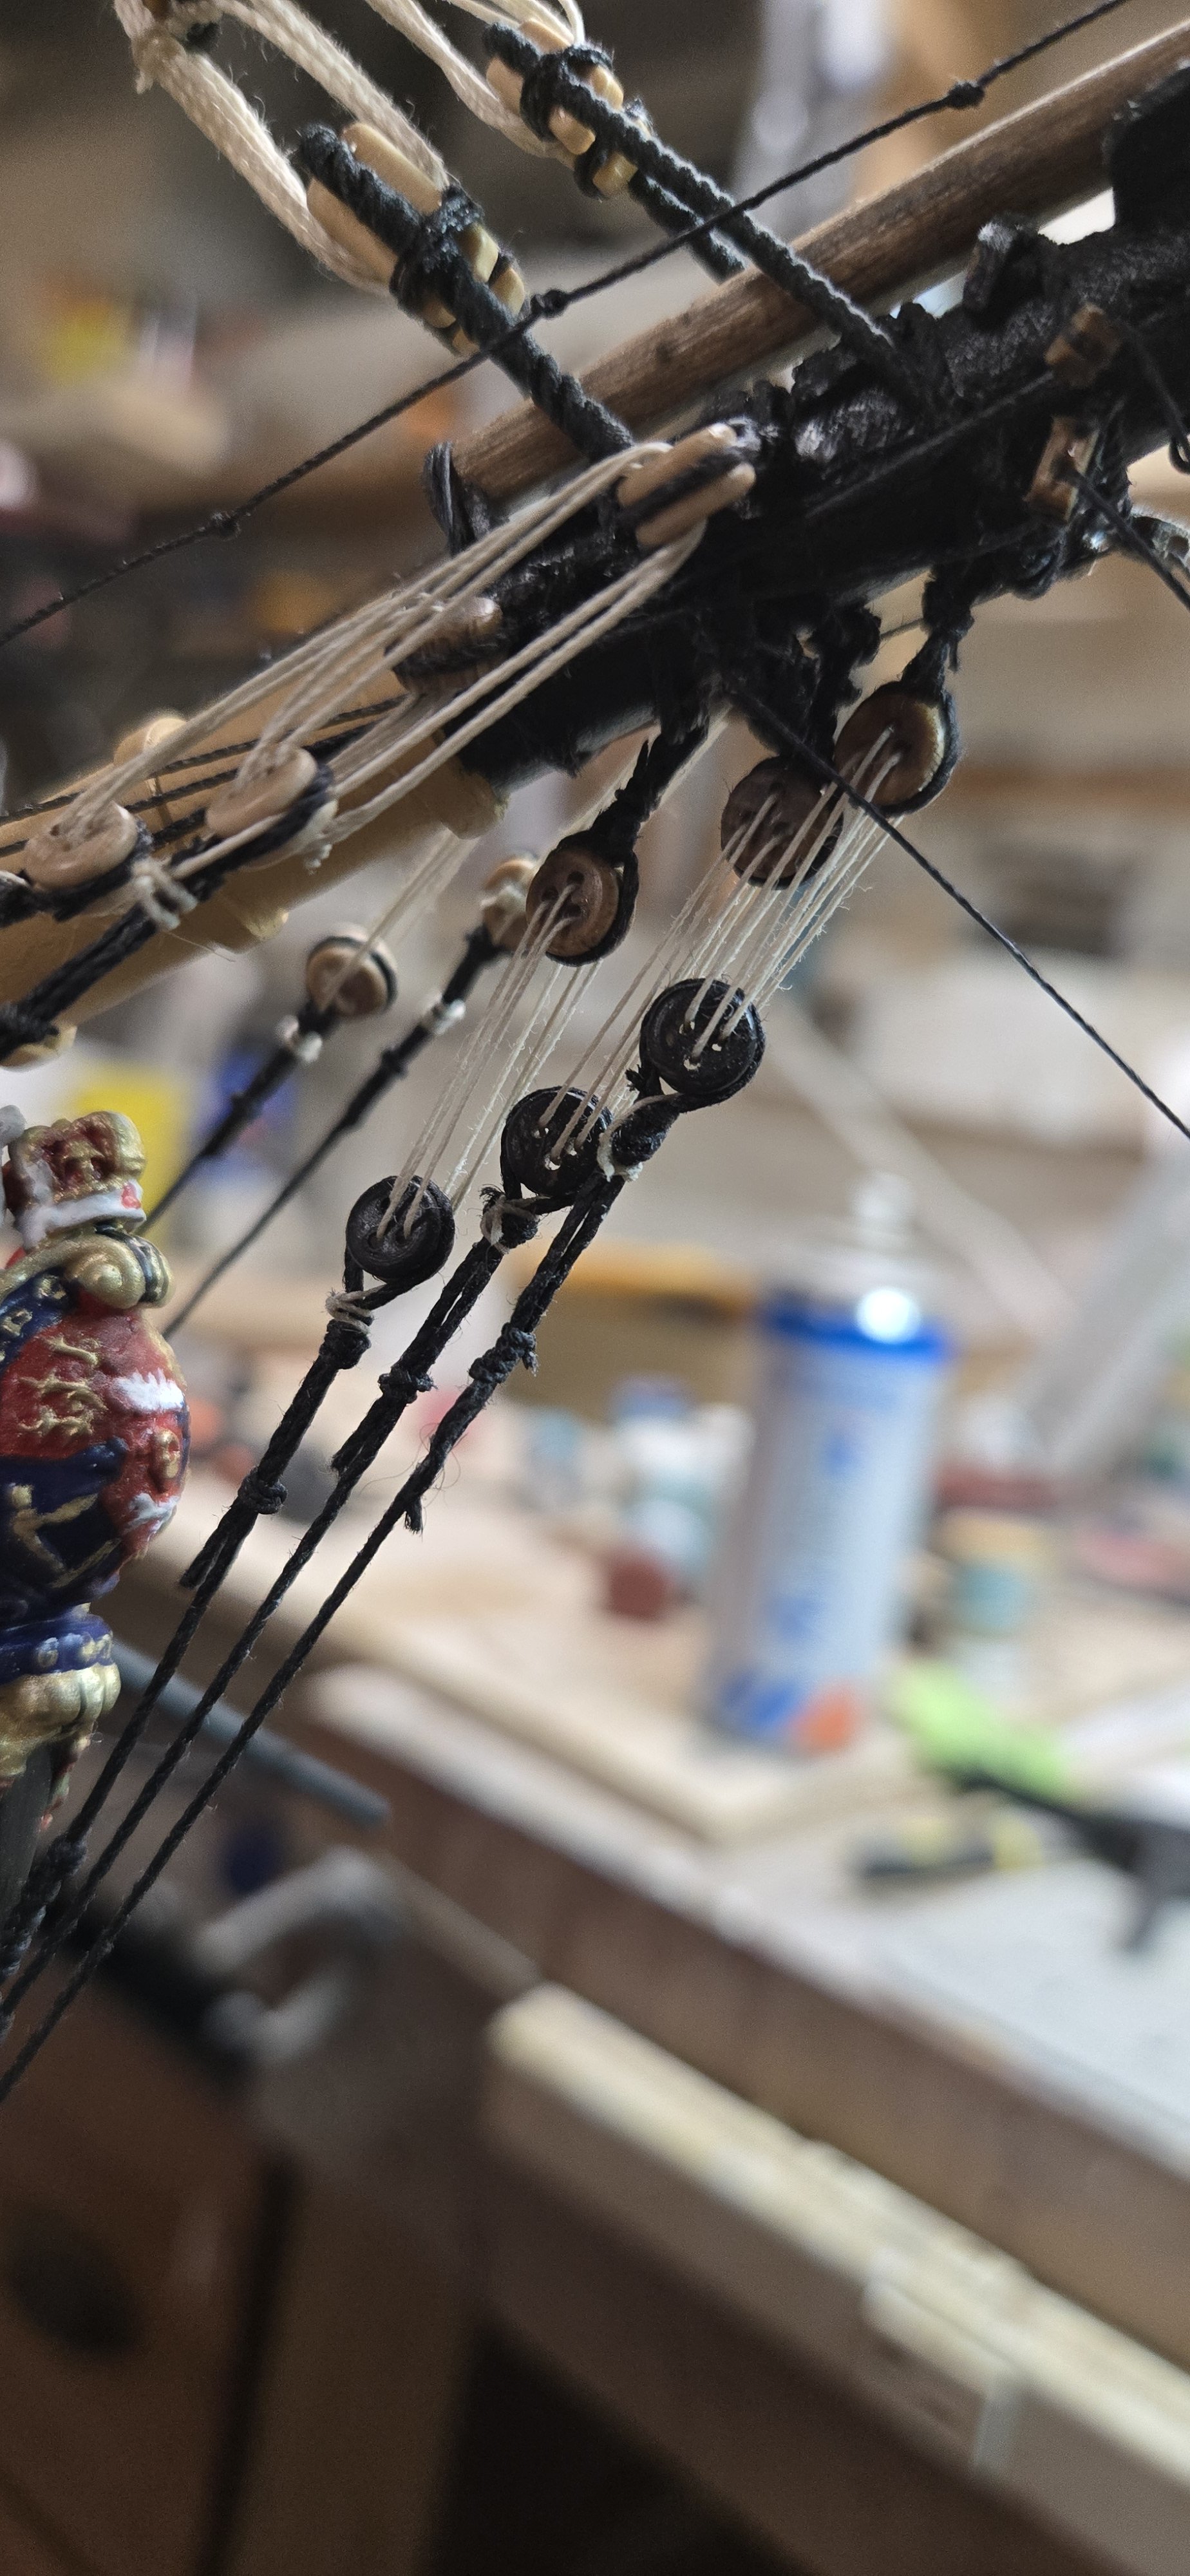
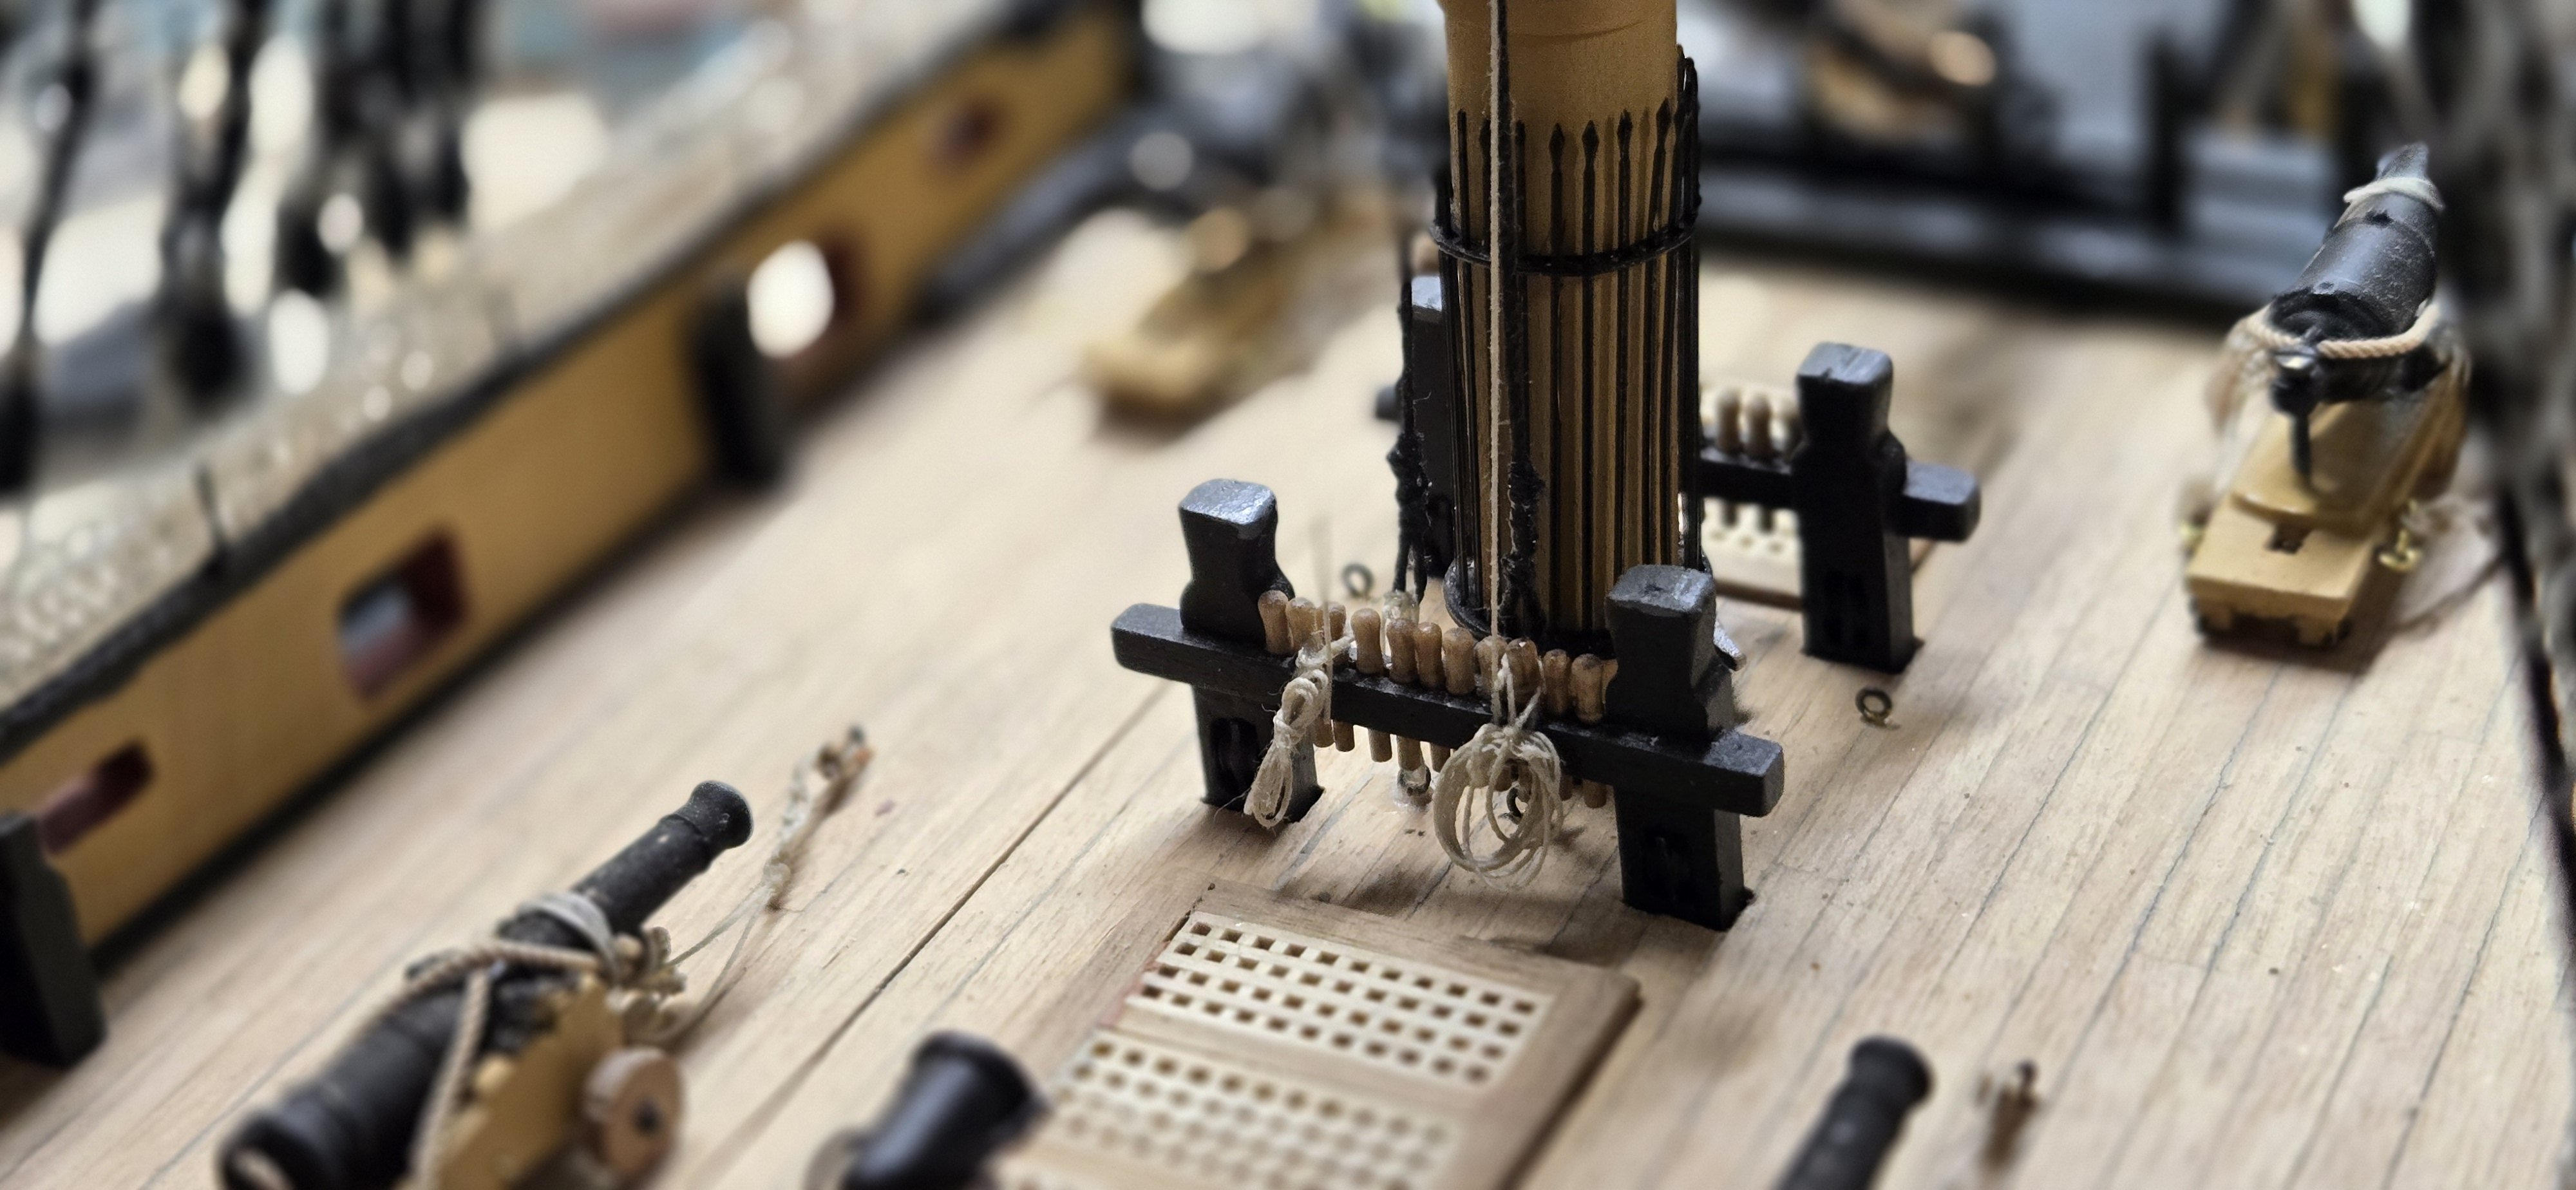
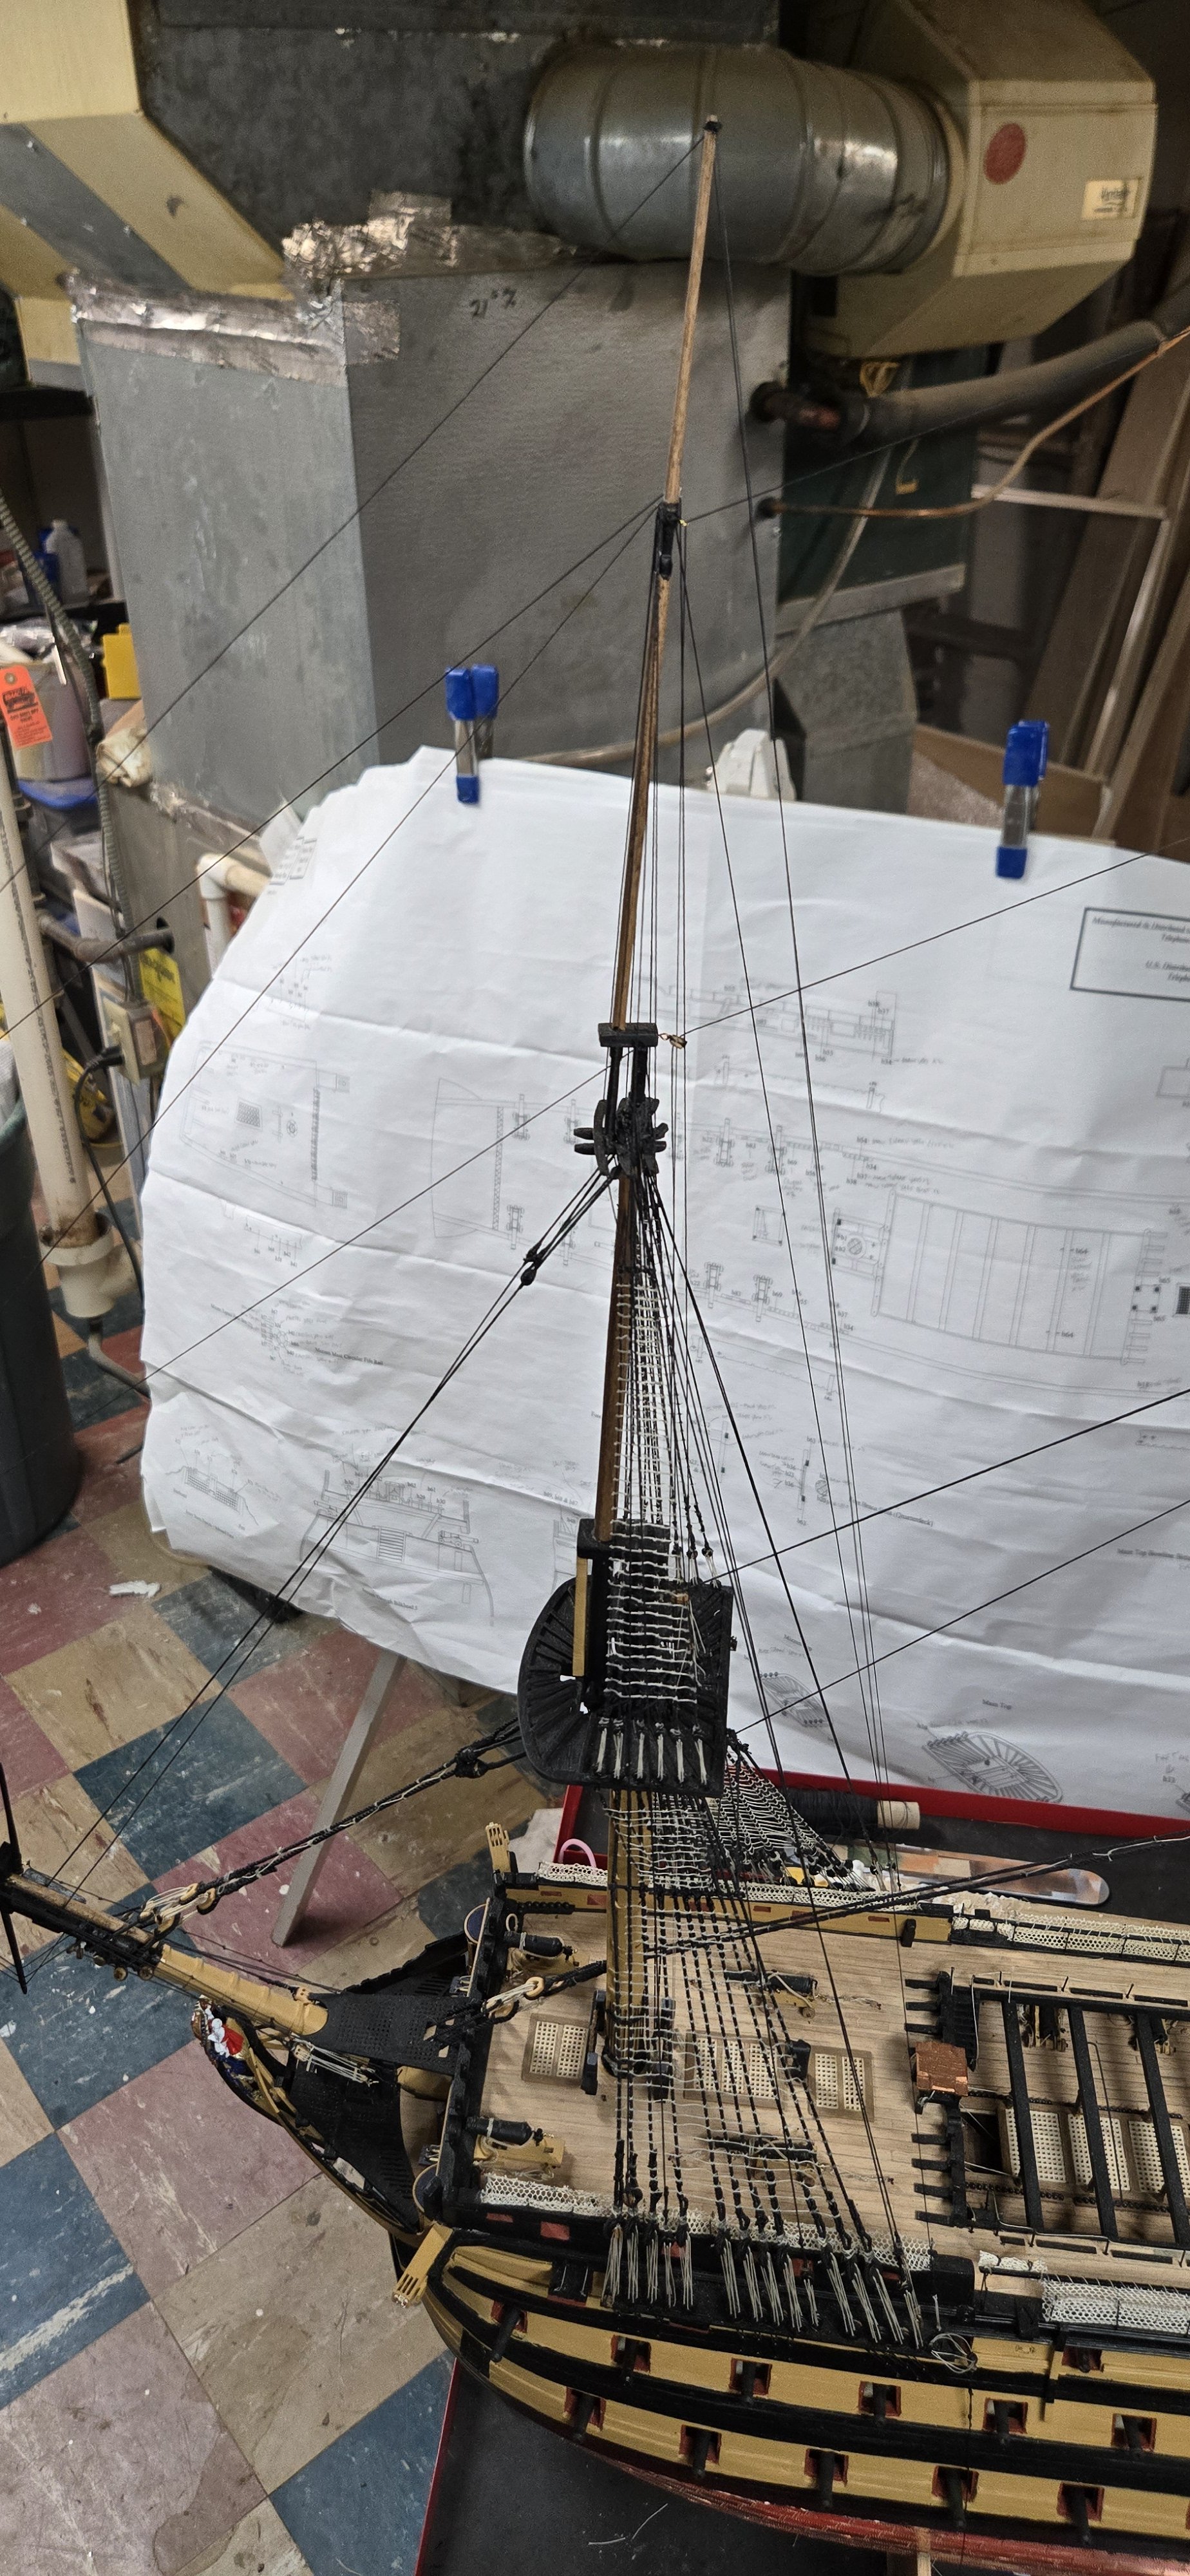
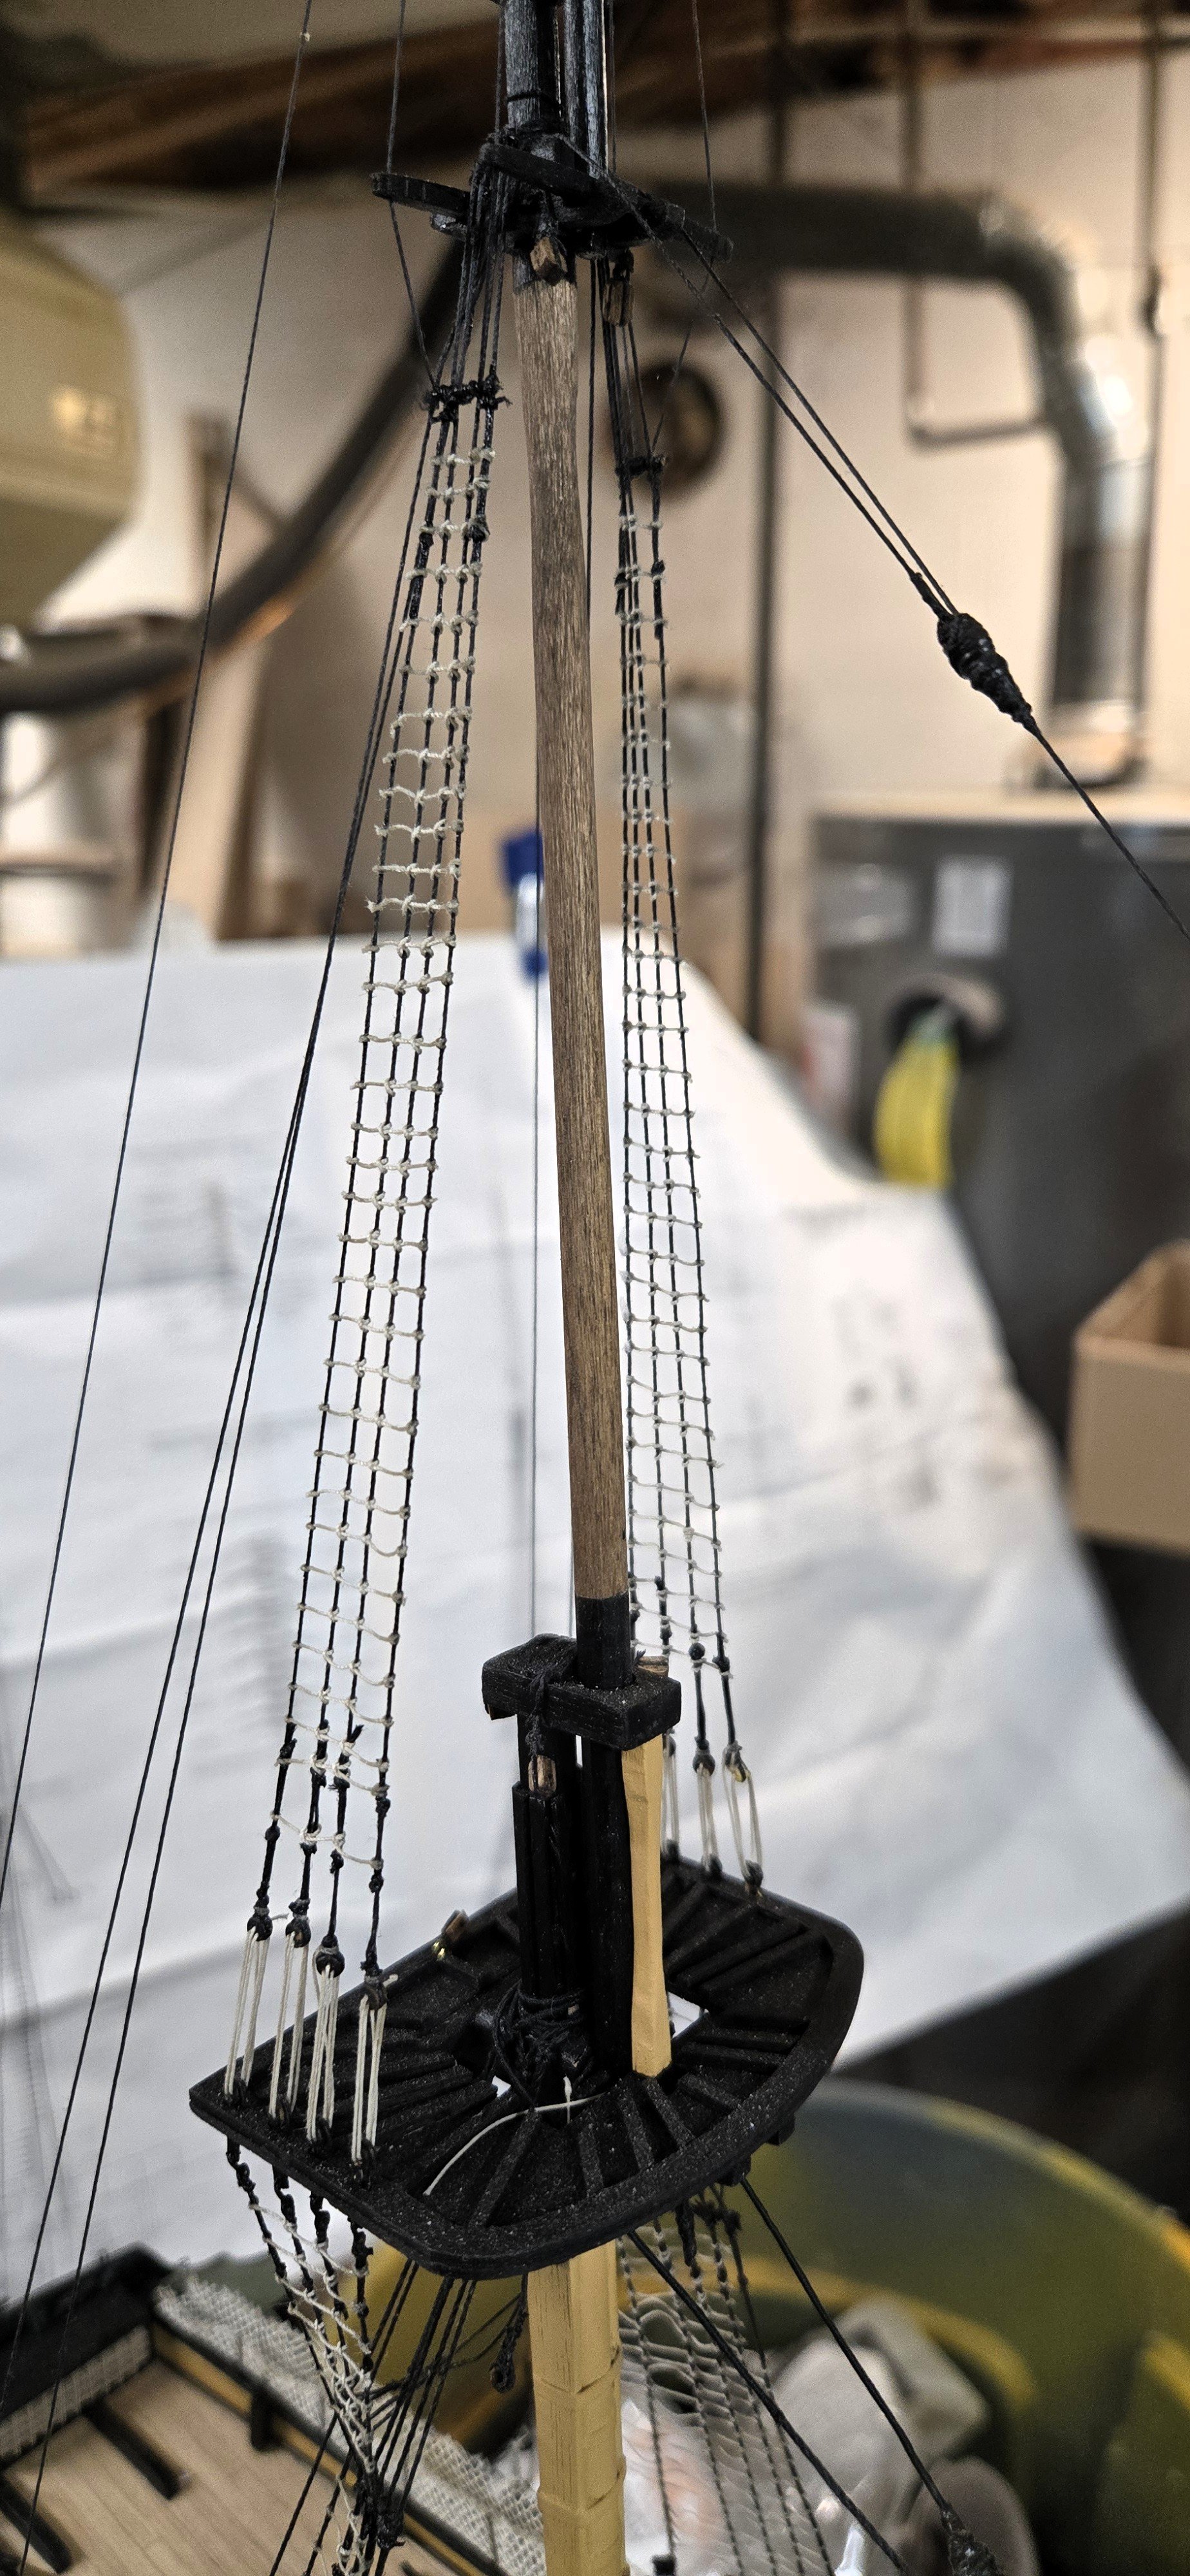
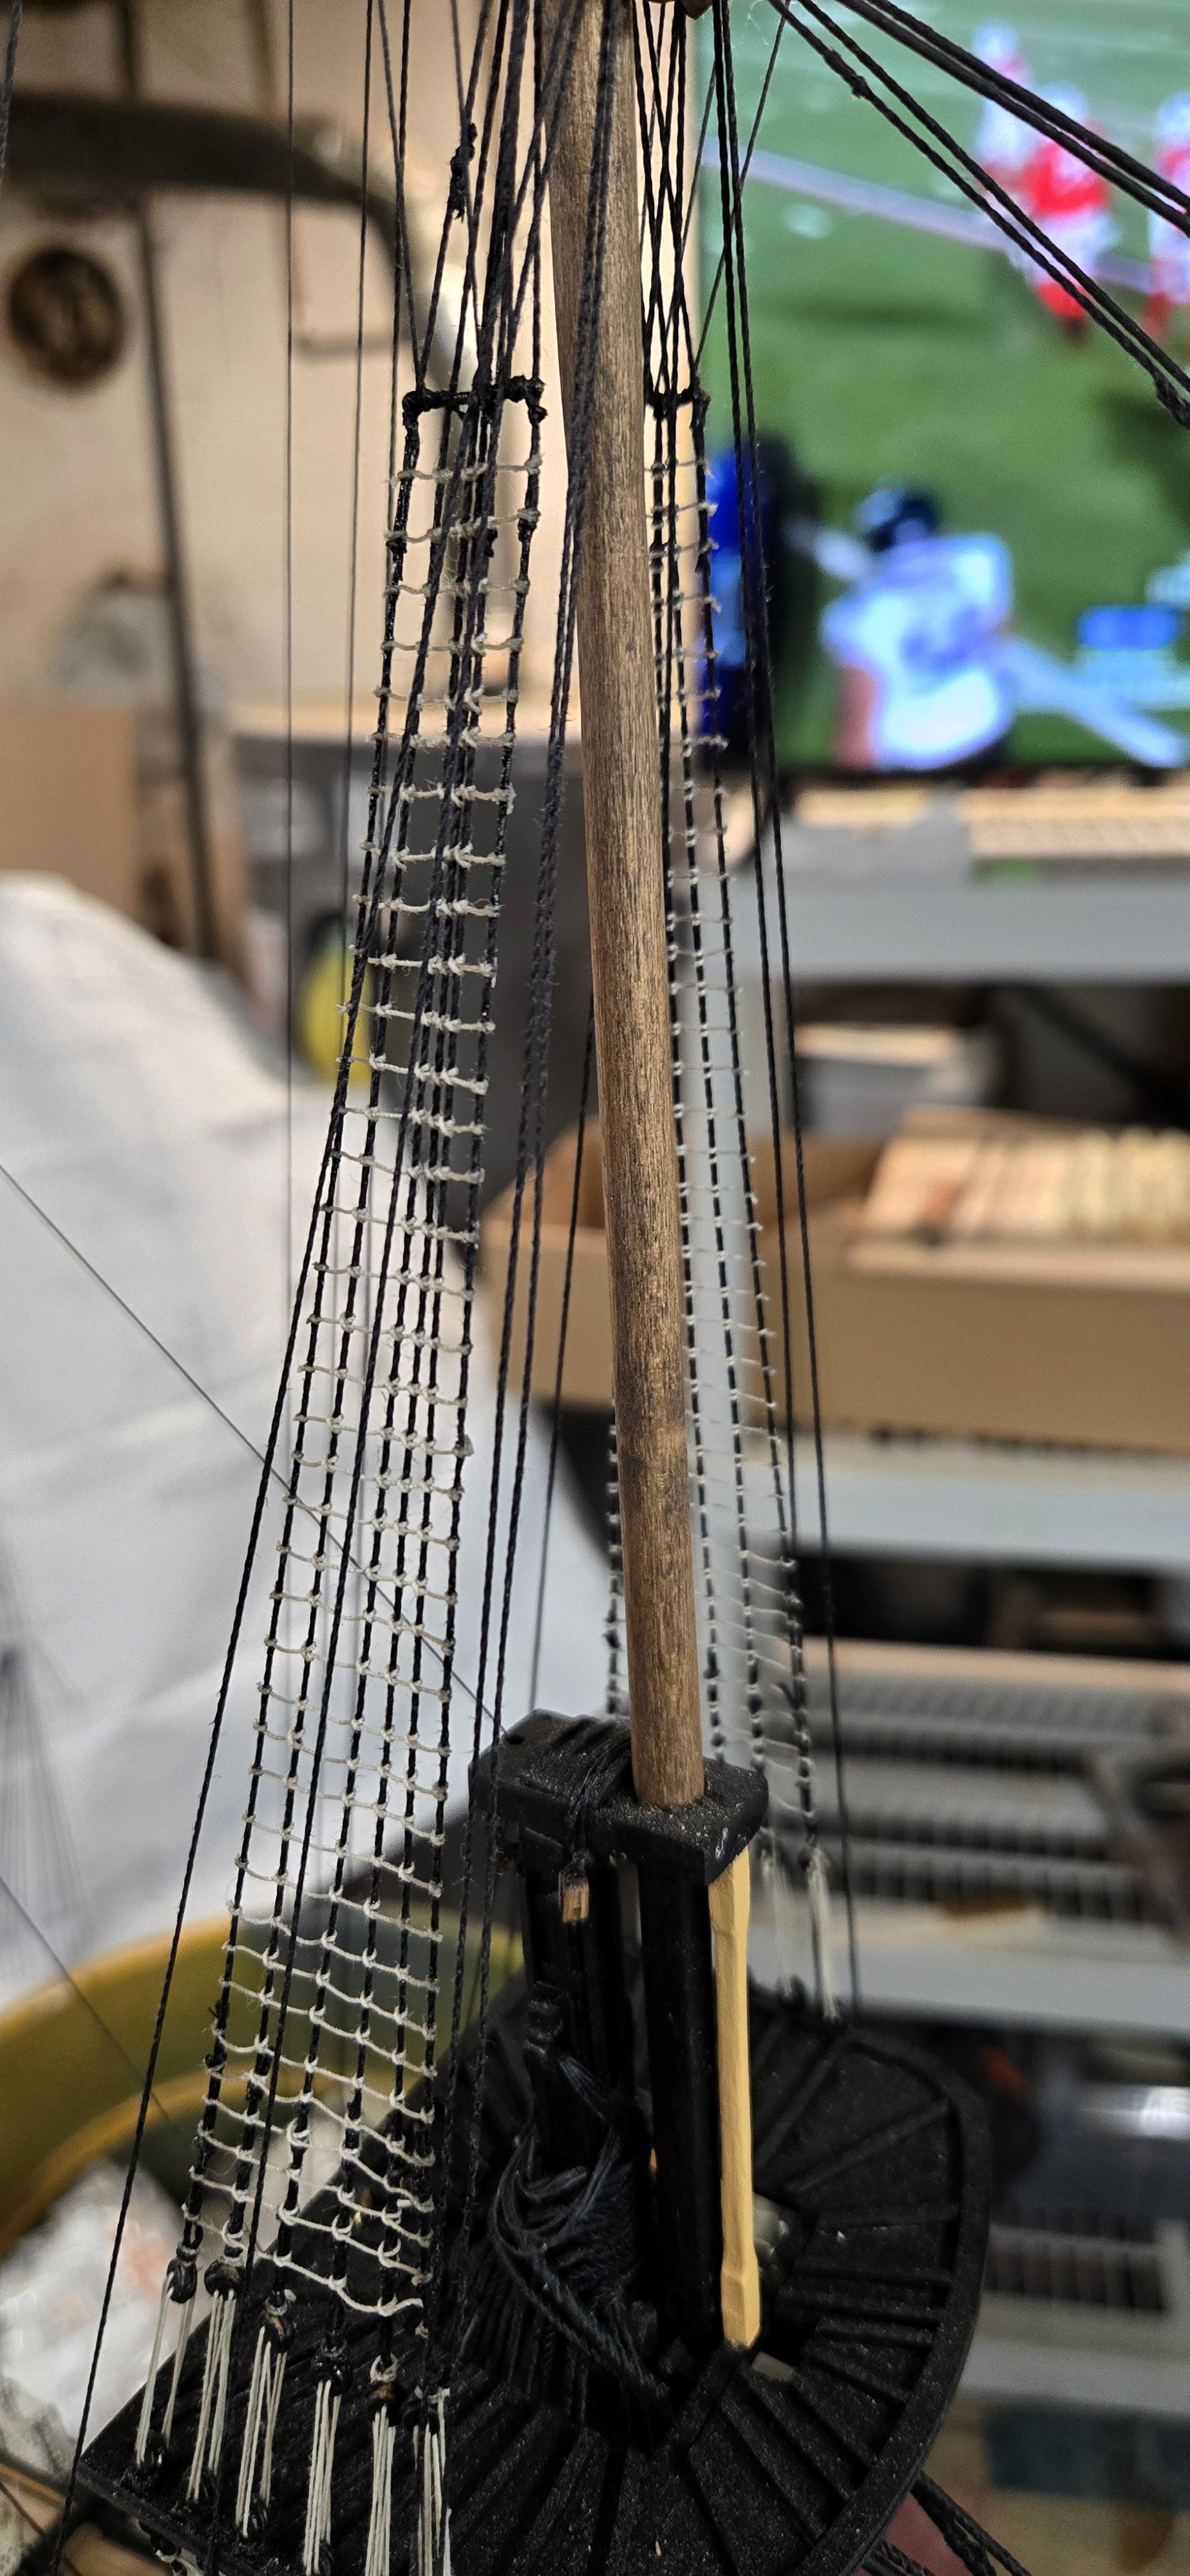
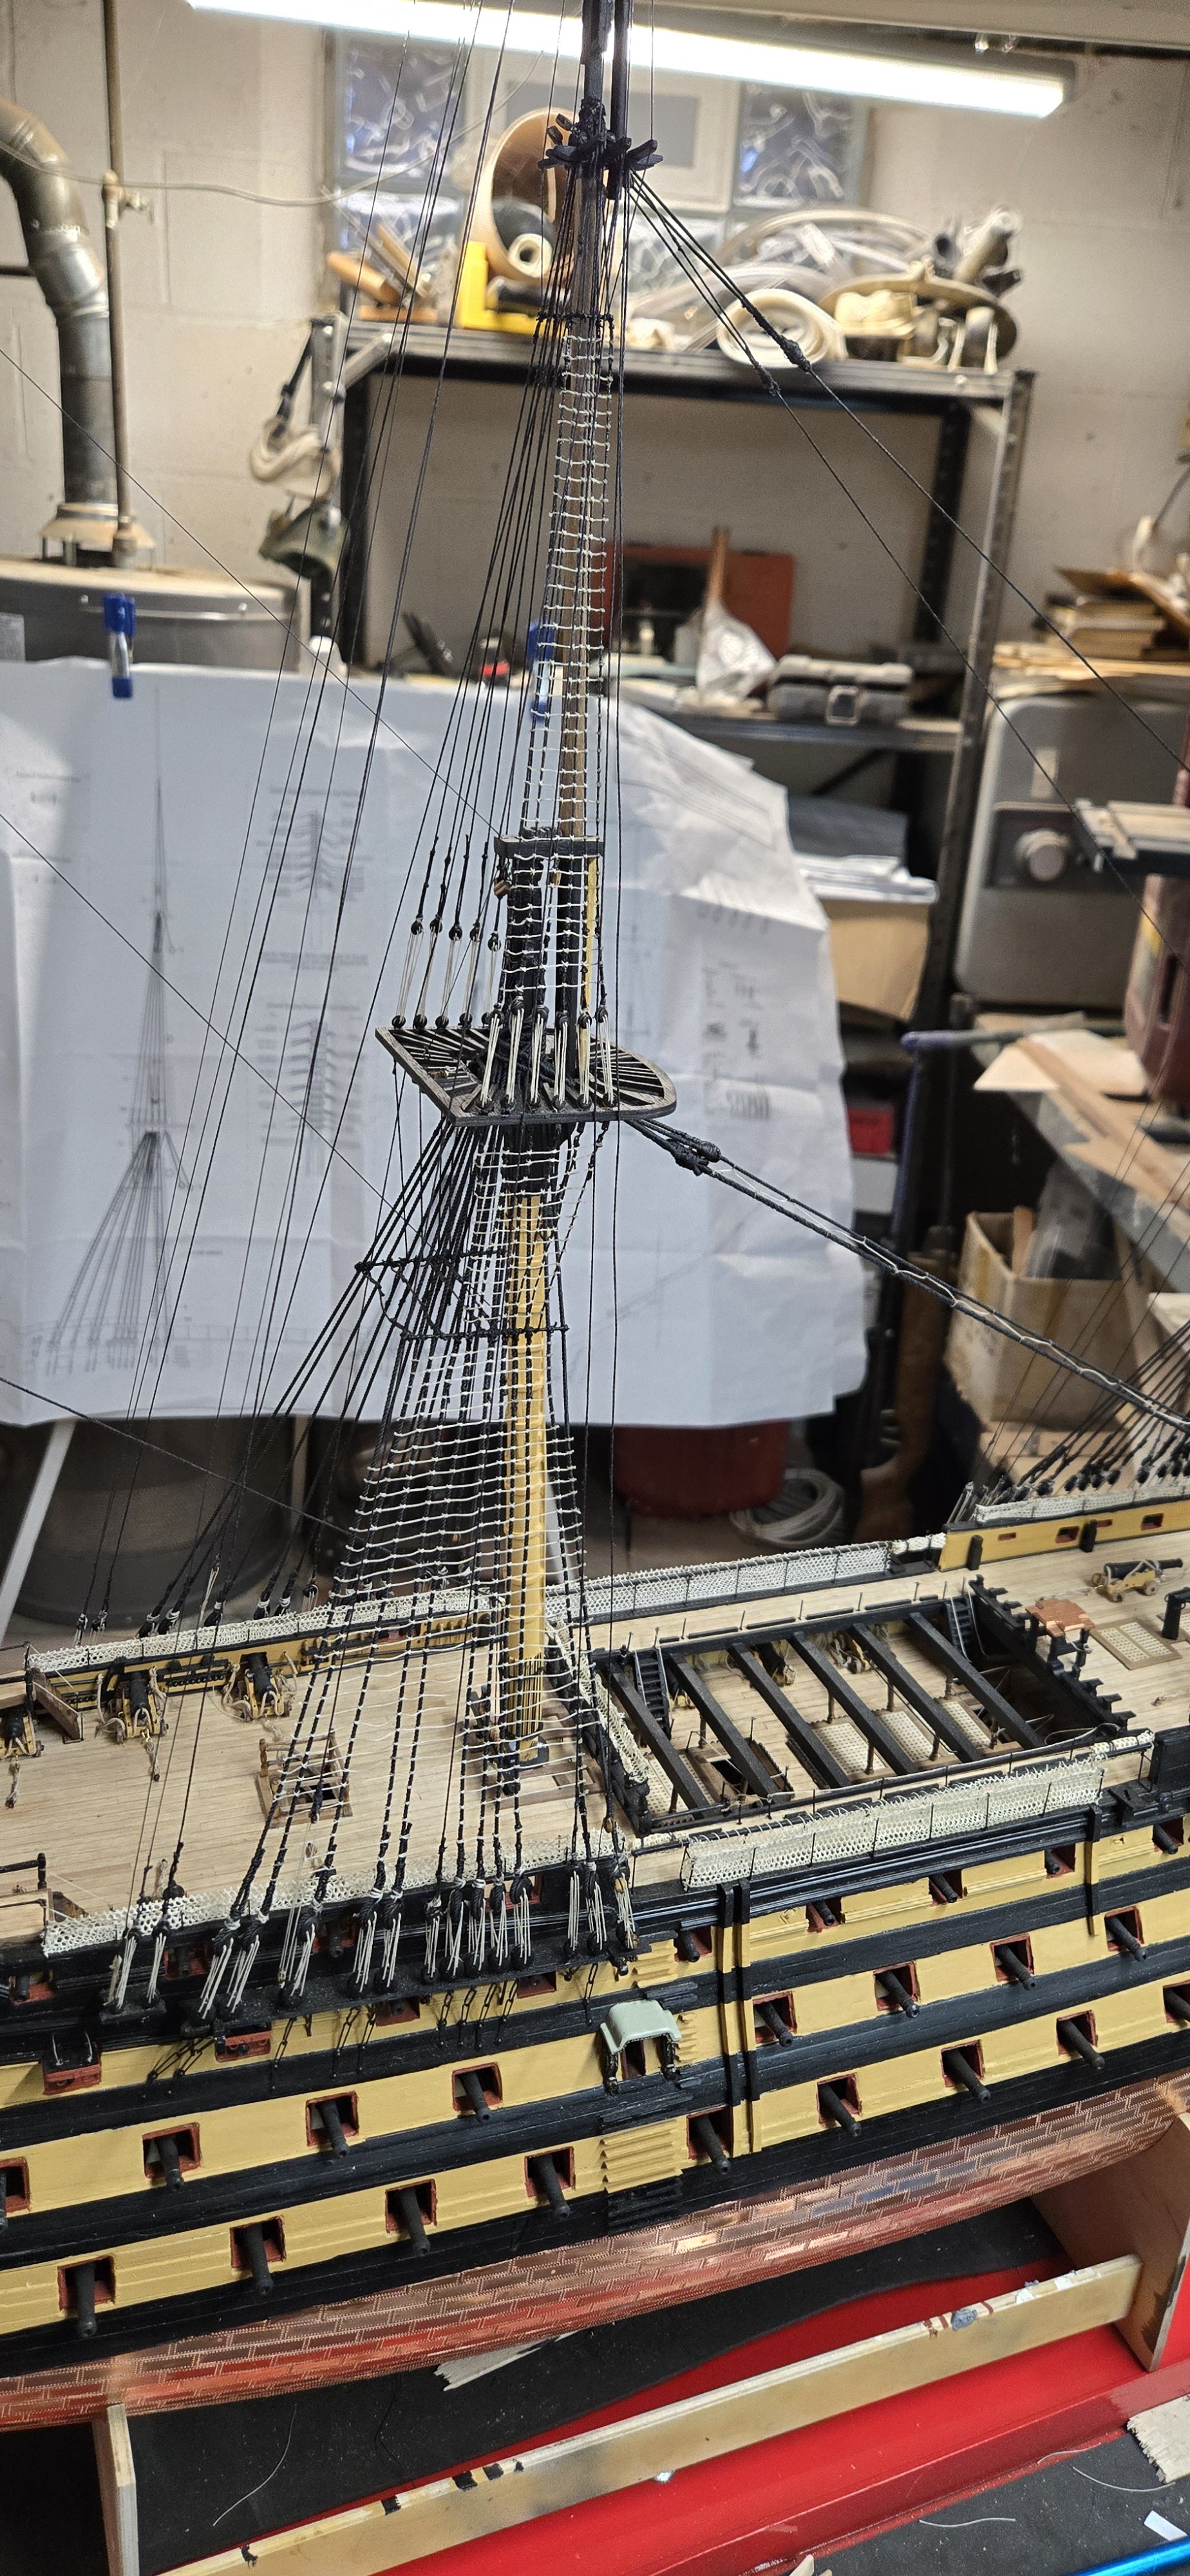
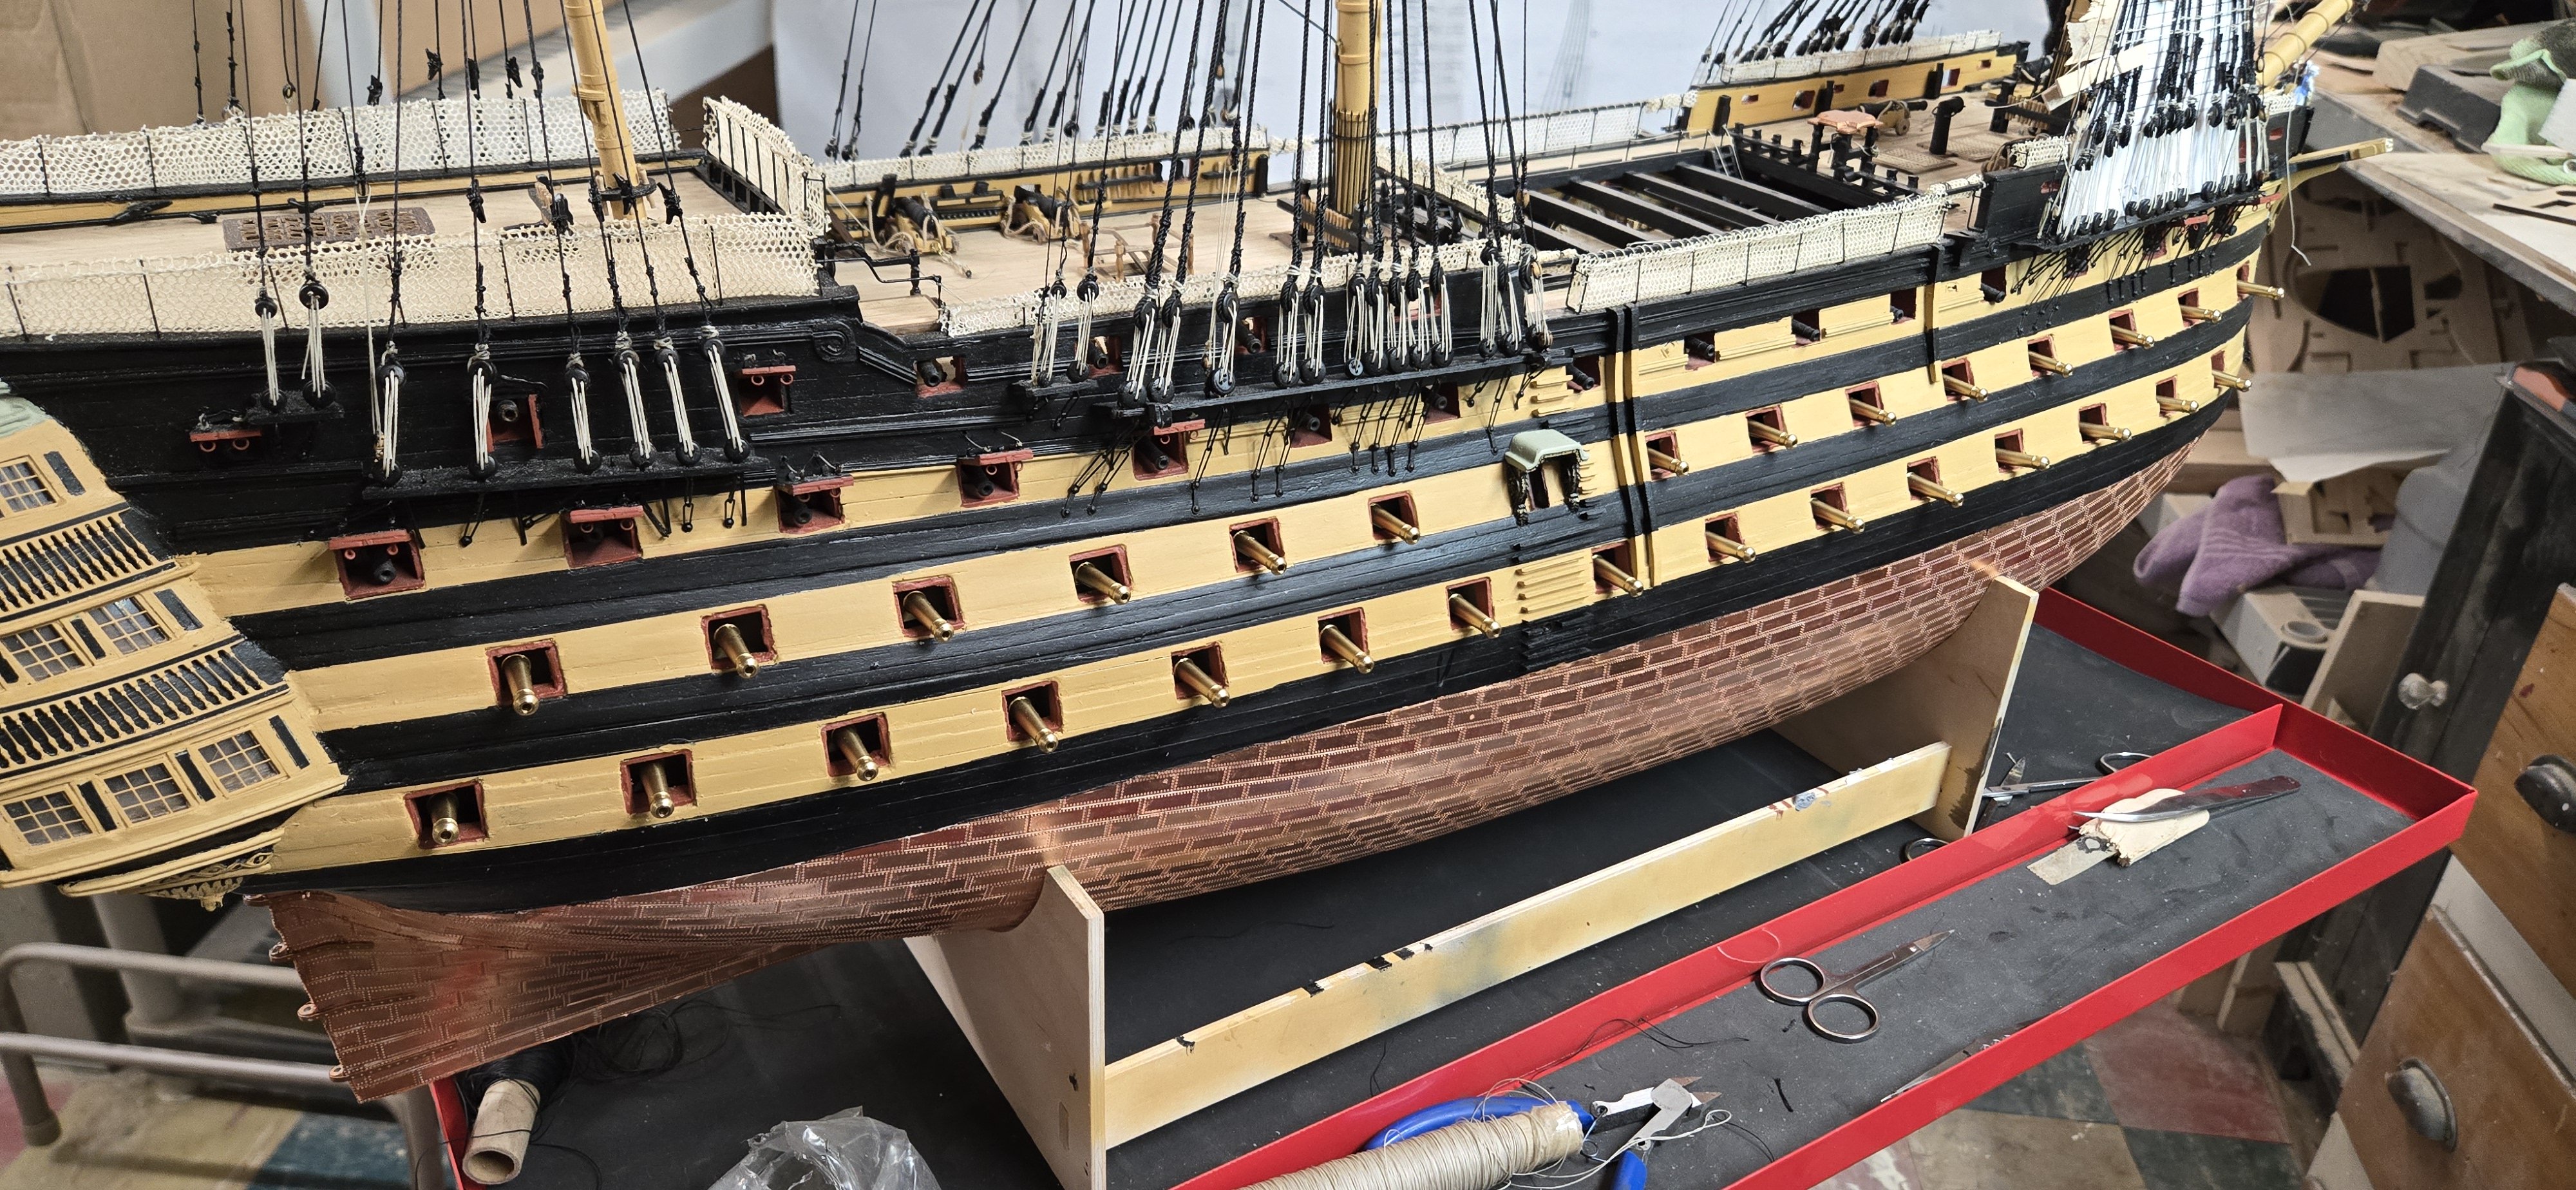
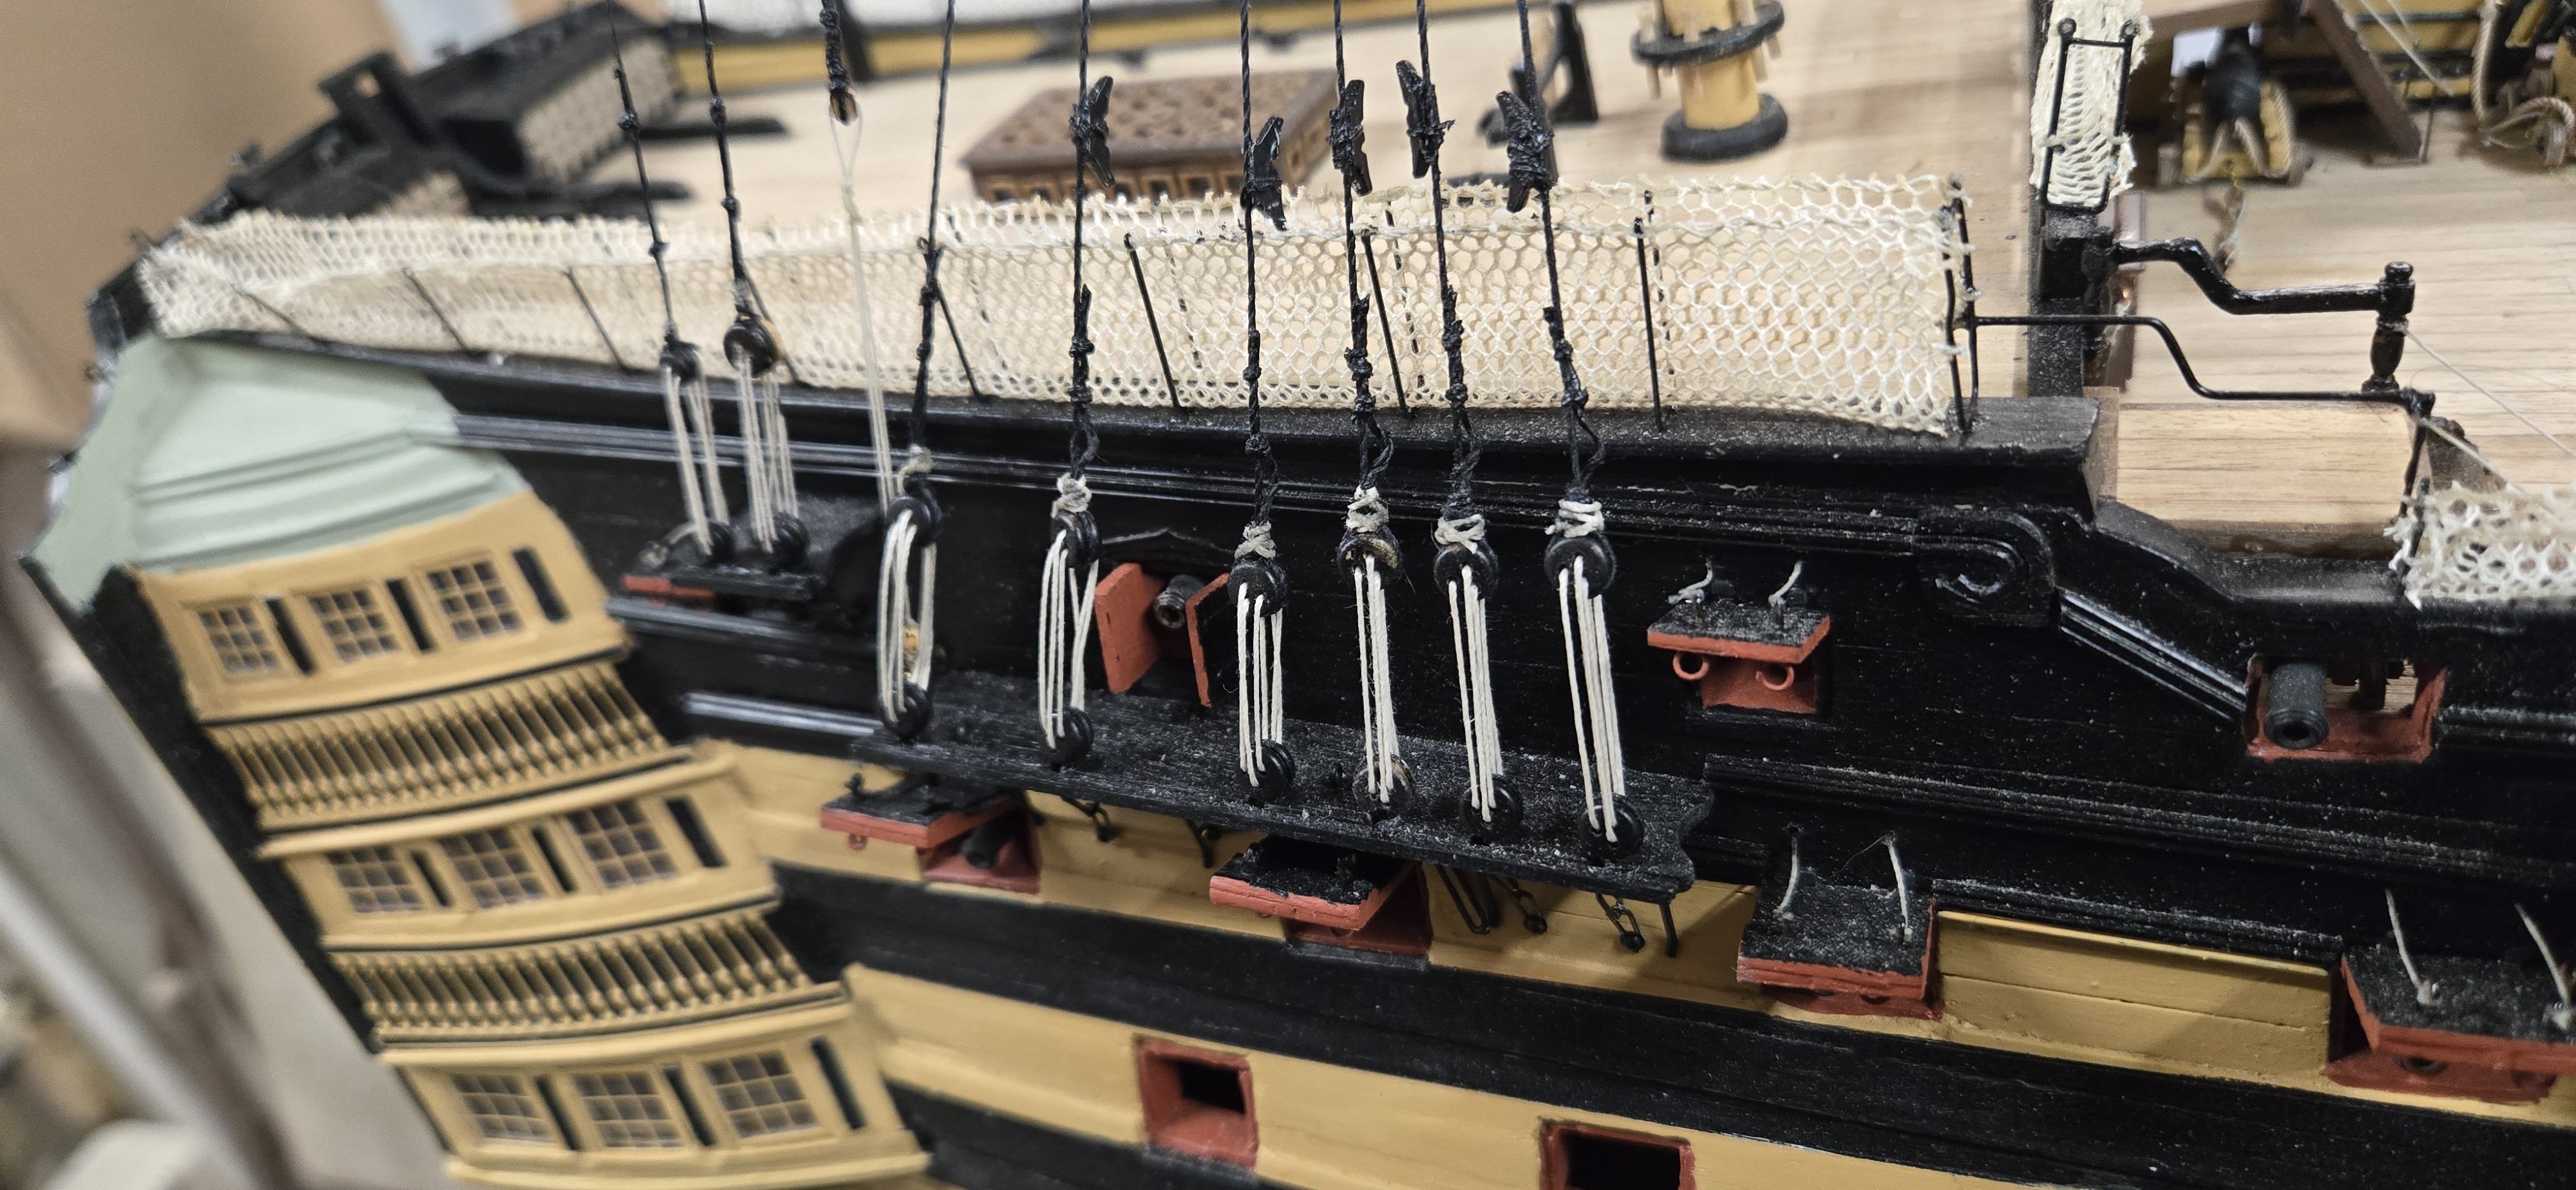
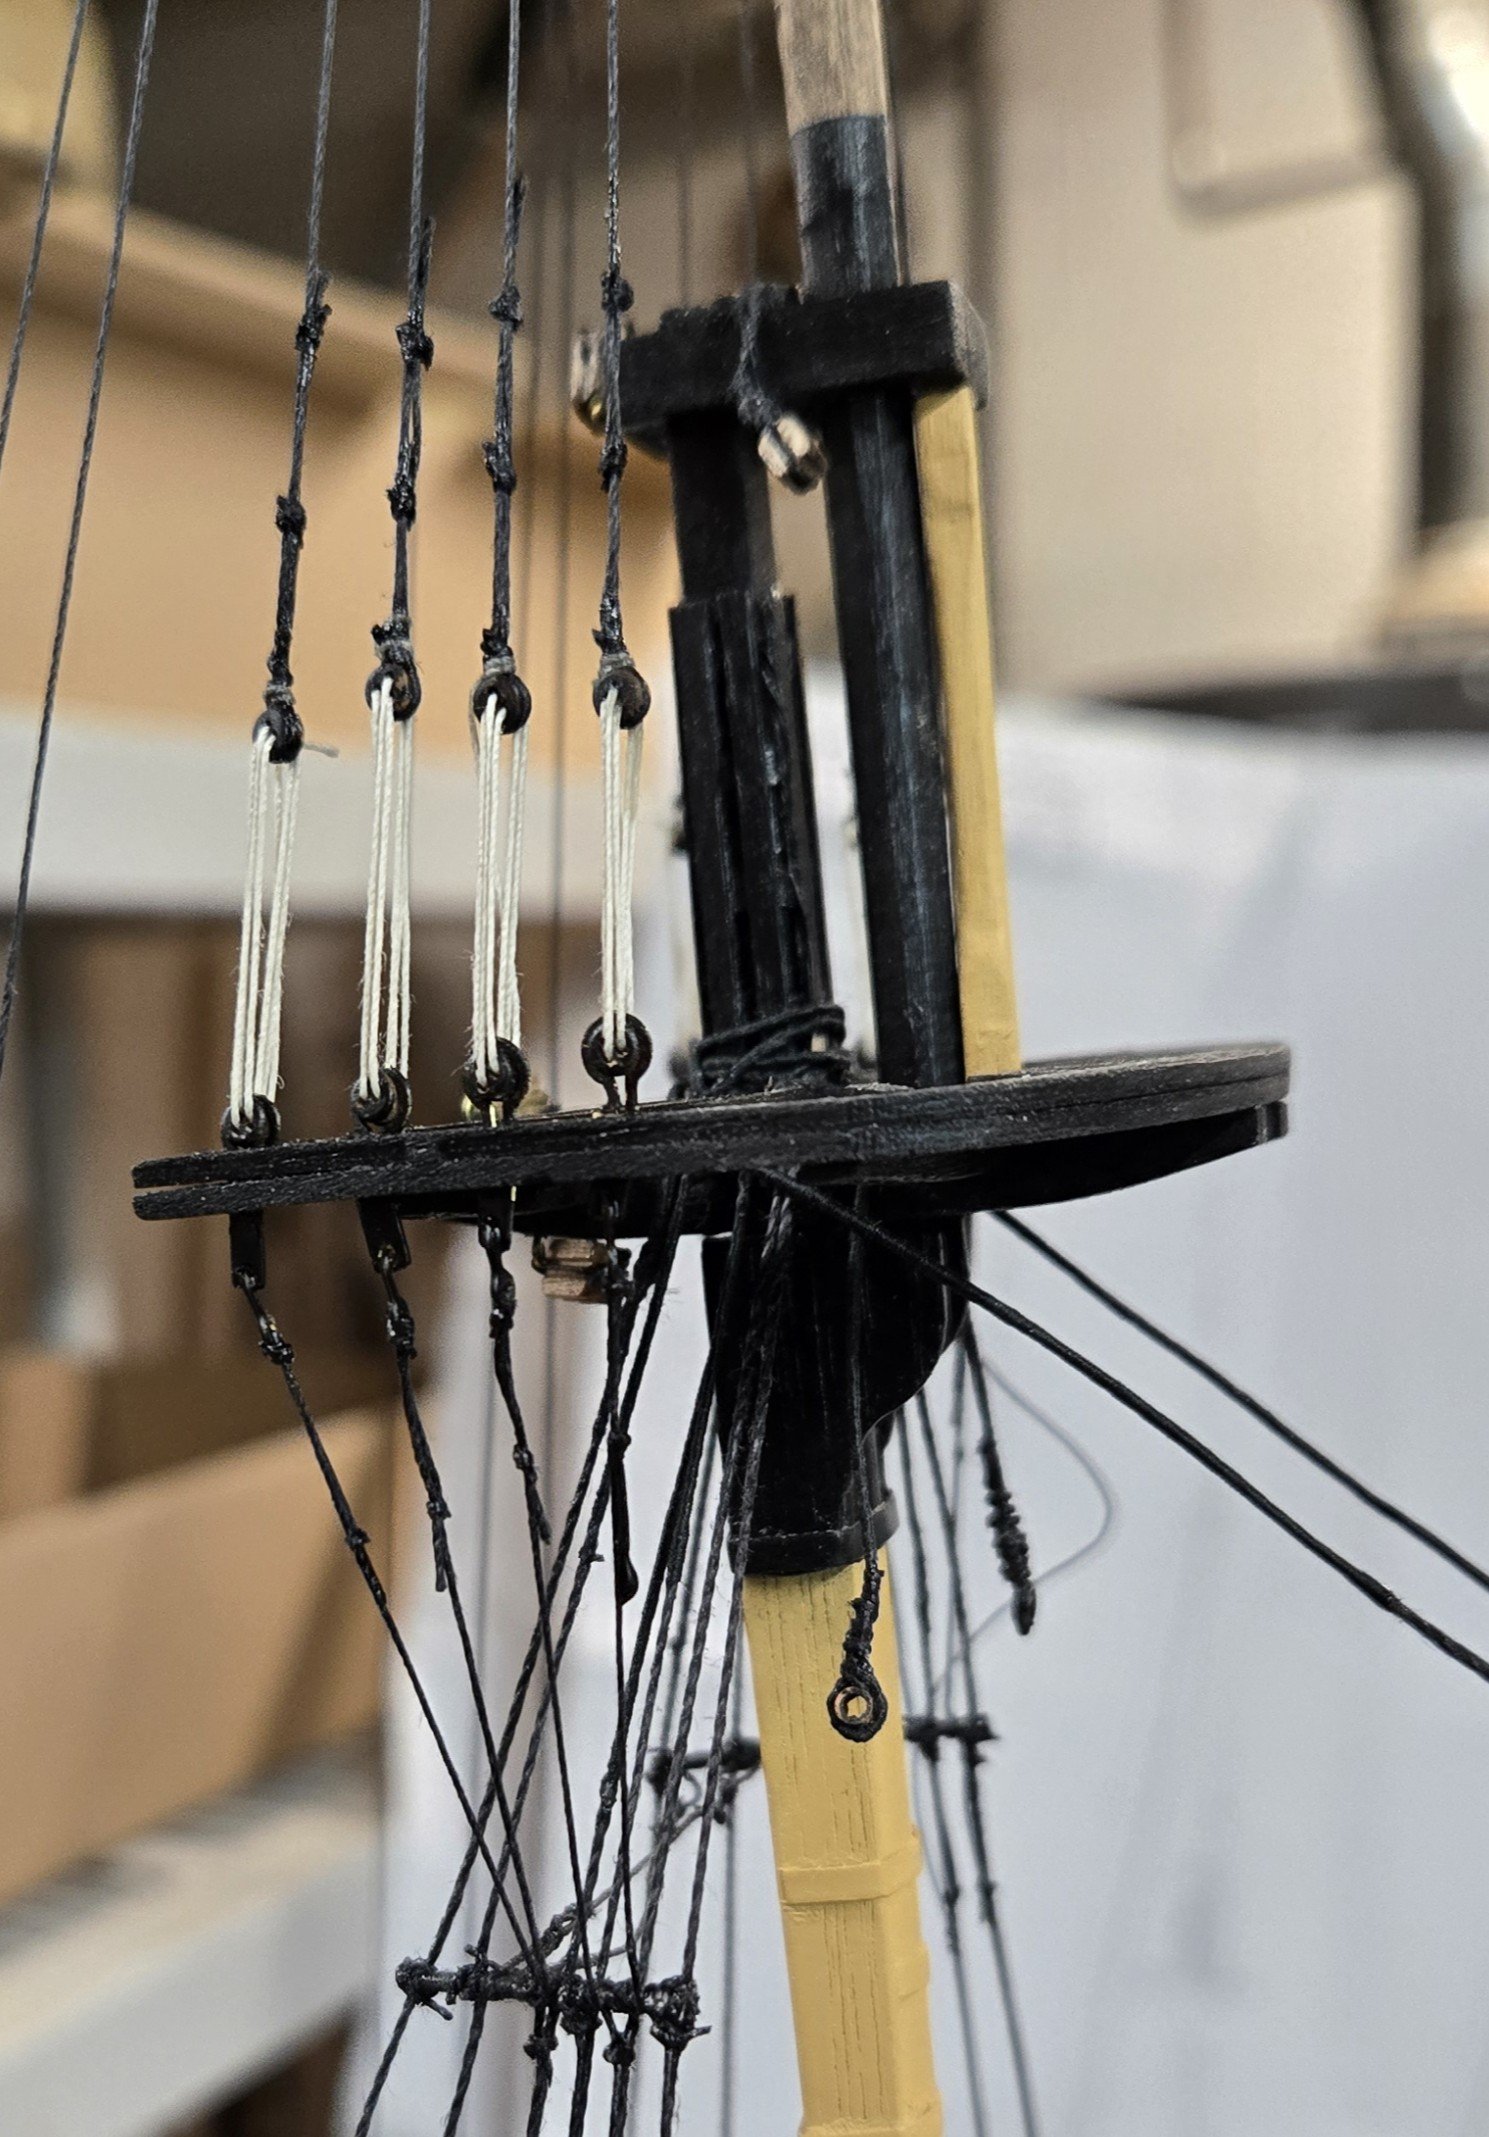
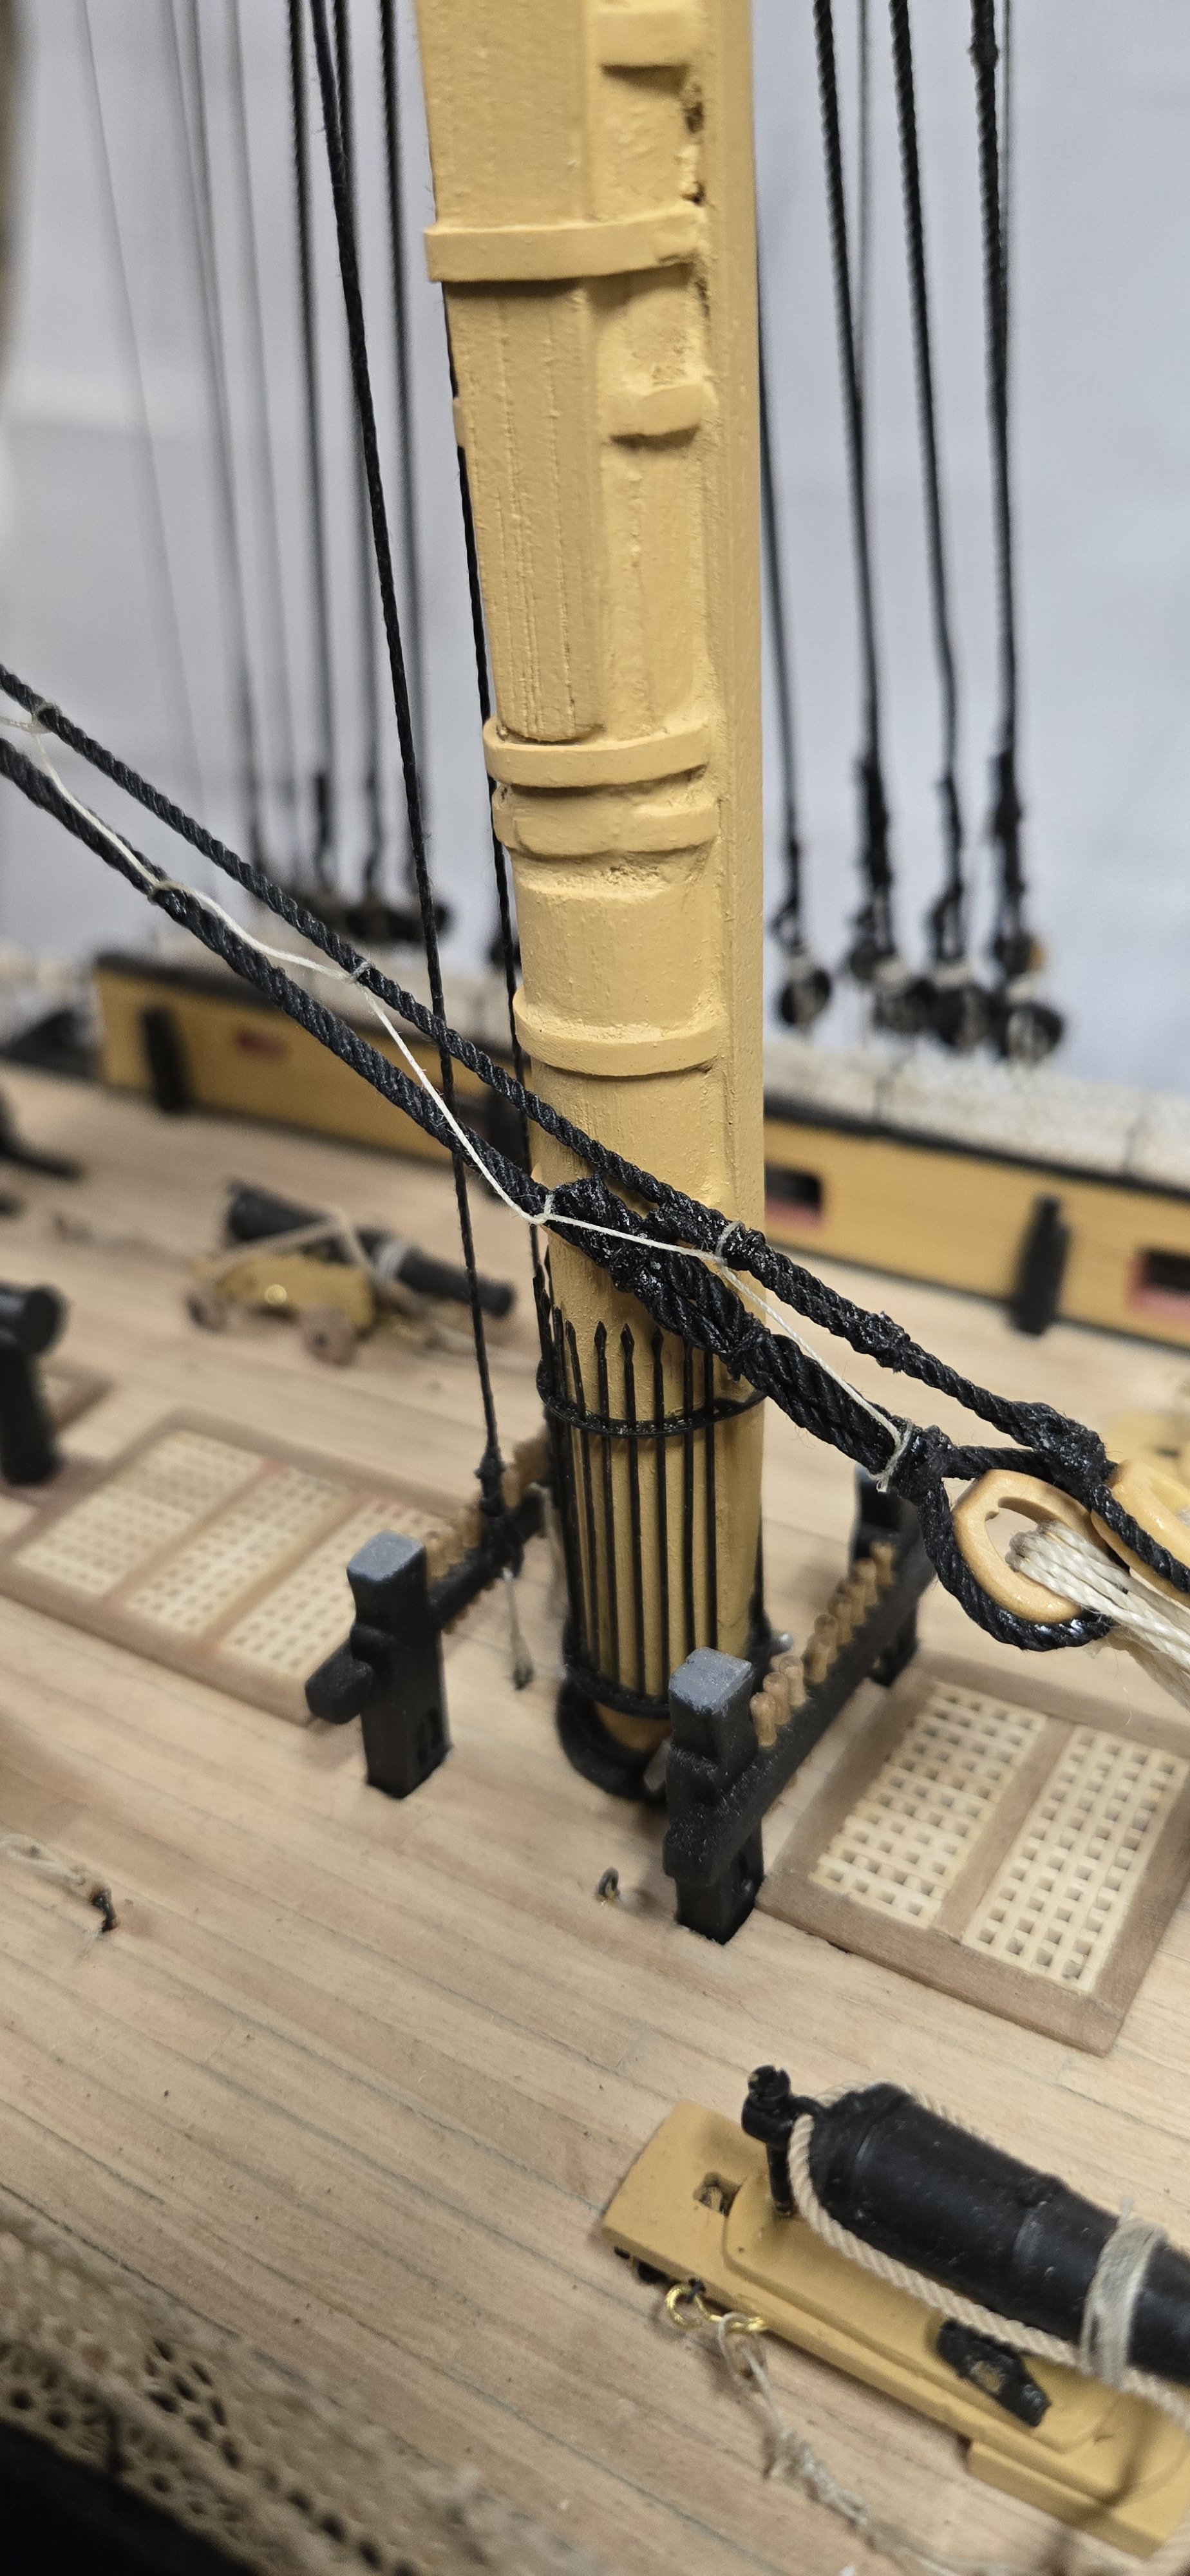
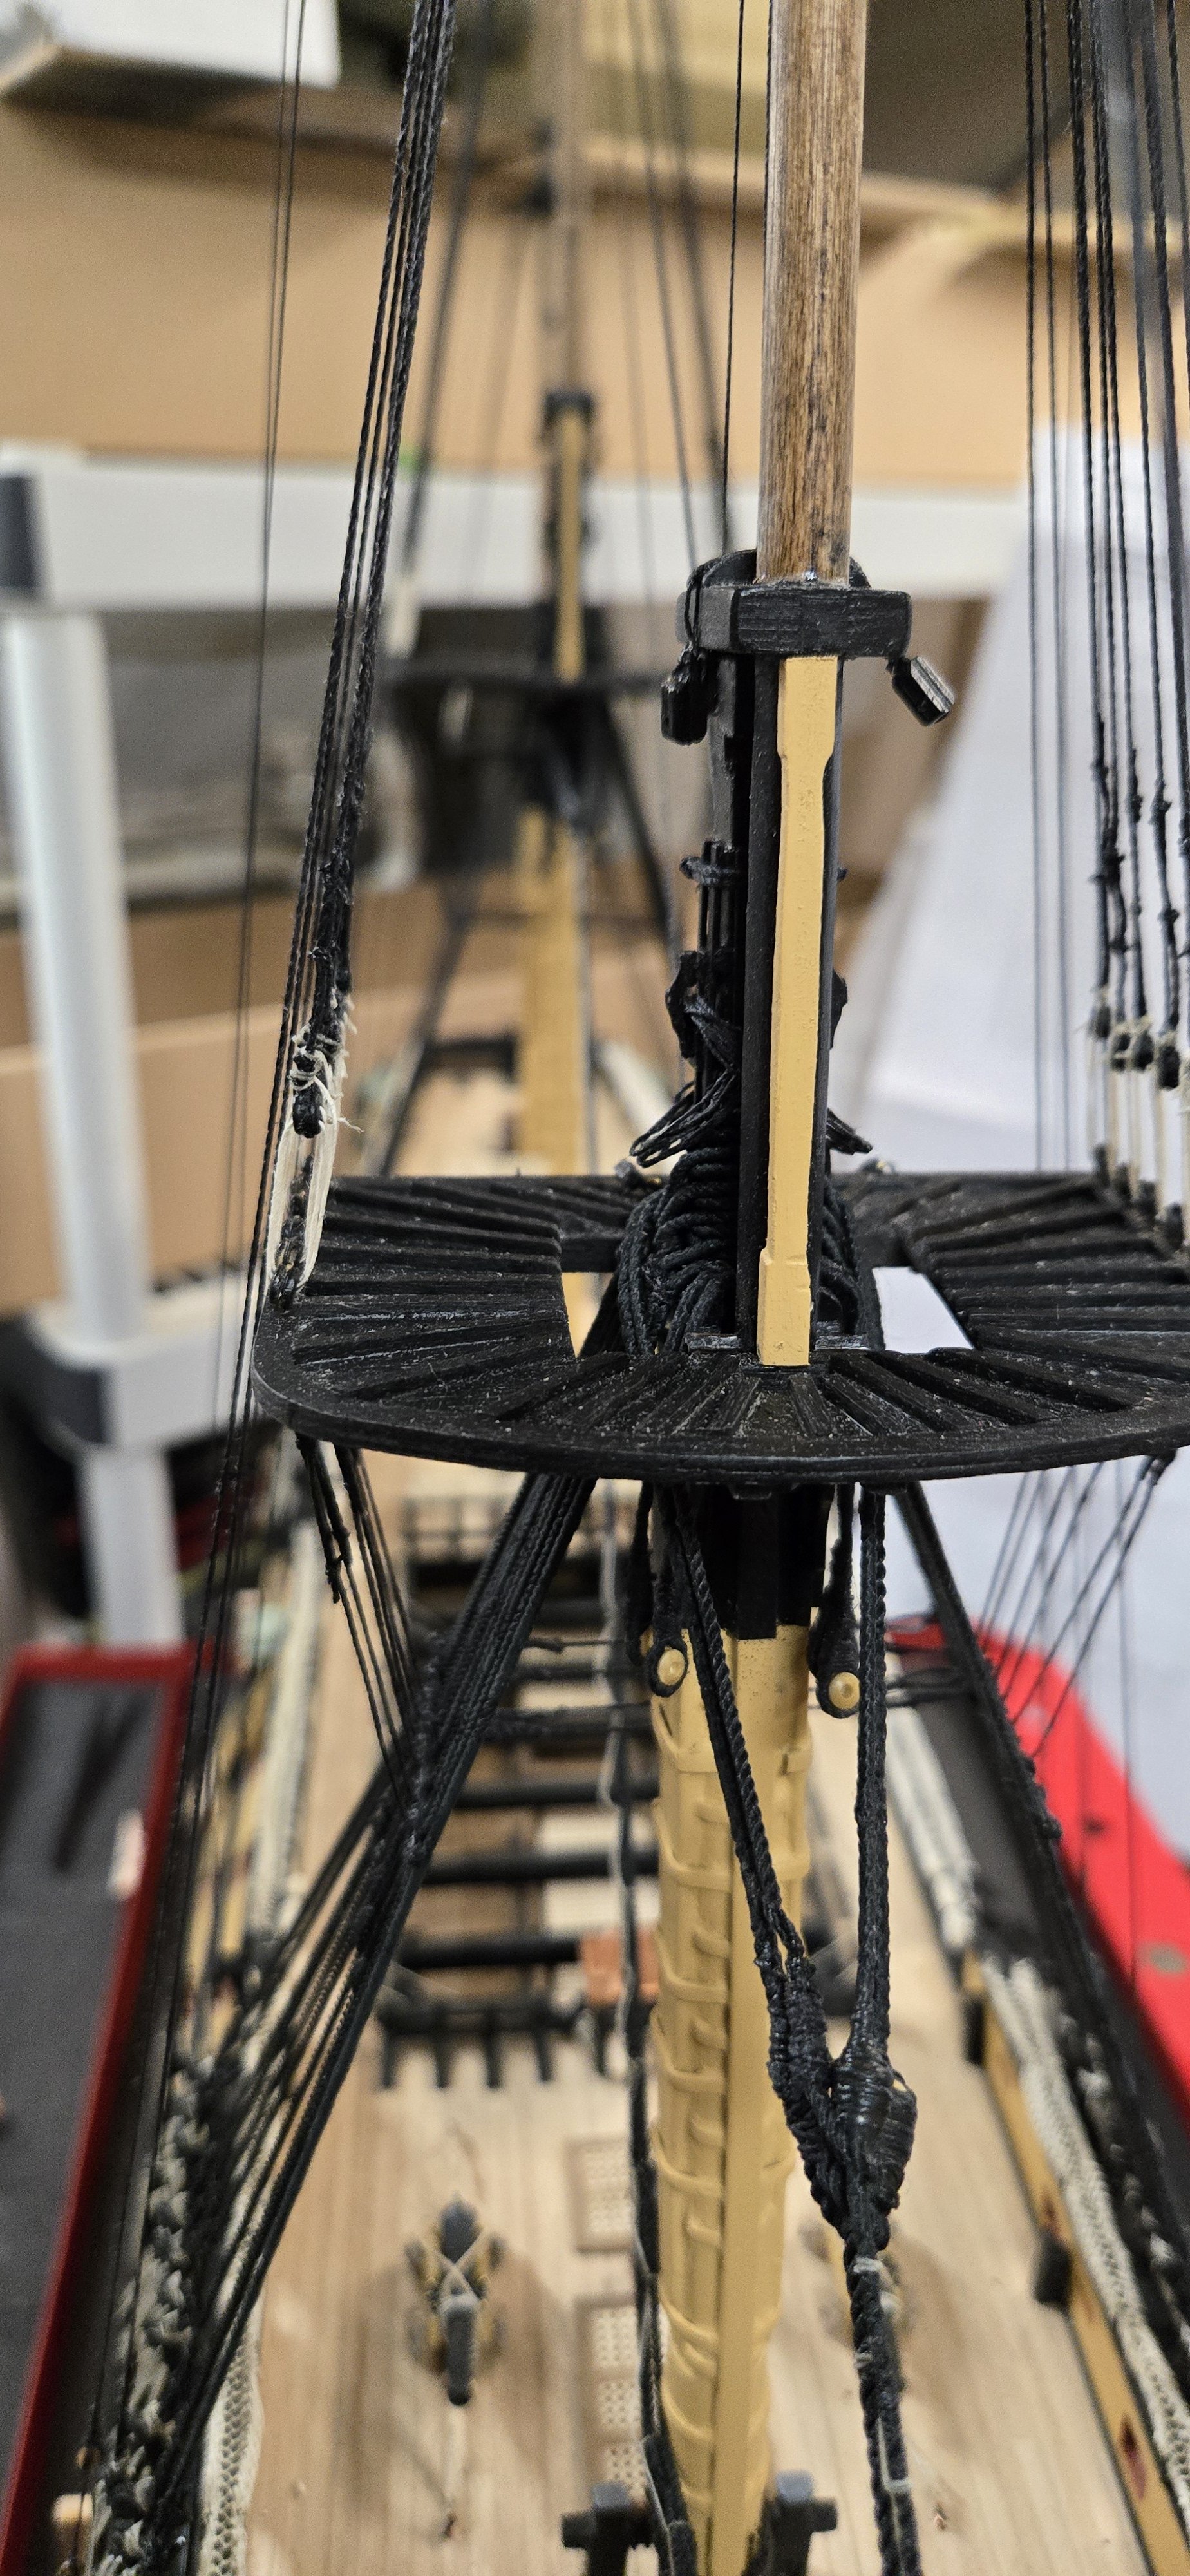
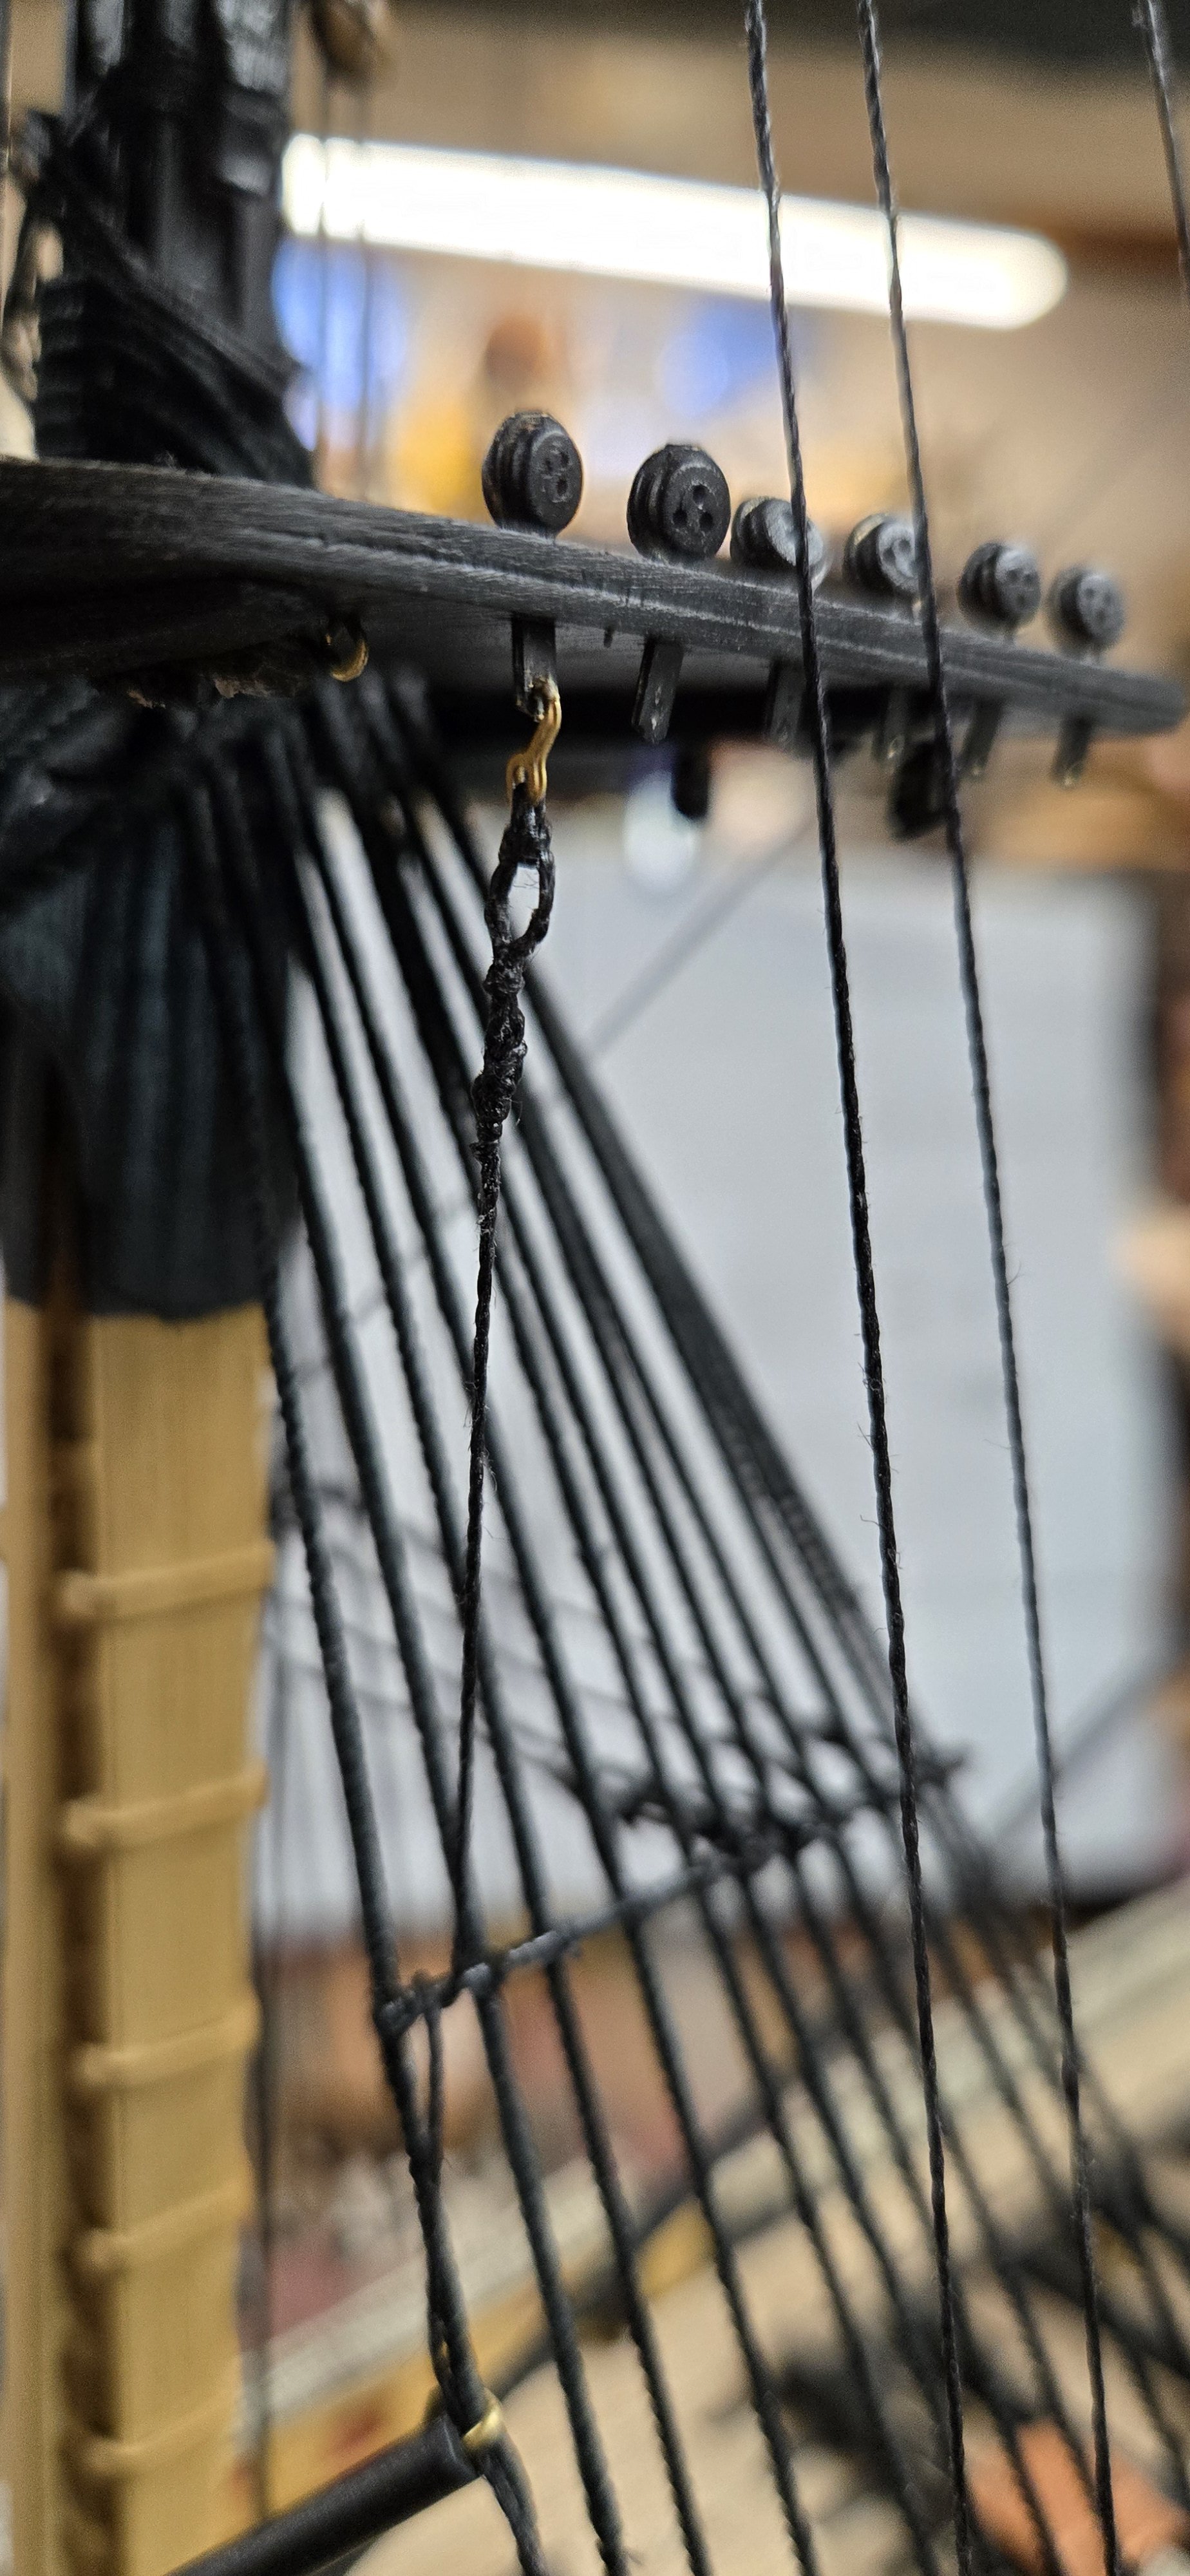
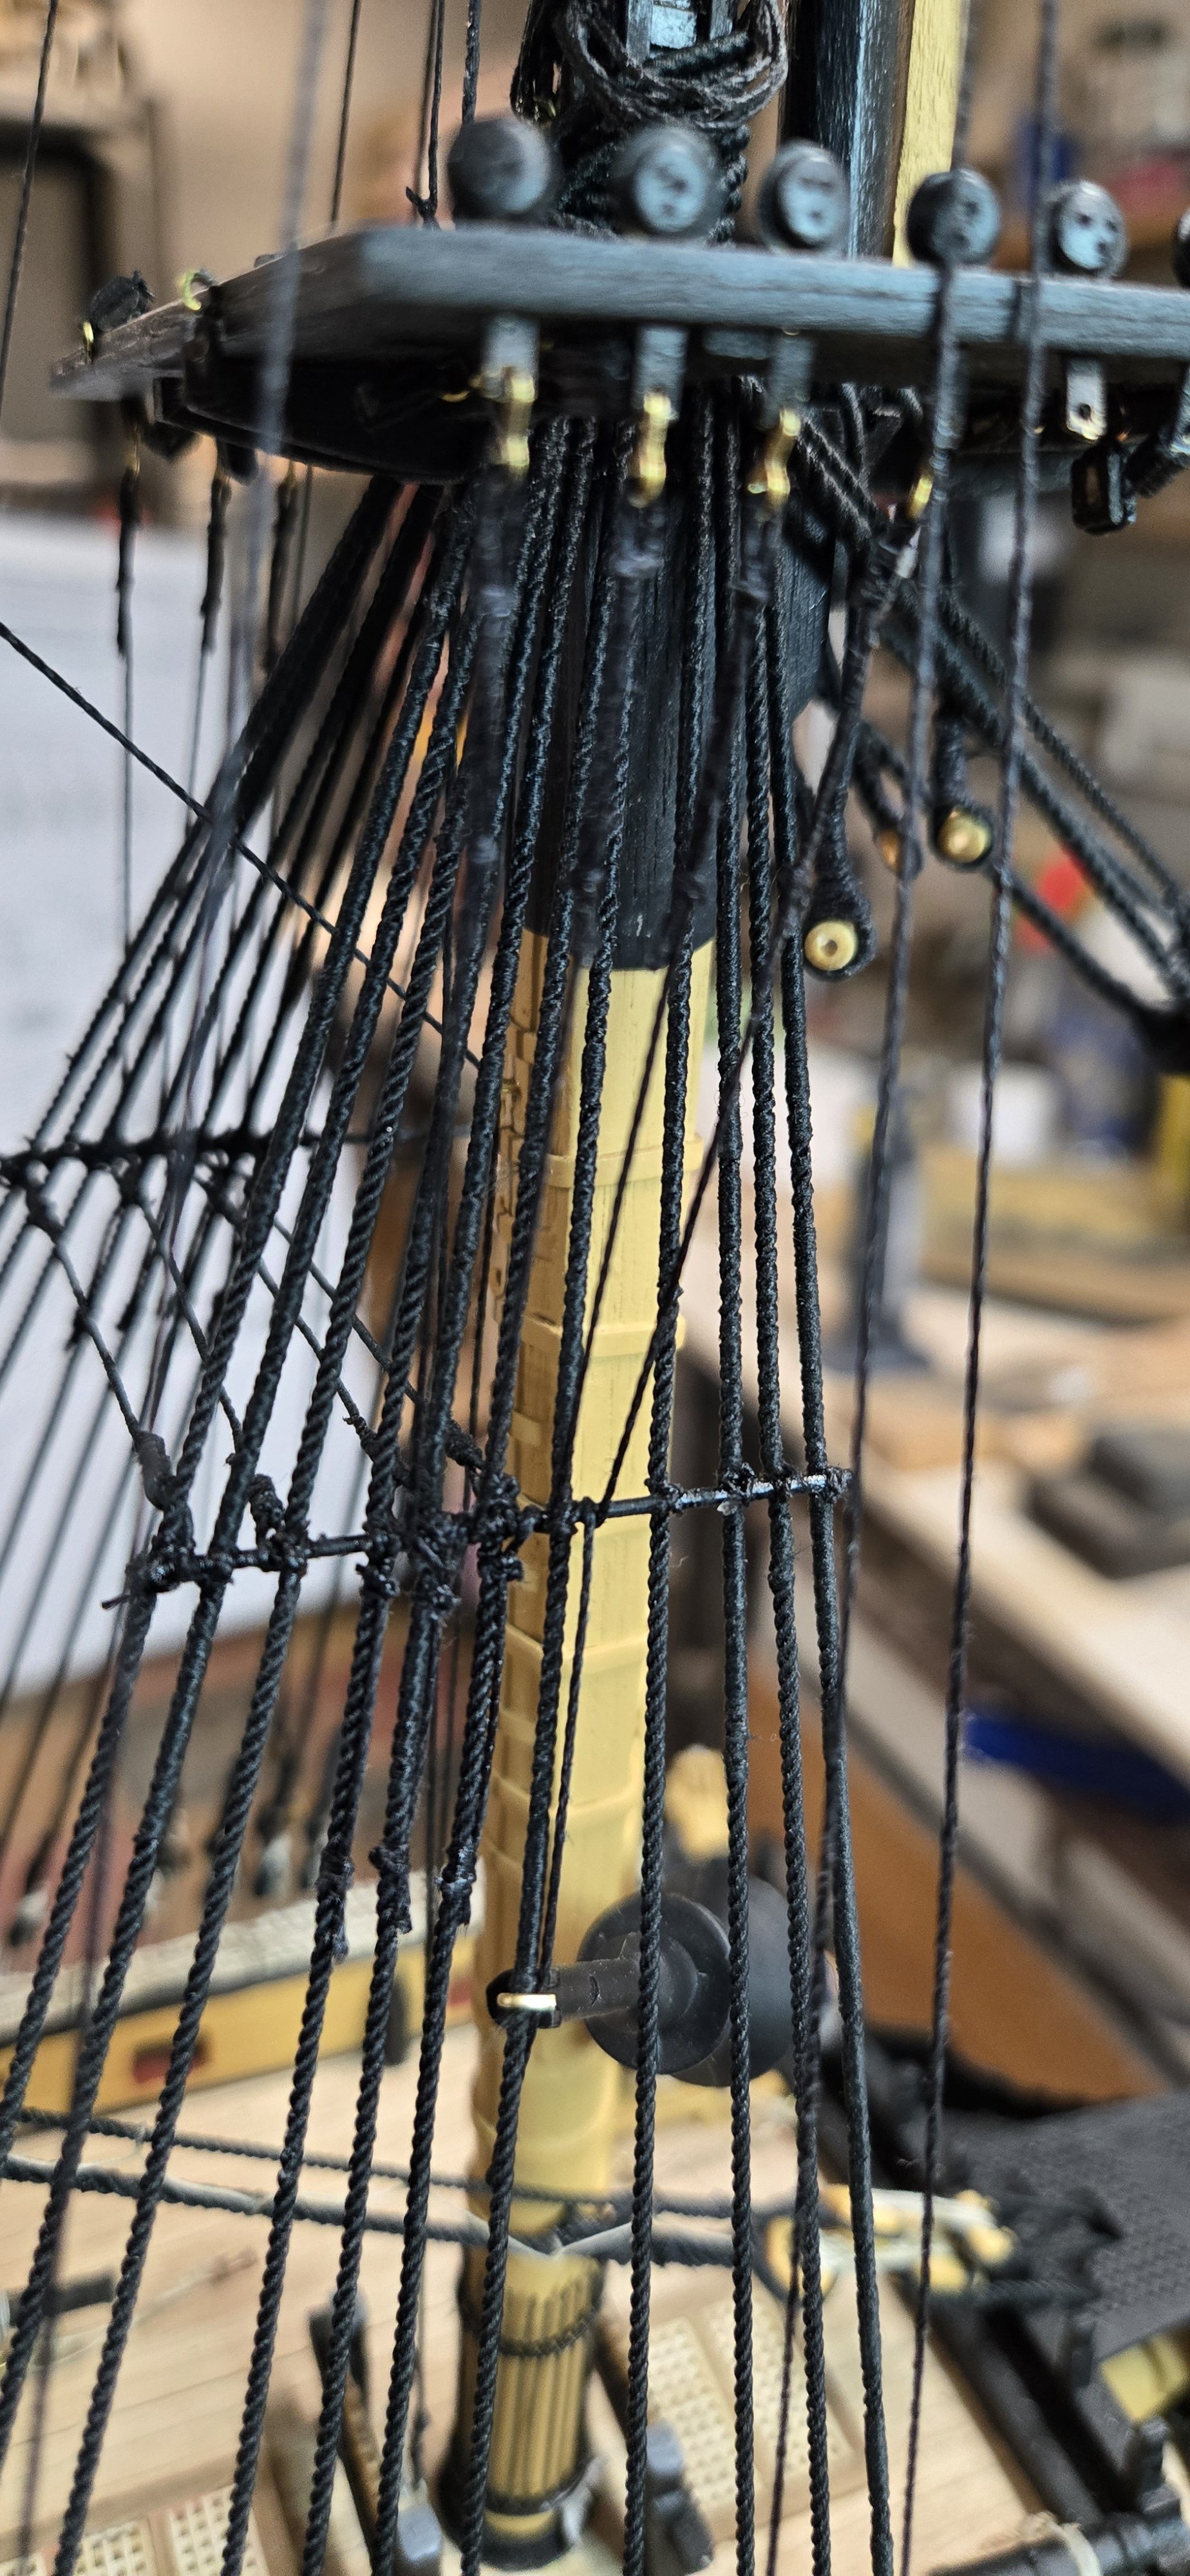
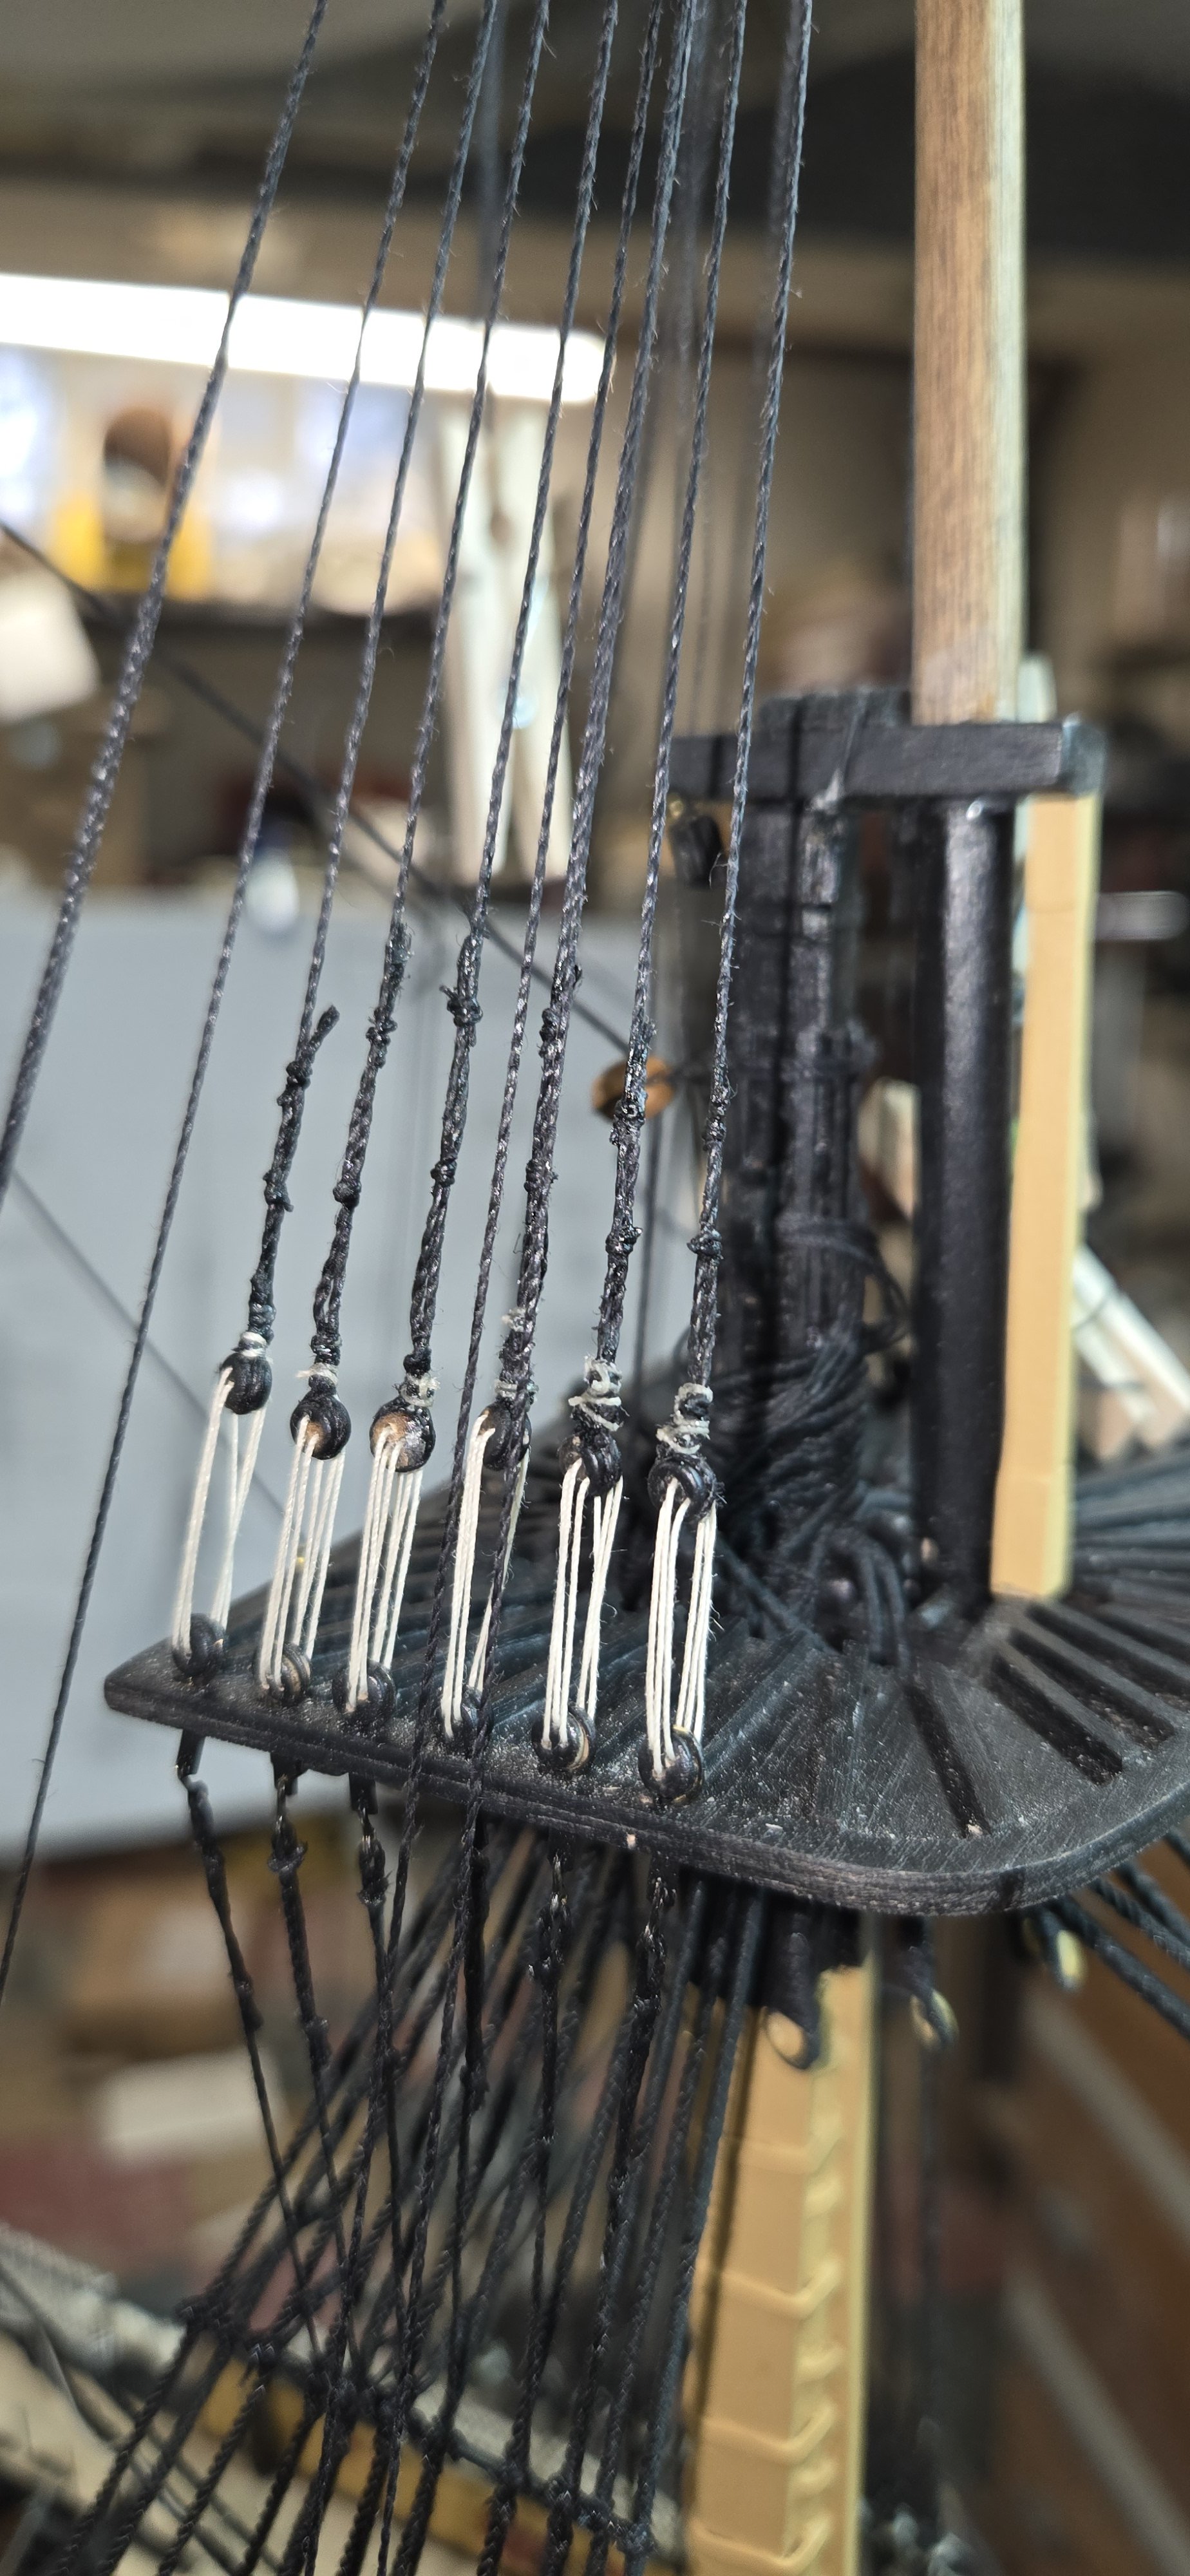
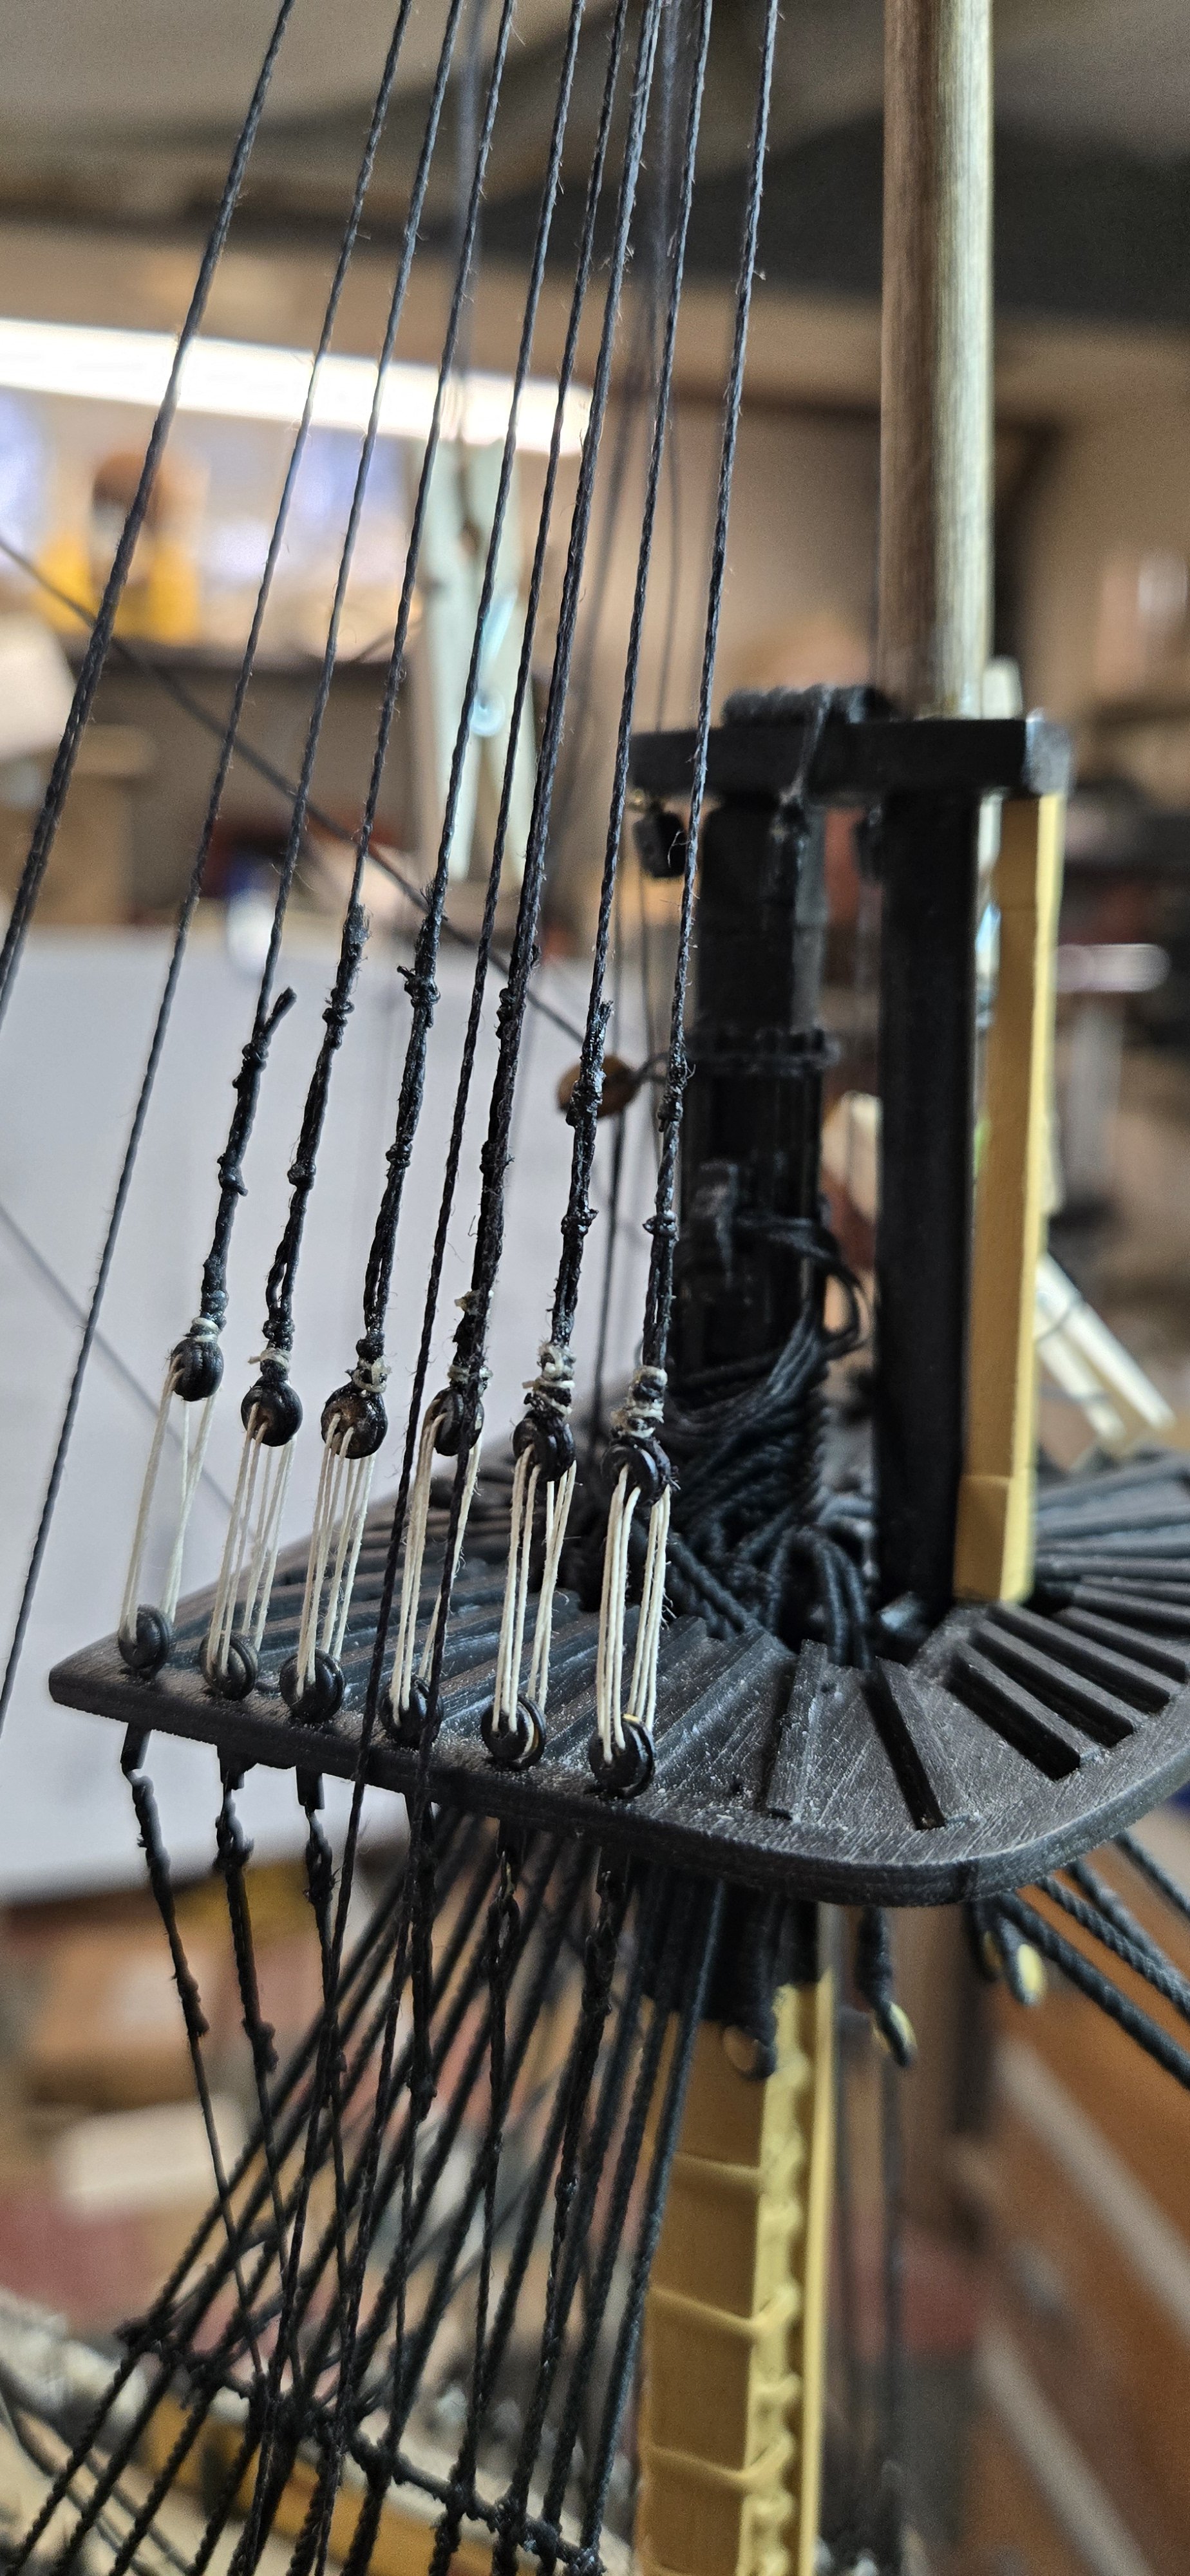
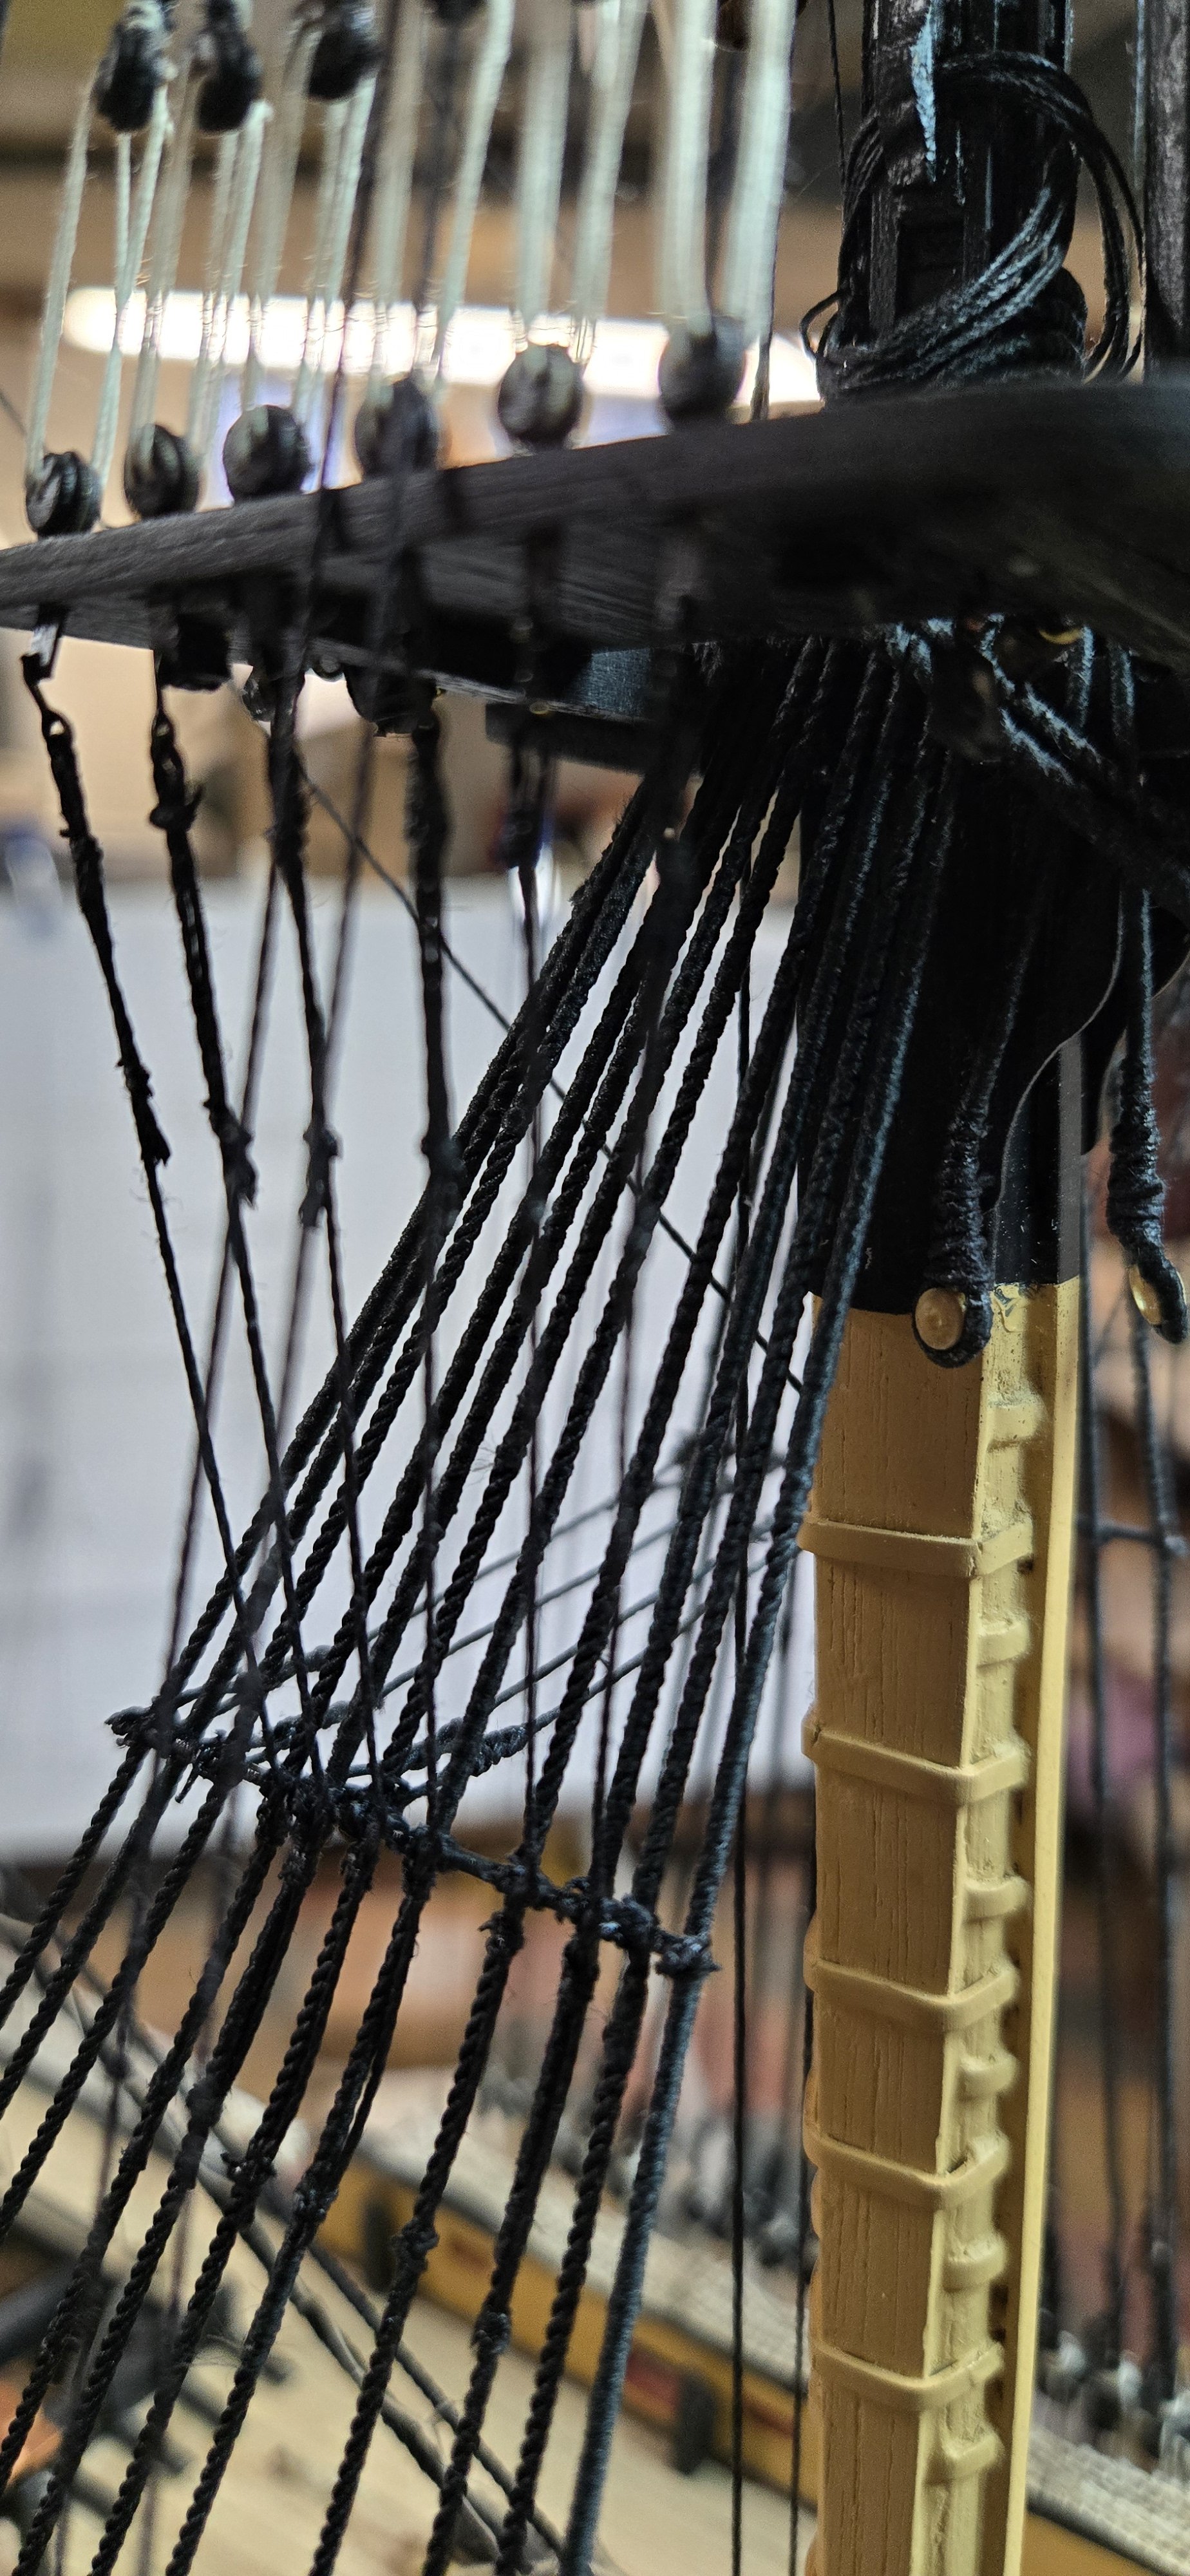
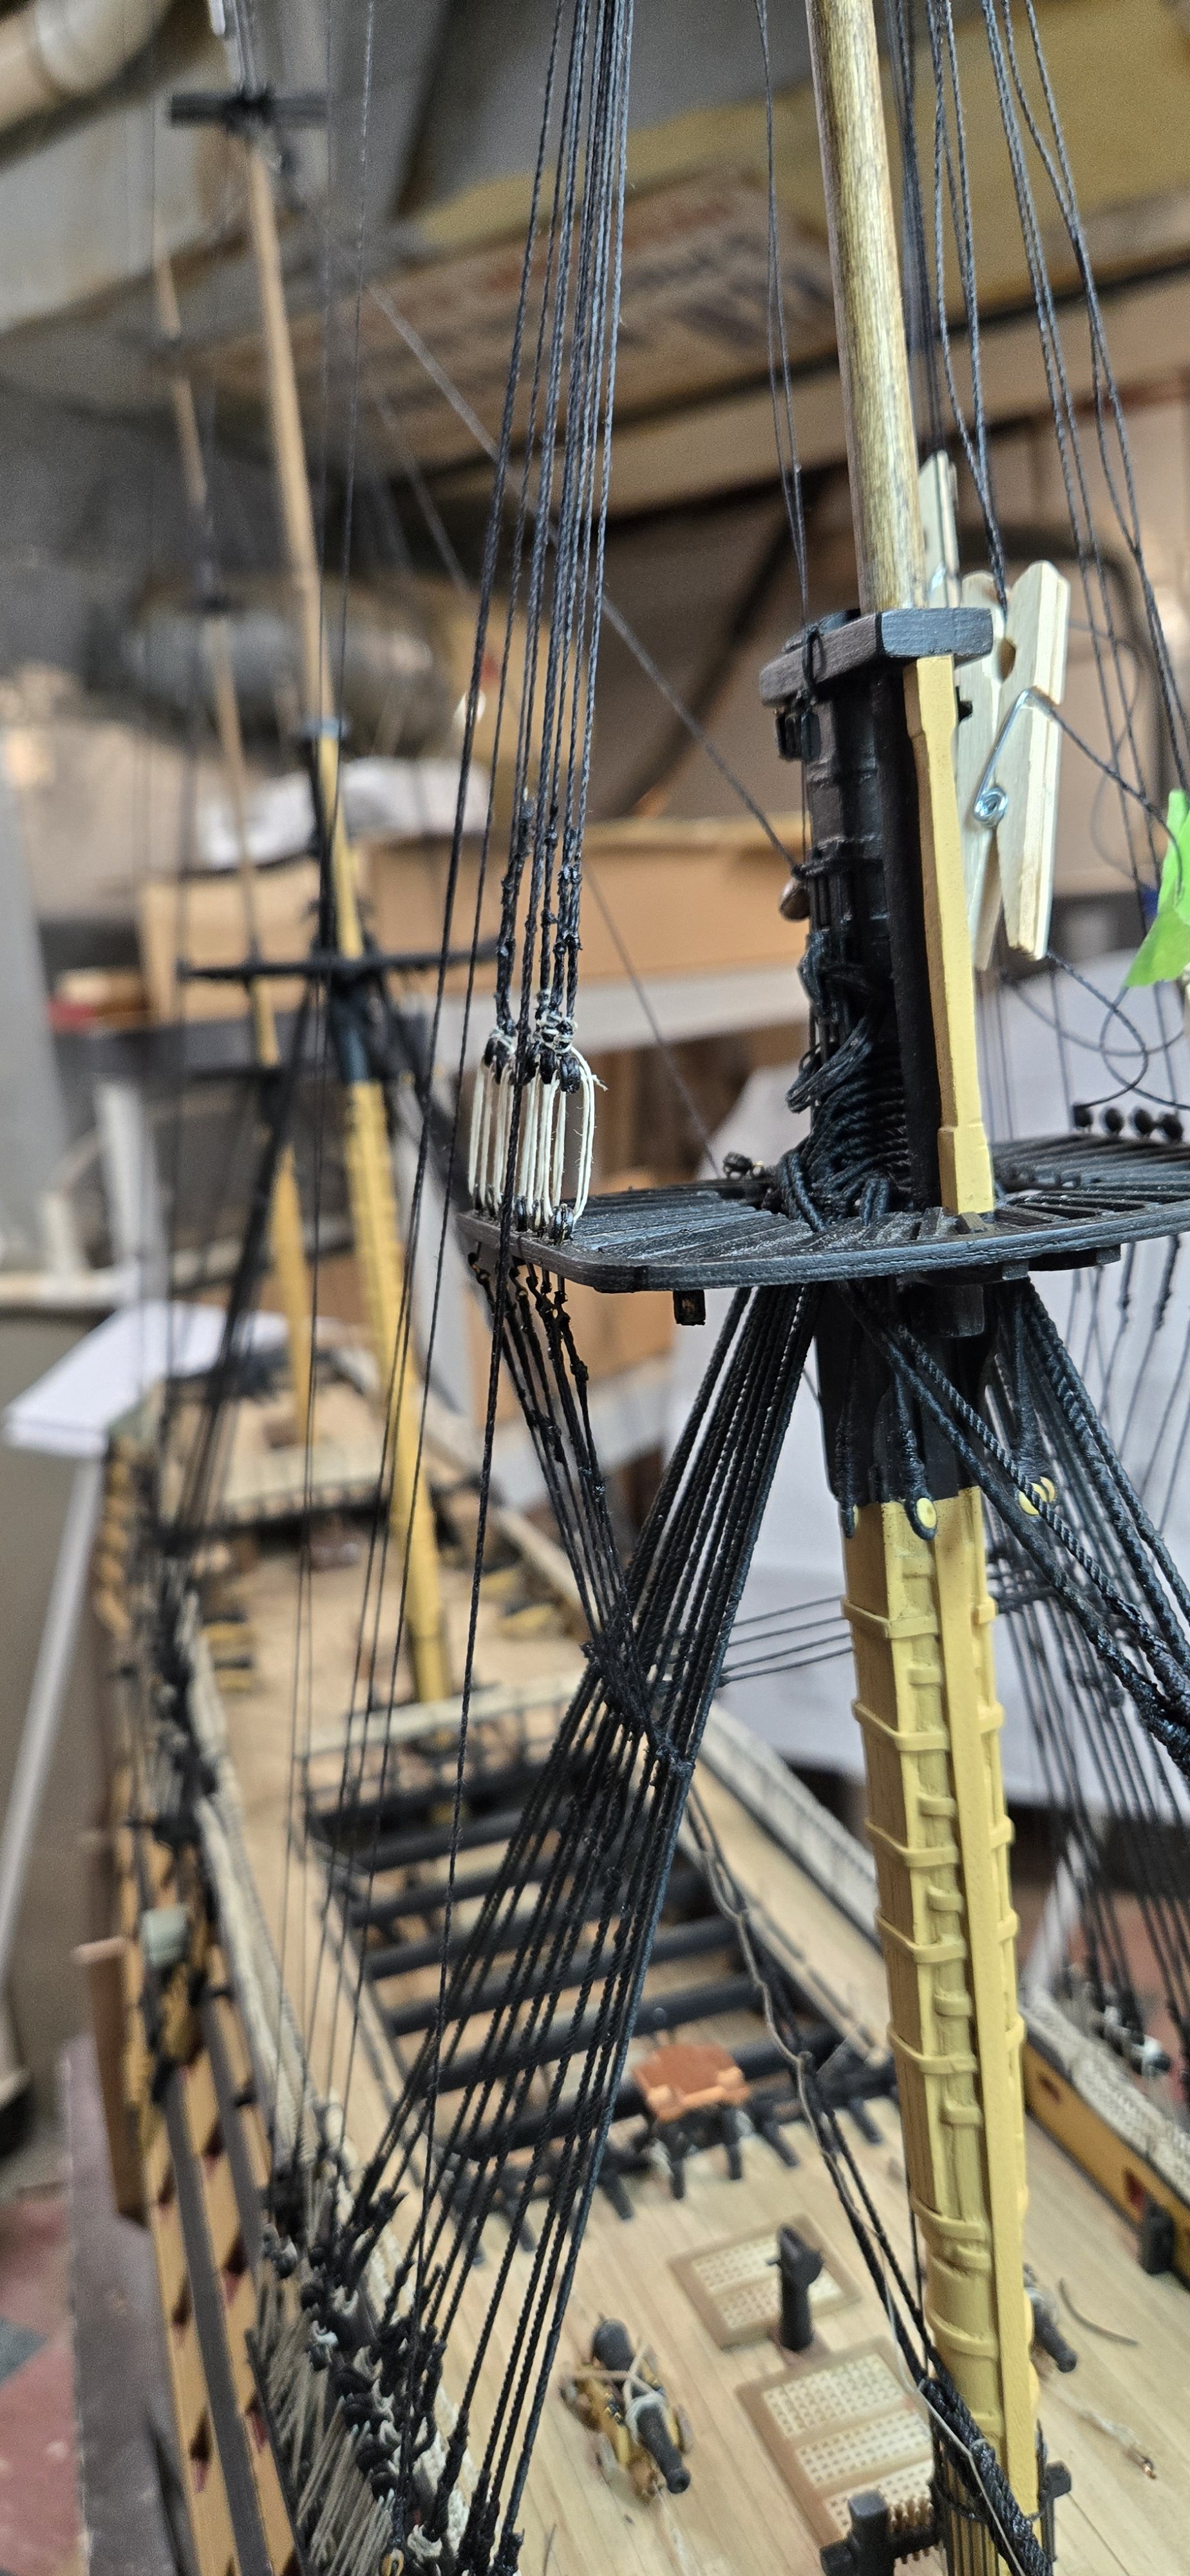
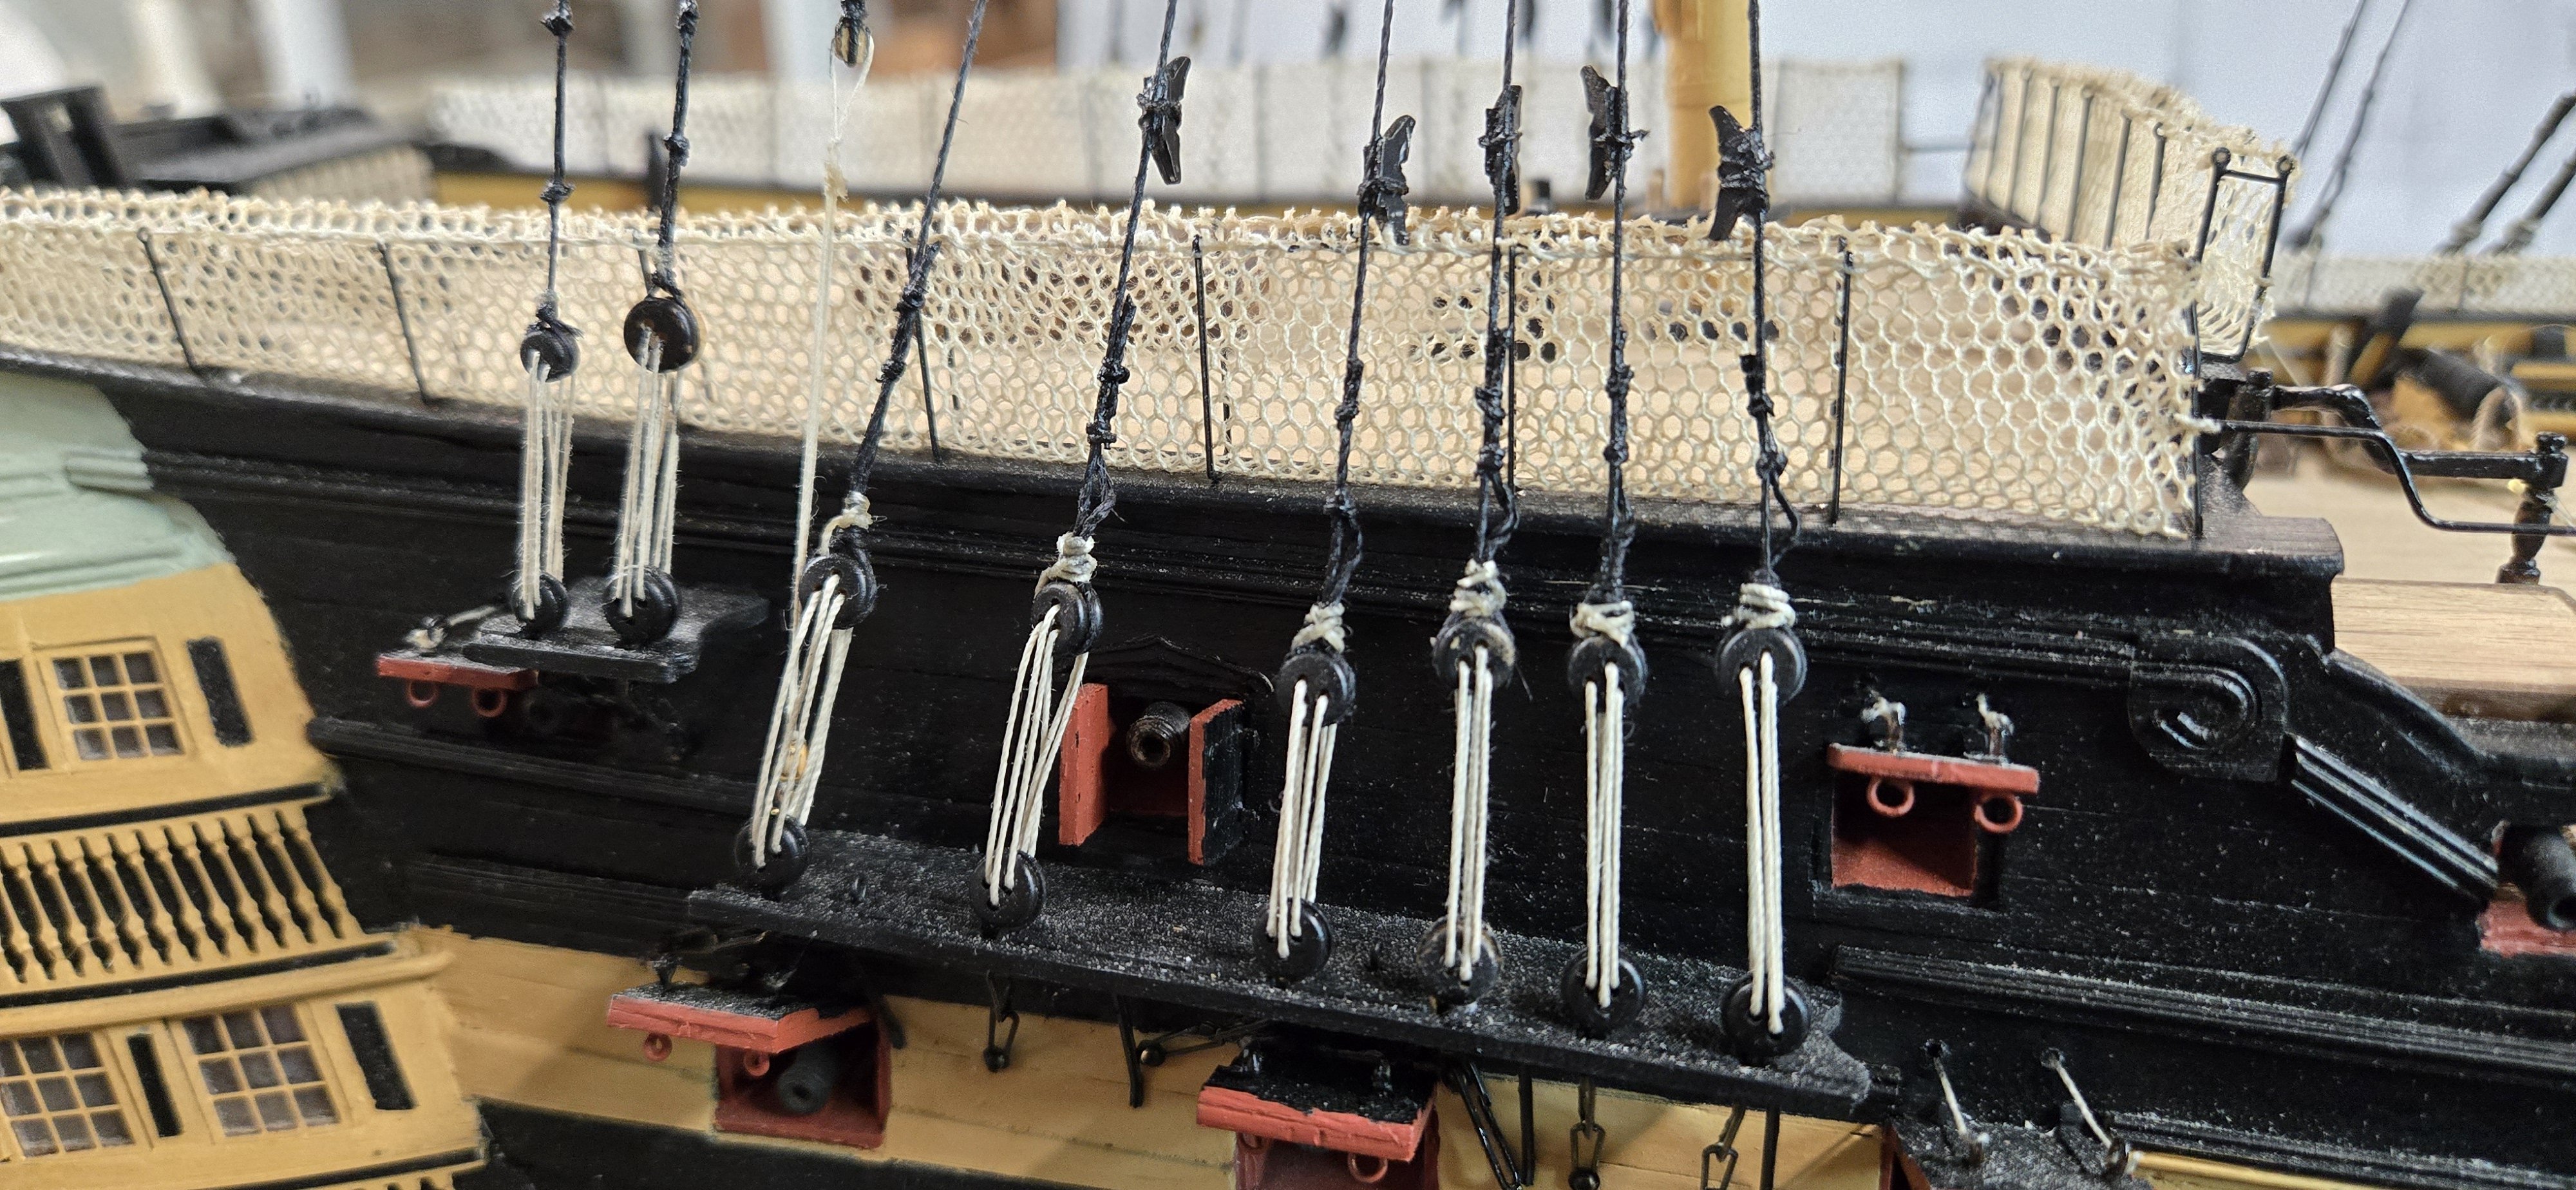
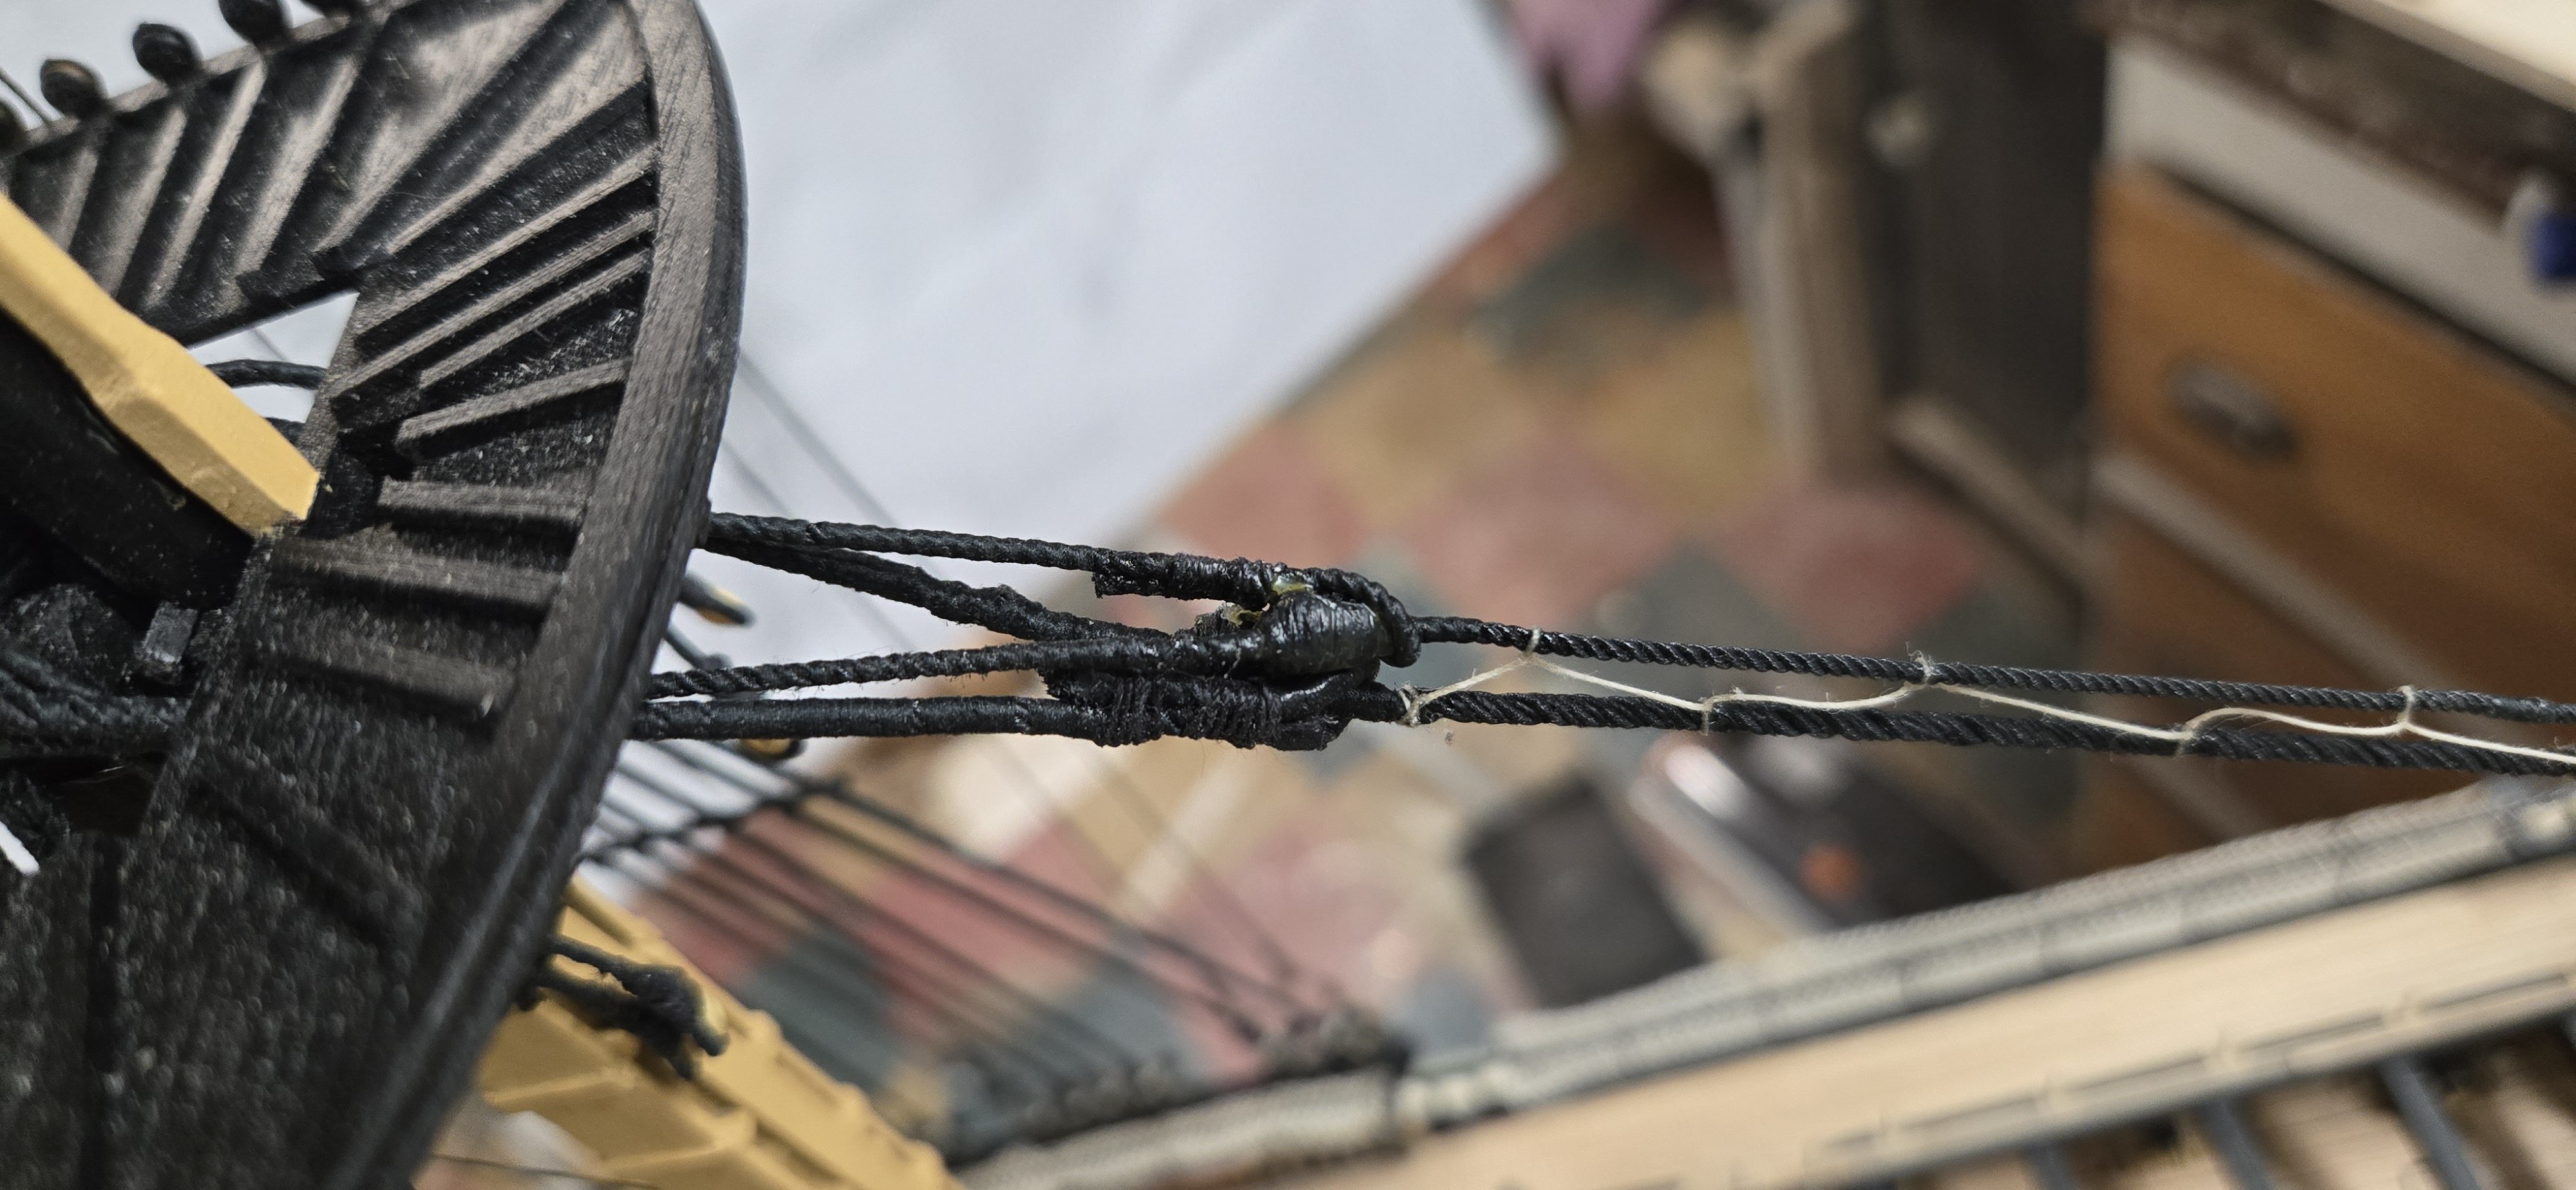
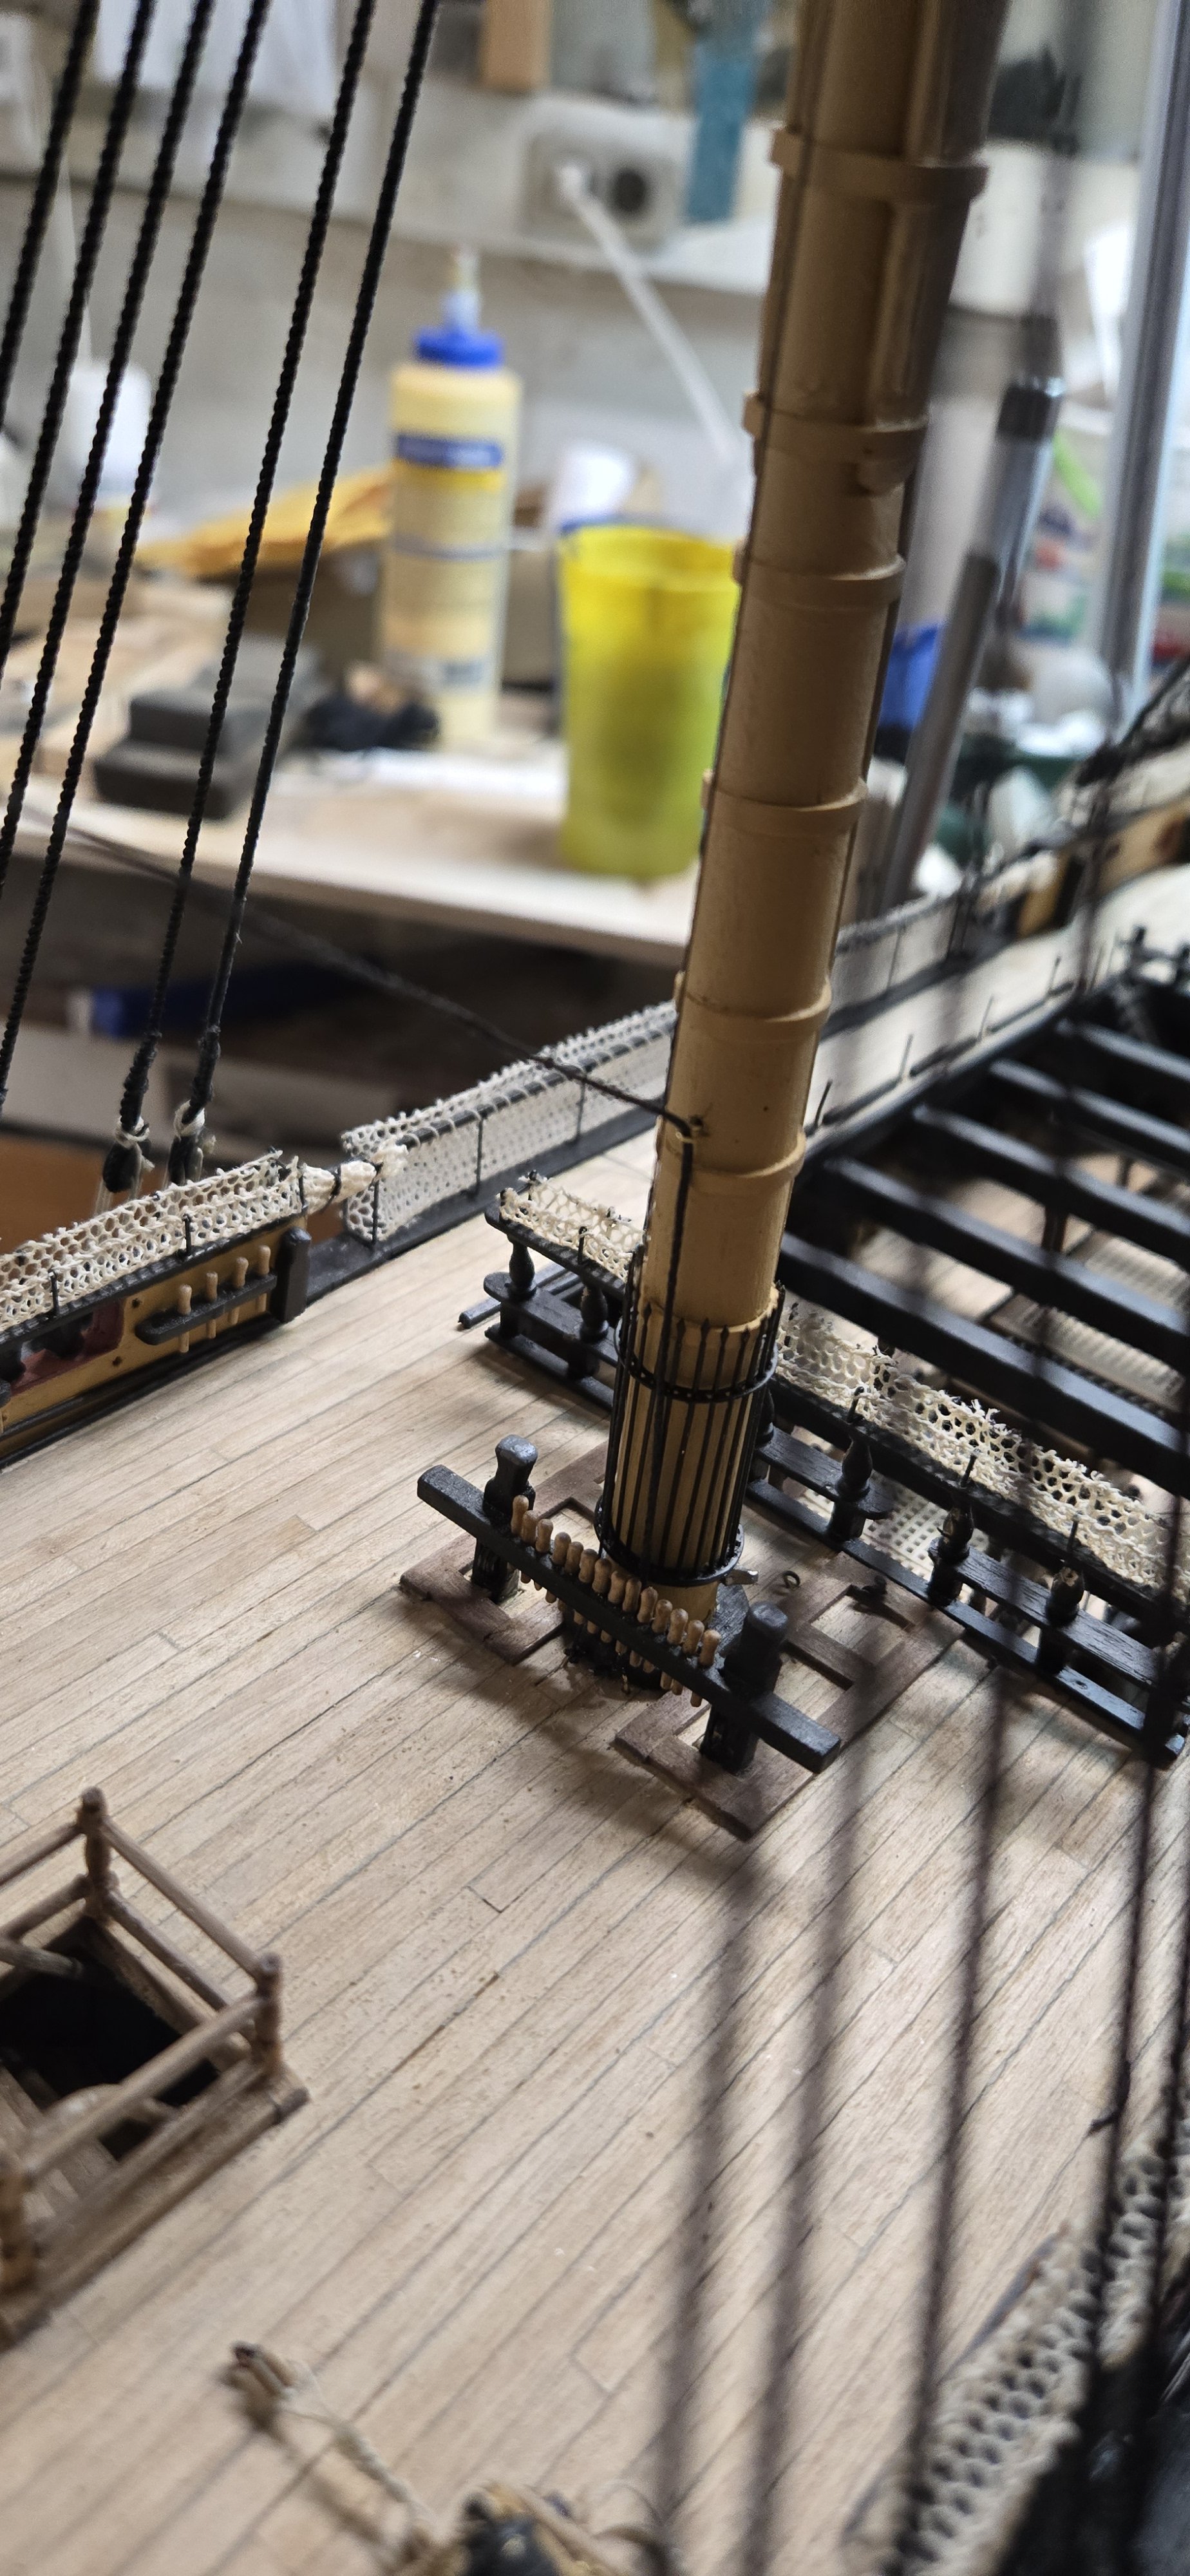
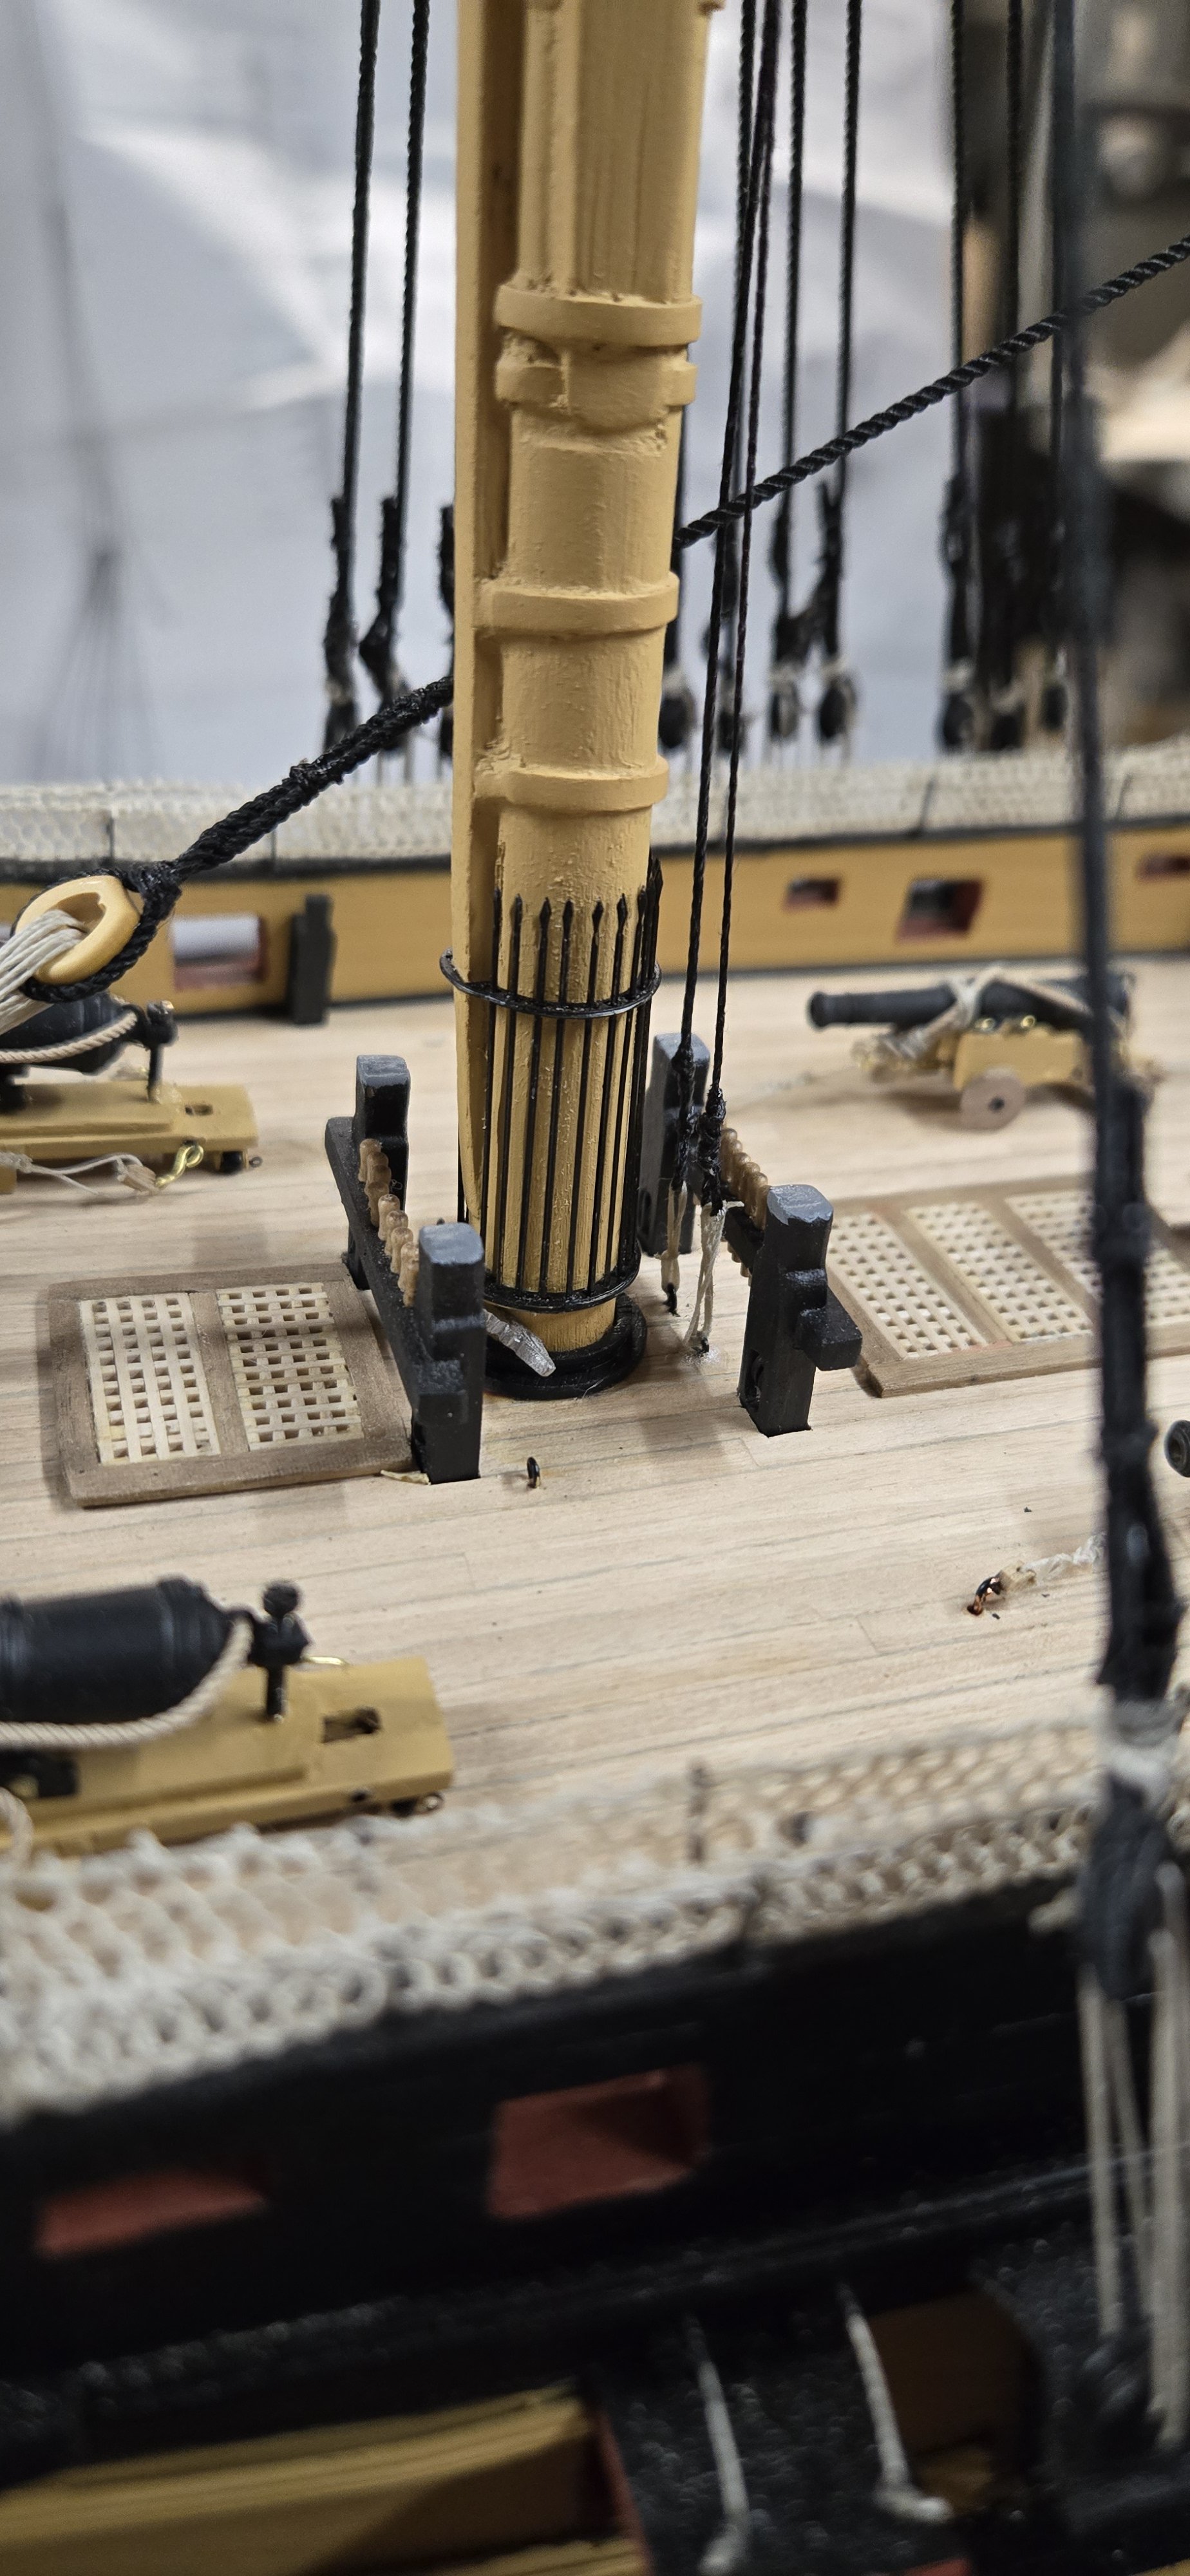
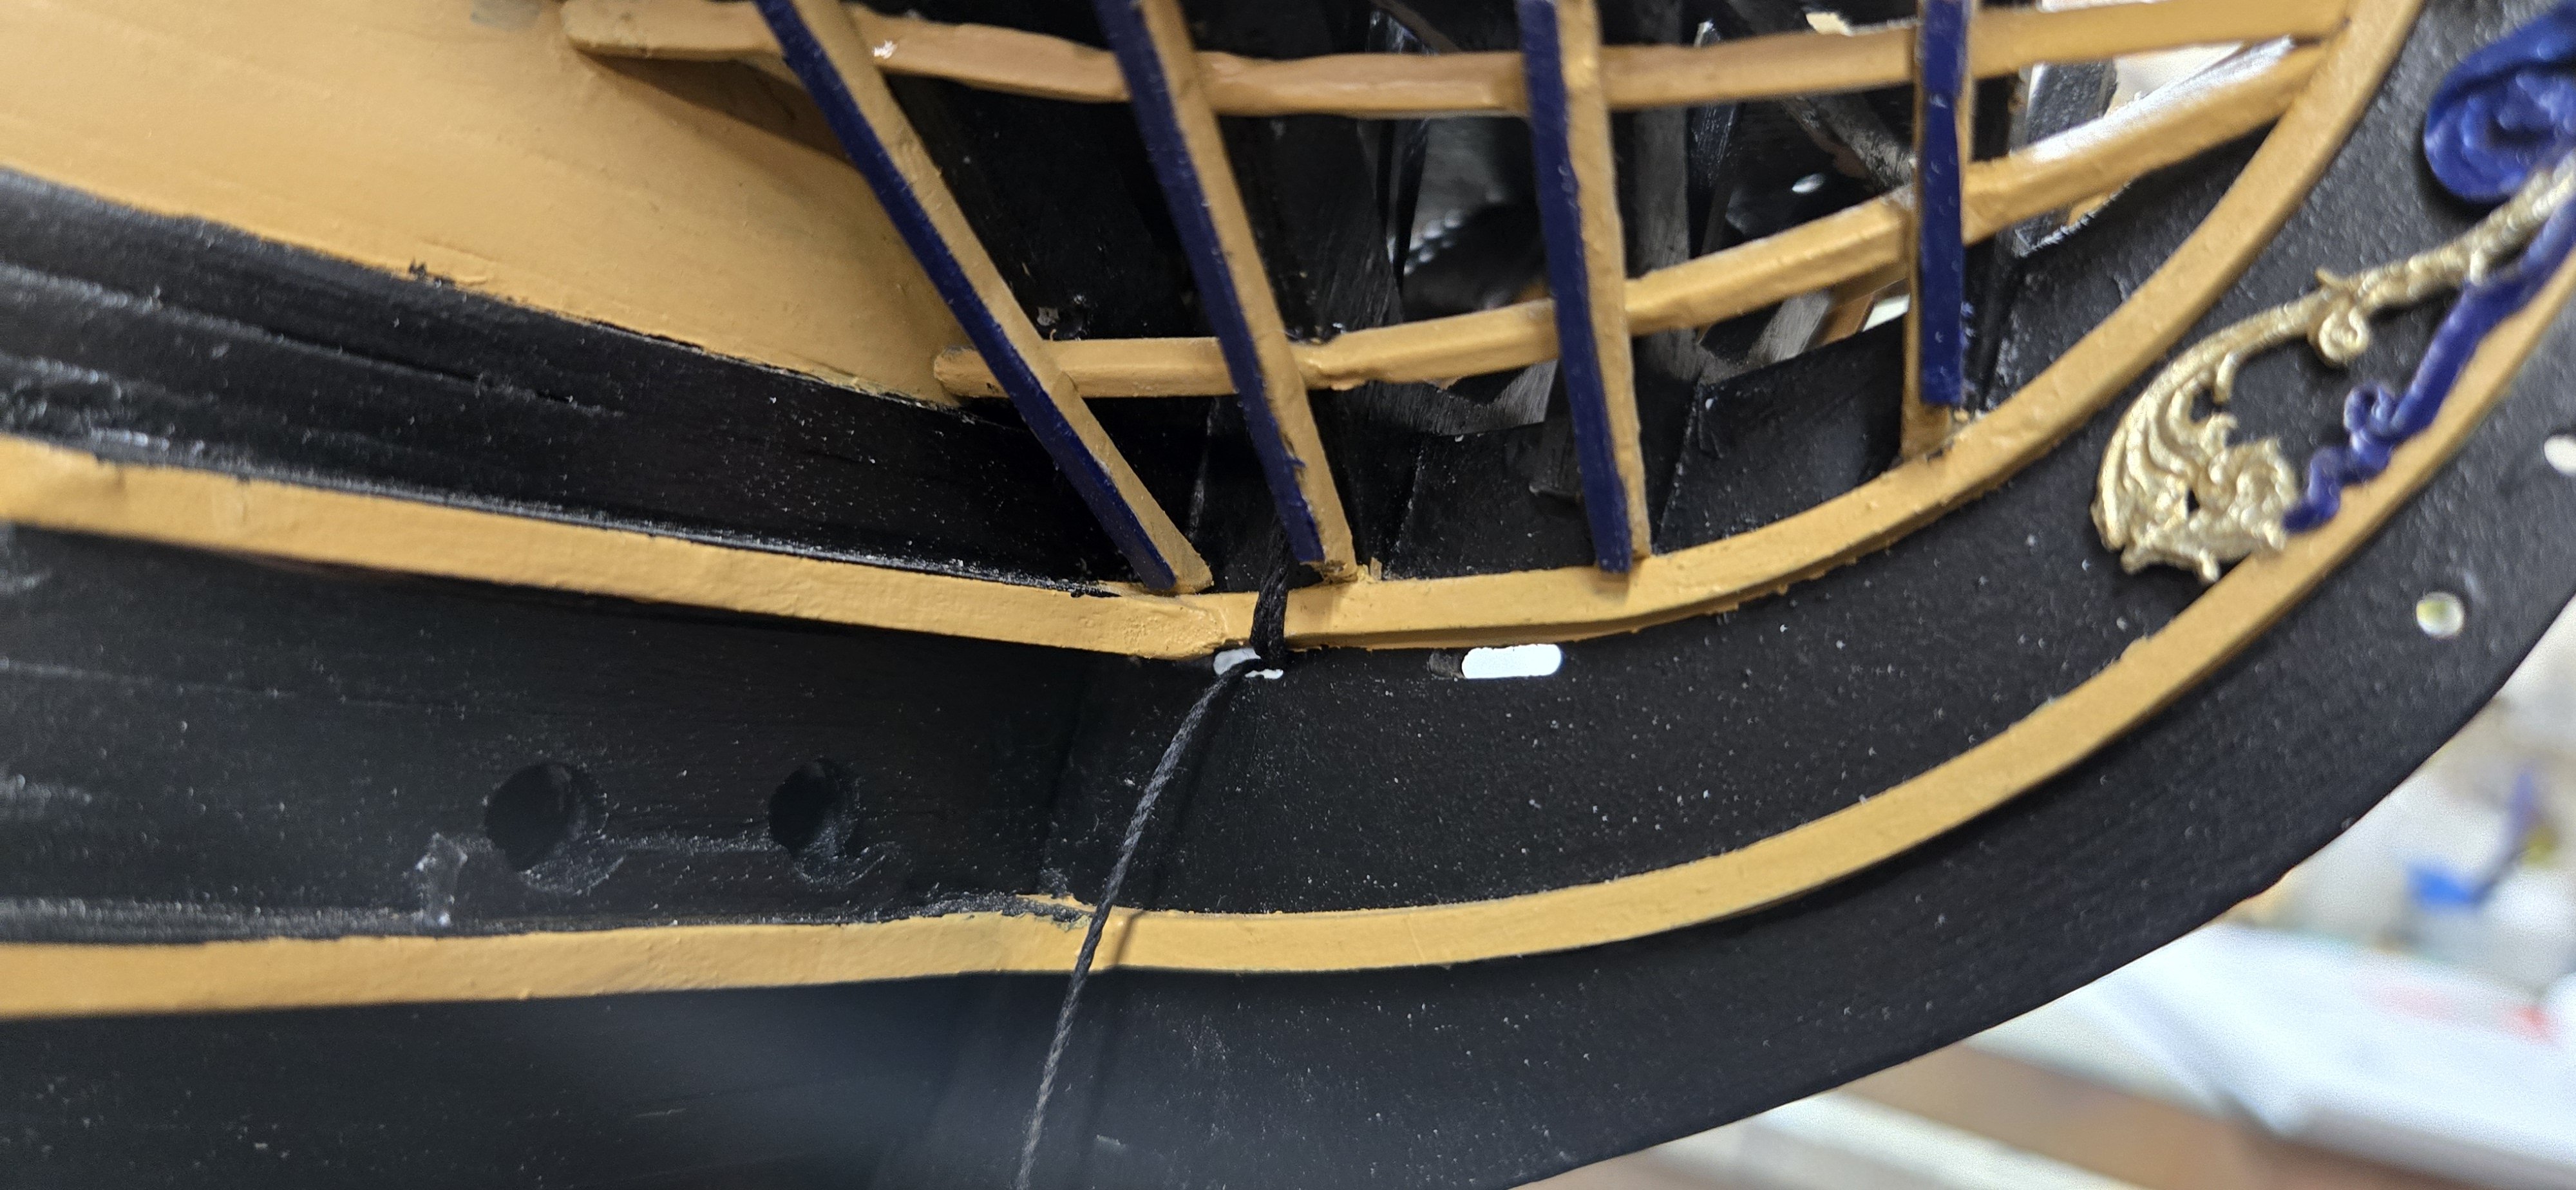
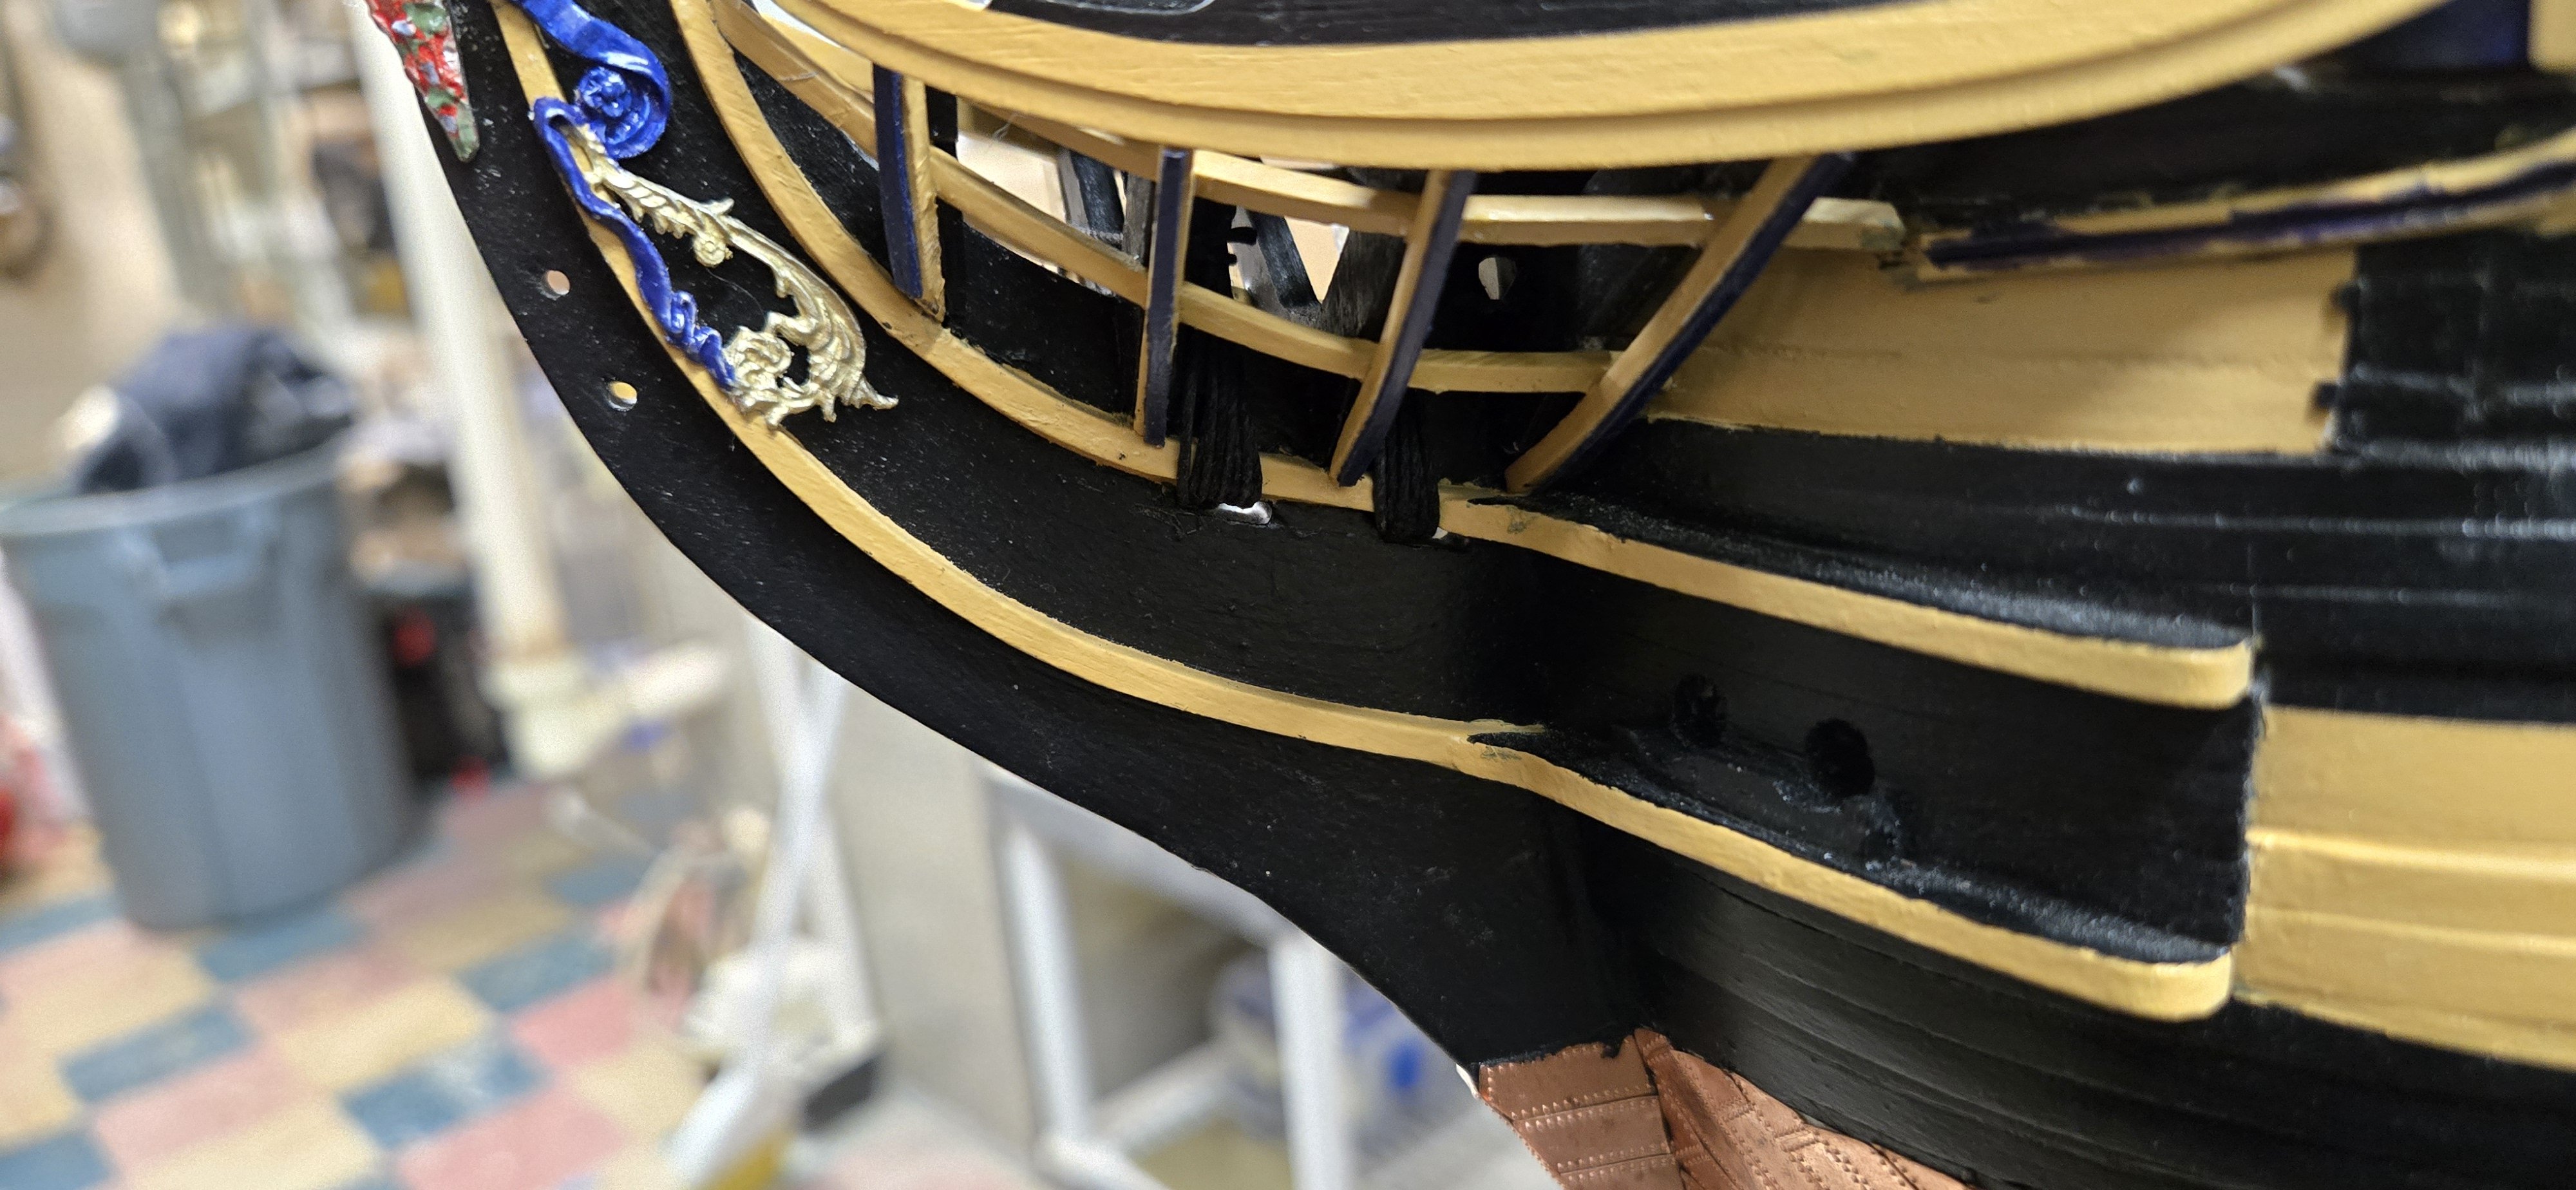
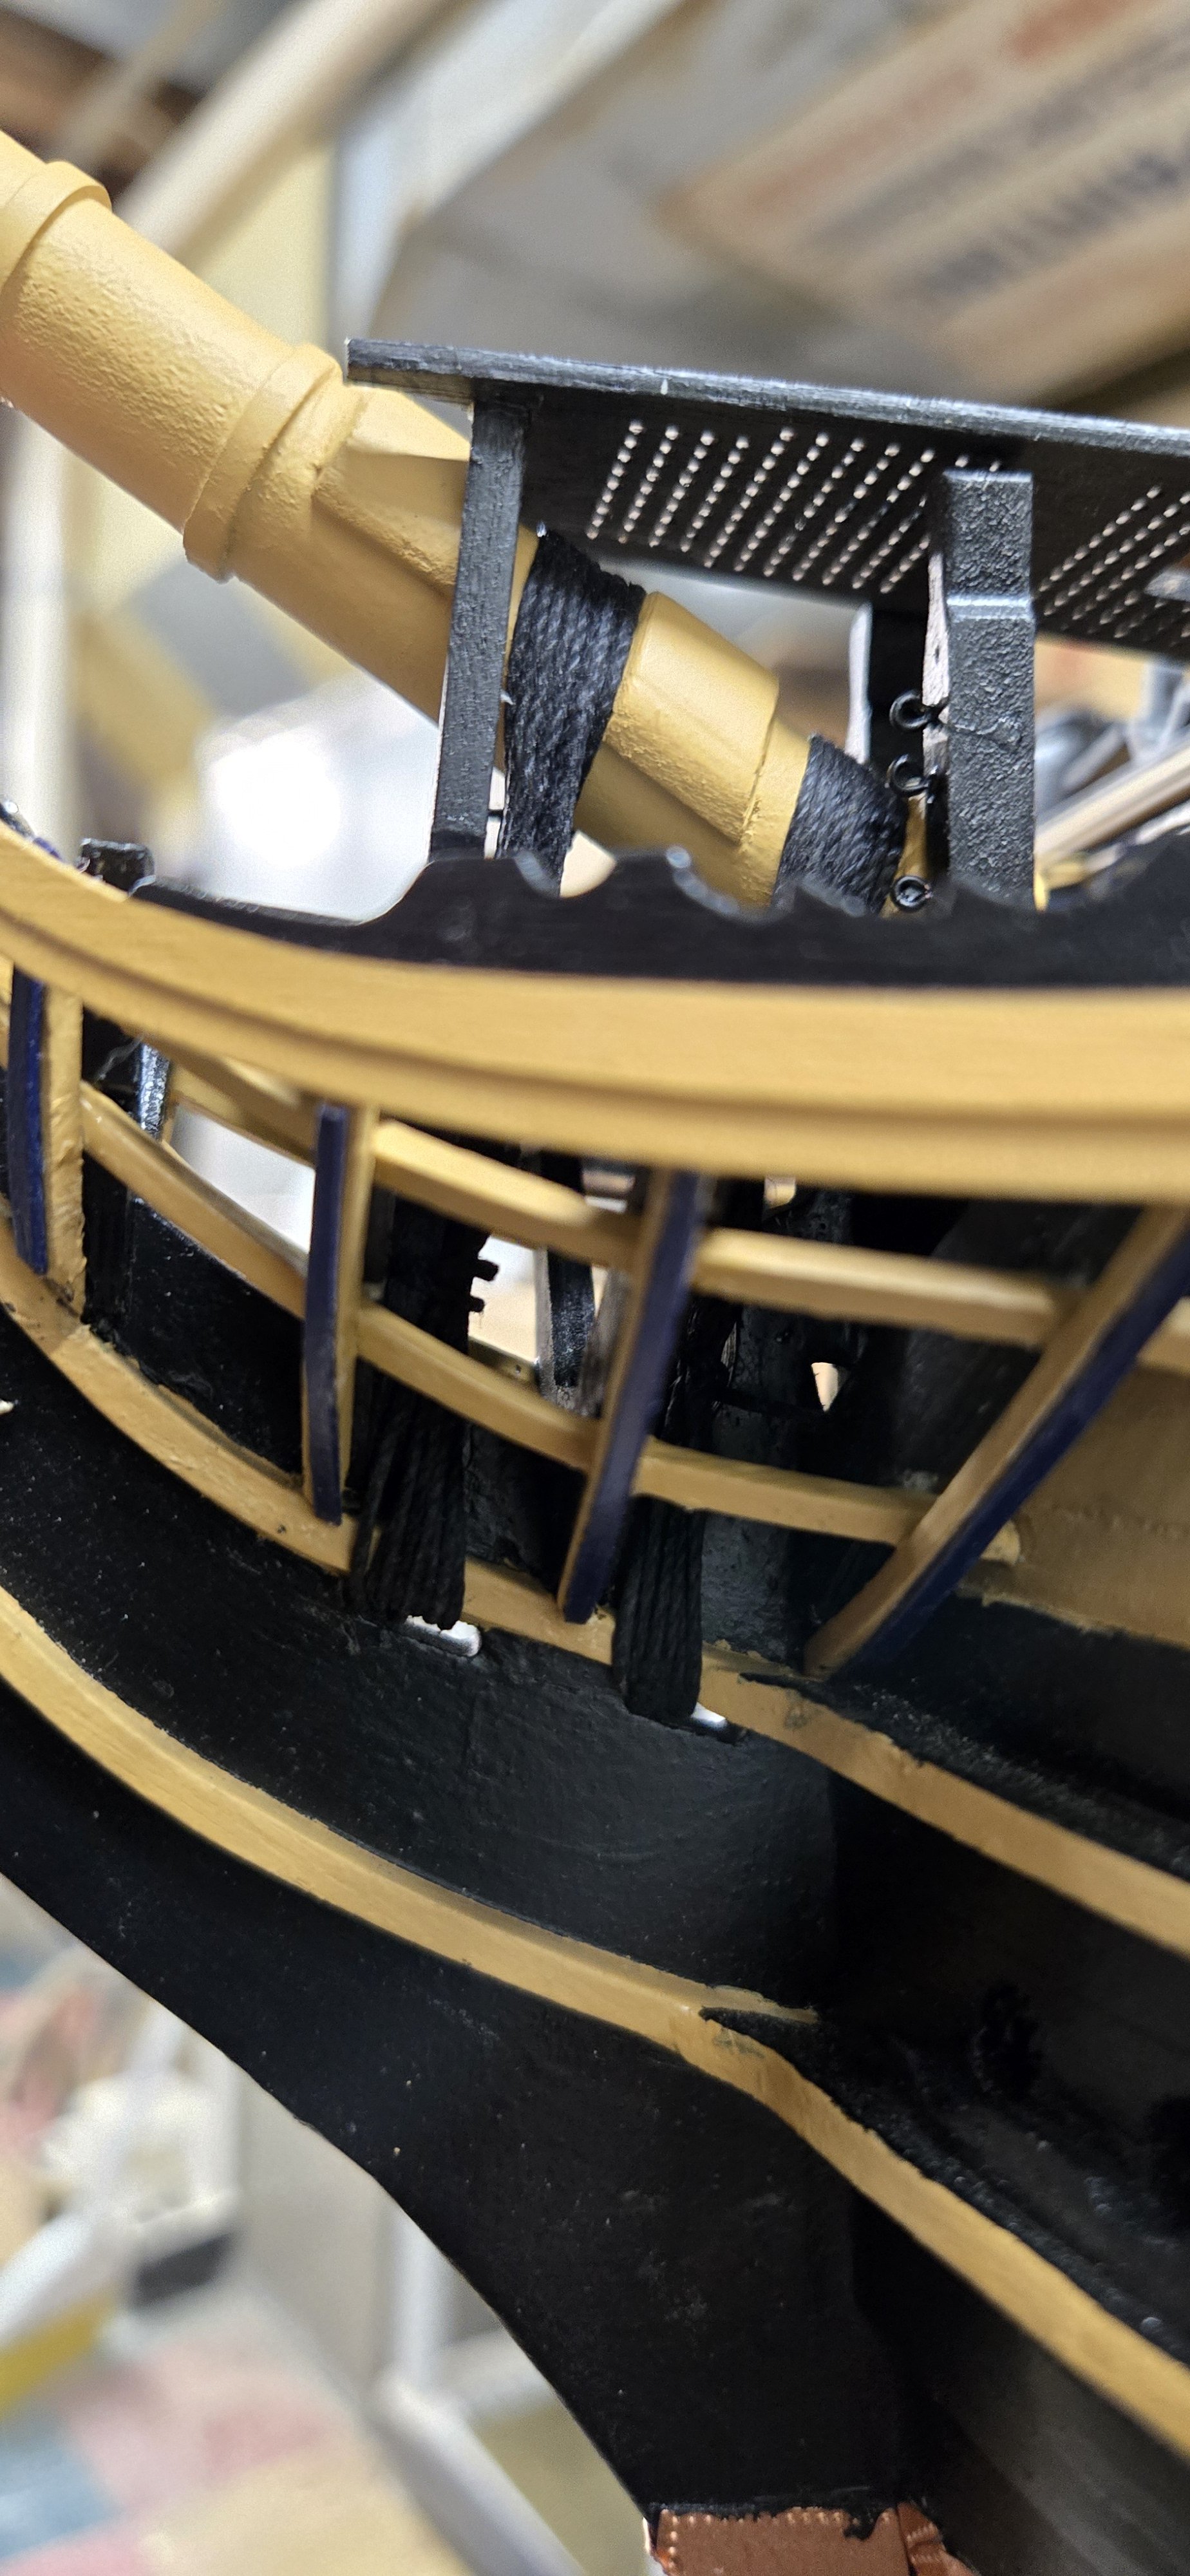
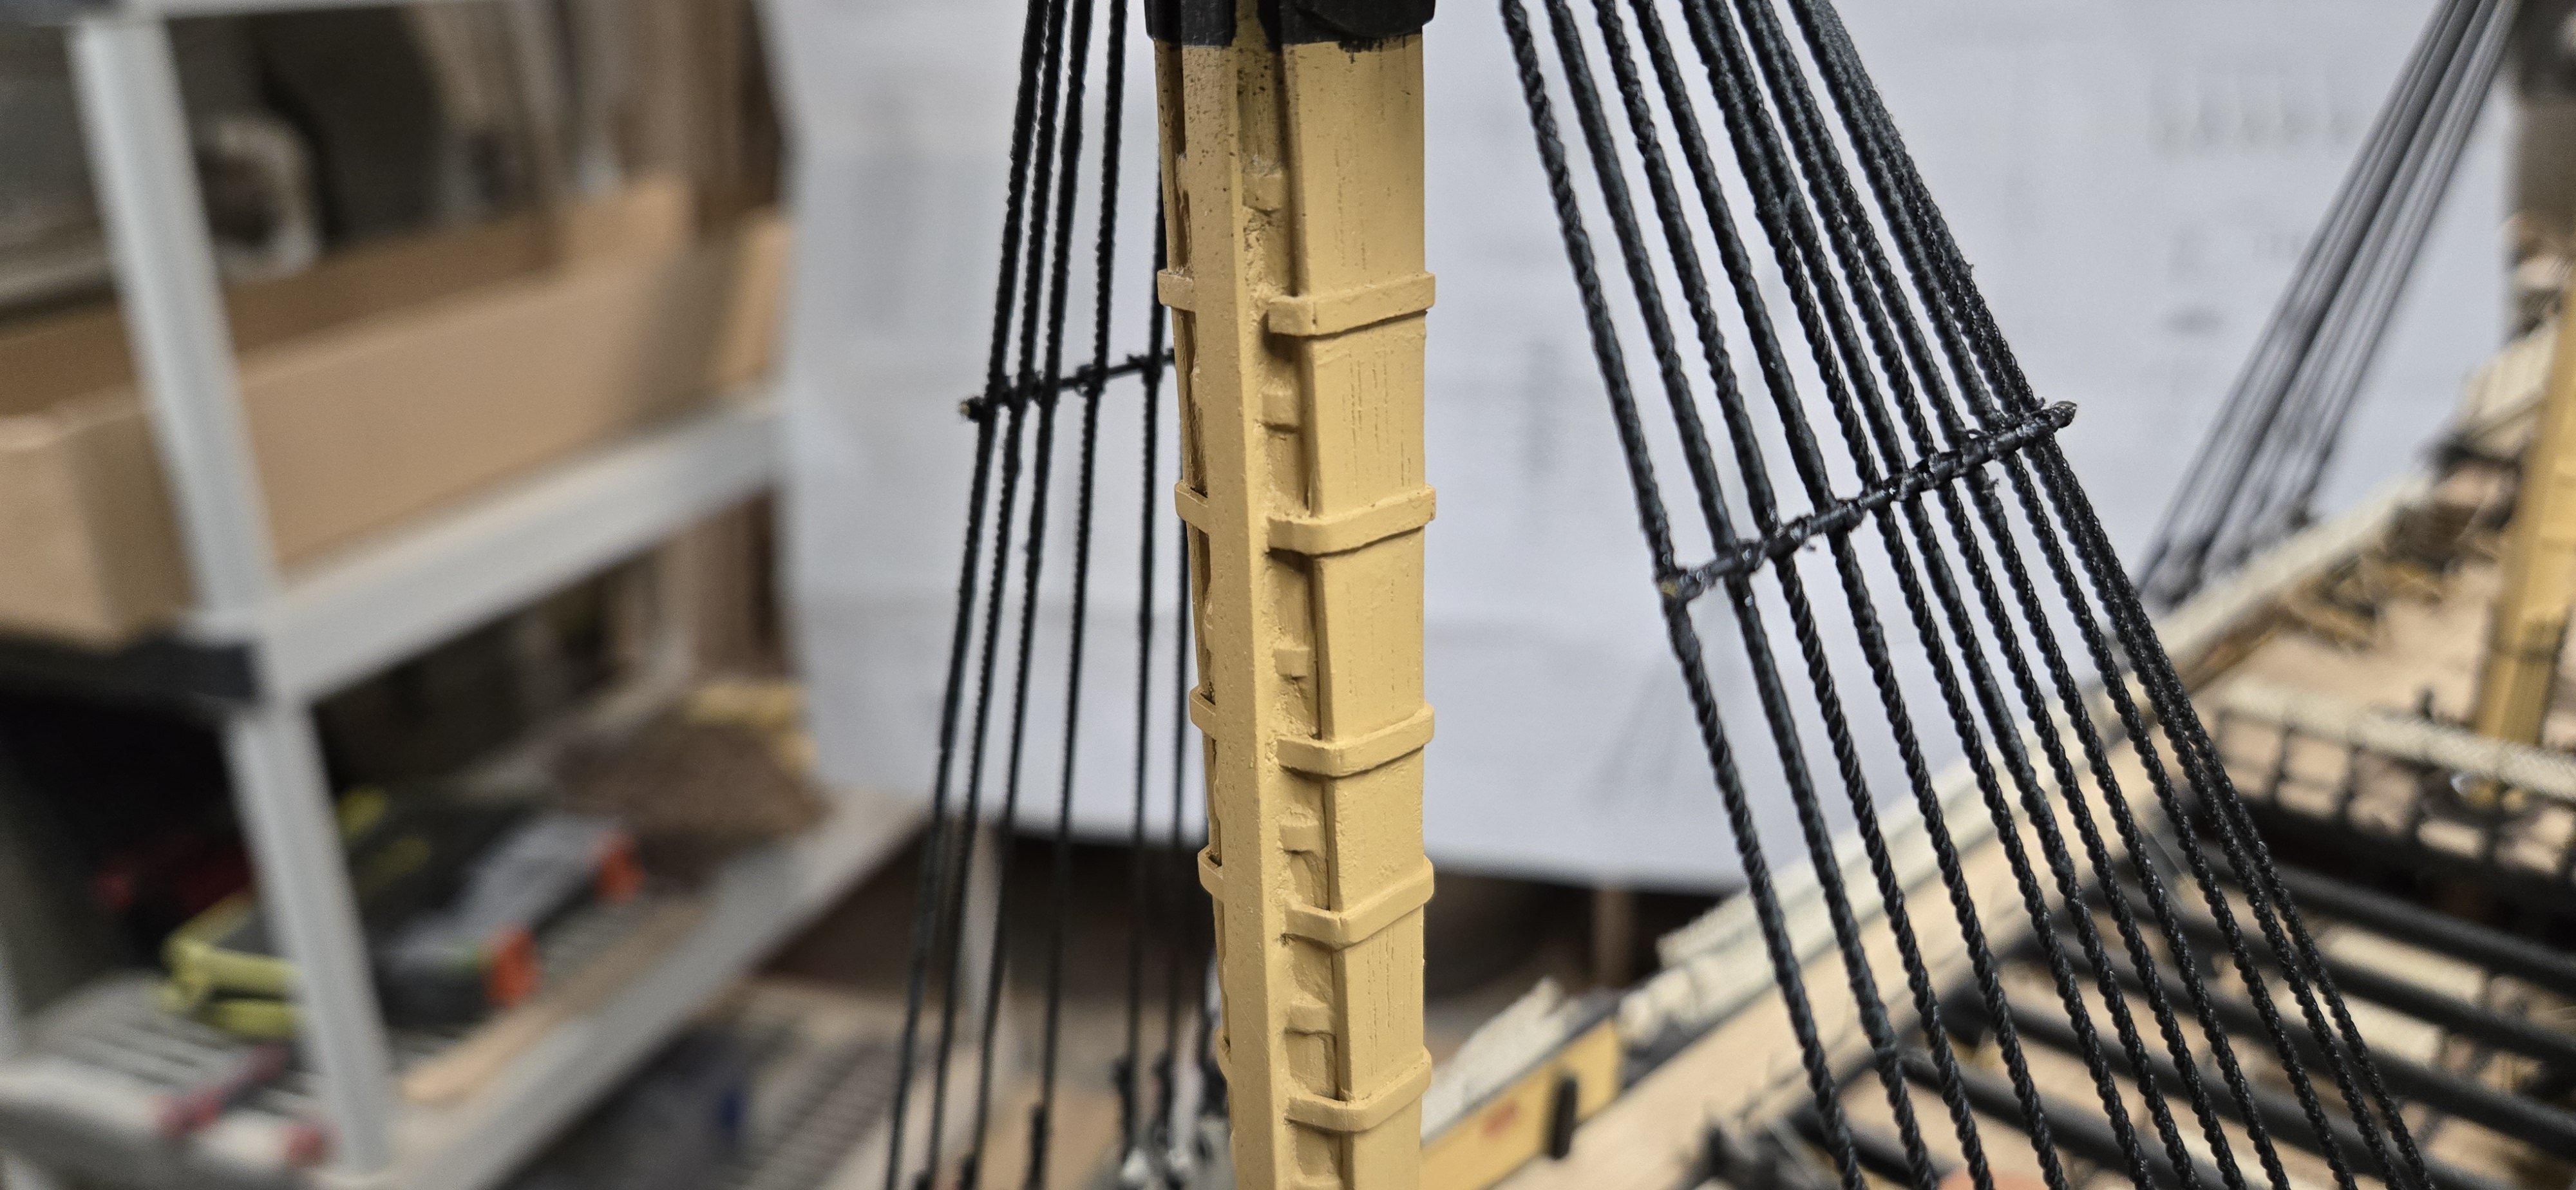
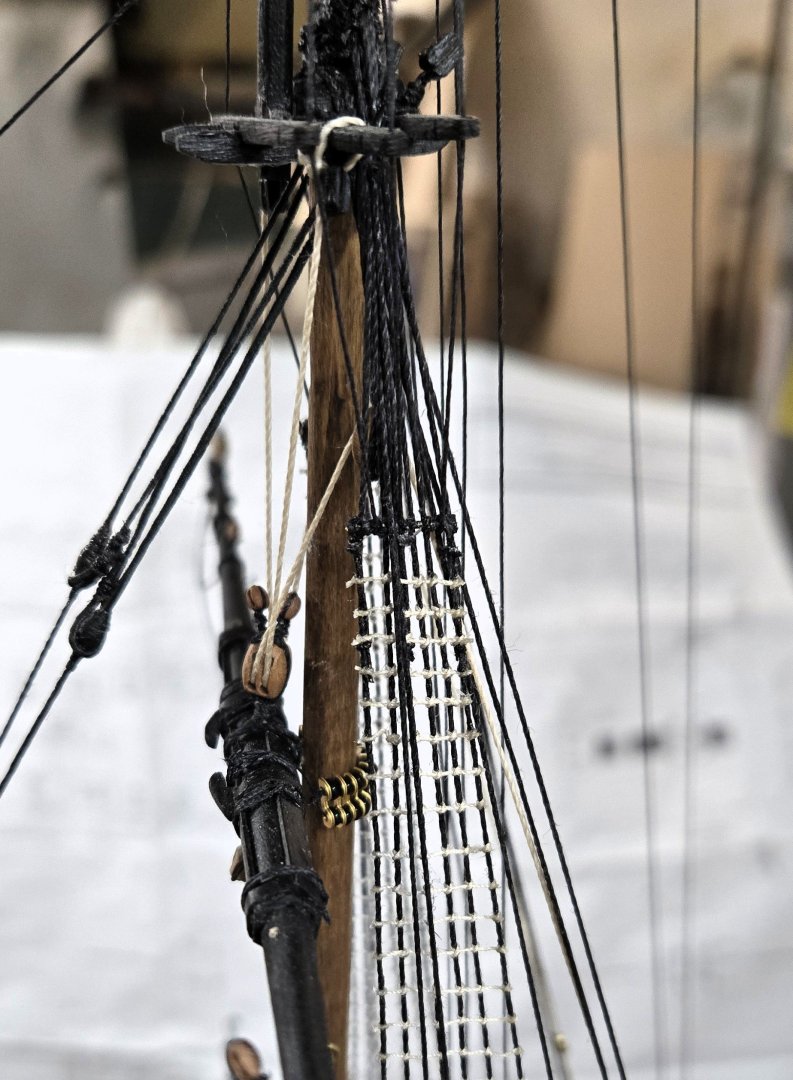
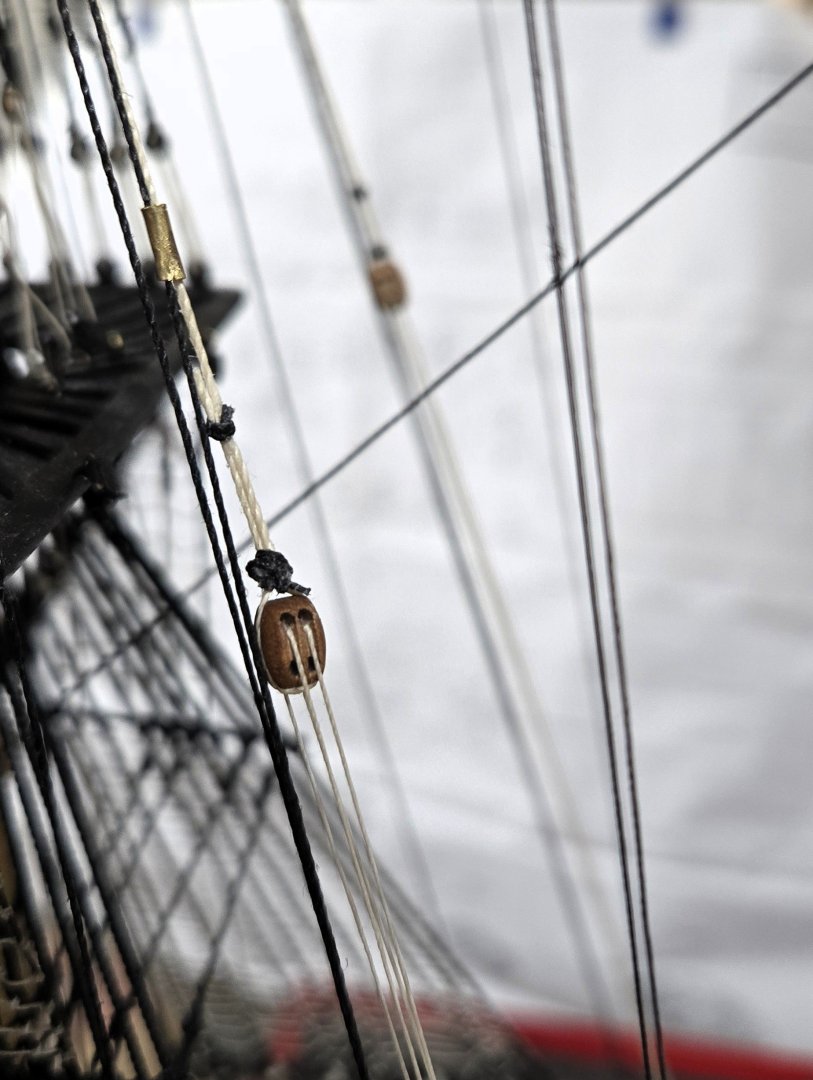
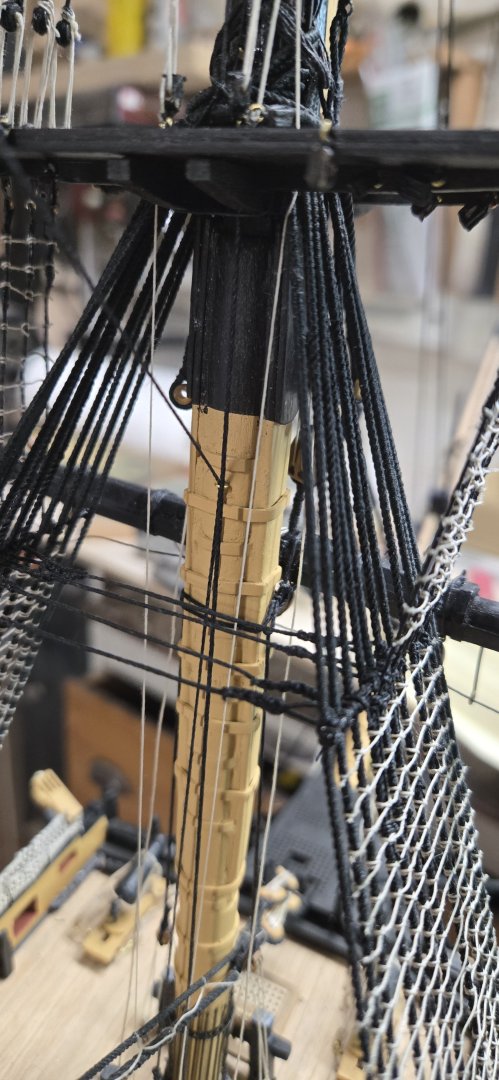
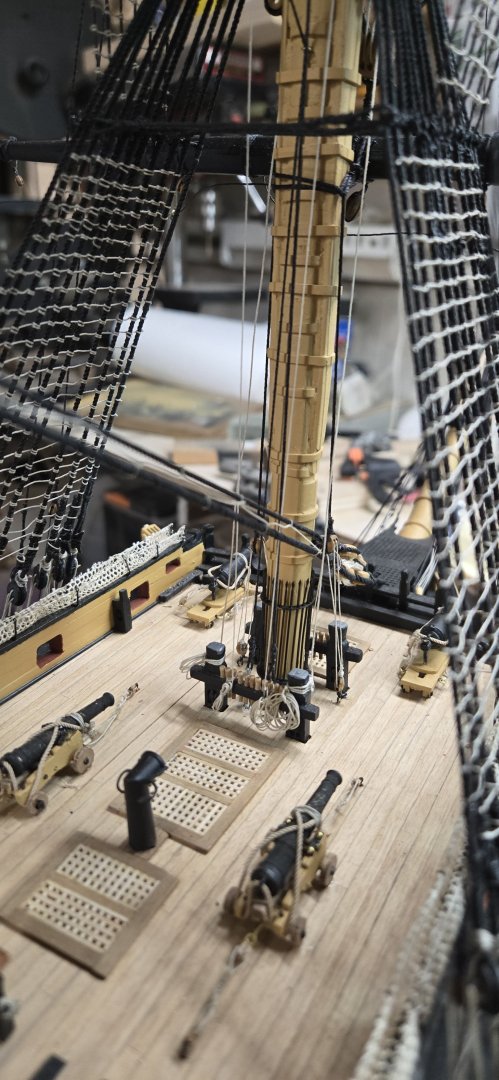
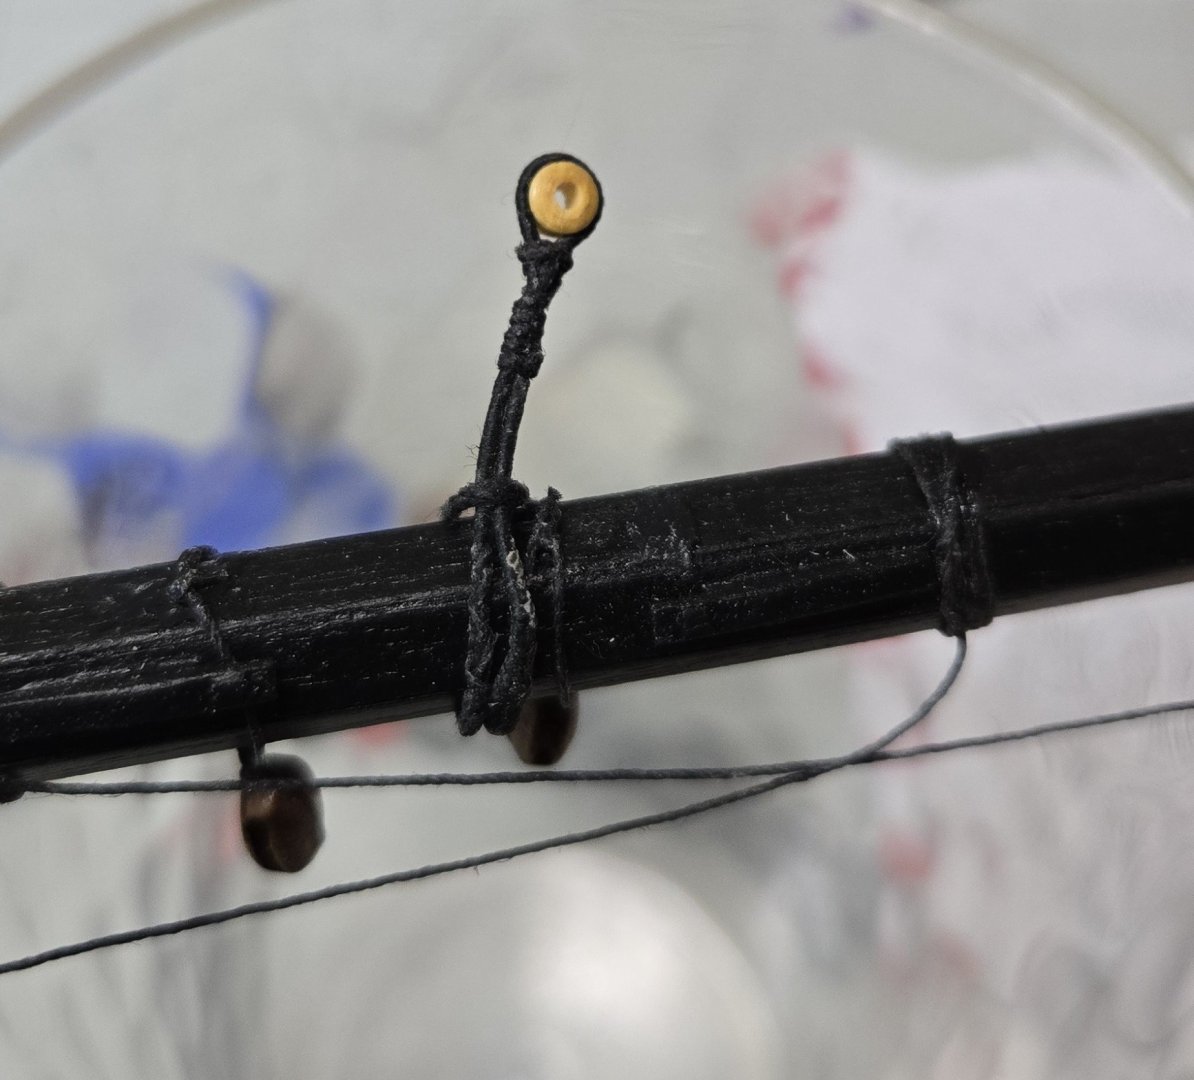
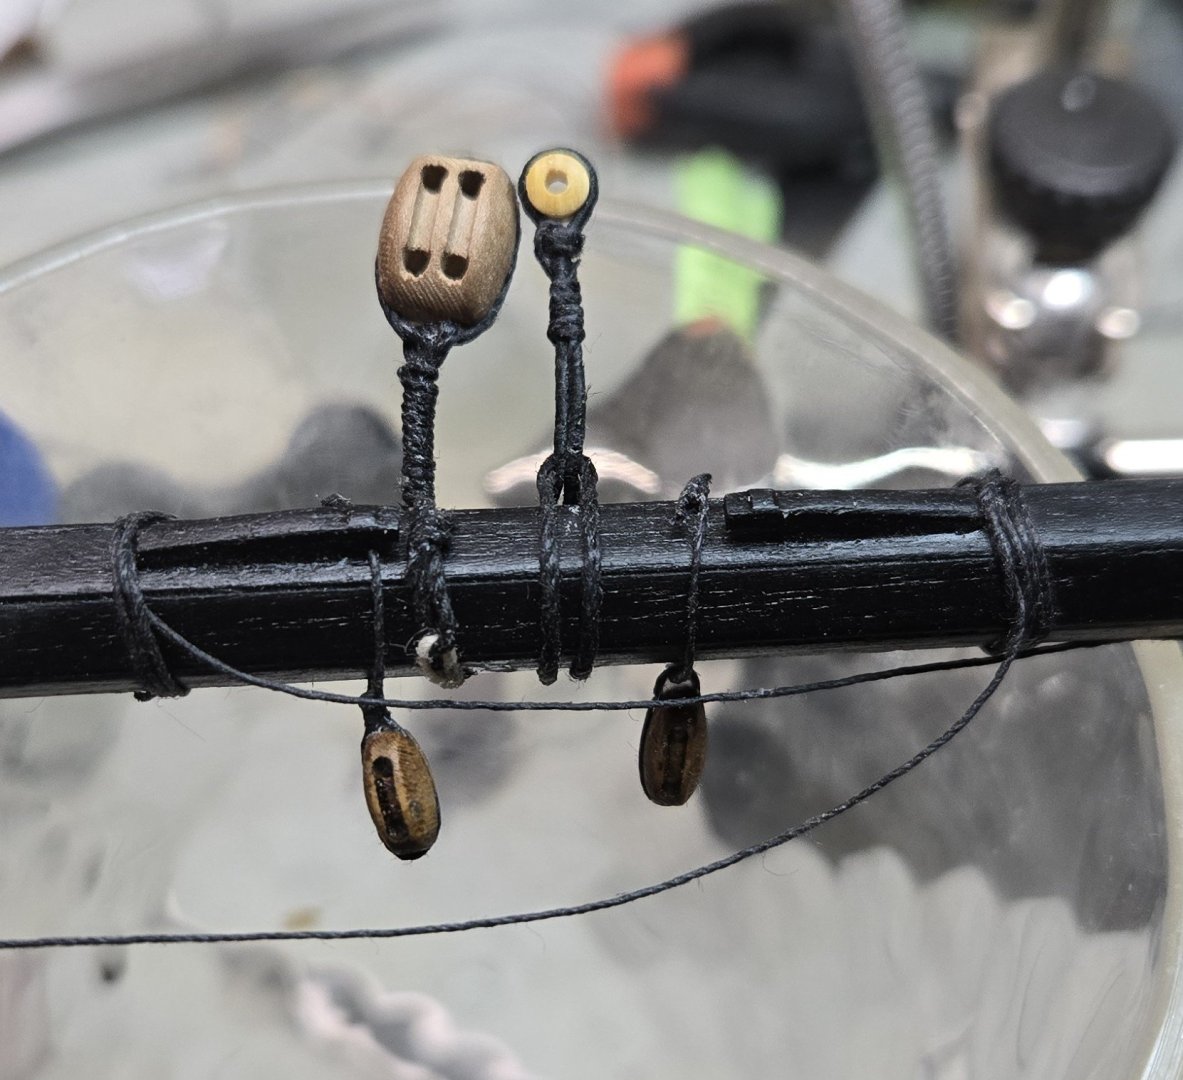
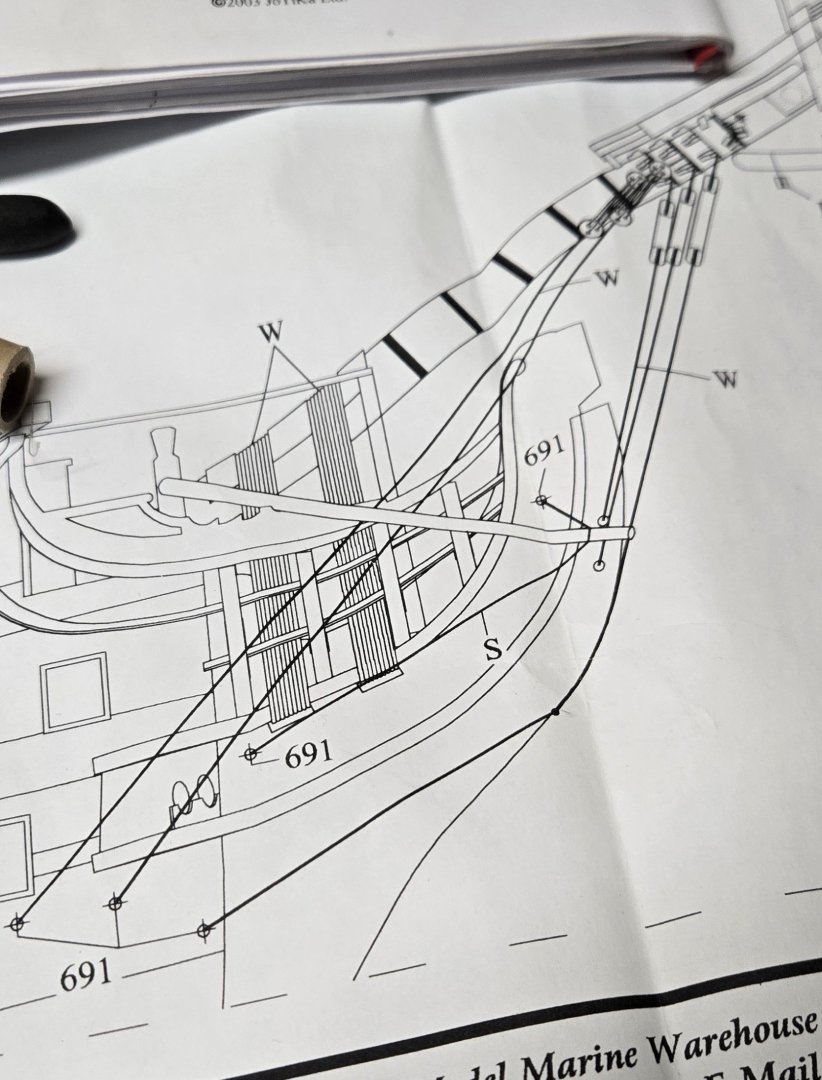
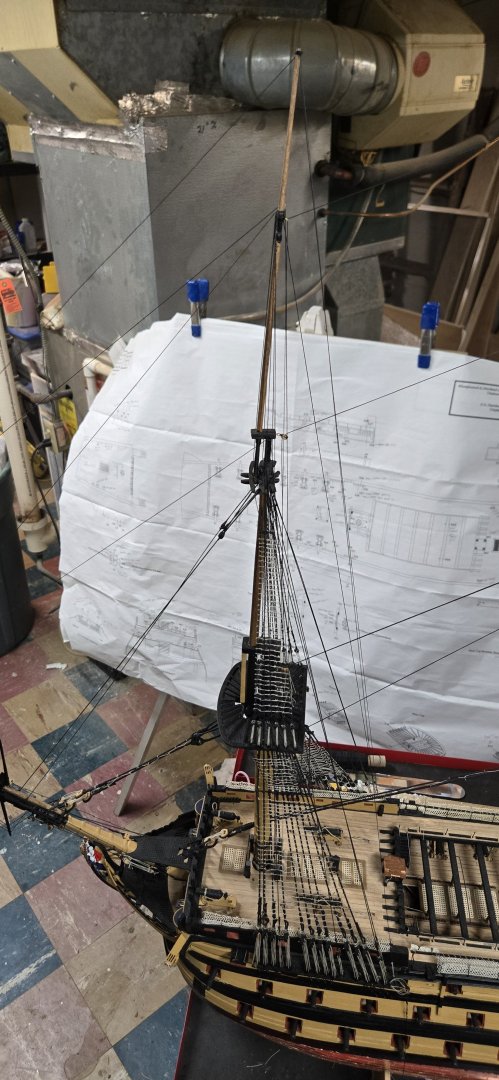
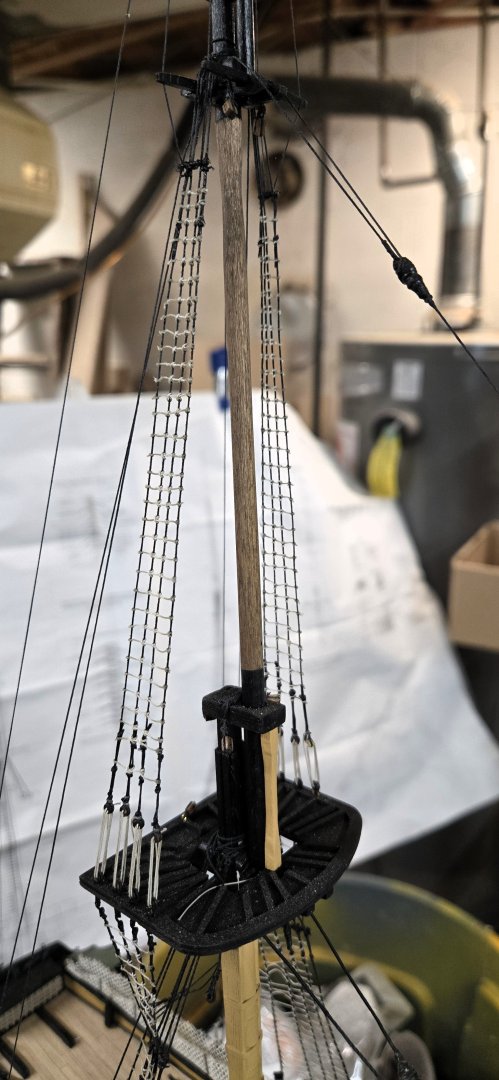
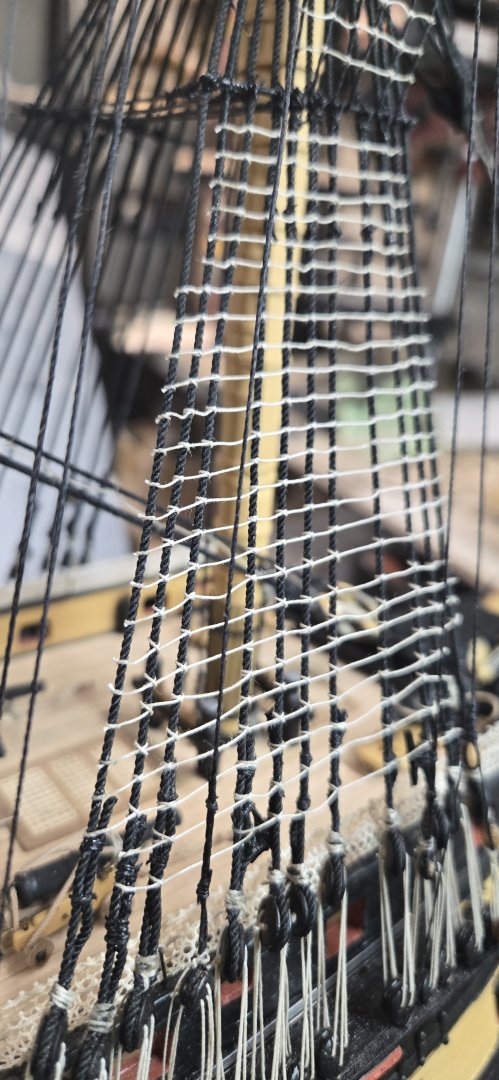
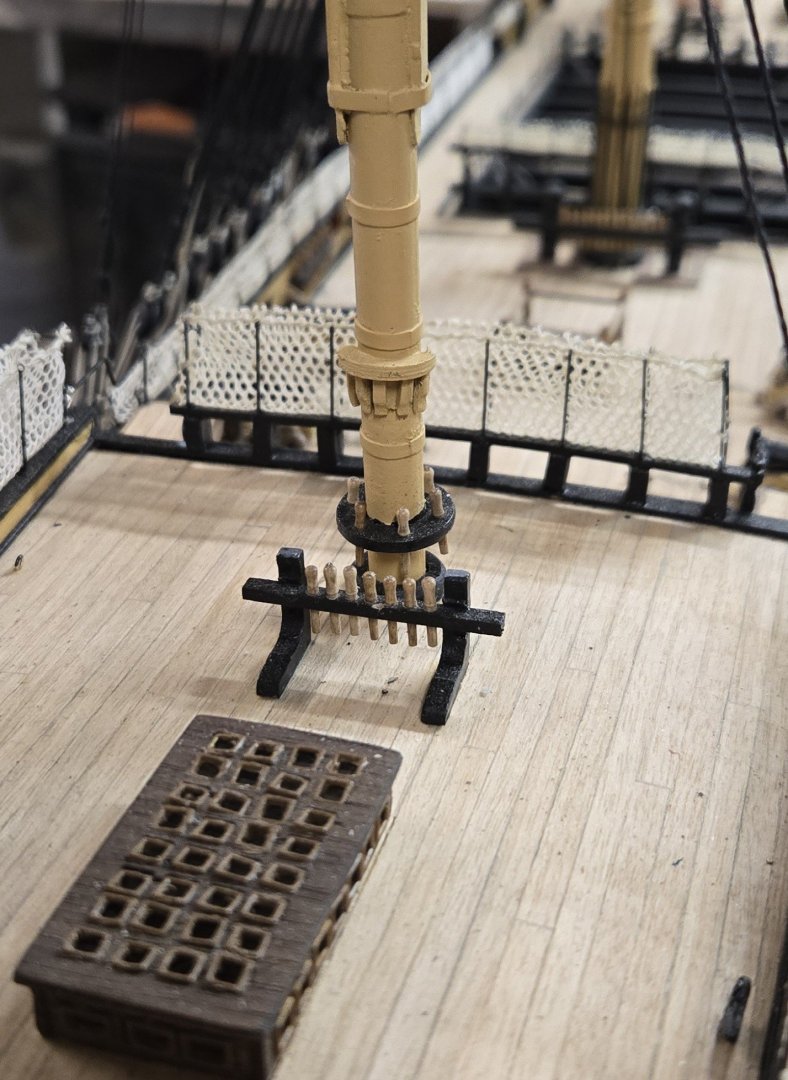
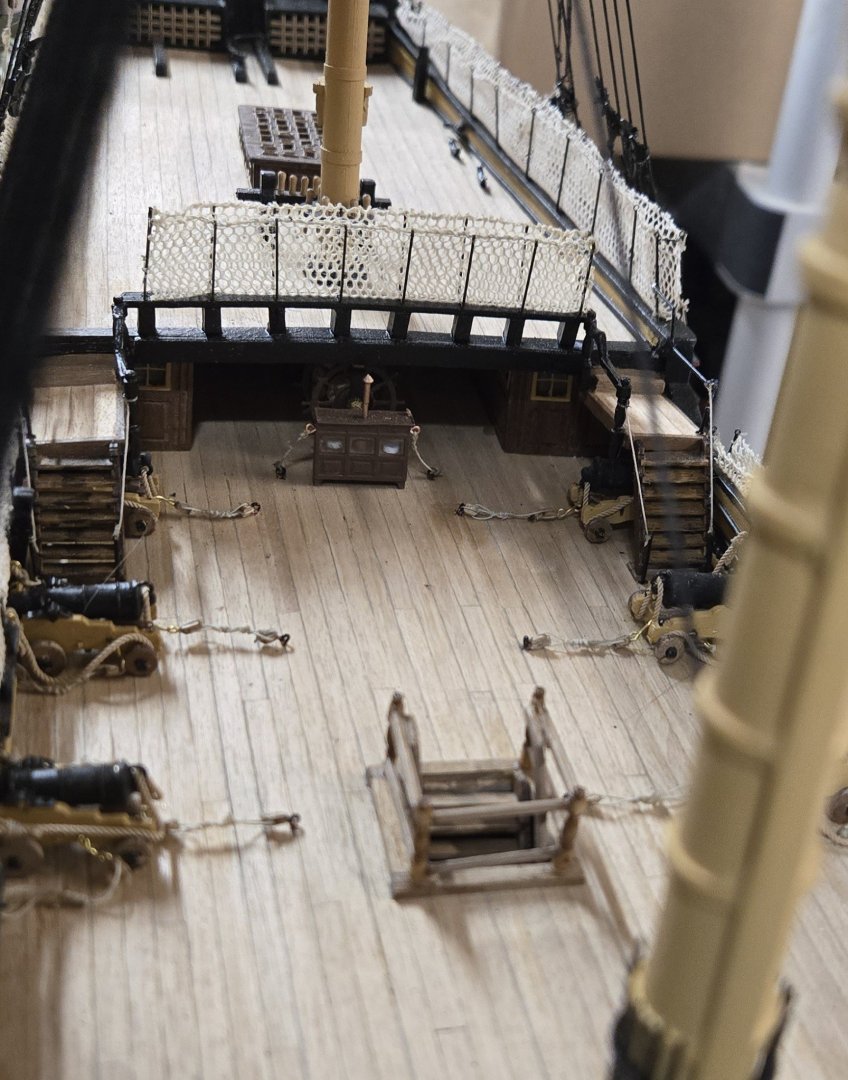
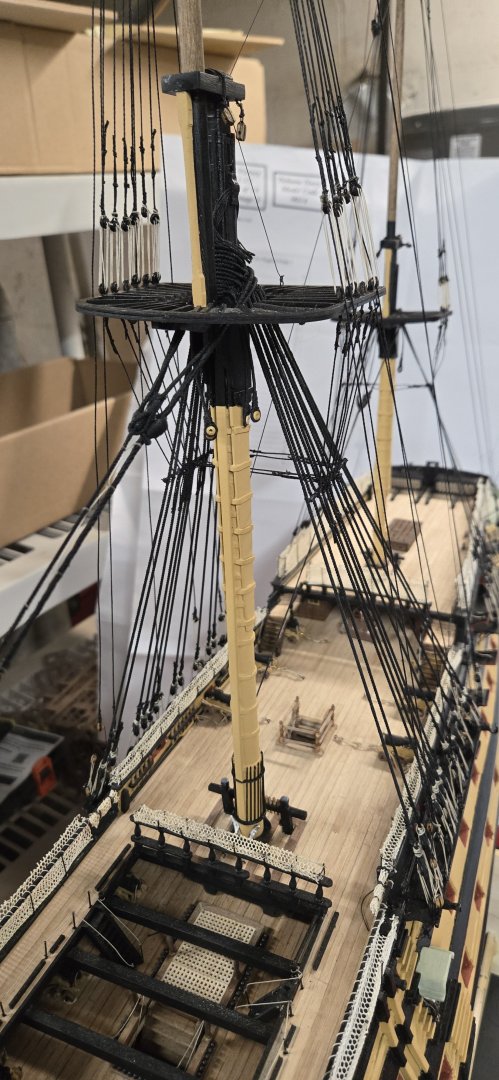
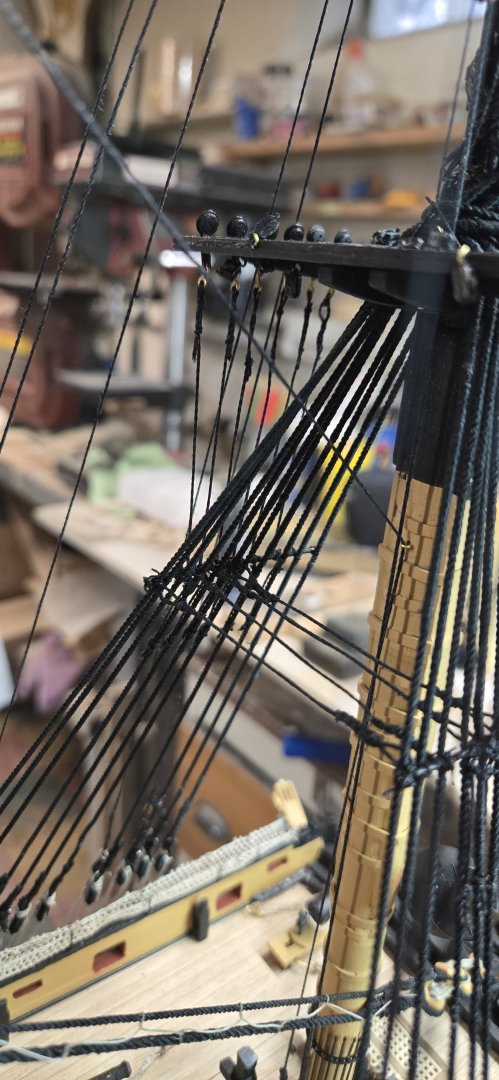
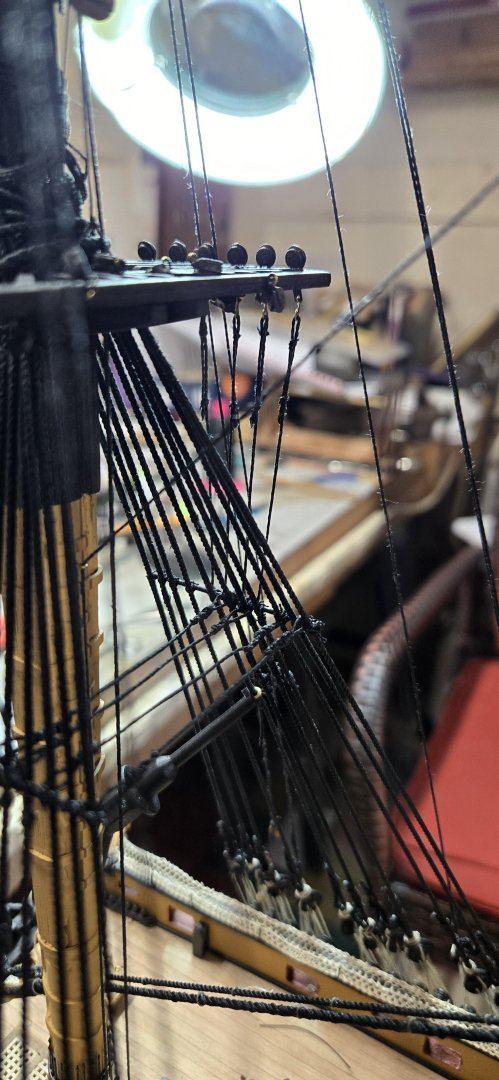
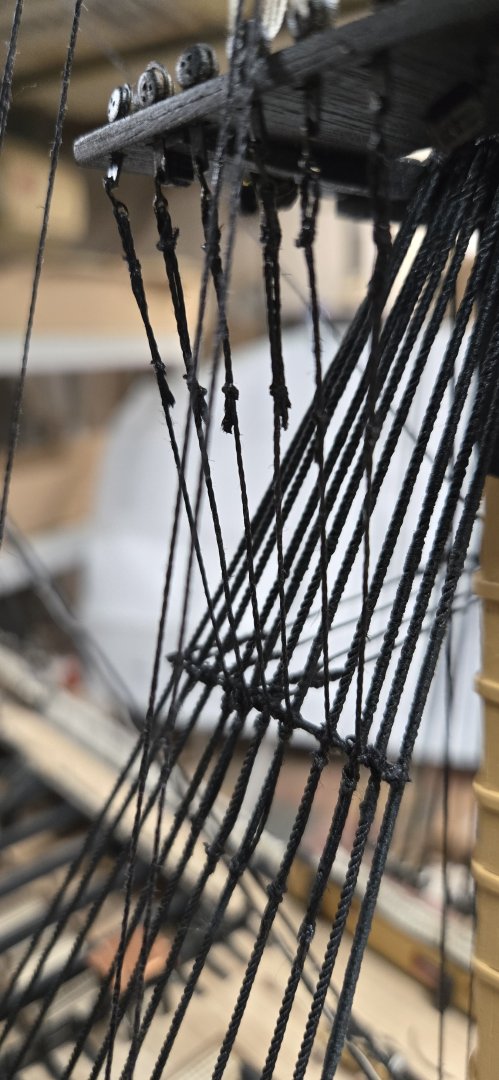
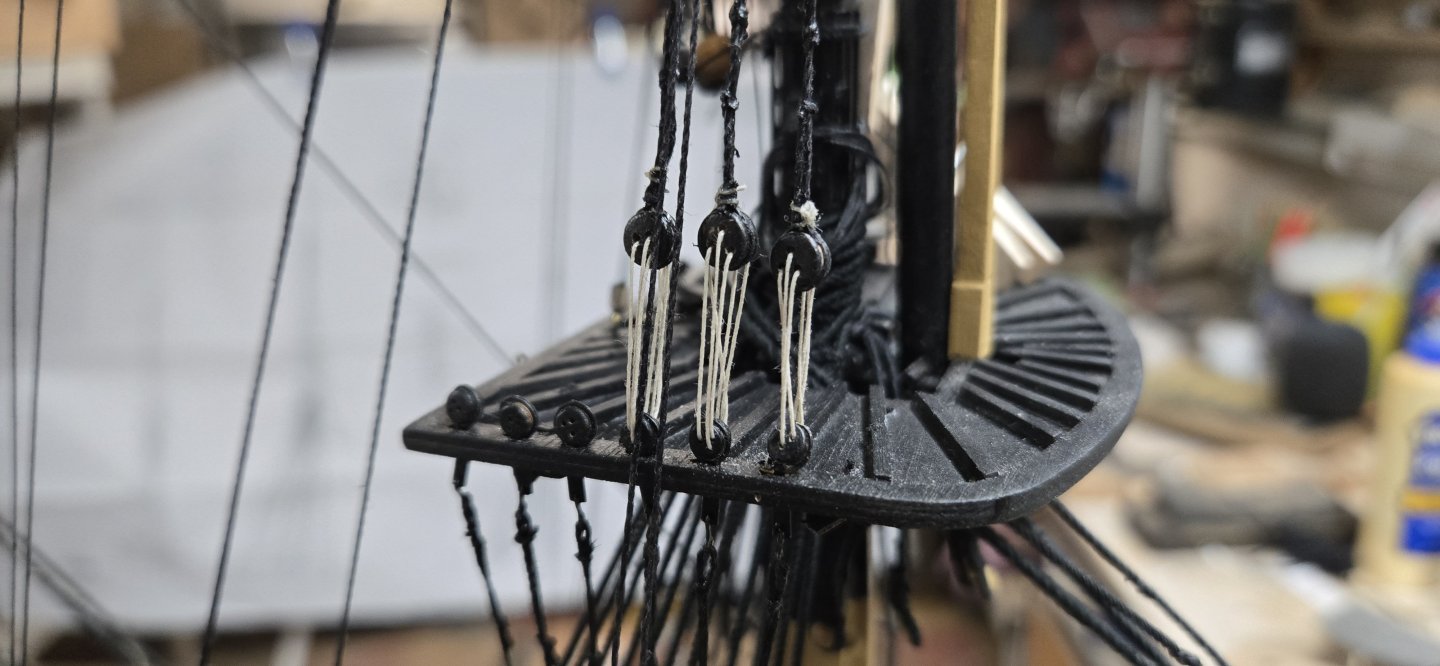
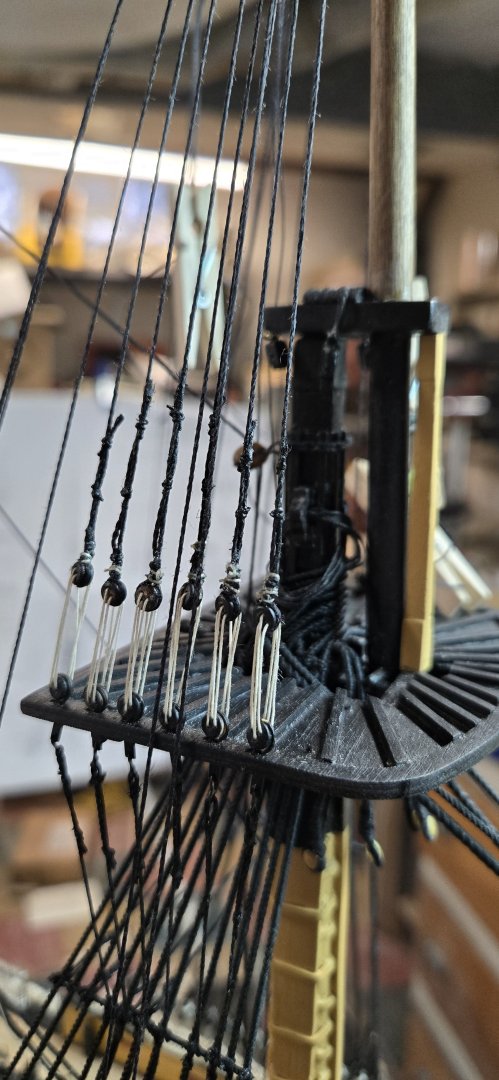
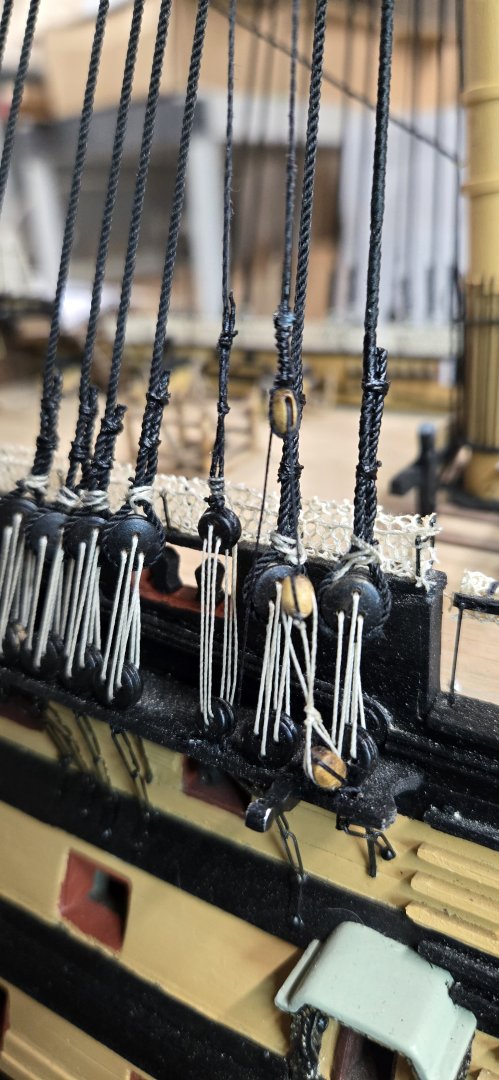
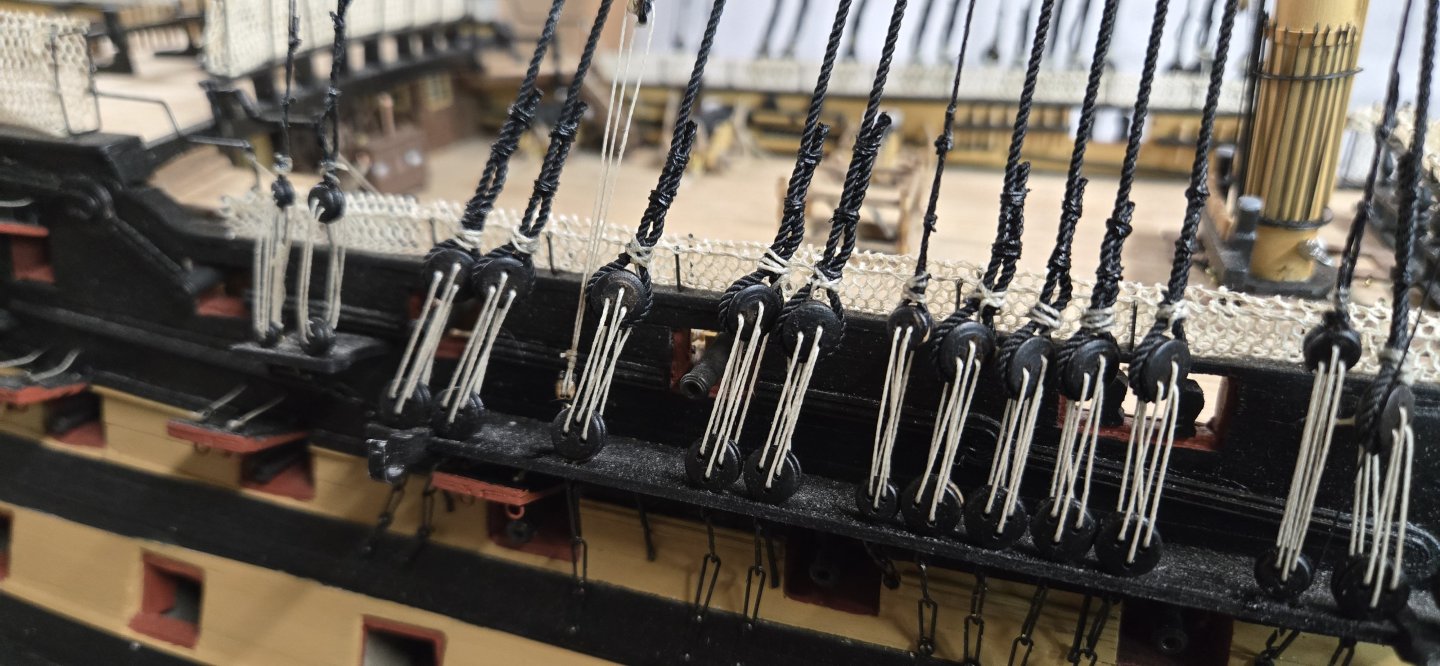
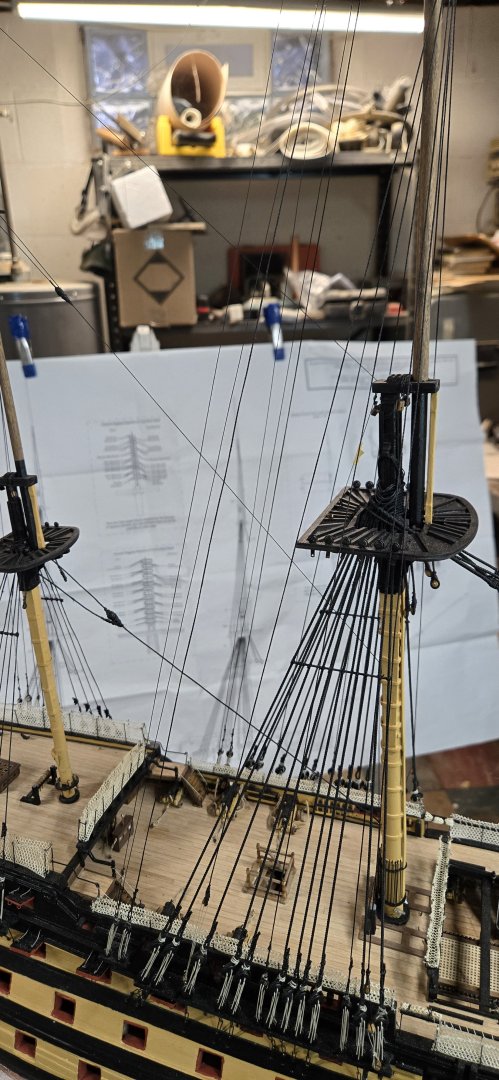
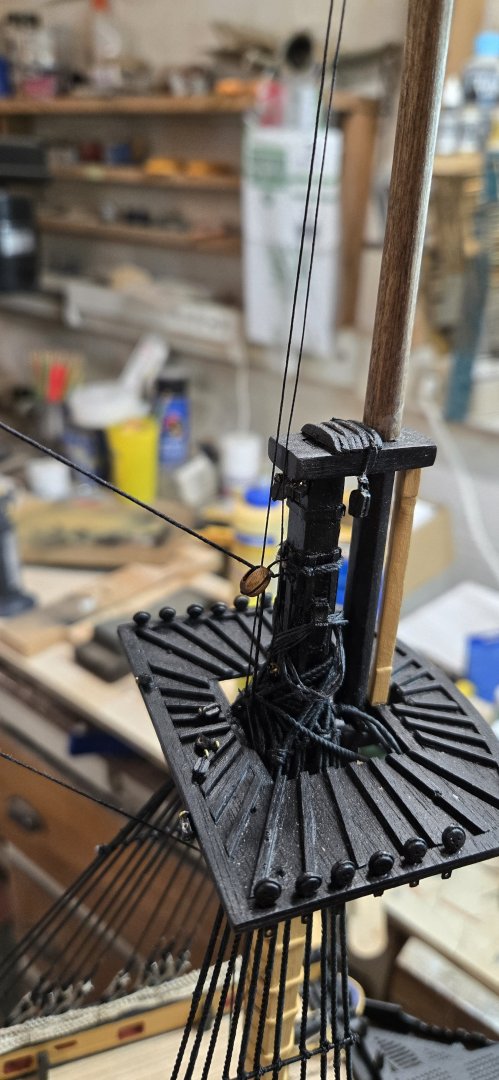
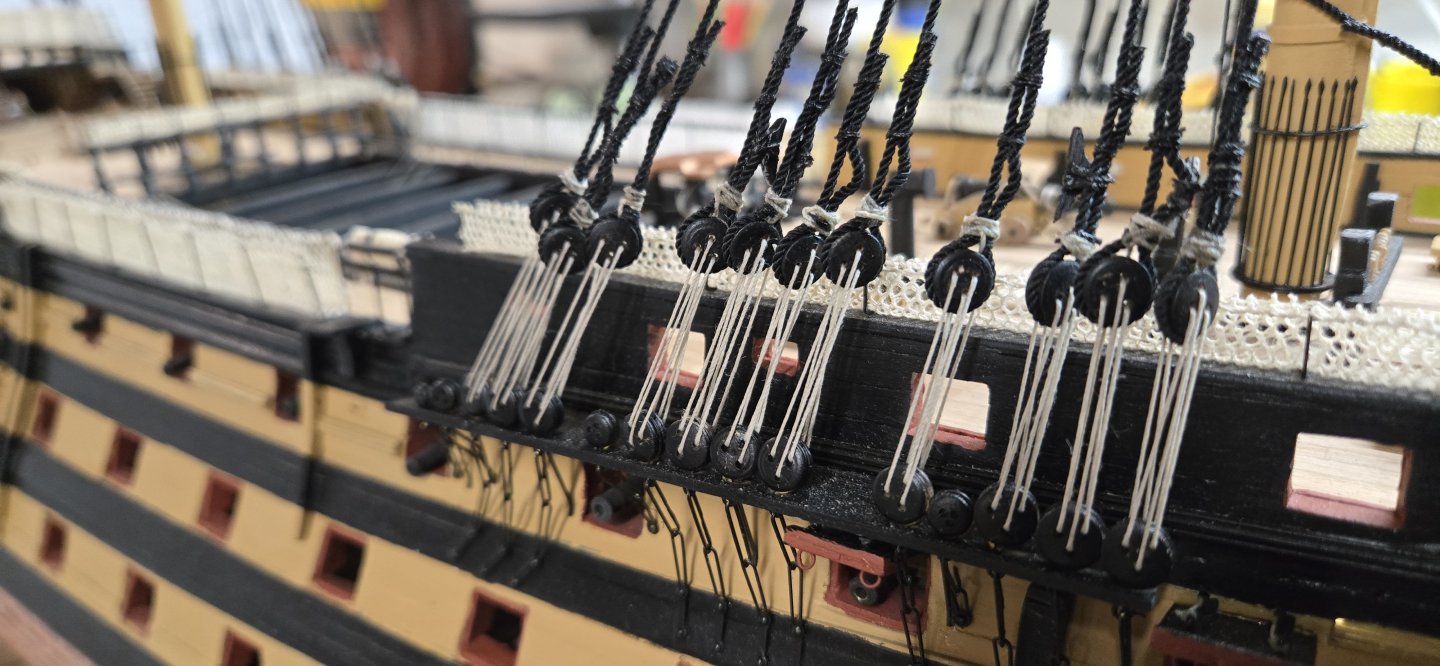
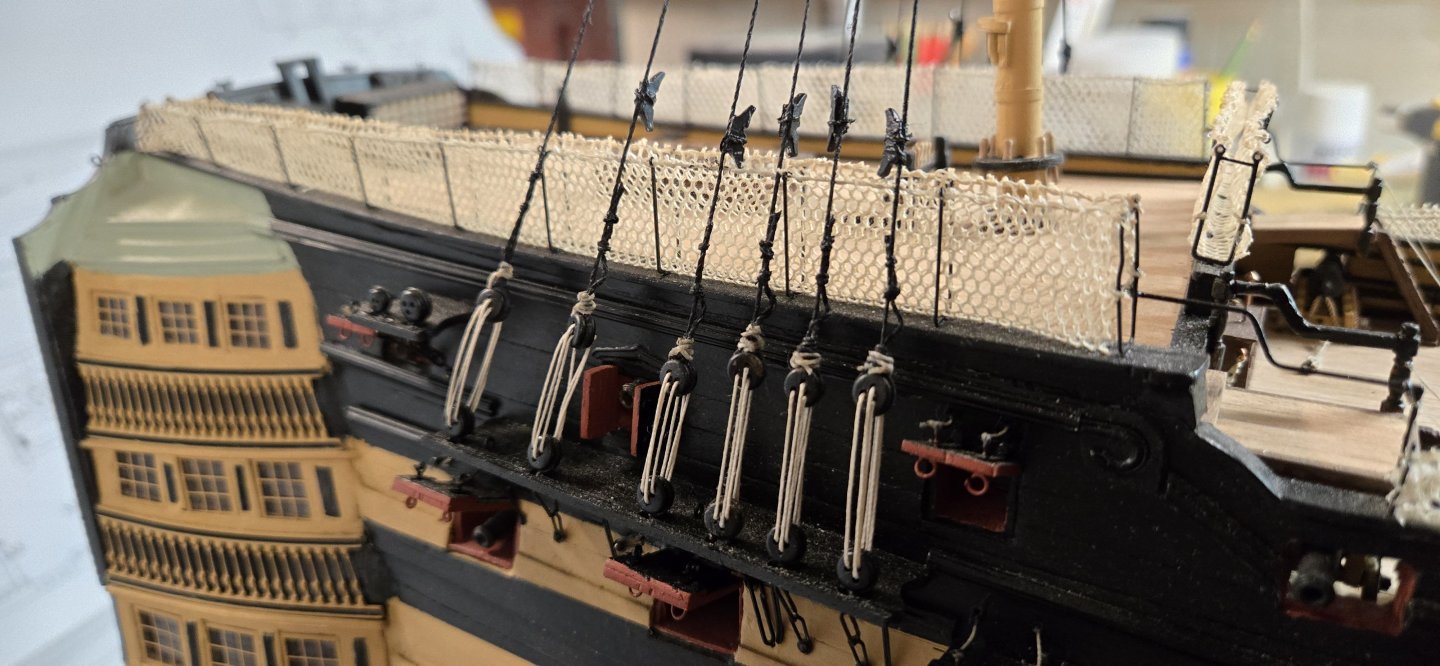
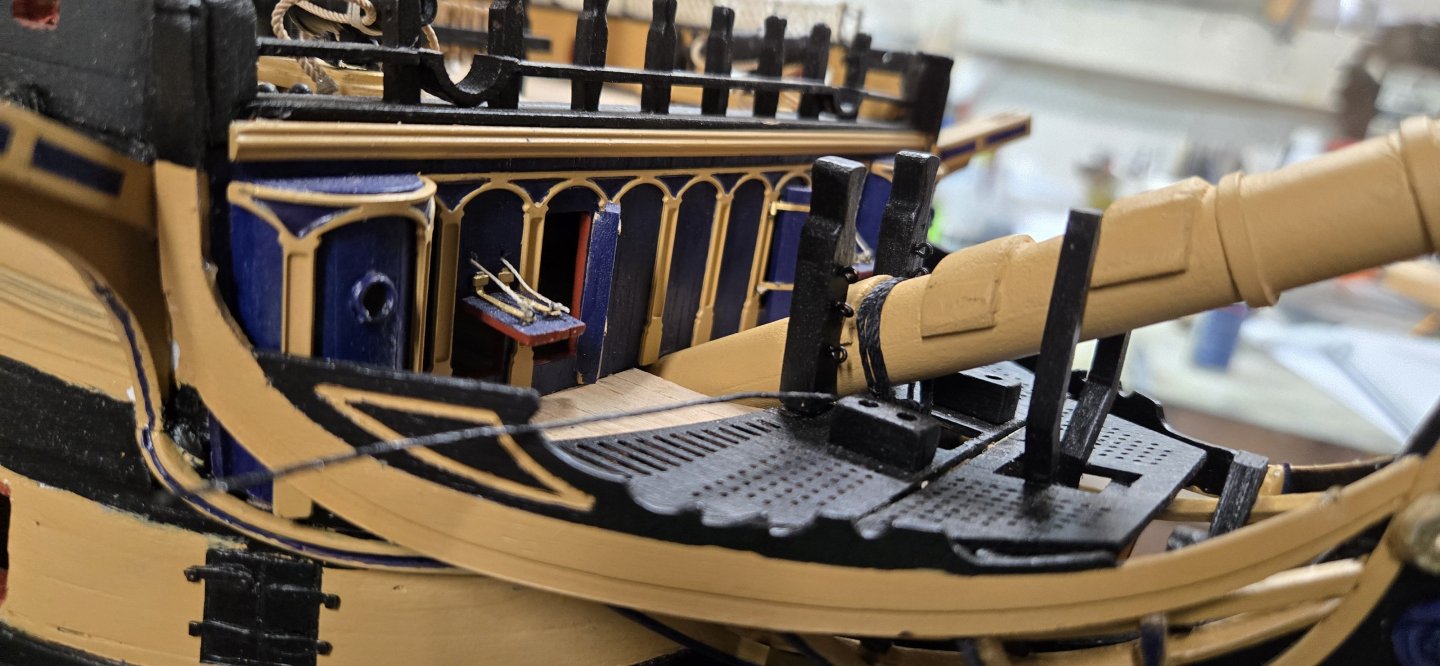
Earlier I had stopped work on the boat to concentrate on make the yards. As posted, it is a very labor intensive, high learning curve task. Using my drill to help sand and shape the yards, adding the additional planking to create the octagonal shapes, the supports for the horses, cleats, blocks and more. I thought I was done but realize in the steps after doing all of the standing rigging (fore and back stays, etc) there are more blocks and jeers than have to be added that help manipulate the yards once they are rigged to the mast. All of these blocks are associated with running rigging that would used to adjust sail angles when sailing. Getting the yards ready is VERY labor intensive. There are so many new blocks that need to be added, you have to create the parrels for the upper yards so they can slide up and down the mast and rig all of this while the standing rigging and shrouds are IN THE WAY!!!! I had finished (as best as I can) the fore main yard and began working on the foretop mast yard (the next in line). The instructions can be very daunting and I relied heavily on Longridge's diagrams to get an idea of what I need to do. I also ran out of nice quality 7mm single blocks and was forced to use the clunky square kit ones. I have more on order from Dry Docks. Sadly as a US citizen (NOT in favor of much of our current administration's actions) I was forced to pay duty for the first time. It was only about $10USD on a $50 order and it is what it is, but a sign of the times! It took a while to sort out just how to rig the slings to the trestle trees, the blocks on the yard and the blocks that secure the tyes to the deck. I was forced to lay out three different sets of blueprints to get an idea of what was what. You also have to use the kit's cast pieces for the 'trucks'. These are just tubes that allow the tye to slide up and down using a backstay to hold the truck secure. The problem is I didn't put the trucks in place while installing the backstays. In fact looking at the instructions, there is no mention to do that. The problem is the cast trucks are round tubes and way too small to cut a slot into them so you can fit lines through them. Also....I lost all but 2 of them! I had teflon tubing but it was too wide. I ended up using some small brass tubing. It is easy to roll cut with an exacto knife. Then I held it in place with tweezers as I used the knife to saw a slot into it. Once I did that (BE VERY CAREFUL THE KNIFE DOESN'T SLIP AND CUT YOU) I was able to add the trucks to the backstay. I will add some artificial black thread after to make it look like it's tied to the back stay and paint it black The tyes are natural thread. In essense: The tye of .75mm natural thread is tied off on the foremast trestletree. It goes down to the double block on the yard If goes back up to the other side to the single block It goes through the truck down to the deck Now, be sure that when you do both that you keep them sorted and clean. I had to redo them a few times so that they weren't tangled up with each other or the other shrouds or backstays. You'll understand that as you do it. Once done, you have to add a double block to the end of the tye. This would be around the height of the platform...you can kind of see that in the picture above. You then make a single block with a black thread to tie to the open eyelet on the channel. The picture is a bit muddle with all of the rigging. There is an eyelet on the very end. There is a black thread that leads up to a double block....yes, it is supposed to be a single block, I realized it was wrong after I had attached it to the eyelet and was rigging the lashing so I decided to leave it in place. This block also has to have the lashing attached to the end to secure this block to the block at the end of the tye. When that is all rigged (again, be careful all the lashings are neat and not crossed or tangled), the bitter end will be secured to one of the kevels, listed as b18 on the plans. Another flaw in the build, these kevels are glued flatly to the side walls of the deck. There is no space to tie off this line. So either I did it wrong or I should have sanded the kevel so that there was a space all around it. I was forced to drill a hole from either side to get the line through. That was very hard due to all the other rigging in the way. After, I made up some coils to glue in front of my work! Whew!!! That was a lot of work but was actually very rewarding. I mean I still have seven more to go!


-
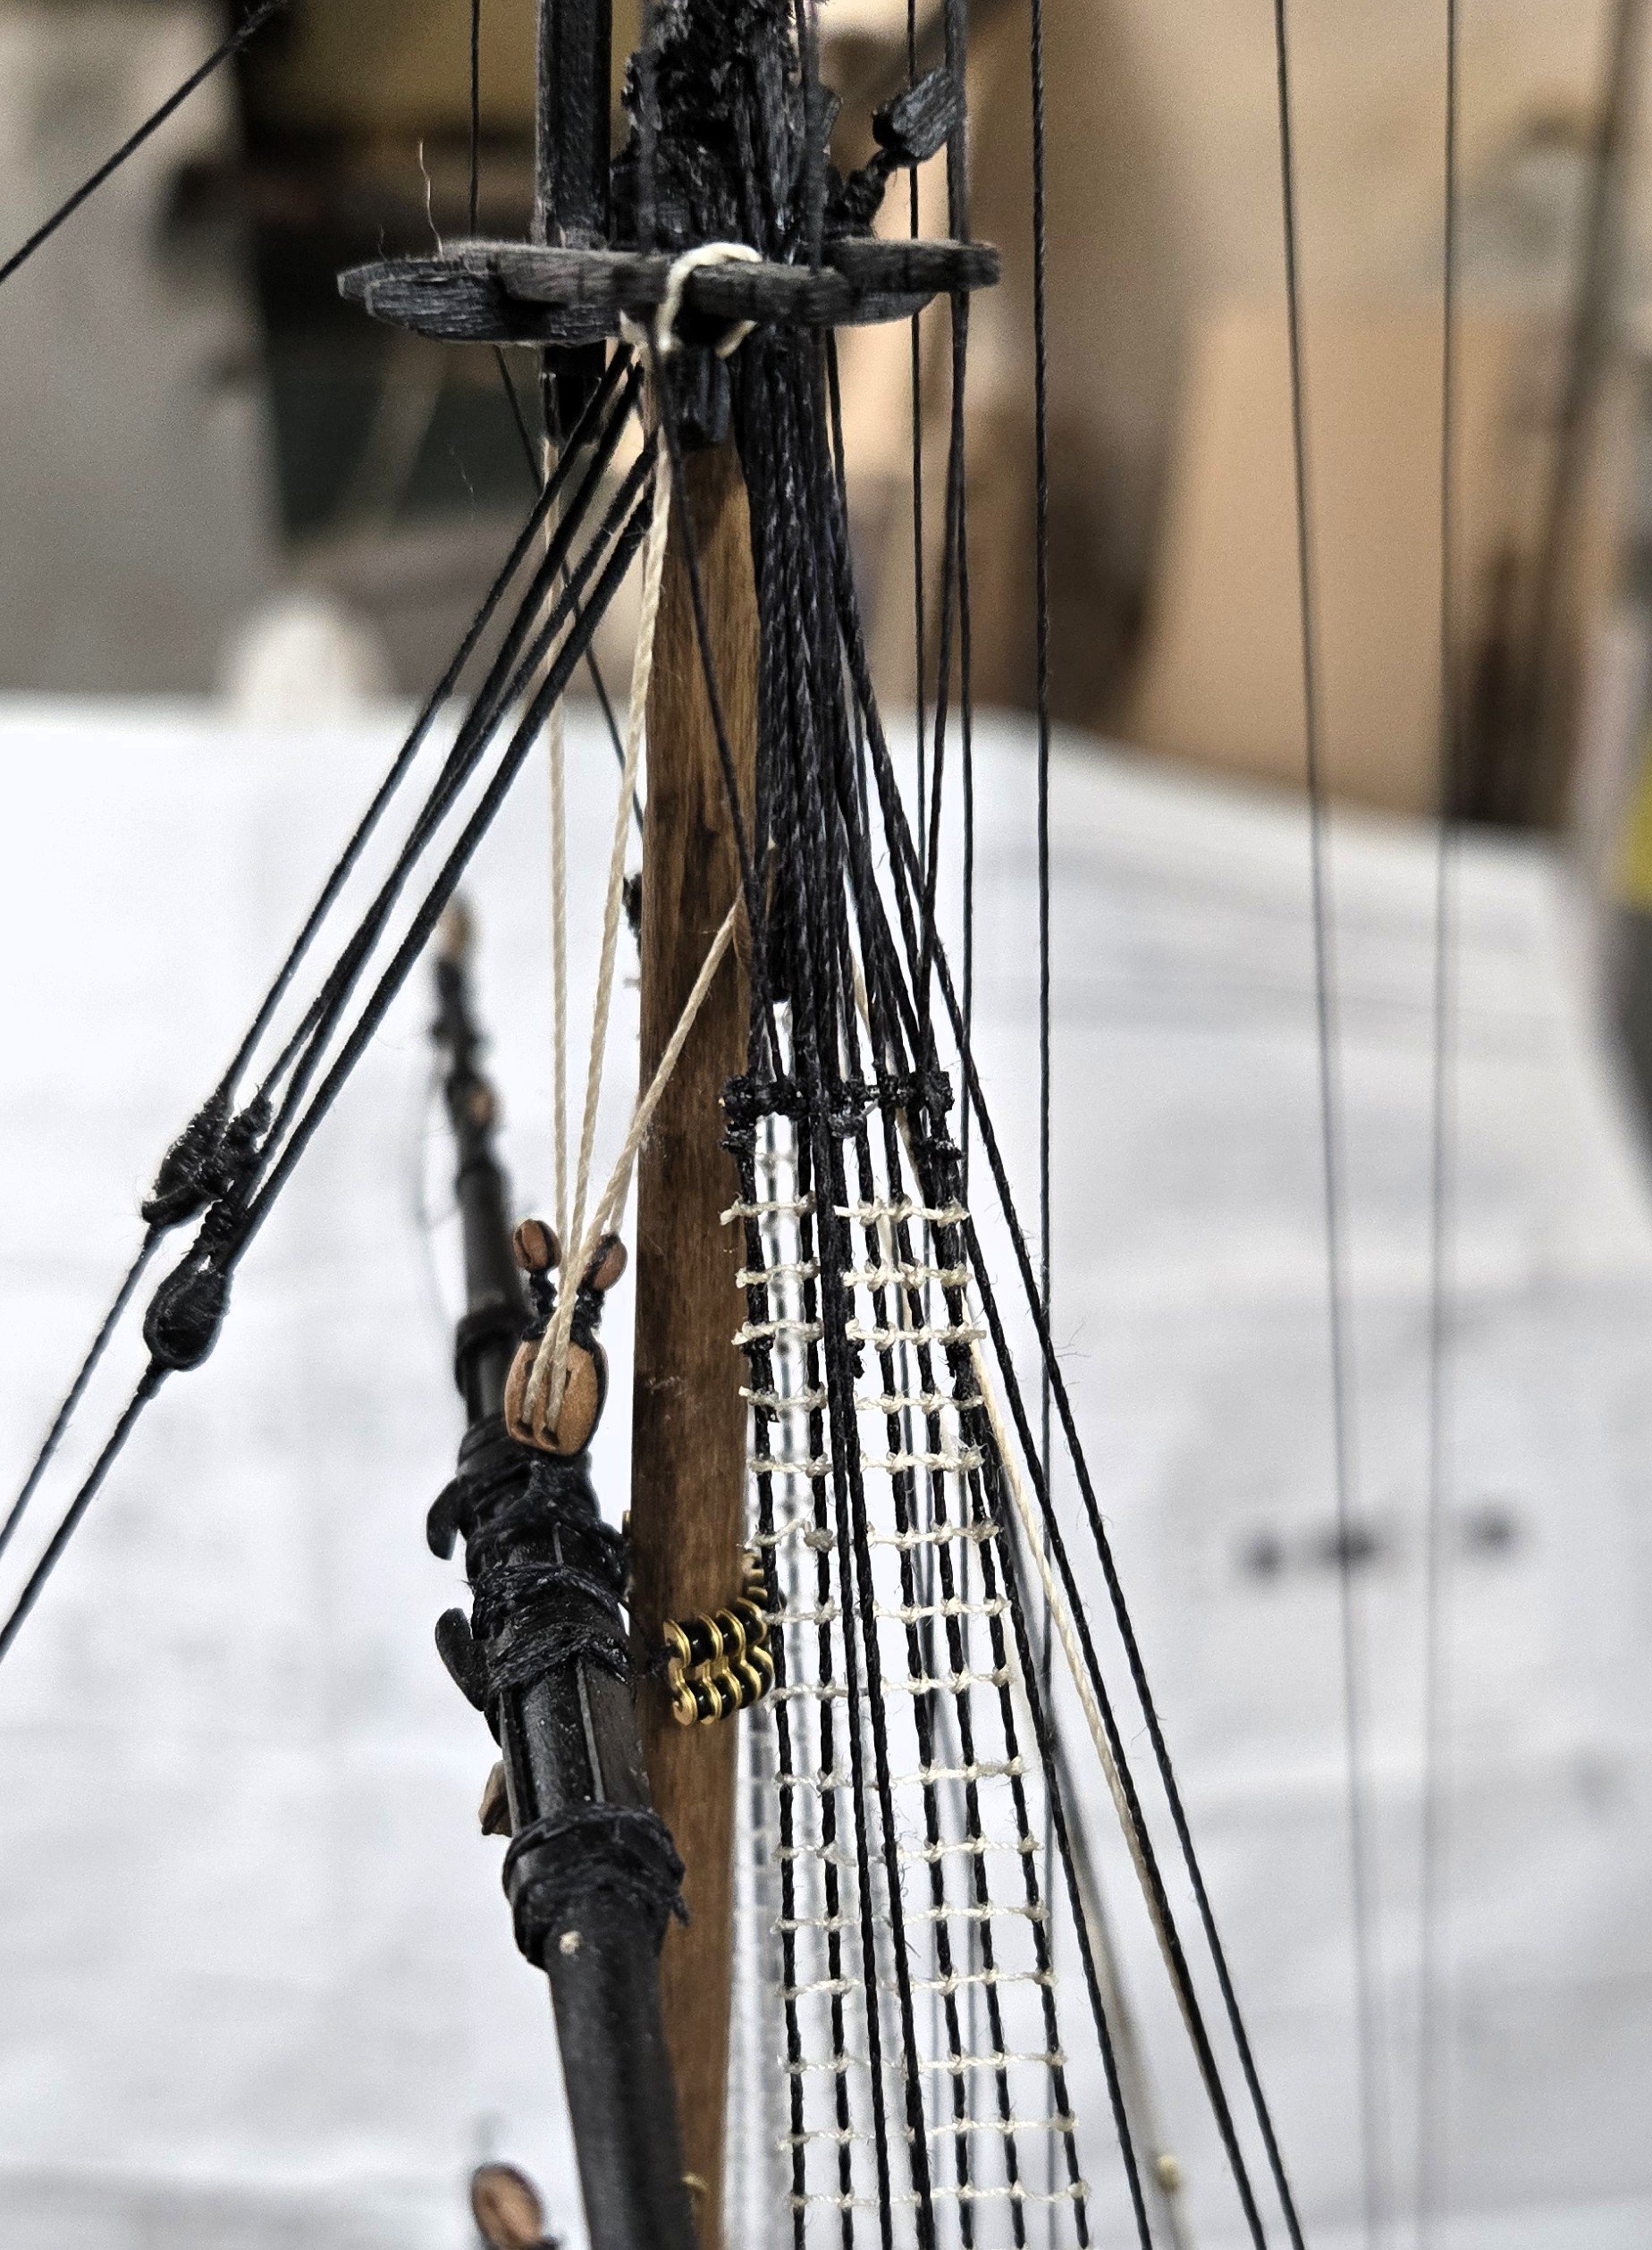
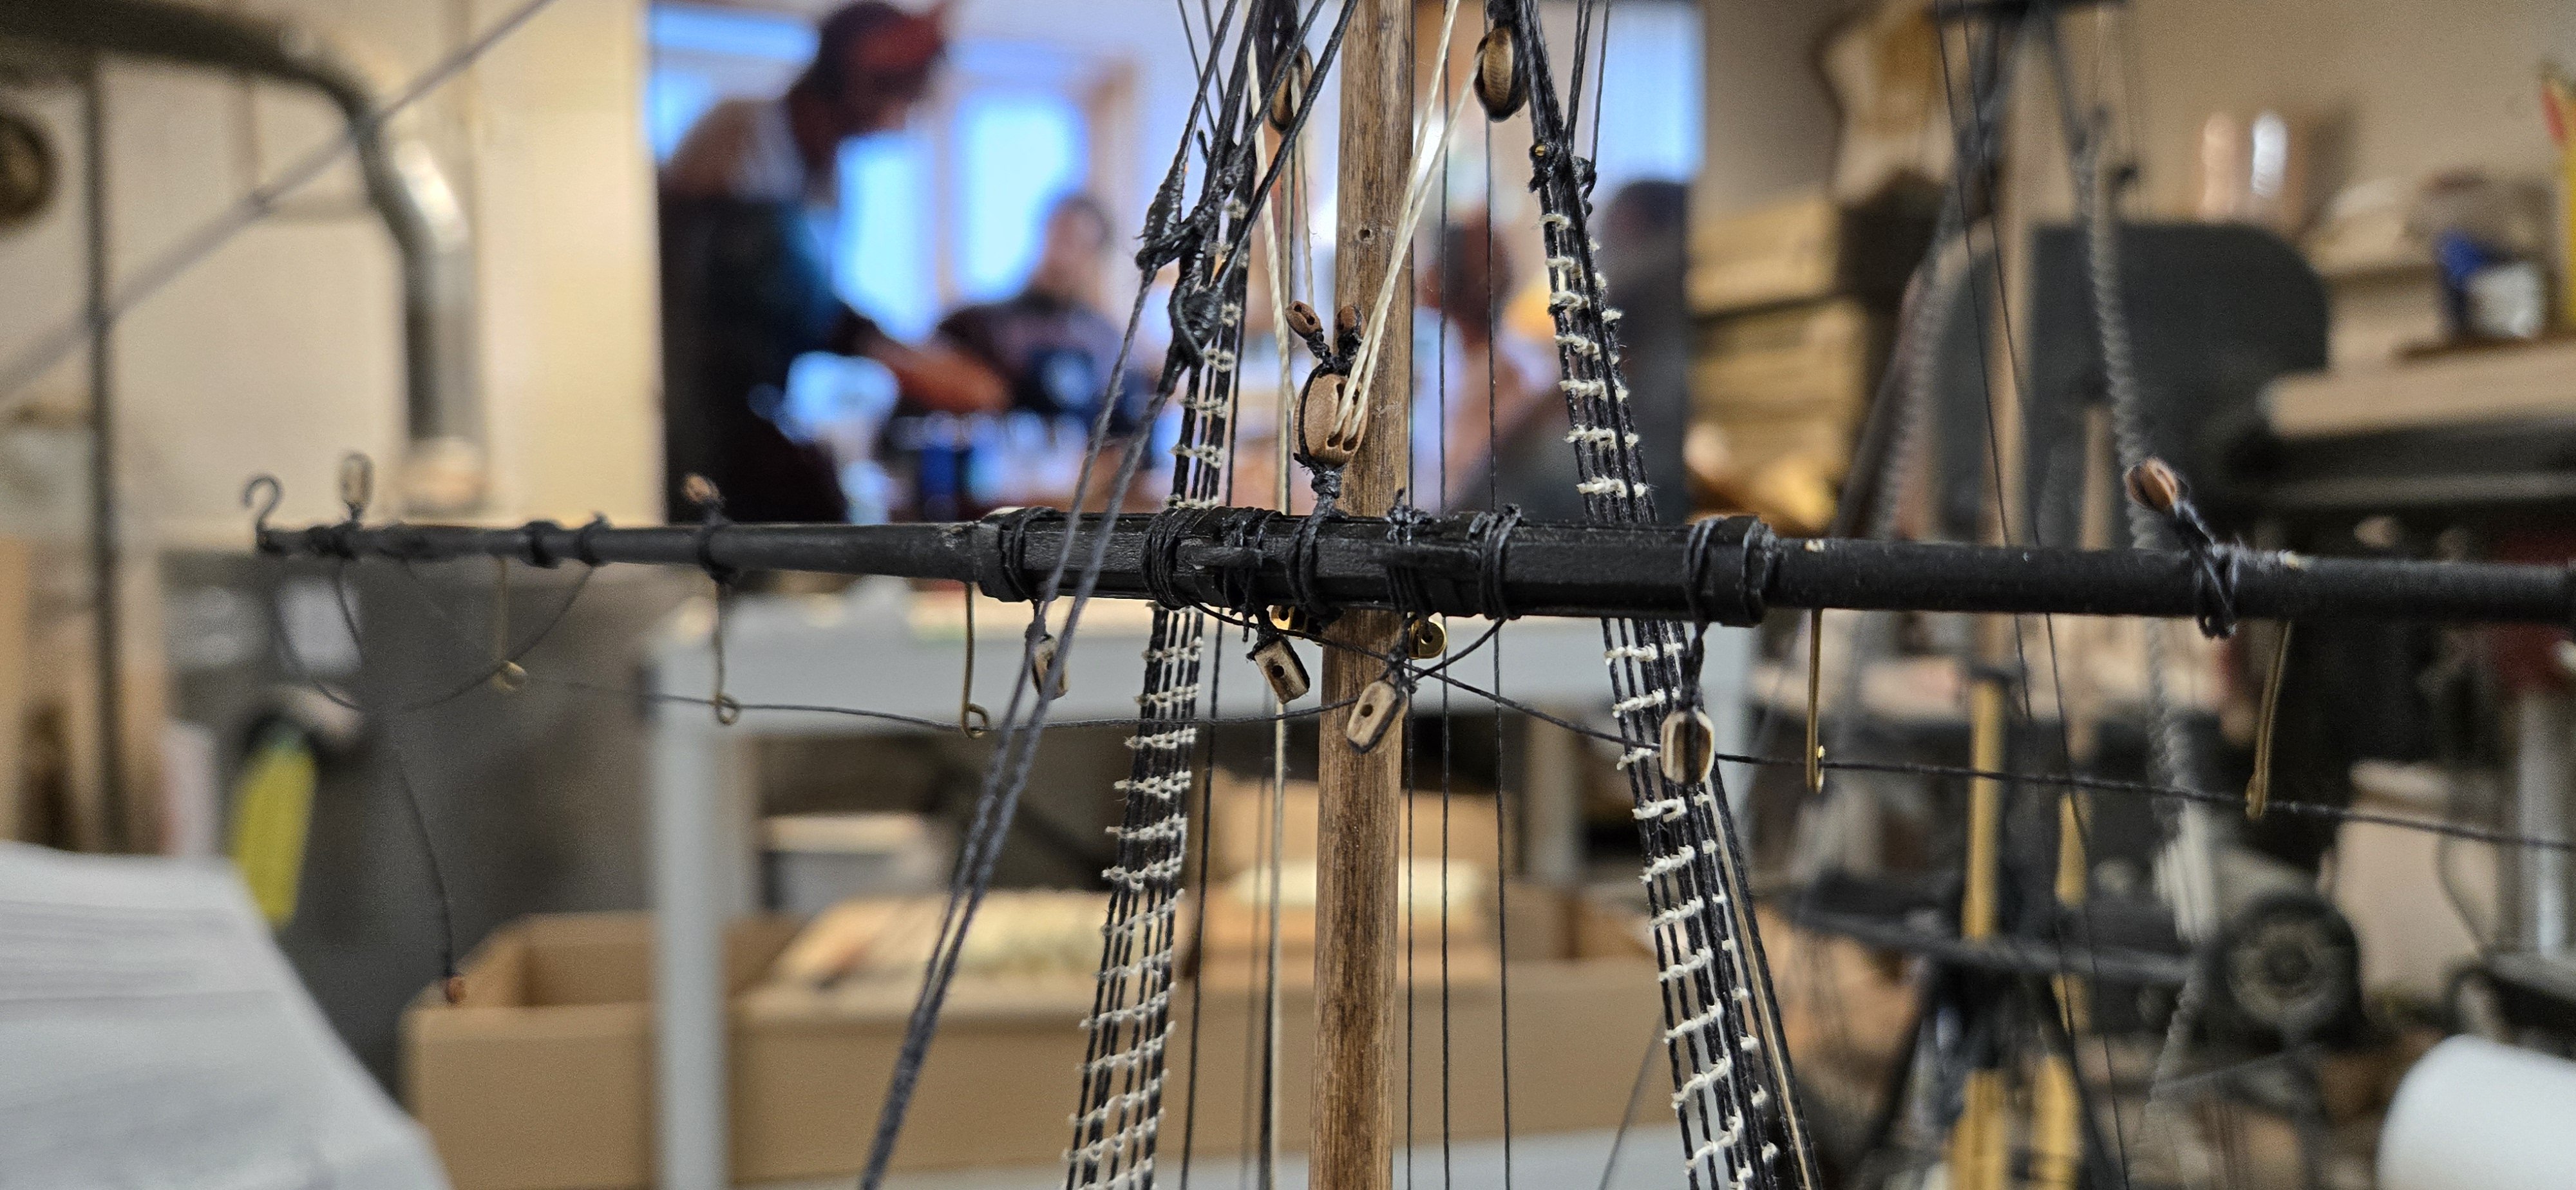
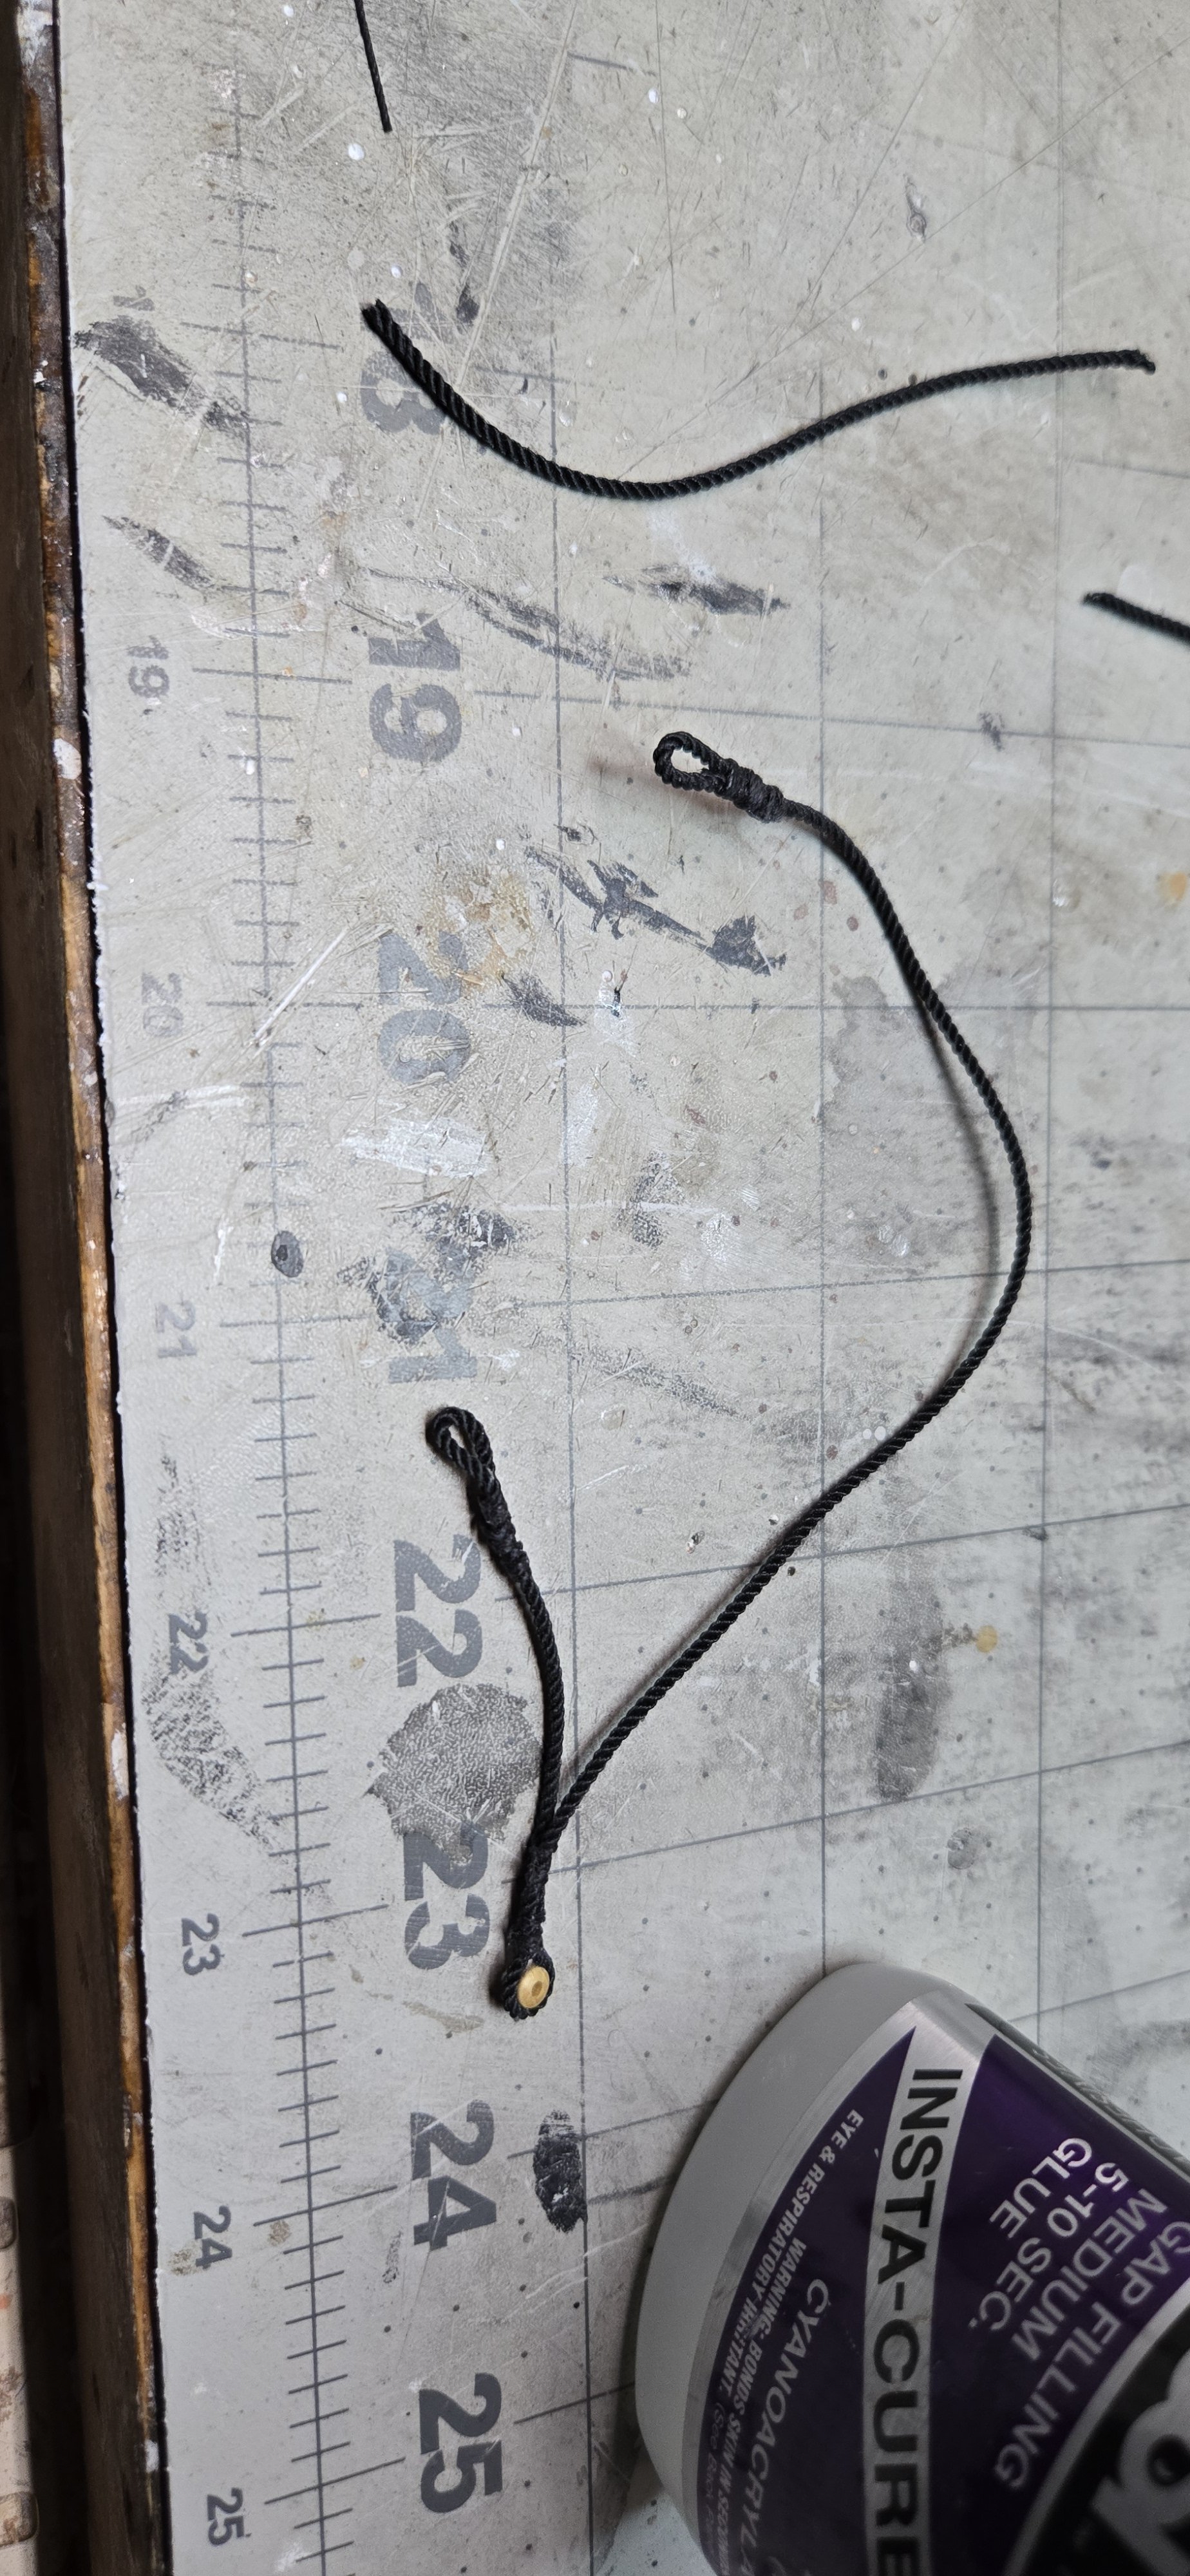
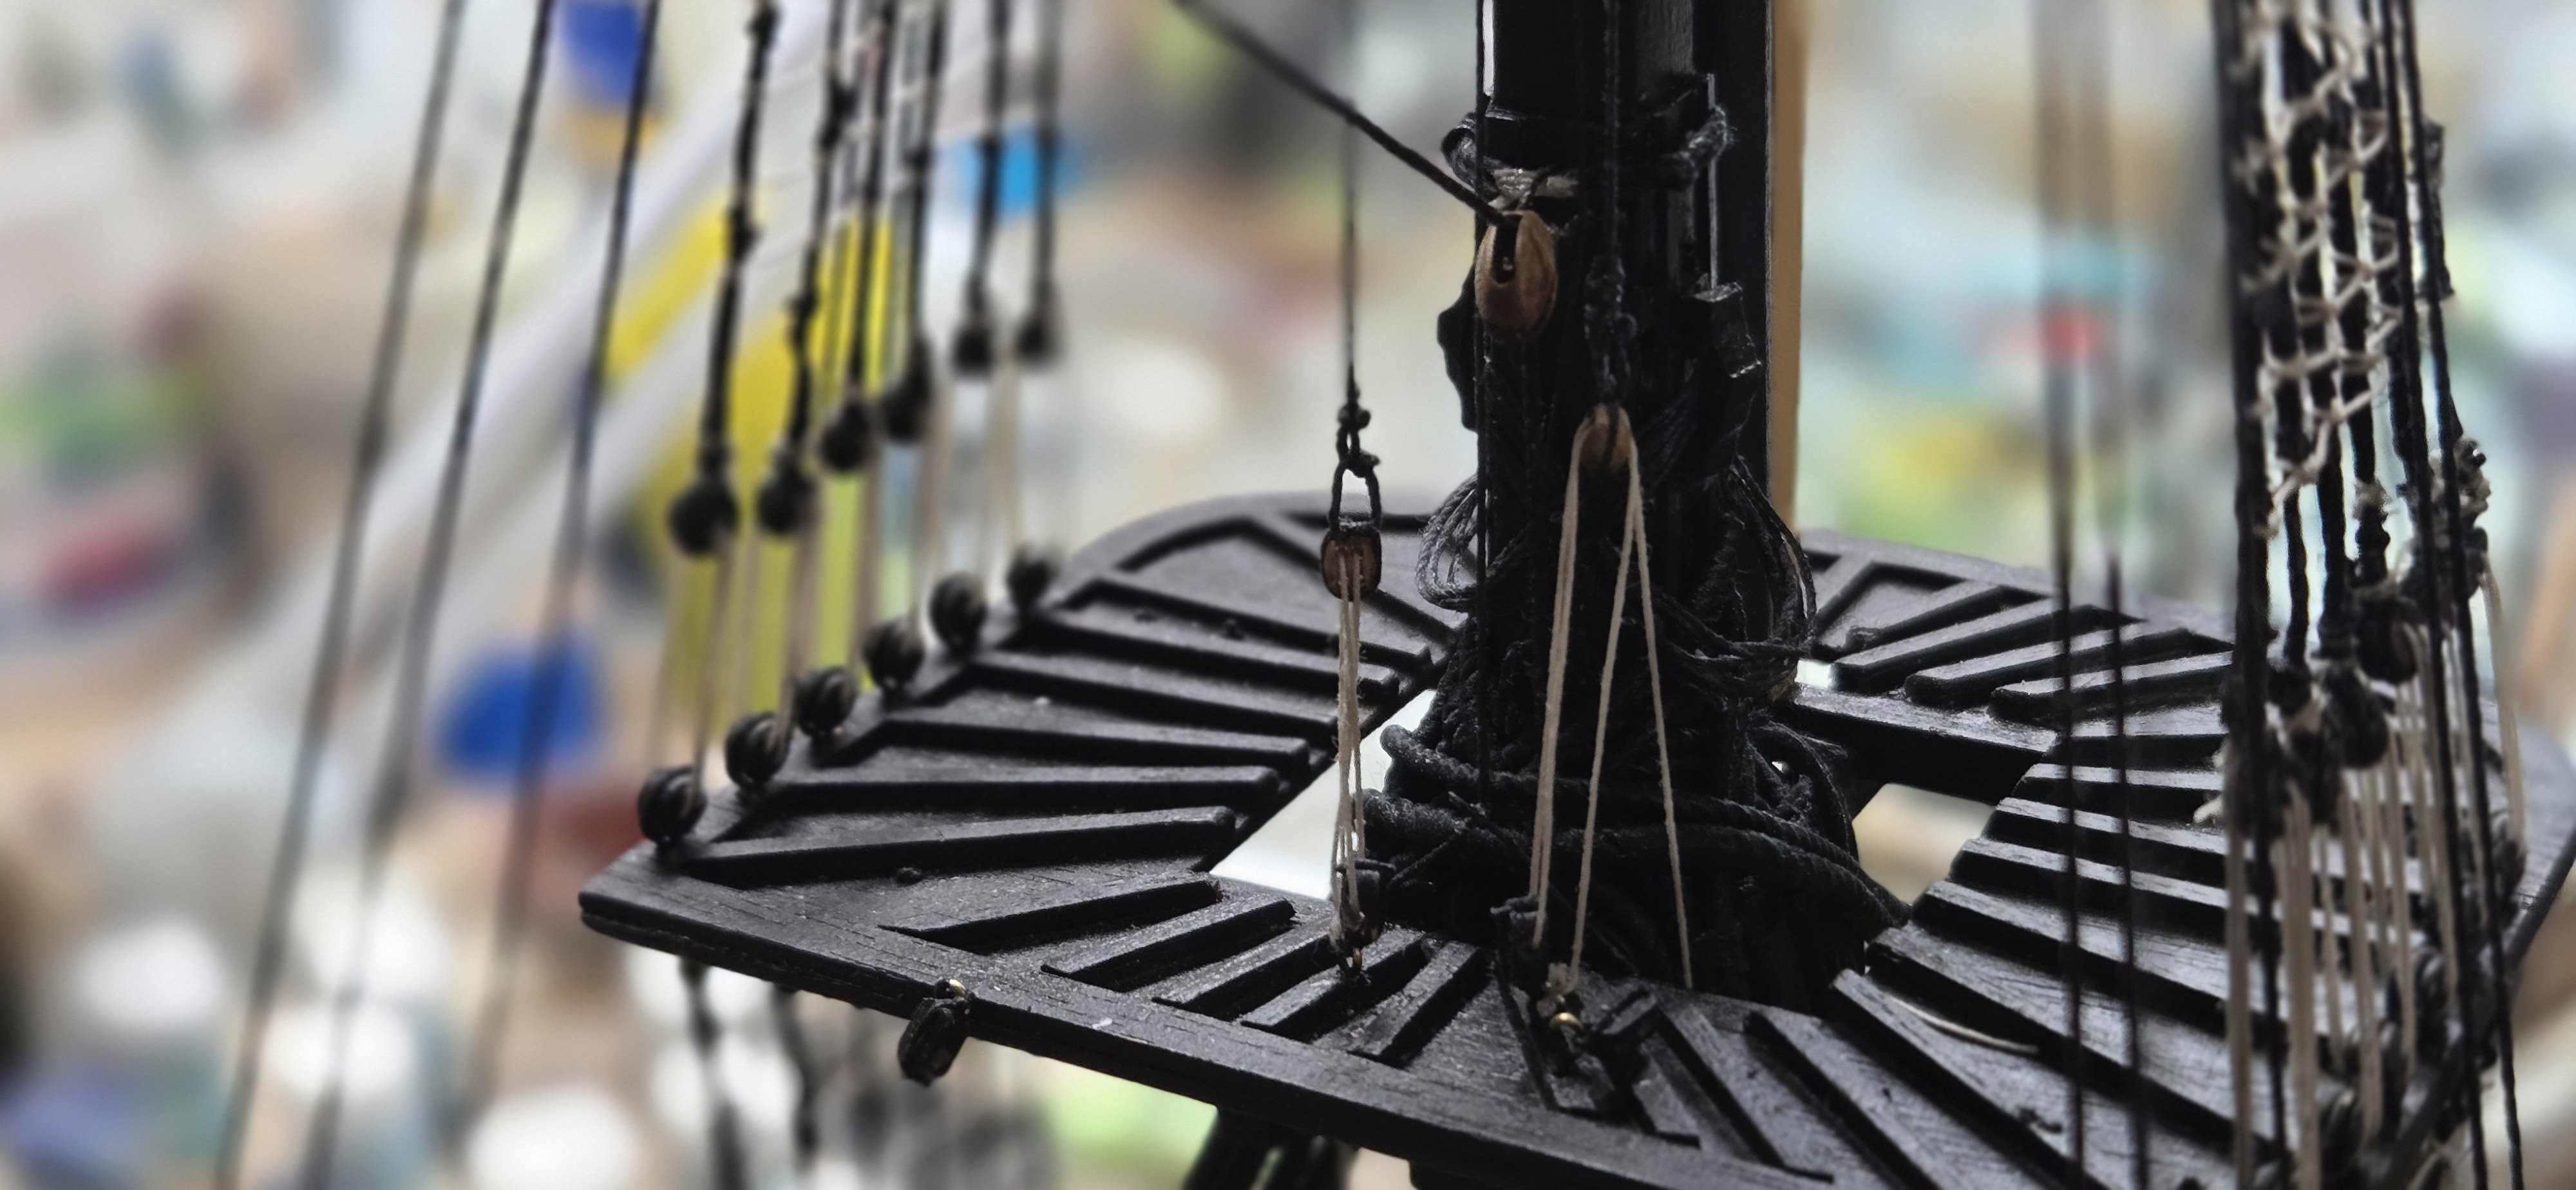
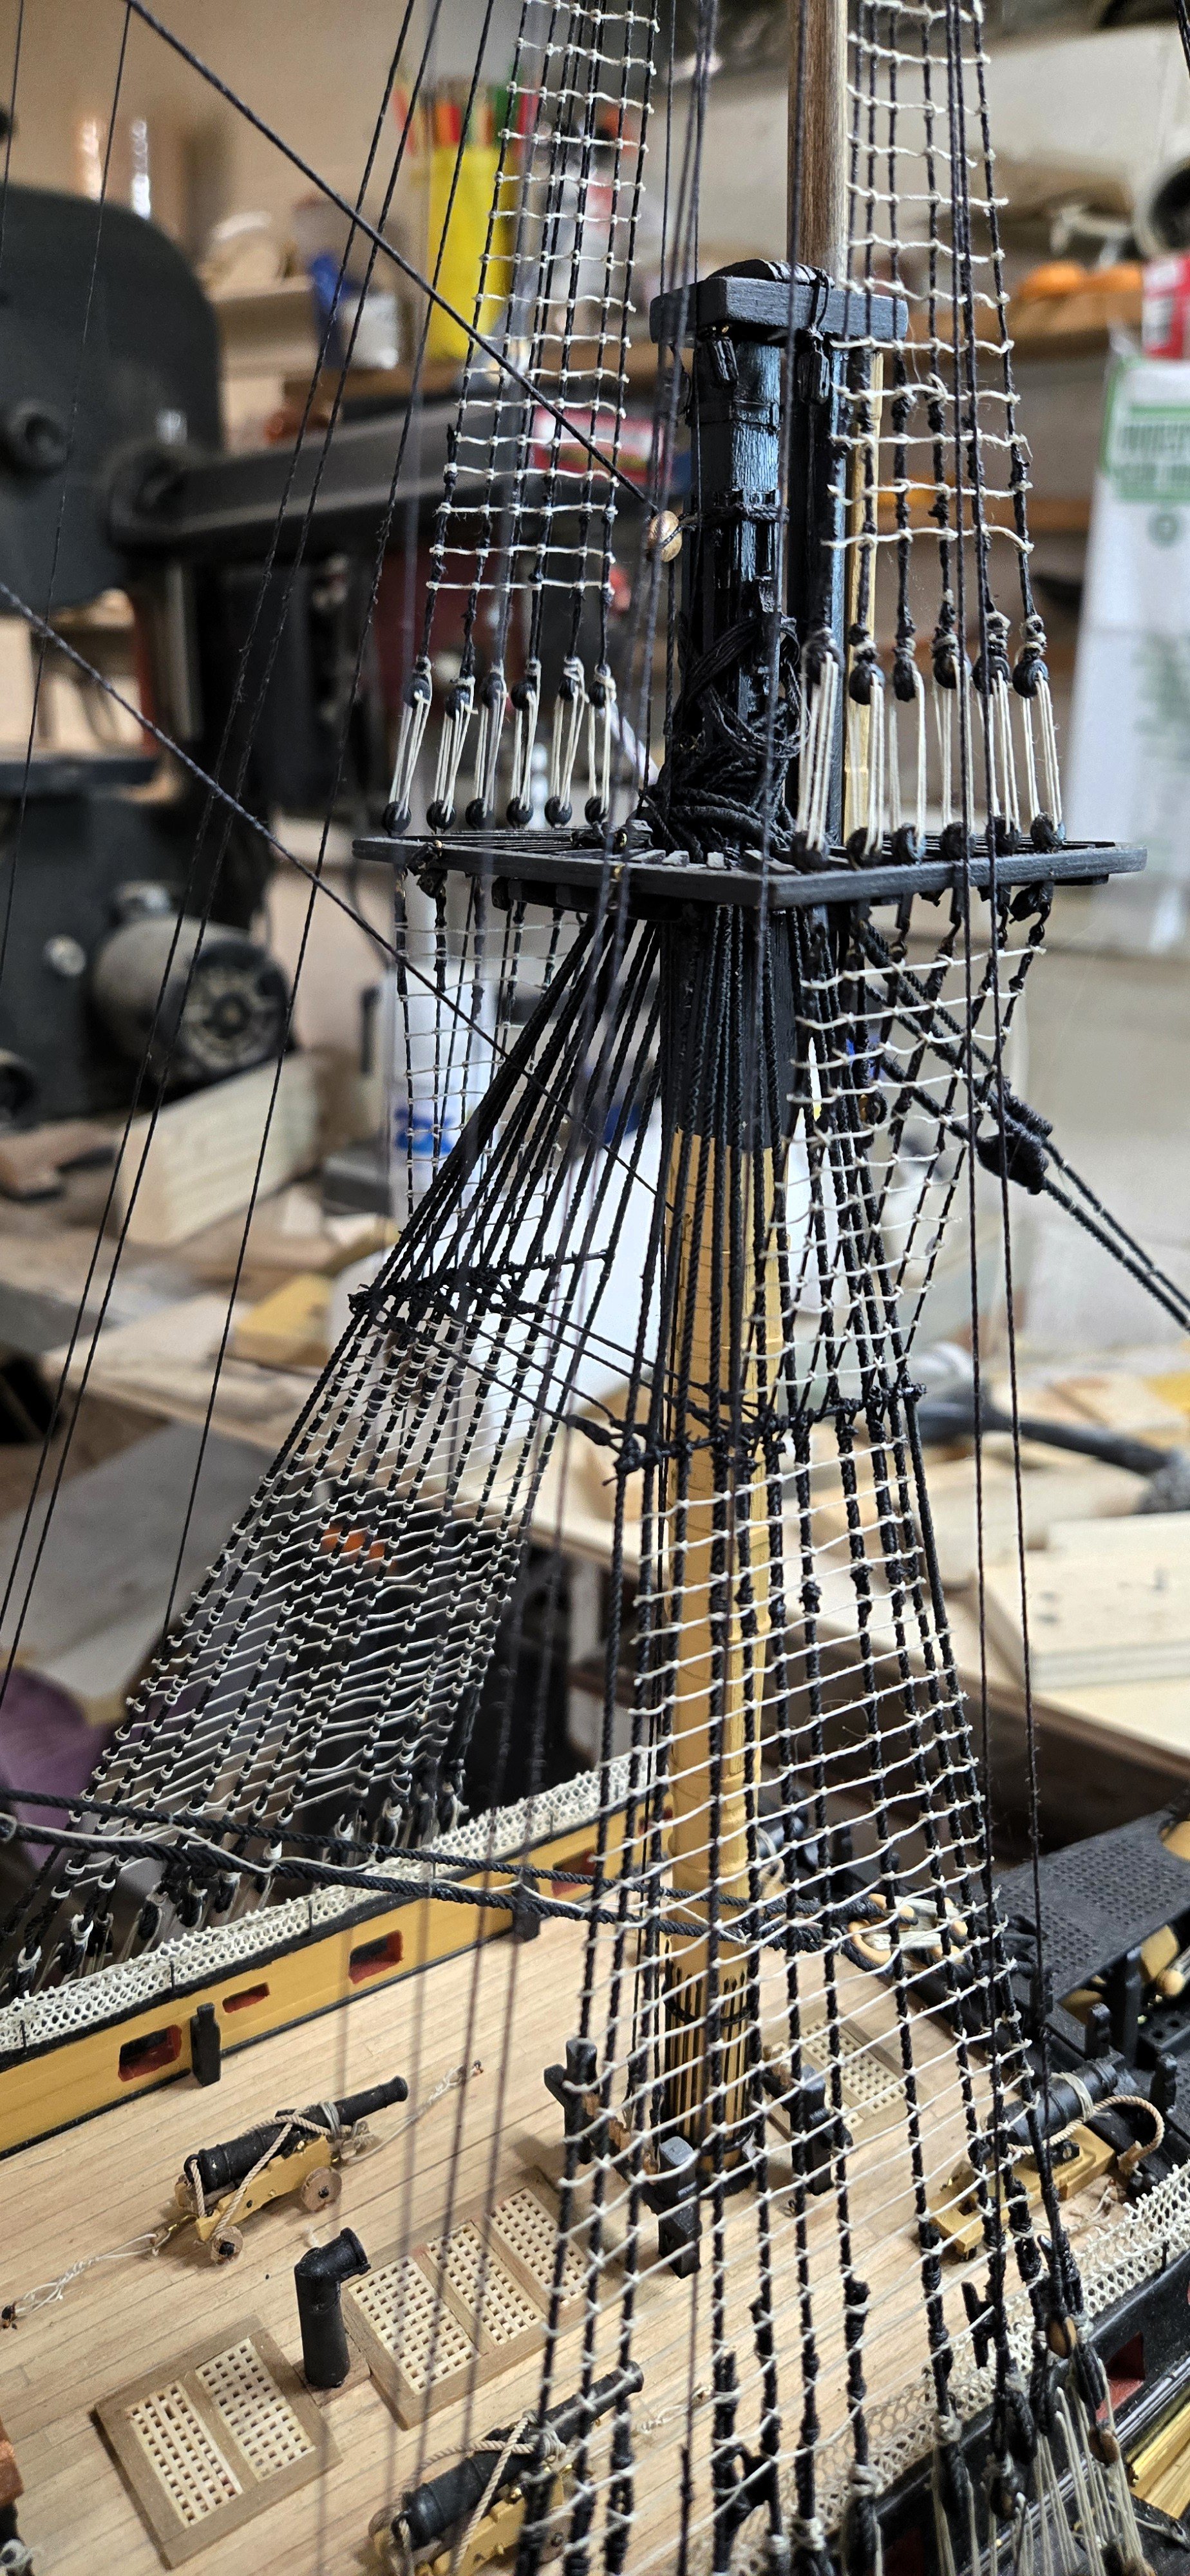
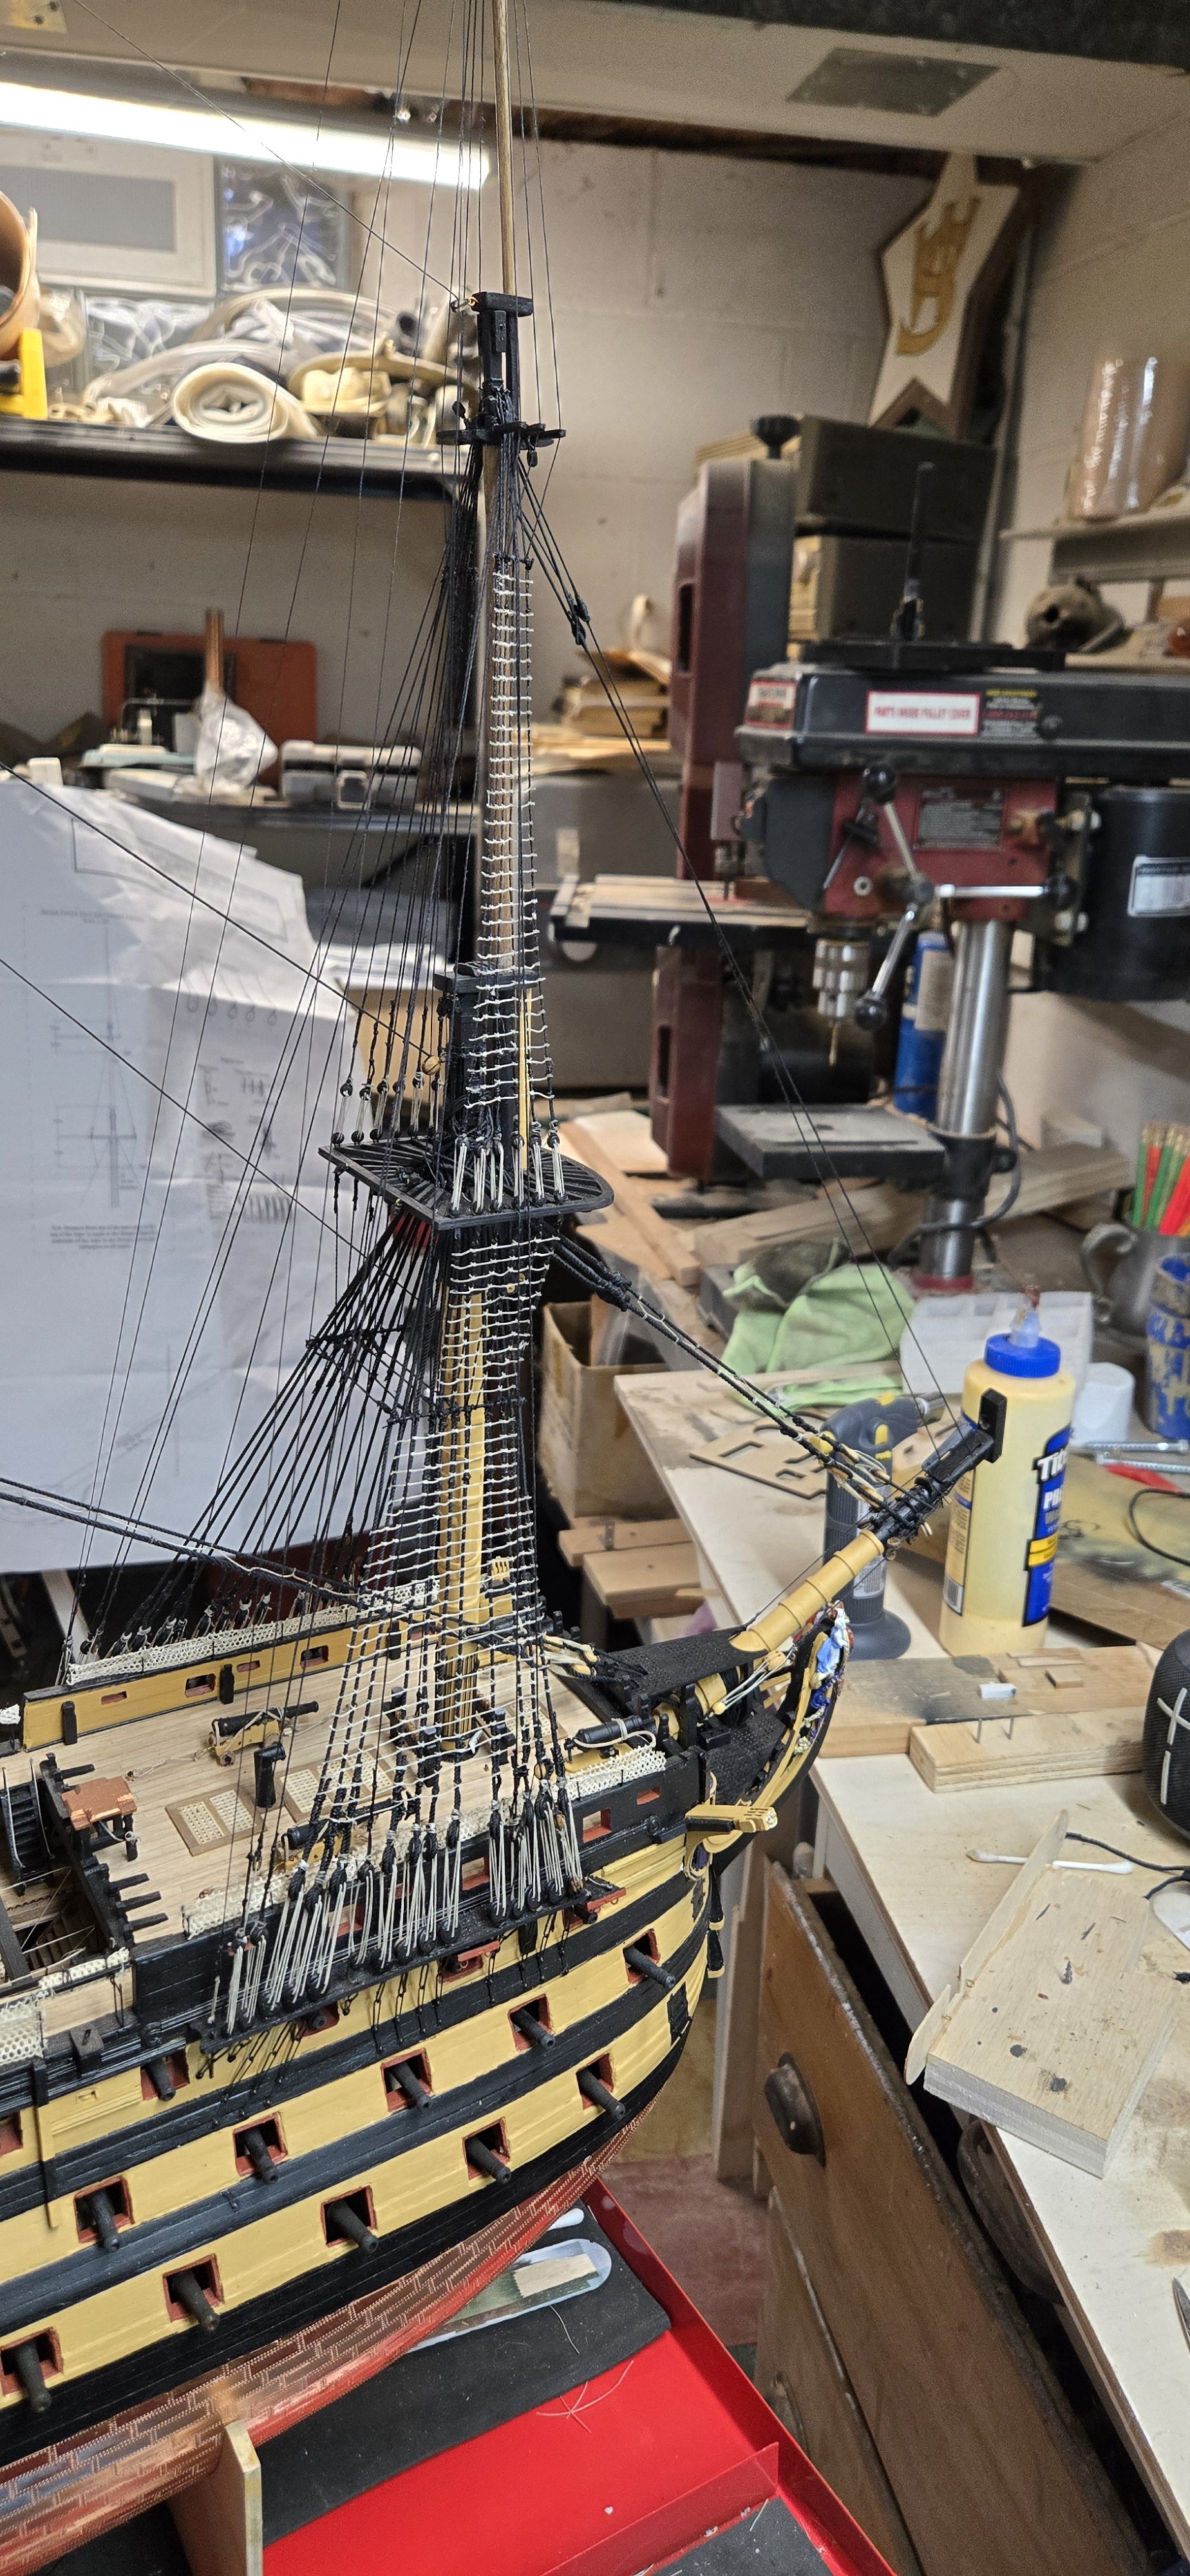
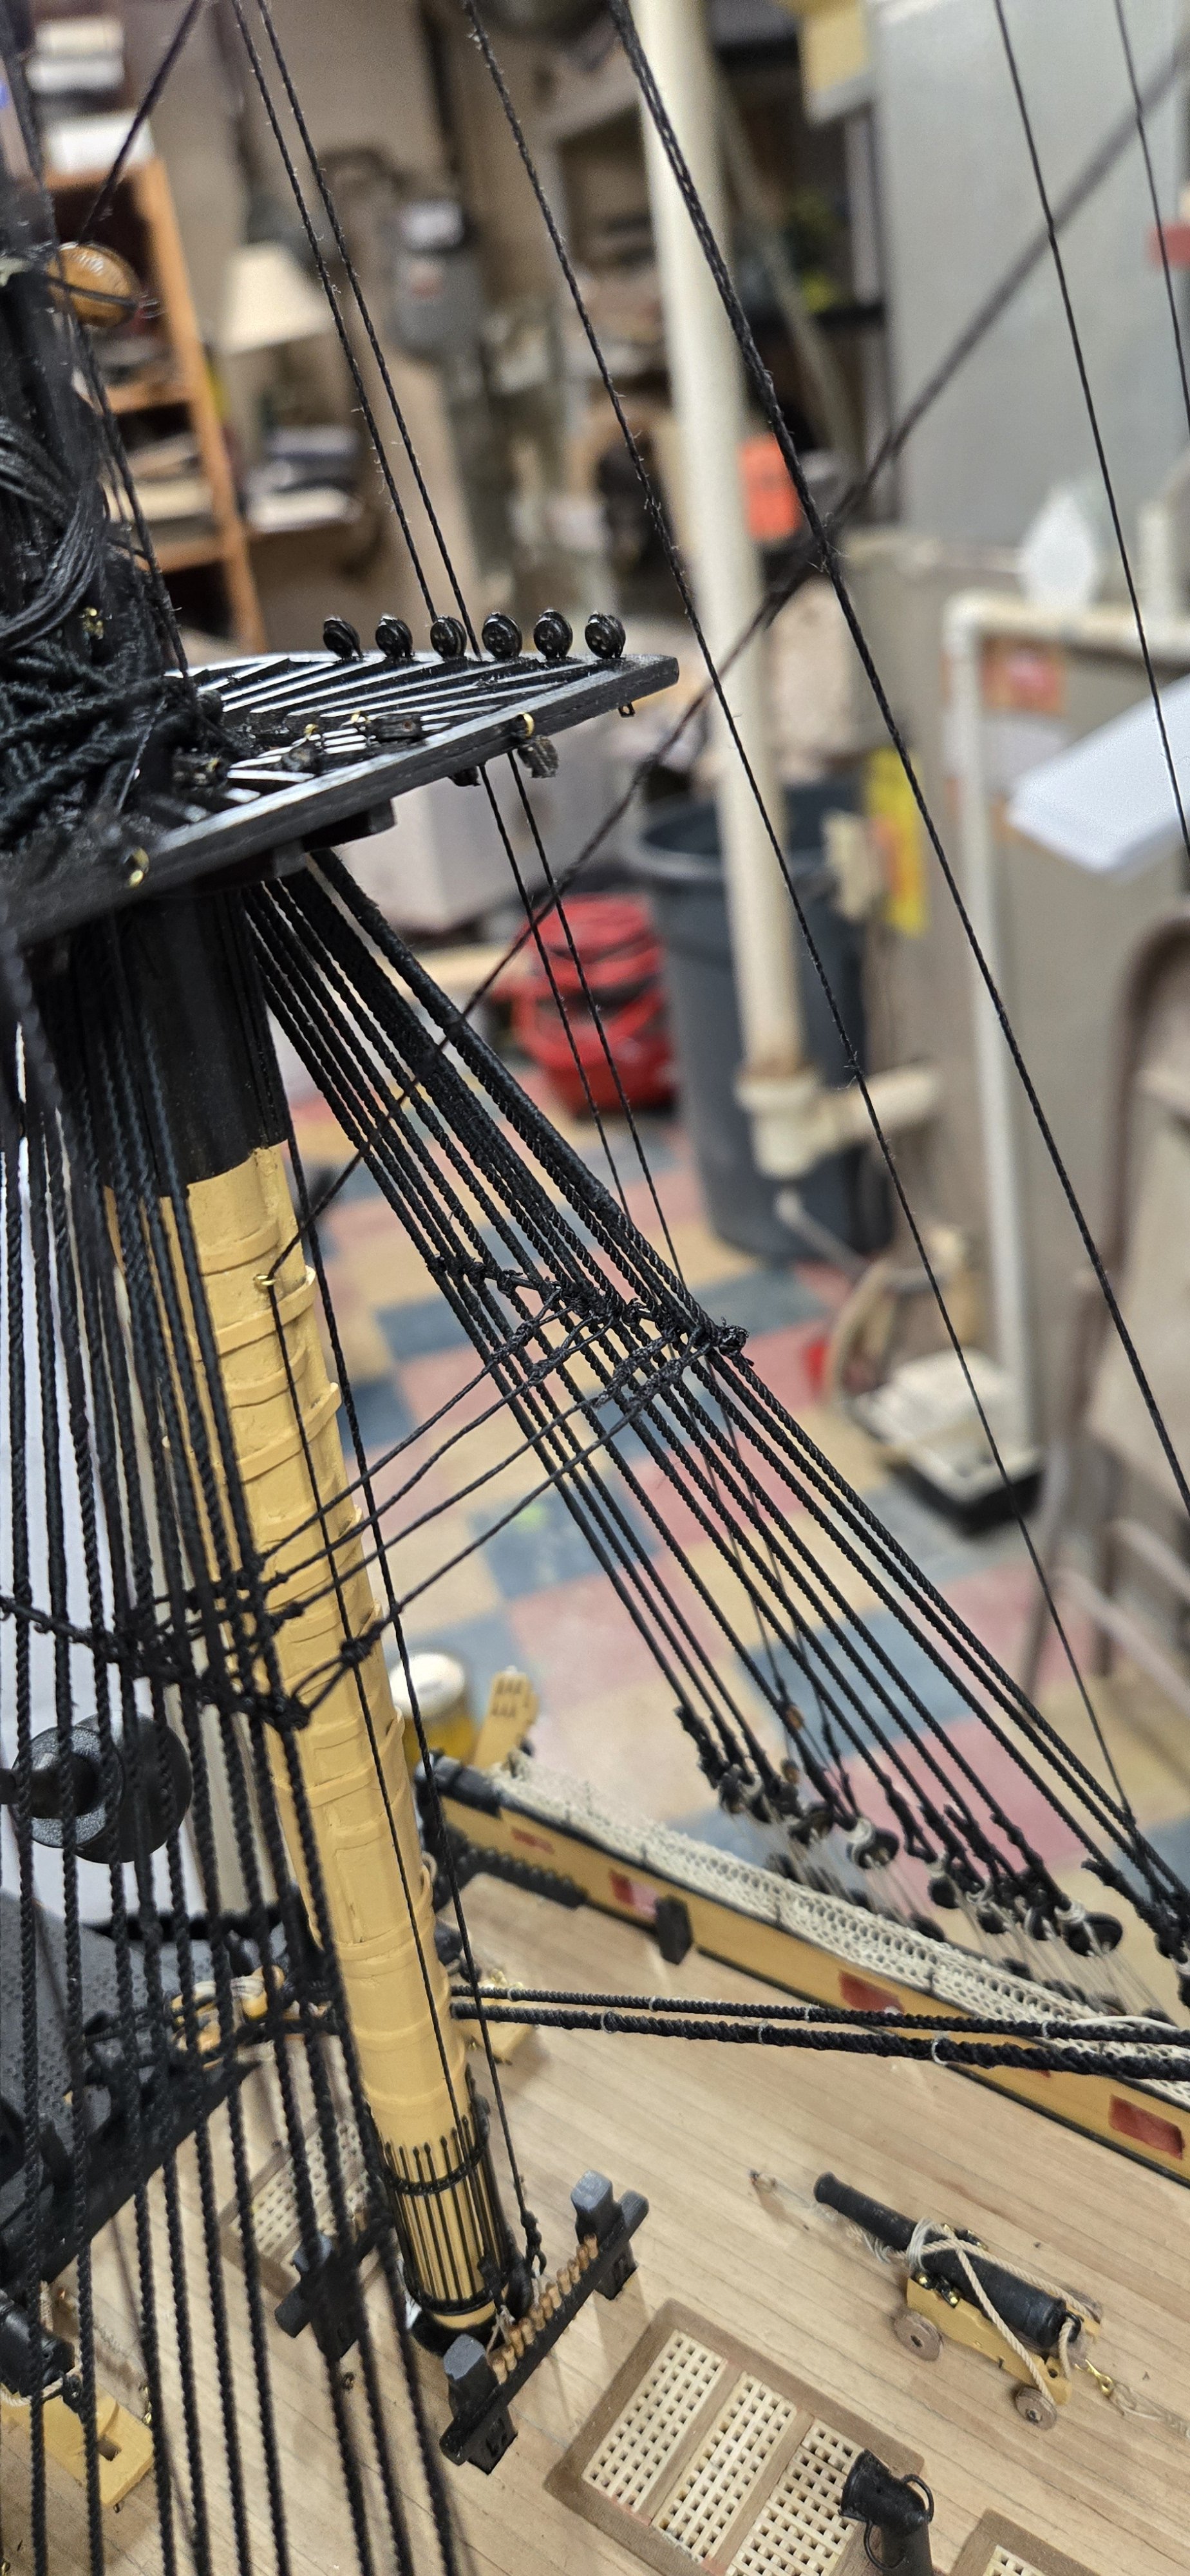
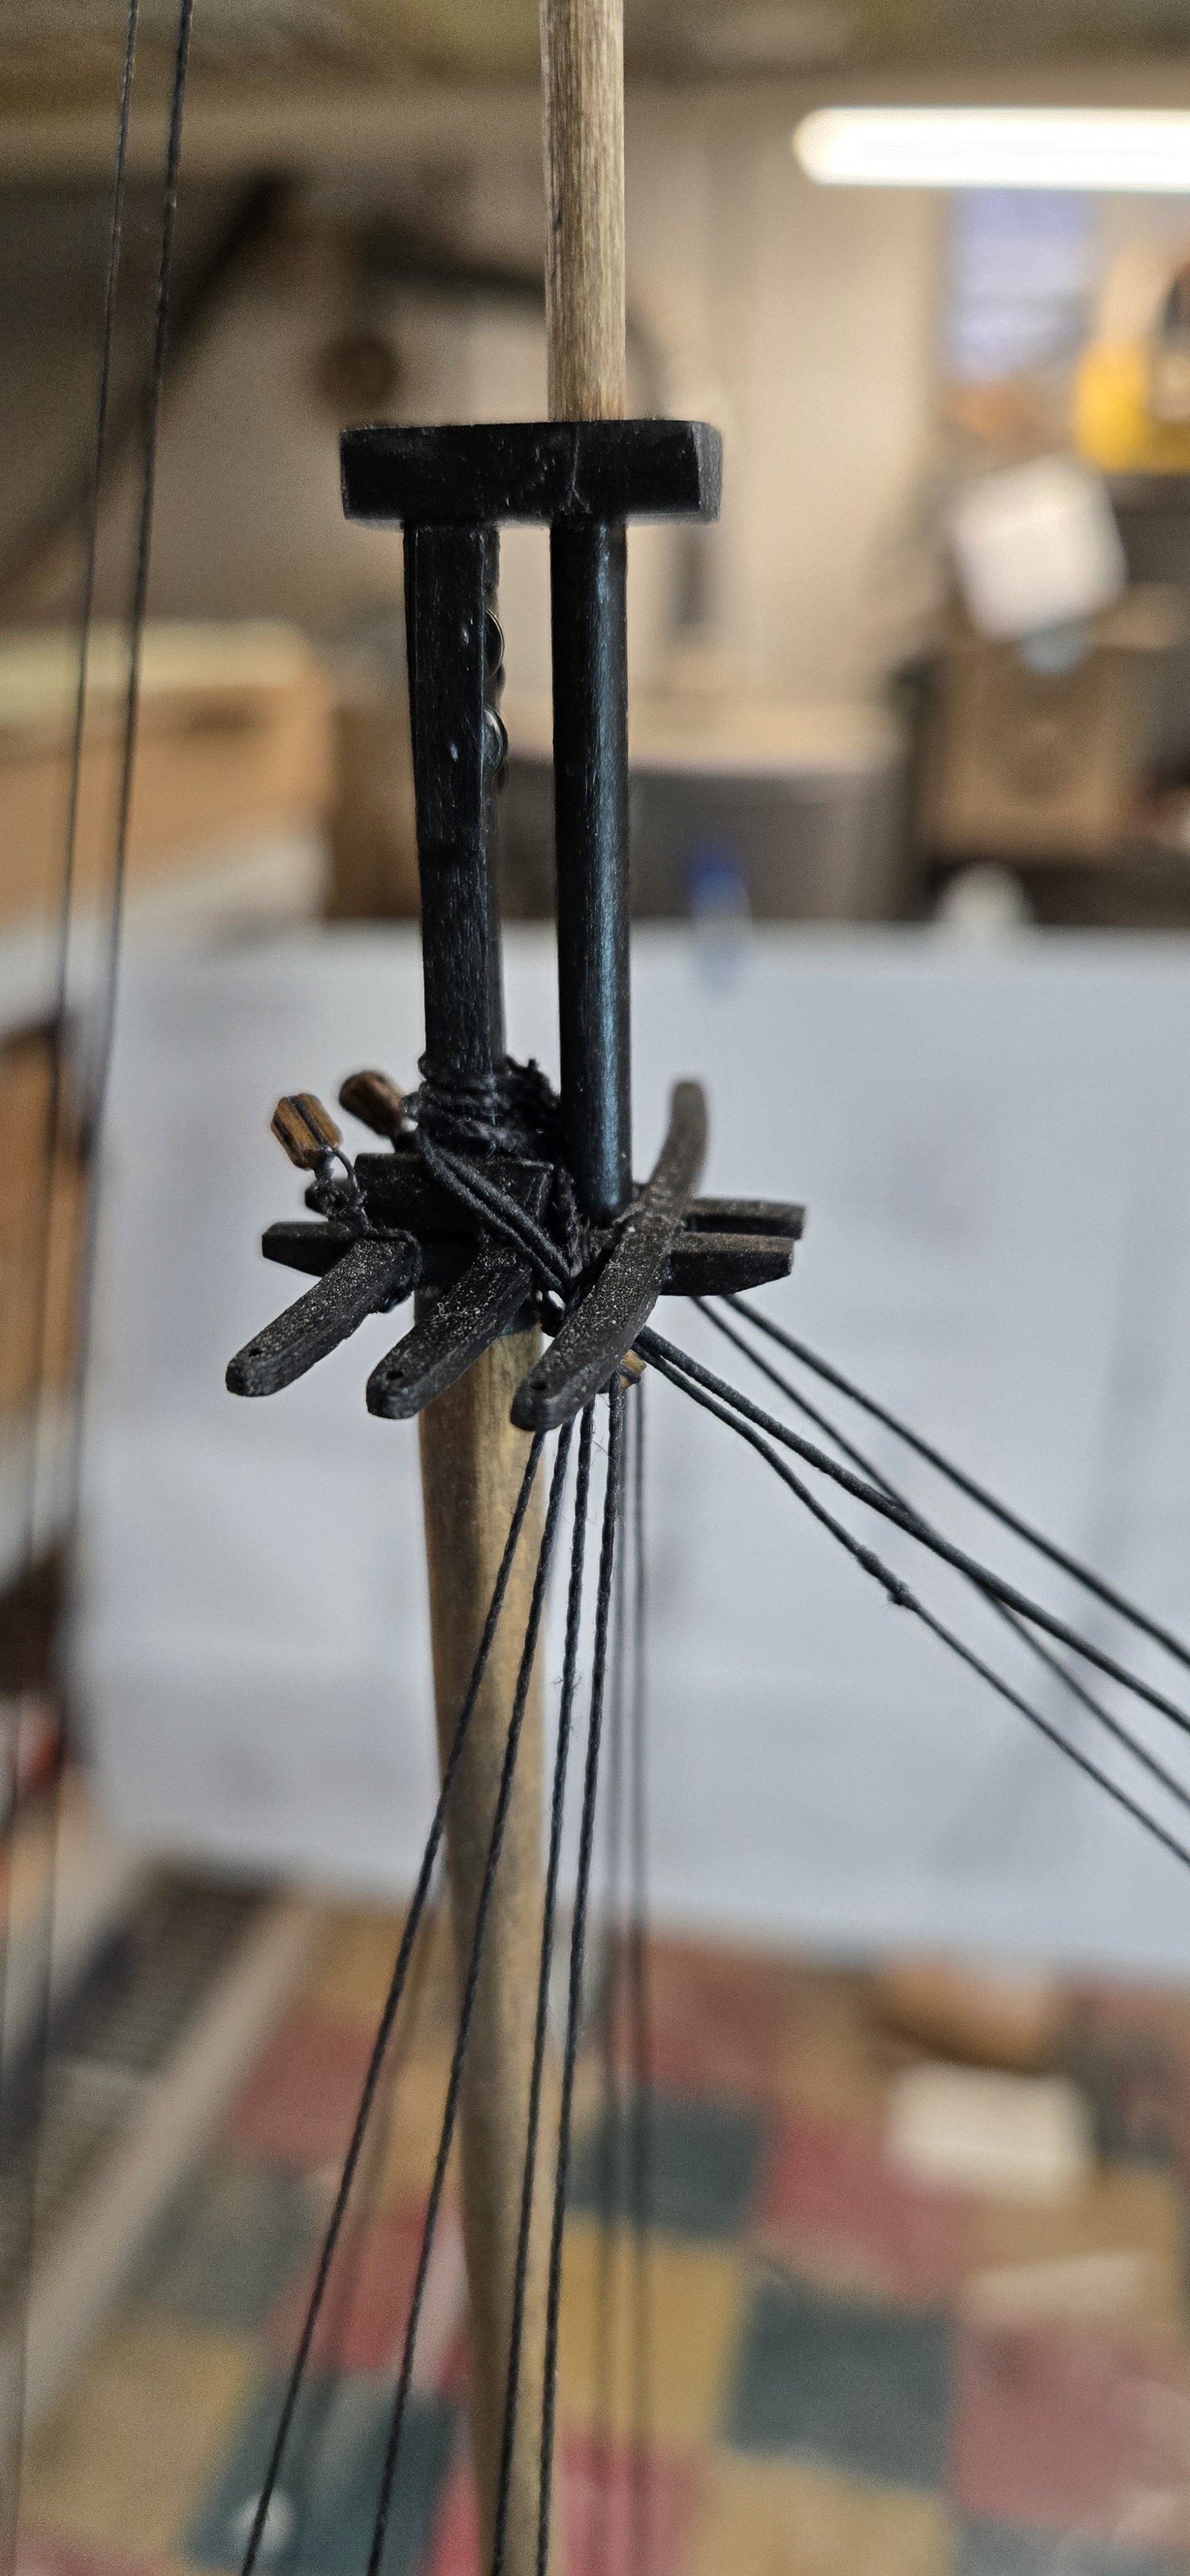
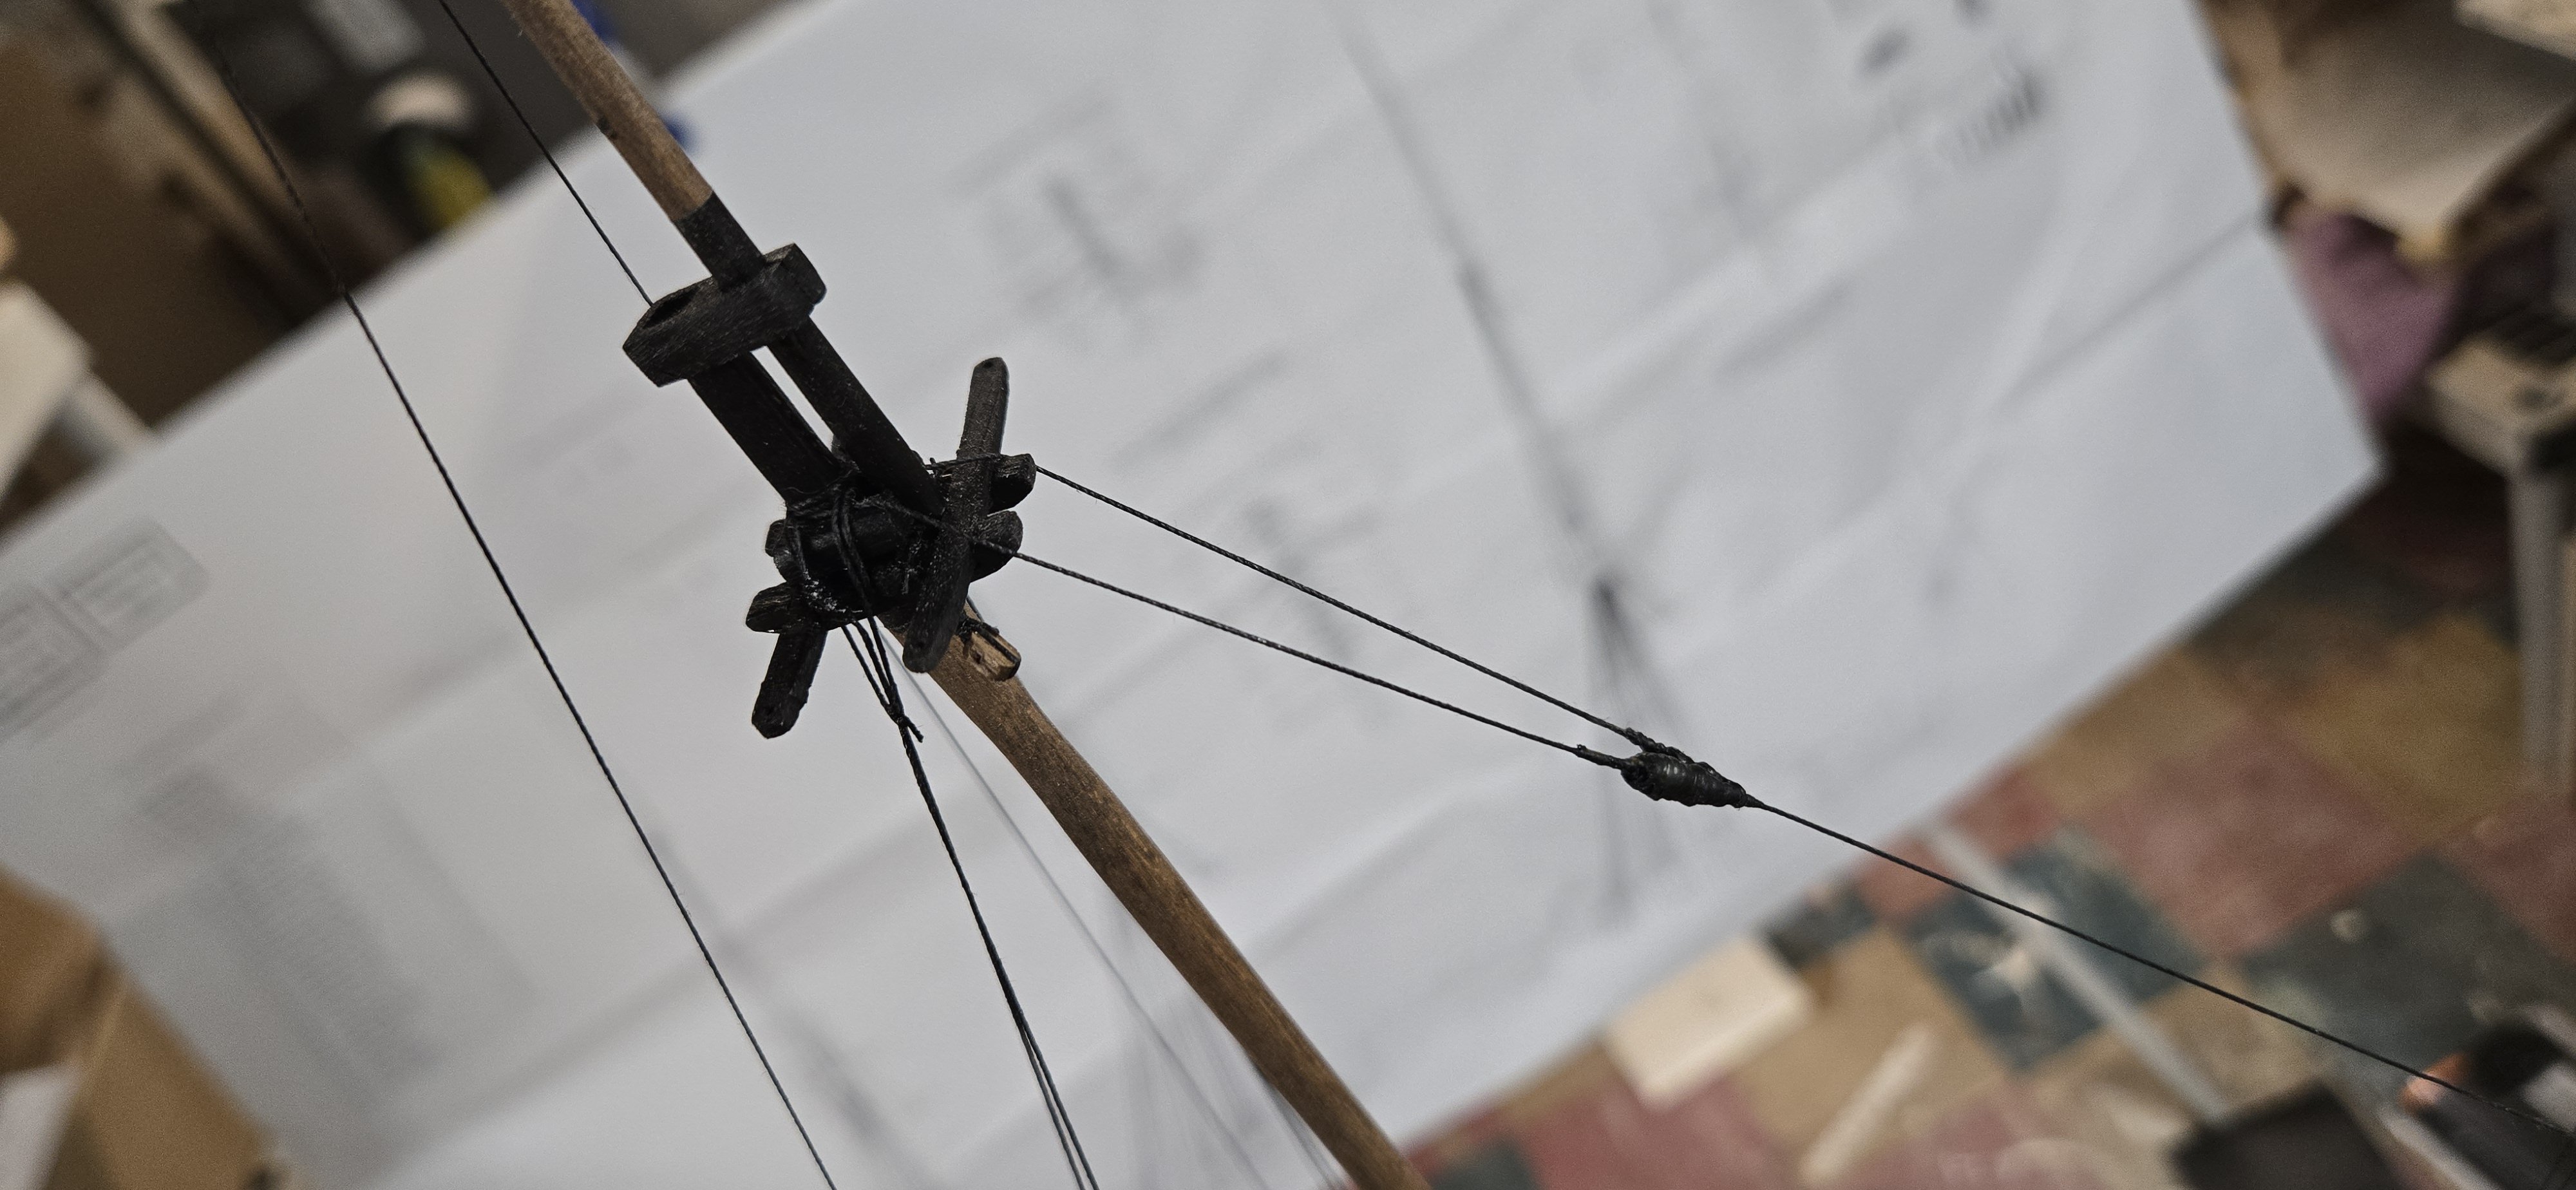
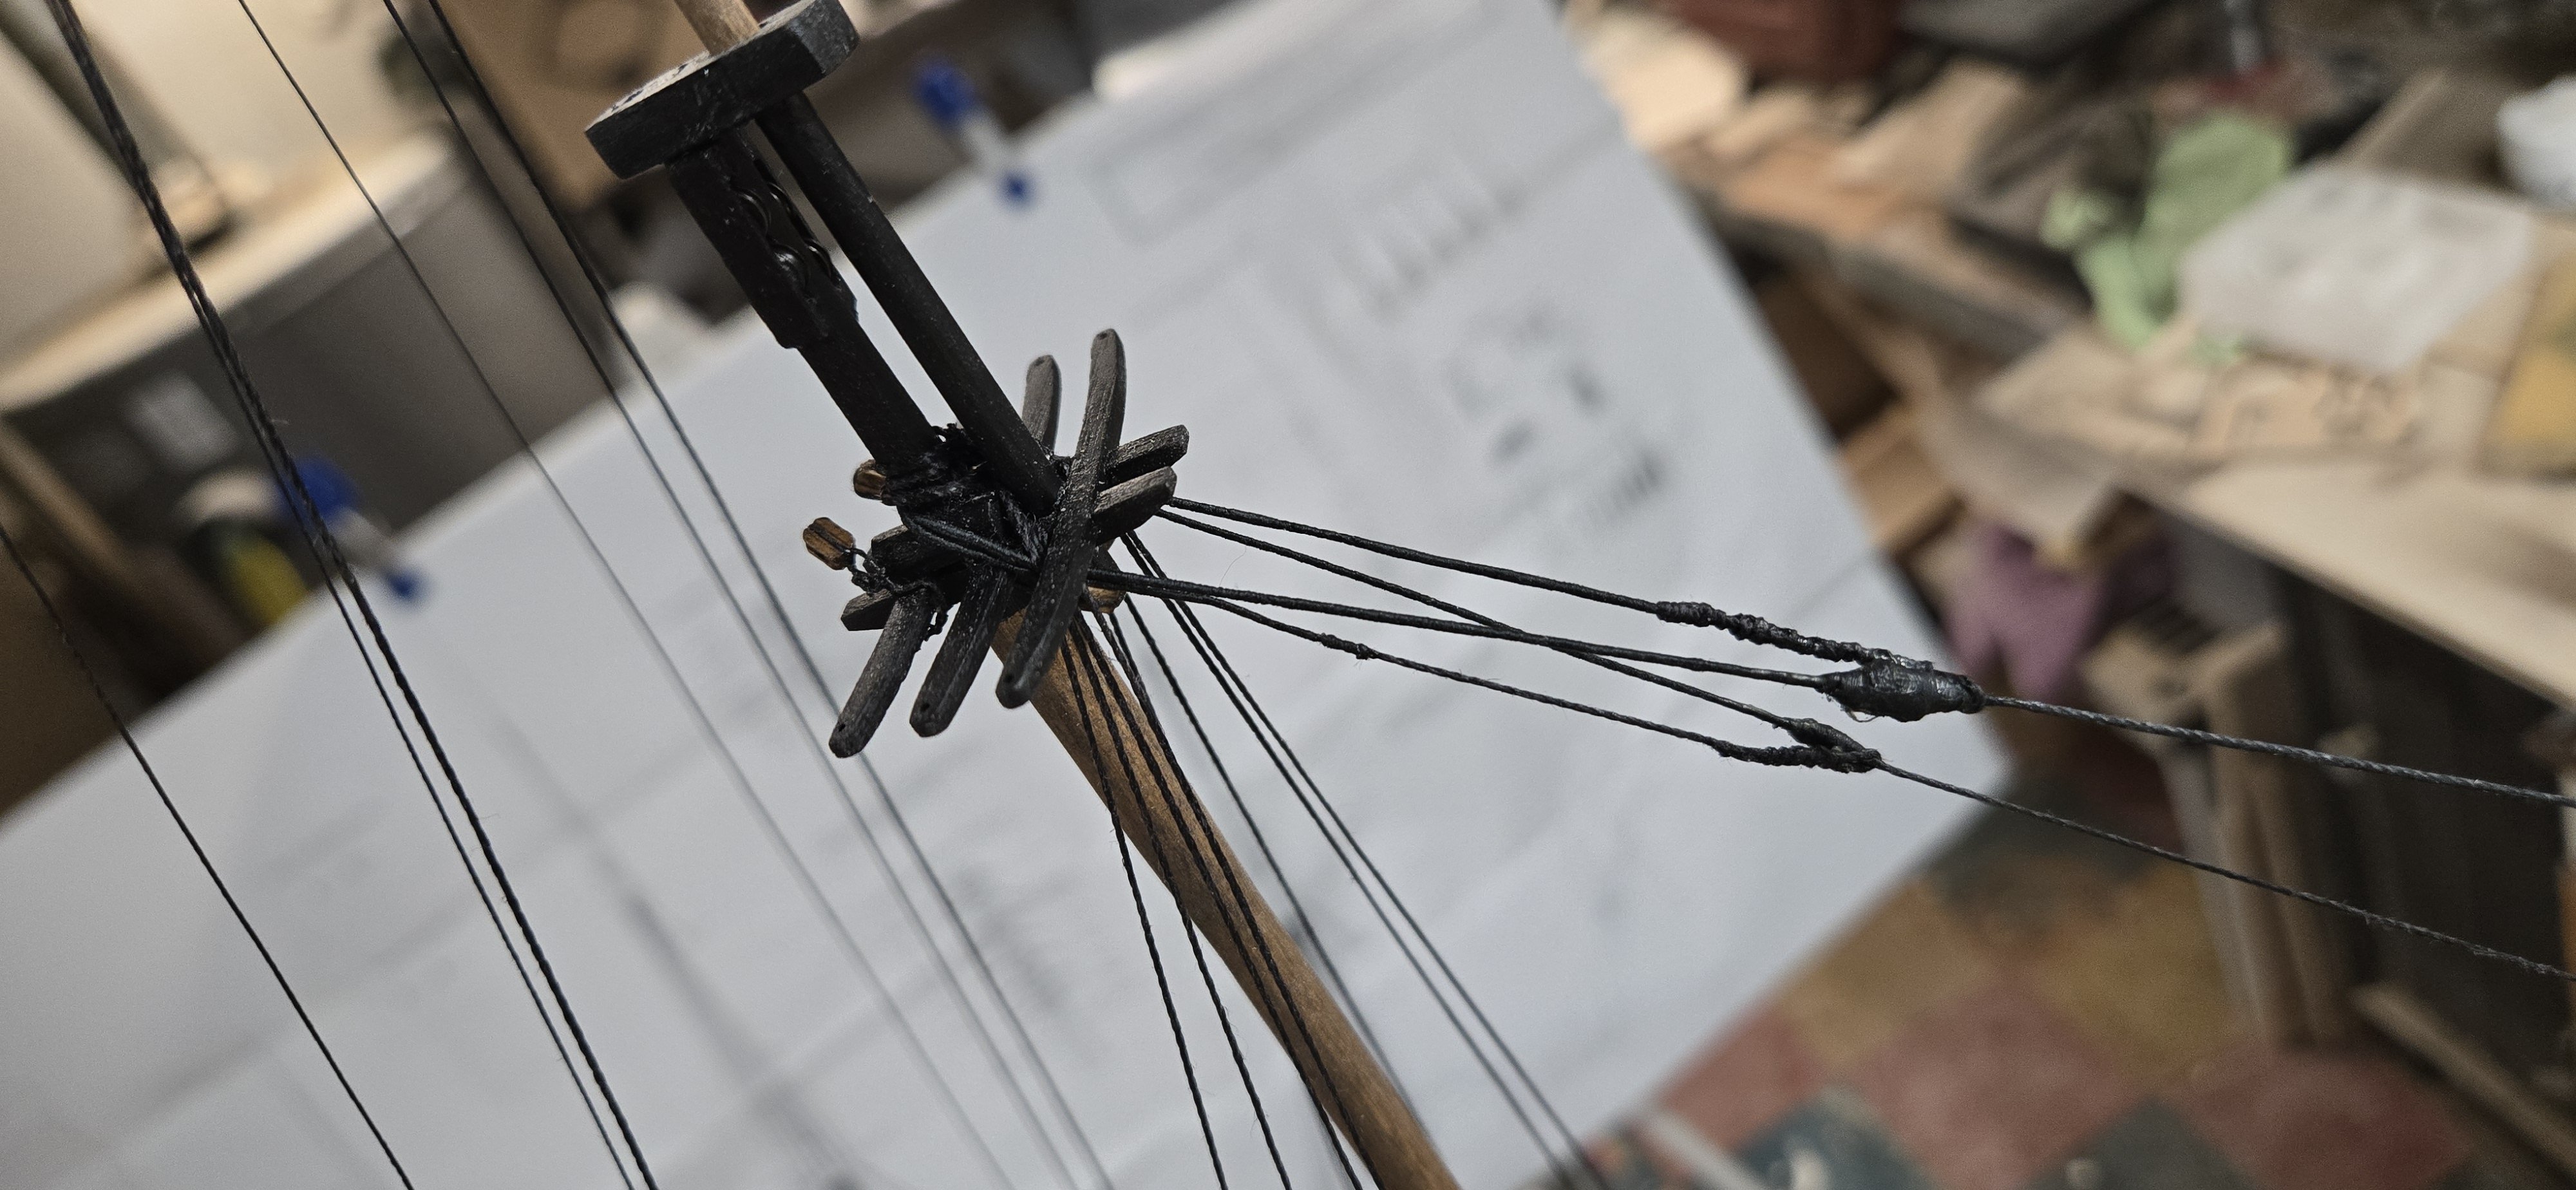
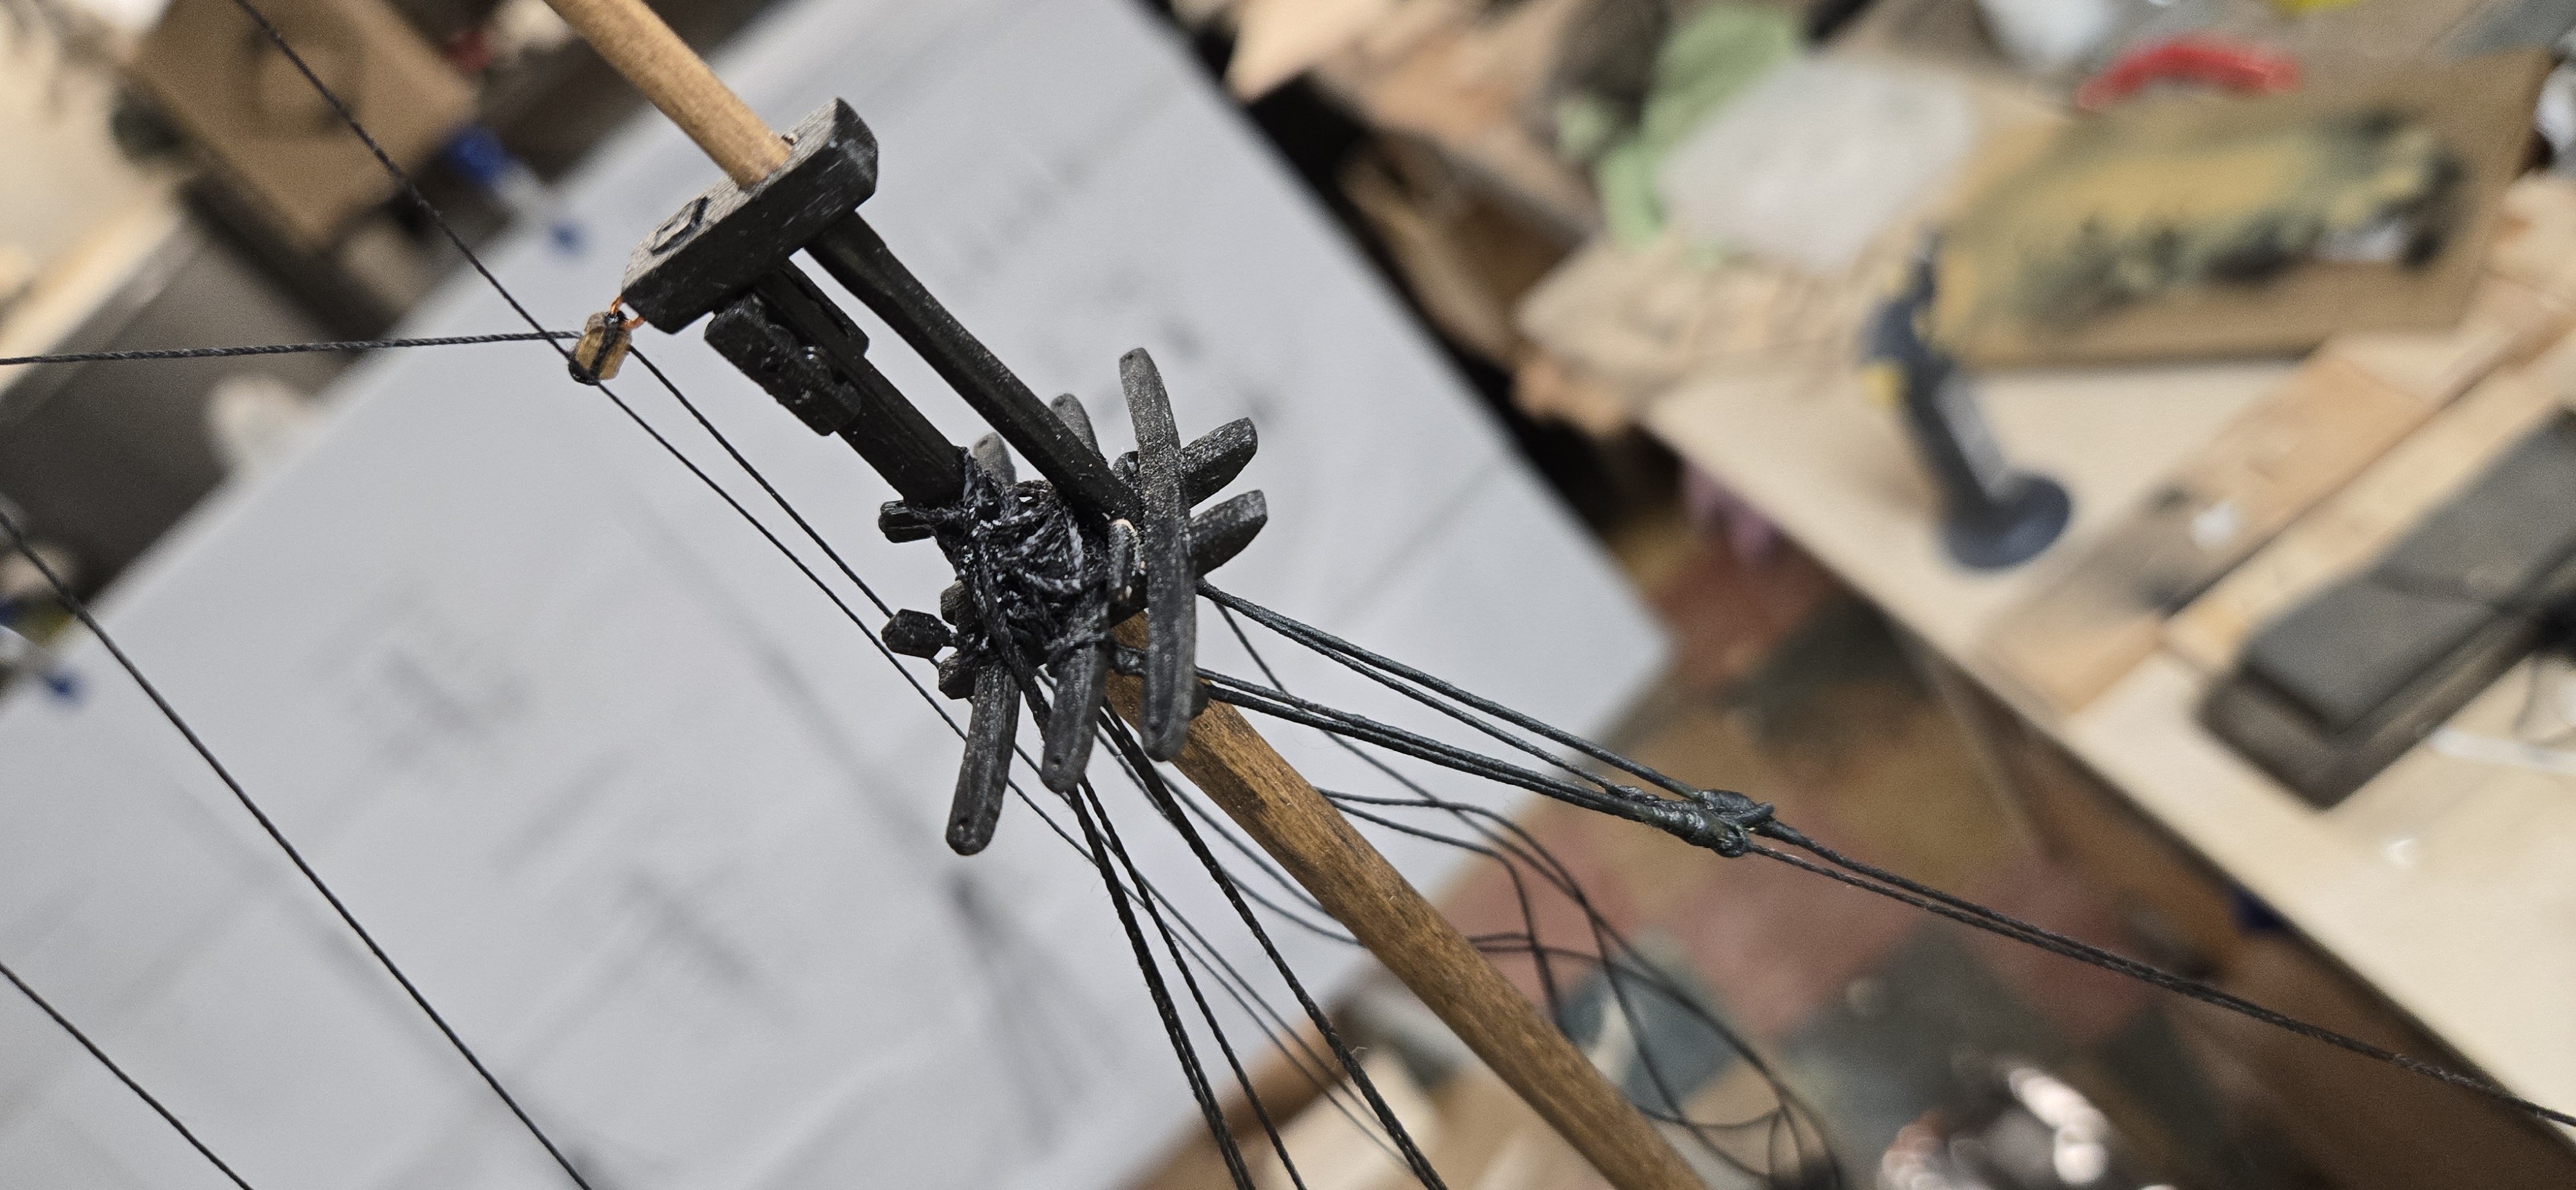
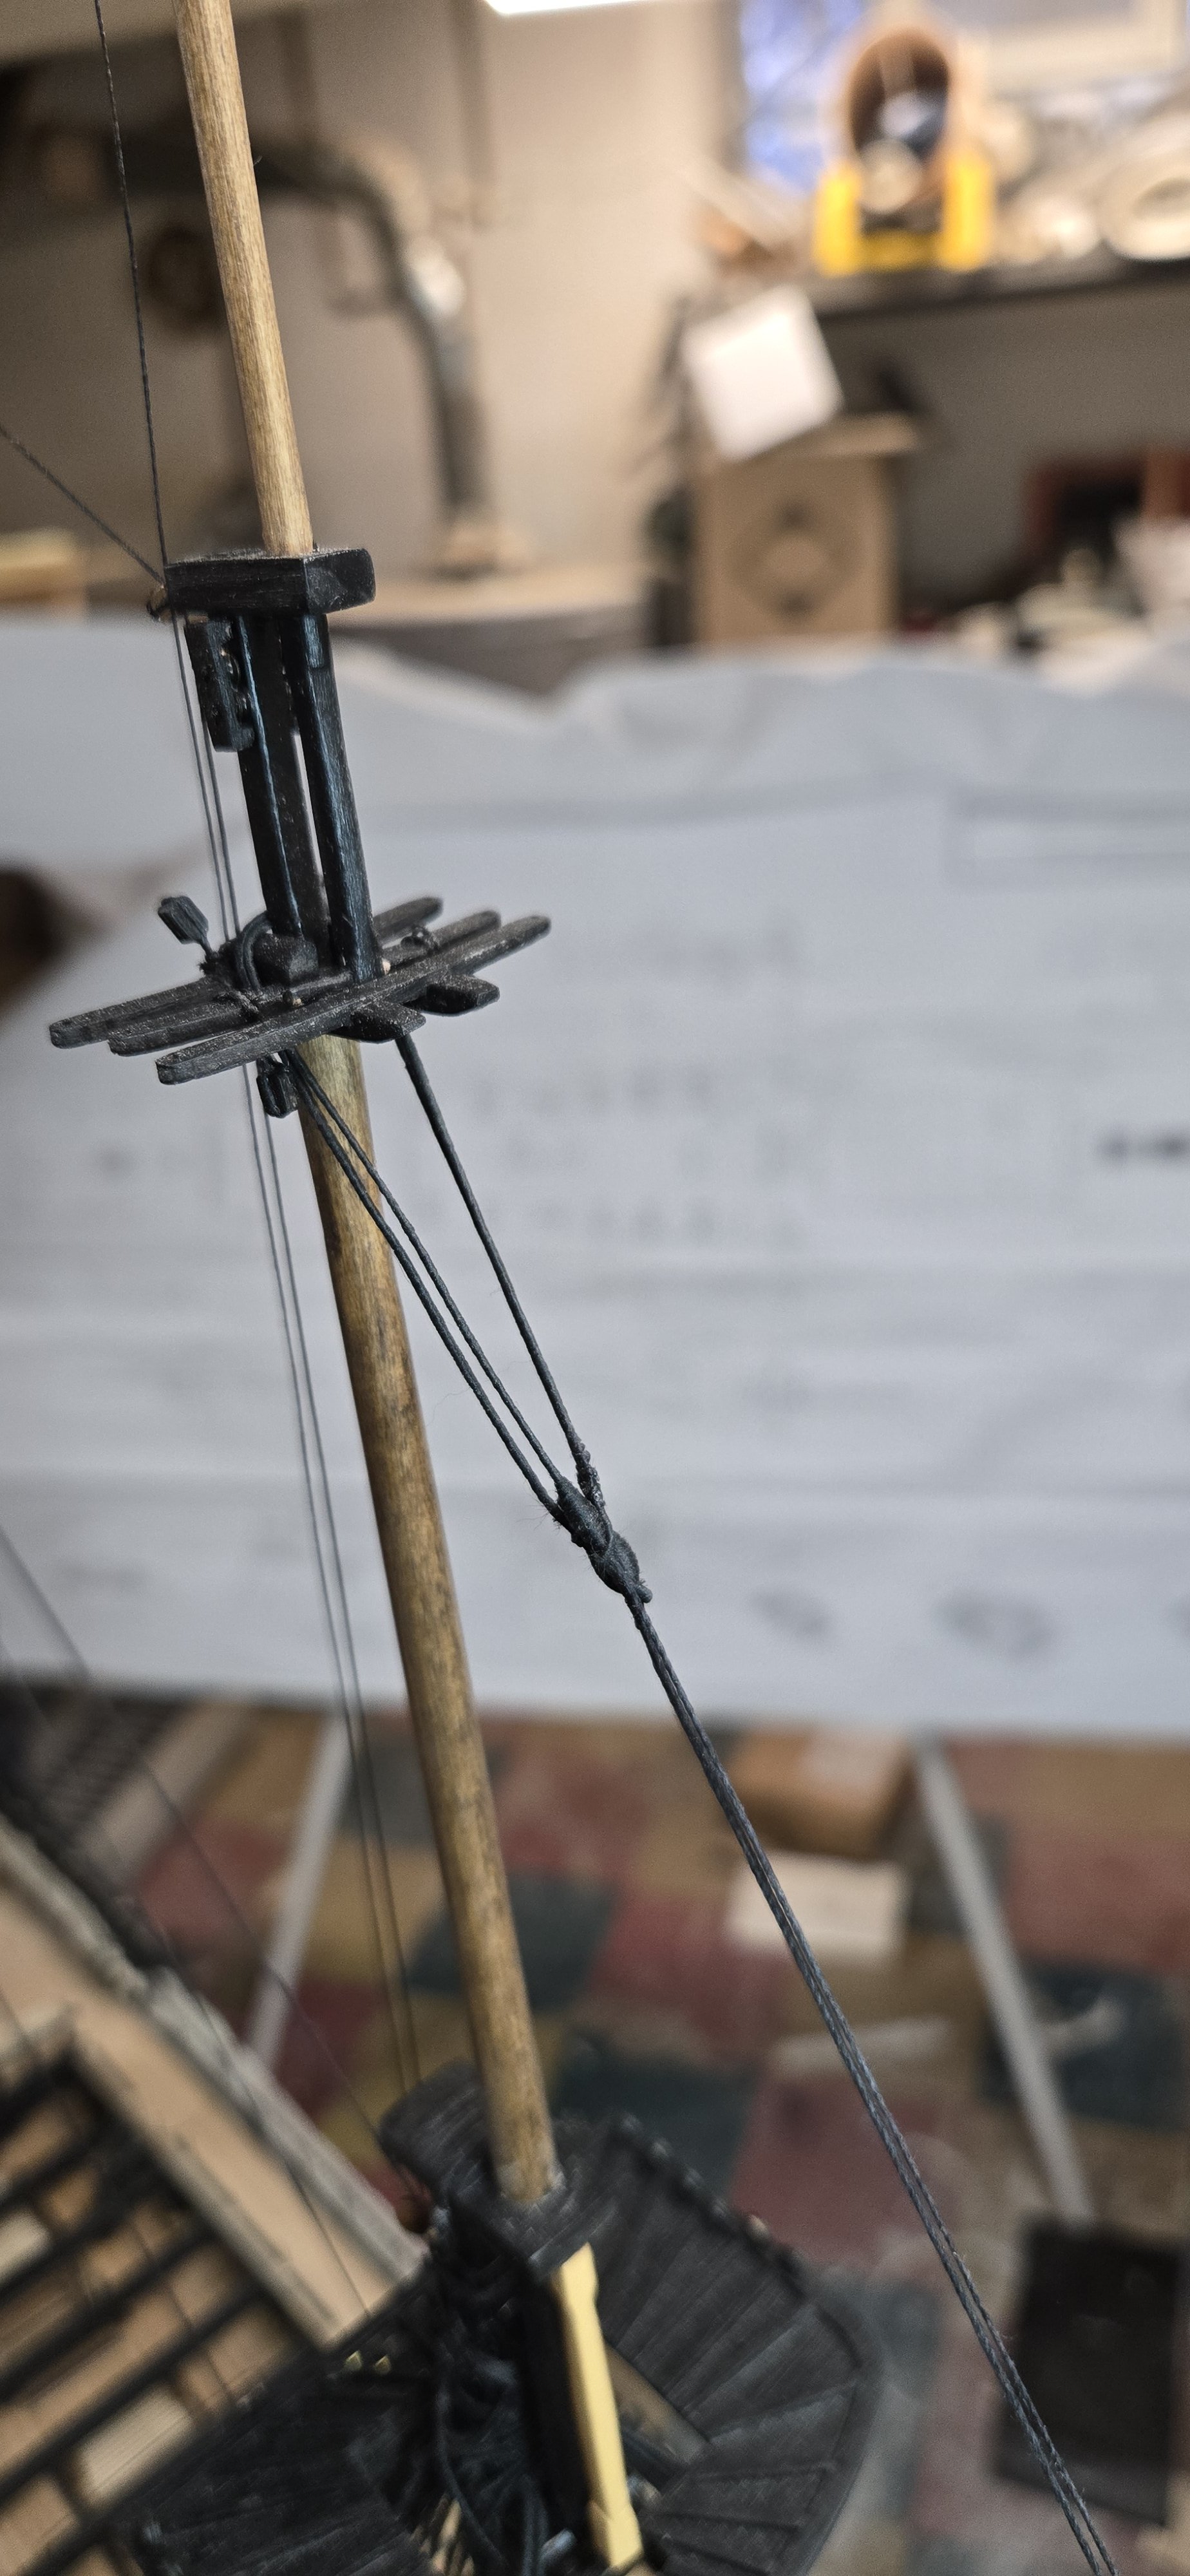
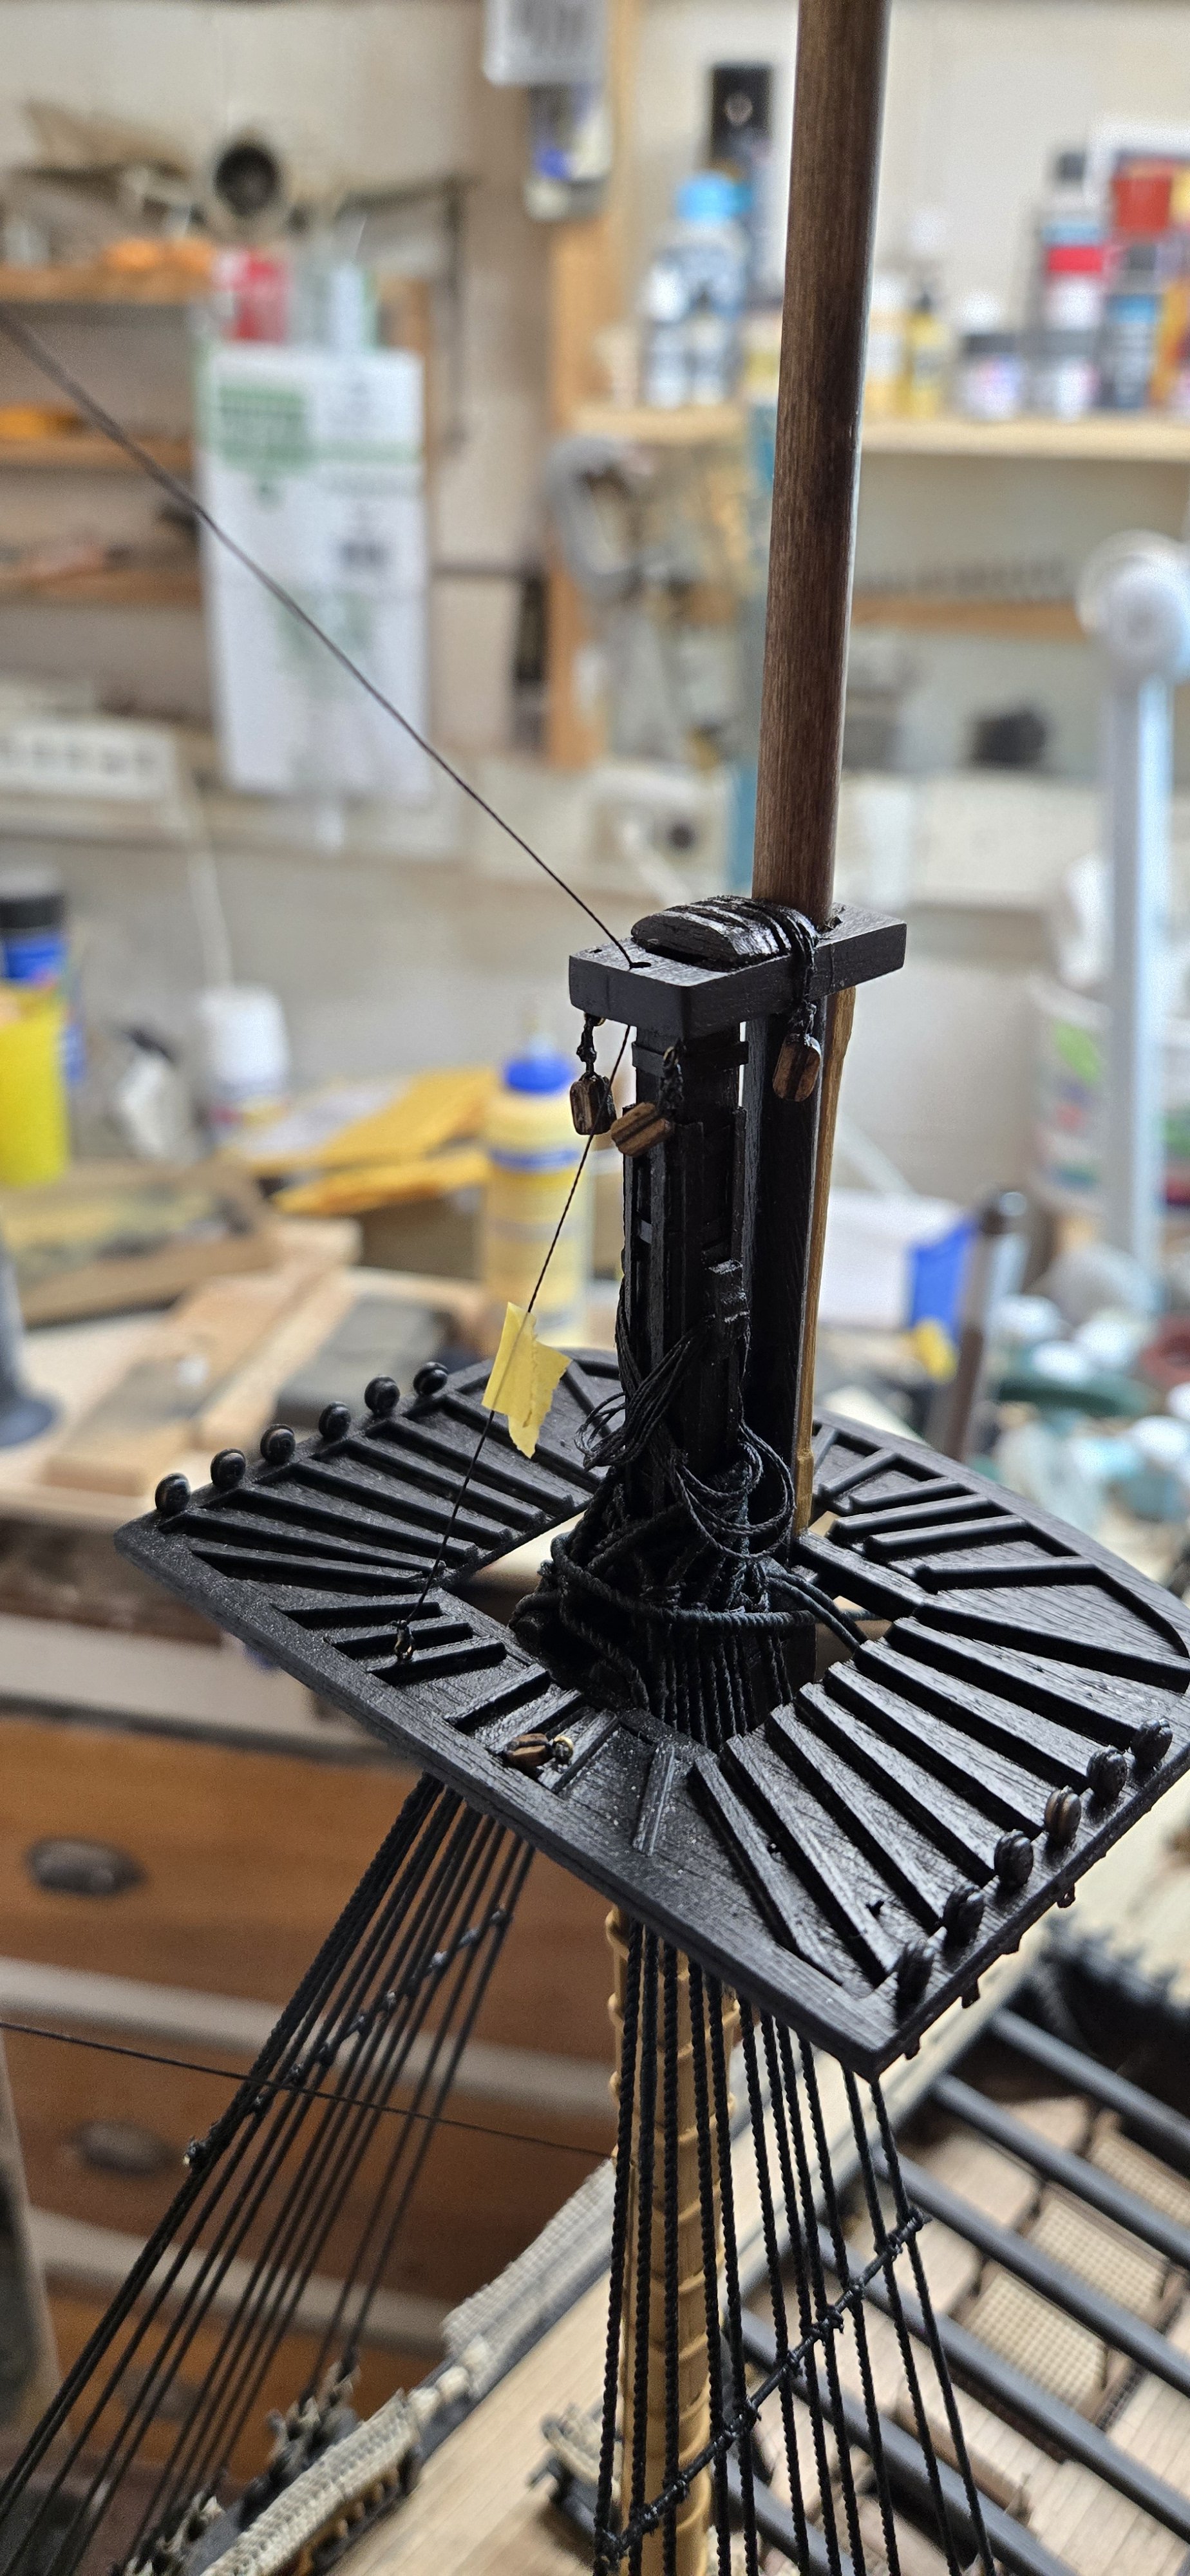
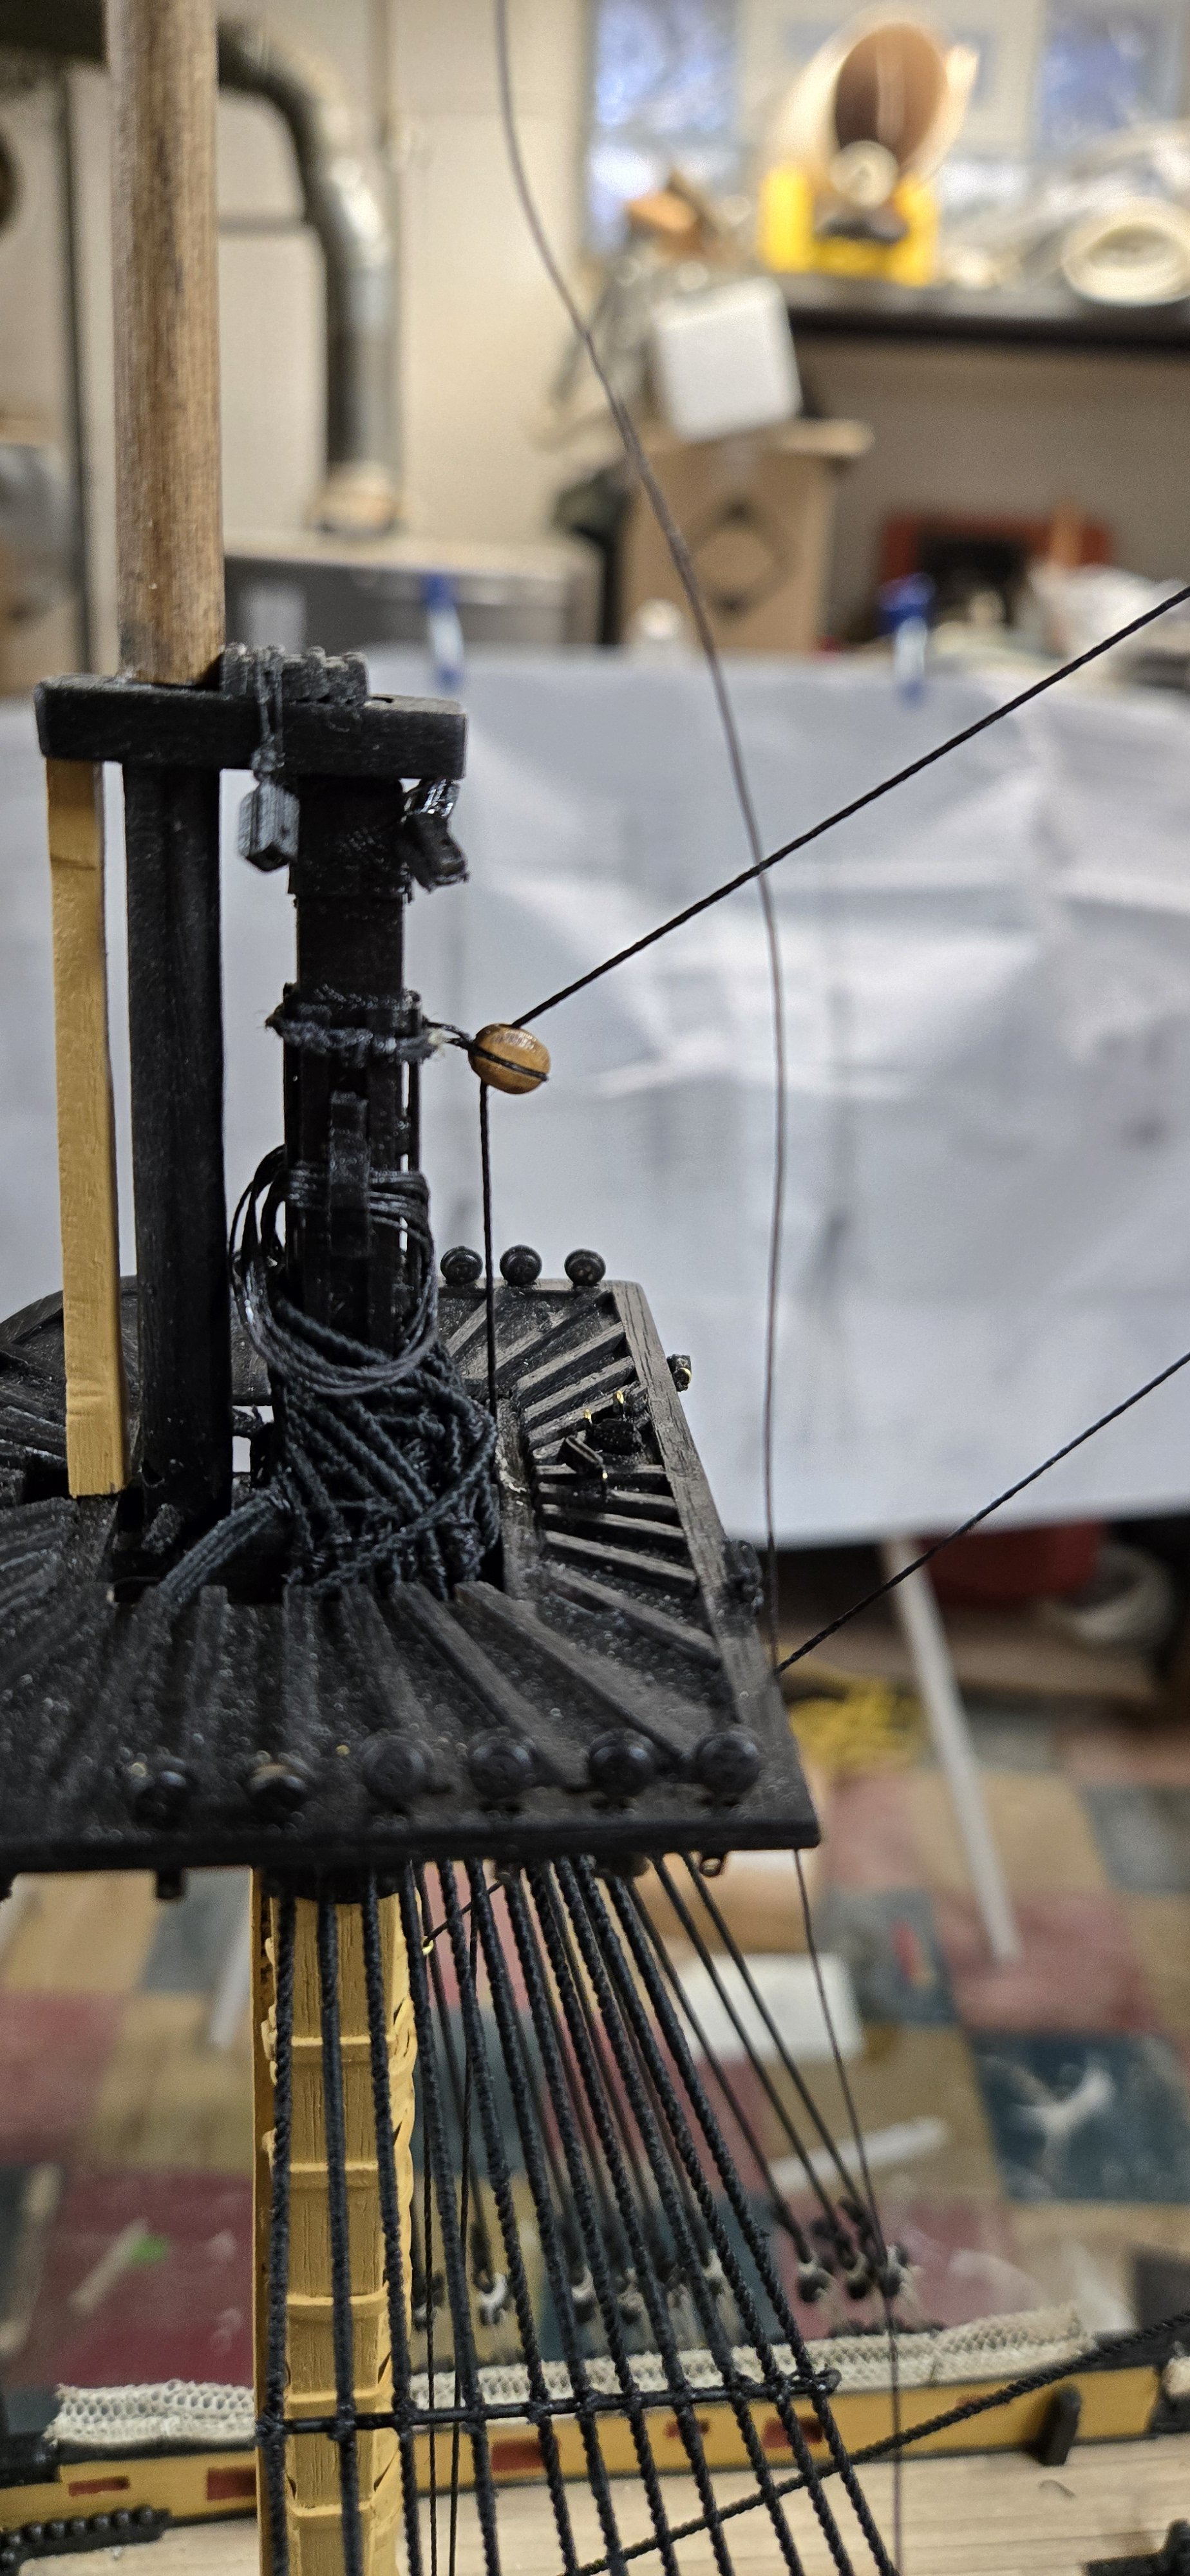
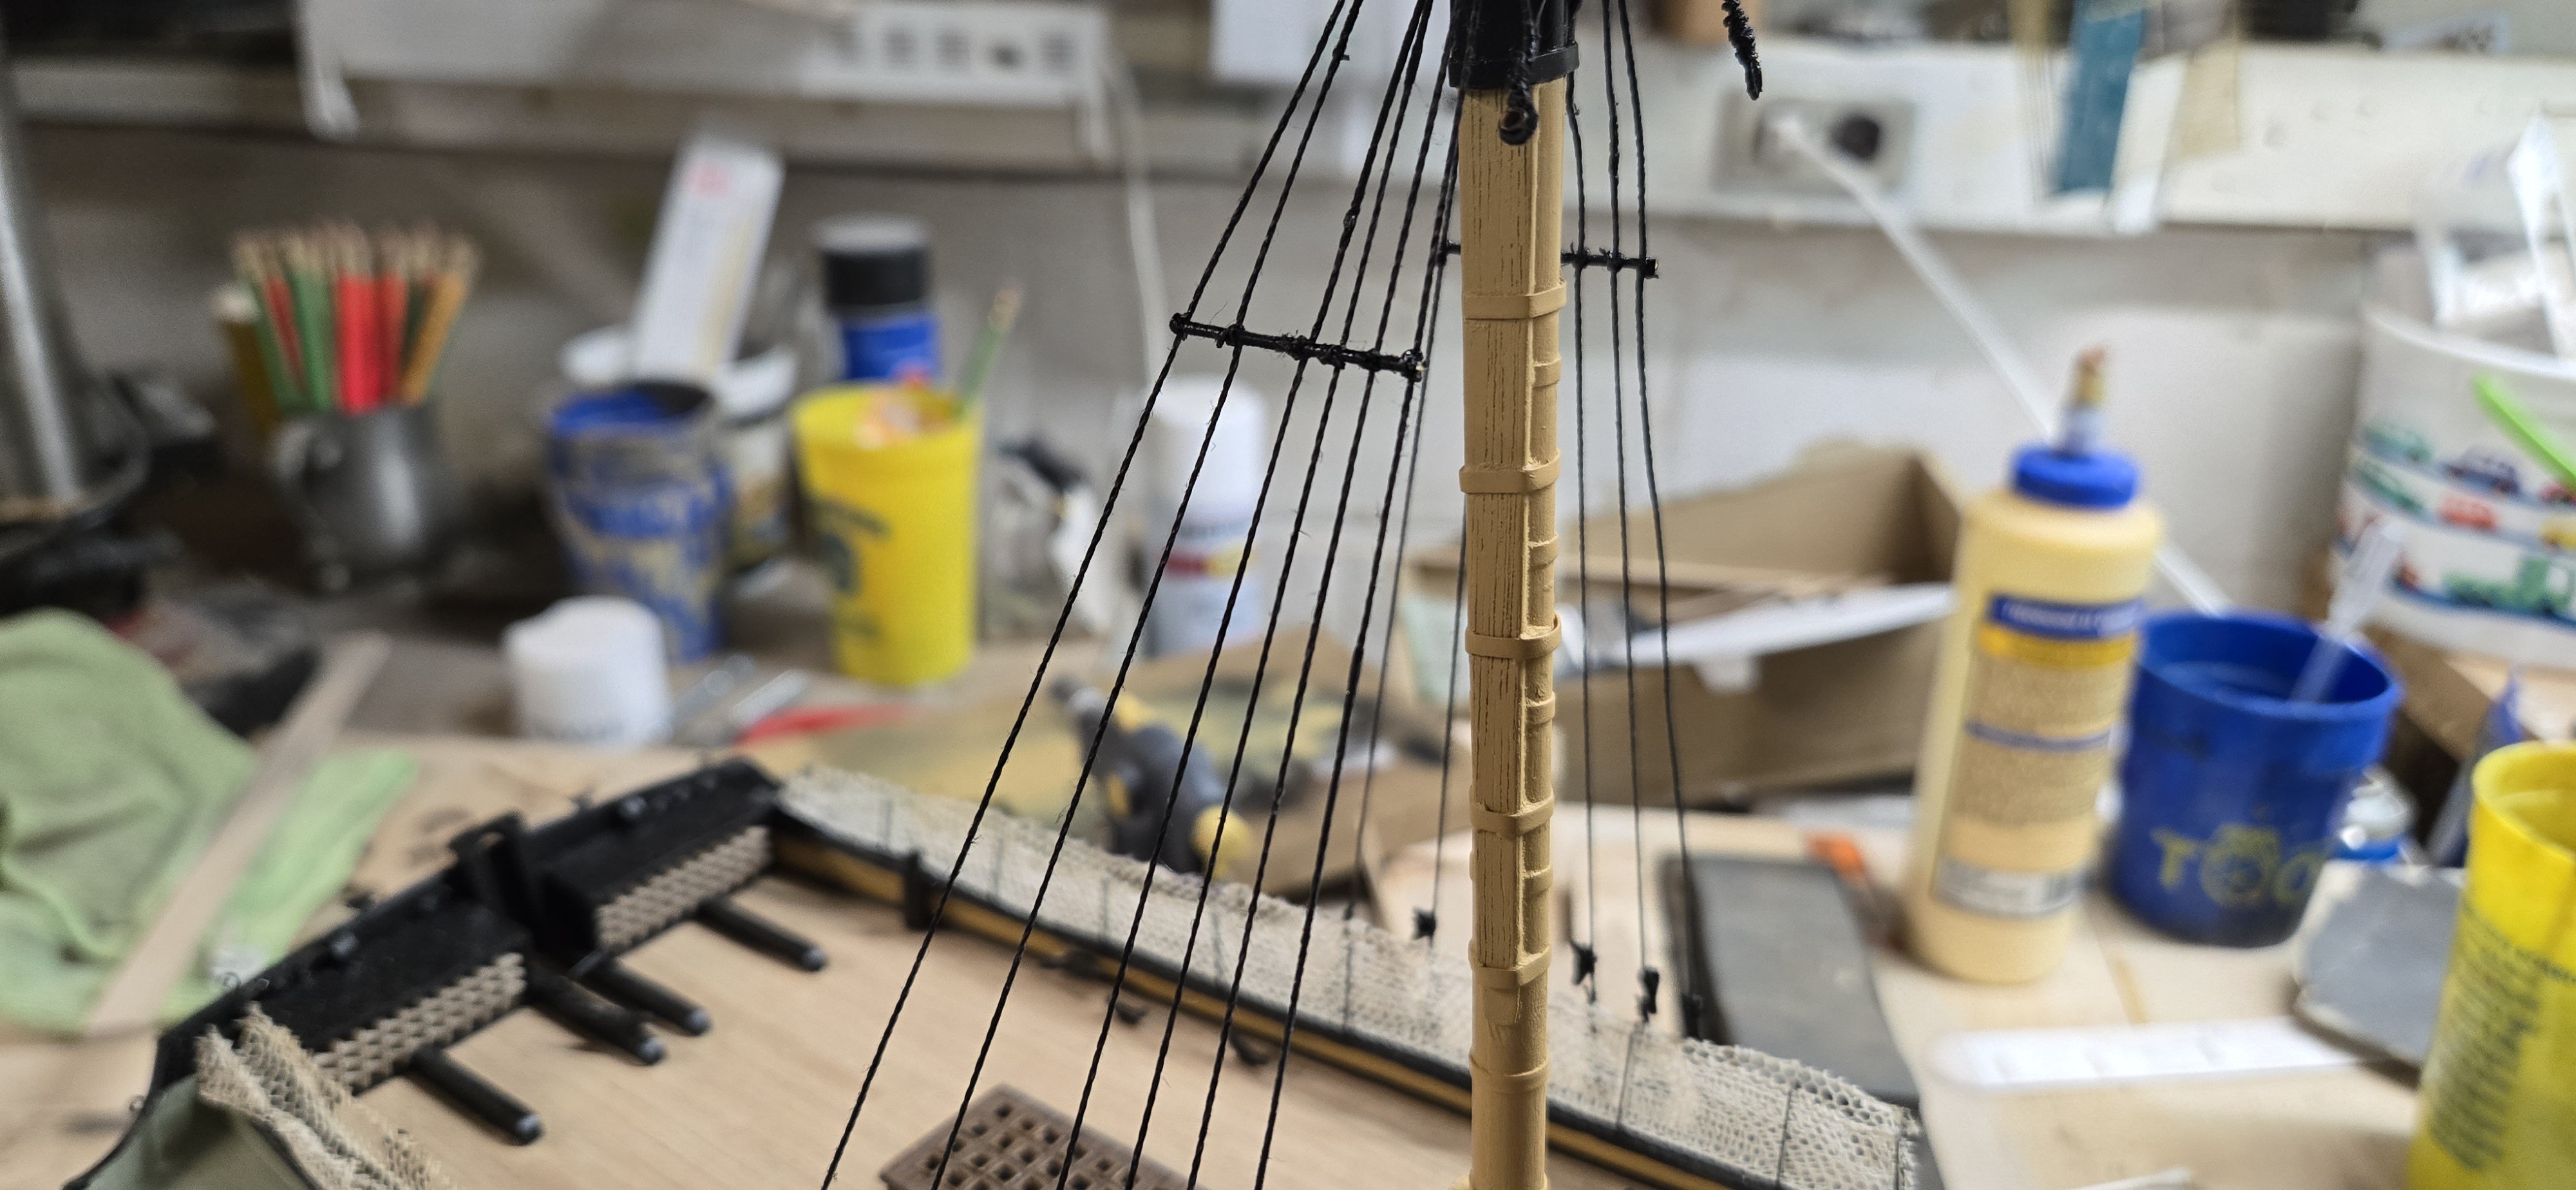
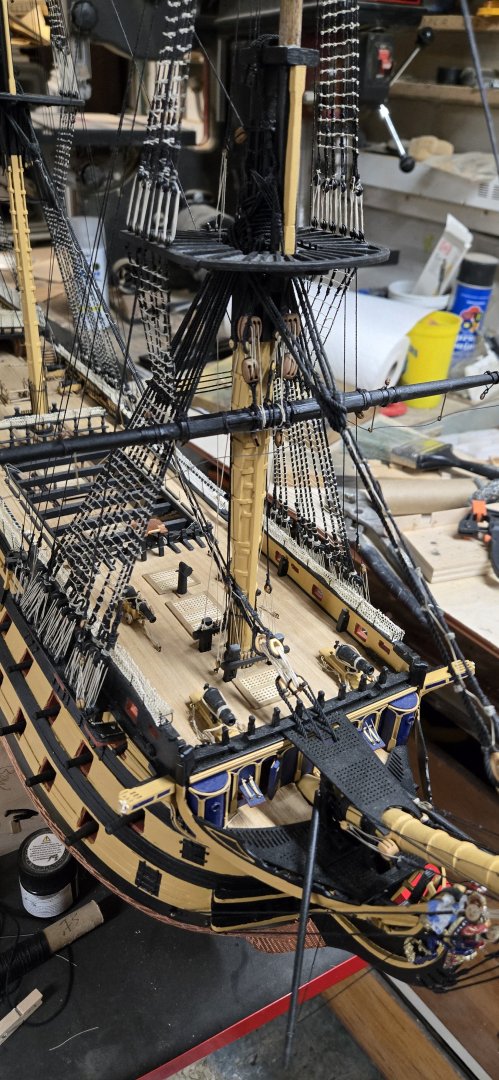
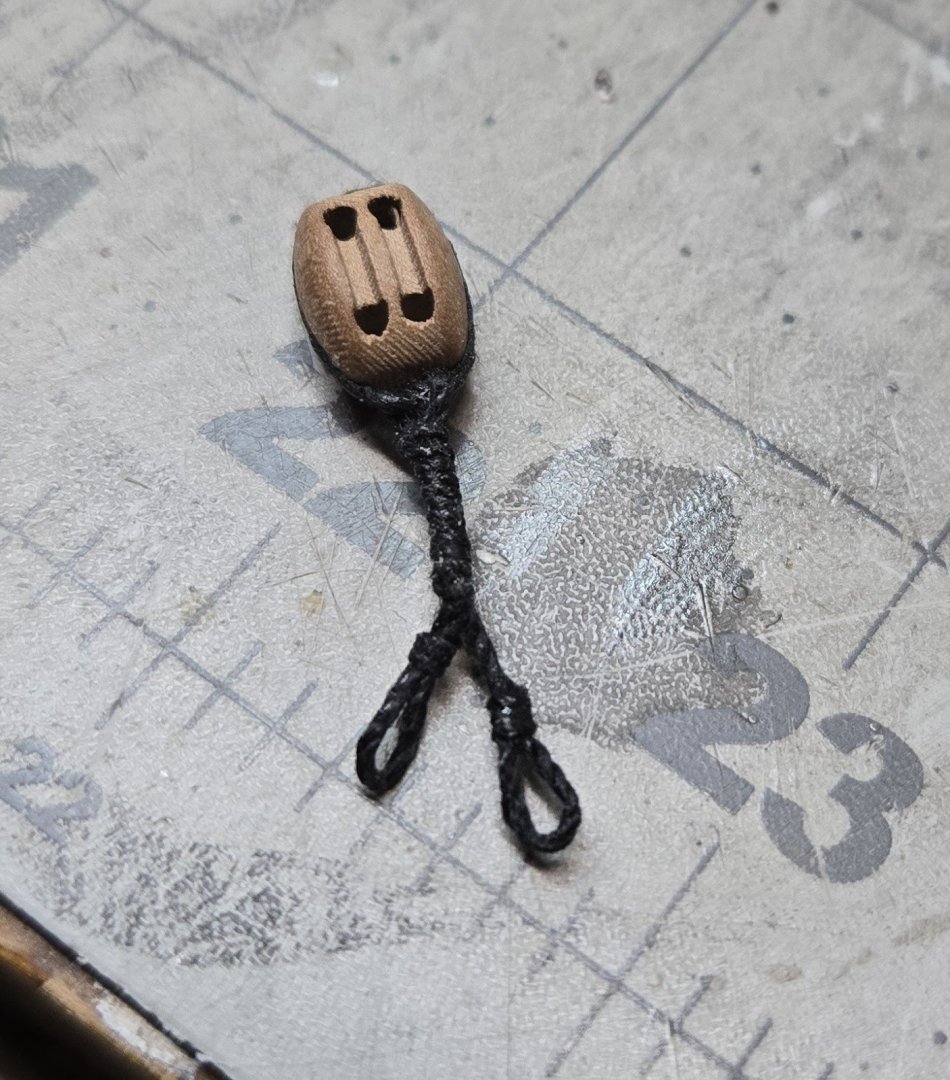
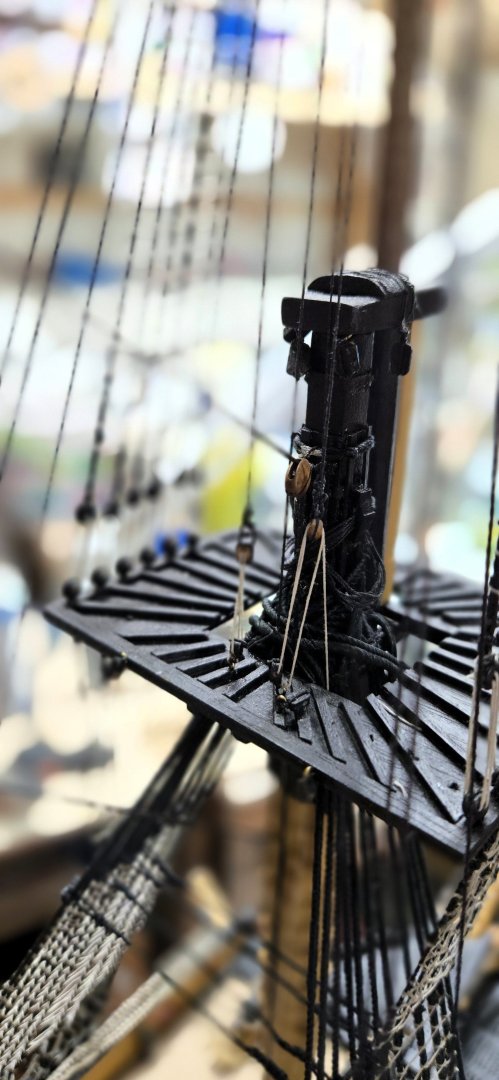
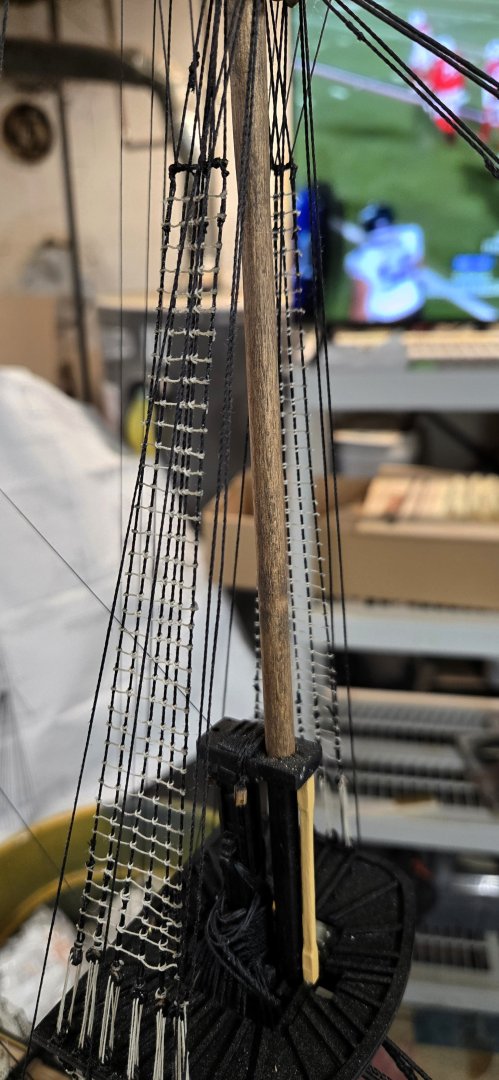
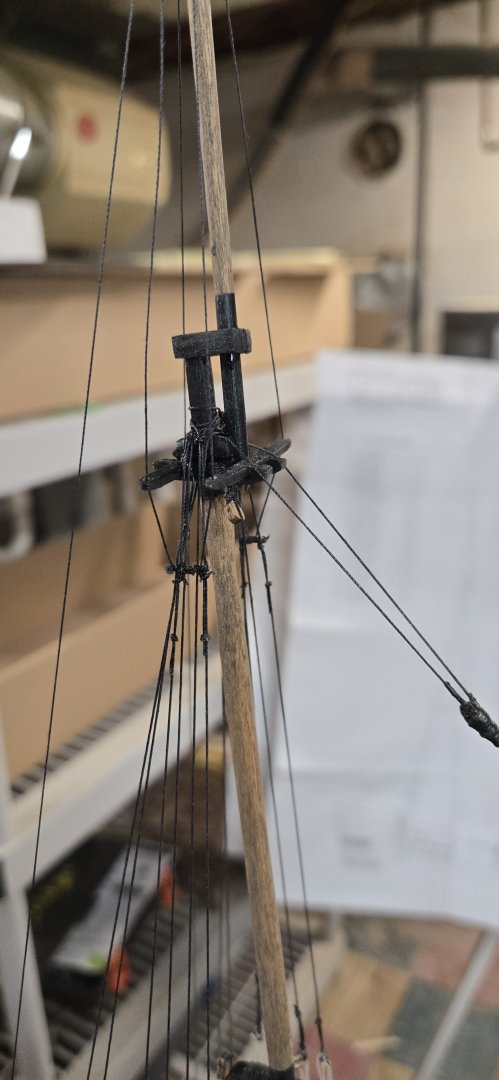
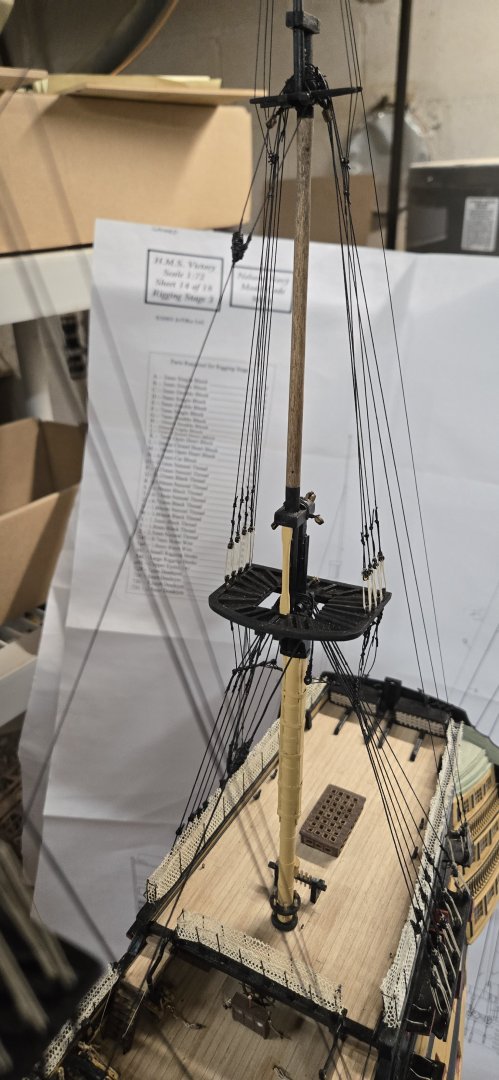
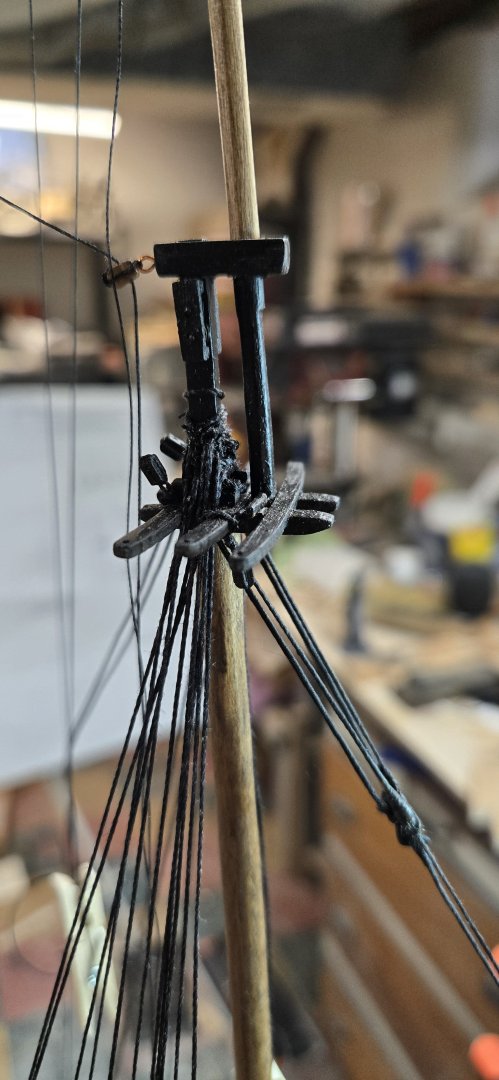
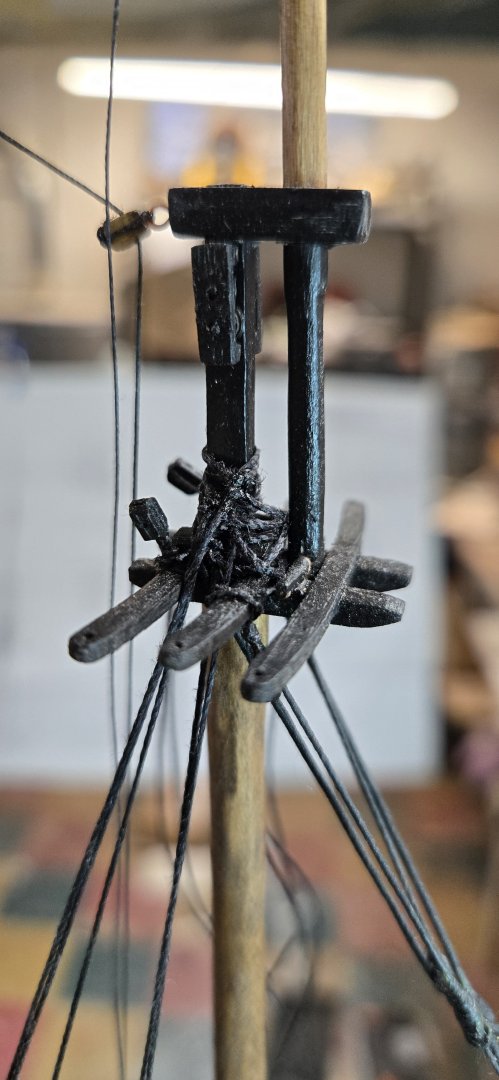
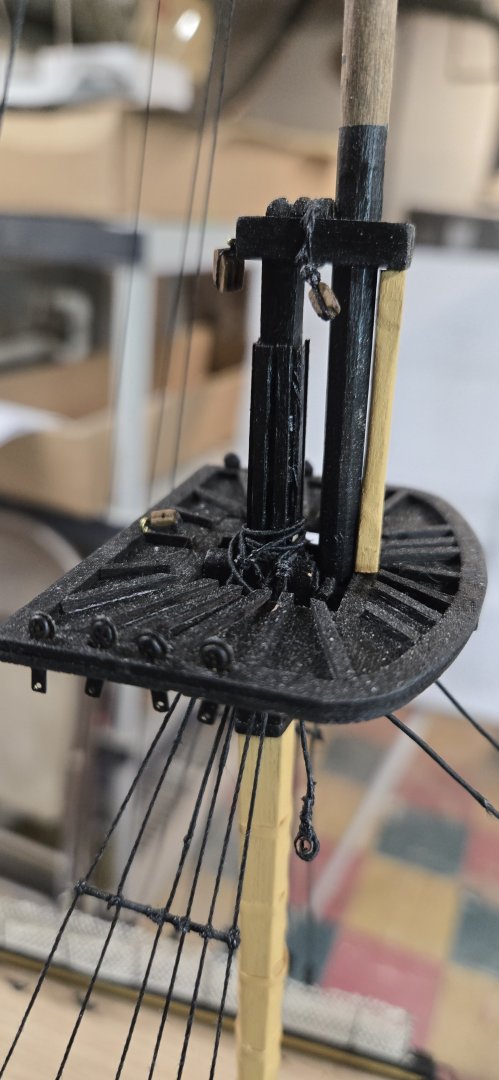
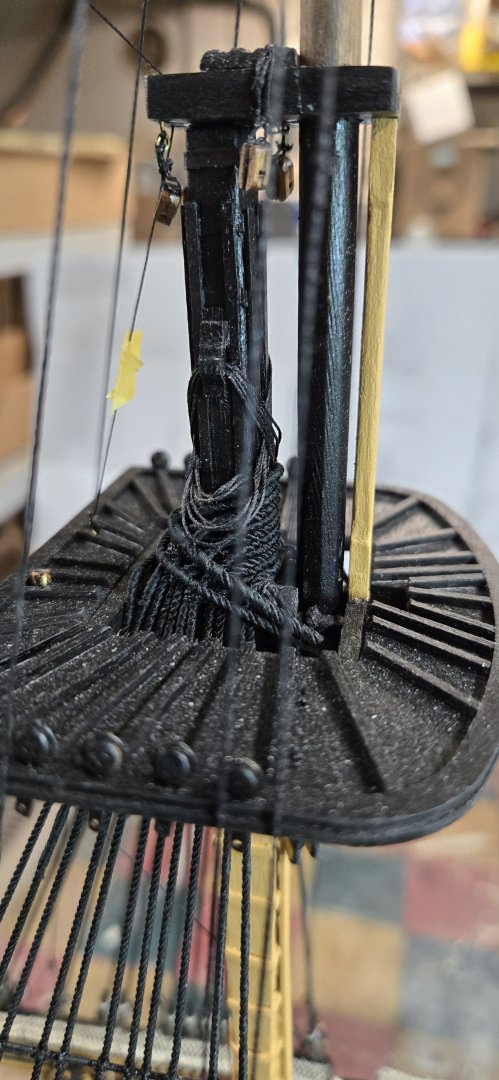
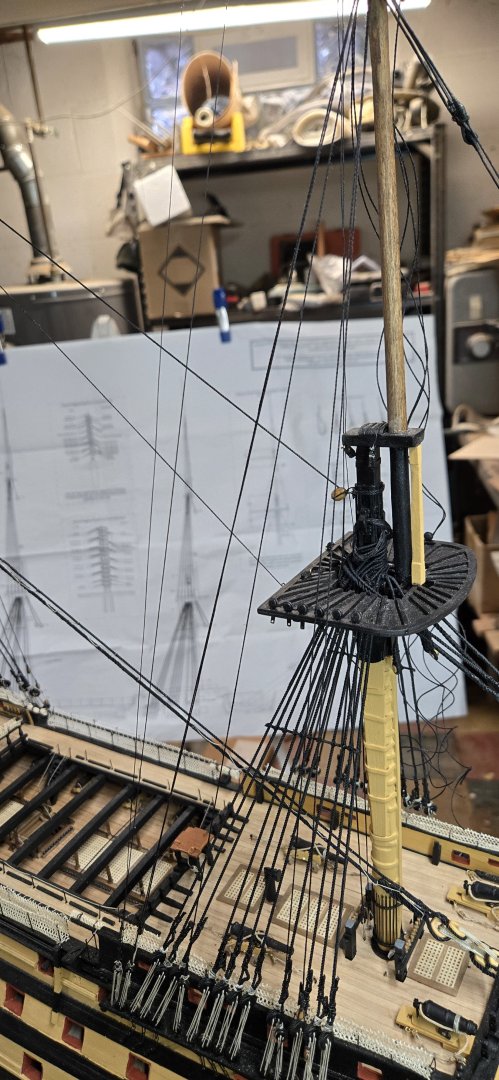
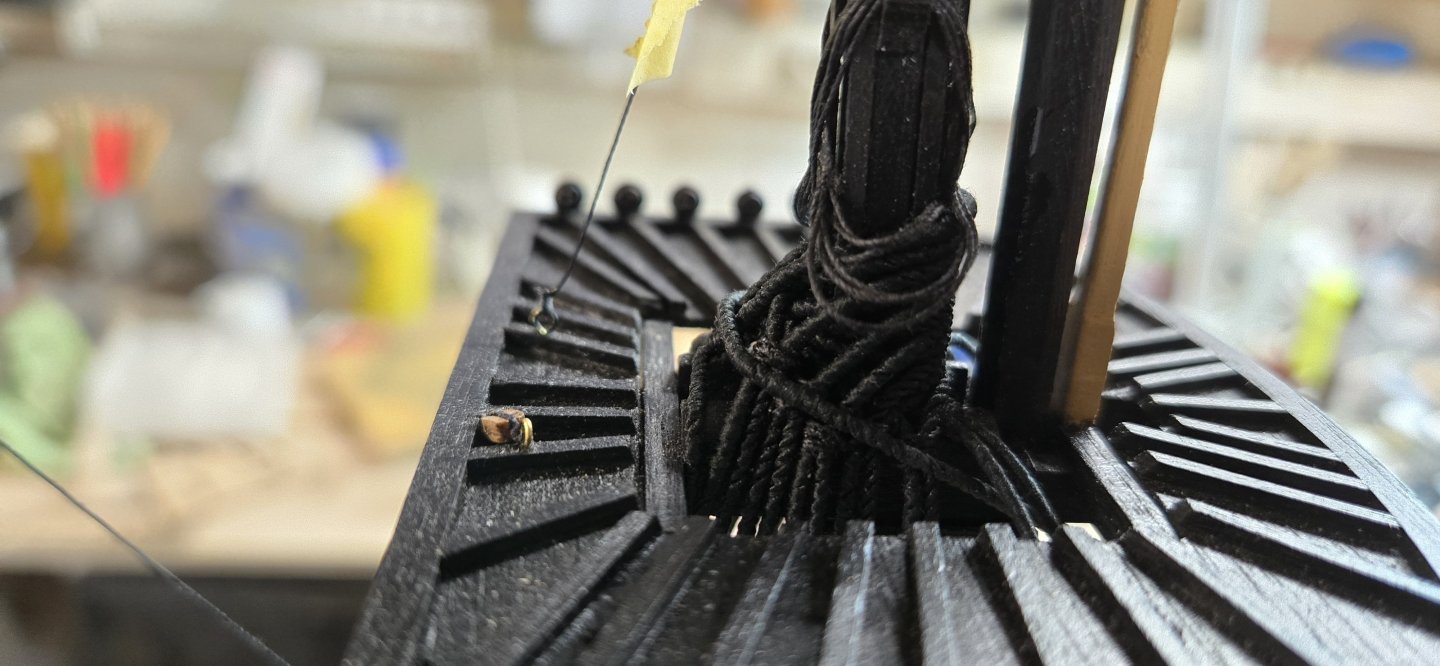
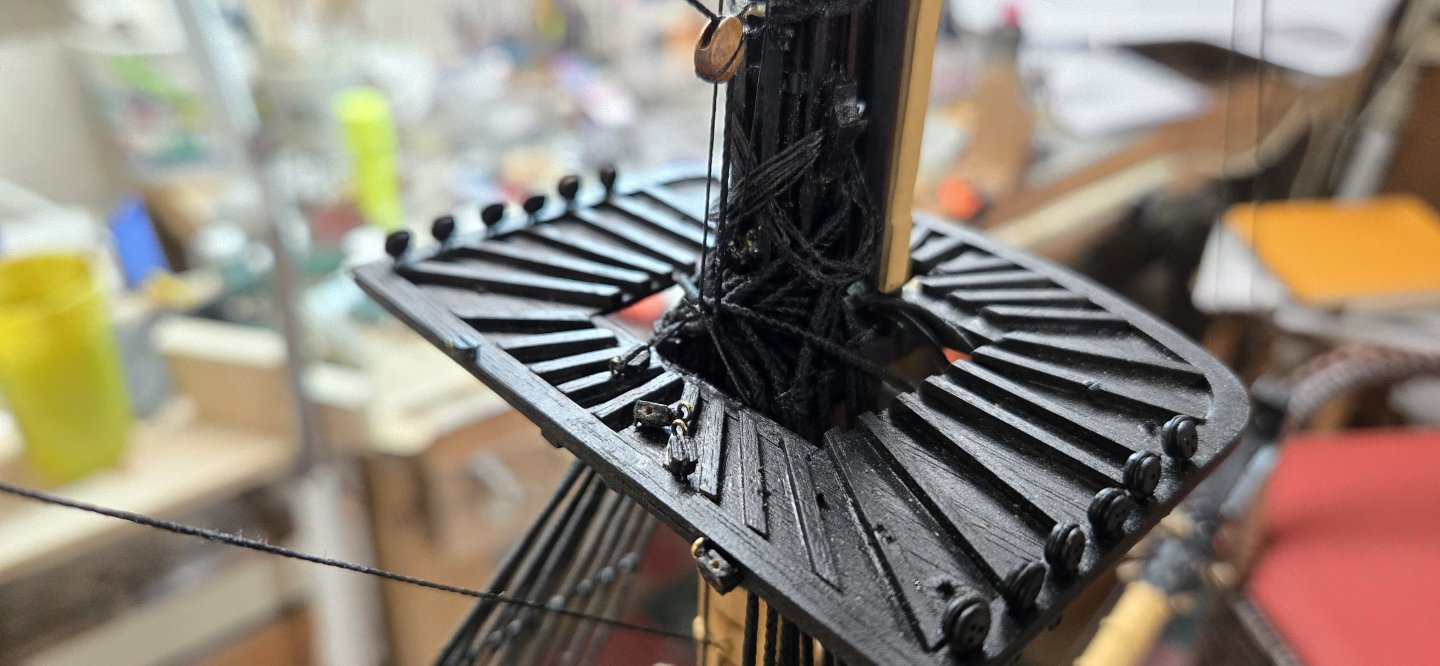
Man o man, what an afternoon! I spent 6 hours working on the fore yard, finishing up all the things I missed. So one down, ten or so to go!!!! I relied HEAVILY on Longridge's diagrams and my database of other builds. I created the upper sling for the yard. Now Longridge has the eyes of the sling tied together, but that would be a lot of work because my mast is already in place. If I had built these before the upper and top gallant masts had been installed, I could have done it that way. As it was I created the little mini eyes for the sling and then lashed them together with black thread. You can see here that I lashed to the two eyelets together with black thread rather than creating one eyelet and then running the other one through it... After that, it was just slow work adding the double jeers to the yard, then the triple jeers off the mast. I did use the wrong size lashing for those jeers, it should have been 1mm natural. By the time I realized it, I had committed to the smaller diameter and didn't want to remove my work and possible damage things. Getting the jeers lashed and then run down to the deck was tough with all of the other standing rigging in the way, especially with my fat shakey fingers. I also tried to create coils and I am going to have to circle back to some of the videos around because I'm not happy so far with my work there. The next thing was adding the truss pendants. At first I didn't understand what the directions were saying. Not even a little bit. But there is a reference in Longridge and a diagram of how they are made and lashed to the yard around the back of the mast. After looking at that, I did notice on the blueprints there is a similar diagram with the rigging down to the deck. Then it made sense. Not that that matters because this is a task that would be WAY easier without all of the stays in place. Also, I should have installed them BEFORE I did any of the slings or jeers. That would have helped too. As it was, I was forced to create these truss pendants, tie them to an already shipped yard, wrap them around the back of the mast, bring the bitter ends down to the deck, attach blocks to the eyelets and the ends of the pendants, lash those together and then secure them to the teeny tiny cleats at the base of the mast. Well I'll know what to do with the main!!!!


-
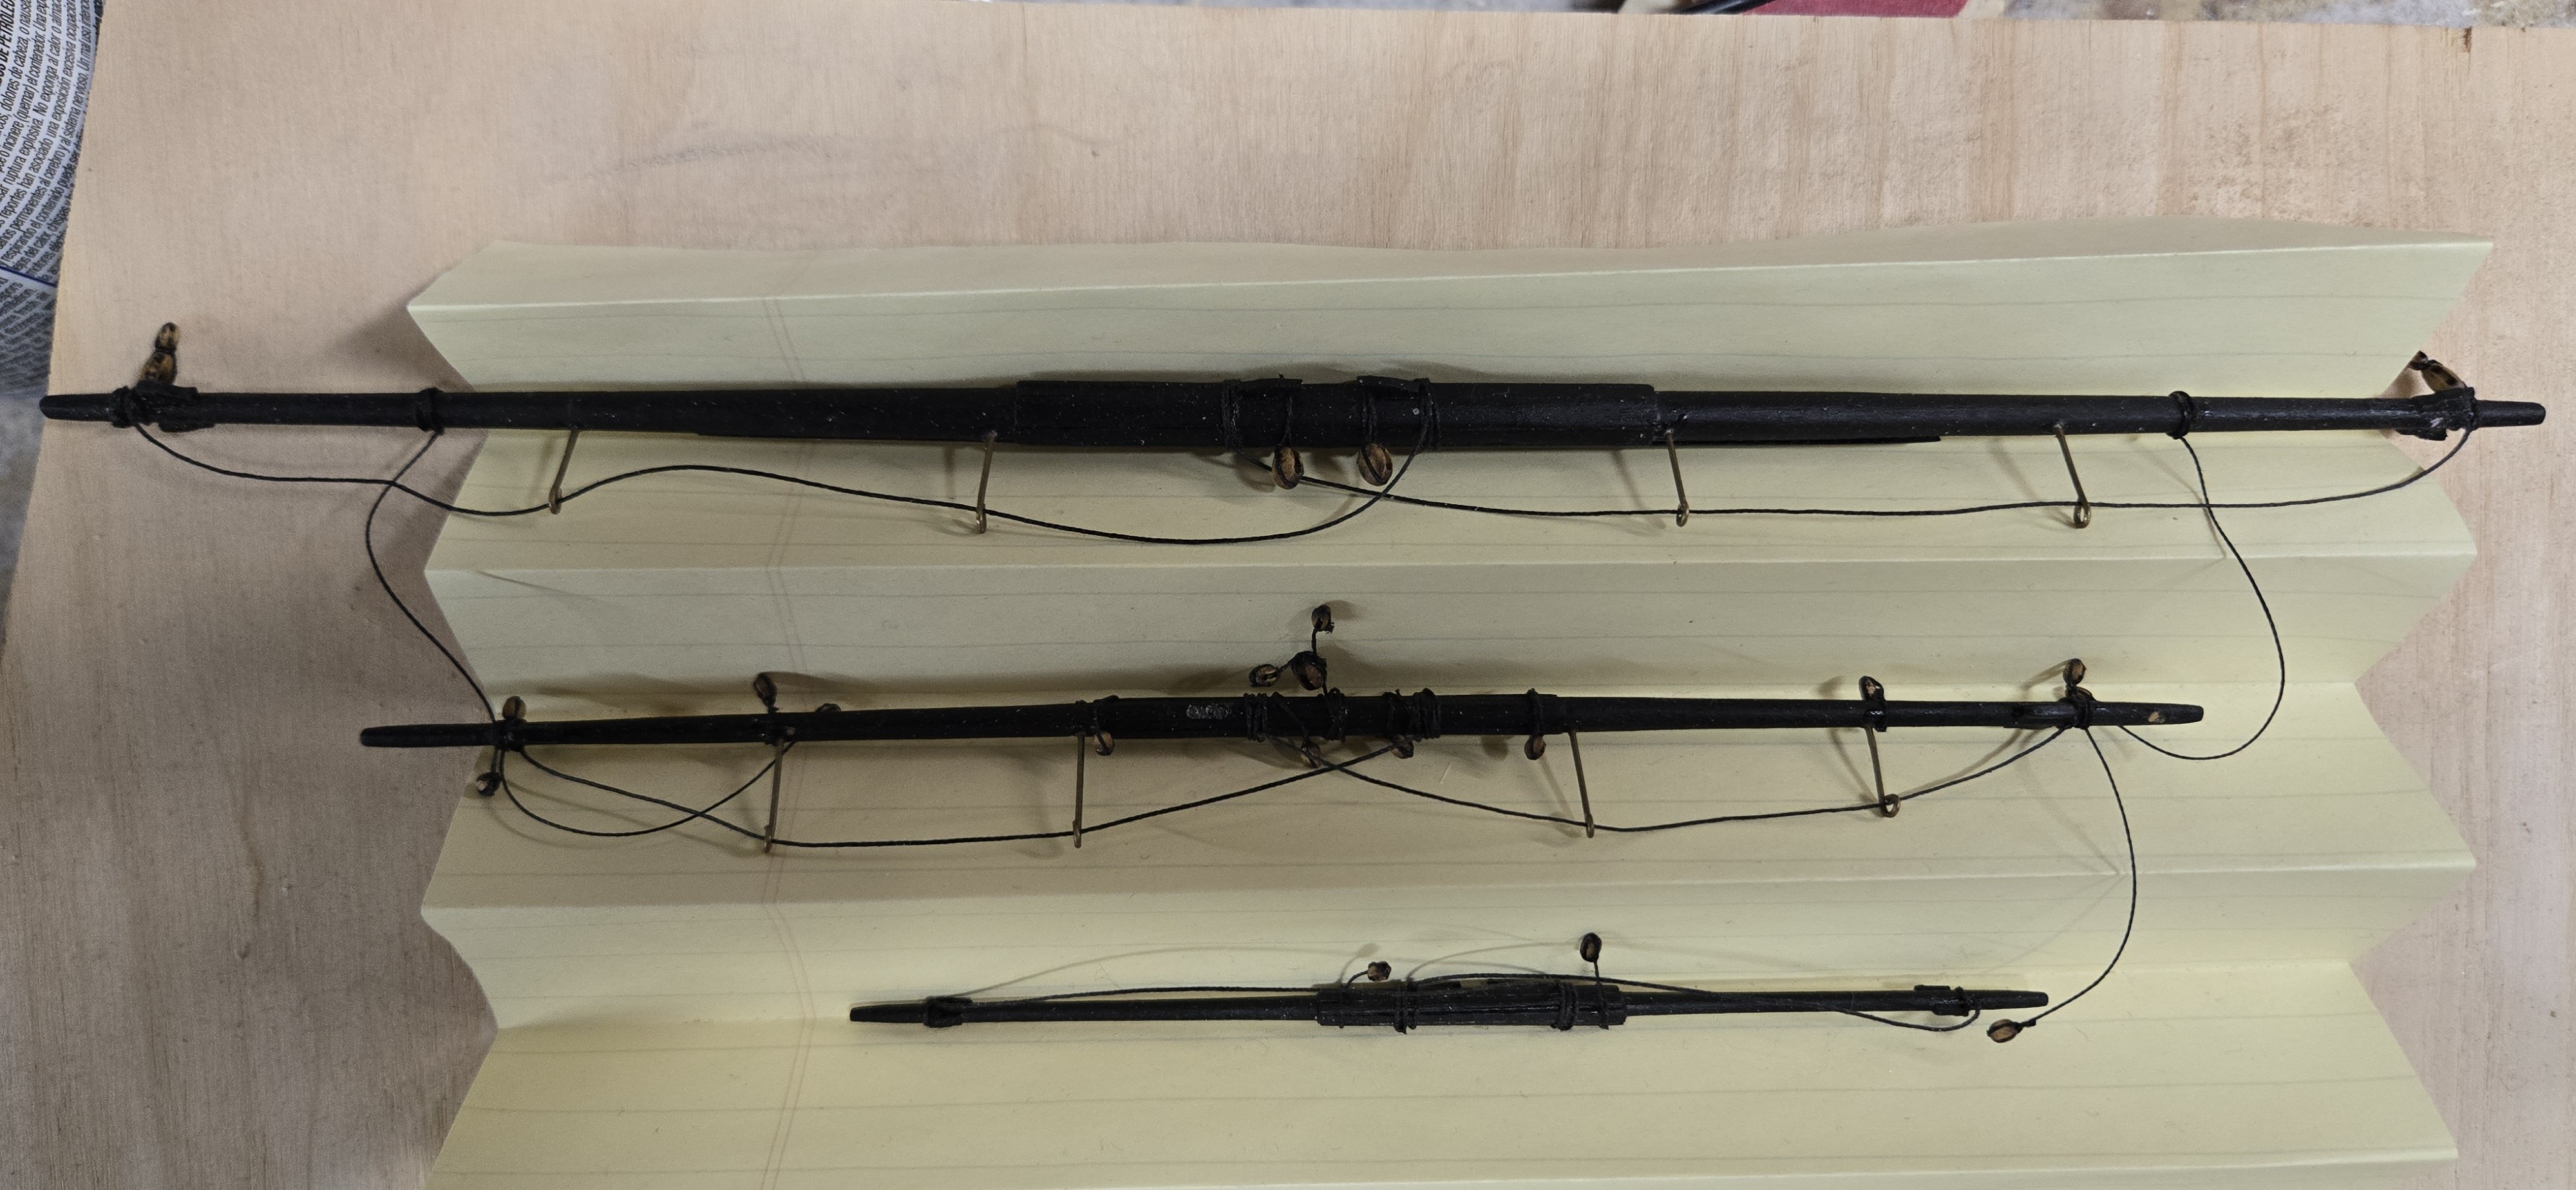
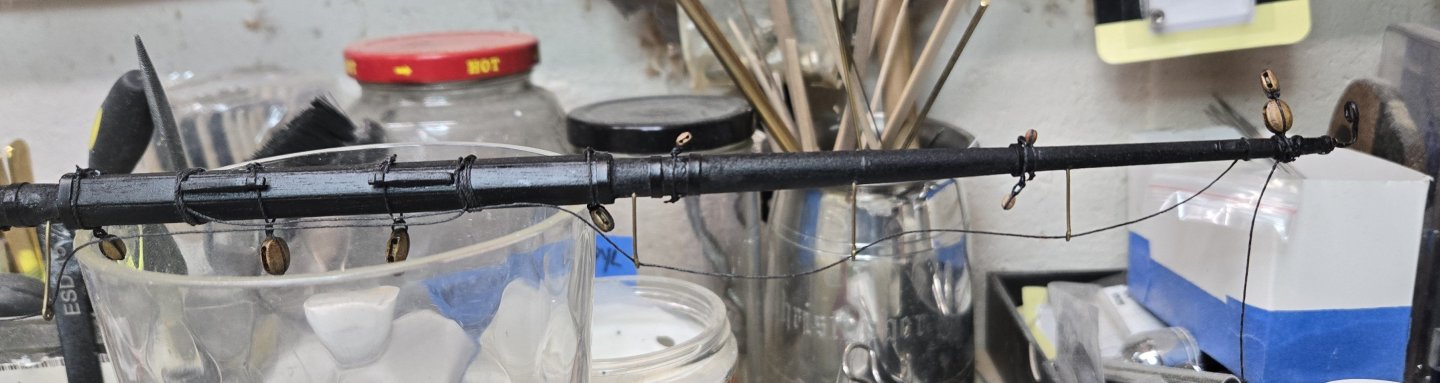
Spent 2-3 hours today working on the fore yard. While I thought I had most of the yards complete, I realize now that all of the running blocks hadn't been installed. Yikes! I purchased aftermarket blocks last year from Dry-Dock Models. Their prices are fair and they ship out very quickly. I haven't bothered staining them but I just love the look of them compared to the square sad sack things that came with the kit. I didn't like the kits method of creating a strop to tie the yards to the masts with fake knots to simulate thimbles. There are plans in Longridge's book that show the strop is 2 parts, one tied to the yard and the other tied to the mast. I like the look of that and am using pictures of other builds to try and create that. I haven't started that yet, but did try to add on the larger blocks to the yard. I think I made the lashing from the base of the block too long because all of the examples I have seen show the lashings in front of the yard. I will have to do the second one the same on this yard and do better on the rest. I also had to create a double block fiddle which seemed to work out ok. I still need to paint the horse braces. Hopefully I am encountering a learning curve and things will go more smoothly as I see what needs to be done for each of the yards. ...so far...so good!


-
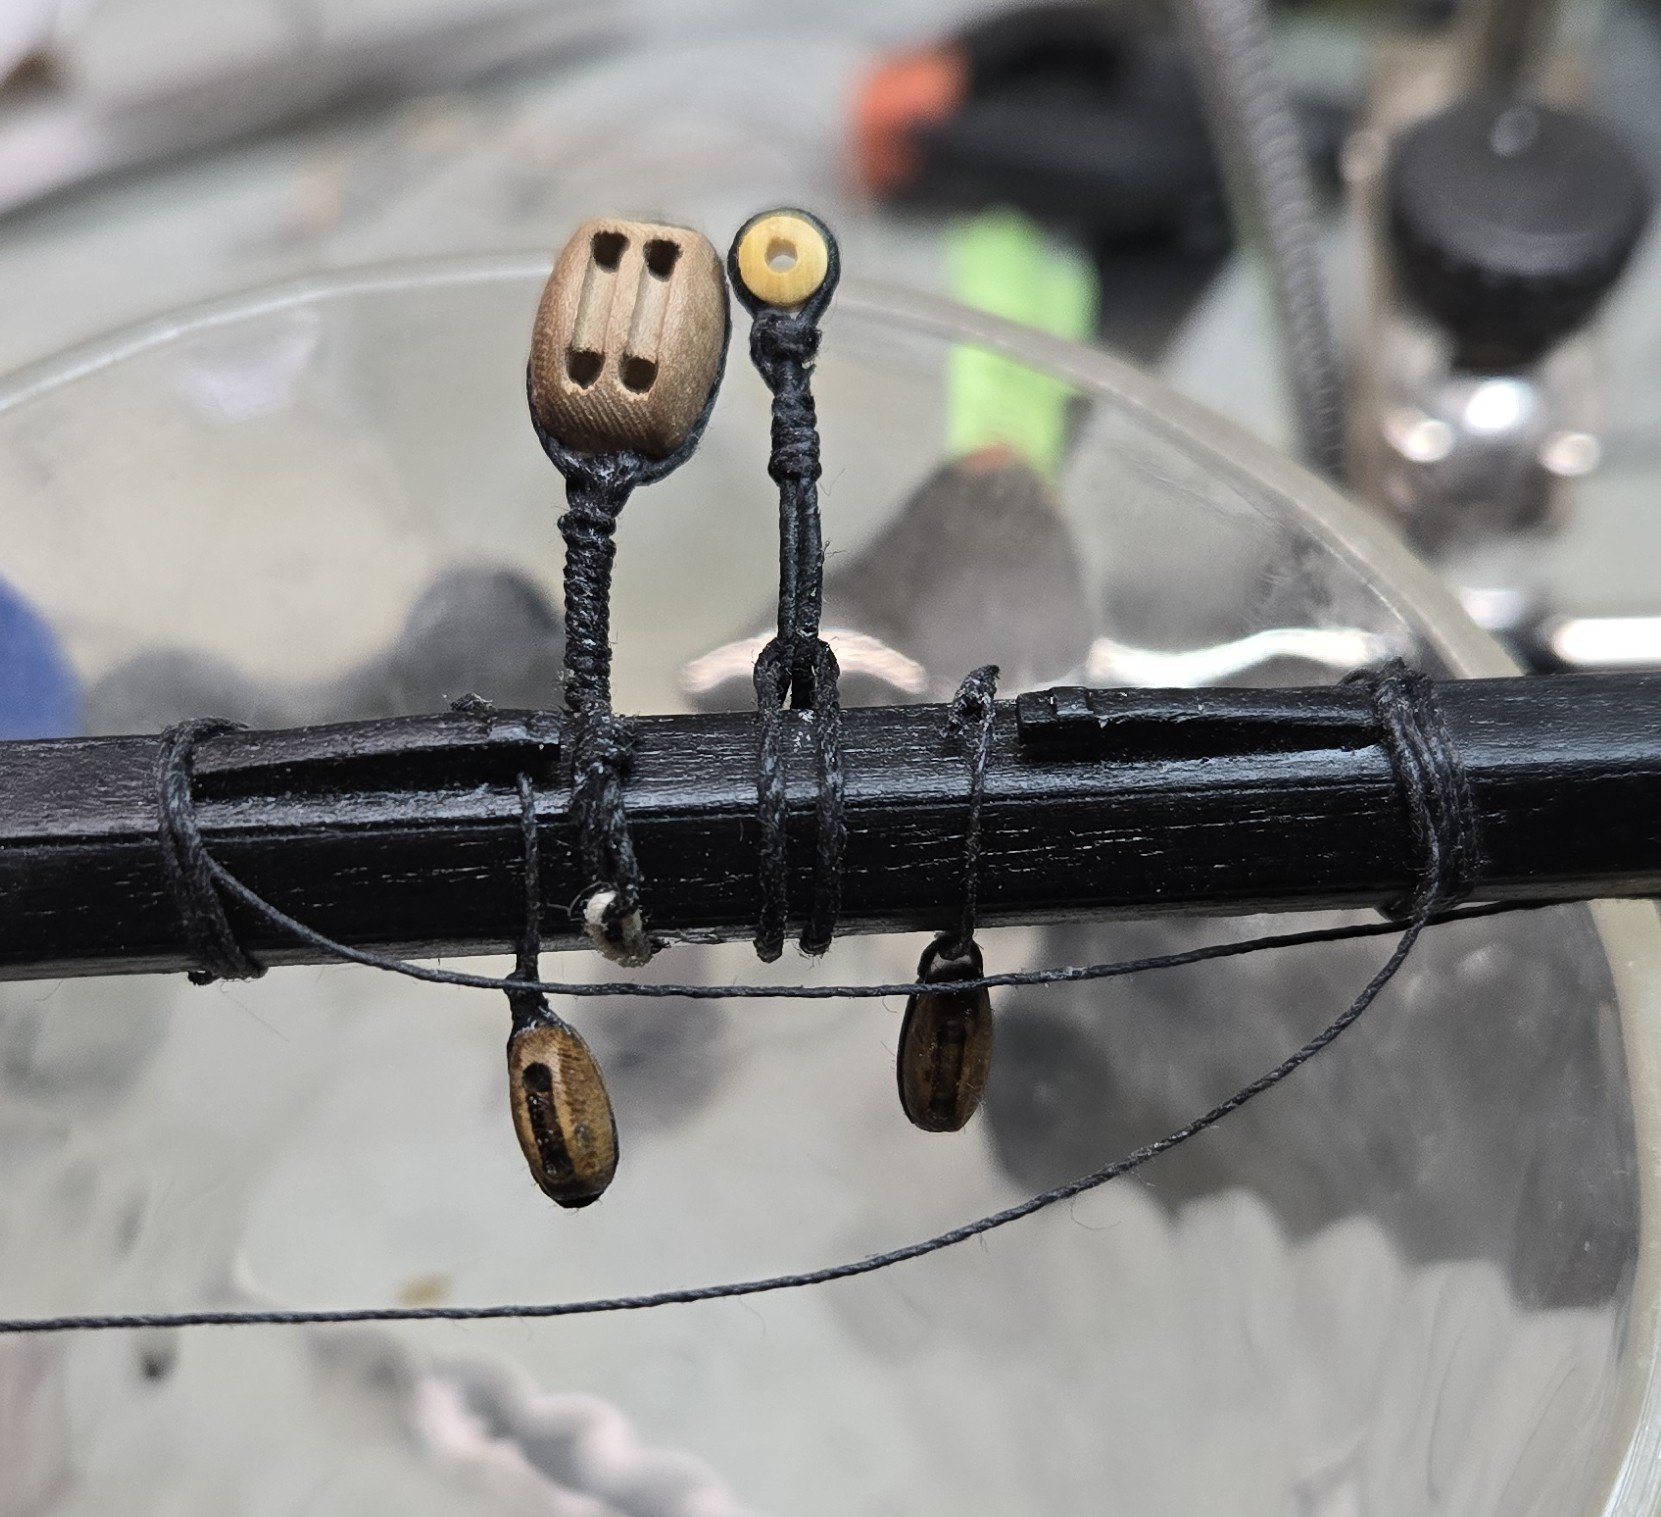
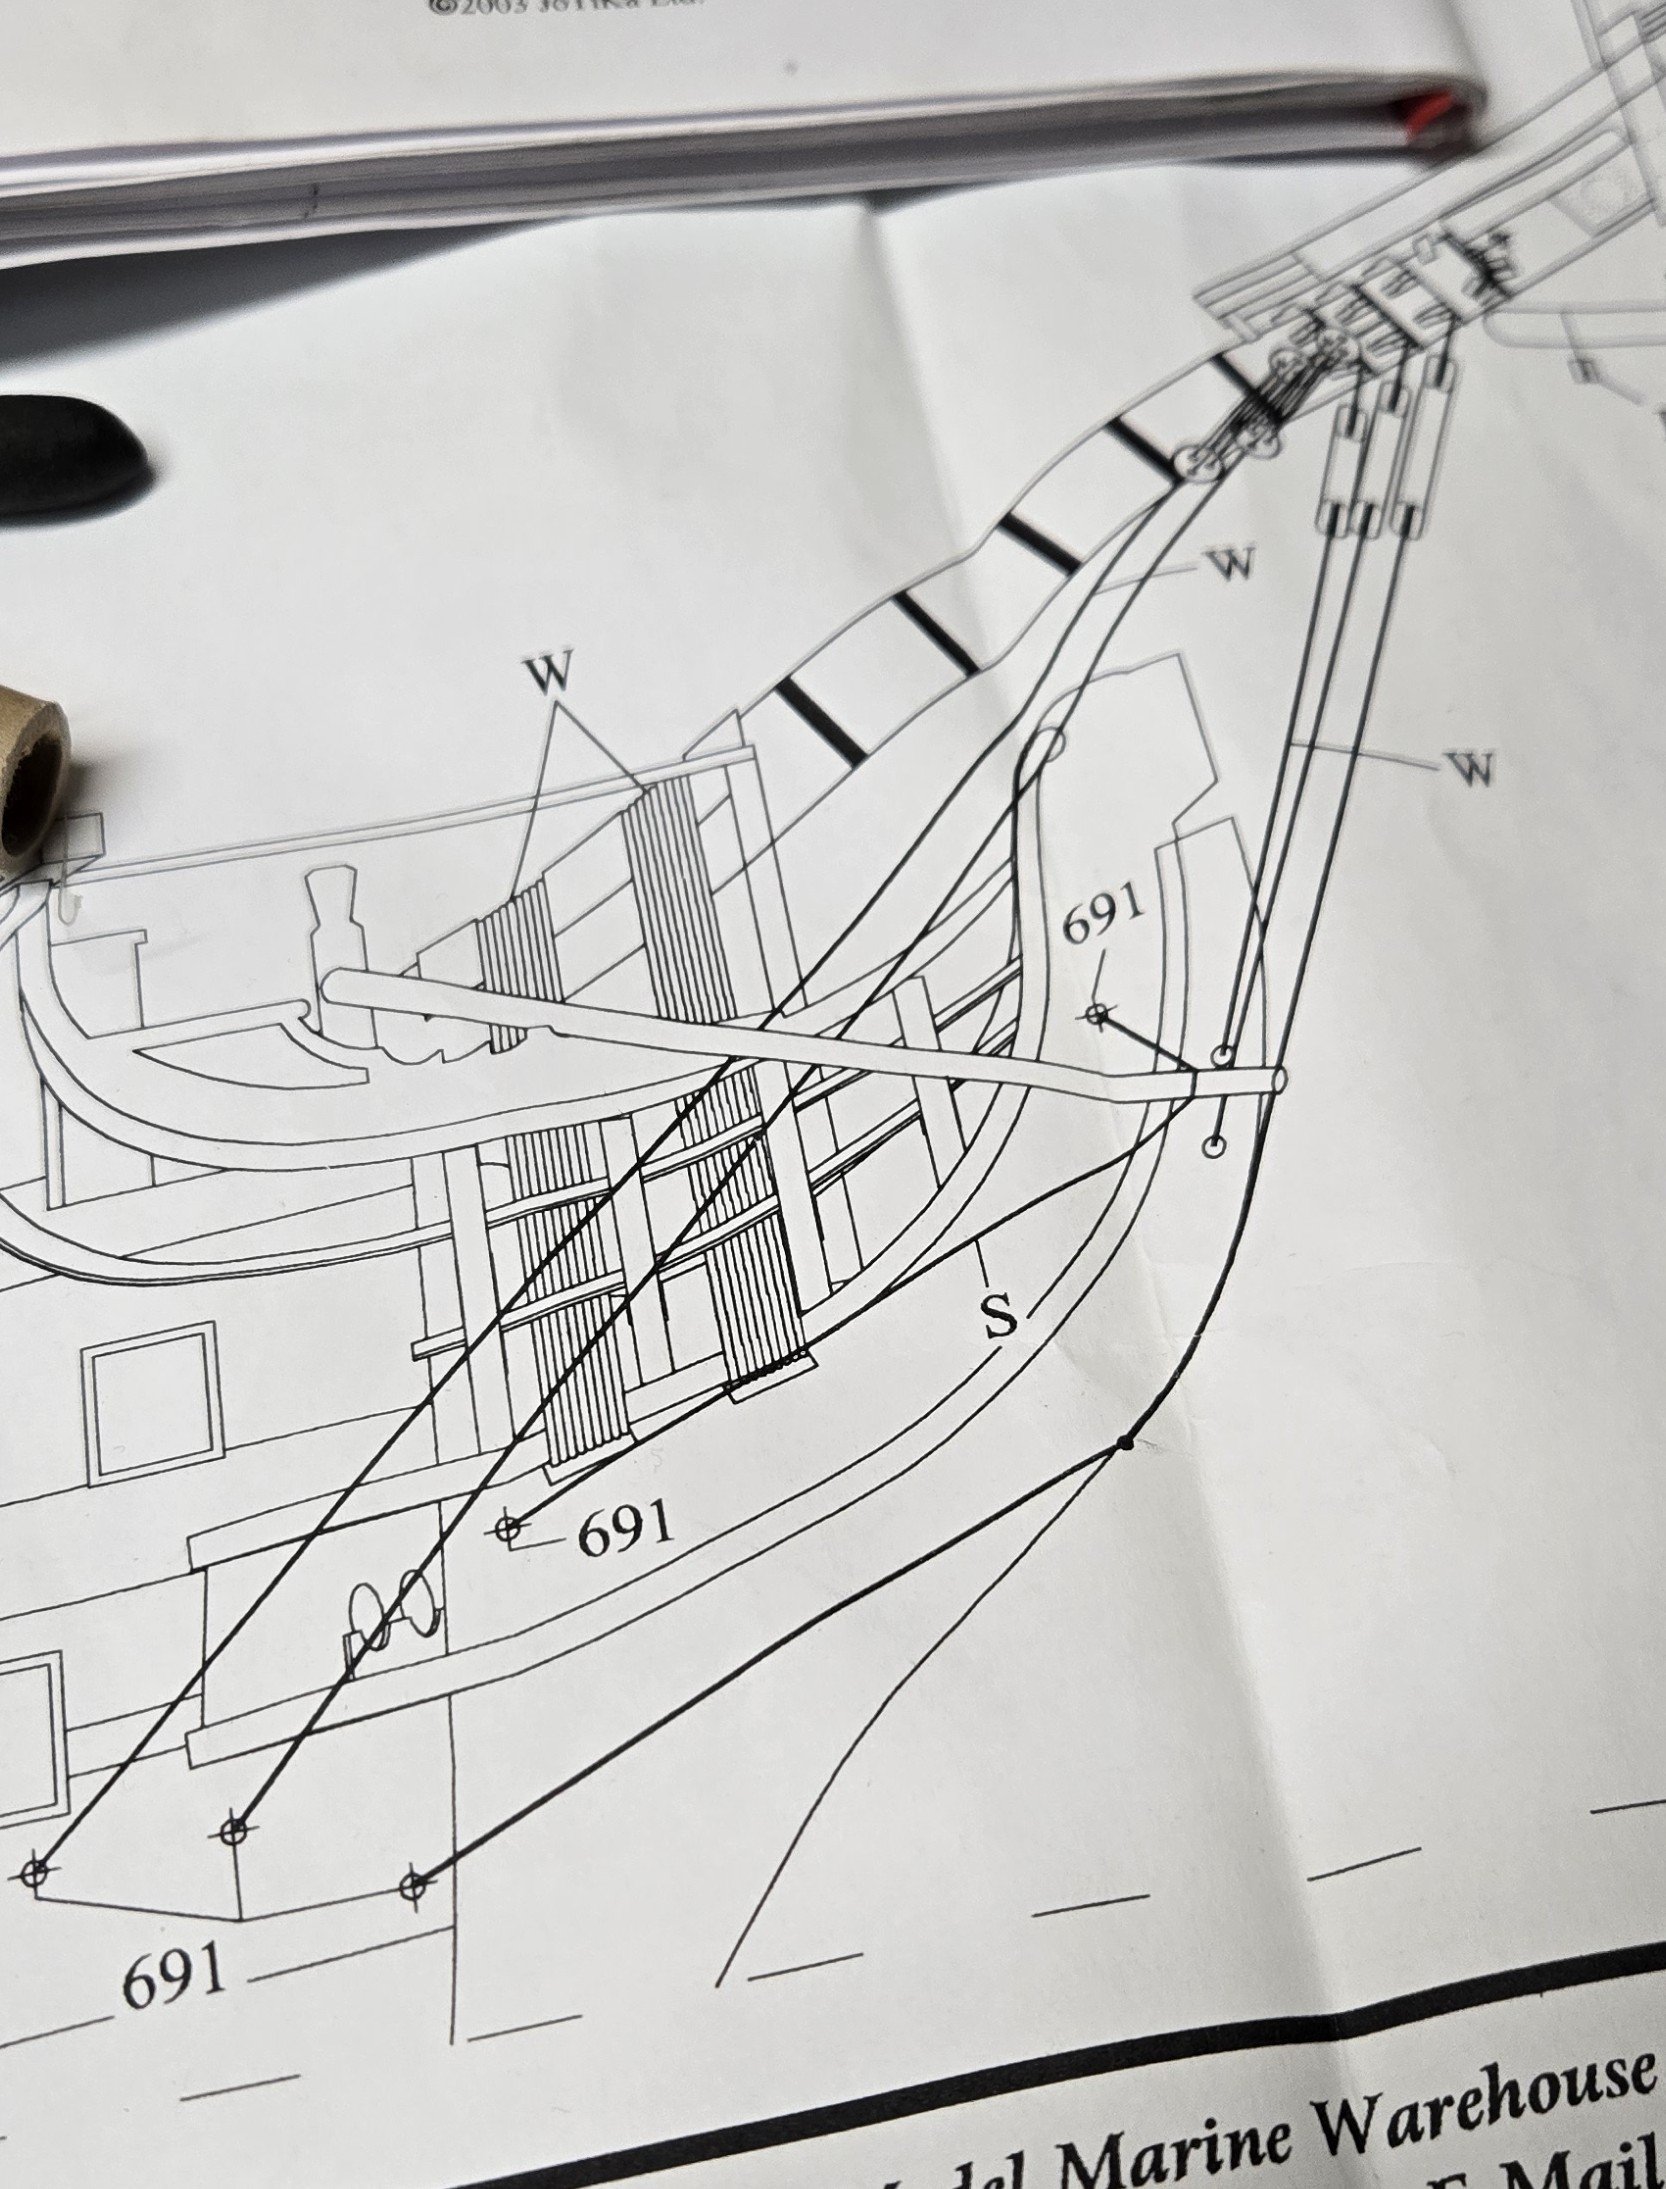
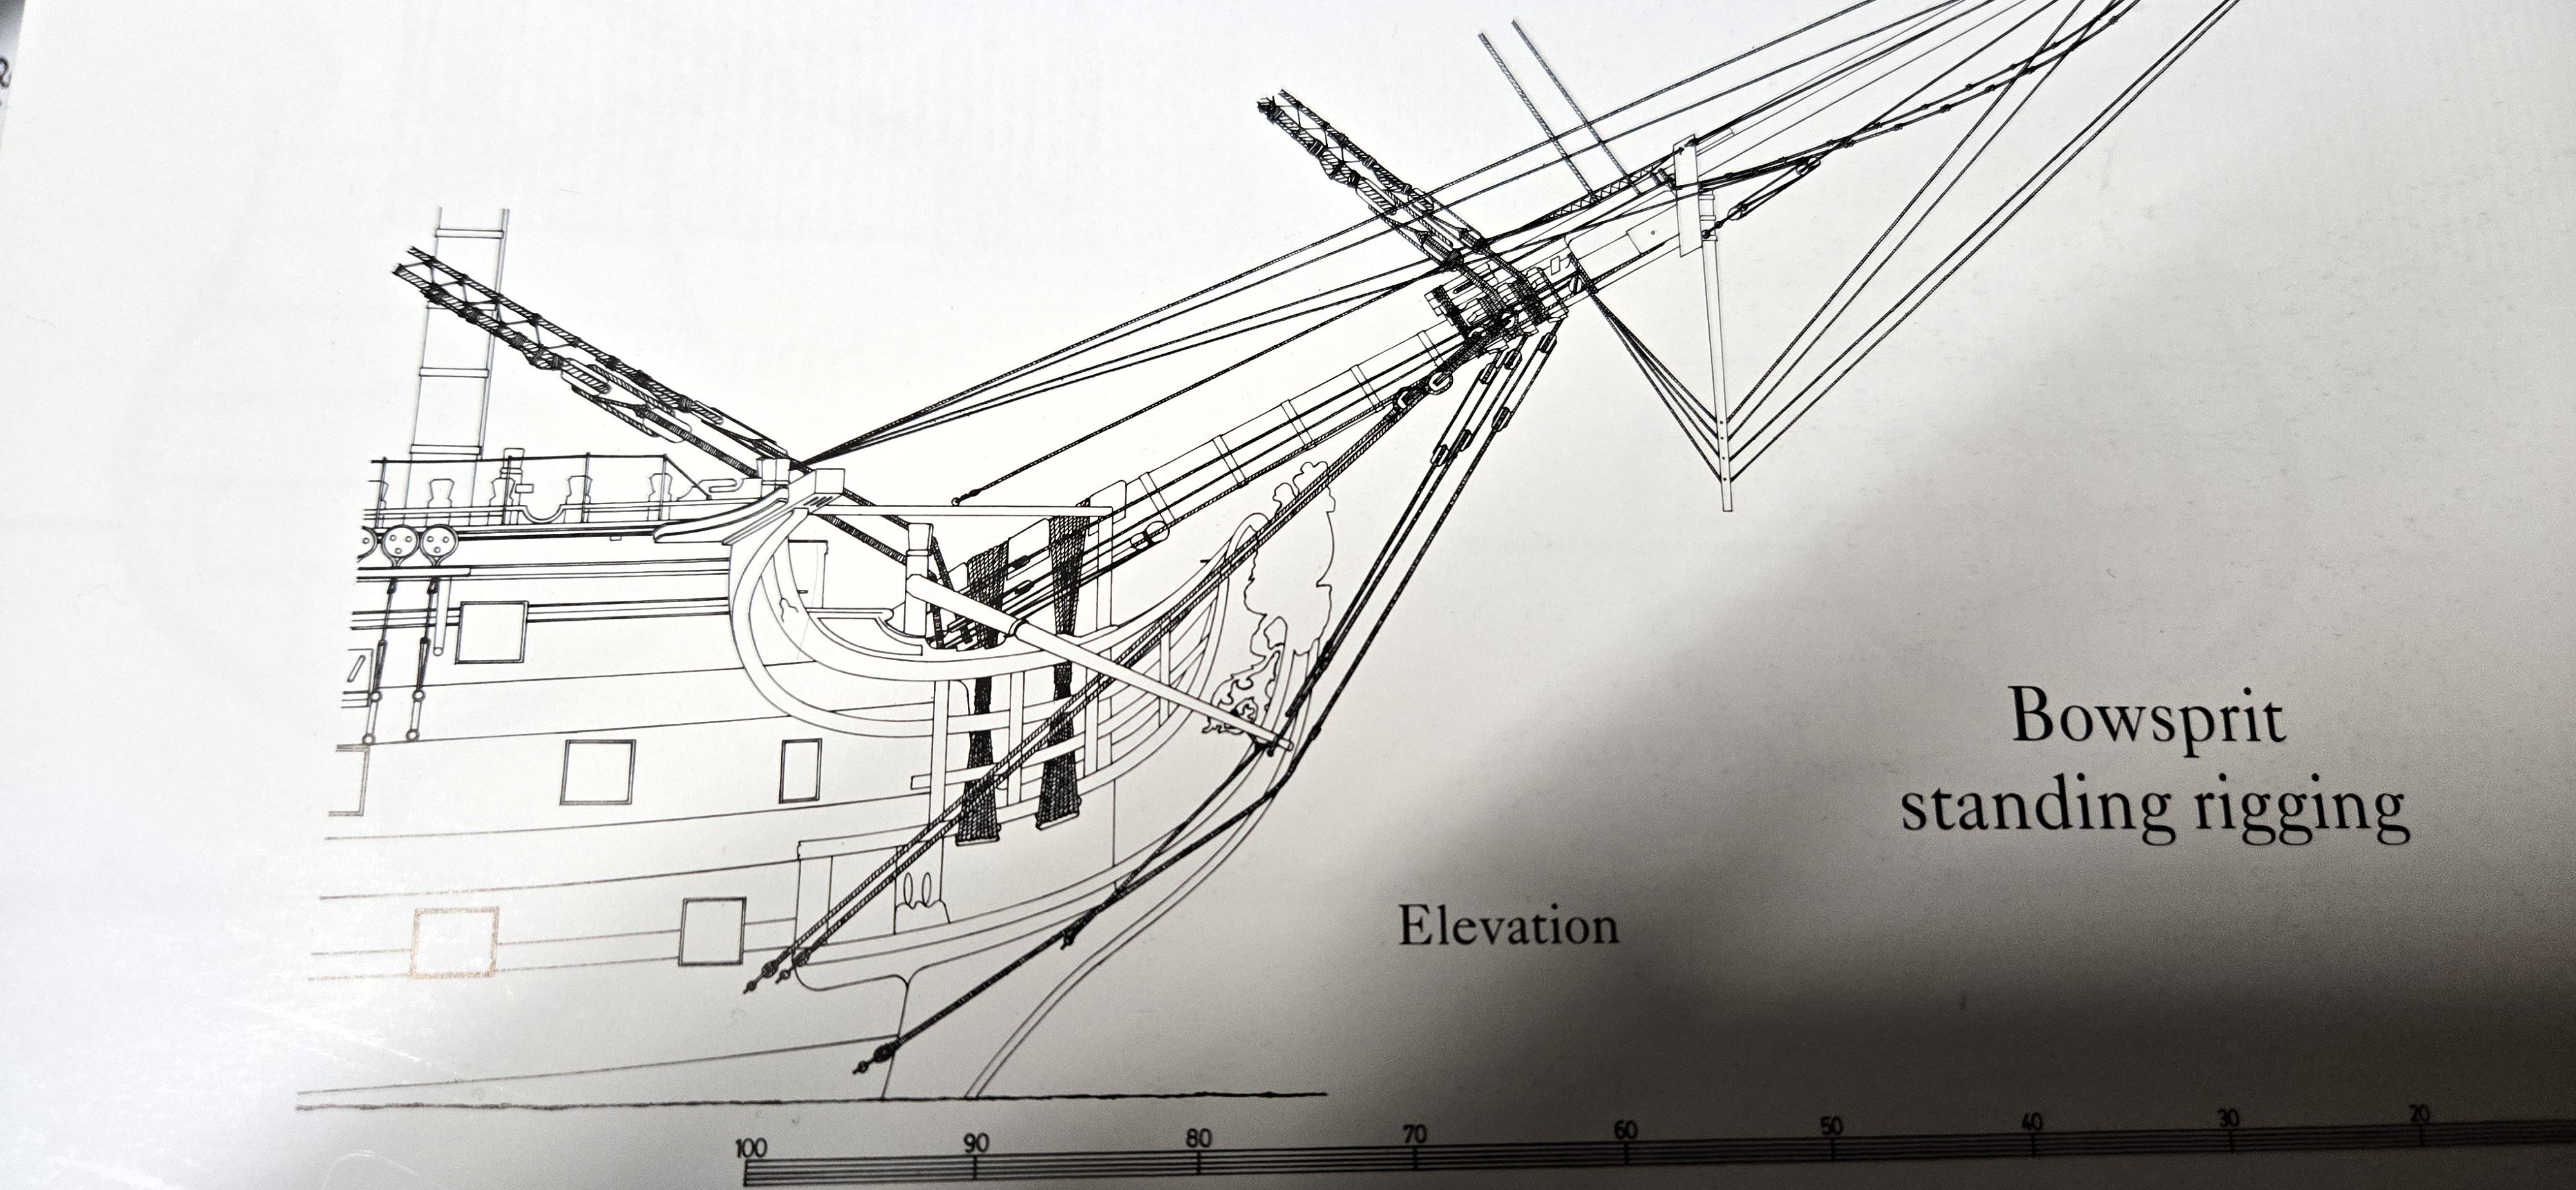
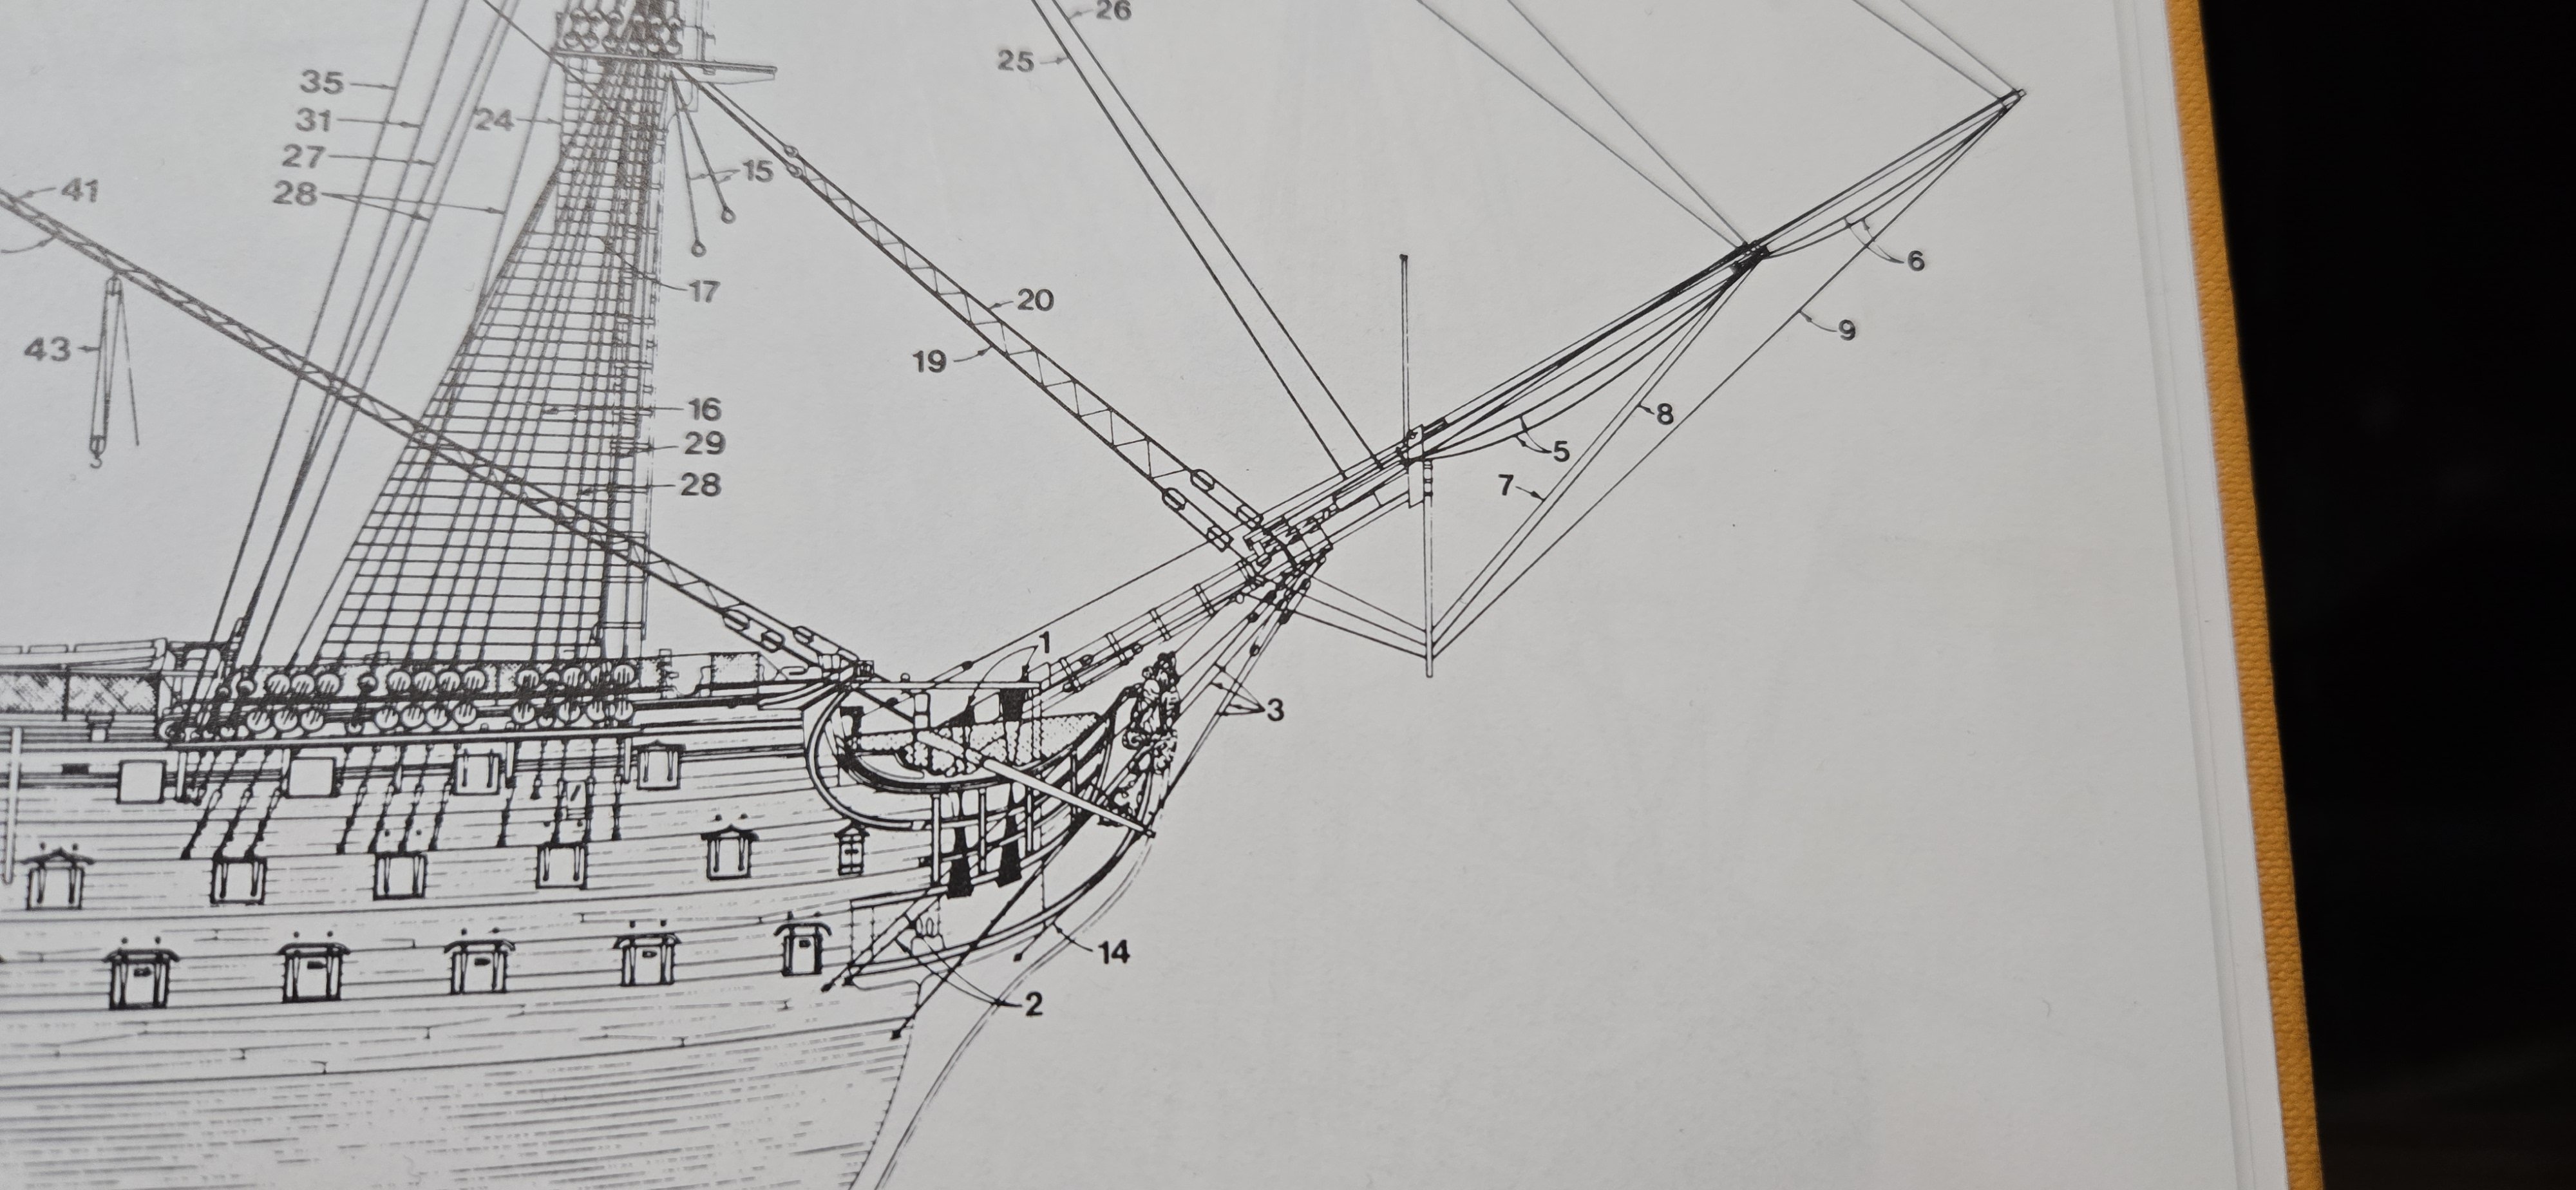
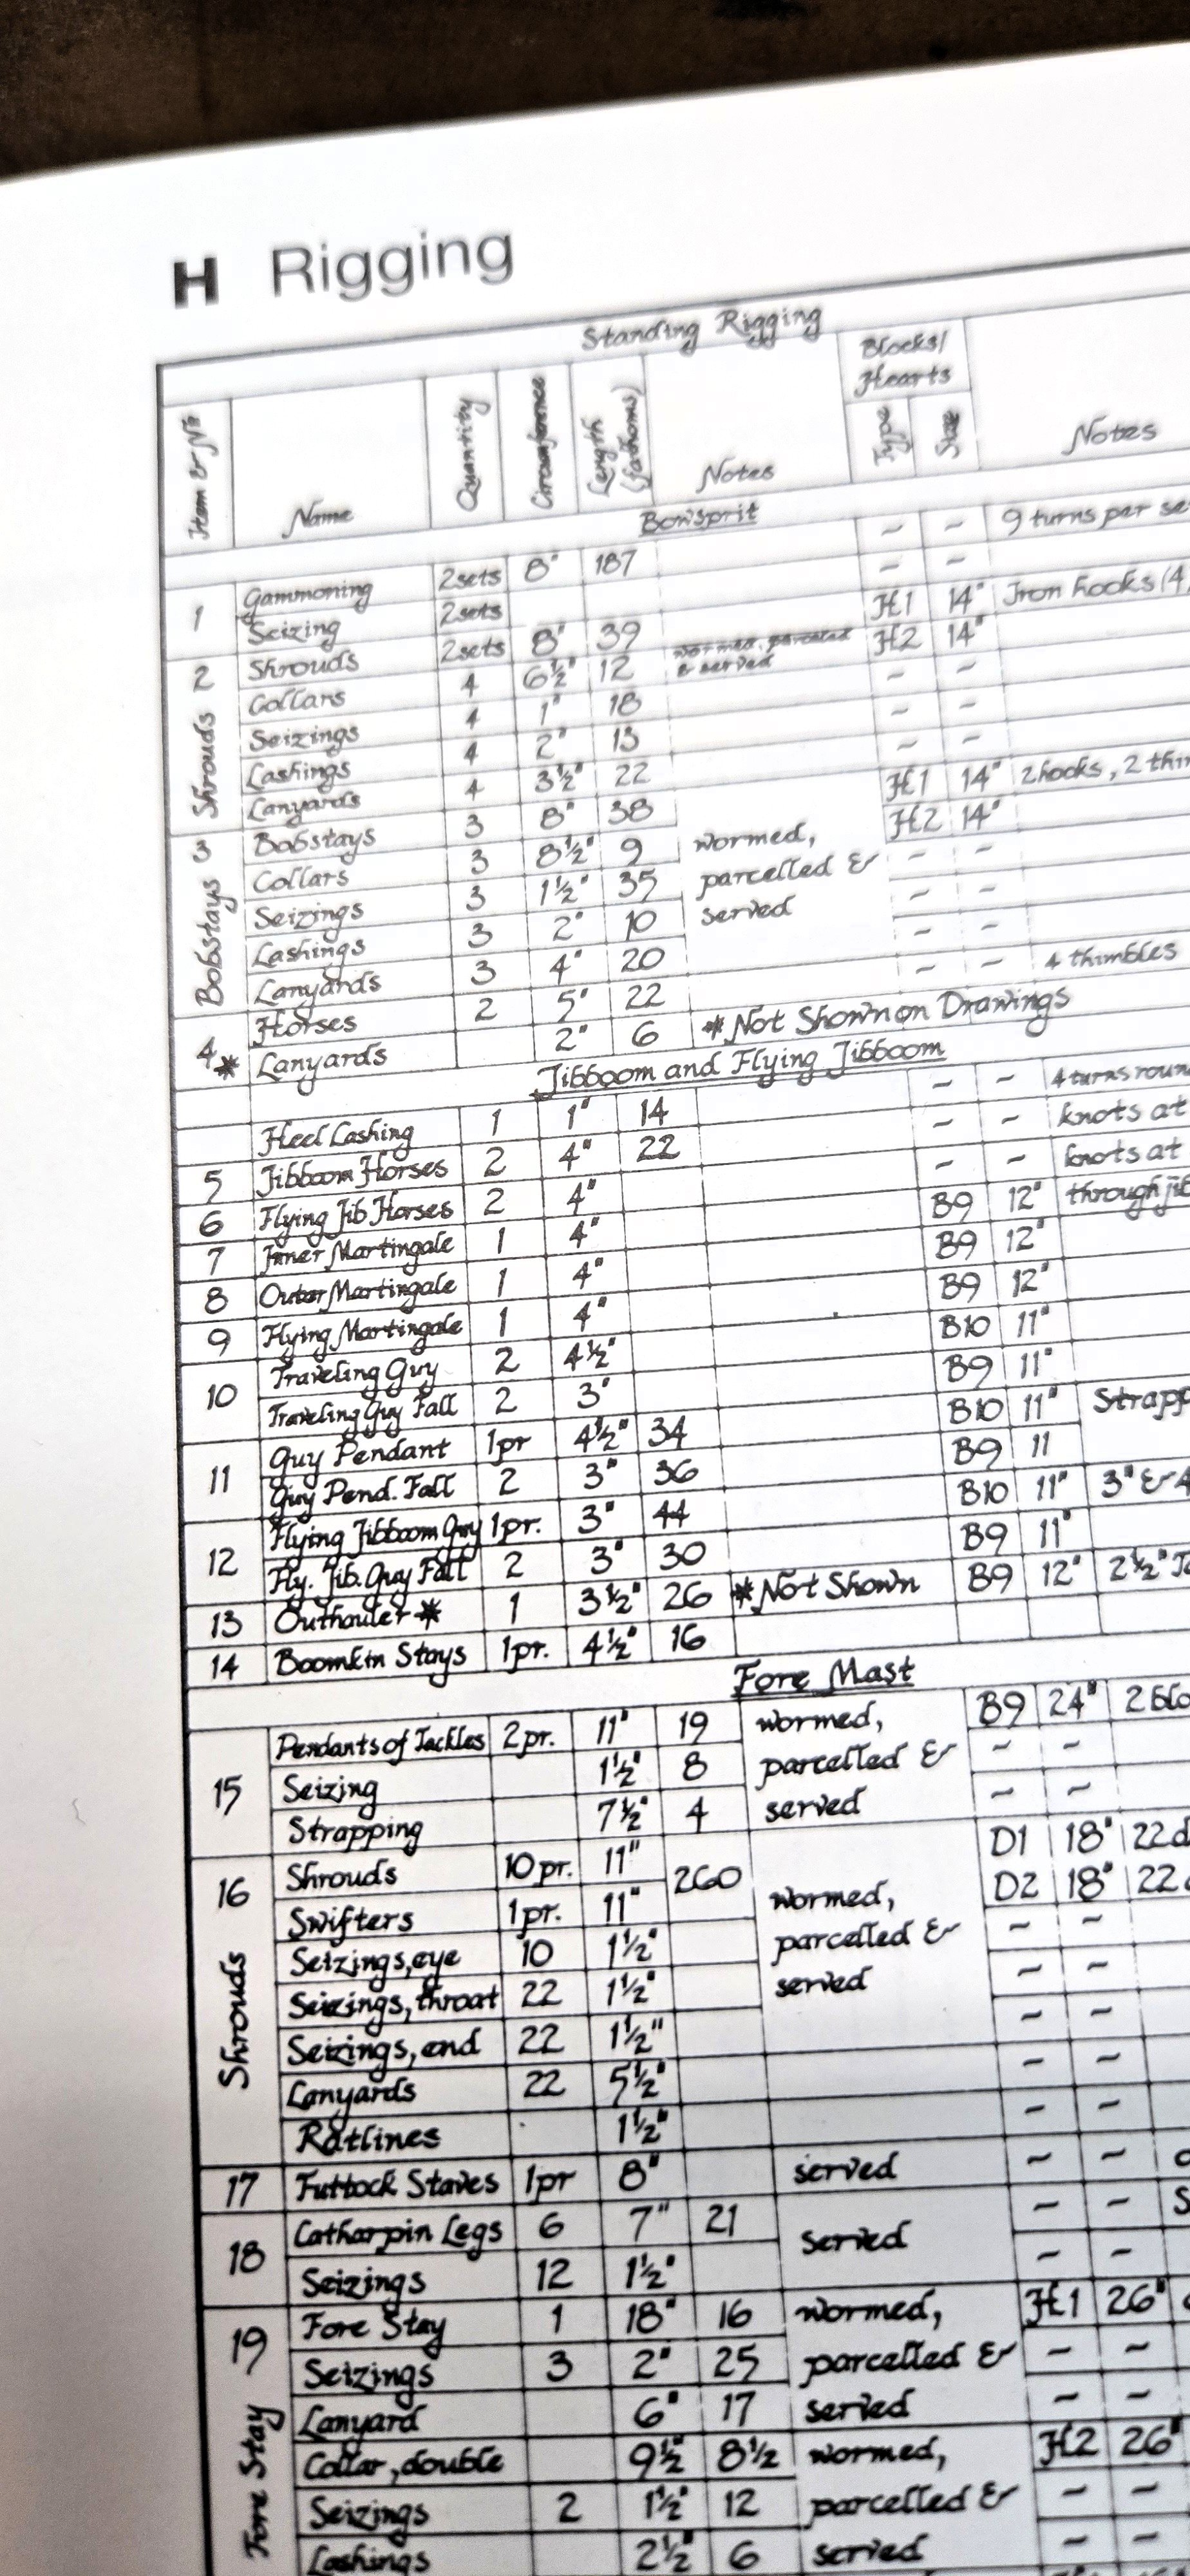
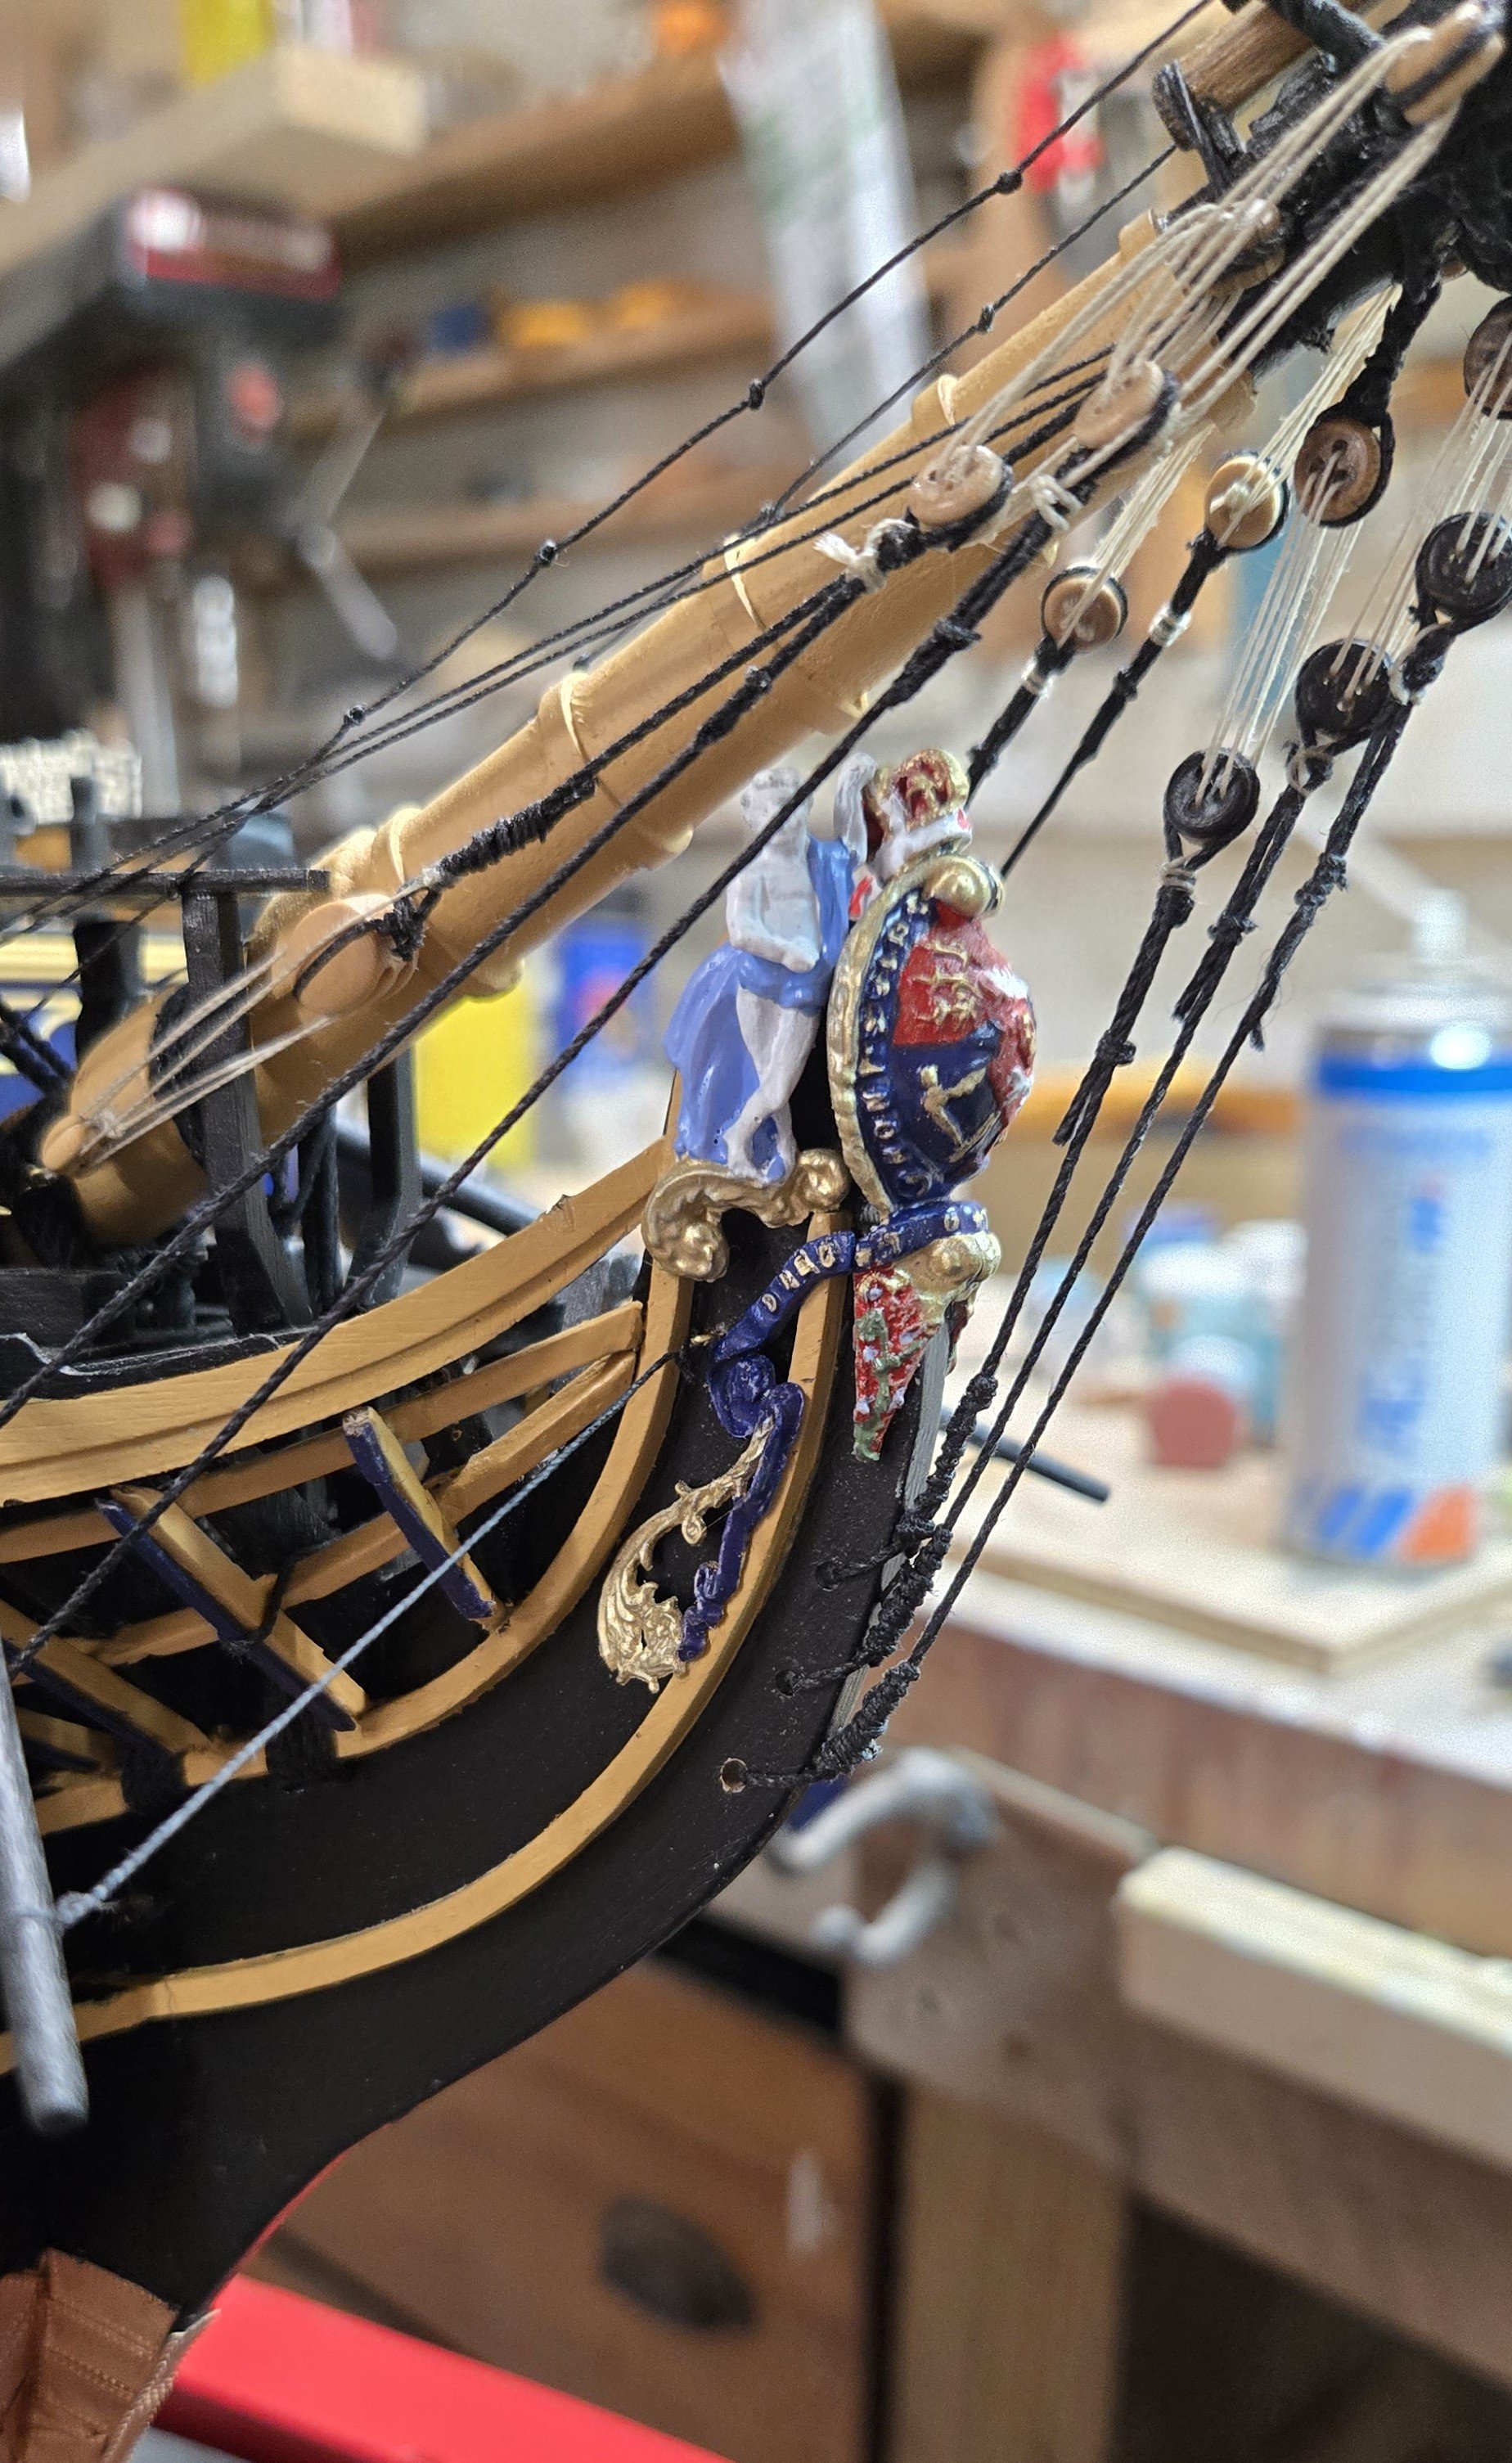
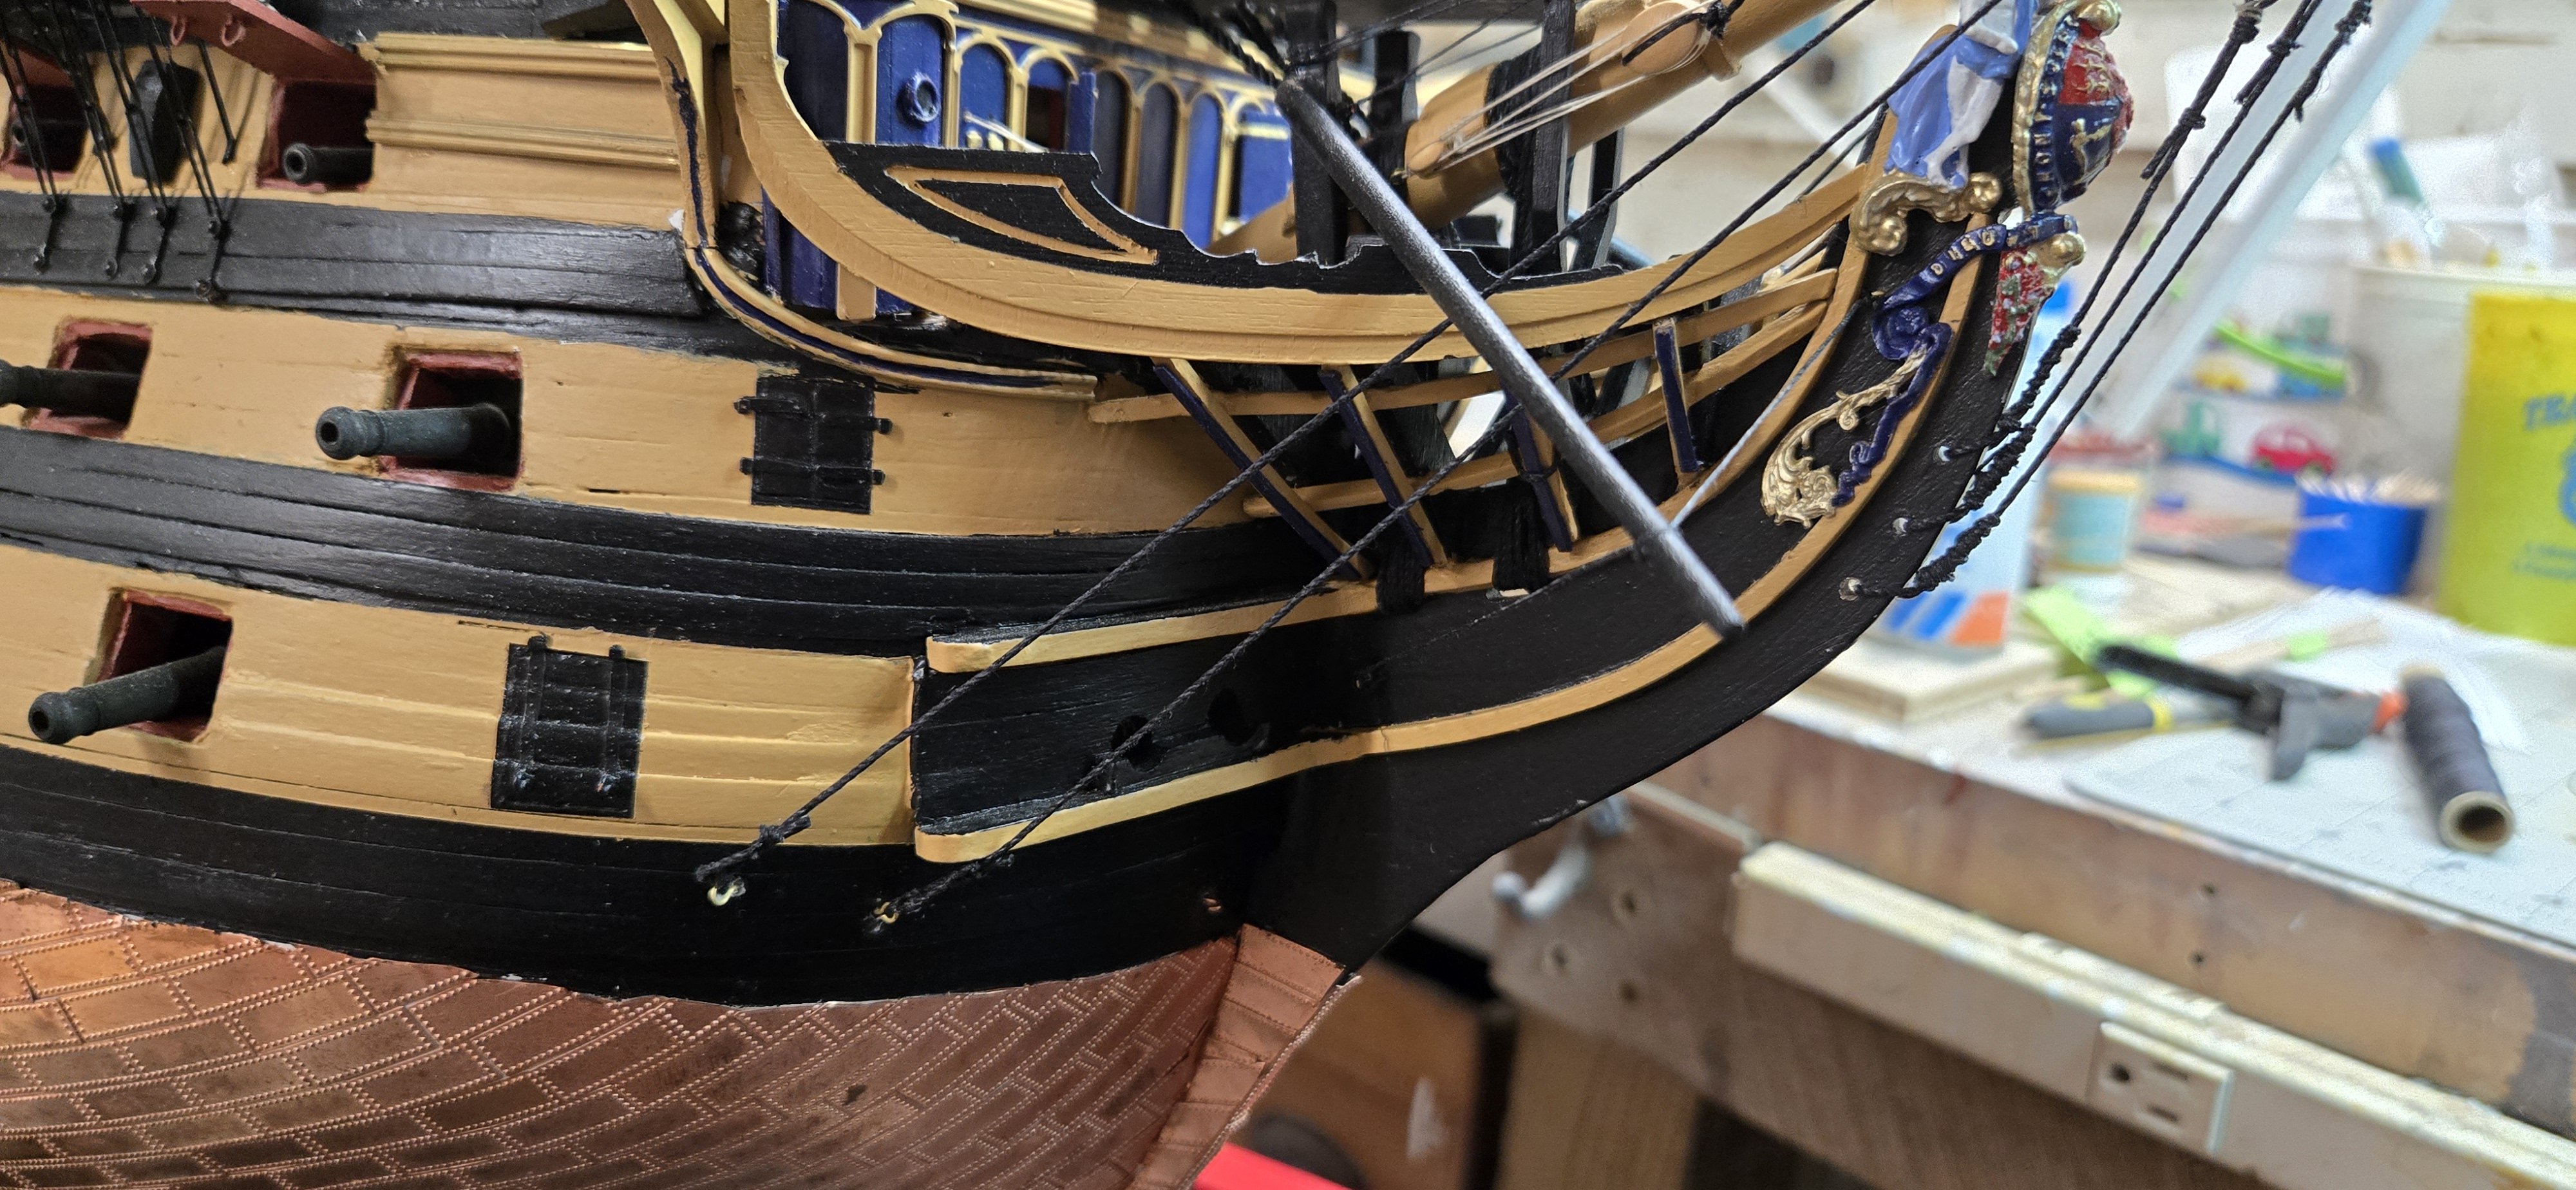
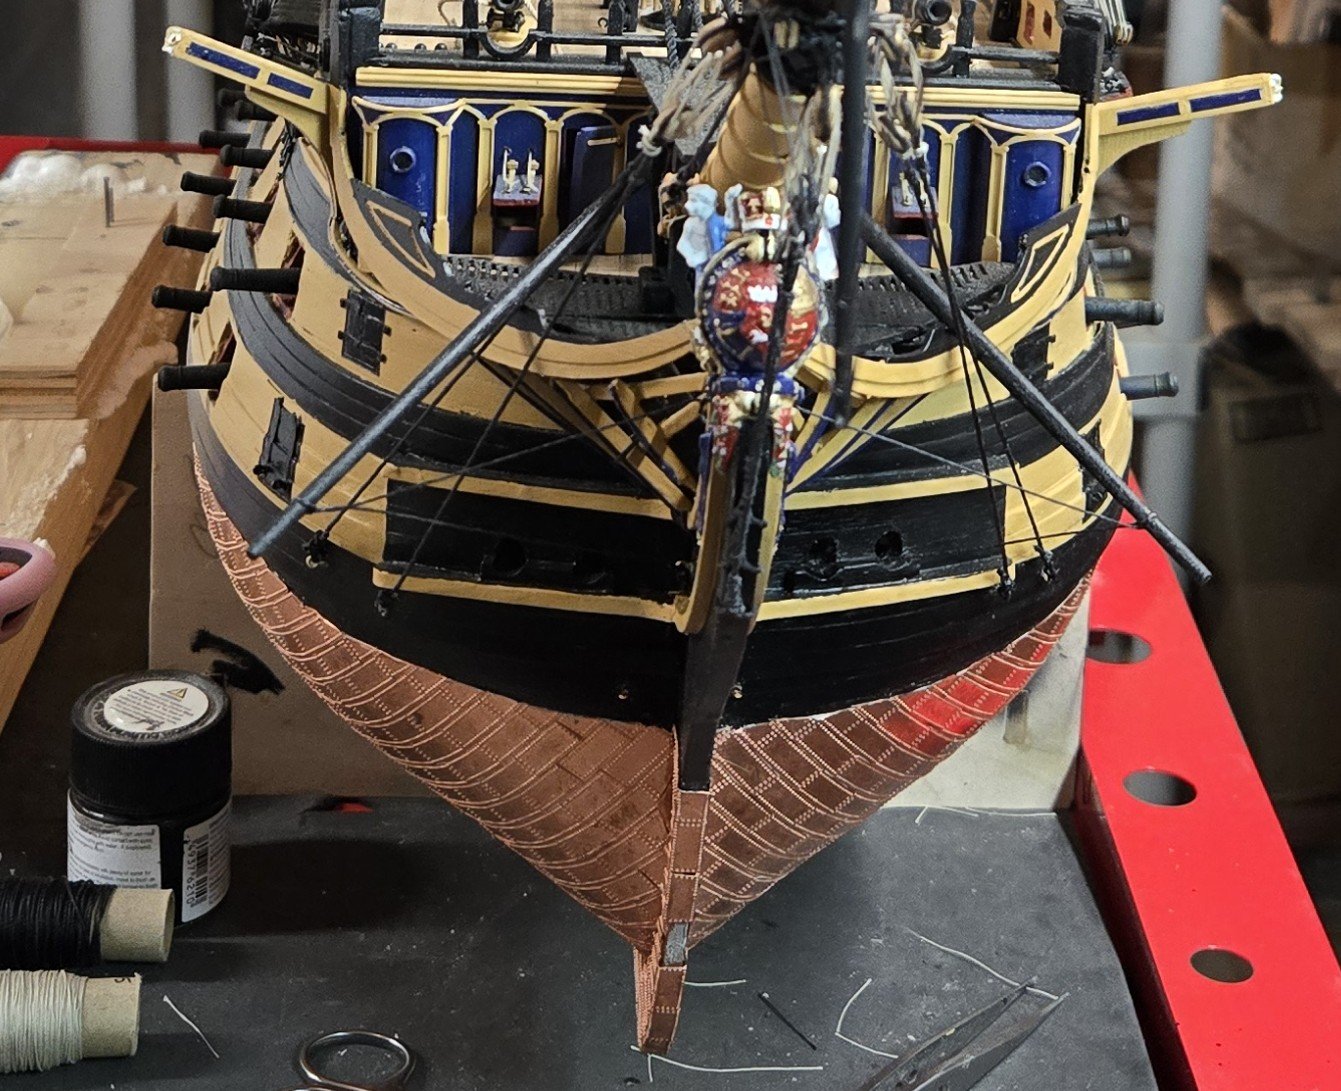
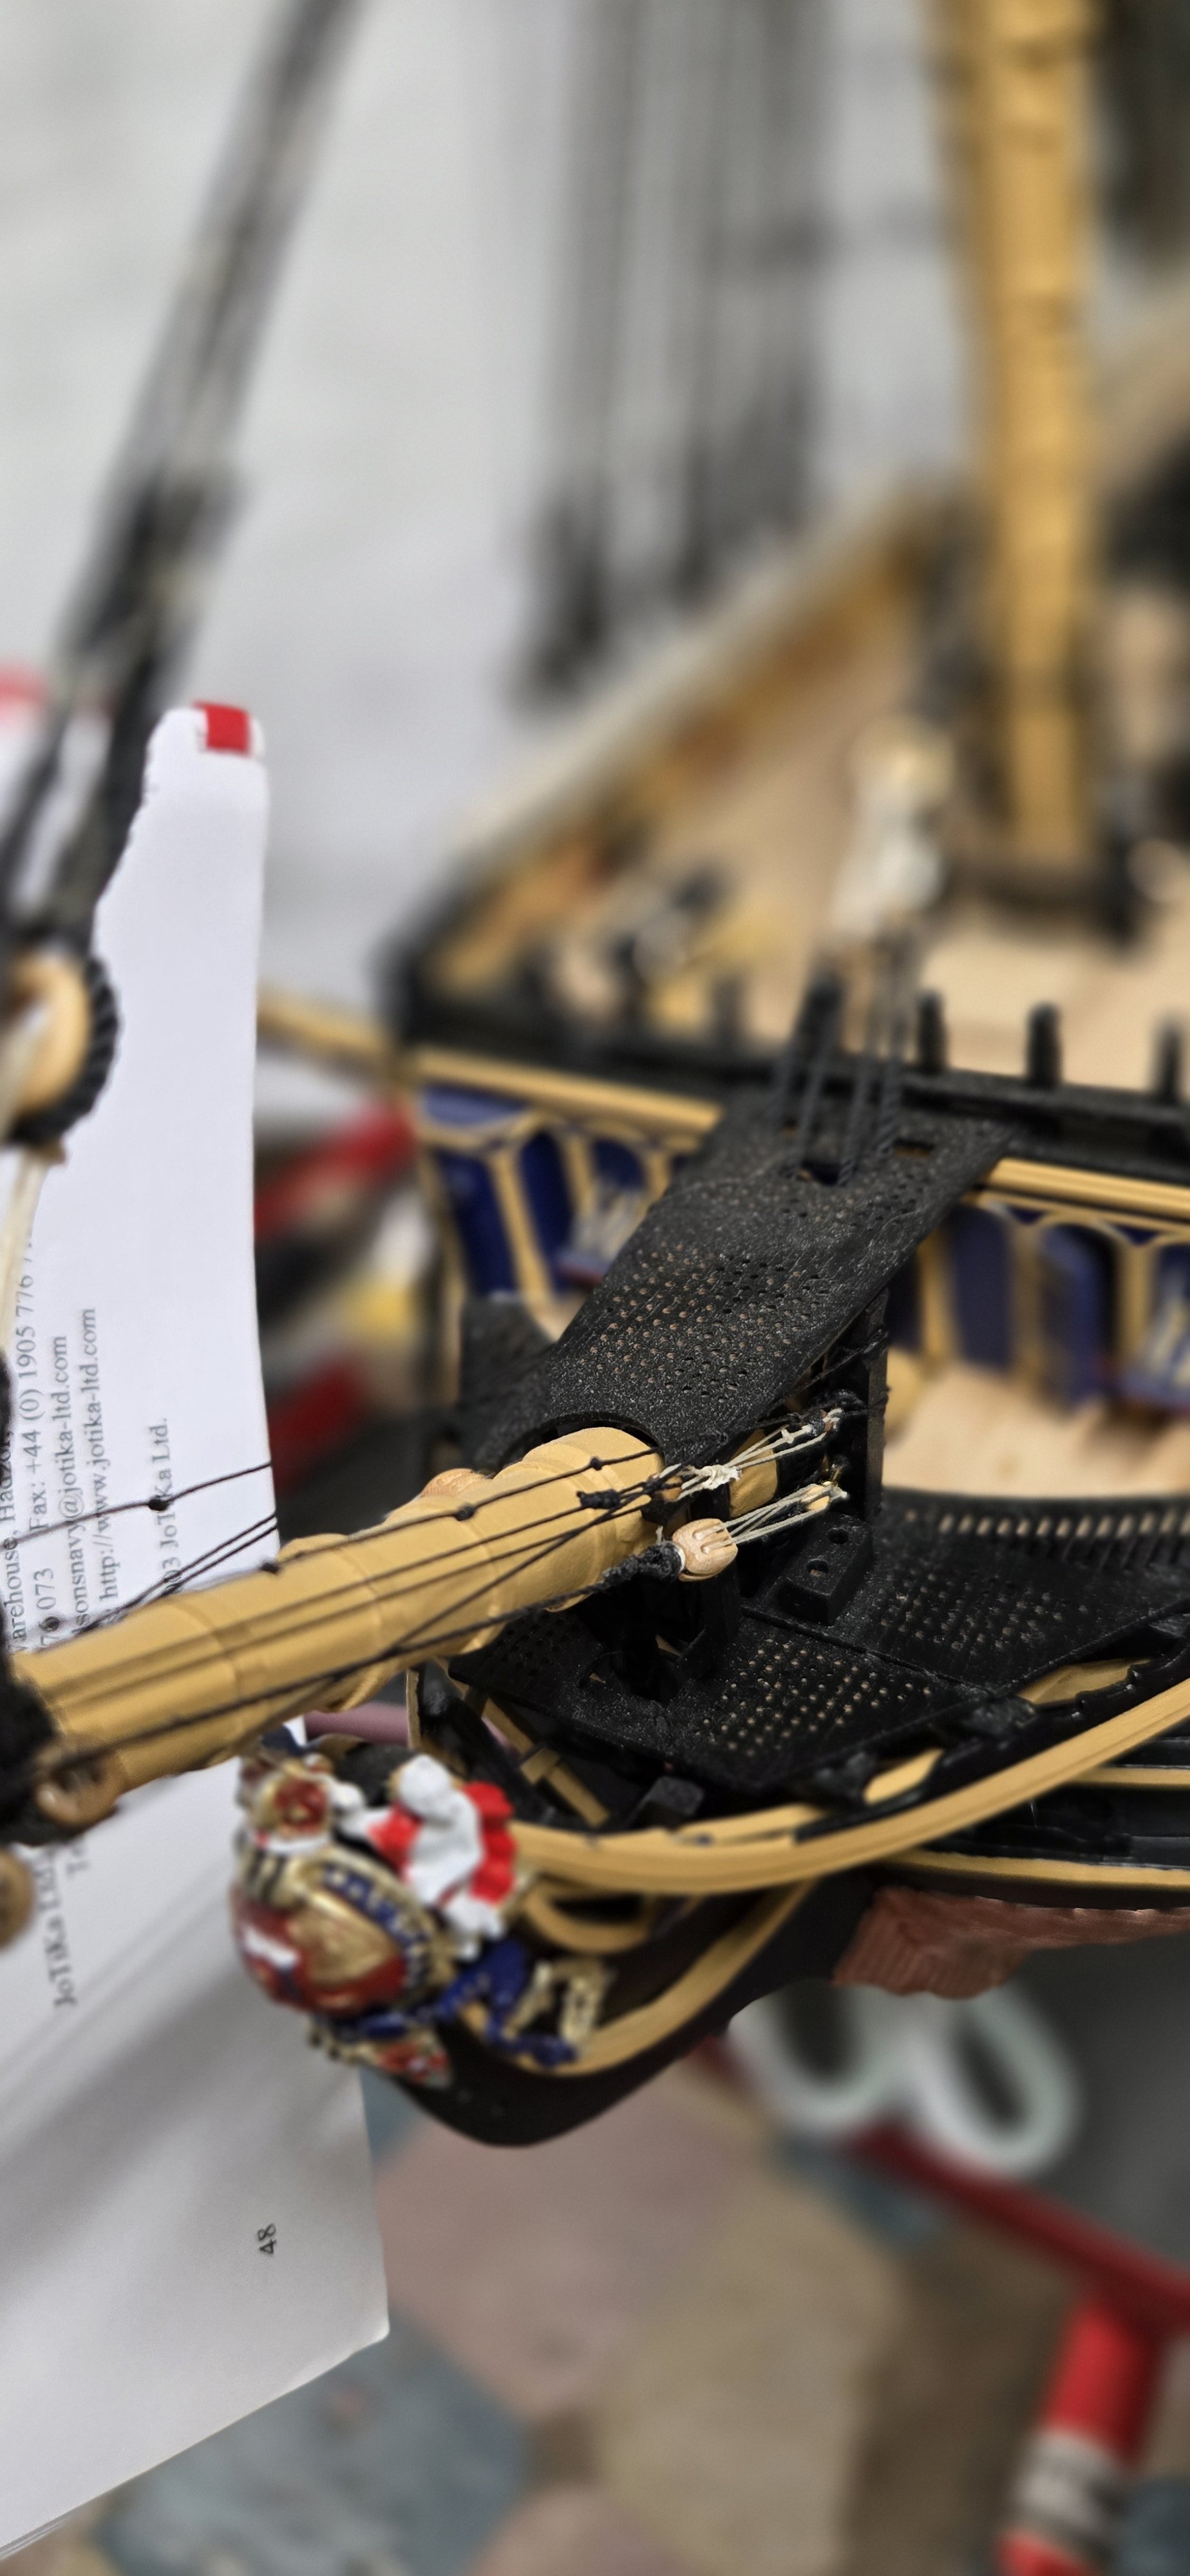
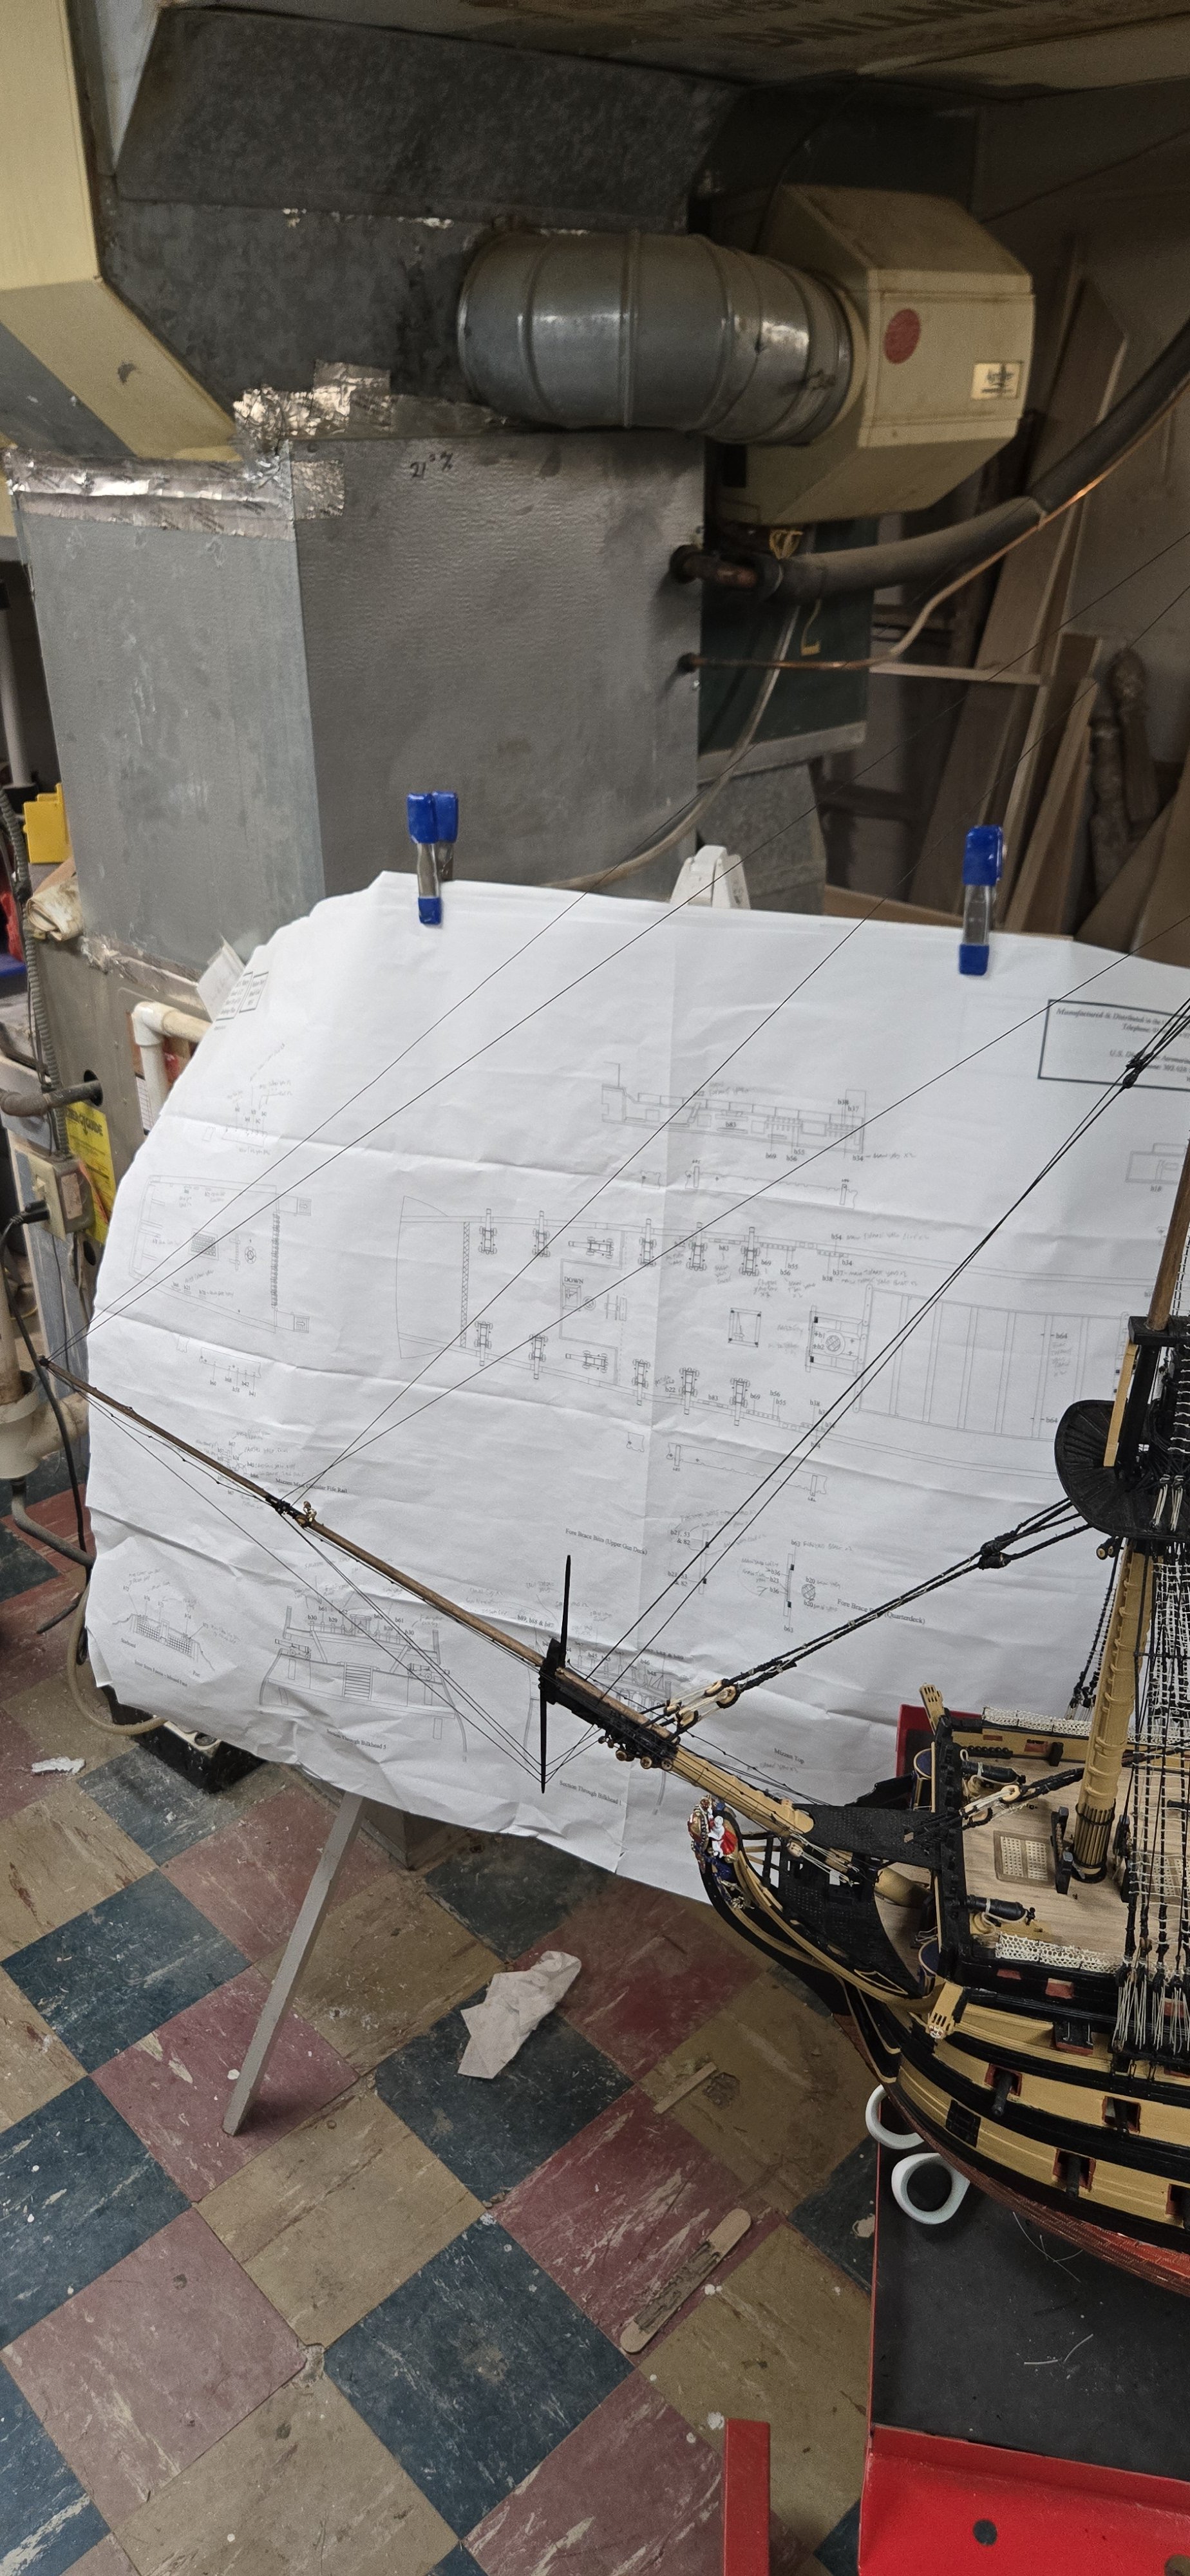
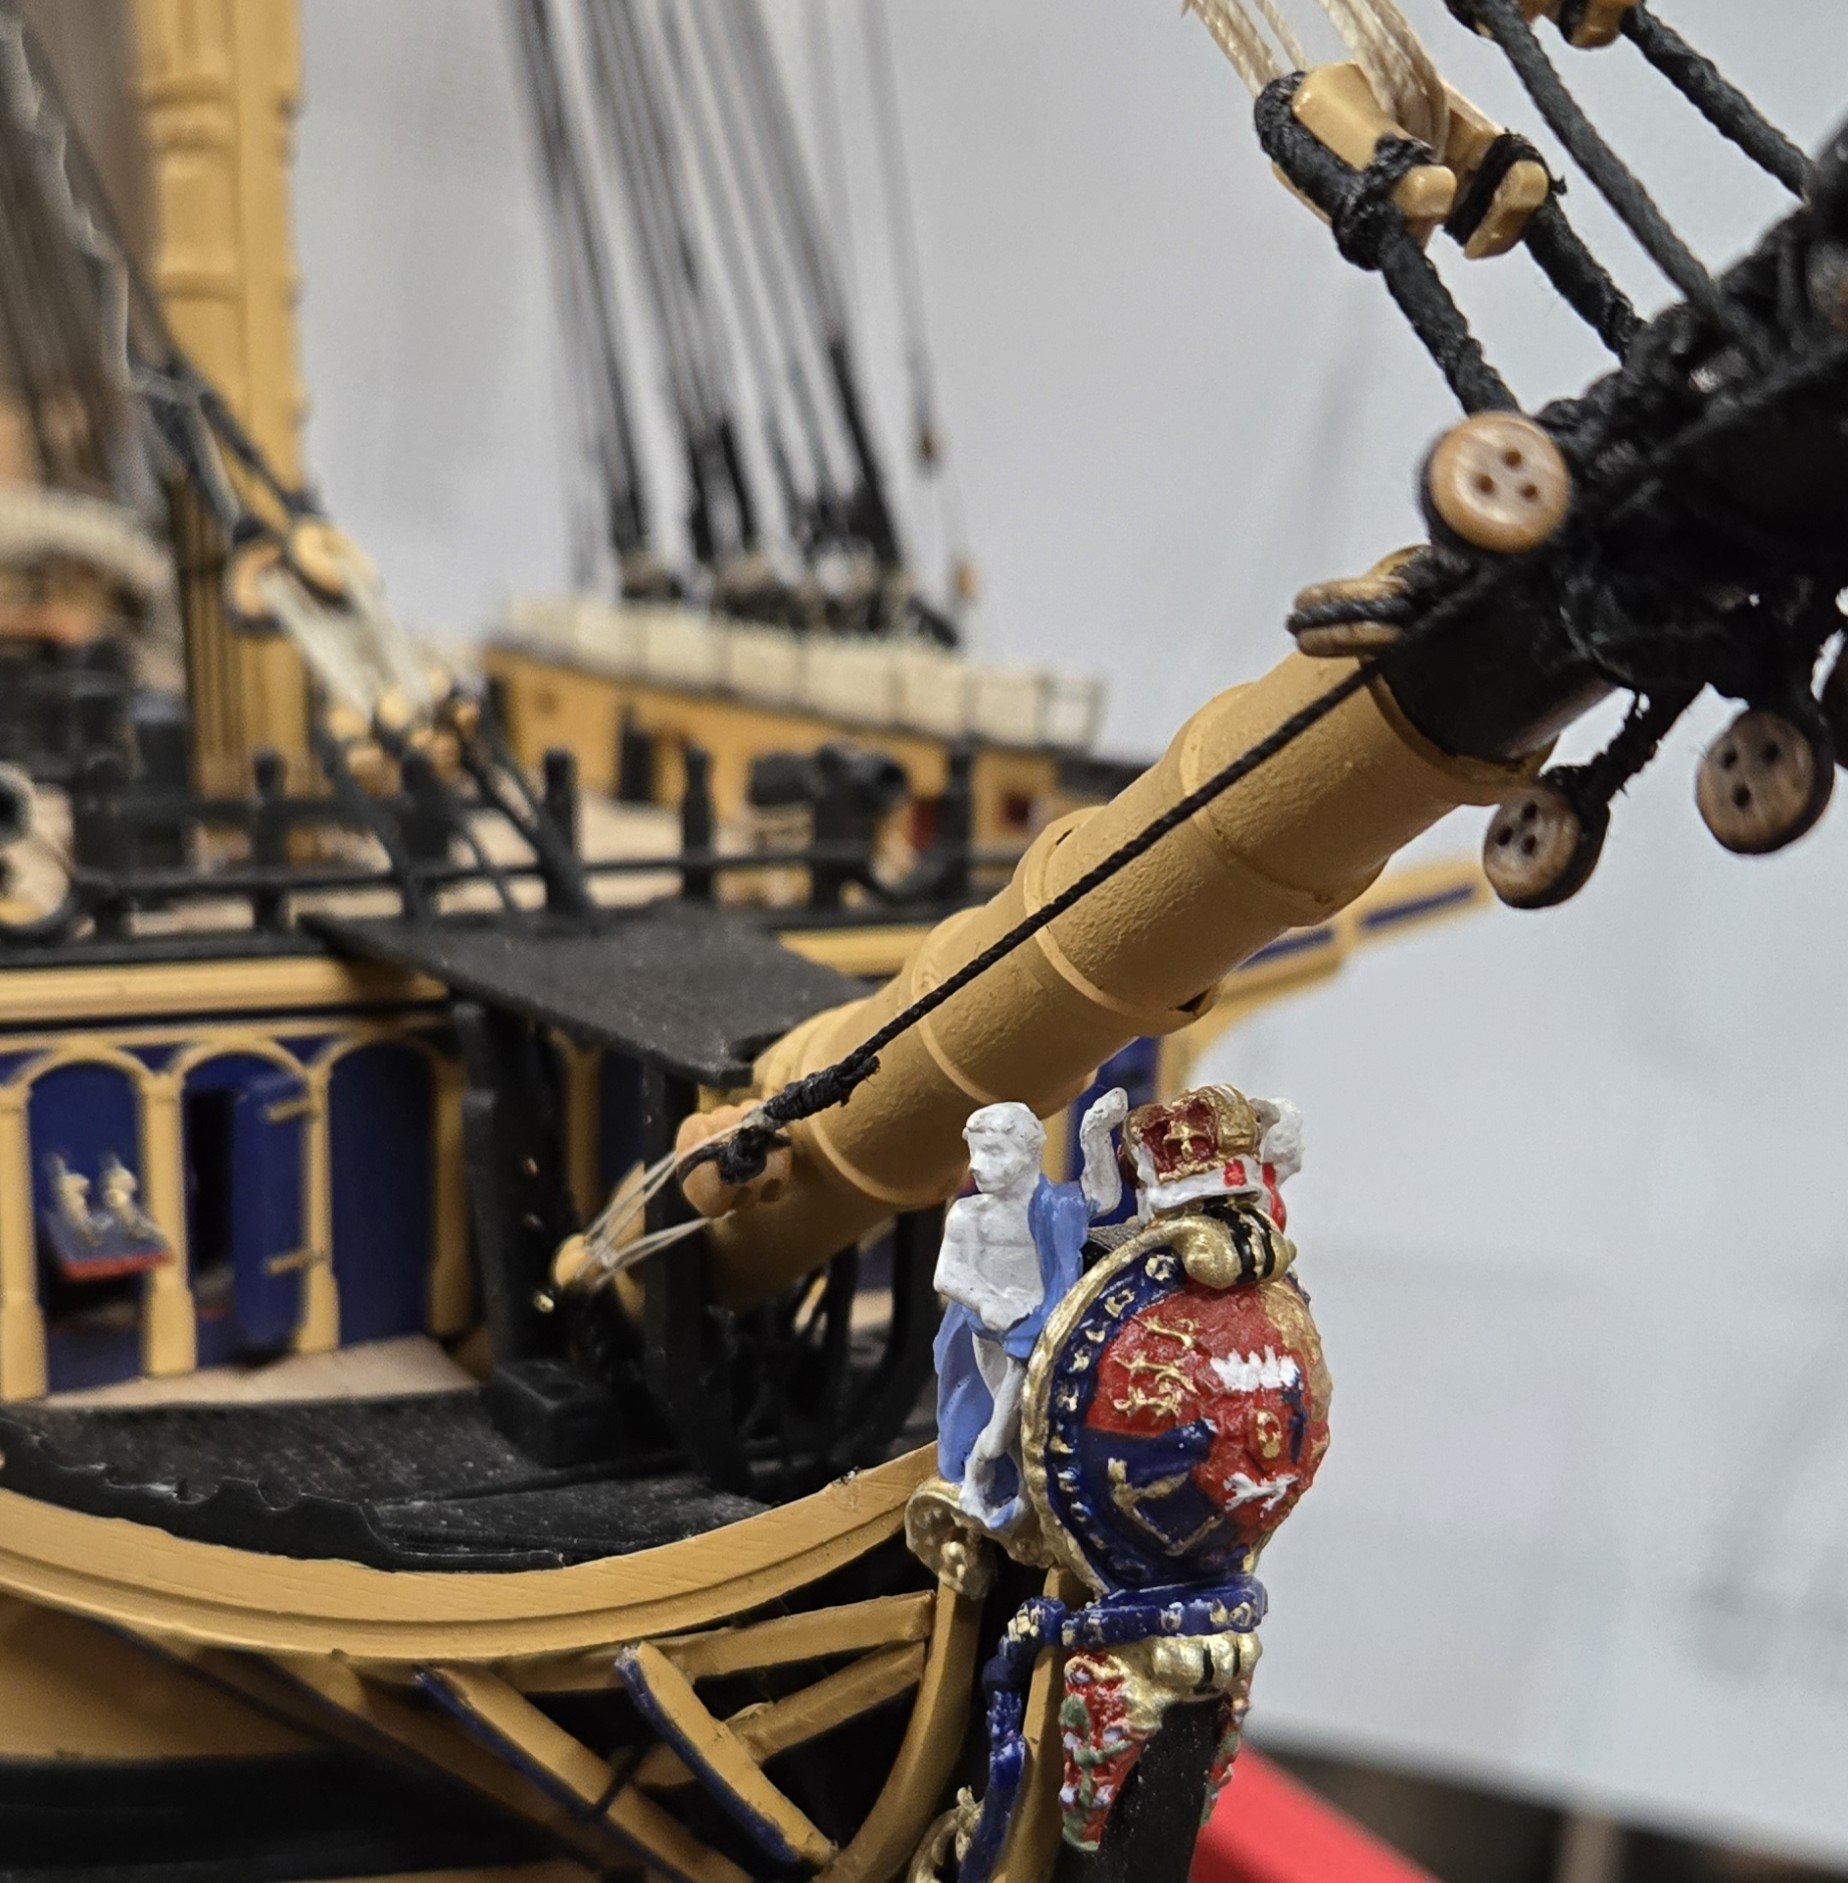
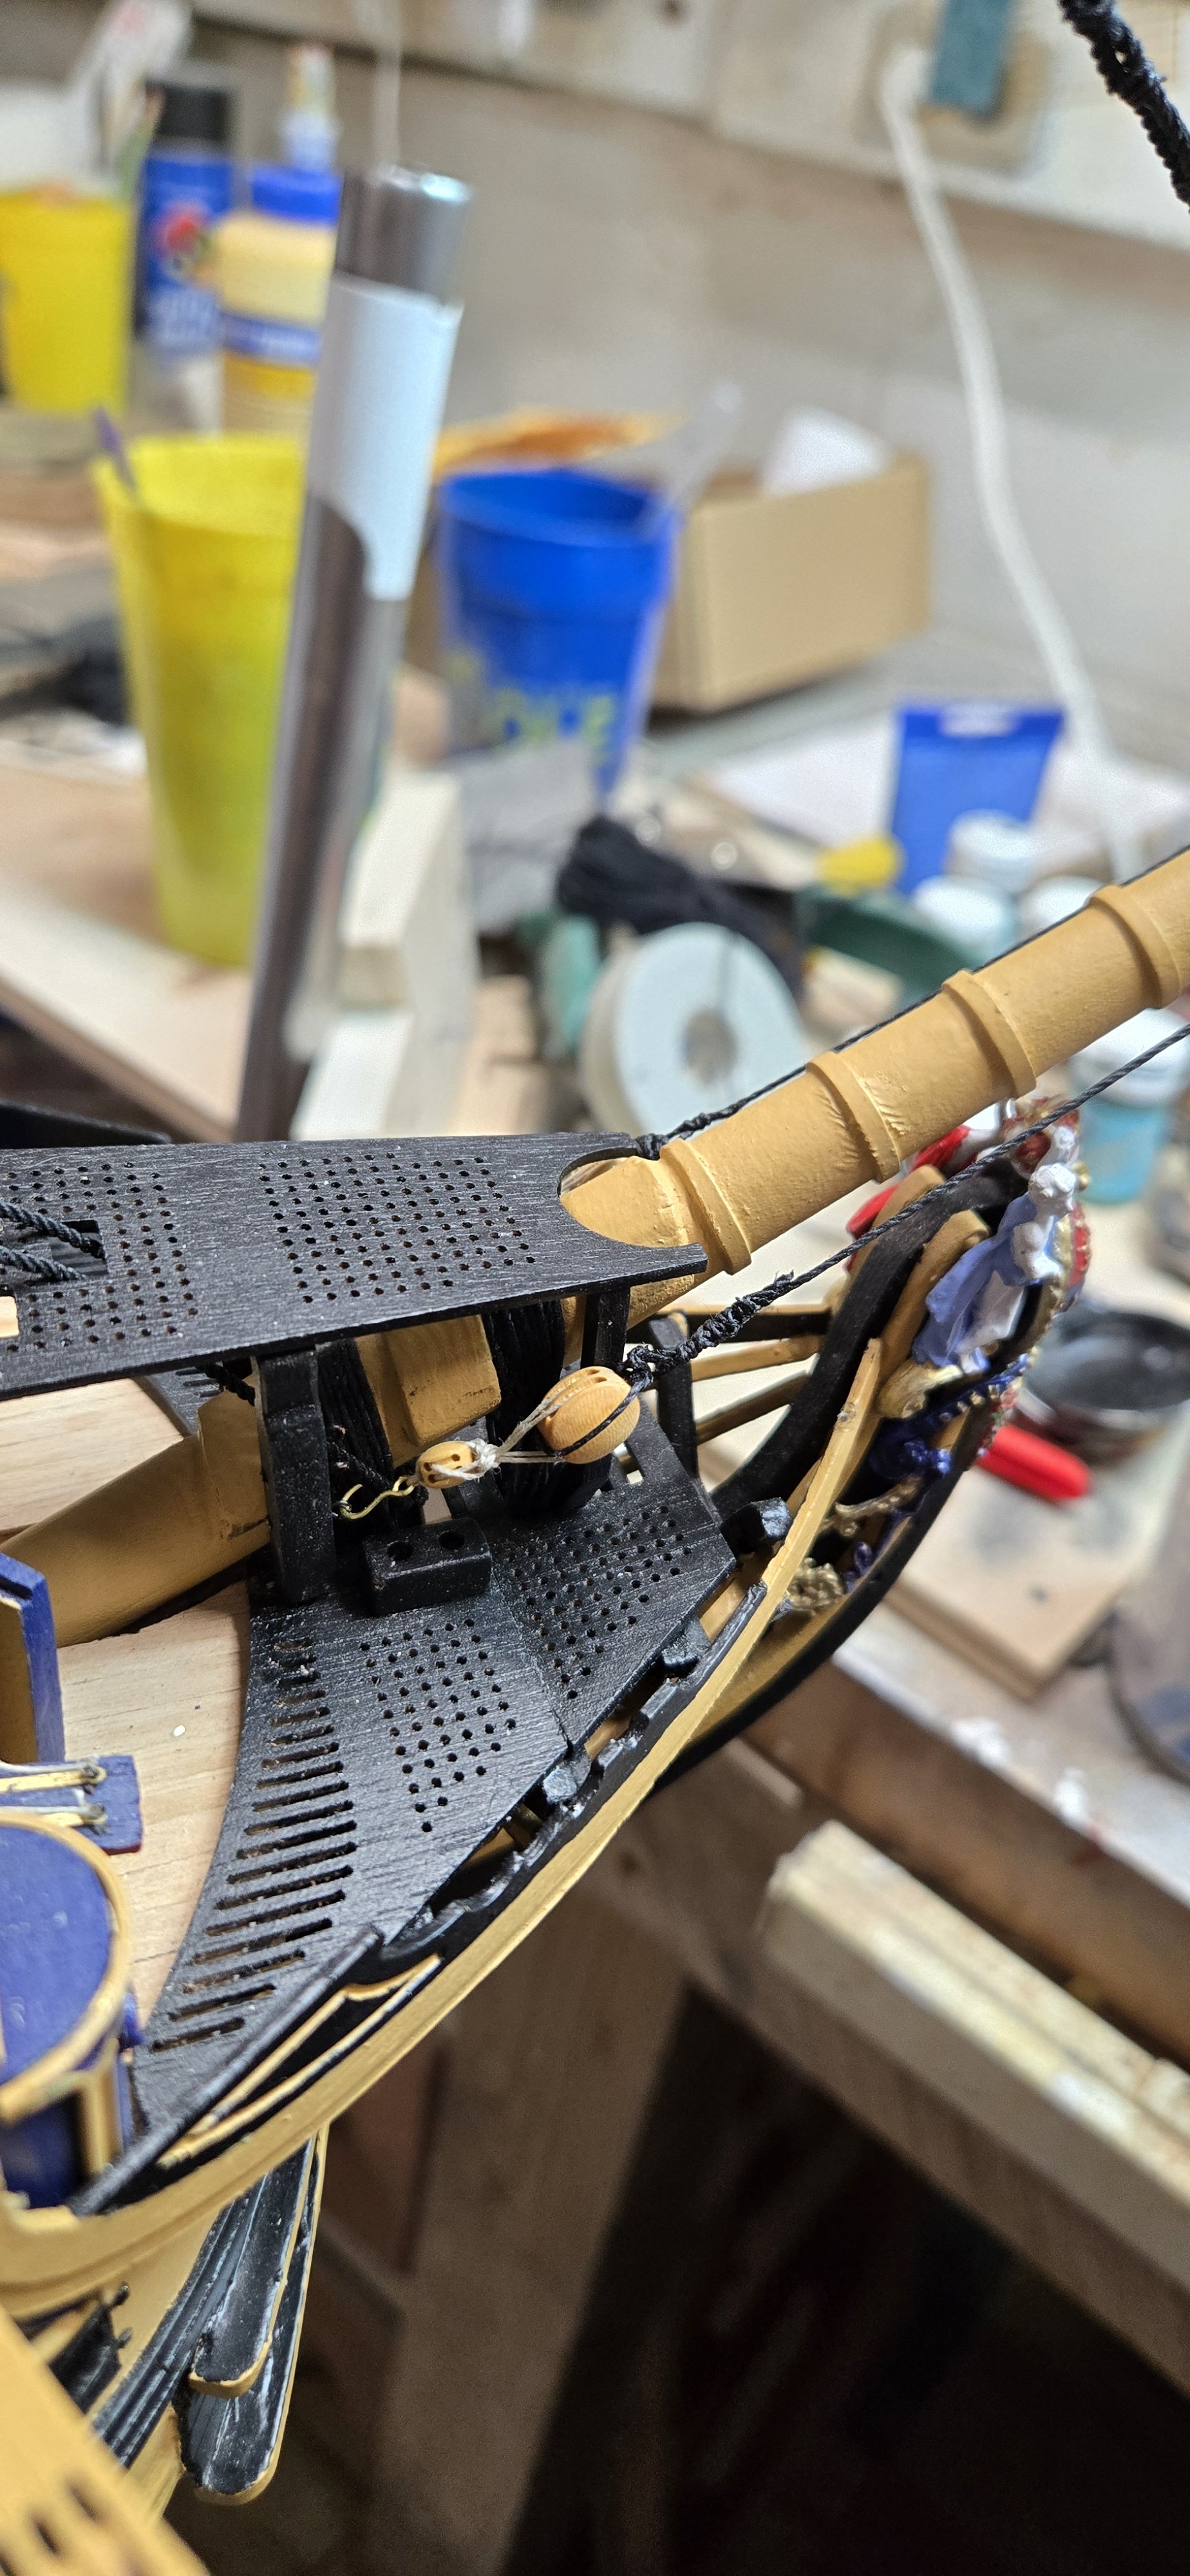
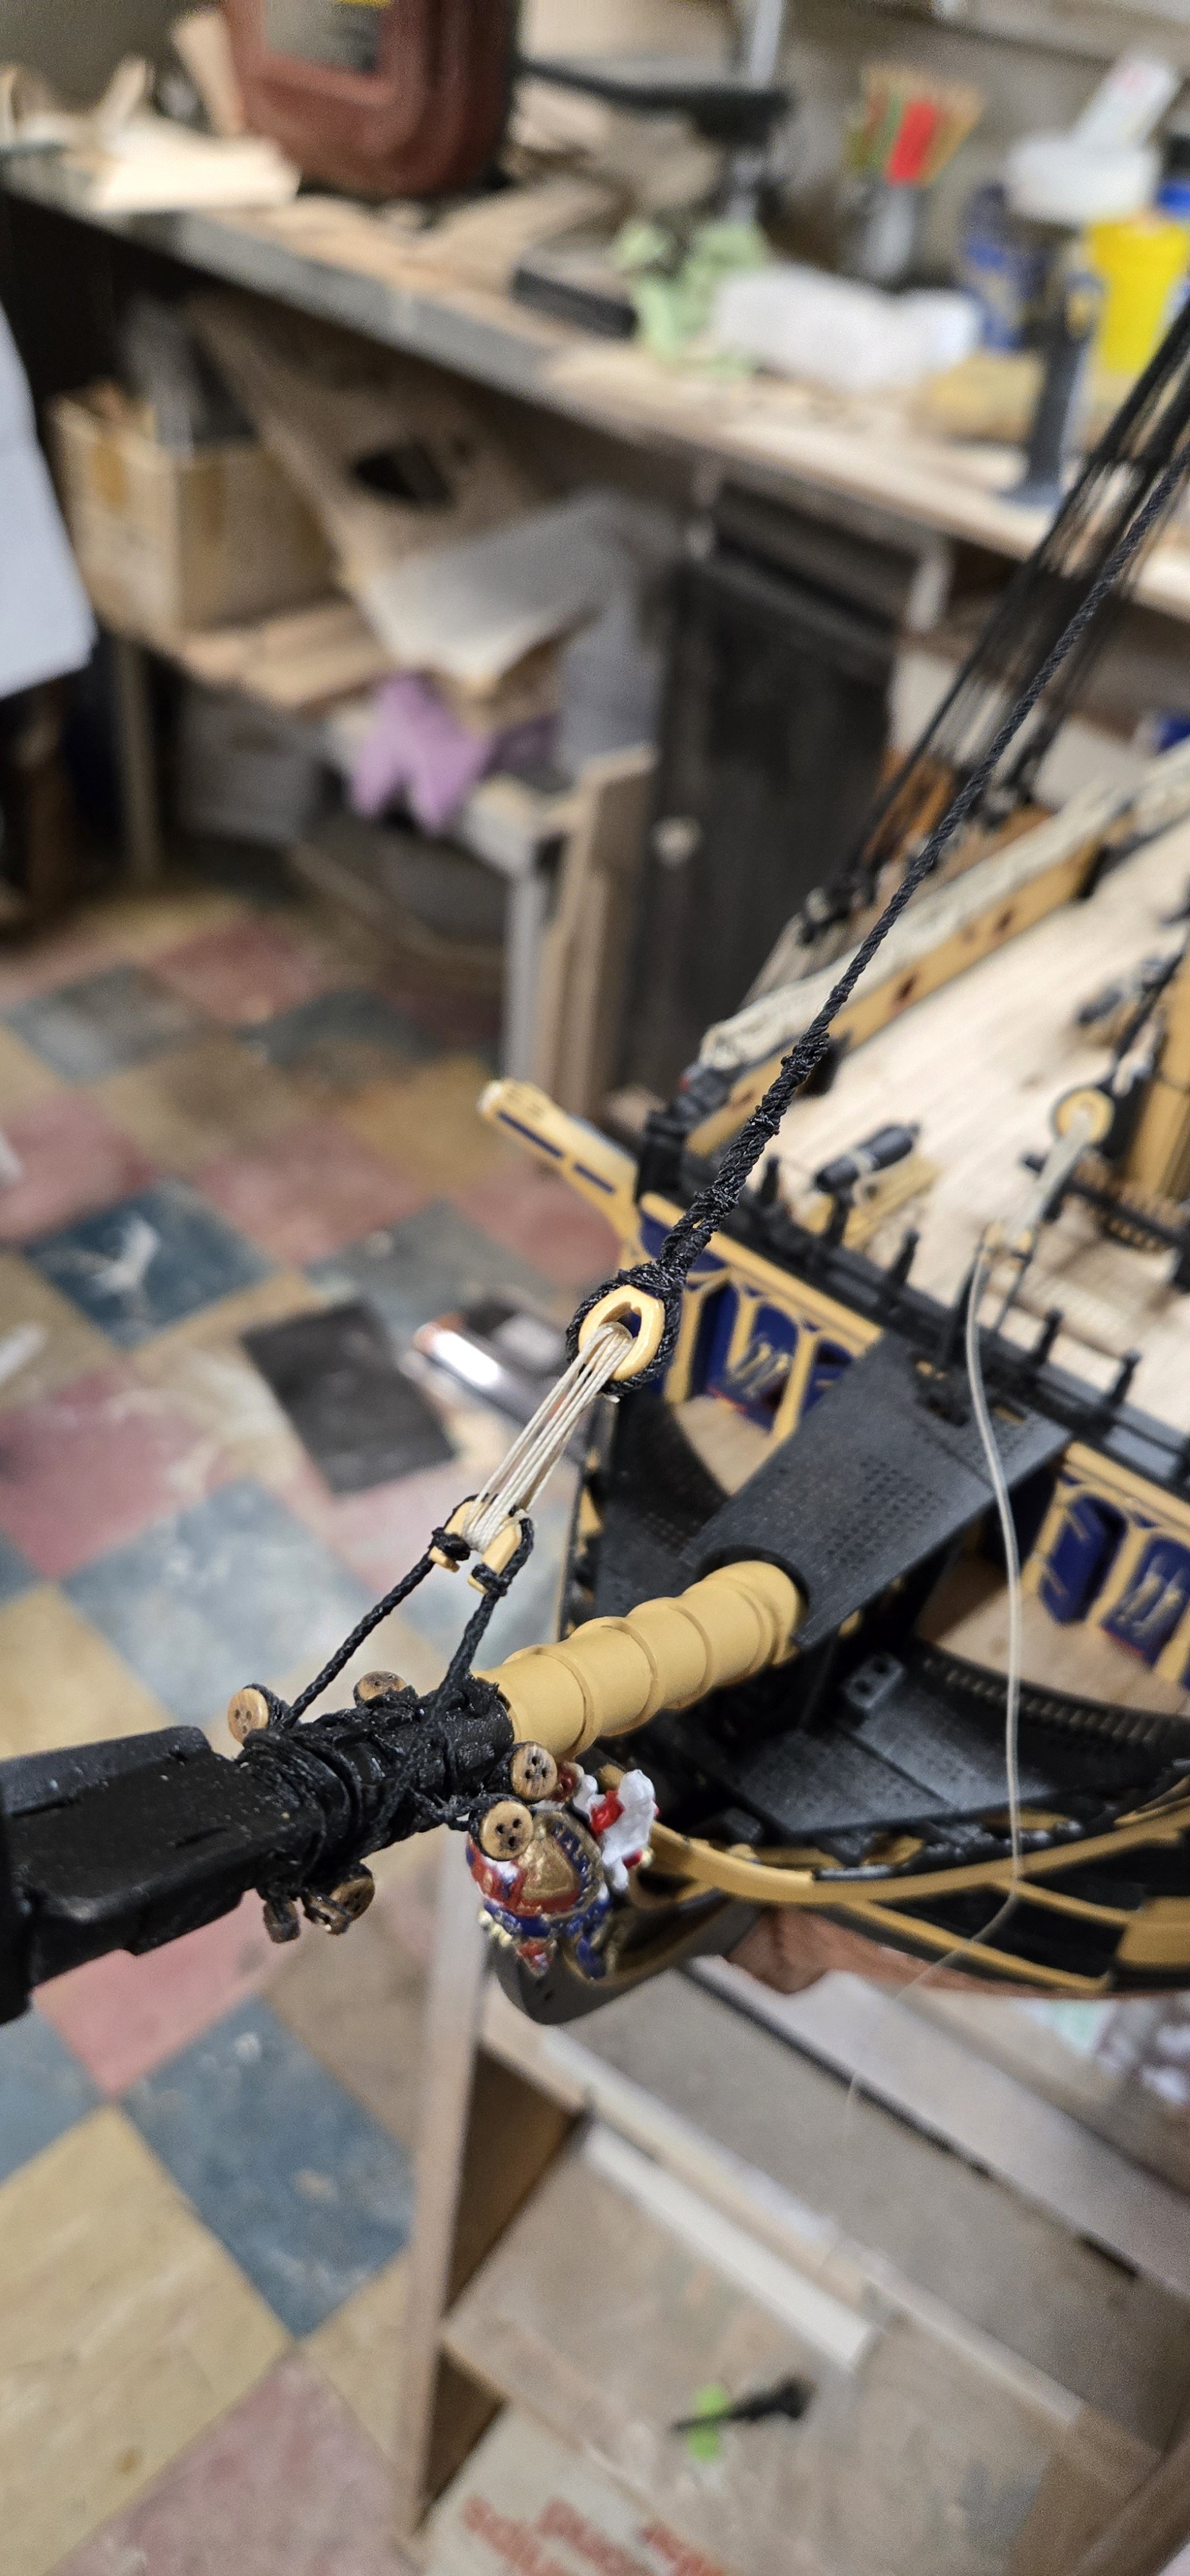
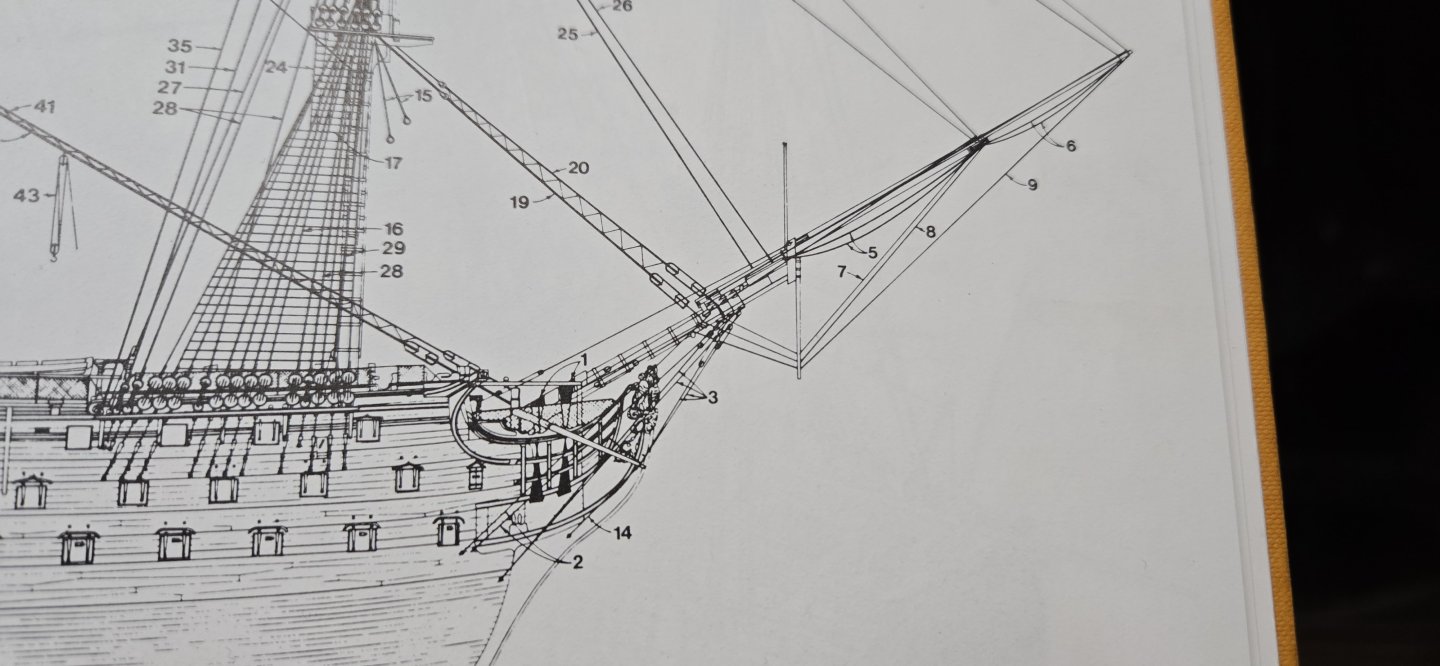
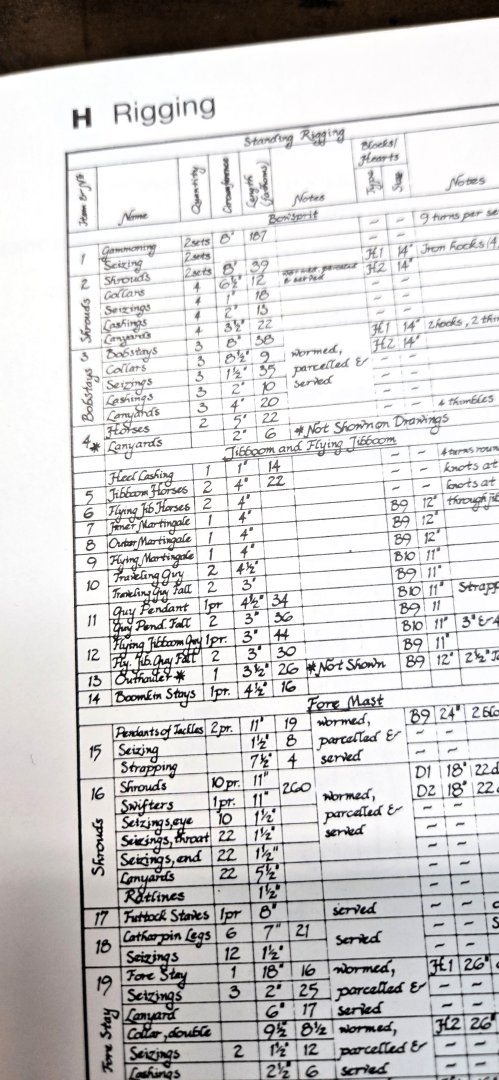
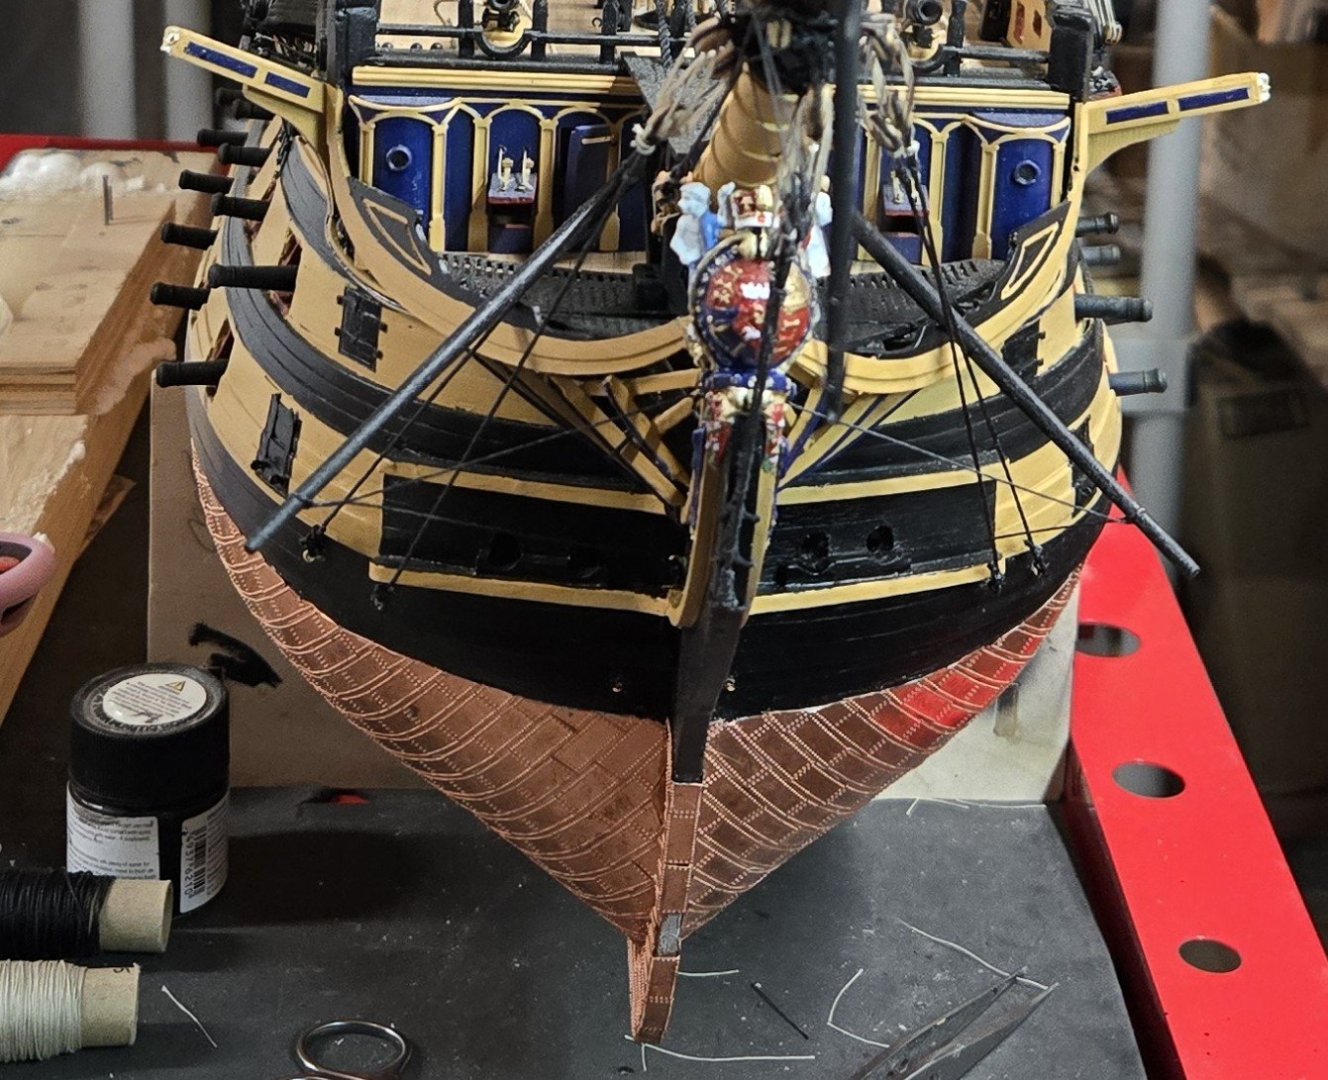
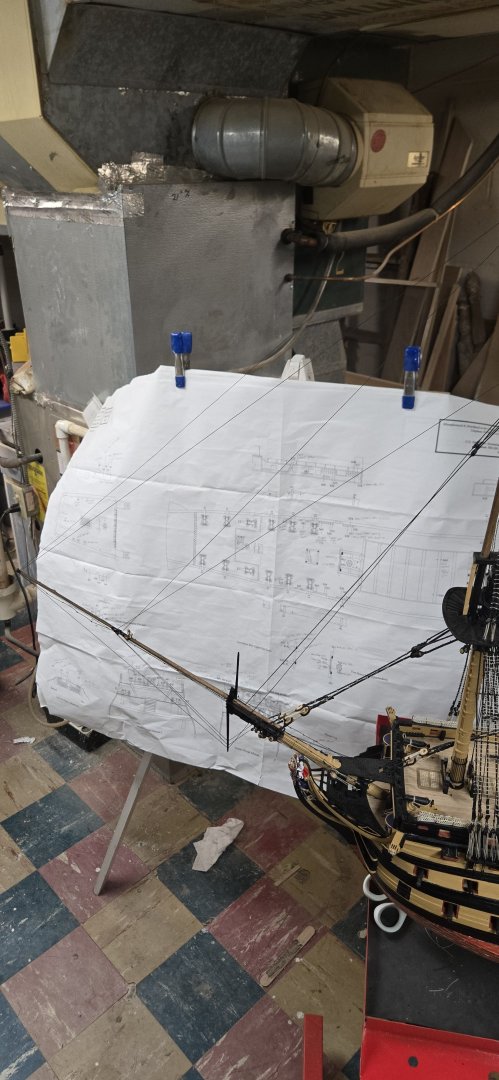
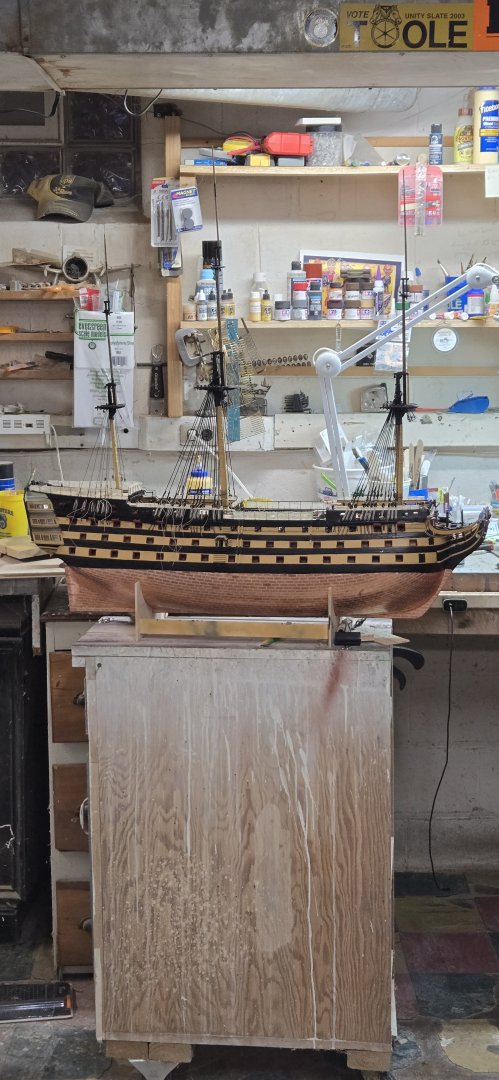
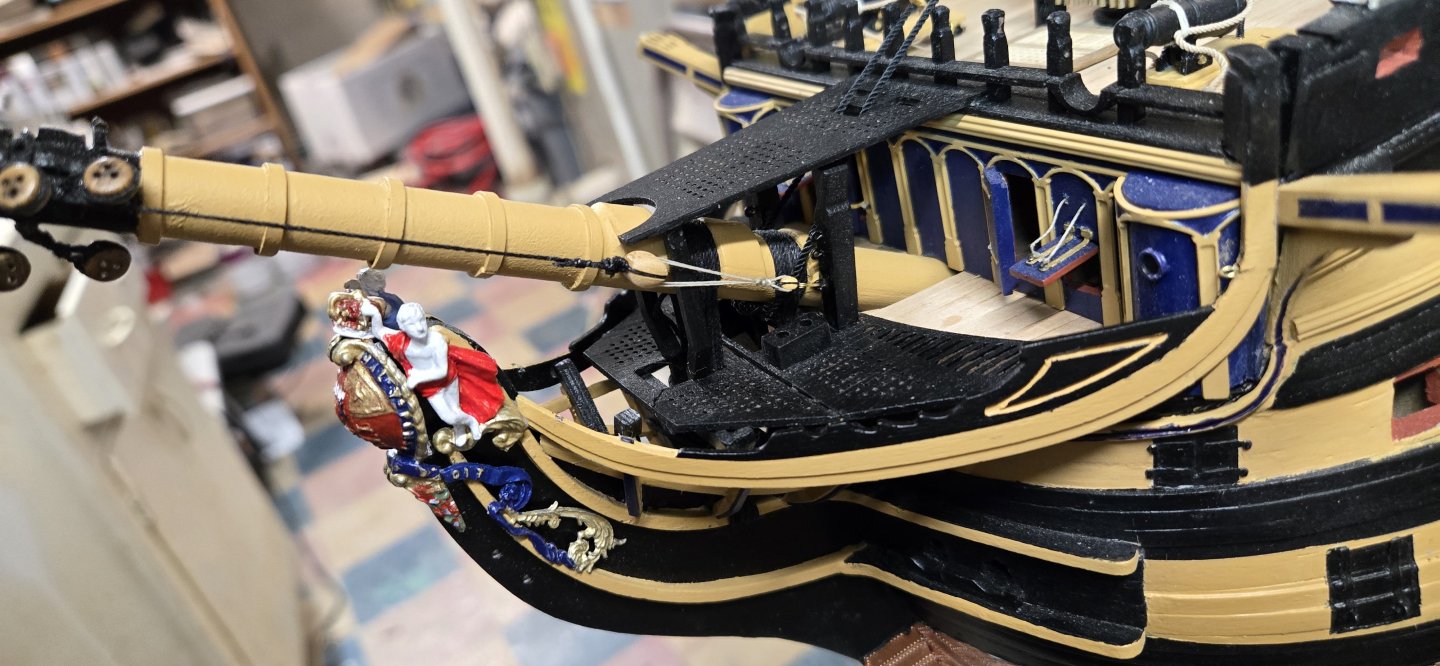
The next task was to finish off bowsprit shrouds and bobstays. I needed to create seven 5mm deadeyes, so there is a lot of minutia labor involved in just putting these together and then lashing them to the deadeyes I already secured to the bowsprit. Because I hadn't worked on deadeyes since last year, I had to dig out the blueprint plan that showed how to correctly lash two deadeyes together. You know what has become the biggest pain????!!!!! I have all these open and used blueprints stacked all over and all of the used ones are folded every which way based on what I needed at the time. So when I need plan #11, I spend 10 minutes hunting them down. I've resorted to writing plan numbers all over each as I use them!!!! I do have an big easel, but I have the deck belaying plan posted there so I can see at a glance where I need to finalize running rigging. The bowsprit shrouds are fairly self explanatory. I hadn't added the copper eyelets so it took some time to try and get them even. Moving to the bobstays the plans seem 'off'. The bobstays are the three lines that run from deadeyes that are attached under the bowsprit and go to the two pre-drilled holes in bow. But...the third one is confusing. The plan looks like it might go to an eyelet at the bow or it might end in an ring and then a line goes through the ring and is attached to both sides of the hull. Even 2 of the books I have offer different opinions: The first is McKay's book, you can see that #3 are the shrouds I'm dealing with. They end at the bow, I know it looks like they go on, but that is #14 which is part of the boomkin. The other is McGowan's book and is similar to Caldercraft's plans. So.....I went live! In this pic there is a 3rd hole for the foremost bobstay. So that is what I did. With those tasks finished, I am on to putting up the various yards. I have them all pretty close to done. But I see that I haven't added the blocks yet, so I will go through the plans and add all of the blocks for the fore yards. Then I plan on using Longridge's book to help guide me through installing the yards in tandem with the instructions....fingers crossed!!!!


-
Finished with all of the martingales and added the boomkins back onto the bow deck. I hadn't added the eye bolts for the standing ends of the boomkin stays. There are 2 that create tension for these spars on each side. All I did was file a small groove 10mm from the end of each boomkin and created a loop around them and tied them off to the hull. While working on the next set of tasks, I saw a picture of a 'bumpkin' that rather had one continuous line with a strop in the middle that attached to the bottom of the boomkin. This will counter tension created by the tacks of the foresails...in the real world. Too late and all I did was create a tied loop and then secured to the hull. I have to touch up the eyelets.
-
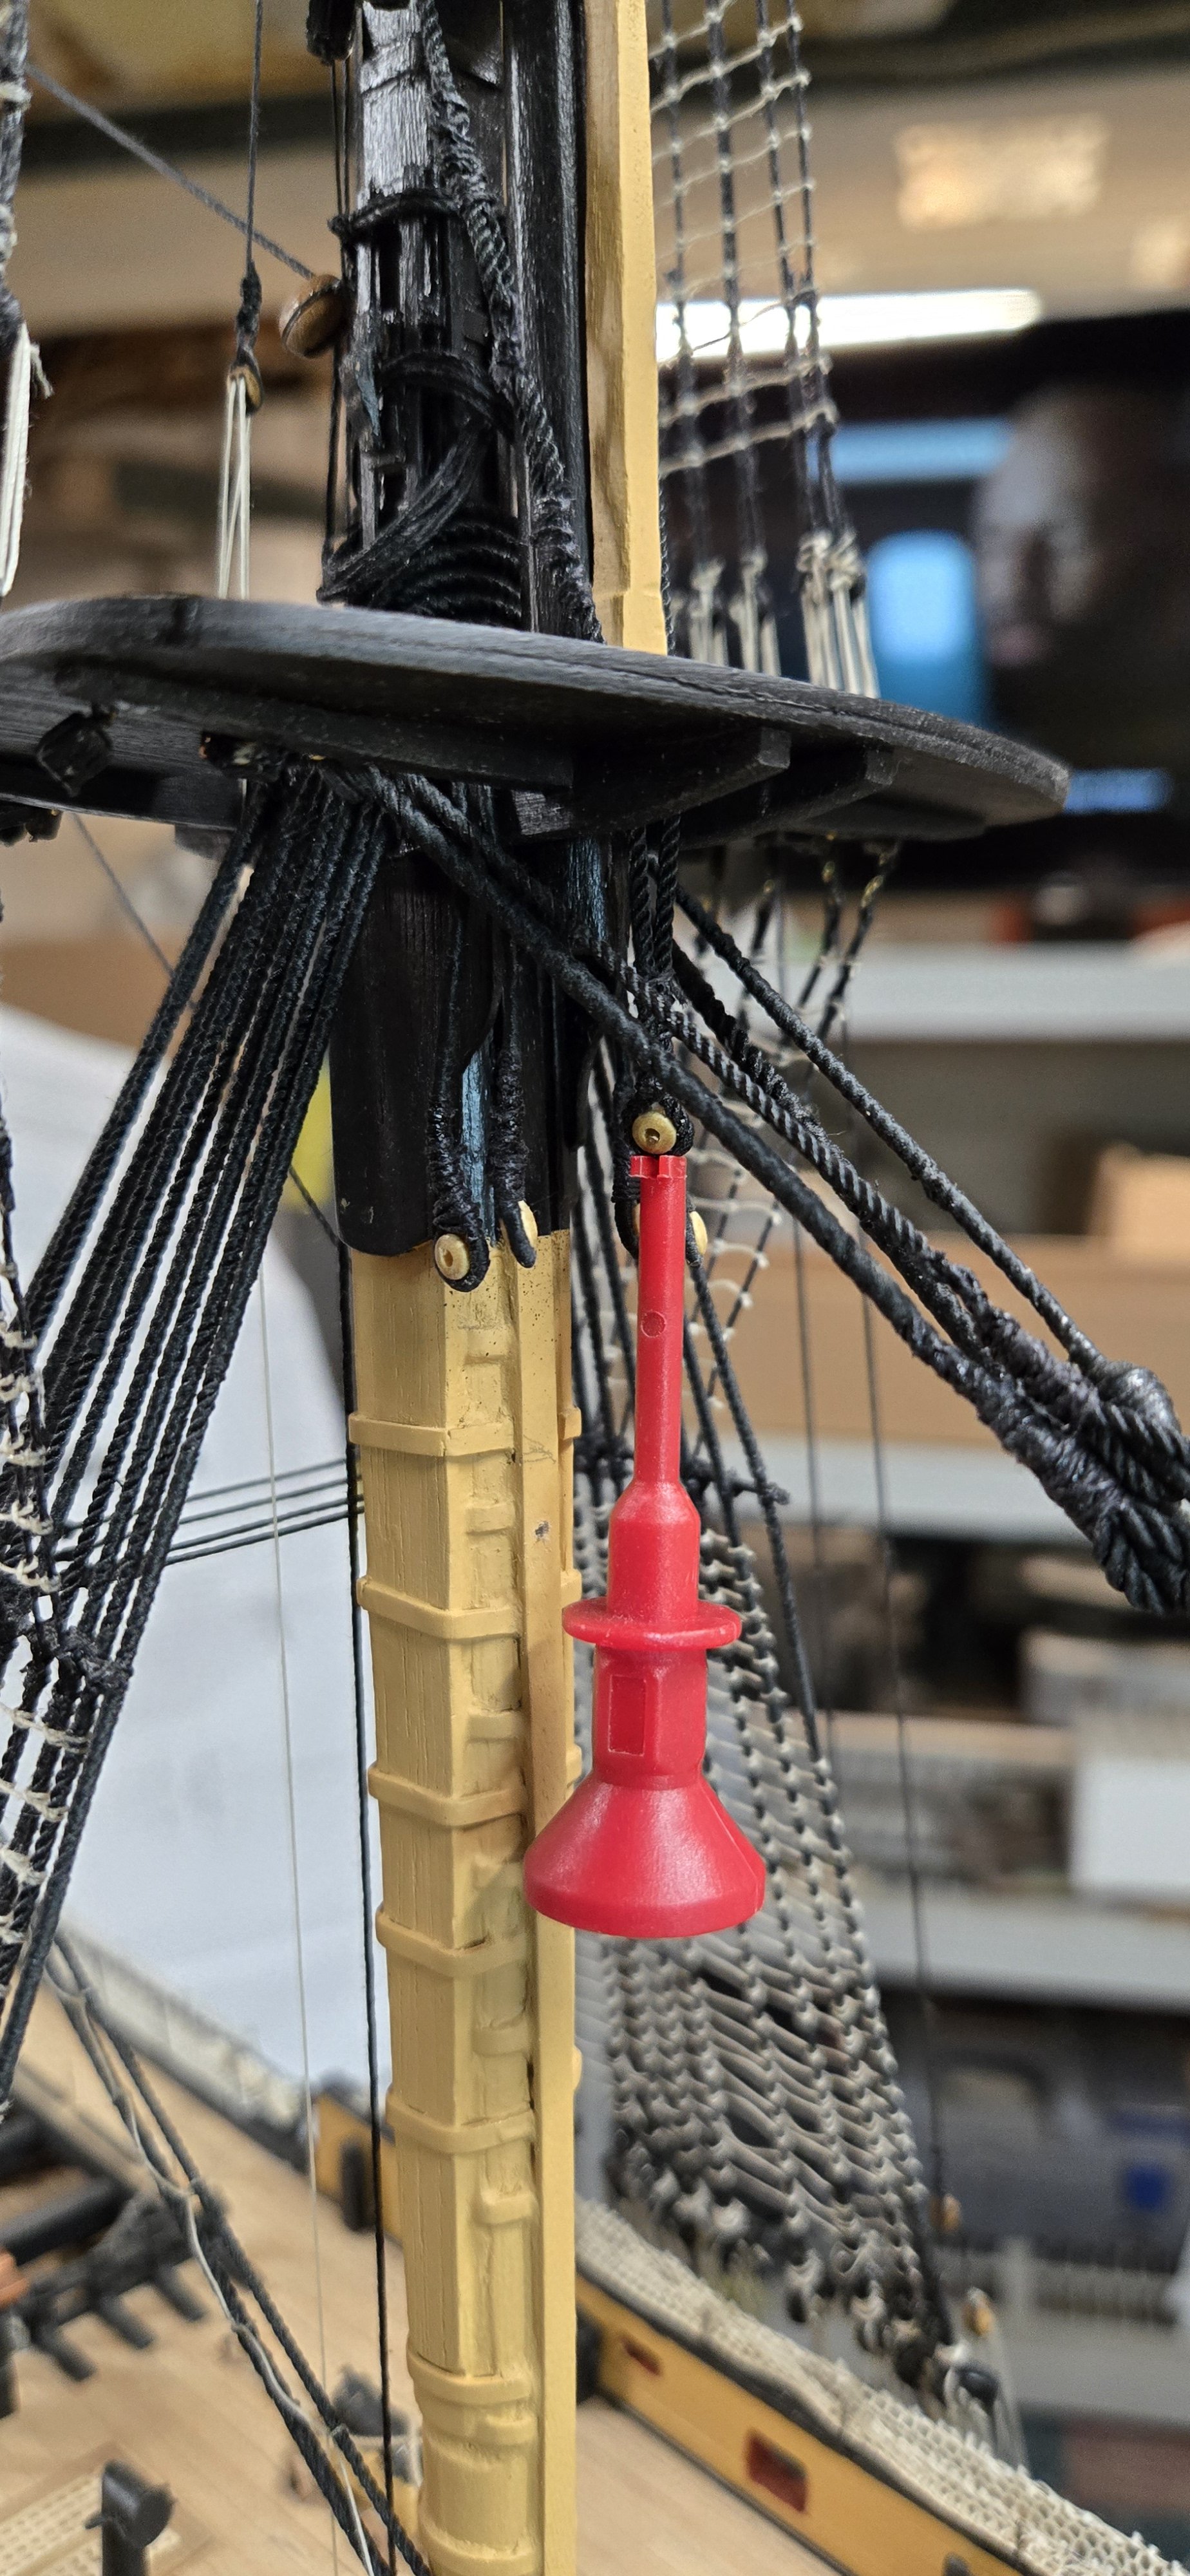
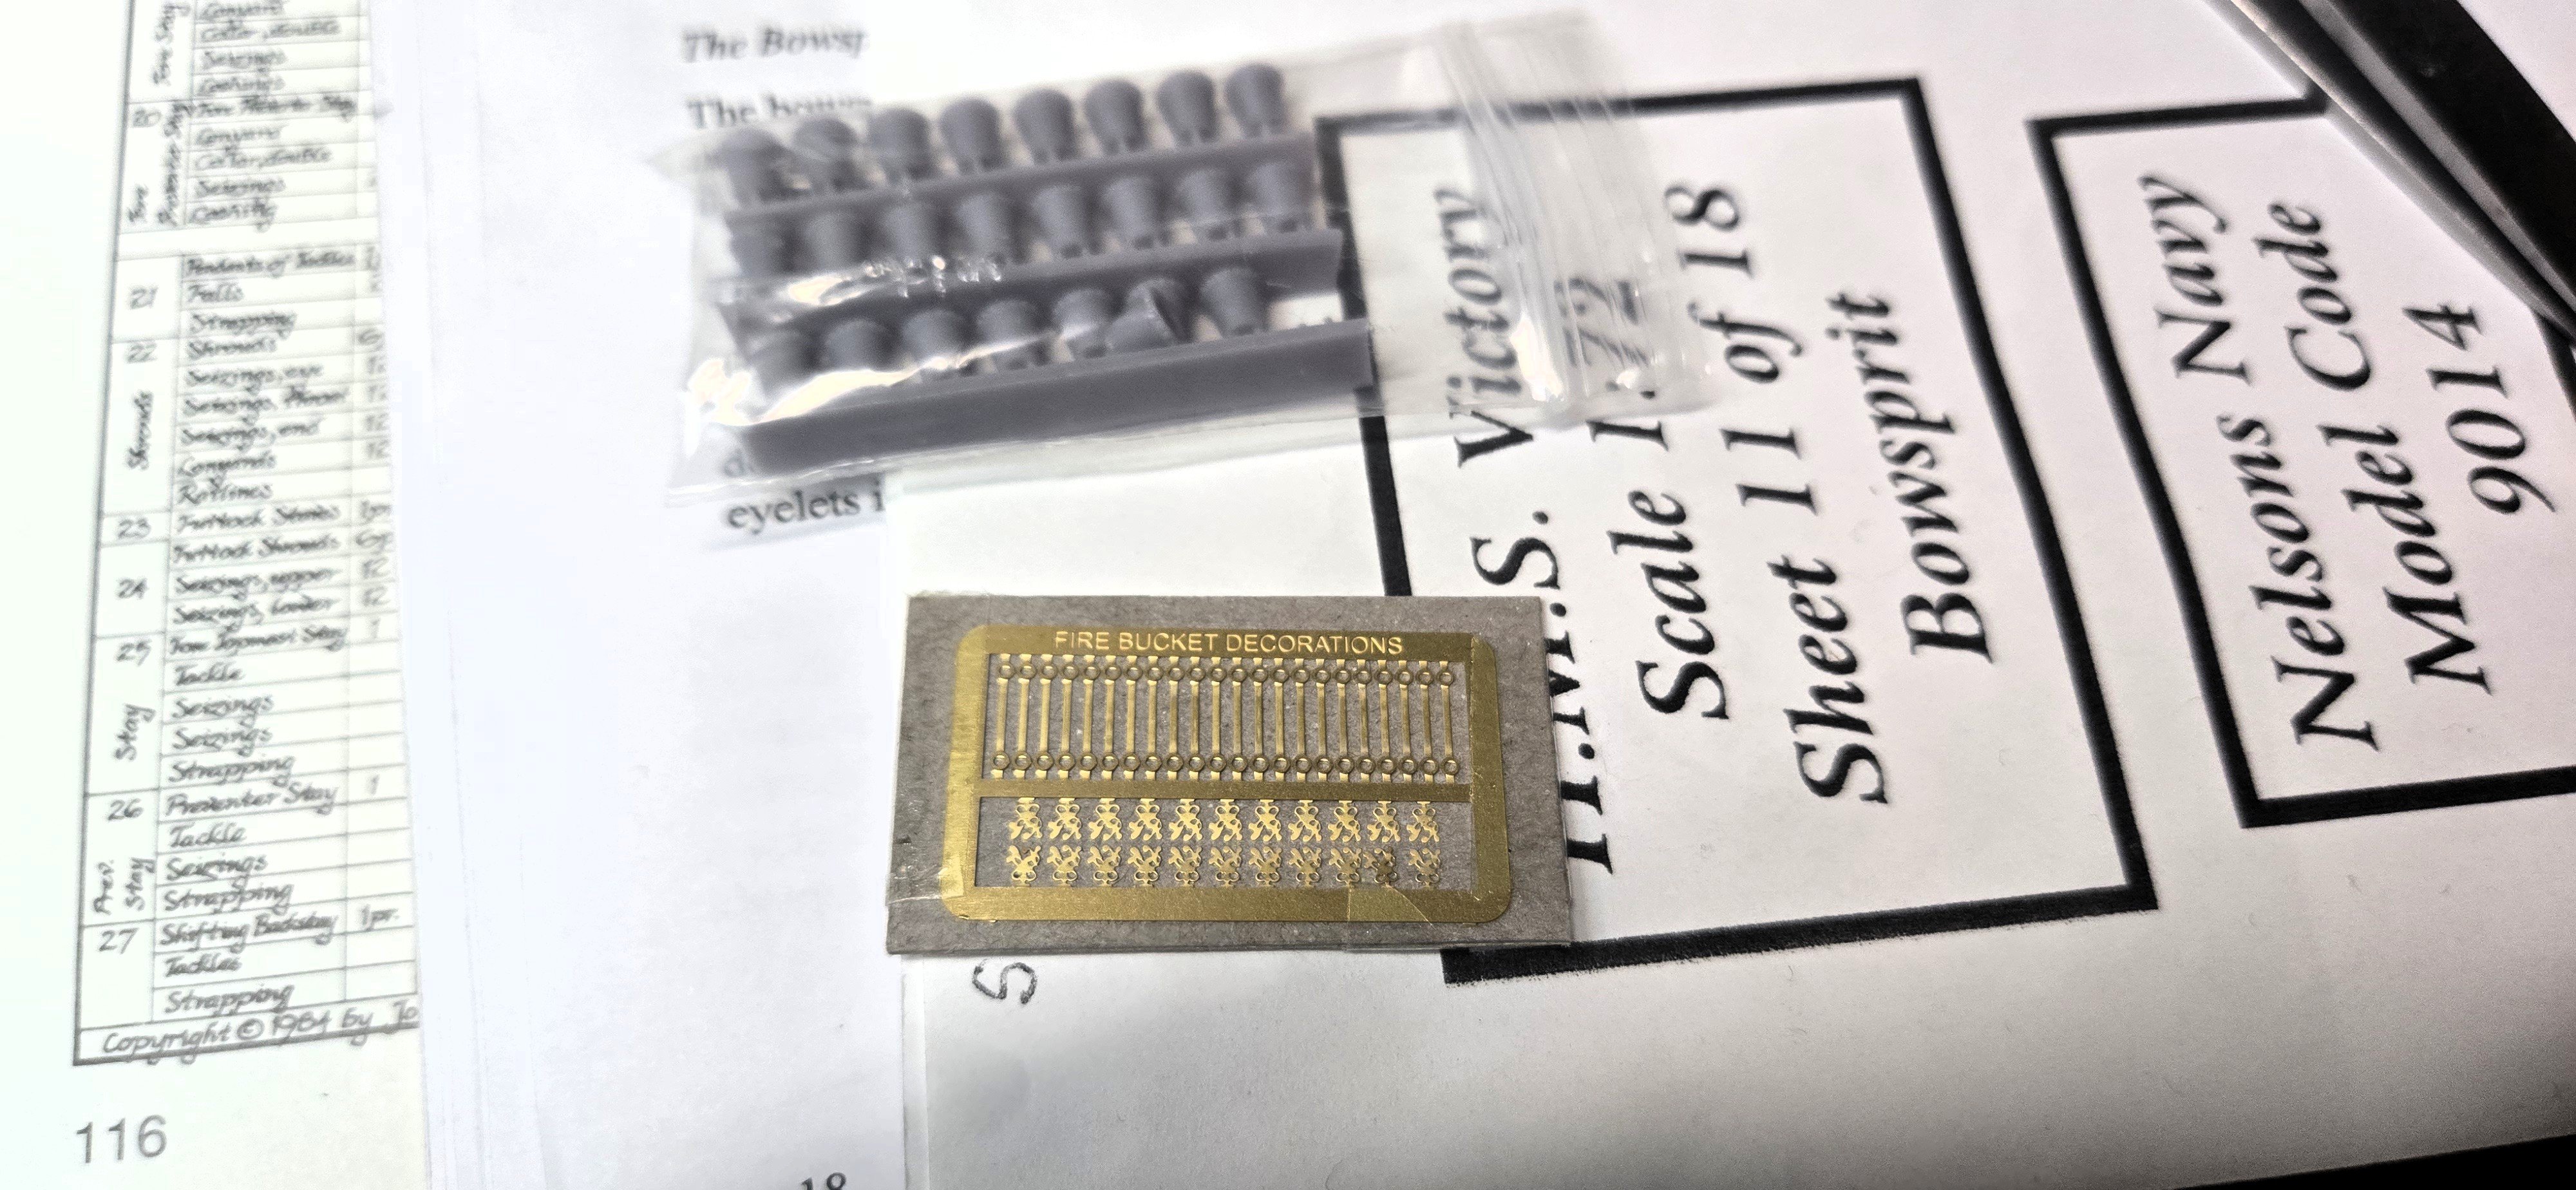
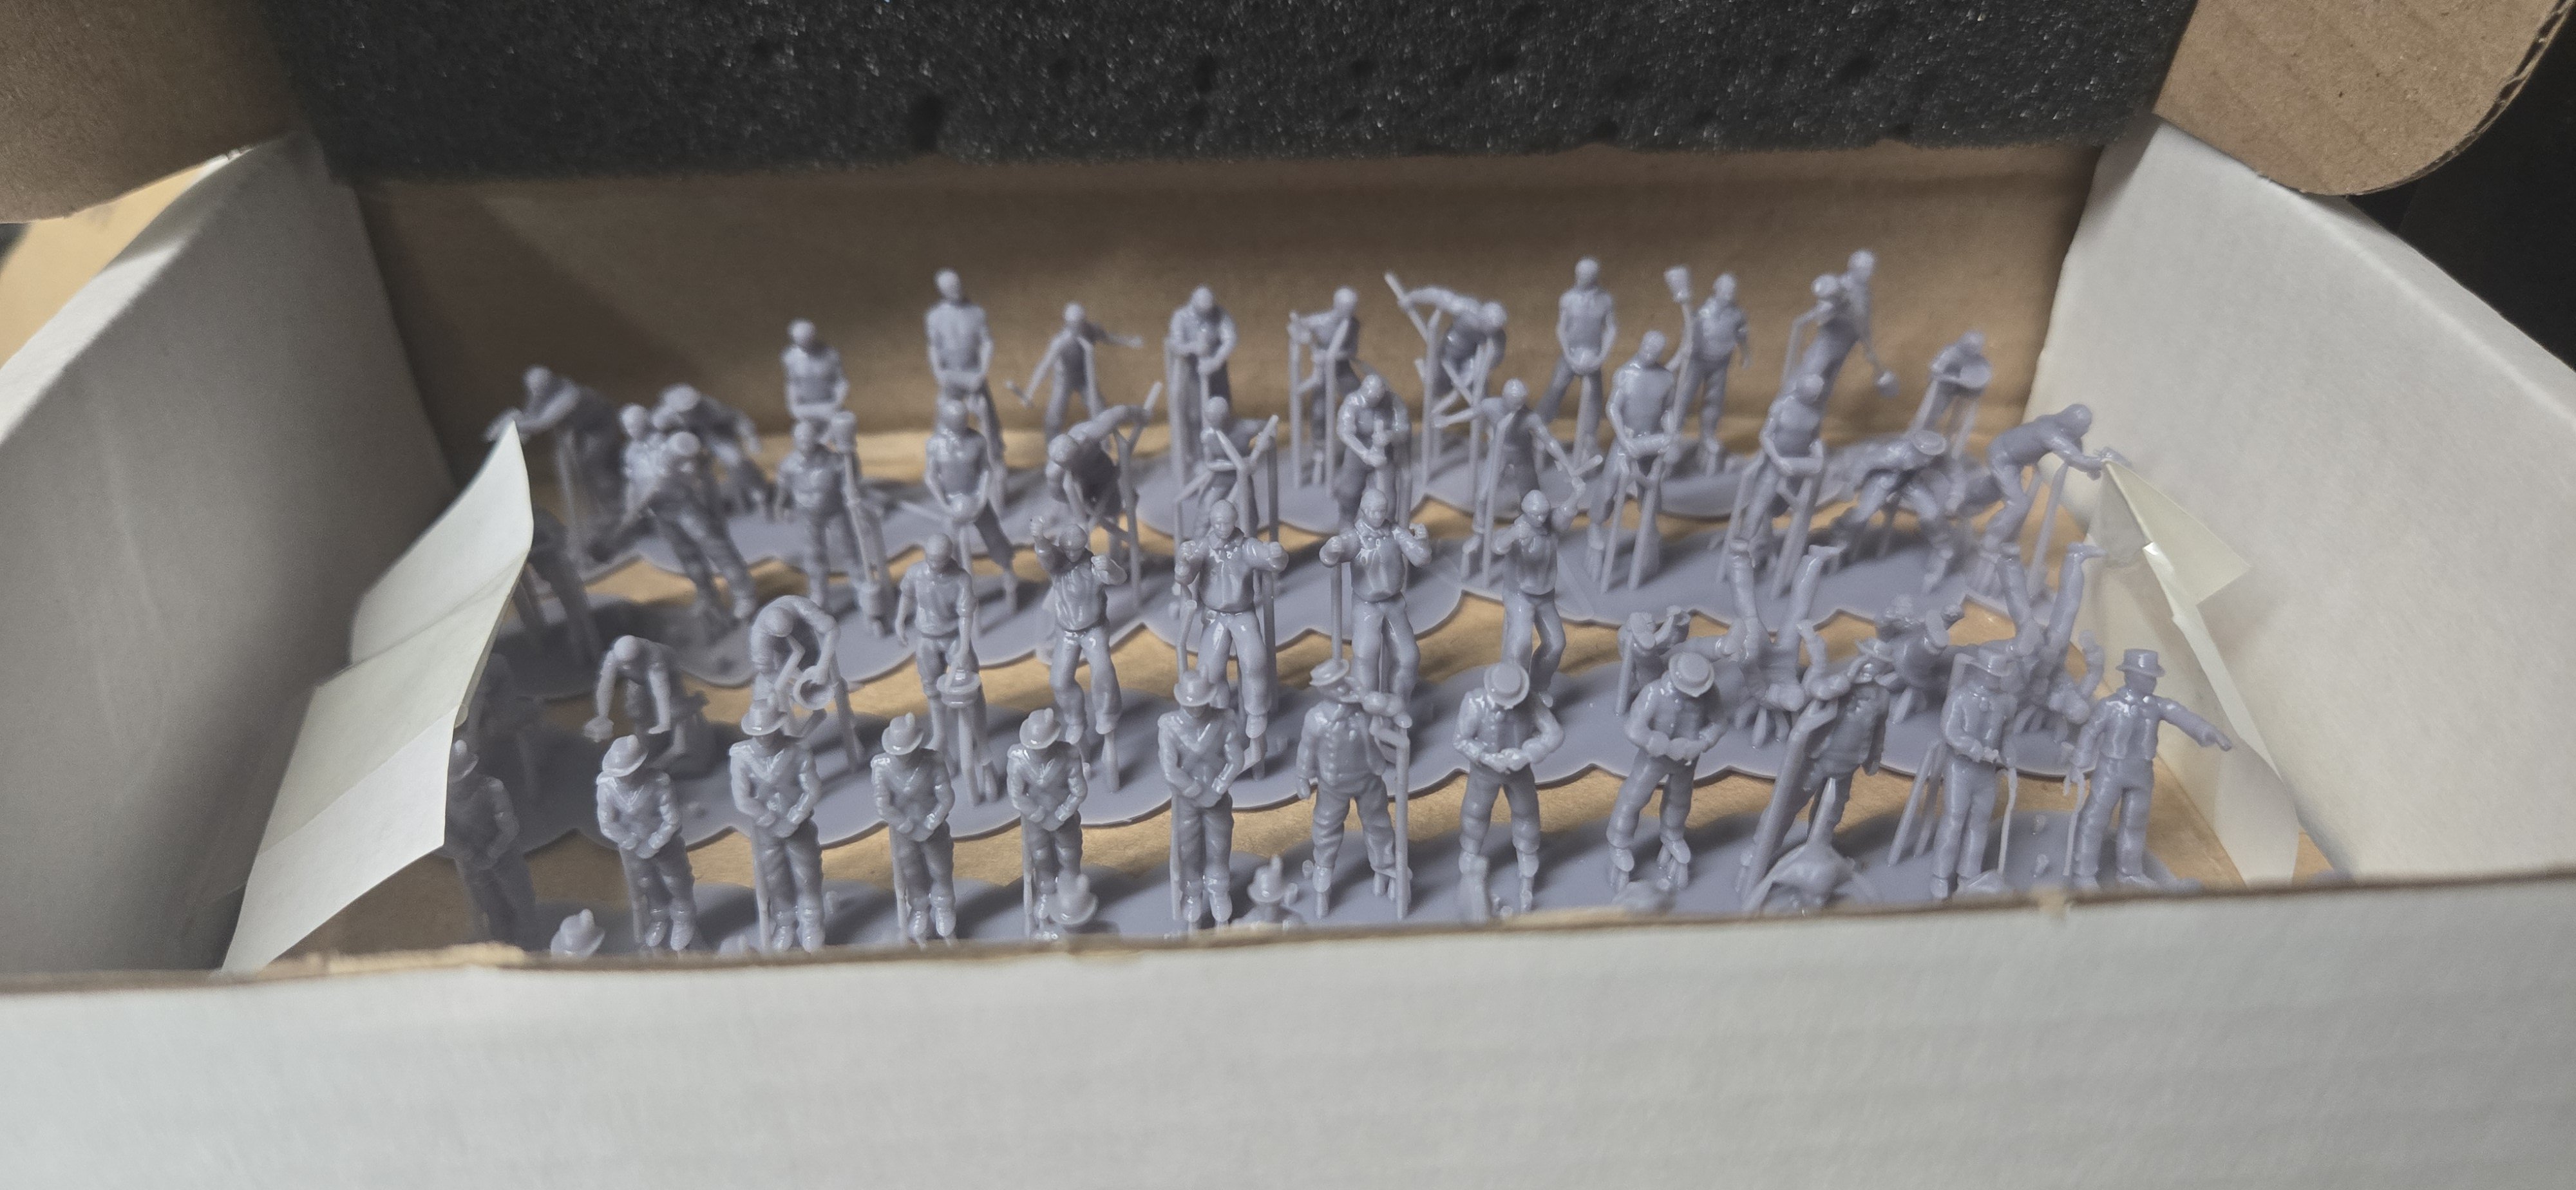
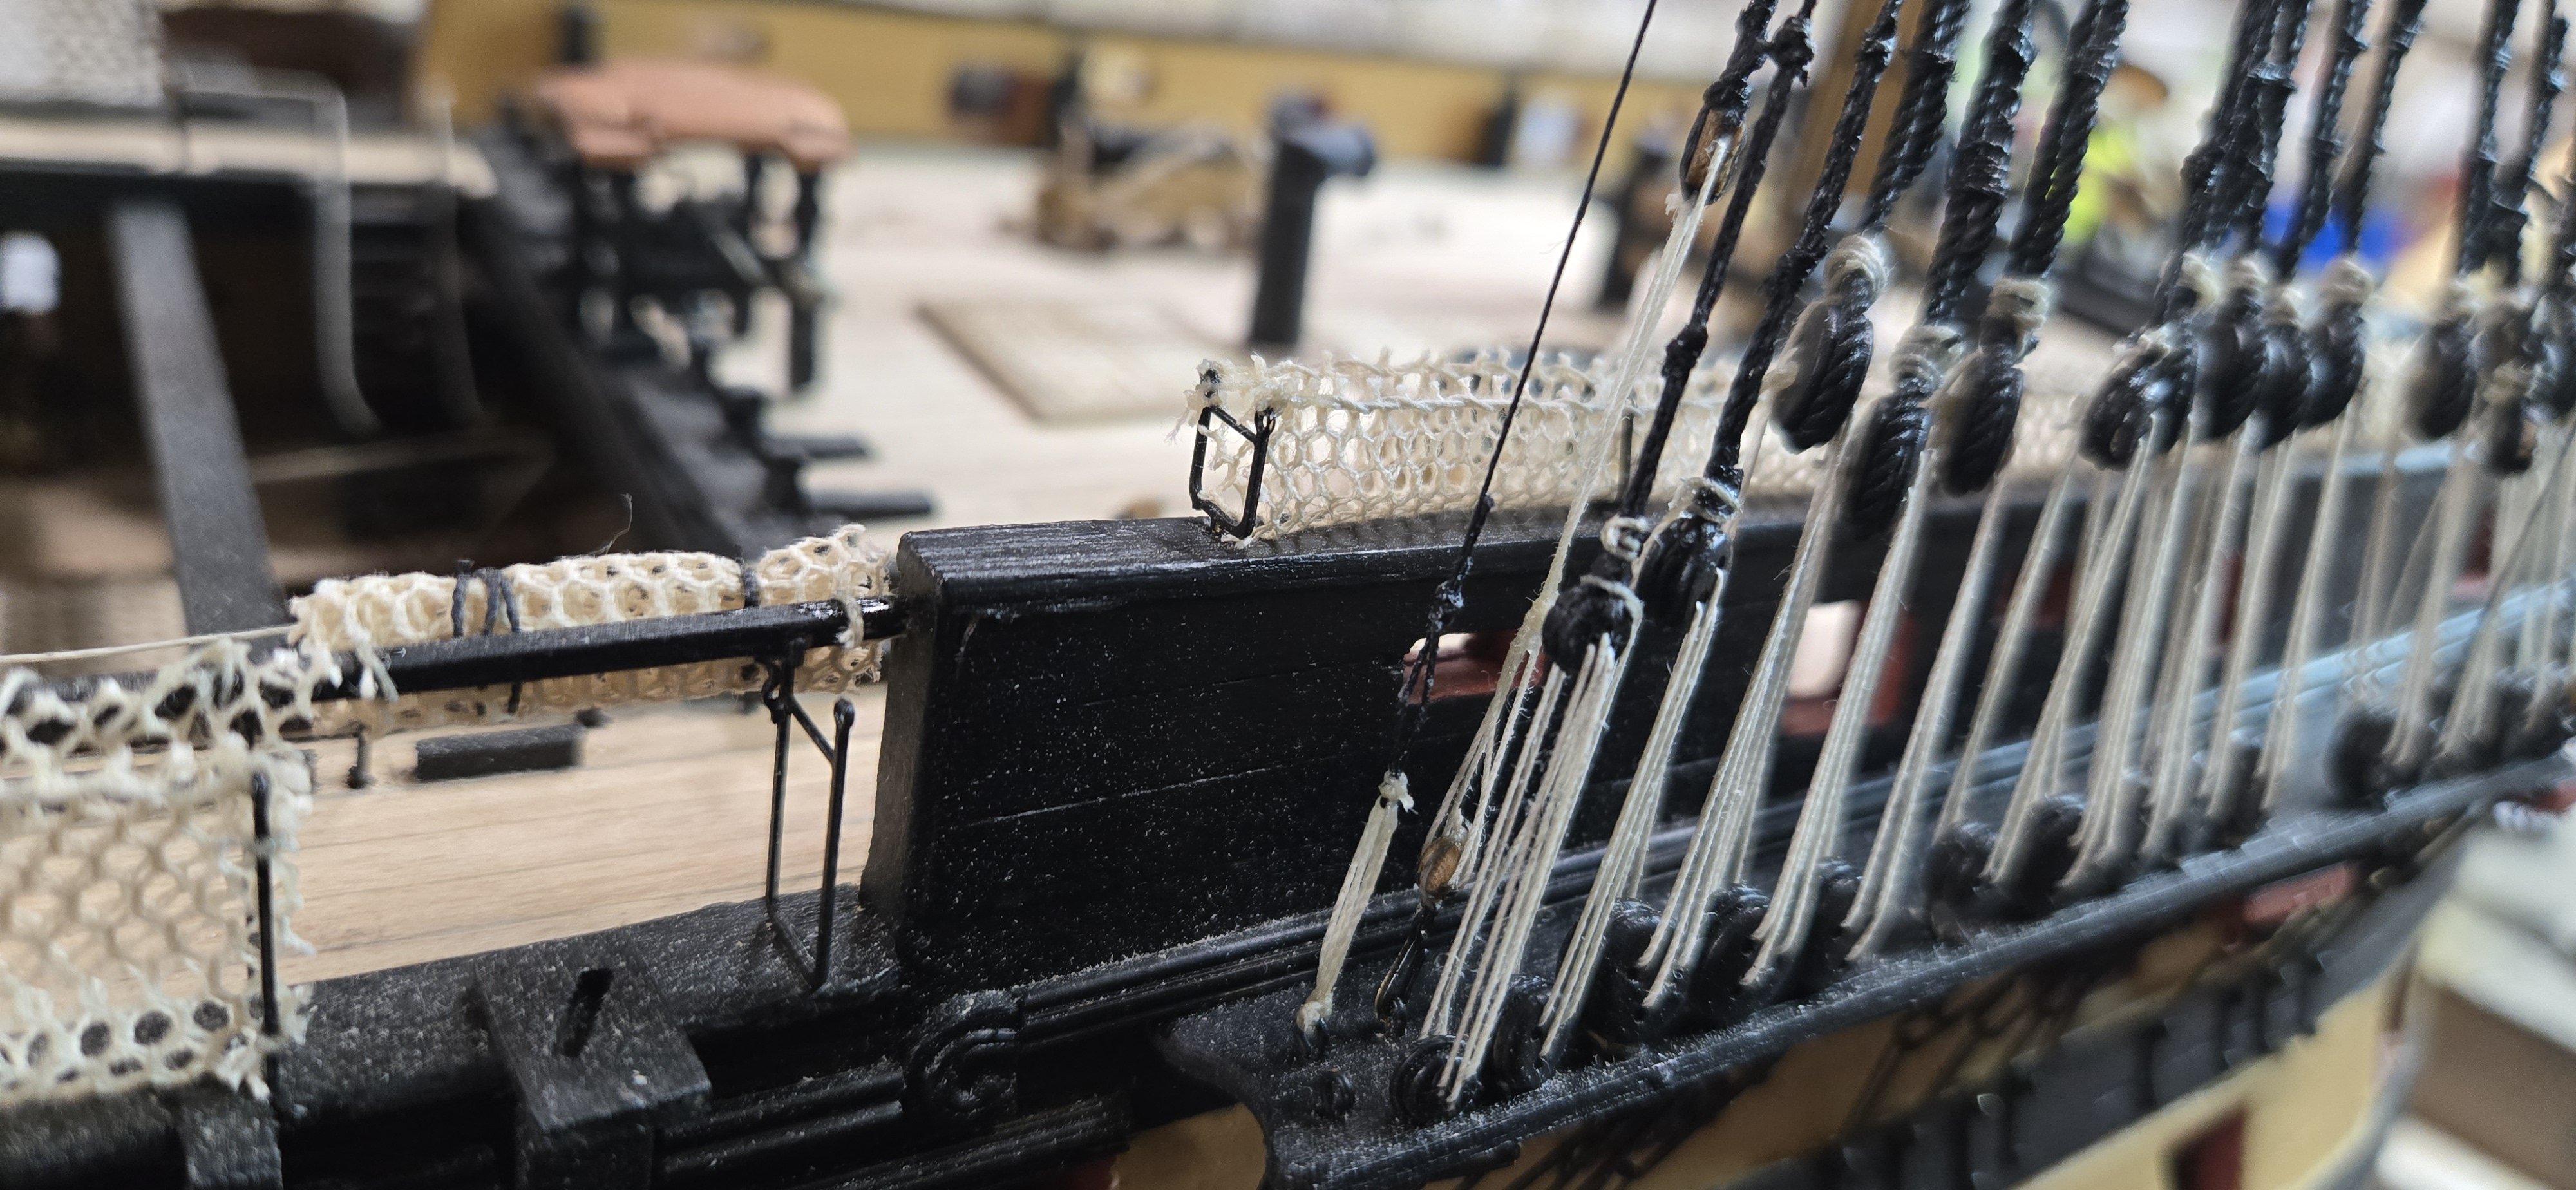
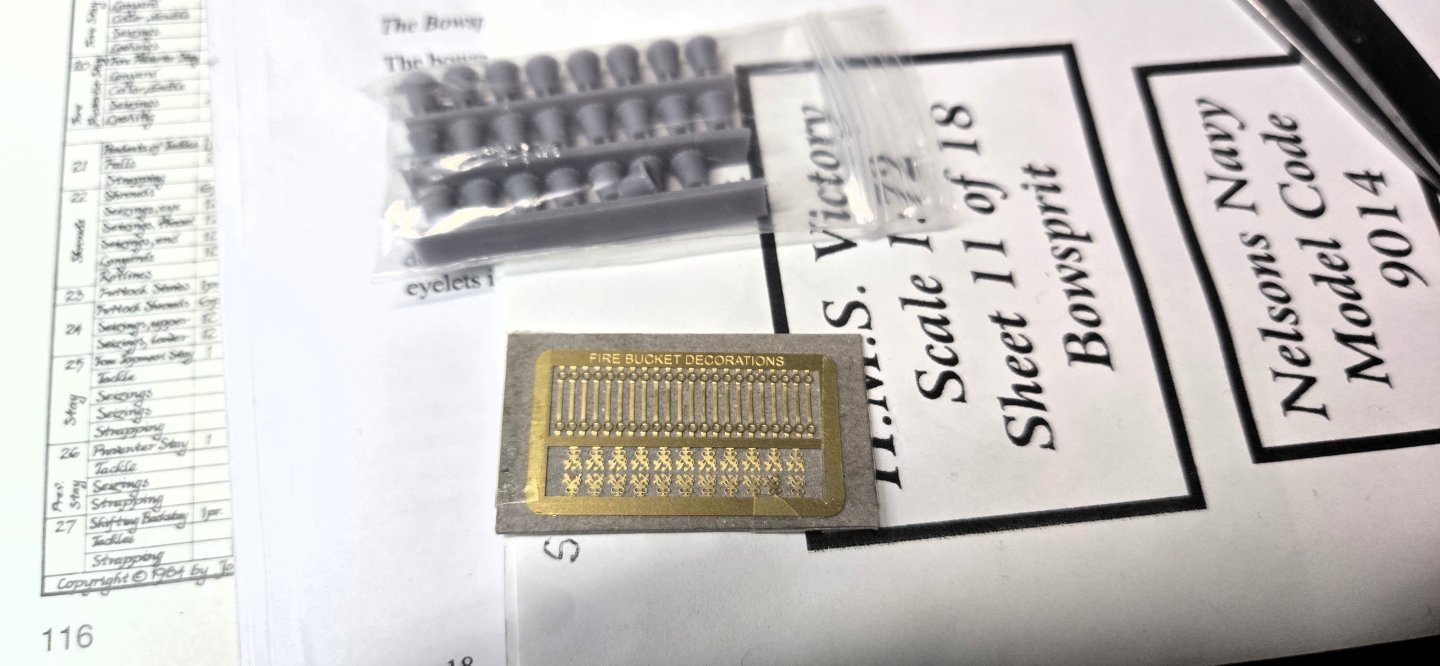
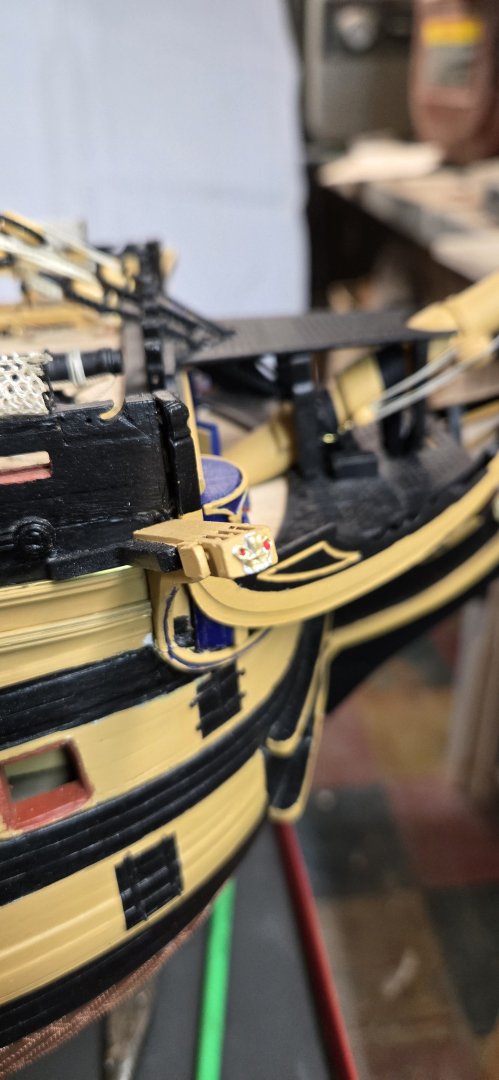
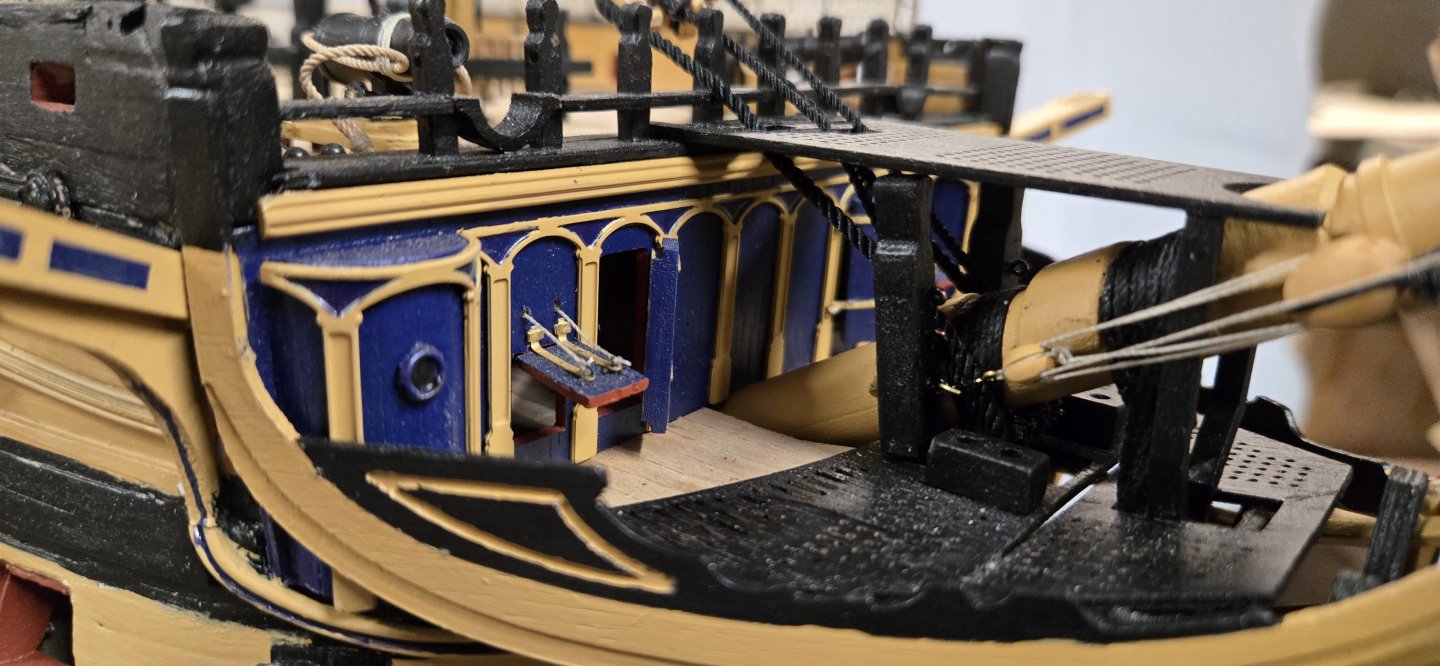
One of the things I promised to myself was to try and keep 3rd party enhancements to an absolute minimum. They can and will create a rabbit hole that is almost impossible to get out of once you jump in. That being said, I tried many ways to create the fire pails that hang just about the helm. The kit PE pails just look weird. Too tall and skinny. I tried to add rings around them and even bought decal paper from my printer to see if I could create the logo. All of them just looked pathetic. So I turned to Woody's and opted for their 3D printed versions and PE decals. I haven't started them, but they look pretty good and I'm optimistic. ...and since I was already in the hole, I saw the 3D printed crew members. I mean, how cool would that be to add 'real' people to the build. I have seen a number of posts where the builder has commented that people who look at finished builds relate more when there are characters in the model to add depth and perspective. It will be the last thing I do but it might be fun to try and create some live action!!! It's the end of 2025 and the cost of the 2 options from the UK to the USA was about 120 pounds.

-
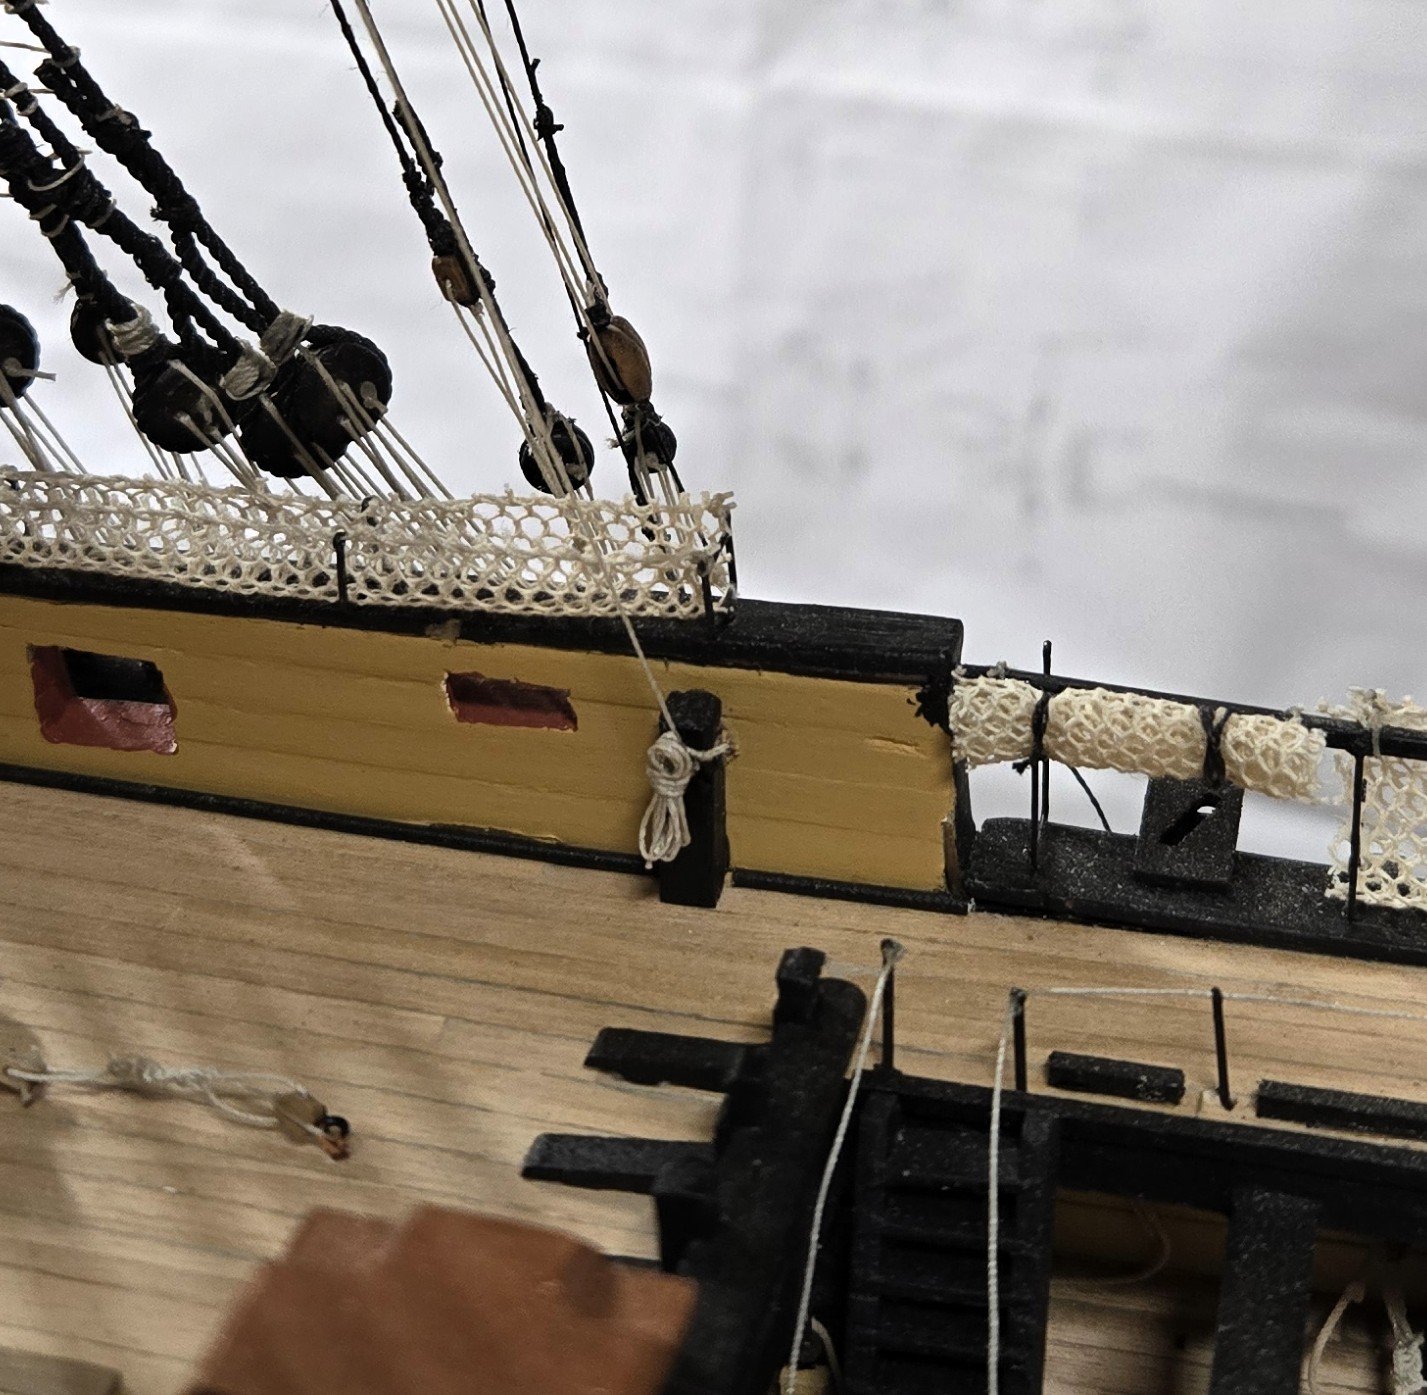
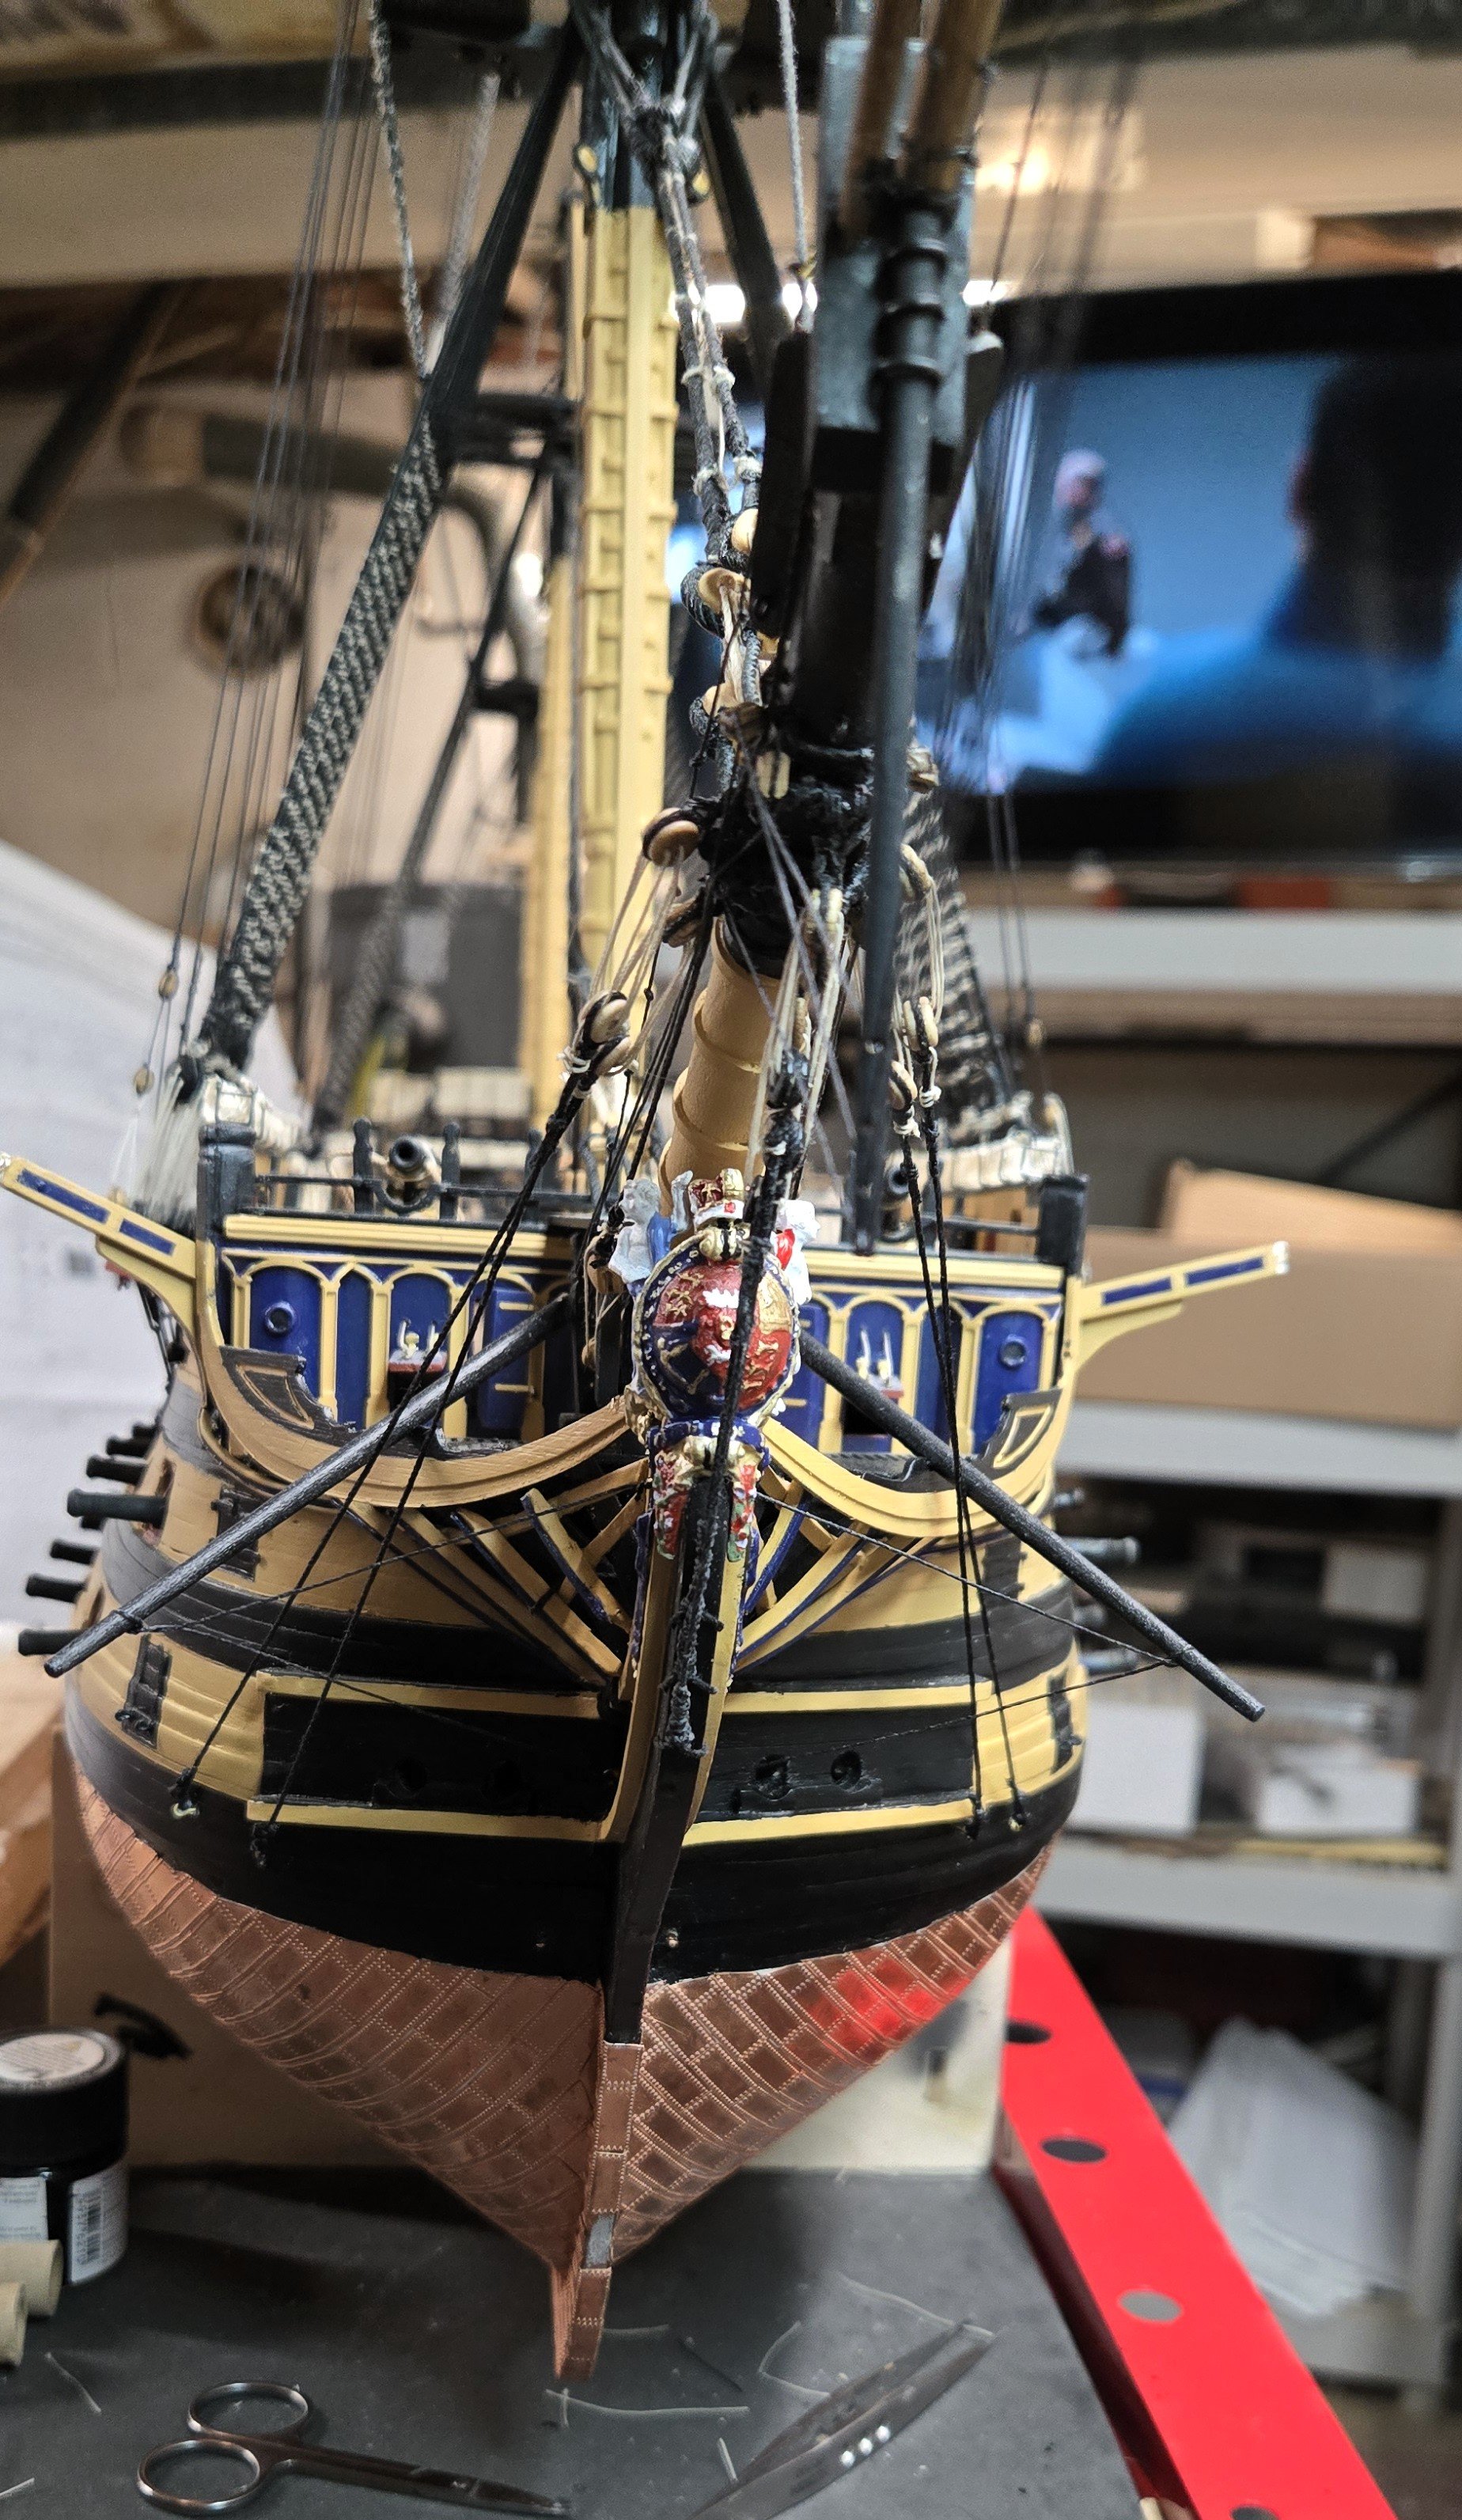
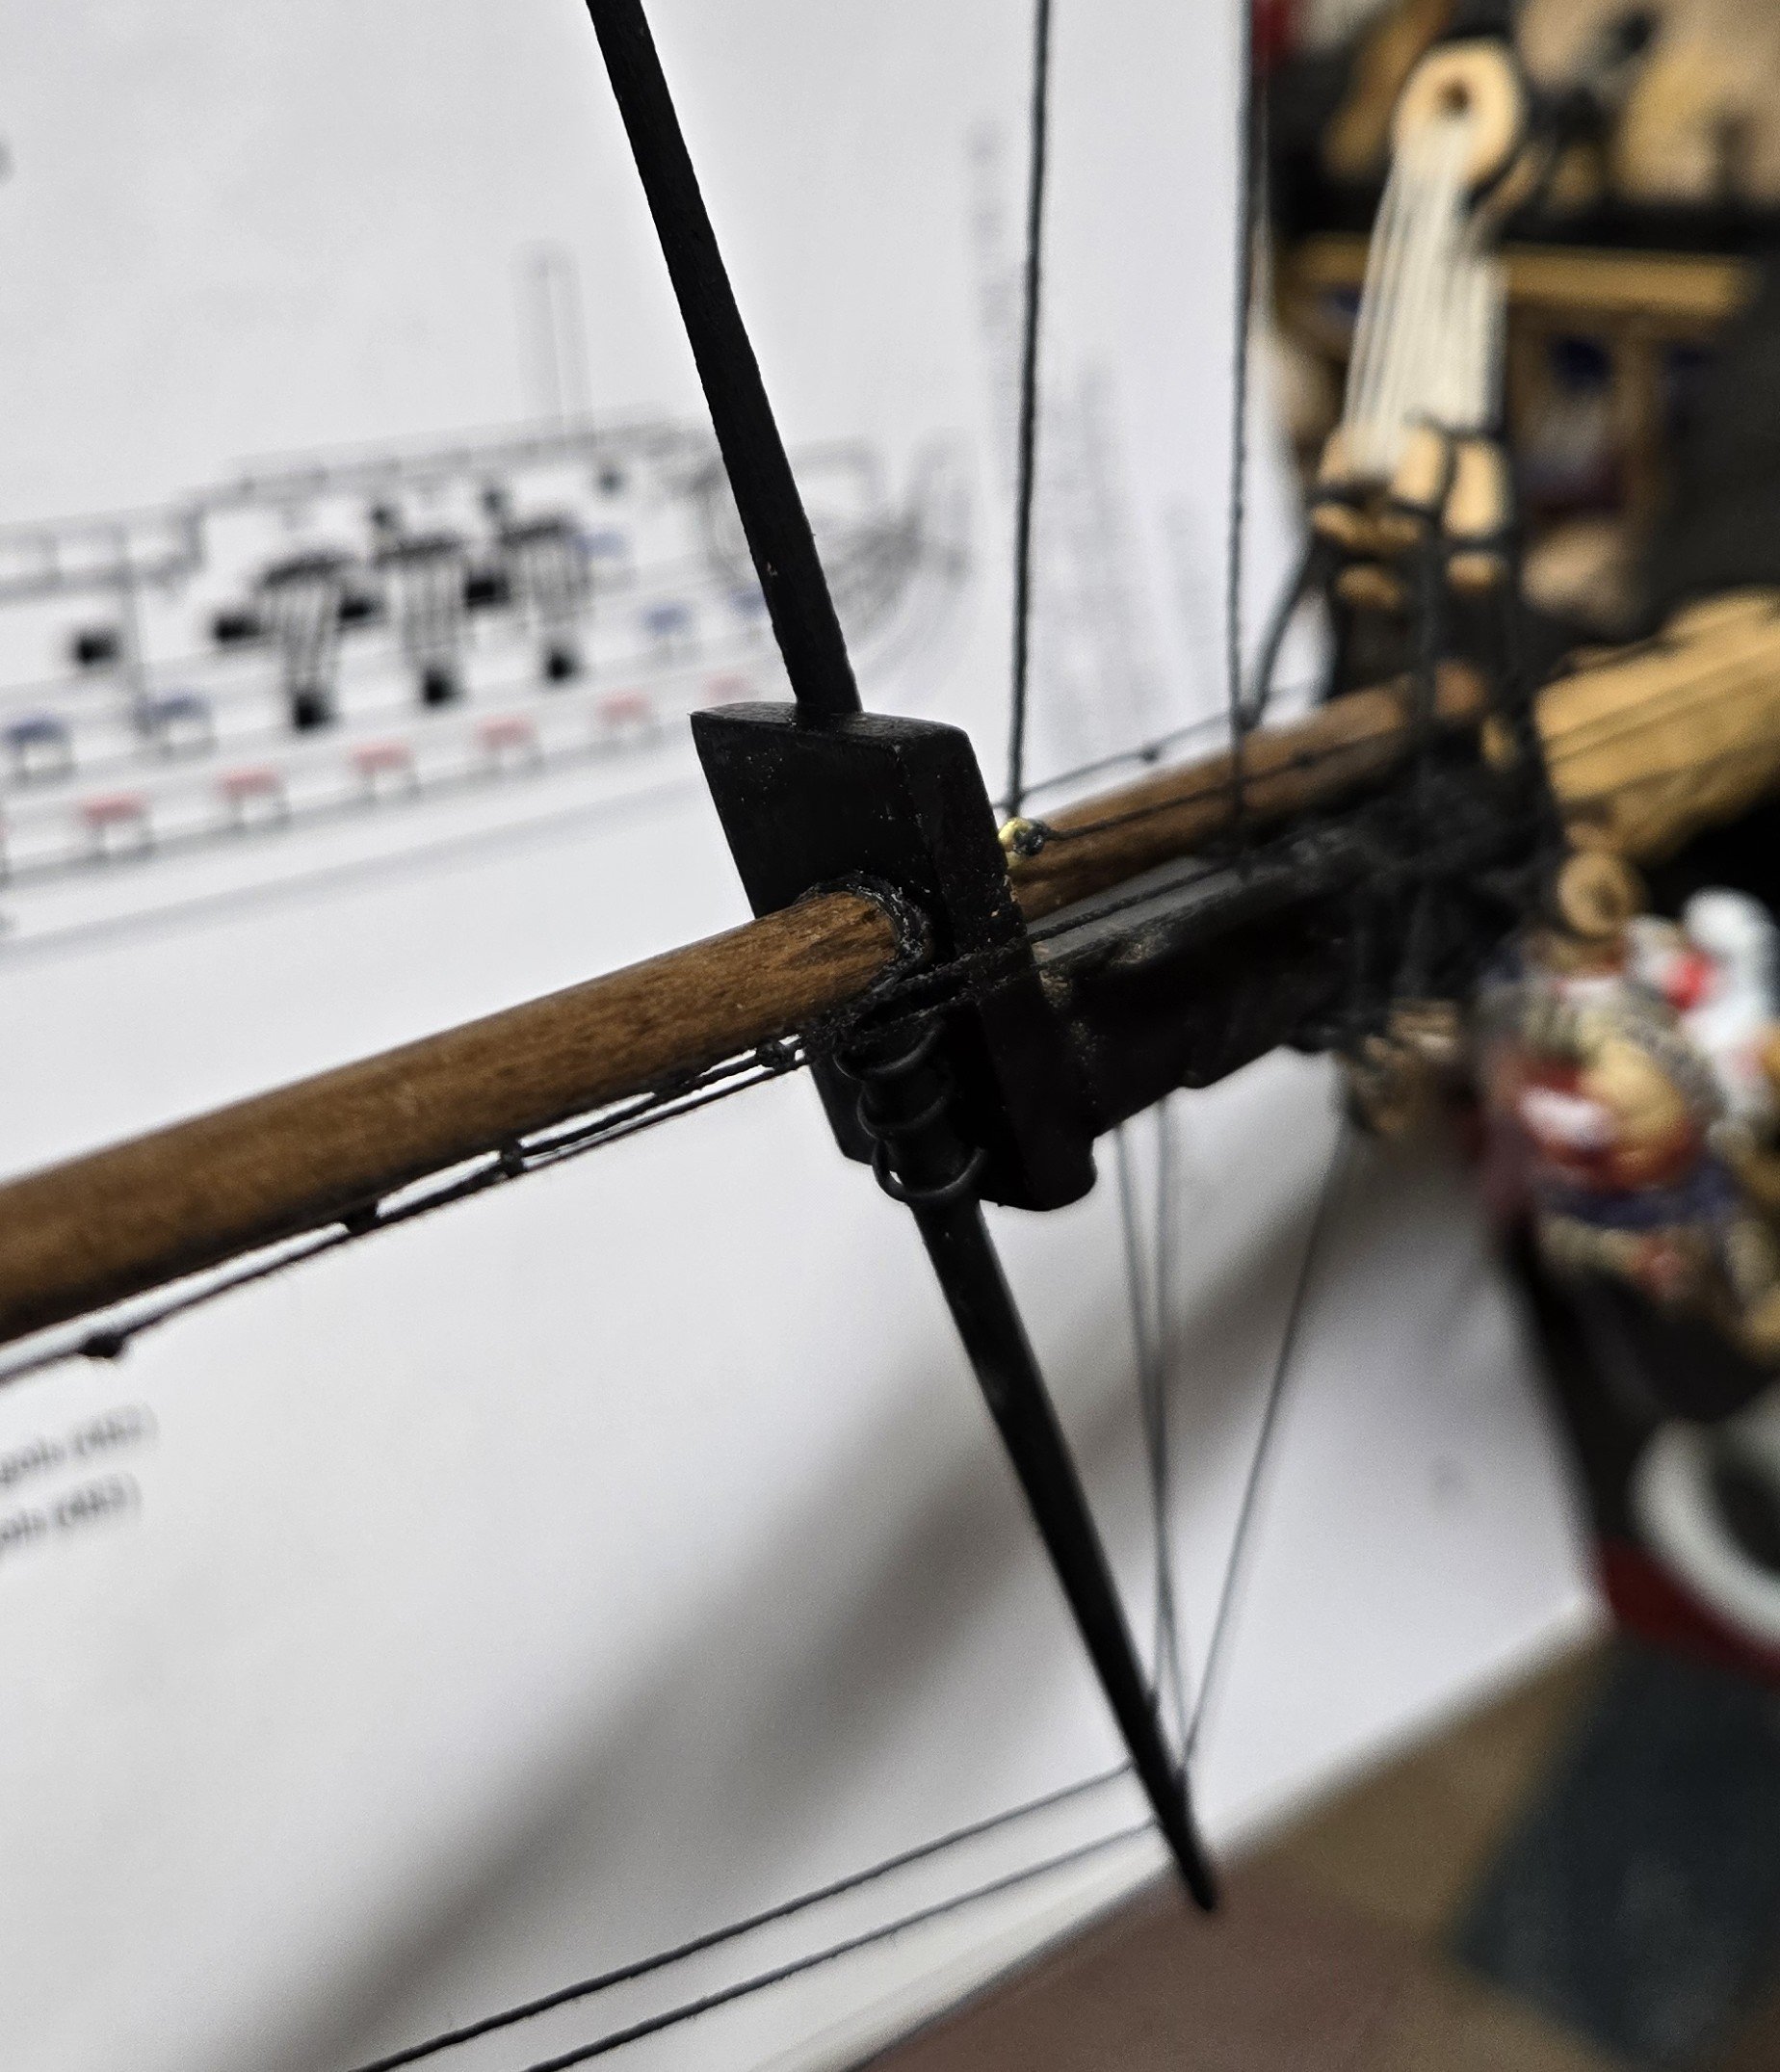
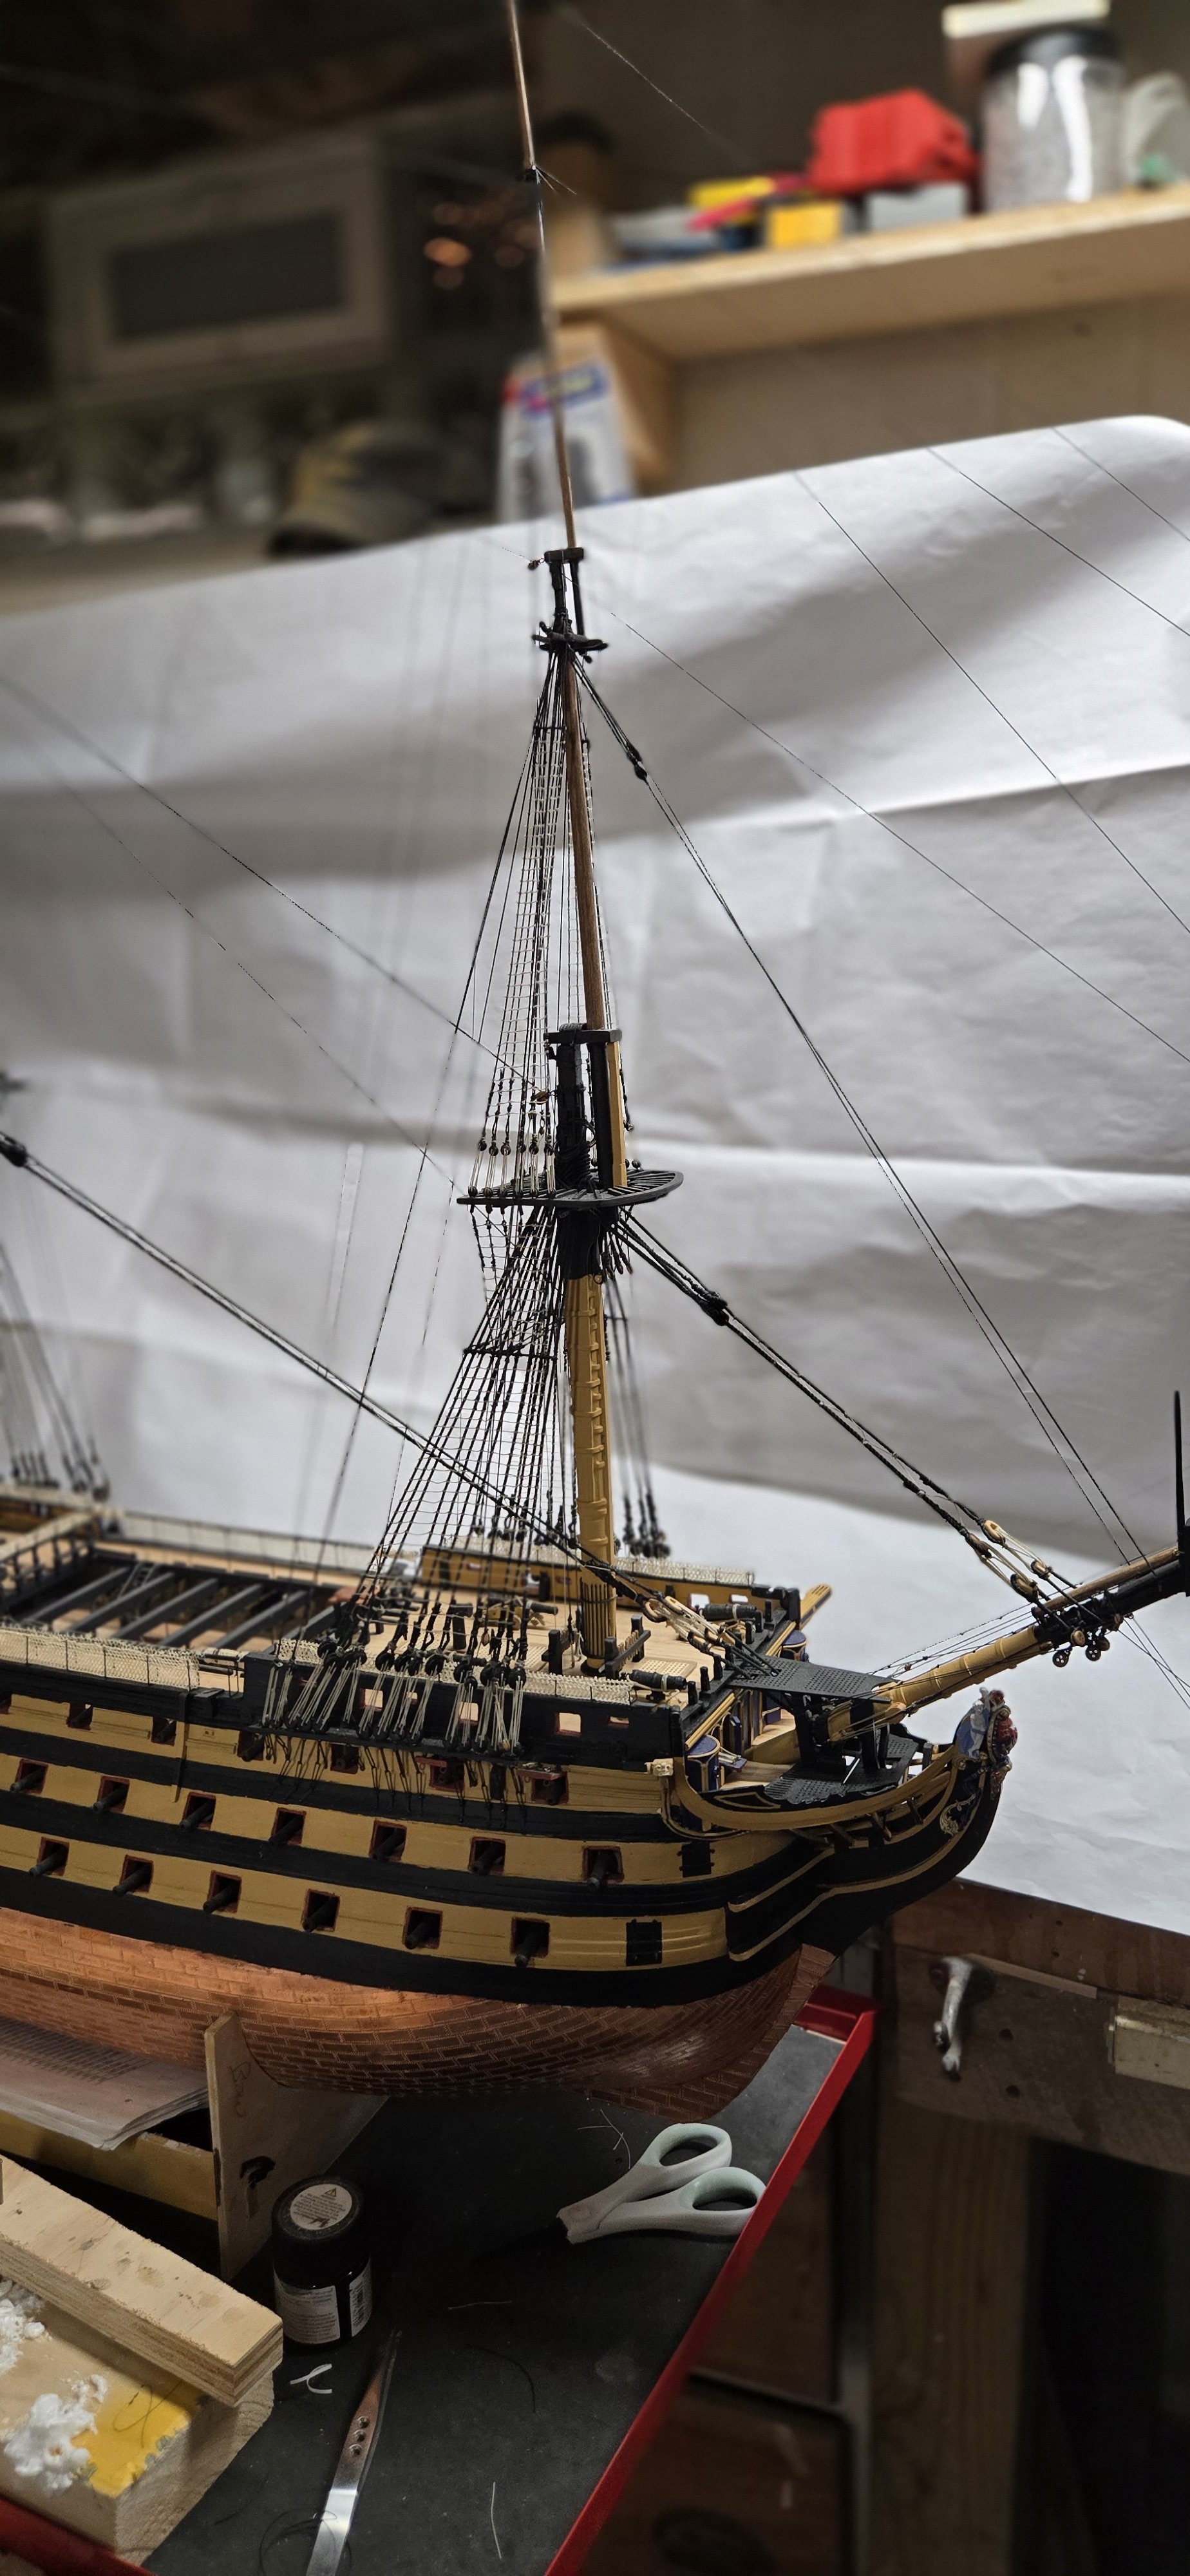
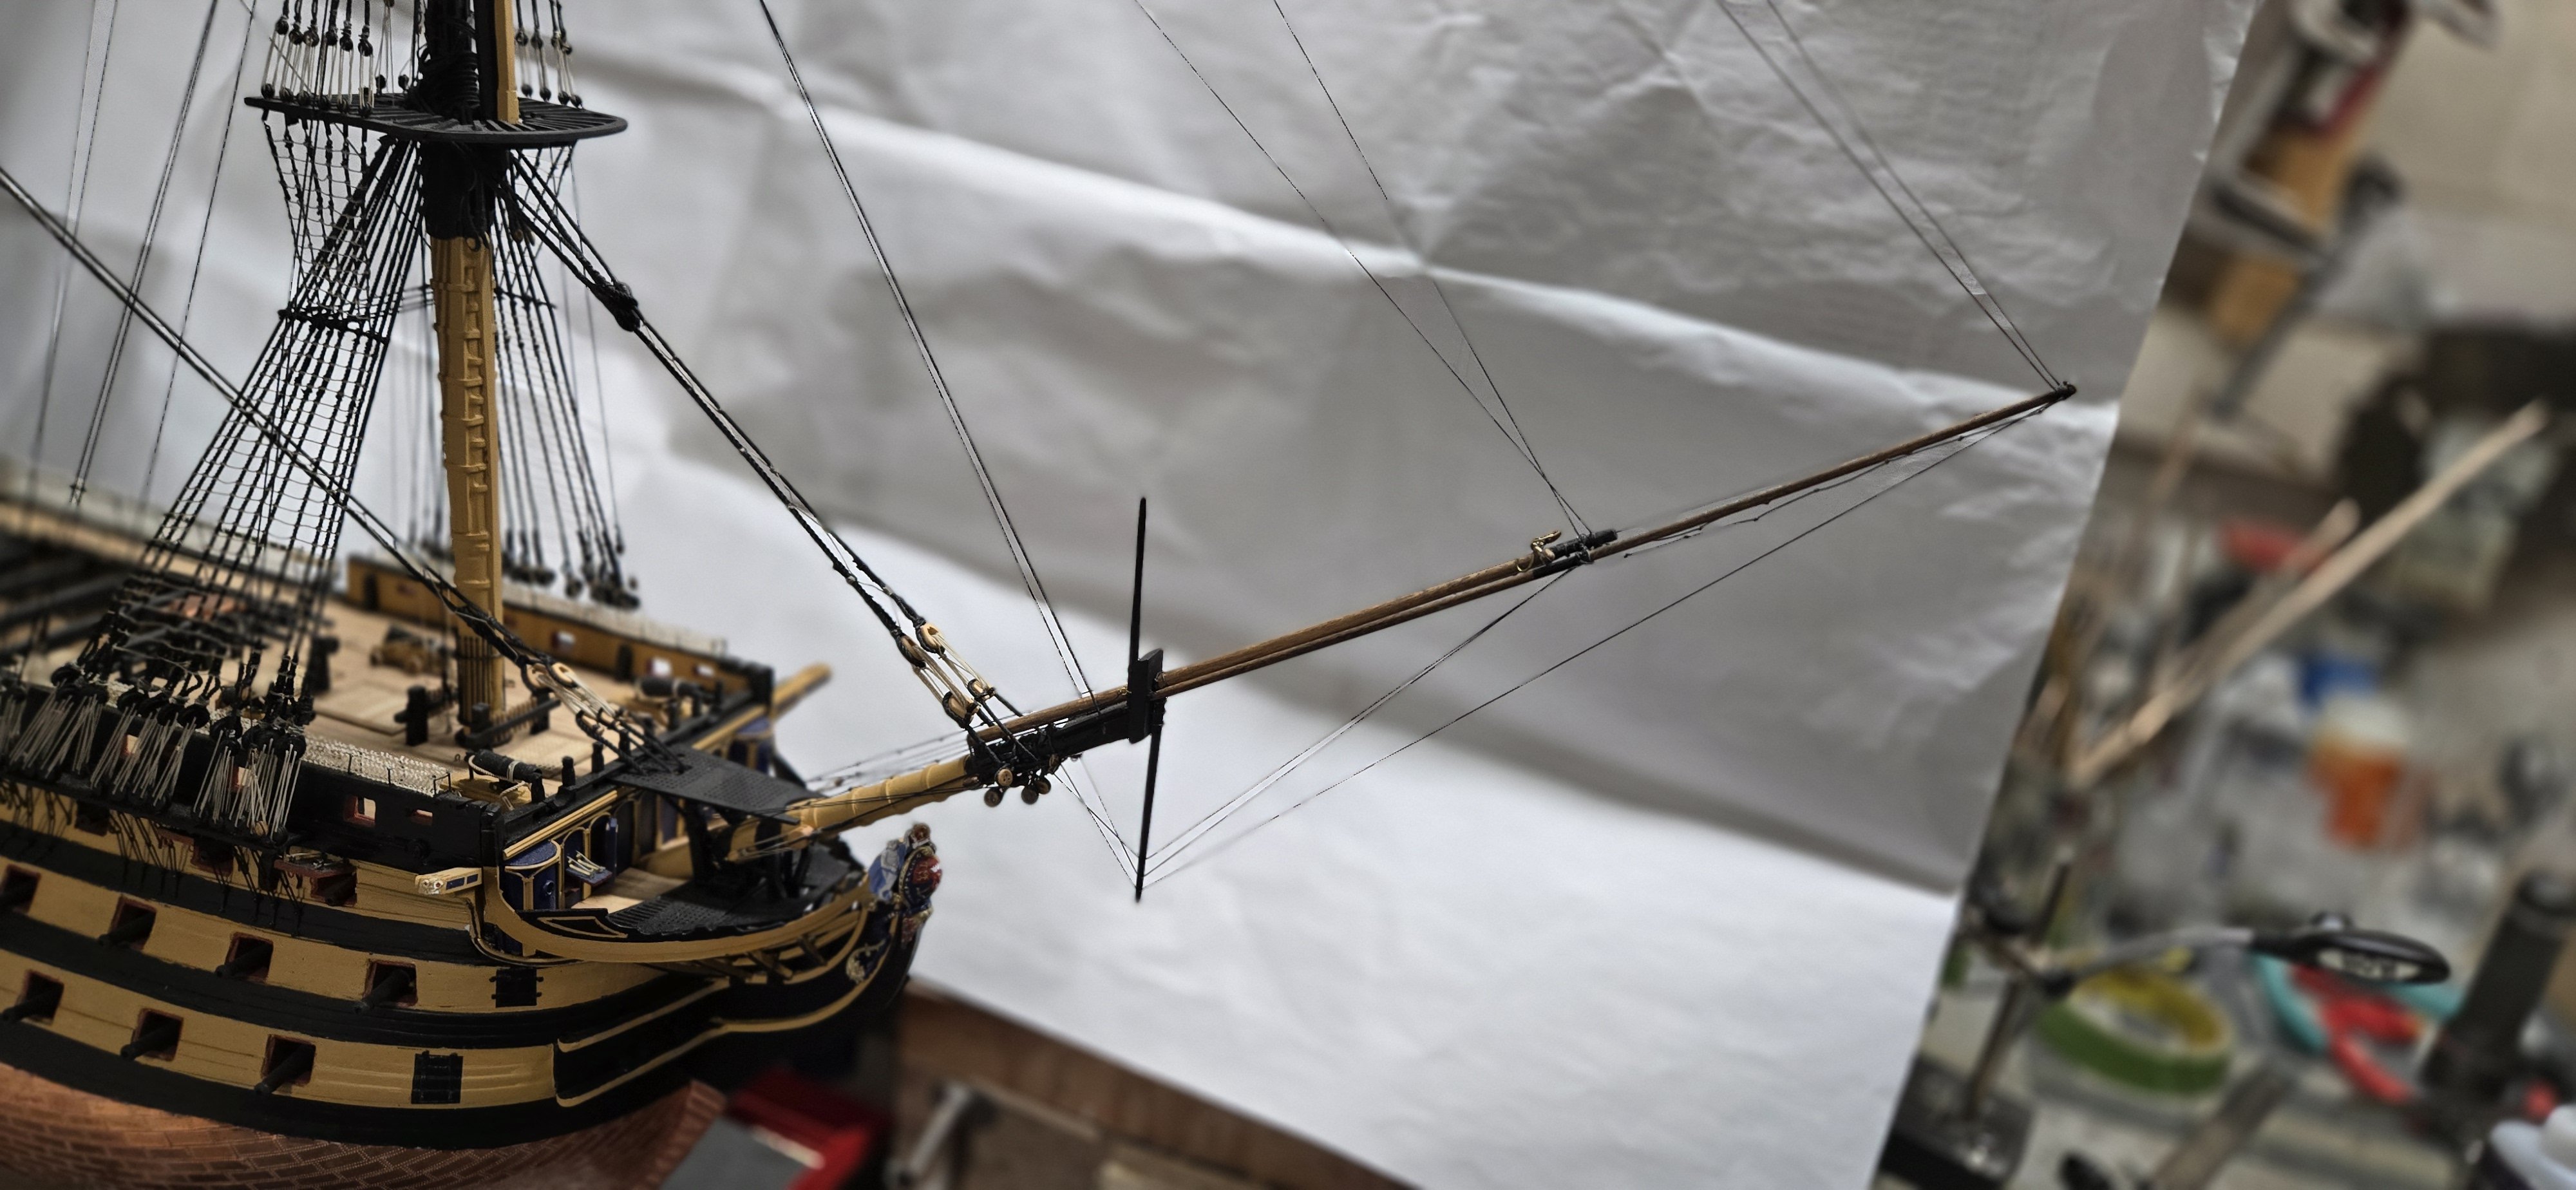
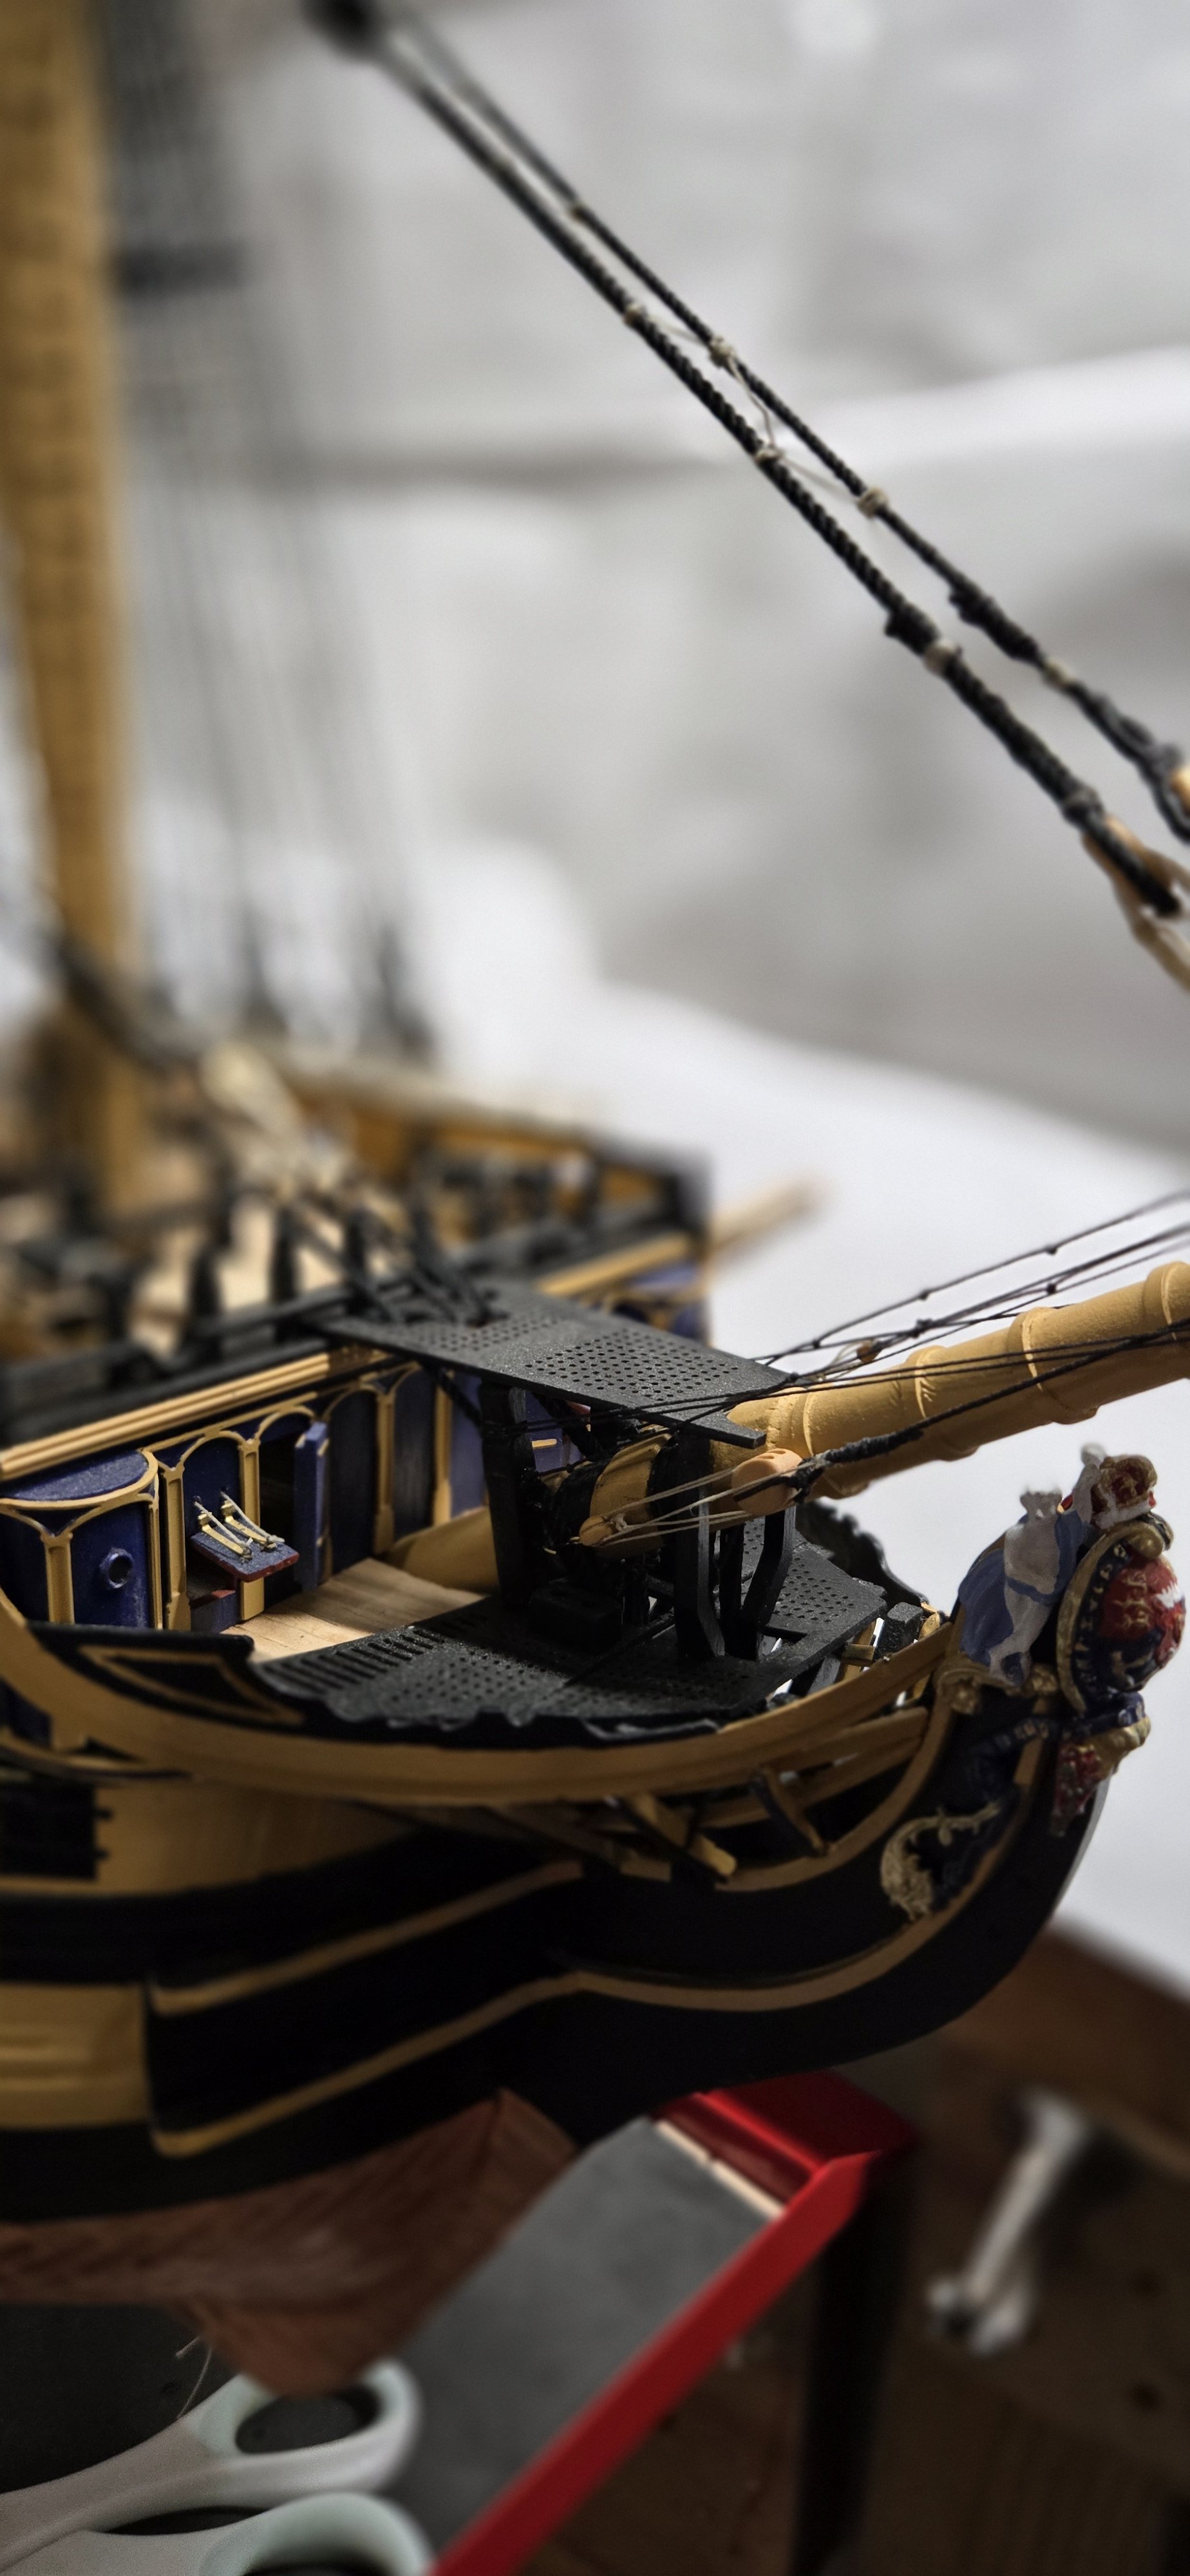
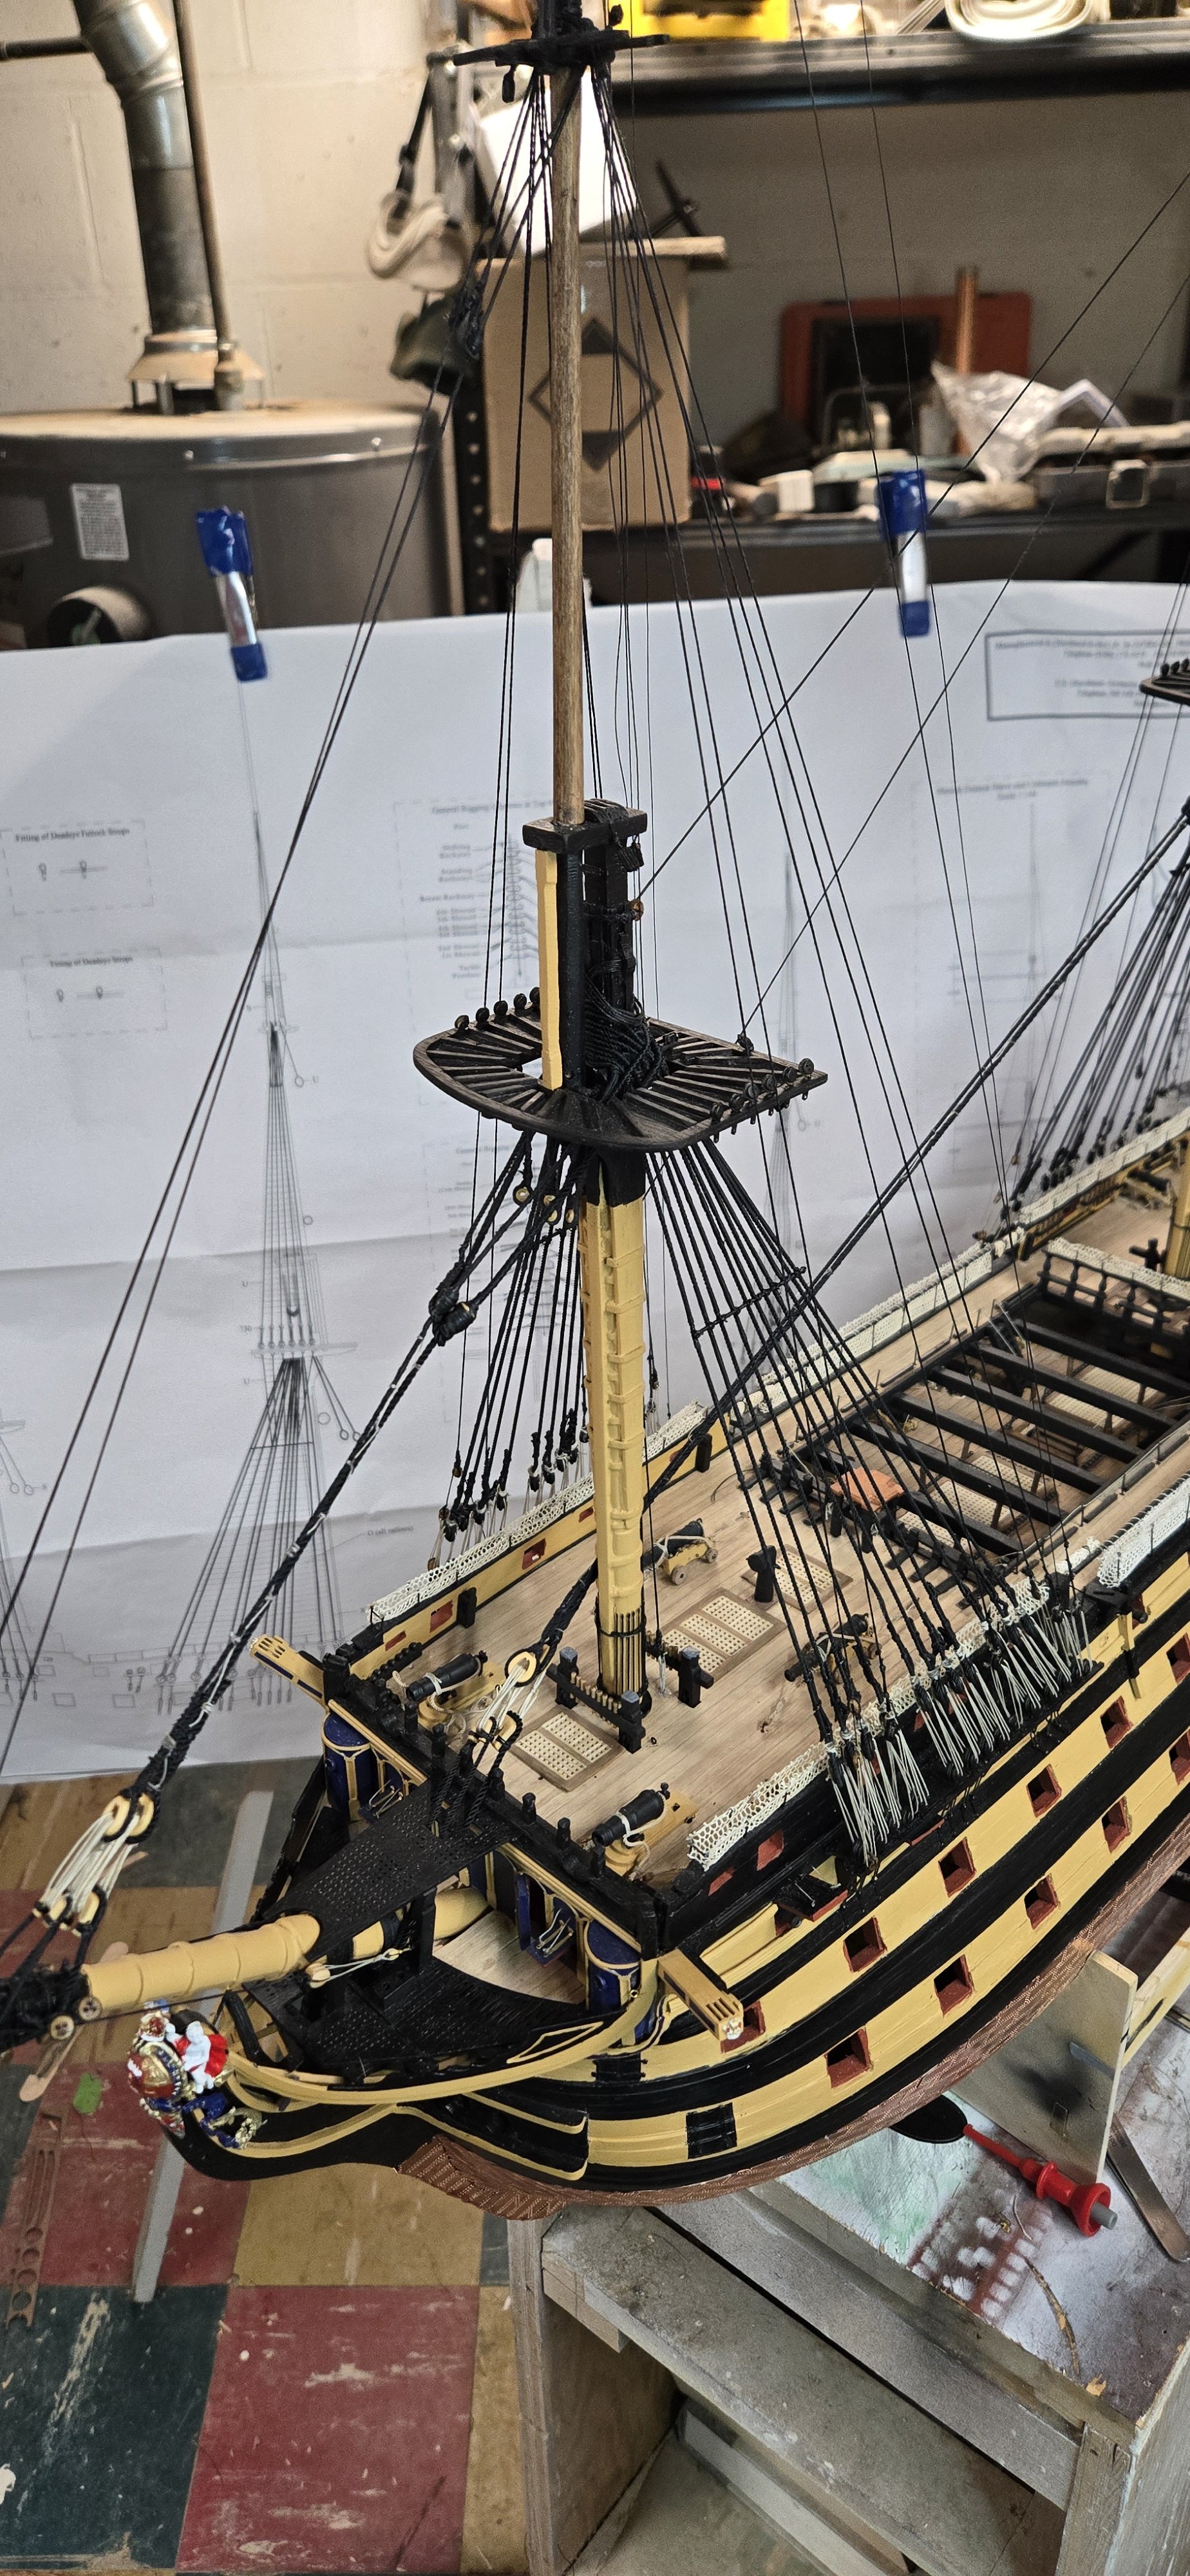
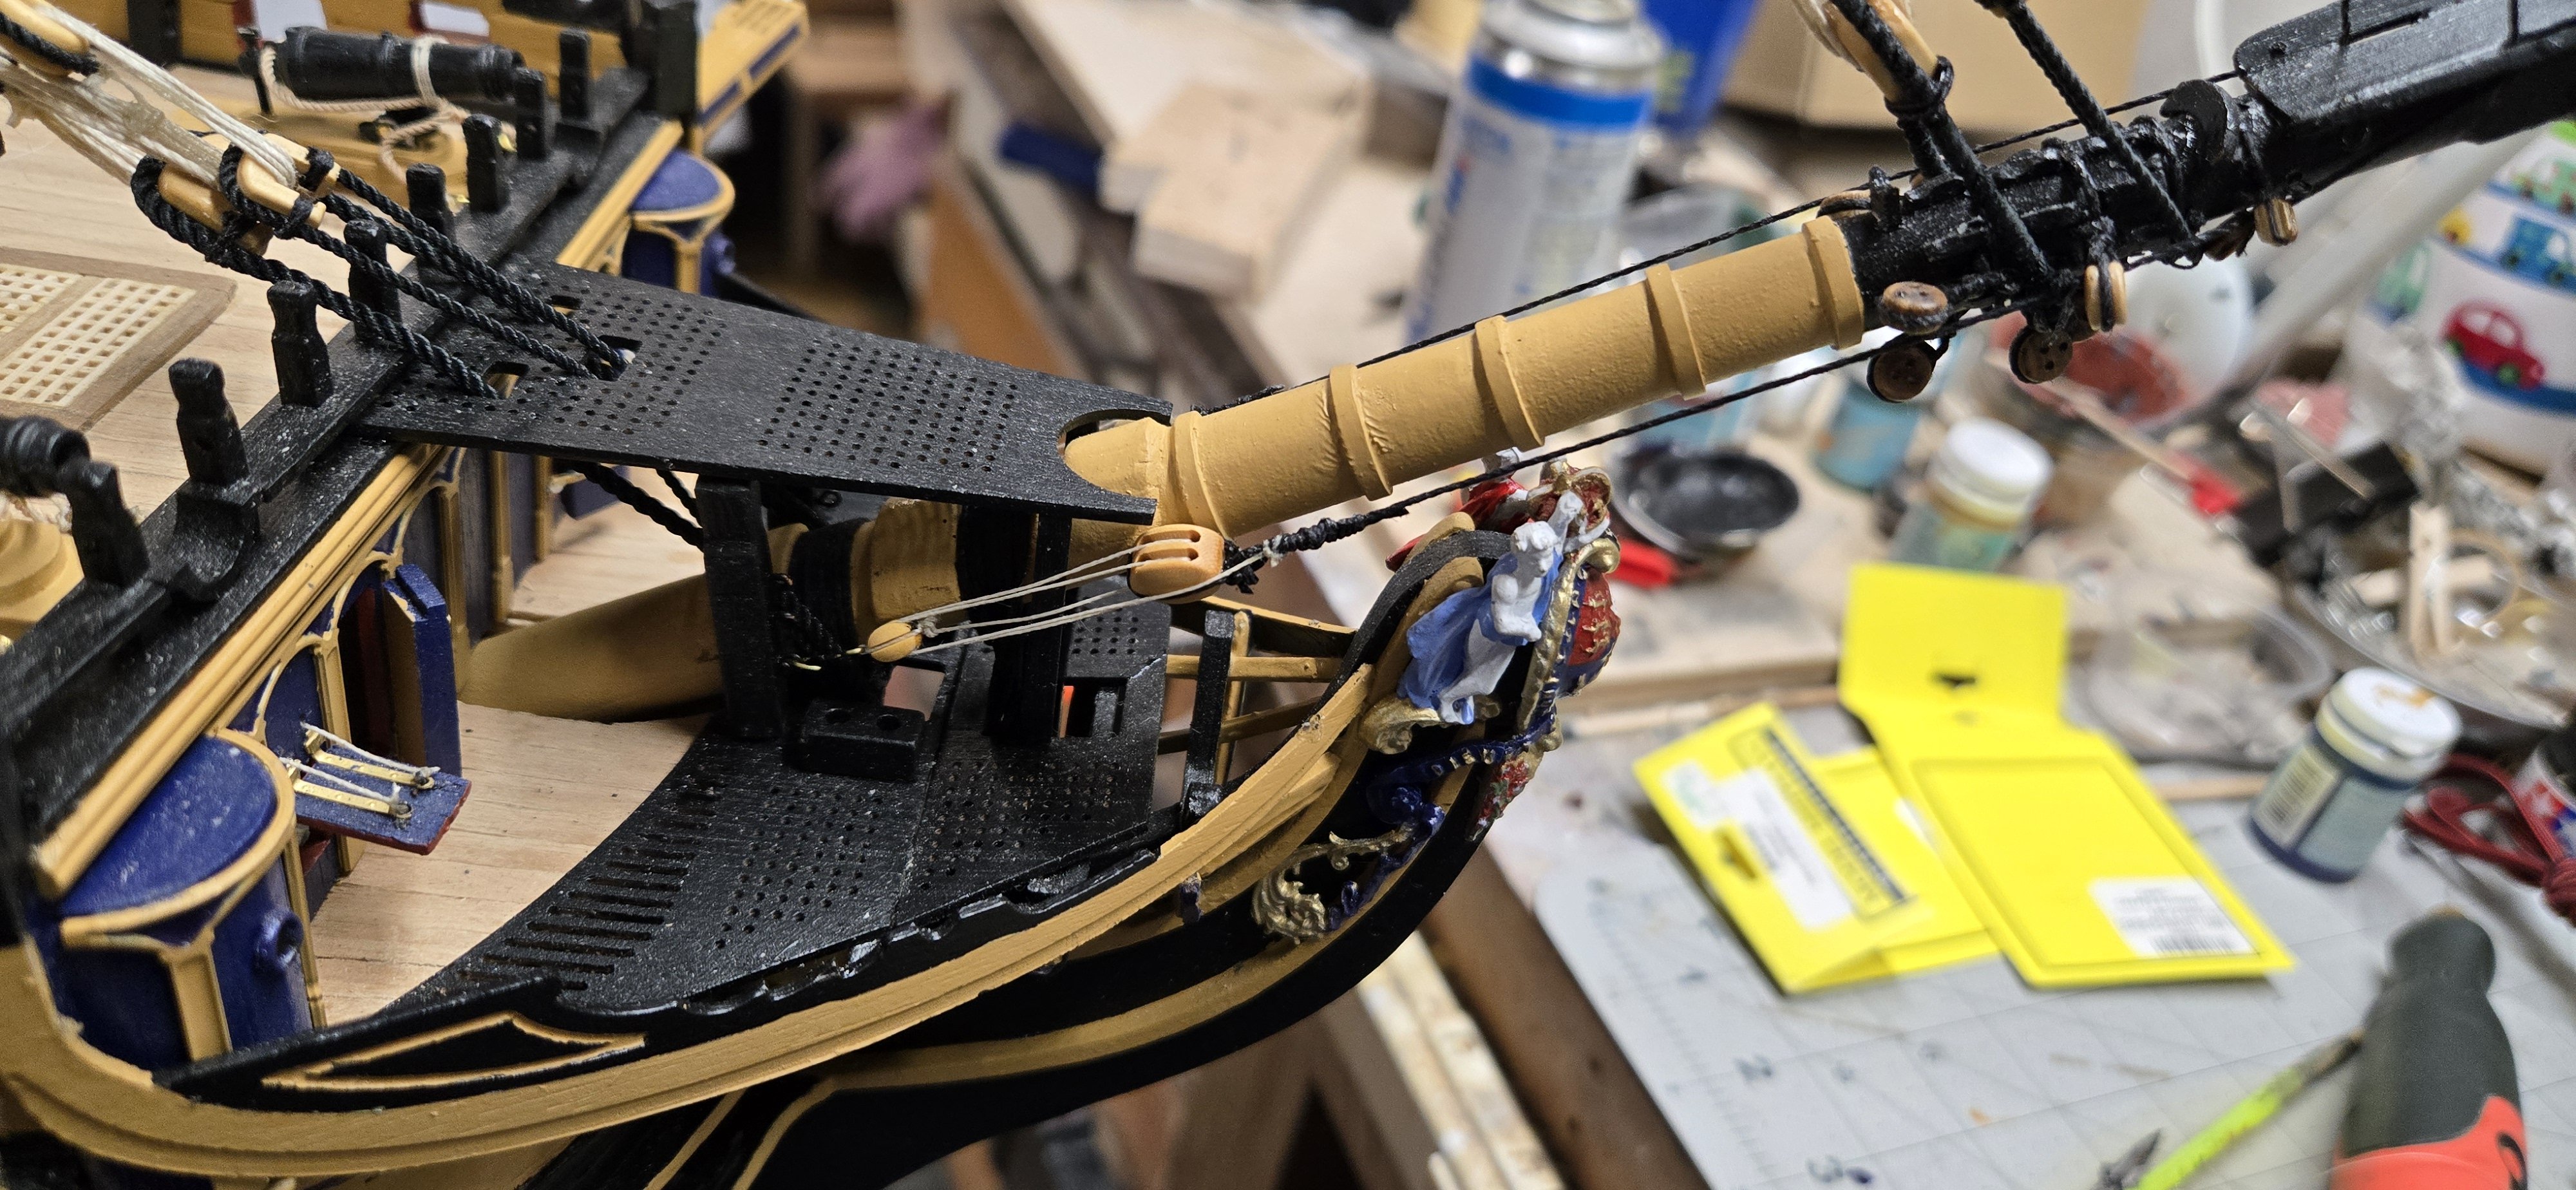
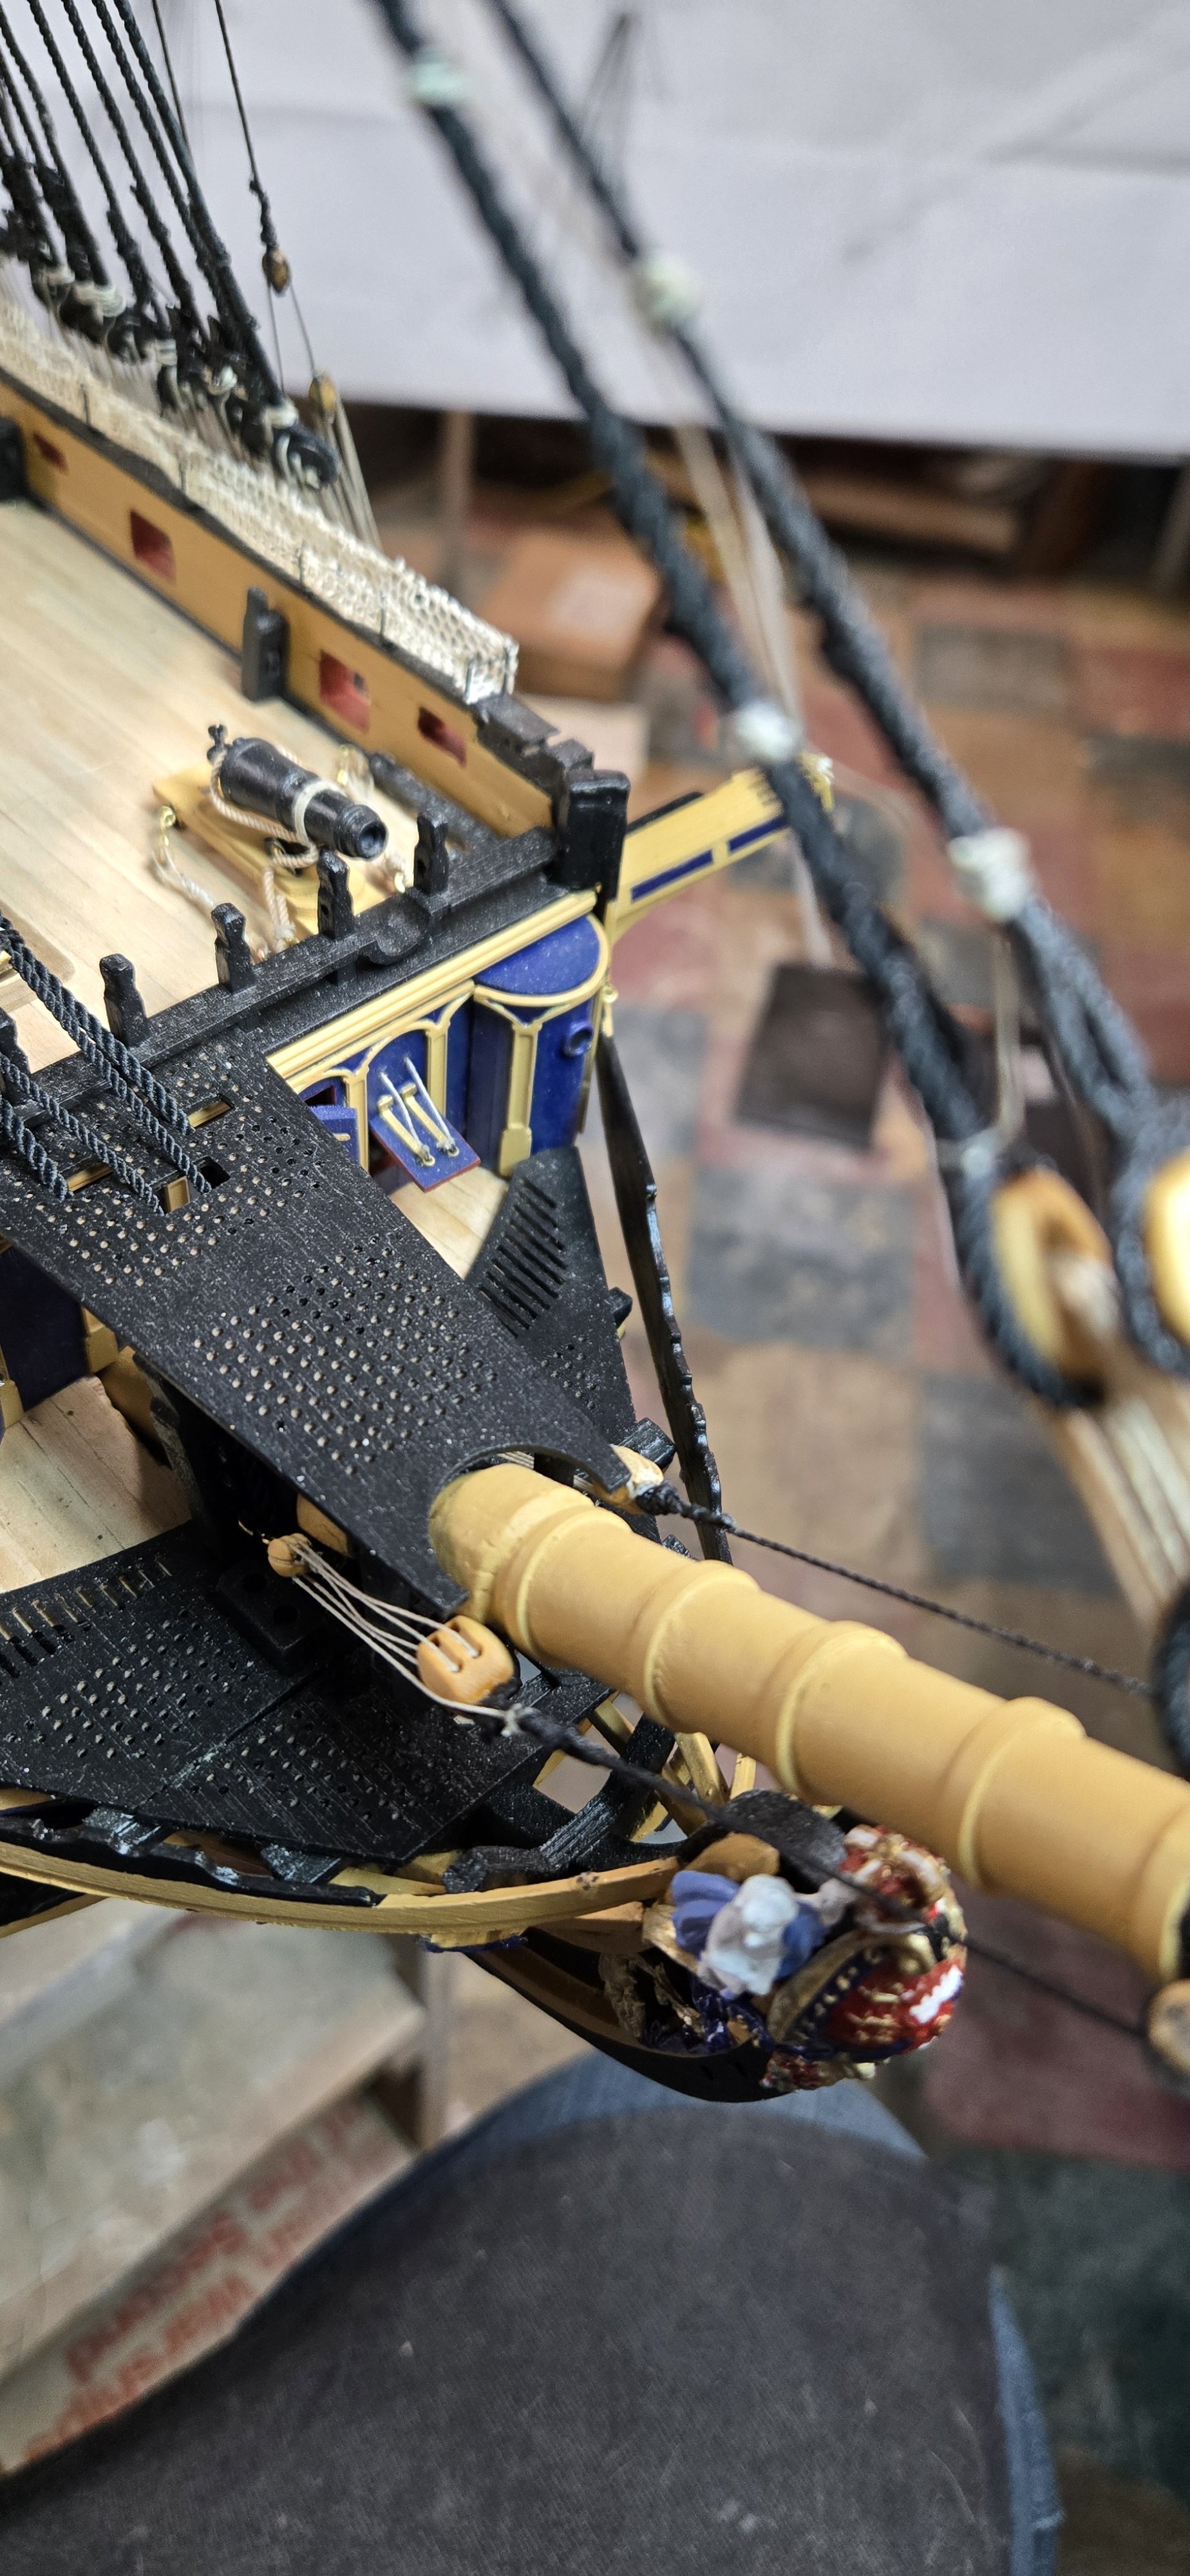
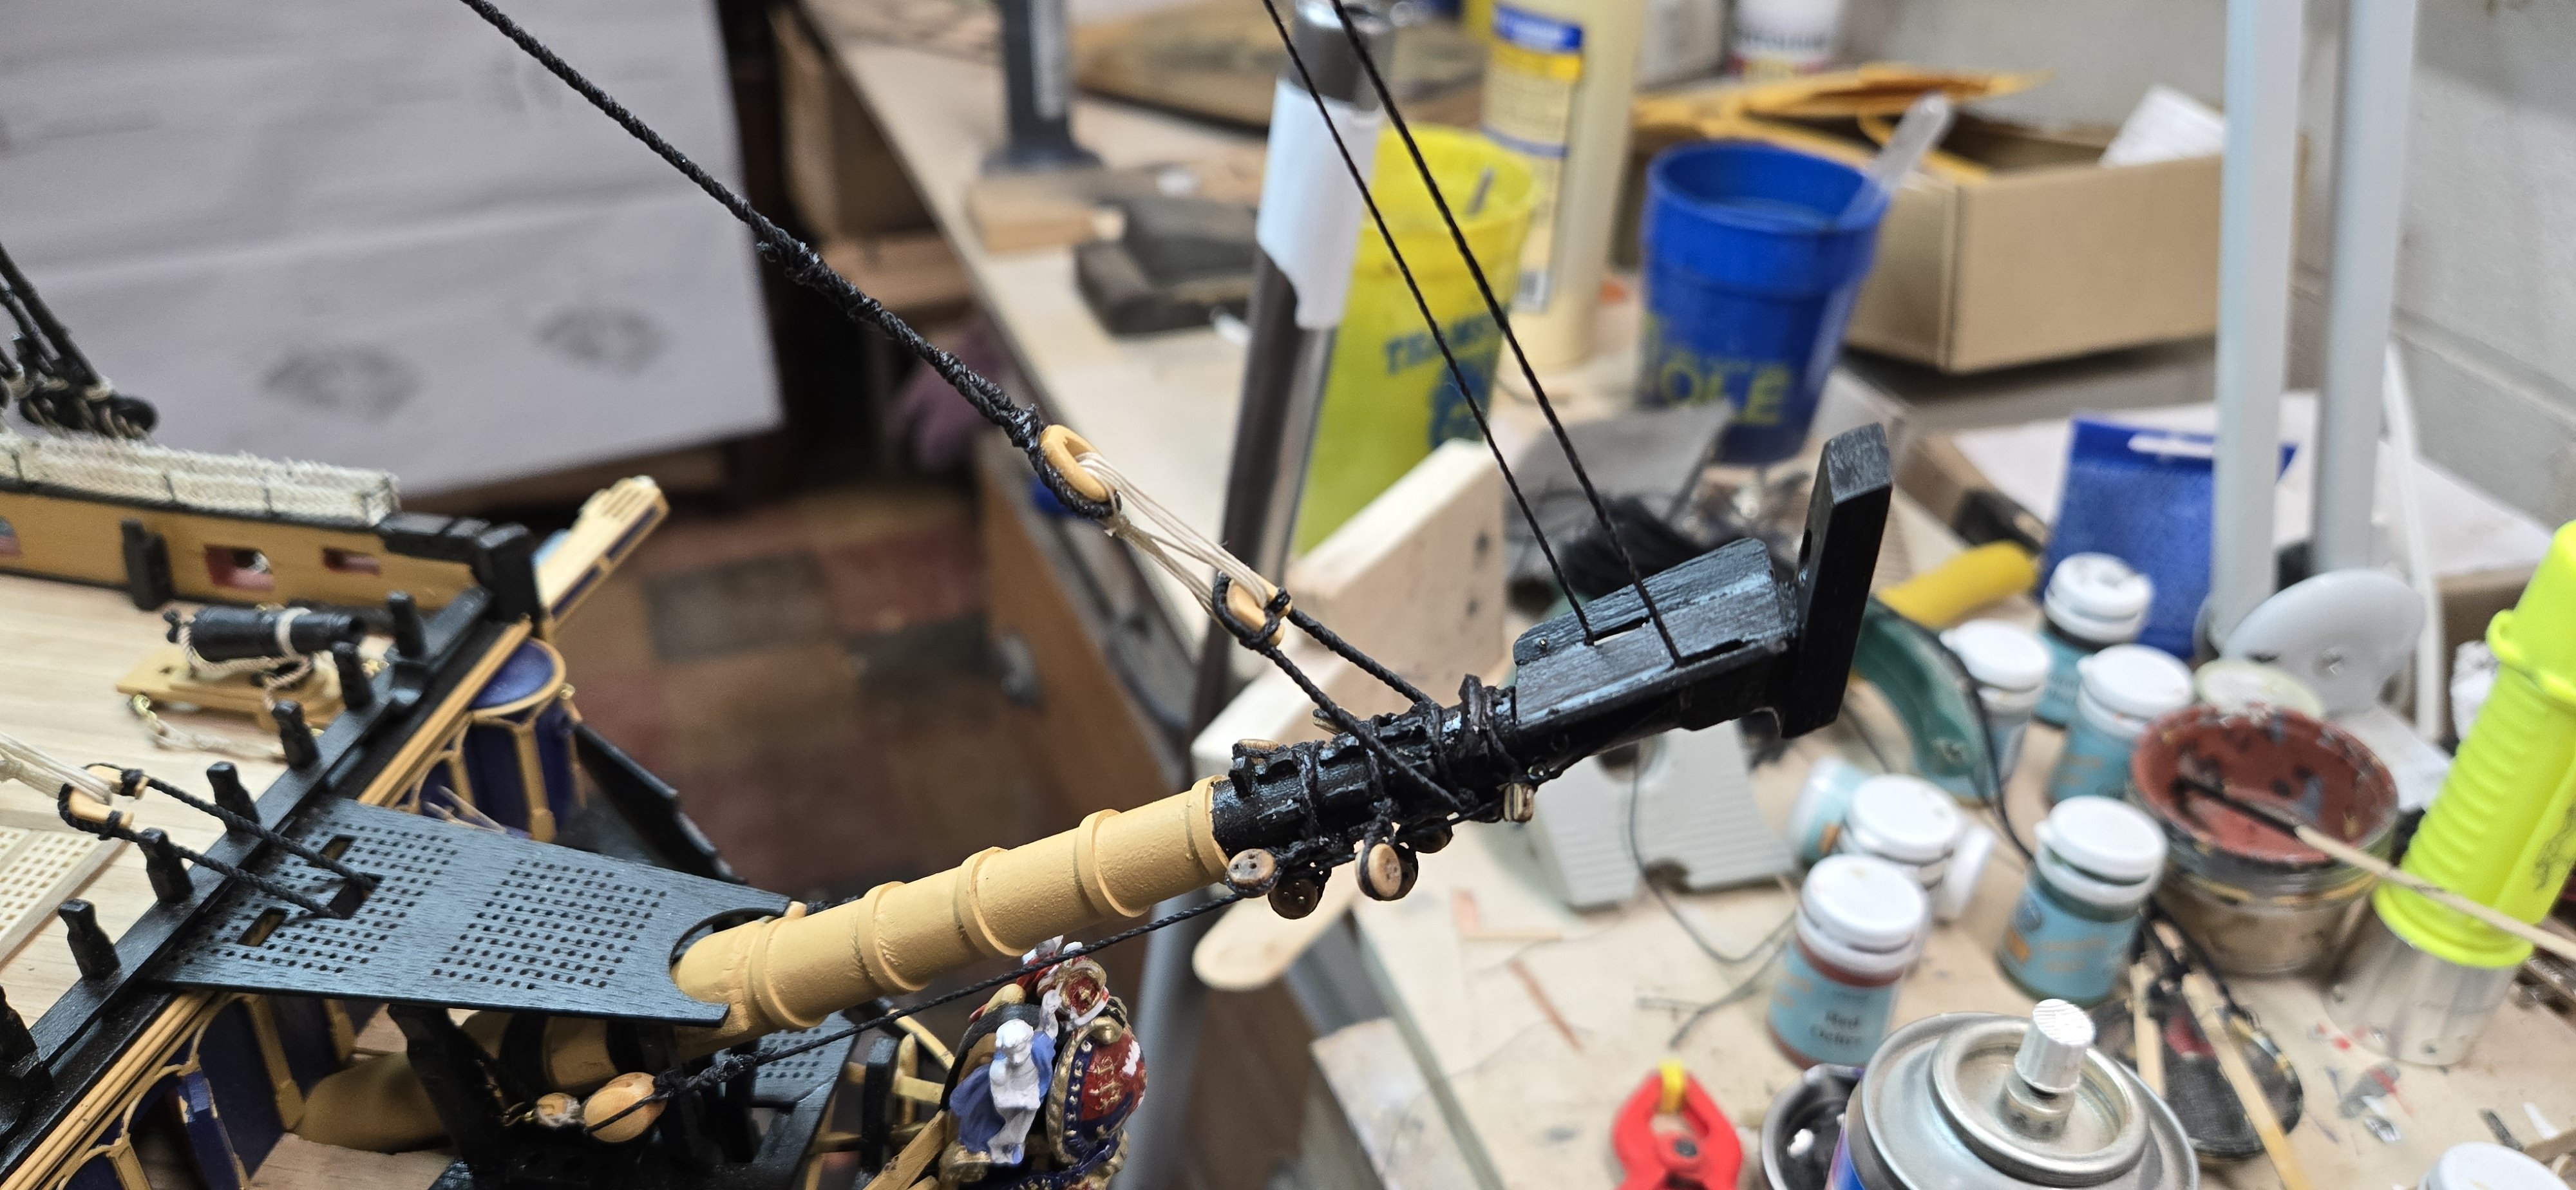
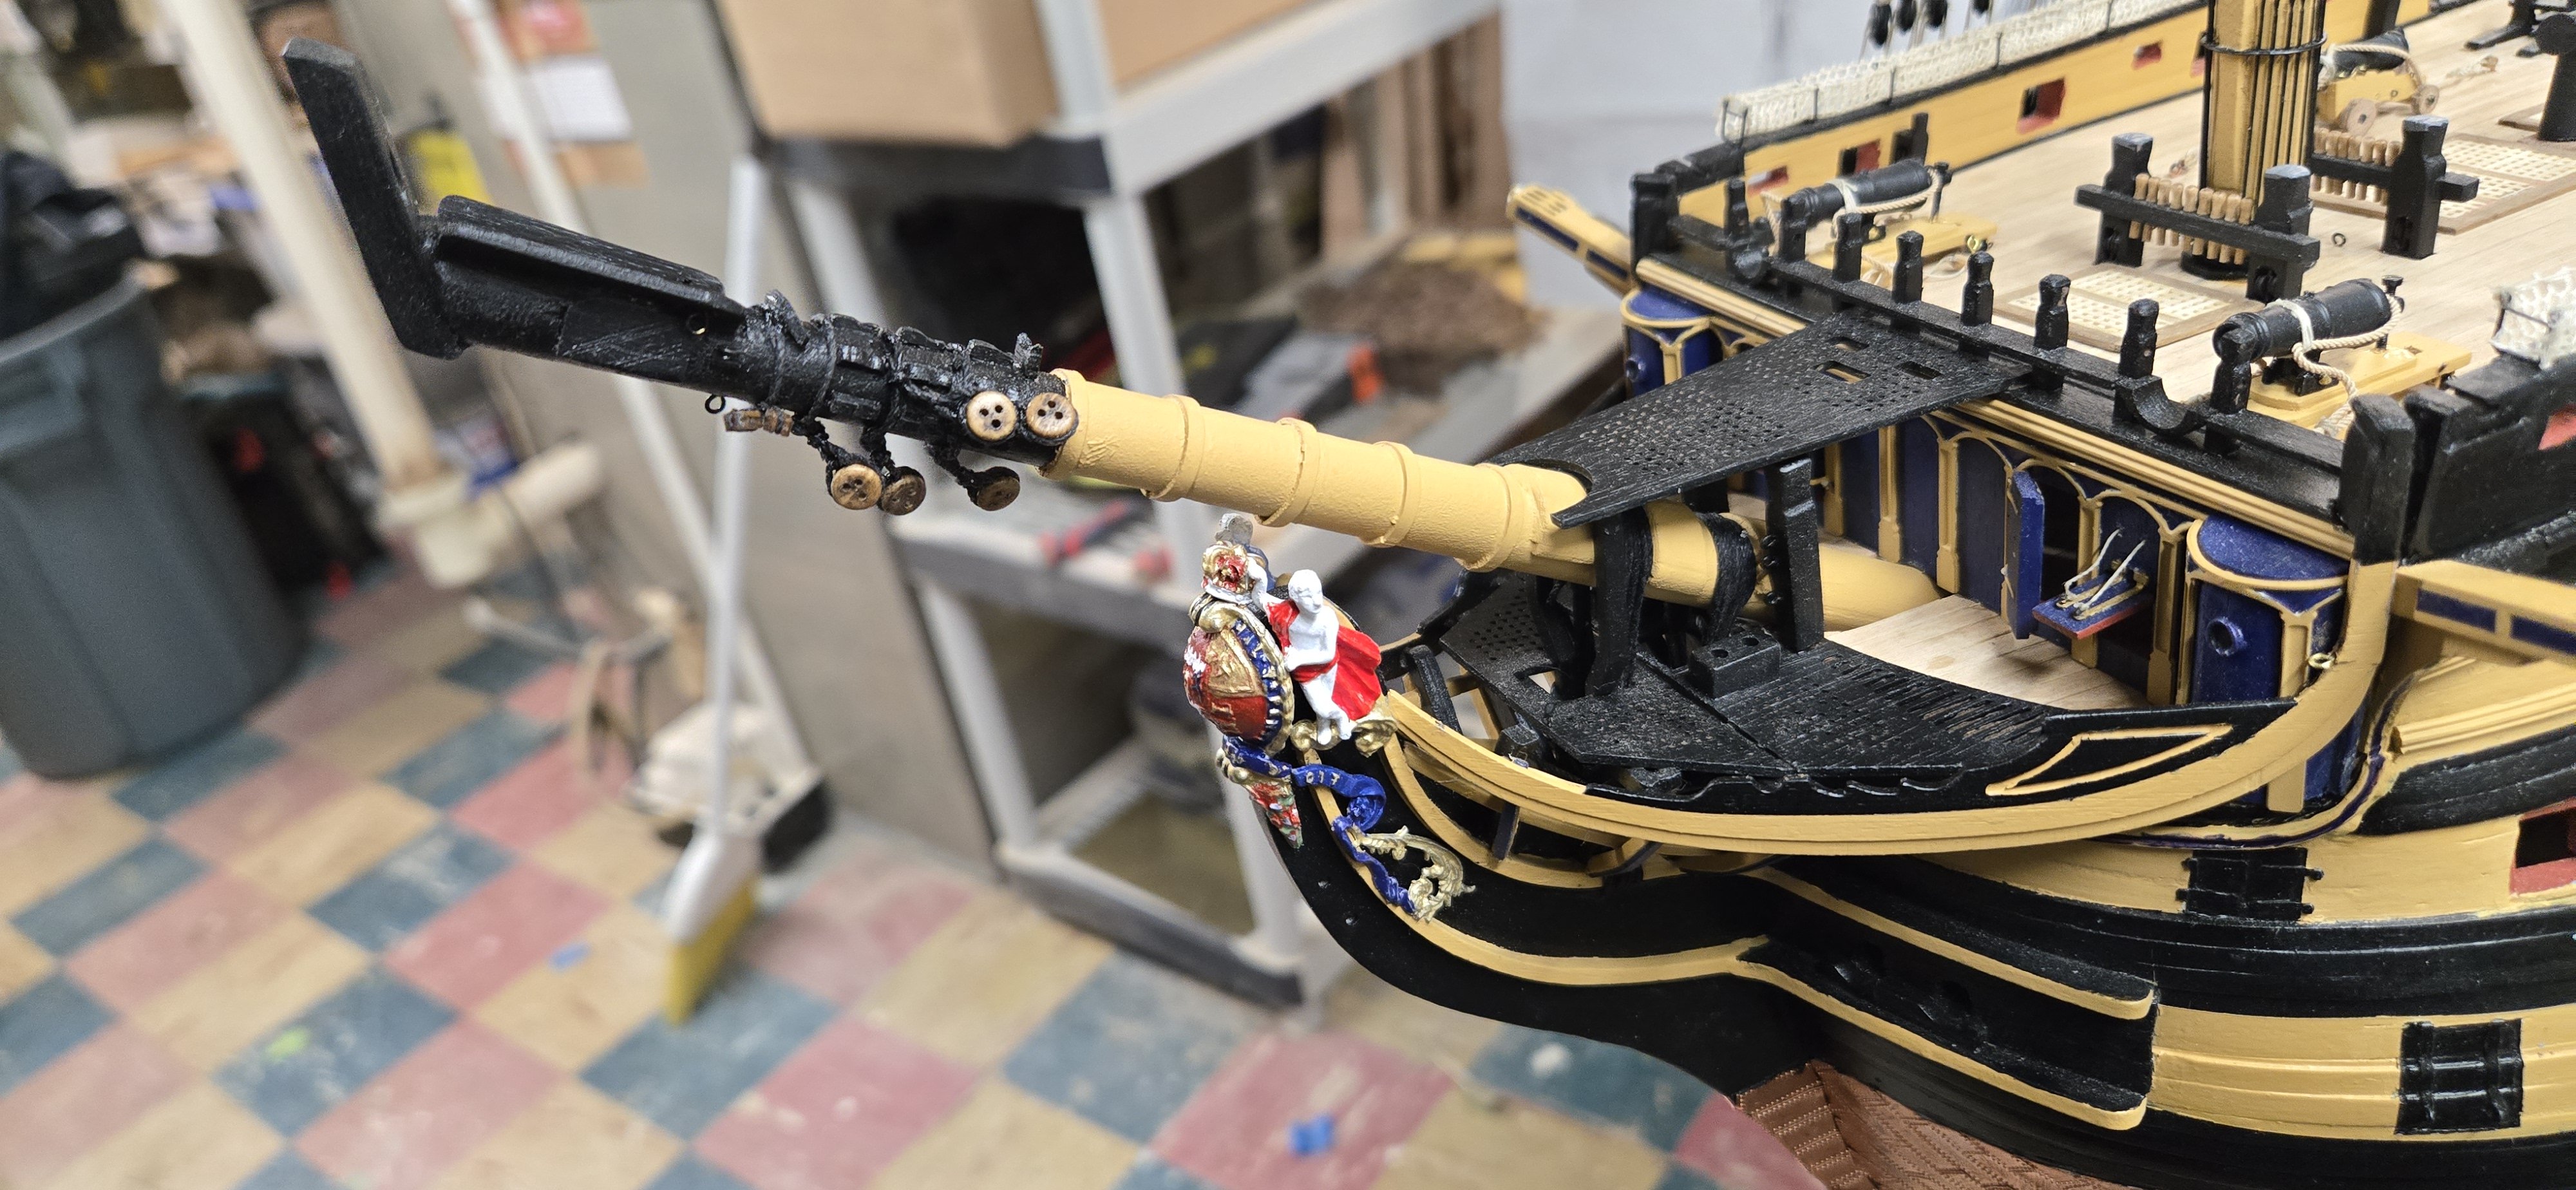
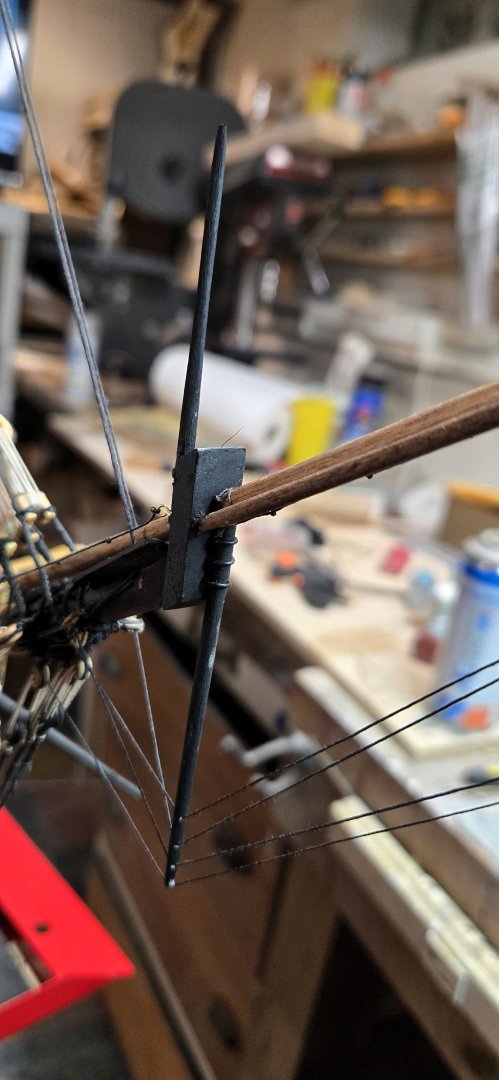
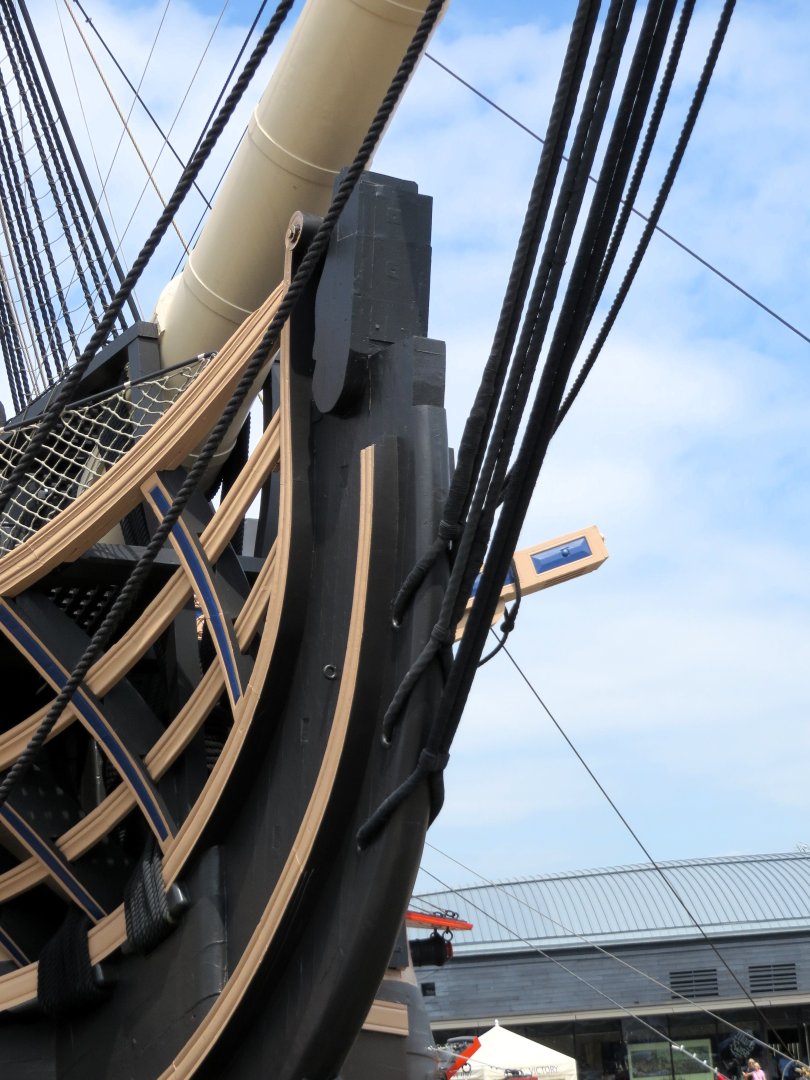
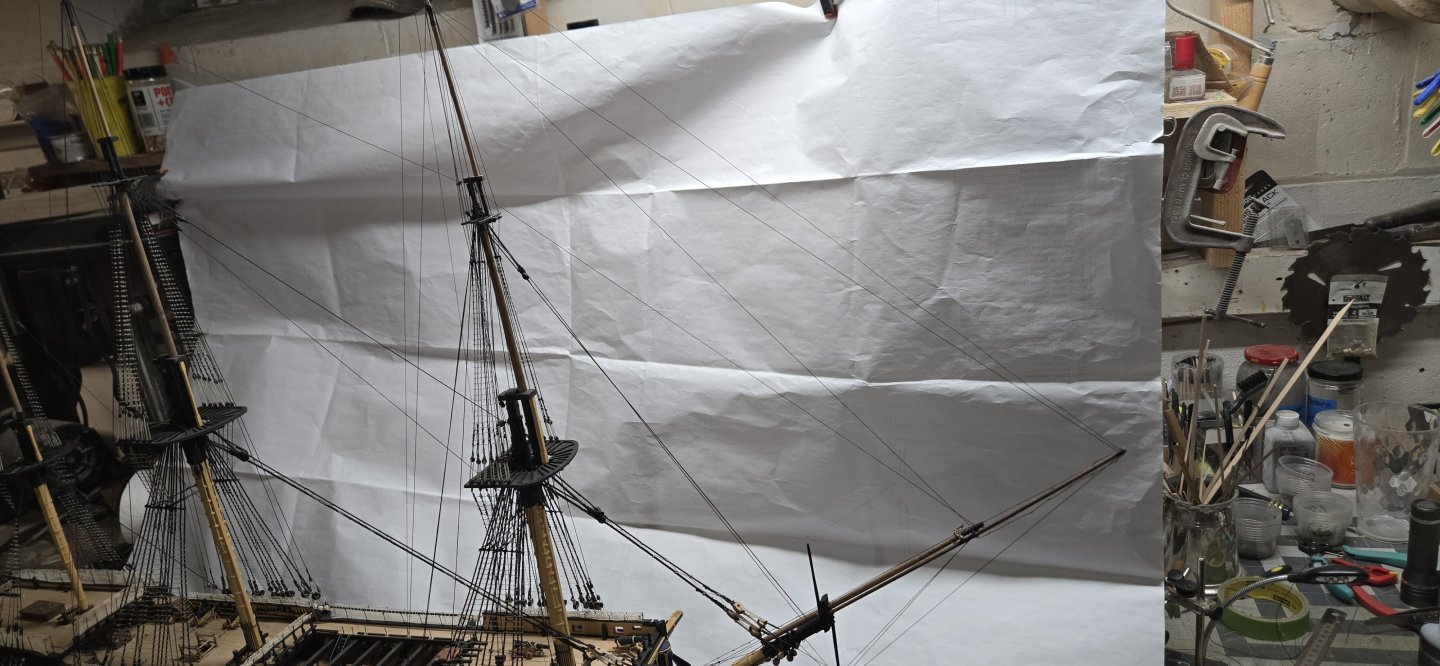
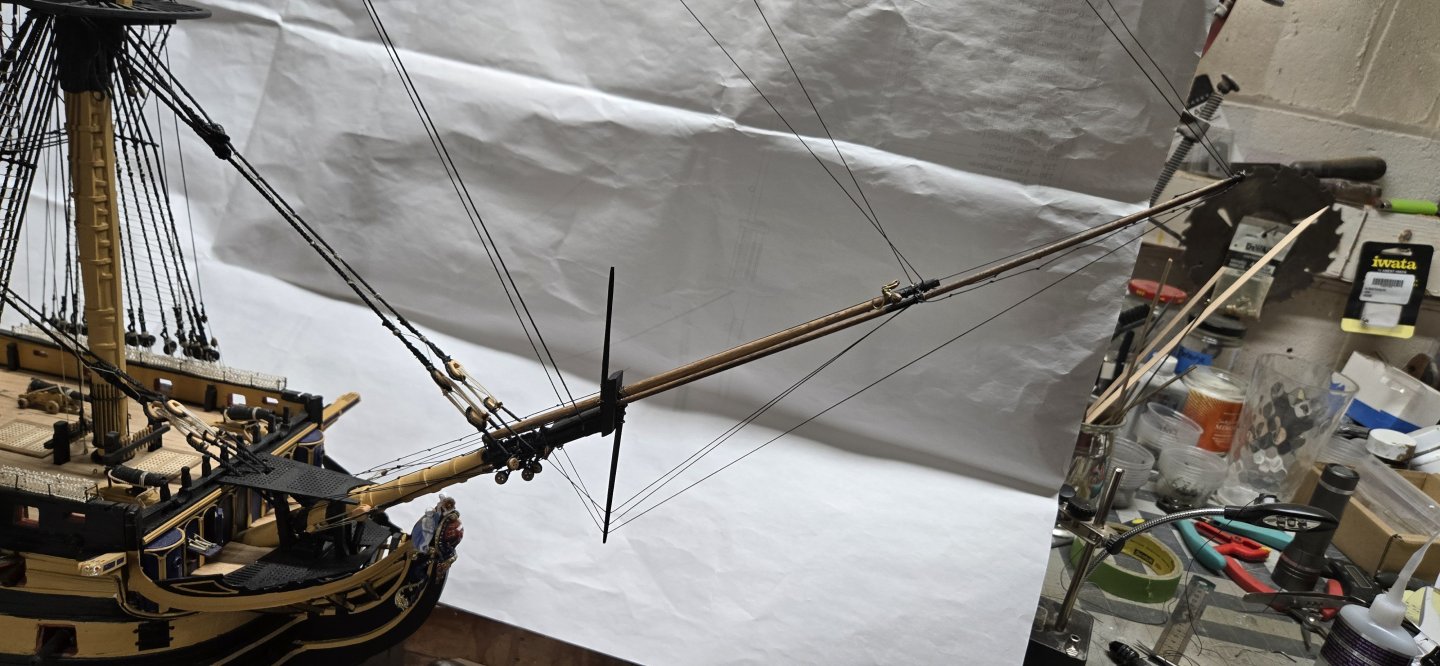
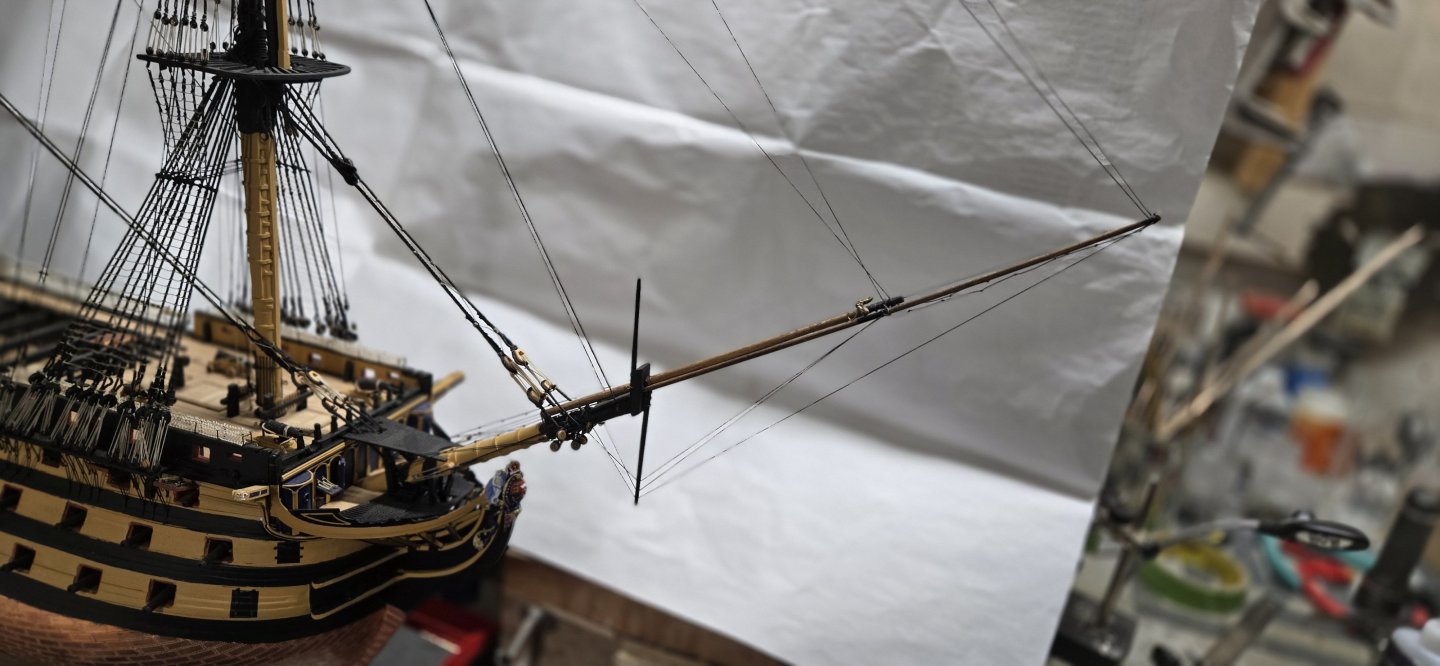
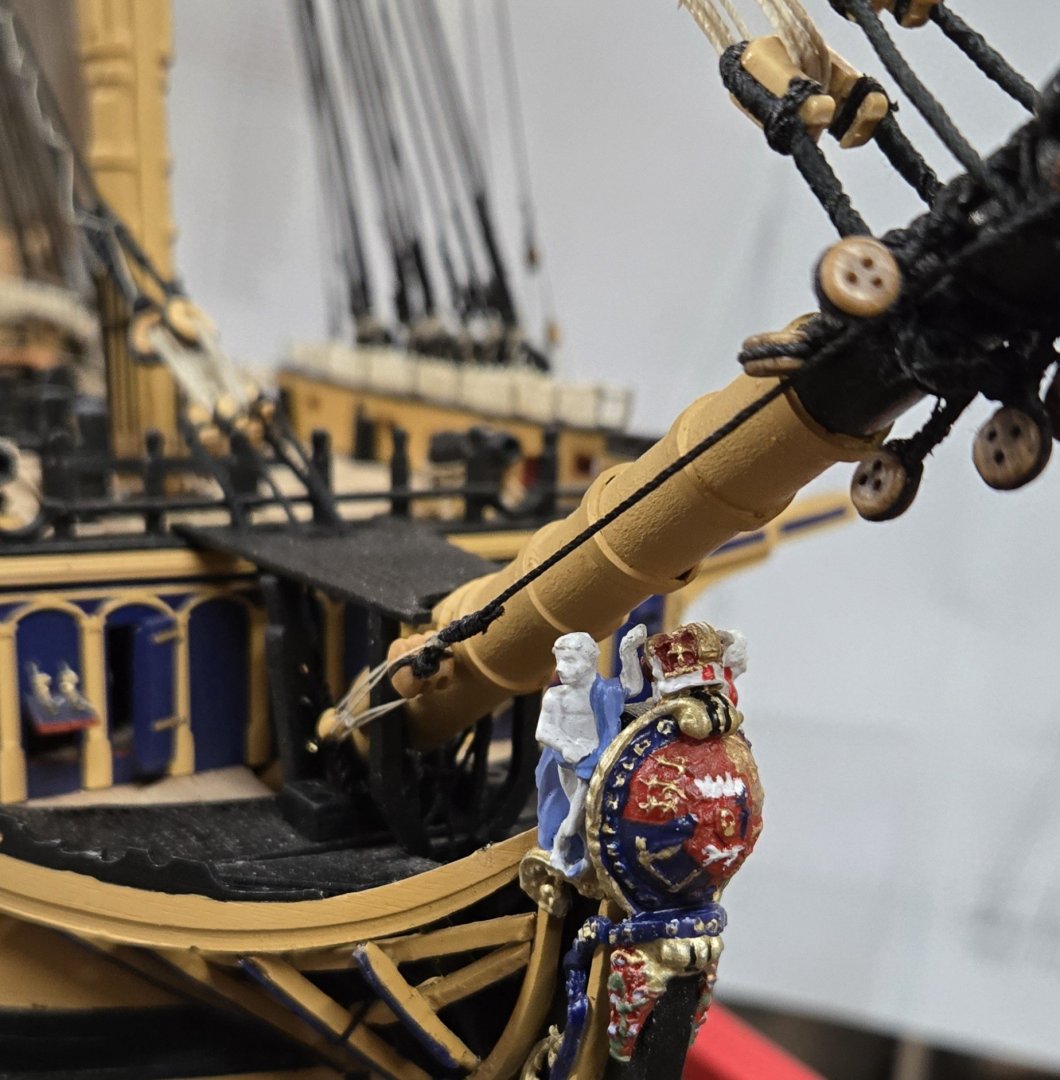
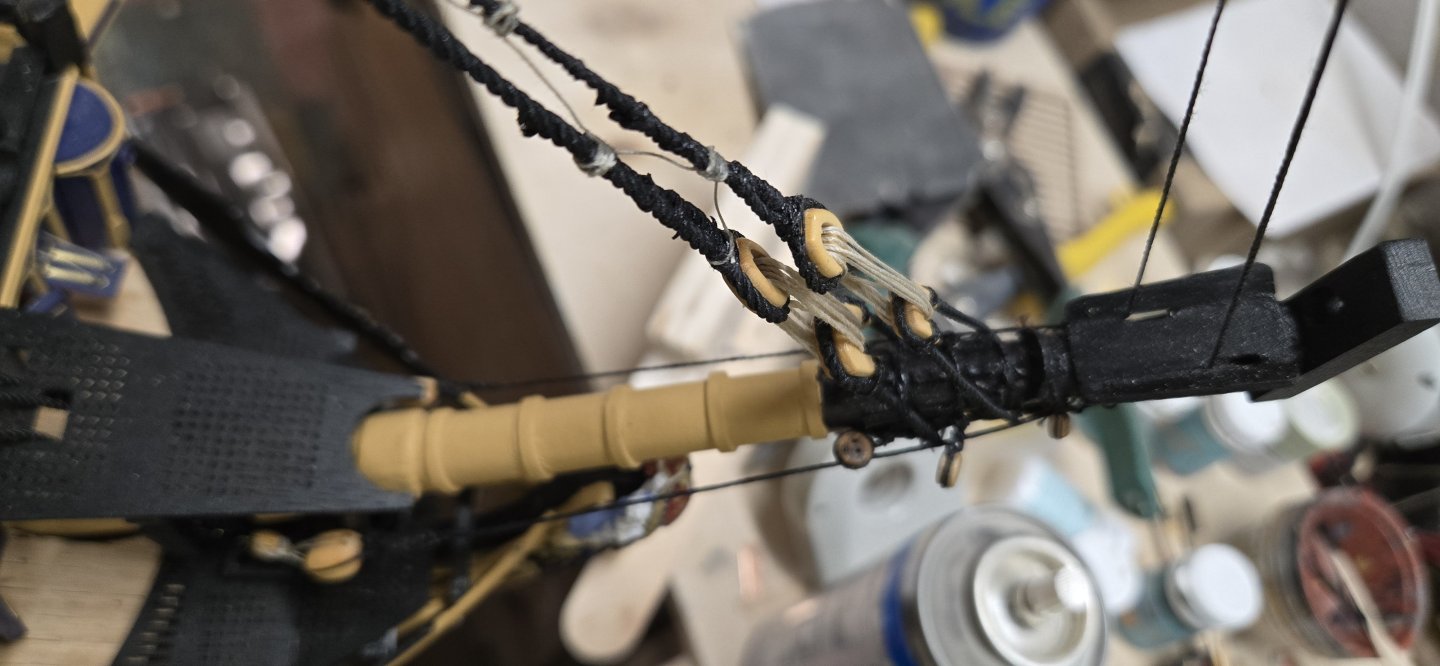
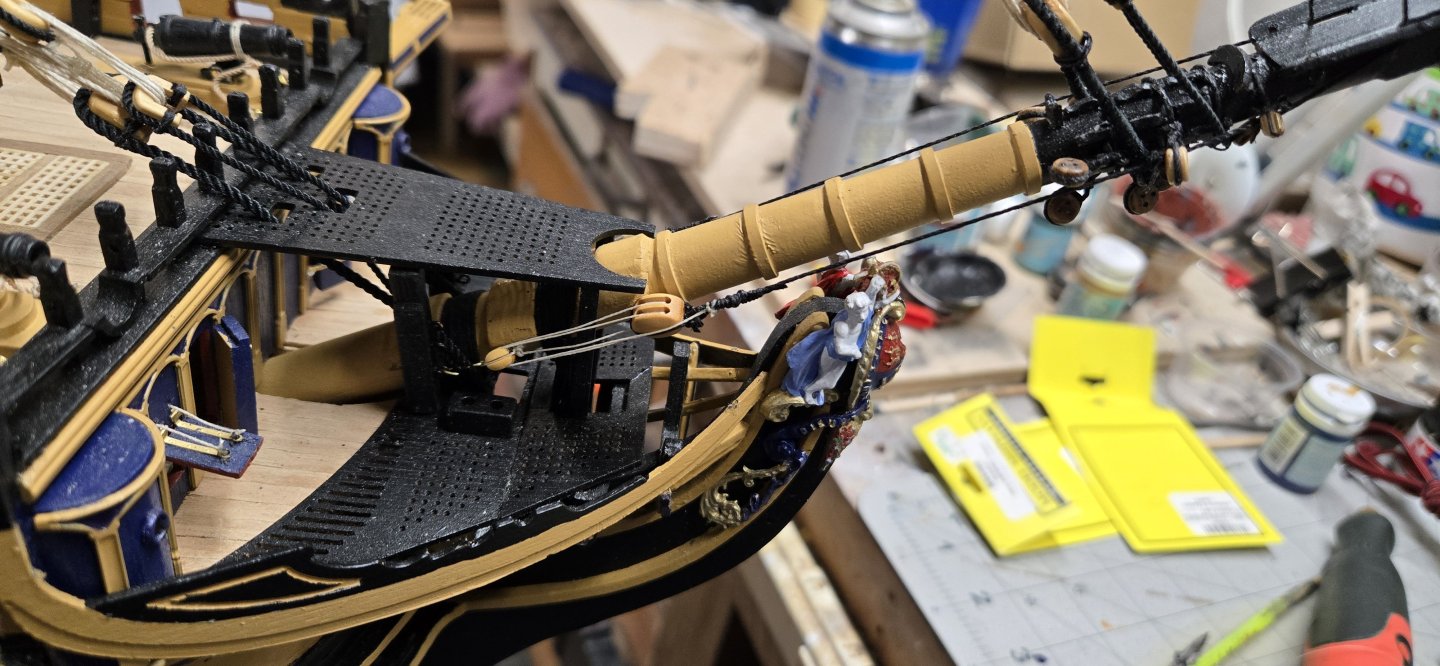
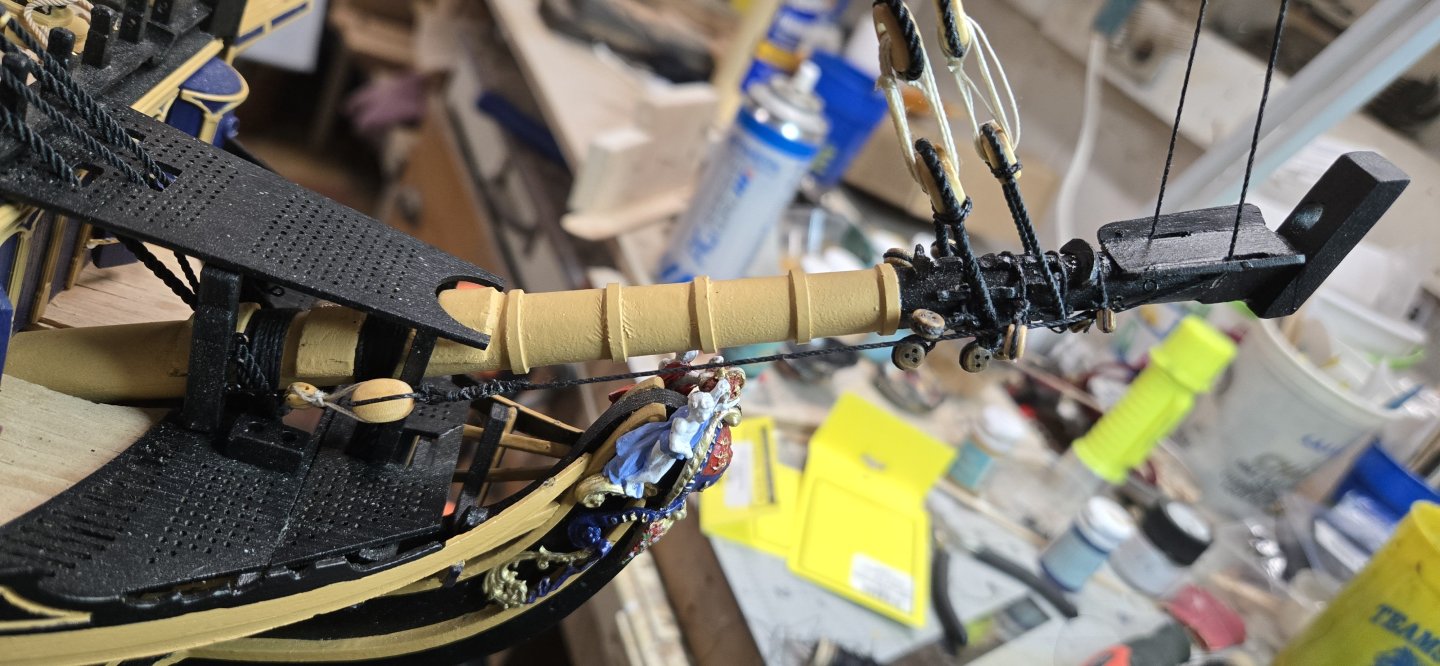
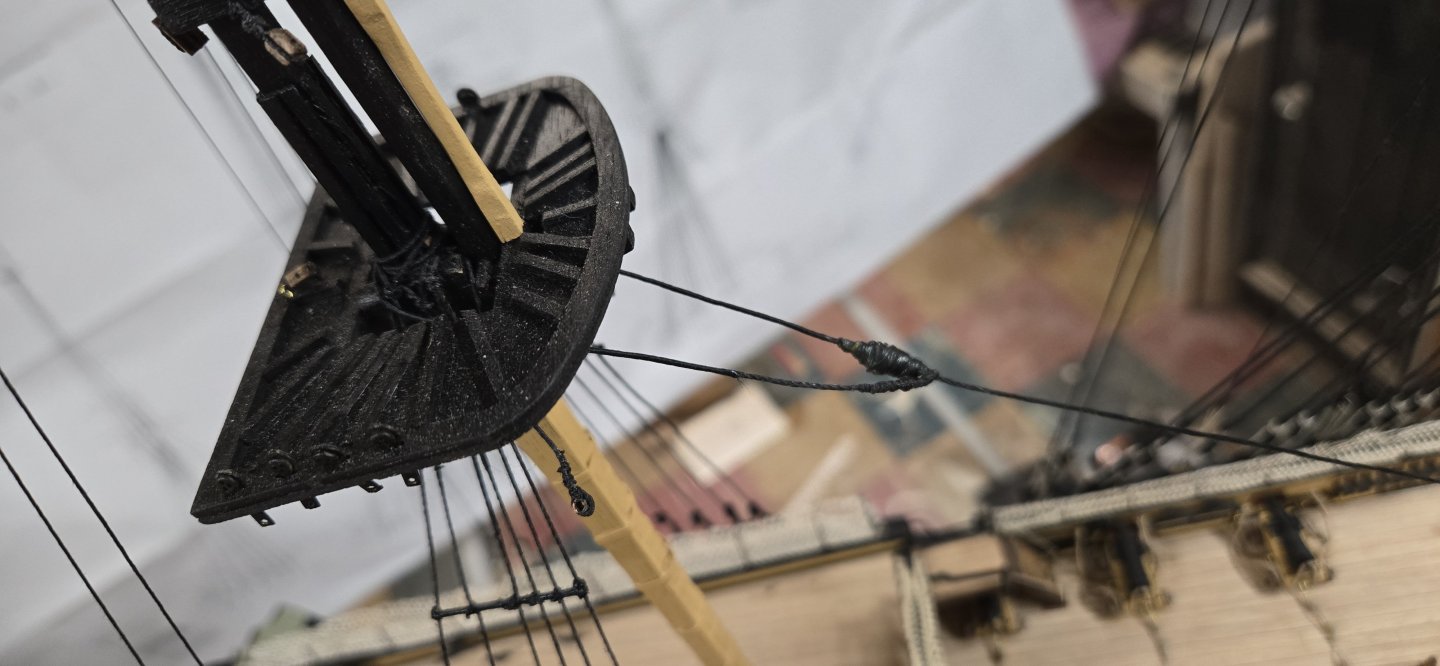
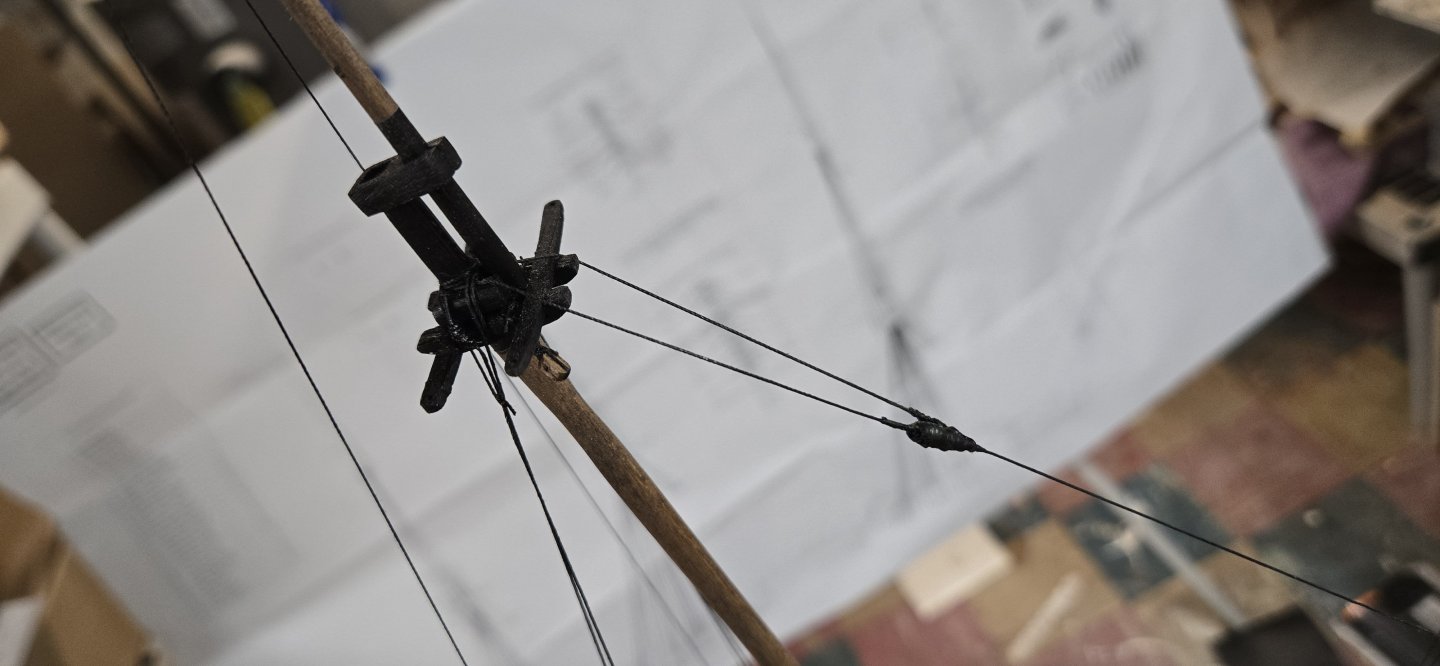
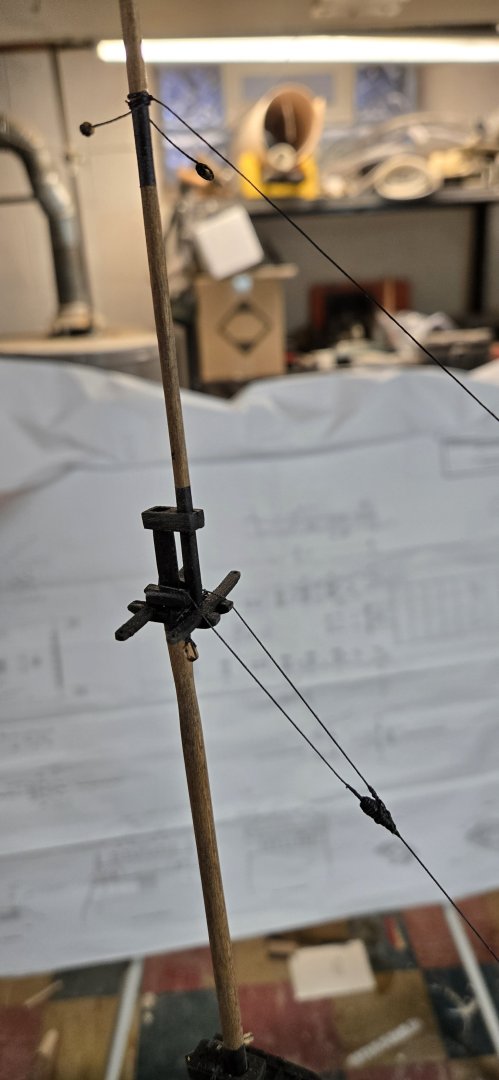
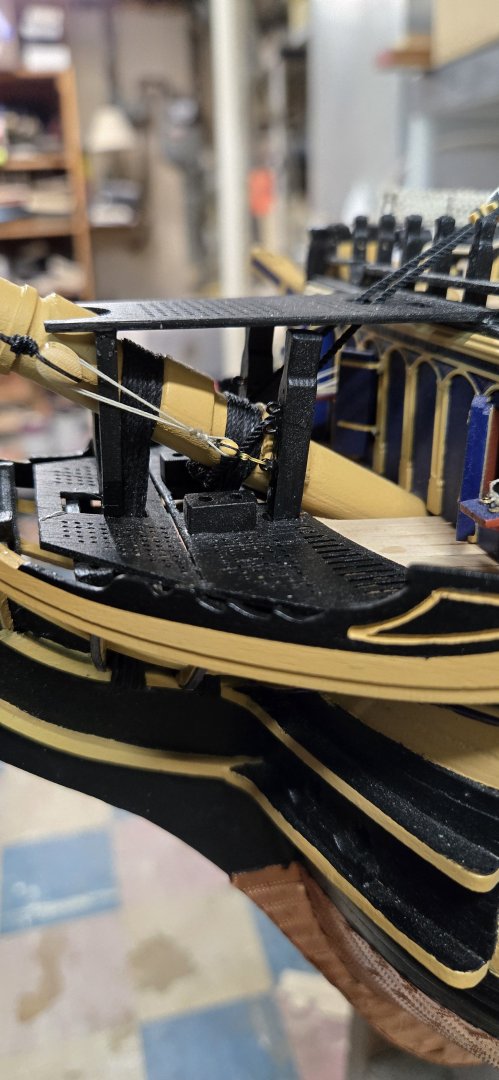
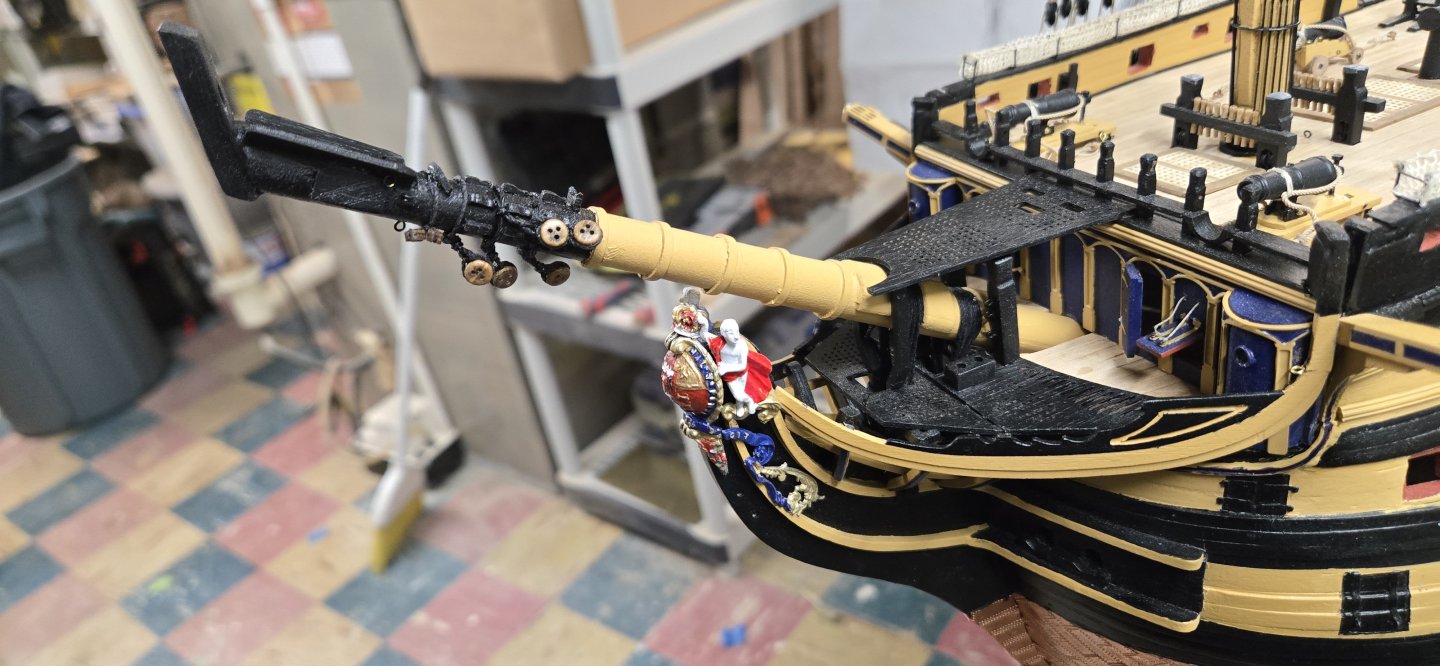
I shipped the jibboom and flying jibboom, added the dolphin striker and the jib jack staff. I was also able to add the jib stay and jib halyard. Now I took a stab at actually creating traveler rings for the jibboom and flying jibboom. The jib halyard should have been attached to my traveler ring, but I followed the directions. I may redo it and try to use the ring, but for now it's done. I also added the three martingales. I'm not sure if I did them right, but manual seems to say that all 3 are tied off at the knightheads under the beakhead platform and then are strung to various 3mm single blocks, through one of the 3 holes of the dolphin striker and tied off at the jib or flying jibboom. I also tried making coils of line for the jib stay and jib halyard. I'll keep working on those. You can see one is a typical sailboat style coil and the other is more of a 'garden hose' style. The former is neat and tidy but would be very slow to undo in a hurry. I'll keep experimenting. I also know that I kind of rigged the blocking for the stay and halyard incorrectly. Some of it was because the manual asks that you add the single blocks to the platforms earlier in the build. The problem is that since these are single blocks, they should have the lashing beginning on them....the lashing goes up to the double block, back down and through the single block, back up to the open hole of the double block and then all the way down to be secured on one of the bit pins. To get around that, I tied the lashing UNDER the single block on the eyelet. It's not right, and it twists the block up. I also added the man ropes and horses. I may try to shape them with watered down white glue and see if they look a bit better. The only open line is for the Fore Top gallant Flagstaff Stay. I thought I had already installed that one, but this one says it runs from the top of the fore mast down to the end of the flying jibboom, to the very bottom of the dolphin striker back to the fore stay collar. I will have to circle back around and see what I did wrong there. Finally I will have to reinstall the boomkins and begin rigging them. I just want to double check what's needed.


-
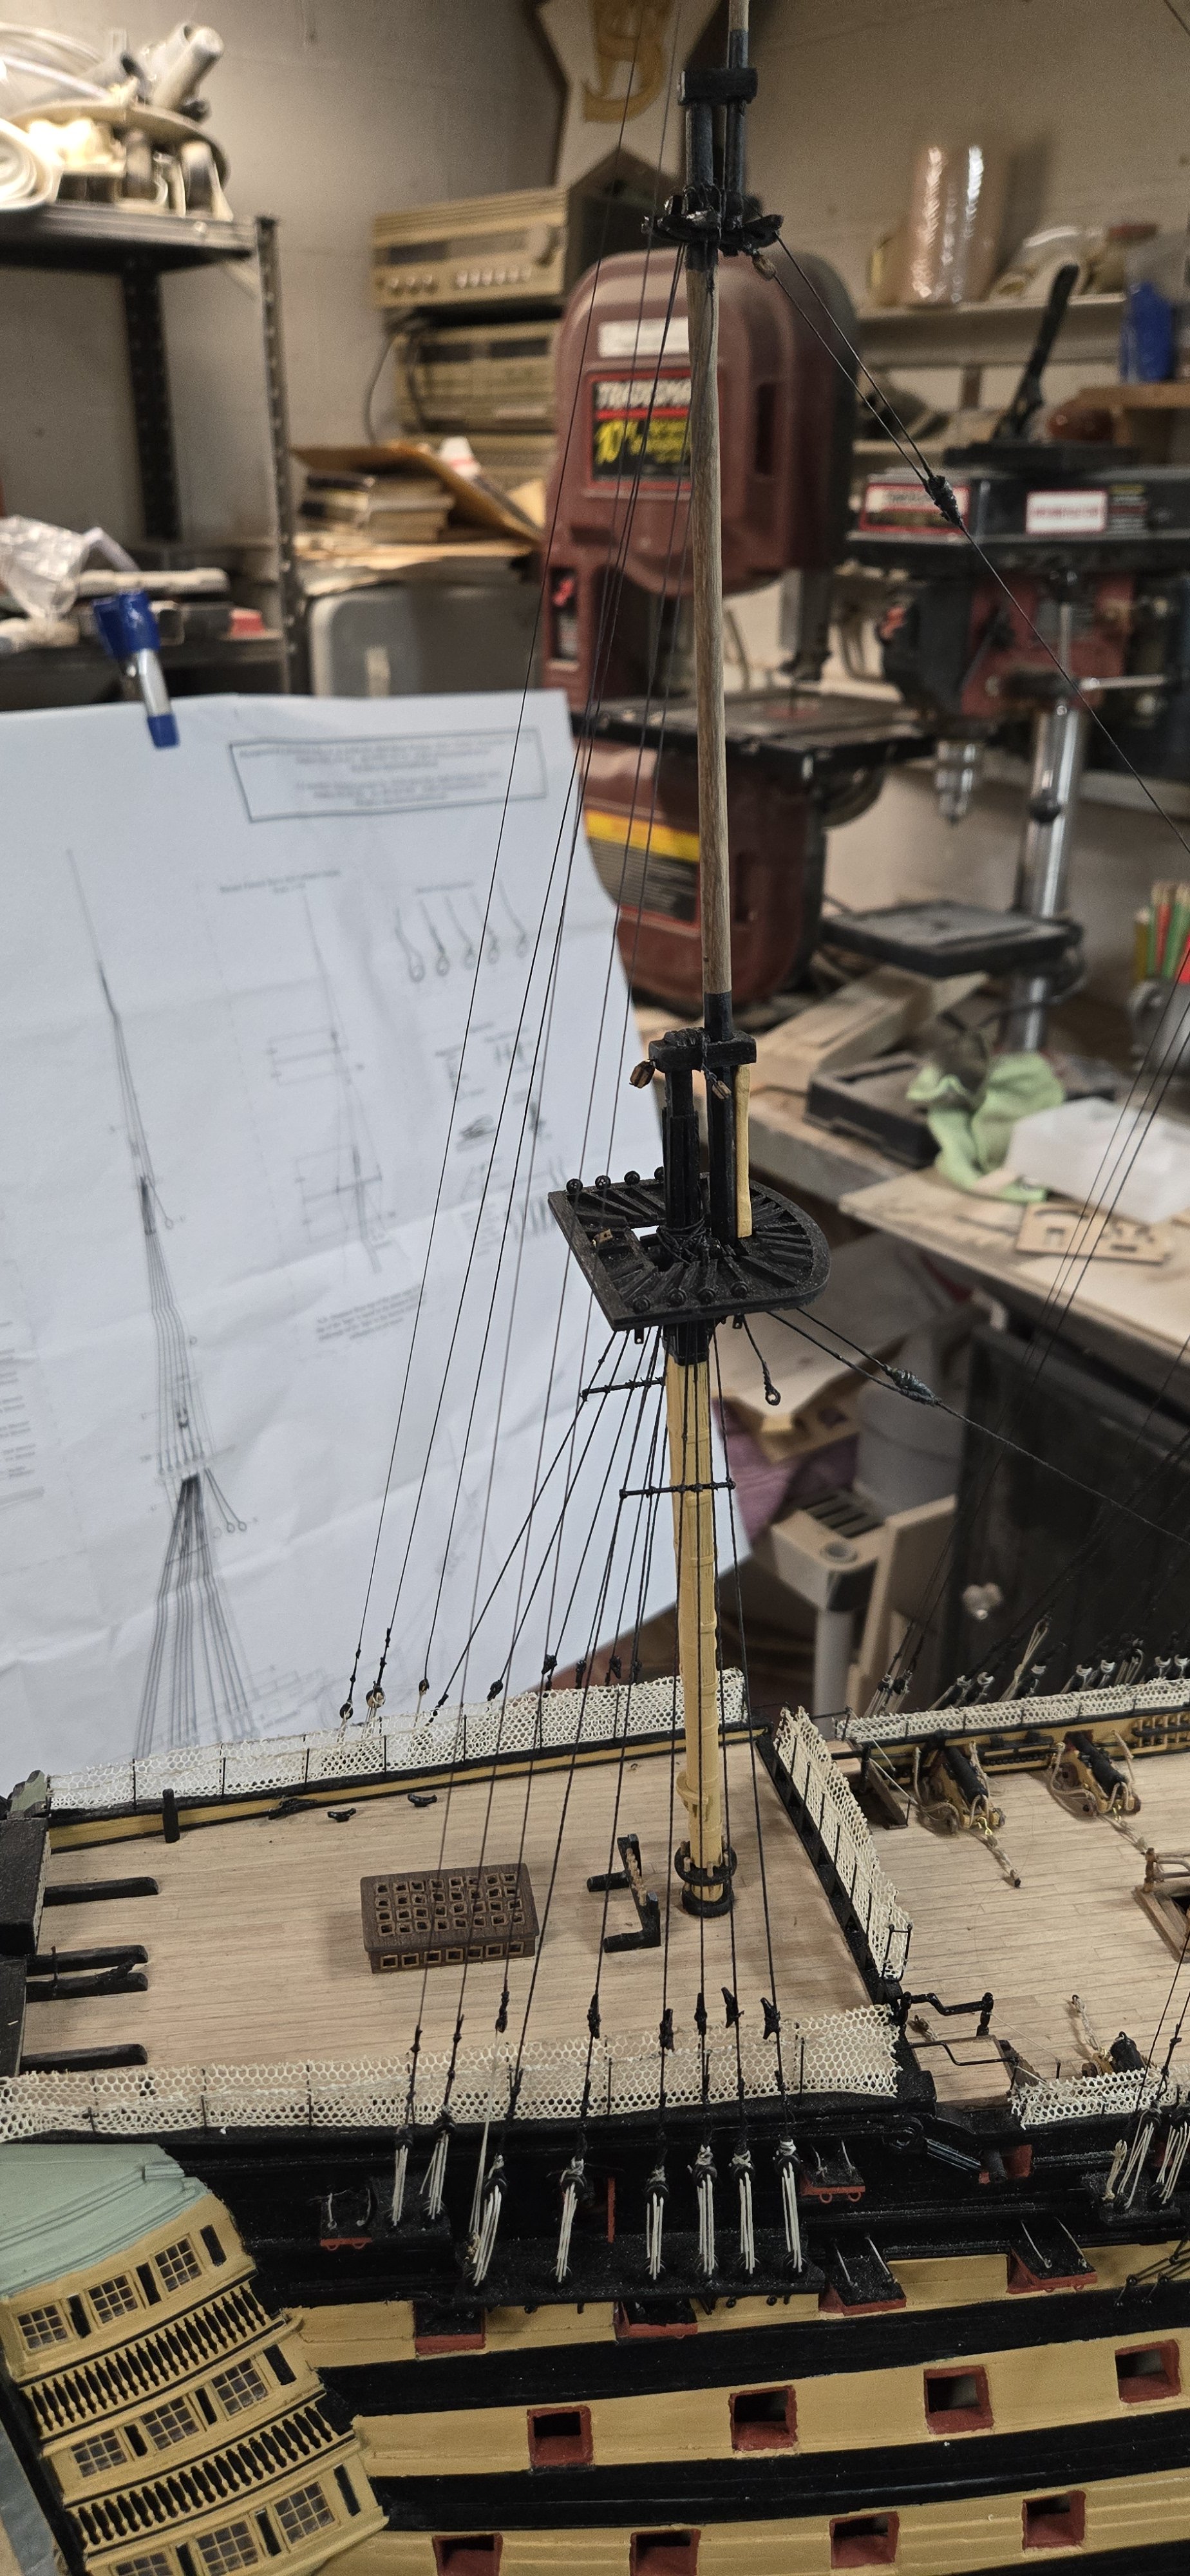
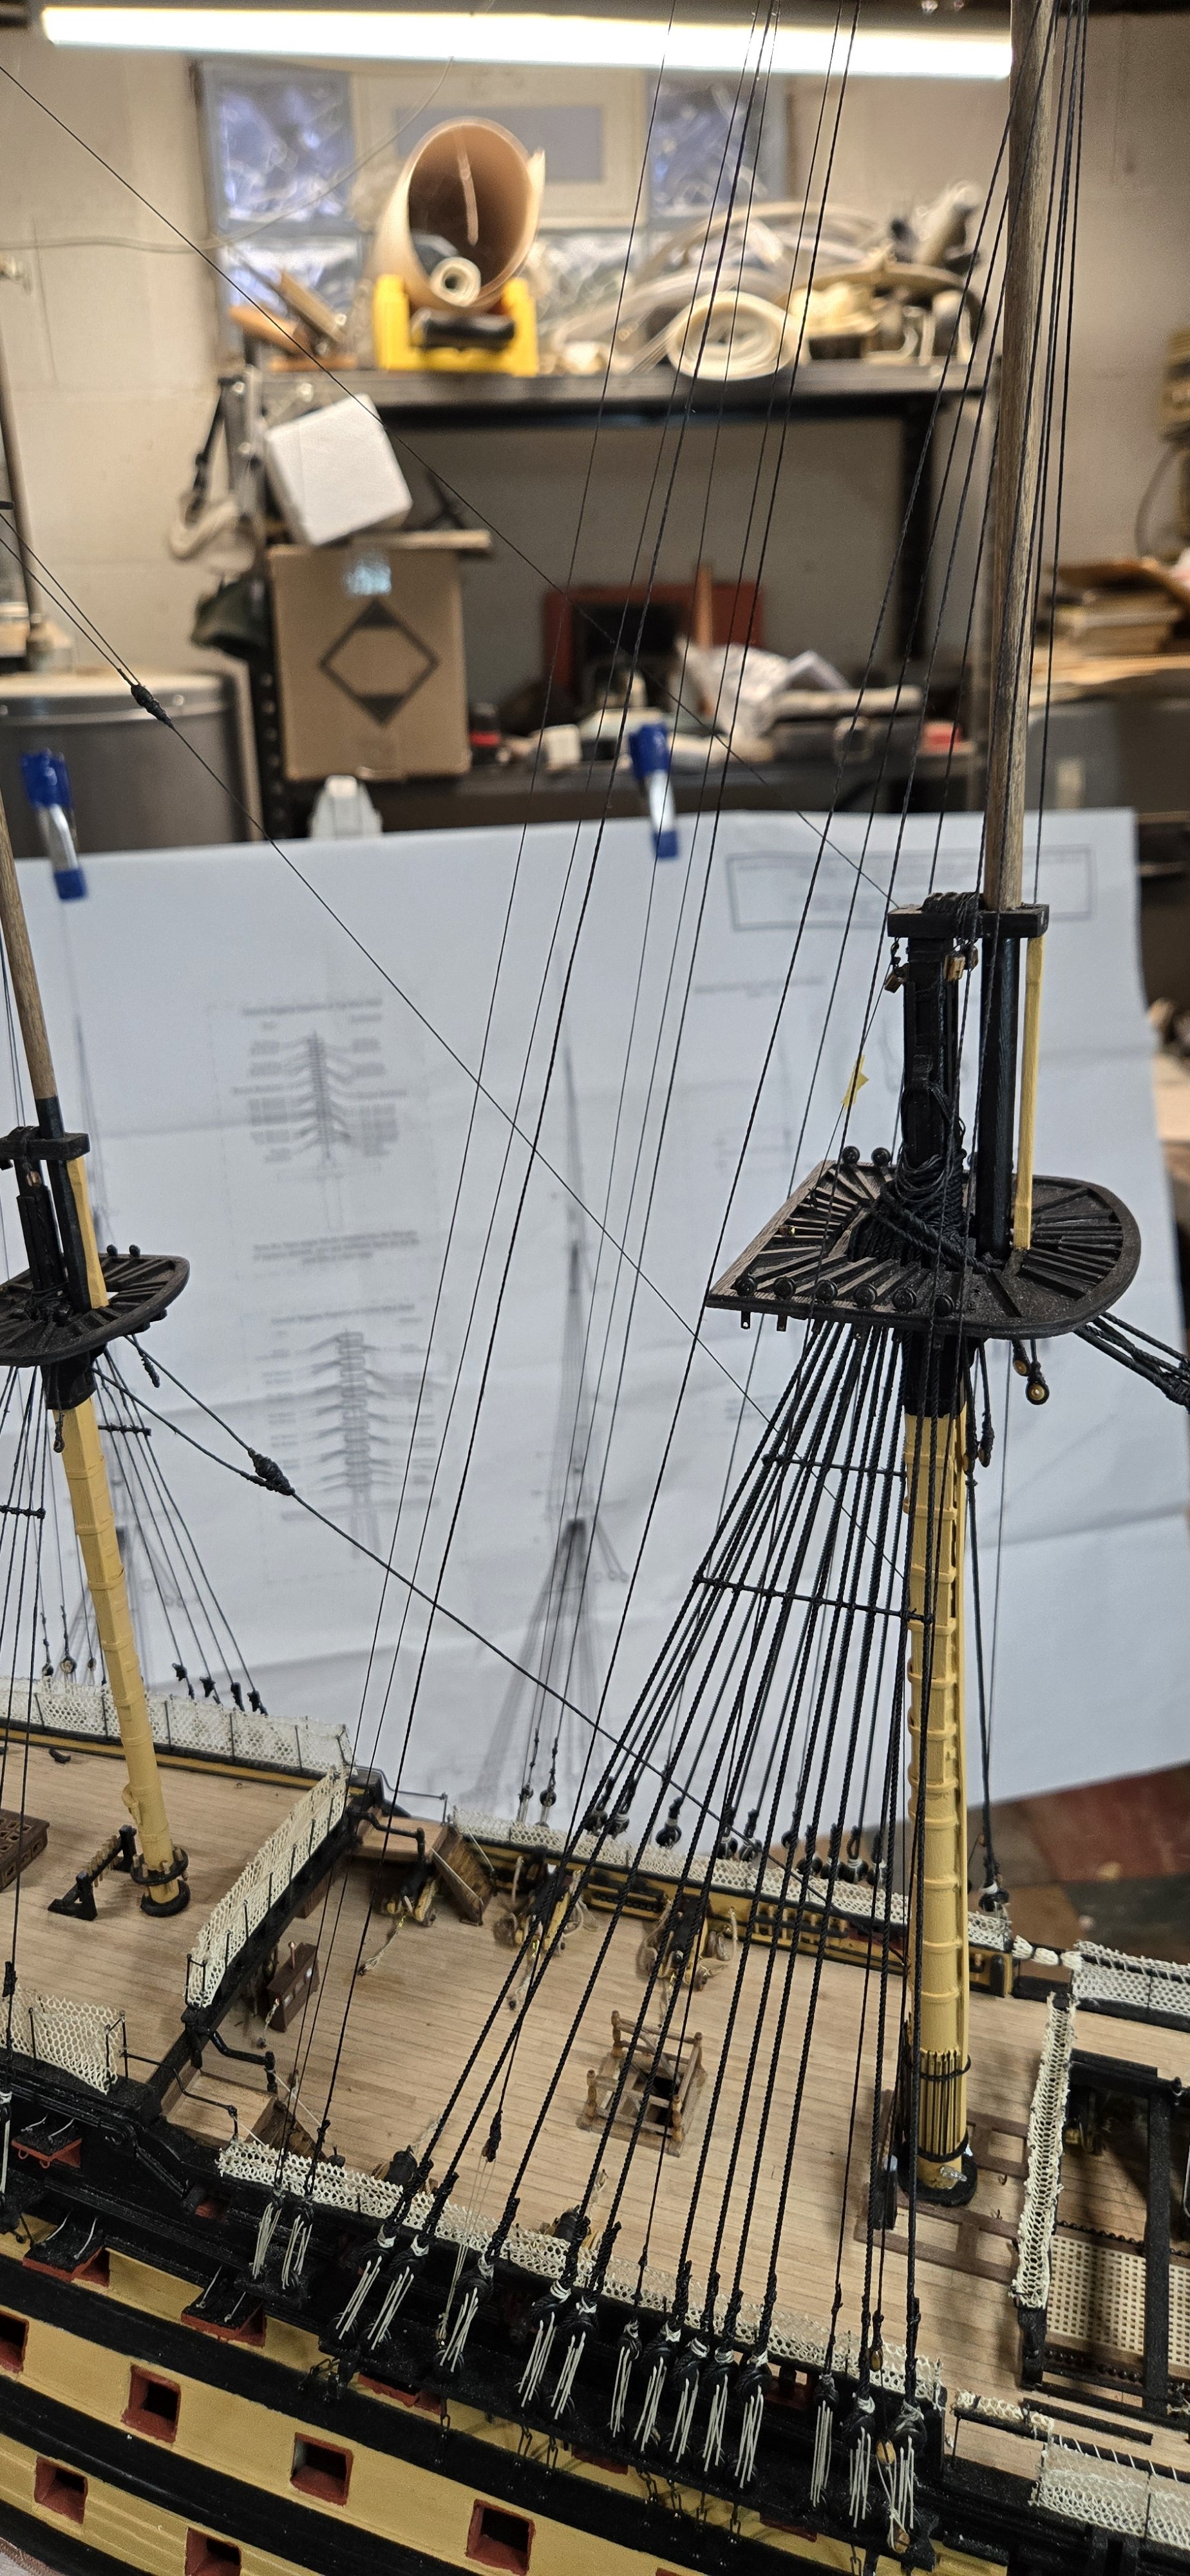
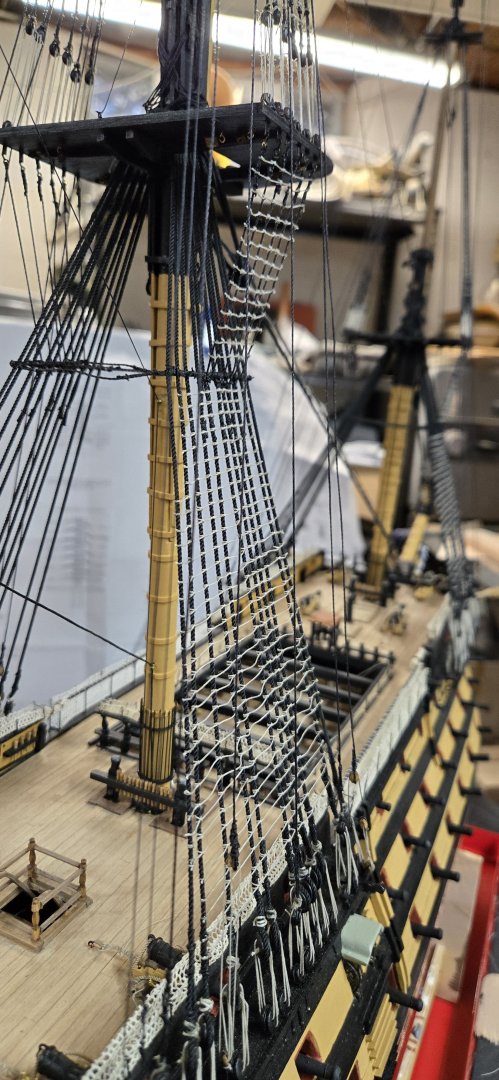
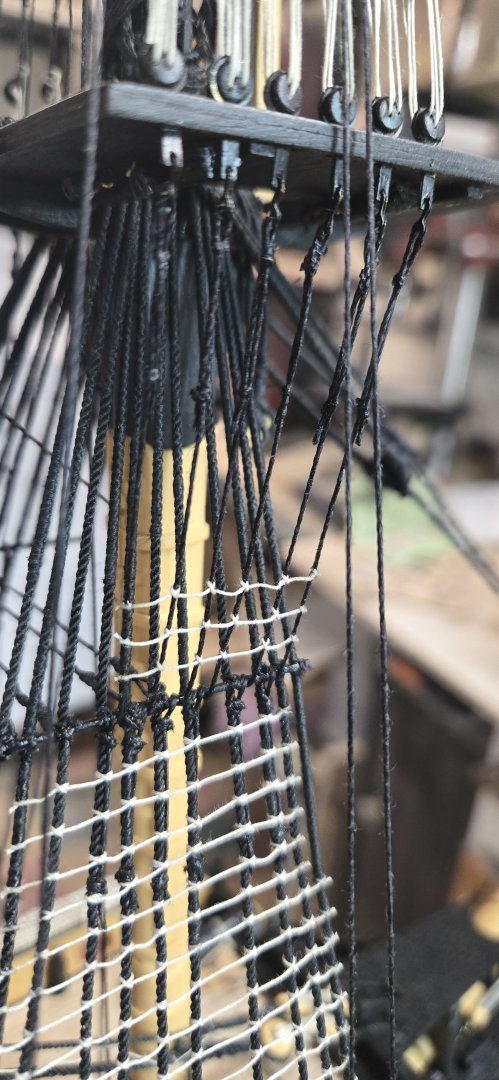
FINALLY! I have completed all of the ratlines. Like the copper plating, it is just something you have to grind out...one thread/plate at a time! At least with the ratlines, I didn't ruin my fingertips with CA glue! Now I have the blueprint sheets spread out all over. I have the rigging instructions on my computer, pictures of other builds for help and The Anatomy of Nelson's Ships and HMS Victory, Her Construction, Career & Restoration open with all kinds of page markers sticking out. I have to refresh my myself as to where I was headed next after the ratlines. I had such good plans back last April and now I have to rethink them all. First, I'm going to install the jibboom and flying jibboom, all of the stays that are attached to them. I have to remake the dolphin striker and jackstaff as I misplaced them. I want to create jibboom travelers and figure out how to adapt them to the model. I am remembering that the instructions are very vague and I was relying on Longridge's book for a lot of my future work with the yards. Happy New Year to all! Chris


-
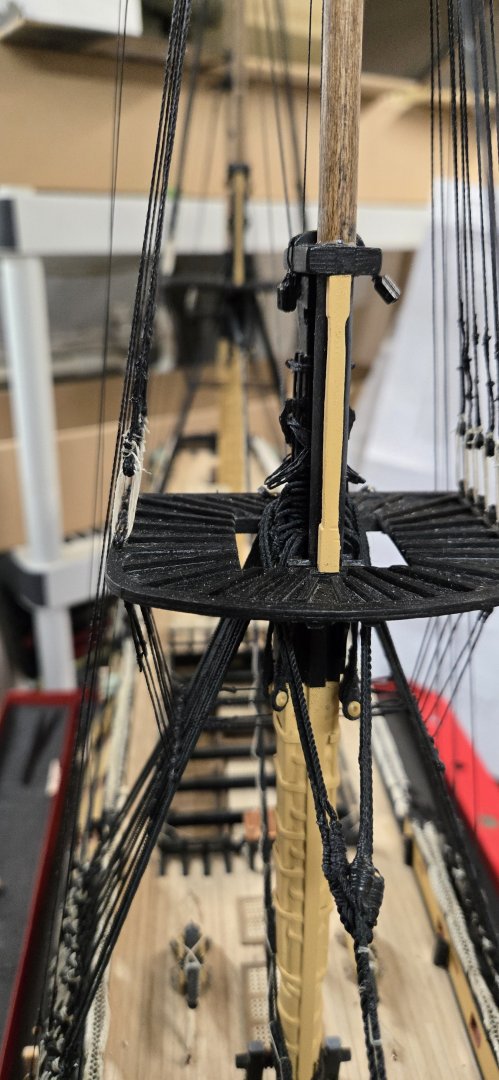
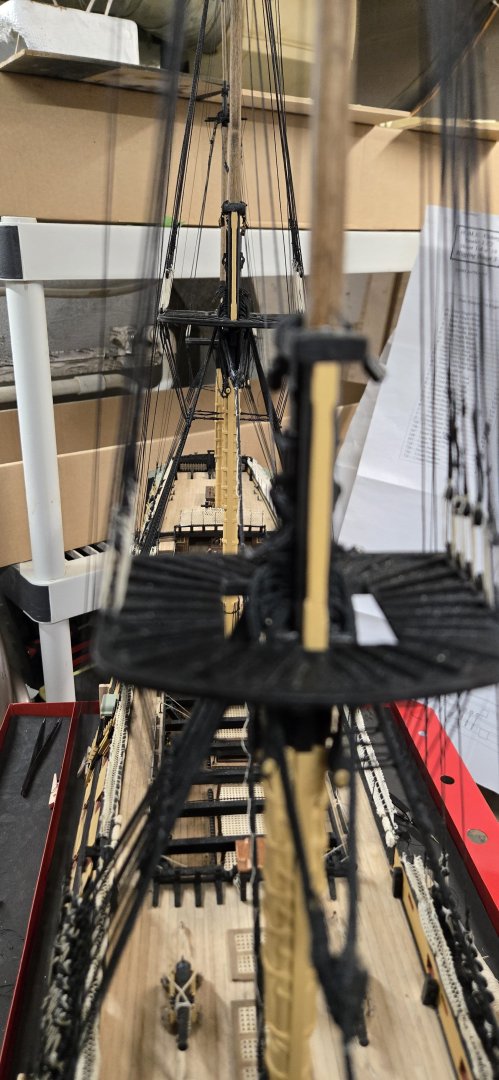
Well, I have finished the ratlines on the starboard side. I had to spend an hour cleaning up my shop that had turned into a dumping ground for all the end results of my summer projects. Bits and pieces of wood, foam, dust. It was a mess, but the upside is that after sweeping I found three deadeyes that I had dropped! Hopefully I can still use them! All I had were the upper ratlines of the starboard mizzen mast to finish the side, but first I had to watch a video to re-familiarize myself with how to tie ratlines. It came back pretty quickly. Ironically, the upper ratlines are the hardest. These are obviously high up on the boat and even though I tip the model towards me (I put a 2x4 under the port side of the stand), it becomes tiring. The very last 3 have little room to work the lines and tweezers and standing helped. They're done now, at a glance, not bad. Some dips there and there, but they'll blend in. Still have a month or so of fall work around the house until I can spend quality time on the model!

-
No!!! I am not gone! But summer is almost done and I'll be back down in the shop to resume my work!!!! See you soon! Chris
-
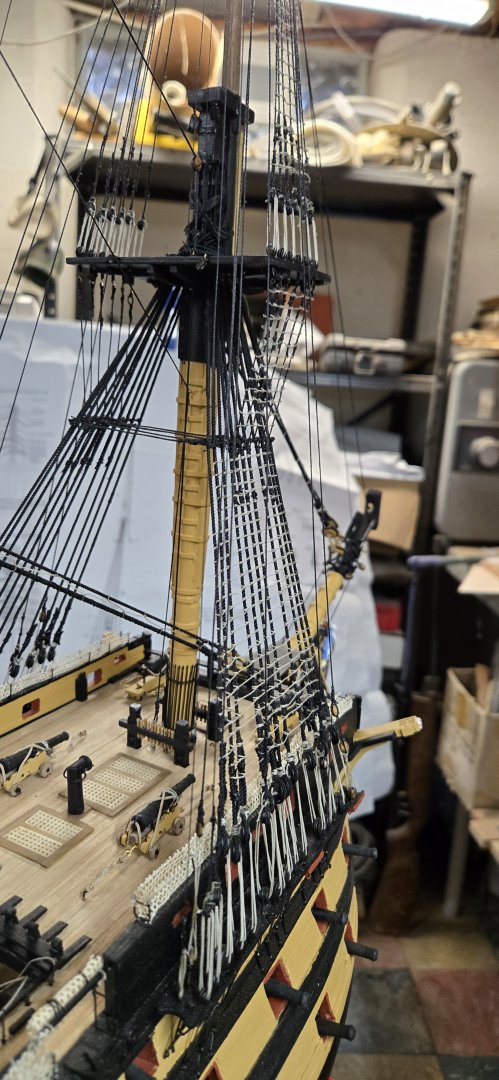
Hello there! I haven't gone anywhere, just plugging along! The rat lines are very tedious and even after buying a new work table that rotates like a breeze and goes up and down, it's hard on my back . For many of the sections, I've resorted to placing a 2x4 on one side of the model base to tilt it towards me to help. Even using the templates I made, some of the rat lines seem to meander a bit. I'm hoping that once done, I can use watered down white glue to kind of straighten or stiffen them up. It's a slow slog doing these, I can get maybe 10 or so lines in an hour or so and I stop. In addition, the weather is starting to break up here in western NY. Trying to get out in between snow/rain storms and work on my sailboat for the summer. That has been a dismal failure with 2 or so days of warm weather in the past 30 days. I have the futtock and upper ratlines for the mizzen mast on the starboard side and then I'll move to the port side. So hours to go before I sleep!!!!


-
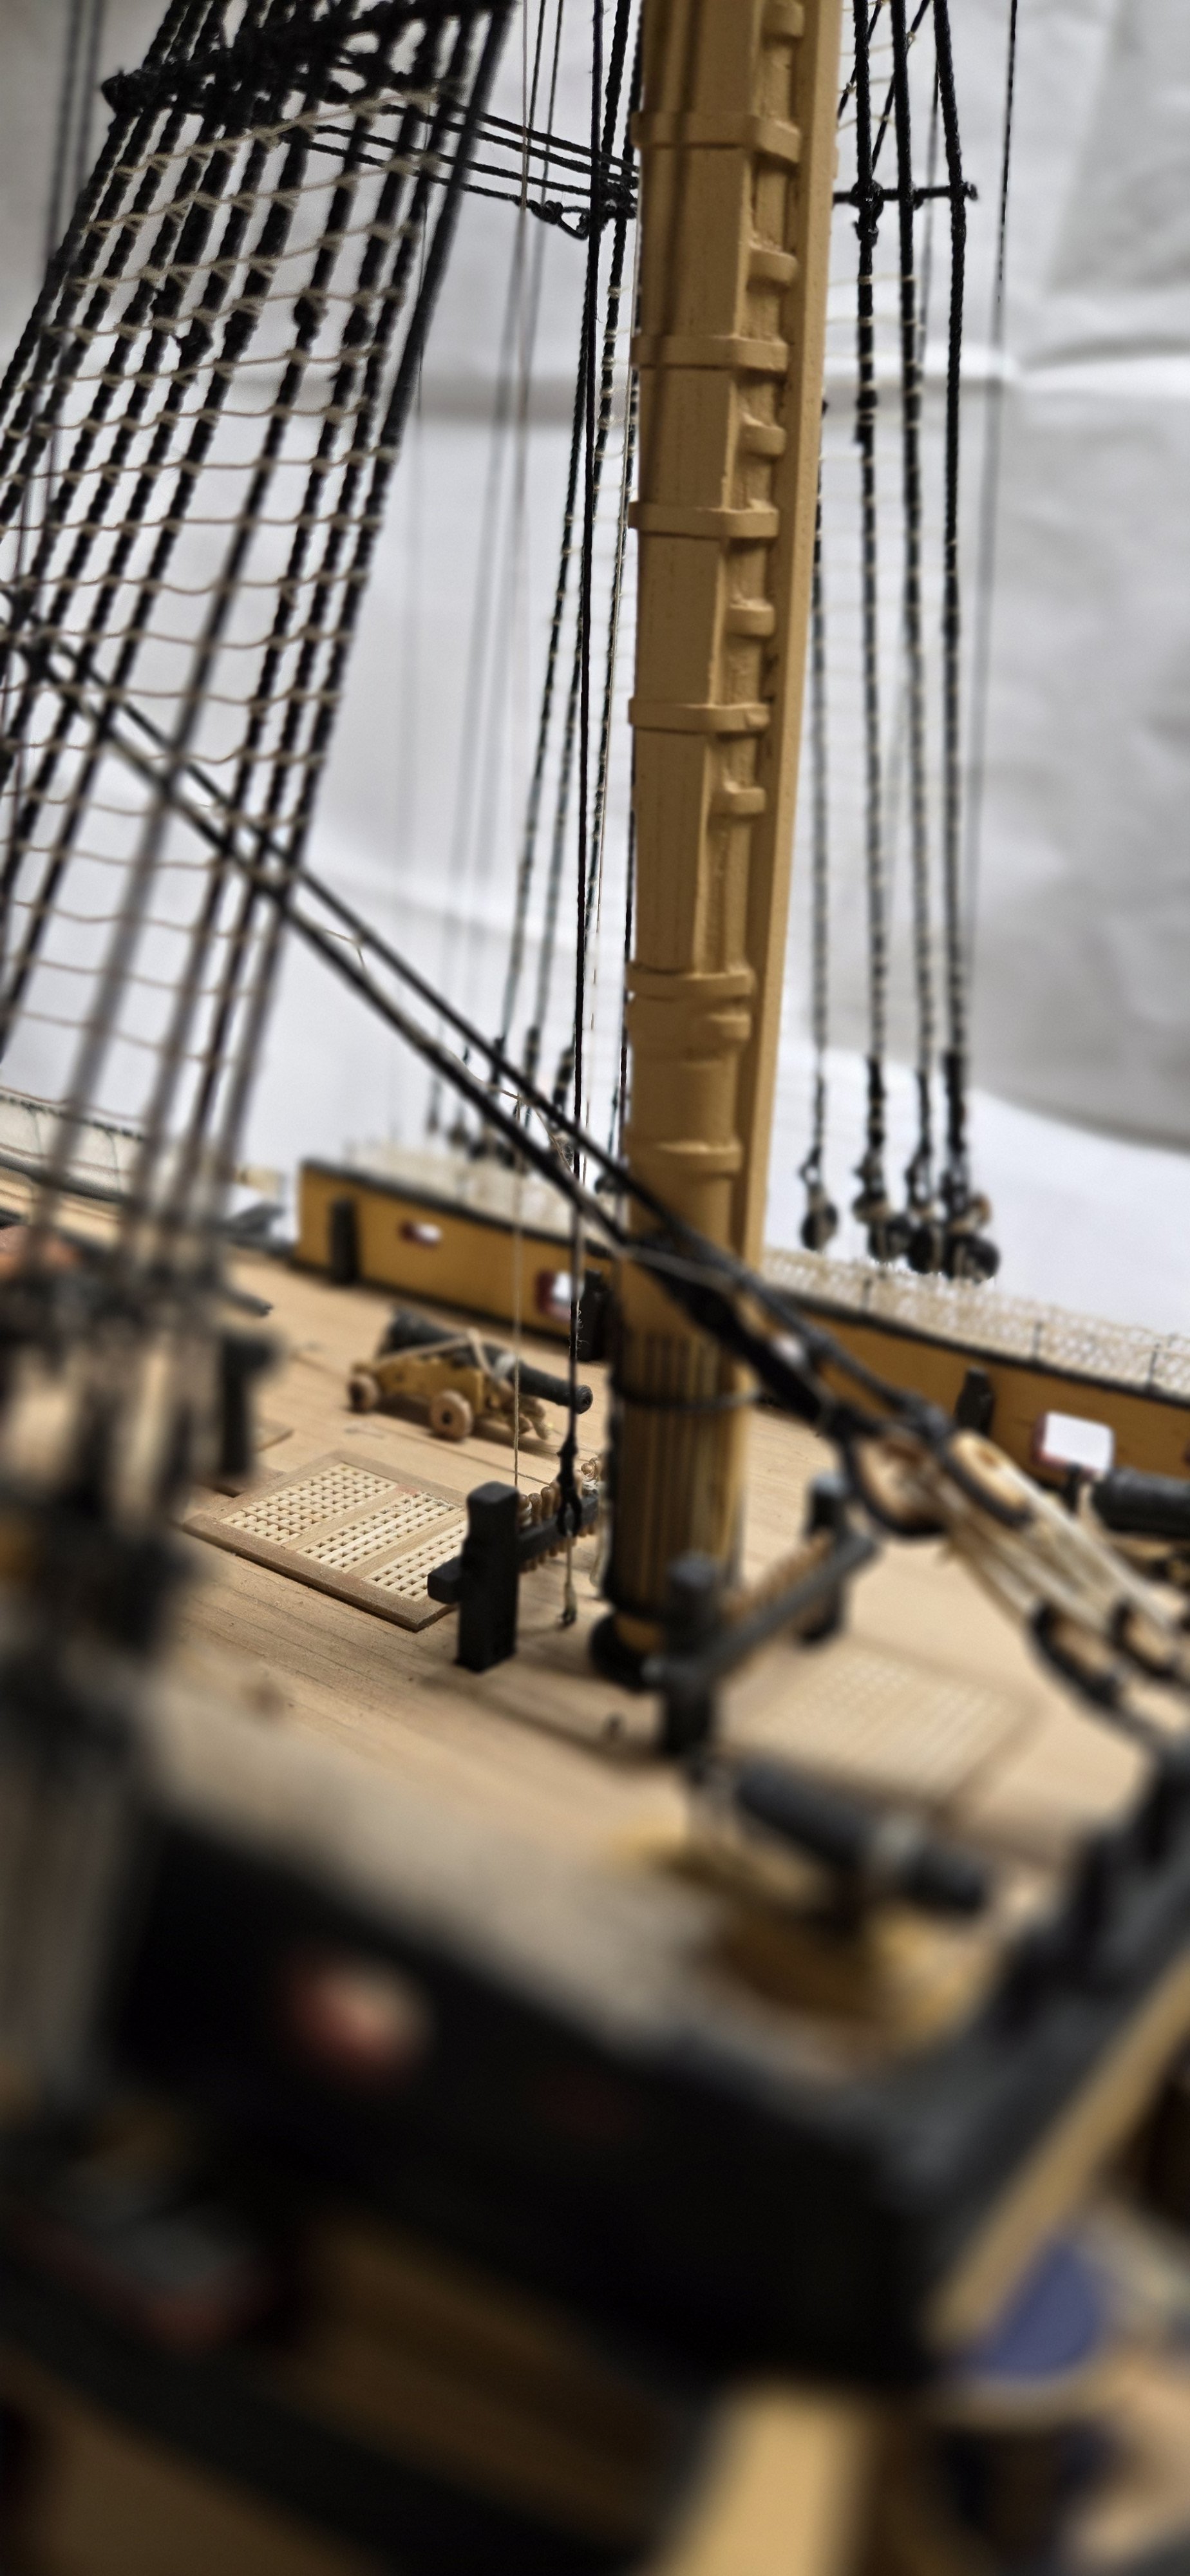
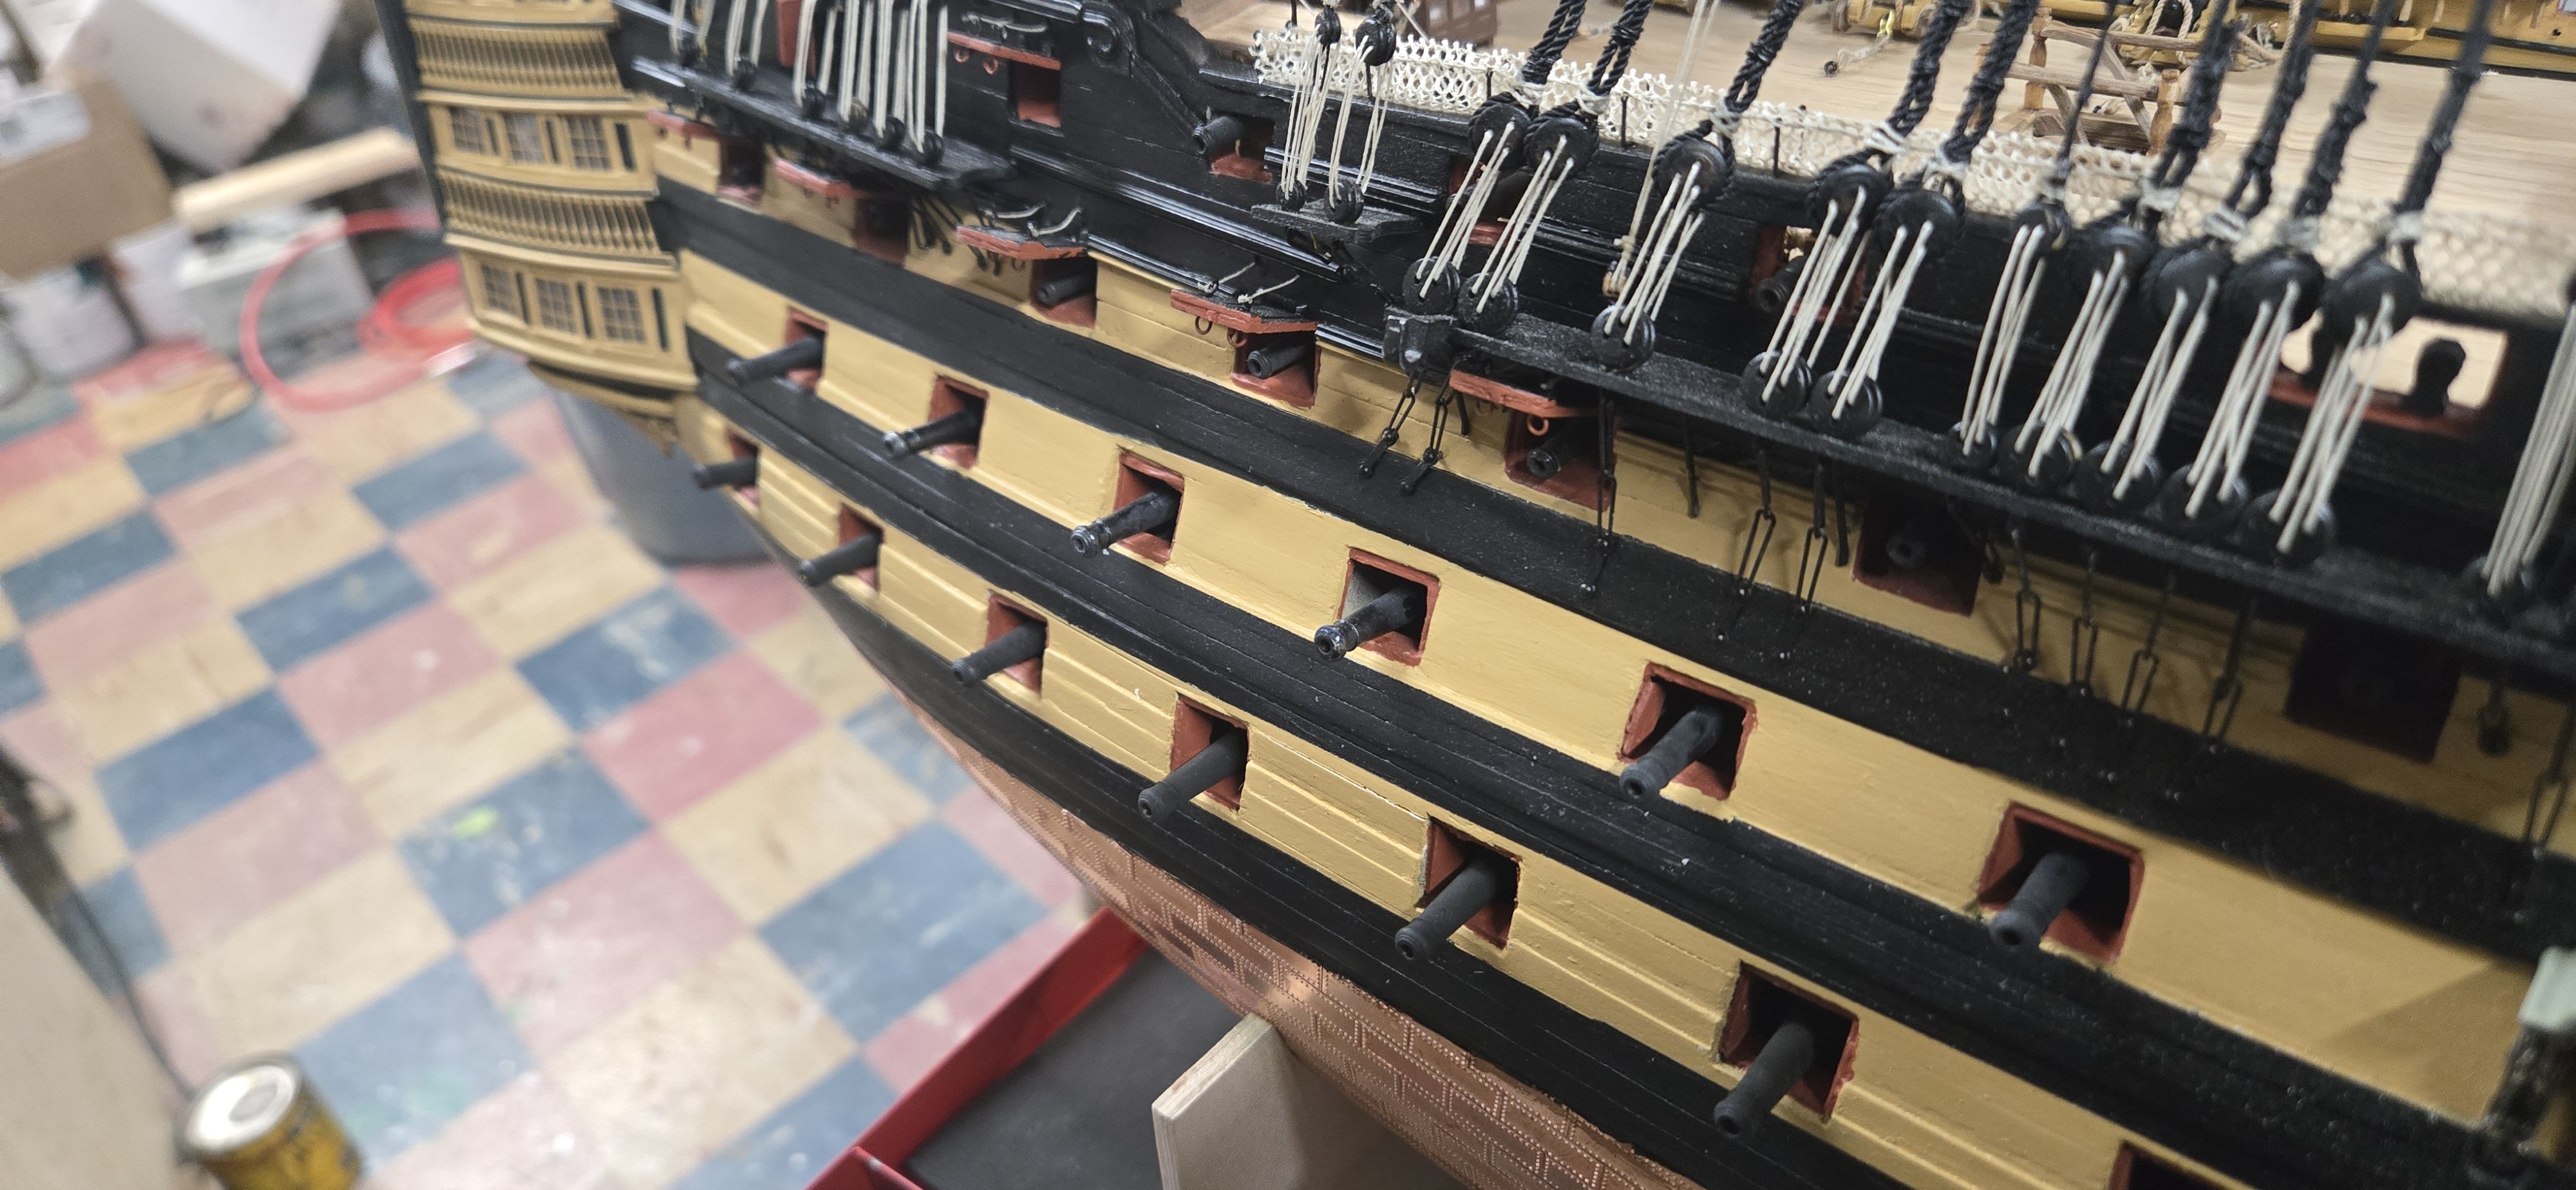
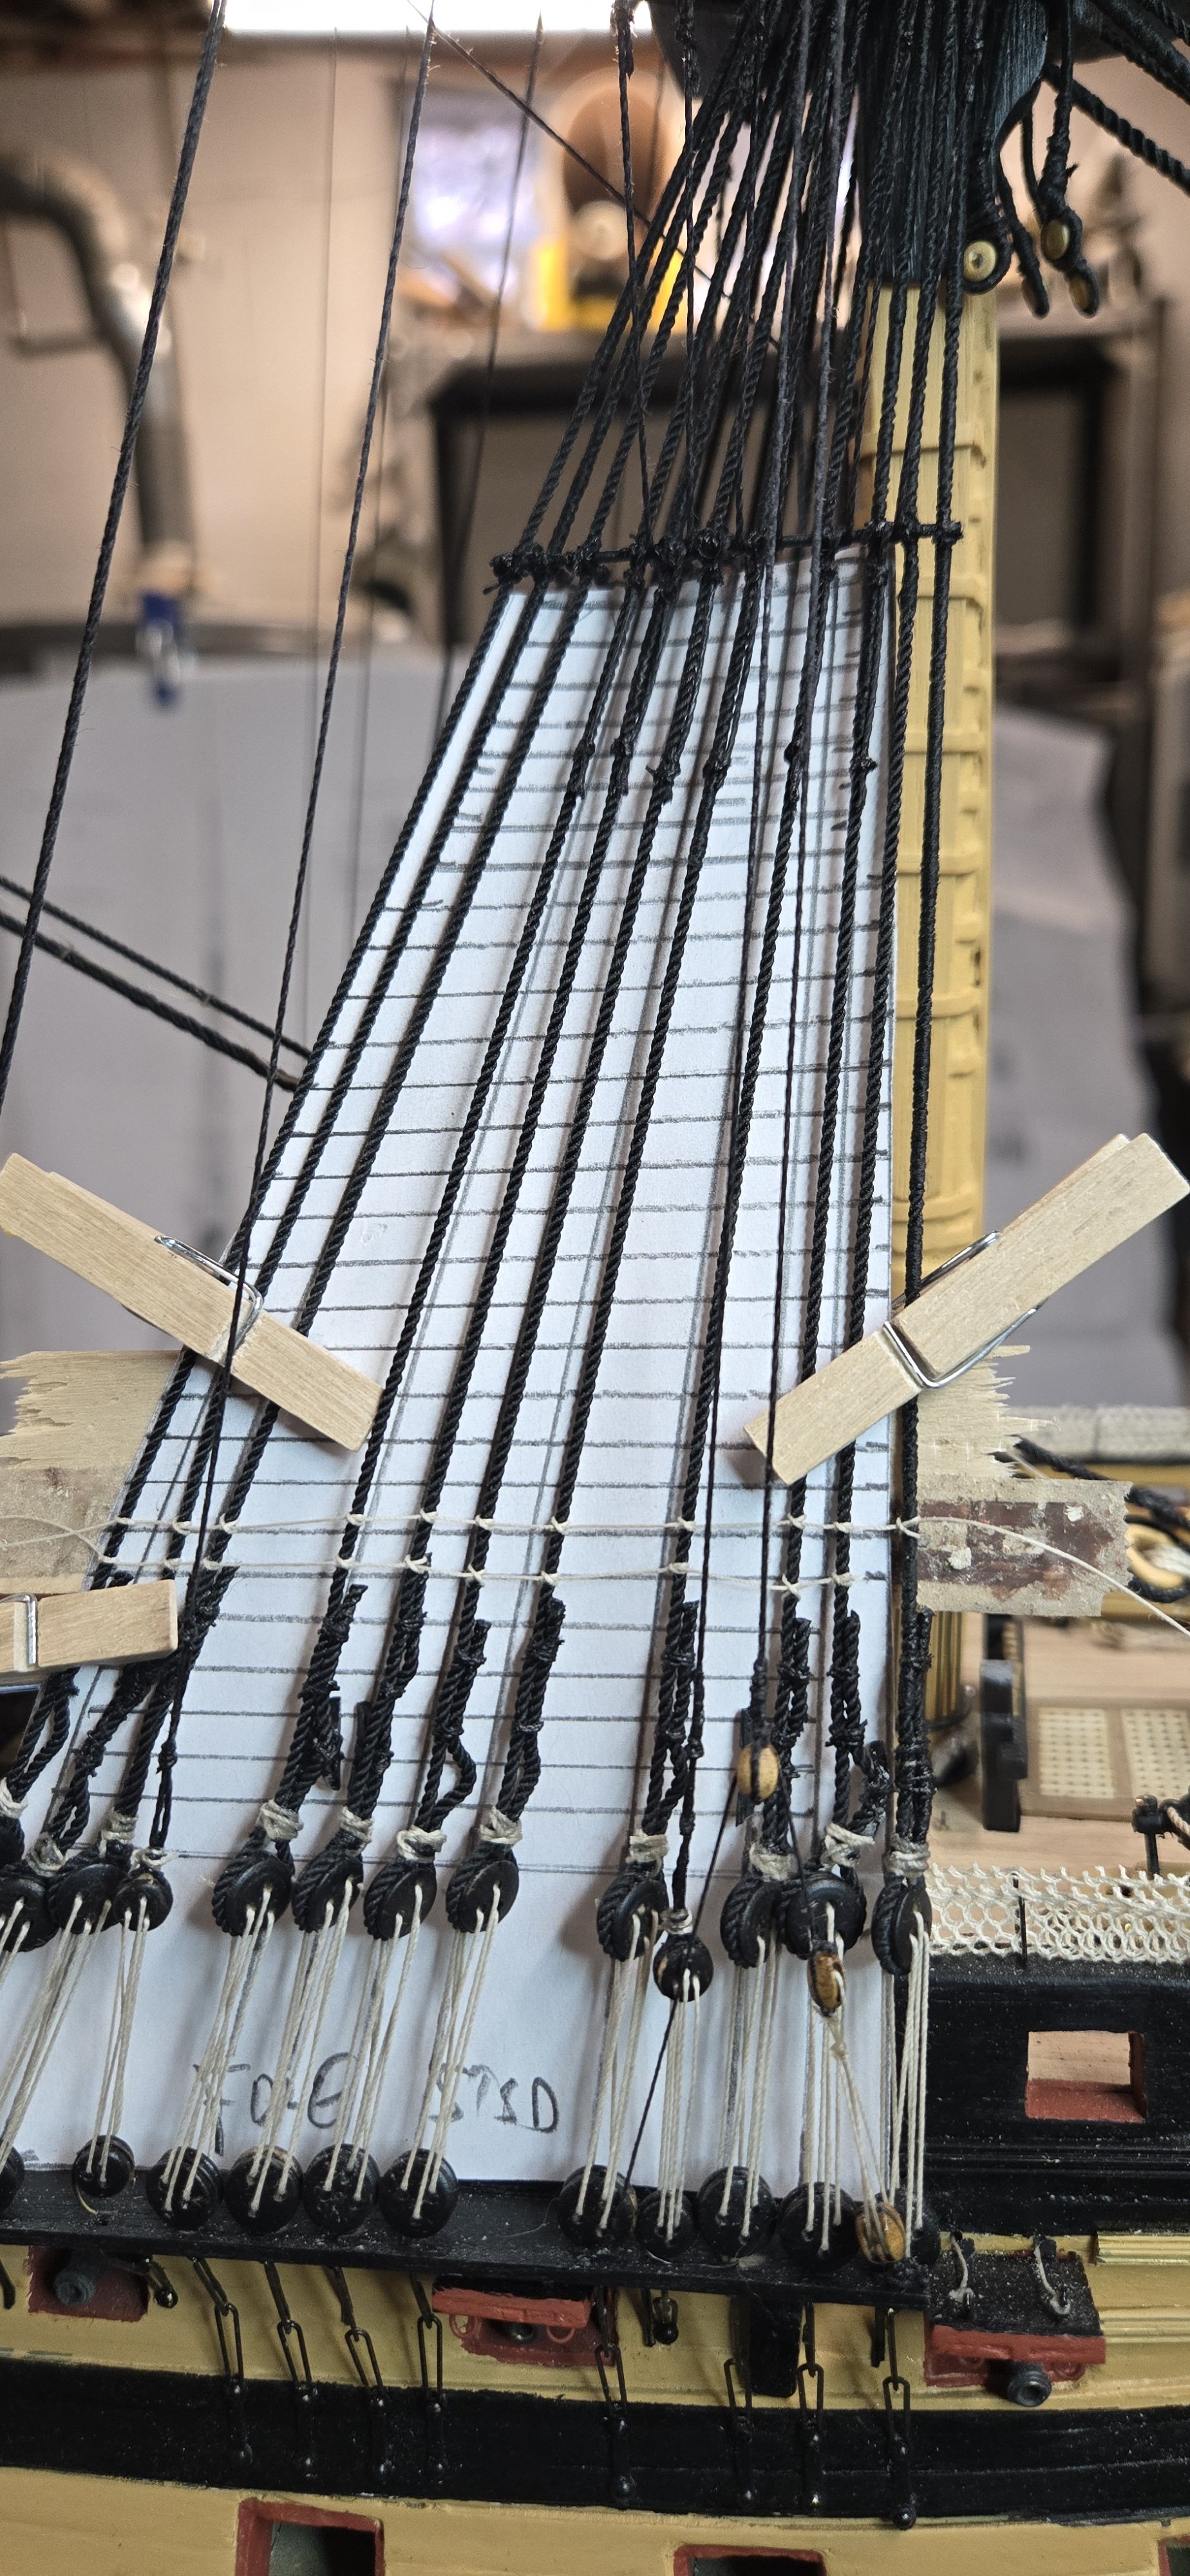
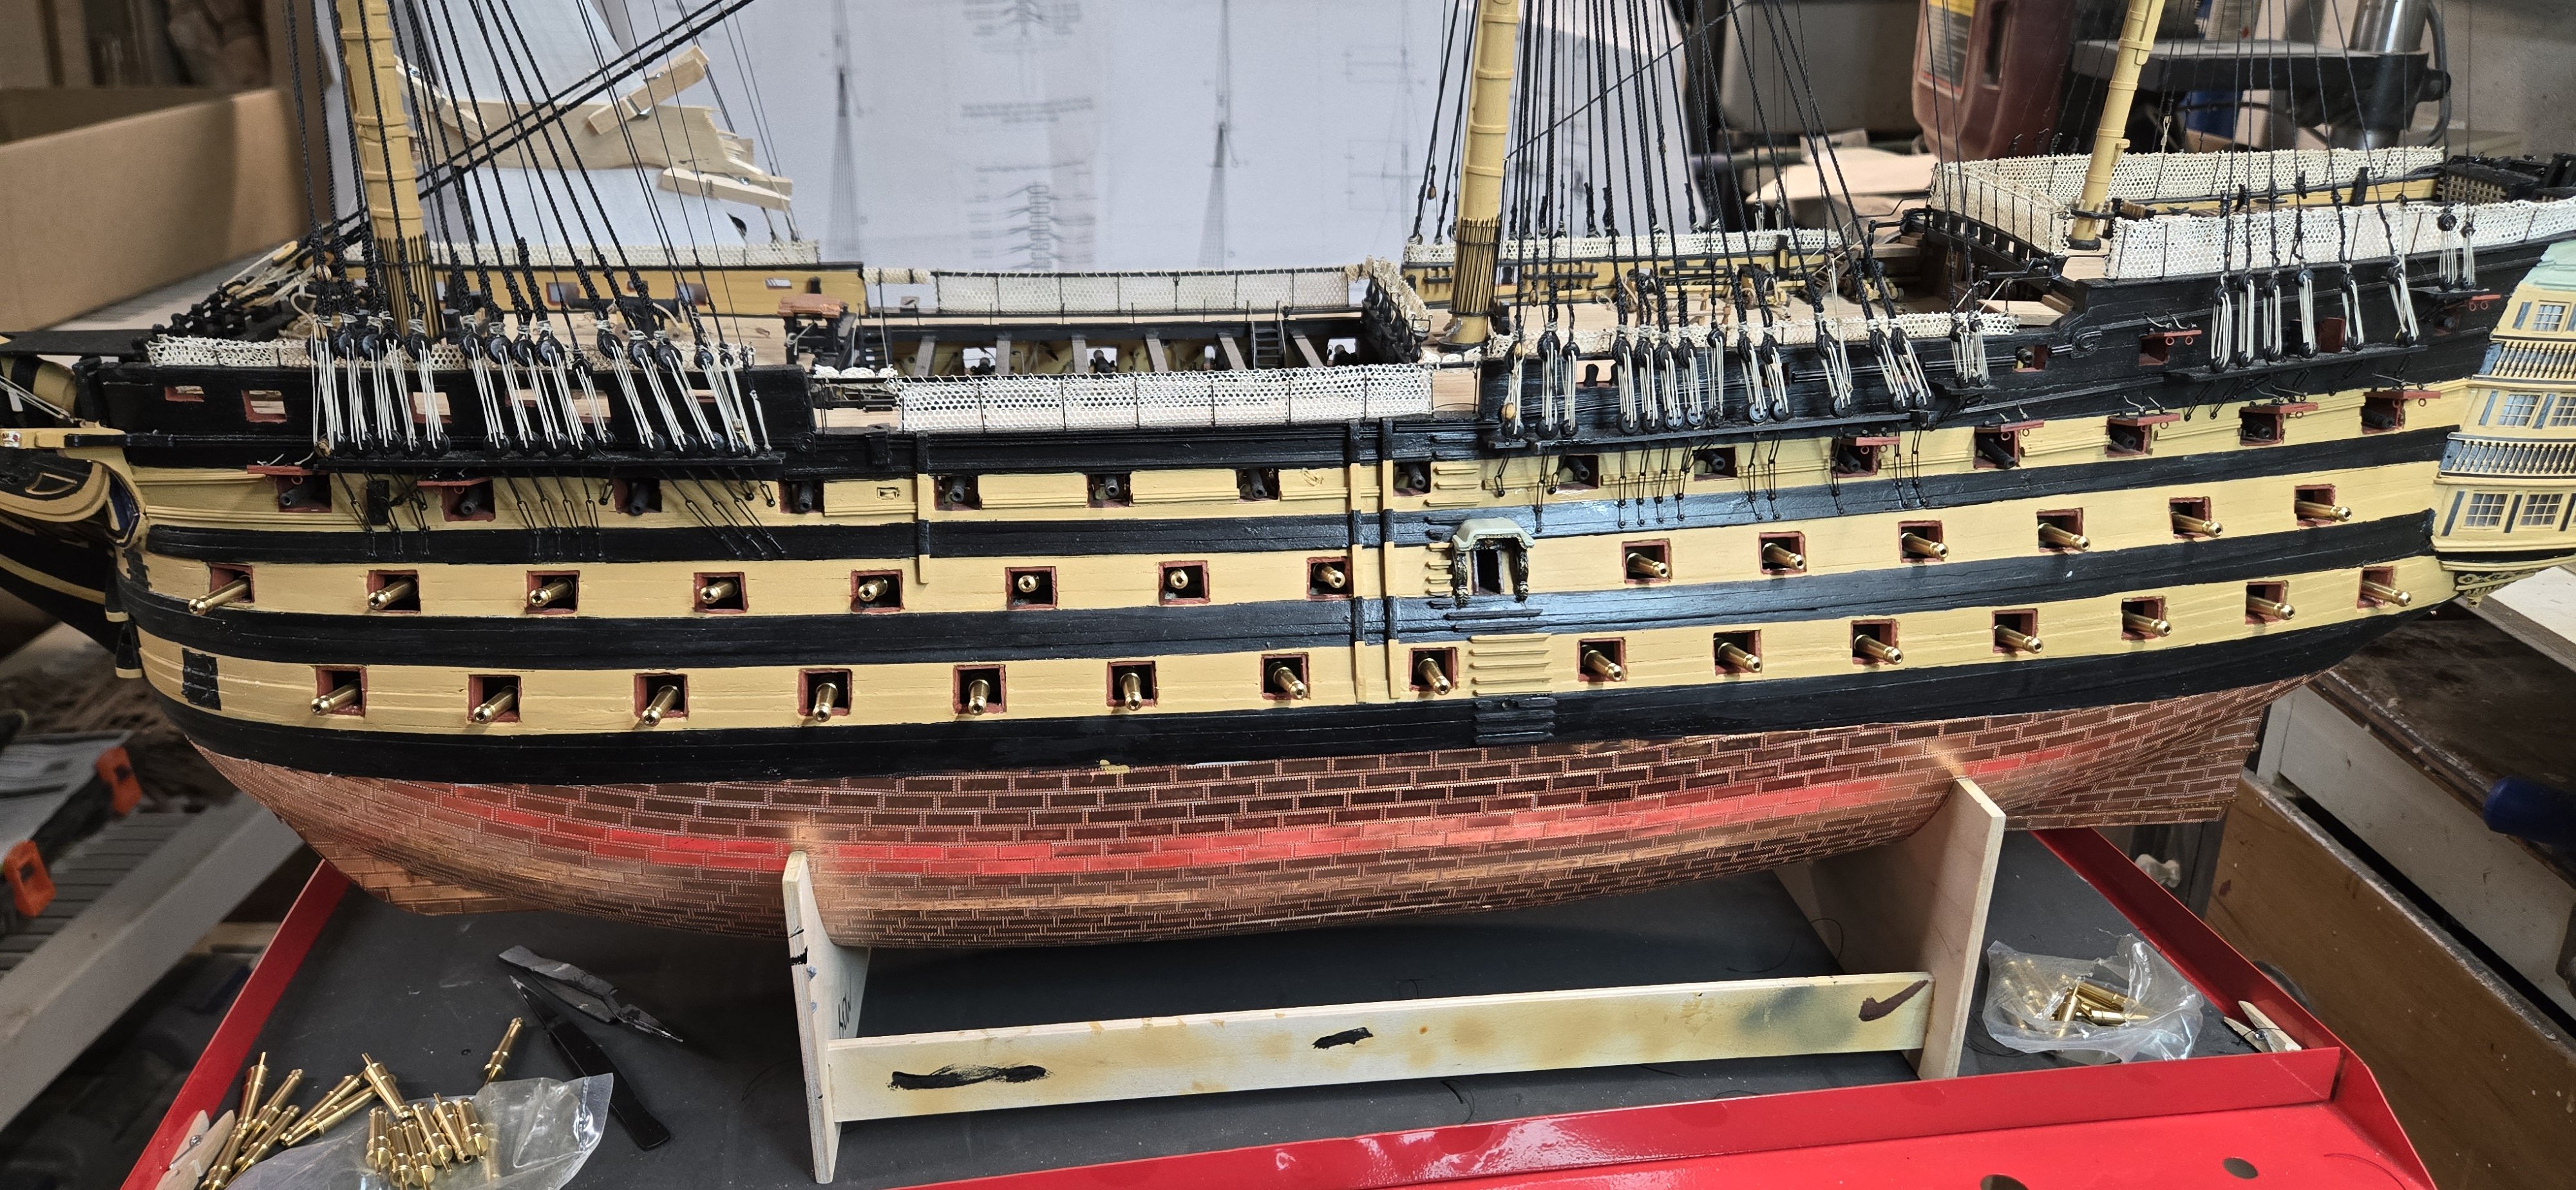
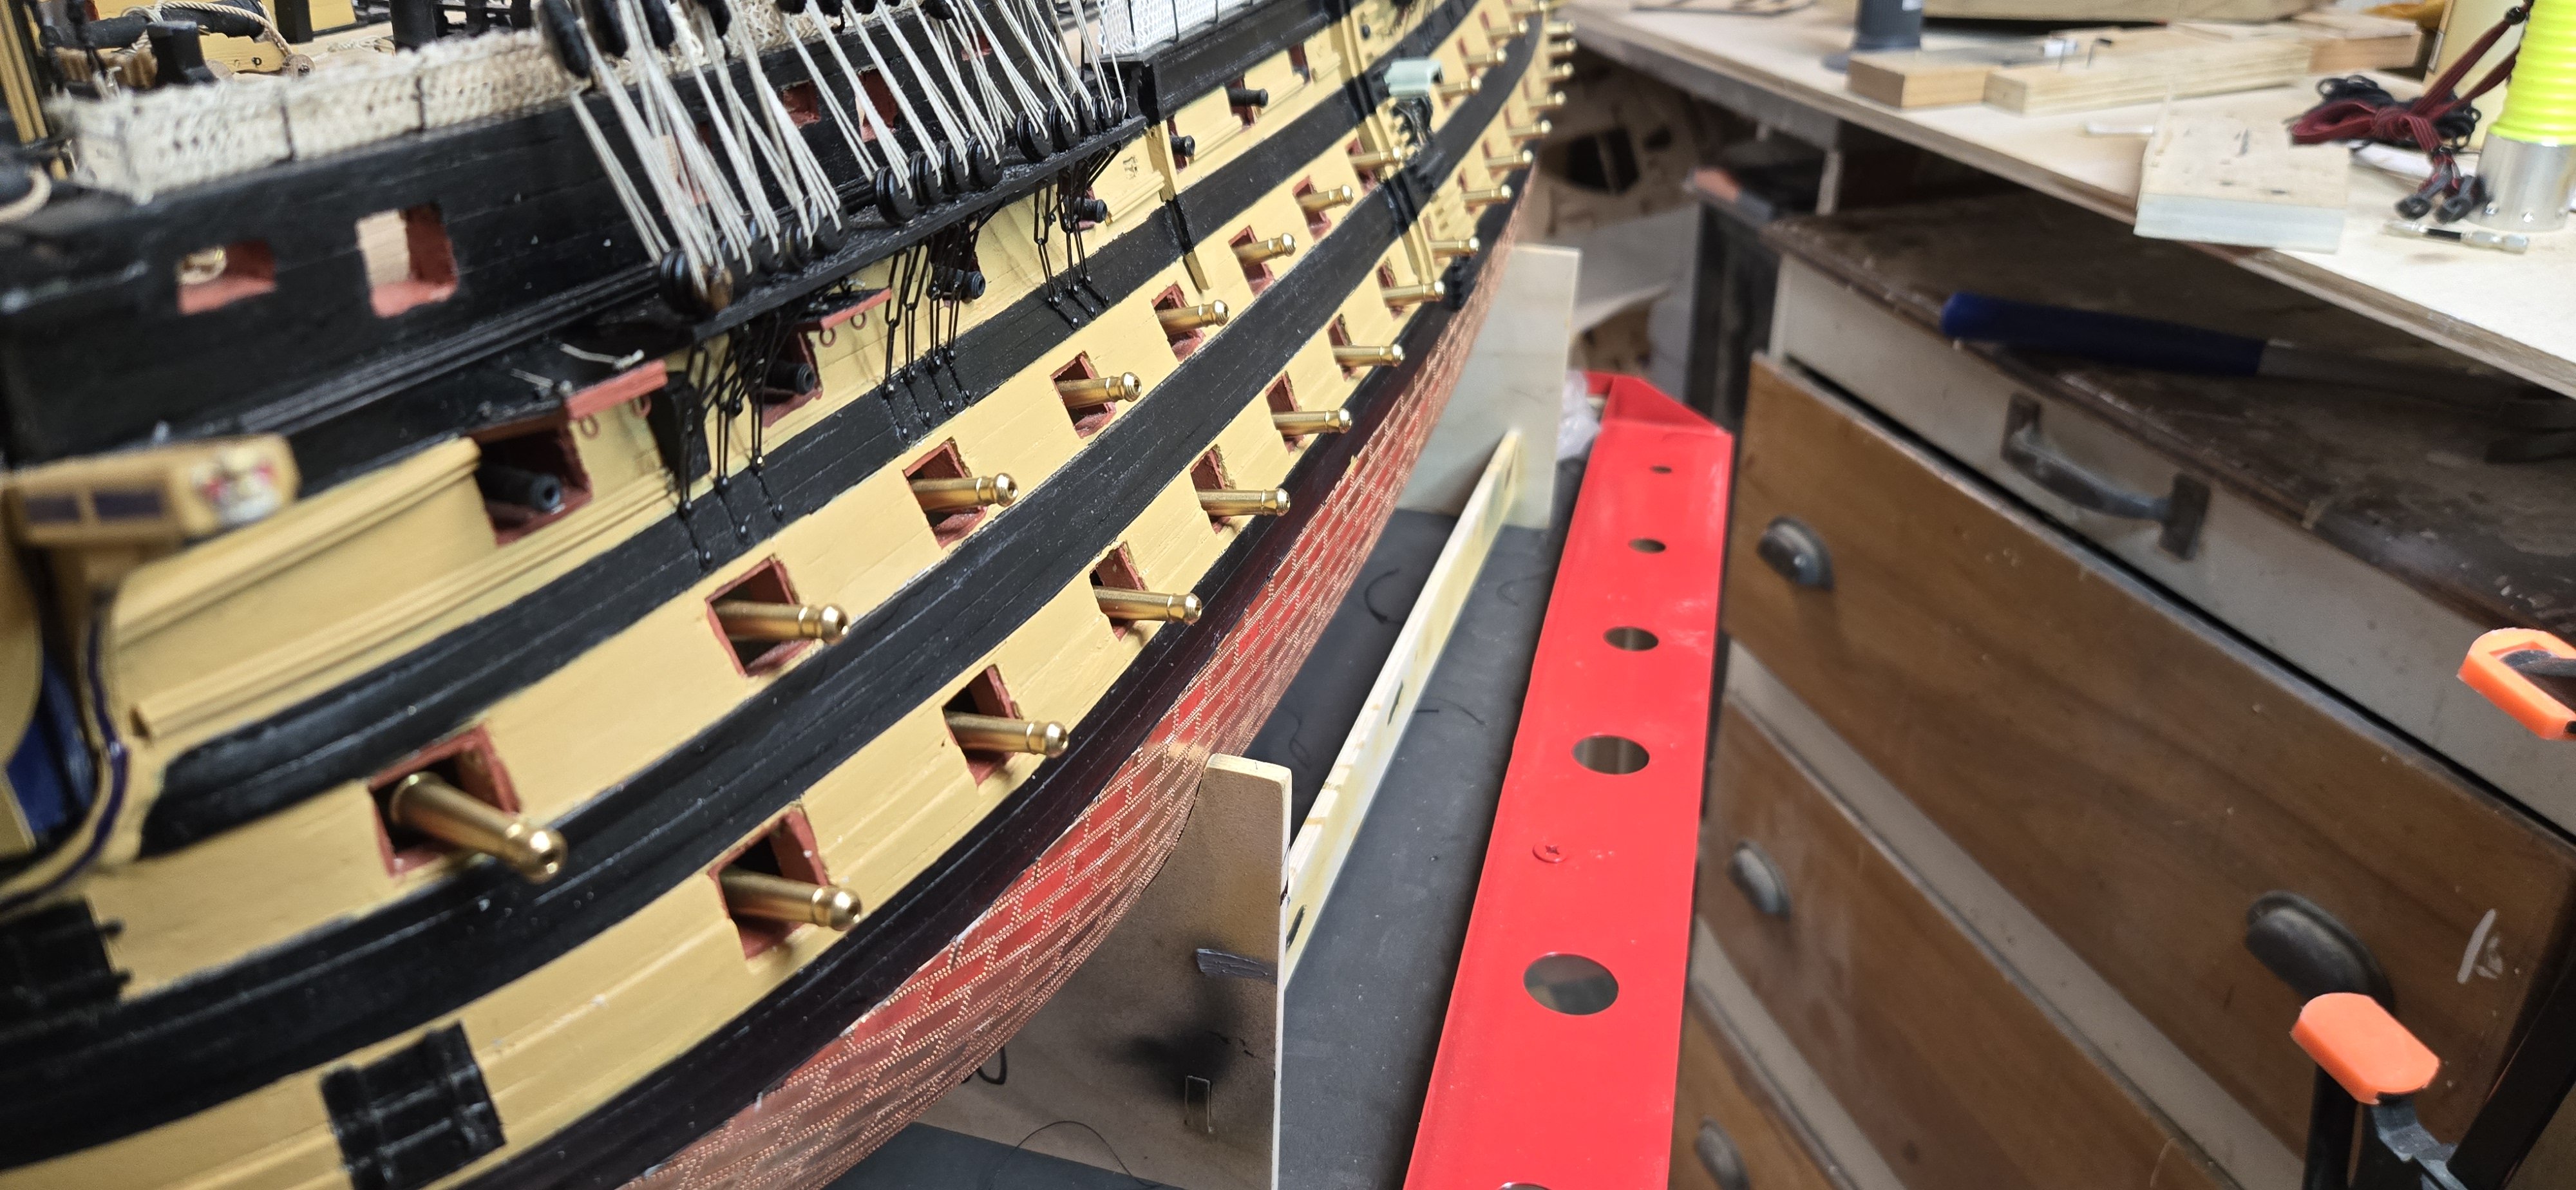
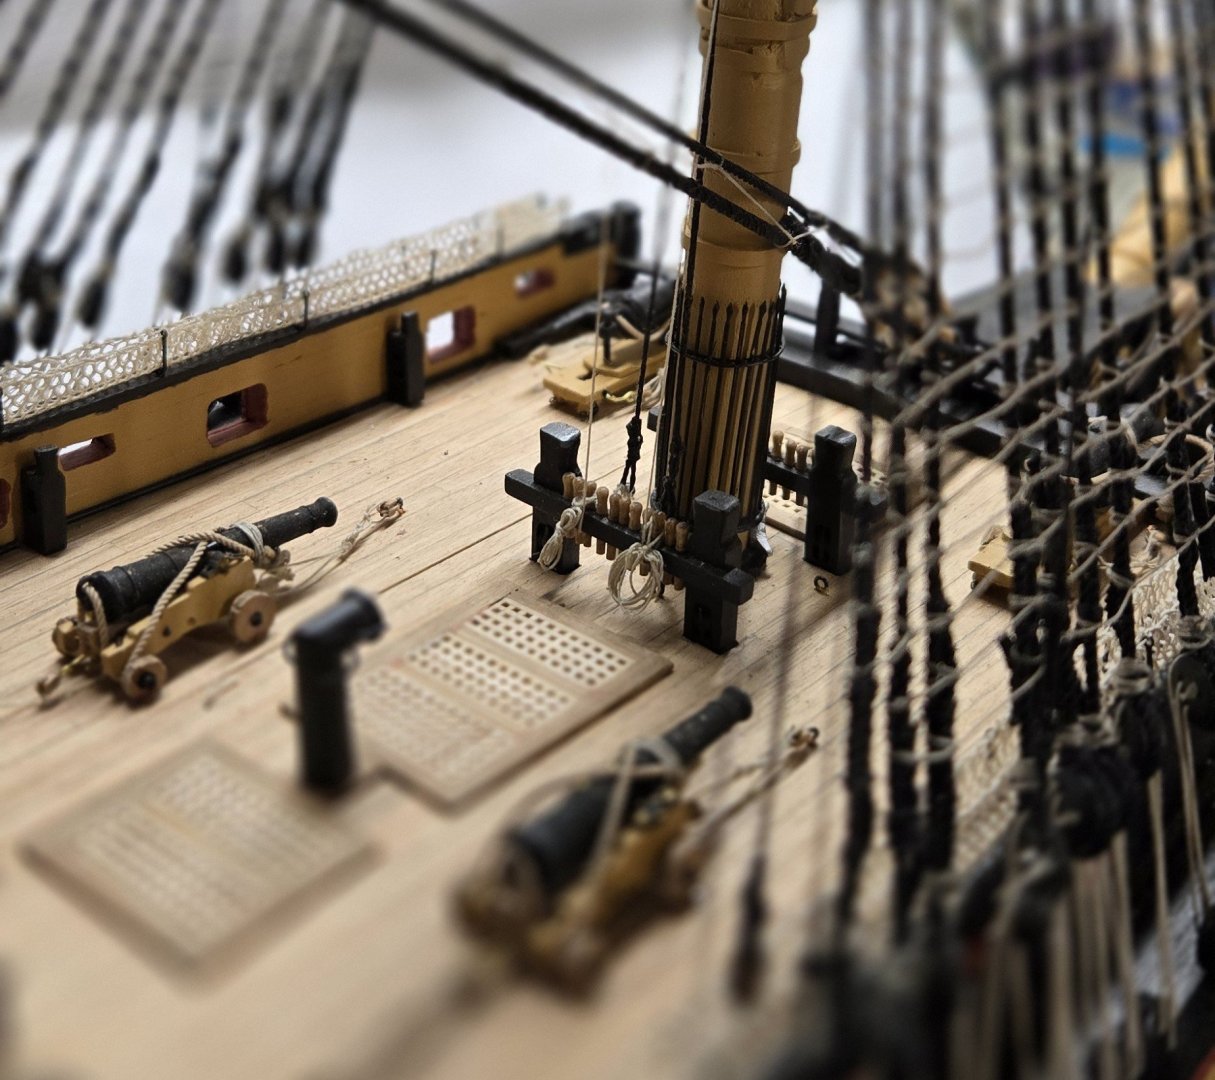
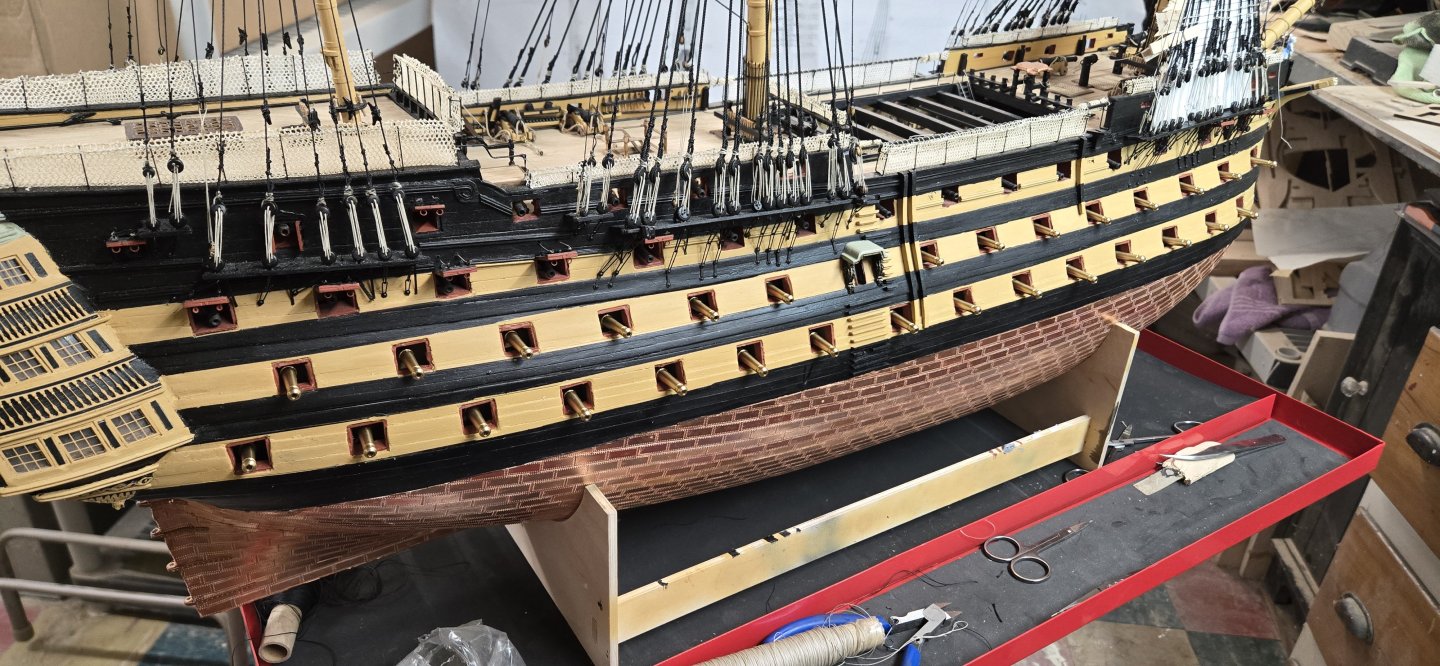
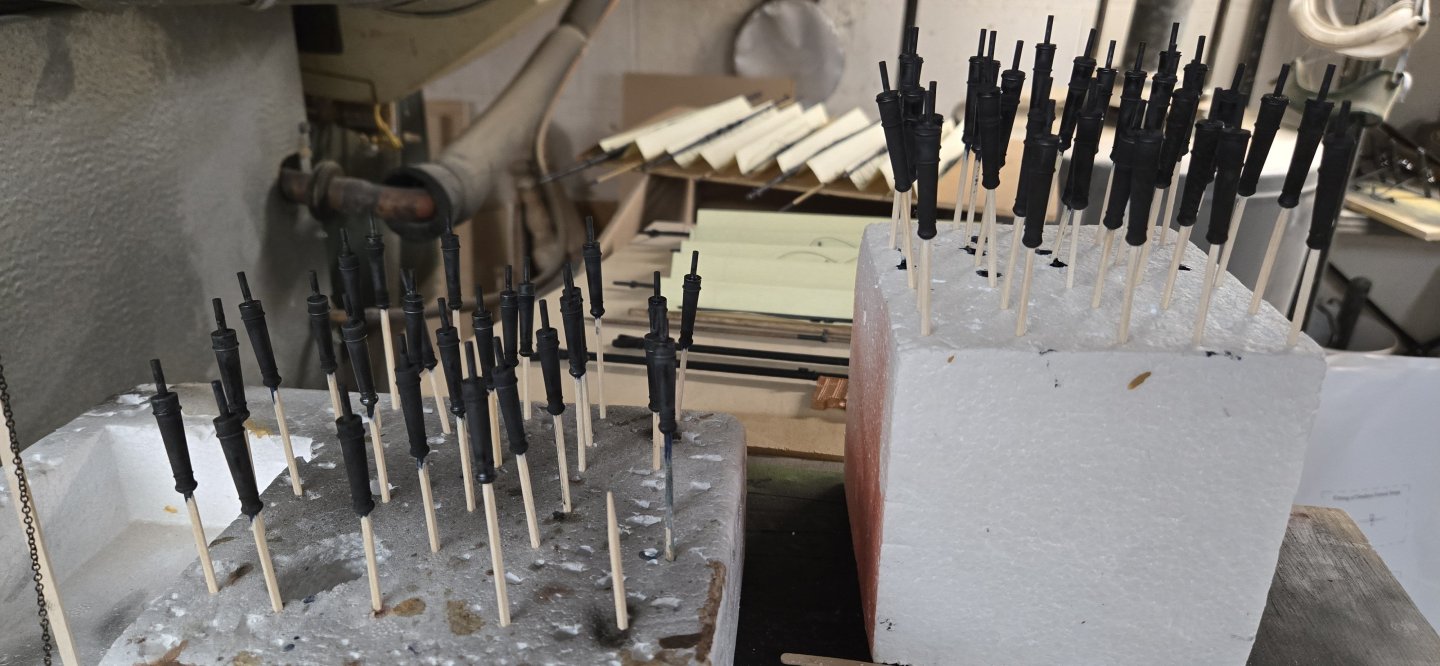
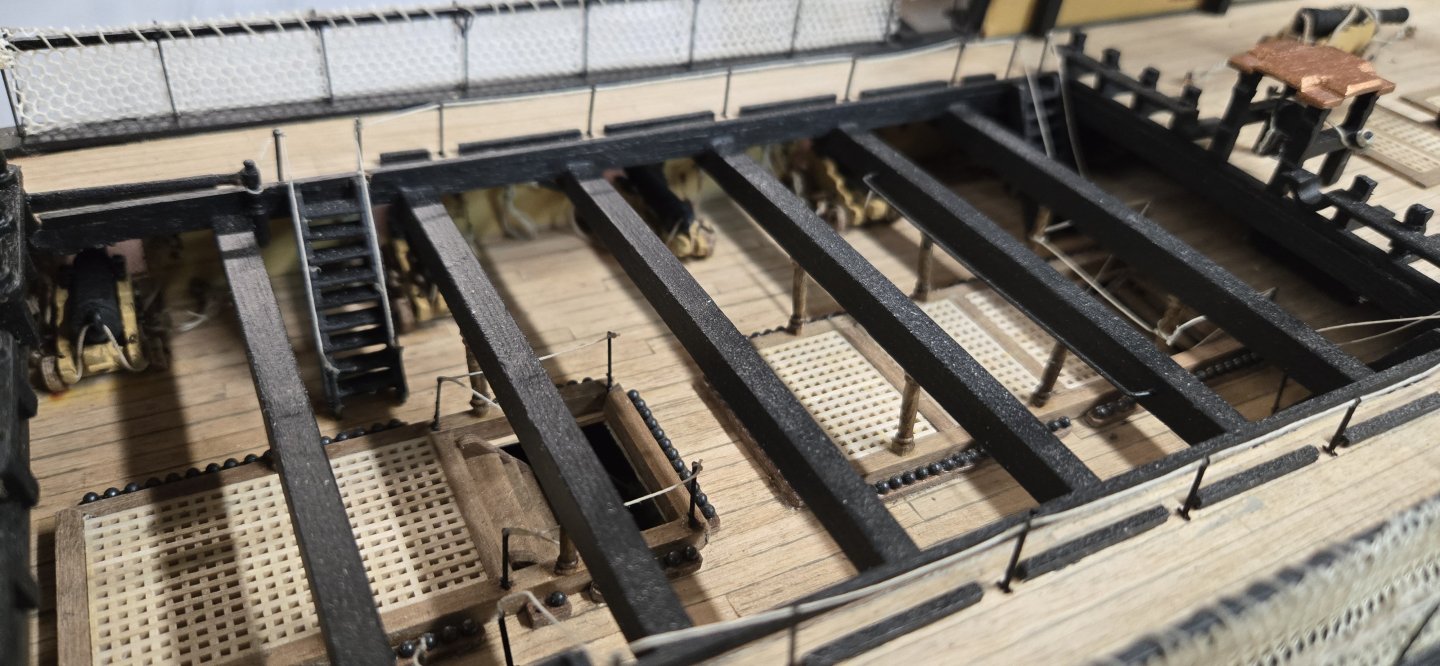
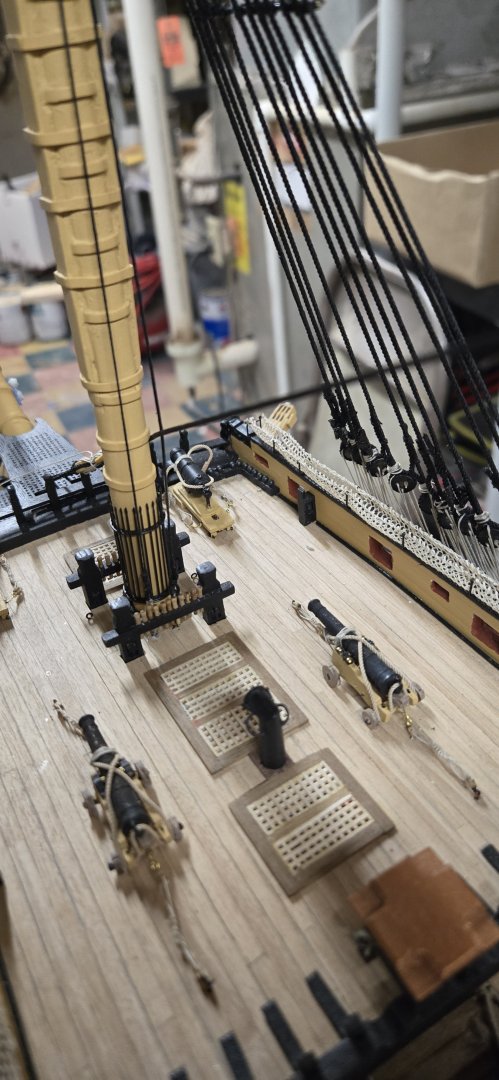
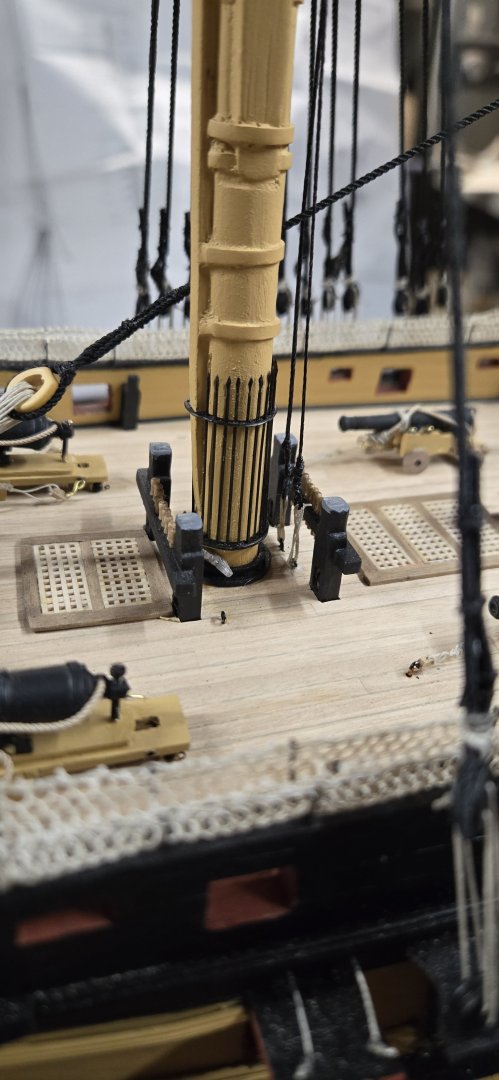
Started working on the ratlines...foremast and then back! I also drilled the holes for the cannons. I took a 1.9mm drill and using a 12x12mm block as a guide, drilled holes in all of the backings. They aren't perfectly squared off, but when I put the cannons in place, they appeared to look good. Be sure to see that there are 2 sets of cannons. The longer ones on the very lowest deck. I dipped all of the cannons in Birchwood Brass Black. I would dip half a deck in for about 2-3 minutes. Take them out and let them sit on a towel till dry and then re-dip them for another 3 minutes or so. After than, I would place them on toothpicks to dry. I may have to add a little paint to help hide flaws, but they seem ok. Once done, I moved on to the ratlines. I took the shroud blueprints and placed paper over the shrouds and drew lines to create the ratlines for the starboard lower, futtock and upper ratlines. I had to darken some of the shrouds and lines to make them show up through the paper. Once done, I cut them all into the right shapes and started with the foremast lower shrouds. I clothpined them to the shrouds to help keep the ratlines consistent. At first, it was a learning curve to tie the clove hitches but once the muscle memory kicks in, it actually goes pretty fast. Not fast enough for my back, but quick enough! I was able to finish the lower fore ratlines and start on the futtock ratlines. I have only CA glued the outer knots, the inners remain free. I will wait and straighten them all out and then add some watered down white glue to set them in place. The rest is going to take some time to finish! This was about 2-3 days of a few hours...my patience isn't as forgiving right now. Perhaps I will switch off between ratlines and making cannon lids or move to making the lanterns and life boats? This will be a haul and I'll see you all at the end!


-
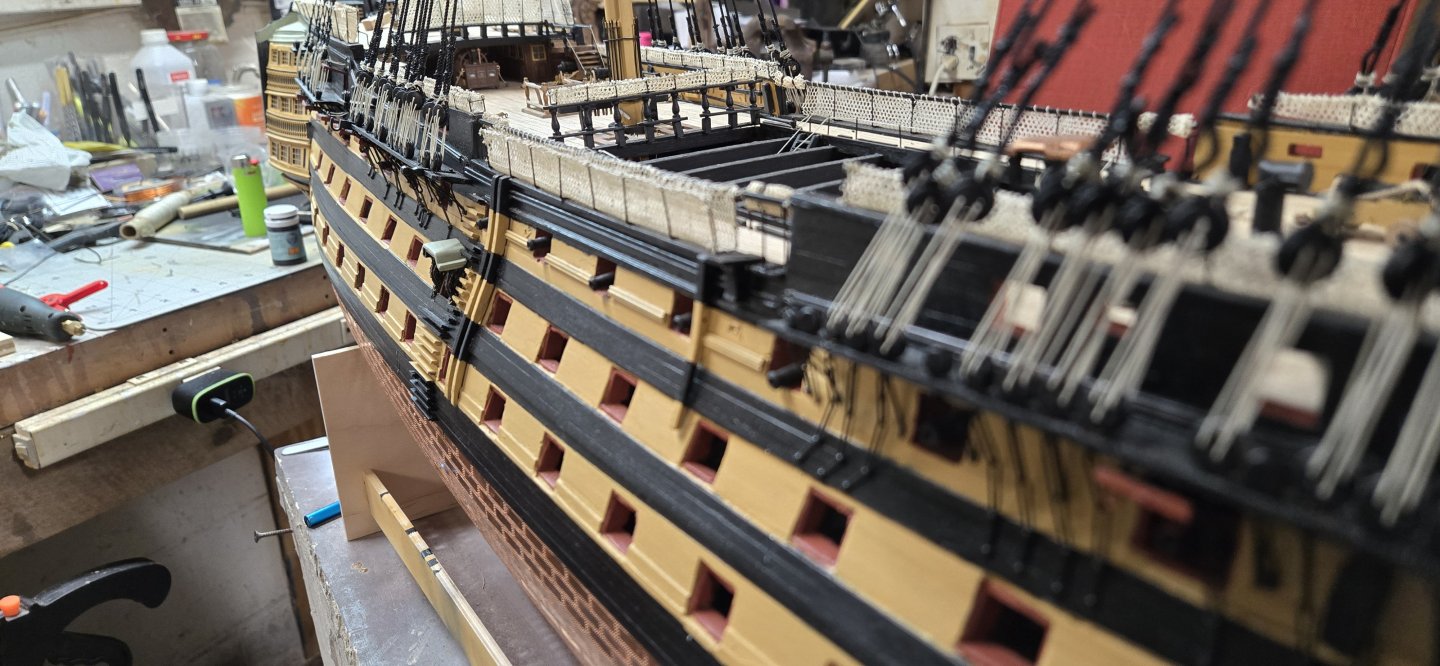
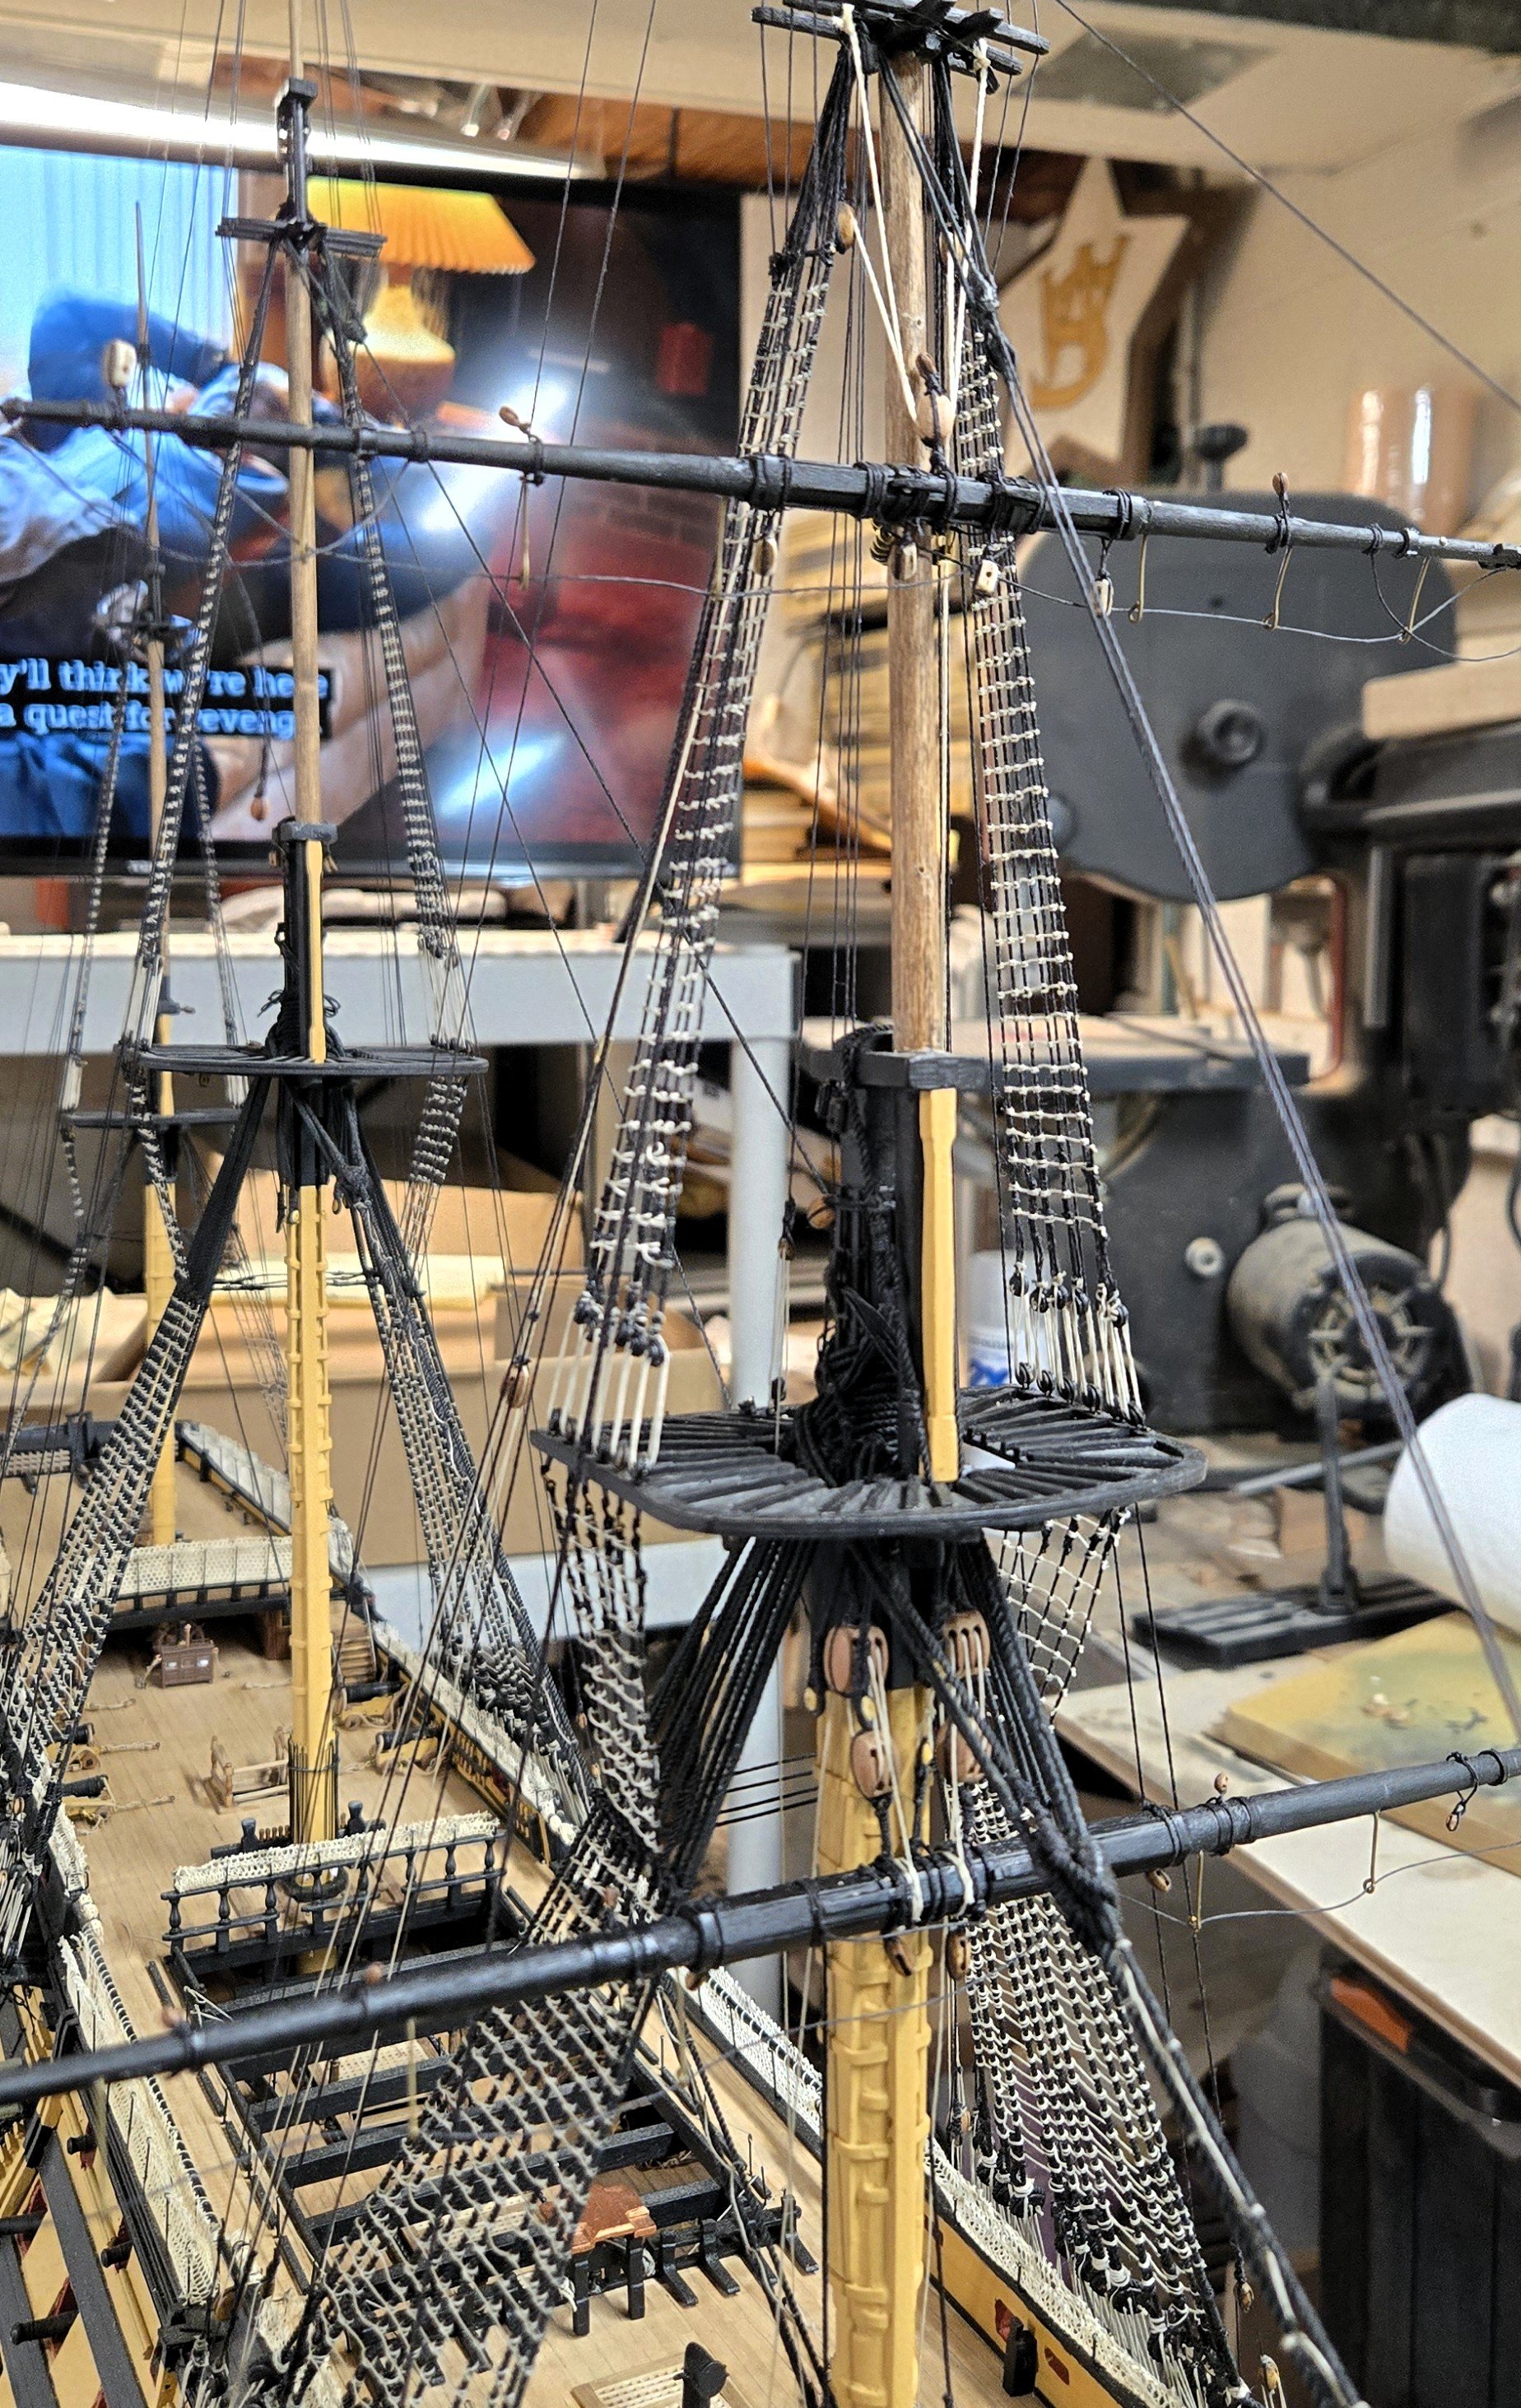
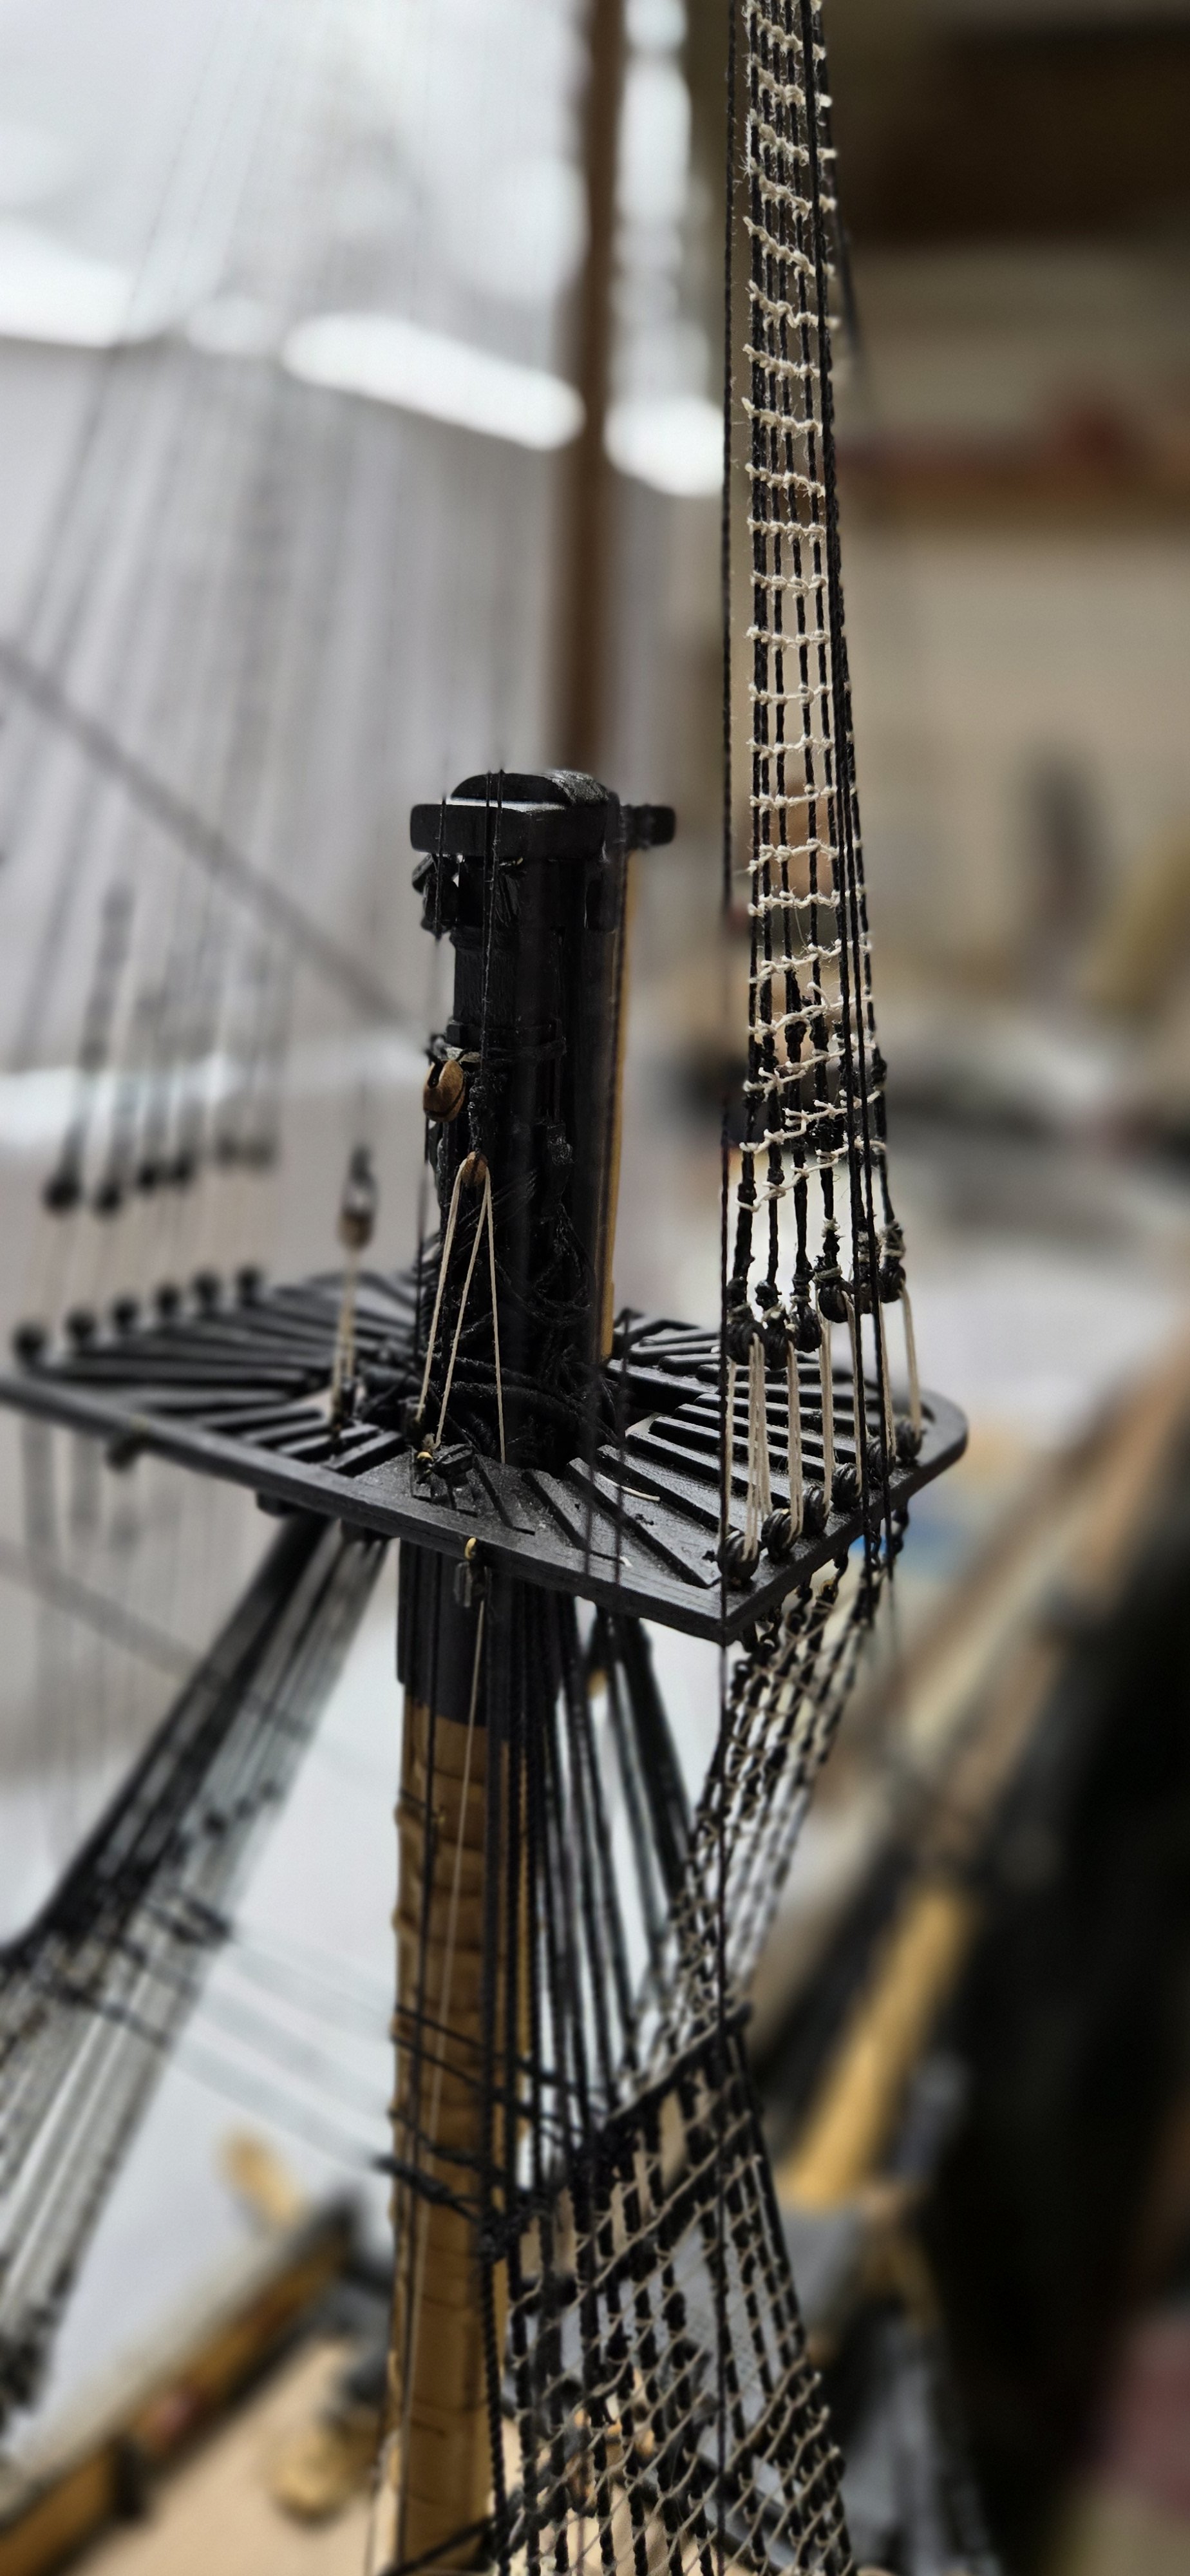
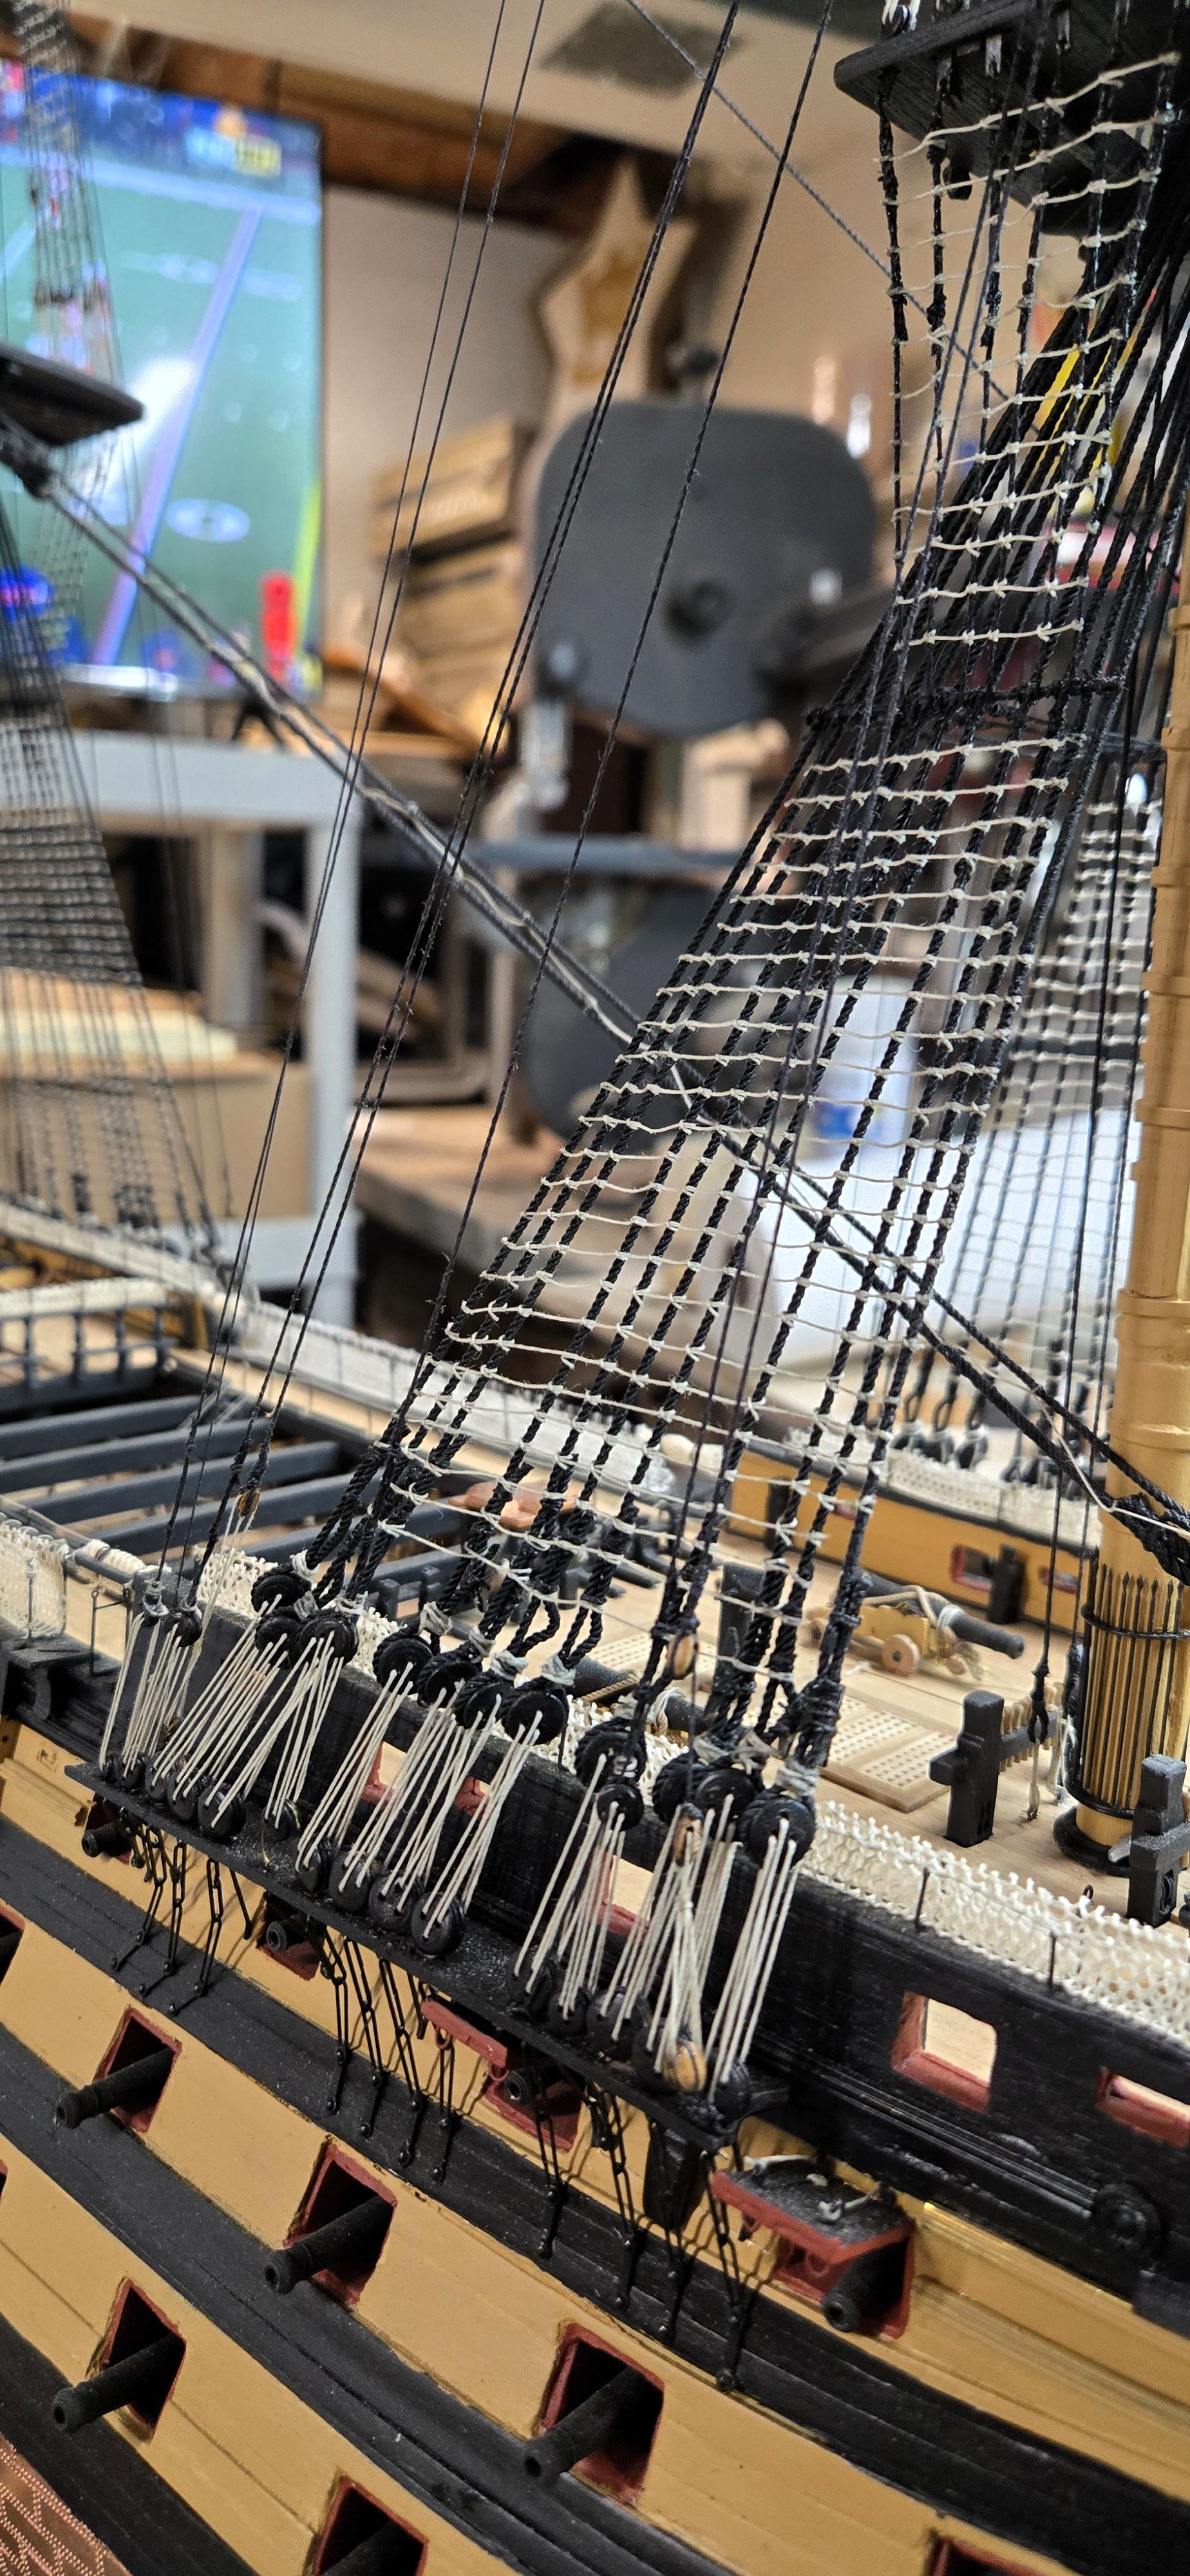
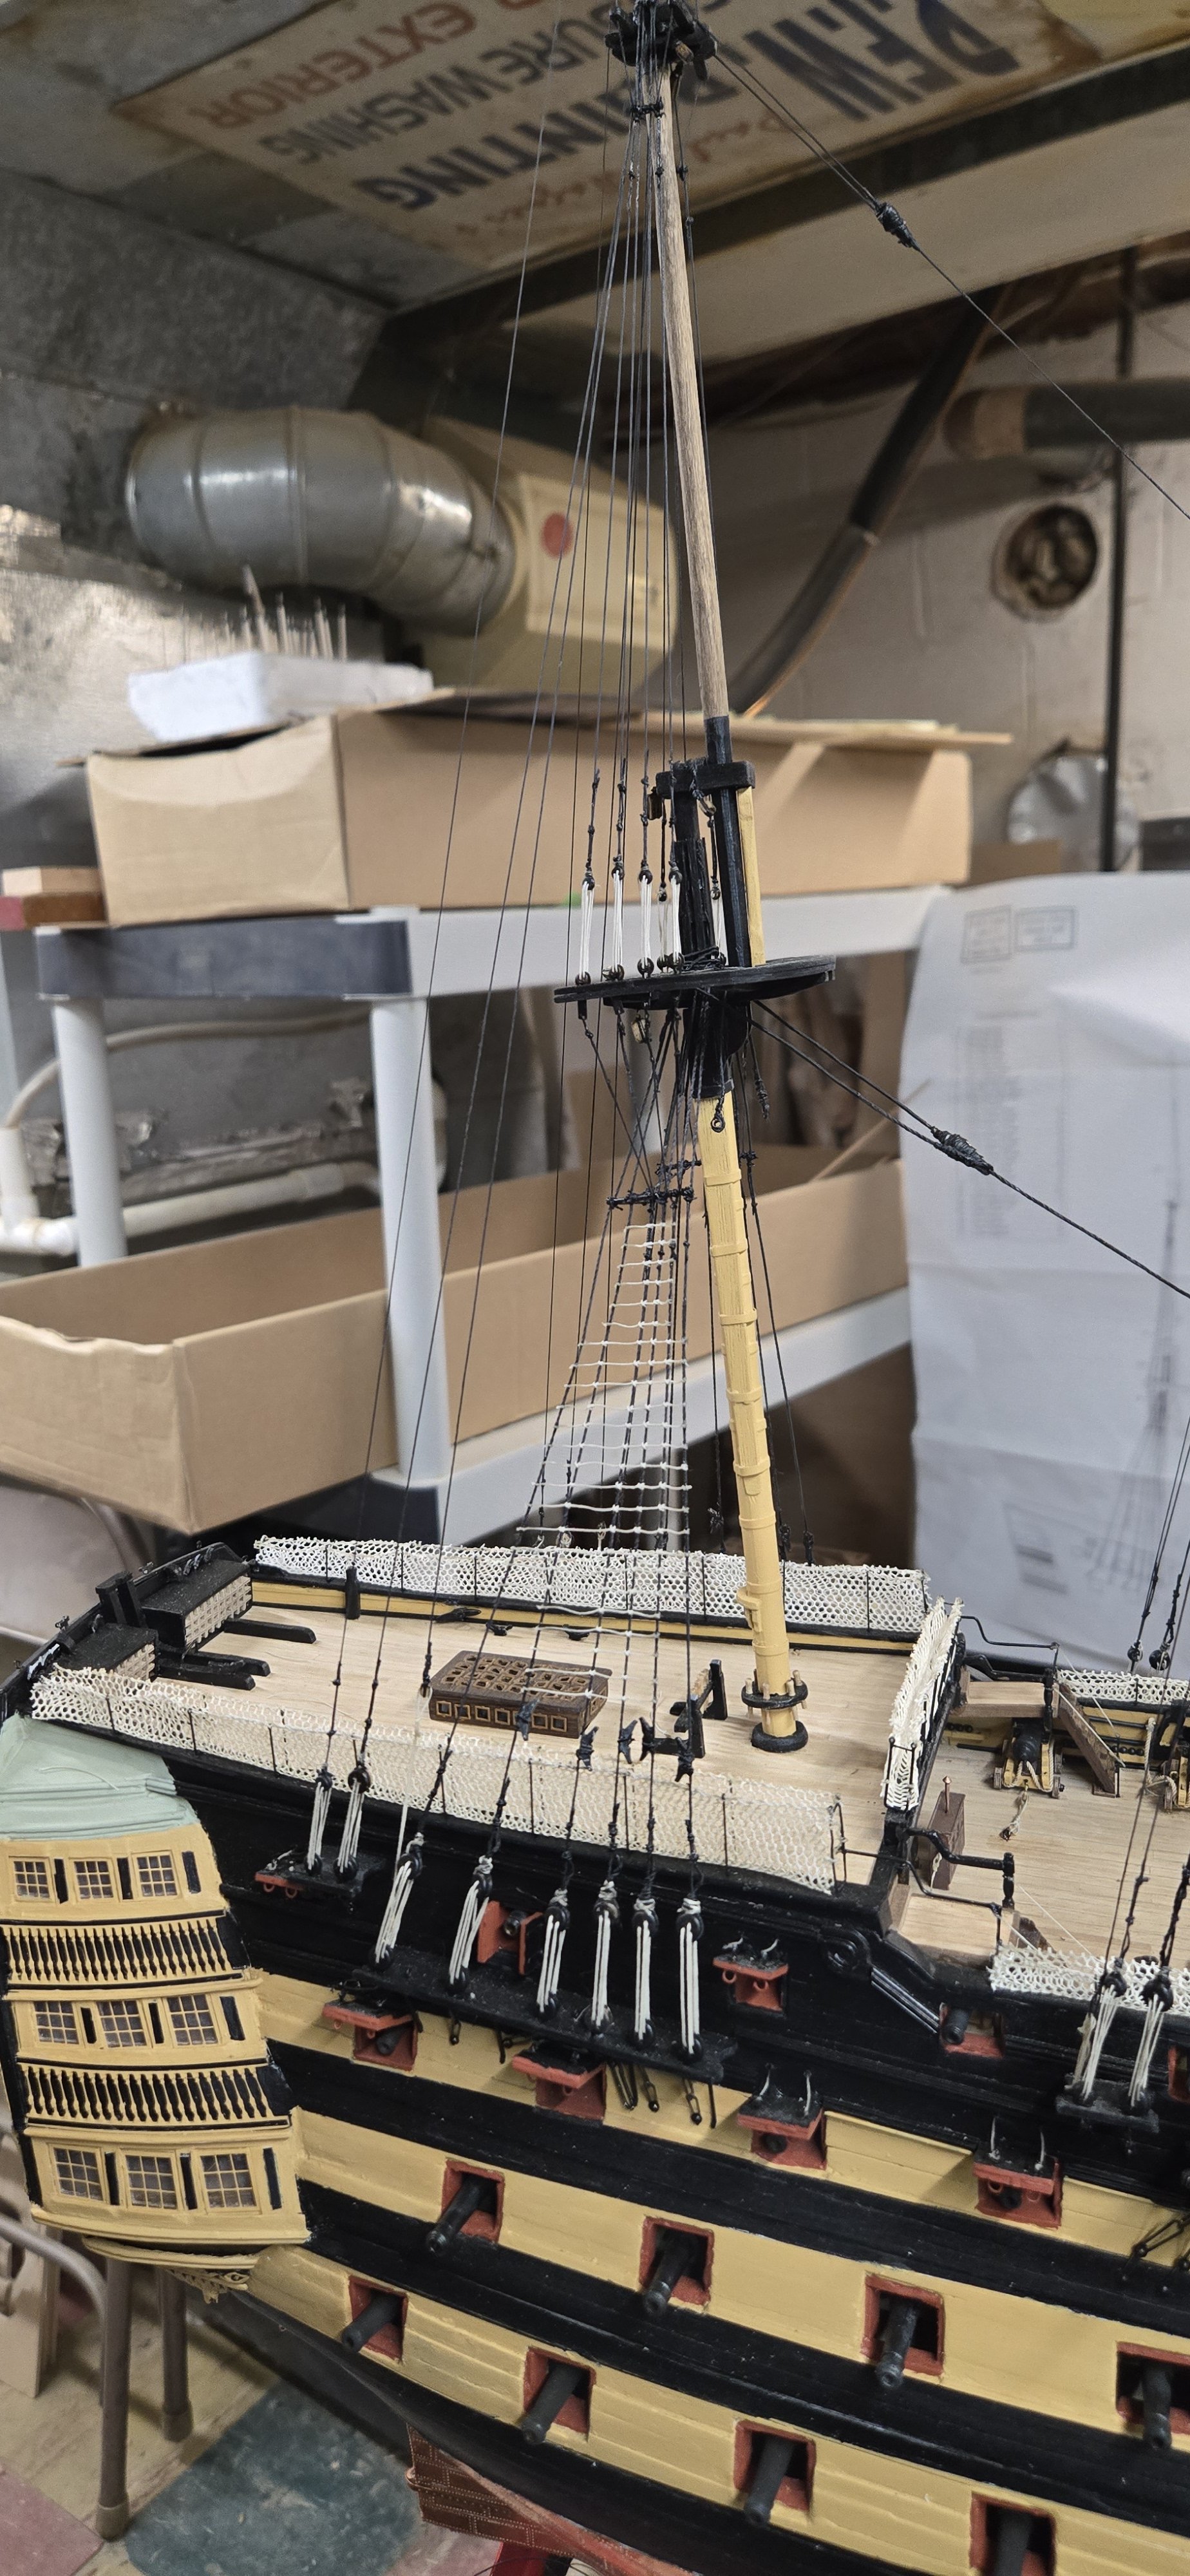
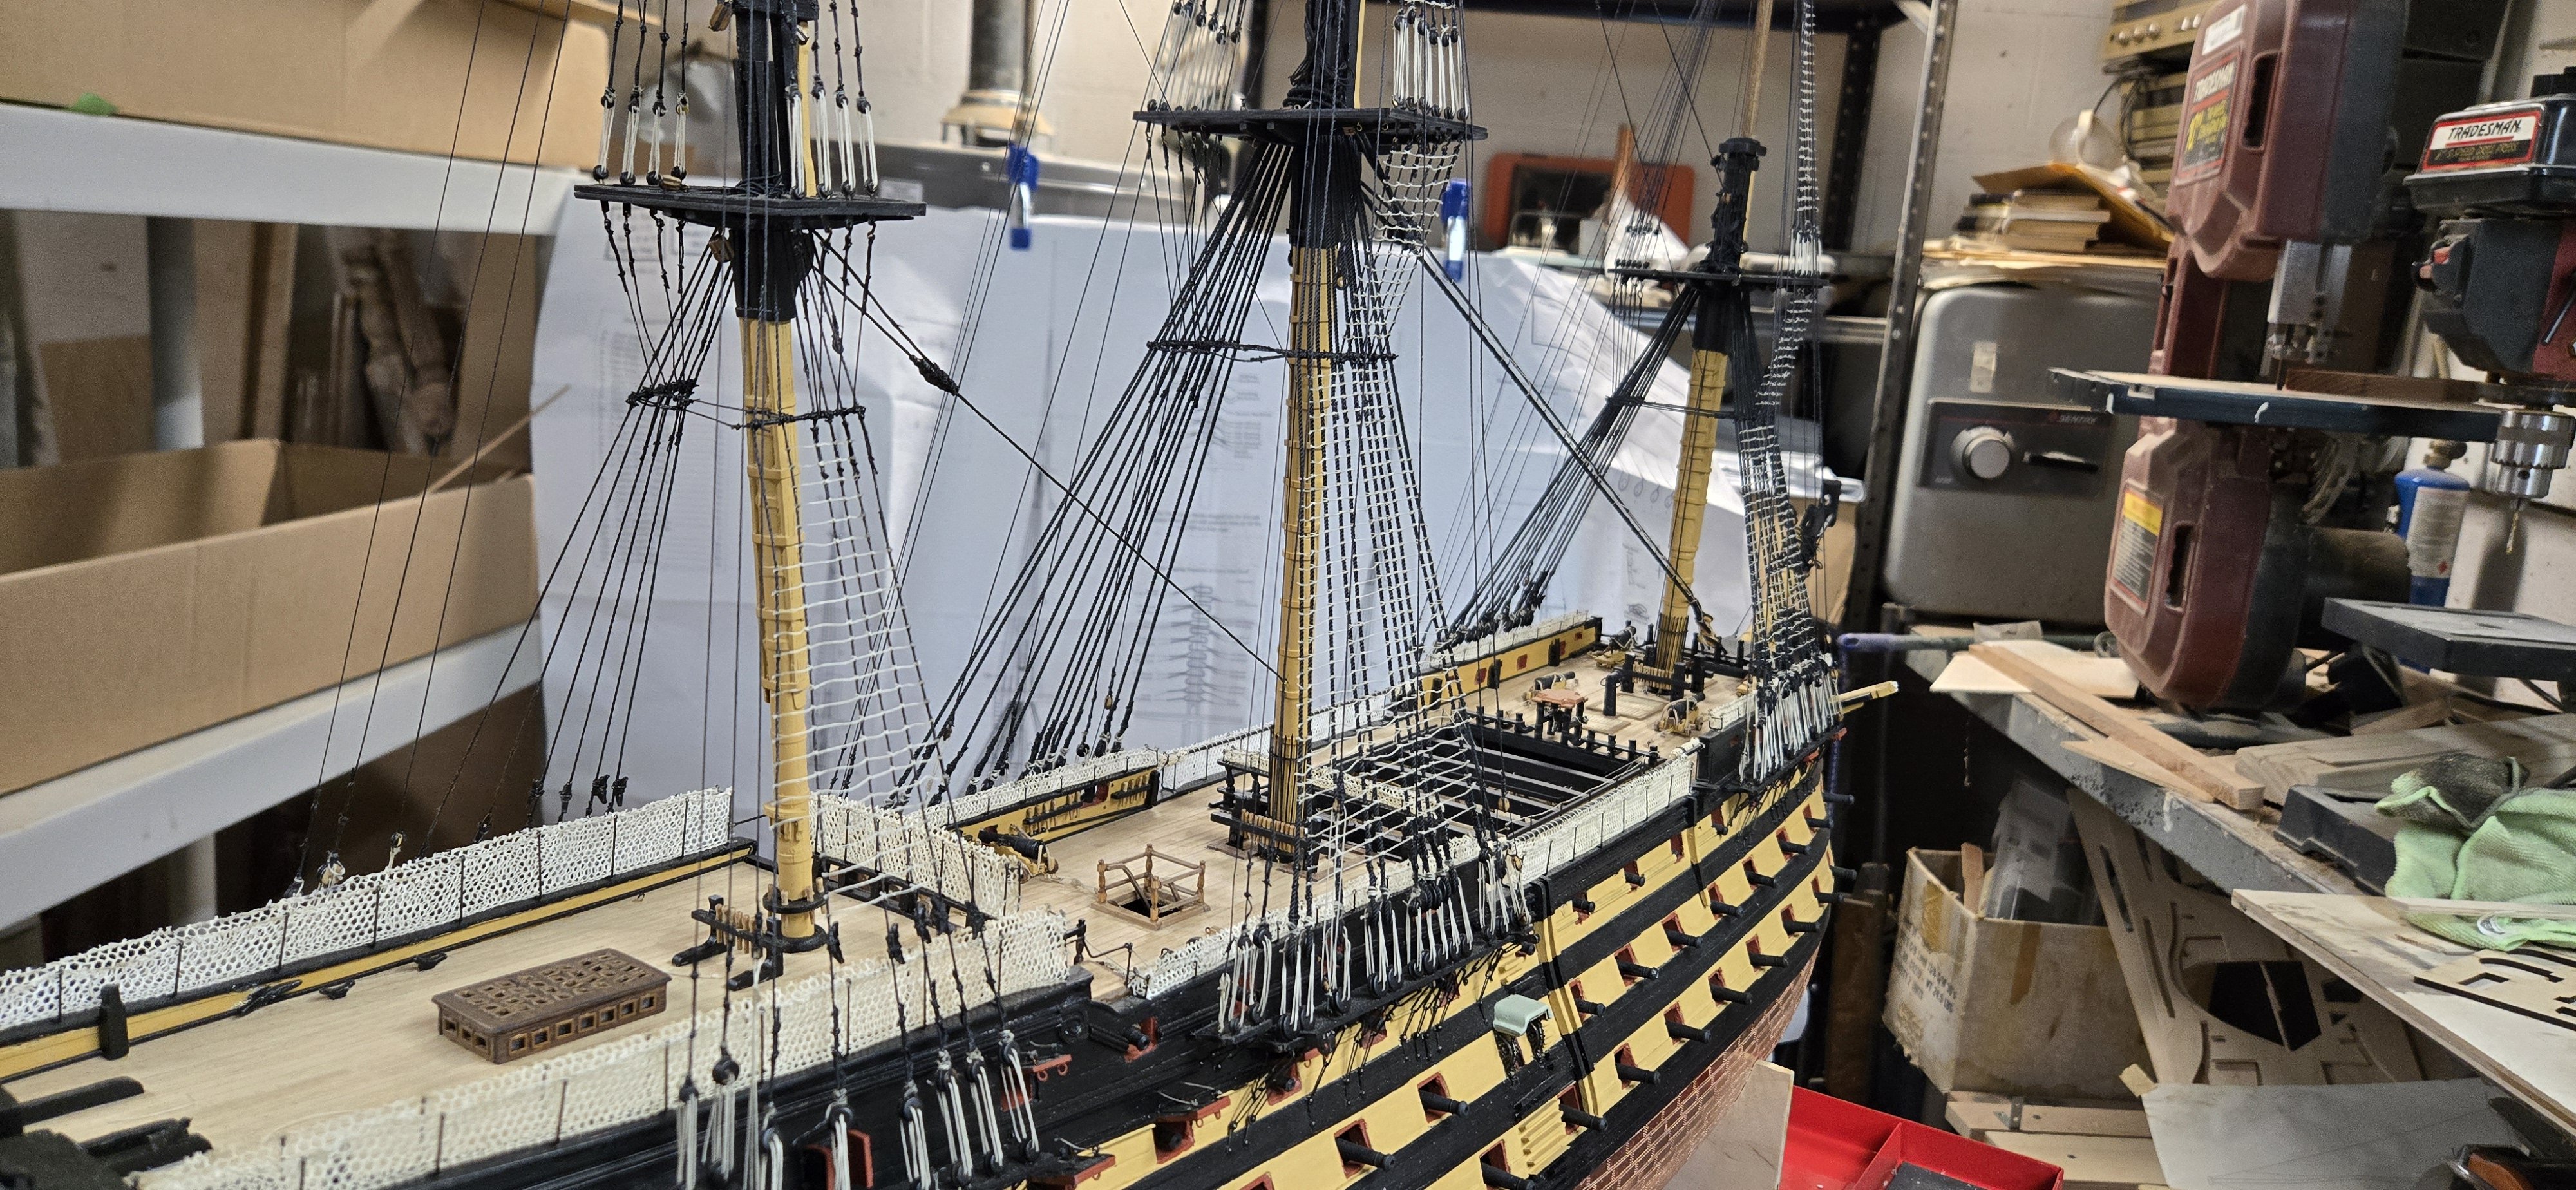
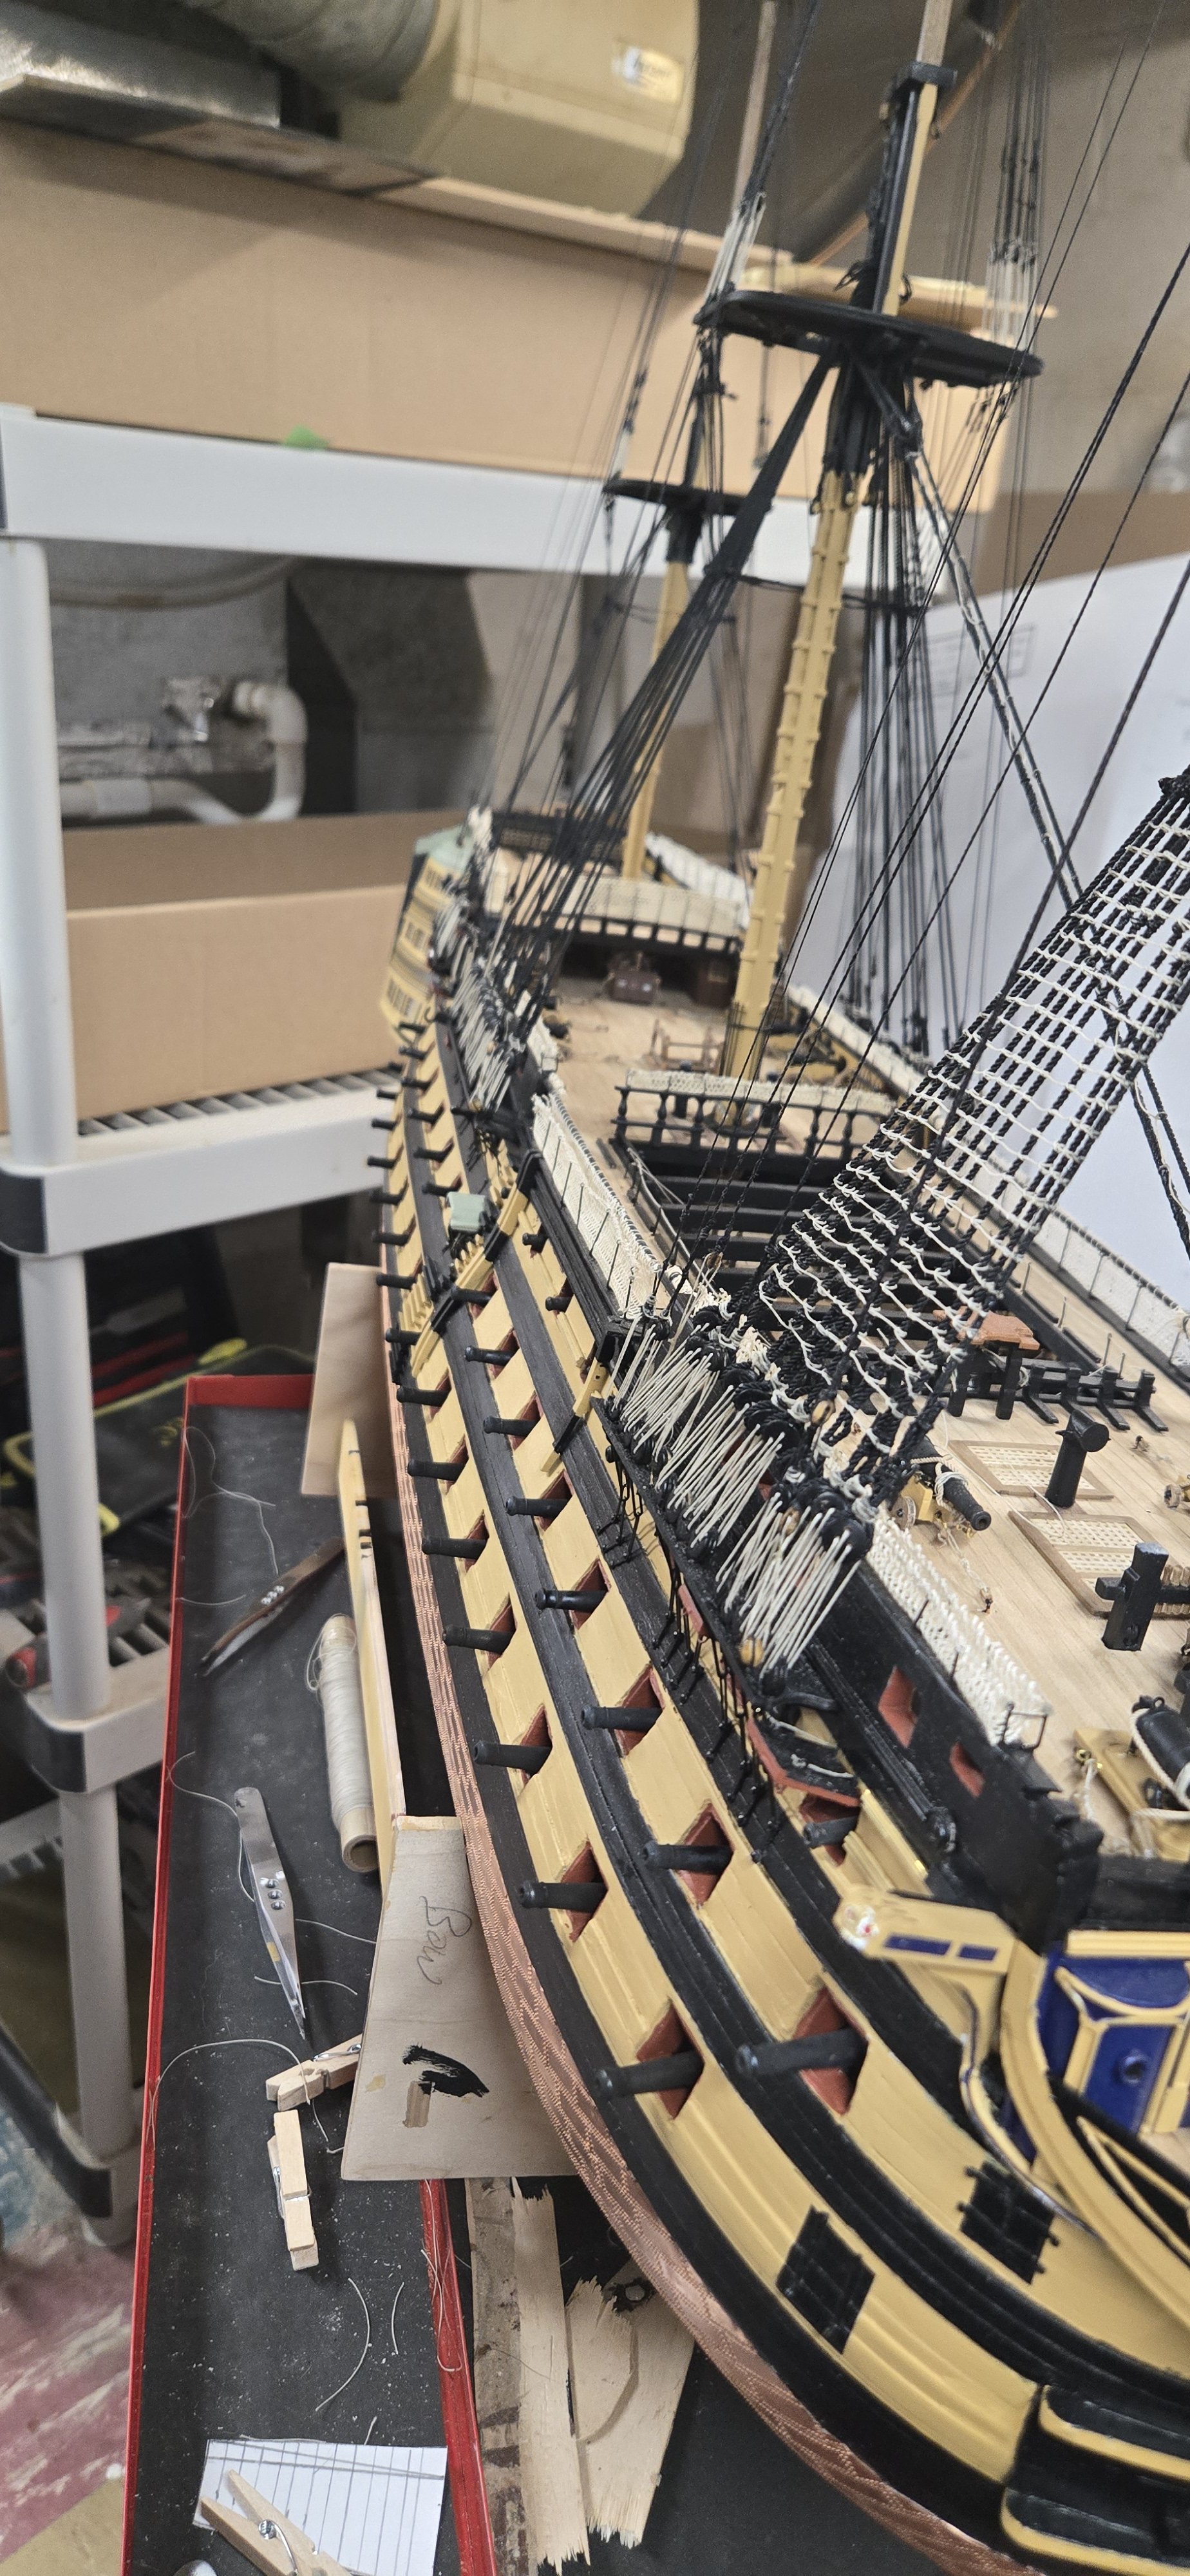
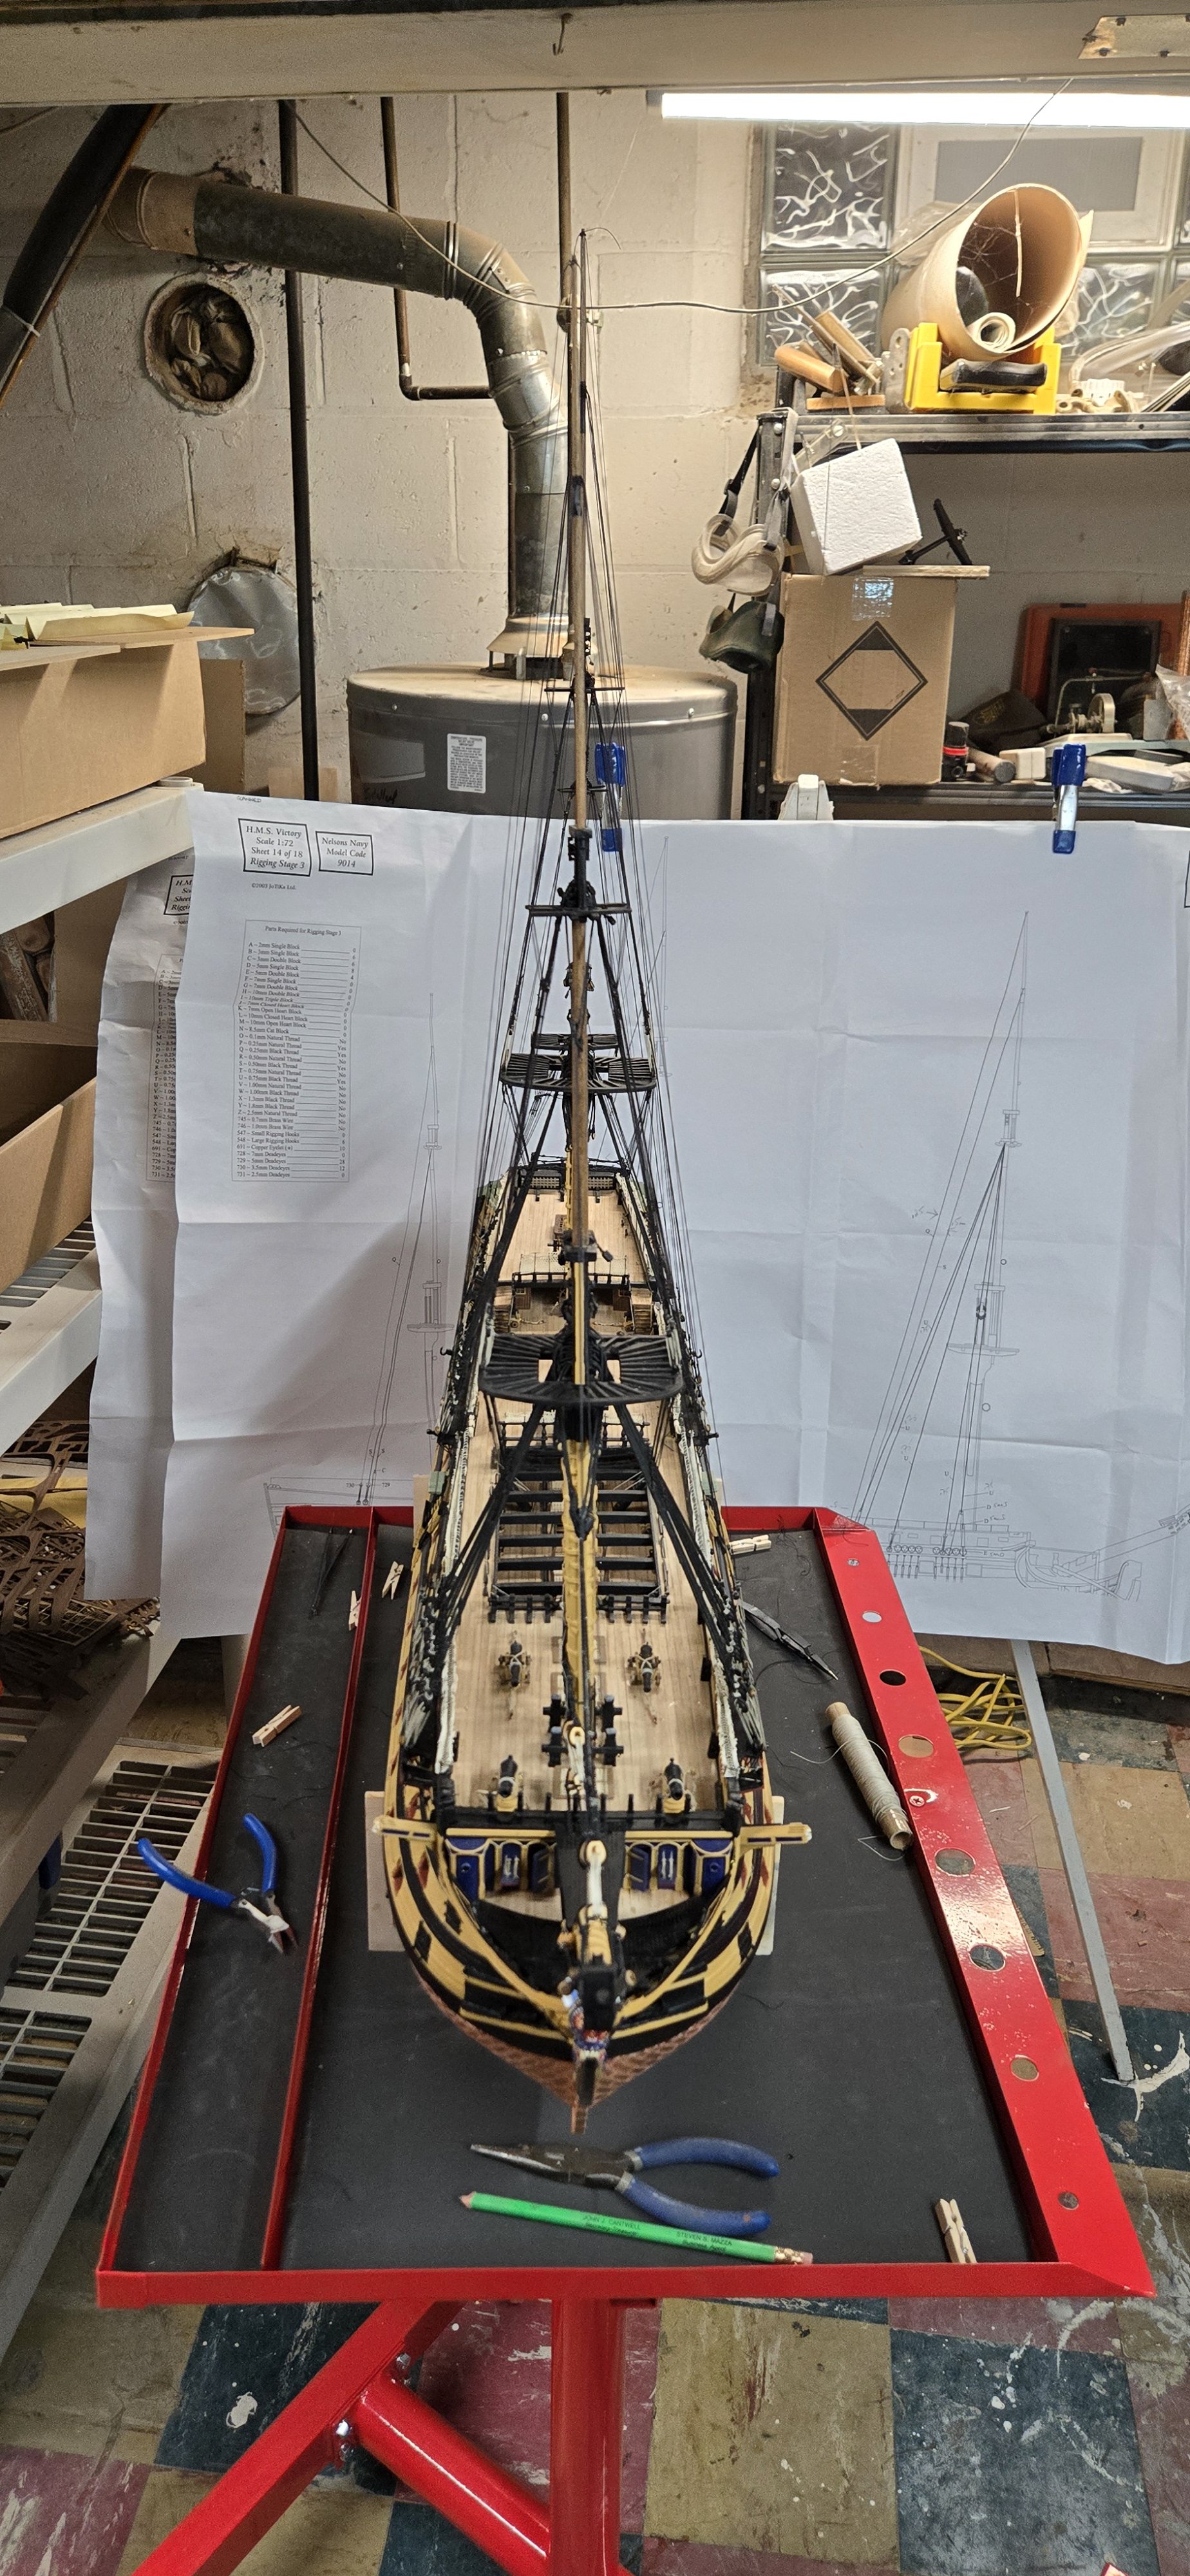
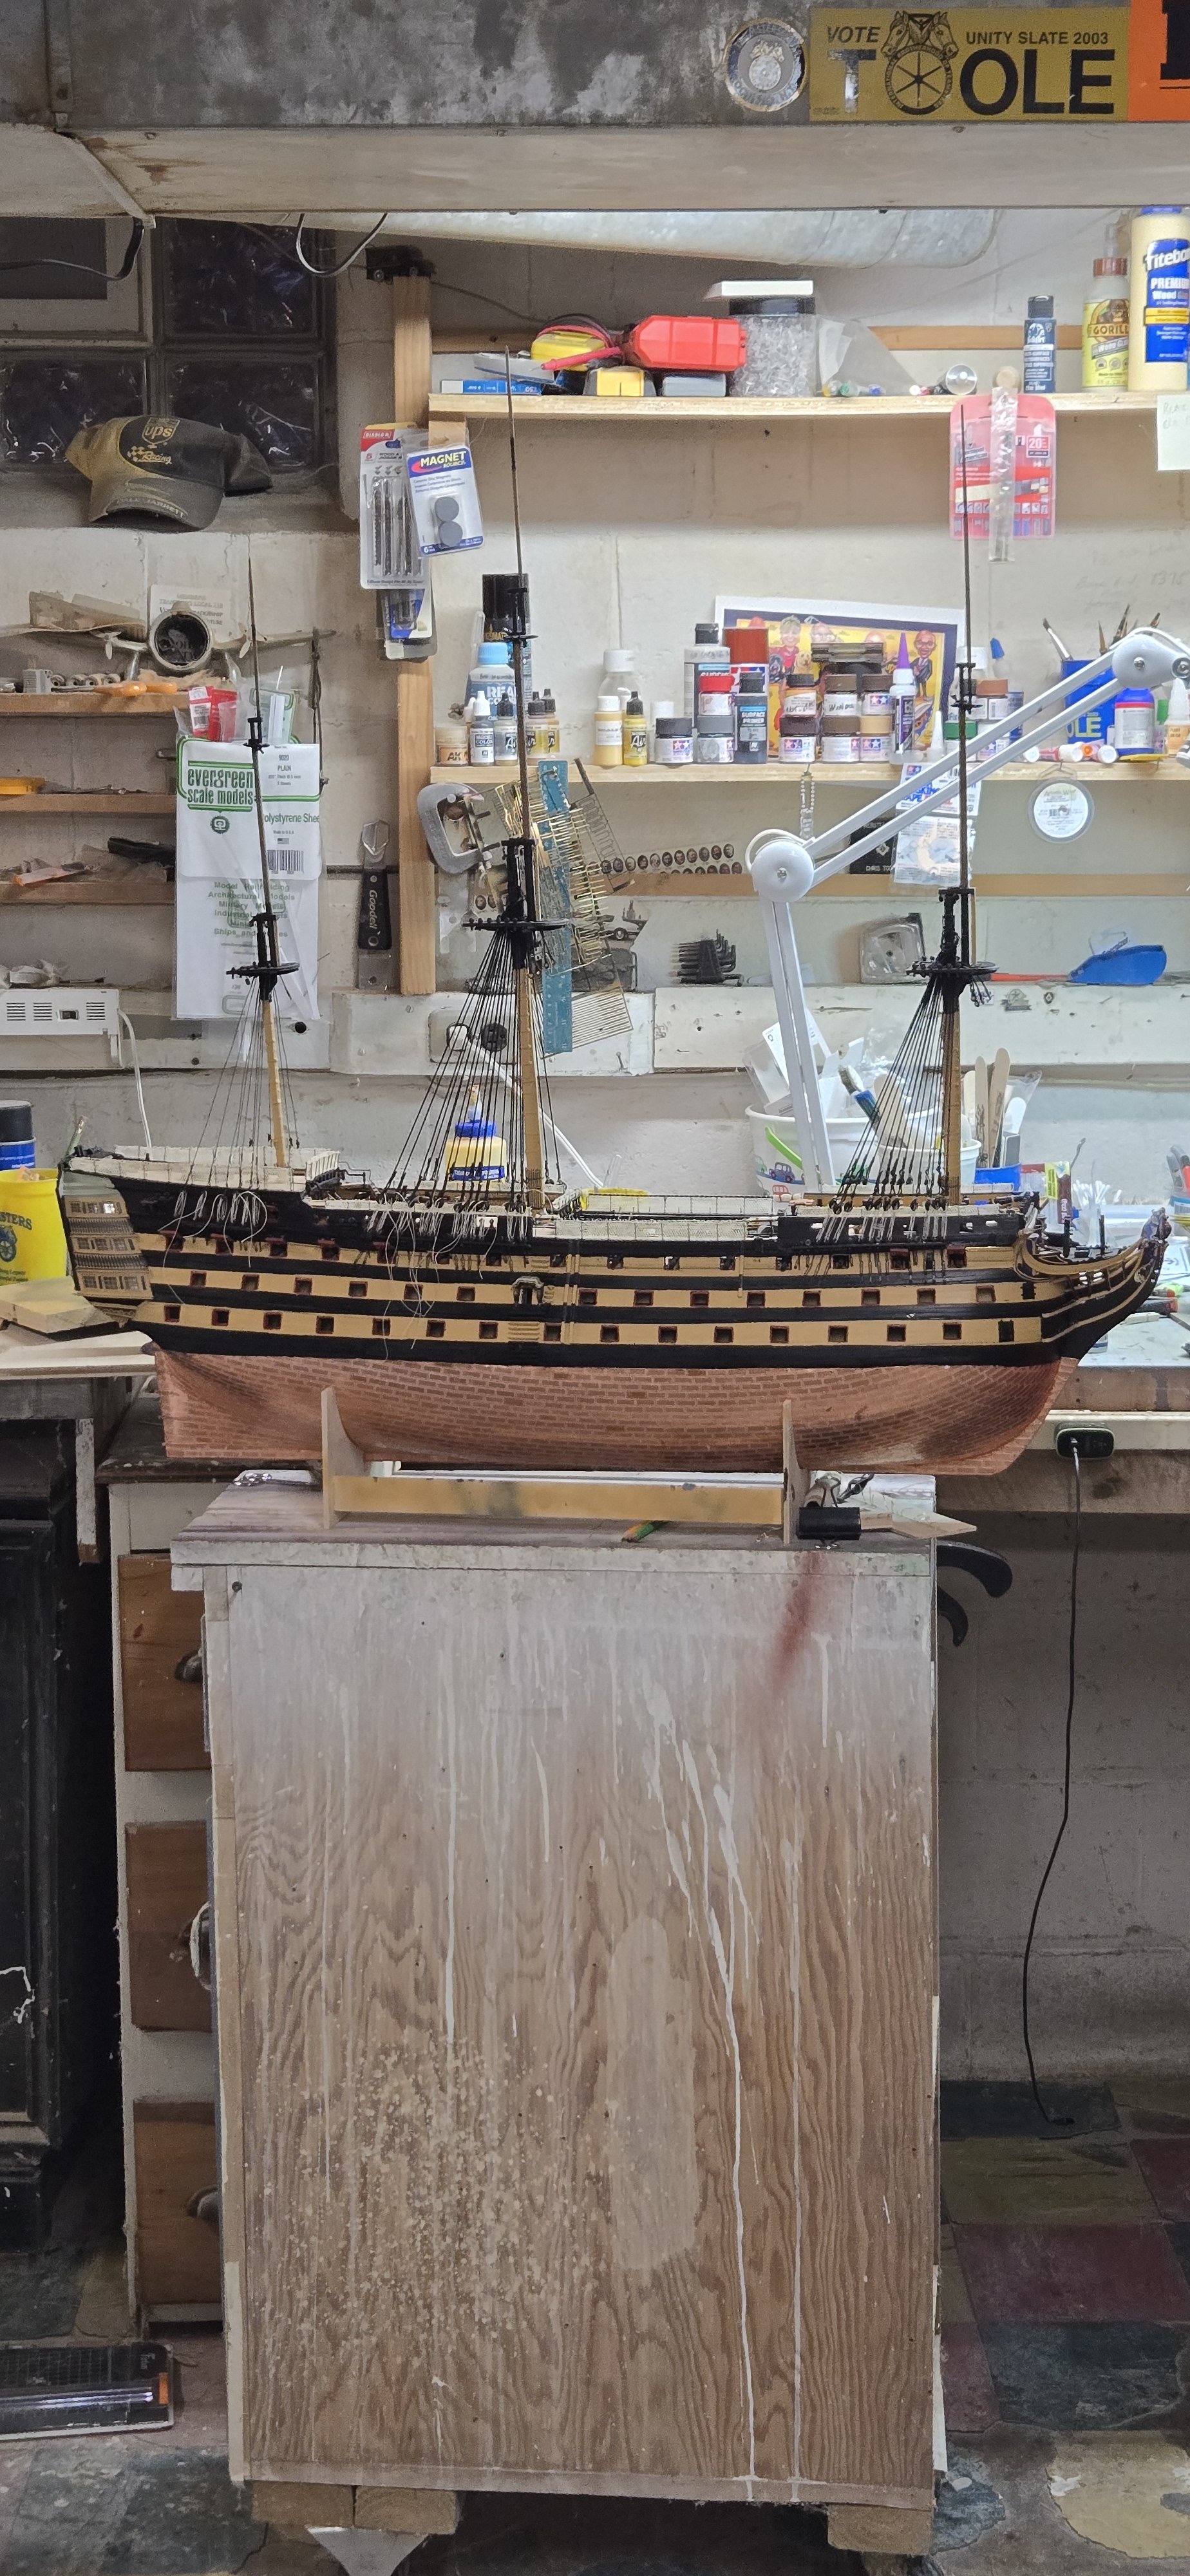
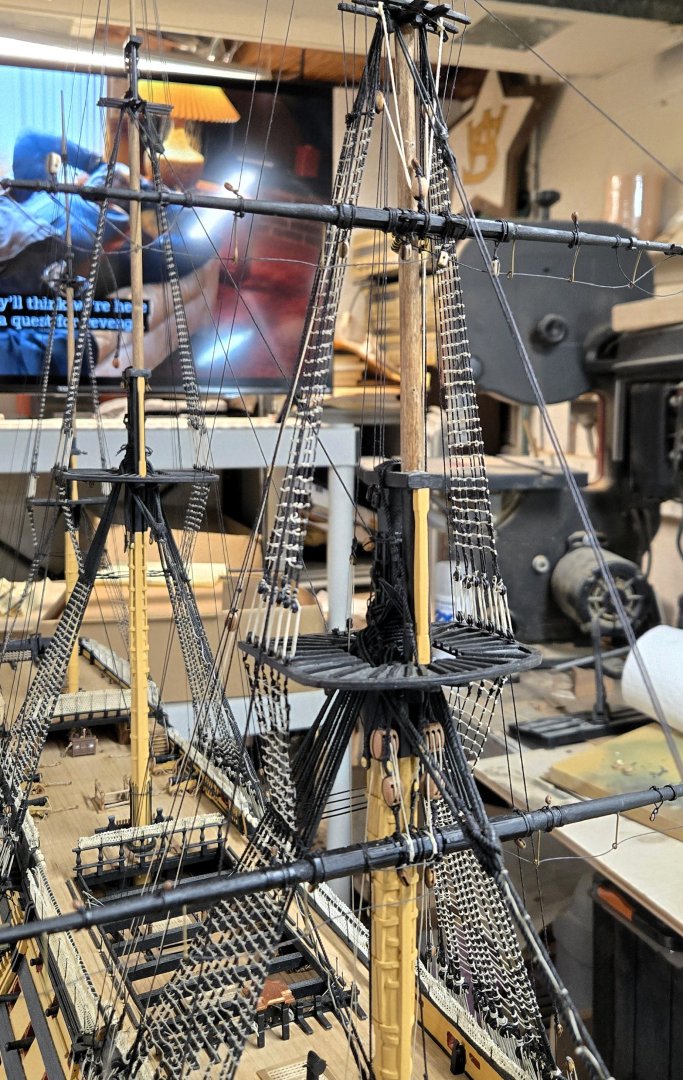
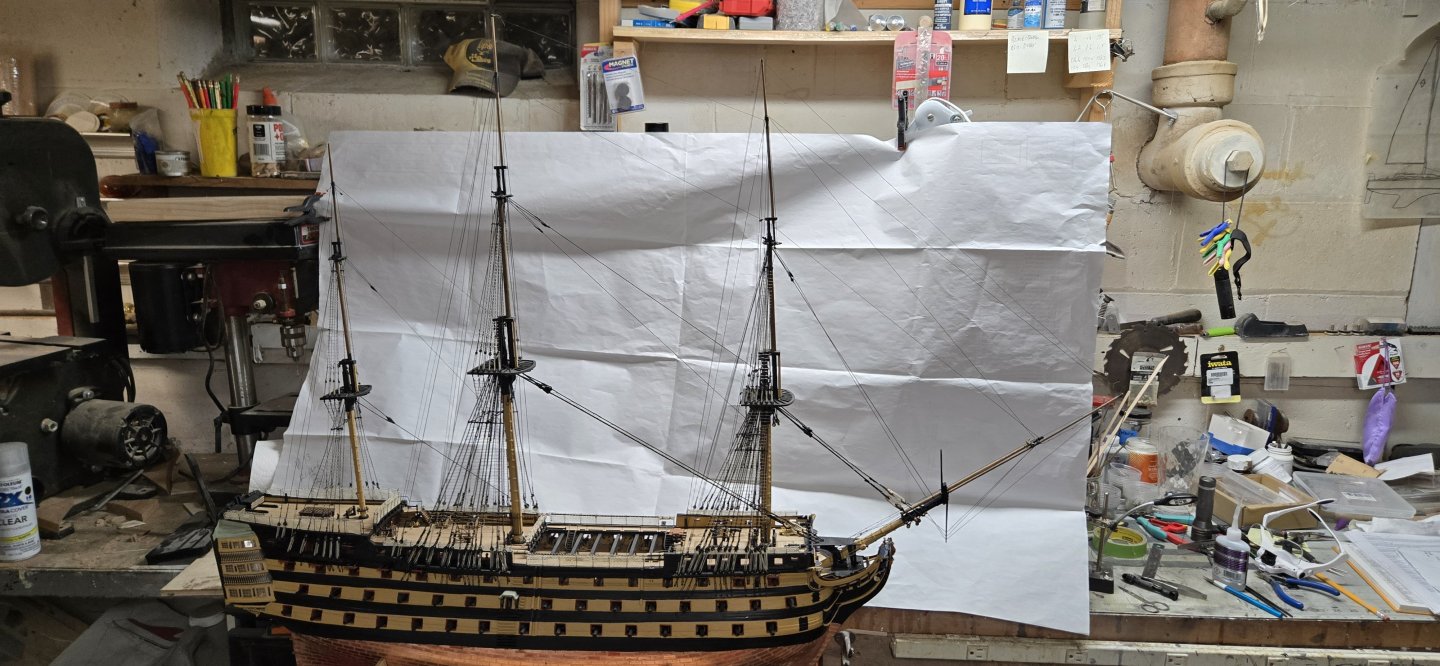
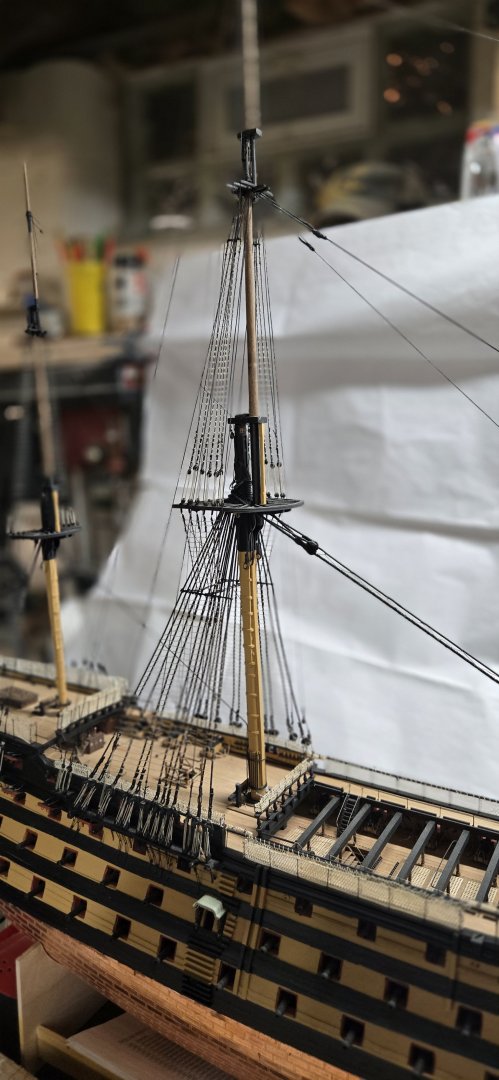
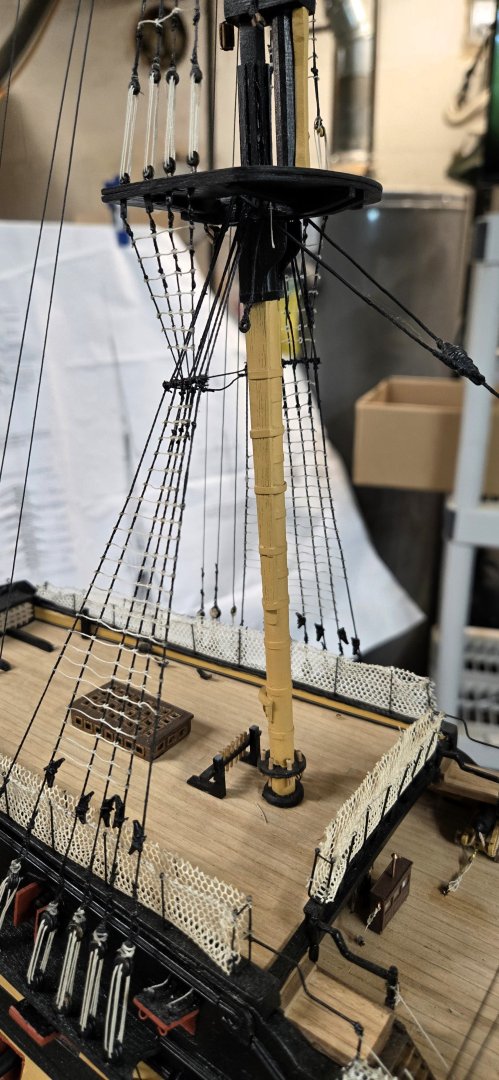
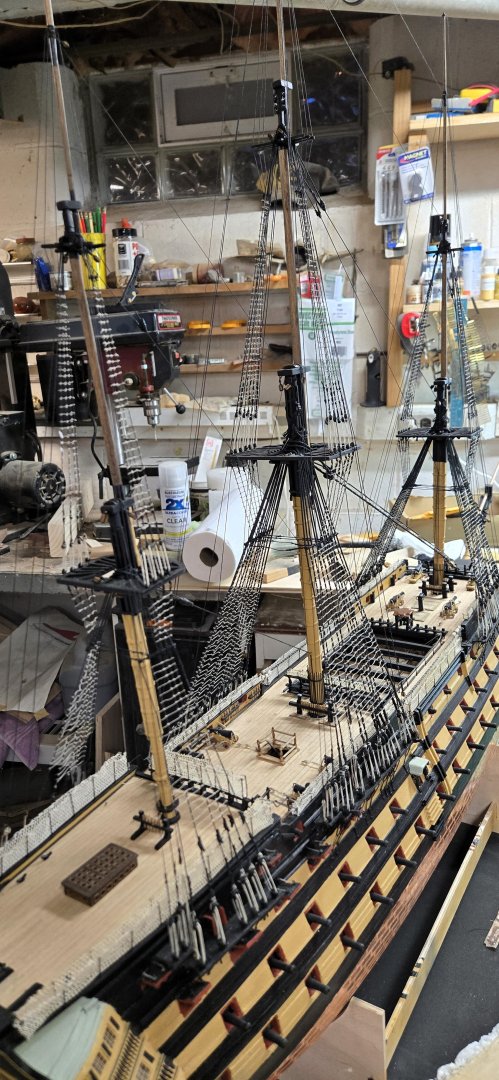
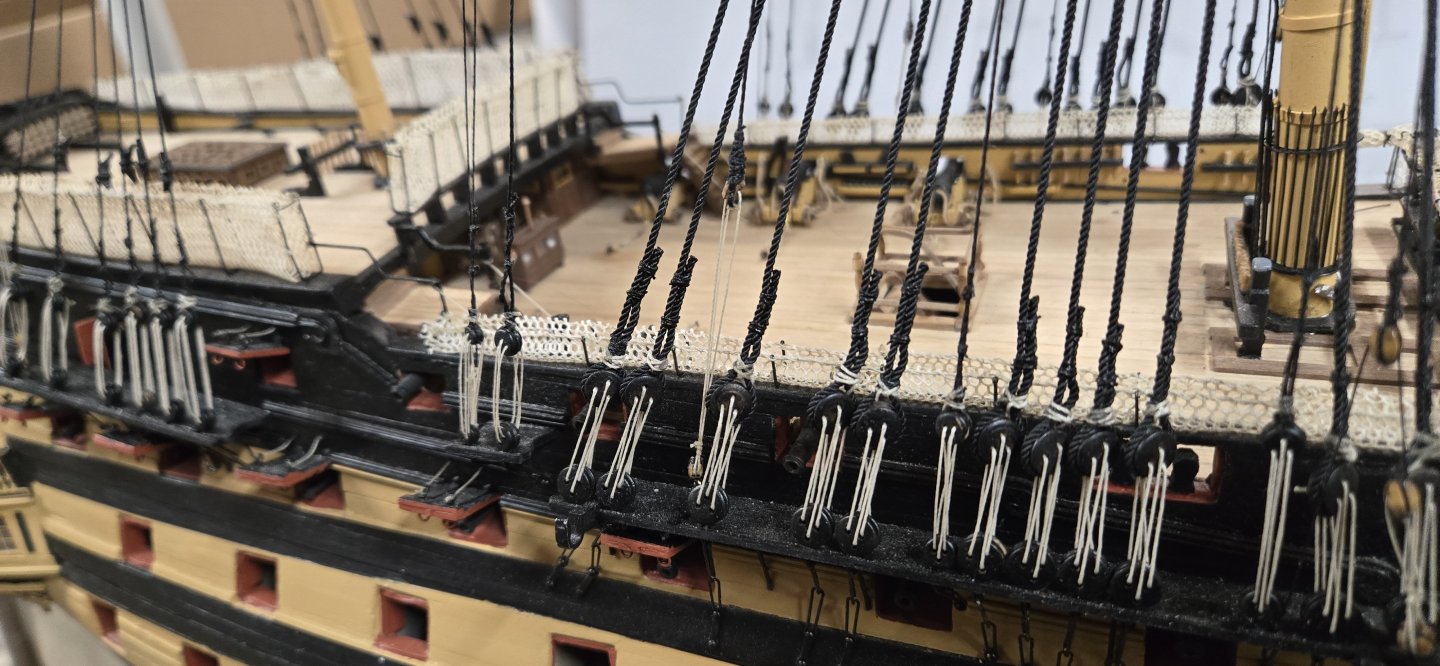
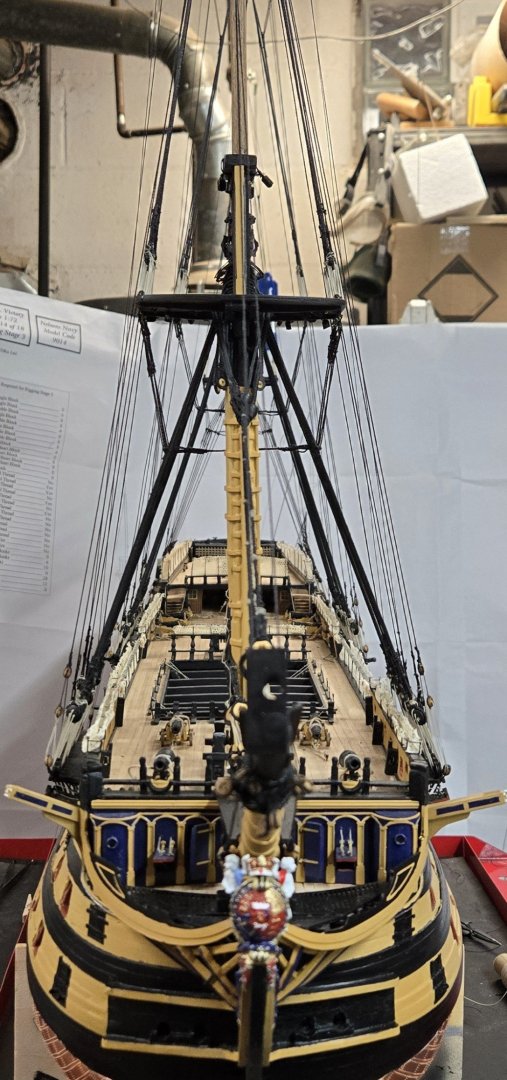
Looking back at my picture log, I see that I started working on the shrouds back on January 18, 2025. Learning how to serve line, create semi realistic seizings and more! Well, six weeks later and I think I may have finally finished with most of the standing rigging! I think if folks look at this as a 'how not to do a model' guide, I would suggest following the directions and the real life sequence of standing rigging installations. I had opted to do the lower shrouds and then move right to the fore and back stays before moving back to the upper shrouds. After the fact, it did cause some issues, some of my back stays are not in the right location because of this and most definitely, they are not laid correctly around the mast heads. Is she close to perfect, well I think we all know my answer and I truly love the people that actually take the time to look and comment. I think that is validation enough!!!!! I tried to add a few pics of the various areas. I am going to have to clean this sucker up! She's a real dust magnet! Anyone have techniques or tools they use to clean in the tight spots, let me know! I have mentioned that I needed a new platform to work on the model. I have used a home made case that normally holds my belt/disc sander. It was skinny enough for the model and low enough to keep the mast heads from hitting the heat ducts in the basement. However, when I was working on the very top, I had to stand. In addition, the wheels really weren't made for pivoting very easily and every time I tried to turn the boat around, I had to hold on to it so it wouldn't fall!!!! I found a nice table option online through Titan Attachments. I can raise and lower it (using a twist tightening knob) and she turns very easily and is very stable! On to the next phase! I still have to add the fire buckets, which I will do next. Then I think I will do the ratlines. I think this will be along the same line as doing the copper tiles. A long, tedious task that I will do in small time increments, unless it goes quickly. Once done, I will look to install the jib and flying booms and do all that rigging. I haven't done it yet, because it will really limit my turn around space, once it's done! Then....I think I will add the lower deck cannons. They have to be drilled into place and I haven't done them yet. I won't do the lids, but I will at least get the cannons so they are all level. I should have done them ages ago! Then, on to the yards and the running rigging! Woot! My bet though is that will end up being put on hold till this fall. Winter is coming to an end up here and I'll soon be working on my real sailboat getting her ready for our 5 month sailing season. But till then, I'll keep cracking on!!!!!


-
Very true! I think about when it's finished and someone asks me....do you know what all these ropes are for? Sure I do!!!! Thanks Mark! Chris
-
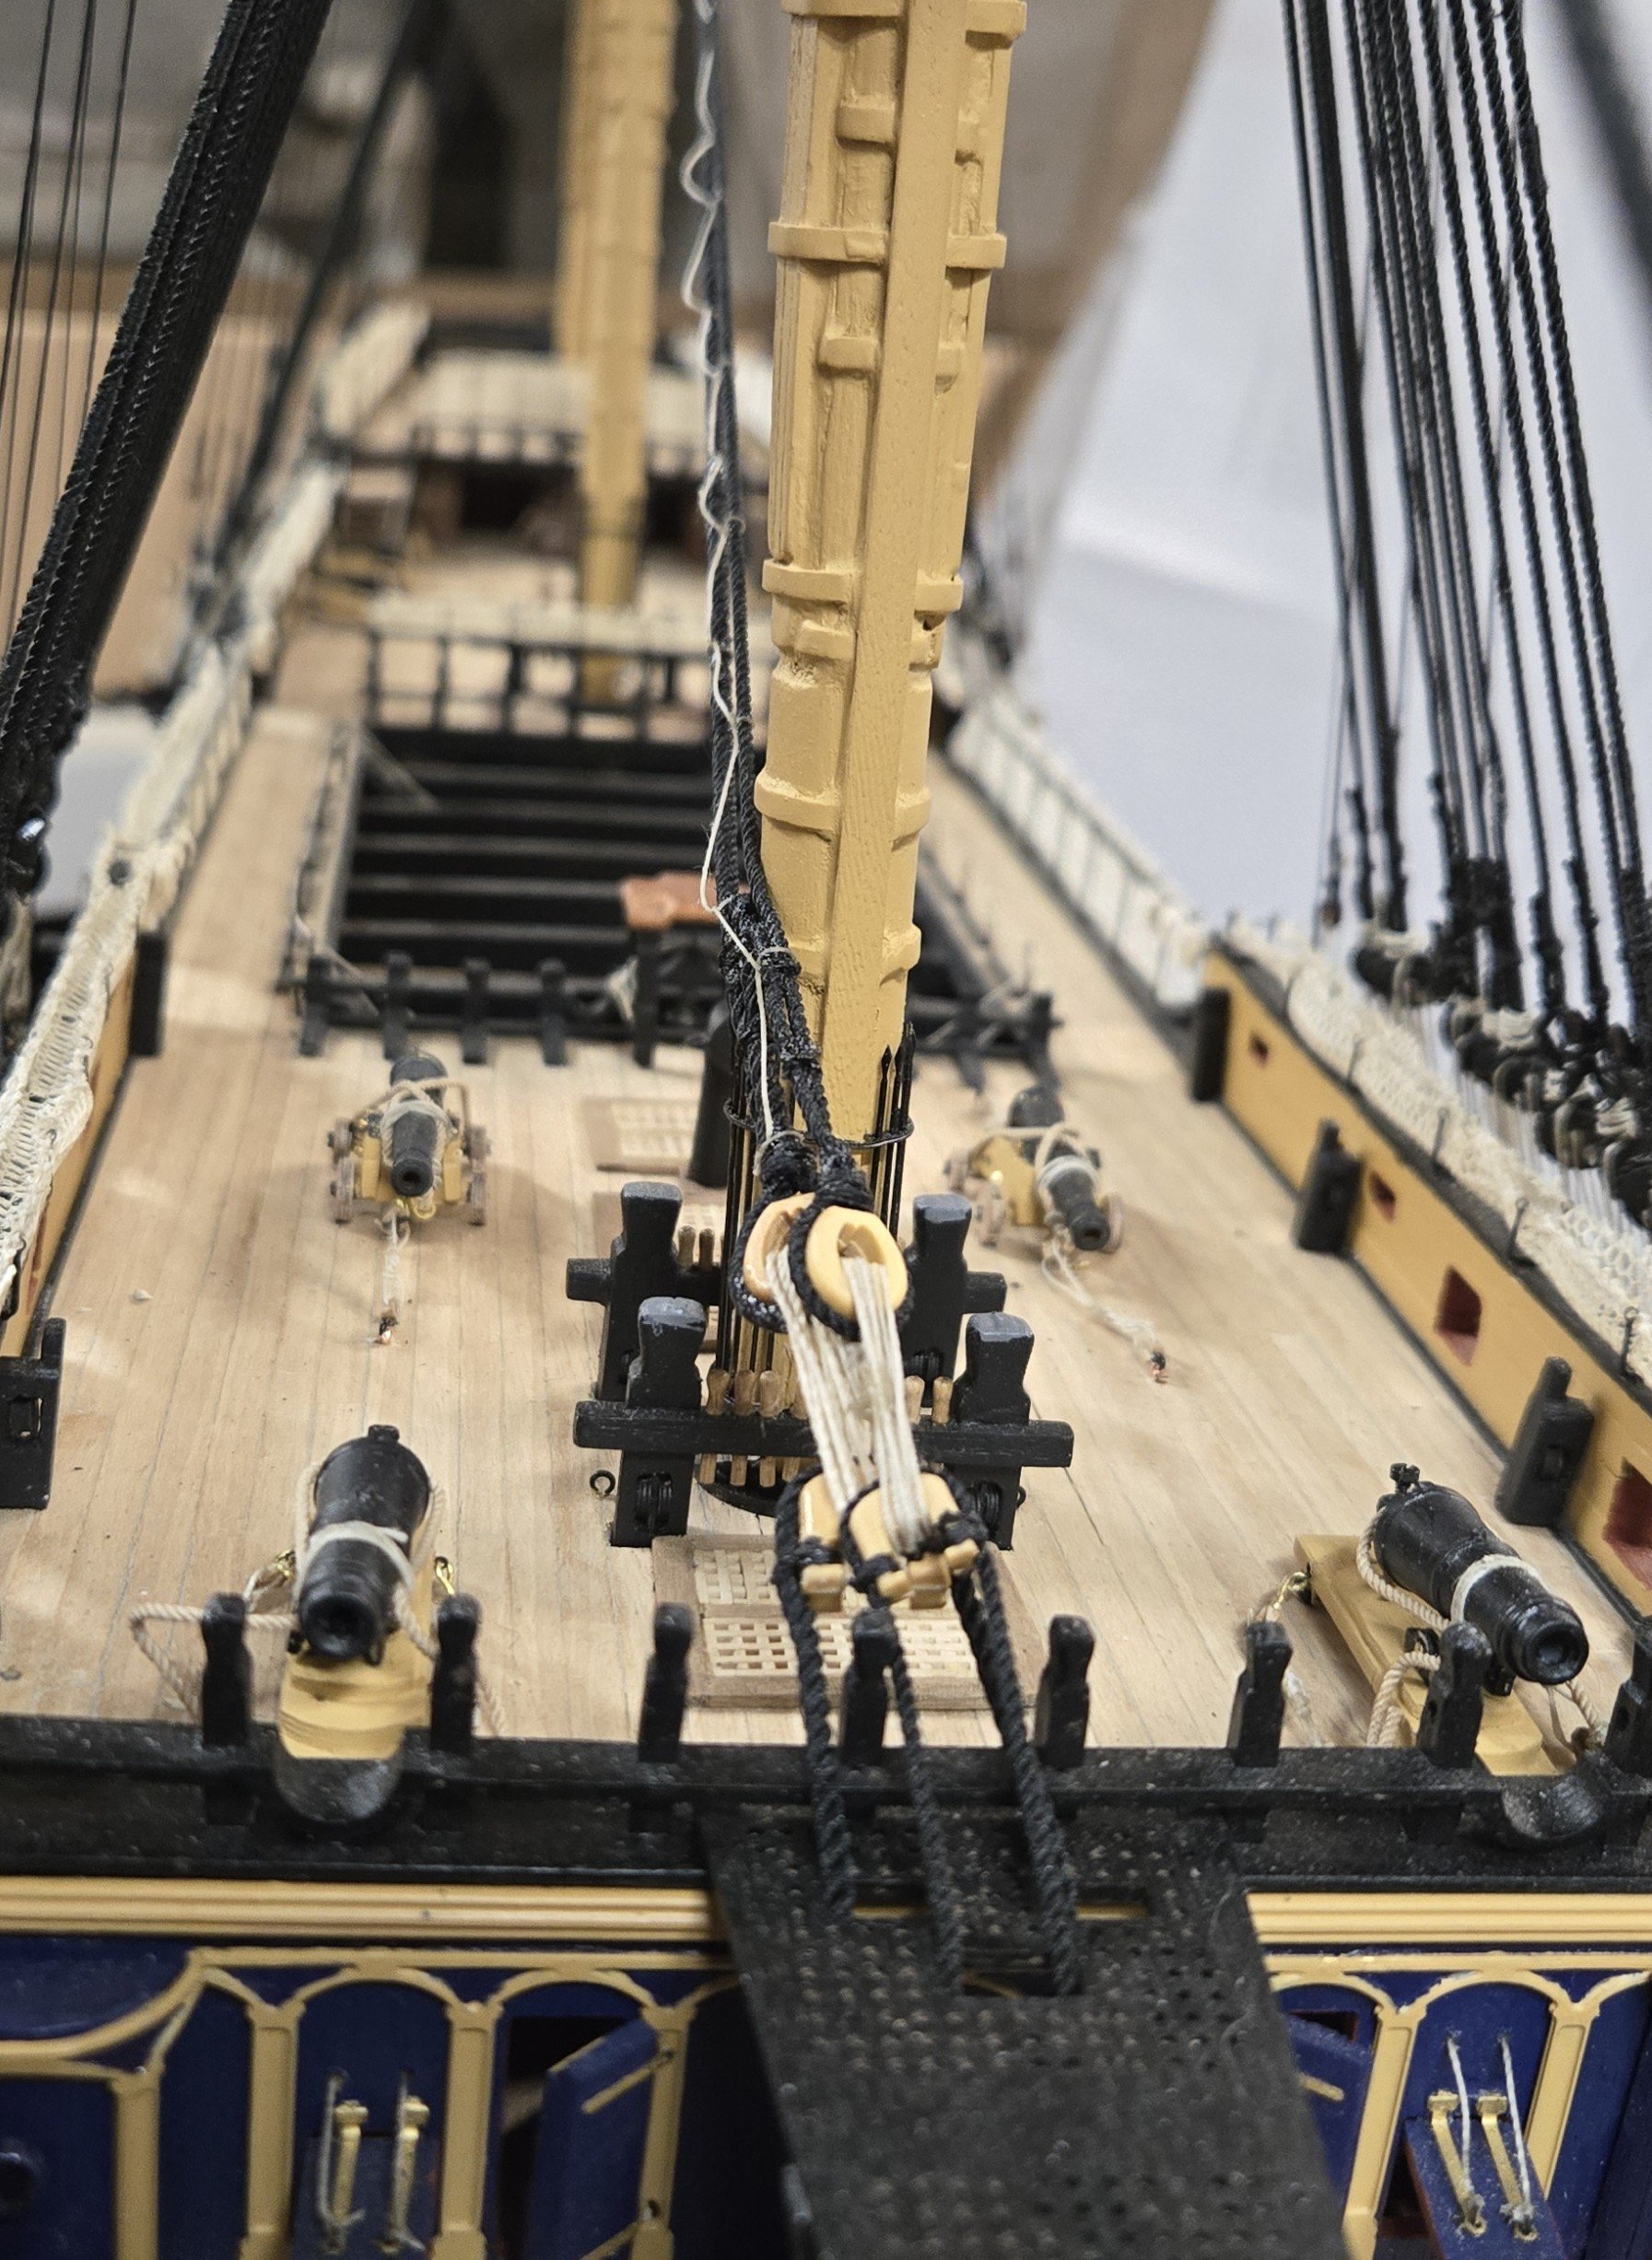
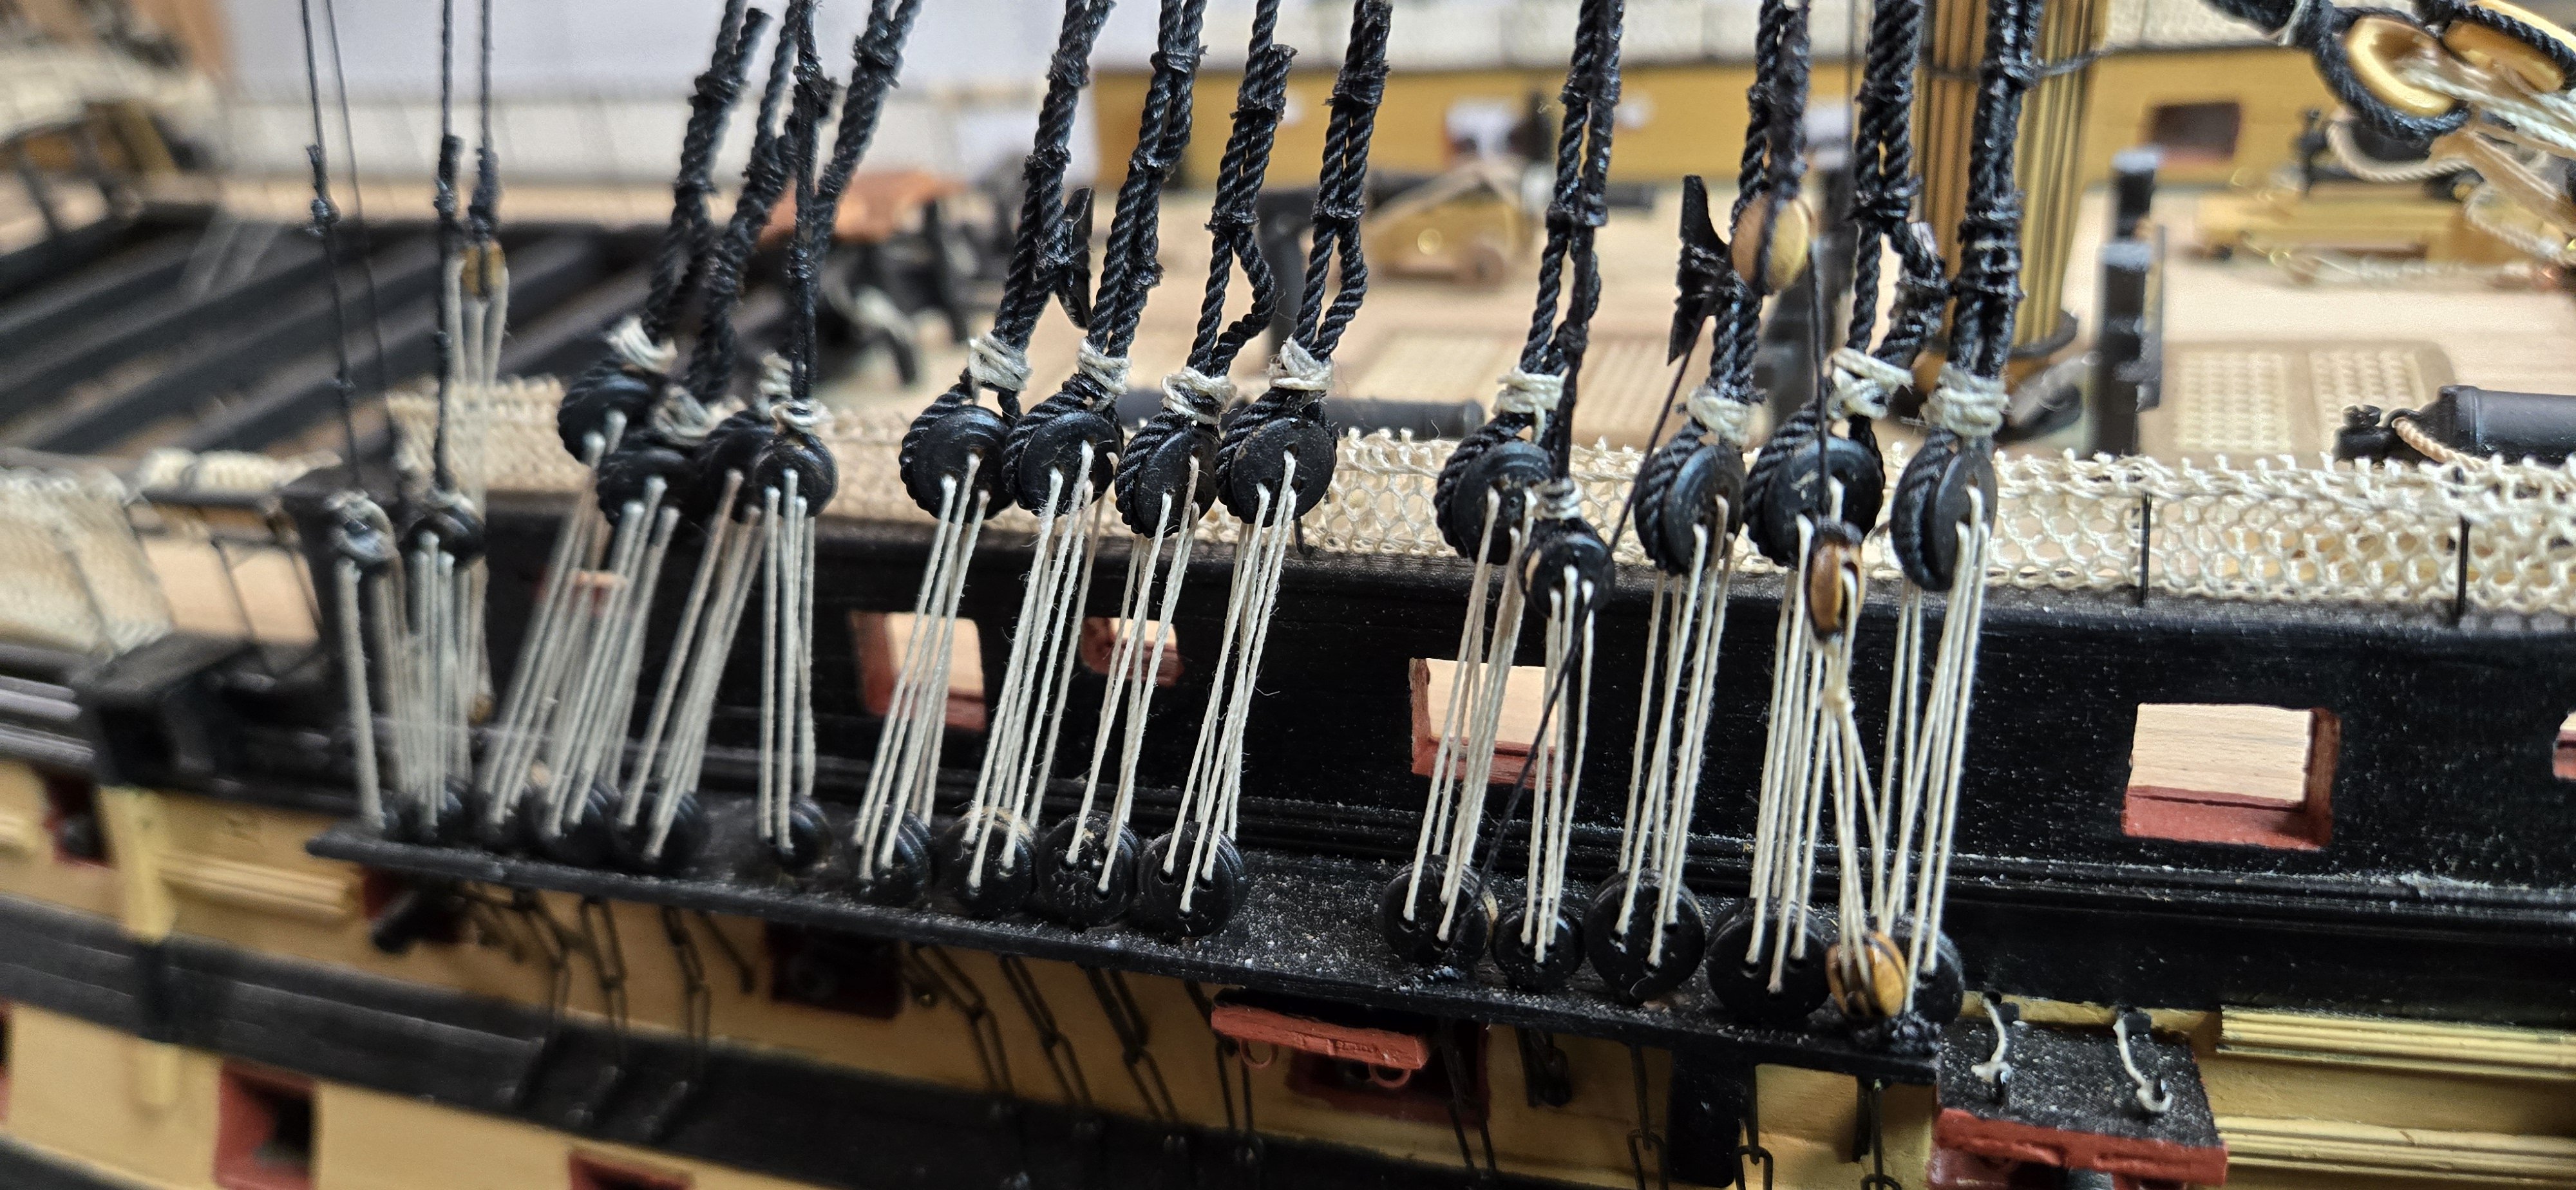
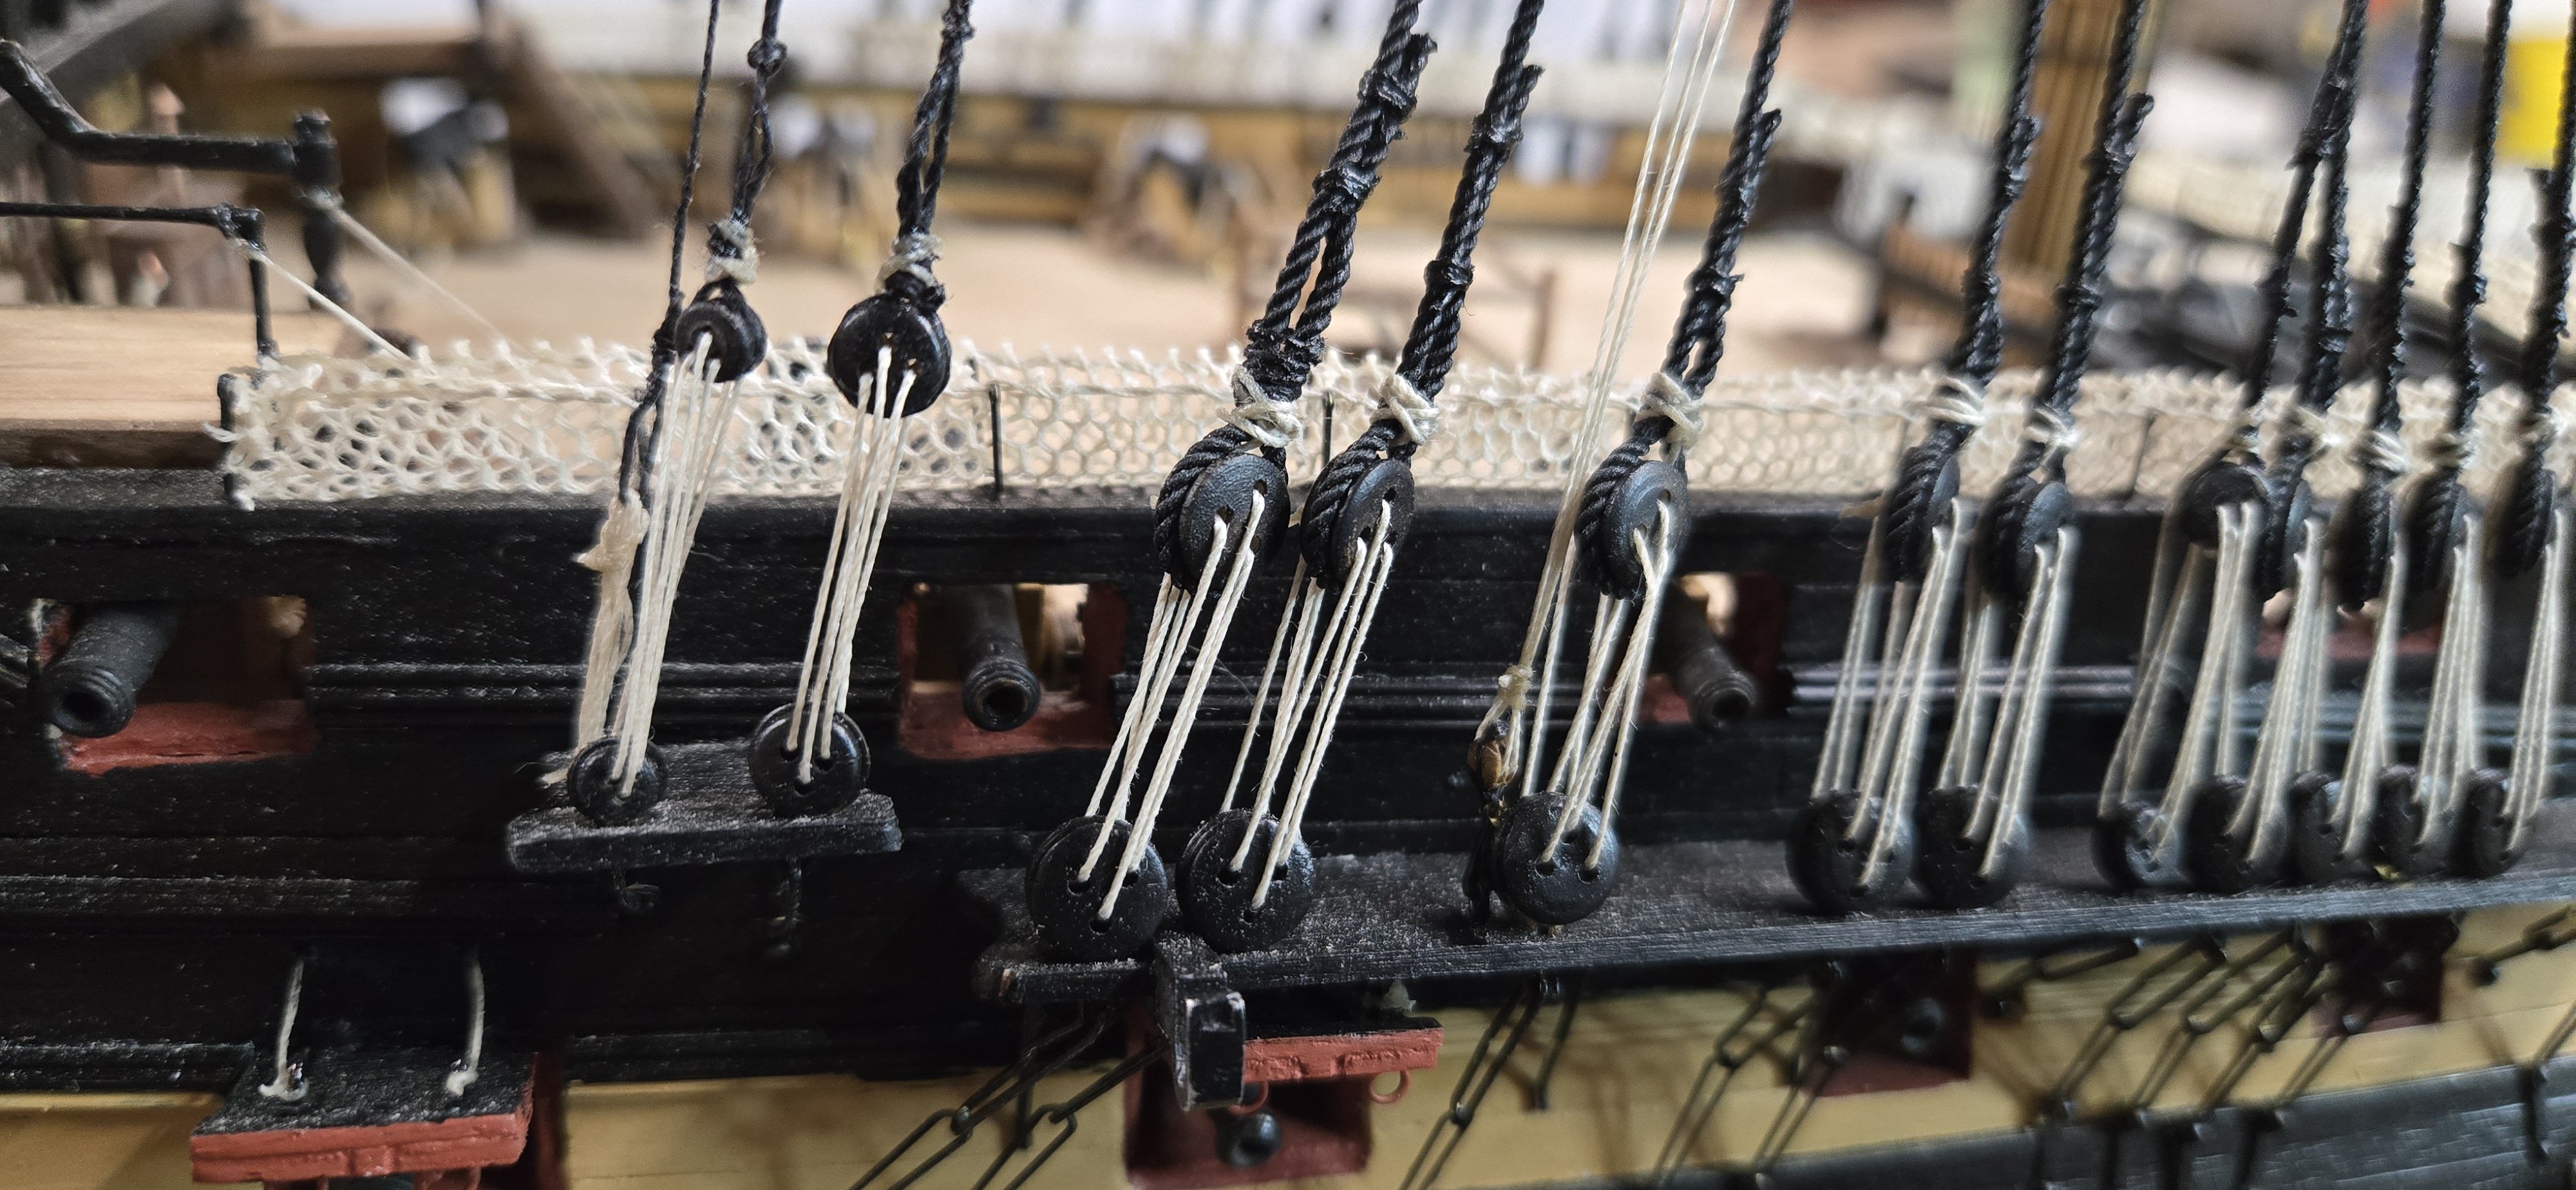
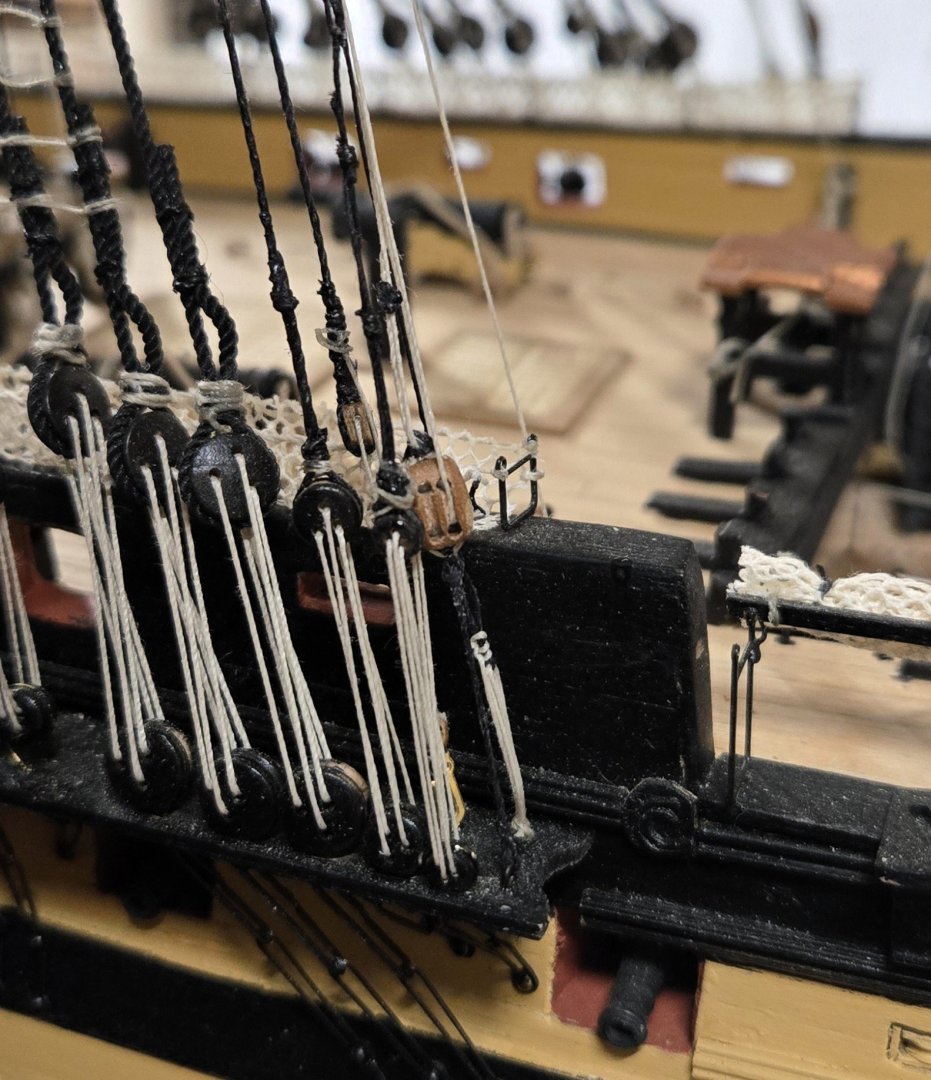
One of the things that has bothered me was my rigging of 2 blocks together. It started as I was doing all of the cannons, which require a double/single combination. I get that the rigging line would start from the single block, go up to the double block, back down and through the single block, back up and through the double block. In real life, this bitter end could be coiled around the rigging and secured. However at this small scale it looks terrible...well at least the way I did it. I seems to create an hour glass shape and my way never seemed to give that coiled look. I think that is why you see so many models use a flemish flake, which wouldn't be done in reality...it's a very dirty set up if you've ever seen what the deck looks like after a few days of rain and dust. Not much to do about the cannons now! I had installed the foremast stay and preventer stay that run through the bowsprit bees. They are then secured to 2 blocks on each side. Again, I just hated the look and the blocks on the port side was WAY too close to each other. I cut the lashing and redid them. This time, I just tied the bitter end under the block so that you get the sense of the block rigging. For the short port side, I just tied 2 knots in the stay that are hidden under some of the other yet to be used blocks. I am much happier now. I used this technique for some the last back/breast stays I did and they look a lot better. I may go back and redo all of them now.


-
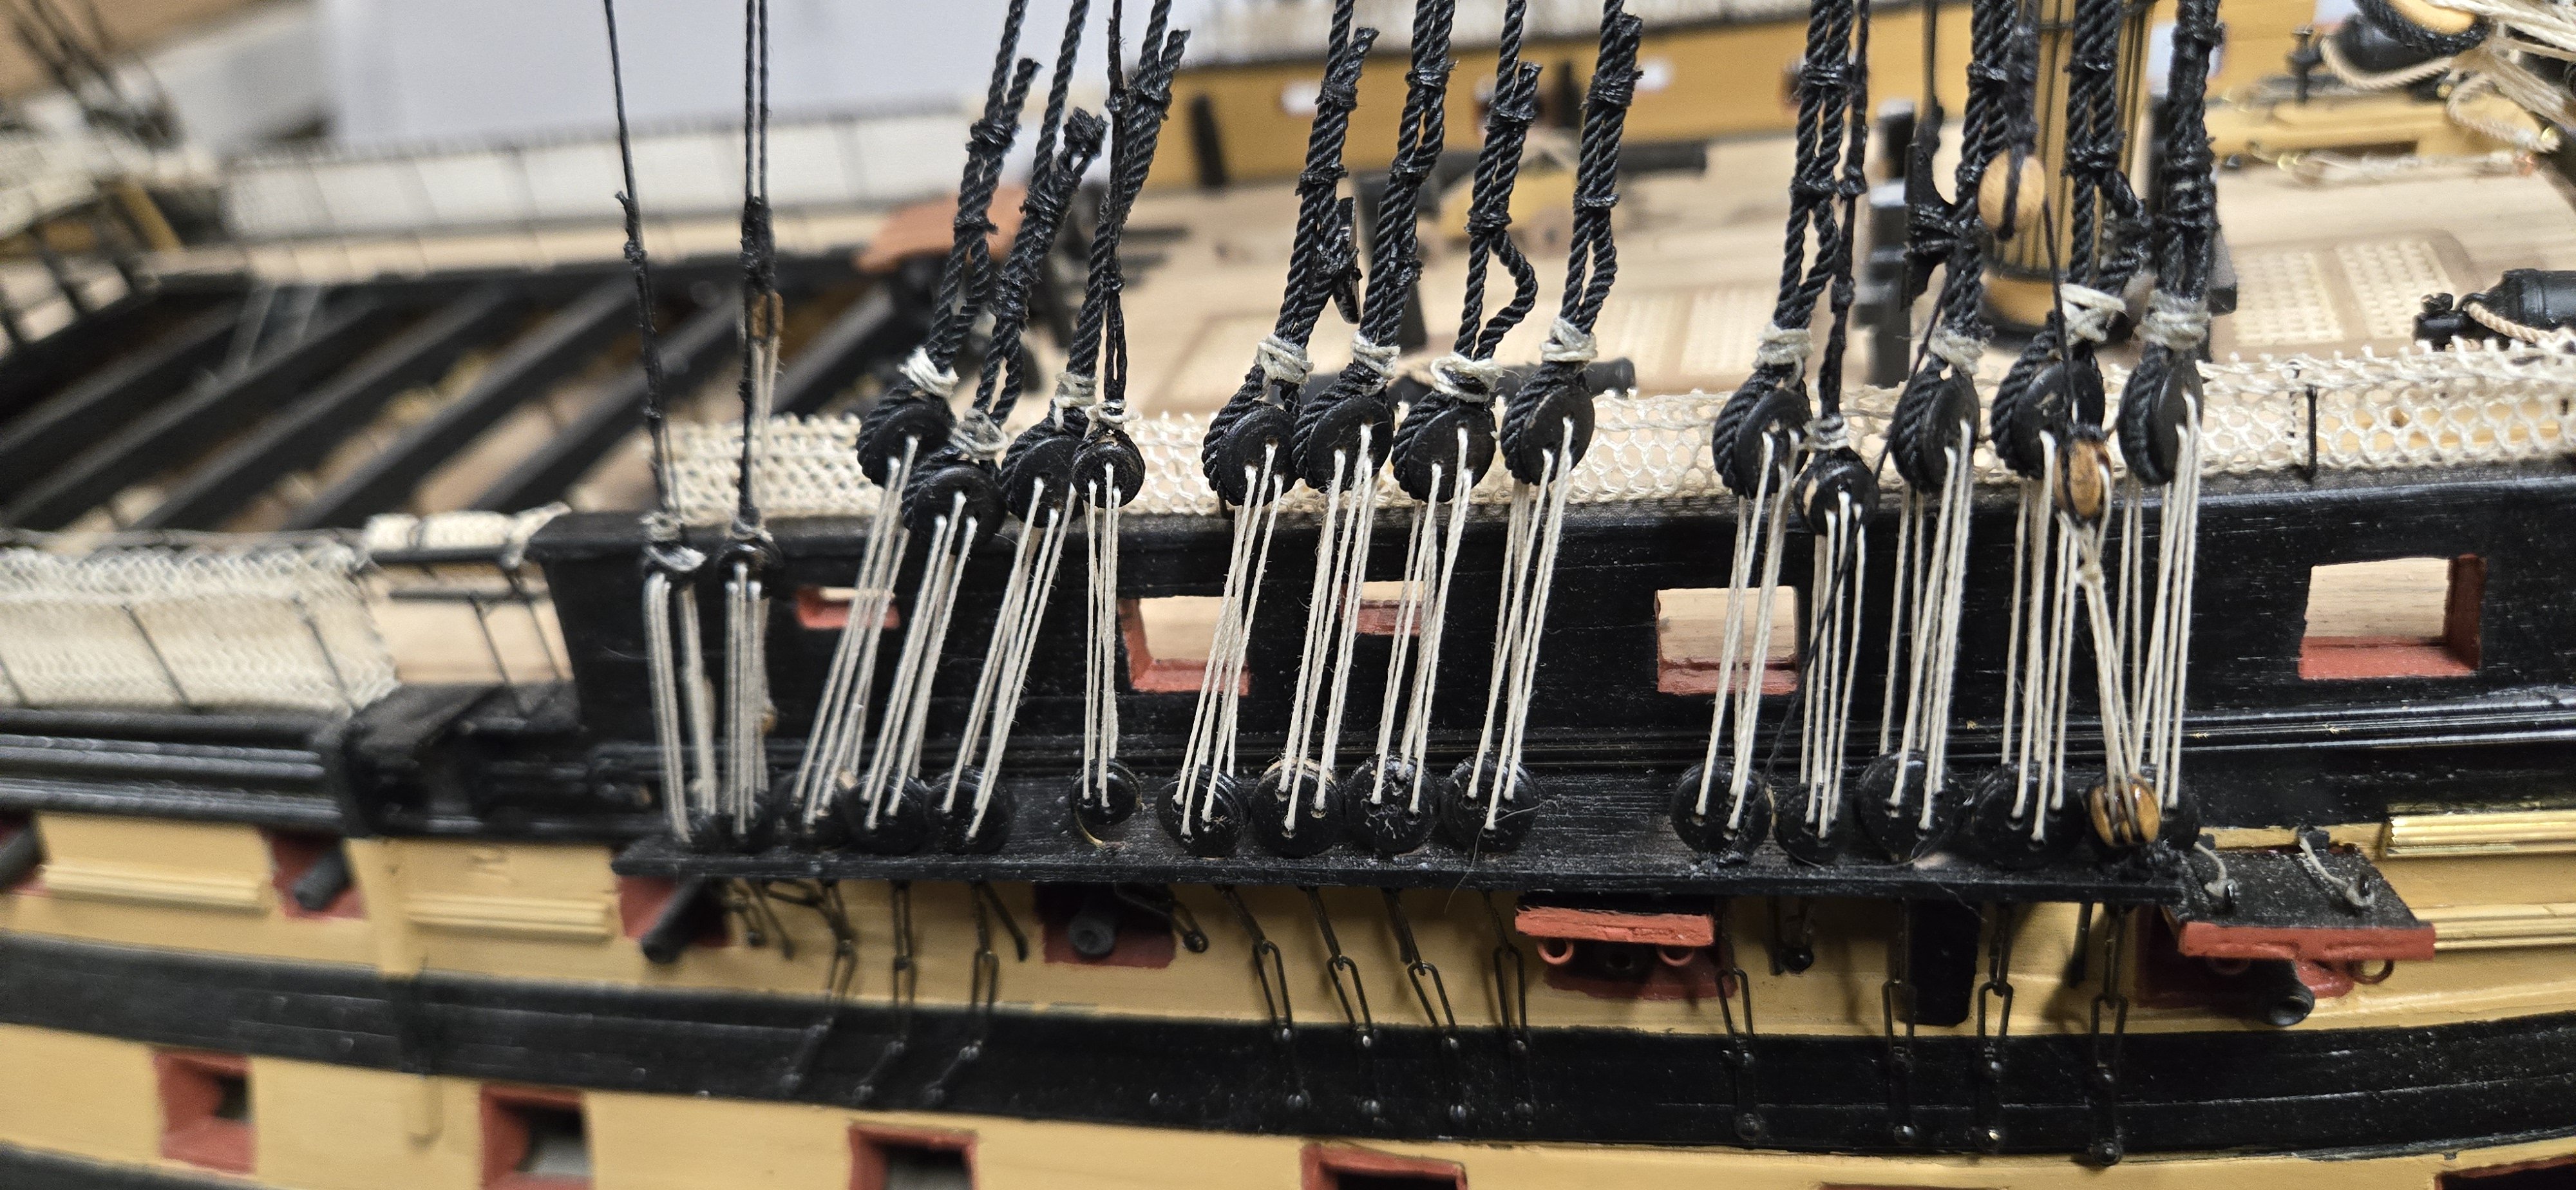
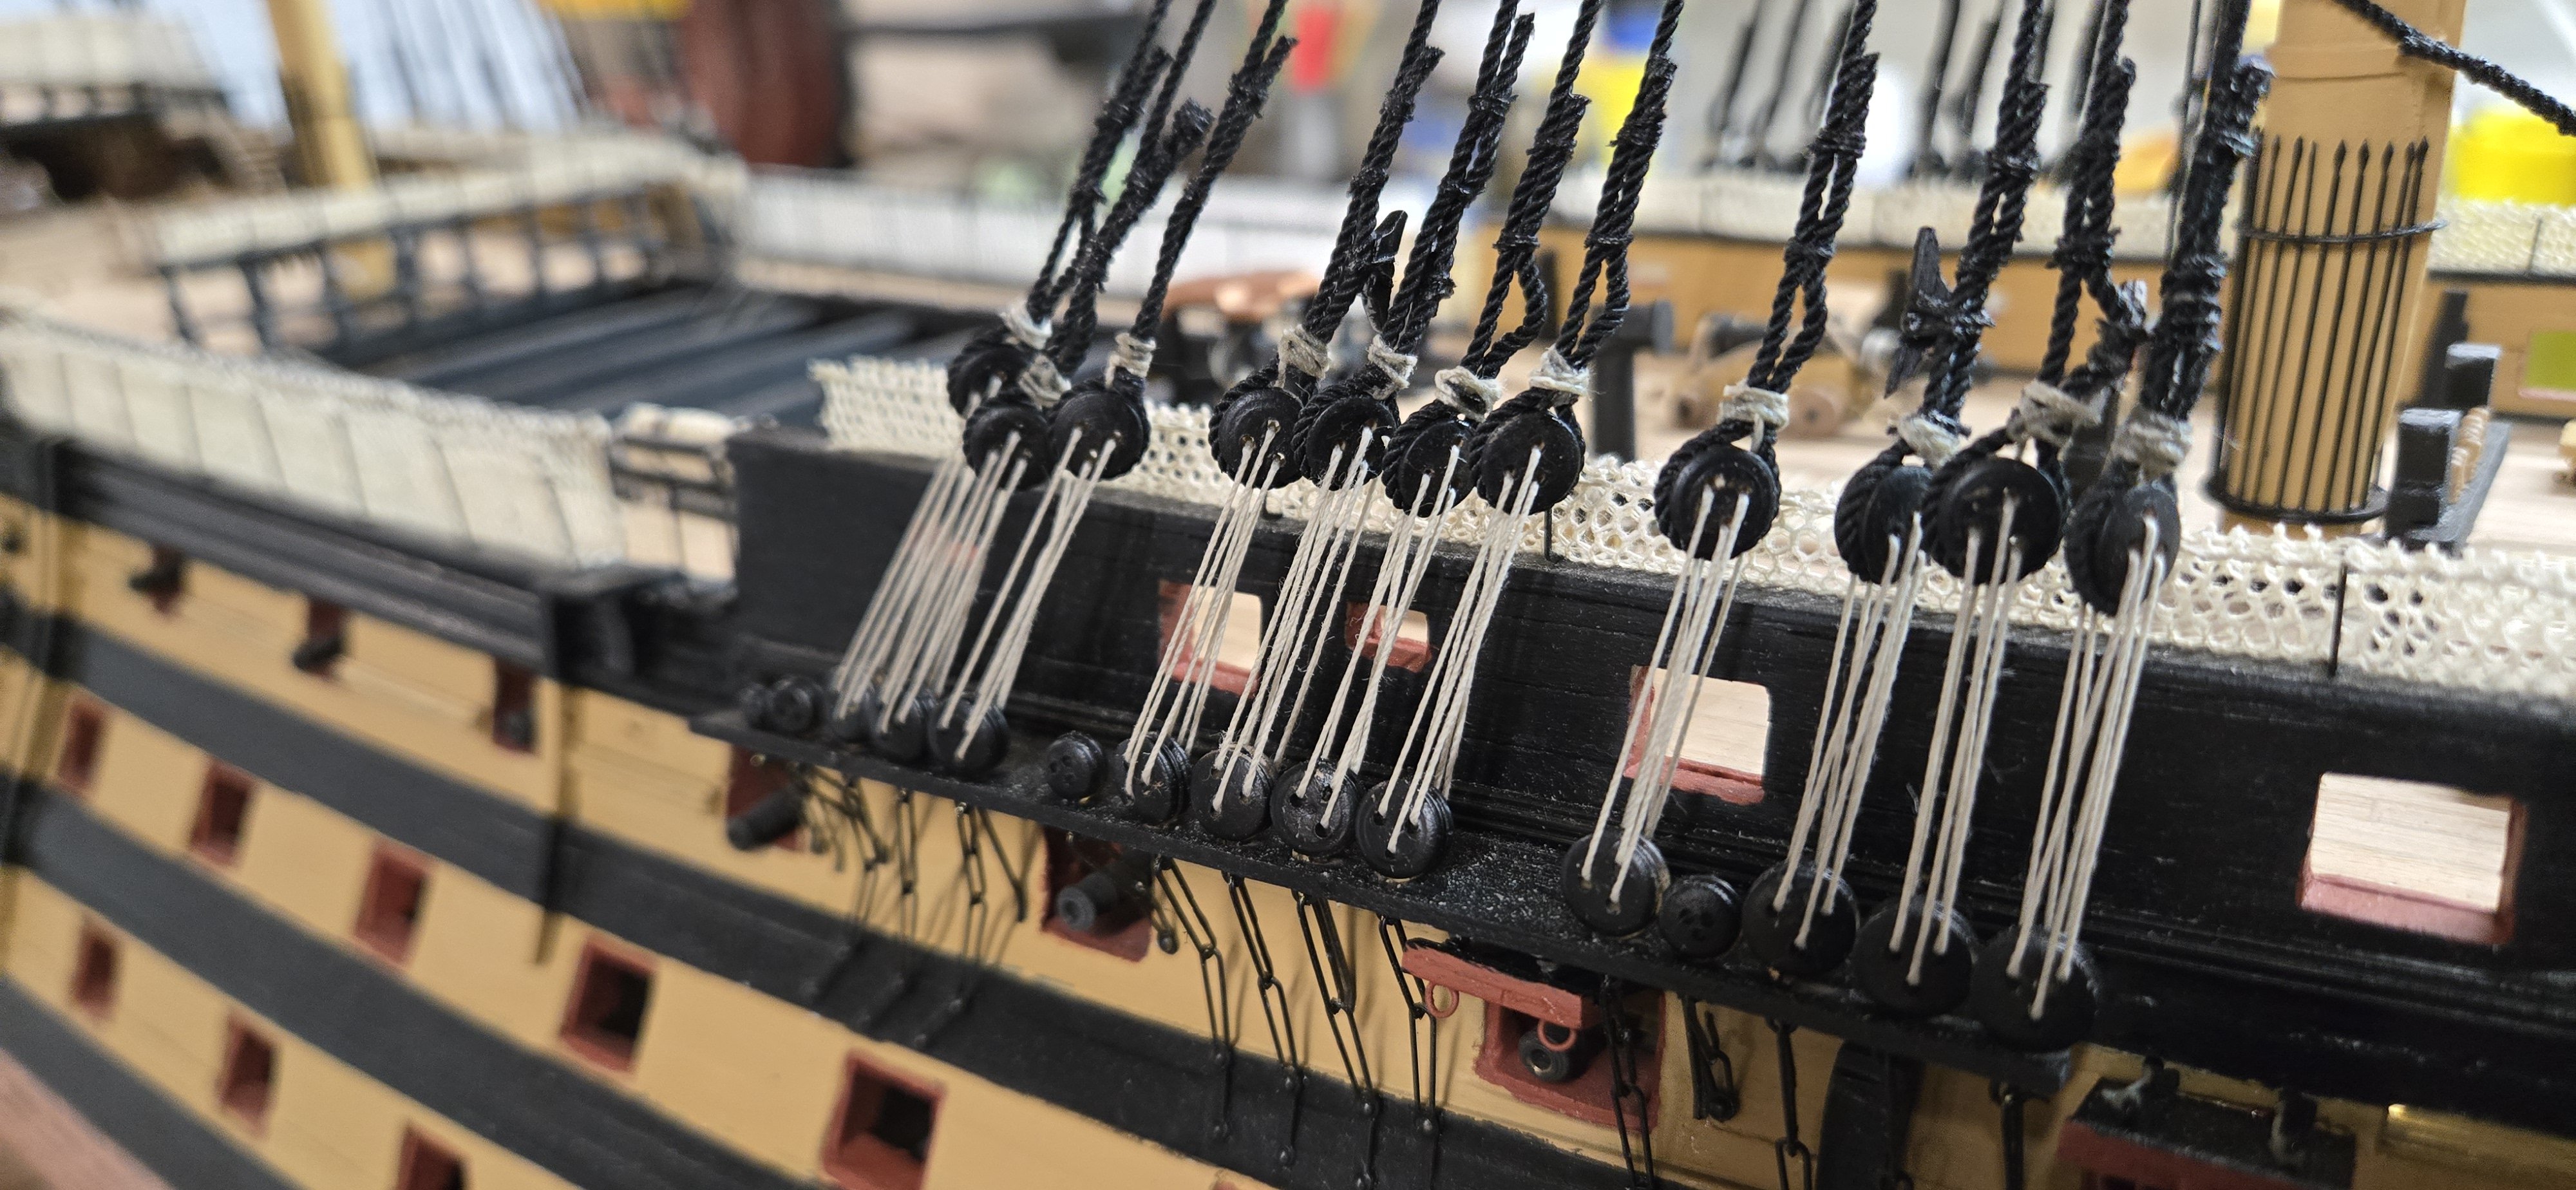
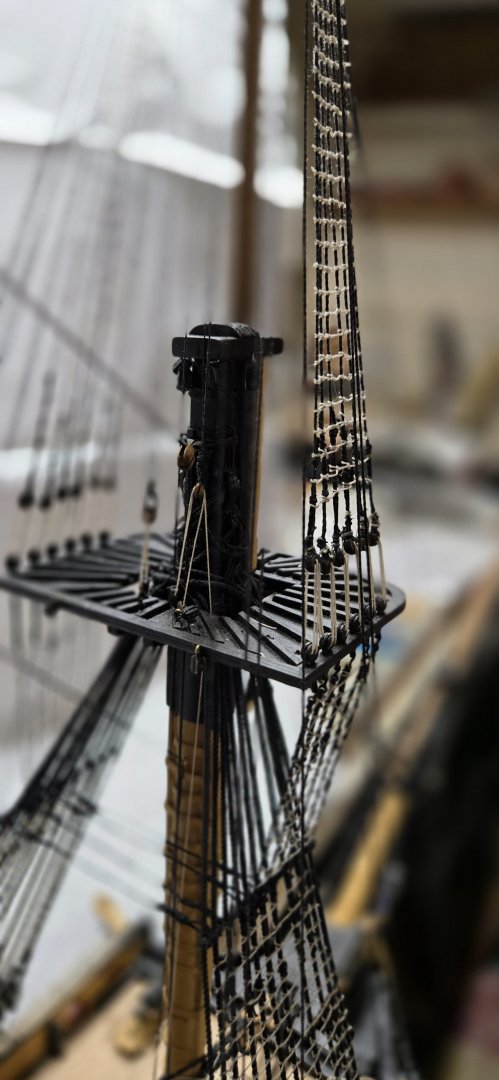
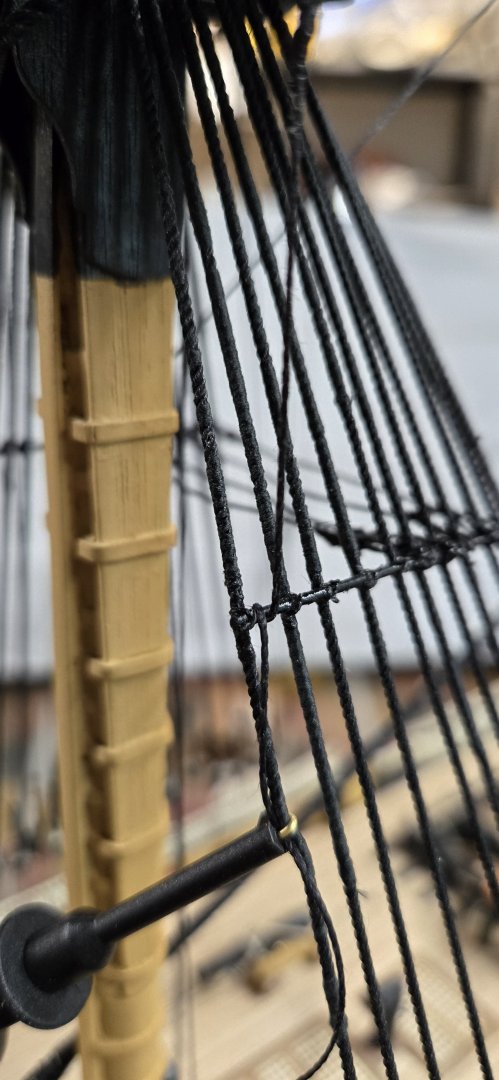
After finishing all of the various back and breast stays, I moved on to the futtock and then upper shrouds. I did notice that I made 2 of the back stays on the foremast too tight and there is a noticeable forward rake to the t'gallant section of the foremast. This has also caused a lot of the other lines to droop. It may be the stay that is lashed to an eyebolt, which would be great because I can just cut those lashings and redo. It it's one of the others, the deadeye lashing is all glued, so I may have to look at cutting the tops and retying them. I'll keep you posted. I did the catharpins for the foremast. I think I need to make the others a bit shorter so that the lashings pick up any slack. You can see that mine are sagging a bit. I think that white glue will help to smooth that out. These were the first I did, so I know to do a better job to make them #1 look consistent and about #2, 2-3mm shorter than the futtocks. Also, the directions call for catharpins on shrouds #4-9, so 6 of them. But the books all say they go on shrouds #4, 5, 7 & 9. That is what I did. The futtock shrouds are attached to a chainplate under the platform with a PE hook and then lashed to lower shrouds. I had to drill out the hooks so that I could get the .75mm line through the hook. I tried to just create a loop on the shroud and then tie the hook to the loop but didn't like that. The hooks are also a bit larger than the chainplate hole so it takes some time to get them in place. According to my books, the shroud is laid in front of the futtock, then wrapped under and around the futtock and then laid on the side of the lower shroud. You can't pre-form the seizing for these, you have to tie the lashing and then add a few hitches. It's fiddly, but doable. The back stays are there and they do get in the way, not unmanageable, but they are there. My feeling is the stays get in the way but I think had I done ALL of the shrouds first, they would have been in the way of doing the stays.....50 50 and pick 'em. After the futtock shrouds, I moved on to the upper shrouds. Here I made an installation mistake. The lay of the shrouds and backstays for the upper mast should have the upper shrouds laid first and then the back stays...alternating starboard then port. Since I did the stays first, I have to lay the upper shrouds on top of them. My model will never make it into a maritime museum now!!!!! Adding the deadeyes, I should have waited till morning. I did all 6 on the starboard side and started lashing them when i realized that I was using 5mm deadeyes and they should be 3.5mm. The next morning, I was able to pull the deadeyes off without damaging the shrouds. I added the correct sized deadeyes and was able to add some seizing to secure them. A bit sloppy but done.


-
Lol, you are NOT wrong Fritz. I was overthinking things when I added them. I just don't have it in me to remove them and re-orient them! I may try to drill the top holes but I don't have a lot of hope with such small bits! Just don't tell anyone else!!!!!
-
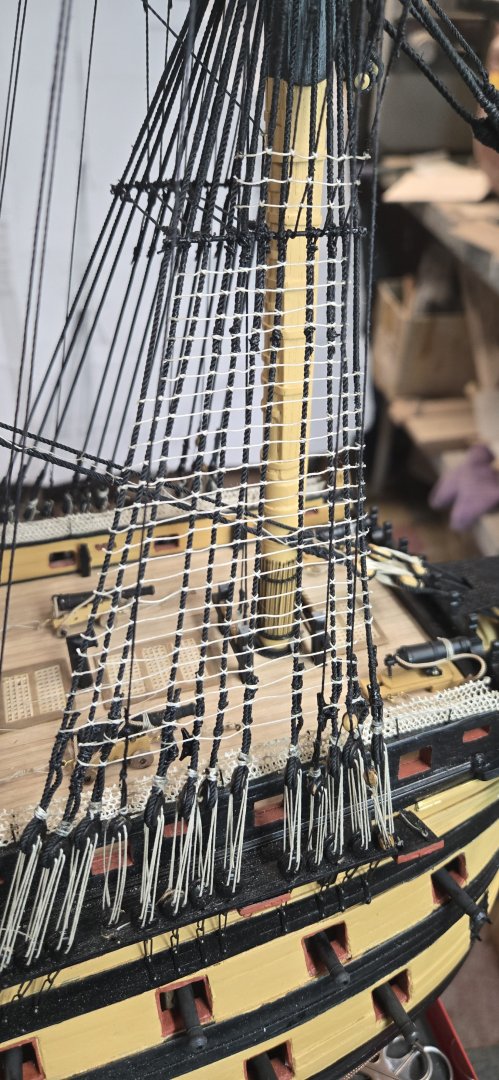
Continued to work on the back stays now. They are very labor intensive with the breast backstays requiring a tackle system and more complicate rigging that a standard deadeye to deadeye setup. I have to finish the fore port side backstays and then I will move back to the futtocks and catharpins. I wasn't happy with the way the mouse looked, so I coated most of them with white glue. this at least smoothed them out. Snaking them was harder than it read in the manuals and books. In the end, my ties were terrible and they are too far apart. It's hard to get good pictures of the rigging, I'll need to put up something white as a background to get a better feel for what's been done. I spent about 3-4 hours just working on the fore back stays today. Rigging the main shrouds for both sides and then taking the time on the starboard side to install the deadeyes, blocks etc takes a lot of time. The pics really bring out the dust!!!! So dirty, I think I'll have to look for a very soft, light brush to get into the nooks and crannies!


-
Continued working on the stays. Spent a lot of time on the fore and fore preventer stays that run to the bowsprit bees and then back to the knightsheads. I like it because there are a lot of little details: blocks, lanyards, etc. I think the port side came out better than the starboard side, I thought I had measured the second one so that it would fall in line with its opposite side, but it didn't happen. Doing the stays is a challenge. The directions are very simple and direct and if you don't have a background in this, it's hard to figure some things out. I spent a lot of my time using my books as references...especially Longridge. I've finished most of the forward stays and was going to begin working on the back stays. While the instructions don't state this, it appears that many of these stays are 2-sided. IE, one on each side of the hull. Thankfully, McKay's book has a table and since I was staring back to front, my first line was for the mizzen t'gallant backstay. McKay in very VERY small letters says it's 1 pair. I'll see over the weekend how this goes! Some of the stays I did were a struggle to figure out. The main t'gallant flagstaff stay goes from the main t'gallant mast to the foremast and then down to a belay point b9. It says this is above the foremast preventer stay. That's a bit vague and I couldn't for the life of me find any reference to b9 anywhere on the various blueprints. In the end, I drilled a hole above the foremast preventer line about 10mm above the foremast platform...so technically, it is above the prevent stay!!!!


-
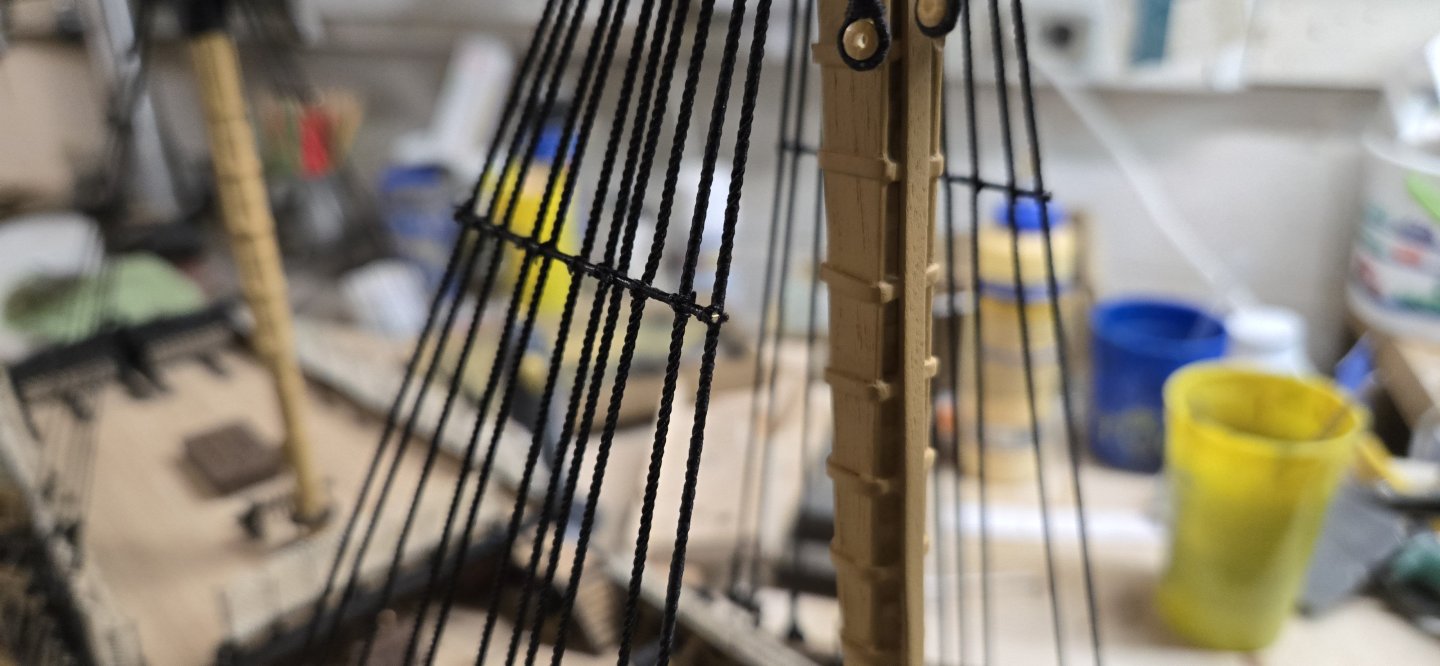
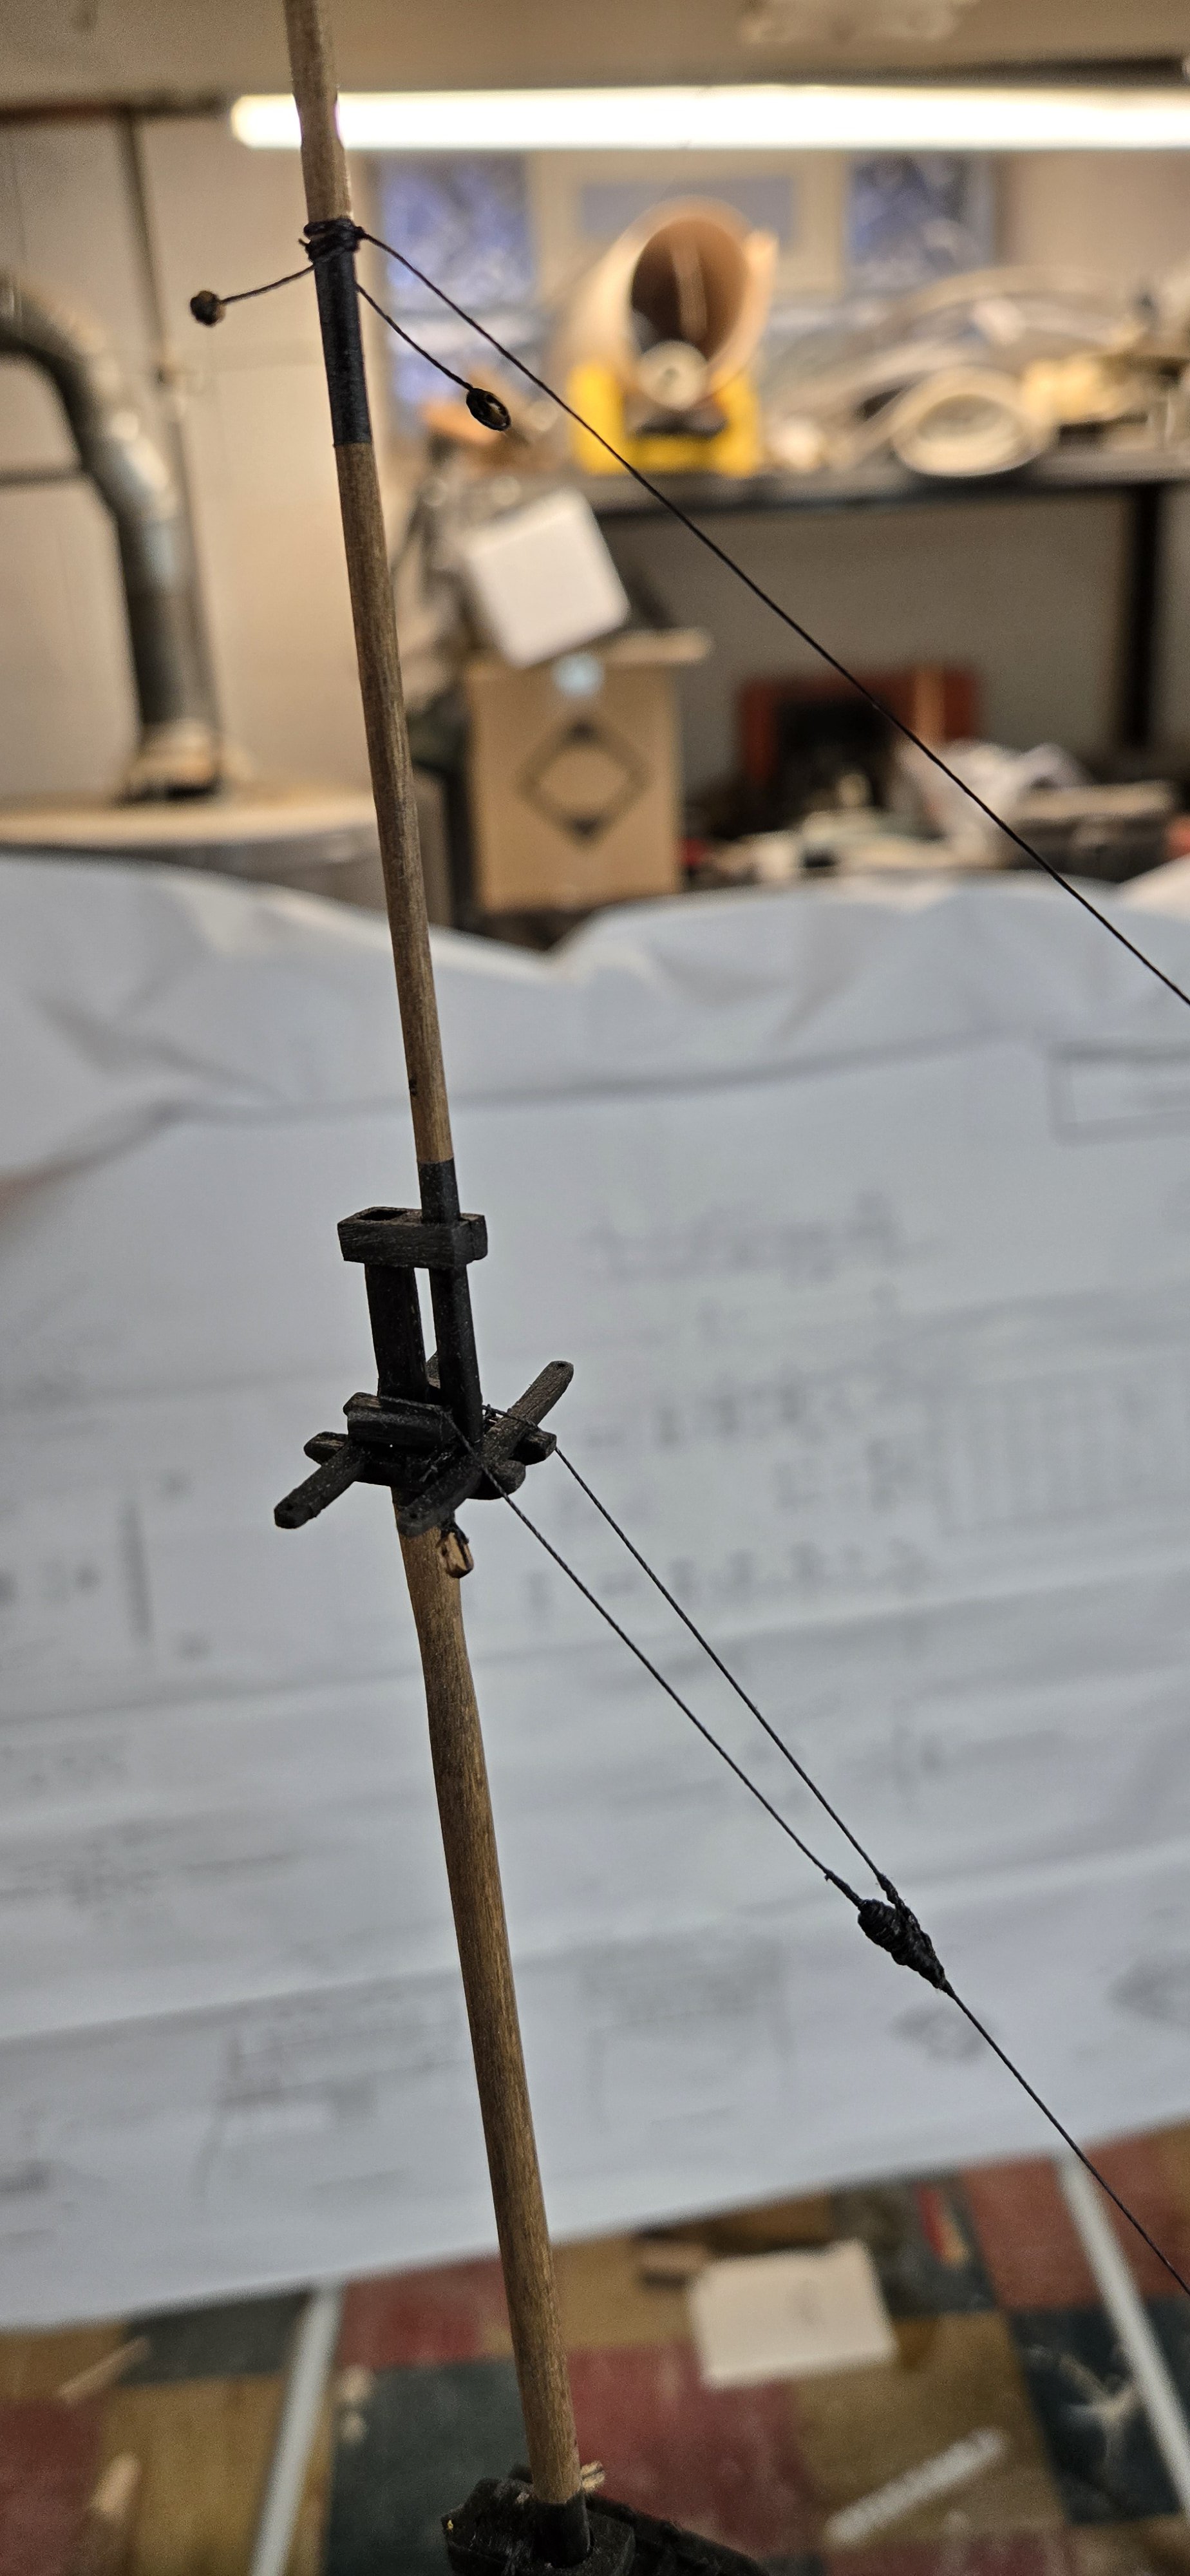
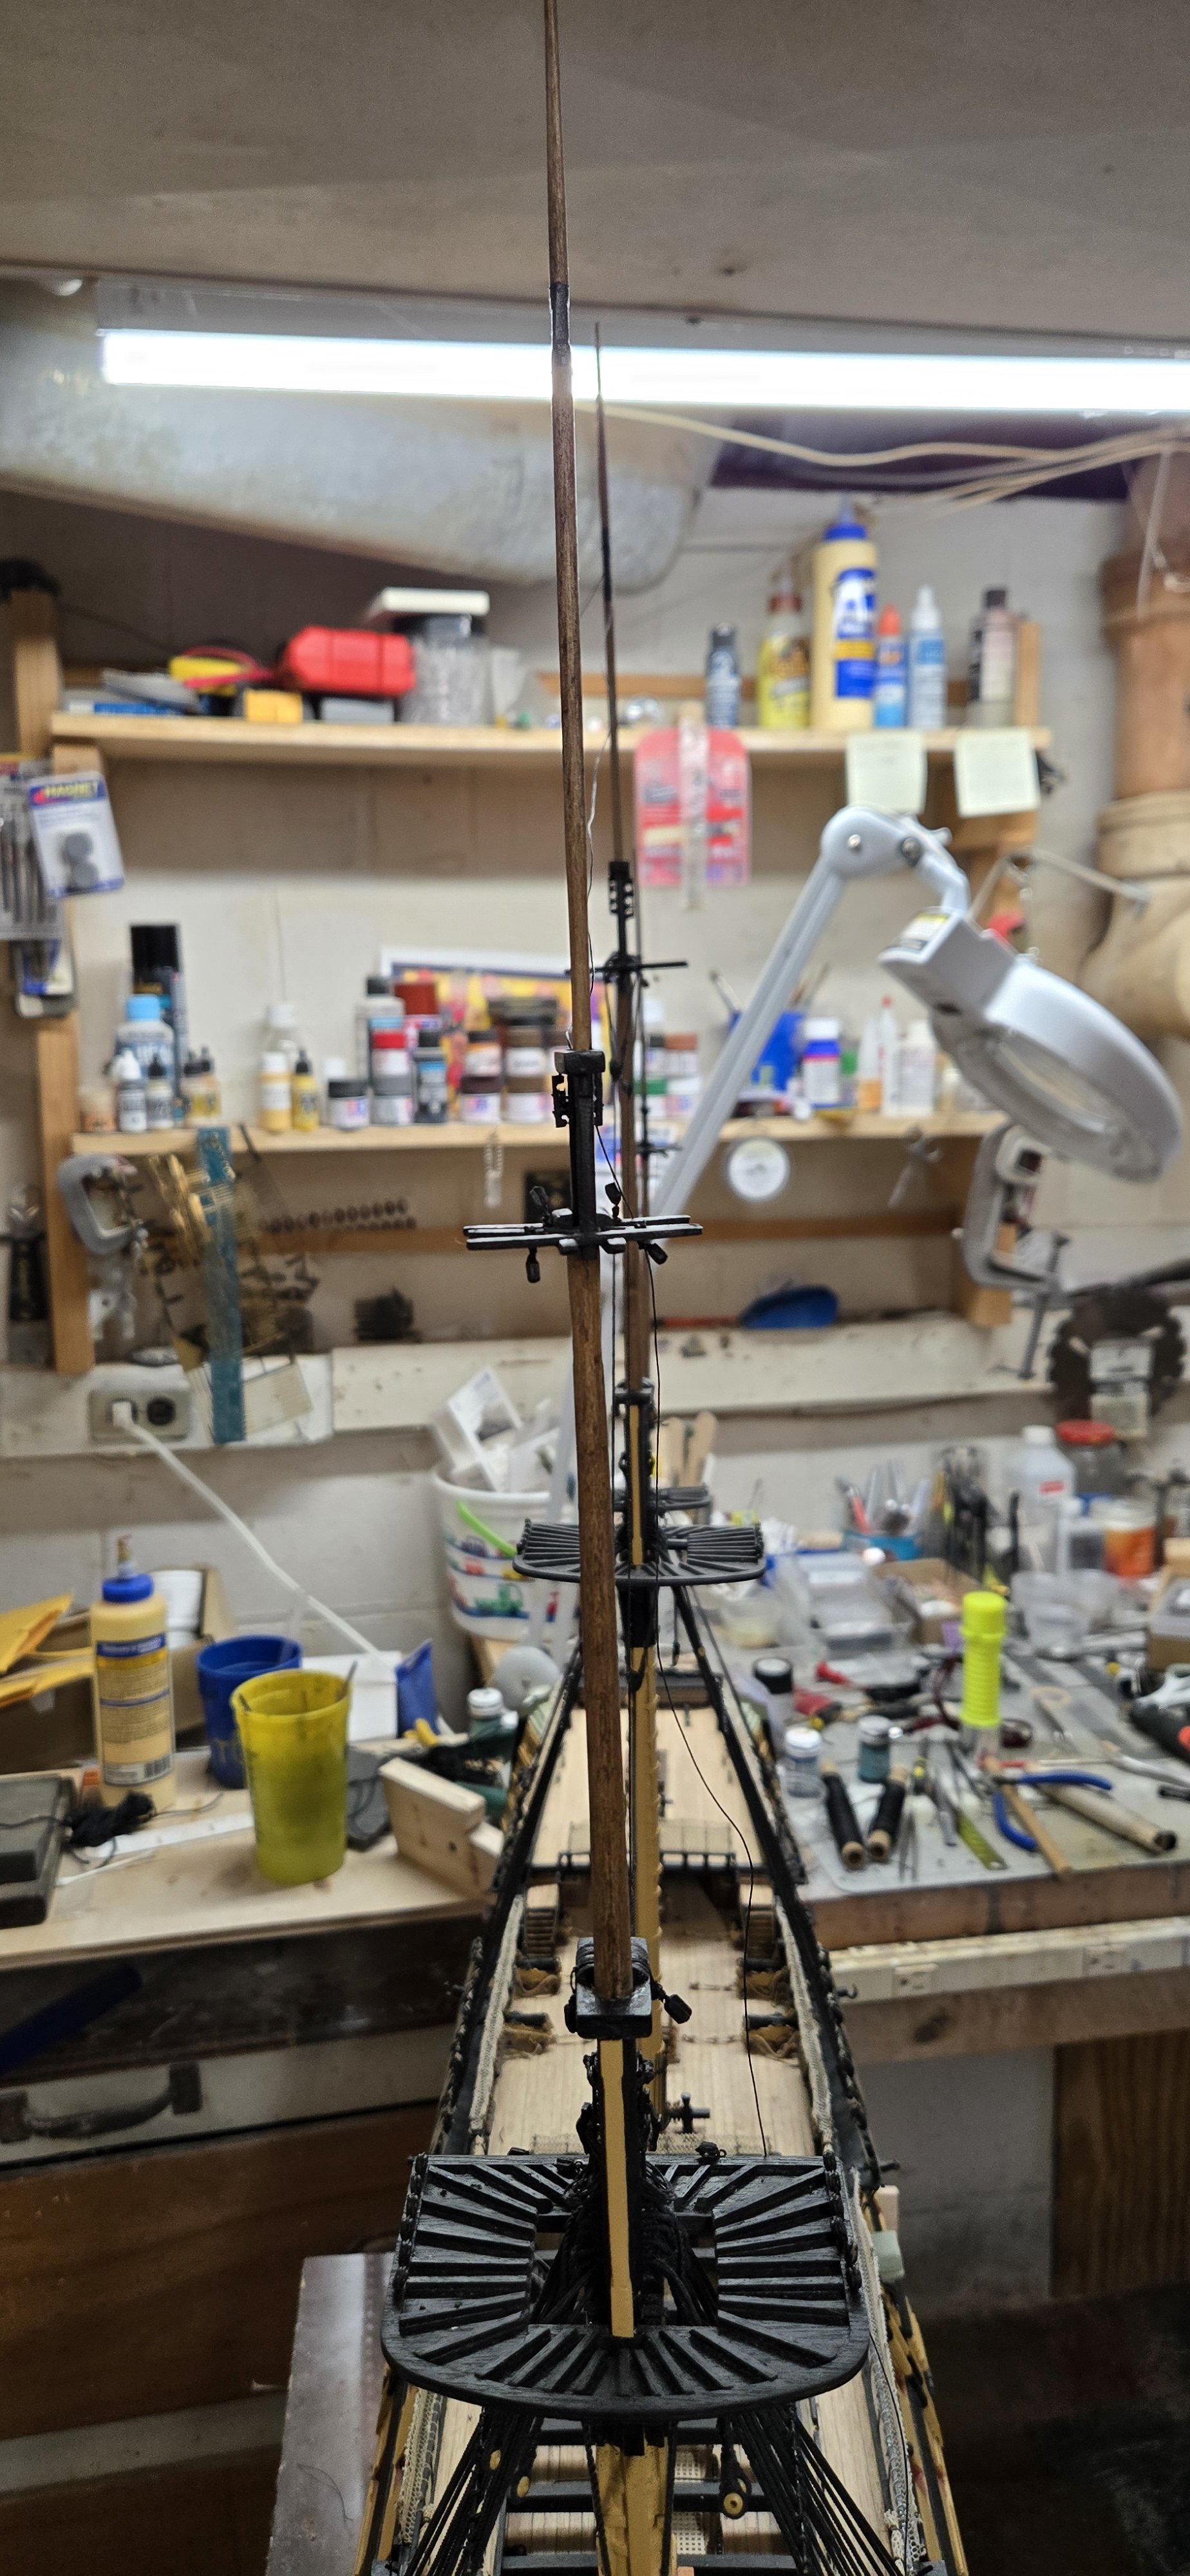
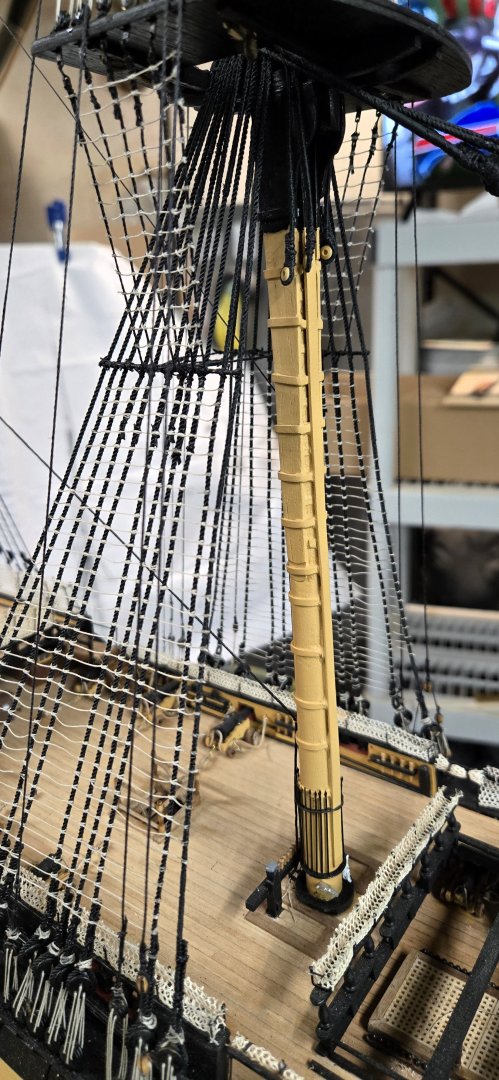
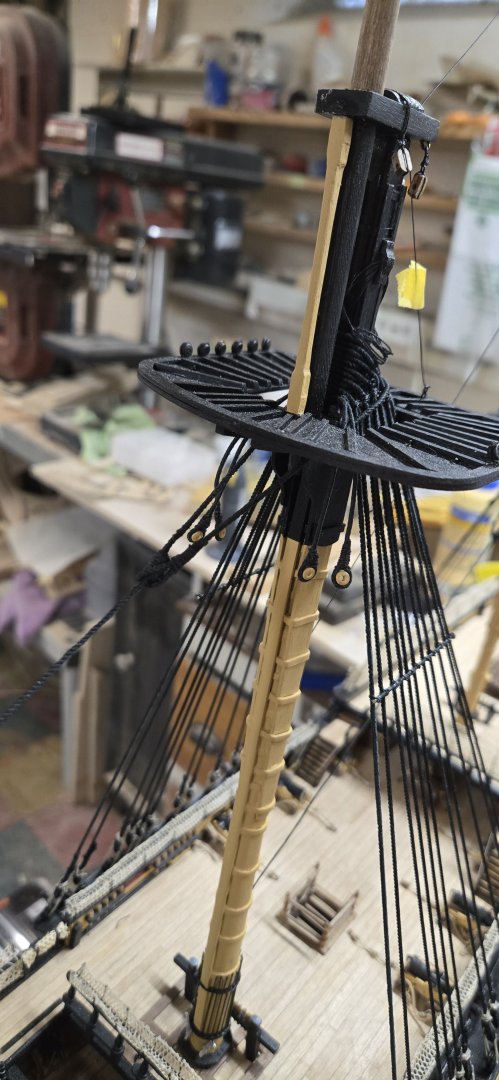
I opted not to continue working on the upper shrouds or caparthins until I finish all of the stays. I think so far that was the right choice, it's bad enough I'm hitting everything with my arms and my magnifier headset!! It is a learning curve, especially trying to make the mouses for the various forward stays. For a few of the larger ones, I was able to drill a hole in some small dowel and then sand them into a pear/oval shape. After, I tried to seize them, which is very hard as the line keeps sliding off. The smaller stays were a bit easier just using seizing line to create the mouse. Although for a few, I used bigger line that does not seize well and then I went over it with my very thin (almost fly fishing diameter) line to try and clean and smooth them out. I'm still waiting on the 1.8mm line so I was able to do all of the forward stays except the 2 major ones and the fore stays that attach to the jibboom and flying jibboom as I haven't installed that yet. I put the yellow tape on this stay because I kept hitting it as it gets lost in the shadows.... Sadly, the foremast has taken a definite twist in shape. Given the way it is put together, I don't think I can break it apart without risking breaking the mast itself. I never noticed it until now but the cross trees are way off!!!!


-
That is what I am thinking. Running through those larger square holes in the marine walk....down past all of the interior structures where the gammoning is to that hole just the aft gammon slot. I am back home and thinking I'll try that. Waiting on the Rope of Scale 1.8mm rope and I'll let everyone know!
-
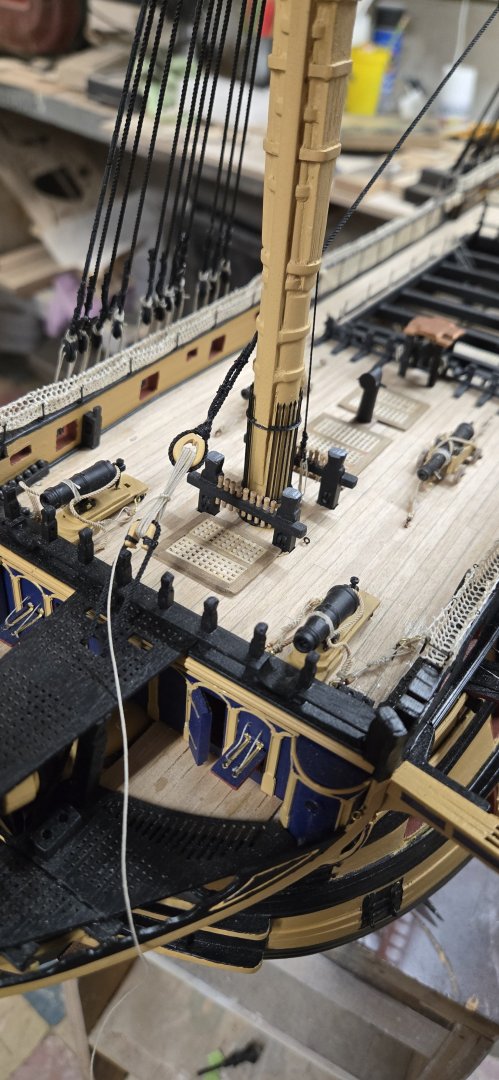
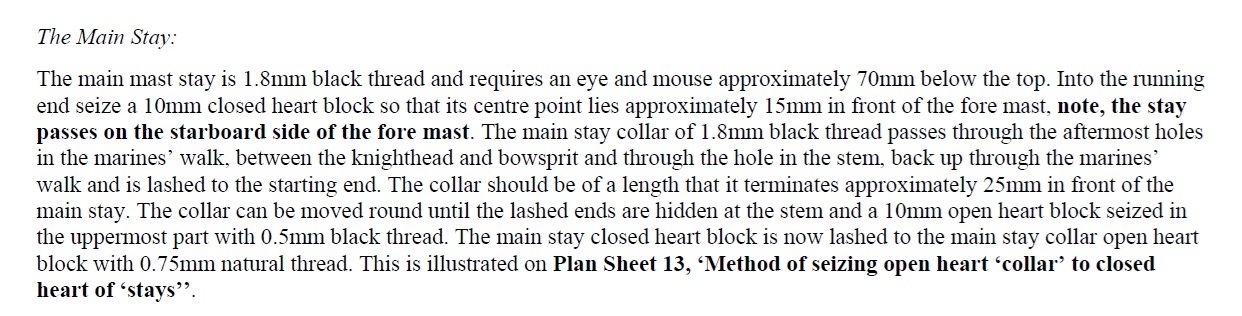
Working on the first stay, the main stay. It requires 1.8mm thread and the thread supplied with the kit is just terrible. I have seen others complain that it breaks under and stress. It did for me. It's fuzzy, unravels fast and is just plain ugly. I also messed around creating a mouse. Longridge suggest drilling a hole through a pear shaped piece and then adding many lines of thread around the mouse and hole....almost like creating a magnetic field around it with string. Then perhaps rig this to a serving machine and darn above and below each line to create the circumference lines. I tried that...eh. It didn't go too well. I used some dowel, drilled a hole, cut the piece small and then tried to sand into a pear shape. It didn't look too good. For the stay, I tried to worm the rope all the way. Once that was done, I retied it so that I could serve the upper section. When doing this, the rope broke in the machine because it frayed where it goes into the serving machine. Ugh. The worming went ok and the serving did too. Doesn't matter, I went to Rope of Scale and ordered 1.8mm GOOD rope!!! It'll be here in a week, and I'll be happier. Finally, a question for someone. The instructions call for the main stay collar to run through the marine walk (which I see) down through a hole in the stem. Which I am not sure what or where that is.... Part #55 is the stem. Is the hole they are talking about the one just above the 2 gammoning holes? Which is pretty hard to see on other builds and will be a bear to get to!

-
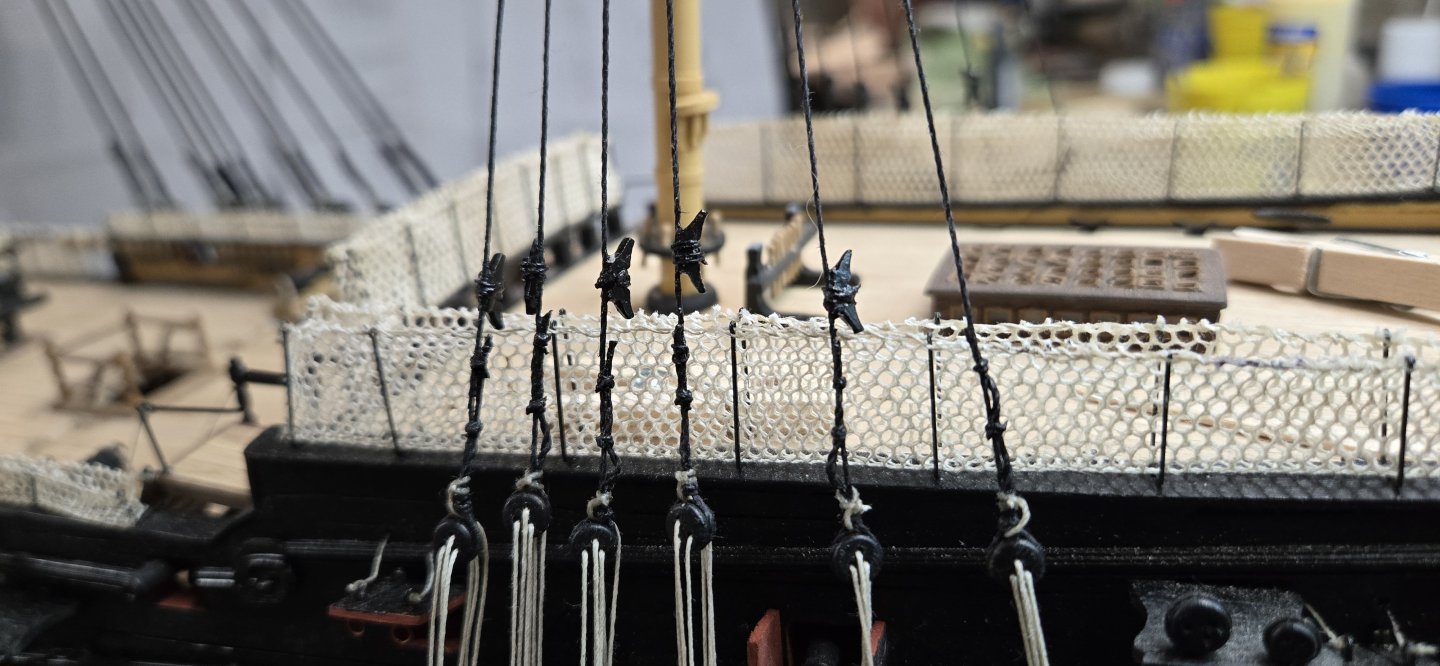
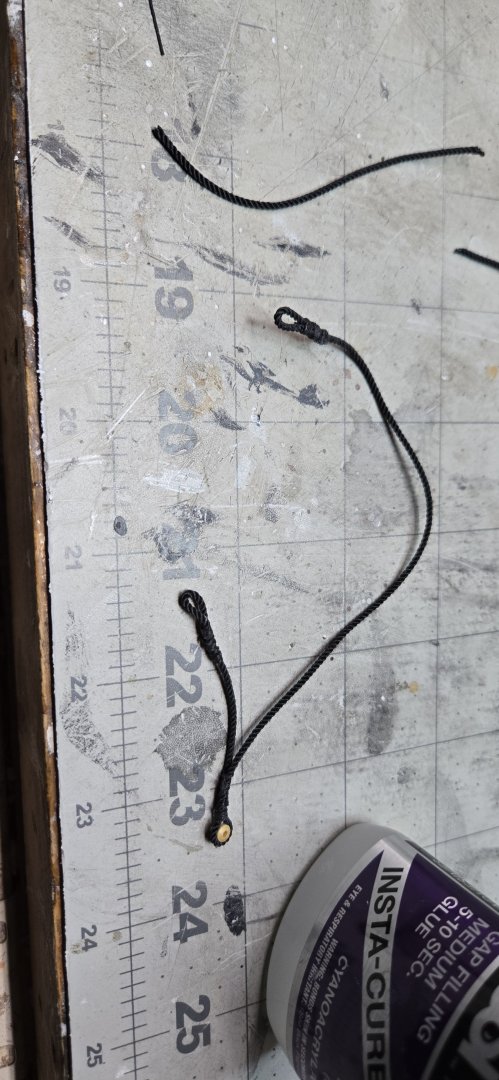
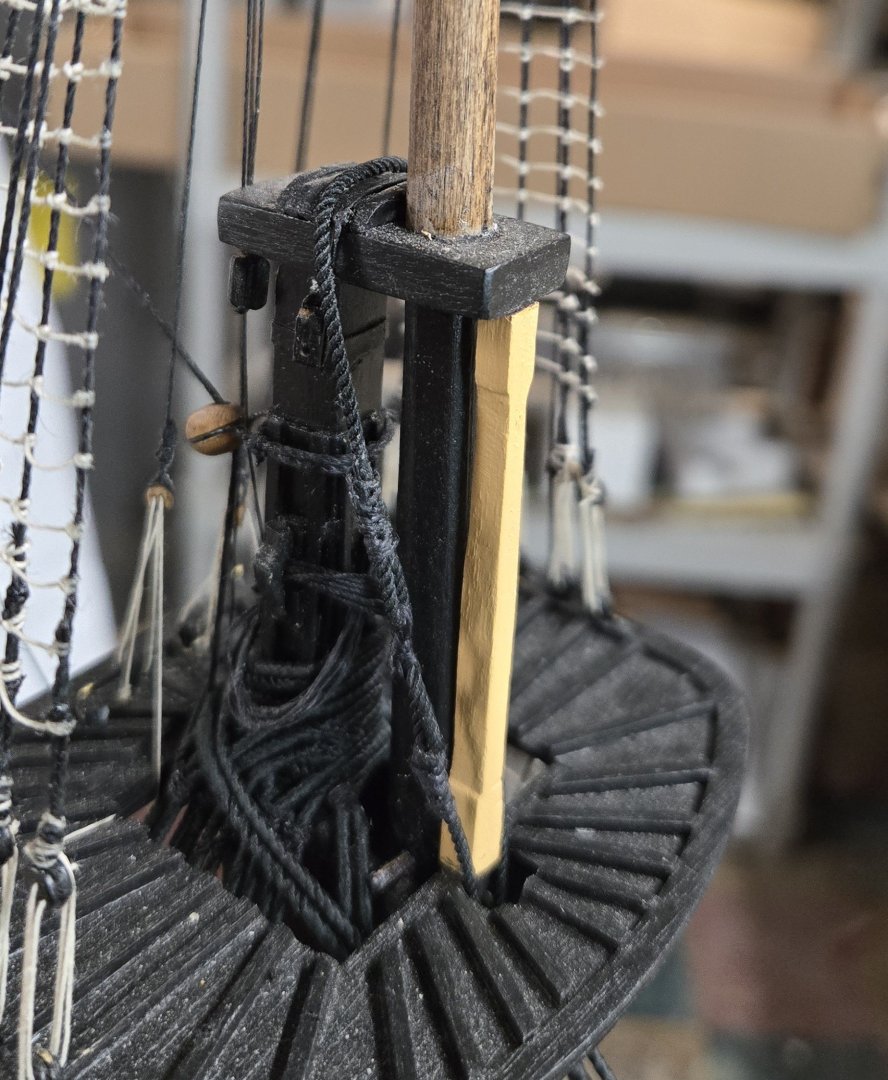
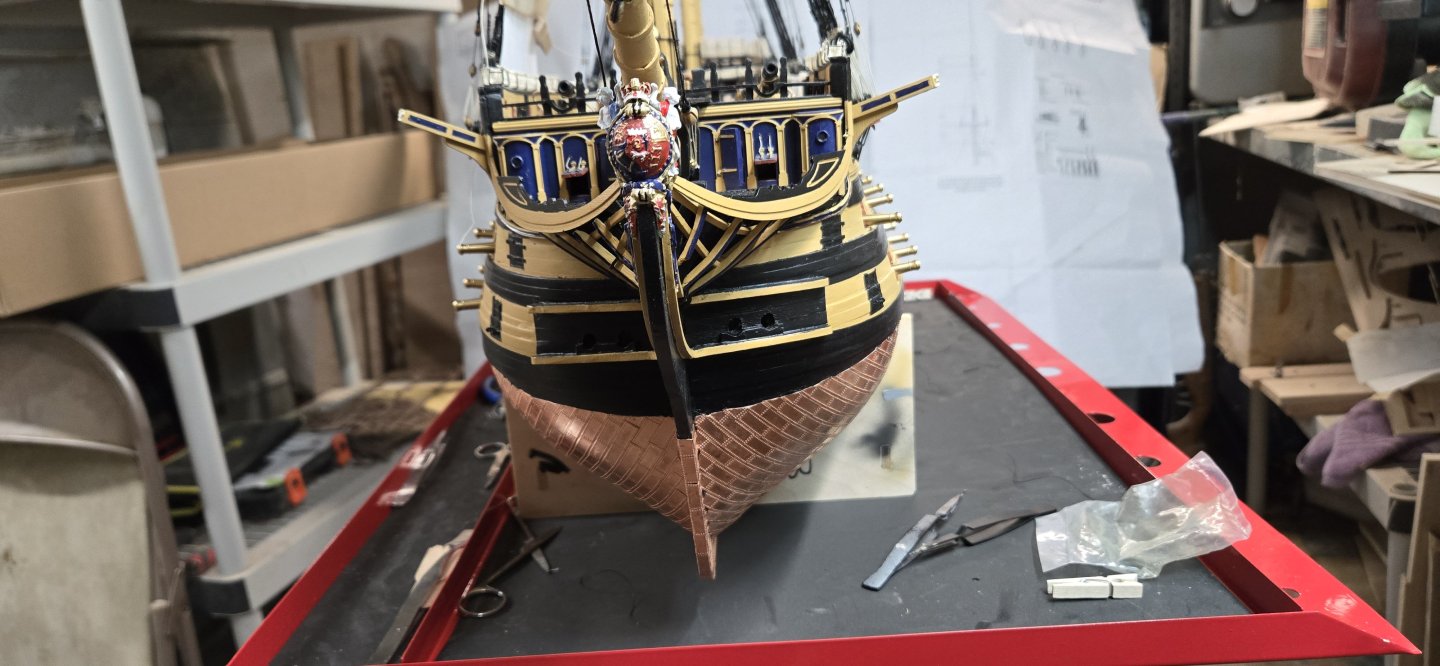
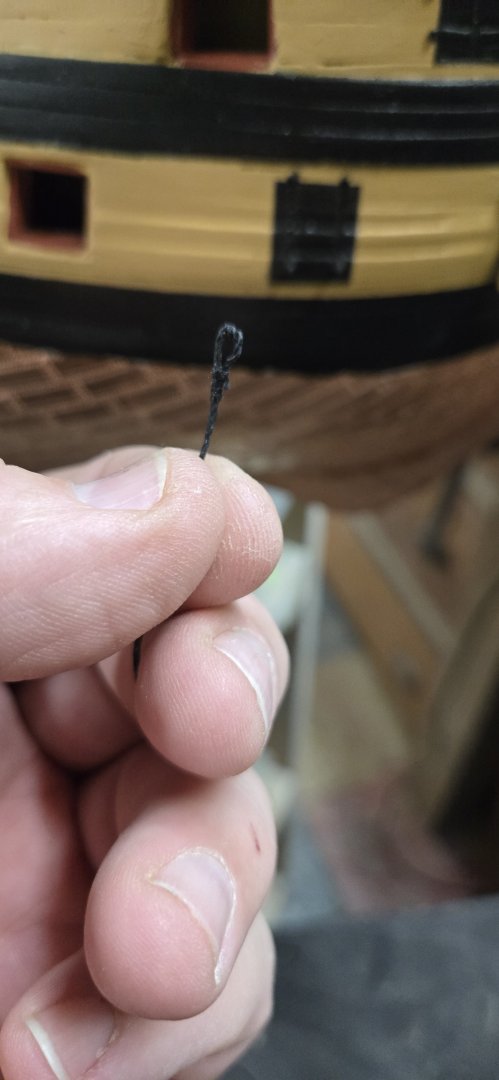
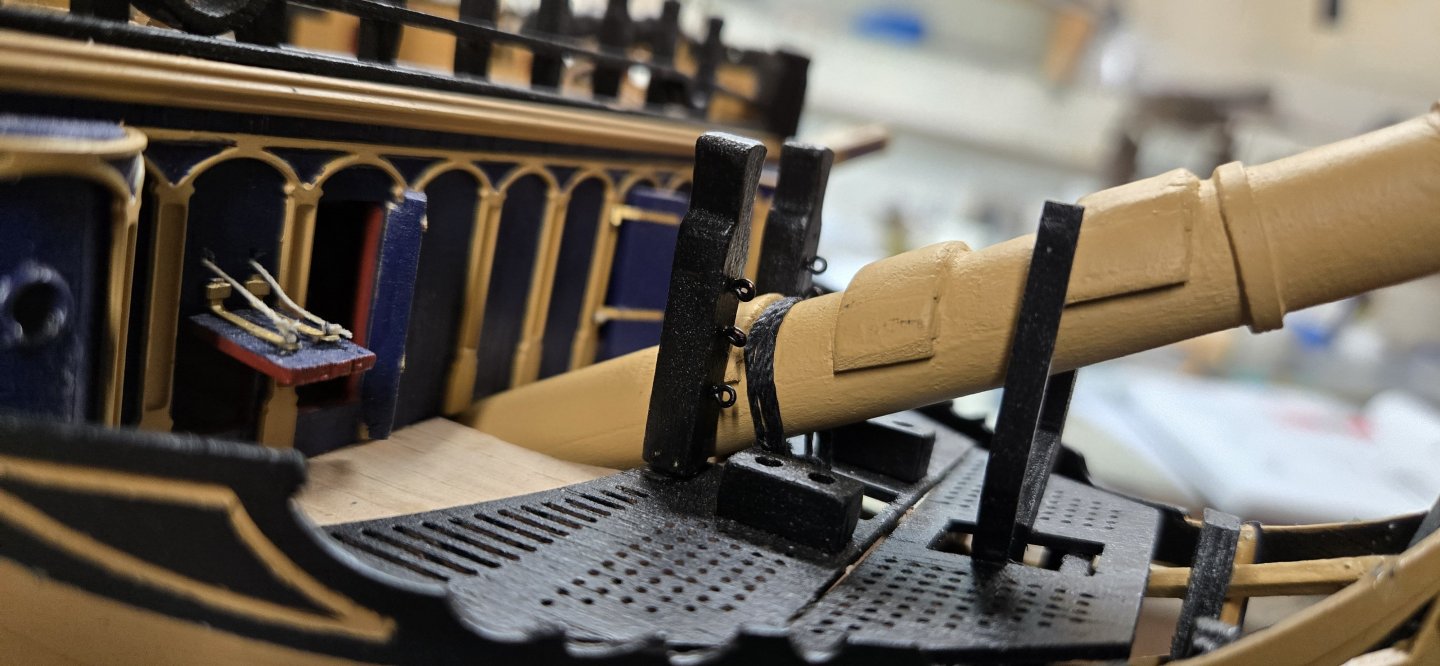
After this, I decided that before moving on to the catharpins, futtock shrouds and upper shrouds, that I would install the bowsprit and add all of the stays. I think that because they are all in a center line down the boat, it will be easier to install them without a lot of shroud lines getting in the way. The bowsprit requires 2 gammoning rigs to hold it in place. I was a bit nervous to do this. Number one, did I make the bowsprit right and number two, can I thread and lay down the gammons correctly? I created an eye splice to hold the gammon in place, with the eye splice laying directly under the bowsprit. I then added a bunch of CA glue to the other end of the gammon to create a stiff needle as others have done. To get an estimate of how much line I'd need, I wrapped the line around three fingers so that there were 10 loops on top...more than enough to do this. From the port side, I fished the eye splice under the sprit and then threaded the 'needle' down through it. The hard part for both was navigating the internal structures down to where the gammon slots are. Then threading back up and making sure that each pass laid smooth and correctly. AND....counting the loops to make sure I did nine!!!! I know it said to use smaller thread to tie down the middle of the gammons but I used the extra from the gammon line and threaded around a few times and tied them off. They are really invisible....I know because I CANNOT see them on any other builds! I do think that there might be a loose loop in one of them on the underside....sigh.


-
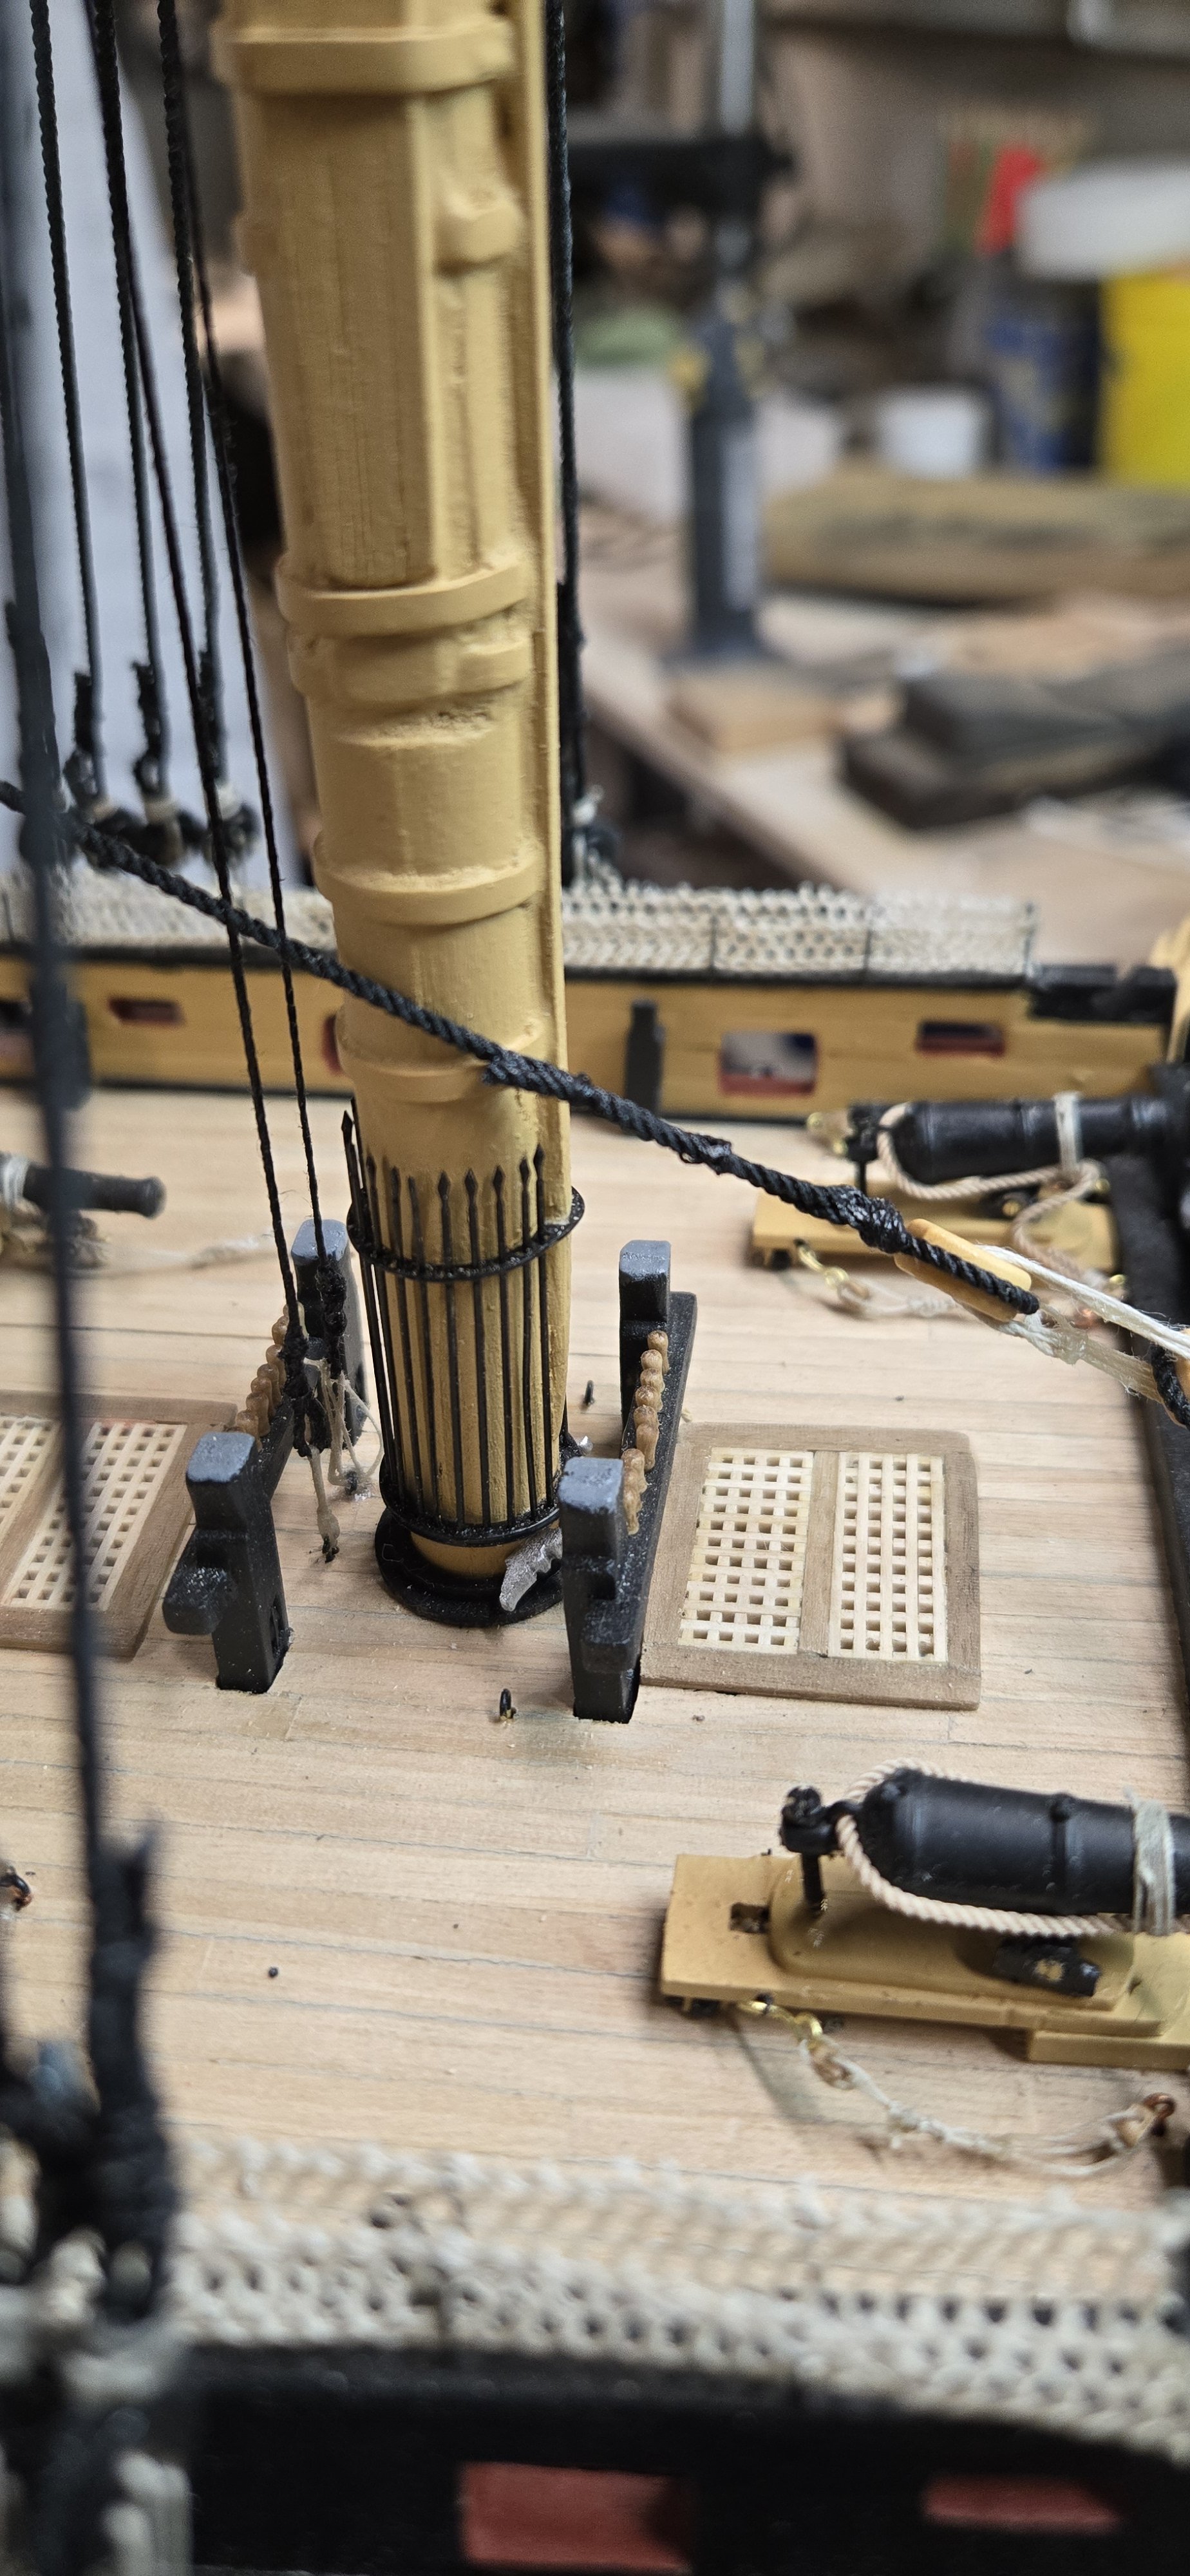
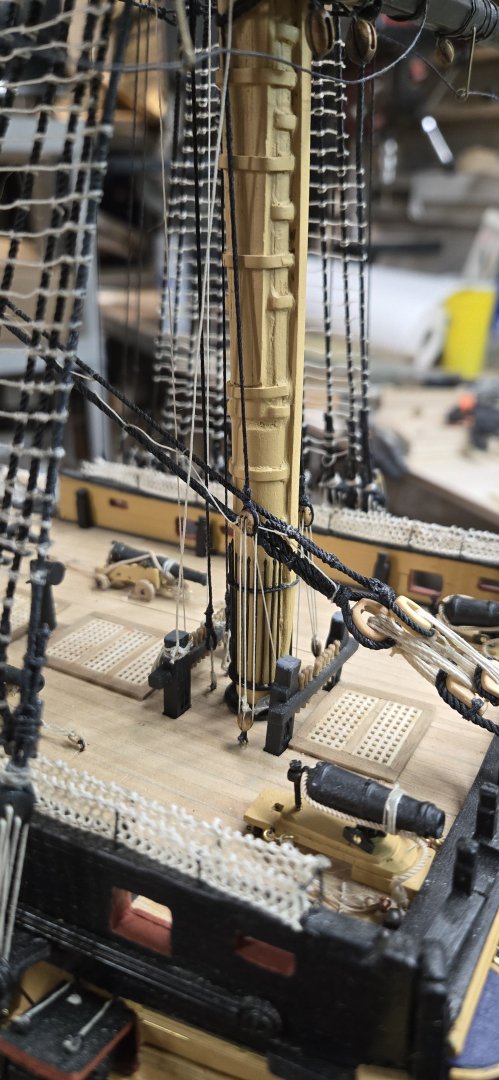
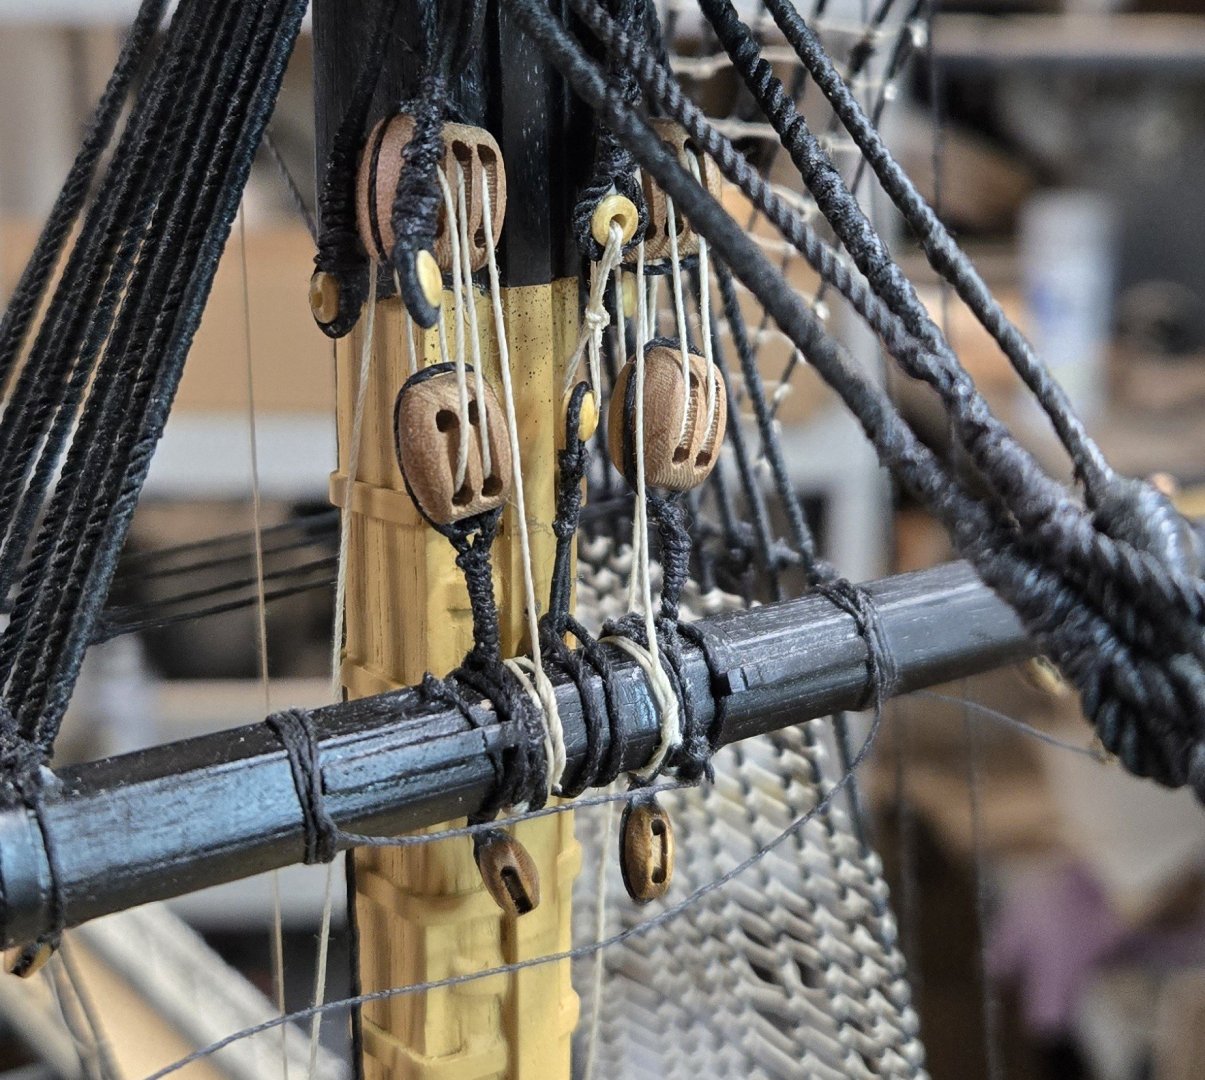
I finished installing all of the lower shrouds and their cleats. I believe they are pretty even across the board. After, I worked on installing the futtocks. It doesn't really say, but I believe they should be served, which I did. To install, I used my calipers to measure from the top of the hand mast on each mast to the base of the platform. Then I took this measurement to estimate where the futtocks should be under the platform. Once I had that position, I used small clothespins to hold them in place before tying them to the shroud. I tied the opposite end and then leveled them off before permanently securing them. Once I had all 6 done, I wen back and tied off all of the shrouds.