DONATION DRIVE - SUPPORT MSW - DO YOUR PART TO KEEP THIS GREAT FORUM GOING!
×


cdrusn89
-
Posts
1,915 -
Joined
-
Last visited
Content Type
Profiles
Forums
Gallery
Events
Everything posted by cdrusn89
-
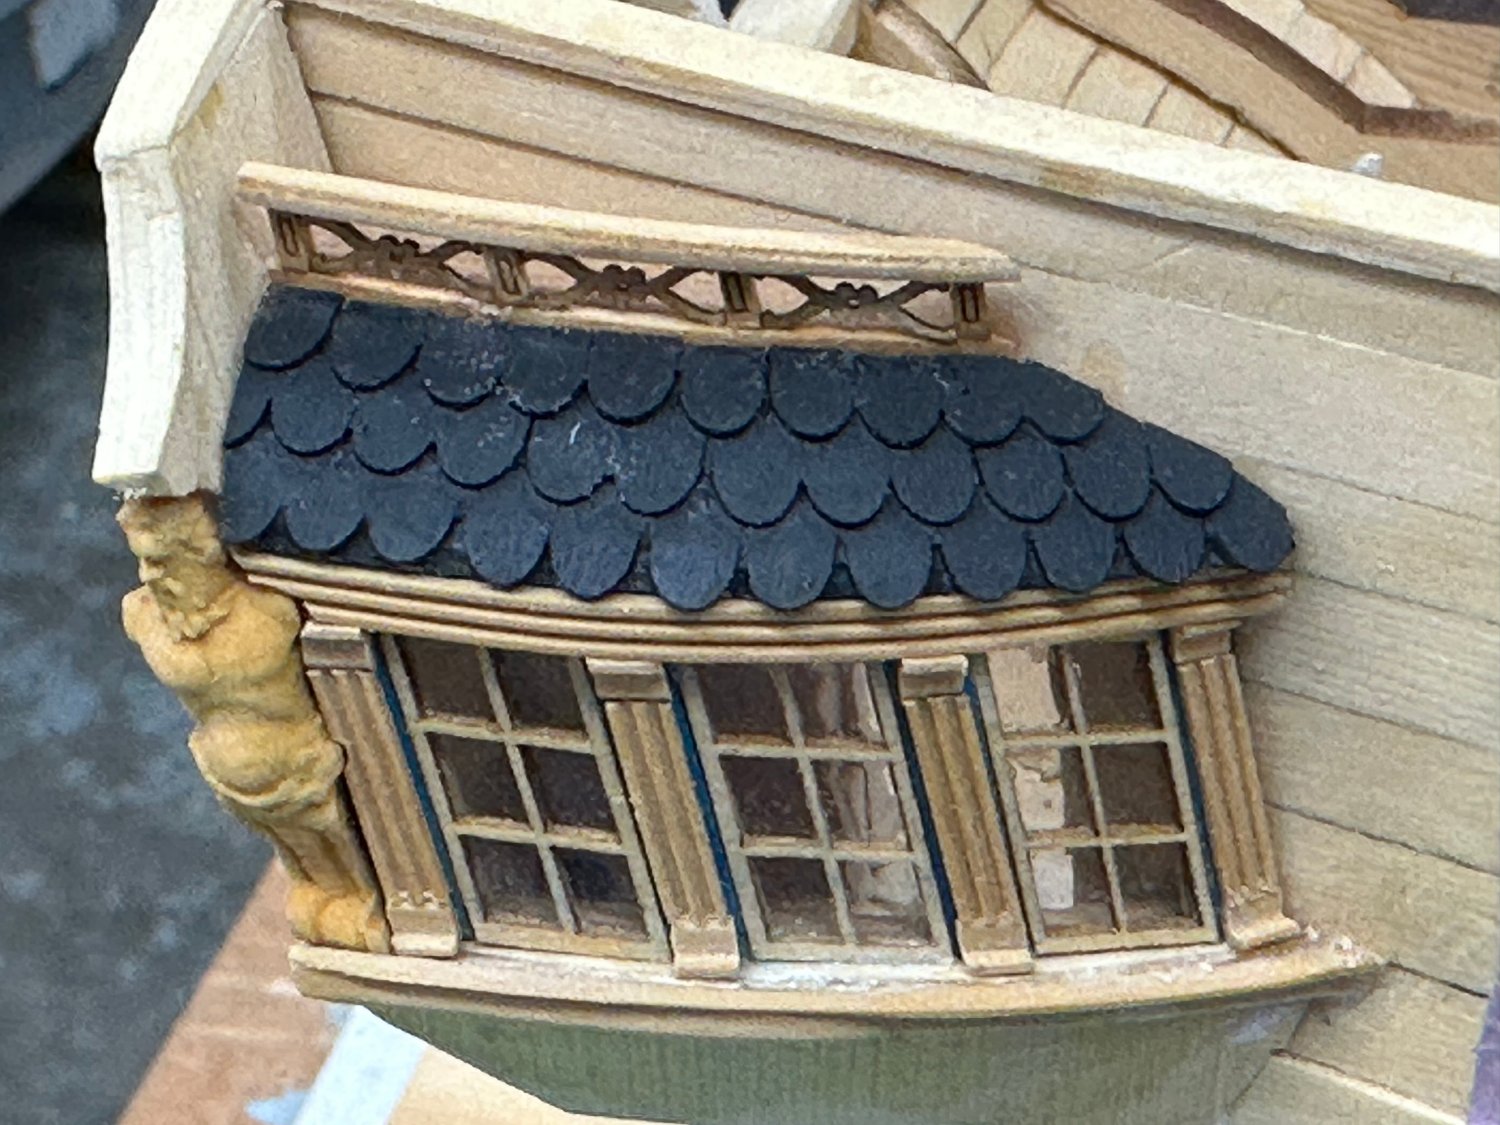
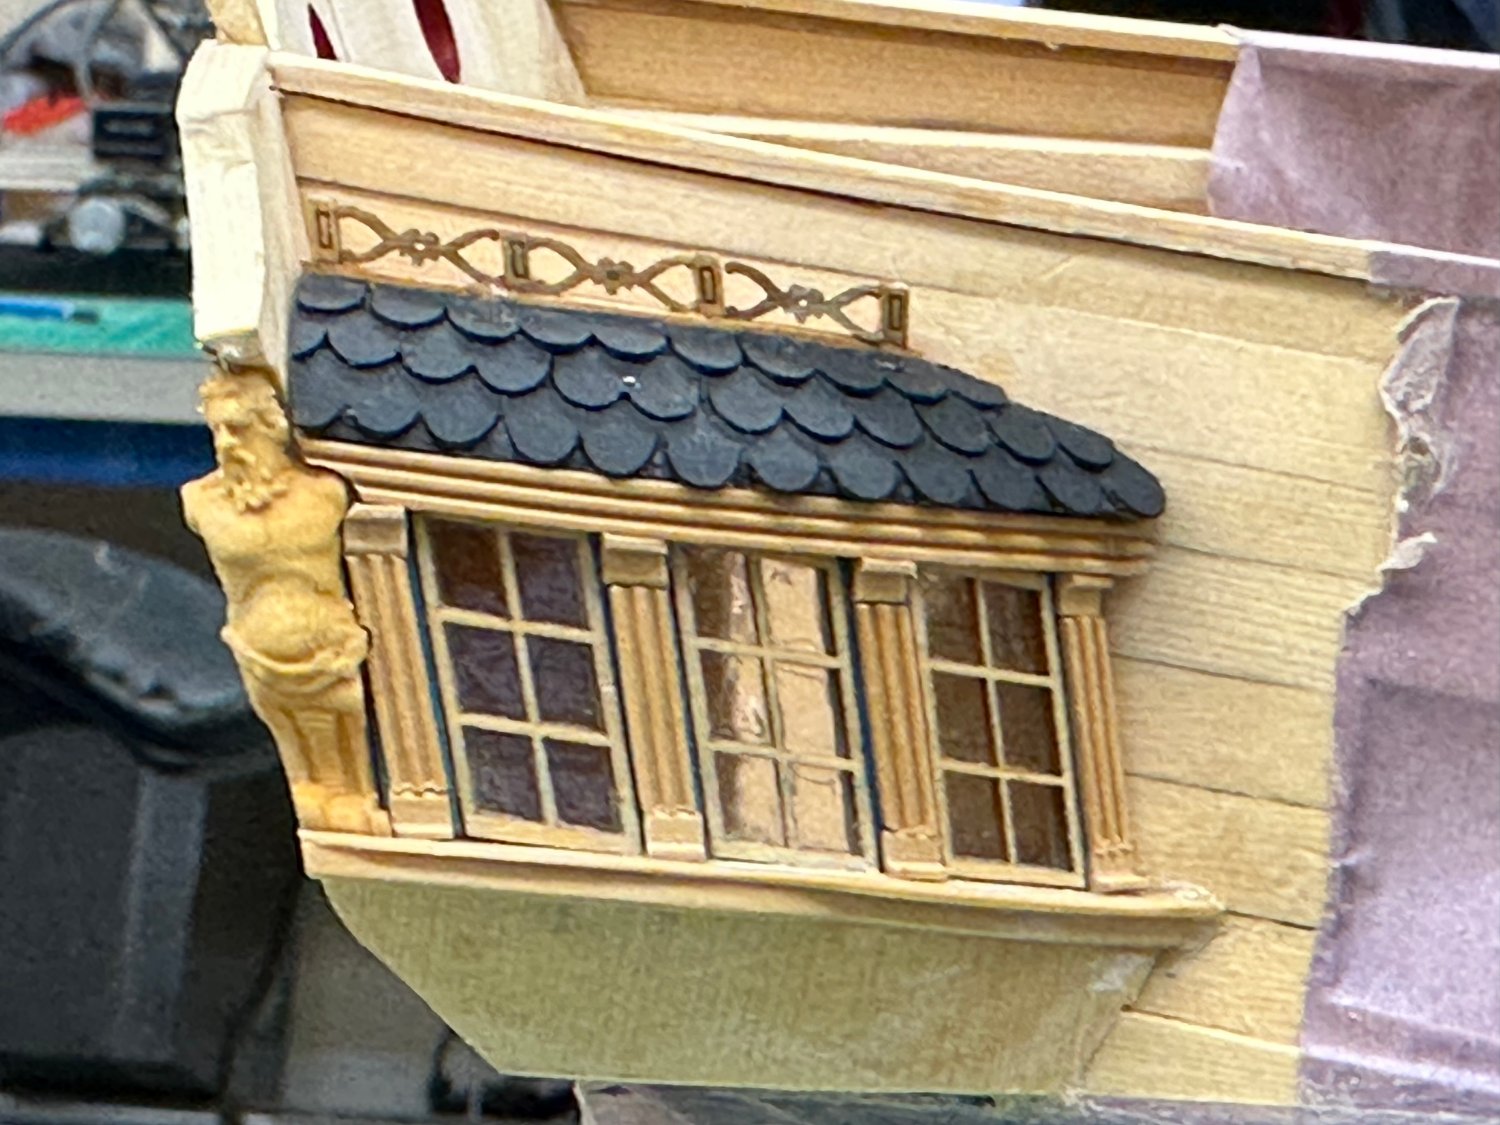
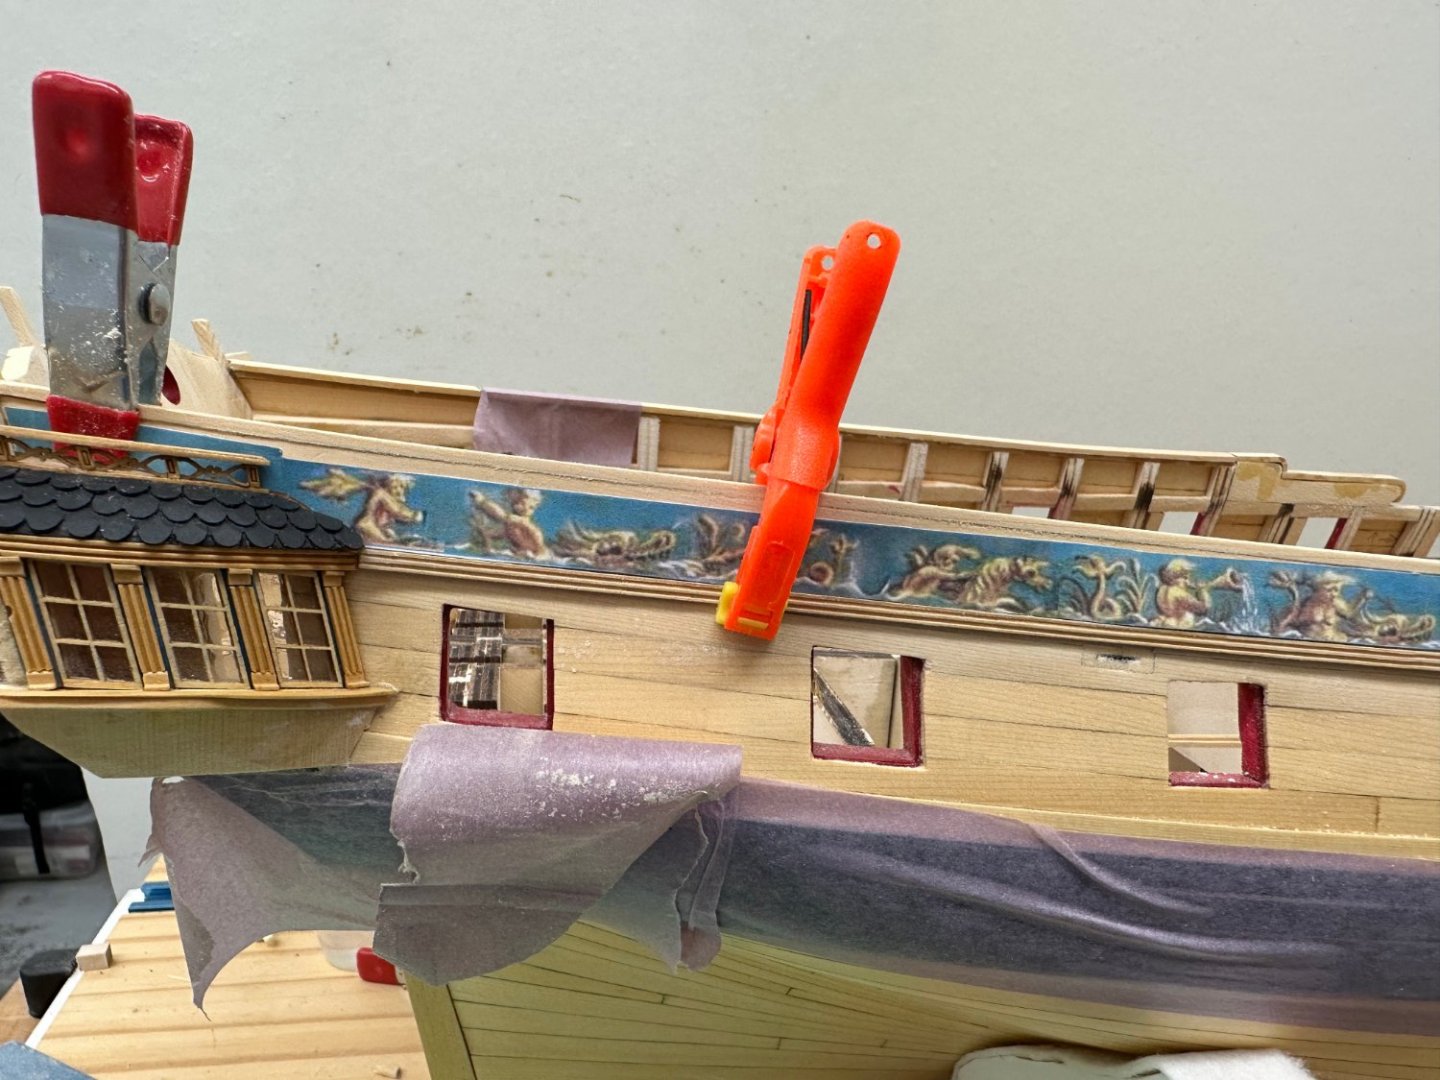
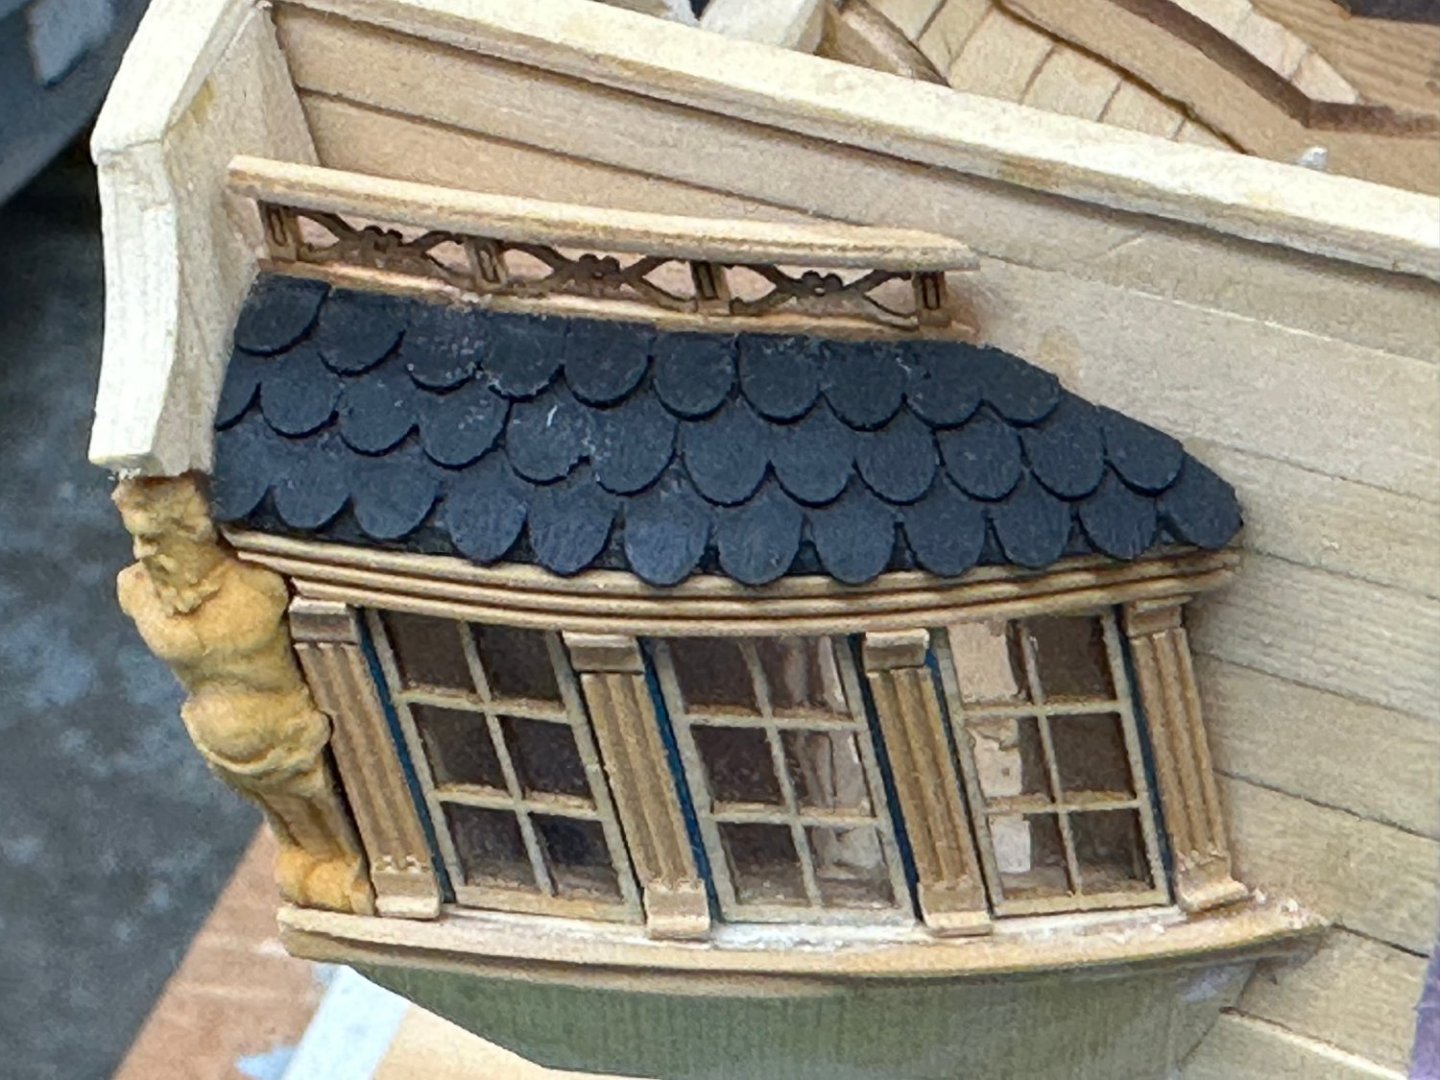
 Added the friezes, the "thing" under the q-gallery, the "fancy" molding at the top of the bulwark, and the molding above the "thing". Roof, fancy molding and statue are still just sitting there. Working on the rest of the friezes and the molding. Going better than I had anticipated. I added a small triangular piece of frieze to cover the gap between the frieze and the top of the bulwarks. I think it will be essentially invisible with the fancy molding in place
- 389 replies
-
- 6
-

-
- winchelsea
- Syren Ship Model Company
- (and 1 more)
-
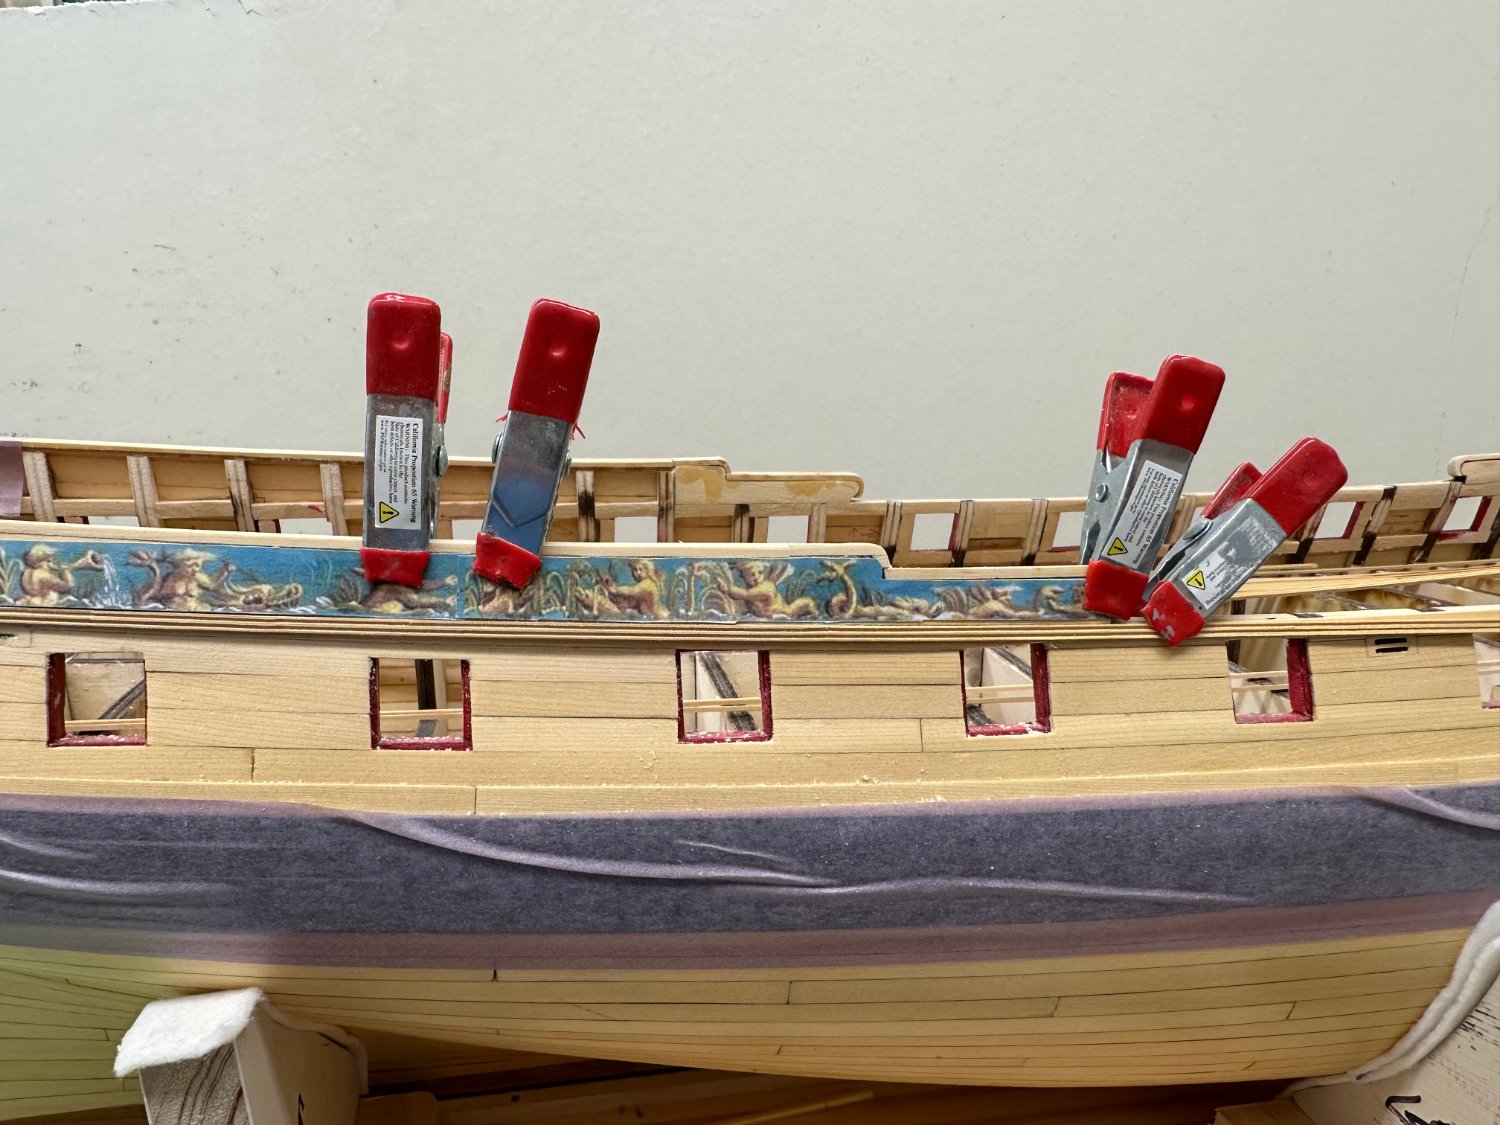
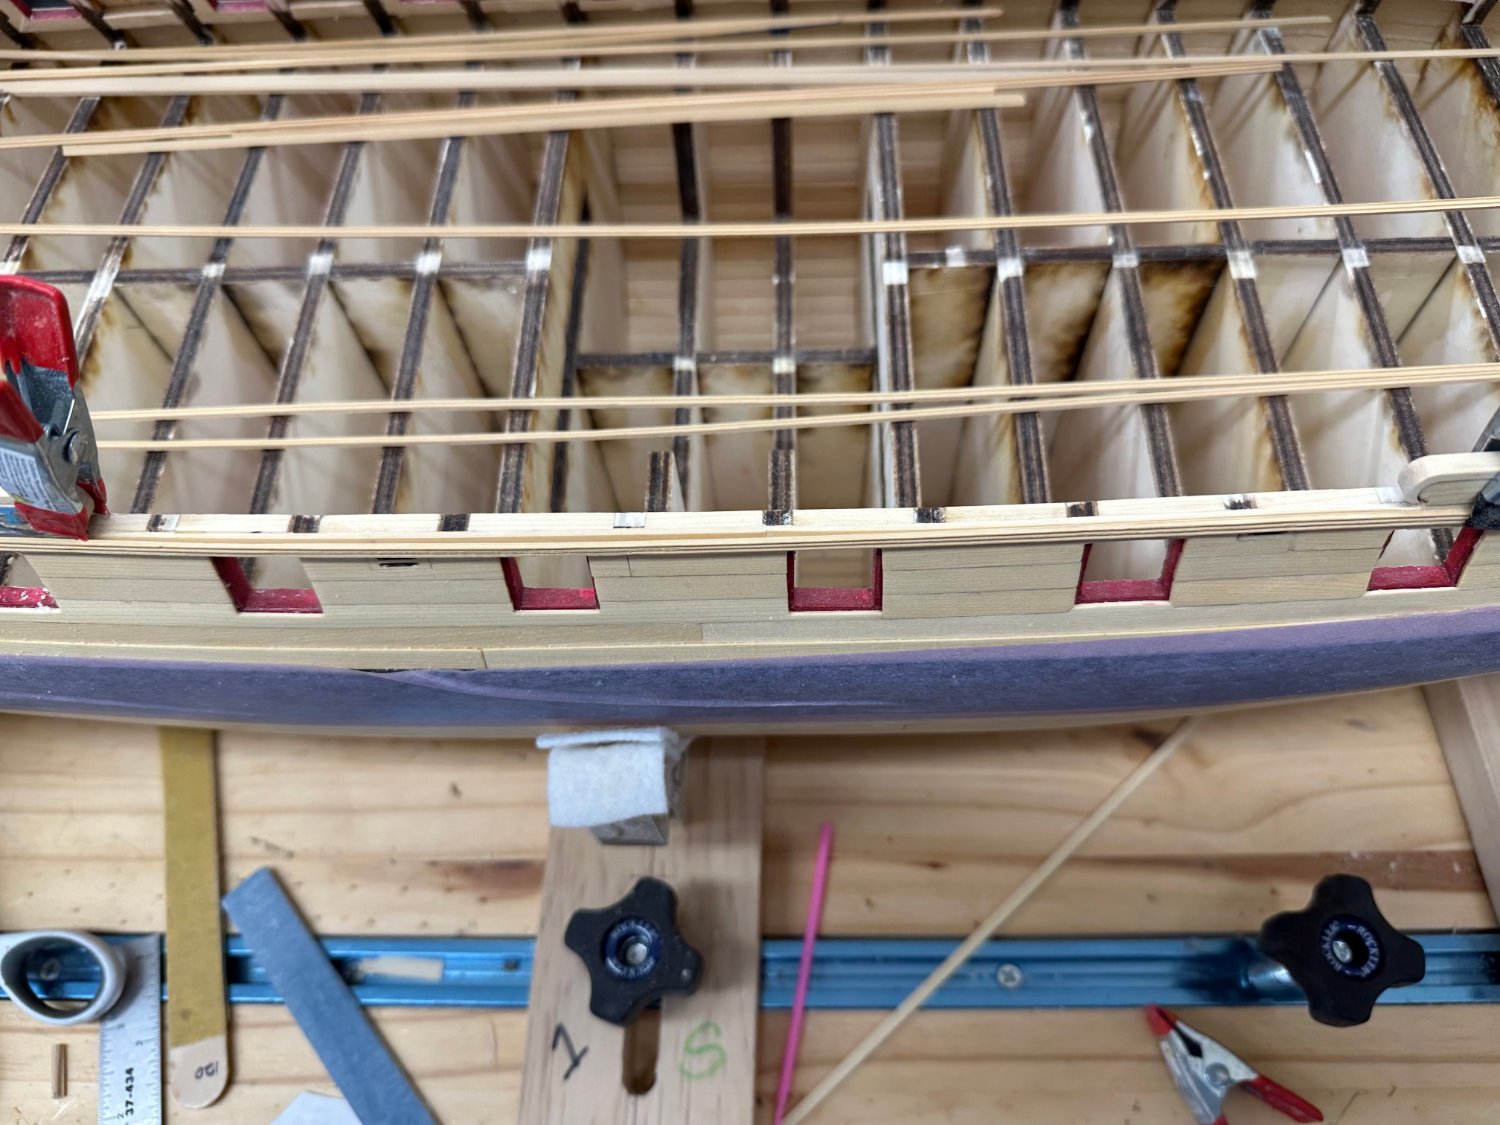
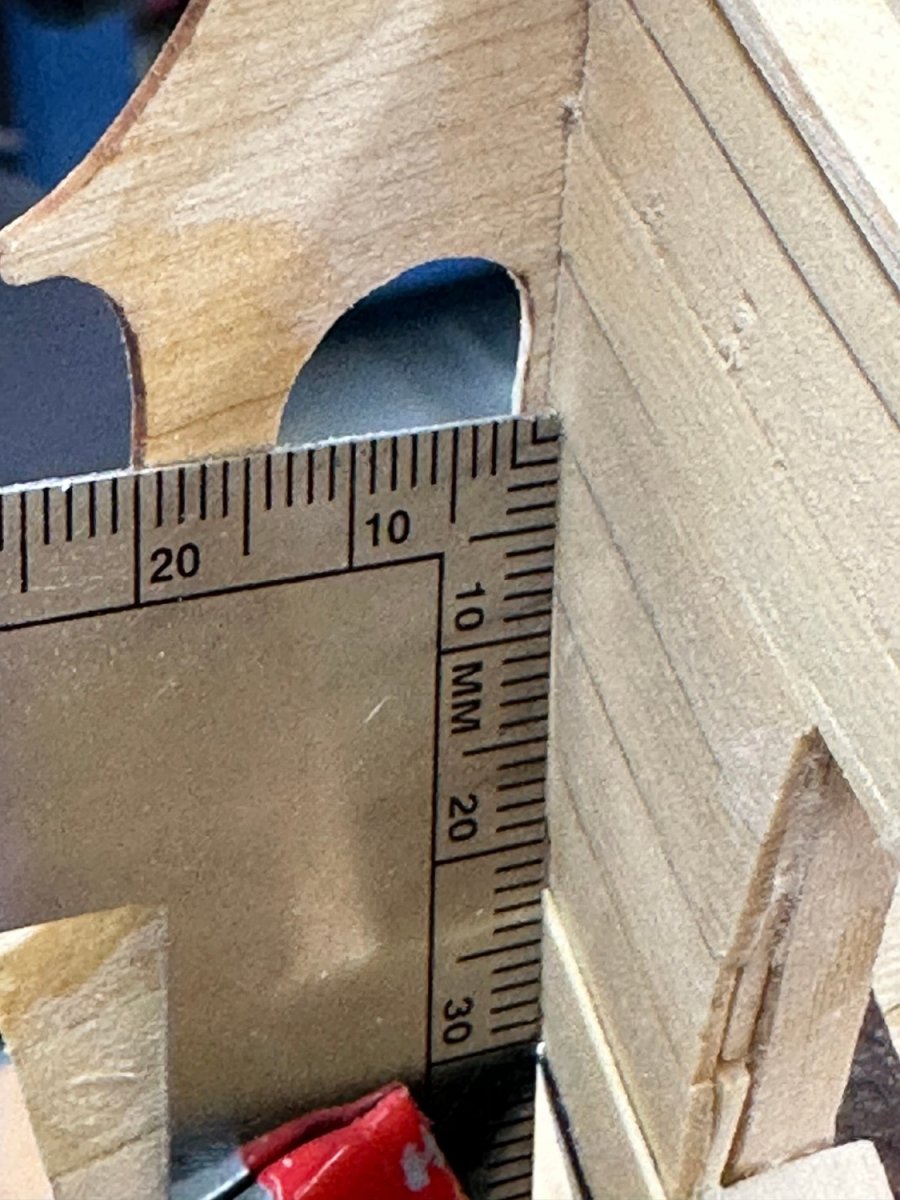
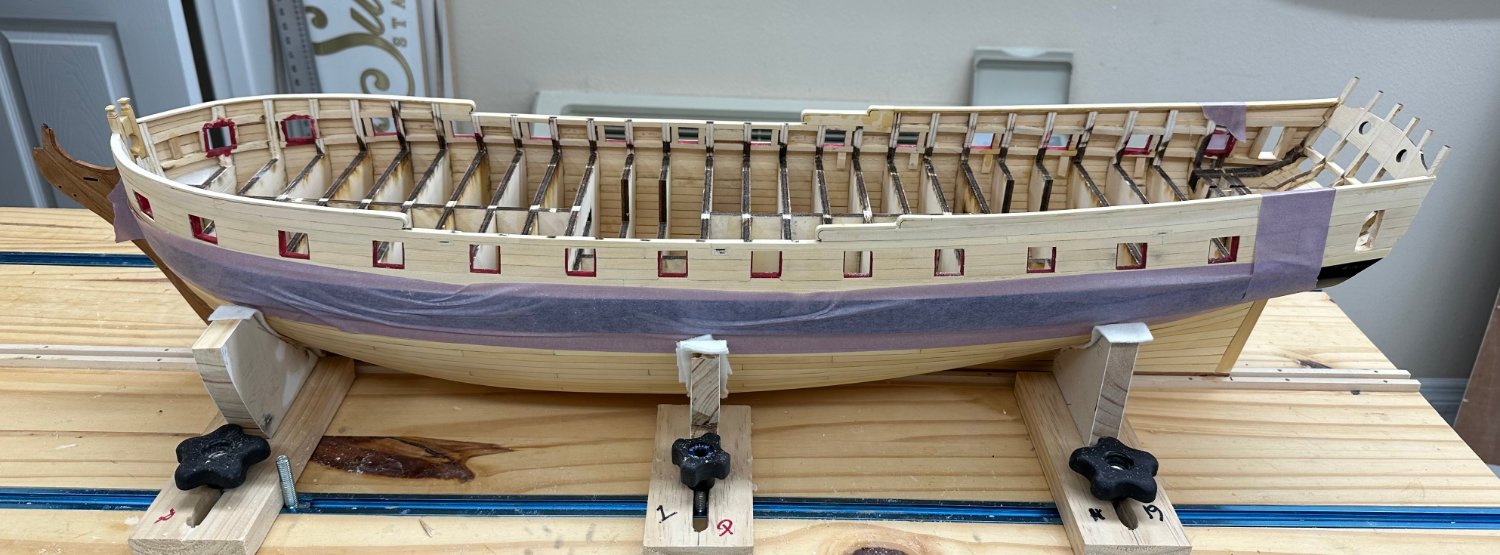
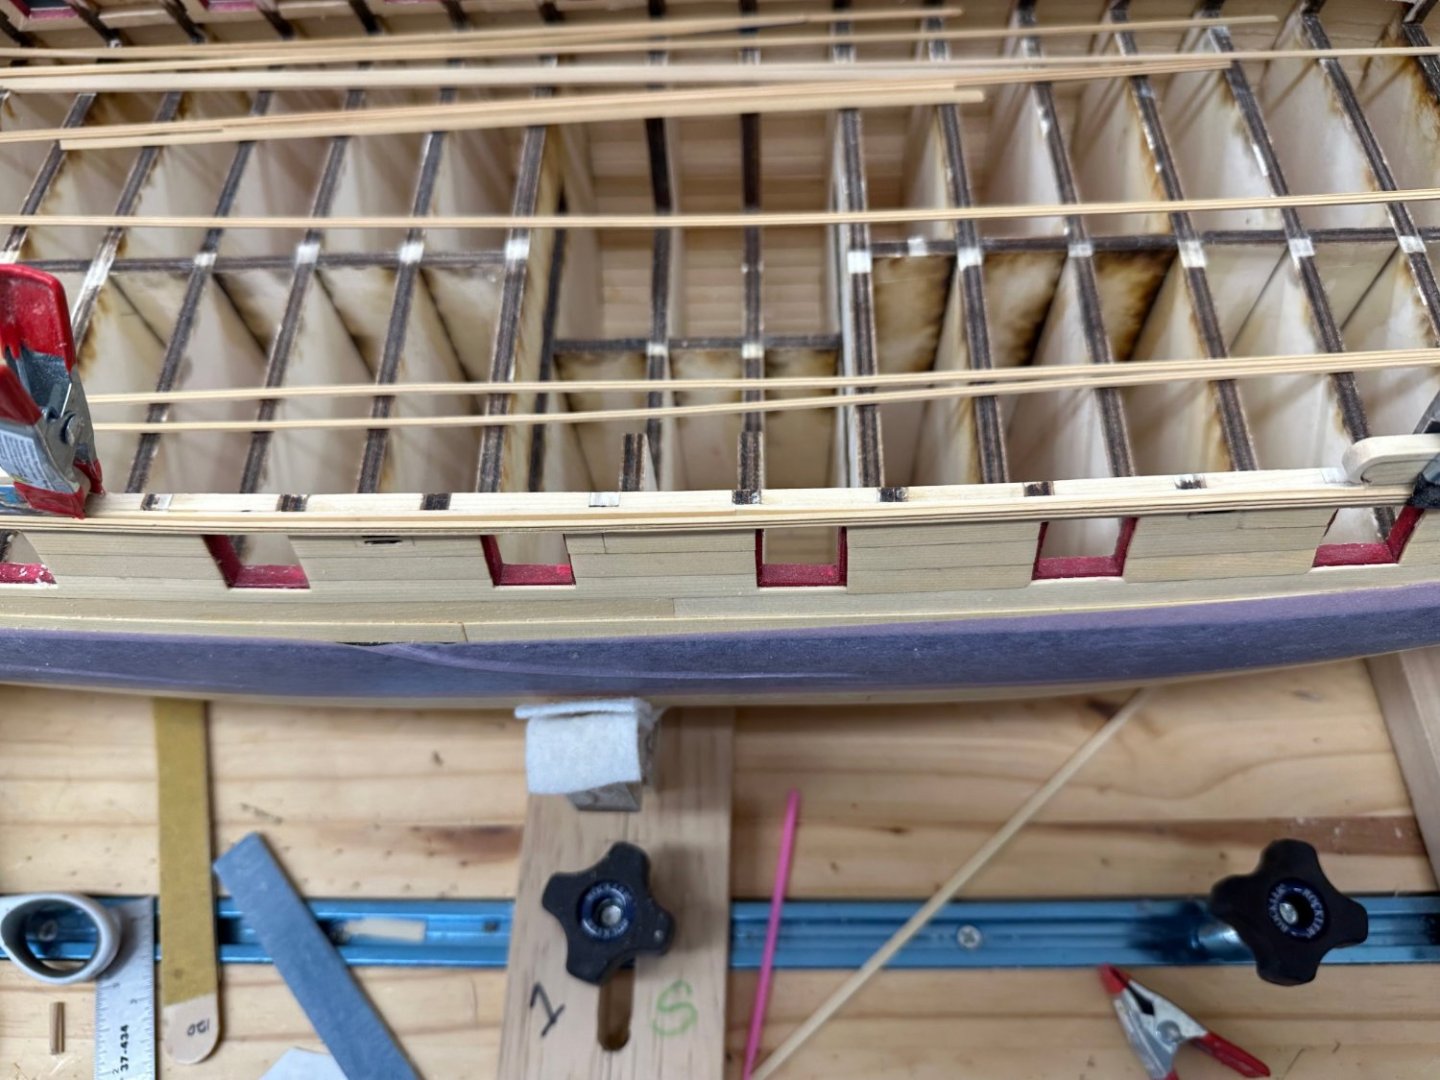
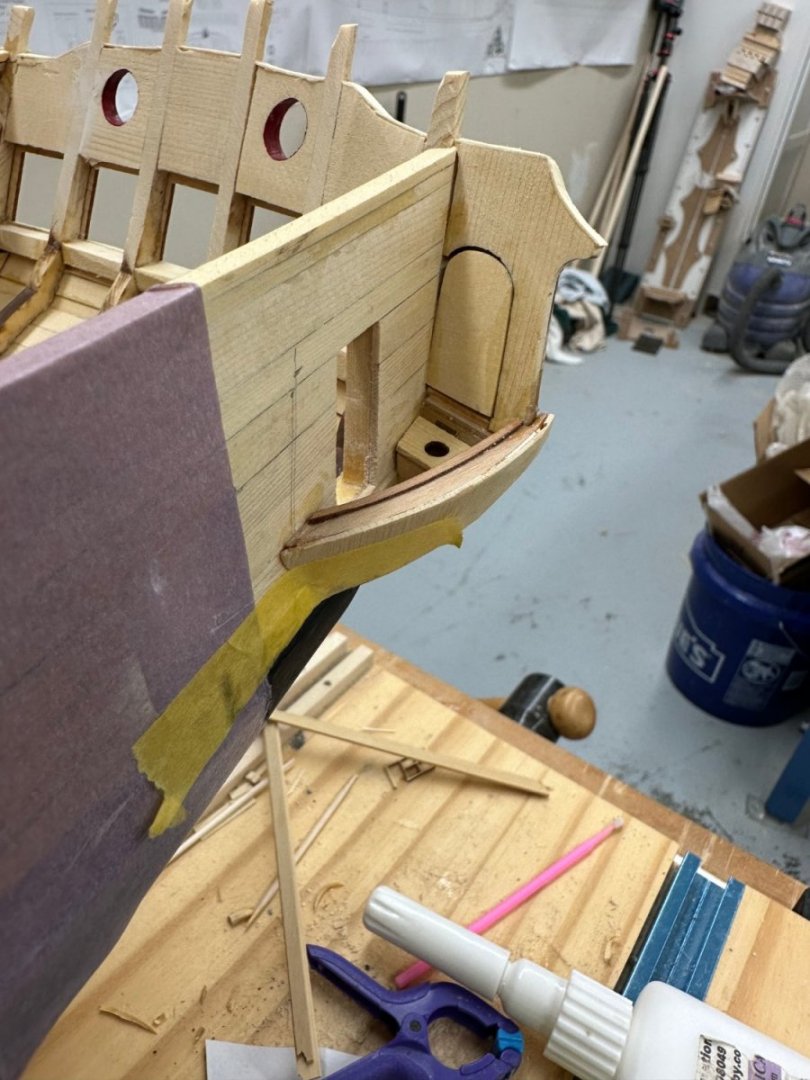
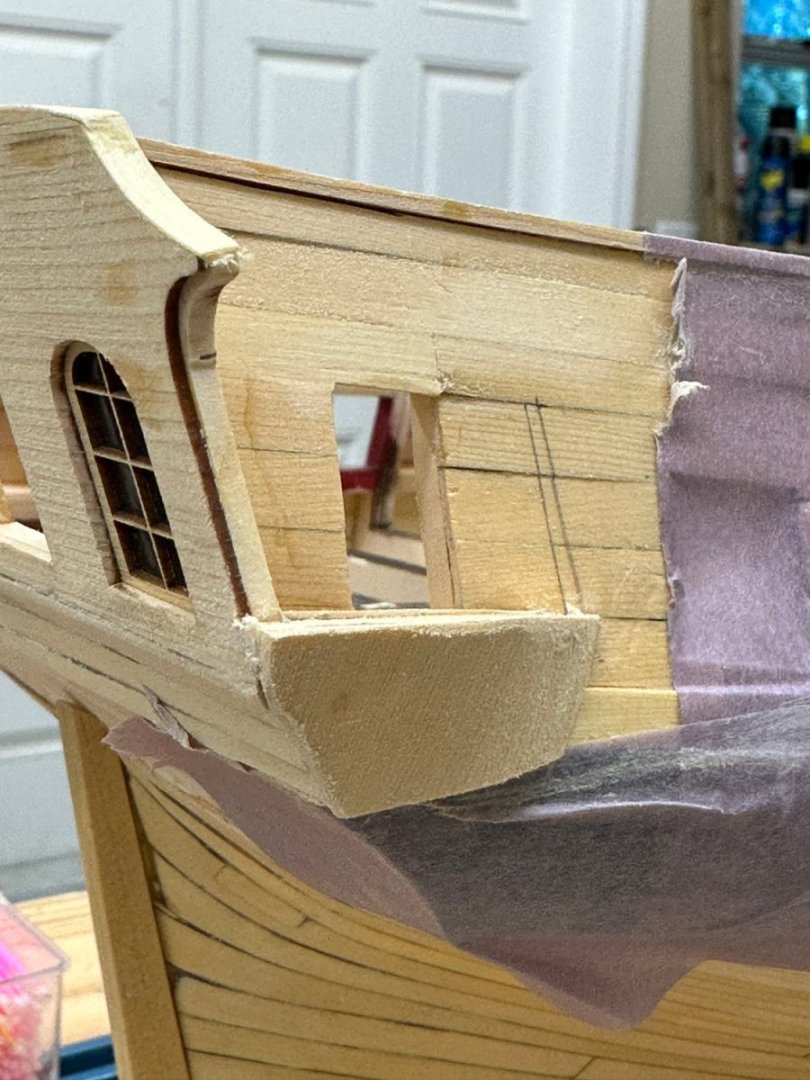
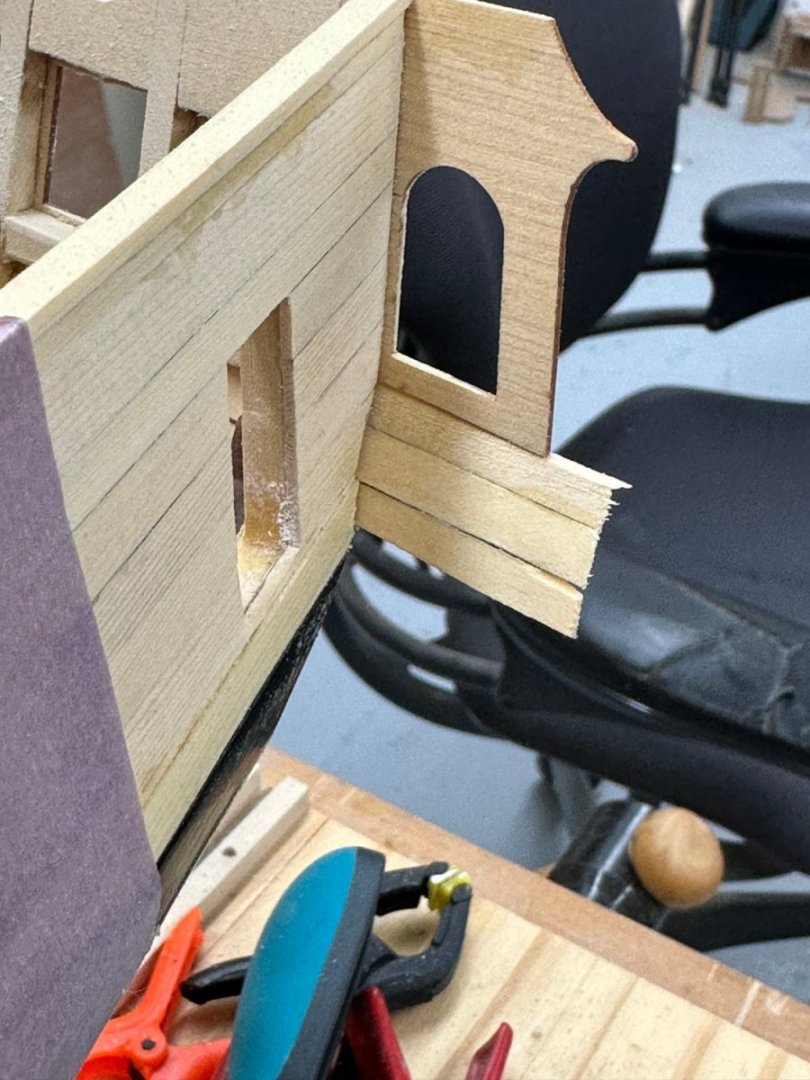
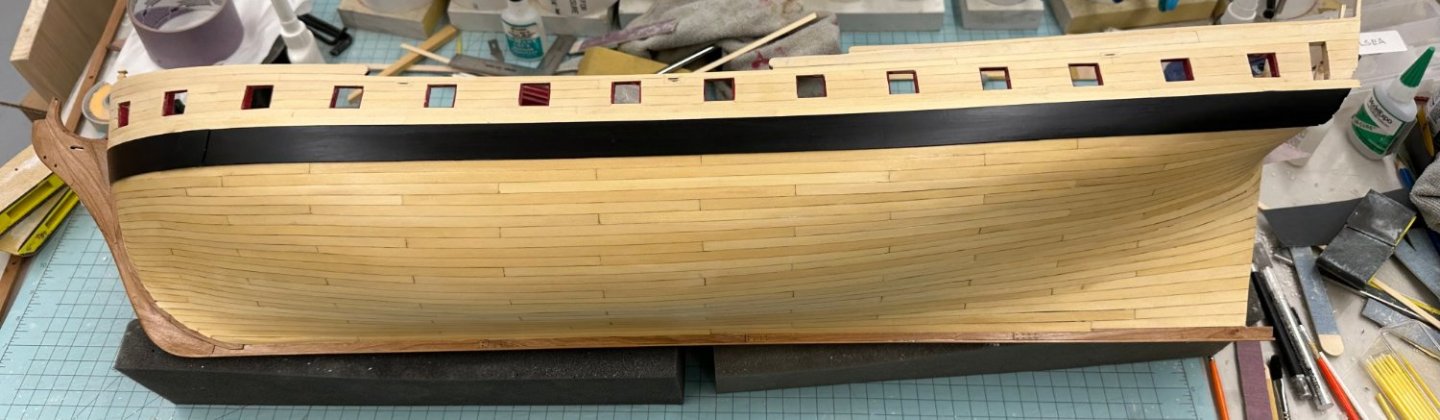
I "solved" the molding cutter not having the correct size (3mm vs. 3/32) by cutting the molding at 3mm then using the thickness sander to thin it down in both dimensions so I end up with 3/32" X 1/32". That was reasonably straightforward, at least when you have all the necessary machinery. So the end point of the "middle" molding at the stern is the molding on top of the q-gallery windows. At the waist I am confused. Currently there is nothing on top of the hull planking at the waist - it looks like this: So is the scraped molding supposed to be flush with the top of the waist as it exits now or some amount higher to accommodate something that finishes off the tops of the bulkhead extensions later? Or have I missed something entirely? That however is not the only issue I have found. I have a gap of about 5/32" between the top of the frieze and the top of the bulwark just forward of the q-gallery. It narrows down to the thickness of the bulwark cap (1/16 - 3/64) between gun ports 11 and 12. For this picture the center molding is flush with the top of the bulwark at the waist as shown below I am going to start researching the other build logs to see if I can figure out where the middle fancy molding is supposed to be at the waist. Until that is established I will work the port side q-gallery. Okay - problem, at least where the middle fancy molding goes at the waist problem solved. Chuck's build log (page 22 about 3/4 the way down) shows pictures of the model with the friezes and fancy molding installed and you can see the tops of the bulkhead extensions at the waist. So the middle fancy molding is flush with the top of the bulwark at the waist.

- 389 replies
-
- 2
-
-
- winchelsea
- Syren Ship Model Company
- (and 1 more)
-
And now with the top rail on the top rail. I left the ends of the top rail "loose" so when the time comes I can get them up to the transom and side - it may take a little "surgery" on the top to get it "right" but I think I have enough "play" to accommodate.
- 389 replies
-
- 4
-
-
- winchelsea
- Syren Ship Model Company
- (and 1 more)
-
The rail on top of the q-gallery roof was not as hard as expected although I did manage to lose three of the posts somewhere on the floor when they "popped" out of my tweezers. I am going to try the frieze next - am considering doing all the friezes on the starboard side before shifting attention to port side but jury is still out. It would sure be nice to have one side "done" (more or less).

- 389 replies
-
- 3
-
-
- winchelsea
- Syren Ship Model Company
- (and 1 more)
-
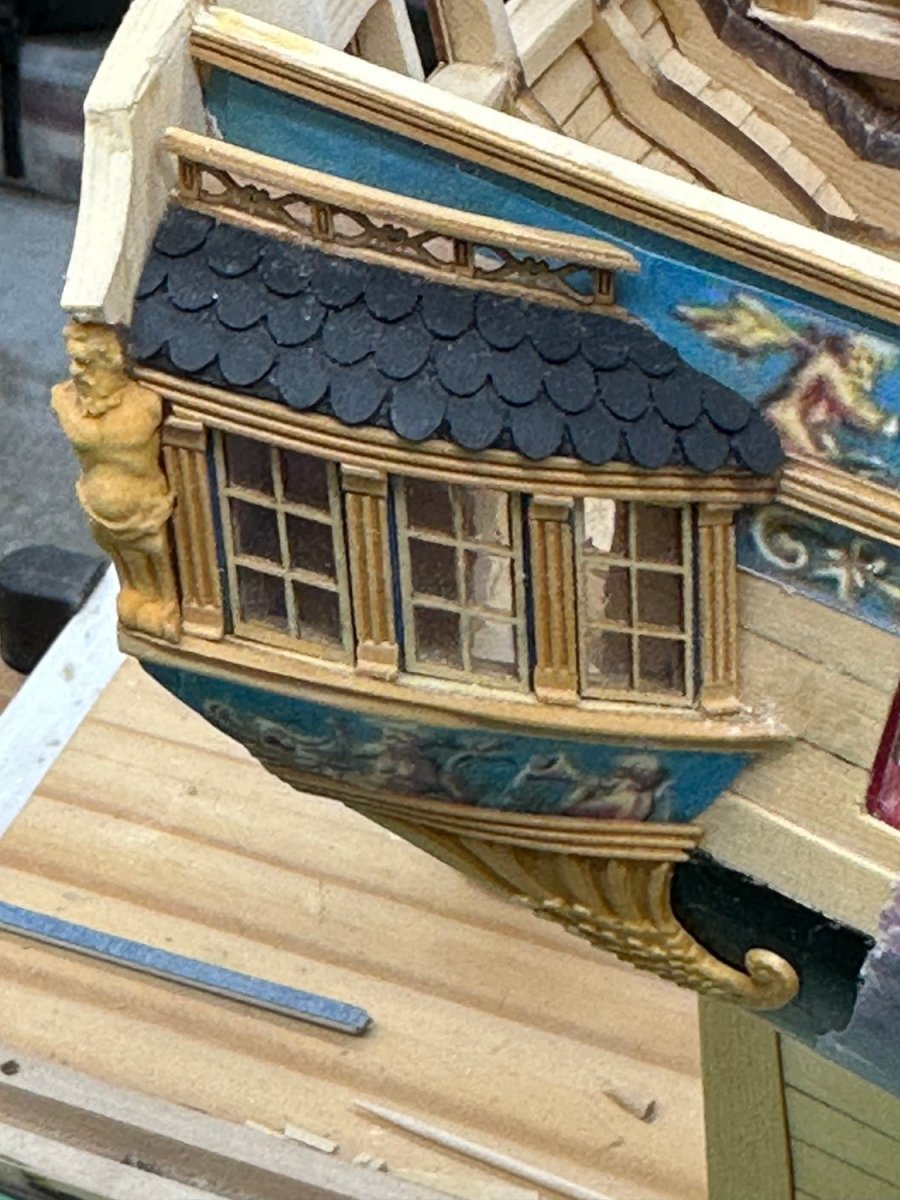
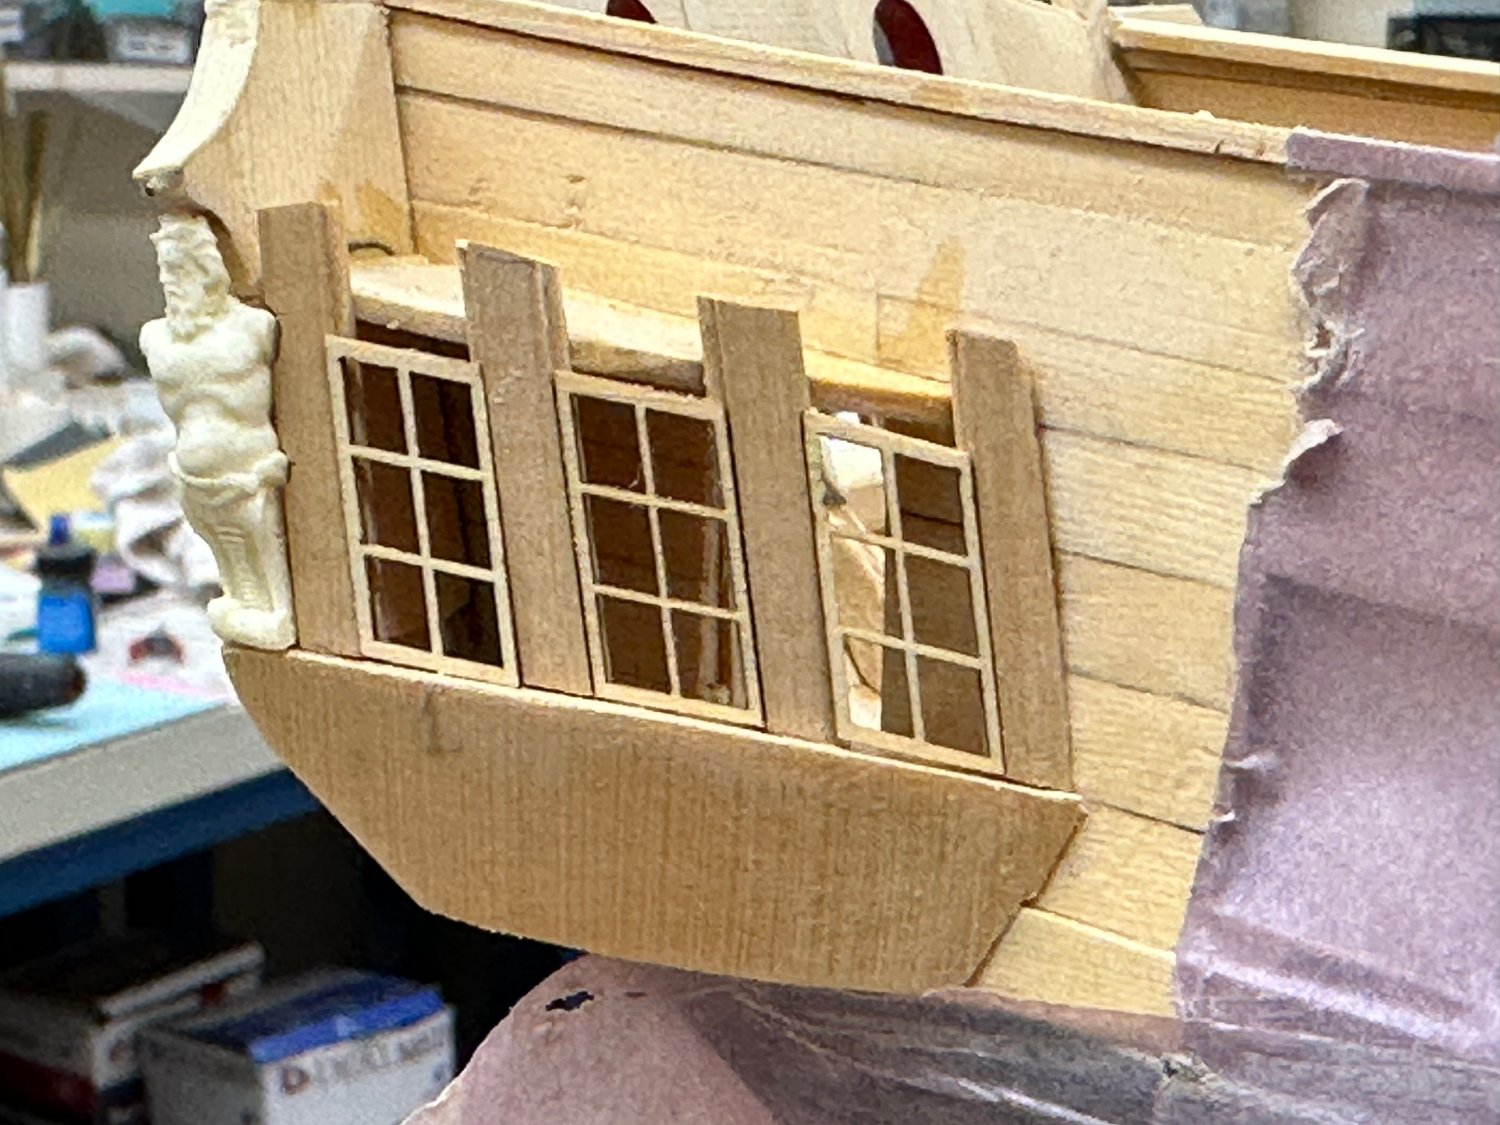
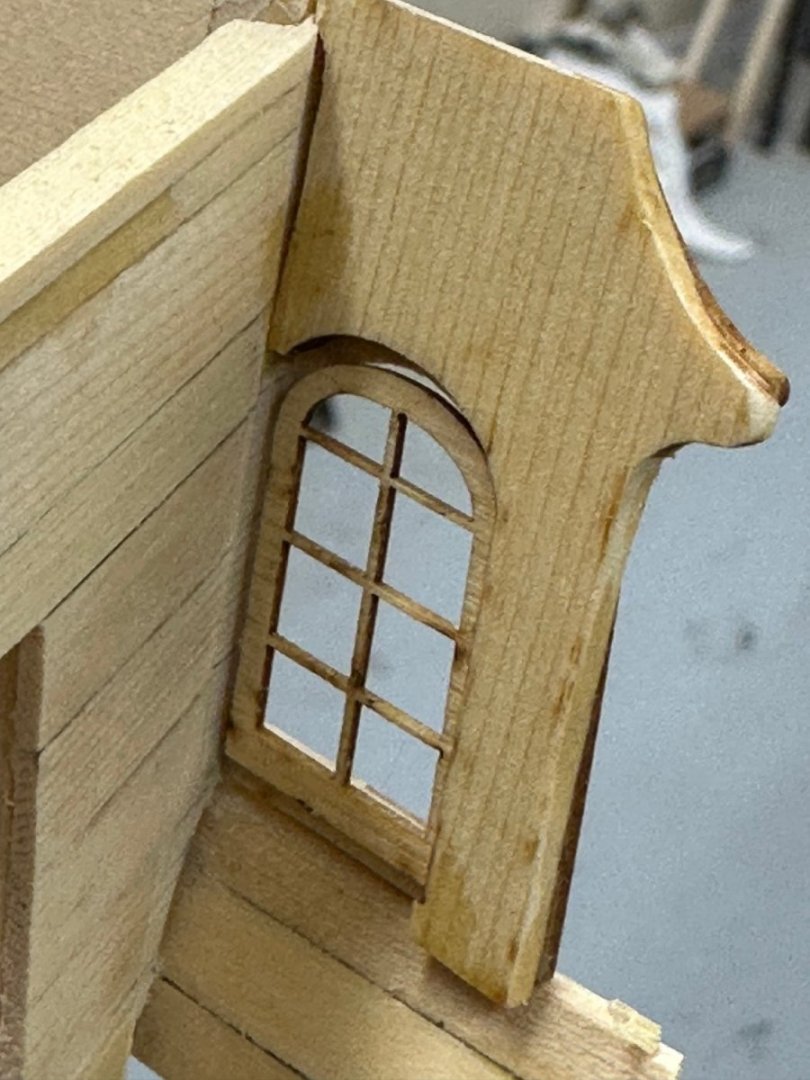
Starboard q-gallery nearly complete - still need the railing on top of the roof, the decorative whatever below the gallery and the frieze. The statue is the "real" one in the photo below, still not permanently attached. It is a CNC machined version out of boxwood with a gloss varnish on it to keep it clean. I will spray on a flat finish just before it gets mounted permanently. The "columns" provided in the laser cut package were too long and cutting them short enough would remove the plain area at one end (at least) so I decided to make my own from boxwood cut to fit the 3mm X 1mm molding cutter. Once I had a piece sufficiently long to cover both sides I thinned in down to just under 1/32". The top and bottom are short pieces of the same molding that runs below the windows. These are really small pieces and handling them is really a challenge (for me). I lost track of the number of times I had them pop out of the tweezers. I know I lost five or six that will turn up next time I sweep the floor. So now on to the port side.
- 389 replies
-
- 3
-
-
- winchelsea
- Syren Ship Model Company
- (and 1 more)
-
Thanks Edward. I used the same Model Master Window Maker on the my Confederacy model but since it was 1/64th the panes were smaller and it did not "work" as well as here.
- 389 replies
-
- 2
-
-
- winchelsea
- Syren Ship Model Company
- (and 1 more)
-
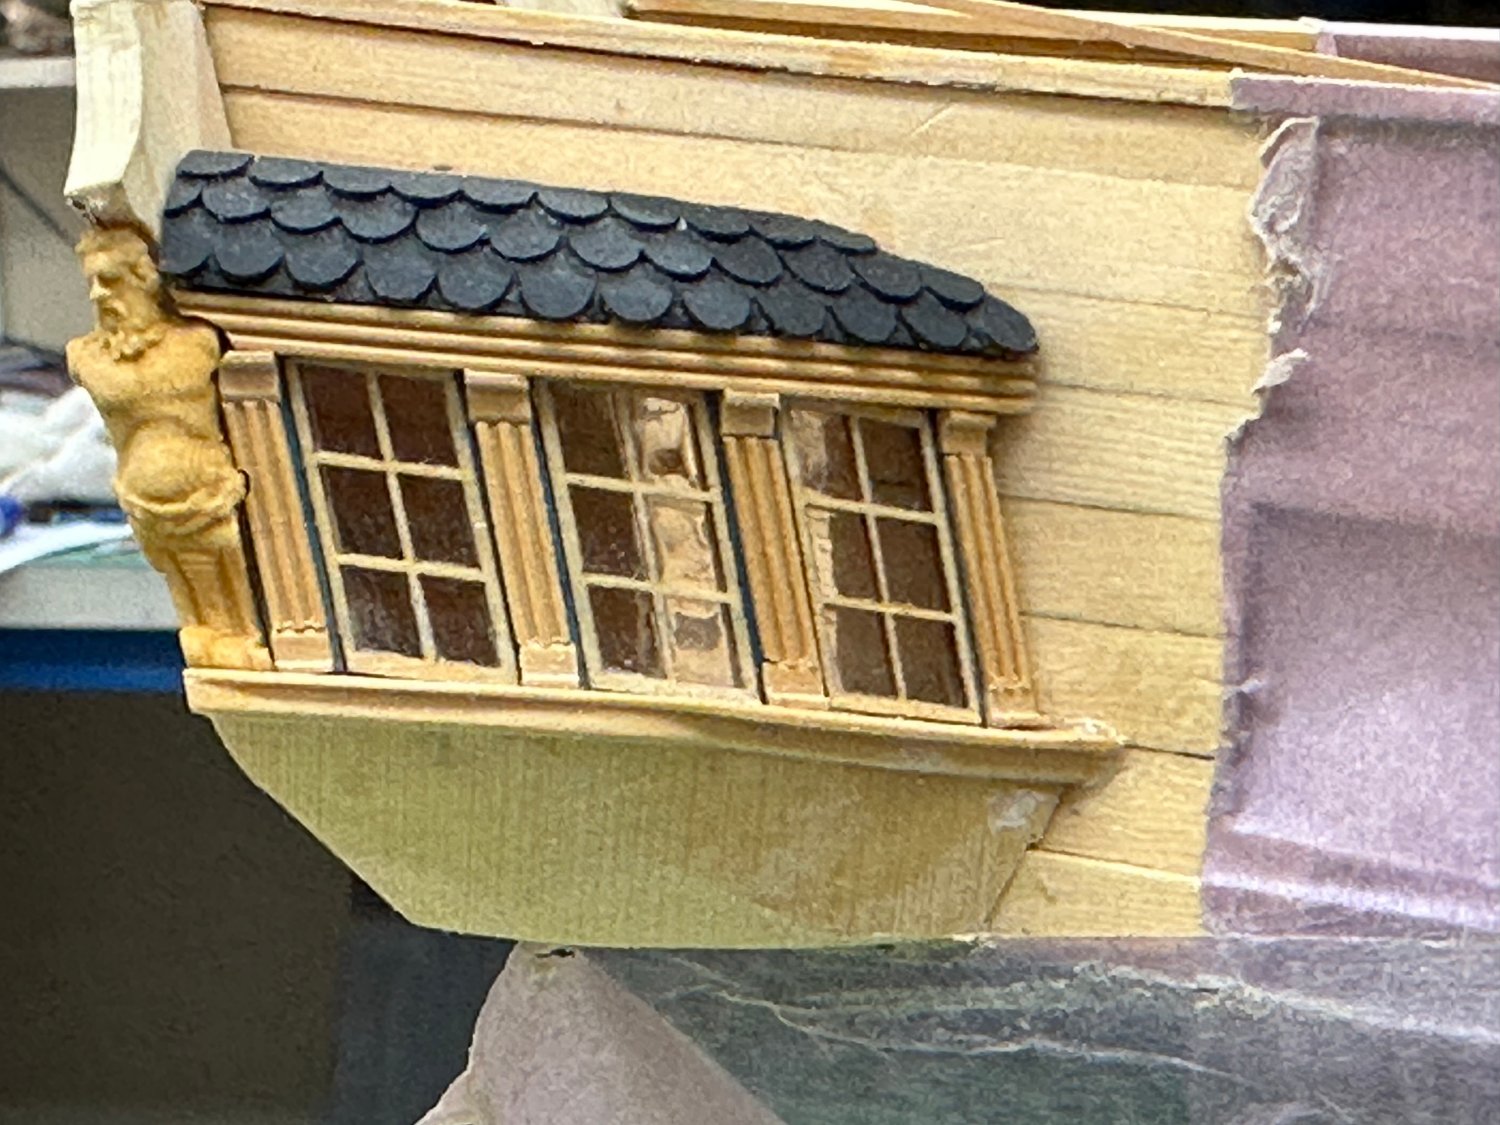
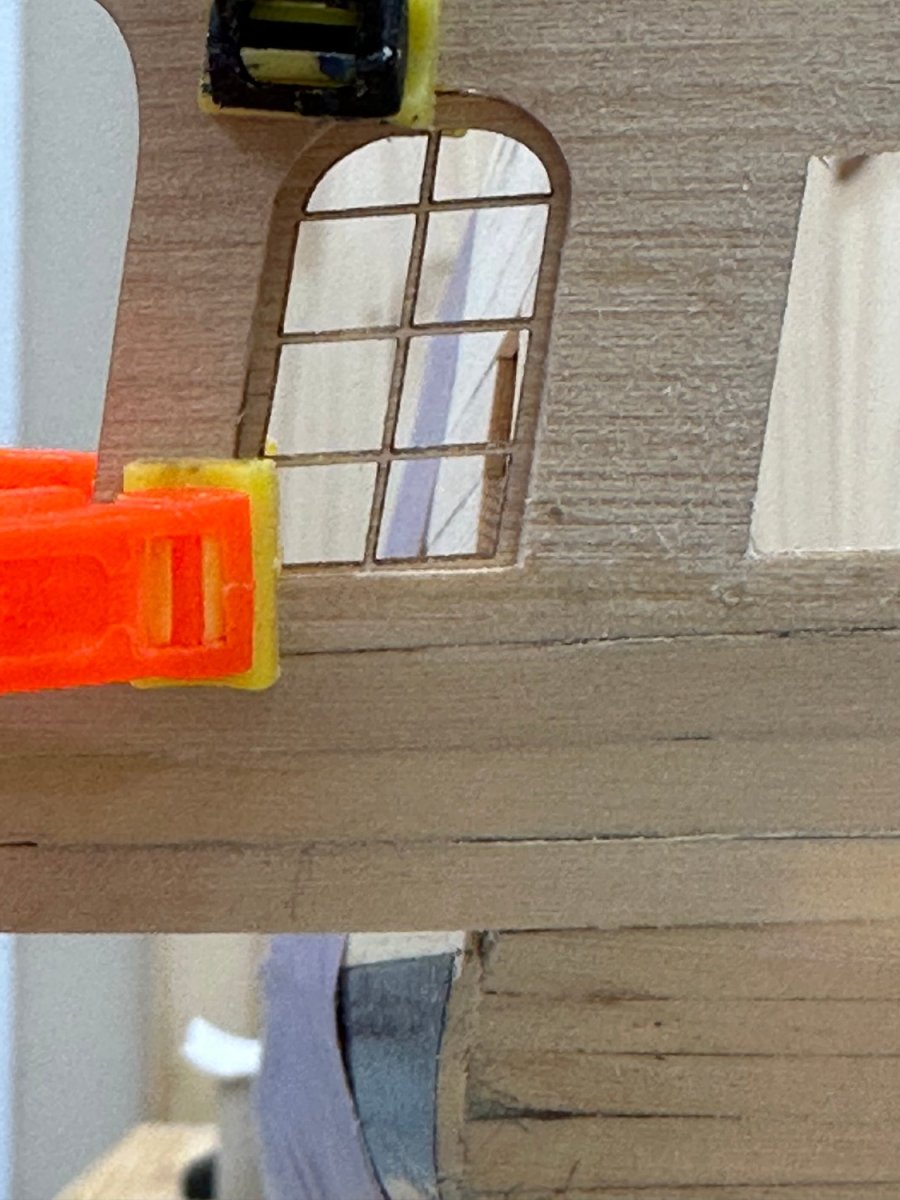
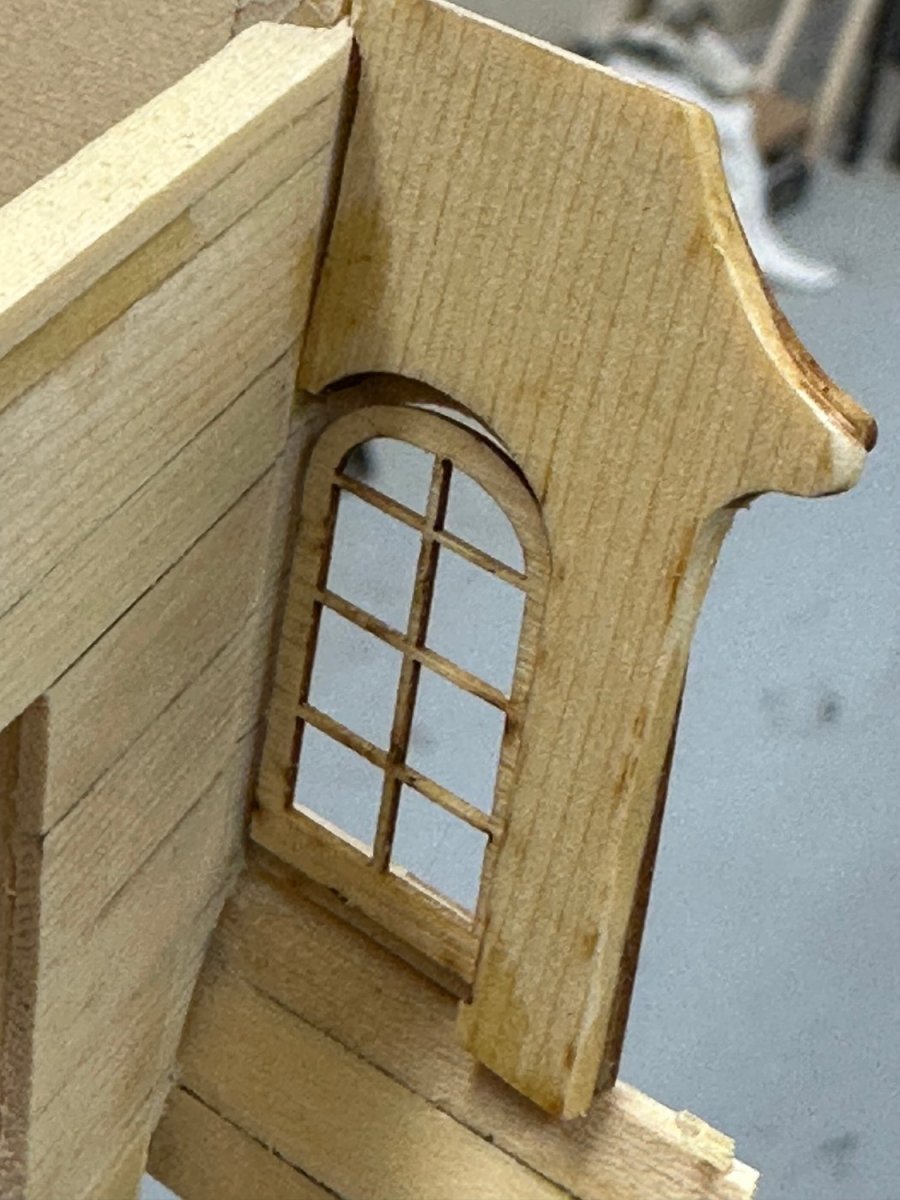
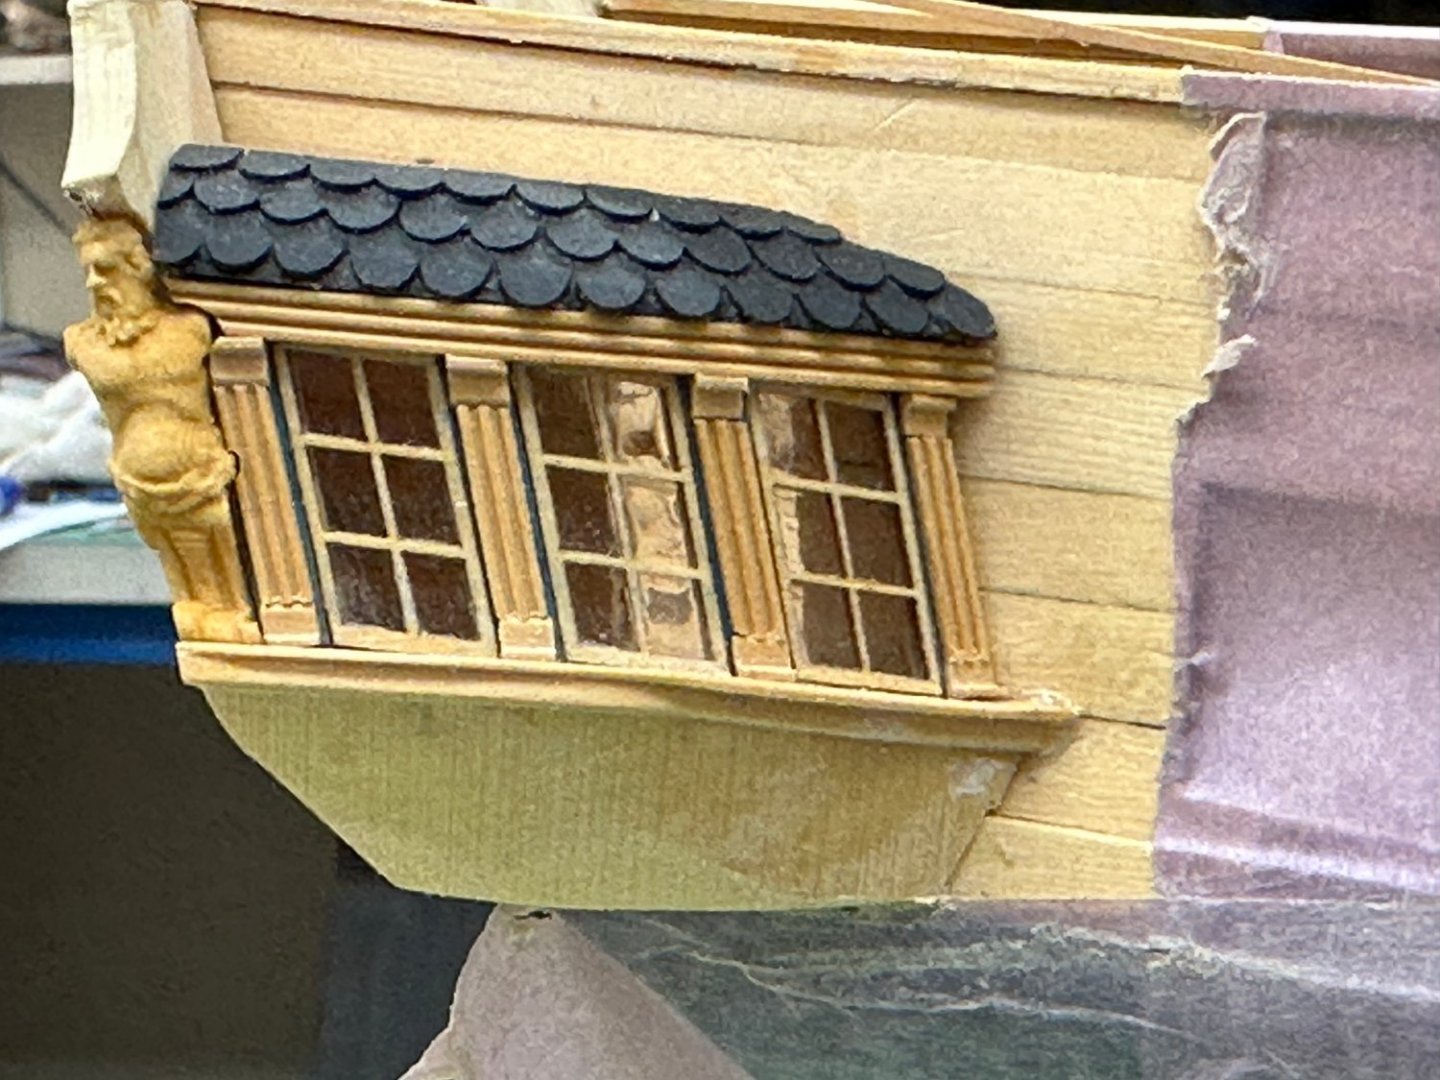
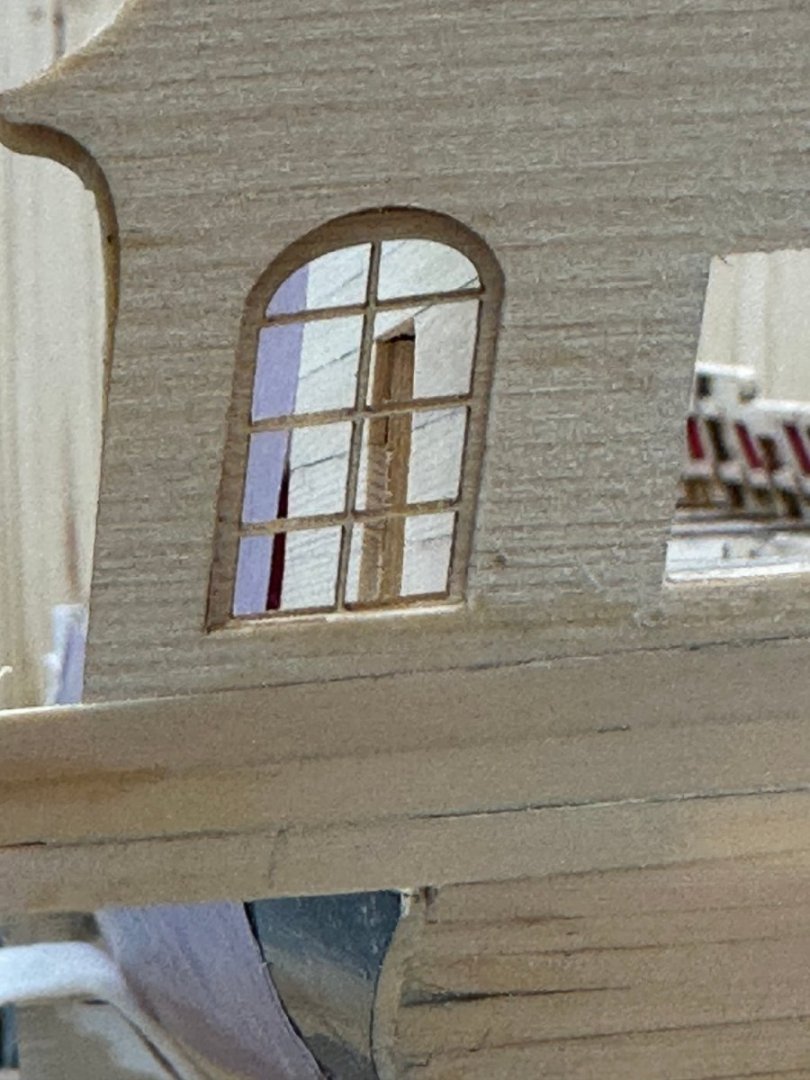
Starboard side q-gallery windows and uprights installed. The figure are just "sitting there. The two forward uprights have been trimmed even (more or less) with the top. I did "double duty on the windows - I used both the acetate (on the inside) and then the "Model master Window Maker on the outside on the acetate. I think it gives the "not perfect" glass look while avoiding the potential for a "cloudy" window if the Window Maker is put on too thick (don't ask me how I know this). Comparing this to the monograph it seems that I do not have nearly the same amount of room above the windows as the pictures of Chuck's model. Not sure why that would be but Chuck mentions that the initial measurements before placing the first beam were IMPORTANT. Not much I can do about it now except note that it appears there will be a similar "issue" on the port side. Since I already finished the roof and shingles I put it on just to get an idea of how it will look.

- 389 replies
-
- 5
-
-
- winchelsea
- Syren Ship Model Company
- (and 1 more)
-
Thanks Glenn Yes the smallest width molding these cutters can make is 3mm and the molding on the hull sides is 3/32 = 2.3mm. I am not sure what I will do when I get there - still struggling with the q-galleries at the moment and mounting cannon on carriages. Maybe there is a way to cut the molding 3mm and then thin it down to 2.3mm without it looking out of "shape".
- 389 replies
-
- 1
-
-
- winchelsea
- Syren Ship Model Company
- (and 1 more)
-
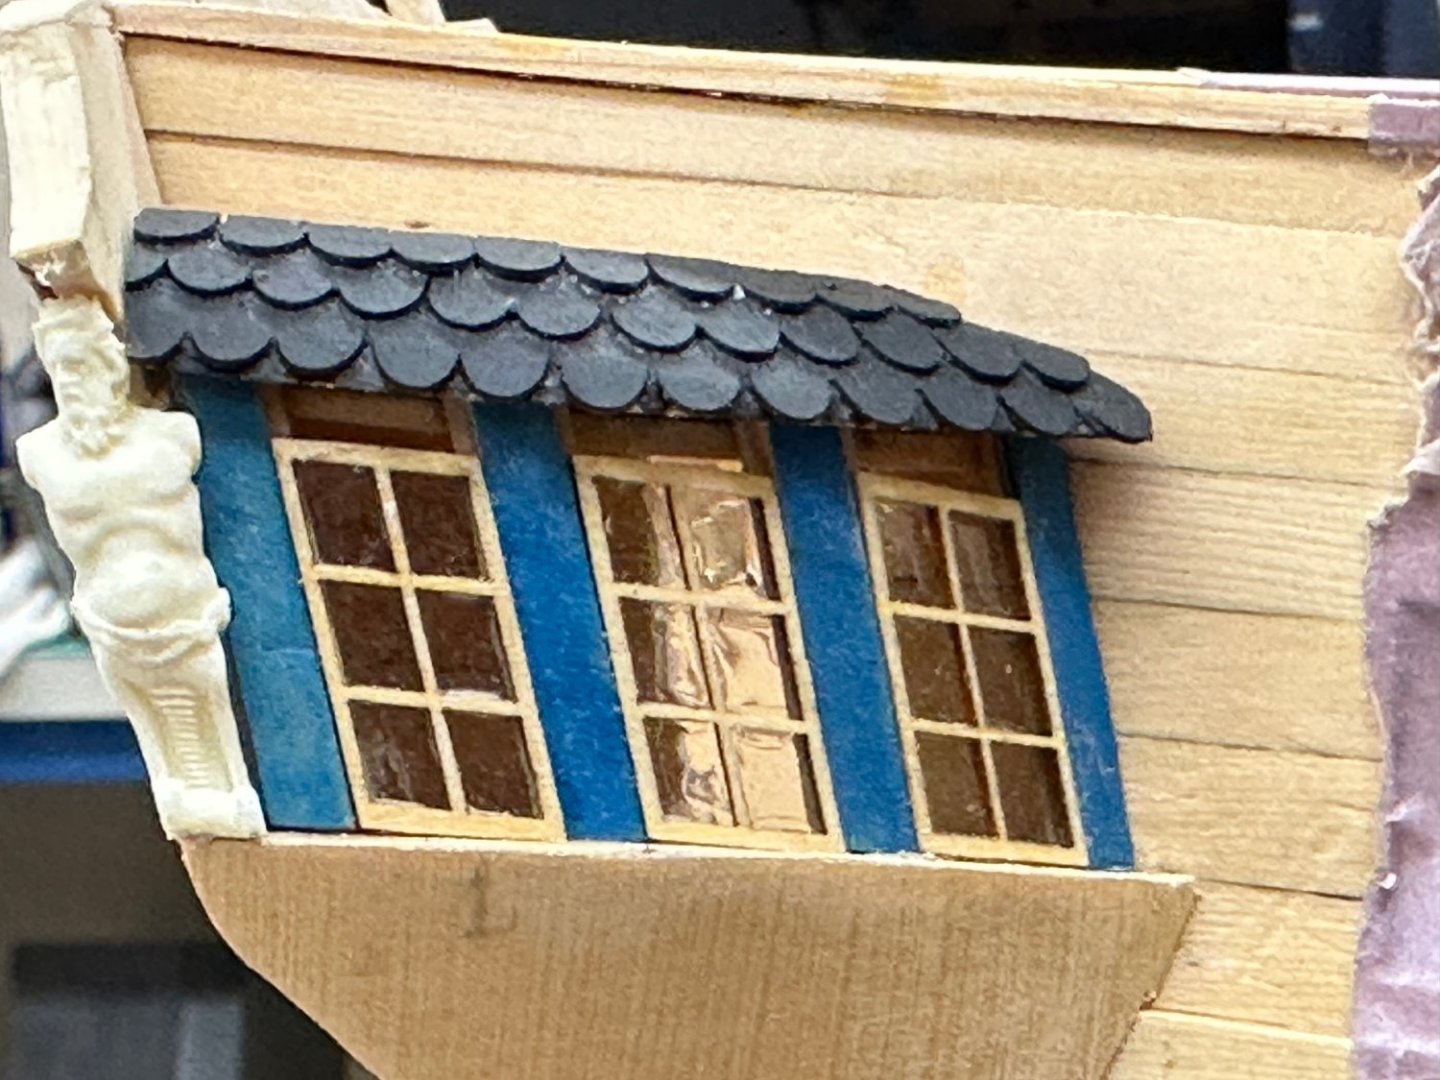
Dry fit of the port side q-gallery windows and uprights with the help of a little rubber cement. I am waiting for the cerulean blue (Windsor Newton acrylic) to arrive (Monday supposedly) and the Micro Krysatl Klear (Tuesday supposedly) before I can go much further on the q-galleries. I have the Windsor Newton oil cerulean blue but it takes forever and a day to dry (I thinned it down and added a drop of white to the consistency of "normal" paint). I painted the uprights on the starboard side five days ago and the paint still comes off on my hands. I will try the acrylic (on a test piece) and see how that does before I paint anything more. I was thinking that since only the very edges of the blue actually show that maybe it isn't really "required" but that is just the impatient me trying to move ahead. I will wait for the paint. And it will take a bit of time to put the Krystal Klear (or Window Maker from Model Master) to fill the gallery windows. You (or at least I) can really only do two panes at a time per window and it is best to leave it to dry overnight before handling. Plus I have to keep track of which window is which. Anyway I have 24 more cannons to mount on their carriages and 24 more breeching tackle to assemble, not to mention 60 some sets of tackle for the sides and rear.

- 389 replies
-
- 5
-
-
- winchelsea
- Syren Ship Model Company
- (and 1 more)
-
Thanks Matt. I had not thought about the protection aspect but it certainly would provide more than the acetate sheets. I ordered some Micro Krysal Klear to test to see if it is better than the Model Master Window Maker.
- 389 replies
-
- 1
-
-
- winchelsea
- Syren Ship Model Company
- (and 1 more)
-
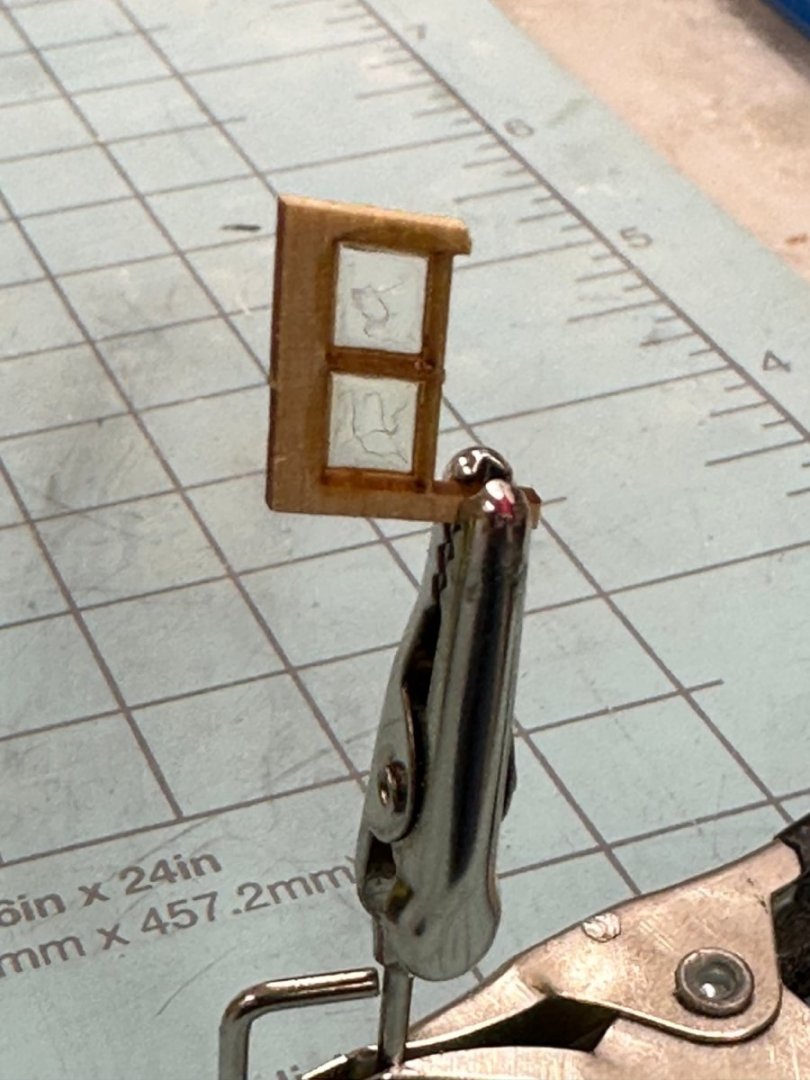
While waiting for something (I now forget exactly what) I experimented with using plastic model airplane canopy "maker" for the windows in the q-galleries. Since I used the provided acetate sheets in the outboard stern windows I am pretty much committed to using the acetate there but for the q-gallery windows I think I will use the "Model Master Clear Parts Cement and Window Maker. I think it might also be useful in attaching the acetate sheets to the stern windows with a minimum of "mess". It is my understanding that glass windows in this era were not necessarily as flawless as we are used to in our time.
- 389 replies
-
- 4
-
-
- winchelsea
- Syren Ship Model Company
- (and 1 more)
-
Thanks Ed. I too learned to practice on scrap wood before committing to the "real". I found these cutters are made to cut cleanly in only one direction. It took a few attempts before that became obvious.
- 389 replies
-
- 1
-
-
- winchelsea
- Syren Ship Model Company
- (and 1 more)
-
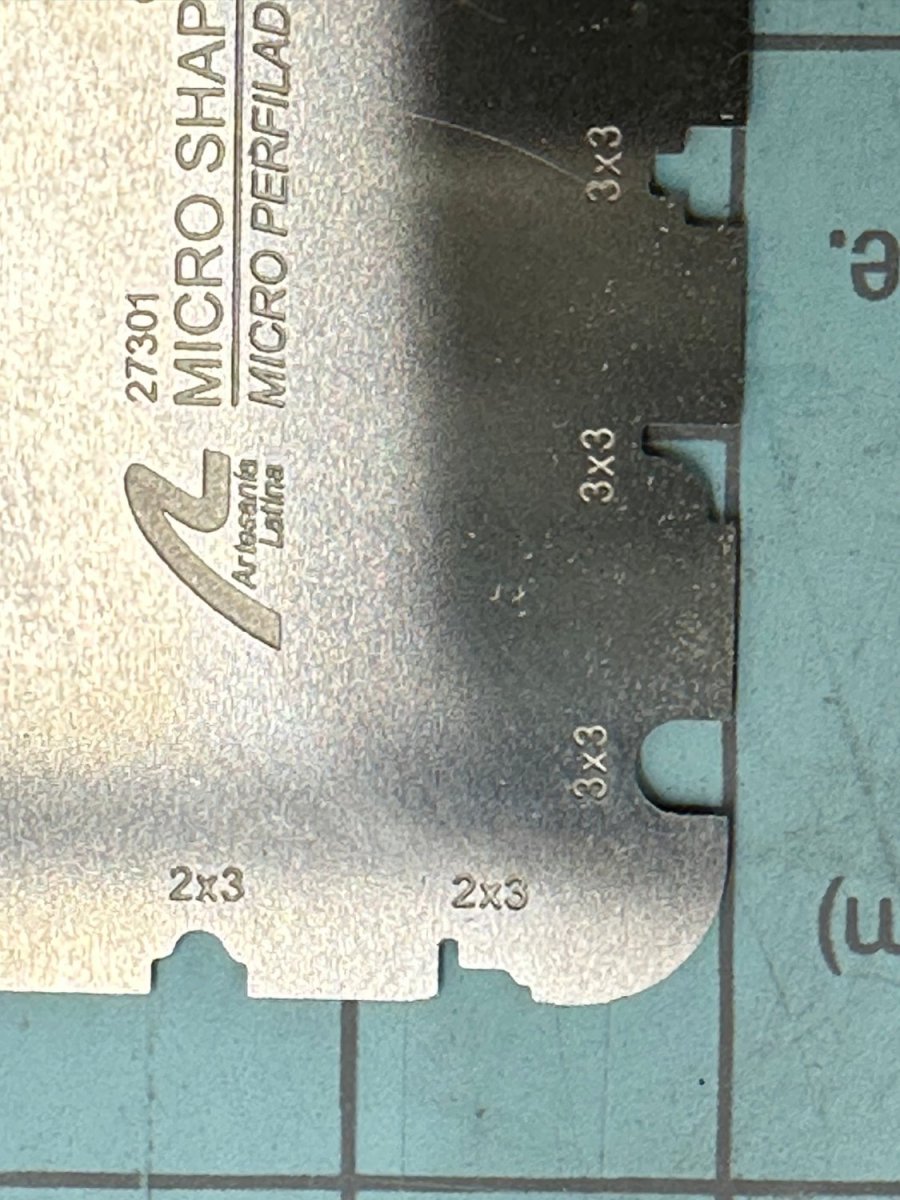
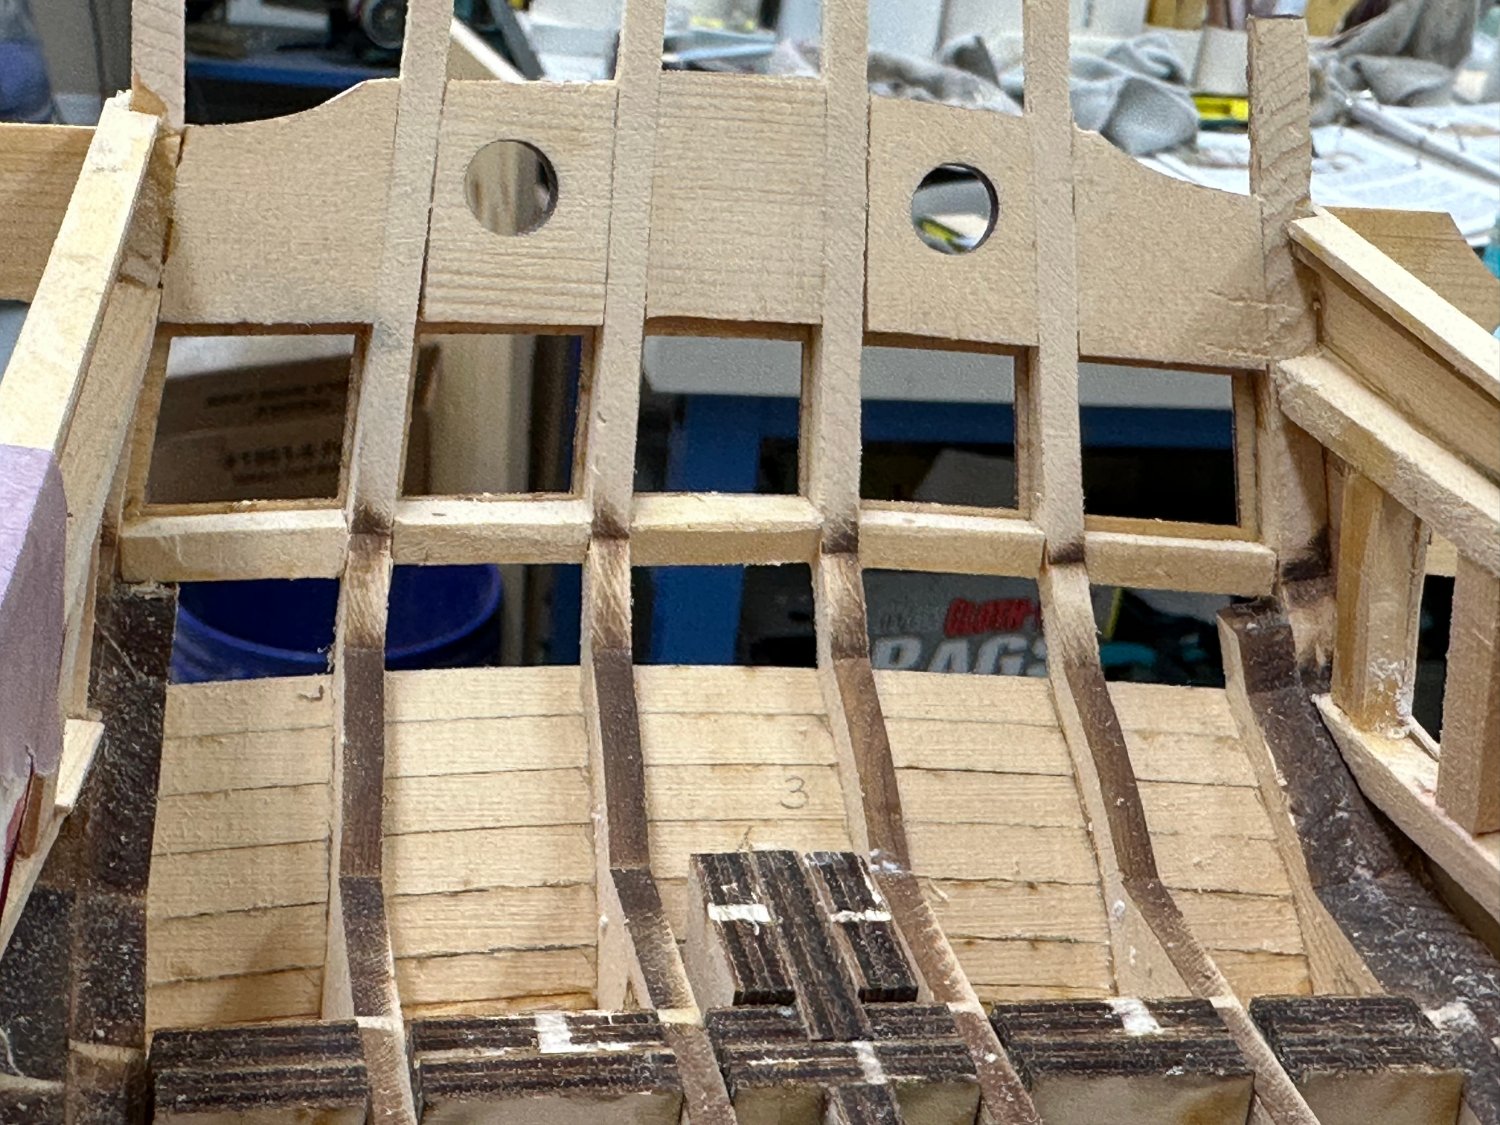
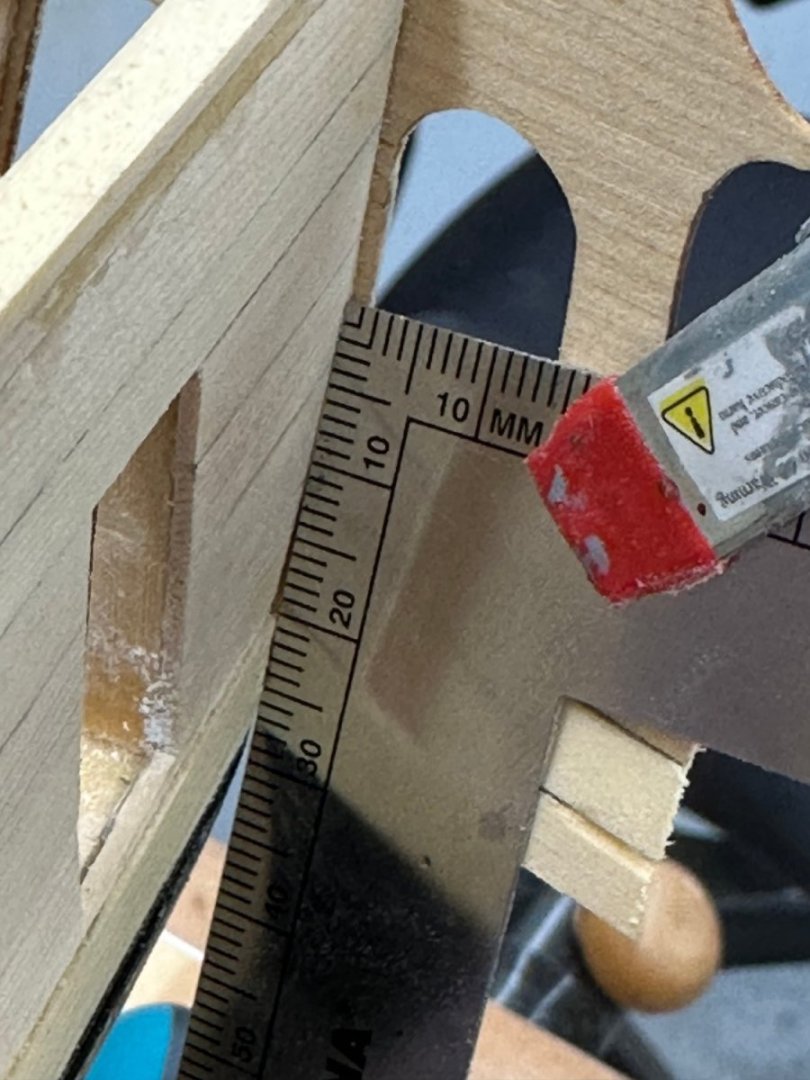
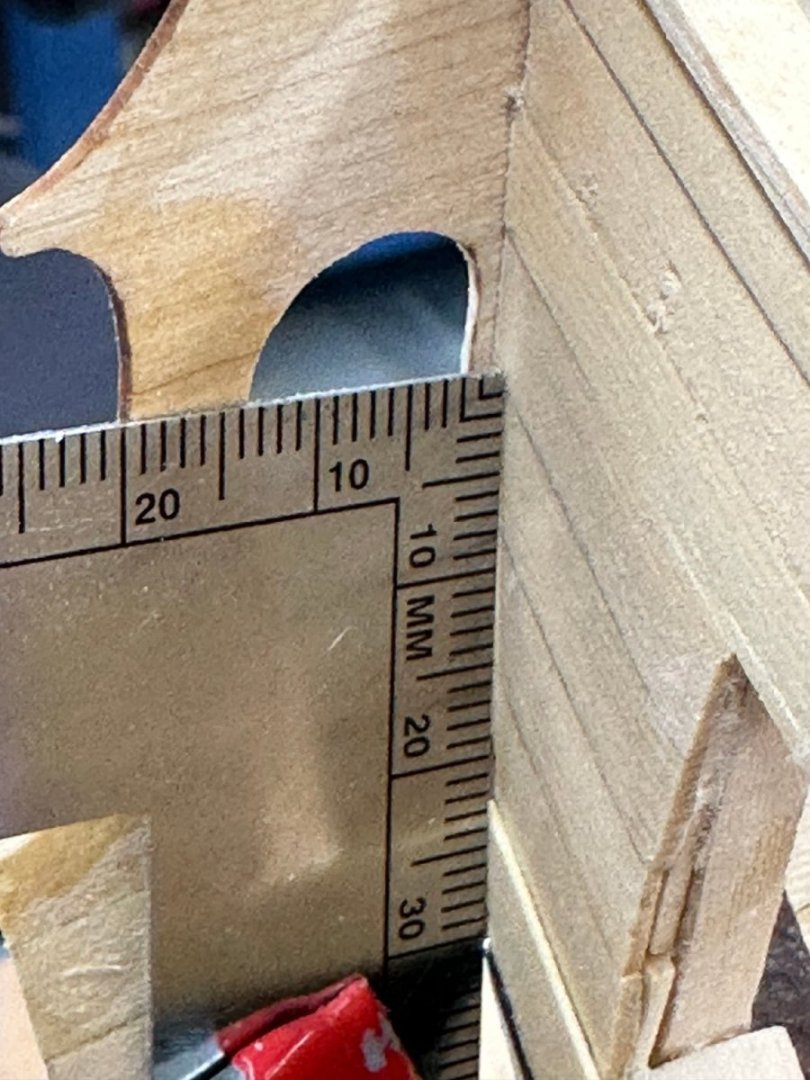
I was going to prepare the "fancy" molding that goes under the stern windows but I can't find where the profile is described. I am assuming it is close to the 2X3 molding at the bottom right of the photo below. I have a set of six of these molding cutters but they are all metric sizes. 2mm X 3mm works out to: .0787" X .118" while 1/16" X 1/8" would be .0625' X .125' so if I use this cutter the molding will be a little "shorter" and a bit thicker. I have never tried to make my own molding cutter since these work so well once you get over that they are not "exactly" the size called for in most kits. But since this is a "new" experience maybe it is time I gave it a try. But it would still be nice to have a drawing or something that shows the desired profile. I am guessing that the molding running along the sides has a different profile, or at least it looks that way in the monologue photos.

- 389 replies
-
- 1
-
-
- winchelsea
- Syren Ship Model Company
- (and 1 more)
-
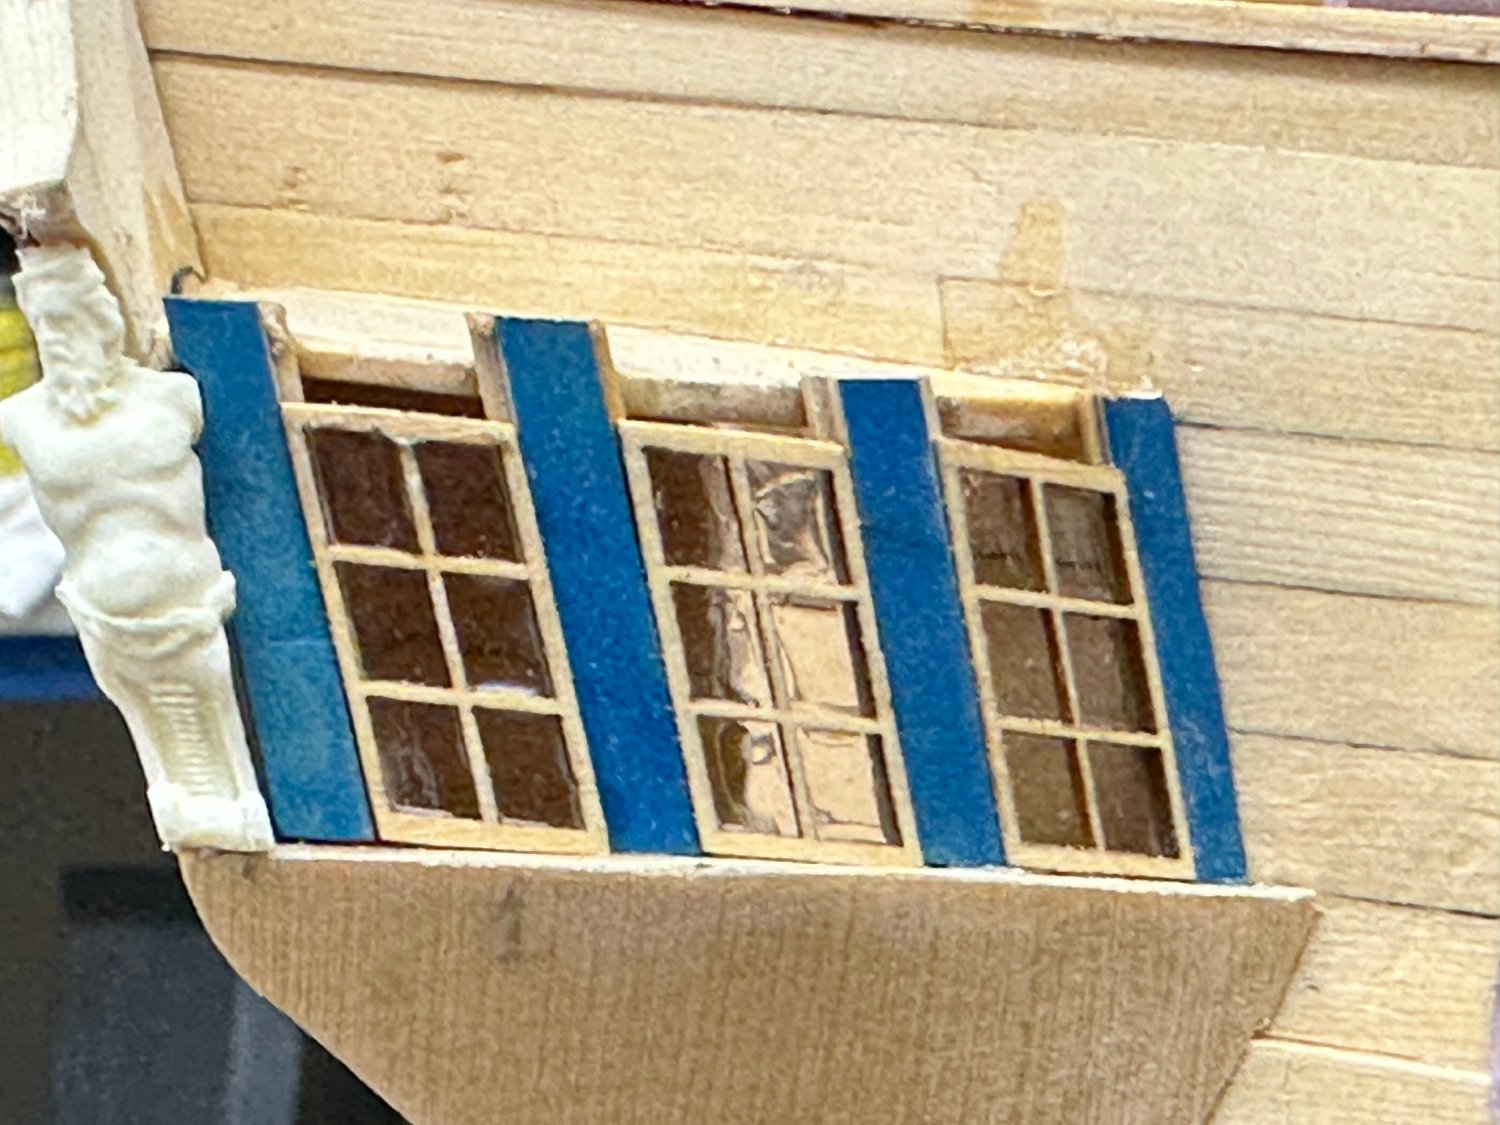
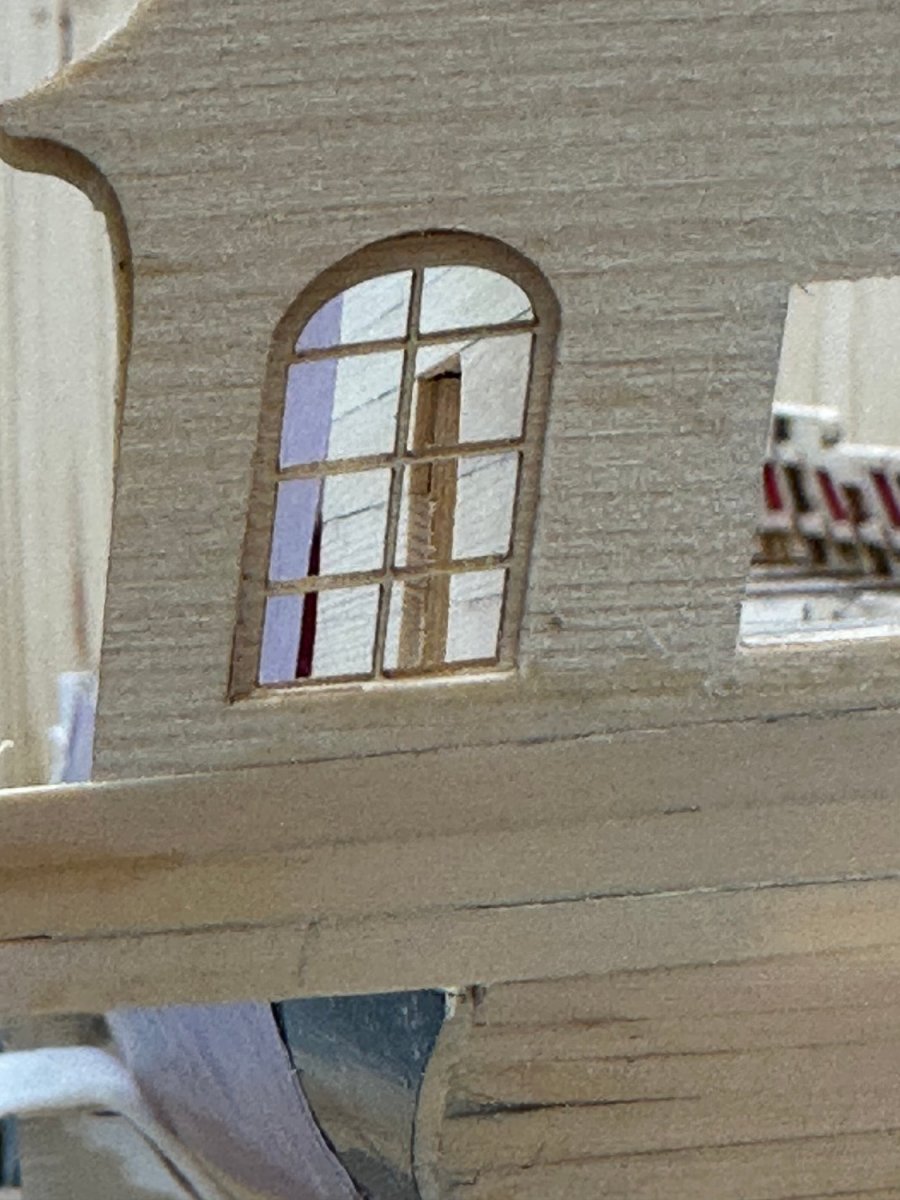
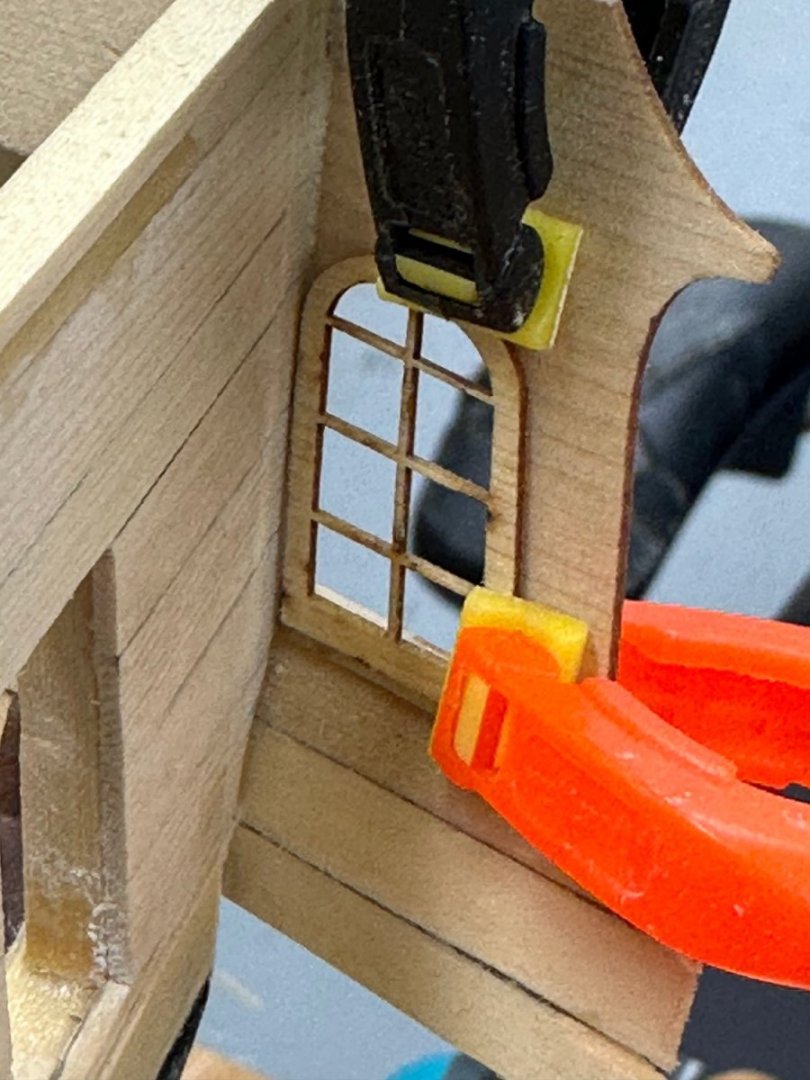
Home from Christmas/New Years cruise and ready to tackle the q-galleries "in earnest". Since I had the top of the starboard side q-gallery already finished I decided to start there before proceeding further with the port side (thanks Chuck for the replacement windows -, now I can add the top to the port side gallery). I decided to "refabricate" the uprights out of boxwood and to make "plenty" so I was not worried about having to throw out a piece. (I am sure that happens only rarely with those working on Winnie, but I am prone to over/under do things with regularity.) So I used rubber glue and as suggested added an upright and then a window. I also rubber glued the figure that will occupy the "ledge" at the aft end and had to modify the aft upright to fit around the figure. Here is how the windows look at the moment - everything is "held" in place (not very steadily since there is not much area for the glue to grab) by rubber glue which I will let set tonight and see how it looks tomorrow before taking it apart (marking the pieces appropriately) for painting. While letting the rubber glue set I installed the window frame, glazing and backing on the port side. Although it is hard to see in the picture below I also painted in inside of the "holes" in the transom red. Now that I have the cerulean blue paint (arrived while on cruise) I mixed a small bottle of it (with a dash of white as suggested) and will shortly paint the transom along with the q-gallery window uprights.


- 389 replies
-
- 9
-
-
- winchelsea
- Syren Ship Model Company
- (and 1 more)
-
While I was working on the port side q-gallery - (can't go beyond the base since I do not have the window for that side installed yet) I noticed that it was a bunch easier to install the "facilities" before adding the planking than it was on the other side after the planking was added. It should not be a problem to sand back any interference with the planking should that come to pass. Just a note for those who come later to the Winnie.

- 389 replies
-
- 5
-
-
- winchelsea
- Syren Ship Model Company
- (and 1 more)
-
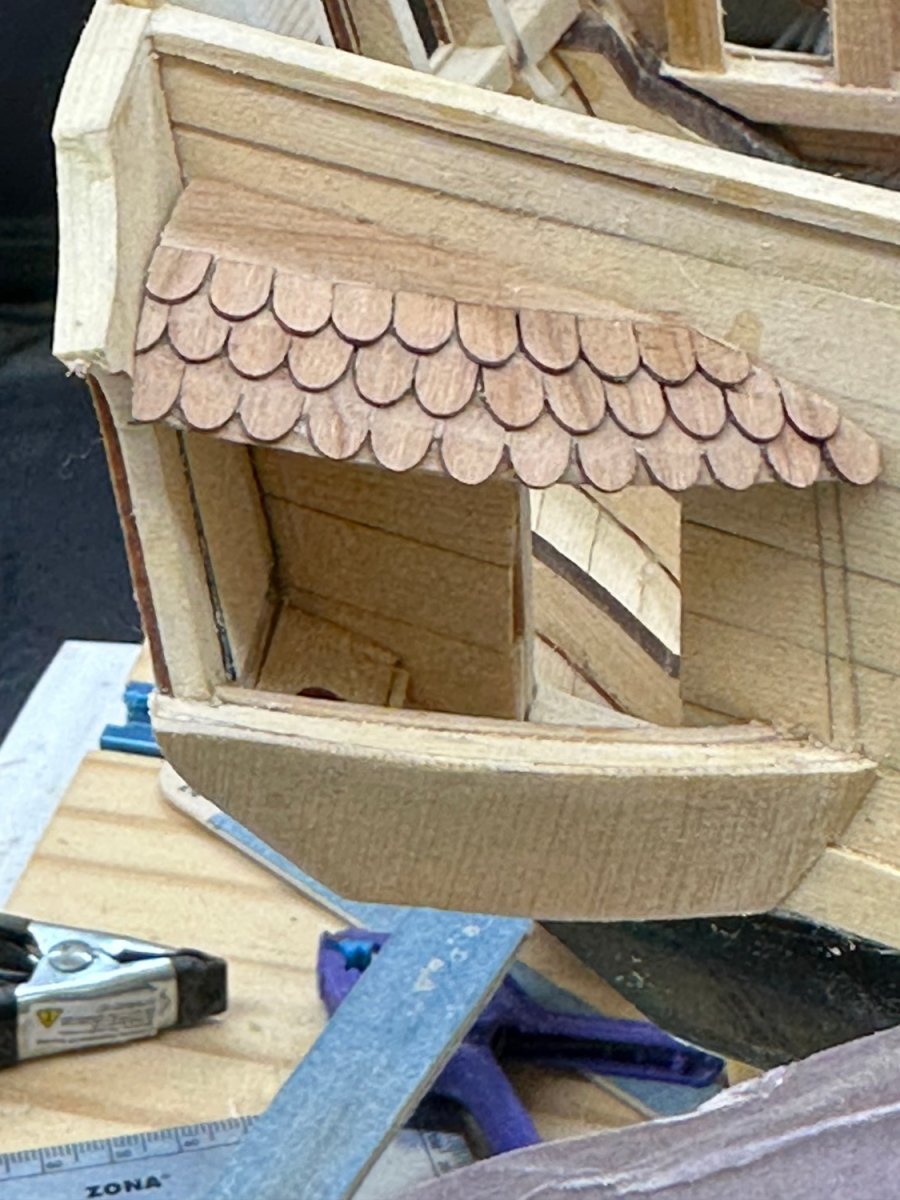
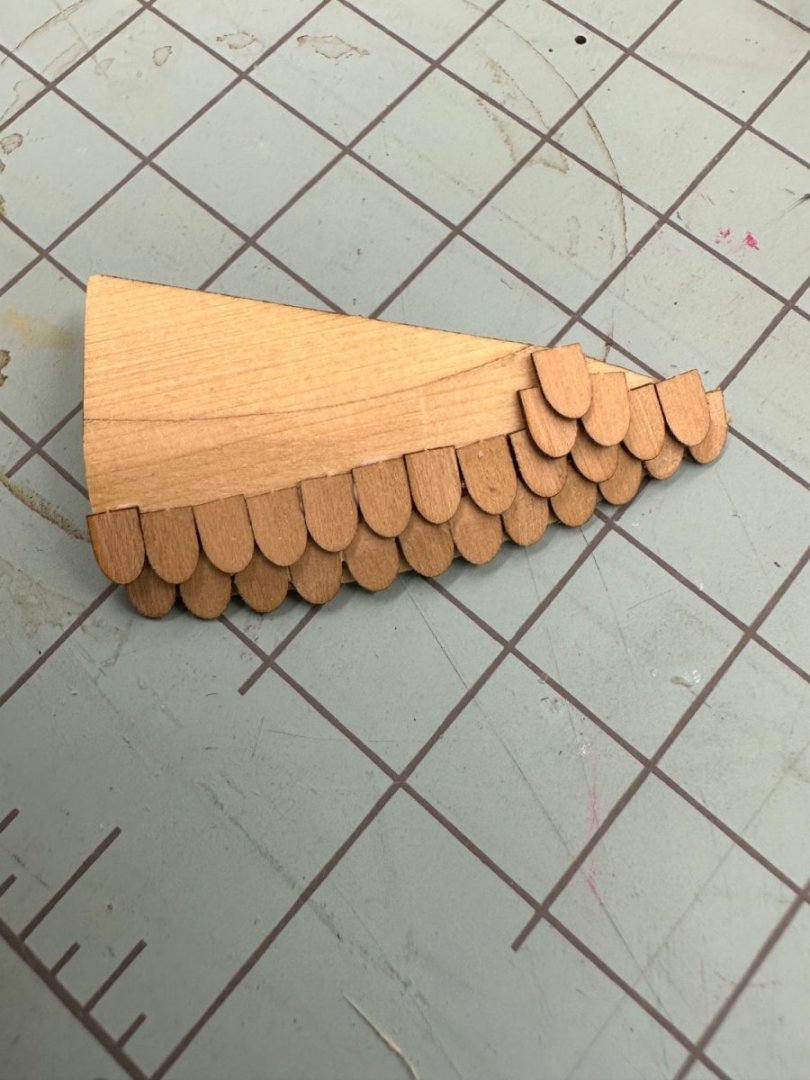
Thanks Glenn. I have not got my Cerulean Blue paint yet so I decided to work on the roof for the starboard side. I took everything else off the carrier sheet except the shingles then ran that through the thickness sander to get it down to just over 1/64" thick (the monograph says the shingles should be "almost paper thin"). My first attempt got the shingles too close vertically and it was going to take four rows instead of the three. I should have read further in the instructions where it suggests drawing pencil lines on the roof piece to mark where the THREE rows should go. Anyway here is the four row roof with the first two rows glued on and the others just sitting there. With the shingles at 1/64" thick, and sanded flush at the top to provide a flat area for the next row I do not think any of these shingles can be salvaged. So I looked for other resources. I already have the cherry package for Chapter 3 so I used that material to make another starboard side roof. This time I used the fine paper disc sander to make the first pass at shaping the roof piece. Went much faster than the first time using 220 sandpaper. Anyway here is the cherry roof sitting on the starboard side top piece. I still probably got the second row on too far down on the first but I think it "will do" for now. I should have enough shingles and roof pieces to make the port side and then one more for whichever side looks the worst after painting.

- 389 replies
-
- 8
-
-
- winchelsea
- Syren Ship Model Company
- (and 1 more)
-
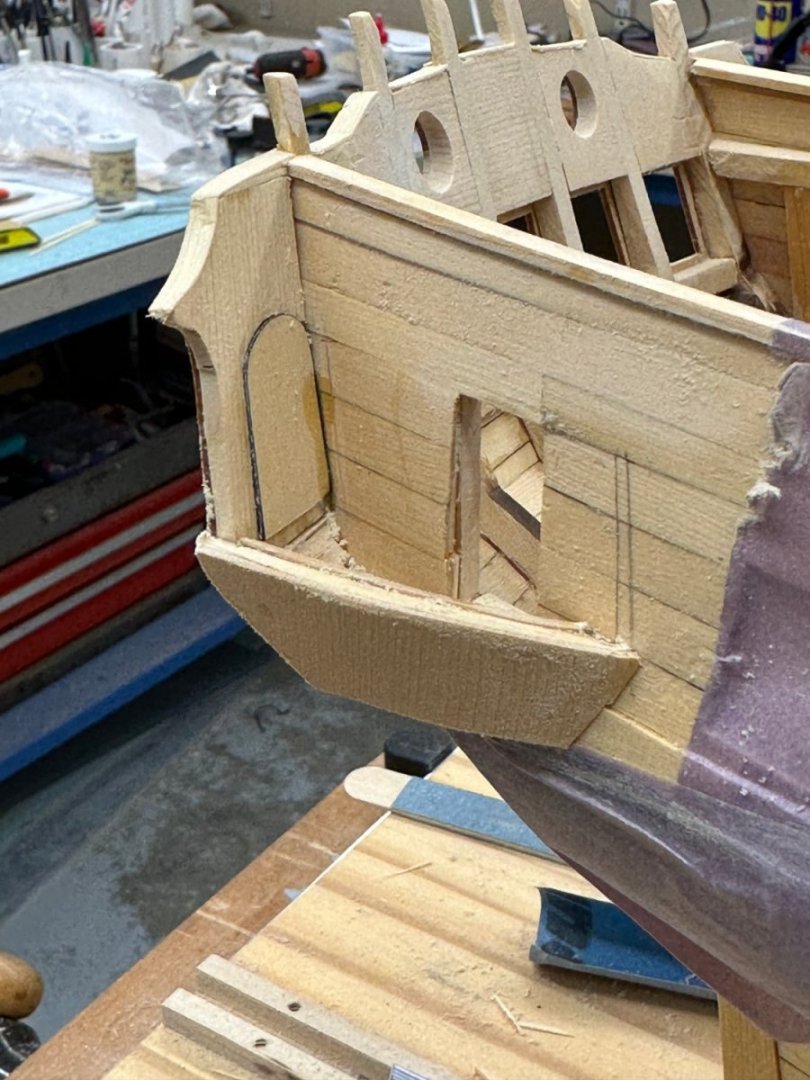
So I got the "head" installed (more or less) and have moved on to the top. The monograph goes to some length to get the modeler to "look at the q-gallery from the same level as the gallery and note that the "outside edge of the q-gallery should follow the run of the planking". So here is what the starboard side looks like from the q-gallery level. The top is only on with rubber cement at this point. I note that the top is somewhat short of the mark I drew earlier and I added a piece to the (admittedly less that 1/32") to the stern of the top trying to "fix this. I think the outside edge of the q-gallery follows the run of the planking pretty close. but I am beginning to think it needs to be angled down a bit on the outboard side so it hit the mark on the transom. Anyone care to weight in?

- 389 replies
-
- 5
-
-
- winchelsea
- Syren Ship Model Company
- (and 1 more)
-
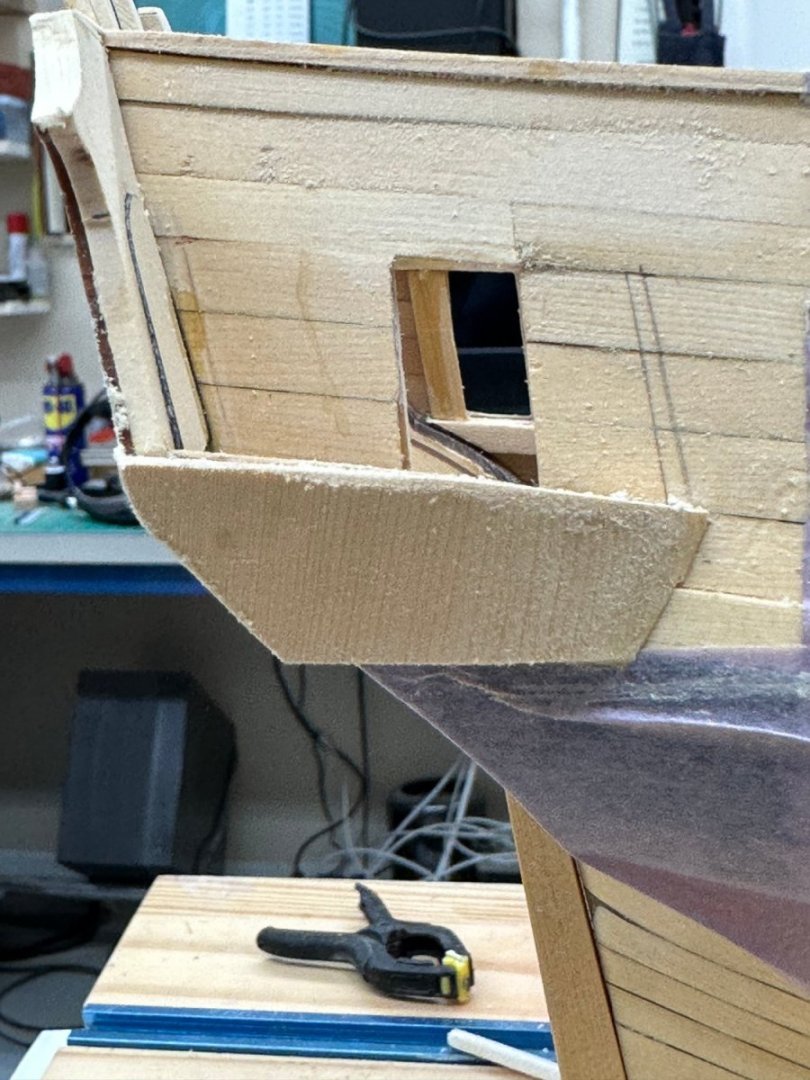
I broke the window for the port side q-gallery so while I wait for the replacement (thanks Chuck) I went ahead and worked the starboard side. I got the window, "glass" and backing filler in place and sanded down - not to self, do not paint the edge of the filler. There is no way to cover that black outline. Not that you will be able to see it much. I think I have the lower portion installed and "planked" correctly but I believe that the "real" test comes later. I hit the mark from the template with the upper counter timber - the planking pushed it a little (1/32"??) past the mark but I was careful to get the planking attached to the timber where it meets the hull and notched for the black strake. I leave Wednesday for a Christmas/New Years cruise so I will keep working the starboard side until my better half makes me start packing.
- 389 replies
-
- 5
-
-
- winchelsea
- Syren Ship Model Company
- (and 1 more)
-
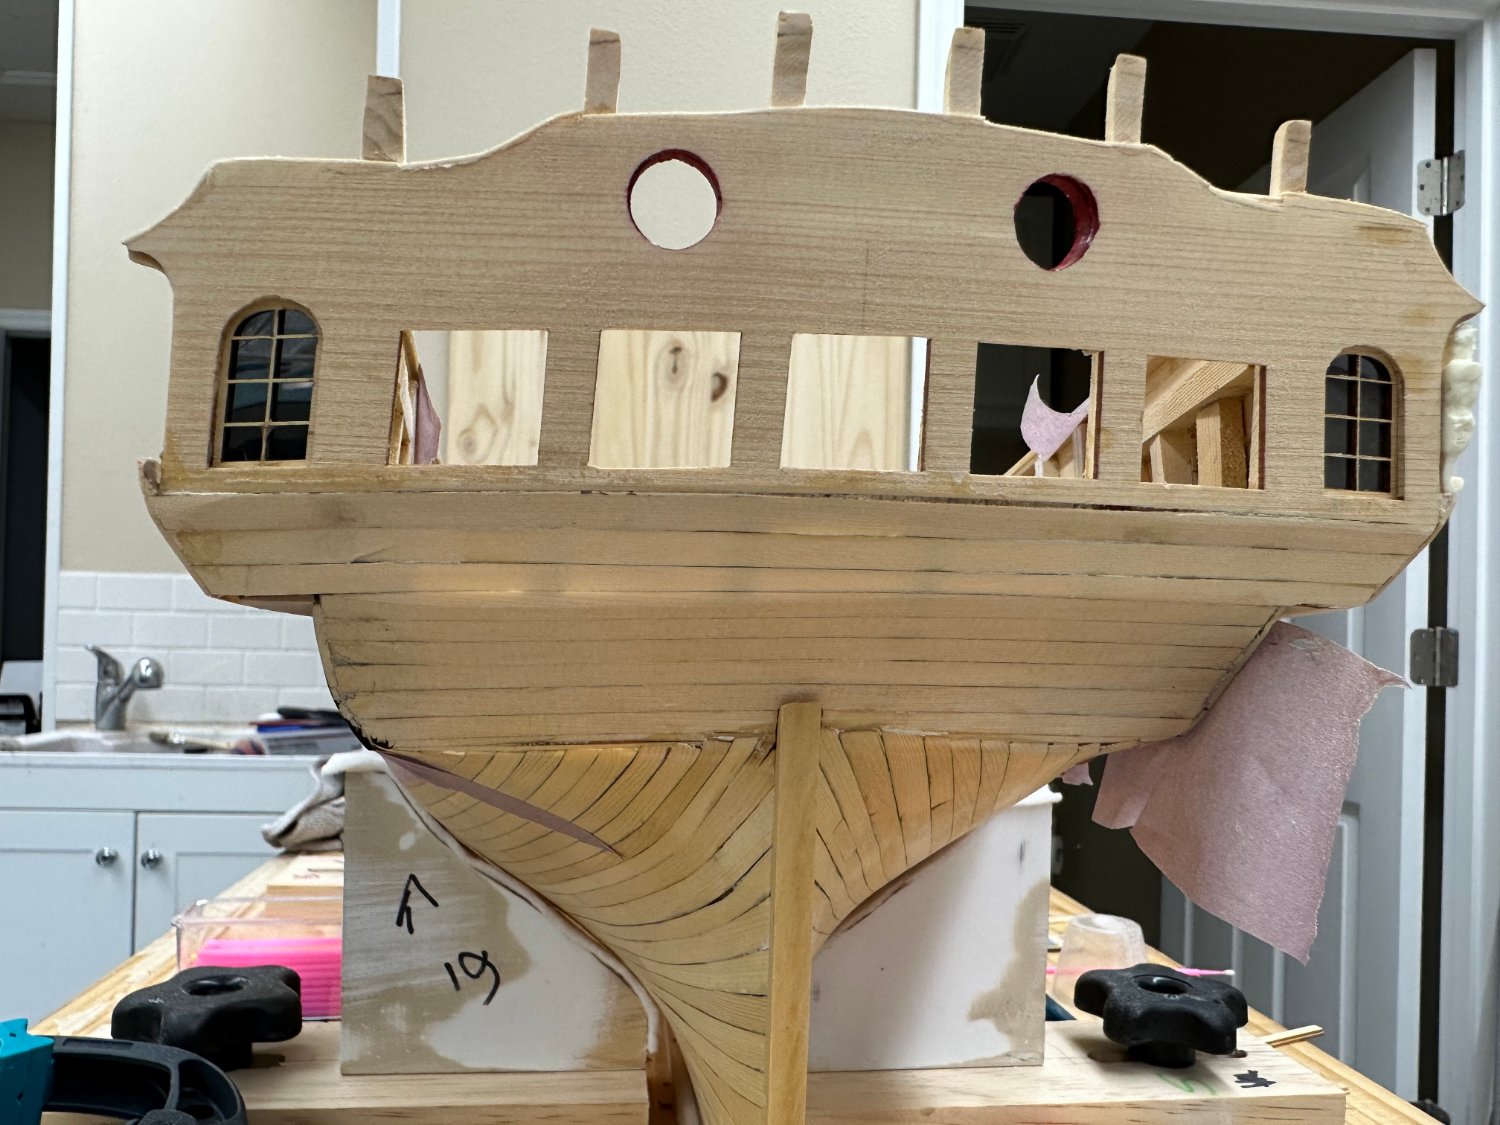
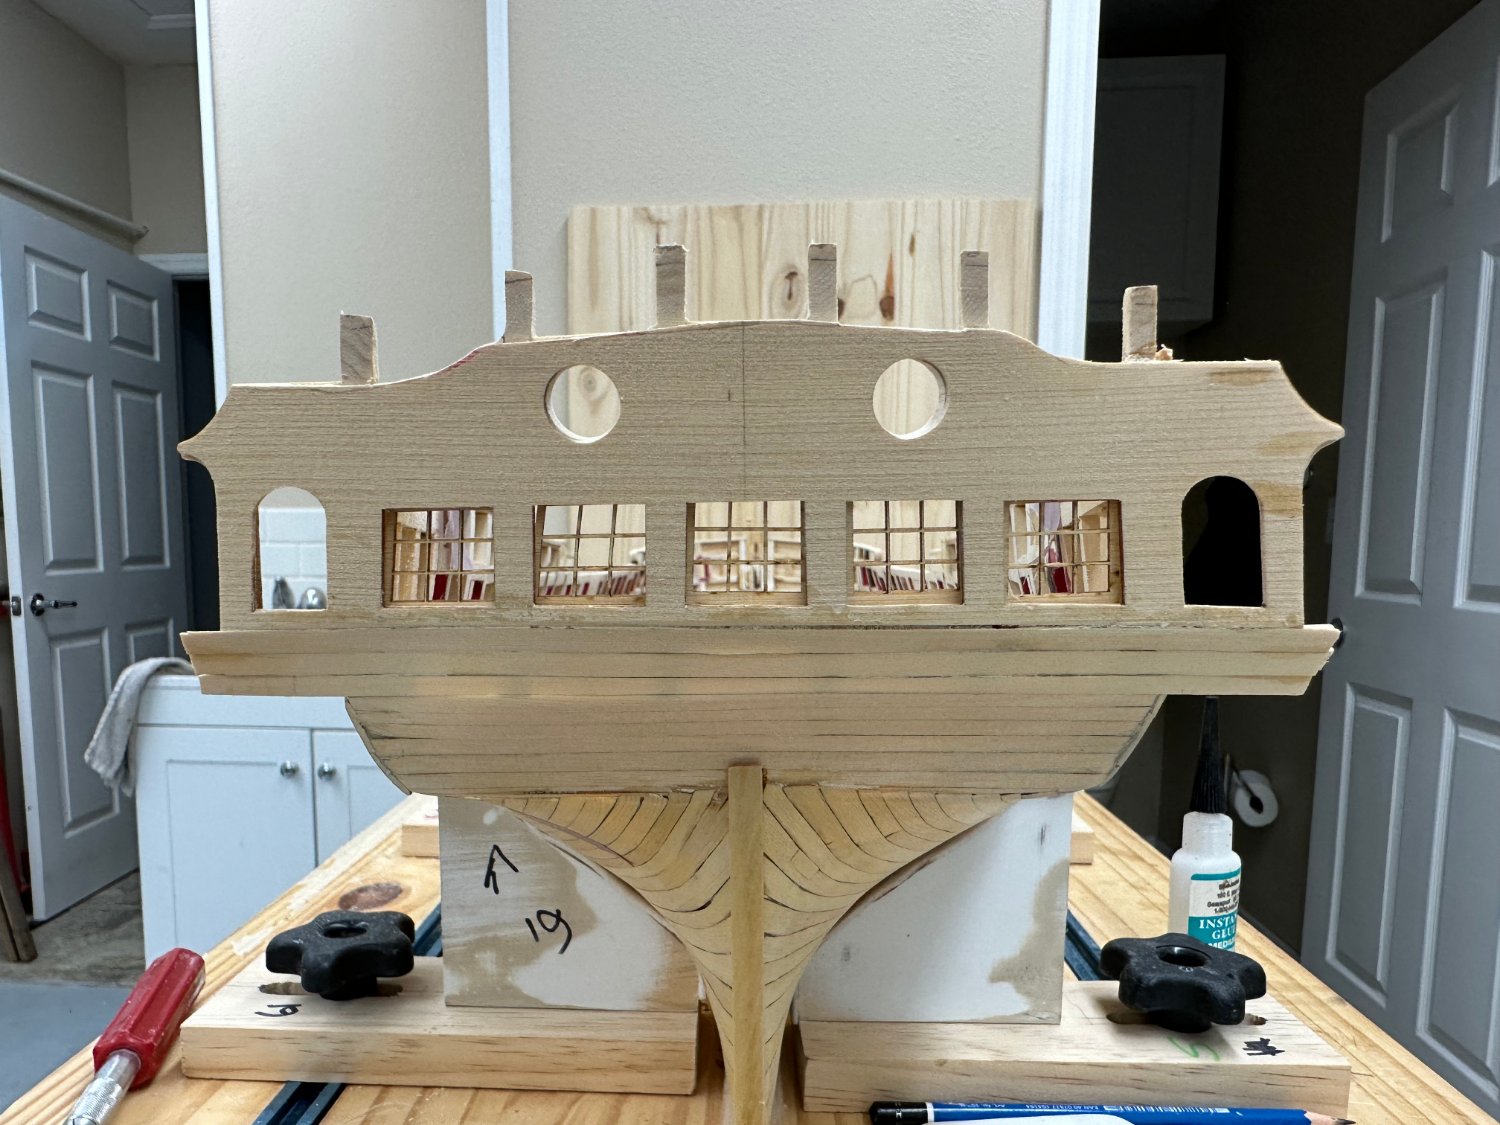
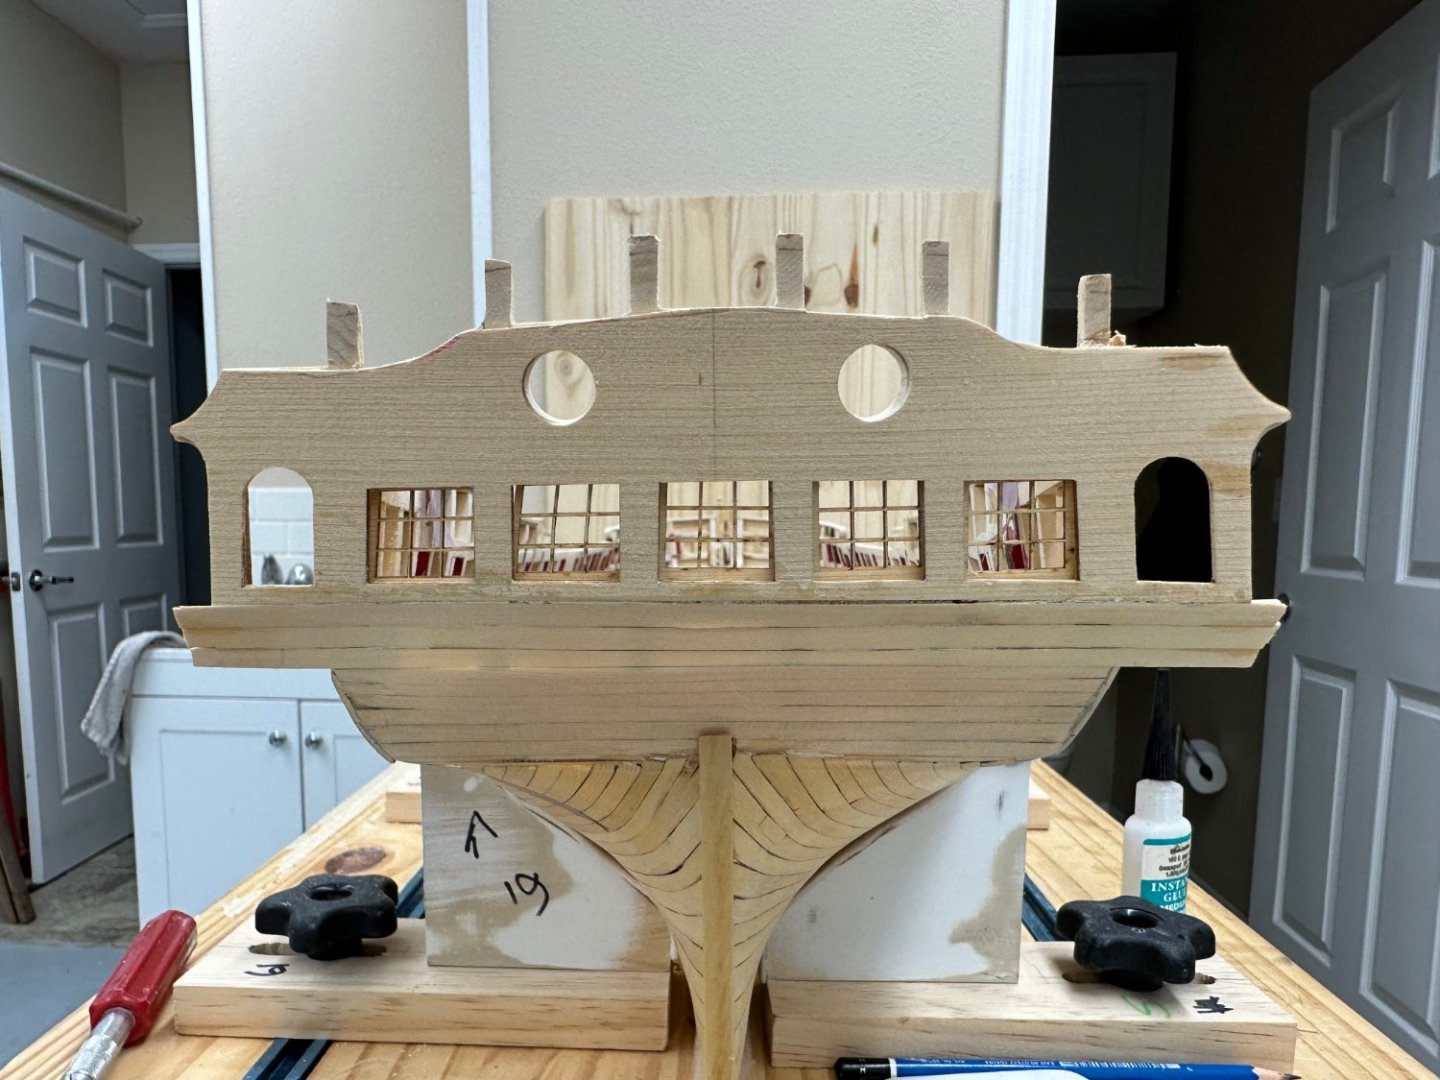
Test fit of the windows in the "Great Cabin". Not perfect but after some trimming on two of them I think this is as close as I am going to get. I also (taking note of Glenn Barlow's build log) used the template from Chapter ten to cut the stern timbers down closer to what will be required later. I broke one during the planking and have "hooked" several during the q-gallery window work so thought I would "reduce the target profile" as we used to say. The windows are now safely back in their padded box until "later".

- 389 replies
-
- 7
-
-
- winchelsea
- Syren Ship Model Company
- (and 1 more)
-
Thanks Chuck and Glenn, So I used a sanding stick and managed to get a bit of the planking removed. And I took as much material as I could off the filler piece (without actually removing the inboard side. But it still is not enough to allow the window frame to be centered in the opening. I centered the window frame and used two clamps to hold it in place (it might be a hair low but it is okay left/right). On the "inside" it looks like this: After more sanding on the hull planking and trying to thin down the filler piece even more I eventually broke off the inboard side (and the bottom too for good measure). So here it what it looks like now, with the window frame in the correct position (rubber glue). You cannot see the gap at the top from the stern. When I thicken the upper counter planking I can make up for the missing piece at the bottom of the filler. Now on to the starboard side.


- 389 replies
-
- 3
-
-
- winchelsea
- Syren Ship Model Company
- (and 1 more)
-
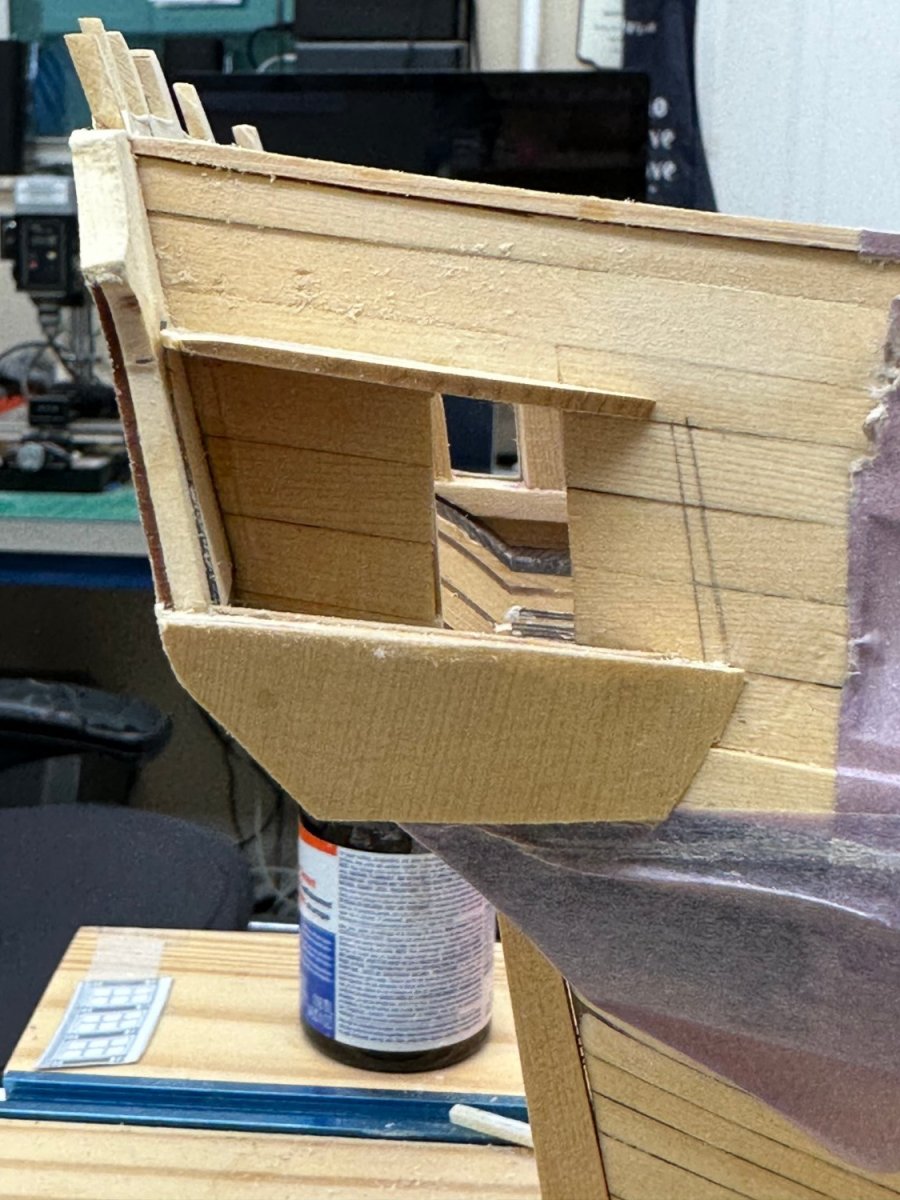
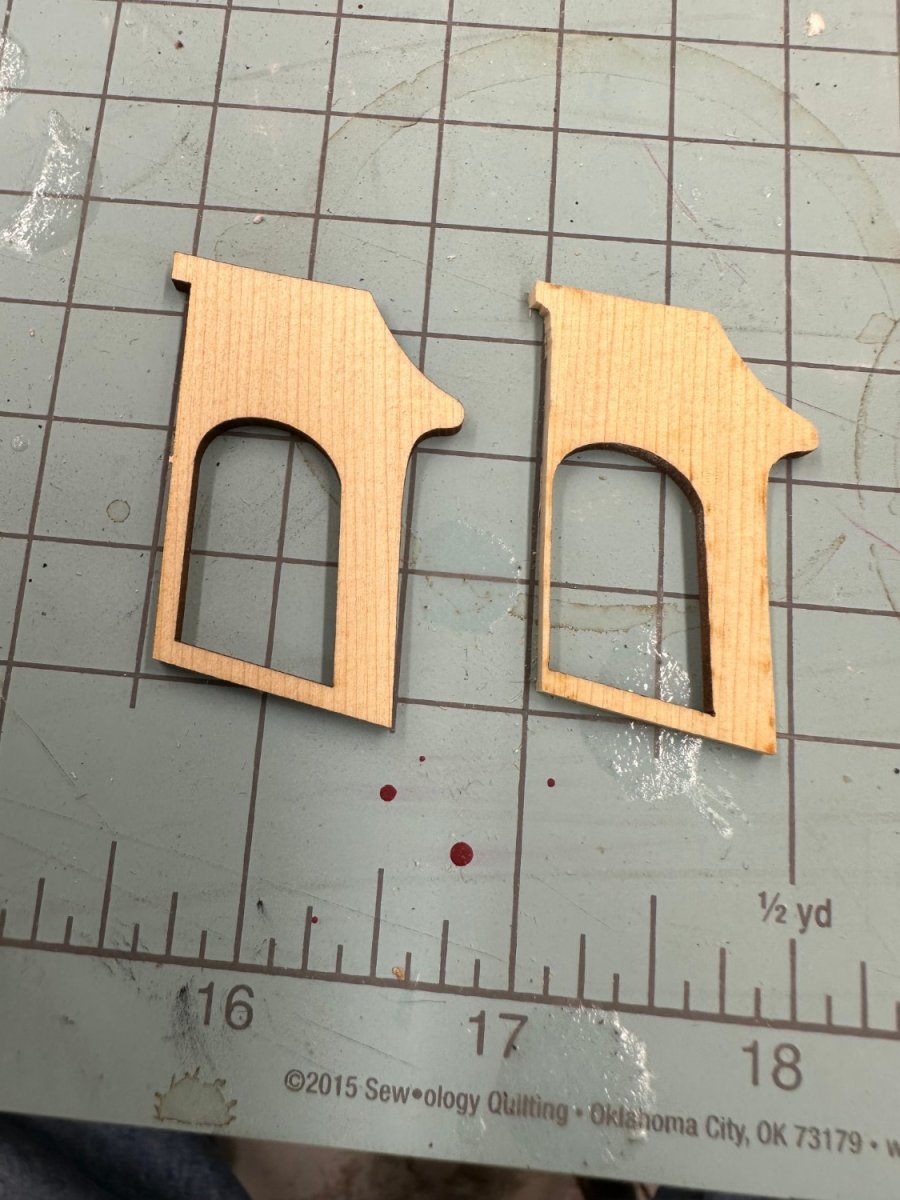
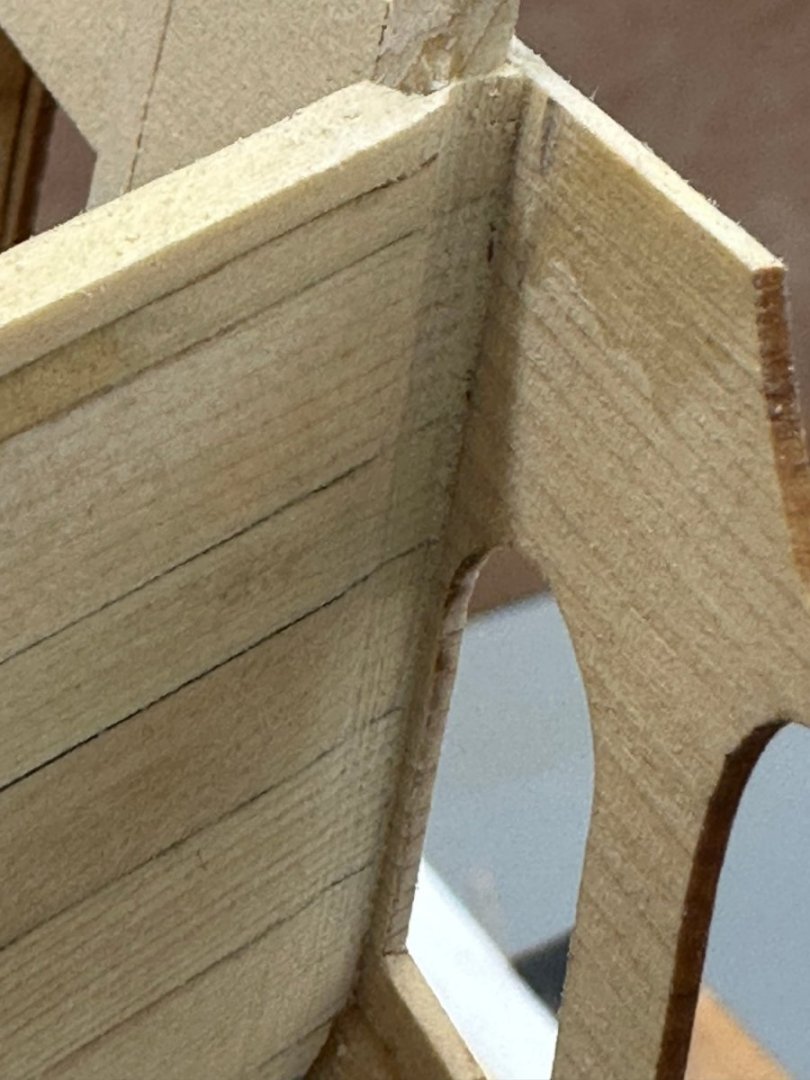
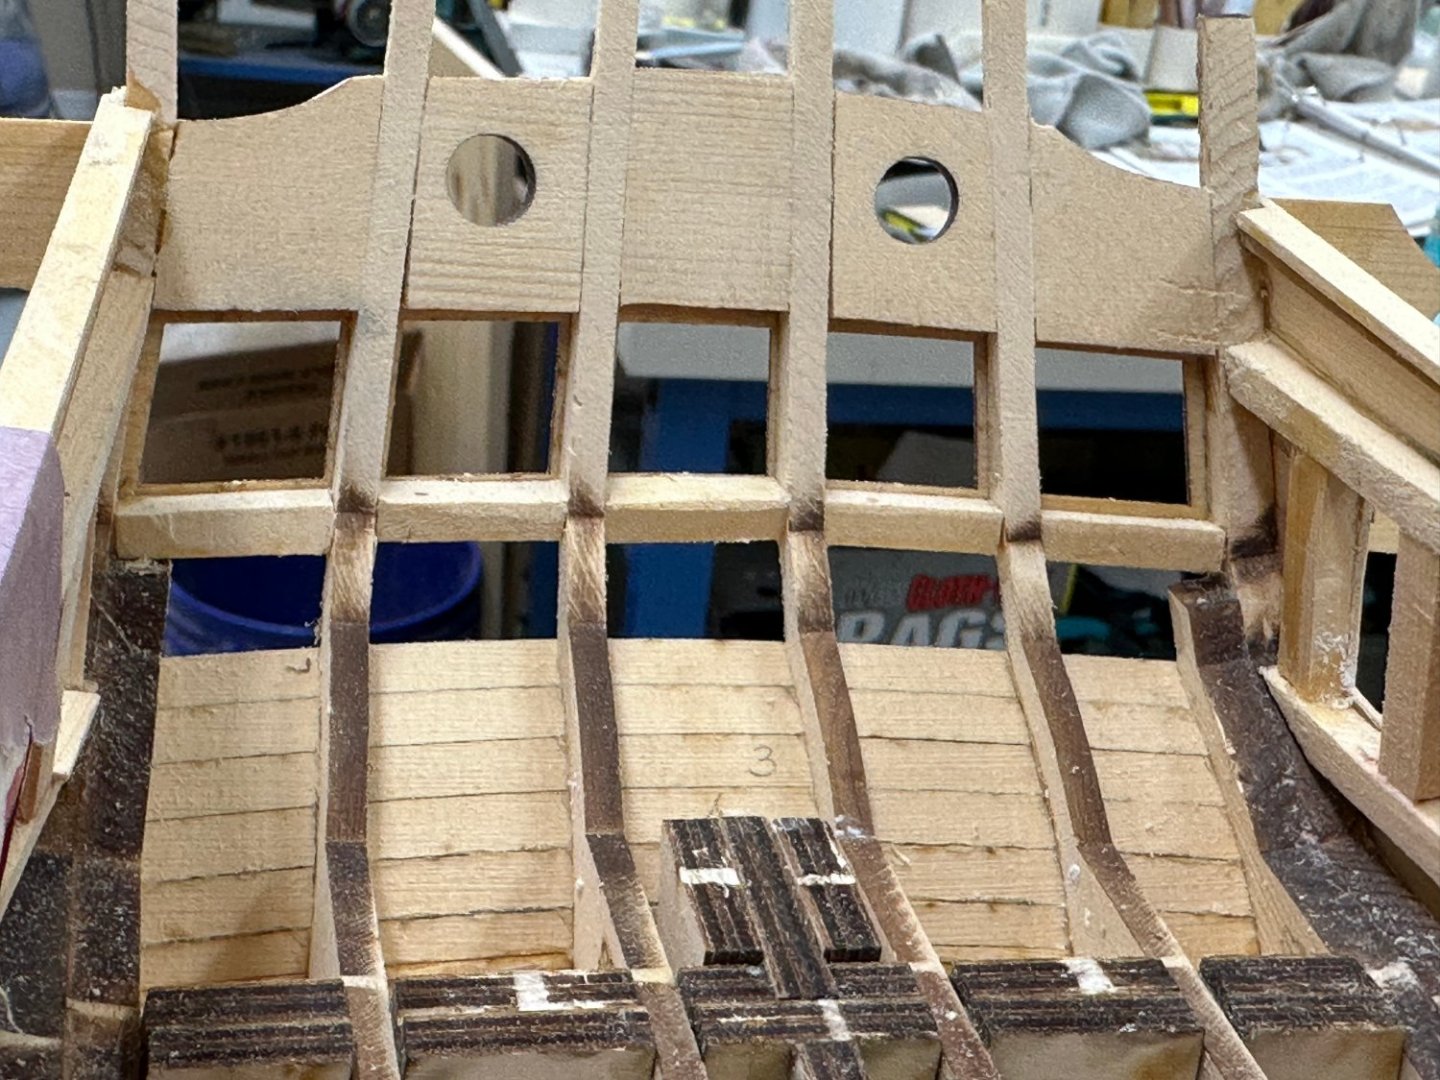
And now the problem(s). The next step in Chapter three is to fir the inner q-gallery window frames. The instructions indicate that, as with the great cabin windows the inner frame should be larger than the outer to give some "wiggle room" for the window frames when they are installed to make it easier to get them "straight". Here is what the transom piece looks like outside the hull on the port side. There is just a bit over 1mm extending beyond the hull planking. Just to make sure I had not grievously misaligned the transom here is the starboard side. Approximately the same problem (give or take a half a mm). To provide a "lip" on the inboard side would require essentially the removal of at least the more or less vertical portion of the inner frame on both sides. Pausing to consider what options I have (beyond removing the vertical portion of the inner frames).
- 389 replies
-
- 1
-
-
- winchelsea
- Syren Ship Model Company
- (and 1 more)
-
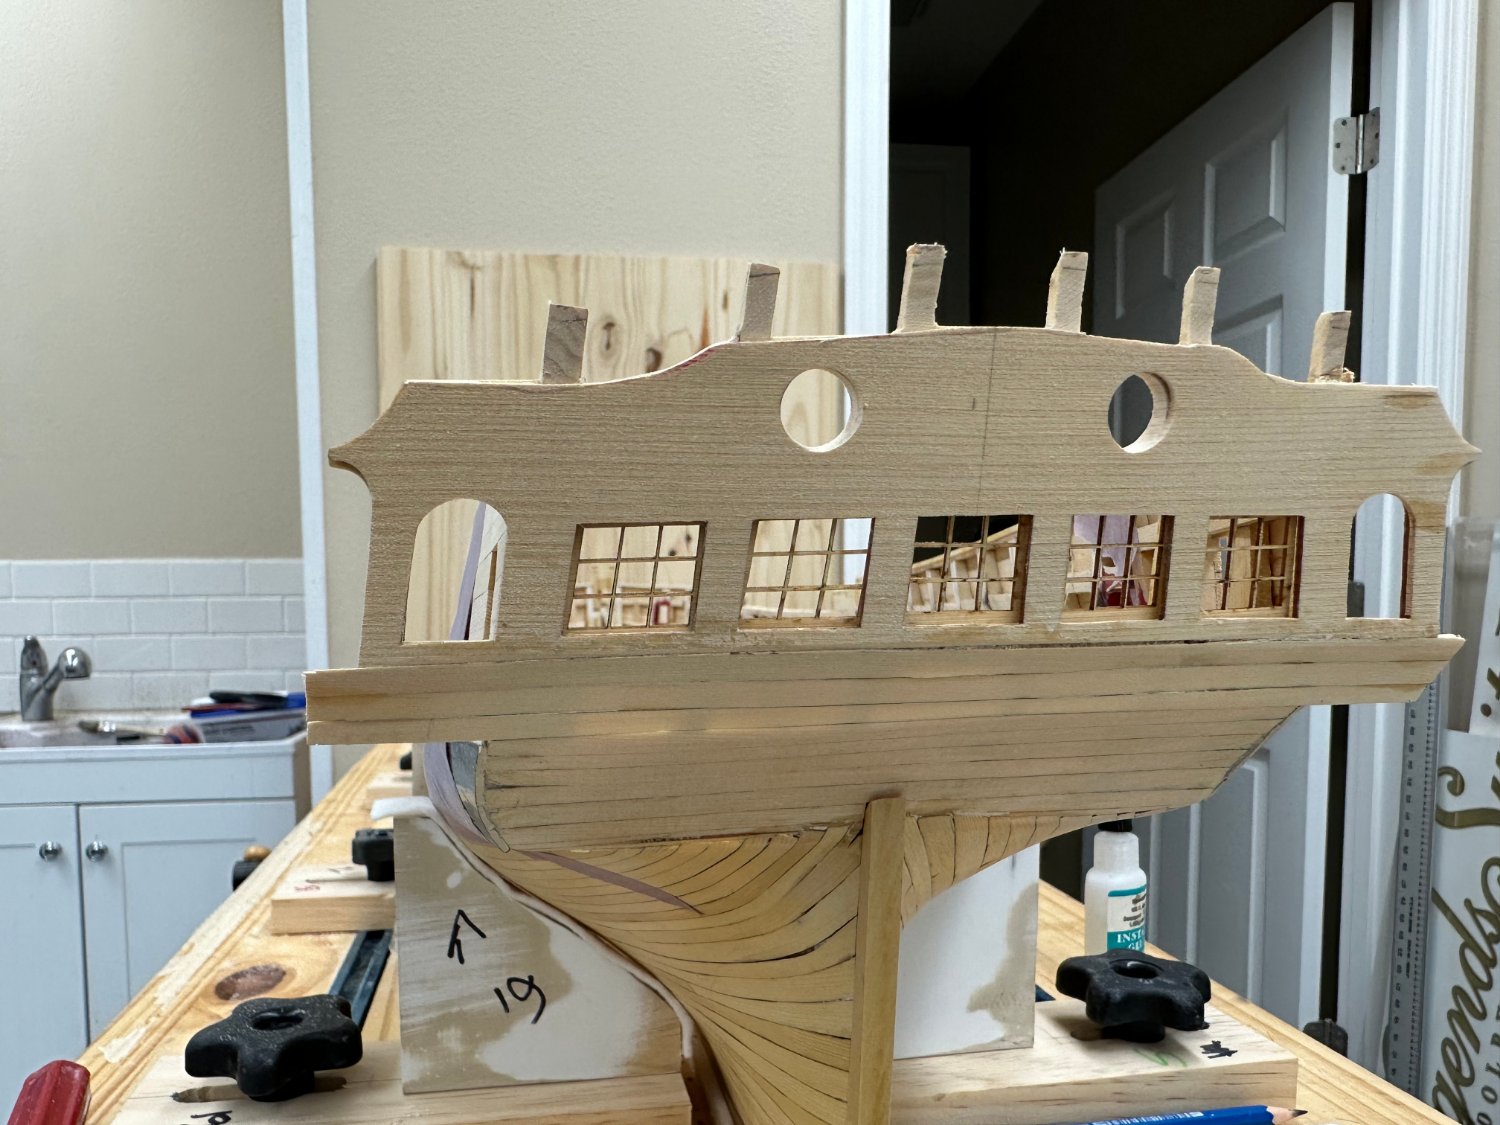
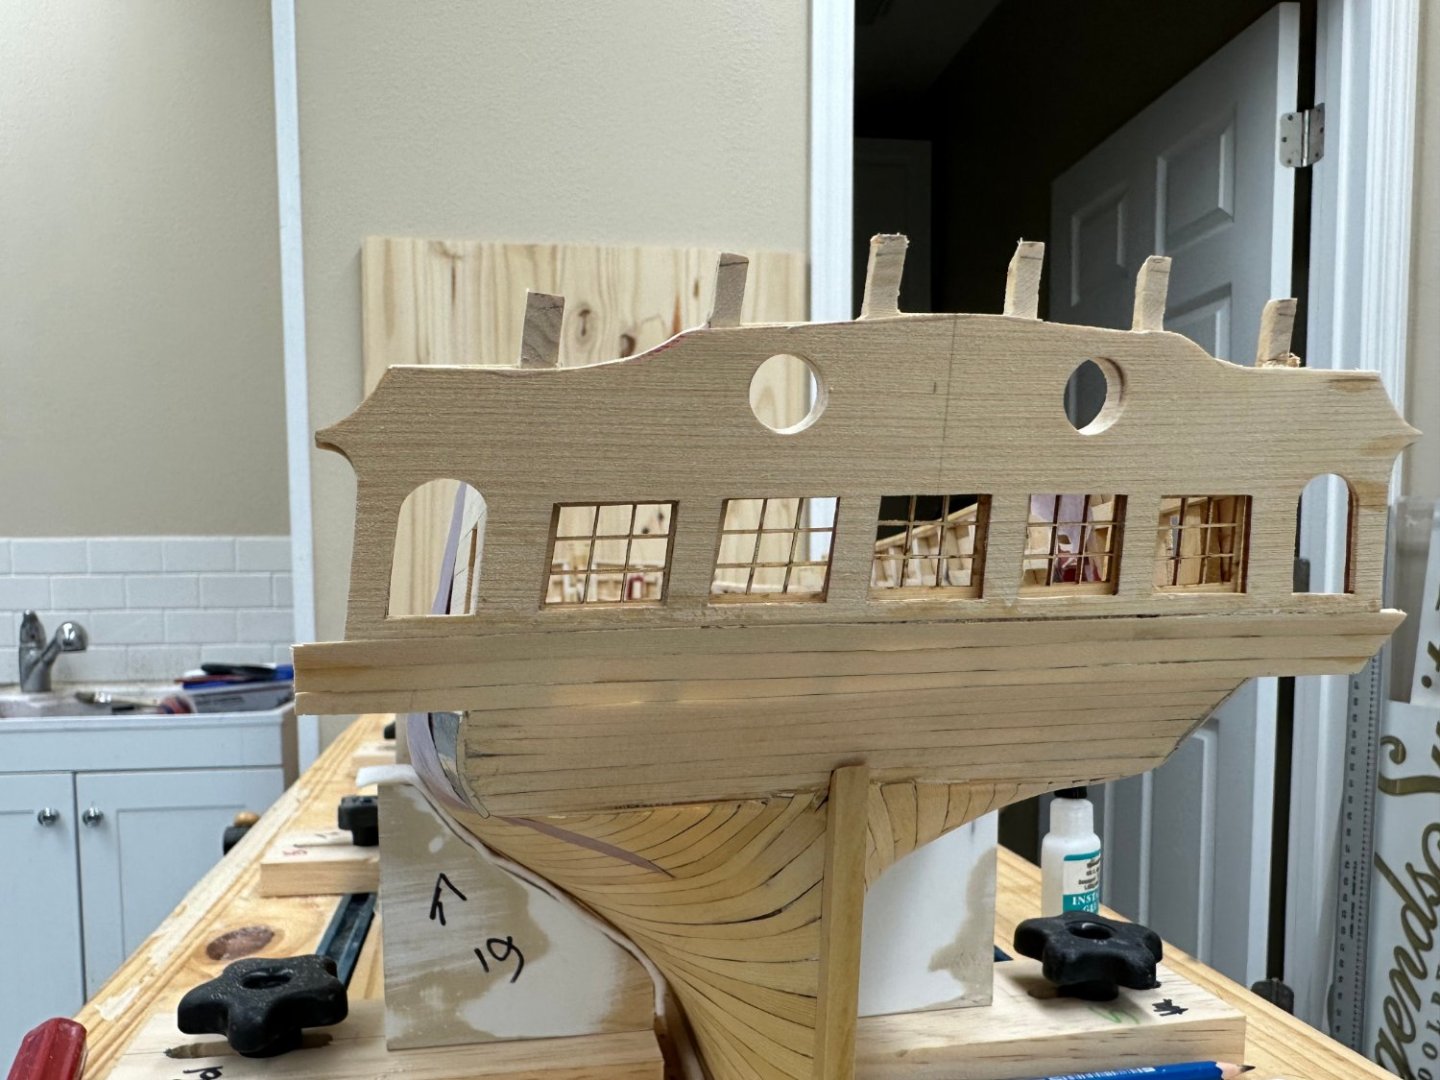
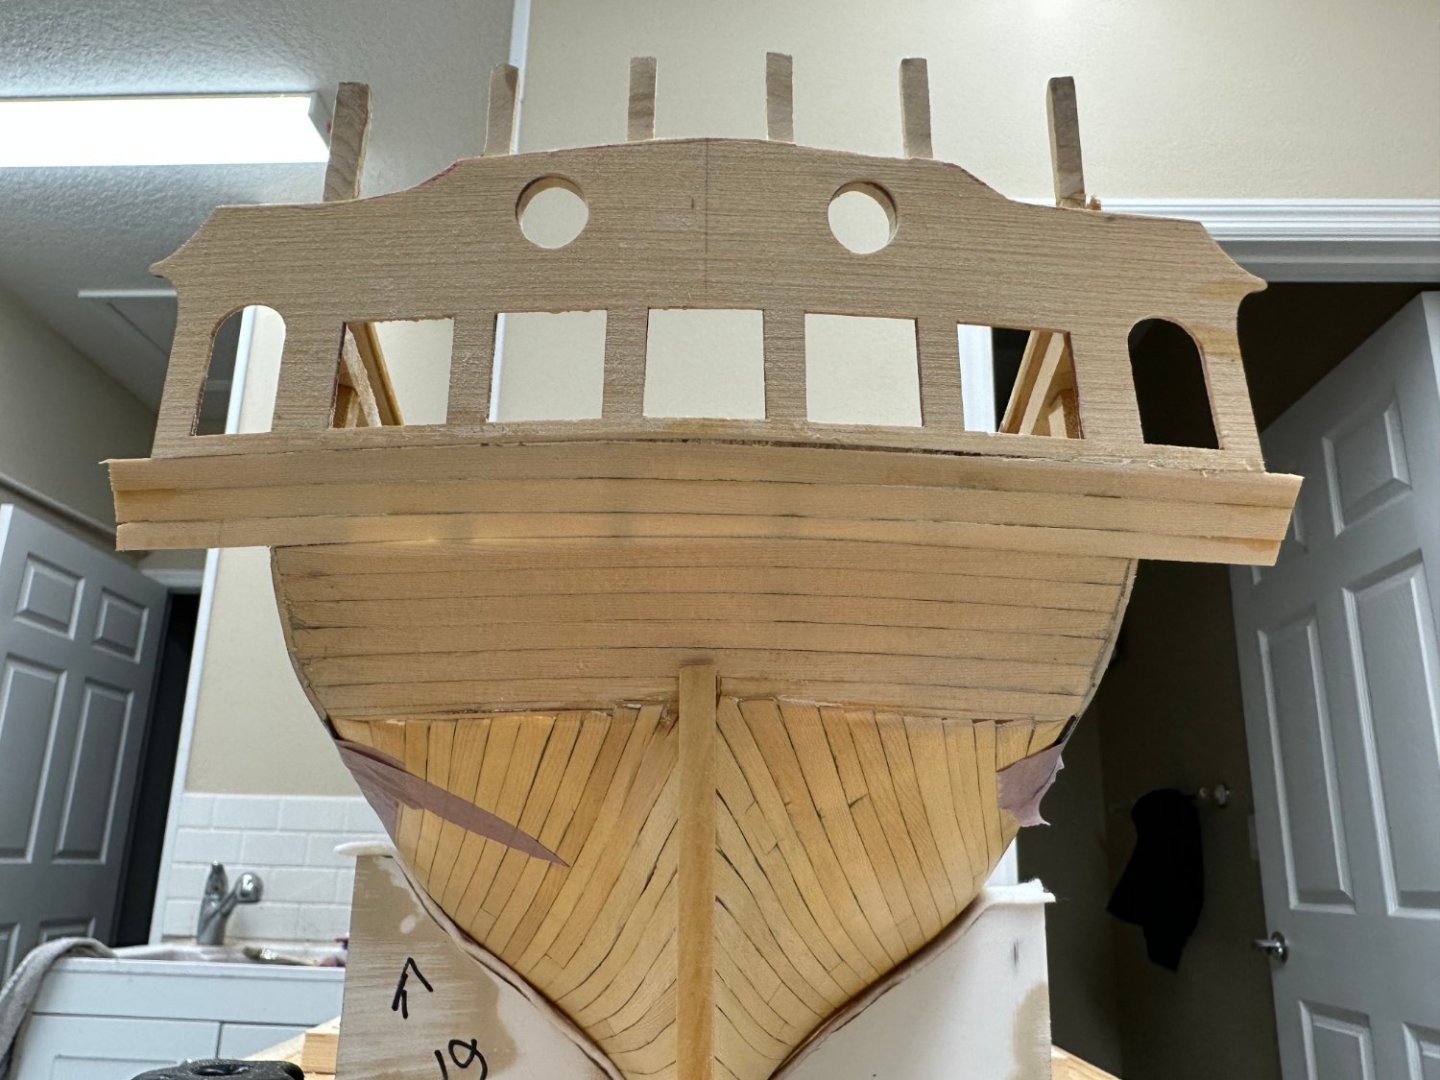
Chapter 3 starts with the transom installation and I thought it went pretty well. here is a shot from the inside And yes, their is only the barest of lips at the bottom of the center window but that seems like the best compromise that I could come up with. Hard to tell what is "ground truth" since the reference is the lower sills which were (in theory) installed per the provided template. Anyway this appears to be workable, based on what I know now - which isn't much. So on to the upper counter planking. I disassembled my edge bending station yesterday - just in time to set it up again. As it turned out three 7/32" planks were too much for the space I had so I used two 7/32" and one 3/16" wide planks. Had to narrow the 3/16" one a bit to boot. So here is the upper transom with the planking (the last hull planking I would hope) completed, sanded but no WoP. I am not too worried about the gap at the top since there is a piece of molding that goes just below the windows. Probably should put some filler in here to give the molding a level surface to bond to - maybe tomorrow. I also enlarged the holes in the stern fillers to match the transom holes.
- 389 replies
-
- 2
-
-
- winchelsea
- Syren Ship Model Company
- (and 1 more)
-
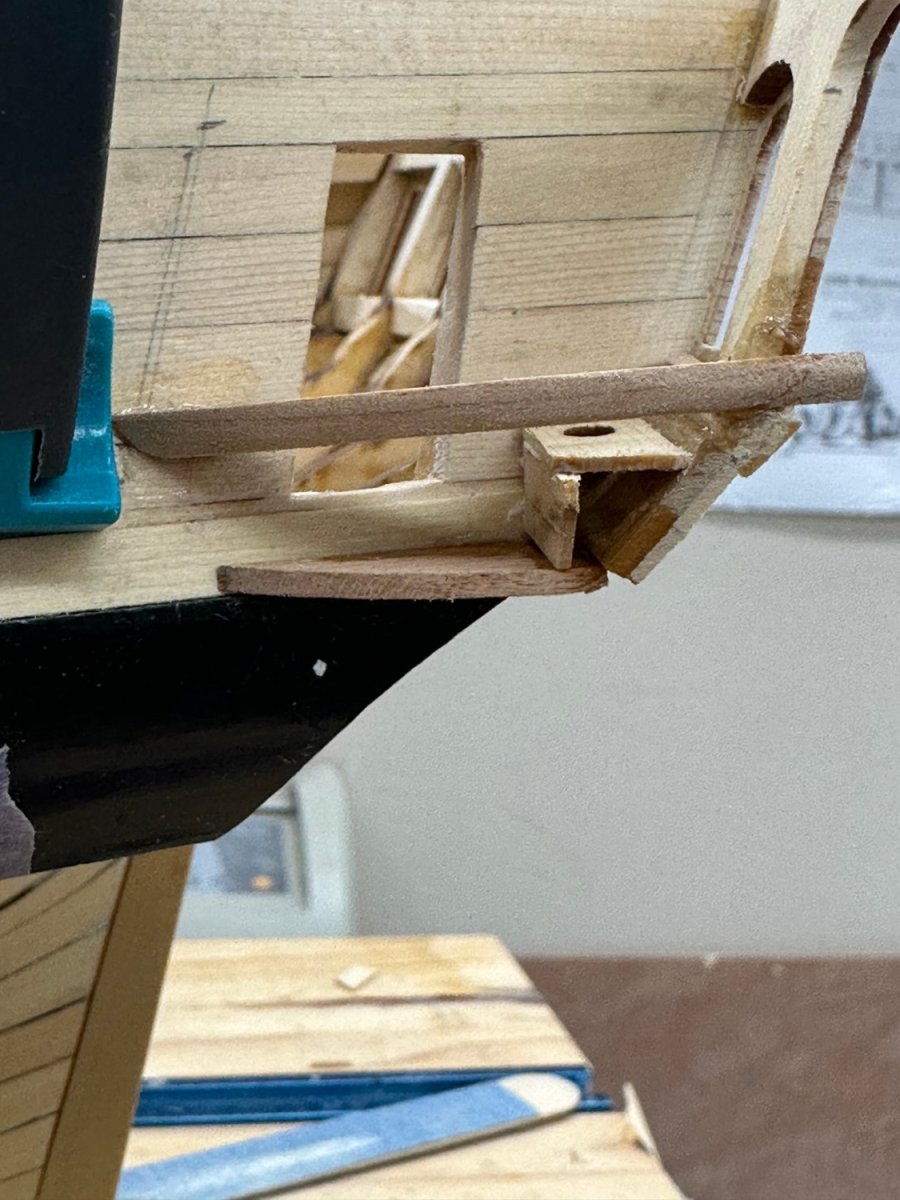
Thanks Chuck and everyone for the "Likes". I moved Winnie back to the build board after fabricating the pieces to hold the hull (and drilling the holes for the eventual pedestals that will be part of the final display arrangement). I was careful to keep them below the wales and padded with white felt to (hopefully) keep from marking up the hull. Stern post added as well as the hance pieces and fairing caps. I did not have a sheet of 1/16" cedar to fabricate the forward fairing caps so I used basswood as these will (I hope) all be covered later. Now on to Chapter 3.

- 389 replies
-
- 4
-
-
- winchelsea
- Syren Ship Model Company
- (and 1 more)
-
Port side wales planking completed (including the anchor lining this time) Now for a few coats of WoP, install the stern post and it is on to chapter 3.
- 389 replies
-
- 9
-
-
- winchelsea
- Syren Ship Model Company
- (and 1 more)
-
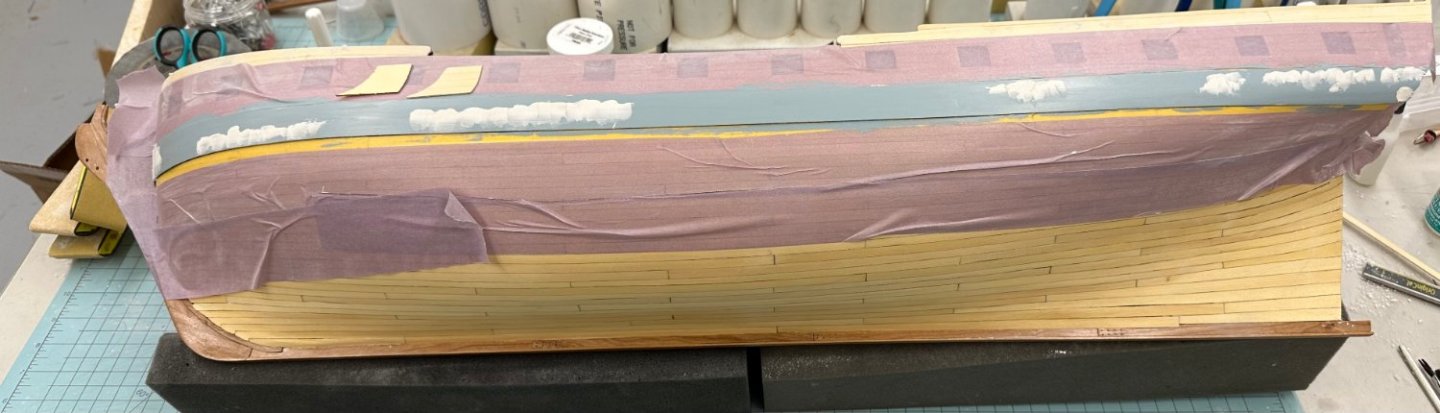
The port side wales clamping is done. now to get them smooth and the anchor lining installed. As shown below, I am on my second pass with both the primer and filler. I think this time I've got it ready for a final primer coat, 400 grit sandpaper and then the first coat of flat black. Speaking of the anchor lining, I took some of the scrapes from the wales planks, glued them edgewise and then traced the anchor lining outline. I also thickness sanded the new piece down to the 1/32" of the provided lining. Here are the two candidate anchor linings. I will prime and 400 grit sand both before deciding which to use. On the starboard side the provided piece looked okay but...

- 389 replies
-
- 2
-
-
- winchelsea
- Syren Ship Model Company
- (and 1 more)