HOLIDAY DONATION DRIVE - SUPPORT MSW - DO YOUR PART TO KEEP THIS GREAT FORUM GOING! (89 donations so far out of 49,000 members - C'mon guys!)
×


Dan Poirier
-
Posts
111 -
Joined
-
Last visited
Content Type
Profiles
Forums
Gallery
Events
Everything posted by Dan Poirier
-
 Double-check the 3/8" size, it seemed awfully big to me. I thought it might be a typo for 3/16". (Ultimately, I just free-handed with a smaller file rather than buy a new one just for this.)
- 39 replies
-
- 2
-

-
- Norwegian Sailing Pram
- Model Shipways
- (and 1 more)
-
In my experience the isopropyl doesn't completely dissolve the glue, but it does soften it from rock-hard to a thick sticky paste and then I can carefully pry the pieces apart. Sometimes the hard part is getting the alcohol to reach the glue.
- 28 replies
-
- 3
-
-
- Lowell Grand Banks Dory
- Model Shipways
- (and 1 more)
-
This was my first model kit and brings back some good memories. I think I redid my knees several times until I was happy with them. It's so nice being able to re-do a glued joint, and I take advantage of it regularly 🙂
- 28 replies
-
- 1
-
-
- Lowell Grand Banks Dory
- Model Shipways
- (and 1 more)
-
This looks great. And it sounds like you're having a lot of fun with it, also great.
-
Greetings from a clueless Patrick O'Brian fan
Dan Poirier replied to Galkar's topic in New member Introductions
Welcome! I read the O'Brian series years ago, and now that I'm building model ships, I keep thinking I should read them again. -
I think I had to read the instructions at least four or five times before it started to sink in.
- 84 replies
-
- 5
-
-
- half hull planking project
- NRG
- (and 2 more)
-
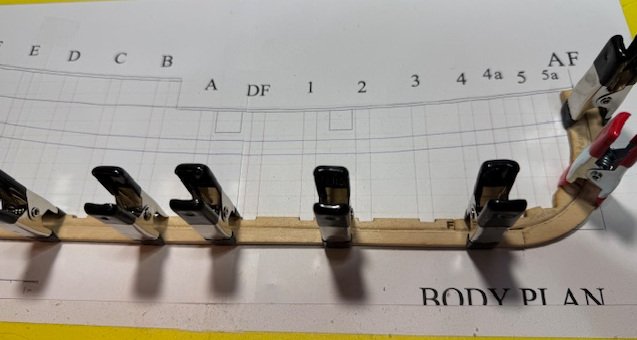
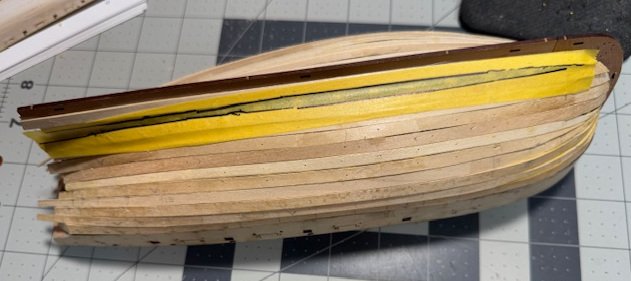
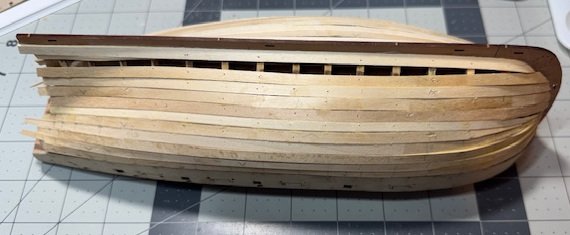
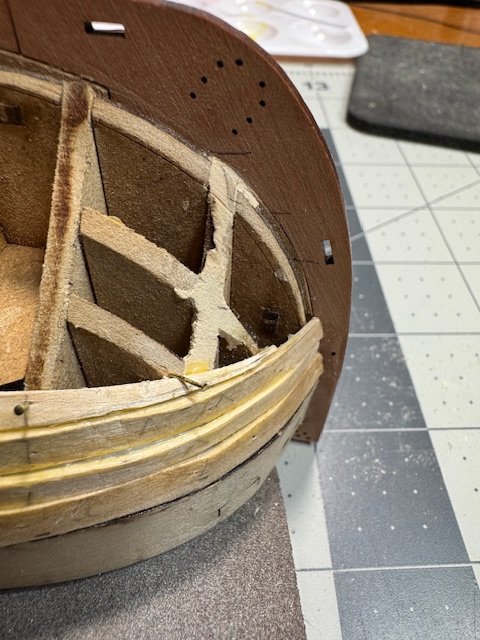
Before installing the bulkheads, the notches in the keelson needed to be deepened. Then the bulkheads were glued in place, using part of a carpenter square to make sure they were upright and at right angles to the keel.
-
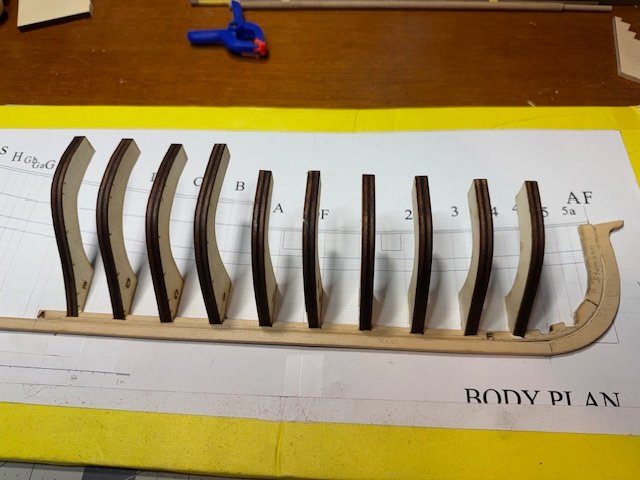
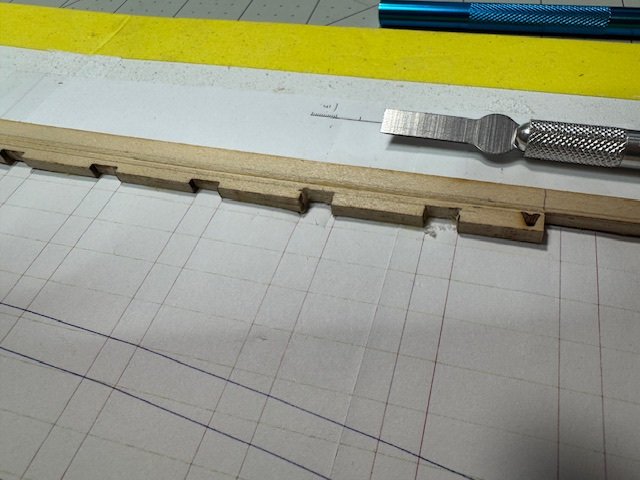
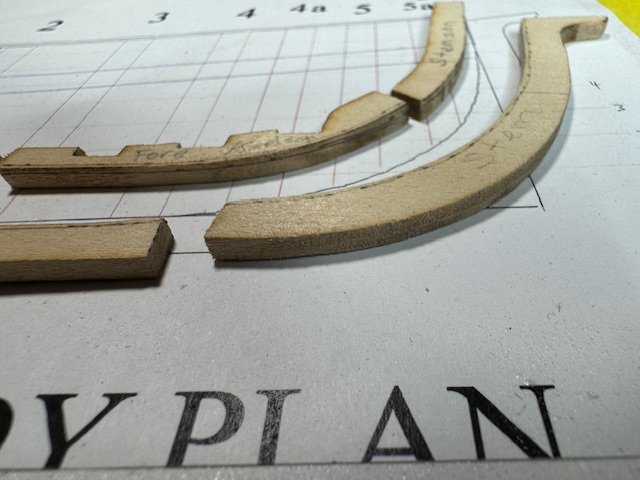
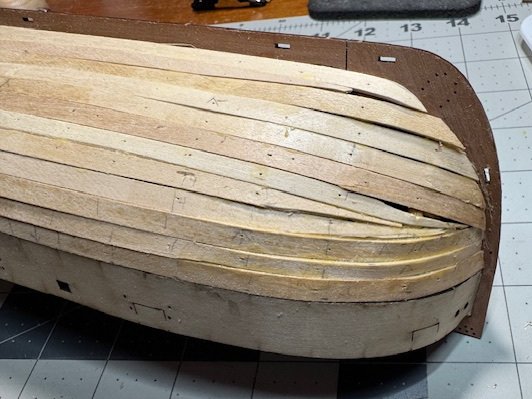
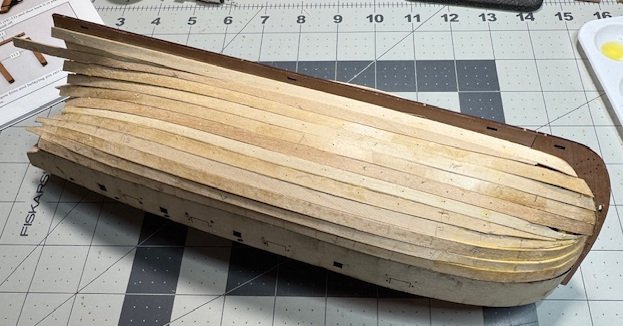
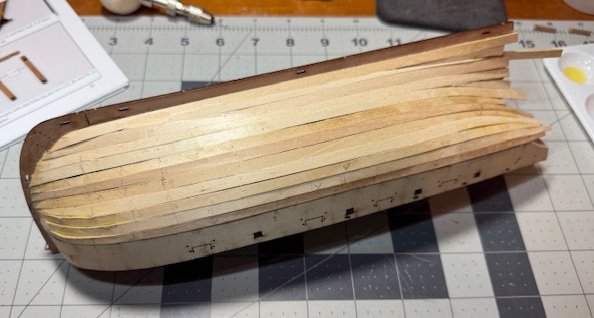
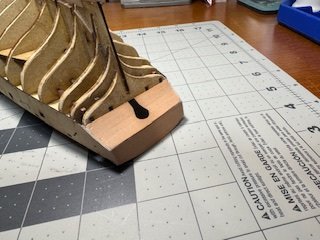
I continued cutting the rabbets. In this picture you can see how cutting angles on the corners of the keel and keelson created a place for the edge of a plank to rest when the two pieces are joined. At the bow, the angle of the planks to the stem gradually changes from 45 to 90 degrees. The top end of the stem has a flat-bottomed rabbet to receive the ends of those planks. With the rabbeting all done, the keel and stem pieces were glued to the backing board.
-
I'm starting on carving the rabbets to receive the plank ends. First marking 1/32" from either side of the edges of the keel and stem pieces, then starting to sand down, forming half of the 90 degree socket at a 45 degree angle that'll receive the plank ends when the two keel pieces are joined.
-
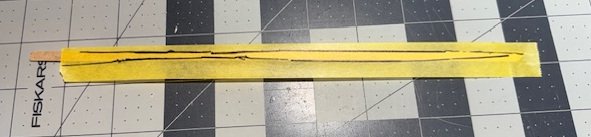
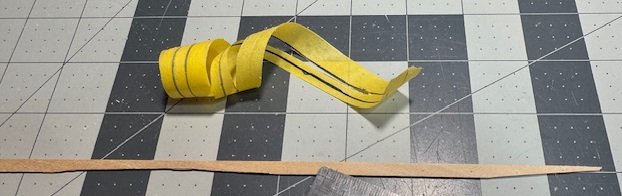
I hope to improve my planking skills by doing the Nautical Research Guild's 18th-Century Merchantman Half-Hull Planking Kit. The first challenge turned out to be gluing the plan to a piece of foamboard. It was my first time using spray adhesive, and I discovered that there's no room for error - once the glued paper touches the glued foamboard, it's pretty well stuck. It did seem for a few seconds that I might be able to carefully peel the paper off and reposition it, but in no time I had completely destroyed my paper. Luckily, I was working with a copy of the original plans. I was able to make another copy and try again. This time I stuck the left half of the paper in place with post-its, then folded the right half back over it. I sprayed the back of the right half and the right half of the backing board, waited a minute, then very carefully unfolded the right side and smoothed it down starting from the fold. Then I folded the left half over the right and repeated the process. It worked so much better. (No pictures, since the plans are proprietary.)
-
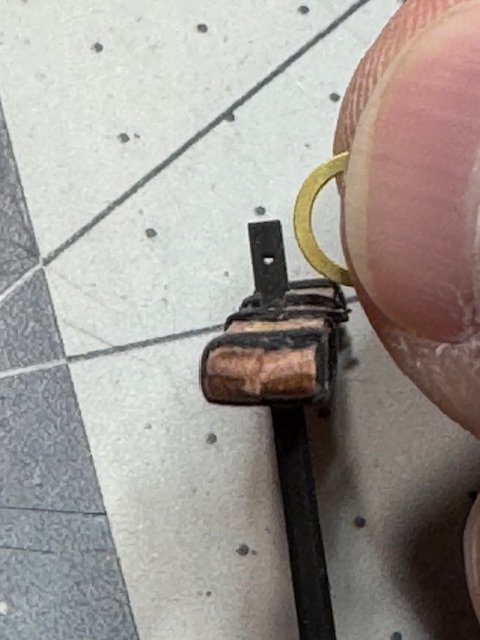
Working on the anchors, I'm seeing a small problem. Maybe I'm looking at the wrong rings or the wrong holes, but it doesn't seem that the provided anchor rings are going to fit through the holes in the anchors. I can probably make up some rings with wire. It just seems odd.
-
I'm skipping ahead to some tasks that don't require the planking to have been done, and cannot get over how tiny things are. Like the cannons.

-
I've changed my mind. I want to learn to plank better and redo all or most of the planking for Sherbourne, so I can feel proud of the work. To that end, I've put Sherbourne's planking on hold for now, and ordered the NRG's 18th-Century Merchantman Half-Hull Planking Kit to improve my planking. After I've finished that, I'll reconsider Sherbourne's planking. Meanwhile, I will probably jump ahead to some tasks that don't require the planking to be done, like assembling things that will eventually go on deck.
-
Welcome!
-
I just finished first planking on the Vanguard Sherbourne model, and I too bought a pin pusher online only to find it way too big for the TINY nails (this one). I ended up using needle nose pliers to push the nails in. It got the job done, but I sure bent a lot of nails along the way. It seems like there must be a tool that would work better for this.
-
I've installed the final plank of the first planking. I wish it looked better, but sanding and the second planking should hide a lot of things, right? 🙂 I did some reading at the Model Ship World framing and planking articles before starting, but still had a hard time shaping the planks to lie flat along the bulkheads near the bow. A technique I saw in another build log worked really well for me, though, using tape to transfer the shape of the final gap to trim a plank to fit. Here's how things look now. I still need to trim the stern ends of the planks and sand thoroughly.
-
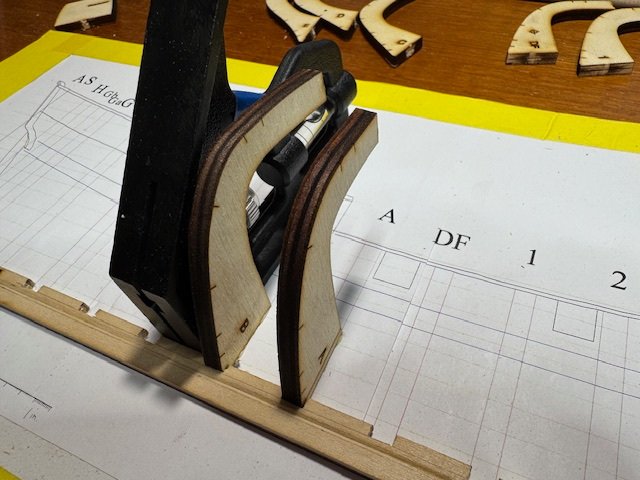
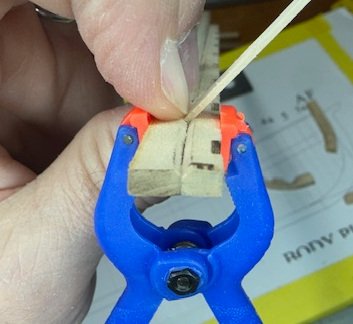
I'm also using an electric plank bender, but when making hockey-stick style bends, I use rubber-tipped clamps to hold the plank in place while I apply the heat, and I need a little extra room so I don't melt the clamp tips.
- 129 replies
-
- 1
-
-
- vanguard models
- Sherbourne
- (and 1 more)
-
It's there now! Thanks.
-
I joined the NRG on the 18th and updated my profile to select the "I'm an NRG member" option and enter my member #. But I'm not seeing the NRG logo on my posts, like I see on so many others' posts. E.g. at https://modelshipworld.com/topic/37210-are-there-better-tools-for-drilling-tiny-holes/page/2/#comment-1067451, I'm not seeing the NRG logo on the left. Is there something else that I need to do?
-
I believe I can summarize the responses to my question, "Are there better tools for drilling tiny holes", as "Yes, there are many better tools, and everyone has their own favorite. Most seem to prefer HSS (high speed steel) bits with manual drills/pin vices, though a few use powered tools, at least in some cases. For example, per @wefalck, 'if you can put the part under a (quality) drill-press and hold it safely, this may be a good option for even the smallest drills. Otherwise, use a pin-vise or similar'".
-
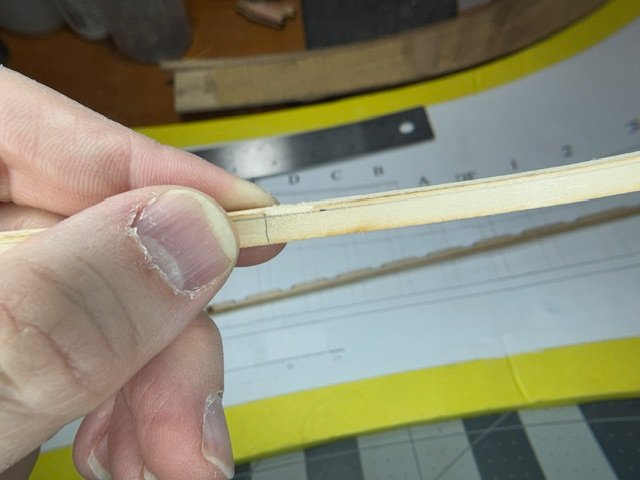
I'm just a few planks in on this model, and struggling. I needed to bend the bow ends of my planks down like hockey sticks to get them to lie flat there, and they wouldn't bend that much, so my first couple planks are sticking up from the bulkheads along one edge. On the fourth plank I just cut the bottom edge straight, ending the plank in a long thin point short of the stem, so that the next planks wouldn't have to bend nearly so much. I'll see today how well that works. One thing I did figure out. It's a lot easier to make bends near the eventual end of the plank if I leave some excess attached until after I've done the bending.
- 129 replies
-
- 2
-
-
- vanguard models
- Sherbourne
- (and 1 more)
-
Welcome!
-
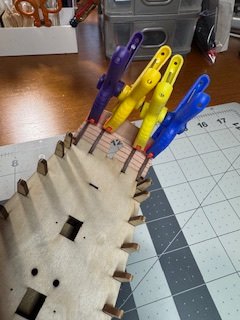
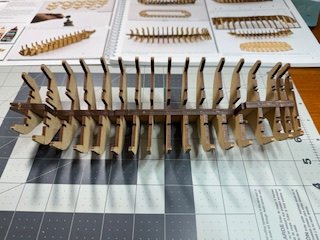
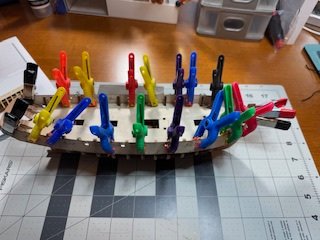
After fairing the bulkheads, it was time to add the prow and keel: Then two inner bulwarks were glued around the false deck. I first shaped them with an electric plank bender. The bulwarks were slightly longer than needed at the stern, and so needed to be trimmed down even with it. One comment about the instructions here. I knew from other build logs that I'd be snapping off the tops of the bulkheads later (p. 25 of the instructions), so I didn't want to glue them to the bulwarks. As far as I could see, the instructions here (pp. 10-11) didn't mention it. So, thanks again for the build logs!


-
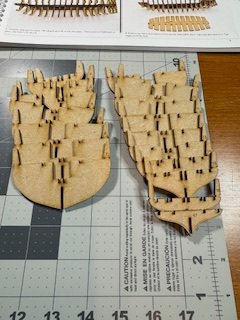
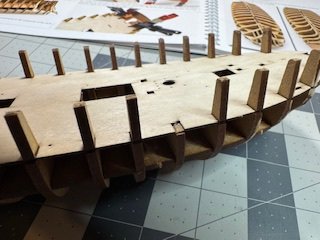
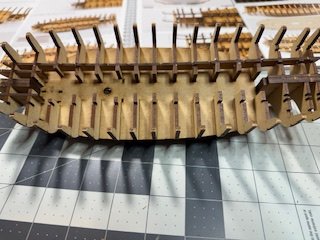
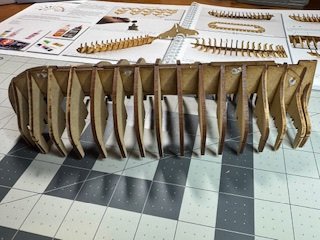
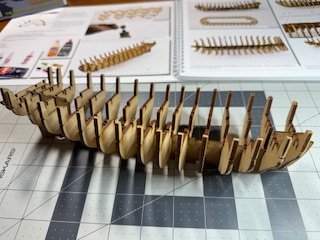
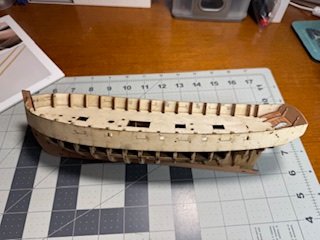
I've finished the framework/skeleton that the outside of the hull will be built onto. Here are a few photos, but honestly, they look about the same as the (copious) photos in the instructions. One thing the instructions didn't mention or show was how easy it was to accidentally snap off the top tab from one of the bulkheads while installing the false deck. I glued the tab back on. (I had seen other build logs and knew I'd be snapping them all off eventually, so I didn't sweat it much.) The stern counter and transom glued in place. Next up: fairing the bulkheads, prow, keel, and two bulwarks.