DONATION DRIVE - SUPPORT MSW - DO YOUR PART TO KEEP THIS GREAT FORUM GOING!
×


Stuka
-
Posts
137 -
Joined
-
Last visited
Content Type
Profiles
Forums
Gallery
Events
Everything posted by Stuka
-
 Looking good Nick, And good luck !
 -
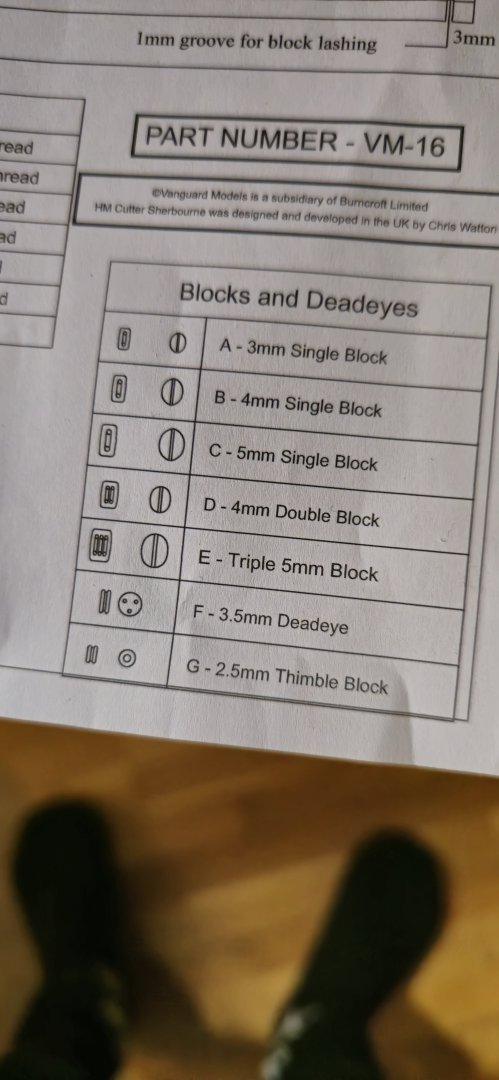
So I have been adding PE parts to some of the parts in the meantime but I still cant find this part and Im wondering if im supposed to make this part myself? even though it says all blocks are included in the kit. If anybody knows what to do please reach out as im at this point stuck. Was I meant to order these triple 5mm blocks seperately or something?
.thumb.jpg.3ea30cb1aad884f61e822709ba4c1740.jpg)
-
Okay so I for some reason got stuck on that the knot should be at the top thinking that the top edge was the one pointing inward to the dowel. So now the first blocks have been added. Still cant find the 5mm triple block 🤔
- 129 replies
-
- 3
-

-
- vanguard models
- Sherbourne
- (and 1 more)
-
Mini update "Stuck" Firstly even after reading Chris instructions on how to tie the two single blocks to the bowsprit I cant visualise how its supposed to look. One knot around the block and then am I supposed to make a knot on the bowsprit and another one connected to the last block? I just cant quite understand how. Also I cant for the life of me find this E block "Triple 5mm block" its not listed in the parts list and I looked through the bags and cant find anything. Anybody know where I can find it?

-
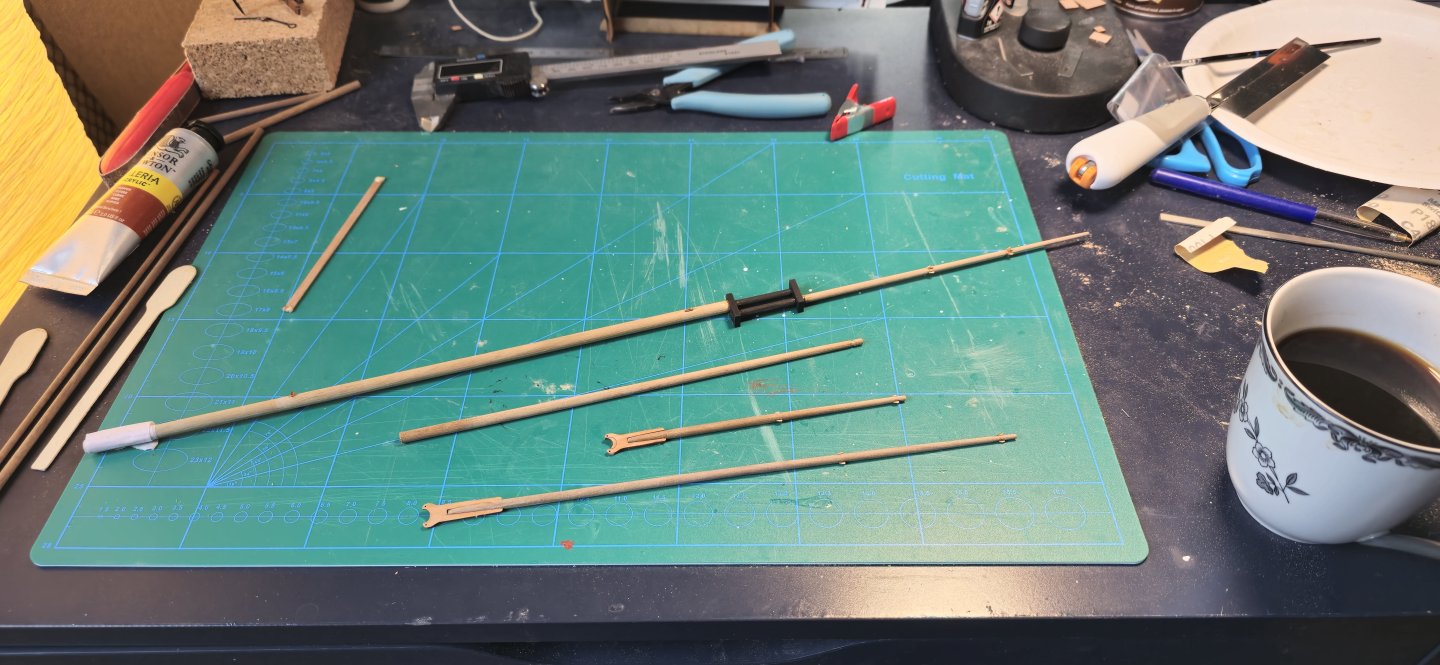
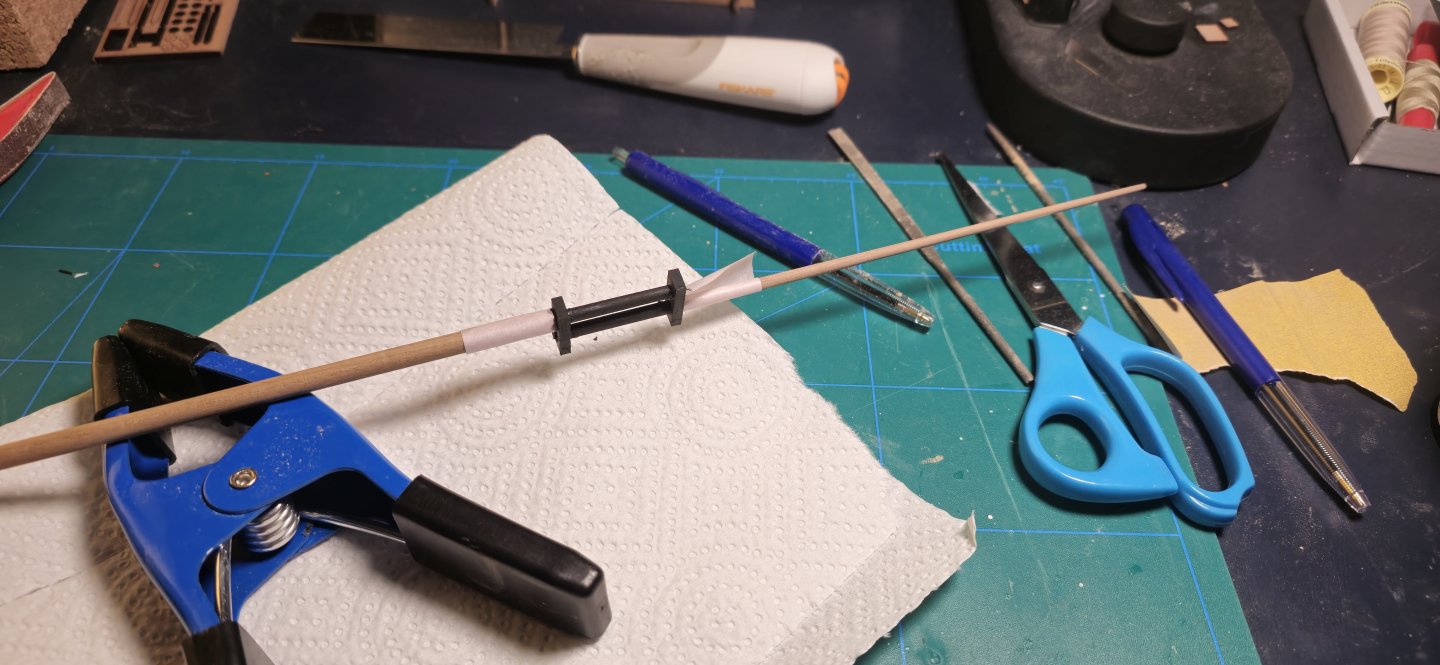
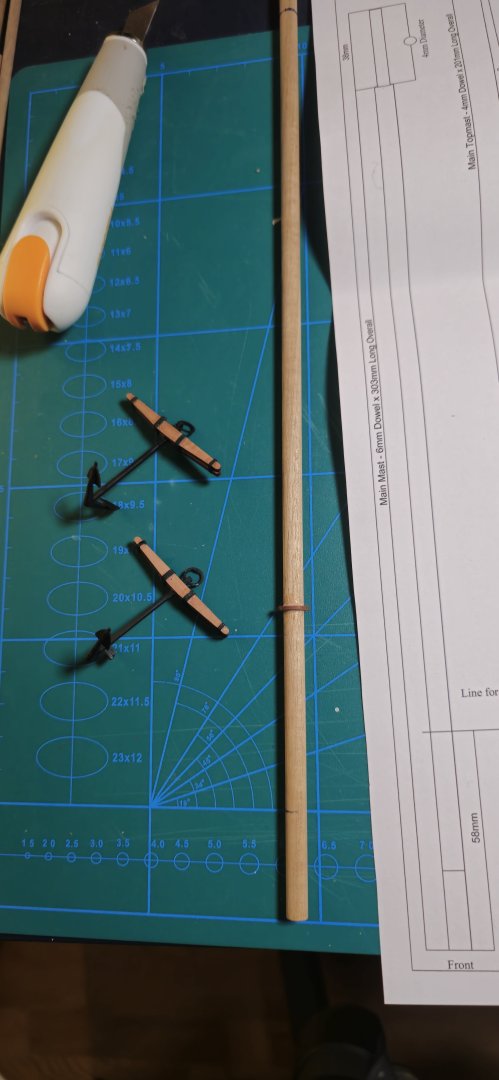
Hello again, My hand is getting better and with some motivation I have done a little work on the bowsprit, boms and main mast. Still got work to do with adding eyeholes etc but its progress. I have found myself in a little trouble with how to tie the blocks to the (yards, spars etc) But I might have gotten myself an answer by Chris in Palmerits build log so if anybody get into the same situation know where to look. To get the grove on the bowsprit I just put the dowel in a screwdriver with some masking tape protecting the base. While I used sandpaper first for the shape and finally took out my needlefile and shaped the grove. I have said this alot but the rigging is a dreaded step for me. knots have always been a challenge for me but I have to get over it just as I thought the planking was super dreaded before, in the end just another problem to solve. As im nearing the end and to add some motivation for me to finish this one I actually put up an order on the Speedy, So after this one my plan is to start a build log on that one.
- 129 replies
-
- 6
-
-
- vanguard models
- Sherbourne
- (and 1 more)
-
Thanks for the input. Alright then so its mostly about the visuals then
-
Hello Im putting together an order on the Vanguard speedy and I see that its optional to buy Walnut blocks that replace the standard ones in the kit. What advantages do these have over the normal ones anybody know?
-
Thanks for the suggestion Craig. Il try something like that with the yard and broms to get them done.
- 129 replies
-
- 1
-
-
- vanguard models
- Sherbourne
- (and 1 more)
-
Hello Sorry for the delays, Im trying to shape the masts and spars and that is going okay I guess. The main mast I could put the dowel into a screwdriver and shape it with sandpaper. As for the spars I dont know if I can do the same without breaking one end considering that both ends are supposed to be small on each ends of the dowel i might not be able to risk it. I did have a mishap in the form of me slipping on ice and breaking some fingers a week ago and that makes my modeling harder now that im limited to one hand and a couple of fingers. However I did manage to paint the main mast head today so I hope I can get on track and finish this model 🙂
- 129 replies
-
- 8
-
-
- vanguard models
- Sherbourne
- (and 1 more)
-
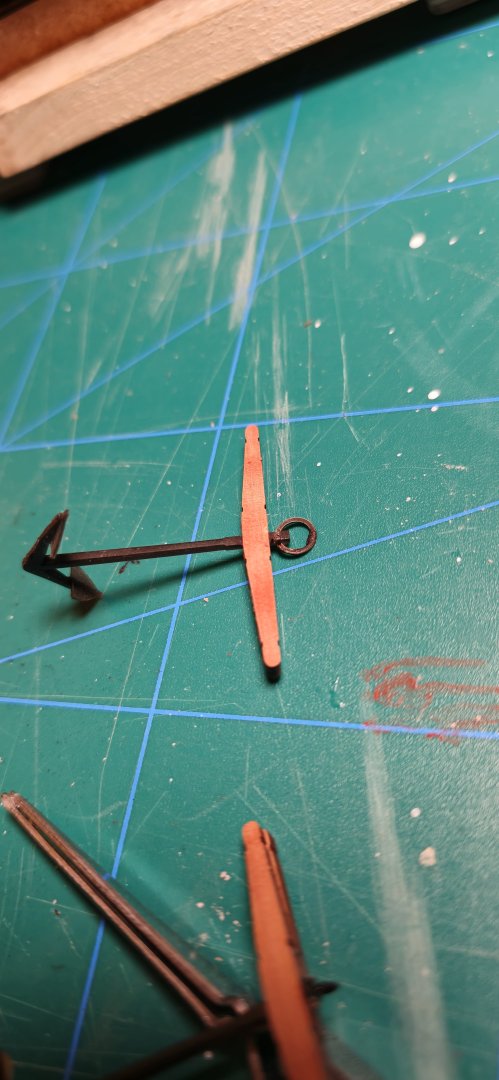
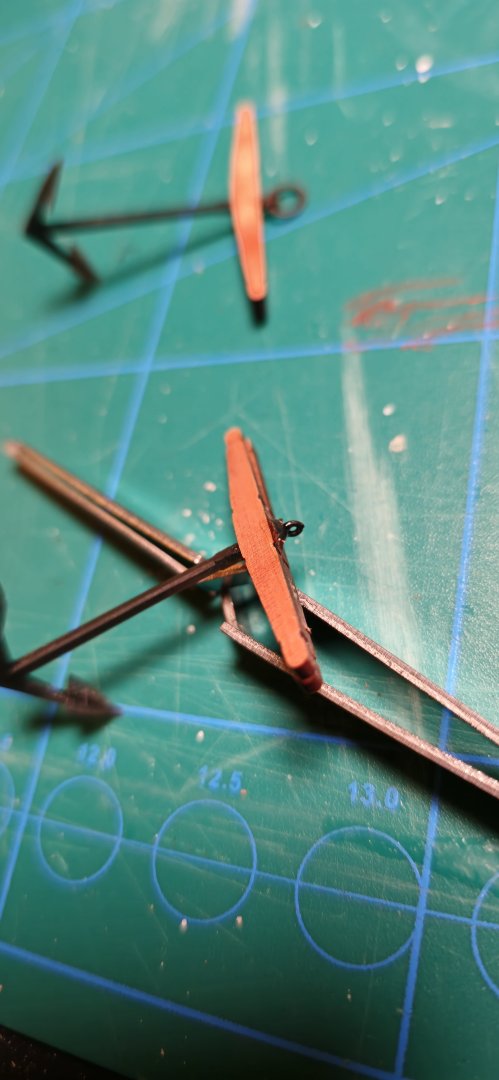
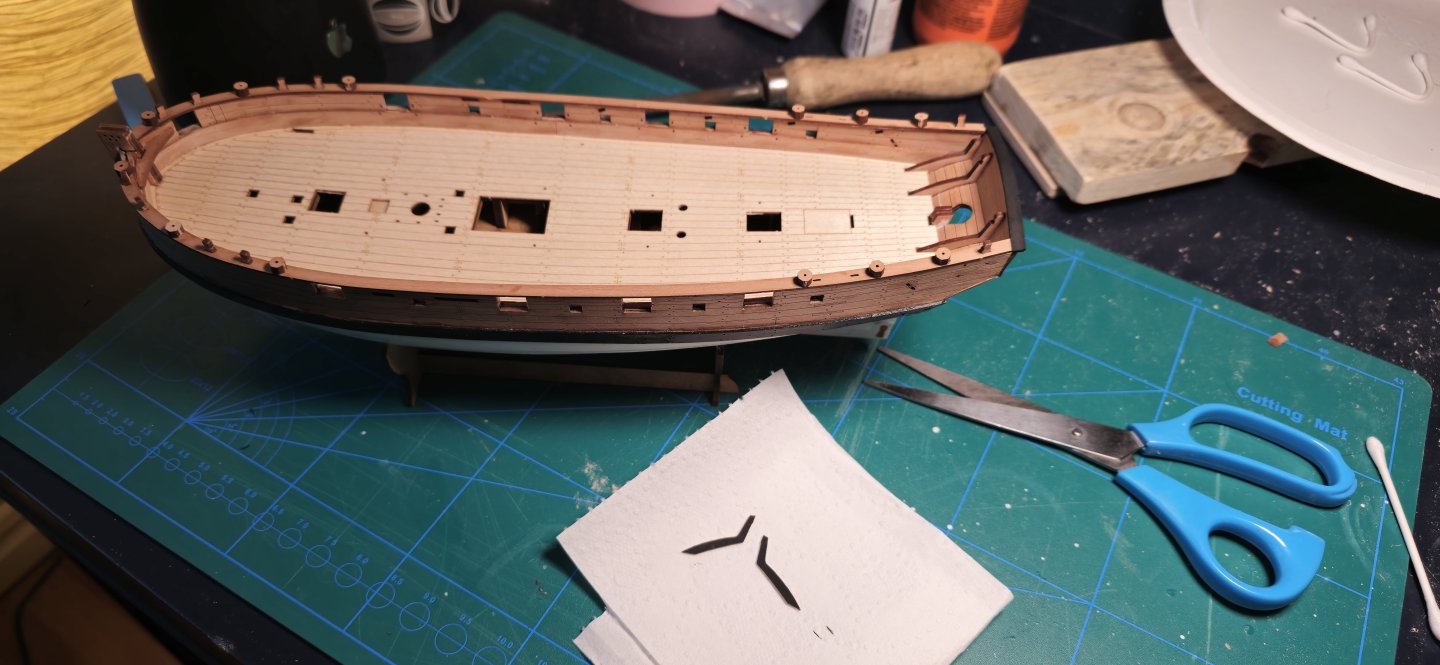
Anchors with the supplied paperstrip is done, I just eyed the width and cut very thin strips with my scissor afterward I used CA gel on on the top side and just attached the strip. I then let the glue dry for like 2 mins before I applied glue on all other 3 sides and then I just "dragged" the strip and attached it as I went around the Anchor while cutting off the excess on the end. Now for the hard part. Doing the masts and rigging is a big challange for me. I have very little experience tying good knots etc so this will be challenging to say the least.
- 129 replies
-
- 6
-
-
- vanguard models
- Sherbourne
- (and 1 more)
-
Nice work Palmerit, Im following partly of your log to build my mast on my Sherbourne too 👍. A question regarding the main mast the part that is 4mm on the 6mm dowel, That is just sanded down on the same dowel right? No part that is just cut and glued on seperately. Im juts double checking so I dont misunderstand or do something wrong here
-
Agreed, I just have been to lazy to look into my local hardware stores to find it, But it is the bettter approach for the future. This time I only used a sharp scalpel and worked my way around each corner carefully until eventually I could take it off by hand carefully.
-
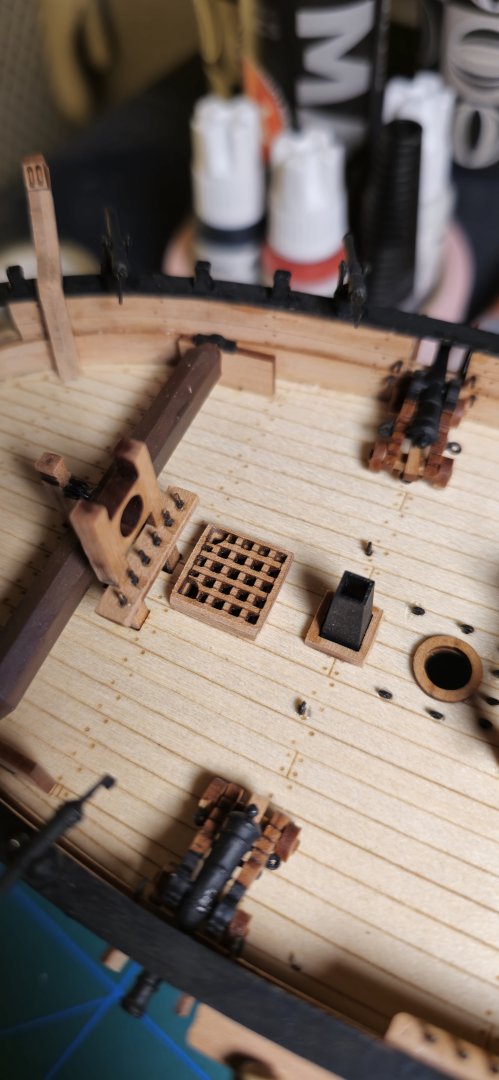
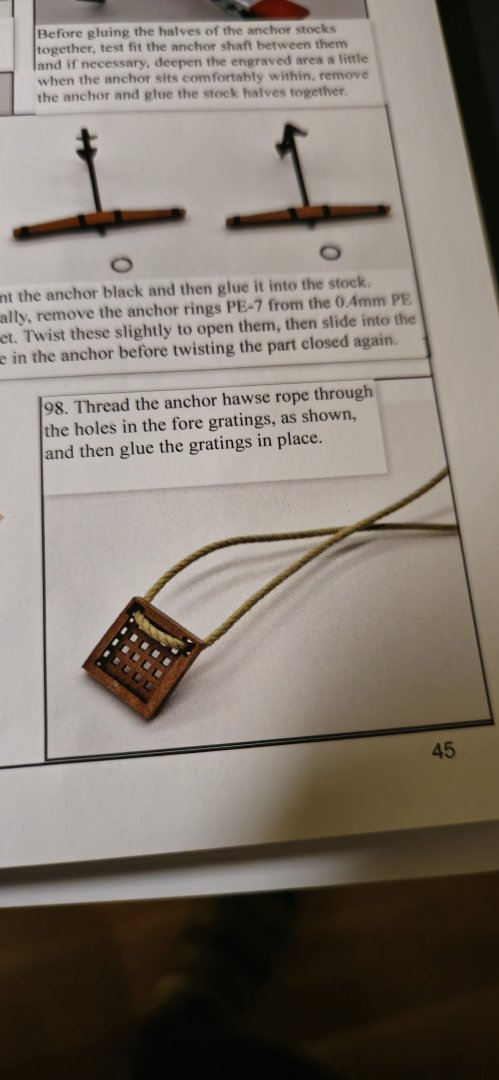
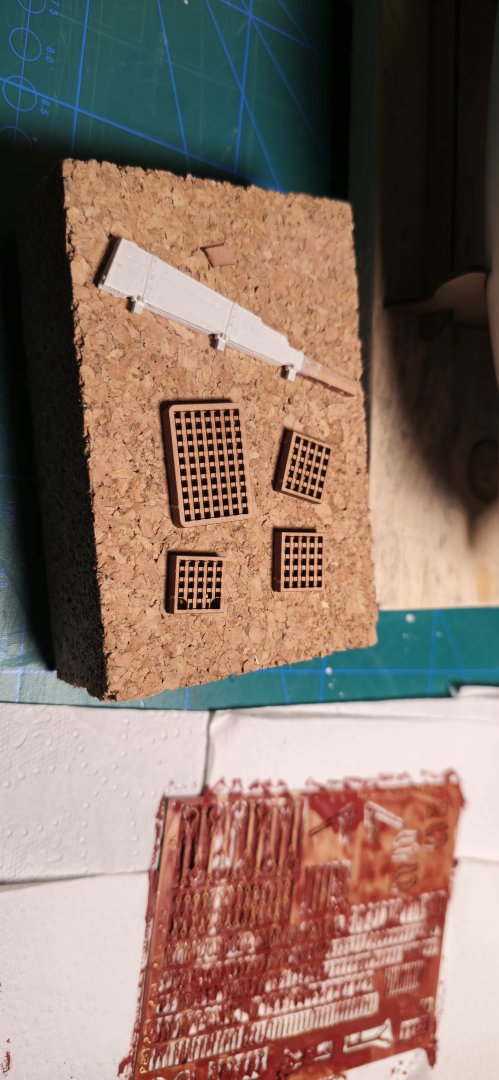
Hello again Have been abit busy with some trips, also had problems with my car and now its the holiday season and all so have not done to much, I did also get a little discouraged because me gluing on the foregratings before the rope was attached and I was unsure of how to procede the best. But the other day I tried to carefully get the gratings loose with a knife and it worked. So now Im back on track again 🙂


- 129 replies
-
- 12
-
-
- vanguard models
- Sherbourne
- (and 1 more)
-
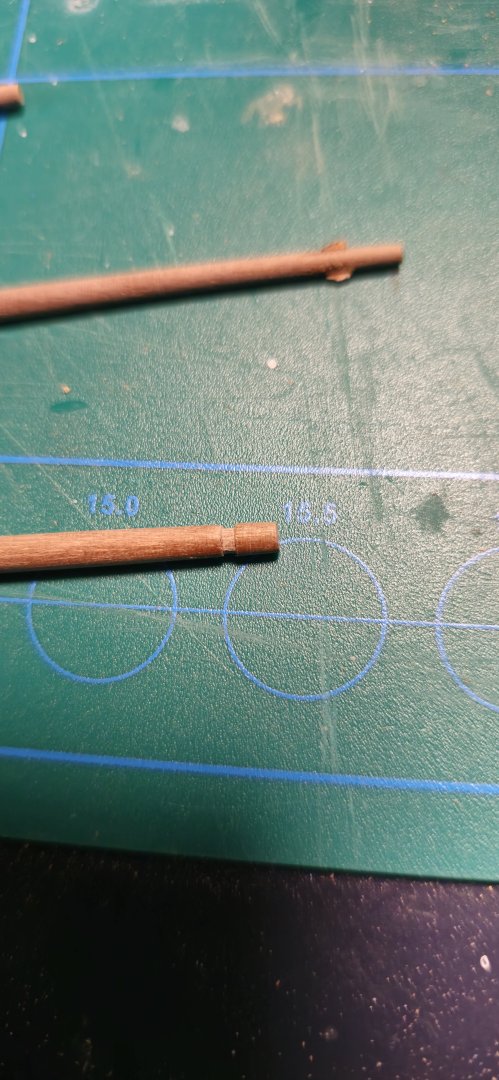
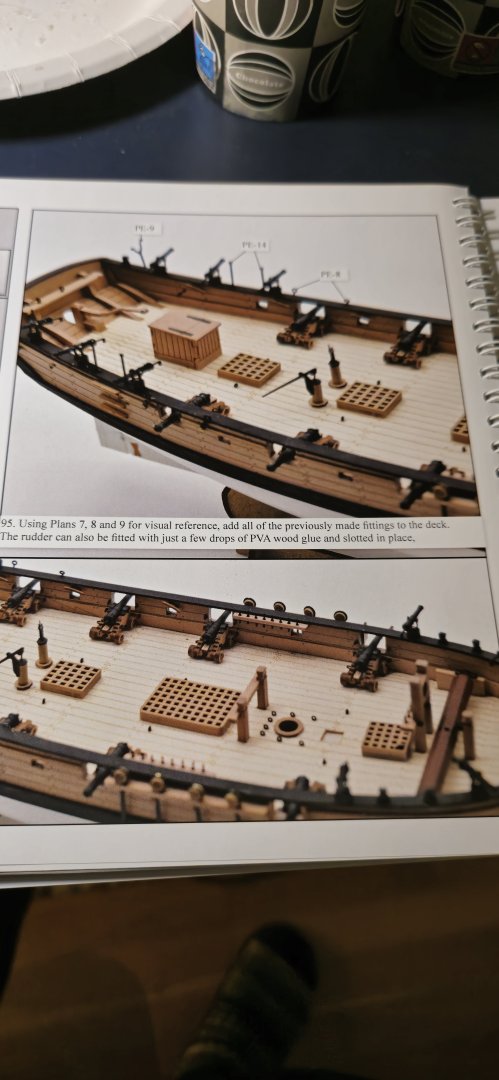
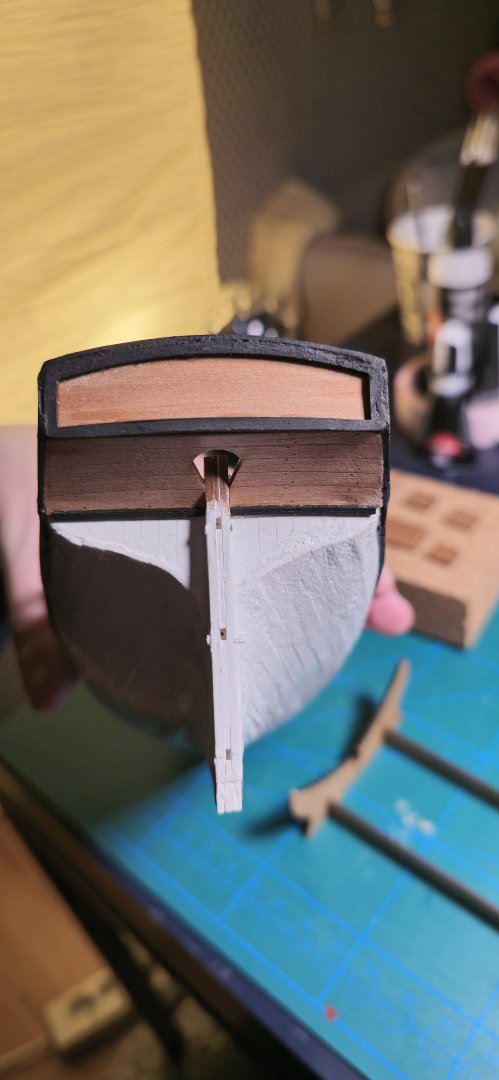
Hello again I have now almost finished all the deck details, Just the ancors remain now pretty much and some additional black coatings., Fitting the swivel guns went very smooth and without trouble. However trouble began today when I was fixing the holes on the ancors. Not only did my ancor break during the assembly so I had to reglue the resin parts together again which went fine. But now as I was fixing the holes for the ring on top of the ancor one of the top parts just broke apart and is impossible to reglue. feeling a bit demorilised I took one of the spare brass keyholes on and modified it and after glued it on. acting as a holder for the ring so fingers crossed I can save this. Another less fun thing to say. Some mild frustrations are growing on my side with the instructions, about the foregratings that are supposed to be glued on with a thread through it. I again followed the instructions and a couple of pages before It says that all deck fittings are now to be added and glued I presume. Unless I severly misunderstood the instructions though when I read it I thought all of the deck fitting where supposed to be glued on and added when it said I should add them. Cause the pictures even show several before photos with all the fittings attached including this part that I have troubles with now. This is not the first time an annoying error happends even though I follow the instructions as told, Before it was with the pump dowel material which in the instructions wrongly state that 25mm of dowel is to be used per pump but in reality its only 15mm. Which means if you followed the instructions one mast is going to be 2cm short. I fully understand that these kits are developed by Chris alone I assume the instructions are written by Chris and somebody that helps him. But I would hope these instruction errors can be corrected for the future so rookies like me dont have to make these errors by just following the instructions cause it just feels very uneasy as if I cant trust the instructions unless I have looked through the future pages and all the plans to constantly double check whats written. I overrall love this kit and would still recommend it for a complete beginner like me but I hope the instructions can have a second look at them sometime and some errors corrected. And I mean nothing to try and put anybody or the model in a bad light im just trying to let some steam off with my frustrations as of now. I will probably take a break for today atleast on the build but I will finish it just need a little positive energy first 👍

- 129 replies
-
- 4
-
-
- vanguard models
- Sherbourne
- (and 1 more)
-
Hello and welcome, I would suggest you post a build log with pictures and people with experience on the model can help you 100% 🙂
-
I am Swedish too and while I agree its harsh with the extra toll fee. In the end there is nothing to do about it and I still think Vanguard models are worth it even if I have to pay 1/3 extra Toll.
-
Welcome and Hello 🙂 I would recommend the Sherbourne as you will be probably less likely to break the parts of the Sherbourne due to the high quality of the material. Then all wooden ships require you of course to be careful and mind your steps but to my own experience I think the Sherbourne is forgiving. Finally I saw that you talked about a keel jig, For a ship like Sherbourne due to its small size I dont think you need one all the work I have done on it has been holding it in my hands or having it sitting in its build craddle so I wouldnt use money on that, Perhaps on a future much bigger model.
-
Thanks for the suggestion Craig, I will see how I will solve this issue 🙂
- 129 replies
-
- 1
-
-
- vanguard models
- Sherbourne
- (and 1 more)
-
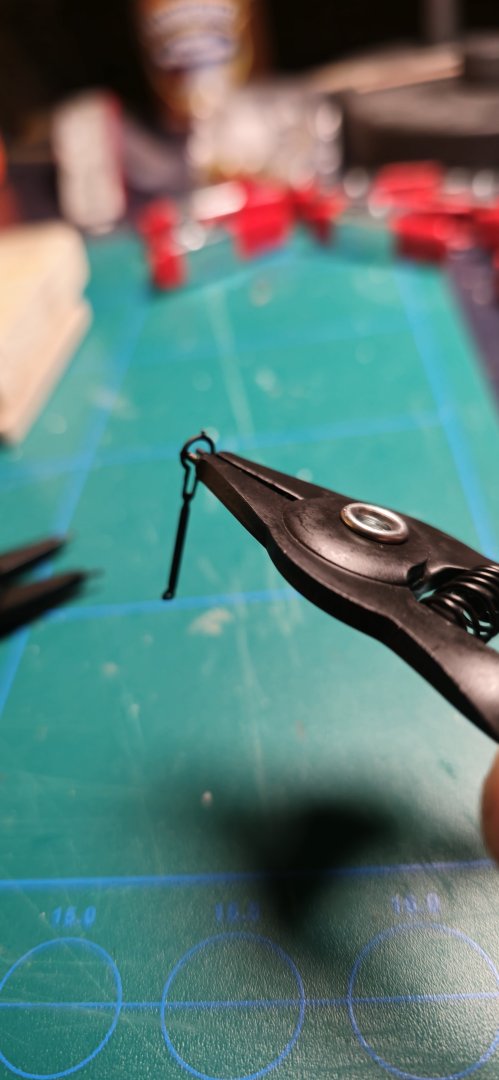
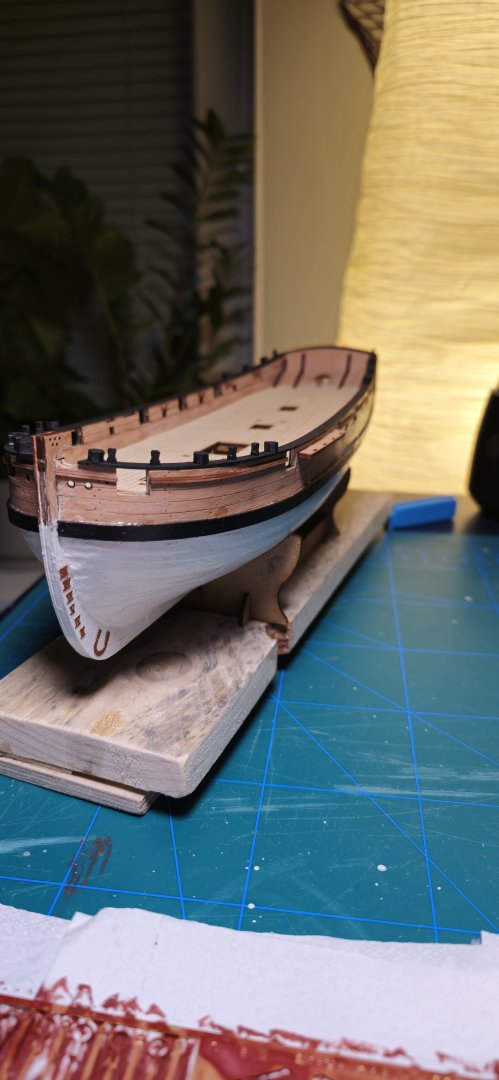
Alot of work has been done now on the deck details, Cannons have been assembled and painted, Deck details like the chimney, deck hatches, companionway have been glued down, and the million eyeholes which had my me fiddling for a long time have been mostly added. Along the way as I was drilling the dowels for the deck pumps I accidently broke two of the drillbits one of which is the 0,8 mm Im certain off. Probably just to me mishandling it and drilling to far in and then with forceful movements so that was unfortunate but I still managed so far with the smaller and bigger ones. An error that happend was that I blindly followed the instructions on constructing the pumps so I made them 25mm long each. however on an unrelated note I read in Palmerits build log that Chris stated that they should be 15mm not 25mm that leaves enough wood left for some mast later. Im not entirely sure what exactly is affected but some mast is going to be 20mm to short so I hope it wont be ugly. Painting the main windlass for the Sherbourne I didnt have any wood colour so instead I just did a mix from the grecian paint set with red and black to gain this dark brown colour. For attaching the rudder since the fit was pretty tight I actually put in PVA glue in the slots and then gently very gently hammered it in place using the wooden handle from one of the old files so It fits like a glove now 👍. In case anybody has problem with fitting the deadeyes inside PE-5 I solved it this way I bought these mini lockring pliers cheaply and fit them inside and just worked my way around to expand the loop. Then I just fit the deadye and using the other plier I gently closed it around finally I did atleast use a tiny bit of CA gel to make sure it wouldnt accidently pop out or something. Next step will be gluing on the swivel guns that I have prepared now for assembly


- 129 replies
-
- 6
-
-
- vanguard models
- Sherbourne
- (and 1 more)
-
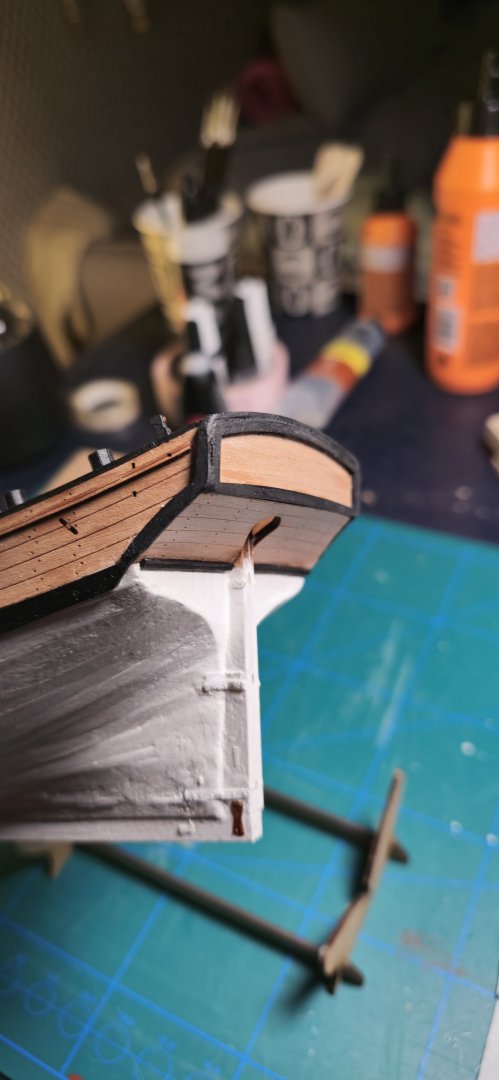
Hello Since Saturday, I have been painting the Gunwhales, swivel gun posts and timberheads black, precision work to say the least with my sometimes shaky hands. I also fit the stern transom rail and used some wood filler for the side rails after which I painted them black. After those steps I fit the bulwark rail which went well using tonnes of clamps 😁. Had to trim the rails by the bow by some mm or 2 for them to fit properly other than that no problems. Today for the first time I tried out my hand drill set that I got with the model and using it I drilled the holes for the gunport eyeholes having never used one I accidently drilled some holes through the entire bulwark (whoops) barely noticable though. Some time later the next step involved me attaching the 8 Cleats which was easy work using the tweezer but I gotta say wow these pieces are thin to handle. Added aswell the side channels with PVA after just a sanding touch. Finally I opened up my primer for the first use and figured I might aswell cover the entire side of the PE brass sheet so thats why I did I hope it looks good as long as the black colour later sticks im happy. Got one more side to prime in a couple of hours but thats work for the future🙂


- 129 replies
-
- 5
-
-
- vanguard models
- Sherbourne
- (and 1 more)
-
More work has been done, added the gunwhales which I did using CA glue due to the fact I found no good solution to using PVA. Because if I had used pins on the gunwhales I feel that I might had just slipped and broken the piece. Anyway back when I added the first bulwark I did so without a plank bender or using a good technique, that resulted in that the curve to the bow became how to say it "uneven?" so the gunwhales dont fit correct by the bow but they still fit good so it wasnt a huge problem. After the gunwhales I used a tiny amount of PVA glue to glue both the swivel gun posts aswell as the timberheads. Then I today took an old 4mm plank and trimmed it and bended it with my electric bender to get that nice curve so then I could glue it on the stern board. Finally I carefully painted the stern side timers aswell as the plank on top of the stern board.

- 129 replies
-
- 6
-
-
- vanguard models
- Sherbourne
- (and 1 more)
-
I have the speedy in my sights at the moment though, But Il see how things develop, Now that I started with vanguard models I feel reluctant to try another brand of models fearing that they are not up to the same standard, even though I wish someday to do ships of other nations besides the UK
-
Thanks Thukydides for the input, hopefully I will be good enough to do the Speedy as my next one 🙂 I see with all that experience you are building up I think your Duchess will turn out very nice. Also I agree on what you say about getting better on planking, I myself had to use quite some filler but if this model had not been painted over it had looked pretty bad so I myself must also get better at planking
-
Huh really? On Chris site its rated as a 3 while the adder is 2. Though of course I understand one shouldnt look blindly on the skill level on the paper. But I have also heard about the tricky bow planking for the Adder. Ovverall you are completely right im not gonna get anything new until my nice Sherbourne is finished but curiosity got the best of me so I made this post.
-
So as I have been now progressing with my sherbourne. Even though im far from done the thought has come to me whats next? So I am interested in perhaps doing Vanguards Speedy. But maybe thats to much in skill im not sure. Otherwise I have seen the Vanguard Brig adder or perhaps even the Amati/victory models Granado would be good? What do you guys think is a suitable second wooden model?
.jpg.4fa962bd05305de54b00d22fdac850c8.jpg)