Nick 843
-
Posts
91 -
Joined
-
Last visited
About Nick 843

-
 Nick 843 reacted to a post in a topic:
Christiania 1774 by TJM – approx. 1:67-1:64 – Danish Light Frigate based on Vanguard Models HMS Sphinx
Nick 843 reacted to a post in a topic:
Christiania 1774 by TJM – approx. 1:67-1:64 – Danish Light Frigate based on Vanguard Models HMS Sphinx
-
Zvr reacted to a post in a topic:
HM Armed Cutter Sherbourne 1763 by Nick 843 - Vanguard Models - 1:64
-
KurtH reacted to a post in a topic:
HM Armed Cutter Sherbourne 1763 by Nick 843 - Vanguard Models - 1:64
-
Nightdive reacted to a post in a topic:
HM Armed Cutter Sherbourne 1763 by Nick 843 - Vanguard Models - 1:64
-
Nick 843 reacted to a post in a topic:
Duchess of Kingston 1798 by Glenn-UK - Vanguard Models - 1:64 - Commission Build
-
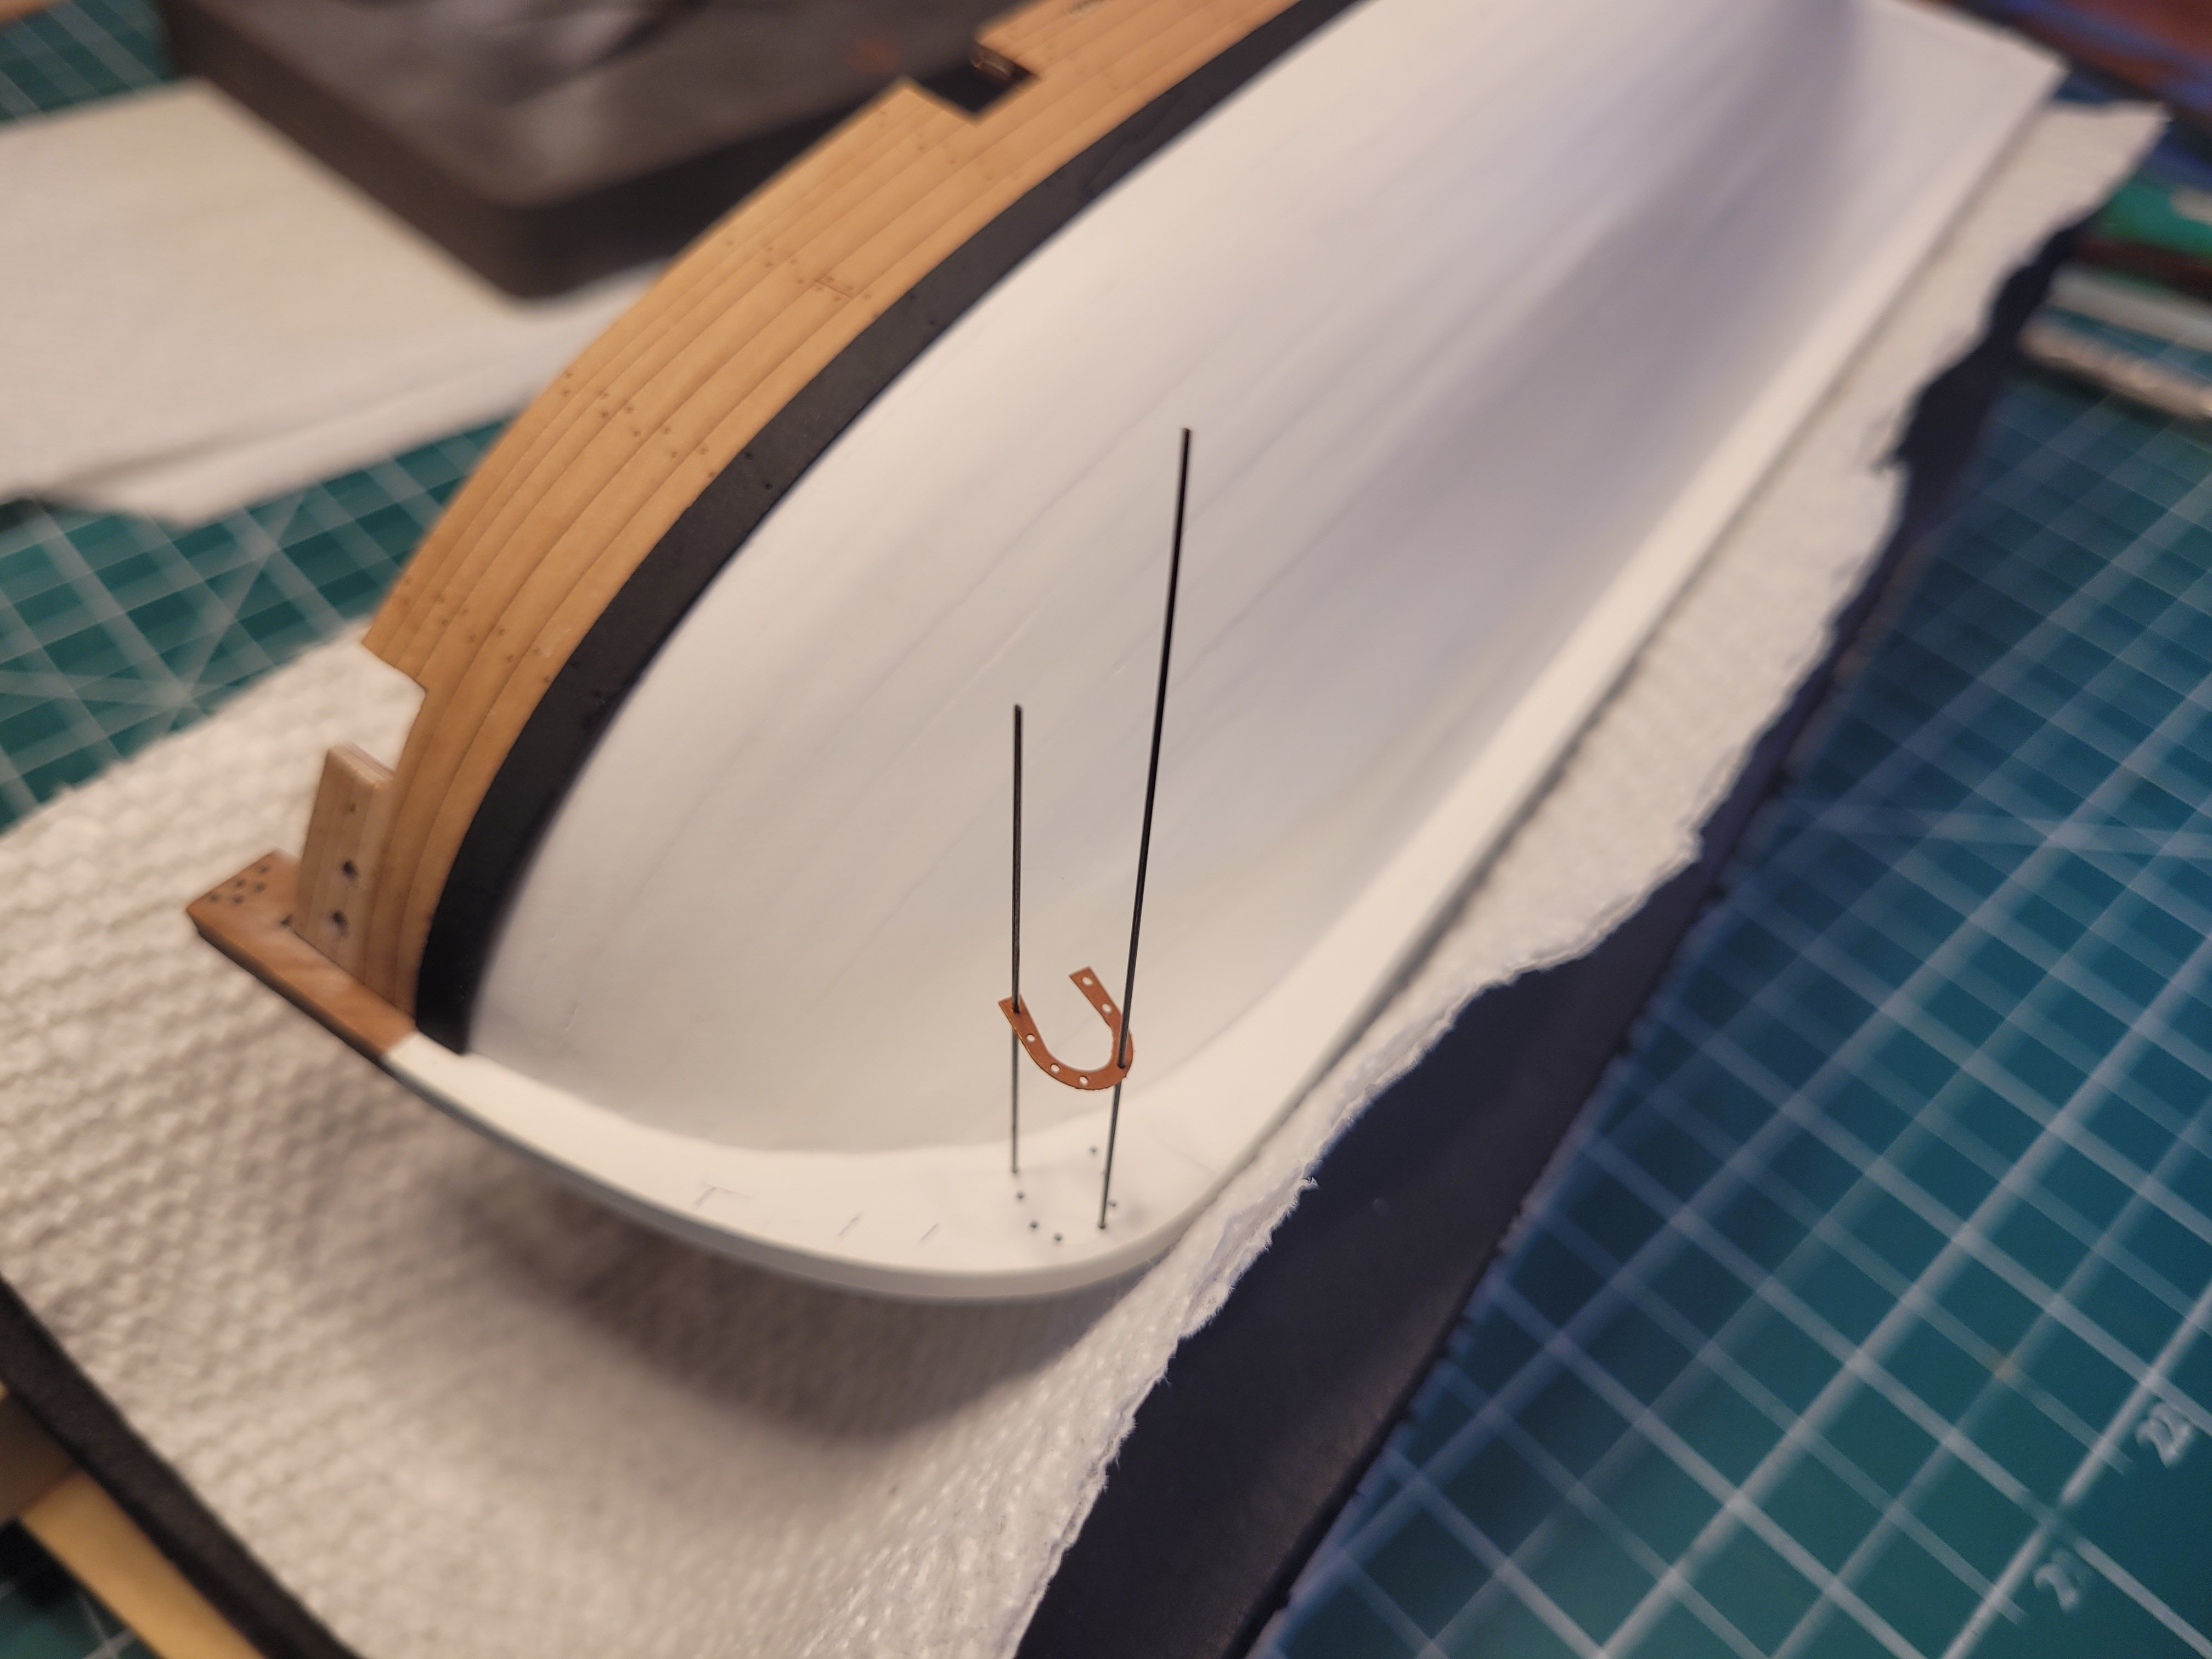
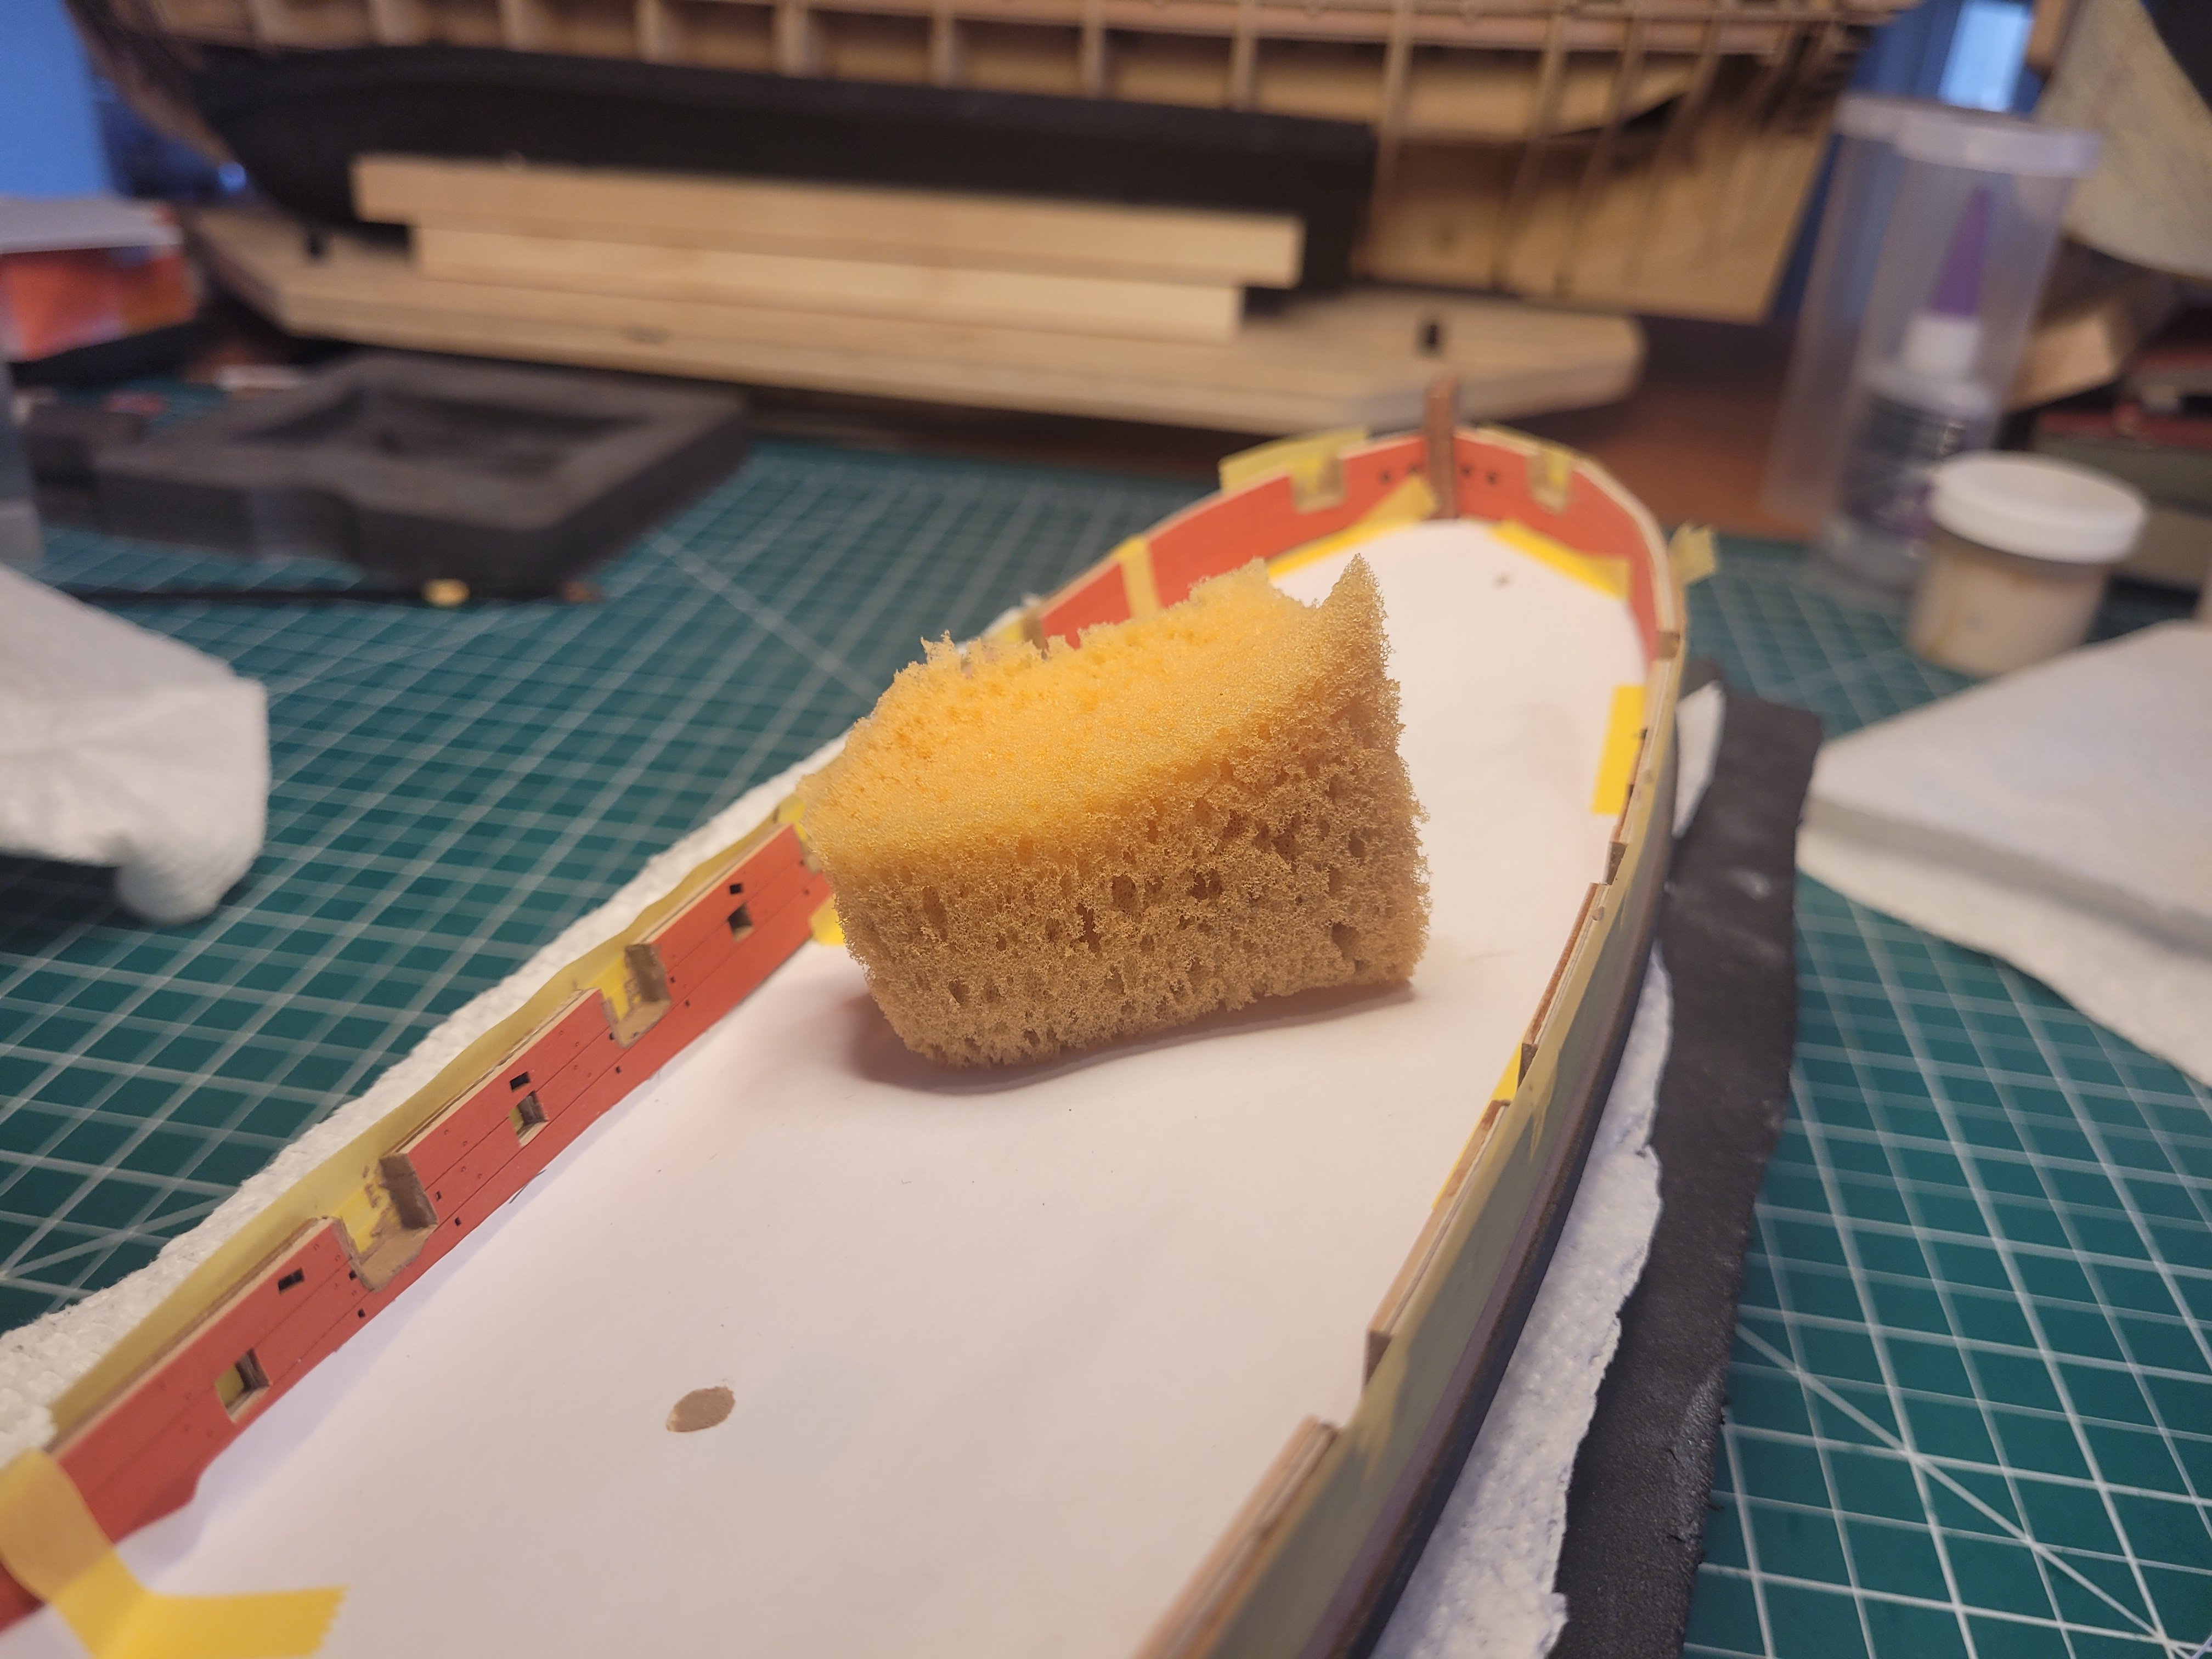
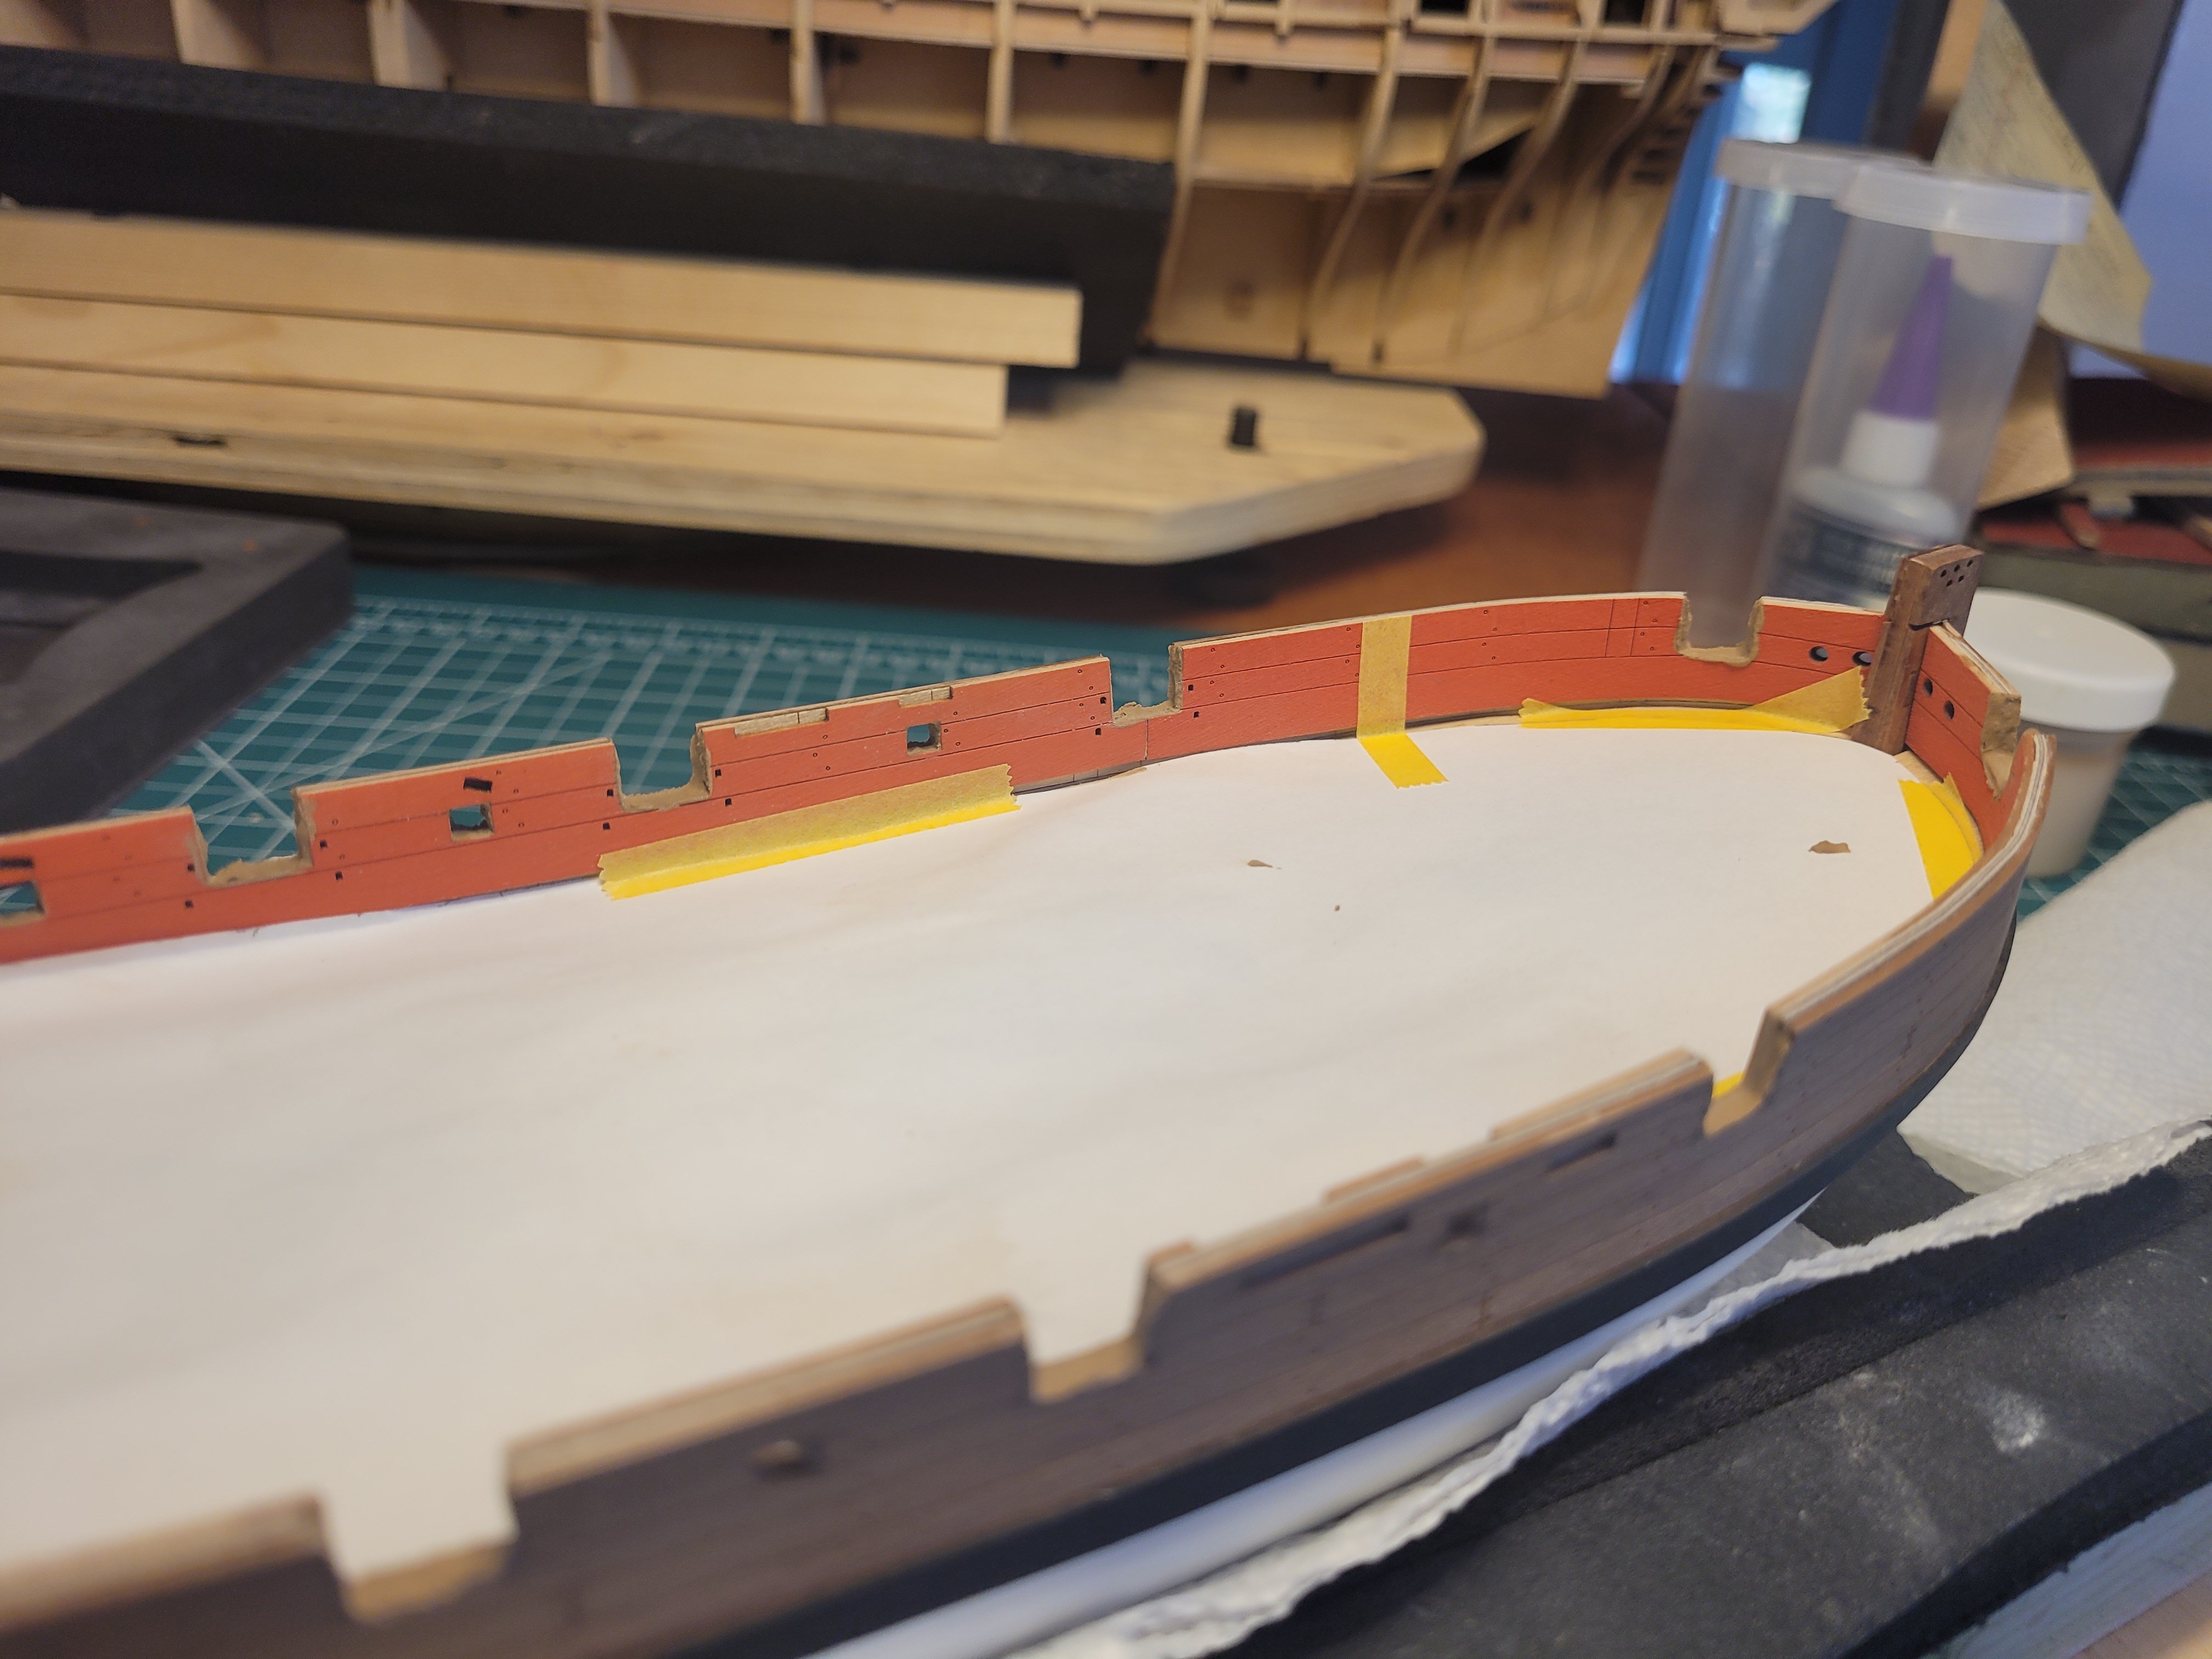
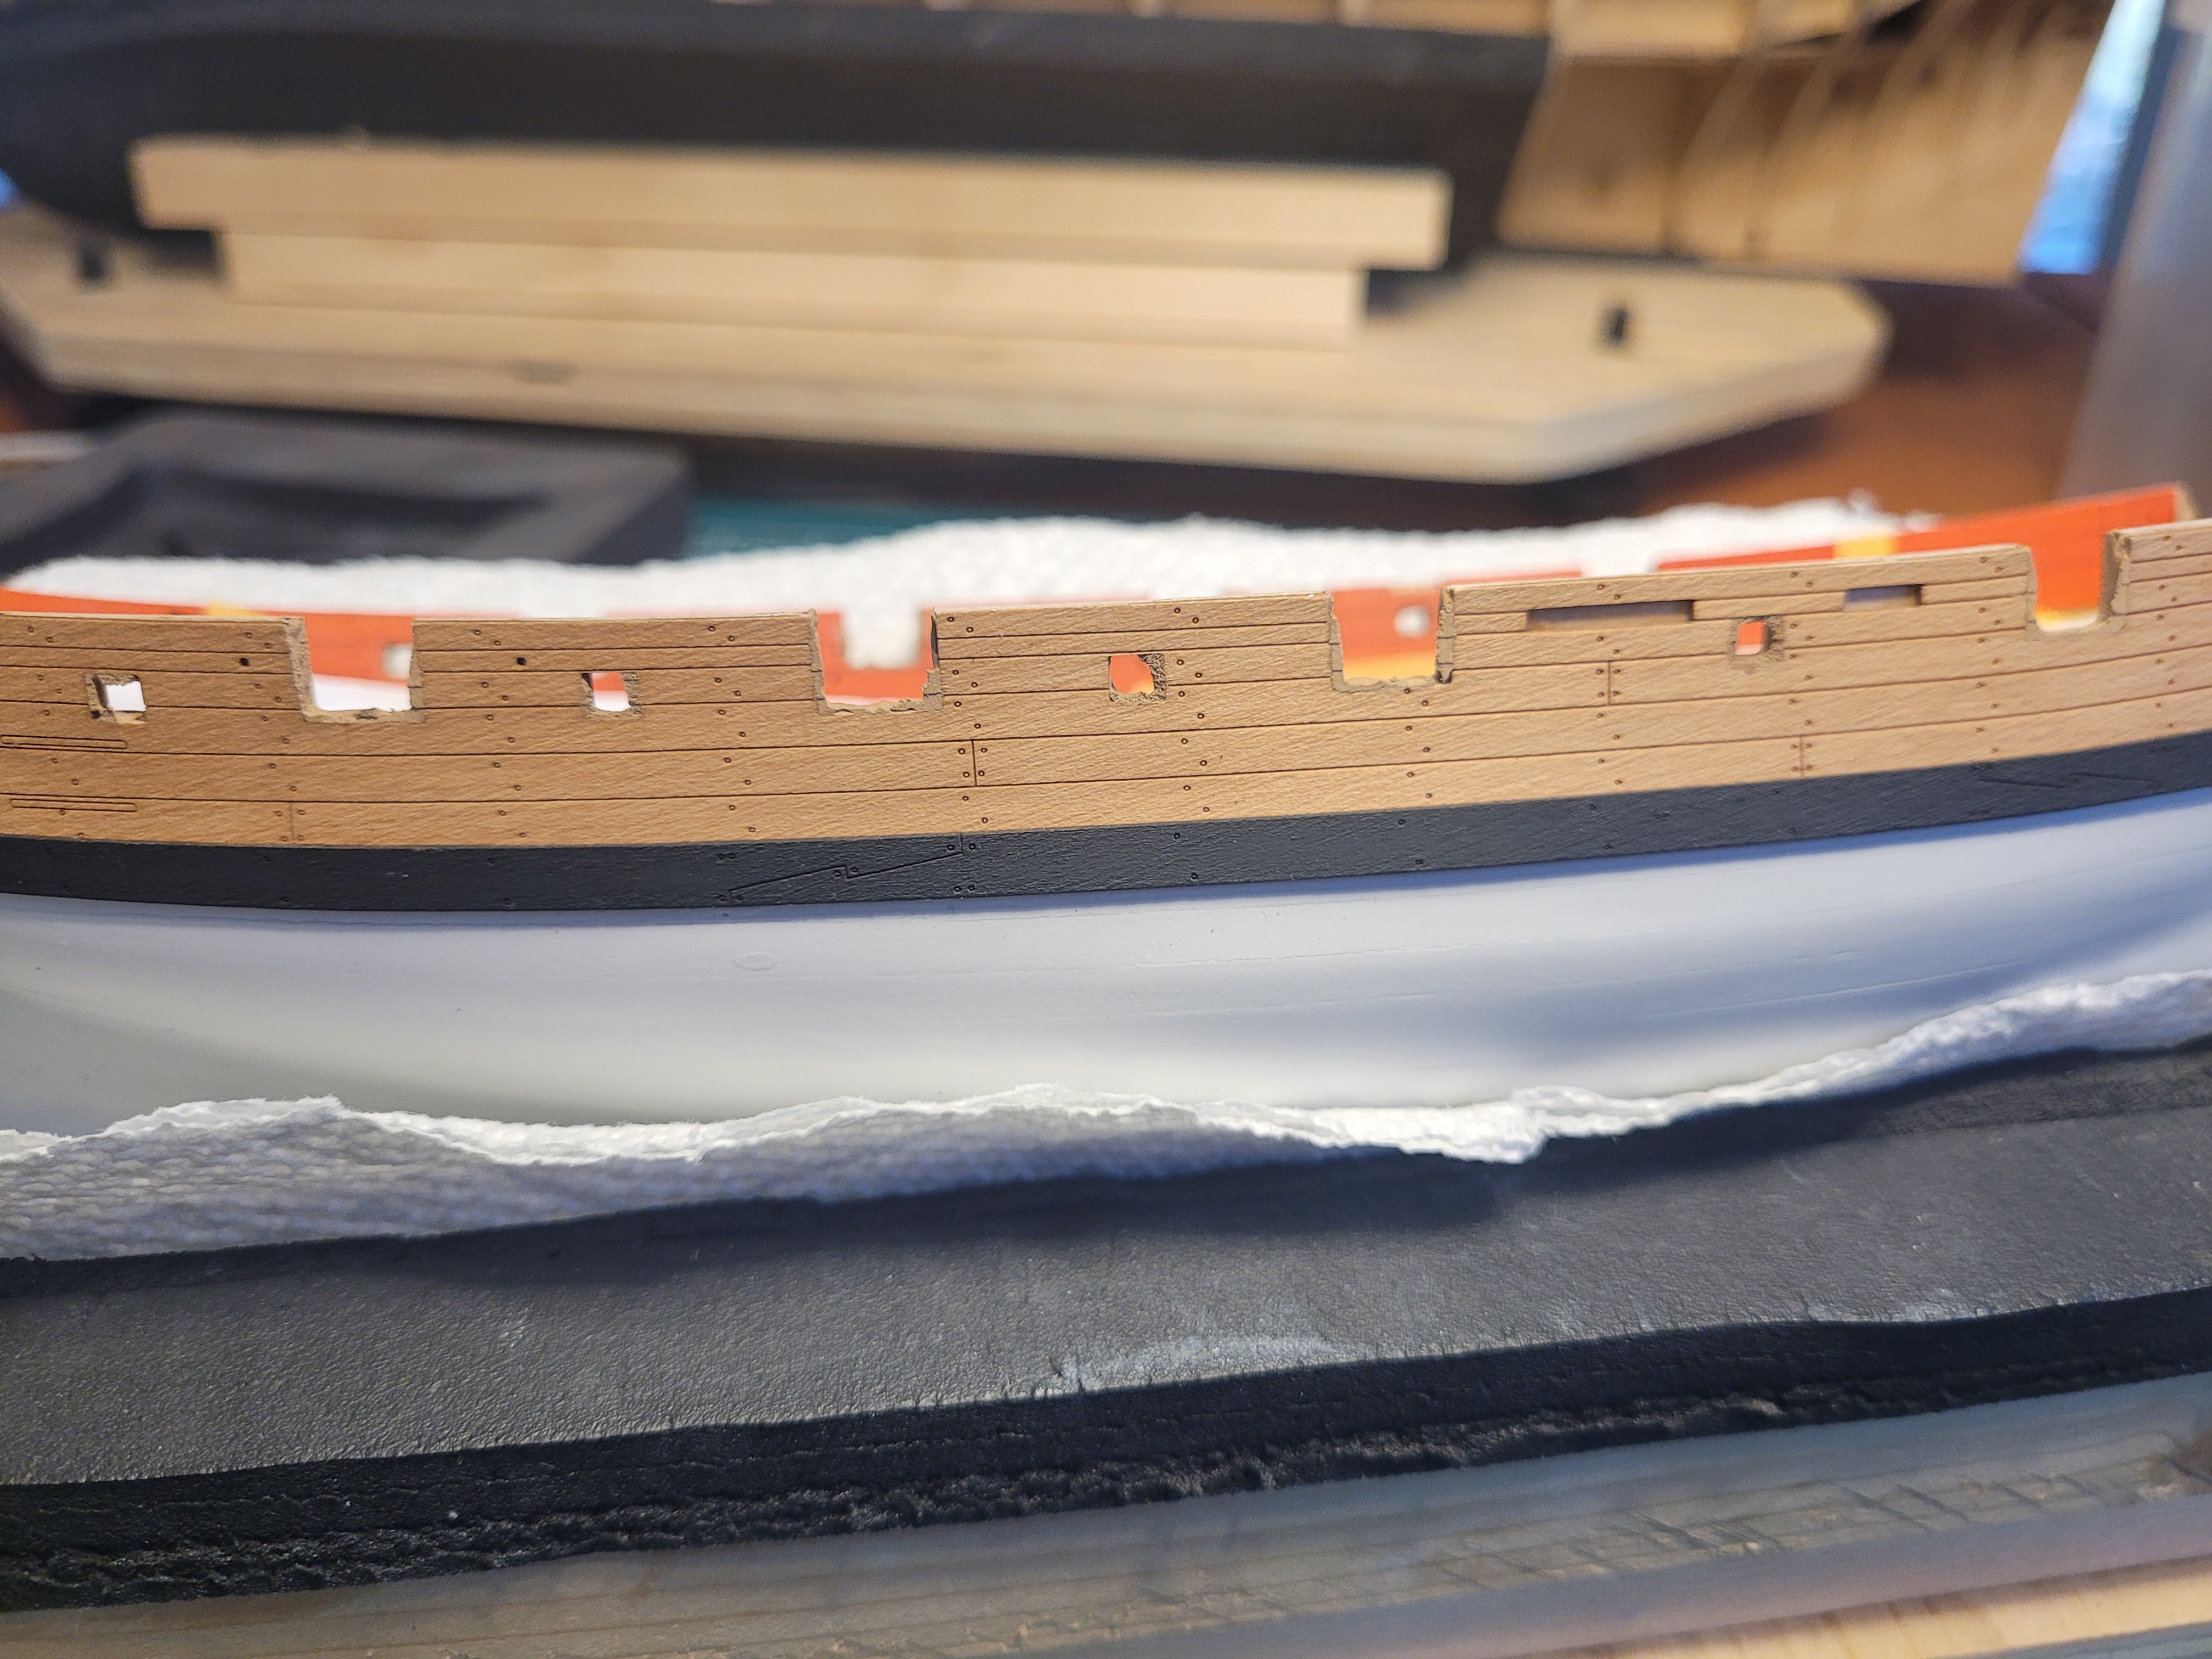
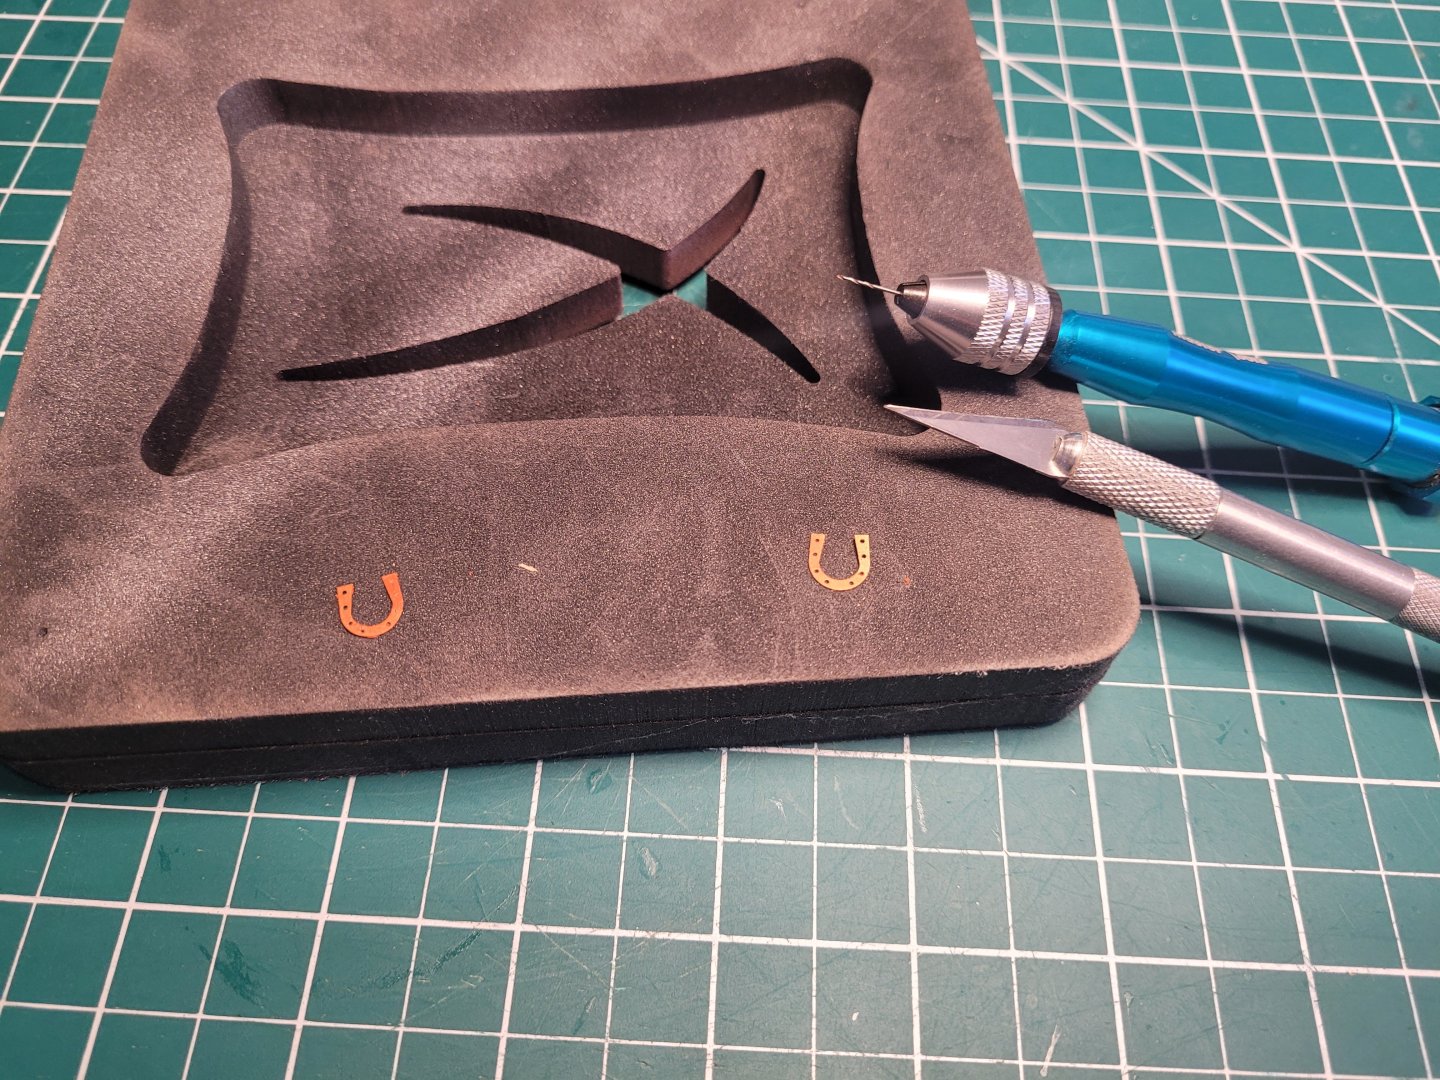
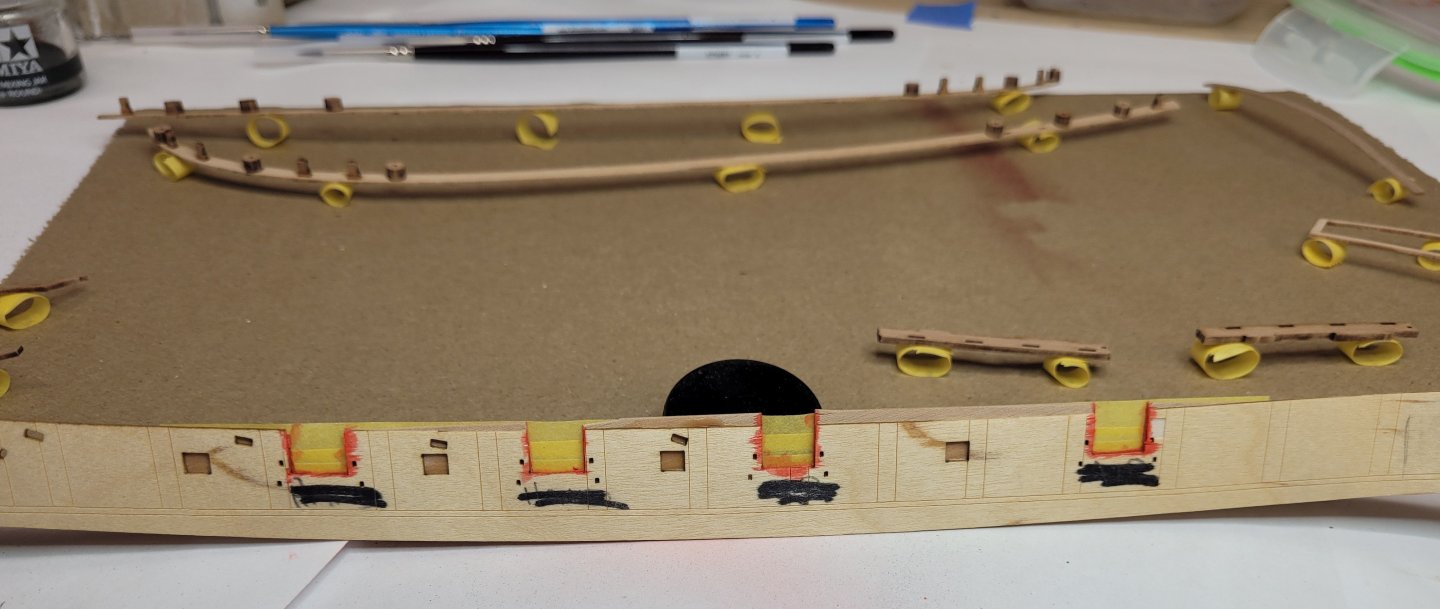
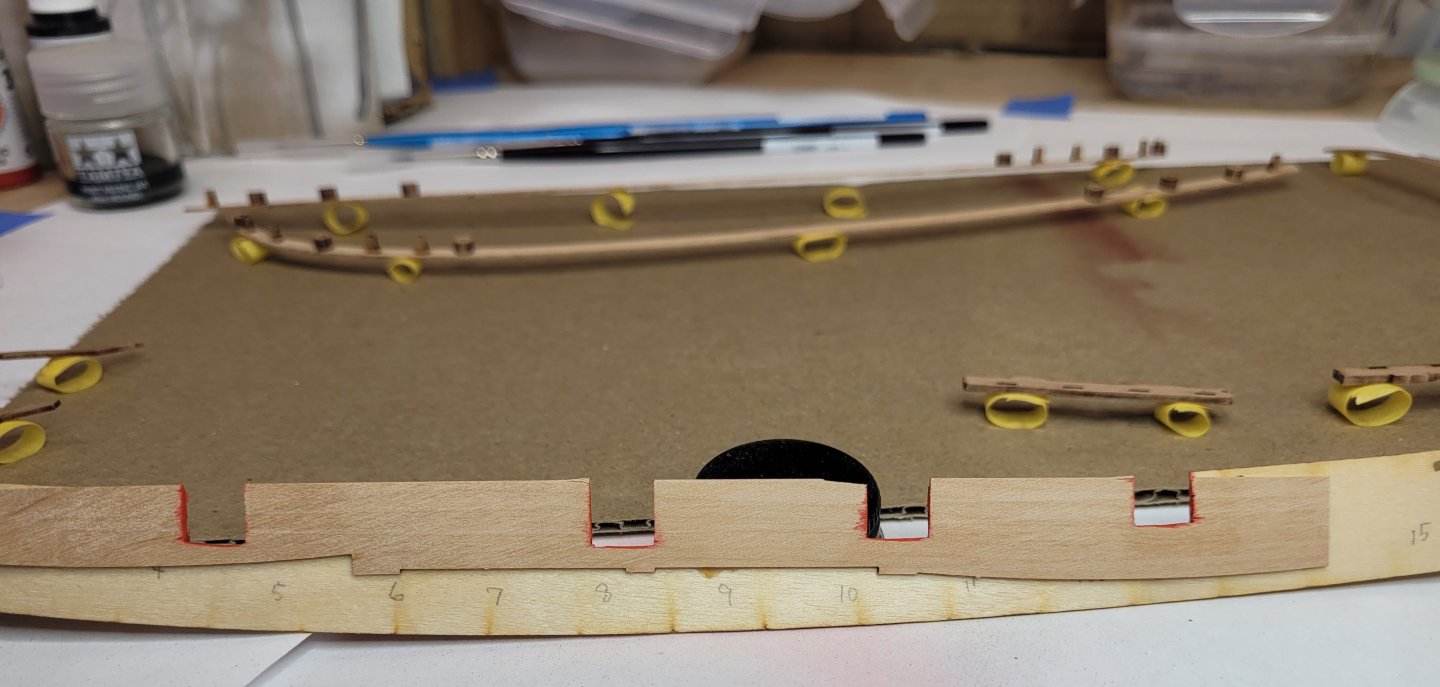
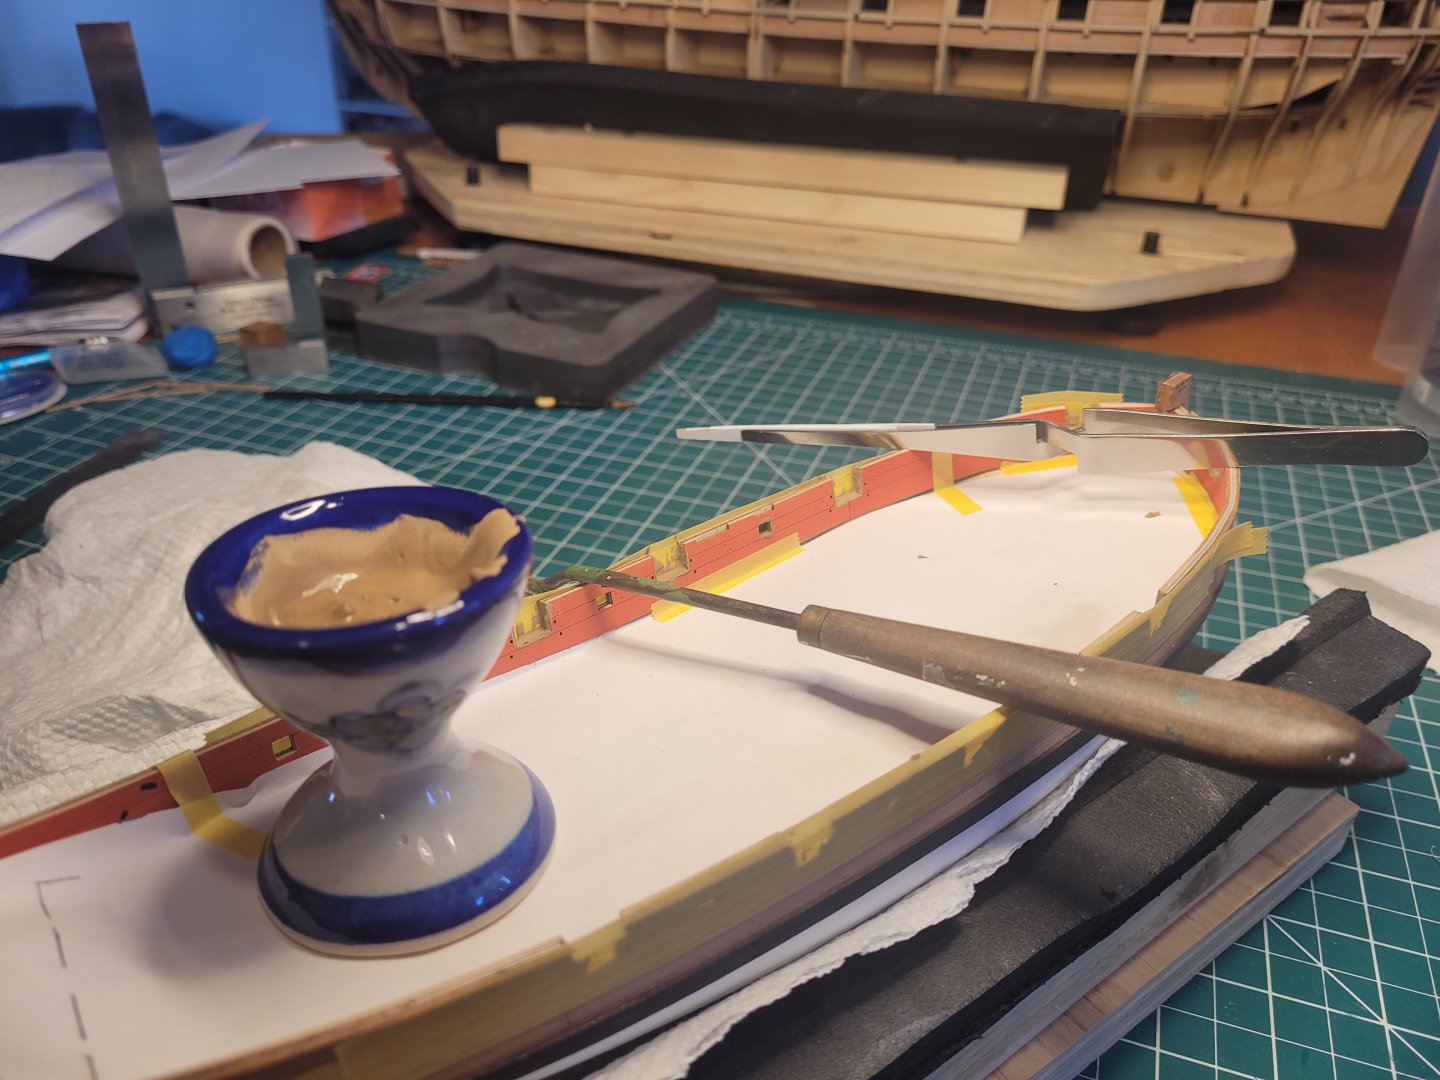
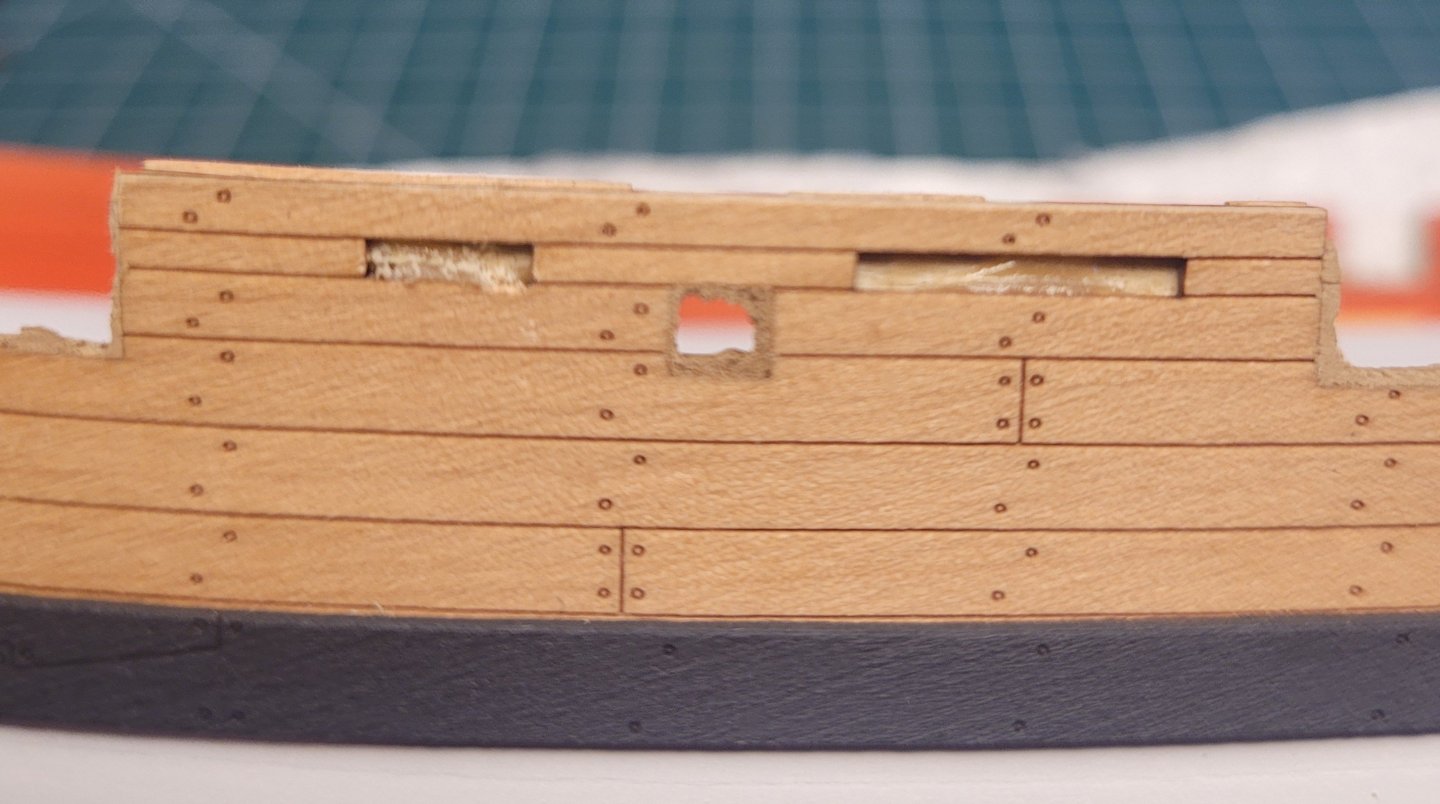
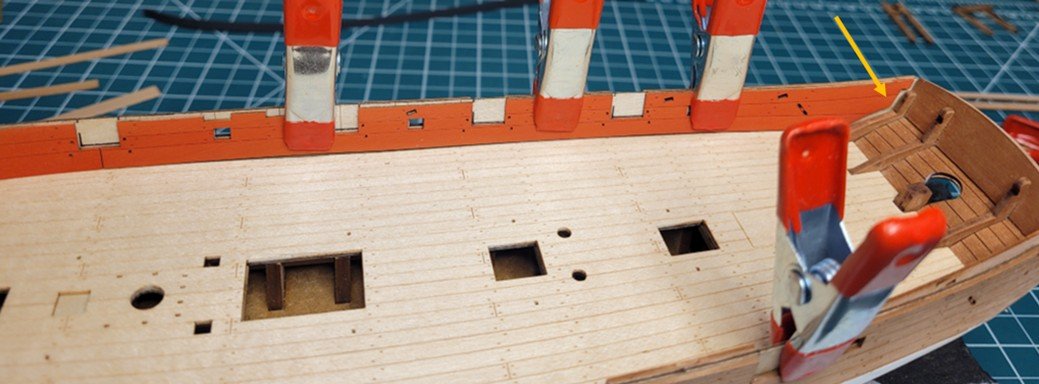
Here's an update; I went a few weeks without getting in any work on the model and then was away for a while. Next up was dealing with the pesky/tiny PE depth markings. I chose to paint them, and used the Vallejo Copper. They looked far too orange but when on the hull, look ok imho. I managed to clog up holes etc, but some finicky work with a drill bit and hobby knife cleaned them up ok, although I'll probably have to do some minor touch-up after they're on the hull. I started with the horseshoes. After glaring at them for a while, which didn't really accomplish anything, I fiddled with various ways to put them in accurate position, and glue them. Picking them up as such with the wax pencil works great, but since the wax pencil obviously sticks, I couldn't keep or manoeuvre them into correct position. There ensued multiple tries, with the cussing increasing exponentially, no luck. Then I had the idea of using two metal rods of the same diameter as the holes to use as guides to slide them down into position. A few tense moments but it generally worked well, here's a pic. Putting on glue with the PE parts is a beast, particularly as you're putting the glue (I used superthin CA) on a finished surface and don't want excess glue to show. Putting some tiny dots of glue on the hull seemed to be the answer versus trying to put it on the part and then trying to slide the part down the rods. I had a bit of excess glue squeezed out, but not too bad. It's only when i went to do the numerals that I figured things out. I didn't take a pic but there wouldn't be much to show. I started by just placing the part on the hull, with the stem horizontal as per the above pic, then twiddled it into final position using the tip of my hobby knife. Then, very carefully, so as not to move the part, I put on a mini-clamp just catching the outside bit of the part. With the part solidly held in place, I used the smallest applicator I could find to dab on some CA at the interface of part and hull and get the capillary action to draw the glue in. That has worked pretty well on the whole. Then the clamp could come off and the other side of the part glued. This has worked ok through the first two numerals, but I have left off for the time being in favour of switching to the following. But I will have to go back to the depth markings to finish them before installing upper work stuff. Waiting off-camera are a bunch of parts that have been prepped, painted and ready to glue in place. These include the spirketting, the gunwales with installed swivel gun posts and timberheads, stern board strip, stern side timbers, stern transom rail, channels, hatches/gratings, rudder/tiller. Basically, except for steps 79-81, all parts are ready up to step 85. So I'm on the verge of a frenzy of installations. But first, I need to do some cleanup on gunports and oar ports so that the plywood middle layer of bulwark won't be seen. The idea was to tape over the outside of the ports, and then paint the insides. But experimenting with a piece of inner bulwark from my messed-up original build just confirmed the obvious, which is that paint would bleed through the external pearwood like crazy. Here's my dummy test: So I figure the best way is to put filler on the inside of the ports, sand that flush, and then WOP to seal. I don't think I can just go with filler, as that will soak up paint and possibly bleed through to the outer bulwark. So here's the work with the filler. I used a small palette knife for the gunports, but it was too big for the oar ports, so I made a palette knife out of some plastic strip held in tweezers. I used a just-damp sponge to wipe the bulheads right after applying the filler to remove any excess; that worked really well. The end result, which is where I'm up to now: Sanding/cleaning next. Finally, before I glue on the gunwales, I'm going to have to get rid of some excess glue that I hadn't noticed that's in a couple of the upper rail slots, pic below. I've previously hacked away at these with a hobby knife, but the wood glue is touch as old army boots. I'll resume hacking away, but if anyone has a suggestion, much appreciated. More soon. Nick


-
Paul White reacted to a post in a topic:
His Britannic Majesty's Cutter Sherbourne 1763 by Paul White - Vanguard Models - 1:64
-
Nice desk, Paul. Nick
-
Nick 843 reacted to a post in a topic:
His Britannic Majesty's Cutter Sherbourne 1763 by Paul White - Vanguard Models - 1:64
-
 Ronald-V reacted to a post in a topic:
HMS Sphinx 1775 by Ronald-V - Vanguard Models - 1:64
Ronald-V reacted to a post in a topic:
HMS Sphinx 1775 by Ronald-V - Vanguard Models - 1:64
-
Nick 843 reacted to a post in a topic:
HMS Pegasus 1776 by muratx - Amati/Victory Models - 1:64
-
Der Alte Rentner reacted to a post in a topic:
HMS Sphinx 1775 by Ronald-V - Vanguard Models - 1:64
-
That's from your post #457 January 3; I'm catching up on my reading after being away longer than expected. To me, any suggestion about how to do something is useful. In my case anyway, I'm not necessarily going to clue into the best way to glue a part on, or at least not right away. And a suggestion such as that translates into other situations. I was going to comment in my own next Sherbourne post about gluing on the pesky/tiny PE depth markings, but had been thinking likewise that it's obvious. So I will comment it, because it may be useful to someone. Nick
-
Nick 843 reacted to a post in a topic:
Speedwell Battle Station Kit 1752 by CiscoH - Syren Ship Model Company - 3/8" or 1:32
-
Nick 843 reacted to a post in a topic:
HMS Portland 1770 by westwood - Portland Scale Ship Co. - 1:48 - 50 gun 4th rate
-
Nick 843 reacted to a post in a topic:
HMS Indefatigable 1794 by Mowzer - Vanguard Models - 1:64
-
Nick 843 reacted to a post in a topic:
HM cutter Sherbourne by Maid of the Mist - Vanguard Models - 1:64
-
Peter S reacted to a post in a topic:
HM Armed Cutter Sherbourne 1763 by Nick 843 - Vanguard Models - 1:64
-
Nick 843 reacted to a post in a topic:
HM Cutter Sherbourne by WWR4 - Vanguard Models - 1:64
-
Nick 843 reacted to a post in a topic:
HM Armed Cutter Sherbourne 1763 by Peter S - Vanguard Models - 1:64
-
Javelin reacted to a post in a topic:
HM Armed Cutter Sherbourne 1763 by Nick 843 - Vanguard Models - 1:64
-
Geordie Tyne reacted to a post in a topic:
HM Armed Cutter Sherbourne 1763 by Nick 843 - Vanguard Models - 1:64
-
barnacle Chris reacted to a post in a topic:
HM Armed Cutter Sherbourne 1763 by Nick 843 - Vanguard Models - 1:64
-
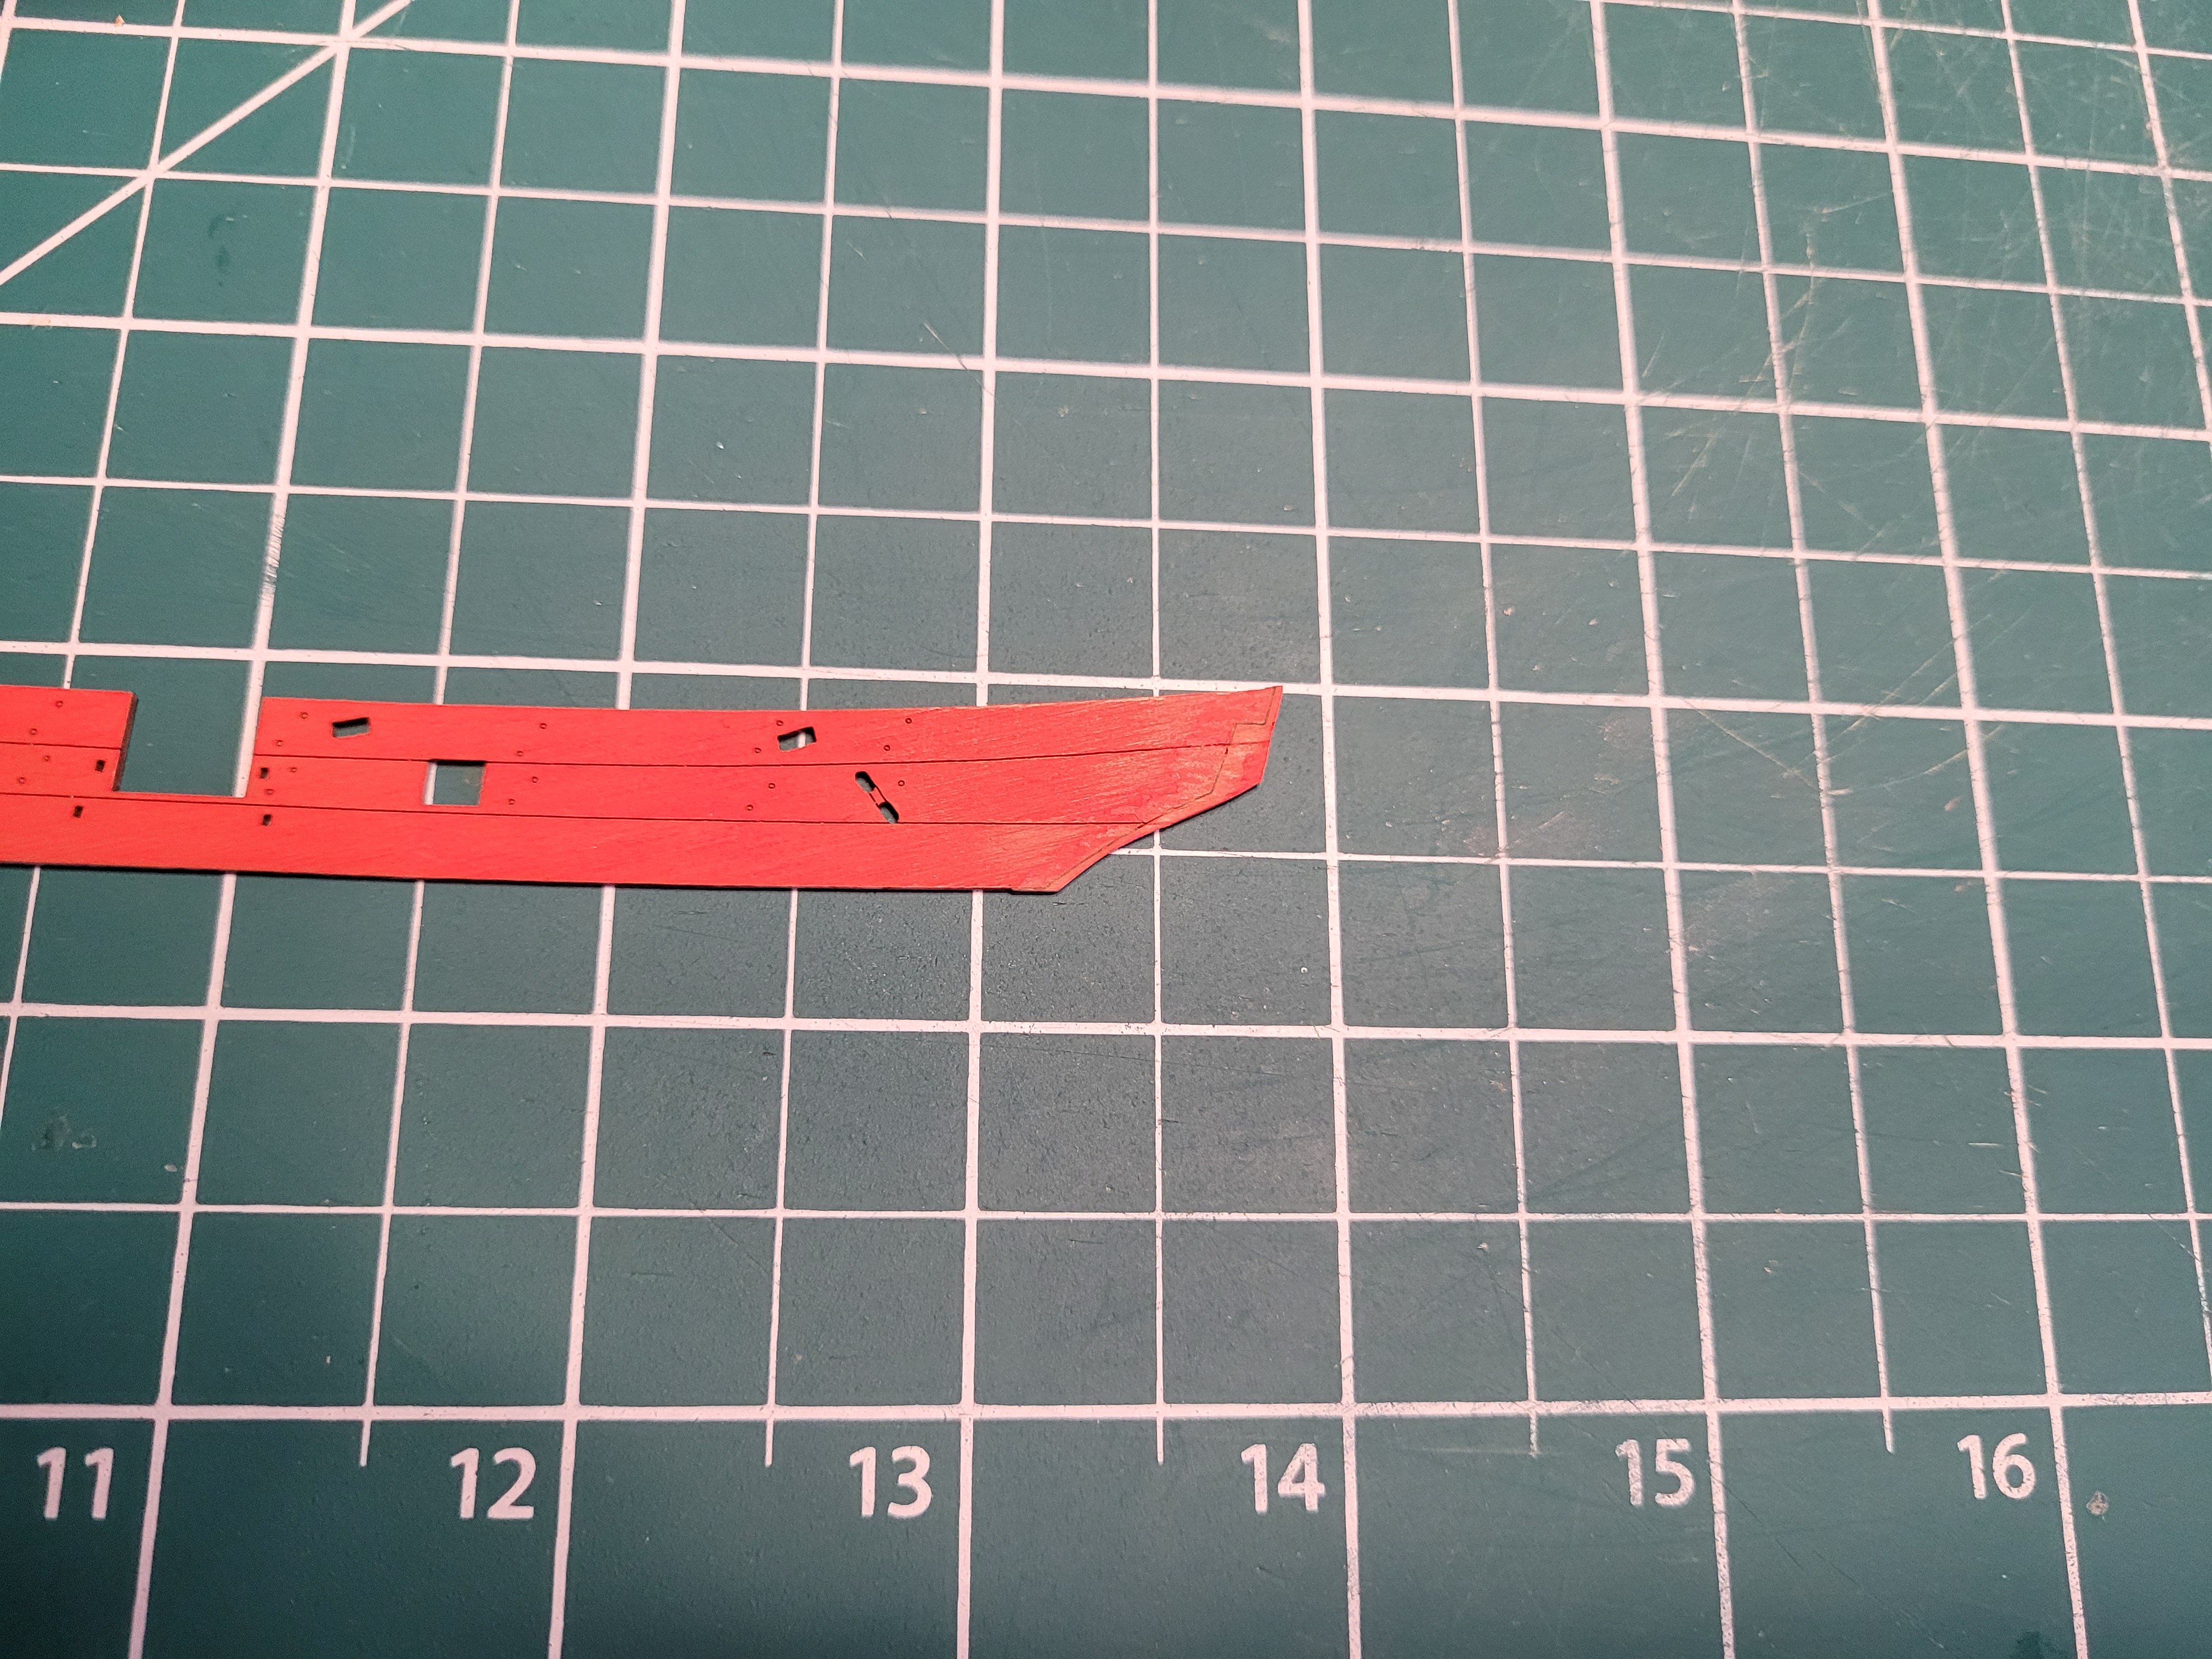
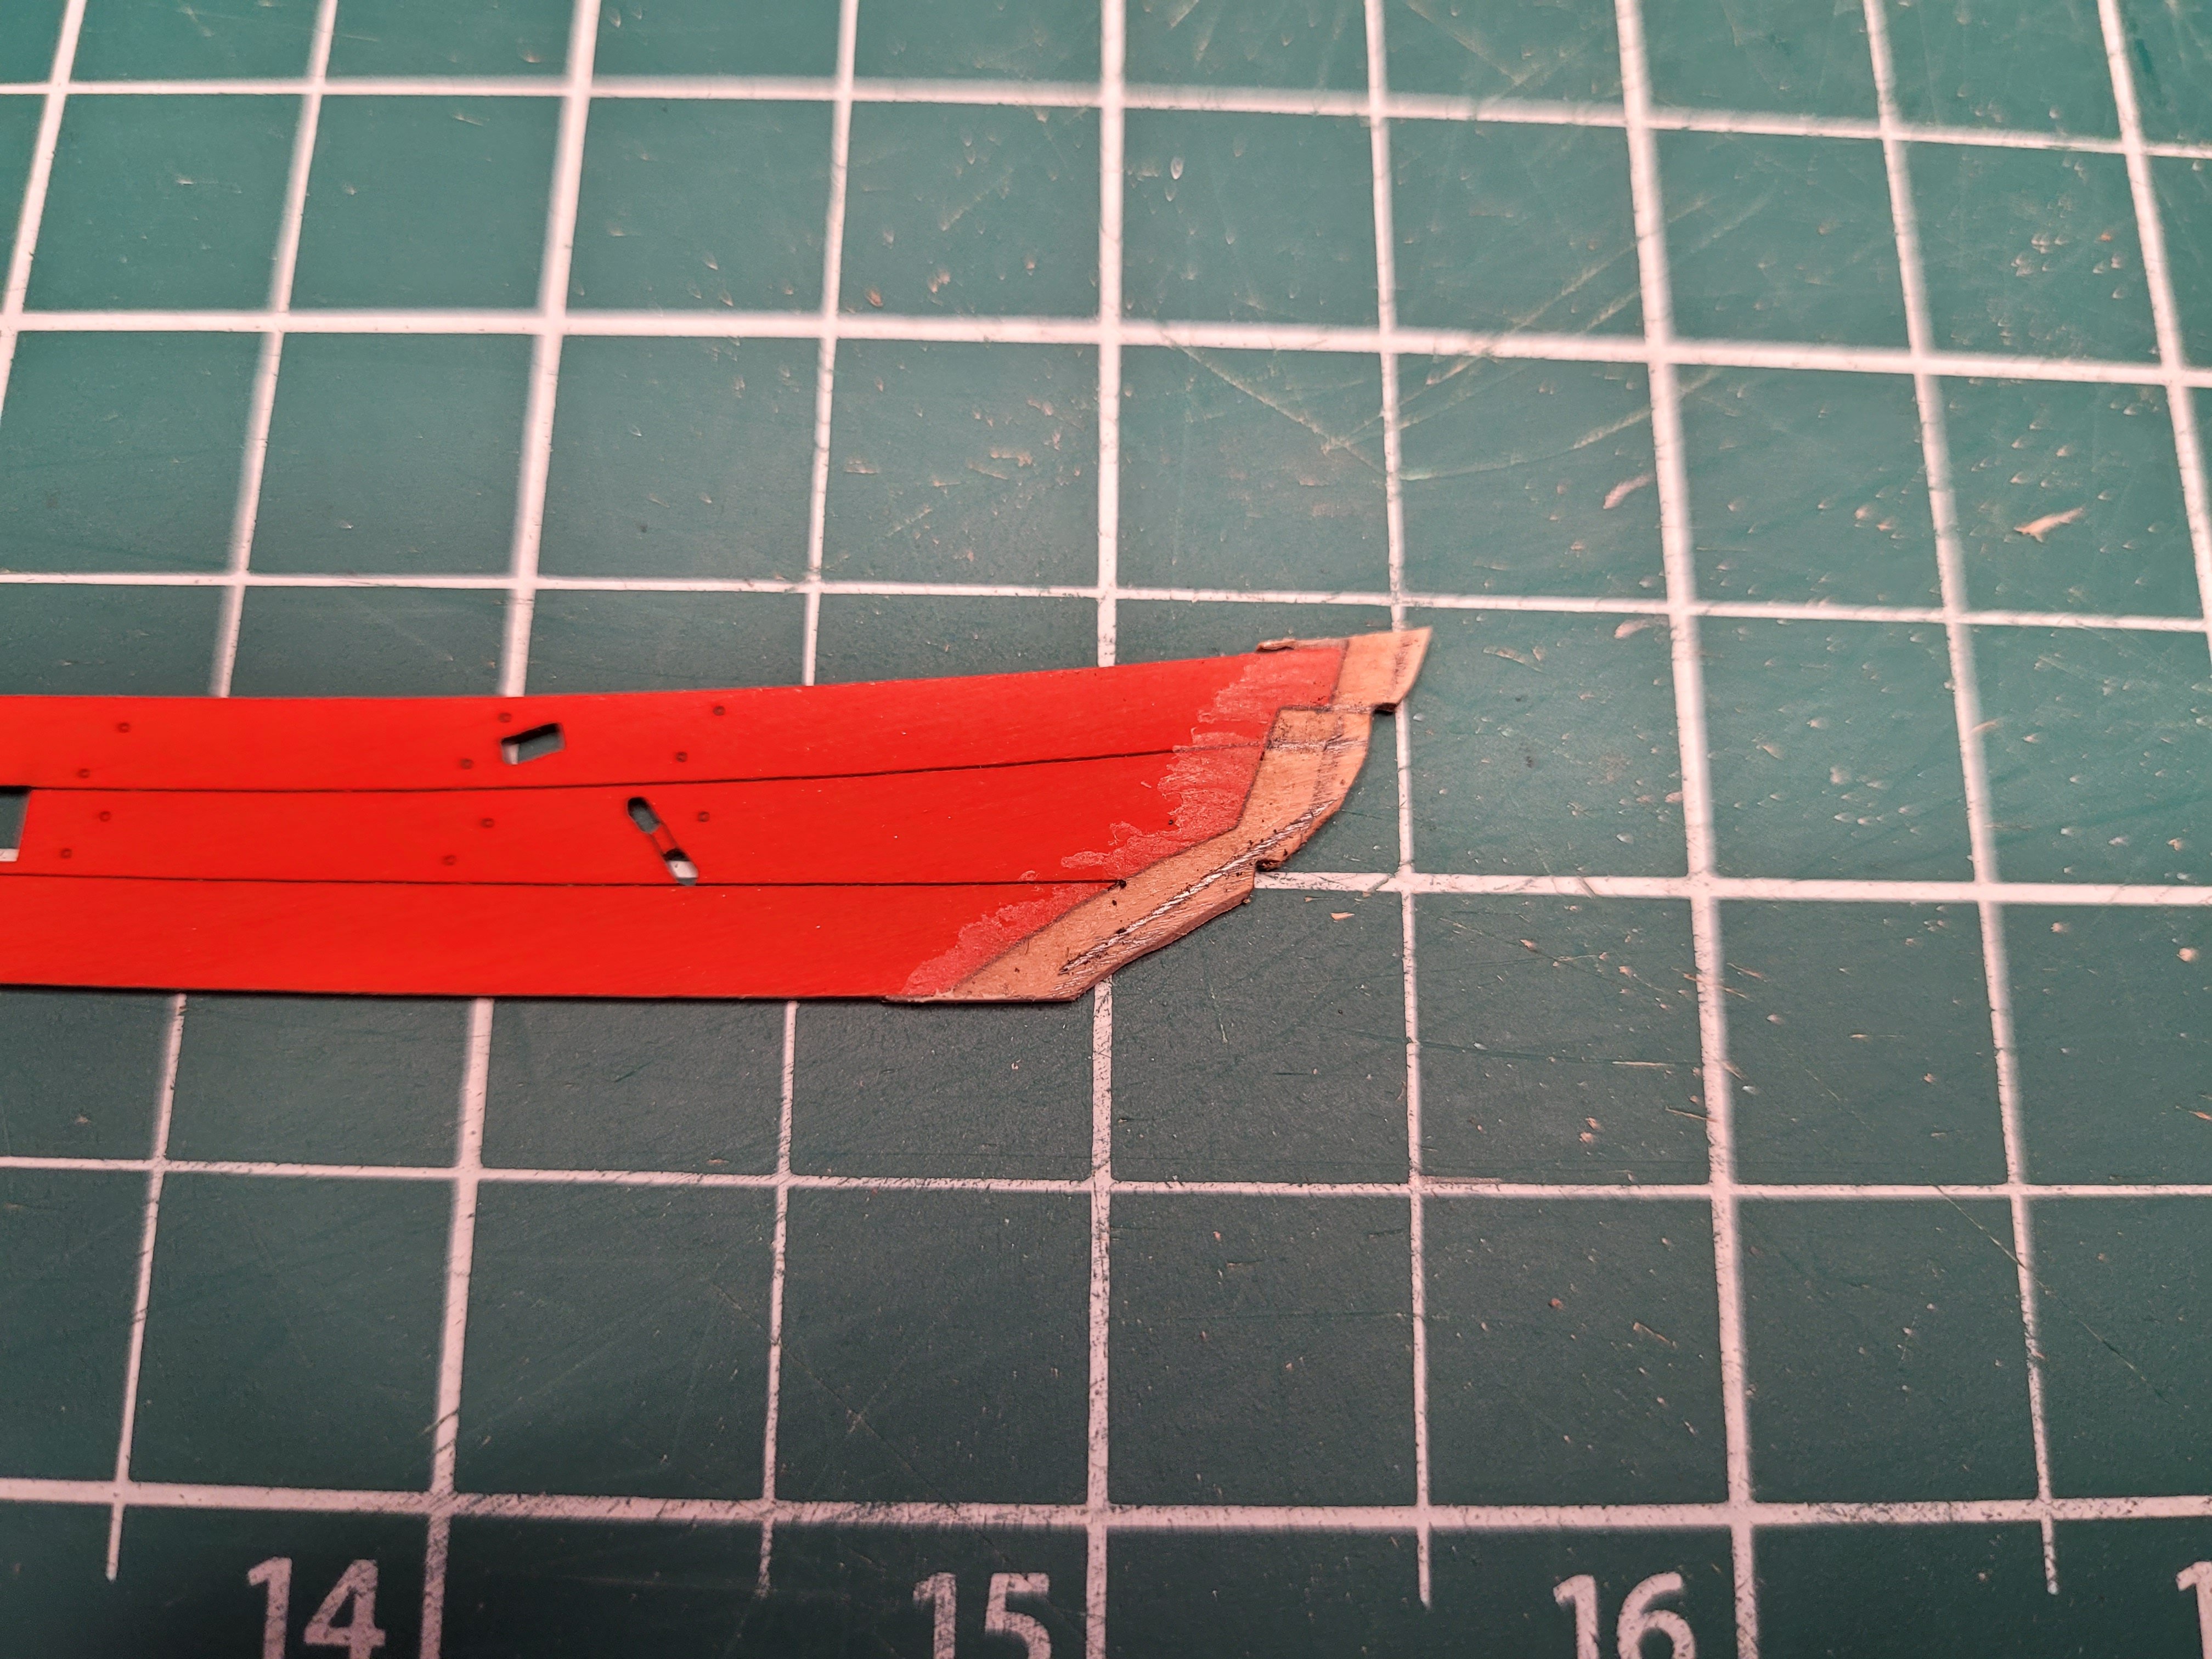
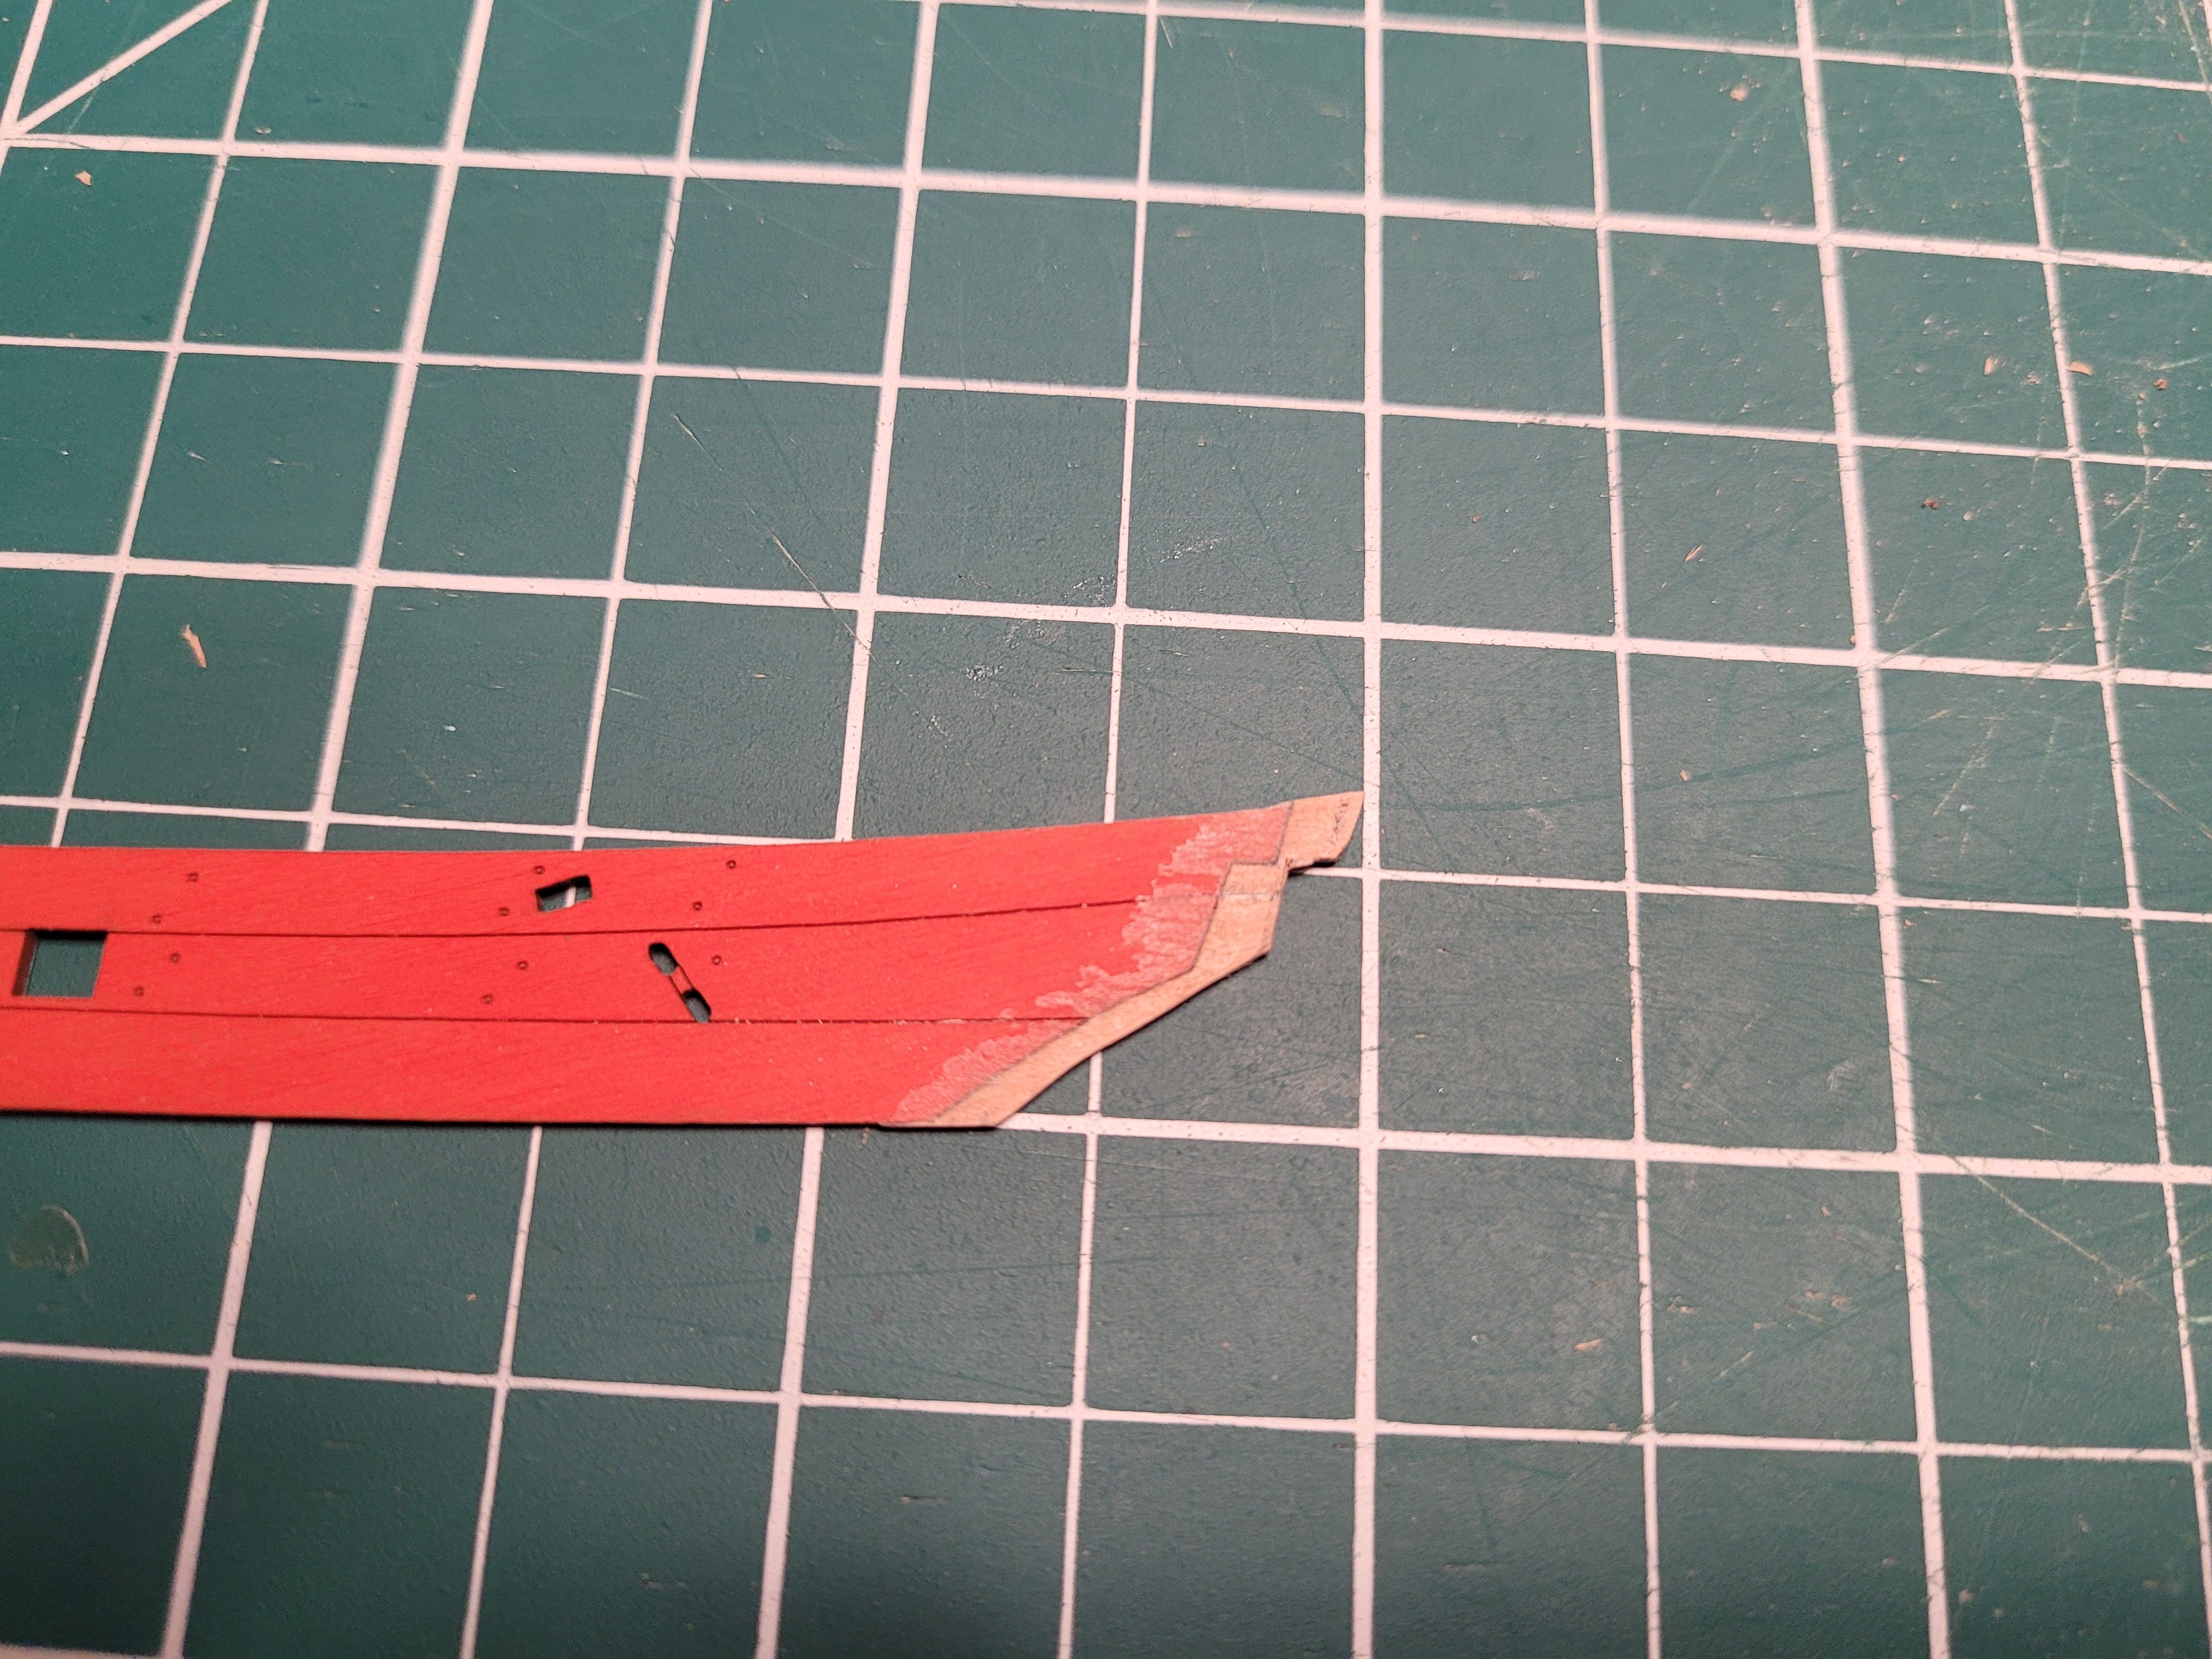
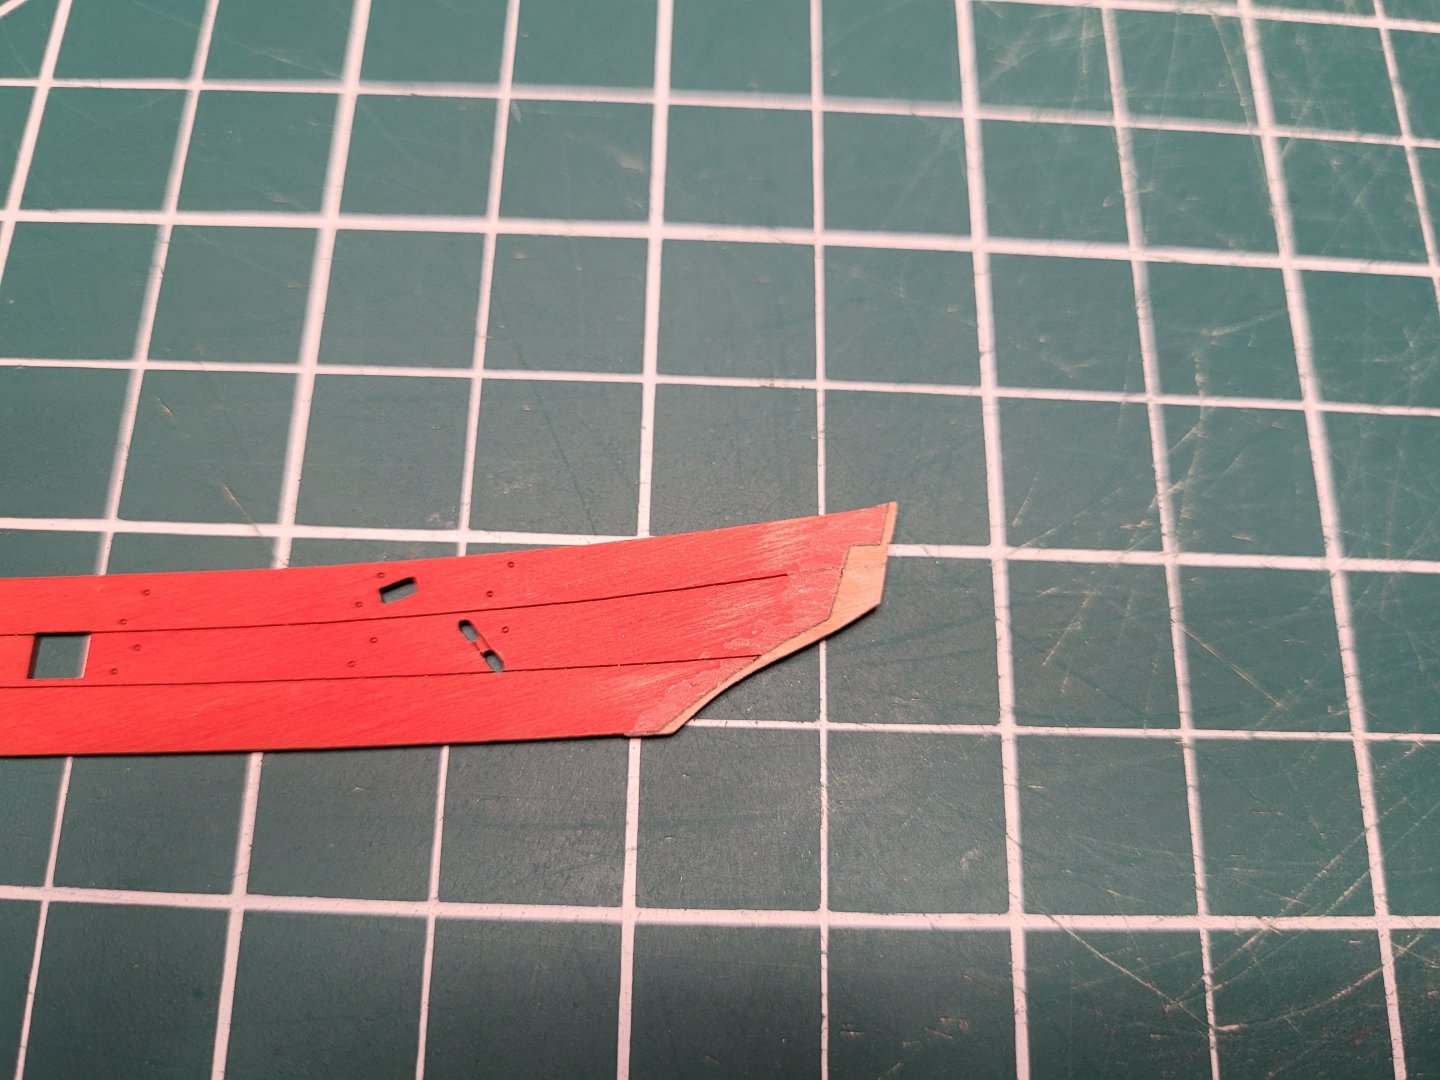
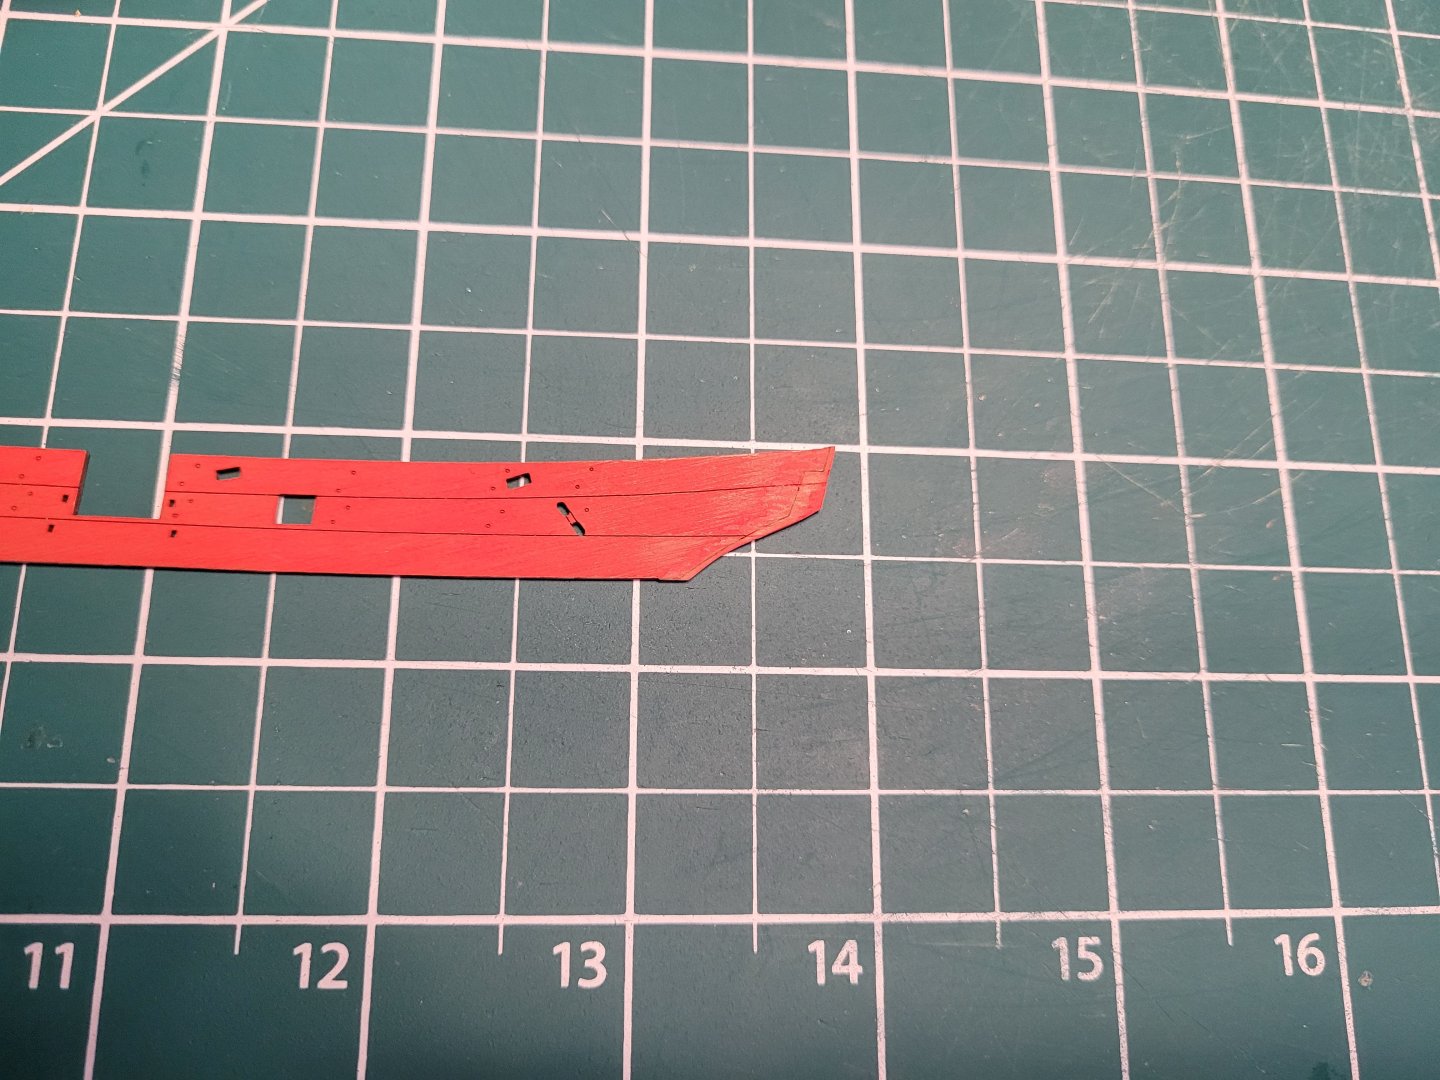
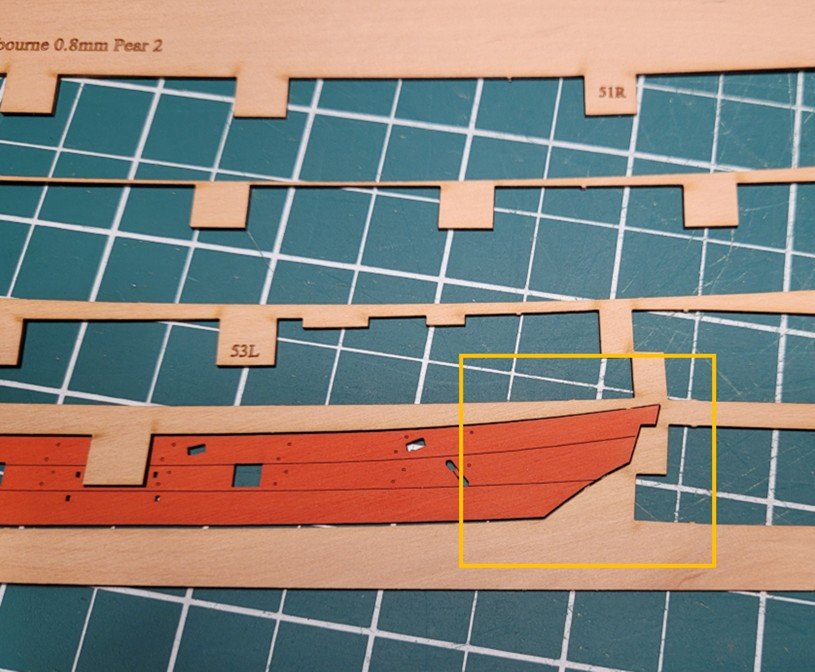
Well that fix worked pretty well. I carefully sanded down to final shape, cleaned off the glue residue, scribed out the etched lines as best I could, and painted. Glued in, it's not so noticeable. I've now glued on the other main wale and roughly cut out the gunports. There are a few little slip-ups here and there, but I'm pretty pleased with it. The red looks a bit orangey in the pics. Installing the main wales was kind of nervy, in part because I thought I was through with planking LOL. I decided to use CA; I just can't use those pins, they never go in right. I had pre-shaped the wale parts in the usual way, but I had to clamp them on a bit higher than the top line for them because I couldn't clamp down that far. I suppose that gave them an ever so slightly different shape, and on the starboard side one I should have backed off and re-shaped, especially the bit right at the stem, which wasn't curved enough. But of course I forced it down with glue on and luckily it held. It's a touch off but I'm not going to try to fix it. There's also a little bit of clinker effect on both just under the foremost gunports on each side, but again you can't really notice it when you're looking at the model normally, so best left alone I think. Except for the slight clinker, the portside wale wen down better as I did re-shape near the stem to fit better. Nick


-
Thanks all. I think this is going to work. The glued joint is good and without much excess. I took the "gross" down with the Dremel, now sanding sticks and so on. Trying to remember to be more and more careful/slow as I go and holding with fingers on the joint and as close as possible to the sanding so as not to stress the joint. Close enough here to stop with the Dremel. Closer in with some hand sanding. A test fit suggests ok on general shape. Now it'll be repeated test fits and sand a tiny bit, etc etc. Won't get anymore done today though as have to do some other stuff. Nick

-
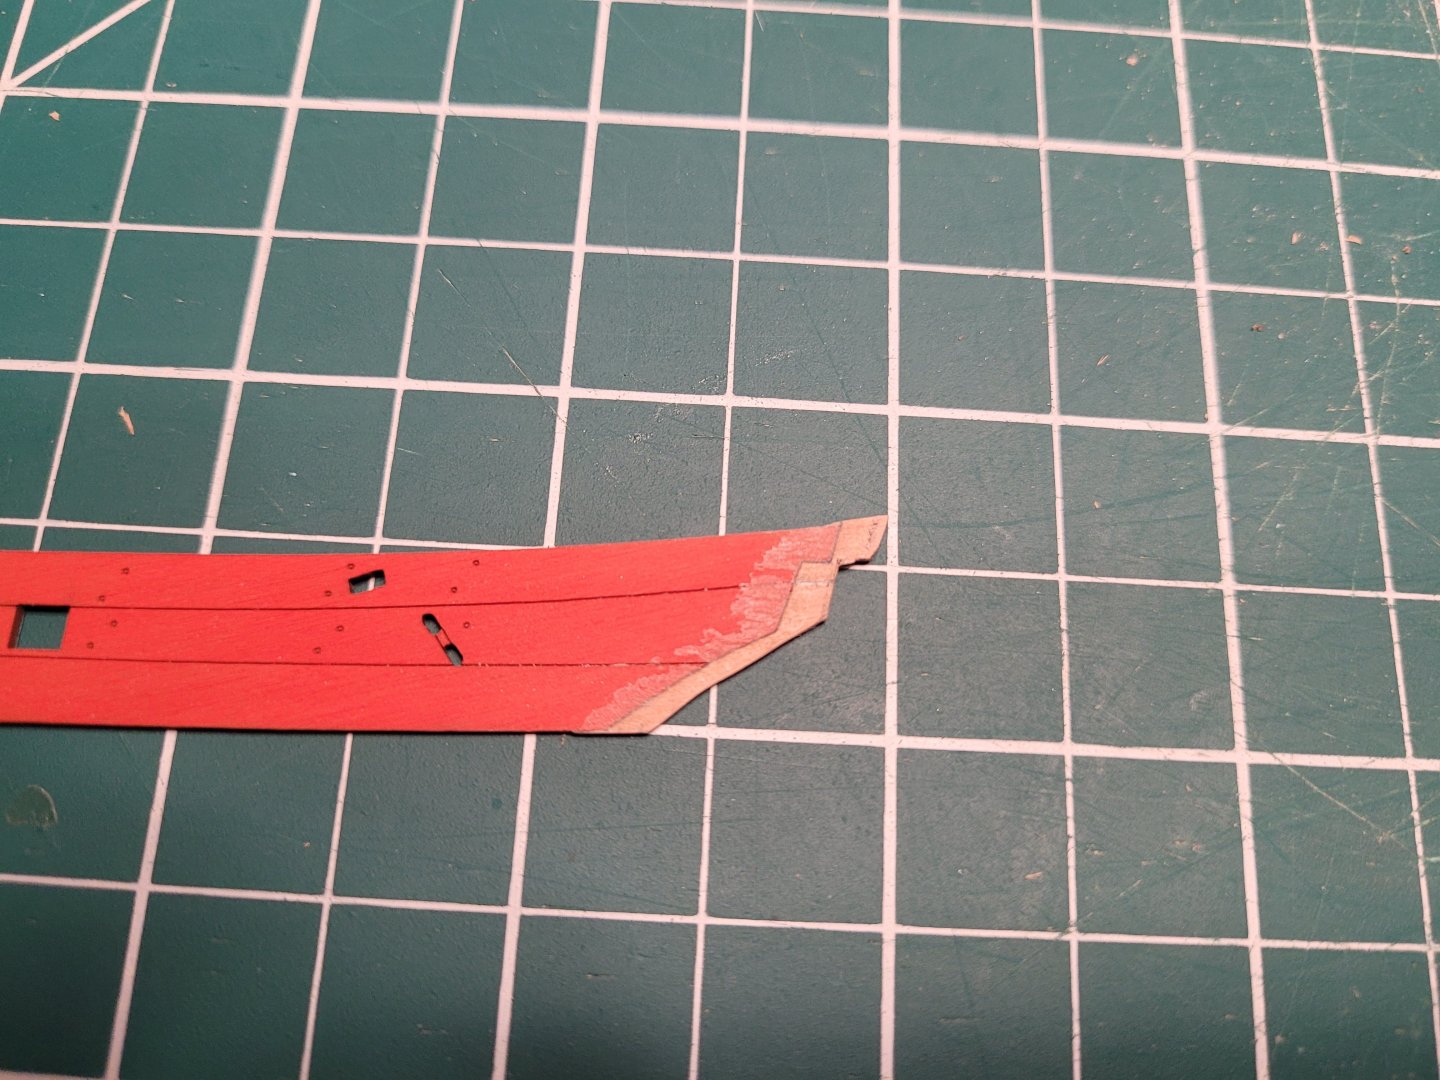
I ran into a little issue with the fit of the aft section of the starboard inner bulwark. Dry-fitting, I had a small gap at the stern end; it's only 1mm, but is plenty for the gap to show. The section lines up nicely otherwise, so I don't want to do a small insert at the section join, as that would throw alignment off imo. I measured from stempost corner to each quarter corner, and the starboard side measurement is indeed 1mm longer, so my starboard side is longer somehow than my port side. So my idea has been to try and tack on an extension to the stern end of the bulwark section, using the sprue form, so it will necessarily match, and then I'll just have to cut/sand the addition to match. So goes the theory anyway. So I've put down some wax paper underneath to prevent the glue from sticking everything to the cutting mat, put some glue on the sprue end, inserted the part and put some tape on to hold it as firmly as possible against the sprue end, some wax paper on top to prevent glue sticking to a board clamped on to hold it all in place. That was half an hour ago. Gonna leave it for at least two hours before taking a look to see if it's worked. Fingers crossed. Nick
-
I thought I'd add a note, having now used AK matt red and smoke black. First, I did thin 50/50 with water. Worked a charm. I think my previous (and very limited) lousy experience with AK must have been because I used ISO to thin, probably not bothering to check. Anyway, it thinned nicely and went on so smoothly, I'm gobsmacked. As to the colours, the matt red is really nice and imho looks right. It's a duller red as you know, unlike Tamiya flat red. I think the Smoke Black is really nice on the wales; it's also dulled from straight black, and looks to me to be closer to German Grey, although to my eye not quite so grey. Nick
-
Thanks Ron; yep feeling close to a ship model now. Once I get on wales, inner bulwarks, spirketting, which should be today, that'll be a major step. Then it'll be cutting out the gunports (itching to do that) and putting the rails on. Nick
-
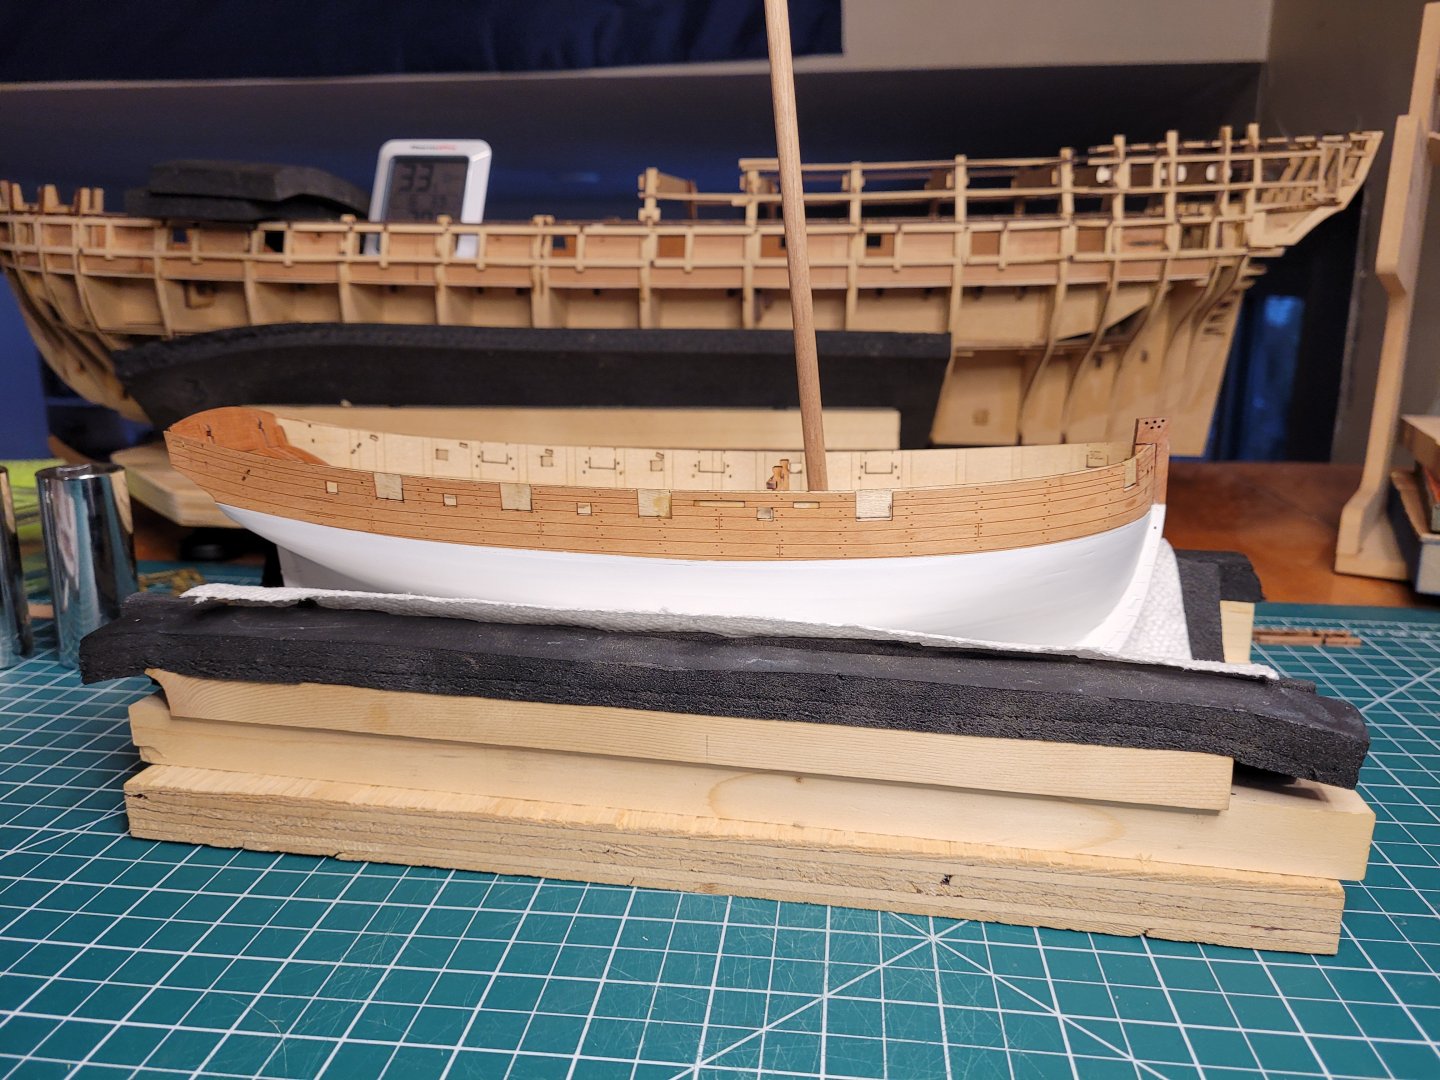
Here it is with the weights etc off. Nick

-
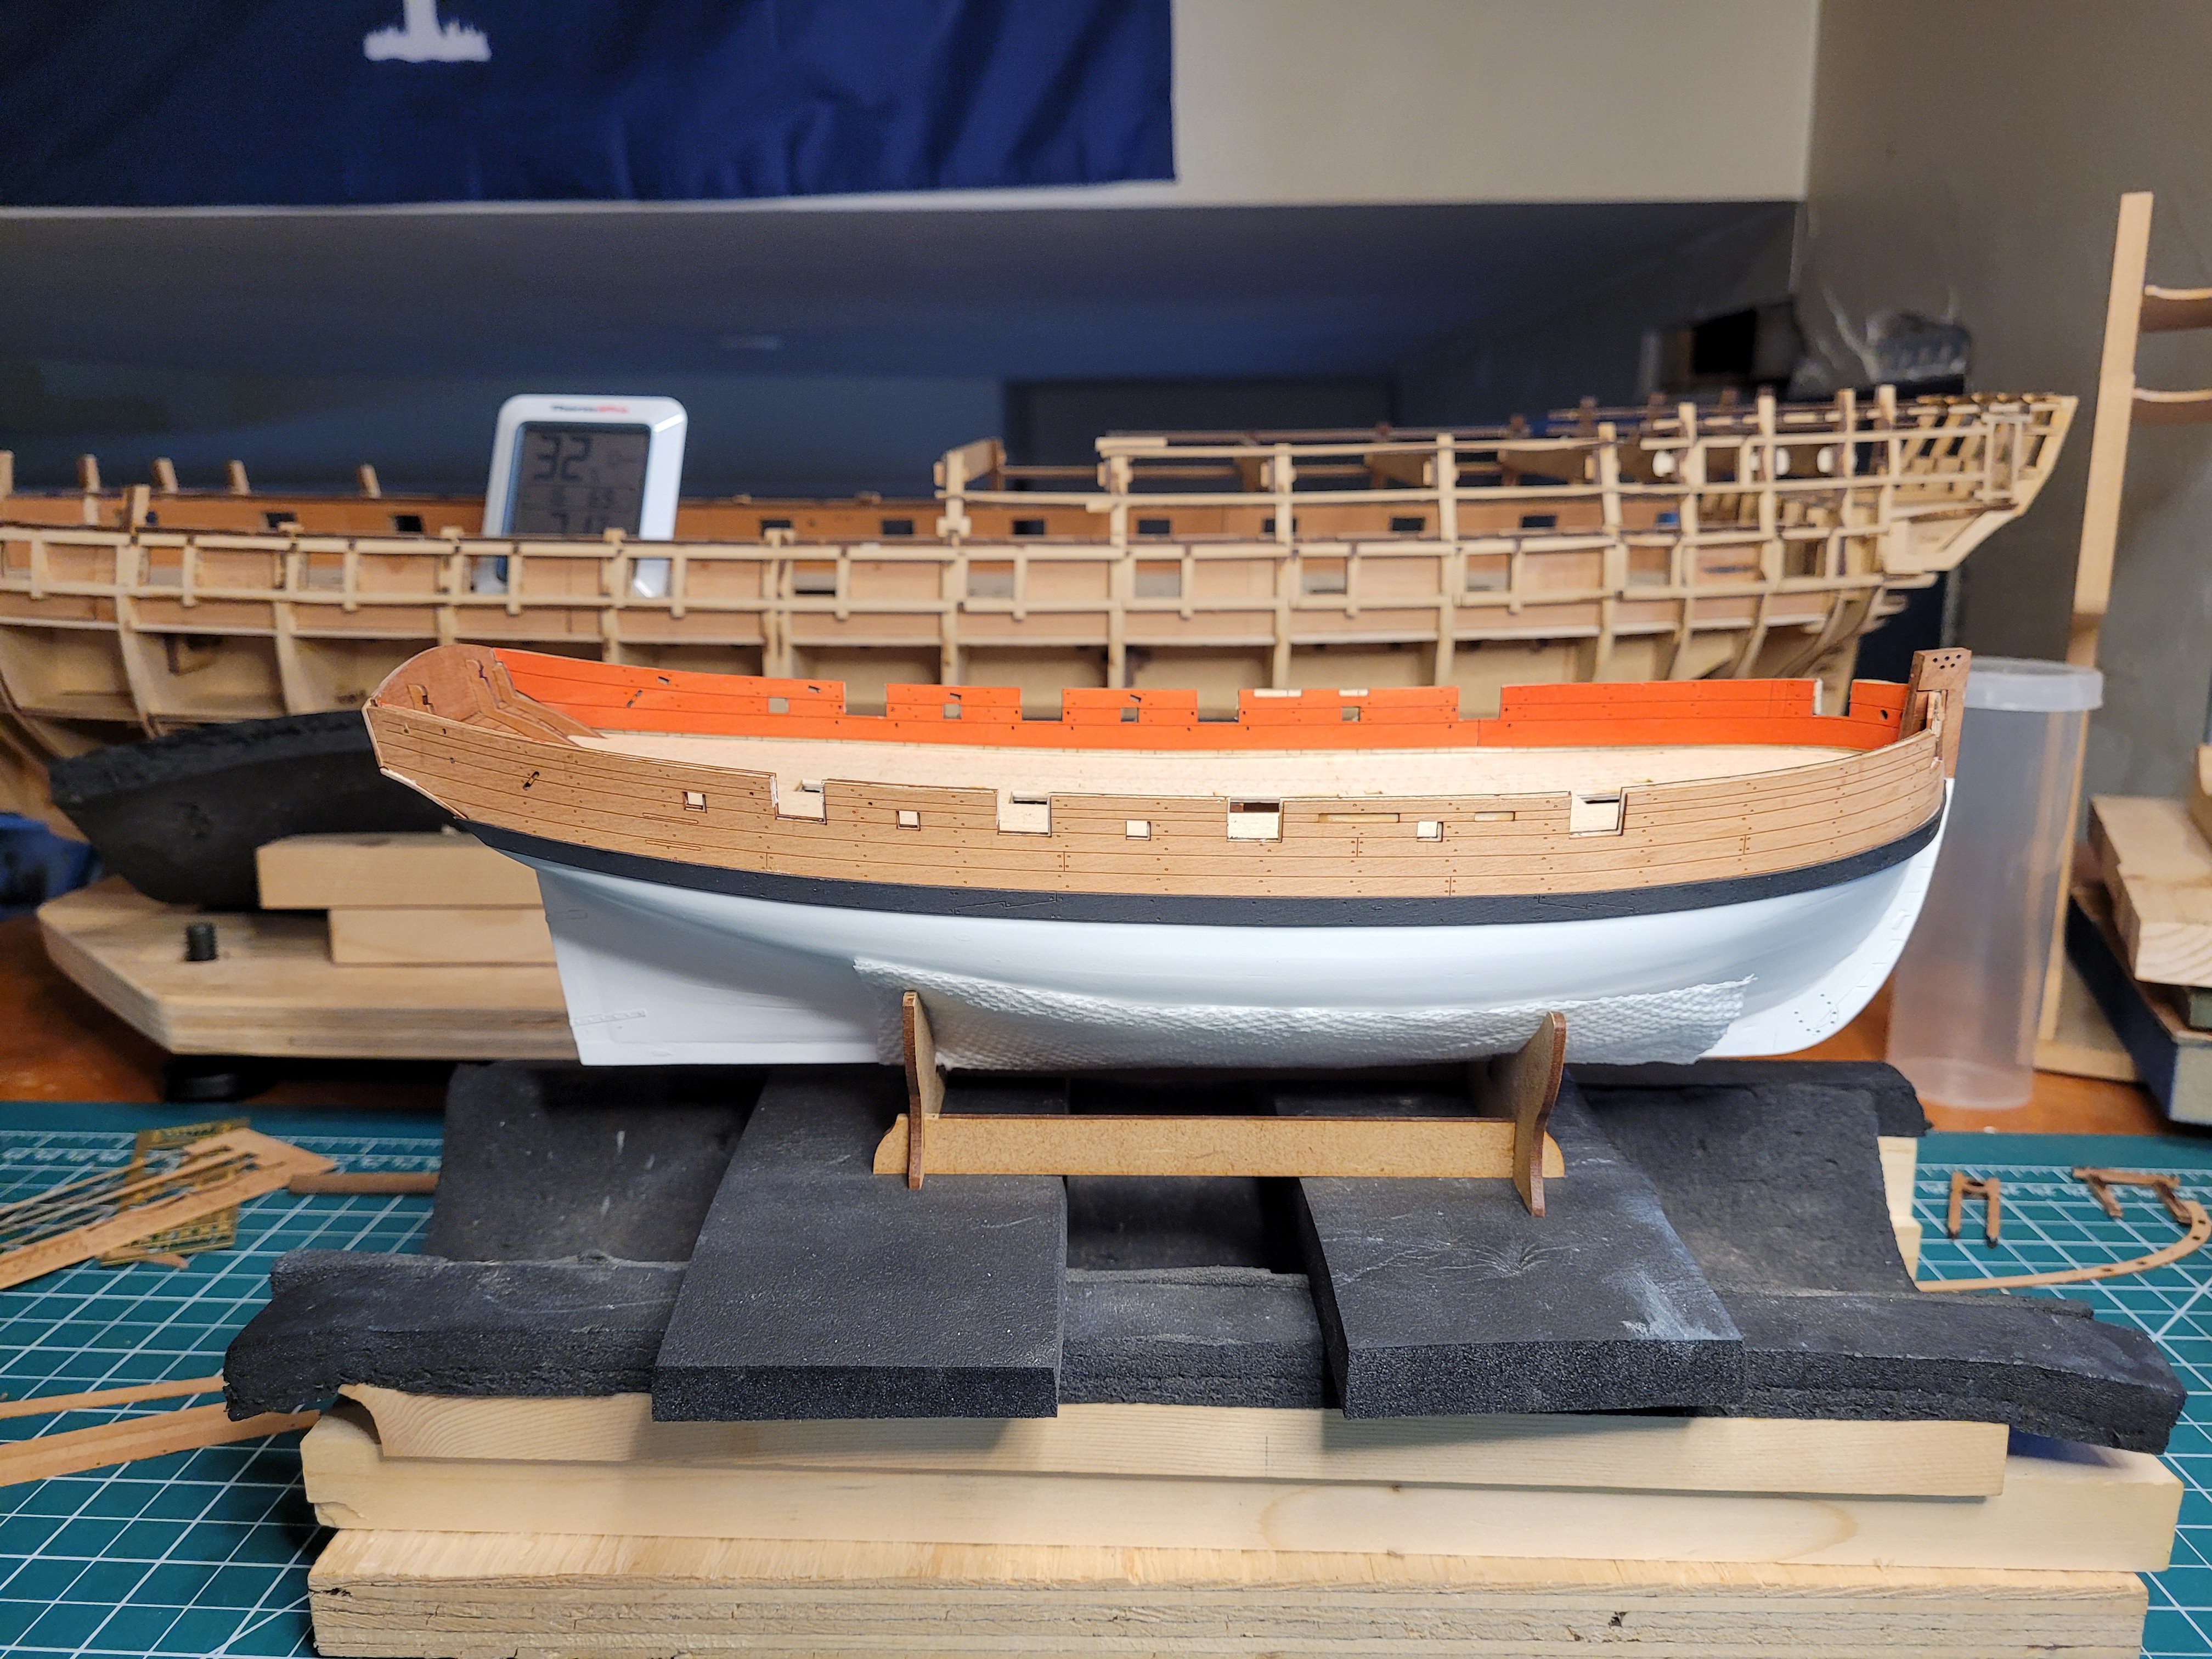
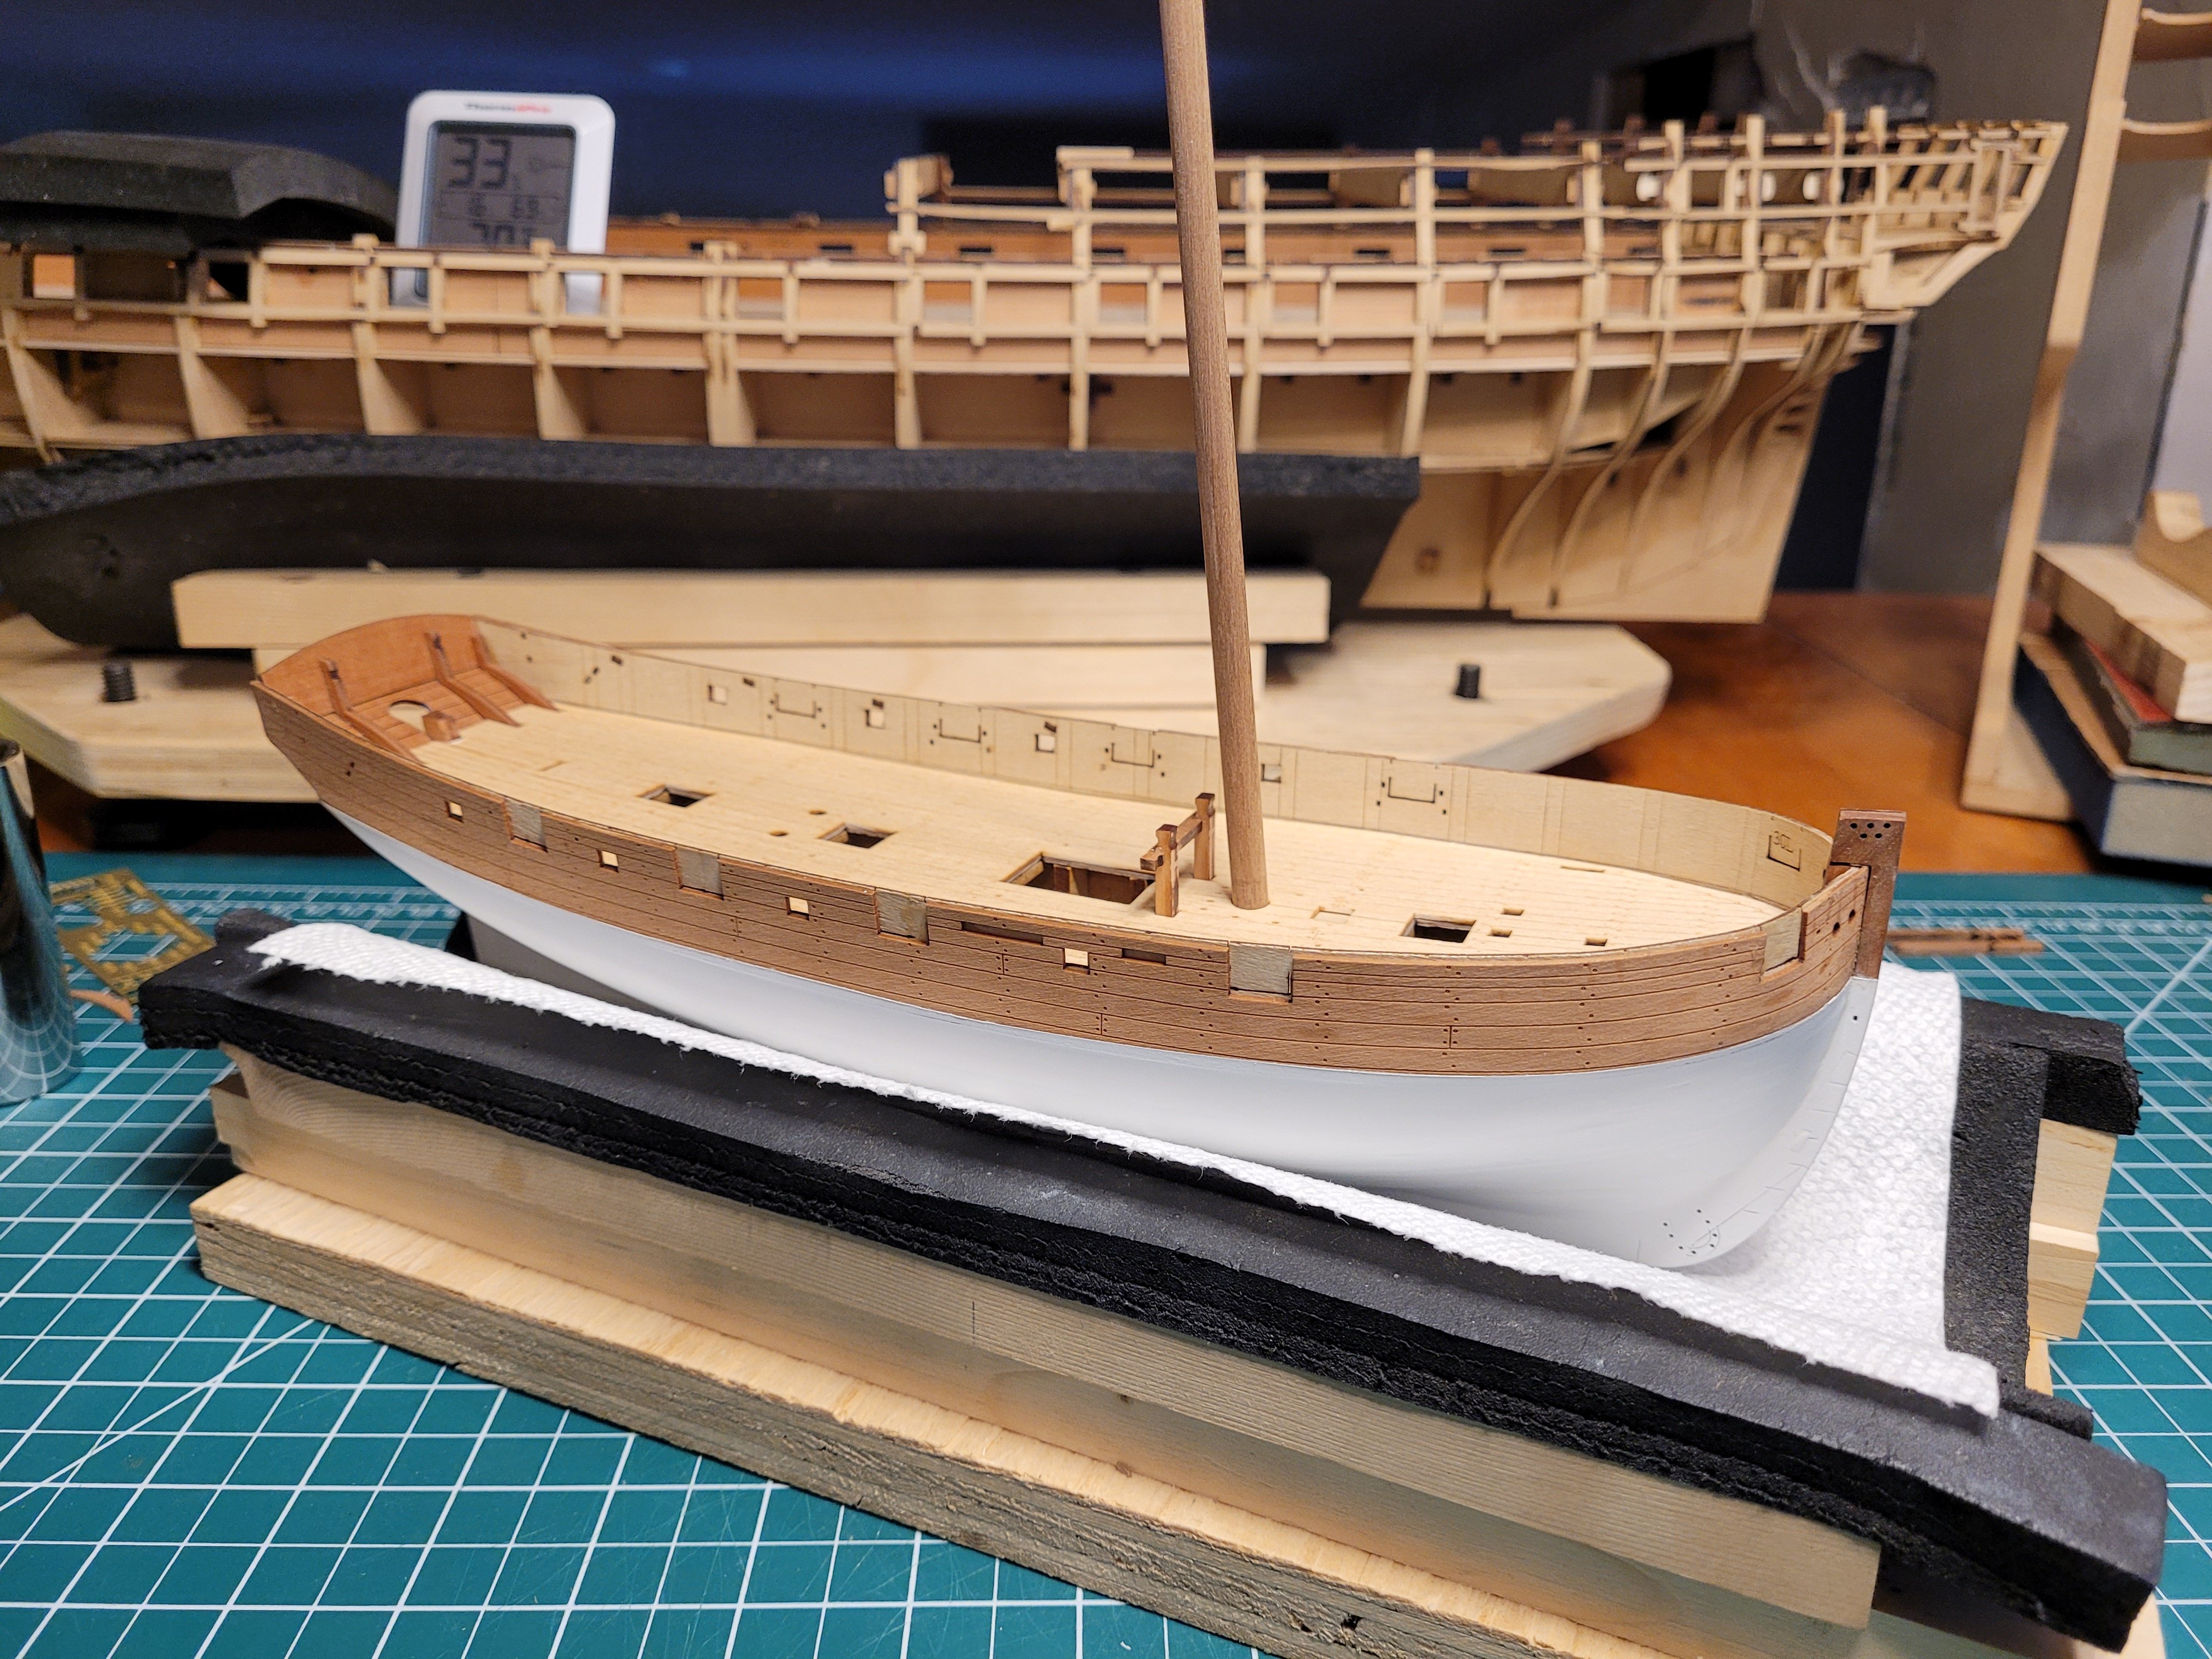
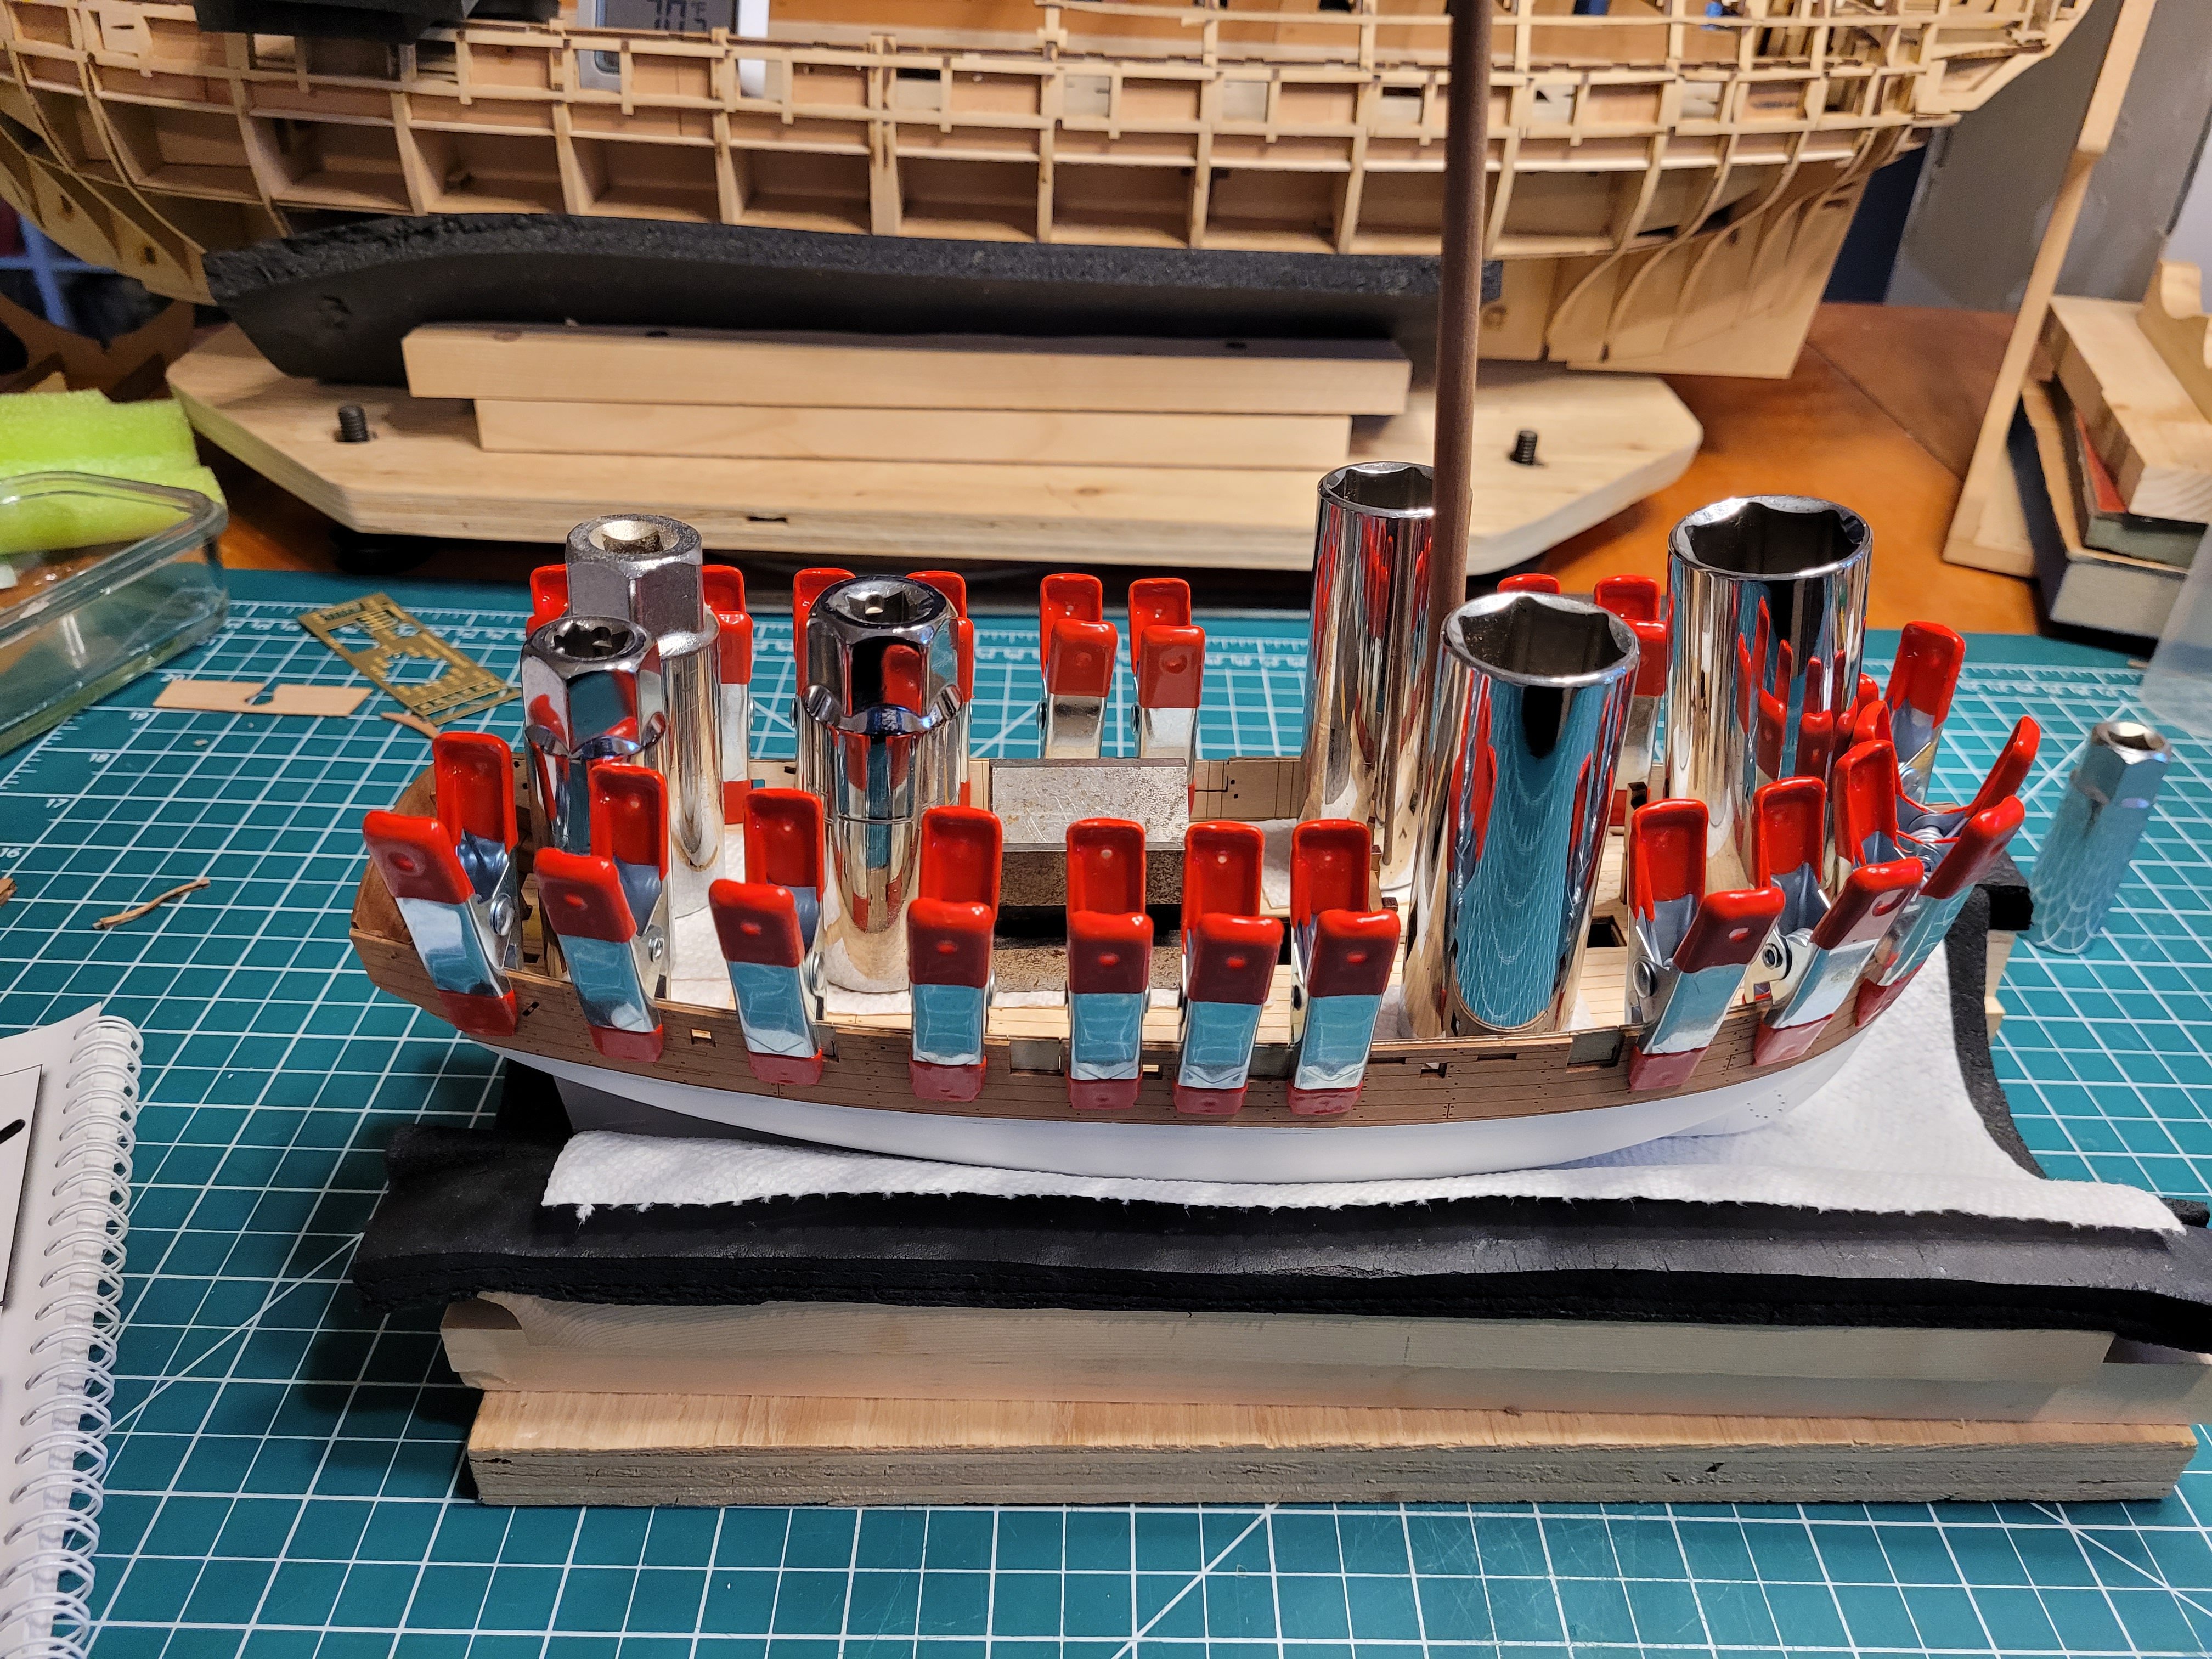
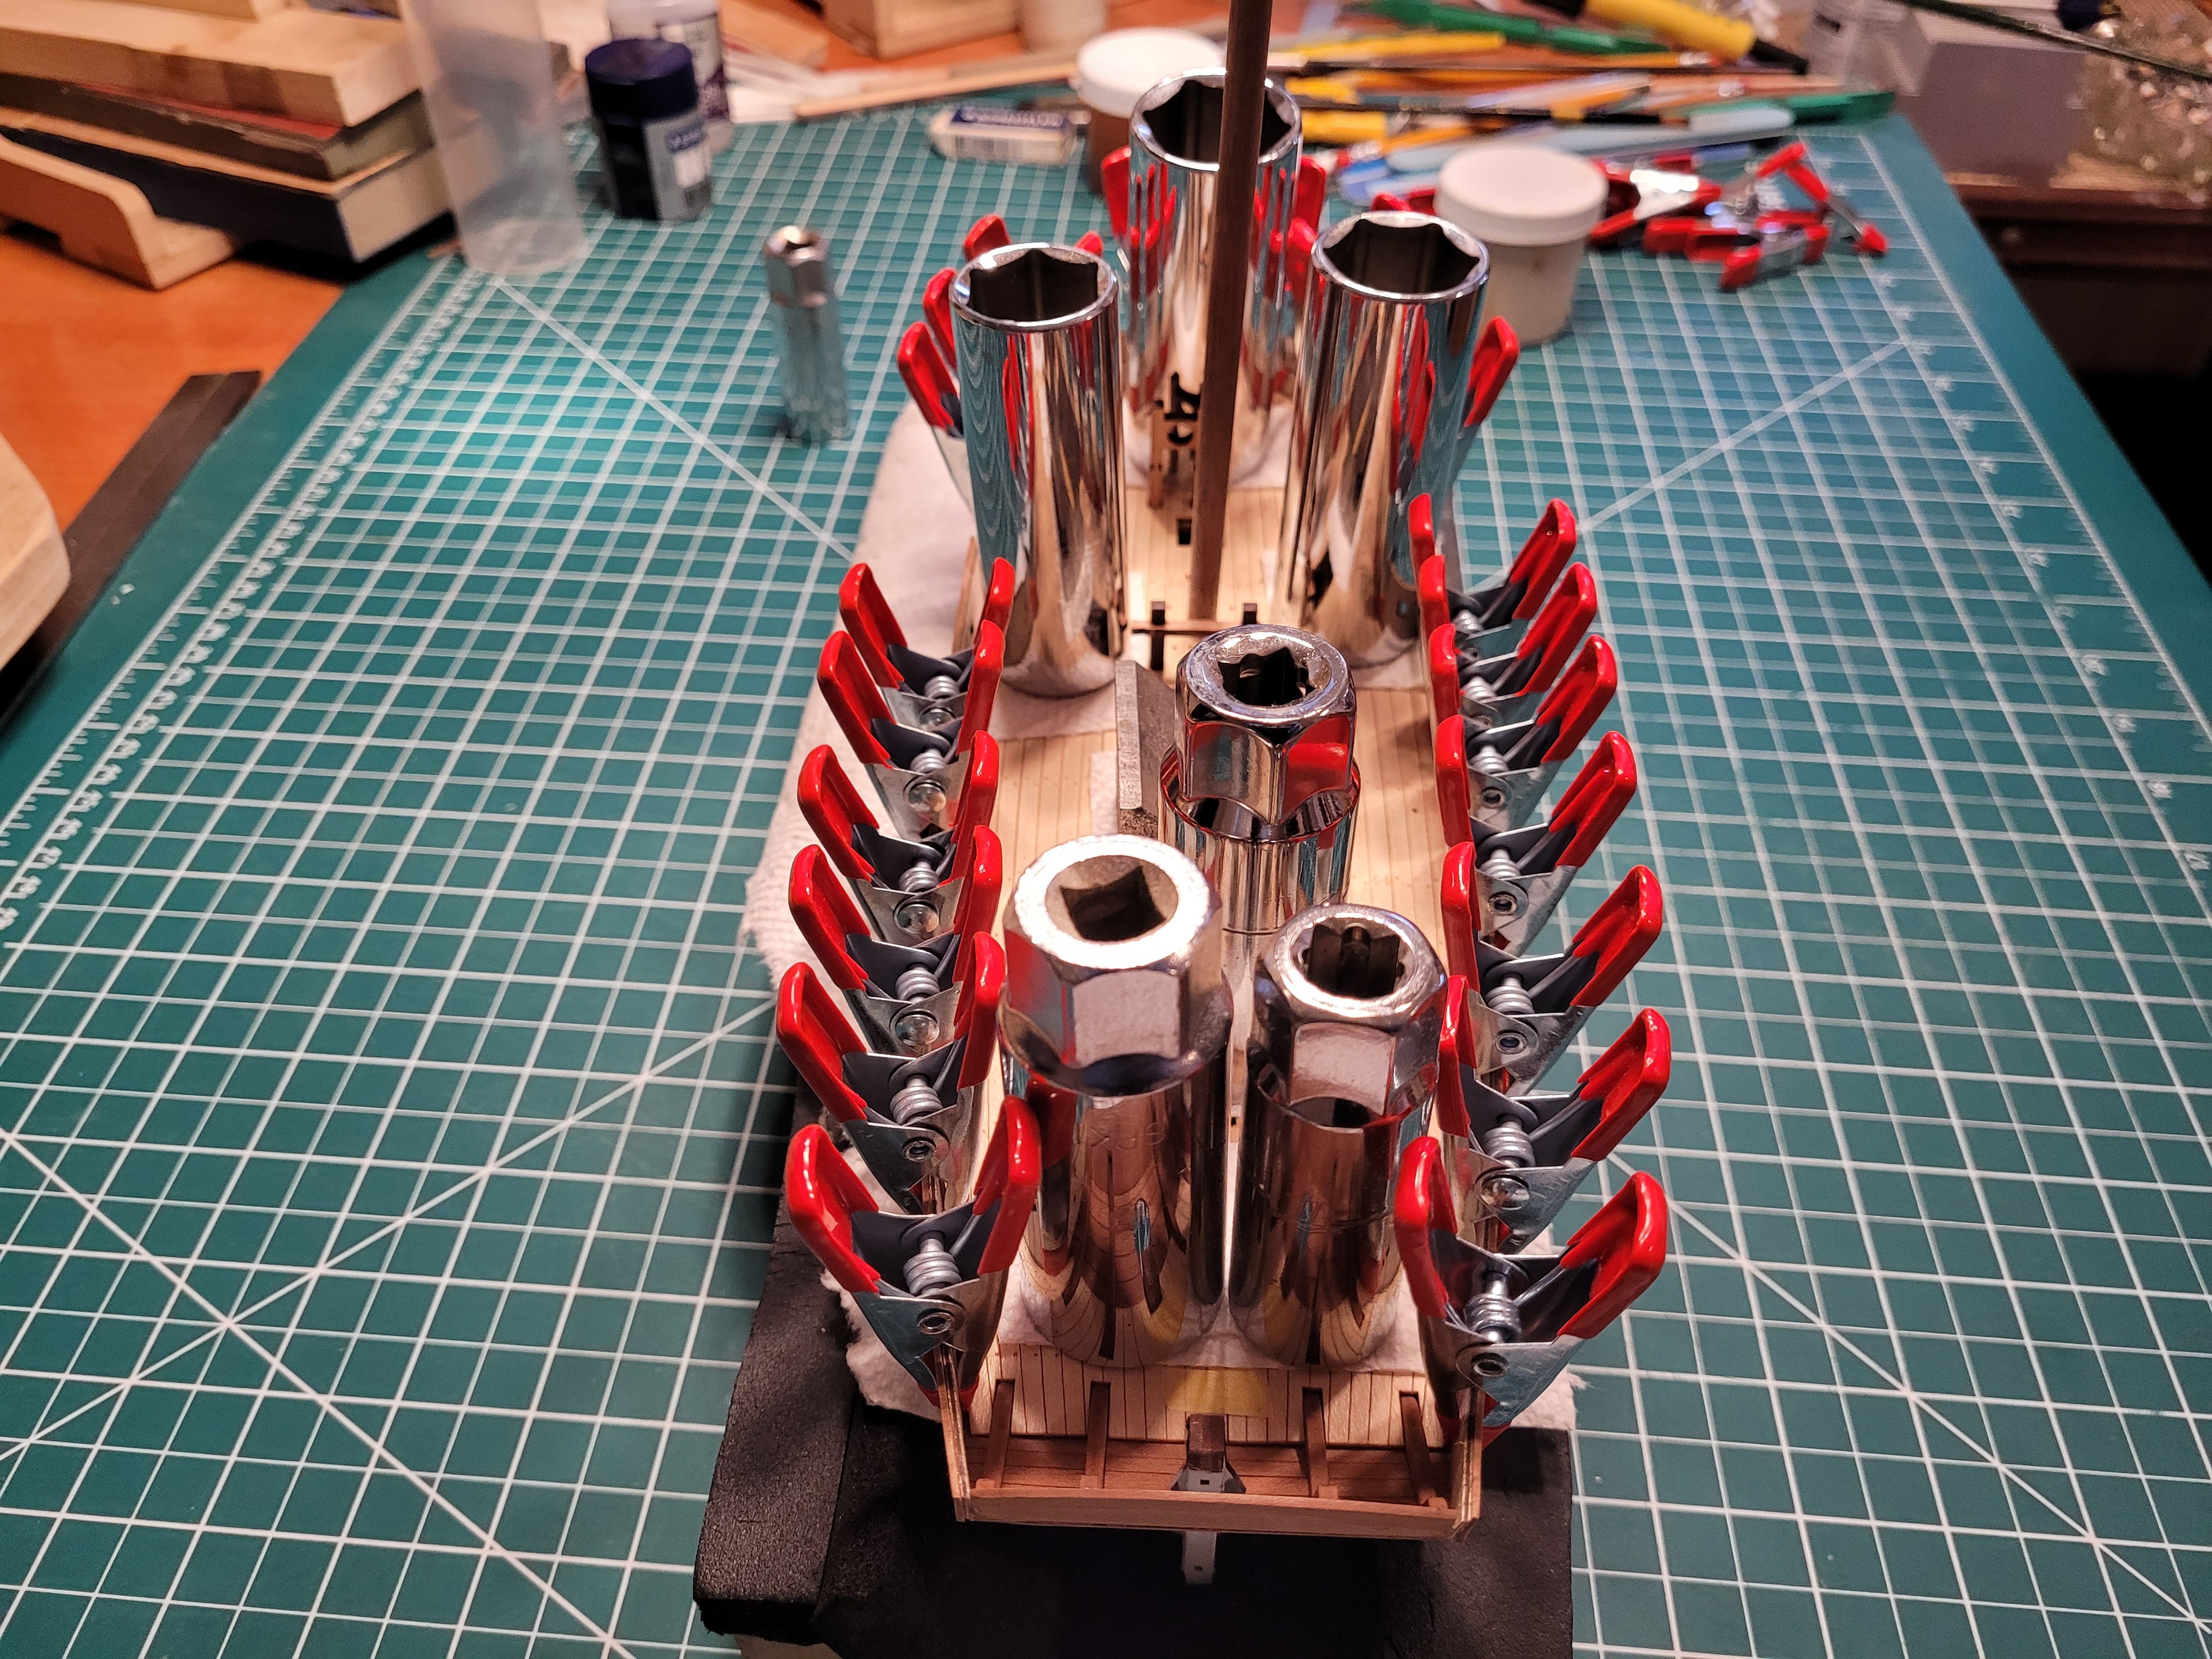
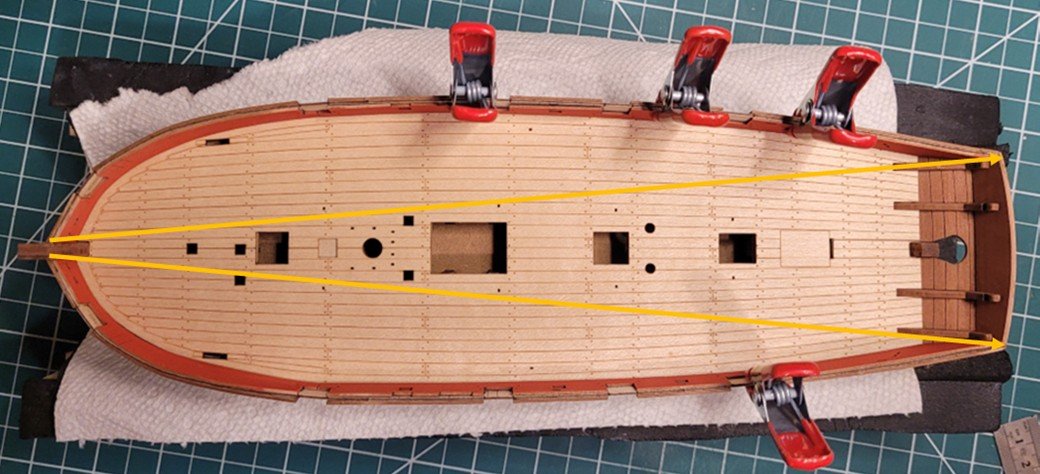
The deck is now down and just waiting on the glue to set fully in a couple of hours. The deck went in very nicely, just a bit of sanding on the notches for the stem and stern posts. I checked the fit dry a couple of times using the mainmast and the bowsprit and main bitts to make sure it all lined up. Then I put them in again after putting the deck down onto the glue to be absolutely sure it's all aligned. A couple of pics glued and with clamps and some weights while drying: Meanwhile, I've been multi-tasking since yesterday. The main wales are downstairs primed and ready for paint, as are the inner bulwarks. The tiller is assembled, sanded and ready for WOP. You can't really see in these pics, but the outer bulwarks have been WOP'd, also the inner transom area. I'll post a pic after the clamps and weights come off. I love what WOP does on pear, gives it a real nice tint. Nick


-
Thanks Geordie. Nick
-
Thanks Palmerit, and I will certainly check out the rigging videos and 90 deg tweezers. Nick
-
Thanks Russ! Nick
-
Been there done that LOL. Your build looks great. I'm next up to use the AK matt red; curious about your experience as I tend to have trouble with AK paints and use Tamiya 99.9%. Did you thin (I'm reading 50-50 recommended for airbrush), and by how much and with what? I look forward to your choice about the black. I'll be into black momentarily for the wales and so far have planned to use the AK Smoke Black as suggested in the Sherbourne instructions. Nick