


Giddy Gibberish
-
Posts
26 -
Joined
-
Last visited
-
 Tecko reacted to a post in a topic:
HMS Endurance by GiddyGibberish - OcCre - 1:70
Tecko reacted to a post in a topic:
HMS Endurance by GiddyGibberish - OcCre - 1:70
-
Tecko reacted to a post in a topic:
HMS Endurance by GiddyGibberish - OcCre - 1:70
-
Tecko reacted to a post in a topic:
HMS Endurance by GiddyGibberish - OcCre - 1:70
-
Tecko reacted to a post in a topic:
HMS Endurance by GiddyGibberish - OcCre - 1:70
-
Tecko reacted to a post in a topic:
HMS Endurance by GiddyGibberish - OcCre - 1:70
-
Tecko reacted to a post in a topic:
HMS Endurance by GiddyGibberish - OcCre - 1:70
-
GeneralNuisance reacted to a post in a topic:
HMS Endurance by GiddyGibberish - OcCre - 1:70
-
GeneralNuisance reacted to a post in a topic:
HMS Endurance by GiddyGibberish - OcCre - 1:70
-
Canute reacted to a post in a topic:
HMS Endurance by GiddyGibberish - OcCre - 1:70
-
Canute reacted to a post in a topic:
HMS Endurance by GiddyGibberish - OcCre - 1:70
-
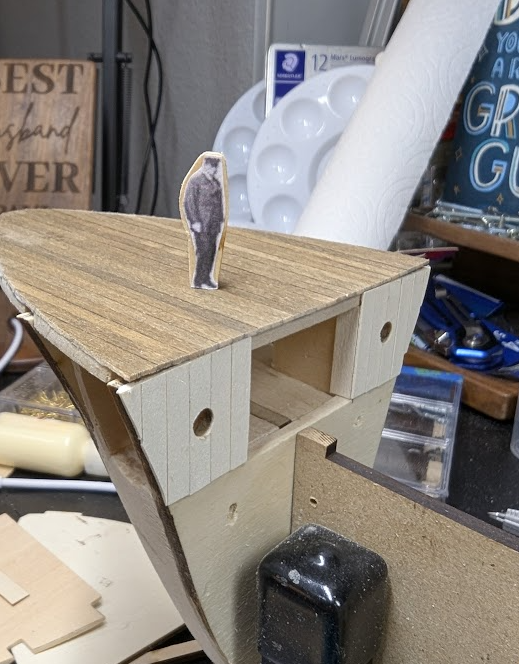
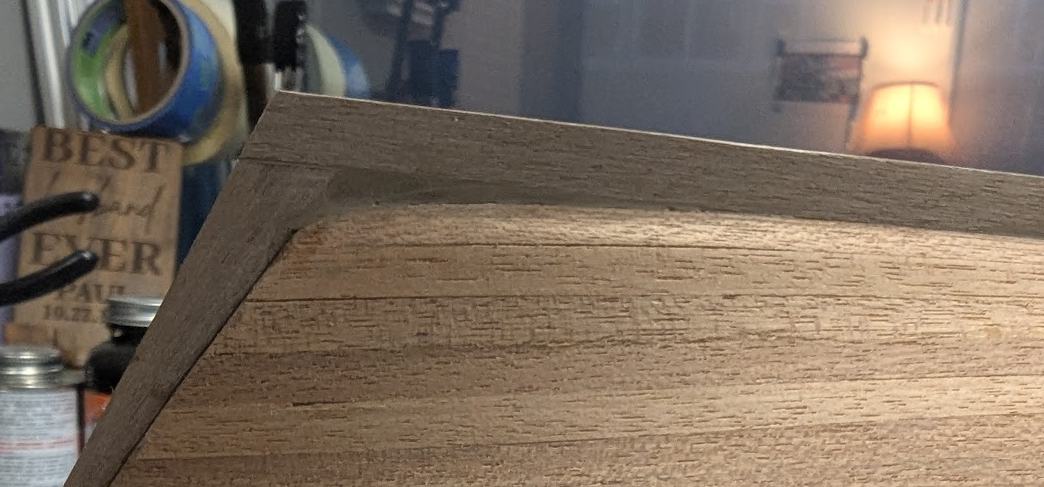
I finished the skylight. I used thinner trim which left a little too much joint showing so I also added some 1/31x1/32 to cover it. Although the stain didn't turn out exactly how I expected I'm happy with the final result. Very excited to finally start planking this weekend!


-
Thanks so much! A lot of great inspiration from those that came before me.
-
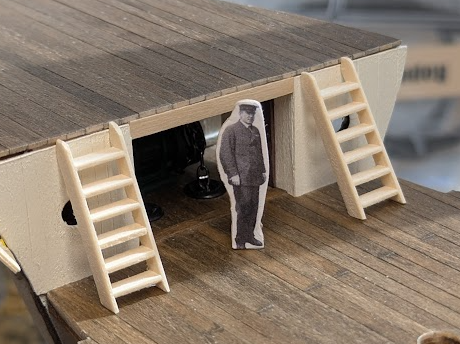
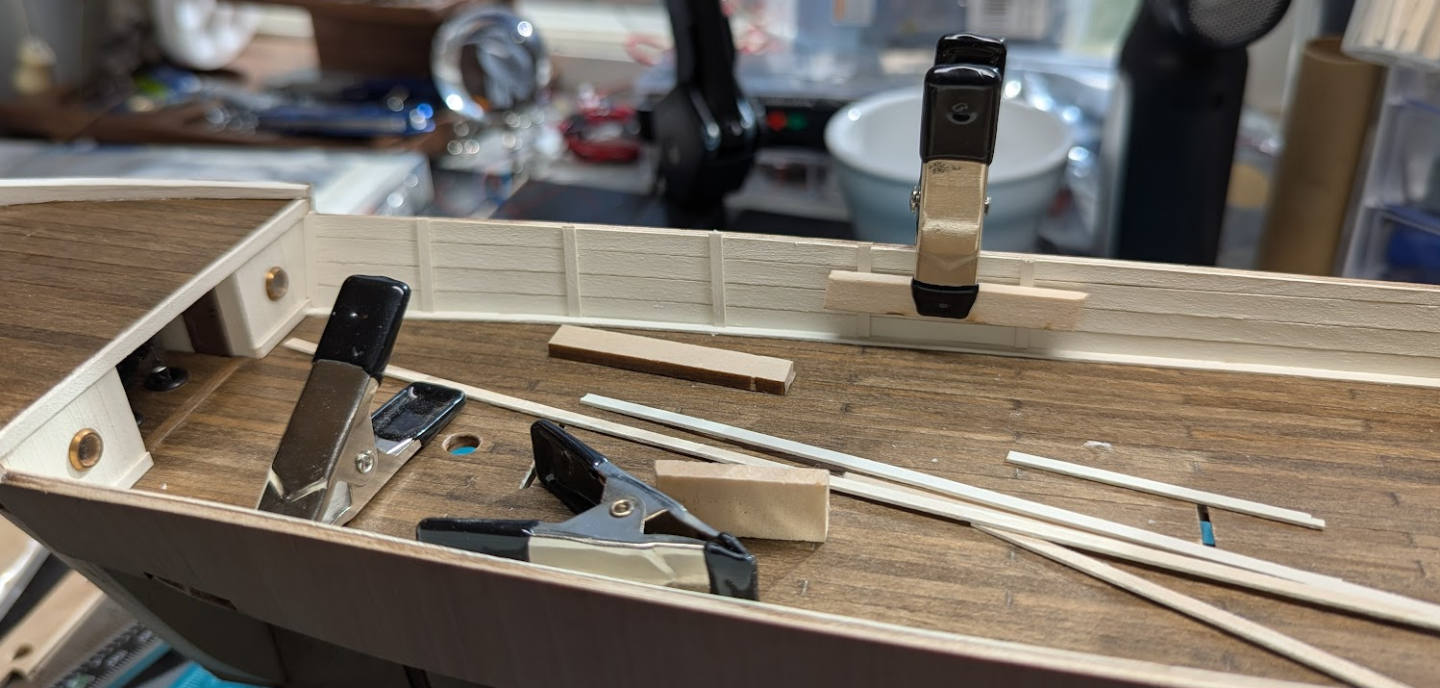
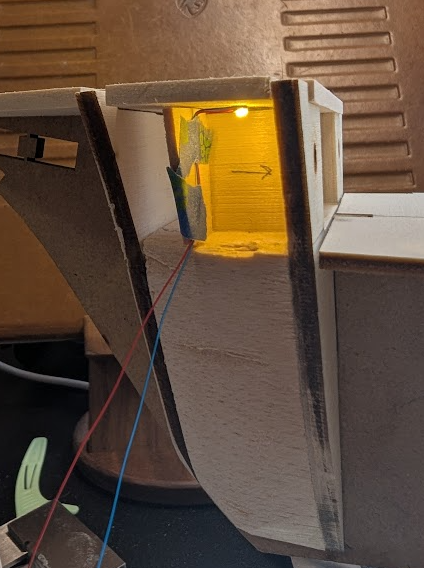
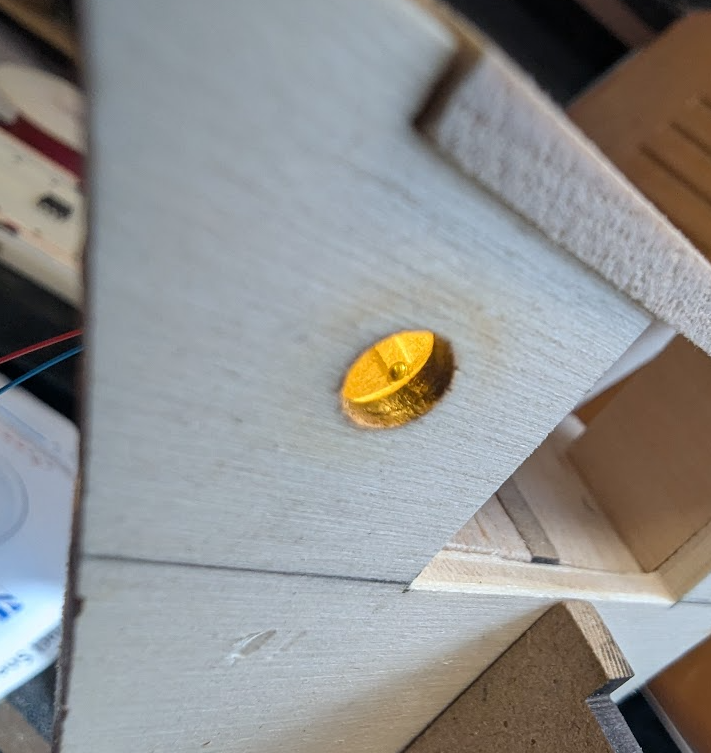
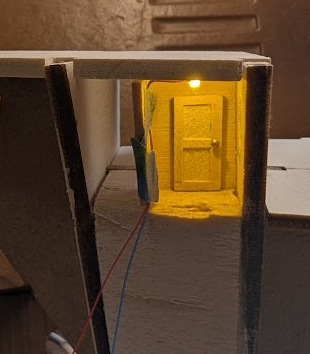
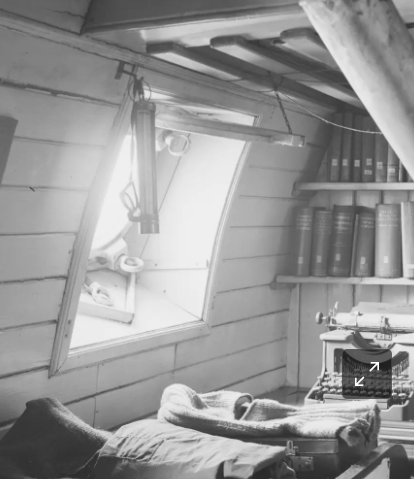
Thanks for the likes and visits! That's good info Dr PR. Thanks! I hadn't intended it to be this long between updates. It's mostly due to indecisiveness at various stages. I knew adding lighting was going to be a challenge and I had to do a lot of experimentation and rethinking. I'm finally 95% done with the lights! I built out rooms using mahogany planks I got from a doll house supply store. The wood was slightly reflective. Using white paint was too bright and this gives the impression of a finished room when seen through the porthole. This increased the luminescence just right and kept it a warm tone. I used CA to attach all the light fixtures to the ceiling. I tested every time I added a new wire. I could have soldered the wiring harness but I was worried about changing my mind repeatedly, so I got a power distribution strip and connectors. To manage the wires, I used small pieces of painters tape that I put a thin coat of CA on. The main harness started with 18 AWG wire but I took it down to 30 AWG. After getting the lower deck lights working, I had to figure out how to get power to the companion way lights without having to attach it. I found small connectors that worked perfectly. I opted to remove the walkways from the companion way and build them separately so they were more like the actual ship. Lighting test looked good: To get the main power line in, I cut a notch in the keel. My plan is to drill a hole in the bottom keel piece and then using that location for the mounting pillar. I haven't figure that part out for sure yet. Showing the wire passing through the hull planks: The final thing I needed to solve before I could plank the hull and block access to the wiring was the skylight. I thought about this one for a few days before deciding I would try and cut a hole in the deck and see if the ambient light from below would be enough to illuminate the skylight. It was not and in the end I added a specific LED. I didn't think of cutting out the middle until I'd already assembled it. That made it a little tricky. First, I had to pick a stain. After trying a few, what I liked was a mix of the Sapelli stain from OcCre and a stain called English Oak. I mixed them 50/50. Also, I didn't not like the look of the scratched plastic, so I bought some 7 mil milky white sheets off Amazon. The LED by itself was much to bright, so I build a light box to diffuse the light. I ended up using 3 layers of plastic for the light box and 2 layers for each window. Finally, for the hinge on top, I'm using a polystyrene rod. Easier to work with and takes black paint well. It's not quite finished but this is the work in progress. Dry fitting: Jewelers saw (disconnected one end and passed it though the hole). Cutting the hole in the deck was much harder. No good: Light box: That's all for now. I'm going to finish the skylight trim and do one final lighting test for starting on planking the hull. I will be adding a mast light along with port and starboard running lights. My plan for those is to feed electricity off the companion way using white 40 AWG wire. I'm hoping it is fine enough to look ok. ~Giddy~ Fair winds and following seas.


-
Giddy Gibberish reacted to a post in a topic:
HMS Endurance by GiddyGibberish - OcCre - 1:70
-
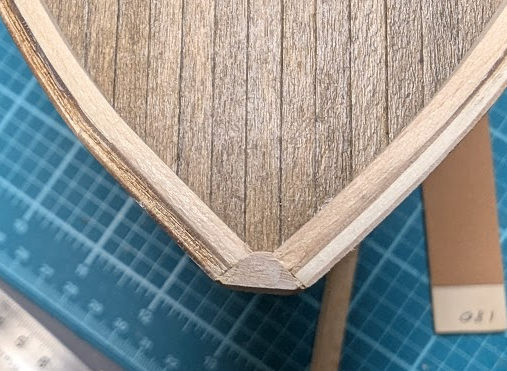
Those little boats look great! Thanks for the tip on the stem pieces. I'll have to pay attention when I get to that part.
-
Giddy Gibberish reacted to a post in a topic:
Endurance by Tomculb - FINISHED - OcCre - 1:70
-
Giddy Gibberish reacted to a post in a topic:
Endurance by Tomculb - FINISHED - OcCre - 1:70
-
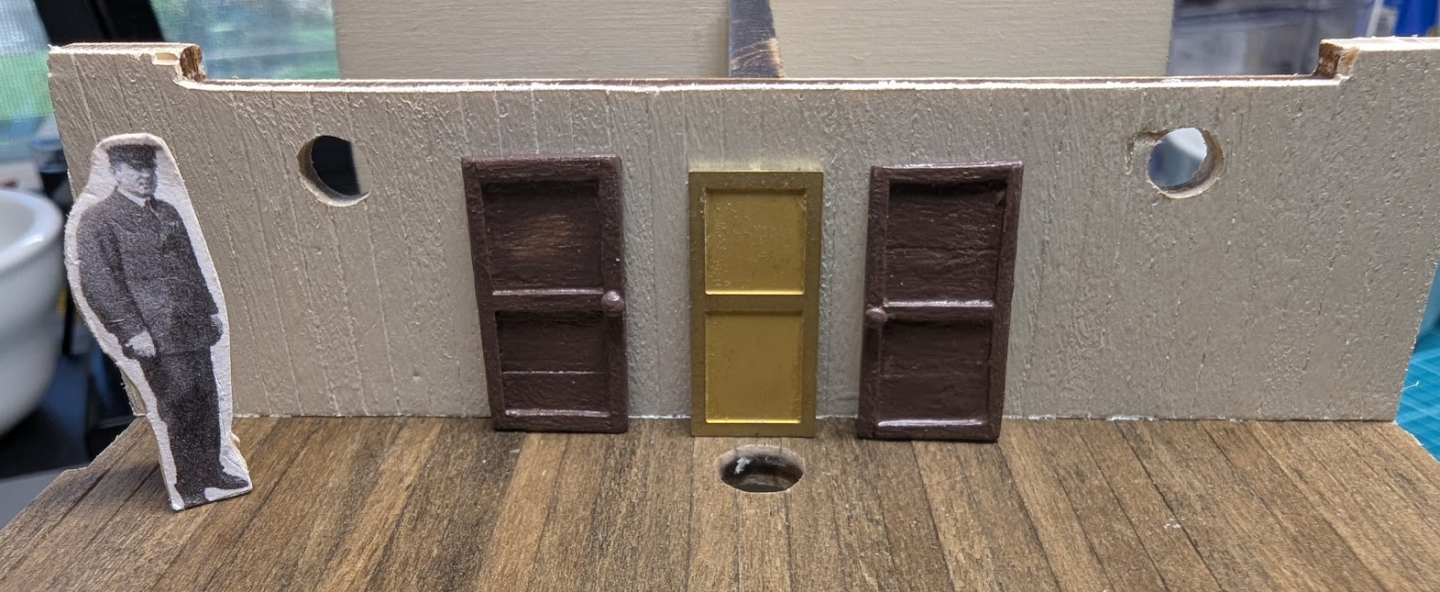
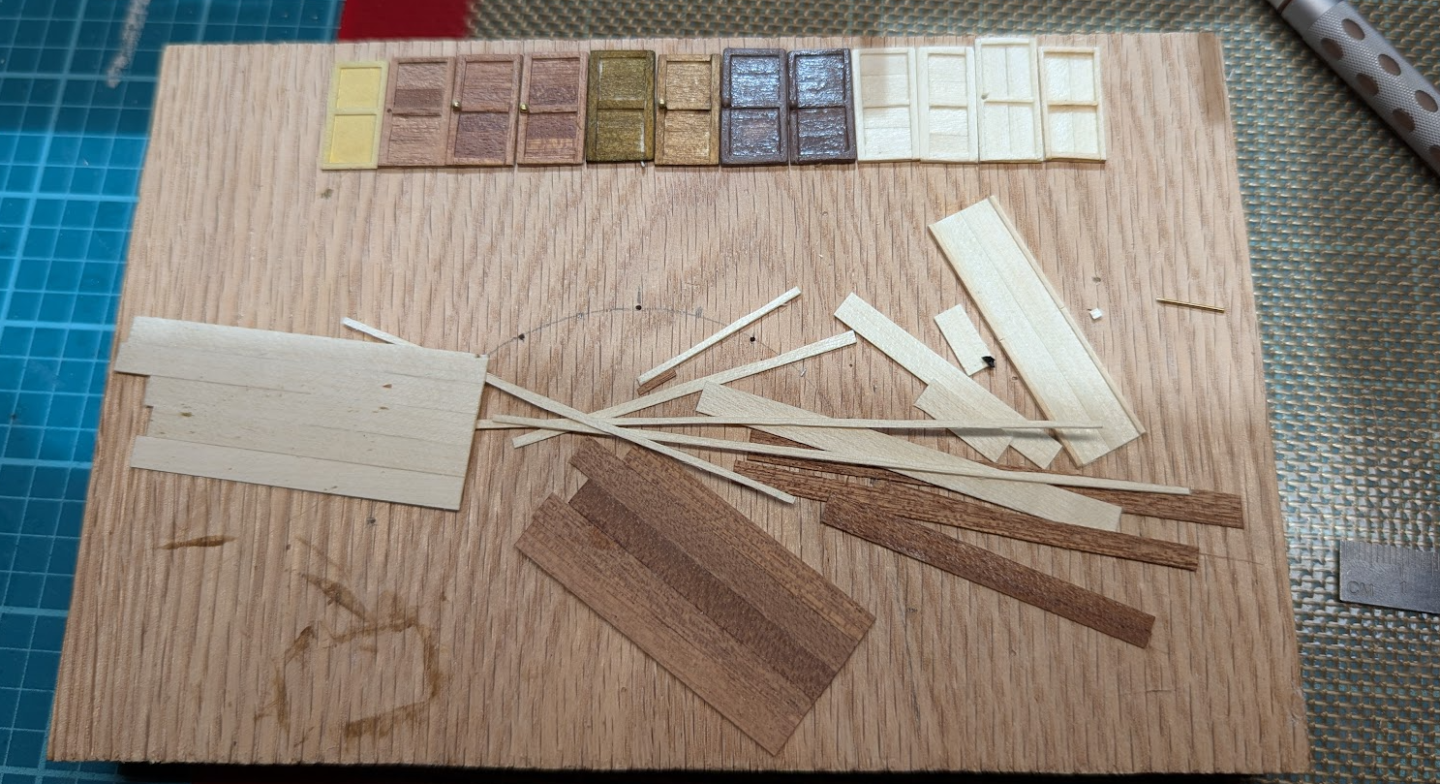
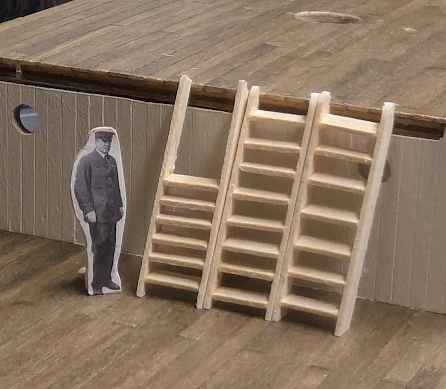
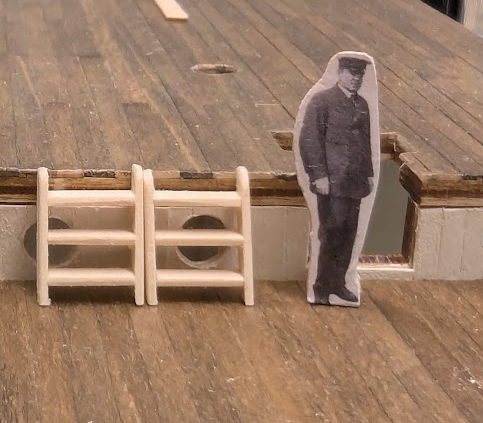
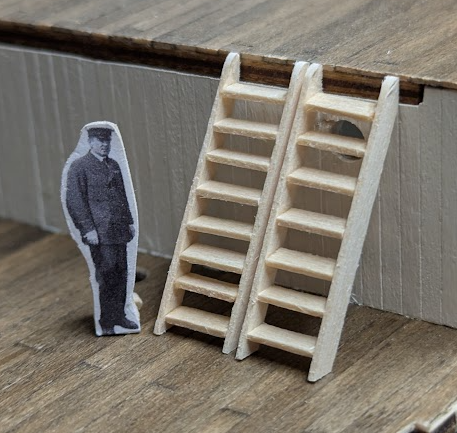
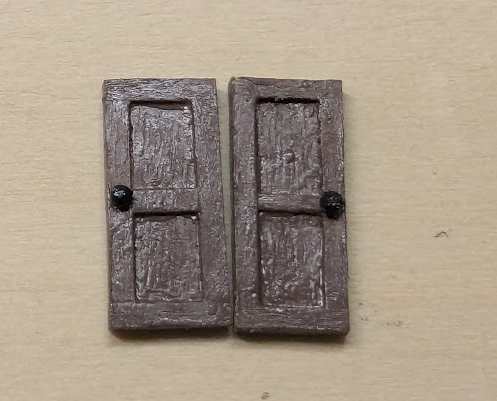
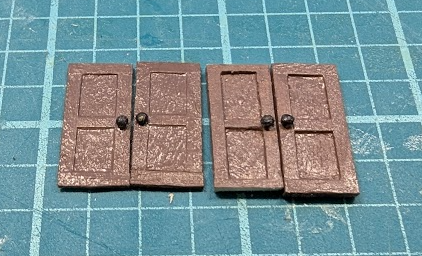
Disaster! Well, that's being overly dramatic but when a grown man cries there must be some drama about, right? Otherwise he's just a big baby. So I ruined BOTH of my cabin bulwarks. I was sanding all the bulwarks for painting and I accidentally broke the second one in 3 places. I had the bulwark flat on the table and I was using a sanding block and it slid off the end and the return stroke broke my heart... er, my bulwark. I tried to glue it back together but it broke again when I tried to enlarge the portholes (one break was across the porthole). I tried to cut one out from scrap wood but it broke cutting out the notches. I ruined the other one trying to enlarge the portholes. I was using a drill bit in reverse trying to go a little larger each time. Well, it didn't stay centered in the starting hole so my portholes are all over the place. I didn't photograph the shattered one. Too ticked off at myself and bummed about the delay to think about a photo at the time. Here's the holey mess: Anyway, I like to learn from my mistakes to I decided to get better at enlarging holes and now I have a tapered expander for when I get my replacement bulwarks in a month. *sigh* I've kept working on small stuff to pass the time. I finally found portholes I really like. I tried tarnishing them in liver of sulphur and I liked the results. Even though they aren't black I'm taking a bit of artistic license and using them anyway. Gluing the decks was pretty straighforward. I ran into a small problem with the bow bulwarks. Because I reshaped the forward deck there weren't any notches to aligh the bulwark with. This may be why I ended up with a larger gap than could be covered by the 4x4mm wood. I cut a piece off the 6x6mm piece instead and made that work. I saw a suggestion on Tom's build log about planking the bulwarks. I've been trying to find a use for the kit supplied sycamore and this was the first place I felt it would be "ok". I think it's a bit wide but I can live with it. Painted first and followed up by adding the bulwark stanchions. I used 1/31 x 3/32 wood for the stanchions instead of the kit supplied wood. When I put the deck plank that runs along the bullwark (the waterway?) it didn't quite snug up enough against the bulwark and there were some gaps, especially at the curve. I had purchased some 1/32x1/32 wood to make doors with (more on that in a minute) so I used it to lay another framing piece to cover the gap. I decided not to try and paint the 1/32x1/32 wood in advance because I thought it would be a pain so I painted it after gluing. I touched up the paint all around at the same time. I'm pretty pleased how this came out. Probably not historically accurate but it looks pretty good! As I mentioned, I was also working on door designs. I didn't really like the brass doors in the kit and I liked making the little doors for the WC and lamp room so I figured I would see what I could do while (guess what!) waiting for portholes. I went a little overboard. I also built a jig and learned how to make ladders. Sooo many ladders. I tried different step spacing and came up with an adjustable jig. I ended up picking 4mm rise and 67.5 degree slope. I did all this before gluing the decks while waiting on portholes. 3/4/5mm at 60 degrees for visual testing. 4 & 5mm finalists: Planning a mini-bonfire for the also-rans. Final versions. My jig. I clamp a small ruler to it when making a ladder.


-
Wow! Thanks for stopping by Tom! I've been so busy working on the model in all my spare time I haven't been on the site since I didn't have much to update about. I appreciate you pointing out the wooden railing. I did pick up on that in one of the comments in your blog and I purchased some capping stanchions for the purpose. I really thought about using Casey's but I'm a bit lazy and that seems like it takes some work to do it right. I was hoping for something easy and non-caustic. After failing with liver of sulphur I'm resigned to trying it at some point.
-
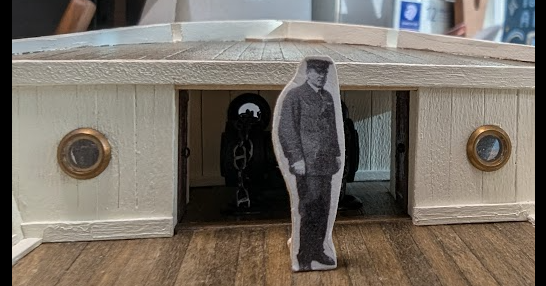
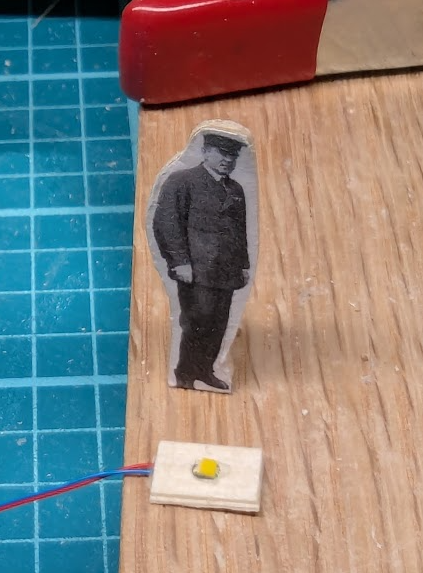
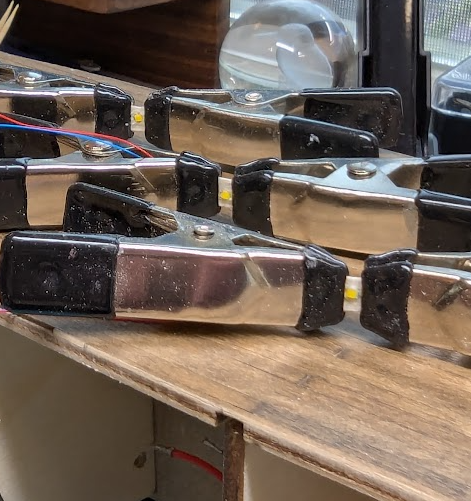
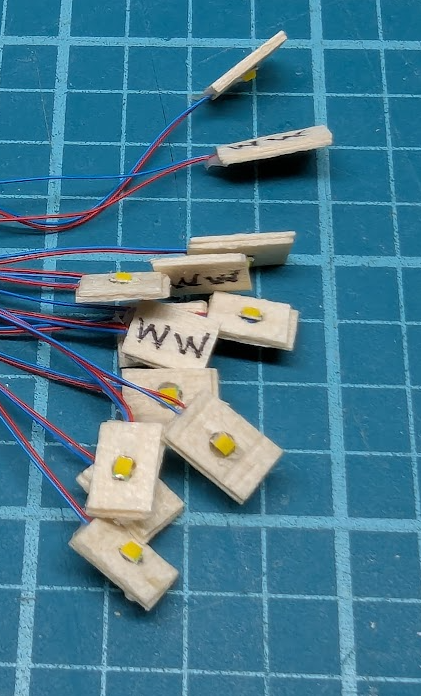
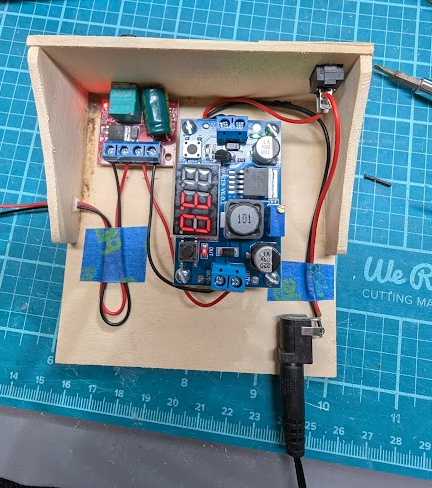
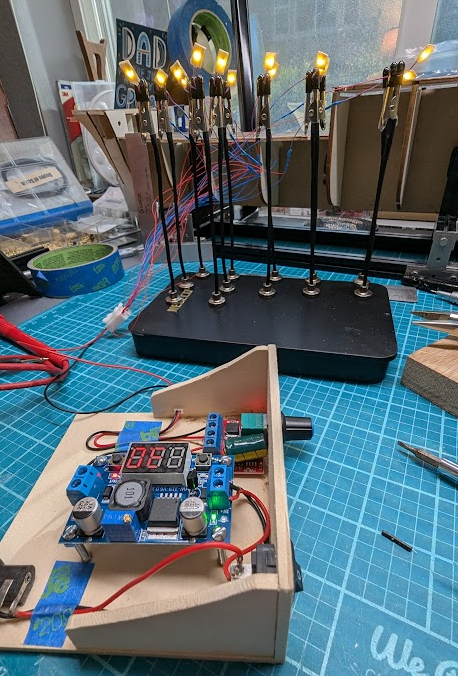
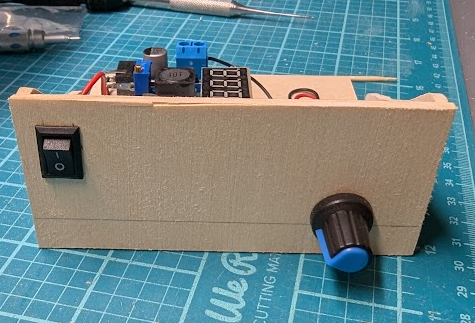
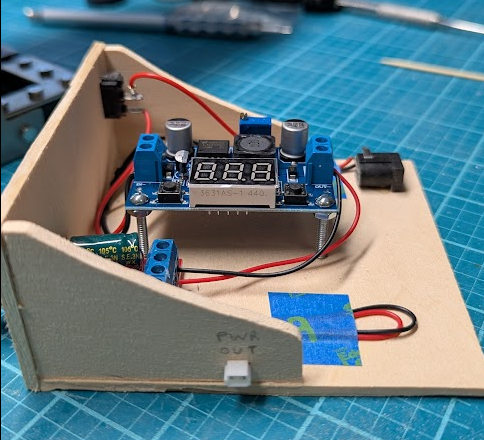
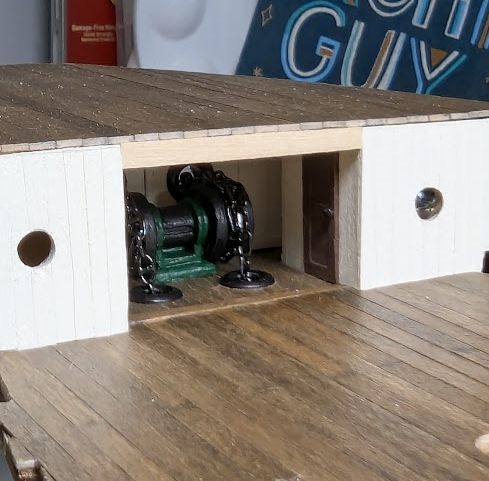
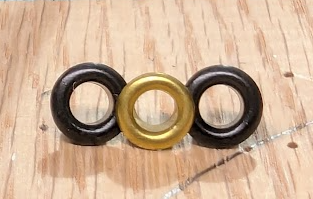
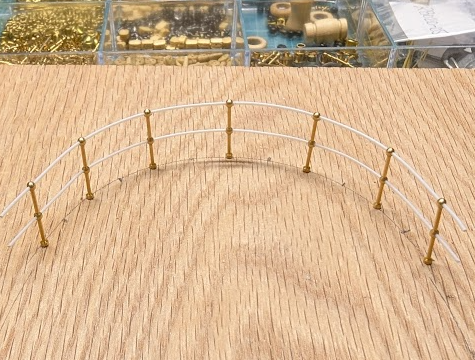
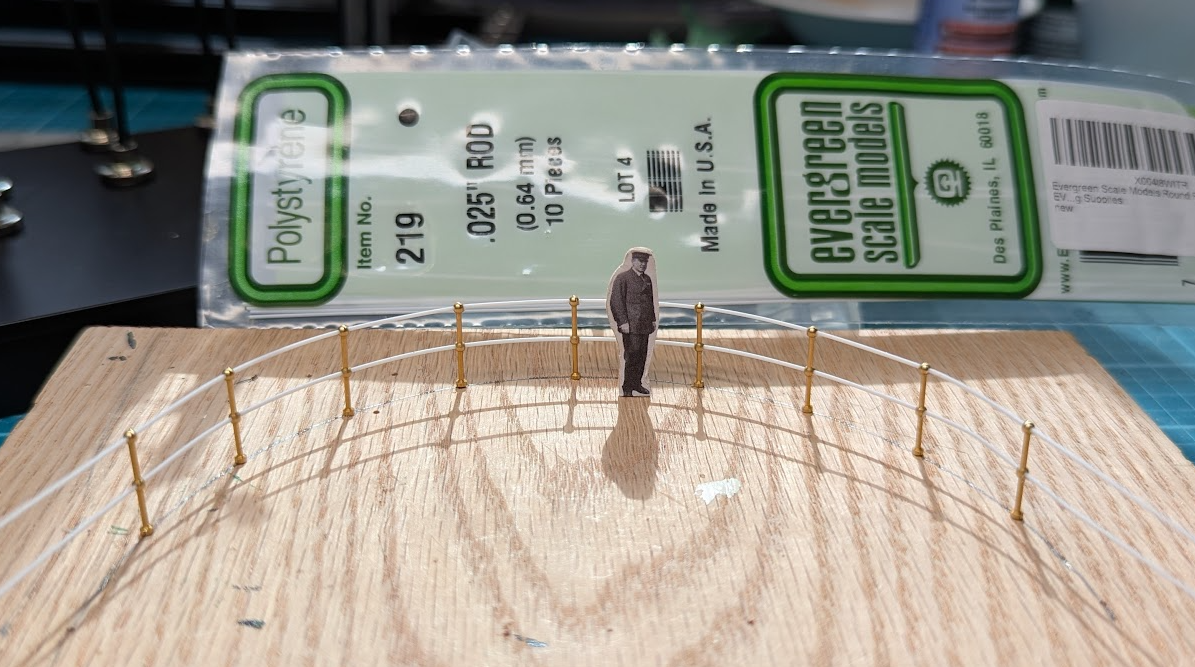
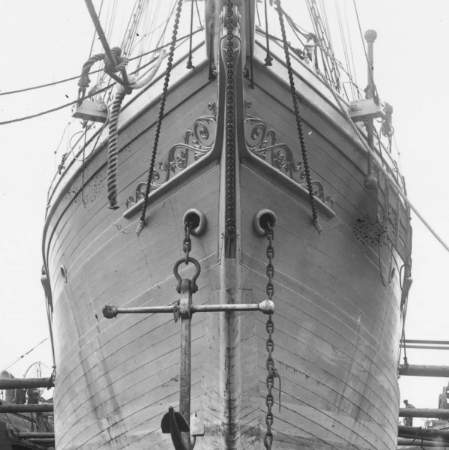
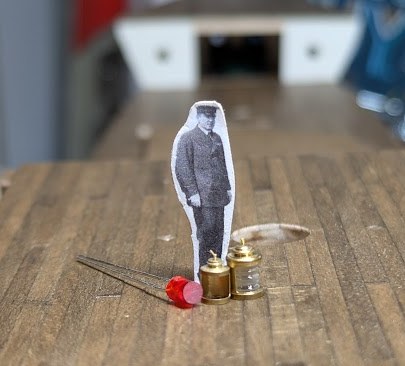
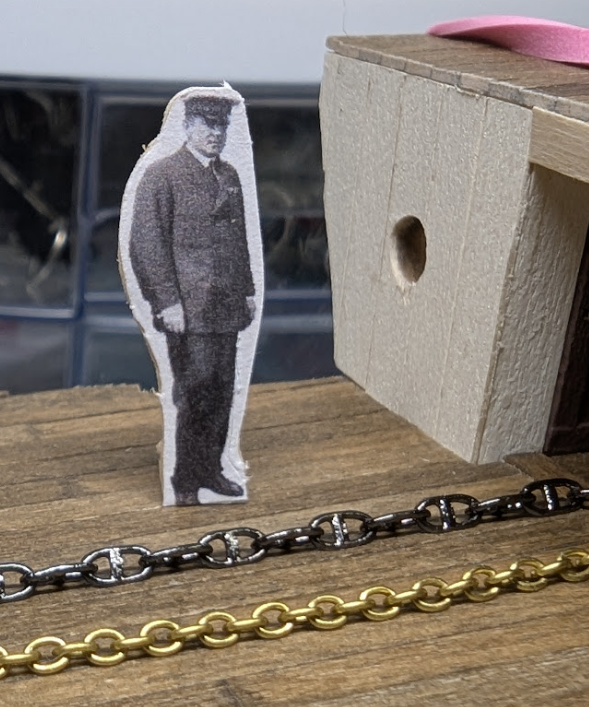
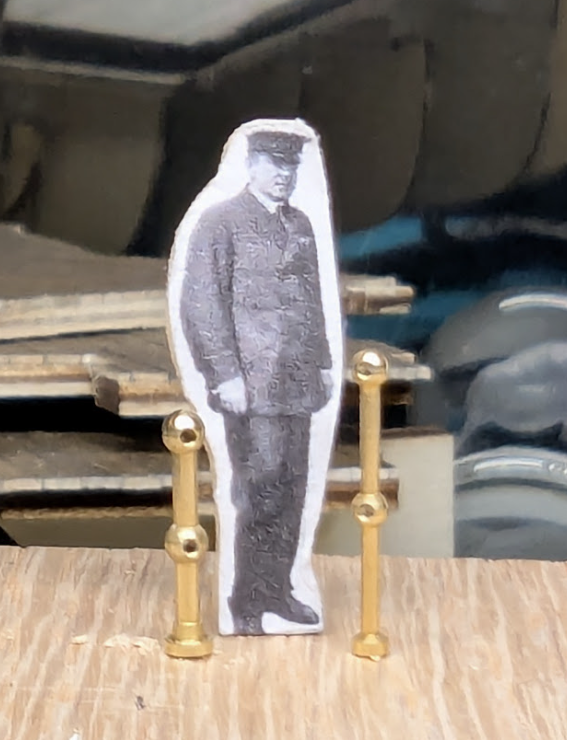
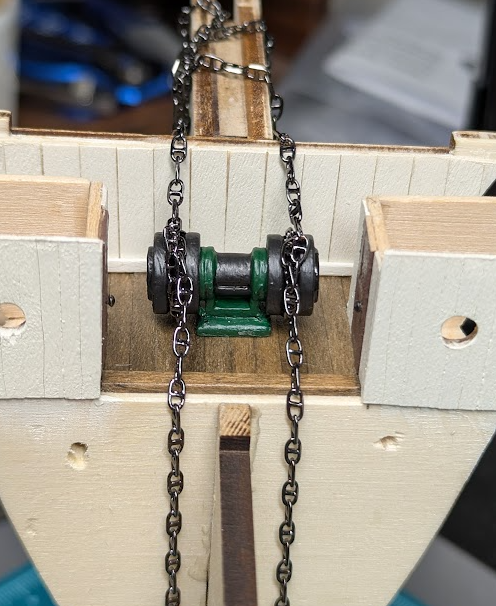
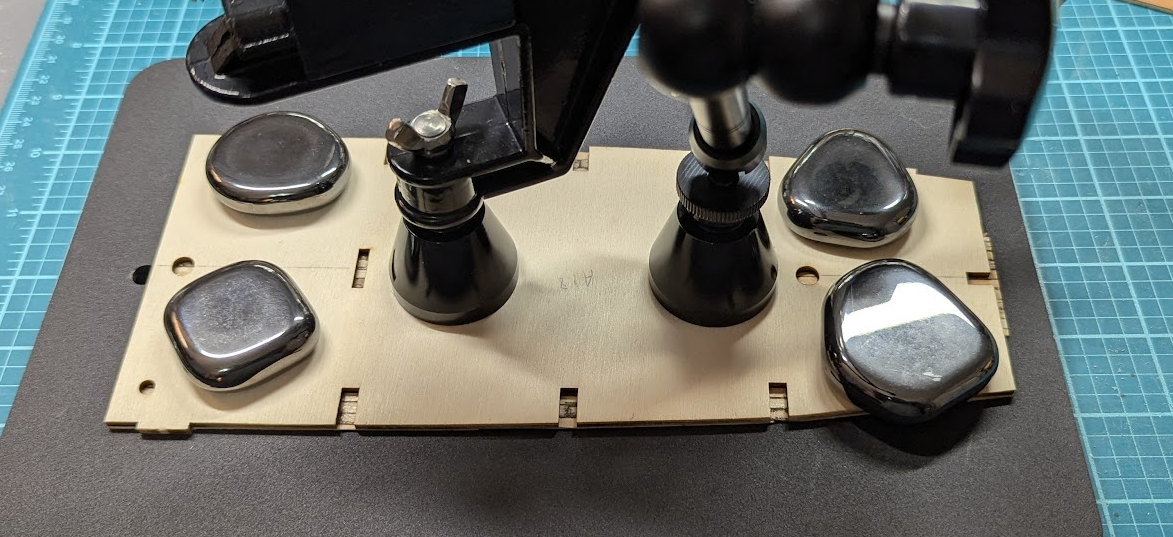
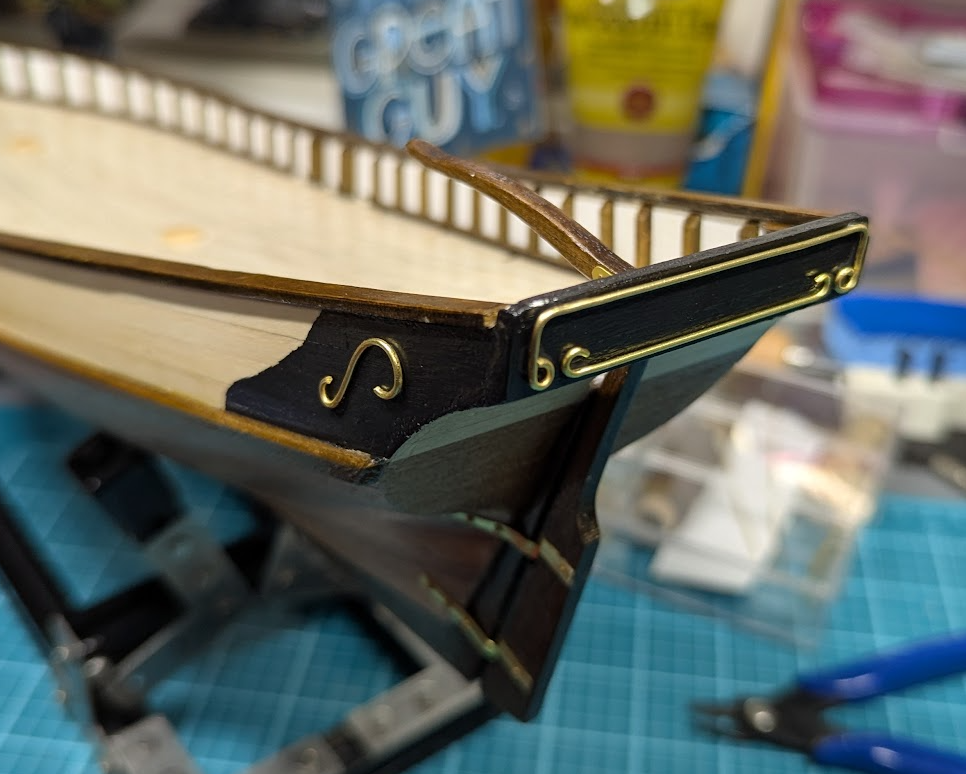
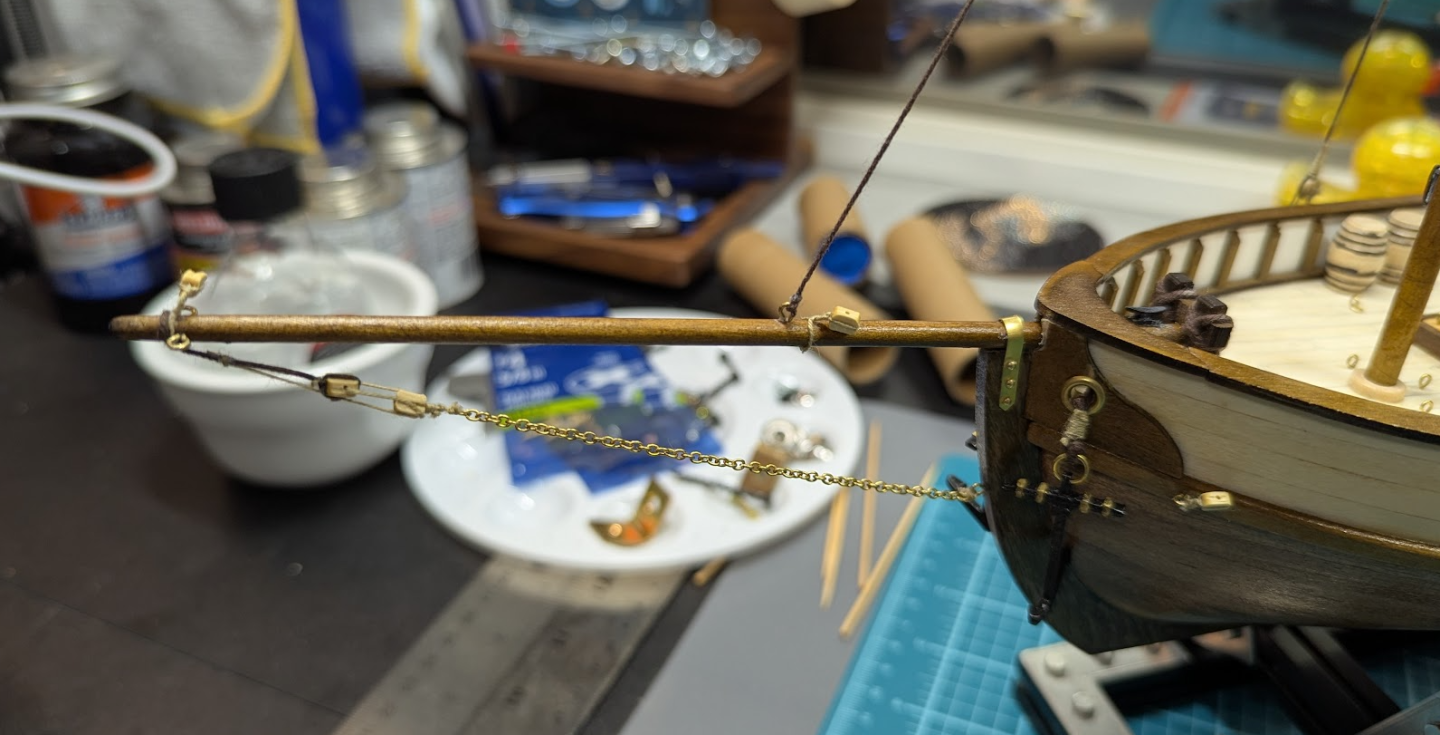
Yesterday I worked on the electronics for the lighting system. The plan is to have the controls mounted in the display cabinet so this is just a temporary setup. My plans for the display cabinet includes two lighting modes, one of which is intended to simulate night. I want to create a diorama of the ship that gives the appearance of sailing through ice floes with some wildlife swimming underneath. I'm sort of figuring this out as I go which is slowing the build down quite a bit. It may not even work out the way I hope so I might end up simplifying this aspect. I wanted to create a prototype control setup so I built a small box to hold everything. I'll keep this as a testing tool and rebuild the circuits inside the display cabinet when the time comes. For the parts, I disassembled a defective toy to get a 12v power supply and power switch. I bought a LM2596 voltage regulator (three for $14 USD on Amazon), a mini PWM motor speed controller (four for $7), and pre-wired SMD LEDs in warm white and yellow ($9 per 25). I also bought side light and mast light fixtures from Harbor Models in California. NB: They have a great selection of stanchions as well. The first challenge I had was how to attach the LEDs. Super glue did not work at all. It would not stick to either the back of the LED or the wires. I tried white glue and that worked but was very fragile and it was hard to keep the LED from rotating. I messed with a few assemblies before settling on laminating two pieces of 0.6mm wood with a hole drilled in one half. This forces the LED to stay flat and protects the connection points. Once I had the basic design I made several. I'm not entirely sure how many I'll need yet. Sir Ernest is 1" tall. Assembly line Warm White My mental design has wires for power coming out between bulkheads 3 and 4 or 7 and 8, through the keel mounting pedestal. The wire will be routed through the bulkheads and power distribution units will be attached in 3 or 4 places. One for the bow, one for the first cabin, one for midships (side and mast lights) and one for the rear cabin. This made it easy to set up my prototype power control unit by adding a plug to connect the ship to shore power, so to speak. I wired up my test power supply and confirmed all the LEDs worked. NB: If you do this, don't connect your LEDs until you've confirmed the output voltage is < 3V. Would suck to blow an entire set of LEDs in one go. The PWM is to help set the proper brightness. The voltage regulator is mounted on bolts that are recessed into the base and glued in. Mast and side light fixtures from Harbor Models. The mast light is 6mm and the side light is 4mm. The side lights can come with red and green LEDs. I only bought red so I could check the scale. Seems reasonable to me. I also mounted my windlass and put in the chain ports. I have been trying to avoid chemical blackening and I found these nice black grommets on Amazon that should work as replacements for the brass hausepipes. The OD is slightly larger but the ID is the same. I also think these would make decent porthole replacements. I haven't mounted the anchor chain yet. I'm still hoping I can remove the shine. Maybe I'm being too picky. What do you guys think? I'm also working on what I will do for the railings. Tomculb chose to go cable throughout. Many others have used brass. Someone mentioned white crafting wire. I'll be doing something different. I was in my local hobby store and just happened to notice these polystyrene rods. They are very flexible but the ones they had at the store ended up being too thick. I found some online in 0.64mm size and they fit perfectly in the stanchions. This material can be easily bent to 90 degrees and shaped around curves. Kinks can still happen when it's this thin, but they are pretty easily removed. In fact, my package had been bent but I was able to remove the bend just using the heat from my fingers. Lastly, I didn't want to use the same size chain for the bowsprit as the anchor chain. There is a good picture of the bow showing the difference in chain sizes. I ordered some but I think I need to go up a size. I wish I could get my anchor chain to be the same color. Maybe I should abandon using stud linked chain. This was my inspiration for the anchor and bowsprit chains. I may start gluing decks today. I can glue the lower deck and poop deck in but I'm still waiting to receive a couple of porthole options. If they need to be mounted from inside it will be easier without the forecastle and main decks installed. The portholes are sort of holding everything up. One I have them I need to mount them temporarily and test them with the lights. As soon as that decision is made I can proceed with the next part of the build. Thanks for stopping by! ~Giddy~ Fair winds and following seas.

-
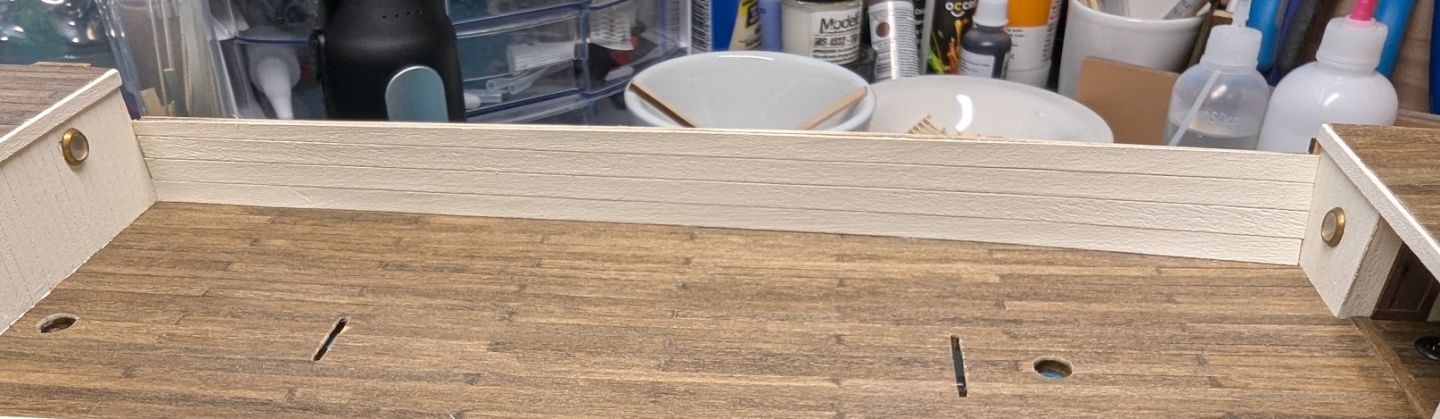
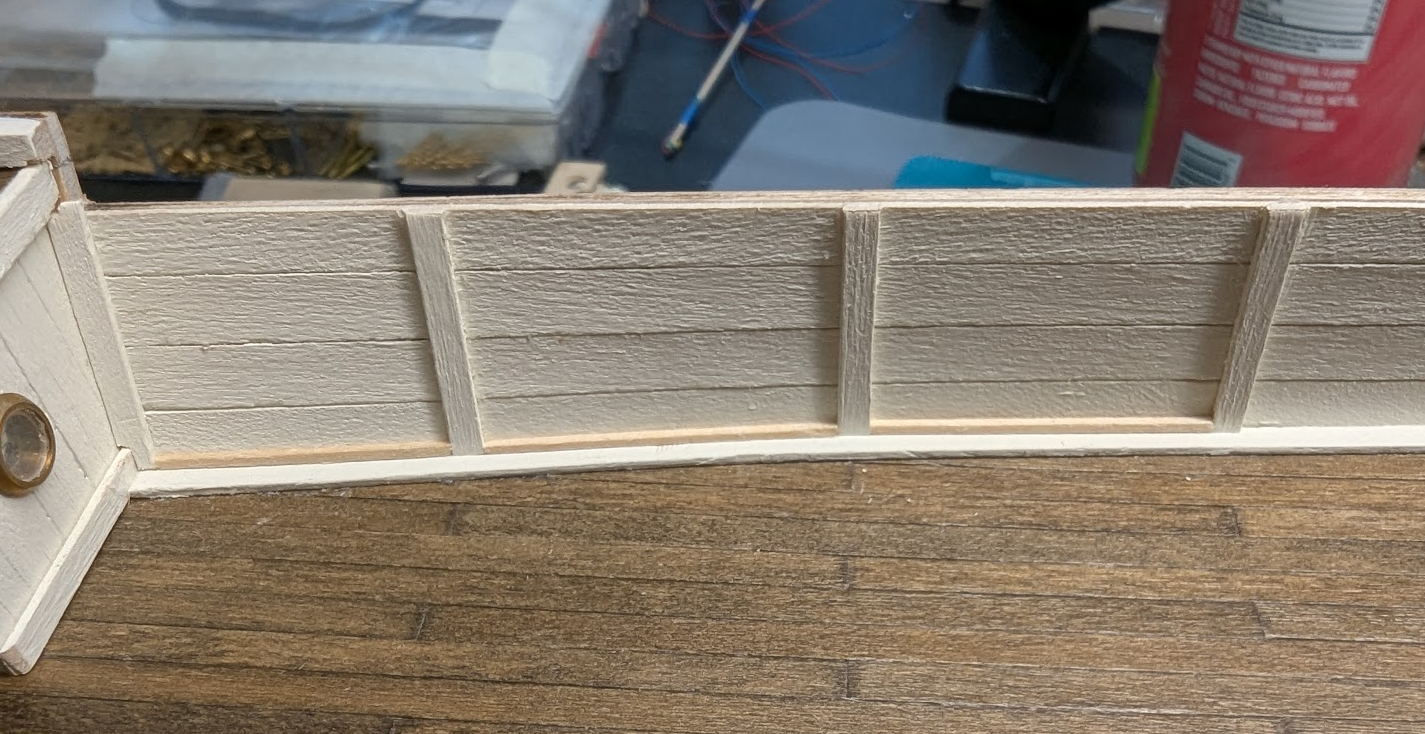
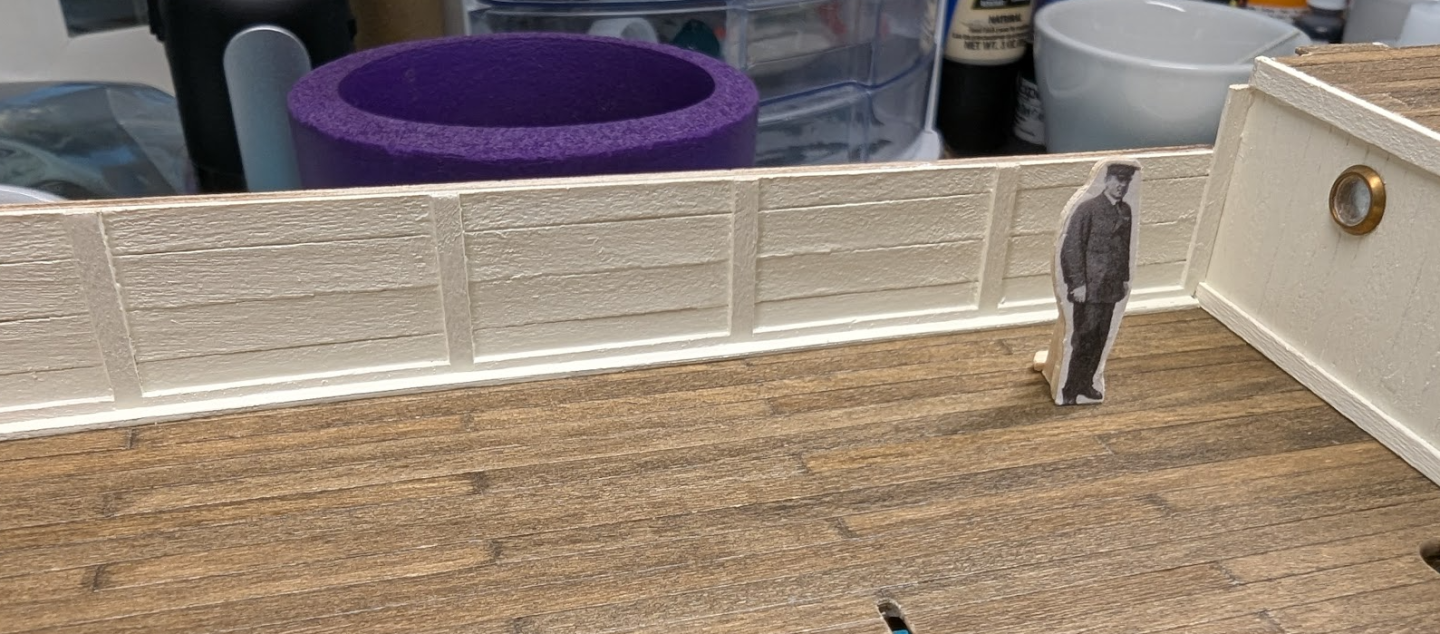
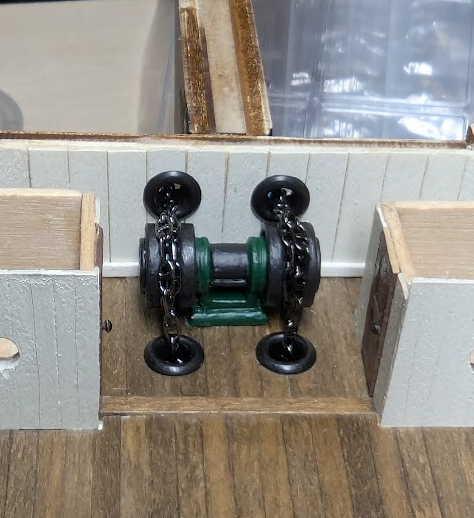
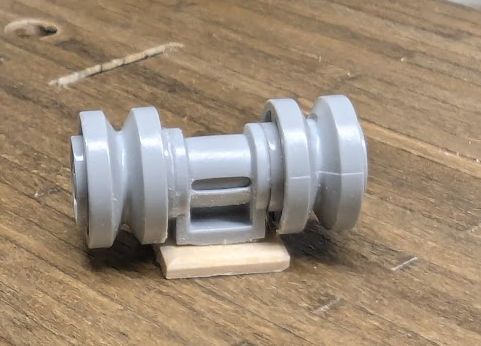
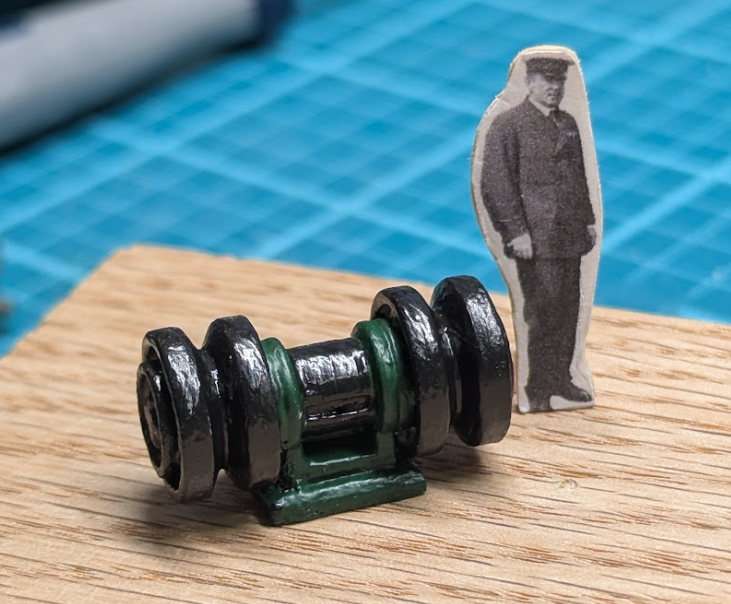
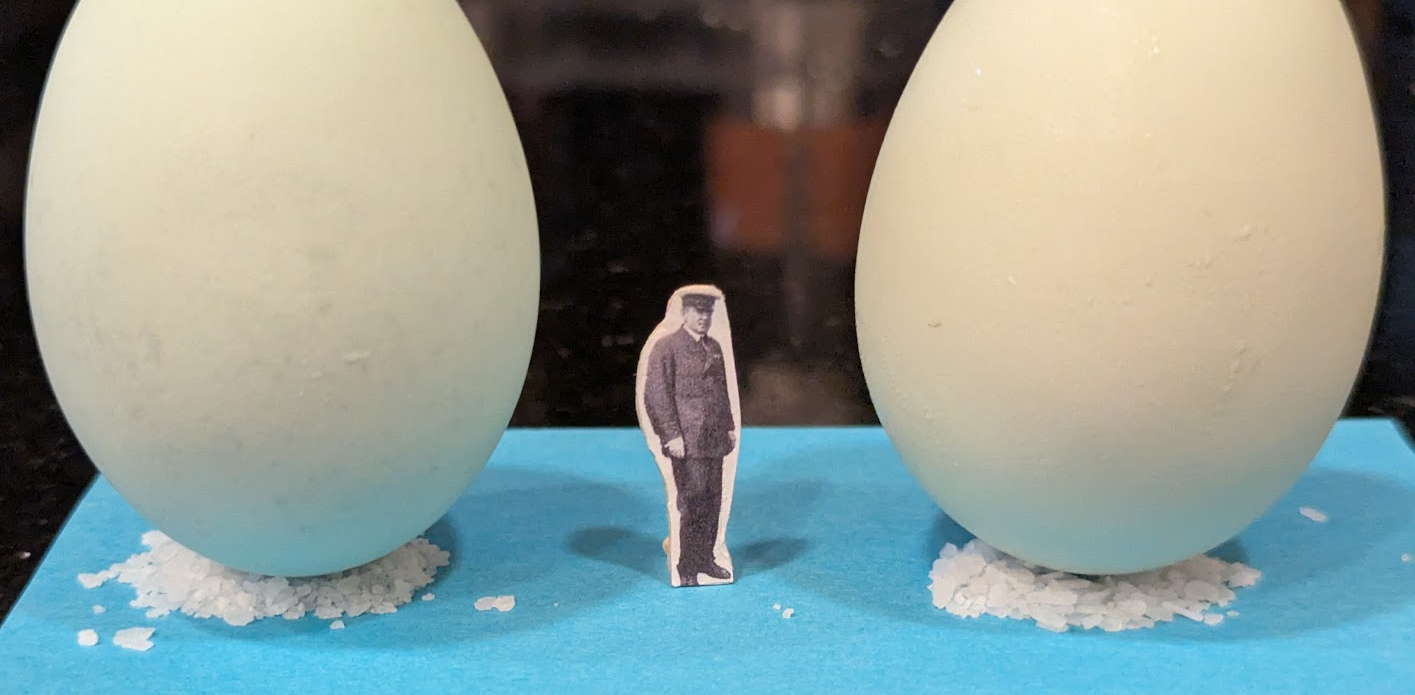
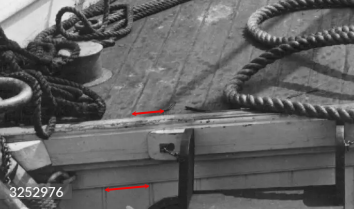
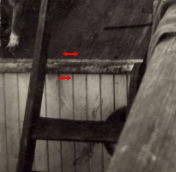
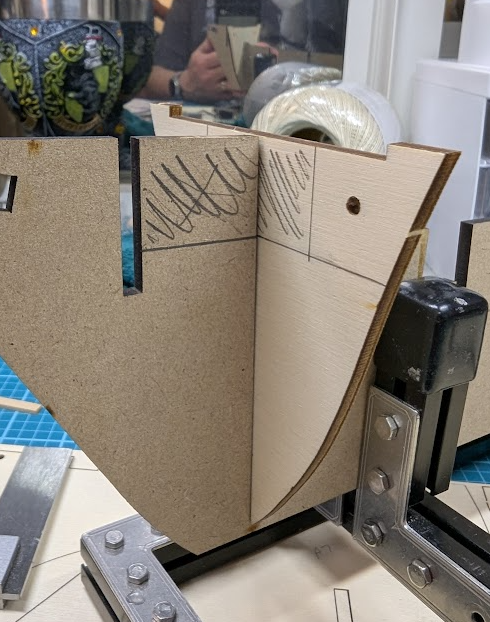
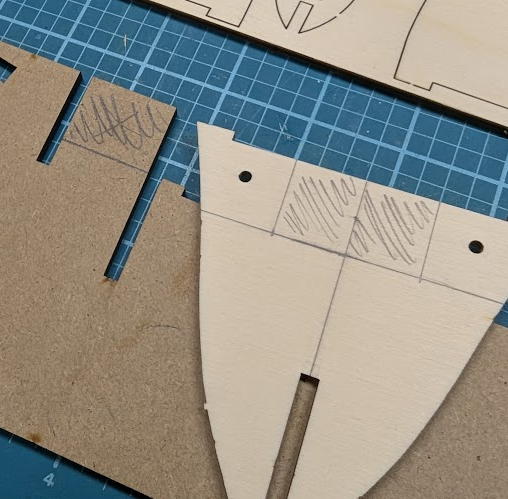
Thanks for the likes on my last post! Lot's of experimentation and a few tidbits but not much real progress. Still experimenting with portholes and have some more on order. The ones I have are beautiful but a tad too small. I would like to have the portholes installed before attaching the decks so I'm fiddling around until I get my package from Cornwall. You might notice a change in the bulkhead paneling at the bow. I had started using the supplied sycamore strips to panel the walls. I based that choice on this picture of the forecastle area, where the wall planks look wider than the deck planks: But when I was getting read to panel the poop deck bulkhead, I saw this photo from the dog kennels and the wall planks look slightly more narrow than the deck planks: Some of the older photos before the refitting make it seem like all the paneling is the same width. I got stuck in analysis paralysis again. I finally decided to use 1/32 x 3/32 planks for the poop deck bulkhead and really liked the look. I really did not want to remove the forward bulkhead paneling because it was very well fit and I wasn't sure I could do as good a job. I decided to try and score in the plank lines to make it look like I used thinner planks. I feel the results are mixed but still better than the full width plank. You can see my scored plank in the foreground vs the unscored plank in the background. I should have used a ruler but thought it would create a more natural look going freehand. I wanted to use black anchor chain but I didn't want to deal with blackening brass. I found some cool looking stud-link anchor chain on ebay. Unfortunately it's very shiny. It didn't look this shiny in the advert. I'm going to try a few different ways to matte the finish. Boiled Emperor Penguin eggs had no affect (the boss had a couple on ice from the Scott expedition). I also received some stanchions in 3 sizes. For the 2-hole stanchions I liked 15mm. It felt slightly too tall, but the 12mm felt too short even though it matches the kit stanchions exactly. I also worked on the windlass. I probably spent way too much time on something that can barely be seen, but I figured it was a good way to practice building from scratch without risk. I looked at a lot of pictures of antique windlasses but I wasn't sure what to use. I looked at model windlasses online to get ideas. I was going through my "toy box" and noticed the Lego Mindstorms pieces might work out. I tried a few things and ended up using two wheel hubs, a crossbar, and a fitting with the base cut off. I glued a small piece of beveled wood for the base. I didn't have any matte paint so I used a matte varnish at the end to bring down the shine a bit. I stupidly glued everything before thinking about how to paint it. The bulkhead paneling behind the windlass is more pointless than the windlass itself, but it photographs well, lol. Good view of the panel scoring as well. Another short sighted decision I made was to not leave a gap for the chain to pass under the deck. It's a filler block. Not sure how I'll deal with that yet. Thanks for checking in! ~Giddy~ Fair winds and following seas.


-
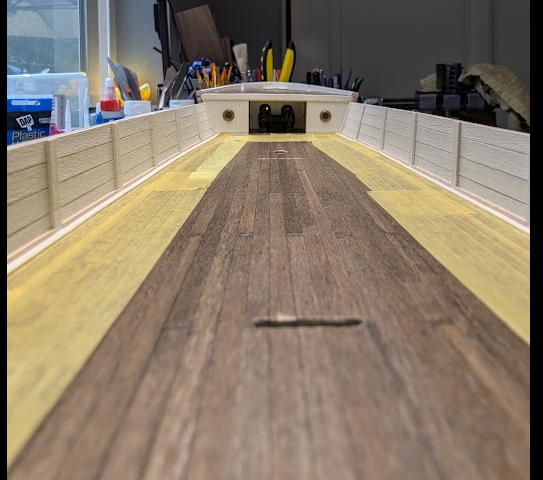
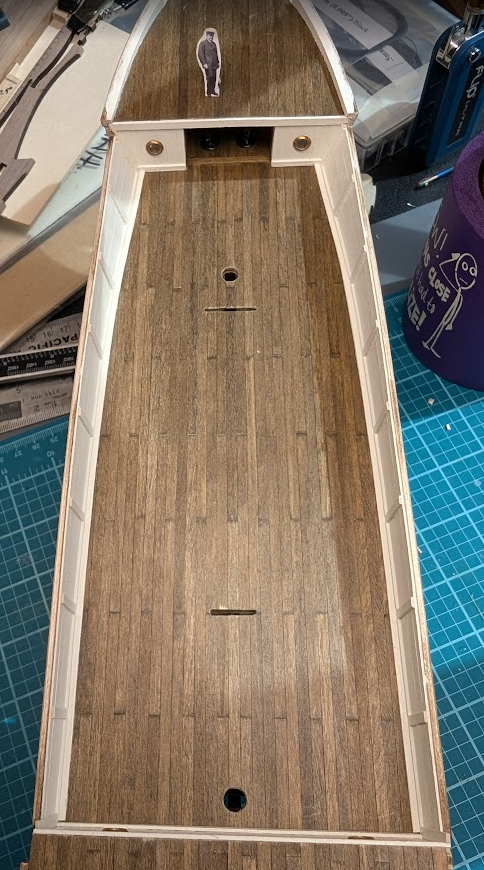
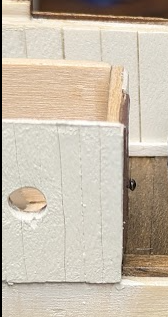
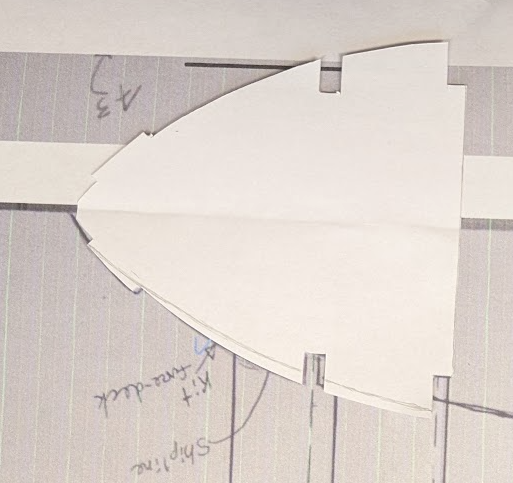
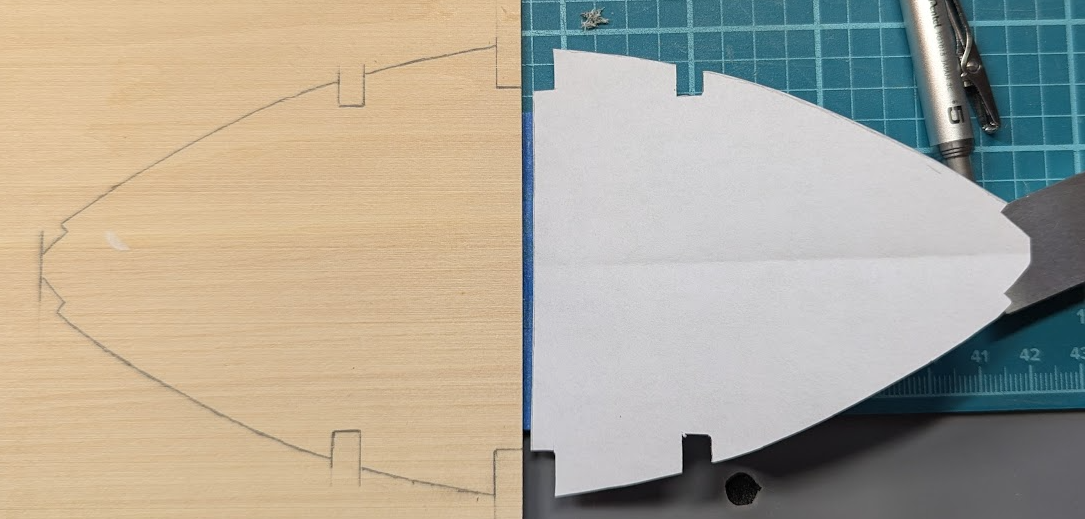
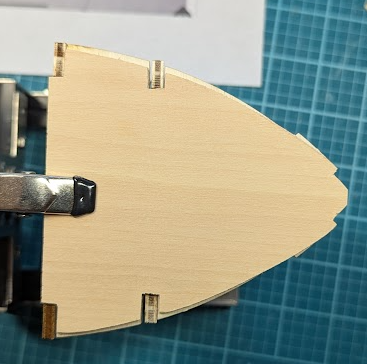
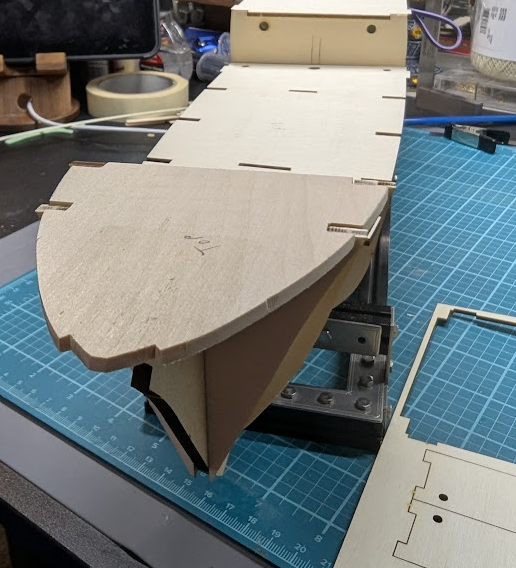
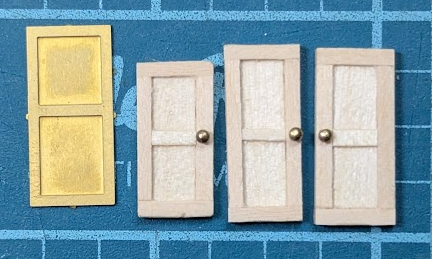
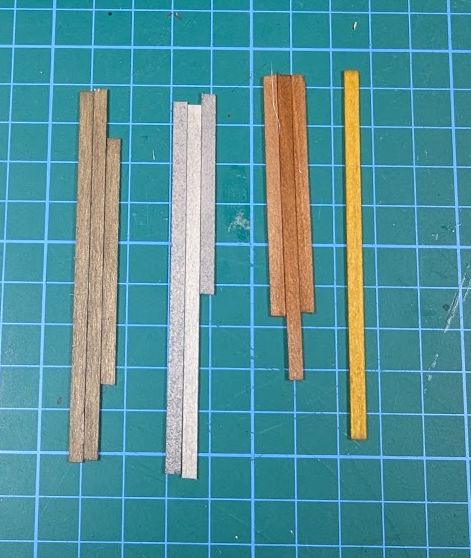
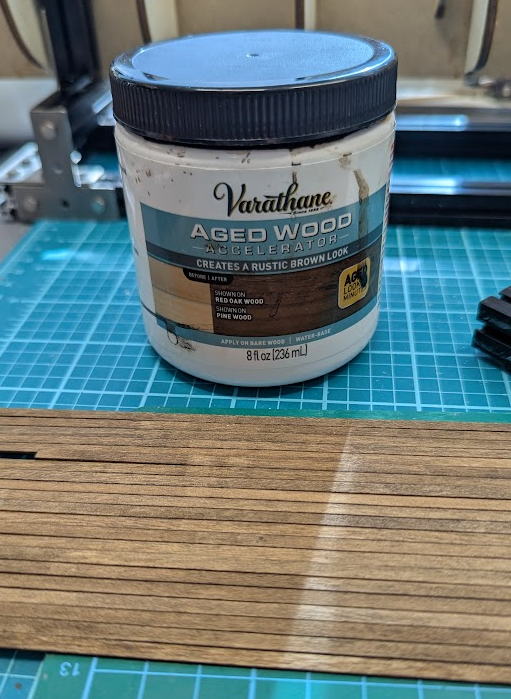
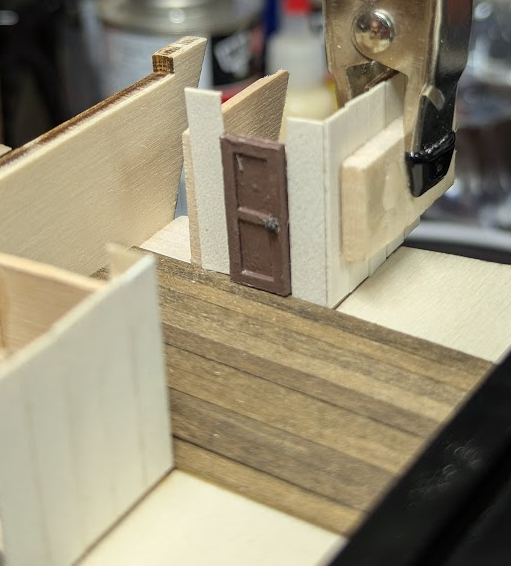
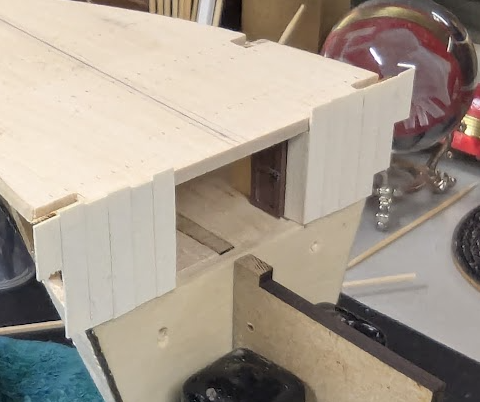
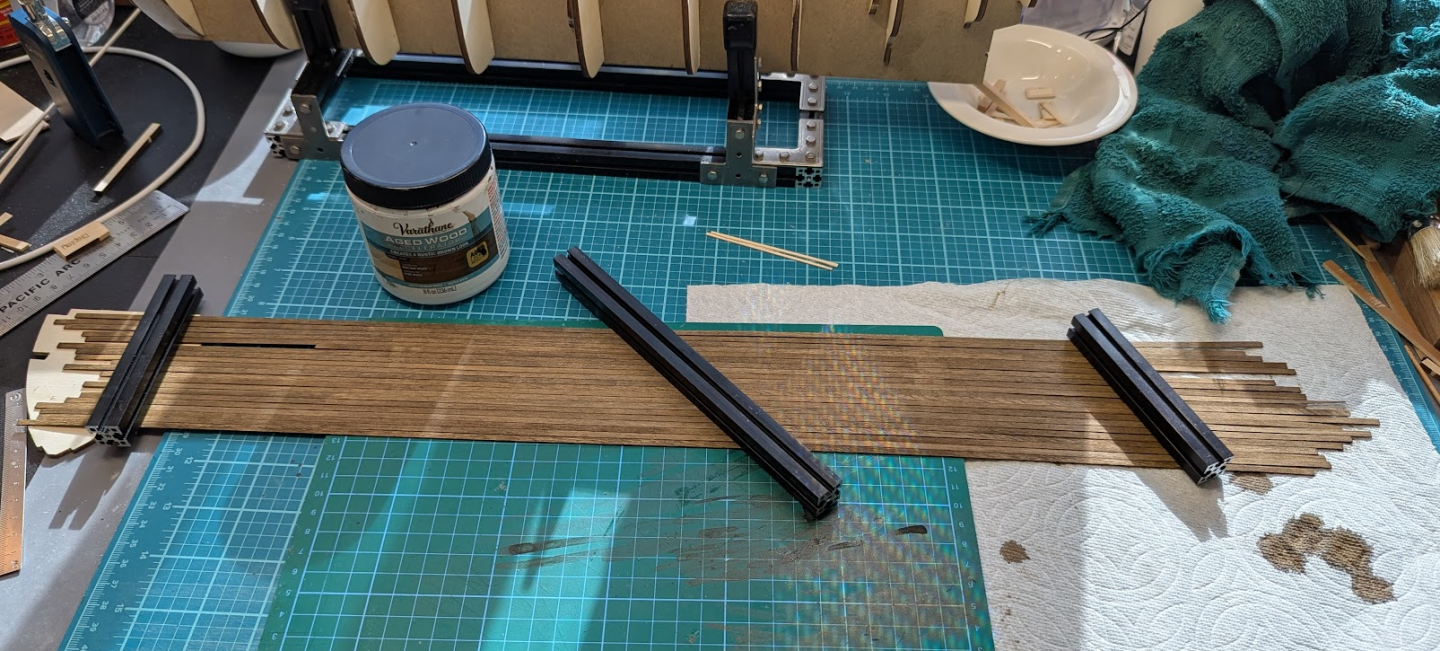
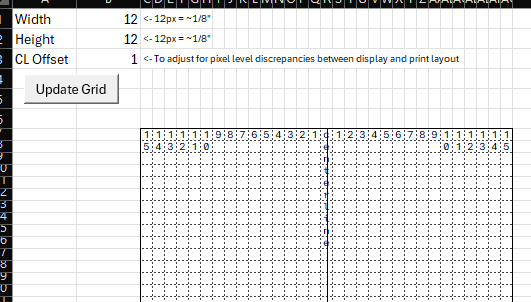
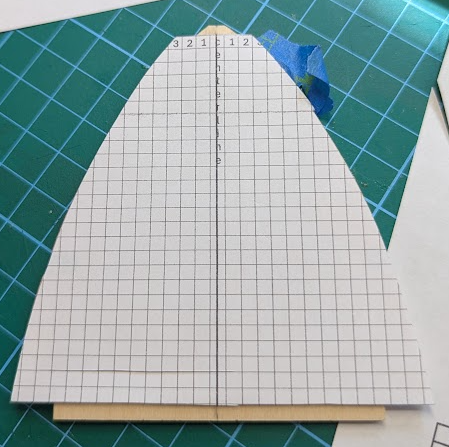
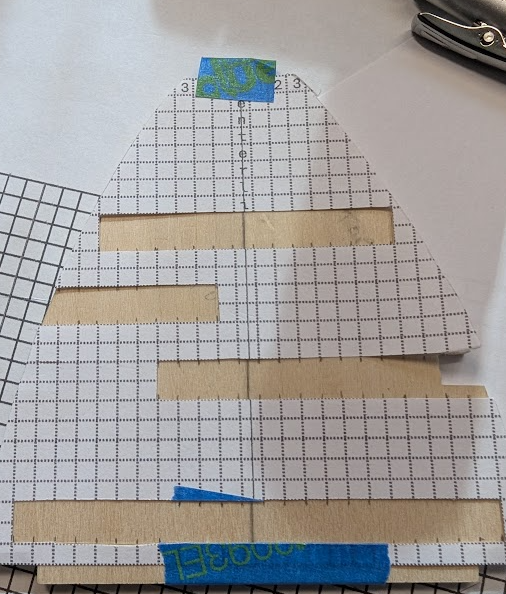
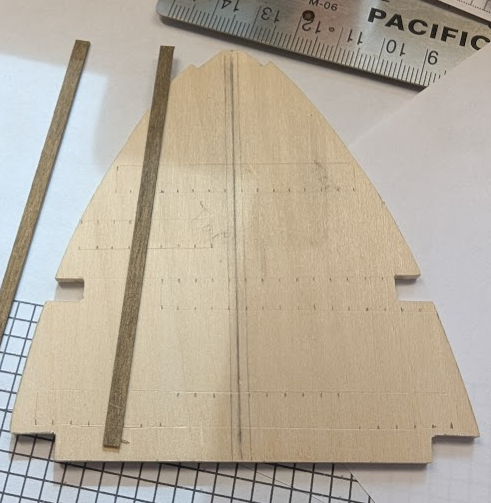
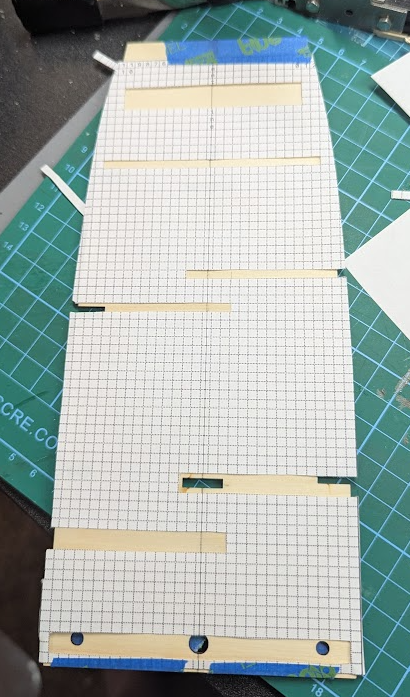
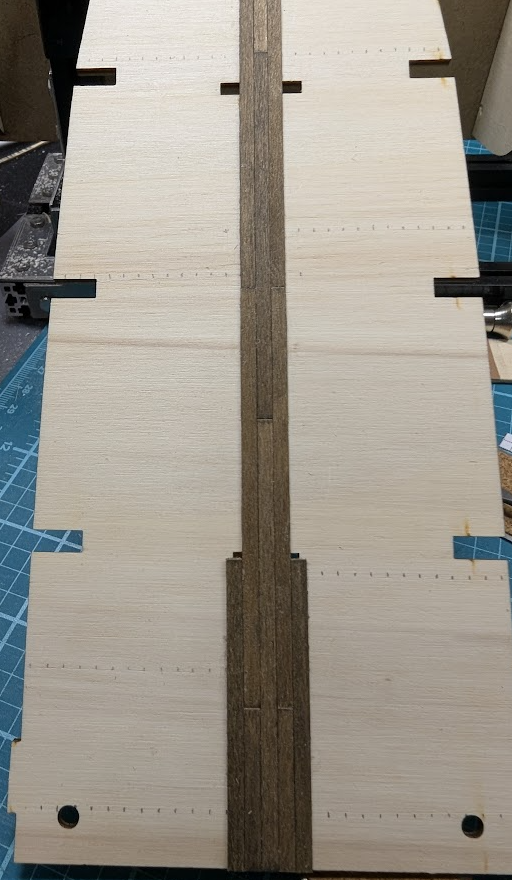
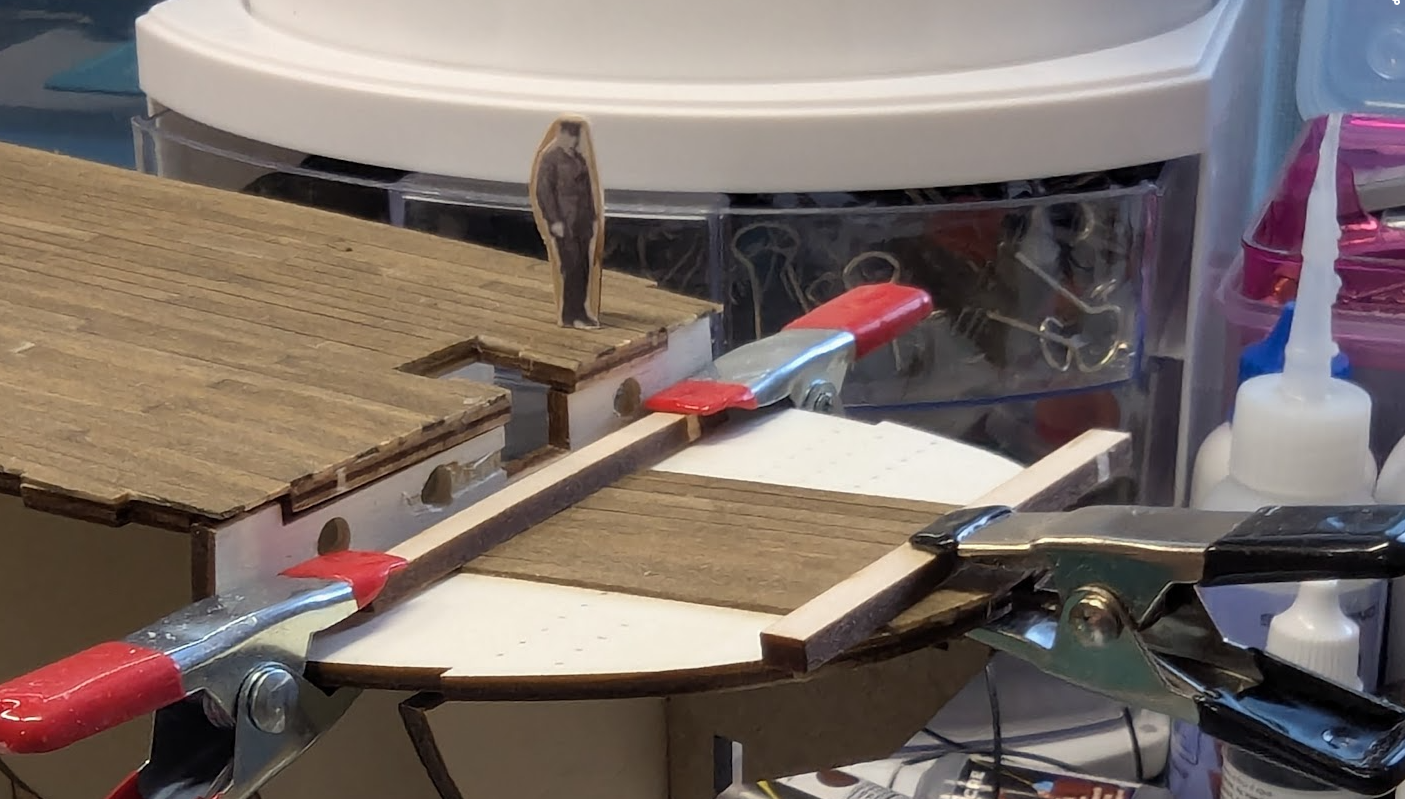
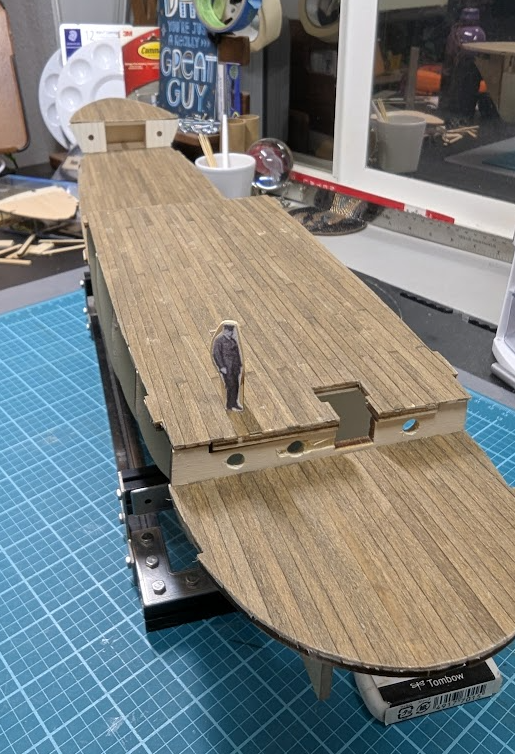
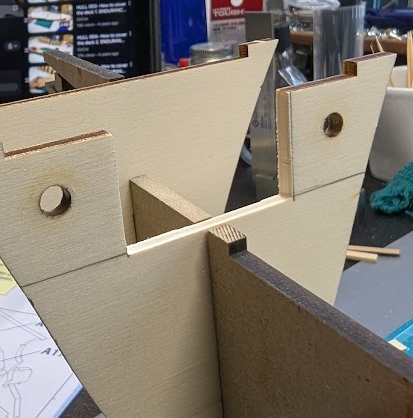
Ahoy! It's been a couple of weeks since I posted and I've been busy in the shipyard. Not a great deal of actual progress due to lots of testing and experimentation. Lots to catch up on so let's get underway! First, I decided to try and adjust the shape of the forecastle deck using Snug Harbor Johnny's suggestion. I created a paper template based on his drawing. Rather than modify the supplied deck I created one from scratch. I actually made two. I didn't have wood the exact same thickness. One was a little thin, the other a little thick. I ended up going with the thicker piece. This reshaping cuts of the forward tab where the bulwark sits so I'm a little nervous about what might happen when I get to that step. I plan to dry fit things for as long as possible before committing to my custom deck. I have not shaped the bulkheads to match yet. My deck overlaid with the kit deck. I was very pleased with the final fit. Several different people suggested using filler blocks. I decided to try and use the filler blocks as the floor for the area under the forecastle deck. I also experimented with a few different door designs. I really liked the first version but it ended up being too thick so I made thinner ones later. Painting them was very difficult. Hard to get an even coat of paint without clumps on something so small. OcCre door and mine. I've ordered 1/32x1/32 wood. so I can narrow the frame. I used laminated pieces of the supplied sycamore wood and 1/16x1/16 for these. I tried to make them work but they are too thick. I made some new ones with a single layer of wood which are much better. The one on the left is the single layer version. It was very fragile until I brushed CA on the back. My deck timber also arrived. Due to some logistics difficulties, I ended up ordering from multiple places and all of them showed up. I have plenty of 1/32 x 1/8 planks for two or three Endurances. I agonized quite a bit over which stain to use. More than is probably reasonable. After several trips to the store I ended up trying 4. I settled on an aged wood accelerator from Varathane. It was a little darker than I was after, but when I saw photos of the "official" Endurance model, the deck planks are even darker and that made me more comfortable. I decide to stain the full length planks before decking. This was another 'analysis paralysis' moment. I noticed a lot of builders would plank the deck and then stain it but I found several references recommending staining the planks in advance. A couple of the decks were pretty warped. I was worried that if I stained it after the warping would get more pronounced. Turns out just gluing the planks caused them to warp more anyway. Aged wood, gray aged wood, summer oak, pine. Summer oak was my second choice but felt too... decadent? Fancy? High-falutin'? Not right, anyway. My choice: The wood warped considerably when applying the stain so I flattened it out while it dried. Museum Model of Endurance https://bloximages.newyork1.vip.townnews.com/gwinnettdailypost.com/content/tncms/assets/v3/editorial/5/e4/5e410d78-7138-11e9-b73f-3b8cfd7eec88/5cd23dcc7a24a.image.jpg?resize=666%2C500 I also started looking at the white paint for the walls. I didn't want bright white. I had some "Warm White" from Model Shipways and the white from OcCre. I tried them both and on their own neither was right, so I mixed them until I had something I liked. I did a lot of dry fitting with finished pieces before I settled on the color scheme and then I planked part of the WC and lamp room walls. I noticed during dry fitting that my door was going to be too tall so I had to shorten the design a little. This is my test door. I'm using the supplied sycamore for the walk planks. Next I was on to planking the decks. I decided to use a three-butt shift like I did on Polaris. I made a few hundred 90mm planks. I search and searched through photos of Endurance's decks to try and see if I could determine how long the actual planks were. It was so hard to pick out seams that I gave up and just sort of picked a convenient length. 90mm is about 20' which seemed reasonable for the period and where it was built. I really wanted to do a good job on the deck so I wanted to tick out guides but I felt using ruler and pencil was too imprecise for me. I found a tutorial online where someone had used 1/8" graph paper to tape down a pattern on the deck. I just took that concept a bit further and made an Excel file that can generate a grid of any size to the desired scale. I plan to expand this to support much larger layouts. I type in x and y dimensions in pixels and I have a module that will adjust the grid size perfectly. It also automatically positions the centerline. The offset is necessary because depending on the printer, the centerline may be slightly off center when printed vs what is on screen. Here's some photos of that process. Through trial and error, I determined 12px = ~1/8". The centerline needs to be 1 pixel to the right of center on screen to print perfectly centered on my printer. I print the grid and cut it to shape, making sure it's shorter than the deck. Then I tape it down. I cut out a few sections (being careful to maintain enough paper for the template to retain it's positioning) and tick the deck. Ready for planking. On a larger deck. Pretty proud of that. It needs some refinement but worked really well for the four Endurance decks. It took several days to complete the decking. The workers kept getting distracted. "The Boss" showed up to supervise the rest of construction and keep us focused on the mission. The crew were ecstatic! All decks are dry fit. Fun fact... Sir Ernest was 5'10" tall according to my research. At 1:70 that makes him exactly 1"! I tried to remove the warping from the deck. It was partially successful. After planking I wet the back with a brush and then heated it with a heat gun. I took a trick from Tomculb and used a metal helping hands base with some magnets and left it overnight. It was a noticeable improvement but there is still a small amount of warpage. I'm sure I can remove the rest with careful clamping during gluing. Earier in the build I had also started experimenting with lighting and wiring runs. Just some photos. All of this is just for testing. Whew! I should hope that's enough for this one. Next I will finish the area under the forecastle deck and install the wiring harness for the lights. I'll also finishing cleaning up deck cutouts. My PWM controllers came in so once I finish experimenting I was planning on a specific post about the lighting. I haven't looked at any build logs with lighting yet but I seem to remember seeing an Endurance model being built like a plank on frame model with lighting and interiors. Haven't been able to find it again... sound familiar to anyone? Thanks for checking in! ~Giddy~ Fair winds and following seas.

-
Wow! I was just reading that review this morning. I was trying to decide if I was brave enough to attempt that. I haven’t glued any forward bulkheads yet. I was trying to find a post you had made about replacing the blocks and sails but I think it was on someone's build log.
-
Thanks! Yes it is. I was working on it while waiting for my Endurance kit.
-
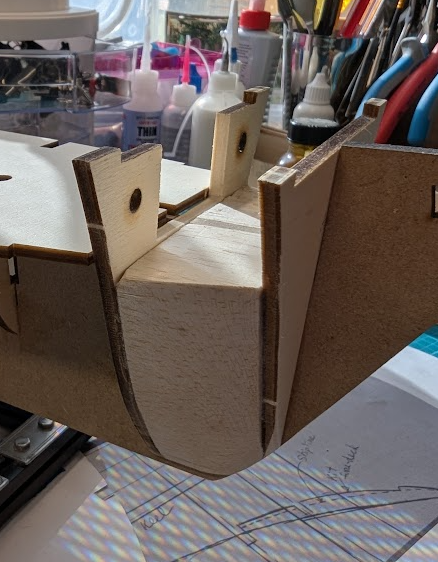
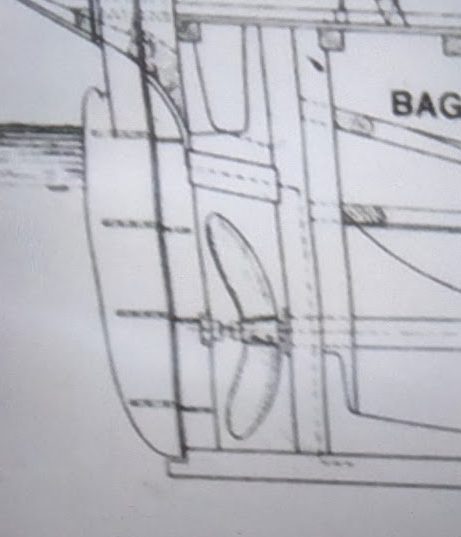
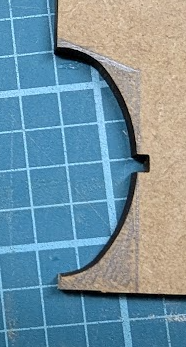
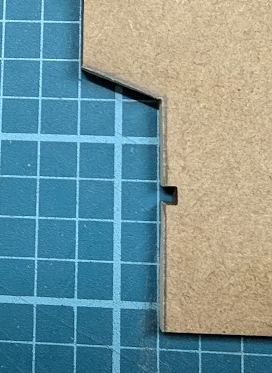
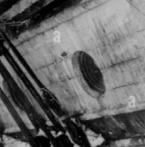
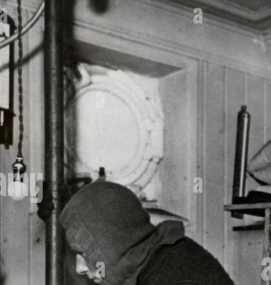
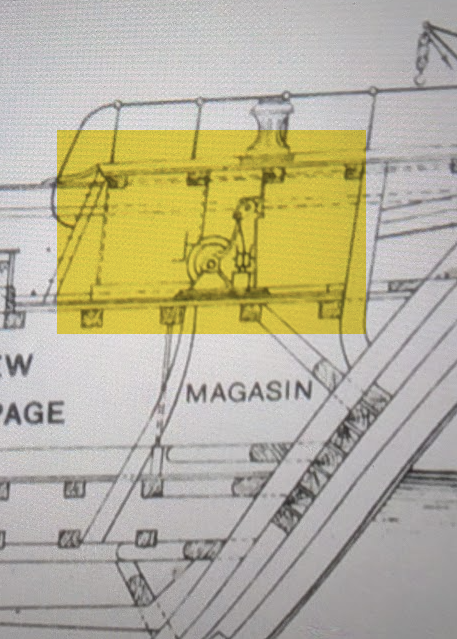
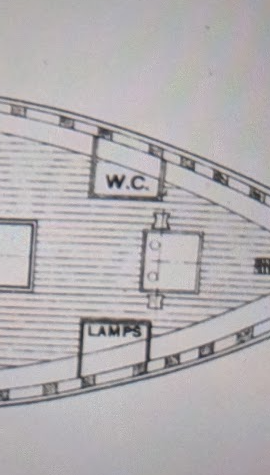
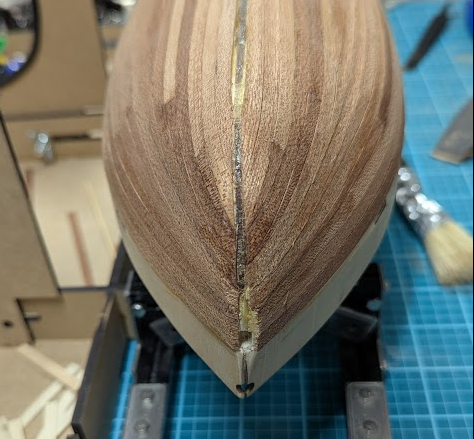
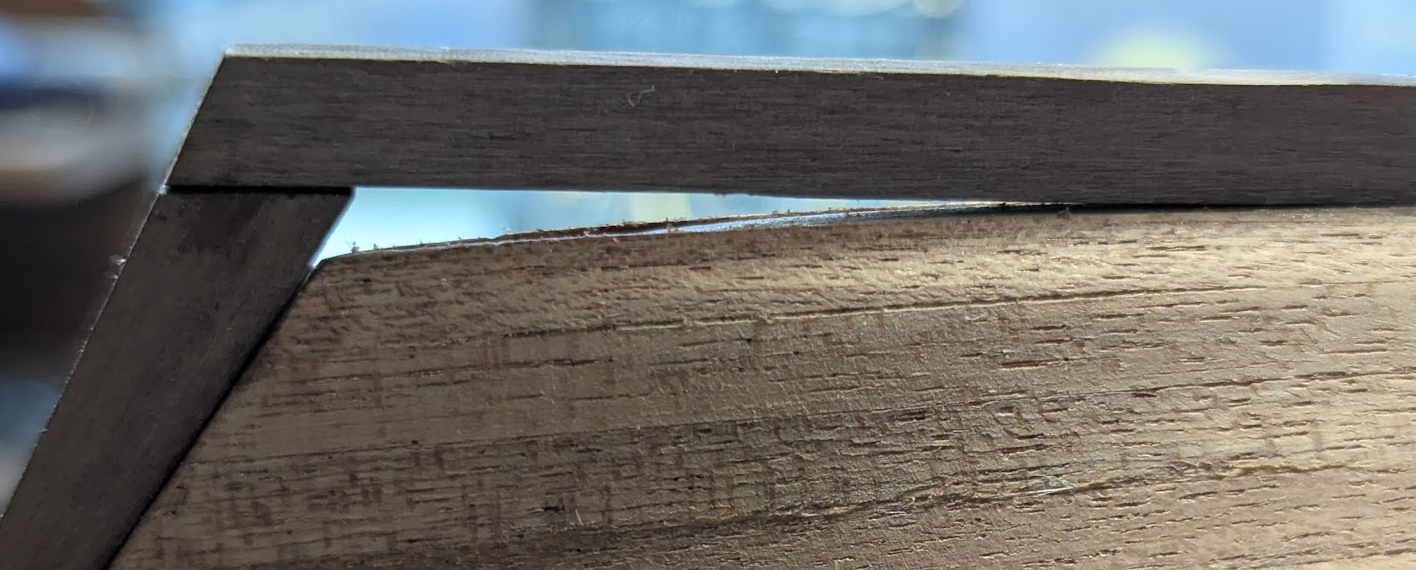
Welcome to (yet another?) Endurance build log! I'm very excited to be starting this build. It's actually somewhat serendipitous that I have picked the Endurance. I started ship modeling with a very long term goal of scratch building a close-as-I-can-manage replica of a ship captained by one of my ancestors, a barq called the Florence Treat. Based on my research into model ship building and my modeling experience so far, I figure I'm 5 years from being able to start such an ambitious project. I need more knowledge and skillz! I started digging deep into other ship kits to build up my skills and wasn't finding much to inspire me. I mean, of course I want to build the $1500 HMS Victory, but not just yet, right? Then one day I was reading the daily page at Wikipedia (yeah, I'm that kind of nerd) and they had an article about Shackleton. Well... down the rabbit hole I went! I've since become super passionate about "the boss" and polar exploration in general. Fram! Terror! Erebus! Terra Nova! I've found my niche! So, this will be my second model ship and my first "official" build log. Although I've completed one build (OcCre Polaris) and even started a log for it, my building was so far ahead of my posting I gave up and just closed it. Rather embarrasing, really, so I hope to make up for it by doing a better job with this one. I hope being diligent about this log will help me slow down and avoid mistakes. I have to start by giving a big thanks to @Tomculb for his great Endurance build log. I'm mimicking his format and official build updates like this will be in bold font. I hope that is ok. I found Tom's log when I was researching deck planks on the Endurance. I was looking at Hurley photos while my kit was in the cart and I felt like the deck planks in the kit were too wide and too bright compared to B&W photos. I had download the plans and watched the videos so I noticed Polaris used the same 5mm deck planks but at 1:50 scale. I wasn't sure if it made sense use the same size planks for a 1:70 scale model. Anyway, Tom's post about his planks showed up in my Google searching. That was the starting point of my inspiration to try and take this kit up a notch and attempt to make it more accurate, something I had assumed was beyond my skill level. I read every post and I highly recommend his log to anyone considering building this model. Then, like the first leaf in an Ancestry.com family tree, Tom's log led me to many others and I've learned so many great details about this ship. Each of those logs were like additional leaves that led to more and more information. My build will draw inspiration from builds by @B-Ram, @HakeZou, @clearway, @theoracle09 and others. I'm also very greatful to @Snug Harbor Johnny for all of the insight he provided in those other logs. Truth be told, I feel very fortunate to be coming so late to the party of Endurance builders and being able to benefit from all of this prior information and experimentation. I also hope to incorporate some unique modifications of my own. As a beginner I was reluctant to keep a build log anyway. Everyone here seems to have such great skill and knowledge, I felt I had nothing to contribute and it feels presumptuous to include myself among such history buffs and craftsman. I was especially worried about keeping one for the Endurance... so many seem to start their Endurance log off with something like "Sorry for starting yet another Endurance build log"... I was wondering if I'd be violating forum policy if I started "and yet another", lol. Anyway, having gotten over that feeling, I hope this will end up a useful contribution to the rich library of Endurance builds on this site. By the way, I'm going to try and use the correct nautical terms which might make me sound smarter than I really am... please correct my mistakes! On to the build! I'll skip all the preliminaries and get right to my first changes which will be very familiar if you've followed any of those other builds. My first "cheat code" was in the stern keel area. Not sure if there is a unpronounceable nautical term for that area (looking at you "gunwale" and "forecastle"). Tomculb pointed out the halfmoon cavity for the prop was wrong and Clearway pointed out there is an angle at the top. Consulting the drawings on the Shackleton estate website, I cut out the half-moon and tried to mimic the angle from the drawings as best I could. I estimated it to be between 20 and 30 degrees. I played with the angle on the false keel to eliminate all the curve from the "moon". I also noted that there is a slight tilt aft in the vertical part (which is why my estimate above is so broad). I decided to not replicate that angle and cut it off straight. I was worried it would cause alignment issues later with the rudder, etc. Next up was adding the windlass chamber, WC, and lamp room under the fo'c'sle deck. The OcCre model does not incorporate these areas and I'll be honest... this was a scary thing to do at the very beginning for a newb! I was very worried about a fatal error that might require replacing a piece so I tried to be especially diligent. From the drawings, I estimated the width of the opening to be 36mm at scale. I drew a centerline on the bulkhead and measured out 18mm to each side and cut out the part of the false keel where the windlass will go. As others have done, I also enlarged the portholes. However, I chose to go with 3/16" instead of 1/4". If I did the calculation correctly (ok, I'm lying... if Chat GPT did the calculation correctly), 1/4" would be a ~17.5" porthole which seems large for an arctic exploration ship from 1914. Also when compared to the pictures of the portholes. 3/16" is 13" which seems closer to scale. Having said that, I plan to add interior lighting (oops, spoiler alert!) so larger portholes would be nice, but I couldn't convince myself to go bigger at this time. I will be ordering (or 3d printing) porthole covers but they will be inset into the cavity from behind. This may also require enlarging or beveling the inward part of the opening. I'm going off photos like these (sorry but I could not find who originally shared these). In the second photo, an adult male head is 9-10" tall from chin to top of skull. I'm not sure who that is, but if they tried to stick their head out the porthole face first it looks like a they'd only have 1-2" clearance. That's all for my first post. I think my next update will be building out the WC and lamp room walls/floors. If my deck timber arrives I may also include some information about that. Thanks for checking in! ~Giddy~ Fair winds and following seas.
-
Giddy Gibberish reacted to a post in a topic:
Endurance by Tomculb - FINISHED - OcCre - 1:70
-
Giddy Gibberish reacted to a post in a topic:
Endurance by Tomculb - FINISHED - OcCre - 1:70
-
So, I didn't keep up with this at all. Building is so much more satisfying the writing about building. I've finished Polaris several weeks ago. I'm mostly posting this to close out this log because I have the Endurance on the way and I want to try and keep up with a proper build log for that one as my first "real" ship. For the final parts there wasn't much to tell. I had a lot of challenges attaching the spars to the masts. The glue just wouldn't hold. I read too late about a technique to drill a hole partway through the mast and in the spar and using a pin or nail to attach it to the mast. Next time! I really enjoyed rigging. It was fun passing line through all the blocks and tightening it up, but another problem I had was making the blocks. The video and instructions were not exactly clear on what knots to use to tie the blocks to the beams. I ended up just using a few square knots to create some spacing. I need to learn more about knots. The rope from Occre was really fuzzy. I thought that was just the way model rope worked until I read about quality rope. Looking forward to ordering my Rope Rocket as soon as the Syren store opens. Other than those few things, nothing special or noteworth happened with the final part of the build. I did get one sail backwards (I poked holes in the wrong edge) but you can't even tell. Truthfully, I'm disappointed in myself. I made a lot of mistakes that I feel were easily avoidable. Some were due to impatience and those are hardest to forgive. But... I find the pursuit of improvement very motivating so at least I have a lot of "low hanging fruit", as they say. Here's some final photos and comments. Overall I was pretty proud of the second planking results, but because of my poor shaping on the bow, a few ends broke due to the very sharp bend: As I mentioned, I had oversanded the keel pretty bad. This was my solution: Walnut colored wood filler: I found the metalwork a little stressful, but I was happy with the result: I really enjoyed placing stuff on the deck and building the little pices like the pump. I did a horrible job with the barrels, though. All done. On to the Endurance!


-
Giddy Gibberish reacted to a post in a topic:
Endurance by MarcinPrzybys - OcCre - 1/70 scale - upgrade
-
I find your build log very inspirational as a fan of this ship and her story. I will be starting my own build soon and hope to incorporate many of the alterations I’ve learned here, so far as my skill allows. Yours was the first Endurance build log I clicked on and, after reading the entire thing, I’m looking forward to reading the other build logs that inspired you. I wanted to share that a big part of the reason I recently took up this hobby was to learn to slow down mentally and your post about recognizing that shift from “want to” to “have to” and feeling forced to rush was very relatable. I appreciated learning that someone with your skill and obvious patience encountered a similar feeling. Thanks for sharing.
- 206 replies
-
- 1
-
-
- Endurance
- Shackleton
- (and 2 more)
-
 Giddy Gibberish reacted to a post in a topic:
Endurance by Tomculb - FINISHED - OcCre - 1:70
Giddy Gibberish reacted to a post in a topic:
Endurance by Tomculb - FINISHED - OcCre - 1:70
-
Giddy Gibberish reacted to a post in a topic:
Endurance by Tomculb - FINISHED - OcCre - 1:70
-
That’s amazing! Your painting technique is so realistic. How did you make the tarps?


