ZhangRenWing
-
Posts
18 -
Joined
-
Last visited
-
 TJM reacted to a post in a topic:
Norske Love by ZhangRenWing - Billing Boats - 1:75
TJM reacted to a post in a topic:
Norske Love by ZhangRenWing - Billing Boats - 1:75
-
Ronald-V reacted to a post in a topic:
Norske Love by ZhangRenWing - Billing Boats - 1:75
-
Barbossa reacted to a post in a topic:
Norske Love by ZhangRenWing - Billing Boats - 1:75
-
Ian_Grant reacted to a post in a topic:
Norske Love by ZhangRenWing - Billing Boats - 1:75
-
Paul Le Wol reacted to a post in a topic:
Norske Love by ZhangRenWing - Billing Boats - 1:75
-
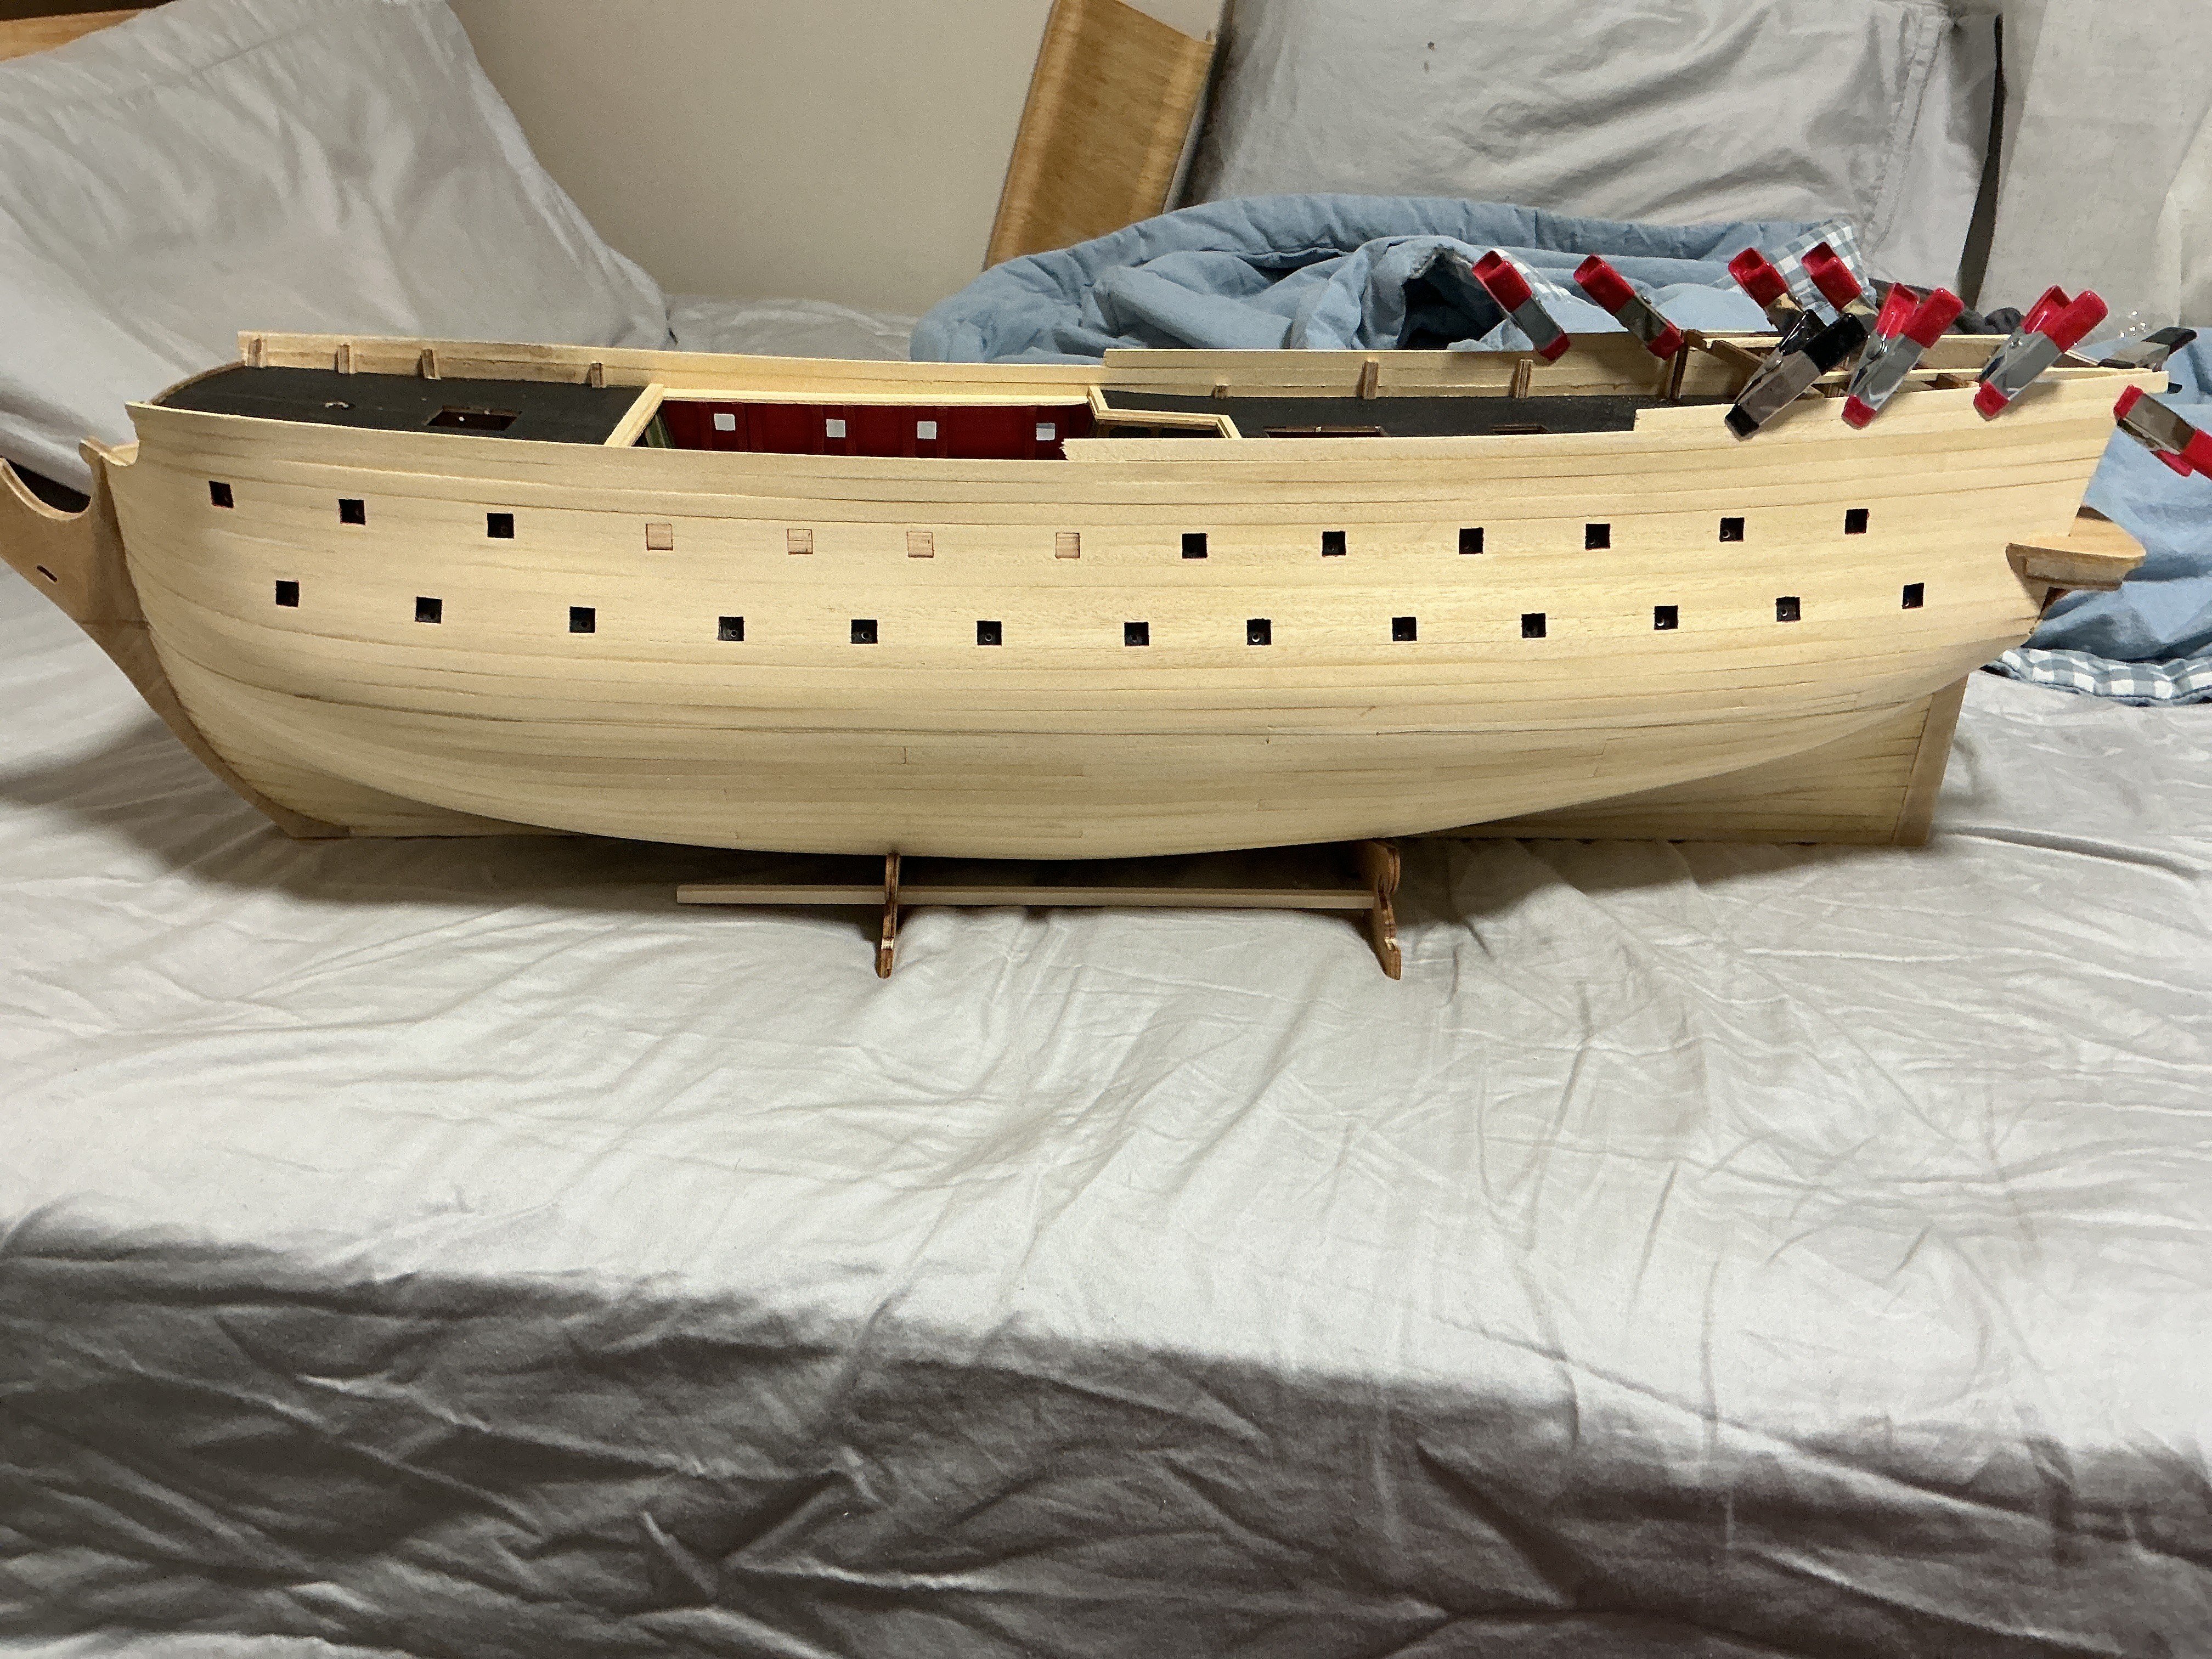
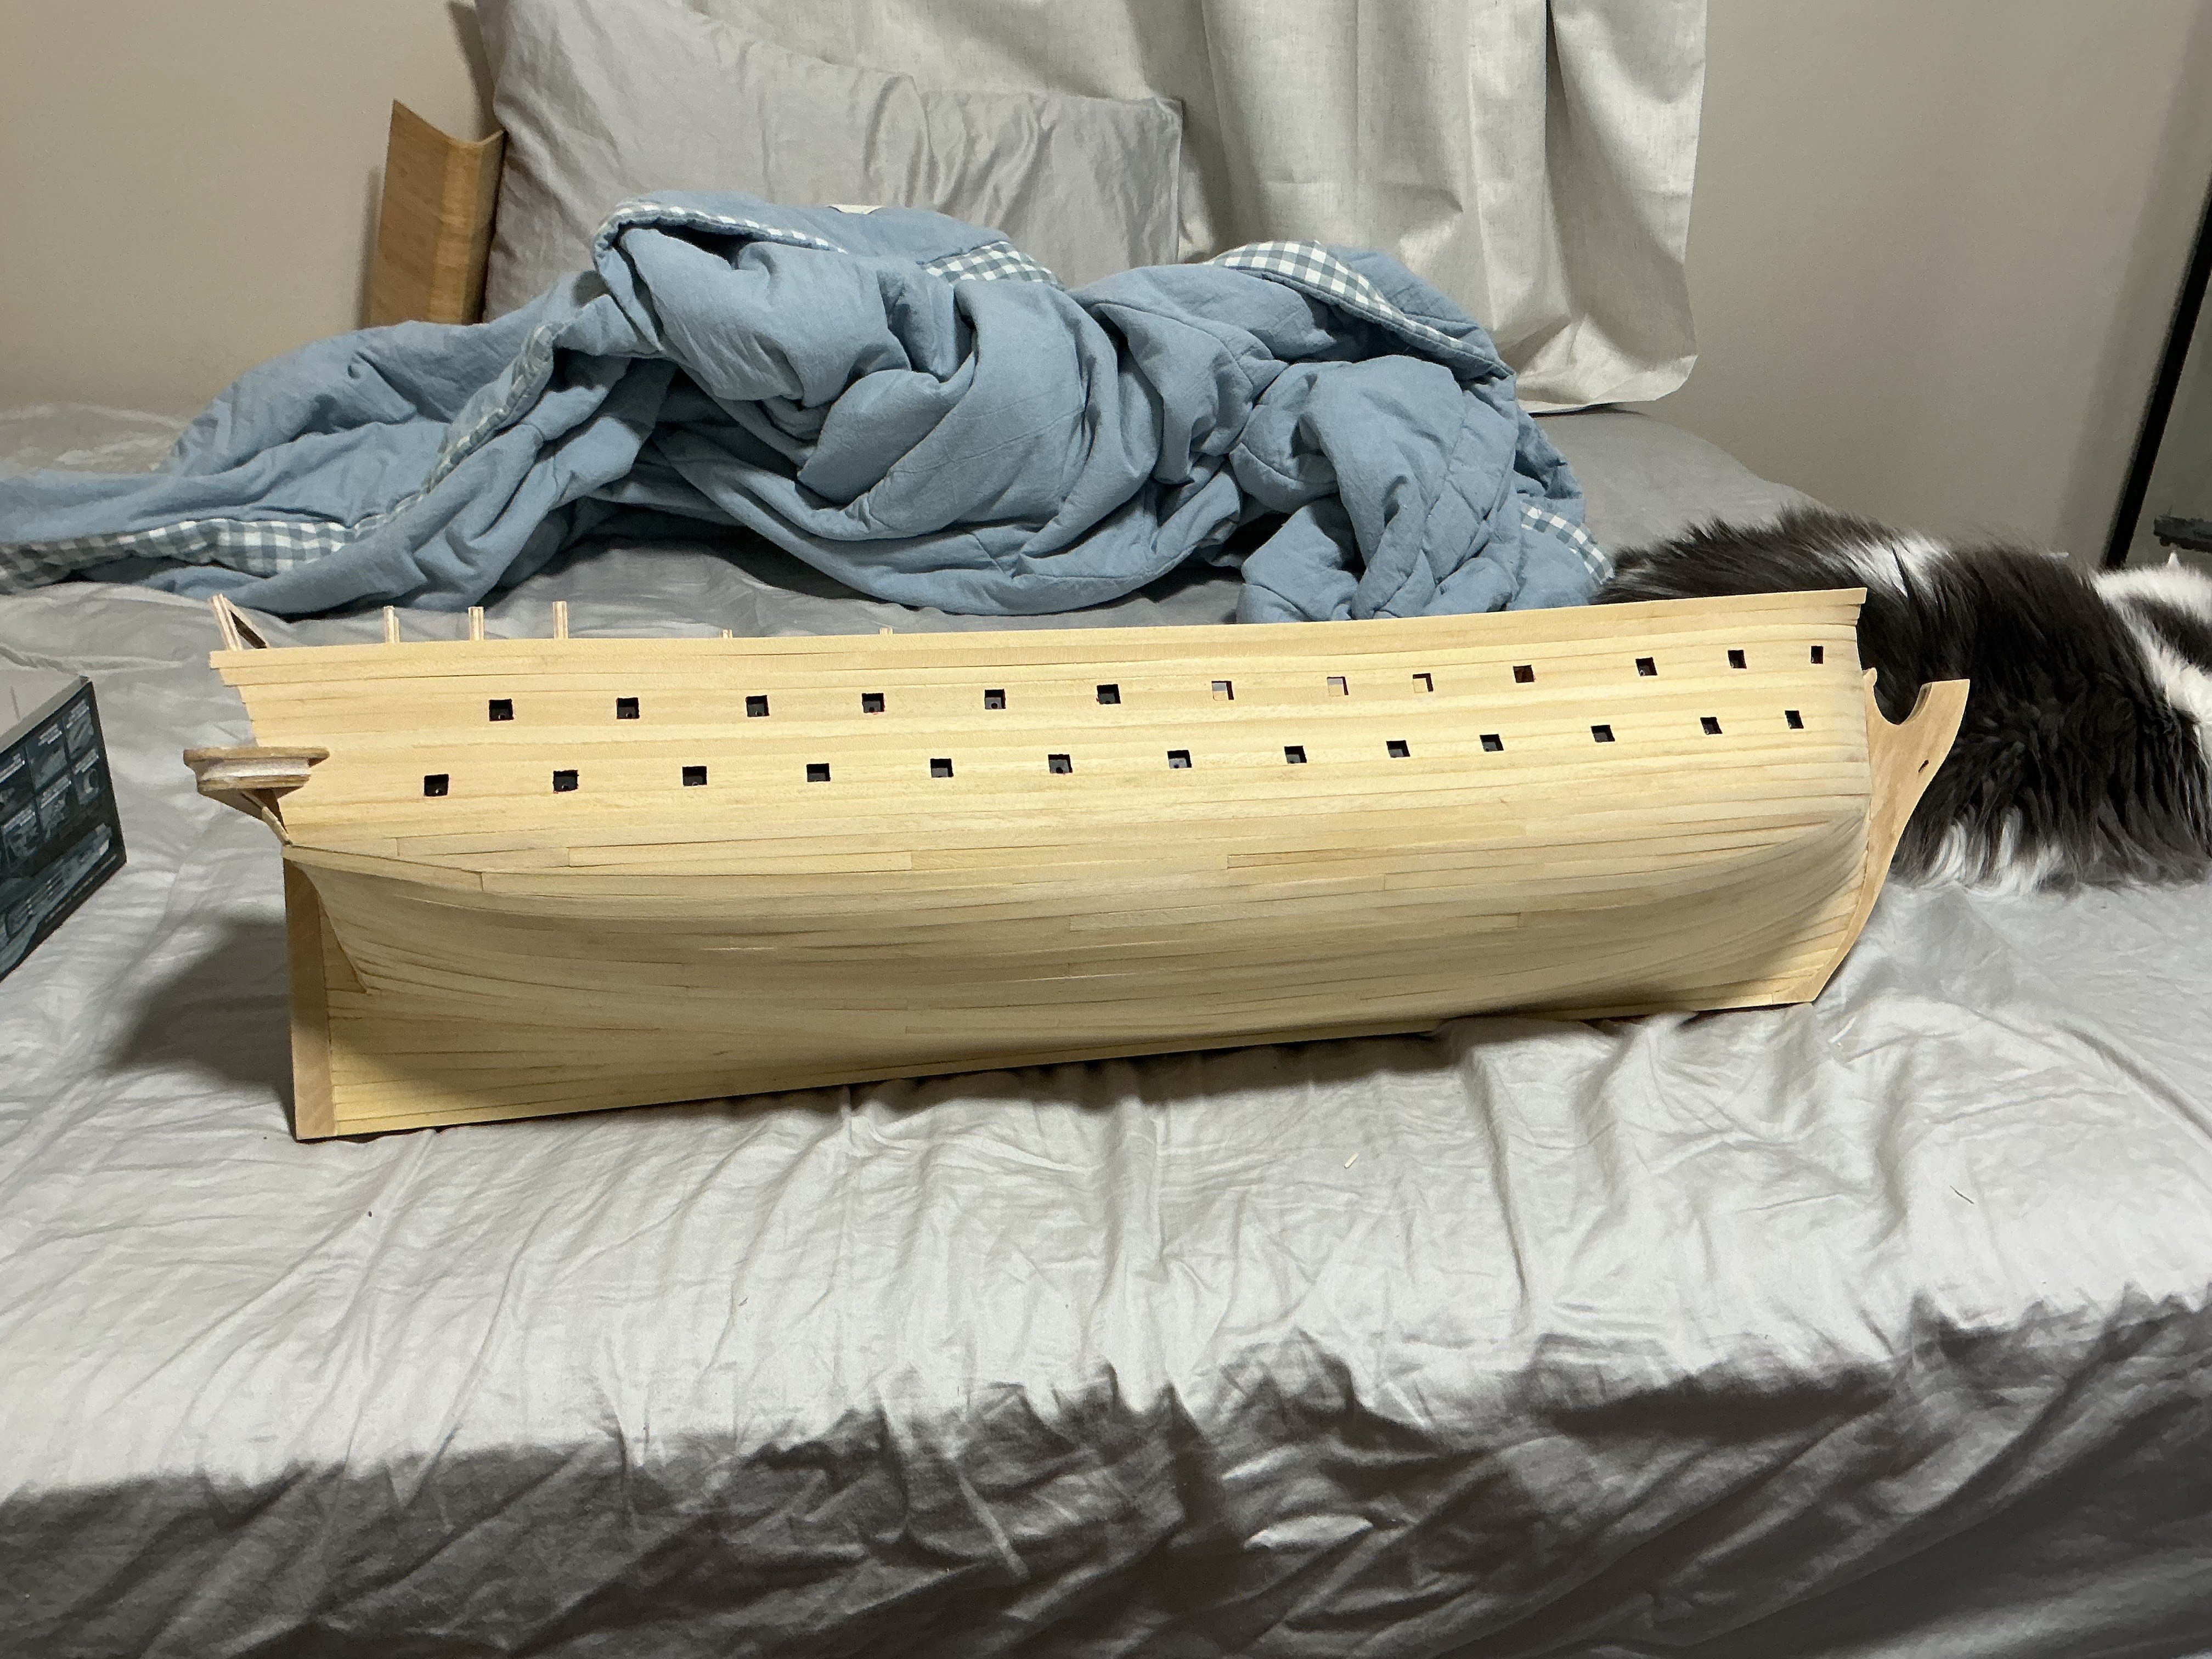
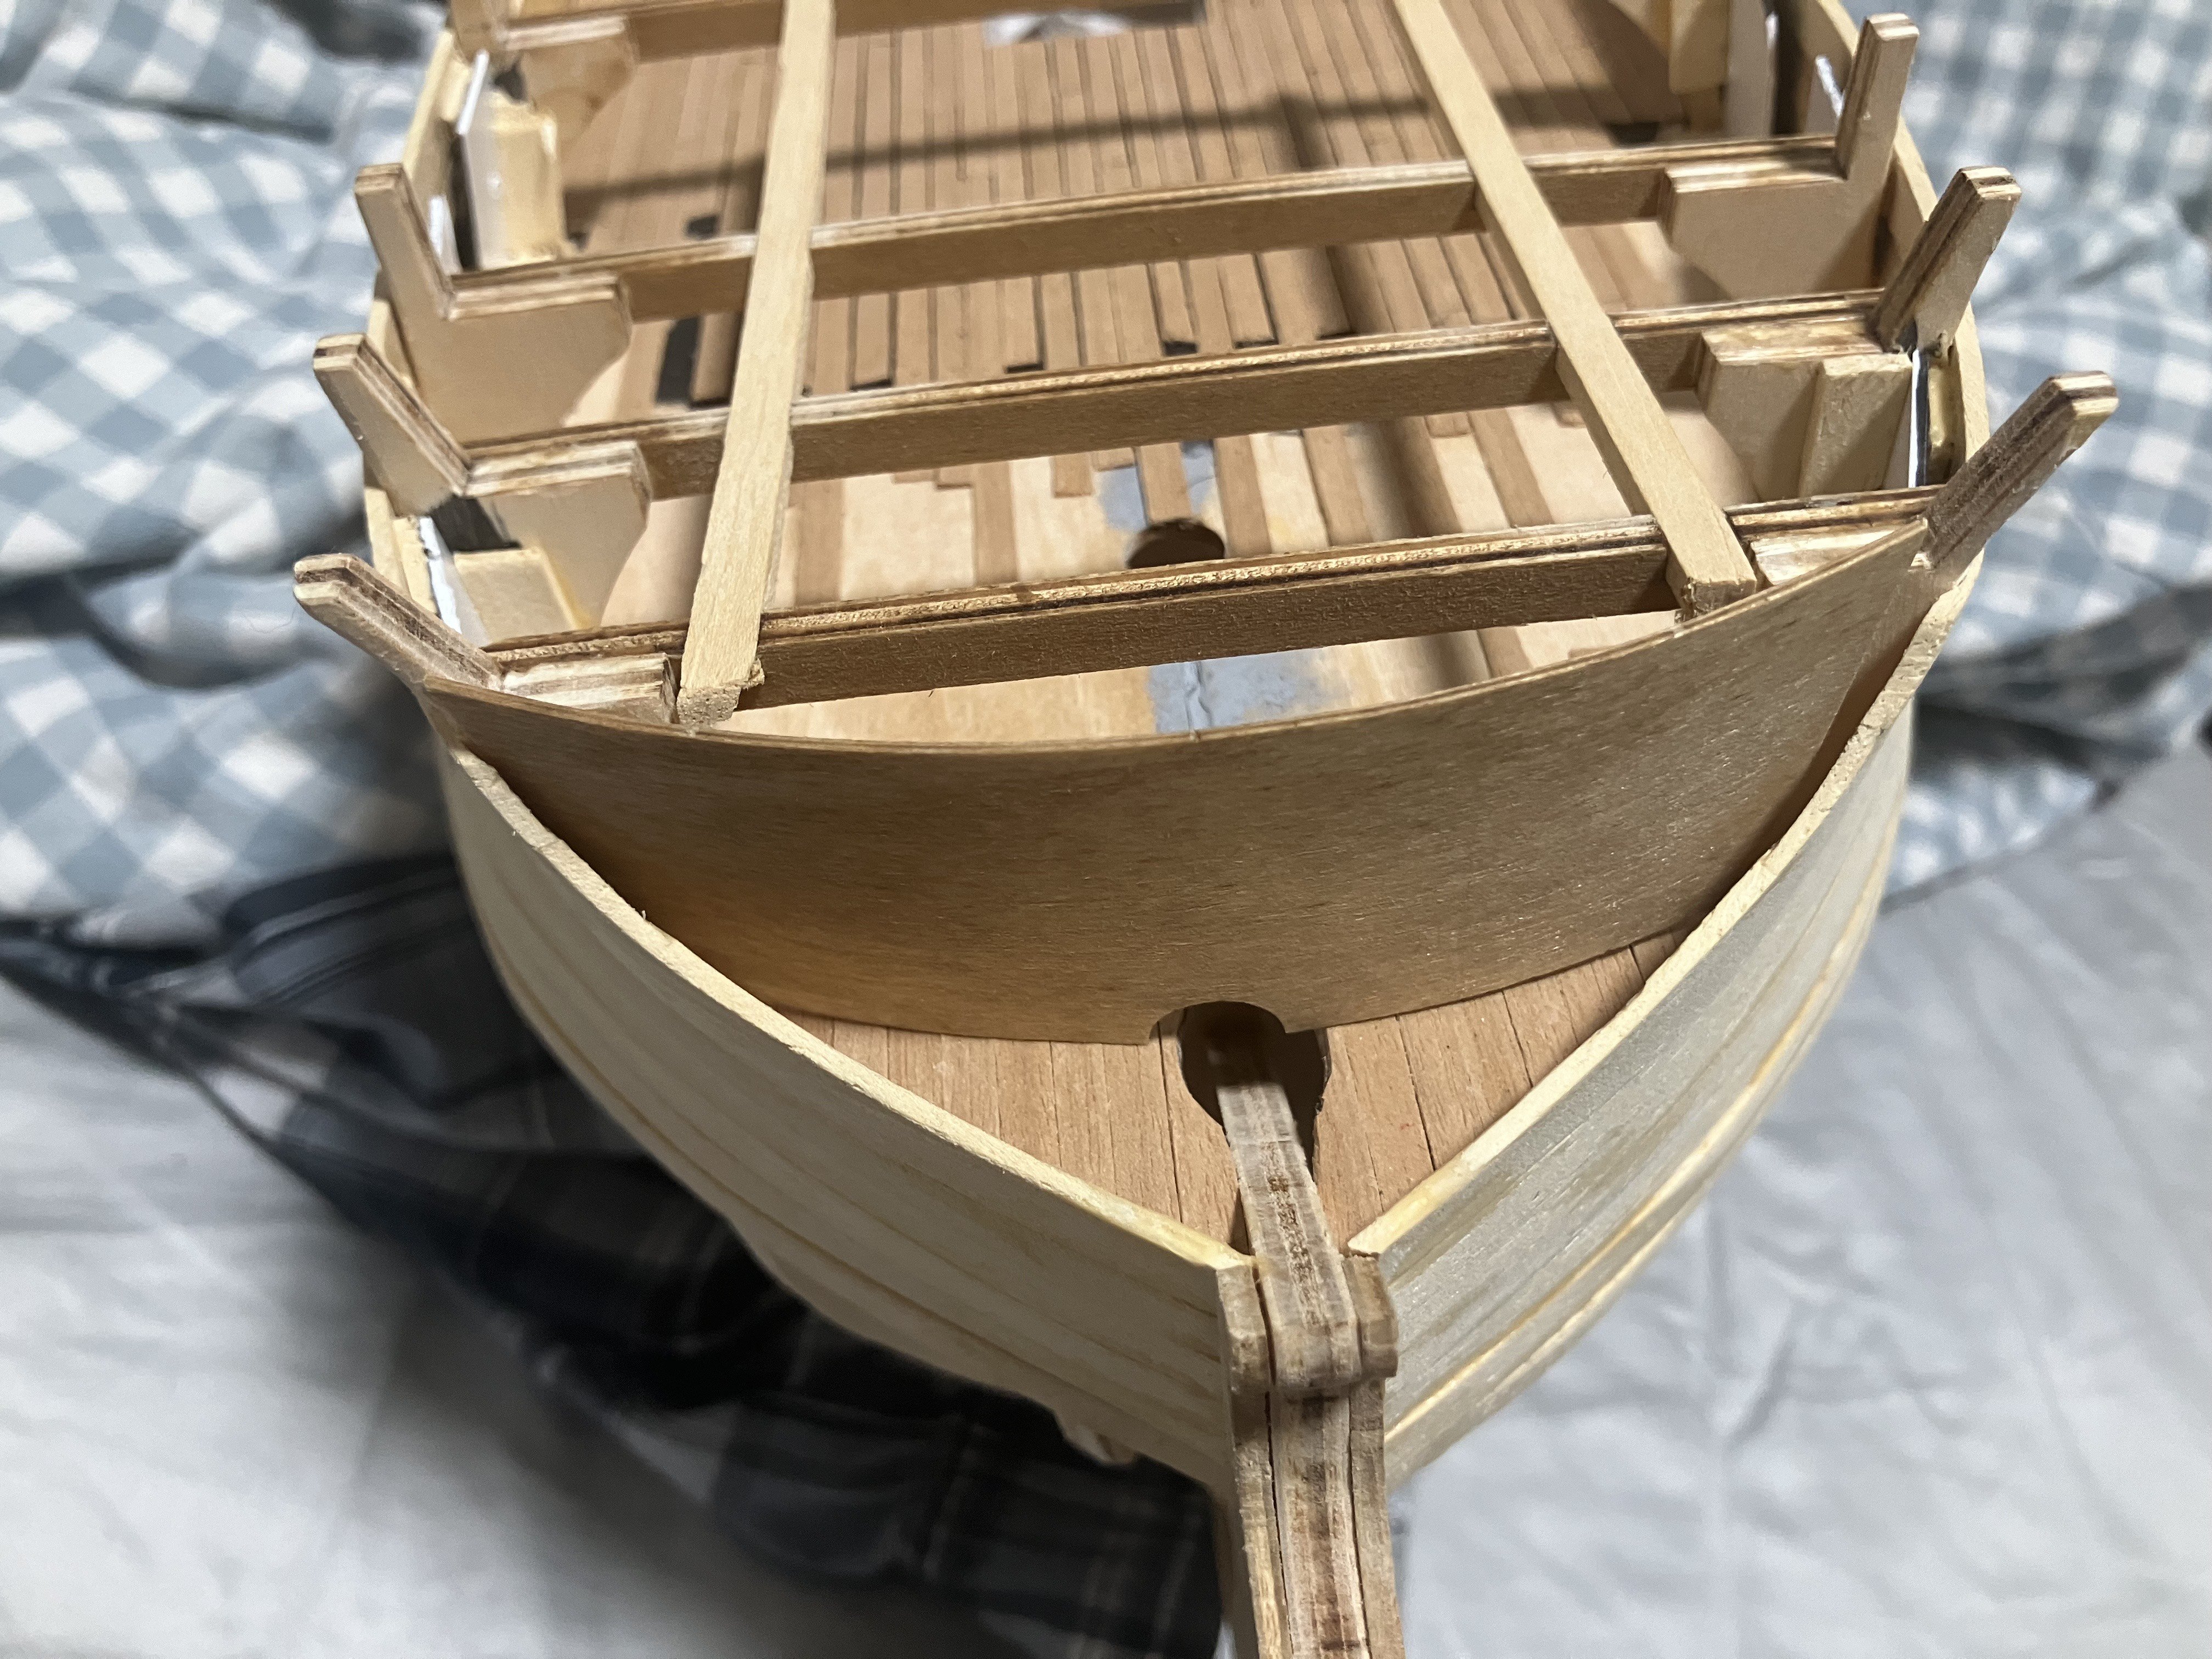
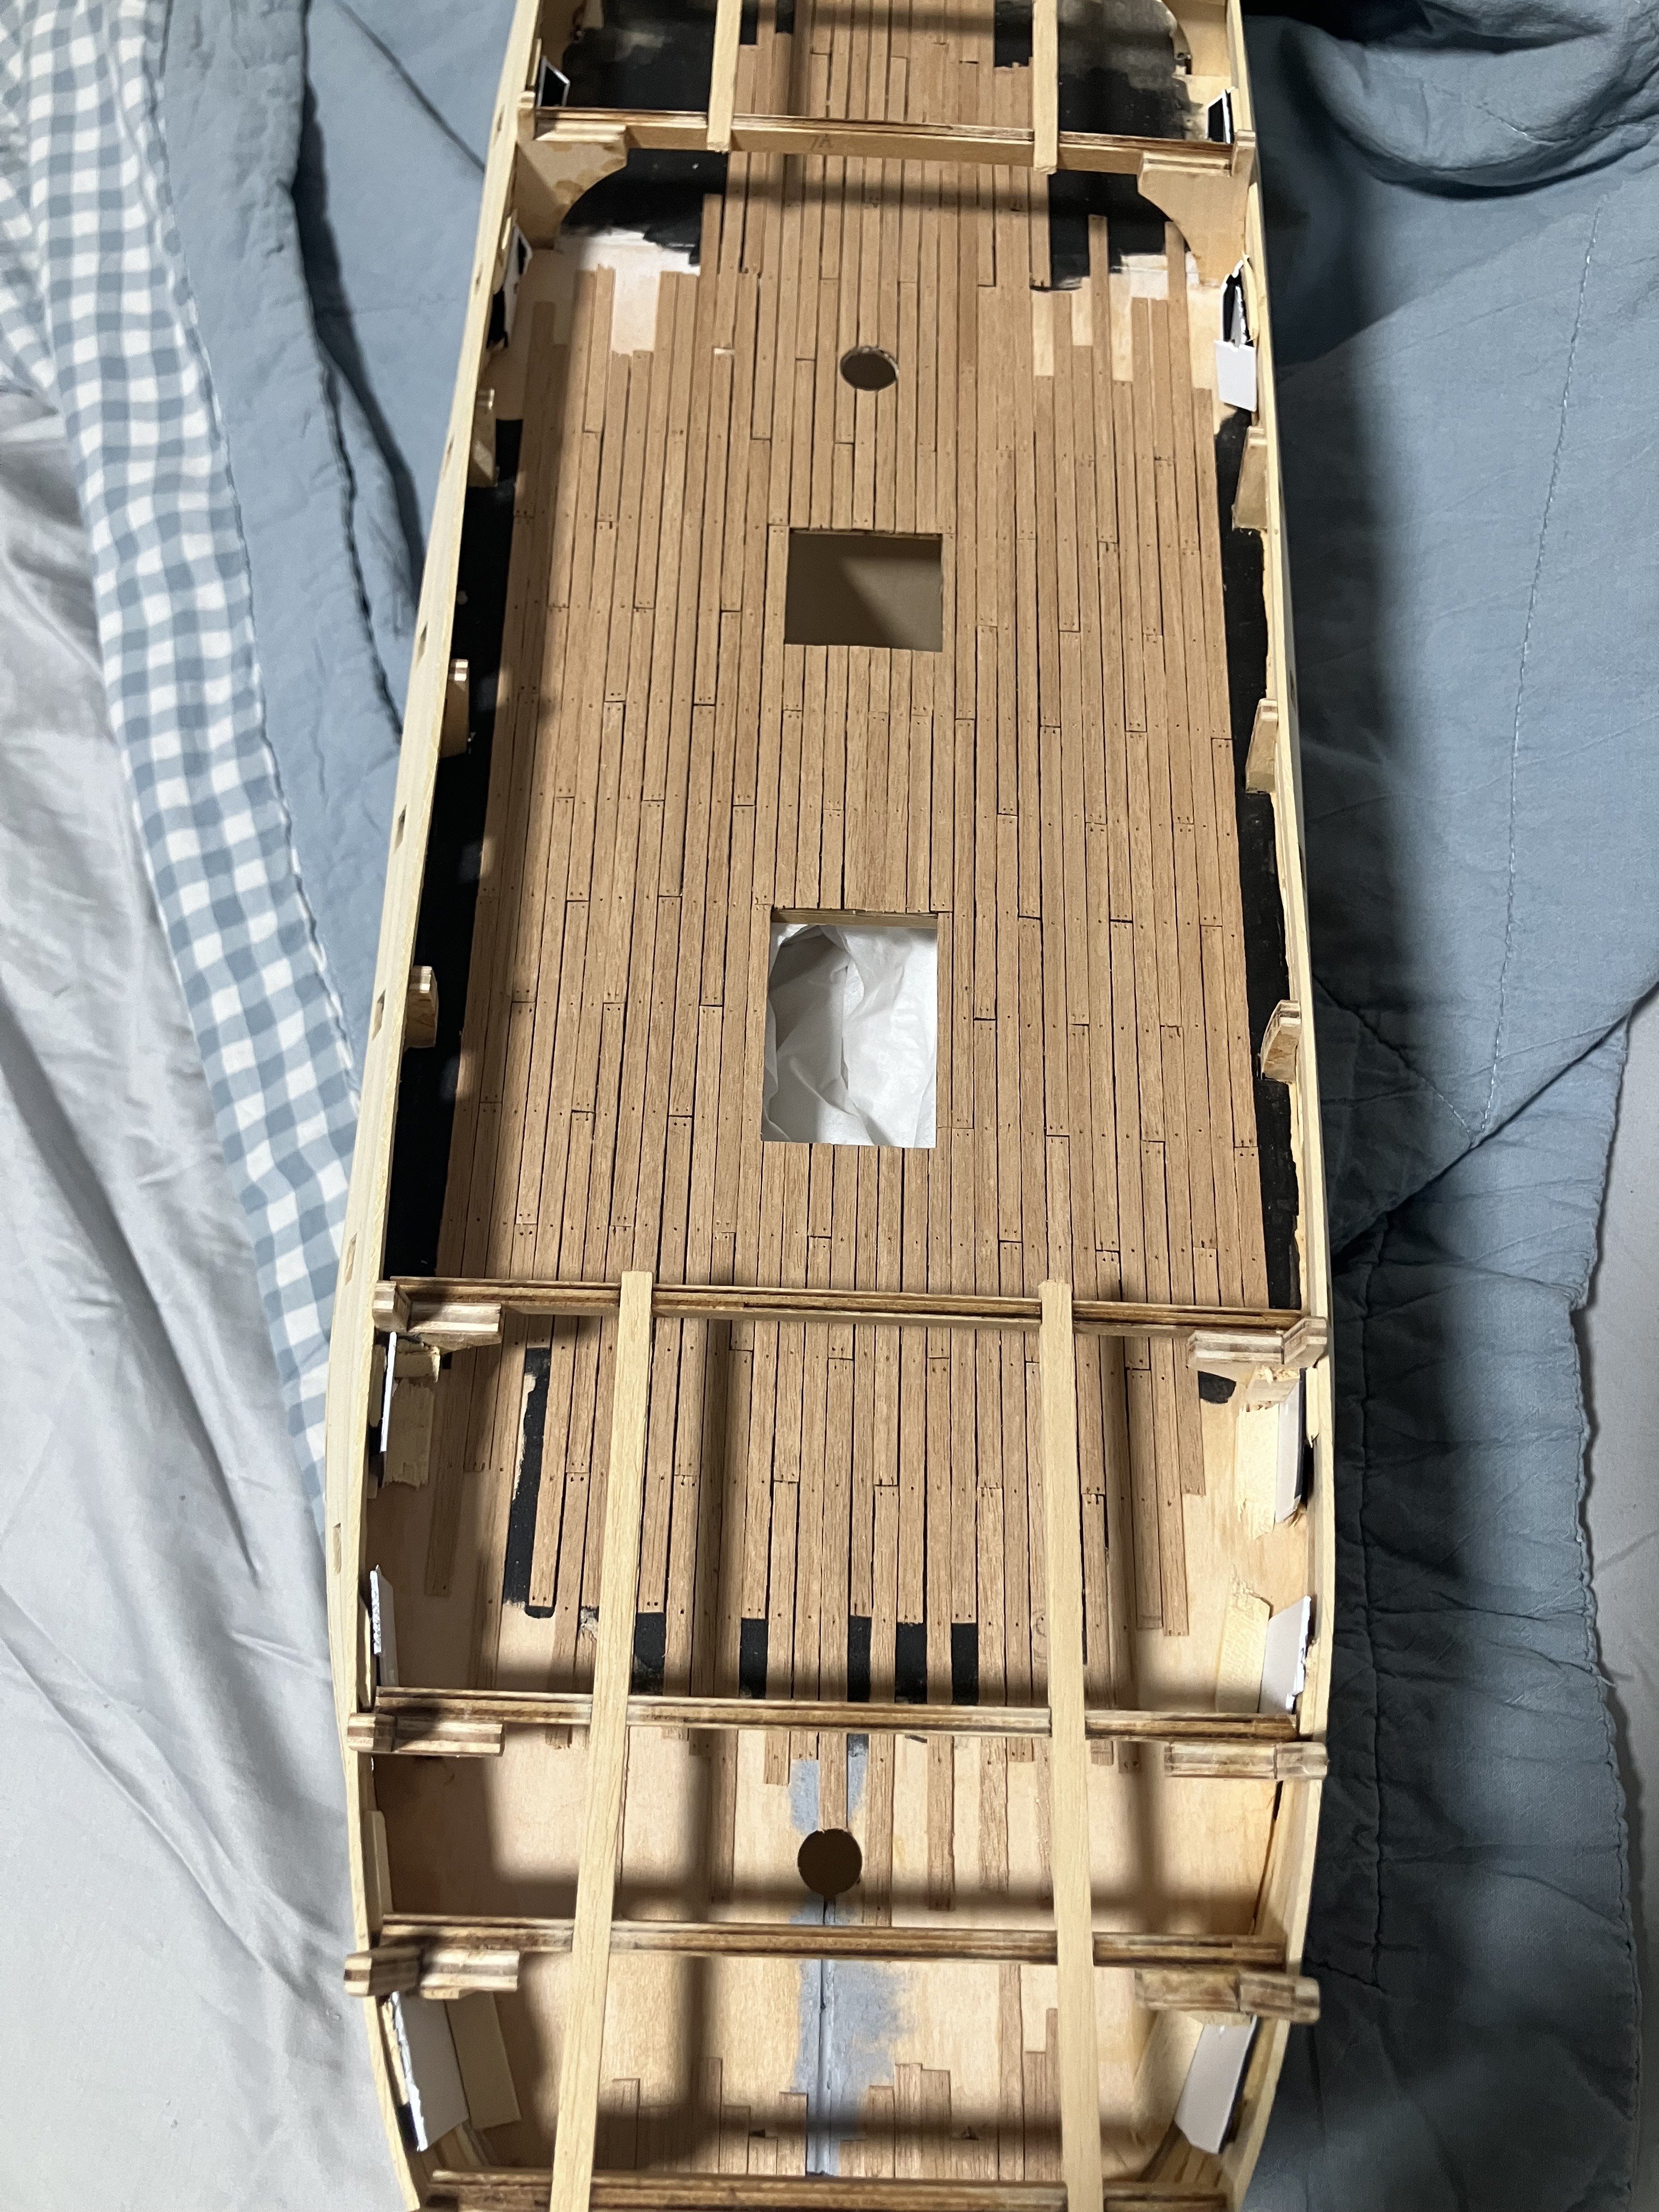
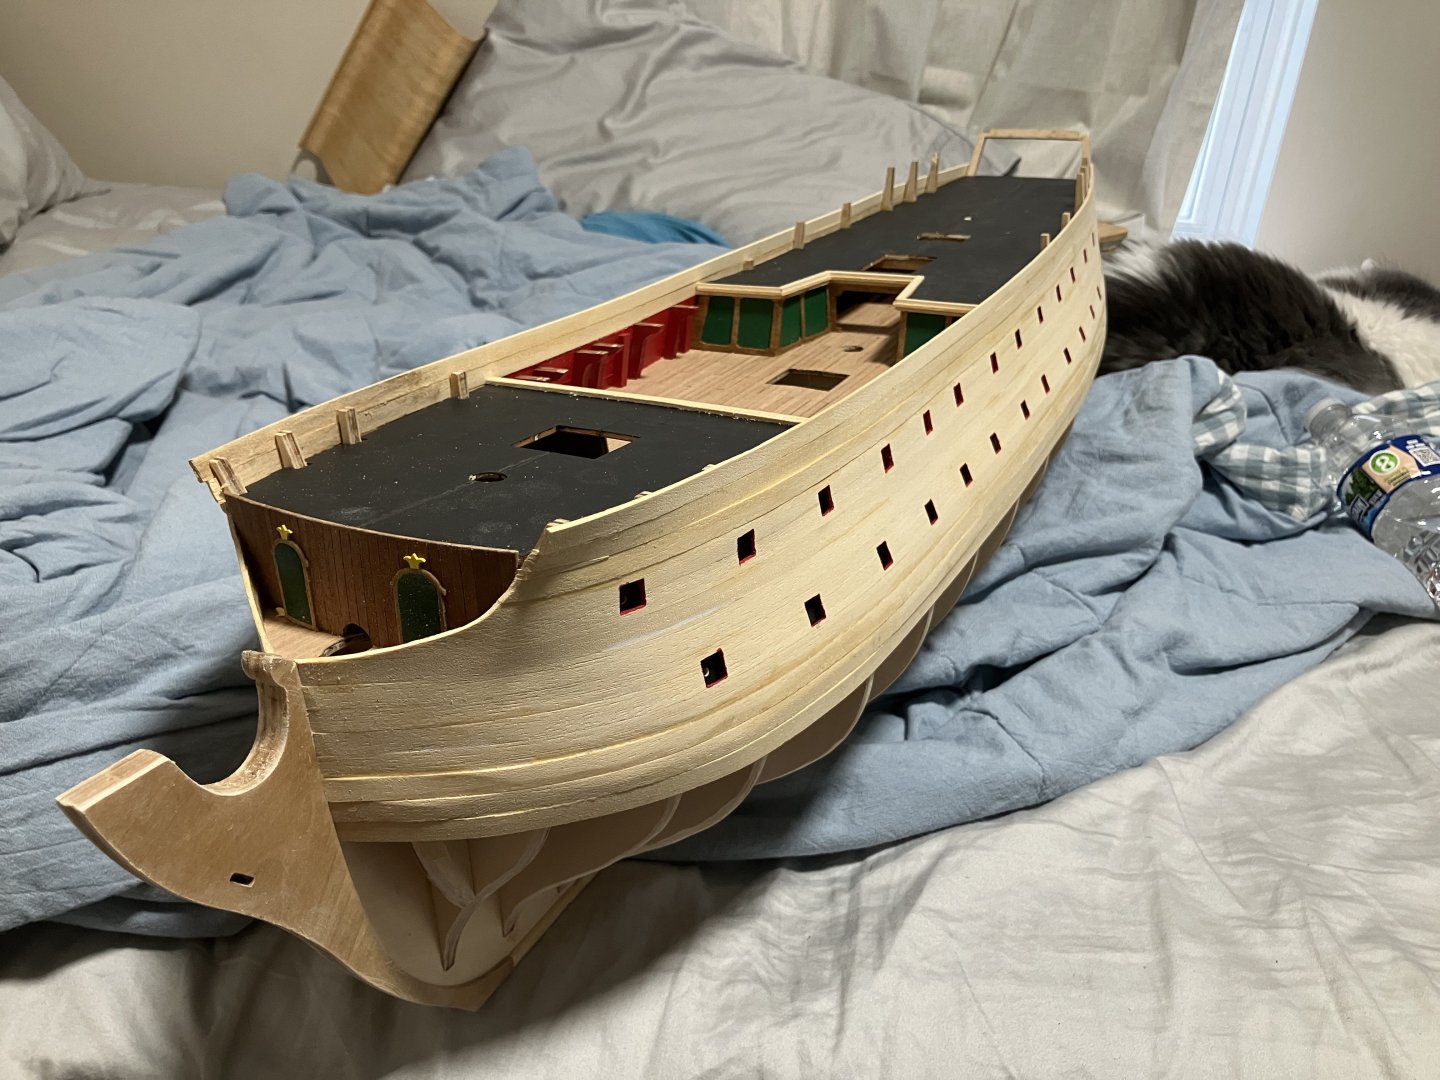
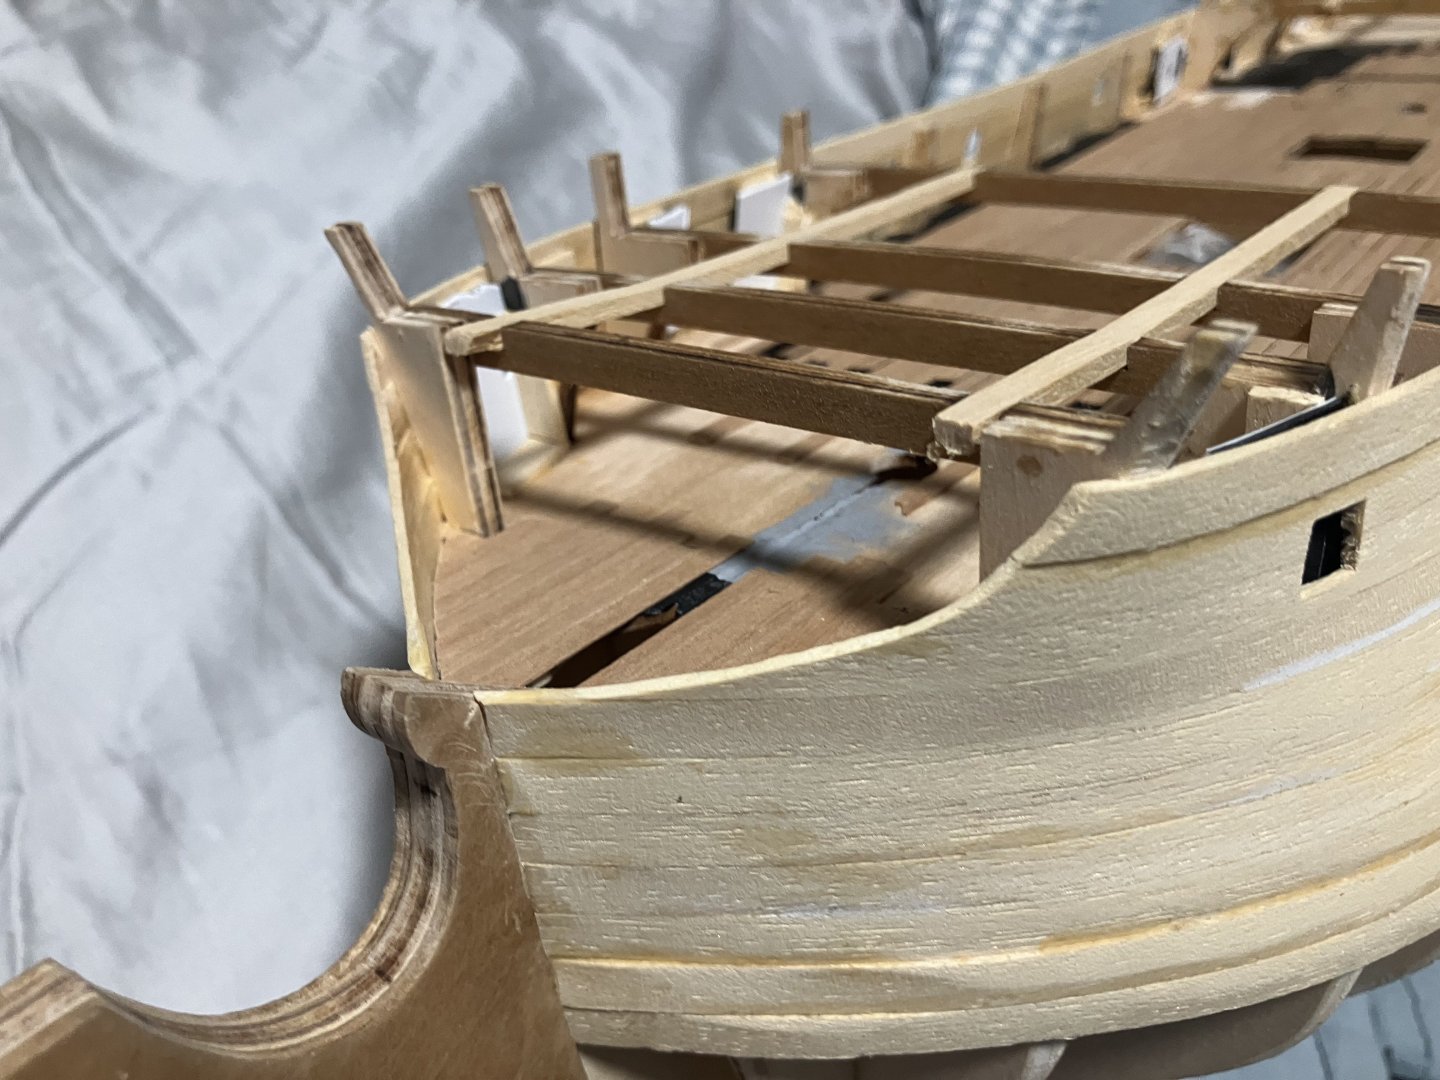
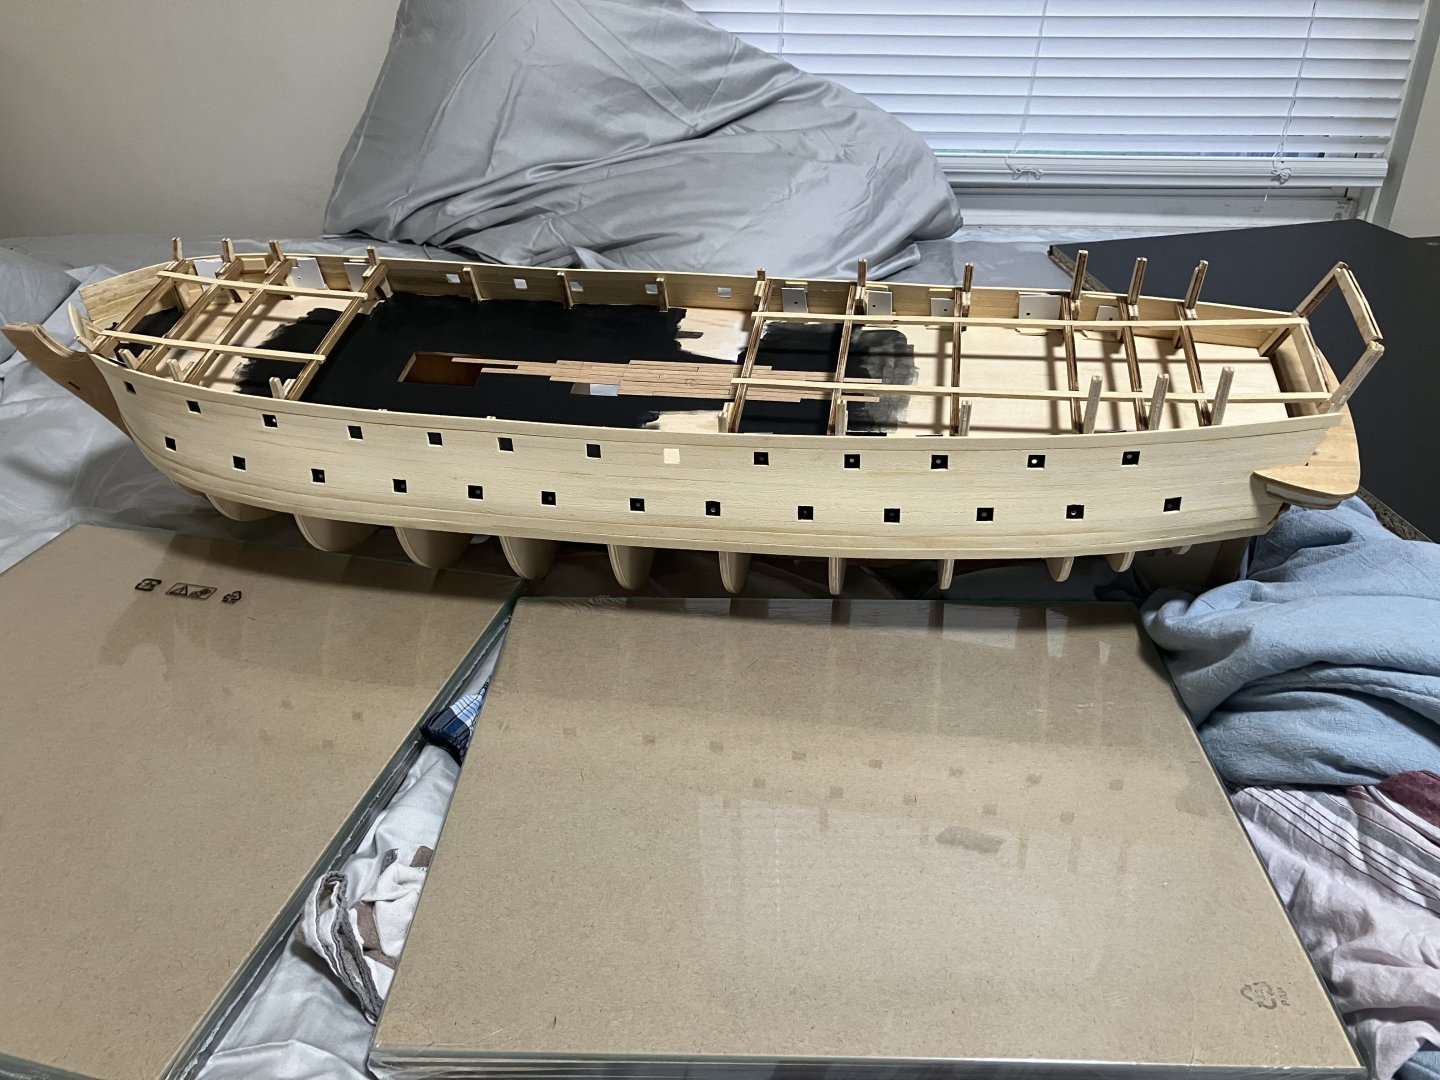
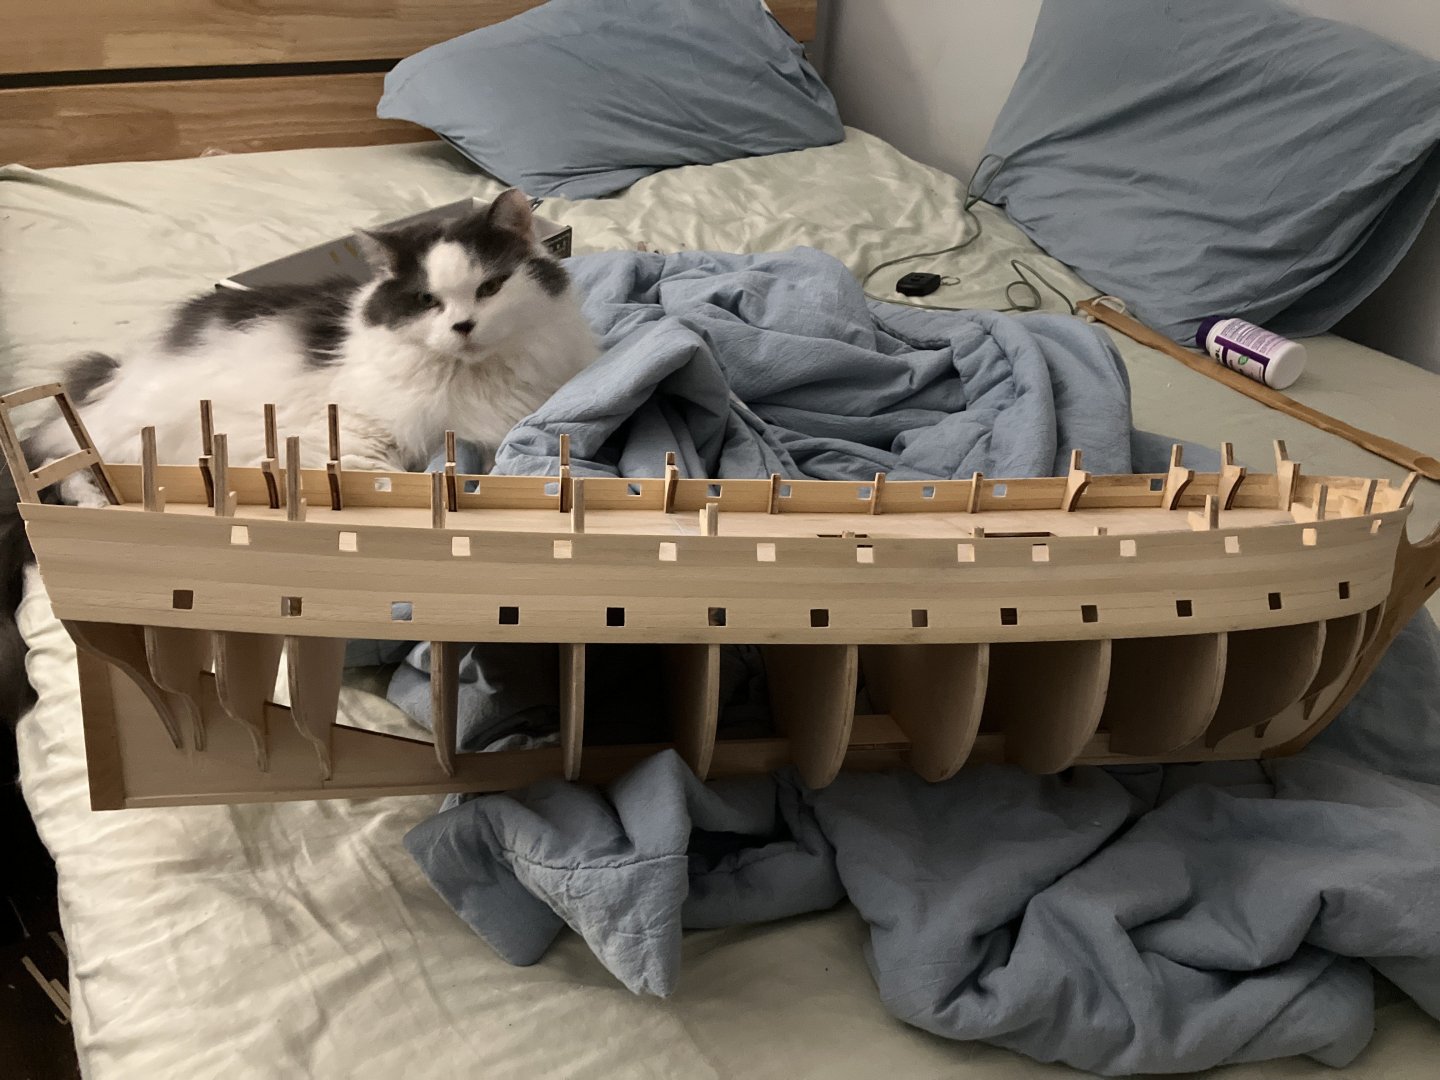
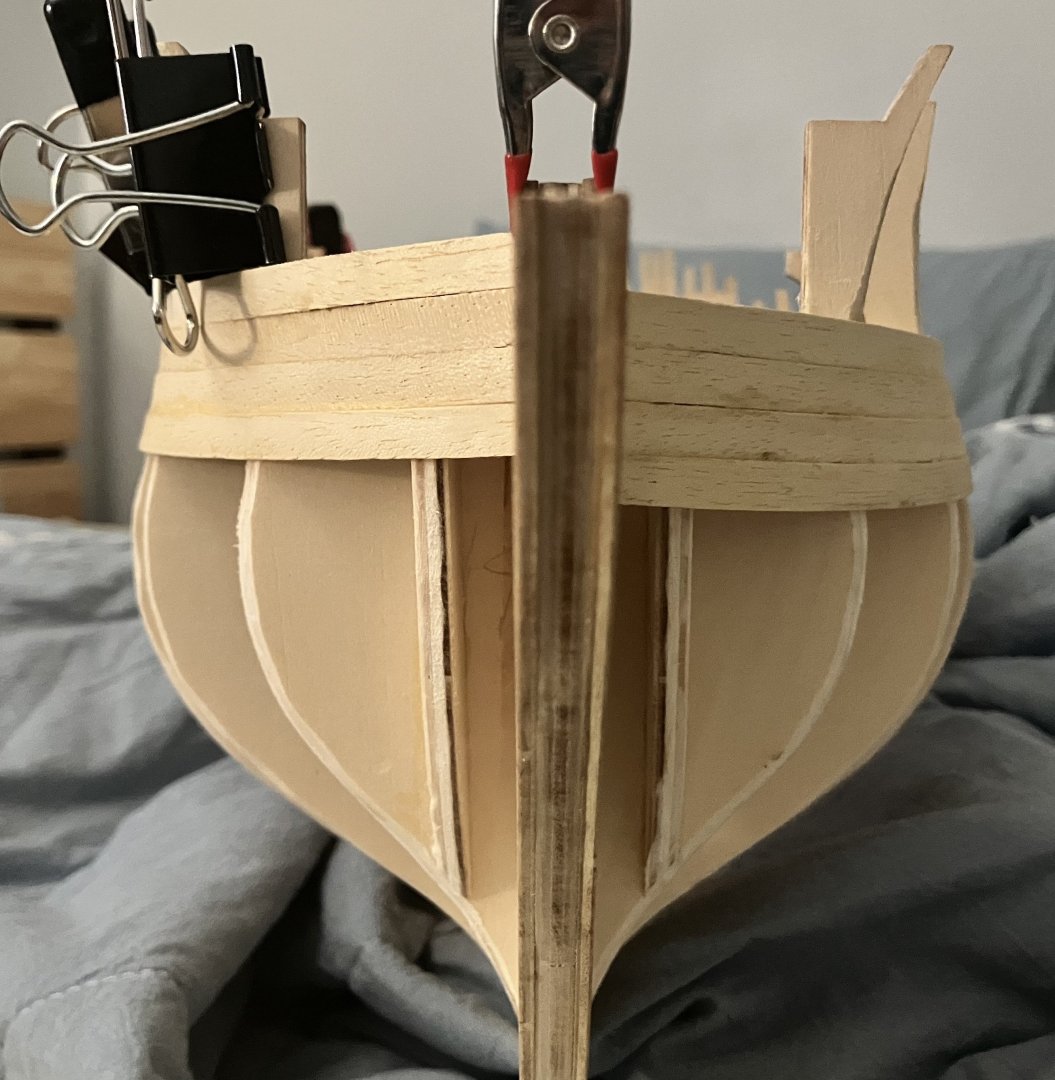
 Week 35 update: finished planking the portside, started on the display stand and the poop deck. Will update again when I have some progress to show for the stern. Might have to rip out the stern gallery base and shape the piece again since the plastic decoration pieces under it simply won't fit with the current placement.
-
Ian_Grant reacted to a post in a topic:
Norske Love by ZhangRenWing - Billing Boats - 1:75
-
Week 31 update: finished the planking on the starboard side of the ship. About halfway done with the portside. Hopefully I can finish it by December.


-
Ian_Grant reacted to a post in a topic:
Norske Love by ZhangRenWing - Billing Boats - 1:75
-
I am still building, just very slowly and the progress is not enough to warrant me to post weekly. Don't want to drag on the post with too much small minor progress. Will update the log when I finish planking the decks or the hull, whichever comes first.
-
Ian_Grant reacted to a post in a topic:
Norske Love by ZhangRenWing - Billing Boats - 1:75
-
ZhangRenWing reacted to a post in a topic:
Le Superbe by greenskin - Heller - 1/150 - PLASTIC
-
Knocklouder reacted to a post in a topic:
Norske Love by ZhangRenWing - Billing Boats - 1:75
-
Knocklouder reacted to a post in a topic:
Norske Love by ZhangRenWing - Billing Boats - 1:75
-
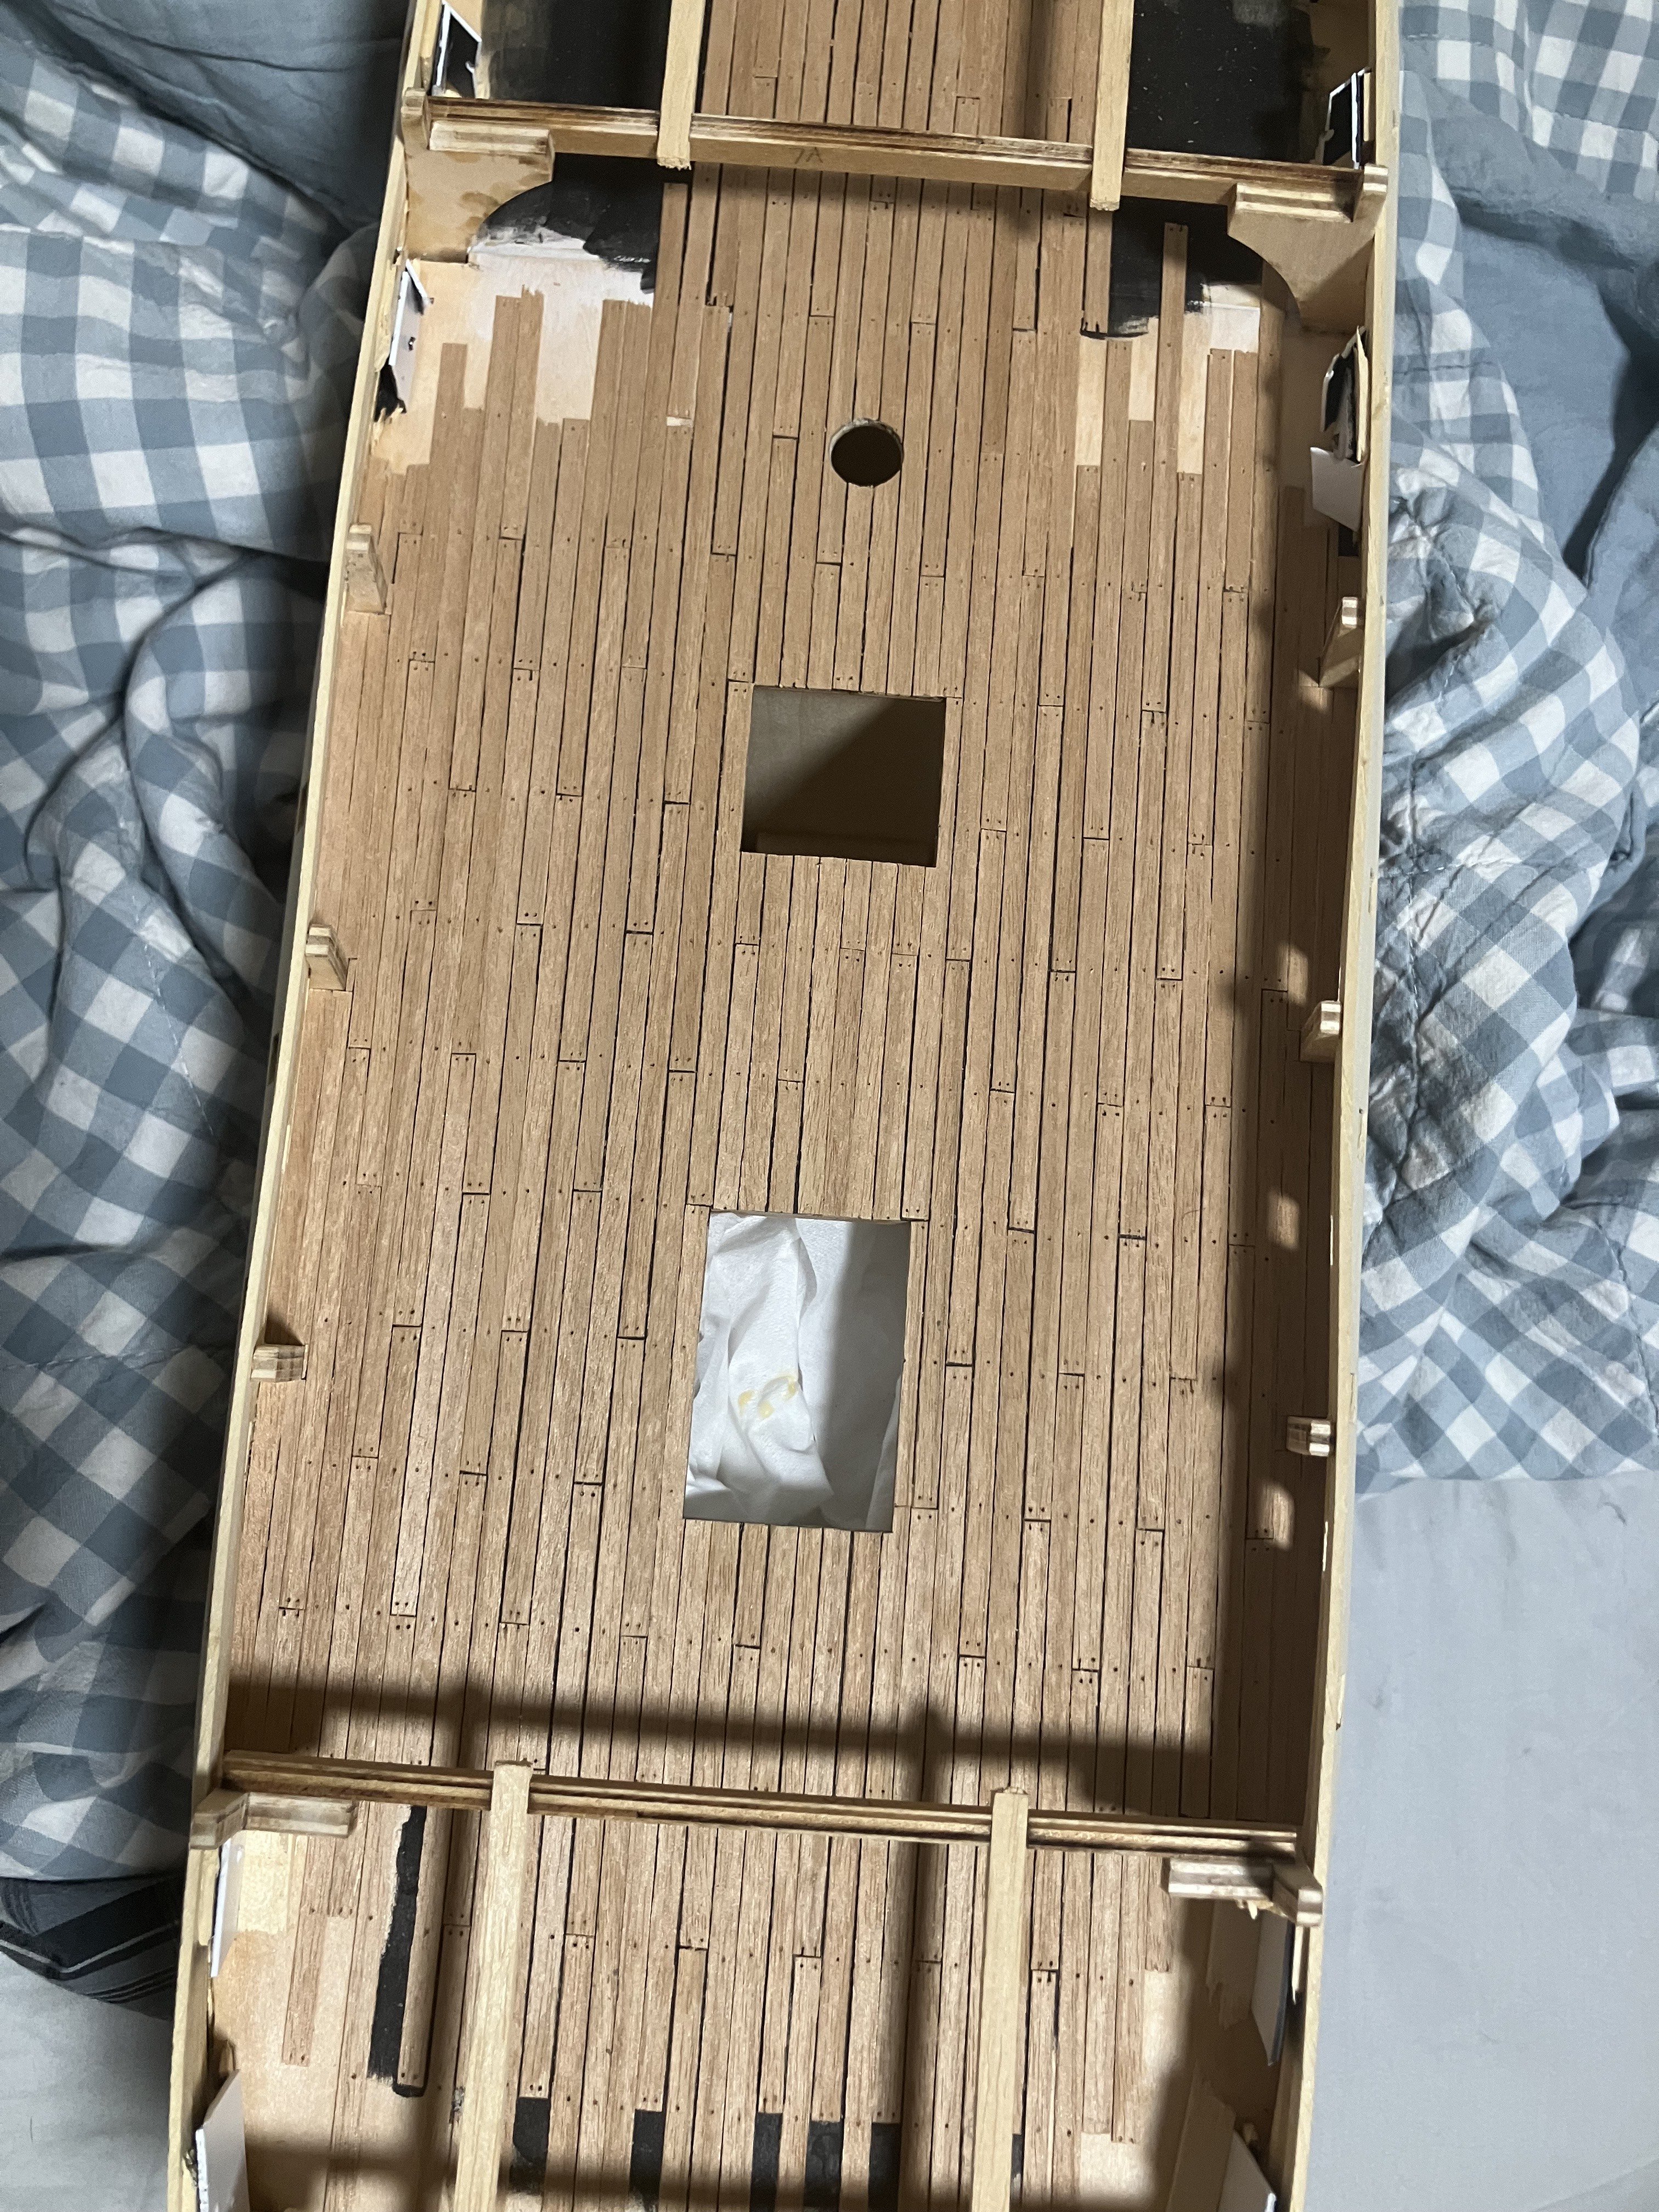
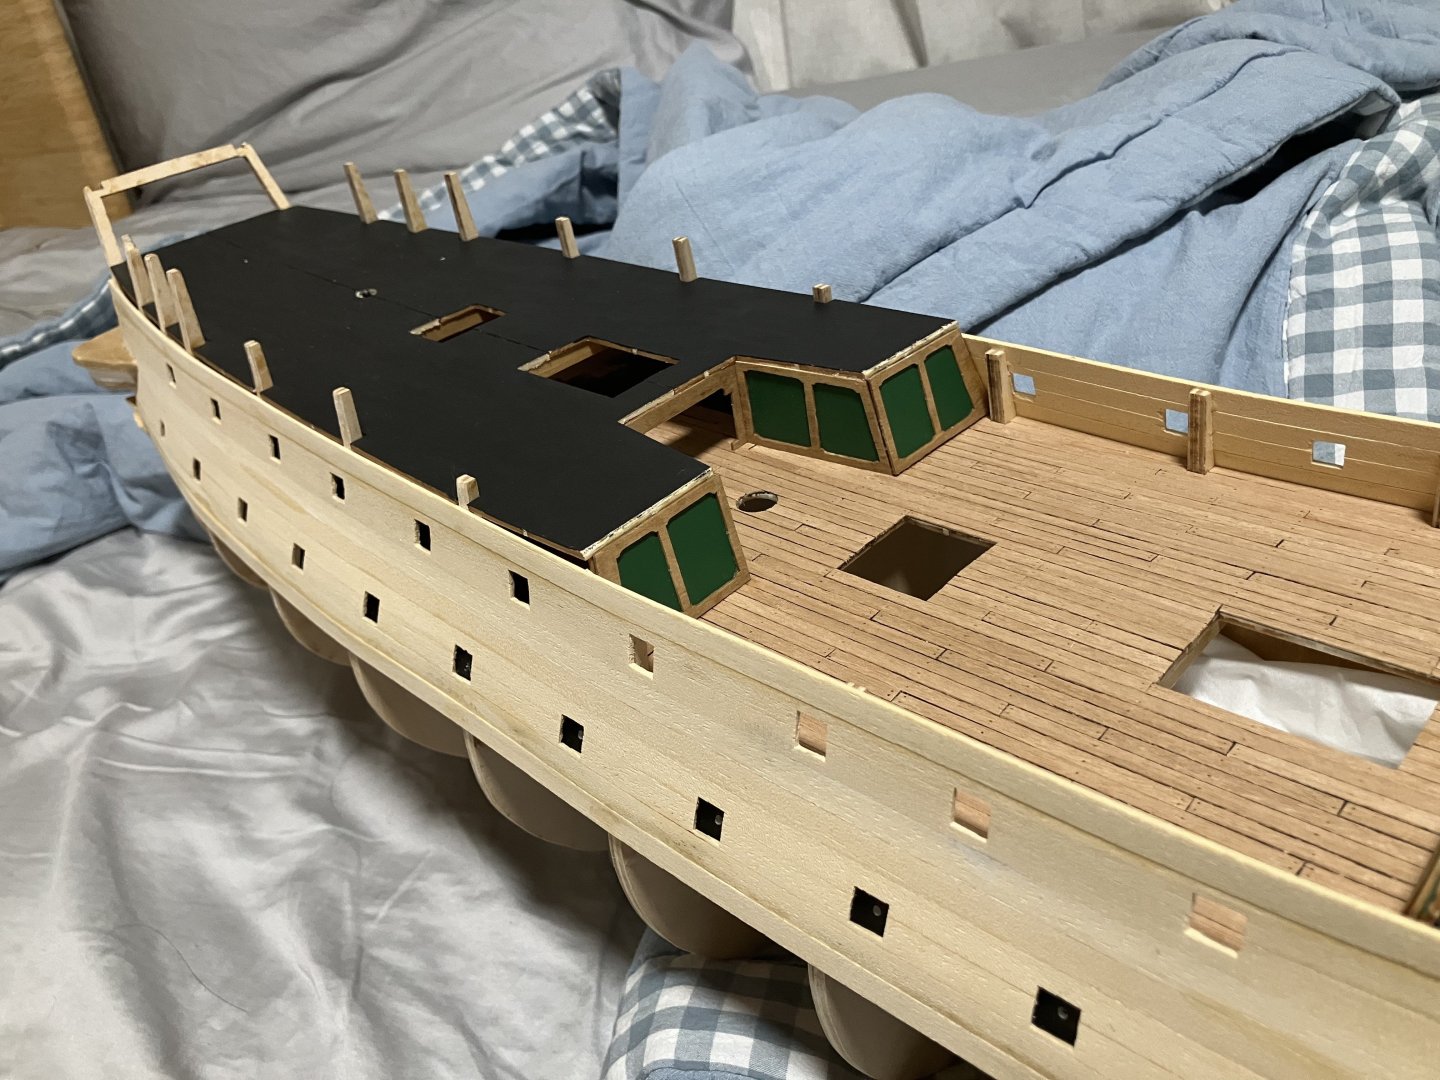
Week 13: quarter and forecastle false decks down. I also somehow managed to lose my instruction book during the move, and for the life of me could not find it. So there goes all the time I spent labeling the strips and marking on the instruction book. Now I have to rely solely on the digital copy. I suppose I should also explain the reasons for my slow progress. Been building the USS Enterprise and UNCF Yamato. The Grey Ghost as she was during the Battle of Midway Any Star Blazer fans? Losing the instruction book was a big blow to my morale, but I will keep working on her. Next up: planking false decks.


-
Week 11: finished the main deck planking. Progress has been slow since I have been working on other plastic models. Next up: installing the walls and planking the quarter and forecastle decks.


-
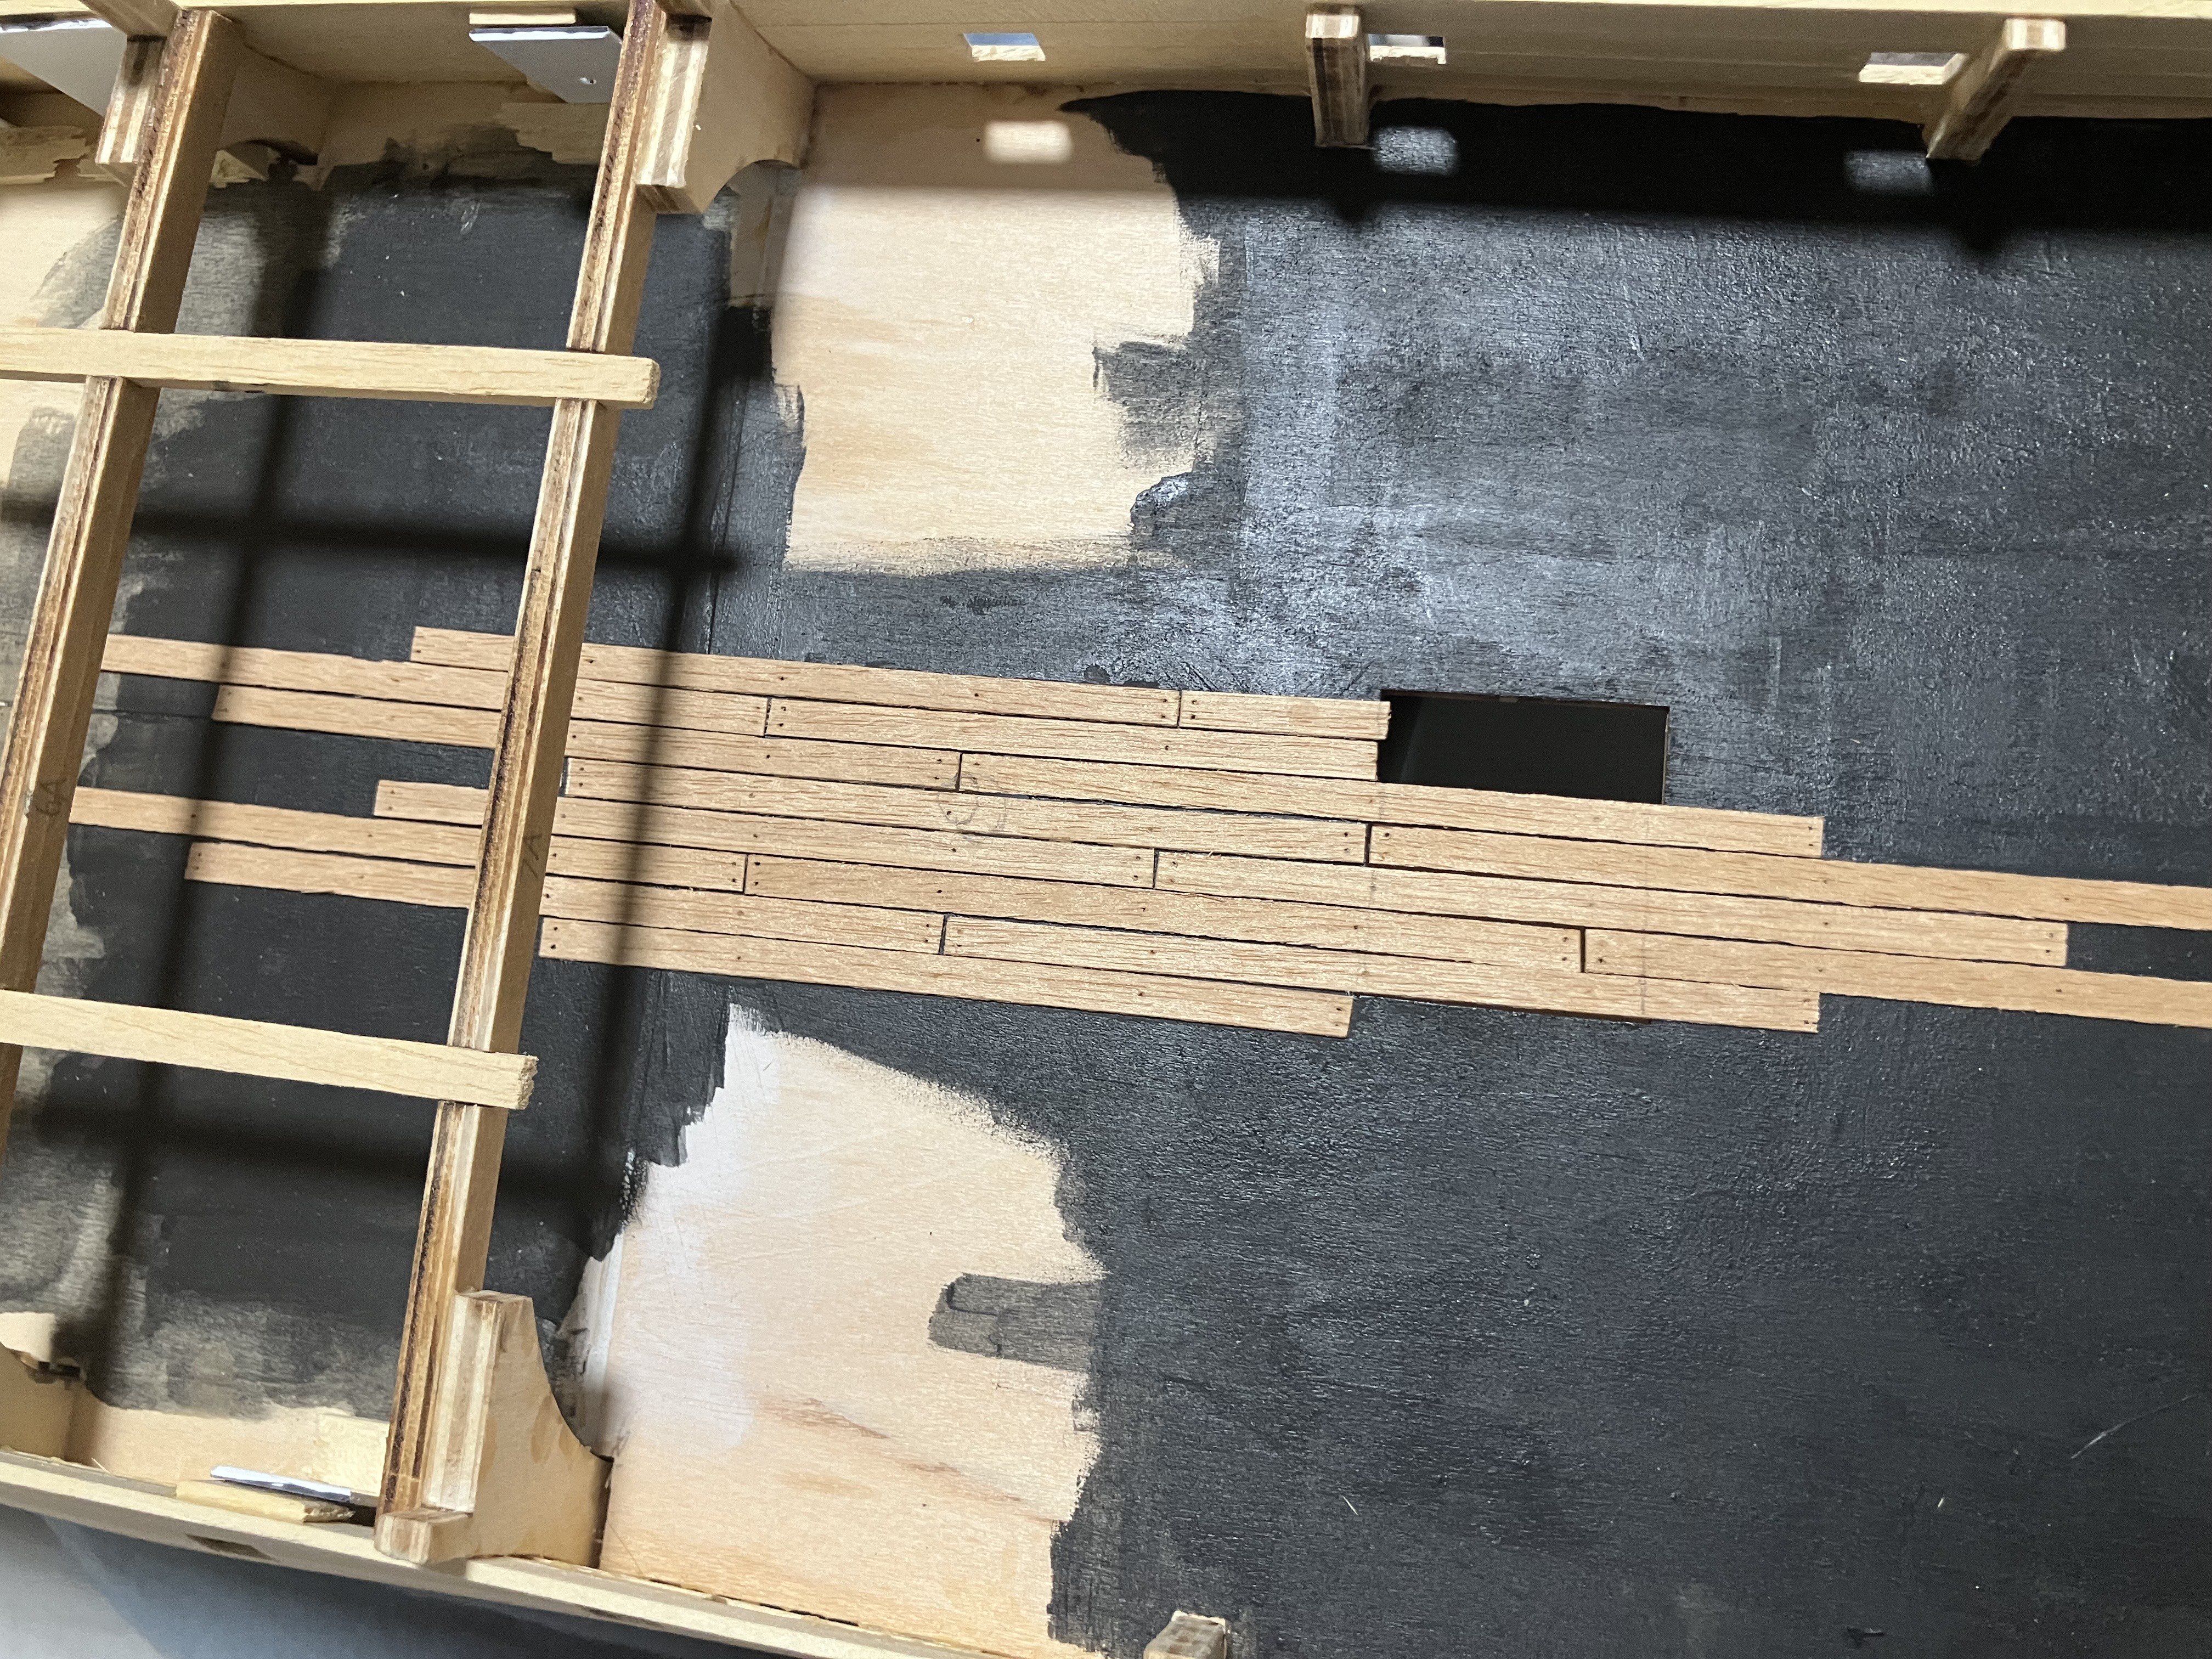
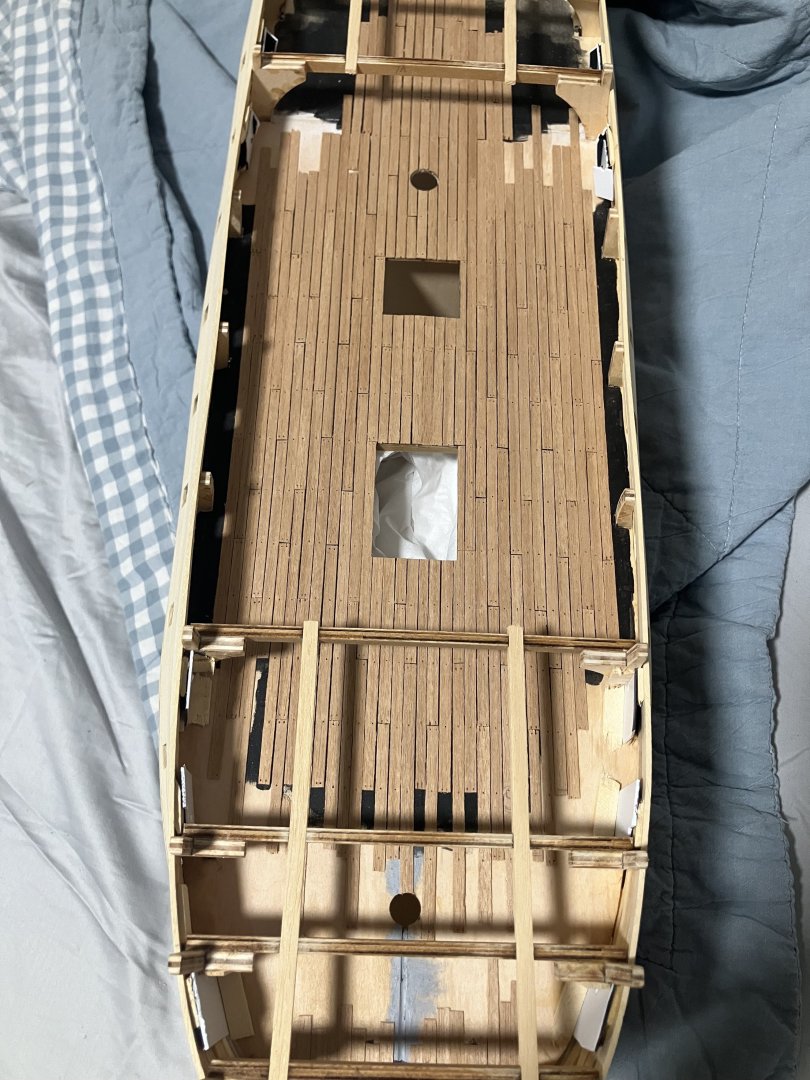
Week 10 update: finished most of the planking on the main deck Hopefully I will be able to finish the deck and start to work on the quarter and forecastle decks. Next up: still more deck planking
-
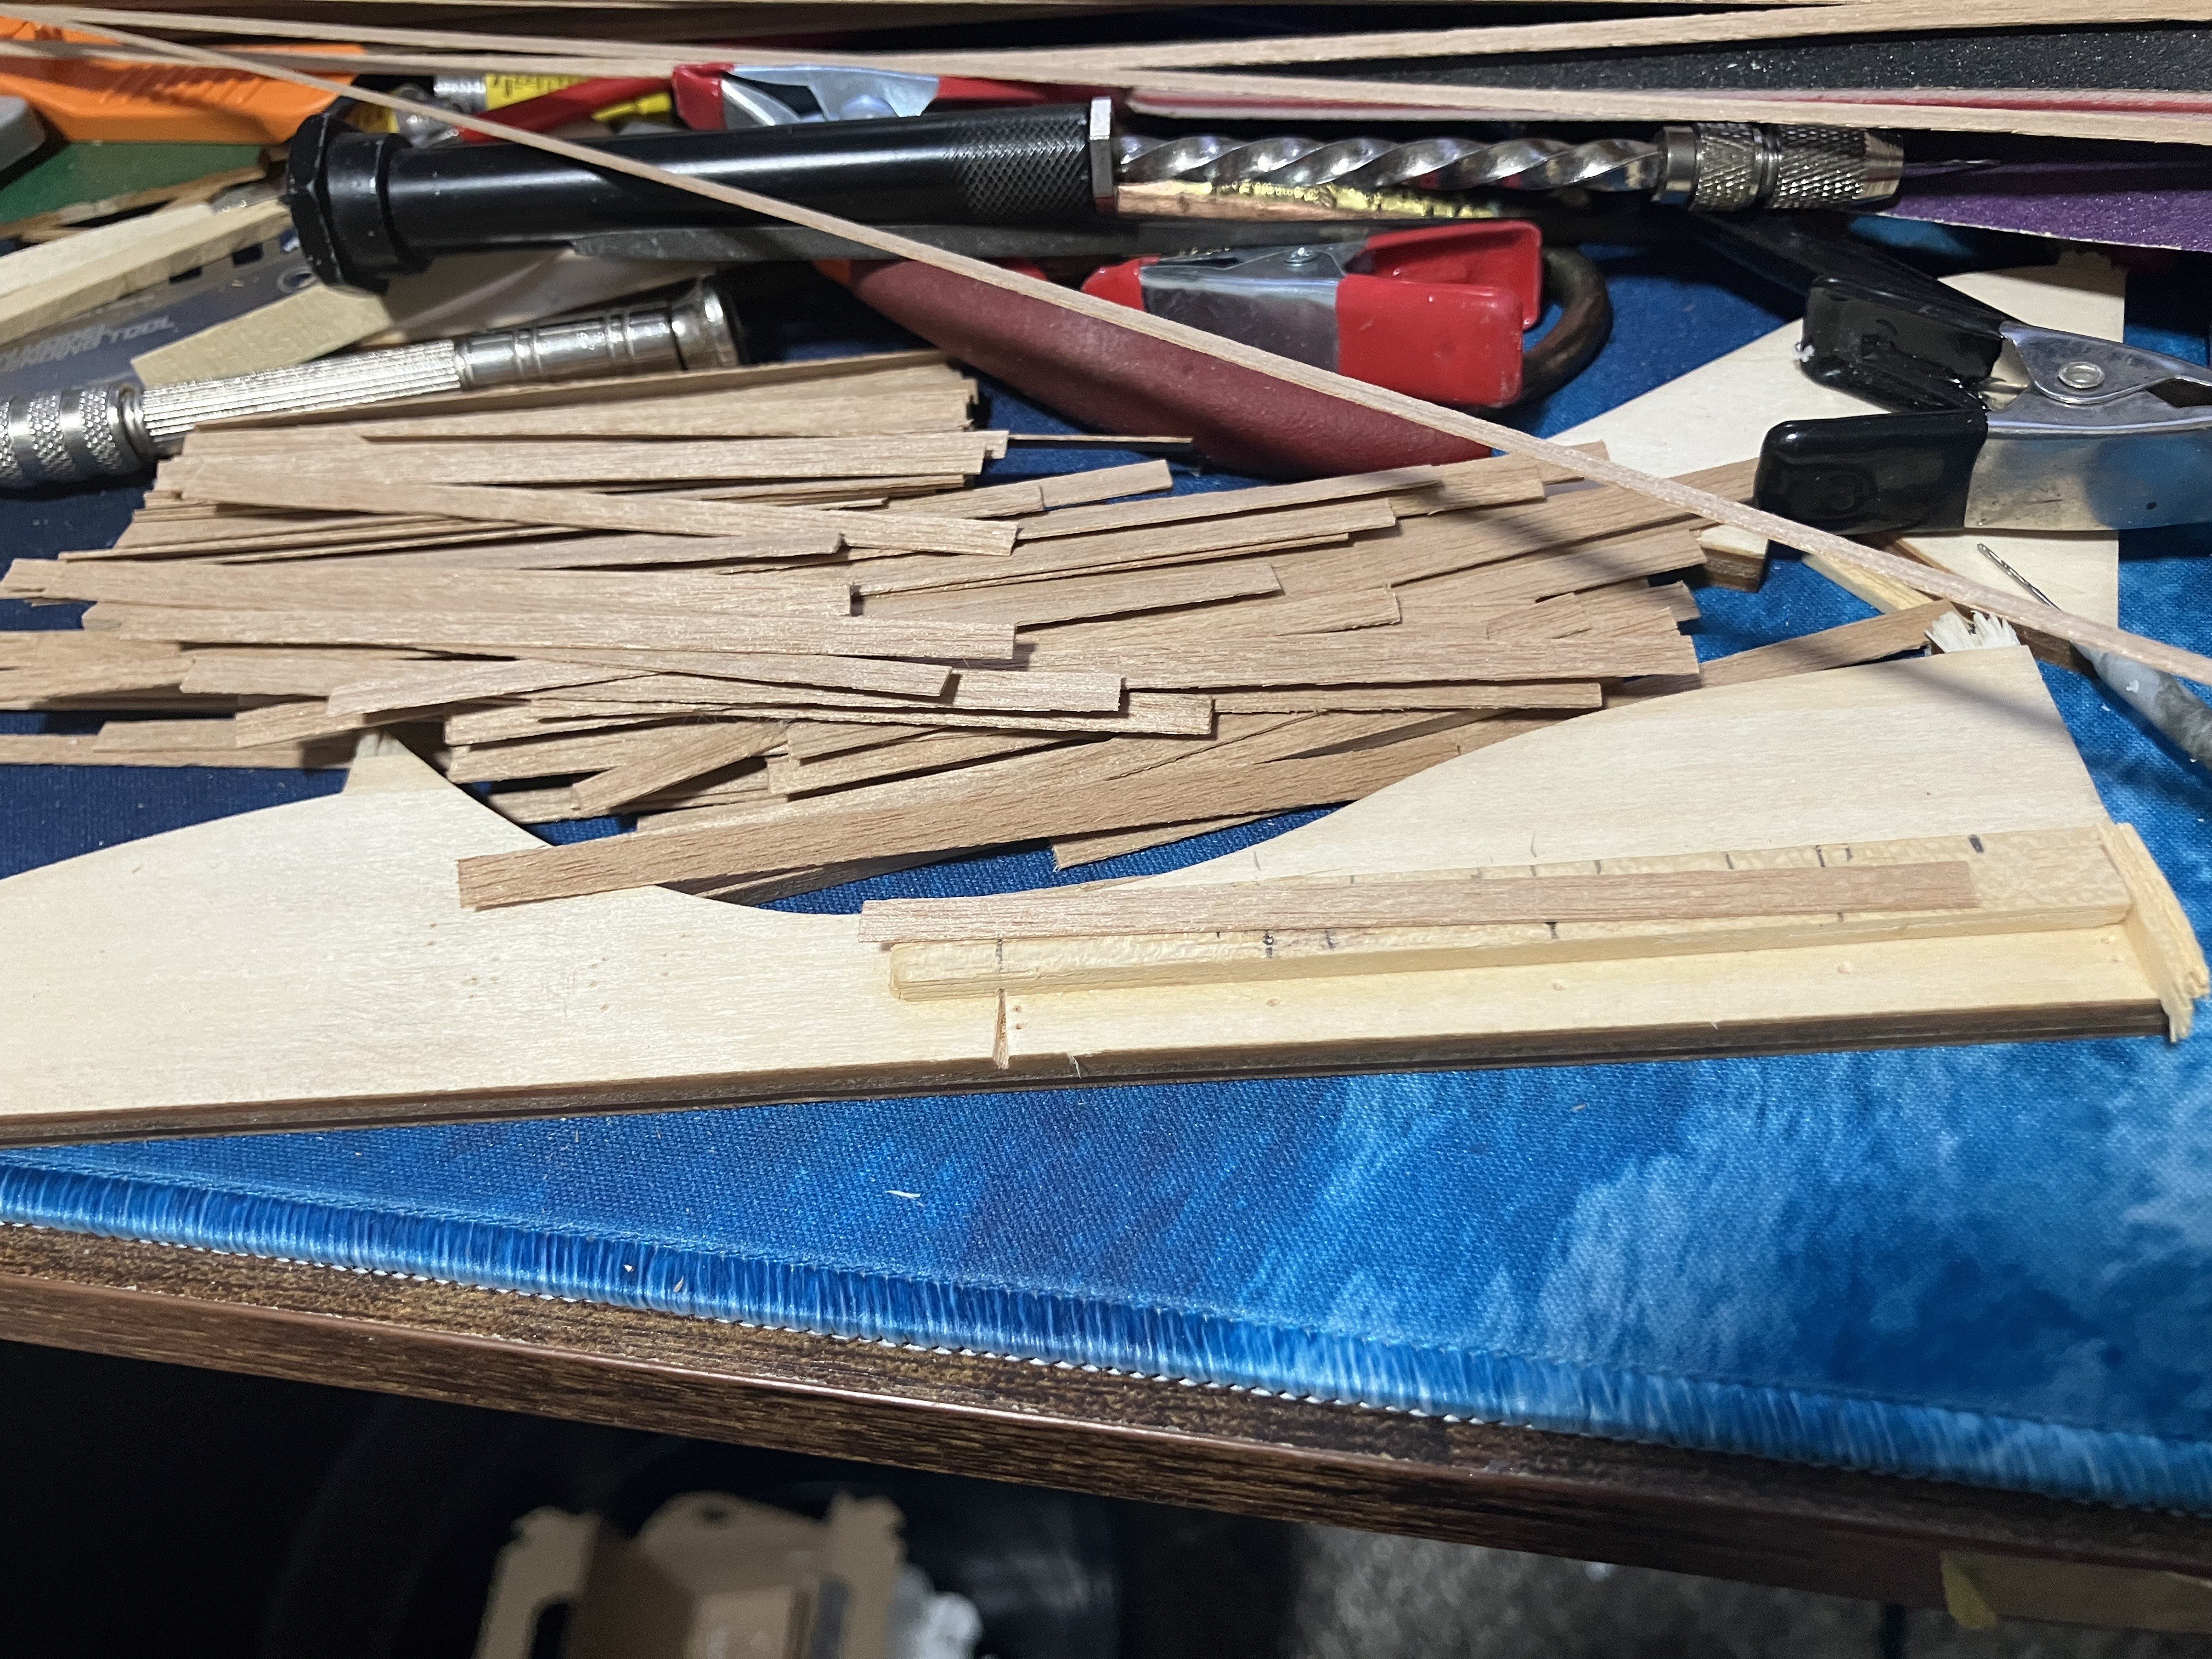
Week 9 update: added the gun fixtures and their bracings, started work on the deck planks. Mostly done with moving, still assembling some cabinets as of now but I did manage to get some work done on the ship. I looked through the instructions and I do not see anywhere where these thin annegre strips were to be used so I am assuming these are supposed to be the deck planks. I am going with a three butt pattern. Still a ton more planks to cut and drill. Next up: more deck planking.


-
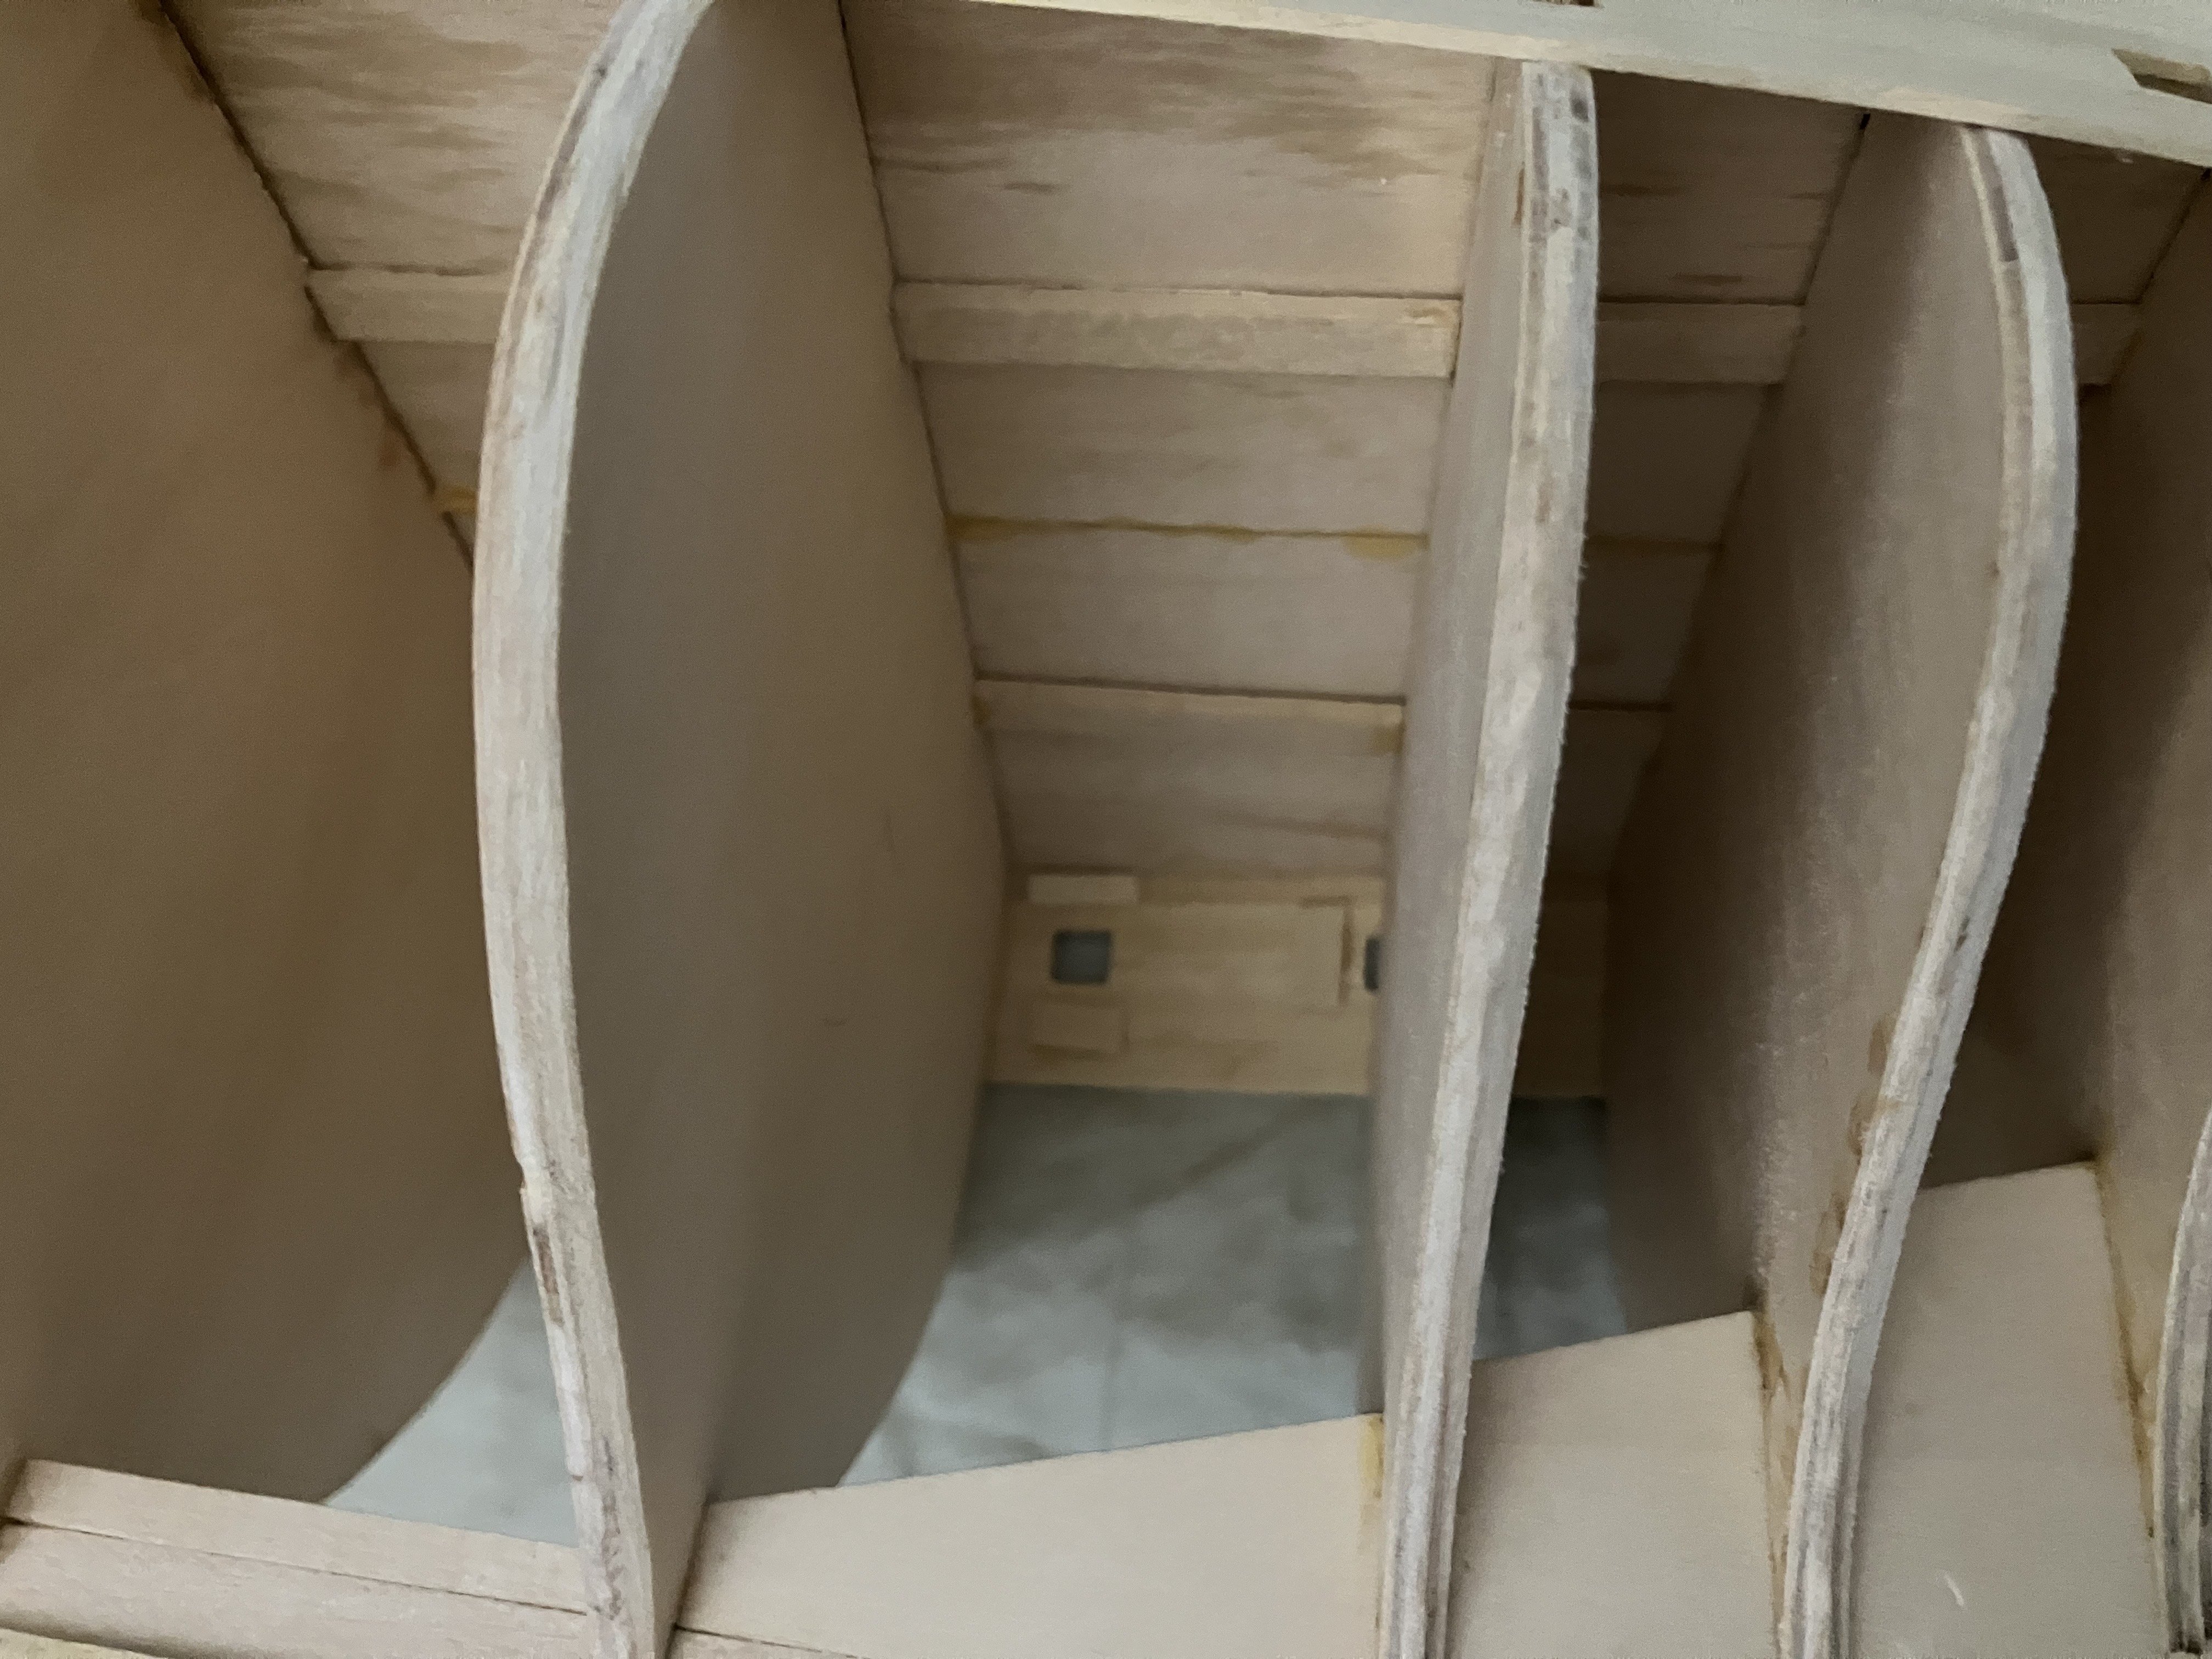
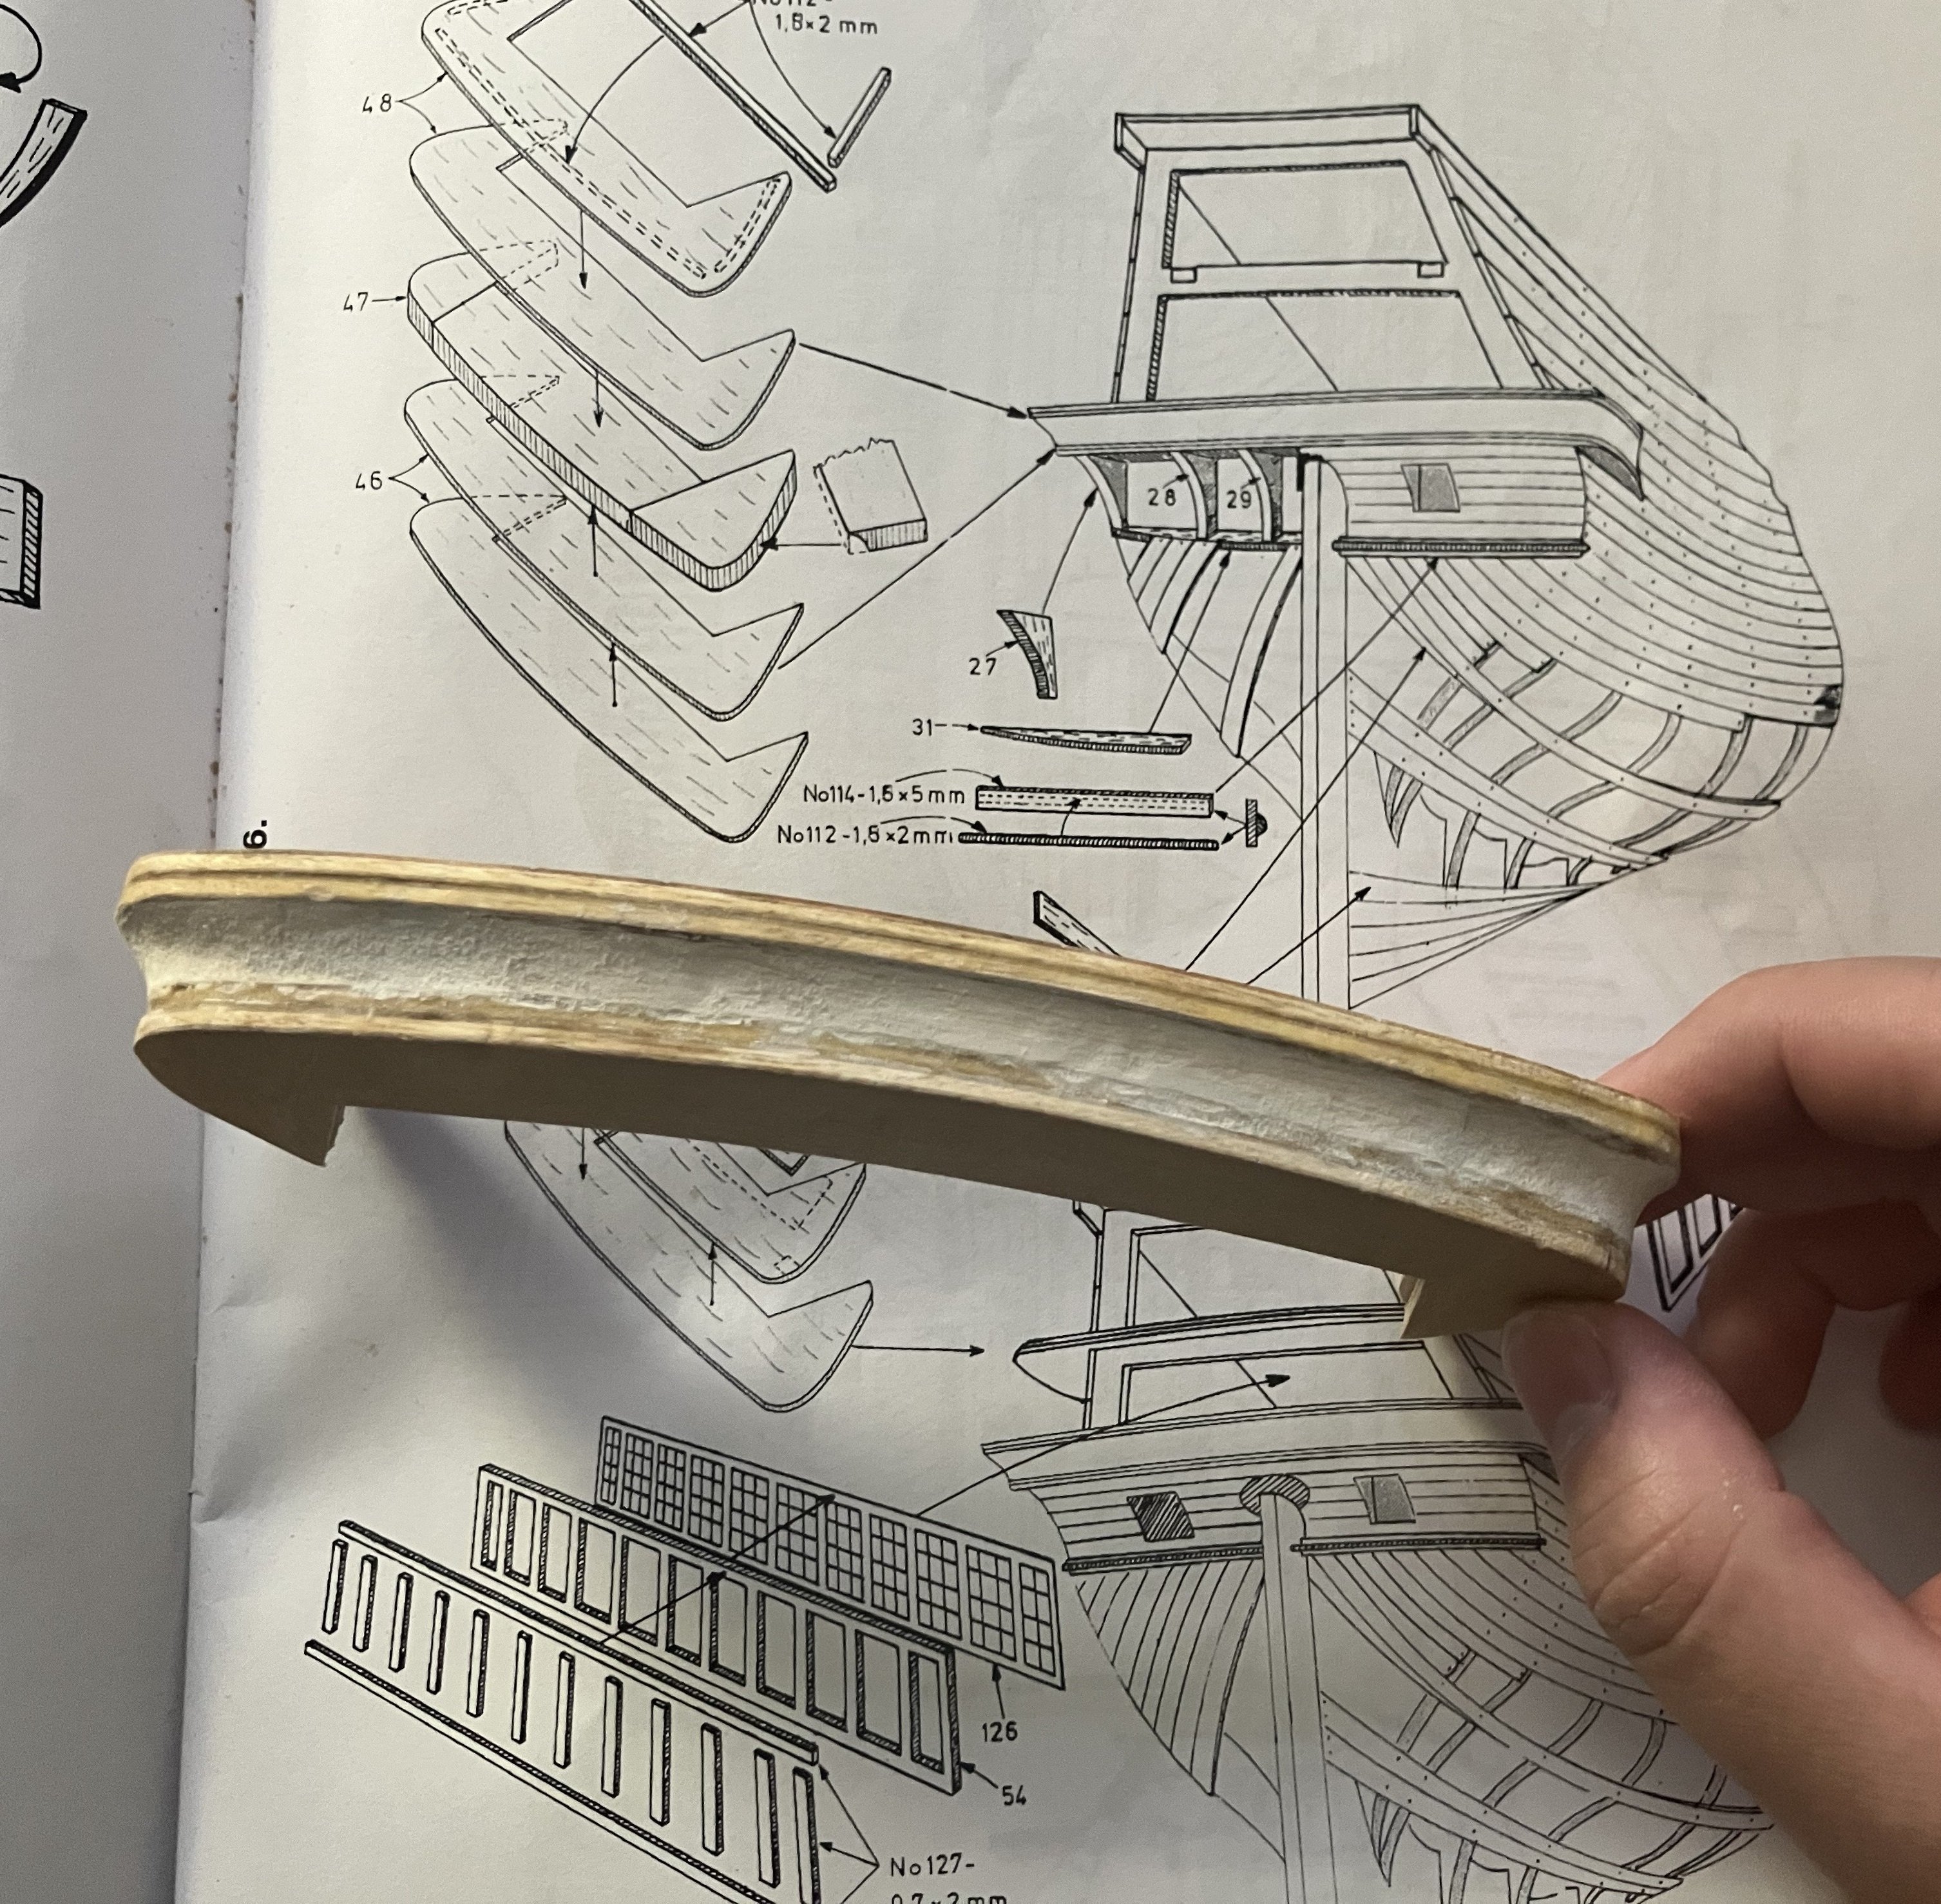
Week 7 update: attached the base piece for the stern gallery, and added beams for the forecastle and quarter decks. This piece was quite a challenge to fit into place, I had to cut and sand much of the side gallery base to make it fit. Also added the distancing tabs from scrap wood for the guns' fixtures in the lower gun deck. Probably won't be an update next week as I will be moving and probably spending the whole weekend arranging the house. Next up: a few more layers of planking so that I can add the gun fixtures for the upper gun decks.

-
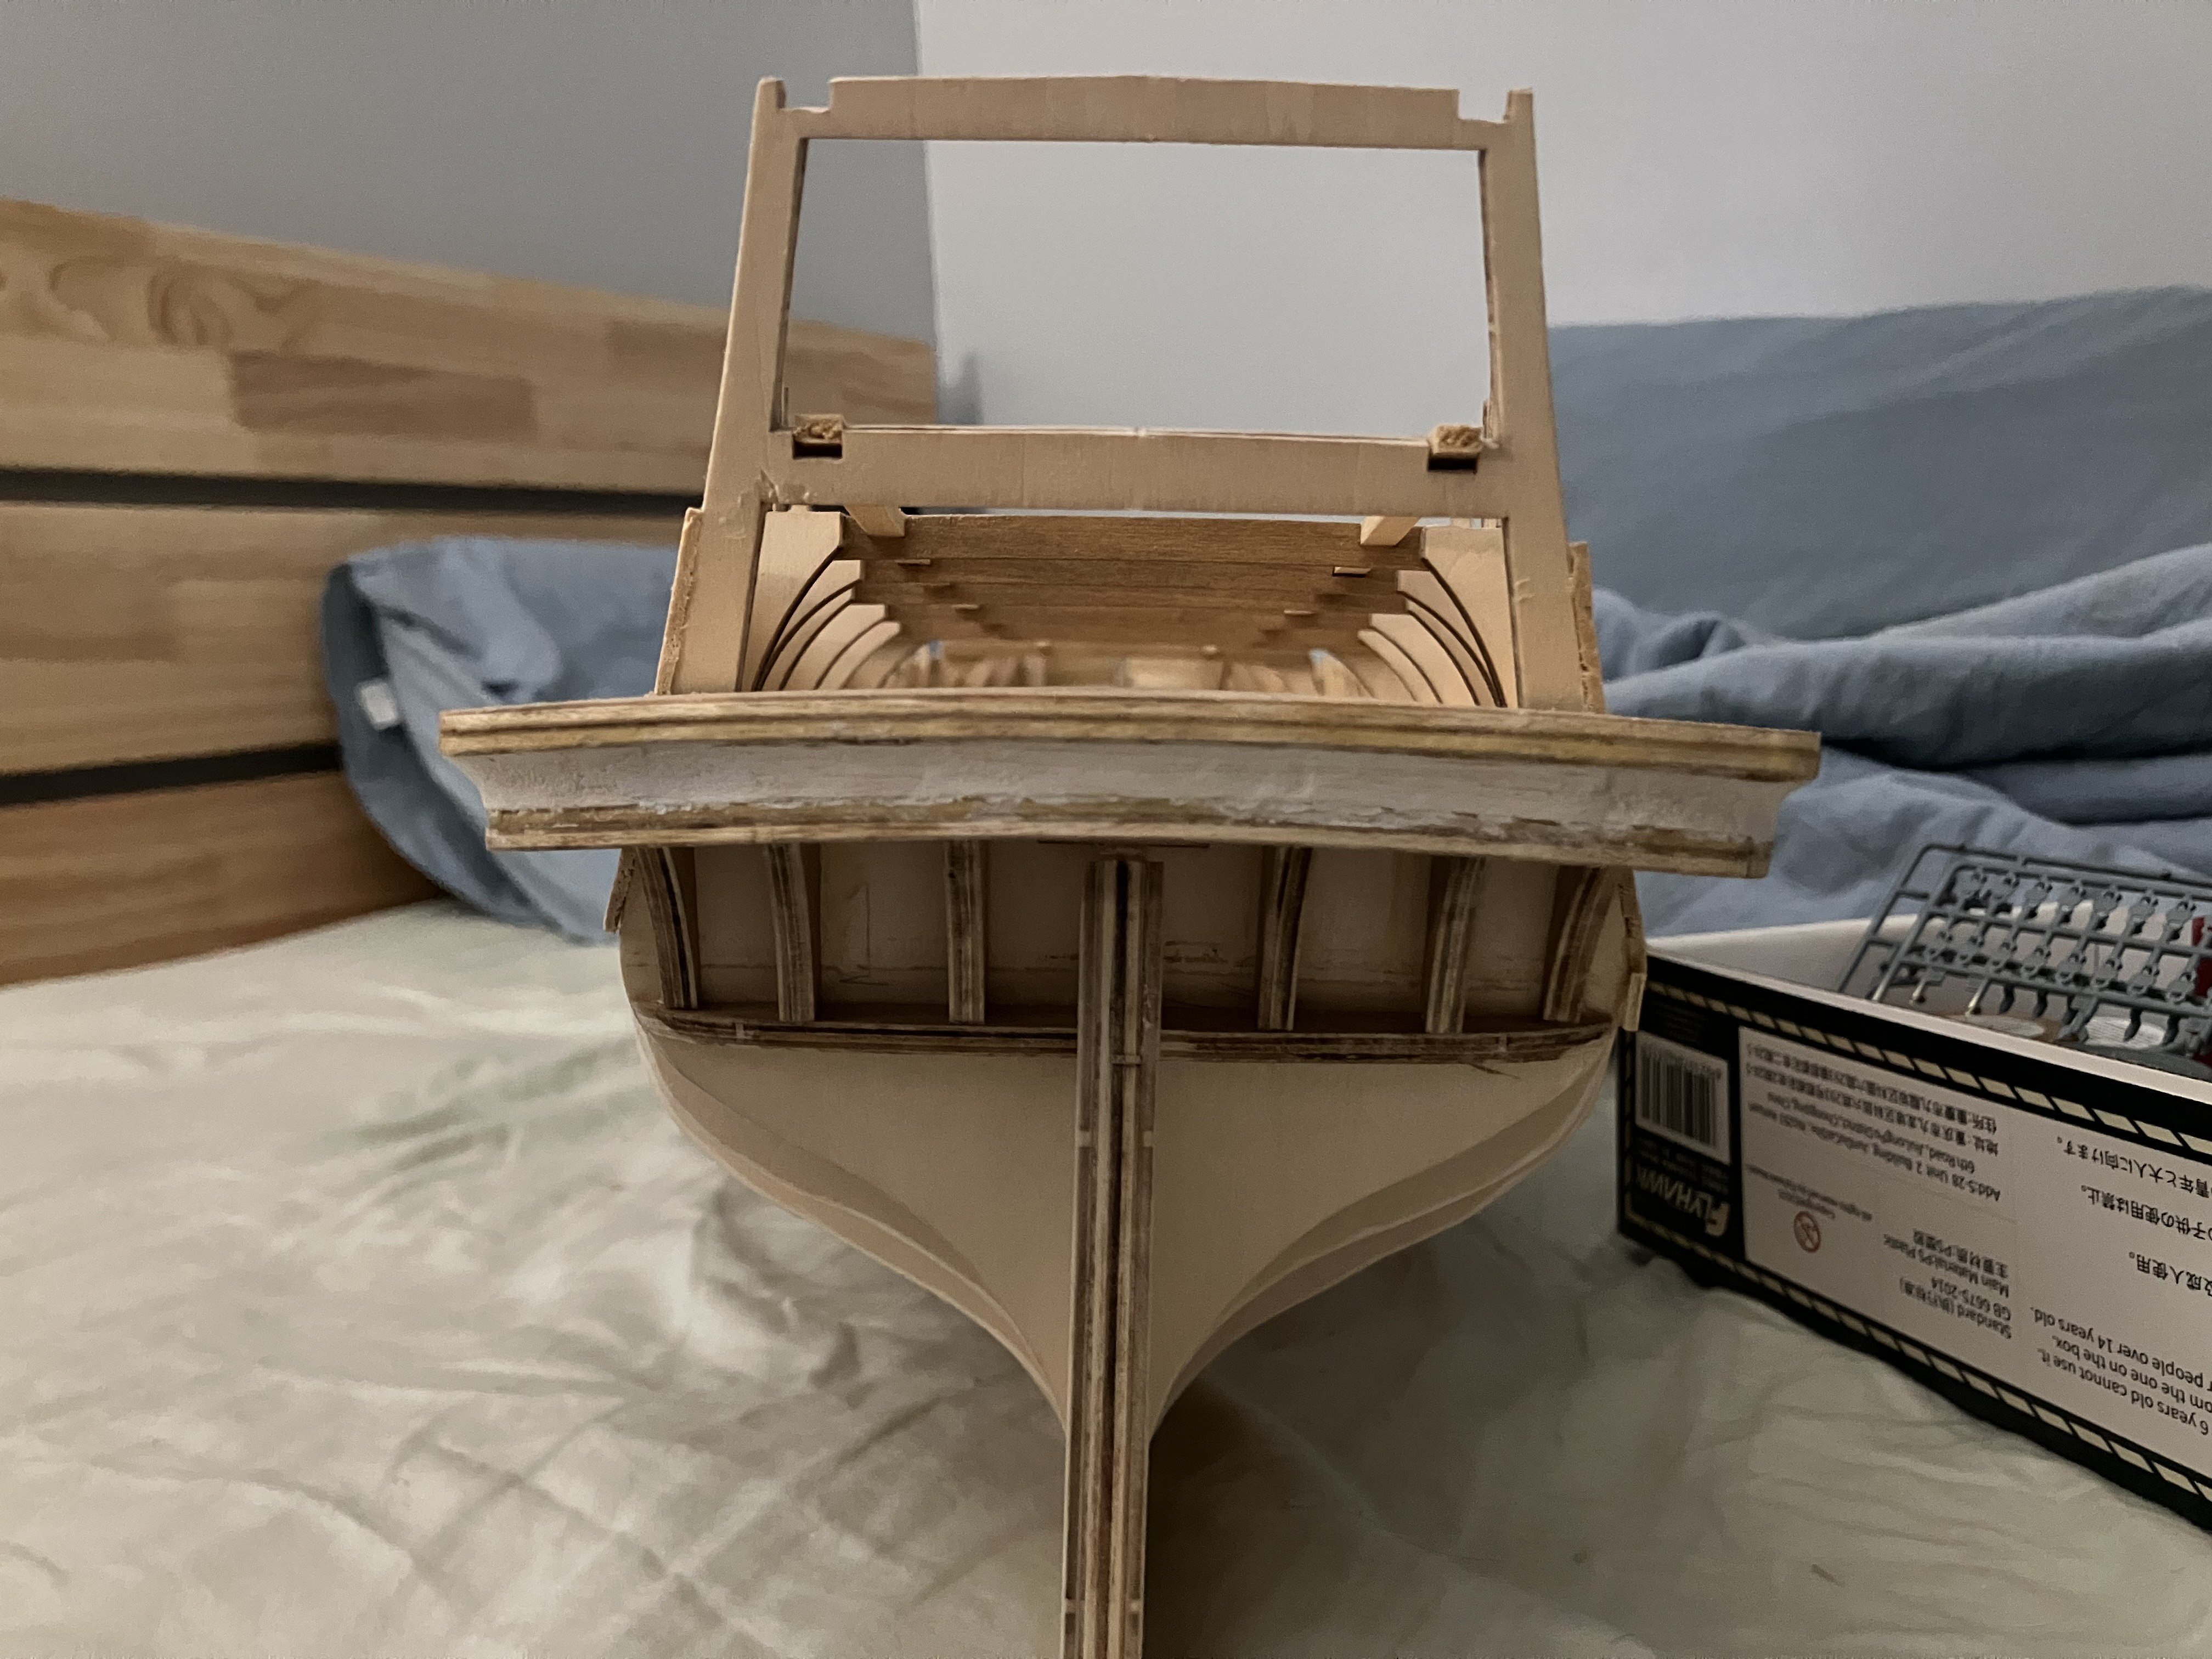
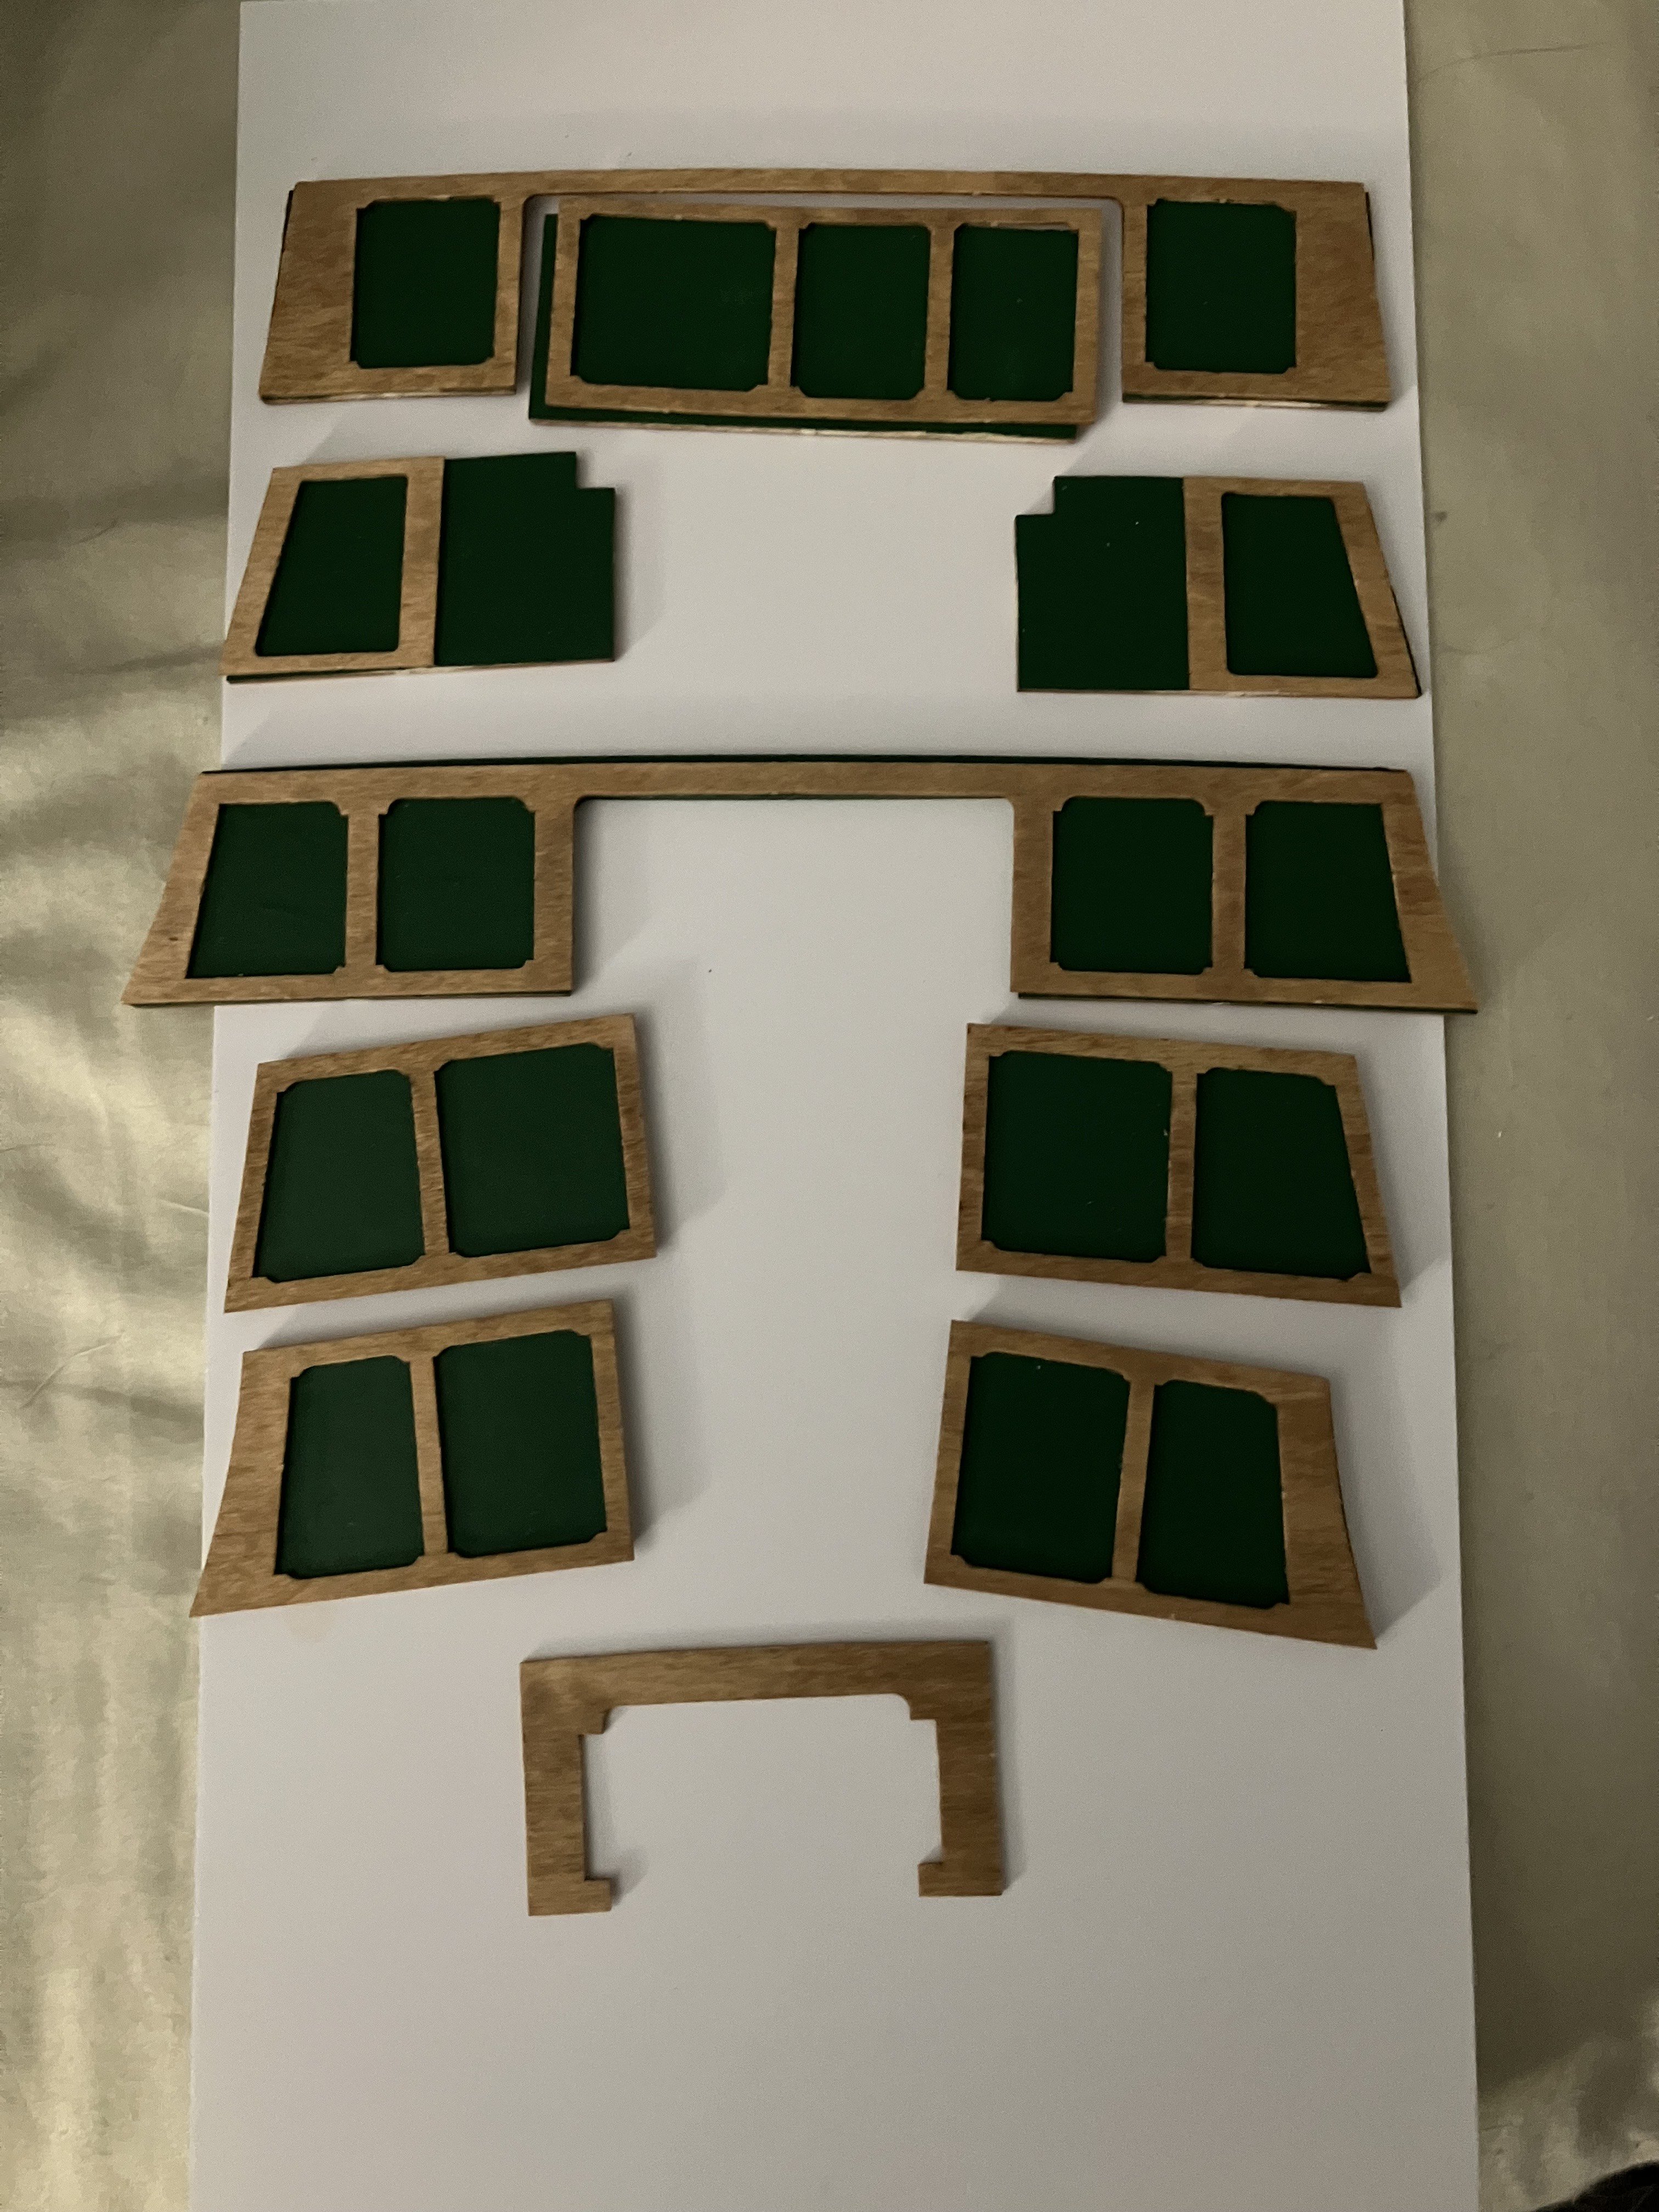
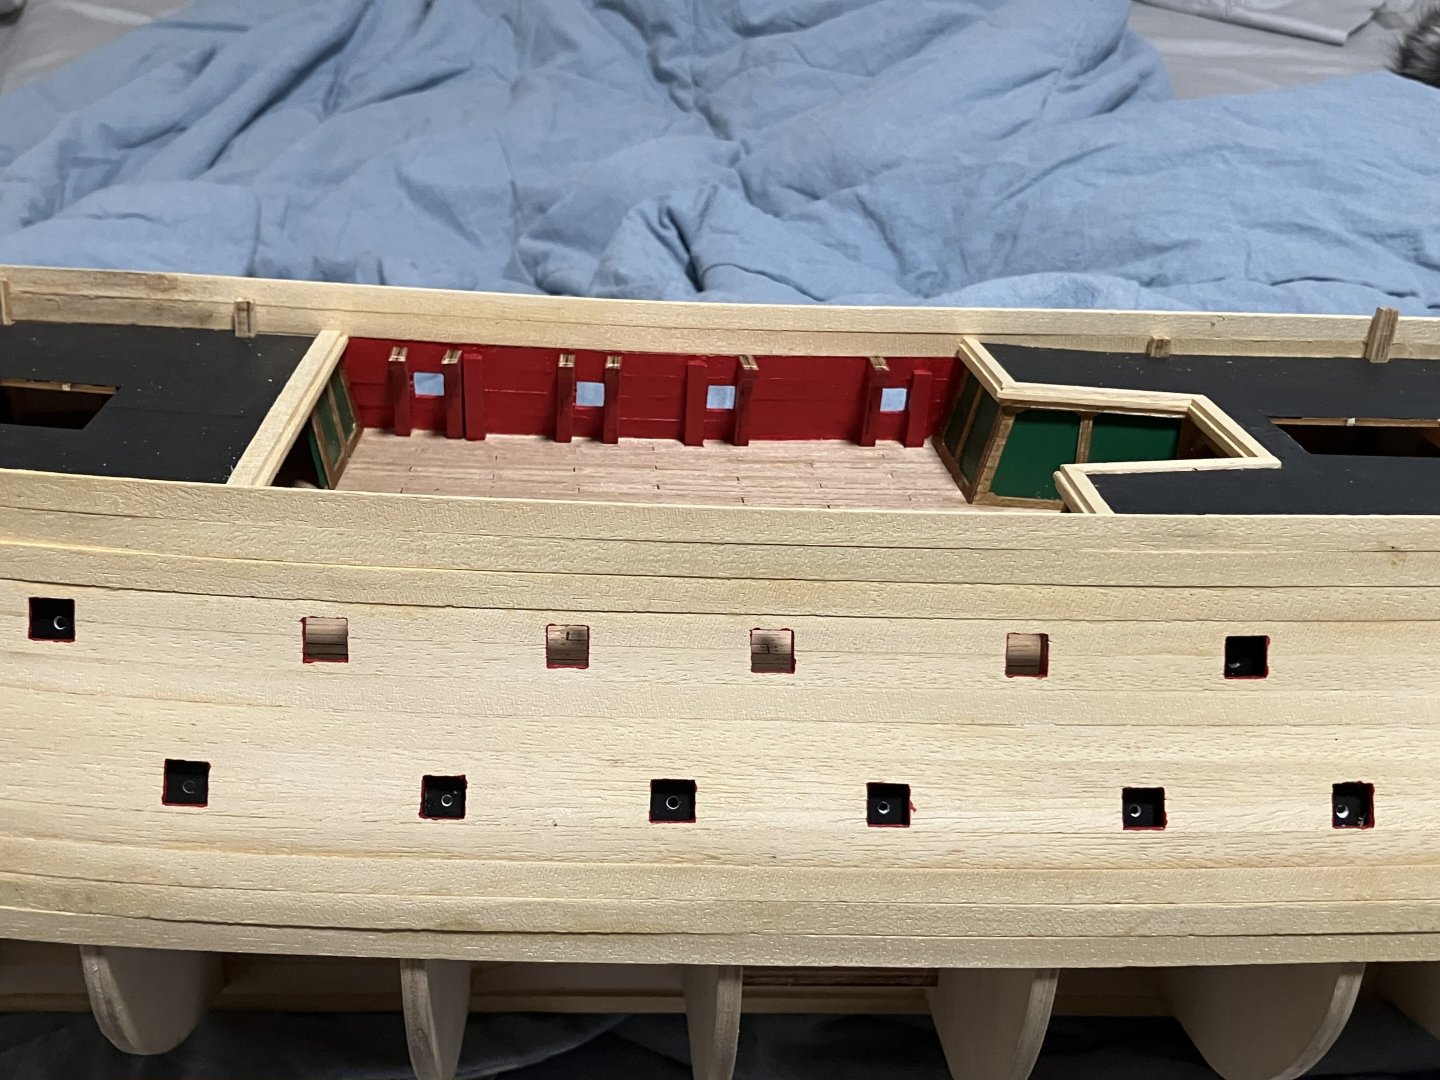
Week 6 update: finished carving out the gunports and painted some walls. At first I was not very happy with the distancing on some of the gunports because I distanced them based on the drawings and the ribs, which must have been off by a few millimeters when I built them. (gunport 4 and 5 from the bow are the most obvious) But overall I think they look quite decent. The walls are not labeled on the instructions as usual, so I had to make some guesses as to which parts are what. The lighting is not very good in this picture so the paint looks darker than it is in real life. I am at the point now where I need to install these walls and the quarterdeck and forecastle deck before I can plank further up so that will be what I am doing next week.

-
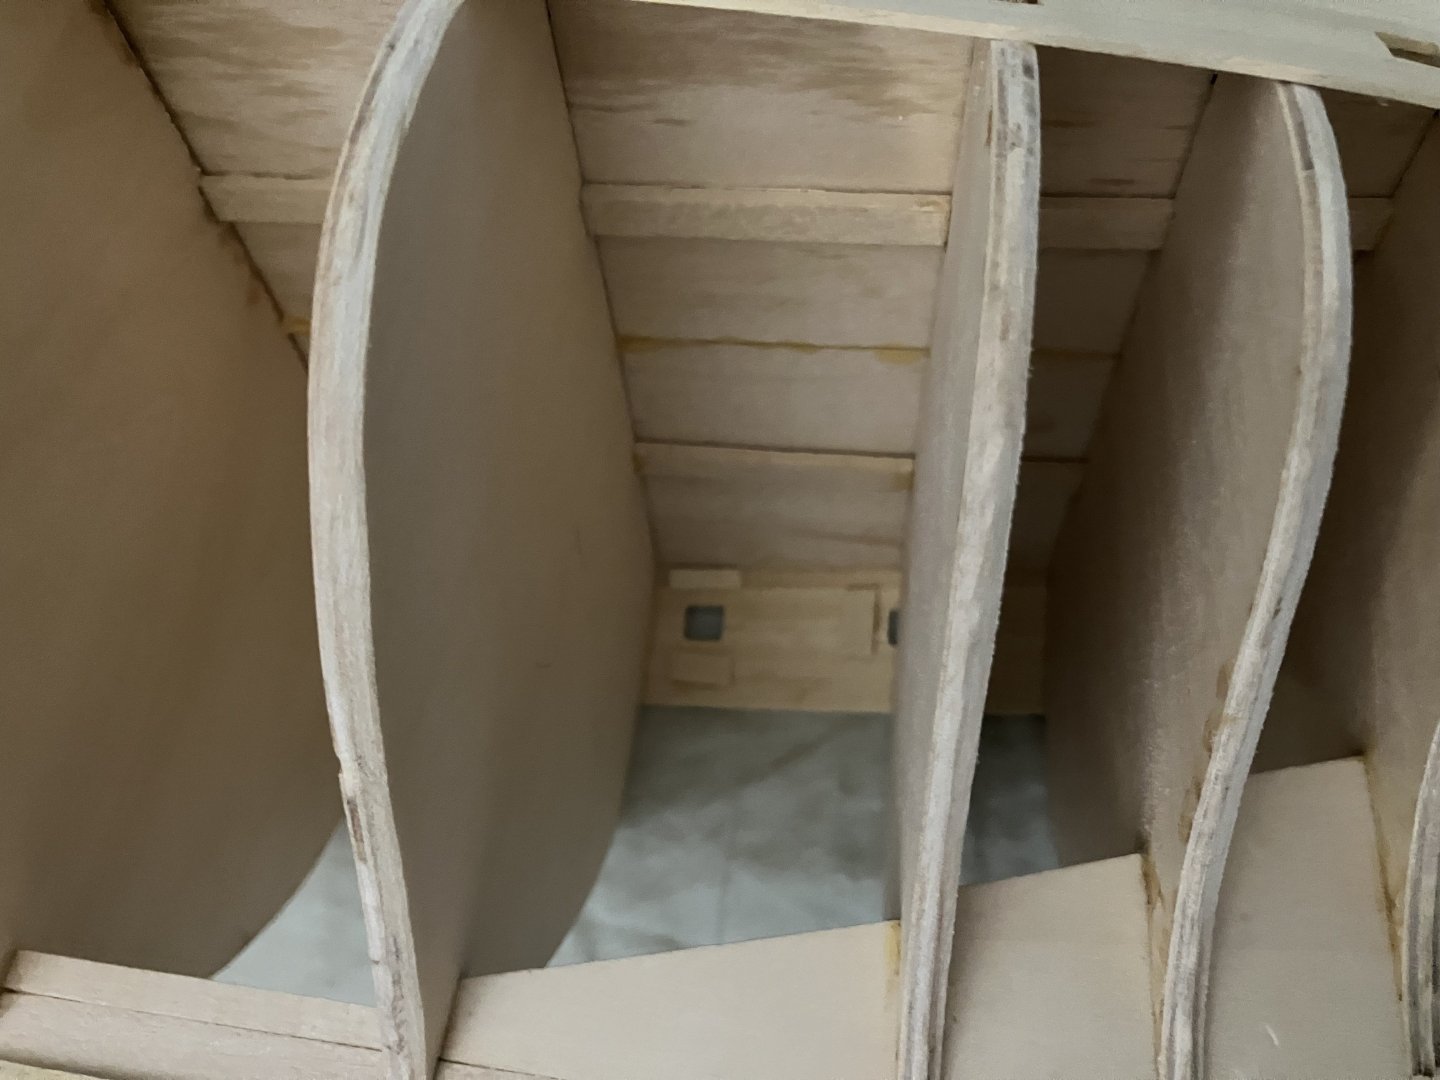
Week 5 update: added 3 more strakes of planking on each side, filled the gaps and sanded them, and started work on hollowing out the upper gun deck gunports. To make the gunports, I first made an 8mm sized square jig from the styrene sheet I recently bought for the inner layer, then I laid the jig on the ship's plan and cut out the areas where the gunports should be. Then I tried to lay the plan on the ship to mark where the gunports should be. It did not work out very well as the plan was not designed to curve around the hull. I ended up using the ribs and the deck as a guide to mark out the individual gun ports. Next up: more planking, drilling, and cutting for the gunports.


-
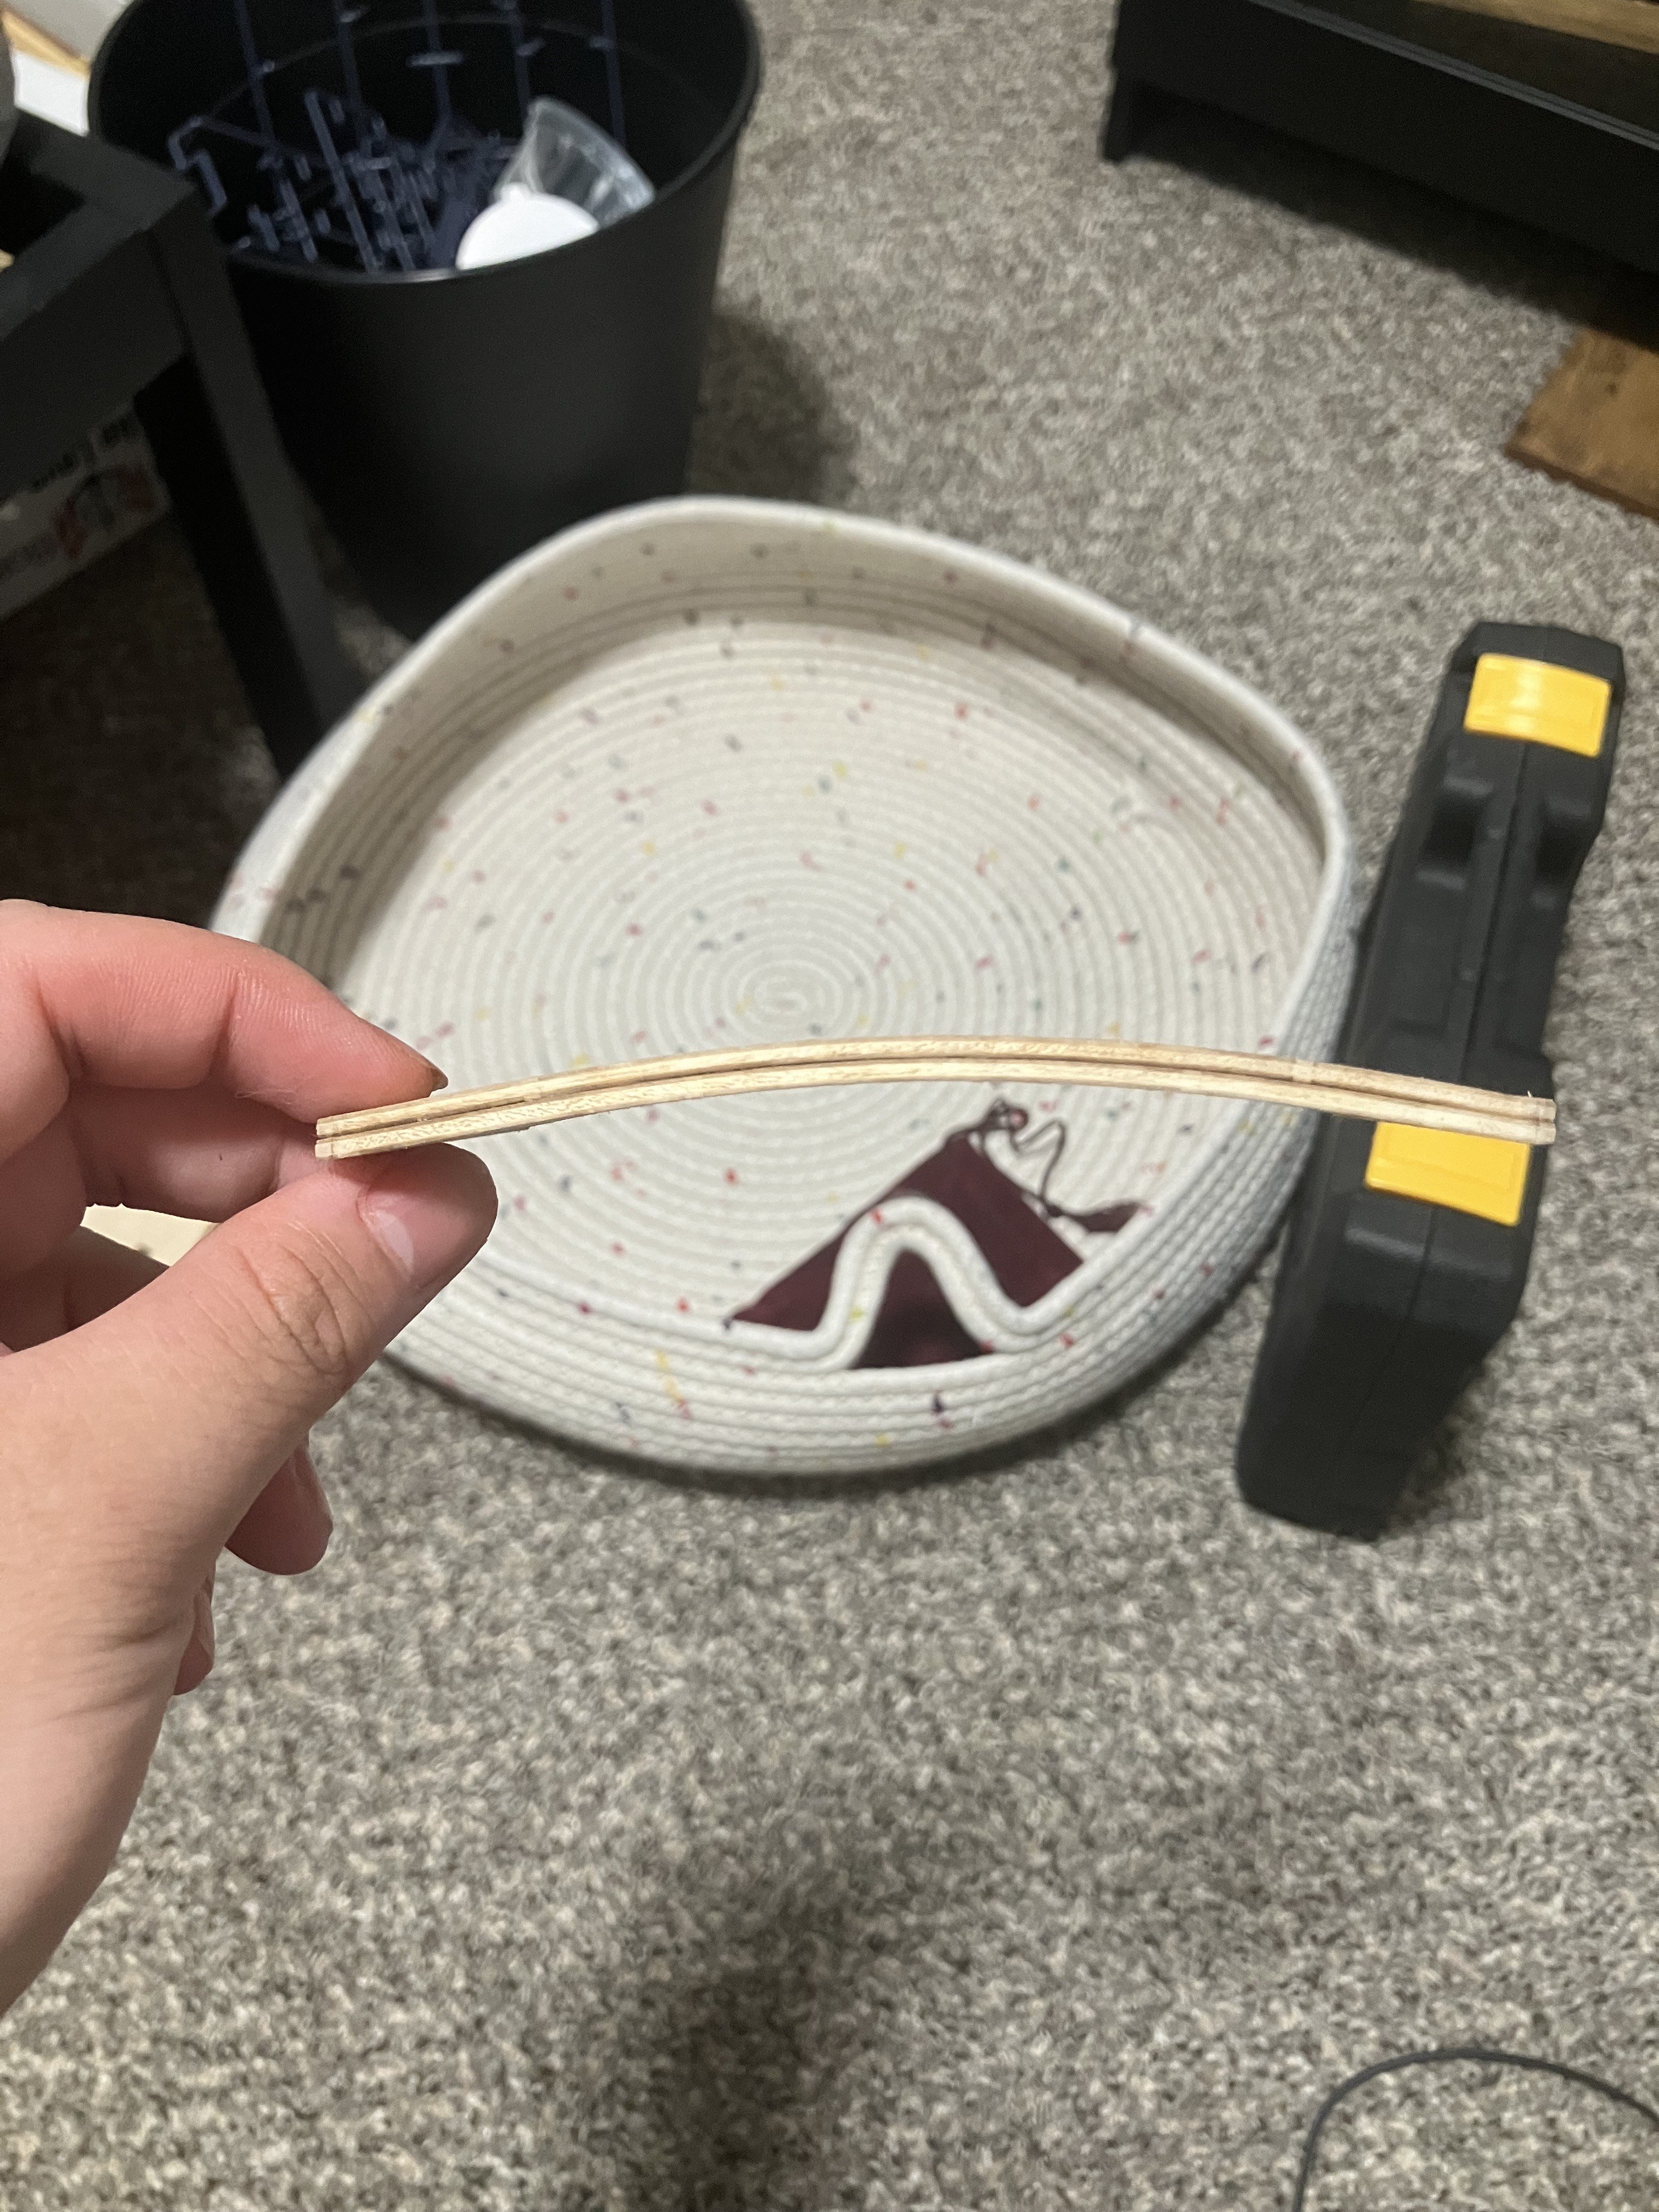
Week 4 update: assembled all 20 cannon carriages, pre-bent a few planks for use, and made a jig for bending. I have to hand it to Billings because I am actually impressed with how bad their instructions are. They seem to have started including these laser cut sheets for the gun carriages at some point, but have decided that updating their instructions was too much work for them, so now you have to guess which parts goes where. Luckily the carriages have very few parts at just 6 per gun so there was not too much trouble there. The main issue I have are the gun trunnions and the wheel axles, which are not on the sheet and due to the lack of instructions, I had zero idea of what I am supposed to make them from. I ended up sanding down a bunch of scrap basswood I had from previous kits to avoid using wood I was not supposed to. With the gun carriages assembled, I can finally measure out the distance to attach the inner layer, and it seems like I would need to basically glue the inner layer directly behind the first layer. I decided to go buy some styrene sheets for the inner planking since I do not have enough scrap wood or plastic to make them. In the meantime I have painted the carriages and the wheels. Might have to paint a third layer along the edge to cover up the plywood layering. Lastly I created a jig with scrap plywood to bend planks length wise, which have so far been such a huge pain that I have only done the center planks which required little to none bending in that direction, hopefully this will speed up my planking process. Next up: inner layer planking.


-
ZhangRenWing reacted to a post in a topic:
Norske Love by Mike Reader - Billing Boats - 1/75 scale
-
ZhangRenWing reacted to a post in a topic:
Norske Love by Mike Reader - Billing Boats - 1/75 scale
-
ZhangRenWing reacted to a post in a topic:
Vintage Billings Norske Love
-
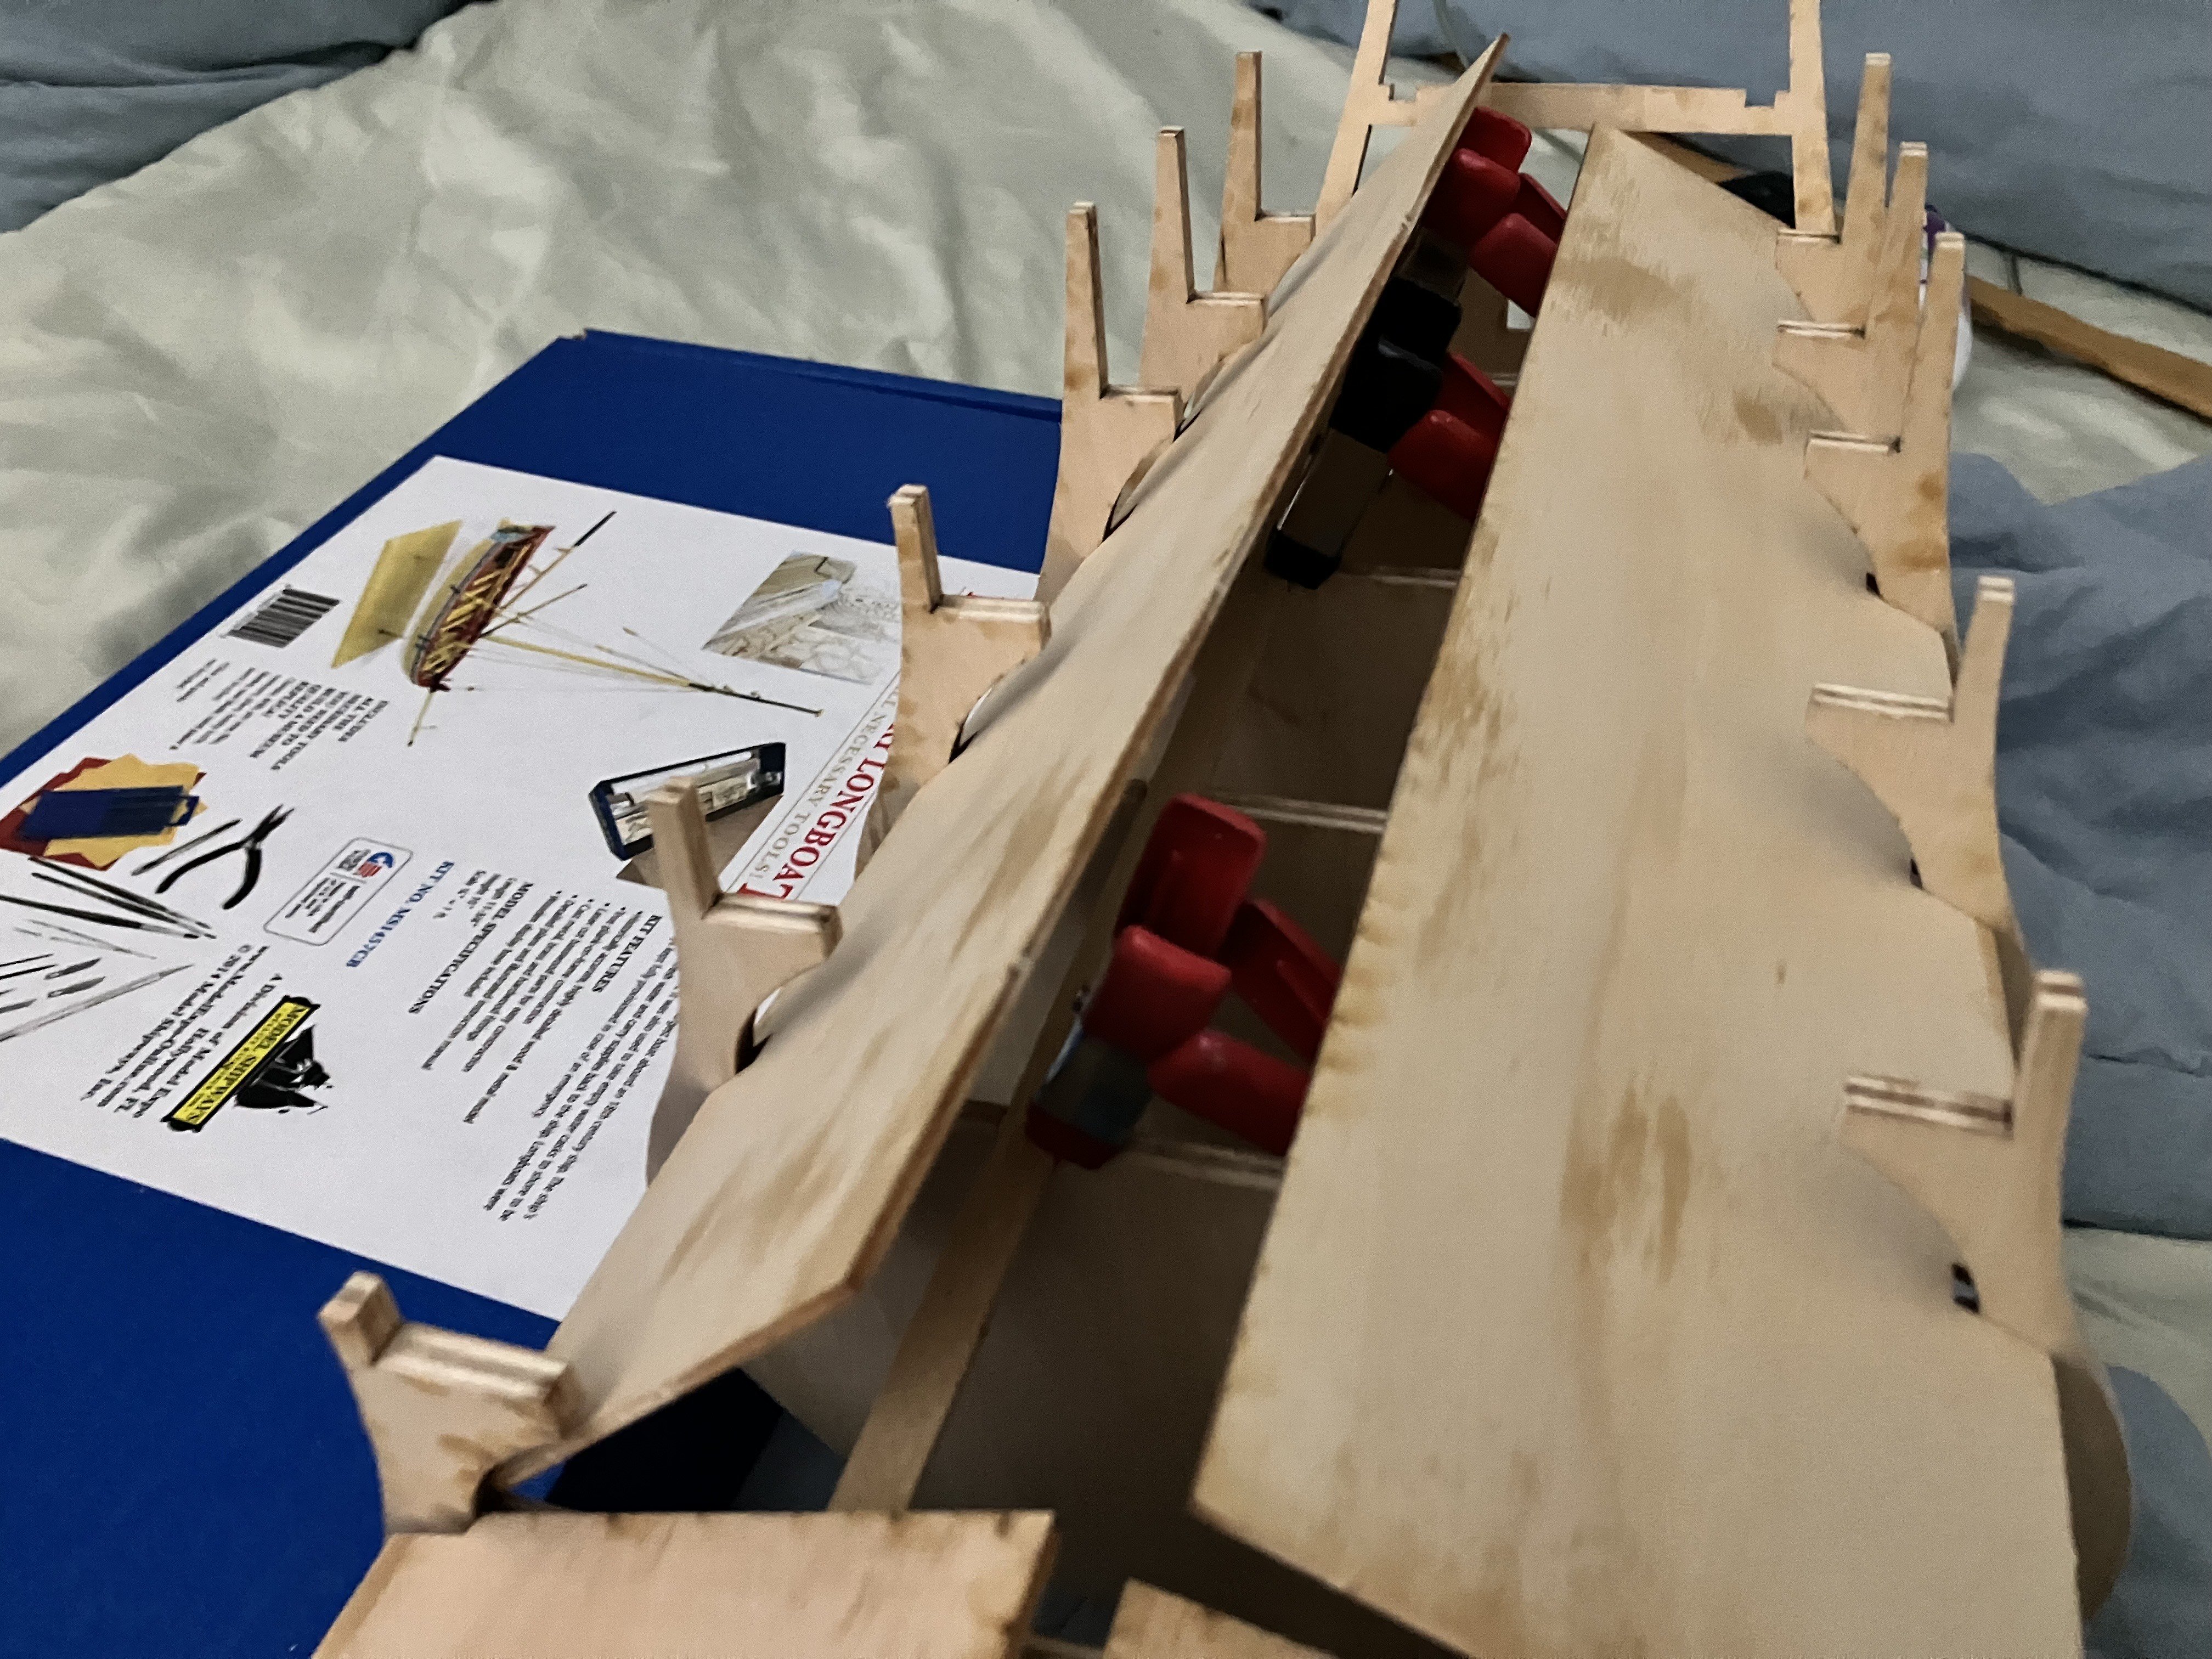
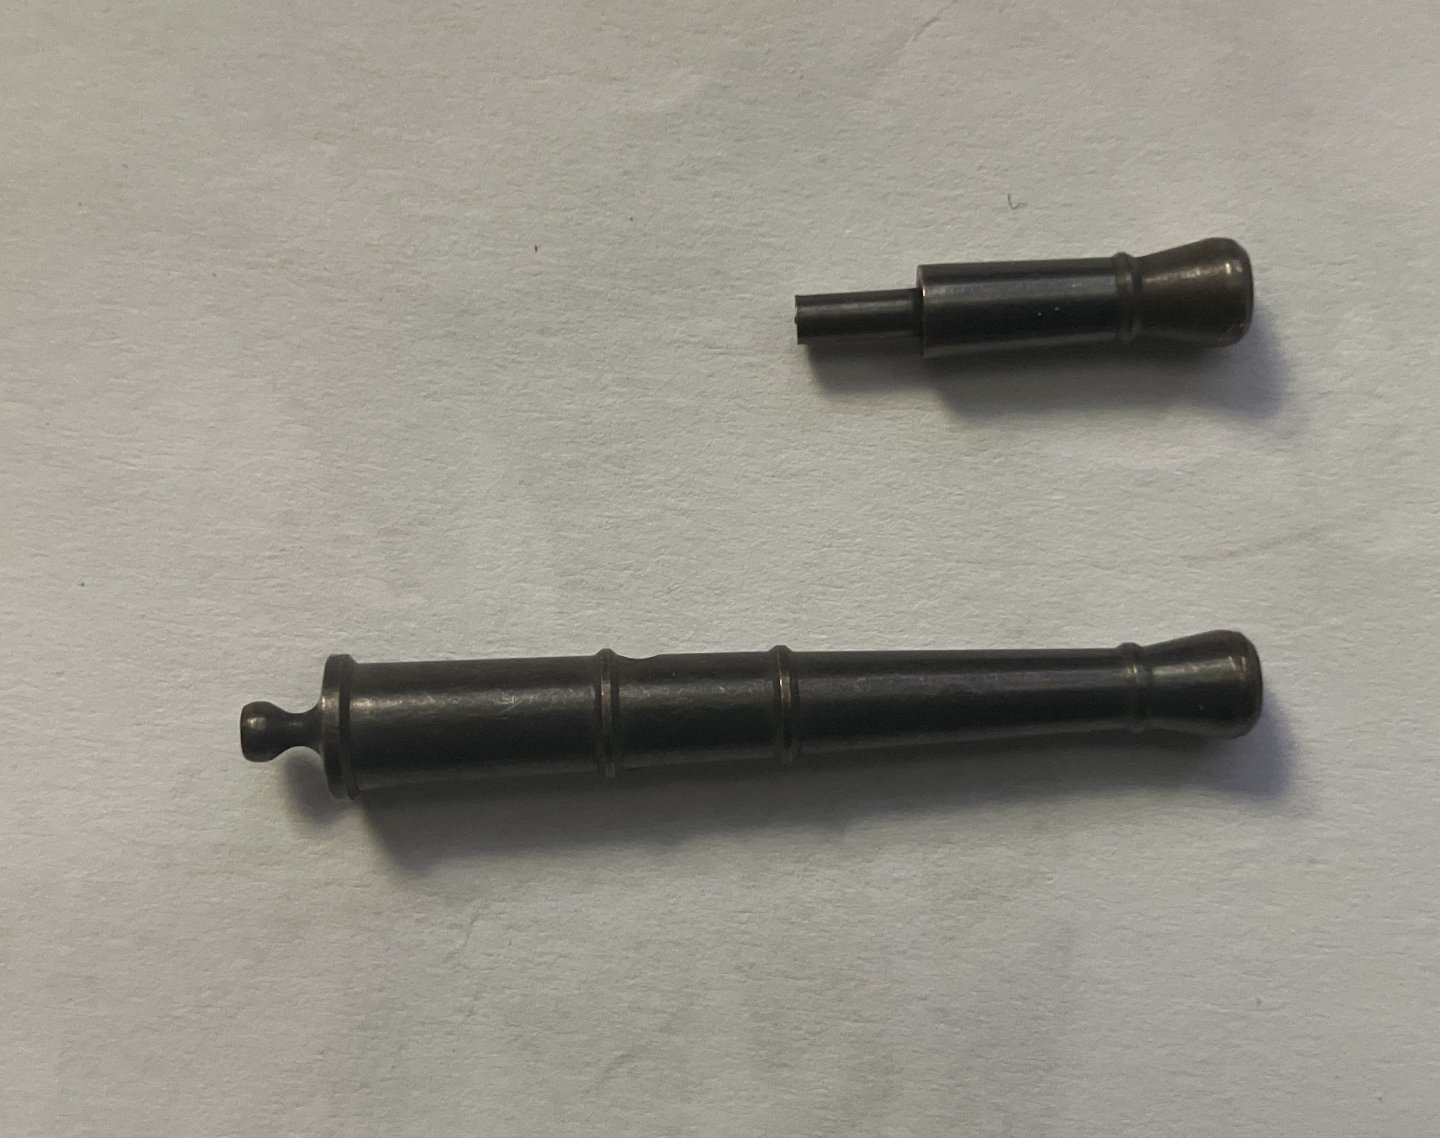
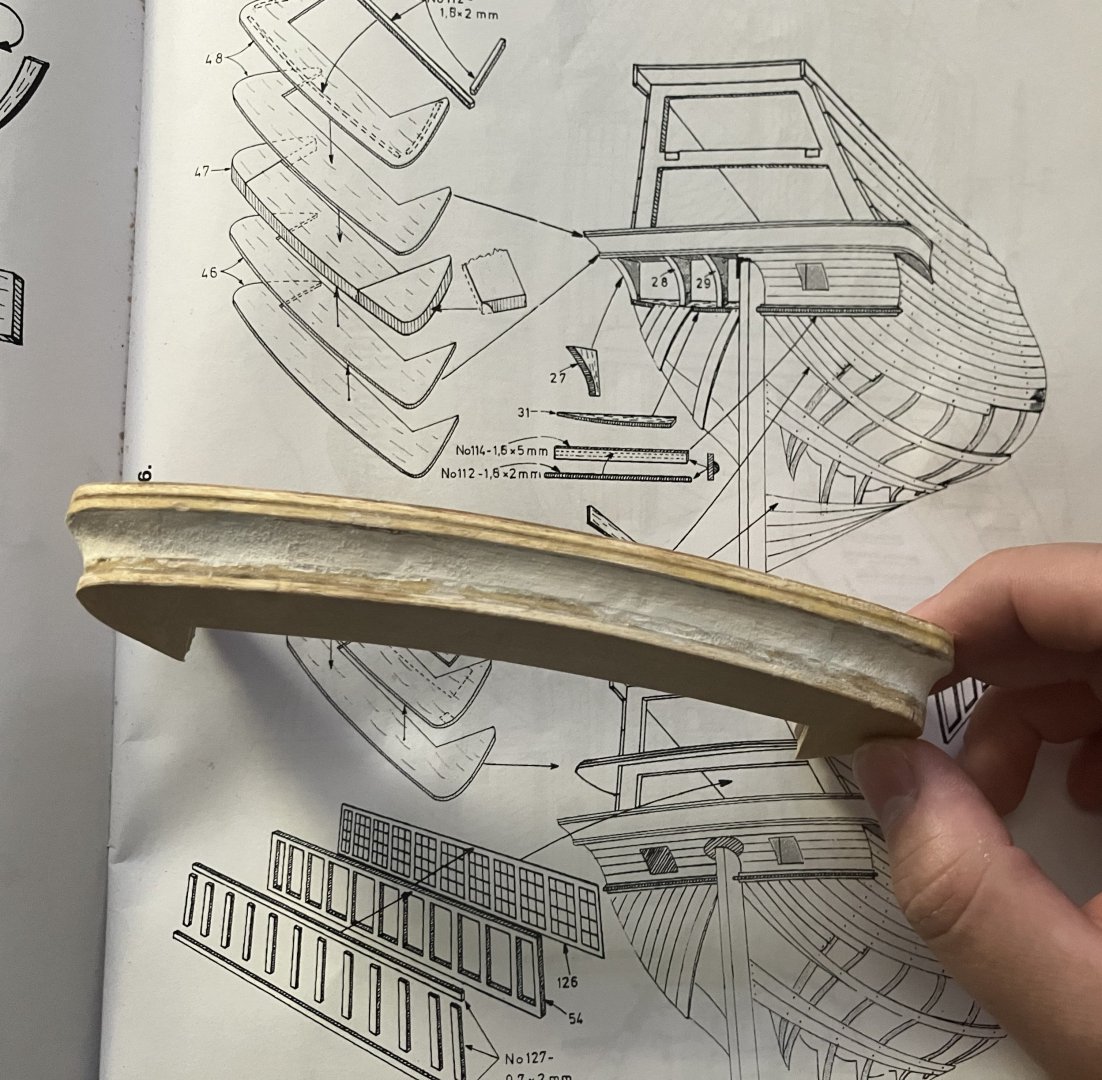
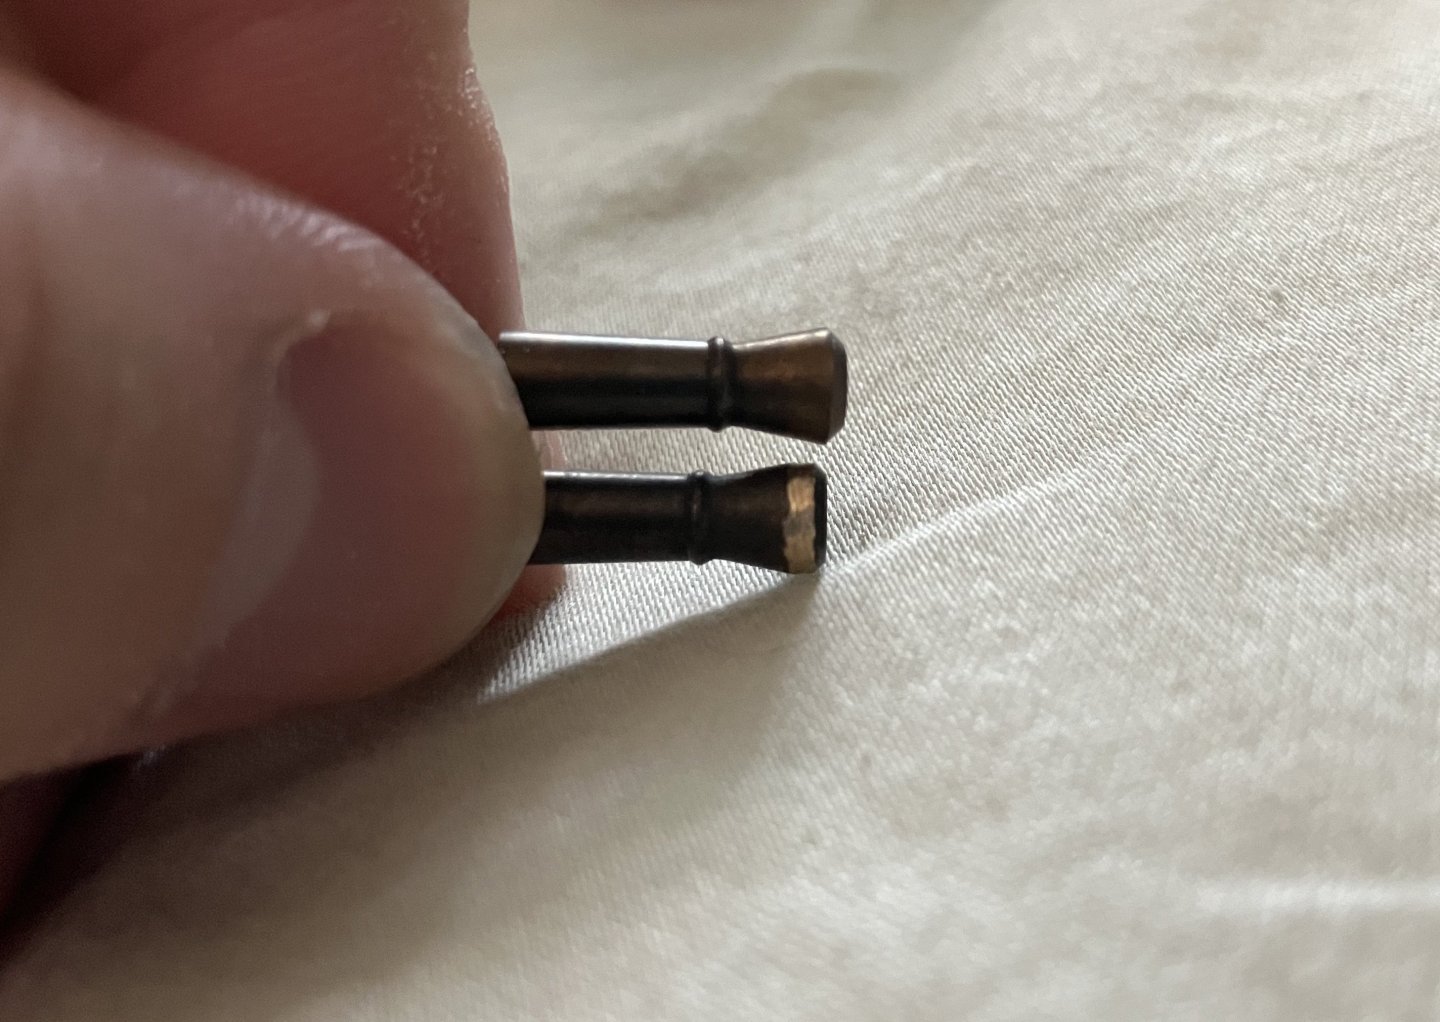
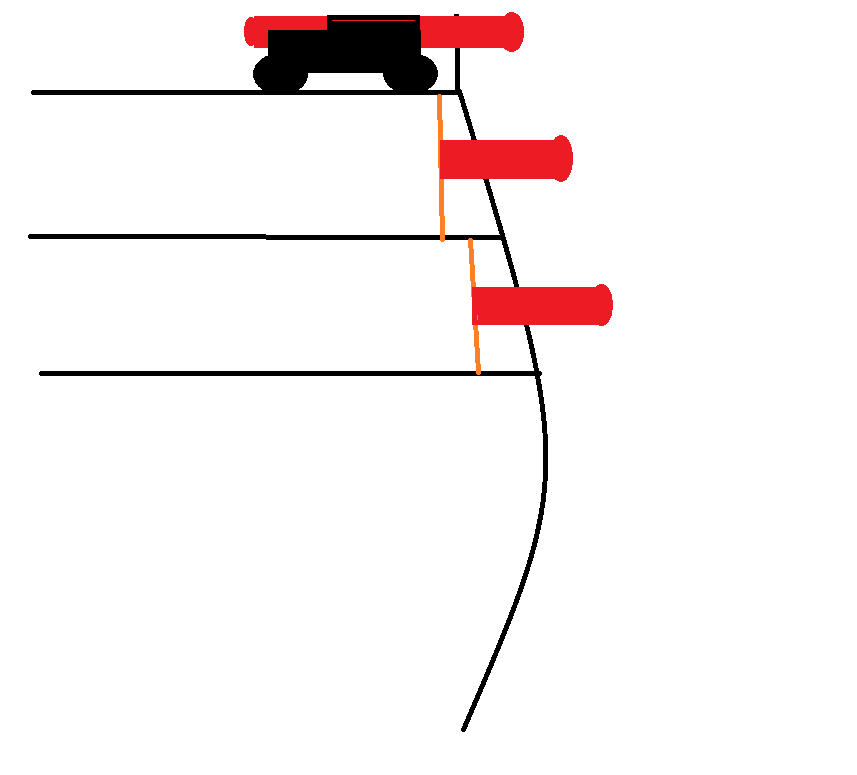
Week 3 update: added 3 more strakes of planking on each side of the ship, sanded and blackened the cannons, finished shaping the stern gallery base, made the glass panels for the gallery, and started working on the transom. I was working my way down the main deck when I realized I couldn't tell quite finish planking the stern without the transom and gallery base in place. So I started making them instead of continuing planking. It looks kind of rough right now as balsa wood was not very happy with being sanded and I had to use a bunch of wood filler in the gaps joining the three balsa pieces. Should look better after the wood filler dries and I sand it smooth and paint it. Bending these pieces also proved to be a challenge, as they would not bend no matter how much I soaked and steamed them with soldering iron so I just superglue and wood glued them on to the balsa wood which was much easier to bend instead. According to the instructions and other build logs of this ship on this site, the cannons below decks are just glued straight into the hull planking with black paint being used to simulate the firing ports. I really do not like this idea and much rather cut out the gun ports and create a small recess for the guns to stick out from, to create a sense of depth. To achieve this, I plan to add a second inner layer of planking (probably using just whatever junk wood or plastic I can find, since it will be painted black anyway) behind the first layer, close to the waterline and above, which will serve as the base for the guns to stick out from. However, since the brass guns parts provided for the guns below deck are very short and only shows the protruding parts away from the ship, I need to get a sense of how far they would protrude when they are above deck, with the carriage shown. Here is a picture of what I have in mind, the inner second layer I plan to add is shown in orange. All this is to say I have decided to create at least a few guns assemblies for distancing the inner layer planks to mount the stubby guns. I first blackened the guns with some brass ager, but then I decided I really do not like the sharp edges around the bore of the guns and sanded them to be more rounded and smooth with a rotary tool and then blacked them again. Next up: carriage assembly for distancing.
-
ZhangRenWing reacted to a post in a topic:
Norske Love by EdS - FINISHED - Billing Boats - 1:75
-
ZhangRenWing reacted to a post in a topic:
Norske Love by EdS - FINISHED - Billing Boats - 1:75
-
ZhangRenWing reacted to a post in a topic:
Norske Love by EdS - FINISHED - Billing Boats - 1:75
-
ZhangRenWing reacted to a post in a topic:
Norske Love by EdS - FINISHED - Billing Boats - 1:75
-
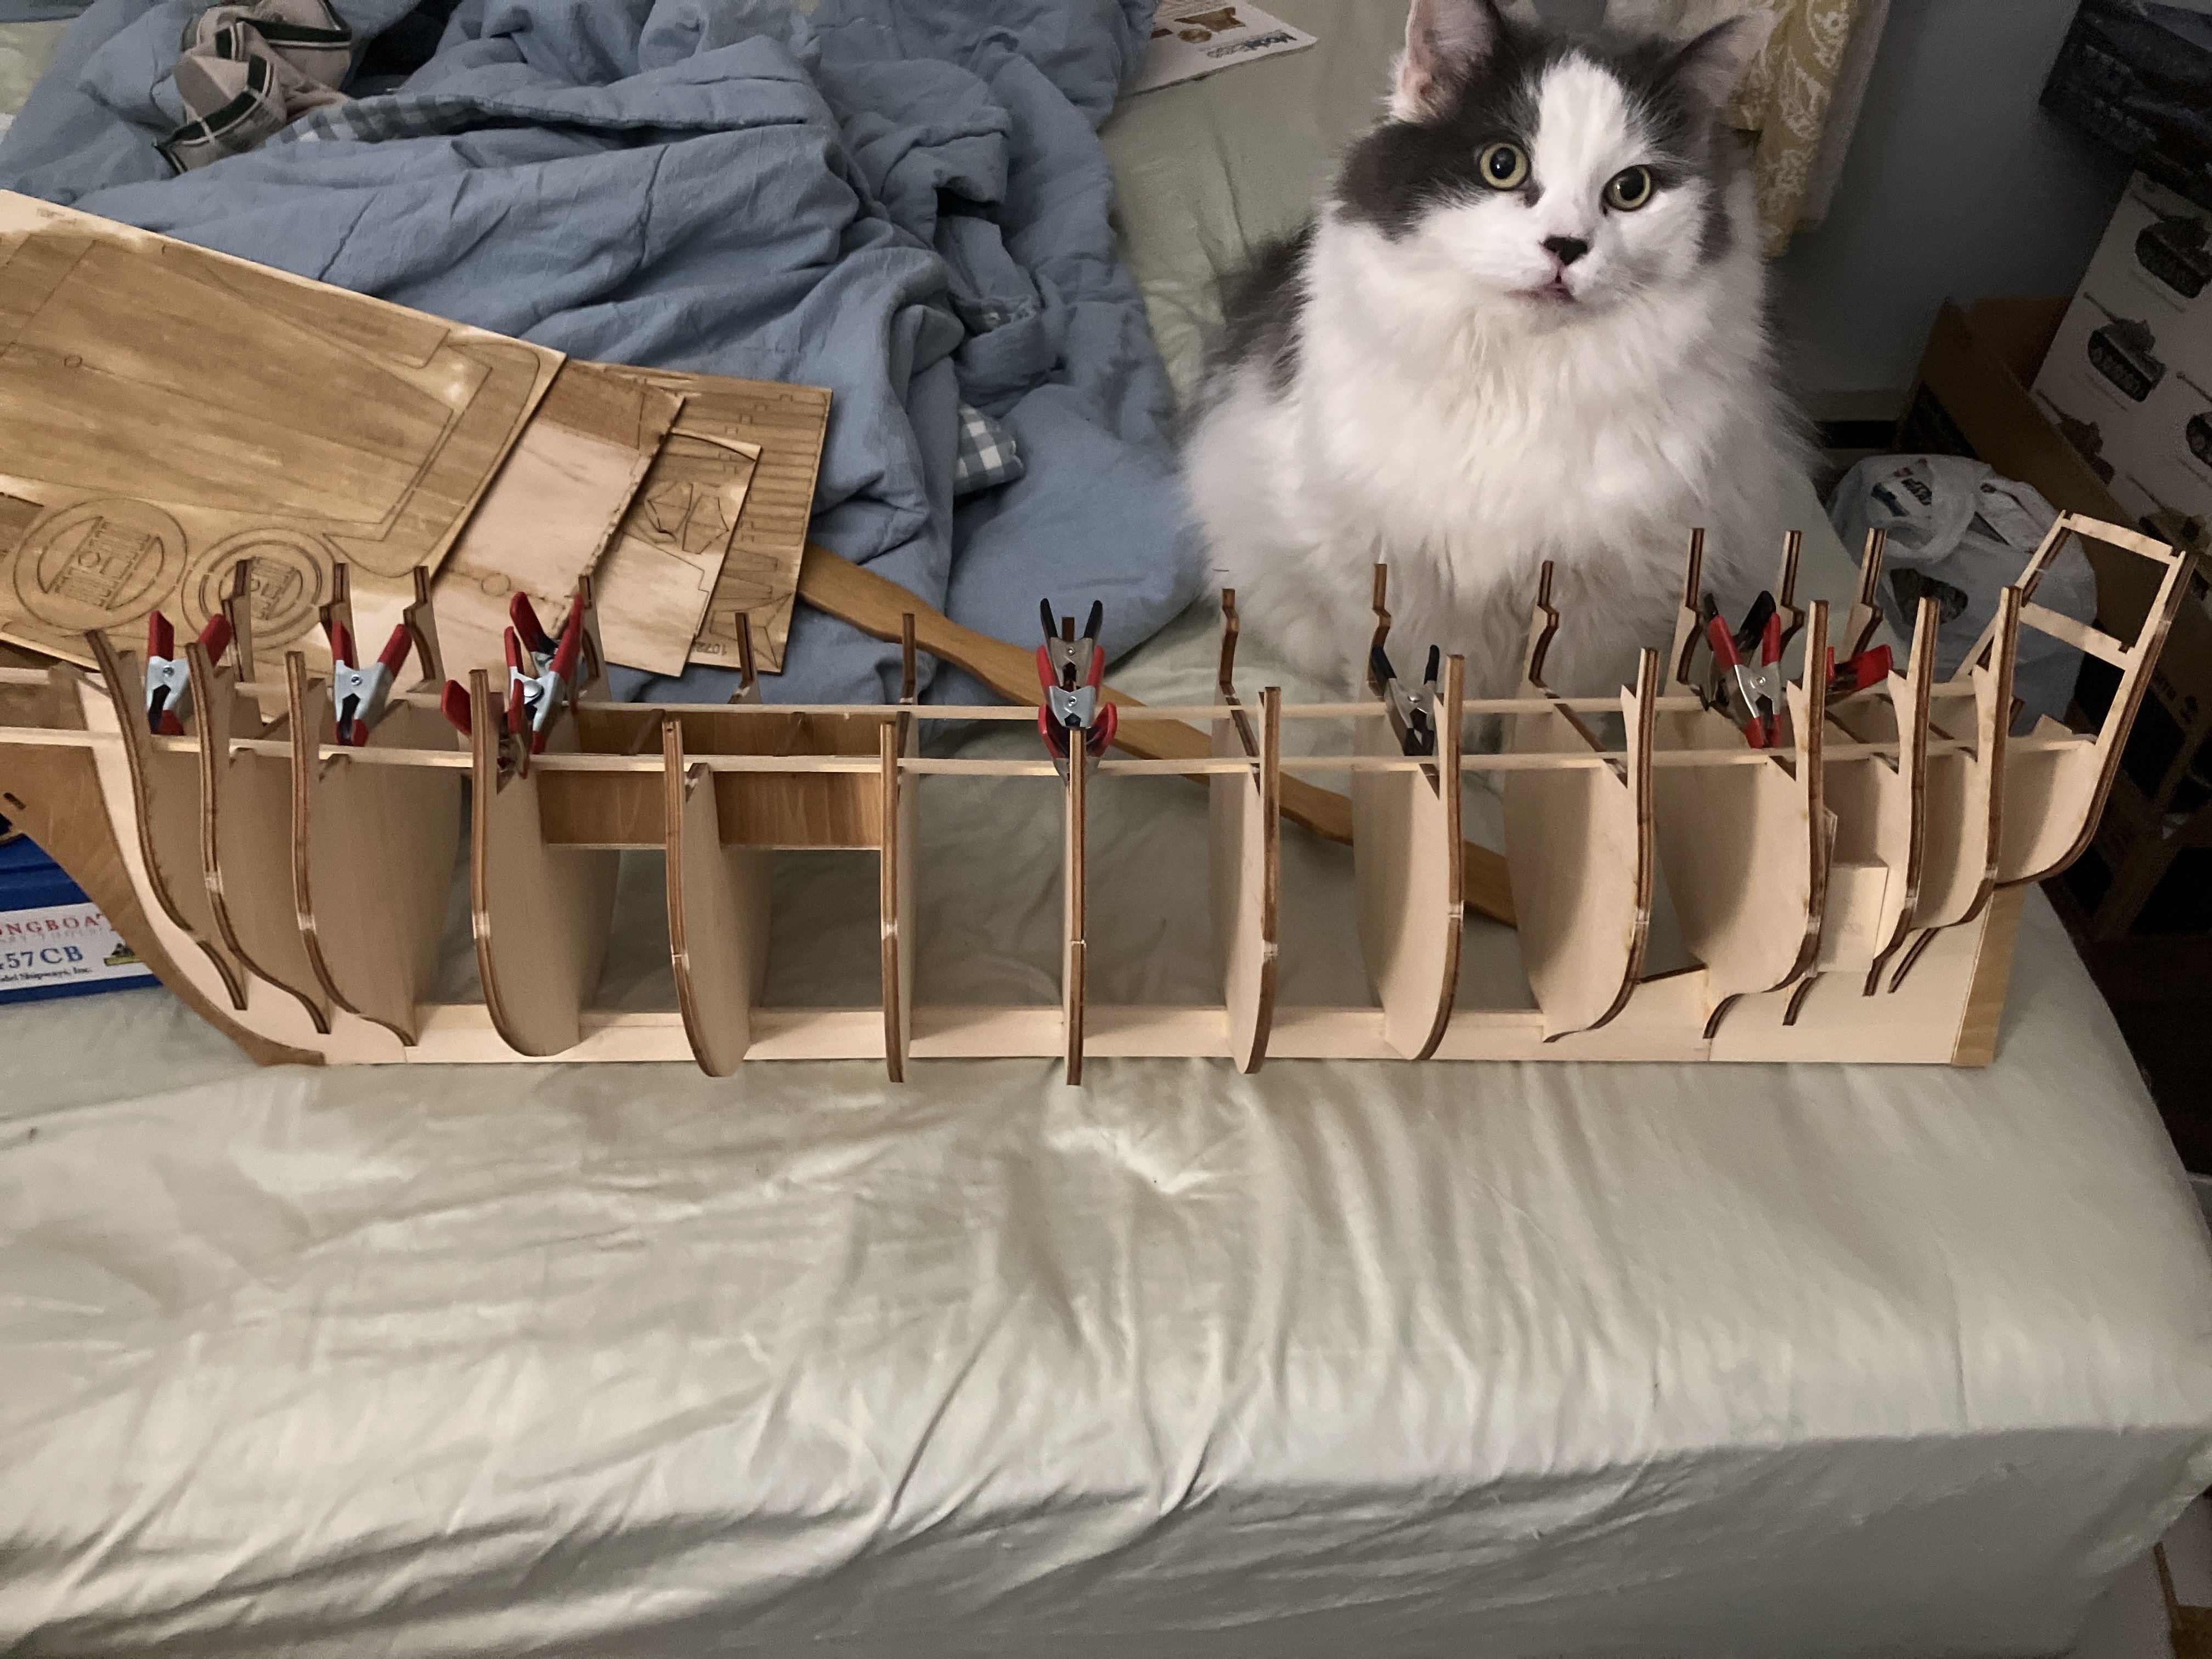
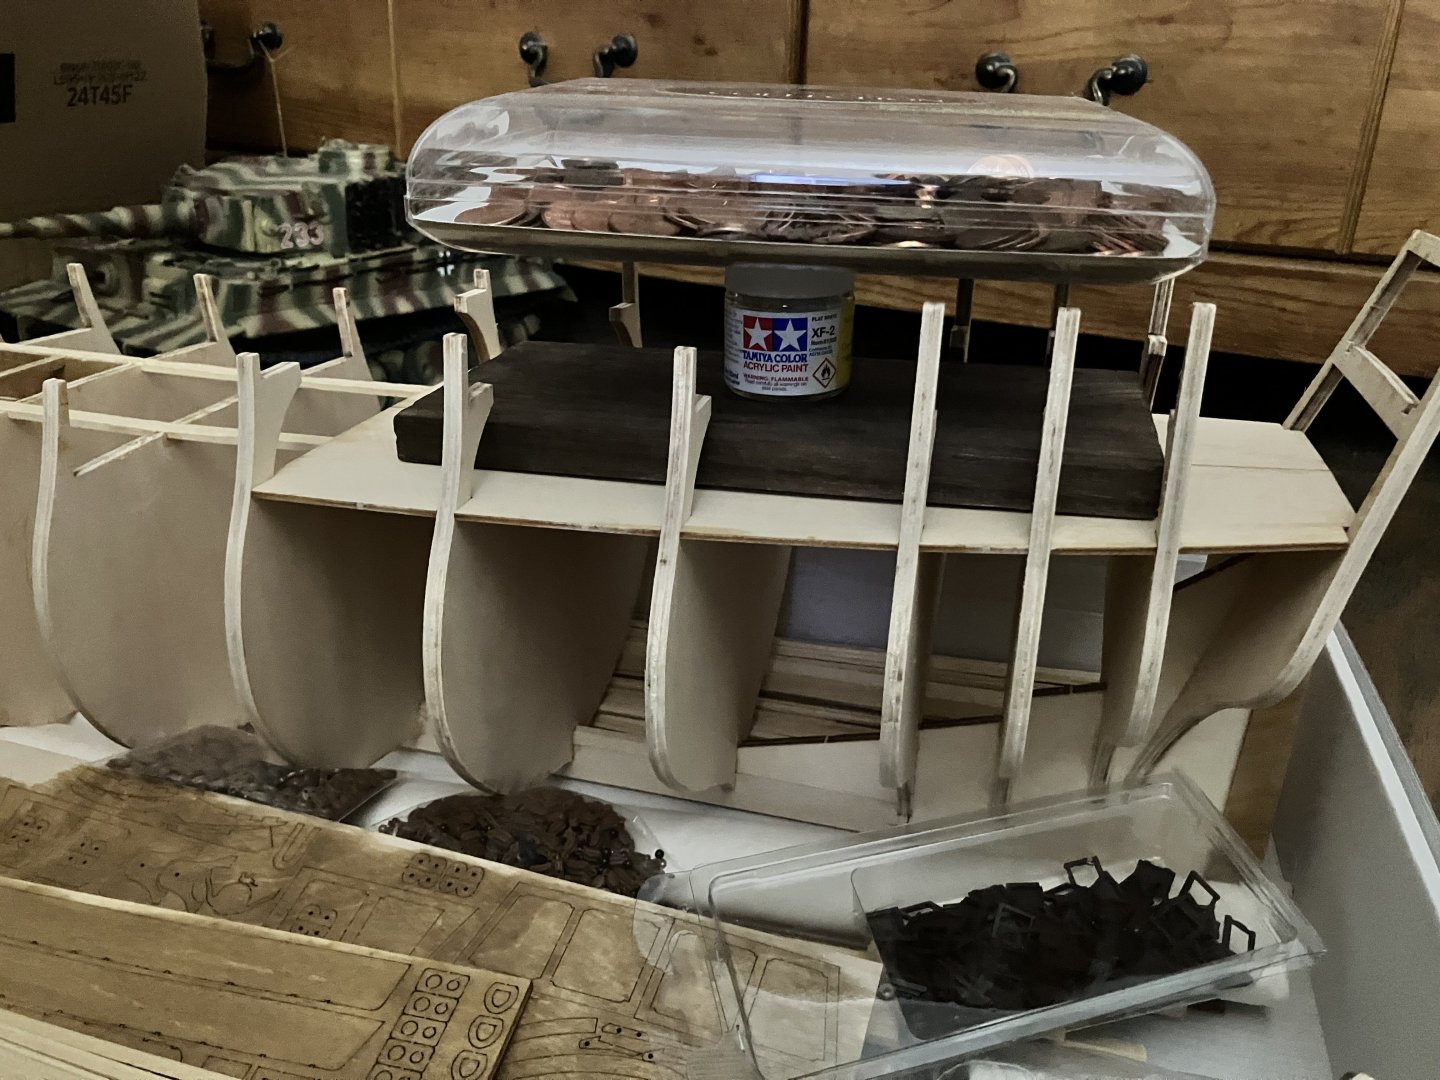
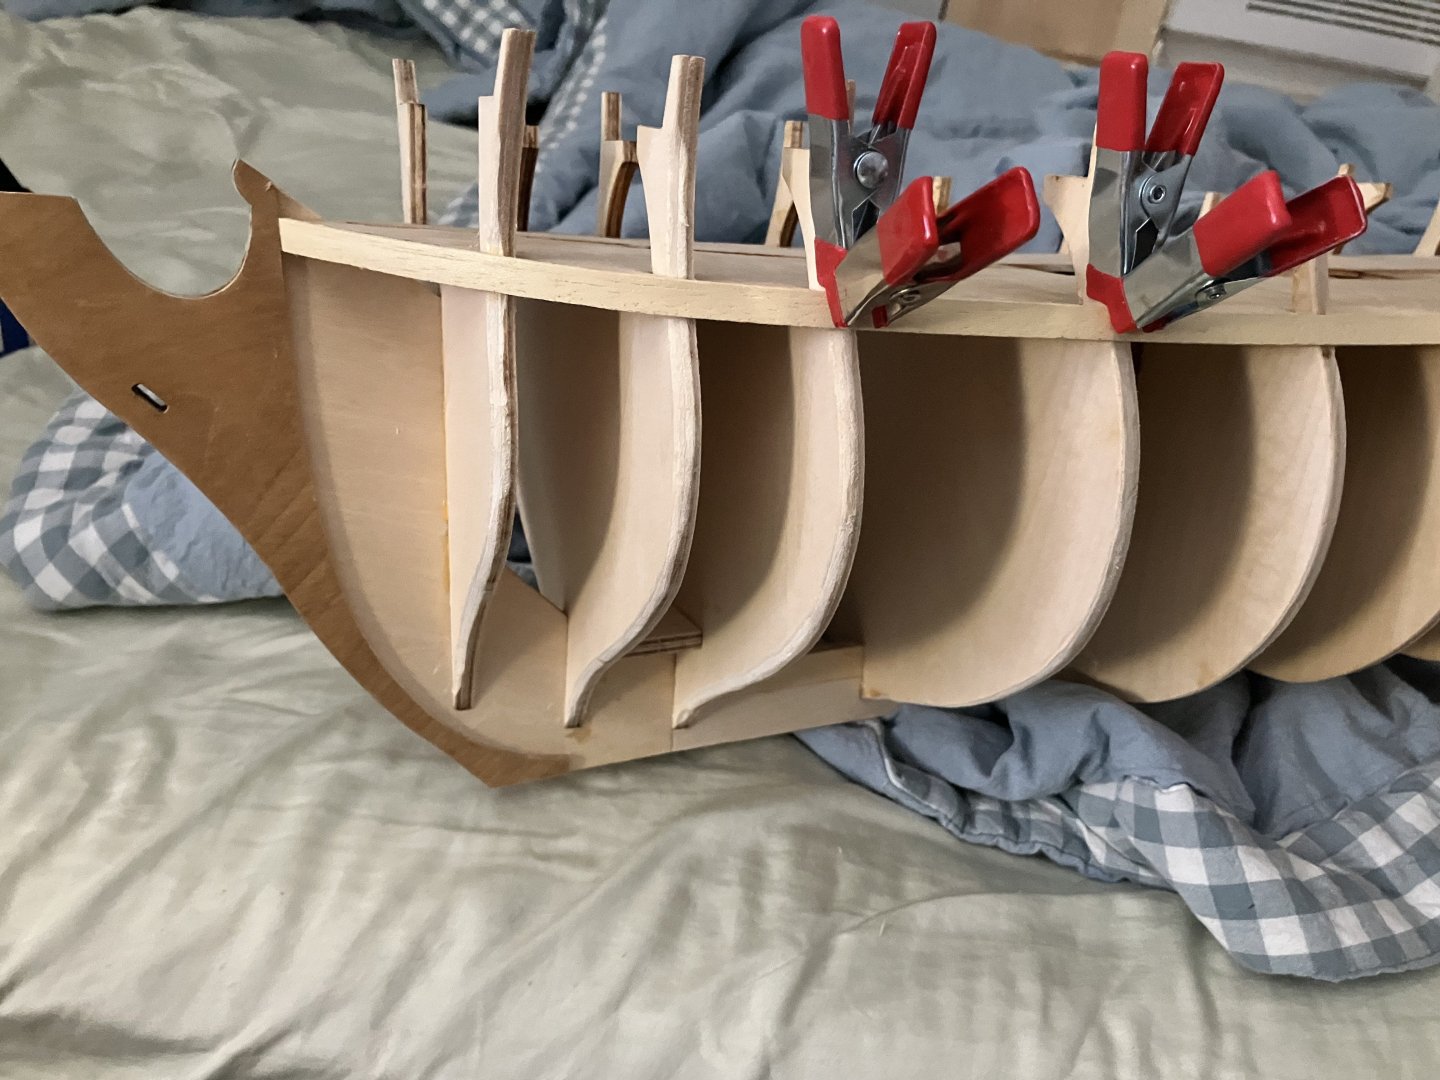
Week 2 update: I have finished fairing the bulkheads and attached the deck and first hull plank. I had to remove the two upper structural beams because I glued them before I had test fitted the deck, and they would not fit. I also took a bit of time to identify and label every type of strips included in the kit. It was pretty much impossible to apply enough downward force to the beams as the glue dries while making sure the bulkheads are correctly spaced for the deck, so I ended up doing this using spring clamps. After I made sure the beams are dried and the bulkheads are correctly spaced this time, I glued the deck in place and held them down using a bunch of pennies I had collected. Then after a bit more hair tearing with bending the planking strips, I have finally attached the first plank on the ship. My speed is much slower than I was expecting, the combination of thicker planks and obeche being harder than basswood that I have experienced with in my two previous builds meant it was very difficult to bend them by soaking. I might have to buy an electric plank bender if I want to finish this build in any reasonable time as it took me nearly an hour to bend just two planks by soaking them over and over. I am also still not sure if I will have enough leftover planks to actually do the decking on the ship, might be forced to buy them as well.


-
ZhangRenWing reacted to a post in a topic:
Montanes 1794 by Cmm4000 - OcCre - 1:70
-
ZhangRenWing reacted to a post in a topic:
Montanes 1794 by Cmm4000 - OcCre - 1:70
-
Thank you, I did notice the other non-wooden ship sections of this forum but what attracted me to here from r/ModelMakers on Reddit was the wealth in wooden ship knowledge and experience. Billings now include a cast metal lion figurehead for this kit so I would be saving some work there; it's not as detailed as newly designed 3D-printed ones, but it will do. The instructions still say to carve out my own volutes for the decorative bulwark ends from the balsa blocks, however, so hopefully I will be able to manage that. I did consider the two other kits from the shipwright series at first, but decided on the 18th century longboat to practice instead as I preferred its looks.
-
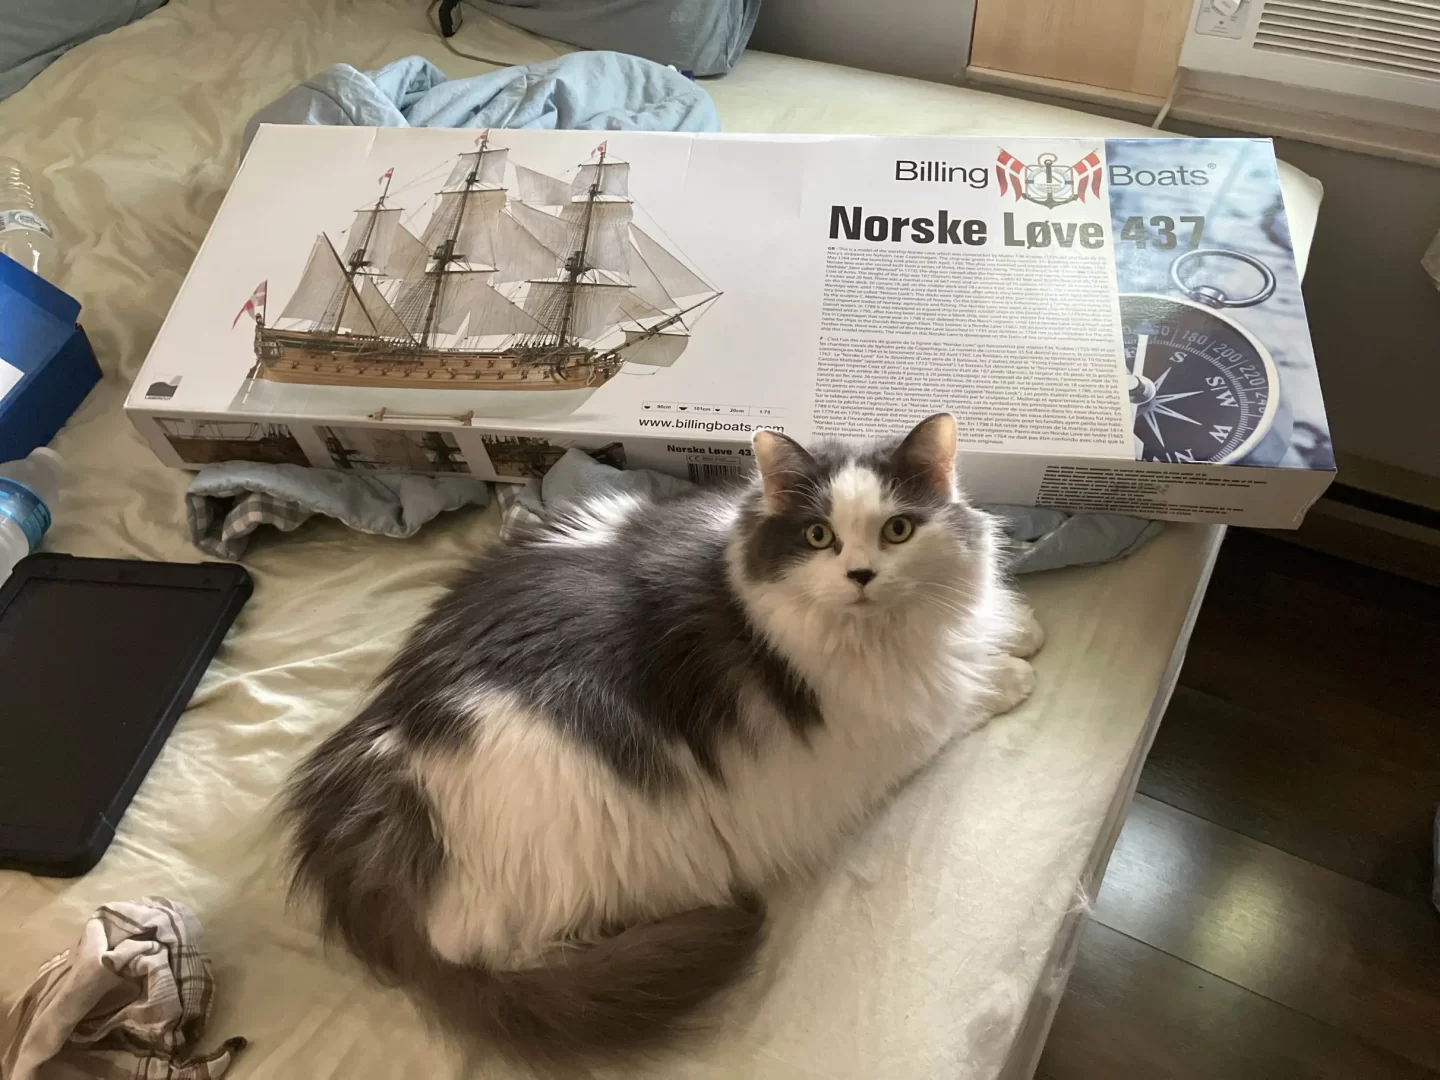
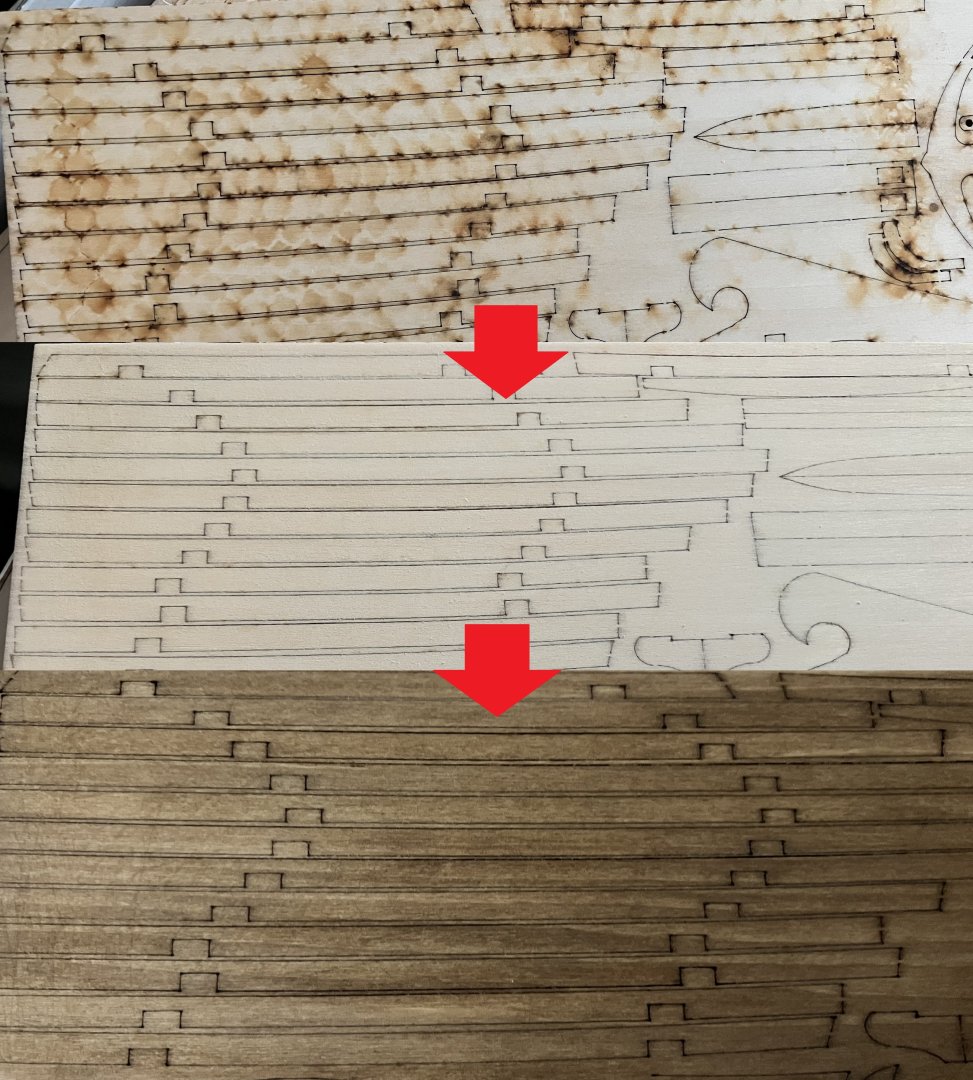
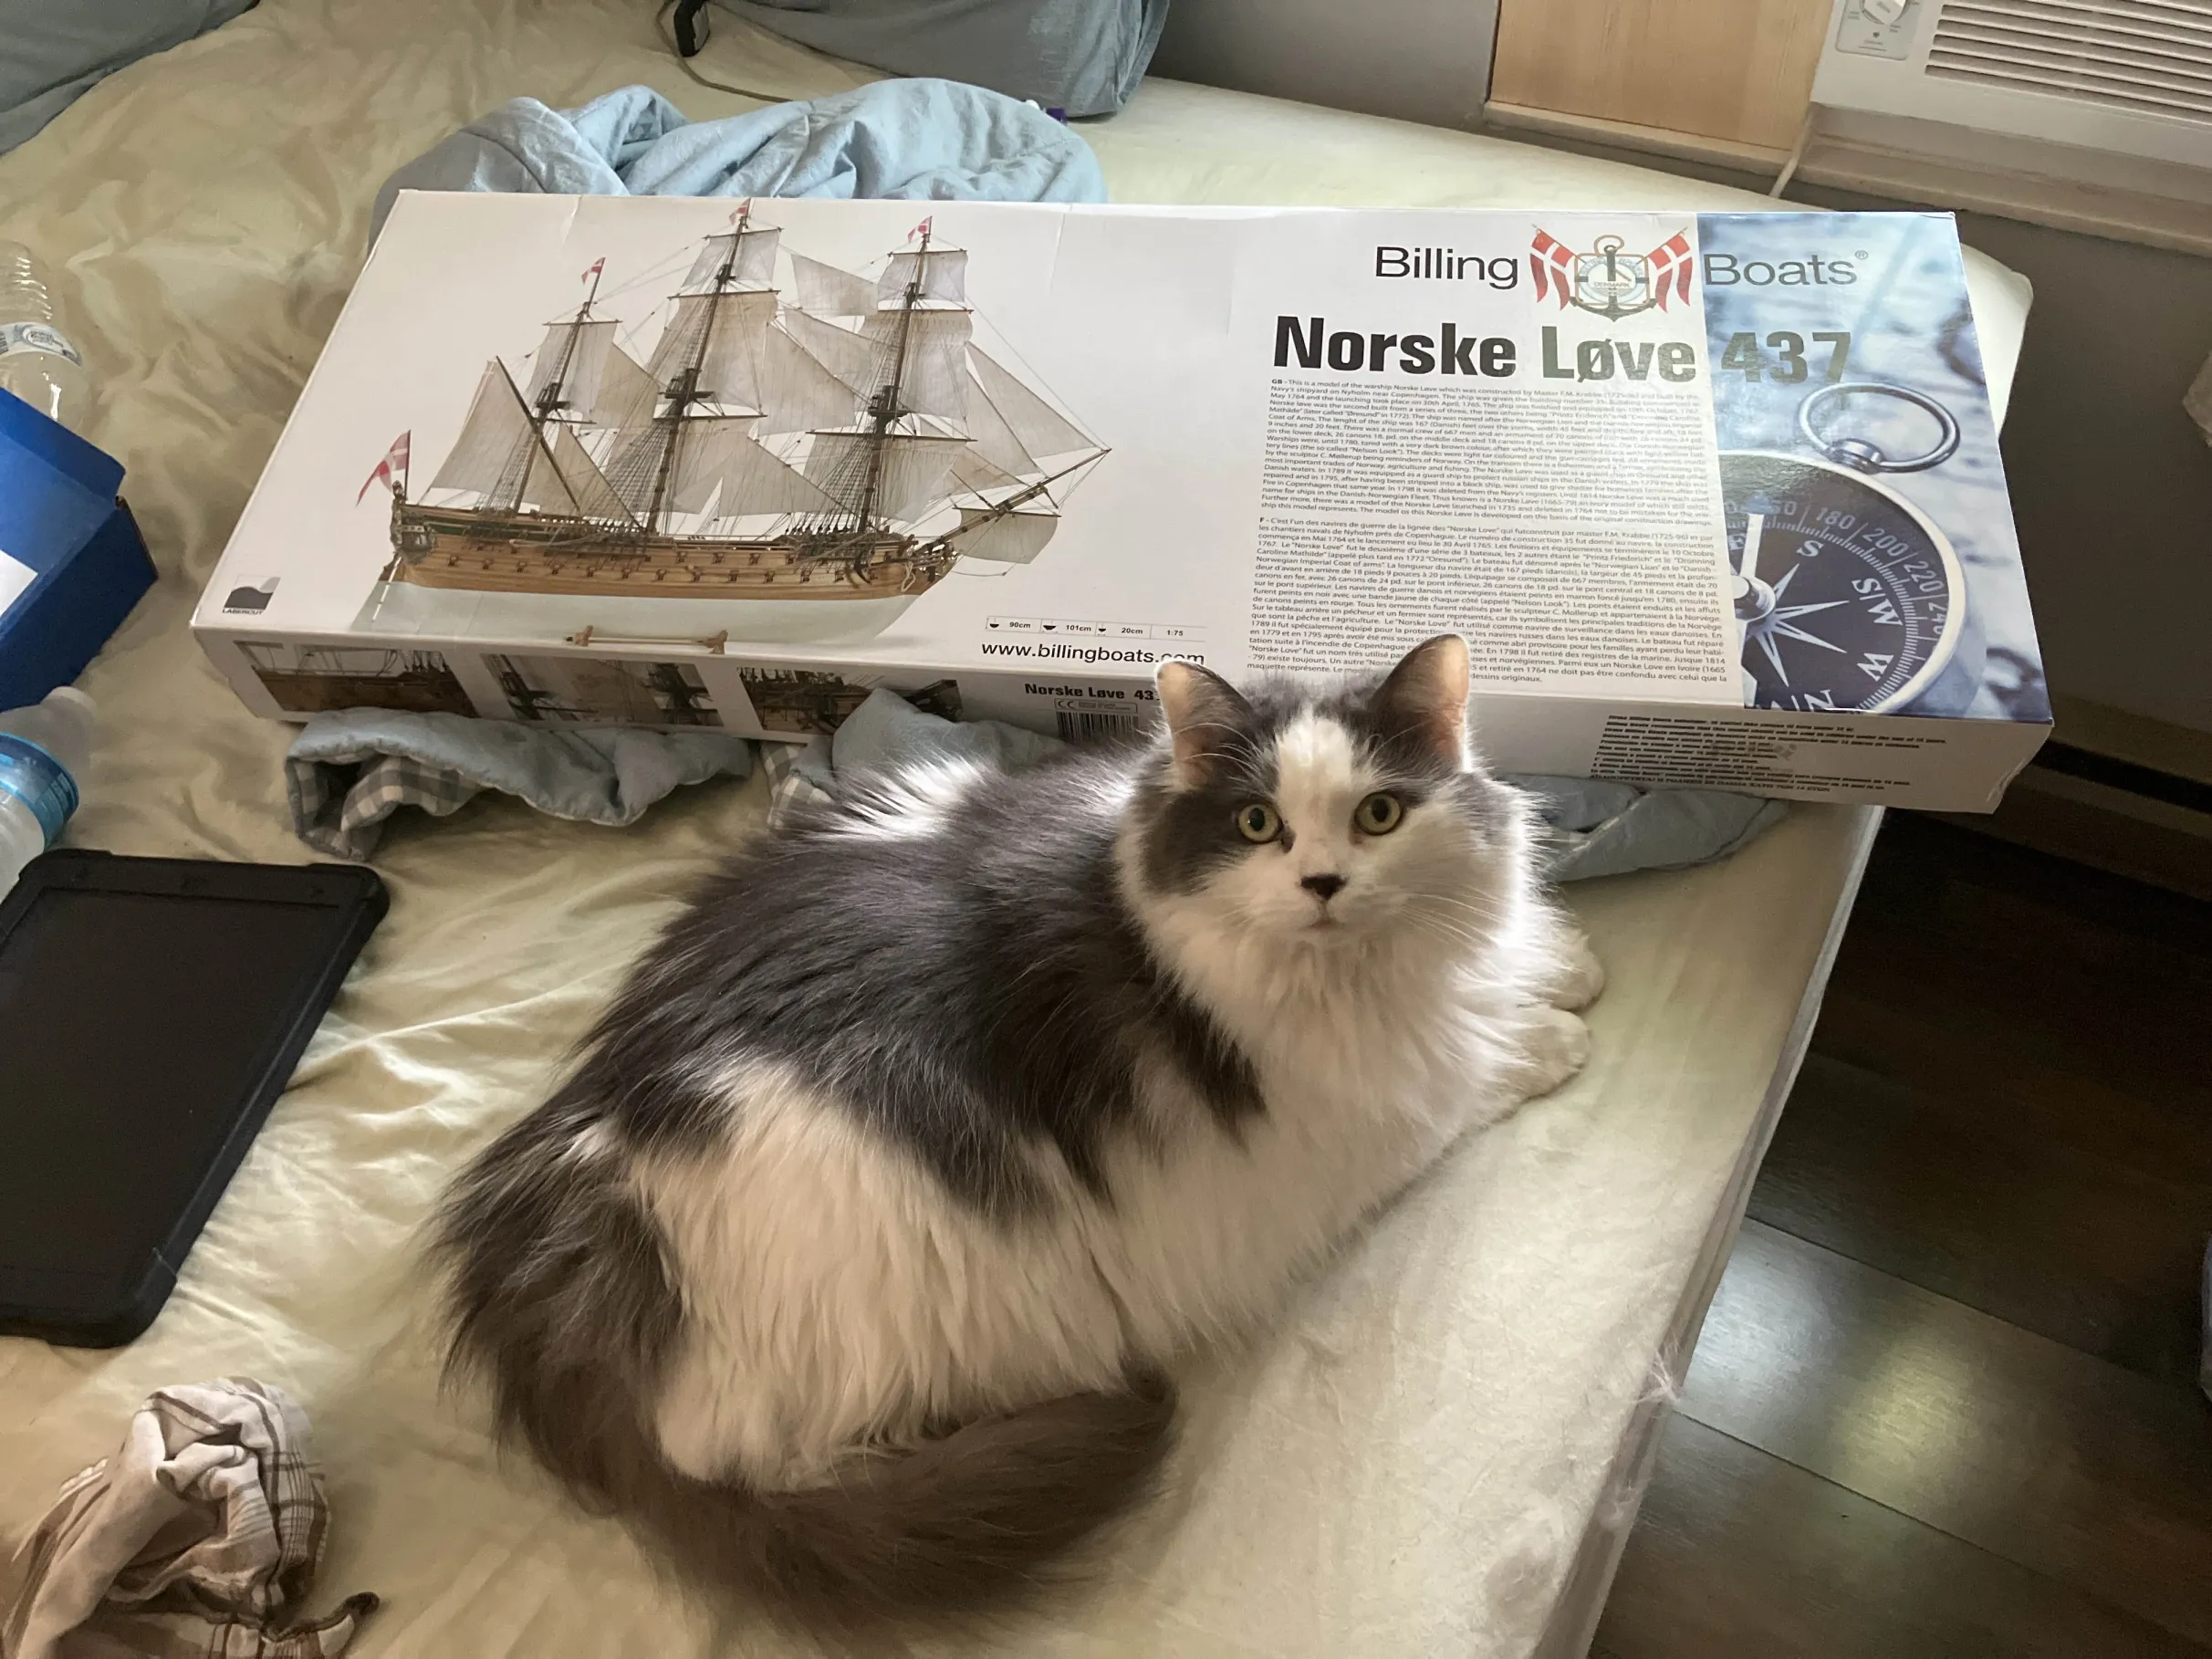
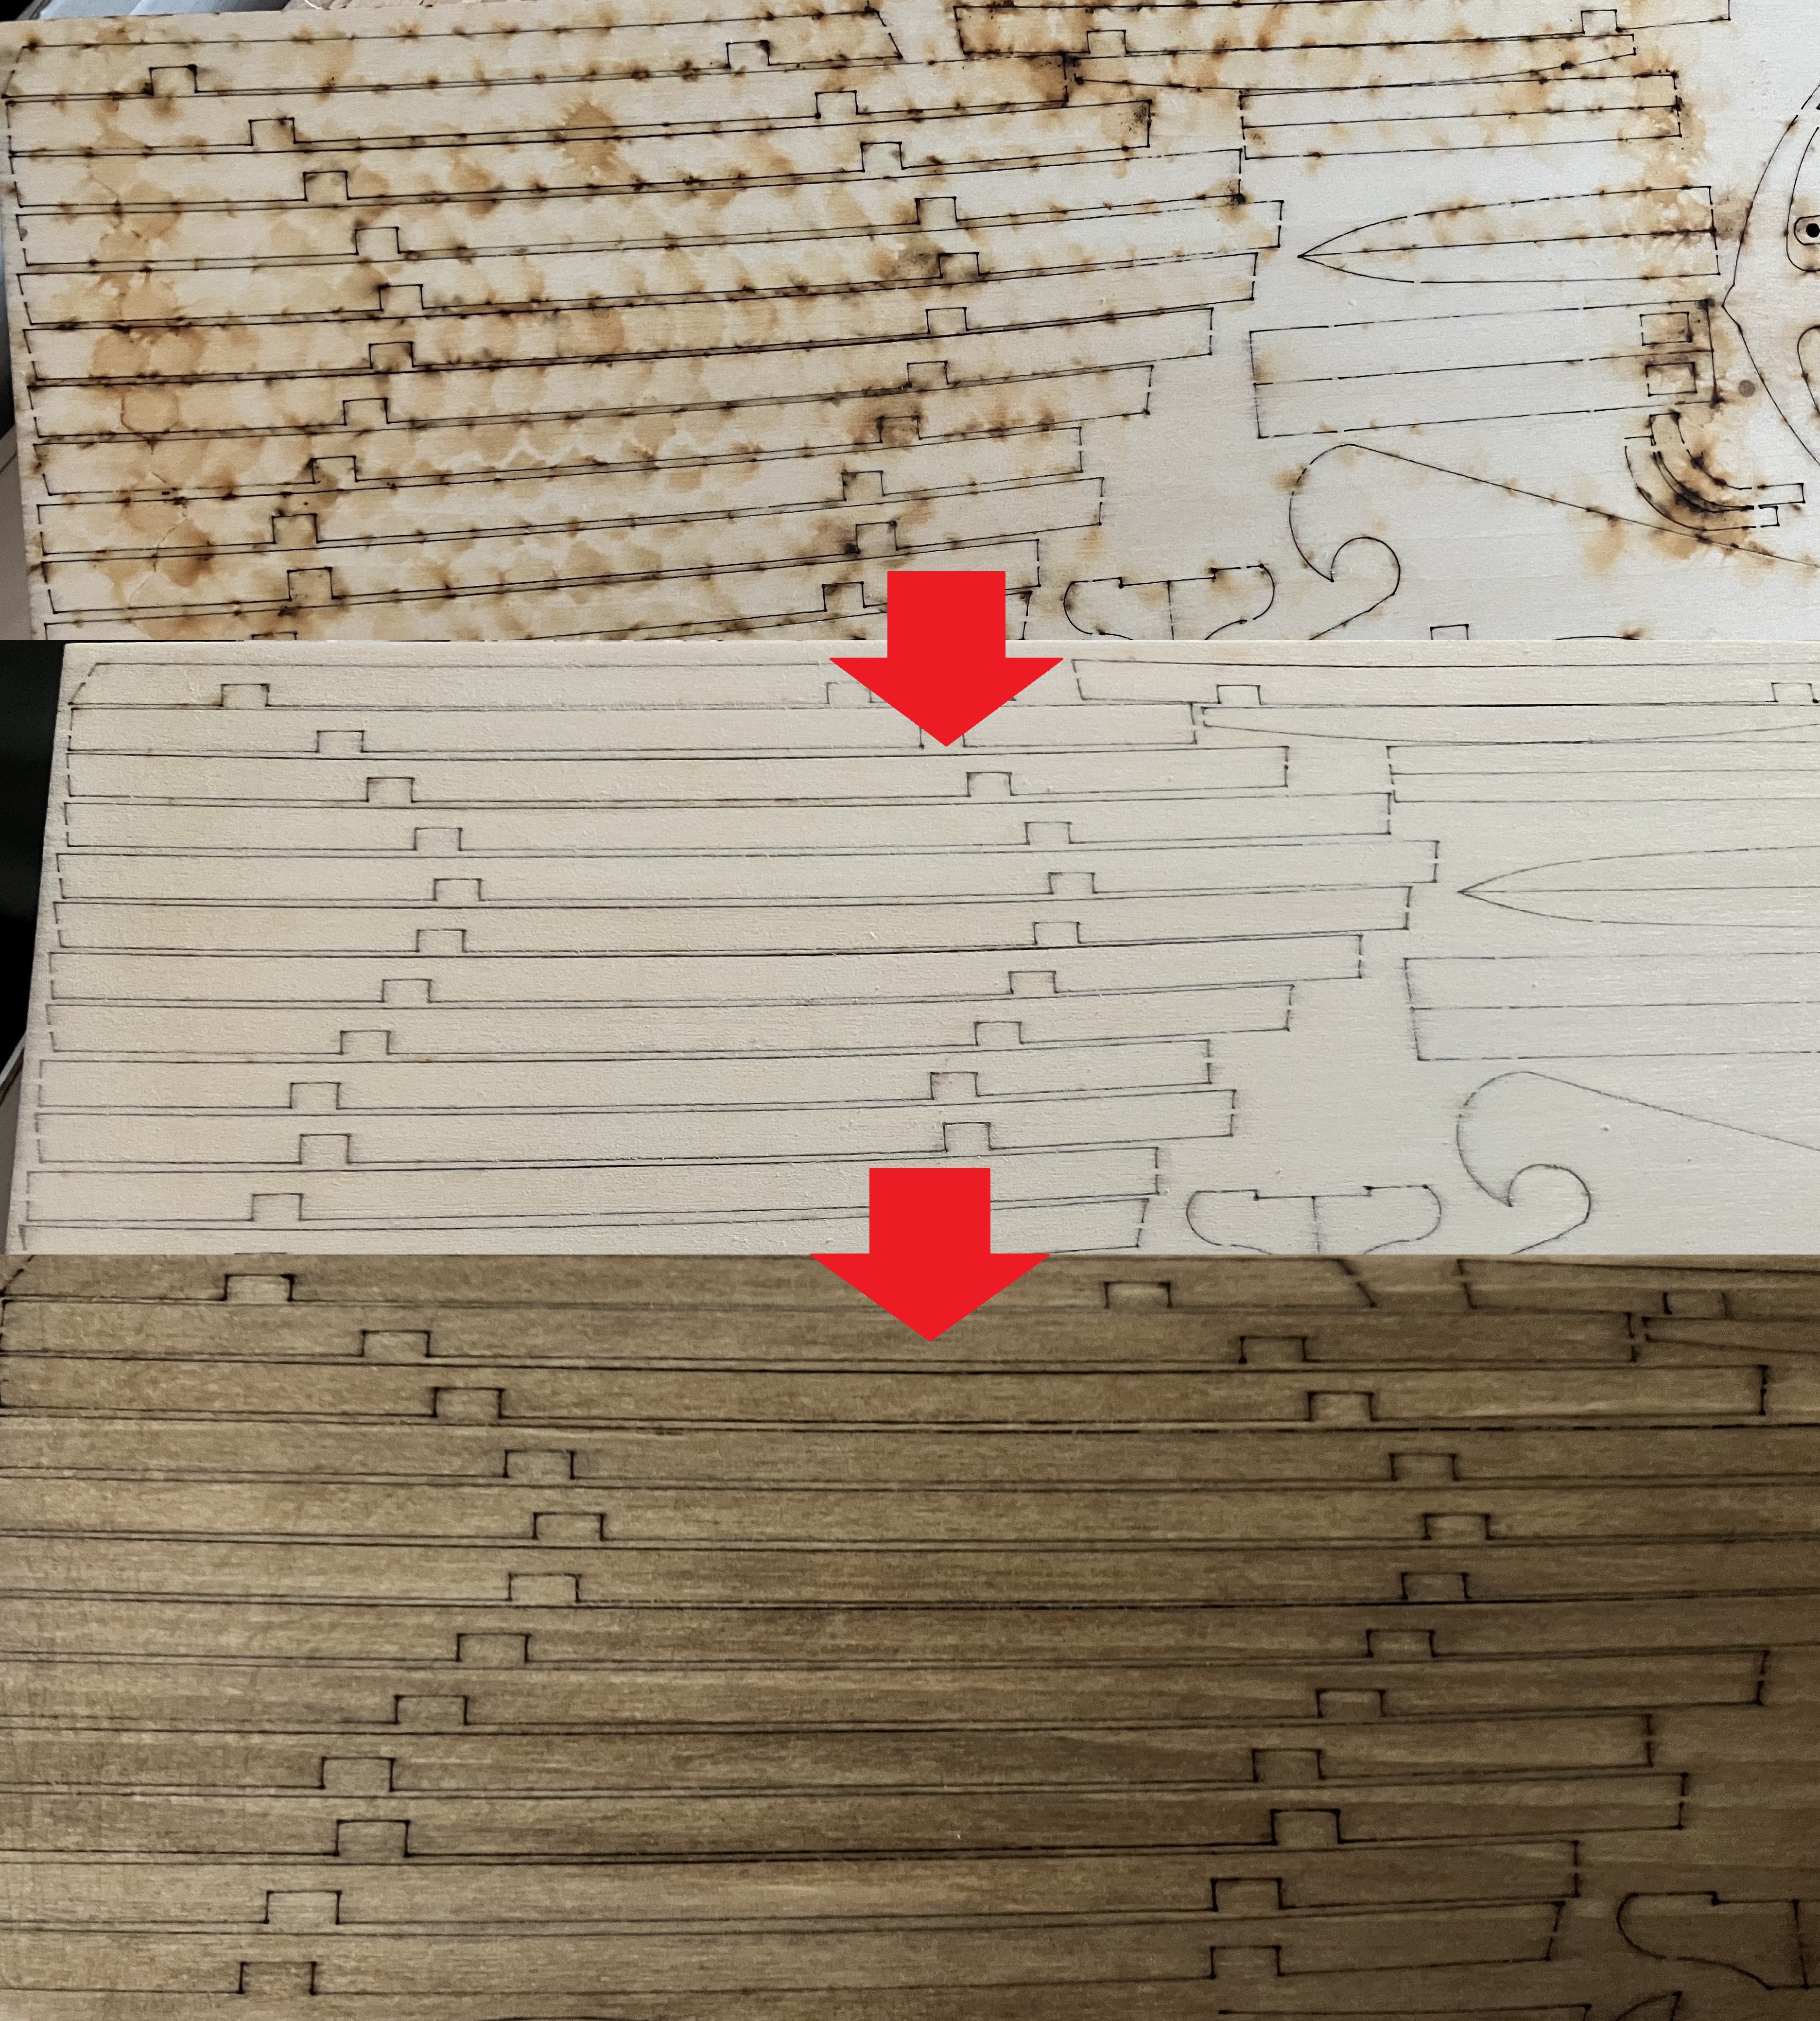
Having recently finished my second wooden ship kit, I have started the long journey to build this Norske Love kit from Billing Boats that I bought on Model Expo for around 260 USD. I noticed a lot of build logs of this ship have seemingly been abandoned and I aim to not be one of them. Updates might be infrequent but I will try to post weekly on the weekends.  Before I did anything I firstly sanded away the laser scorch marks on the back sides of the wood sheets with 200-600 grit sandpaper, then I stained them with Minwax golden oak. The keel lumber provided was oddly bumpy and required sanding. Now for the problems I have with this kit: most importantly, the instructions are simply incomplete, and I am not talking about the sparse directions, but the fact that three entire laser cut sheets (1067L-A/B/C to be specific) were not labeled in the instructions at all, not even on the digital copies on Billing Boat's official website. I ended up finding a properly labeled copy of the instructions on Model Expo. Coming from a plastic modeler background where every single part was labeled on the sprue itself (meaning you did not have to flip between pages or write on the parts yourself) this was a huge disappointment right off the bat. Secondly, according to the instructions, the decks are to be made from 6 big laser cut parts, with pencil being used to mimic the deck's planking. I hope I am reading it wrong and the pencil was merely intended to be used as guide and that there will be enough wood for me to finish the planking. Lastly, the included blocks are all made from plastic, I read they have replaced these with wooden blocks in a different build log but evidently my kit was not new enough. As with the upsides, the kit does come with 4 sheets of A1 sized plans for the ship and sails which are also included. Enough yapping and I will just end the first post with the current progress after a whole weekend's work. Progress is rather slow because sanding plywood seems to be a lot harder than I had anticipated. Next up is fairing the bulkheads and getting her prepared for planking.