Pinenuts
-
Posts
14 -
Joined
-
Last visited
Recent Profile Visitors
241 profile views


-
 Pitan reacted to a post in a topic:
HM Cutter Sherbourne 1763 by Pinenuts - Vanguard Models - 1/64
Pitan reacted to a post in a topic:
HM Cutter Sherbourne 1763 by Pinenuts - Vanguard Models - 1/64
-
Pitan reacted to a post in a topic:
HM Cutter Sherbourne 1763 by Pinenuts - Vanguard Models - 1/64
-
Pitan reacted to a post in a topic:
HM Cutter Sherbourne 1763 by Pinenuts - Vanguard Models - 1/64
-
Pitan reacted to a post in a topic:
HM Cutter Sherbourne 1763 by Pinenuts - Vanguard Models - 1/64
-
brunnels reacted to a post in a topic:
HM Cutter Sherbourne 1763 by Pinenuts - Vanguard Models - 1/64
-
chris watton reacted to a post in a topic:
HM Cutter Sherbourne 1763 by Pinenuts - Vanguard Models - 1/64
-
JacquesCousteau reacted to a post in a topic:
HM Cutter Sherbourne 1763 by Pinenuts - Vanguard Models - 1/64
-
Ryland Craze reacted to a post in a topic:
HM Cutter Sherbourne 1763 by Pinenuts - Vanguard Models - 1/64
-
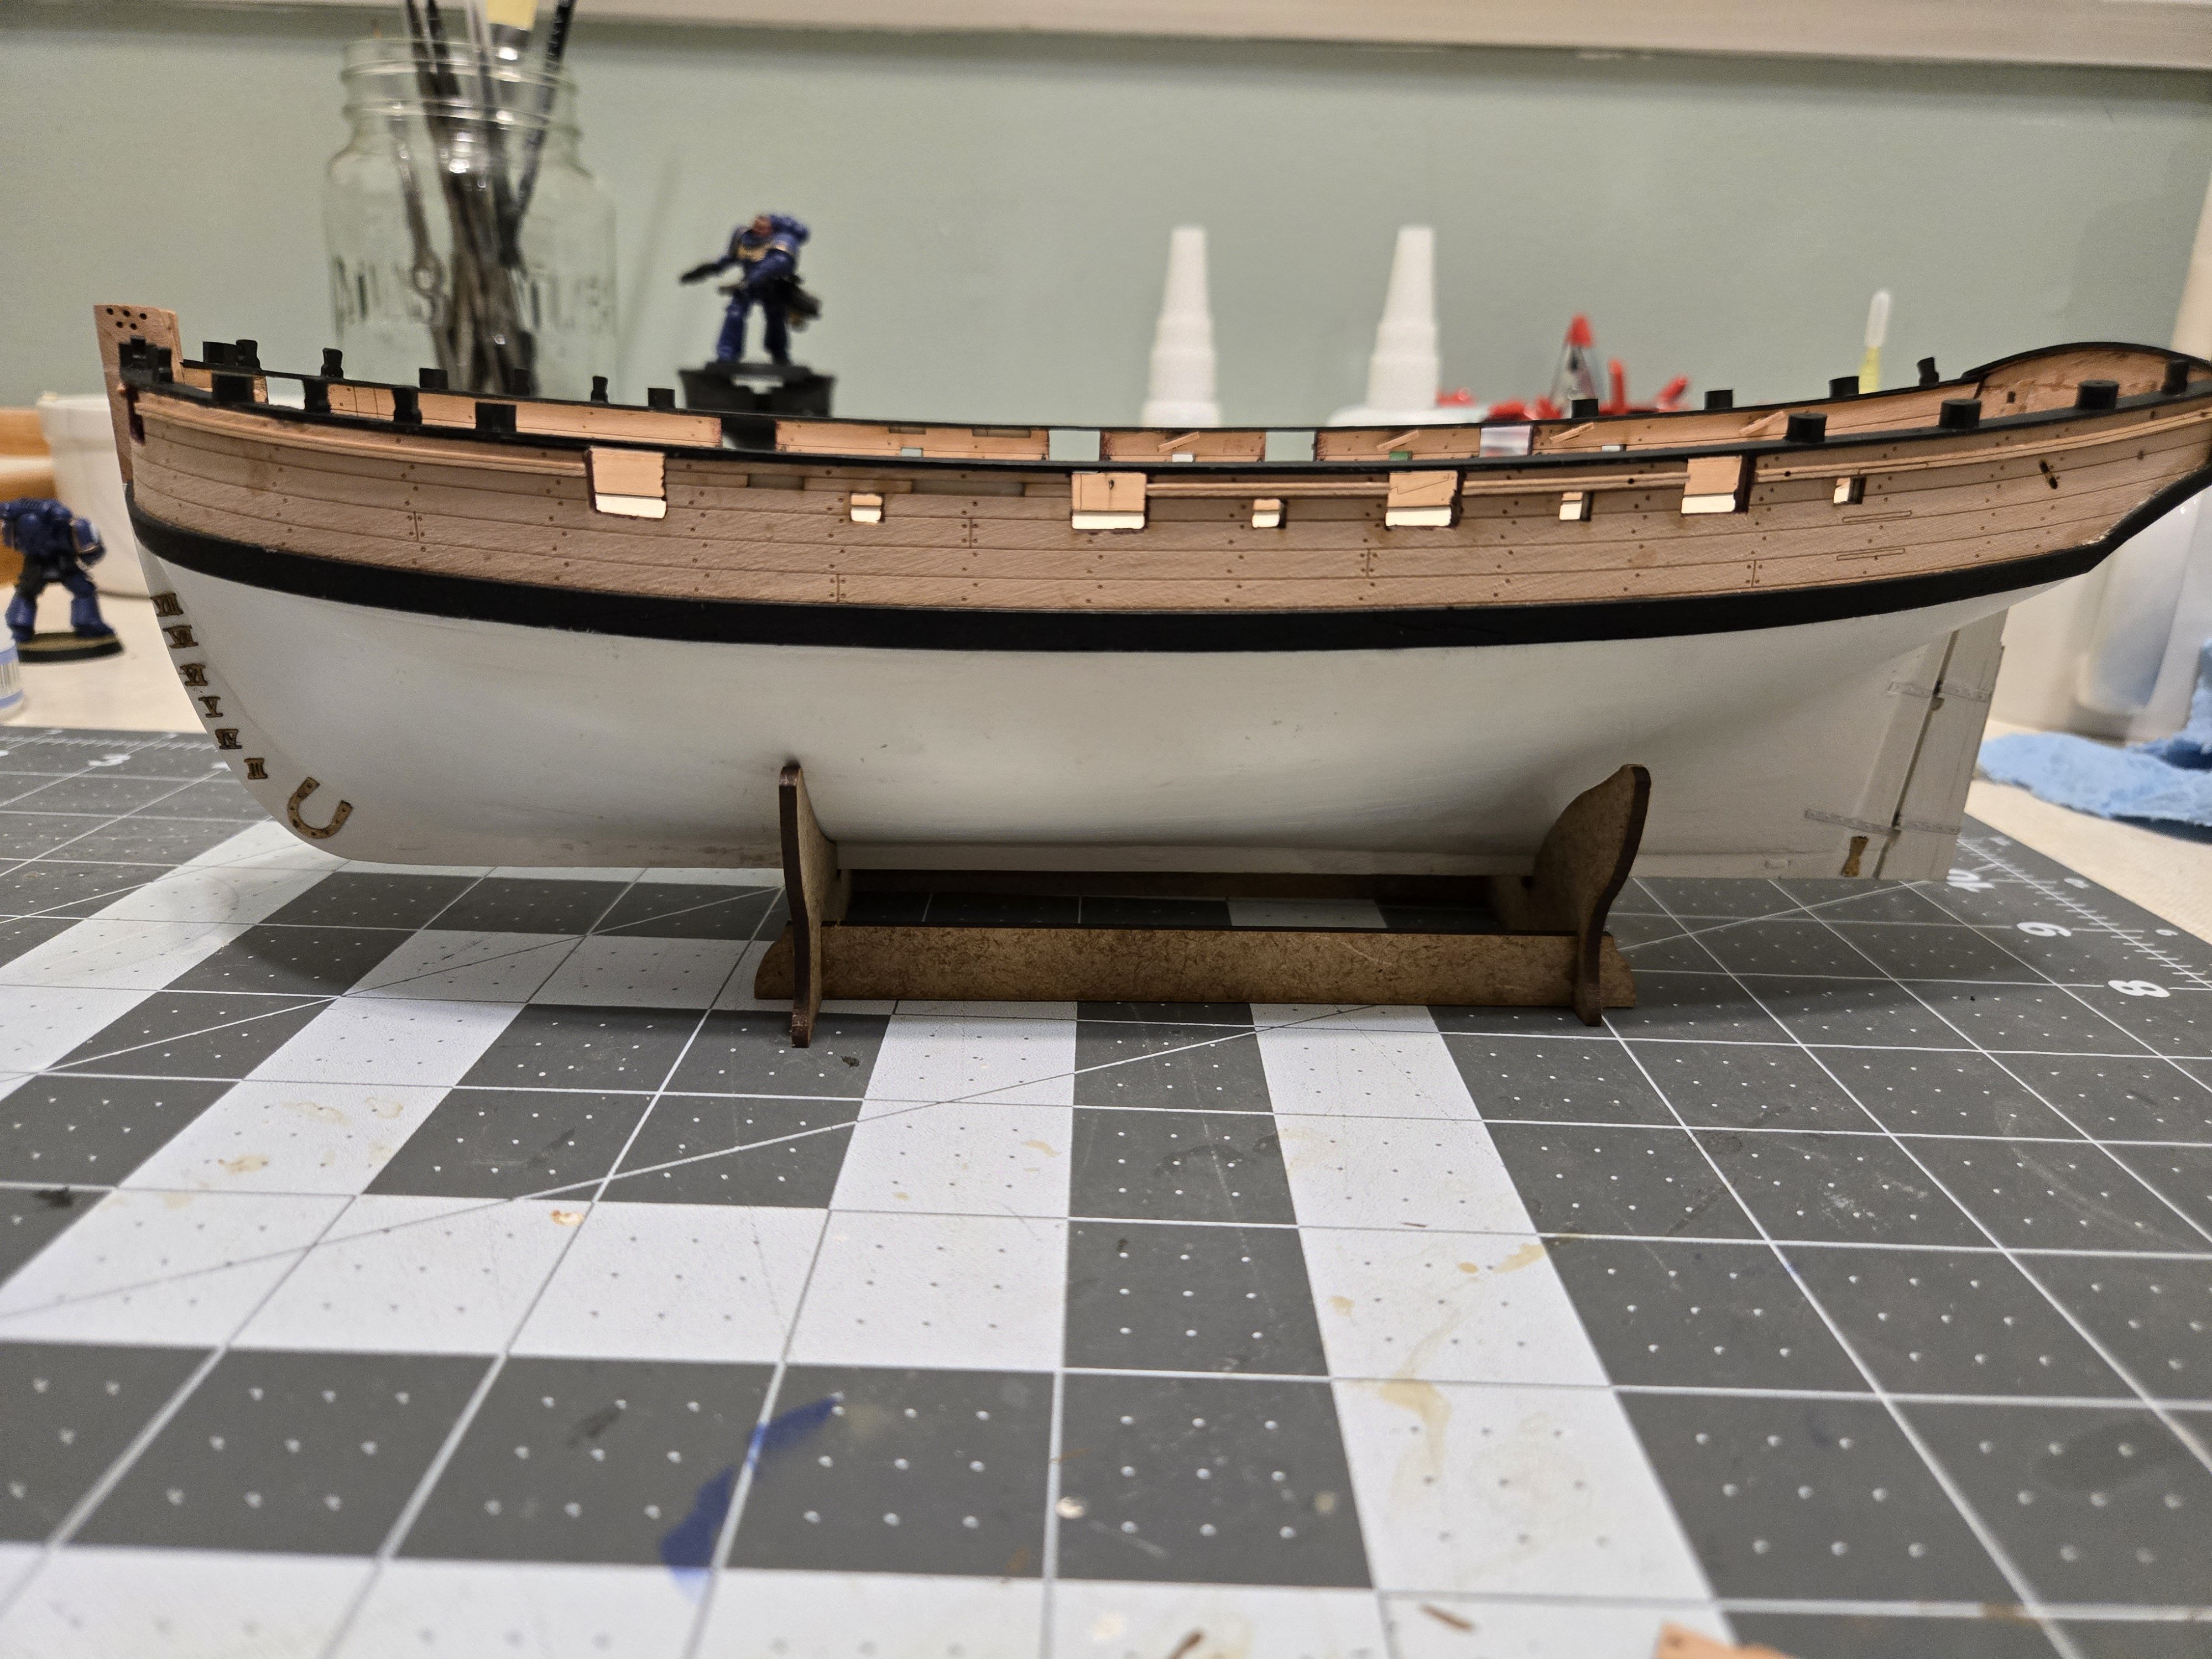
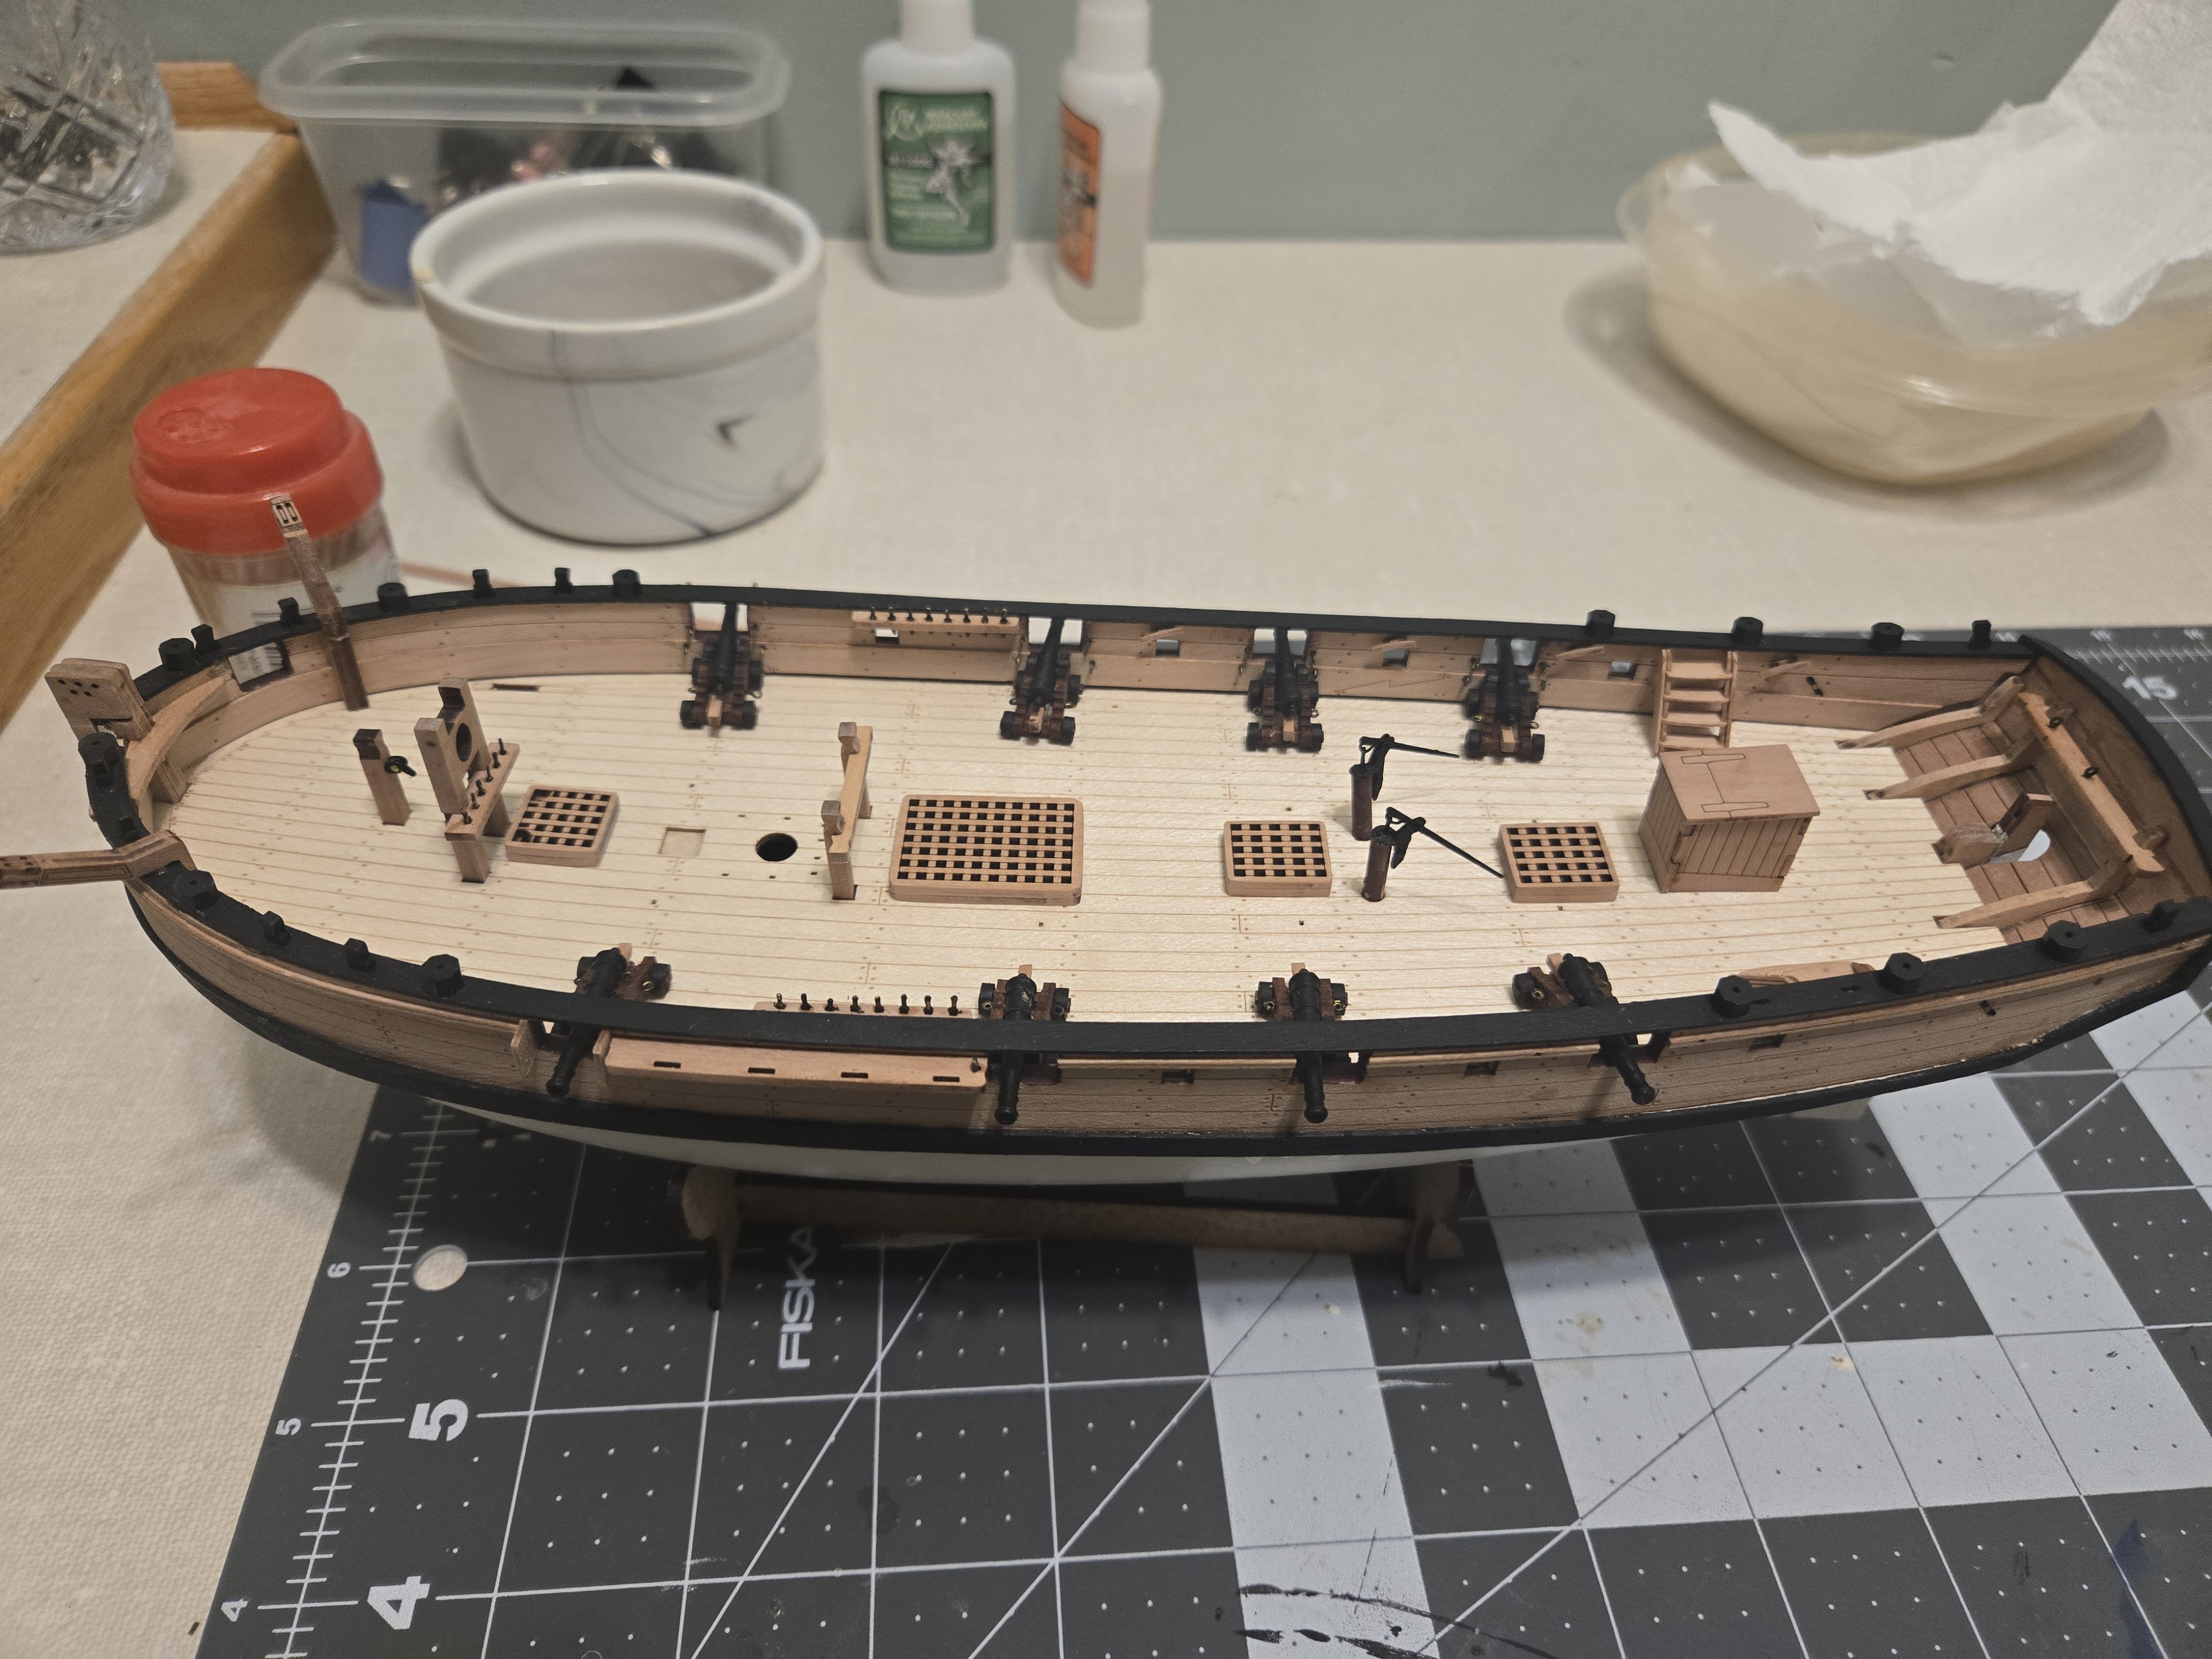
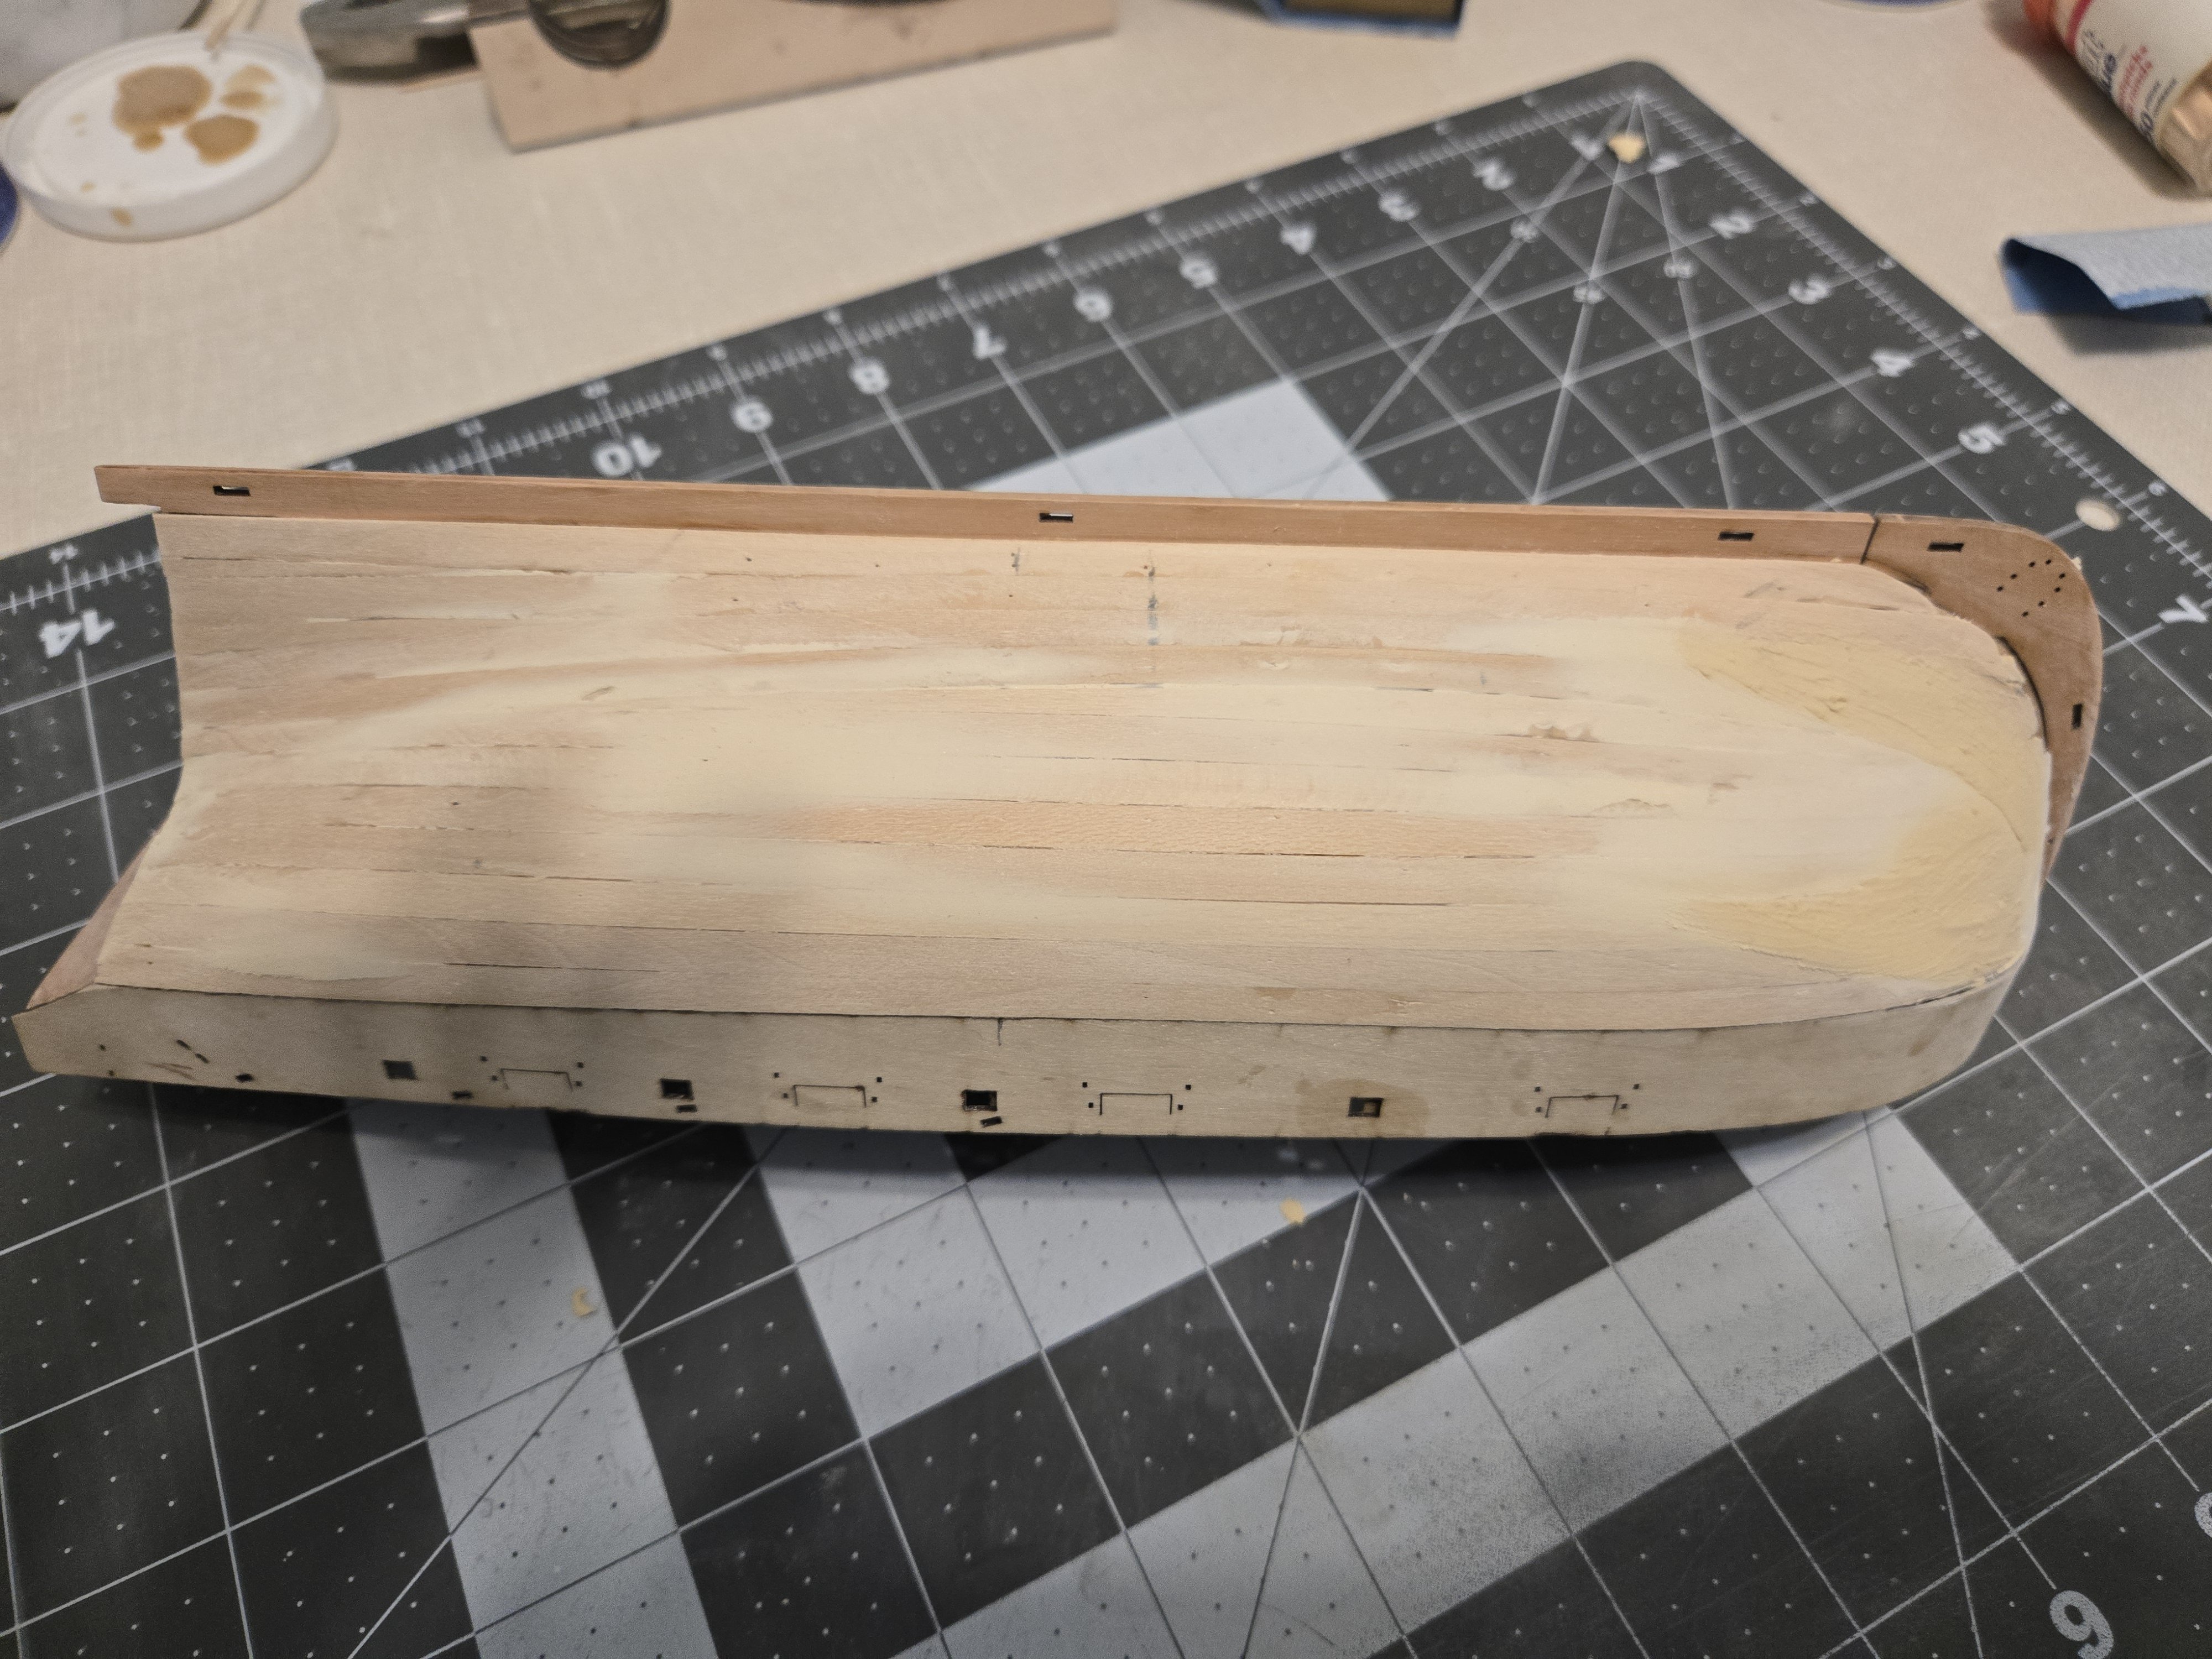
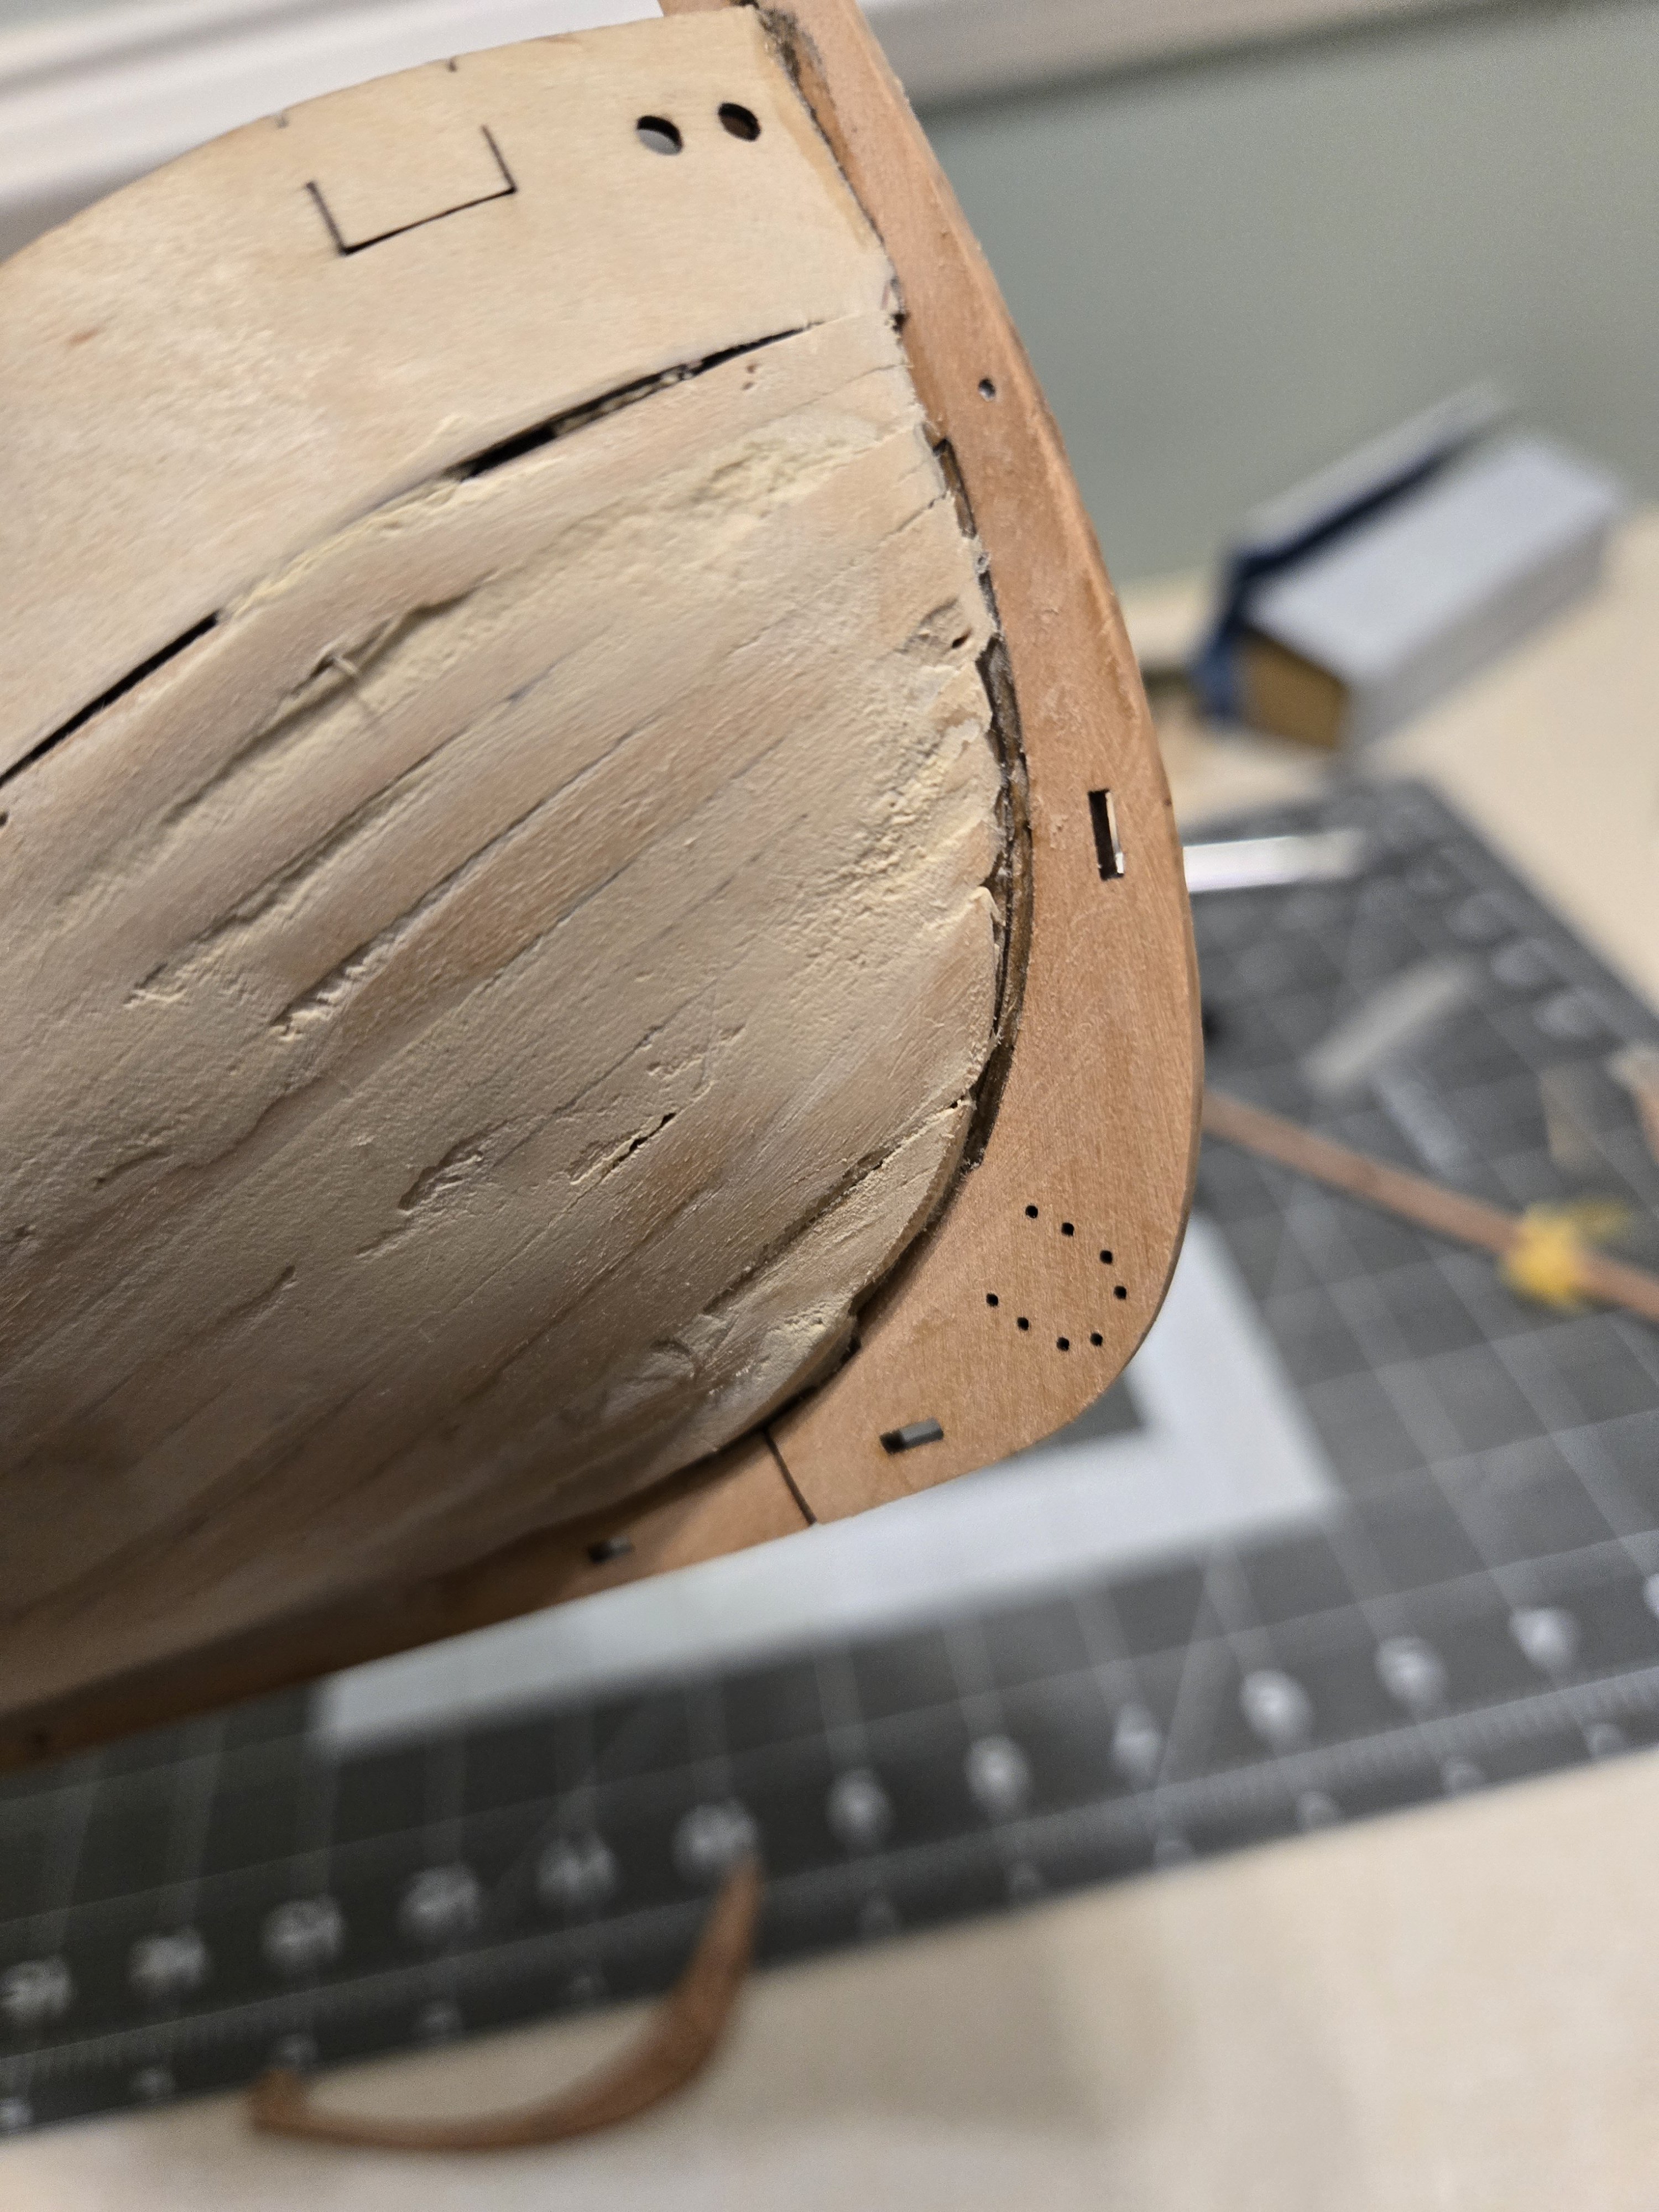
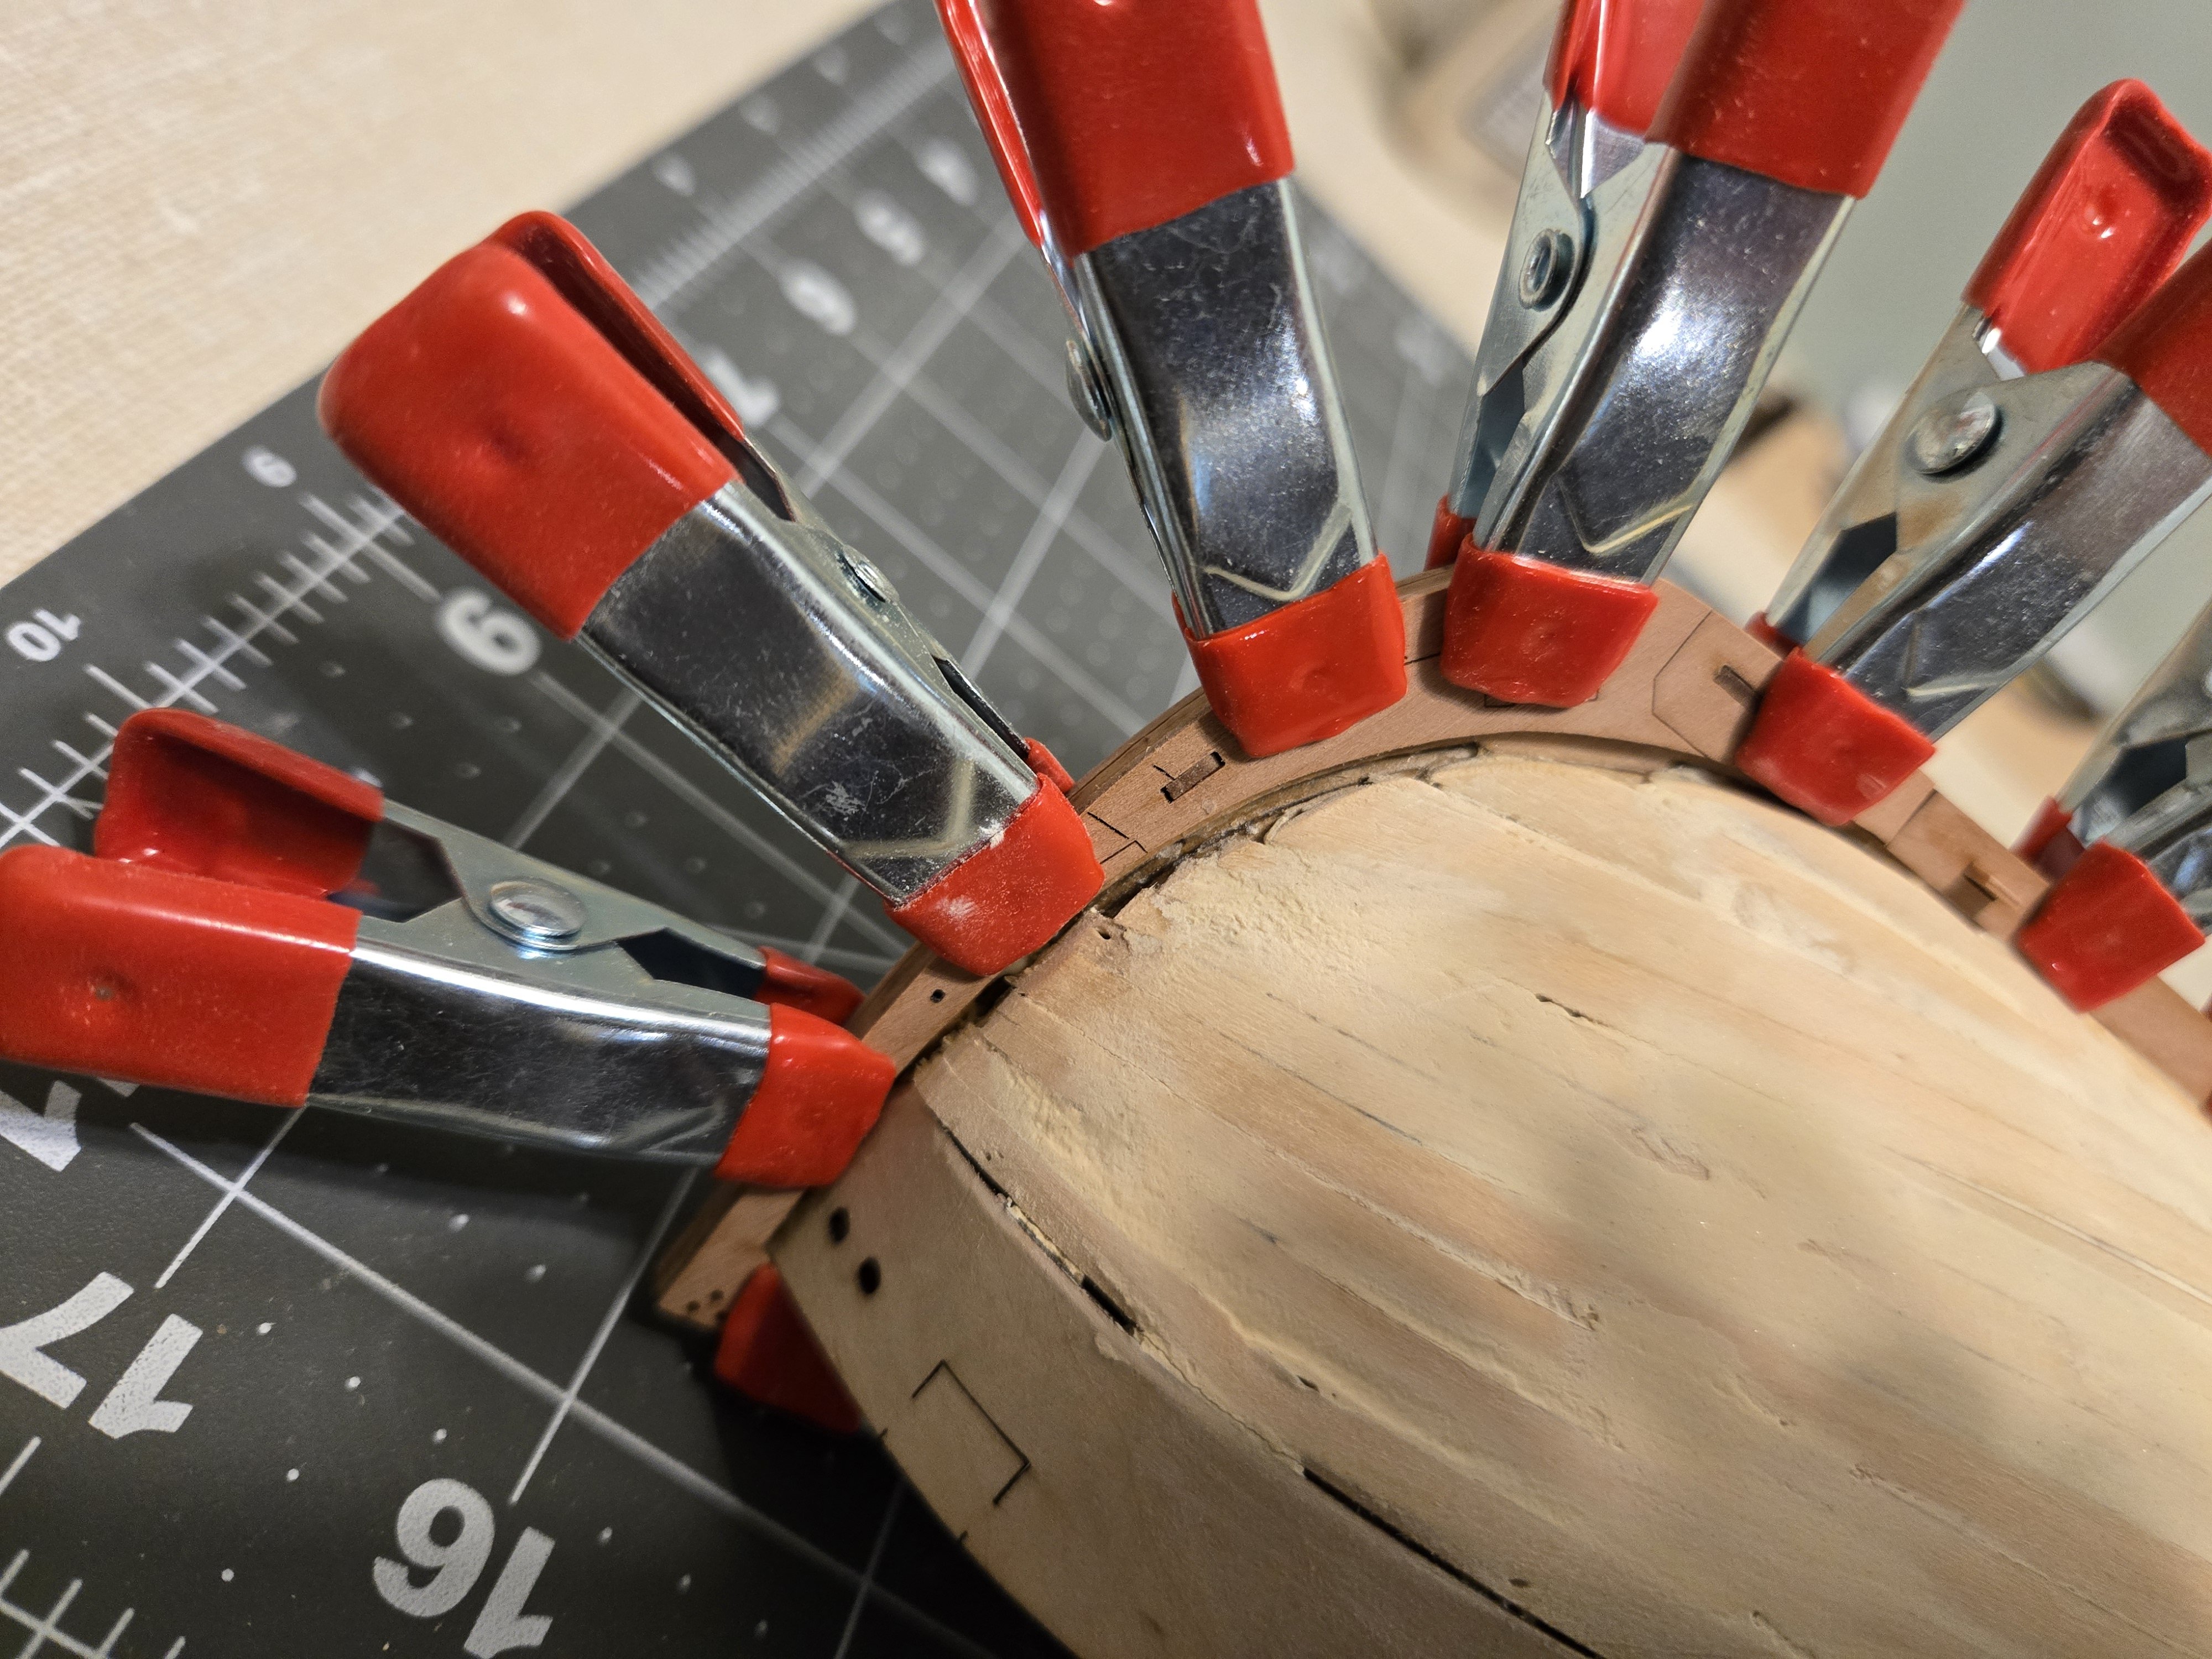
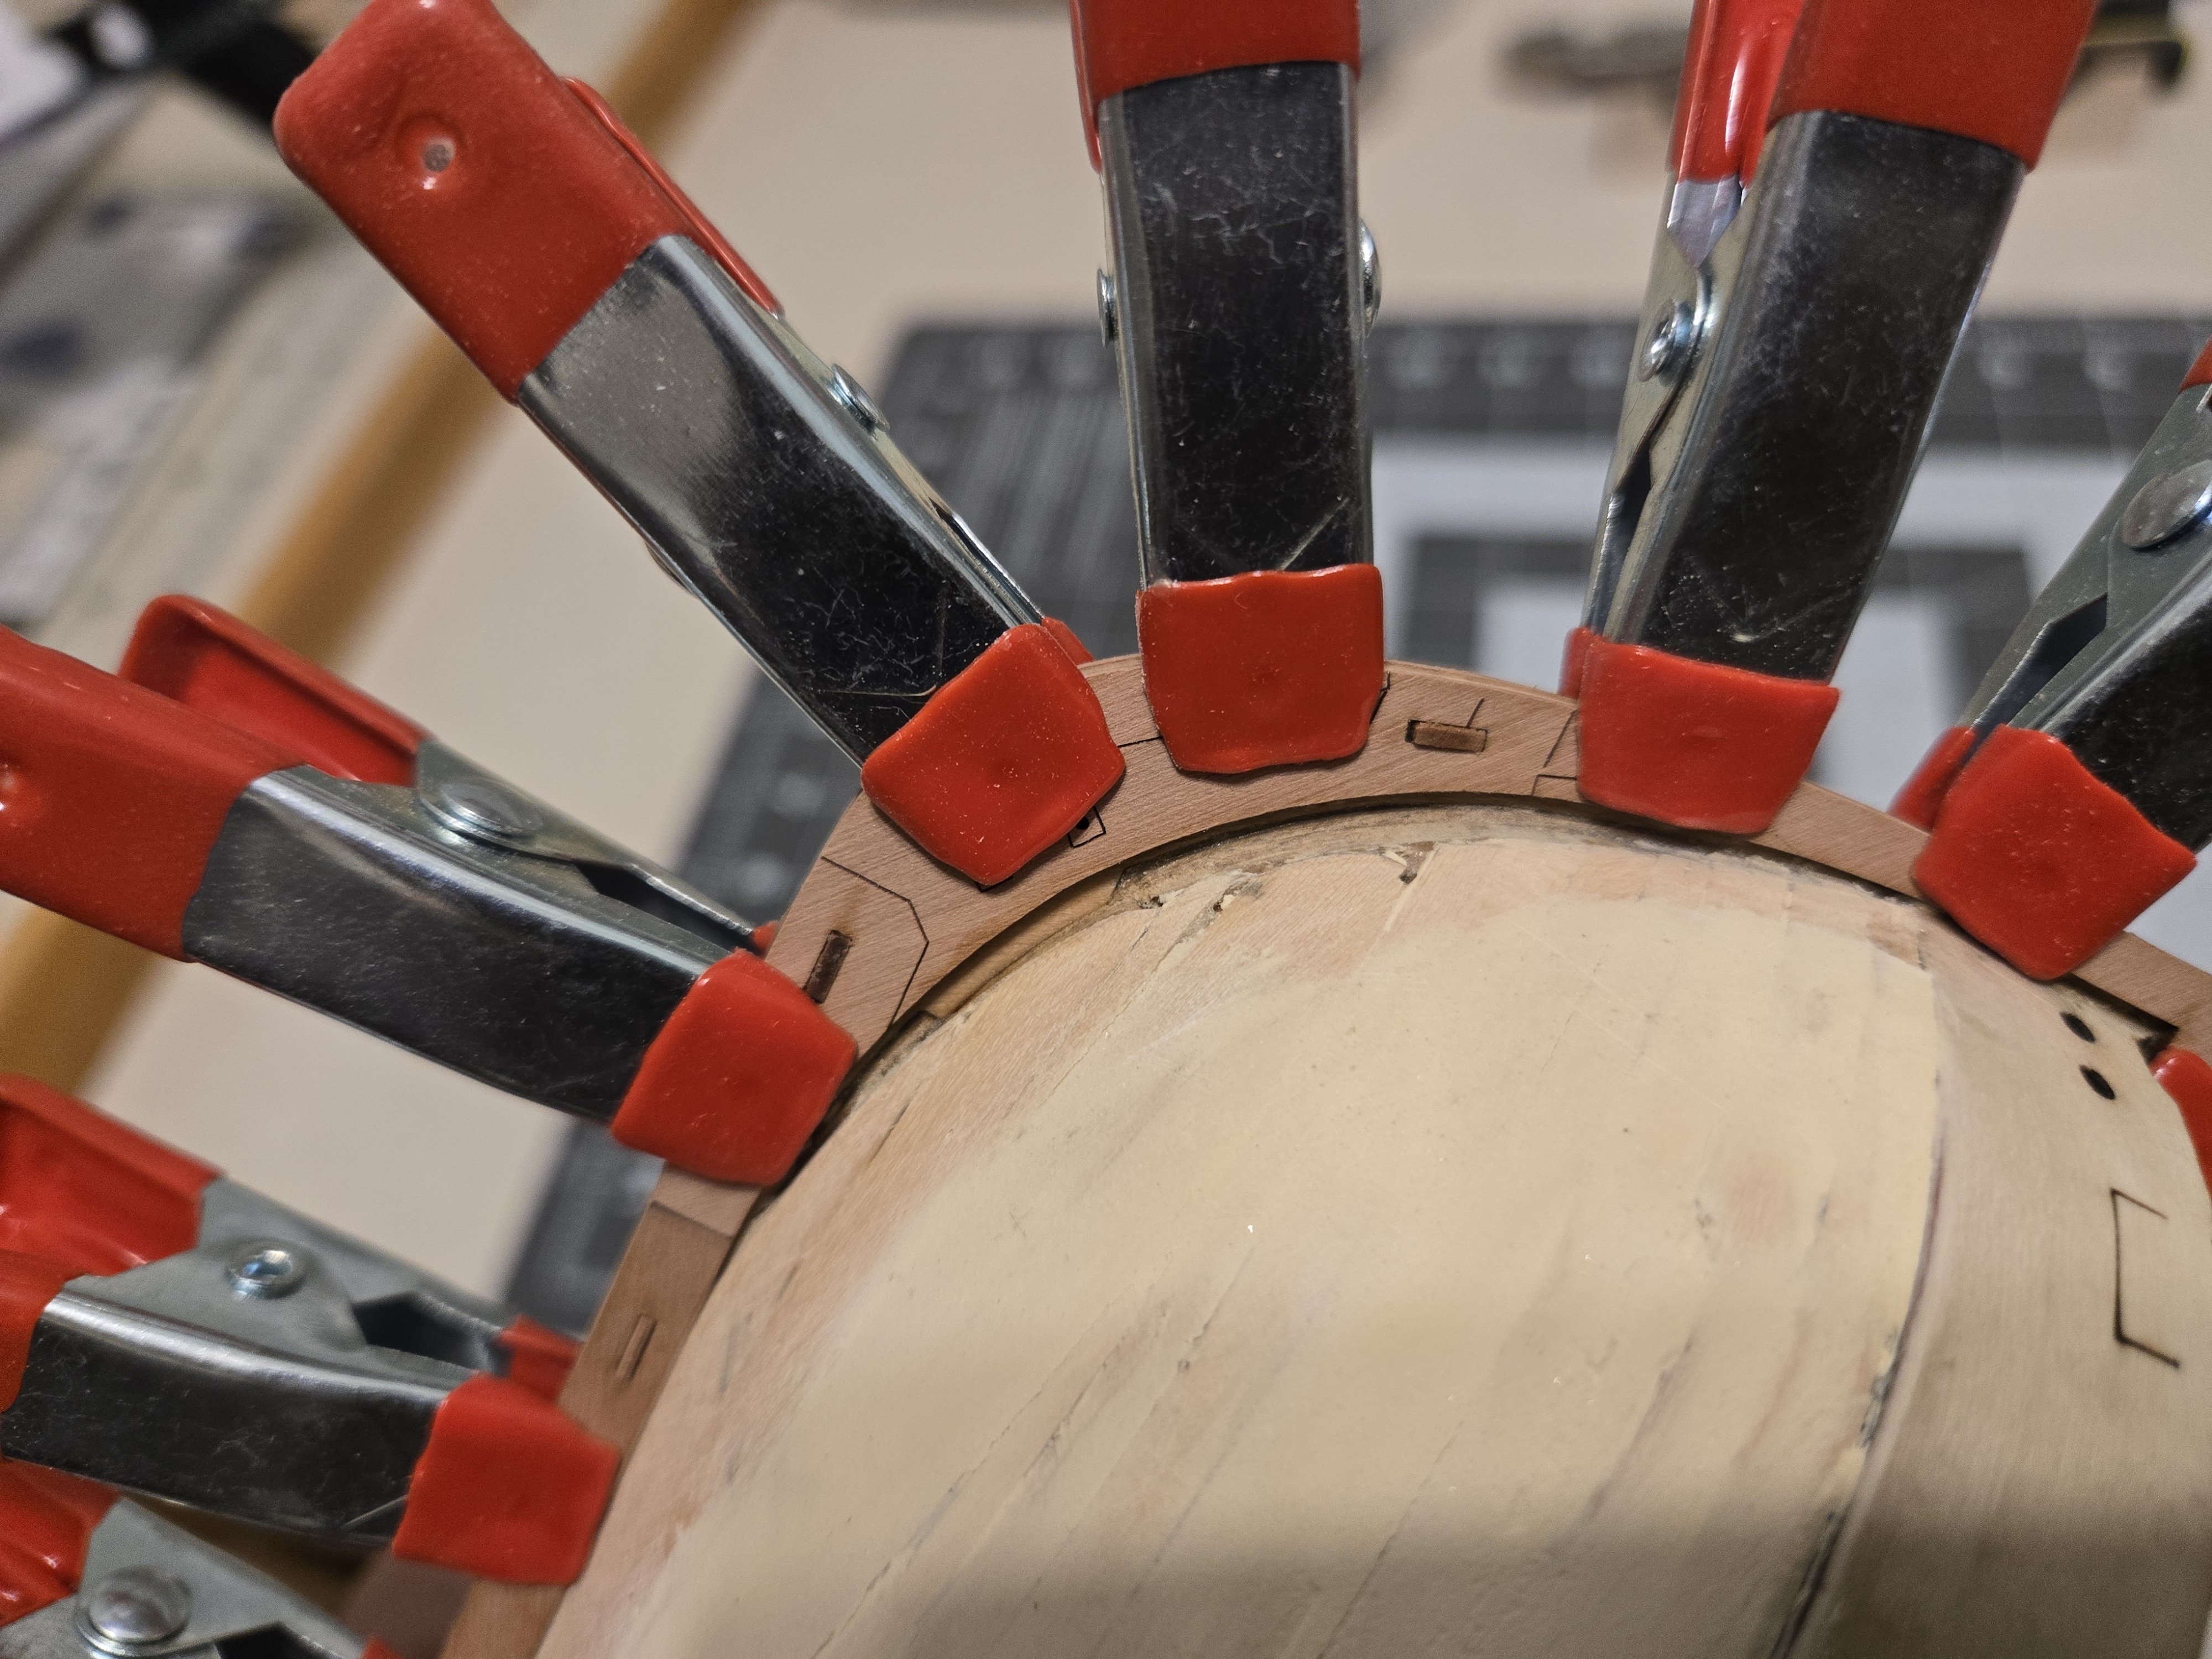
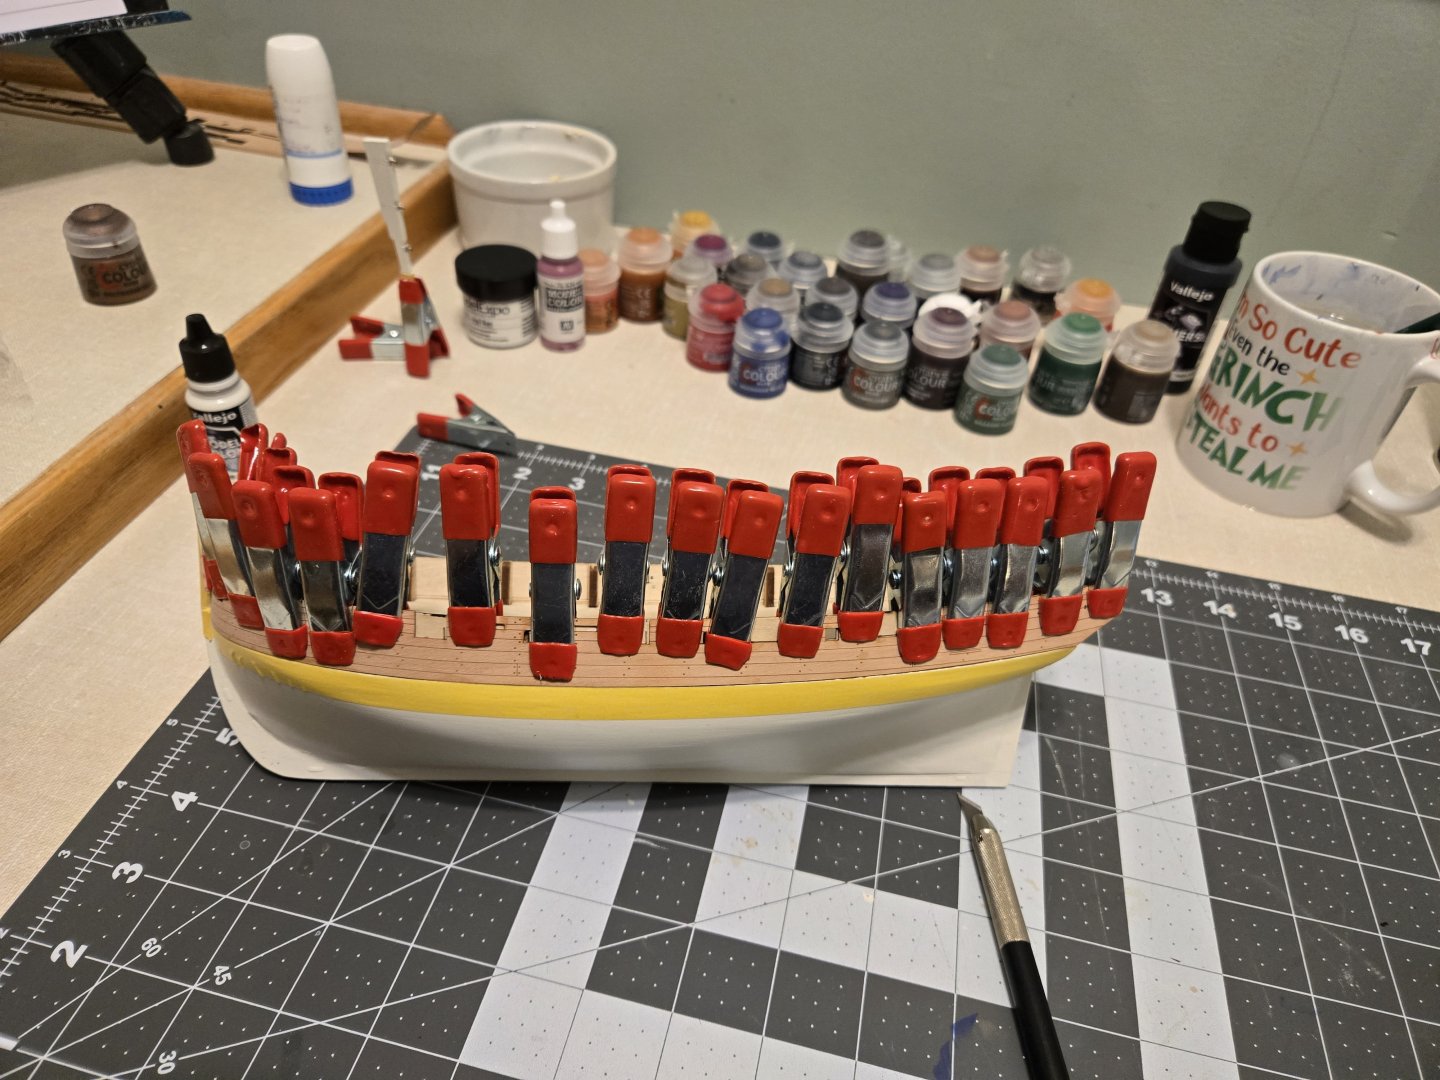
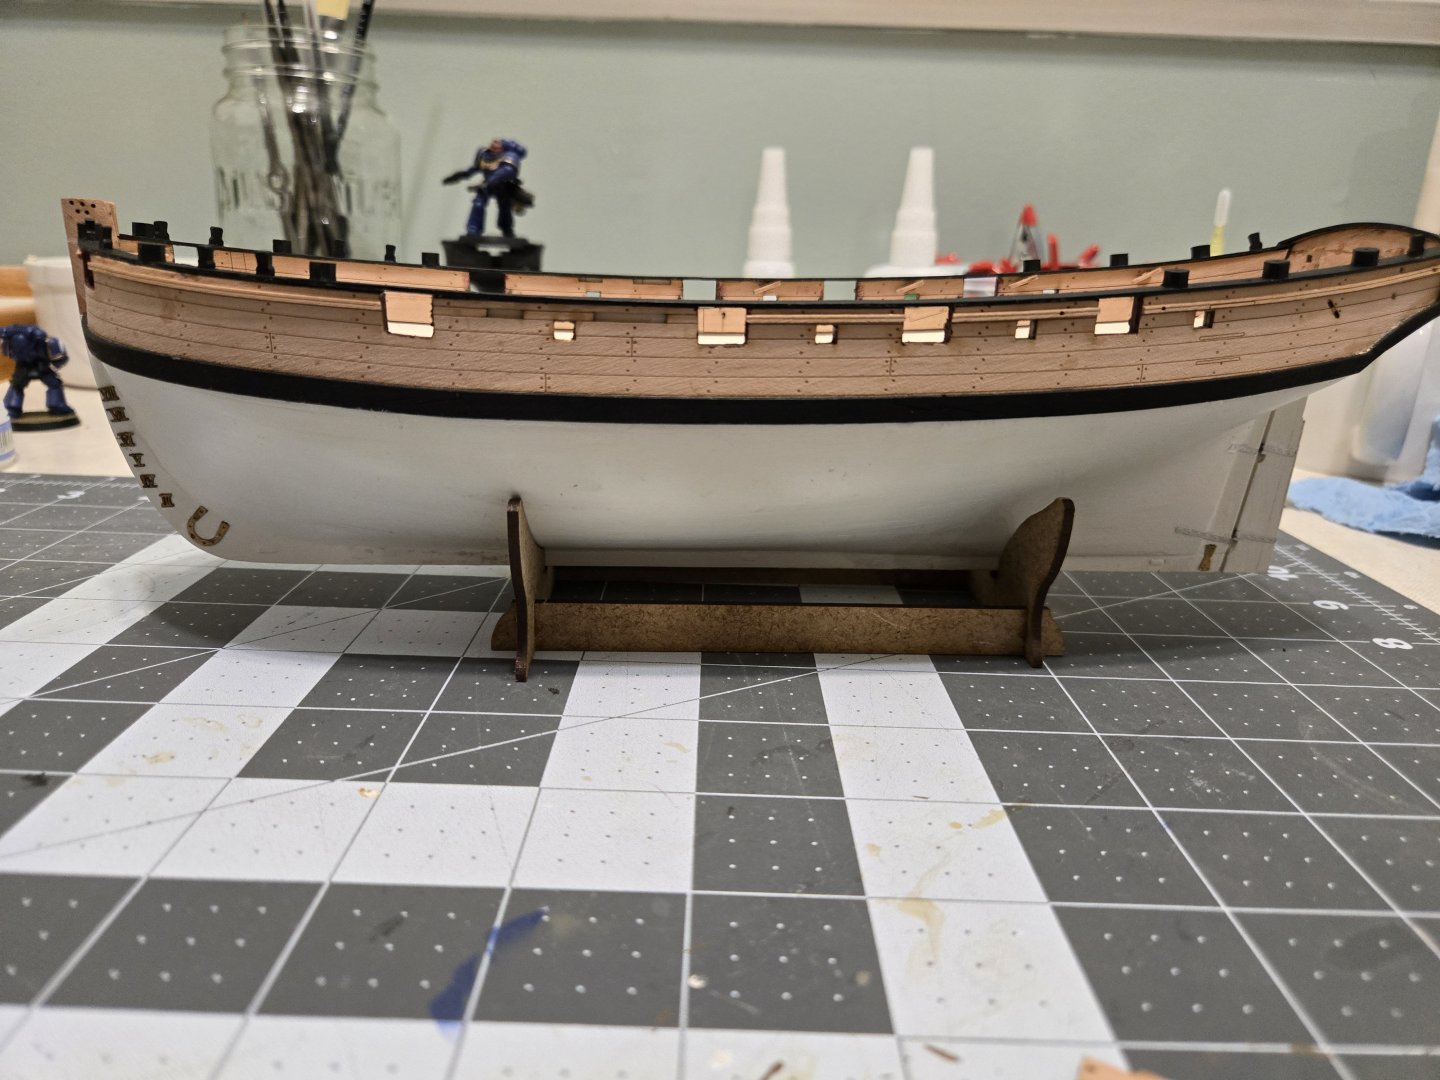
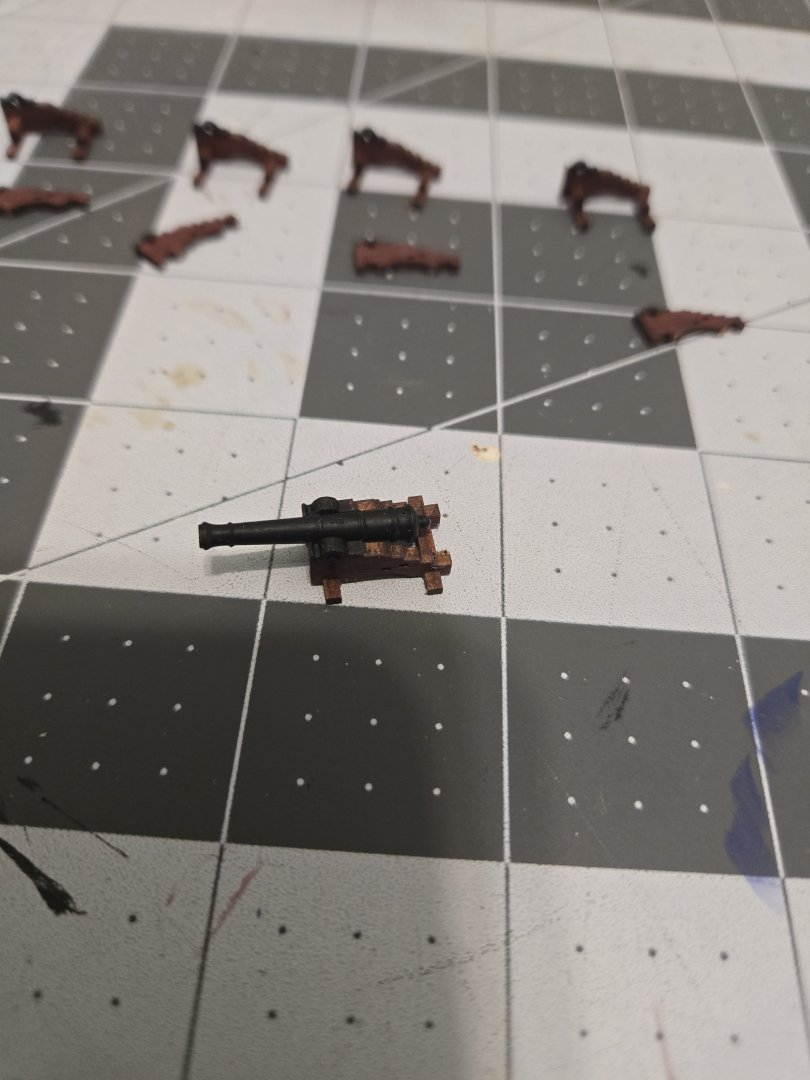
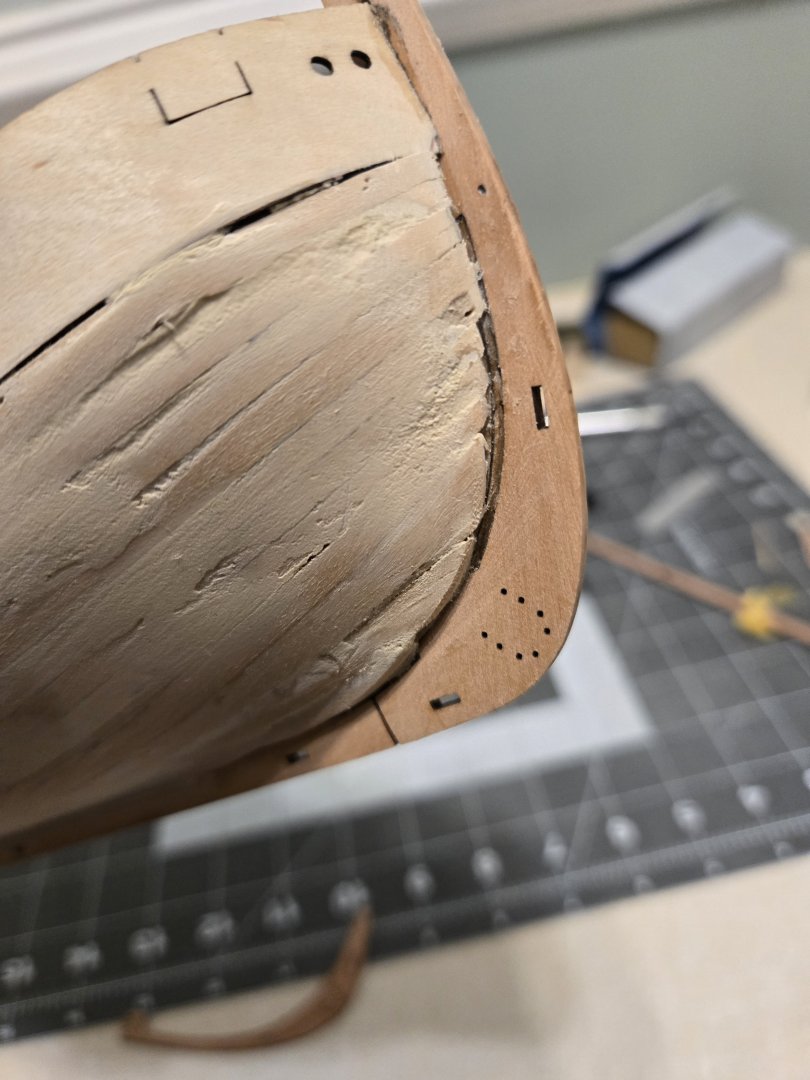
It has been a minute since I posted an update, life has been bust as happens. Progress has been getting made, just not documented super well. But here we go anyways! Getting the outer bullworks formed up. I realized I had made an error awhile back here (This will be a theme going forward. Much is being learned.), as the channel it slots into at the bow was absolutely filled with dried glue on the port side. I wasn't able to dig it out, to just had to settle for adjusting it as well as I could with a sanding block and clamping it. It did work out fairly good though! Bullworks on I moved on to doing a lot of trim work. The side trim on the boat went fairly well. Some fill was required at the stern to make everything line up nicely, but no big deal. Ignore the background space marines they're just chilling. Where I ran into problems was the gunwales. Whoo boy the gunwales were rough. I fought tooth and nail with them for a couple hours trying to get them to fit, and they just would not cooperate. If lined up at the curve on the bow they simply would not lay properly further towards the stern. I did not end up solving this problem as well as I would like and essentially cheated them flush on the outside at the bow and properly split them along the bullwork the rest of the way. This was a mistake I came to regret later when fitting the cateyes. To much of the gunwale was towards the inside of the ship for the cateye to lay against the bullwork as it should. I had to file away a LOT of material on the cateye so it would sit against the bullwork. Ended up breaking one and it was very painful to get it glued back together true. Lesson learned, it's never "good enough" no matter how long it takes do it right or it will come back to bite you. After that I moved on to sub assemblies. The gun carriages in particular were a lot of fun, and consumed a lot more time than I thought they would. Of special note, the cannons do have a top and bottom, which is something I did not realize until after everything was all put together and some weren't sitting right. The pegs that hold them to the carriages are not centered, they're offset and do go a particular way. Easy fix but a little trip up of note. I do really like the hull red model expo paint I used for them as well. And here she sits at the moment, quite a few sub assemblies put together, a few still needing paint touchups, all of it dry fitted here nothing but the cateyes glued yet. One thing of note, is I picked up this photoetch burnishing fluid from AK, thinking it would be a great option for all the little eyebolts and such that need to be painted black. Either I am doing something wrong or it is a terrible product. It blackens everything nicely, very perfect, but it flakes off as soon as you touch the part really. A lot of brass needs to be touched up with paint consequently. If anyone has any insight into what I might be doing wrong with the burnishing fluid I'd appreciate it!


- 20 replies
-
- 5
-
-
- Sherbourne
- Vanguard Models
- (and 1 more)
-
DB789 reacted to a post in a topic:
HM Cutter Sherbourne 1763 by Pinenuts - Vanguard Models - 1/64
-
DB789 reacted to a post in a topic:
HM Cutter Sherbourne 1763 by Pinenuts - Vanguard Models - 1/64
-
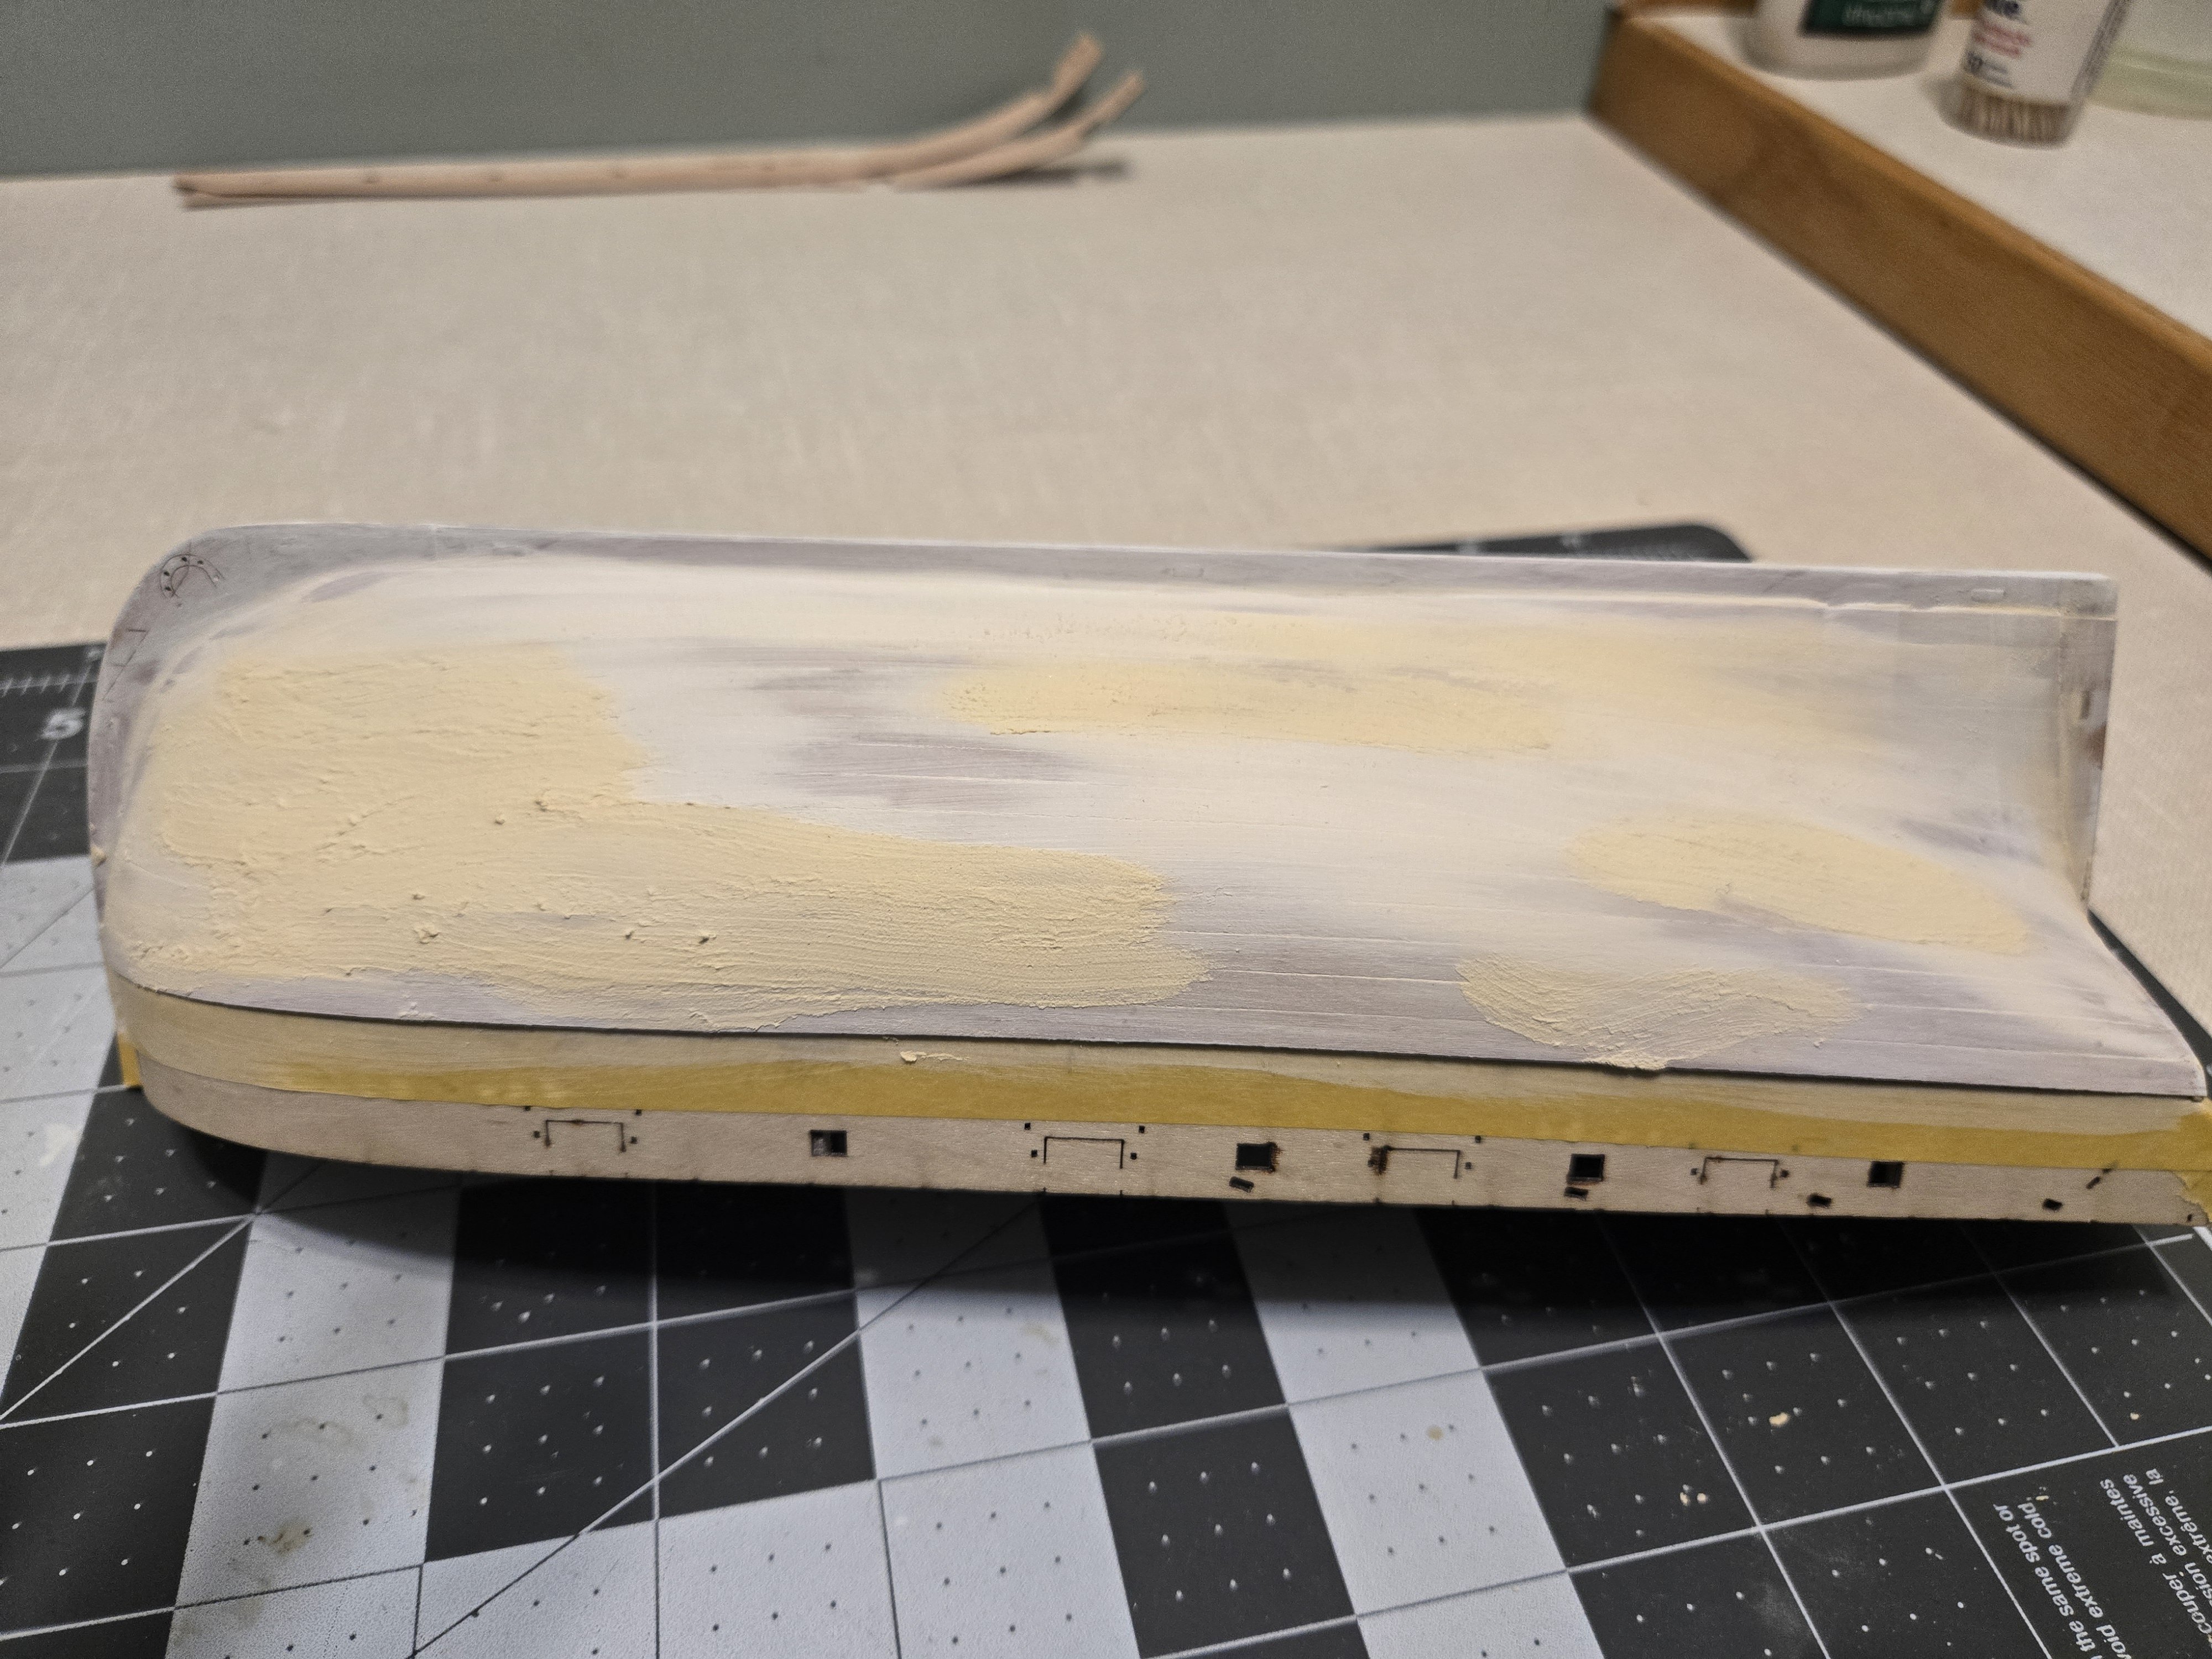
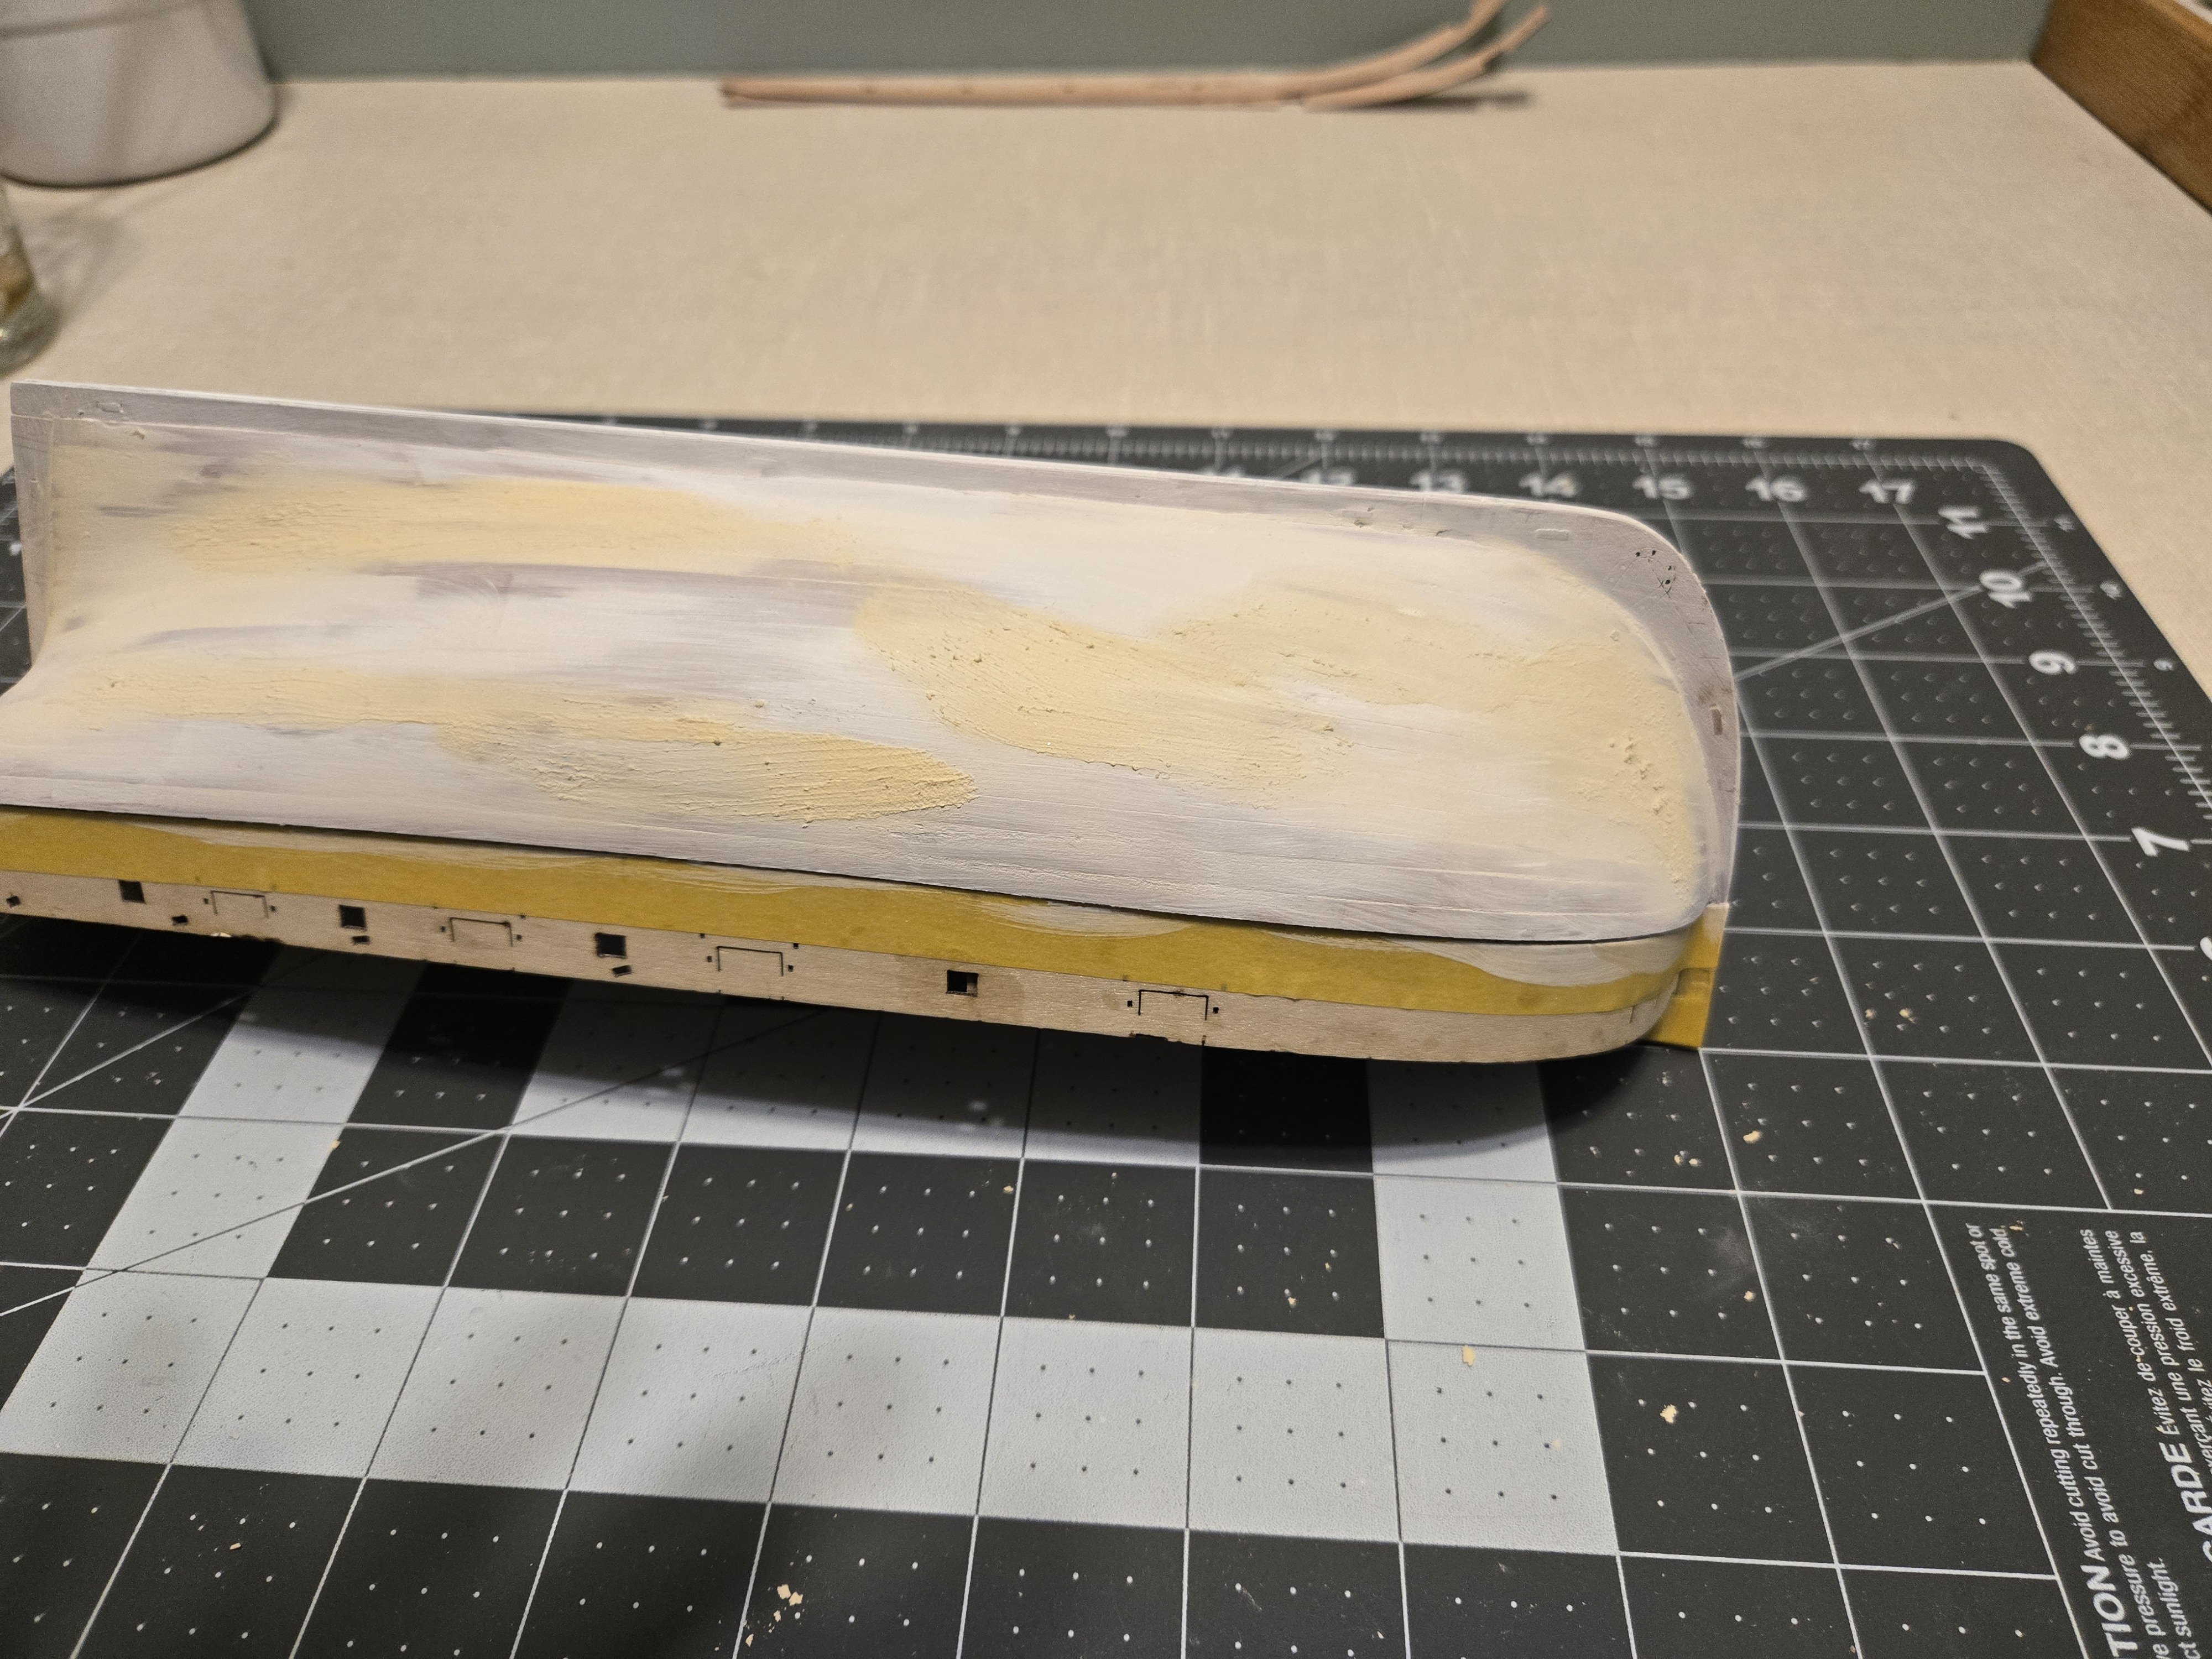
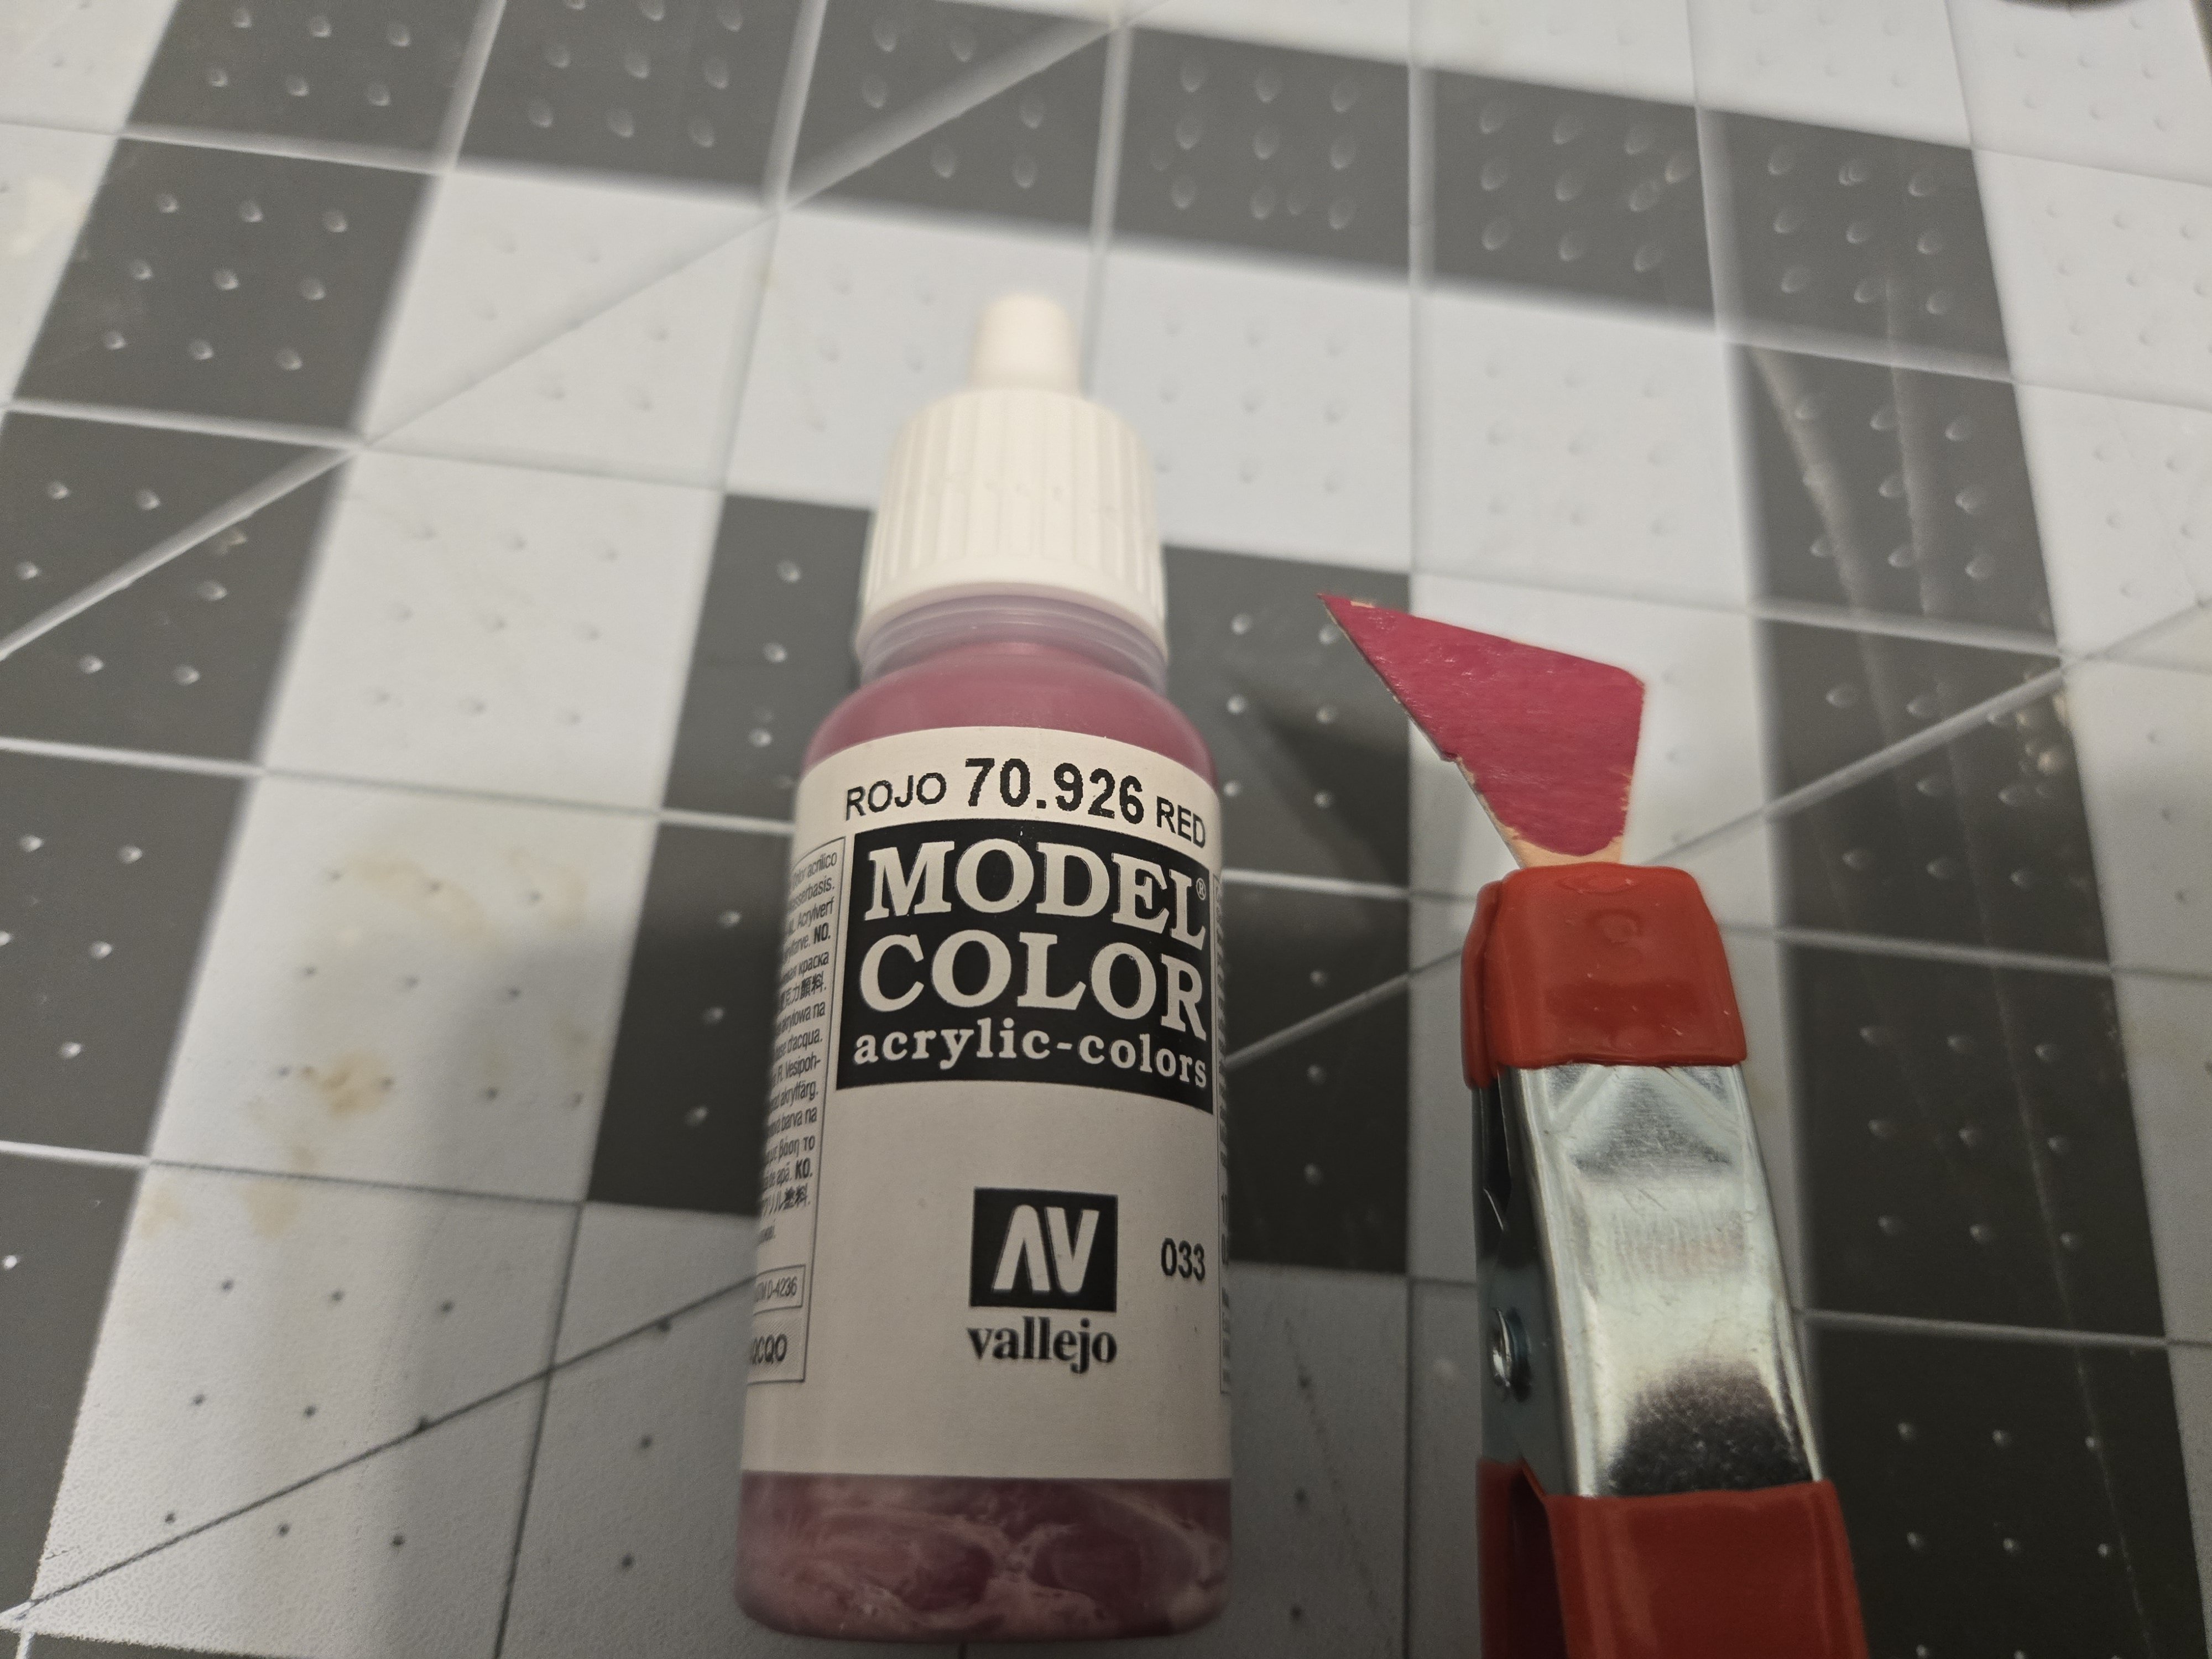
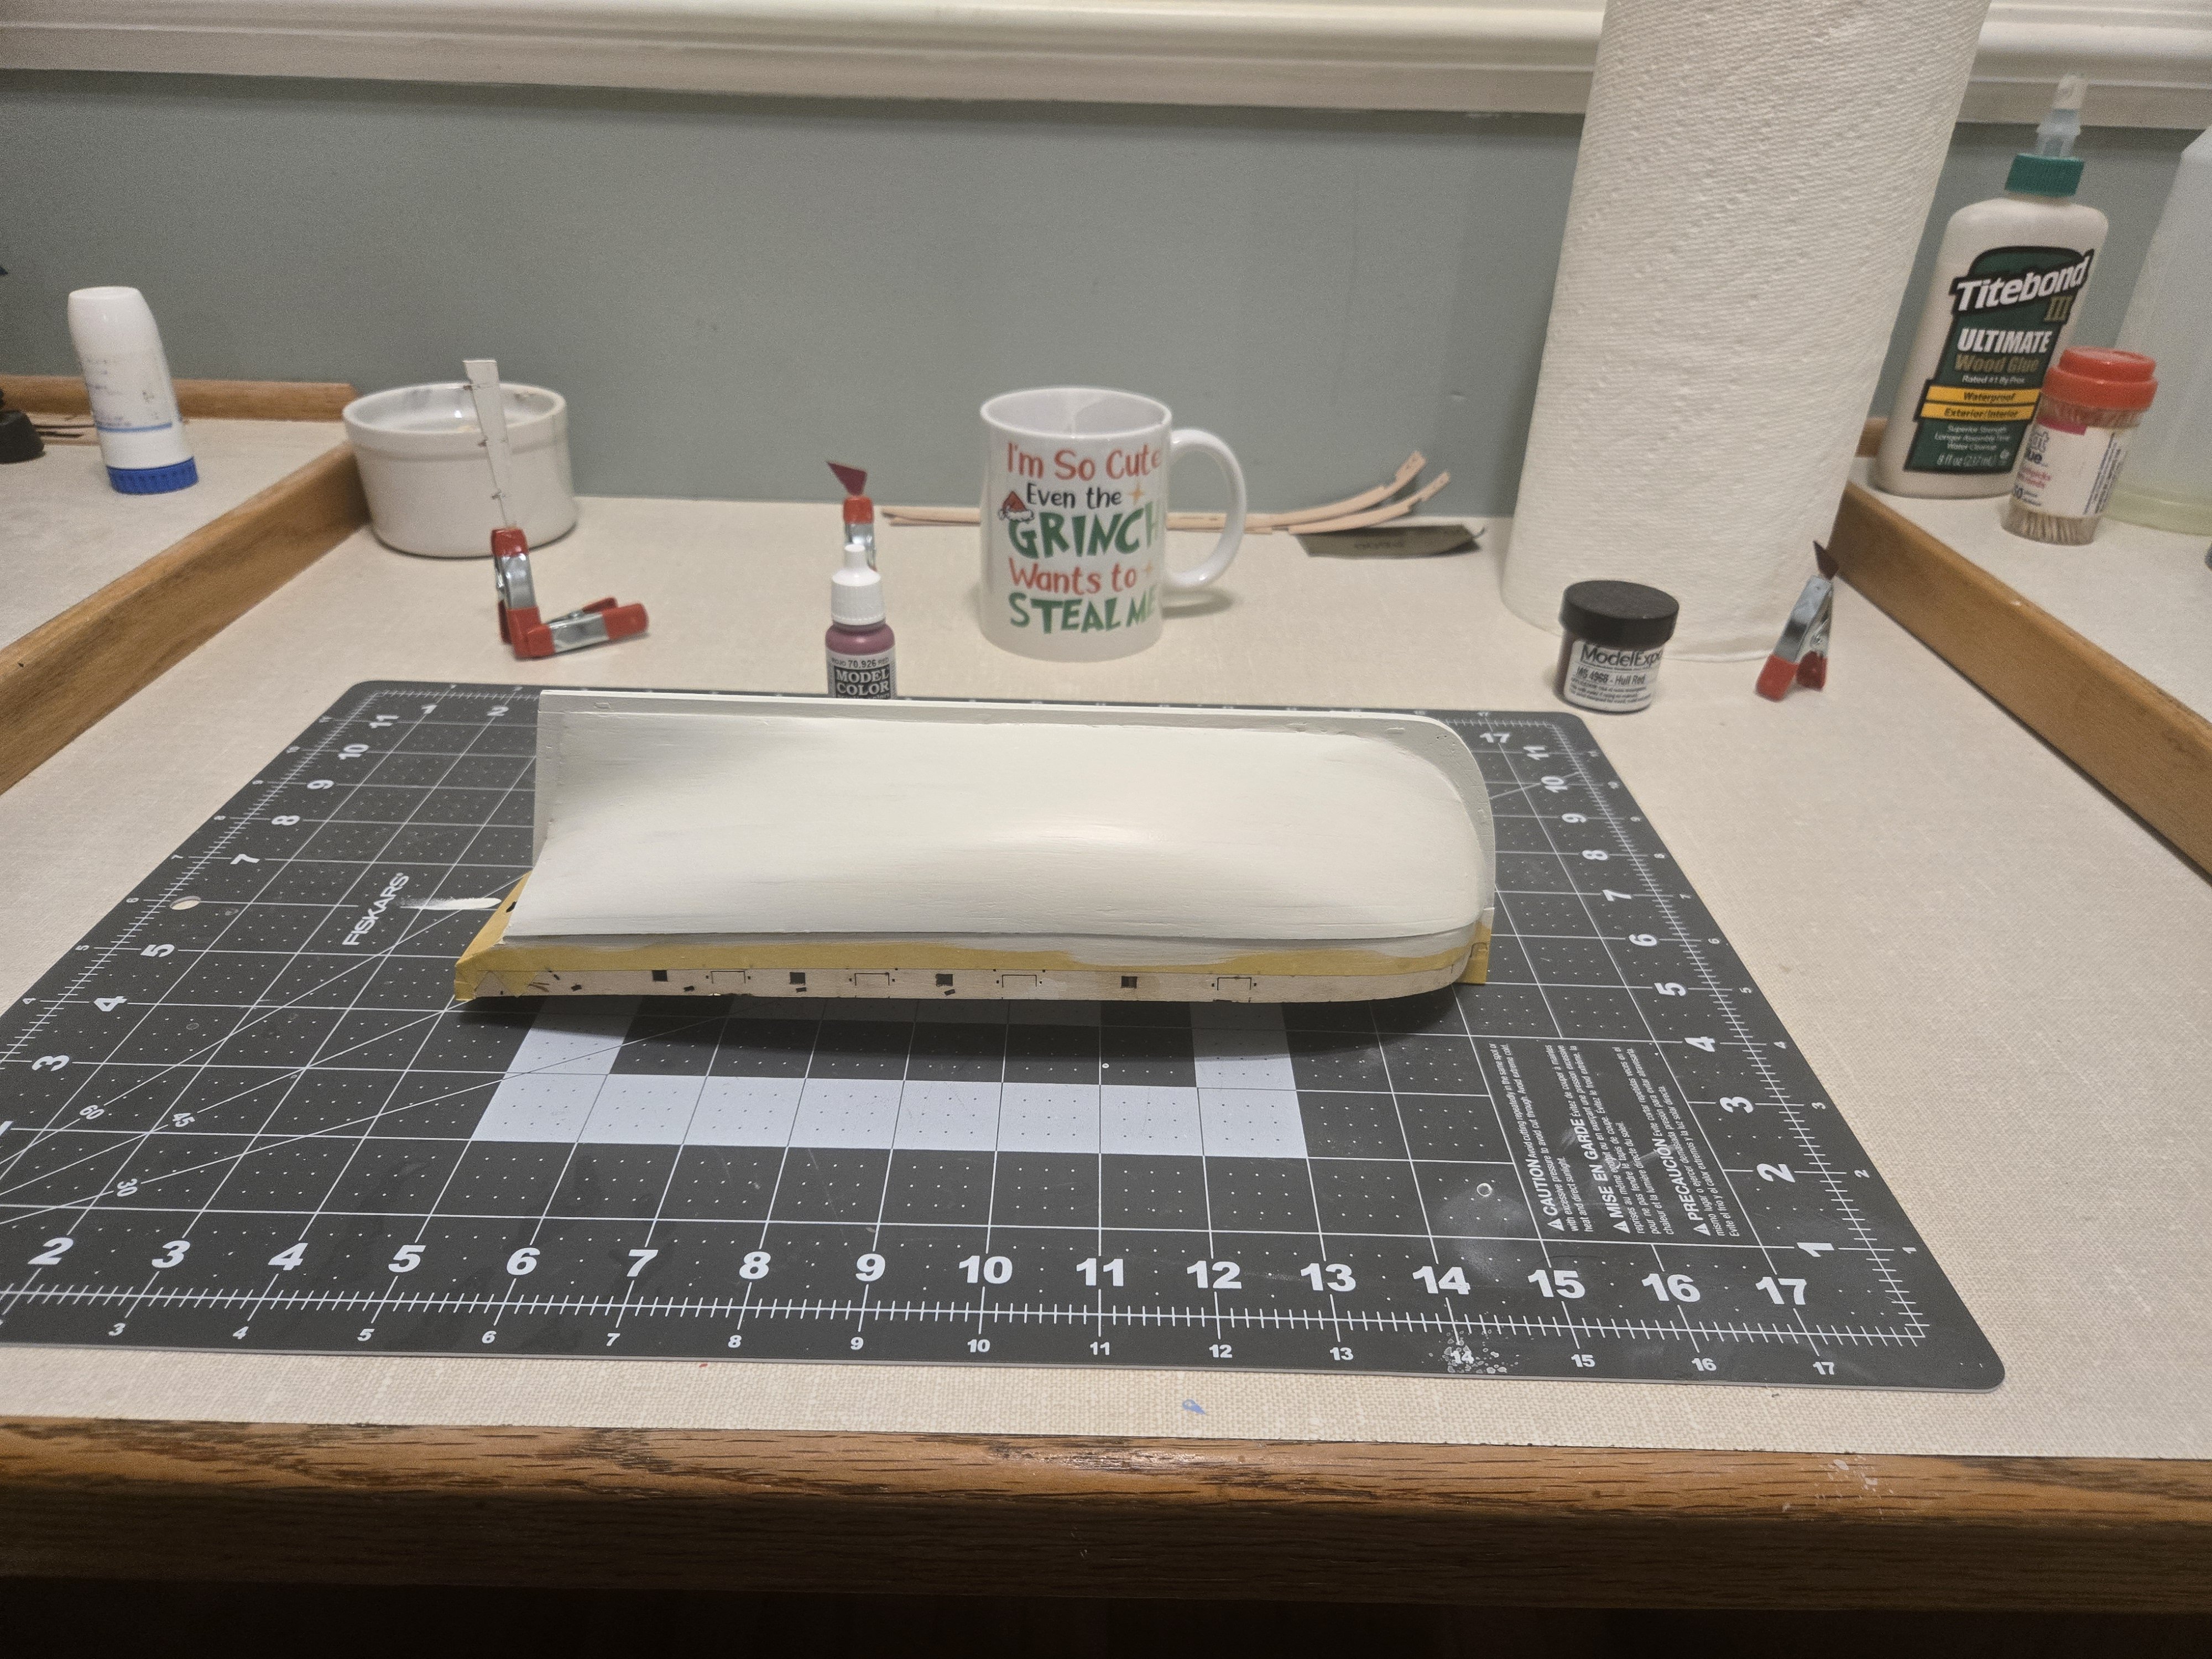
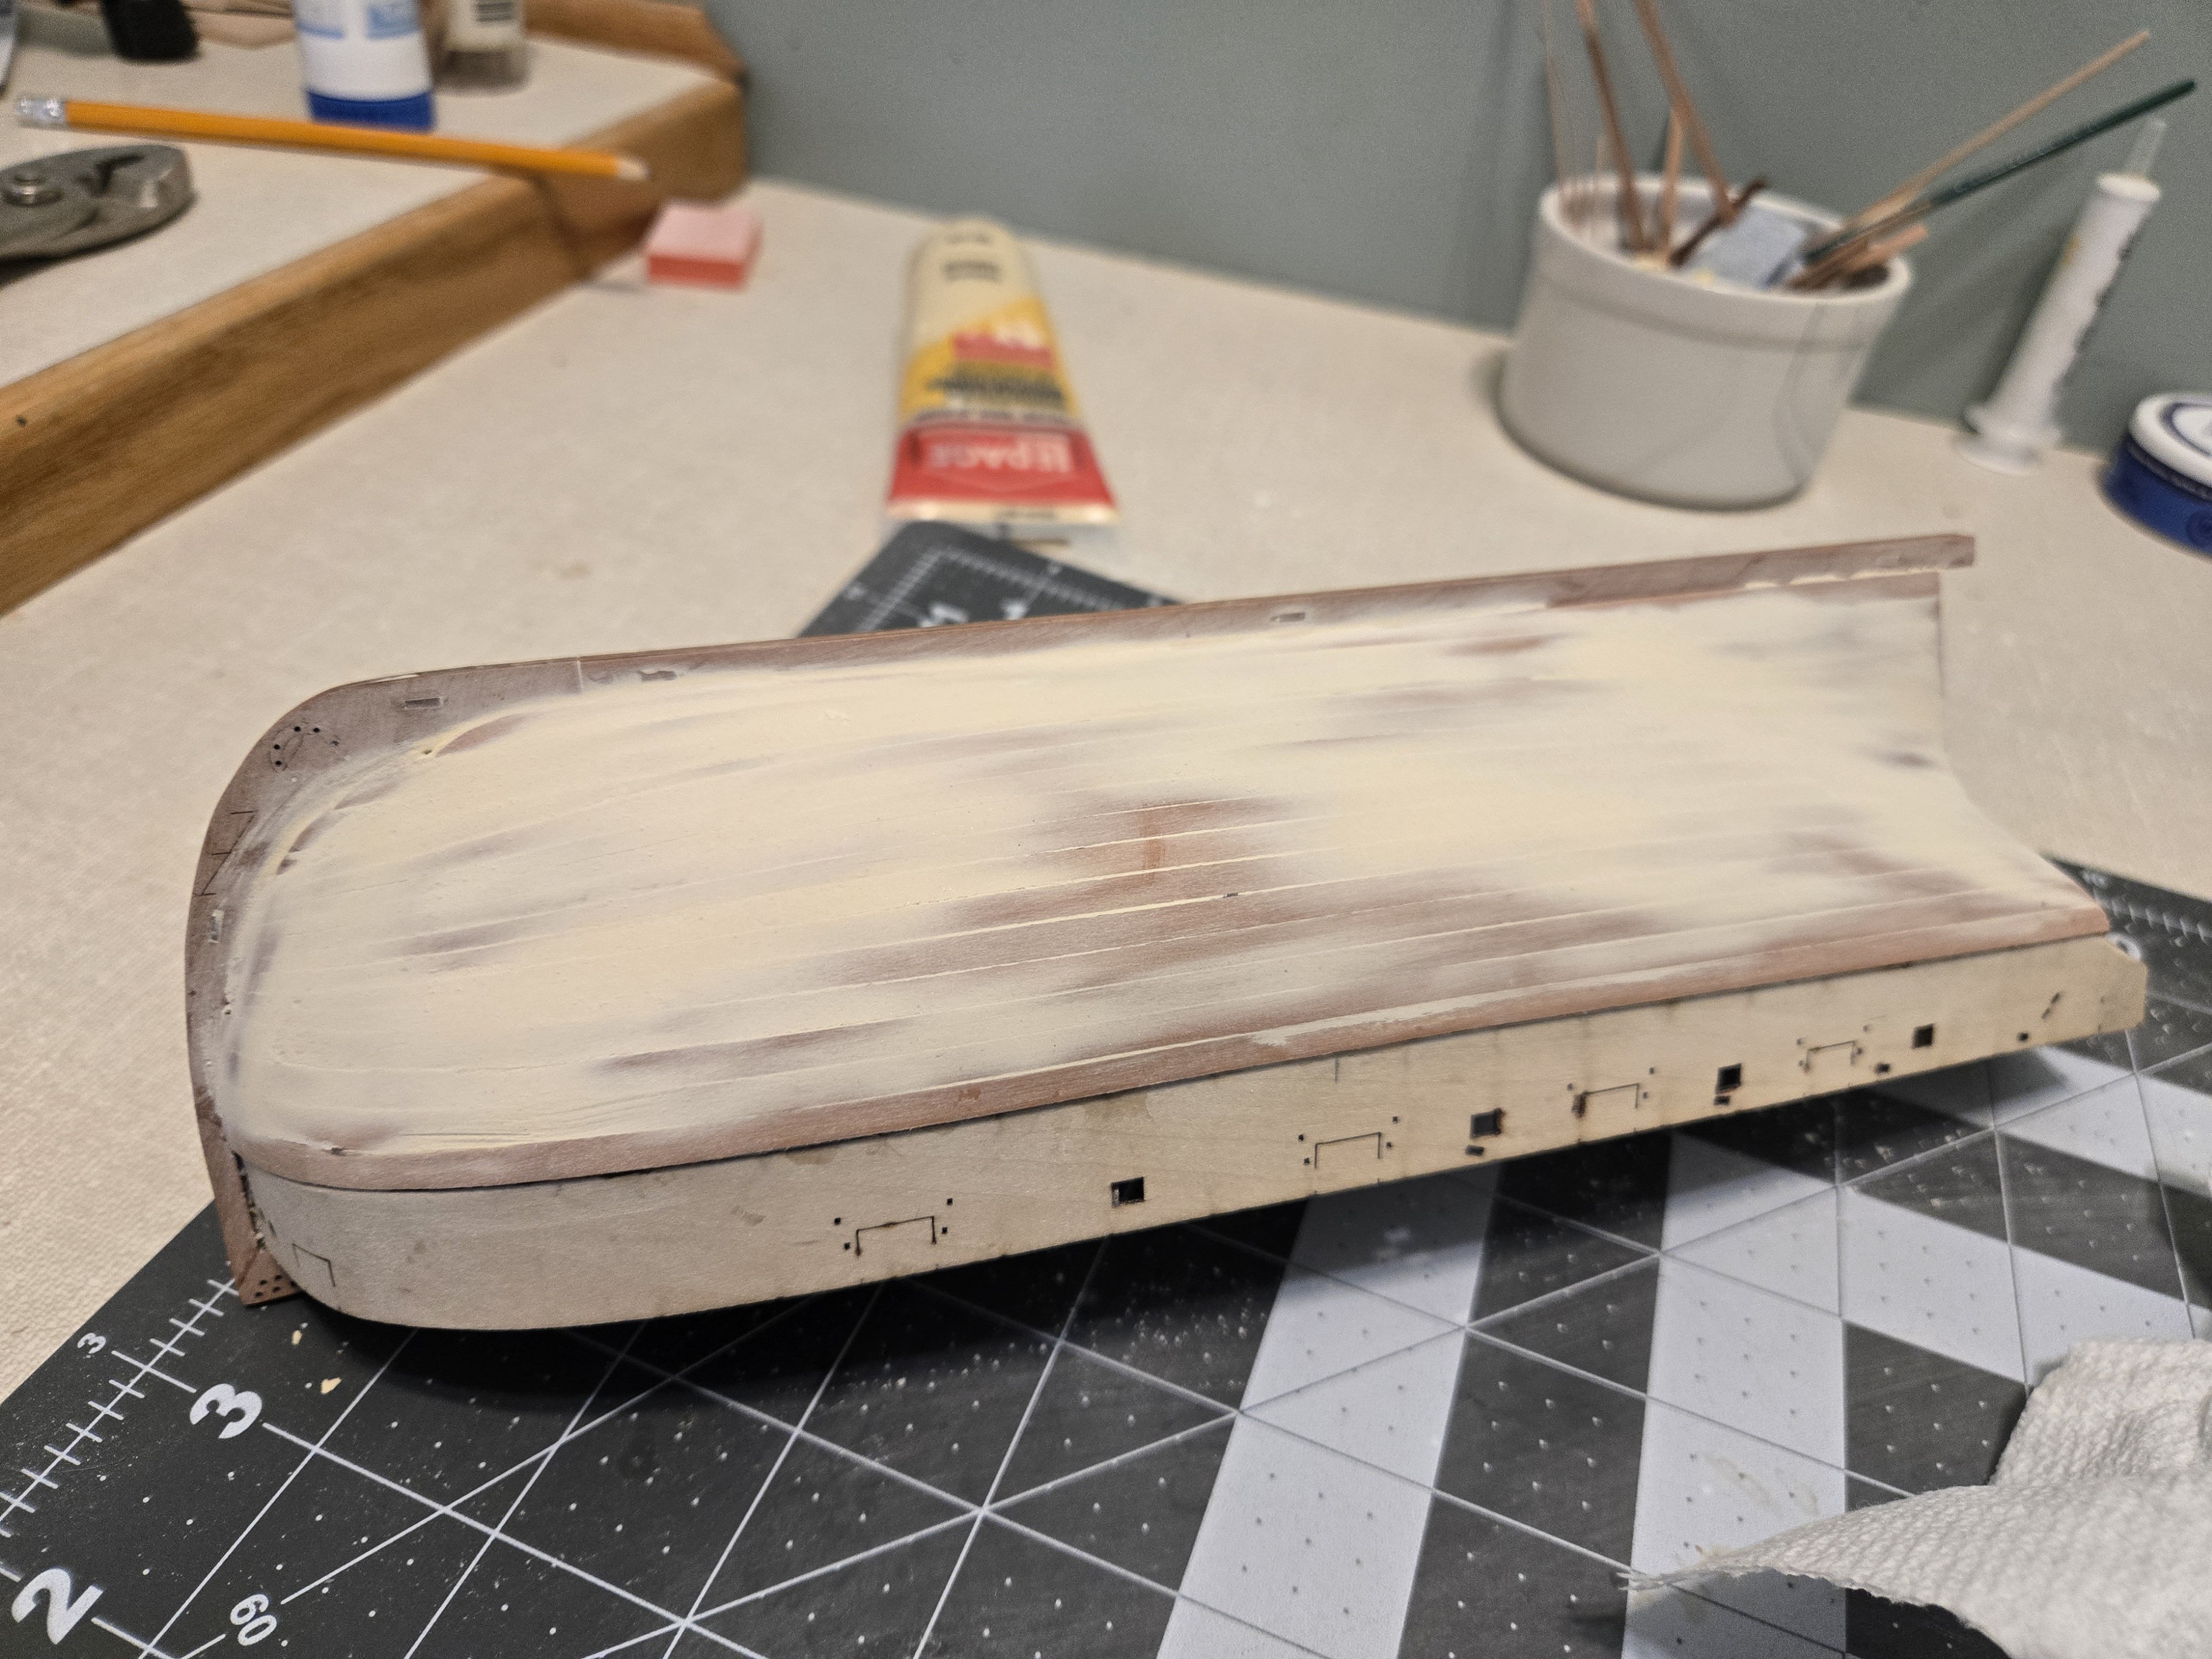
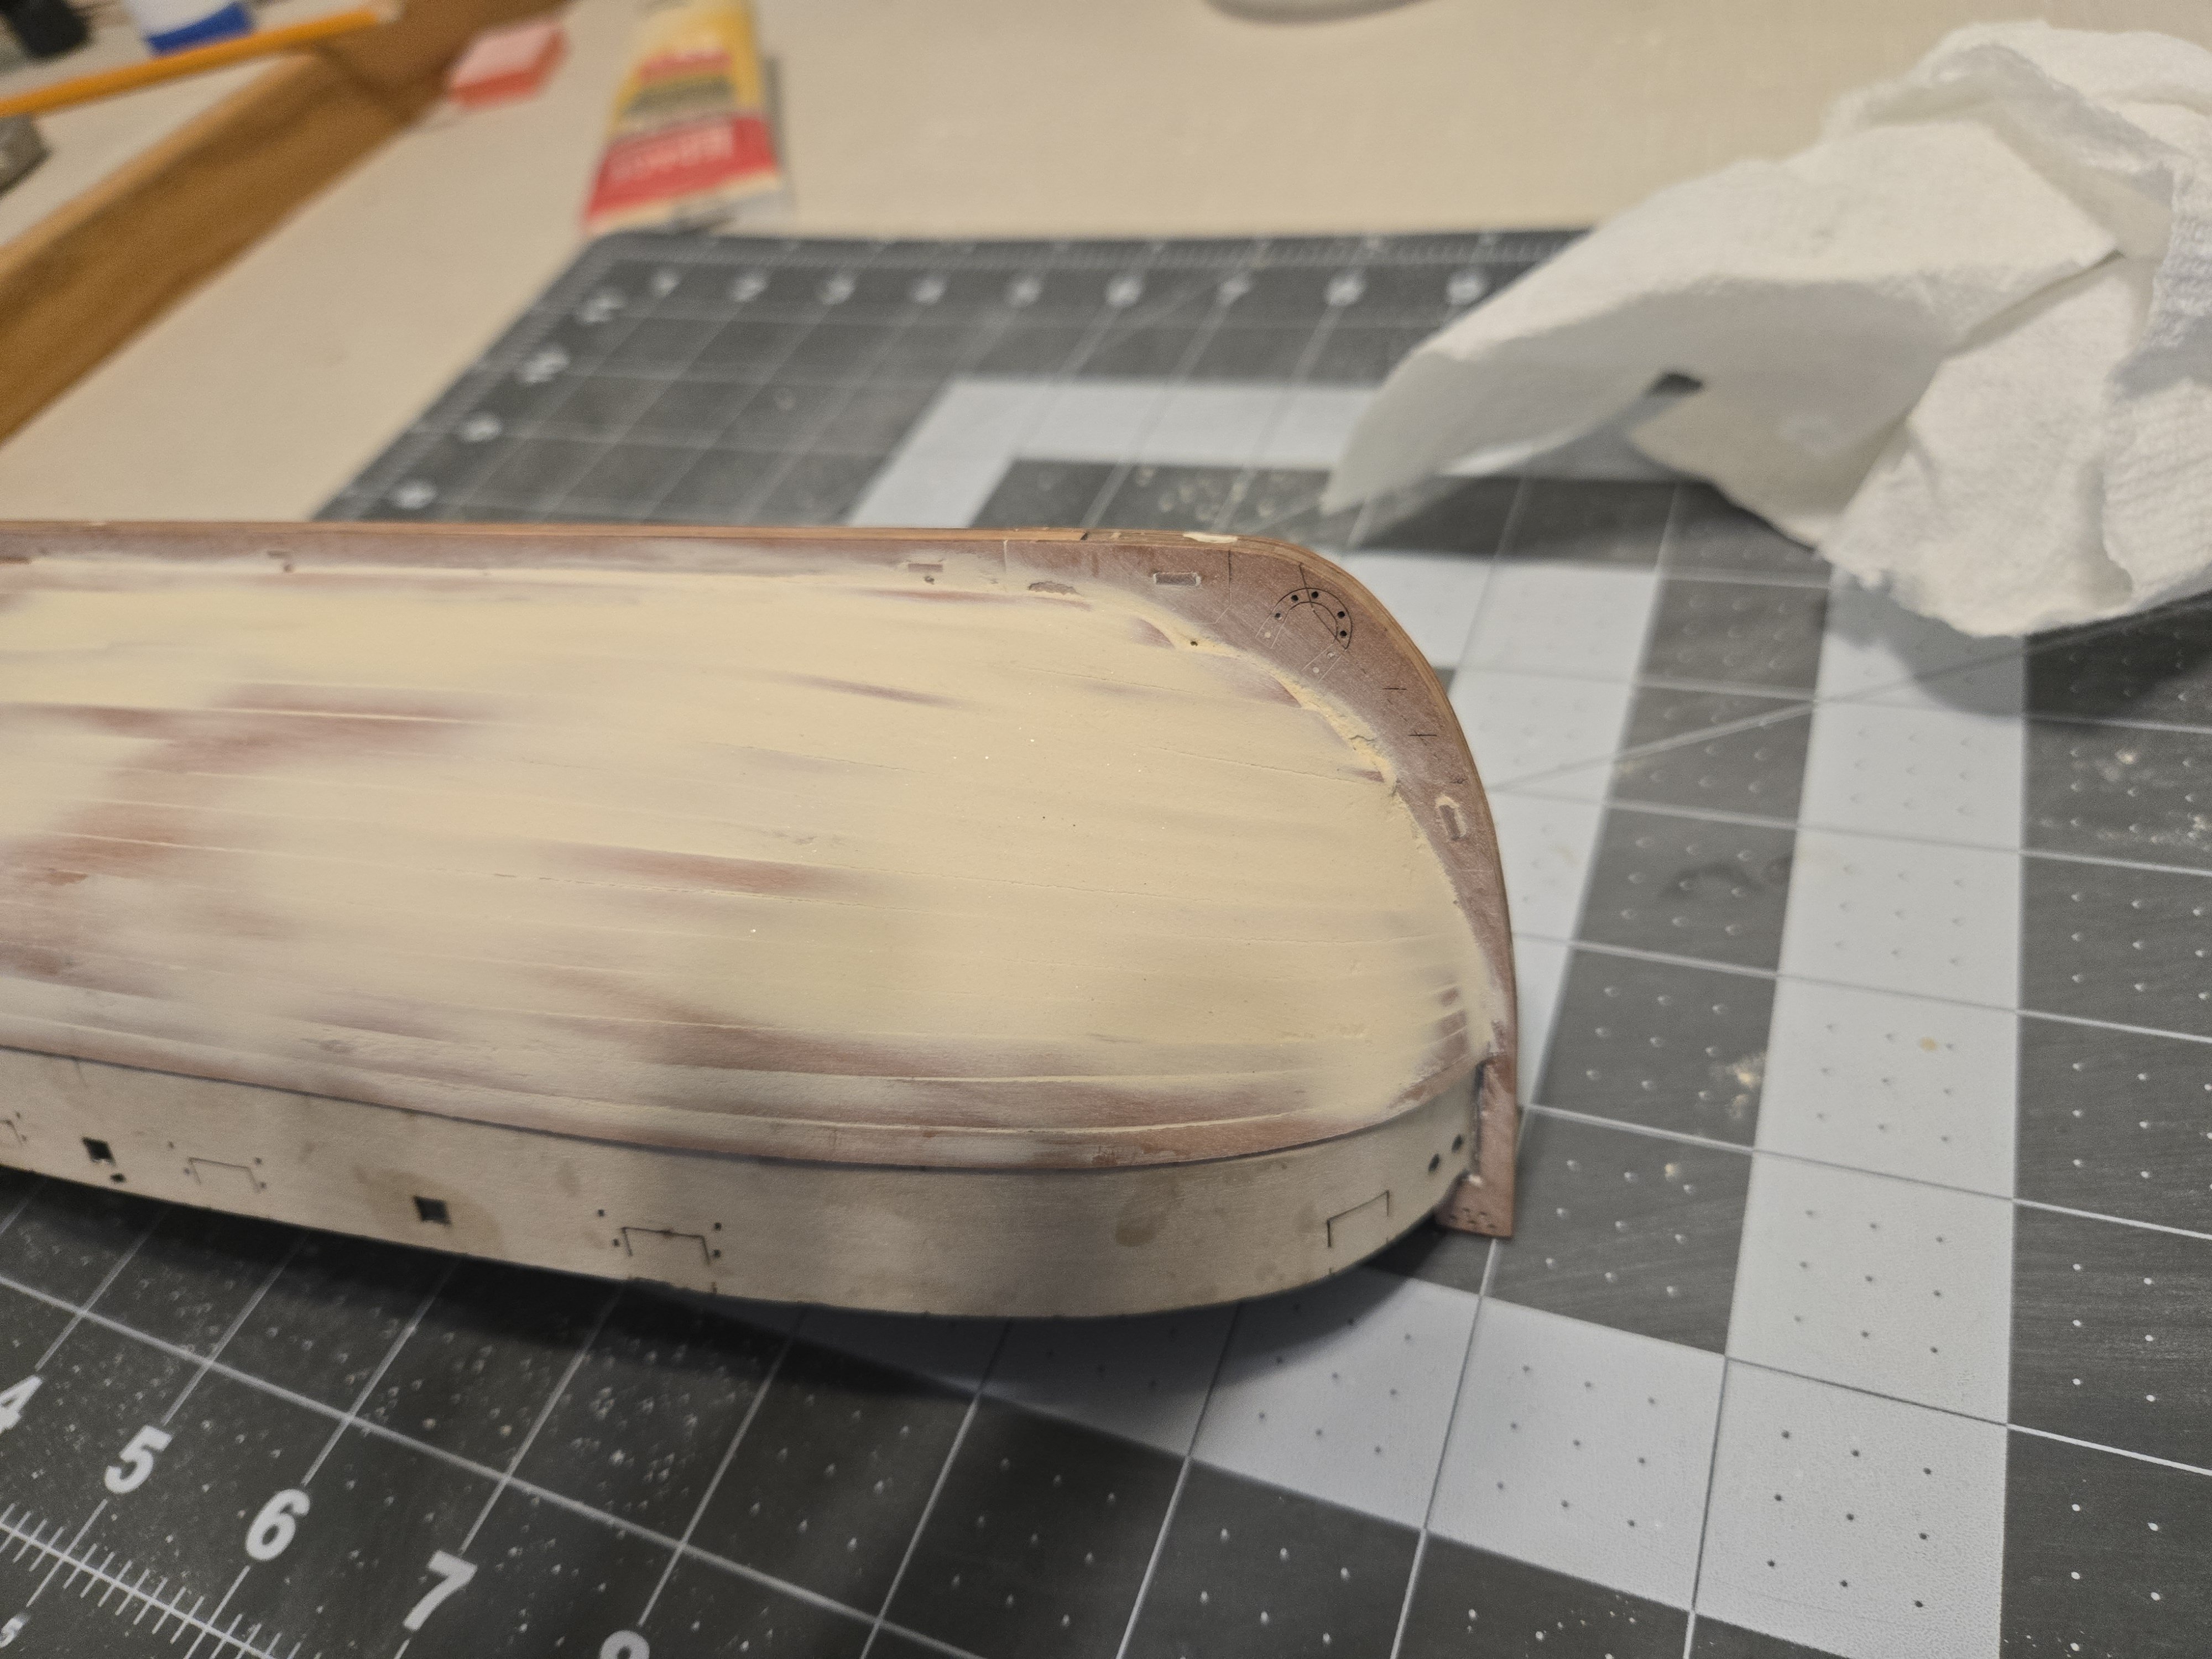
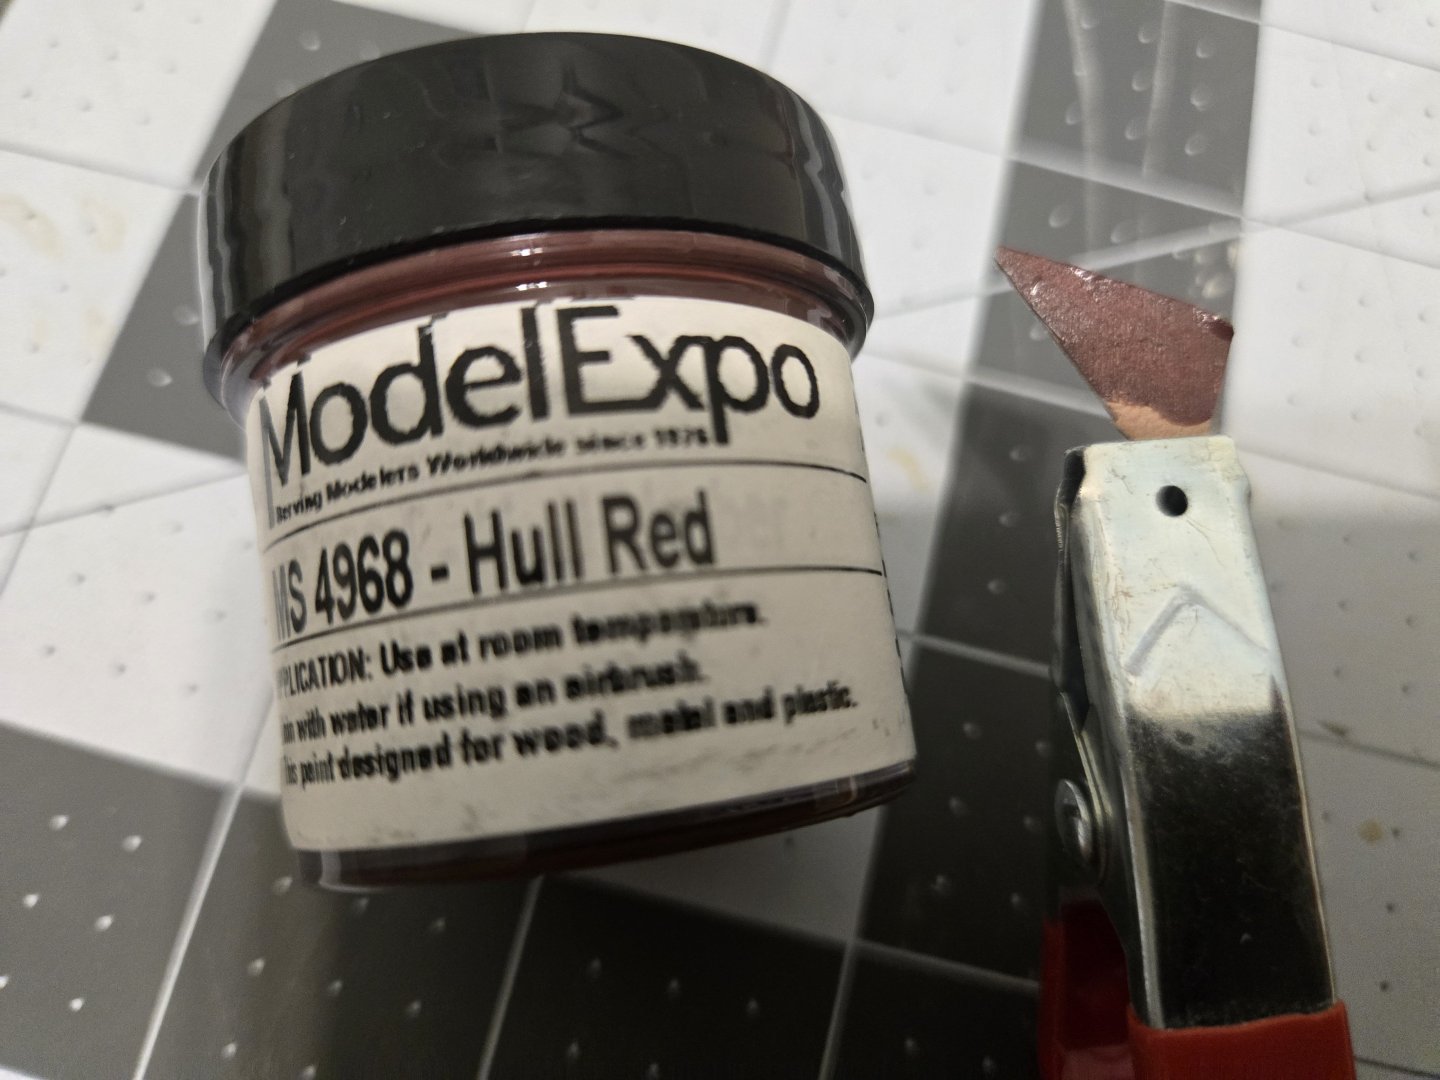
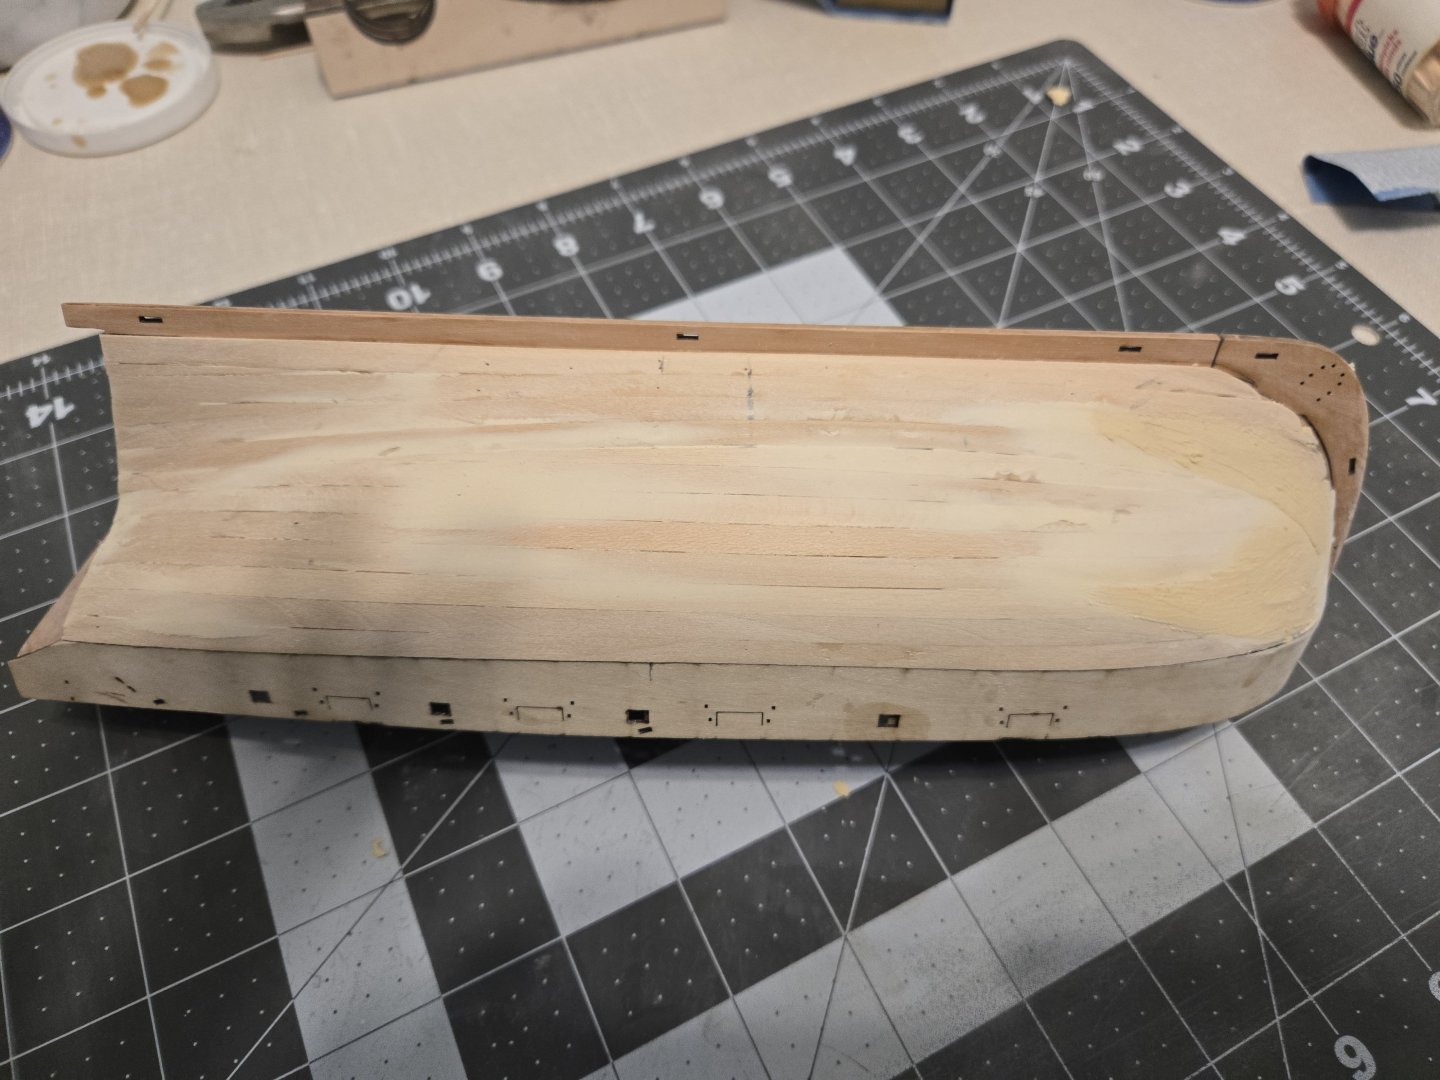
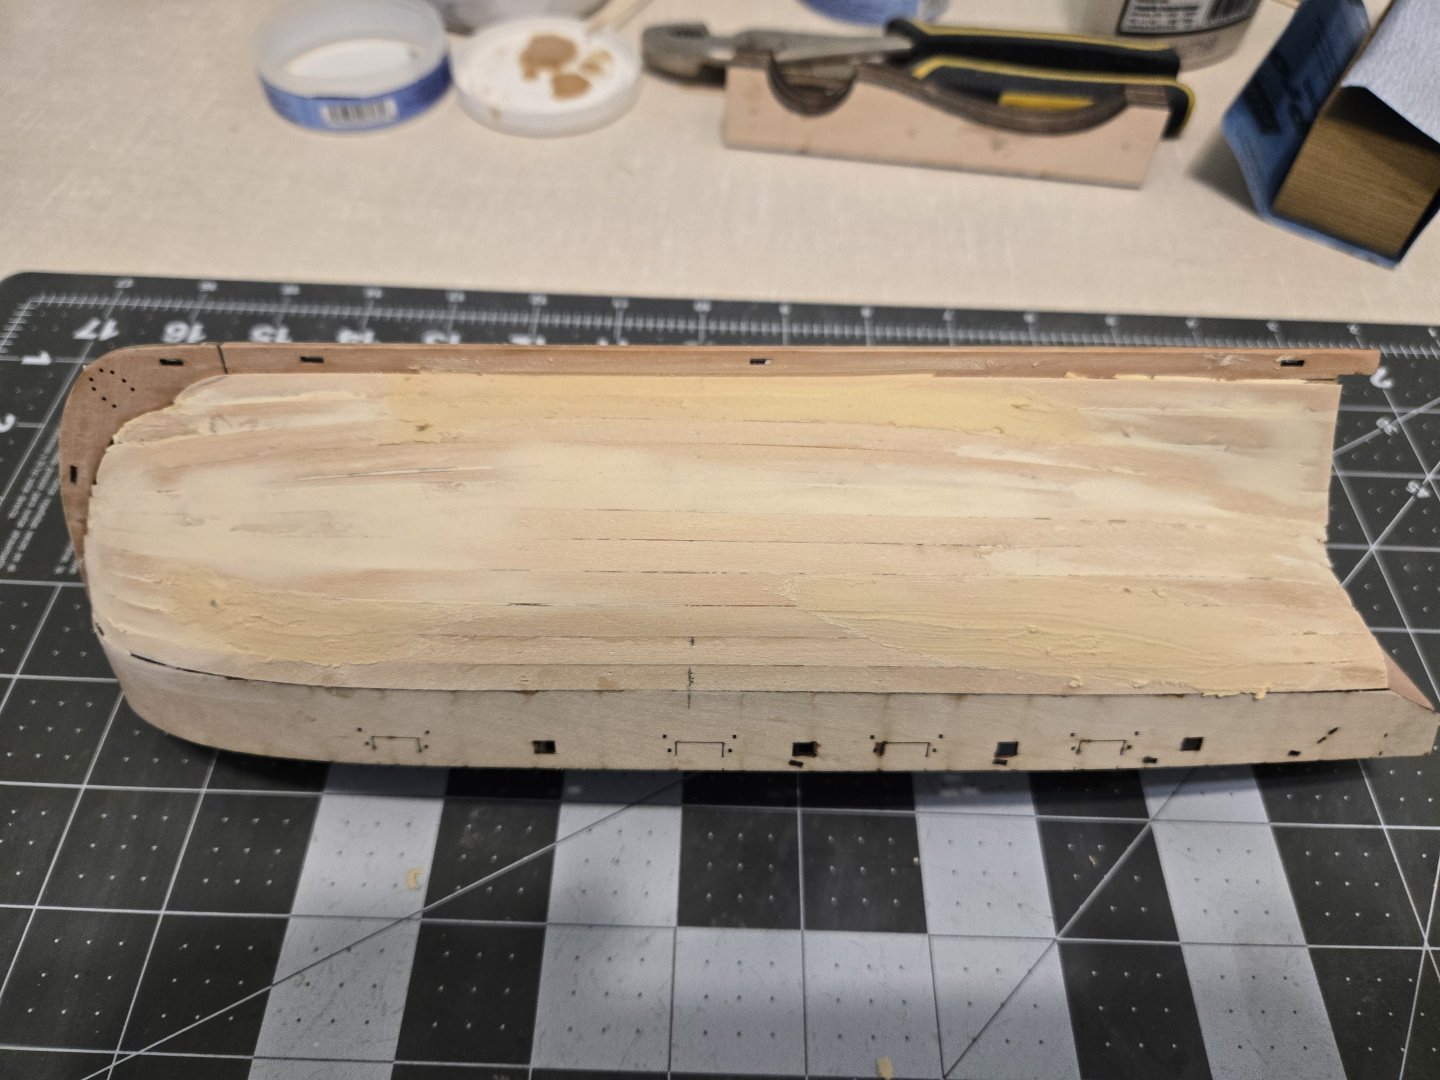
Got started on painting, more filling, more sanding today. Started out using some of my wife's paint, which she uses for painting canvases, quickly figured out that while workable it's not ideal. The canvas paint is really thick and needs a ton of thinning. Didn't find it ideal. Also was using a titanium white and it was super white. A trip to the hobby store later I had some vallejo off-white. So I did the very first coat in the wife's titanium white, which revealed a lot of little imperfections. More filler and sanding after first coat brought me to here Some sanding after that, and another coat using the Vallejo paint, another light sand with 800 grit, and another 2 coats has it here It's still not perfect, there are definitely some imperfections. Another round of filler and sanding probably going to happen in the morning. Also my word the camera reveals a lot of stuff I can't see very well with my own eye. Beyond that I picked up a few more colors for some future parts. I've been looking for a good red ochre, but have been having a devil of a time finding it. Some searching lead me to an old thread here that advised Vallejo - Red 70.926 can be a good stand in for it, so I grabbed a pot of that. I then noticed way off in a corner of the store they had a shelf of model expo paint specifically for wooden ships. Hadn't seen it before as it's not with the rest of the paint in the store. So I grabbed a pot of Hull Red from that. Clipped the corner off a couple of sprues when I got him and painted them with each. Personally I think the model expo looks a lot better for what I have in mind. The Vallejo Red is far to purple/pinkish I think. Cheers.


- 20 replies
-
- 6
-
-
- Sherbourne
- Vanguard Models
- (and 1 more)
-
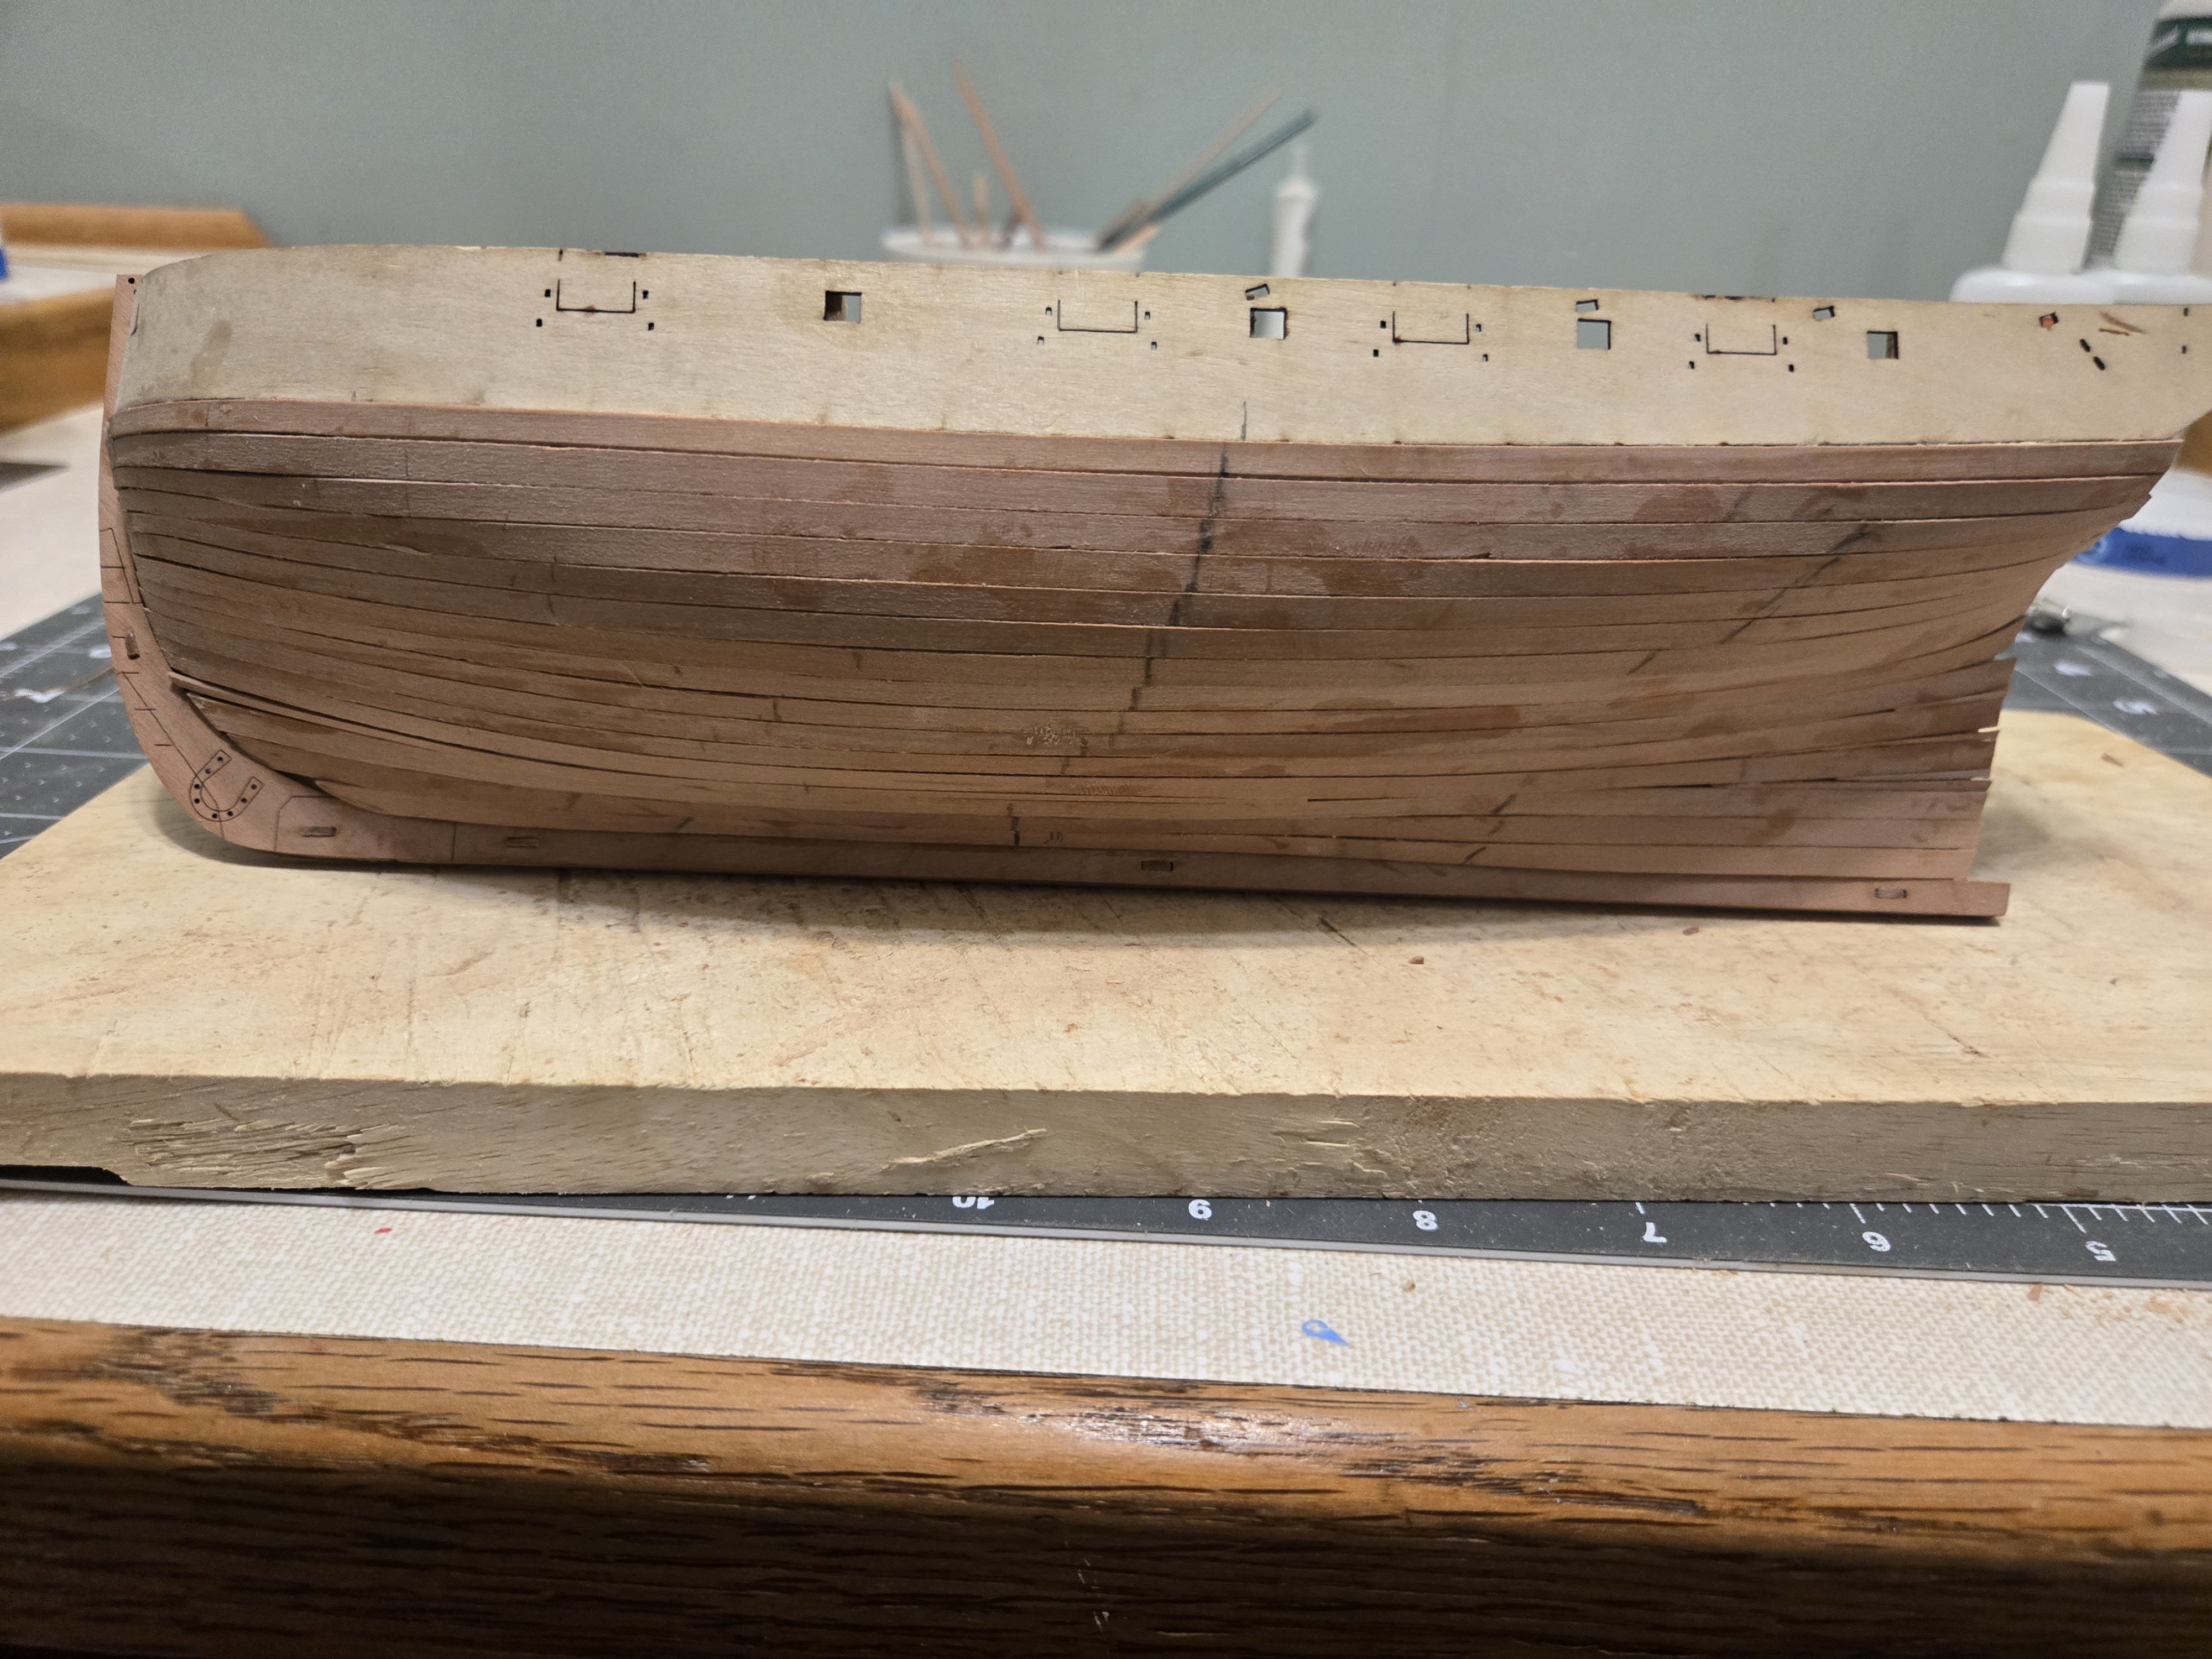
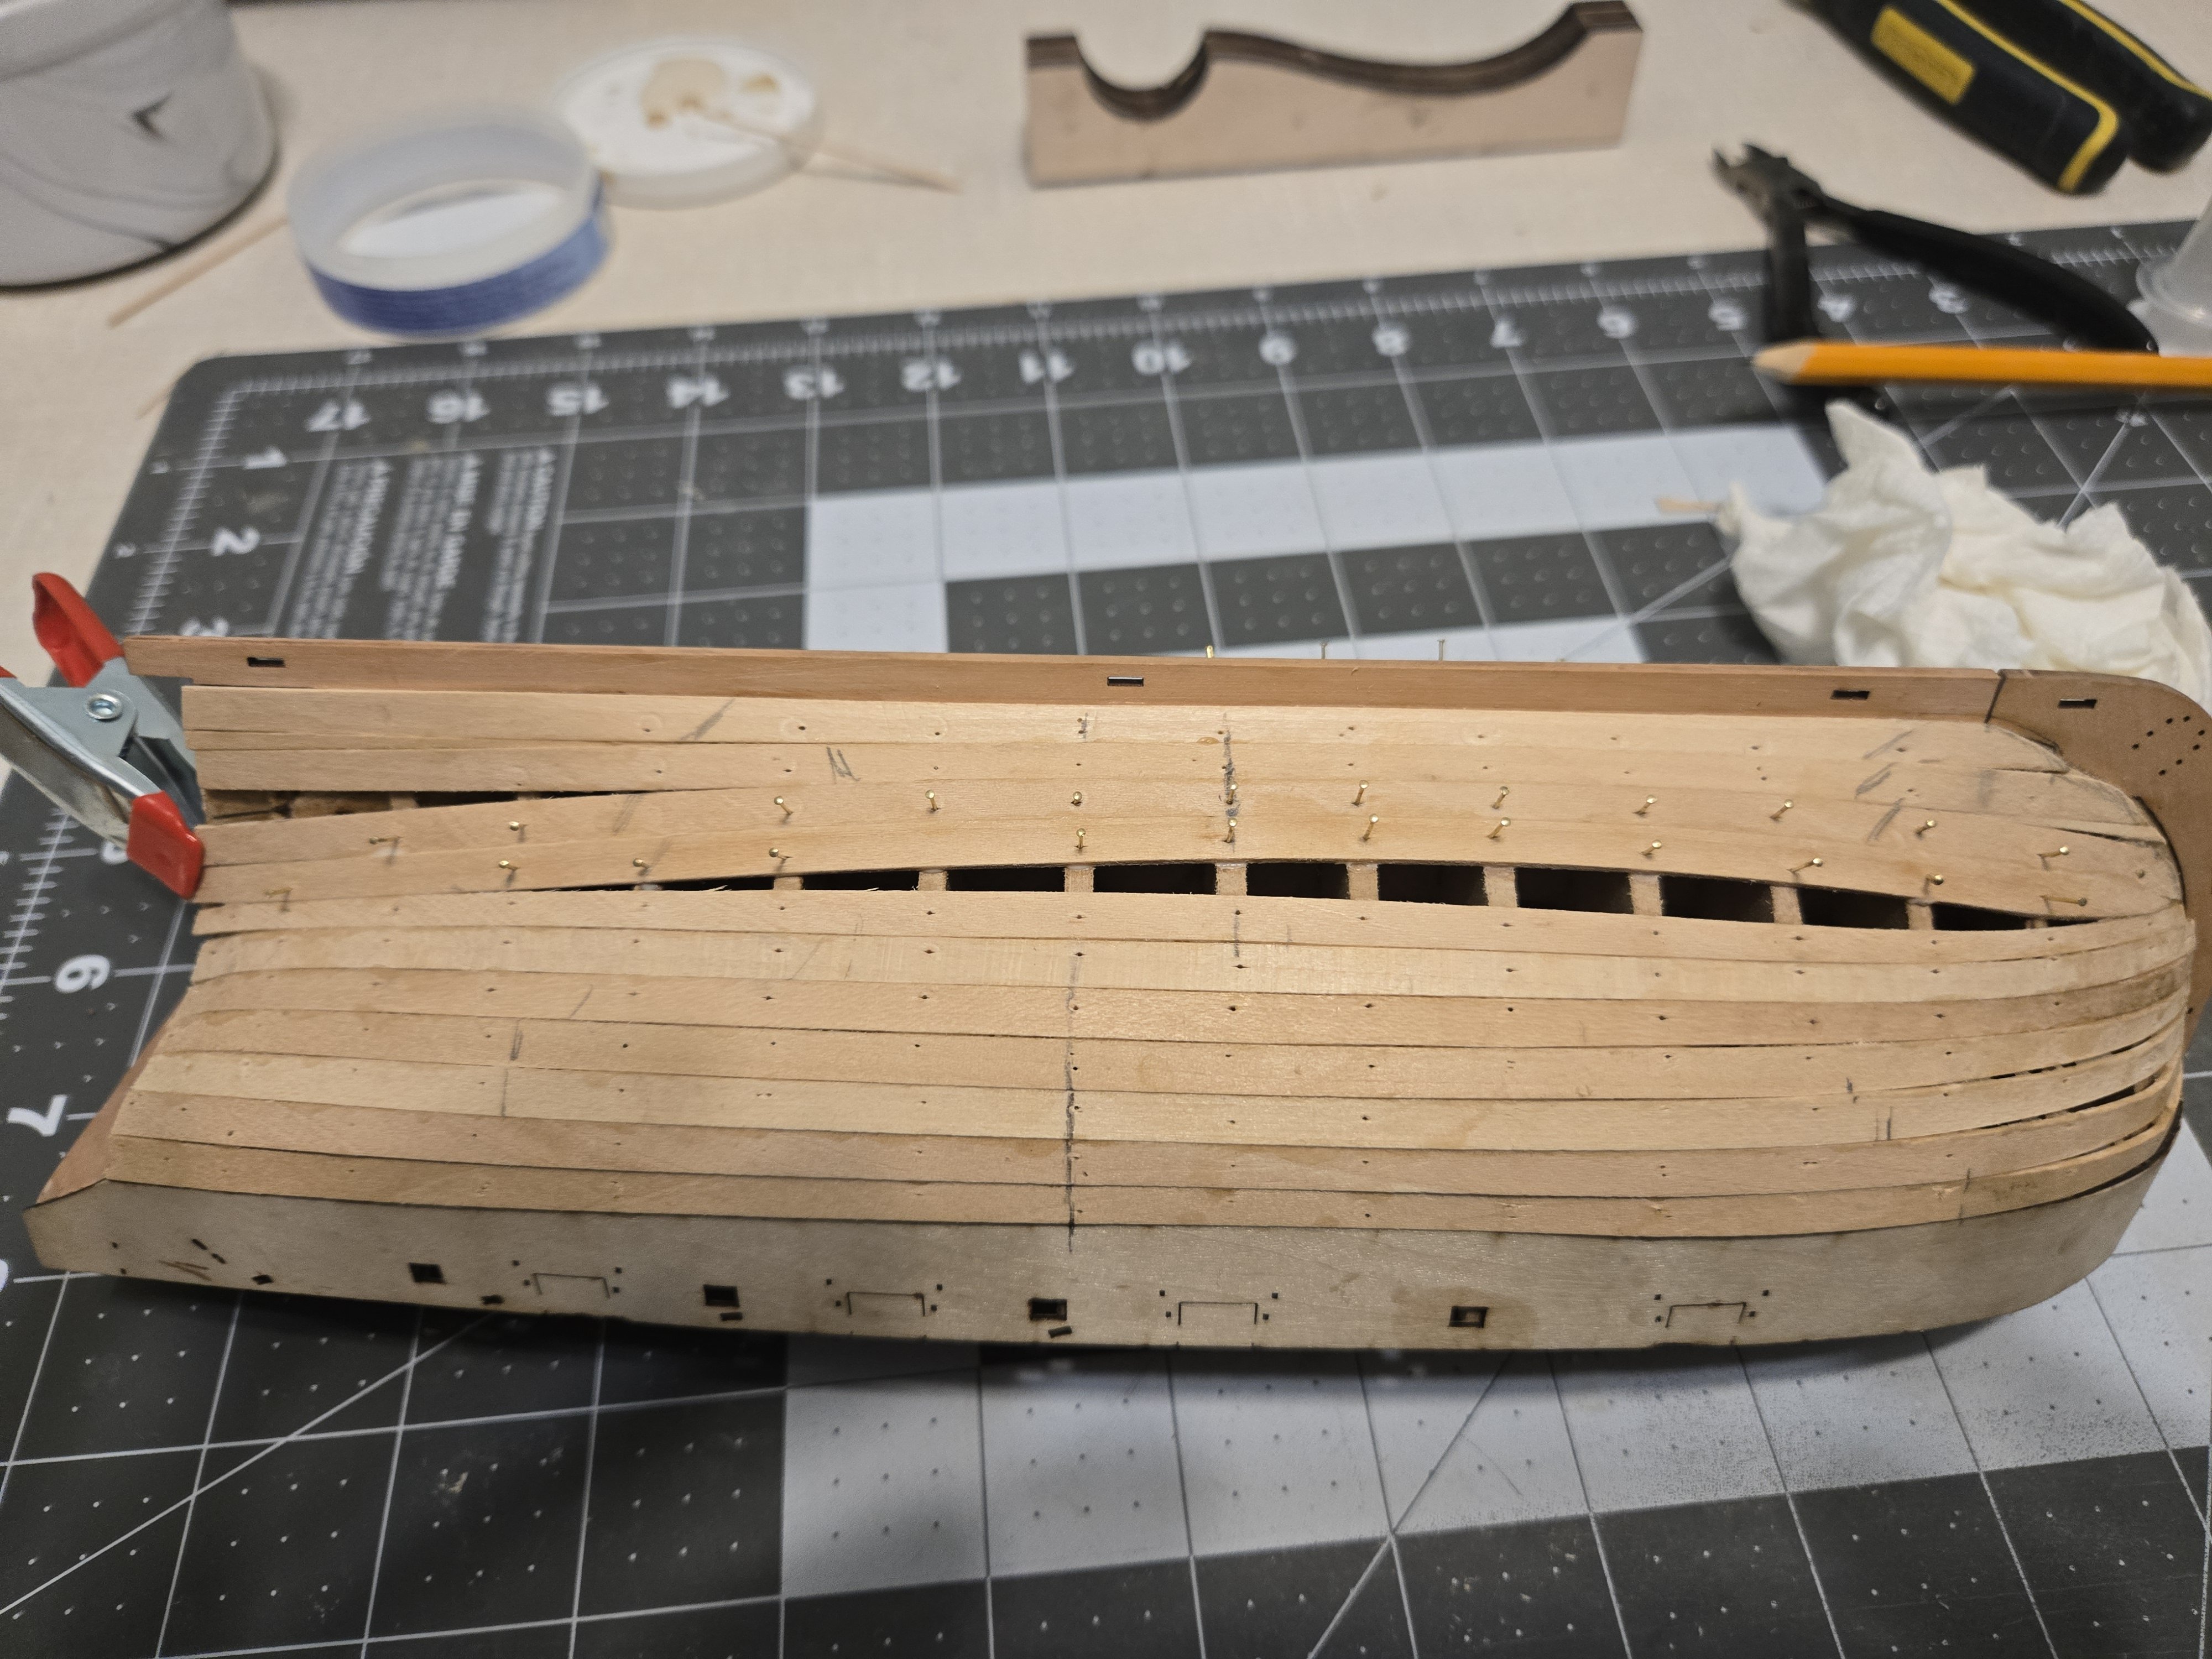
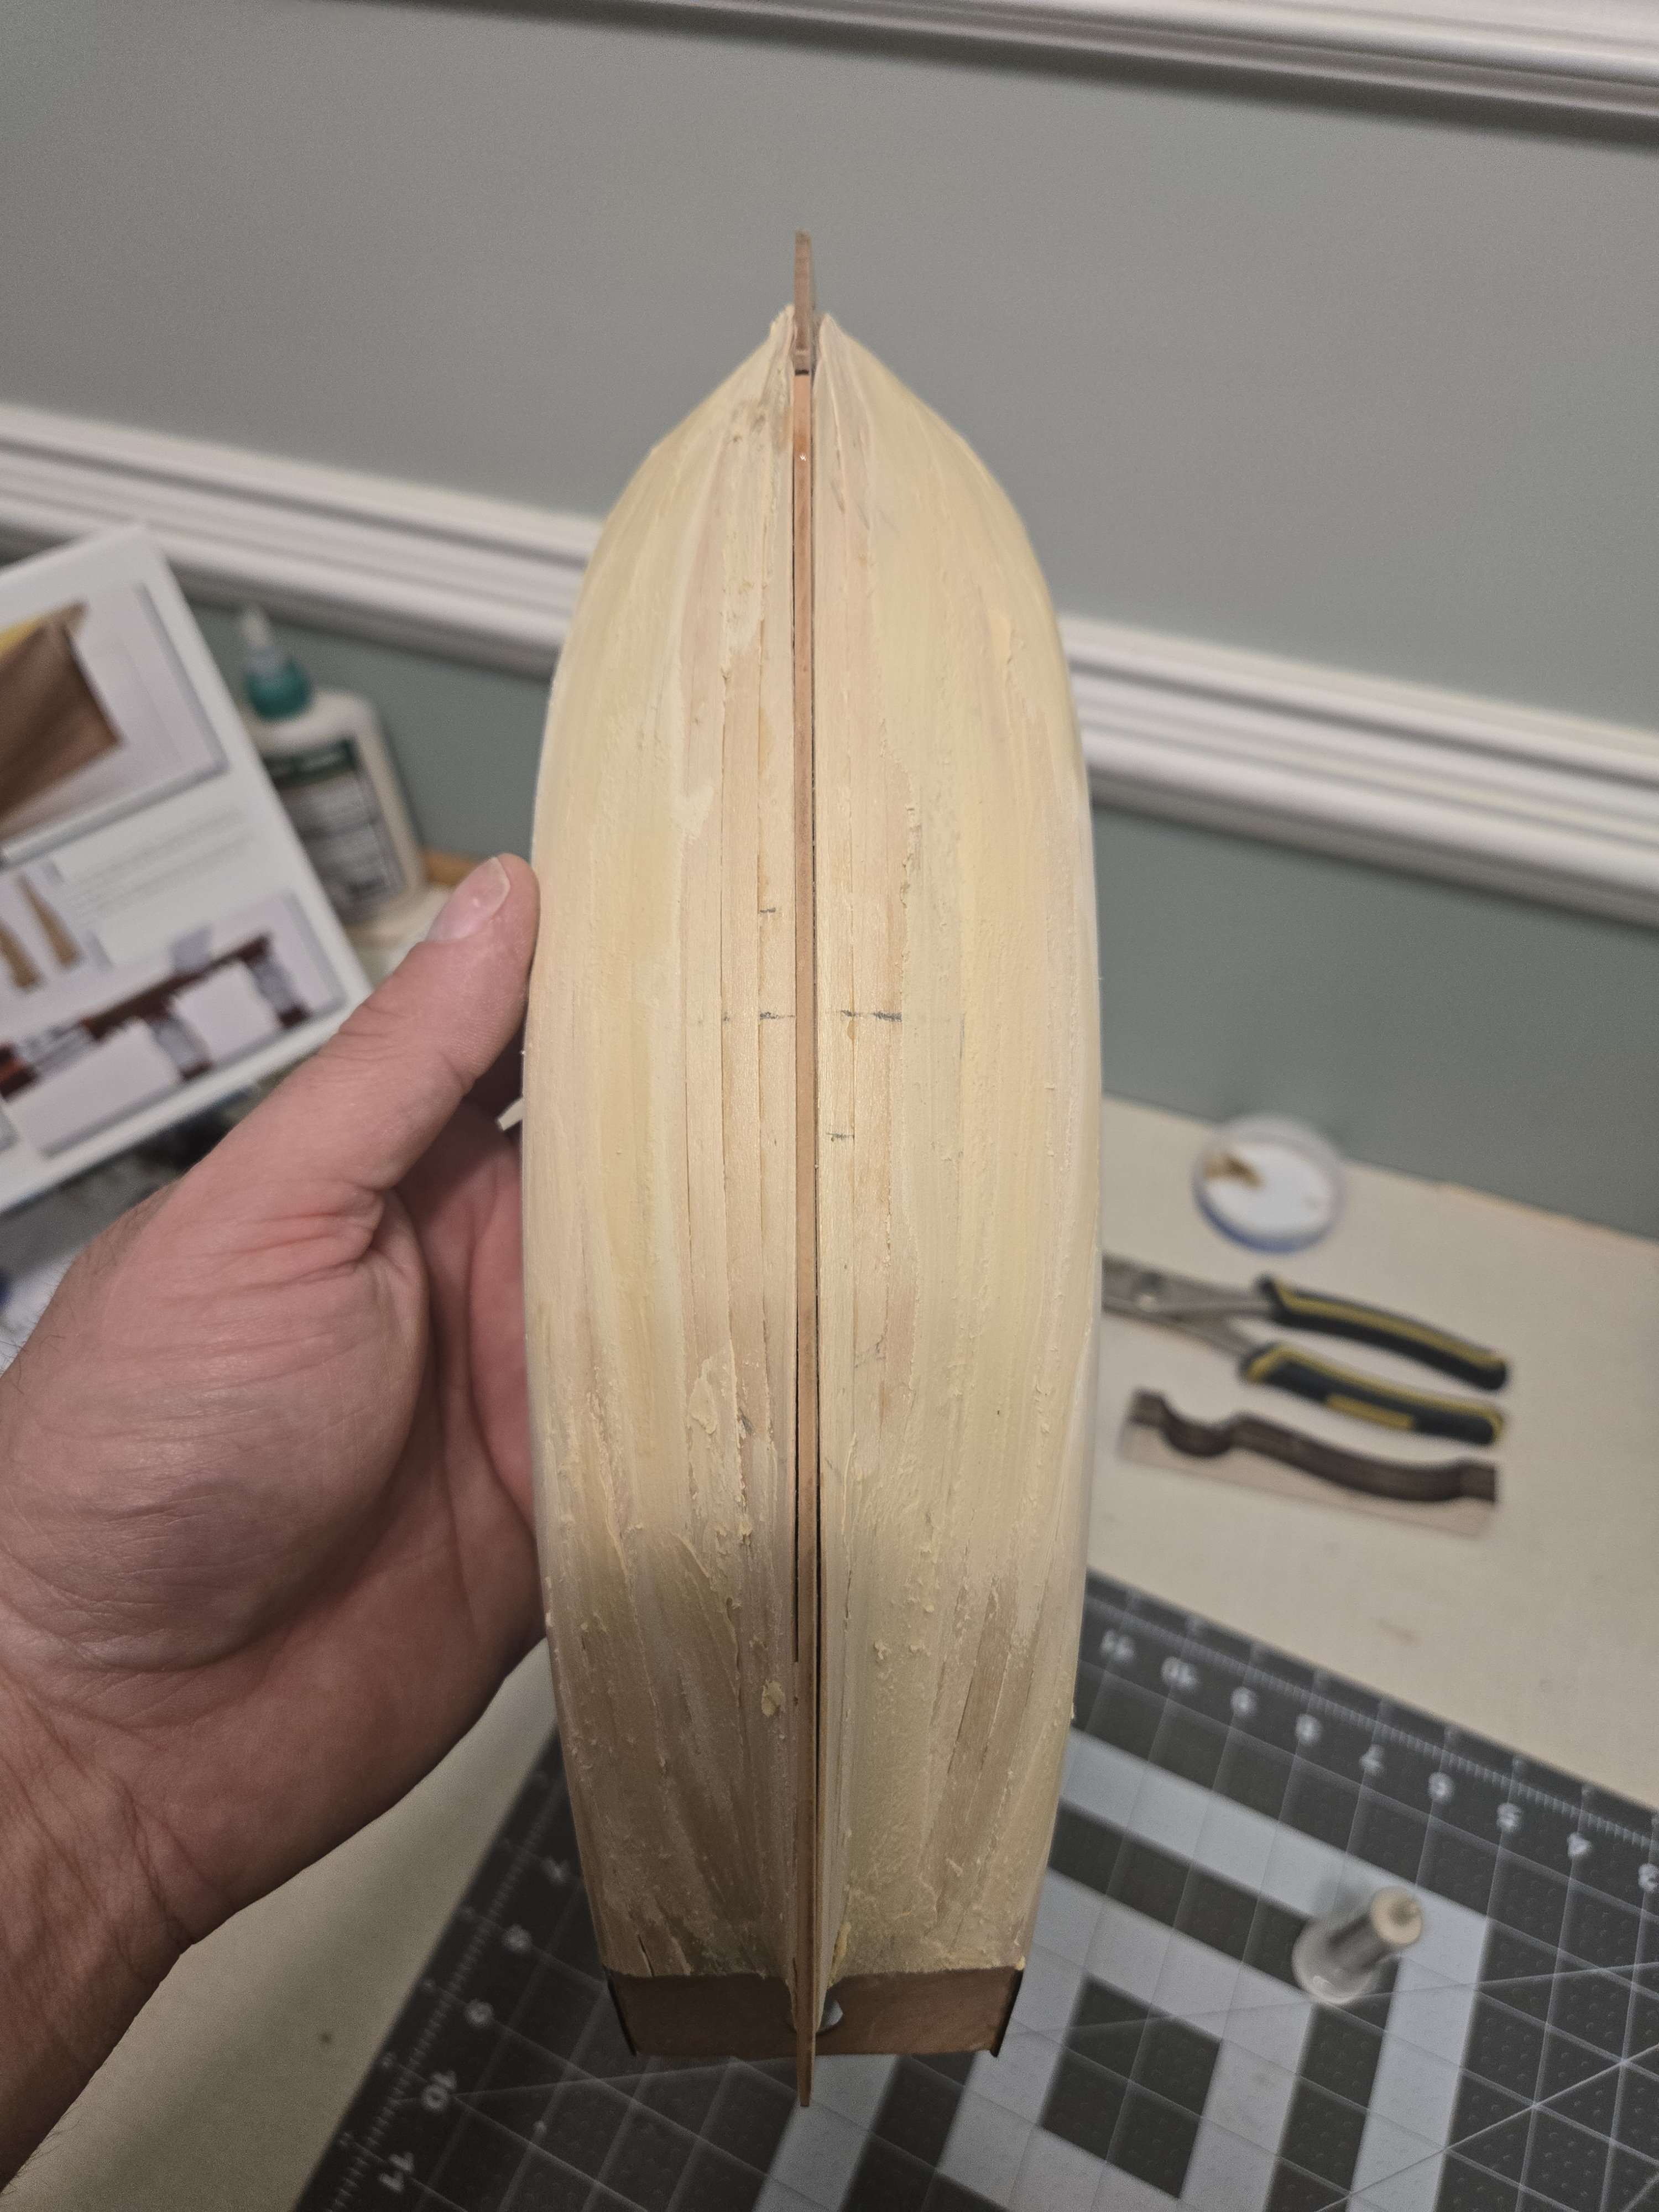
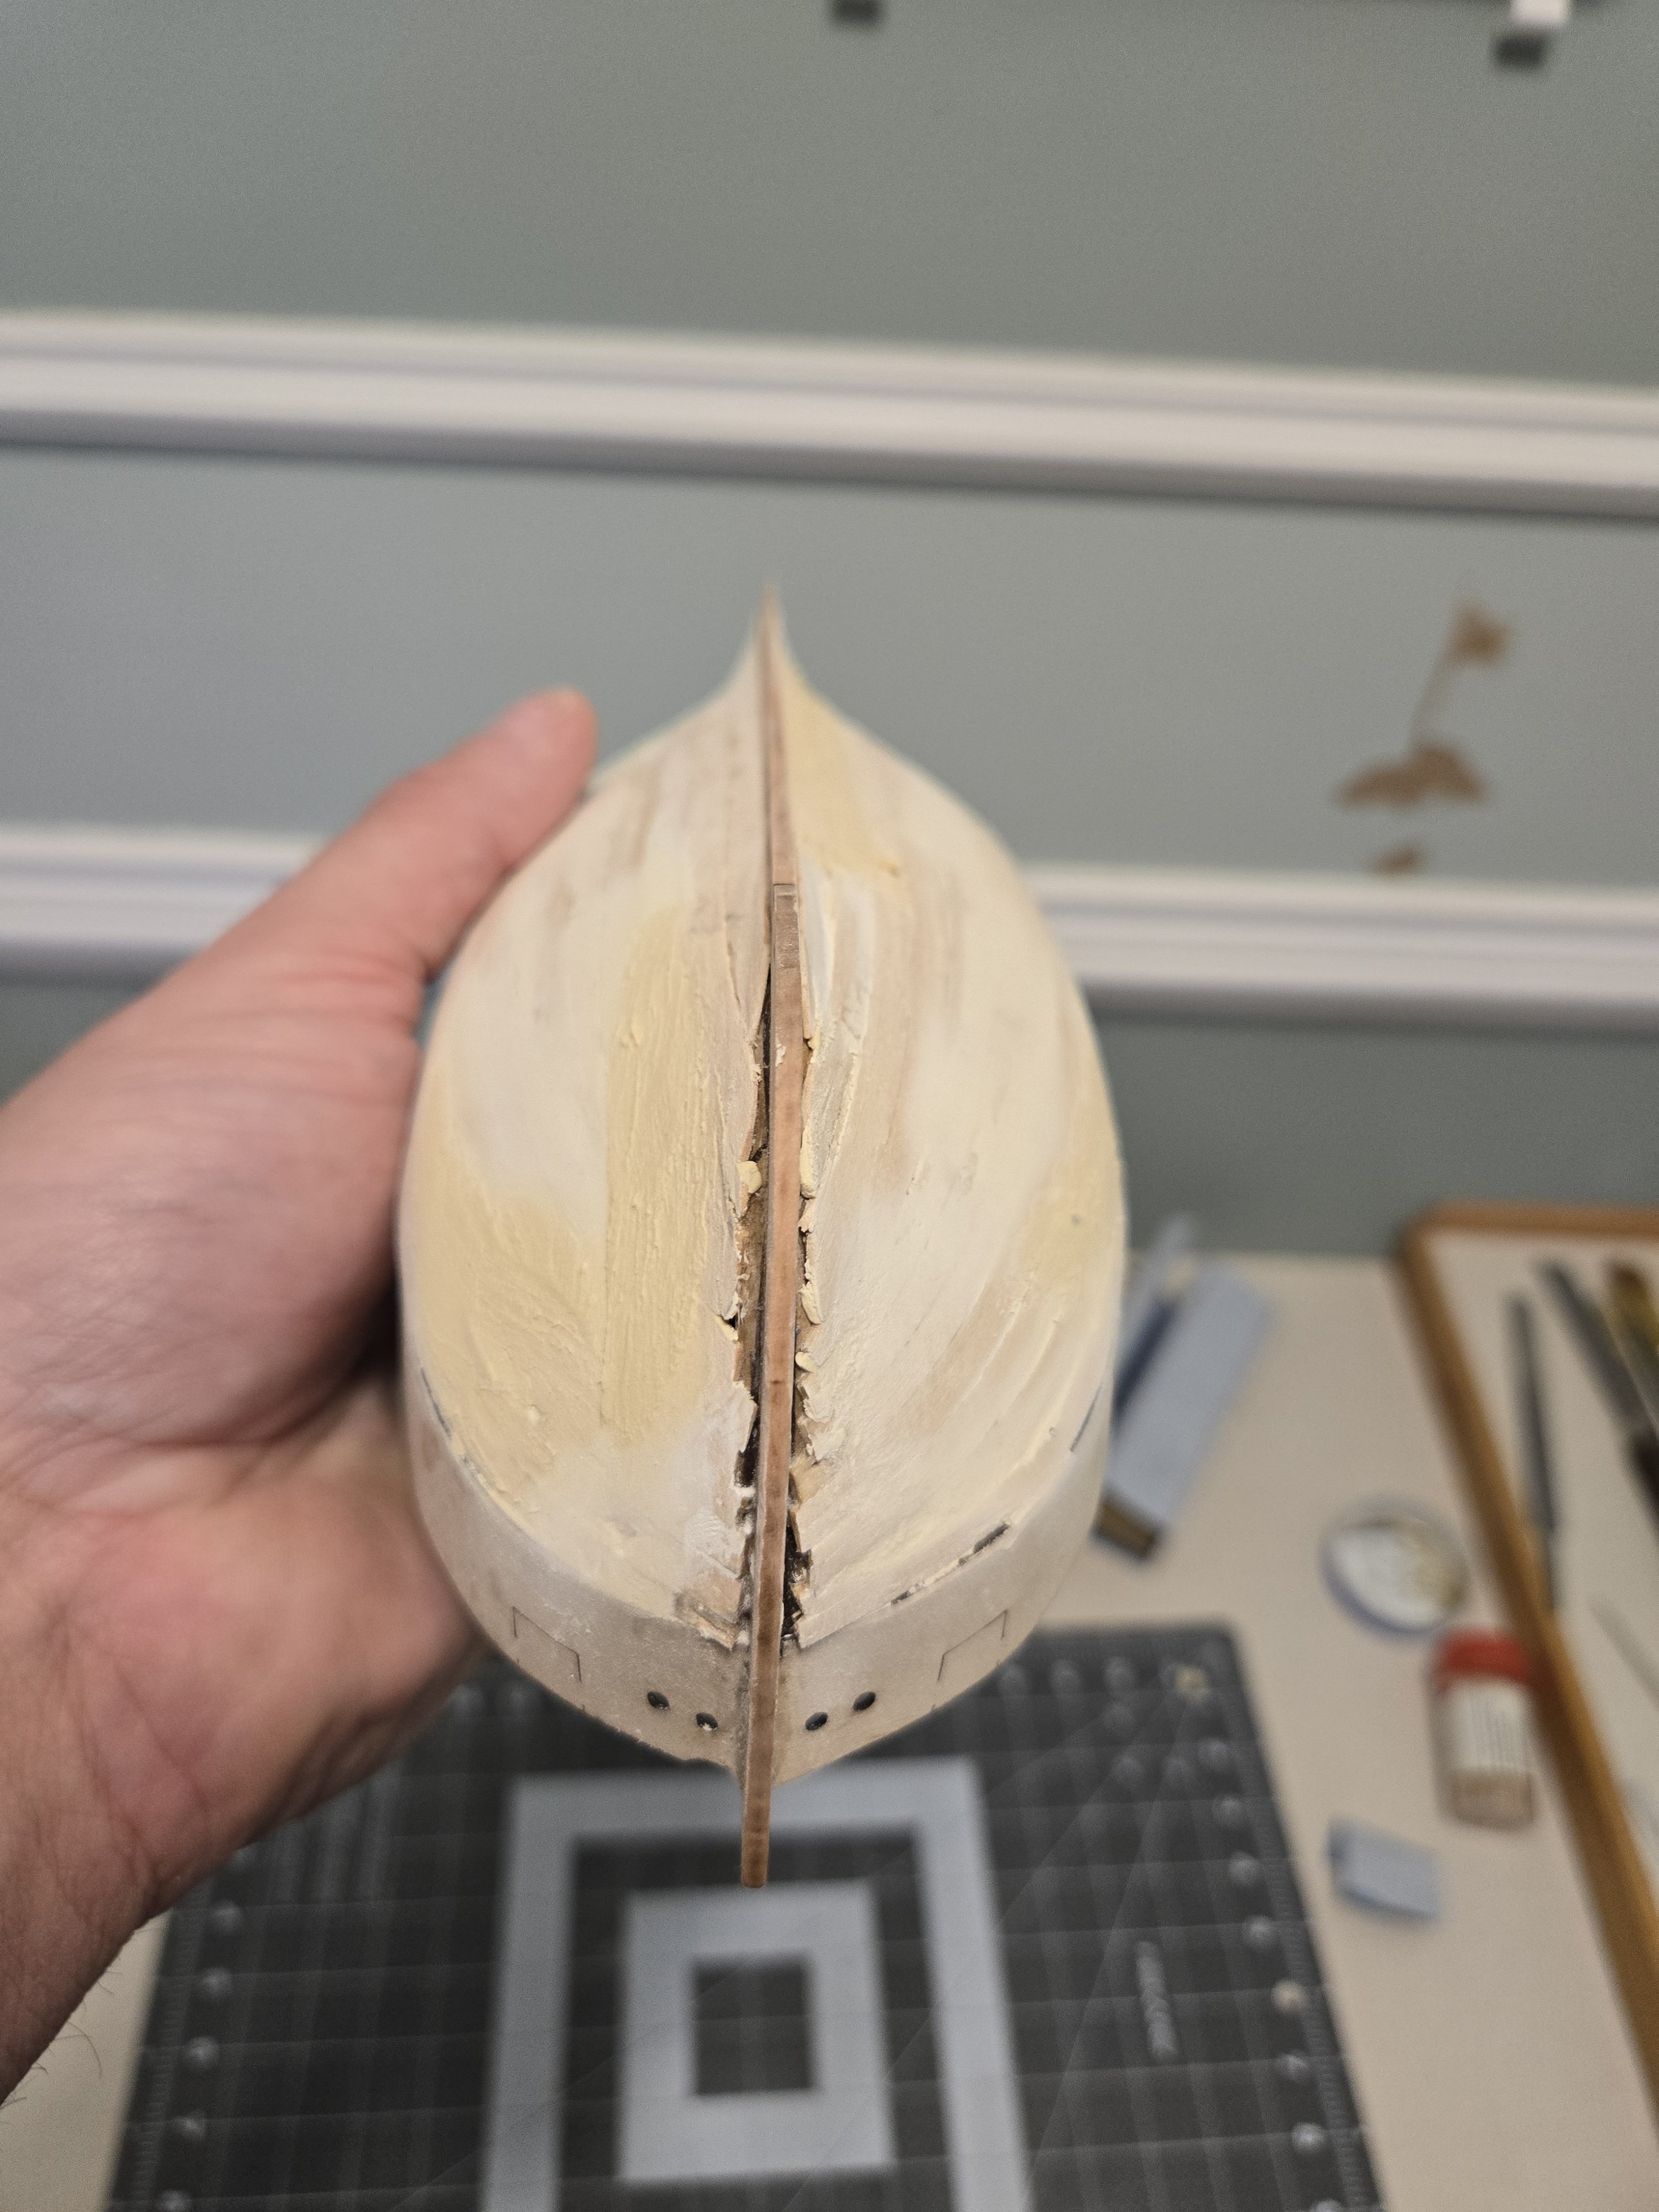
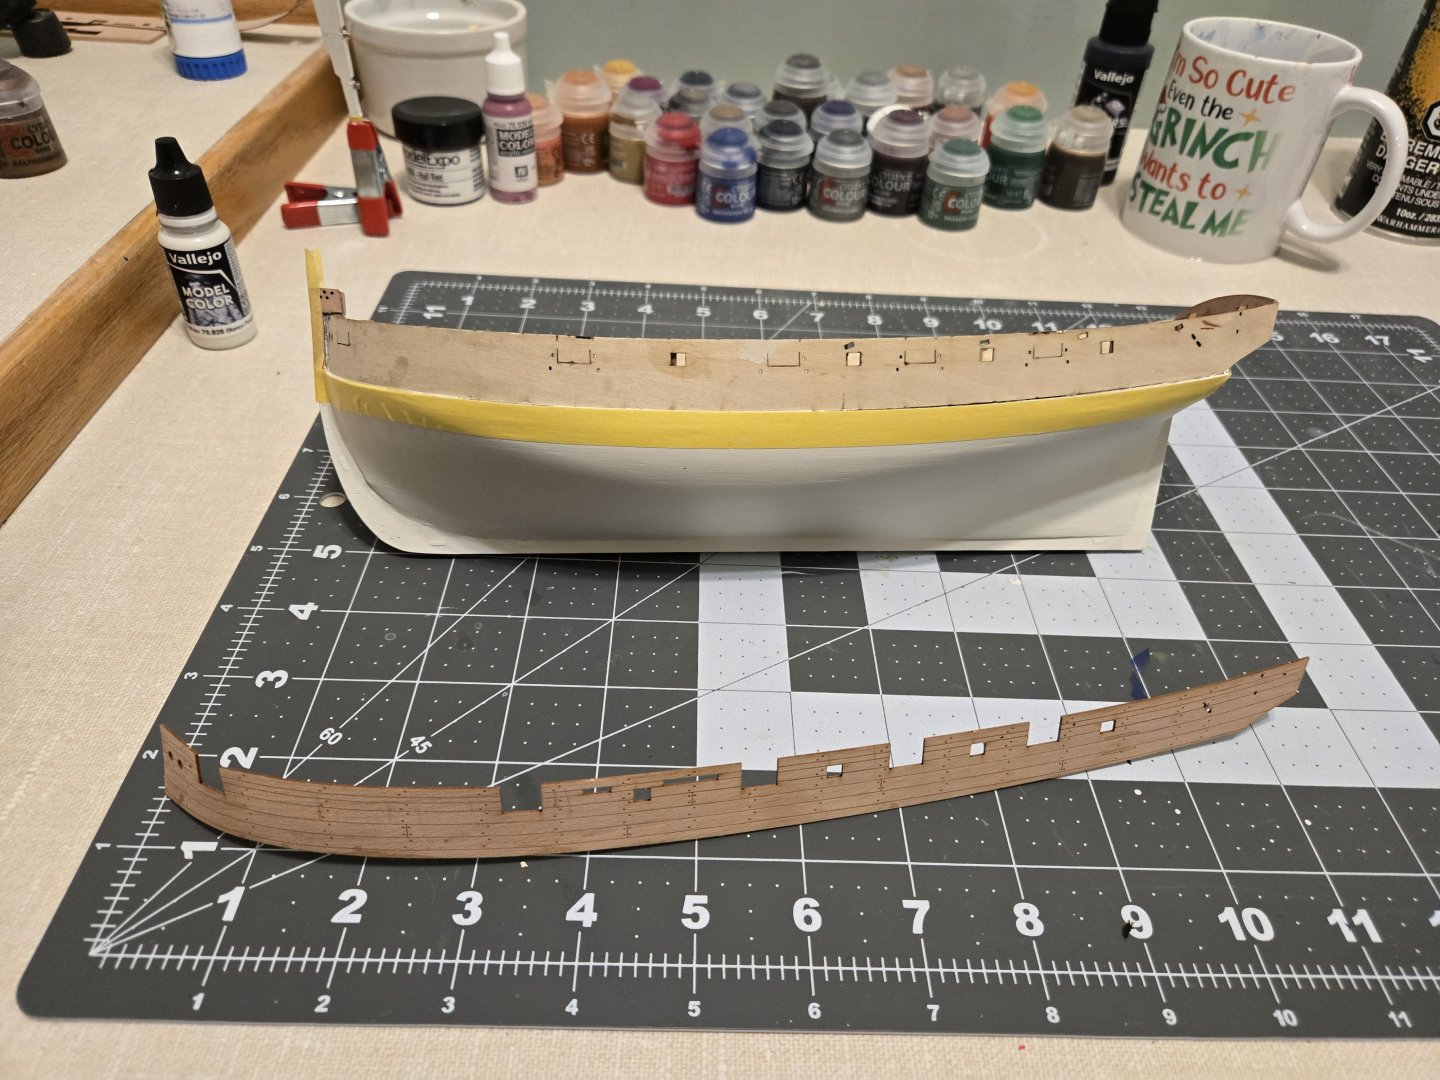
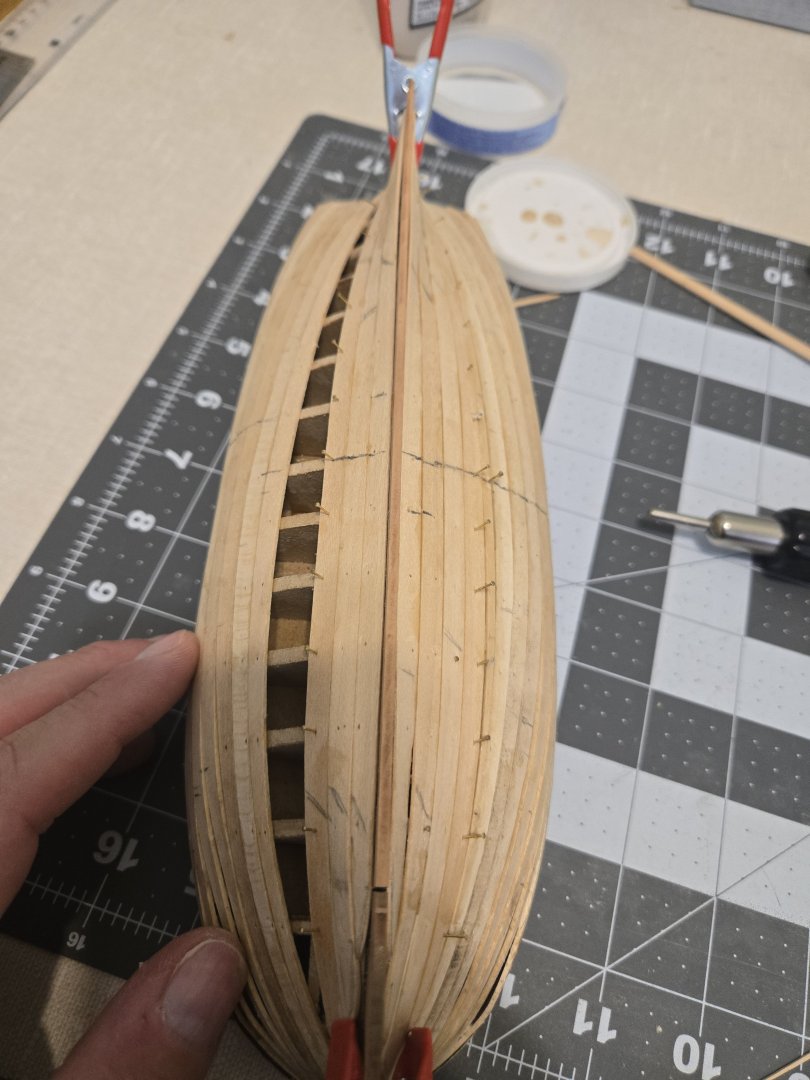
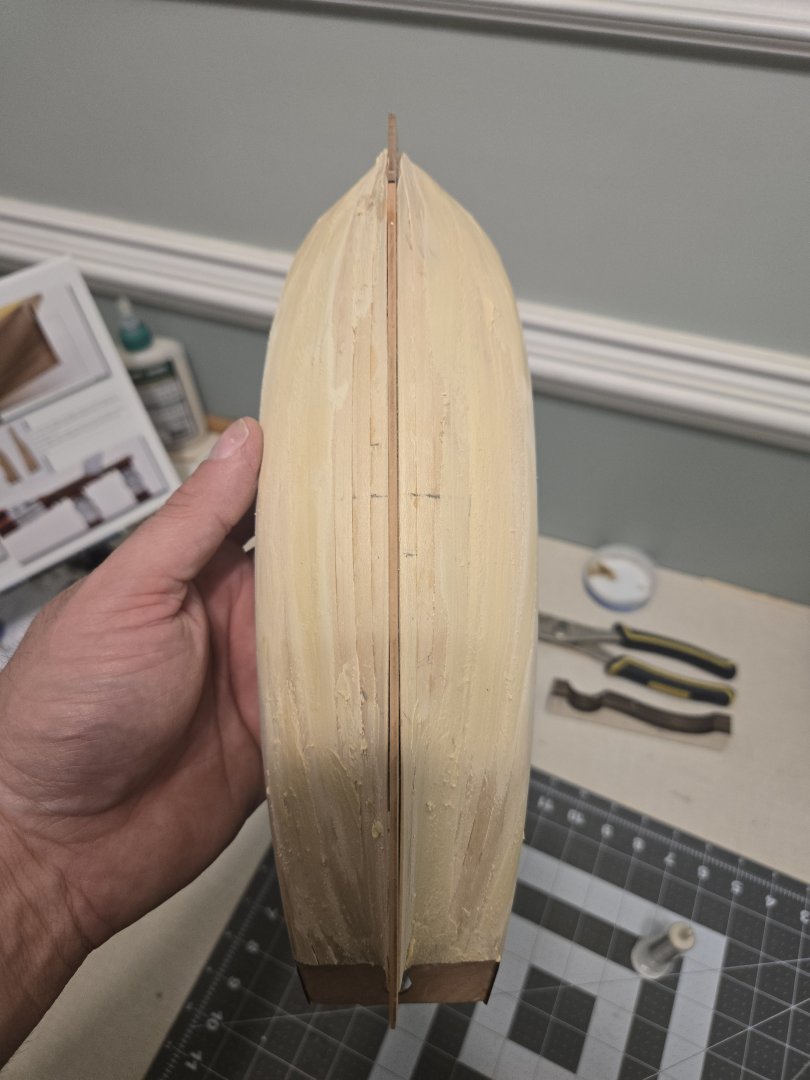
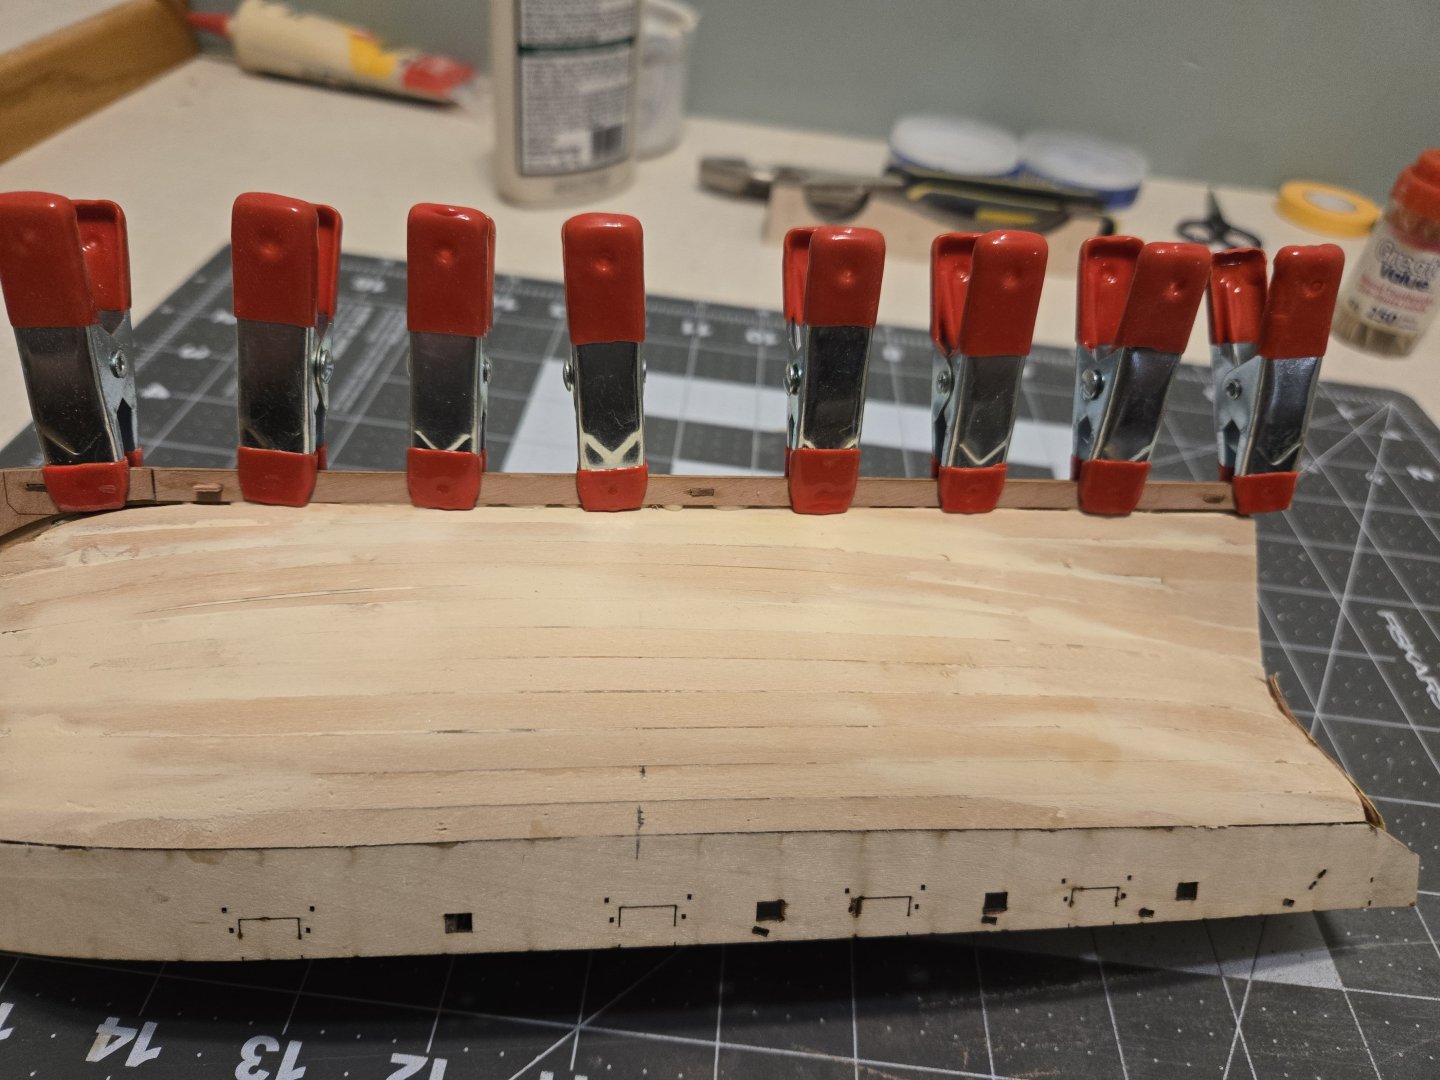
Busy week at work with an actual ship being delivered to the navy, and therefore a 75 hour crunch week getting it finished. Fair winds and following seas to the HMCS Robert Hampton Gray though! She's delivered and that leaves me more time to work on the Sherbourne! I finished up the 2nd planking, which went a fair bit smoother than first planking did. And much faster. Far less issues with clinkering this time. A whole lot of wood fill, because I want the hull nice and smooth. We have a saying at work; grinder and paint makes me the welder I aint, well wood fill and paint makes me the planker I aint! Still a lot more sanding and some additional touch ups to do with the fill but overall it's going pretty decent. There have definitely been some noob traps I fell into however. I didn't leave enough room to fit the 2nd planking in under the prow for the top couple planks, so that's definitely something on my list for next time. I didn't try a planking fan or anything with this ship either, but I think I would like to on my next model. I was left with a couple of awkward planks for my finishers as it is, and while they did work out I would like to take a stab at just having everything shaped to fit without an awkward finisher next time. Hopefully over this long weekend I can get the rest of sanding and fill finished and, get it the hull painted.


- 20 replies
-
- 3
-
-
- Sherbourne
- Vanguard Models
- (and 1 more)
-
Pinenuts reacted to a post in a topic:
HM Armed Cutter Sherbourne 1763 by palmerit - FINISHED - Vanguard Models - 1:64 - First Build
-
Been picking away at the first planking the last few days. A lot of hard stops in the second half of the planking when I had to clamp the stern and wait for things to cure so I wasn't able to just sit down and grind it out. But things did progress, just slowly. Here we had one side finished, was fun shaping the final plank which didn't go all the way to either bow or stern. Ended up sanding one side down to essentially nothing. Just getting ready to finish the final plank and a little stealer to complete installing the first plankings planks. Never did get a pic before applying filler, but I thought at the time it didn't look half bad and I was proud as a peacock, oh how wrong I was. This mess below, oh boy. I messed up how the tips of the planks should lay at the bow. Consequently when test fitting the prow pieces the 2nd planking is supposed to tuck into, there was simply no room. This required substantial effort with a file and sanding block to fix. I was able to fix it eventually I think. There may be some filler work here after the 2nd planking to get everything looking smooth and nice, but hey that's what filler is for ! After that I got my outside prow pieces on, and the outer keel sections installed as well. I have definitely learned a lot during this first planking. I have identified some pitfalls and newb traps. I didn't have my shaping done well down by the keel, which required a lot of careful effort with a file, and never did come along as well as I'd like. The previously mentioned termination of the first planking at the bow as well is something I will be mindful of in the future. It's not all pretty, but for the first model I've ever built I'm happy to say I got through the first planking. Now on to second planking.


- 20 replies
-
- 9
-
-
- Sherbourne
- Vanguard Models
- (and 1 more)
-
What an absolute stunner of a build. It looks amazing!
- 177 replies
-
- 2
-
-
- Sherbourne
- vanguard models
- (and 3 more)
-
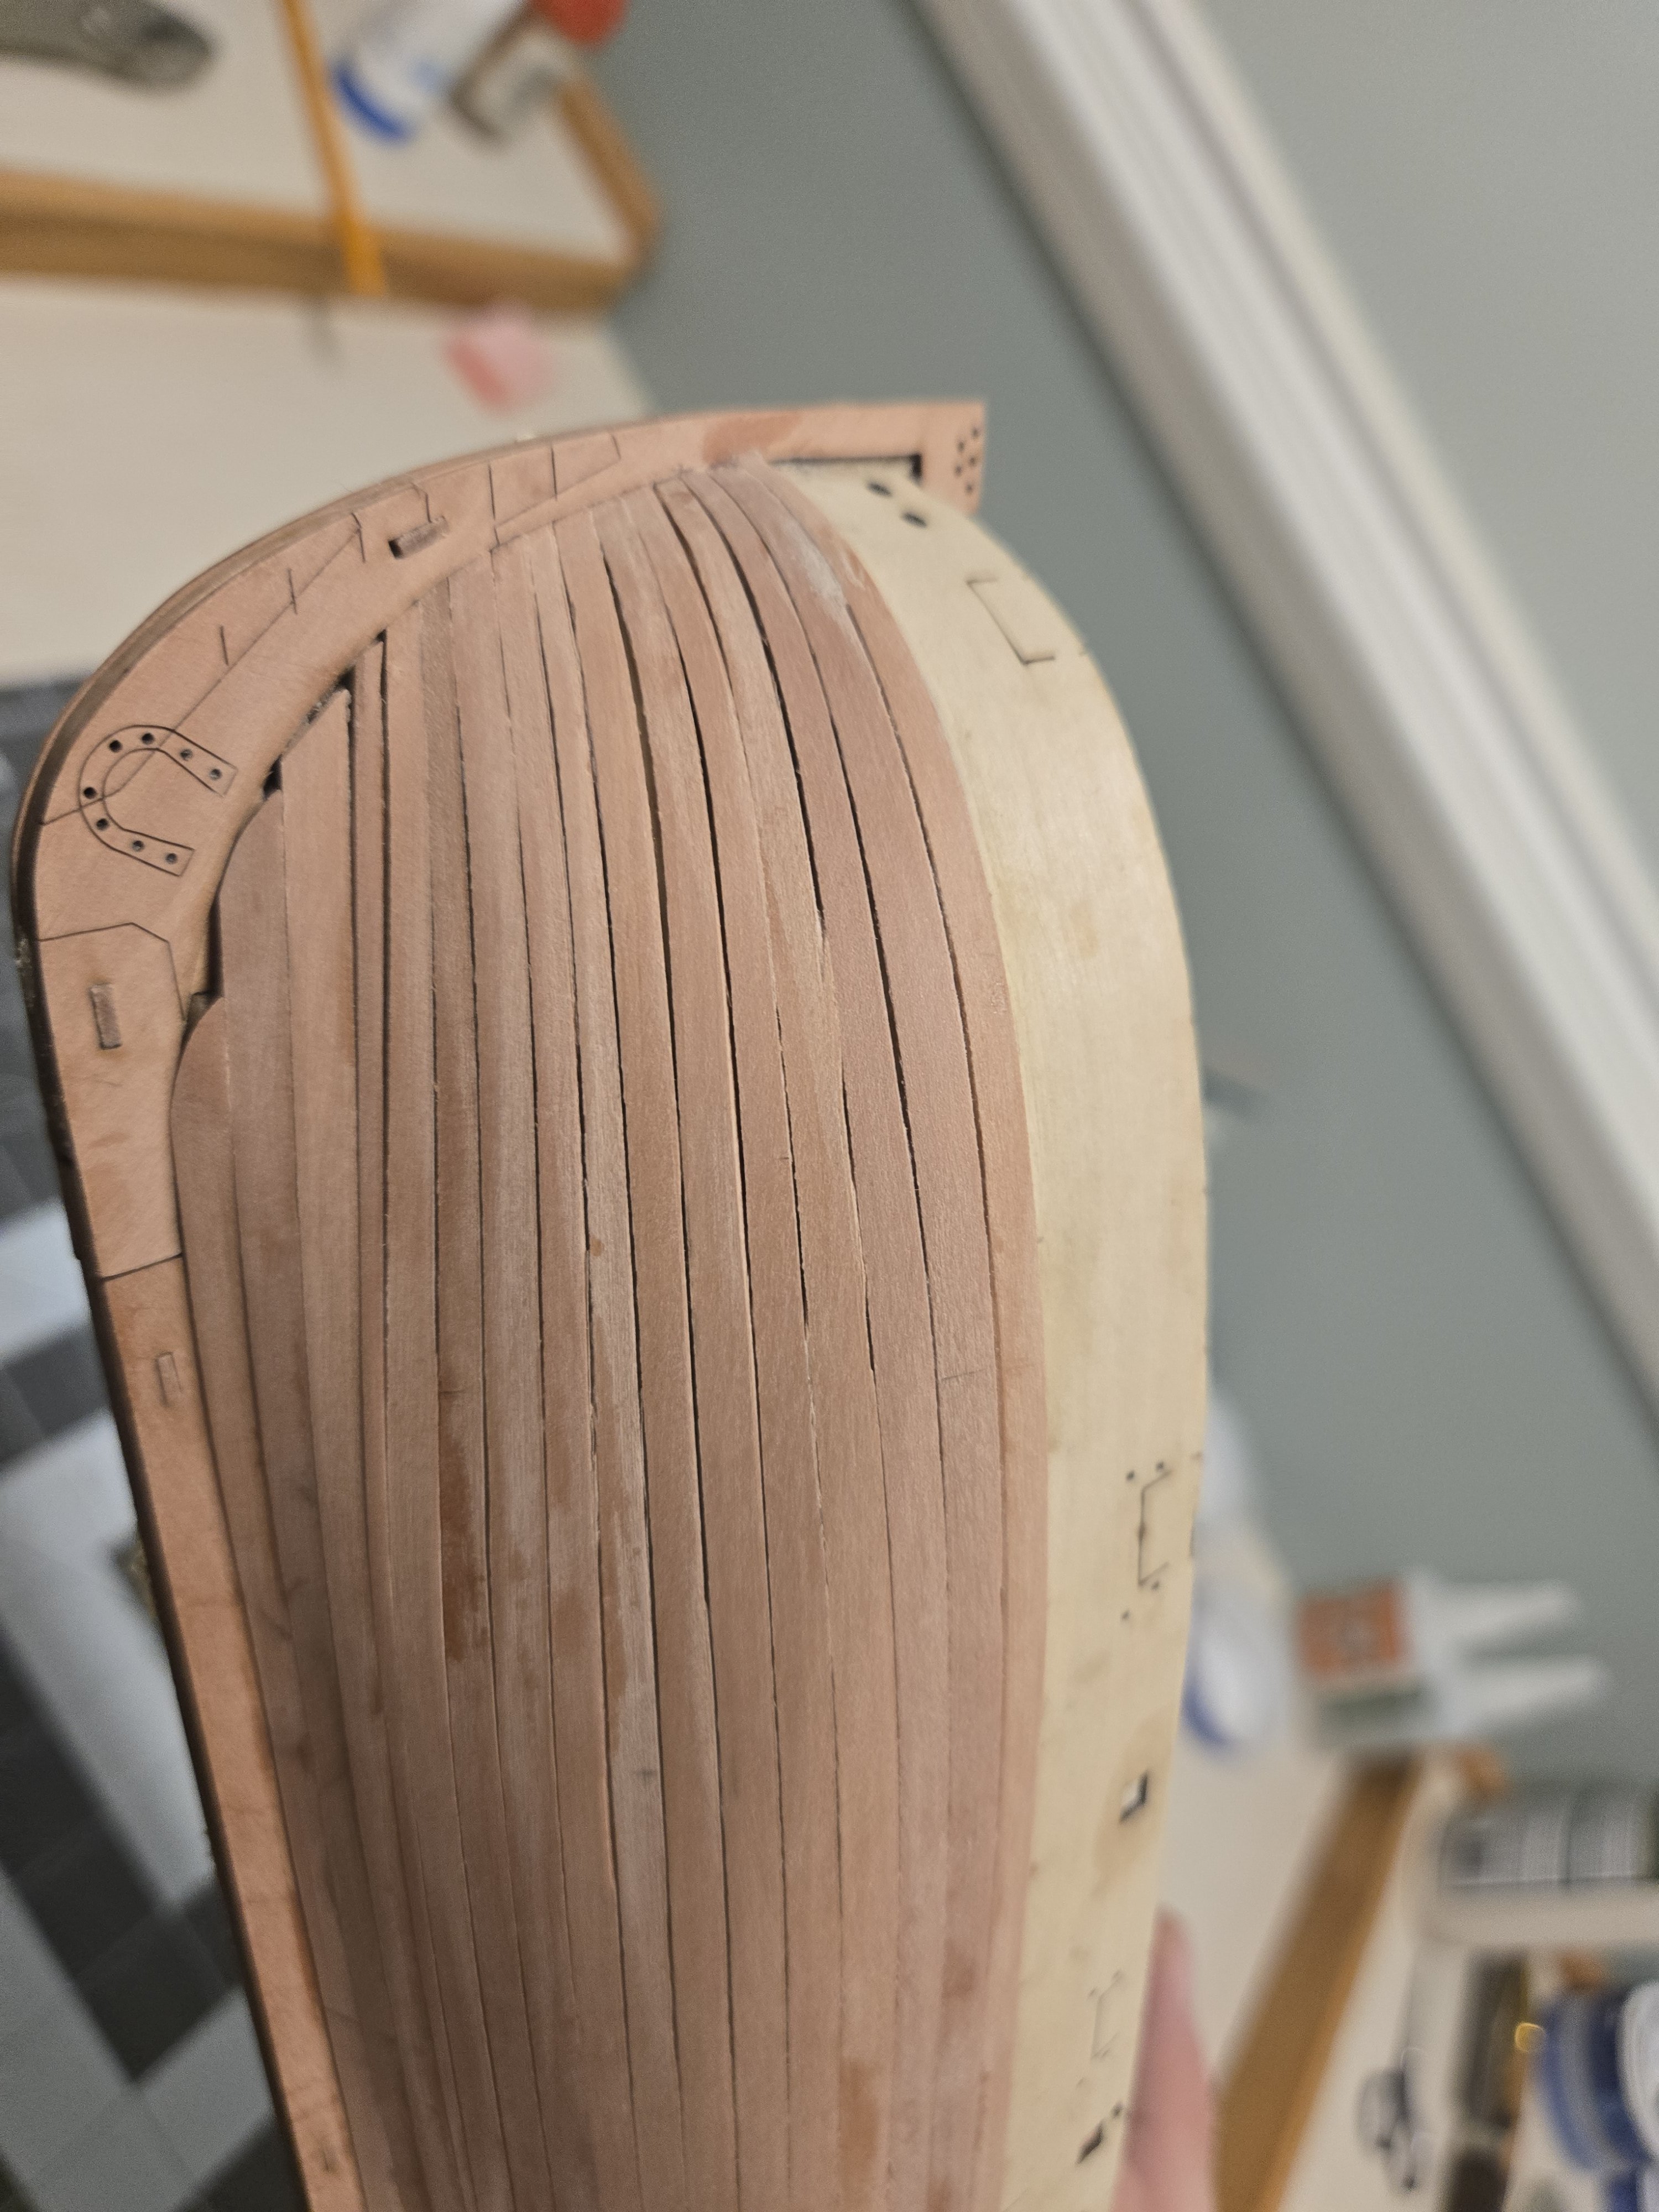
Alright so, I watched some videos suggested by some very helpful folks here, checked some suggested build logs, and modified my techniques a bit. Started soaking the planks, putting a bit of a bend on the edge, and the results I think speak volumes! The first four planks below were just me putting a little bend in with the steam from the kettle, the 5th and 6th planks were soaked, shaped, and edge bent before being installed. They aren't 100% perfect, but I think they are sitting light years better than the other 4. Even just clicking them into place was much, much easier. They just sat where I wanted them without needing to really put any tension on them. This is definitely the way! Thank you all and keep any more advice rolling it's a huge help! Edit: Also a LOT easier to cut the planks with a knife and rule after they were soaked. Huge thanks for the tips on cutting the taper!

- 20 replies
-
- 6
-
-
- Sherbourne
- Vanguard Models
- (and 1 more)
-
So I was definitely unaware of edge bending for planks. I've been following on with modelkit stuff's youtube series on the Sherbourne and he doesn't mention or do any edge bending during his planking.
- 20 replies
-
- 3
-
-
- Sherbourne
- Vanguard Models
- (and 1 more)
-
Got a start on first planking as well today. The benefits of being on vacation for the week, plenty of time to build! Fitting up the first plank here, and some things I am discovering; Smooth operation of a pin pusher is absolutely 100% a skill that must be learned. I dropped about 4:1 on this first plank. Also it did not sit dead on perfect, a fact I didn't realize until I got the next plank on. Another thing that I was not 'getting' was the steel ruler and craft knife tapering. I found the planks were moving around under the ruler no matter how hard I pressed down on the ruler. In the end I decided to just sand them. Honestly I think I prefer sanding them to a taper anyways. Gives me nice fine control of the process the whole way through. You can see in that final picture the first plank has a weird notch/kink to it by the bow. It looks super bad here, but isn't quite that nasty looking in real life. I think it's within the realm of sand & fill before second planking. Other than that I am pretty pleased with results so far. Some odds and ends and things I will change next time, but for a first ever model I think it's going quite nicely so far!


- 20 replies
-
- 8
-
-
- Sherbourne
- Vanguard Models
- (and 1 more)
-
Advice taken and appreciated. Ran a plank over those spots and you're absolutely right there was still a gap. Took a long and wide file to them carefully to avoid keel damage after noting my sand block was a bit wide and took them down quite a bit more. Plank seems to be running much nicer now! Appreciate the advice!

- 20 replies
-
- 8
-
-
- Sherbourne
- Vanguard Models
- (and 1 more)
-
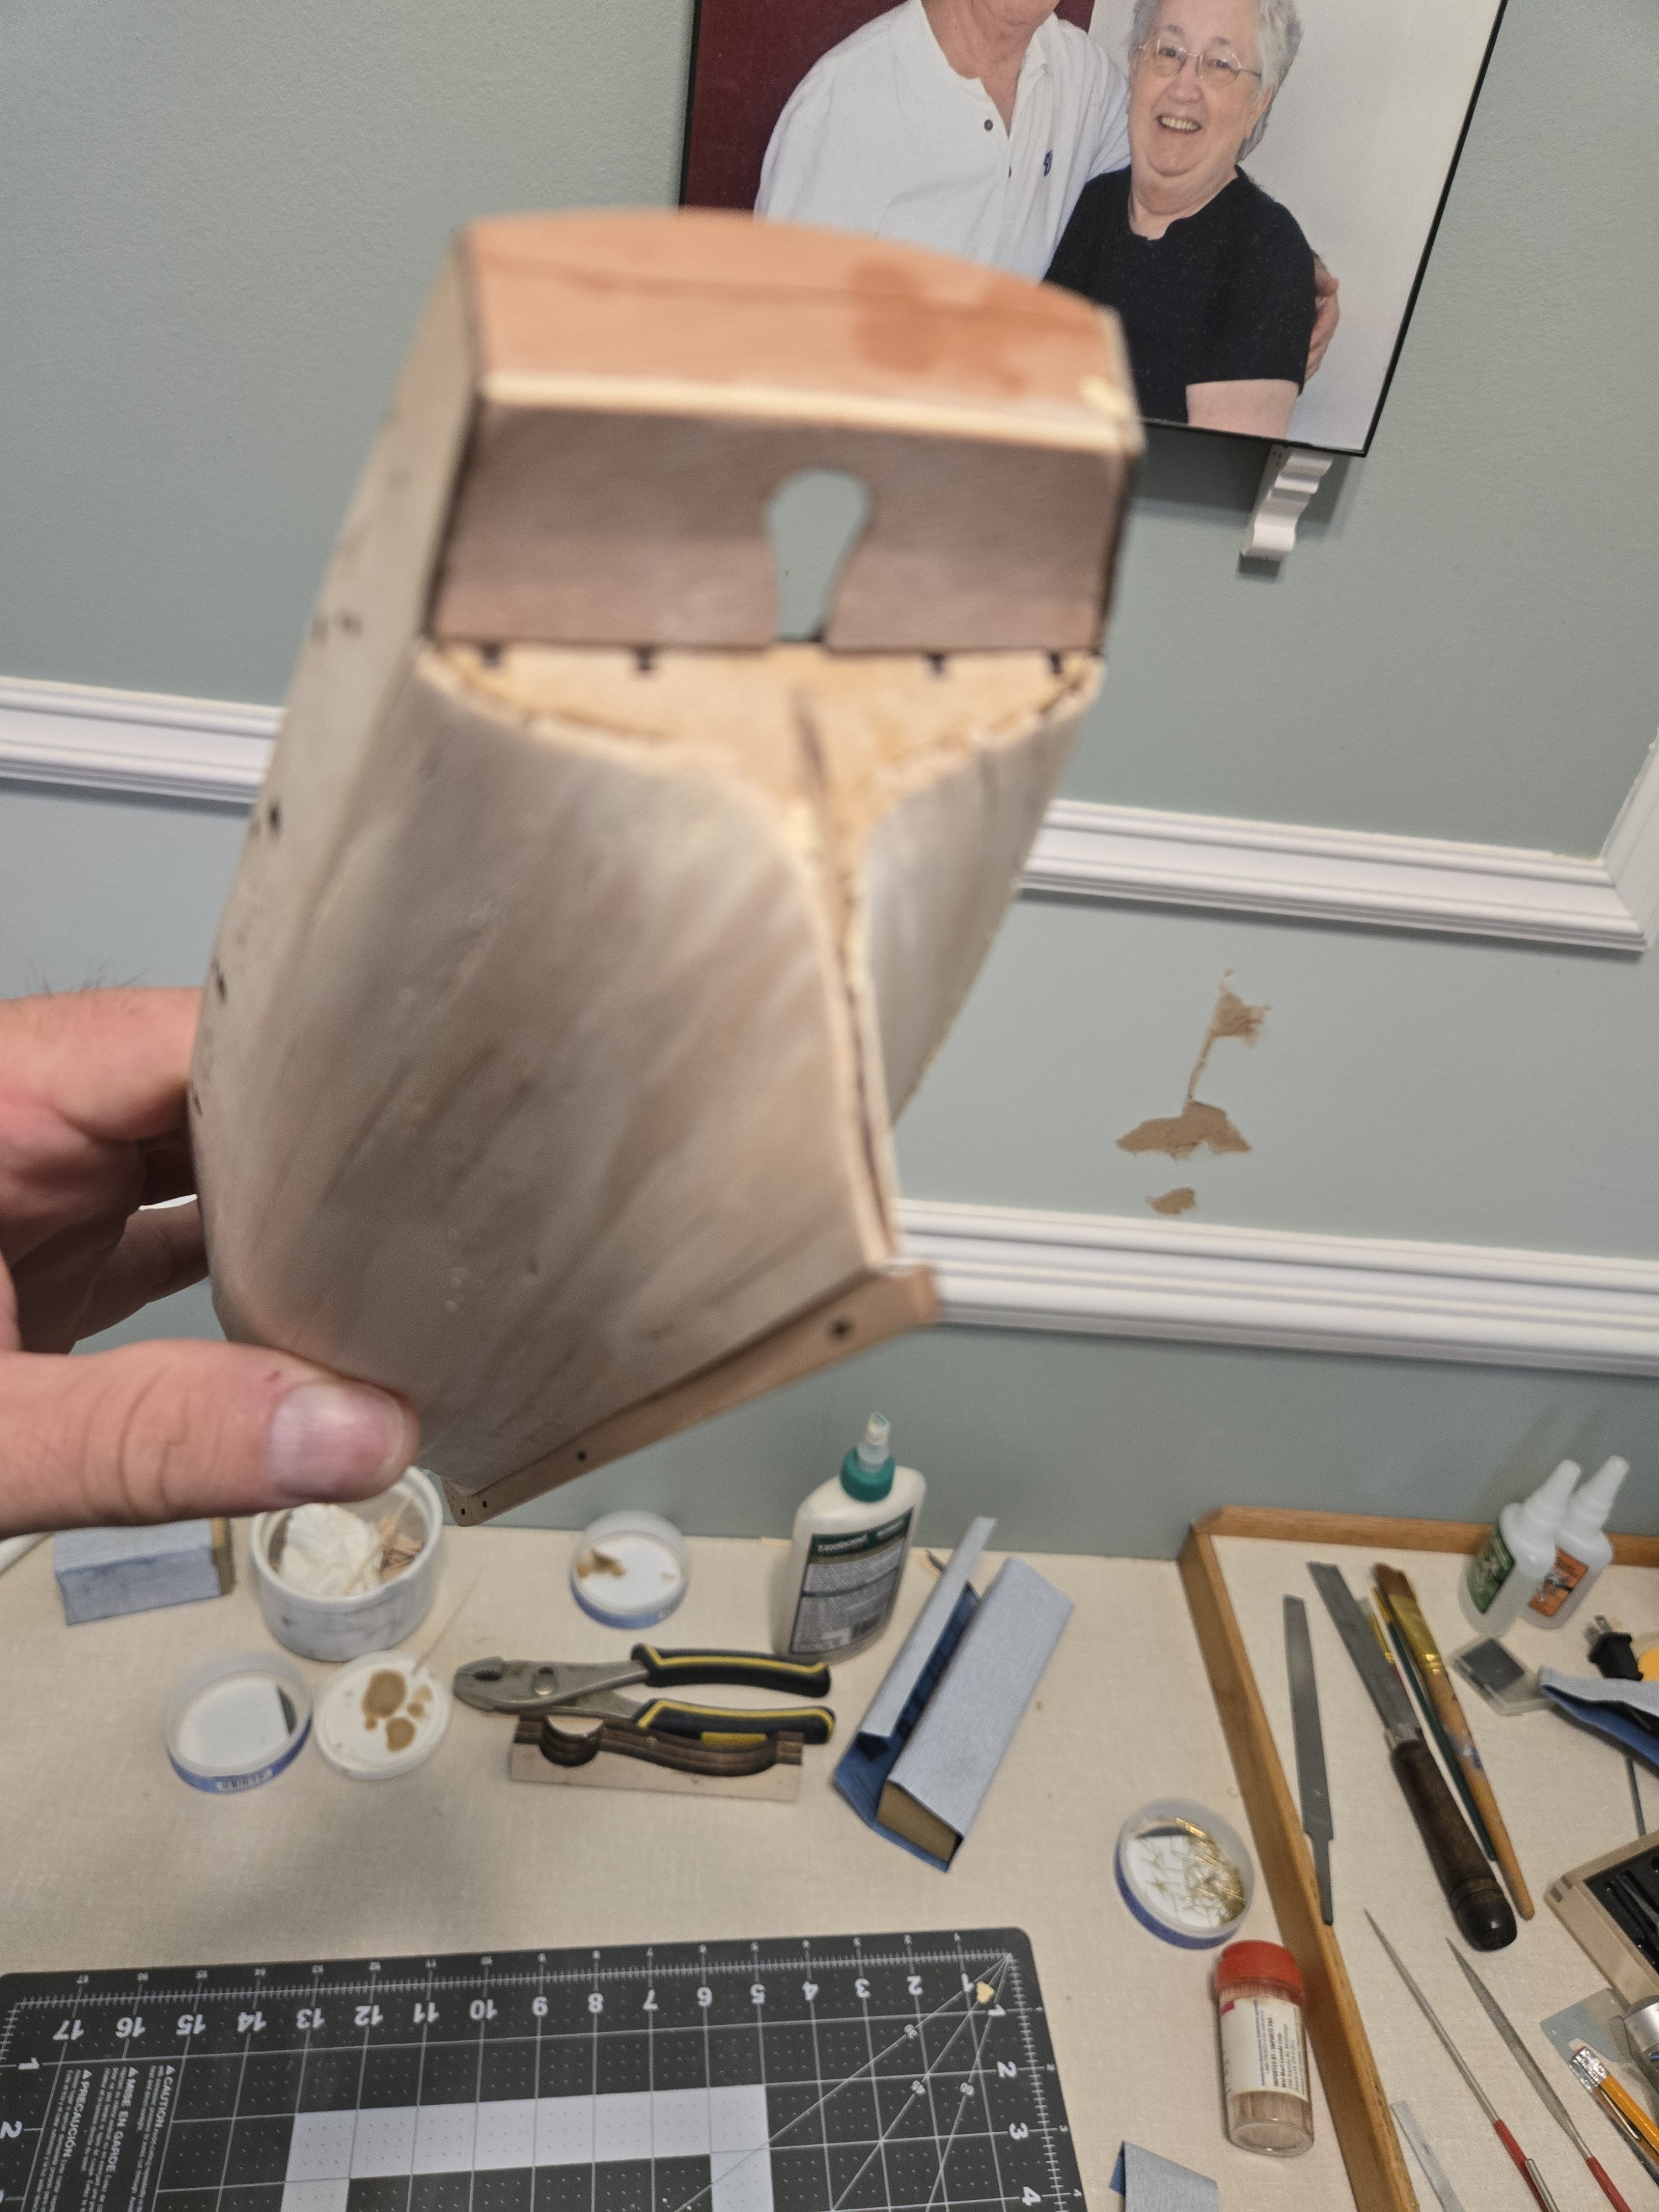
Not a whole lot of progress over the last couple days. A lot of small steps then waiting 12-24 hours for glue to fully cure. I got the keel and prow installed which was a nice and painless process. Then it was time to start working on the...I have no idea the term for these parts. At any rate these were a lot more challenging than the keel. The engraved lines on them don't line up well with my bullworks, but they were lining up very well with my transom and stern counter, and the height against my false deck was also working very well. The manual does mention it's not a big deal if they don't match the bullworks perfectly so I'm thinking it's okay. Do have a tiny gap for about an inch on the same spot on both sides where it turns sharply. I actually give these a bit of a bend with some steam hoping to get rid of it but it just wouldn't go away. In the end I judged it not overly a big deal. There is going to be another deck put over it, and it's a very small gap. Wood filler and some careful file work if it bugs me enough. This evening is definitely time to begin the first planking.


- 20 replies
-
- 6
-
-
- Sherbourne
- Vanguard Models
- (and 1 more)
-
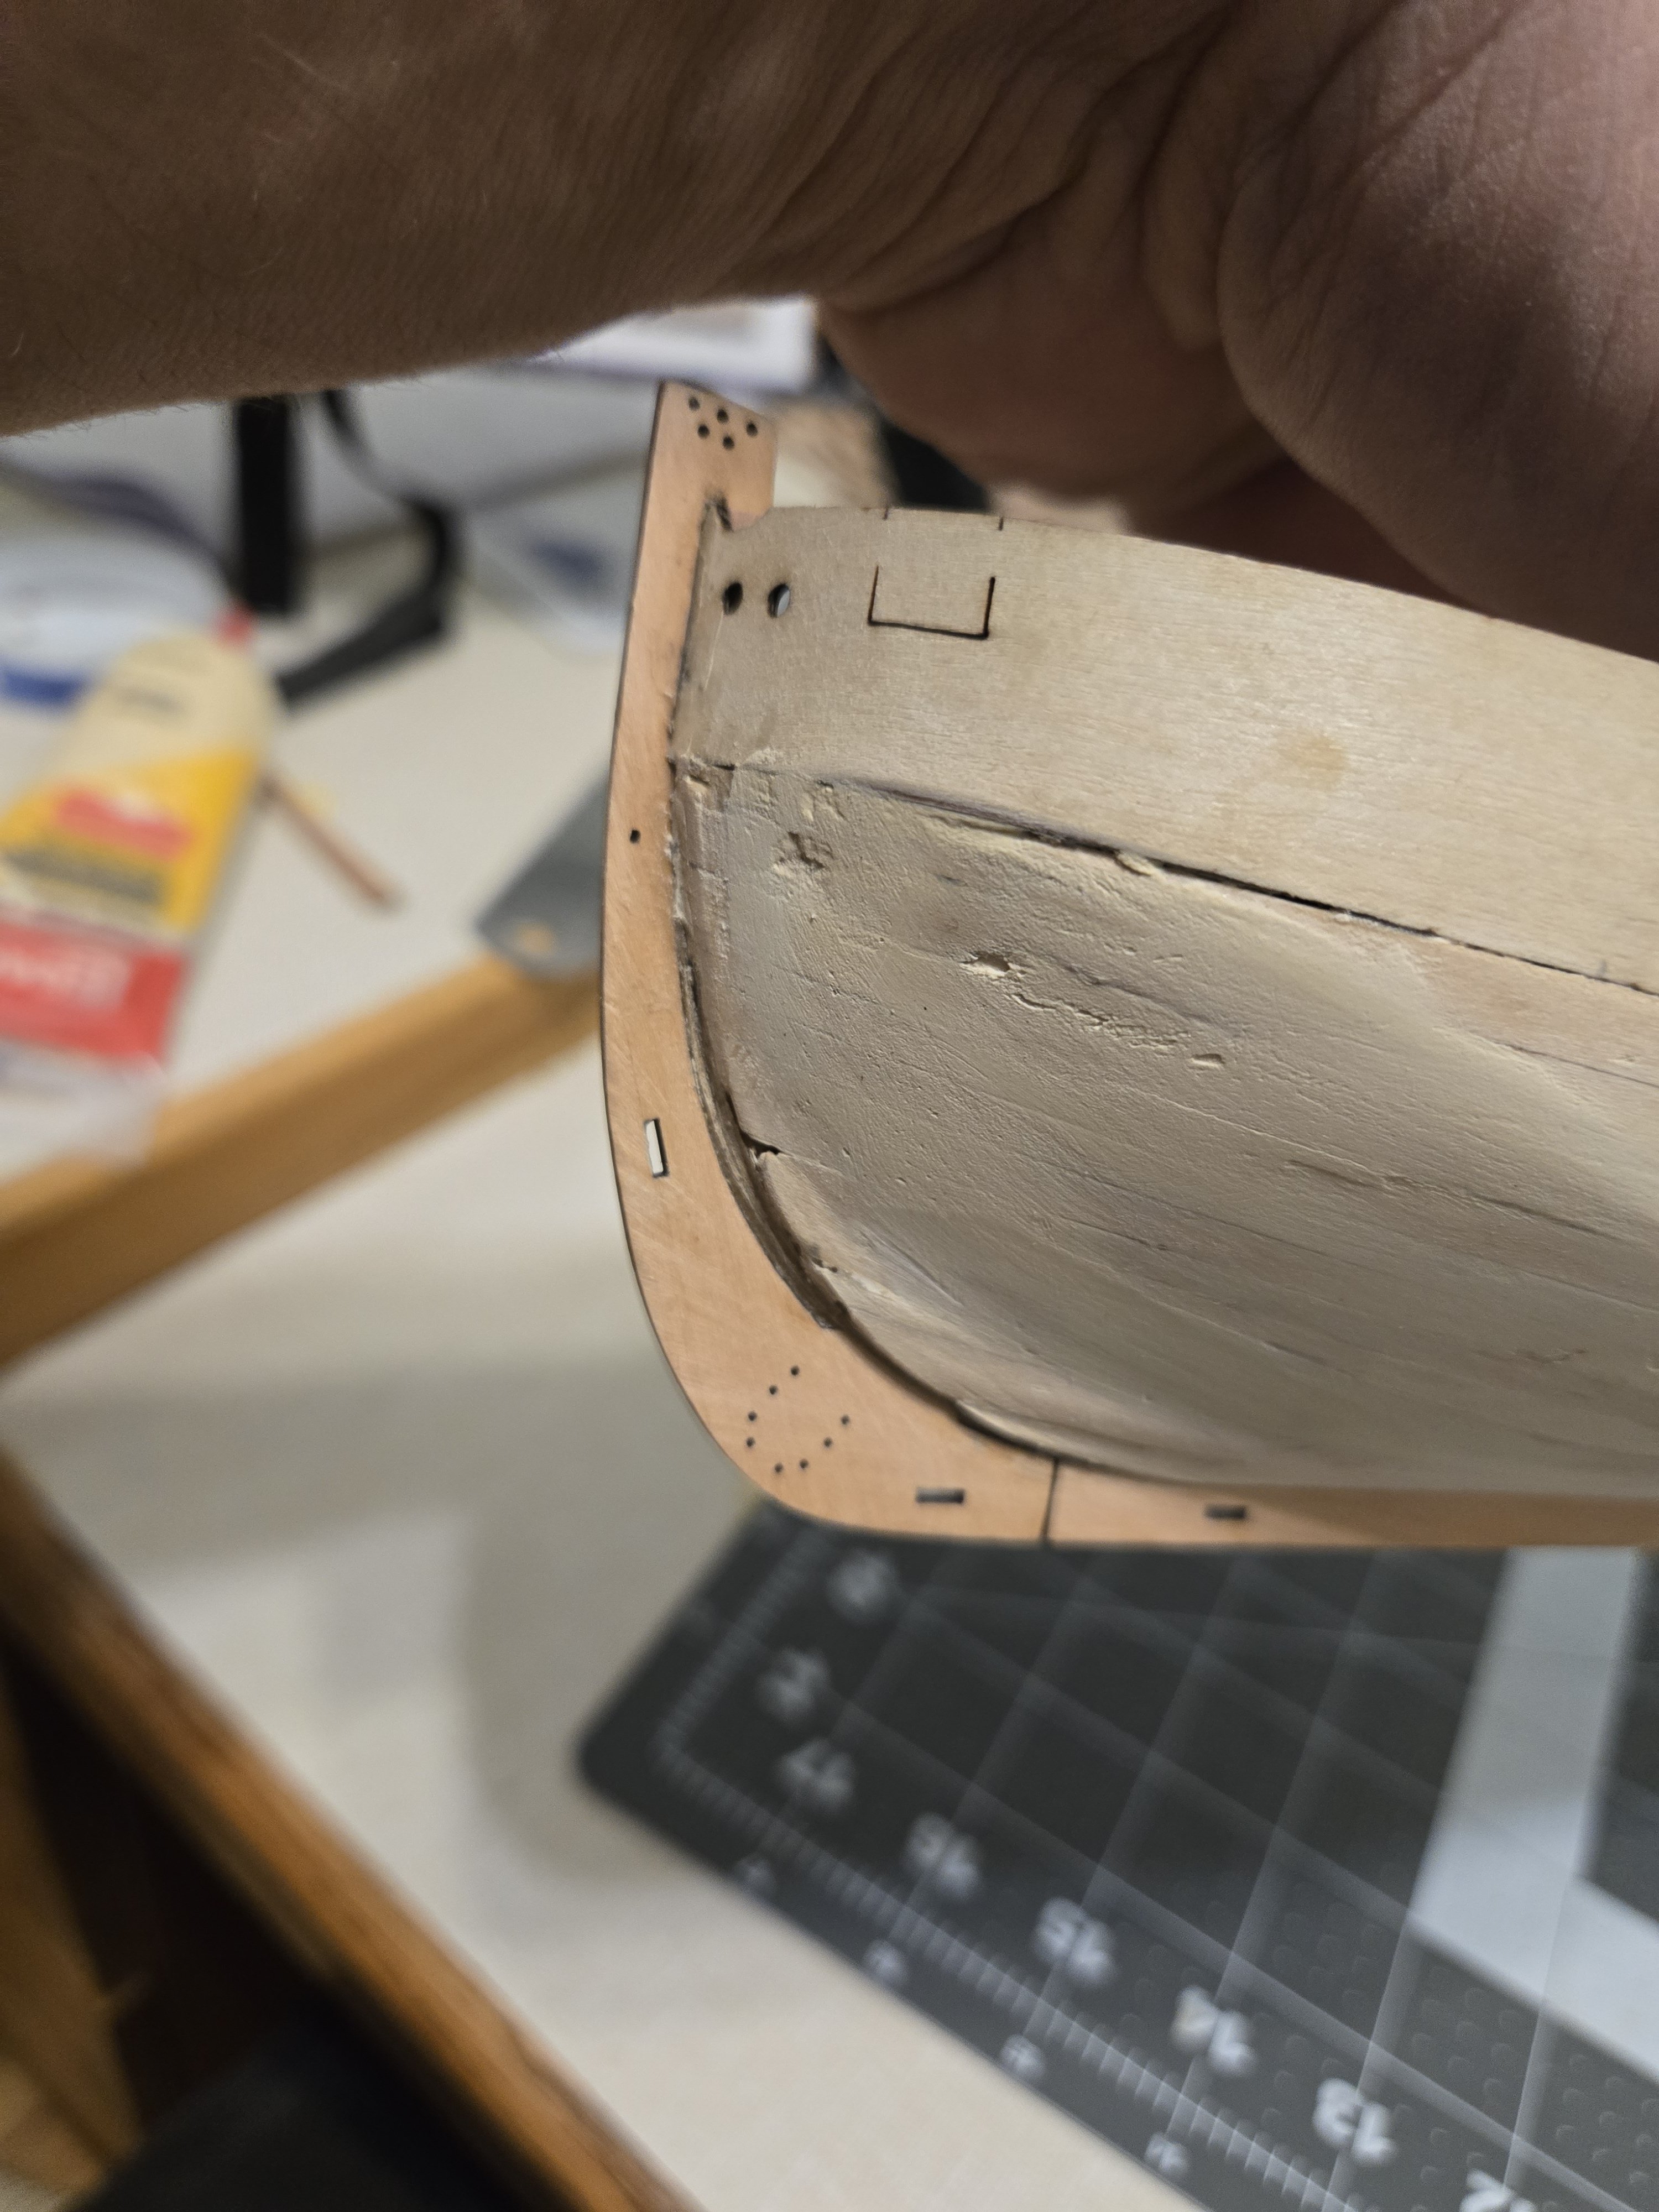
So my kit for Sherbourne arrived day before yesterday, I drove 22 hours home from Ontario that day after picking up some new family pets, slept 4-5 hours and set up my work area. Got a fair chunk of the bulkheads and the skeleton formed. Filed away the bulkheads to the laser mark, and promptly installed them all facing the same direction. After checking a few other build logs here, at least I'm not the only one. Oh well, a few extra minutes with a file. Next up was the thin plywood deck, and it wasn't to bad, but it did require a lot of dry fitting, removing and adjusting the notches with my file. Probably 7-8 test fits before I was happy with it. Then the stern frames, yeah so the 2 inner frames went nice and easy, one of the outers fought me tooth and nail. Took a lot of filing to get it to go...and it broke on the last fitting while pressing it into place. It did sit in nicely however, so I just gave it a dab of medium CA and it's good as new! Until I swing my overly large mitt into one a few minutes later and also break it off. More CA it is! After that I got into the stern counter and inner stern transom. These appeared to fit okay at first glance, I beveled the edge transom and thought it would sit down nicely, seemed to be sitting nicely. It did not sit nicely. Also the parts didn't really line up with each other and it looked weird. I went looking through others build logs here and found that they actually need to be filed/sanded flush, so I went back and did that. Also fixed up the gap with a bit of wood filler and I'm pretty happy with how it's looking now. Clamped all that and left it for a day. Came back at it this evening and it's time to form the hull. I've never built a model before, but I have watched modelkit world do this, so in I went with a sand block and some 180 grit. I've got it fairly smooth and nice I thought, but then went back and looked at his video again and he's definitely taken more off than I have in a few places, so I will probably give it another pass with the sanding block before I call it good. Next time, more sanding, maybe even test fit a plank or two!


- 20 replies
-
- 11
-
-
- Sherbourne
- Vanguard Models
- (and 1 more)
-
Your log actually just saved my bacon about 2 hours ago trying to figure out why some stern parts weren't fitting well. Cheers to you for that!
-
I work on the arctic offshore patrol ships at the moment, a few years from now we'll be switching to the river class destroyers. Not sure anyone is modeling the AOPS or type 26s just yet. Maybe someday! I do see you completed a Bluenose build, and I did have the pleasure of seeing some of the Bluenose II refit awhile back. That was done about 45 minutes away from the yard I work.
-
Hey thought I'd introduce myself. I'm from Nova Scotia, Canada, and work in a shipyard. Figured what better hobby to enjoy after building ships all day long than to come home and build smaller ships lol. Been picking up tools and odds and ends for a few weeks while waiting for an HM Sherbourne kit I ordered from Vanguard to arrive. Looking forward to building said model and chatting here and there. Cheers