Maid of the Mist
-
Posts
70 -
Joined
-
Last visited
Content Type
Profiles
Forums
Gallery
Events
Everything posted by Maid of the Mist
-
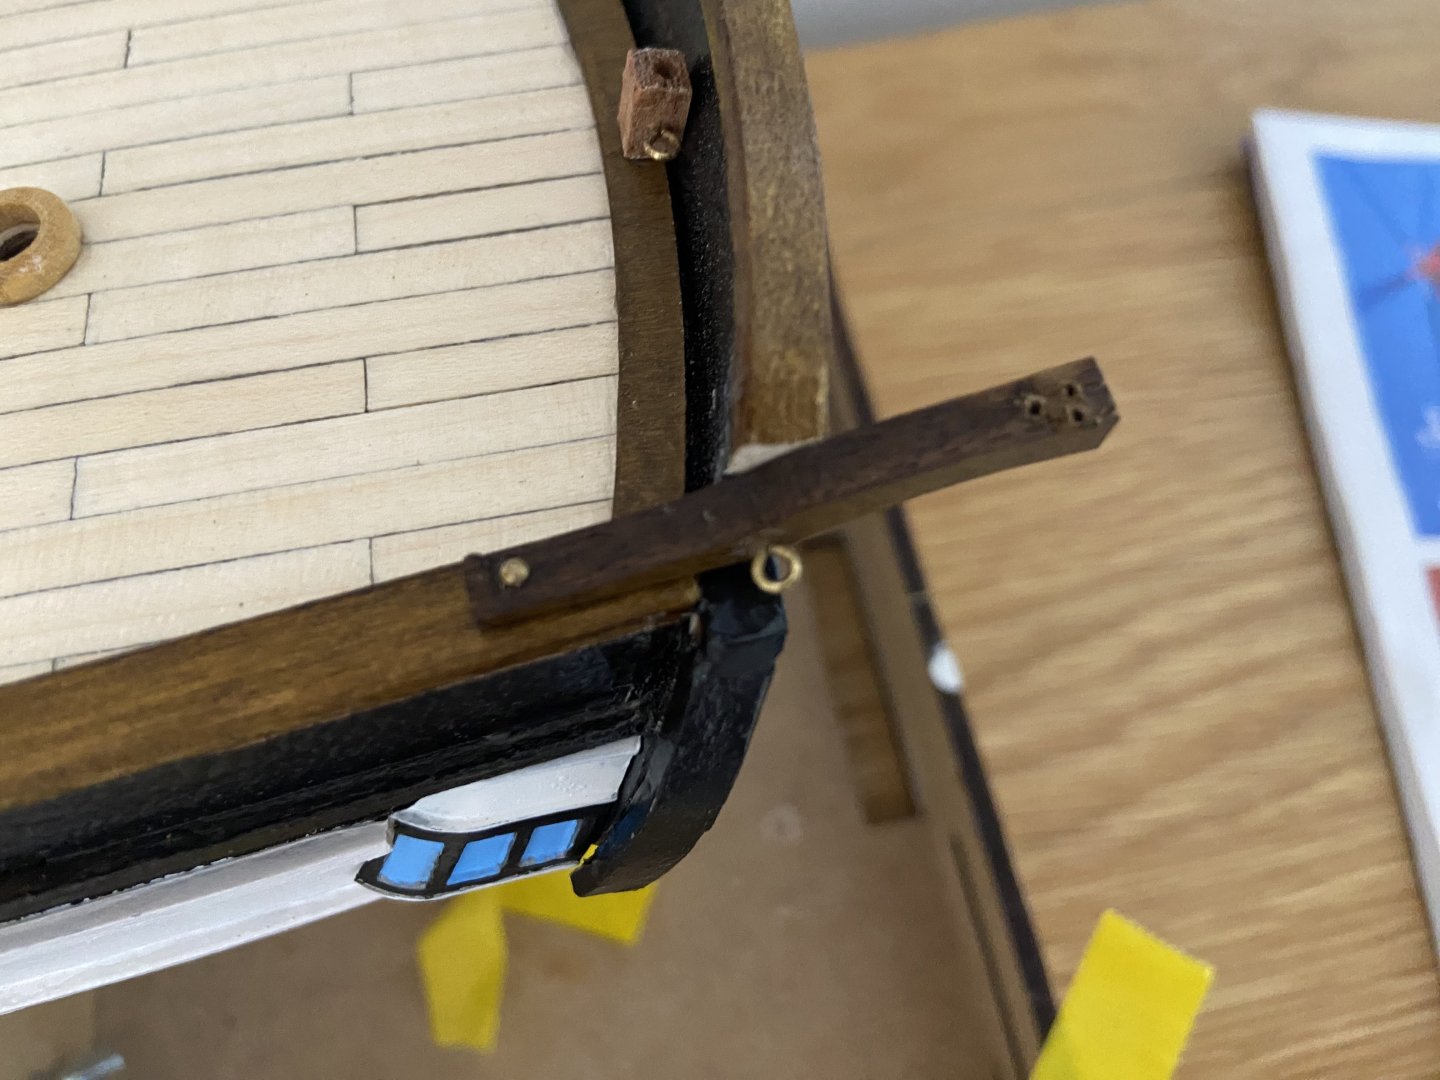
 Attaching the prow adornments gives me another opportunity to have a quick moan about OcCre's dodgy instructions 😆 See below the attachment location for H13, as per the paper instructions. Then the same step in the YouTube tutorial: The attachment location of that piece matters for the vertical supports. Only a minor adjustment, but it means yet again having to detach and rework pieces I've already done! That said... I've found the wire bending at the prow to be quite enjoyable 🙂 It's much thicker wire than used at the stern, so it doesn't lose it's shape easily.
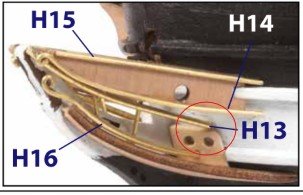

-
A shipwright drinking on the job? Living up to the highest standards of the Royal Navy, I see 🫡
-
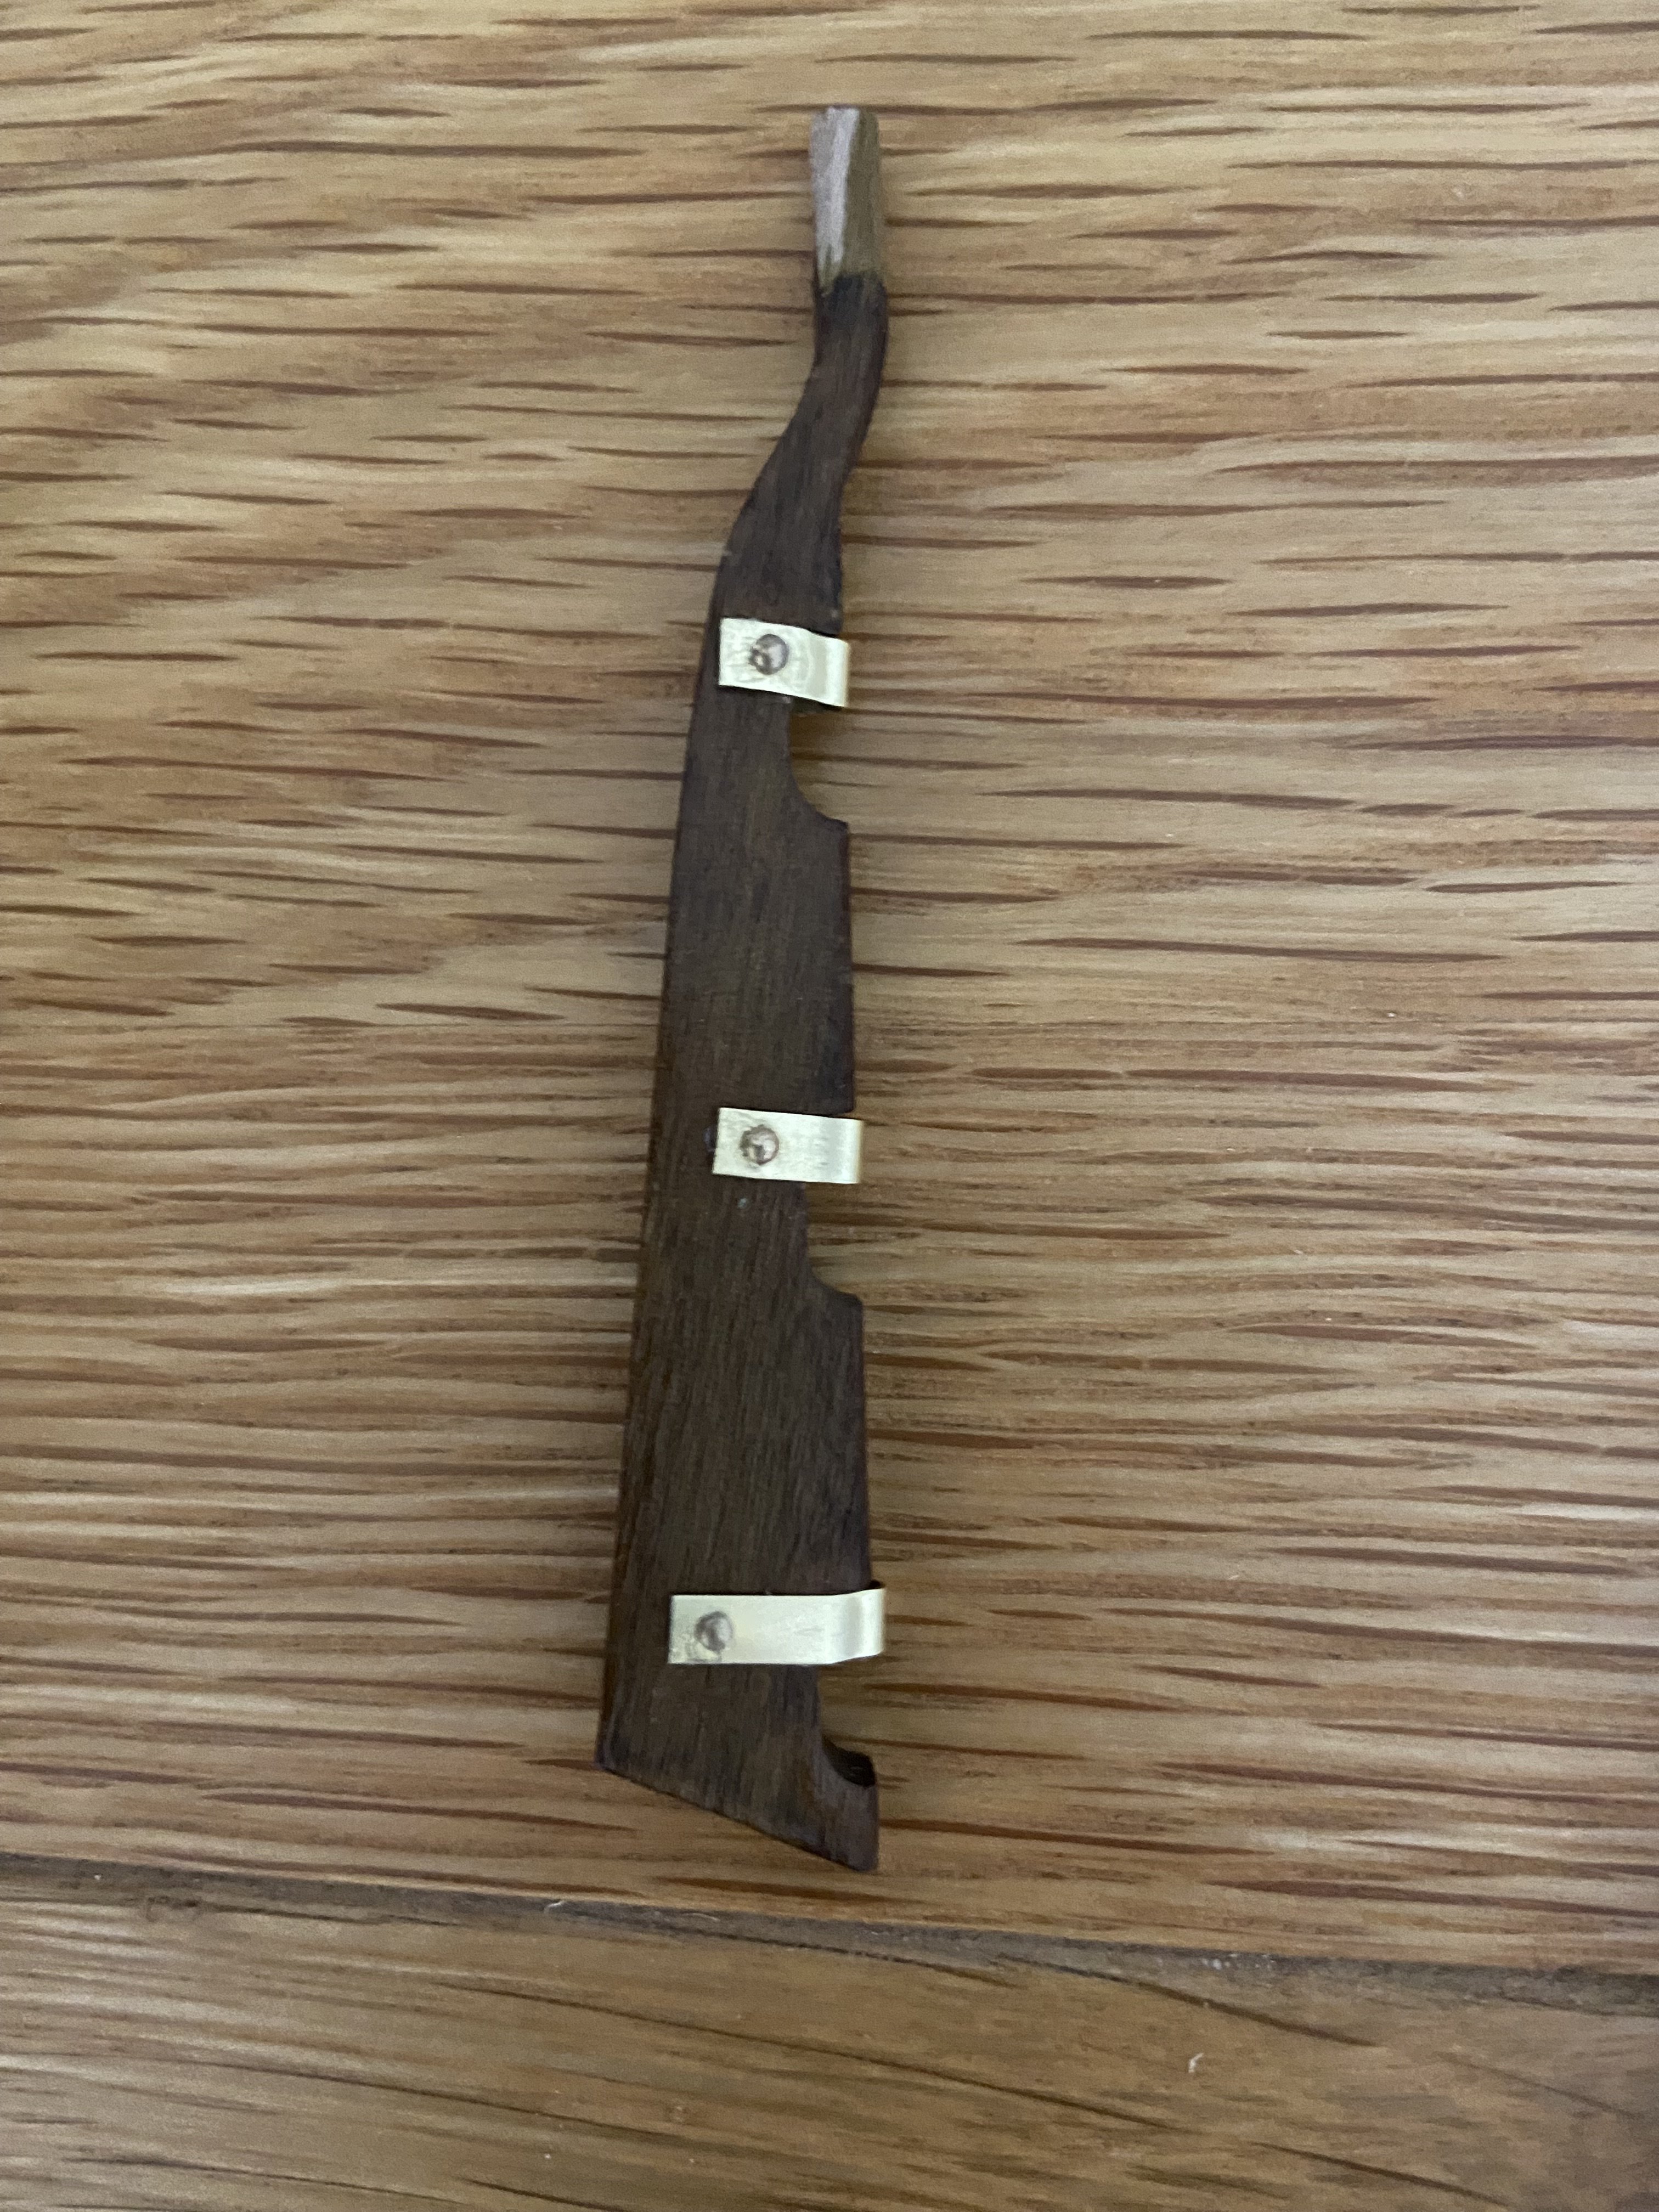
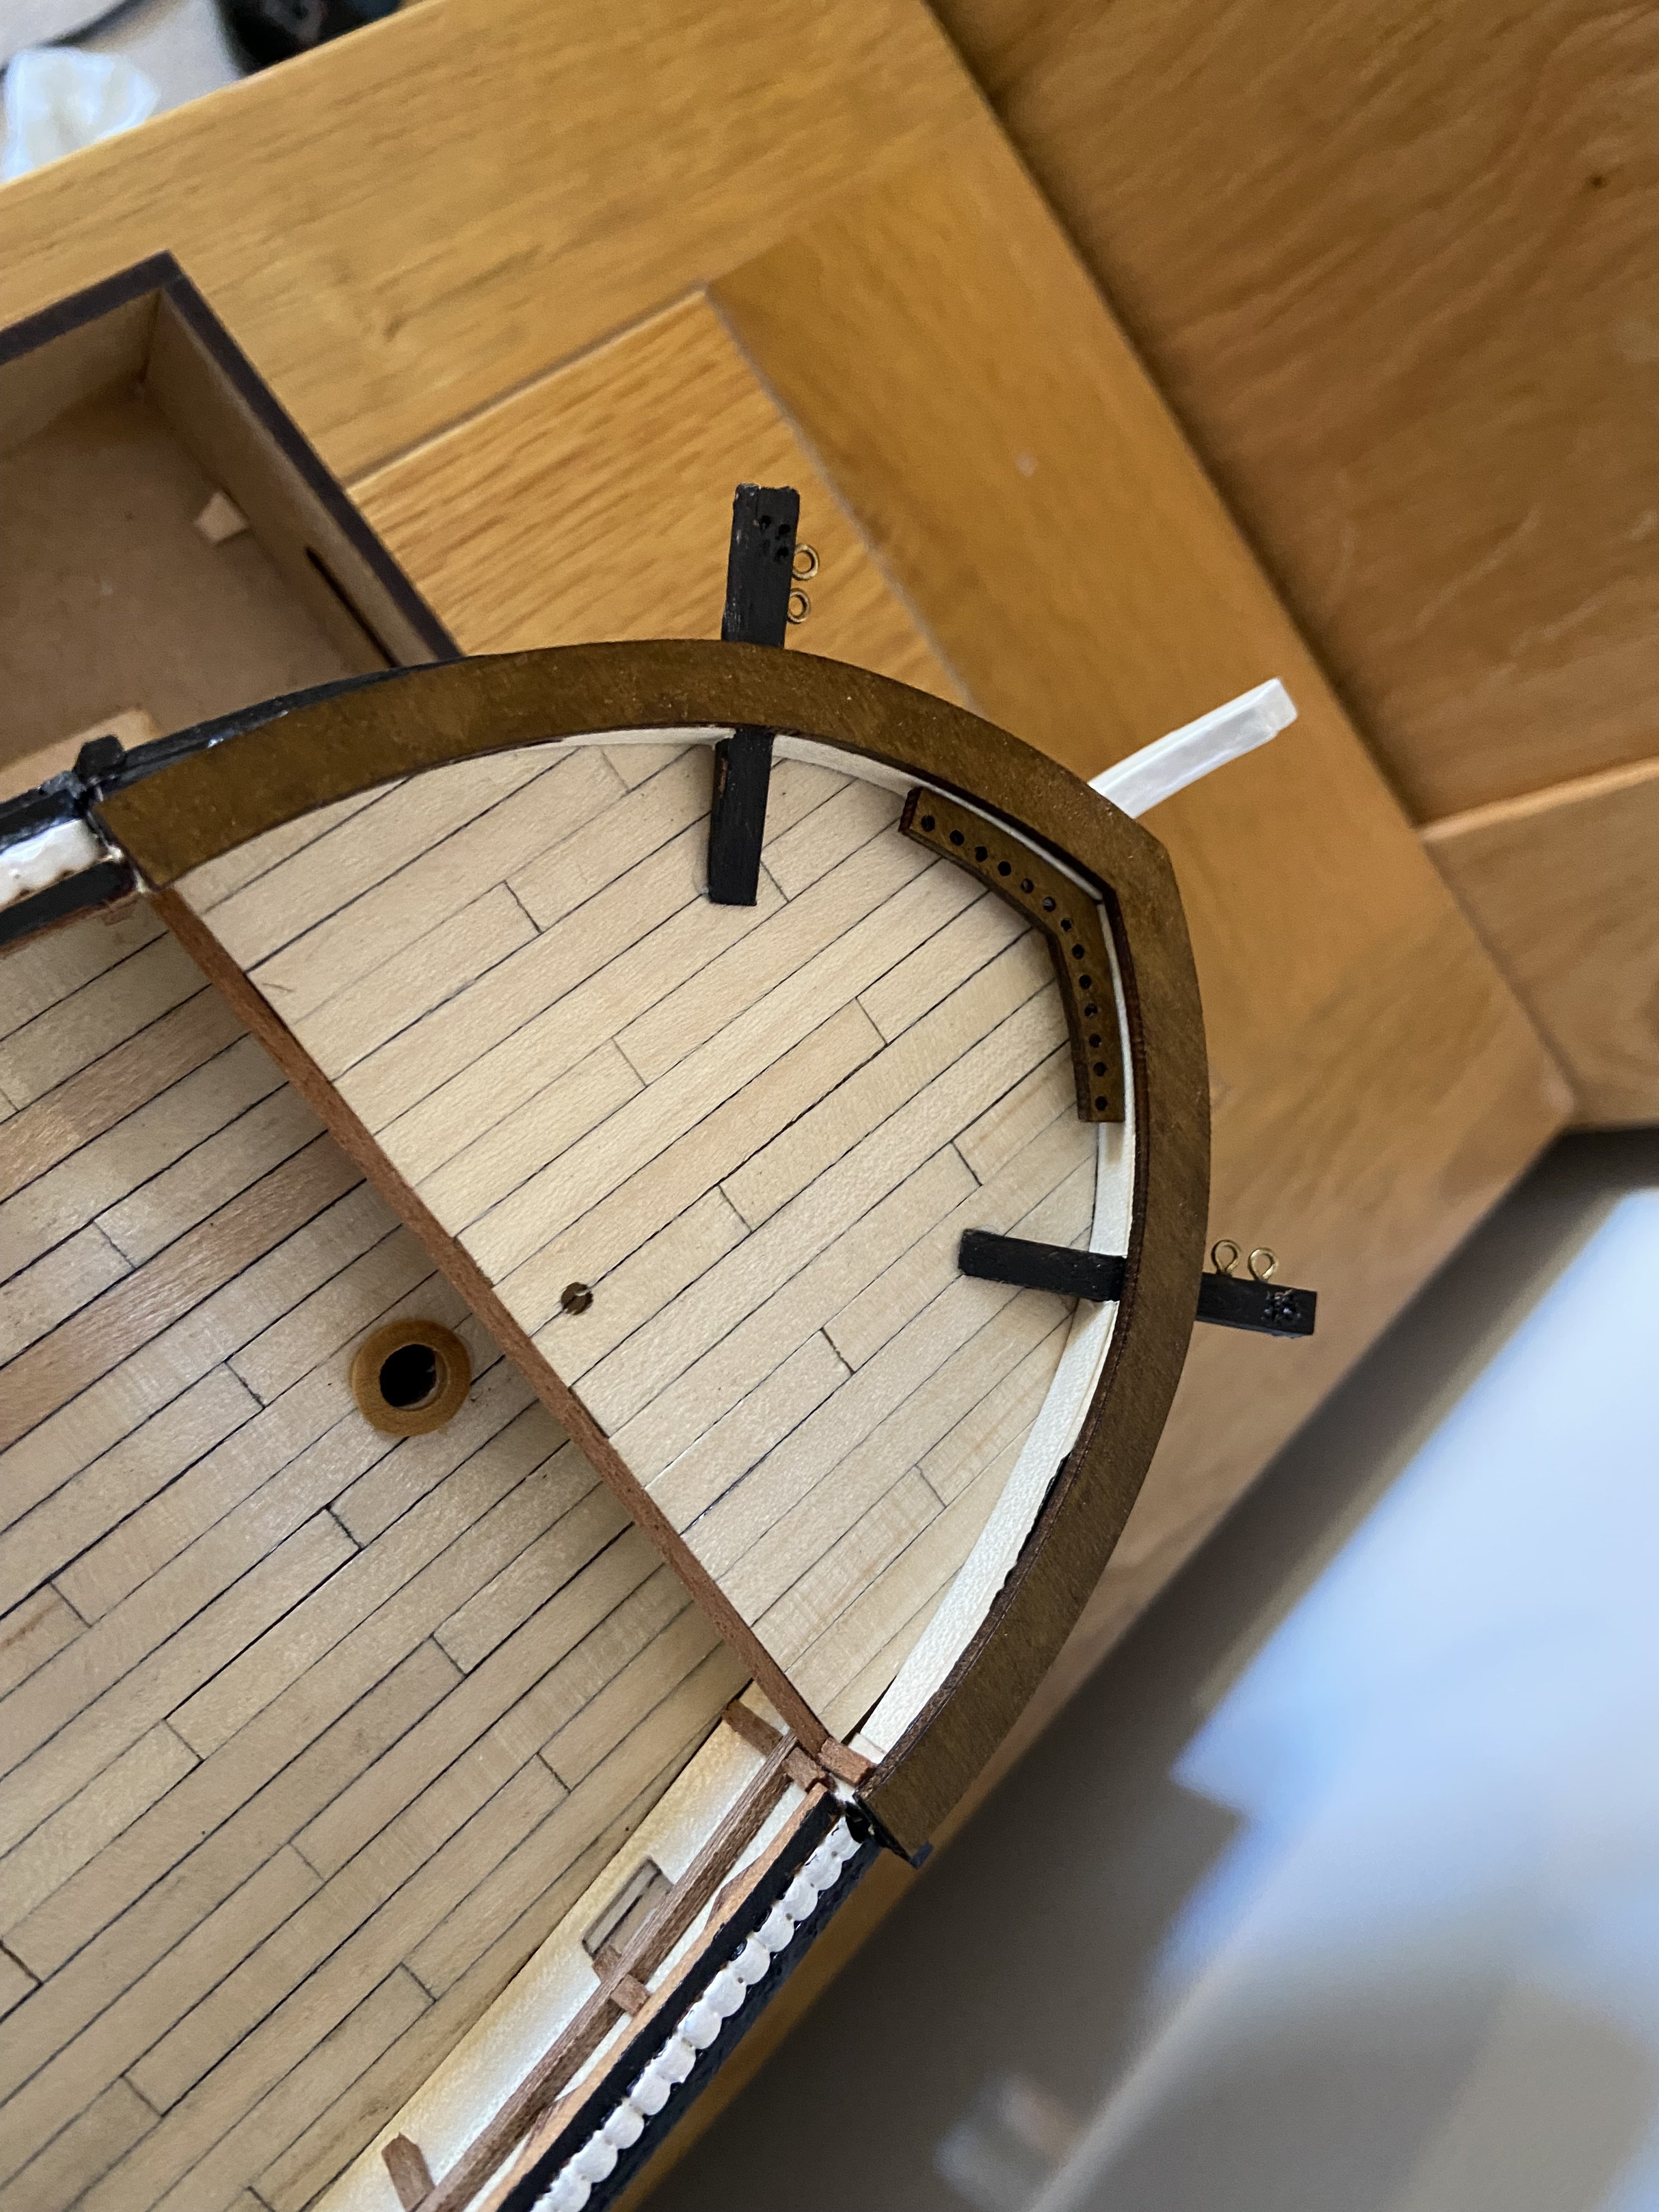
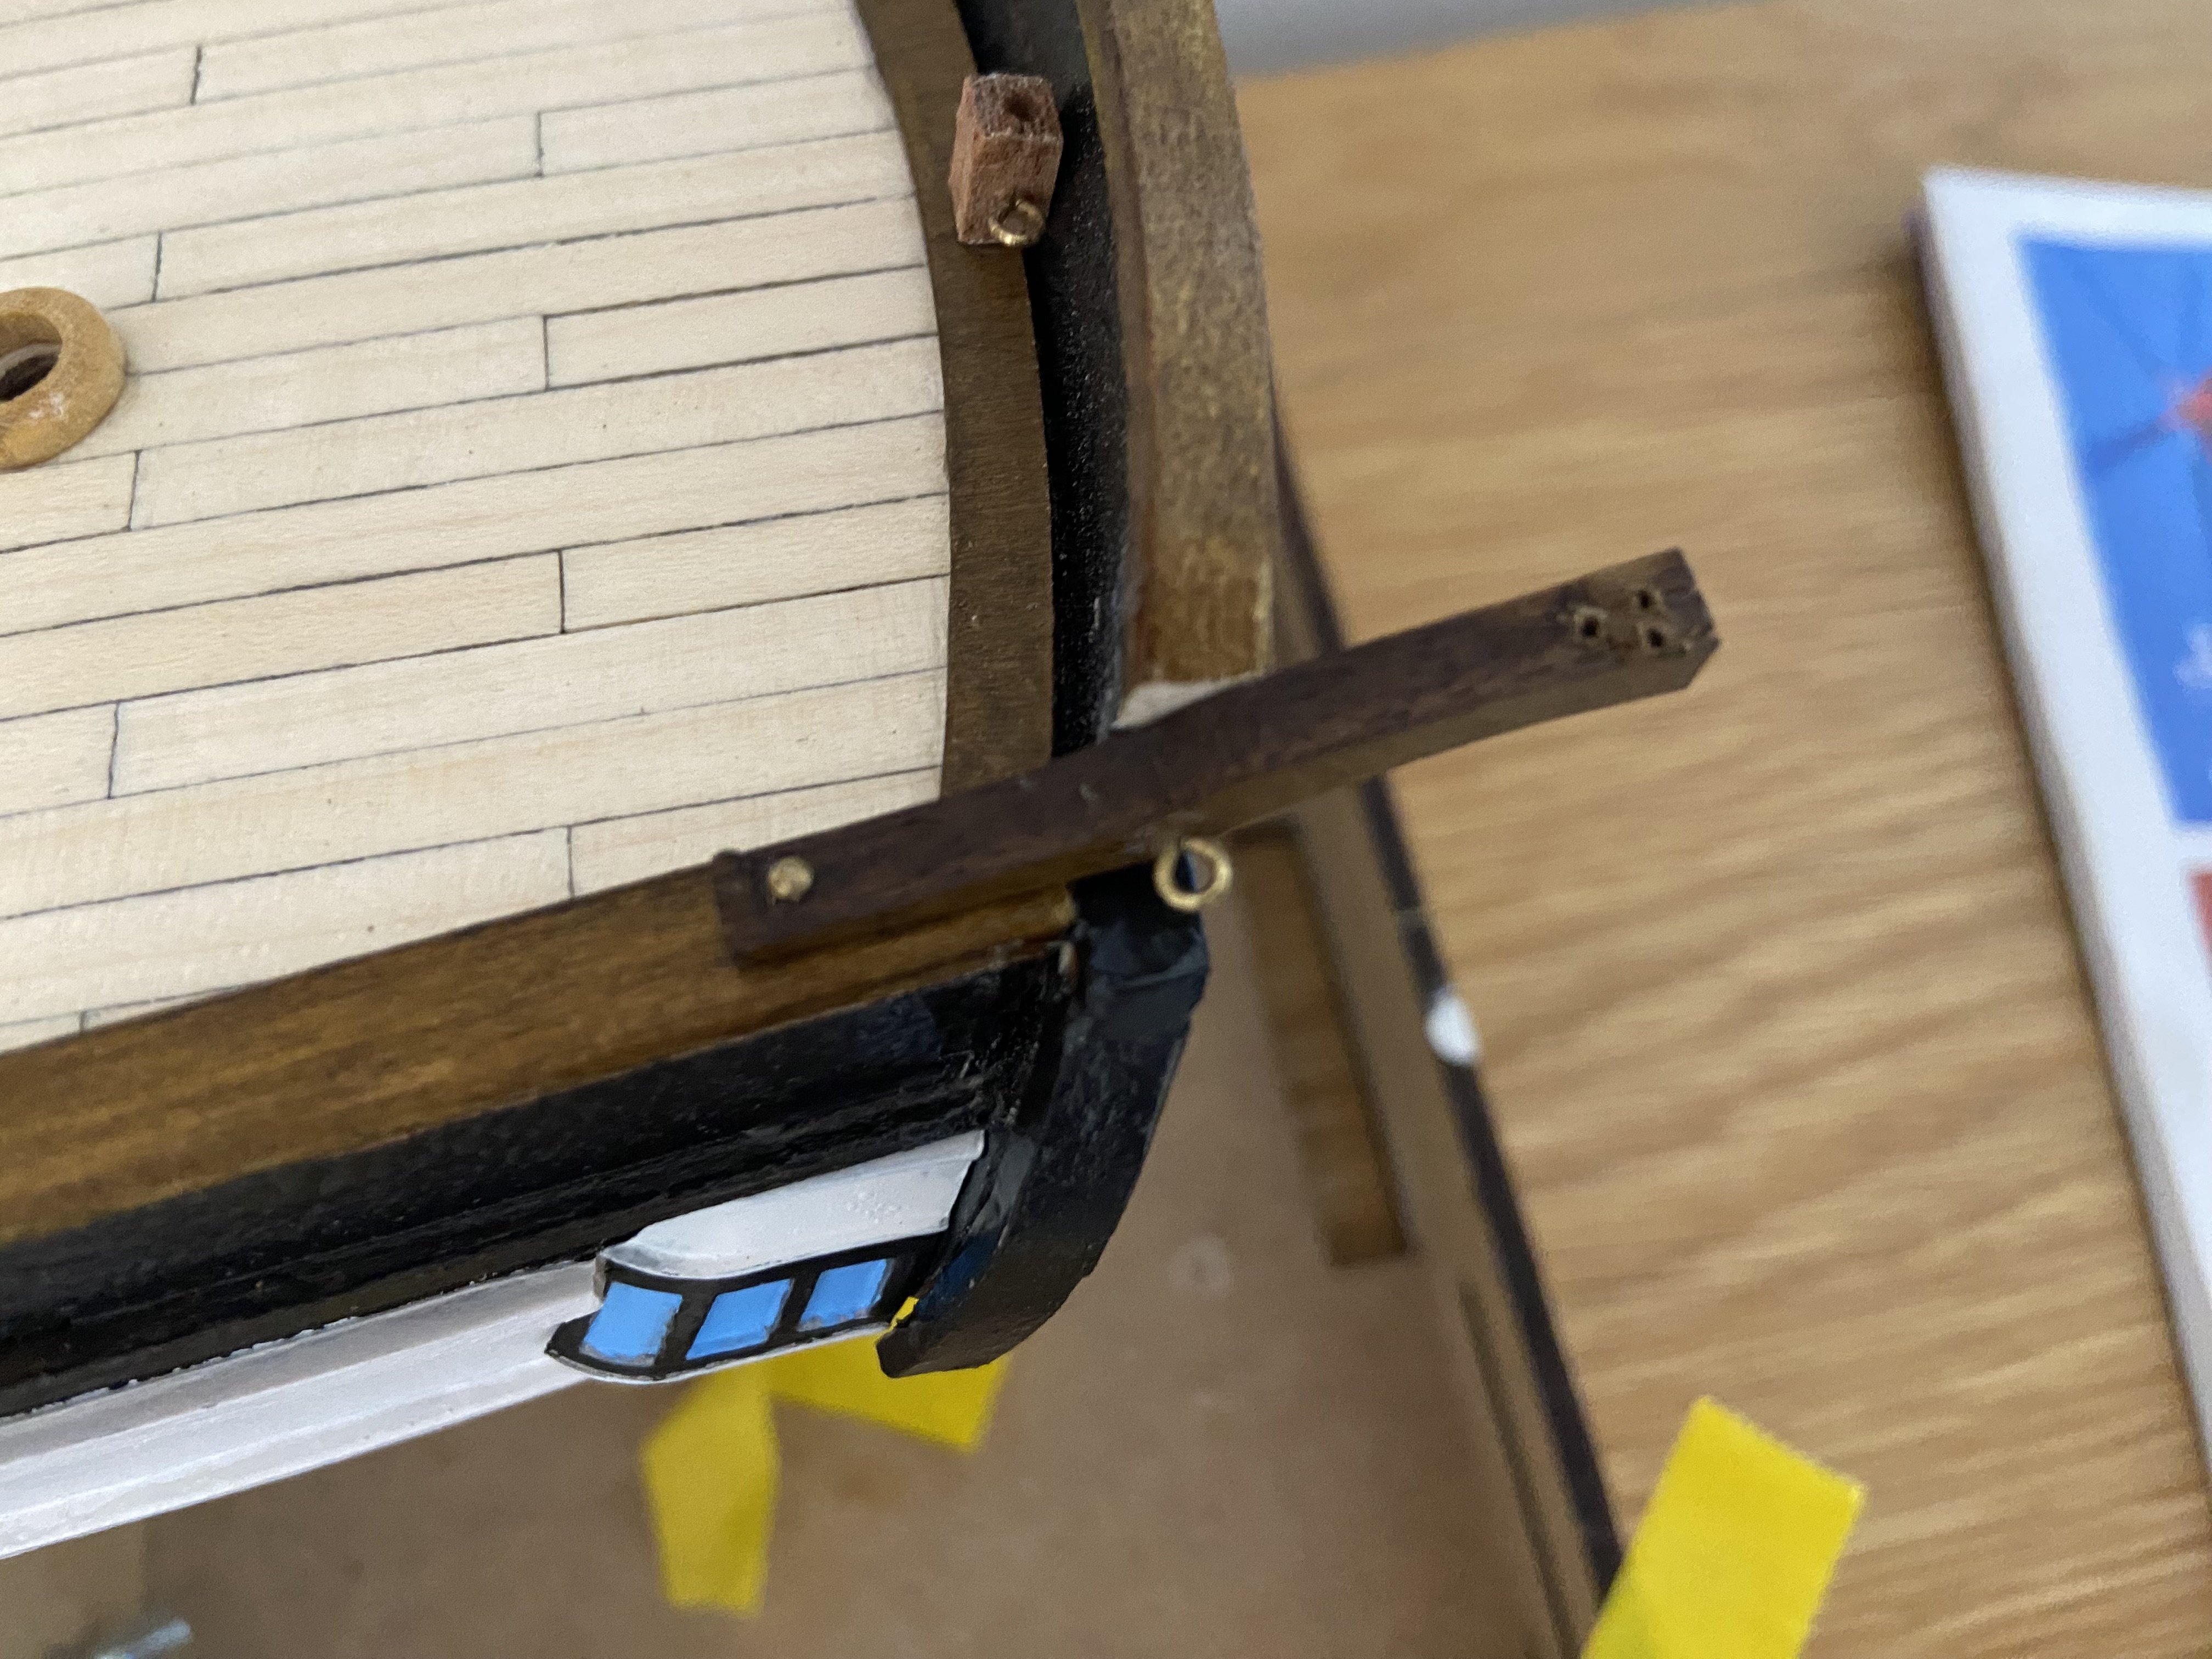
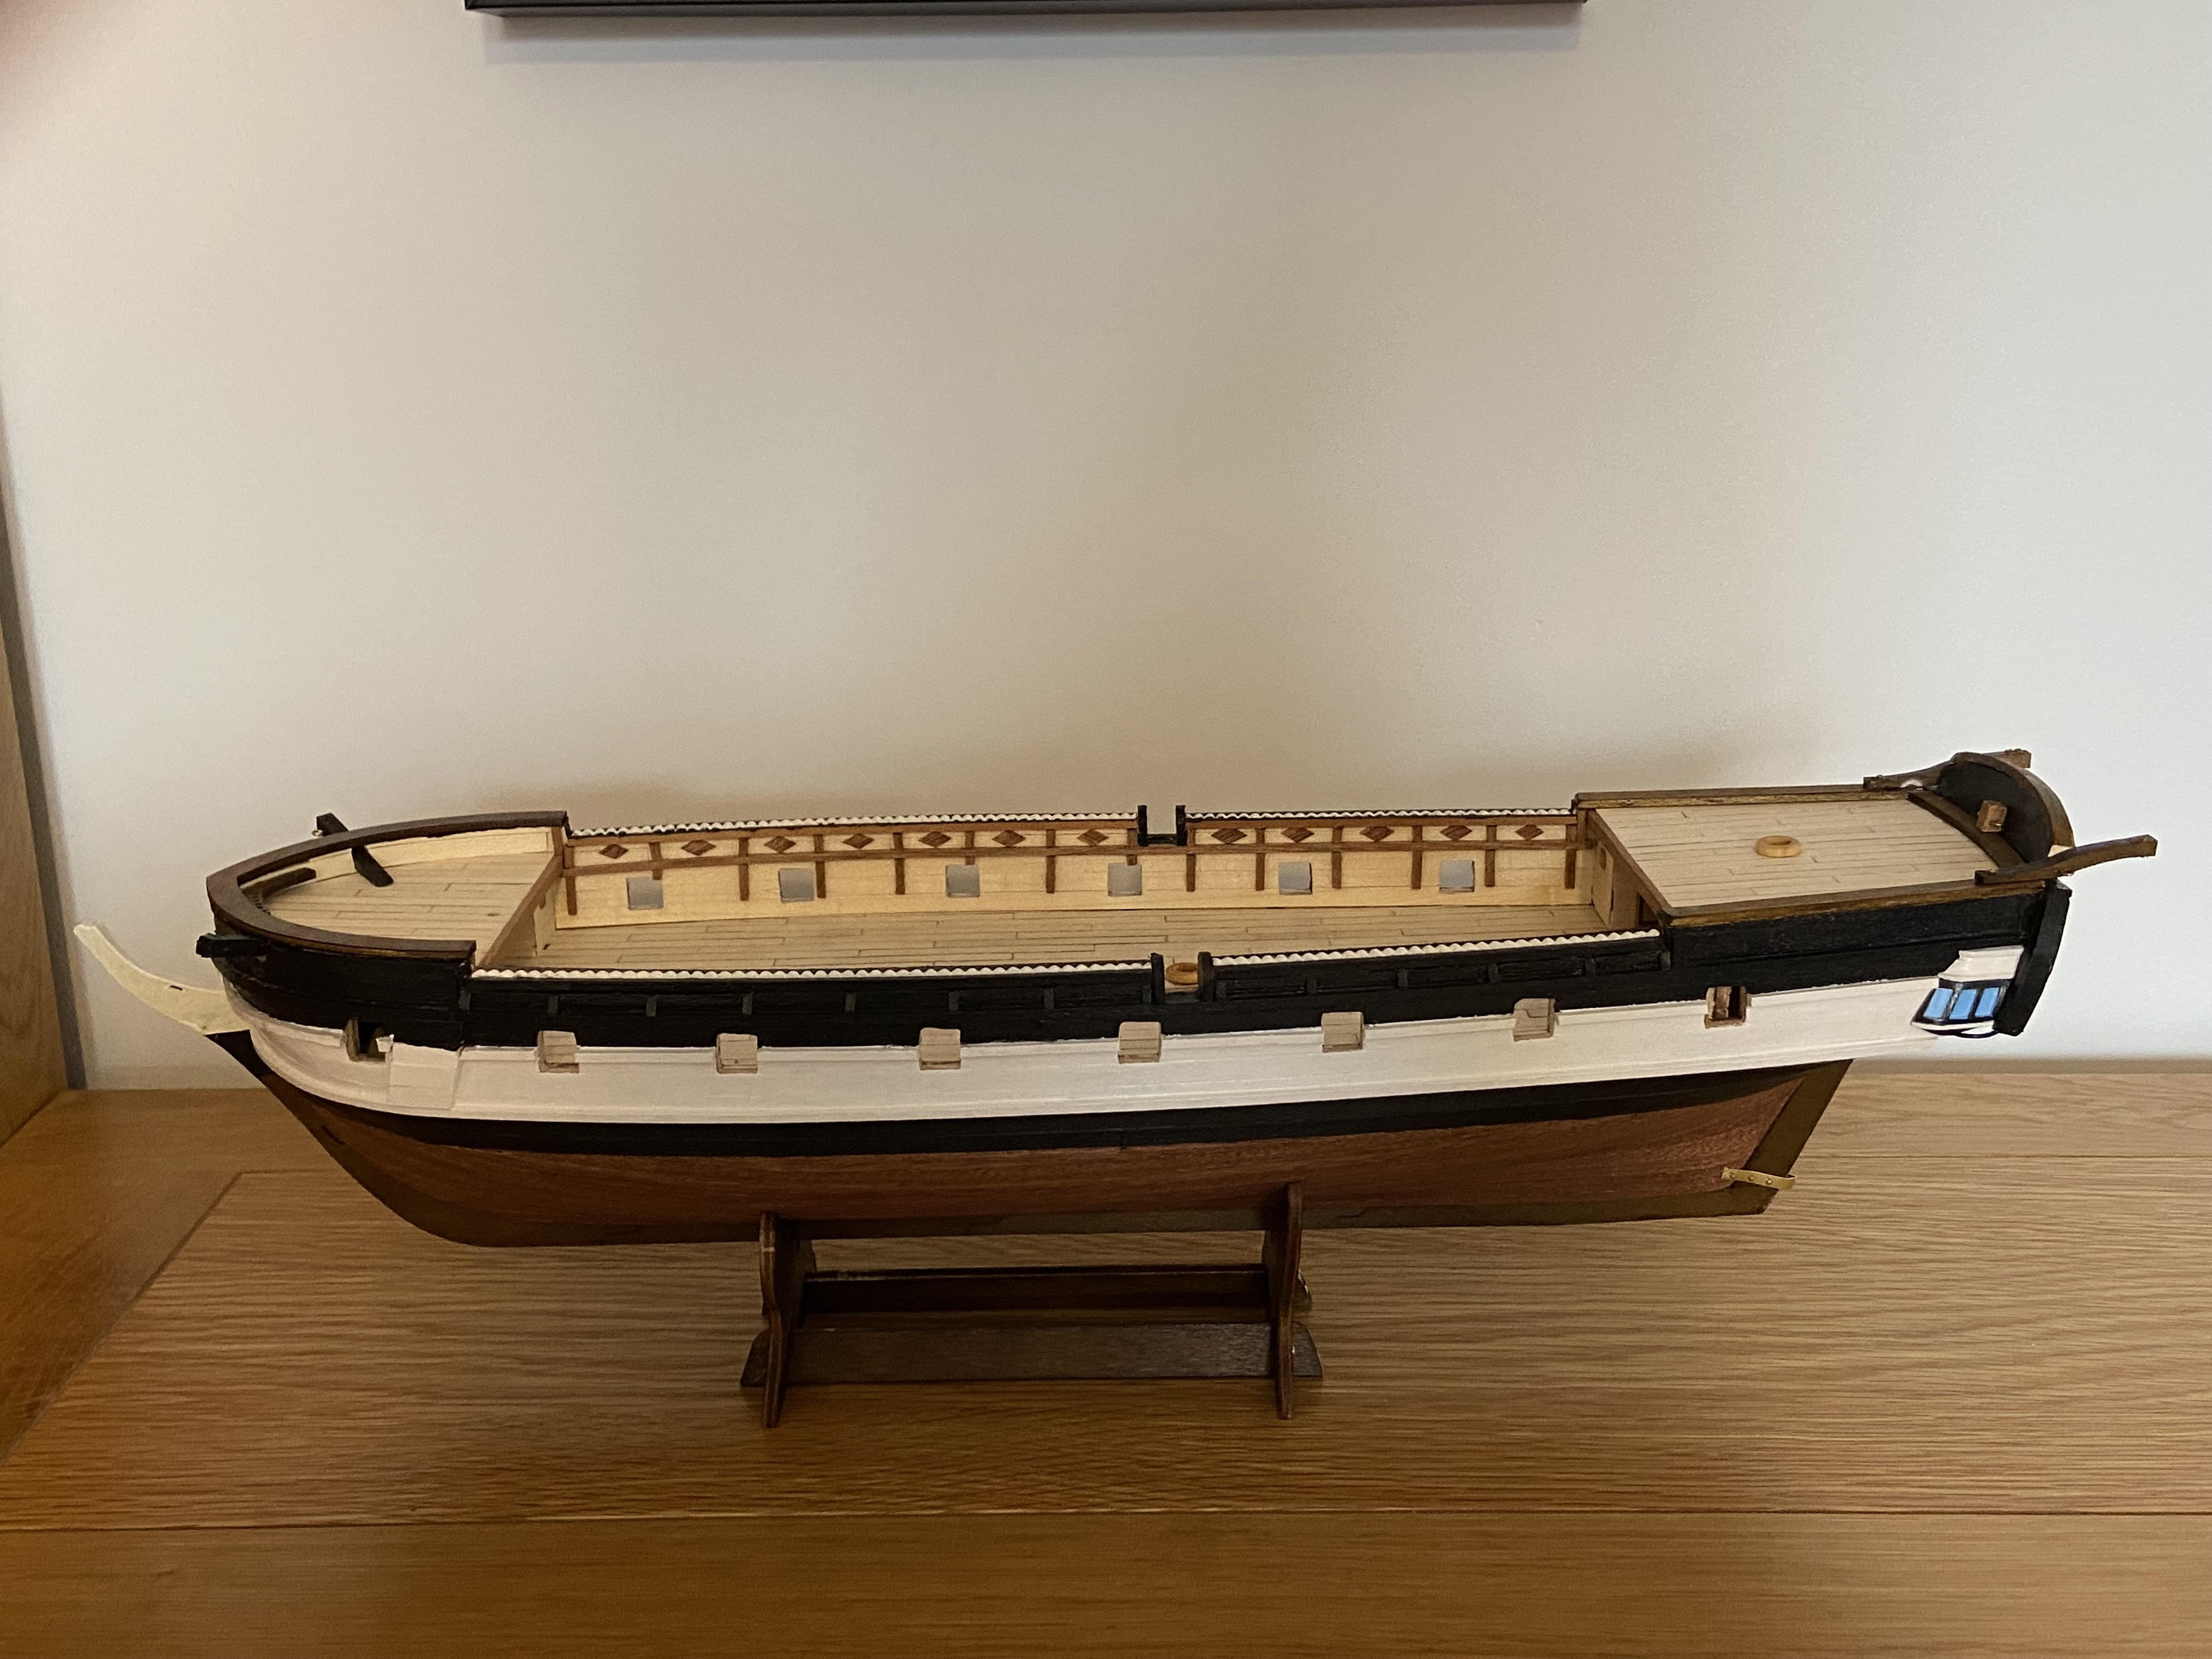
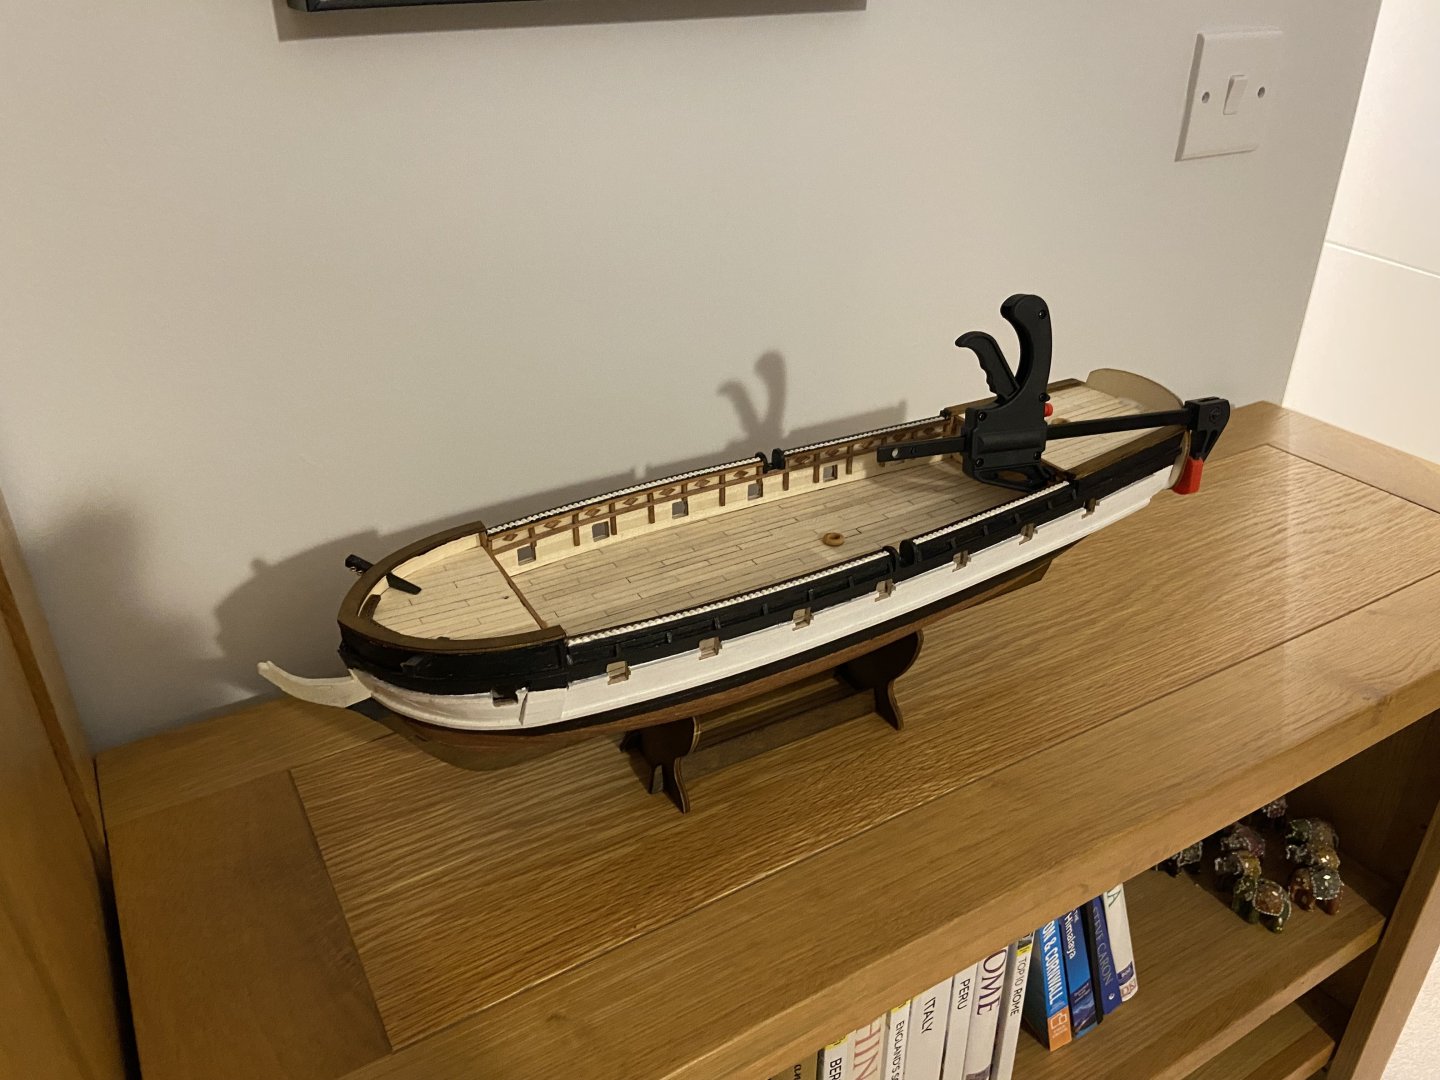
Over the past few days, I’ve been working on some smaller details. They may be minor compared to the big changes from earlier weeks, but they took just as much time. Plenty of shaping, painting, staining, varnishing and finally gluing. The bow pieces went on without much trouble, though the catheads required more shaping than the instructions let on. Next came the stern details: the davits and the stern galleries. For the windows, used the medium blue provided by OcCre. On a ship that’s otherwise mostly brown, black and white, that small touch of colour is a bit of fun. I like to imagine it as the reflection of sea and sky in the glass, as though the vessel were already out on the water. Finally, the rudder. This only my second model ship. My first was the OcCre Polaris and I still find the rudder really catches the eye on the finished model since OcCre does their pintles and gudgeons in bright brass. The rough section at the top of the rudder slots into the hull and disappears from view once the rudder is installed. Fitting it all together without making a mess proved a bit challenging. Although the gudgeons came with pre-drilled holes, they didn’t line up for this rudder size. I had to cut the gudgeons down, re-punch or drill new holes, and shorten the nails to just a couple of millimeters before fixing them in place with CA glue. I still need to fit the rudder to the ship, but here is the current state of play, after almost 7 weeks. Perhaps approaching the halfway point? P.S. Bending brass wire is no fun at all. I didn't like it for the stern decorations, and I'm dreading it for the bow.


-
An elegant solution to avoid glue 🙂 Looking good, sir.
-
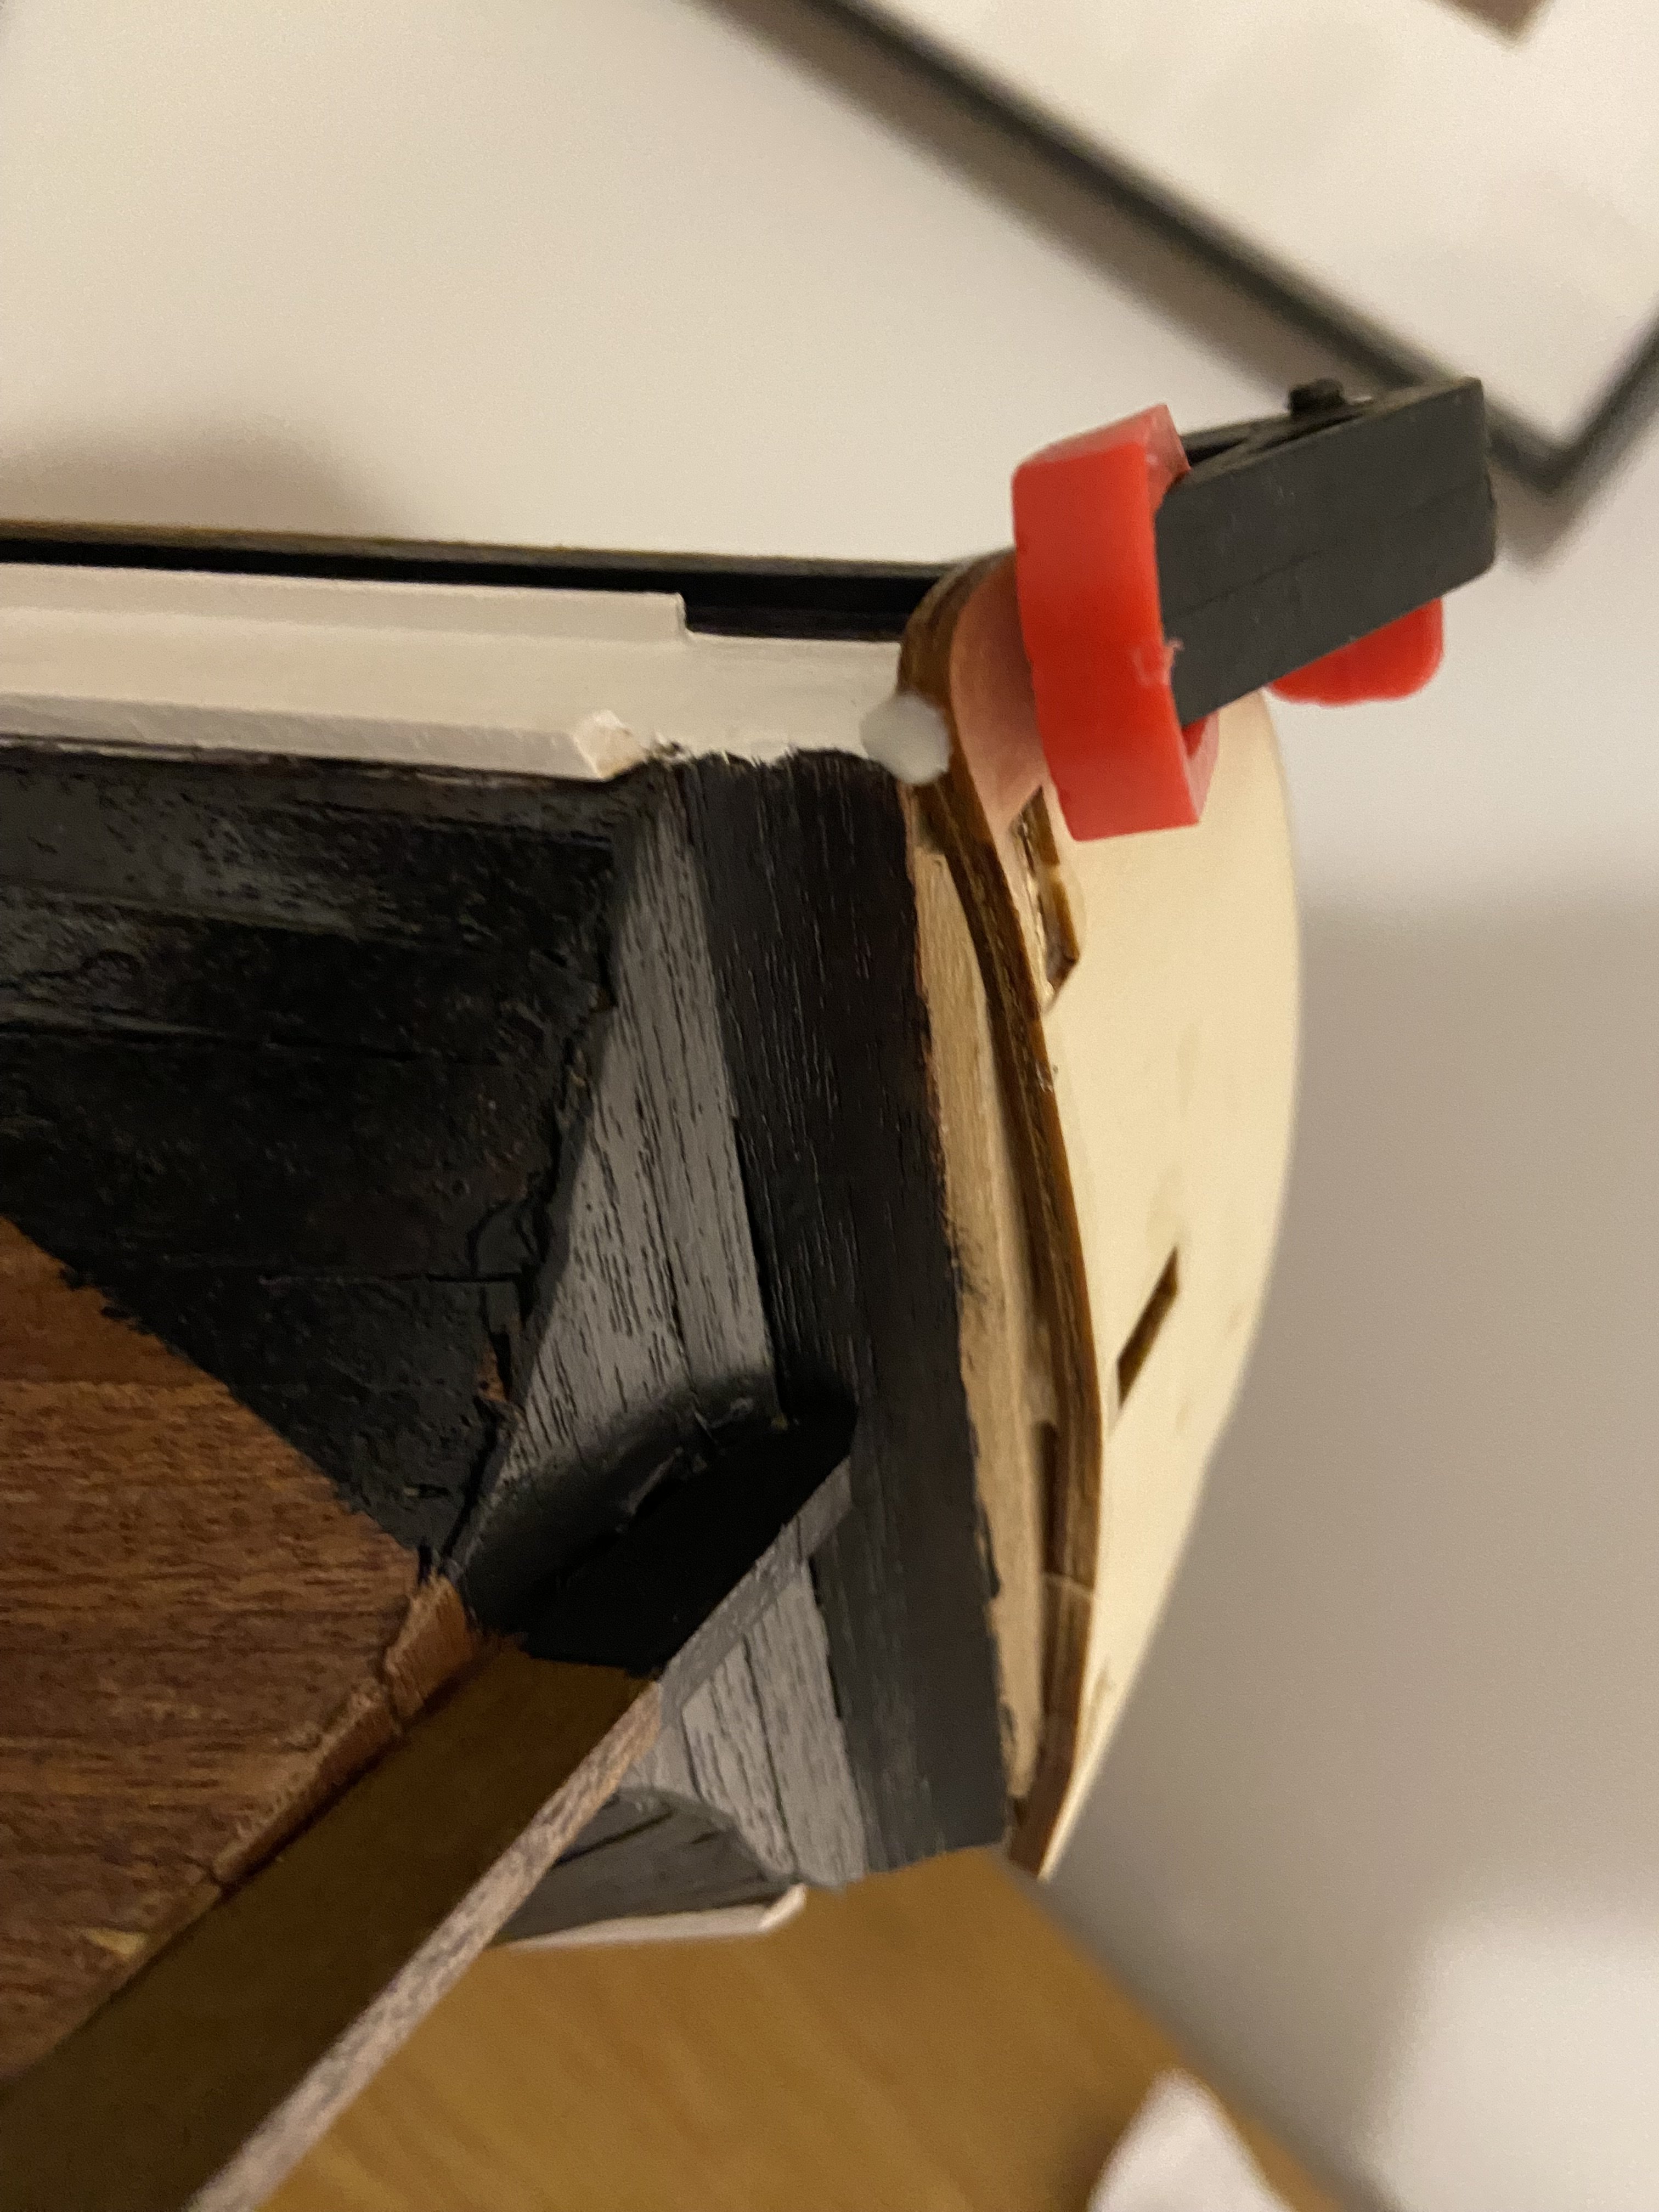
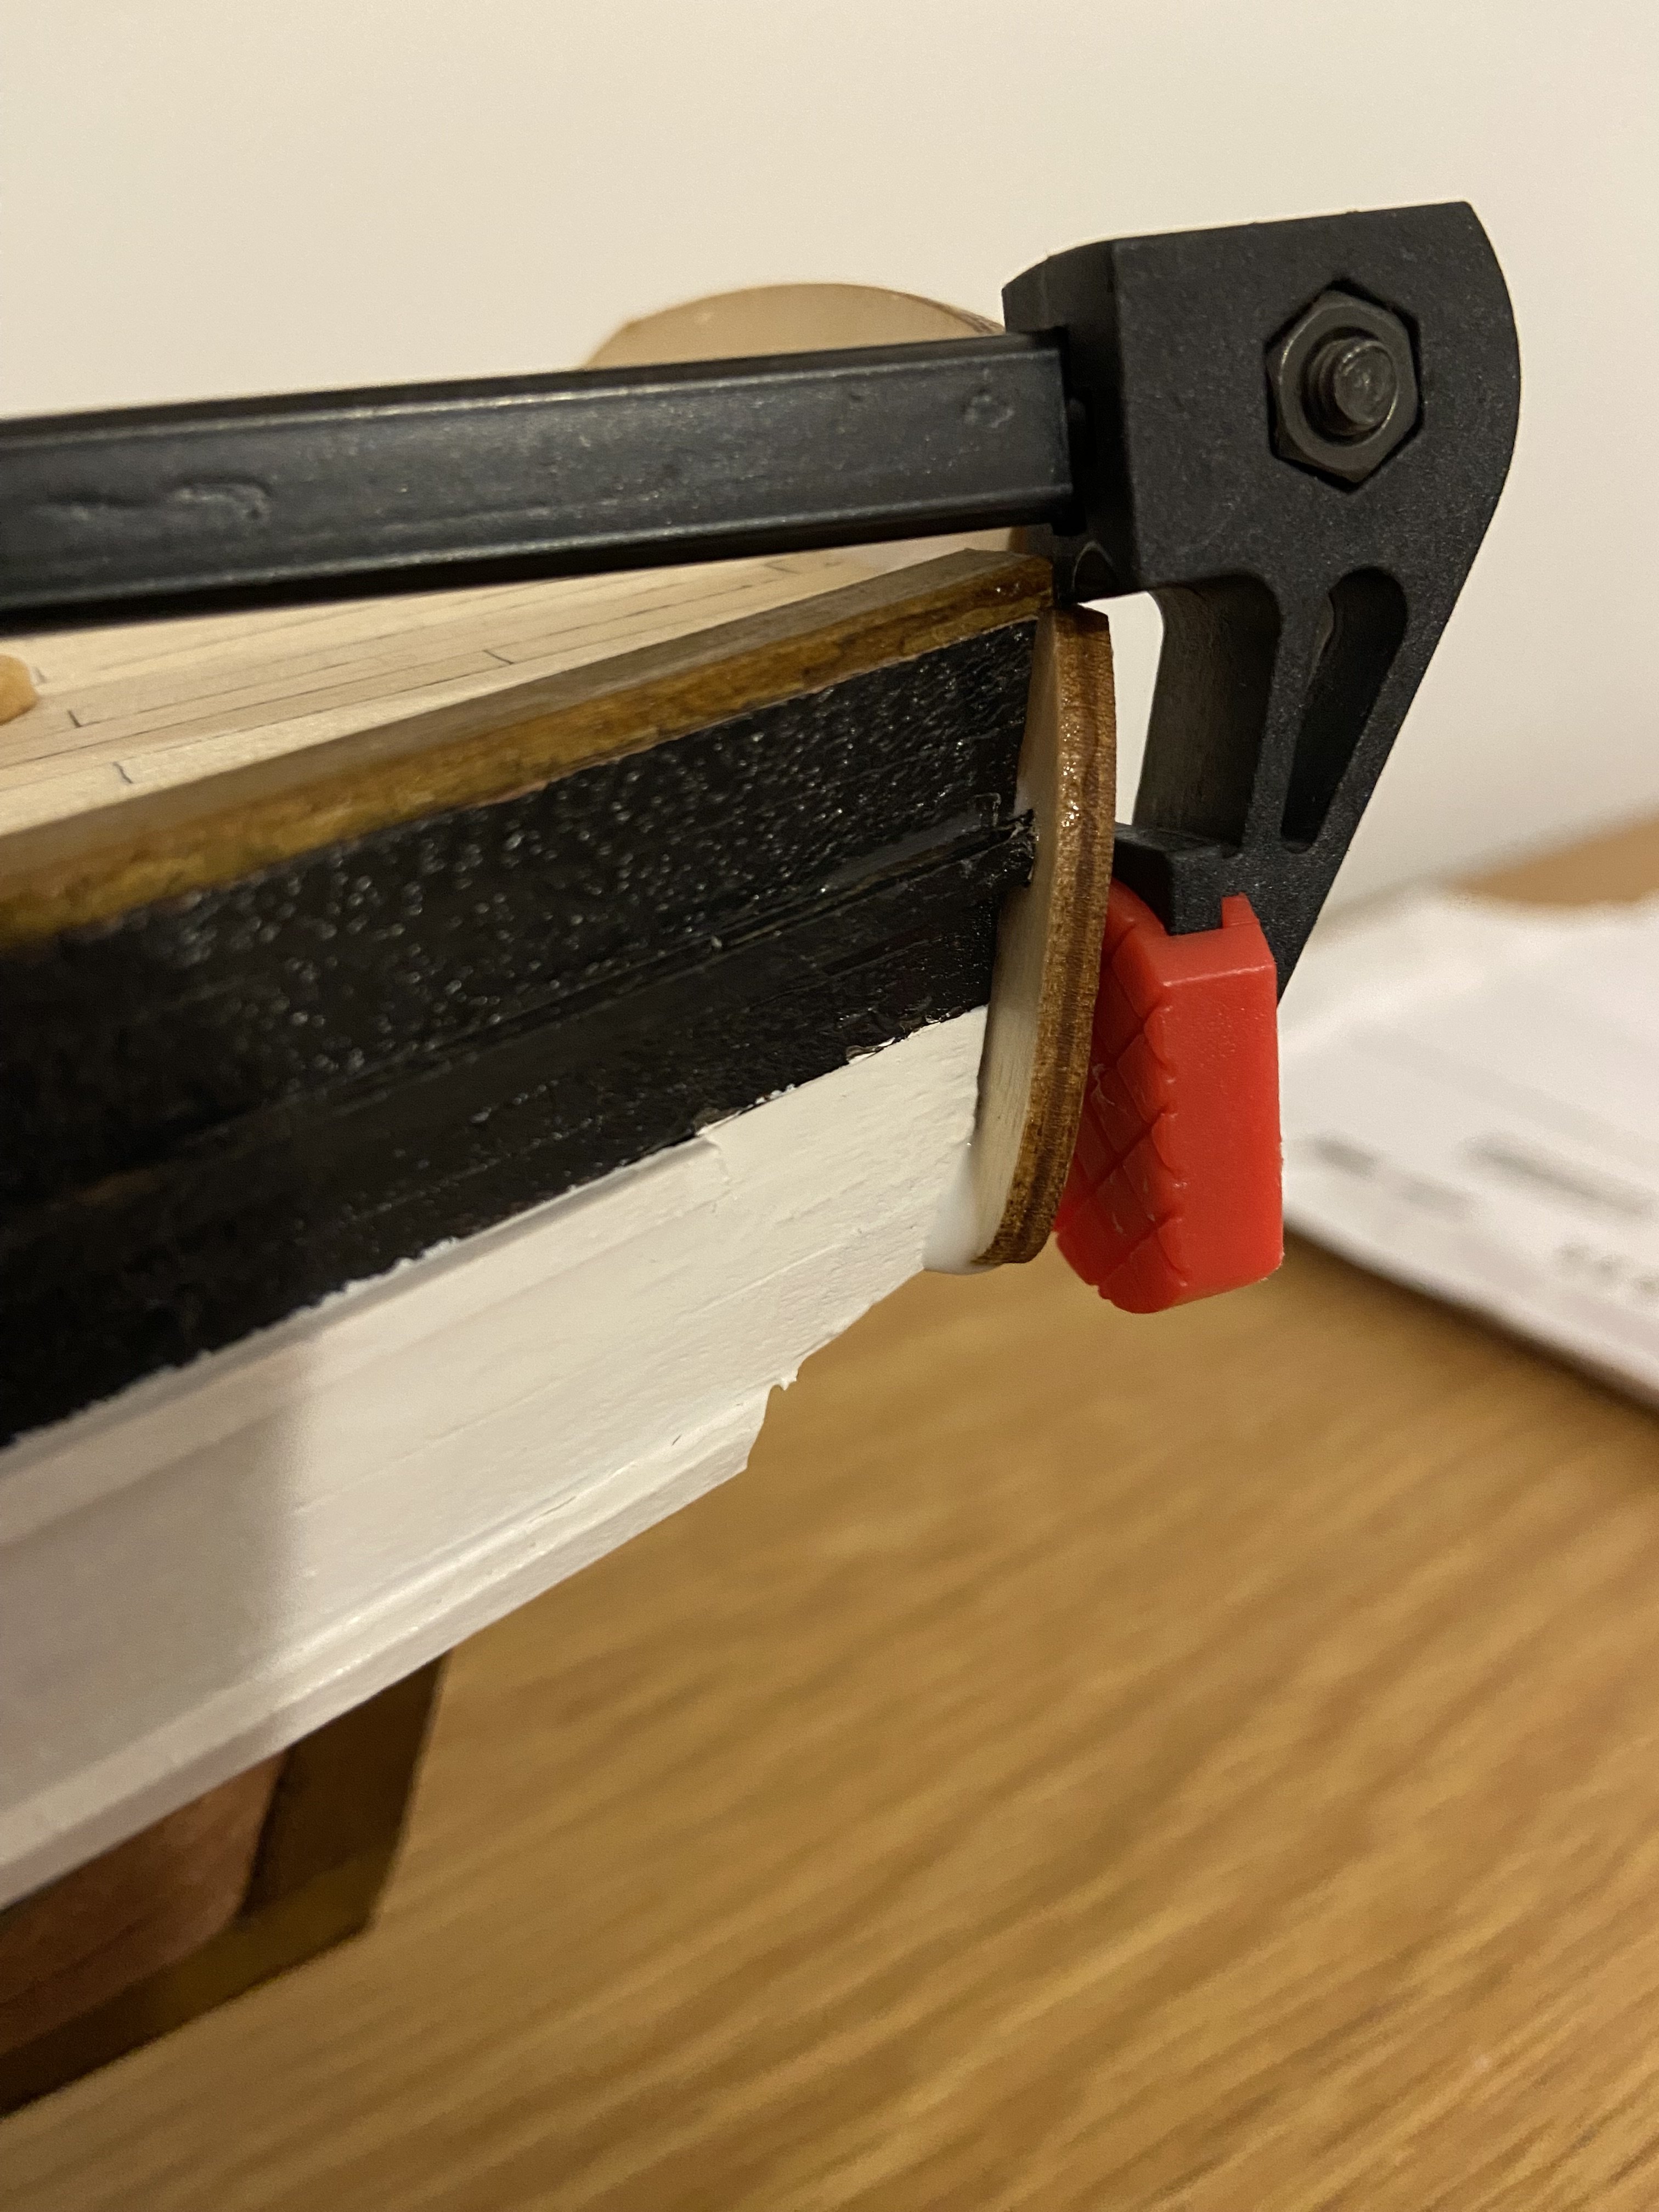
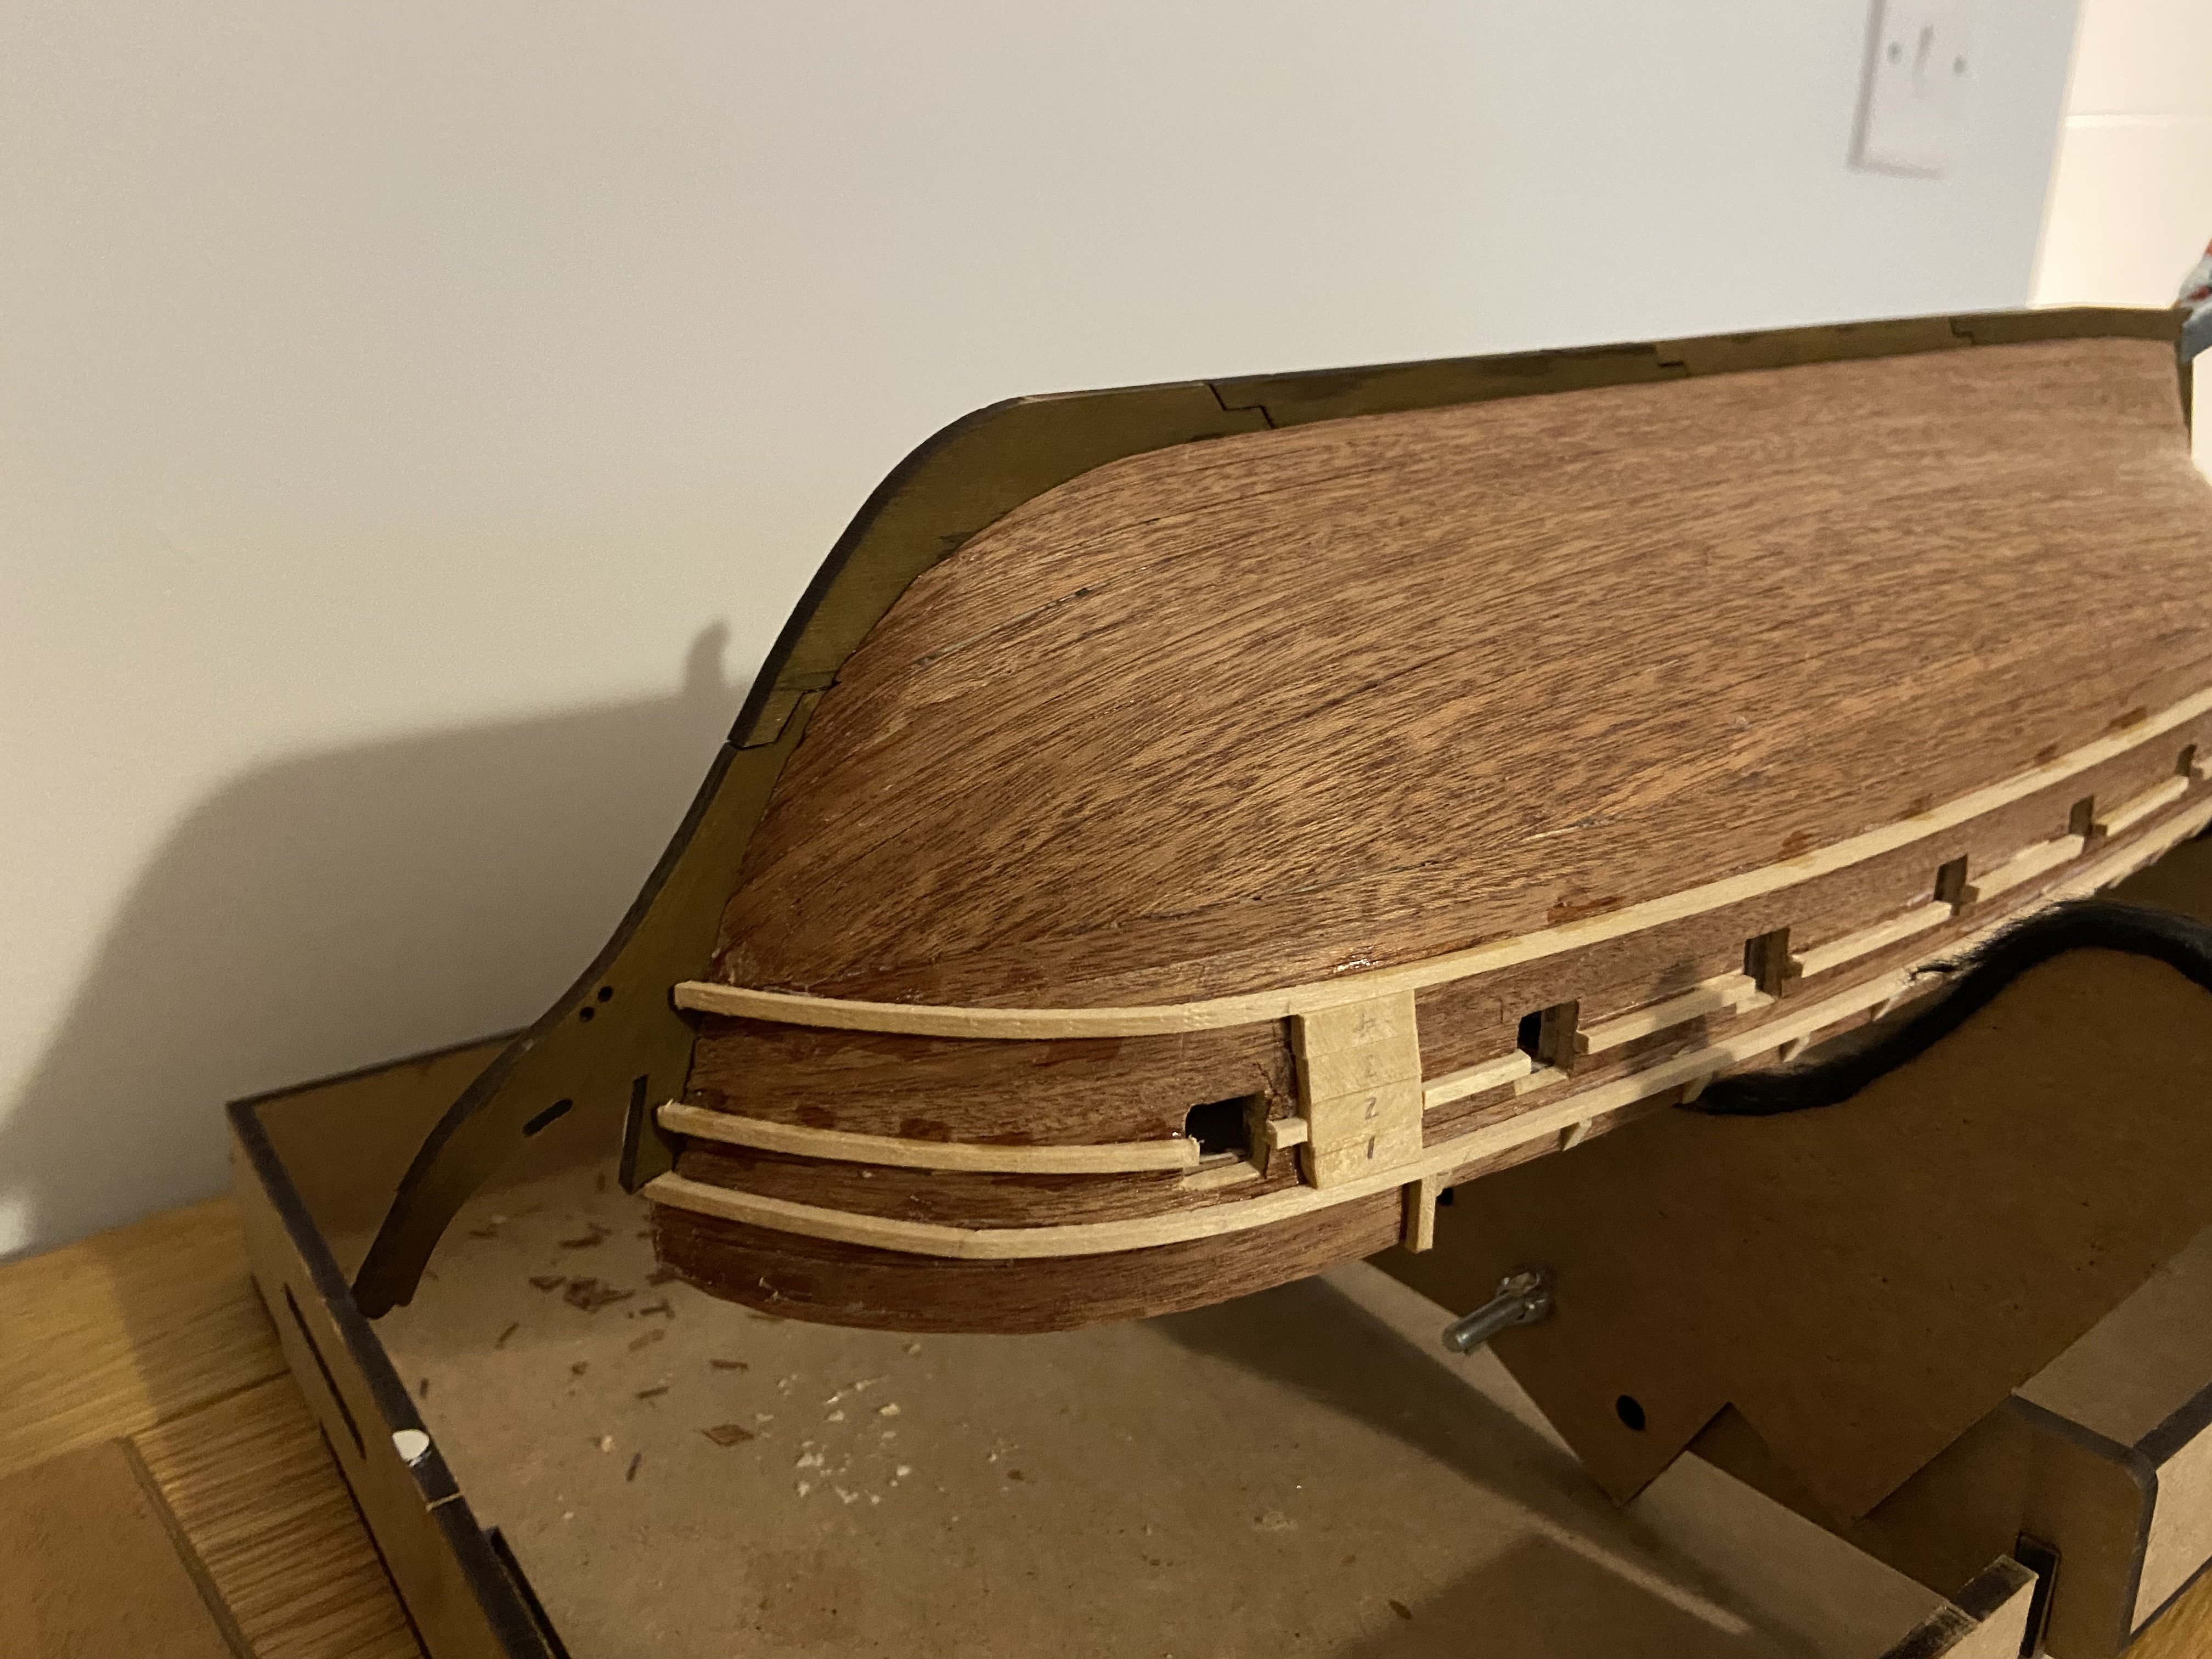
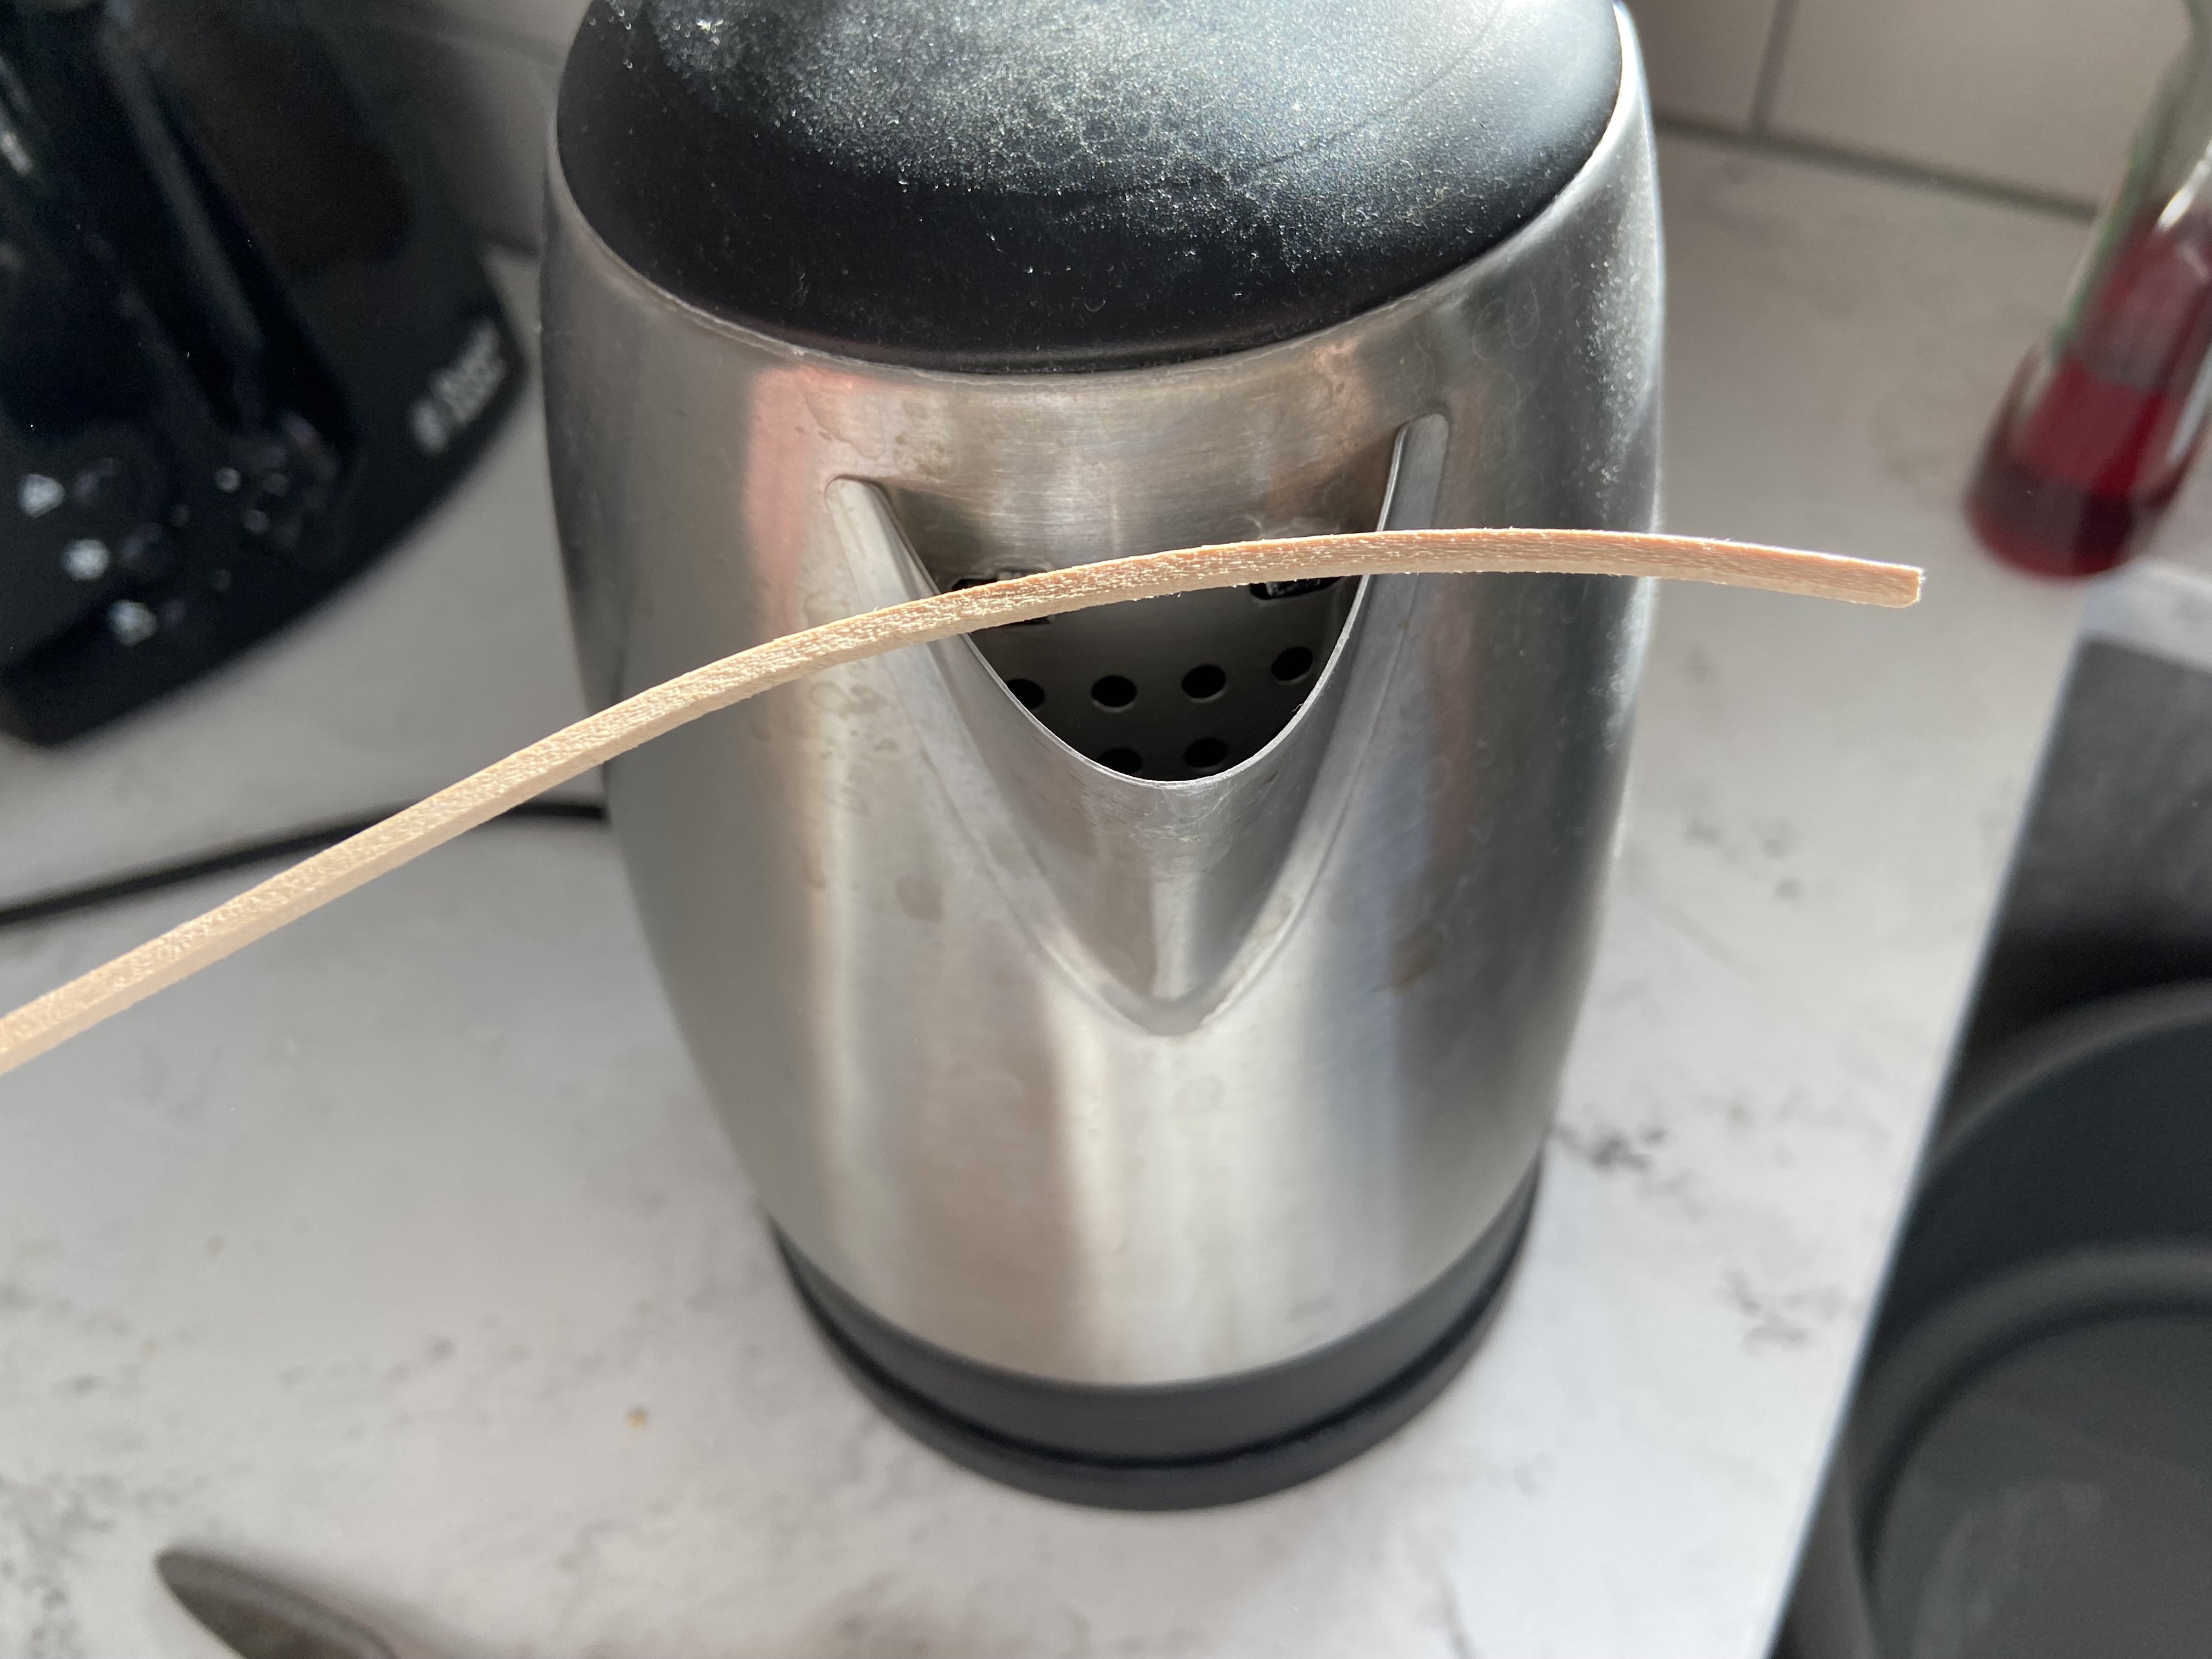
Update on a few bits and pieces I’ve noticed that many modelers struggle with the stern piece, since it has to curve both around and underneath the stern at the same time, a tricky fit. I’ve seen a few different techniques: some people use nails, while others soak the wood and clamp it into shape as it dries. Everyone seems to agree it’s one of the more challenging parts. My own approach was simply to glue and clamp it directly in place. Seen above with only one clamp as I had to re-glue one side. Practically no gap on the sides: I chose not to worry about closing the gap underneath. It won’t be visible, and I didn’t want to risk snapping the stern piece by forcing it into two opposing curves. A more experienced craftsman might have managed it with relief cuts and then hidden any flaws with veneer strips, but I didn’t feel confident enough to attempt that. I may break out the wood filler and then paint it and be done with it That said, I do think this section of the kit could have been designed better to allow a flush fit. Still, at this price point, compromises are to be expected.


-
I’m still fairly new to the hobby, so my experience with paints is limited. That said, I’ve found the OcCre colours to be excellent, provided they’re the shades you actually want to use. A little really does go a long way. Those small bottles hold far more paint than you’ll need to finish a ship, probably three times as much. I bought the Beagle paint set from Amazon.co.uk. It had the exact same product code as the one listed on OcCre’s website and came in identical OcCre packaging. So the mystery remains… If I do have one criticism of OcCre, it’s their instructions. Yes, they provide plans, photos, and YouTube videos but many important details get left out. I often only notice these subtleties after I’ve already glued a part in place, which means reworking it. Clear, thorough written instructions in proper English needn't be the preserve of high end manufacturers like Vanguard.
-
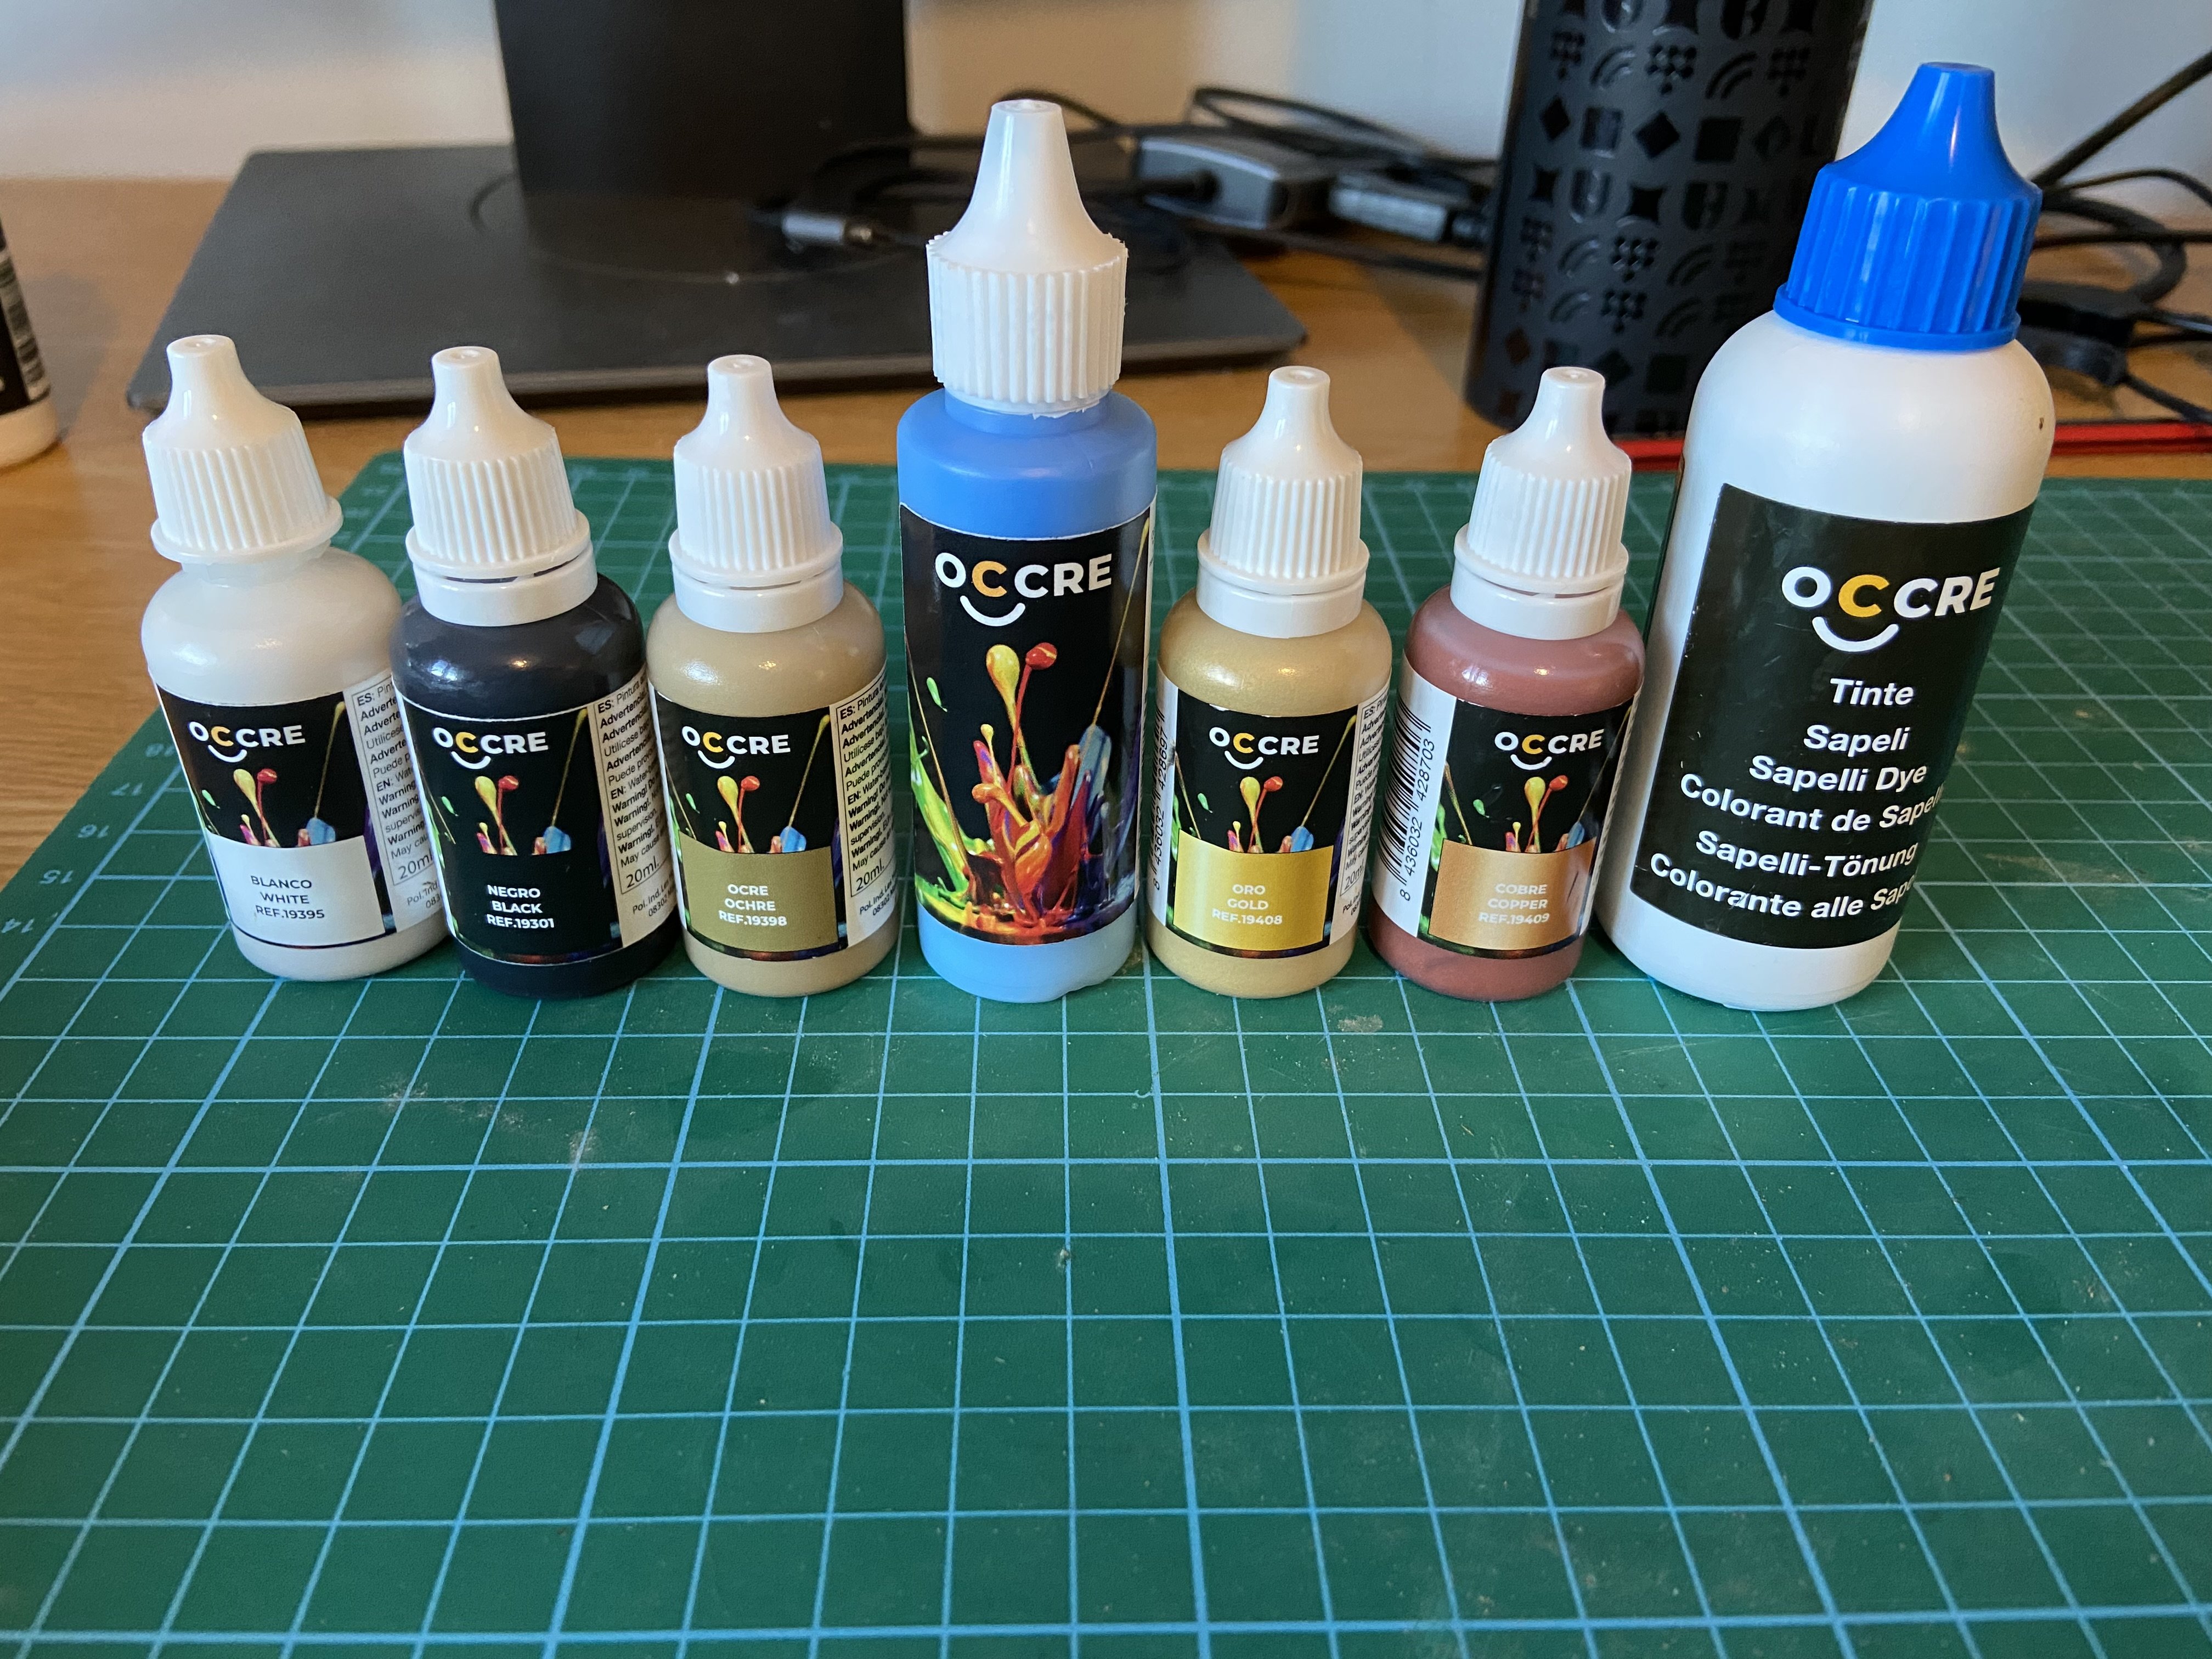
Lots of painting and staining small parts this week. I thought I'd take the opportunity to discuss the selection of paints OcCre provide for the Beagle. I'm hoping you guys may be able to guide me on some of the more eccentric choices they made 😆 First off, the strangest choice has to be the enormous 50 ml bottle of blue paint. As far as I can tell, it’s only needed for the gallery windows at the stern, and those took literally a tiny drop to cover. I’ve now got a whole bottle left over with no clear use for it. Next up is the gold paint. From what I can tell, there’s nowhere on the ship that actually calls for gold. Maybe a couple of small details, like brushing the ship’s wheel with the tiniest touch for highlights but even that feels like a stretch. I’m also scratching my head over the ochre and the copper. What are these actually meant for? Is the ochre supposed to pass as a kind of wood tone? I know some of the ladders are metal and need to be painted to look wooden, would ochre be the right choice there? Is the copper for the cannons? Those would look better painted black, in my view. Even more oddly, the instructions call for walnut stain in several places, but no walnut dye was included, only sapeli. I've had to use what I have left over from Polaris. Honestly, swapping the huge blue bottle of blue for a smaller one and including walnut dye instead would have made much more sense.

-
I’m still very new to the hobby (just a couple of months in), so please take this as just an observation rather than a seasoned opinion. It seems to me there are really two types of advanced kit modelers. (1) Those who want something highly decorative for display, with shiny brass fittings, luxurious dark wood and lots of visual impact. (2) Those who aim for extremely accurate models, using materials like pear wood and features such as white hulls, in the tradition of late 18th-century Admiralty models. They’re really two different markets, but both are presenting an idealised version of a ship. After all, no vessel ever had polished brass and gold chains, but likewise, no ship ever had a perfectly brilliant white hull either. From a newcomer’s point of view, it’s actually encouraging to see that there’s more than one way to approach the hobby at a high level, depending on what someone values most.
-
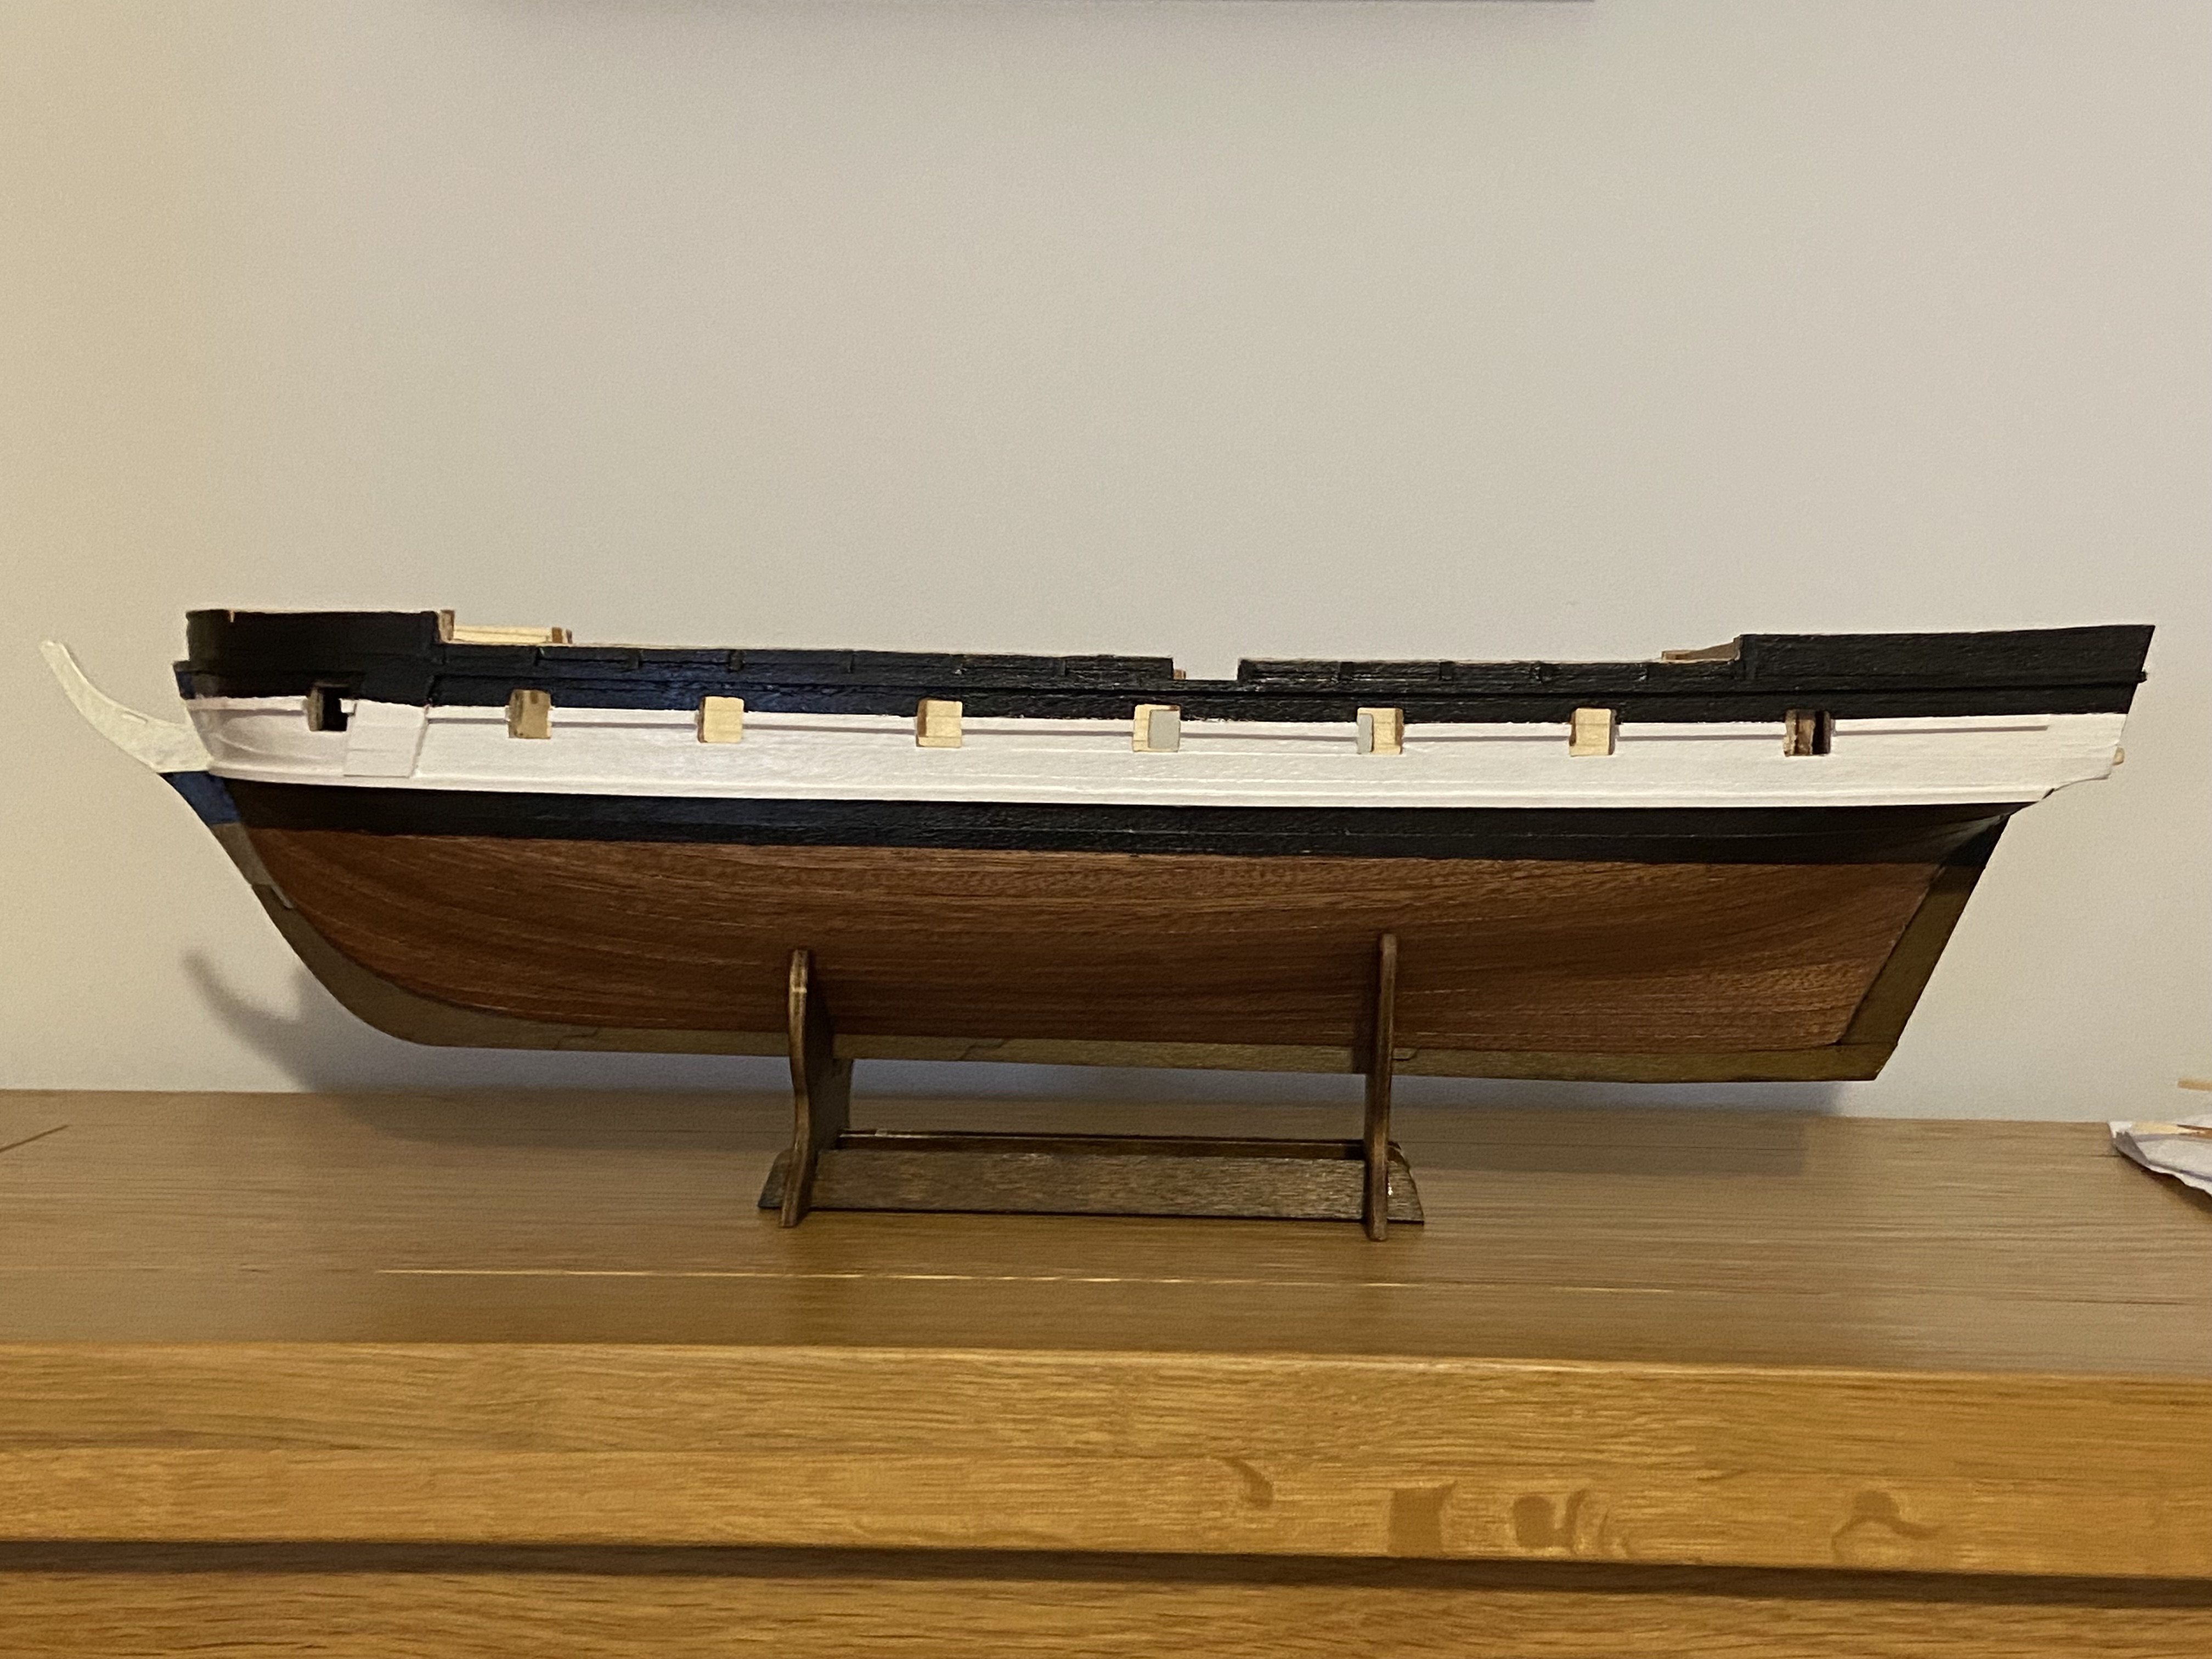
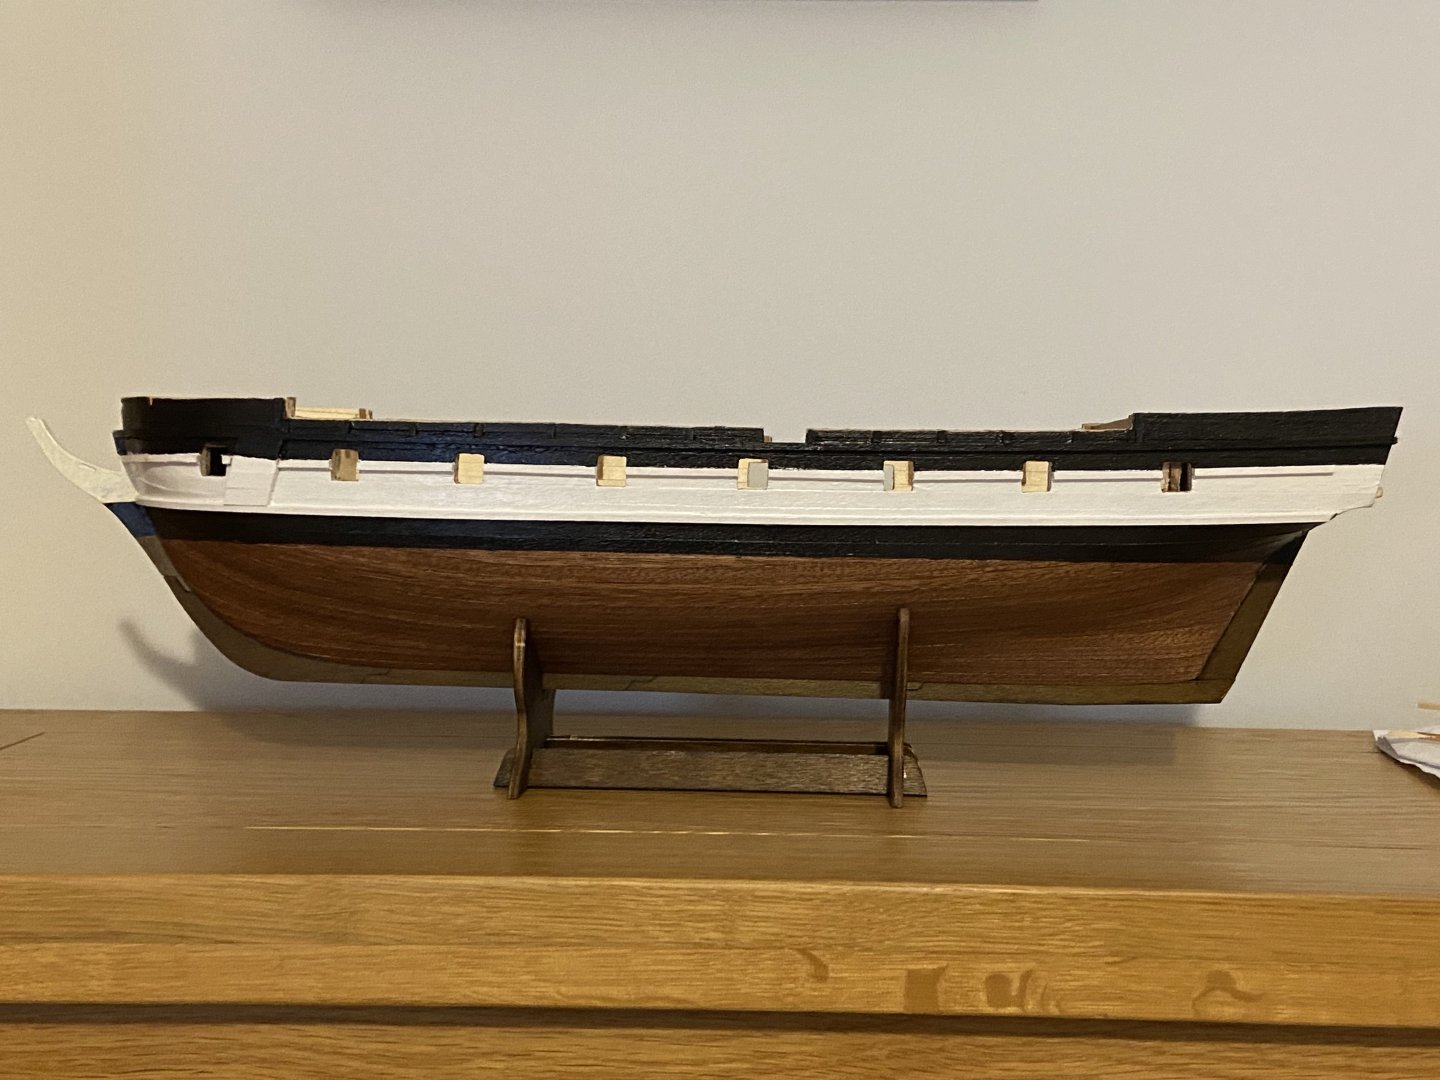
Painting was done today. I loved this part. Nothing transforms the look of a ship so quickly and dramatically as a coat of paint. It was fairly straightforward as the rubbing strakes effectively provide a guide of where to paint! I tried to copy OcCre's pictures to help judge where to draw the water line though. I settled for 10mm below the bottom rubbing strake midships. I then knocked together a waterline tool, which took a few attempts to get the right height but it was fine in the end. It needs a bit of touching up with tiny brushes, and I need to give the stem piece another coat of white. I don't know why but I think the walnut staining is leeching out into the paint and turning it slightly cream coloured. I used OcCre's acrylics paints. The black took only two coats, but I went over the white six (!) times before I was happy.
-
Is it more difficult to cut planks to scale length than to use full length wood strips?
-
I realised after the fact that I’d placed the rubbing strakes about 2mm too low. That small shift was going to cause a couple of big problems: the middle strake wouldn’t pass cleanly through the centre of the gunports and the quarter galleries were not going to line up properly. Since the whole area will be painted anyway, I decided the best option was to bite the bullet, remove all the glued strakes and reposition them. The surface looks a bit messy now from the additional glue stains, but everything around the rubbing strakes will get at least two coats of black or white acrylic paint, so those stains will be invisible I hope! And I’m much happier with the corrected position. Funny how just 2–3mm can create so much extra work! The keel went on today. I stained it walnut, even though the only stain provided by OcCre is sapelli I had enough left over from my Polaris build to use walnut instead. I think it looks better. The plan is to start varnishing tomorrow so that it's ready to begin painting at the weekend 😁


-
You're using actual gold leaf? Do you have a meeting with the Admiralty coming up? 😉 I am even more impressed than I was before.
-
Looks lovely and smooth. Looking forward to seeing the varnished version.
-
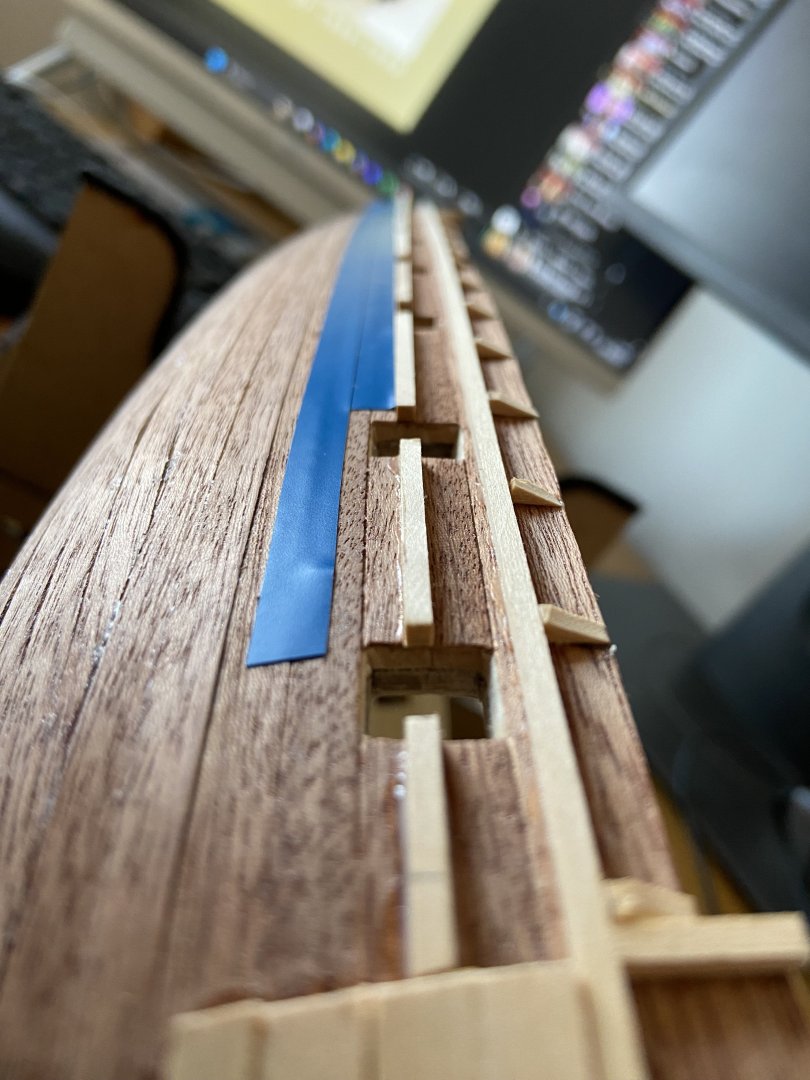
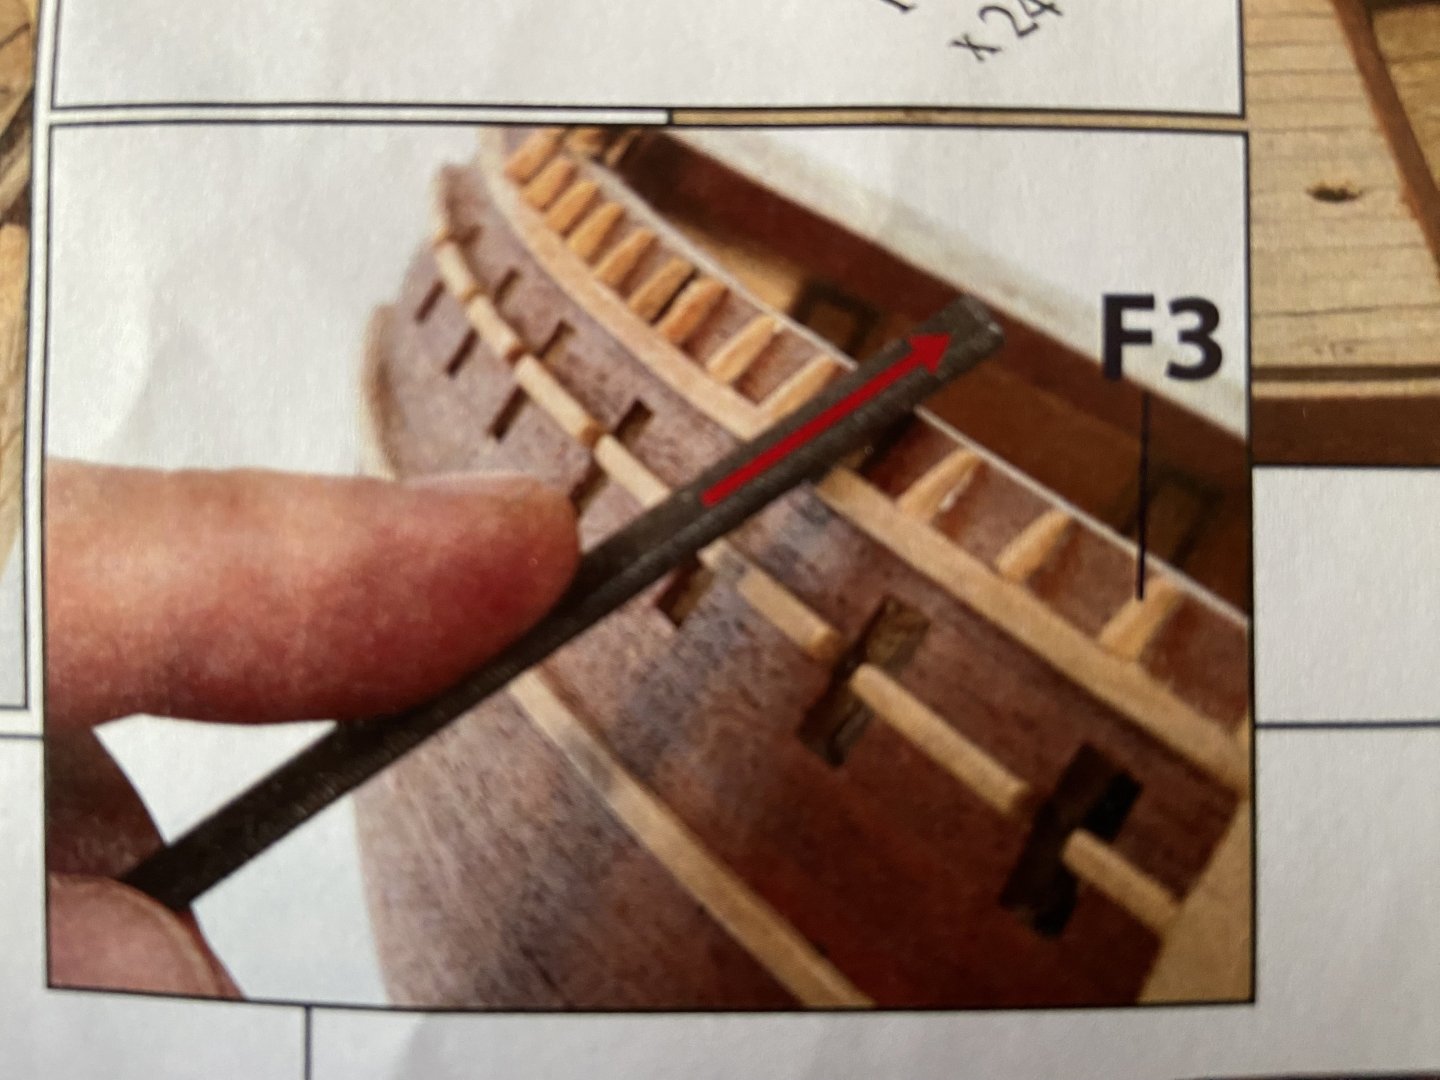
I worked on the rubbing strakes today and decided to pick up some higher-quality masking tape in preparation for the upcoming painting. By happy coincidence, the tape is 6mm wide. Perfect for spacing the strakes: 6mm between the top and middle, and 12mm between the middle and bottom. Sadly I've run out of CA glue so the shipyard is now closed for the day with one and half sides done! One more thing I should mention is that the sloping triangular pieces were cut entirely with a sharp knife before being glued in place. The OcCre instructions, however, recommend gluing the pieces first and then shaping them with a file: I have to say, that’s really poor advice and they recommend something similar on Polaris. I know from experience that small pieces of wood like that can’t withstand something as abrasive as a file. They’ll just get ripped off the side of your ship.
-
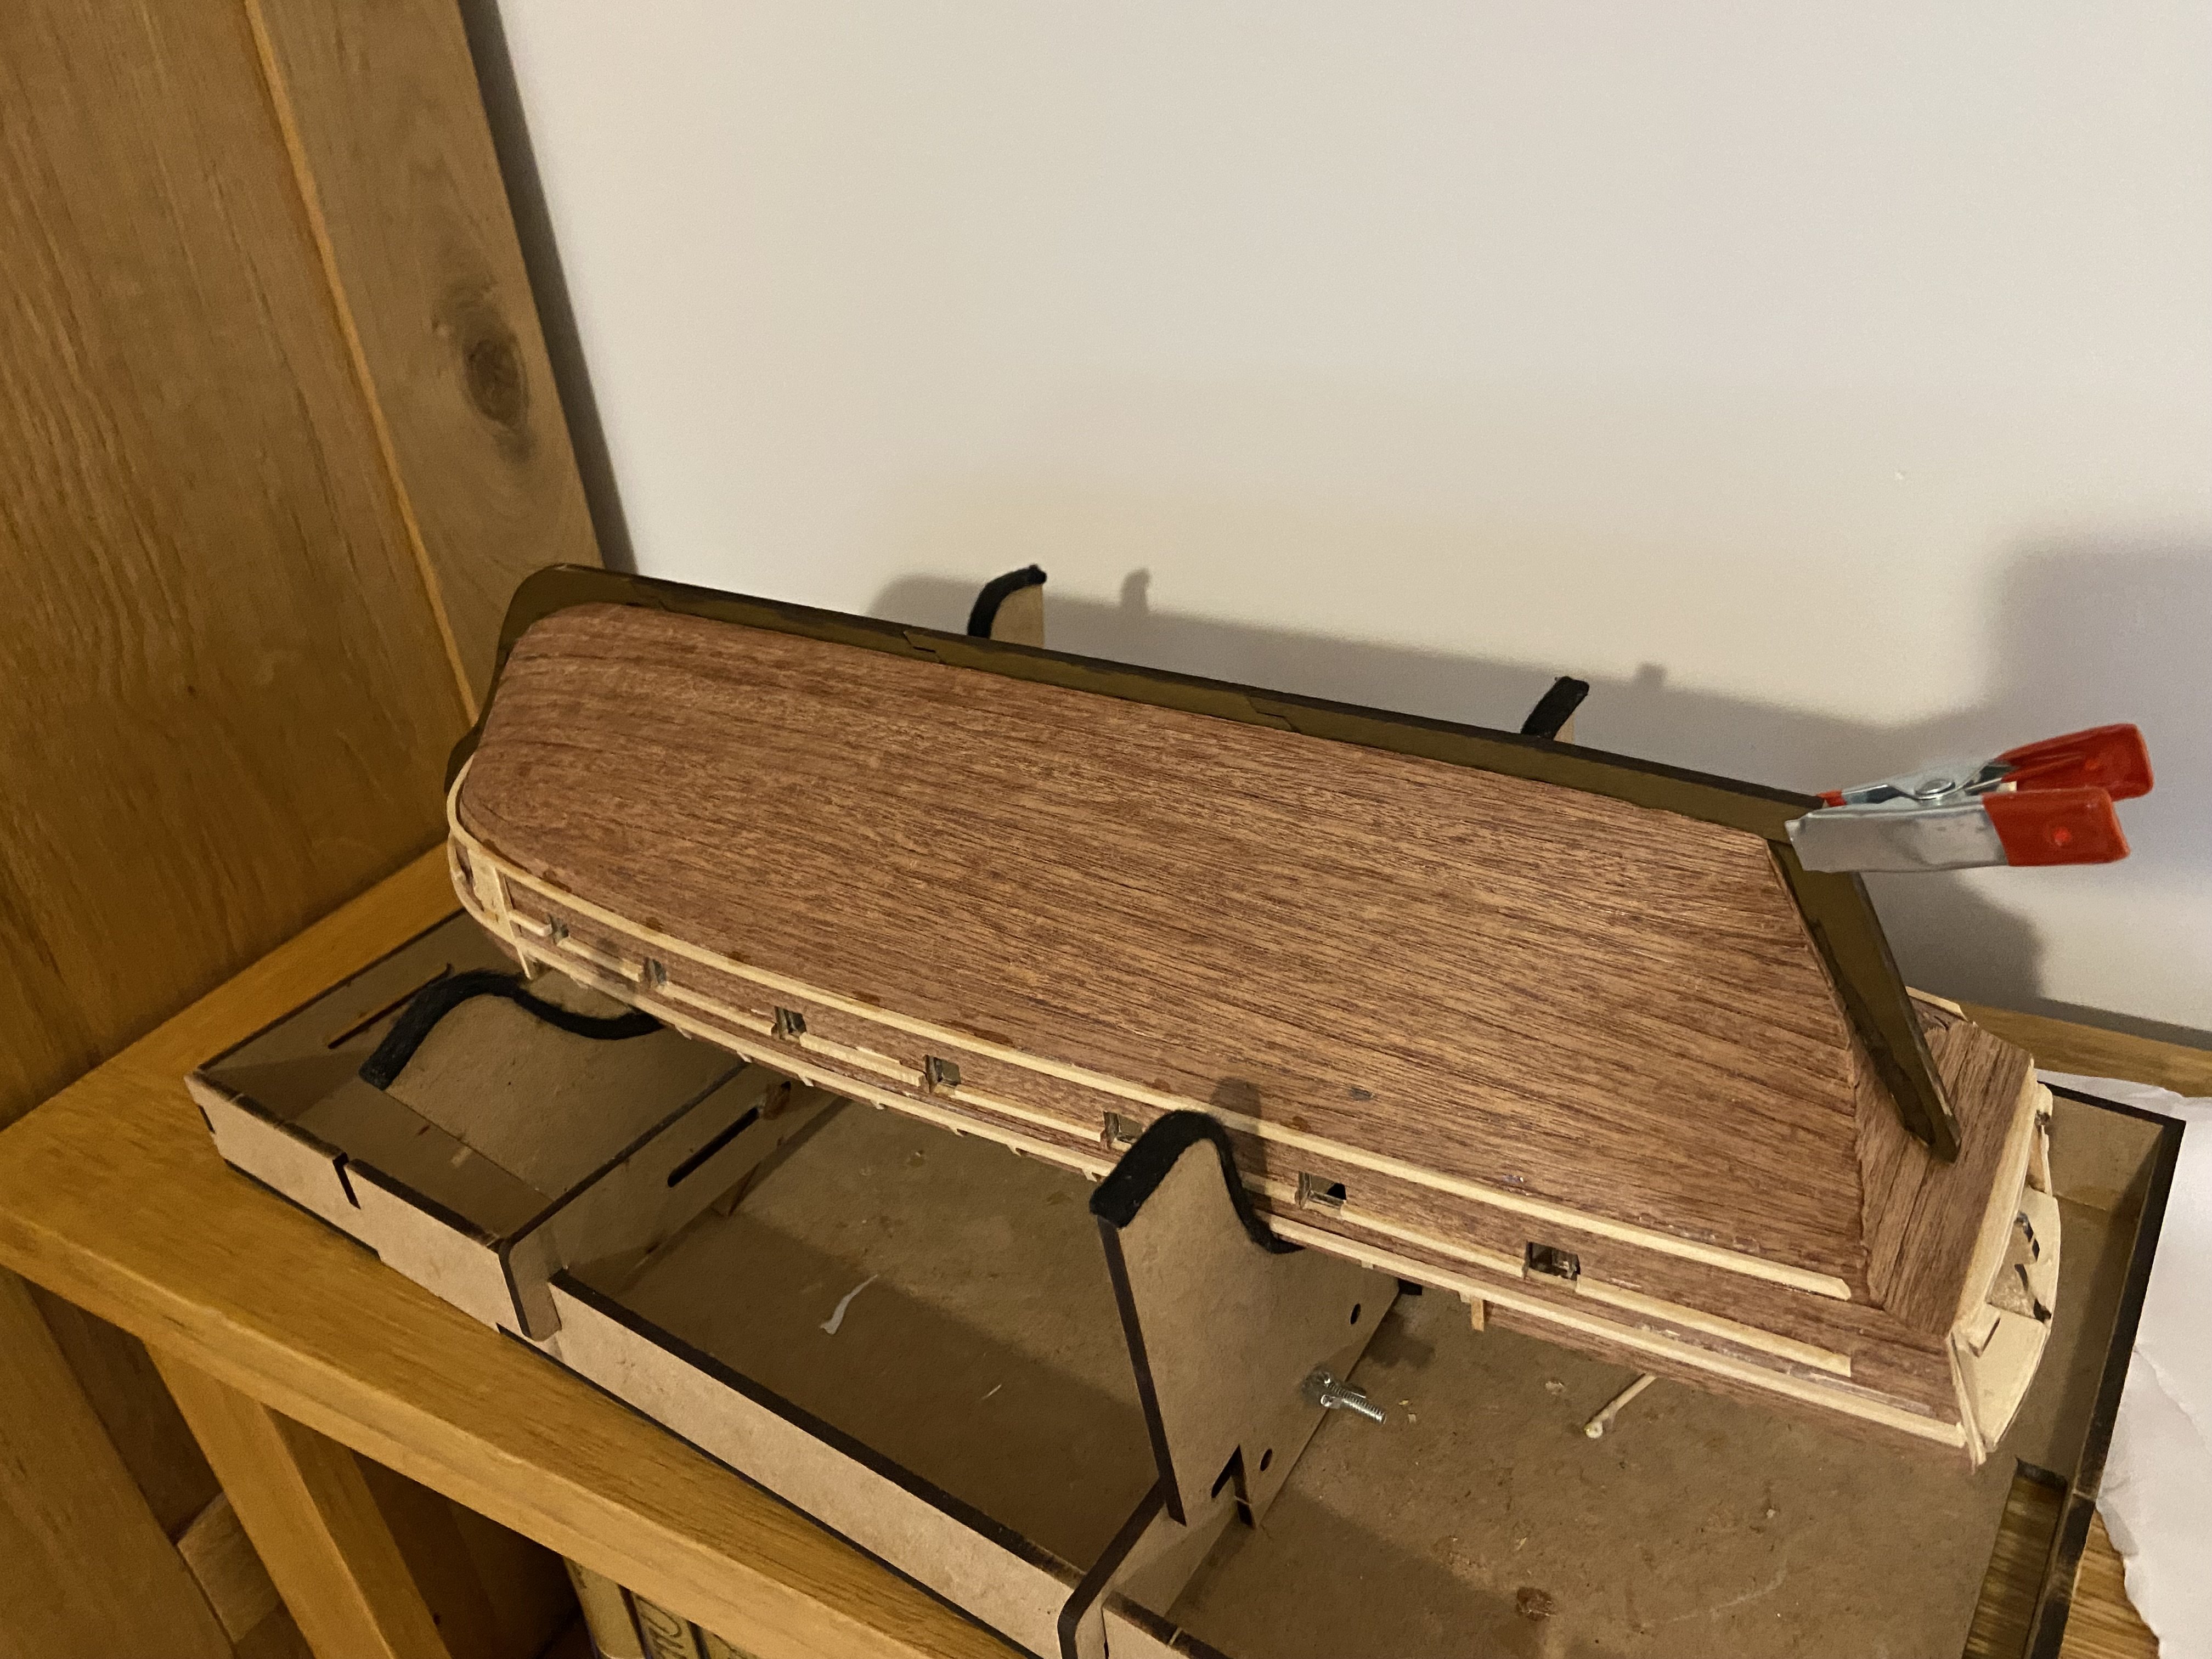
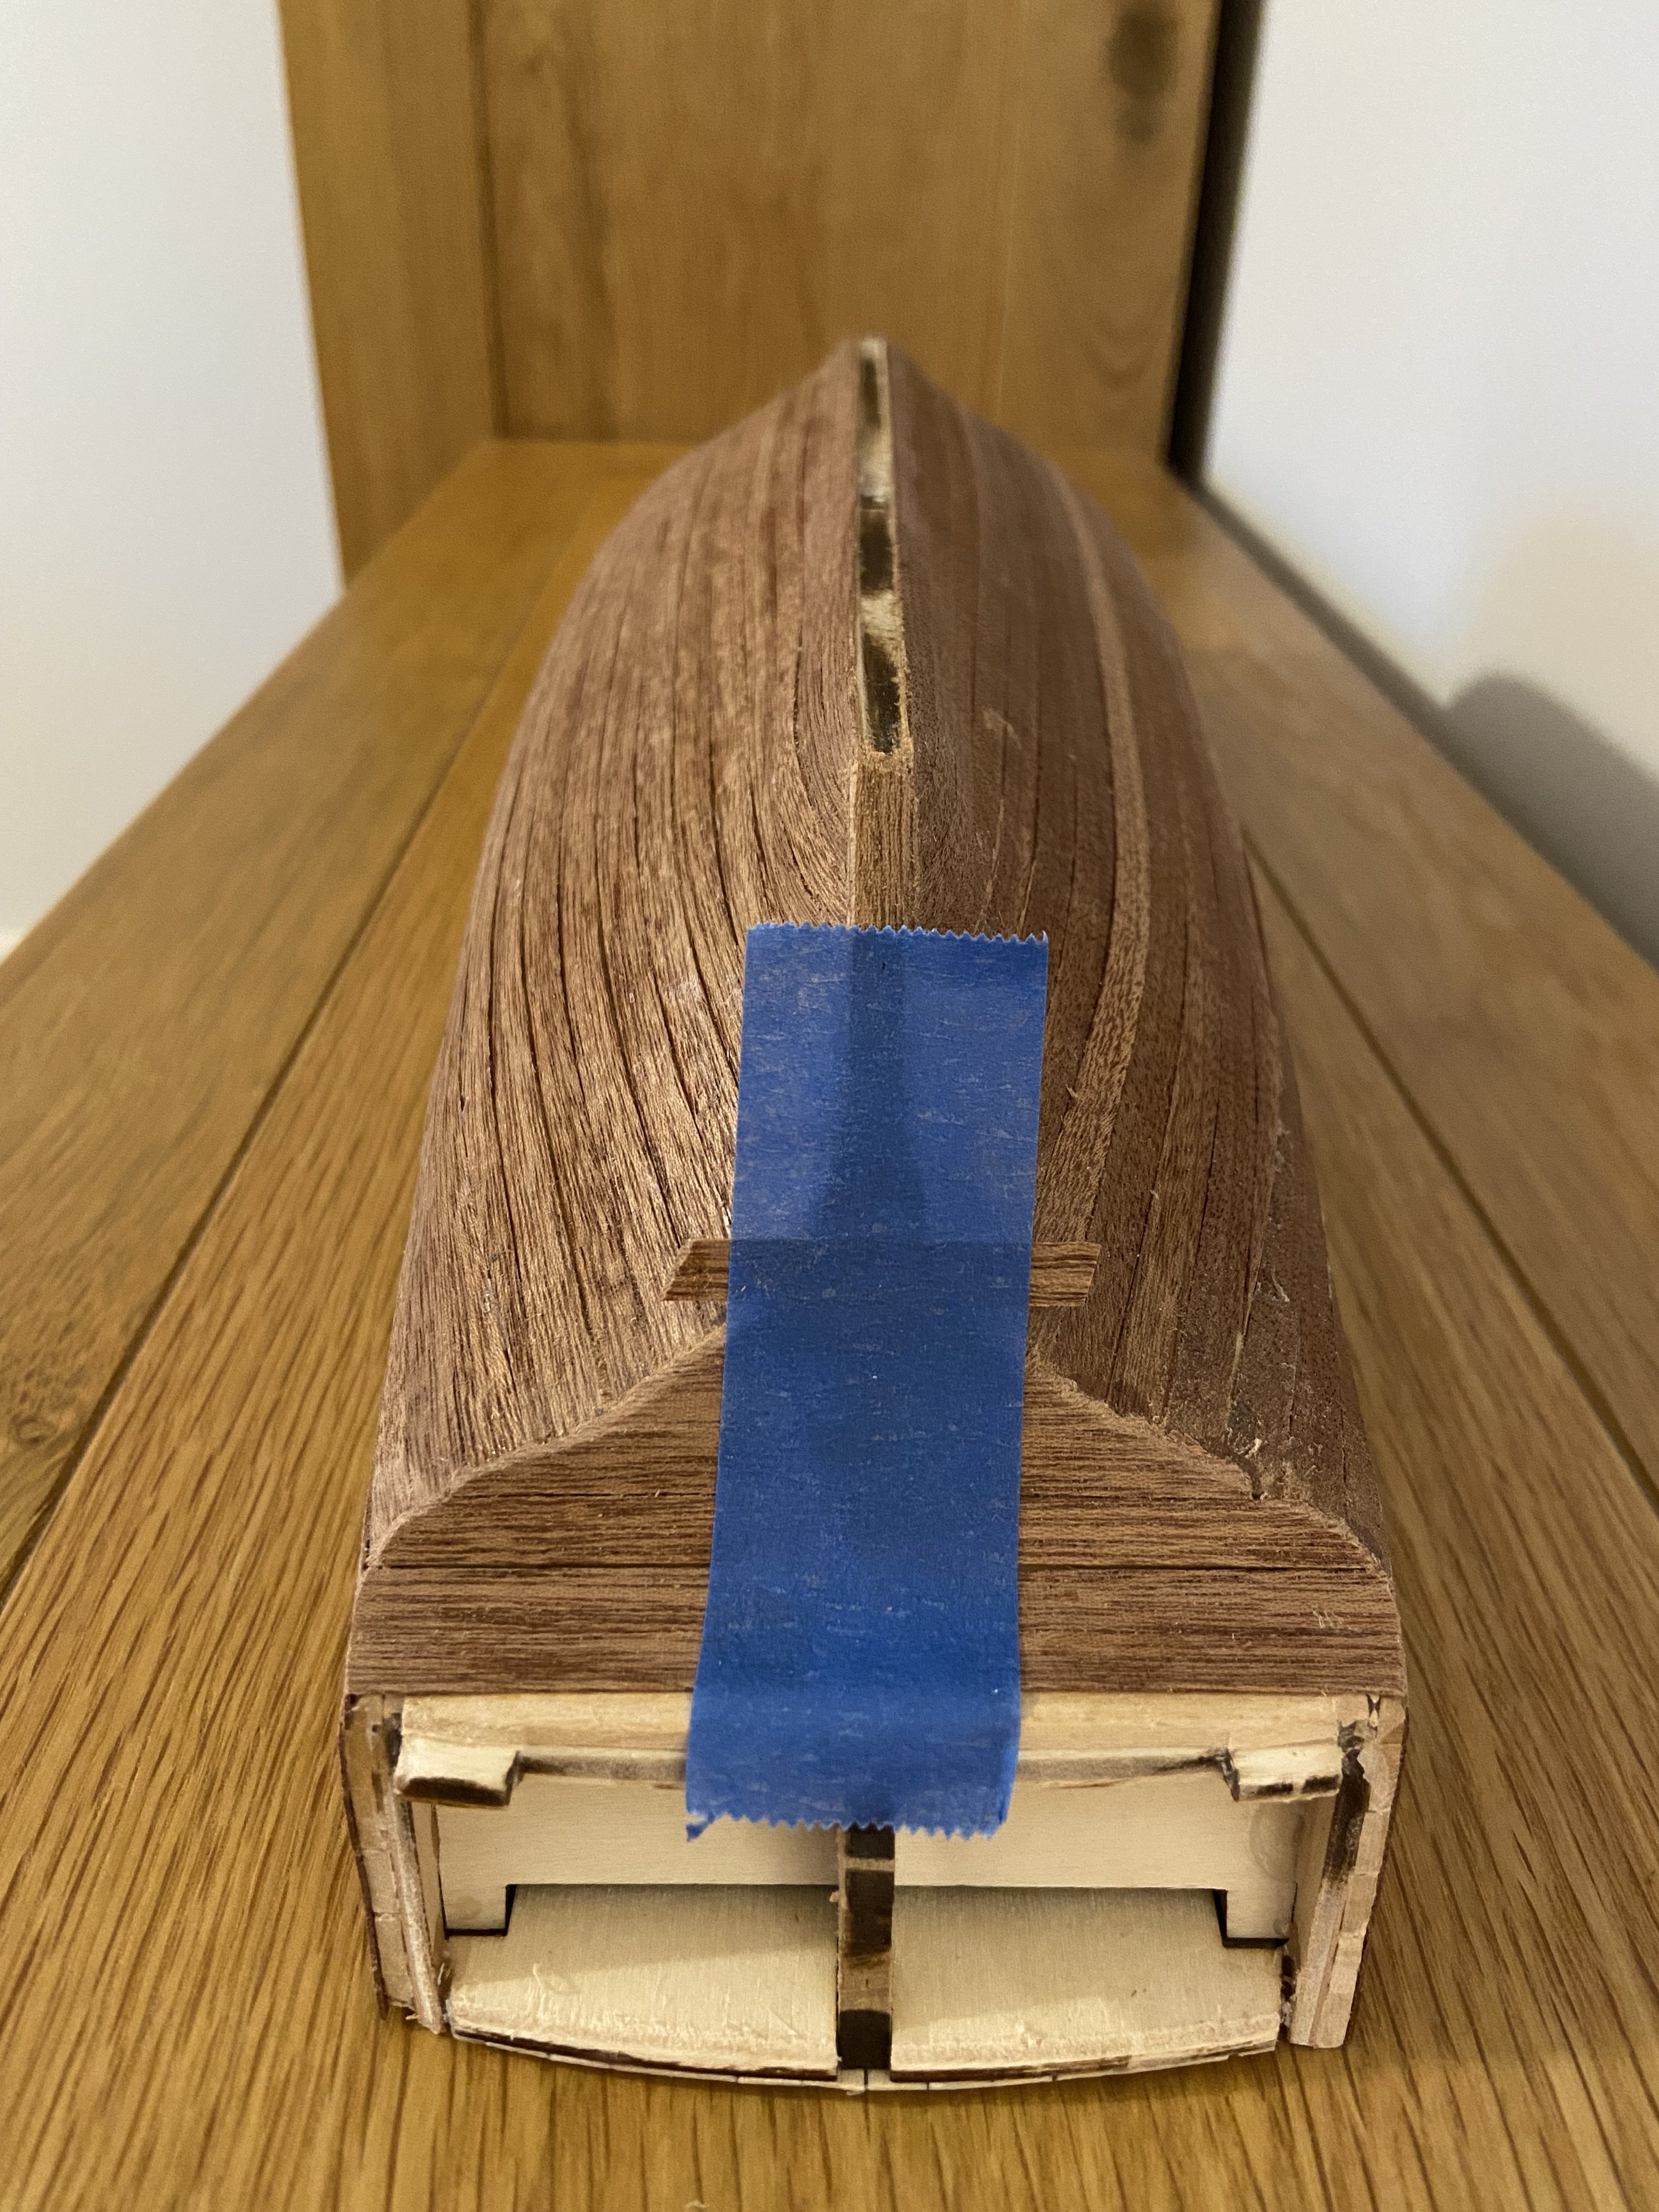
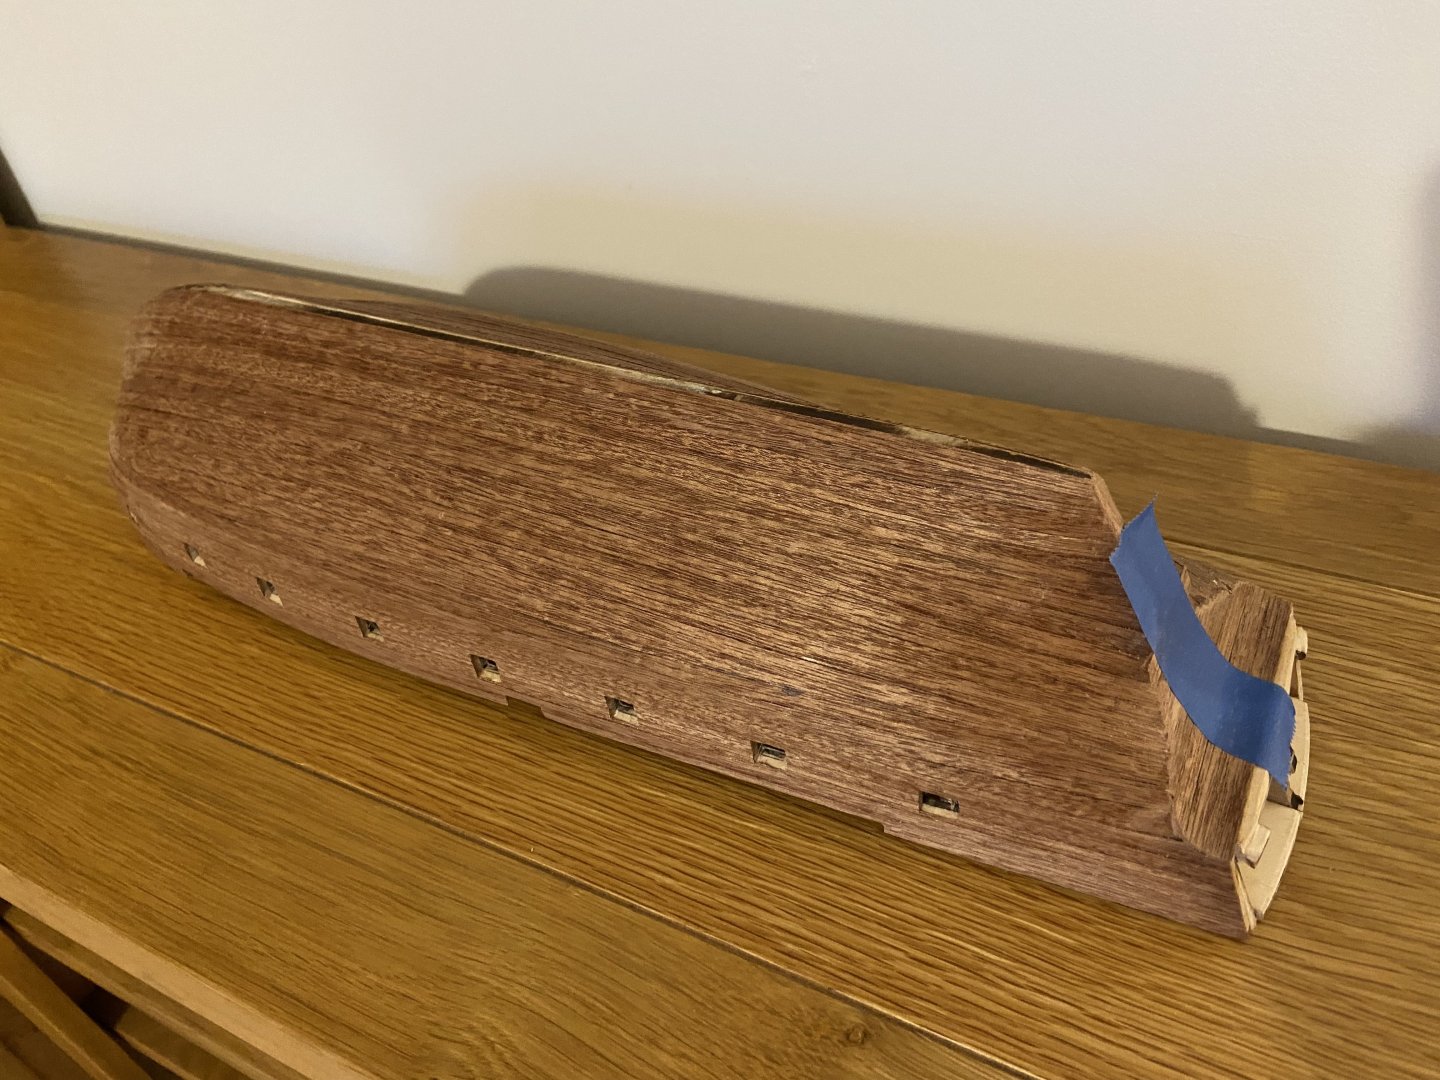
Thanks for your encouragement and support 🙂 The second layer of planking is now complete, and I'm quite pleased with how it has turned out after the challenges I ran into wit the first layer. I've done a bit of light sanding which is why it looks a bit dusty and since the hull wasn't shaped as well as I'd hoped the finish could be better. That said, I like the result and it's definitely a step up from my first build (Polaris). I trimmed one of the stern planks too zealously, so I've had to replace it, hence the masking tape. No bother, I'll trim it and sand it tomorrow. The top two inches of the hull will be painted soon and I'm very excited for that stage because it will totally transform the look of the ship. Before I get there I have to add the rubbing strakes. I'm trying the steam method this time around. Unlike the plank bending tool, this method requires no soaking the wood. Using pliars also makes getting the precise curve a bit easier and since there's little moisture involved the pieces dry and are ready to use in no time.


-
Hi David, just admiring your work and I'm fascinated by the copper plating. How do you go about copper plating a model like that? Do you use special glue? And since real copper tends to tarnish, does it change colour over time even if it's not handled much? Is it real copper, for that matter? It looks very hard to work with.
-
I really like the customised colours and the research you put into figuring out what the Duchess would have wanted her yacht to look like. It's a beautiful ship and a tempting option after I've finished my Beagle.
-
Loving the blue. Just perfect for the baroque era of shipbuilding. Can't wait to see the gold detailing. If I can ever justify buying a big Vanguard model, I think it will have to be Sphinx!
-
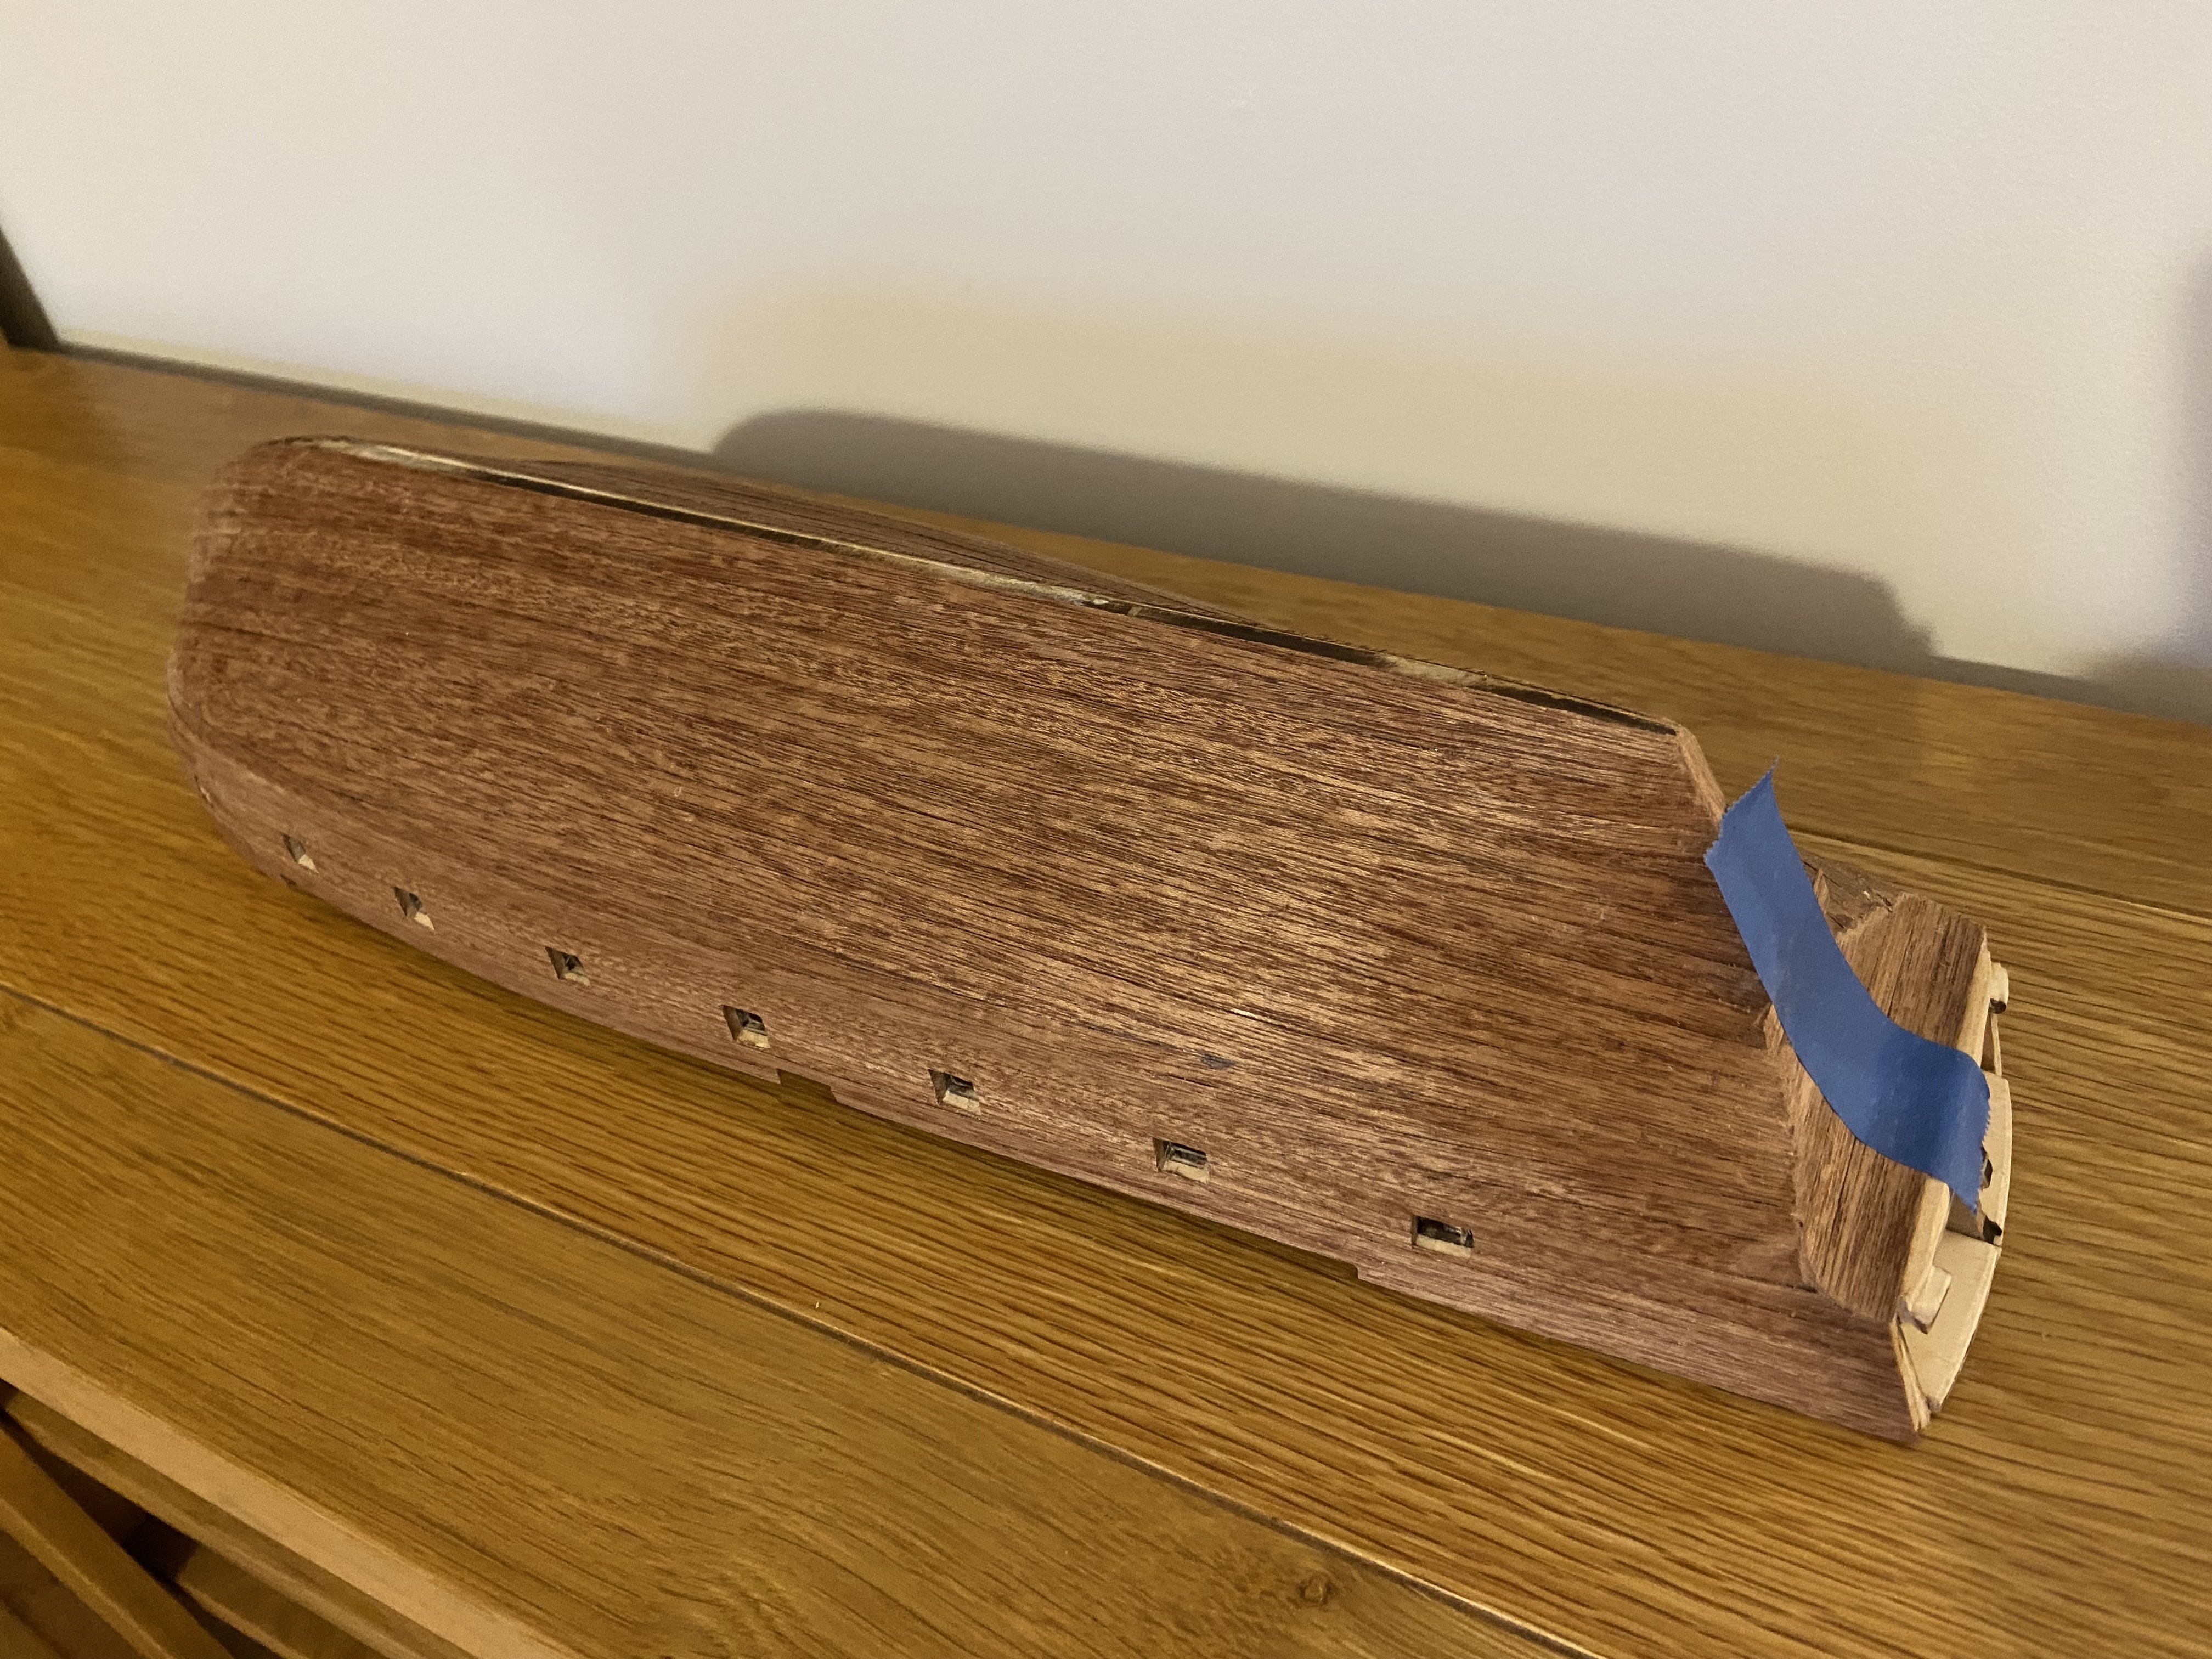
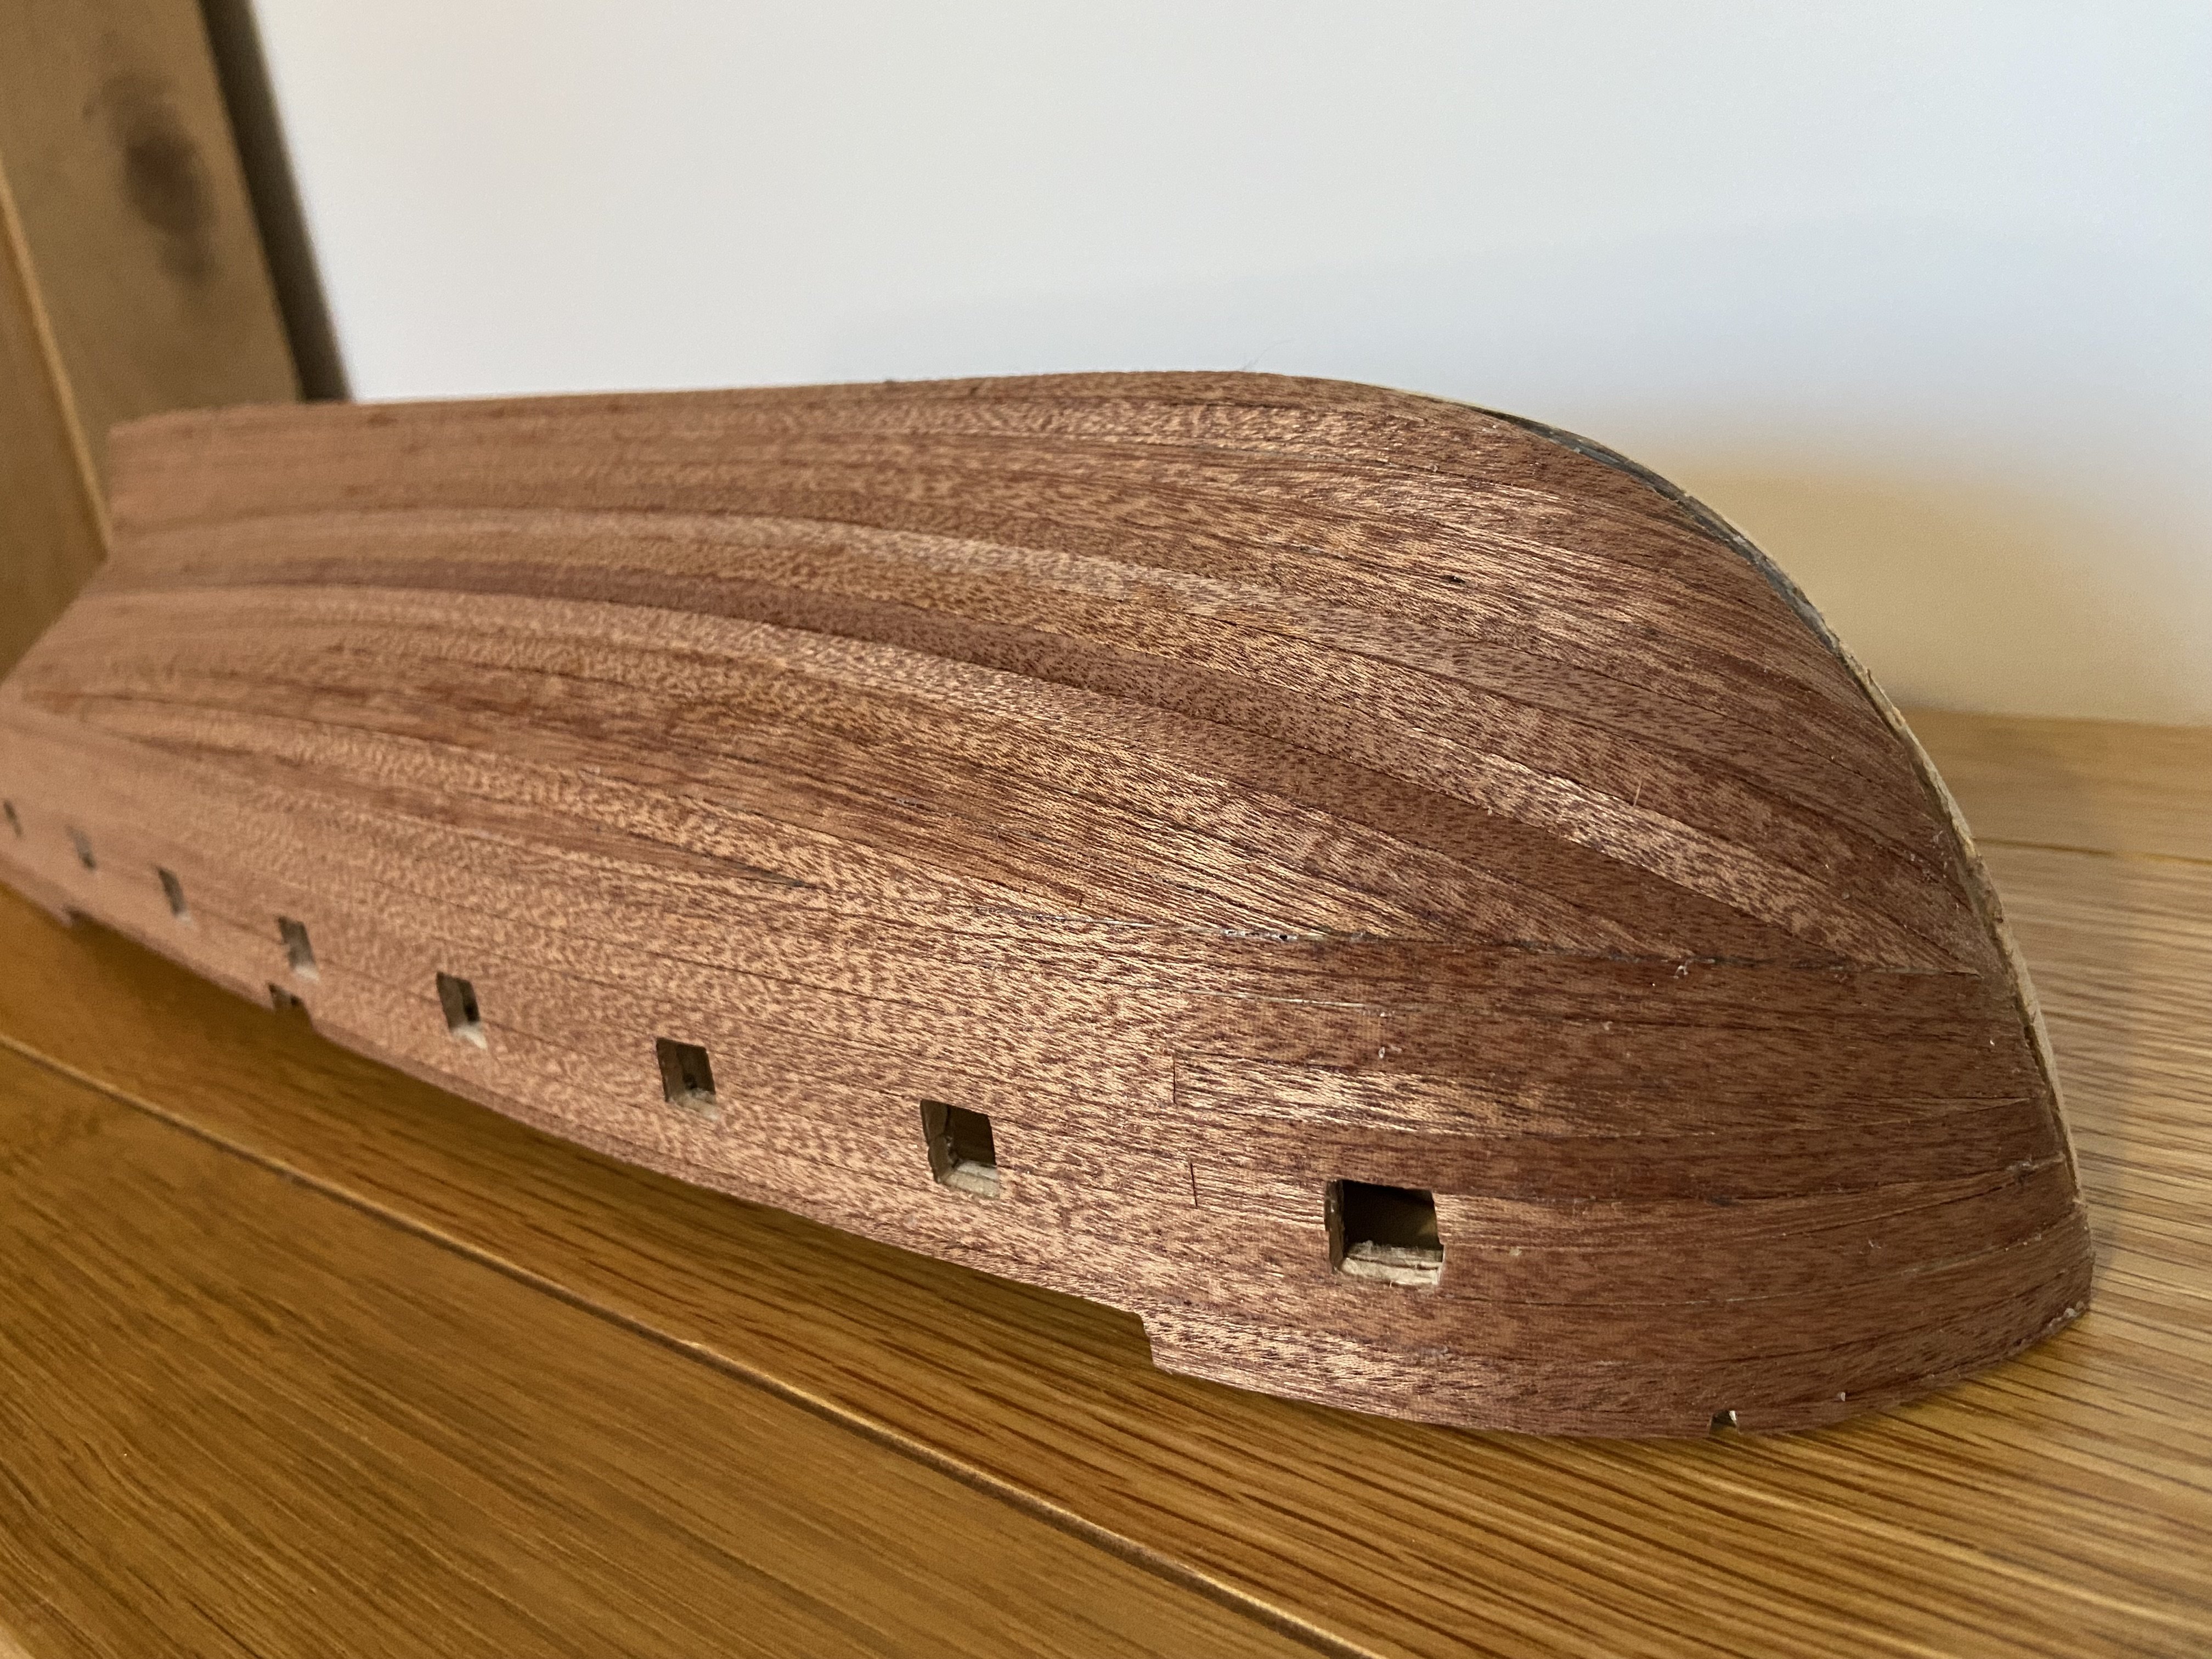
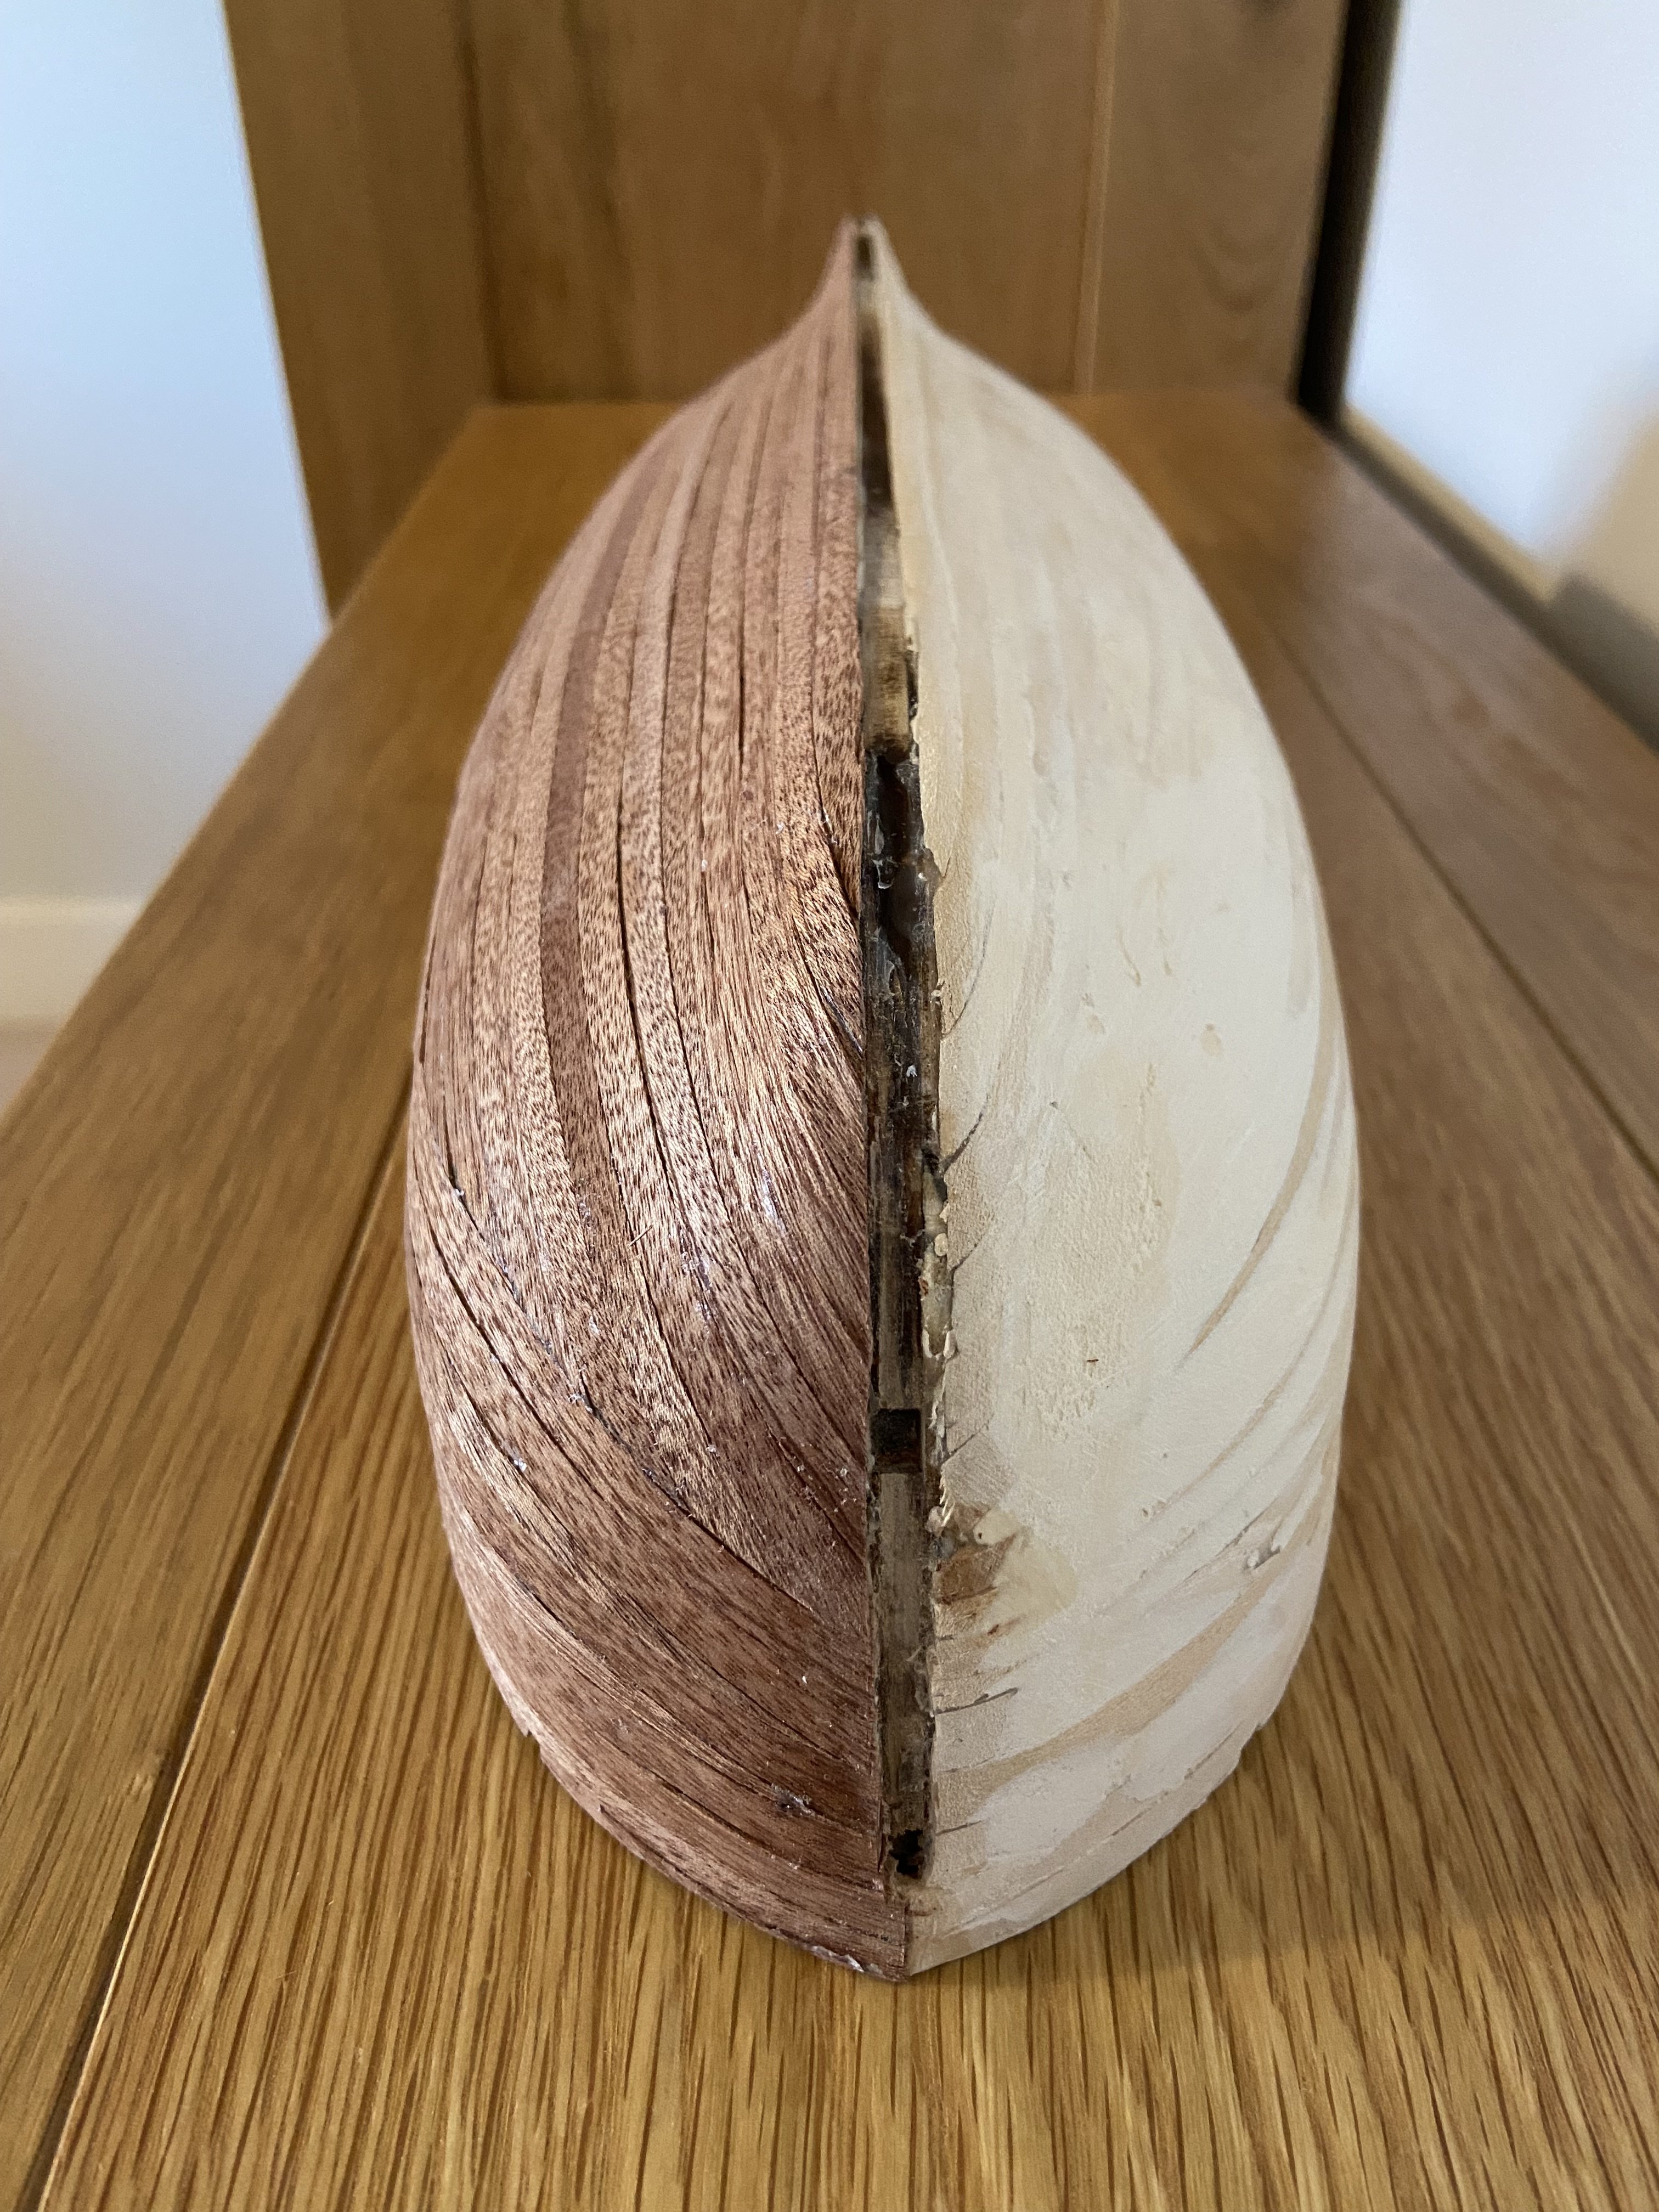
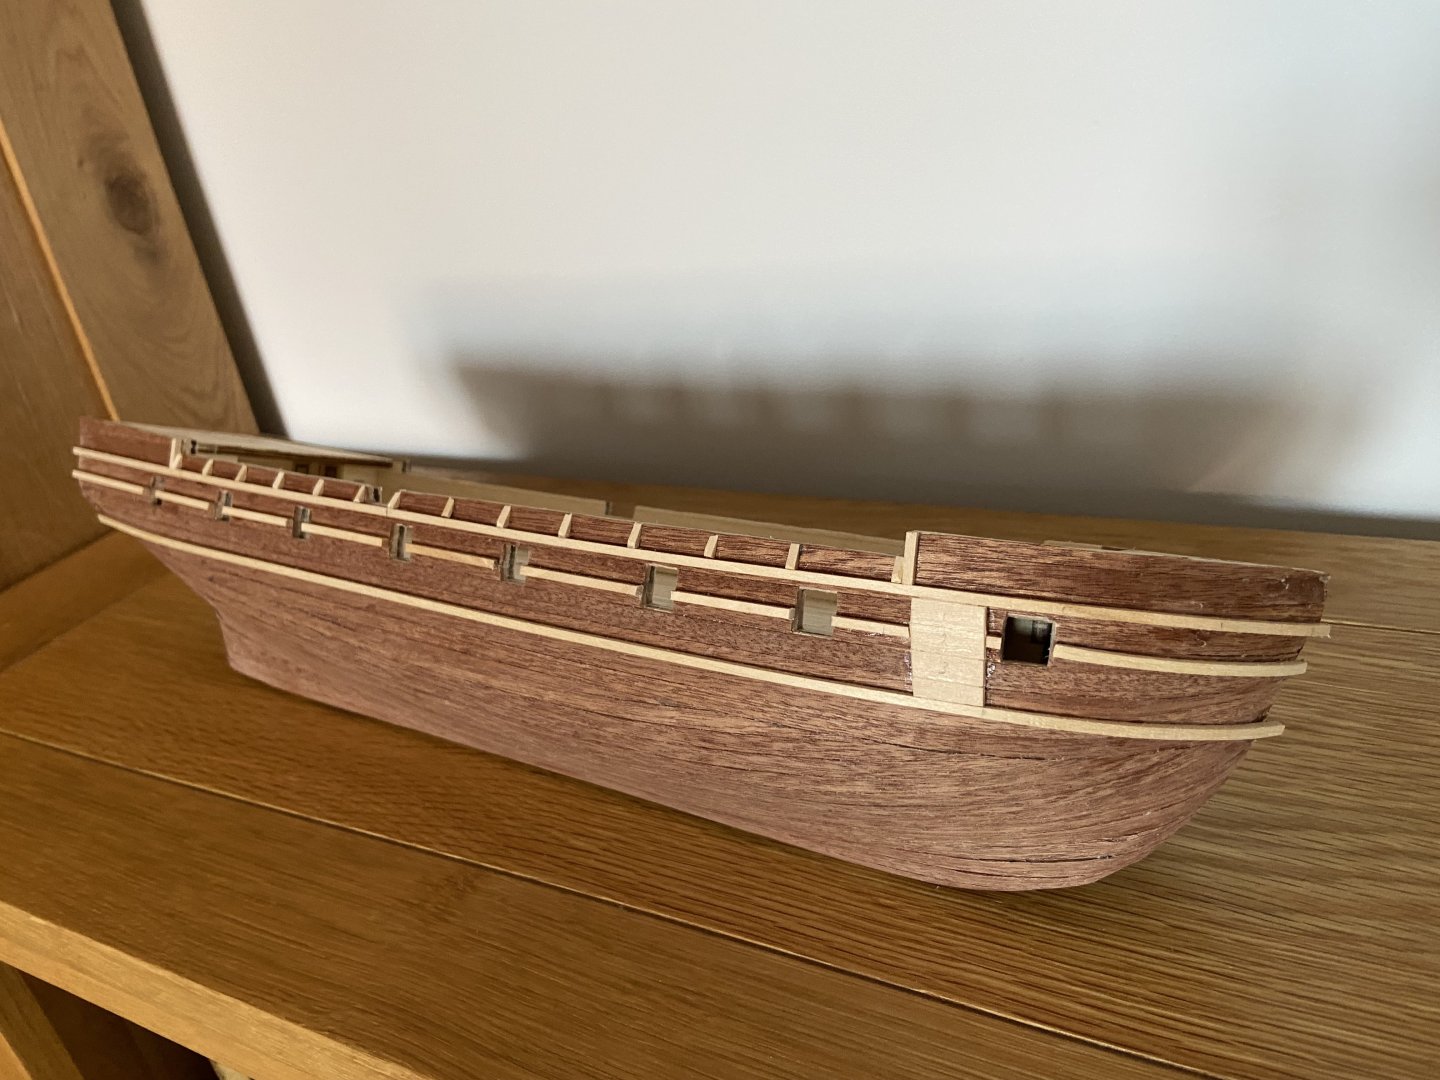
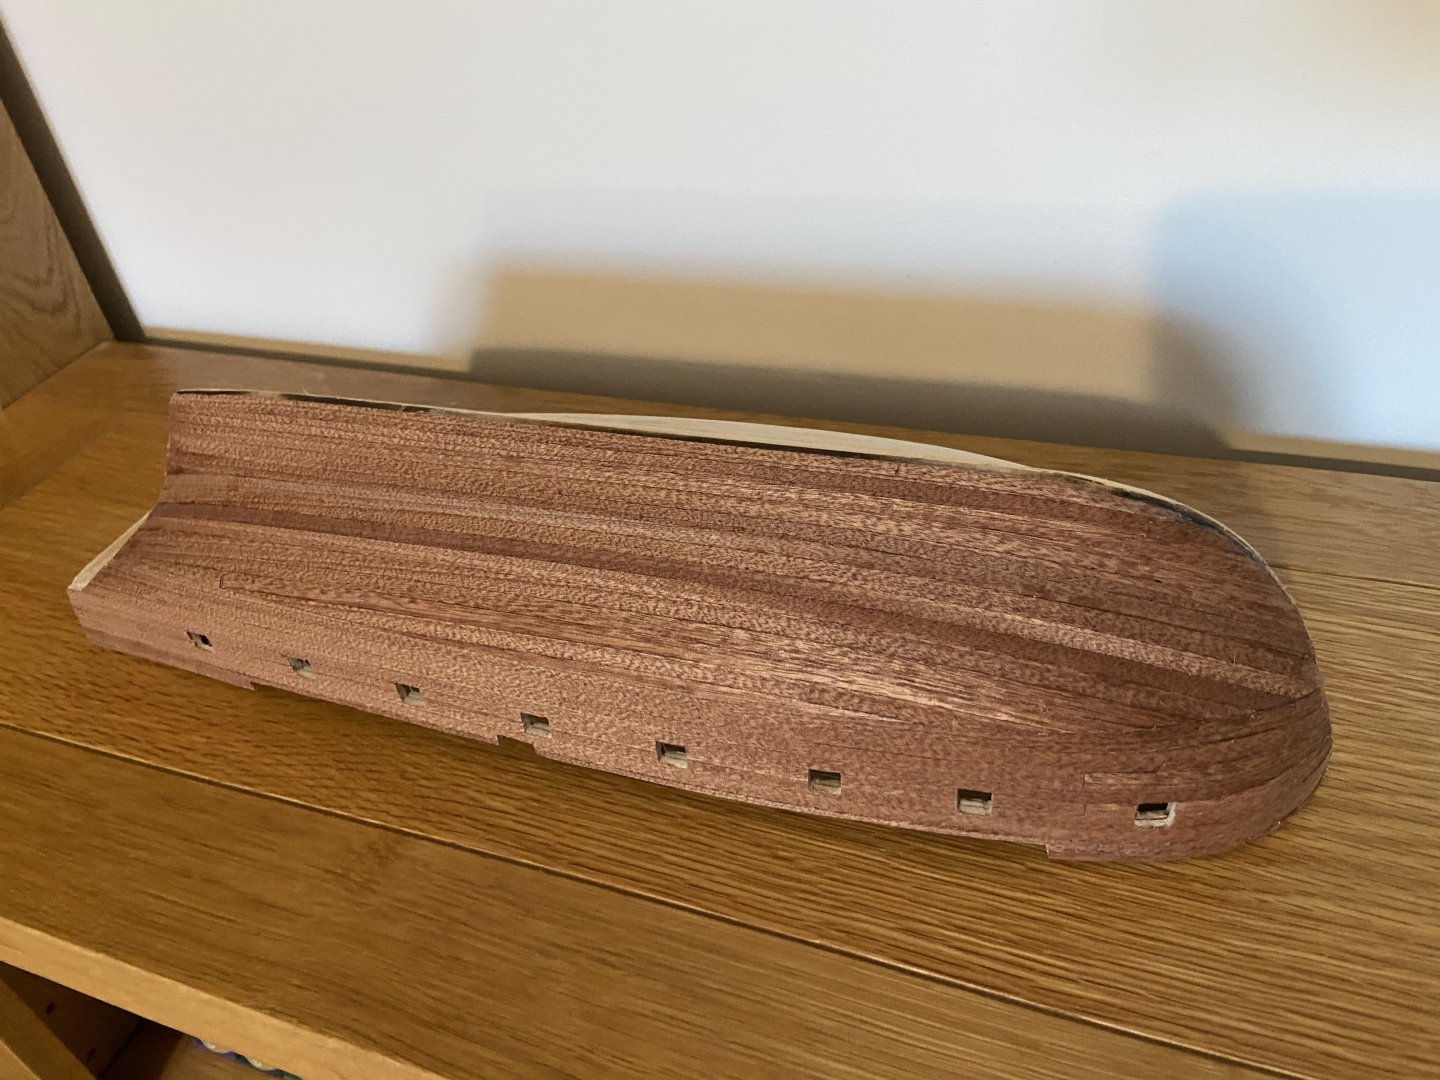
One side of the hull is now finished with the second layer of planking. I chose to work on a single side first so I could focus on getting it to look as good as possible, without being distracted by both sides at once. My thought was that if I managed to get one side right, it would serve as a guide when planking the other. I limited myself to four planks a day to make sure each was positioned carefully. I didn’t do any tapering, but instead followed OcCre’s instructions fairly closely. Overall, I’m pleased with the result. There are a few minor uneven spots and some glue marks, but I expect these will be hidden once the paint and/or matte varnish is applied. The second layer of planking goes on the stern after both sides are finished. I've test fitted the keel and stem to make sure it fits in this slot. Now for the other side 🙂


-
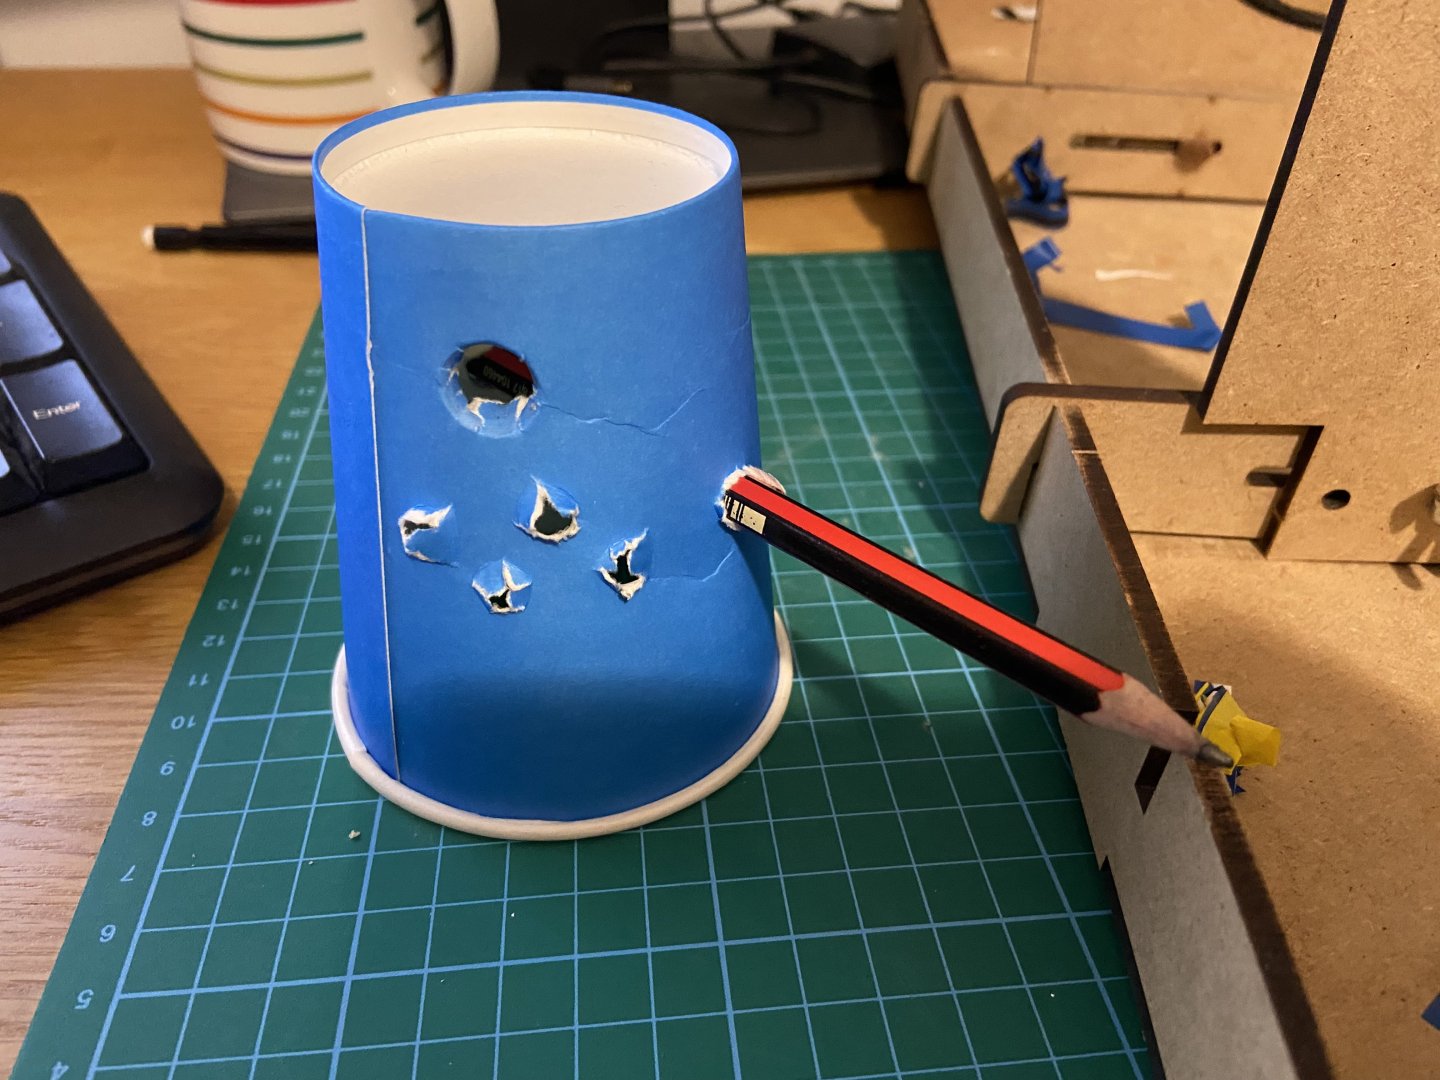
Are your dock workers doing caulking, Greg? My workers have had mixed experiences with using pencil caulking, including one who foolishly used a 6B pencil and smudged the deck.
-
That's funny 😁 I would have thought a professional kit maker like OcCre would redraw everything in CAD and test-build prototypes. Even a minor error would get ironed out in that process, never mind a massive bulge in the hull.
-
Looking good. Nice and sleek. Why did the original bulkheads have a bulge midships?
-
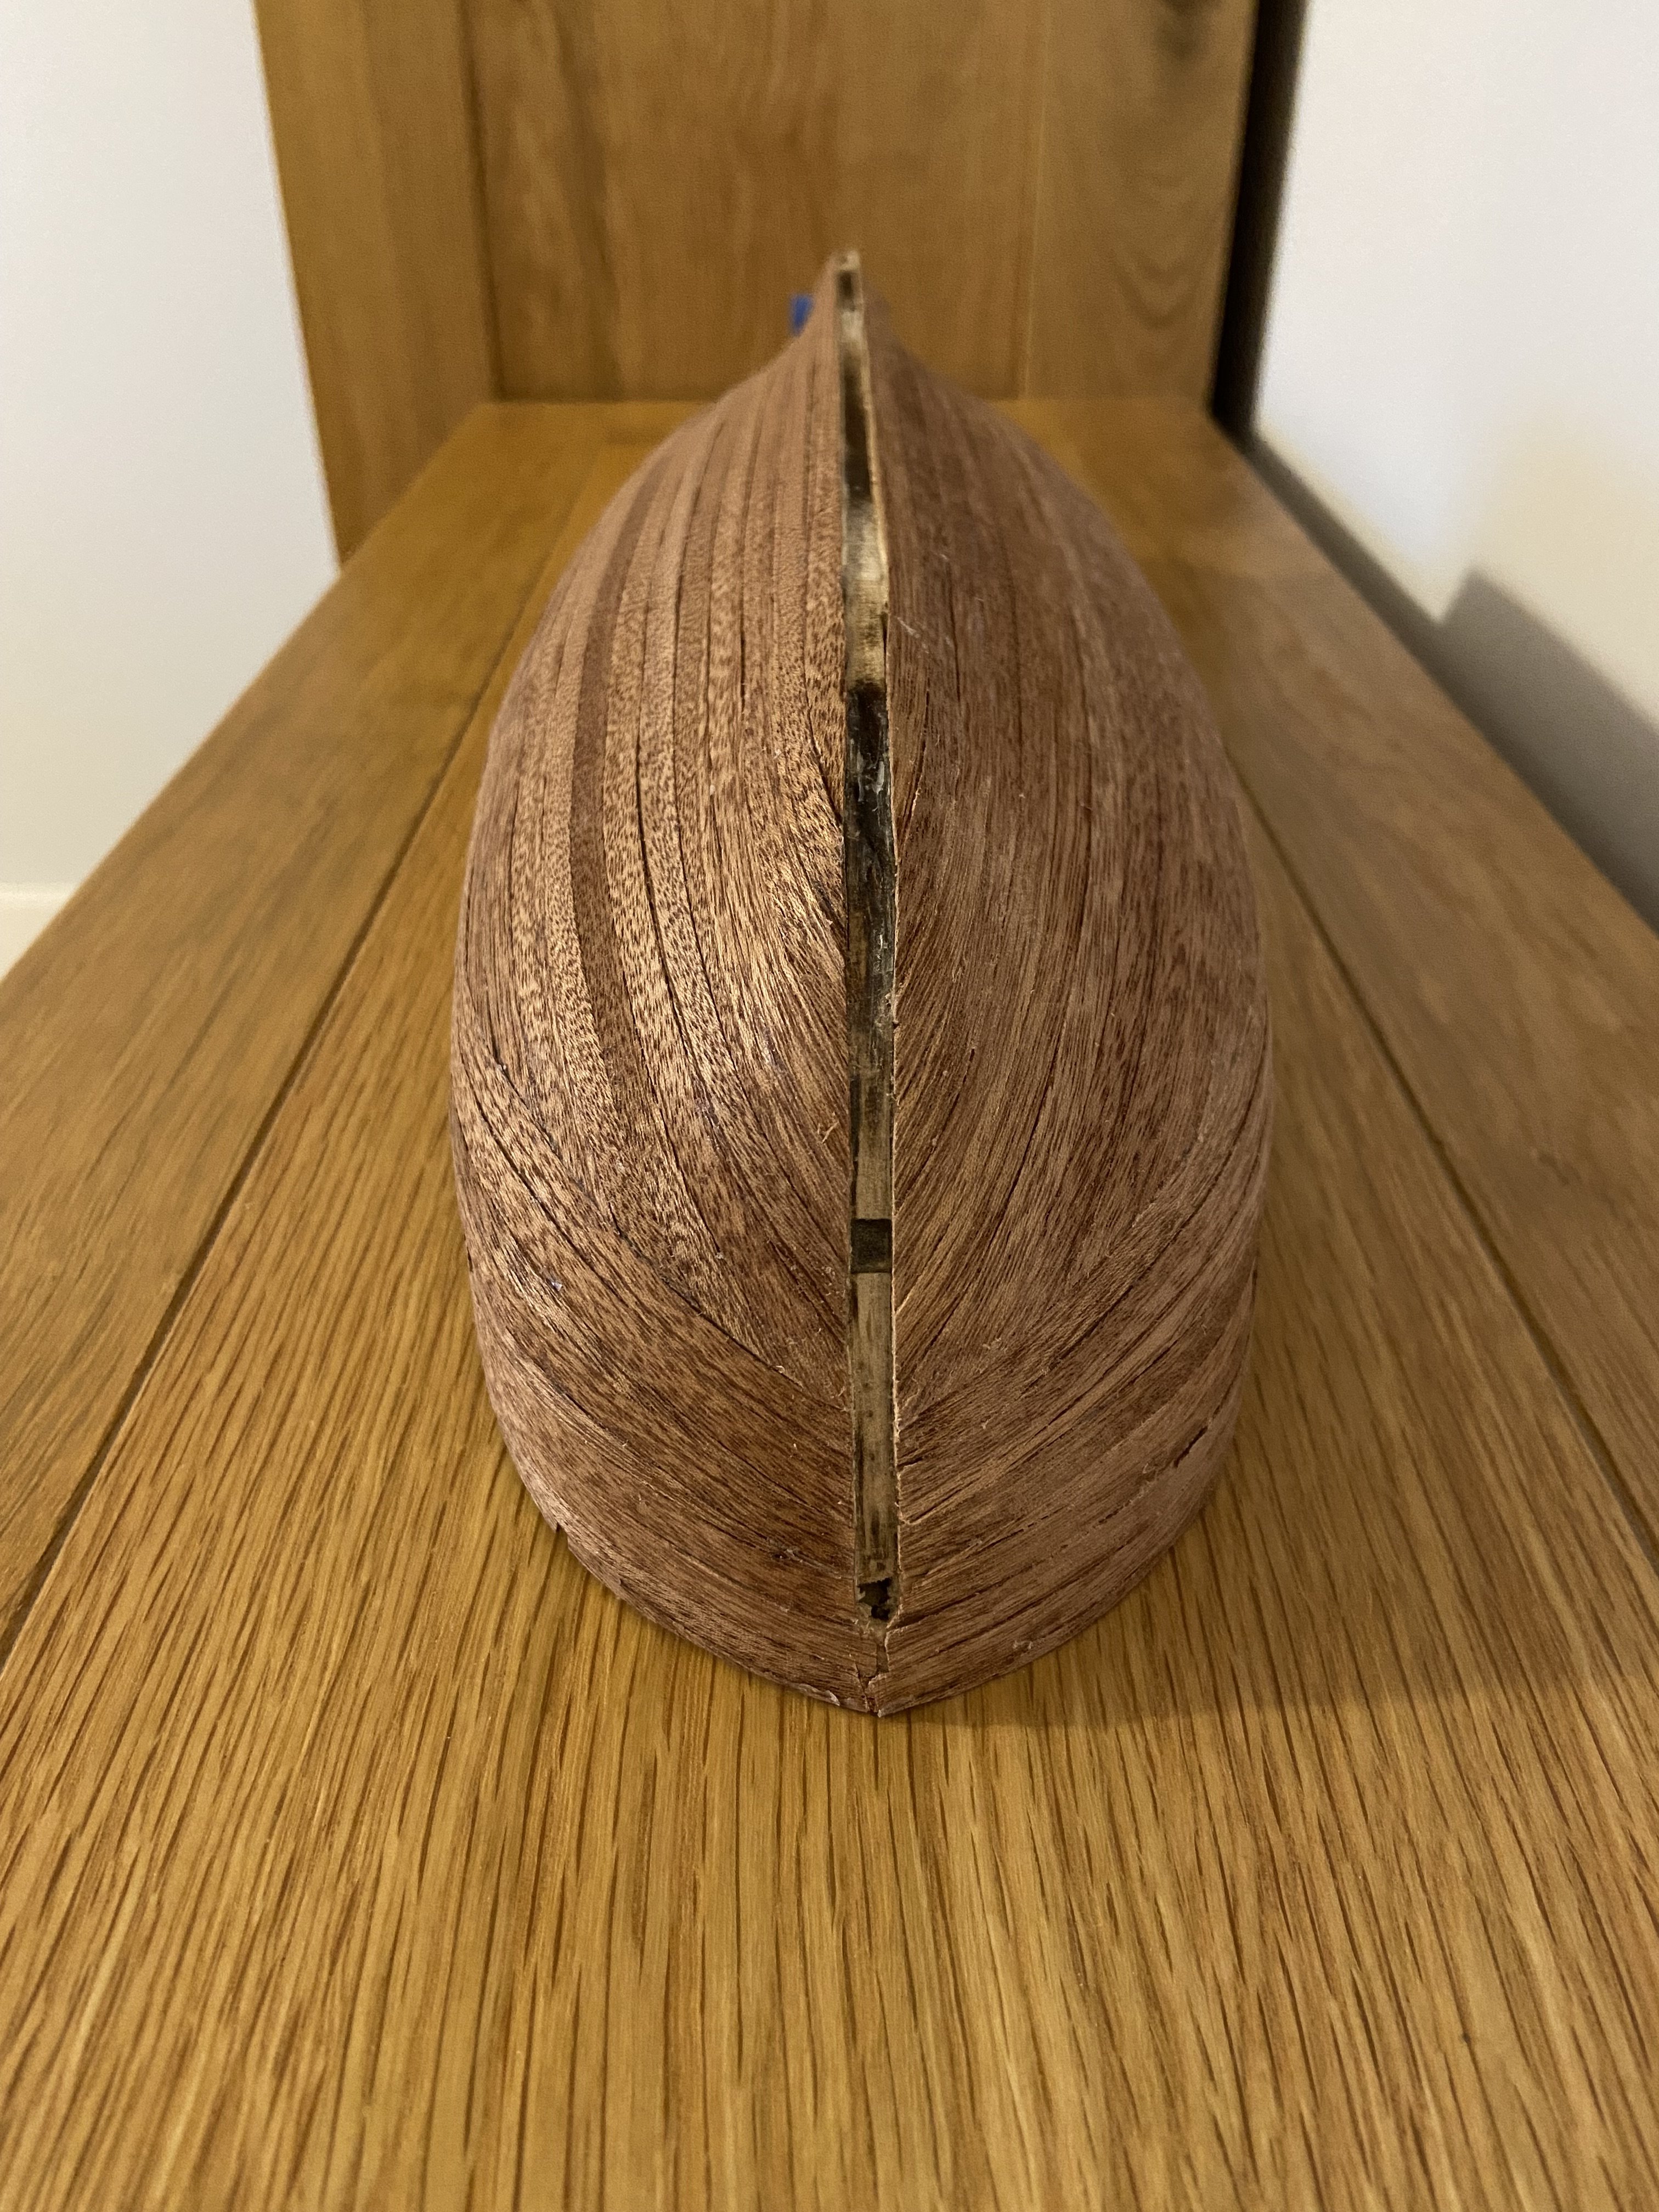
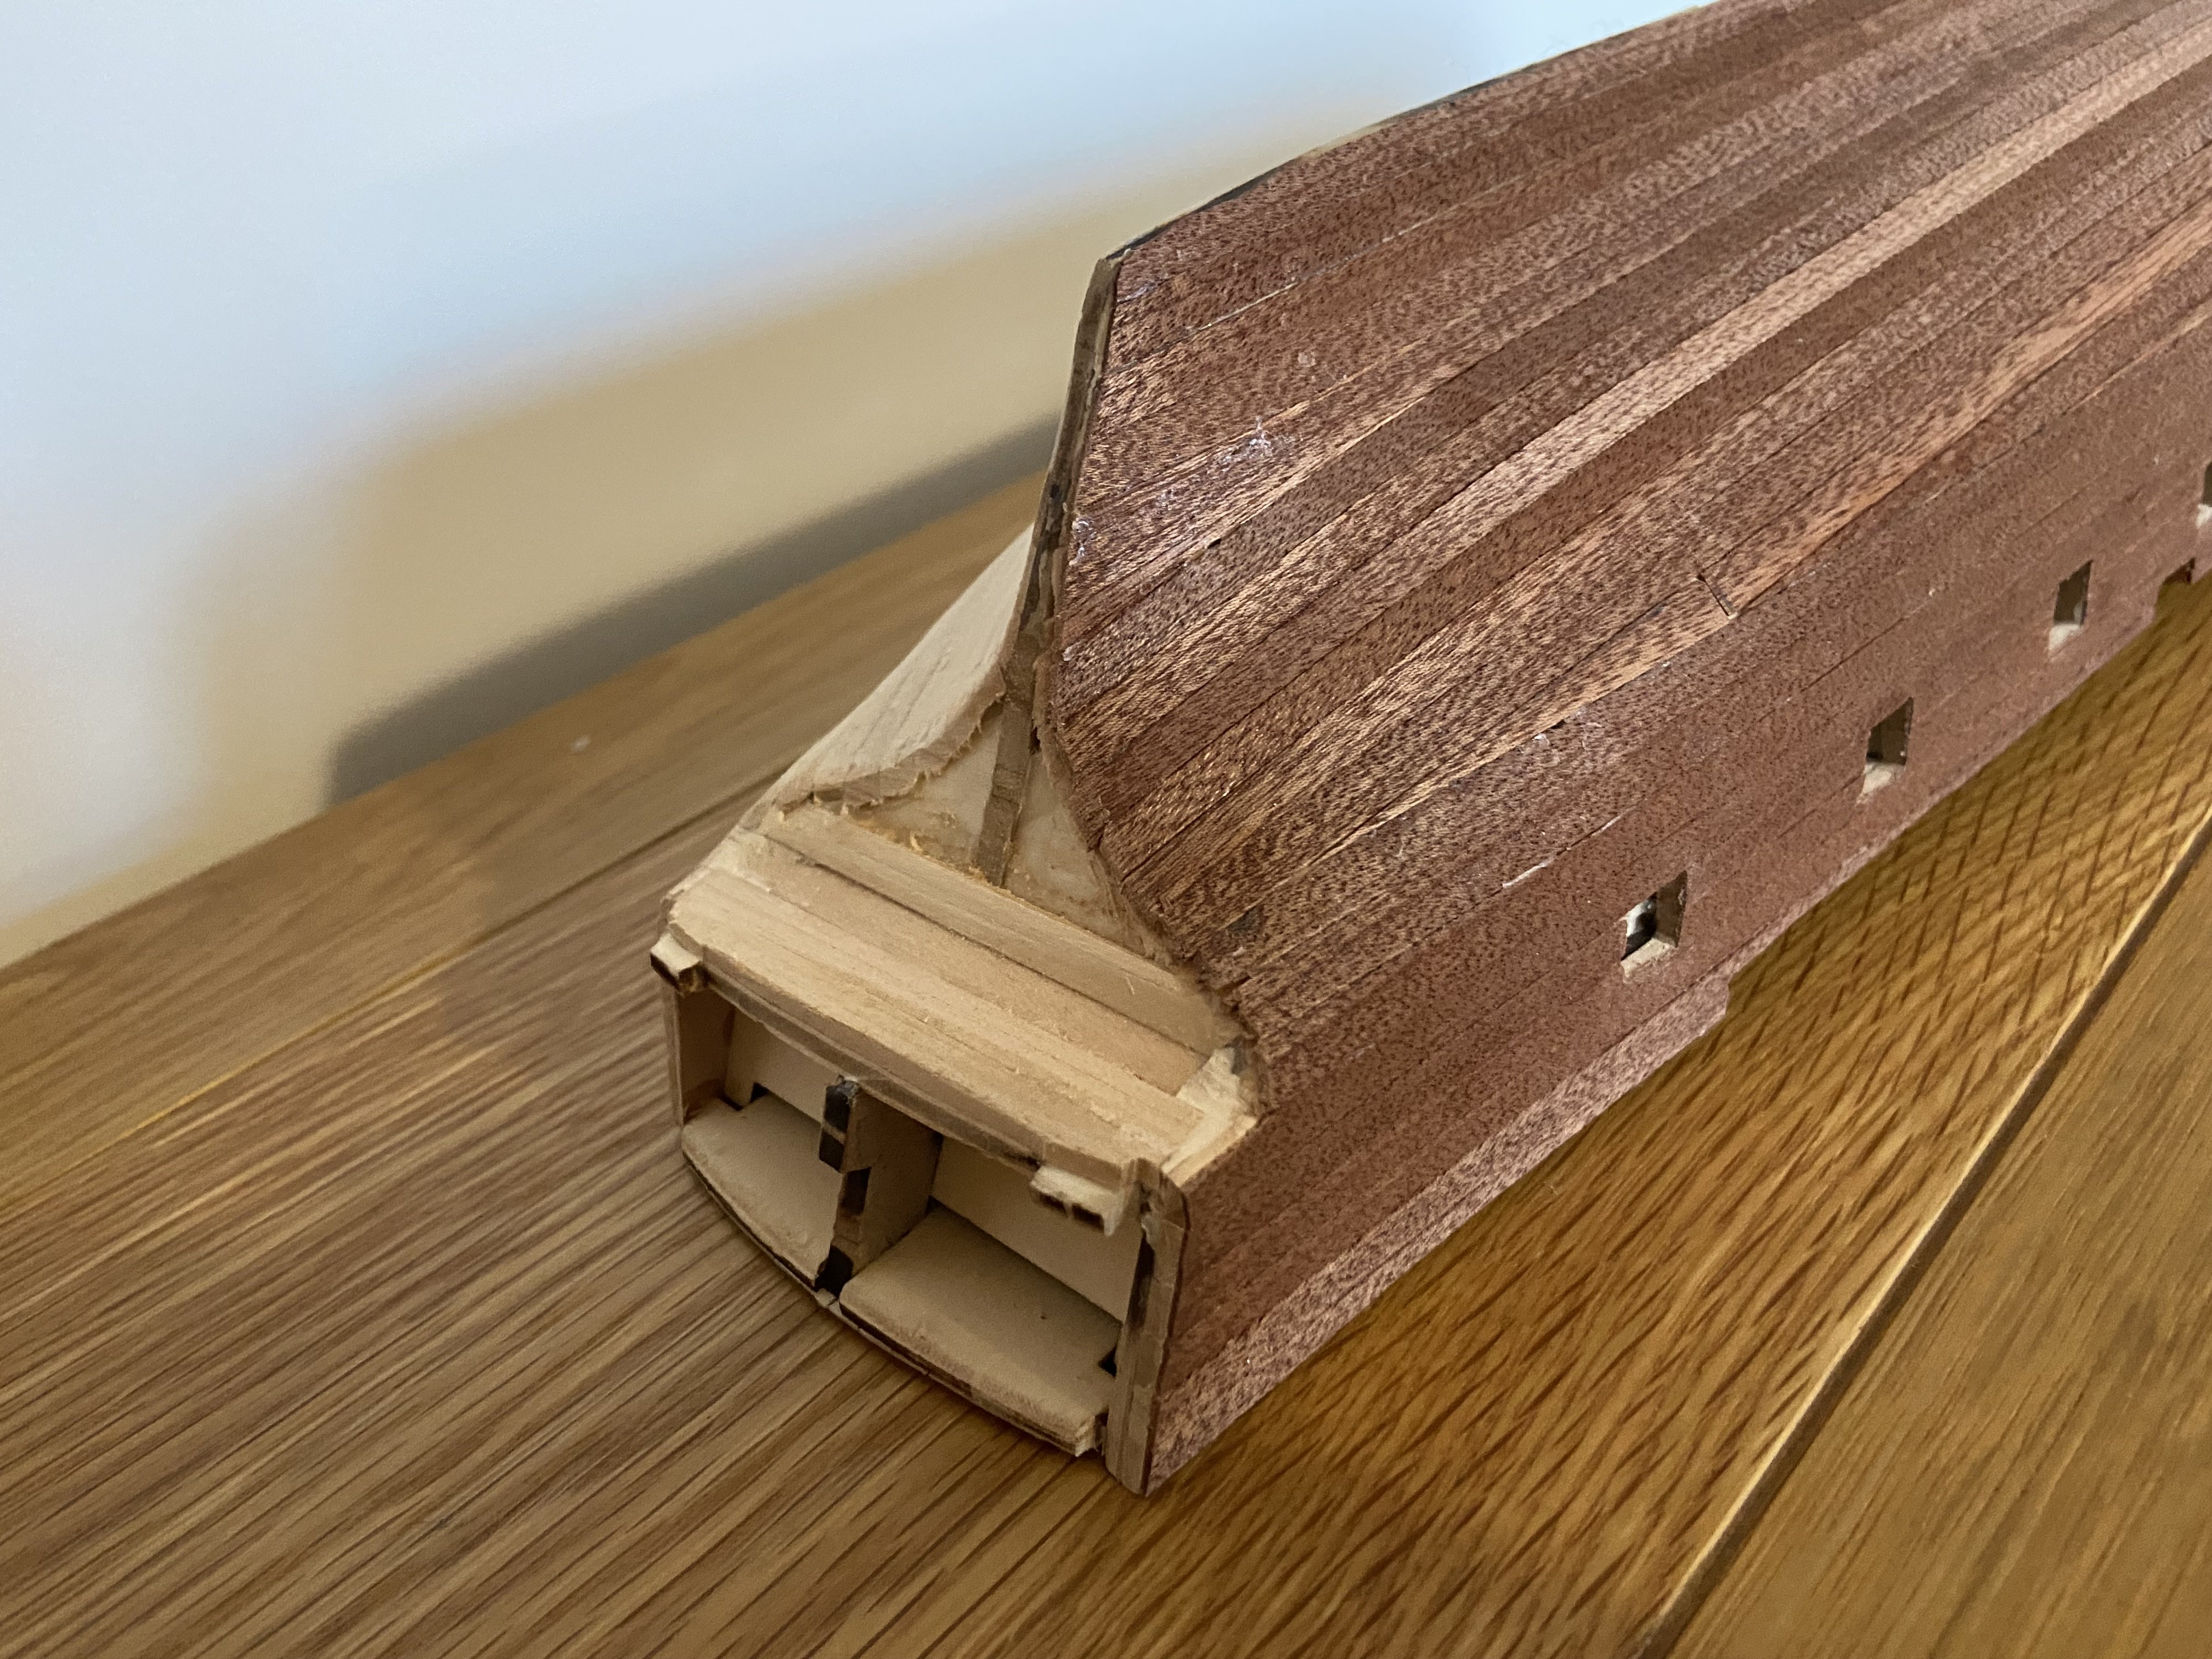
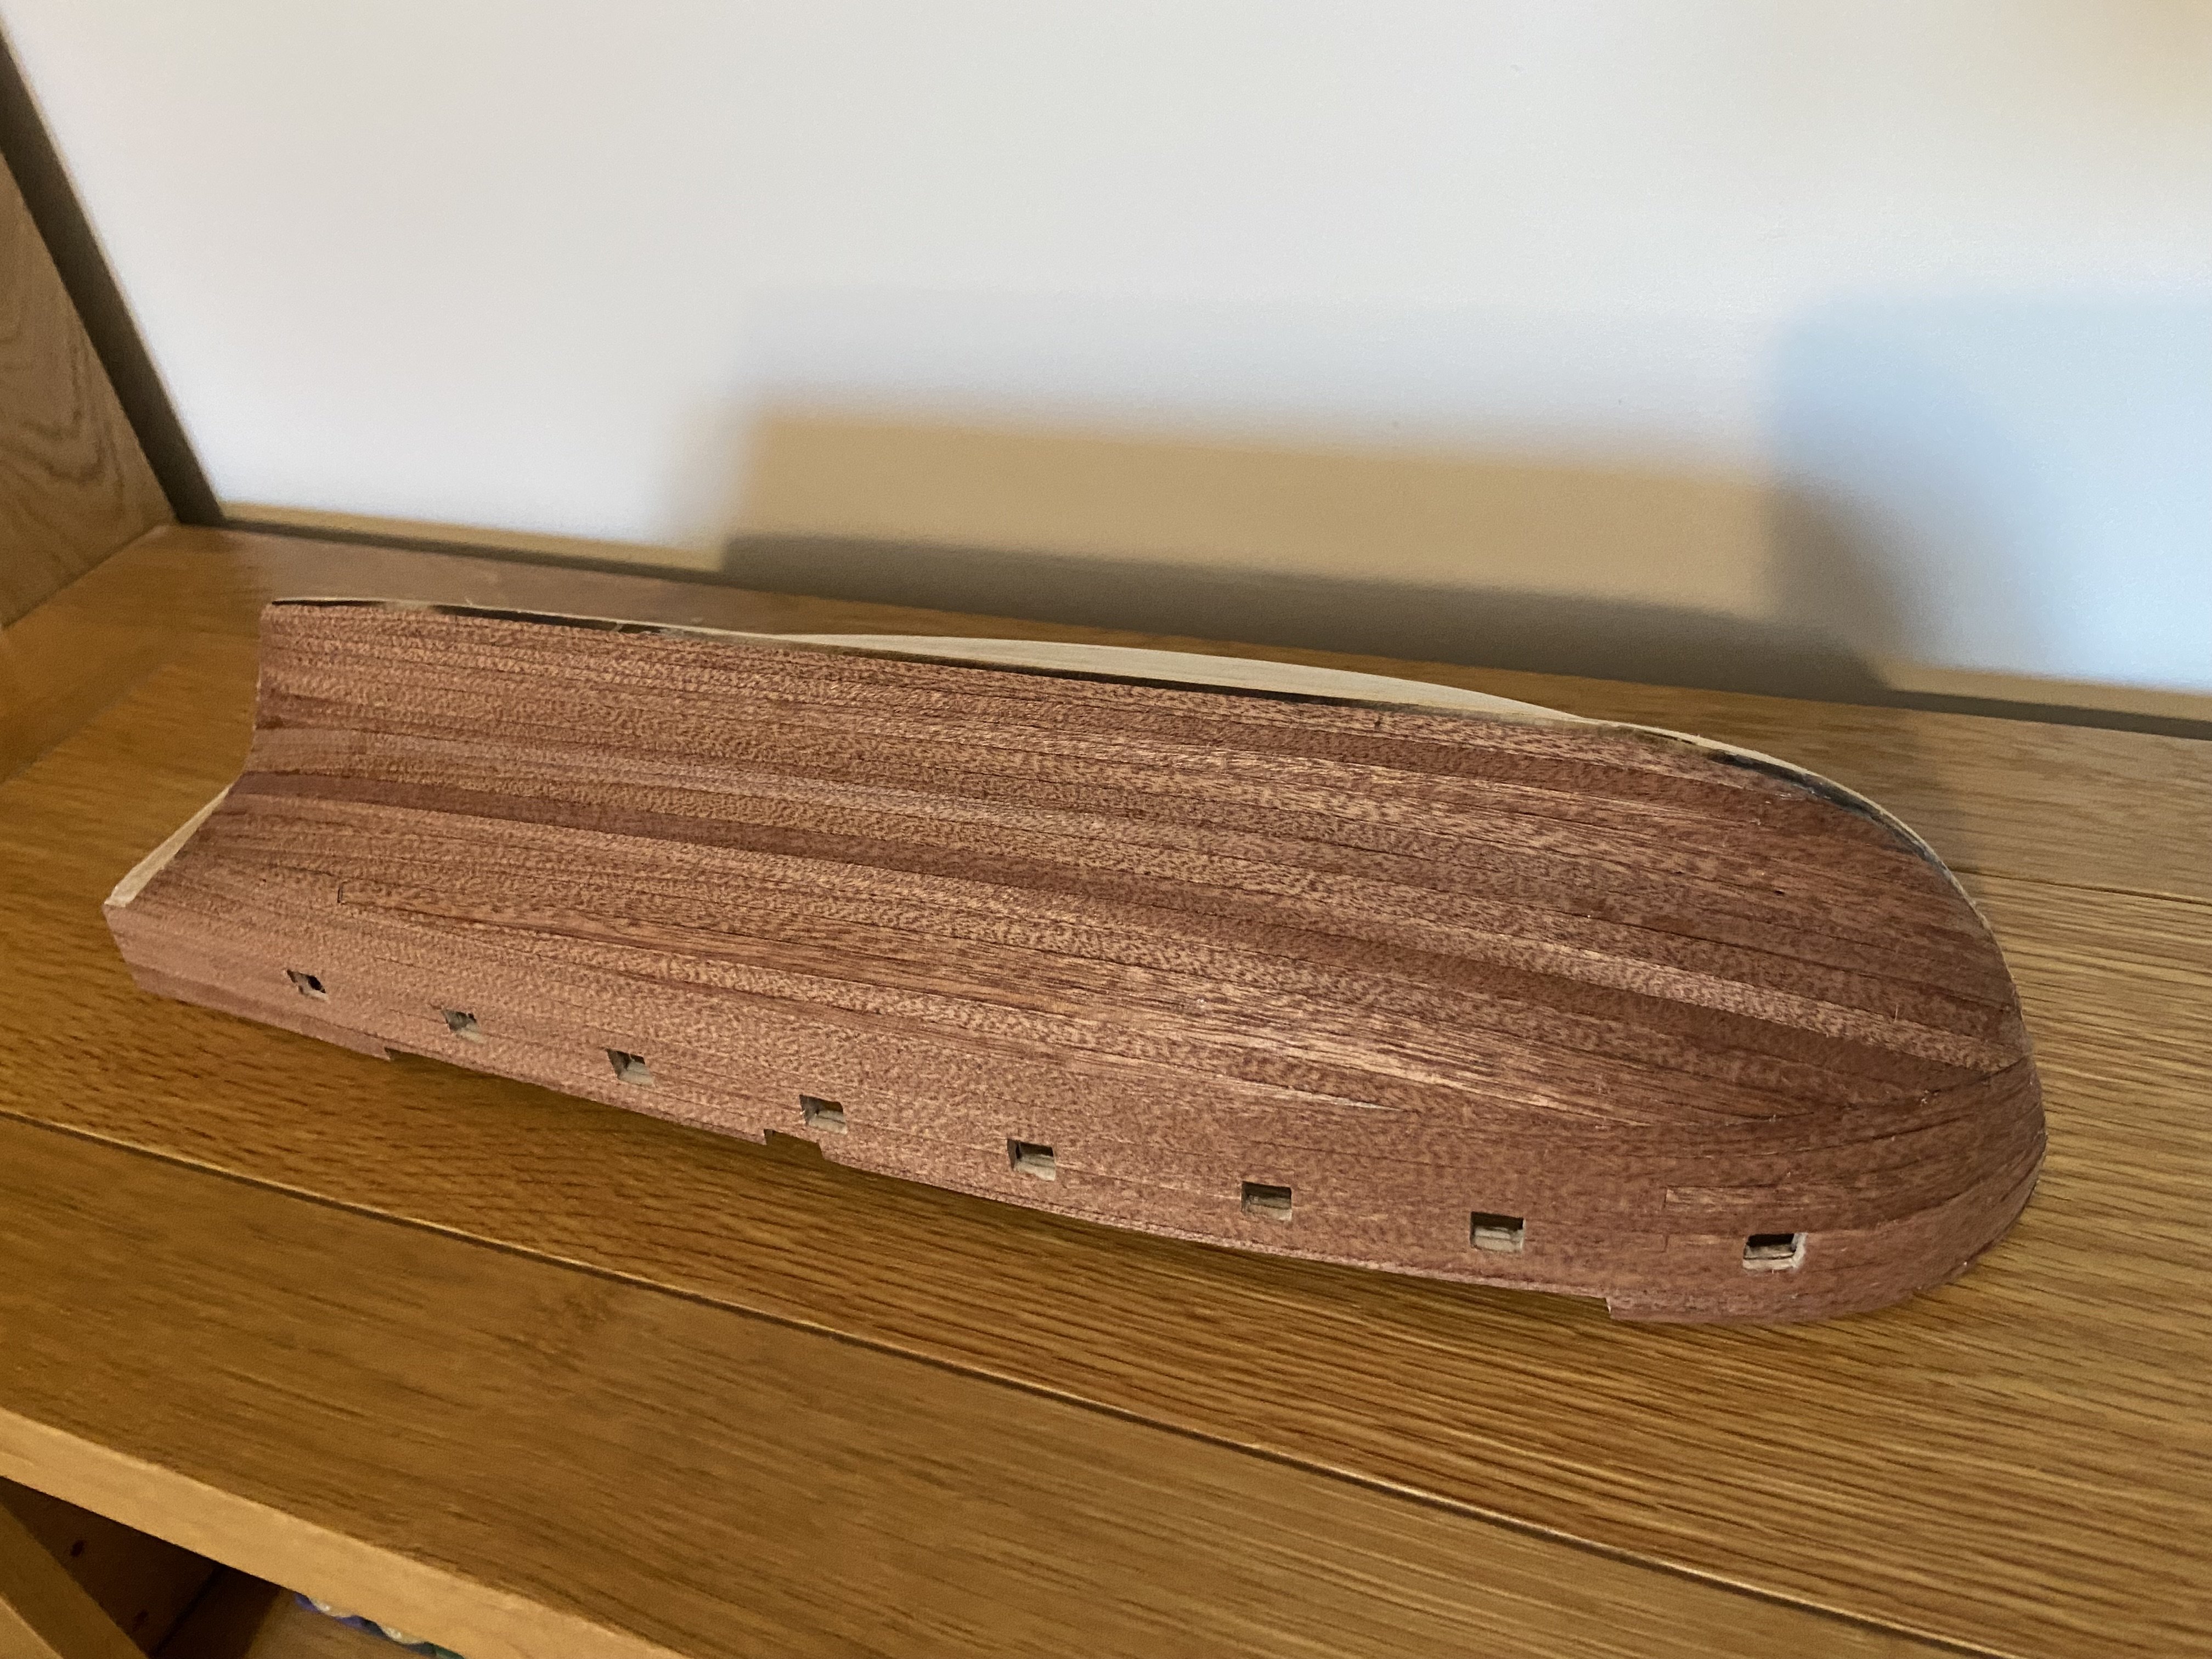
I’ve spent about 4–5 hours over the past couple of days sanding, filling, checking… then more sanding, more filling and finally a last round of sanding and checking. Ended up using quite a lot of filler, not just at the bow but across the whole hull to try and smooth everything out. I think it’s paid off – the overall shape looks pretty good now. I’ve checked that the keel and stem fit properly, which they do, and the curves at the bow and stern look gentle enough for the sapelli planks to sit flush against both the stern post and the stem. I’ll leave it for a bit before moving on, just in case anything else comes to mind. I was also worried that with so much filler on the hull, white glue might not hold as well. So I did a little test: sanded some filler smooth on a scrap piece and glued a spare sapelli strip to it. After an hour or two it was stuck firm, so that’s a relief! I’ll hold off on posting any photos until I’ve got the second layer of planking on. I’d rather share some pretty pictures instead of all the filler.
-
Thanks Greg, this is quite depressing.... But you've given me hope. As I've found with model shipbuilding so far, when I make mistakes it's because I couldn't see how I could have avoided them. Those planks had to be close to the bulkheads to be glued, but that meant I ended up with steps and gaps... I need a teacher, really! I've got a long weekend this week so I'll spend some hours tomorrow evening and then Saturday/Sunday seeing if I can solve it with sanding and filler first.
-
Thank you. When you say detach the planks, presumably you just mean back two or three bulkheads? Not entire strakes? I ask because the rest of the hull is quite good. Relatively smooth and nothing like the horrible gaps and steps I have at the bow.