Danny_CZ
-
Posts
23 -
Joined
-
Last visited
Content Type
Profiles
Forums
Gallery
Events
Everything posted by Danny_CZ
-

removing ca glued rigging
Danny_CZ replied to Lost and Confused's topic in Masting, rigging and sails
Small addition: Debonder is just mixture of acetone, which is not very effective, mainly used as chemical that adds volume, and nitromethane - the actual CA solvent/cleaner which is very effective and more expensive. Source: mixed and sold "debonder" until nitromethane became too expensive and on top of that controlled substance in the EU. Happy modelling. Danny -
It depends on what you want: Is it historical accuracy (difficult as we really don't know for sure and many things changed over years) or model like replica what you like (whatever you desire, be it no paint to shiny finish or matt, whatever you like) My personal opinion is do it so as much of natural wood is visible which means I will probably not paint the hull white at all an go for possibly just few red gunports and ochre yellow on bulwarks and black outline various parts of ship. As for weathering - yes it can be good, but then I feel it should be weathered everywhere which I feel can take away from the model. On contrary you can make a model which would be made as actual model before they build the actual ship, which would naturally be not weathered. We have ideas how things should be and we have three options: 1. "pre-build" model (it was required before they made the actual ship) 2. replica of real ship 3. something that is reasonably accurate yet pleasing to the eye Hope this helps and take everything with grain of salt as I am no expert by any means, just somebody who came from plastic modelling and observed a lot of builds and read lot of opinions Danny
- 23 replies
-
- 1
-

-
- Sherbourne
- Vanguard Models
- (and 1 more)
-
You will catch up to me in no time, you can learn from my mistakes as well. The instructions are good but here is what I would add on top of instructions that is next few steps: 1. sand the stern frames before you put them on 2. make sure the false deck is glued flat where the companion way gonna sit 3. bevel stern counter and transom 4. really sand down the stern area of false keel as later it will have 2 layers of planks which need to be the same thickness as the fully assembled keel 5. with the keel parts on, dry fit the outer keel patterns as well and mark where they outline as this is where your second layer of planking need to slot into (I am now fixing my Sherbourne so it does fit). Good luck and keep us updated! Danny
- 23 replies
-
- 2
-
-
- Sherbourne
- Vanguard Models
- (and 1 more)
-
As many said before, it depends, I have had exposure to plastic kits at home since I was born and as I was visiting museums and other places with my dad, my interest naturally grew. The biggest problem I was facing was overwhelmingly good results I have seen been produced by my dad, I just could not see myself getting even close to it and majority of it was done late at night when I slept - not helpful. I had Lego and also Merkur (metal lego with screws, I think in UK they call it different). For Lego: you need a lot to build creative mind, otherwise it is quite expensive for 1-2 hour build and then it is done and what next. I would recommend looking out for some big old stash and try building some random stuff initially. For Merkur: it had limited use, but it improved dexterity and basic tool usage like screwdrivers and wrenches. This summarised, what I actually started with were paper models - I could play with them, they were reasonably easy and taught me some basic skills. You don't paint them and if you have the mind for it, you will start using stuff like bamboo sticks to reinforce various structures. The ones I enjoyed the most were castles. One note, use PVA glue to joint them, never use the glue sticks, they stop holding after few months. I was also helping around with some tasks for the plastic kits of my dad, quite often metal parts assembly and bending, but was always afraid of painting - I am till today. Later I was more busy with studies and I naturally fallen for computer a bit, this lasted for roughly 8 years, computer games for sure gave me a lot, my English would be absolute garbage without them. They were also good way how to see the models move and play with them in a way that you cannot do in physical world. All good but it will get boring and repetitive. And now age 30, in my new home with now my wife, I am reigniting my crafting passion - and doing once again something that would be my project only. It is lot of struggling and I still have this inferiority feeling, but doing slow progress and overcoming it. Last note: Model building can be lonely and it is a hobby that is good for showing off, yet not great at all for daily discussions. I am fine with that, but I can see some kids could resent their parents as they are not the cool ones. Ships are very on the side and finding other young people doing the same hobby within "visit" distance is close to zero. I see groups everywhere doing trains, RC models, Warhammer and some plastic planes. Wooden ship building is just too niche. I know this forum exists and it is great but I also have to be fully blunt and say this type of forum is really from 15 years in the past - it works, but has many limitations (subdiscussions directly in build logs that can go deeper about the problems without cluttering it or creating infinite amount of help topics OR general discussion which would be more like live chat, people can point out or just straight up answer, for this people would need to be less afraid to join in the discussions, but we are who we are.) Take everything with a grain of salt. Good luck! Danny
-
Fully understandable, I have quite huge database of aircraft (mainly WWII) including detailed pictures of museum pieces and around 100 monographs, so if ever needed, just mention me! And good luck further, I am watching! Danny
-
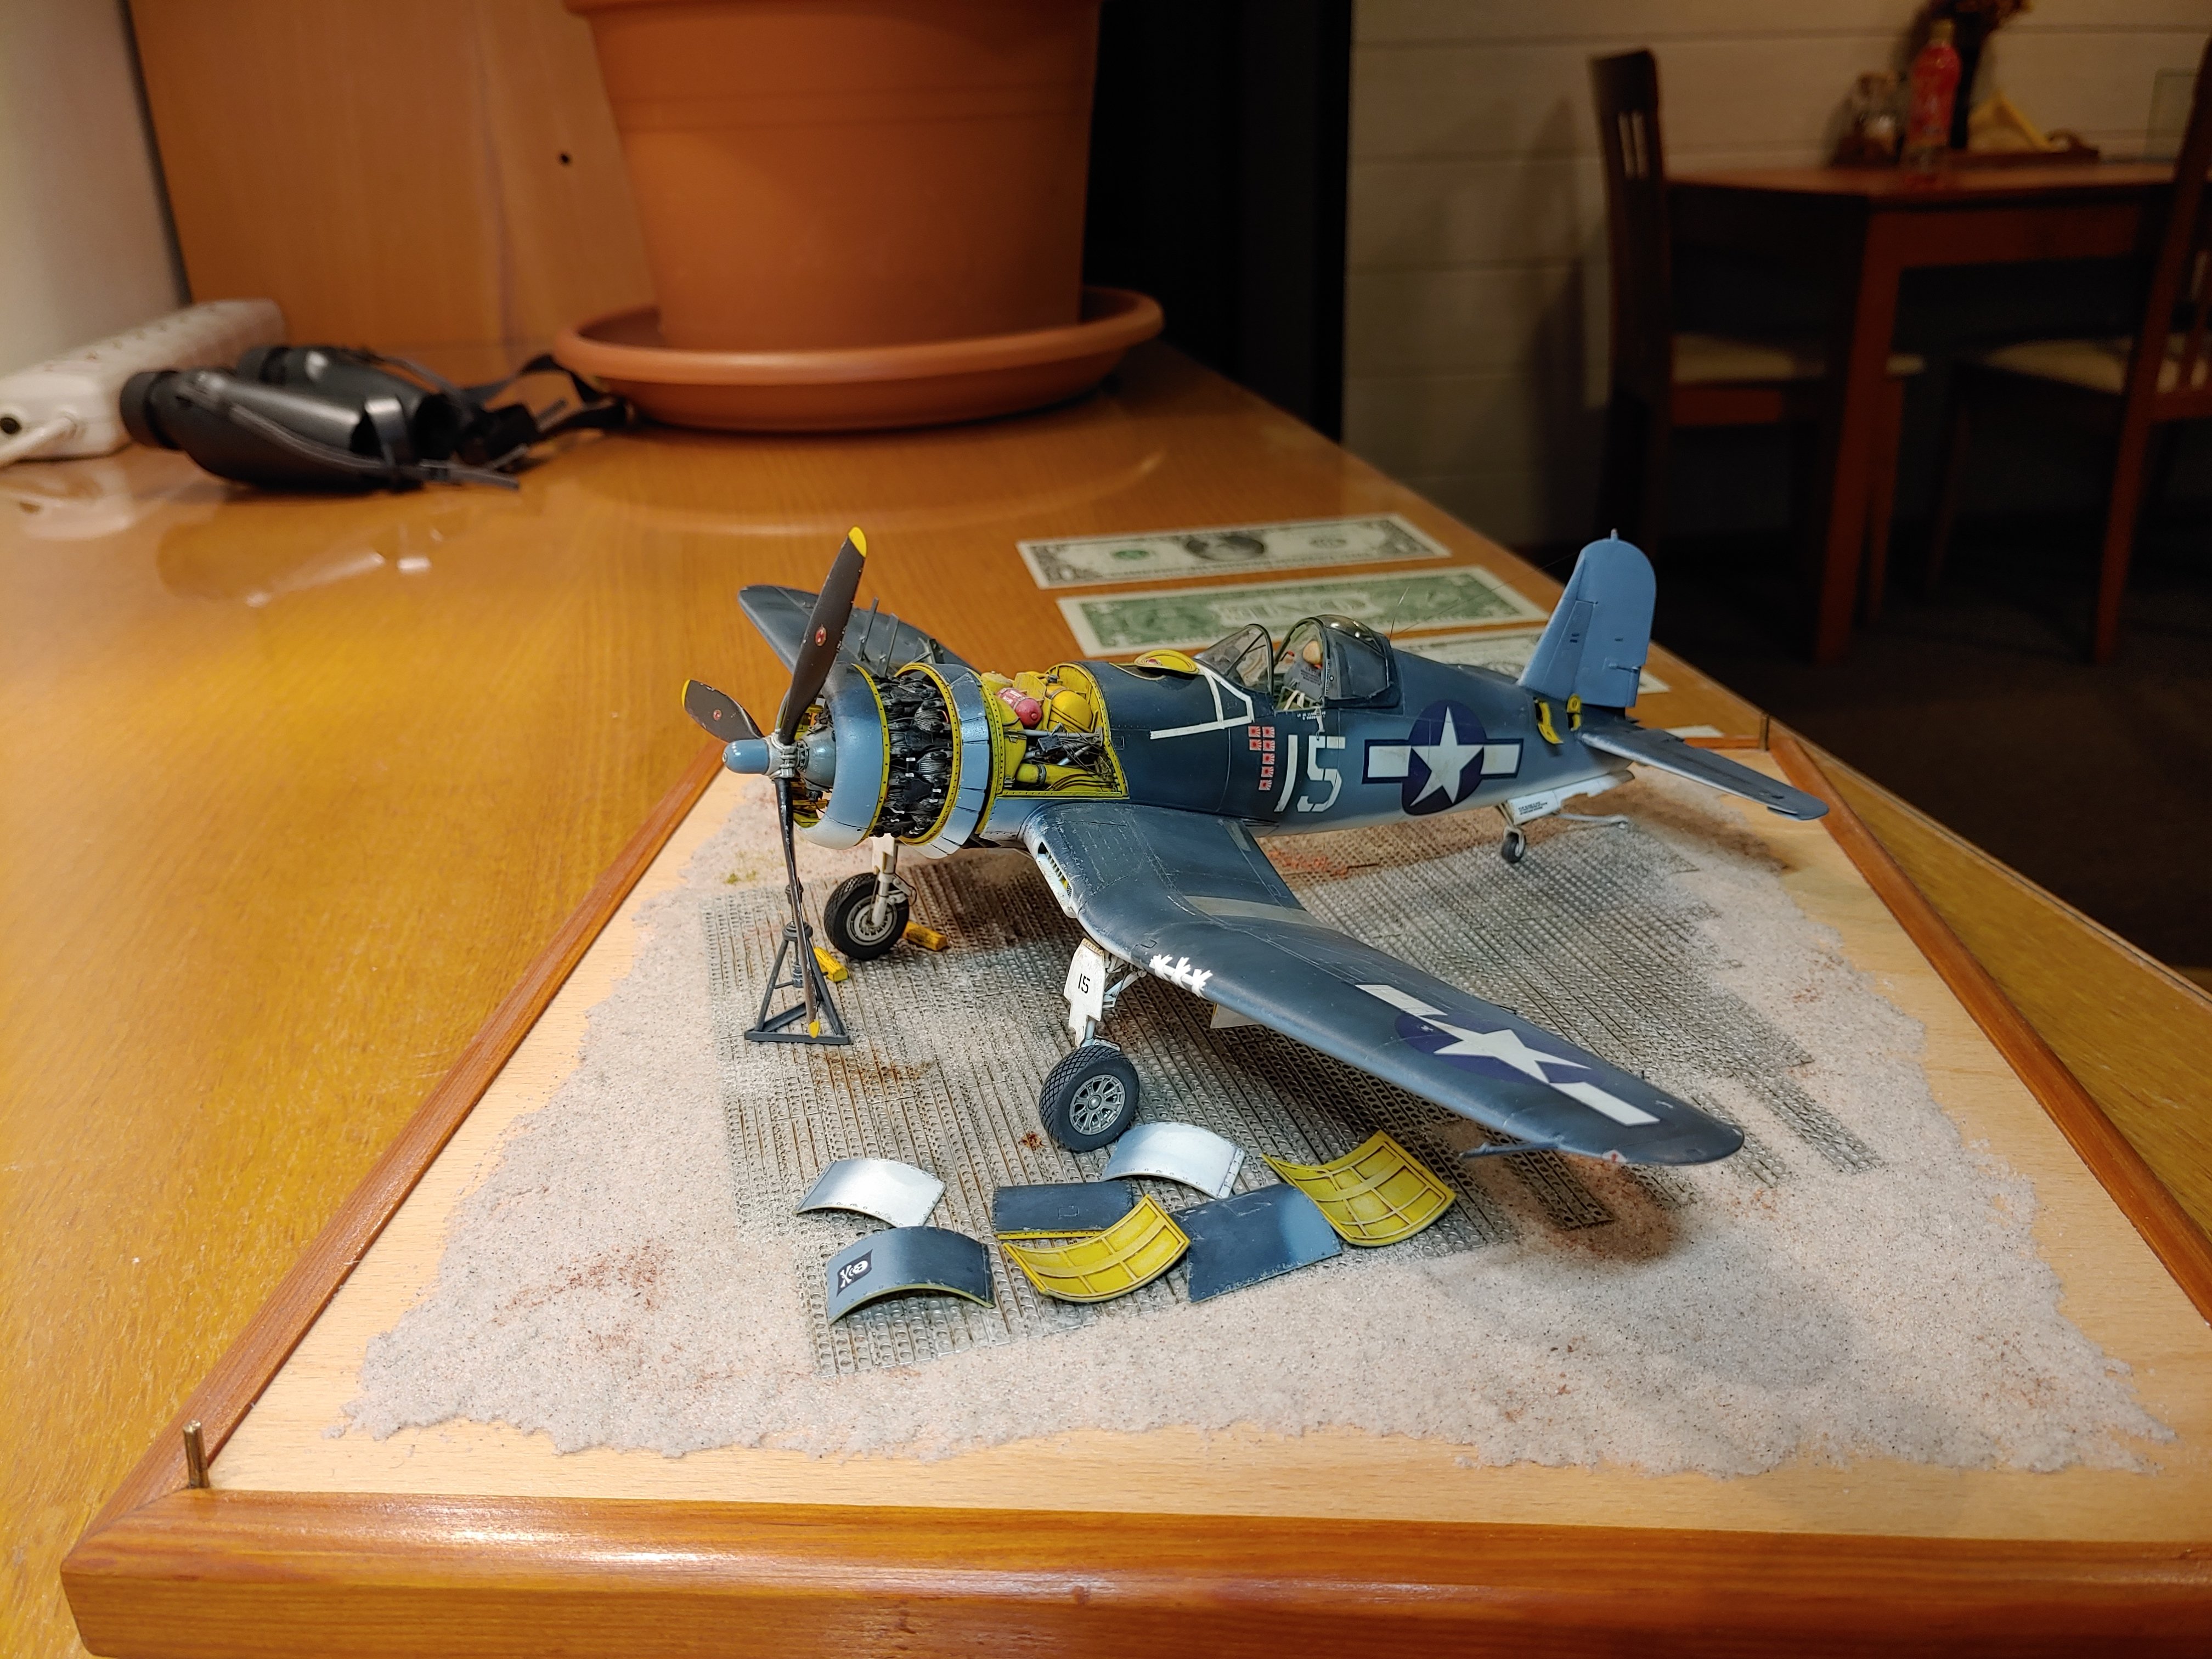
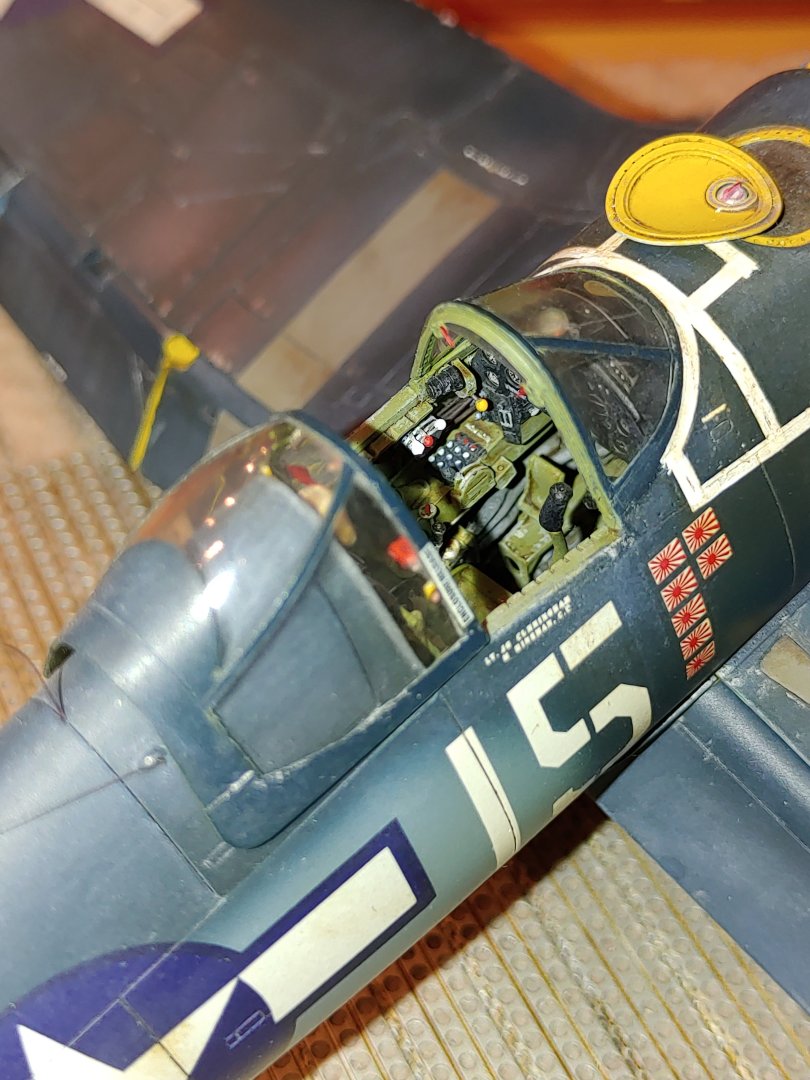
Merry Christmas and Happy New Year!! Very cool what you can do with paper! If you still wanna know what the levers do, here you go: From left to right, they are - emergency hydraulic pressure (not sure myself what this is) - flaps - fuselage gun loading (maybe safety) - radiators control - landing gear safety (this is the small black plate between the slot of red and blue tipper lever, it should be metal casing with a slider with a notch to lock the landing gear lever (rightmost lever on your model) and have a very short purple tipped lever) - landing gear So landing gear one should be down, guns down, radiator and flaps depending on your modifications, but would be closed when parked and no clue about the hydraulic presure, but would guess up as well. - source: Maru Mechanic - Mechanism of Military Aircraft 2 - Type 3 Hien & Type 5 Army Fighter - Type 99 Light Bomber Danny
-
2023 Donations drive
Danny_CZ replied to James H's topic in Using the MSW forum - **NO MODELING CONTENT IN THIS SUB-FORUM**
Donated, Merry Christmas NRG and MSW! After I am gonna have more than 100GBP on my spending account, count me in on more regular donations! For now all the best to 2026 and thank you all for great experience so far! Danny -
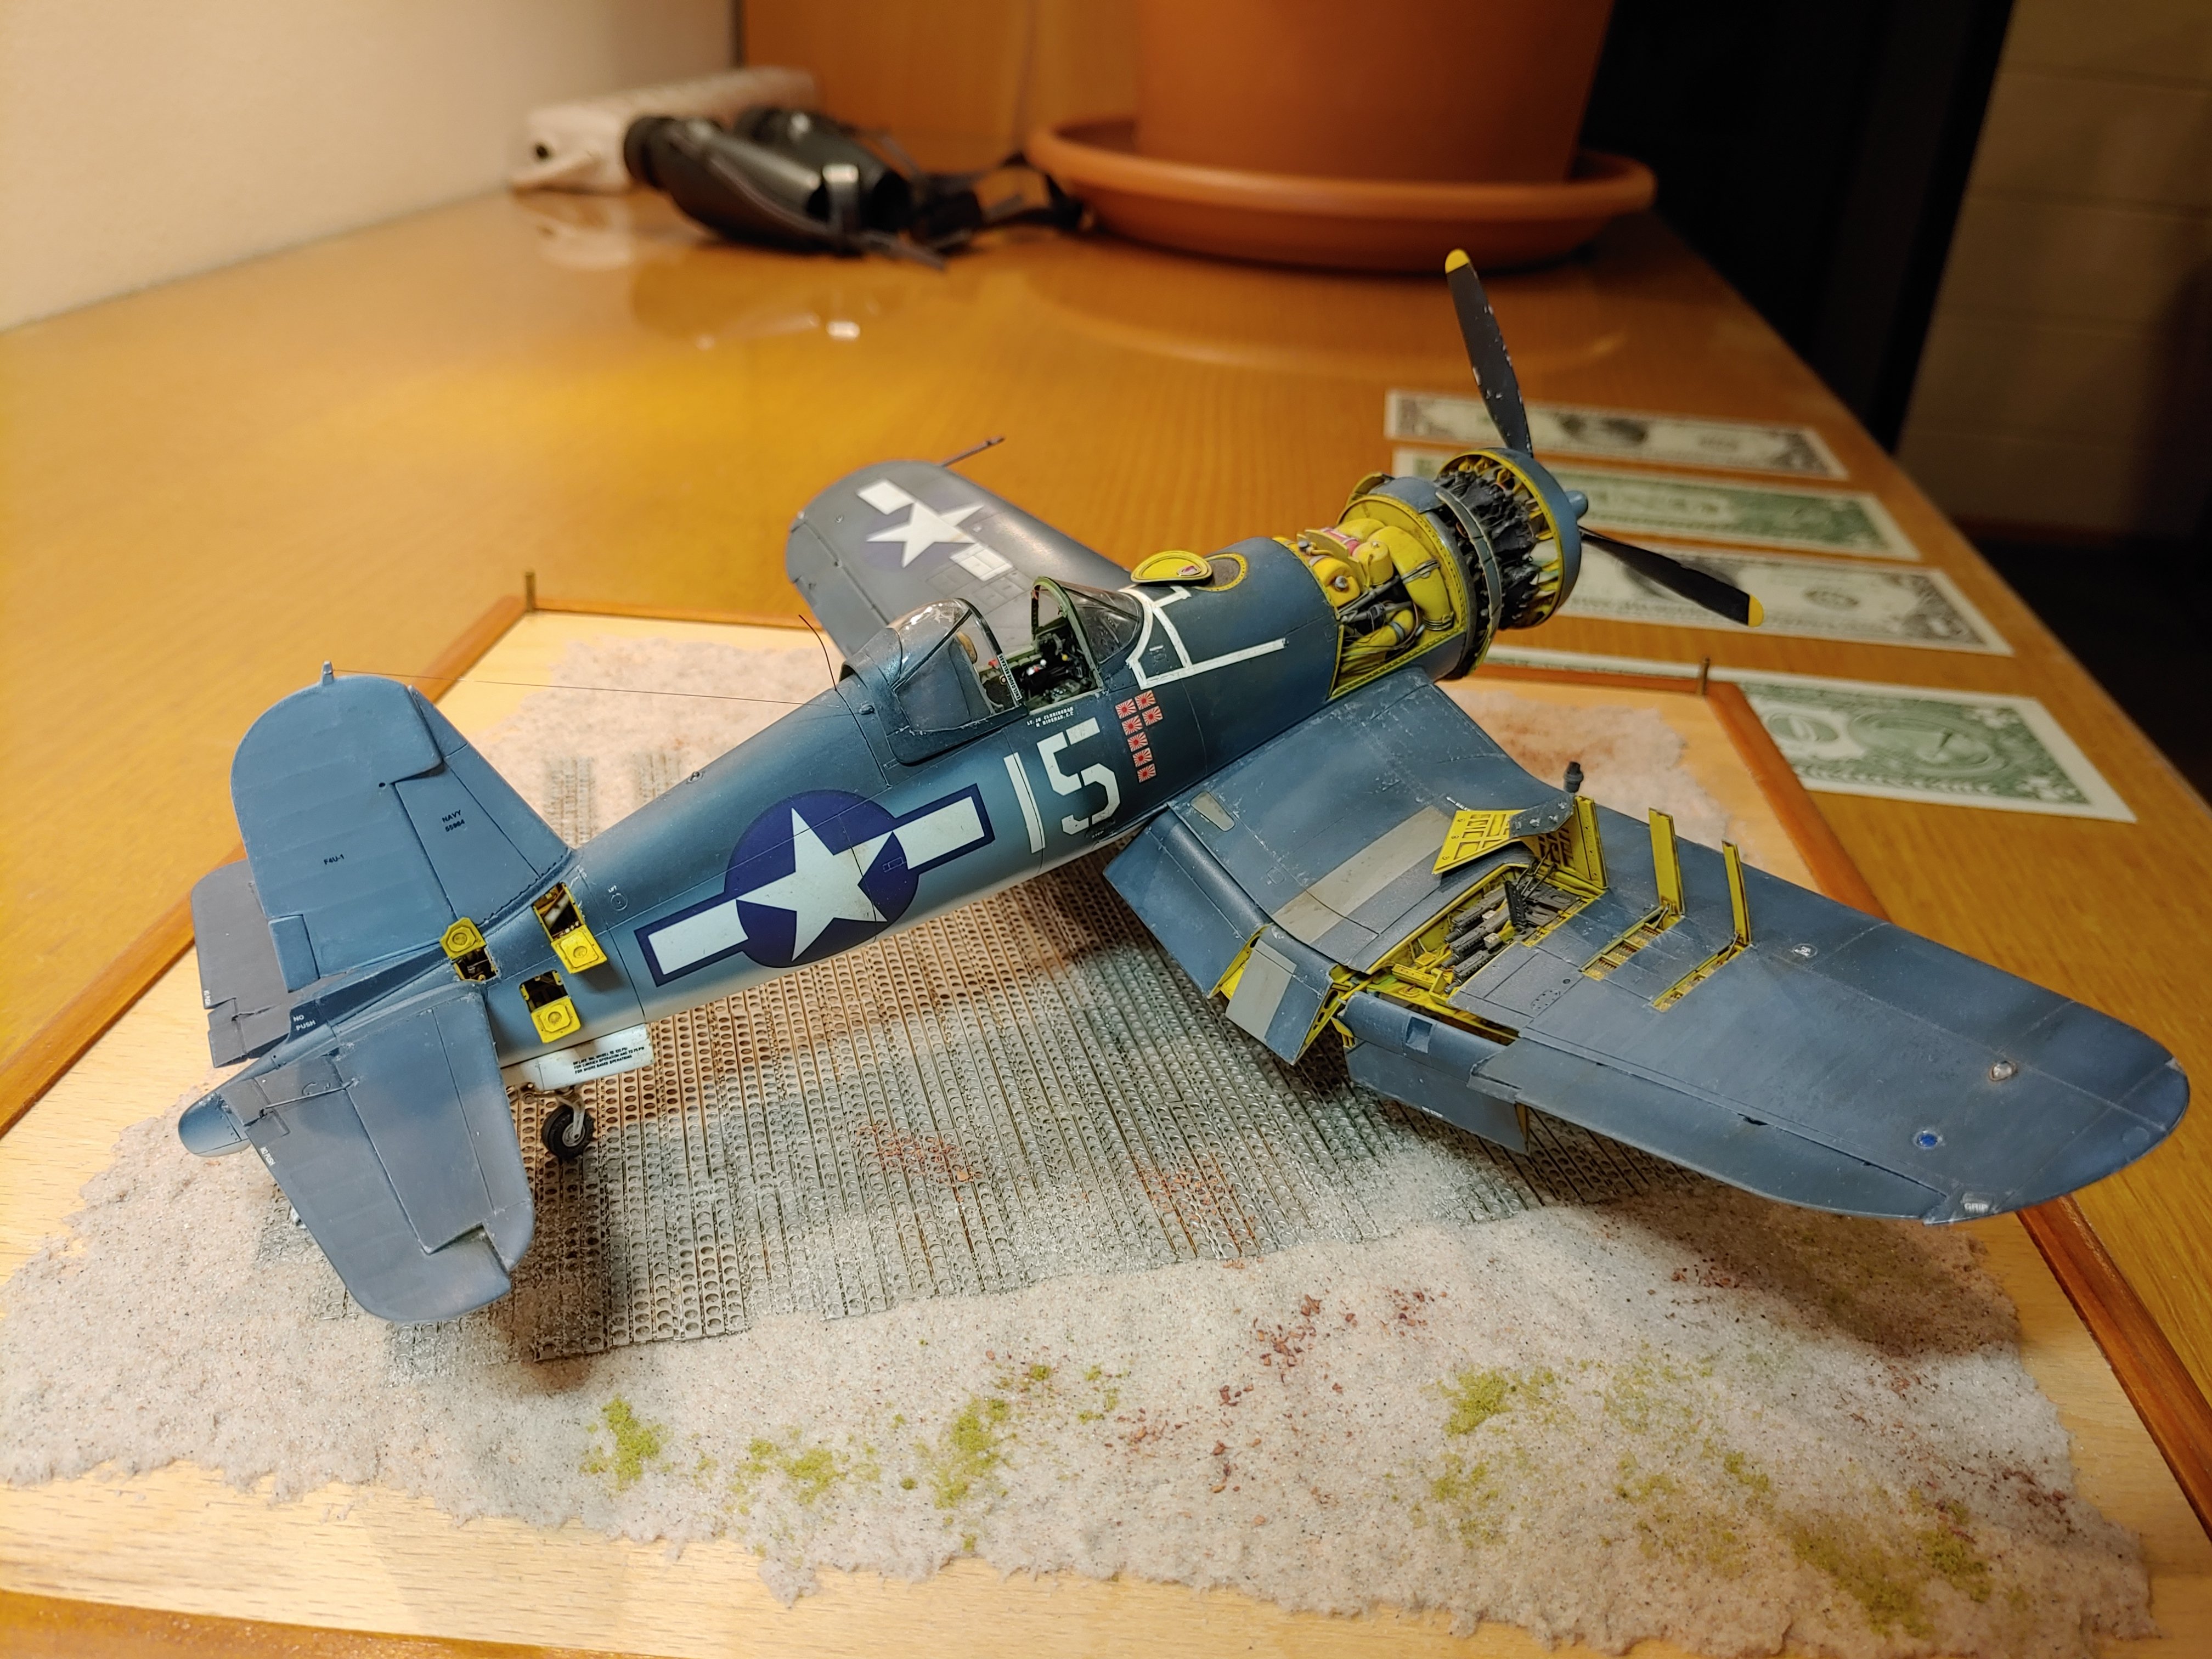
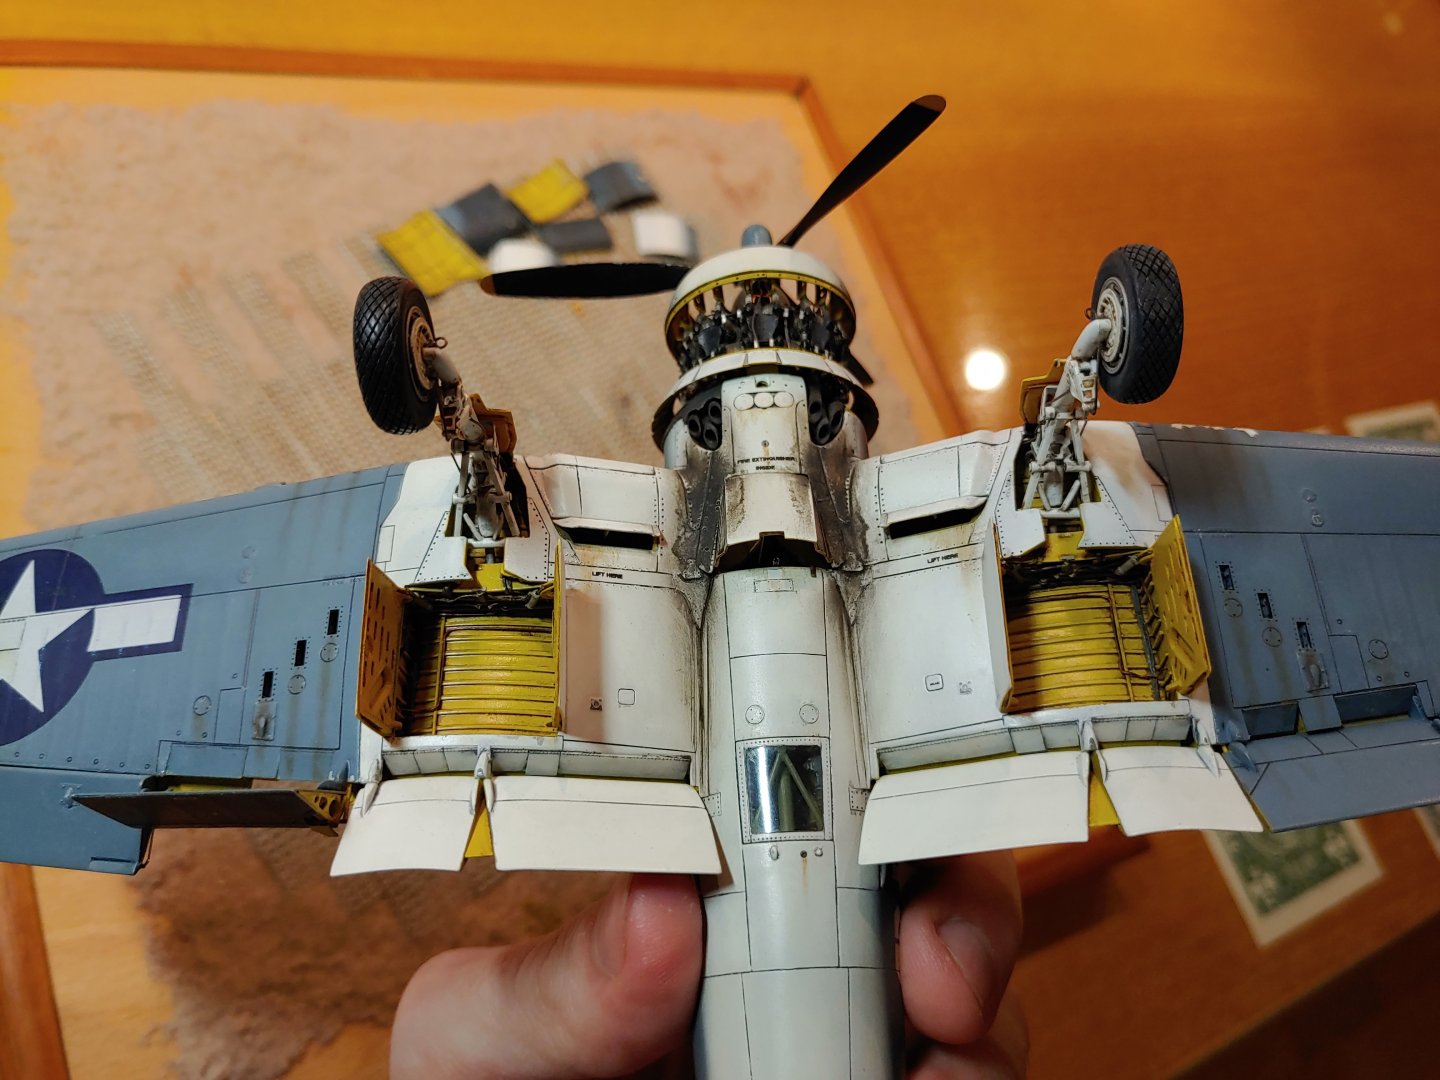
I was thinking and decided to add a model my dad finished when he was still with us. I don’t want to directly write his name, so using his short signature PeD instead. During his best times, he was top 2 modeller in the whole country. This one was considered his masterpiece. The model itself was naturally enhanced by countless additional details and extensive research was done to get is as close to the real thing as possible. May he be remembered!


- 2 replies
-
- 11
-

-
-
Actually quite solid scam page, the design and everything gets a pass, nothing feels too forced. But the thing is, it is a scam page and if you check some other parts of the website, it just misses information and the url is the biggest loss, typical using small "L" instead of "i". I reported it already and will send email to ALif they don't see this in the next 24 hours As mentioned, block your card and report the transaction by calling your bank. Stay safe and remember to always check url for any weird spelling of company name. Danny
-
It is so confusing, on the box and one plan it says scale 1:50 and on the other instructions 1:64. I have to agree the metal pieces look very crude, otherwise well done dealing with it!! Actually a ship I would consider as an option in the future.
-
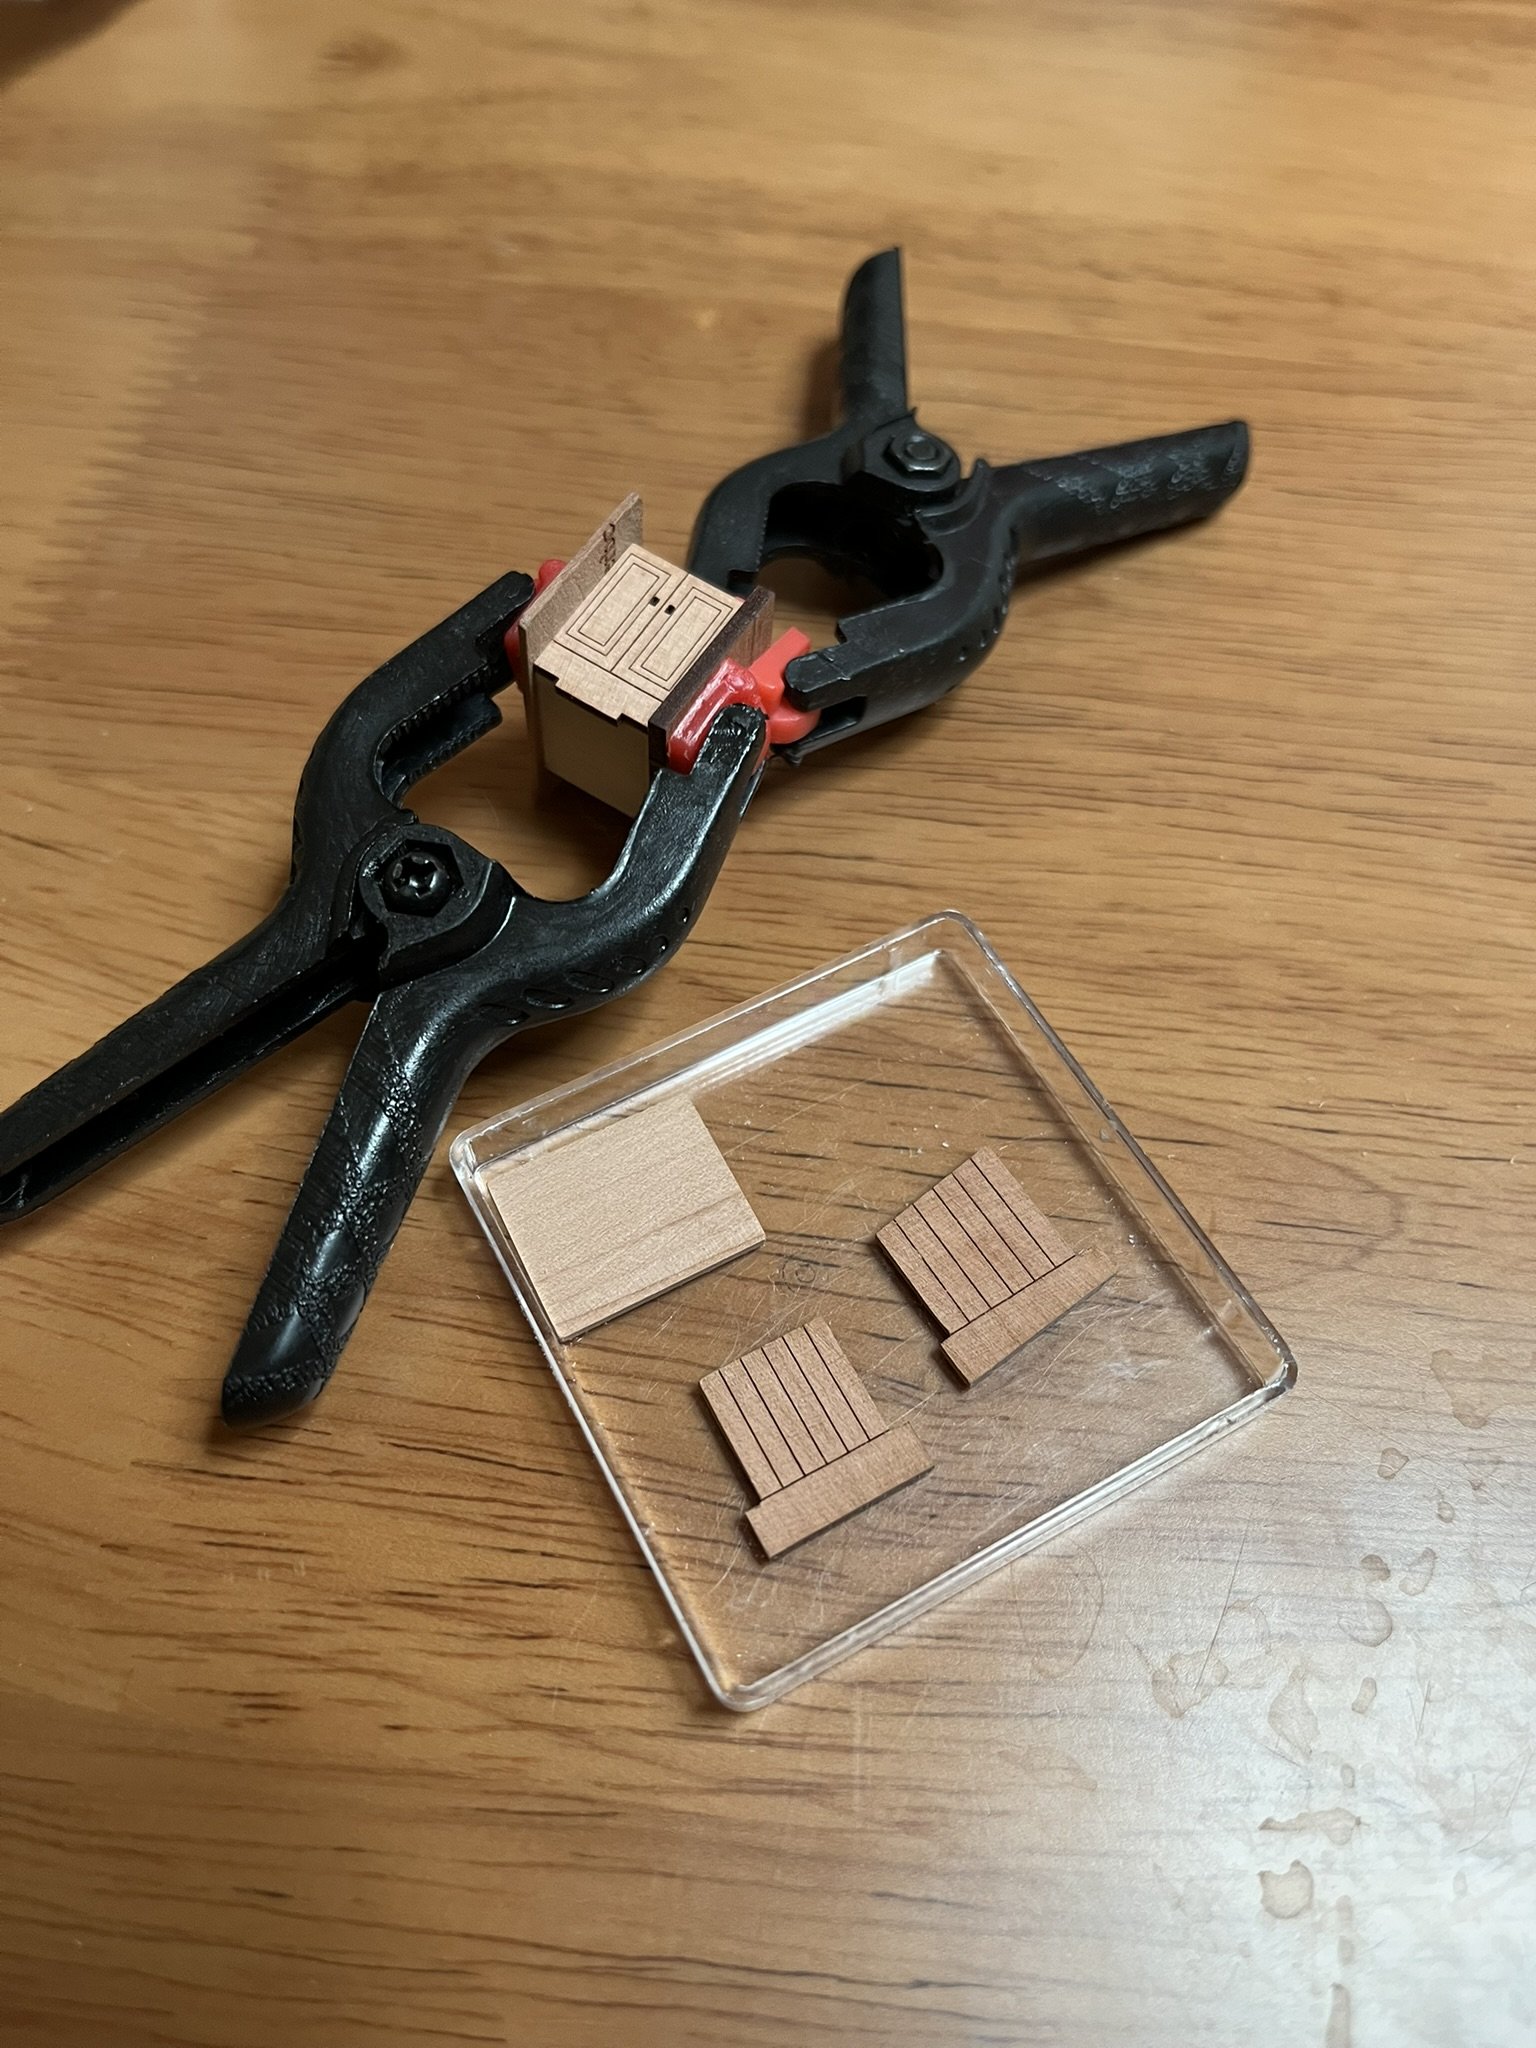
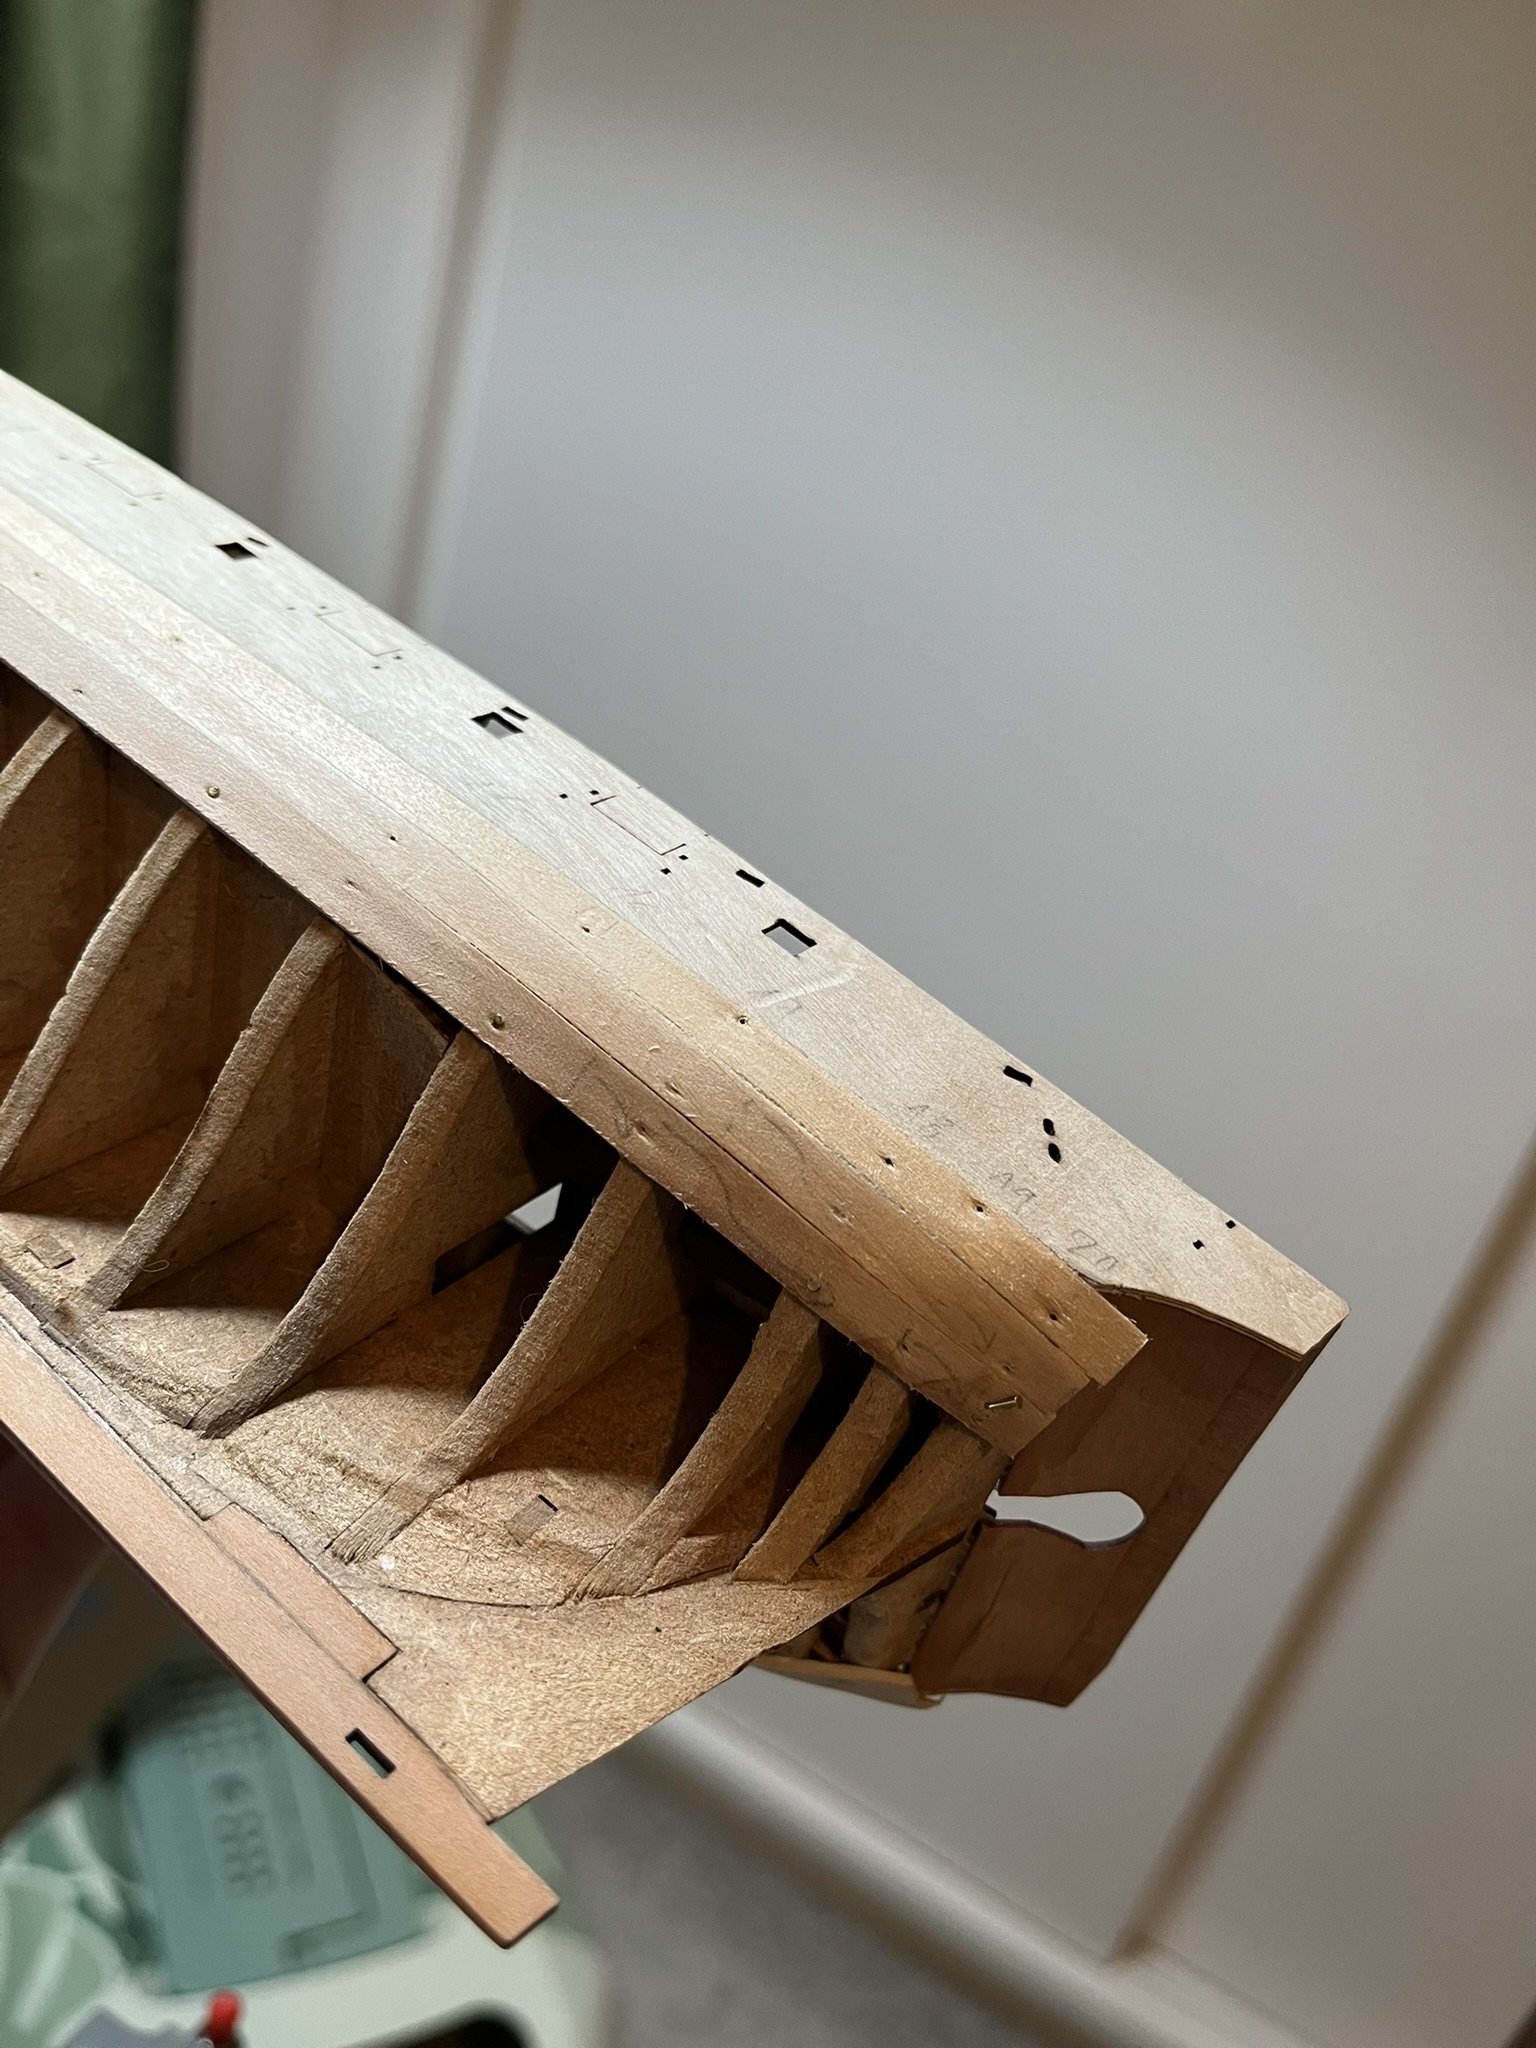
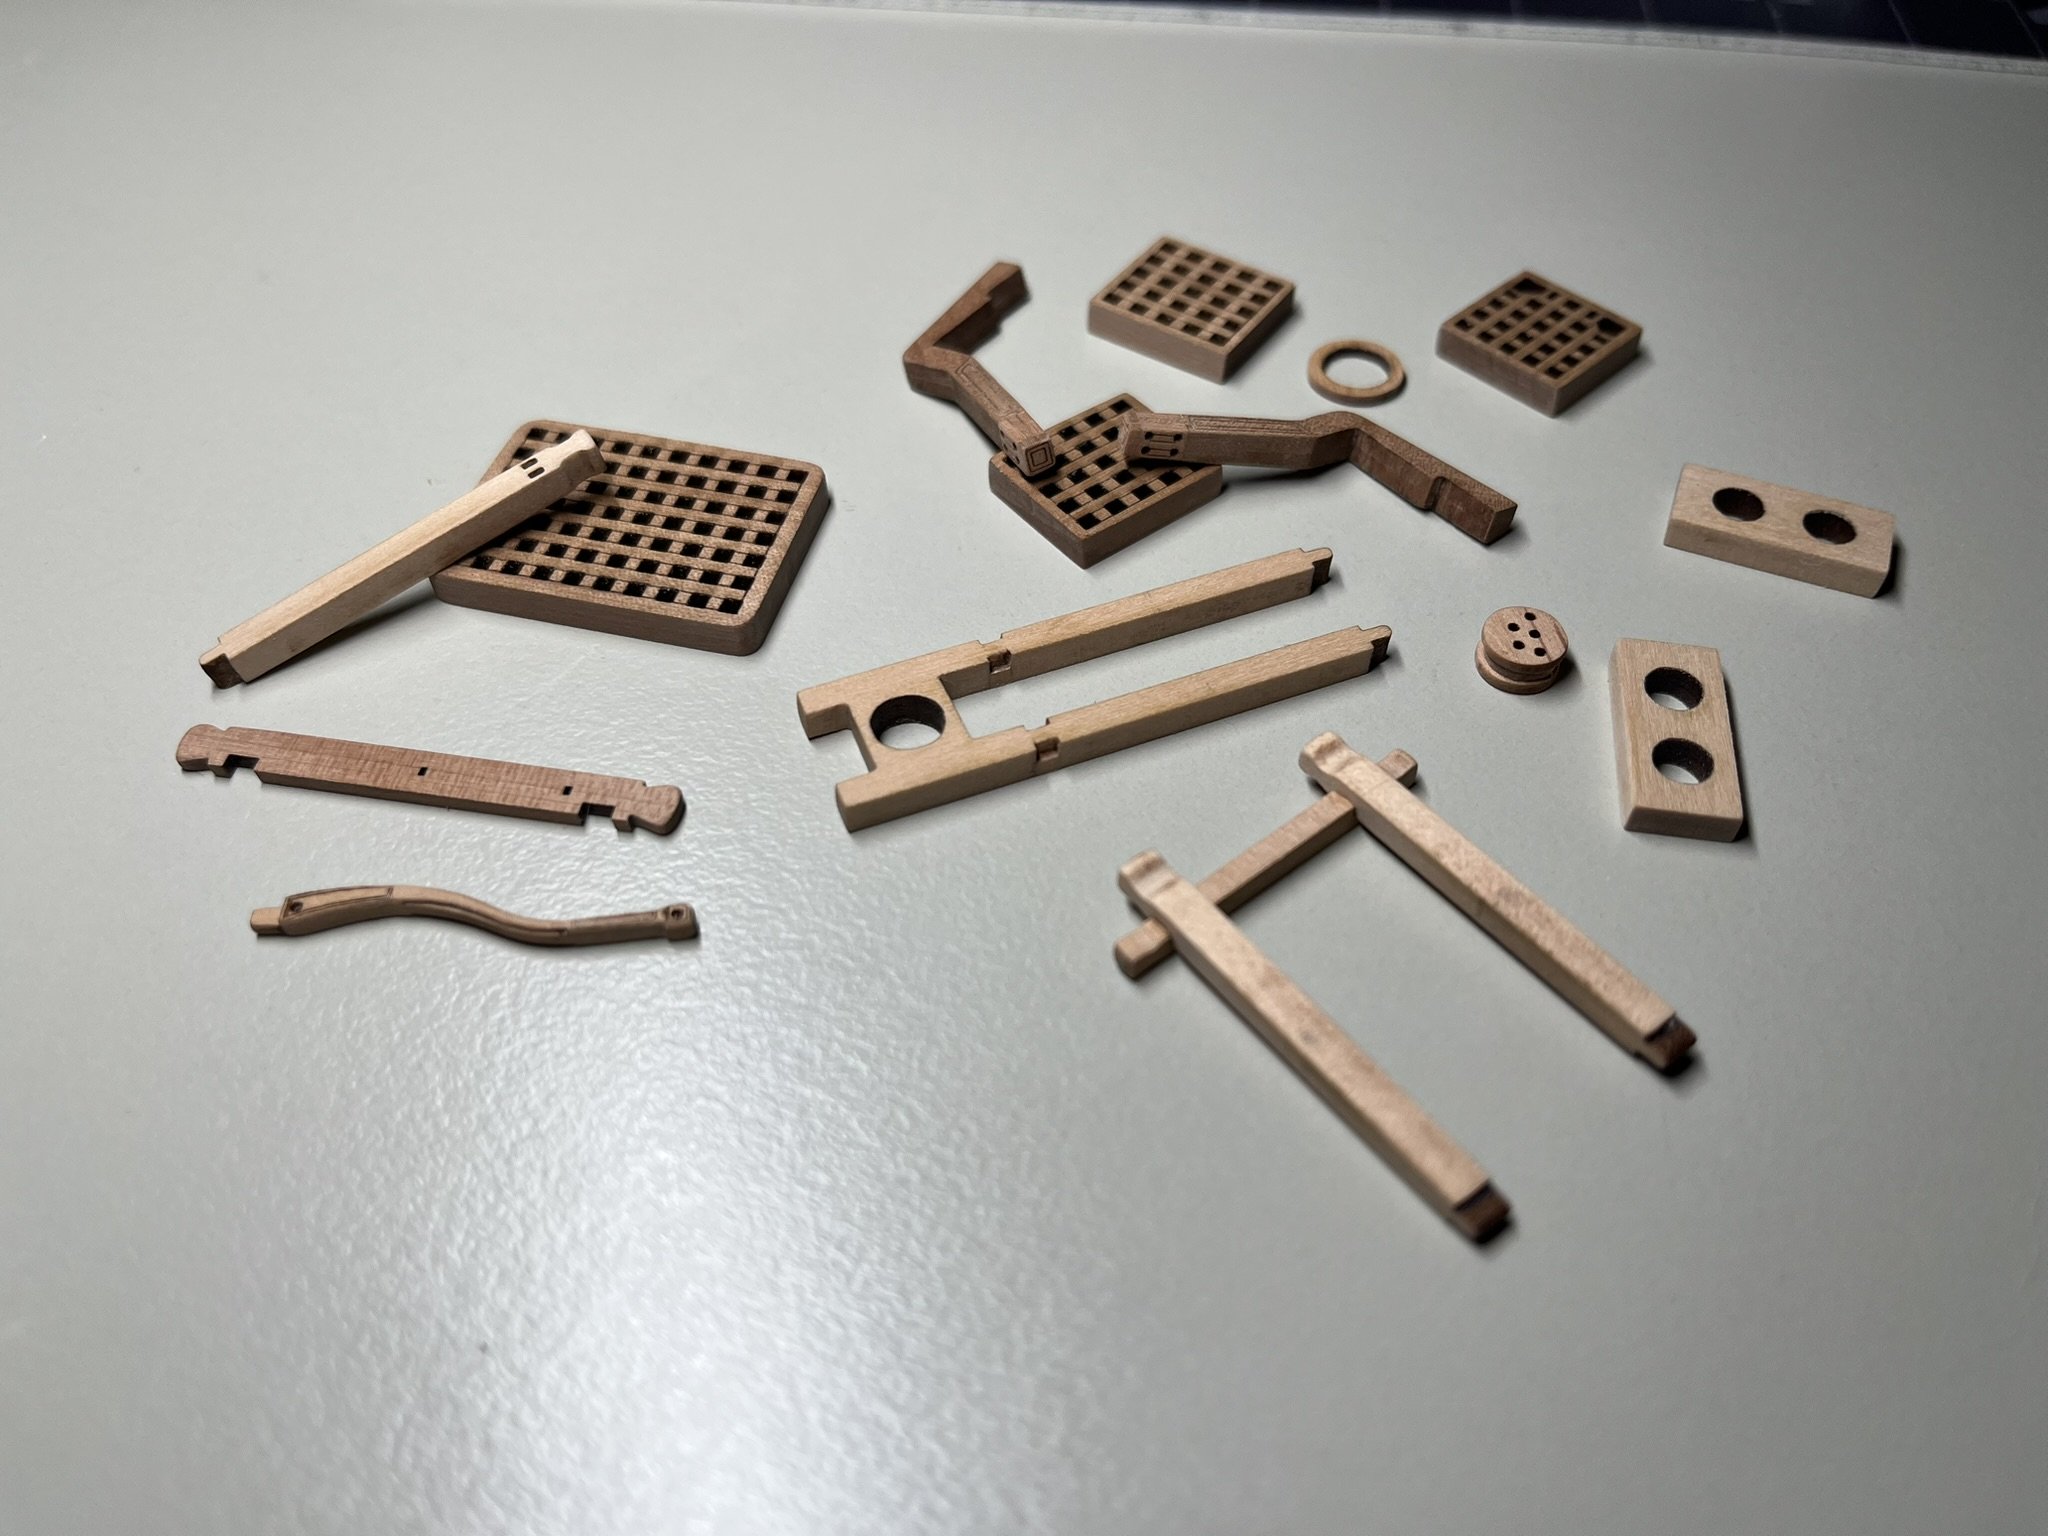
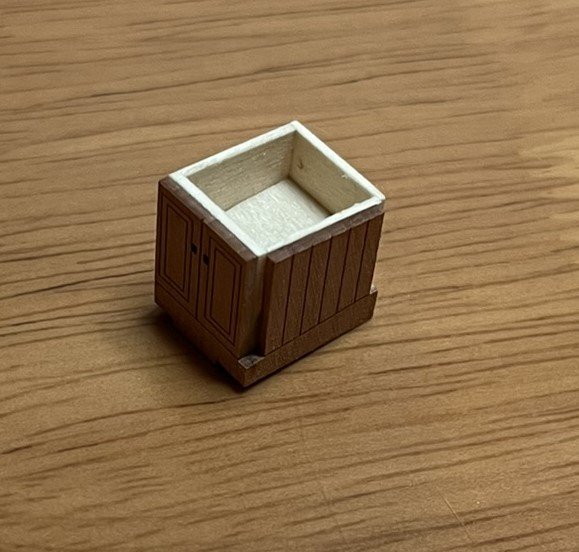
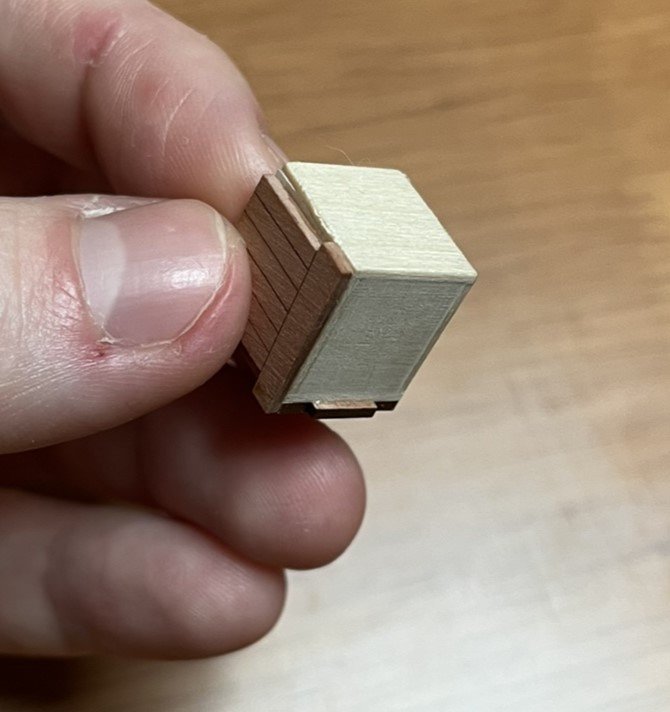
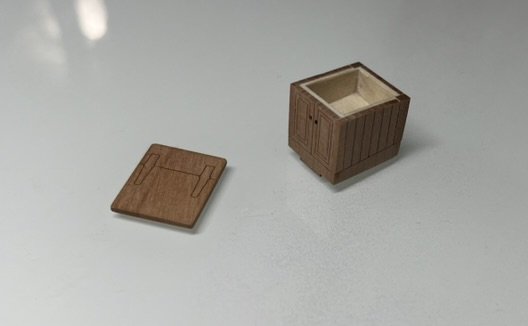
Hello everyone, It’s been a little while since the last update. Life has been busy again, and unfortunately Dandan took a turn for the worse and had to go to the hospital. He’s improving now, but still not fully out of the woods, so progress at the bench has been slower than planned. As for the Sherbourne, I’ve managed to complete two planking bands, three planks each. With that extra stiffness in the hull, I’ve started correcting the keel area shape. I added a few small blocks that I’ll sand to final shape once everything is fully dry. In the smaller pockets of free time, I shifted my attention to the companionway. I wasn’t happy with the original “key-style” construction, so I decided to redo it. I built a new inner structure from spare wood and reinforced it with two plywood sections. Then I cut out the keyed boards from the kit parts and glued them onto the new skeleton. After that, I made each individual plank and sanded everything to size. Right now I’m debating whether to add a skirting around the companionway, similar to what’s used around the chimney and the mast. Otherwise, it’s essentially ready for a final finish — varnish, shellac, or something similar — which I’ll decide on later, before it eventually gets fitted to the deck. That’s it for today. Danny

-
Hello, first of all, I am a fan and I really look up to your continuous improvement!! Great post on the finishes, I checked as well and I think shellac flakes and making own mix is the way to go! When we already have beautiful wood, it feels like the correct option - also feels more easy to use compared to Wipe on poly which in my honest opinion does not look good at all anyway. As for color, both clear and amber look great. I think for pear clear is better, while amber gonna be nicer on lighter colored woods. One thing to watch out for I guess is that shellac can soften PVA glue, so making sure the glue is fully polymerised and any spills sanded is important! Good luck further!! Danny
- 49 replies
-
- 2
-
-
- Lady Isabella
- zulu
- (and 1 more)
-
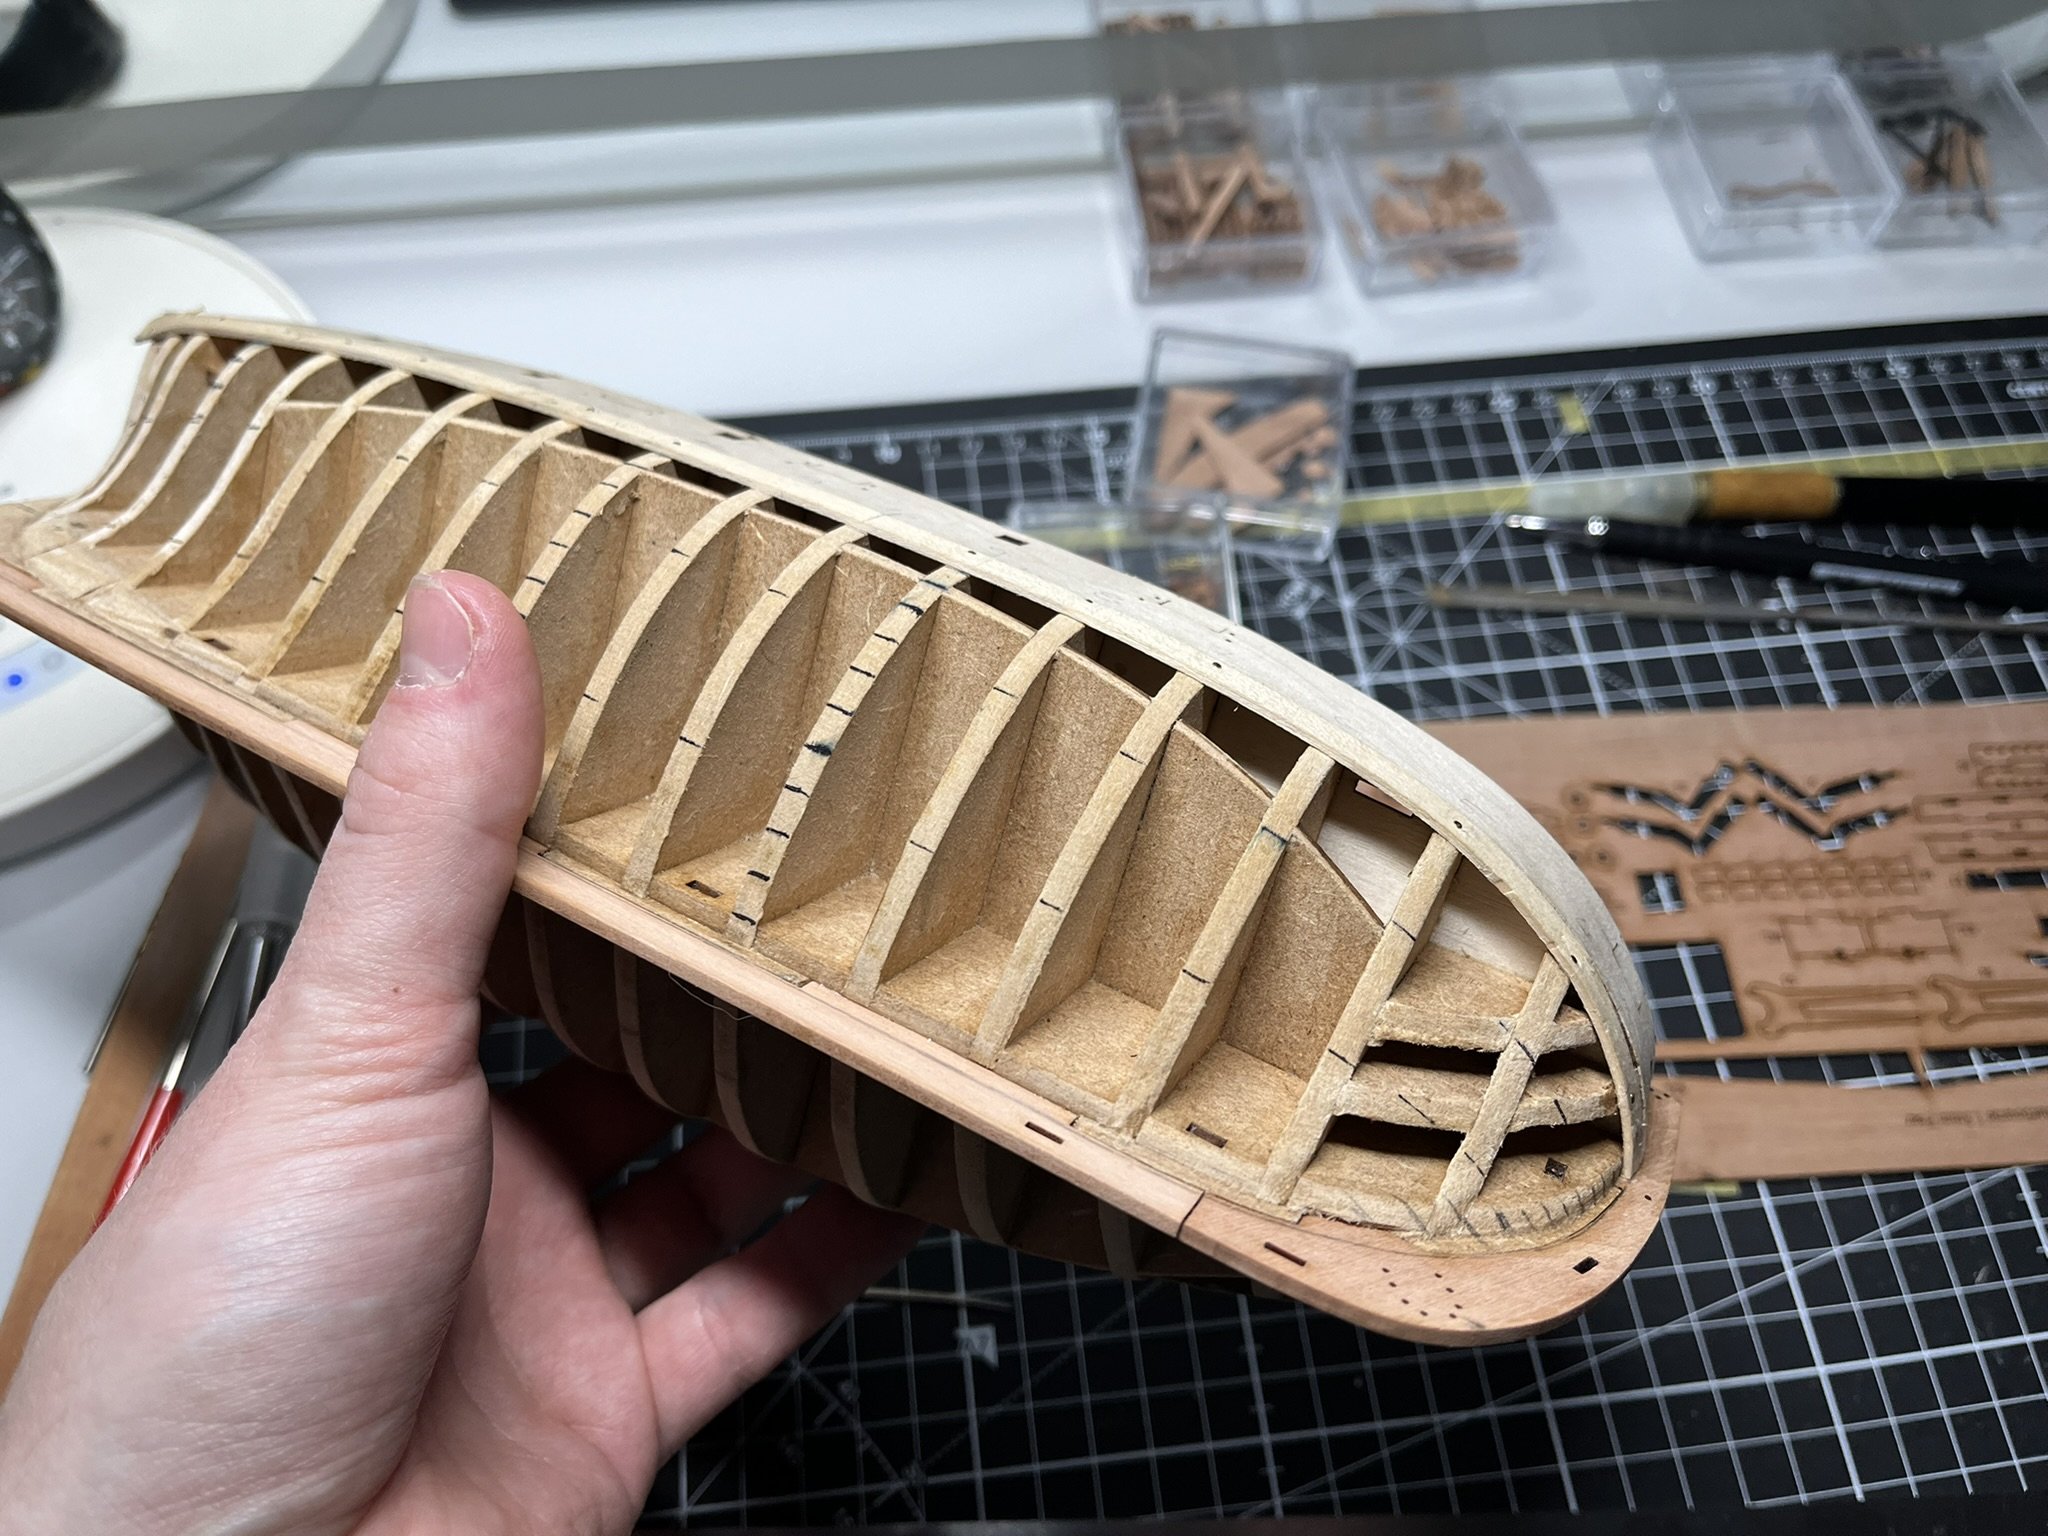
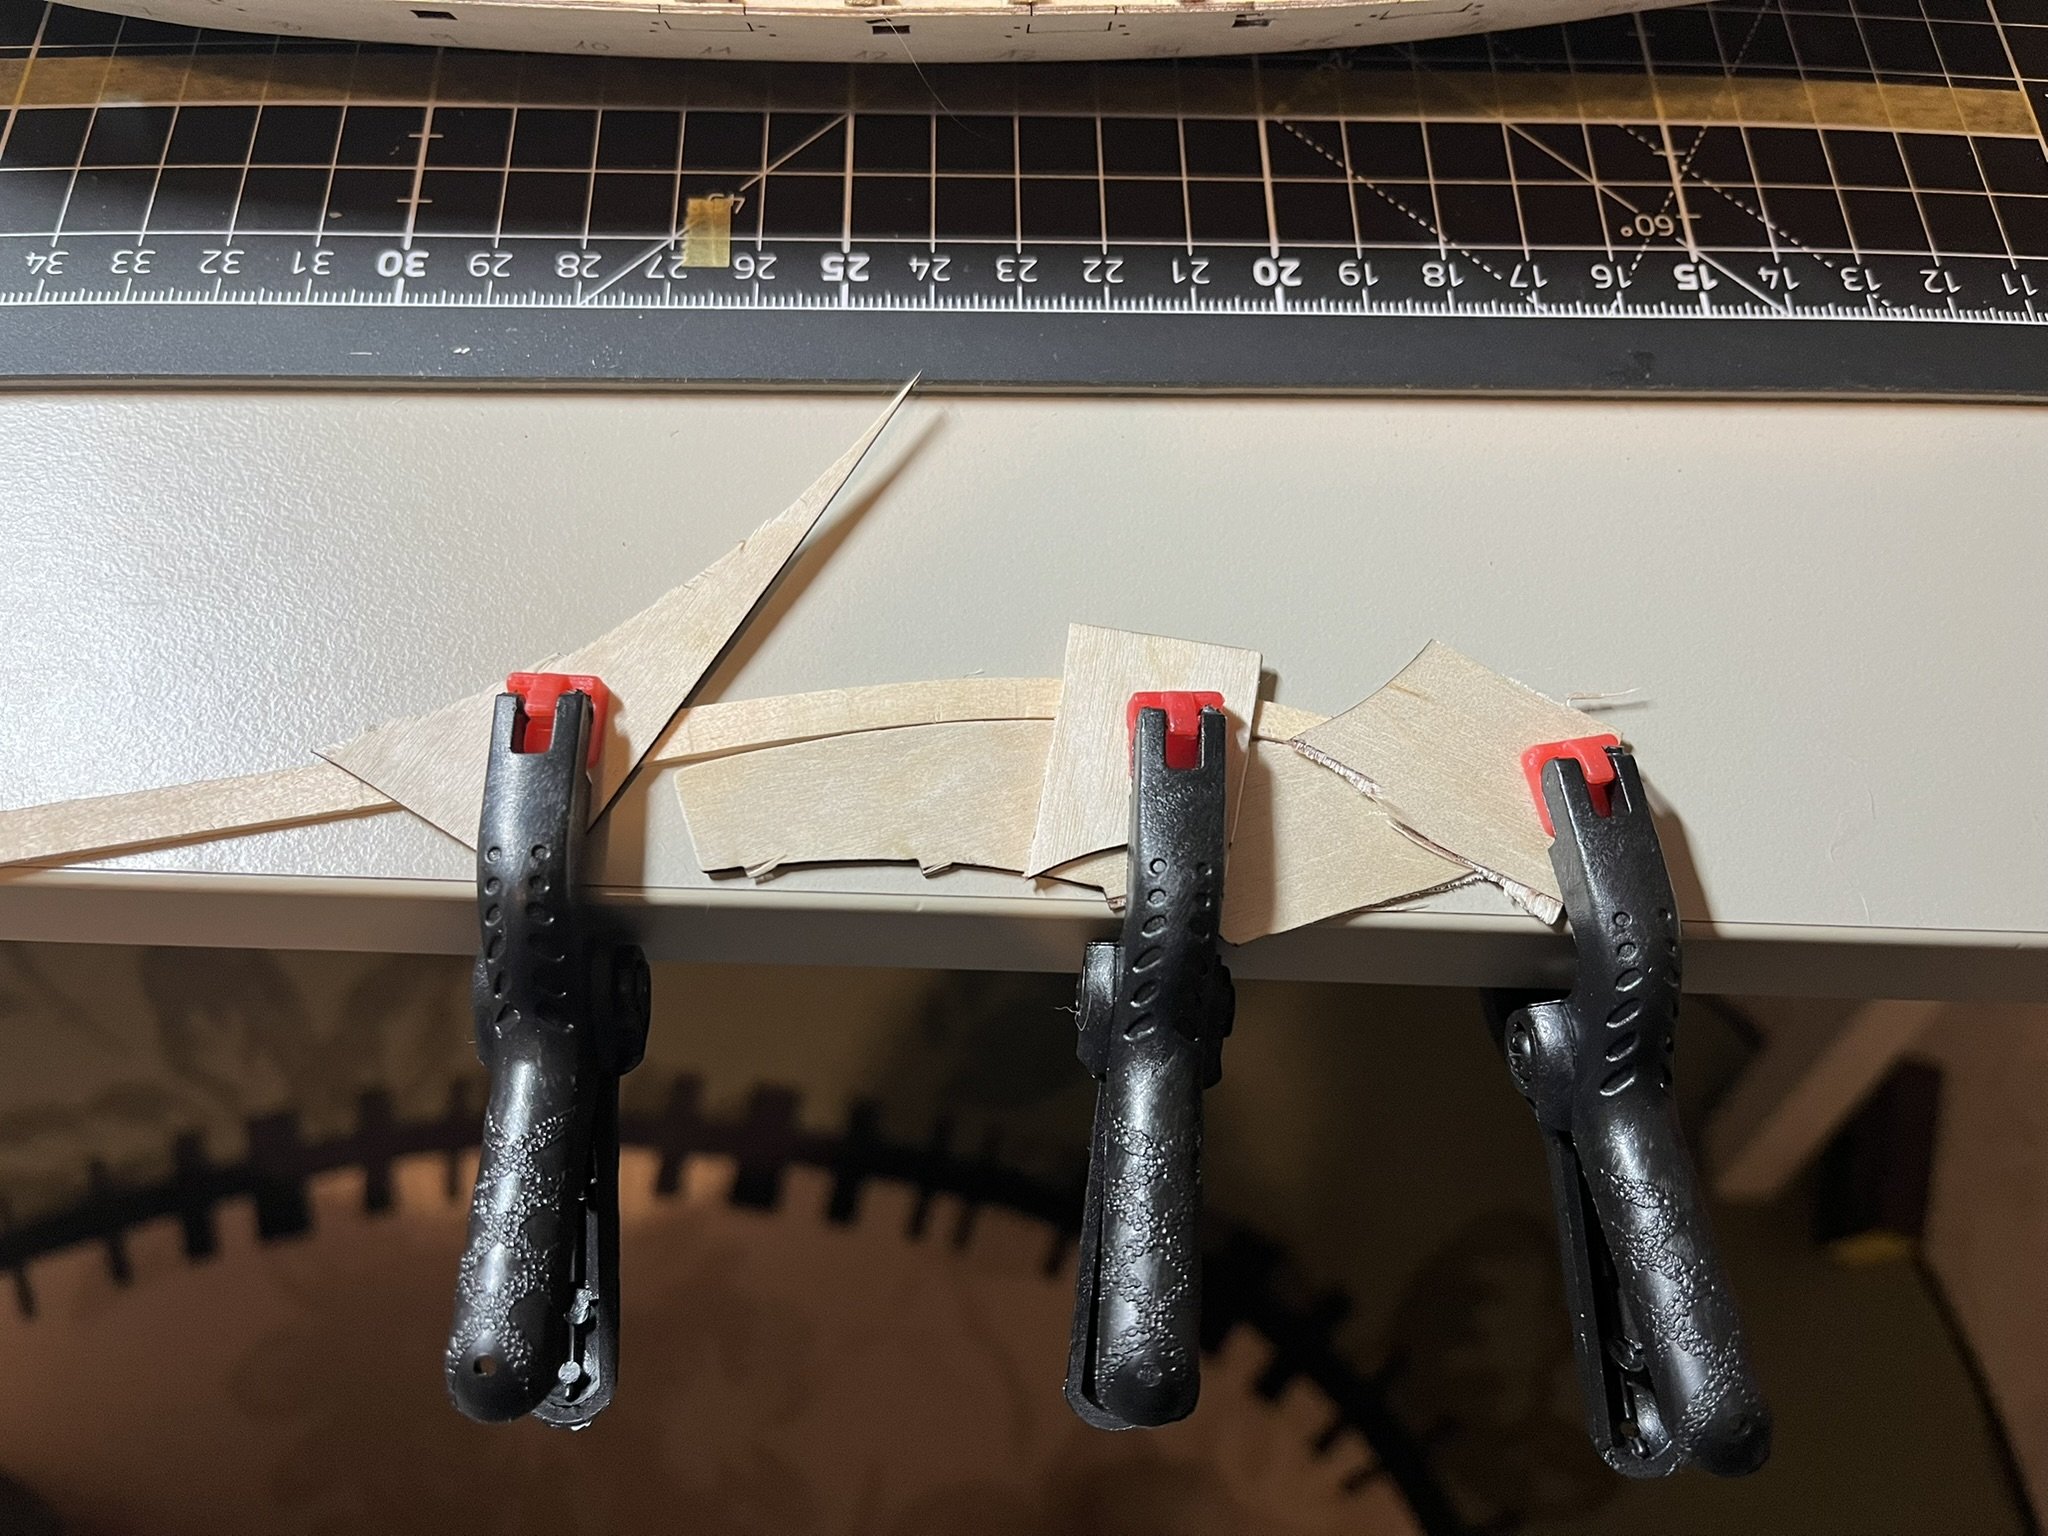
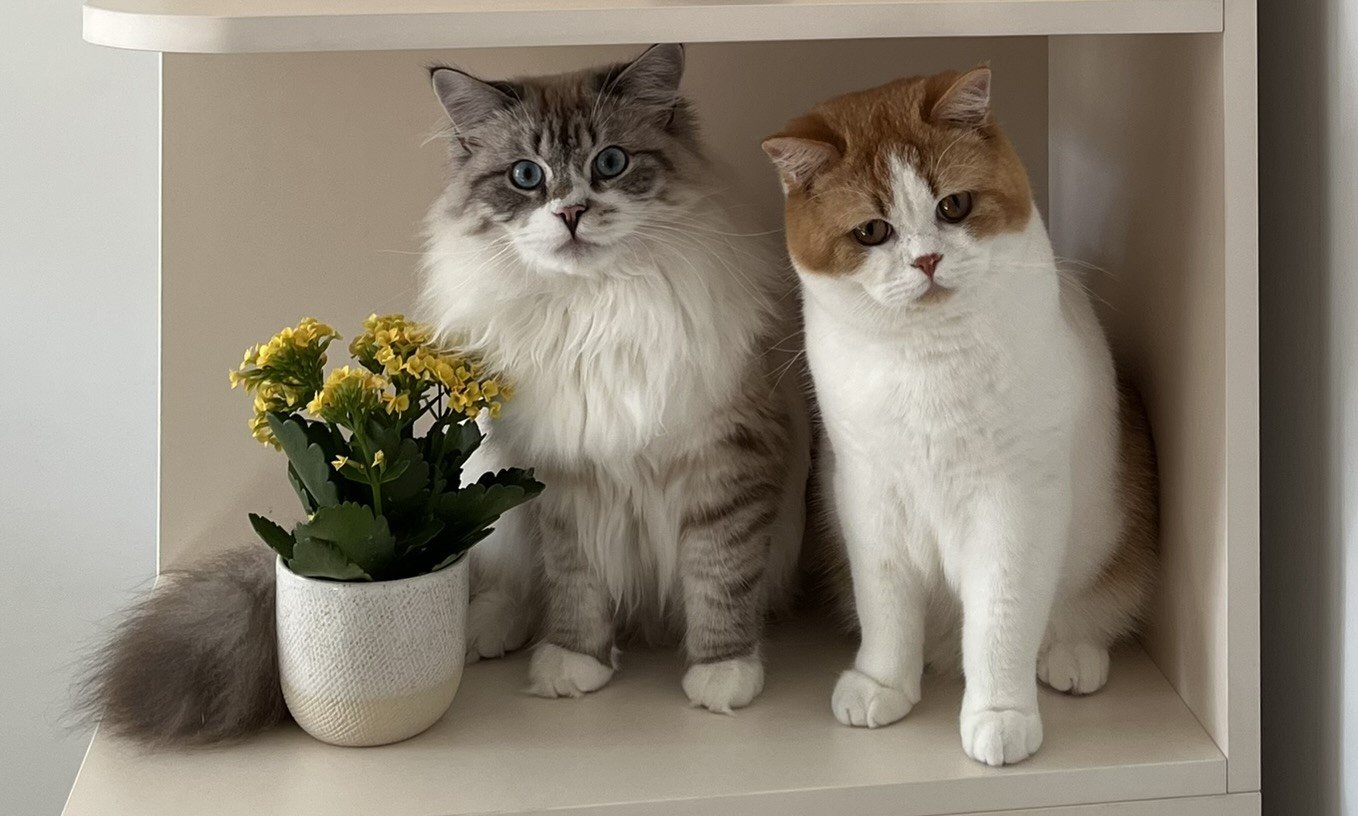
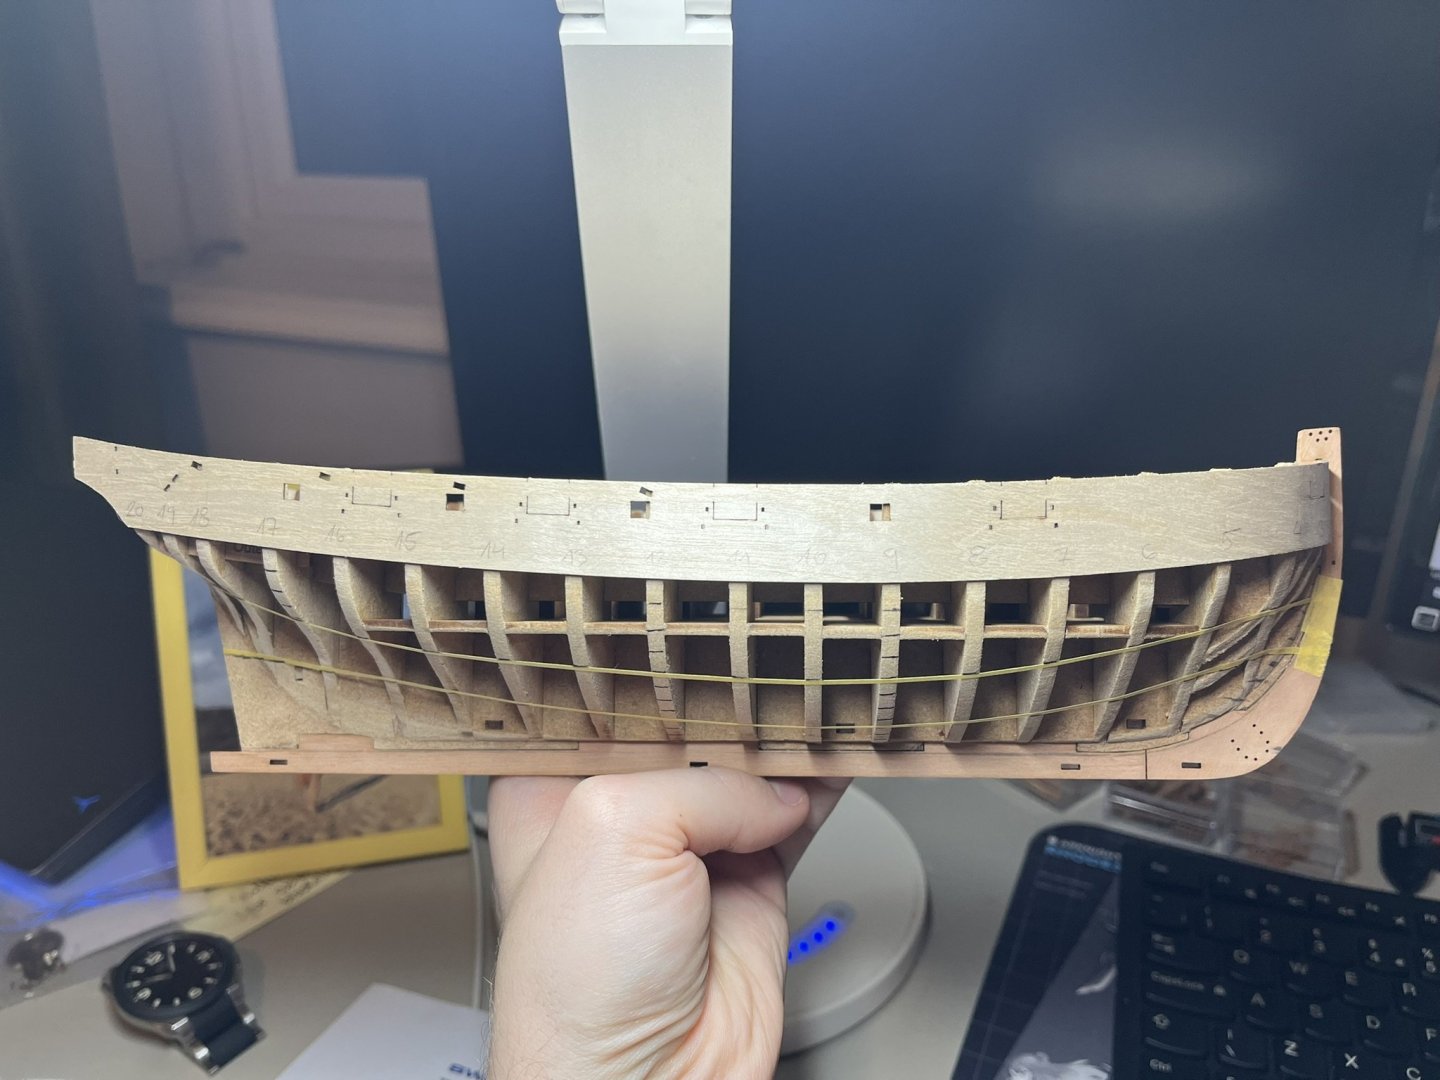
Hello everyone, First of all, cat (Dandan) is doing okayish, he is still lacking apetite, but now moving around as normal. Here is picture of both of my cats, the Siberian is Zhouzhou (read JoeJoe) and British shorthair is Dandan. One of them for sure was the one who knocked off the hull early in my build and broke the transom!!!! A small continuation of the build log: I’ve now almost finished the first three planks (strakes?) below each bulwark — three are fitted on the starboard side, and I’m just finalising the shaping of the third plank on the port side. I definitely feel like I’m improving, but the mistakes are still there to keep me humble. I still get a bit of a clinker effect at the bow. At this point I’m convinced that getting it absolutely perfect would require bending the plank in three directions, and right now I can reliably manage two: the lateral bend to start with, and then the bend along the frames. For now I’m accepting that it won’t be flawless, but I’m doing my best to minimise it. My current process looks like this: – Mark the plank and taper it according to my measurements. – Soak it in water. – Do the lateral bend using my jig and let it dry naturally (or use the iron if I’ve got a longer session). – When it has that multi-S shape, I soak it again in hot water and pin it onto the hull for the final shaping. – I let it dry overnight — wet planks are slightly bulkier — then remove the pins and glue it if I’m satisfied with the fit. This has worked reasonably well, though I did miss one small gap on a plank where I forgot to sand it properly before gluing. Not worth ripping it off, but a lesson learned. Interestingly, the first two planks gave me relatively little trouble, but the third one was the hardest so far. The lateral bend required was much stronger, and the bow shape just doesn’t make life easy. My first attempt even cracked in two spots — surprisingly on the inside of the curve rather than the outside. Since then I’ve been soaking the wood more thoroughly and even doing the bend in two stages if needed. The good news is that preparing the planks in pairs for both sides is working really well, and I’m happy with how consistent things are looking. That’s all for now. Danny


-
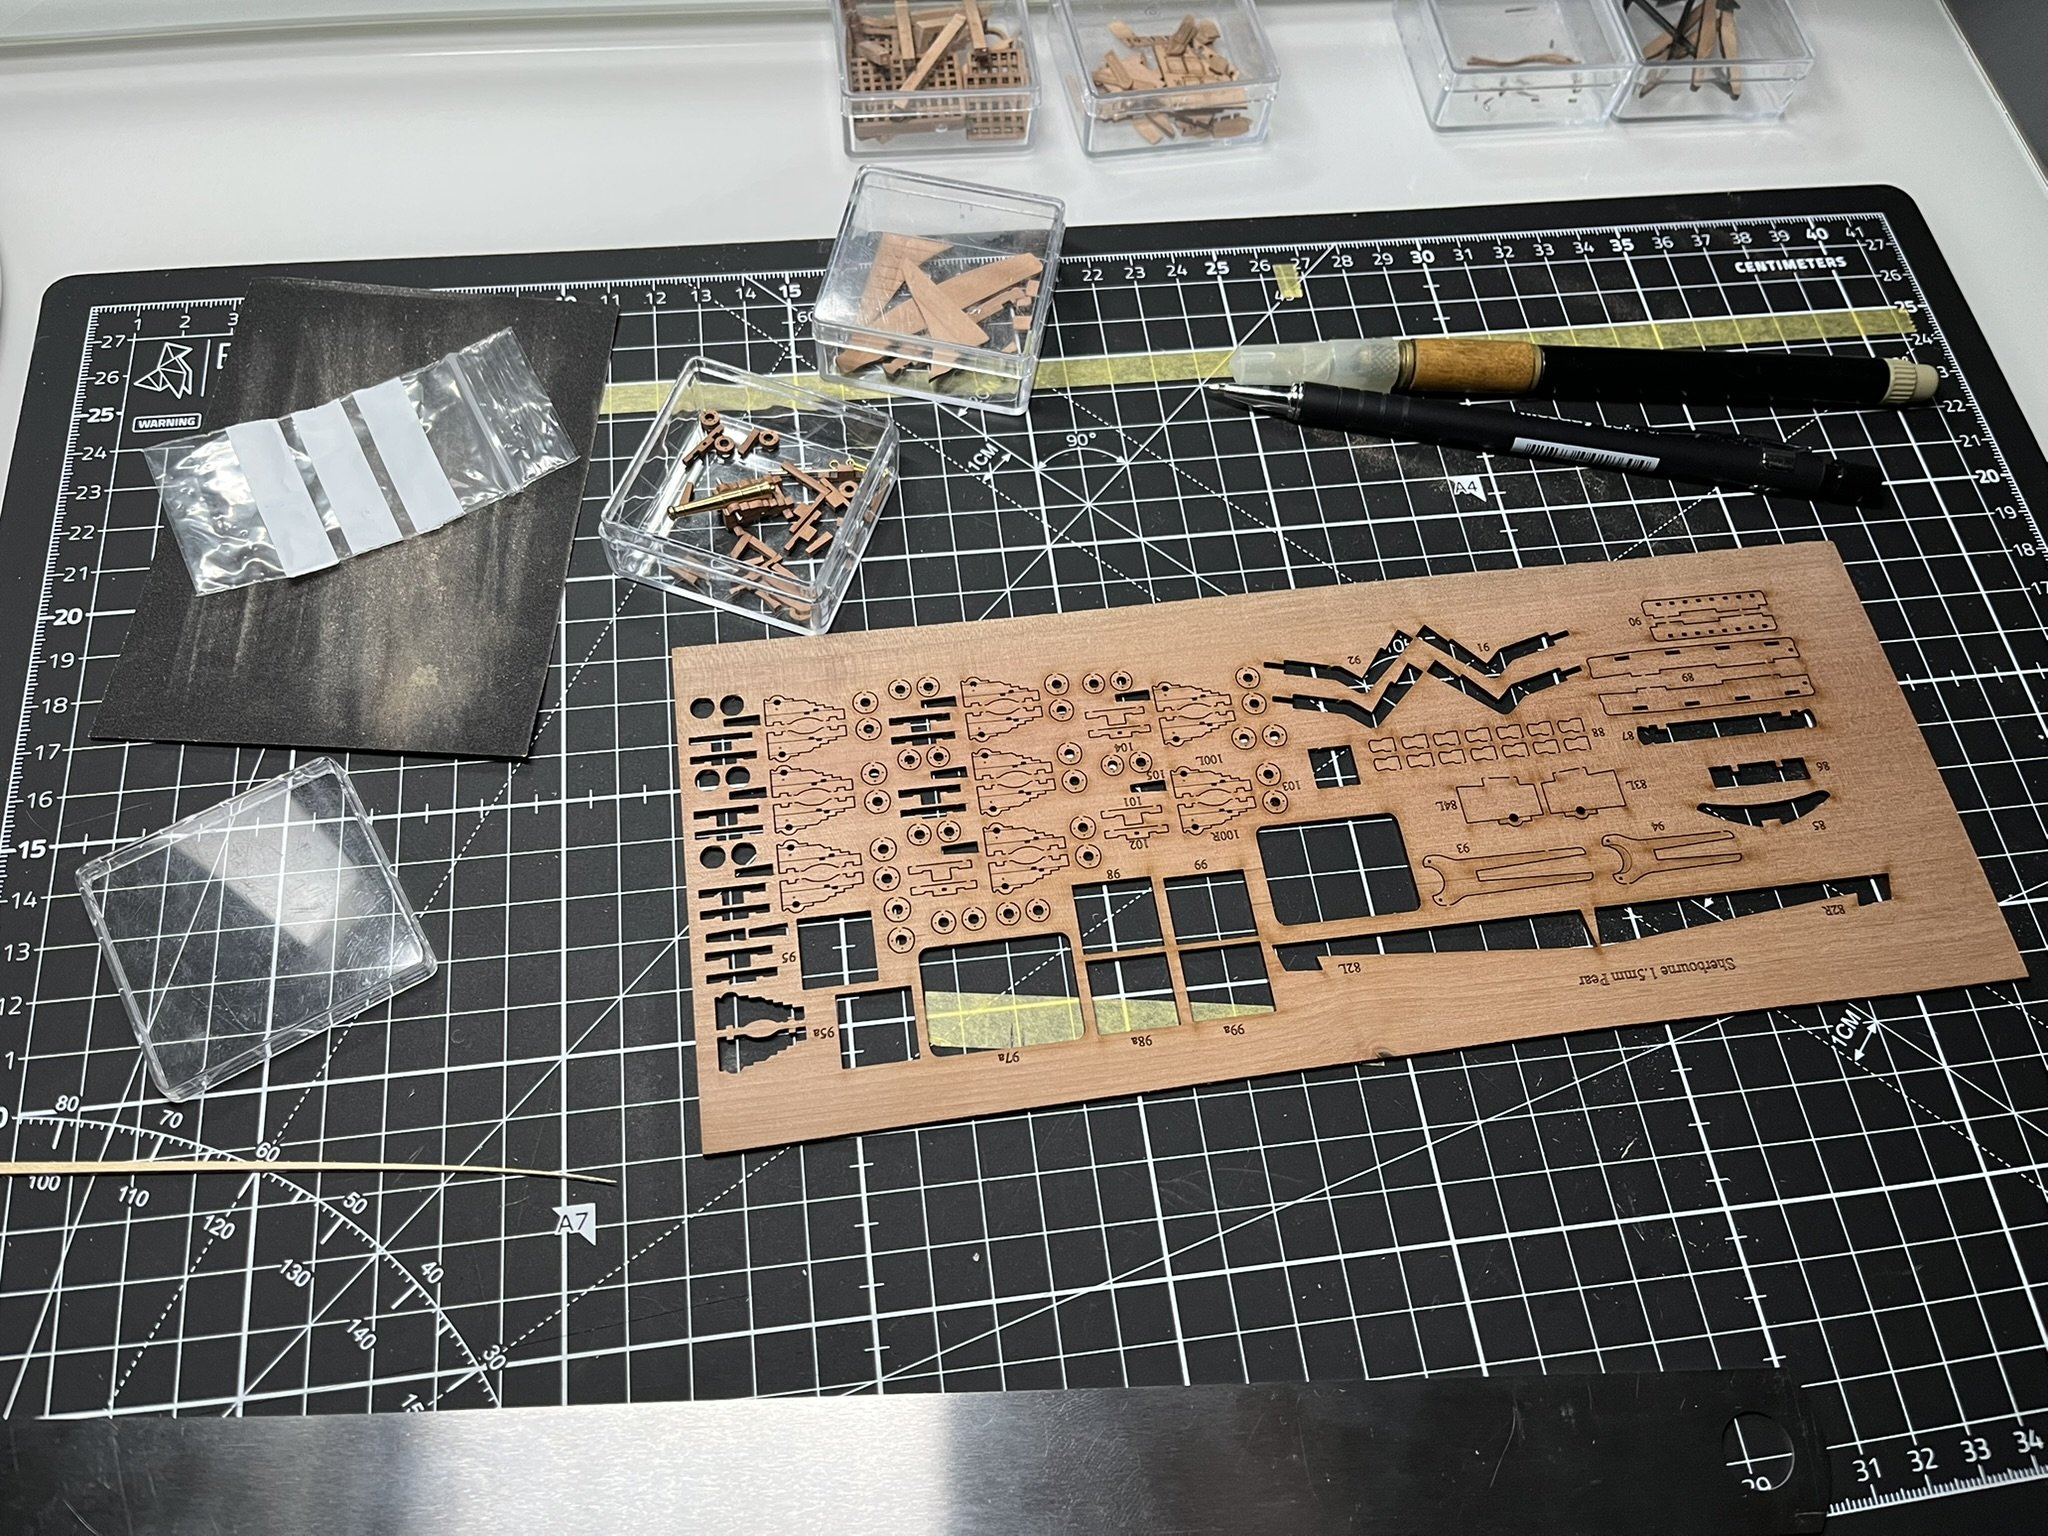
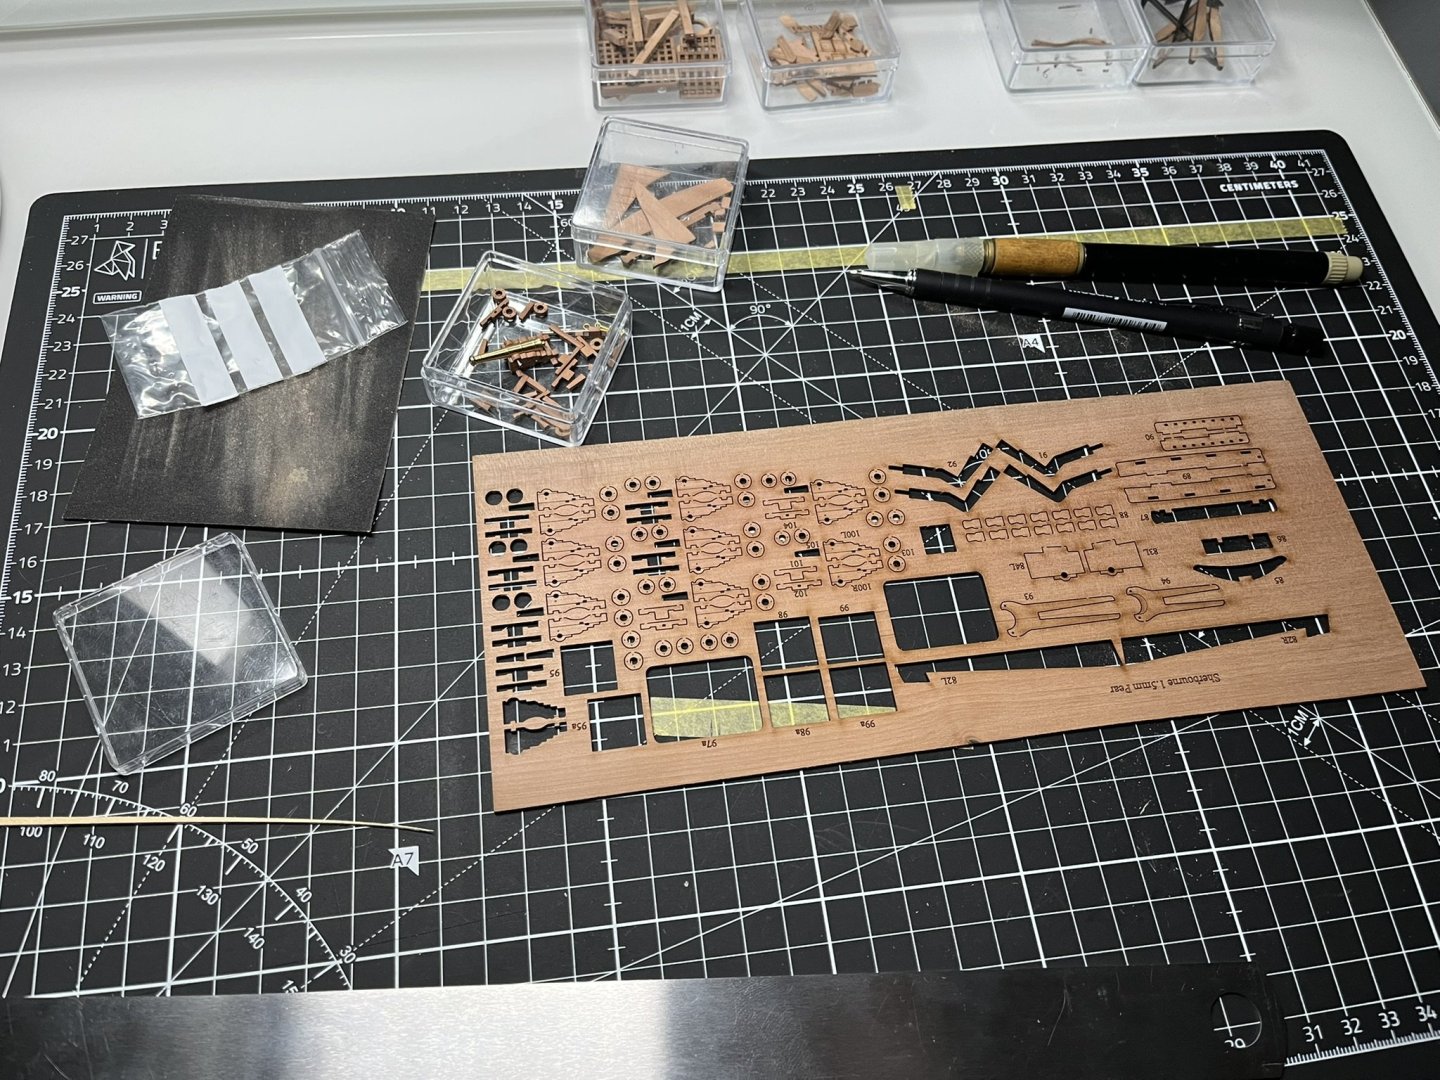
Hello everyone, I’ve been really busy lately and didn’t get a chance to make any big progress on the Sherbourne, but I still squeezed in some reading and research whenever I could. Life got in the way a bit — our cat was ill and the weekend was packed — but I’m slowly getting back into the swing of things. Some supplies arrived, including the brass wire, and I’ve started gathering rods so I can eventually make custom eyepins. In short breaks I also continued cleaning the laser burns off some of the upcoming parts (still plenty left to do…). I tested the cheap brass cannons I bought for £7, and I’m genuinely impressed with the quality. I’ll just need to enlarge the hole for the carriage fit, though I’m not sure yet what I’ll use for that since my tool options are limited and I’ve hit my monthly budget cap (£50). As for planking — well… I managed to bend the same plank the wrong way twice before finally getting the shape right. All of this bending drama is still about one plank out of the full 24 for the first layer! At one point I even splintered it in two places when it caught on my winter pyjamas and snapped from over-bending. But everything was repairable, and plank number one is now glued in place. I also beveled the top edge and accepted that the bulwark at the bow will need sanding to correct the shape difference I mentioned earlier. With a bit more experience under my belt, I’ve now prepped the matching plank for the port side. Later I’d like to start preparing planks in pairs (one port, one starboard) so both sides stay as close to identical as possible — hopefully this will speed up my currently very slow progress. I’ve also made more progress on the rudder and things look promising so far. I’ll share more once I have all three pintles ready. Good news is: I’m still absolutely enjoying the build and in good spirits, and feel like I’m learning a lot. Good night, Danny


-
A bit of progress today. I sanded the starboard side and it now matches the port side much more closely. After that I added some markings on the bulkheads and tried laying a strip of masking tape along the hull to get a feel for how the planks will run. I cross-checked the distances and the flow looks reasonable. Toward the bow the tapering appears to be fairly linear, at least based on my initial measurements. I went ahead and tapered the first plank and started testing Chuck’s bending method. Once it takes the first curve, I’ll give it another bend with my bending iron to match the hull shape more precisely, but I’ll see how it behaves. This part is a bit intimidating, so I’m taking it in small steps. It’s late now, so I’m letting the plank dry naturally overnight. Tomorrow I’ll try the final adjustments and, if all goes well, get plank number one glued into position. If the technique works as expected, I’ll repeat the marking on the other side. As for the keel-insert issue, I’m postponing that for a little later. I may do the correction once a few planks are on and the hull has more strength. Good night, Danny


-
Welcome aboard, I have joined myself not even week ago and this a good and friendly place. I am sure you keep finding new things and will now share with us too. Happy Sailing Danny
-
Posting photos in build log problems
Danny_CZ replied to Desertanimal's topic in Photographing your work. How to do this.
Possibly late for discussion but there is one more option that I am doing and that is downloading from icloud. I have all pictures saved in HEIC as it is more efficient, but lot of places just do not support uploading in this format. And in icloud in browser, I can download them directly as jpg, if you select which ones you want to download and then press the "3dots" (aka deadeye) in circle, there is "more download options" and you can then select "most compatible which is jpeg. Ever since I did it once, I feel it also became the default option and it just automatically downloads jpegs for me with just press of download button. Hope it helps 🙂 Danny -
Very good point about the brass parts sticking together in the solution. That could have gone wrong quickly. I’m going to order a flat stainless-steel mesh tray so I can lay all the small pieces out with space between them and submerge the whole tray at once. That should keep everything safely separated. Today’s progress Nothing dramatic today, more preparation than building. I passed my containers to my jewellery colleague and he’ll put some of his own stock of pickling solution and sulphur-based blackening powder into them when he has time. That should set me up nicely for when I get to the brass work. I also finally started measuring all the bulkheads (which I had mistakenly been calling the bulwark before). I wrote everything down in my notebook — I’ll attach a picture of my notes along with the small glossary I’m building as I learn the terms. At first I was worried: the centre measurement was around 61 mm, and with 12 planks at 5 mm each, that didn’t look possible. Then I stacked 12 planks together and got 63 mm, so the real average is about 5.25 mm and everything lines up fine. I also noticed the starboard bulkheads are a bit thicker — about 0.5 mm, with bulkhead 17 off by a full millimetre. I’ll sand the starboard side so both sides match more closely before I start planking. My plan is to plank from the bottom edge of the bulwark downward, then taper the final plank at the keel. On that subject, I realised I need to adjust the area where the bulkheads meet the keel. I had sanded them earlier to match the MDF outer keel parts, but that leaves too much of a gap for the second planking layer. I’m going to add a triangular insert to correct the shape, and bevel keel parts 58 so the second layer sits properly. At the bow, my calculations suggest tapering the first 6–8 planks to about 3 mm should give a fair run, then gradually bringing them back to full width. I’ll test this using masking tape strips before committing. Rudder update: I found a reference photo (Rudder pintle and gudgeon) that supports the cross-section shape I had in mind, so I sketched out my plan. I’ll include that below. That’s all for today. Mostly measuring, planning, and sorting out small details, but it feels like solid groundwork before I start the first plank. Danny


-
Hello and thank you, I have already started my build log and made some small progress and waiting for some tools, you can view it here: HM Cutter Sherbourne by Danny_CZ - Vanguard Models - 1:64 More to come at a pace of limited evenings!
-
Thank you both for the detailed advice — it’s extremely helpful to hear from people who have already built this kit. I also managed to get access to some of Chuck’s PDFs, and they clarified a lot about his planking approach. I’m definitely going to approach the first planking as you both described: treating every plank as its own small project and taking my time with the measuring. Like Robin suggested, I’ll be using the thin paper/string method to measure the bulkhead girths. I like that approach a lot because it shows the real shape of the hull instead of what it looks like on paper. My plan is to go with a slightly non-linear distribution — a bit narrower near the deck and slightly wider toward the keel — but nothing too extreme. I’ll also stick to the general rule of not going below half the plank width, as recommended in the instructions. As a non-native English speaker (and from a landlocked country!), a lot of the terminology was confusing at first, but thanks to your explanations about stealers, drop planks, and beveling, it’s finally starting to make sense. I actually bought a small logbook to create my own glossary as I learn. I’ll definitely be beveling the planks, and I already practiced a bit of that on the stern area. And yes, the reminder that the first layer is “practice” is very comforting. I still want to do it as well as I can, but I’m keeping in mind that the second layer and the final keel piece need proper slots, so no over-sanding. My calipers should arrive in the next few days, so I’m hoping I can start laying the first planks this weekend. On a side note, I also talked with a colleague from work who has a jewellery workshop about brass blackening. He’s giving me some of his sulphur-based blackening powder and pickling solution, along with tips on what to do (and avoid). That should help a lot with the PE parts and the brass cannons I have coming. I also ordered 0.4 and 0.5 mm brass wire for the hooks and future rigging work. I’ve also started a small rudder improvement project. I have pins and tubes from work that are perfect for making pintles and gudgeons, but I’m still researching what the correct rudder cross-section should be — whether it’s more of a half-circle or a softer curve. If anyone has a good reference for that on a cutter like Sherbourne, I’d really appreciate it. For now, I’ve continued sanding and preparing other components while waiting for the remaining tools. Photos of the progress so far are attached below. Thanks again for the encouragement — it really helps to keep the motivation going. More updates soon, Danny


-
Hello Coyle, it could, but in my case just country code of CZech Republic, just "Danny" is always taken 😅. Anyways, I actually had CZ27 before moving to the UK. Quite enjoyed it as it fitted my small hands. Thanks to John as well, one day I will visit there for sure!
-
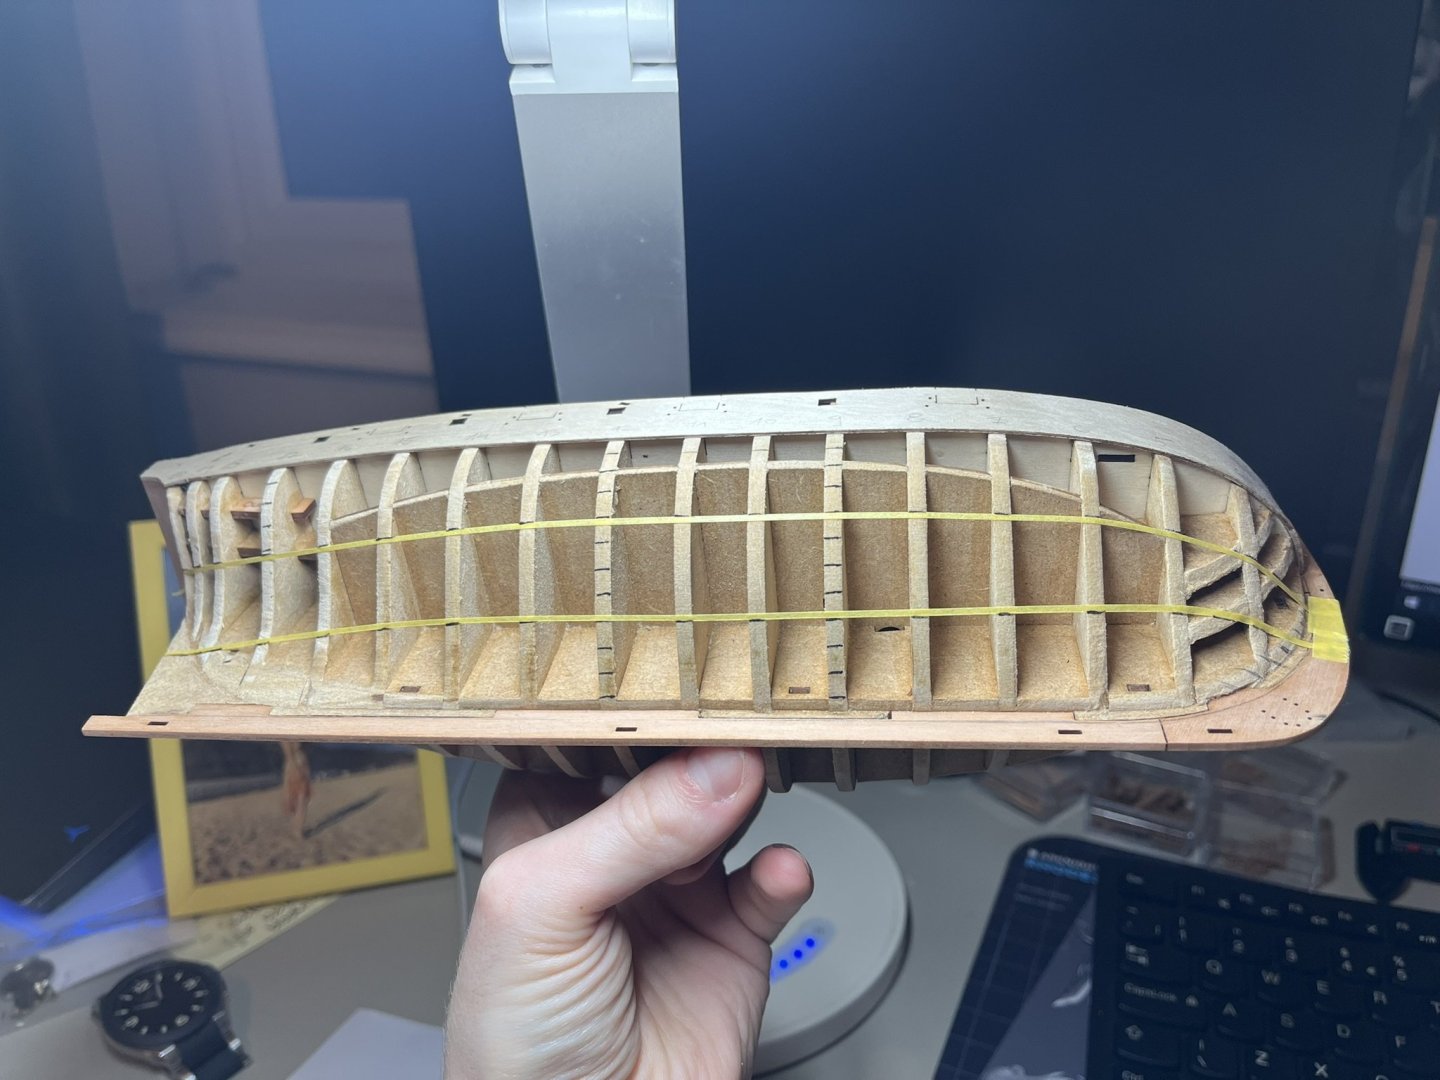
This will be my build log for the HM Cutter Sherbourne by Vanguard Models. This is the first model I have ever purchased for myself and the first time the entire project is truly mine from start to finish. Until now, I only helped with small tasks while my dad built his models. He sadly passed away in April 2021. Things were very difficult for the first few years after he passed, until I met my now-wife. Finding her and eventually moving to the UK to live together helped me rebuild my life, and only now do I feel ready to return to modelling again. I kept some of my dad’s plastic models, but I haven’t touched any modelling project since 2021. As I currently lack the tools for plastic modelling—and have yet to bring everything from Prague to my home in Southampton—I decided to finally start a wooden ship, something I always wanted to try. Choosing the right kit was surprisingly hard. I’m not a fan of galleons like Santa Maria, nor of ships that aren’t wooden. So I started researching here on the forum. I realised I like smaller vessels and frigates, which helped narrow things down. Another thing that mattered to me, coming from a family of aircraft modellers, was scale consistency. Some brands had ships in all sorts of unrelated scales, while others didn’t offer the ships I liked. Then I discovered Vanguard Models. Most of their range is in 1:64 scale, and I instantly liked several of their kits. That made the decision much easier—so I ordered the Sherbourne, which arrived on the 12th of November. Opening the box, I was really impressed by the packaging and the overall quality. I inspected everything and found no issues. I went through the instructions, tried to understand the overall process, and made a shopping list for tools—since all I had was a knife and tweezers! I’ve now stocked up on the basics, with a few things still on the way (pin vice, table clamp, calipers, etc.). I cut and shaped the hull frame and pre-sanded the visible stern pieces before gluing them in place. Everything went smoothly. The deck also fit well, and I was able to do the major hull-frame sanding. I was a bit surprised to find some of the MDF parts slightly off, even though I followed the laser guidelines very closely. I noticed the same slight mismatch in the manual photos, so I just sanded things down to fit. Next came the bulwarks and my first attempt at bending timber. I tested the bending iron on a scrap piece, and it worked well. Both bulwarks went on without trouble—though I was careful not to glue the section that gets snapped off later. During test-fitting of the next stages, I realised I had bent the bulwark curve a little too tightly at the prow because I mistakenly thought the outer bulwark slotted into the same prow slot. So my Sherbourne will end up with a slightly different bow shape. I added a small pearwood filler piece to fix the gap in the inner bulwark, and I’ll fill the outer layer gap later. Another concern was the rudder: I thinned the keel deliberately so I wouldn’t have to sand the first planking layer down to almost nothing. And then—of course—my cats knocked the hull off the table, breaking off a bulwark and part of the stern. I’ll fix all that once I get to adding the outer stern structure! Right now, I’m researching planking while sanding and preparing other parts. My main sticking point at the moment is how to mark the plank lines on the bulwark. I’ve seen Chuck’s videos, but I’m still unsure how to approach it. Do I simply measure the bulwark length and divide it by the number of planks, or is the spacing supposed to be nonlinear? I want to do things the right way and honour my dad by building something I can truly be proud of. As saying this, I am very open to constructive criticism and will be happy if stuff I can improve is pointed out!


-
Hello MSW, I have been browsing for some time and used some of the comments and advice to get my first kit! I have been interested in wooden kits for quite some time and this is actually my first time I have bough a kit myself. Previously I have had access to what my father bought for himself until I moved countries and it was diffcult to find time to make a big trip and bring some of the boxes over. So I have decided to start my own project from scratch! I got a kit and tools and began my journey. I will be starting my build log shortly and hopefully will be able to contribute to this community. I have sadly missed the exhibition few days ago, but count me in next year in Telford, hopefully with a finished model worth of showing. See you all around. Danny
- 13 replies
-
- 12
-