HOLIDAY DONATION DRIVE - SUPPORT MSW - DO YOUR PART TO KEEP THIS GREAT FORUM GOING! (Only 75 donations so far out of 49,000 members - C'mon guys!)
×


kellrandy
-
Posts
77 -
Joined
-
Last visited
Content Type
Profiles
Forums
Gallery
Events
Everything posted by kellrandy
-
Hi Daniel, thank you for the info. That's what I had planned to do for the sides, but was talking more about how they are shaped to make them parallel/horizontal to the keel. In the stern view on the plans, the joint is higher than the sides, they taper down. Are they tapered from the joint down as a whole? Or just from the line in the middle to the outside edge? The line down the middle I'm thinking is the taper line for the inside? Thank you!
-
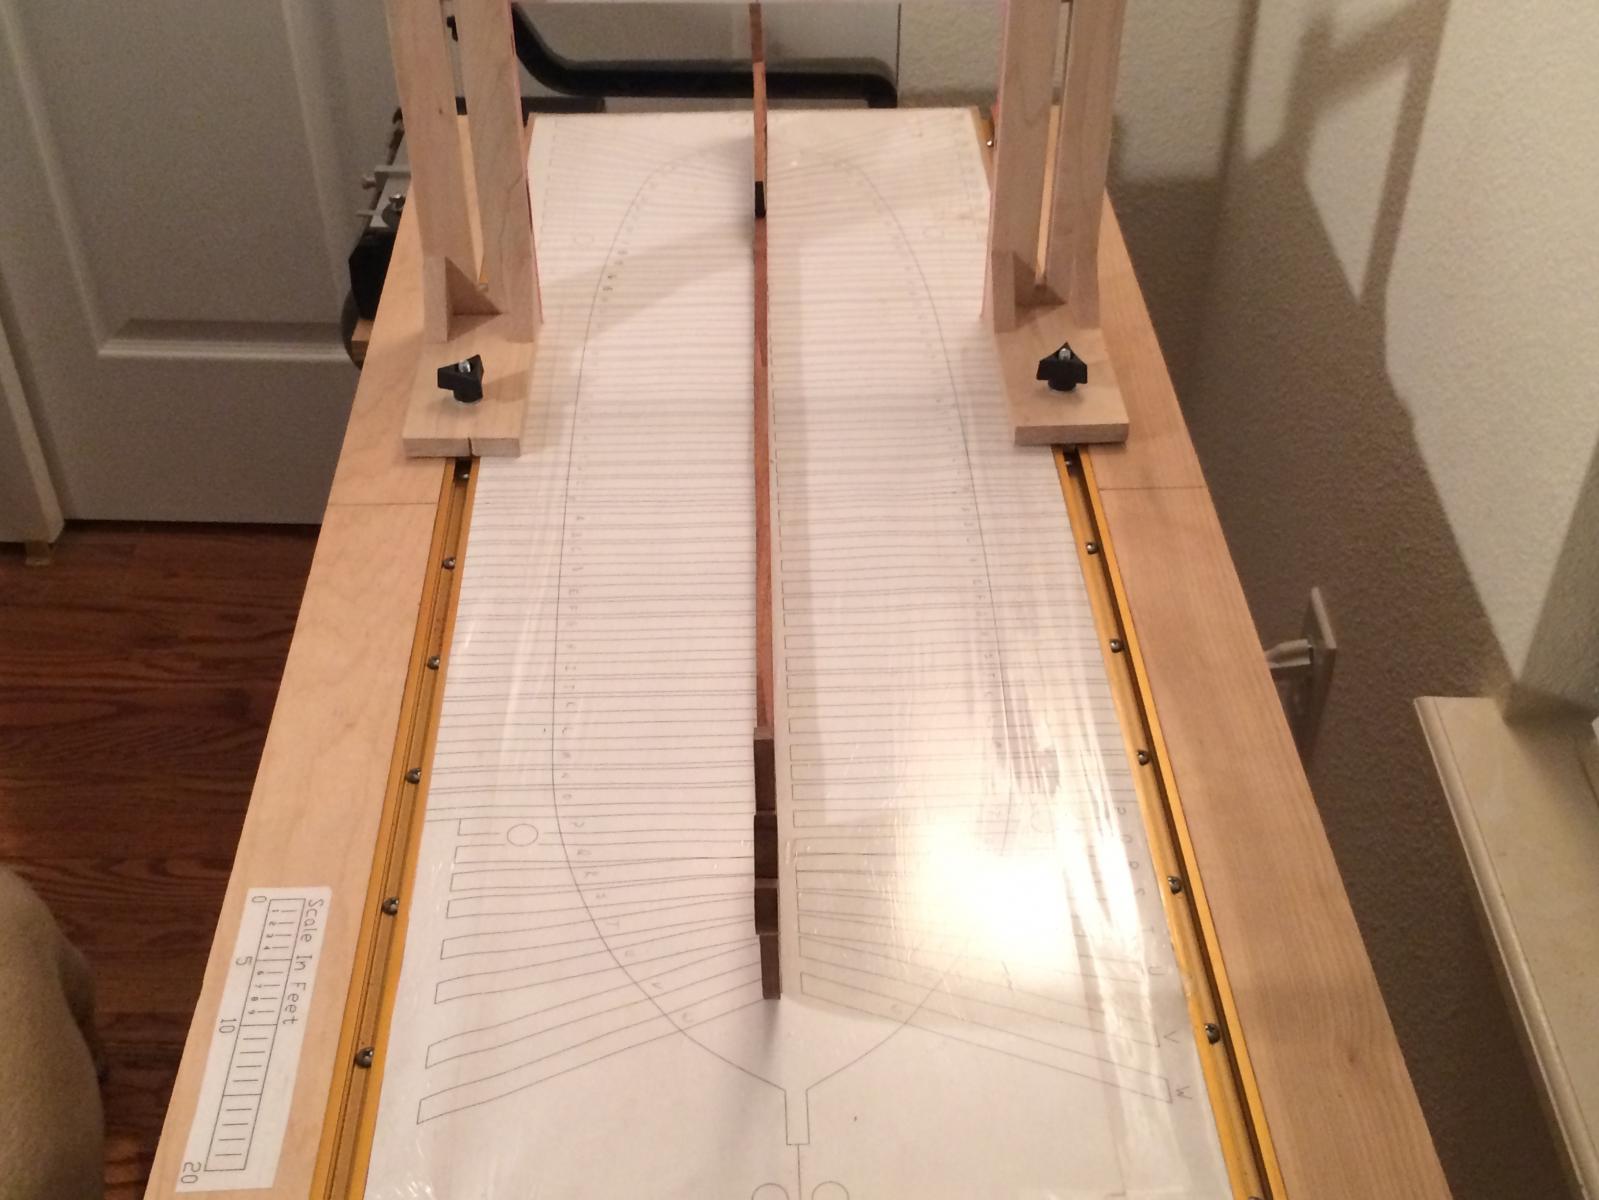
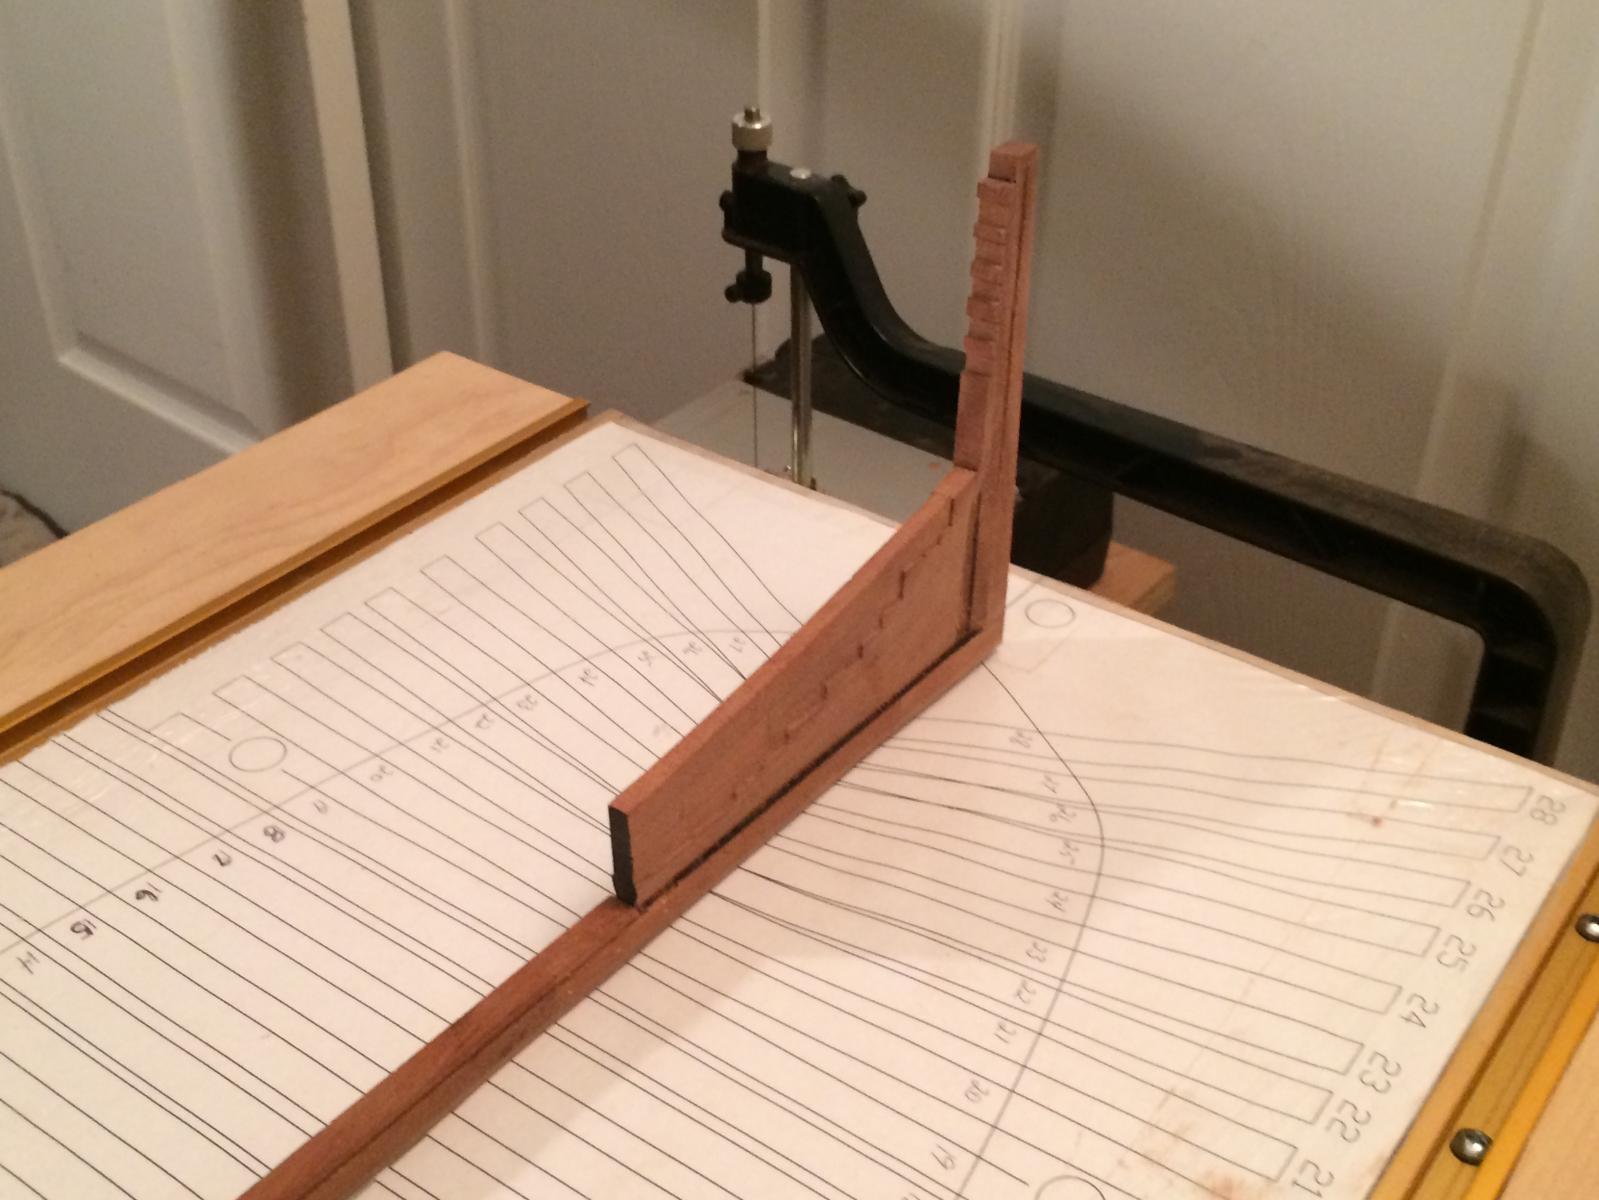
So, I have to say I scrapped my method of mounting the keel, and went with a very basic method of scrap wood with some sandpaper to grip the sides of the keel and some braces for the stem and stern. It holds solid, but not to tight that I can't remove it when it's time. My method was using the rabbet to hold it down, but didn't get enough grip to do it that way and I didn't want to damage it. On to other things... The transoms I am having to redo. I didn't shape them correctly the first go round and am trying to figure out the shape. I'm not able to visualize it properly I guess. Is the whole top and bottom tapered as shown on the stern view? And if so, what's the purpose of the line that's in the middle? Does that taper on the inside of the transoms? Thanks again for helping out a rookie!
-
Don't I know that, lol. After cutting out the transoms and aft frames and test fitting them, I can see where you were coming from, Daniel. Doing it the way I had described will be quite difficult to get right, at least for me, and the keelson may not lay right doing it in sections like that. I think I'll install them all first, still going in sections, make a few, install a few to keep the monotony down somewhat. Then I'll fair the inside, install the keelson, then fair the outside. I do have one question about the hawse pieces... Is it better/easier to fair them roughly, install, then finish the fairing process on them when the rest of the fore frames are installed so it flows more smoothly?
-
Thank you for the tip, Daniel. The stability the keelson provides is why I am thinking of doing it that way. I had planned to cut a set of frames, fair the center, then install a piece of the keelson and continue until all the frames and keelson were complete. Then I would fair the rest inside and out. I had also planned on leaving them with a little extra wood width wise for the fairing process. I'm just scared that I would accidentally break one if my sanding blocks catch one the wrong way if I don't have it installed. We'll see how it progresses as it is a long process and I'll have plenty of time to rethink this approach.
-
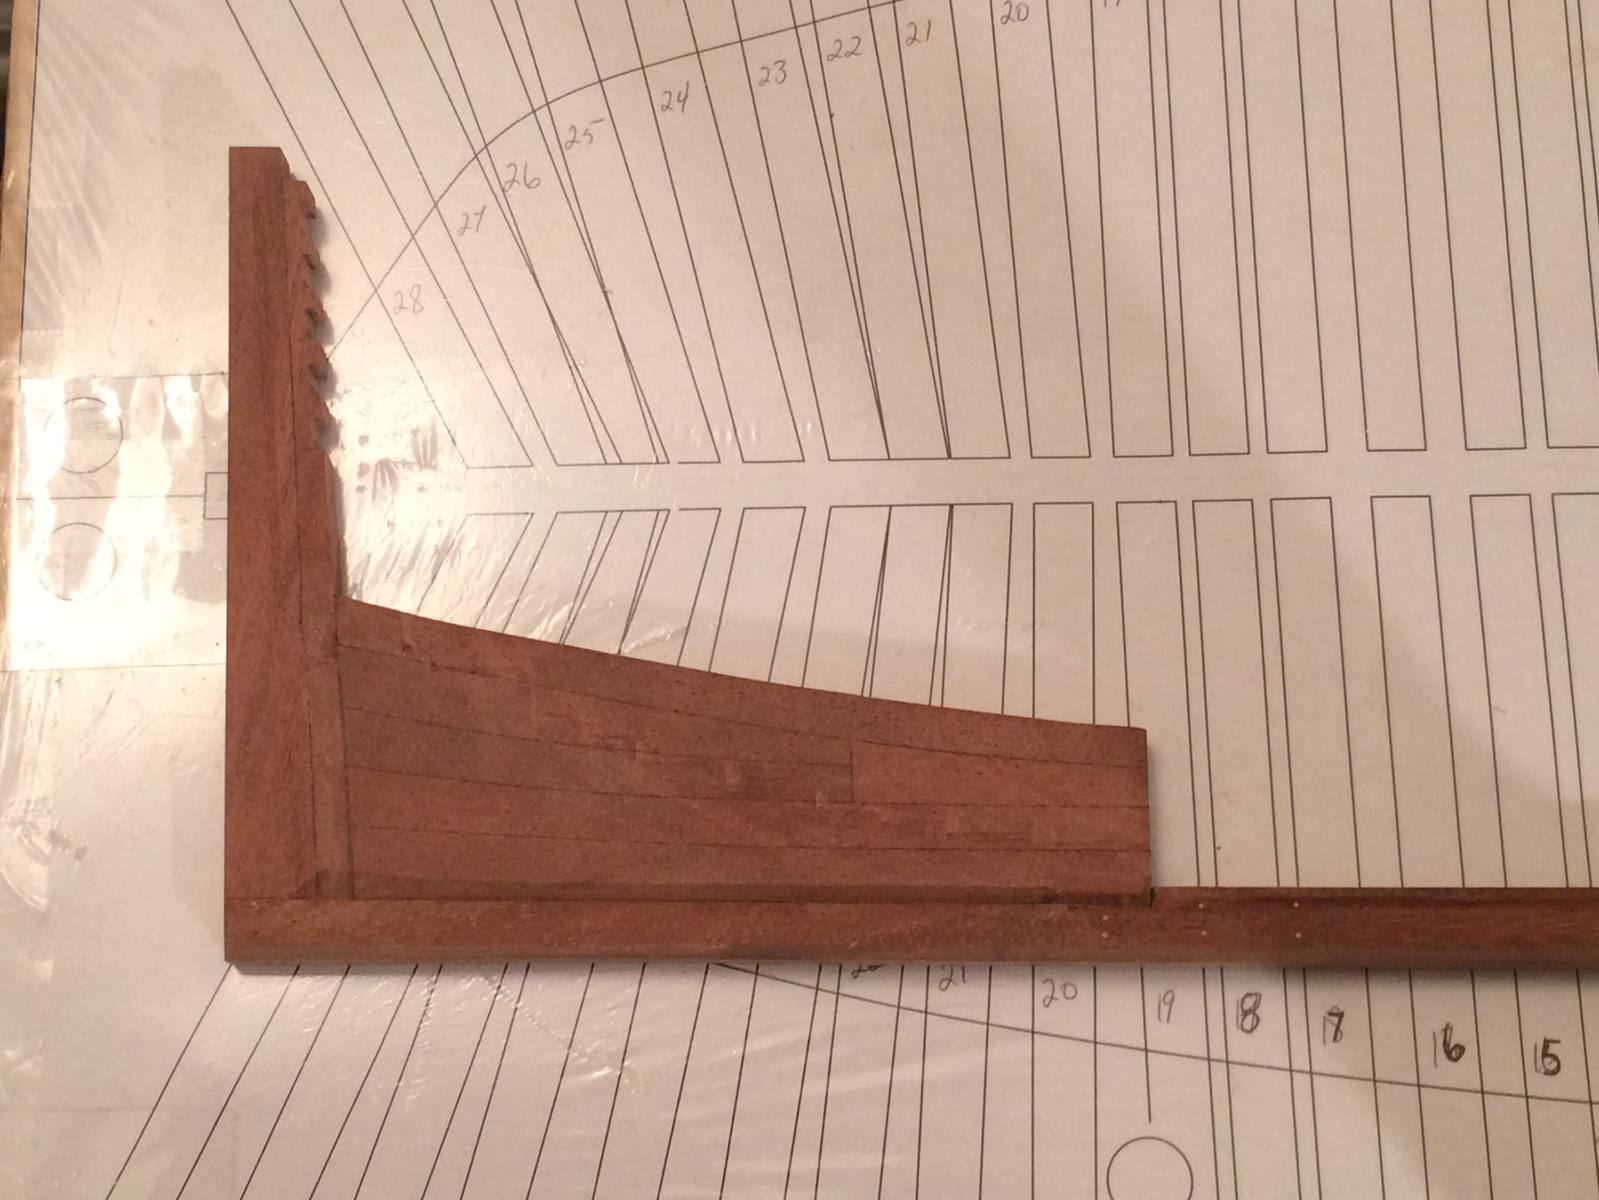
Hi everyone, so I'm a day late in posting photos, but here they are. I'm still working on the board mounting system. I should have some pics of that method sometime this weekend.


-
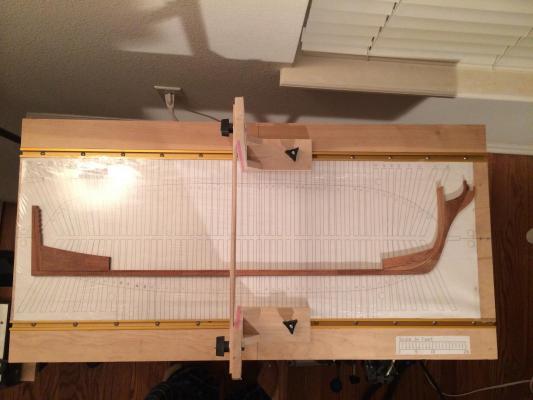
Thank you everyone for the compliments, it's greatly appreciated. I will post some pics tomorrow, but I believe I've reached the stage where I can mount it to my build board and begin the framing process. I have the stem, keel, stern post, inner post, and deadwoods assembled. I plan on installing the keelson as I go with the framing. With all of that complete, is it ready for framing, or should I complete other things before I embark on that? Also, I plan on placing the finished model on a cradle instead of posts, so drilling holes to mount it is out of the question for me. I've come up with a solution I think will work out well, and keep it secure and nicely square and plumb to the board without drilling or glueing anything that isn't supposed to be. I will post that method for everyone when I get all the details worked out. Until then, talk at everyone later and have a great week!
-
I haven't heard of one, actually. If you want to real authentic I've read that the British used elm and oak a lot. I have no idea if those woods would be a good fit for model building because of the coarseness of their grain structure. I know a lot of folks use fruit woods like cherry, apple, and pear. I just went with what I like. For my build, here's what I'm using... Mahogany (main structure ie keel, framing, beams, rooms, etc.) Walnut (anything I want to stand out, so far the false keel, and probably will use it for doors, cannon trucks, rigging blocks, and other deck furniture stuff) Ebony (whales and window frames) Maple (deck planking) Haven't figured out the rest Good luck... Randall
-
Hi Eric, thanks for the compliment. For my joints, I use a plain ole sharpie. I tested with some paint and a pencil, but the sharpie gave me the best look, at least for me. Just test first before using anything on some scraps with them glued together, and also to make sure it doesn't bleed into the wood too much especially on the end grain. The glue does change the color slightly.
-
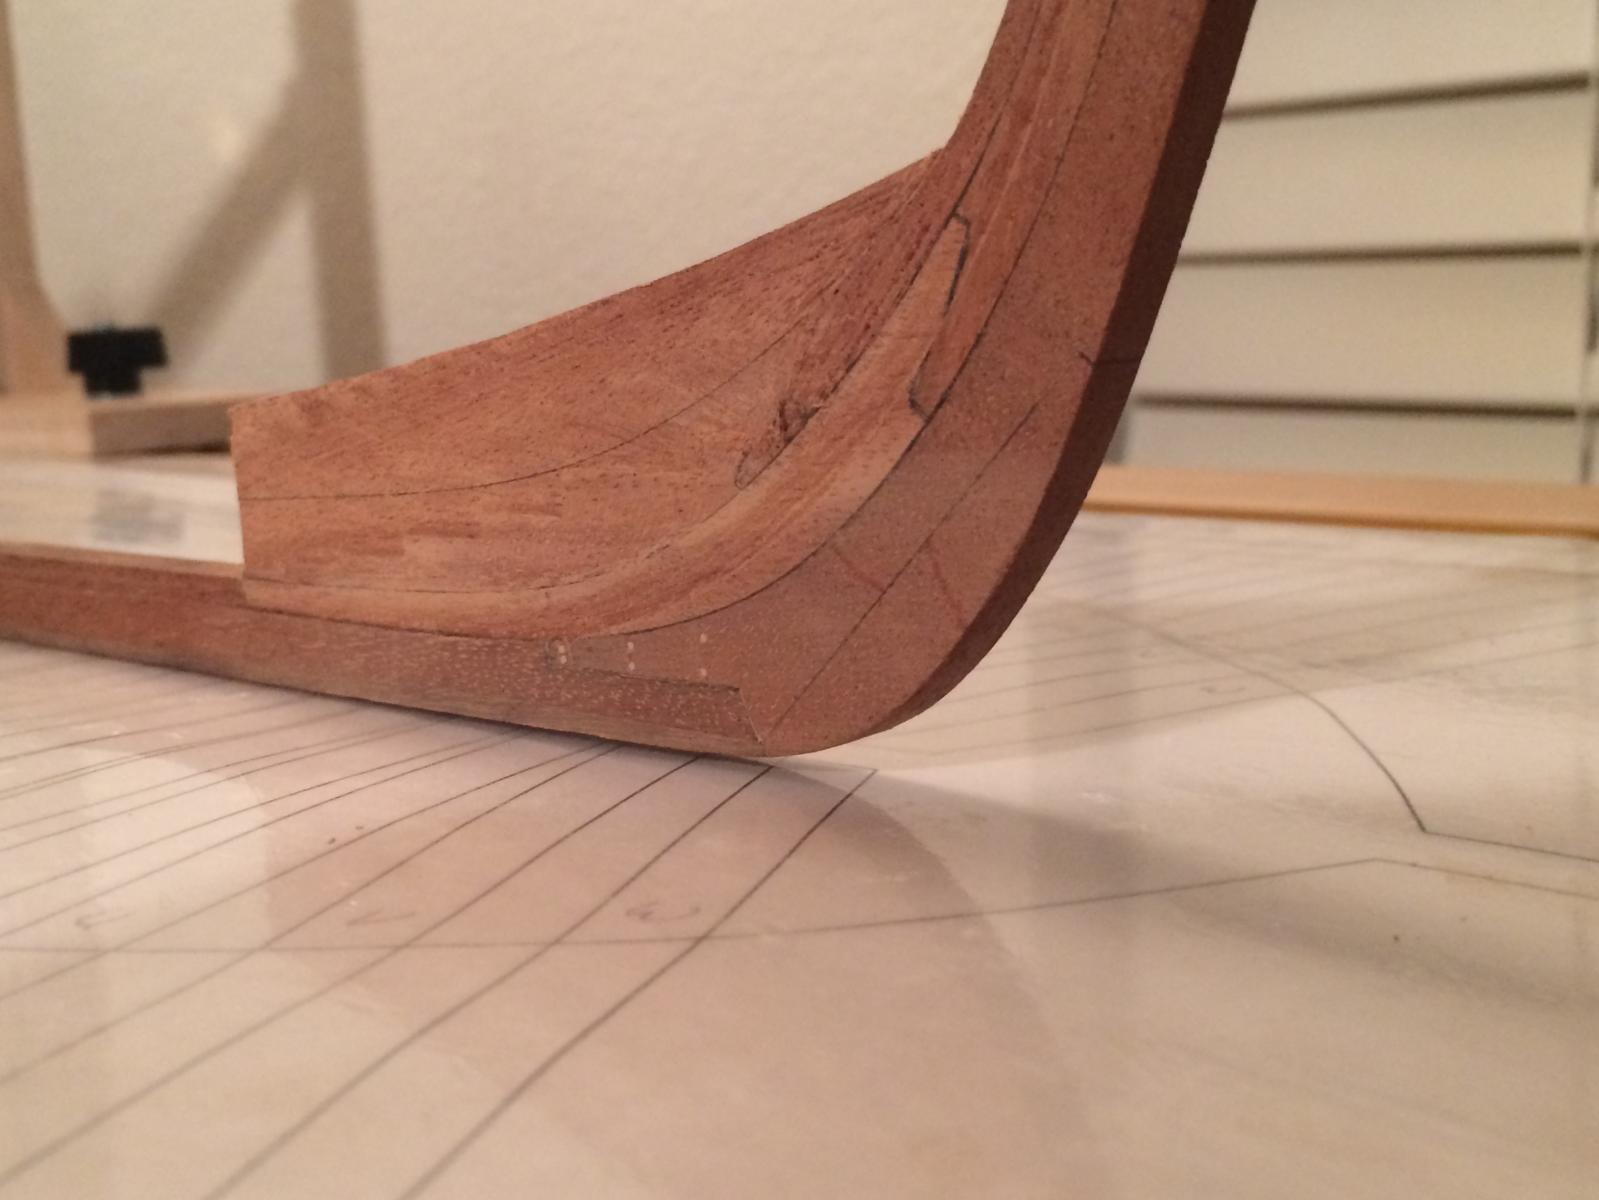
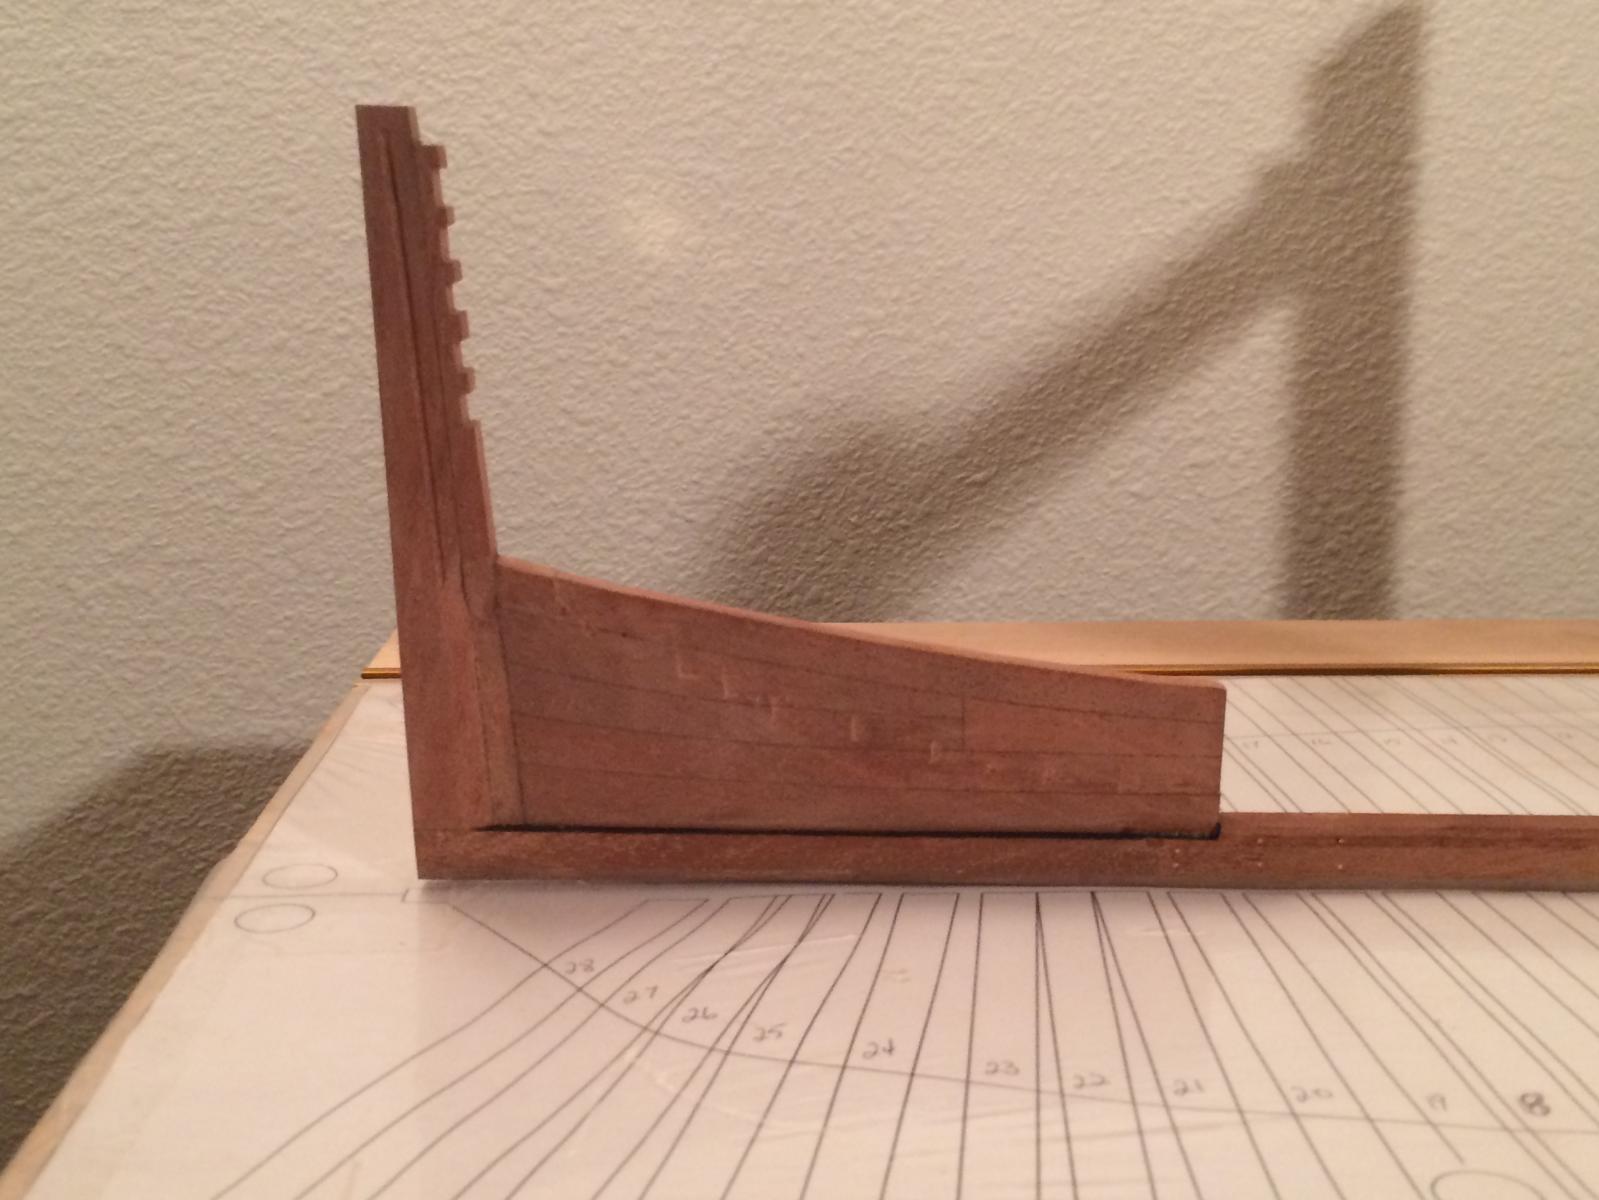
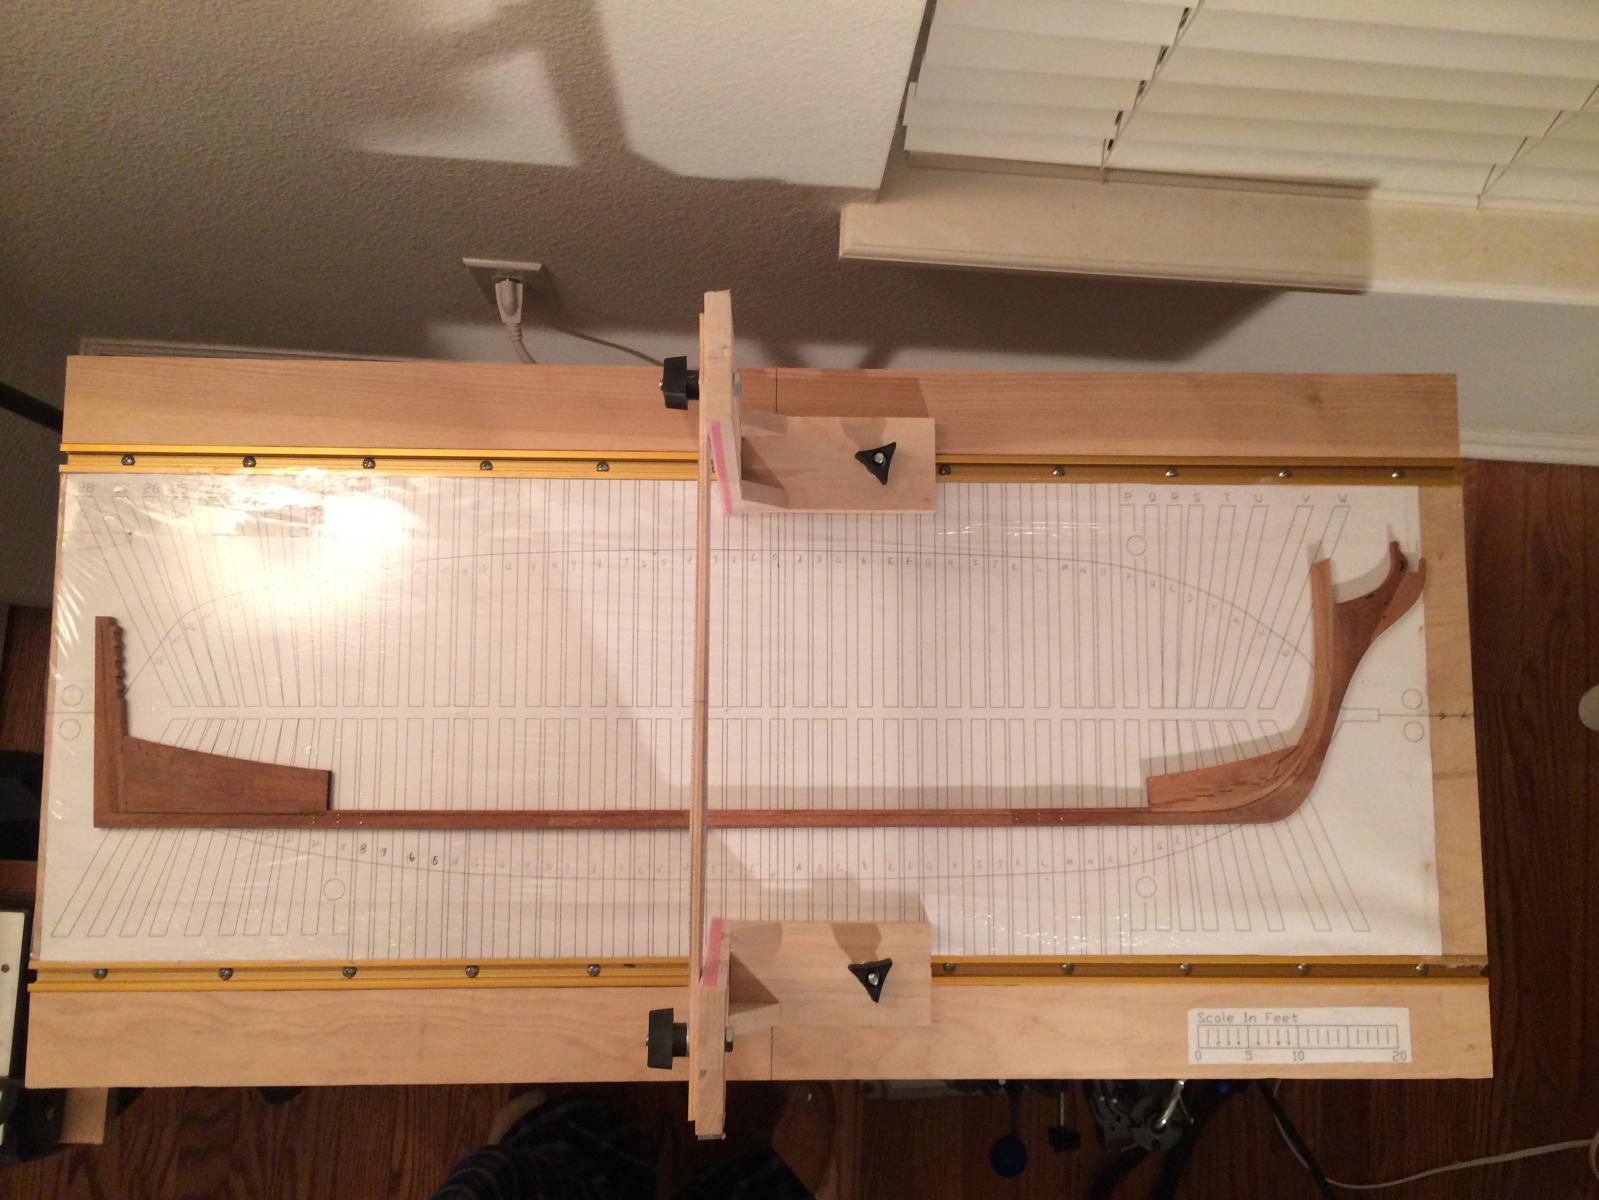
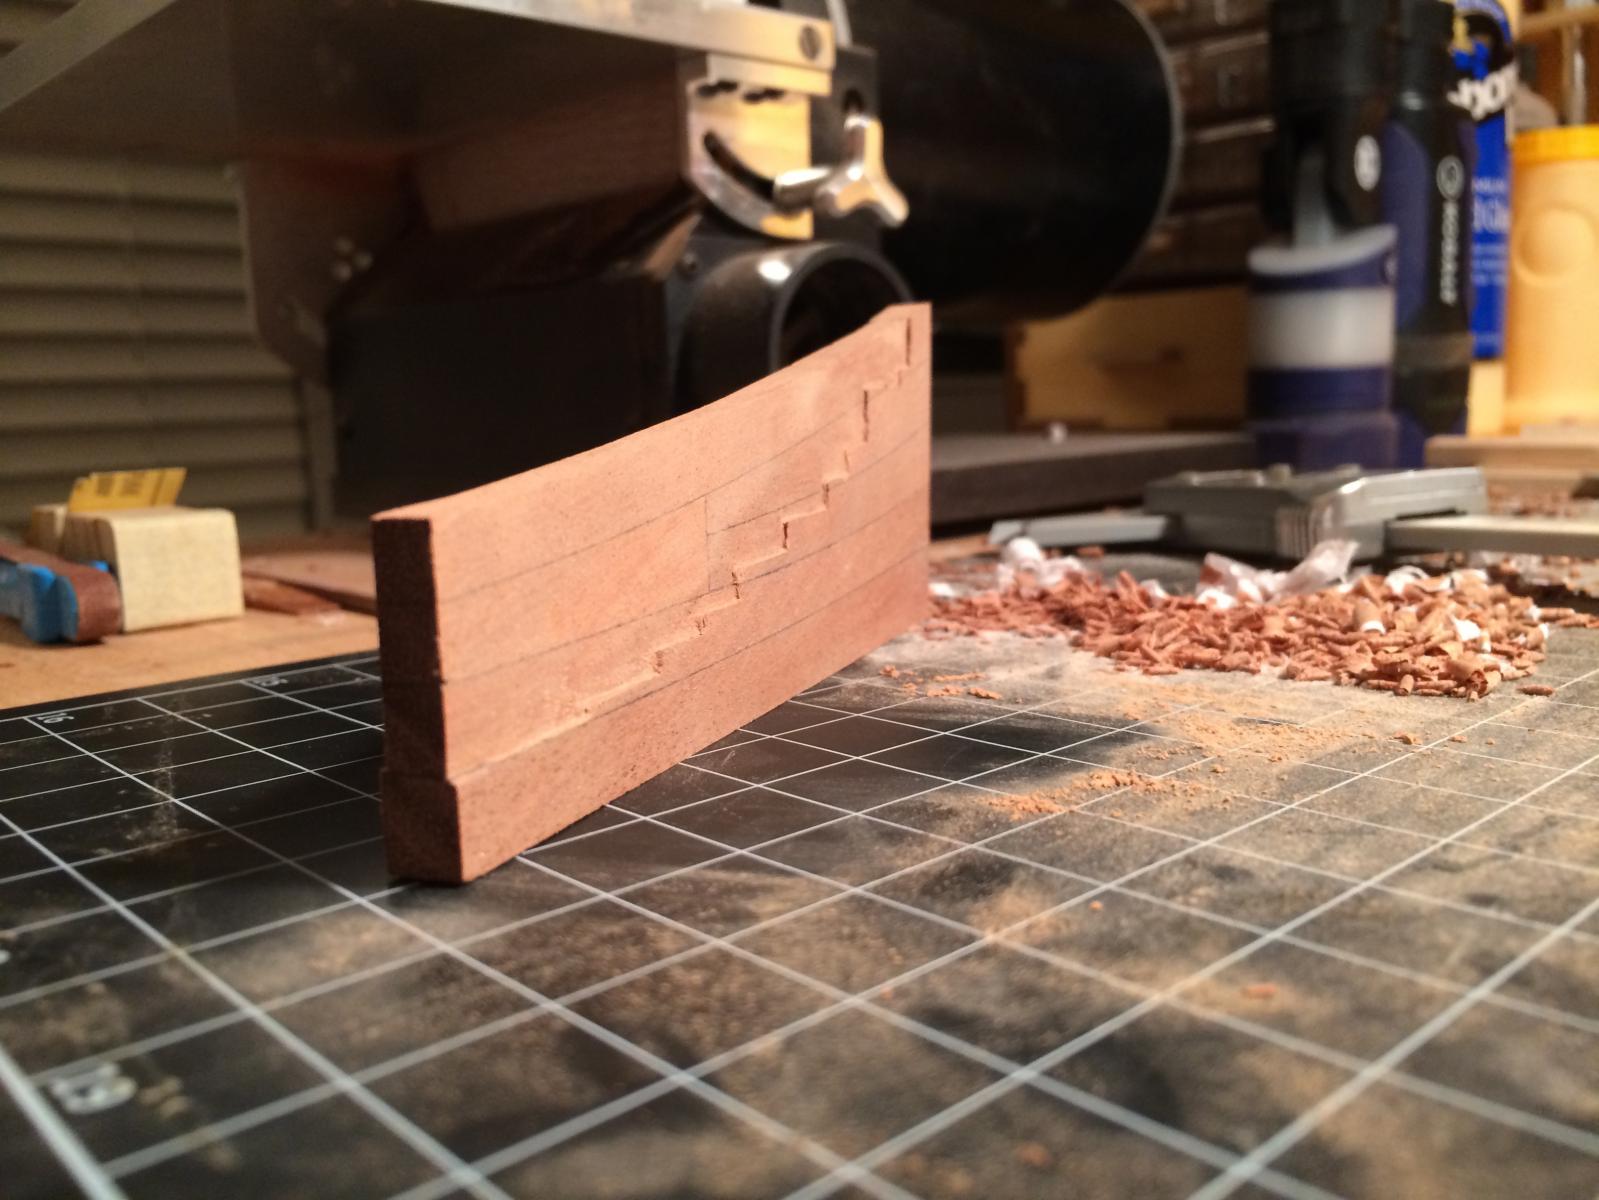
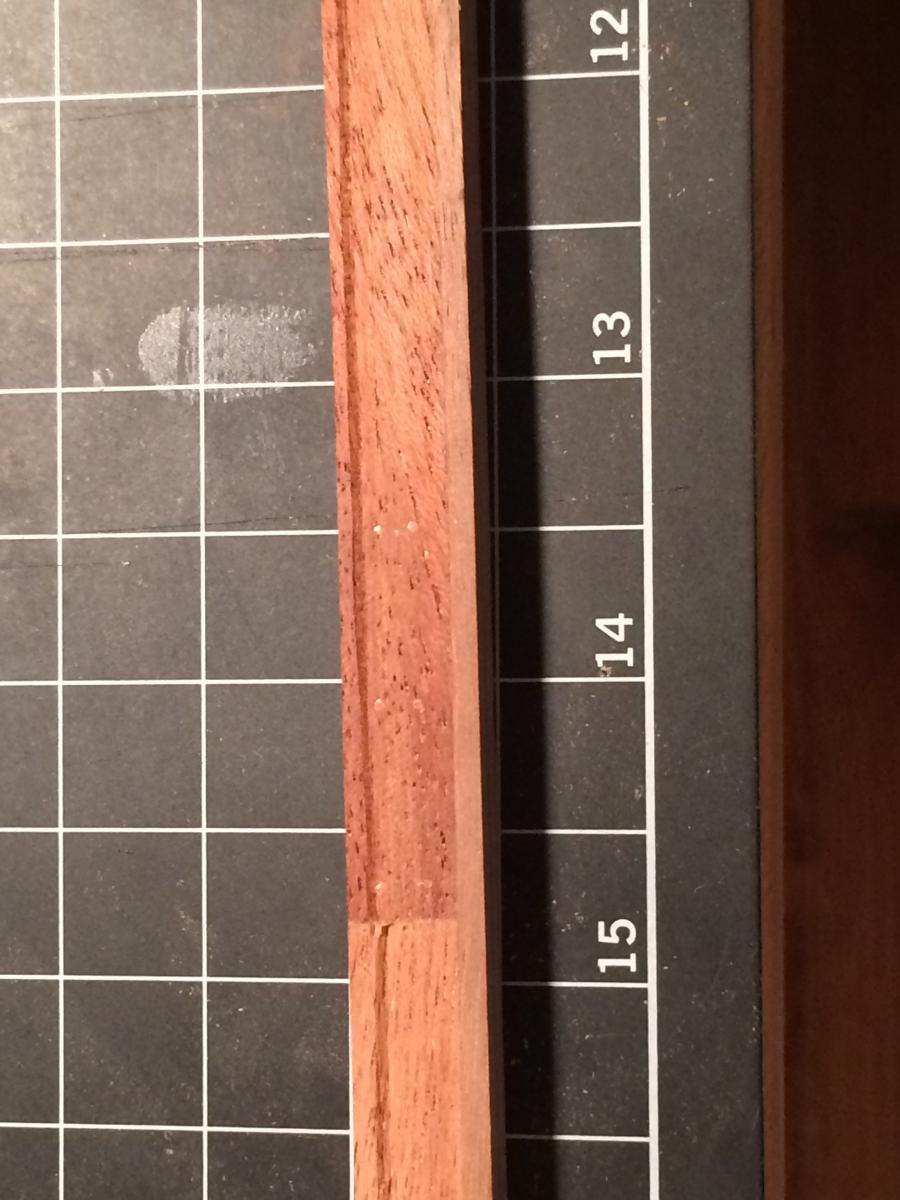
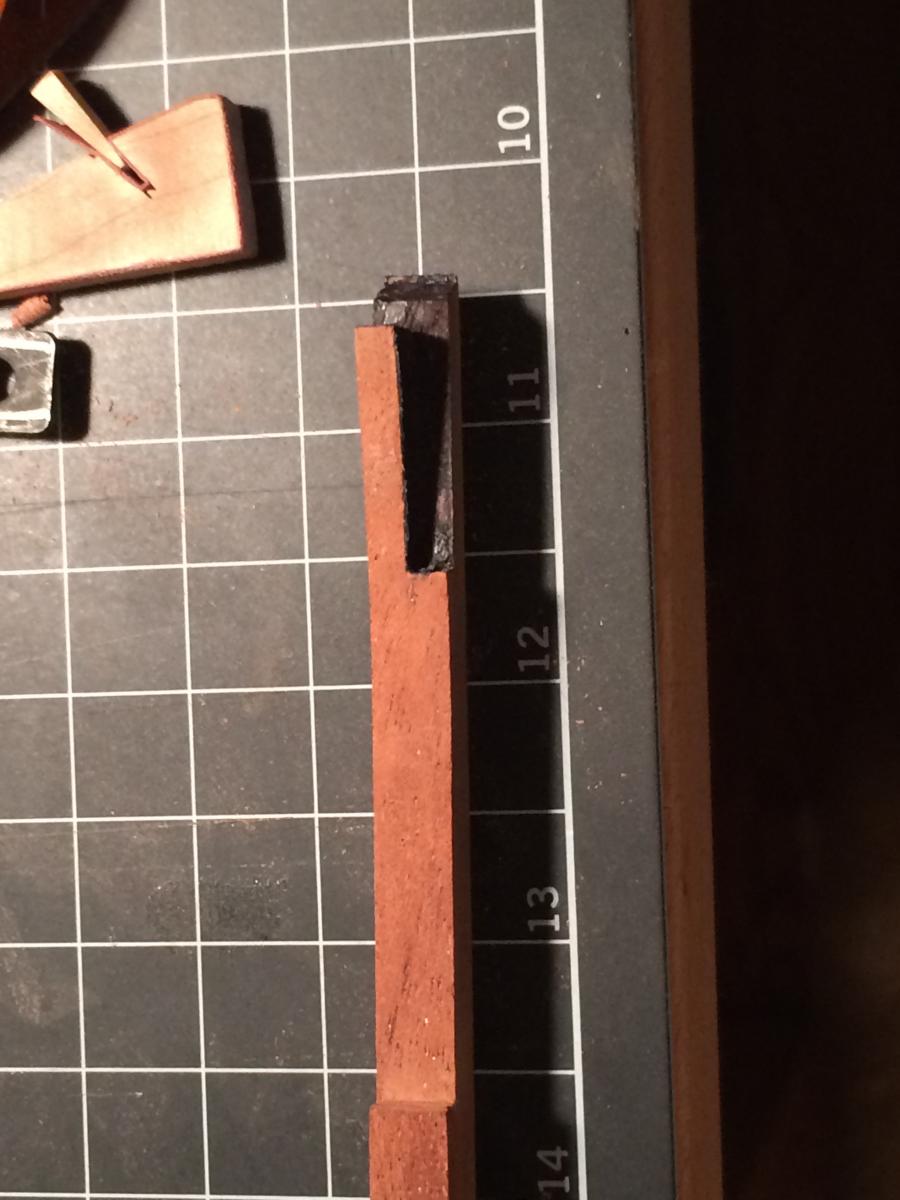
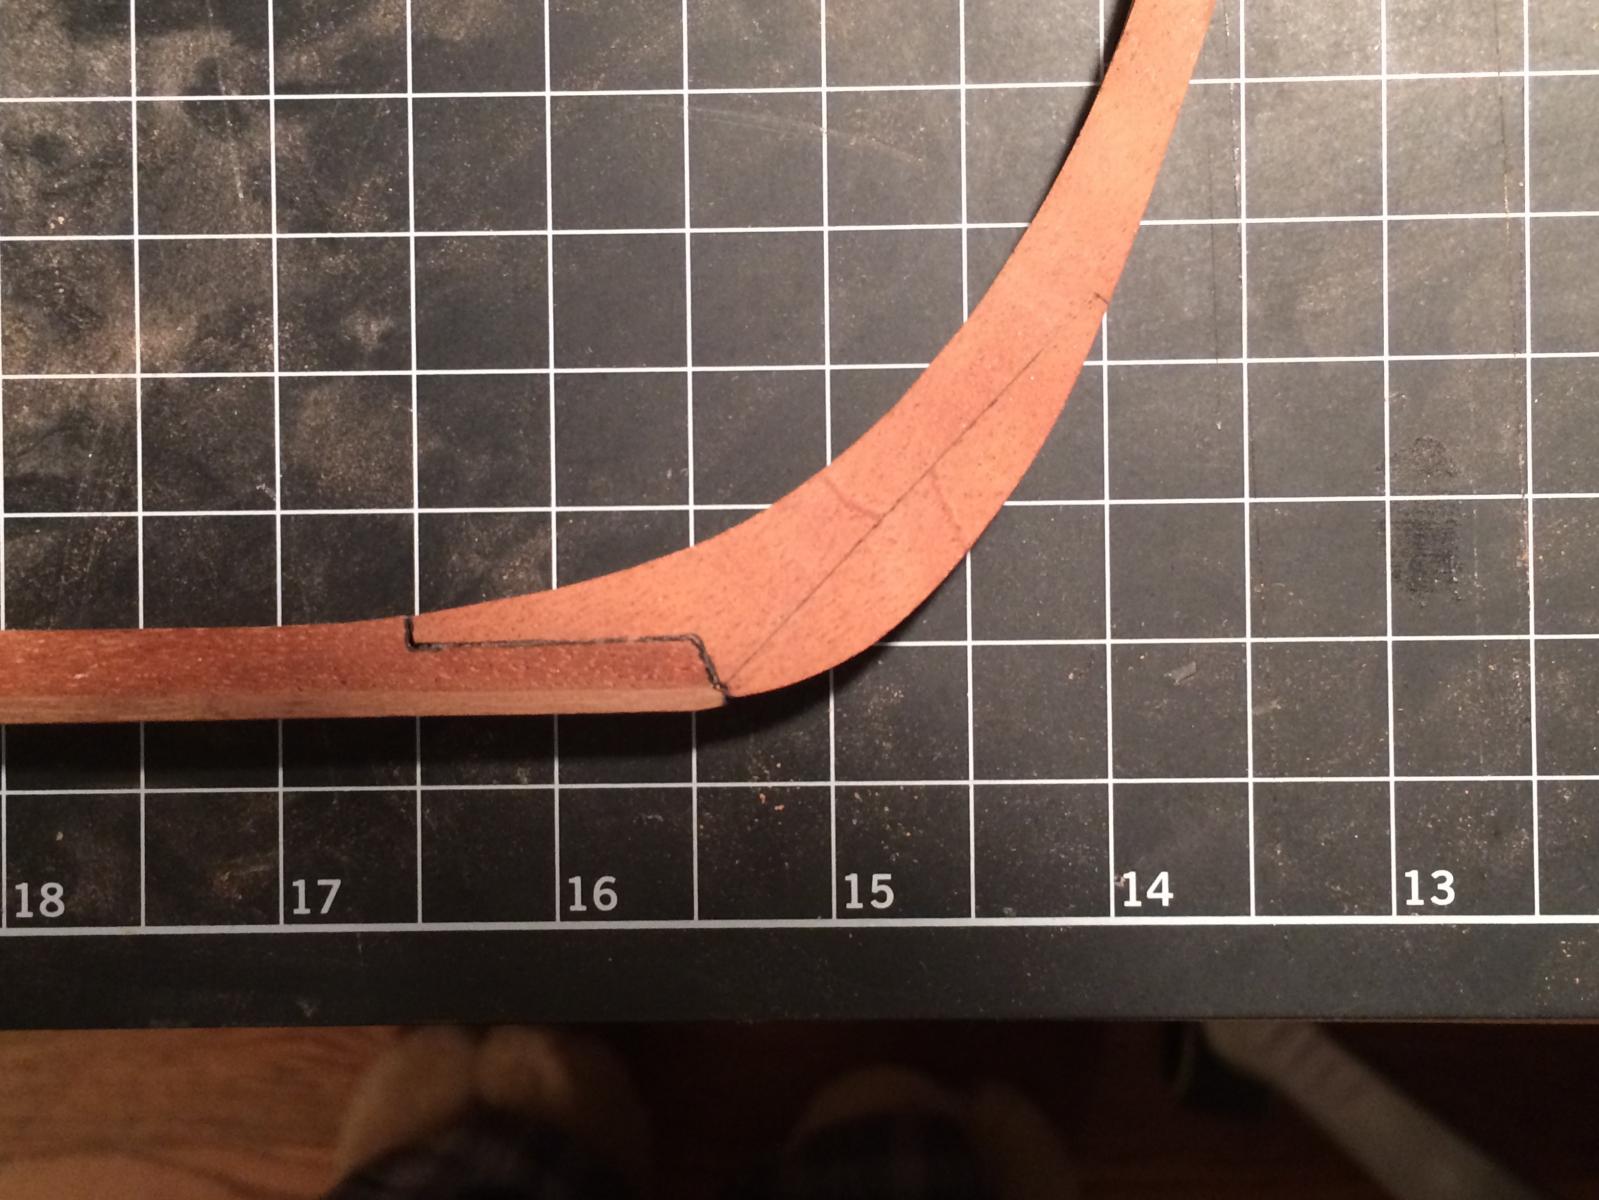
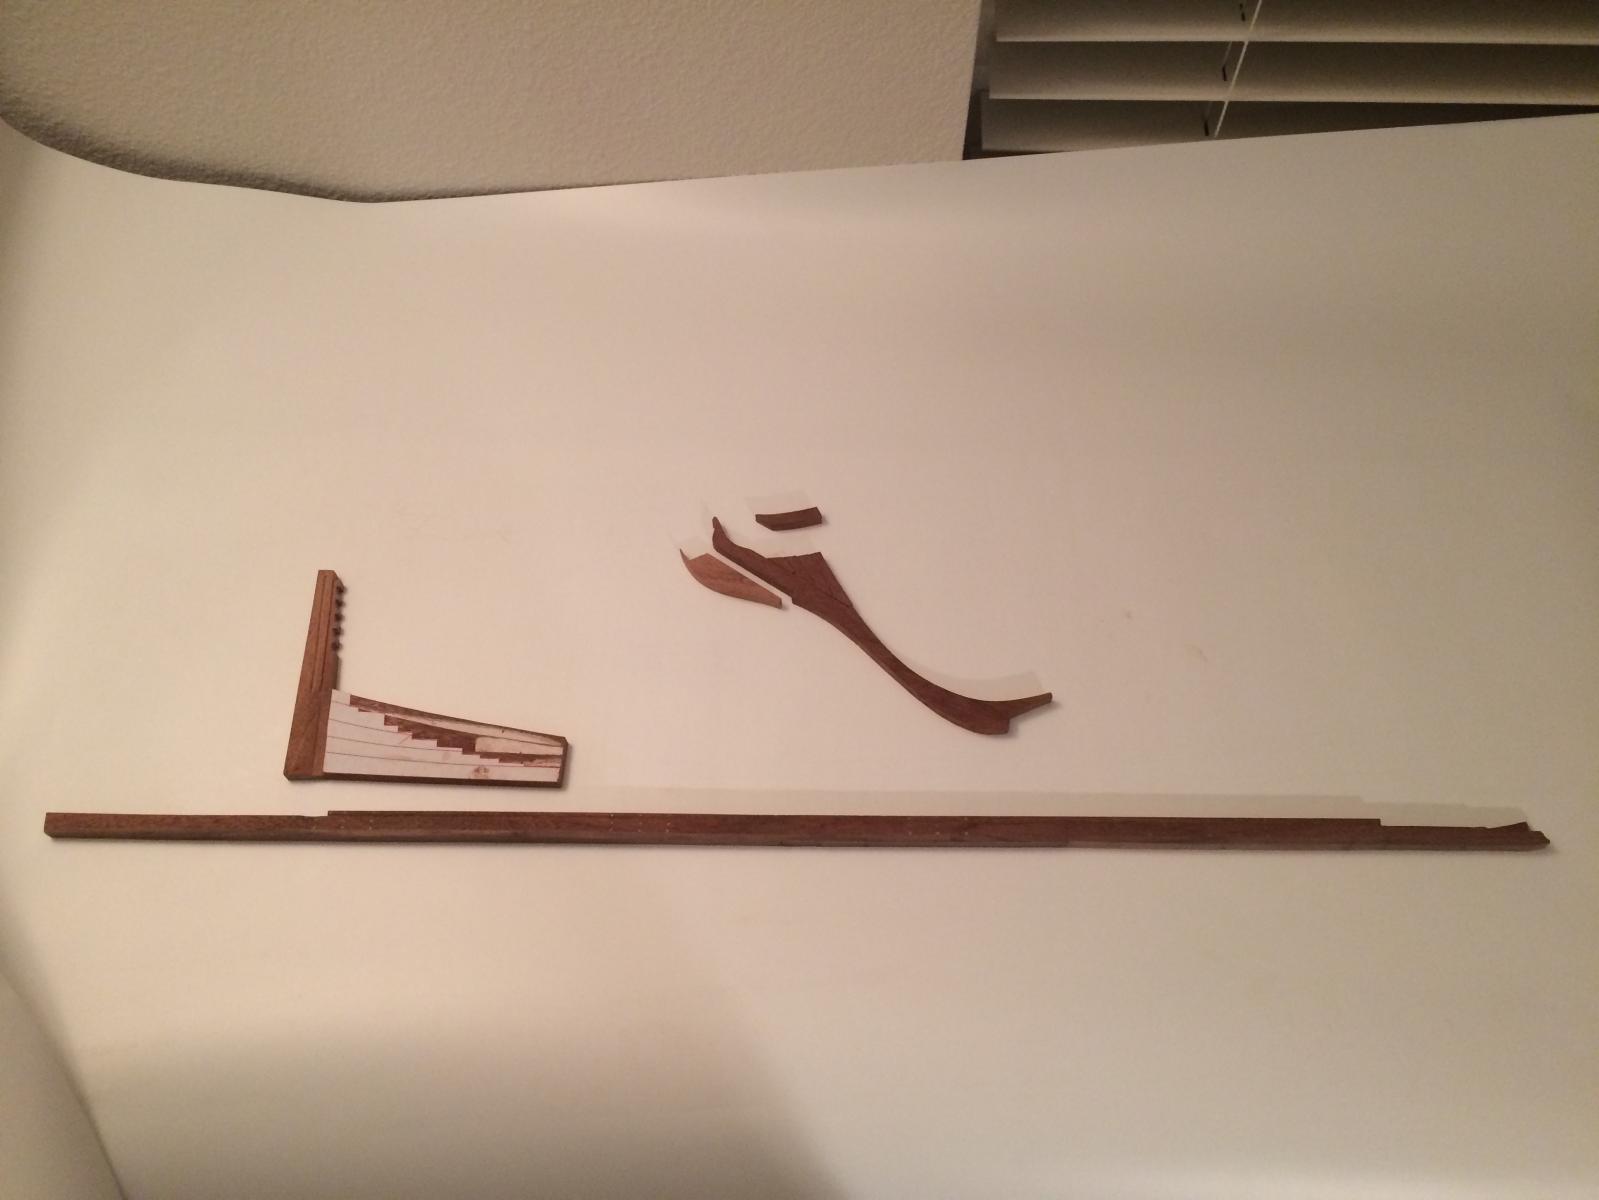
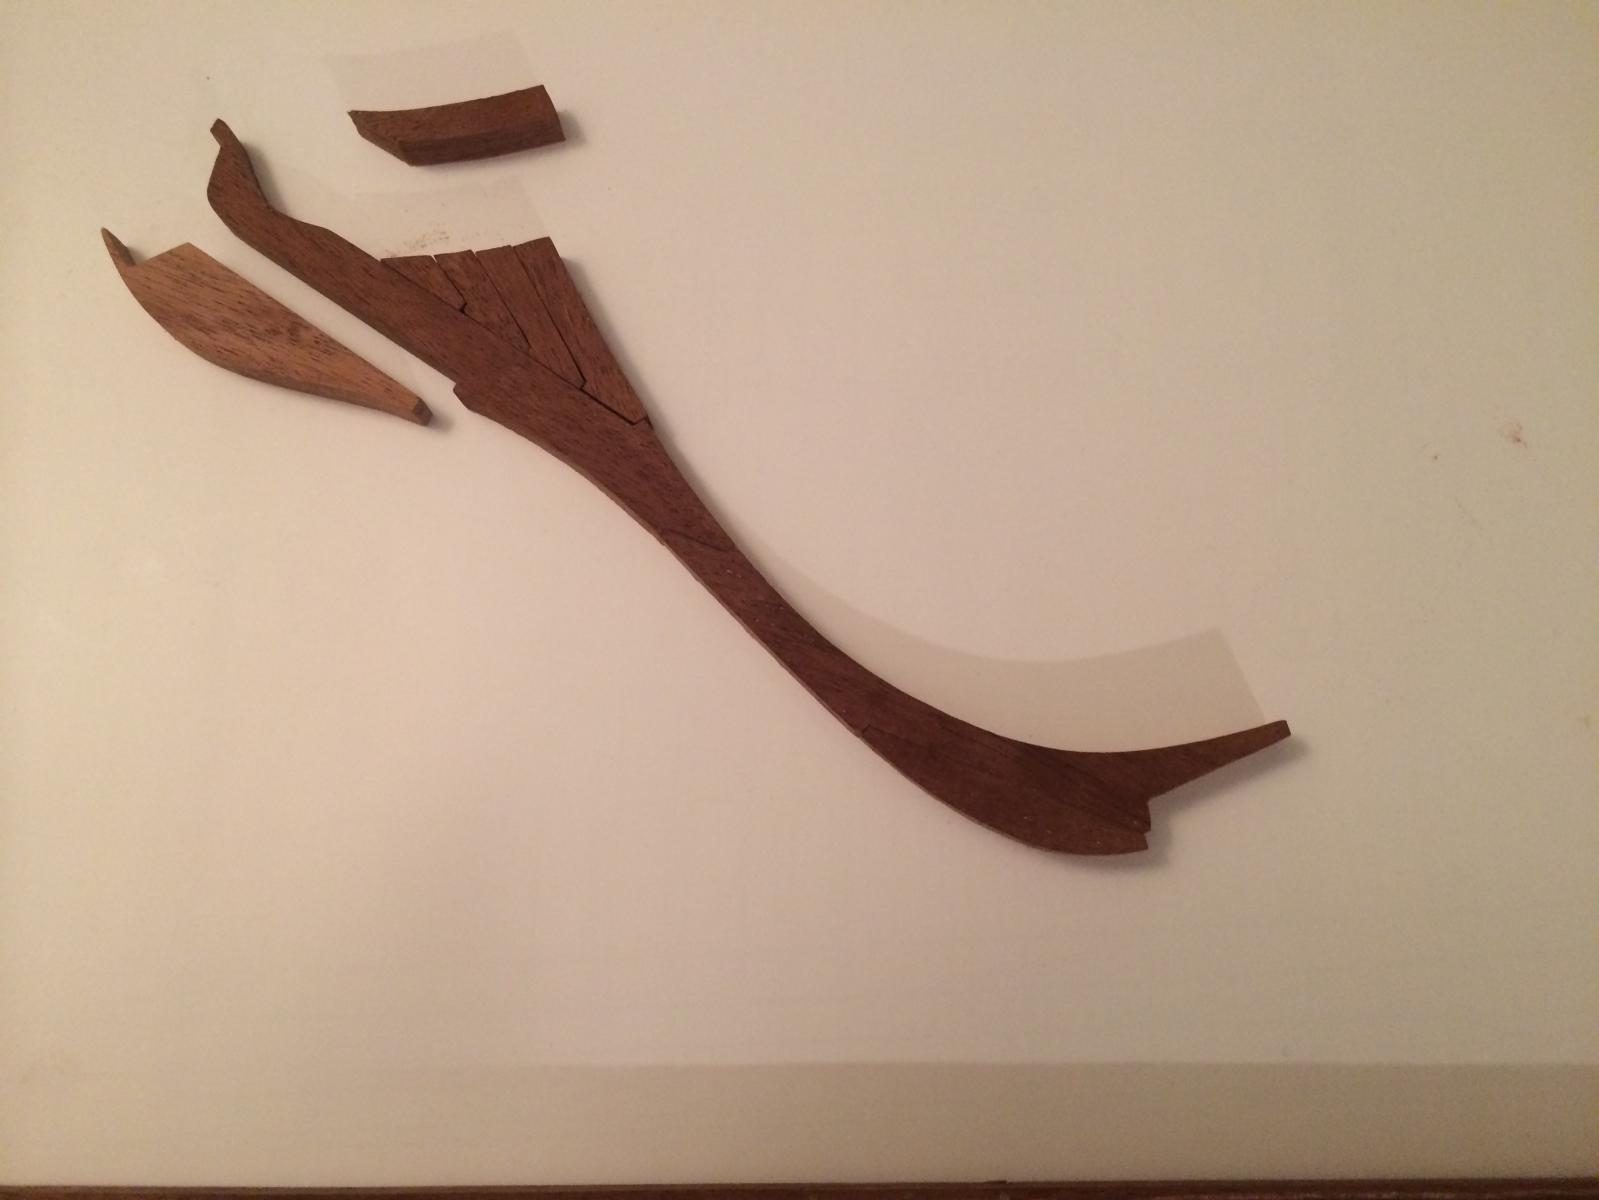
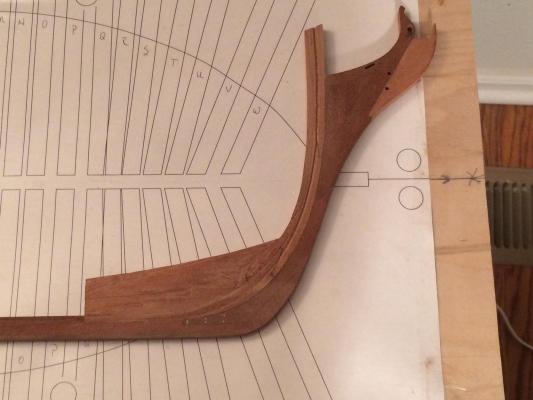
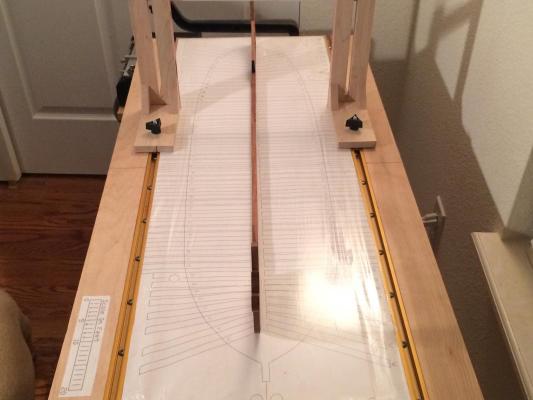
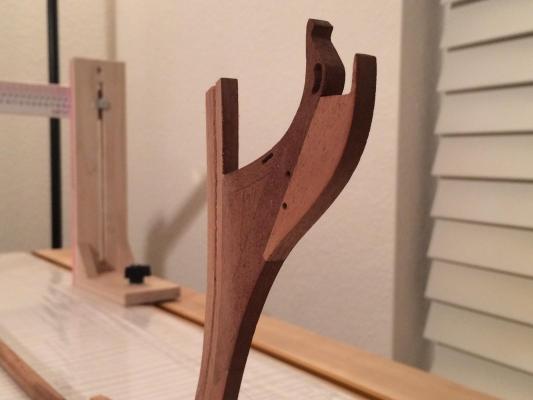
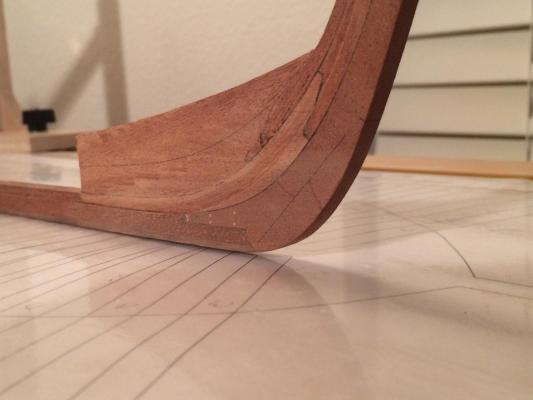
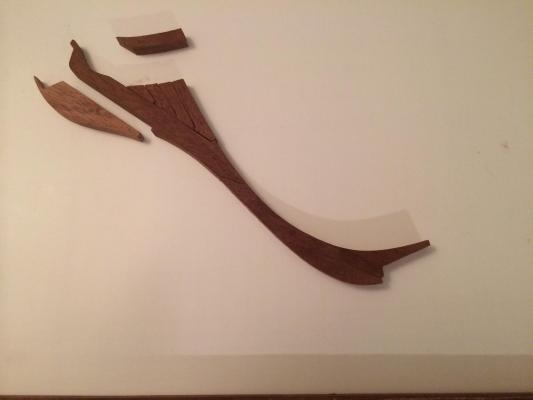
Hi everyone! Hope everyone is having a great day. It's like spring here in the Denver area today, very nice. I'm back again, this time with a little progress finally after having to pretty much start over. I hope the photos came out better this go 'round. So I have the fore pieces, aft deadwood (finally came out acceptable, but still not absolutely perfect), and the keel rebuilt. I carved the steps on the deadwood by hand as you tell by the pile of shavings in the photos. Now I'm off working on the stem, apron, and fore deadwood.


-
Richard, It's not in my set of plans either, unfortunately. That gave me a little motivation to look, and there seems to be more missing as well from the full list versus the available plans. The stove, wheel, and the capstan are some big details that are missing. They do exist somewhere because you can see them being built with Triton specific plans from the plans visible in Wang's log. I planned on using the ones in the articles section, but don't know if those would be correct for this ship or not. Randall
-
Welcome! We'll be learning together. I went through four keels and three aft deadwoods so far before I was satisfied with the results, so don't feel too bad when you mess up. You have a nice keel there. I carved the fore scarf by hand. Make sure your chisels are razor sharp, score the wood well along the plan lines, and carve with the grain. It worked out well for me. Randall
-
Sorry about the photos everyone. I'll try to do a better job with them next time. Using my phone to take them probably doesn't help much either, lol.
-
Hi everyone, one little update and a question... I have the keel rebuilt complete with the copper bolts and everything worked out great this time around. I also have the sternpost and inner post finished up as well. I made quite the error in carving my deadwood that I'll have to re-do that again as well, but hey, I'm still having a blast. I'm not going to bother with pics until I get past the deadwood and can show some progress. Now on to my question... I was told that EdT's books of the Naiad were great sources of information for this build and wow, aren't they ever, thanks again Guy for that. I also found this book called "The Arming and Fitting of English Ships of War, 1600-1815" by Brian Lavery and it had some great samples and even some formulas! (I'm an engineer by trade and love formulas). One sample gave a formula for the keel's bolt diameter which I used for mine. I was wondering if it is also an accurate source for information on building methods as well?
-
Thank you for the tip, Guy. I'll surely check it out. Back to making more shavings on my deadwood...
-
Hi Guy, Very nice work and I have been following your build and it's gorgeous. I do have a question about your keel, since I'm rebuilding mine. Did you use pins or treenails for the scarf joints and how far from the top of the keel did you place them? Are they below the rabbet or do you plan on cutting it? Thank you. Again very nice work and look forward to seeing more. Randall
-
Thank you for the info, Anobium. The way I have gone about it so far is cutting it out close to the line with my scroll saw, then sand to the line and no further. The parts fit but we're off on the full keel plan. I went back and measured the thickness of the lines, and from my printer, they are dang near 1/32" thick. Two thicknesses add up to 1/16" and across all five pieces of the keel, 5/16" of an inch, wow. It adds up fast. I think my problem is solved!! Thank you so much!
-
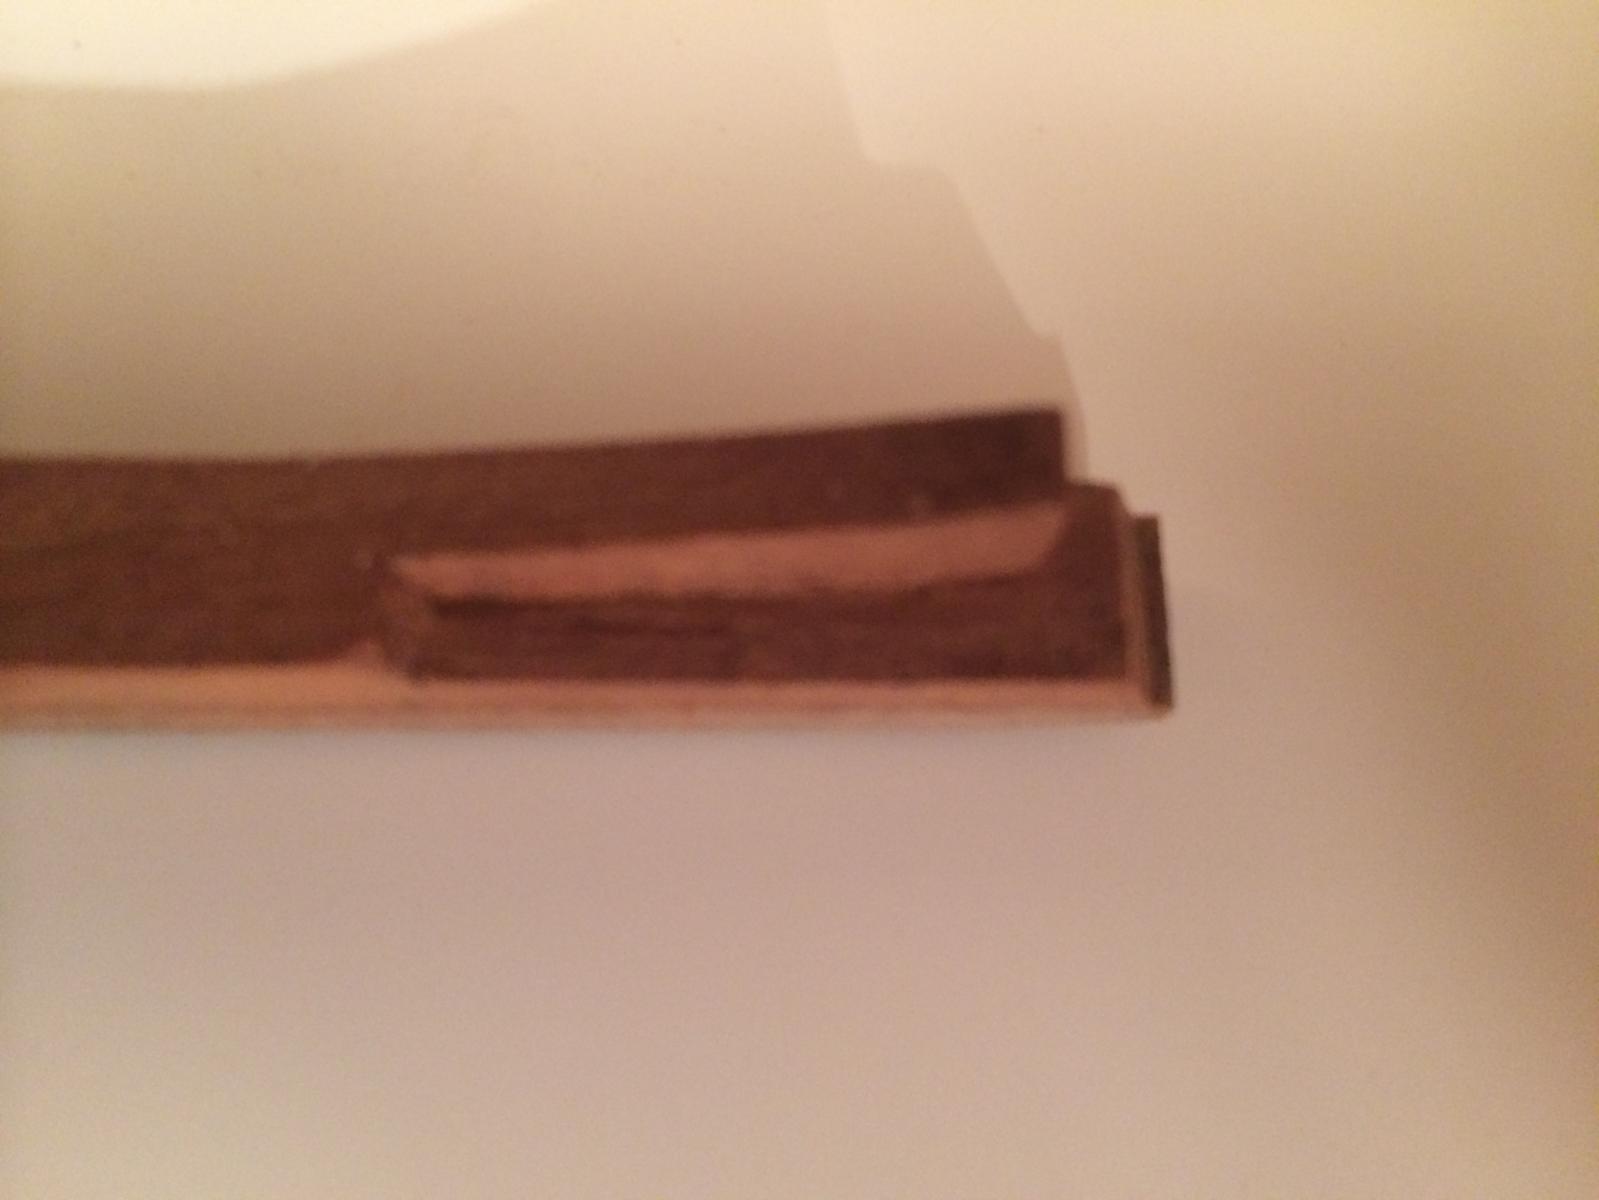
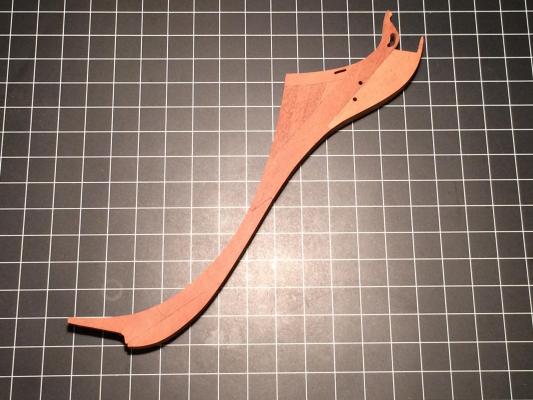
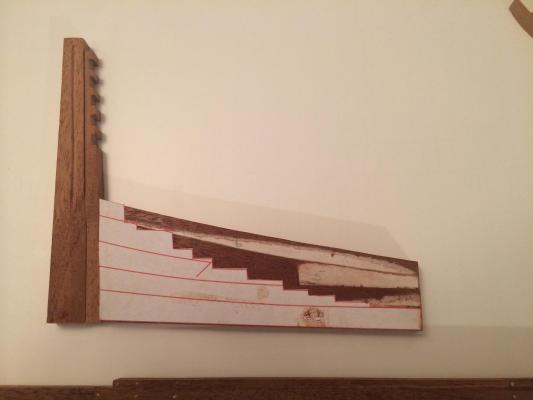
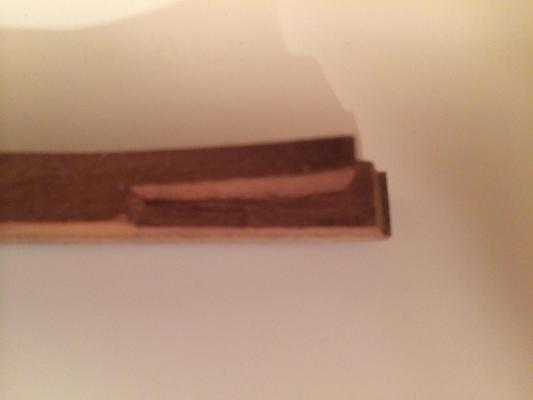
Thanks again Daniel, as I said when I started this thing, this is my first scratch build. The past couple of days, I have found quite a few more discrepancies but have just accepted it and will just build from the assembly plans from now on and the cutting templates I'll leave as a starting point. So, I'm going to rebuild the keel (this will be the fourth time building it). I didn't like the way the rabbet turned out anyhow, lol. In the mean time, here's a few pictures of my progress so far... I'm wondering what to do with the bobstay, as it is a shade lighter than the rest of the mahogany. It does add a little character I guess. Aft deadwood, ready to carve the steps. The scarf joint on the keel, which is getting re-done.

-
Thank you for the information Daniel. I double checked the scales, and they are correct (1' = 1/4") on the keel plan I had printed at the office supply place and the templates I printed, so there aren't any errors in the printing, however, I did find that the lengths for keel sections are 1/16" longer on the cutting templates than the full keel plan, hence where my discrepancy is coming from, and much bigger than I thought at 5/16". So now I know it's an actual discrepancy between the cutting templates and the assembly plans. Since I have to build to the assembly plans and the length of the keel isn't on the framing template for the build board, I have no idea whether to chop off 5/16" from my keel and mount it to my build board or leave it because I don't know which plans are correct or not. Any help would be greatly appreciated.
-
Looking very nice Daniel and I love your little clamps. Might have to make a set those myself, that is when I figure out my plan issue.
-
Hi everyone, back after a long hiatus thanks to work and school. I have been busy with making a little bit of sawdust lately and finally have the keel assembled, false keel installed and have started (round 3) with the aft deadwood. I have also run into a problem with inconsistencies with the plans I have printed and the larger assembly plans I have had printed at a local big-box office chain. I'm trying to figure out which ones are right. My keel matches precisely with the lengths provided in the cutting templates (which I printed), but the assembled keel is about an 8th of an inch too long compared on the full size keel plan I had printed, the same for the false keel and the aft deadwood. When I have the office store print them, I state I want it 100%, no scaling and I print them at 100% as well. I guess what I'm asking is how long the keel is supposed to be before I go any further because this will just make assembly almost impossible if the build board plan is off or my printed cutting templates are off. I'll get some pictures and to answer your question, Daniel, it is a full steamer box, steam provided by a steamer I purchased for 50 bucks. I built the box with the provided hardware and plan included with it. It's not very big, about 3 feet long, and 8 inches square.
-
Aldo, Nice work on the planking. From reading your log, looks like you're going to double-plank and was wondering what wood you plan to use for the second layer. You surely have a great base for it, nice work.
-
Thank you for the kind words and confidence boost, Richard. It's been very slow progress lately on this project, thanks to work and school, but I'm still chugging away at it. I've make up the keel, have the false keel cut and finish sanded, the aft deadwood is coming together ok, however has given me a challenge which I love. I don't have any power tools as of yet ( Byrnes disk sander is on the way though), so I've cut everything so far by hand with a miter box and jewler's saw. It took me quite a while to finish the deadwood pieces finishing the shape with block sanders, lol. Now I'm carving out the steps. I have one side almost done, carving by hand with a set of chisels. It works, but taking forever as I don't want to redo things because of the time involved until some of my power tools get here. I'll make sure to post up some more pictures sometime this weekend. Almost forgot... Did some testing with shaping ebony for my wales. I built a steamer and steamed some test pieces, and made up a mini "work bench" top like you would use for standard wood working for furniture or something else, only much smaller for model work complete with bench pegs made out of steel rod that I could arrange as I wanted for creating whatever shape I needed. I initially steamed them for 30 minutes and had two of the five pieces I had break. I upped my steam time to an hour from 30 minutes. Worked like a charm and the ebony bent very nicely using clamps to pull it against the pegs. I let it dry for two days and when I removed the clamps, I had very minor spring back and slight indentations where they were clamped to the pegs. So, my little experiment worked pretty good and I think I'm safe using ebony for the wales as originally planned. I'll add some scrap and steam them as well to use as support for the ebony so I don't get any indentations when I do it for real. Thanks guys and I'll post some pics soon.
-
On my first build ever, it was the Albatros kit from Occre. It's a 1/100 scale build, pretty small and I did do bamboo trunnels for the whole thing, decks, planking you name it. It is a double planked kit and I made everything to scale as much as I could. On the planking, the wood is sapelli and the bamboo stood out way too much for my taste and would make it look like it had chicken-pox or something. So I resorted to staining them mahogany to match the sapelli color. I left them natural for the decking. So why bother, right? Well after doing it on a test piece for both, it's clear that they are there and I can barely see them, but they do add great detail that would not be there if I didn't bother and to me it looks great. Just my two cents.
-
Thank you for the tip Daniel. I didn't realize ebony may be too brittle for shaping. I'll give it a few test tries before I give up on it then see where that takes me.
-
Thanks for the welcome guys, I appreciate it very much. I don't know if its sacrilege to post from another forum, but here's where I found the build board. The first is the board with all of the instructions to build it, the second is the link to the scales. He's got a few for other scales, and states he uses plain architecture drafting scales to make them. http://modelshipbuilder.com/e107_plugins/forum/forum_viewtopic.php?5571 http://modelshipbuilder.com/e107_plugins/forum/forum_viewtopic.php?5572