

daddytotwo
-
Posts
31 -
Joined
-
Last visited
-
 SigEp Ziggy reacted to a post in a topic:
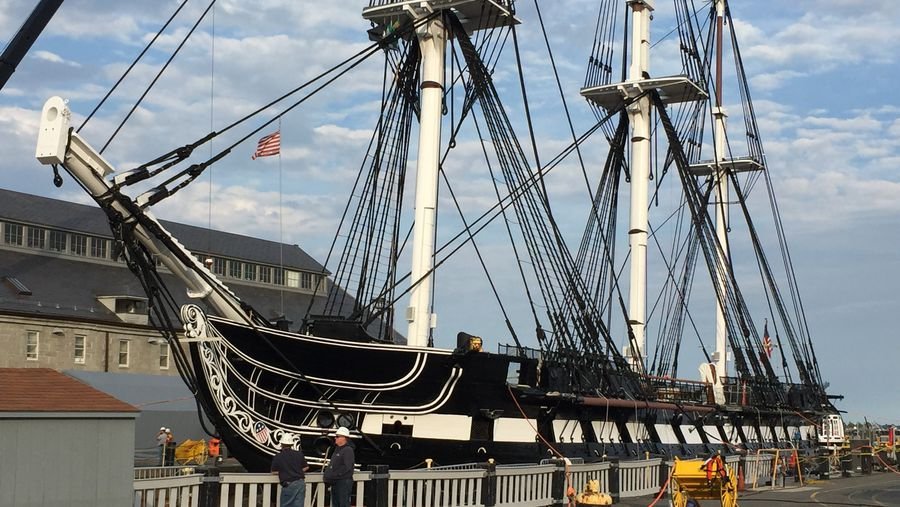
USS Constitution by daddytotwo - Revell - 1:96 - PLASTIC - Here we go again!!!
SigEp Ziggy reacted to a post in a topic:
USS Constitution by daddytotwo - Revell - 1:96 - PLASTIC - Here we go again!!!
-
SigEp Ziggy reacted to a post in a topic:
USS Constitution by daddytotwo - Revell - 1:96 - PLASTIC - Here we go again!!!
-
SigEp Ziggy reacted to a post in a topic:
USS Constitution by daddytotwo - Revell - 1:96 - PLASTIC - Here we go again!!!
-
SigEp Ziggy reacted to a post in a topic:
USS Constitution by daddytotwo - Revell - 1:96 - PLASTIC - Here we go again!!!
-
SigEp Ziggy reacted to a post in a topic:
USS Constitution by daddytotwo - Revell - 1:96 - PLASTIC - Here we go again!!!
-
SigEp Ziggy reacted to a post in a topic:
USS Constitution by daddytotwo - Revell - 1:96 - PLASTIC - Here we go again!!!
-
billt reacted to a post in a topic:
USS Constitution by daddytotwo - Revell - 1:96 - PLASTIC - Here we go again!!!
-
mtaylor reacted to a post in a topic:
Tying hooks to blocks - Tips??
-
thibaultron reacted to a post in a topic:
Tying hooks to blocks - Tips??
-
JerseyCity Frankie reacted to a post in a topic:
Tying hooks to blocks - Tips??
-
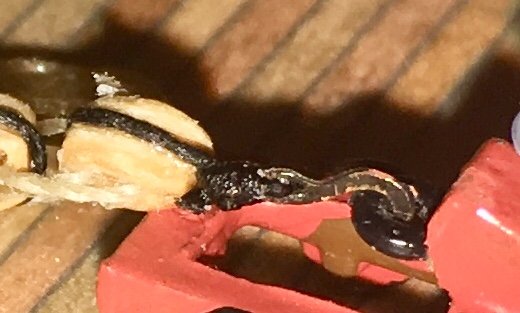
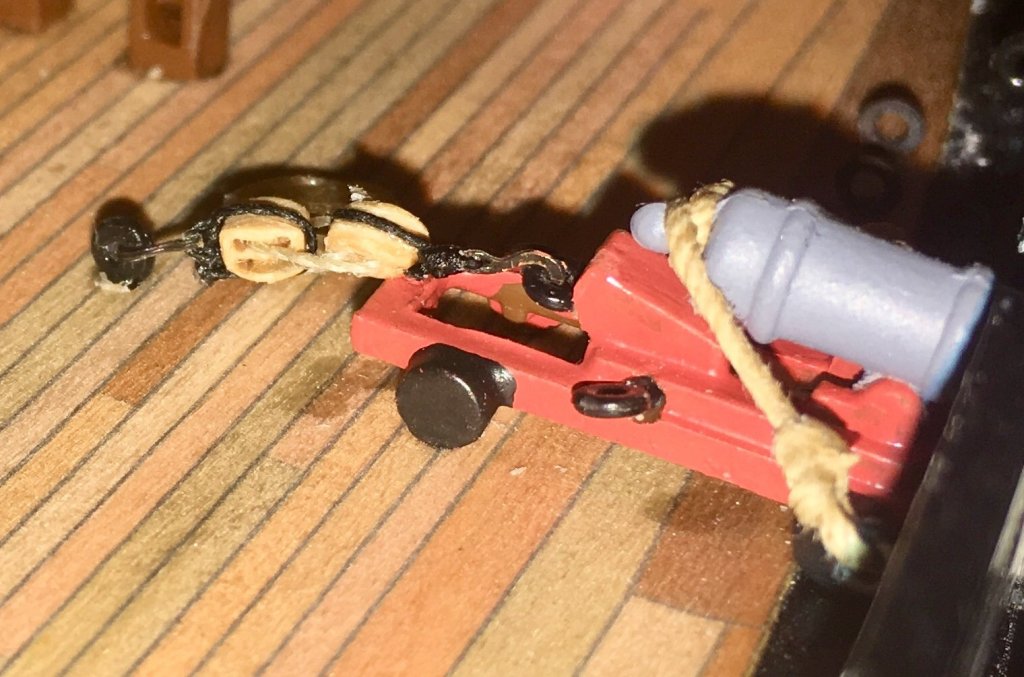
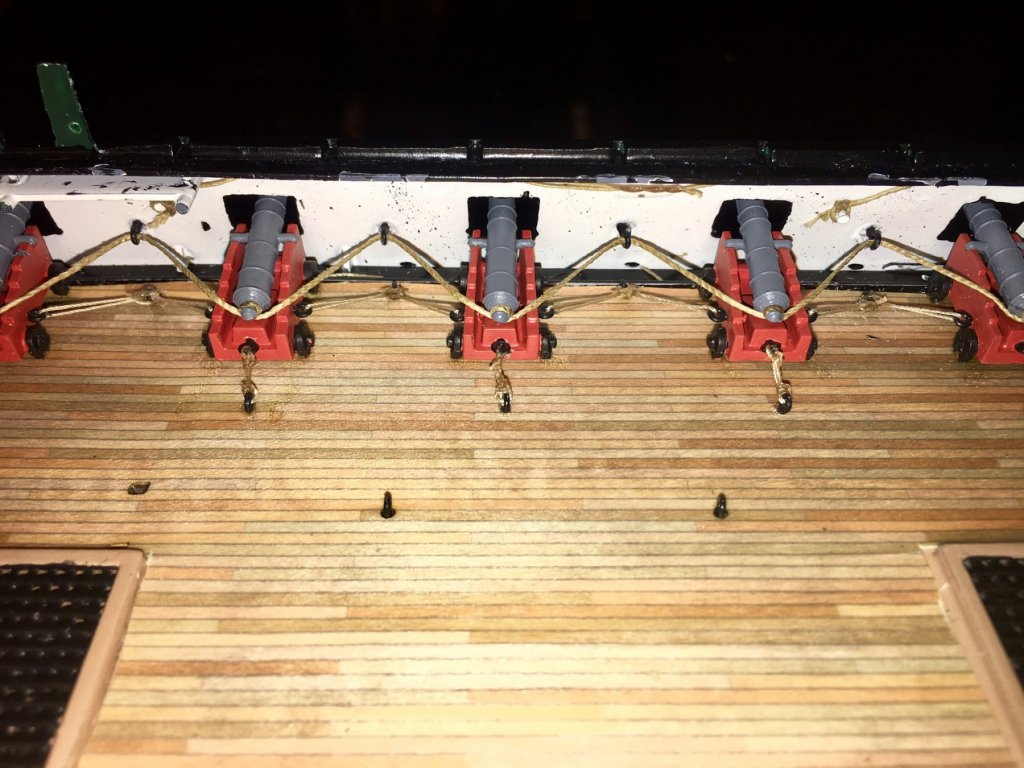
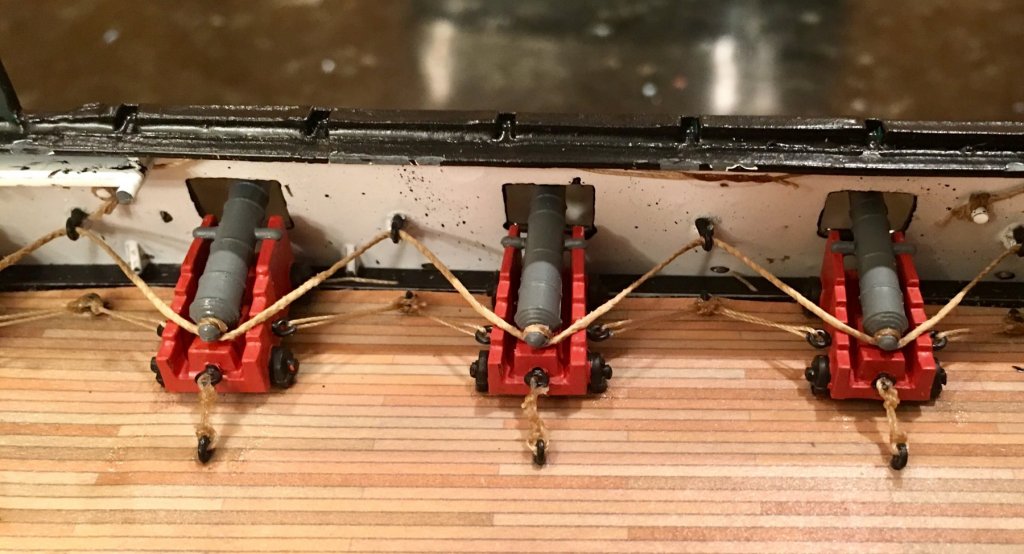
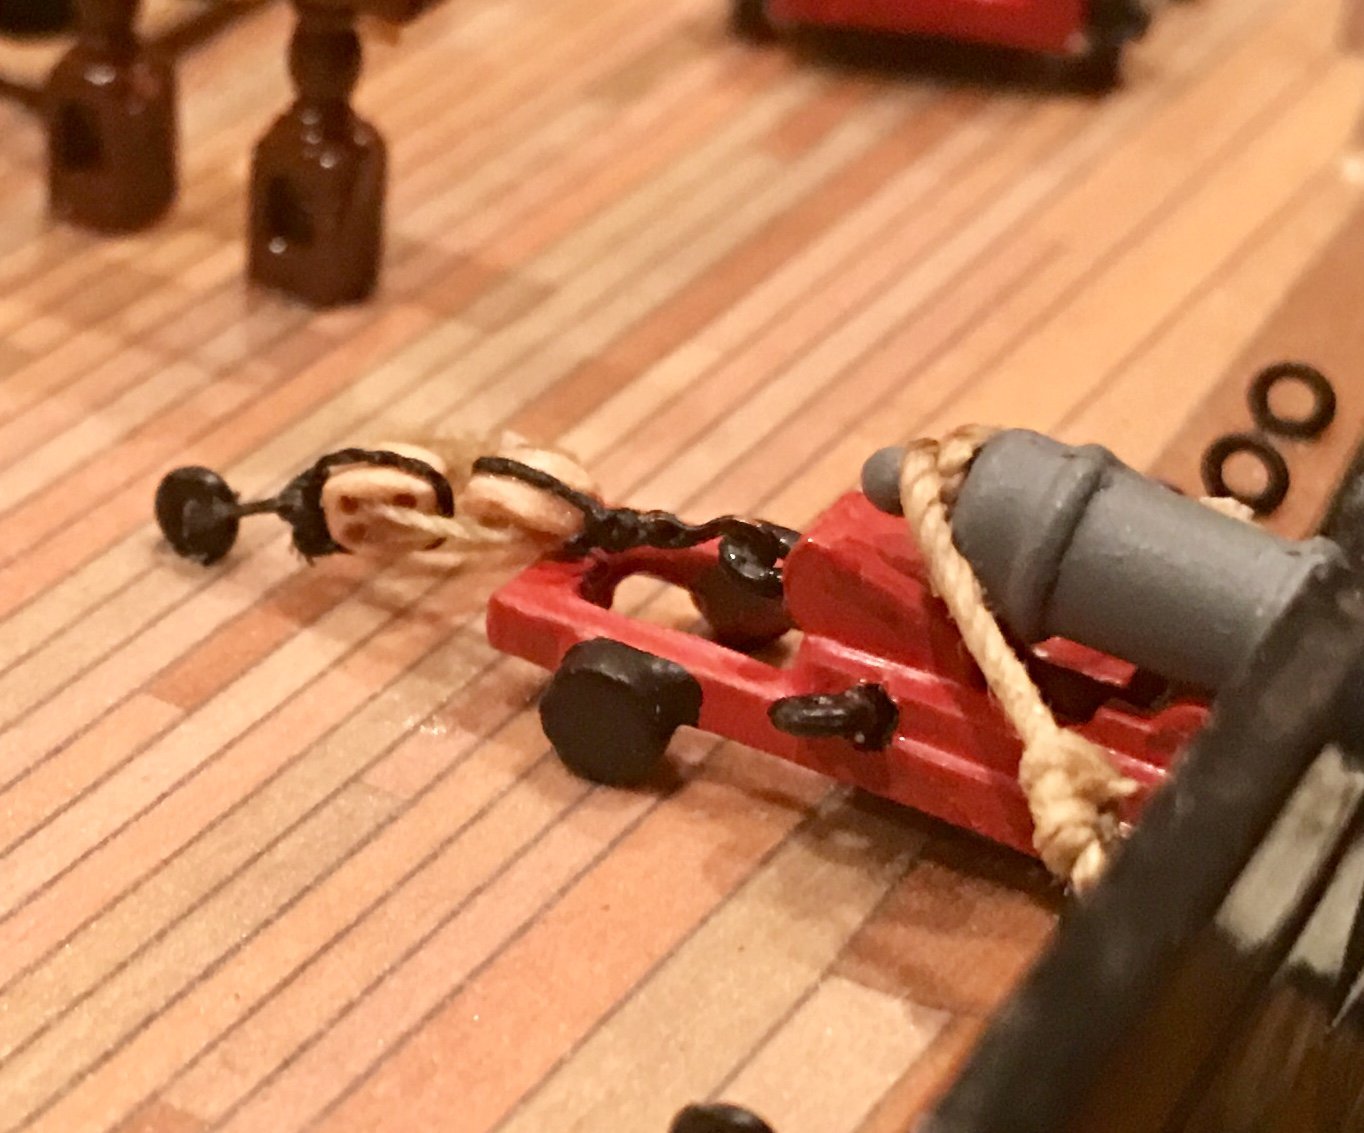
Hi everyone. I am just getting into doing my gun rigging on my Connie. I am trying to come up with a good wat to tie the metal hooks to the blocks. The blocks are 3mm and I am having a hard time making them look good. It also took way too long to do just one. Does anyone one have any tips or tricks to doing this? Videos would be great! Thanks!
-
 I spent about 2 1/2 hours doing the back rigging in one gun. I’m sure I will start to get faster at it once I do a few more.
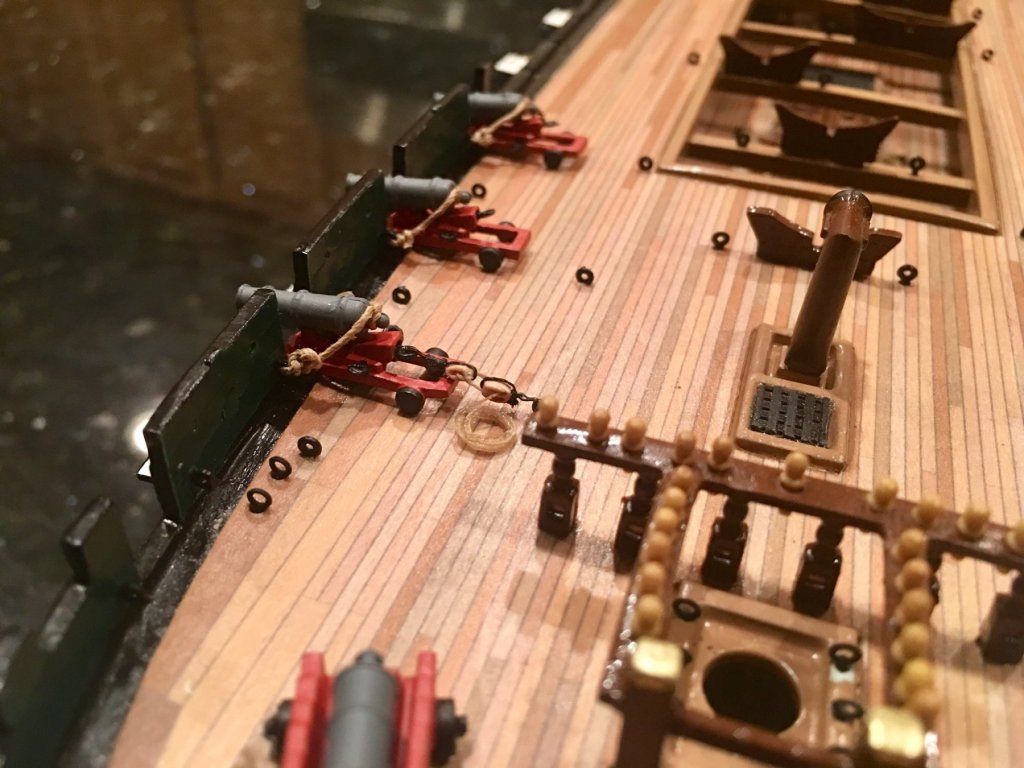


- 35 replies
-
- 1
-
-
- constitution
- revell
- (and 1 more)
-
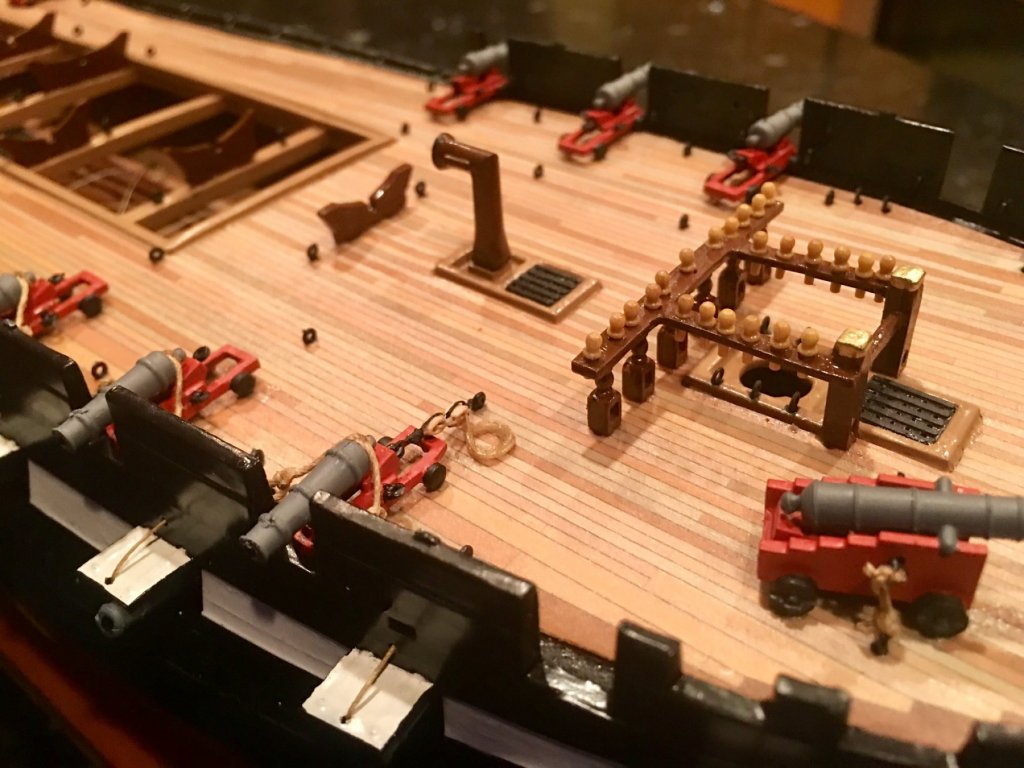
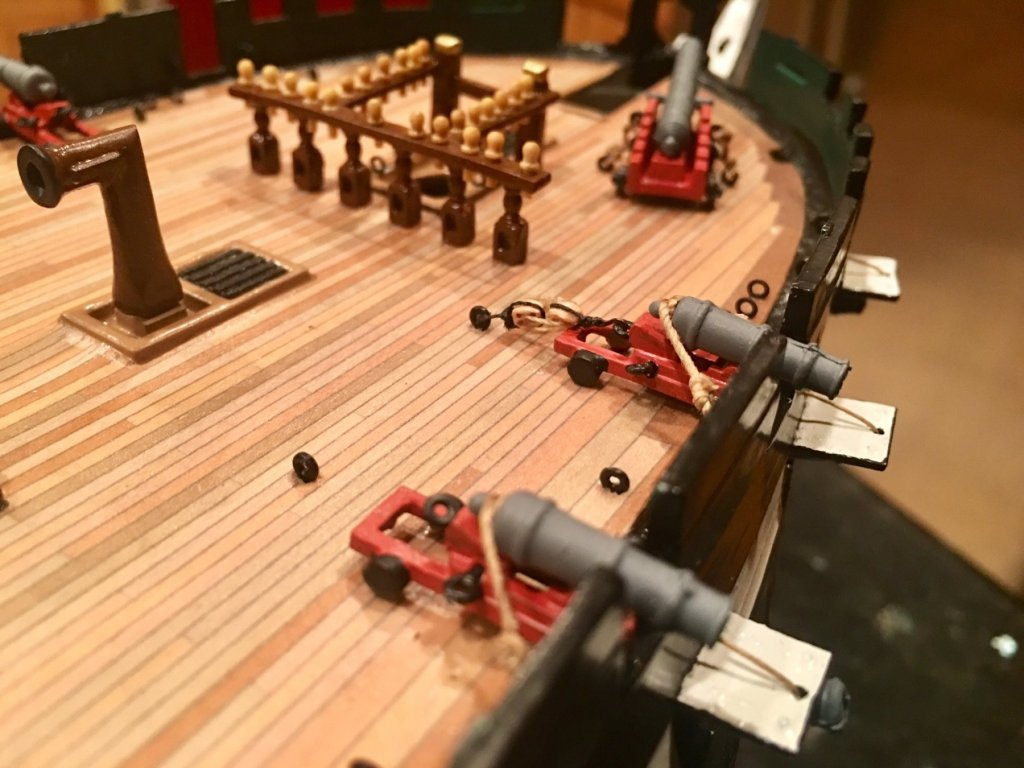
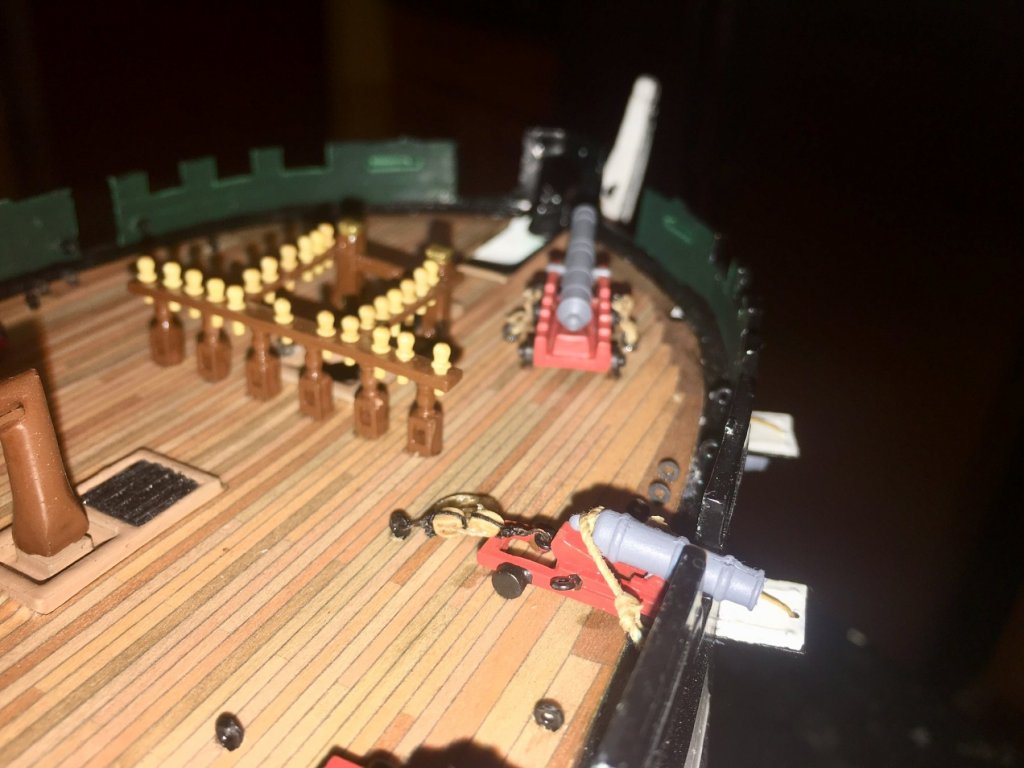
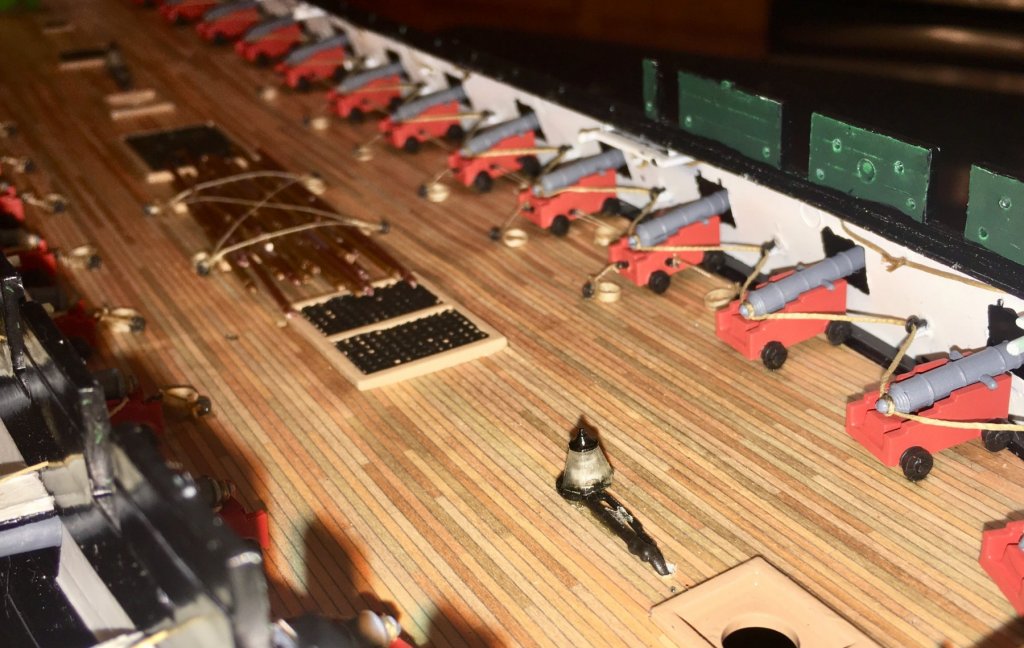
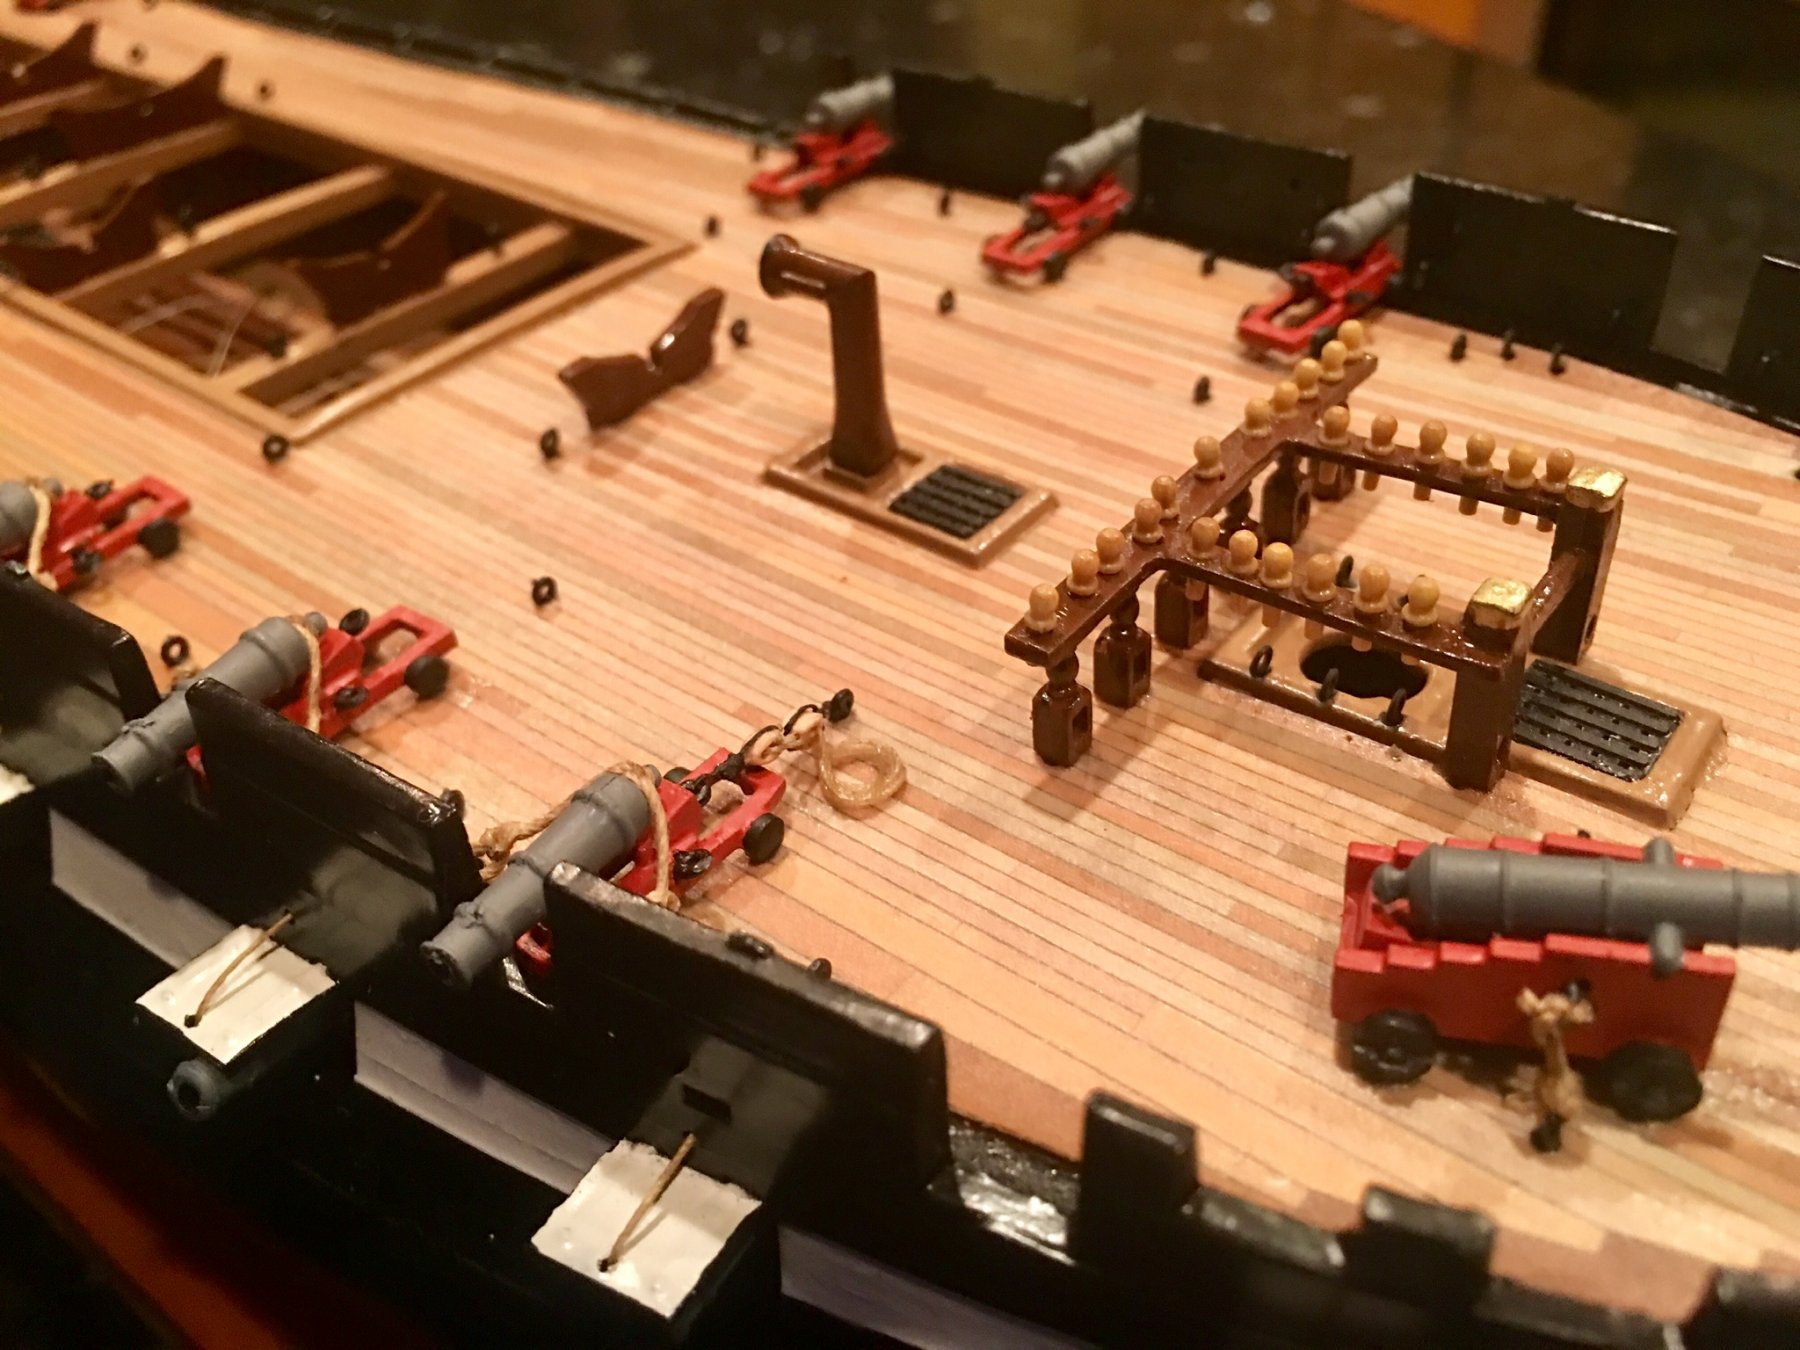
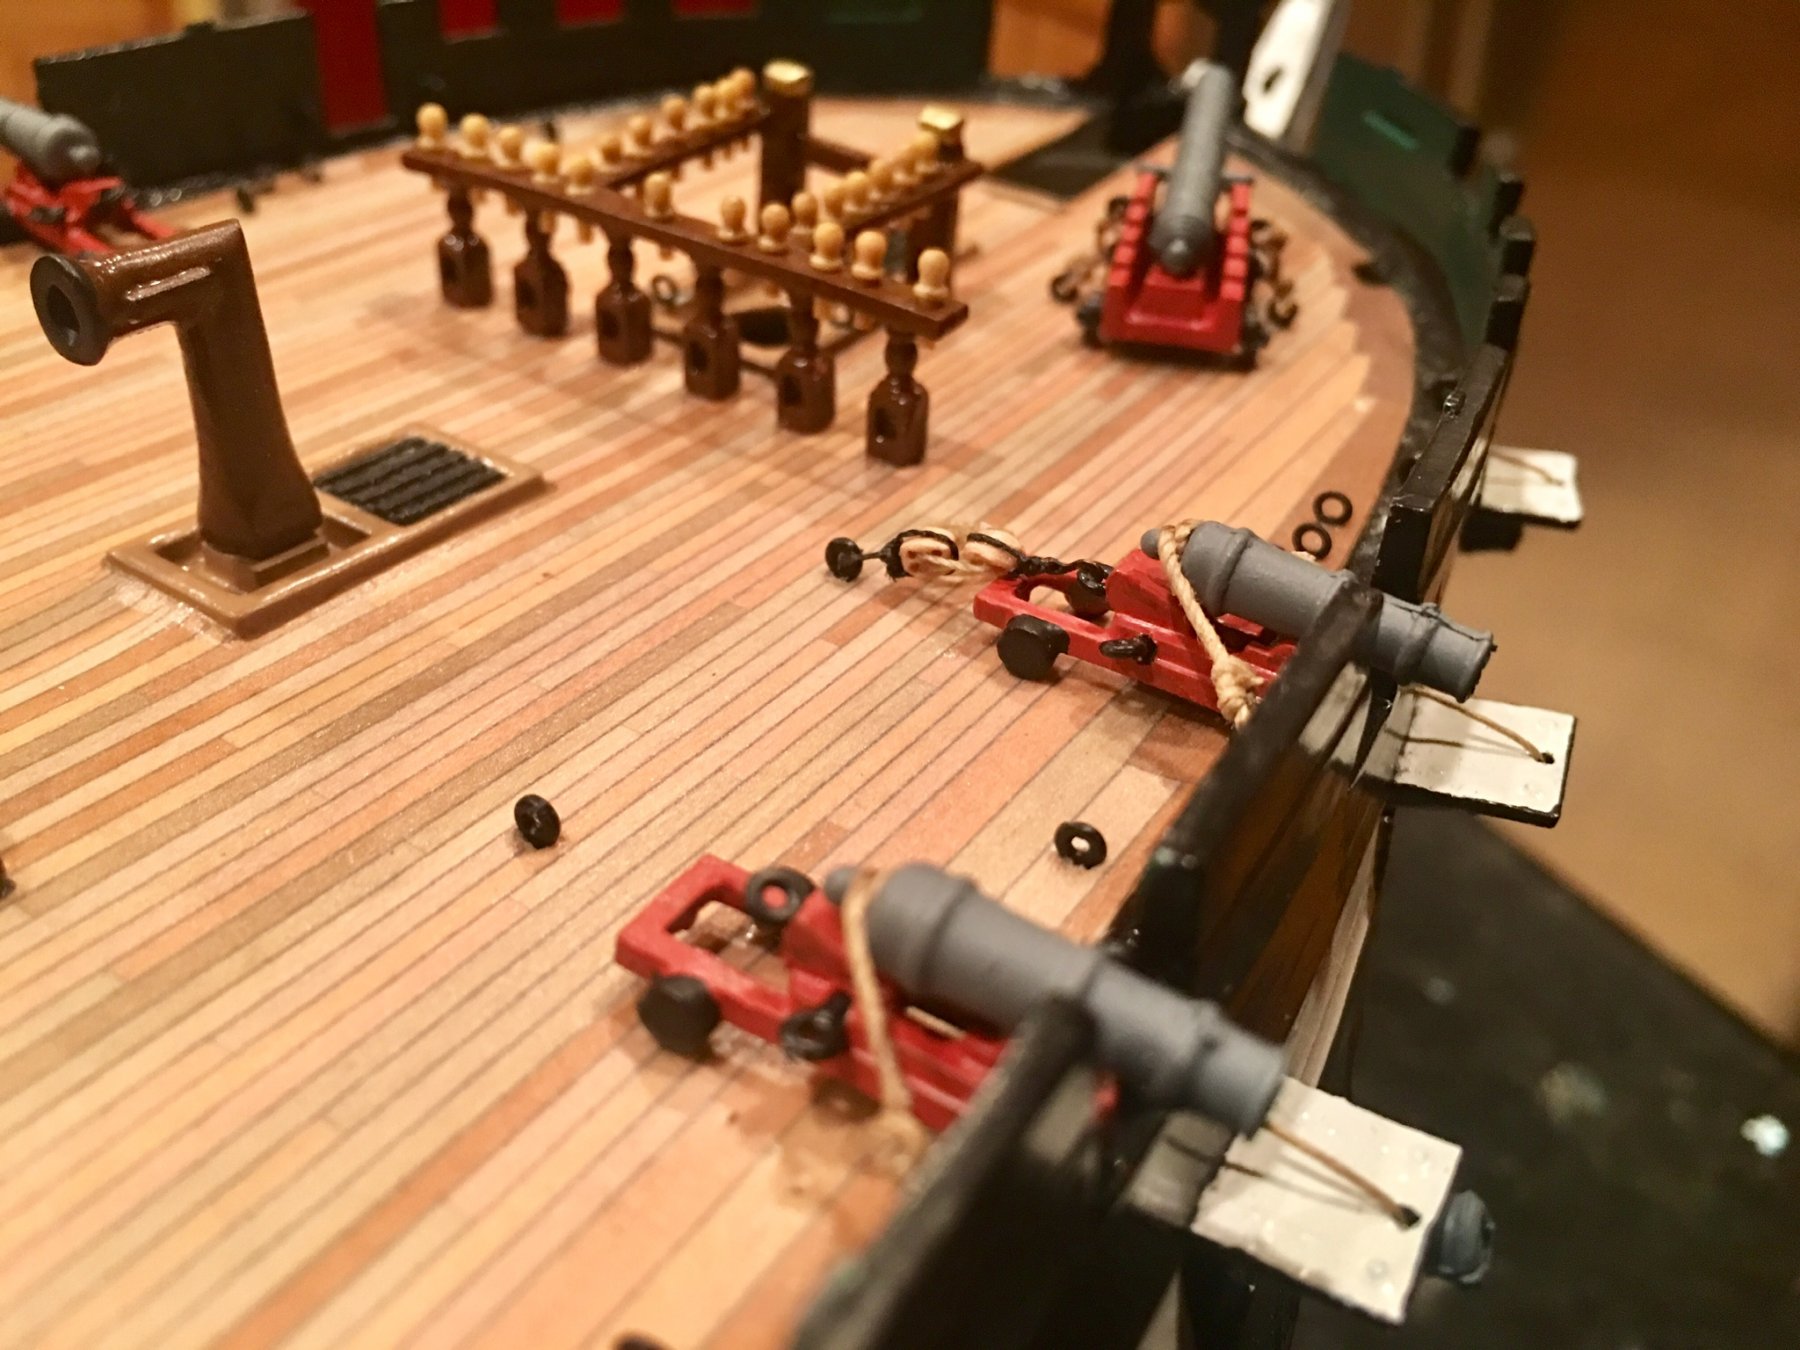
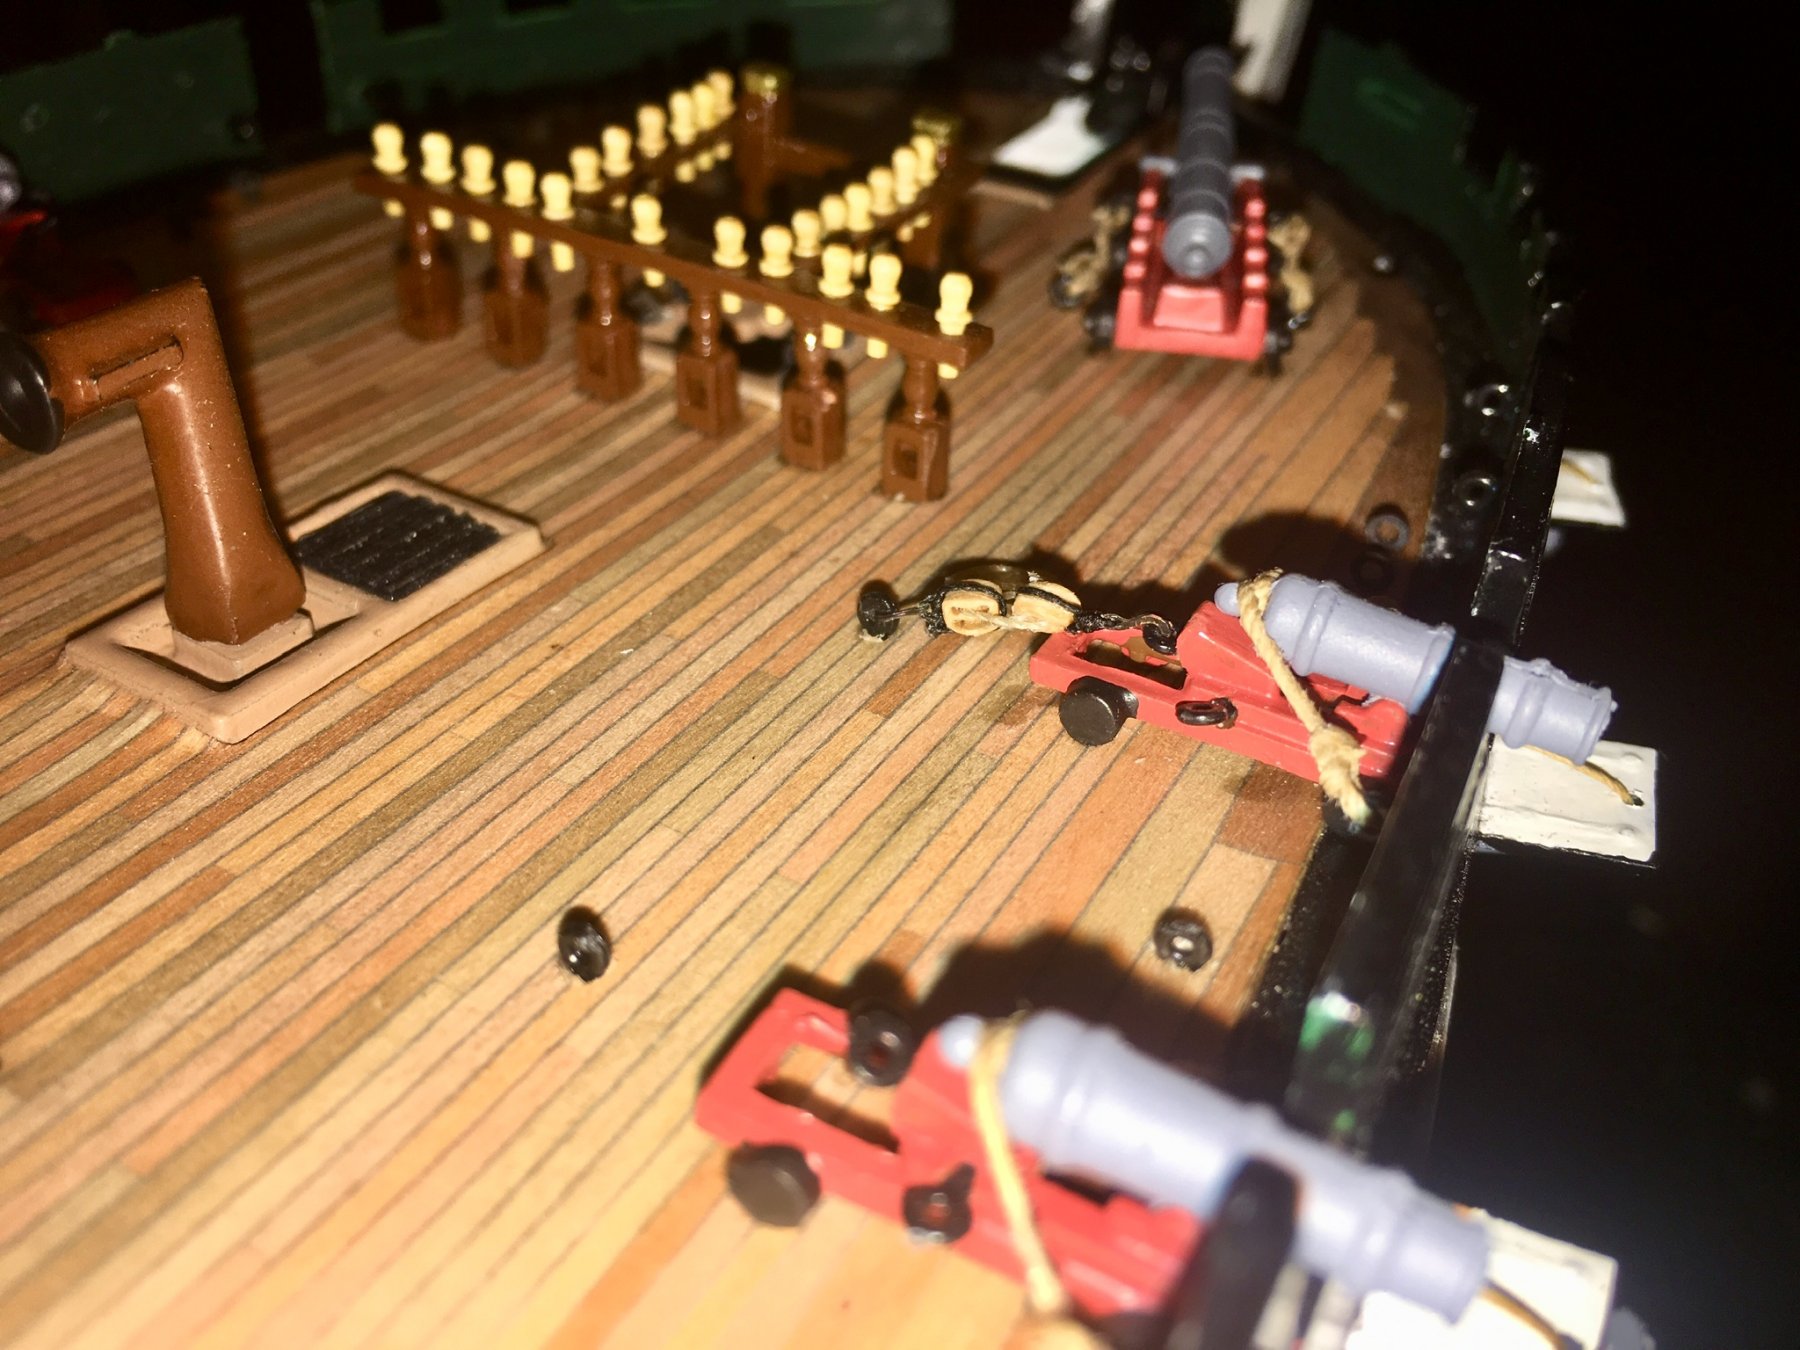
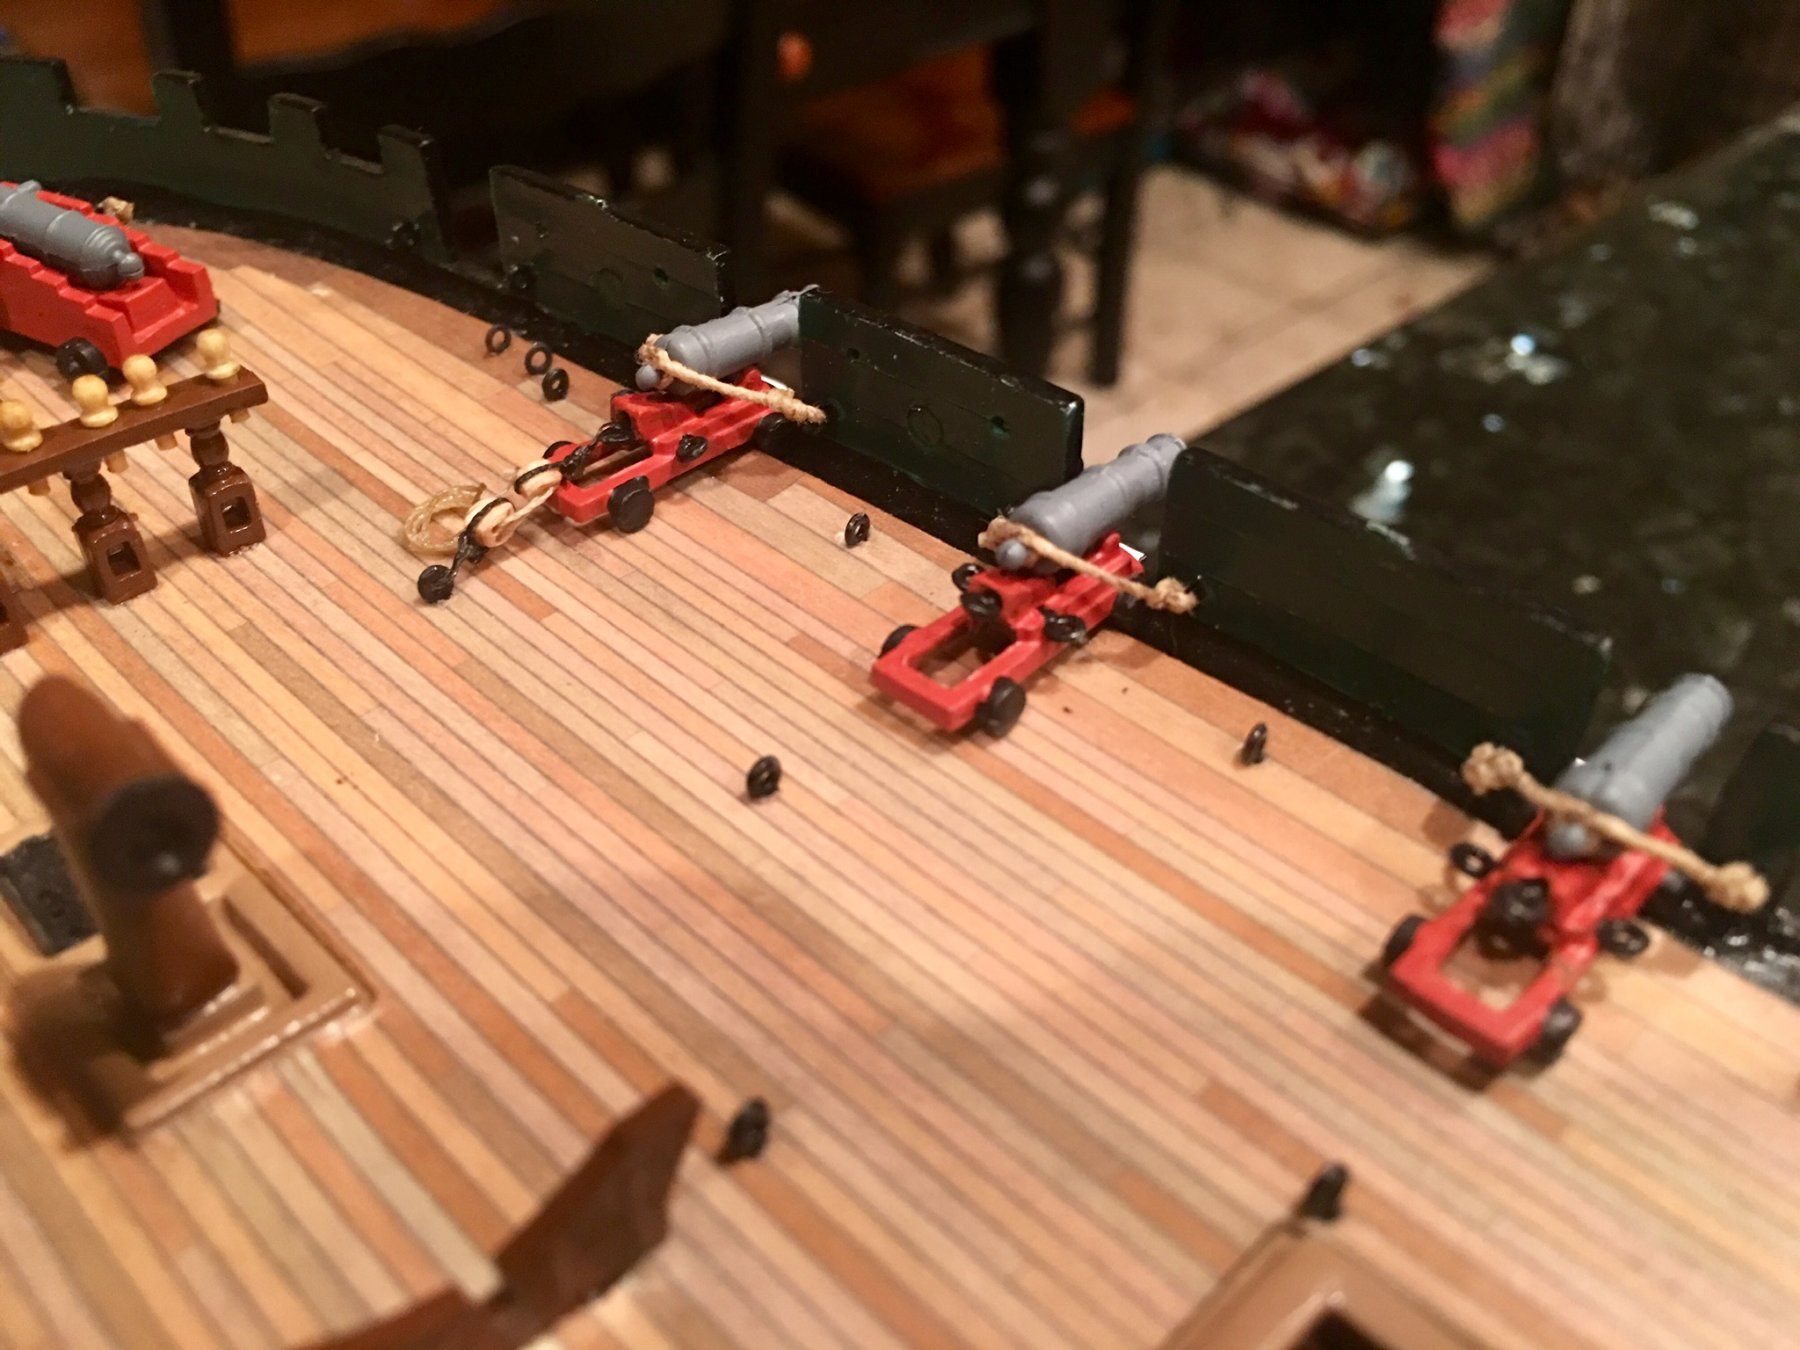
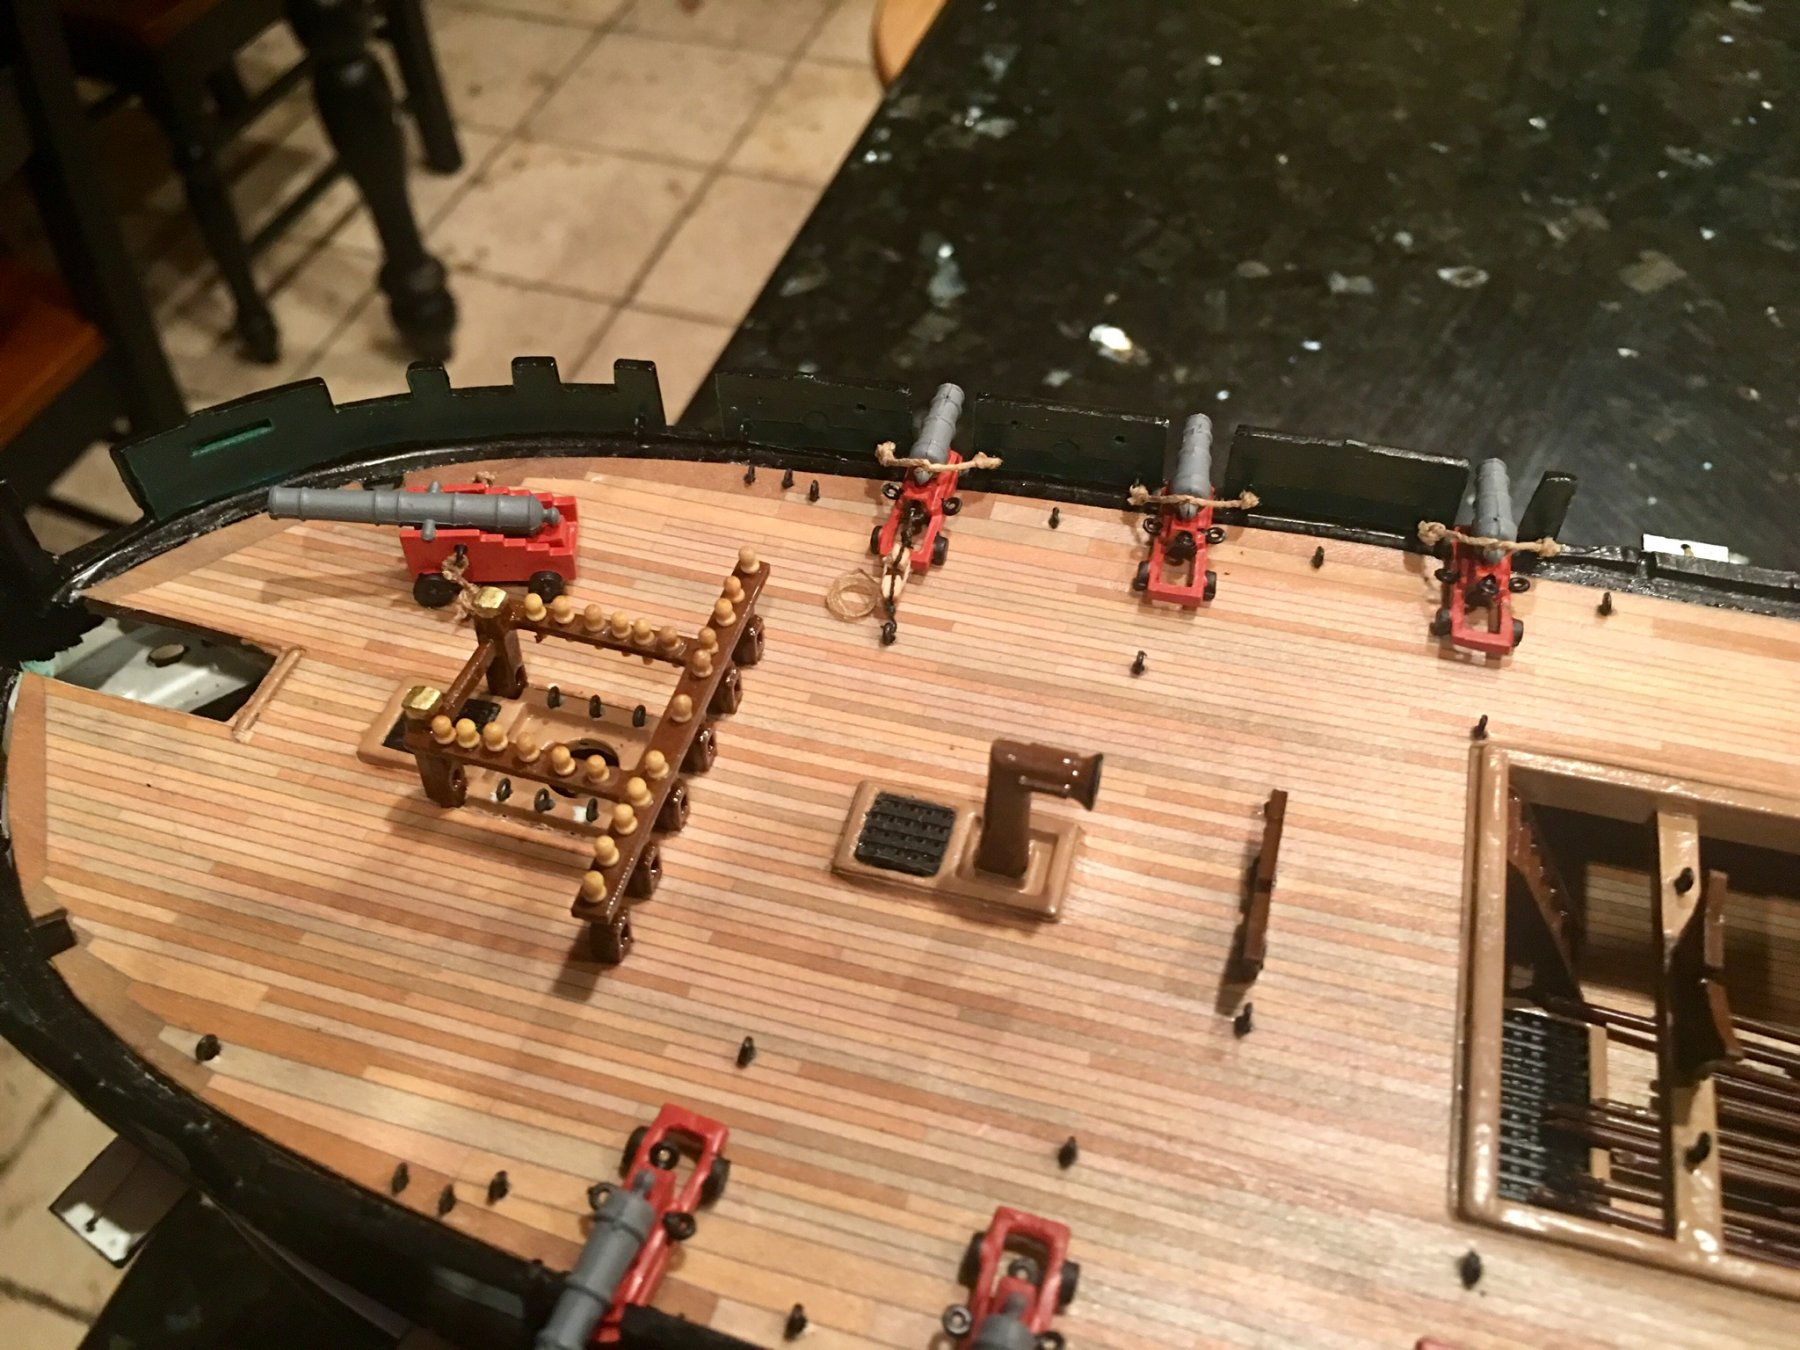
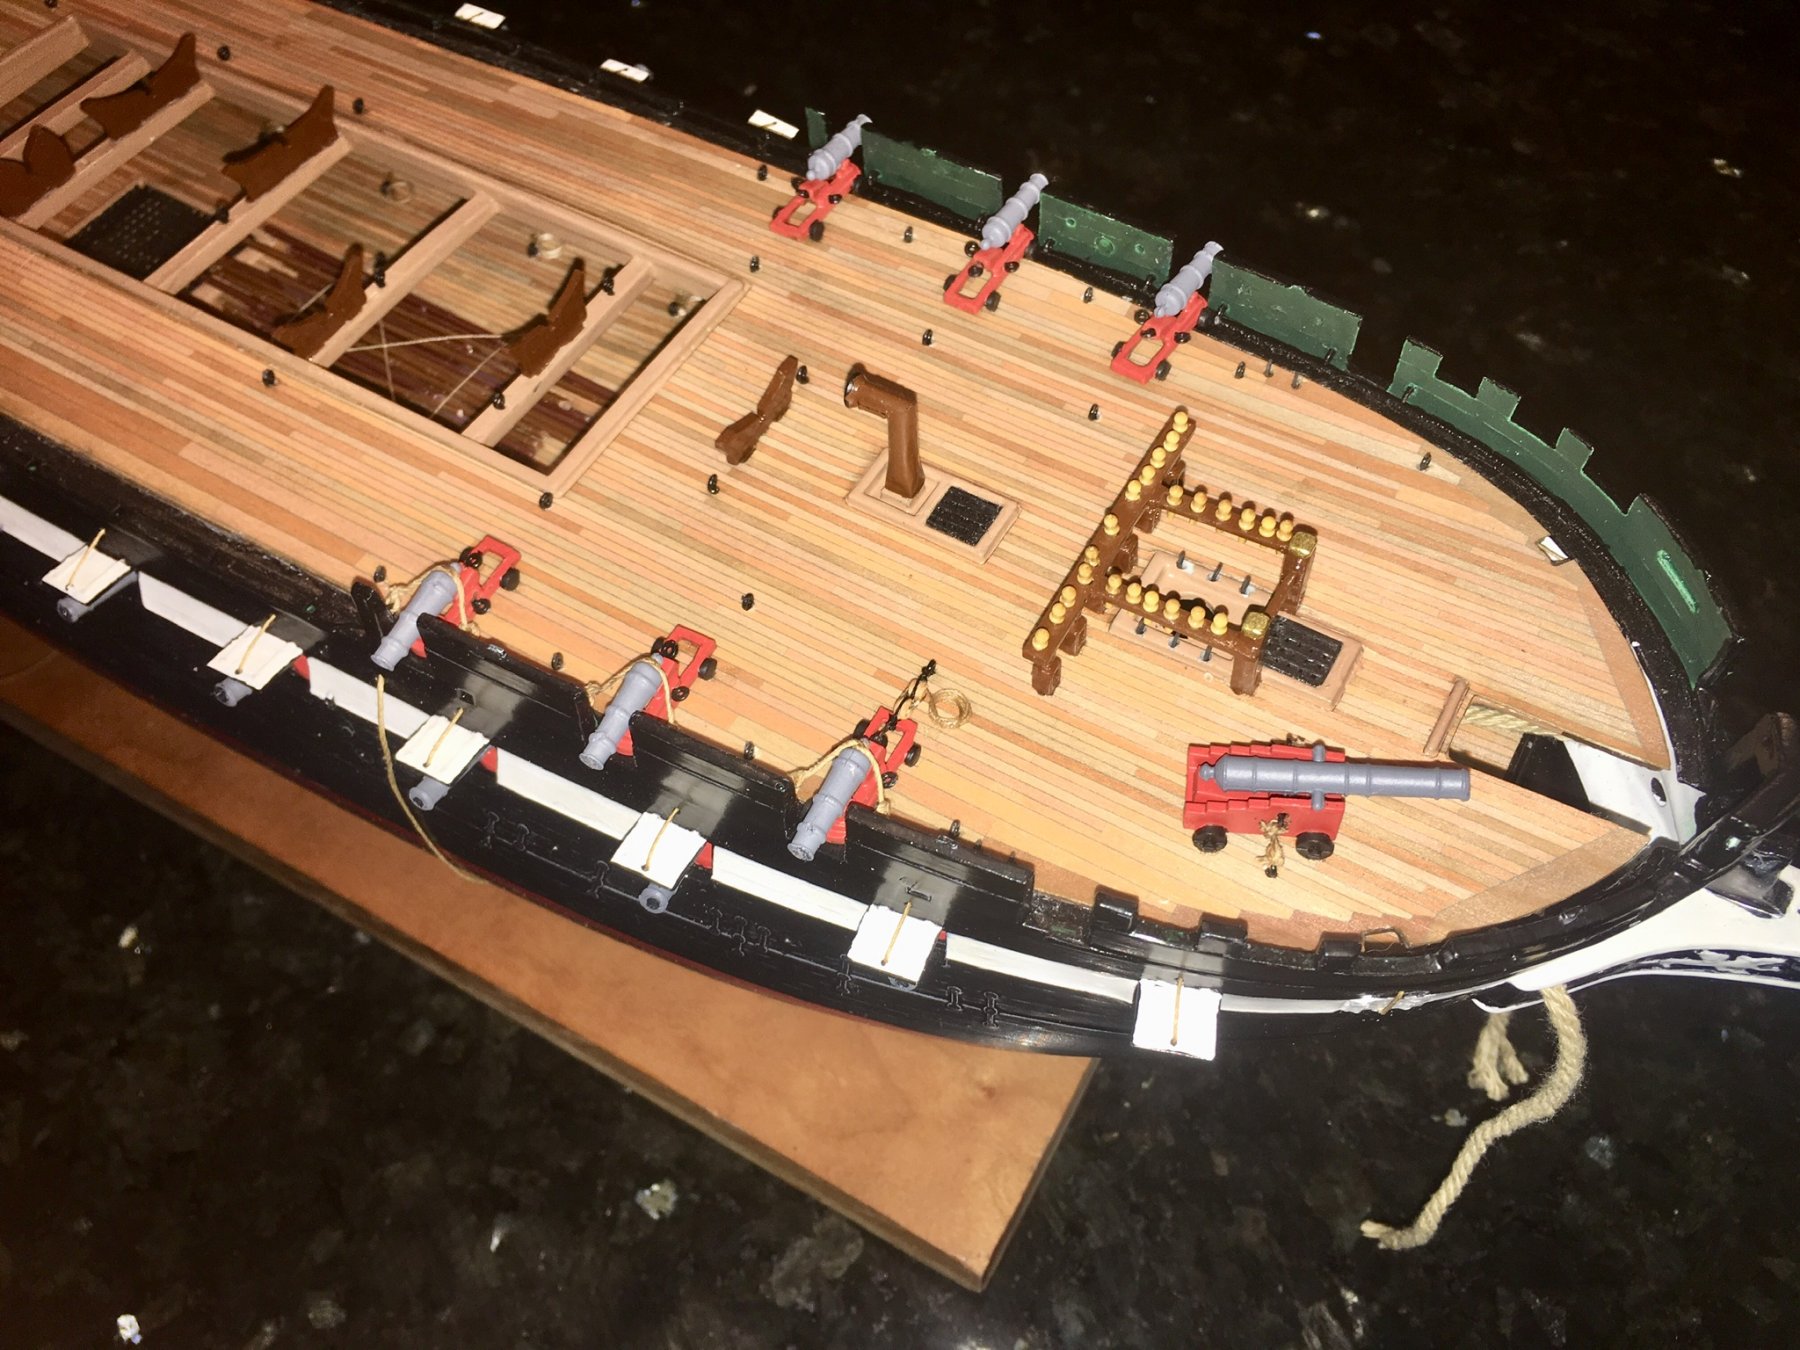
Next I got the guns glued to the top deck. I have the Breaching ripe o. On side, and am starting to do the gun rigging.


-
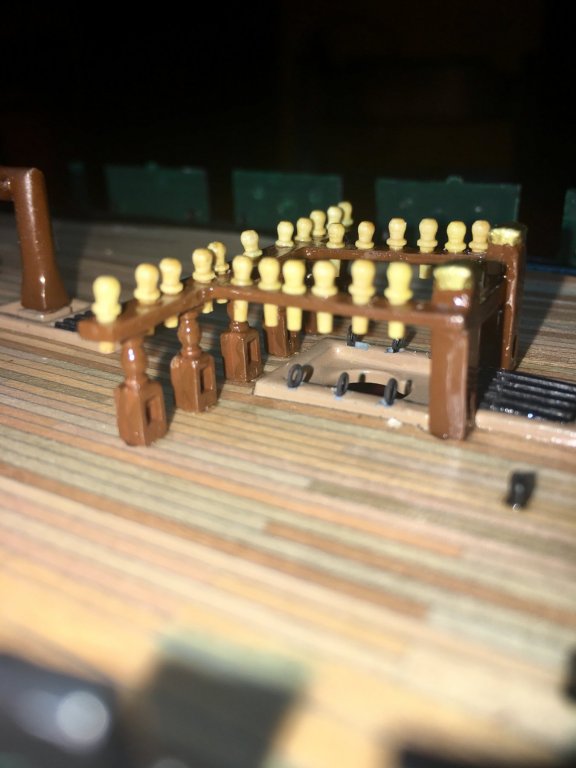
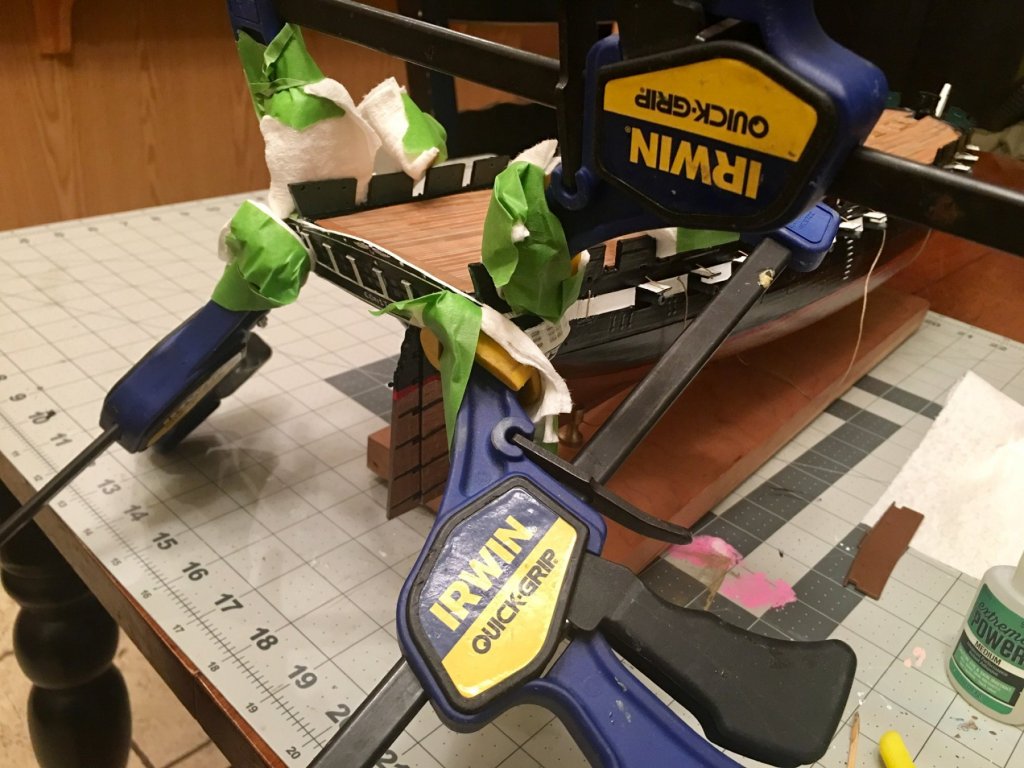
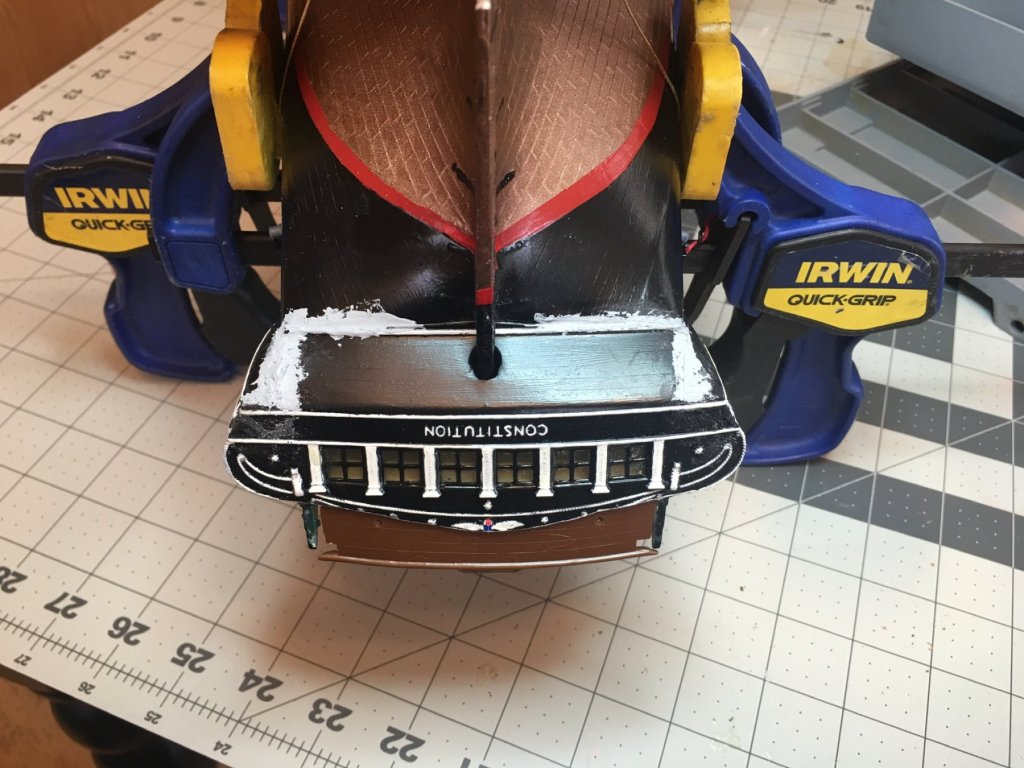
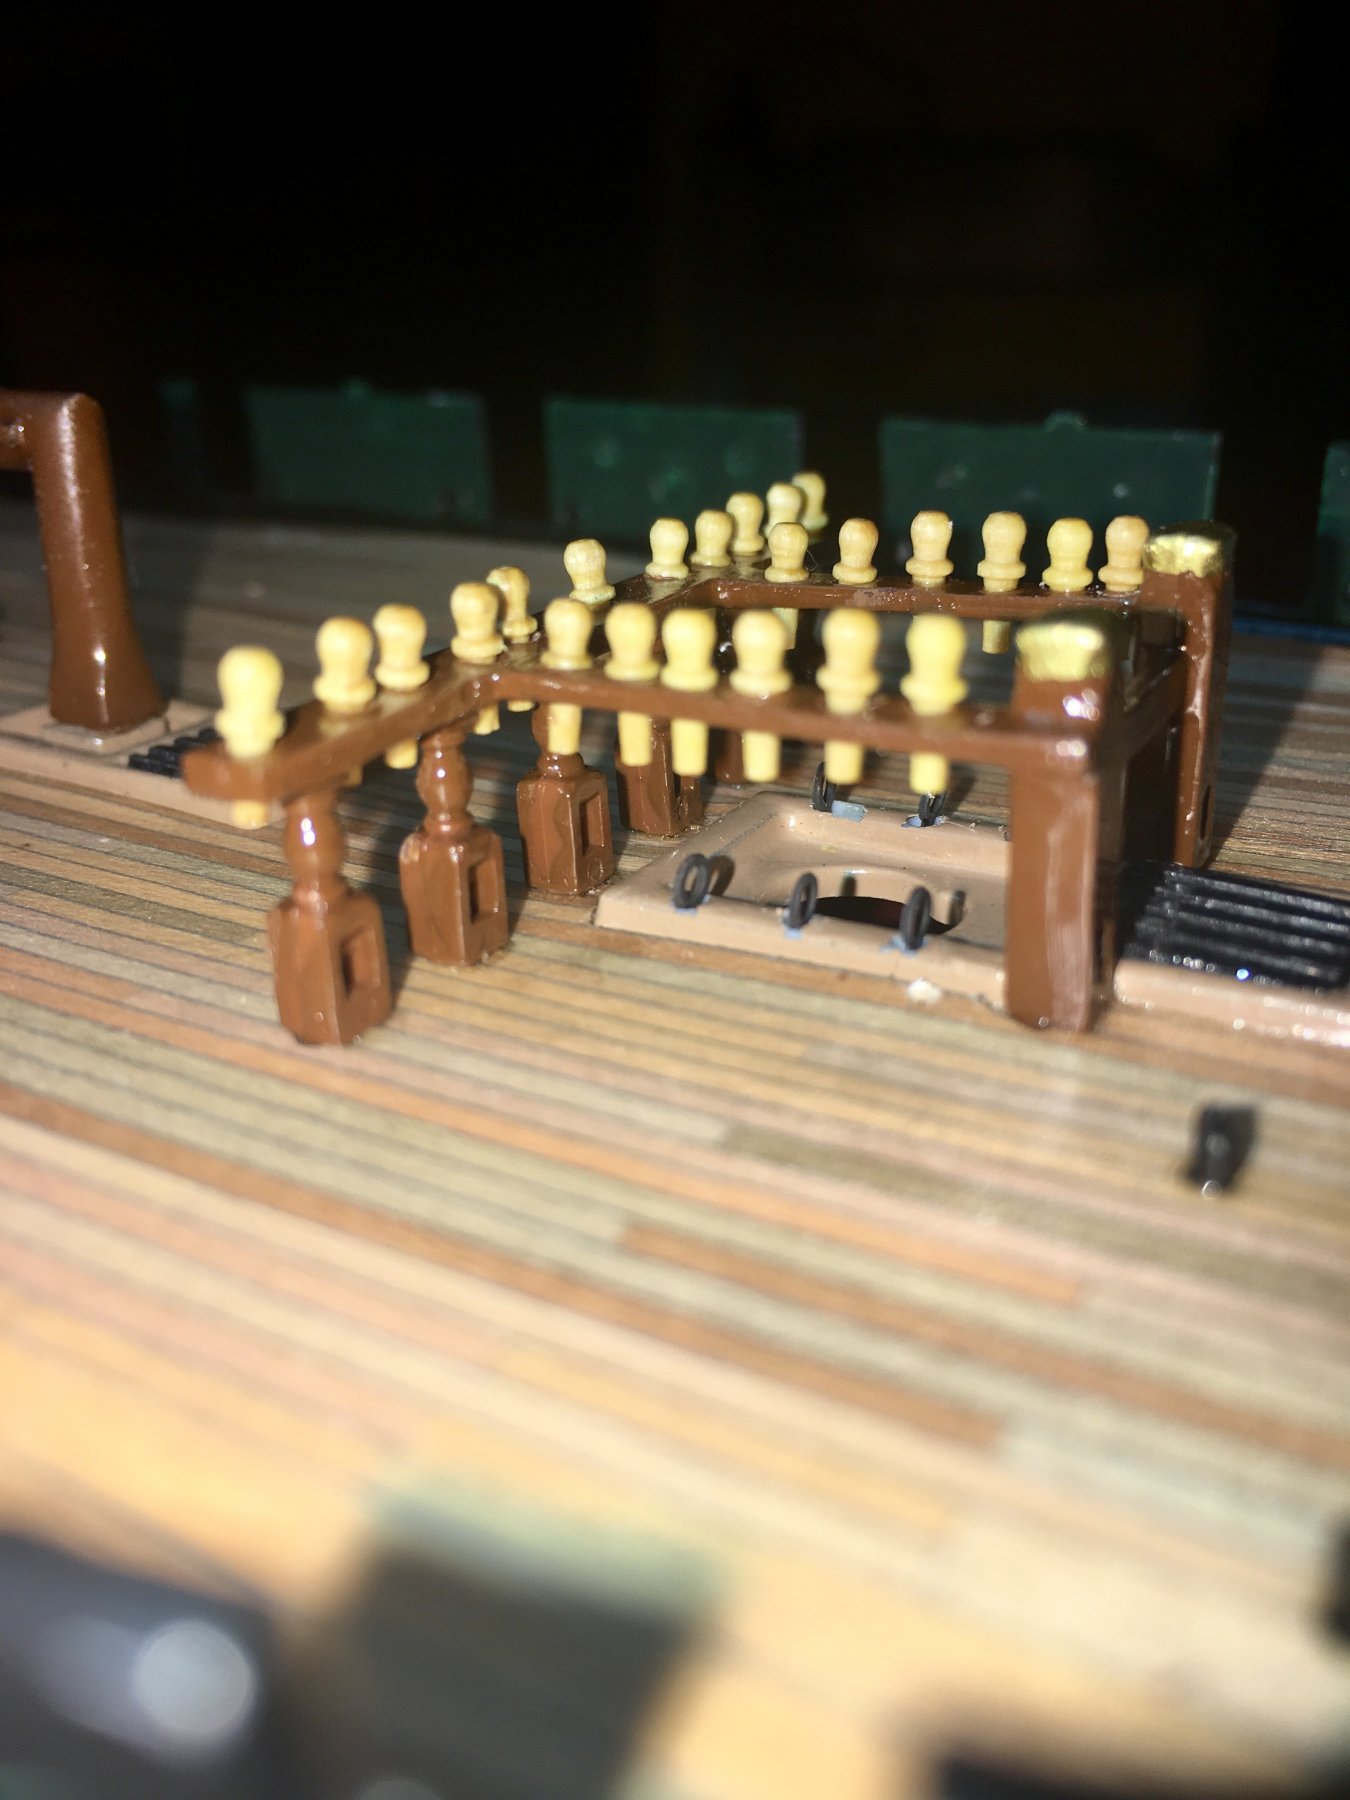
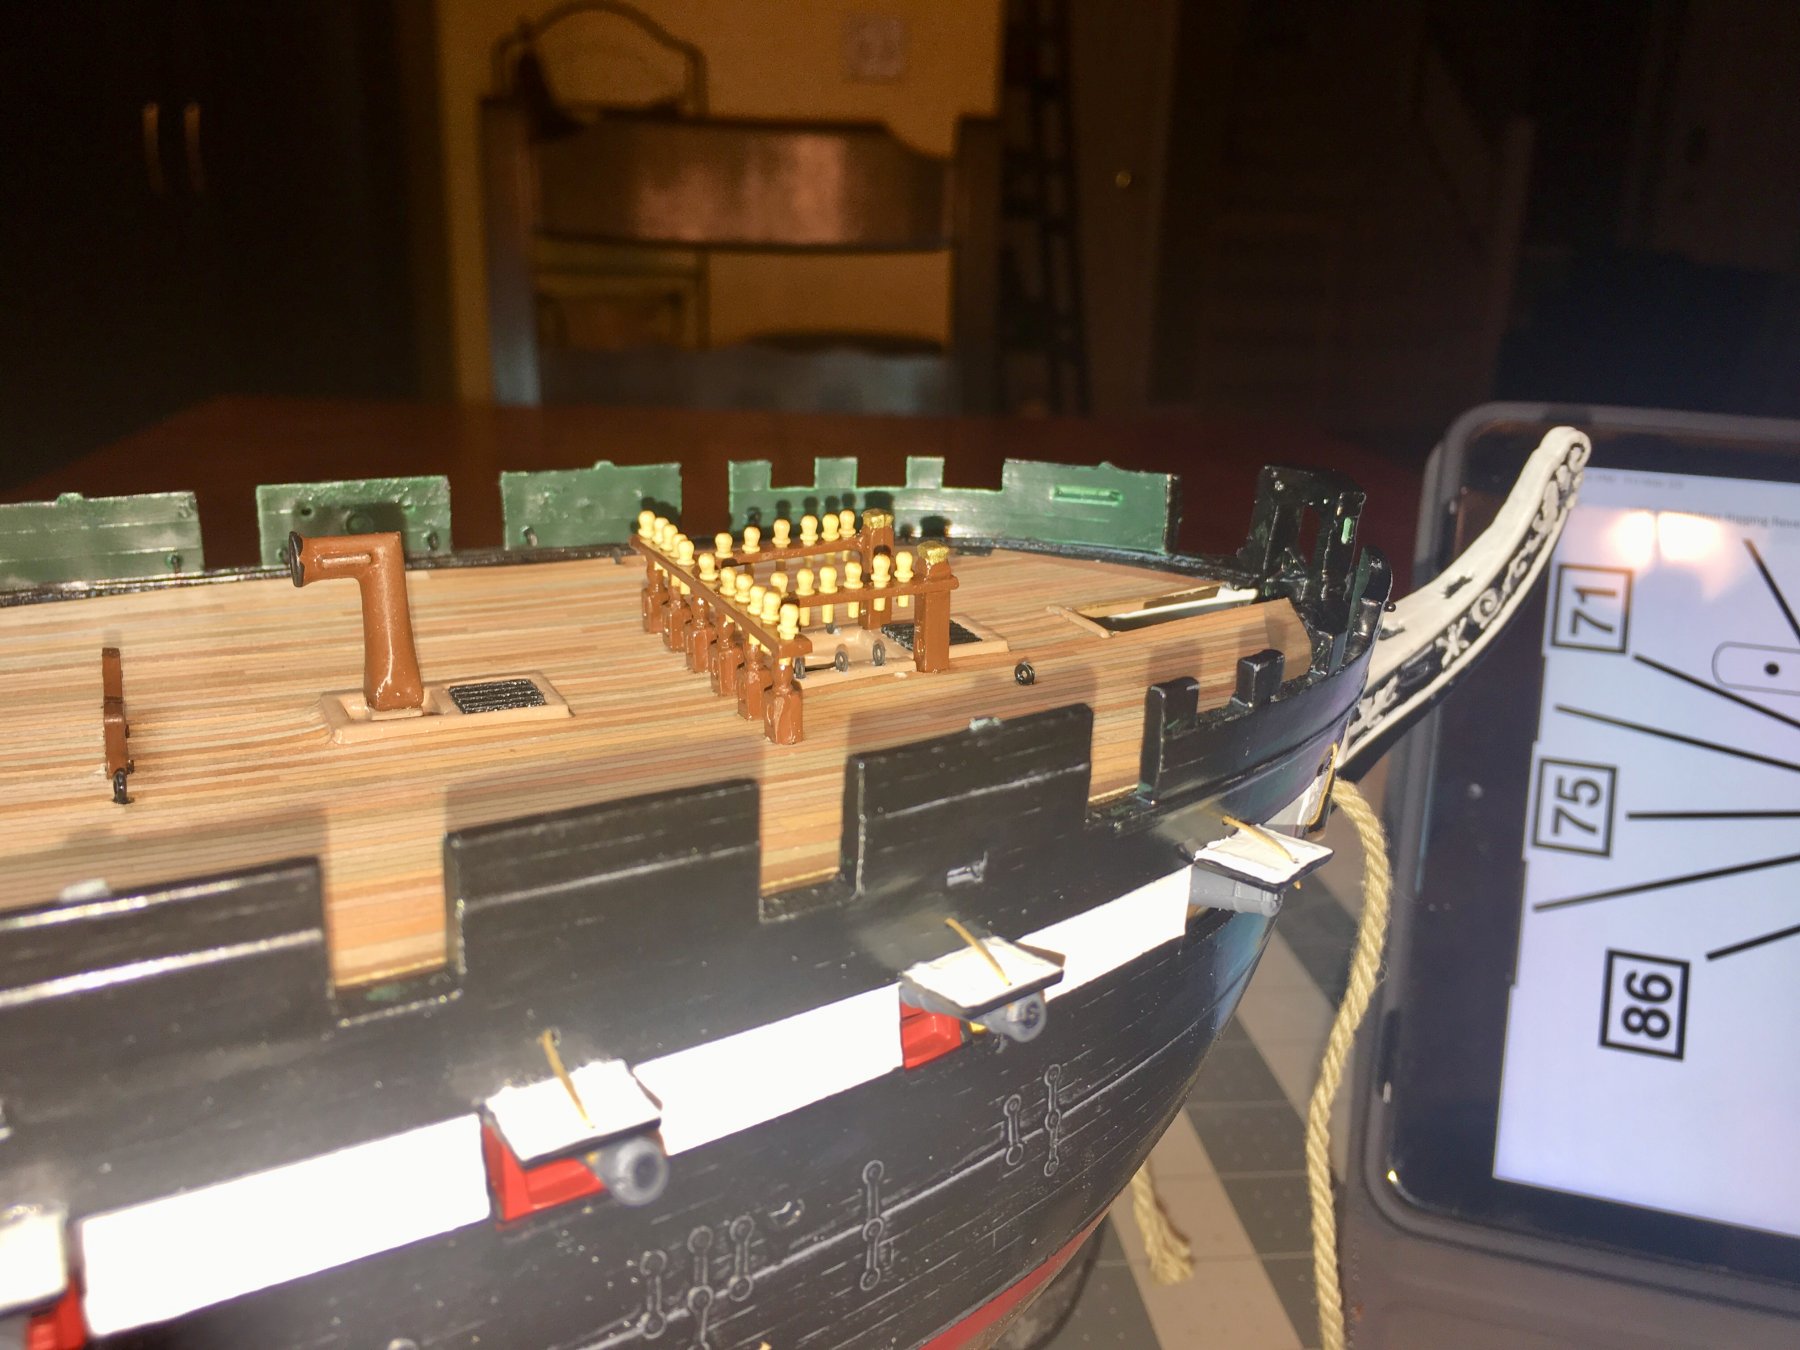
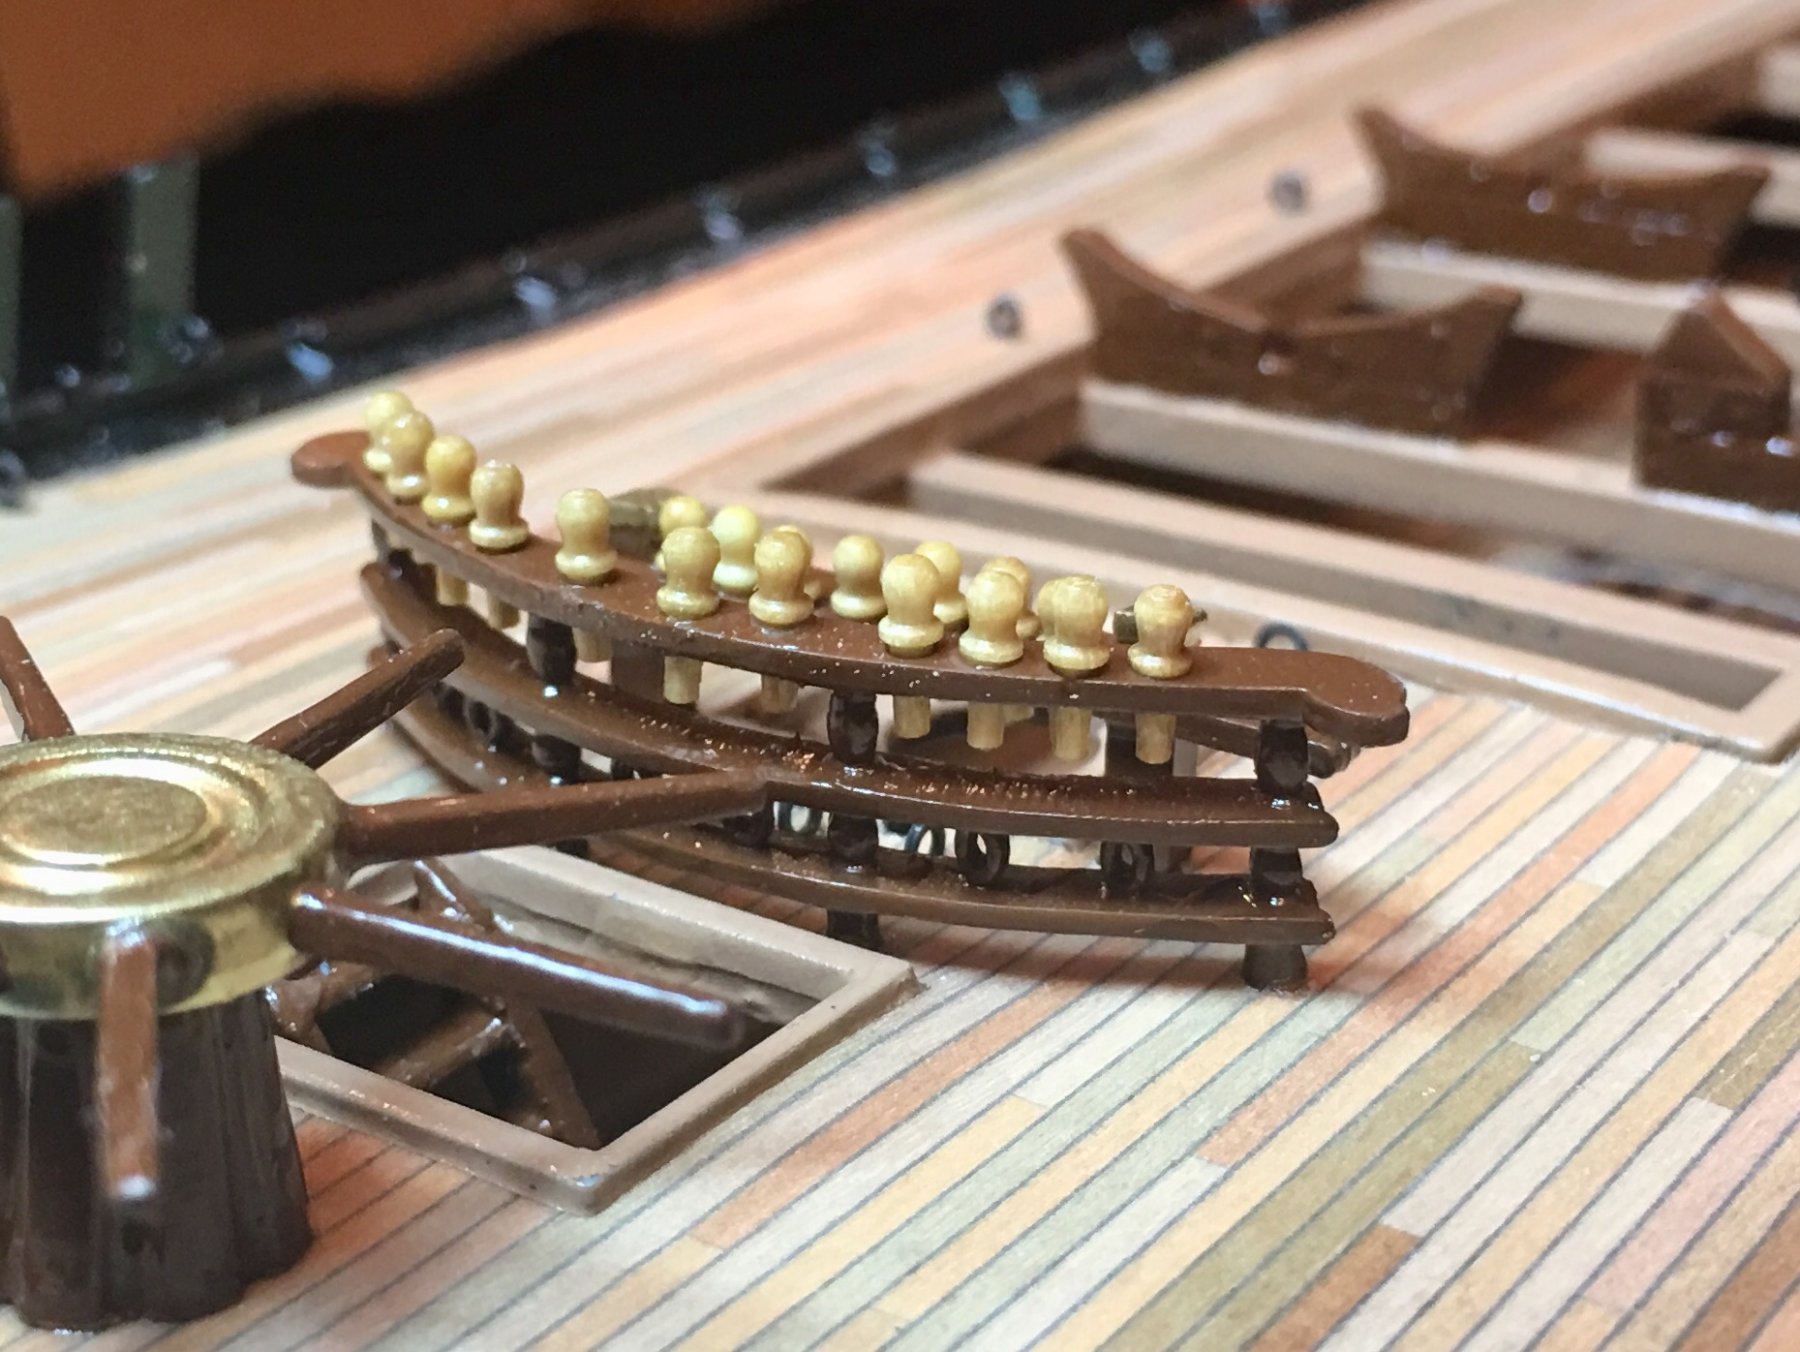
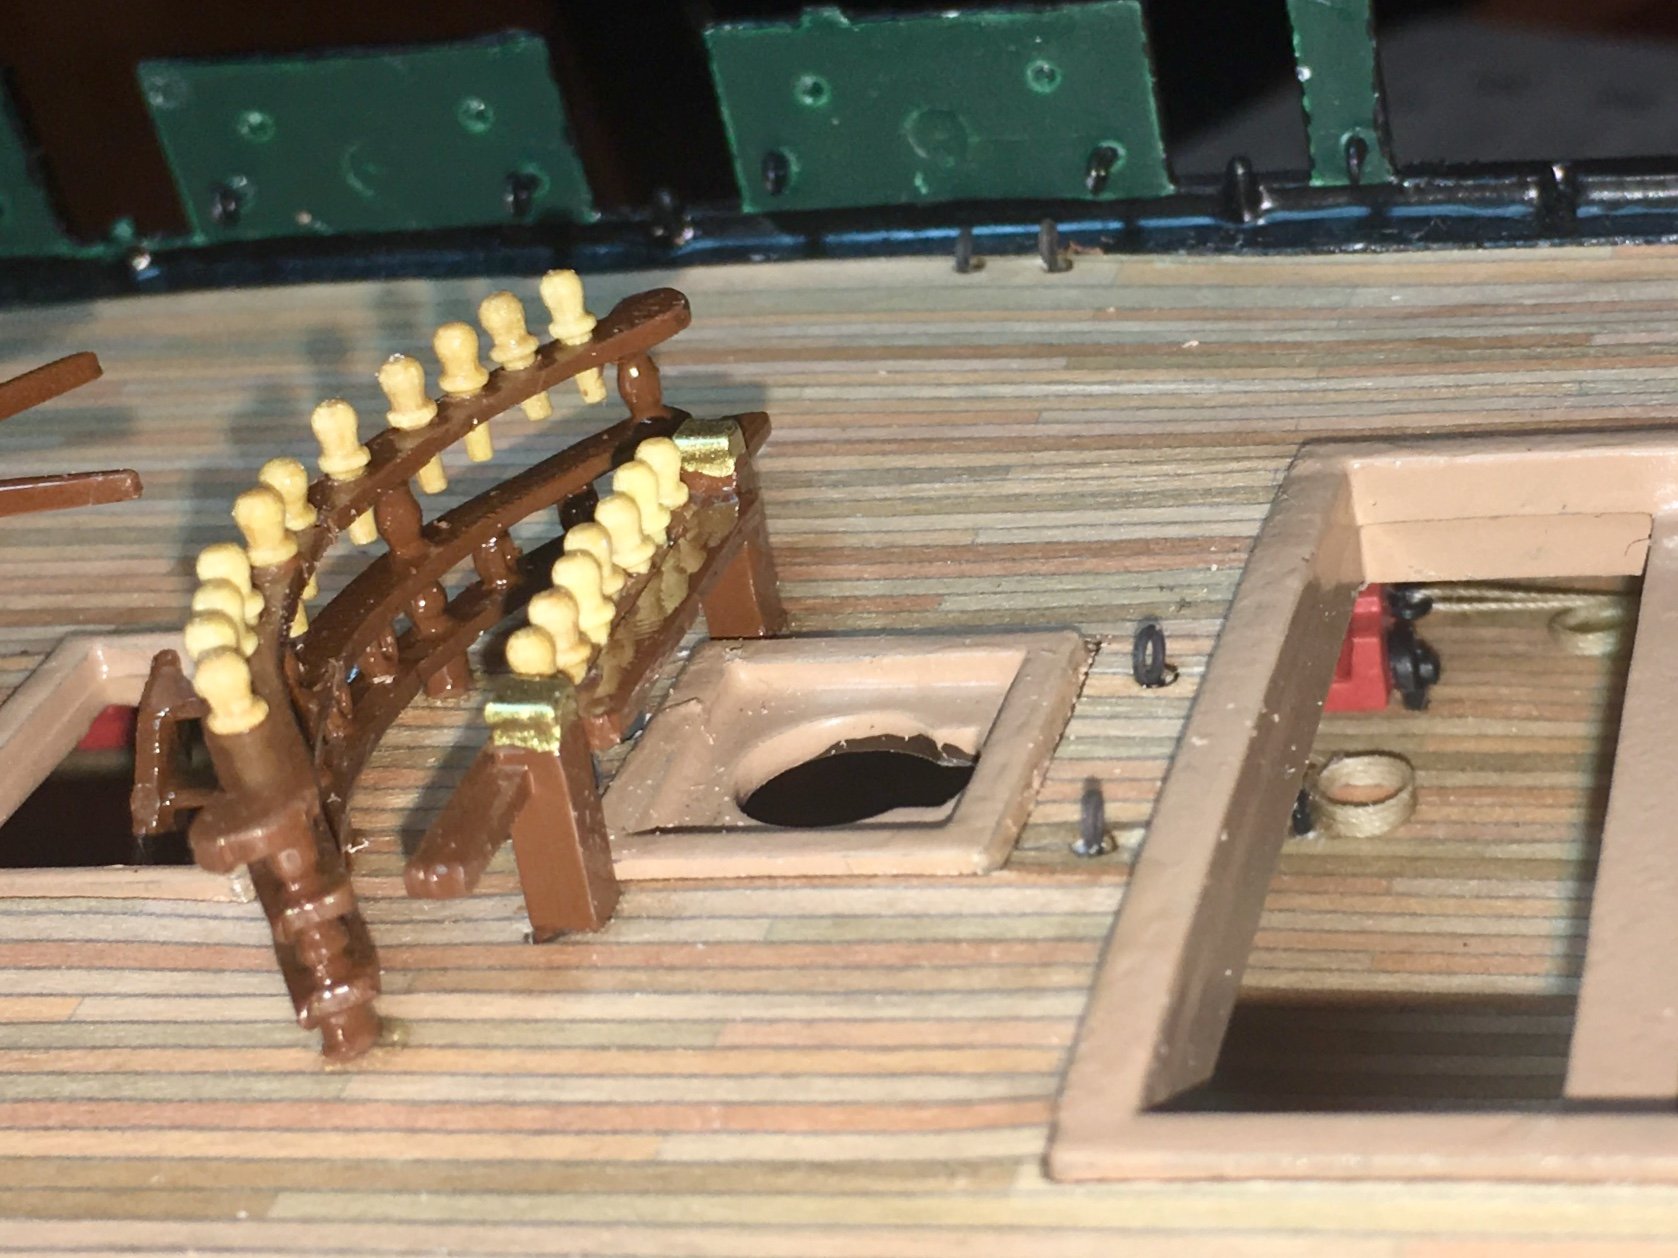
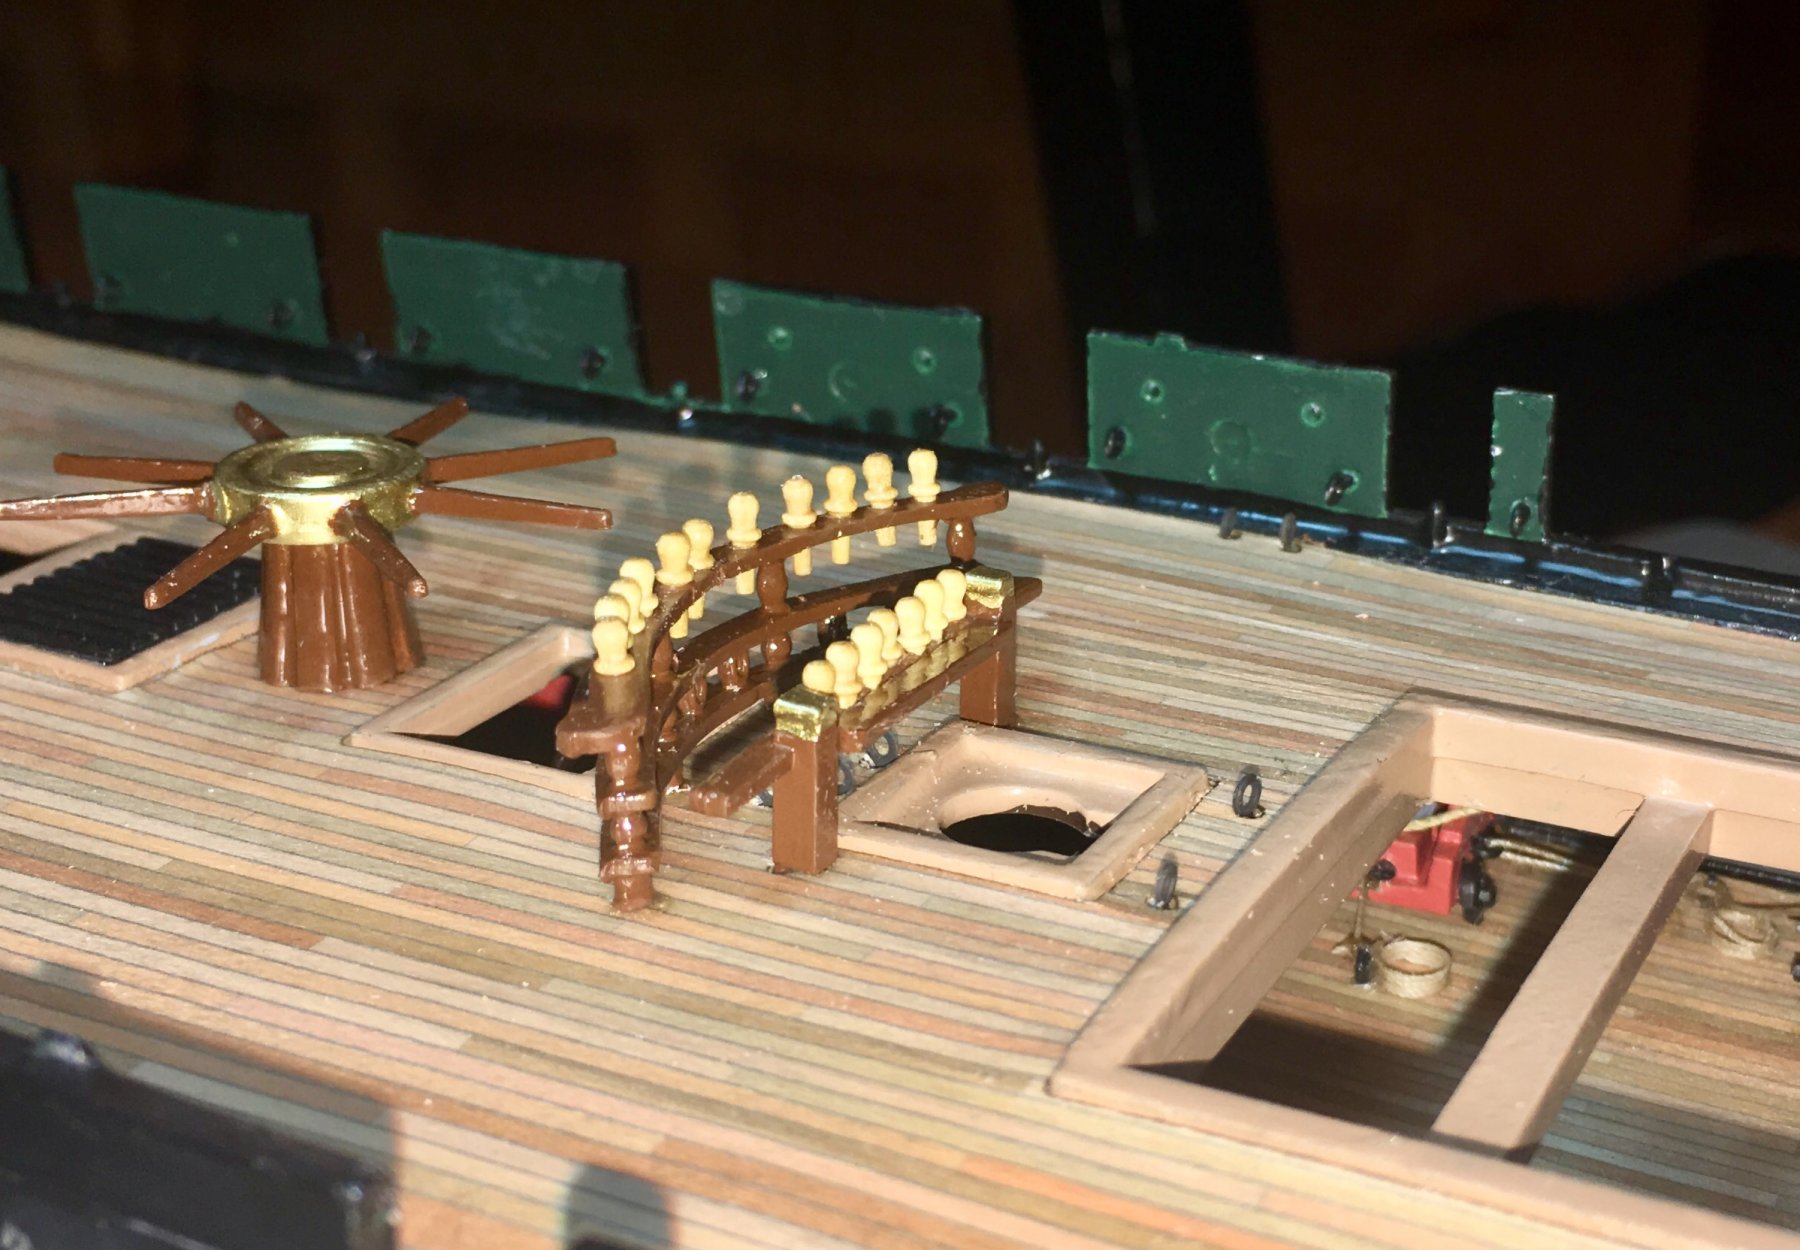
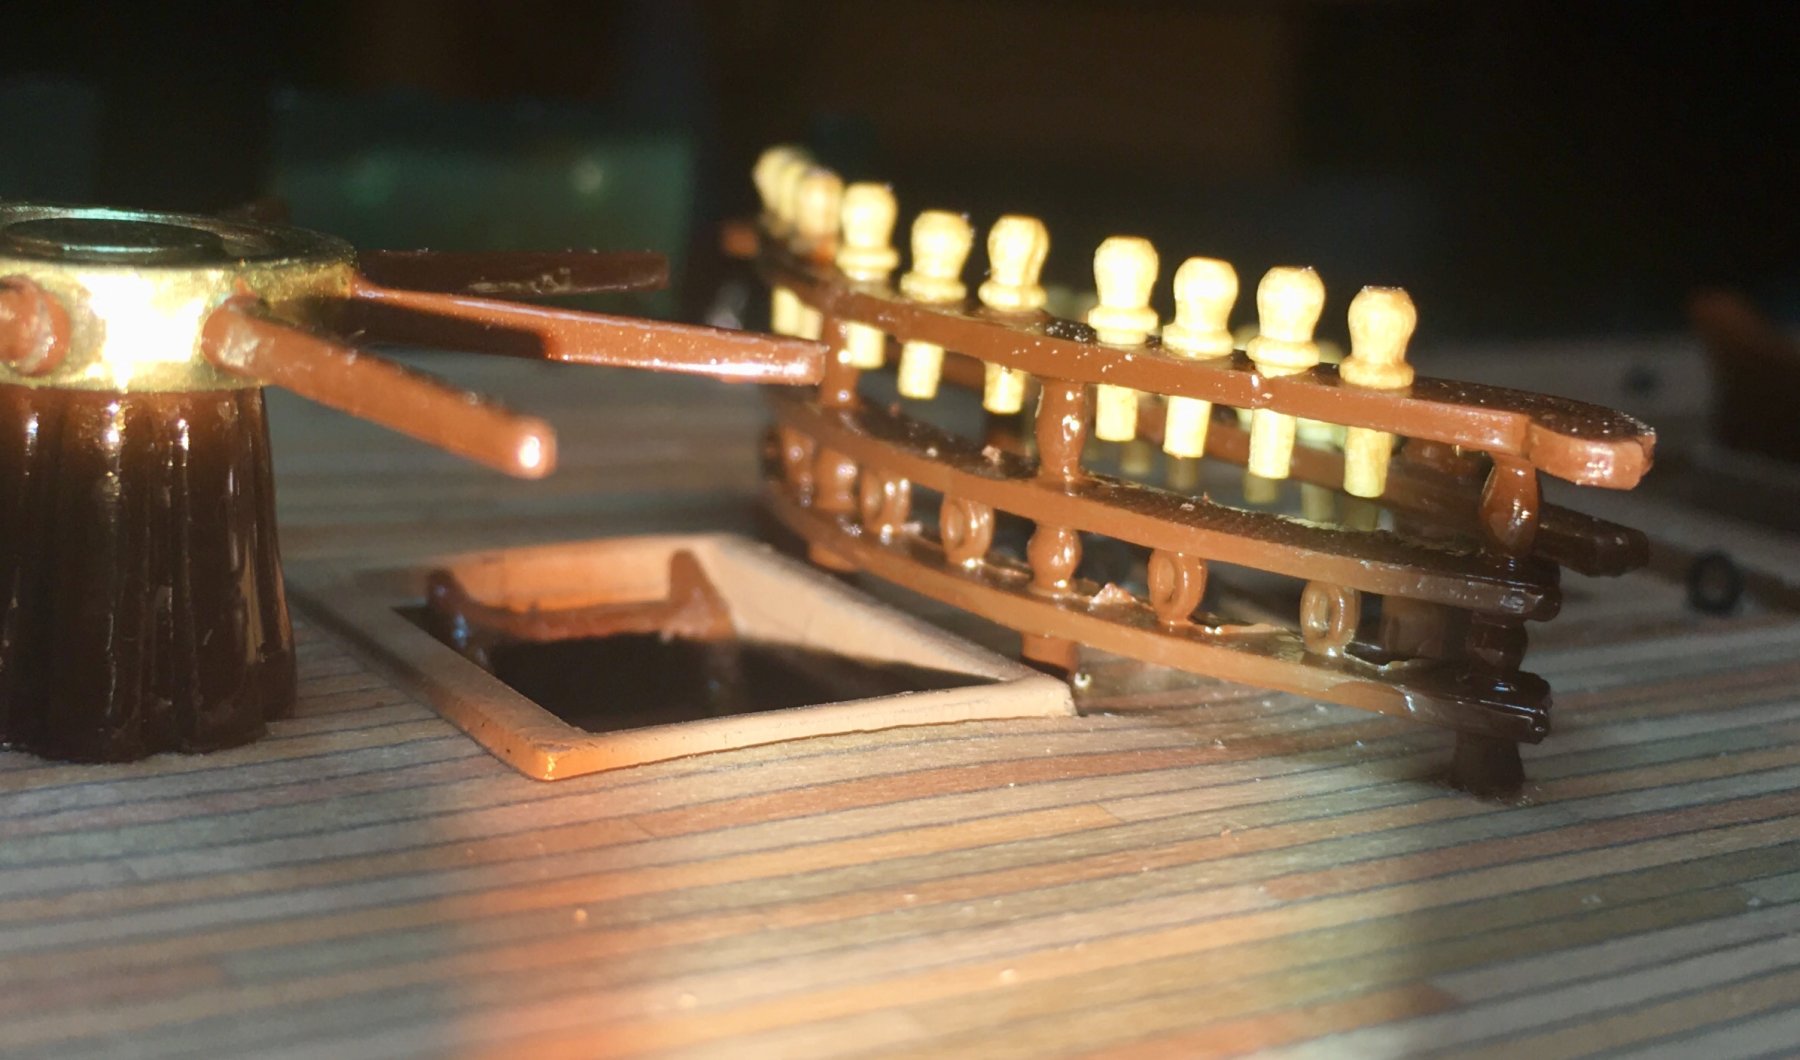
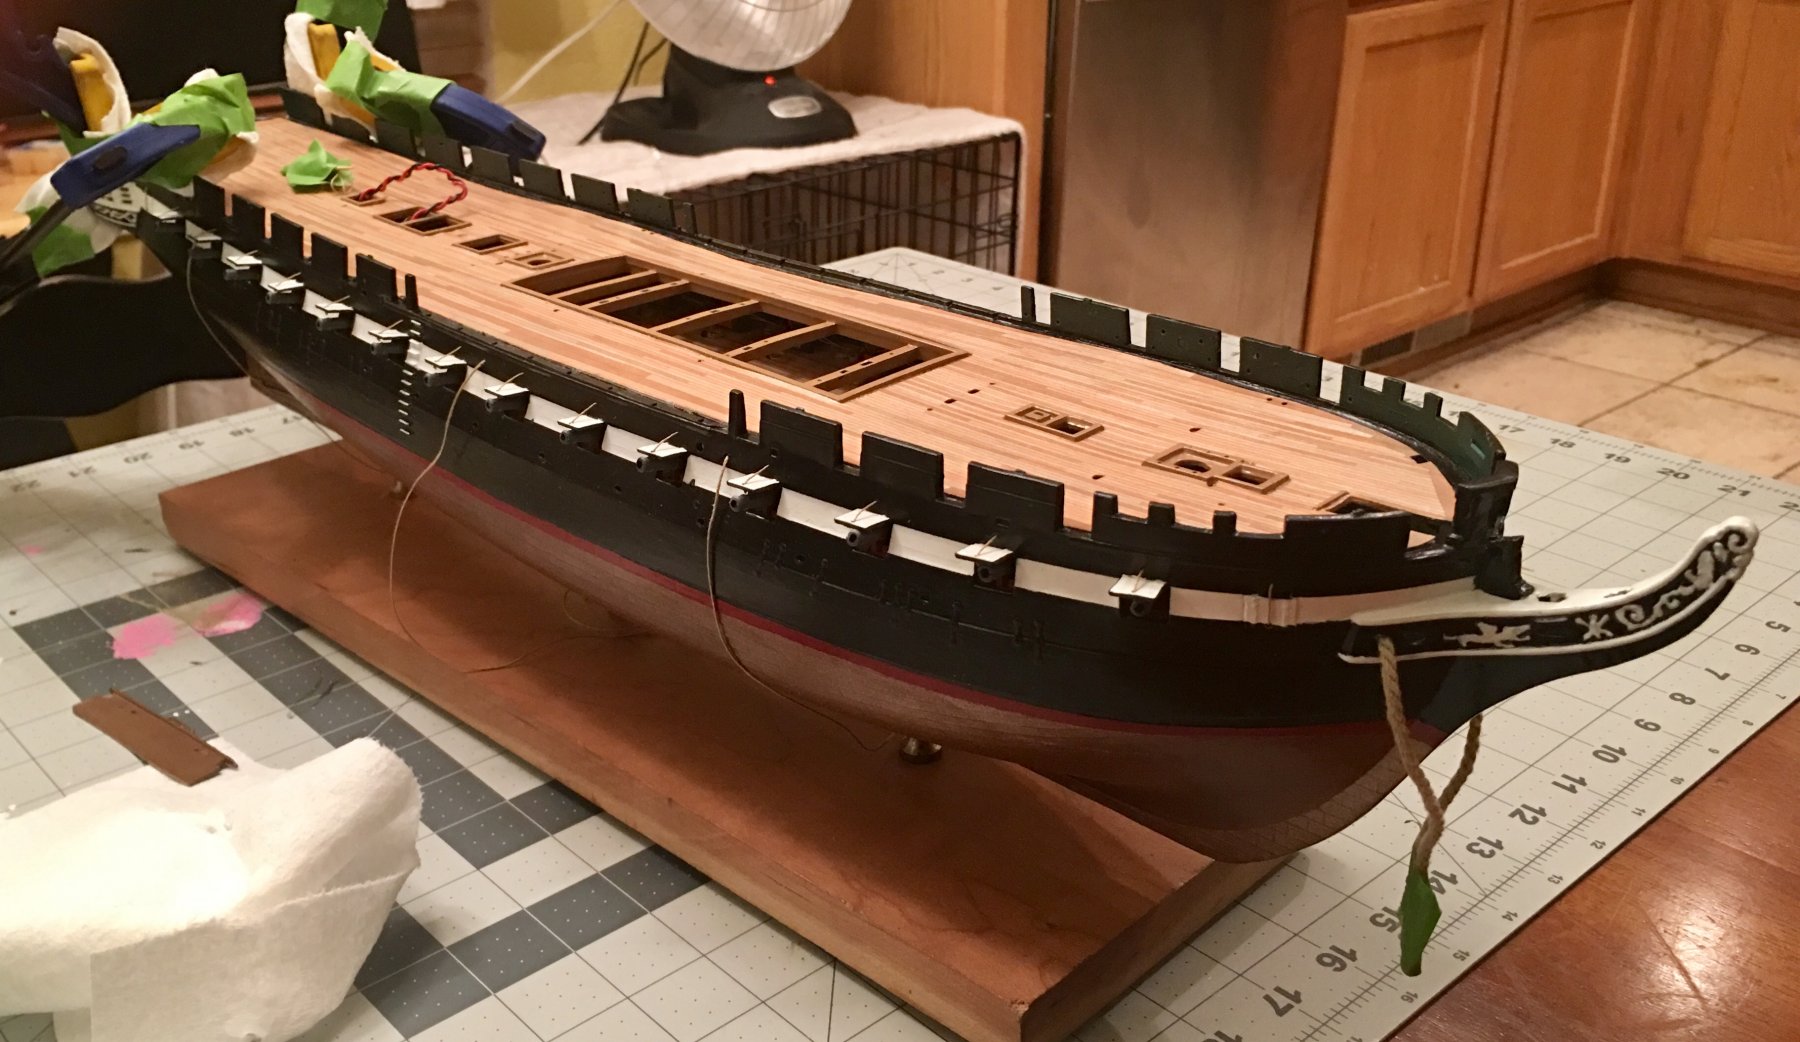
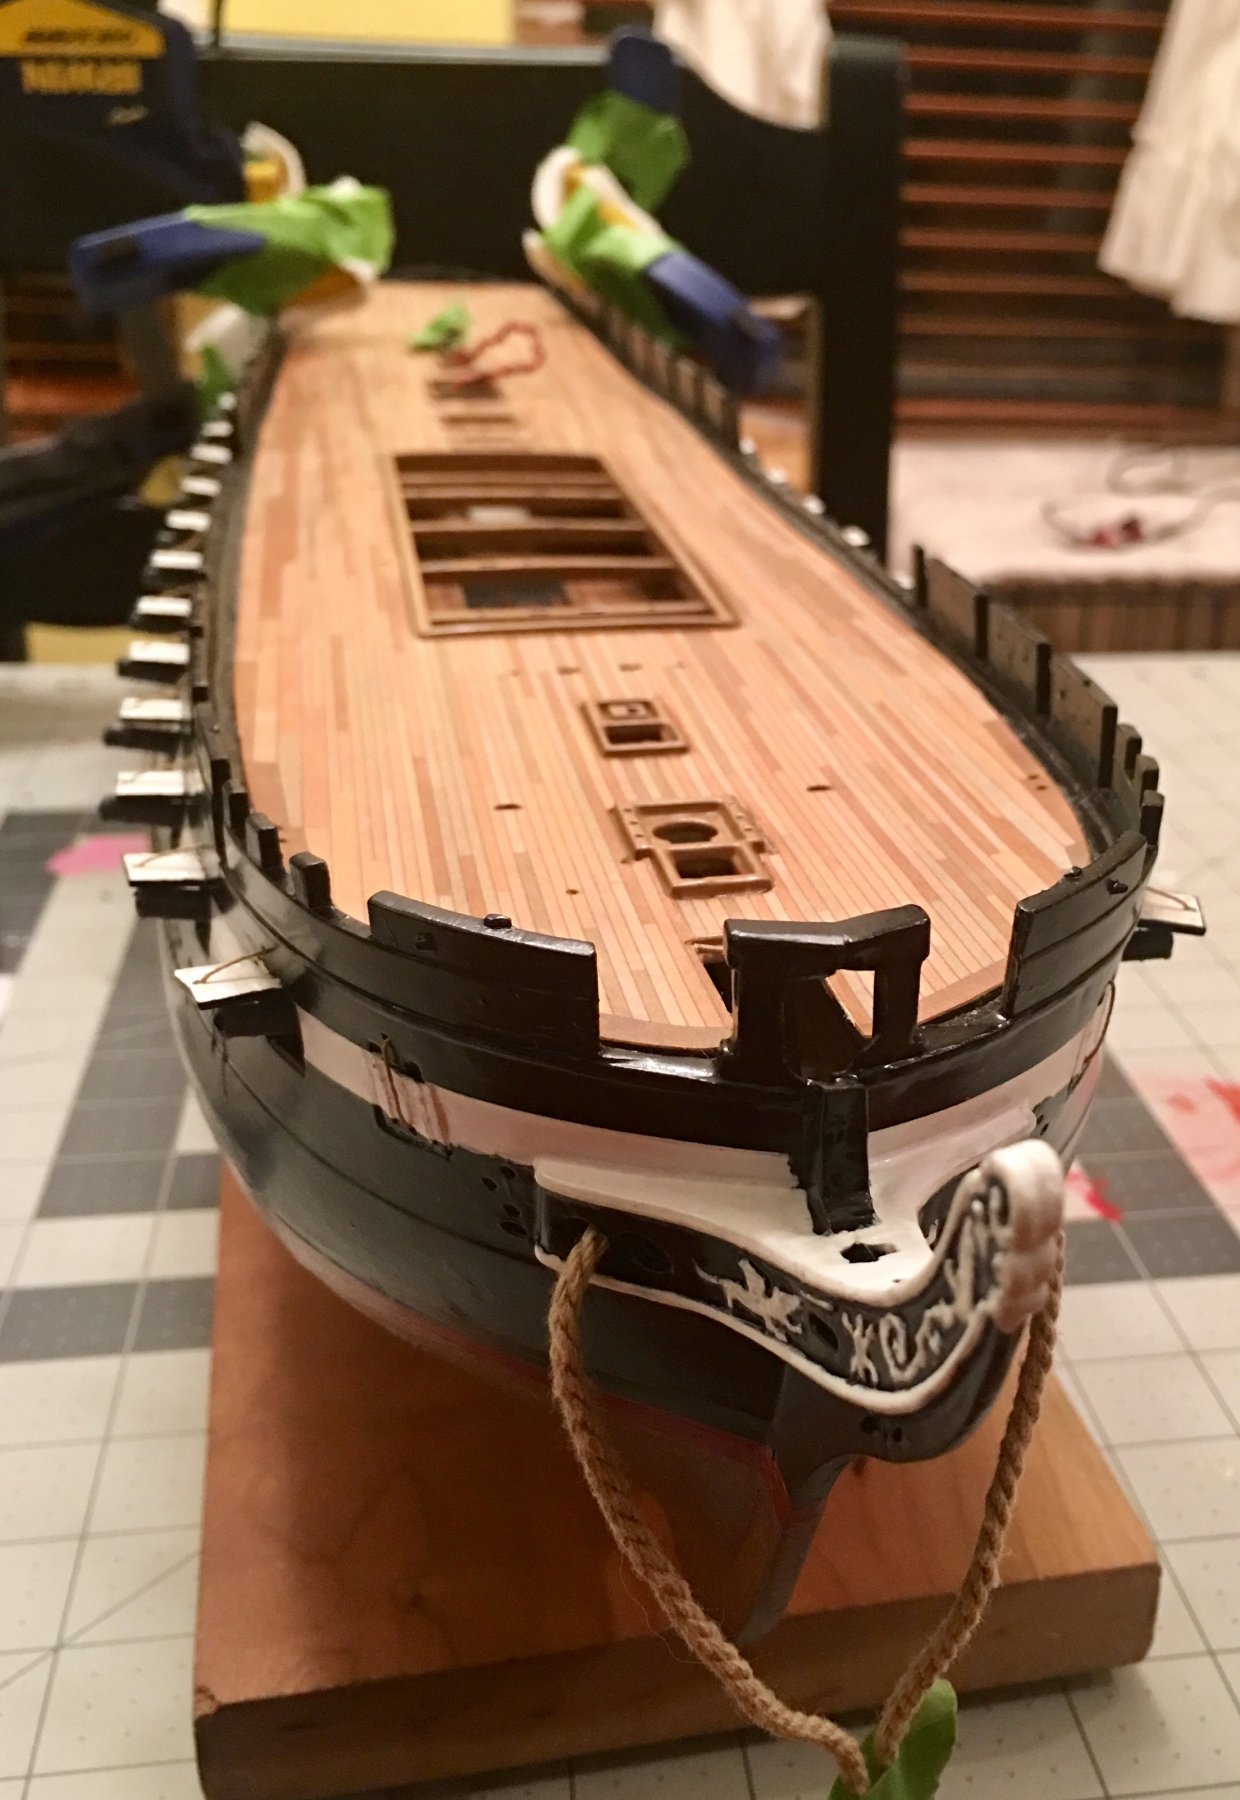
The stern was really a pain in the *** to get aligned and glued. After some shaping, putty, and sanding I got it all painted. Now it’s time to work on the top deck. The other times I tried this kit, the Pinrails in the bulkheads and the monkey rails were always breaking and screwing up my rigging, so I decided to modify them and add some after market Belaying Pins.


-
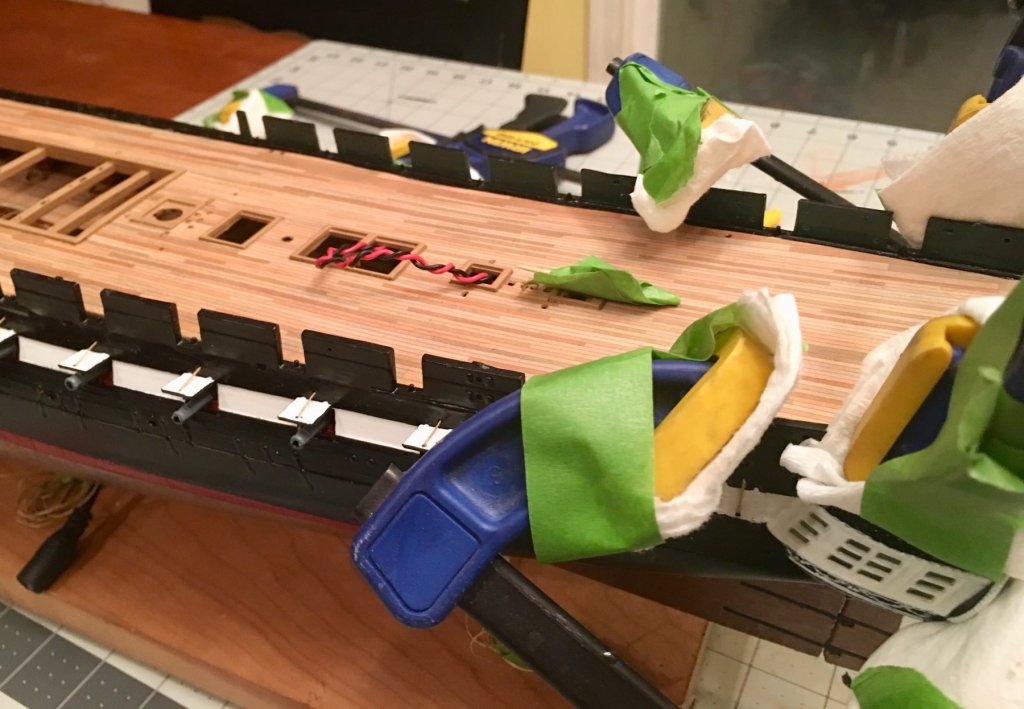
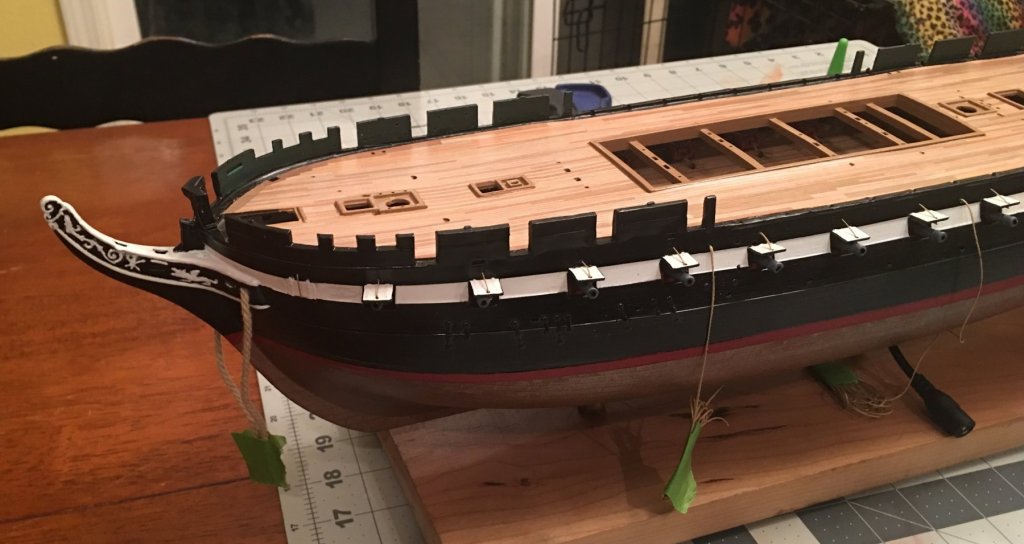
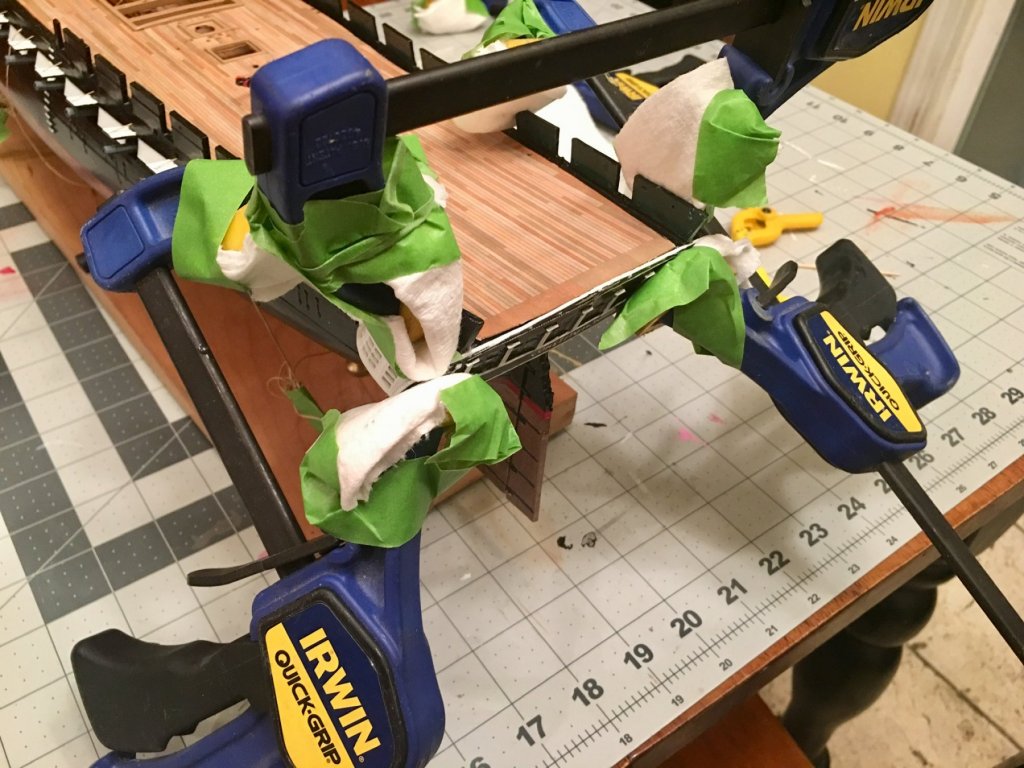
After some touch up and camouflaging the LEDs and Wiring, I got the top deck and stern glued in.


- 35 replies
-
- 1
-
-
- constitution
- revell
- (and 1 more)
-
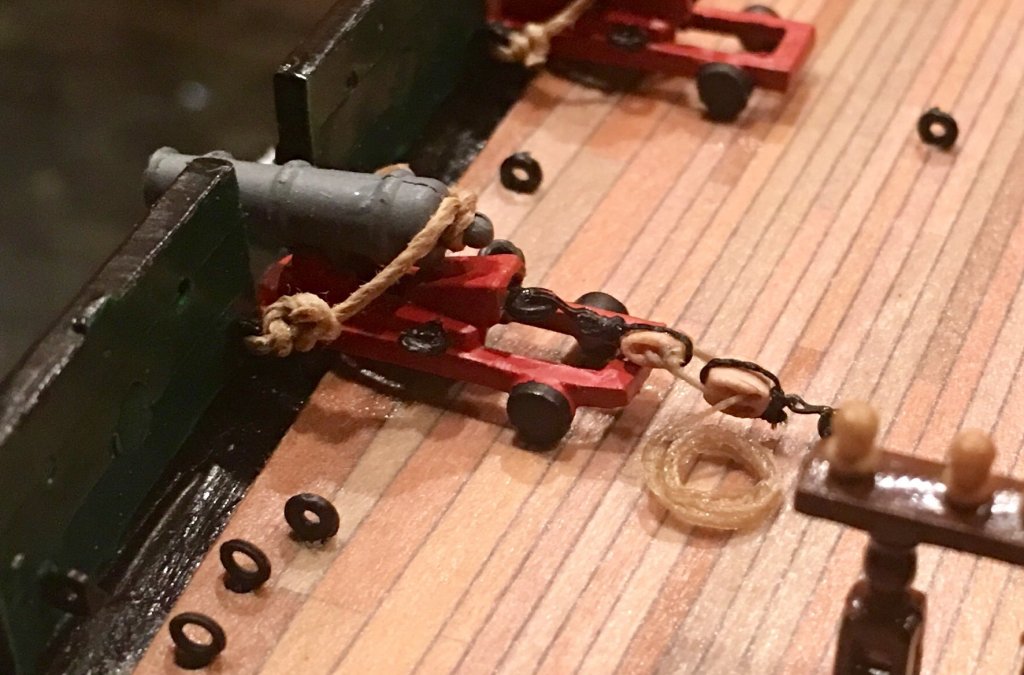
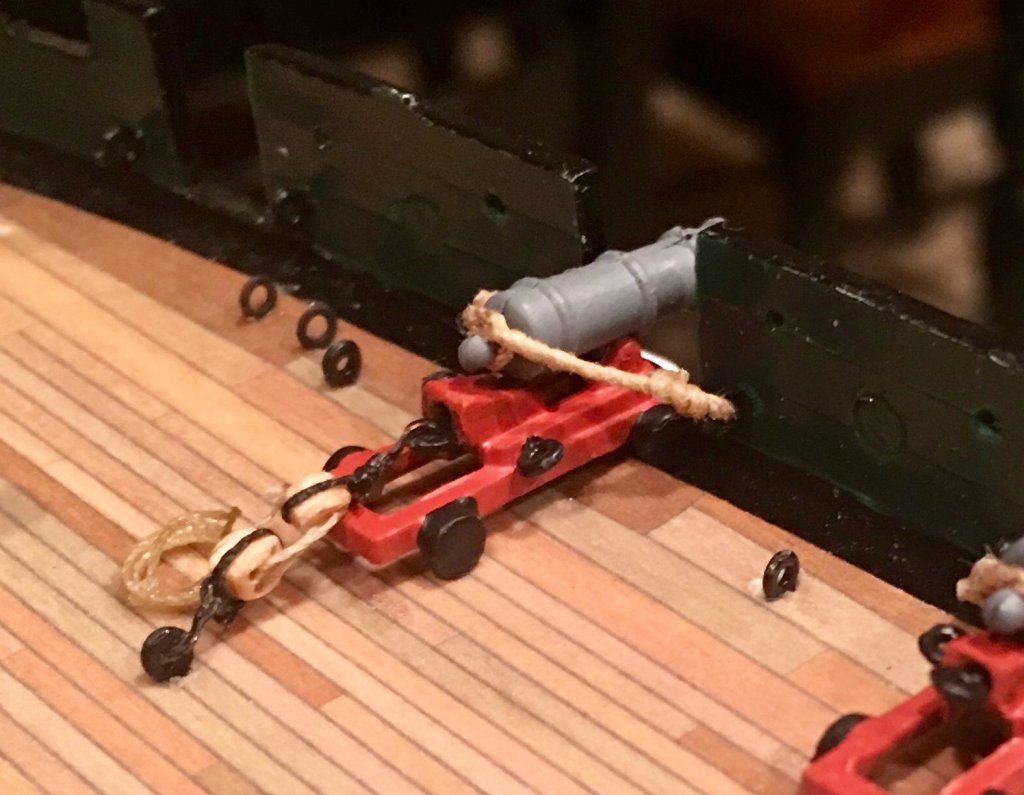
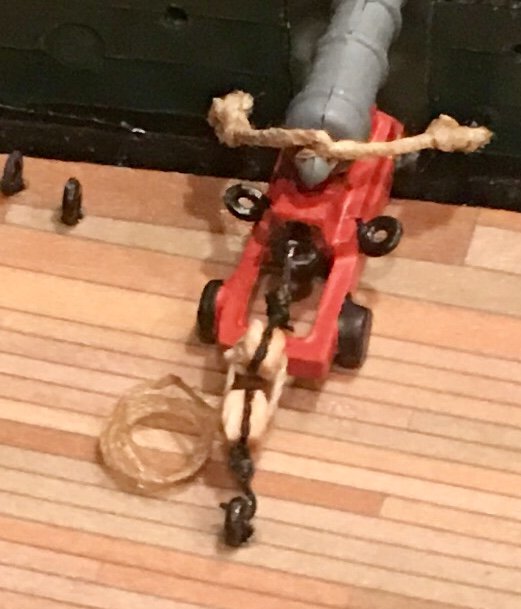
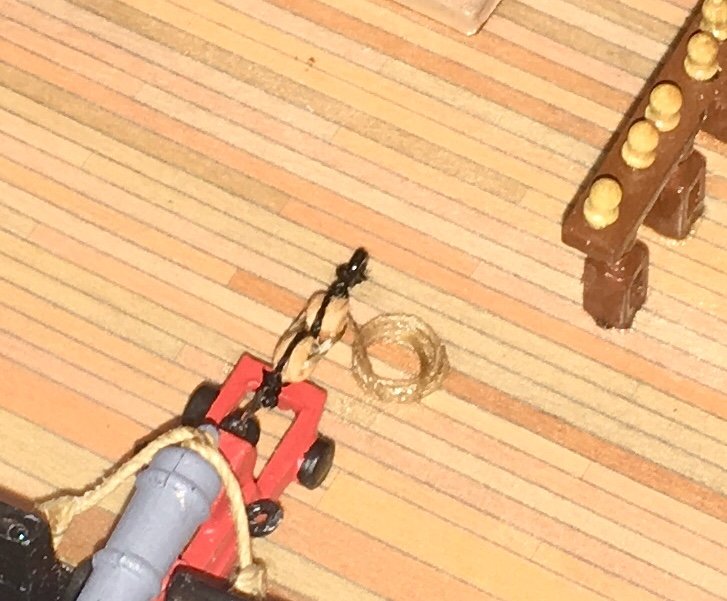
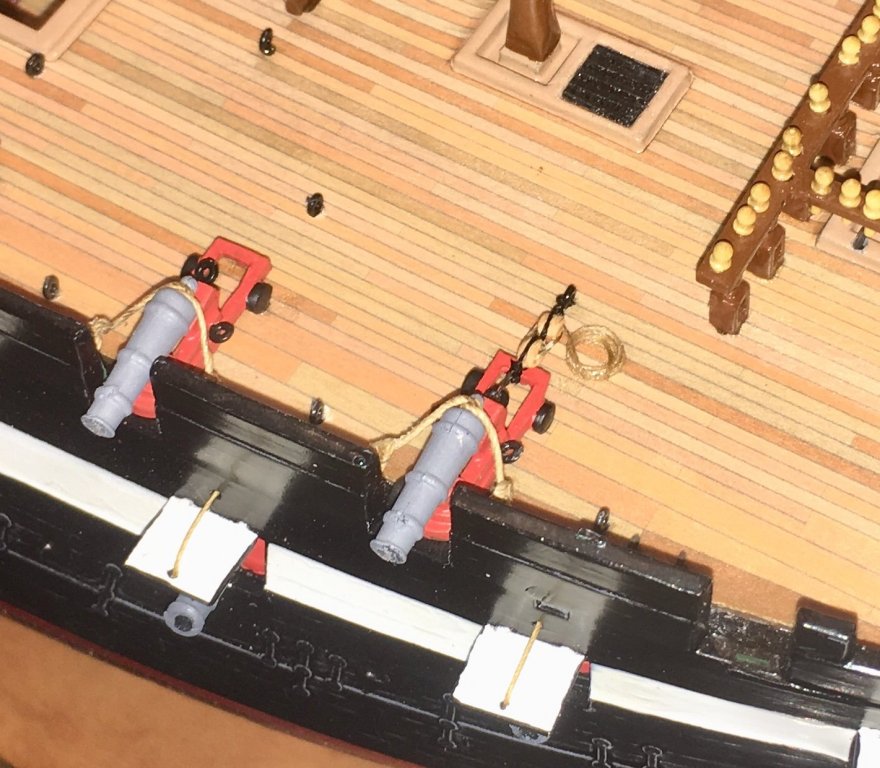
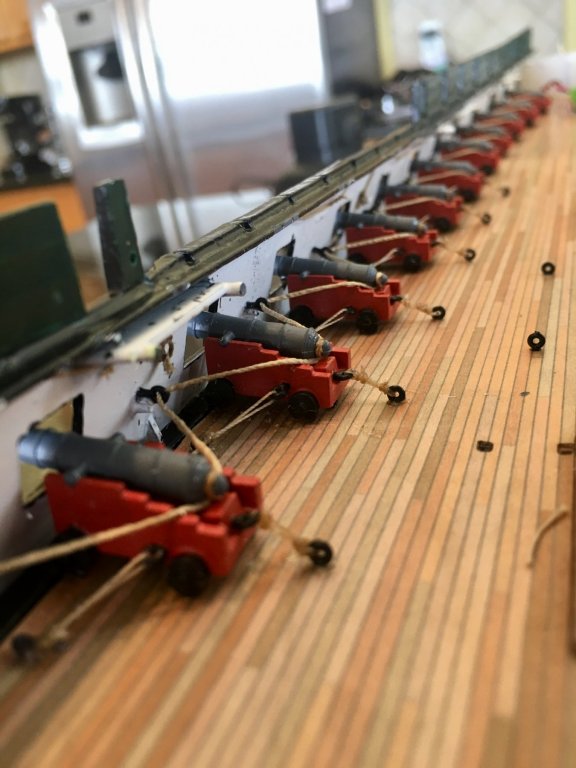
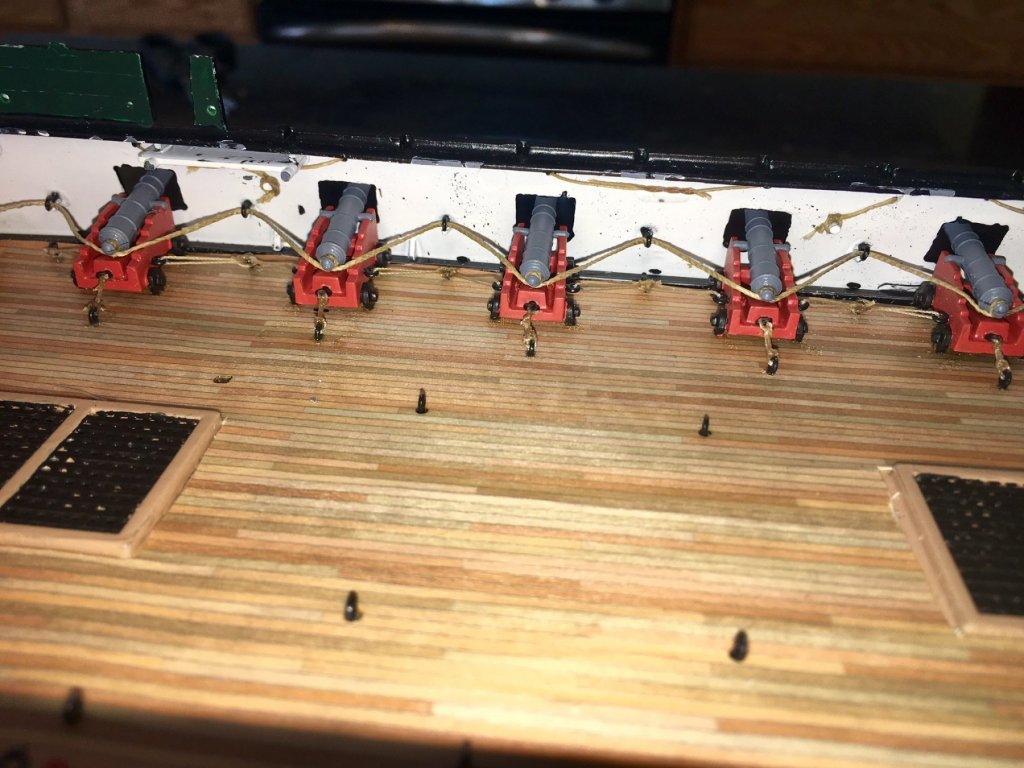
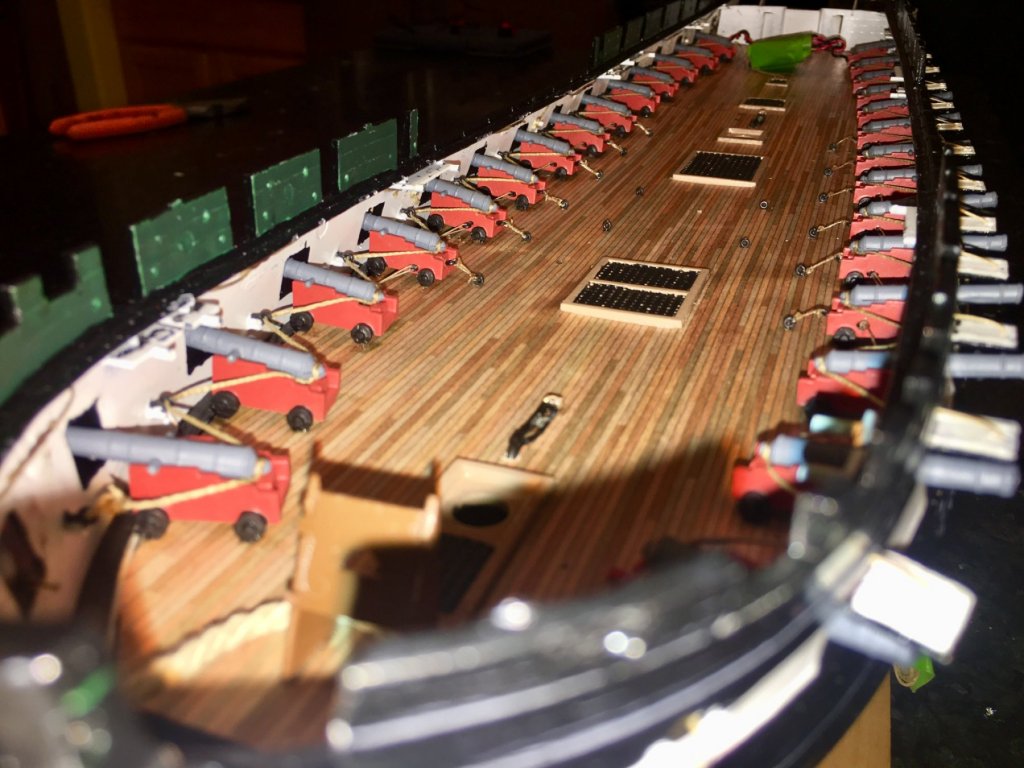
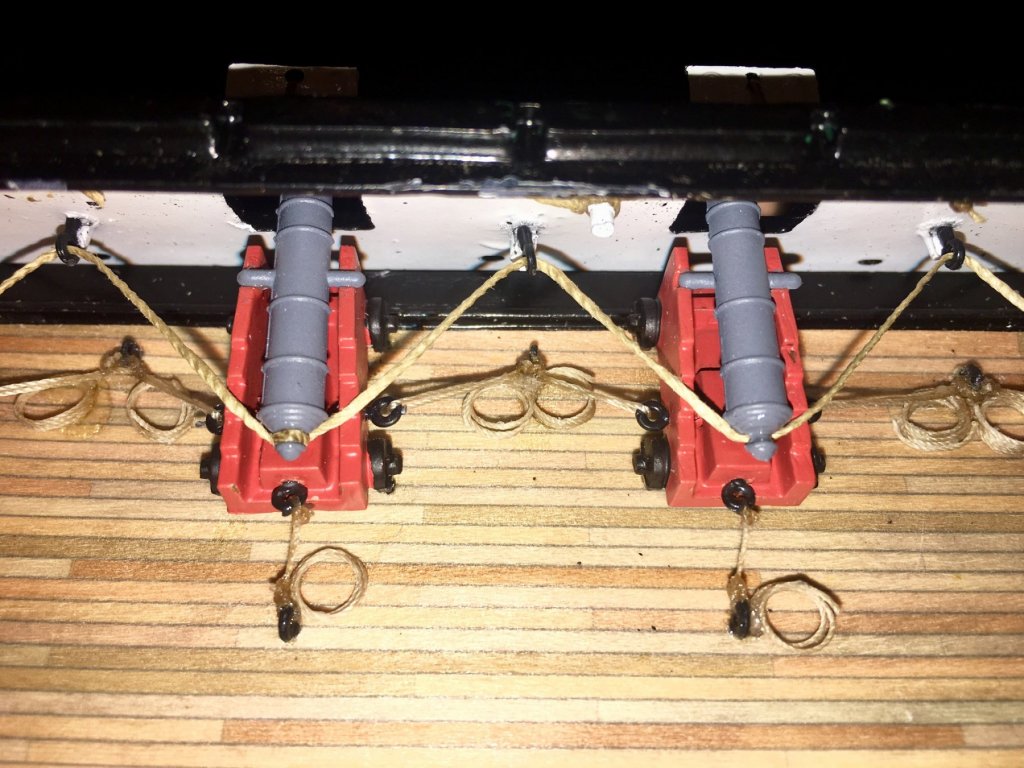
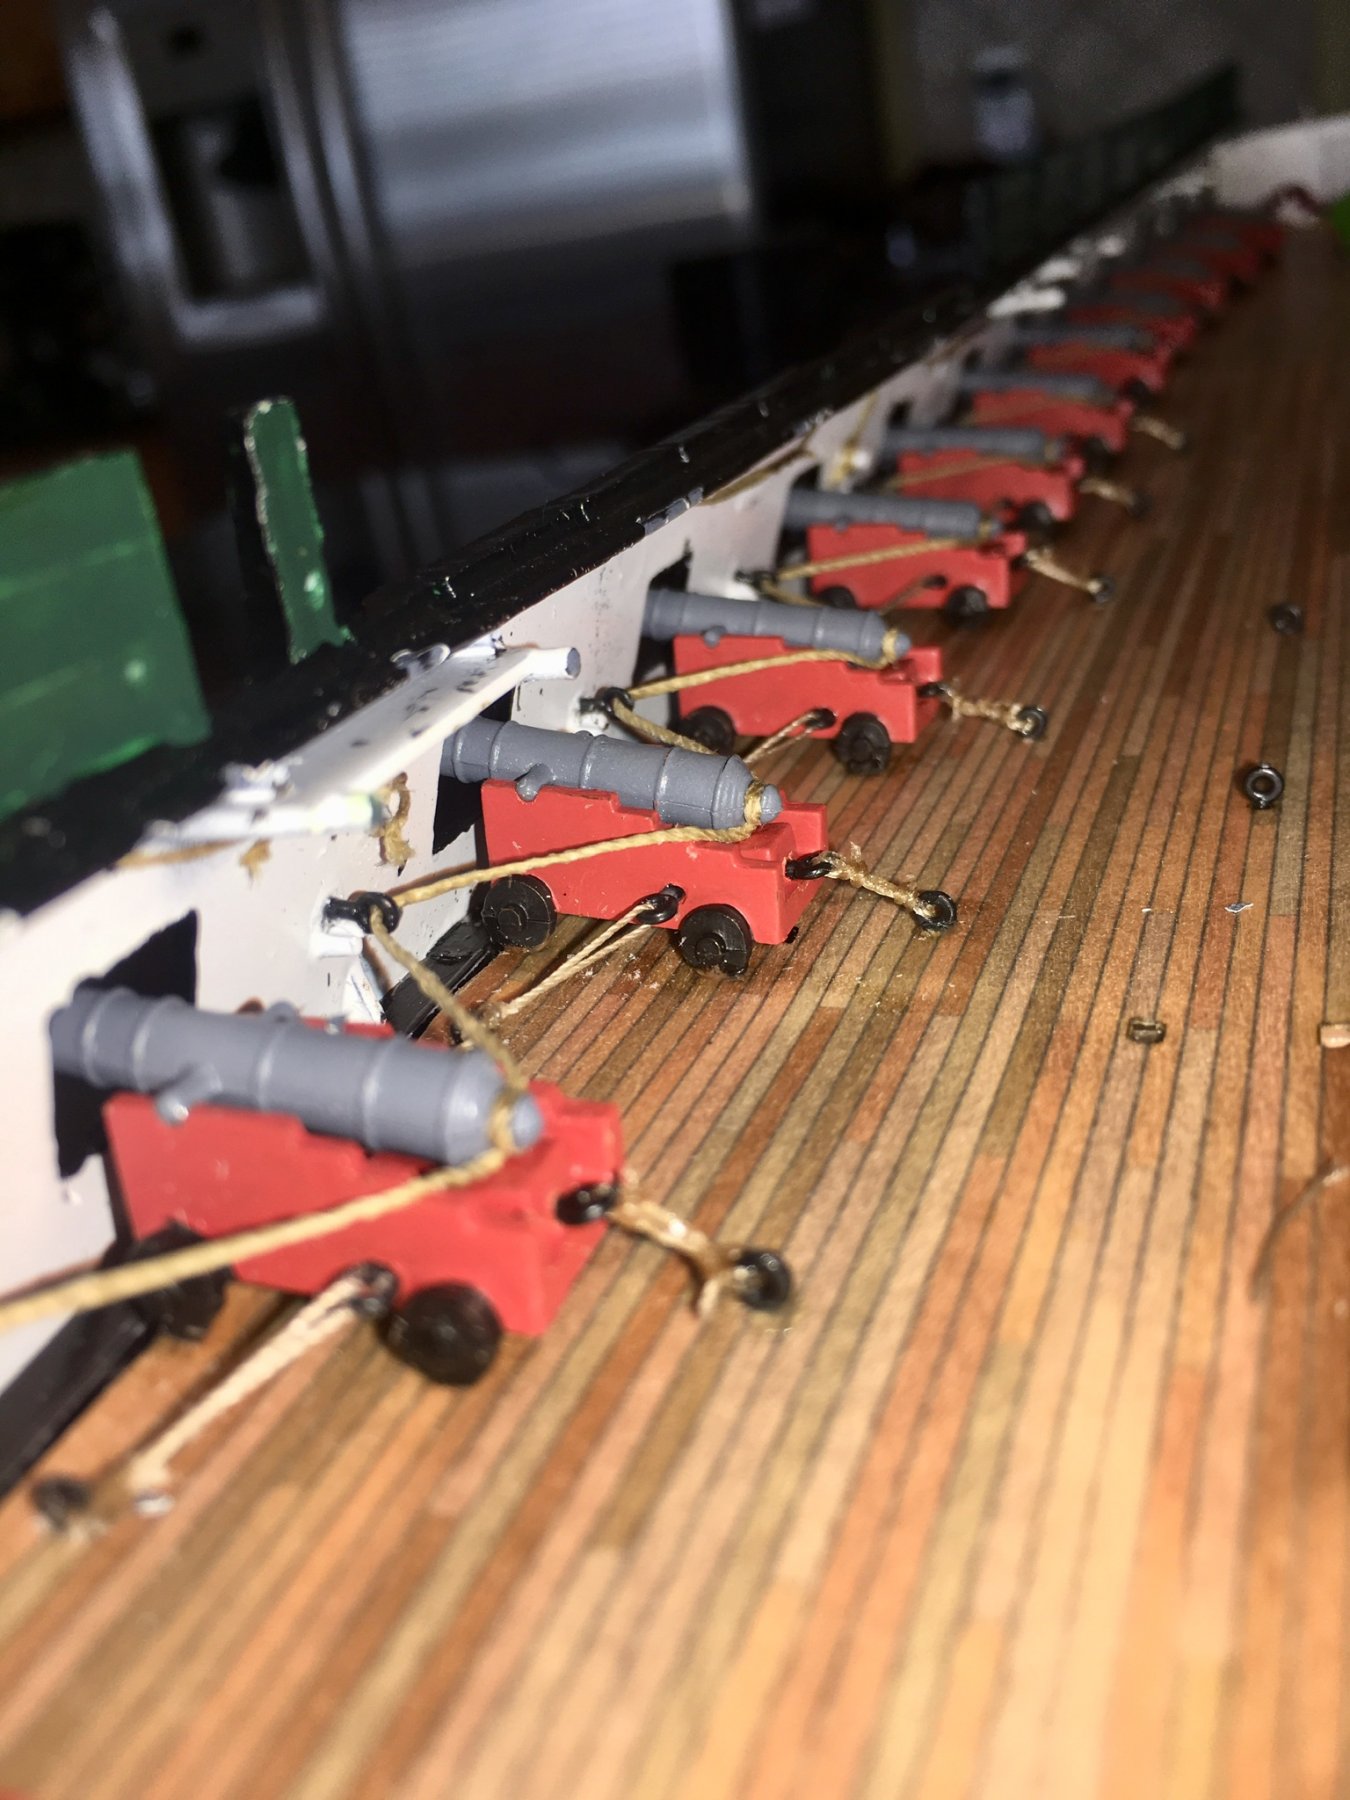
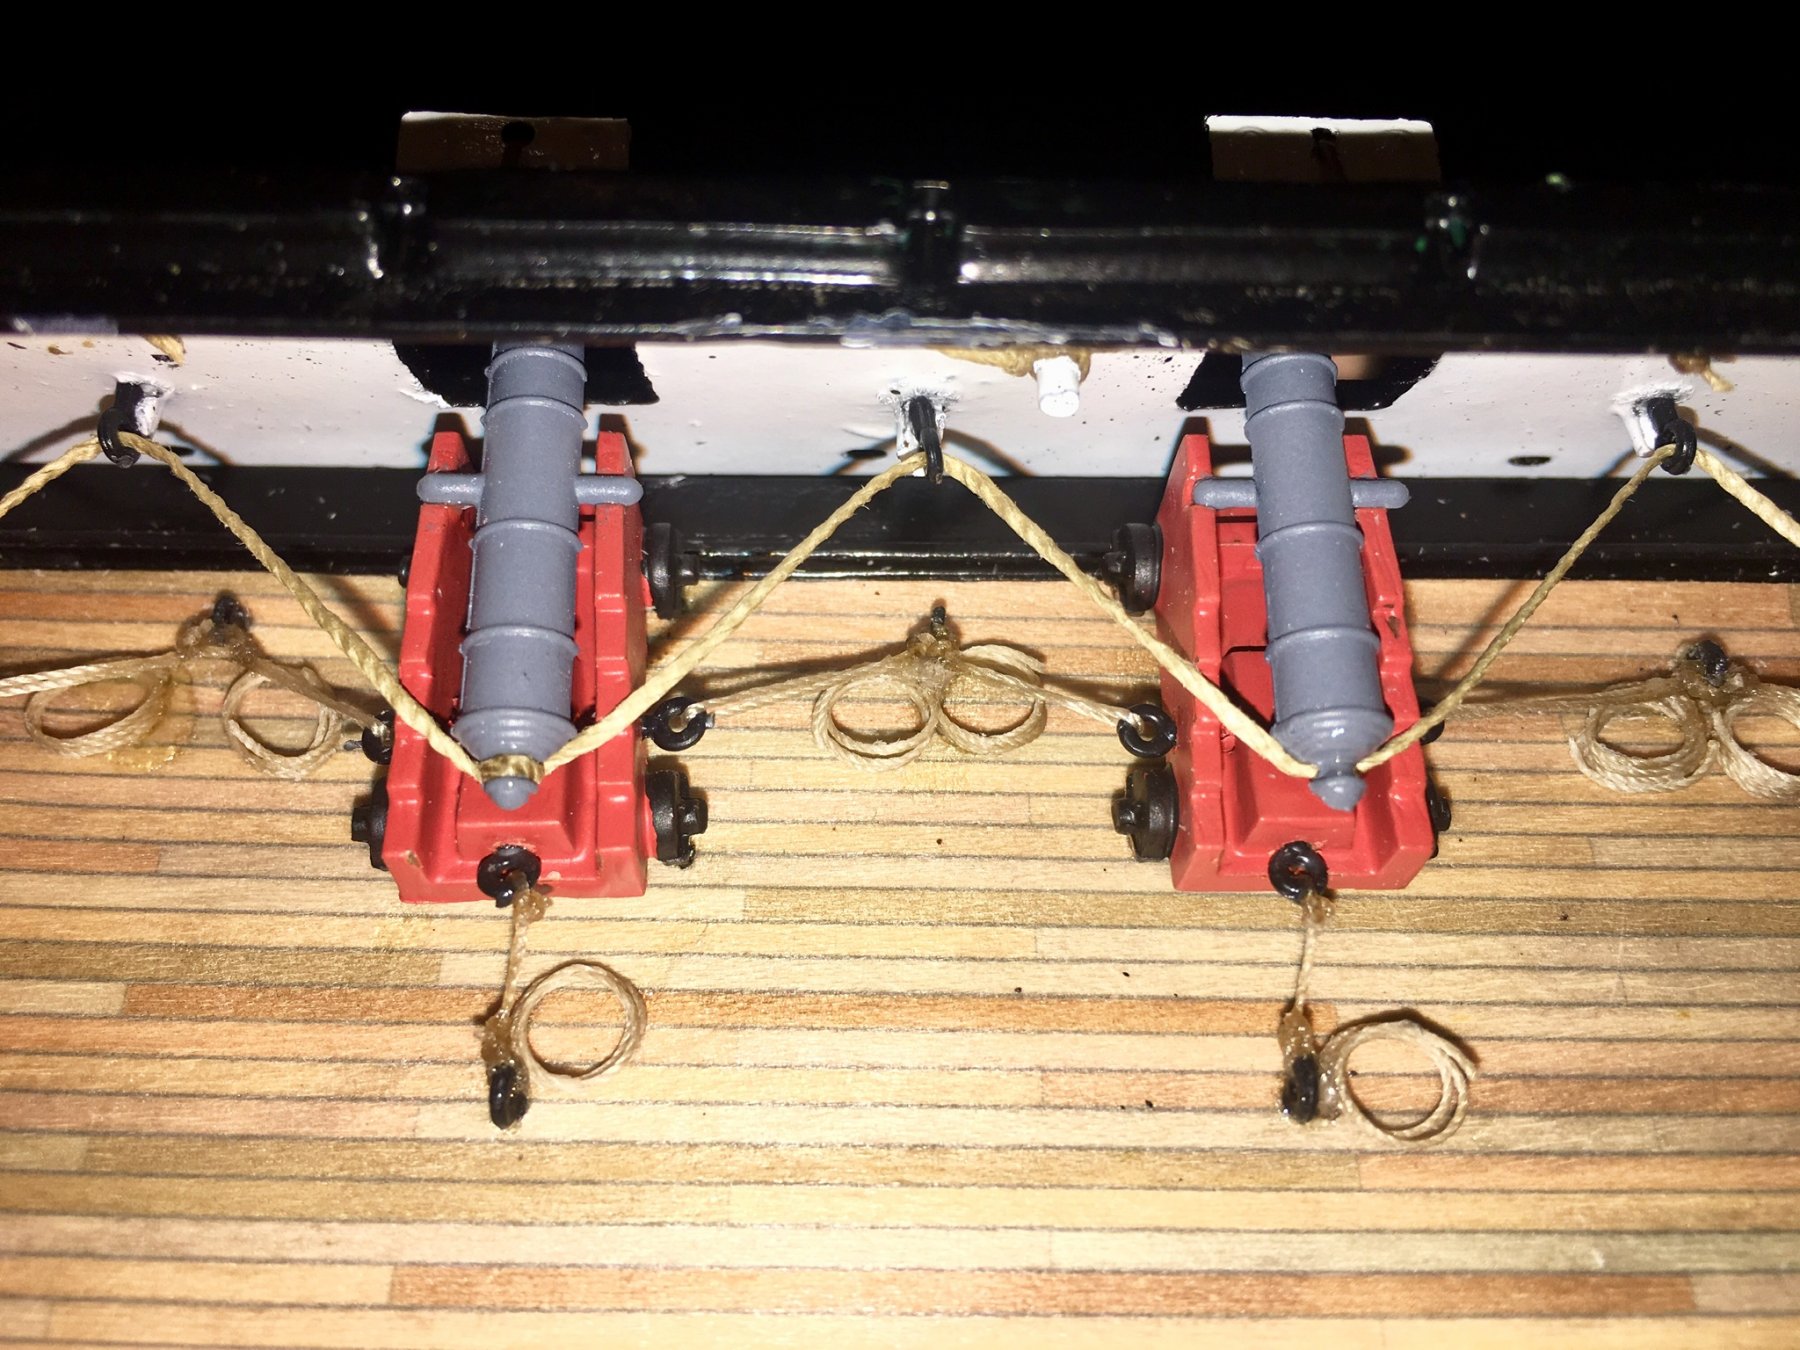
I have all the cannon Glued and rigged to the gun deck. I didn’t like the little “nubs” on the walls to attach the breaching rope, so I glued eyebolts to them. They won’t be seen, but I know they are more secure this way. I also added extra rigging to the guns that will be visible. I didn’t have room to use hooks and blocks, so I just tied them off and added some coils.


-
Wow! Has it really been 3 months since I have posted? Life sure has a way of getting in the way huh? I’ve gotten a lot done since then. I’ll add a little at a time until I get caught up.
-
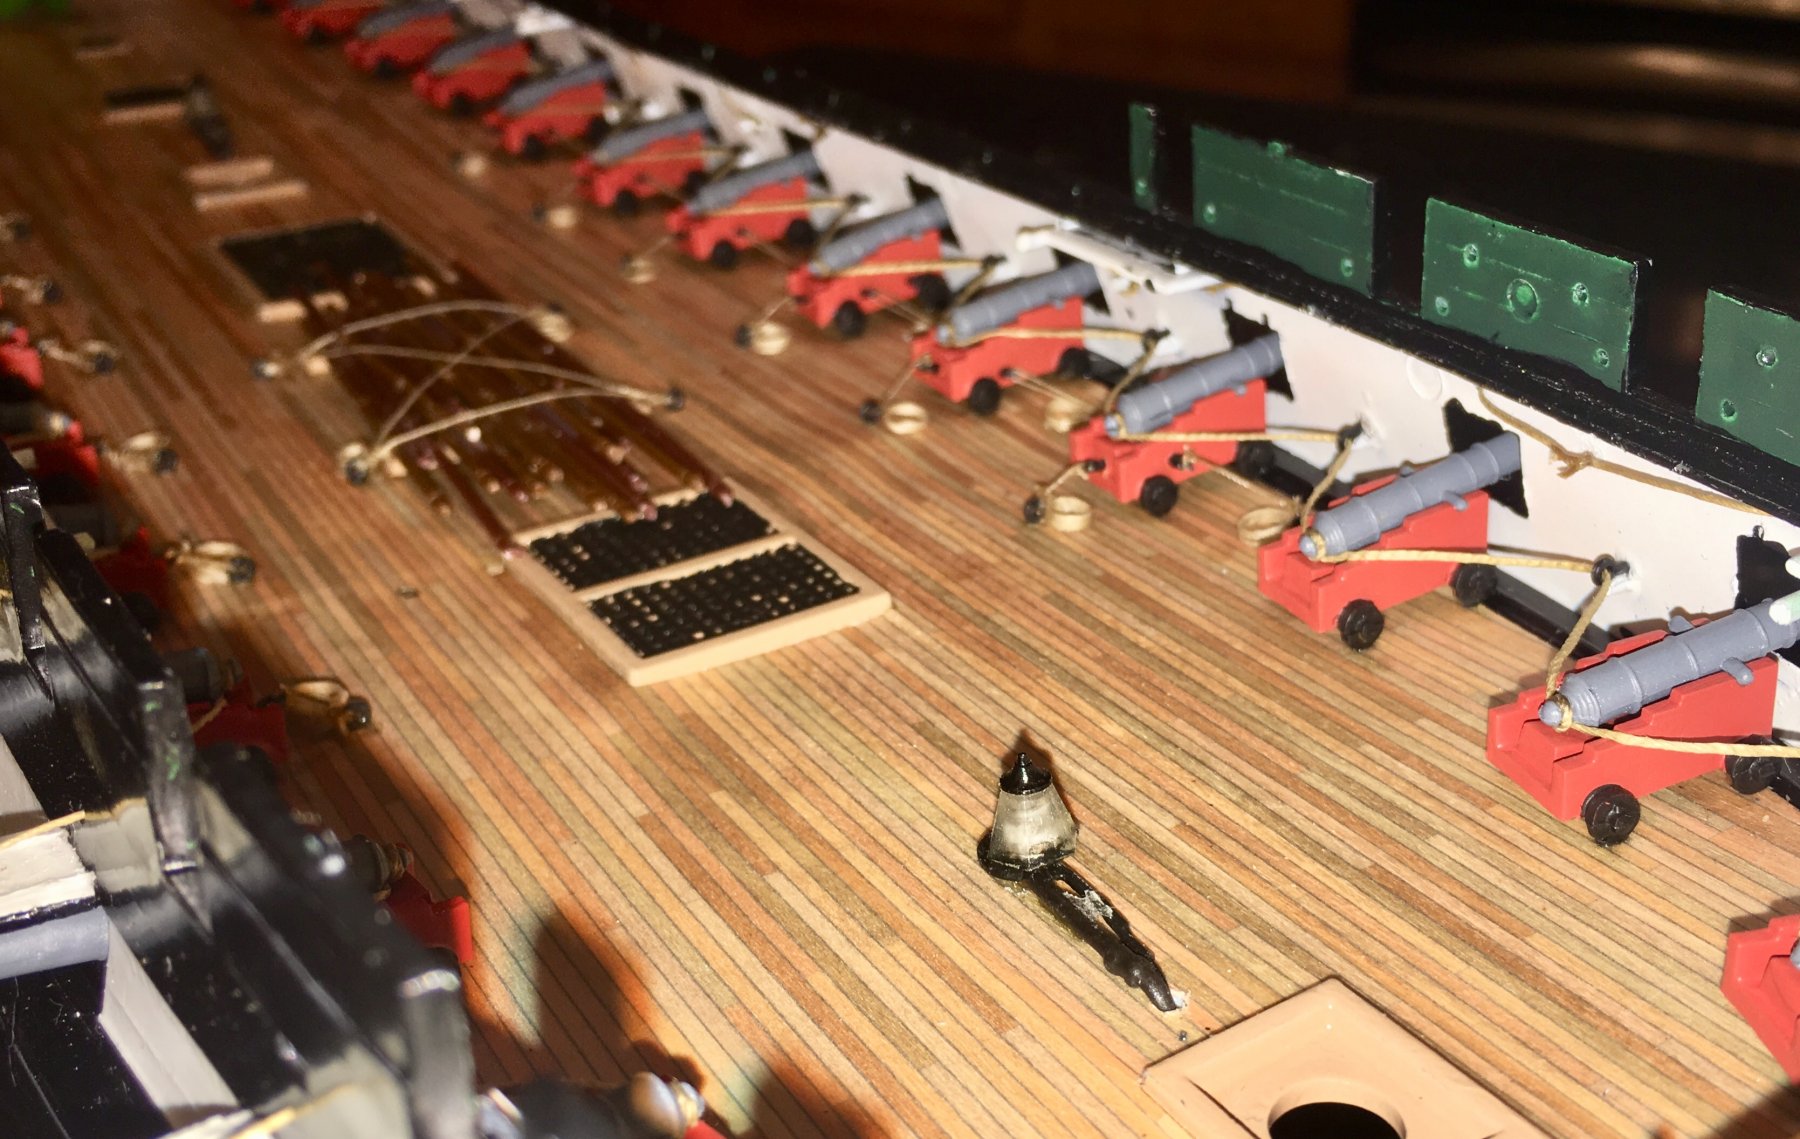
Finally this weekend, I got started on the cannons and Gun Port Covers.
.thumb.JPG.6df45e61d1662c6f78a08c7c48a1e9fc.JPG)
- 35 replies
-
- 2
-
-
- constitution
- revell
- (and 1 more)
-
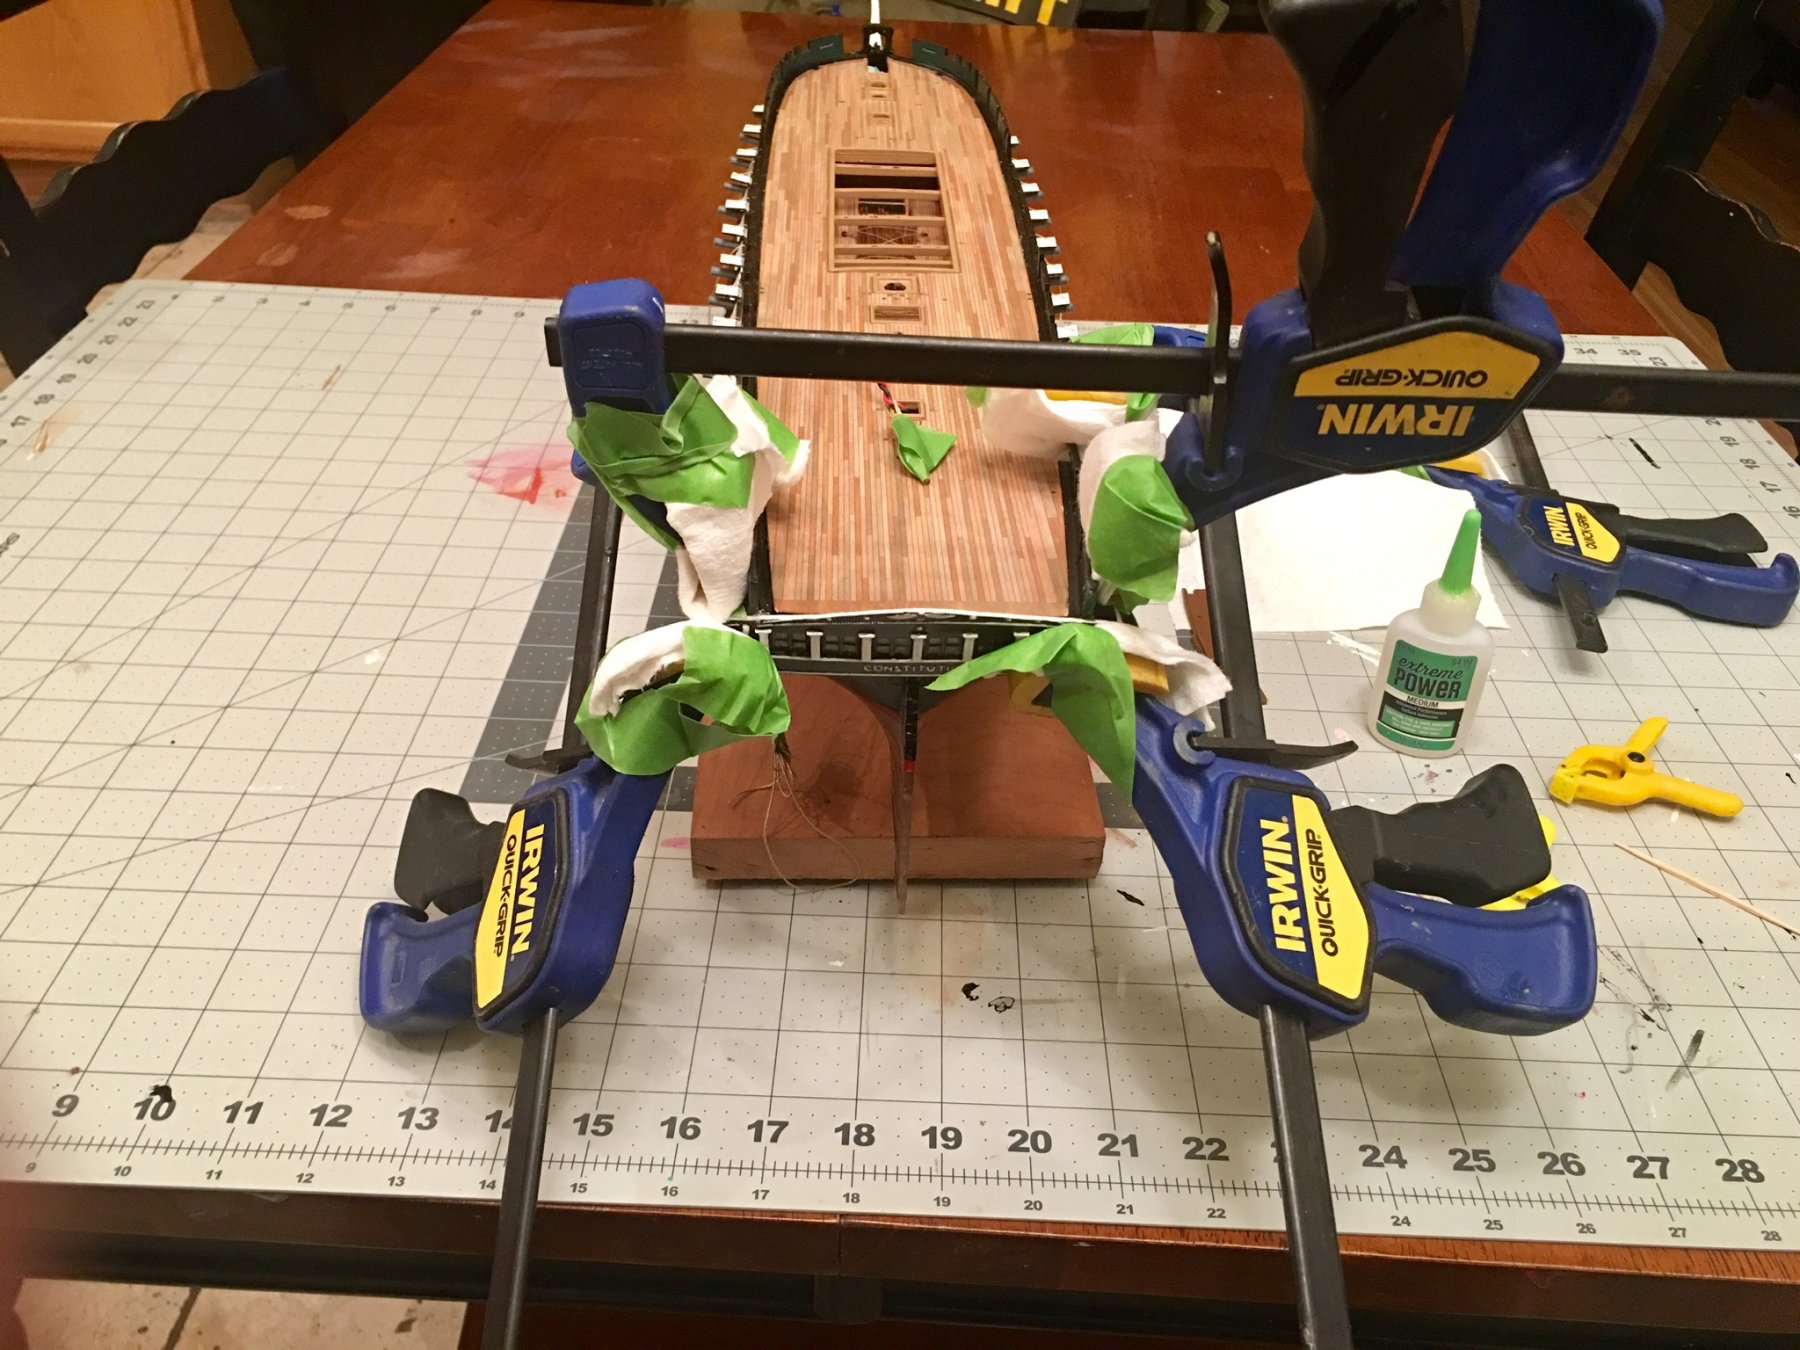
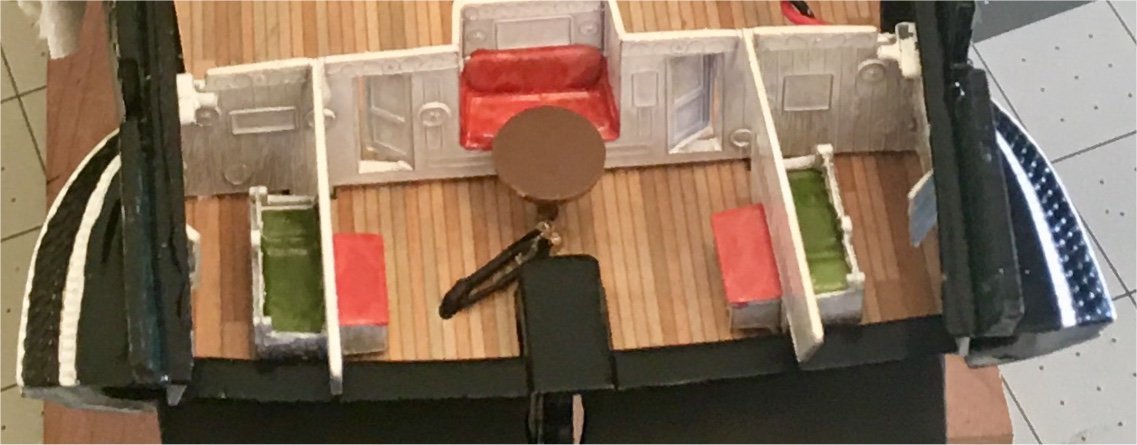
I decided to glue the Gun Deck in, even though the instructions say not to. Im assuming it is supposed to make it easier to install the masts, but I don't like the idea of the deck moving around with all the cannons on it. Also, I decided not to do a lot of detail in the Captain's Cabin because you cant see thru the liquid windows I used. I just did a quick white wash on the walls and put in a little color for affect.
.thumb.JPG.176eb44fd1abd53cc9c98aa65ed4c35d.JPG)
.thumb.JPG.fe593ff679e4a94573e61f0d8ad4d90c.JPG)
.thumb.JPG.7060596f316b64ad12b87ccbe19b77da.JPG)
.thumb.JPG.7a8d5e406bc461e88538b4c05e526b5e.JPG)

-
The finished product. I am going to dab a bit of orange paint on the LEDs so they are a little dimmer and look closer to lantern flame color. IMG_5286.MOV
.thumb.JPG.5c87cd250ed6421c525173ebbc3c68a2.JPG)
.thumb.JPG.1d0e636adc13c35137bab1fd0d30db14.JPG)
- 35 replies
-
- 1
-
-
- constitution
- revell
- (and 1 more)
-
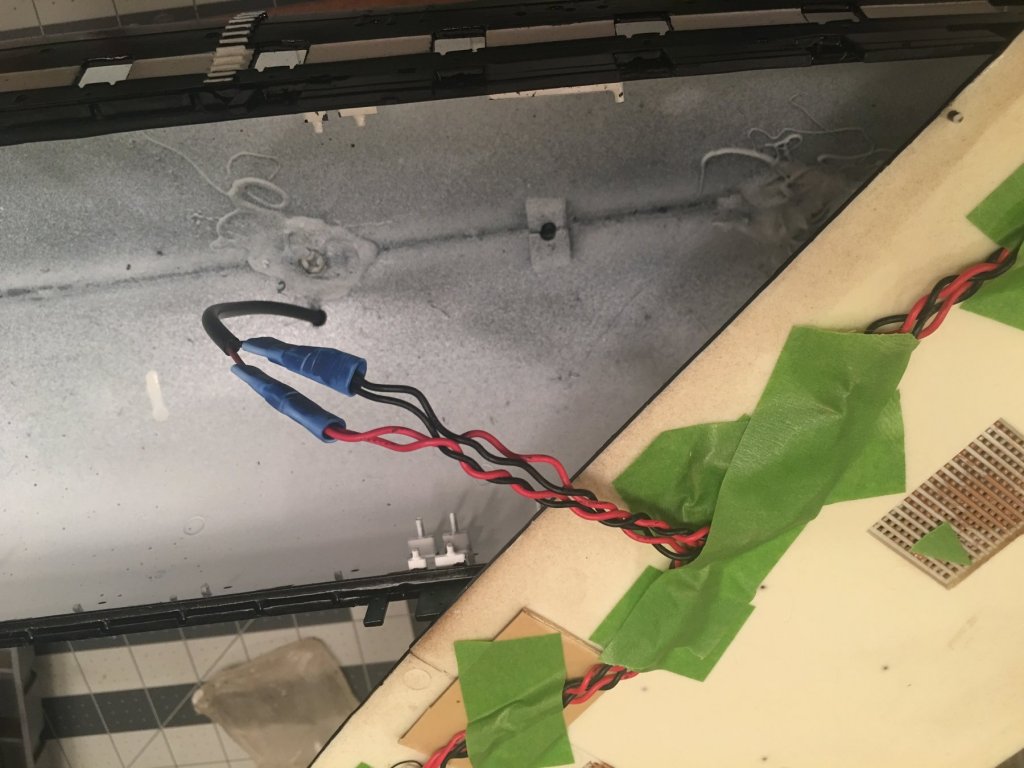
I got my lighting installed on the gun deck this weekend. Here you see an LED in the Captain's Cabin and another by the Mizzen Mast: One by the Fore Mast: And one by the Main Mast: These will all be hidden by the Spar Deck. I used Liquid Window Glass (not sure what it is really called) in the galley, so it is sort of opaque and cant be seen thru. Any LEDs that are visible once the Spar Deck is in place will be camouflaged with Barrels, Boxes, and Canvas. All the wiring is hidden under the Gun Deck. You can see in the top left corner of the pic, I have 1 feed going thru the gun deck (in a corner where it will be easy to hide) that will connect to 1 final LED i am going to put somewhere close to the helm. Still haven't figured out how I am gonna make that one actually look like a lantern. I have a Dimmer switch in l;ine, but it turns out the LEDs don't flicker corectly until they have the full 9 volts. I will be removing the dimmer and rewiring the battery directly to the plug.
.thumb.JPG.475dbb072013c7ca427df621903ccd01.JPG)
.thumb.JPG.4627edd7b6f38ffe481ee93264b54a38.JPG)
.thumb.JPG.7c57229a495d9db00a28eb9242a64bc1.JPG)
.thumb.JPG.7fcc283271acf235e44921dab5d2bd0f.JPG)
.thumb.JPG.951ac40d33746ed93dd716f0edd9a7fd.JPG)
.thumb.JPG.86b0f3525c2879925d0d6aa09b14d7aa.JPG)
- 35 replies
-
- 1
-
-
- constitution
- revell
- (and 1 more)
-
Lastly, I received these Chain Plate Kits! They look great! I can't stand the thought of putting those big, ugly, molded chainplates that came with the kit on, since that is one of the first things that your eyes are drawn to. This will be a challenge!
.thumb.JPG.1ab04dc5f514f01a45807d3a7e792edb.JPG)
.thumb.JPG.00d0d0fec20ce788a88e468679eec1ae.JPG)
-
I also received a bunch of extra blocks and dead-eyes from syrenshipmodelcompany.com.
.thumb.JPG.e014860a0008d8bfc9be873f336c324b.JPG)
.thumb.JPG.f4f1982b4af28da0c2802e3975e3cd22.JPG)
.thumb.JPG.e8c55dbc692fa539fd2378f90ed2dc63.JPG)
.thumb.JPG.a6b4b83395946250c14fc10daa66ab91.JPG)
-
Well, i got some packages this weekend and **** JUST GOT REAL! 😲 The first wave of accessories from HISModels.com came in. The first kit is for adding the rigging for the guns: The next kit is the Standing rigging kit: And I also ordered the Cloth Flag Set and Draft Scales: The flags are really nice and printed on both sides. Too bad they are the LAST thing to go on 🤦♂️
.thumb.JPG.3286e5492d43958d21114a5872b20872.JPG)
.thumb.JPG.28856390bb56cdd2f9c988659ee0f622.JPG)
.thumb.JPG.04395b92d6a9e758291108a217785a4a.JPG)
-
Lol! That is a little weird! Hi, I’m Bob. Nice to meet you 😝🤣
- 35 replies
-
- 1
-
-
- constitution
- revell
- (and 1 more)


.JPG.22202a9fcfda5cfbfe407c8a88e08036.JPG)
.JPG.e952ac7f0670c37d430e2ec497925d3e.JPG)
.JPG.b5988cda14e25ed58b76e2976106fe03.JPG)
.JPG.0e3b1b306acab8e16fc06a0565ba26af.JPG)
.JPG.651910bf99192f1298a9c06706c70c85.JPG)
.JPG.6d75d697e5bf76ac23b8bb97727a7ec4.JPG)
.JPG.0bd8e2d9c6062ec8dd4e8e7265ca11a6.JPG)
.JPG.250031dac558918f2054b1dcad18b806.JPG)
.JPG.572ee10698a343e1e0c6e119d83ce565.JPG)
.JPG.a24ce9782bbc4c27b281a6e072475942.JPG)
.JPG.81267e96b0ca16db80801e9d29a2cd65.JPG)

.JPG.b731cbff8985151c86fc5229741f2b40.JPG)
.JPG.15a7622c9994d73fa5b816c6832a6e86.JPG)
.JPG.bae4e5877ee9e5366118048797e193d1.JPG)
.JPG.29728ca6918fda59da12c925dc8a1e77.JPG)
.JPG.1df9d00467f46fc4ed64e7e4e1add1cc.JPG)
.JPG.cb70d89388b0945e4bf09d39970280b8.JPG)
.JPG.93858bb3d4c6d4d7dae8e5e578d63e8c.JPG)
.JPG.ab0c287c3e437342f2f5a7baeaa35c98.JPG)
.JPG.7770134c33c3d27556c232410ae5b3e7.JPG)
.JPG.9795c31977e6b041c46220670087f4a4.JPG)
.JPG.f104fa764821661de77cfda693509166.JPG)