


flyer
-
Posts
1,004 -
Joined
-
Last visited
Content Type
Profiles
Forums
Gallery
Events
Posts posted by flyer
-
-
Hi Aldo
Great build and superb quarter badge! I look forward to your further improvements and regret that it’s too late to include them myself.Thank you for sharing.
Take care
Peter
-
Hi Frank
Thank you for the very kind remarks.
I look forward to how you make the sails. I’m still undecided. On the last boat I asked a professional seamstress to sew them. But her finest seams still look oversized.
I might try the method of pulling threads I found in one of the old forums. But this still leaves the seams around the edges…How to mix pictures and text – that’s rather easy on the new forum.
You must use the ‘More Reply Options’ option. If you now upload your picture to your unposted reply you see it at the bottom just above ‘Attach Files’. Below the small picture of the file you see 2 possible actions: Add to Post ¦Delete. If you click onto ‘Add to Post’ you create a text-placeholder in the text section where the cursor stands. This placeholder can be moved around like any text block. If you now push the button ‘Preview Post’ or ‘Add Reply’ the post will be displayed with pictures and text mixed.
Take care not to scrape yourself on those barnacles!
Cheers
Peter
-
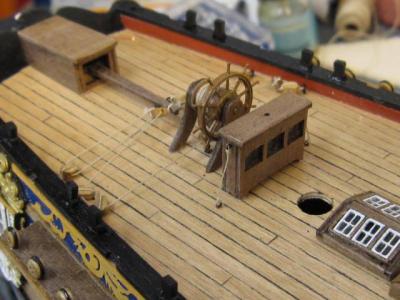
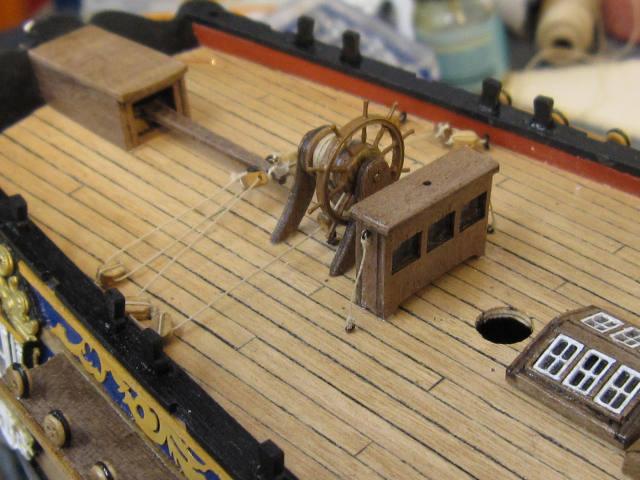
Rudder assembly and deck fittings were fixed with the following additions:
The chimney of the galley stove is a caldercraft part.
And also the binnacle got a caldercraft chimney.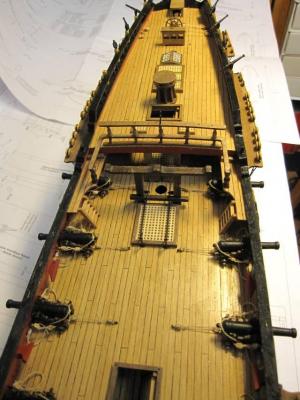
- billocrates and Mirabell61
-
 2
2
-
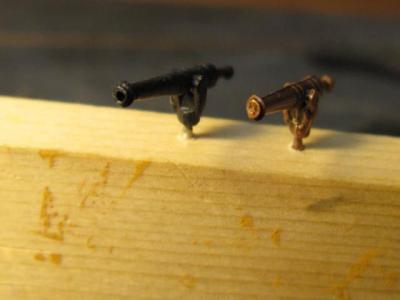
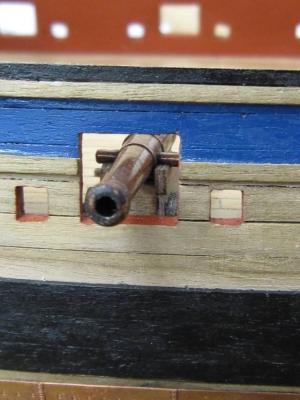
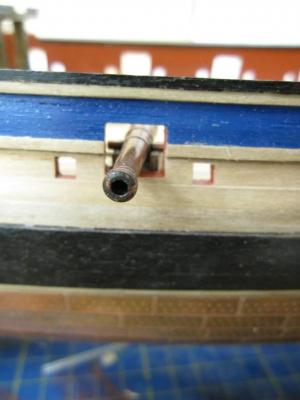
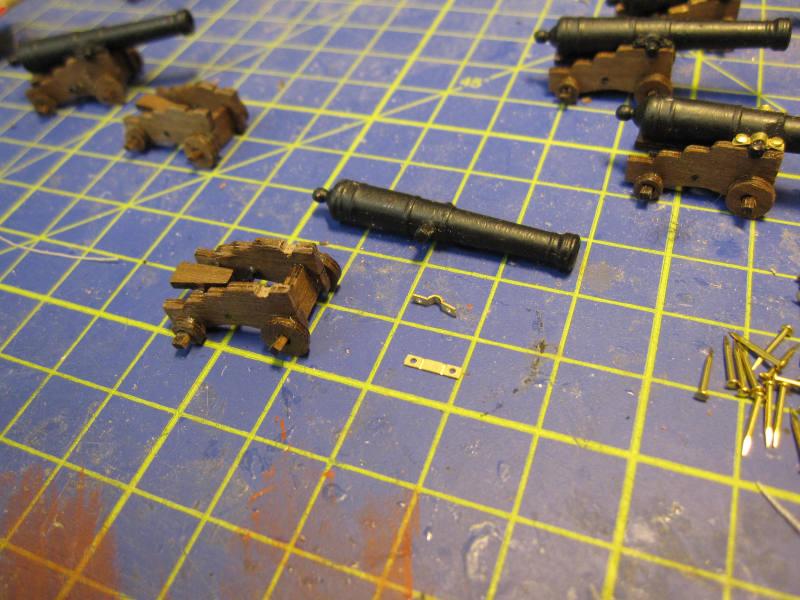
I tried to improve the swivel guns by opening the muzzle with a small drill.
-
The rudder could be hanged. It was previously coppered and fixed with a spectacle plate made from paper and 2 eyebolts.
The channels were pinned and glued and deadeyes and chainplates attached as per instructions.

- Kathy Teel, Mirabell61 and billocrates
-
3
-
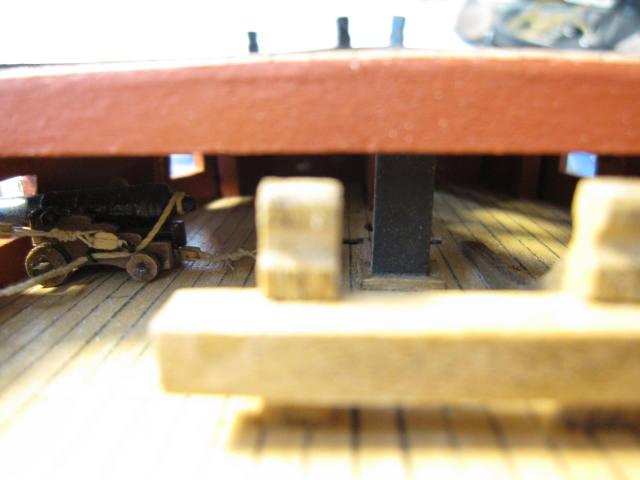
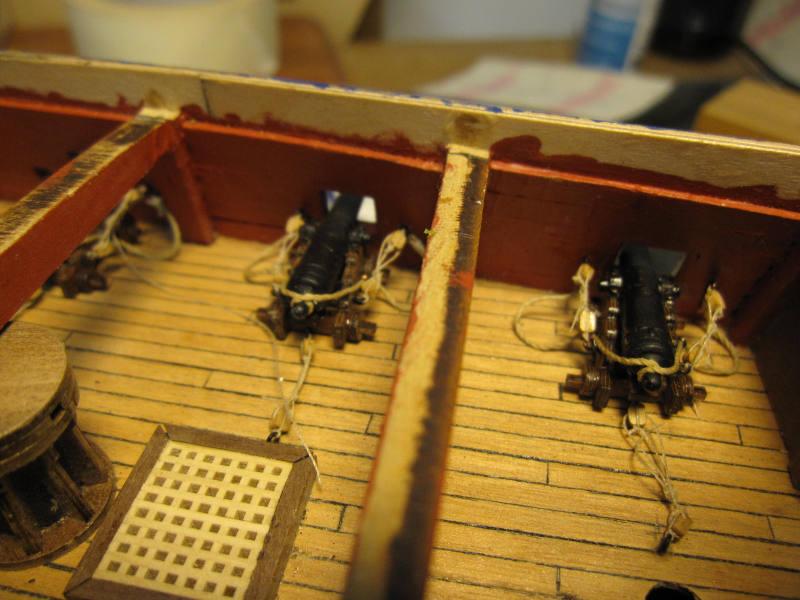
Now the guns under the quarterdeck were fixed there with the tackles.
The Deck was then closed and planked. To simulate the caulking I used a black textile marker to paint the sides of the strips.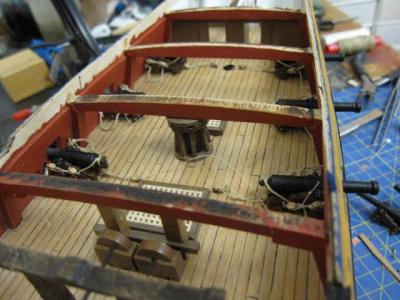

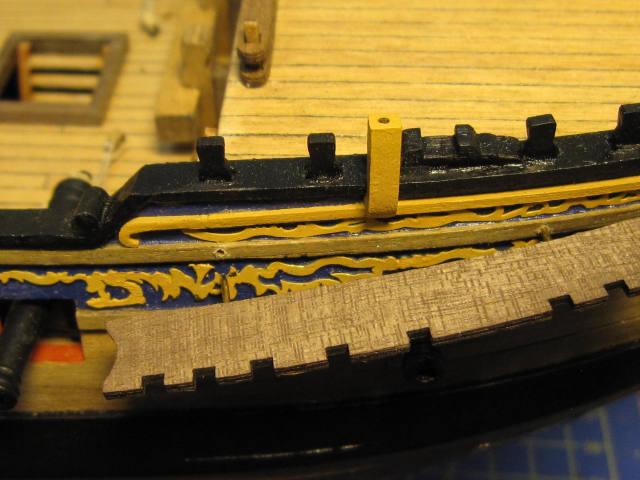
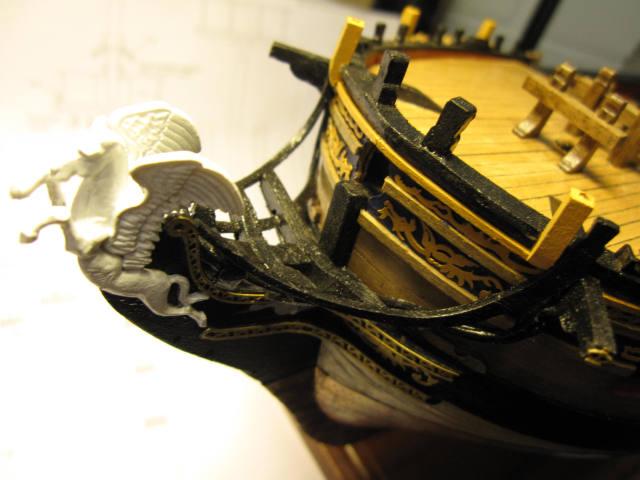
Now it was time to finish the bulwark inner planking, the capping rail and the headrail and cathead assembly.
The last was quite a puzzle and finally I made the complete lower bow rails from the decorative white metal strips filed into
size.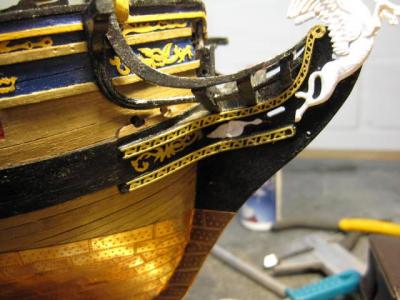

- Kathy Teel, Mirabell61, billocrates and 1 other
-
4
-
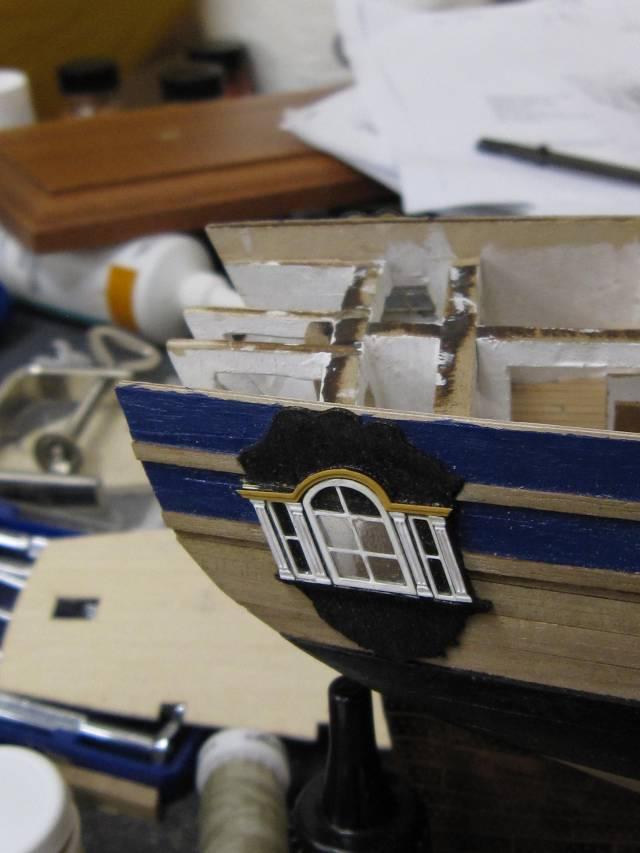
Next the quarter badges and the stern with its decorations were fixed.

Victory models carvings which are build with photo etched layers of brass are the best I have ever seen in a model kit.
For colouring I used the ‘expensive’ gold only sporadic on carvings and the ships name. The side decorations were painted yellow.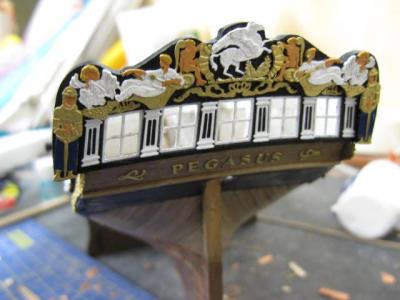
- billocrates and Kathy Teel
-
2
-
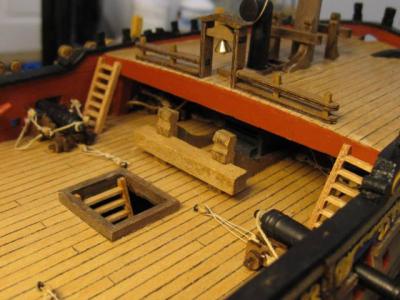
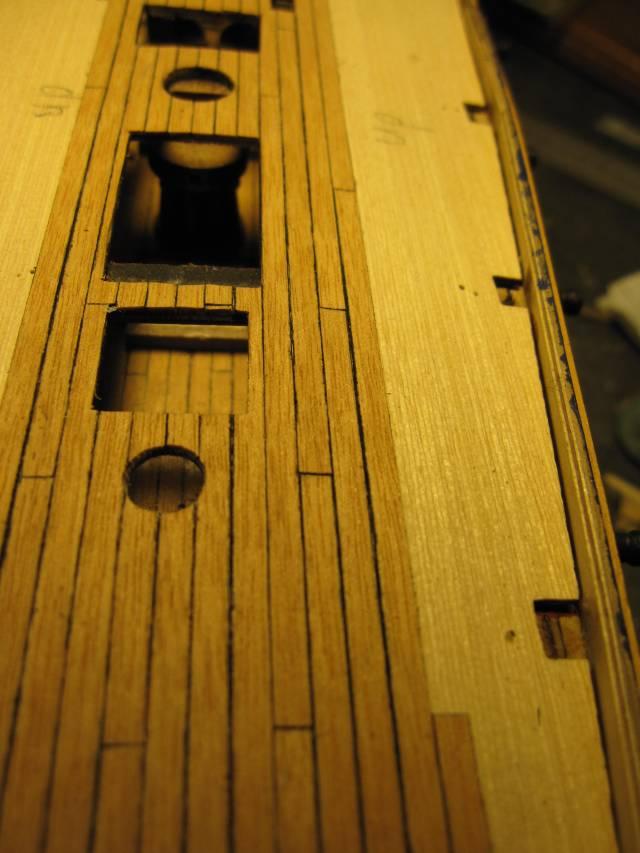
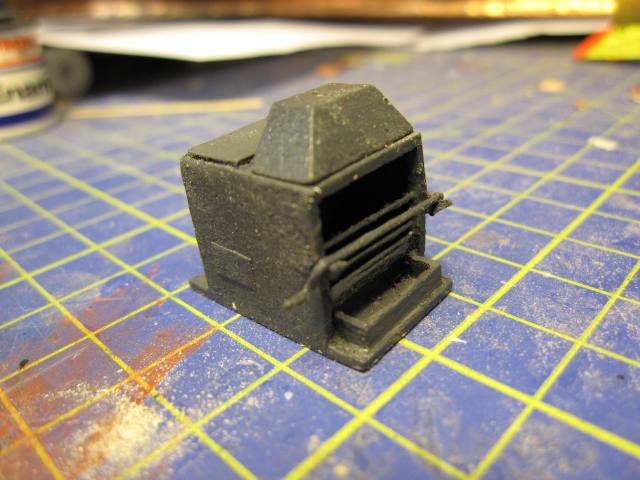
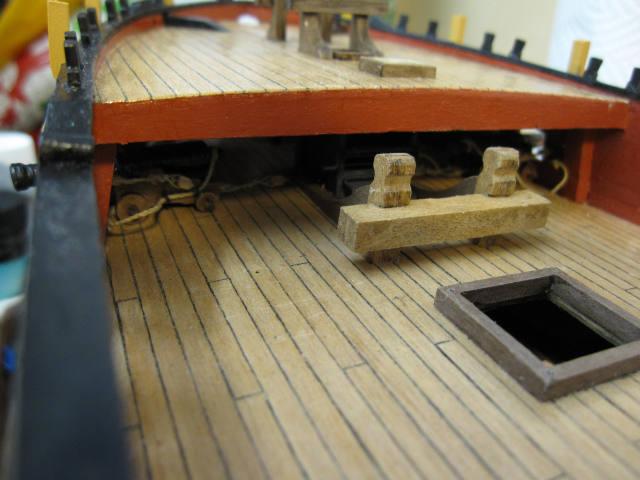
Initially I thought that Pegasus’ galley stove was placed under the main deck (similar to Granado) and fixed only a chimney leading up under the forecastle.
This was the initial chimney.
Unfortunately I found those excellent build logs of that marvellous Kingfisher kit in this forum and had to rethink.
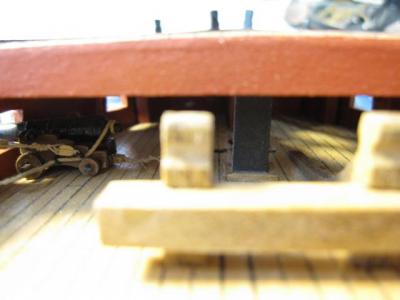
So it was back to the yard again. The chimney was pulled out and with help of the pictures of the Kingfisher logs I assembled a much simplified stove from scratch (mostly wood, wire and some leftover copper plates) with the same proportions. It would just fix between the supports for the riding bitts.
To be able to put it in place the part just below the chimney was made separate.

You really don’t see much of the finished stove, but the little building project was fun.(Looking at it now, I wish I had made it more acute...ok, replacing is impossible because it’s fixed with epoxy, I will make a better one on the next ship.)
- Mirabell61 and billocrates
-
2
-
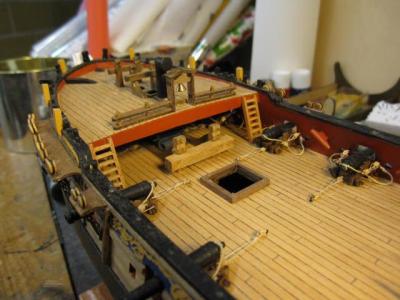
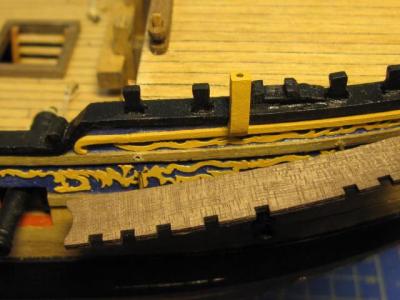
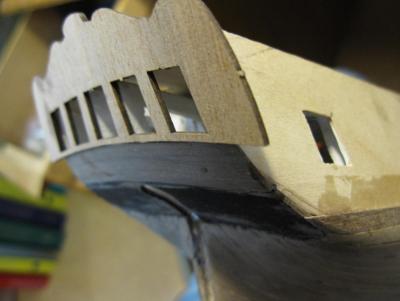
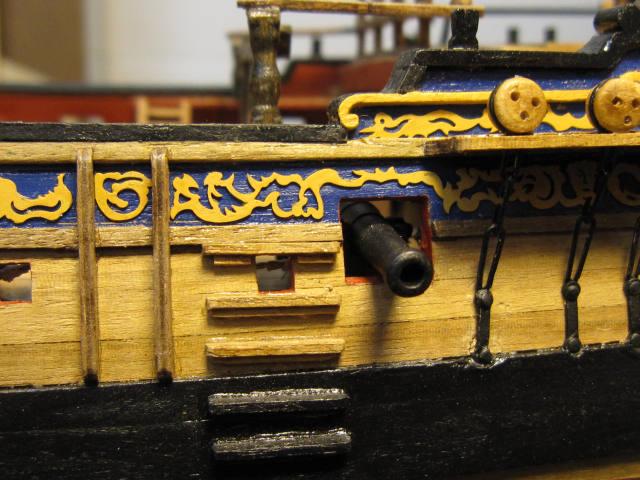
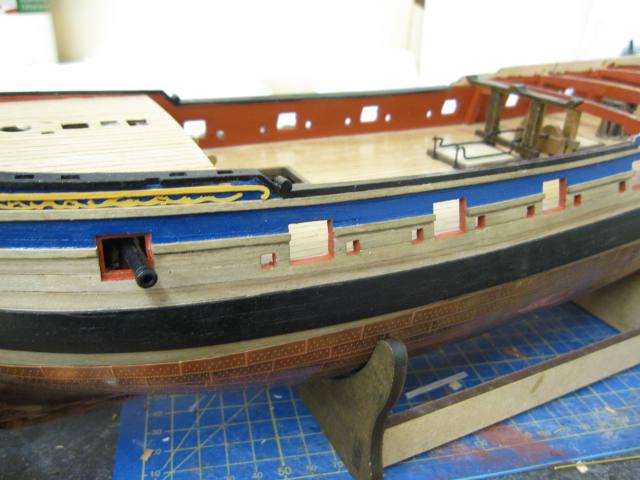
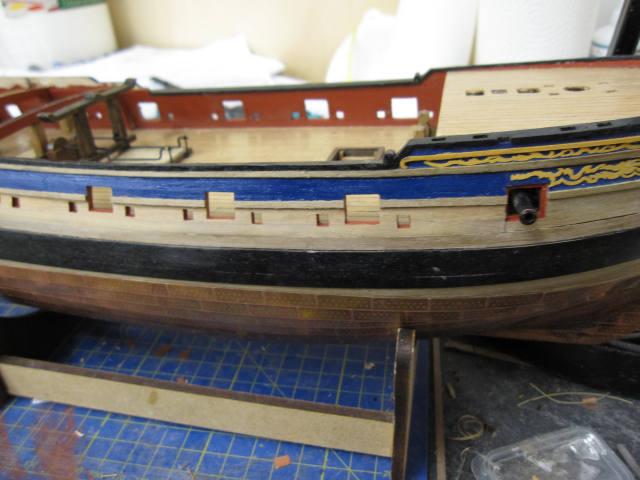
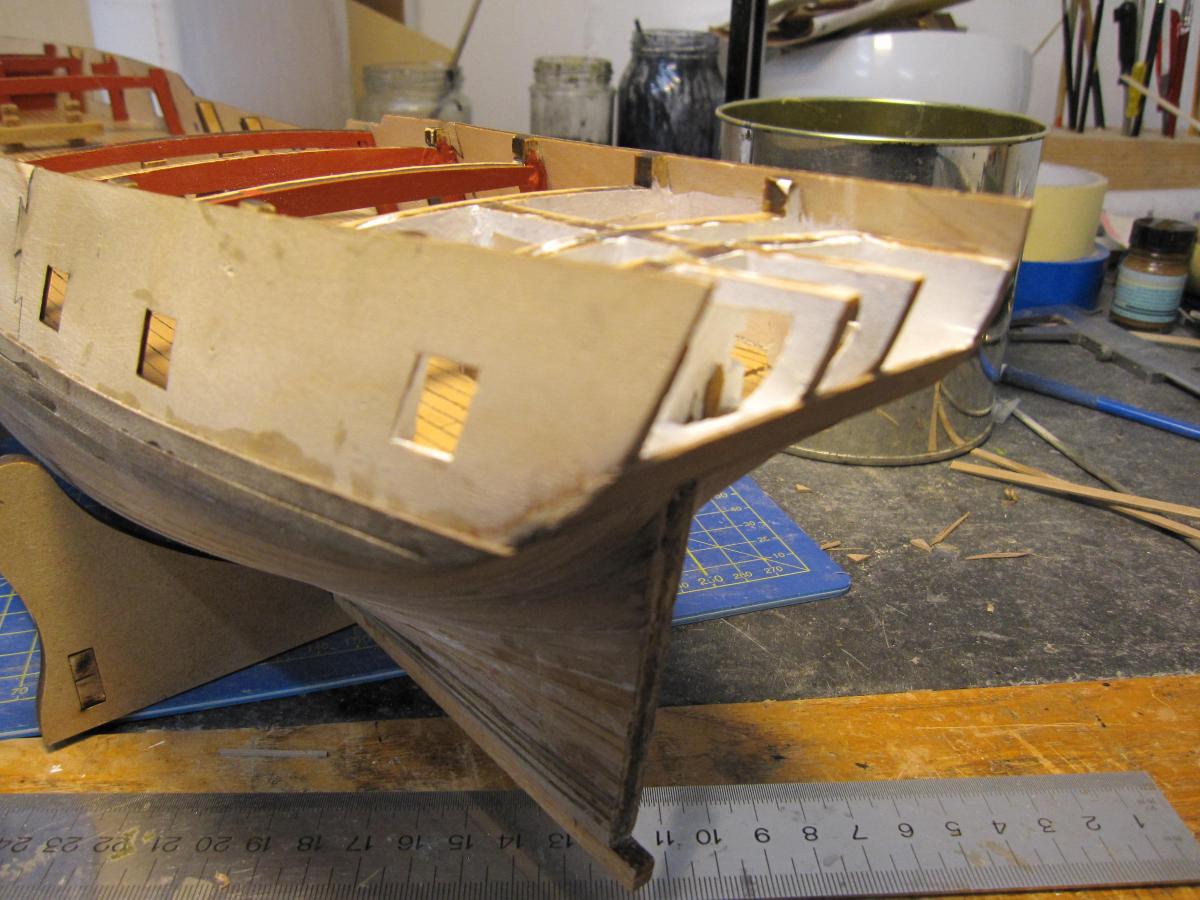
While laying the planks on the forecastle I grew more and more irritated by the size of the midship gun ports. Compared to those which will be fixed with port lids they seemed too large (and would have offered only a limited protection to the gun crew behind them).
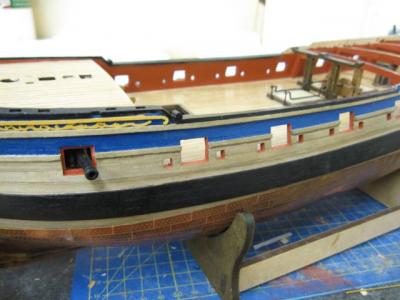
Old layout with the B I G gun ports
Quite reluctantly I finally decided to scrap off the already partly fixed decoration, tear off some planking and fix those ports
with a frame. Then the side was planked again. Now the ports looked more right to me. They were now also quite similar to those of my caldercraft HMS Granado.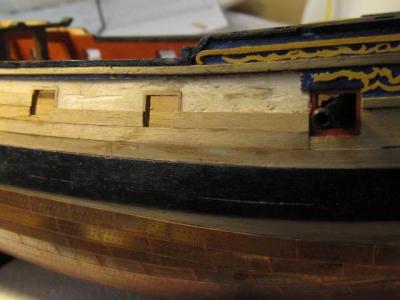
(I learned a lot with the Granado kit – except how to make rope coils – and still think it is one of the kits with the best value for money and excellent material and instructions. It lets you build a really beautiful model.)
The lower sills of the gun ports and the sweep ports were no longer in line but I find the overall picture more convincing.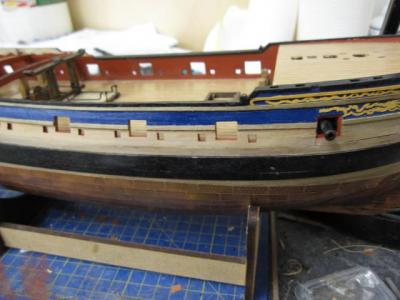
- granta and billocrates
-
2
-
Hi Frank
Thanks to the grounding of those pages I found your log after the restart and realized I really missed something outstanding in the old forums! I love what you do to that poor hull!
But… looking at the pictures, your Supply seems so realistic, it must stink a bit of rotting sea live!?
Do you think the admiralty will let you place such a shabby, smelly old boat in the living room?

It really looks great and I'm looking excitedly forward to what you will do to the rest of the model.Take care
Peter
-
Thank you Aldo.
There is a lot of detail-work ahead also to rebuild the log. But going over it again will perhaps make my learning curve steeper and help me to avoid old mistakes.

Cheers
Peter
-
Hi Andy

Great to be and have you back again.Good Idea, that fast motion log.
It is too bad about all those lost information which came forward during all the detailed discussions. Well, again, John Lennon must have had a presentiment: … it’ll be (just like) starting over…
Newfoundland in winter for training sessions… I still like m y company better – although I had some training sessions in Kangerlussuaq, Greenland, but those were only in the simulator and that was standing in Zurich!Take care!
CheersPeter
-
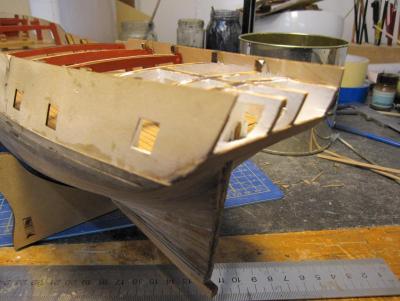
Next I started to work on the guns and put those under the forecastle into position.
All guns are fixed only by their tackles. Thus they keep a certain play or flexibility and I think are less prone to be broken off after they are no longer accessible.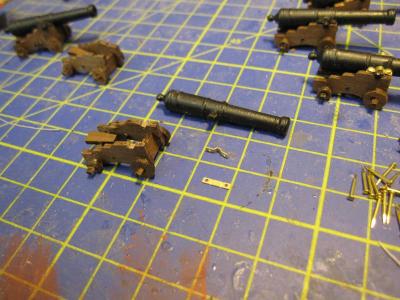
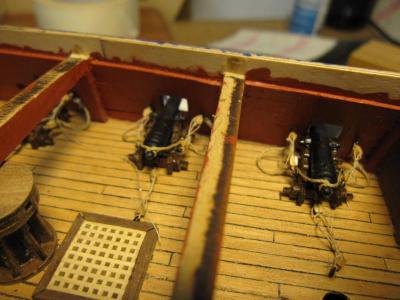
(Actually this picture was shot a bit later and of course shows the aft part of the ship.)
-
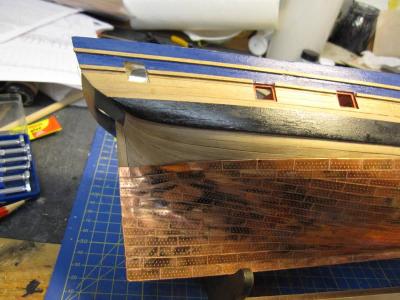
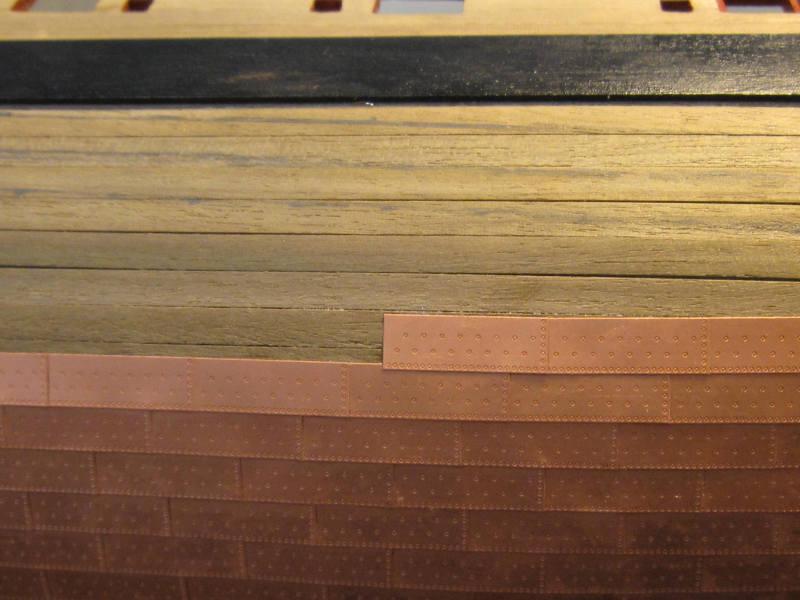
The next step after finishing the 2nd planking was the coppering. I did this rather early in order to have unrestricted access to the hull and less risk to break anything.
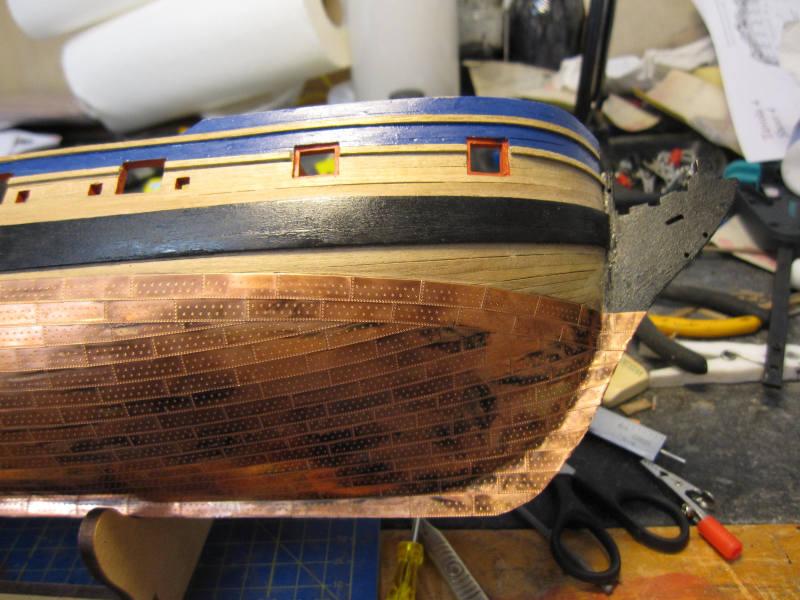
The copper plates were attached slightly overlapping. Following the waterline is a double row of complete plates as top of the coppering. This pattern is according to one found in ‘Ship Modelling from Scratch’ by Edwin B. Leaf. It is rather easily done and in my opinion gives a satisfying result. And those copper plates from Victory Models are a pleasure to work with.
(I find I must apologize for the quality of my pictures but when I took them there was no intention to post them.)
After coppering the plates were cleaned with a brass brush in a little drilling machine. This was to clean all leftovers of the CA glue and let the copper get a natural patina.
By the way – for the colouring of the hull I tried to follow the colour scheme of HMS Bellona.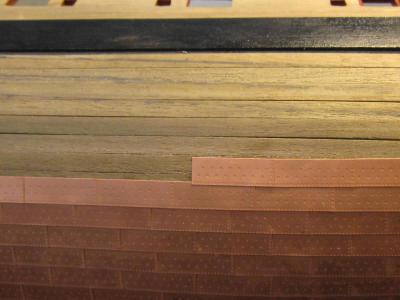

- Mirabell61 and kier
-
2
-
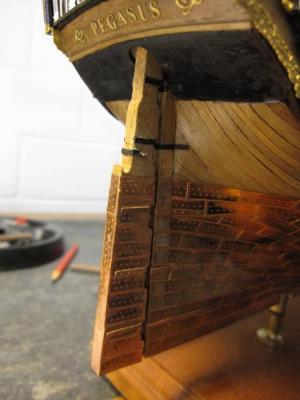
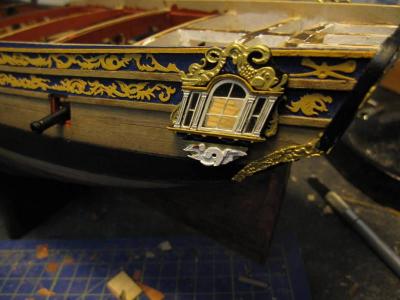
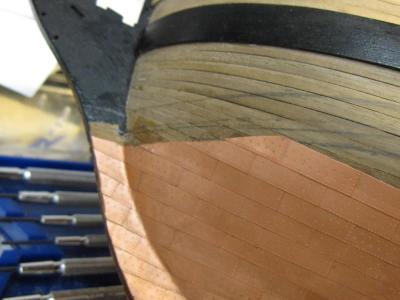
The opening for the quarter badge does not follow the form of the badge window but is rectangular, similar to a gun port.
-
As you will know the details of HMS Pegasus’ kit box and the initial build from other postings I start with my log about 1 ½ years ago while I was building the great cabin during the 2nd planking.
As the captain of a model ship I try to make my cabin as airy and spacey as possible. This means I had to file and scratch away some wood of the stern structure.
-
Hi all
After the crash my log seems lost. I’m trying to rebuild it with information stored on mycomputer.
The build started some 3 to 4 years ago and the following are copies of my original log…
As I am a slow builder and already more than 2 Years into the building process of my HMS Pegasus I might be a bite late, but...
...after having profited much from your forum I might pay a bit back if somebody finds something useful.
... there are some things in building a ship model (this is actually my 5th) which I find particularly important and perhaps they could be discussed. Among those are sails. A sailing ship should have sails – not only invisible down in the hold but on the yard. My lazy solution is to show them furled. But more of this much later.
Another point is the great cabin which should have as much light as possible. I find the contrast between the sturdy hull and the flimsy stern fascinating and try to catch it in a model.
... my building standard (and the order on the workbench) are not on the top level but everybody can still have a lot of fun this way and get a model which smells of the sea.


HMS Pegasus by flyer - FINISHED - Victory Models
in - Kit build logs for subjects built from 1751 - 1800
Posted
Thank you, Aldo.
I’m sure your scratch build oven will look much better than mine.
Cheers
Peter