


cdogg
-
Posts
380 -
Joined
-
Last visited
Content Type
Profiles
Forums
Gallery
Events
Posts posted by cdogg
-
-
Ok, on board now. I molded the walnut strip I the front to match the keel.
-
Just friendly advice, ill have to,take some pics to explain. My terminology is very general.
The front of the deck has a flat half circle like piece that you have to deck plank. If that section is curved upward slightly it may not sit flat. Its Part 19.
As for my bad ipad spelling, I meant that 'the bow is not pointing up'. It can still work but may make the top hull plank harder to lay parallel with the deck. You'll get it once you check out step 17 with piece 27.
Hope that helps
-
Hey also glad you found piece 17!
-
Sygreen, looks good! My only advice is the front bulkhead might have to be lowered so the bow is pointing up. The only reason I mention this is because it might make the planking tough at the front. Also, the bow section may have trouble laying flat.
-
-
leroy, I use these with wood glue, it works great for the second layer planking and spreading the glue in general
-
-
harbm, you have any pics? wood filler is nice but I wouldn't use it for a support piece
-
thanks Pete,
We moved into a new house in February during the winter, inspector cleared everything in the basement, Well, this spring the snow melted and it rained a ton out here. Little did I know the window well in my office was rotted and not installed correctly (it looked ok, a fresh coat of paint can do wonders!). So, thus it started to get worse and I had a window guy check it out. Replacing it in a few weeks but had to move everything out of there, kind of building in various areas of the house until then. Also, I can't have the knives and glue sitting around because my wife does daycare, so my model building has taken painful delay. To make it worse my Lobster Boat got damaged in the move so I will fixing that as well!
Here is a question for anyone who can help, should I brush paint the hull or should I use an air brush? Cannot figure out which one will look better.
-
I think I have a left over piece, ill get a pic for you with some measurements.
-
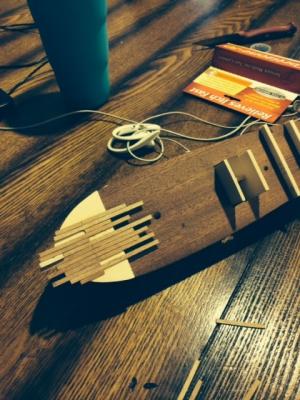
The two filler blocks for the bow were a pain. I think I mentioned to you guys to just get a full balsa block and shape it. These two pieces basically help you curve the first layer planking to the bow. Maybe it's the kit I have but it had two pieces on each side to do this. Sy, were yours different? The instructions aren't very helpful.
As for the bow planking, I made a center line and a midsection line from port to starboard. This picture is just a capture of the process I was using. The planks were eventually tapered and used as a pattern for the rest of the deck. I used the planking pattern suggested by the kit but you can research many different ones. I felt this pattern was the most suitable for this scale.
Hope this helps
-
Mark, I know your pain. My first boat was the Midwest Dinghy. Lapstrake planking on a frame isn't much fun for a first time builder!
I'm on boat number 4 now and I can say I have learned a lot since then.
My advice is to stray from the CA and try to use Wood glue. It settles really well after clamping and isn't as brutal if you make a mistake gluing a part.
You will learn a ton from reading other build logs, specifically Midwest Kits.
-
Hey everyone, thanks for following my Scotland build! I have been reorganizing the house lately and also my shipyard room flooded this summer, so I haven't gotten my build as much as I wanted. Good thing is that only the floor got damaged, none of my ship stuff. But, I had to fix the floor because of mold and stuff.
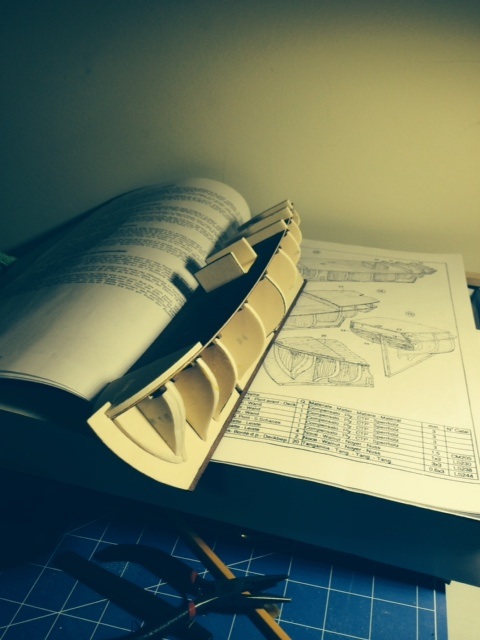
Anyway, I have gotten some questions about the bulkheads at step 3.
Here are some pics of those, hopefully this helps how I installed them.

-
Sygreen, #17 is a piece about 3 inches long that looks like something you would use as a wall crown molding. You have to cut it into two pieces and size them to fit the stern. Should be there somewhere. But, your in luck, you can actually use balsa wood to recreate these pieces. They are only pieces to help form the shape of the stern, you don't see them after planking.
Also, from my experience Model Expo will give the number to Corel. One of my complaints I wrote to the owner of Model Expo here on MSW is that they need to be more accountable for their import ship kits they sell here.
Best of luck.
-
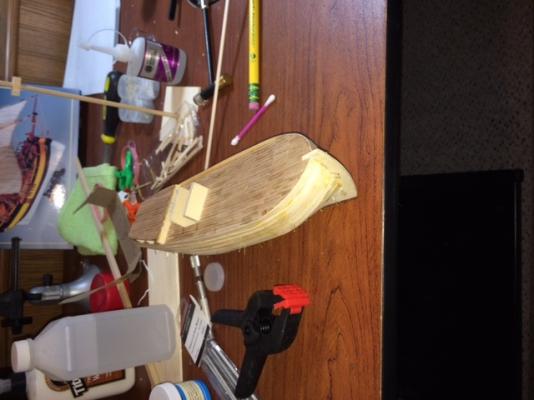
I used wood glue very generously and clamps get them straight. It worked pretty well.
Also, if I could go,back in time I would really try to use balsa filler blocks on the bow and stern. The first layer of planking is tough at the ends and the stern is a little tricky to get formed correctly using the bulkheads
Hope this helps!
-
Match the two bulkheads with plans in the book. You will have to adjust them so they balance out. These two make up the core of what will be the deck house. You'll. find with this kit a lot of the hull parts will need to be filed And sanded to get the first layer of planking to go well.
I'm at the painting stage with this kit right now so I'd be happy to offer advice I can.
-
I found that using a glue spreading tool like a butter knife or an actual glue spreading tool from a woodworking store helps, I had this problem before too and found by spreading the glue to a thin layer below the thin planking wood really holds it better.
Previous to me thinly spreading the glue around I was getting a lot of tiny movement during the drying phase which looked exactly like your example
It was the worst for deck planking, the hull not so much because I clamp / suspend the planks with bindings of some sort.
-
I thought I would never need one then I needed to bend some 2x2mm strips of walnut. I tried every method and finally had to buy the plank bender. Worked like a charm, I bought it off eBay for $20.
-
-
Greetings, I finally took on the 2nd layer of planking. I thought I knew what was doing but I ran into some issues trying too hard following the directions in the kit. I will post some pics tomorrow. I figure by this weekend ill be ready to paint the hull. Cant wait!
- Bindy and Vivian Galad
-
 2
2
-
I have the Black Prince kit on the shelf, everything was good in the box. The instructions are in large print format. From what I have read on here the Mamoli kits get adjusted sometimes by the builder. I contacted their customer service once and they were very helpful too.
-
Your boat is looking good Vivian, glad you feeing better. I was out almost all of March this year because of an illness.
I'm interested to see how those sails are made on your ship
Tchau!
-
-


Scotland by sygreen - Corel - Scale 1:64 - First wooden build
in - Kit build logs for subjects built from 1751 - 1800
Posted
sygreen and fishface, where are you guys from?